Many children like to dress up. It doesn't always have to be a great costume. For most children, a minimal disguise is sufficient. Thus, this disguise is reduced for a unicorn to the horn. For children, this accessory is ideal for dressing up and playing.
In addition, the horn is quickly crafted from a tip of an egg box and the next carnival, children's birthday party, disguise or theme party can come. With a white pants, a glittering sweater and the horn the child is disguised.
I'll show you how to do it!
Media Education for Kindergarten and Hort

Relief in everyday life, targeted promotion of individual children, independent learning and - without any pre-knowledge already usable by the youngest!
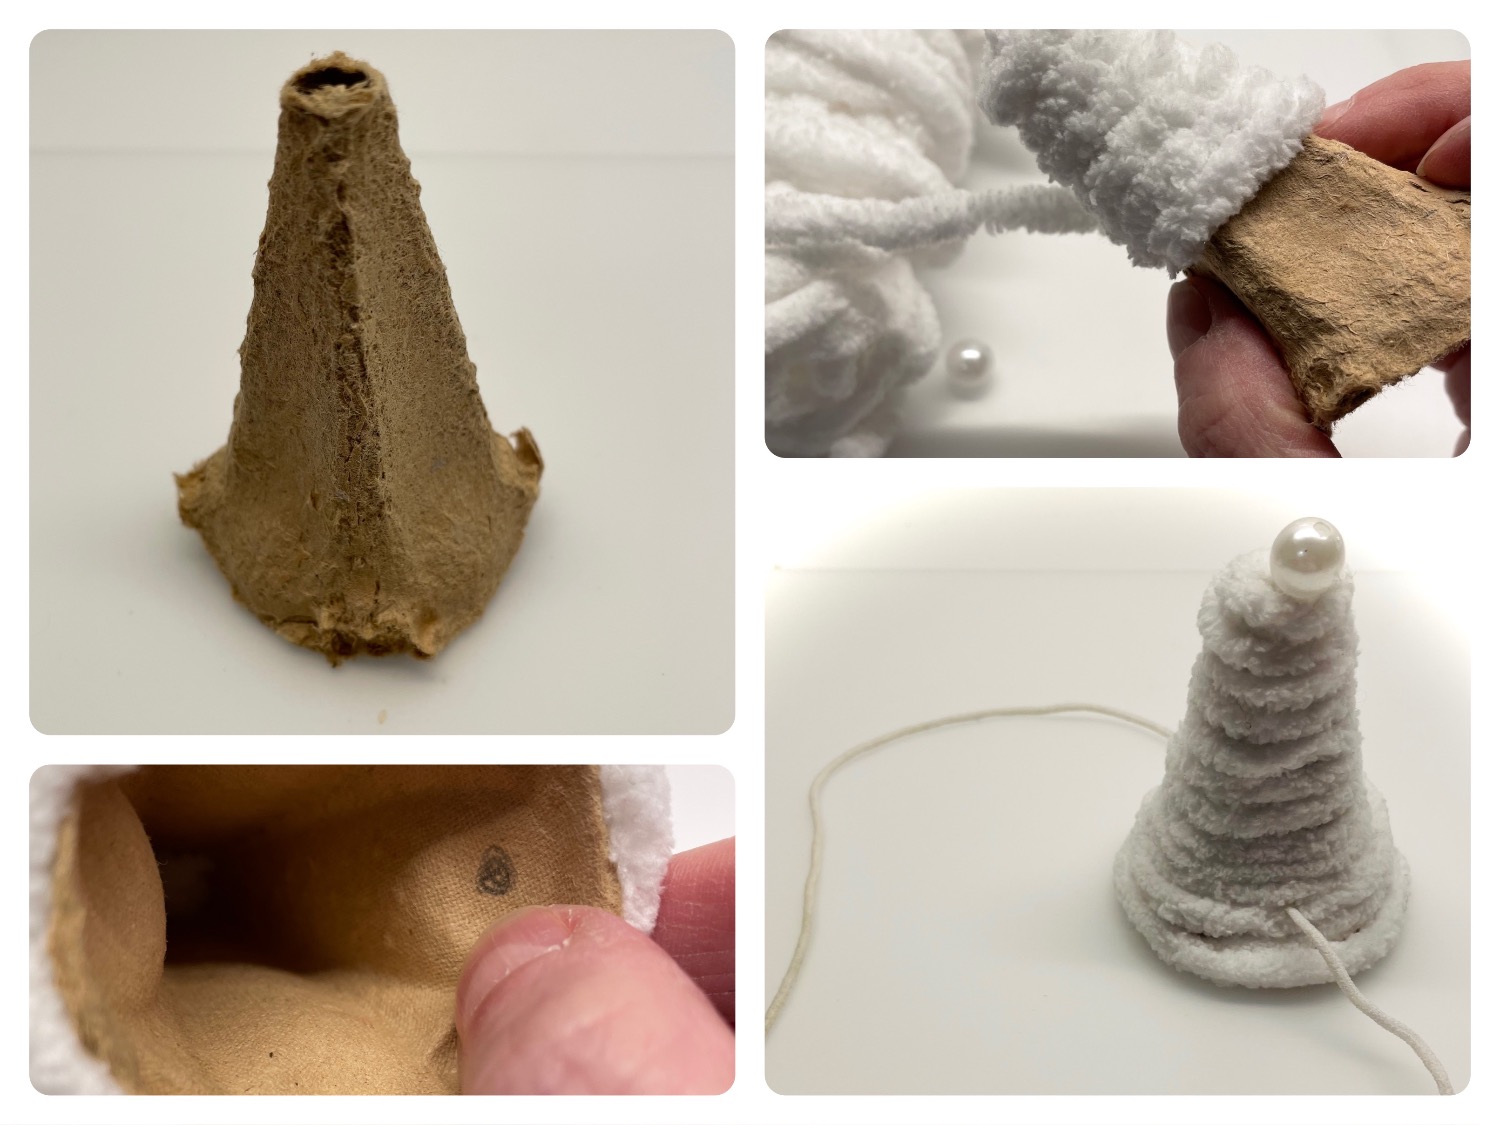
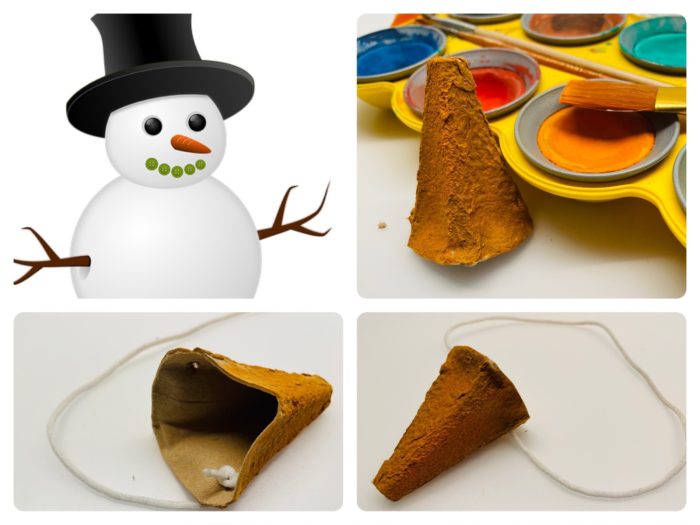
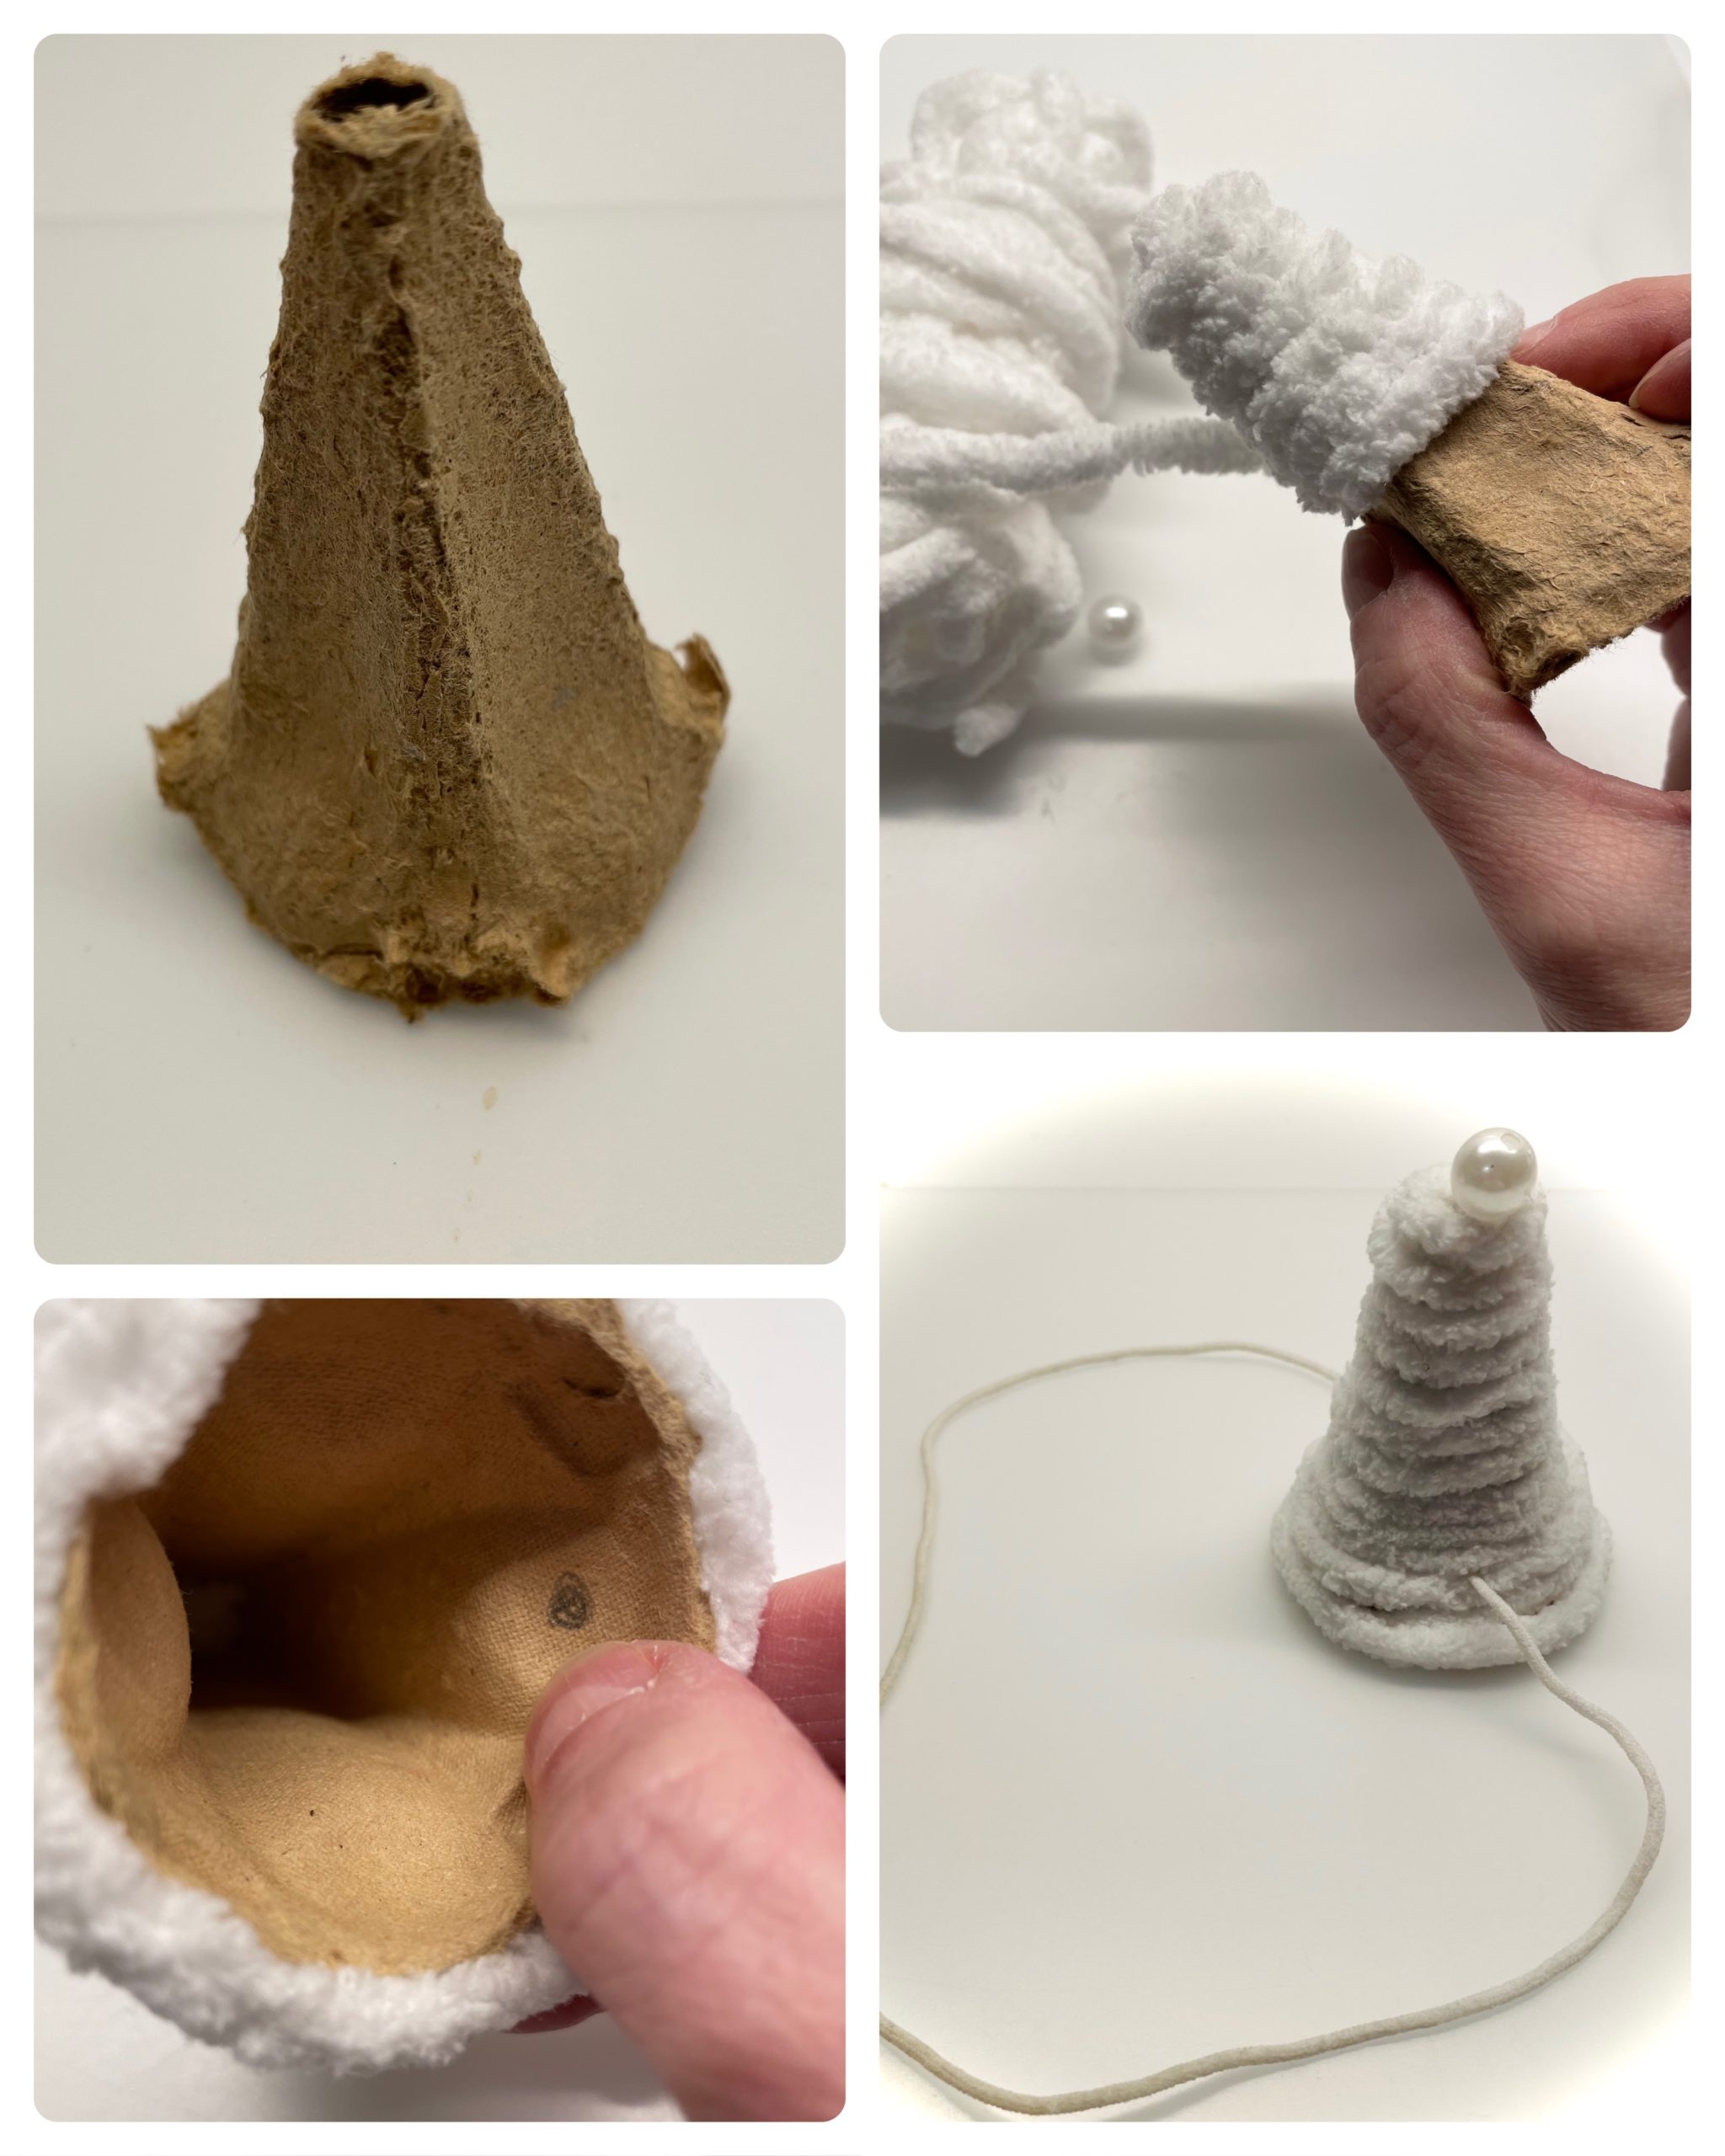
First you need a tip from an egg box.
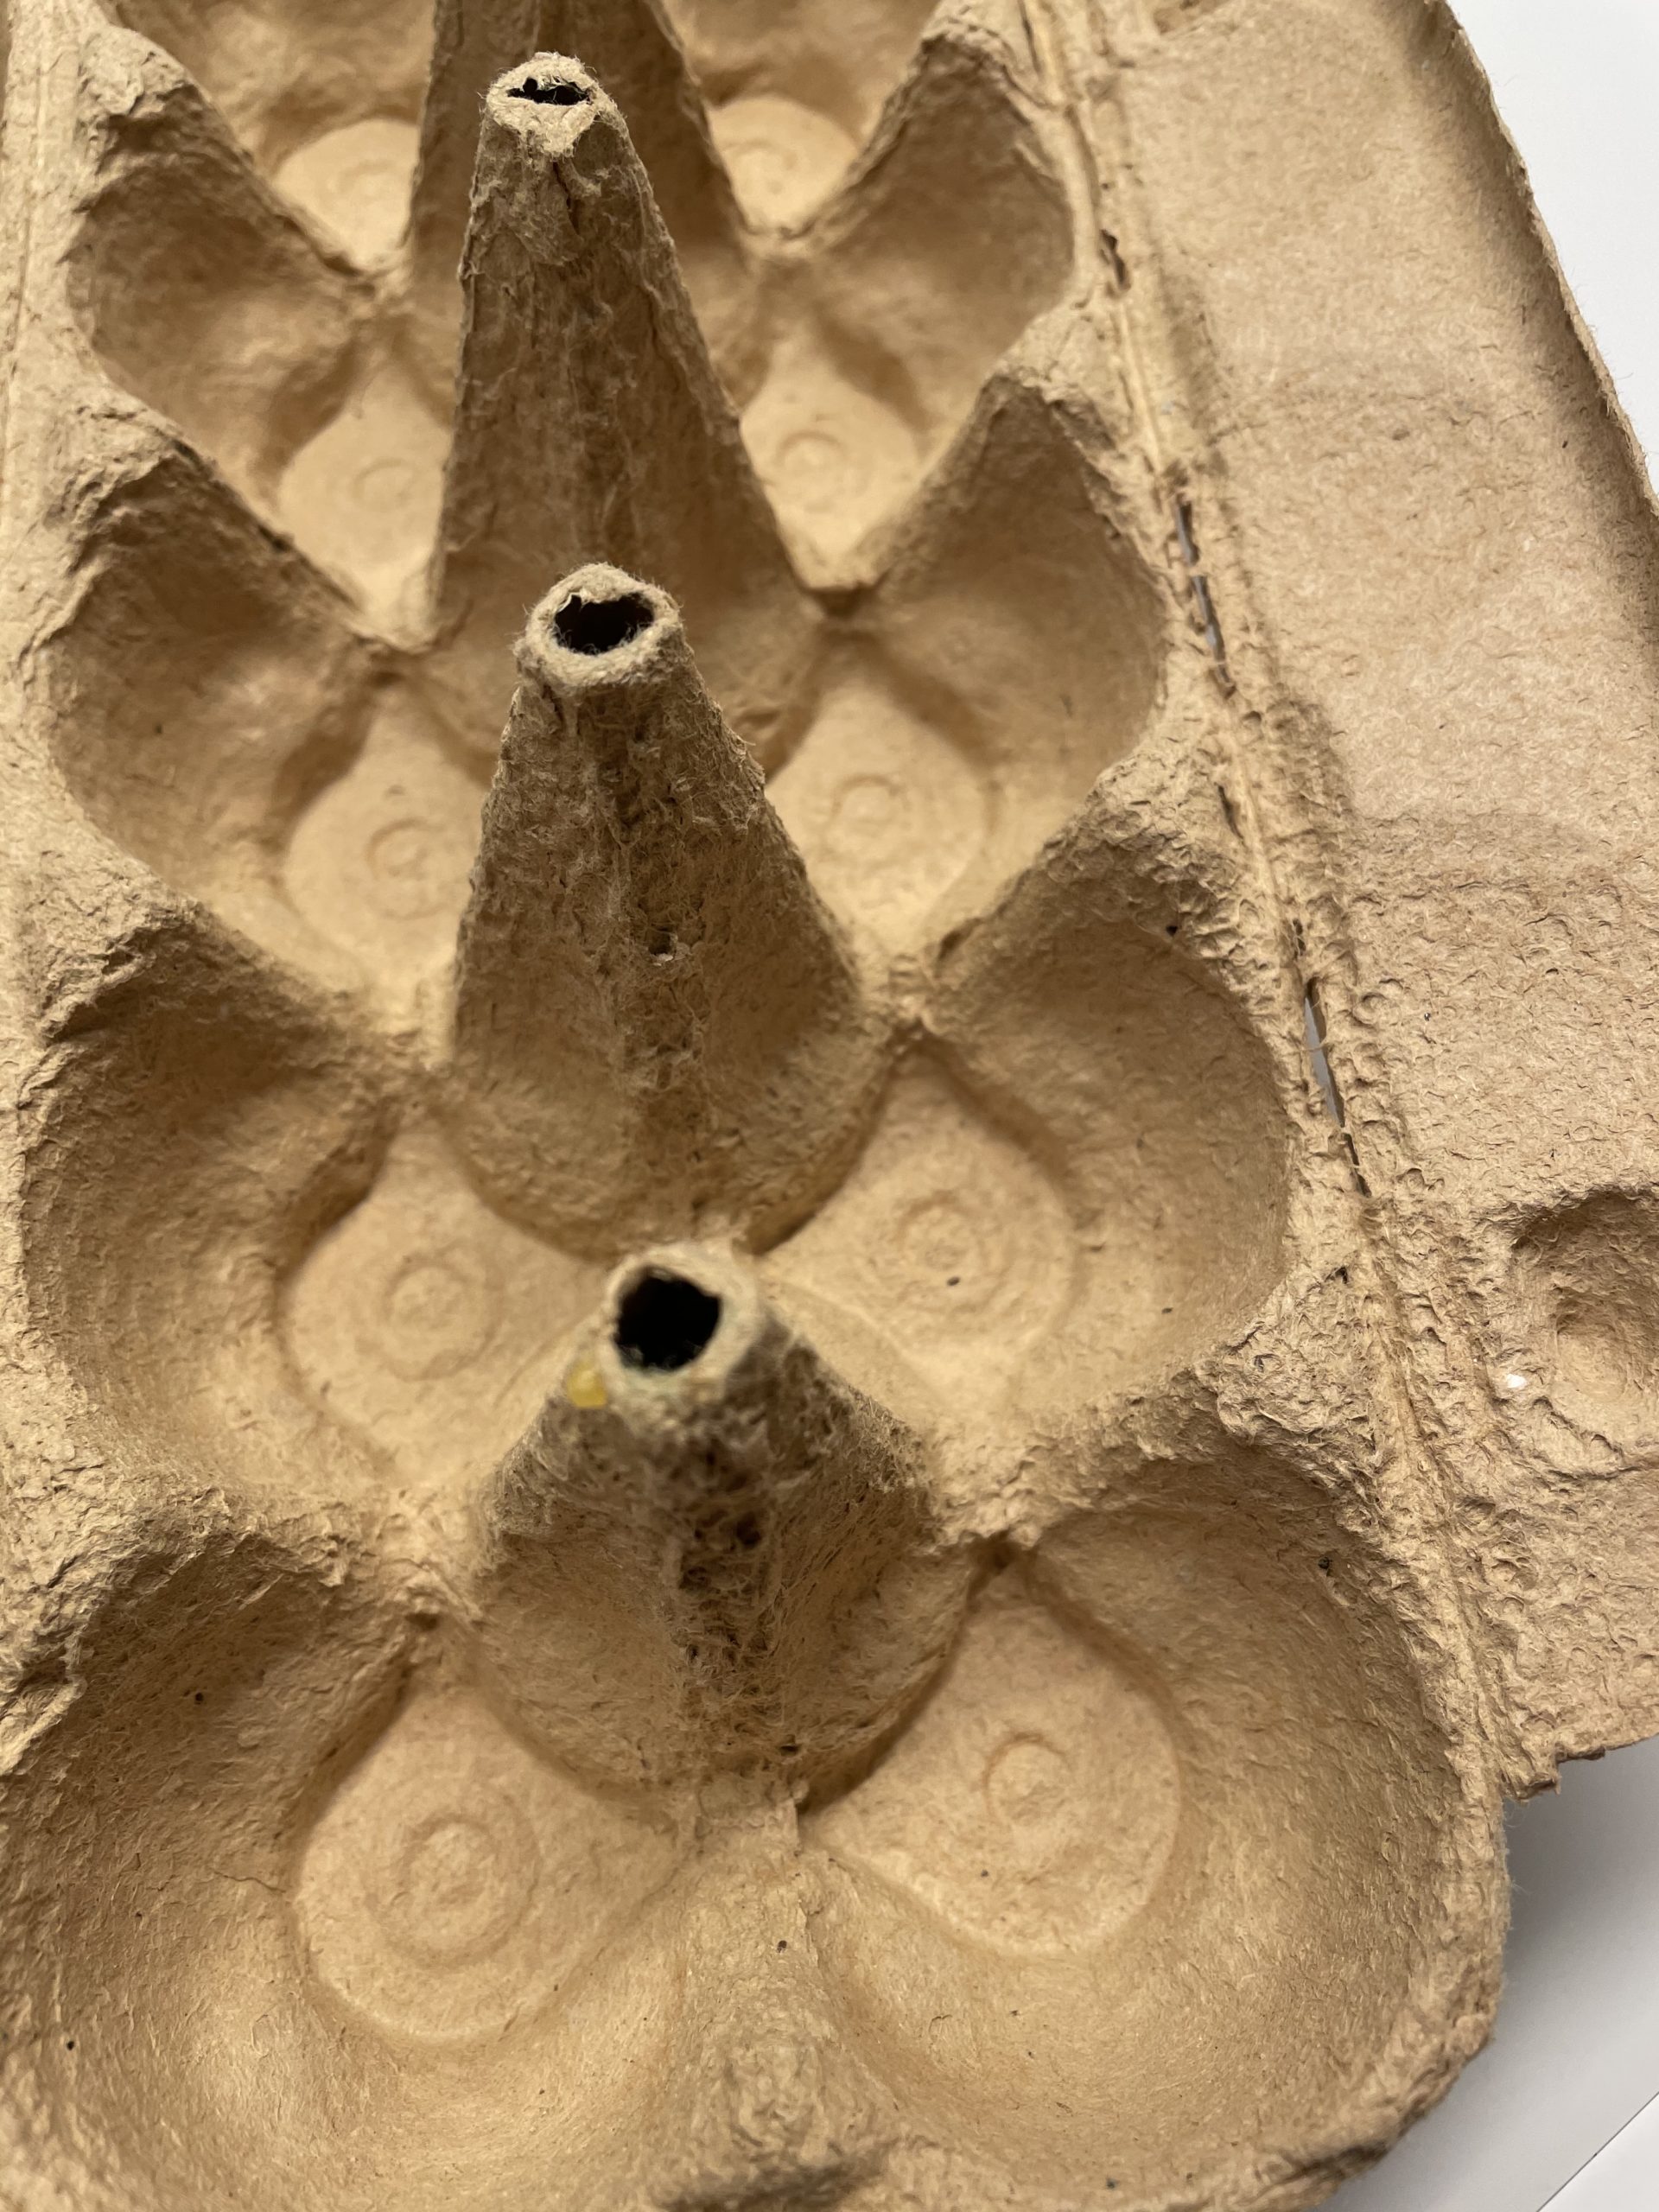
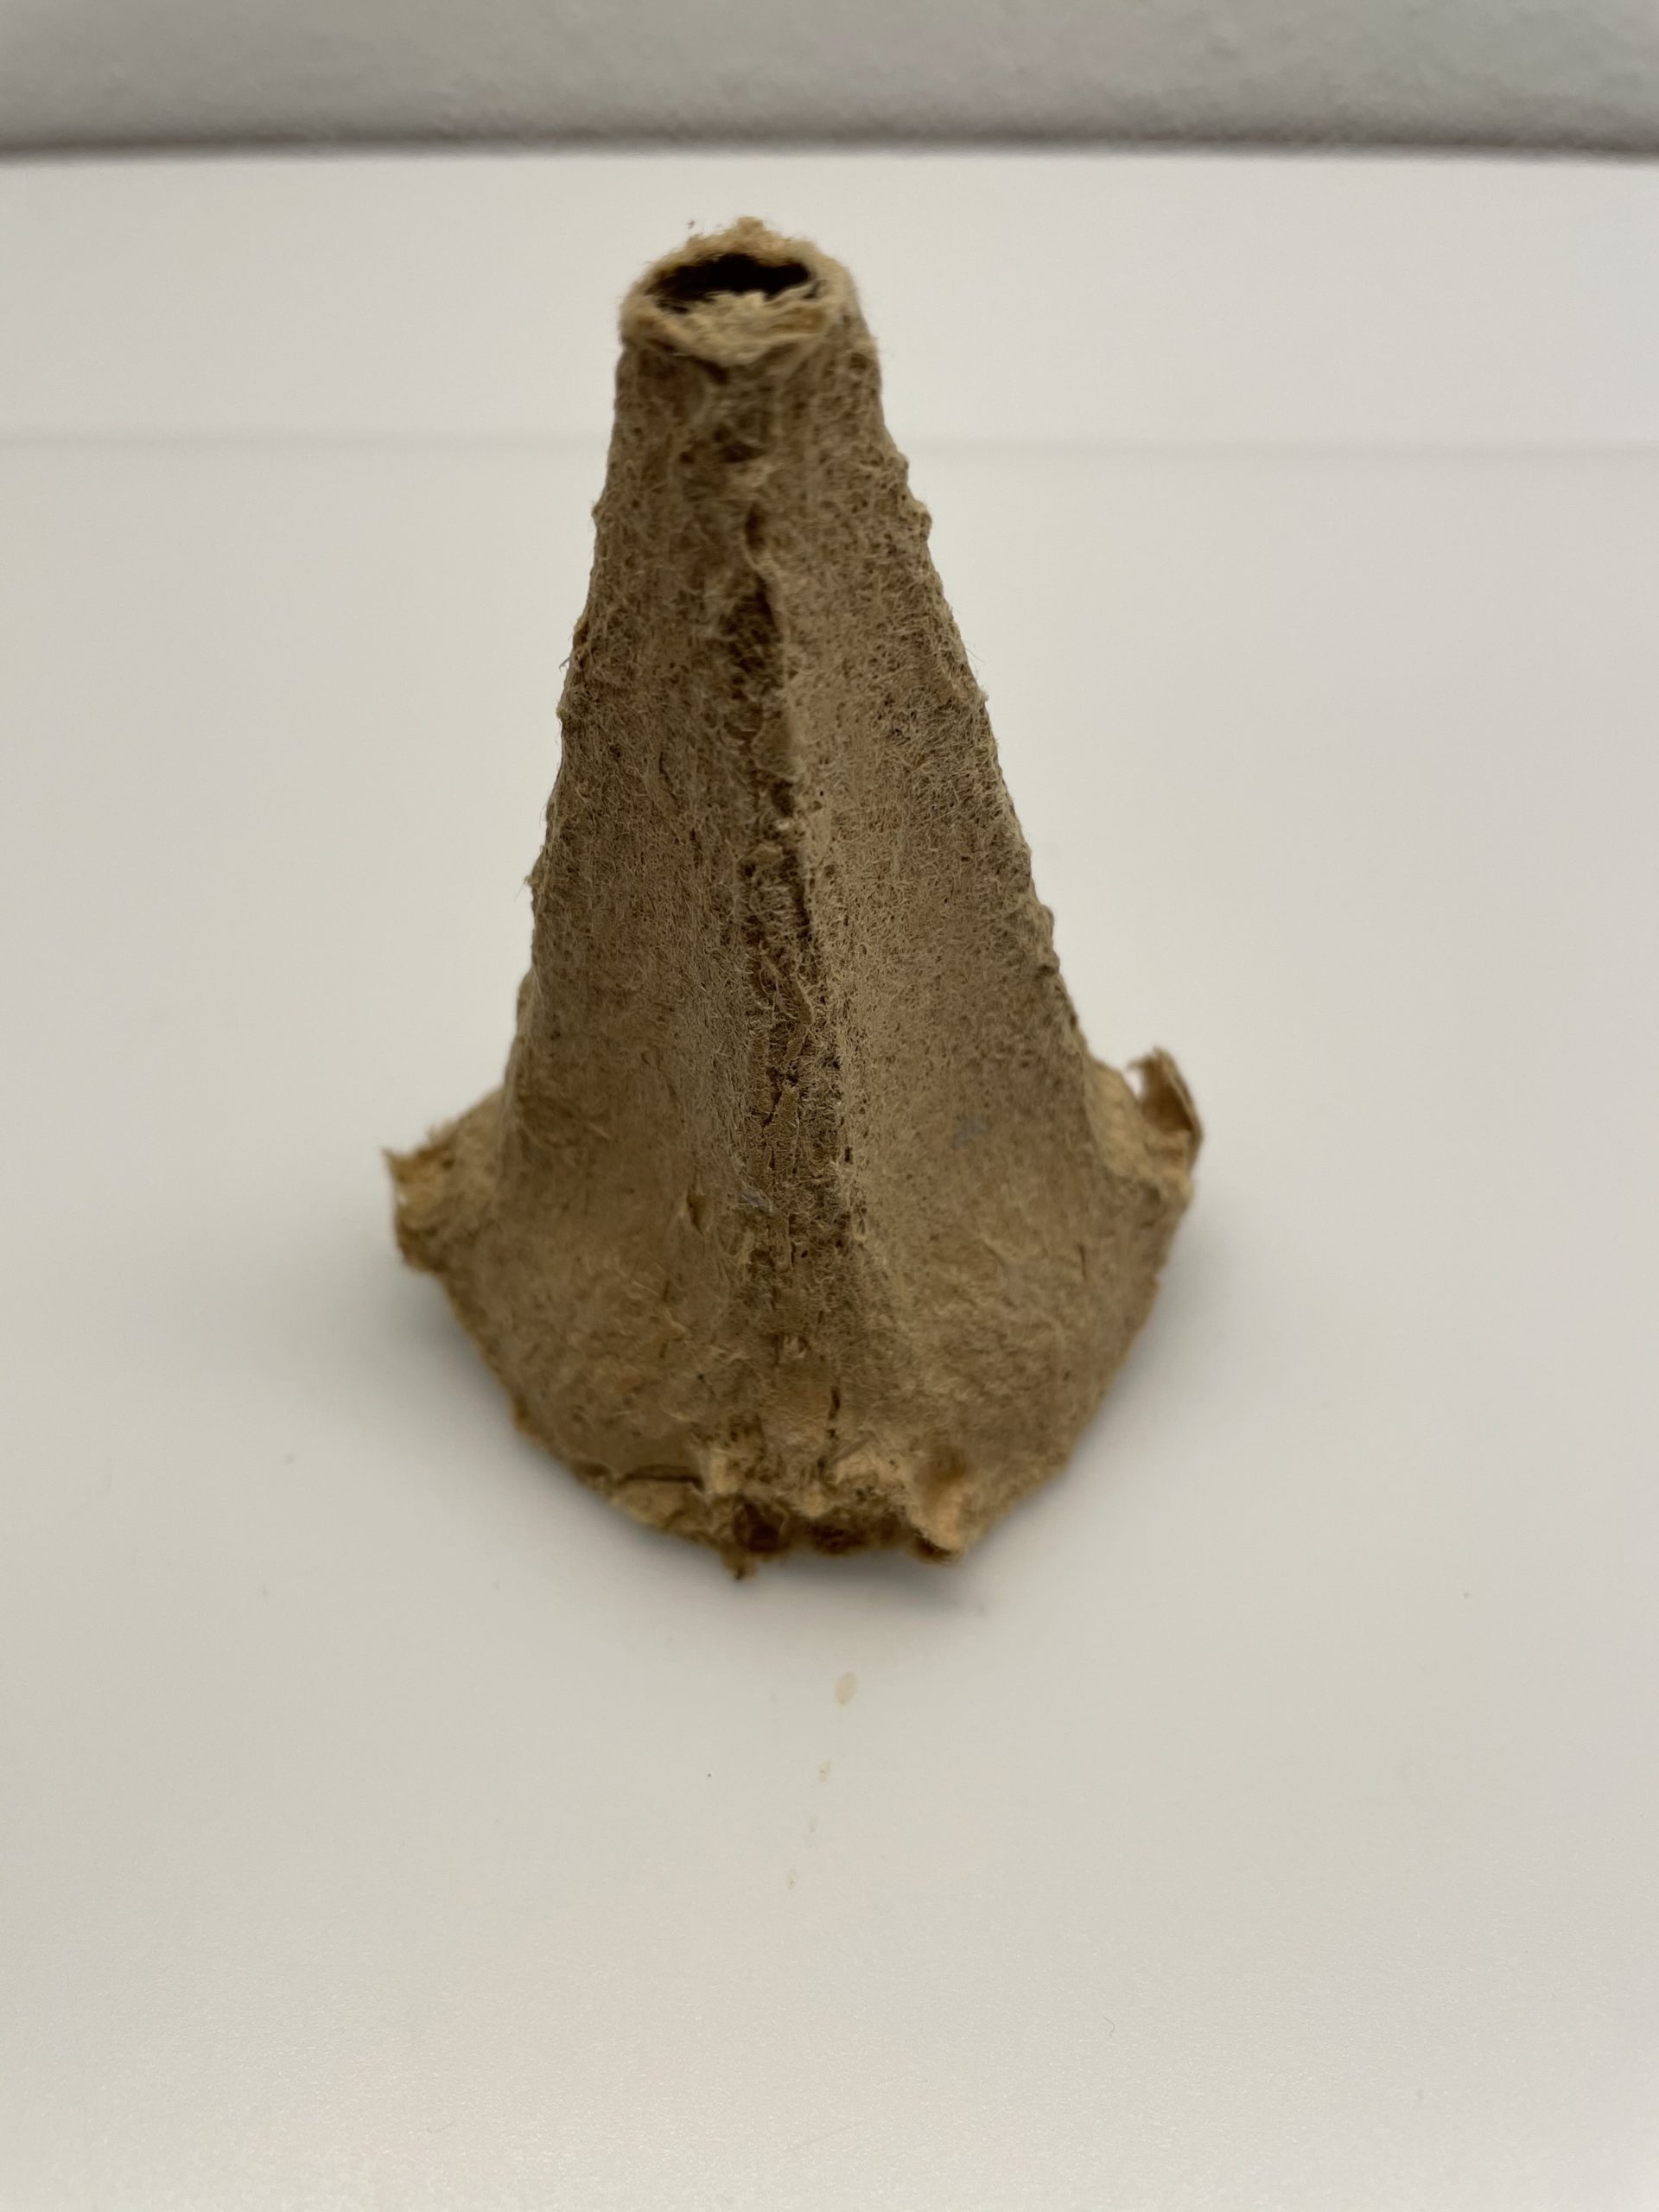
Cut out a tip and cut it straight down.
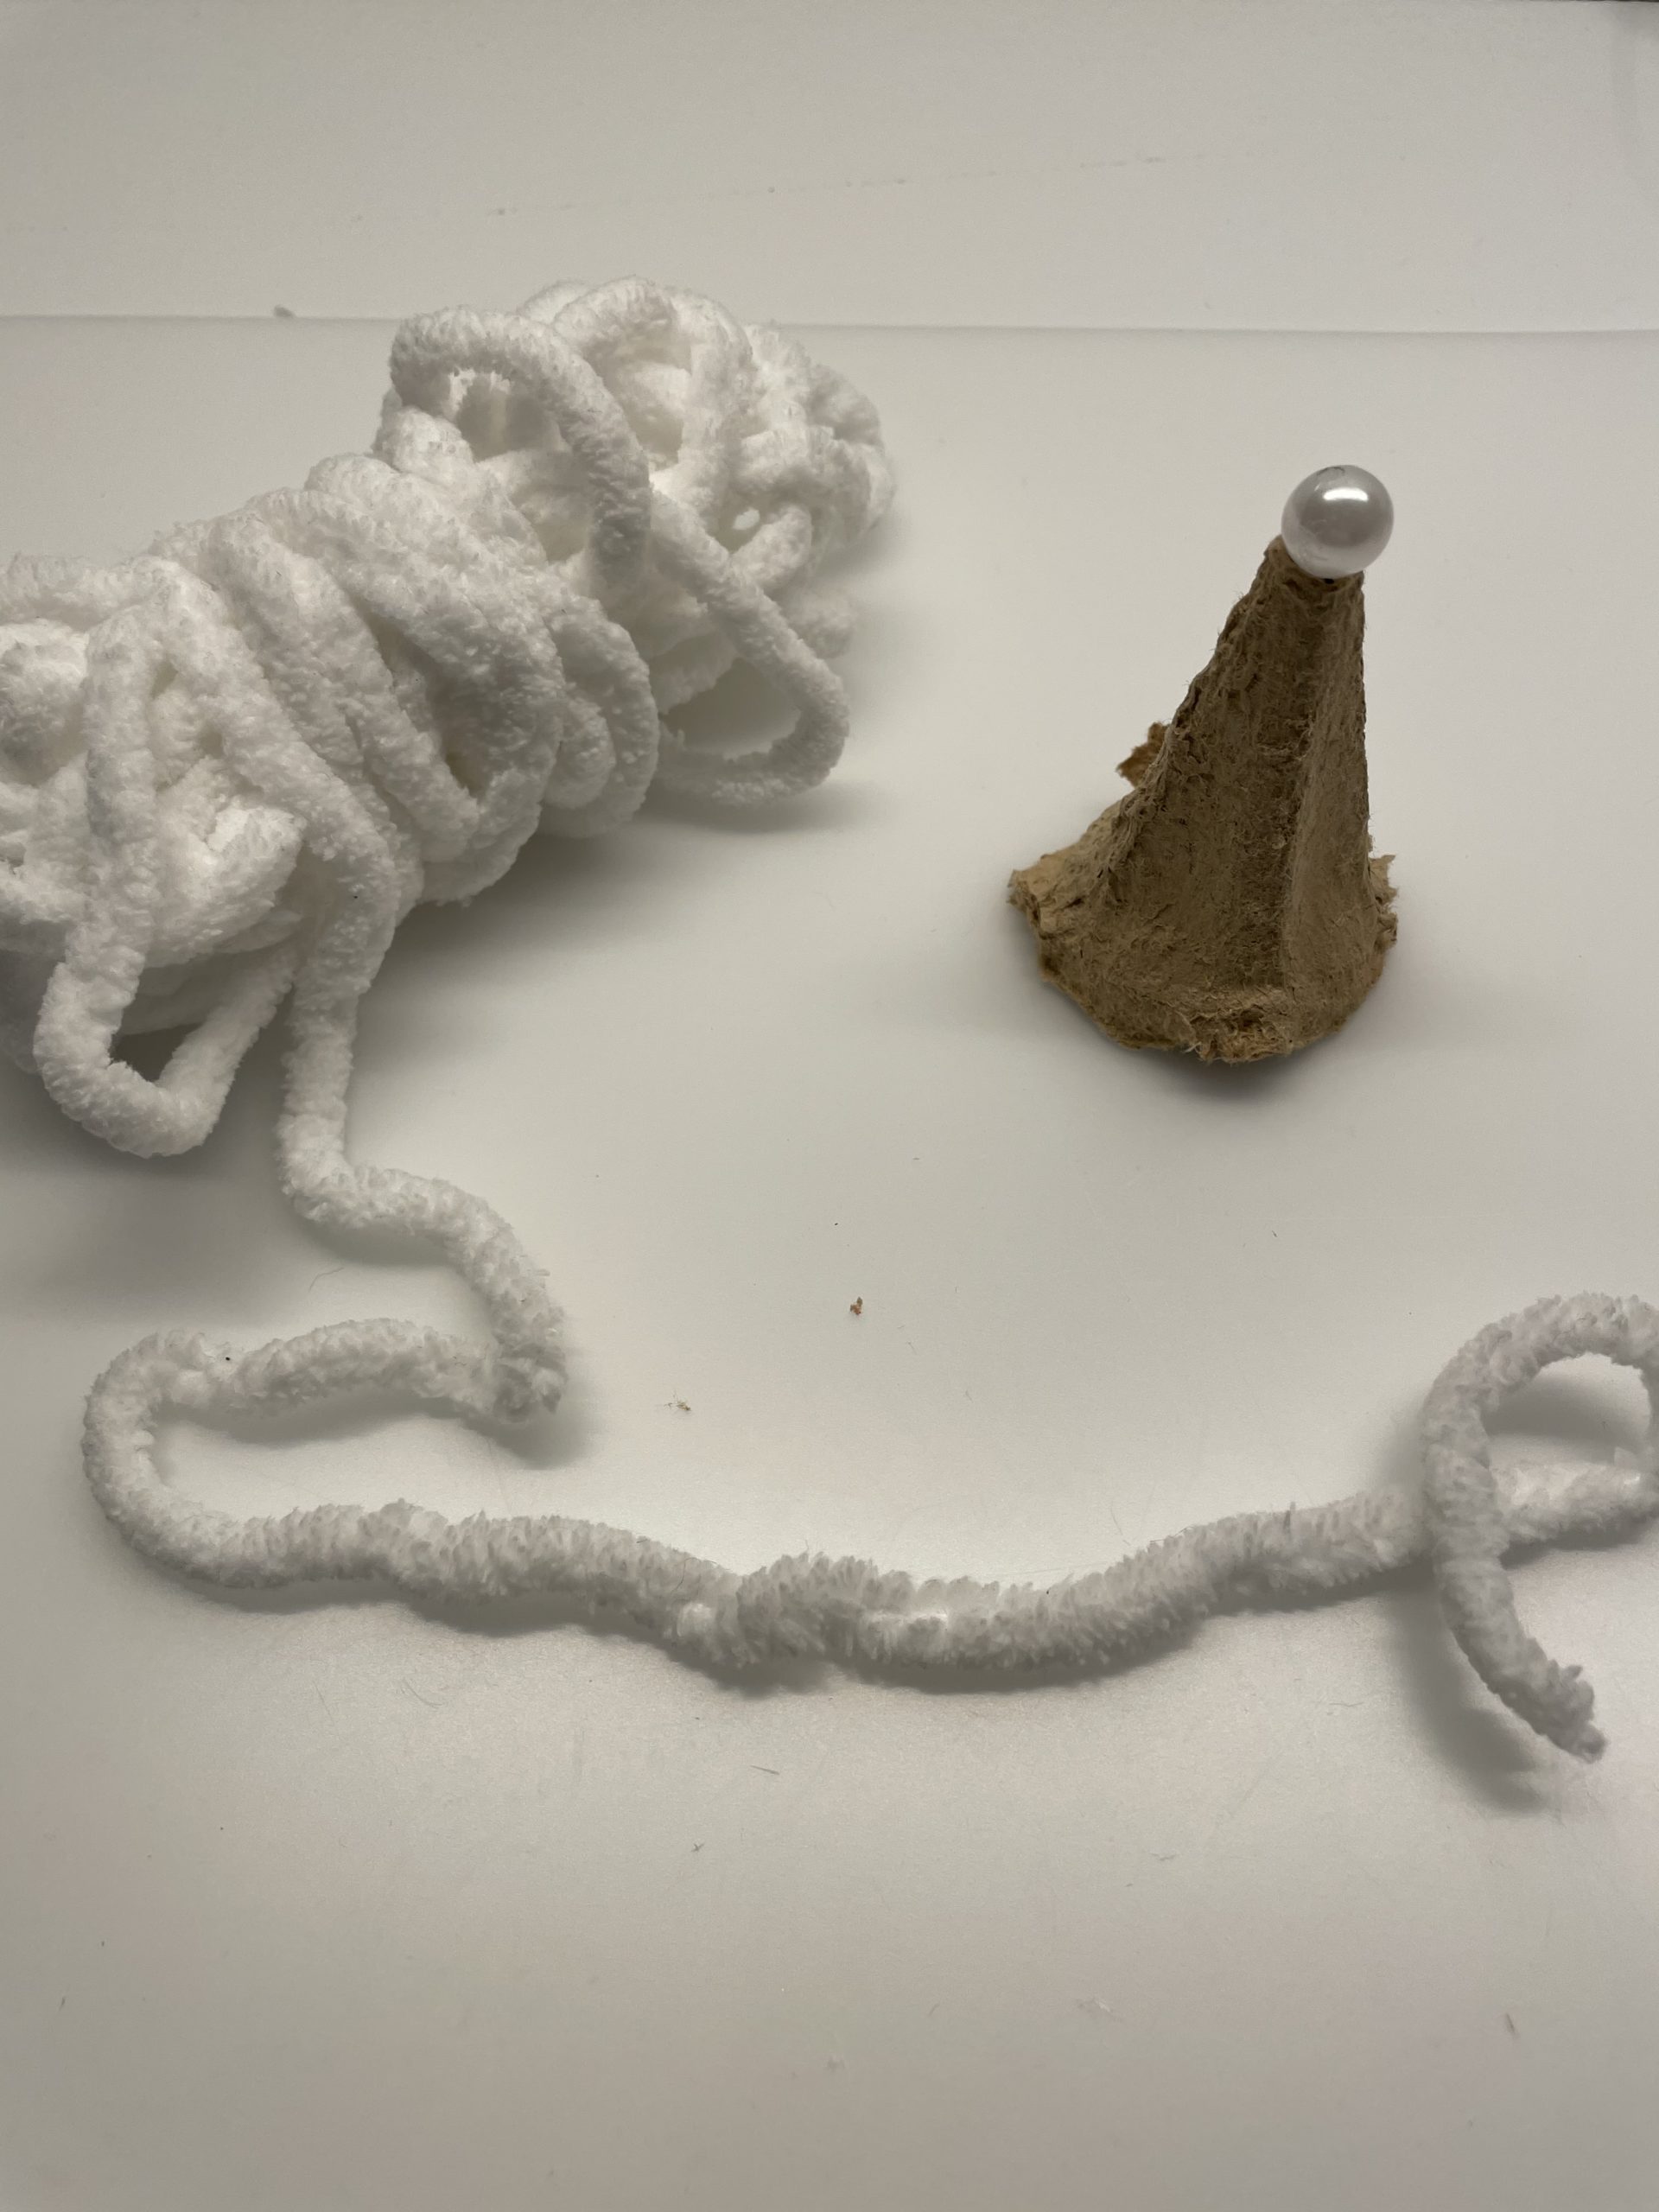
Now take a thick fluffy woolen thread and prepare a pearl.
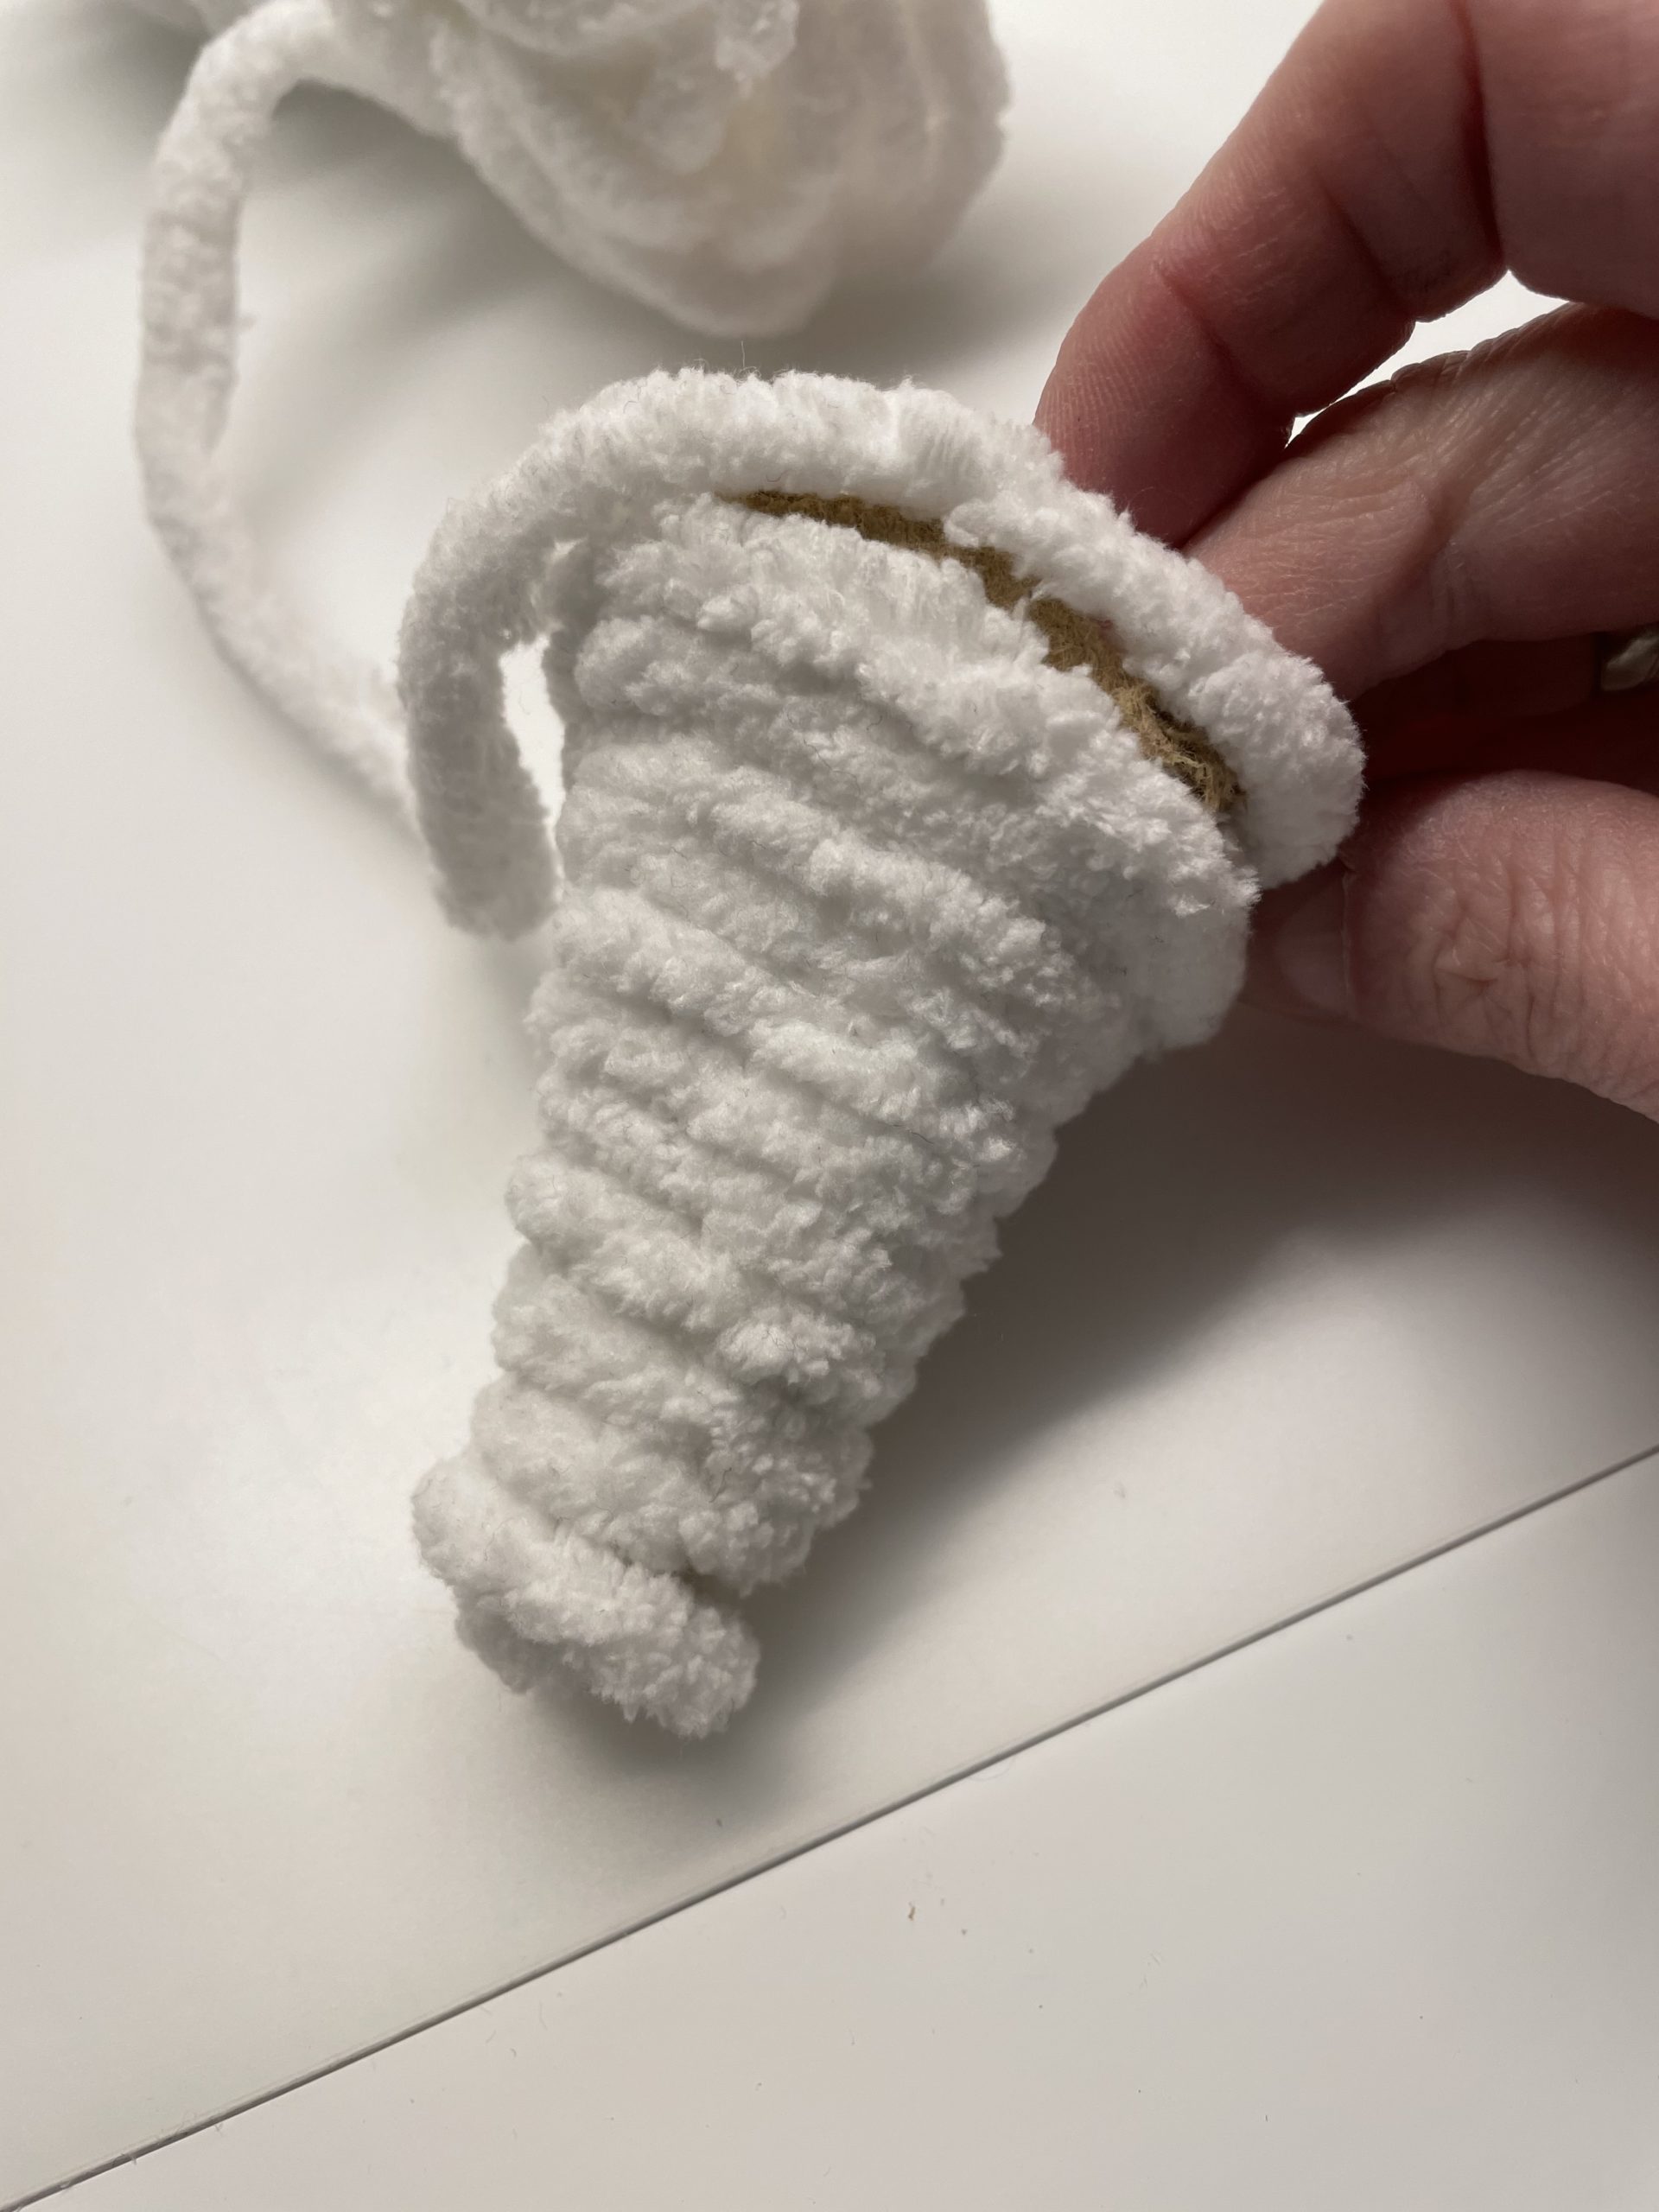
Now touch the tip of the egg box with some glue and start to wrap the tip with the wool from the top. Wrap the wool tightly so that there are no gaps.
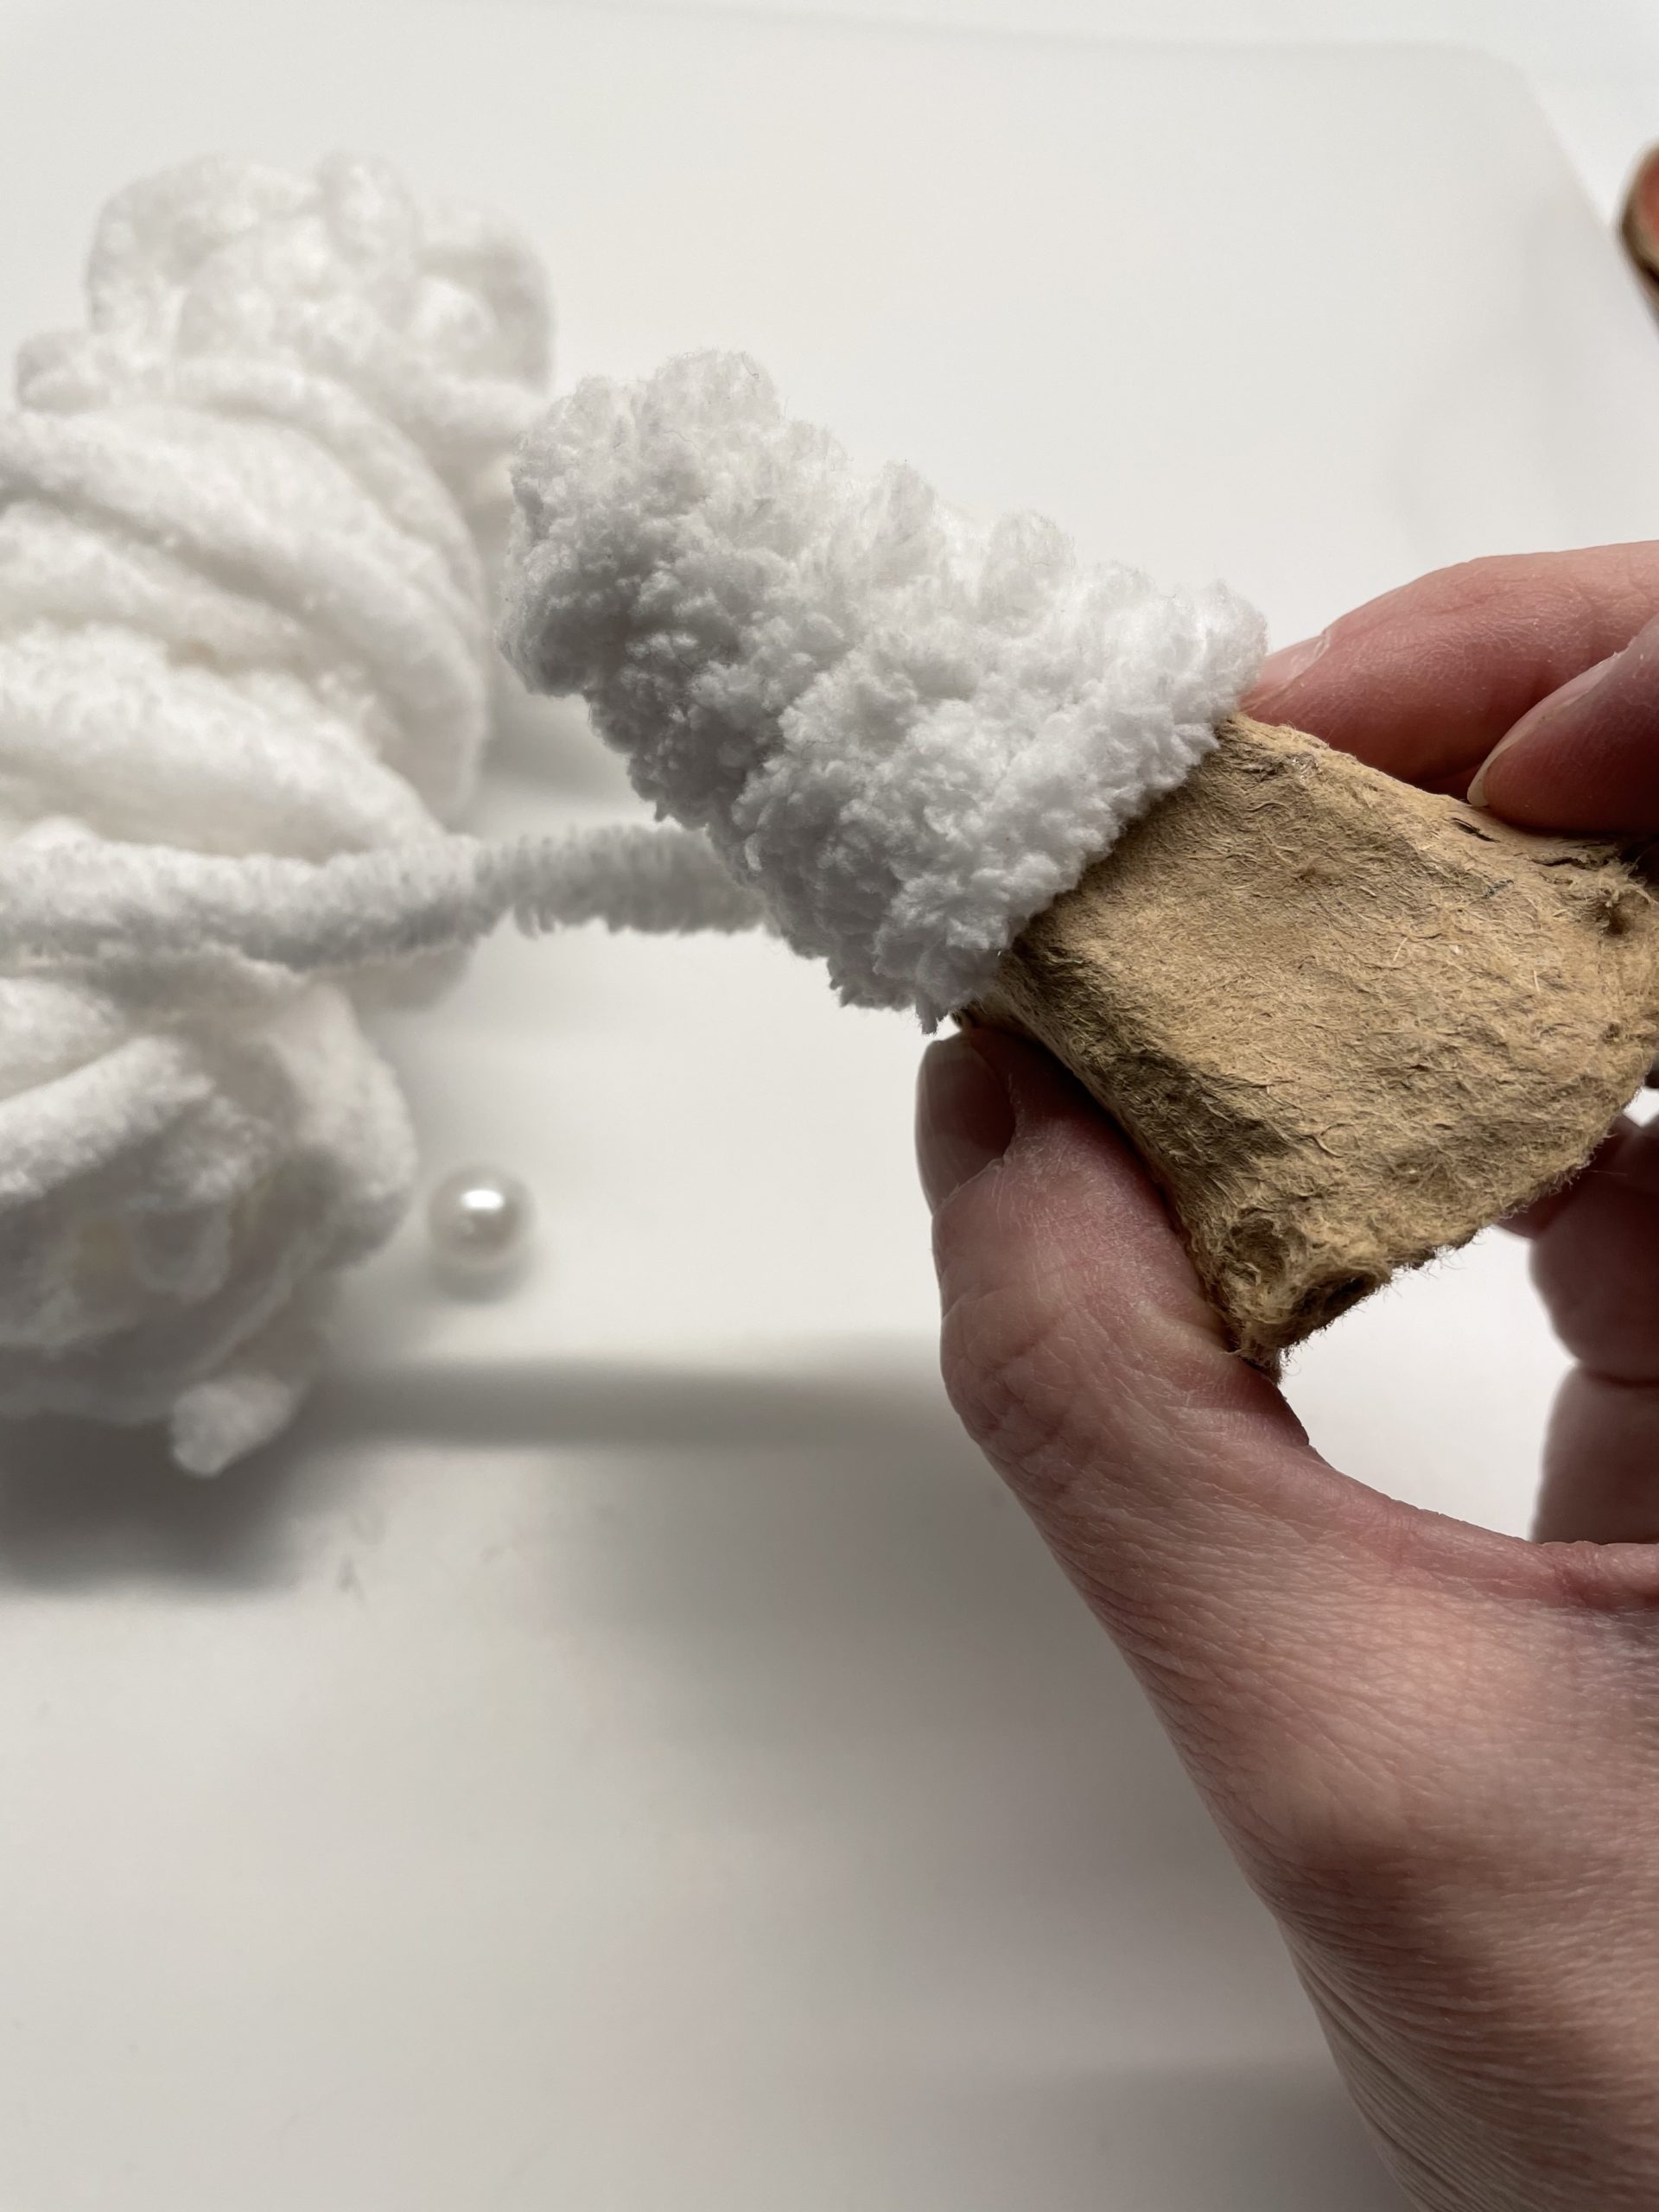
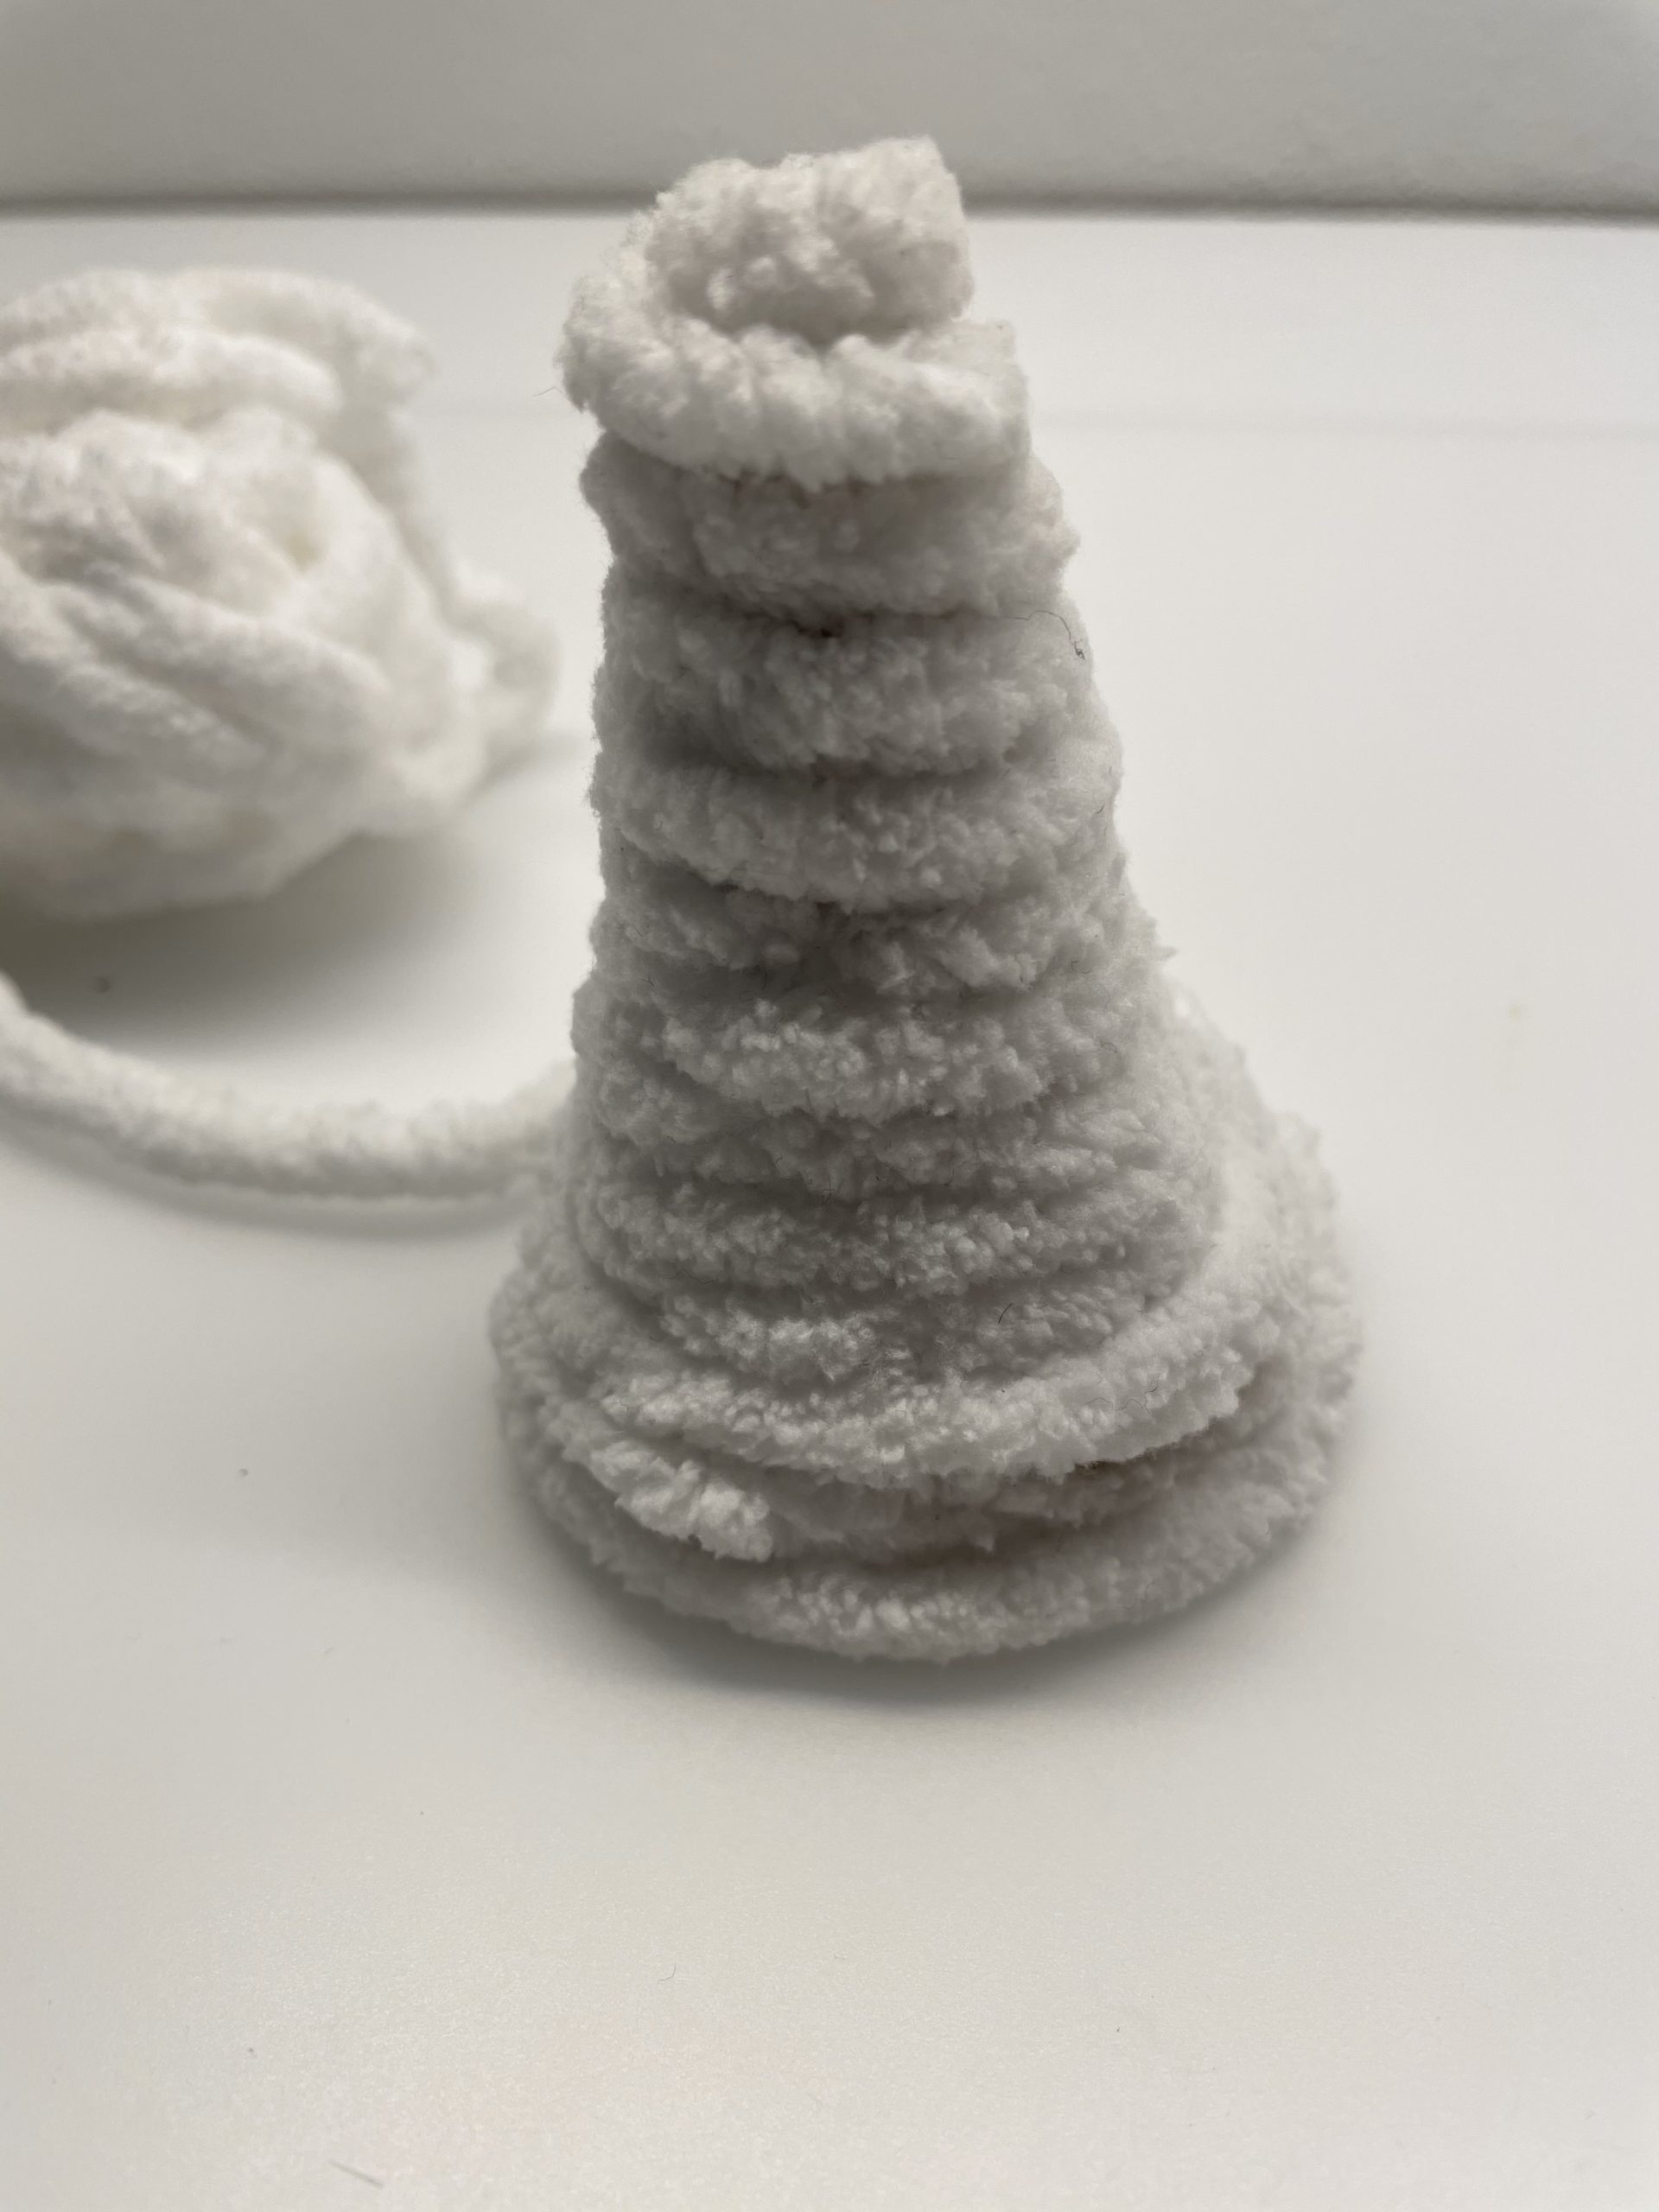
Wrap the wool down.
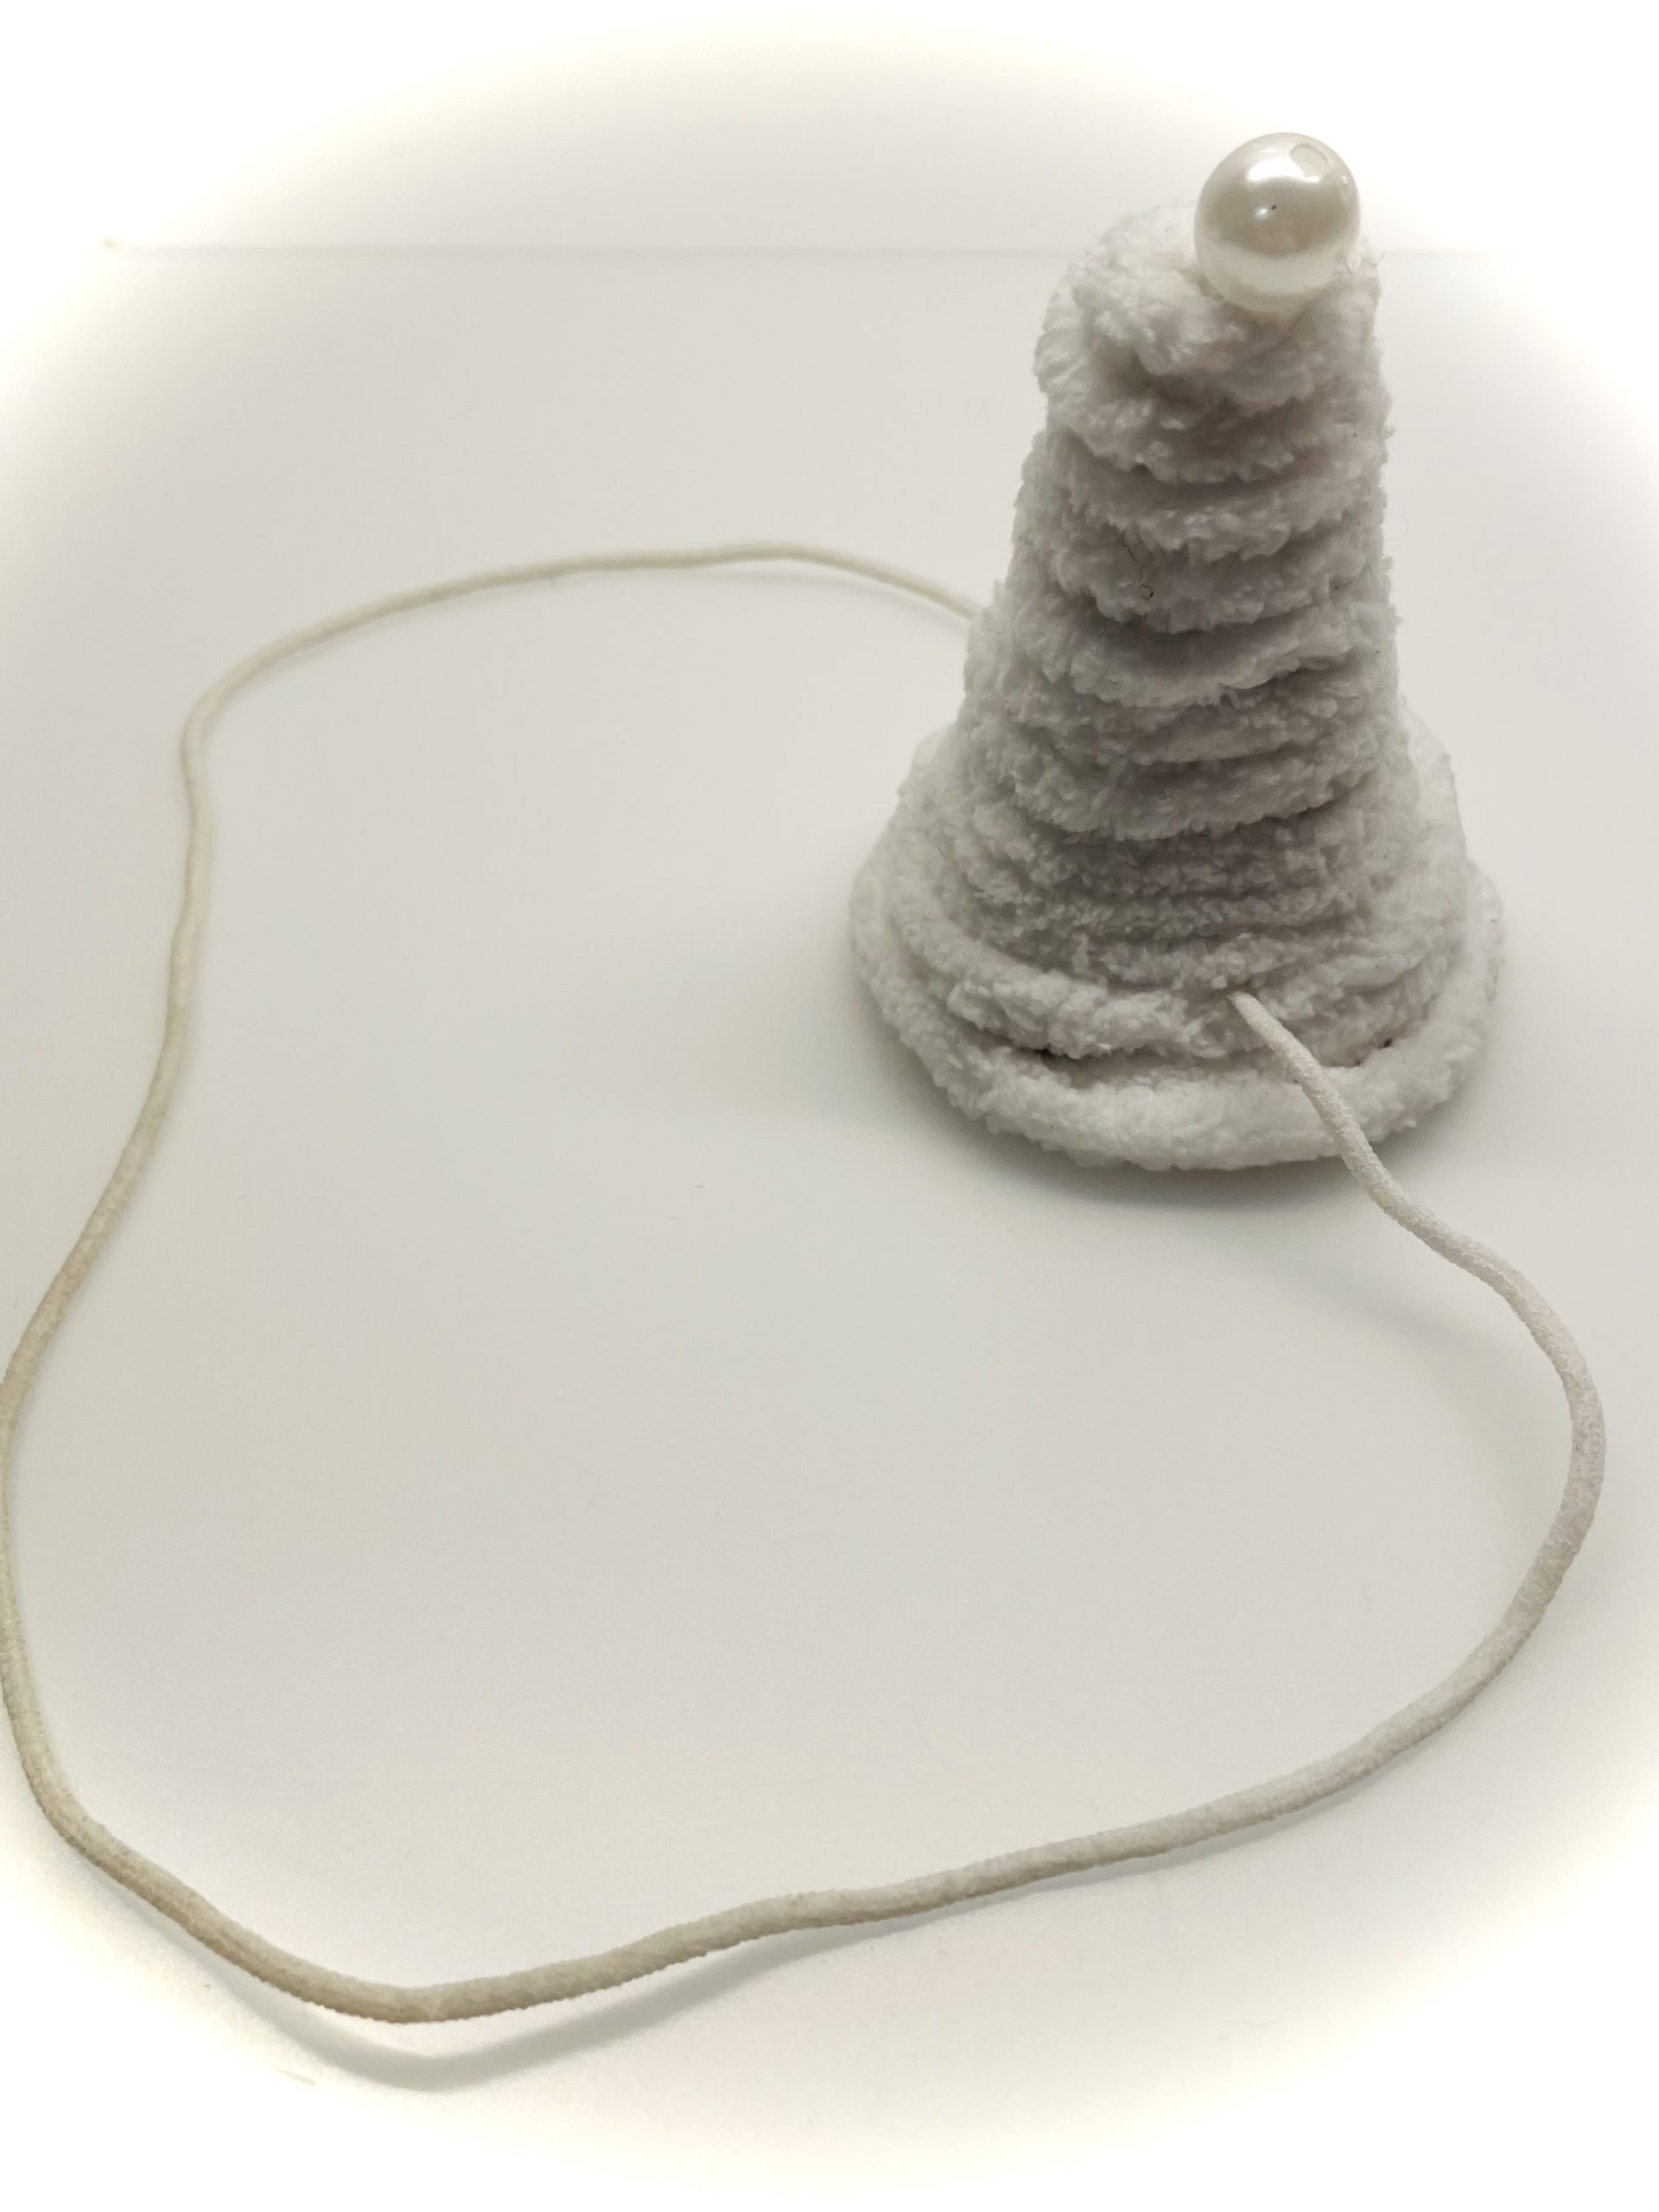
At the end you leave the wool thread a little longer and cut off the thread. Now you wrap the overhanging thread twice over the bottom edge and stick the end of the wool firmly. You can also stick the end piece inside.
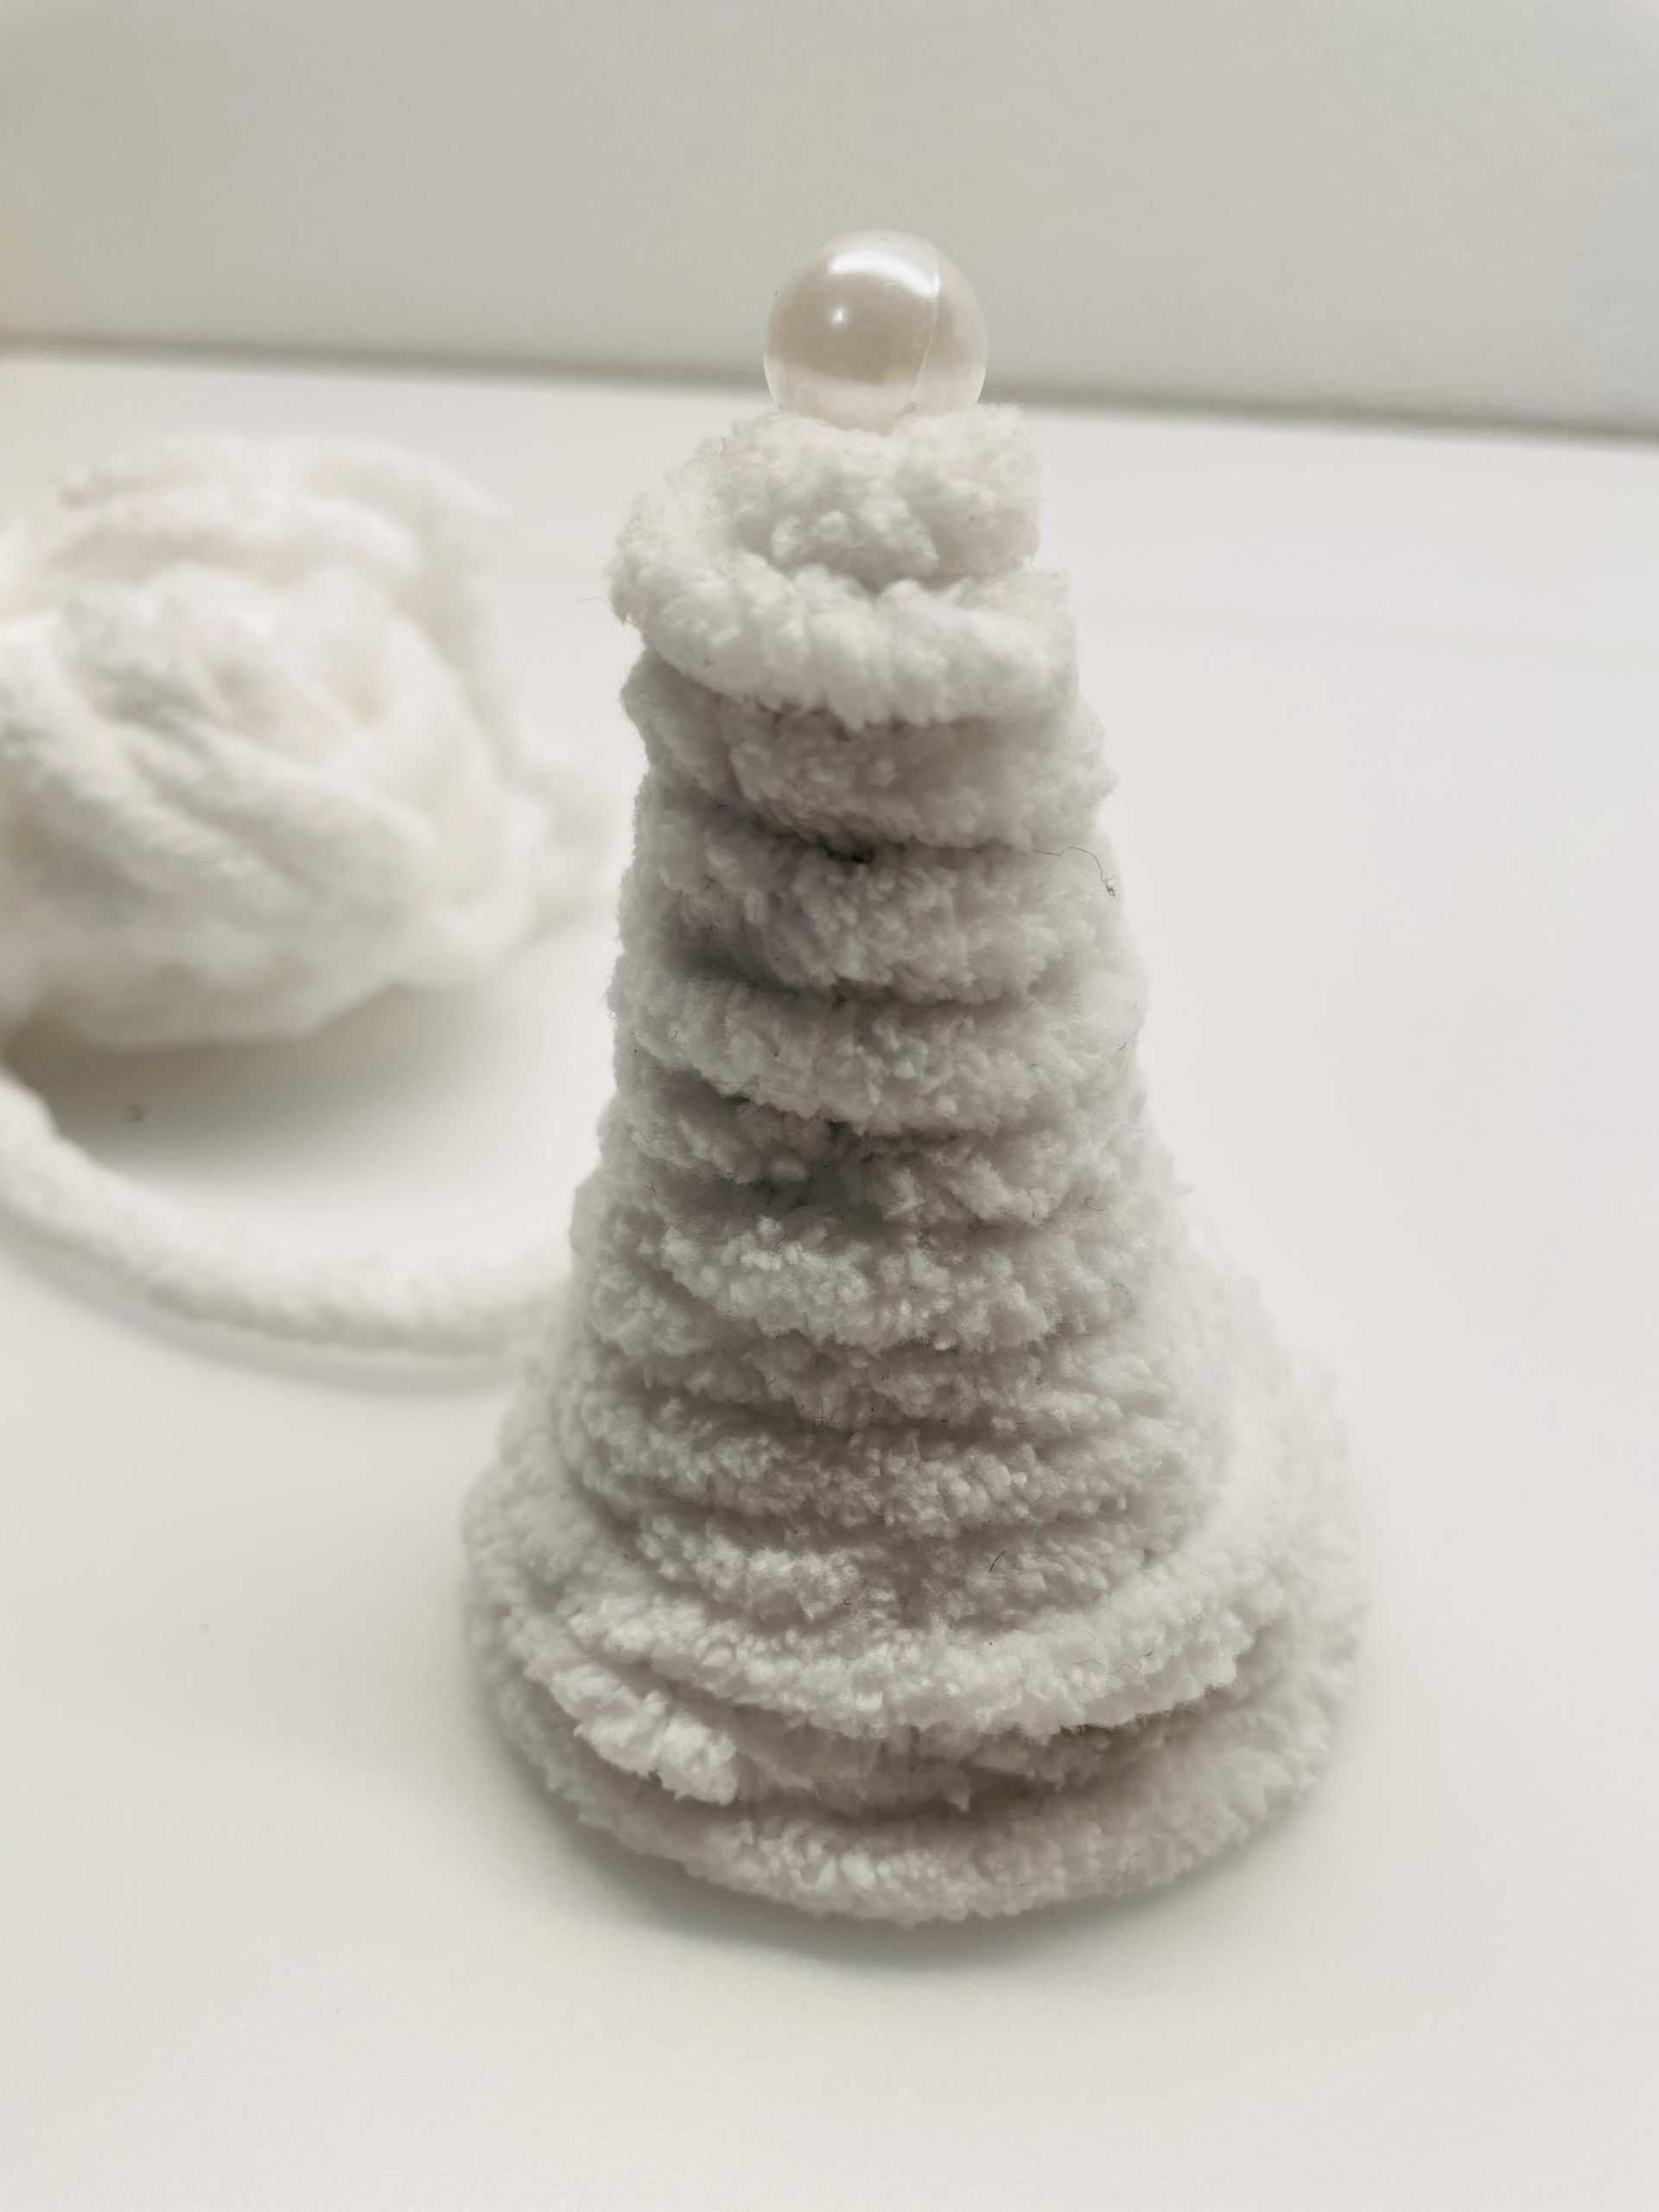
Now stick the pearl to the top.
Now you mark two opposite points inside the tip. Make sure that the holes are far enough from the edge so that they will not be able to tear out later on. This will stash her through as holes with the scissors or a lace knife.
Attention: Injury risk!
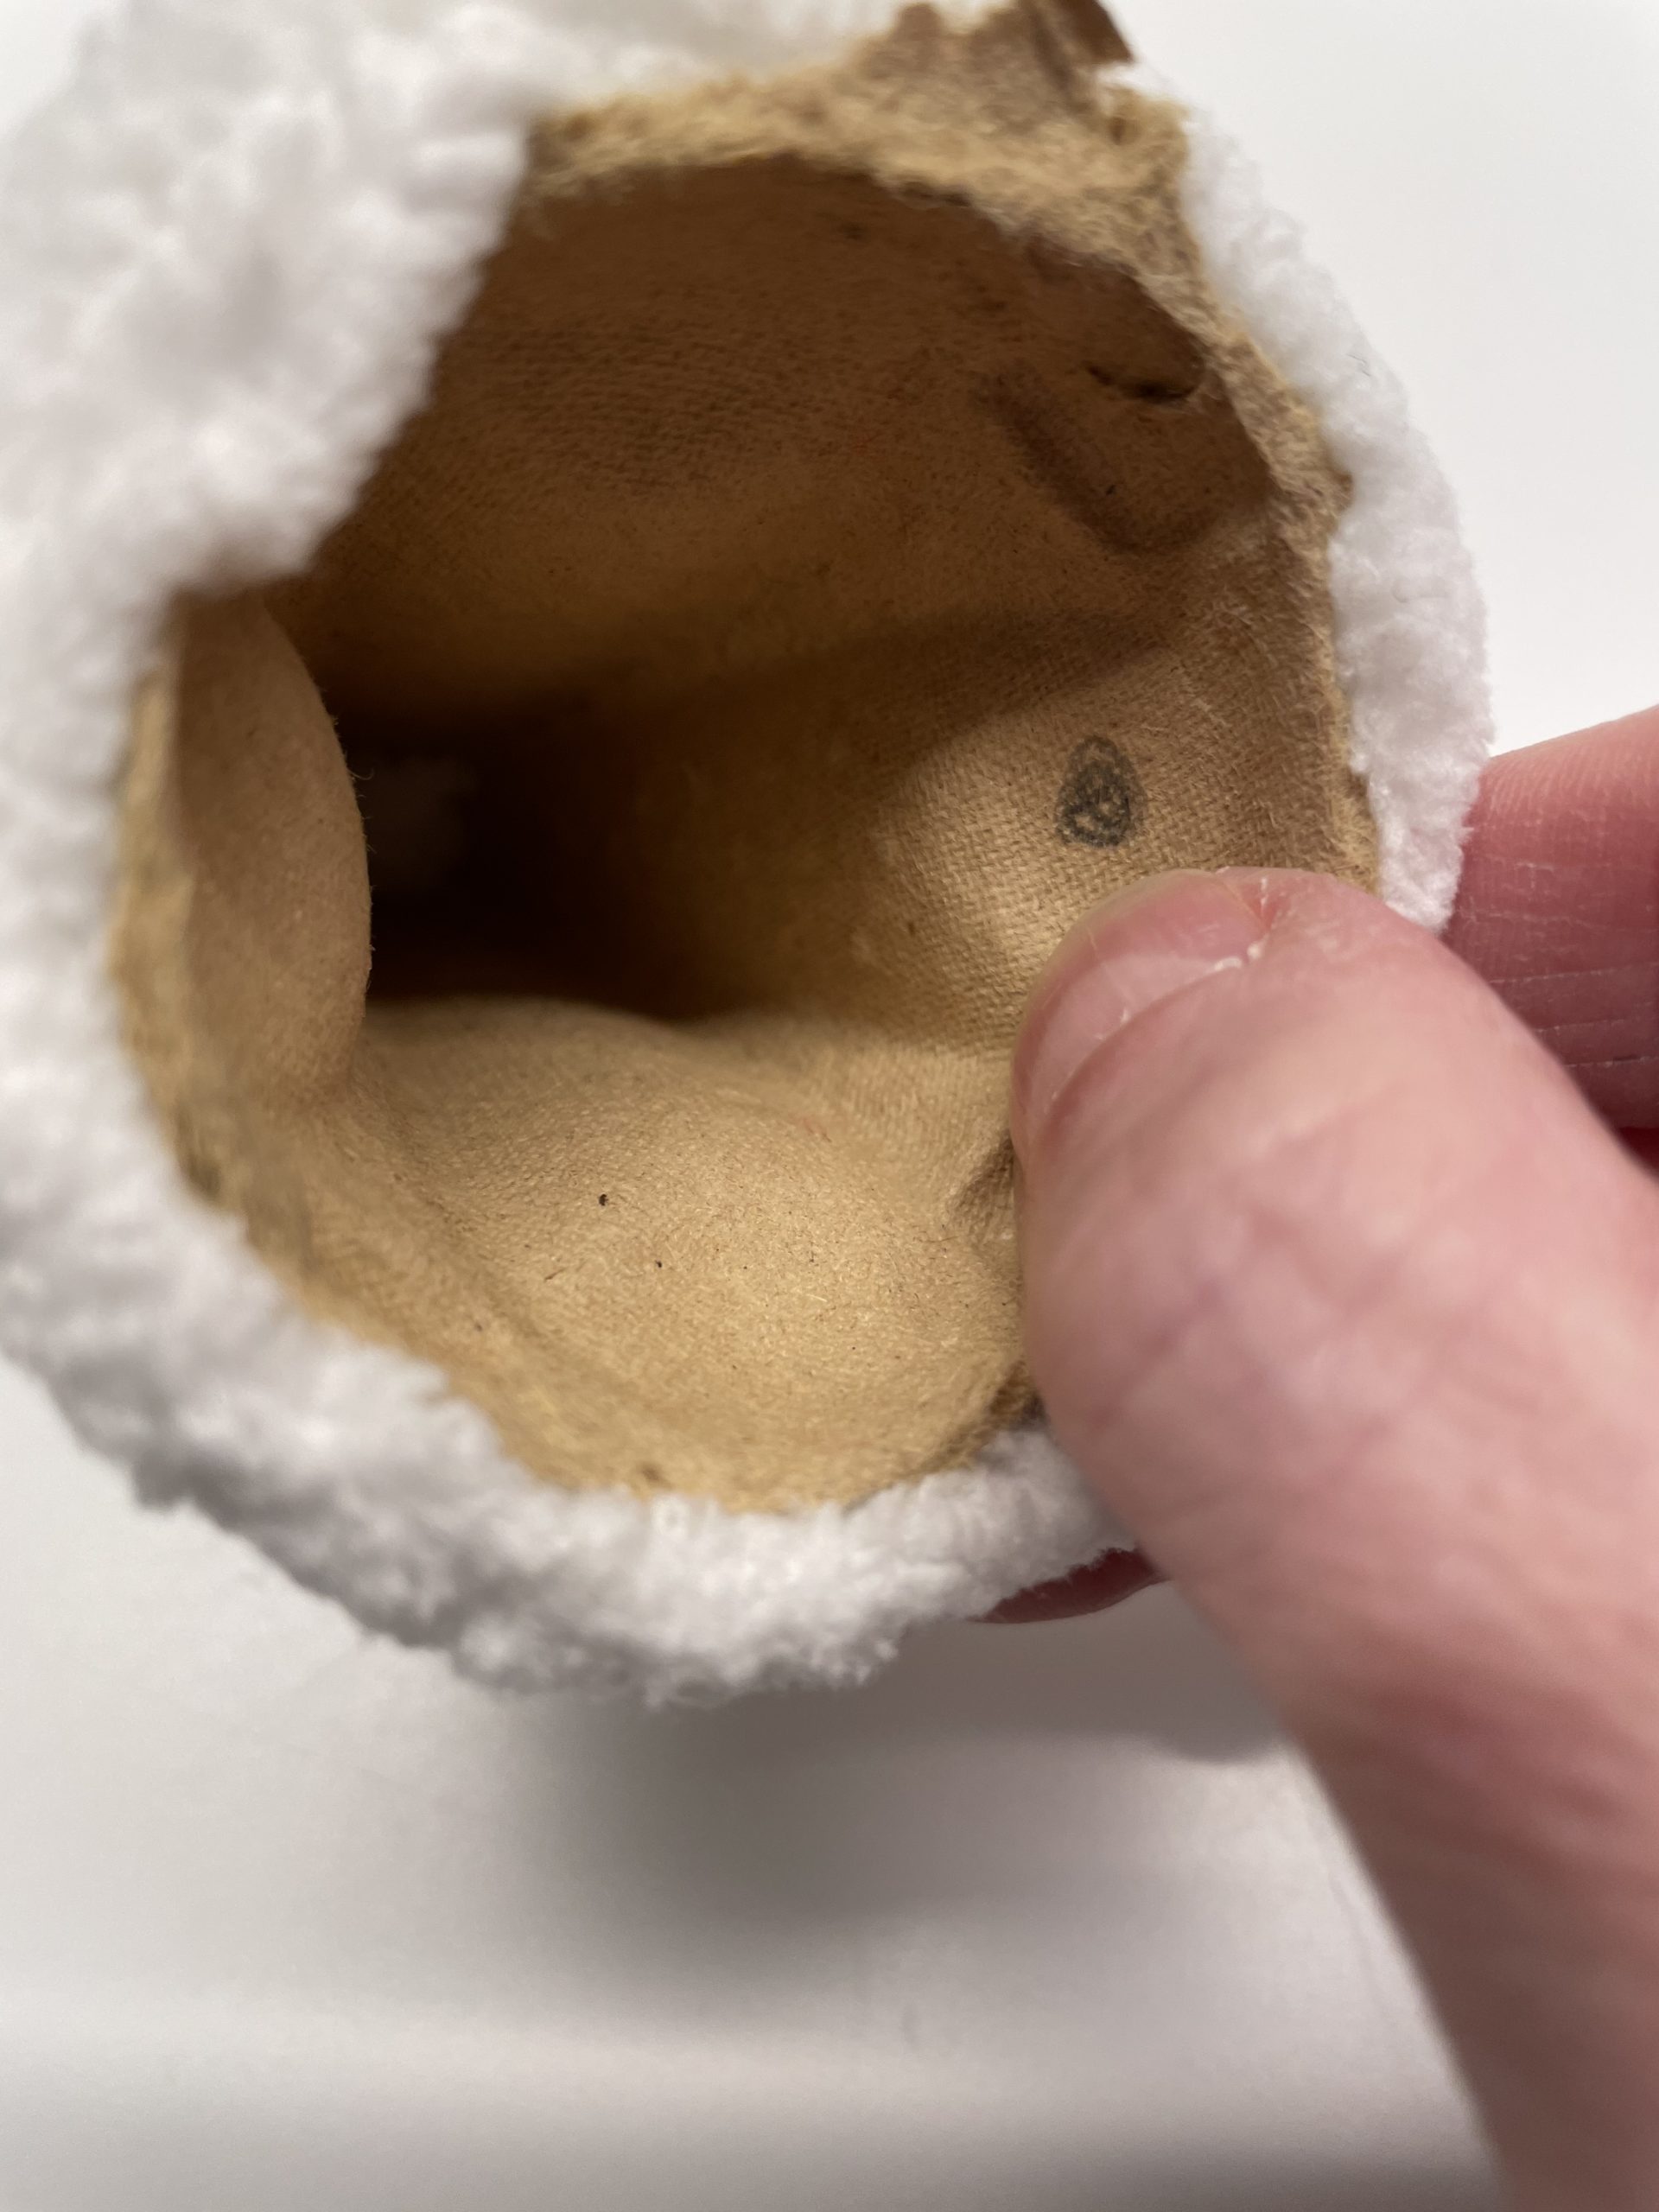
Now thread a hat rubber through the holes.
For this you measure the head circumference of the child before.
Knot the hat cord inside the egg box.
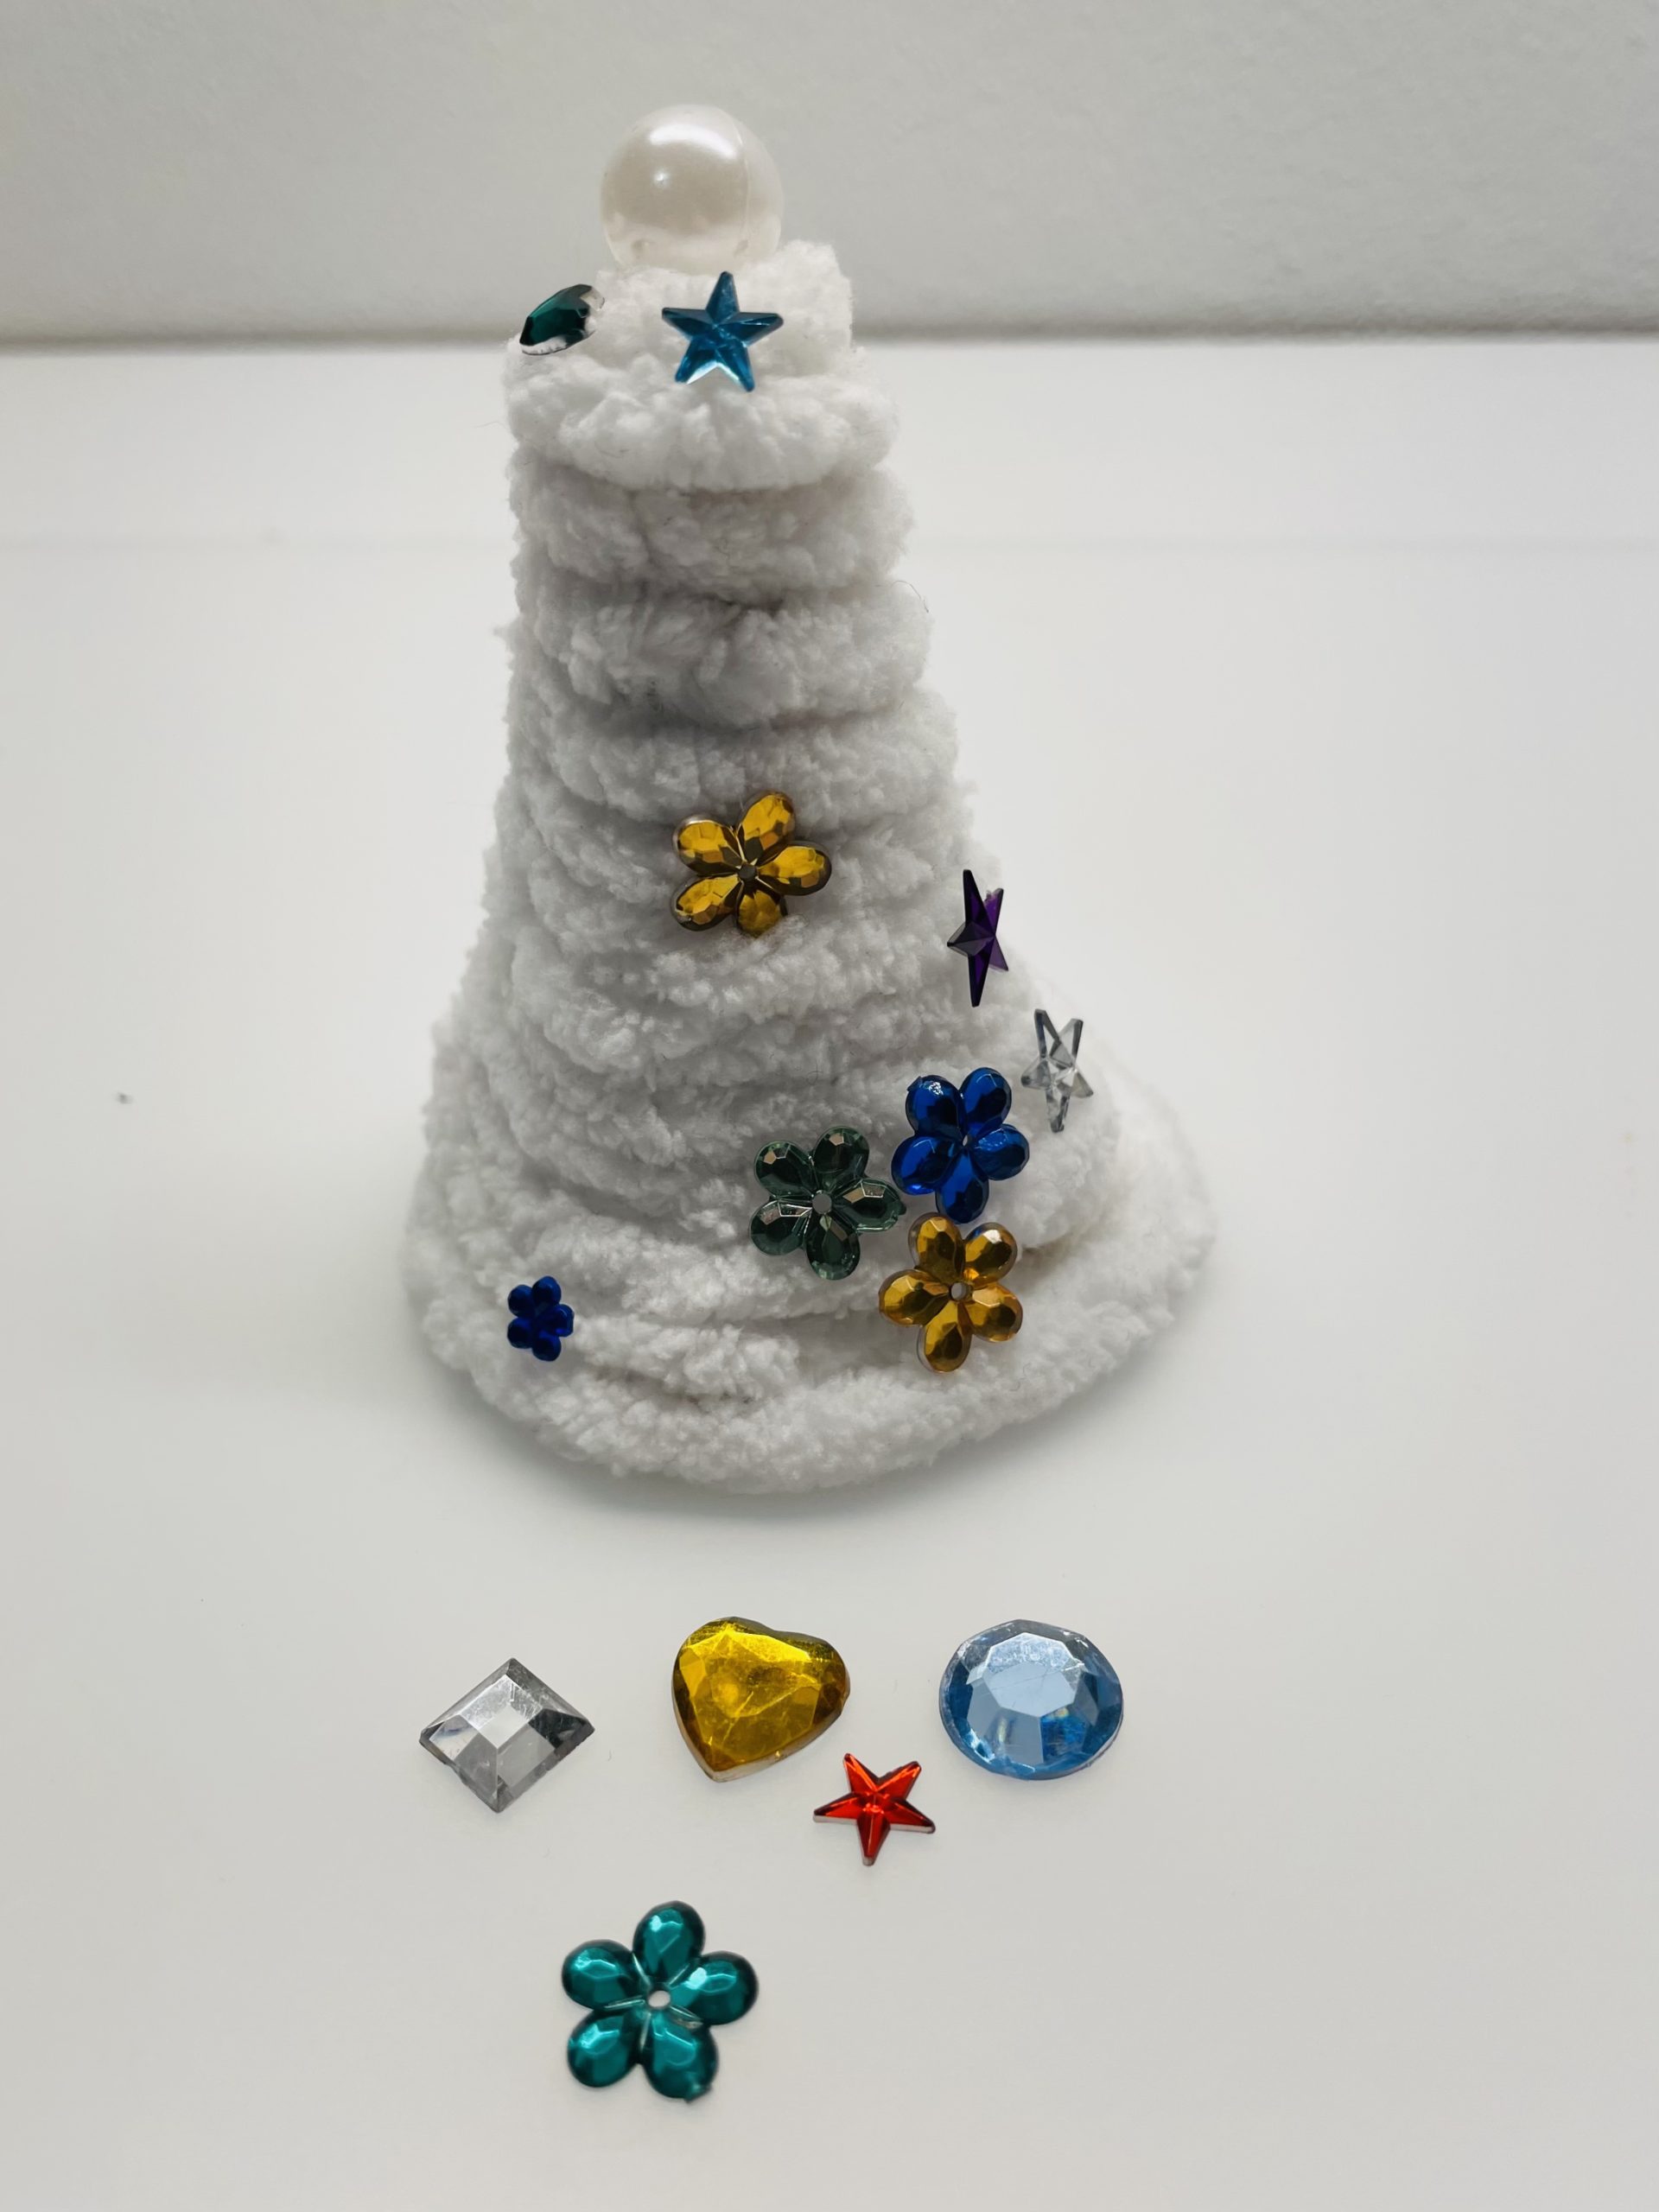
Now the horn is embellished with glitter and sequins.
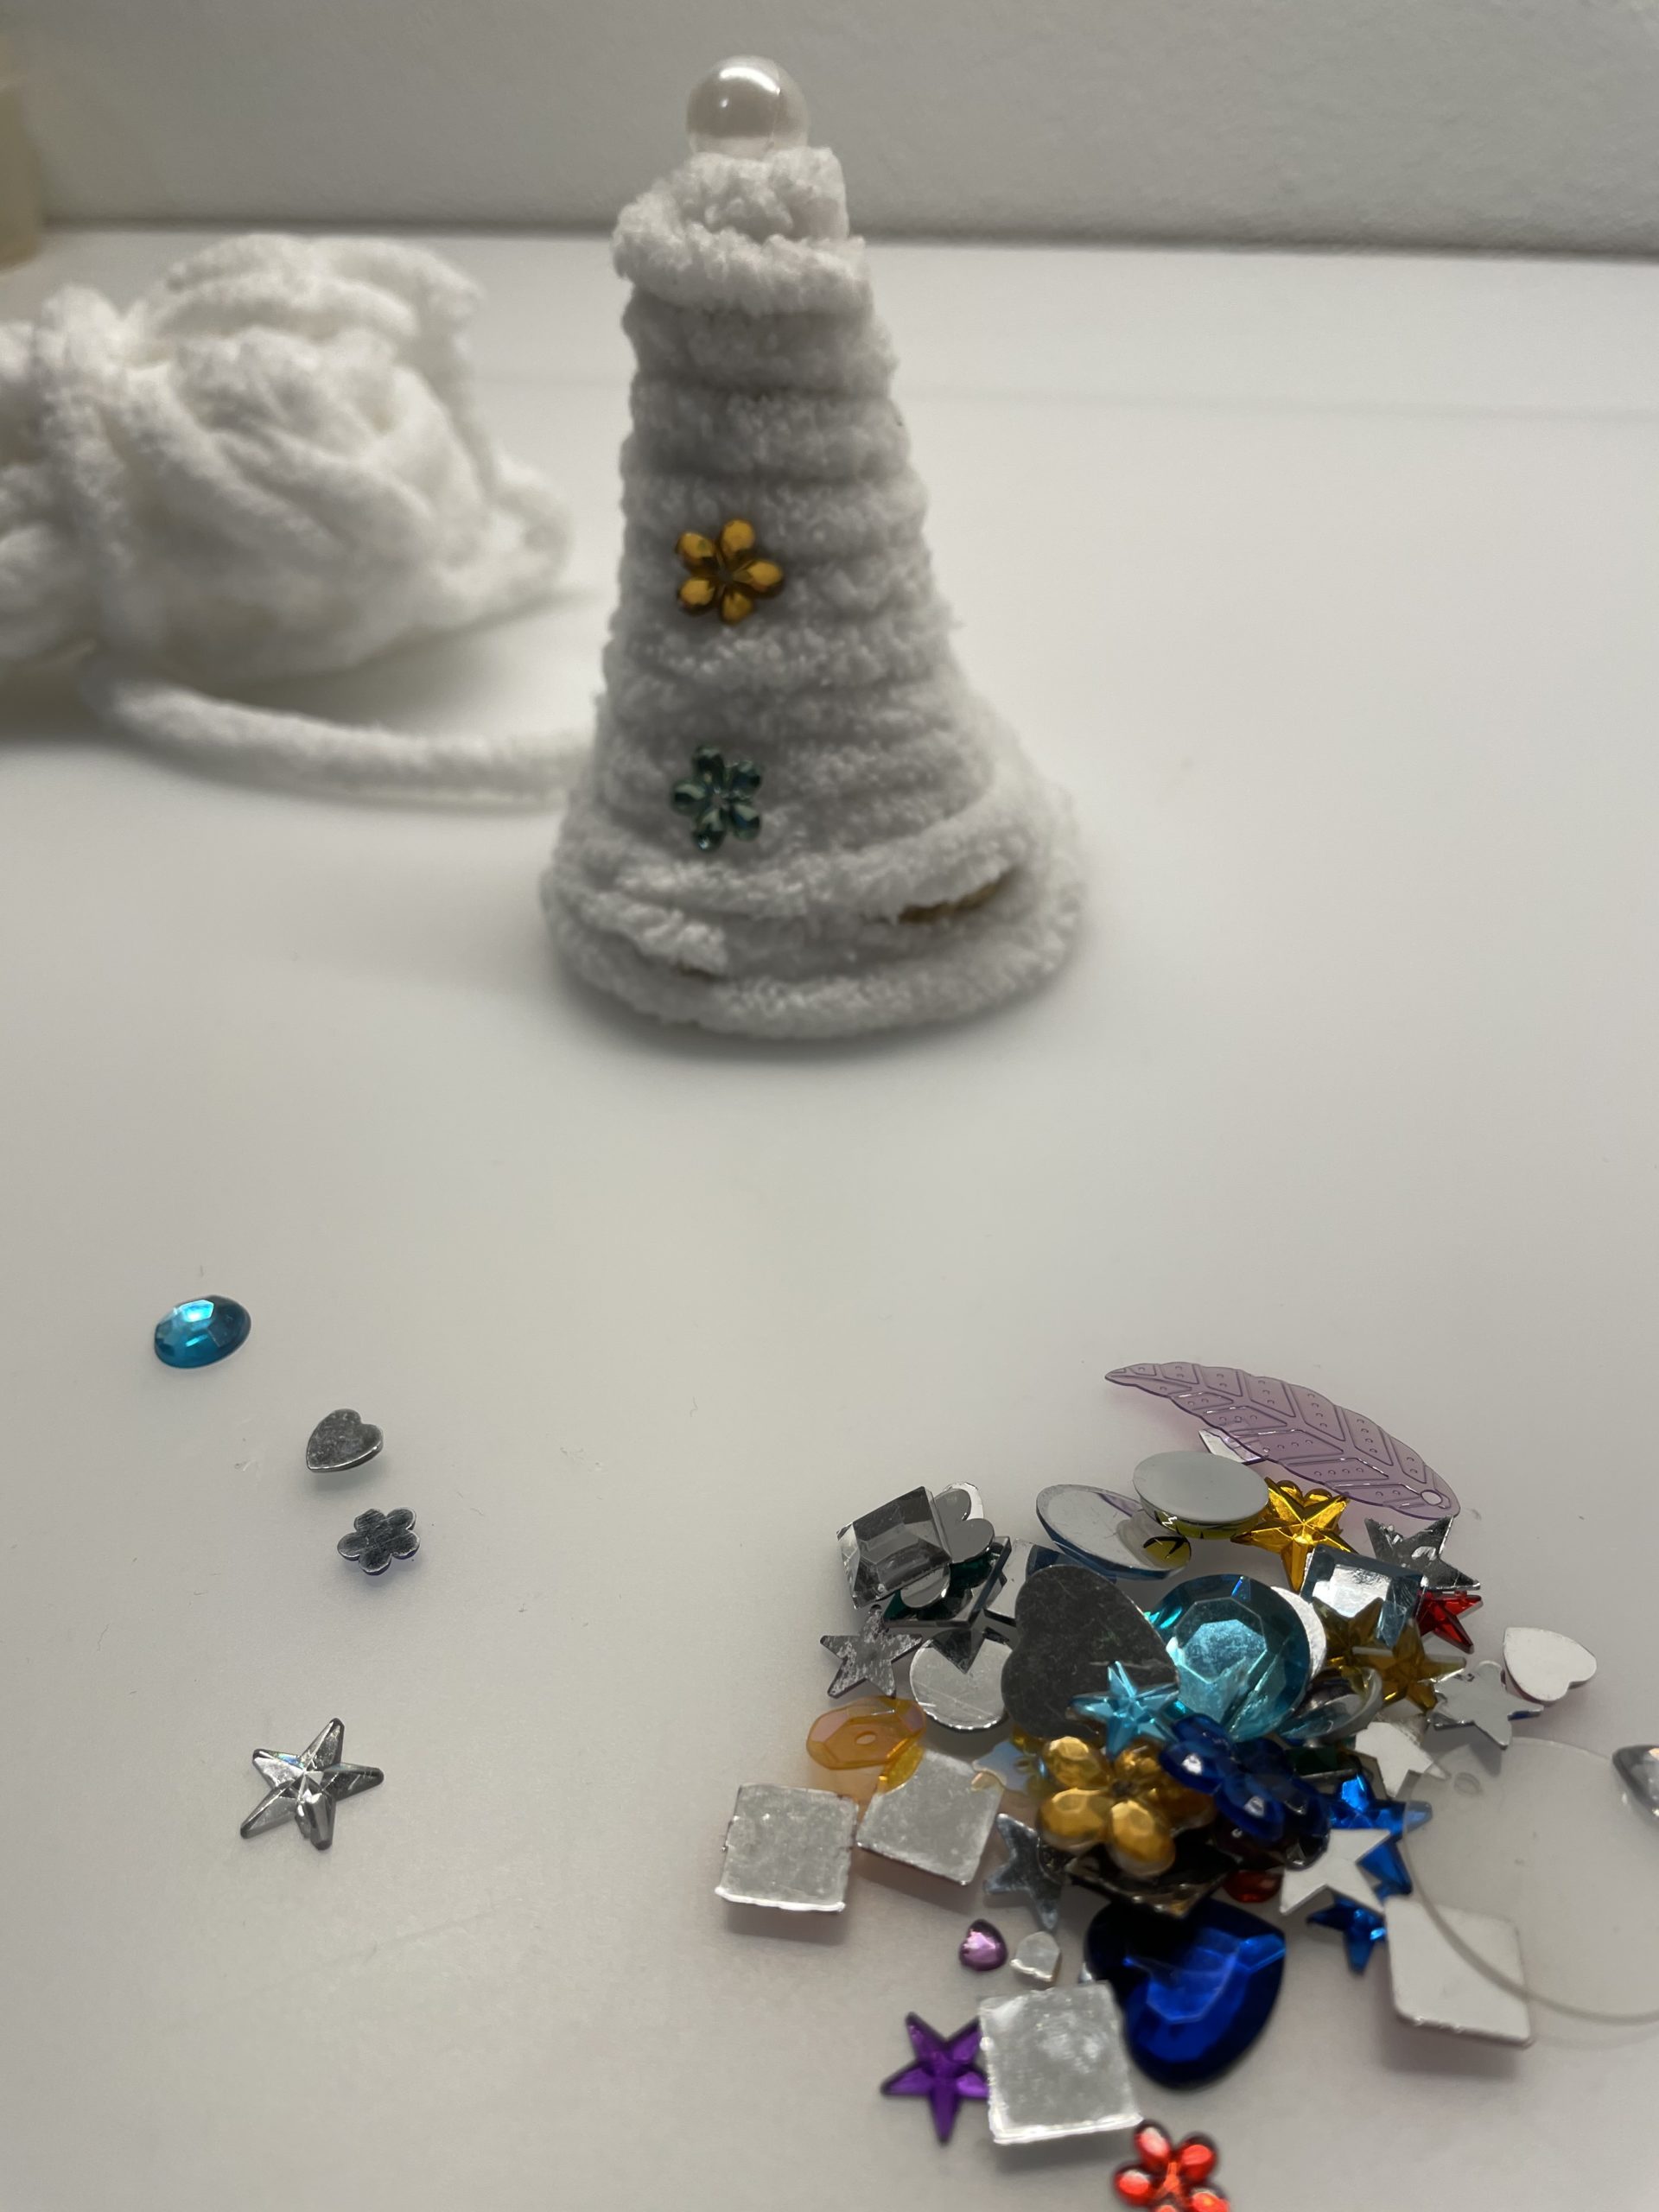
Design your horn as you like it!
Have fun!
Materials
Directions
First you need a tip from an egg box.
Cut out a tip and cut it straight down.
Now take a thick fluffy woolen thread and prepare a pearl.
Now touch the tip of the egg box with some glue and start to wrap the tip with the wool from the top. Wrap the wool tightly so that there are no gaps.
Wrap the wool down.
At the end you leave the wool thread a little longer and cut off the thread. Now you wrap the overhanging thread twice over the bottom edge and stick the end of the wool firmly. You can also stick the end piece inside.
Now stick the pearl to the top.
Now you mark two opposite points inside the tip. Make sure that the holes are far enough from the edge so that they will not be able to tear out later on. This will stash her through as holes with the scissors or a lace knife.
Attention: Injury risk!
Now thread a hat rubber through the holes.
For this you measure the head circumference of the child before.
Knot the hat cord inside the egg box.
Now the horn is embellished with glitter and sequins.
Design your horn as you like it!
Have fun!
Follow us on Facebook , Instagram and Pinterest
Don't miss any more adventures: Our bottle mail