Design egg box for Easter decoration

AdventurerJohanna
Rating5.03.3 Thousand times & (4) DifficultyIntermediate

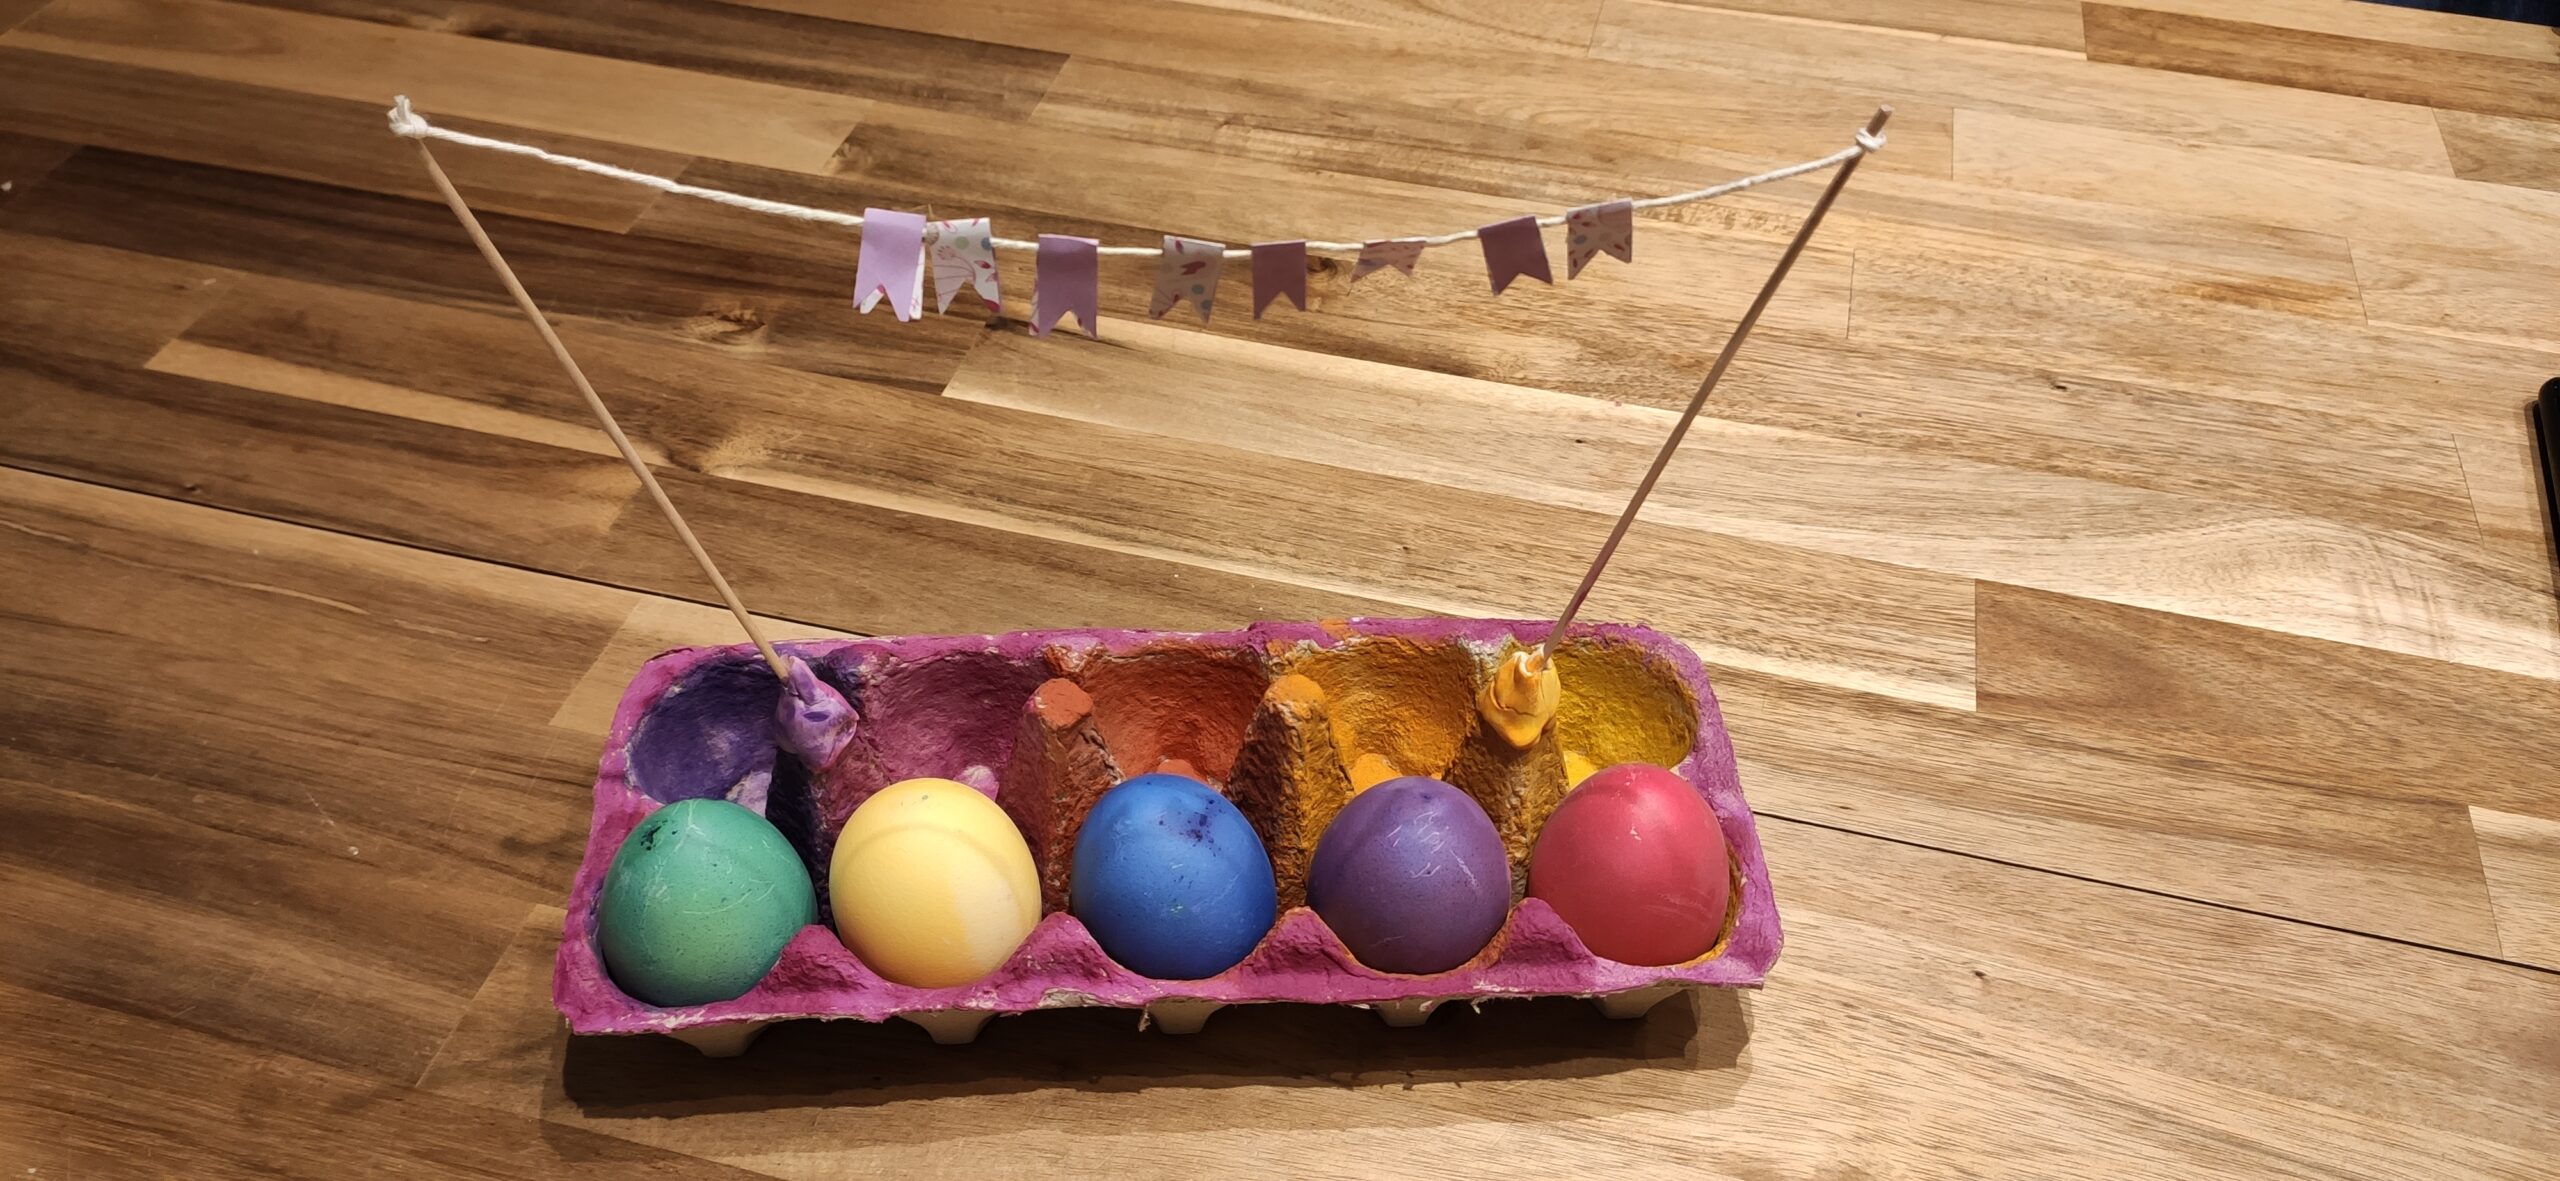
This colourful Easter decoration is suitable on every Easter table and for storing your colorful Easter eggs. All you need is an empty egg box and watercolours. If you want to decorate the painted cardboard with a beautiful garland or pennant chain, then you need some colorful paper, a string and two wooden peese.

Tip: Add moss and other small natural treasures such as snail houses or willow kittens or/and half eggshells that you sow with cress. Have fun designing!

Titelbild zur Bastel- und DIY-Idee für Kinder '(1032) Eierkarton zur Osterdekoration gestalten'
Material for1 Child
Adv. Time30 min.Total Time30 min.
 1 Egg carton
 2 Shashlik skewersWood skewers
 Packing tape (40 cm)Wool thread
 Paper and paperboardor other colorful paper
 Water colours
 Brushes
 Water glass
 Painter's apron
 Pencil
 Kneadto fix the wooden peas
All links marked with a shopping cart lead to Amazon - here we have selected products that we would order ourselves and in part also ordered. In a qualified purchase via the advertising link, we as Amazon partner receive a commission, for you there are no costs. You thus support our cost- and advertising banner-free, educational offer.
1

First lay out the craft pad and start with the egg box and scissors.
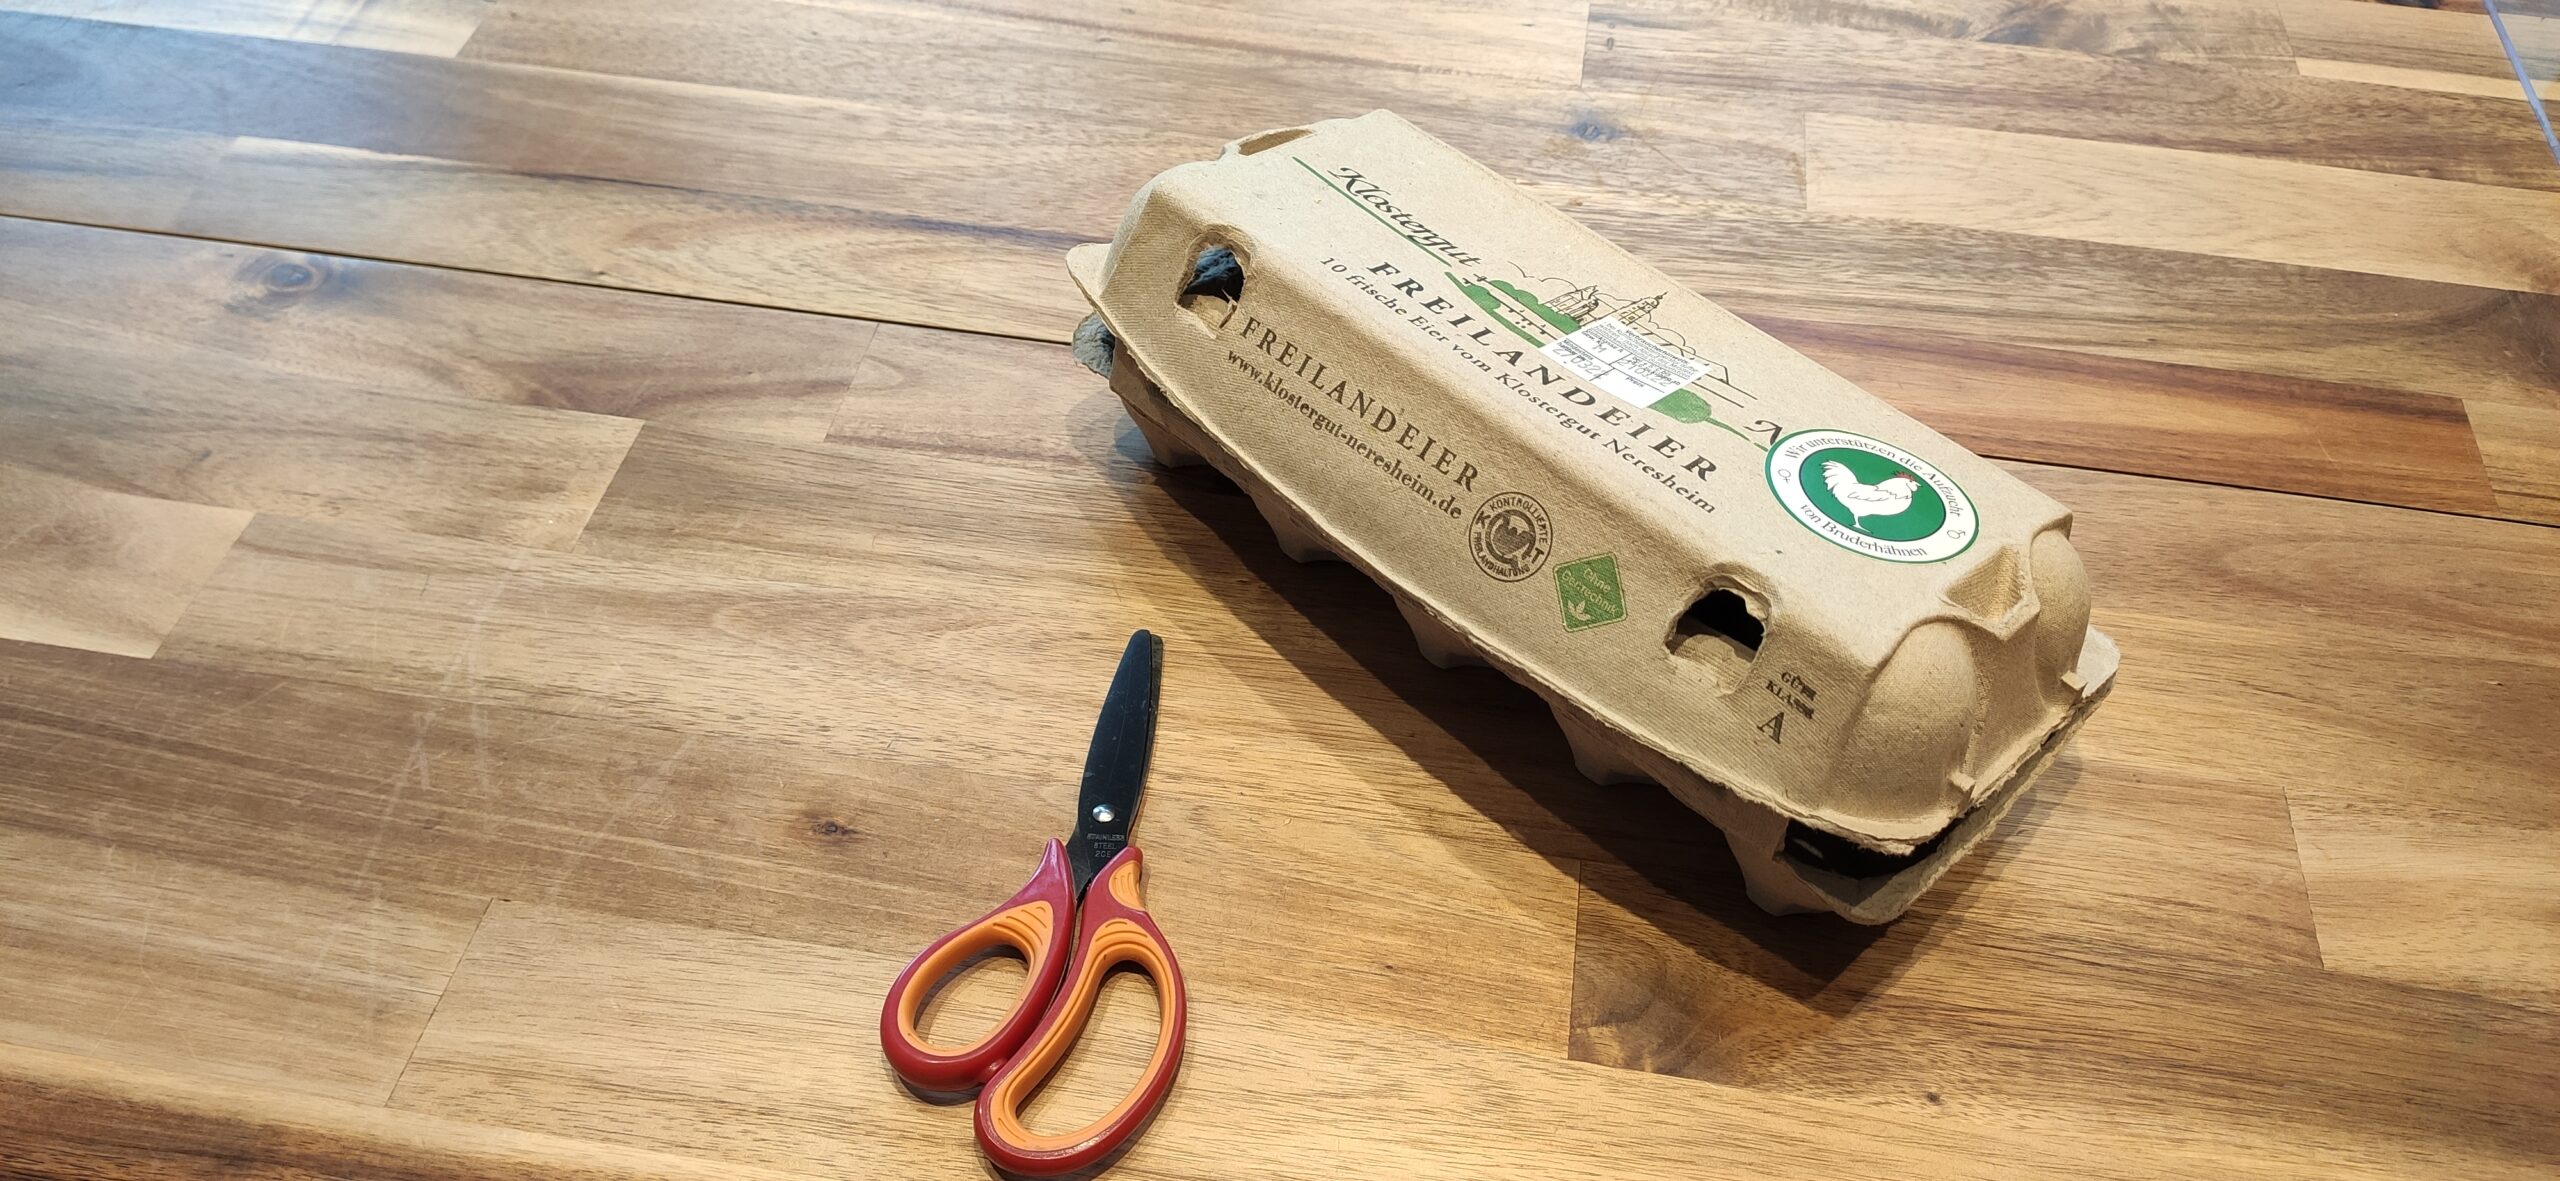
Bild zum Schritt 1 für das Bastel- und DIY-Abenteuer für Kinder: 'Legt euch zuerst die Bastelunterlage aus und startet mit dem...'

2

Now cut off the lid and the flap from the egg box.
Then put the egg box on your side for later.
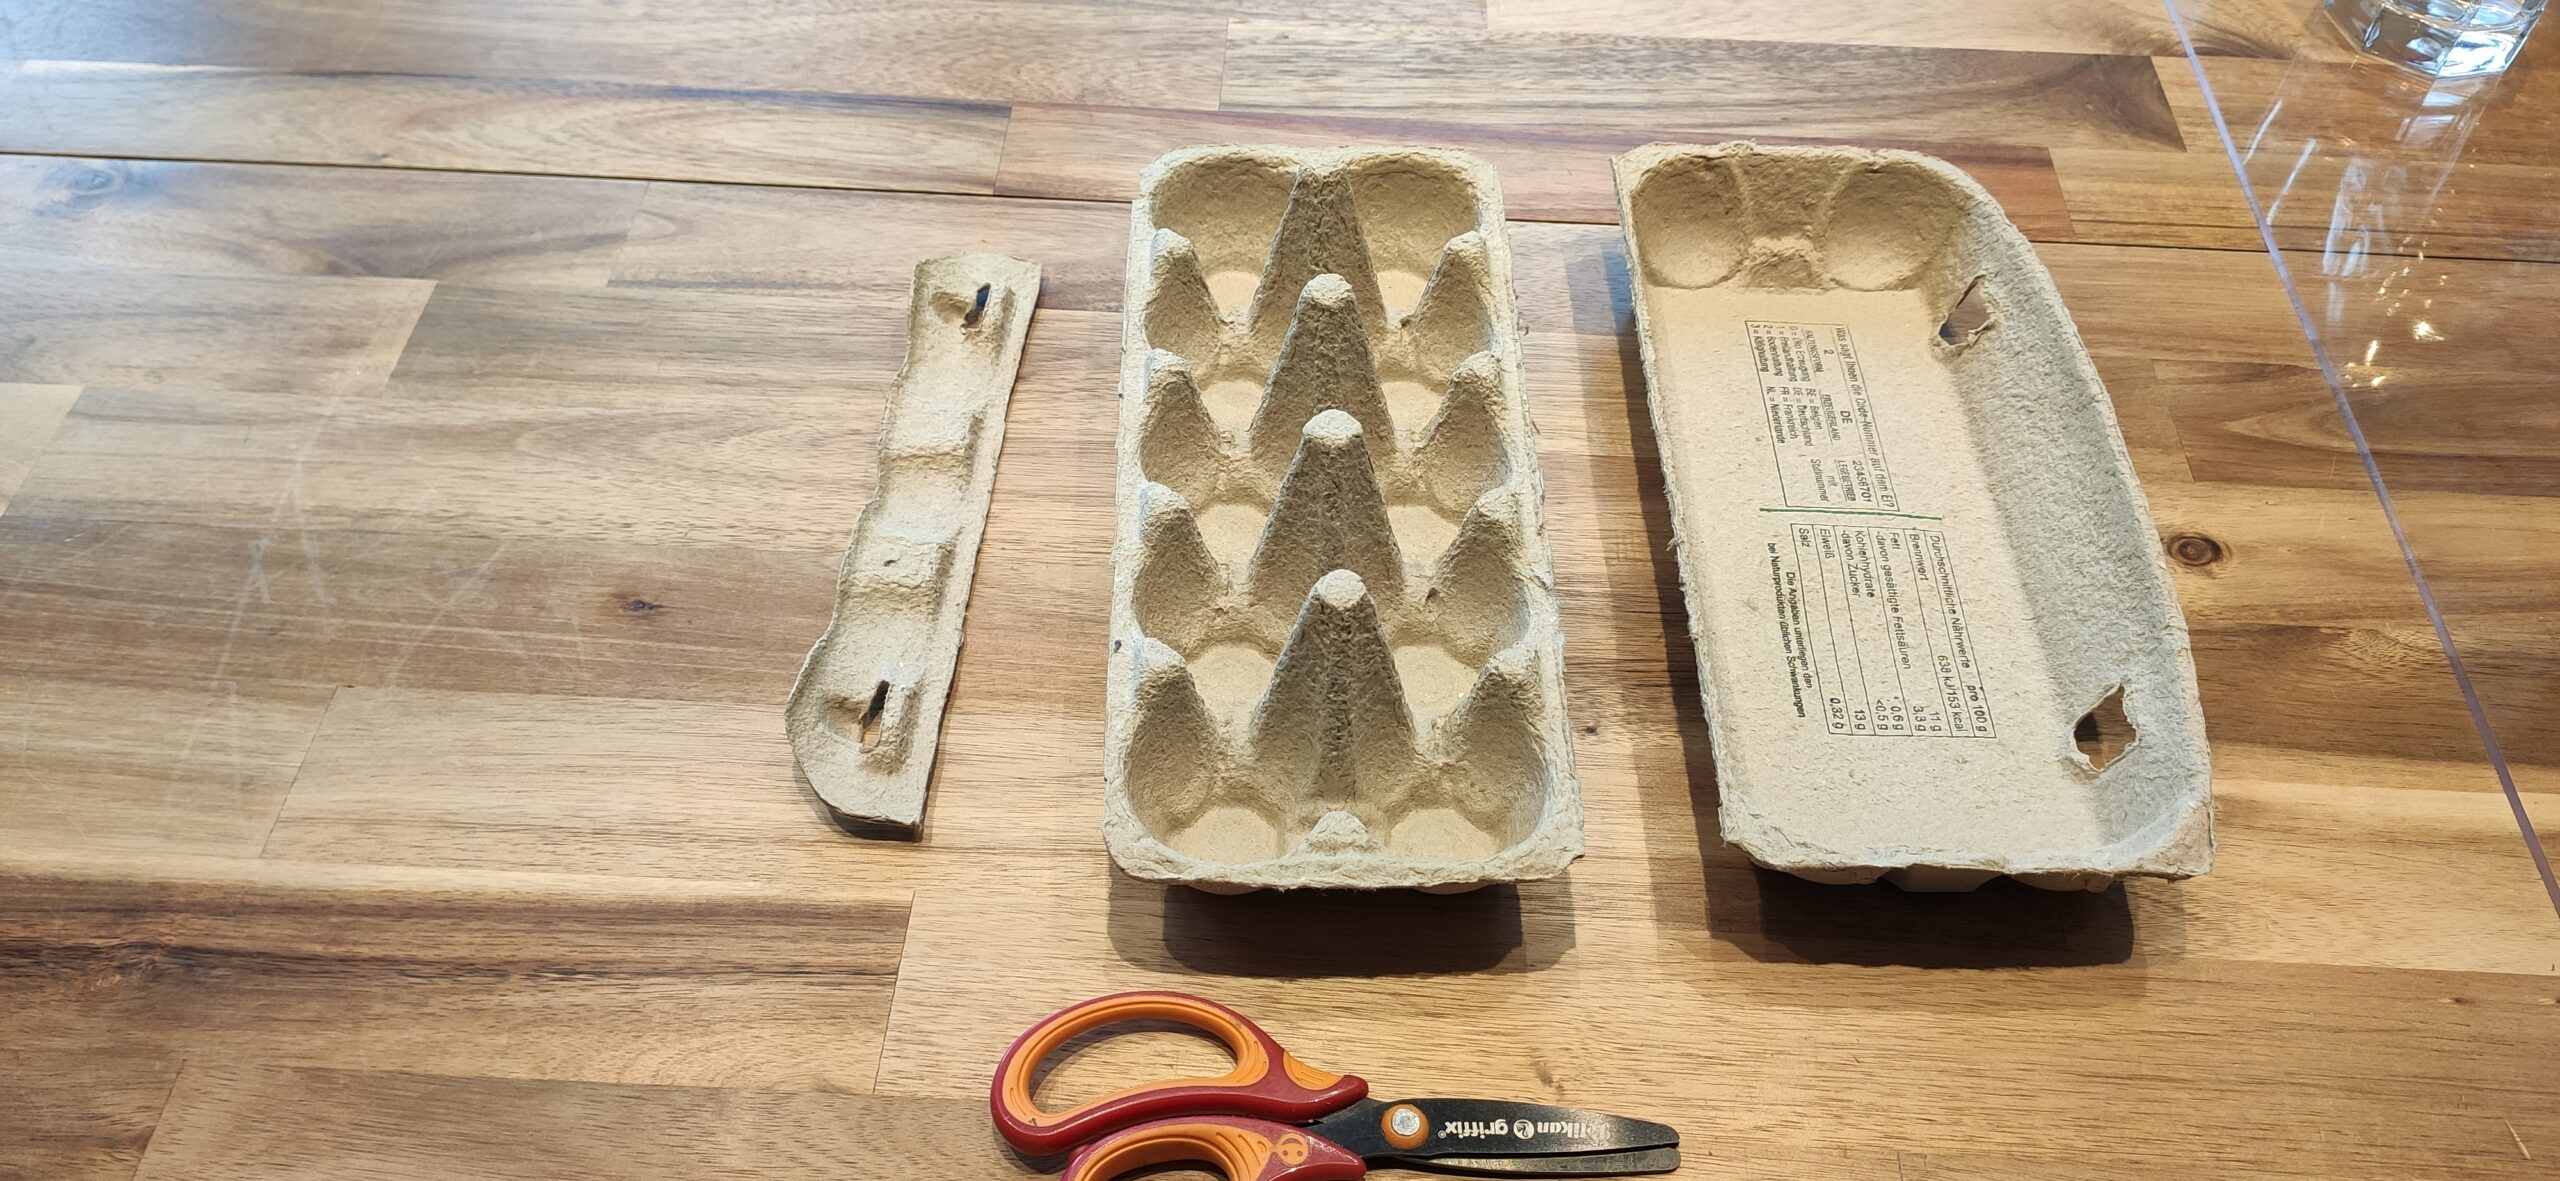
Bild zum Schritt 2 für das Bastel- und DIY-Abenteuer für Kinder: 'Jetzt schneidet ihr vom Eierkarton den Deckel und die Verschlusslasche...'

3

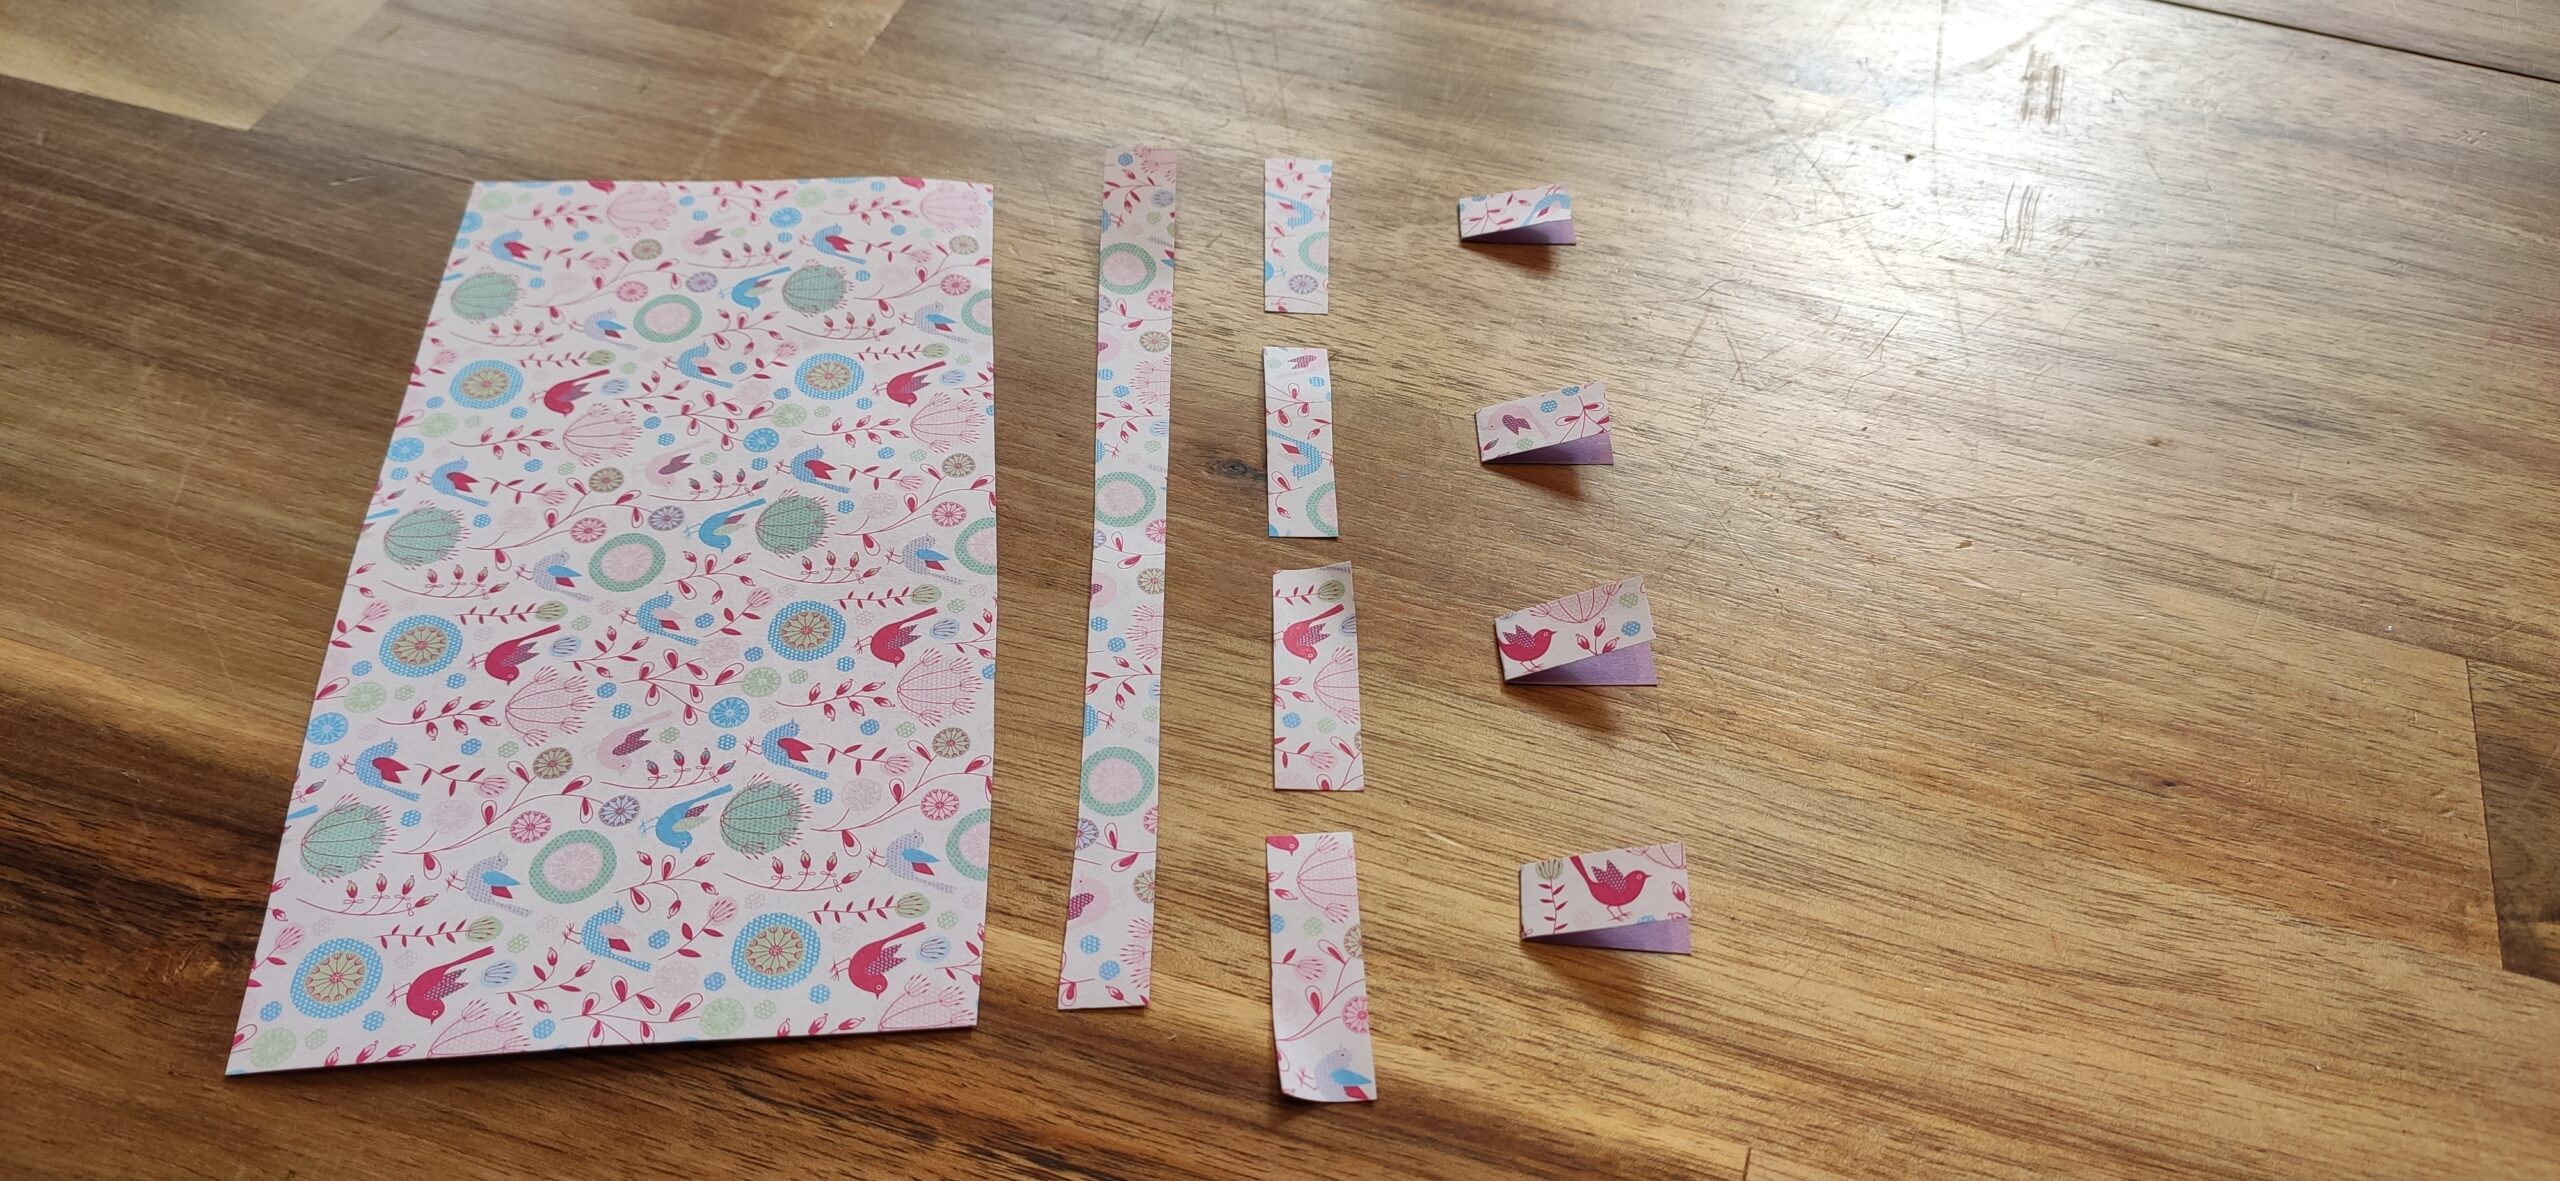
Now cut off 2 strips of colorful clay paper. The strips should be about 16 cm long and 1 cm wide.

Bild zum Schritt 3 für das Bastel- und DIY-Abenteuer für Kinder: 'Nun schneidet ihr vom bunten Tonpapier 2 Streifen ab. Die...'

4

Now you separate each strip into 4 equal parts.

Bild zum Schritt 4 für das Bastel- und DIY-Abenteuer für Kinder: 'Jetzt trennt ihr jeden Streifen in 4 gleichgroße Teile.'

5

Then fold each part in the middle.

Bild zum Schritt 5 für das Bastel- und DIY-Abenteuer für Kinder: 'Im Anschluss faltet ihr jedes Teile in der Mitte.'

6

So you get 8 folded parts.

Bild zum Schritt 6 für das Bastel- und DIY-Abenteuer für Kinder: 'So erhaltet ihr 8 gefaltete Teile.'

7

Now you cut a small triangle from each folded piece. Start at the edge.

Bild zum Schritt 7 für das Bastel- und DIY-Abenteuer für Kinder: 'Jetzt schneidet ihr ein kleines Dreieck aus jedem gefalteten Stück....'

8

You can draw the two lines with a pencil.

Bild zum Schritt 8 für das Bastel- und DIY-Abenteuer für Kinder: 'Ihr könnt euch die beiden Linien mit einem Bleistift anzeichnen.'

9

This is how 8 small pennants are created. Put them on the side for later.

Bild zum Schritt 9 für das Bastel- und DIY-Abenteuer für Kinder: 'So entstehen 8 kleine Wimpel. Legt diese für später auf...'

10

Now you put the two skewers in the outer two tips of the egg box. Fix the skewers with some kneading if necessary.

Bild zum Schritt 10 für das Bastel- und DIY-Abenteuer für Kinder: 'Jetzt steckt ihr die beiden Spieße in die äußeren beiden...'

11

Then you knot the package tape to the two skewers. That's how a garland or a clothesline is created.

Bild zum Schritt 11 für das Bastel- und DIY-Abenteuer für Kinder: 'Danach knotet ihr das Paketband an die beiden Spieße. So...'

12

Now season the overhanging ends of the package tape with the scissors.

Bild zum Schritt 12 für das Bastel- und DIY-Abenteuer für Kinder: 'Kürzt nun die überstehende Enden des Paketbands mit der Schere.'

13

Now use the glue stick to brush one side of the wimpel with glue.

Bild zum Schritt 13 für das Bastel- und DIY-Abenteuer für Kinder: 'Jetzt streicht ihr mit dem Klebestift eine Seite des Wimpels...'

14

Now you stick the pennant around the package tape.

Bild zum Schritt 14 für das Bastel- und DIY-Abenteuer für Kinder: 'Nun klebt ihr den Wimpel um das Paketband.'

15

So glues all 8 pennants and distributes them evenly over the length of the package tape.

Bild zum Schritt 15 für das Bastel- und DIY-Abenteuer für Kinder: 'Klebt so alle 8 Wimpel auf und verteilt sie gleichmäßig...'

16

Who likes can paint the egg box with water paints at the end. Wears a painter's apron.

Bild zum Schritt 16 für das Bastel- und DIY-Abenteuer für Kinder: 'Wer mag kann zum Schluss den Eierkarton mit Wasserfarben bemalen....'

17

Finally you decorate the egg box with moss and other natural treasures. Cress in eggshells look beautiful in it.

Bild zum Schritt 17 für das Bastel- und DIY-Abenteuer für Kinder: 'Abschließend dekoriert ihr den Eierkarton z.B. mit Moos und andere...'

18

Enjoy your crafting and try it out!

Materials

 1 Egg carton
 2 Shashlik skewersWood skewers
 Packing tape (40 cm)Wool thread
 Paper and paperboardor other colorful paper
 Water colours
 Brushes
 Water glass
 Painter's apron
 Pencil
 Kneadto fix the wooden peas
All links marked with a shopping cart lead to Amazon - here we have selected products that we would order ourselves and in part also ordered. In a qualified purchase via the advertising link, we as Amazon partner receive a commission, for you there are no costs. You thus support our cost- and advertising banner-free, educational offer.

Directions

1

First lay out the craft pad and start with the egg box and scissors.

Bild zum Schritt 1 für das Bastel- und DIY-Abenteuer für Kinder: 'Legt euch zuerst die Bastelunterlage aus und startet mit dem...'

2

Now cut off the lid and the flap from the egg box.
Then put the egg box on your side for later.

Bild zum Schritt 2 für das Bastel- und DIY-Abenteuer für Kinder: 'Jetzt schneidet ihr vom Eierkarton den Deckel und die Verschlusslasche...'

3

Now cut off 2 strips of colorful clay paper. The strips should be about 16 cm long and 1 cm wide.
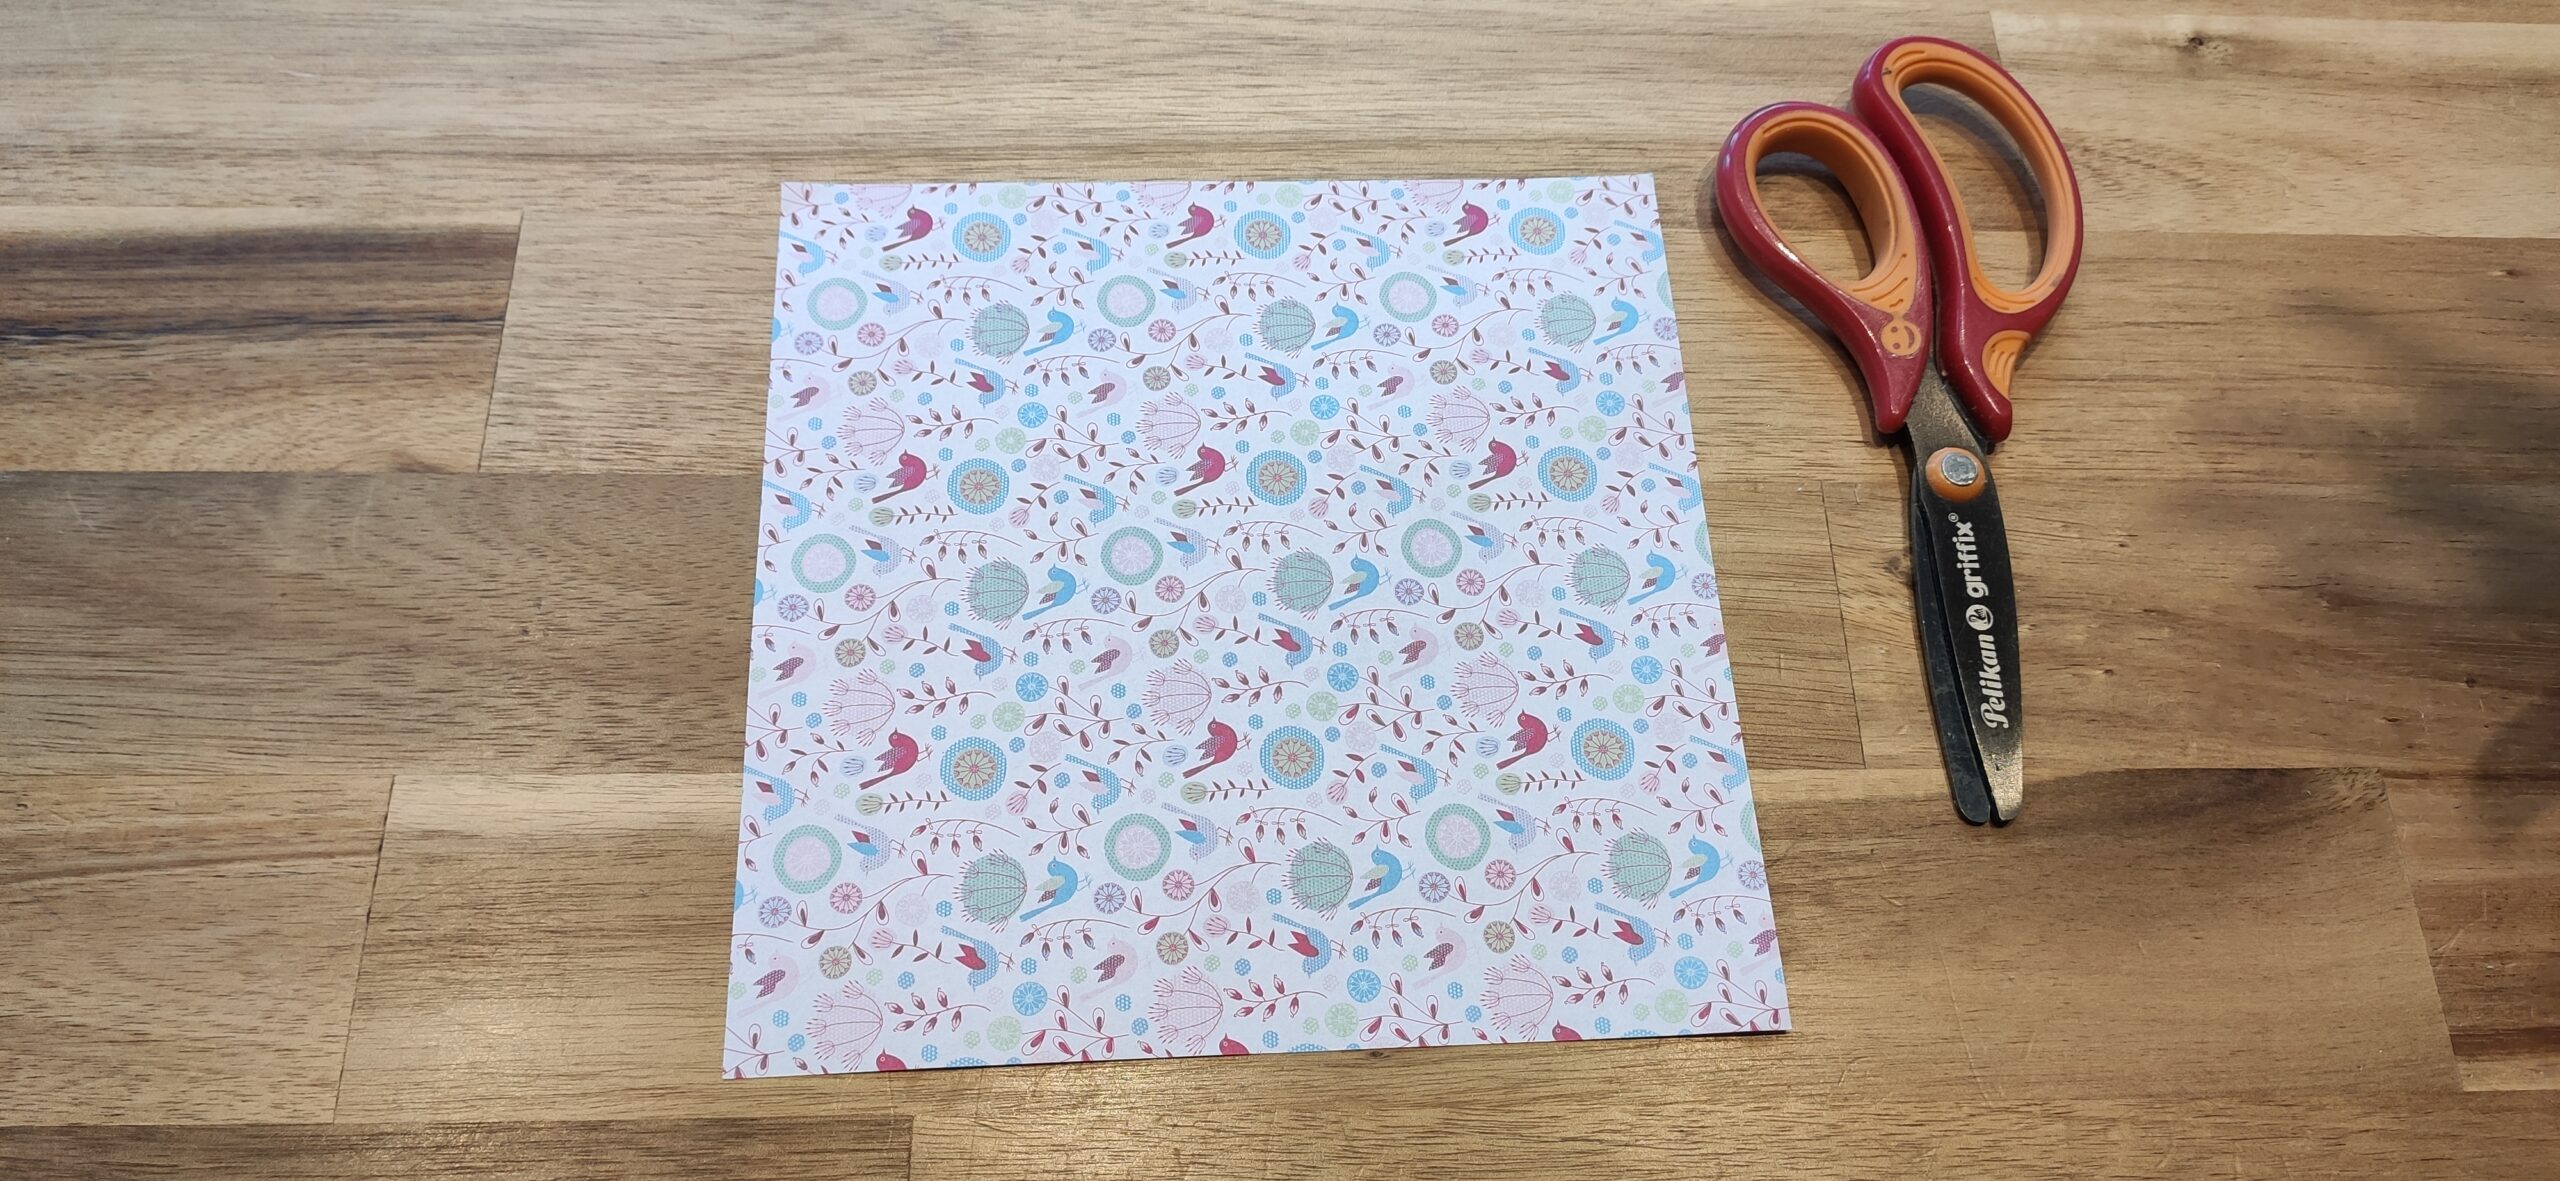
Bild zum Schritt 3 für das Bastel- und DIY-Abenteuer für Kinder: 'Nun schneidet ihr vom bunten Tonpapier 2 Streifen ab. Die...'

4

Now you separate each strip into 4 equal parts.
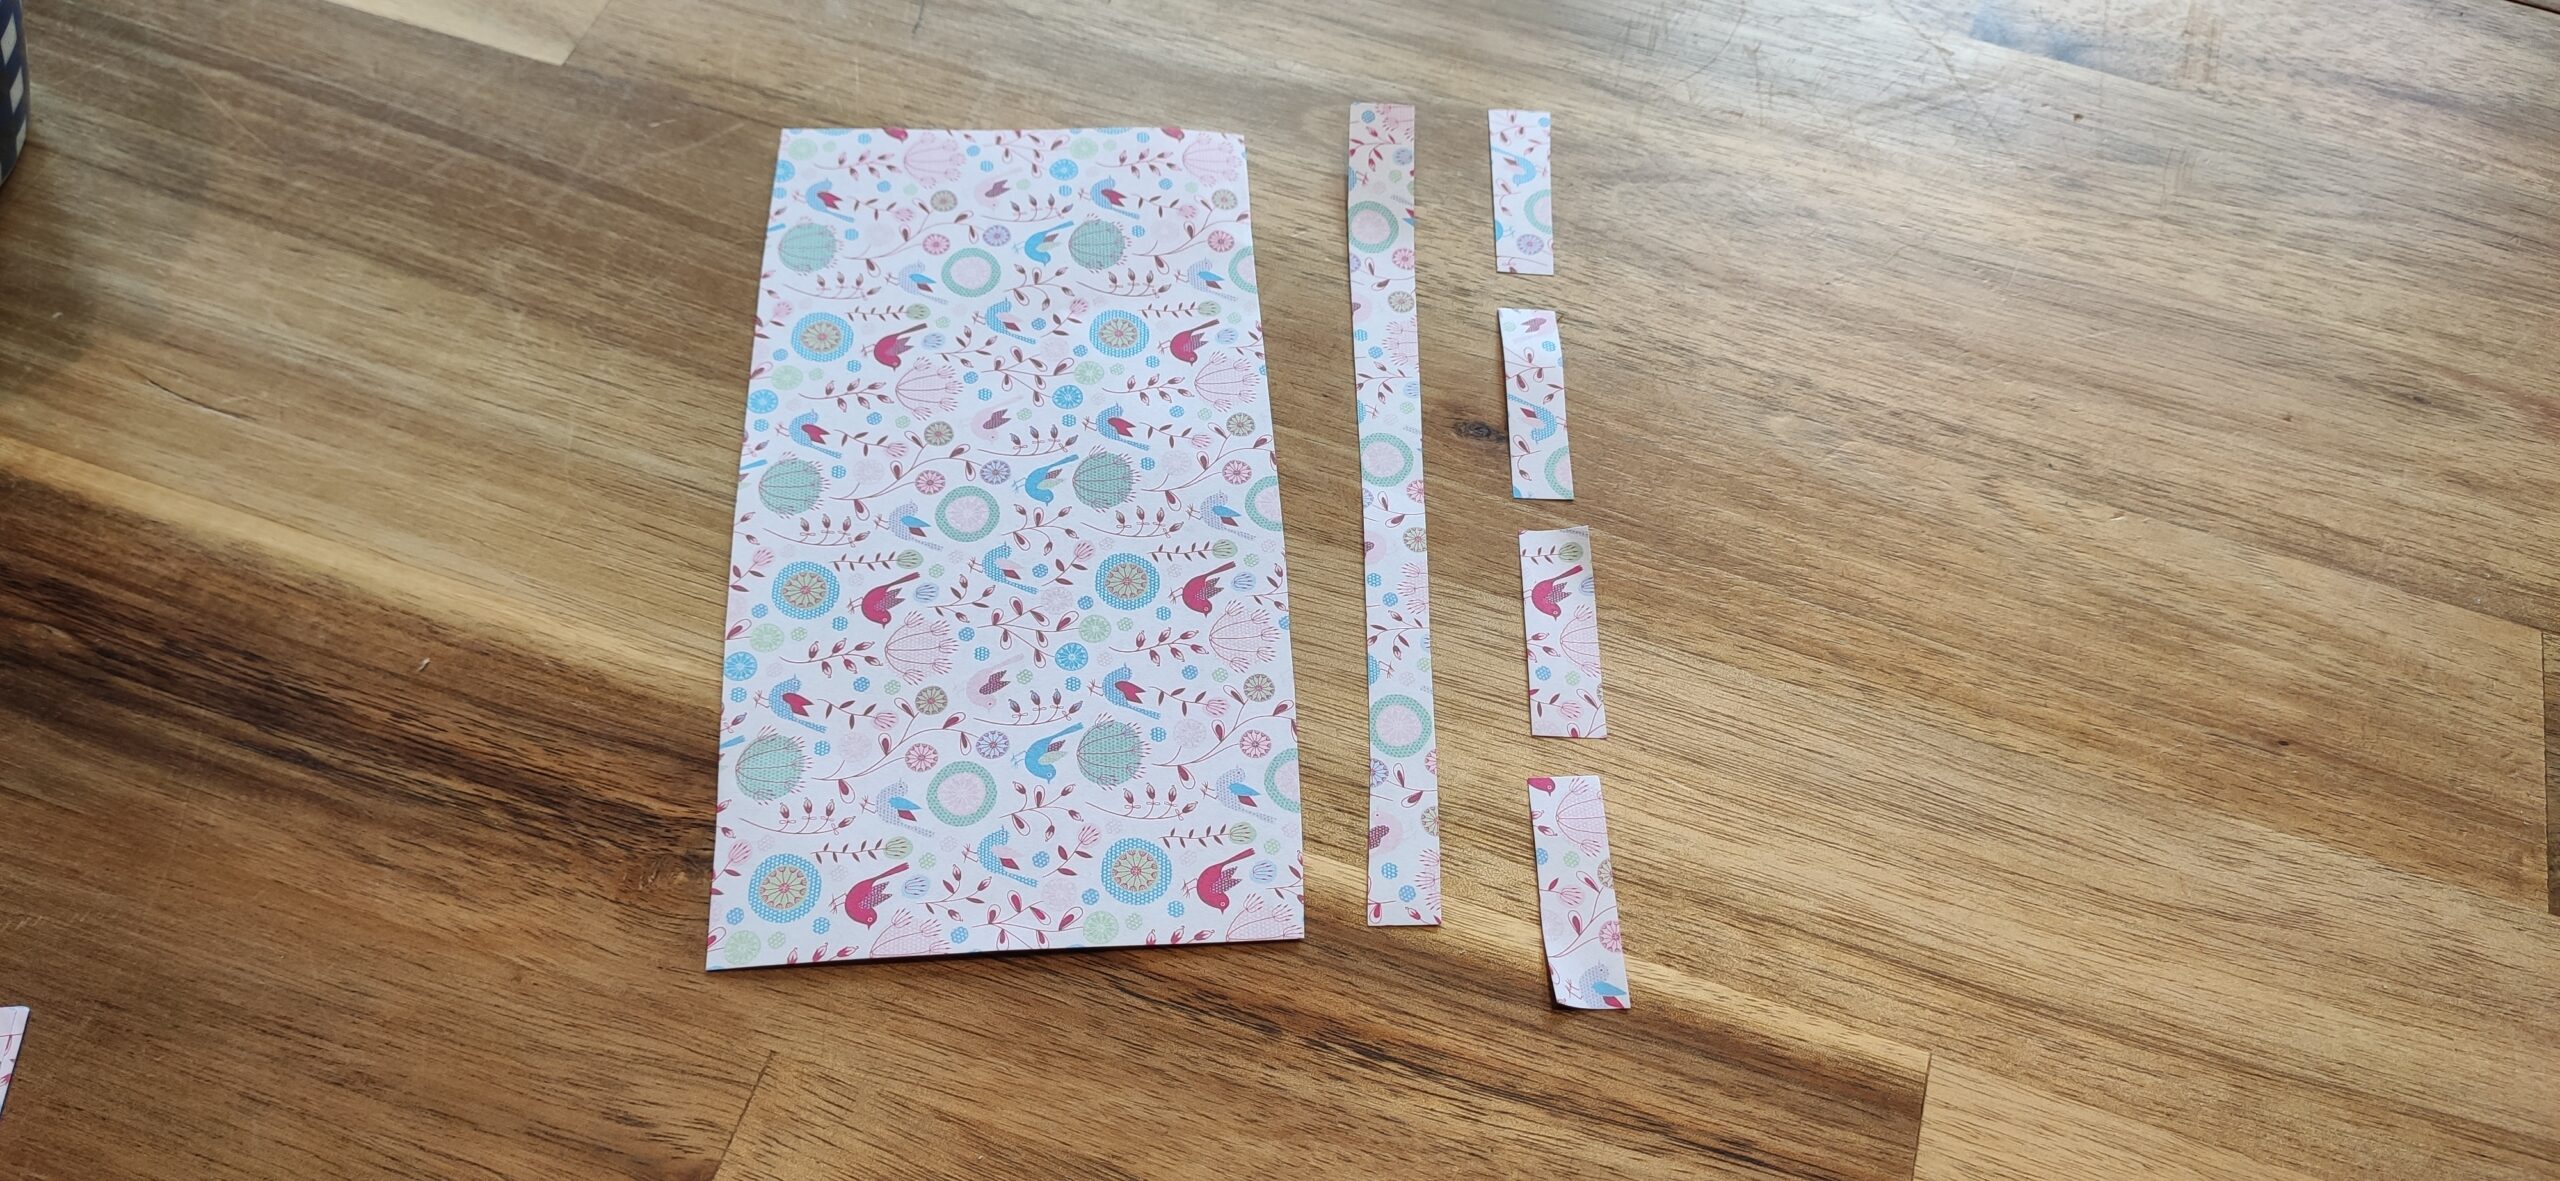
Bild zum Schritt 4 für das Bastel- und DIY-Abenteuer für Kinder: 'Jetzt trennt ihr jeden Streifen in 4 gleichgroße Teile.'

5

Then fold each part in the middle.
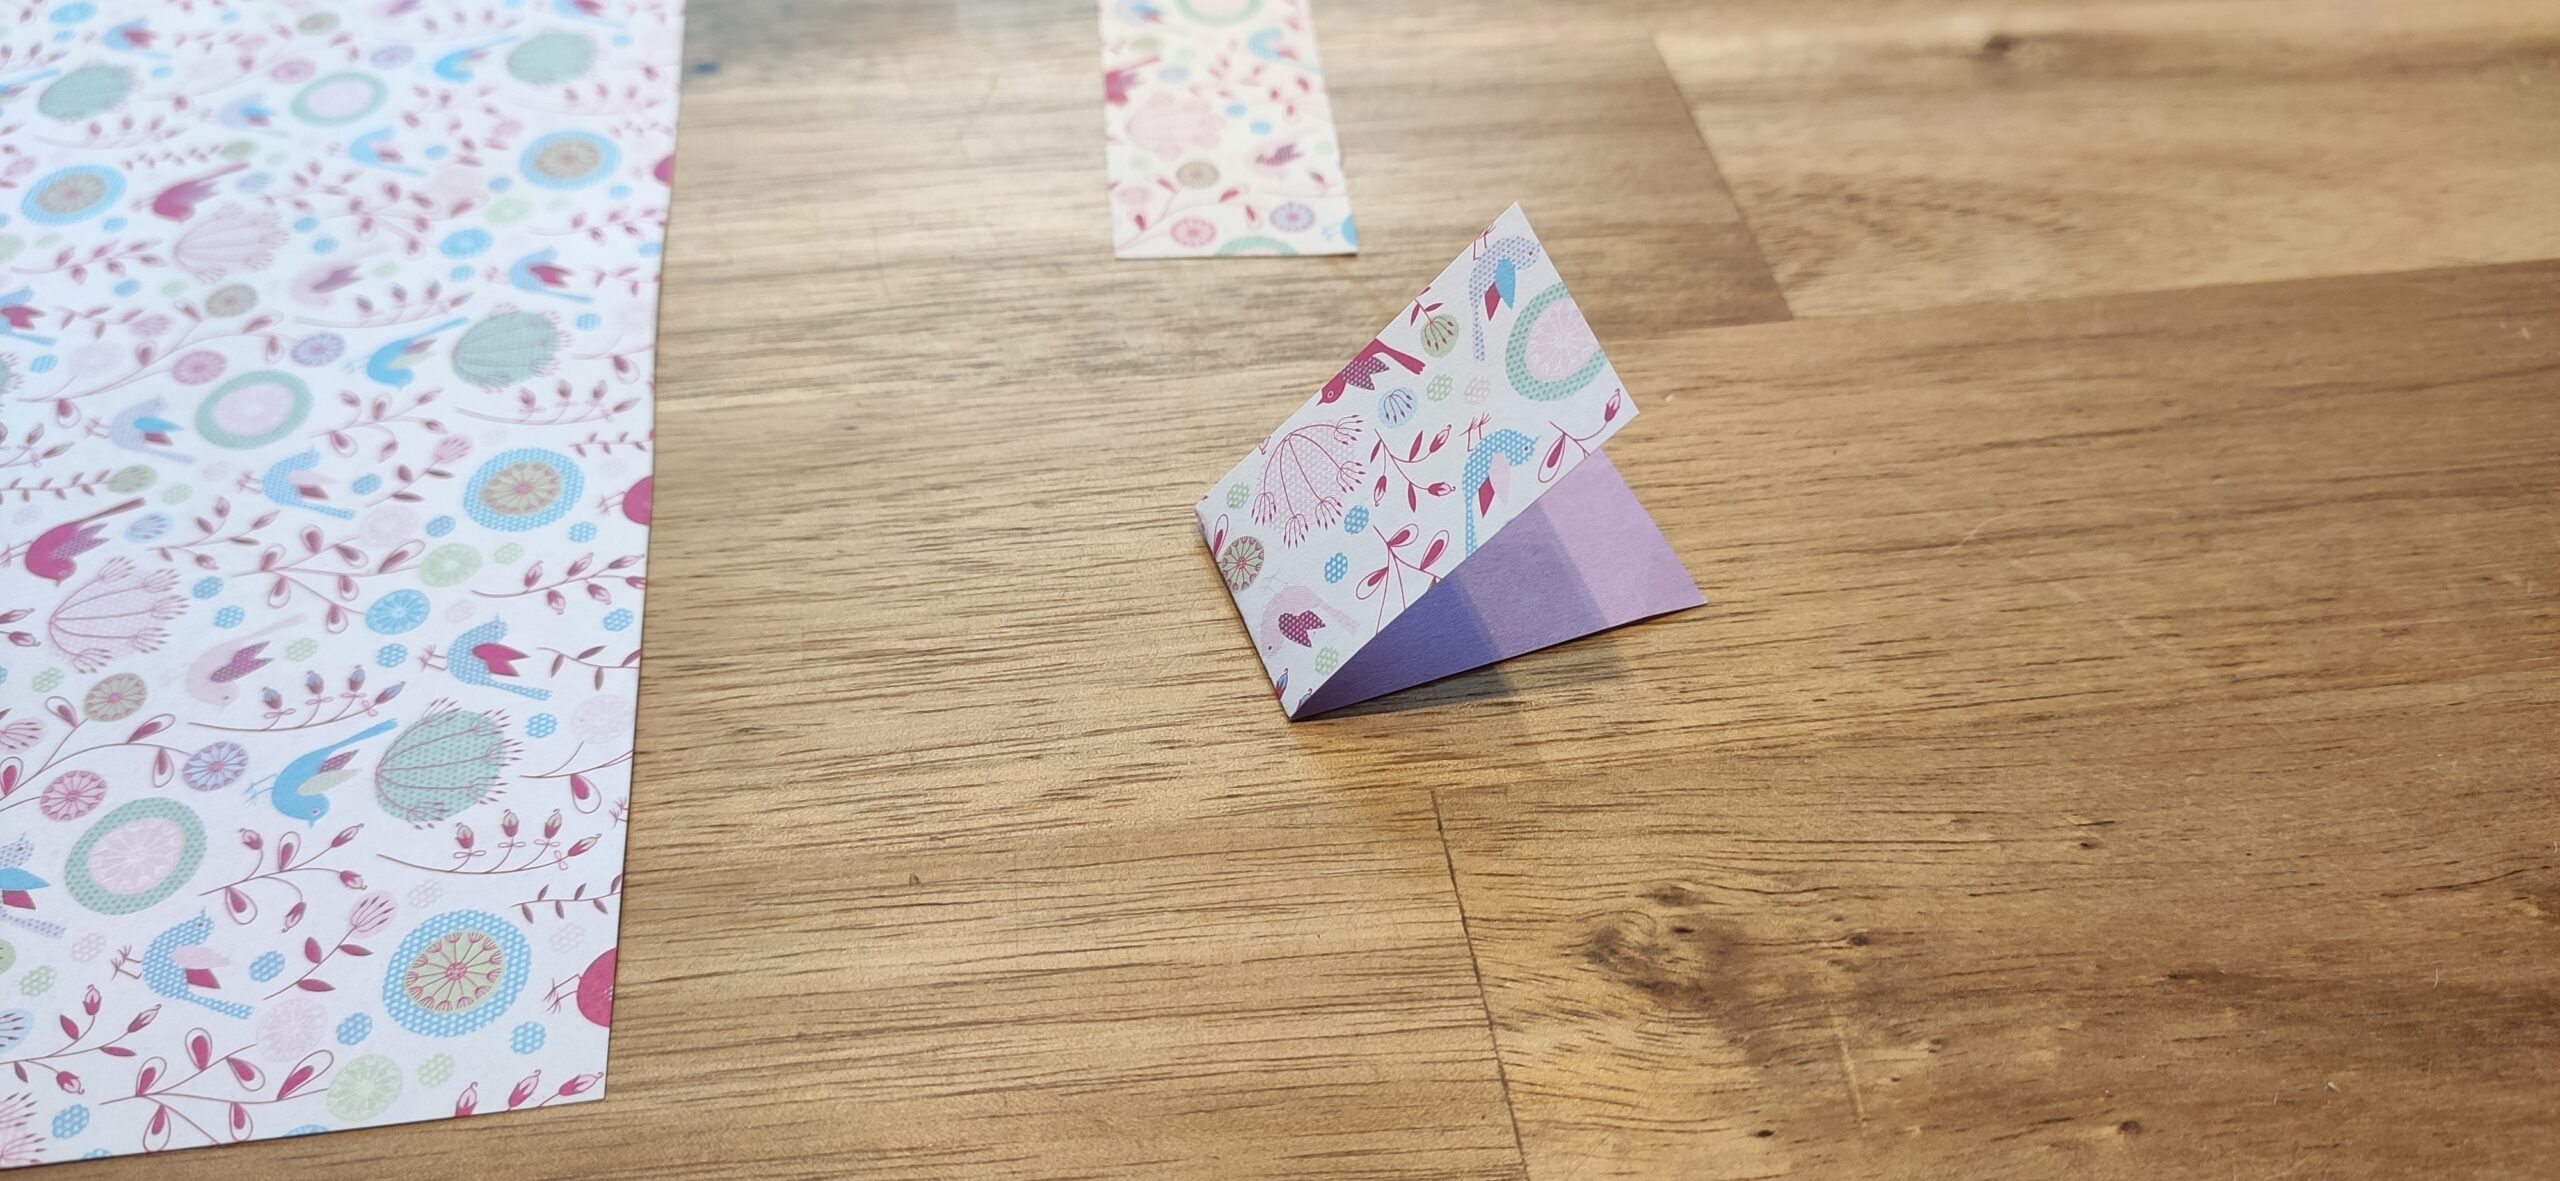
Bild zum Schritt 5 für das Bastel- und DIY-Abenteuer für Kinder: 'Im Anschluss faltet ihr jedes Teile in der Mitte.'

6

So you get 8 folded parts.

Bild zum Schritt 6 für das Bastel- und DIY-Abenteuer für Kinder: 'So erhaltet ihr 8 gefaltete Teile.'

7

Now you cut a small triangle from each folded piece. Start at the edge.
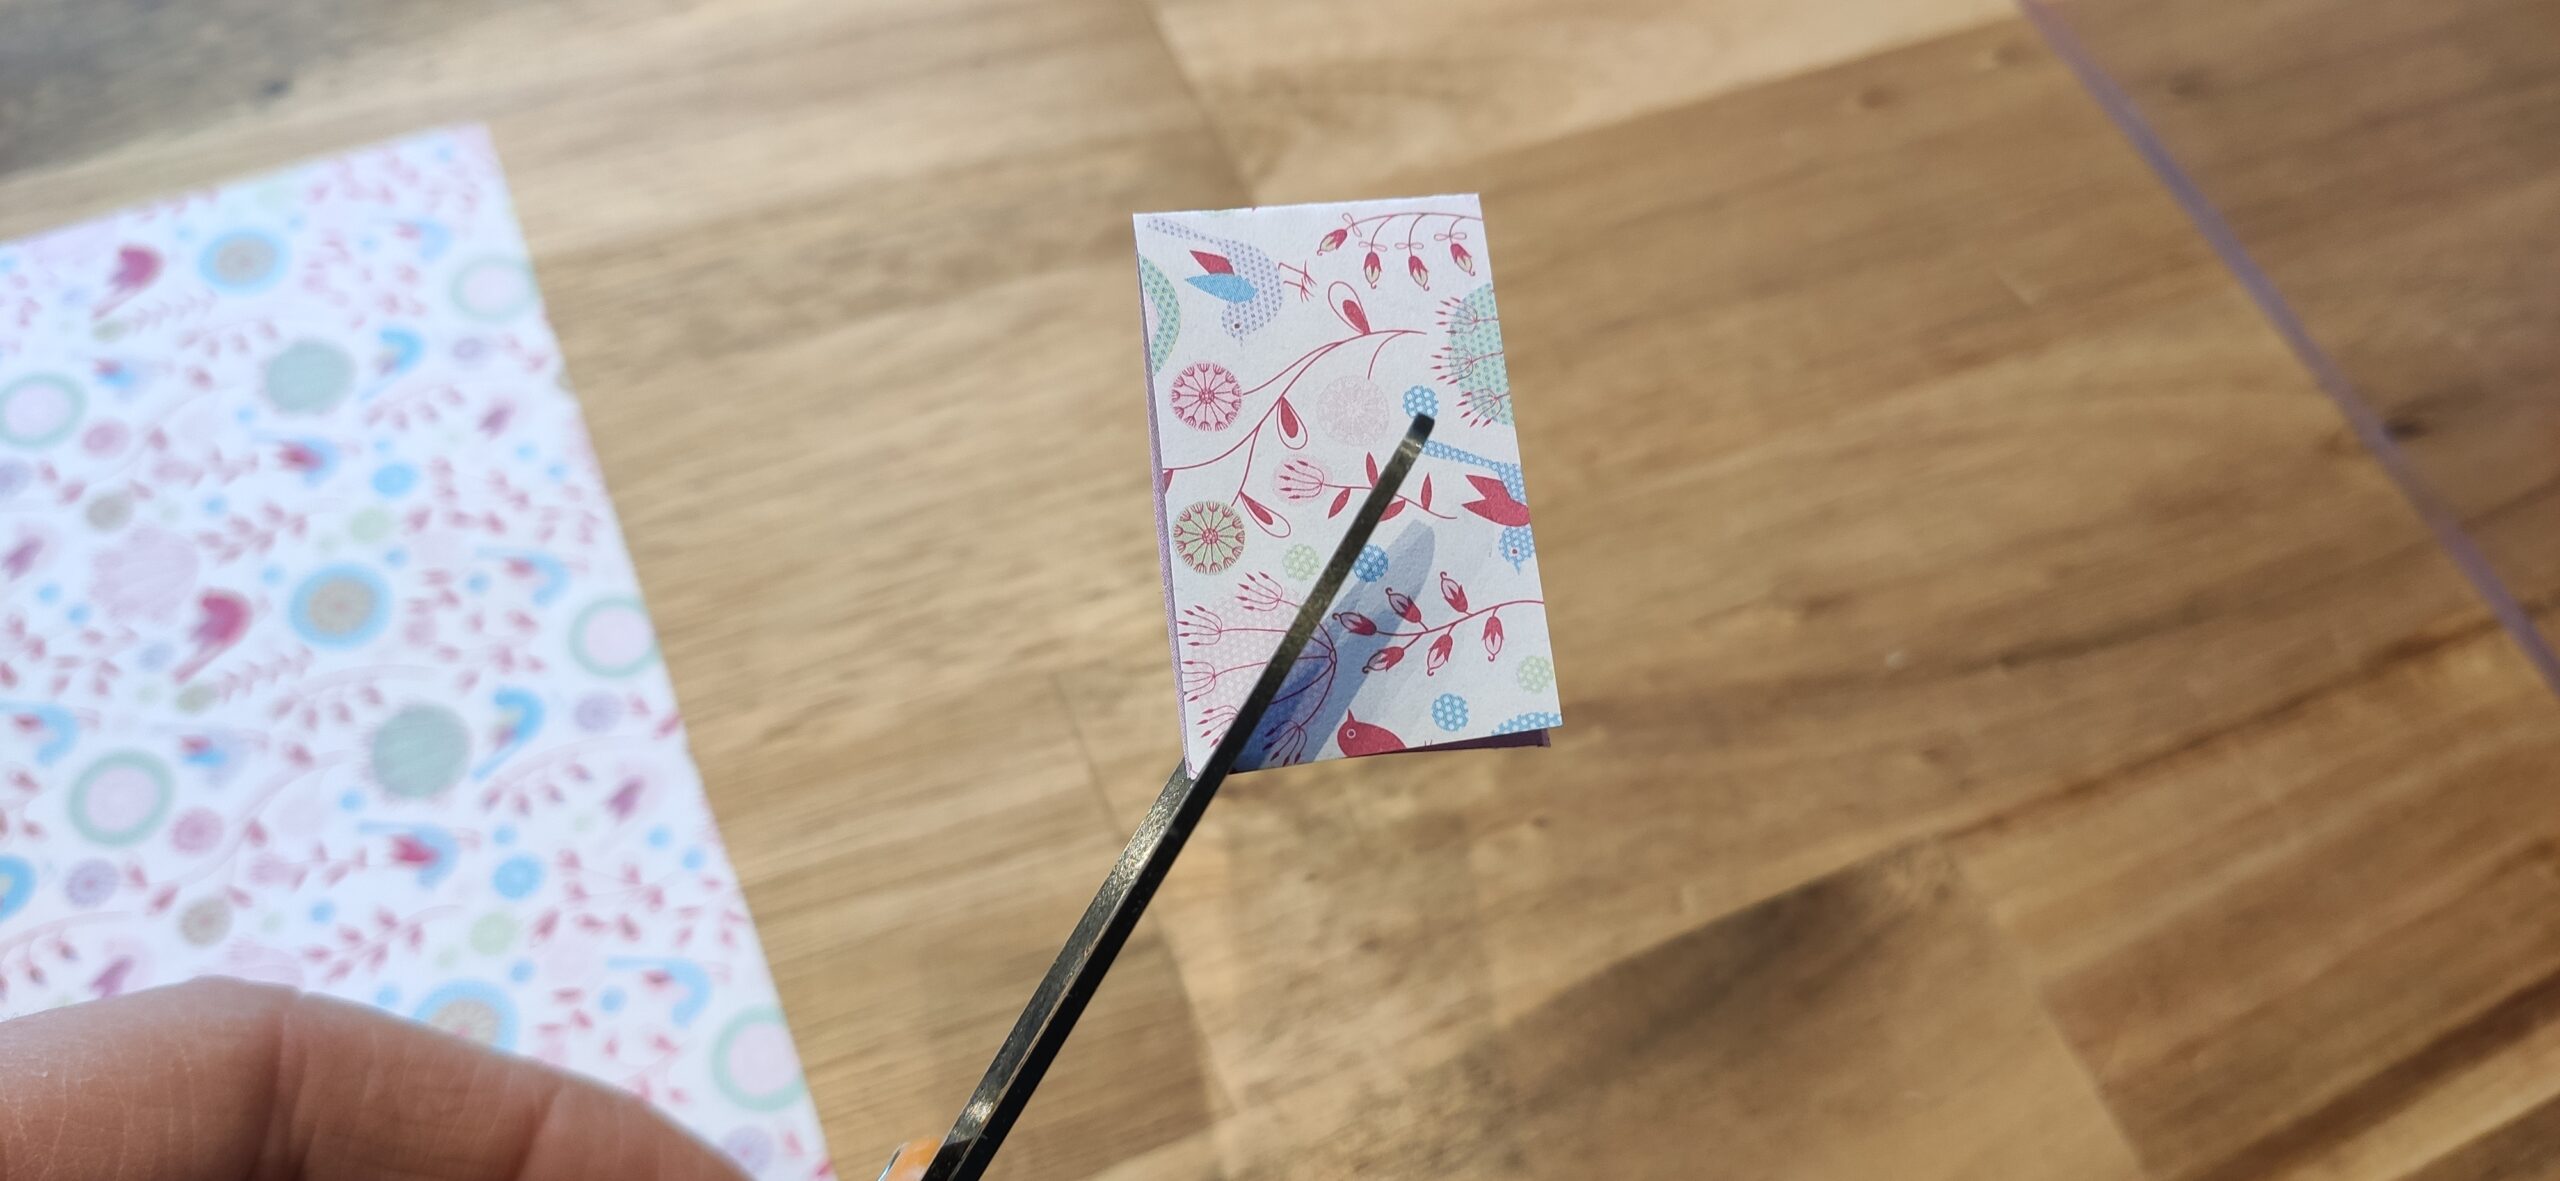
Bild zum Schritt 7 für das Bastel- und DIY-Abenteuer für Kinder: 'Jetzt schneidet ihr ein kleines Dreieck aus jedem gefalteten Stück....'

8

You can draw the two lines with a pencil.
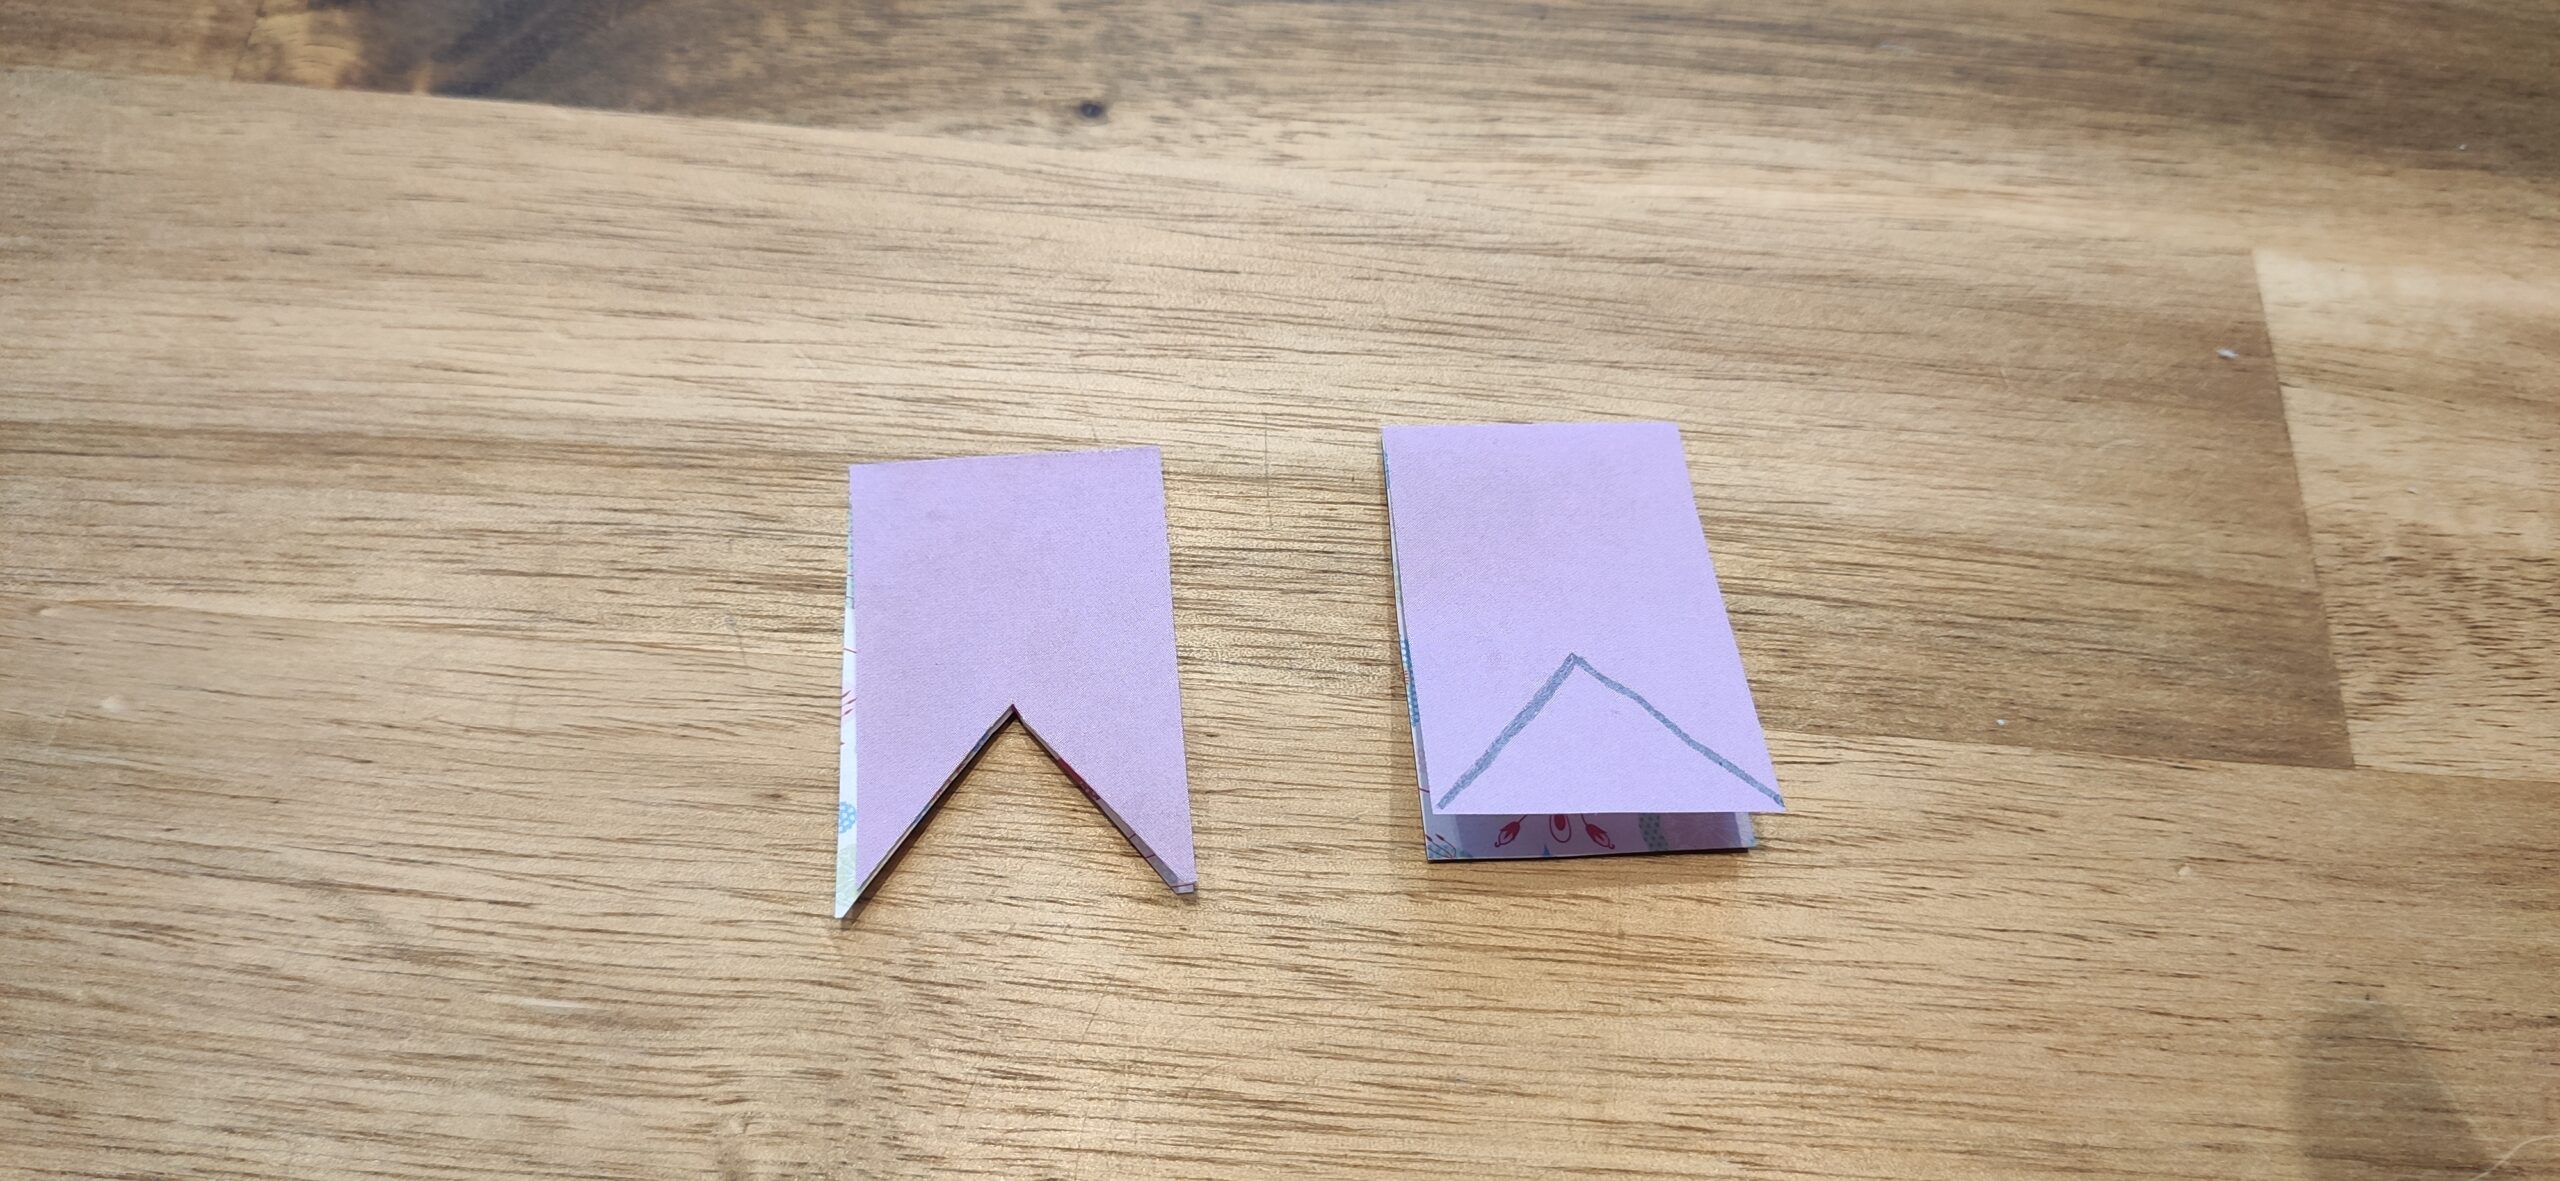
Bild zum Schritt 8 für das Bastel- und DIY-Abenteuer für Kinder: 'Ihr könnt euch die beiden Linien mit einem Bleistift anzeichnen.'

9

This is how 8 small pennants are created. Put them on the side for later.
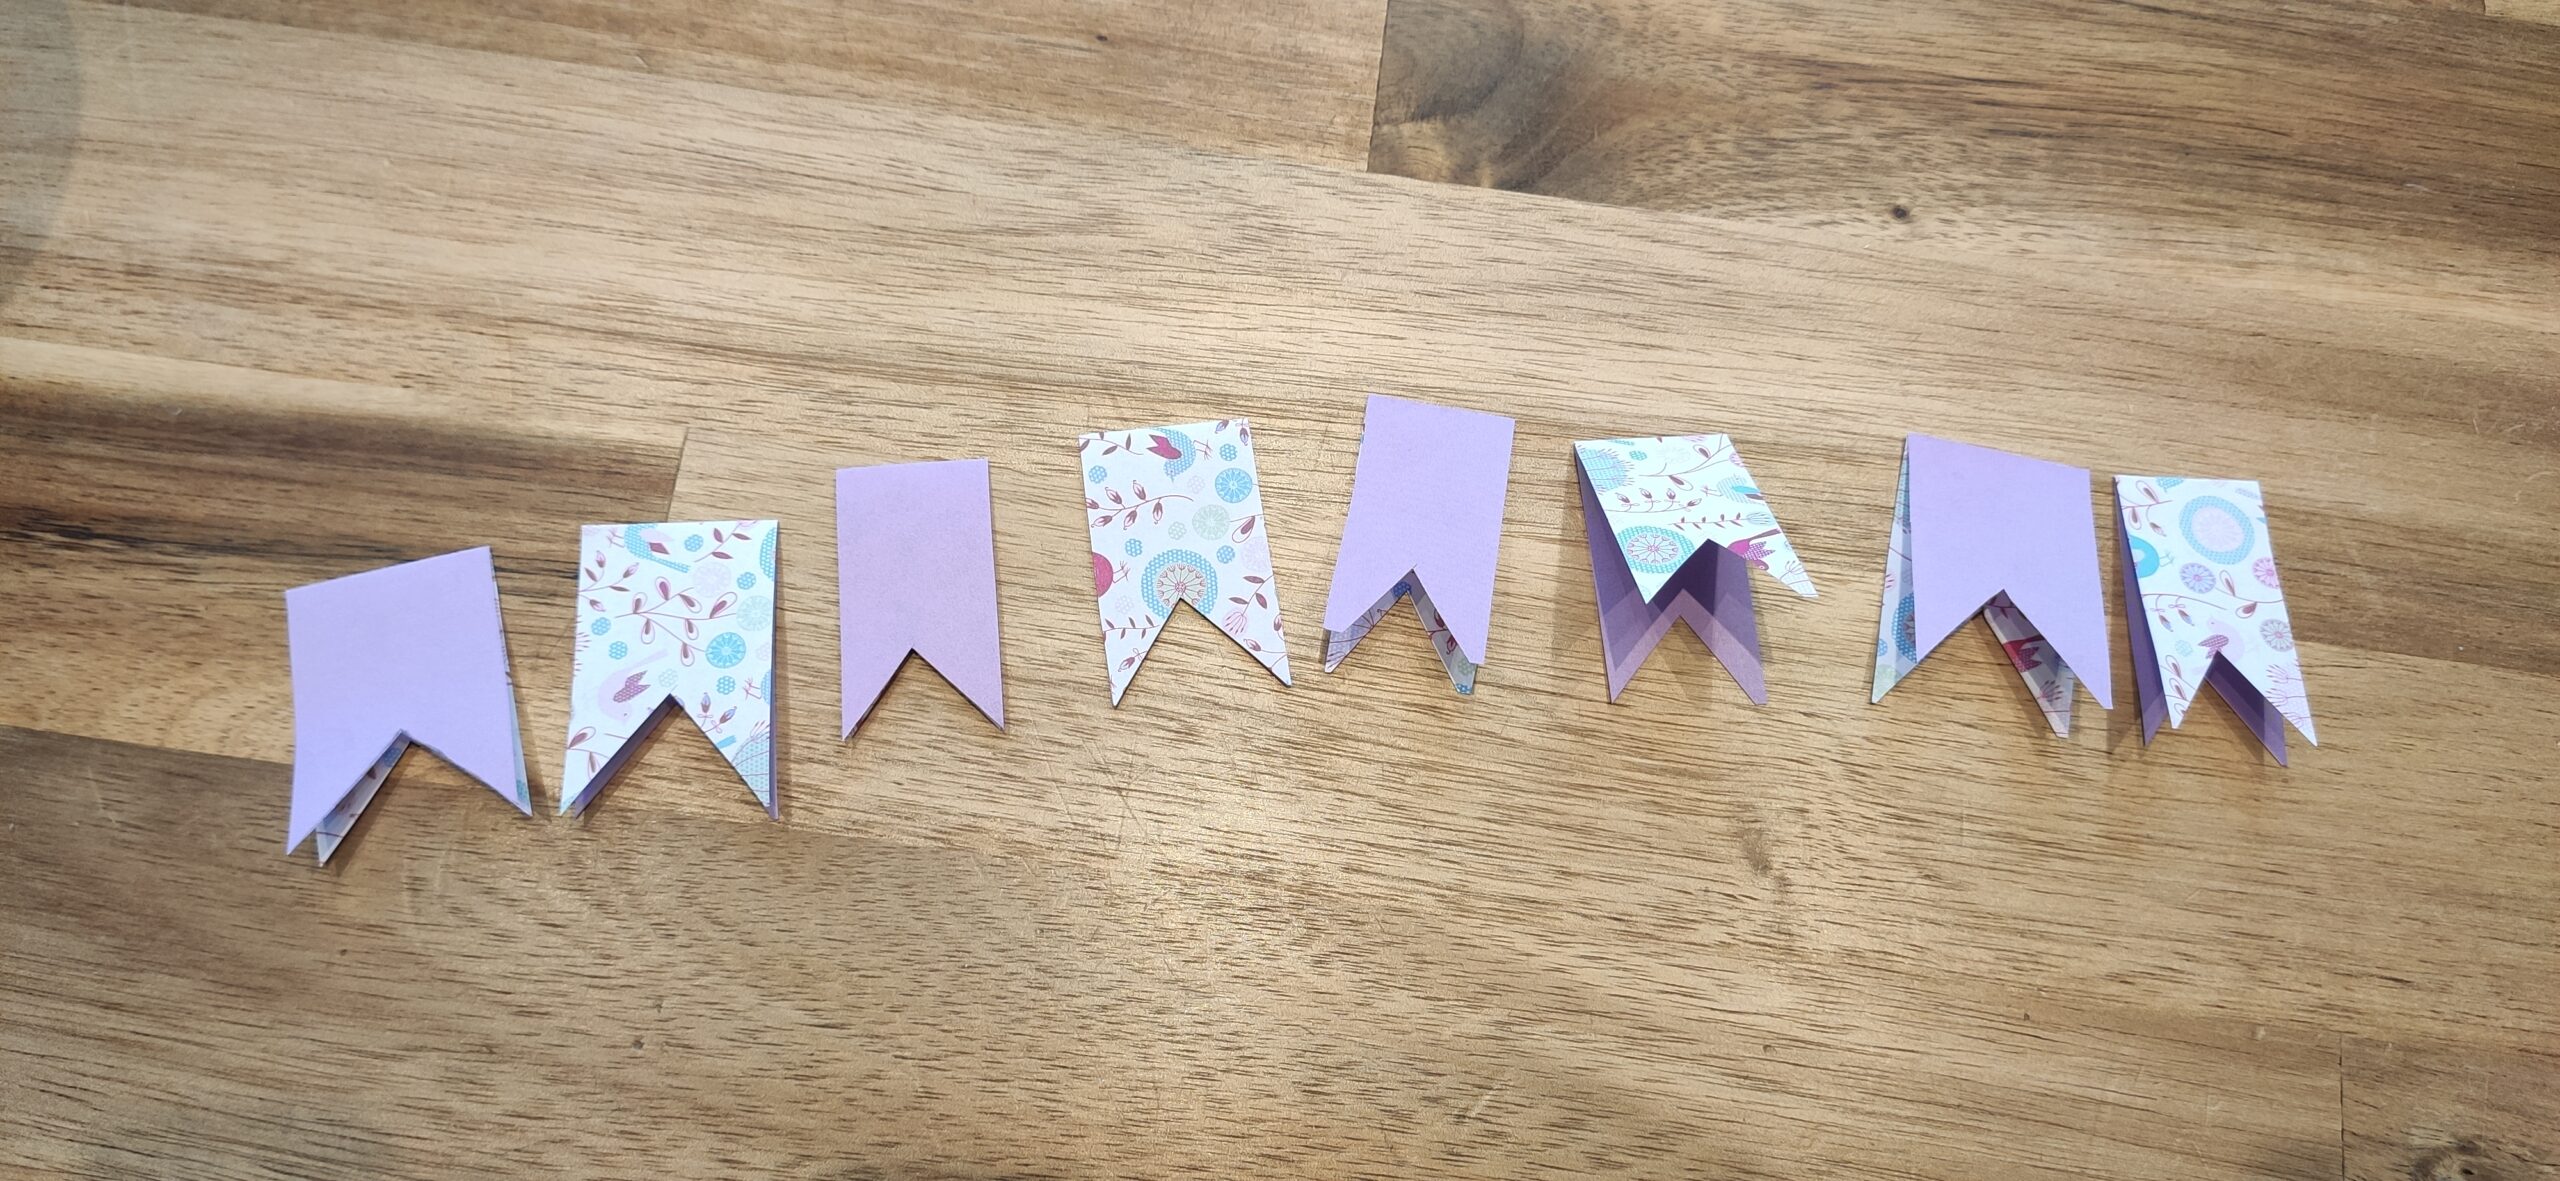
Bild zum Schritt 9 für das Bastel- und DIY-Abenteuer für Kinder: 'So entstehen 8 kleine Wimpel. Legt diese für später auf...'

10

Now you put the two skewers in the outer two tips of the egg box. Fix the skewers with some kneading if necessary.
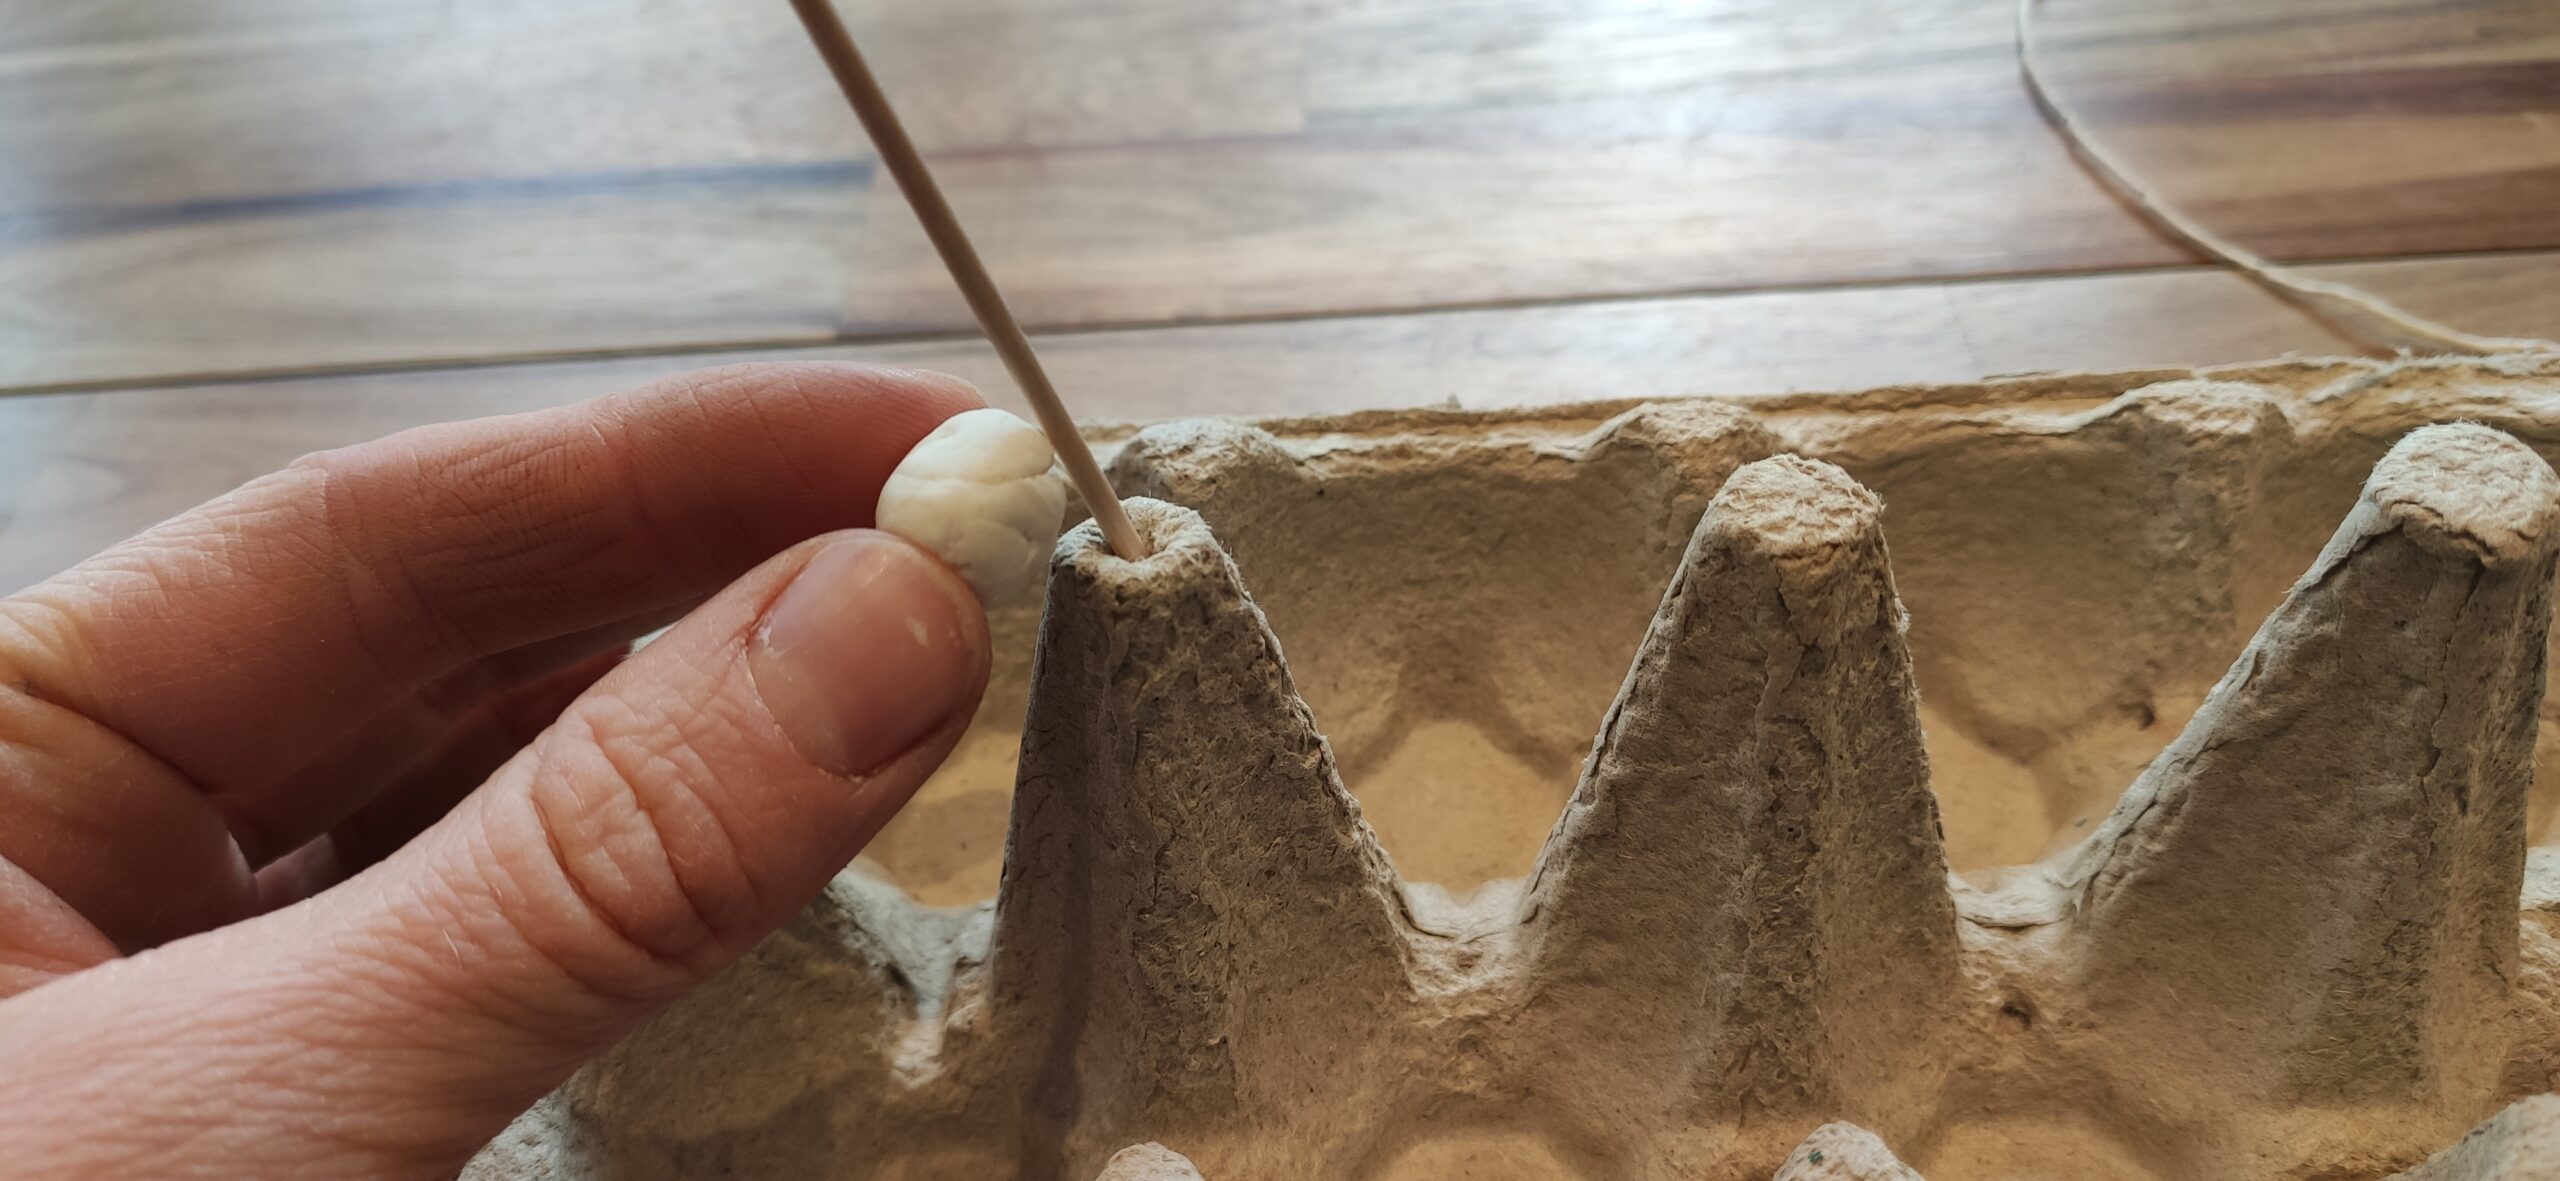
Bild zum Schritt 10 für das Bastel- und DIY-Abenteuer für Kinder: 'Jetzt steckt ihr die beiden Spieße in die äußeren beiden...'

11

Then you knot the package tape to the two skewers. That's how a garland or a clothesline is created.
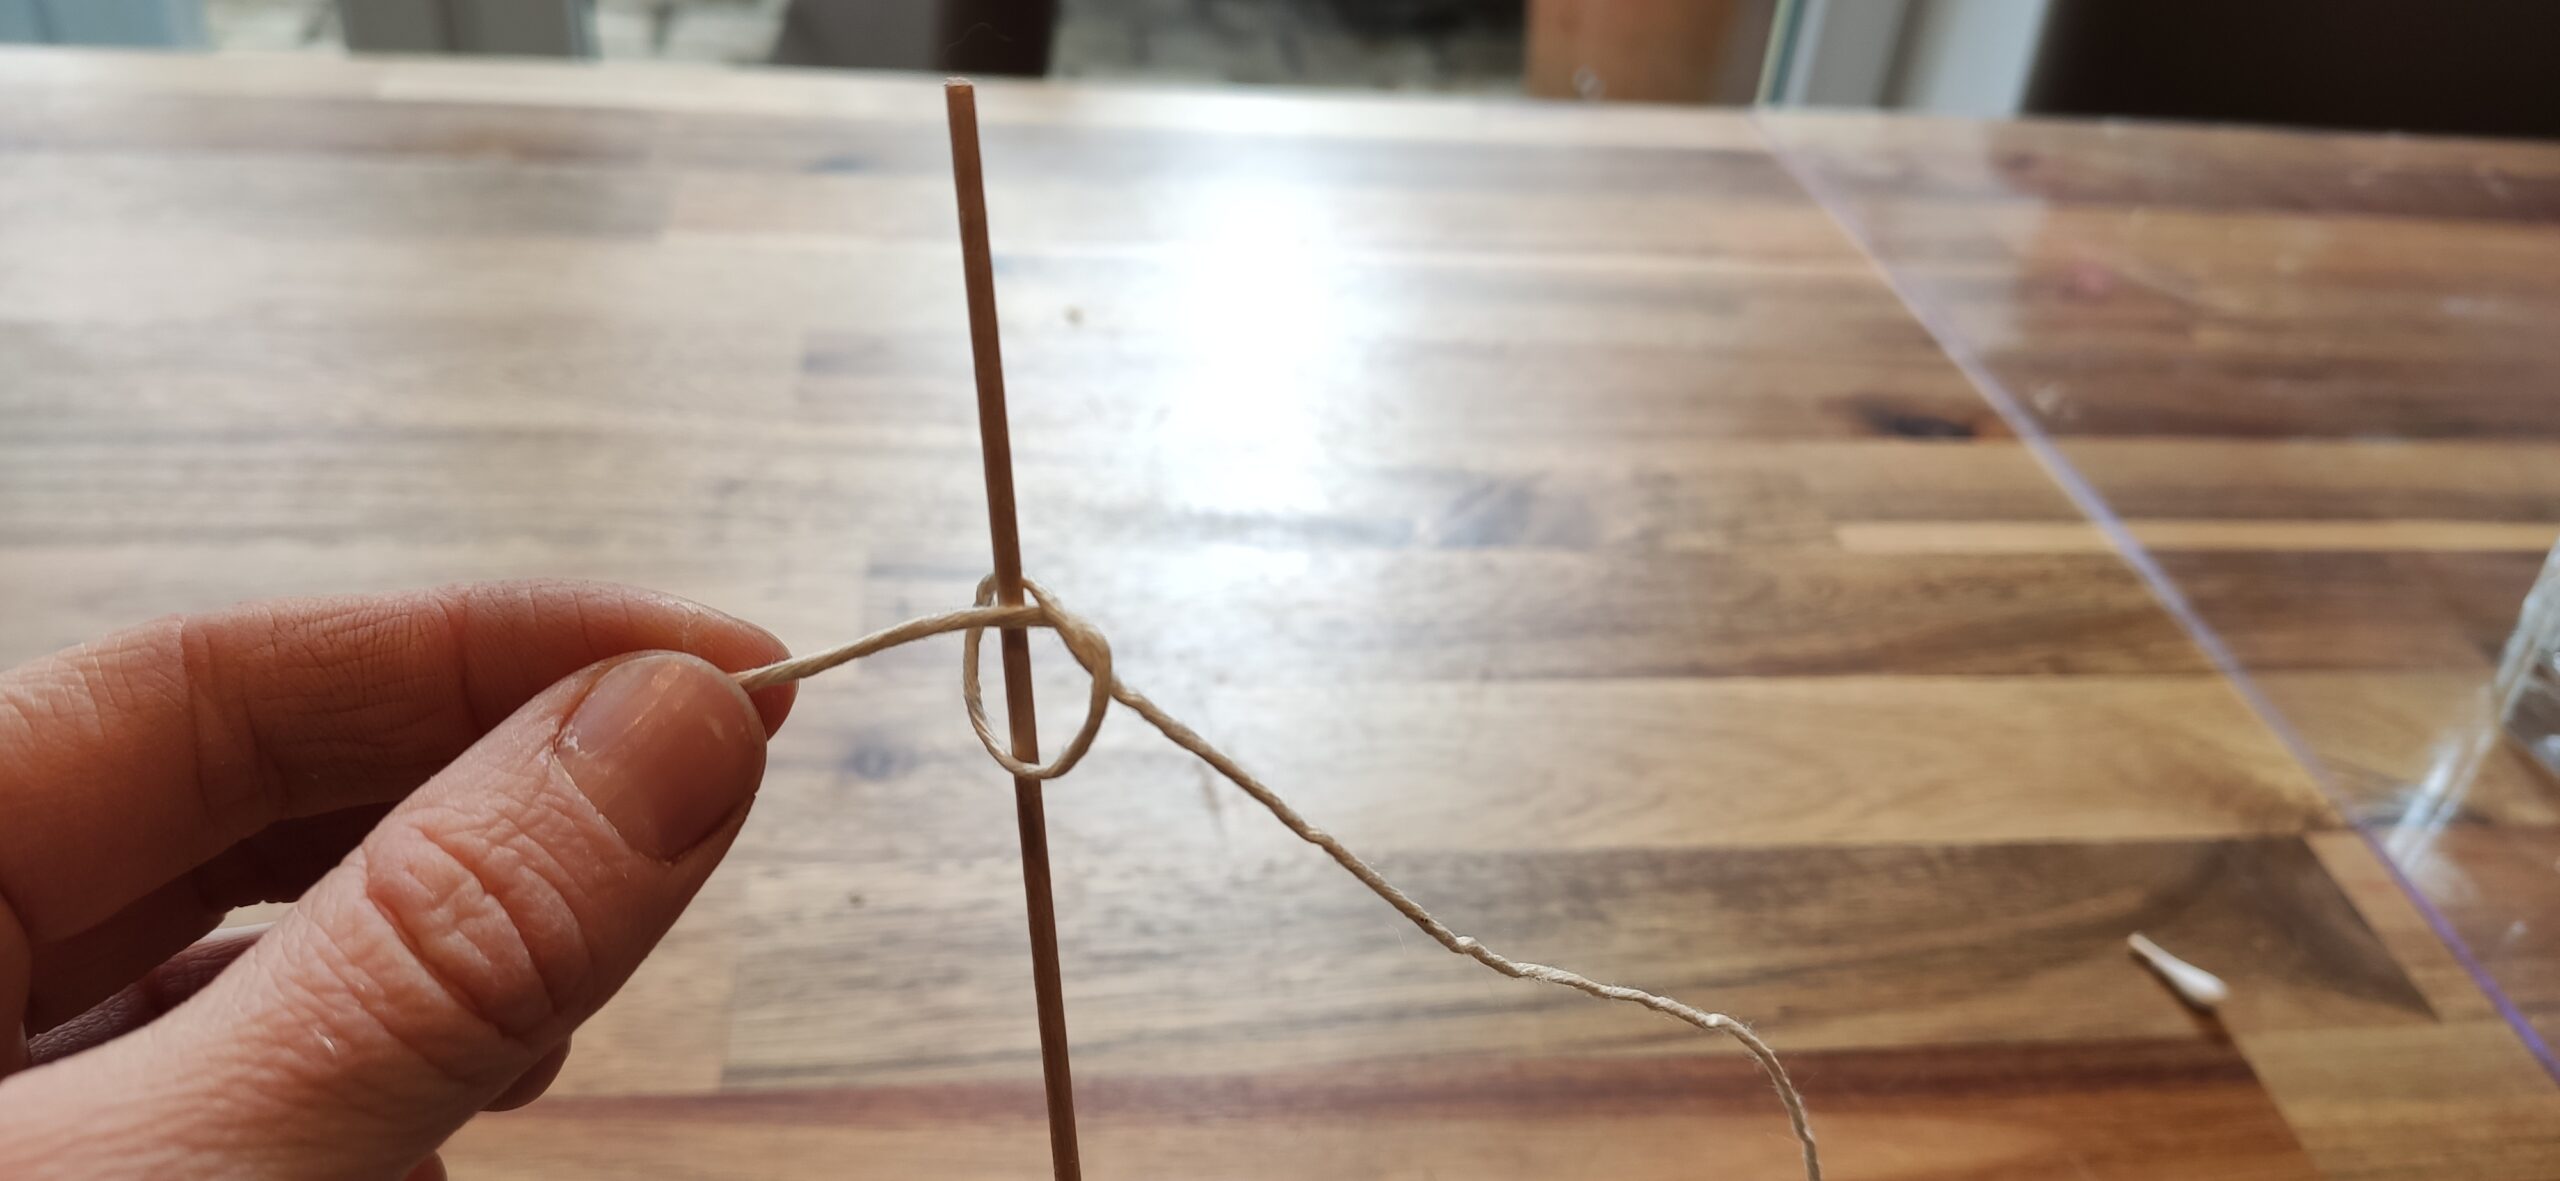
Bild zum Schritt 11 für das Bastel- und DIY-Abenteuer für Kinder: 'Danach knotet ihr das Paketband an die beiden Spieße. So...'

12

Now season the overhanging ends of the package tape with the scissors.
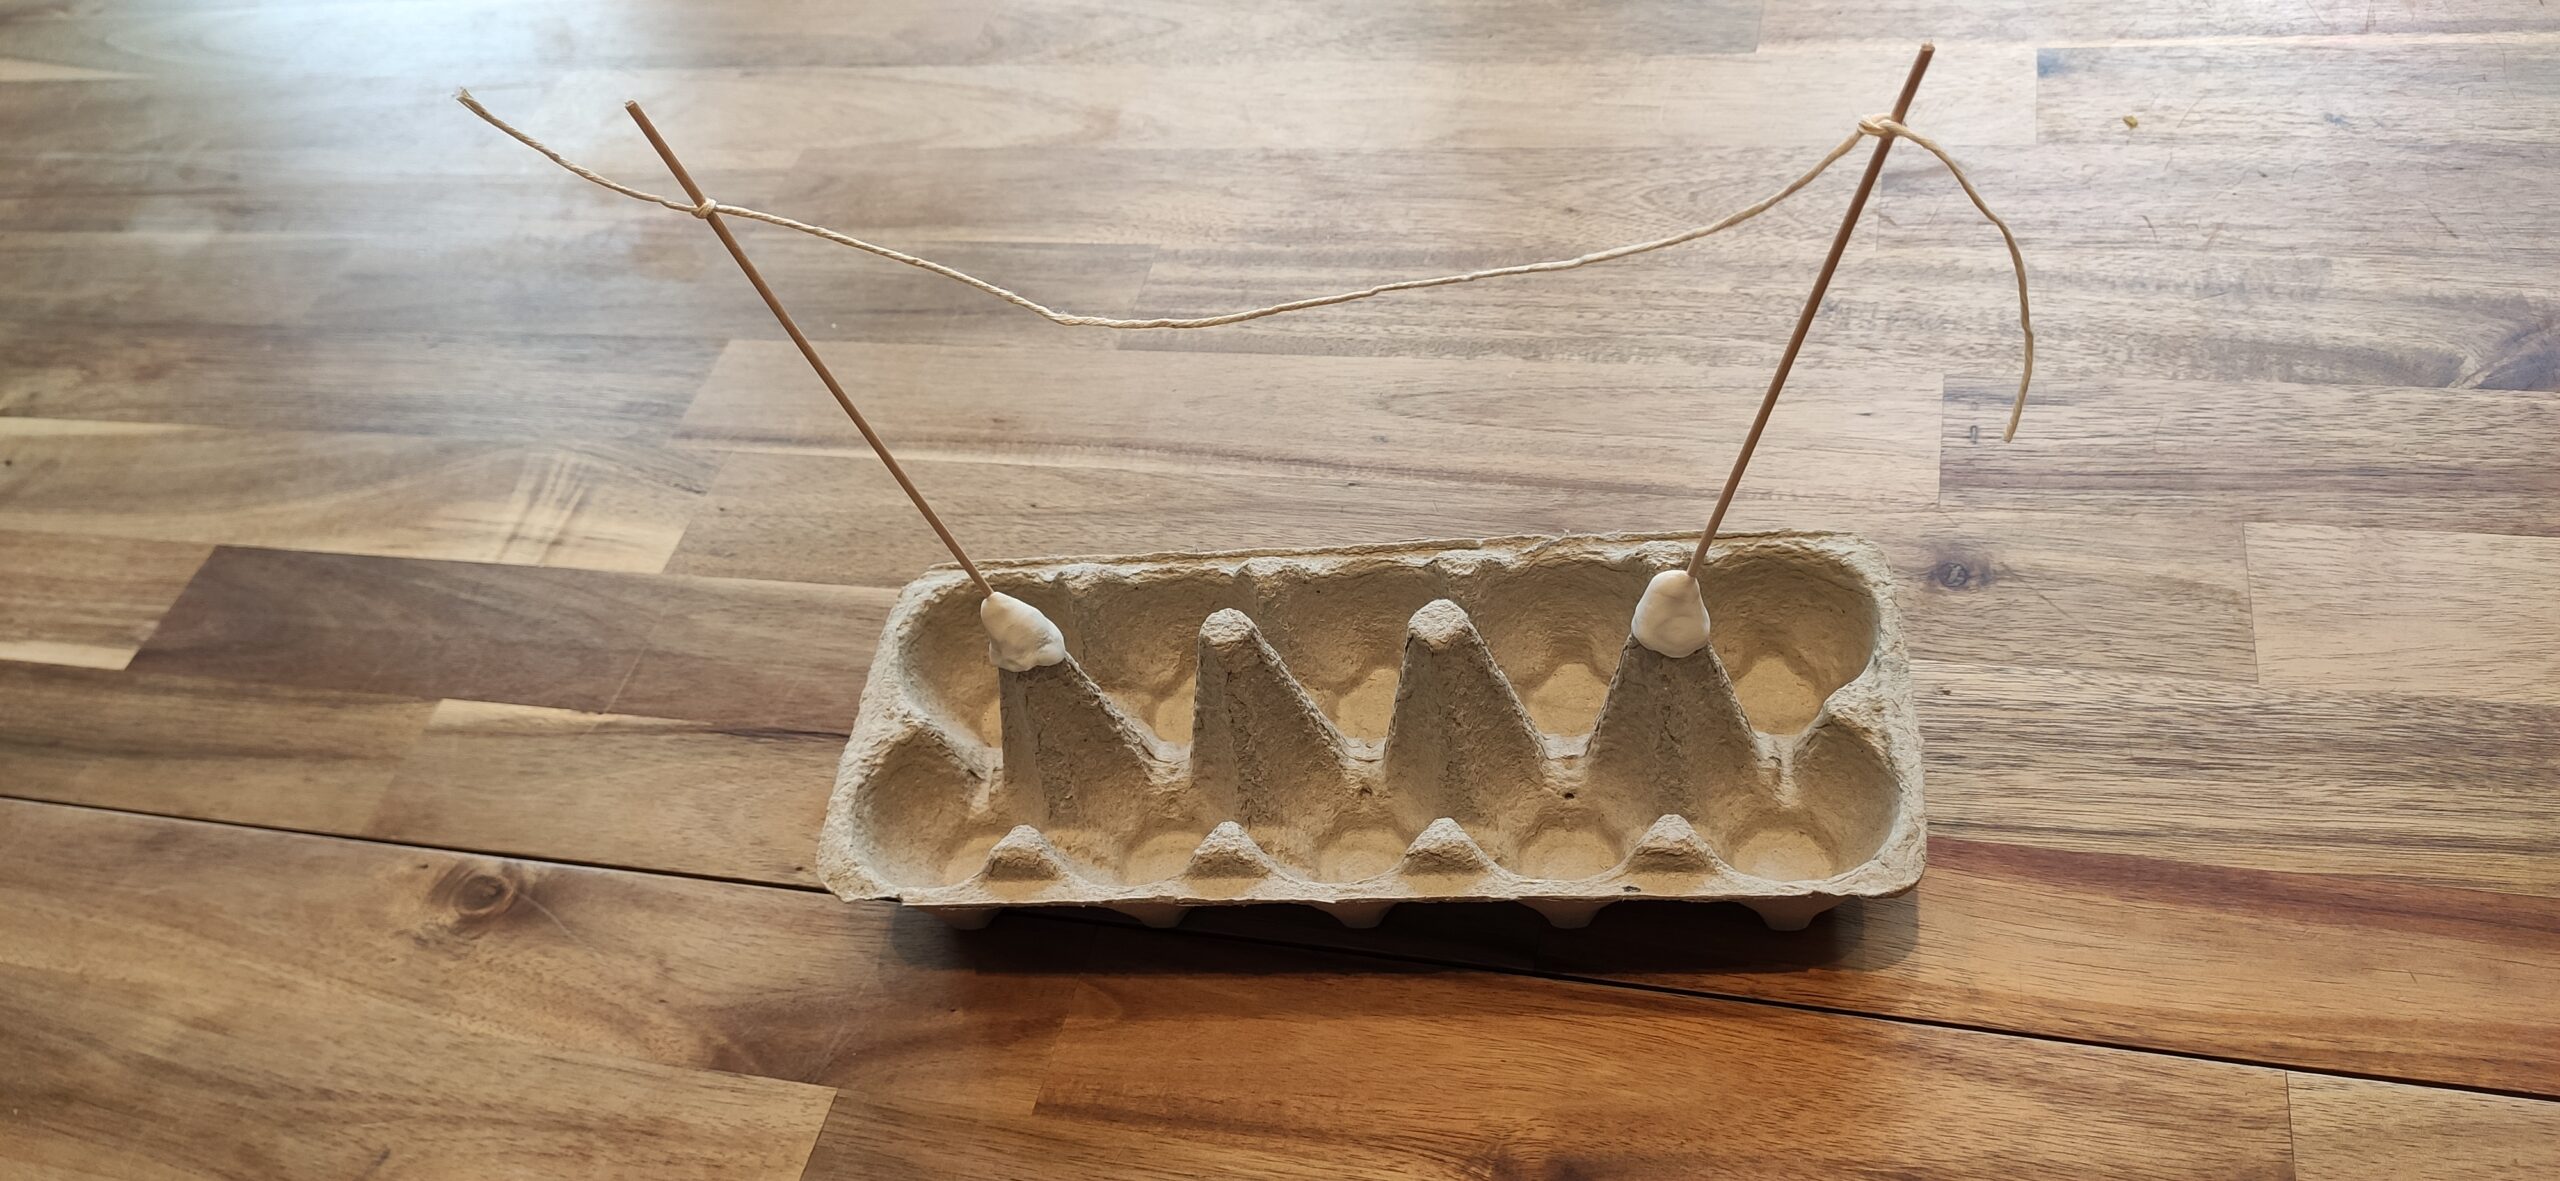
Bild zum Schritt 12 für das Bastel- und DIY-Abenteuer für Kinder: 'Kürzt nun die überstehende Enden des Paketbands mit der Schere.'

13

Now use the glue stick to brush one side of the wimpel with glue.
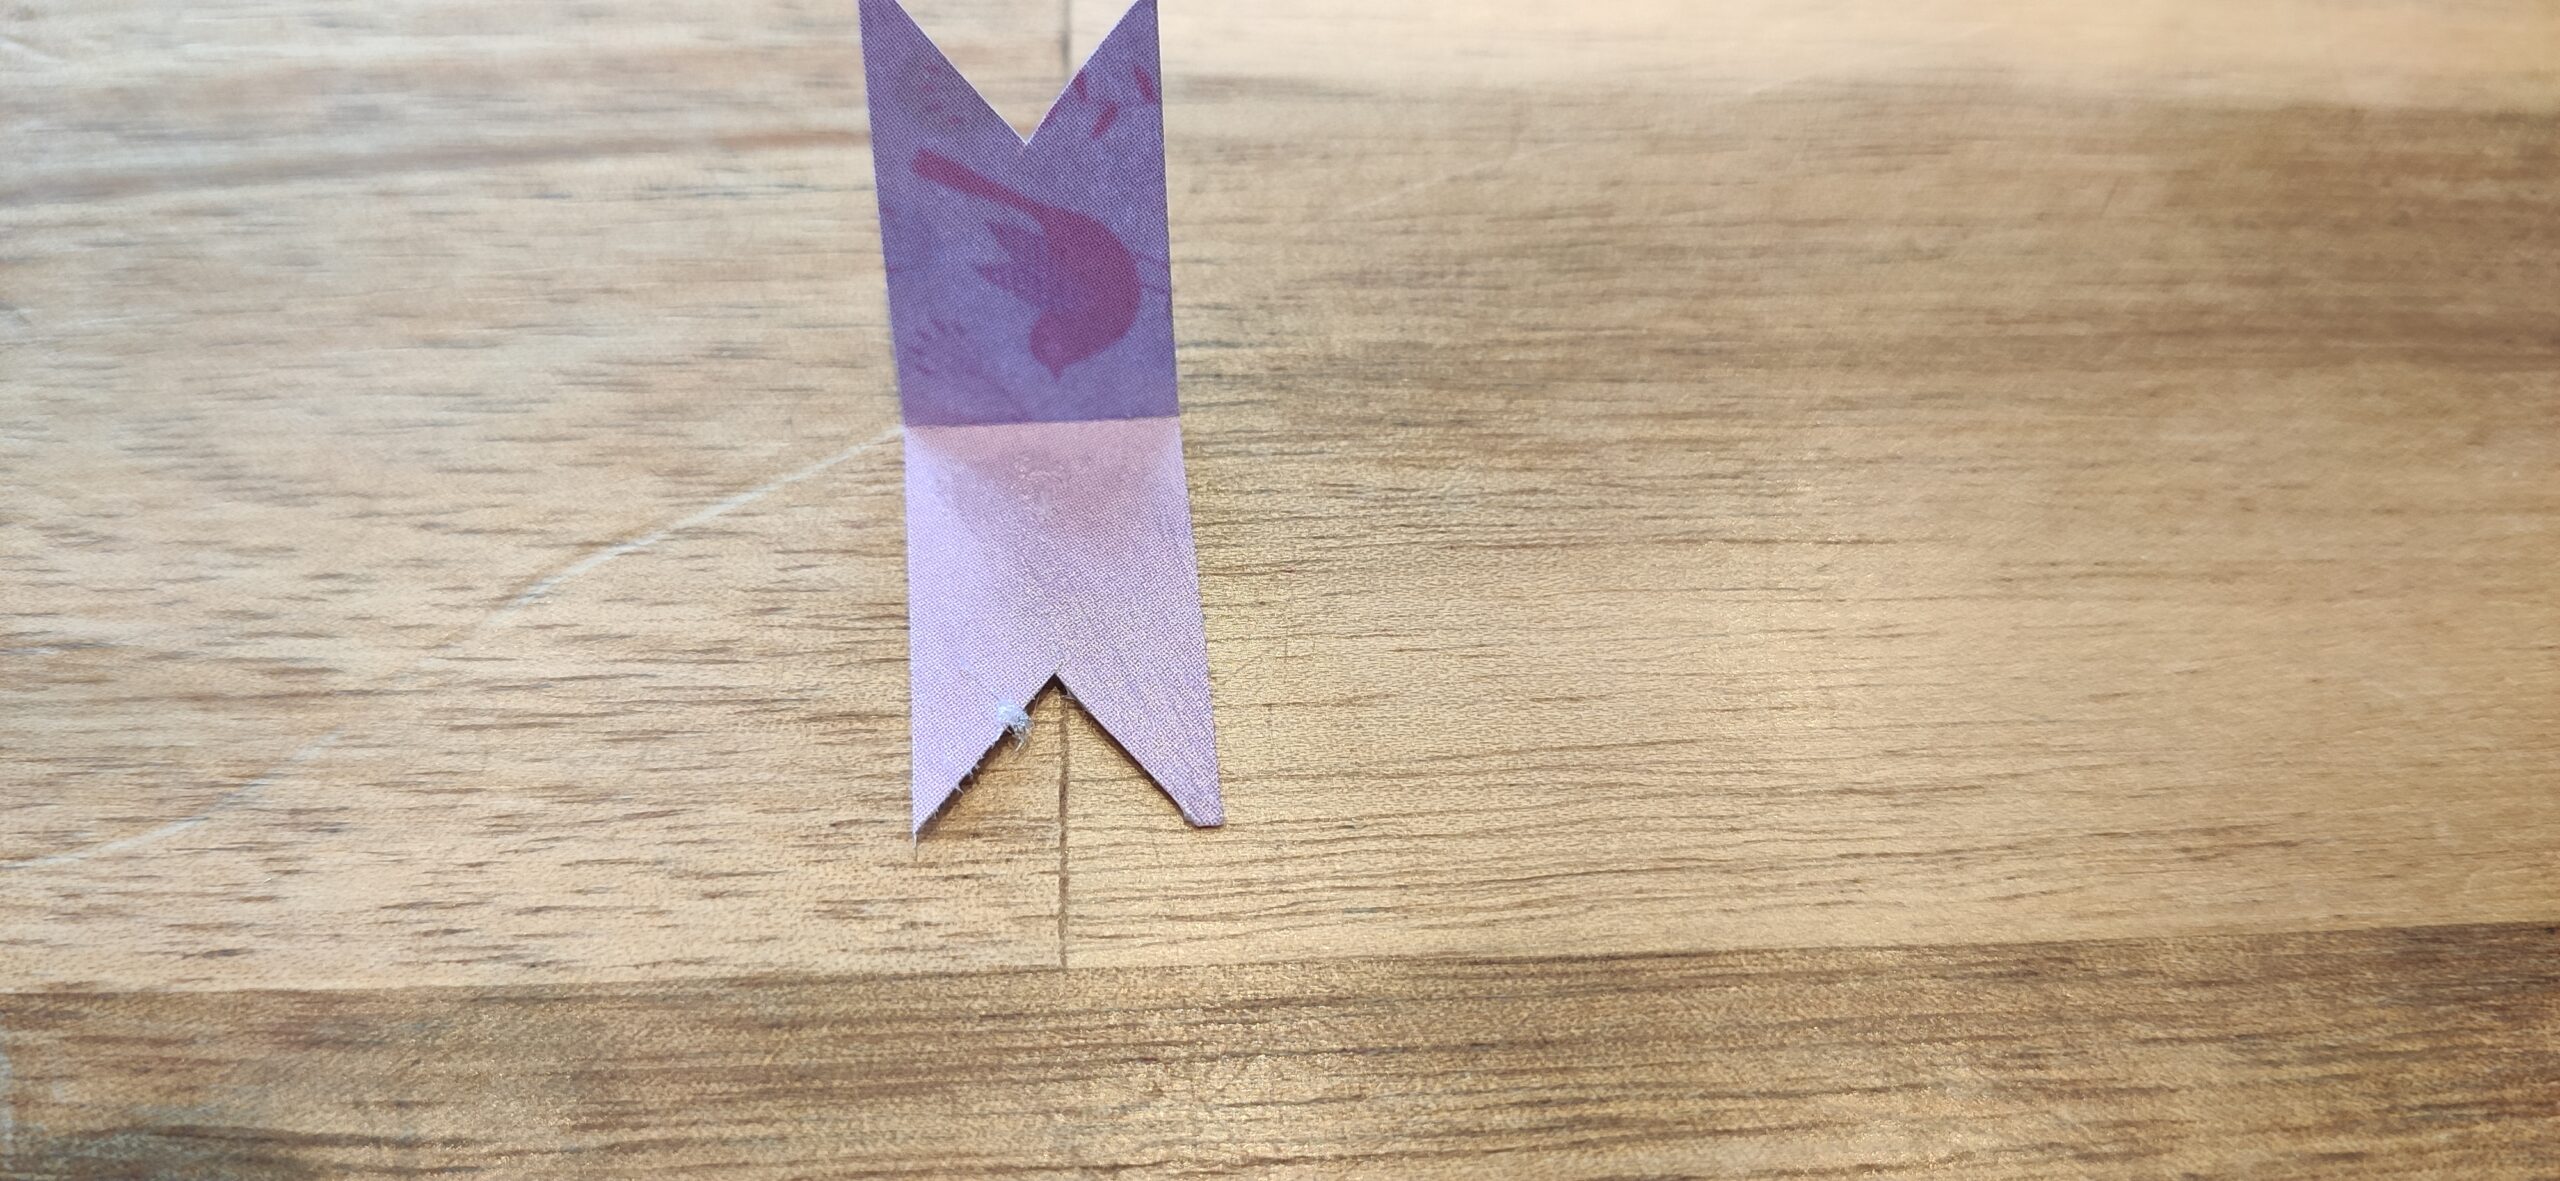
Bild zum Schritt 13 für das Bastel- und DIY-Abenteuer für Kinder: 'Jetzt streicht ihr mit dem Klebestift eine Seite des Wimpels...'

14

Now you stick the pennant around the package tape.
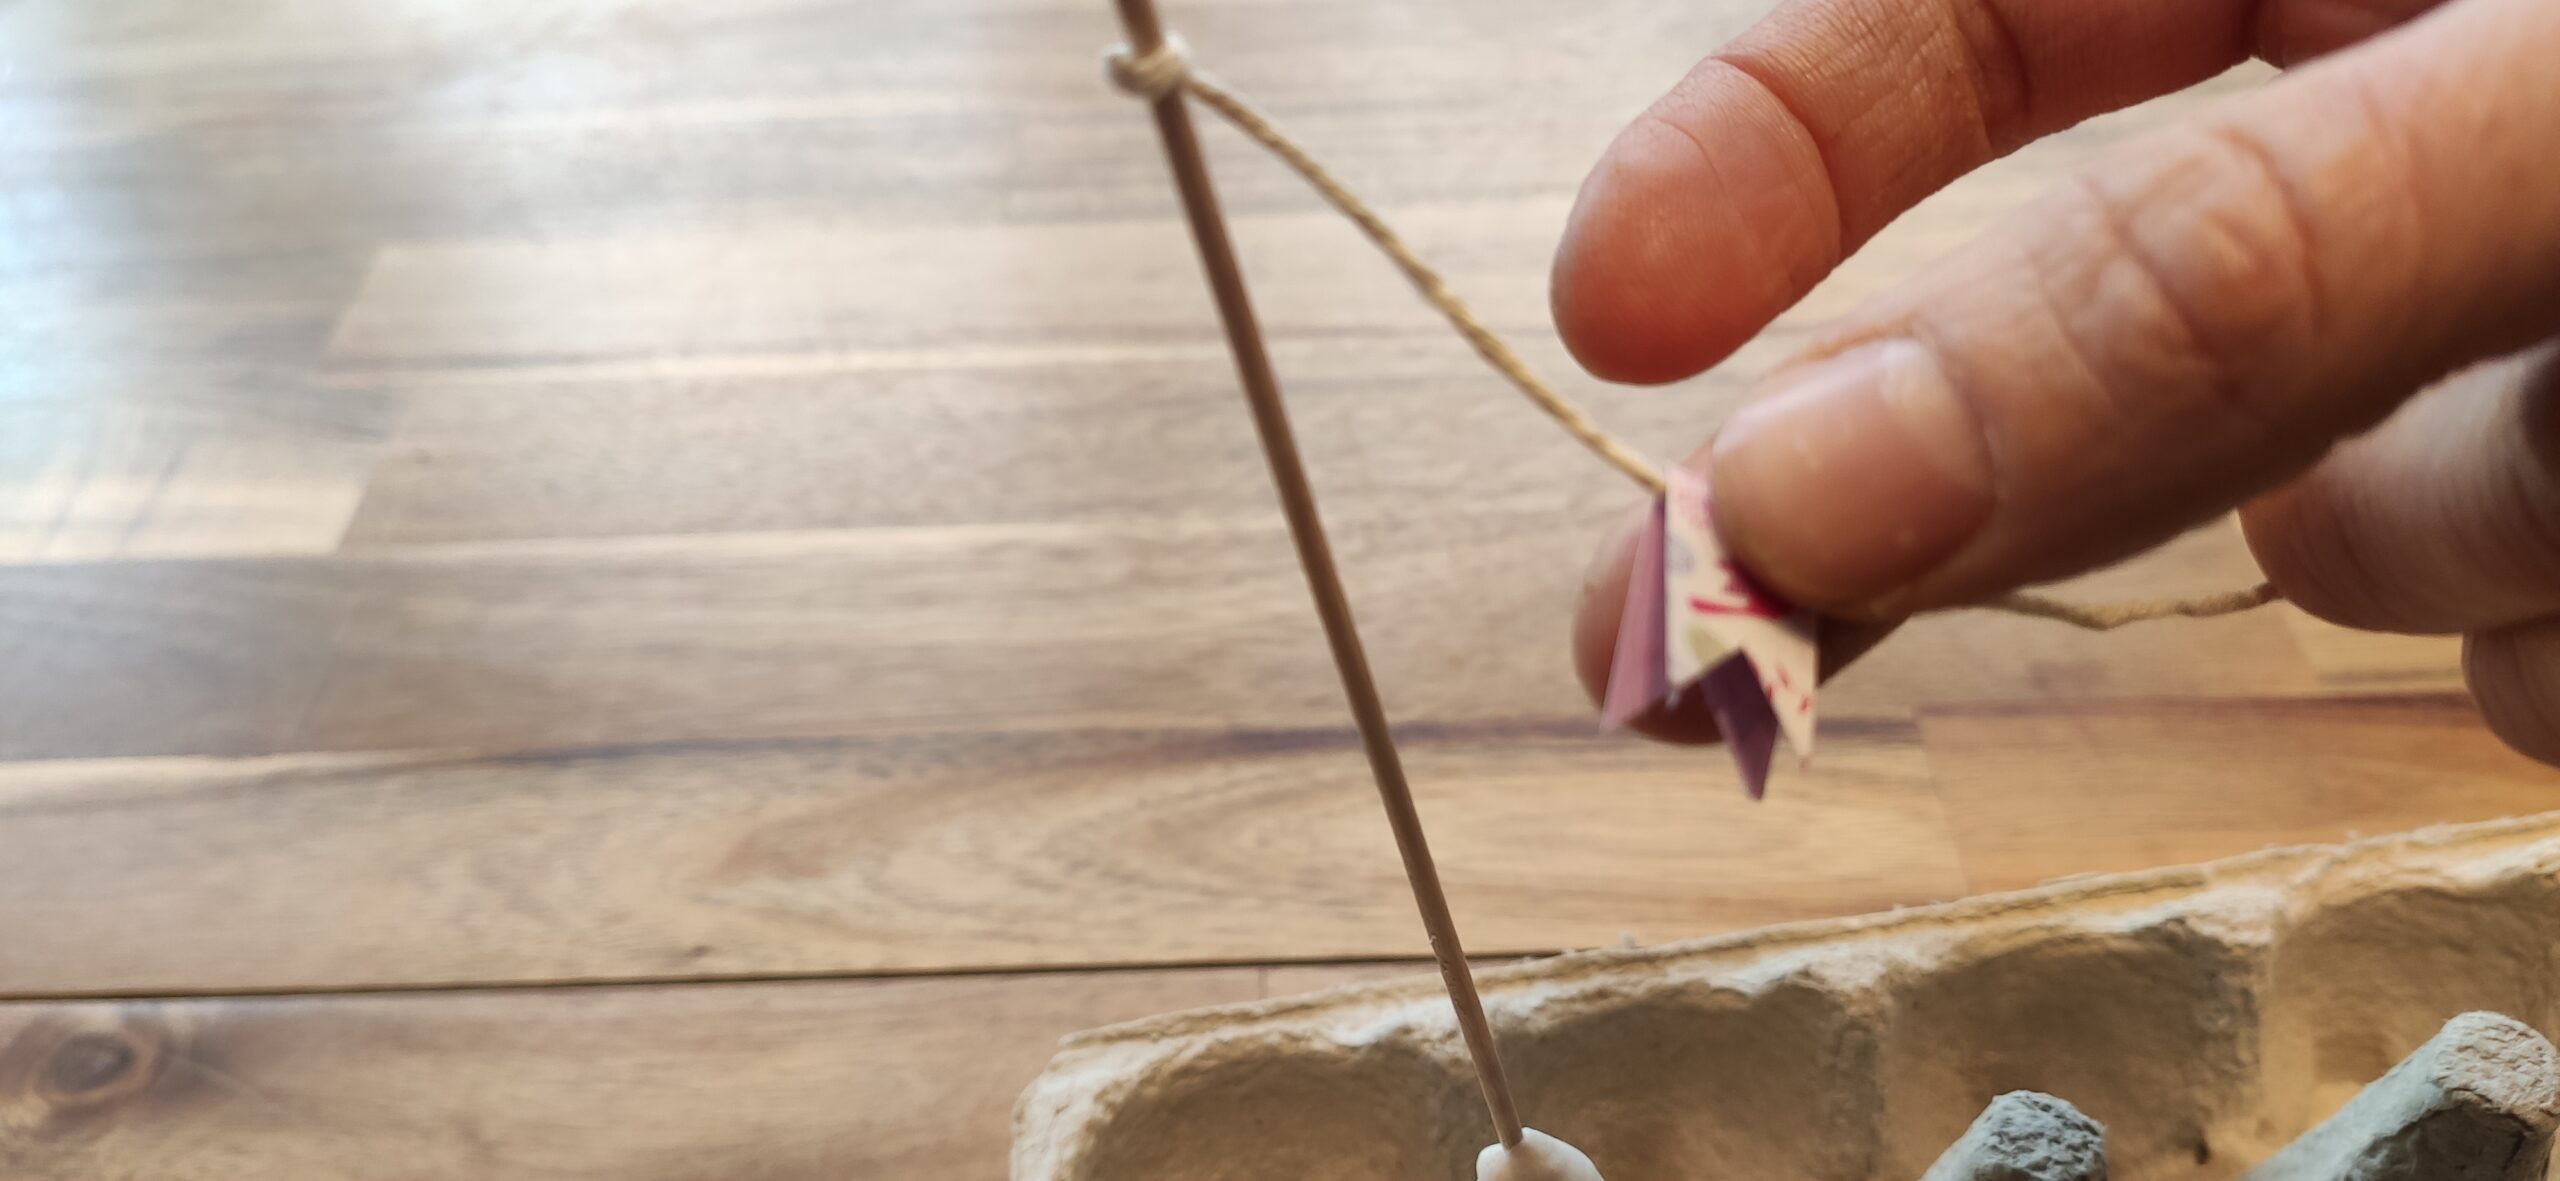
Bild zum Schritt 14 für das Bastel- und DIY-Abenteuer für Kinder: 'Nun klebt ihr den Wimpel um das Paketband.'

15

So glues all 8 pennants and distributes them evenly over the length of the package tape.
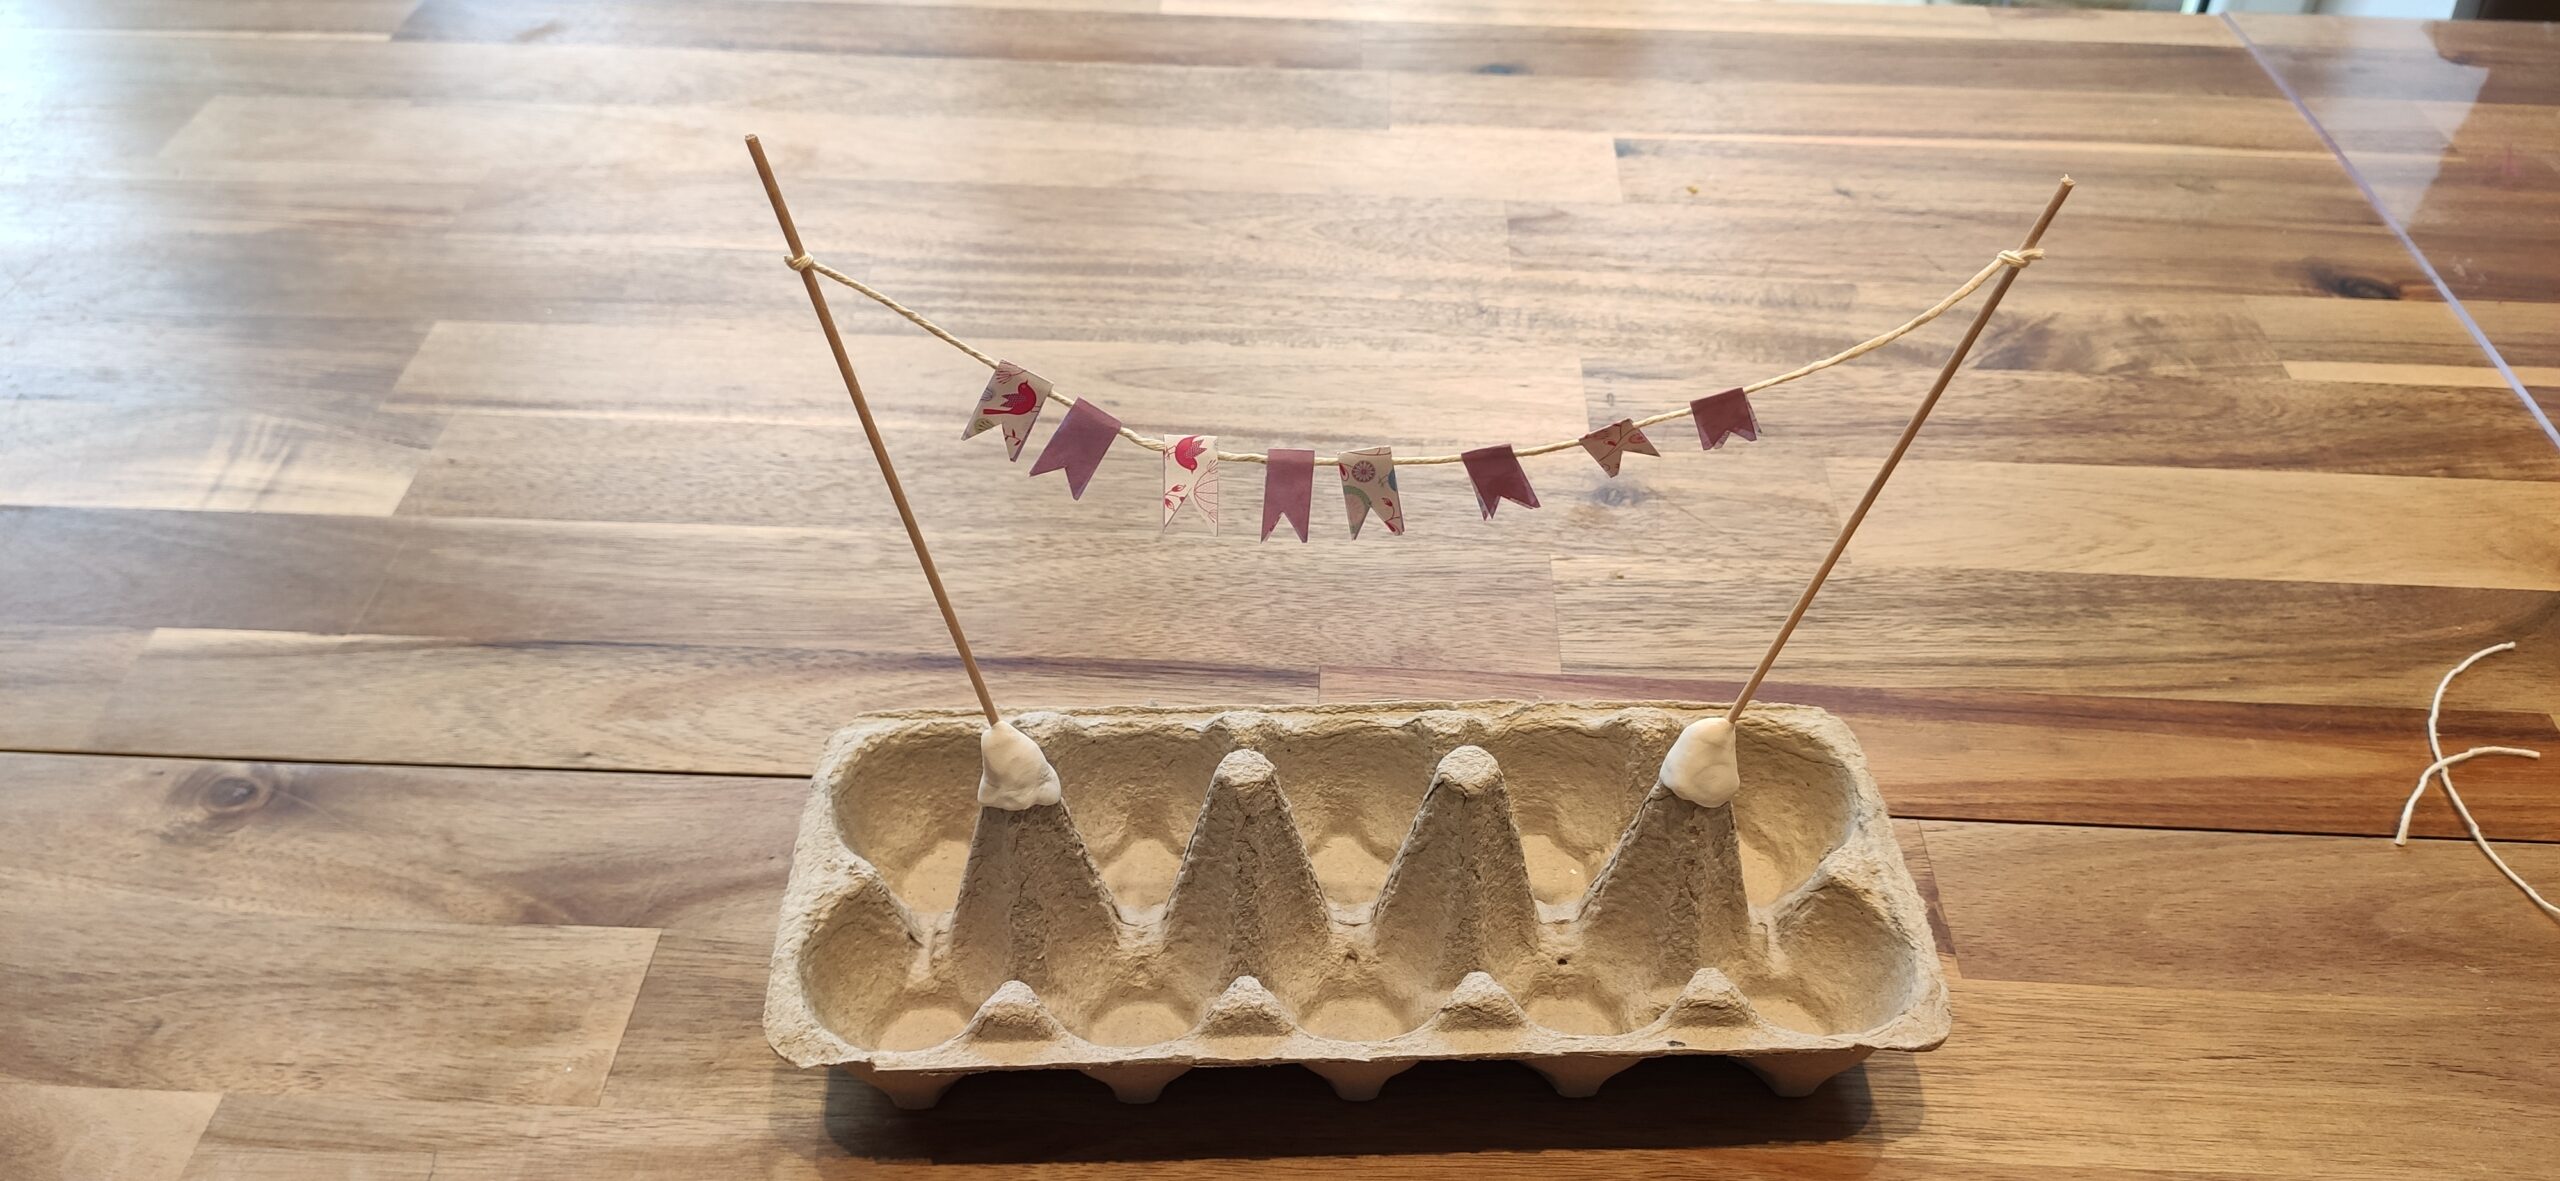
Bild zum Schritt 15 für das Bastel- und DIY-Abenteuer für Kinder: 'Klebt so alle 8 Wimpel auf und verteilt sie gleichmäßig...'

16

Who likes can paint the egg box with water paints at the end. Wears a painter's apron.

Bild zum Schritt 16 für das Bastel- und DIY-Abenteuer für Kinder: 'Wer mag kann zum Schluss den Eierkarton mit Wasserfarben bemalen....'

17

Finally you decorate the egg box with moss and other natural treasures. Cress in eggshells look beautiful in it.

Bild zum Schritt 17 für das Bastel- und DIY-Abenteuer für Kinder: 'Abschließend dekoriert ihr den Eierkarton z.B. mit Moos und andere...'

18

Enjoy your crafting and try it out!

Design egg box for Easter decoration

Follow us on Facebook , Instagram and Pinterest
Don't miss any more adventures: Our bottle mail

Leave a Reply

Your email address will not be published.

The maximum upload file size: 5 MB. You can upload: image, document. Drop file here