"Let dragons rise" make

AdventurerKatzi
Rating0.068 times & (0) DifficultyAdvanced

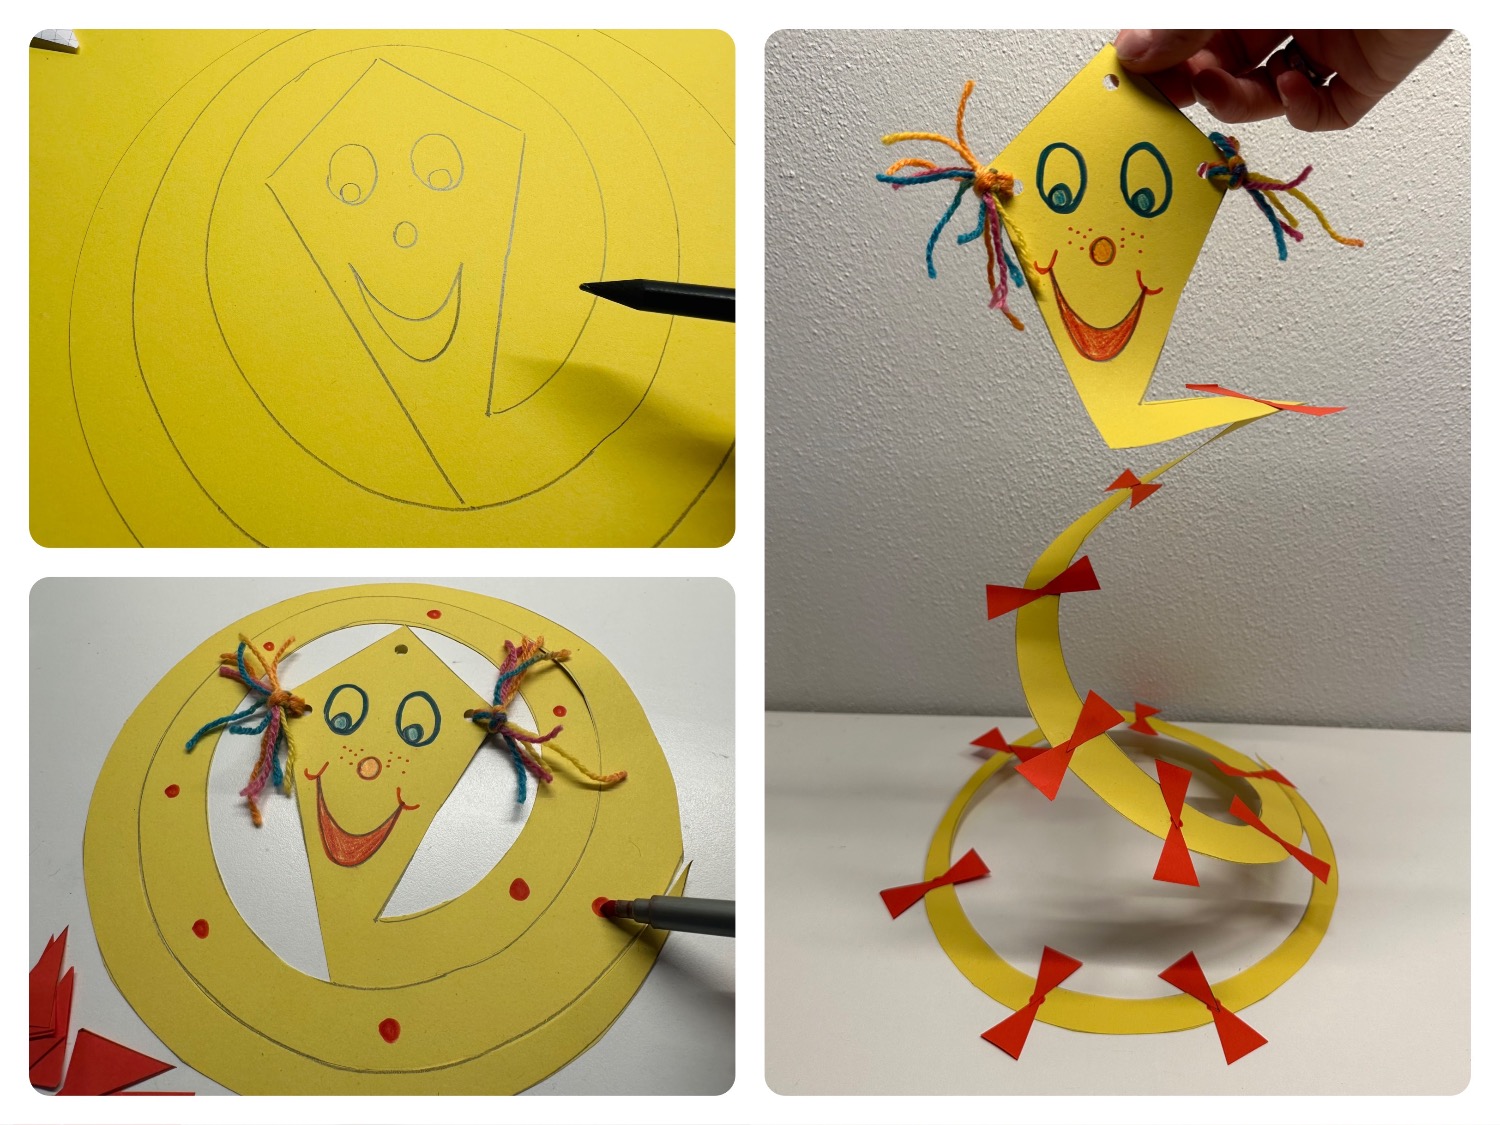
The autumn time is great to let a kite rise. The autumn wind not only lets colorful leaves dance but also colorful dragons rise in the wind. As autumnal decoration this colorful dragon is suitable. A great cutting exercise is it on top of that. When lifting the finished work children's eyes shine, flat on the table the beauty of the finished artwork is not yet fully recognizable. You can see in this step by step instruction how easy this crafting is. Enjoy trying out.

Titelbild zur Bastel- und DIY-Idee für Kinder '(1122) „Drachen steigen lassen“ basteln'
Material for1 Child
Prep Time10 min.Adv. Time45 min.Total Time55 min.
 1 Paper and paperboardNot less than 20cm x 20cm
 Unwrought paper Colorful
 1 Cardboard sheet 10cm x 10cm
 1 Cake plateApprox. 20cm diameter
 1 Pencil
 Pencils and felt pens
 1 Glue
 1 Ruler
 1 Builder's pad
 Coloured wool
 1 Perforator
All links marked with a shopping cart lead to Amazon - here we have selected products that we would order ourselves and in part also ordered. In a qualified purchase via the advertising link, we as Amazon partner receive a commission, for you there are no costs. You thus support our cost- and advertising banner-free, educational offer.
1

Put everything in place.

2

The round cake plate should have about 20 cm diameter. You can also use a bowl or a pot in size.
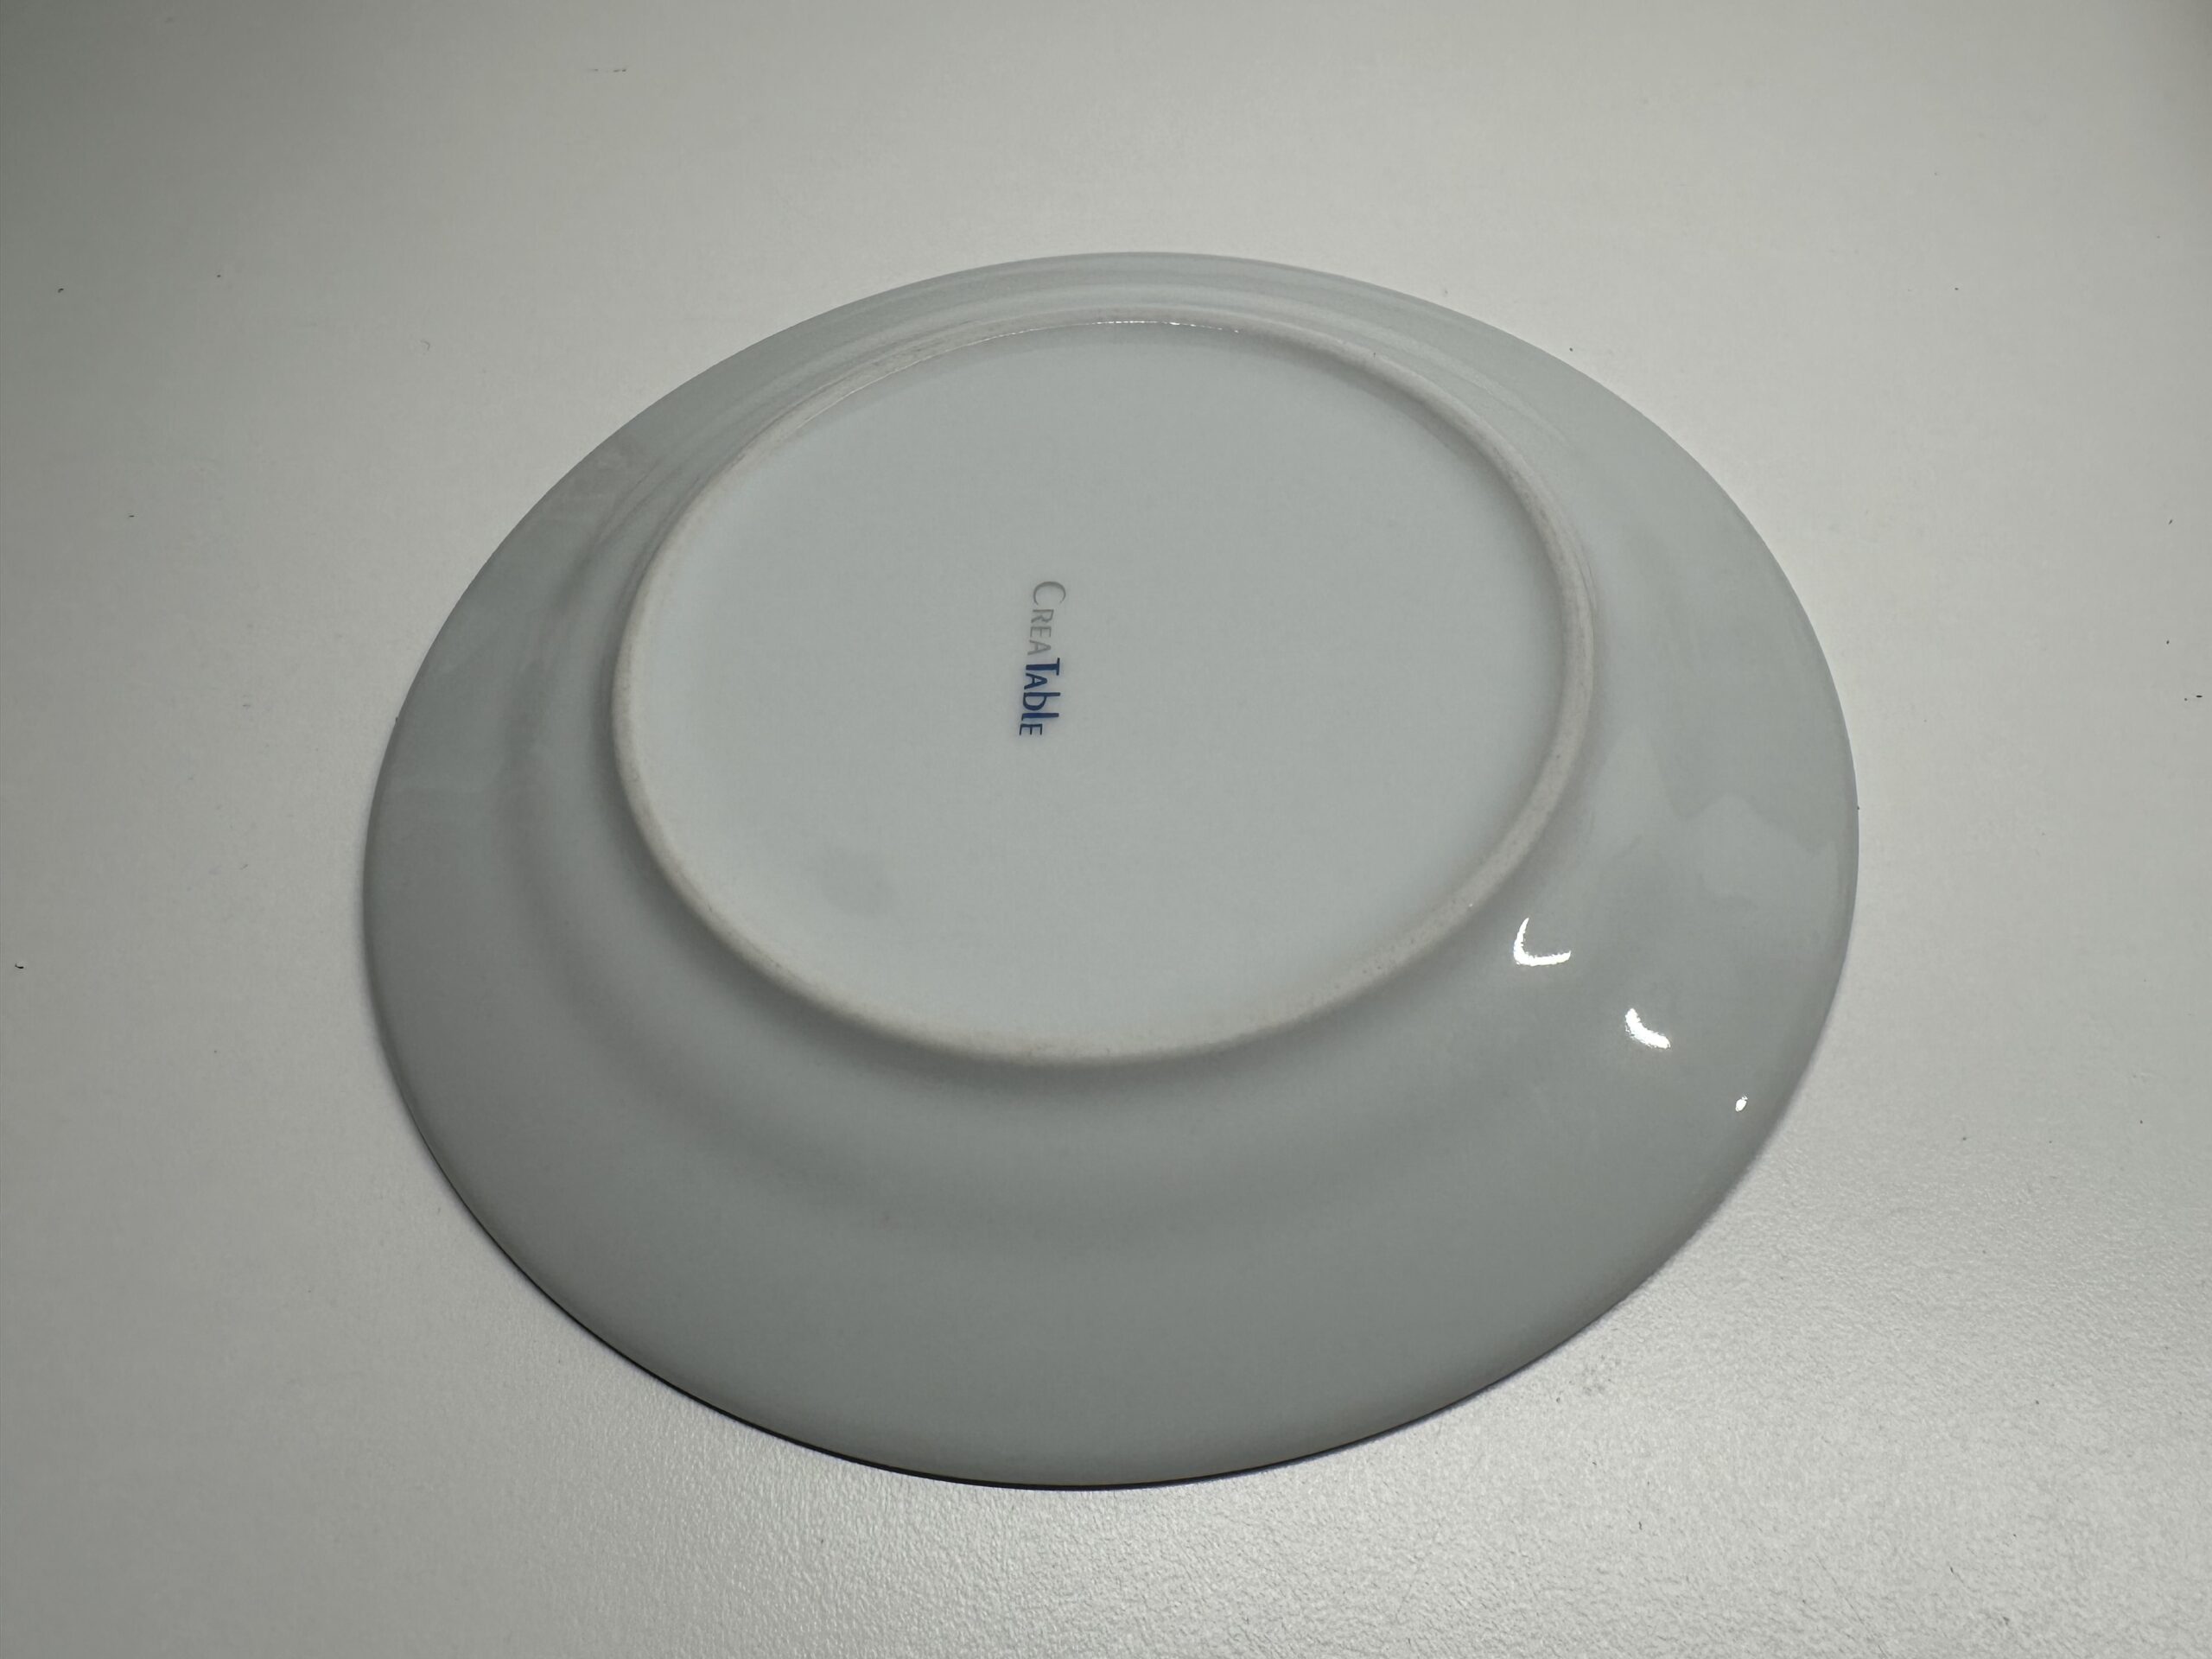
Bild zum Schritt 2 für das Bastel- und DIY-Abenteuer für Kinder: 'Der runde Kuchenteller sollte ca. 20 cm Durchmesser haben. Du...'

3

Get a colorful monochrome clay paper ready.
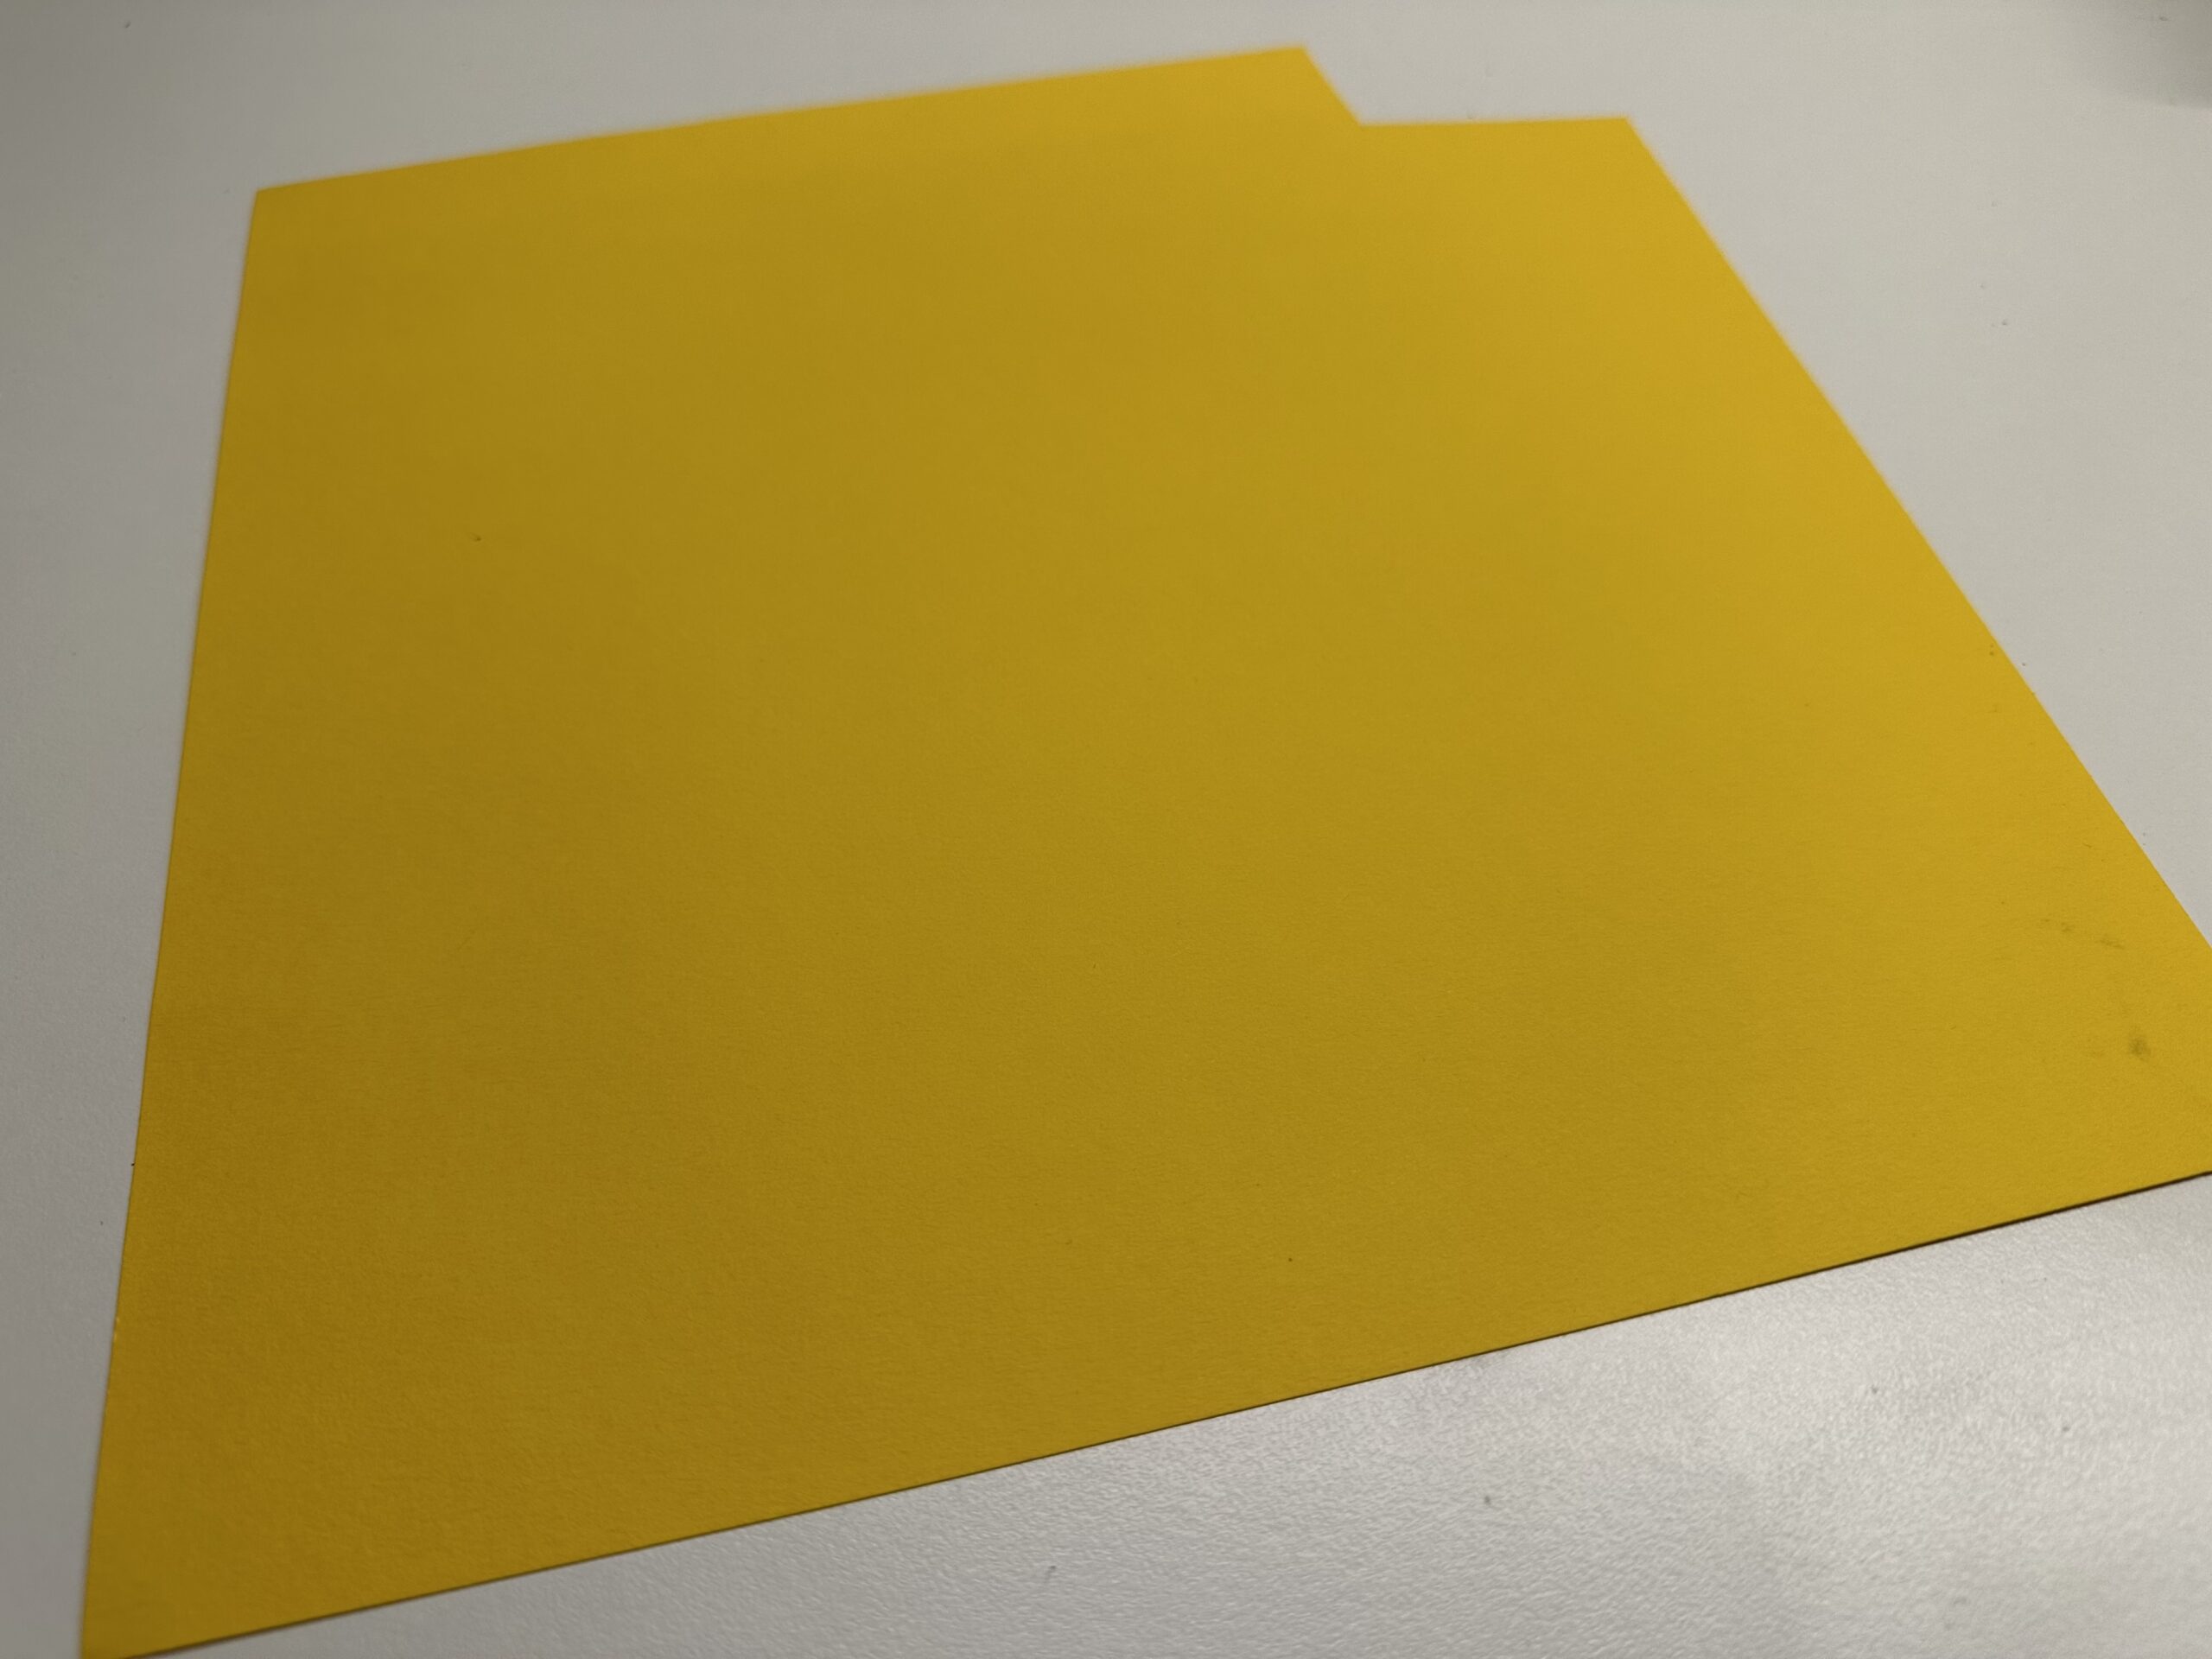
Bild zum Schritt 3 für das Bastel- und DIY-Abenteuer für Kinder: 'Lege dir ein buntes einfarbiges Tonpapier bereit.'

4

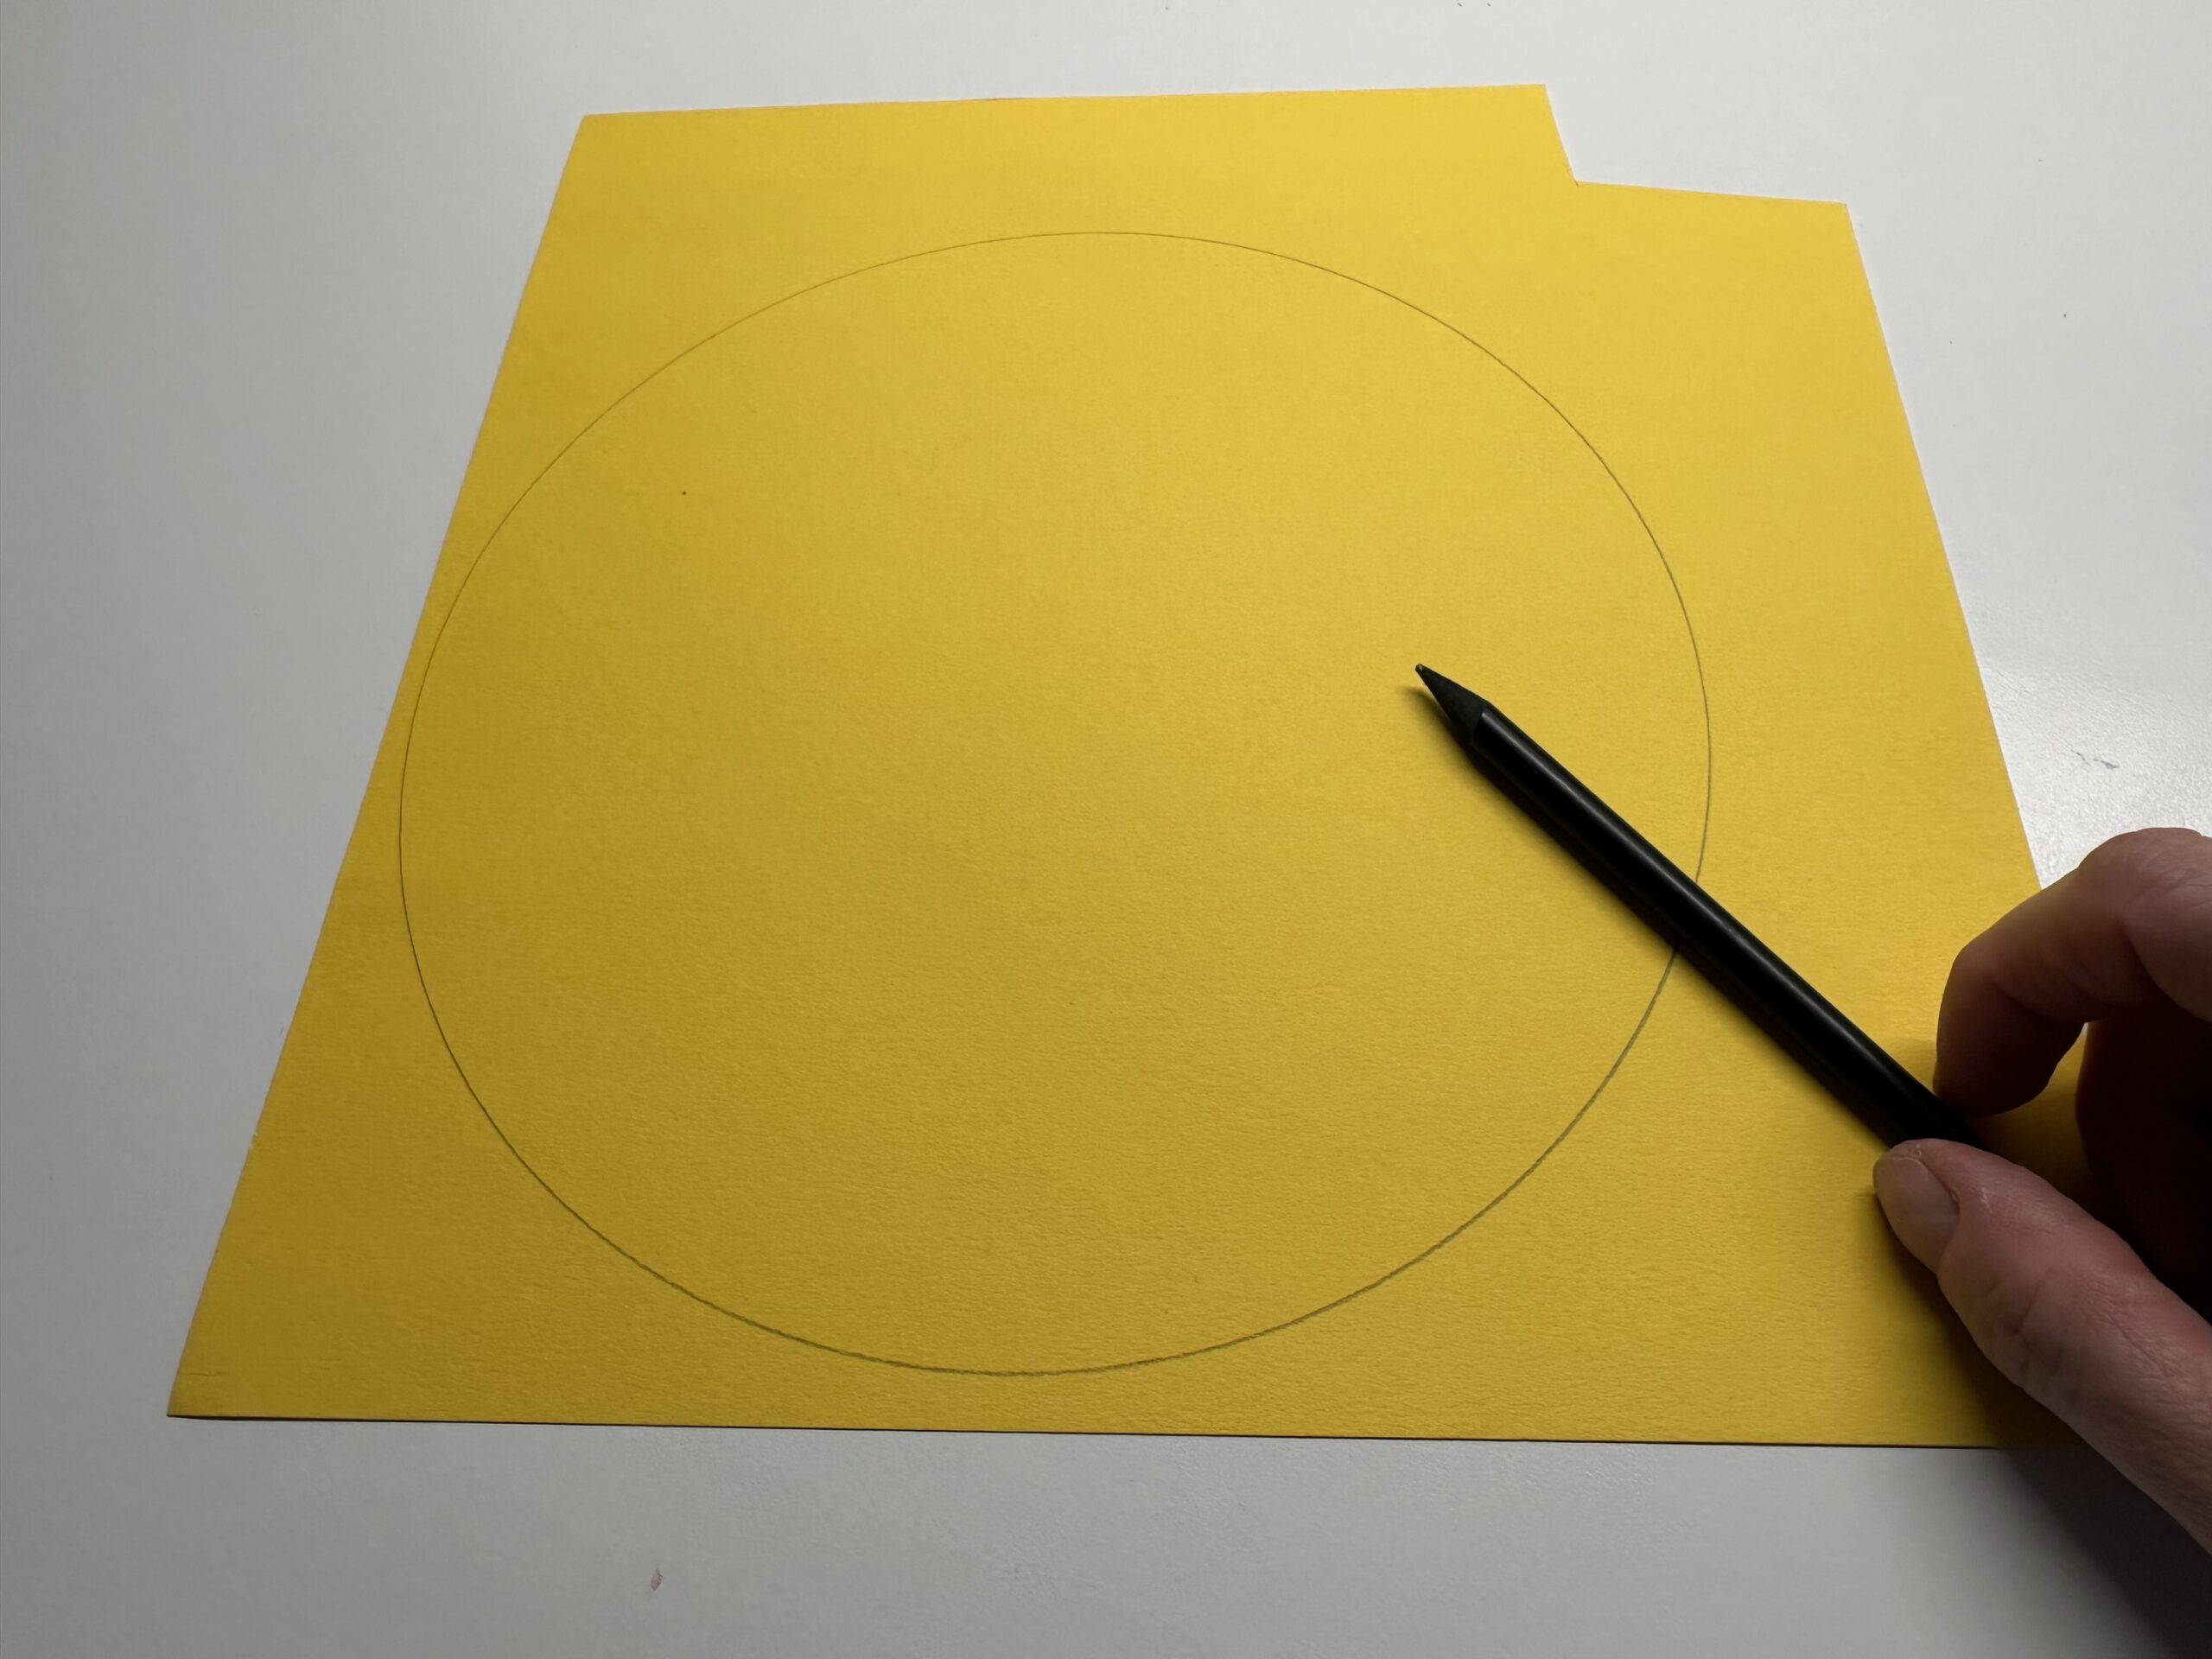
Place the plate (or bowl) on the paper and paint it with a pencil.

Bild zum Schritt 4 für das Bastel- und DIY-Abenteuer für Kinder: 'Lege den Teller (oder deine Schüssel) auf das Papier und...'

5

That's how you get a tape loop.

Bild zum Schritt 5 für das Bastel- und DIY-Abenteuer für Kinder: 'So erhältst du einen Tonpapierkreis.'

The dragon template is made of a square paper with 10 centimetres.
6

You need a sheet of paper in the size of 10cm x 10cm.
The best way is to use a checkered leaf, here you can cut along the lines.

Bild zum Schritt 7 für das Bastel- und DIY-Abenteuer für Kinder: 'Du benötigst ein Blatt Papier in der Größe von 10cm...'

7

Place the square with the tip in front of you. Fold the lower tip of the leaf upwards and place it exactly on the upper tip. A triangle is created.

Bild zum Schritt 8 für das Bastel- und DIY-Abenteuer für Kinder: 'Lege das Quadrat mit der Spitze zu dir vor dich...'

8

Strip the fracture of the folded triangle smoothly.

Bild zum Schritt 9 für das Bastel- und DIY-Abenteuer für Kinder: 'Streife den Bruch des gefalteten Dreiecks glatt.'

9

Shut up the triangle again, put it in front of you so that the breakout points to you.

Bild zum Schritt 10 für das Bastel- und DIY-Abenteuer für Kinder: 'Klappe das Dreieck wieder auf. Lege es so vor dich...'

10

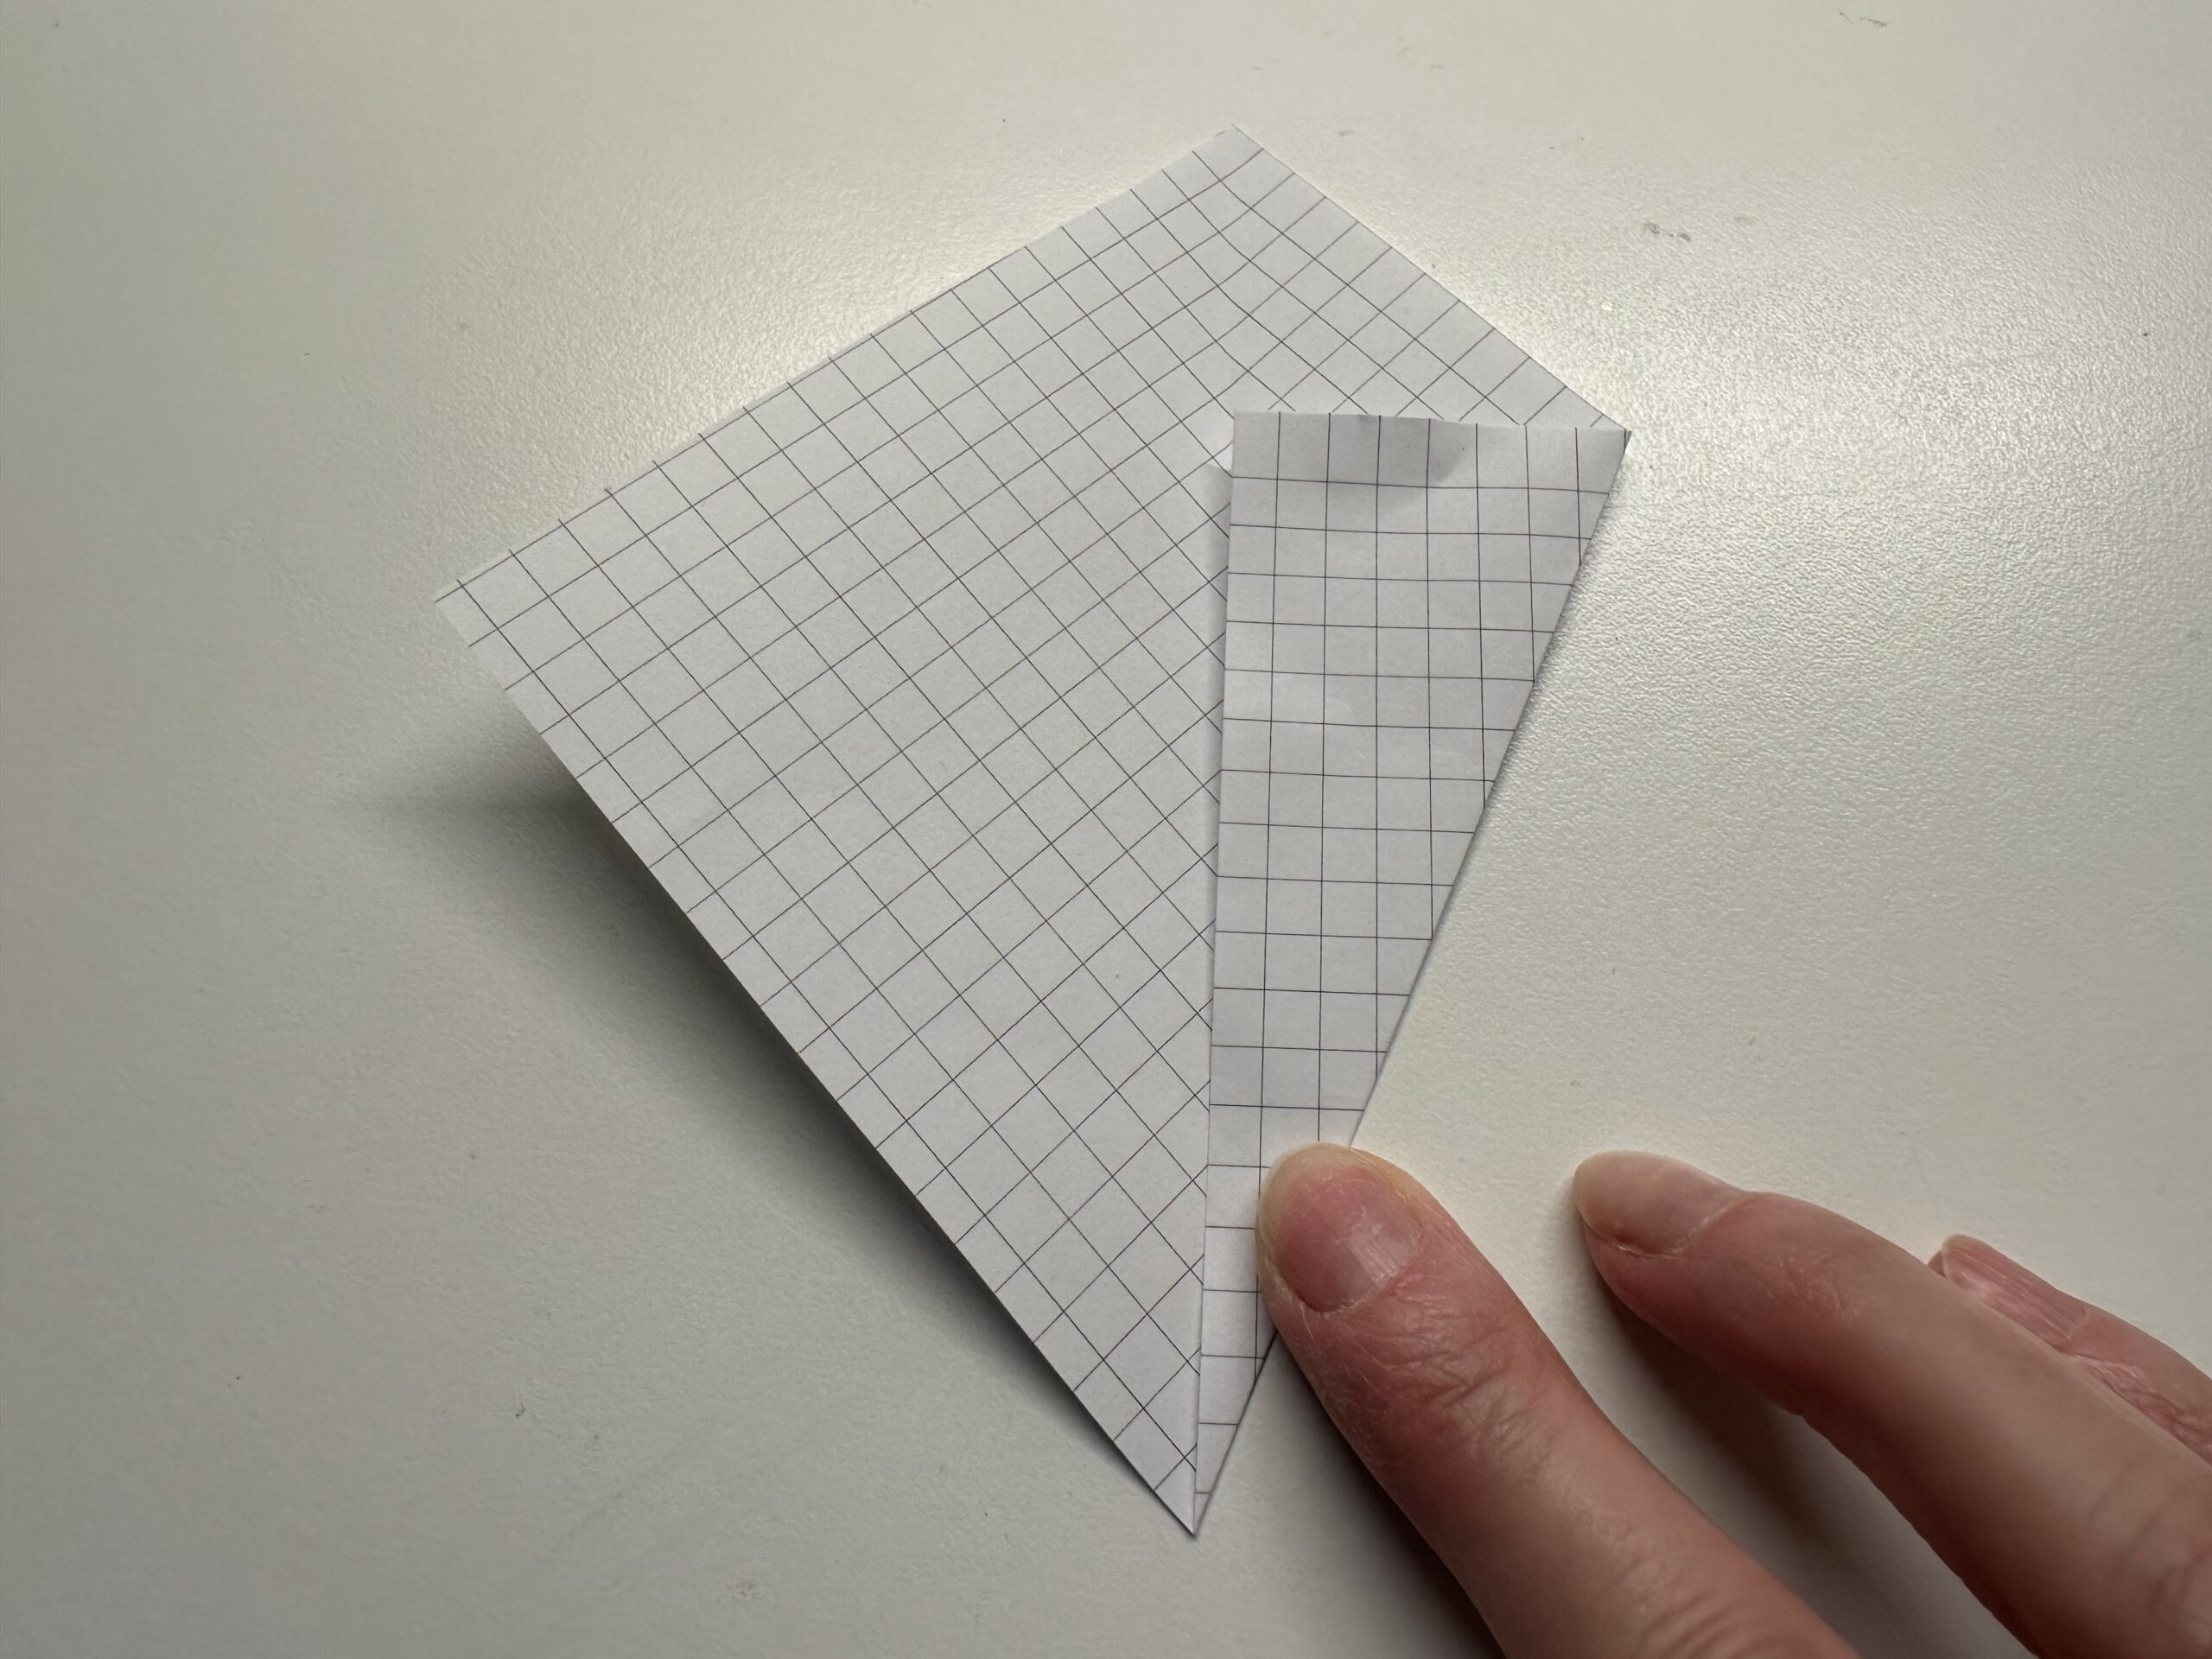
Take the side corner and fold it with the bottom edge to the center line.

Bild zum Schritt 11 für das Bastel- und DIY-Abenteuer für Kinder: 'Nimm die seitliche Ecke und falte sie mit der unteren...'

11

Strip the fracture smoothly.

Bild zum Schritt 12 für das Bastel- und DIY-Abenteuer für Kinder: 'Streife den Bruch glatt.'

12

Repeat this also with the opposite corner. Fold the lower edge here as well to the middle line. Strip the break also smoothly.

Bild zum Schritt 13 für das Bastel- und DIY-Abenteuer für Kinder: 'Wiederhole das auch mit der gegenüberliegenden Ecke. Falte auch hier...'

13

Both sides are now folded to the center line. You now have a small dragon in front of you.

Bild zum Schritt 14 für das Bastel- und DIY-Abenteuer für Kinder: 'Beide Seiten sind nun zur Mittellinie gefaltet. Du hast nun...'

14

Turn the dragon. It now serves as a template for further handicraft work.

Bild zum Schritt 15 für das Bastel- und DIY-Abenteuer für Kinder: 'Wende den Drachen. Er dient dir nun als Schablone für...'

Draw Dragon on the Circle
15

Place the dragon in the middle of the painted circle.

Bild zum Schritt 17 für das Bastel- und DIY-Abenteuer für Kinder: 'Lege den Drachen mittig auf den aufgemalten Kreis.'

16

Umpaint the dragon with a pencil. Start at the bottom. Look at the next picture before you start!

Bild zum Schritt 18 für das Bastel- und DIY-Abenteuer für Kinder: 'Ummale den Drache mit einem Bleistift. Beginne an der unteren...'

17

Stop painting one or two fingers wide in front of the lower tip.

Bild zum Schritt 19 für das Bastel- und DIY-Abenteuer für Kinder: 'Höre mit dem ummalen einen oder zwei  Finger breit...'

18

This gap you need that the kite line stays right on the dragon and you don't cut it off. Here you start to paint a circle around the dragon.

Bild zum Schritt 20 für das Bastel- und DIY-Abenteuer für Kinder: 'Diese Lücke brauchst du, dass die Drachenschnur nachher direkt am...'

19

Umpaint the dragon with large circles. The first circle closes at the bottom of the dragon.
The distance between the two lines shows you how the other rings are painted. Always try to keep the same distance from the previous line.

Bild zum Schritt 21 für das Bastel- und DIY-Abenteuer für Kinder: 'Ummale den Drachen mit großen Kreisen. Der erste Kreis schließt...'

20

Paint circles around the dragon until you reach the outer line of the circle. Here ends the "dragon cord".

Bild zum Schritt 22 für das Bastel- und DIY-Abenteuer für Kinder: 'Male solange Kreise um den Drachen, bis du an der...'

21

Now you can paint a friendly face on your dragon.

Bild zum Schritt 23 für das Bastel- und DIY-Abenteuer für Kinder: 'Nun kannst du deinem Drachen ein freundliches Gesicht aufmalen.'

22

Cut out the outer circle with the scissors once completely.

Bild zum Schritt 24 für das Bastel- und DIY-Abenteuer für Kinder: 'Schneide mit der Schere den äußeren Kreis einmal komplett aus.'

23

Now start cutting at the line that touches the outer circle. See picture.

Bild zum Schritt 25 für das Bastel- und DIY-Abenteuer für Kinder: 'Beginne nun an der Linie, die den äußeren Kreis berührt,...'

24

Cut from the outside to the inside of the line. Turn the paper circle again and again so that you can cut well.
Cut to the beginning of the dragon.

Bild zum Schritt 26 für das Bastel- und DIY-Abenteuer für Kinder: 'Schneide von außen nach innen der Linie nach. Drehe dabei...'

25

Now you can cut out the dragon. Follow the line you painted before.

Bild zum Schritt 27 für das Bastel- und DIY-Abenteuer für Kinder: 'Nun kannst du den Drachen ausschneiden. Folge der Linie die...'

26

The dragon "hangs" right on the long strip you cut along.

Bild zum Schritt 28 für das Bastel- und DIY-Abenteuer für Kinder: 'Der Drache "hängt" direkt am langen Streifen an dem du...'

27

This is what the cut out looks like. Now you can still paint your dragon face colorfully. Use bright colors here possibly even felt pens.

Bild zum Schritt 29 für das Bastel- und DIY-Abenteuer für Kinder: 'So sieht dann das Ausgeschnittene aus. Jetzt kannst du noch...'

28

On the sides (where the ears lie) of the dragon Franzen are now attached.
Make a hole in the side with a perforator. Make sure that the hole is attached with sufficient distance to the edge.

Bild zum Schritt 30 für das Bastel- und DIY-Abenteuer für Kinder: 'An den Seiten (wo die Ohren liegen) des Drachens werden...'

29

Also make a hole on the opposite side.

Bild zum Schritt 31 für das Bastel- und DIY-Abenteuer für Kinder: 'Mache auch auf der gegenüberliegende Seite ein Loch.'

30

That's what the dragon looks like.
Now you need colorful wool.

Bild zum Schritt 32 für das Bastel- und DIY-Abenteuer für Kinder: 'So sieht der Drache dann aus.  Jetzt brauchst du...'

31

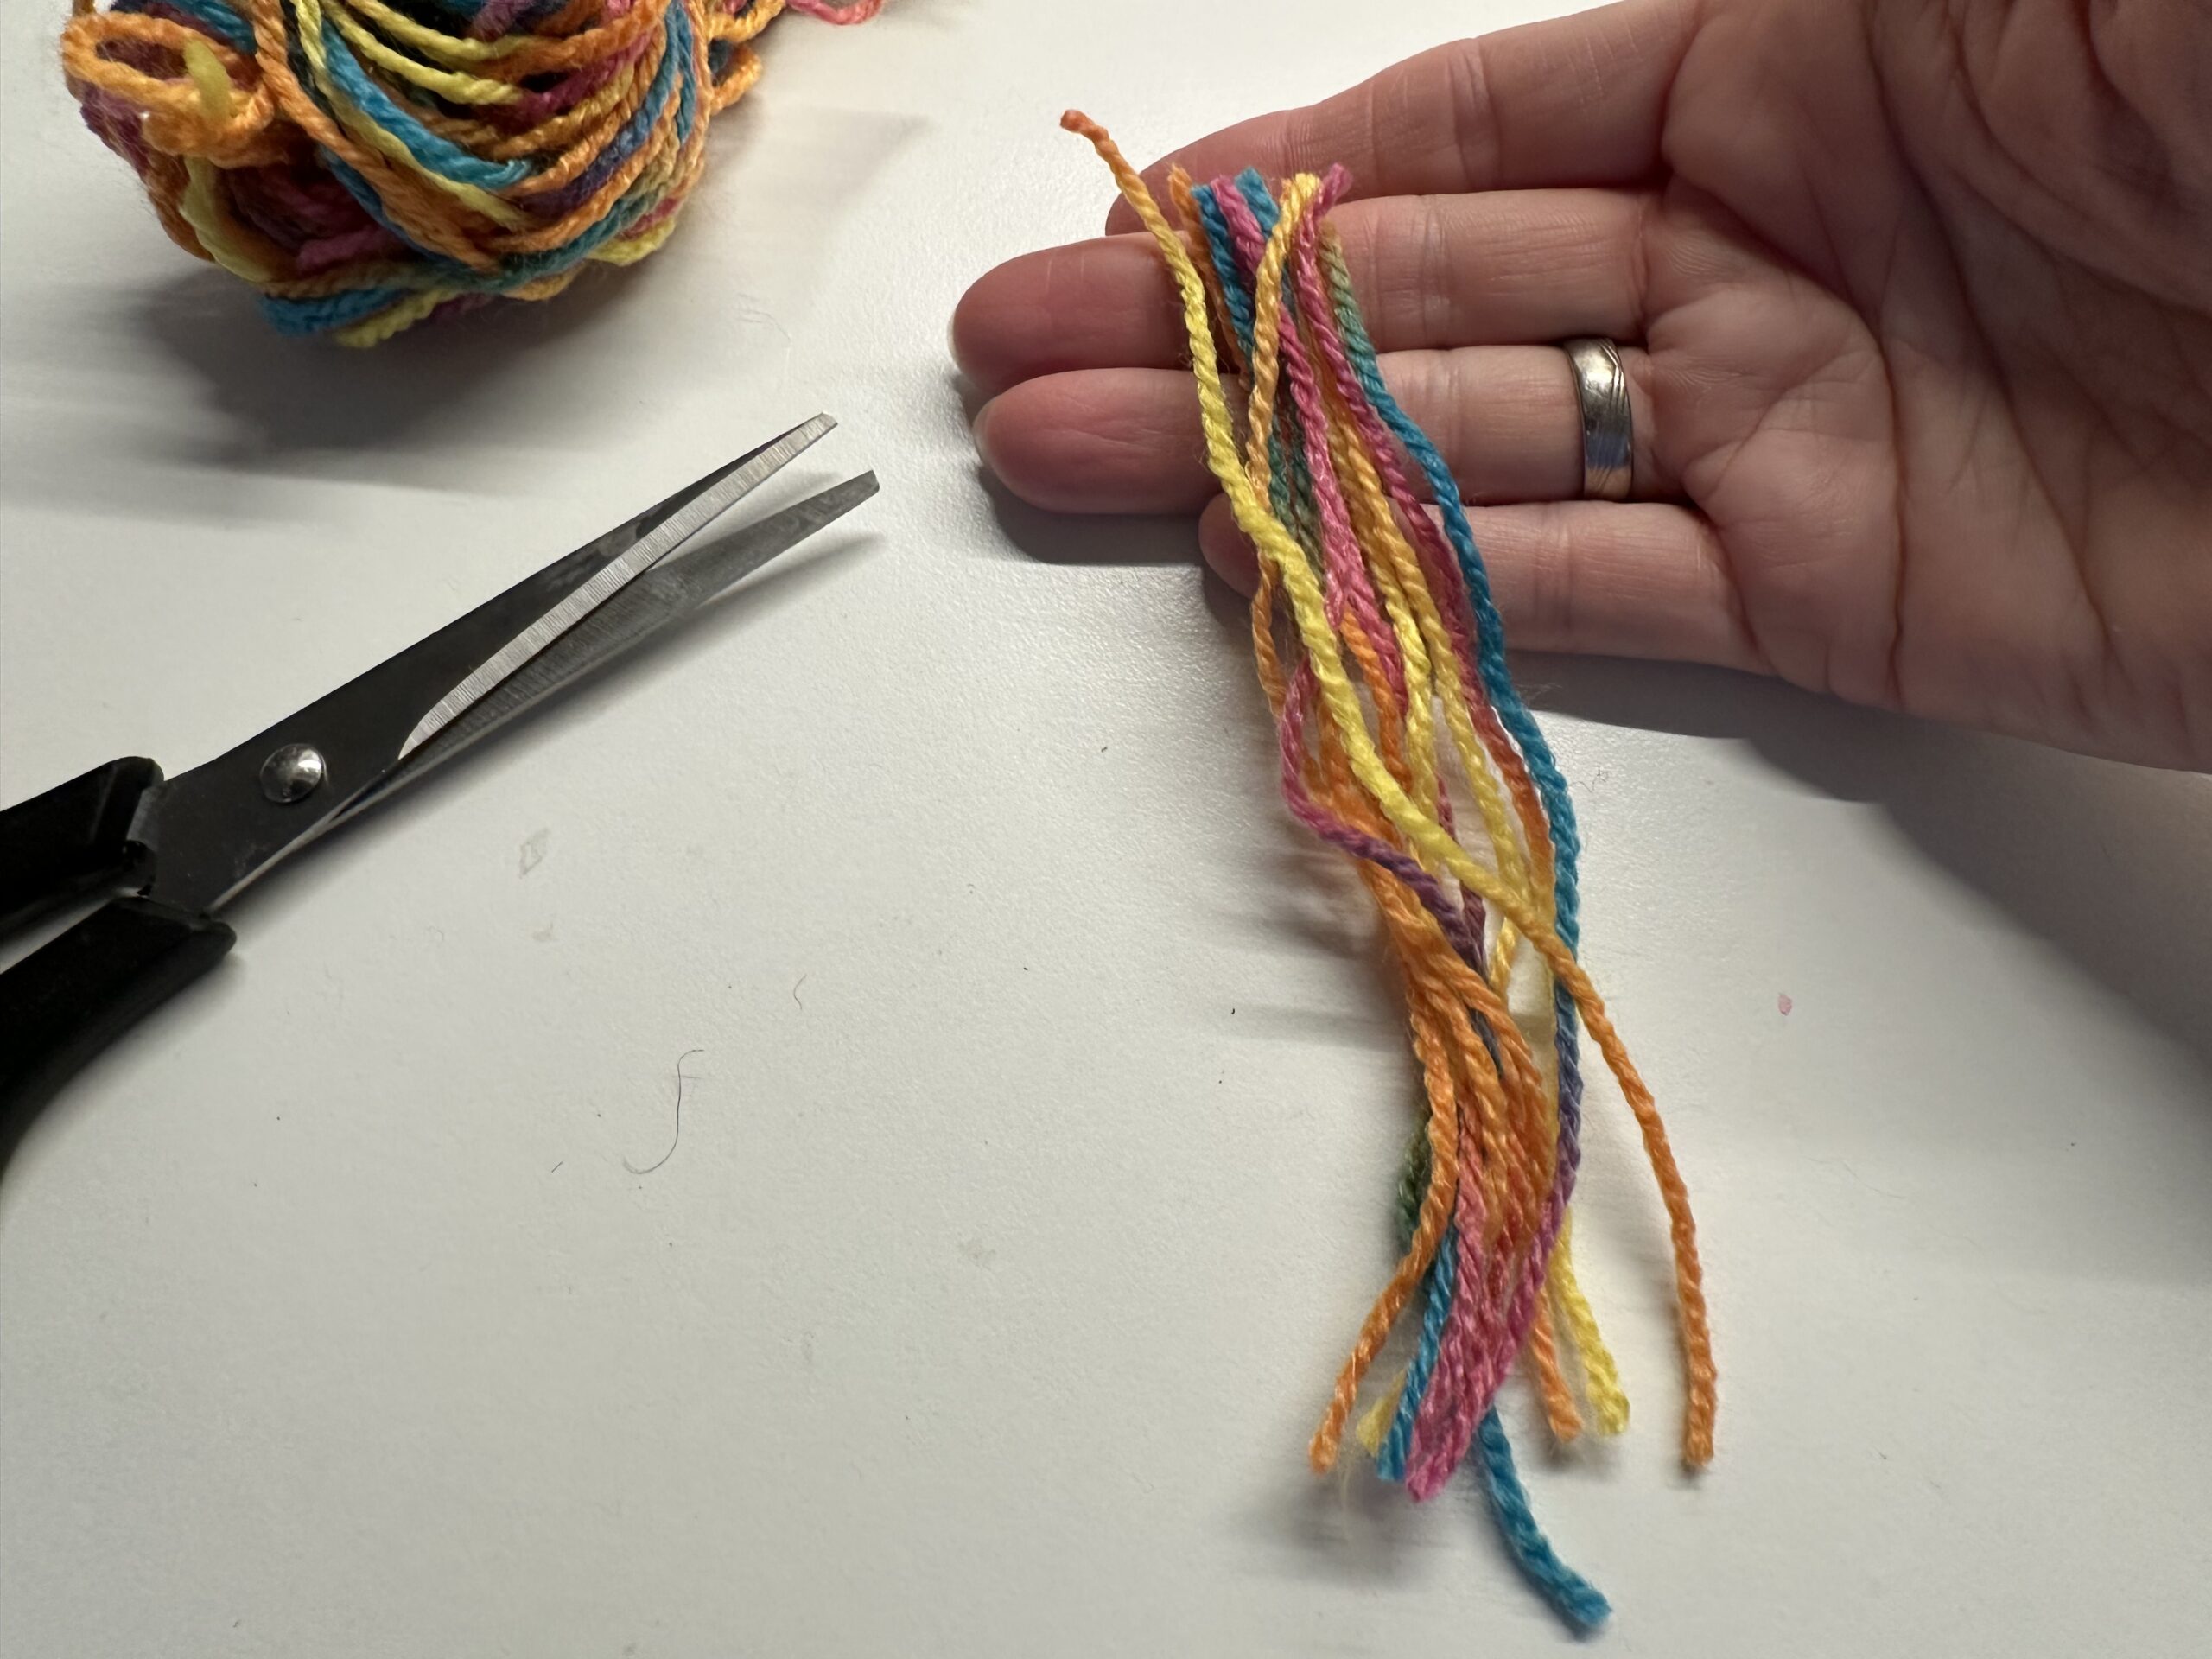
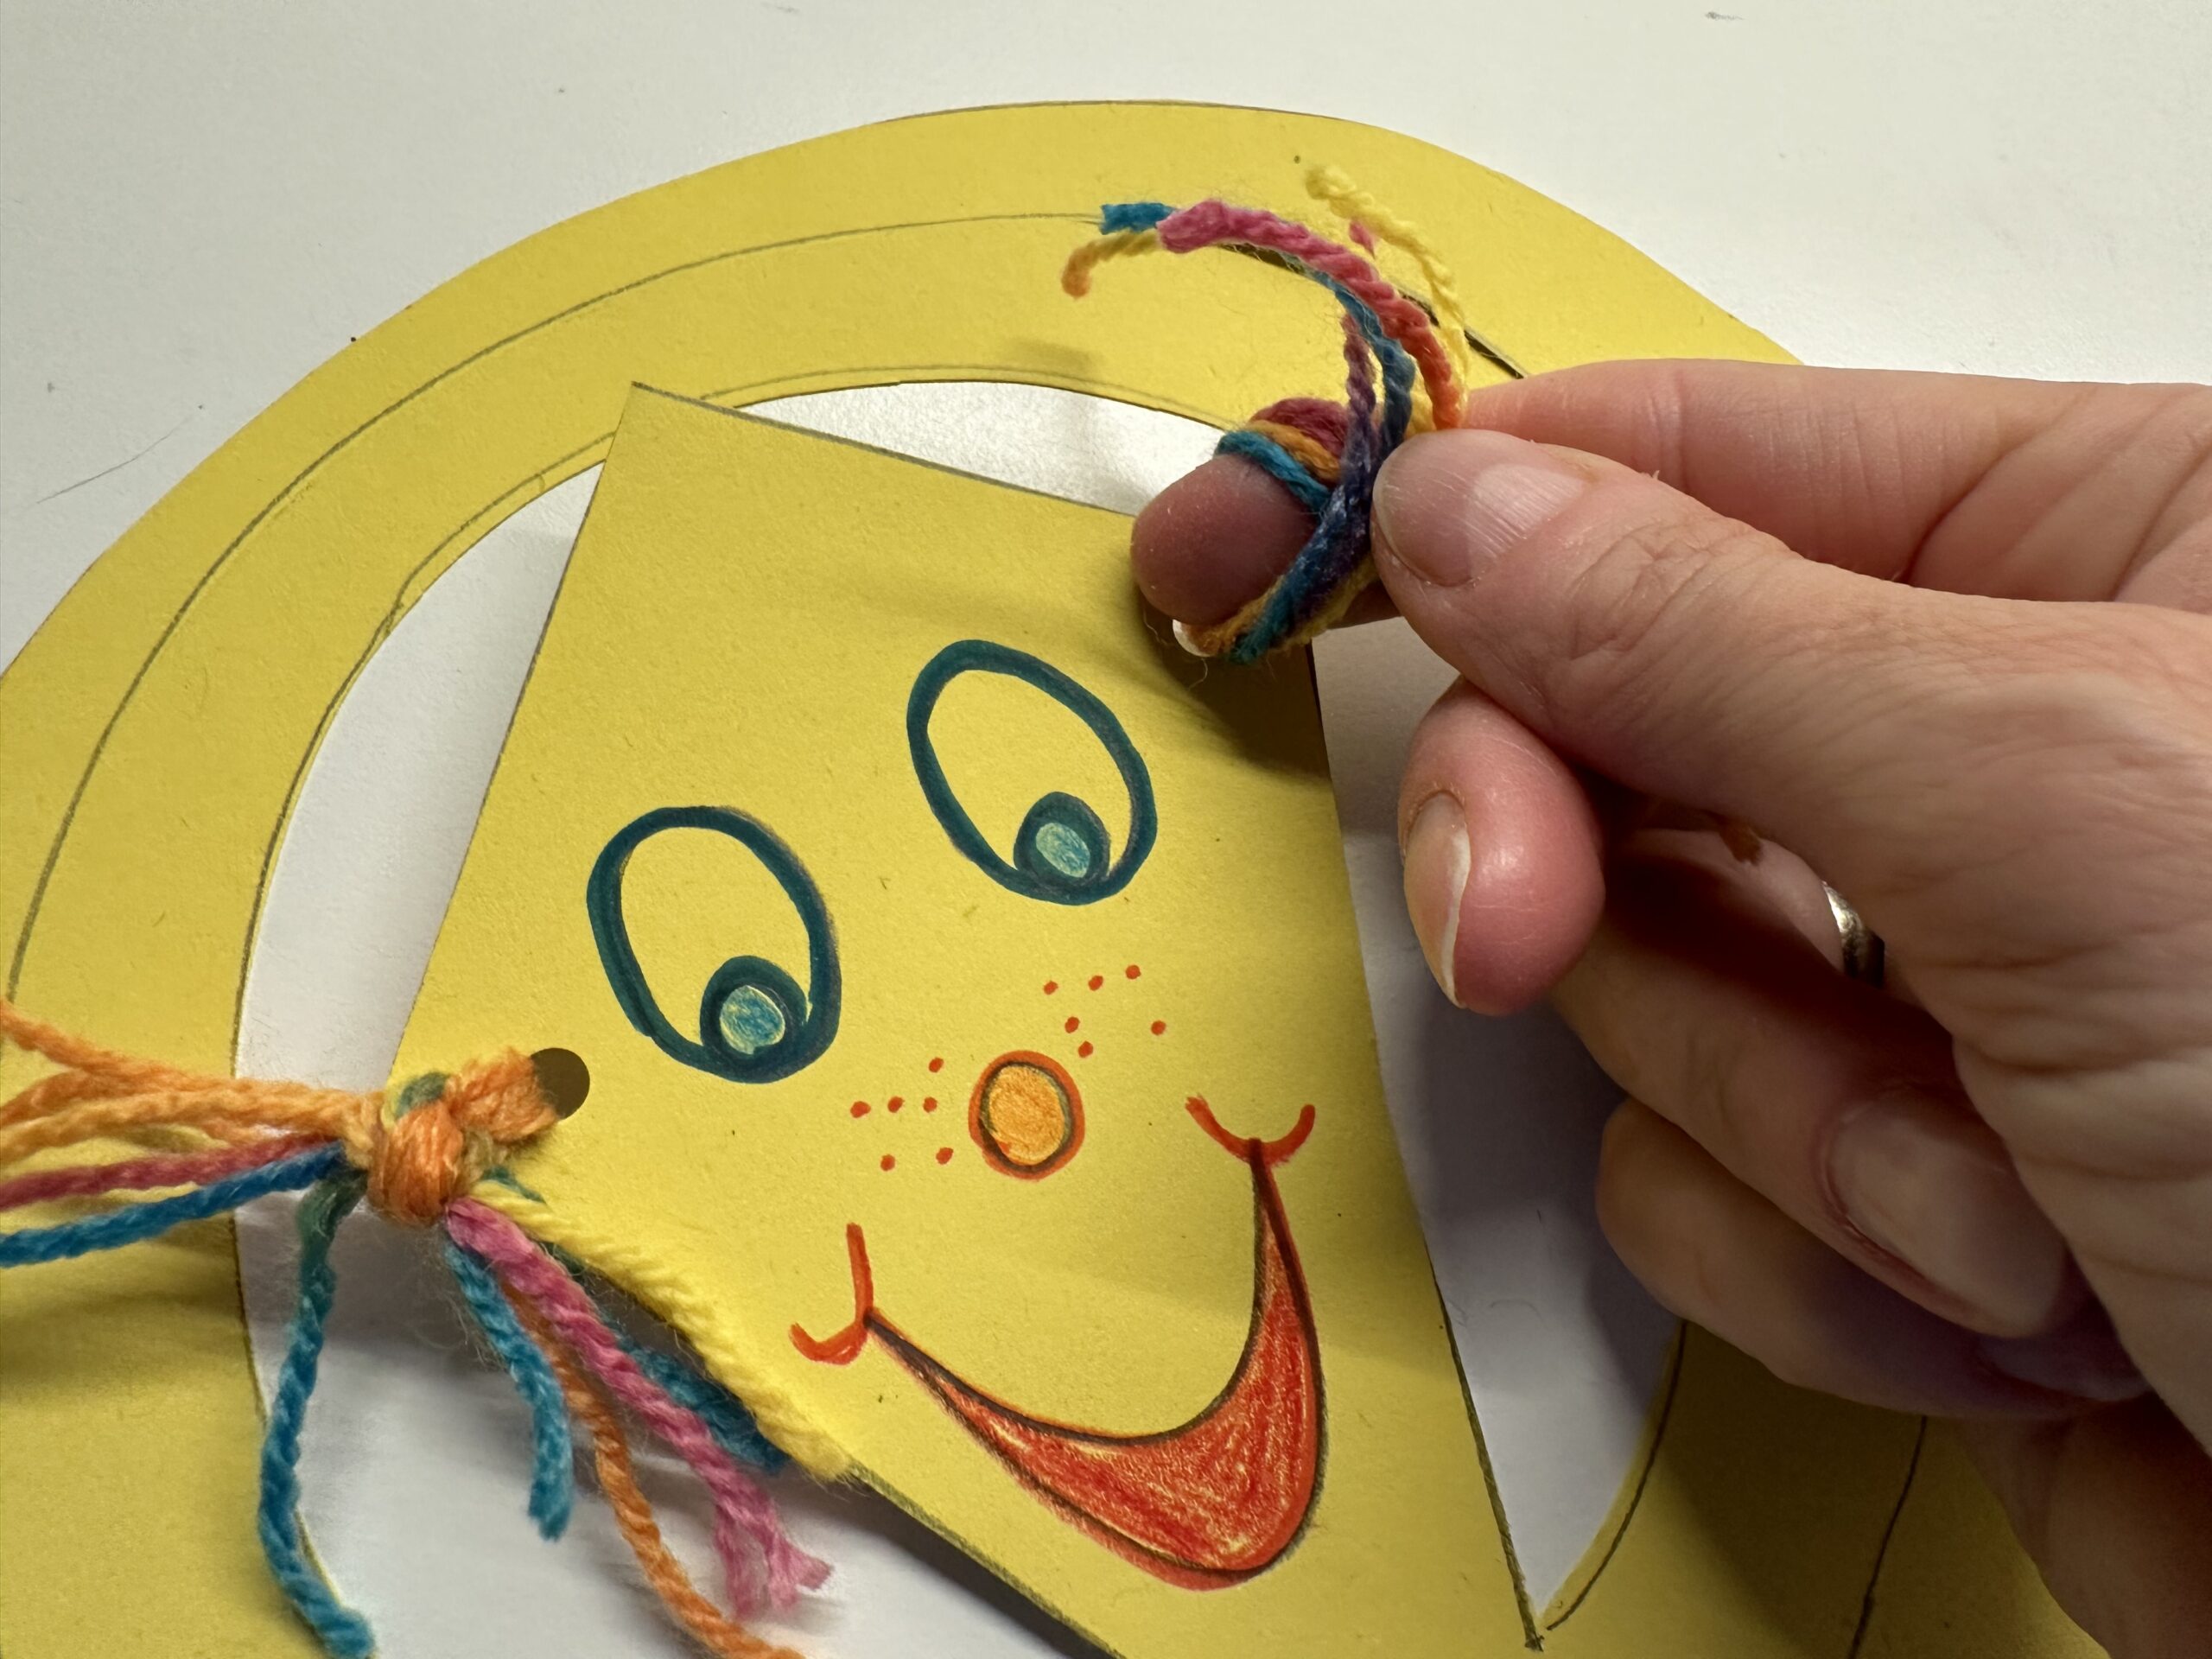
Wrap the wool thread several times loosely around the fingers of your hand. Hold the beginning of the thread well.

Bild zum Schritt 33 für das Bastel- und DIY-Abenteuer für Kinder: 'Wickel dir den Wollfaden mehrmals locker um die Finger deiner...'

32

Hold the thread bundle with your thumb and cut the thread off.

Bild zum Schritt 34 für das Bastel- und DIY-Abenteuer für Kinder: 'Halte das Fadenbündel mit dem Daumen fest und schneide den...'

33

Cut the entire bundle of threads with the scissors, so you'll fall for the same length of fan pieces.

Bild zum Schritt 35 für das Bastel- und DIY-Abenteuer für Kinder: 'Schneide mit der Schere das komplette Fadenbündel durch. So erhällst...'

34

Put the threads on the table.

Bild zum Schritt 36 für das Bastel- und DIY-Abenteuer für Kinder: 'Lege die Fäden auf den Tisch.'

35

Divide the threads into two identical parts.

Bild zum Schritt 37 für das Bastel- und DIY-Abenteuer für Kinder: 'Teile die Fäden in zwei gleiche Teile.'

36

Take a thread tangle and put it through the one hole. For this you can use a pen. With this you can push the threads more easily through the small hole.

Bild zum Schritt 38 für das Bastel- und DIY-Abenteuer für Kinder: 'Nimm ein Fadenbündle und stecke es durch das eine Loch....'

37

Pull the threads halfway through the hole.

Bild zum Schritt 39 für das Bastel- und DIY-Abenteuer für Kinder: 'Ziehe die Fäden zur Hälfte durch das Loch.'

38

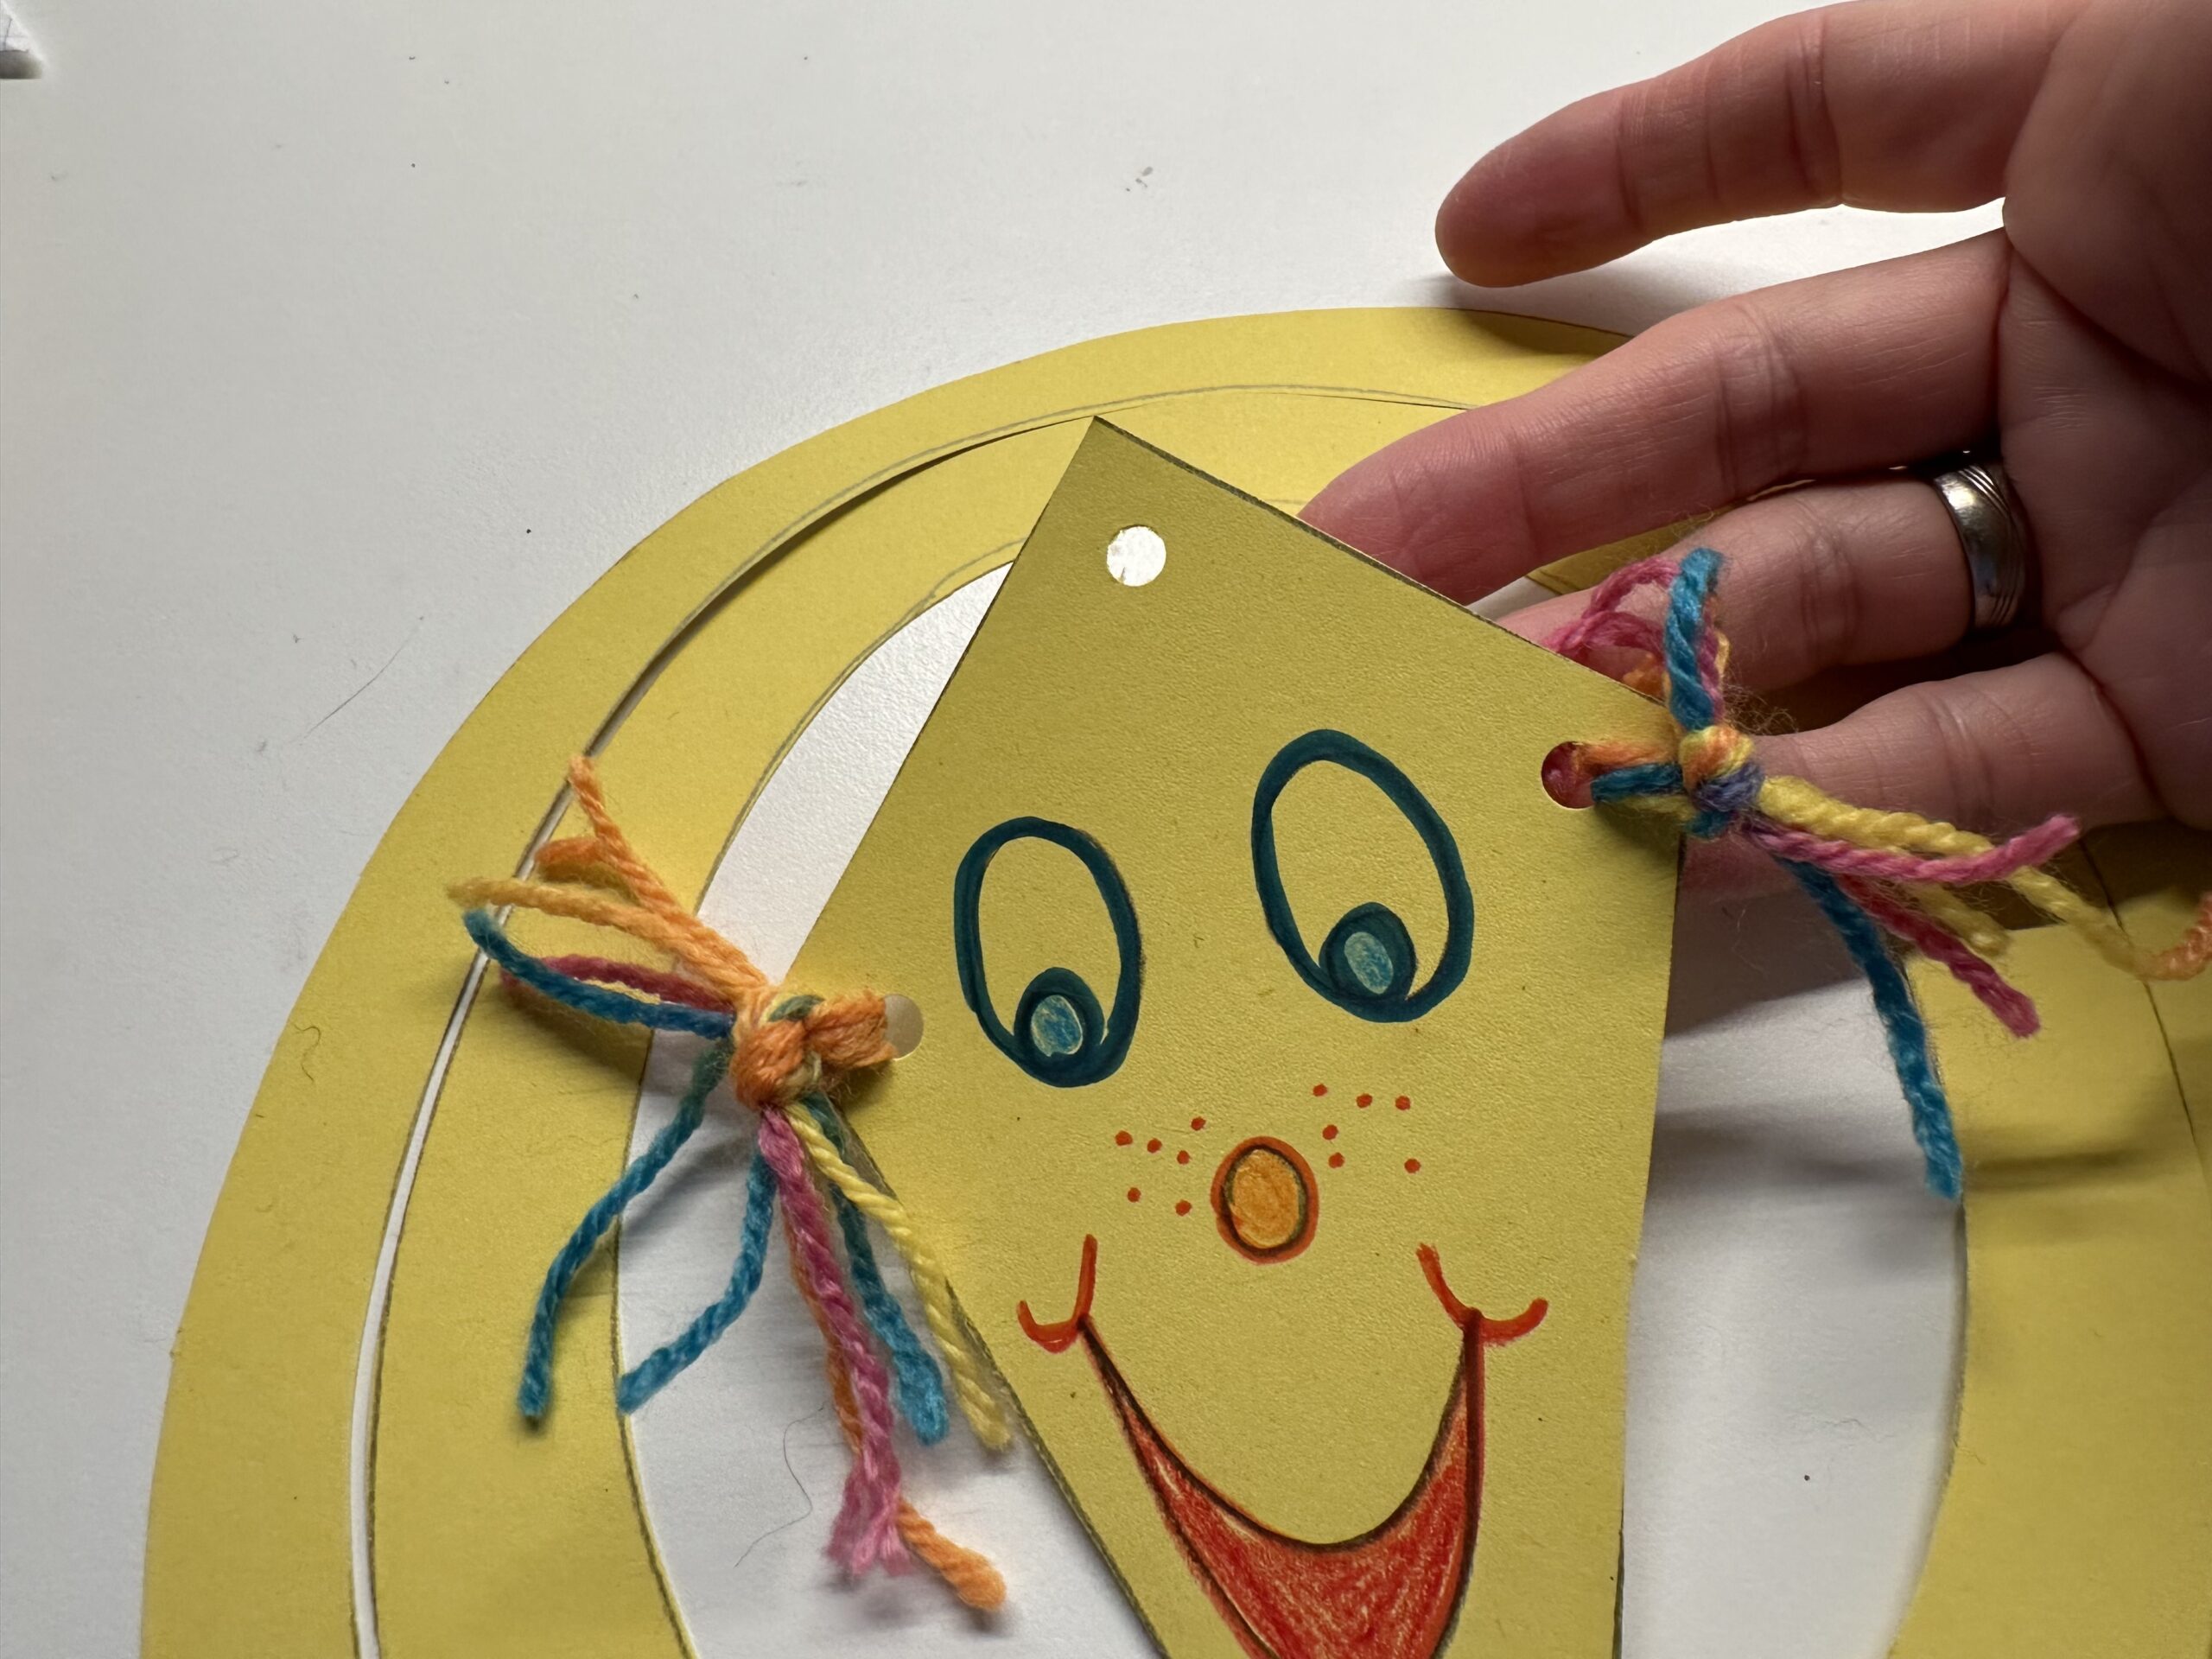
Place both ends of the thread on top of each other and knot them together. Possibly make a double knot.

Bild zum Schritt 40 für das Bastel- und DIY-Abenteuer für Kinder: 'Lege beide Fadenenden übereinander und verknote sie miteinander. Mache evtl....'

39

Direct the knot so that the overhanging threads stand sideways.

Bild zum Schritt 41 für das Bastel- und DIY-Abenteuer für Kinder: 'Richte den Knoten so, dass die überstehenden Fäden seitlich abstehen.'

40

Repeat the whole with the second thread bundle on the opposite hole.

Bild zum Schritt 42 für das Bastel- und DIY-Abenteuer für Kinder: 'Wiederhole das ganze auch mit dem zweiten Fadenbündel am gegenüberliegenden...'

41

Make a knot here, too.

Bild zum Schritt 43 für das Bastel- und DIY-Abenteuer für Kinder: 'Mache auch hier einen Knoten.'

42

You may still be able to shorten the remaining Franzes with the scissors.

Bild zum Schritt 44 für das Bastel- und DIY-Abenteuer für Kinder: 'Die überstehenden Franzen kannst du evtl. noch mit der Schere...'

43

Make a hole with the hole at the upper end of the dragon's head. You can hang the dragon on this one later.

Bild zum Schritt 45 für das Bastel- und DIY-Abenteuer für Kinder: 'Mache mit dem Locher am oberen Ende des Drachenkopfes mittig...'

44

That's what it looks like.

Bild zum Schritt 46 für das Bastel- und DIY-Abenteuer für Kinder: 'So sieht das dann aus.'

45

Only small loops are missing on the kite line. You can easily make them out of triangles. Cut small triangles of clay paper remnants. These should be 2 to 3 centimeters in size. You can also use different colors, so your dragon becomes beautiful colorful.

Bild zum Schritt 47 für das Bastel- und DIY-Abenteuer für Kinder: 'An der Drachenschnur fehlen nun nur noch kleine Schleifen. Diese...'

46

If your dragon lies in front of you, the kite line is still flat on the table. So you should leave it lying. Because here you can easily stick the loops on.
Take a felt pen and paint points on the kite line. Leave at least 5 centimetres of space between the individual points, so the loops have a good distance. Follow the kite line circularly when painting the points and start painting in the middle (see picture).

Bild zum Schritt 48 für das Bastel- und DIY-Abenteuer für Kinder: 'Wenn dein Drache vor dir liegt, liegt auch die Drachenschnur...'

47

The dots show you where the loops are when you stick on.

Bild zum Schritt 49 für das Bastel- und DIY-Abenteuer für Kinder: 'Die Punkte zeigen dir beim Aufkleben wo die Schleifen sitzen.'

48

At each point, two small triangles are glued inwards with a tip, creating a small loop. Make sure that you only apply glue on the painted point and not on the triangles.

Bild zum Schritt 50 für das Bastel- und DIY-Abenteuer für Kinder: 'An jedem Punkt werden nun zwei kleine Dreiecke mit einer...'

49

That's what your finished dragon might look like.

Bild zum Schritt 51 für das Bastel- und DIY-Abenteuer für Kinder: 'So könnte dein fertiger Drache aussehen.'

50

Take the dragon in your hand and slowly lift it up.

Bild zum Schritt 52 für das Bastel- und DIY-Abenteuer für Kinder: 'Nimm den Drache in die Hand und hebe ihn langsam...'

51

So the kite line unfolds. Make sure that you don't tear off accidentally glued loops again. Be very careful with it.

Bild zum Schritt 53 für das Bastel- und DIY-Abenteuer für Kinder: 'So entfaltet sich die Drachenschnur. Achte darauf, dass du nicht...'

52

Your dragon is ready. Find a place to hang up. Evlt. you can hang it up with a cord on a curtain rod. At the window it can move and "dance" nicely in the airflow of the radiator.

Bild zum Schritt 54 für das Bastel- und DIY-Abenteuer für Kinder: 'Dein Drache ist fertig. Suche dir einen Platz zum Aufhängen....'

Materials

 1 Paper and paperboardNot less than 20cm x 20cm
 Unwrought paper Colorful
 1 Cardboard sheet 10cm x 10cm
 1 Cake plateApprox. 20cm diameter
 1 Pencil
 Pencils and felt pens
 1 Glue
 1 Ruler
 1 Builder's pad
 Coloured wool
 1 Perforator
All links marked with a shopping cart lead to Amazon - here we have selected products that we would order ourselves and in part also ordered. In a qualified purchase via the advertising link, we as Amazon partner receive a commission, for you there are no costs. You thus support our cost- and advertising banner-free, educational offer.

Directions

1

Put everything in place.

2

The round cake plate should have about 20 cm diameter. You can also use a bowl or a pot in size.

Bild zum Schritt 2 für das Bastel- und DIY-Abenteuer für Kinder: 'Der runde Kuchenteller sollte ca. 20 cm Durchmesser haben. Du...'

3

Get a colorful monochrome clay paper ready.

Bild zum Schritt 3 für das Bastel- und DIY-Abenteuer für Kinder: 'Lege dir ein buntes einfarbiges Tonpapier bereit.'

4

Place the plate (or bowl) on the paper and paint it with a pencil.
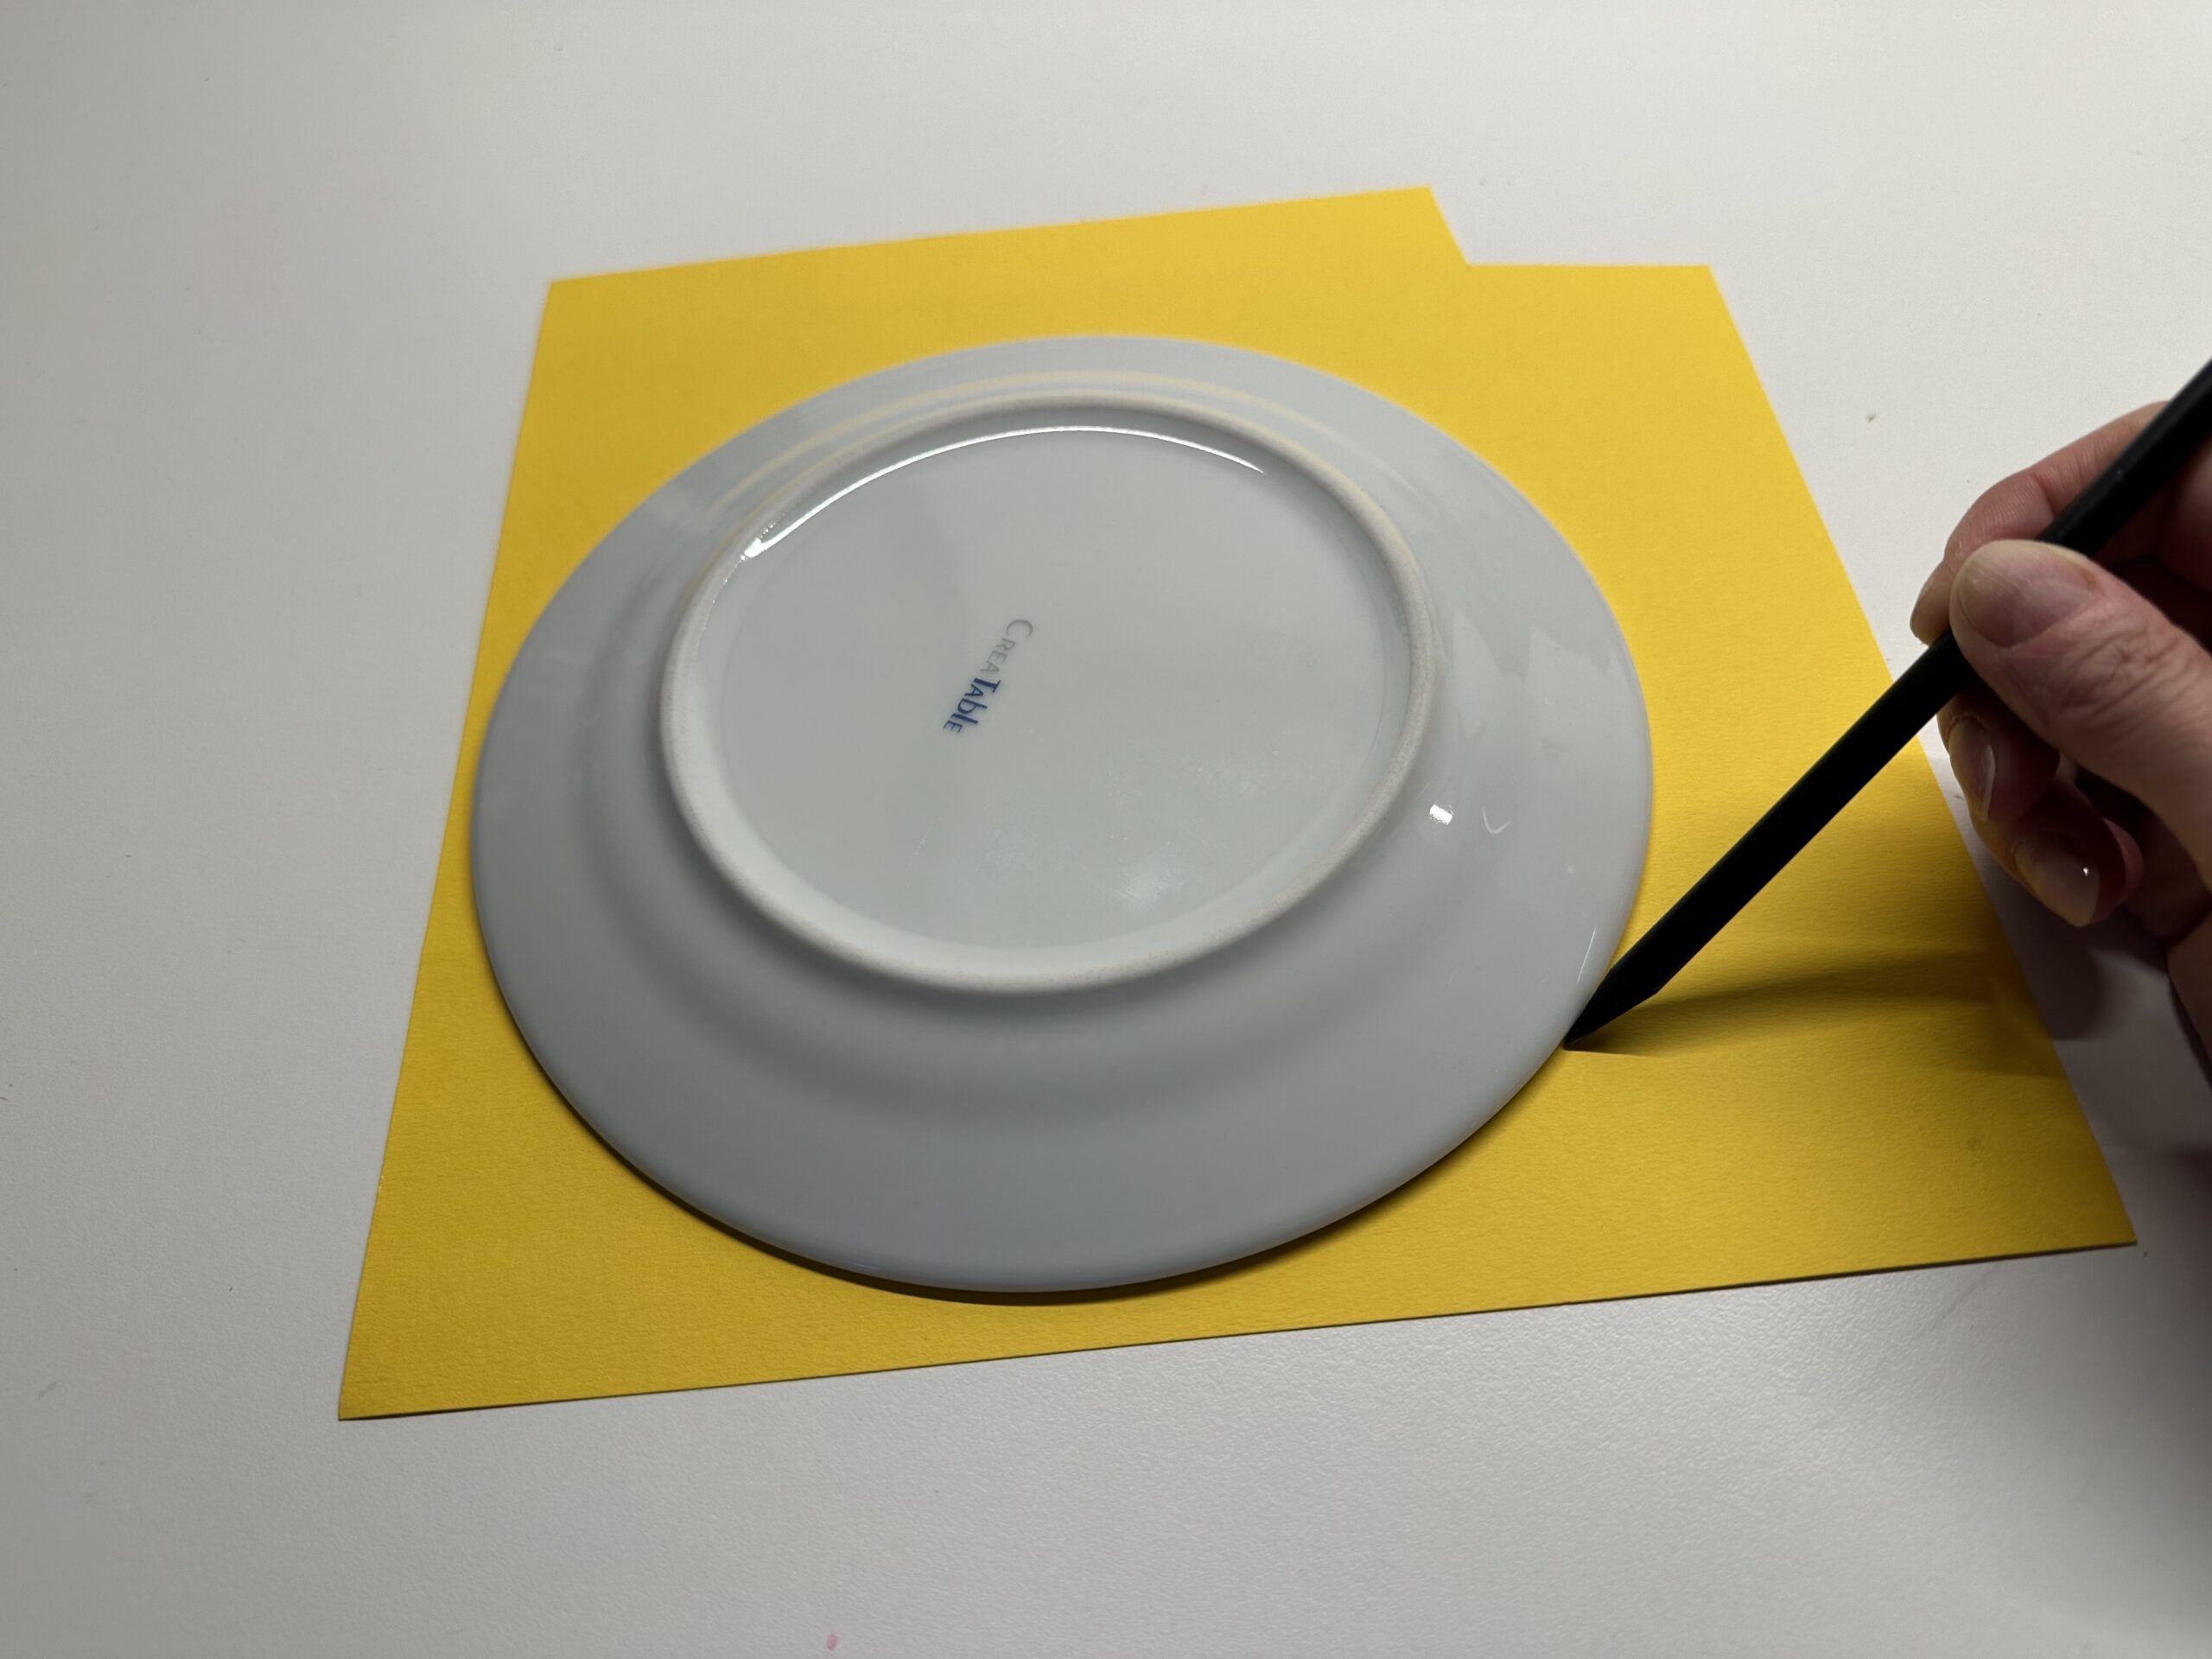
Bild zum Schritt 4 für das Bastel- und DIY-Abenteuer für Kinder: 'Lege den Teller (oder deine Schüssel) auf das Papier und...'

5

That's how you get a tape loop.

Bild zum Schritt 5 für das Bastel- und DIY-Abenteuer für Kinder: 'So erhältst du einen Tonpapierkreis.'

The dragon template is made of a square paper with 10 centimetres.
6

You need a sheet of paper in the size of 10cm x 10cm.
The best way is to use a checkered leaf, here you can cut along the lines.
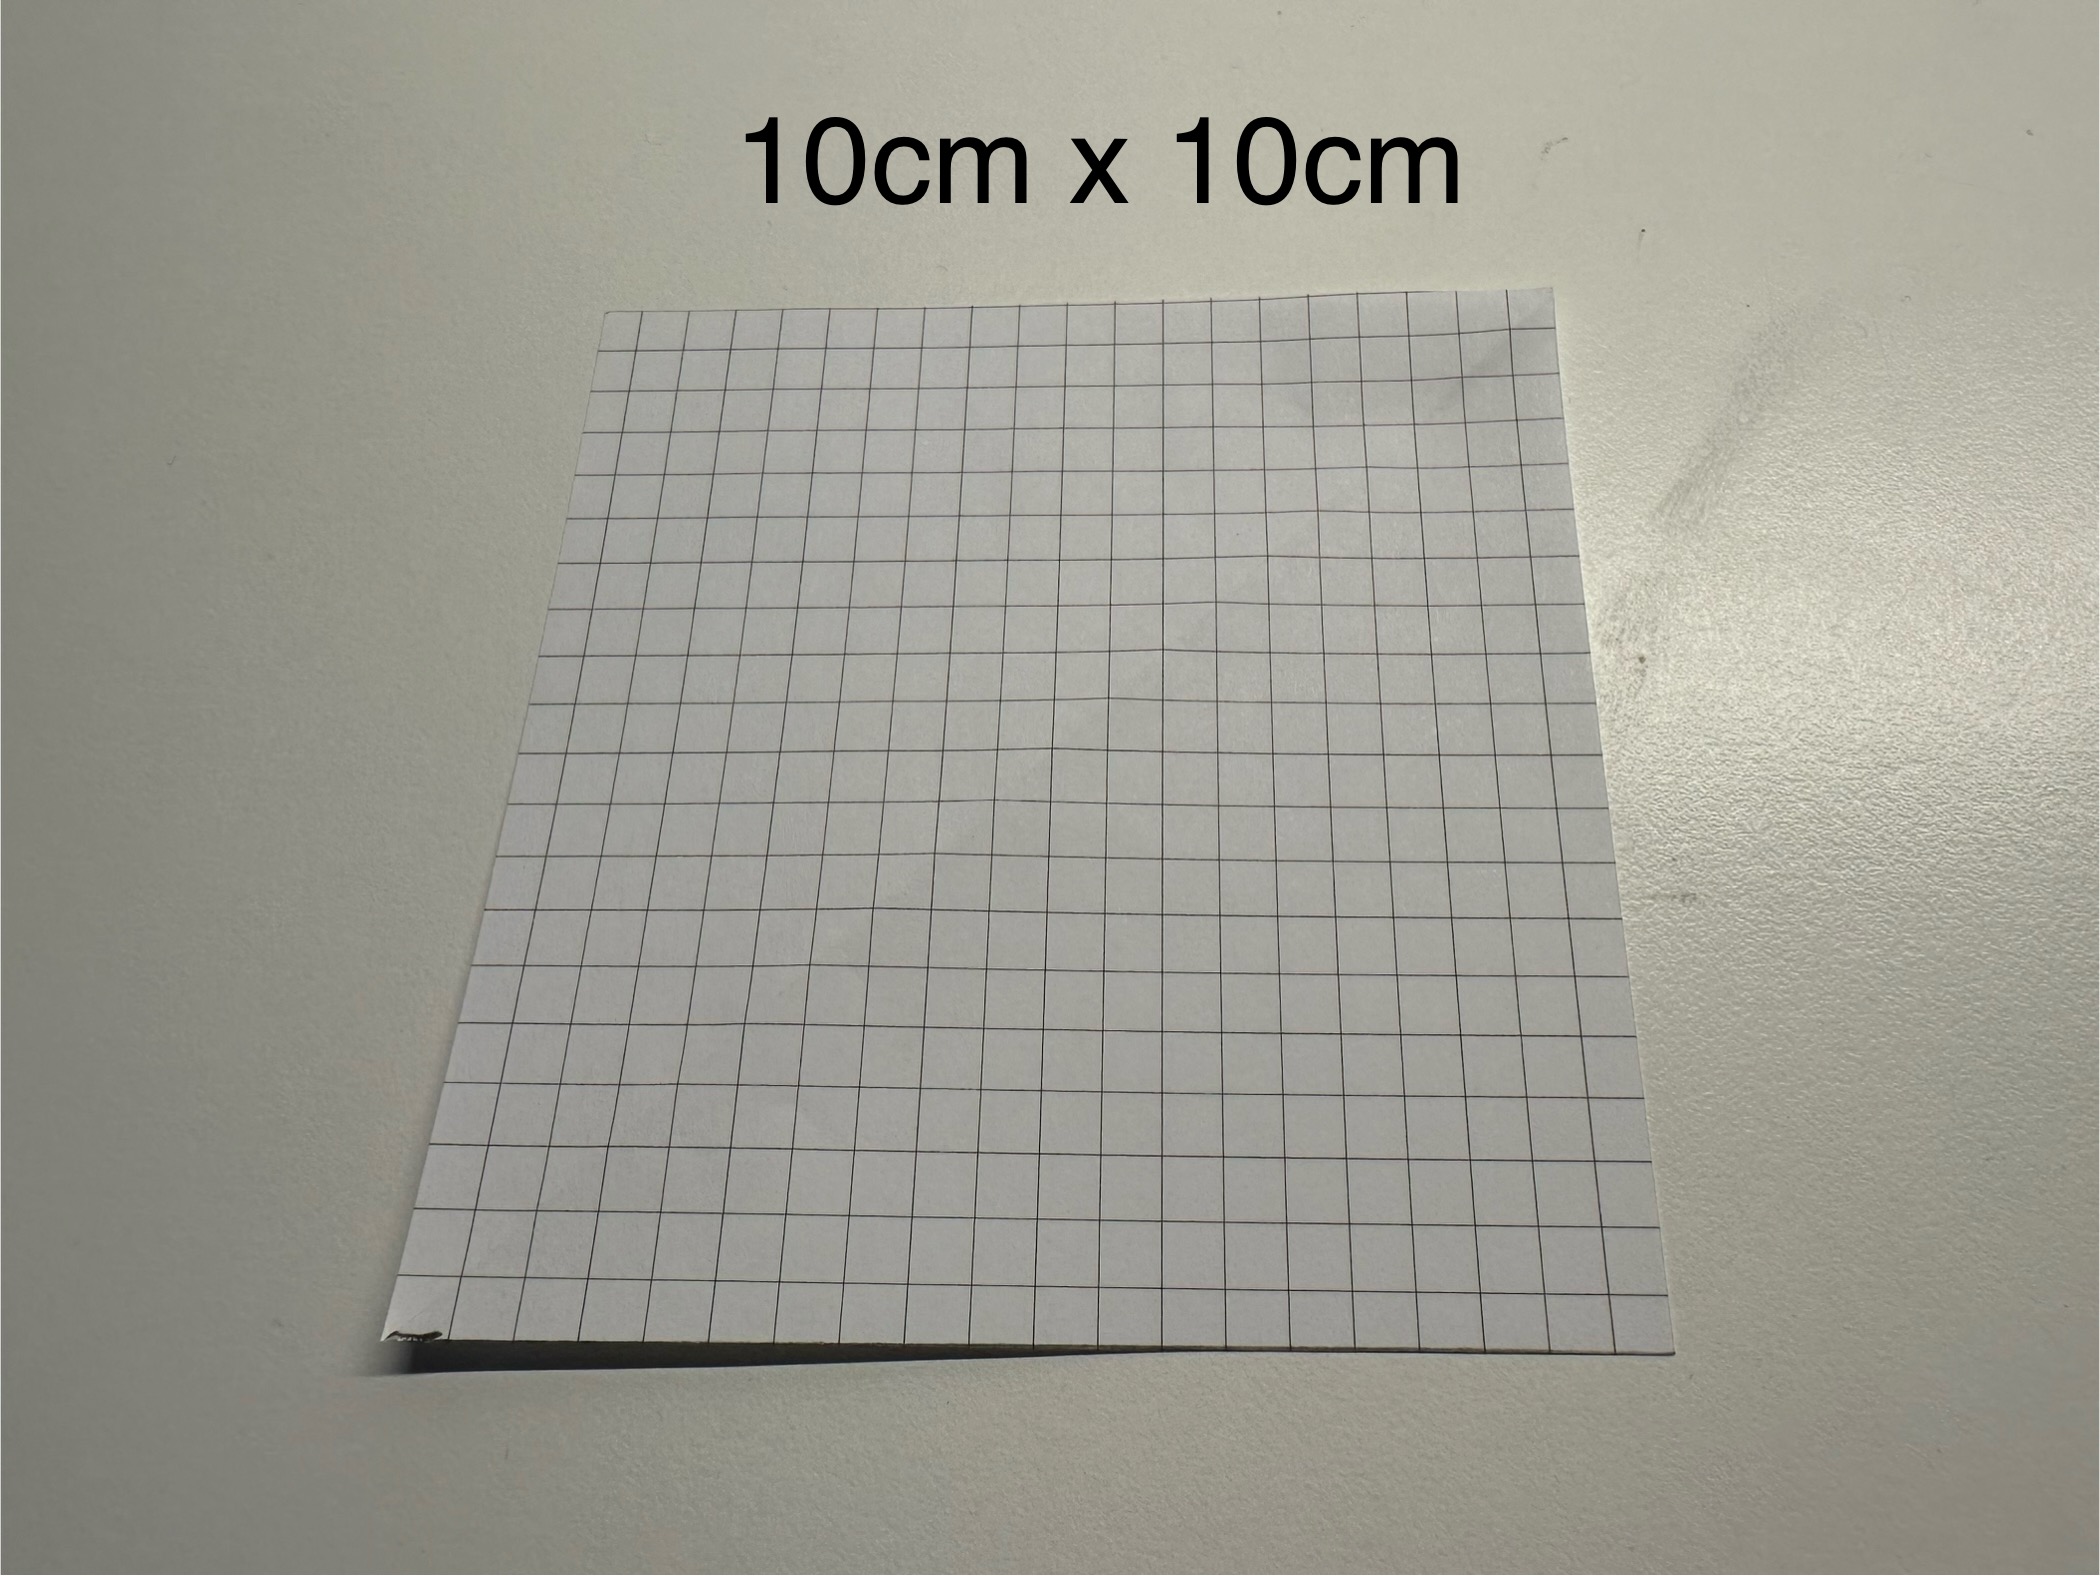
Bild zum Schritt 7 für das Bastel- und DIY-Abenteuer für Kinder: 'Du benötigst ein Blatt Papier in der Größe von 10cm...'

7

Place the square with the tip in front of you. Fold the lower tip of the leaf upwards and place it exactly on the upper tip. A triangle is created.
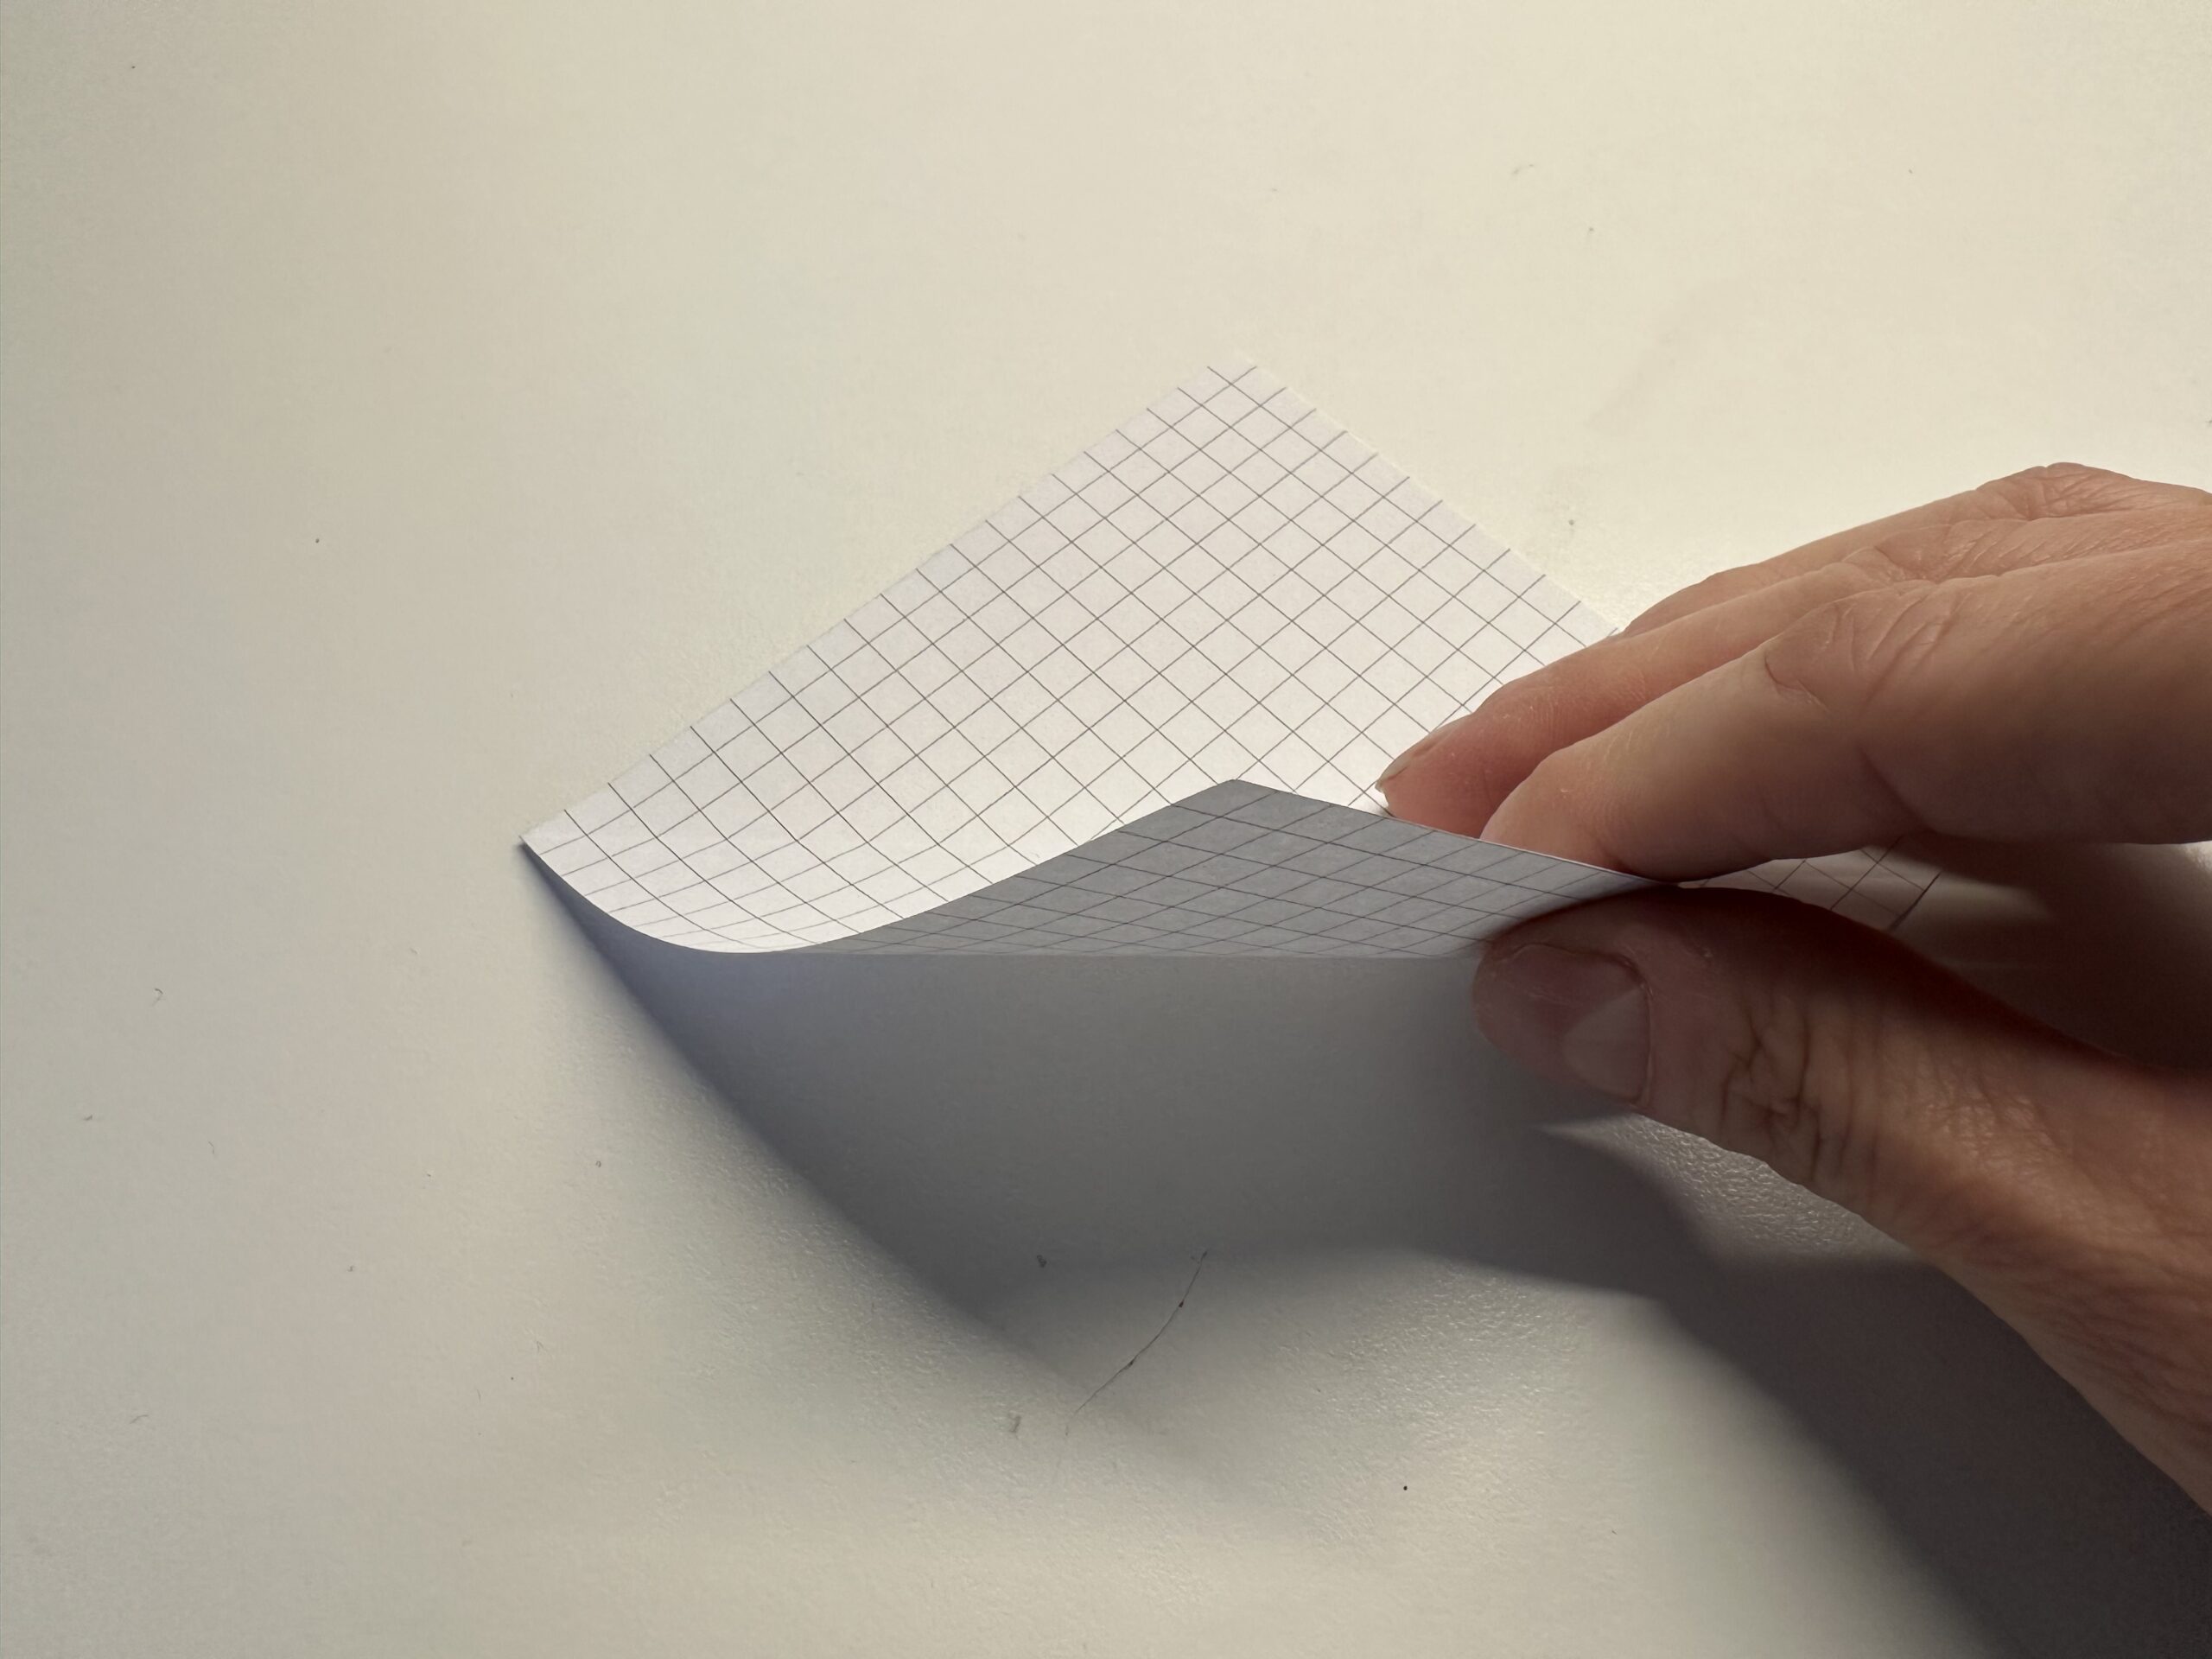
Bild zum Schritt 8 für das Bastel- und DIY-Abenteuer für Kinder: 'Lege das Quadrat mit der Spitze zu dir vor dich...'

8

Strip the fracture of the folded triangle smoothly.
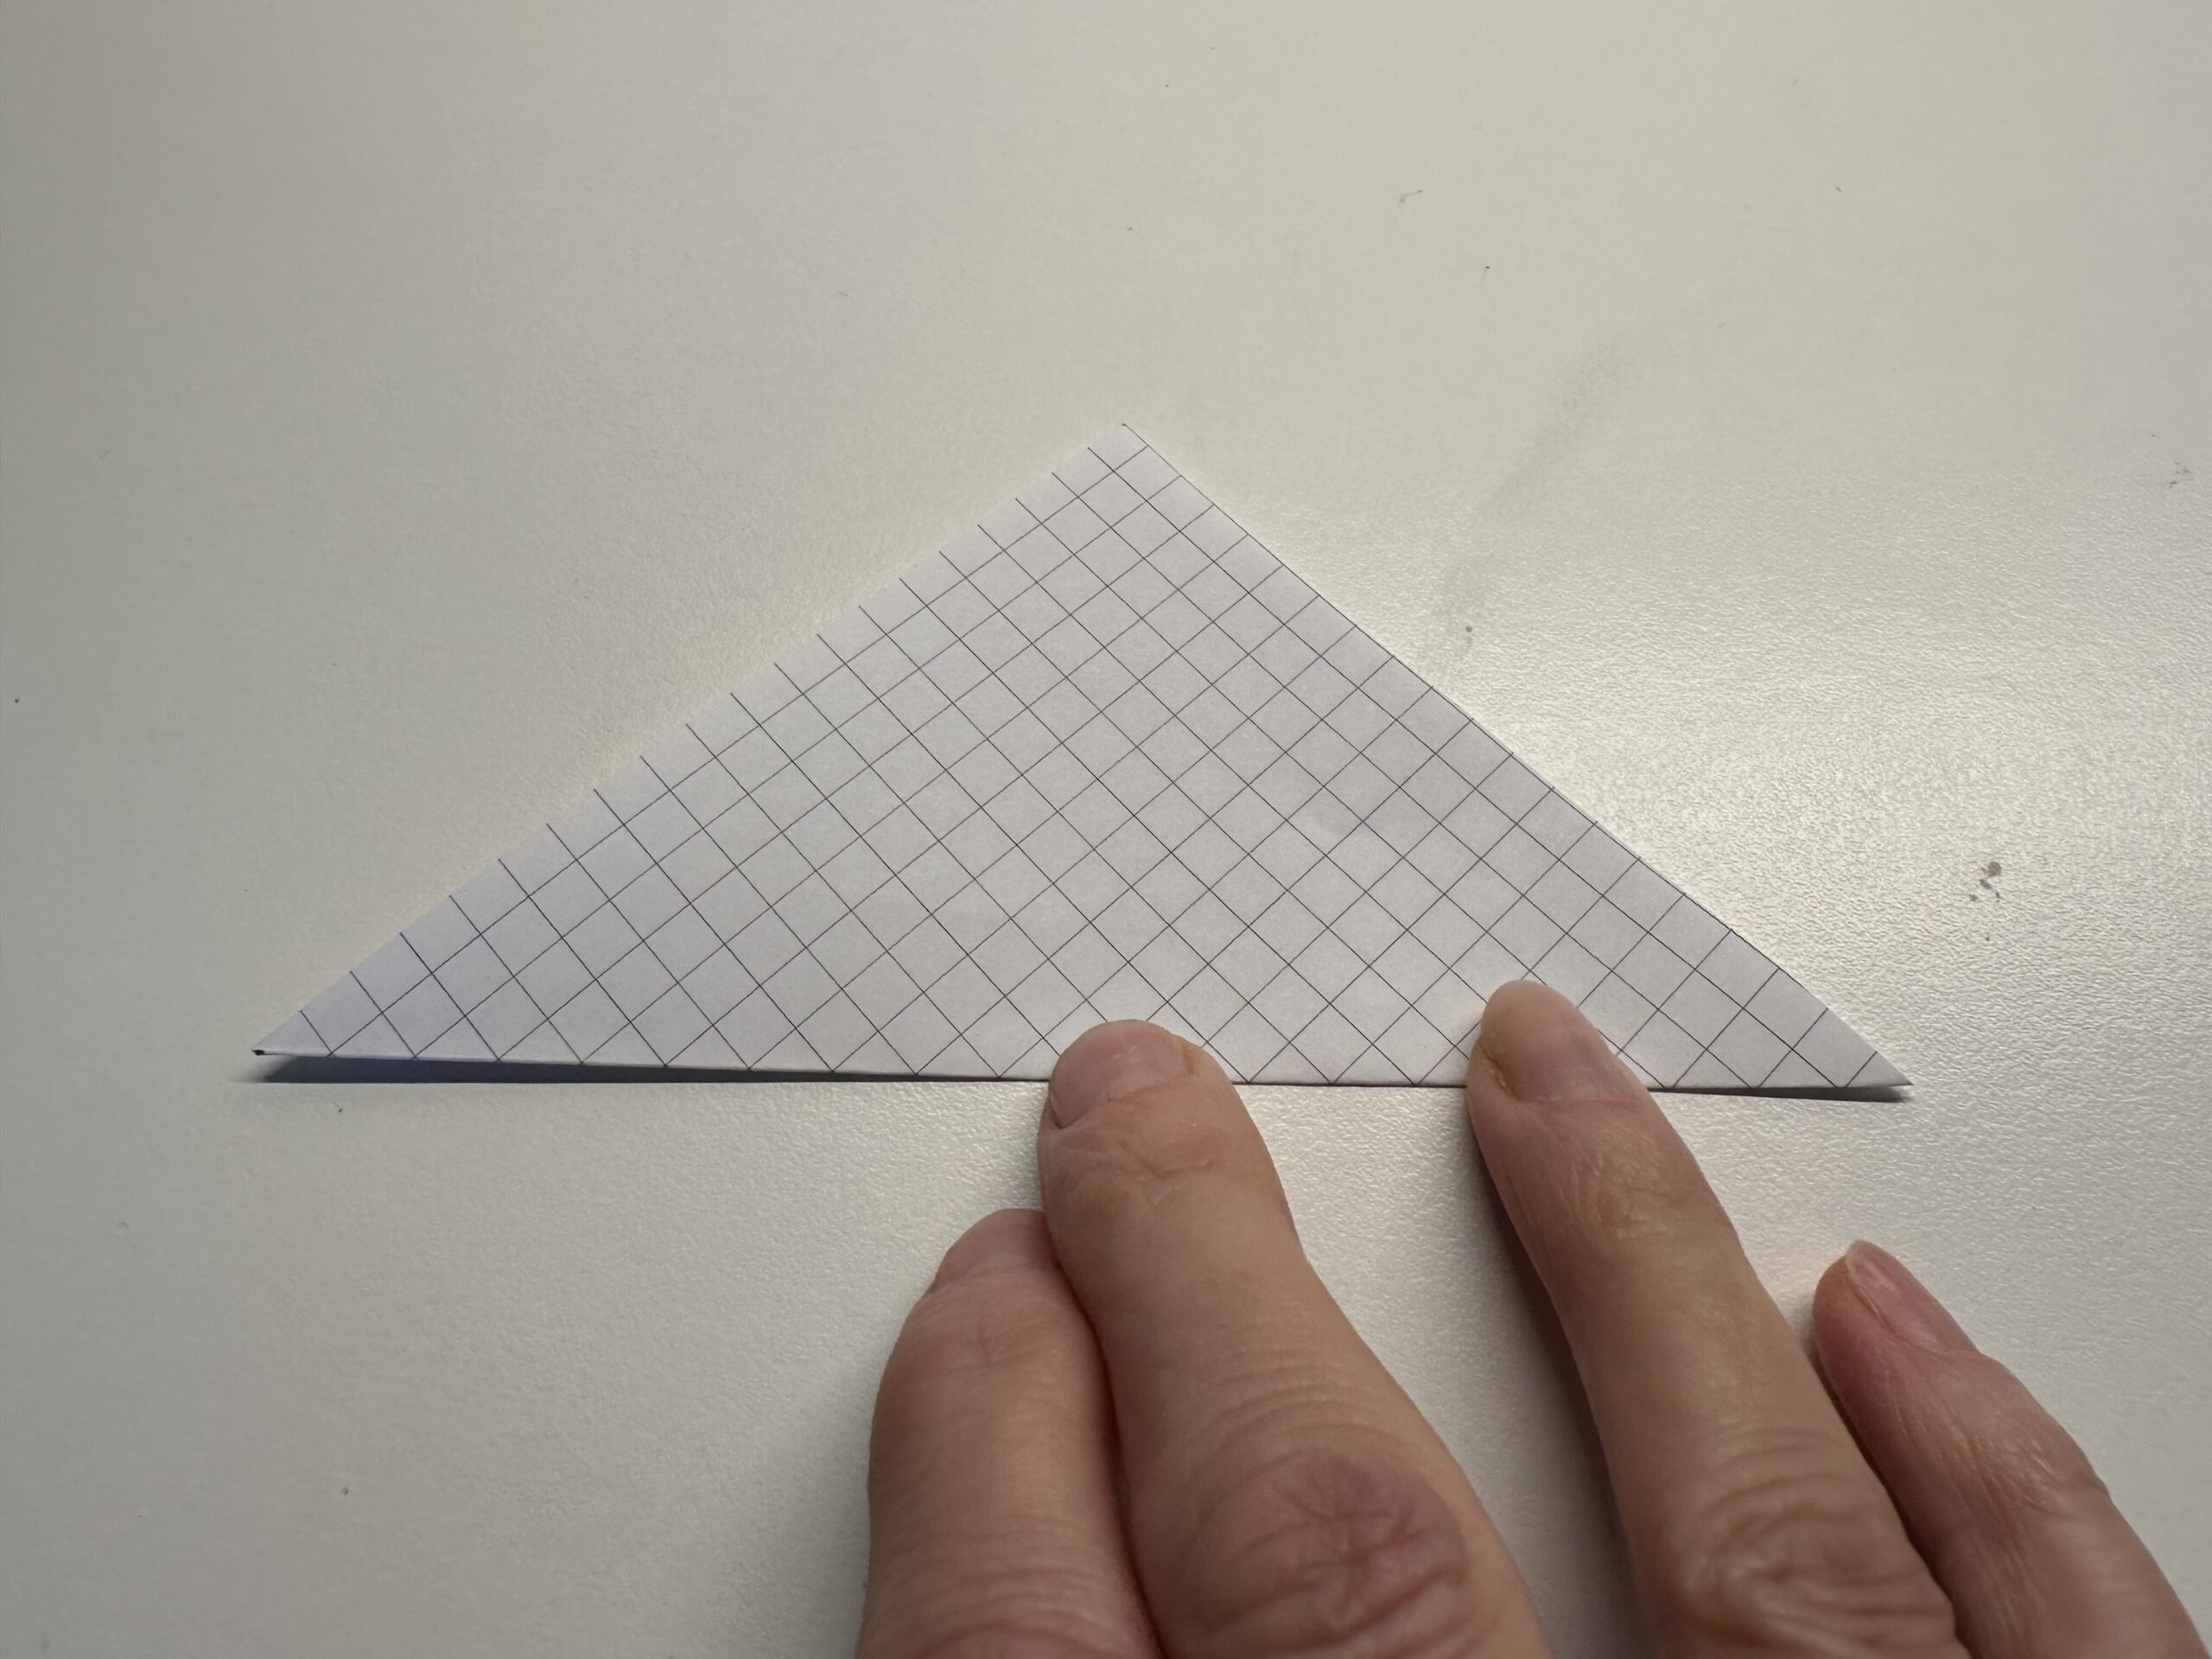
Bild zum Schritt 9 für das Bastel- und DIY-Abenteuer für Kinder: 'Streife den Bruch des gefalteten Dreiecks glatt.'

9

Shut up the triangle again, put it in front of you so that the breakout points to you.
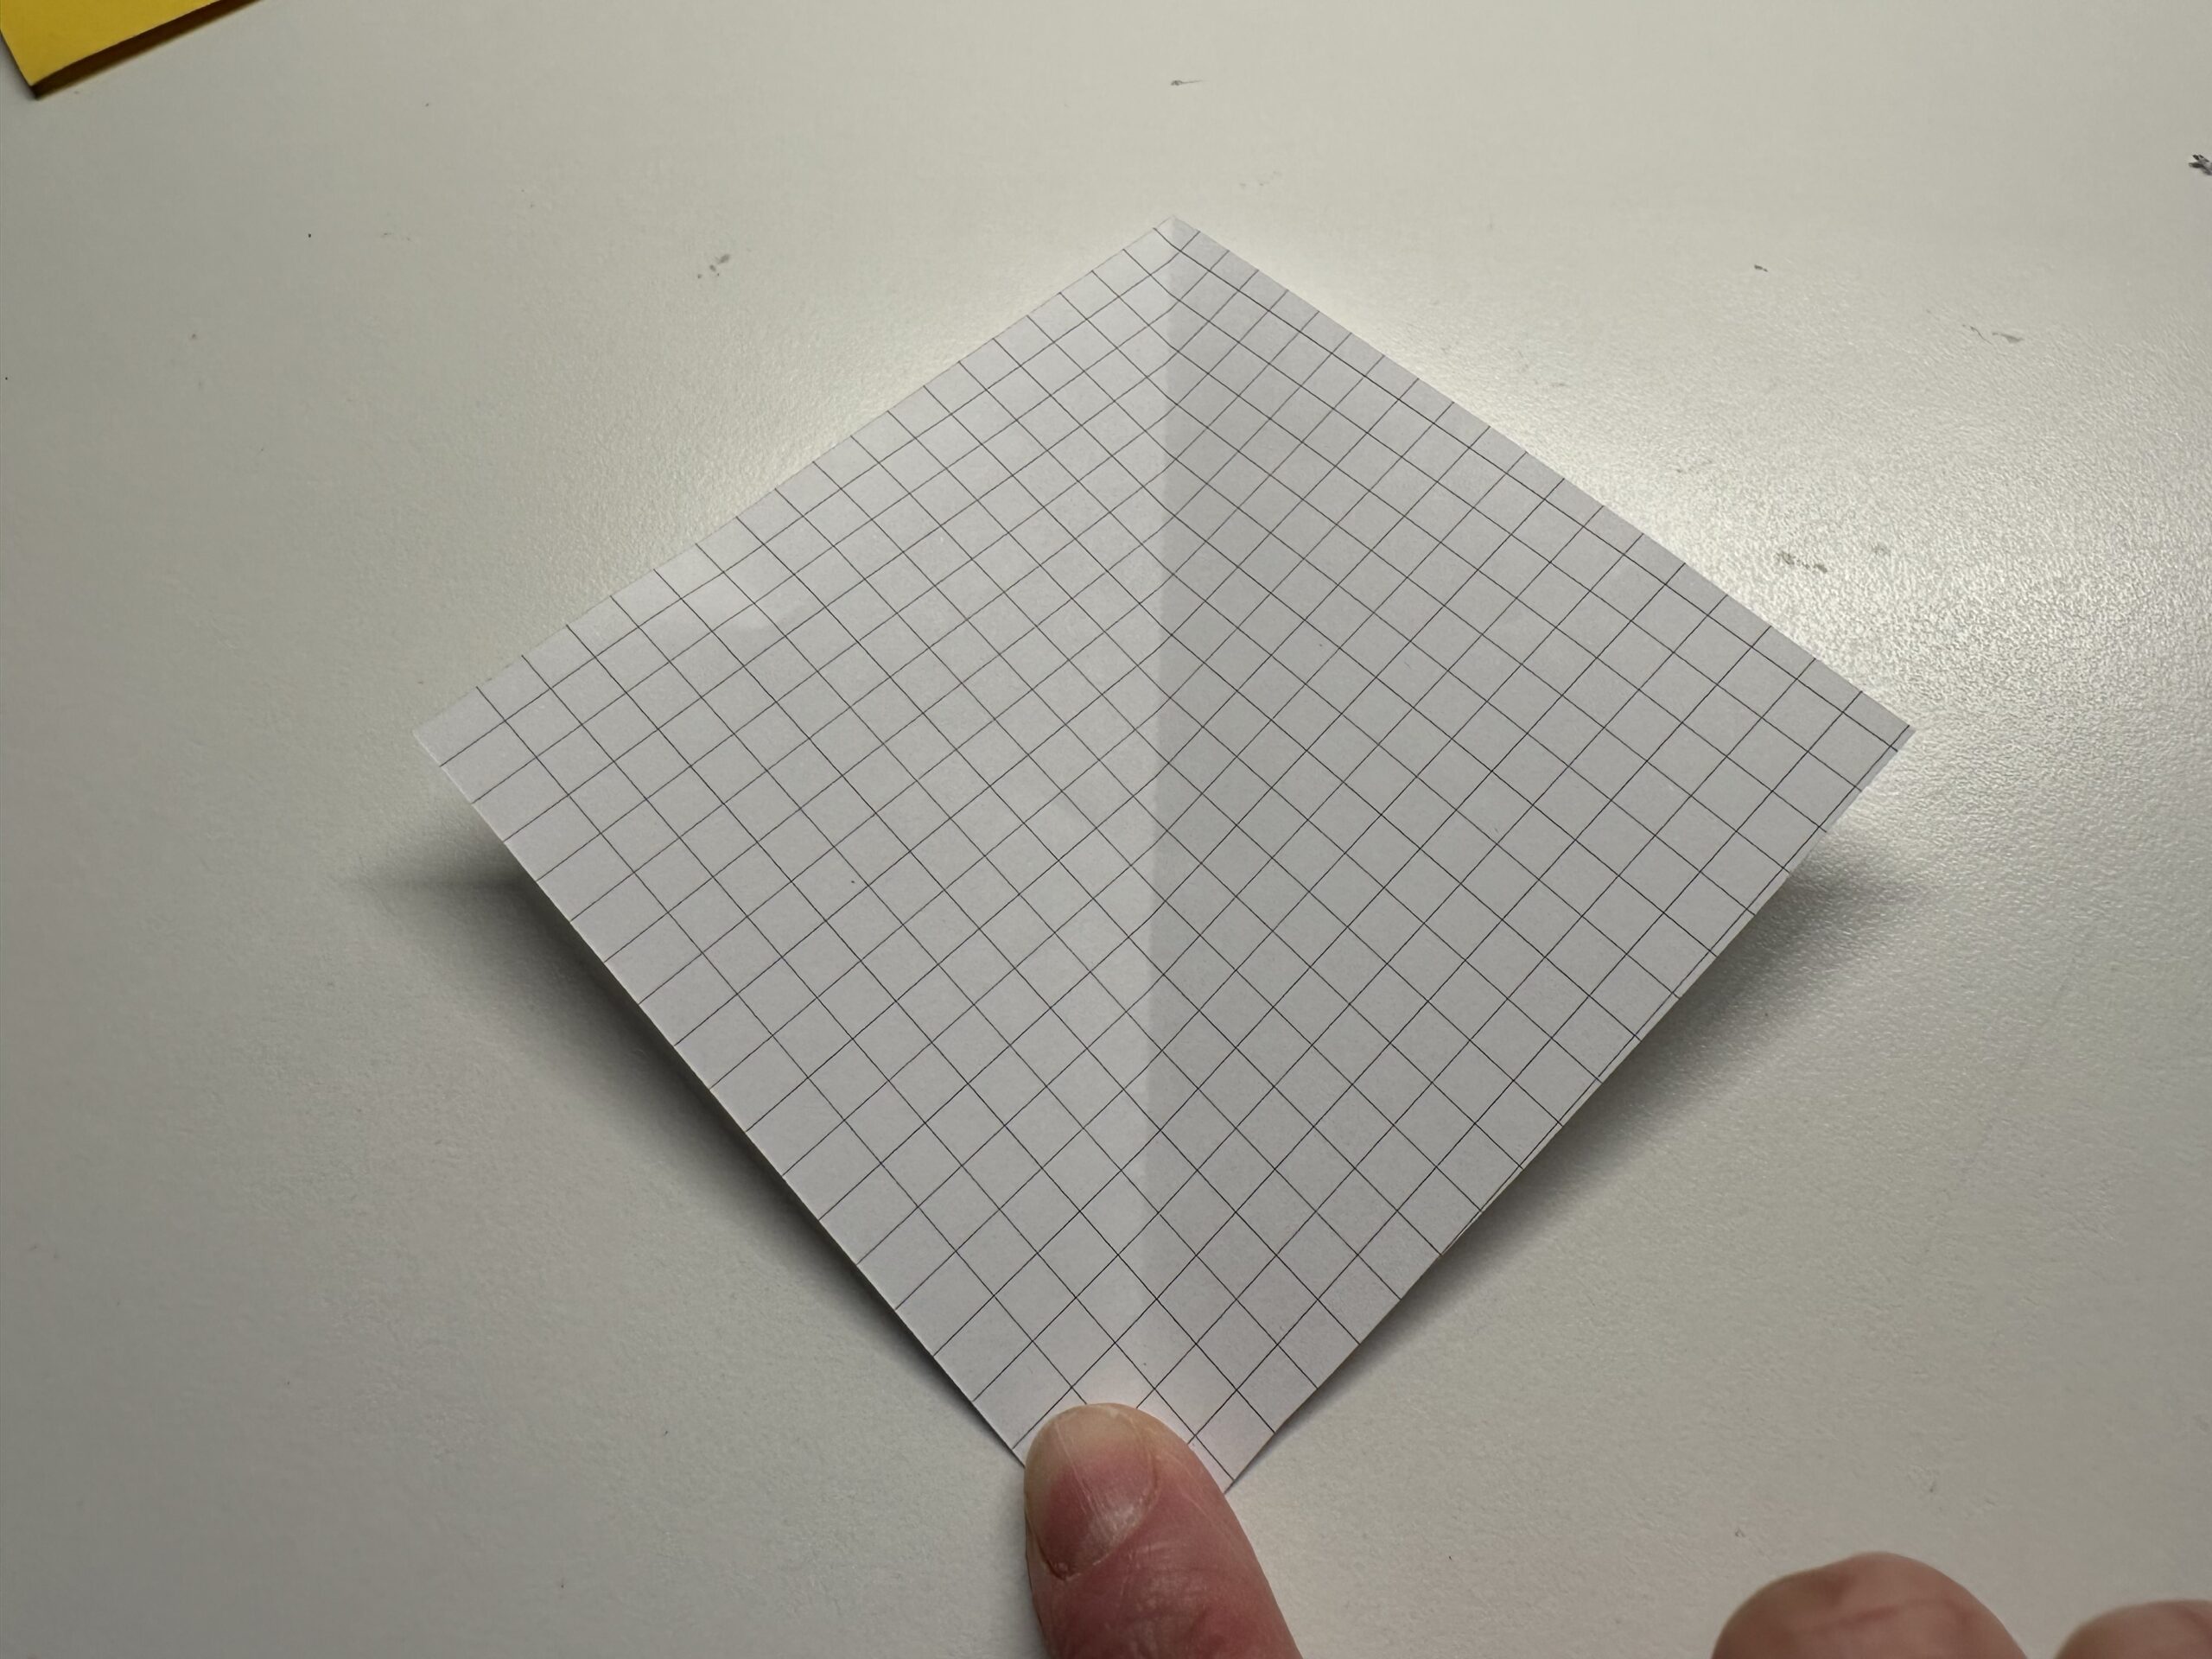
Bild zum Schritt 10 für das Bastel- und DIY-Abenteuer für Kinder: 'Klappe das Dreieck wieder auf. Lege es so vor dich...'

10

Take the side corner and fold it with the bottom edge to the center line.
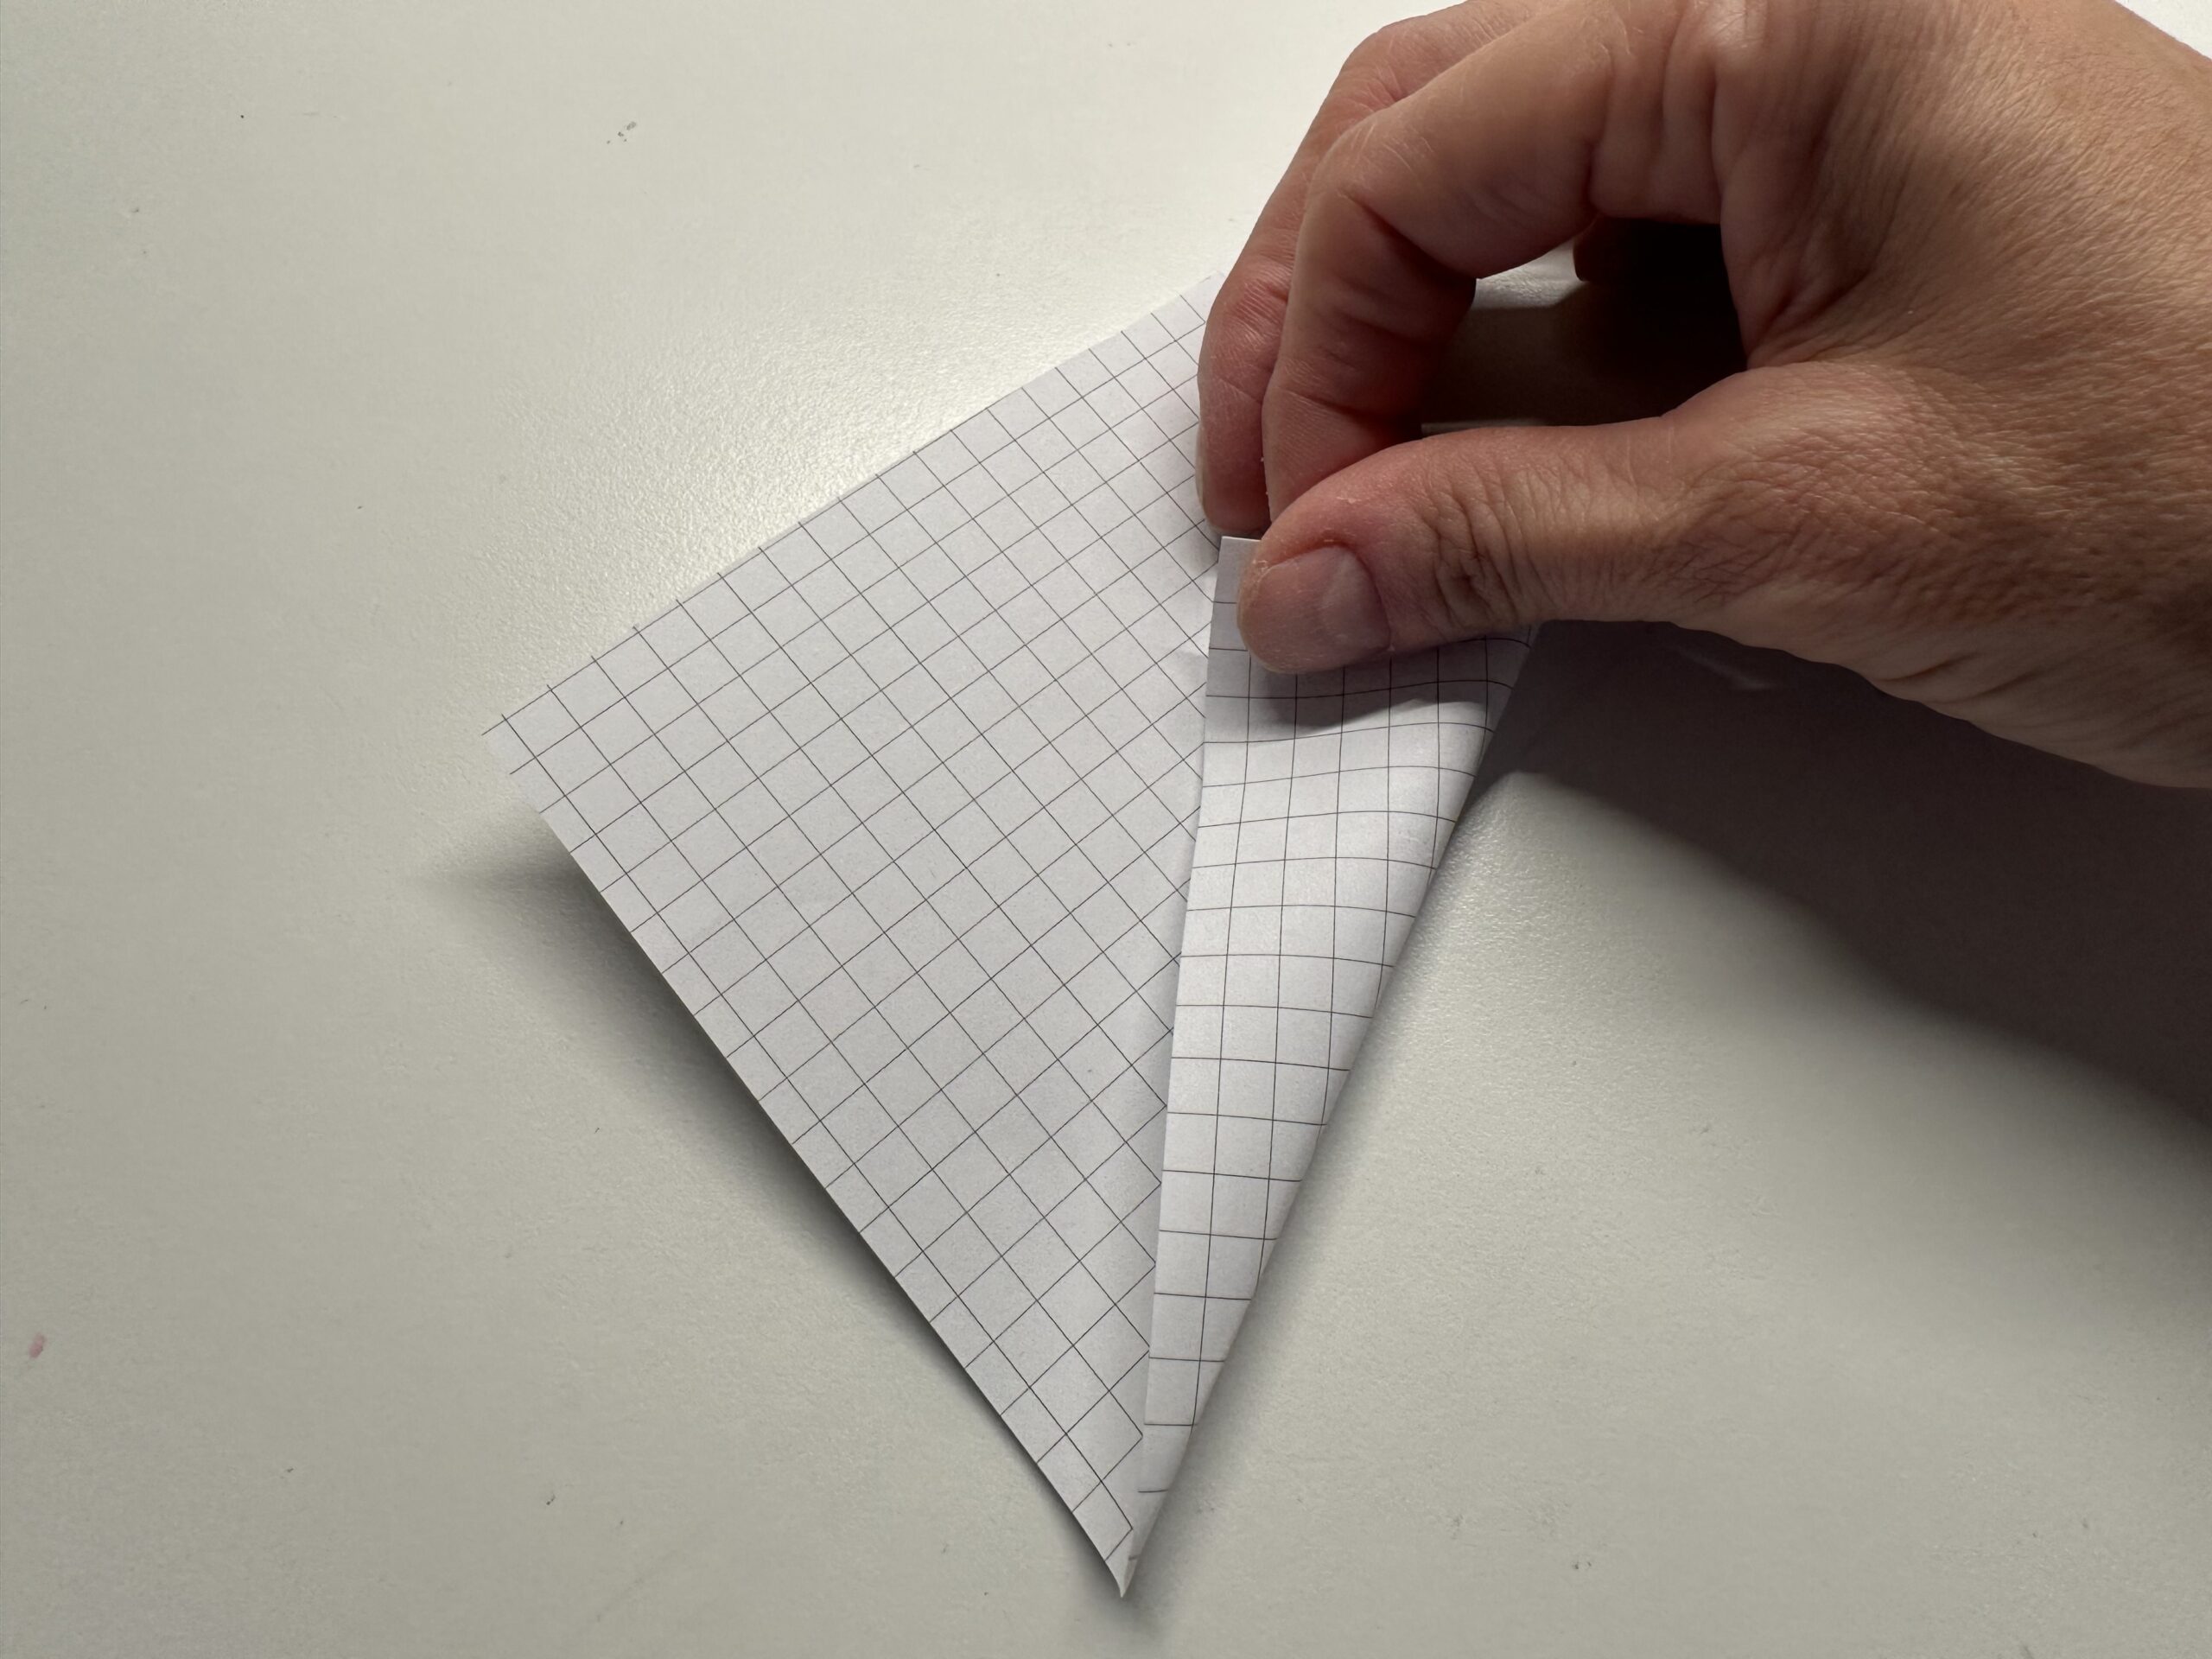
Bild zum Schritt 11 für das Bastel- und DIY-Abenteuer für Kinder: 'Nimm die seitliche Ecke und falte sie mit der unteren...'

11

Strip the fracture smoothly.

Bild zum Schritt 12 für das Bastel- und DIY-Abenteuer für Kinder: 'Streife den Bruch glatt.'

12

Repeat this also with the opposite corner. Fold the lower edge here as well to the middle line. Strip the break also smoothly.
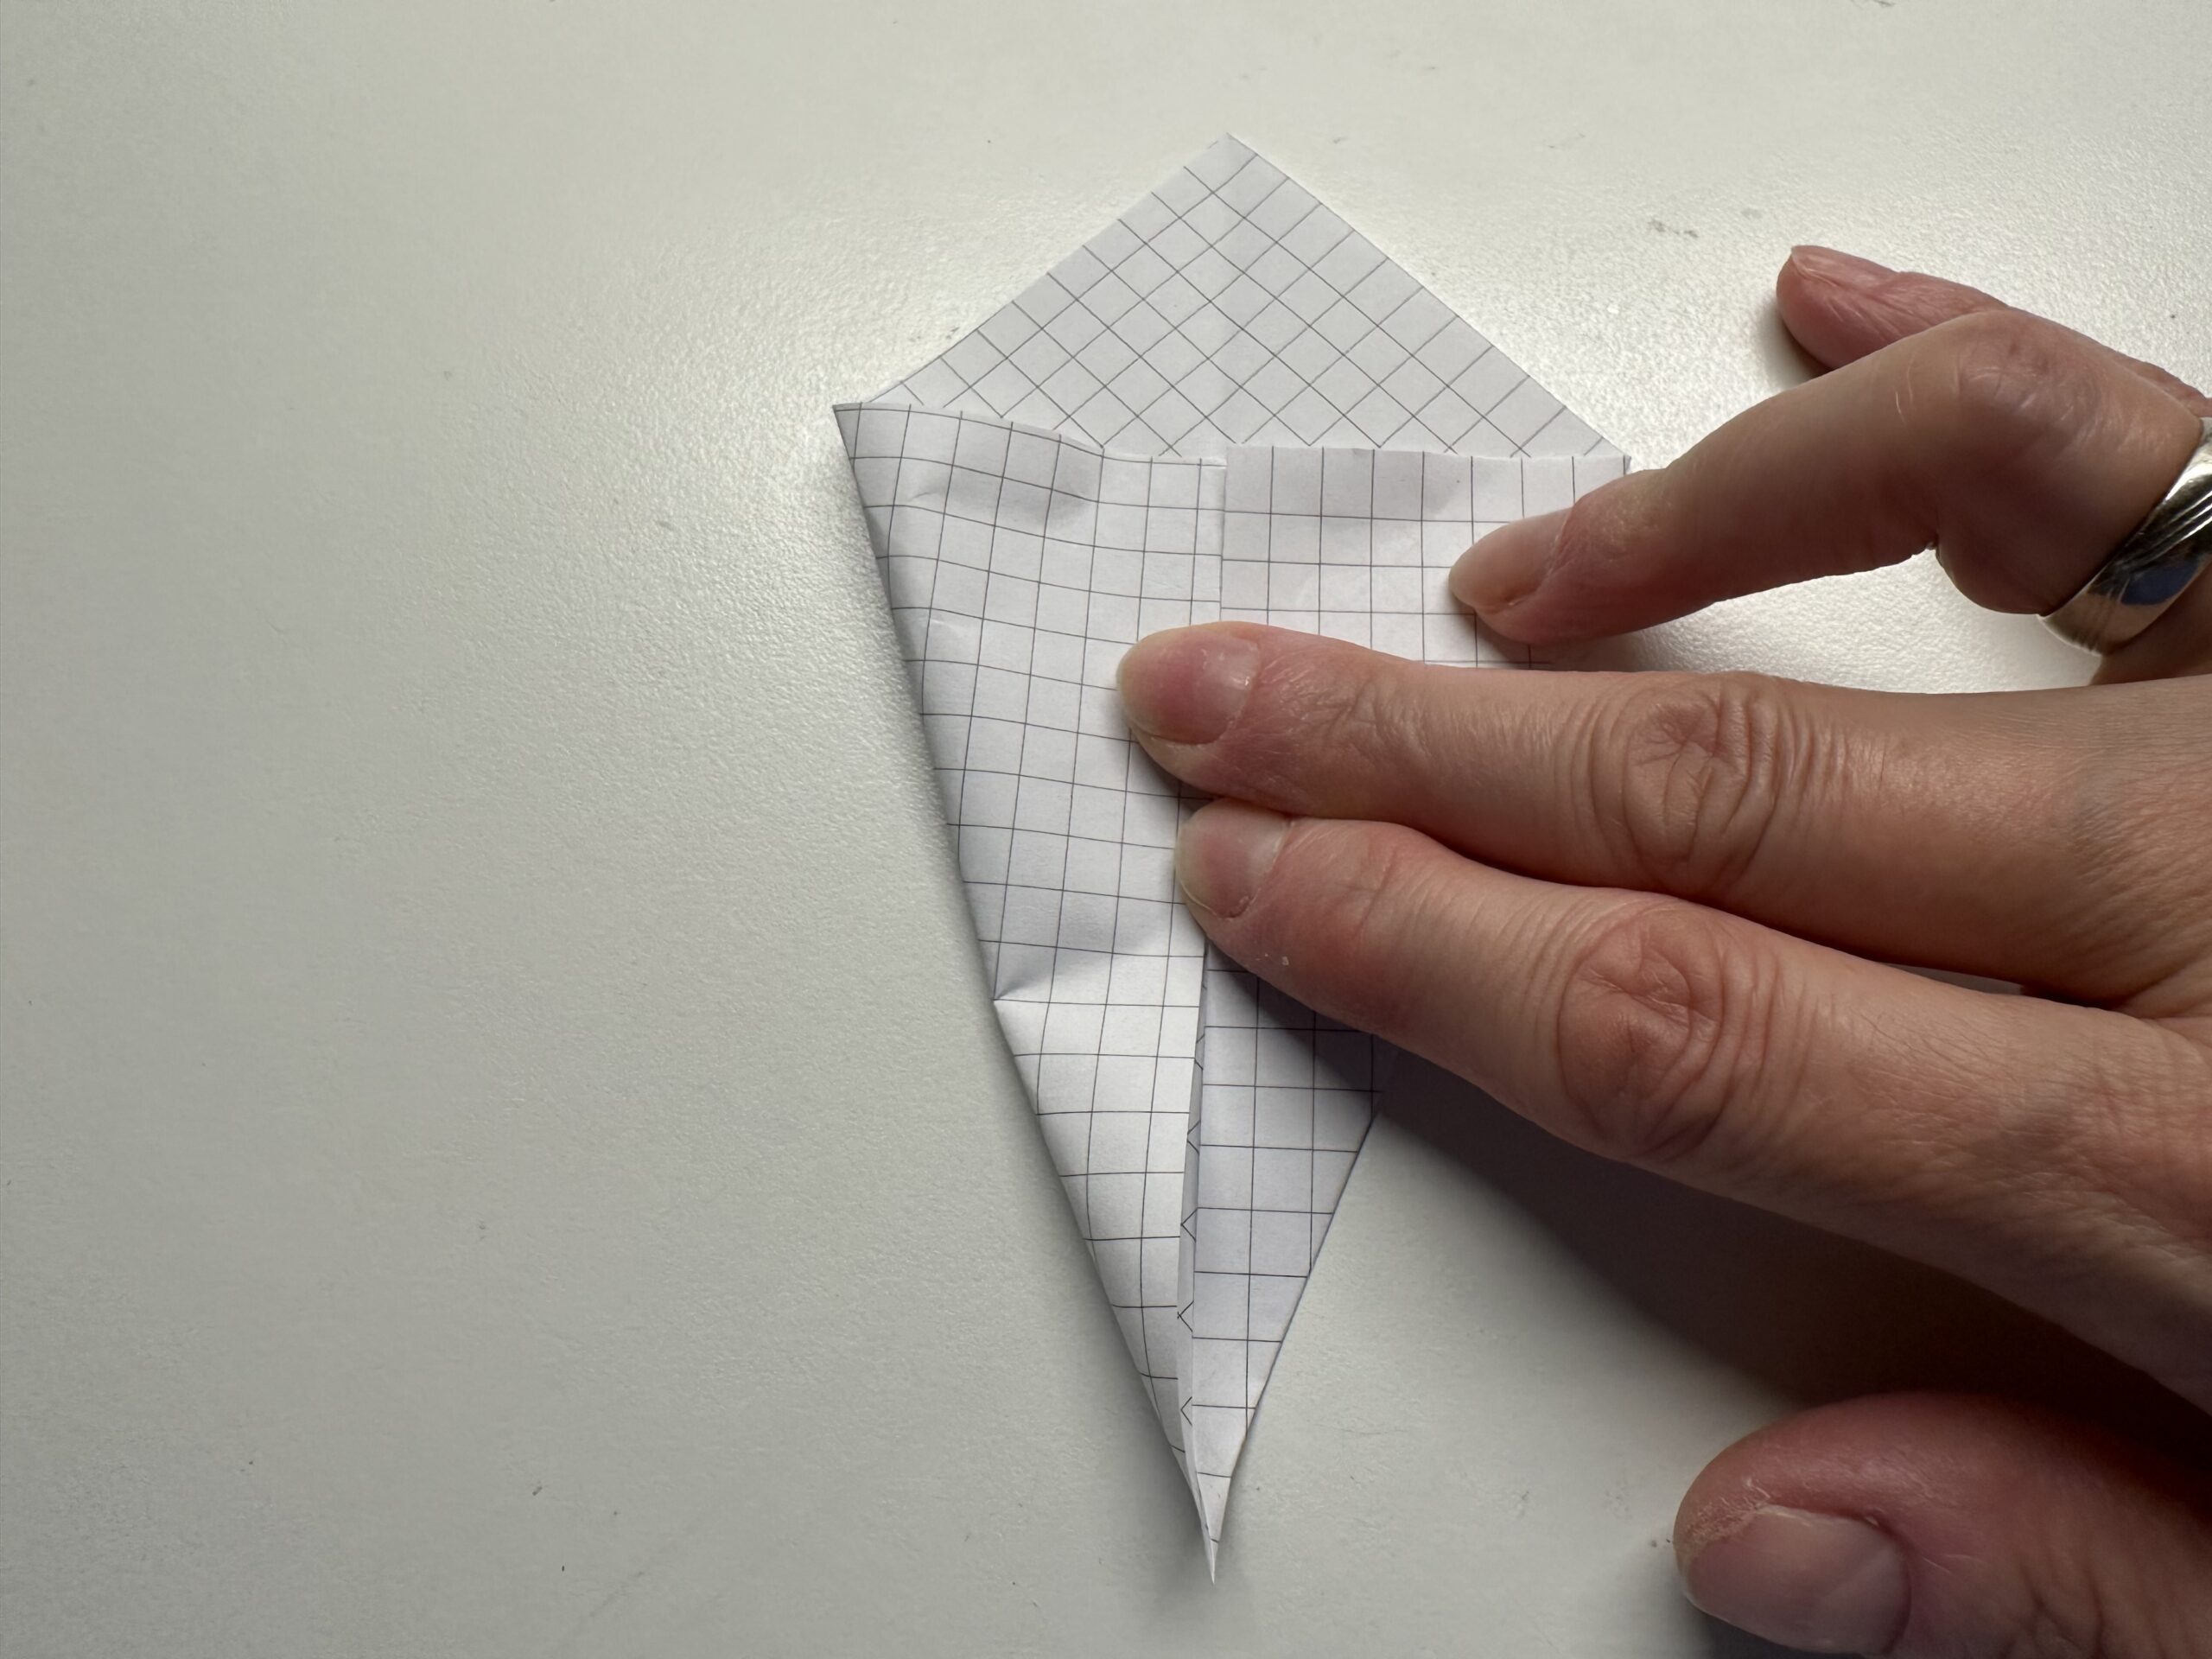
Bild zum Schritt 13 für das Bastel- und DIY-Abenteuer für Kinder: 'Wiederhole das auch mit der gegenüberliegenden Ecke. Falte auch hier...'

13

Both sides are now folded to the center line. You now have a small dragon in front of you.
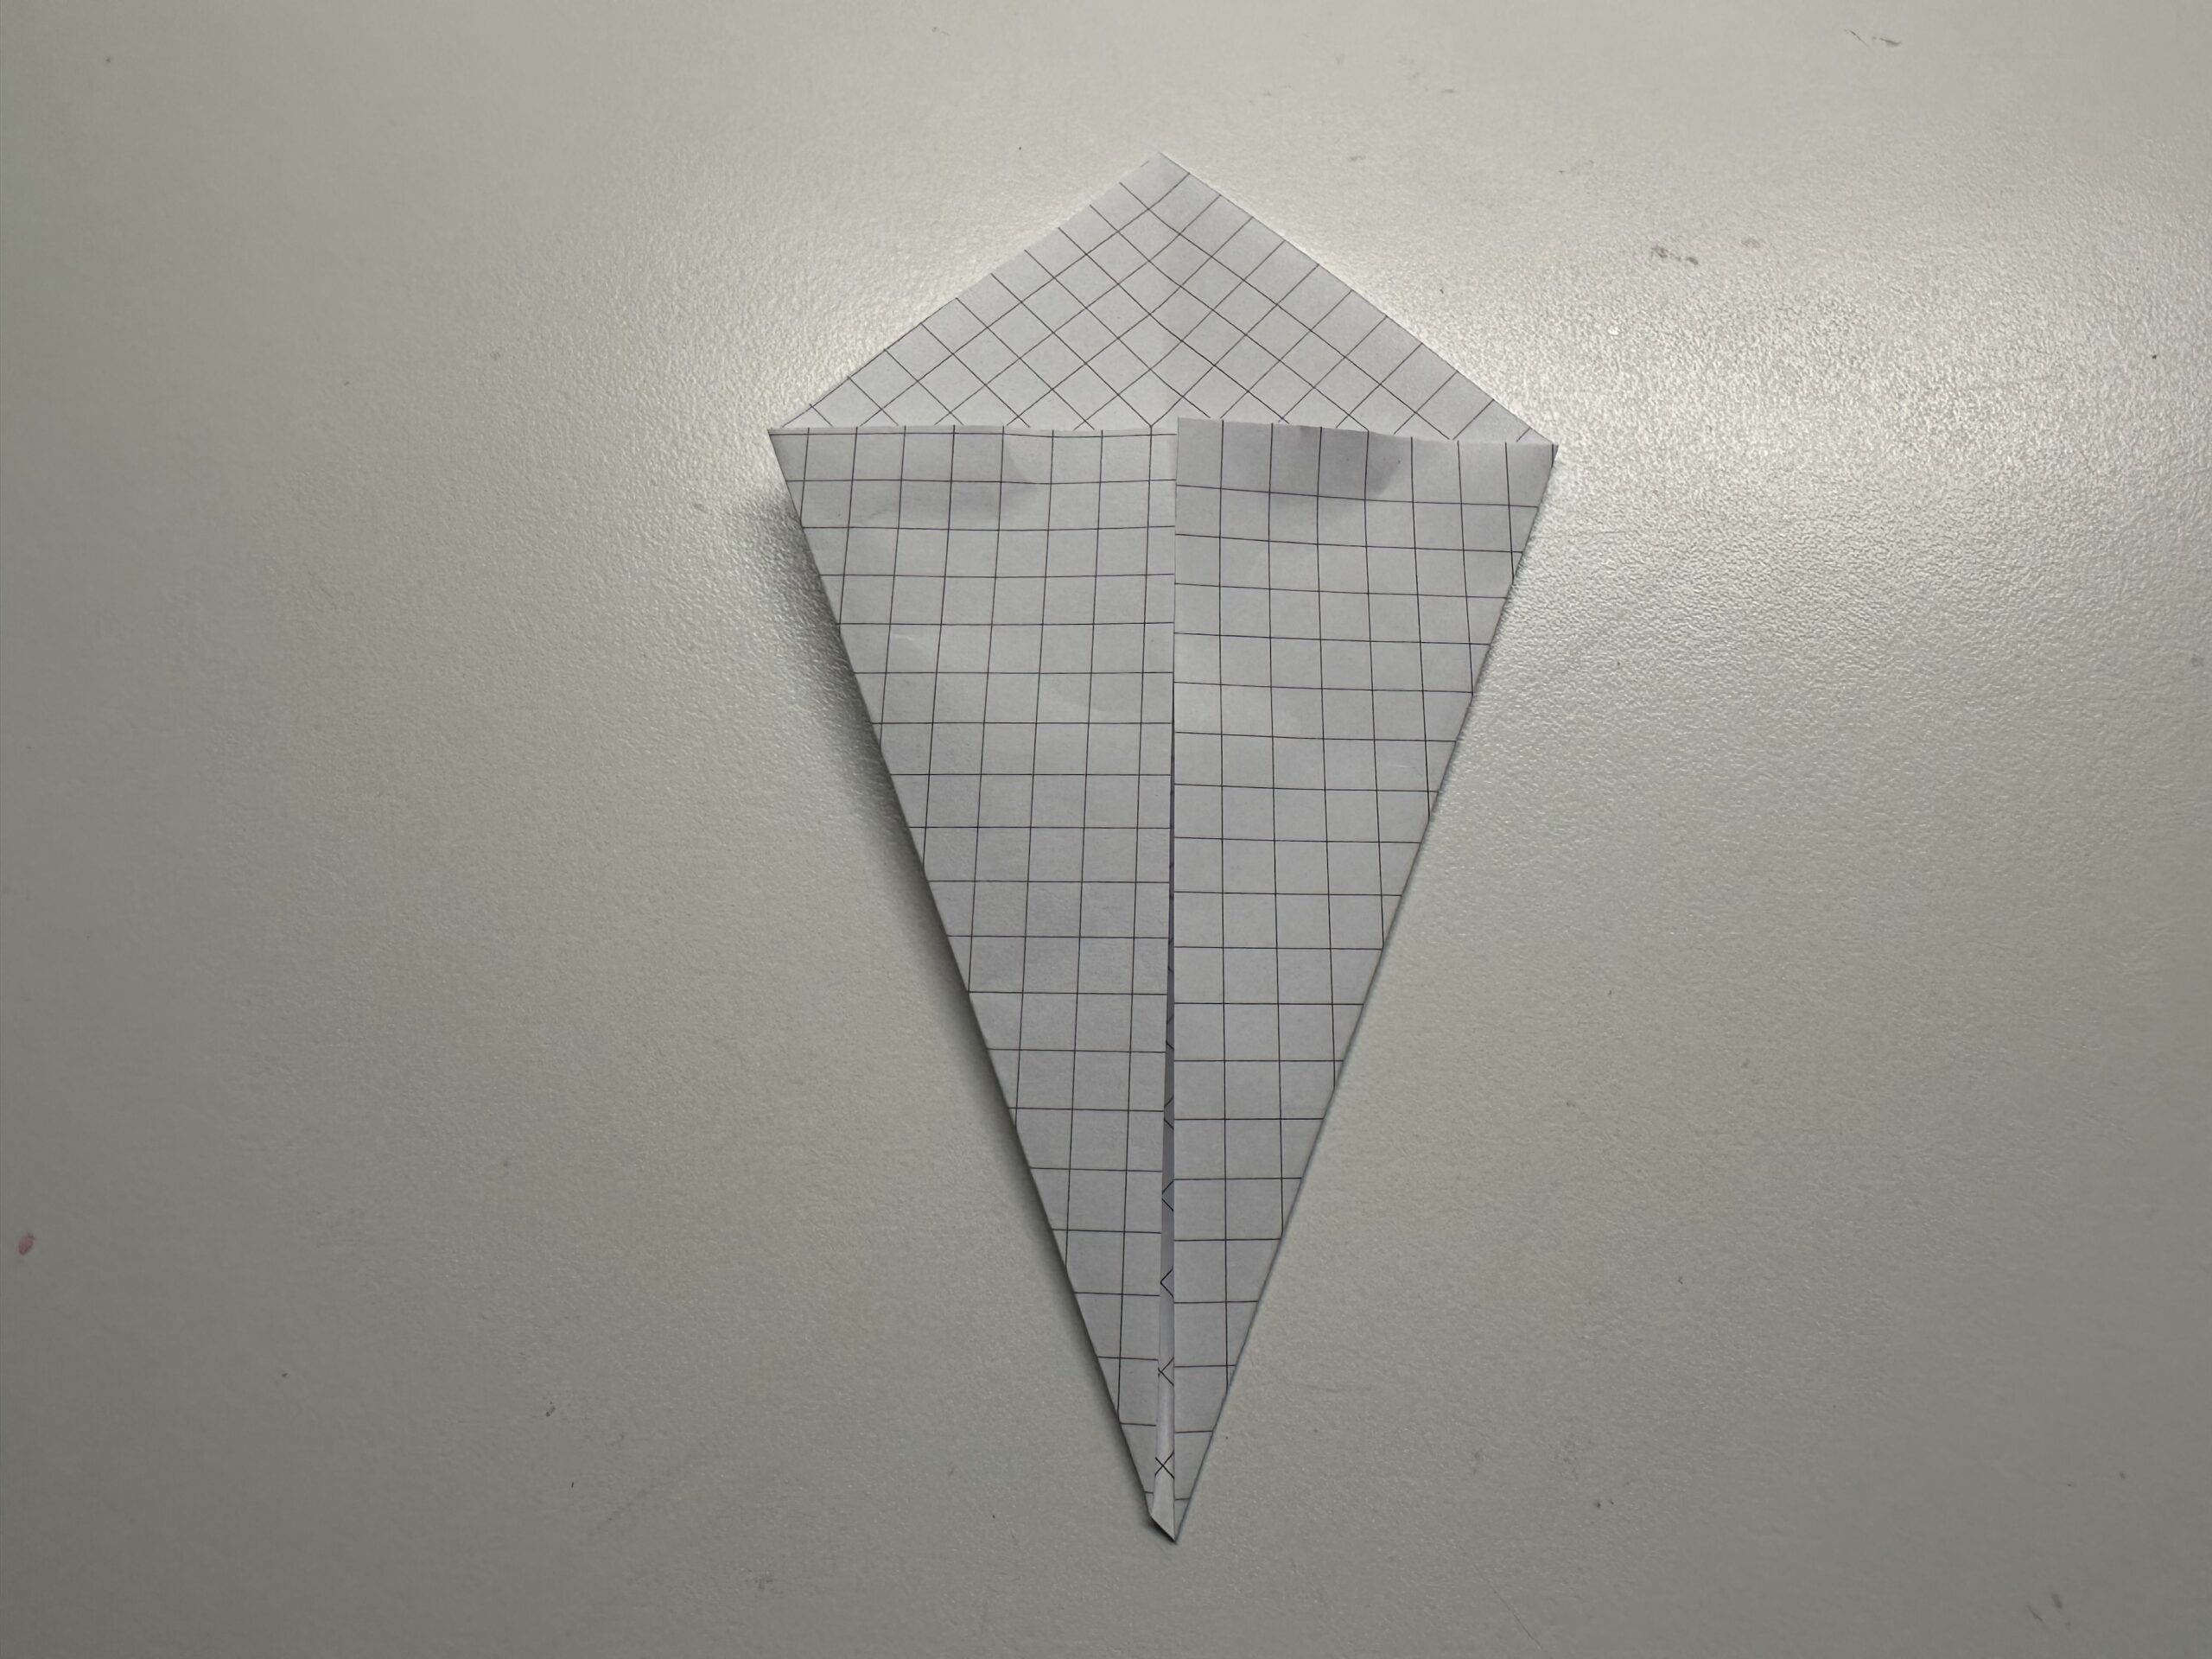
Bild zum Schritt 14 für das Bastel- und DIY-Abenteuer für Kinder: 'Beide Seiten sind nun zur Mittellinie gefaltet. Du hast nun...'

14

Turn the dragon. It now serves as a template for further handicraft work.
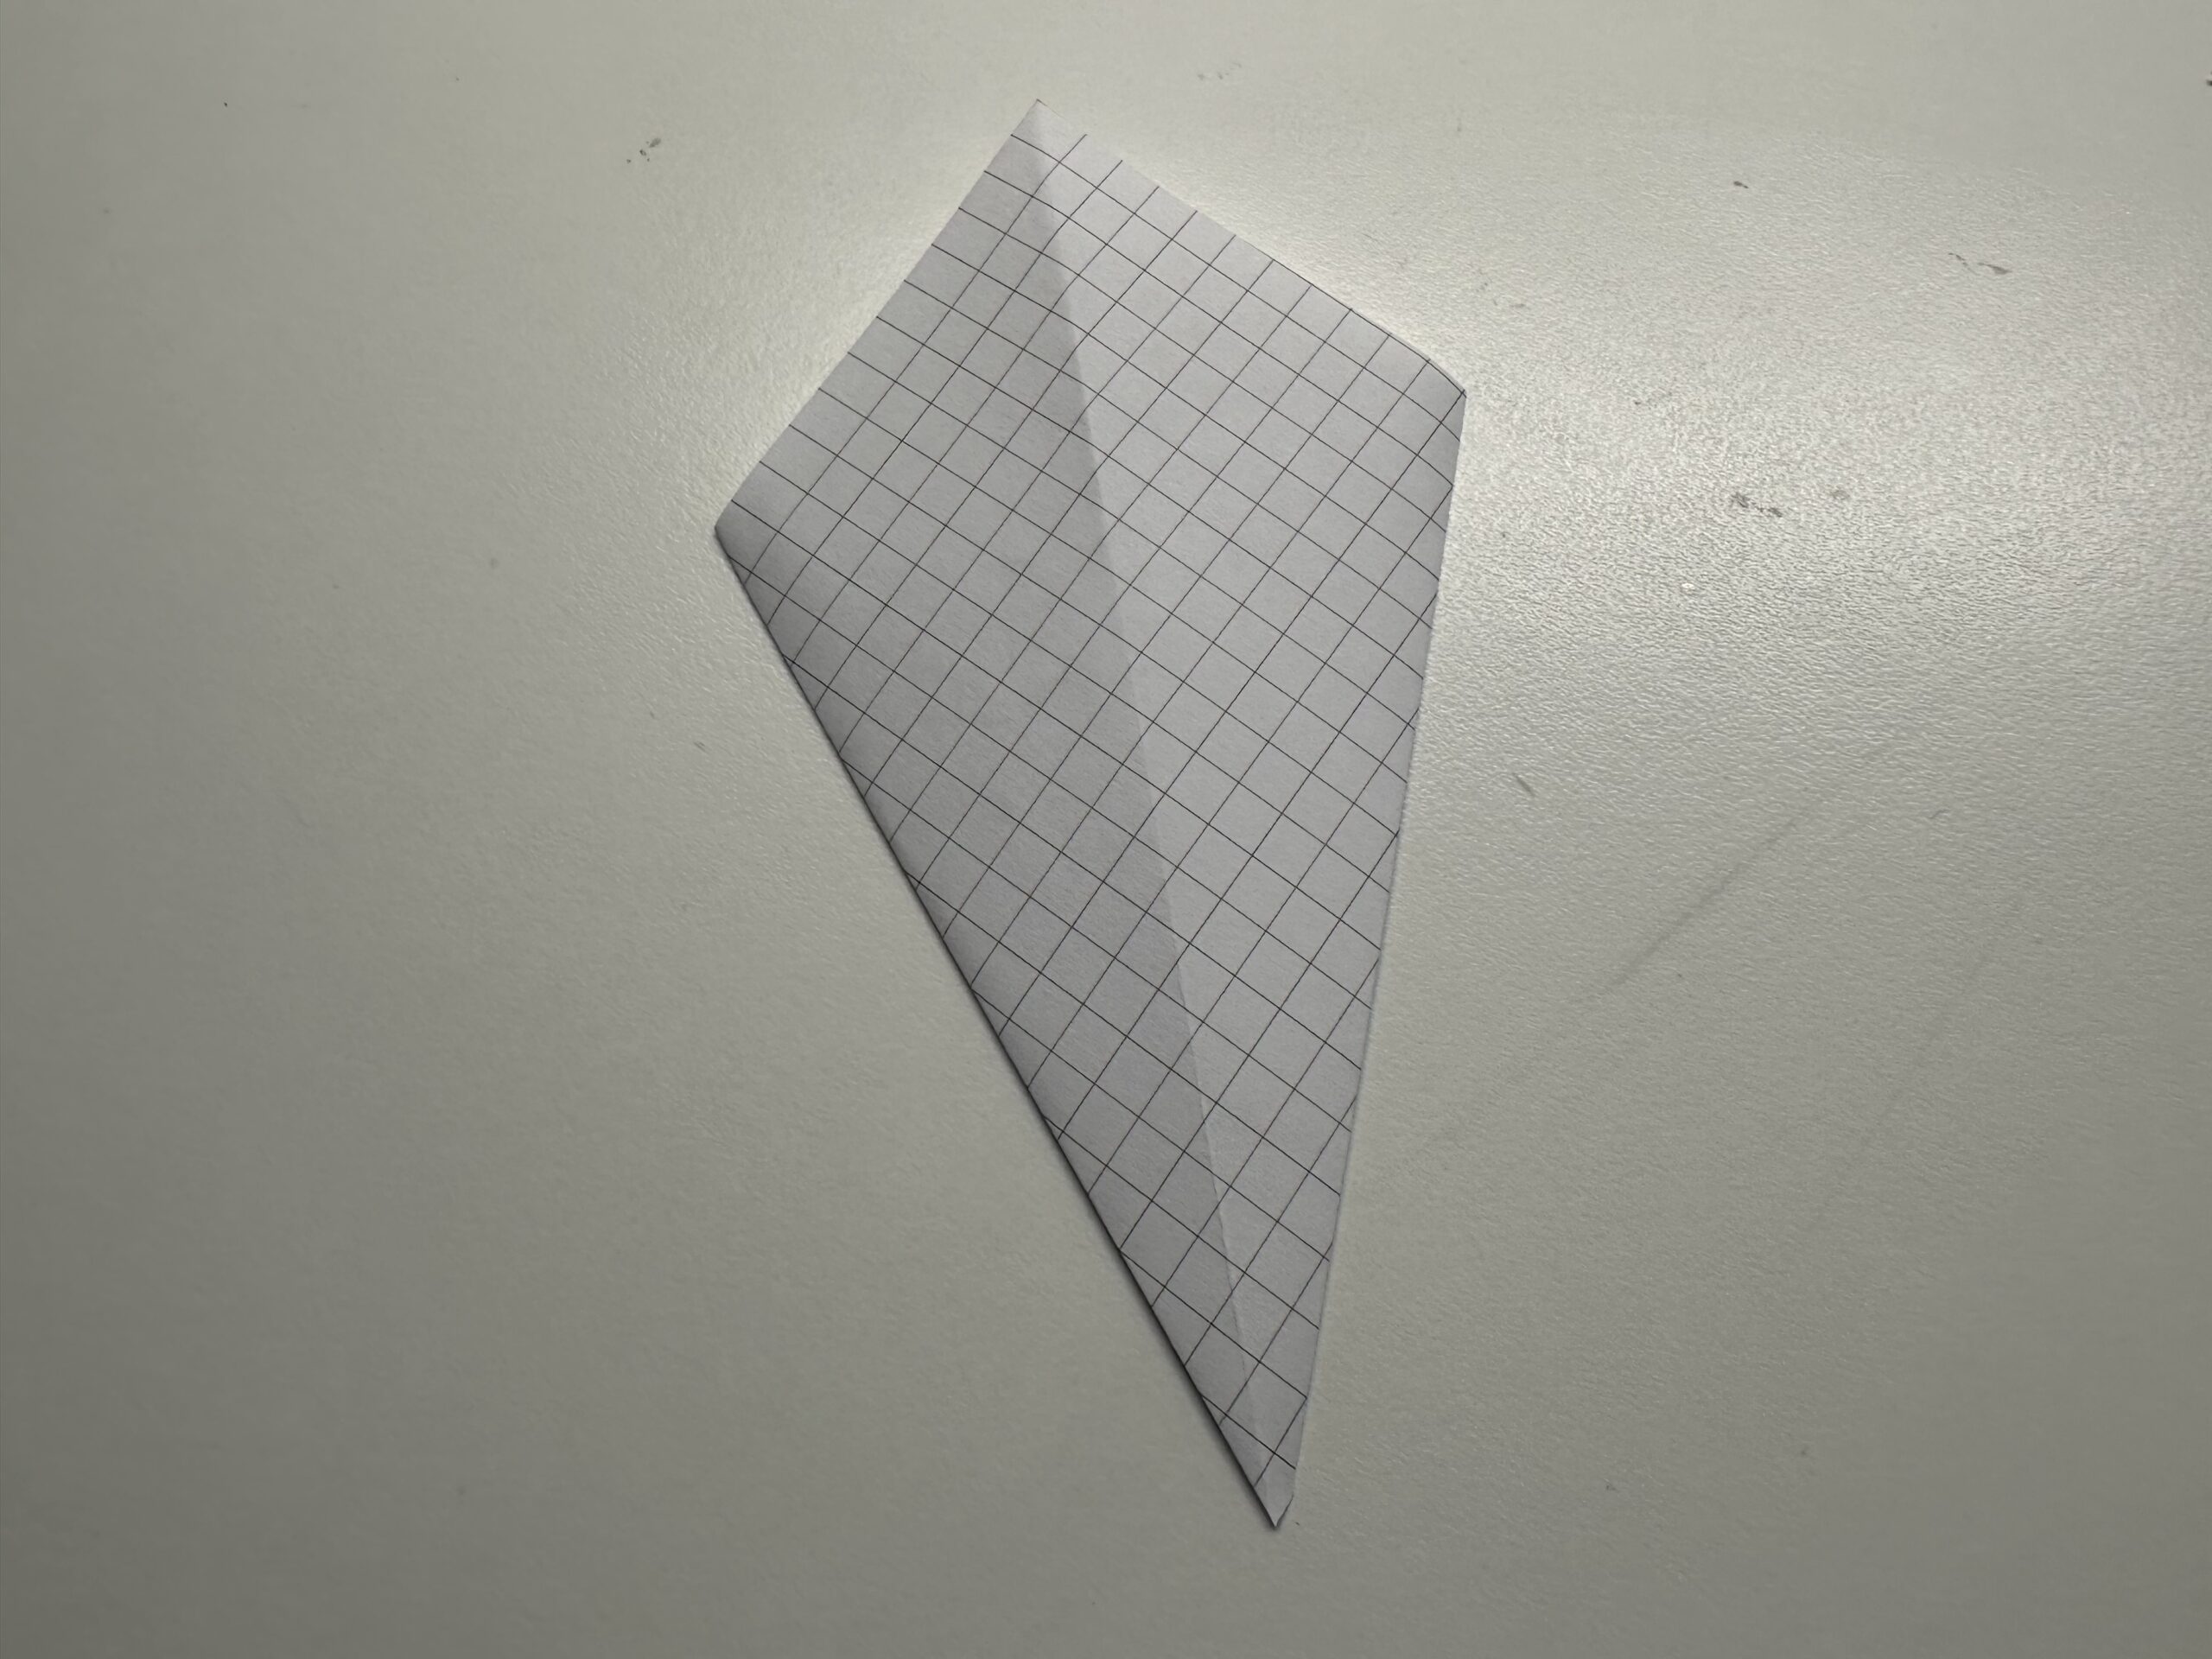
Bild zum Schritt 15 für das Bastel- und DIY-Abenteuer für Kinder: 'Wende den Drachen. Er dient dir nun als Schablone für...'

Draw Dragon on the Circle
15

Place the dragon in the middle of the painted circle.
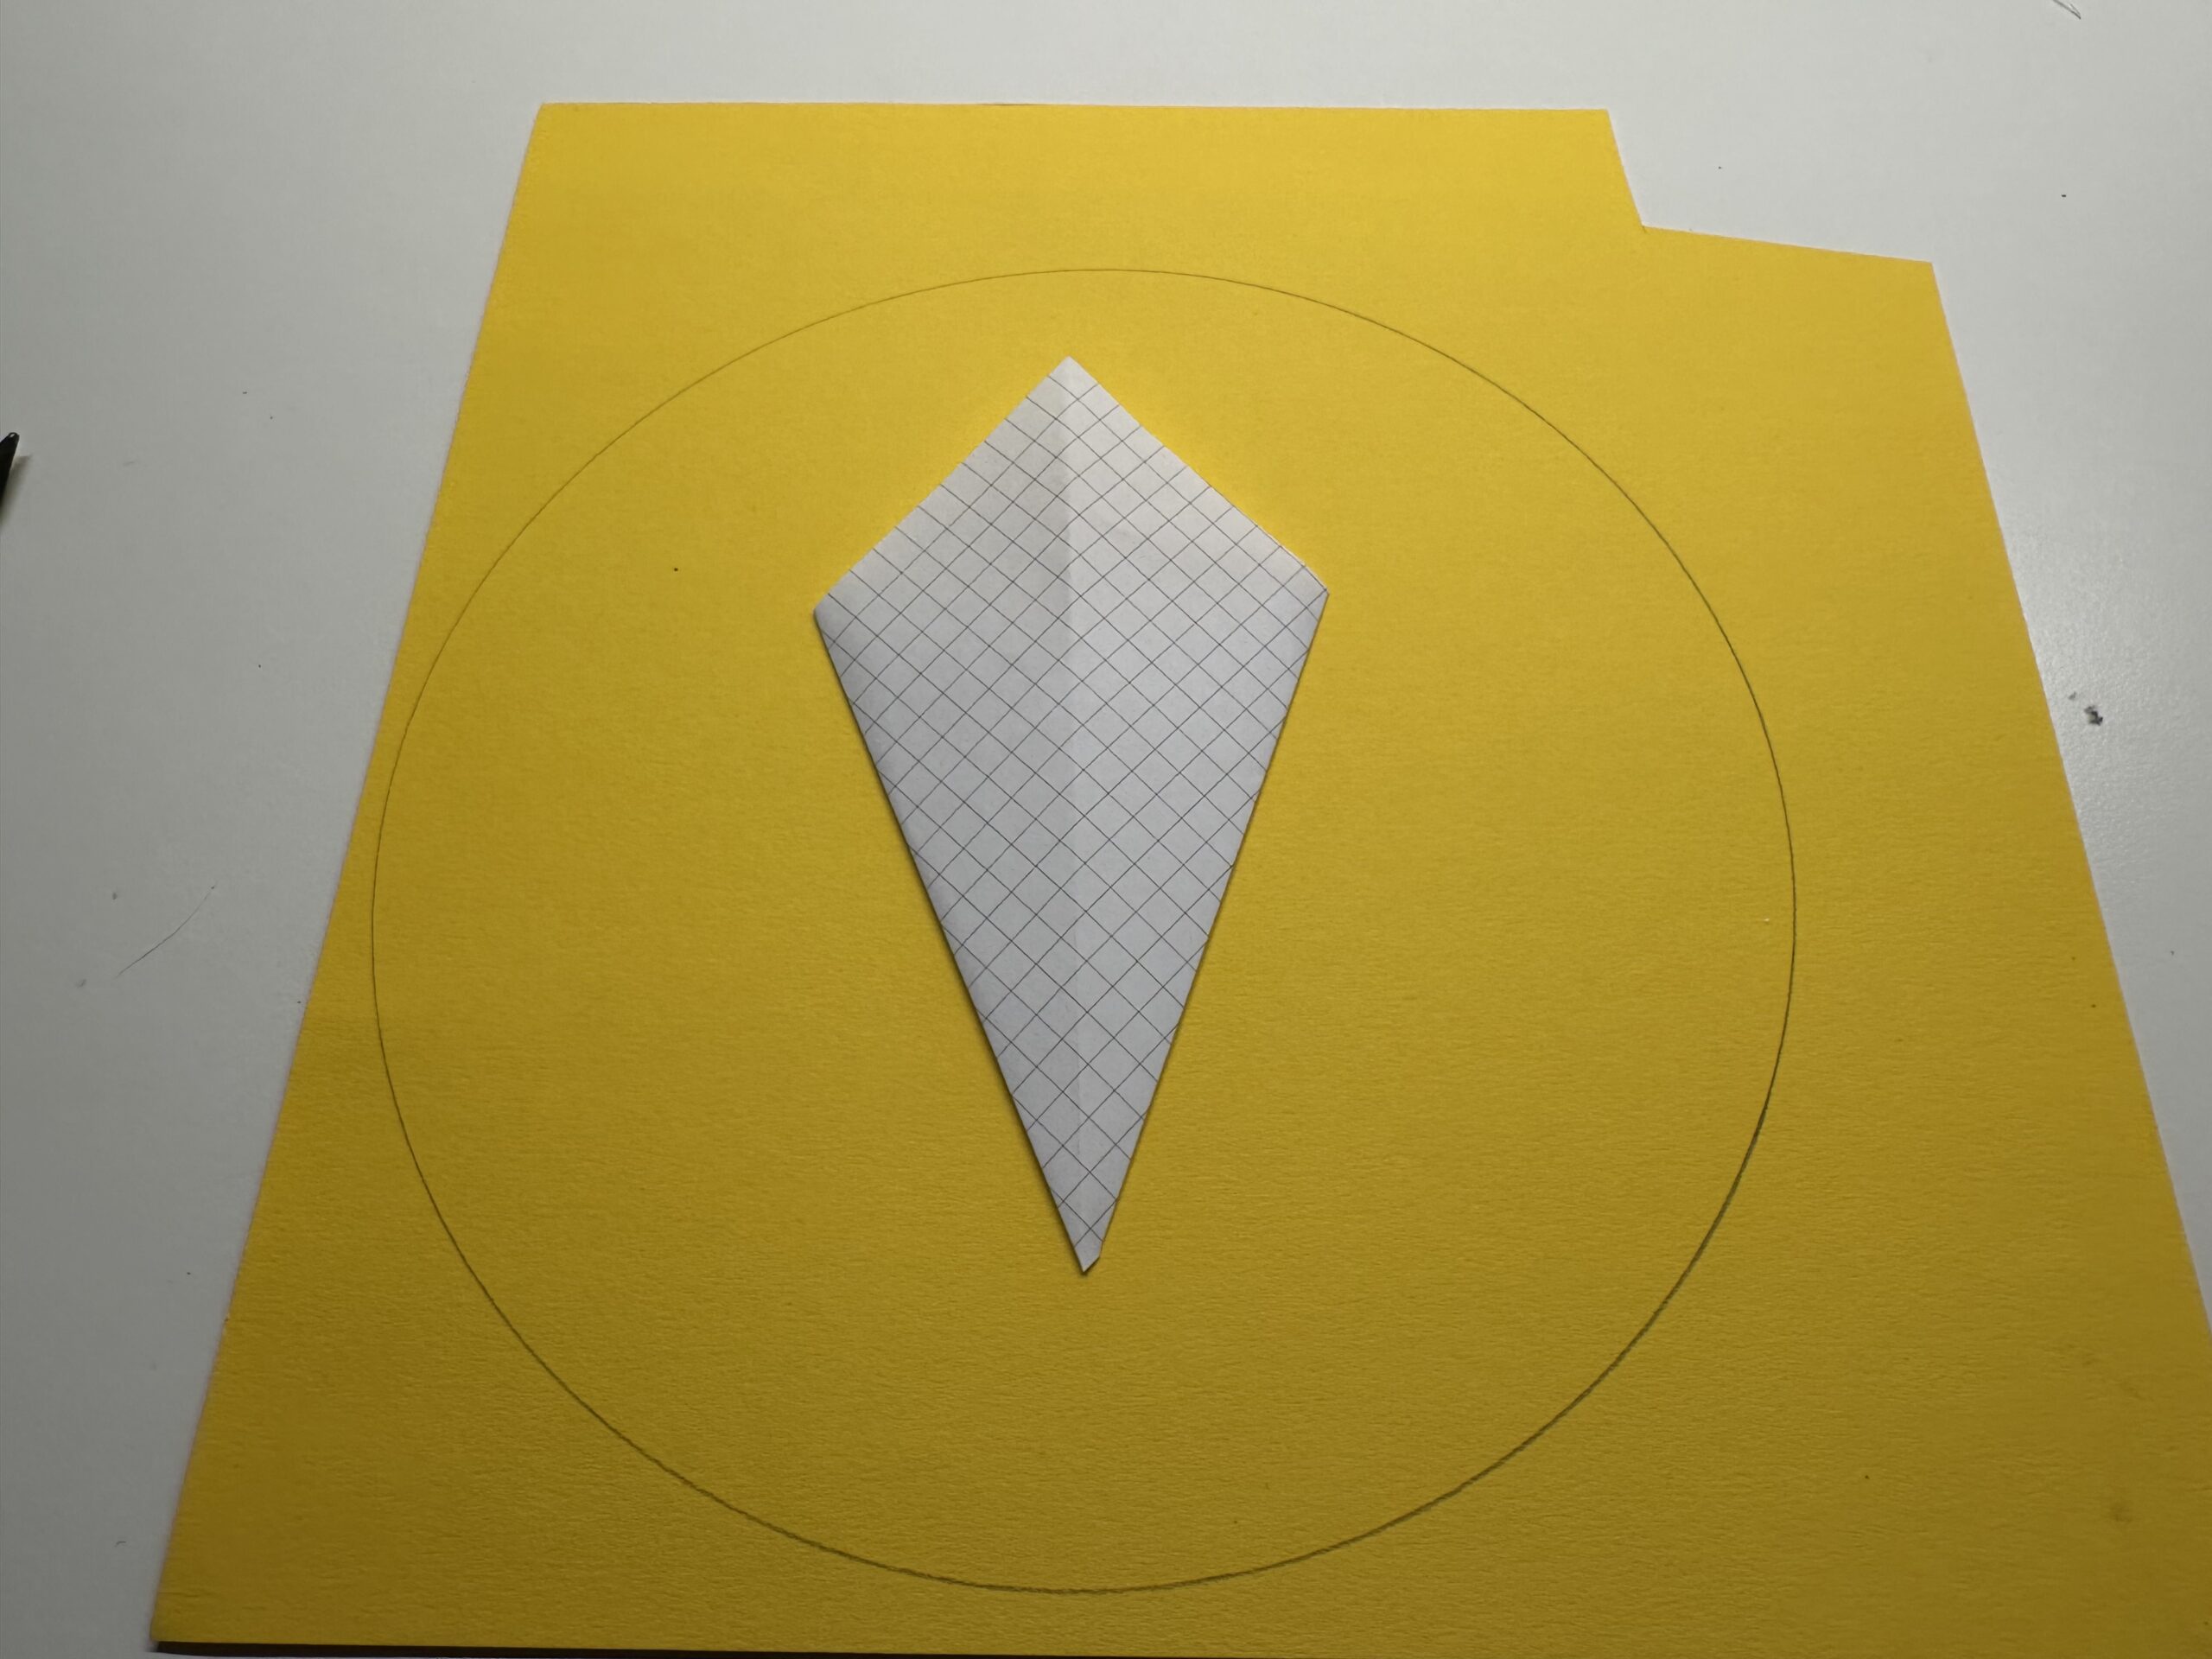
Bild zum Schritt 17 für das Bastel- und DIY-Abenteuer für Kinder: 'Lege den Drachen mittig auf den aufgemalten Kreis.'

16

Umpaint the dragon with a pencil. Start at the bottom. Look at the next picture before you start!
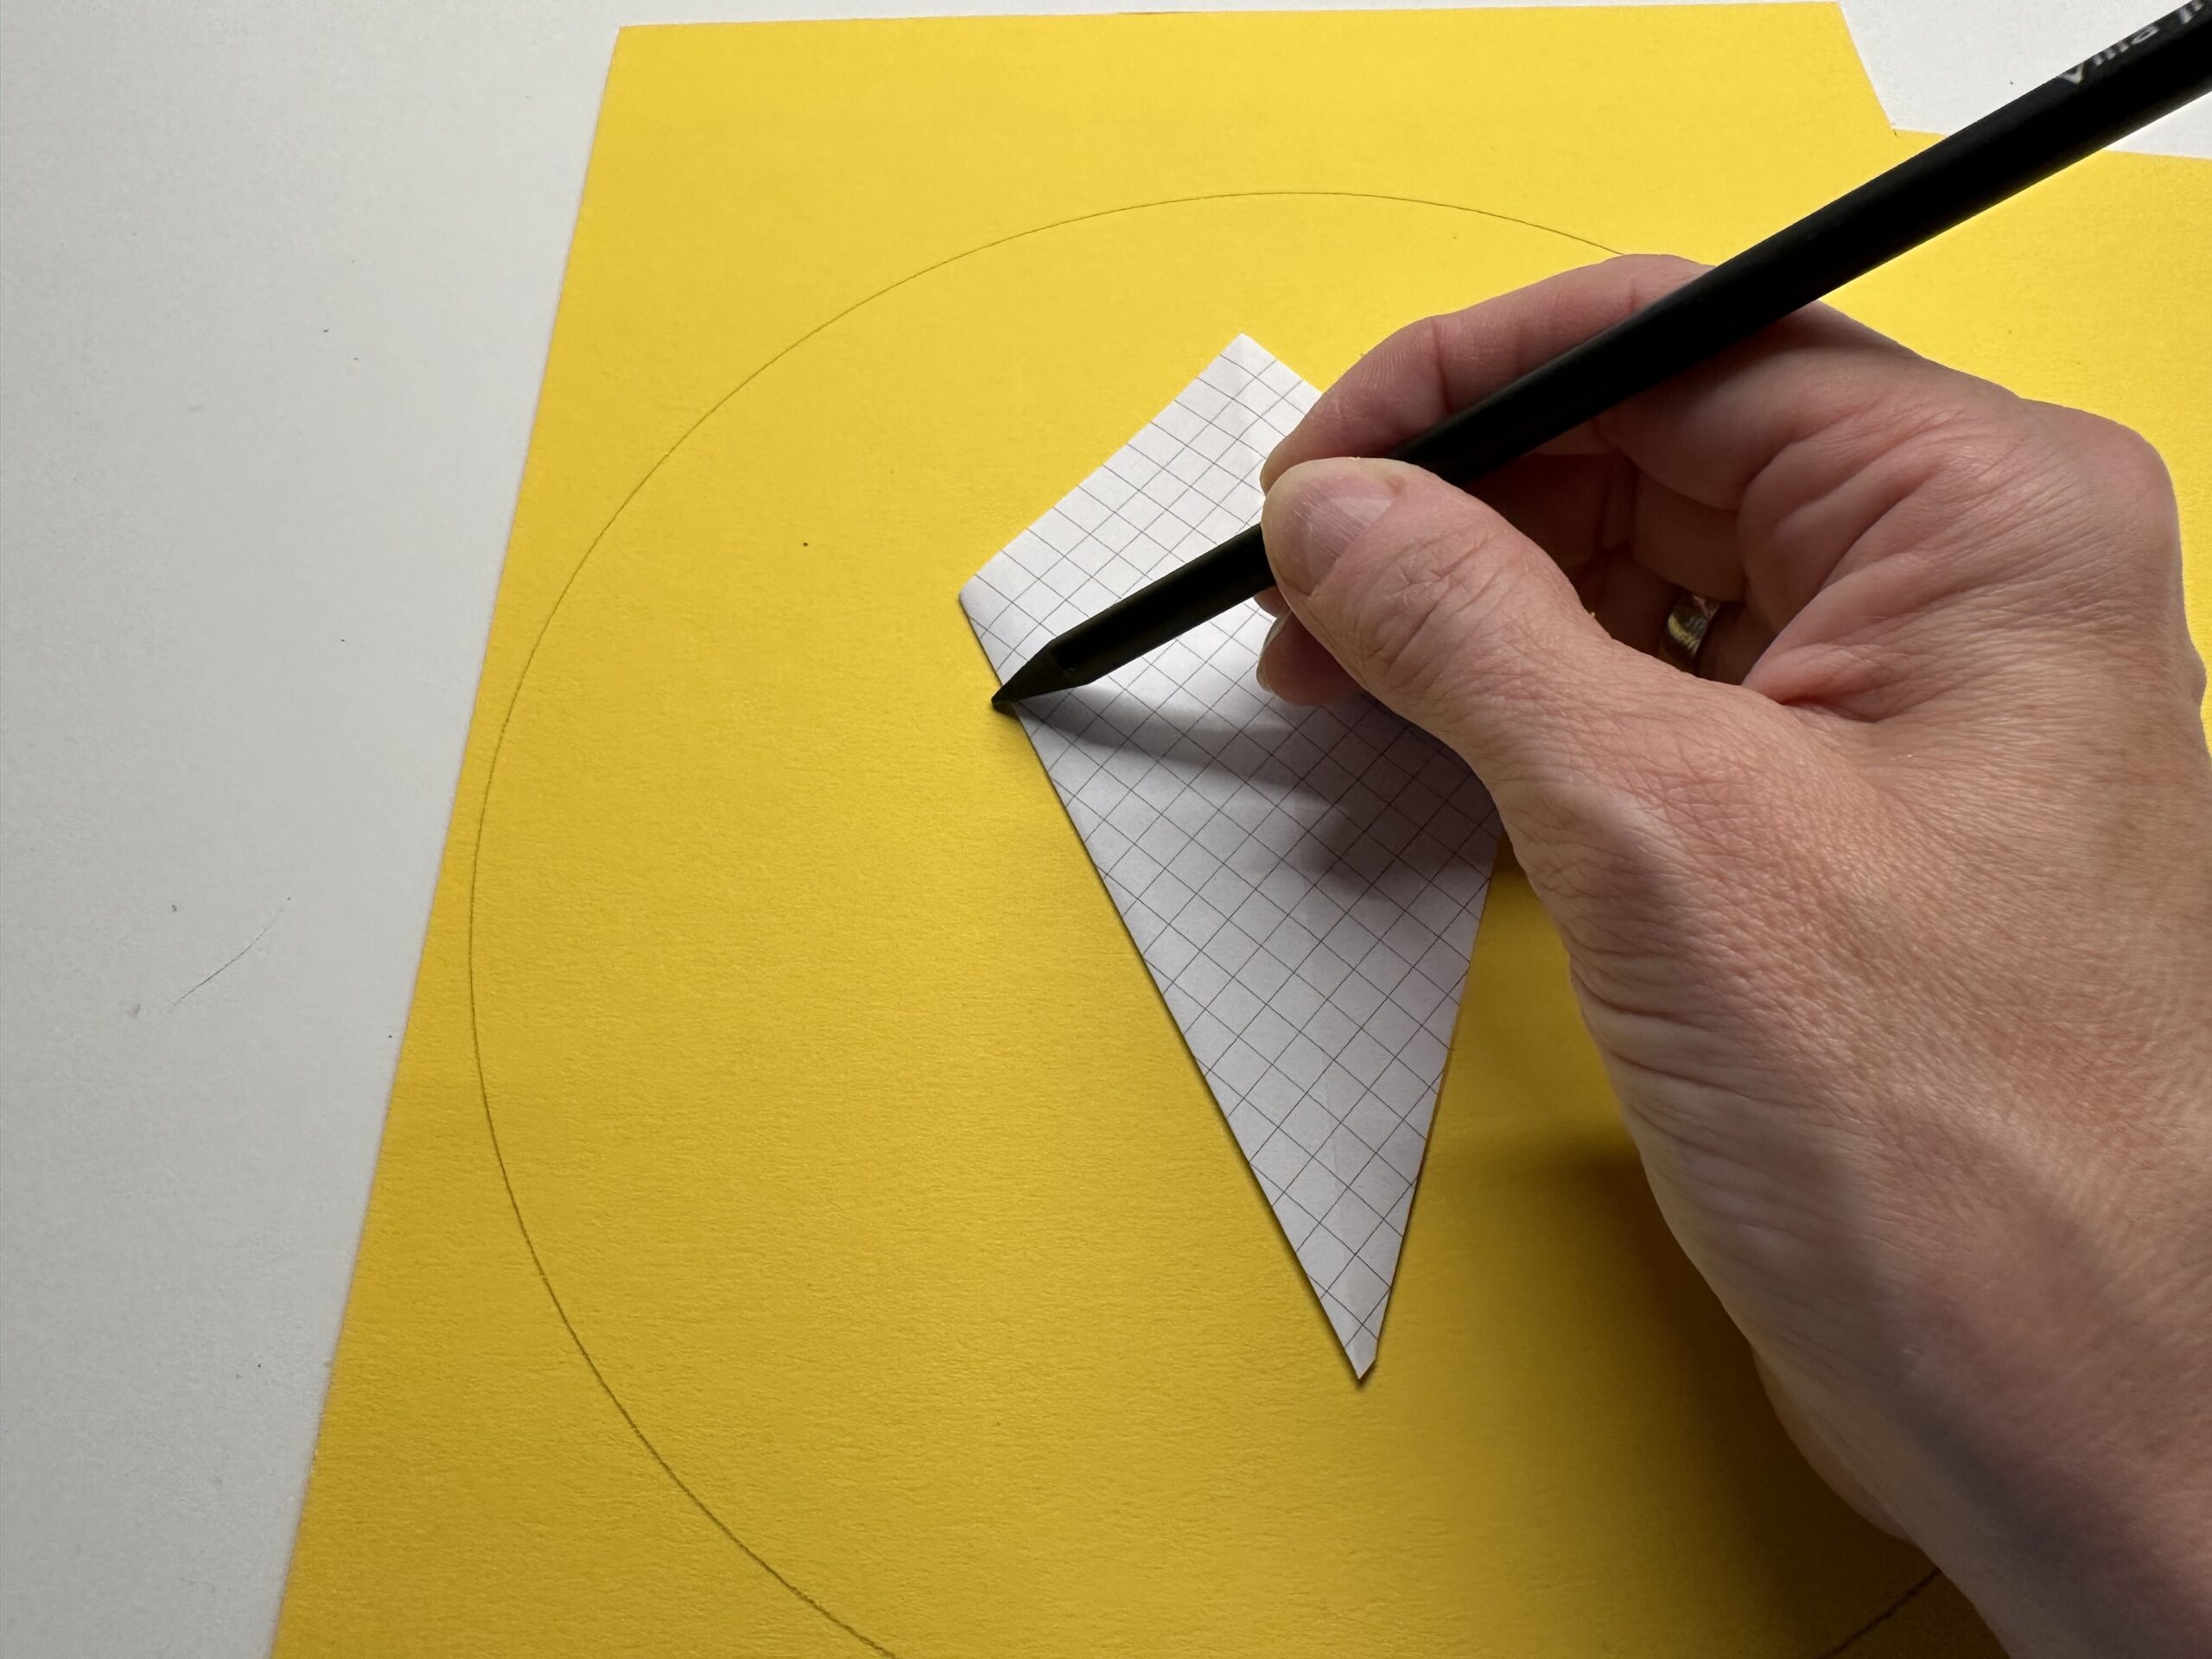
Bild zum Schritt 18 für das Bastel- und DIY-Abenteuer für Kinder: 'Ummale den Drache mit einem Bleistift. Beginne an der unteren...'

17

Stop painting one or two fingers wide in front of the lower tip.
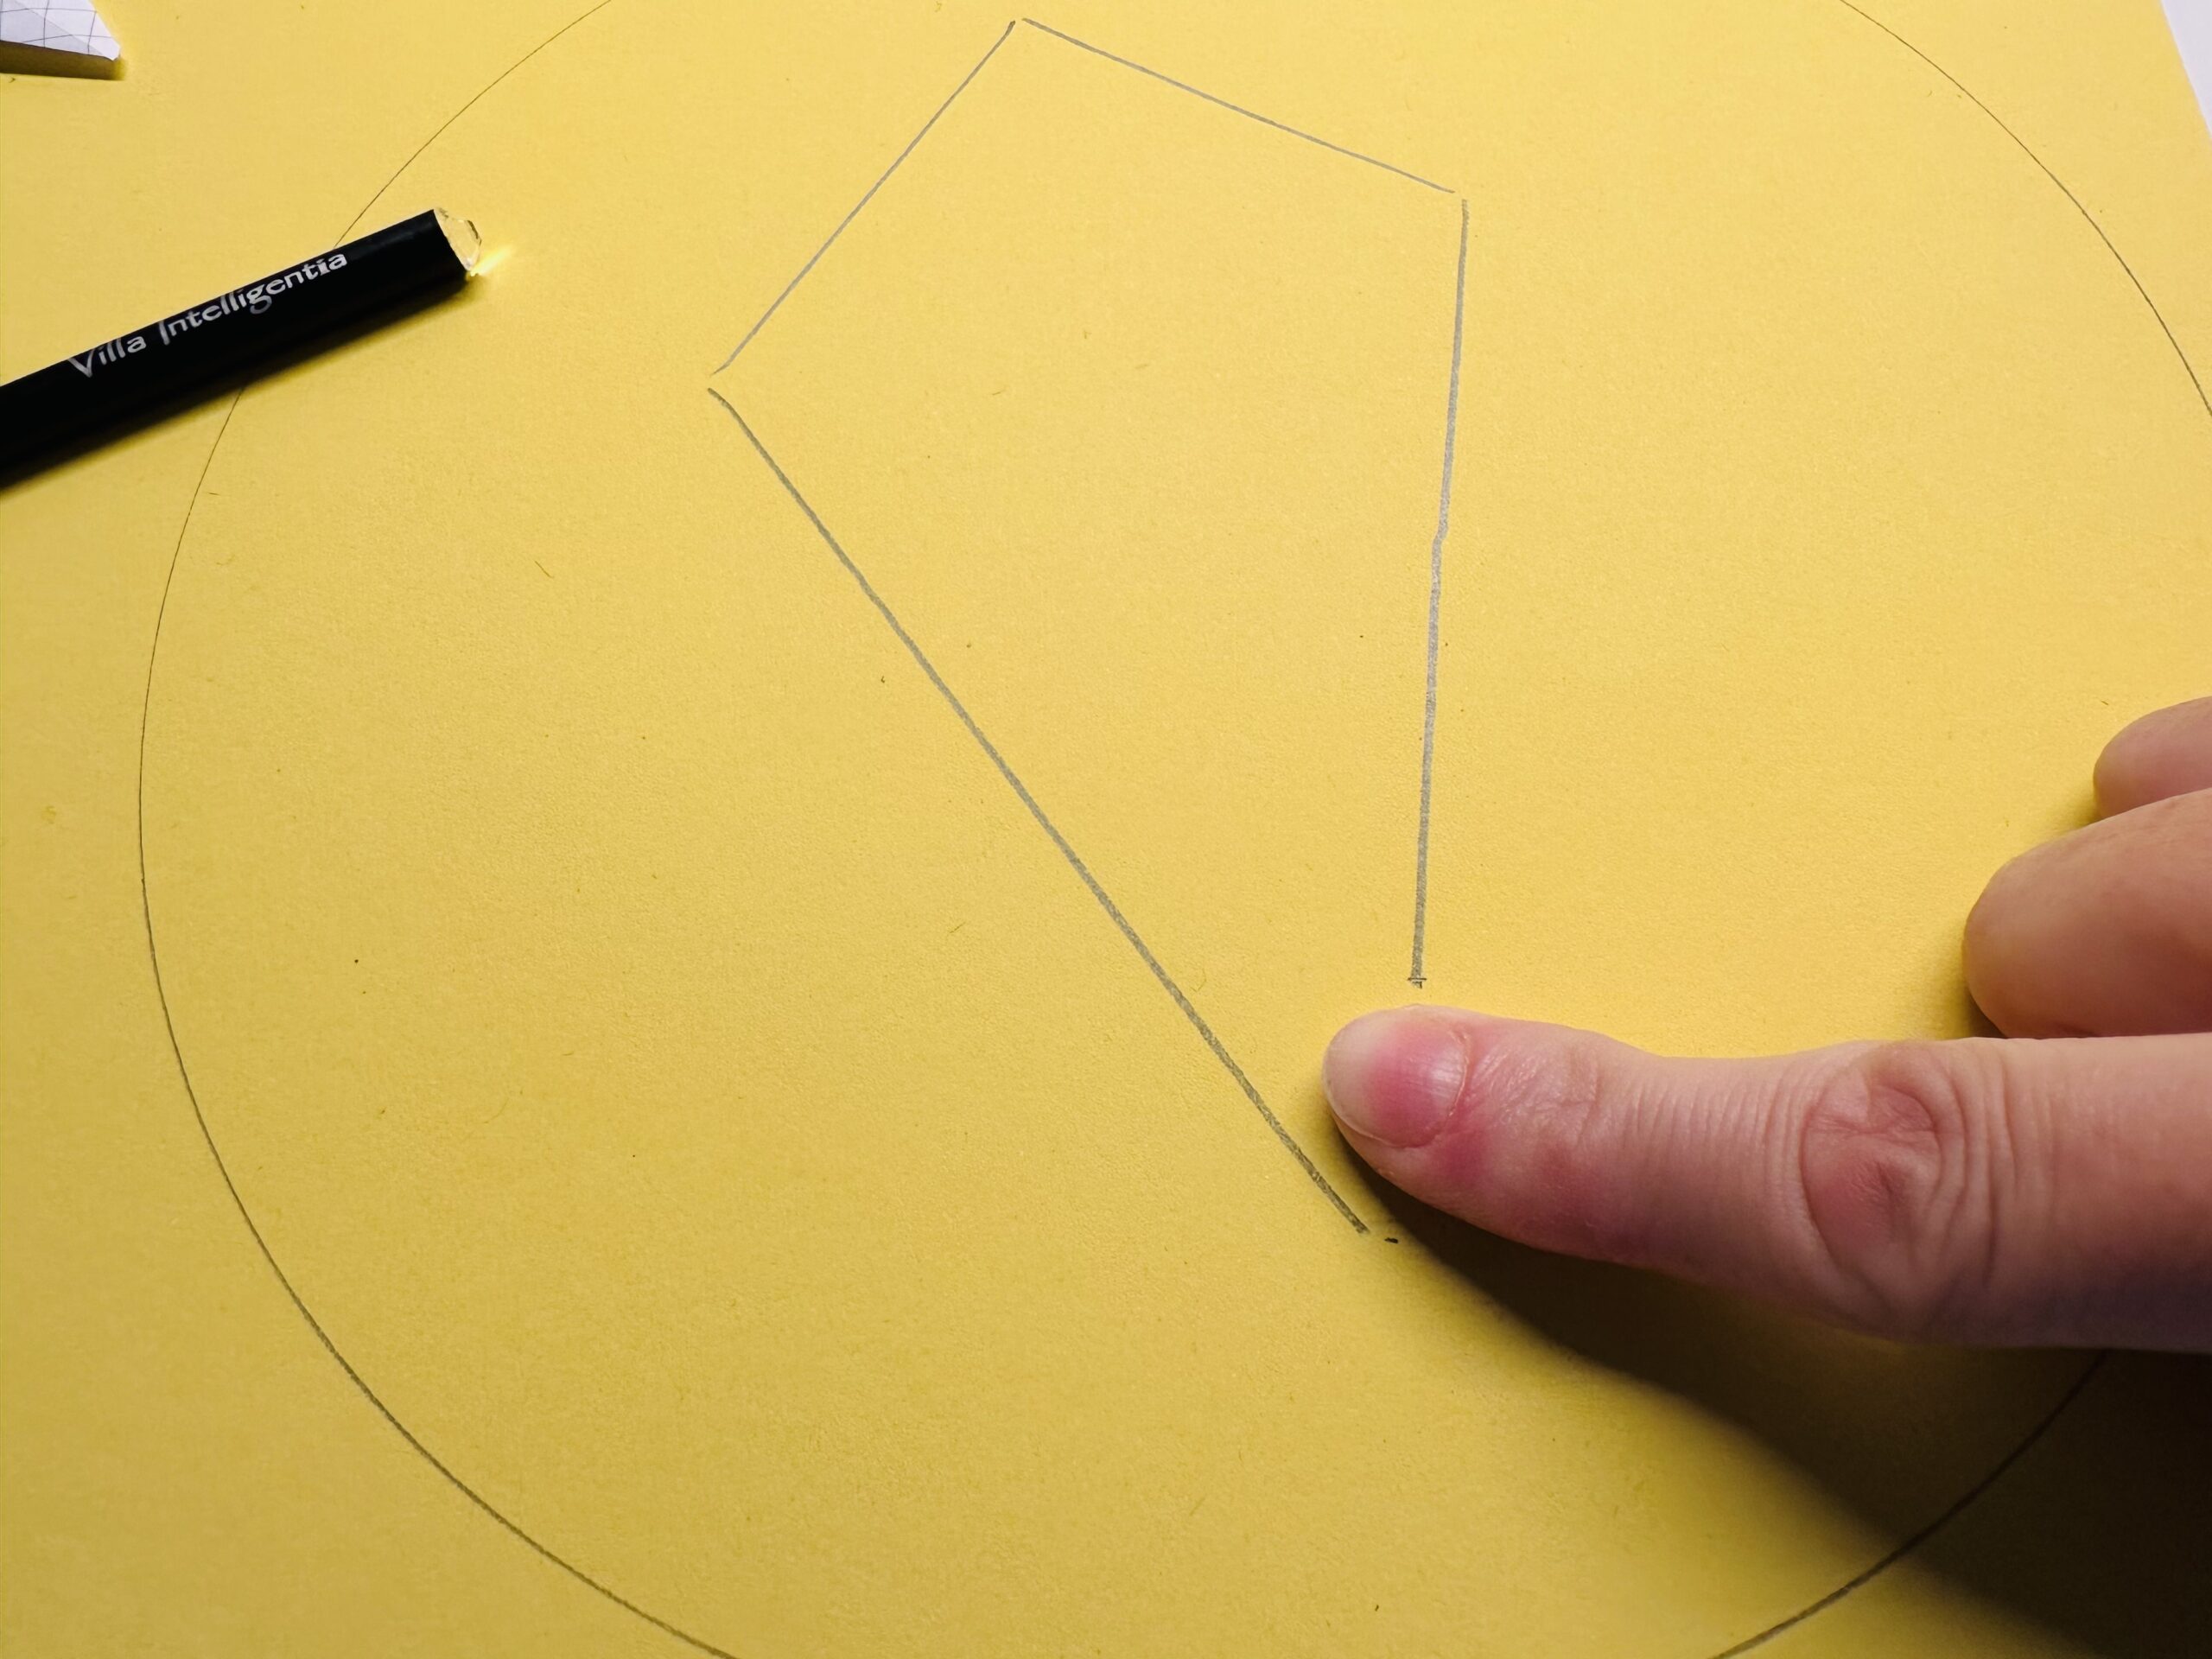
Bild zum Schritt 19 für das Bastel- und DIY-Abenteuer für Kinder: 'Höre mit dem ummalen einen oder zwei  Finger breit...'

18

This gap you need that the kite line stays right on the dragon and you don't cut it off. Here you start to paint a circle around the dragon.
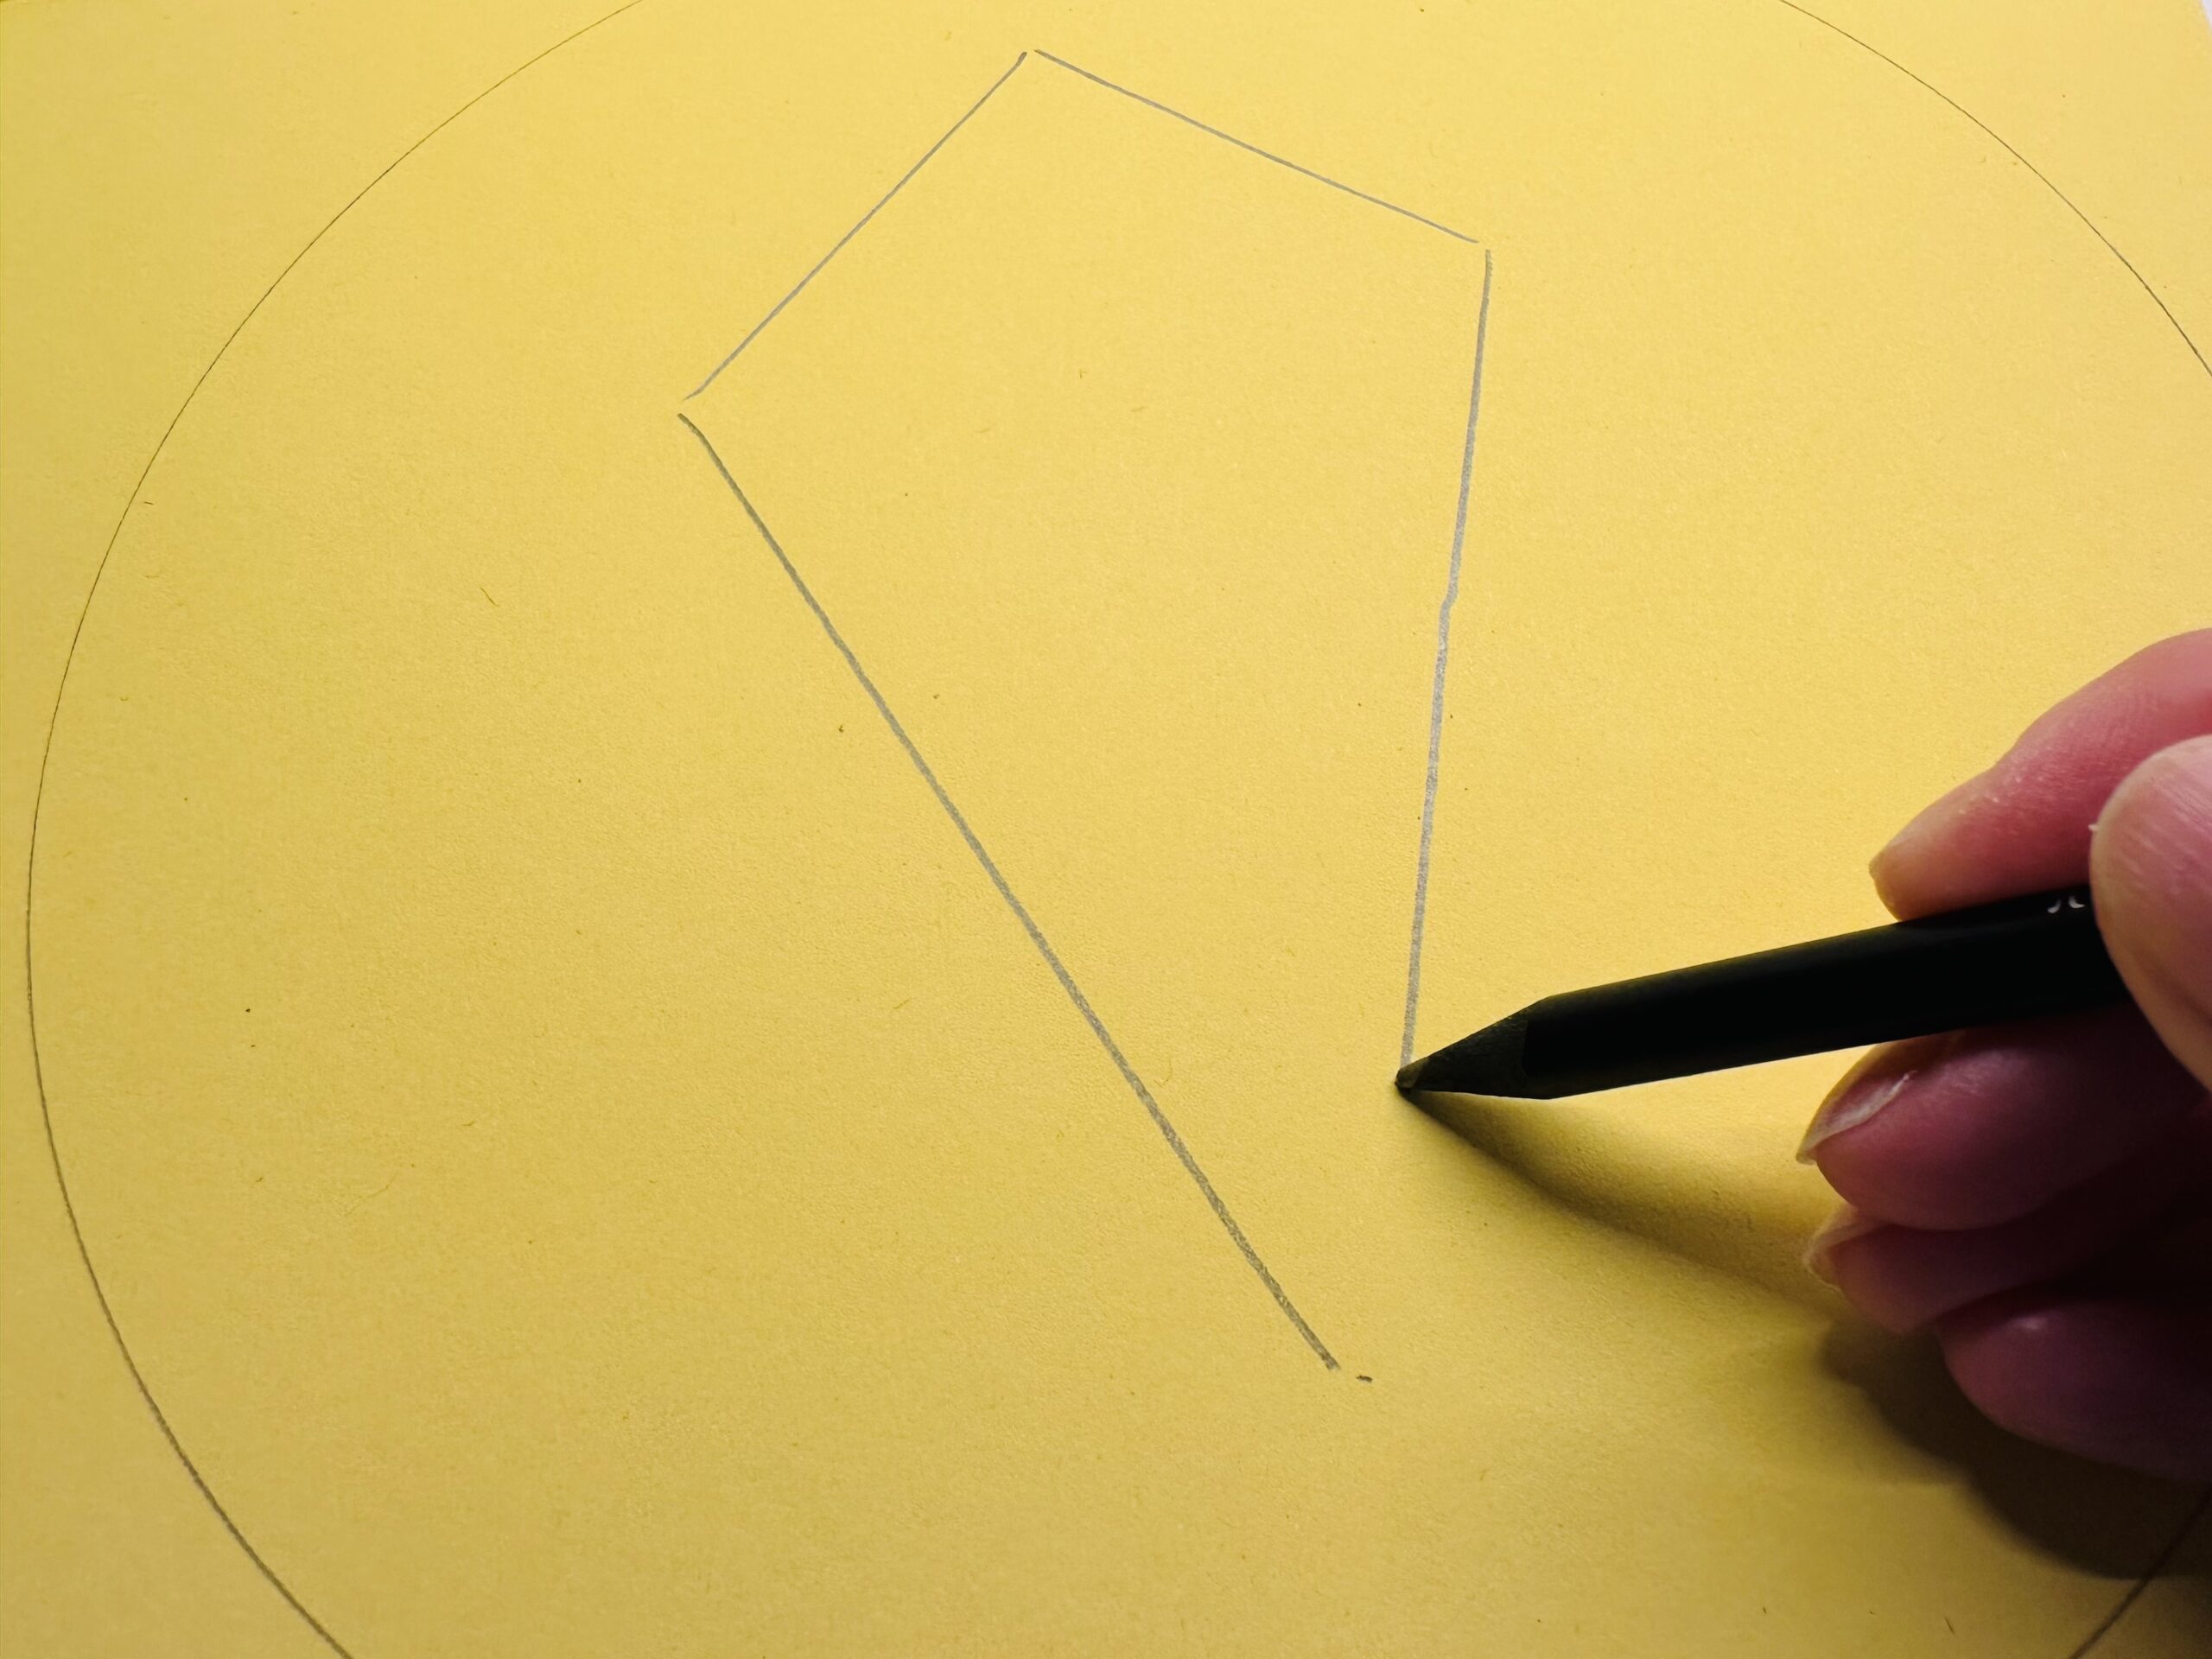
Bild zum Schritt 20 für das Bastel- und DIY-Abenteuer für Kinder: 'Diese Lücke brauchst du, dass die Drachenschnur nachher direkt am...'

19

Umpaint the dragon with large circles. The first circle closes at the bottom of the dragon.
The distance between the two lines shows you how the other rings are painted. Always try to keep the same distance from the previous line.
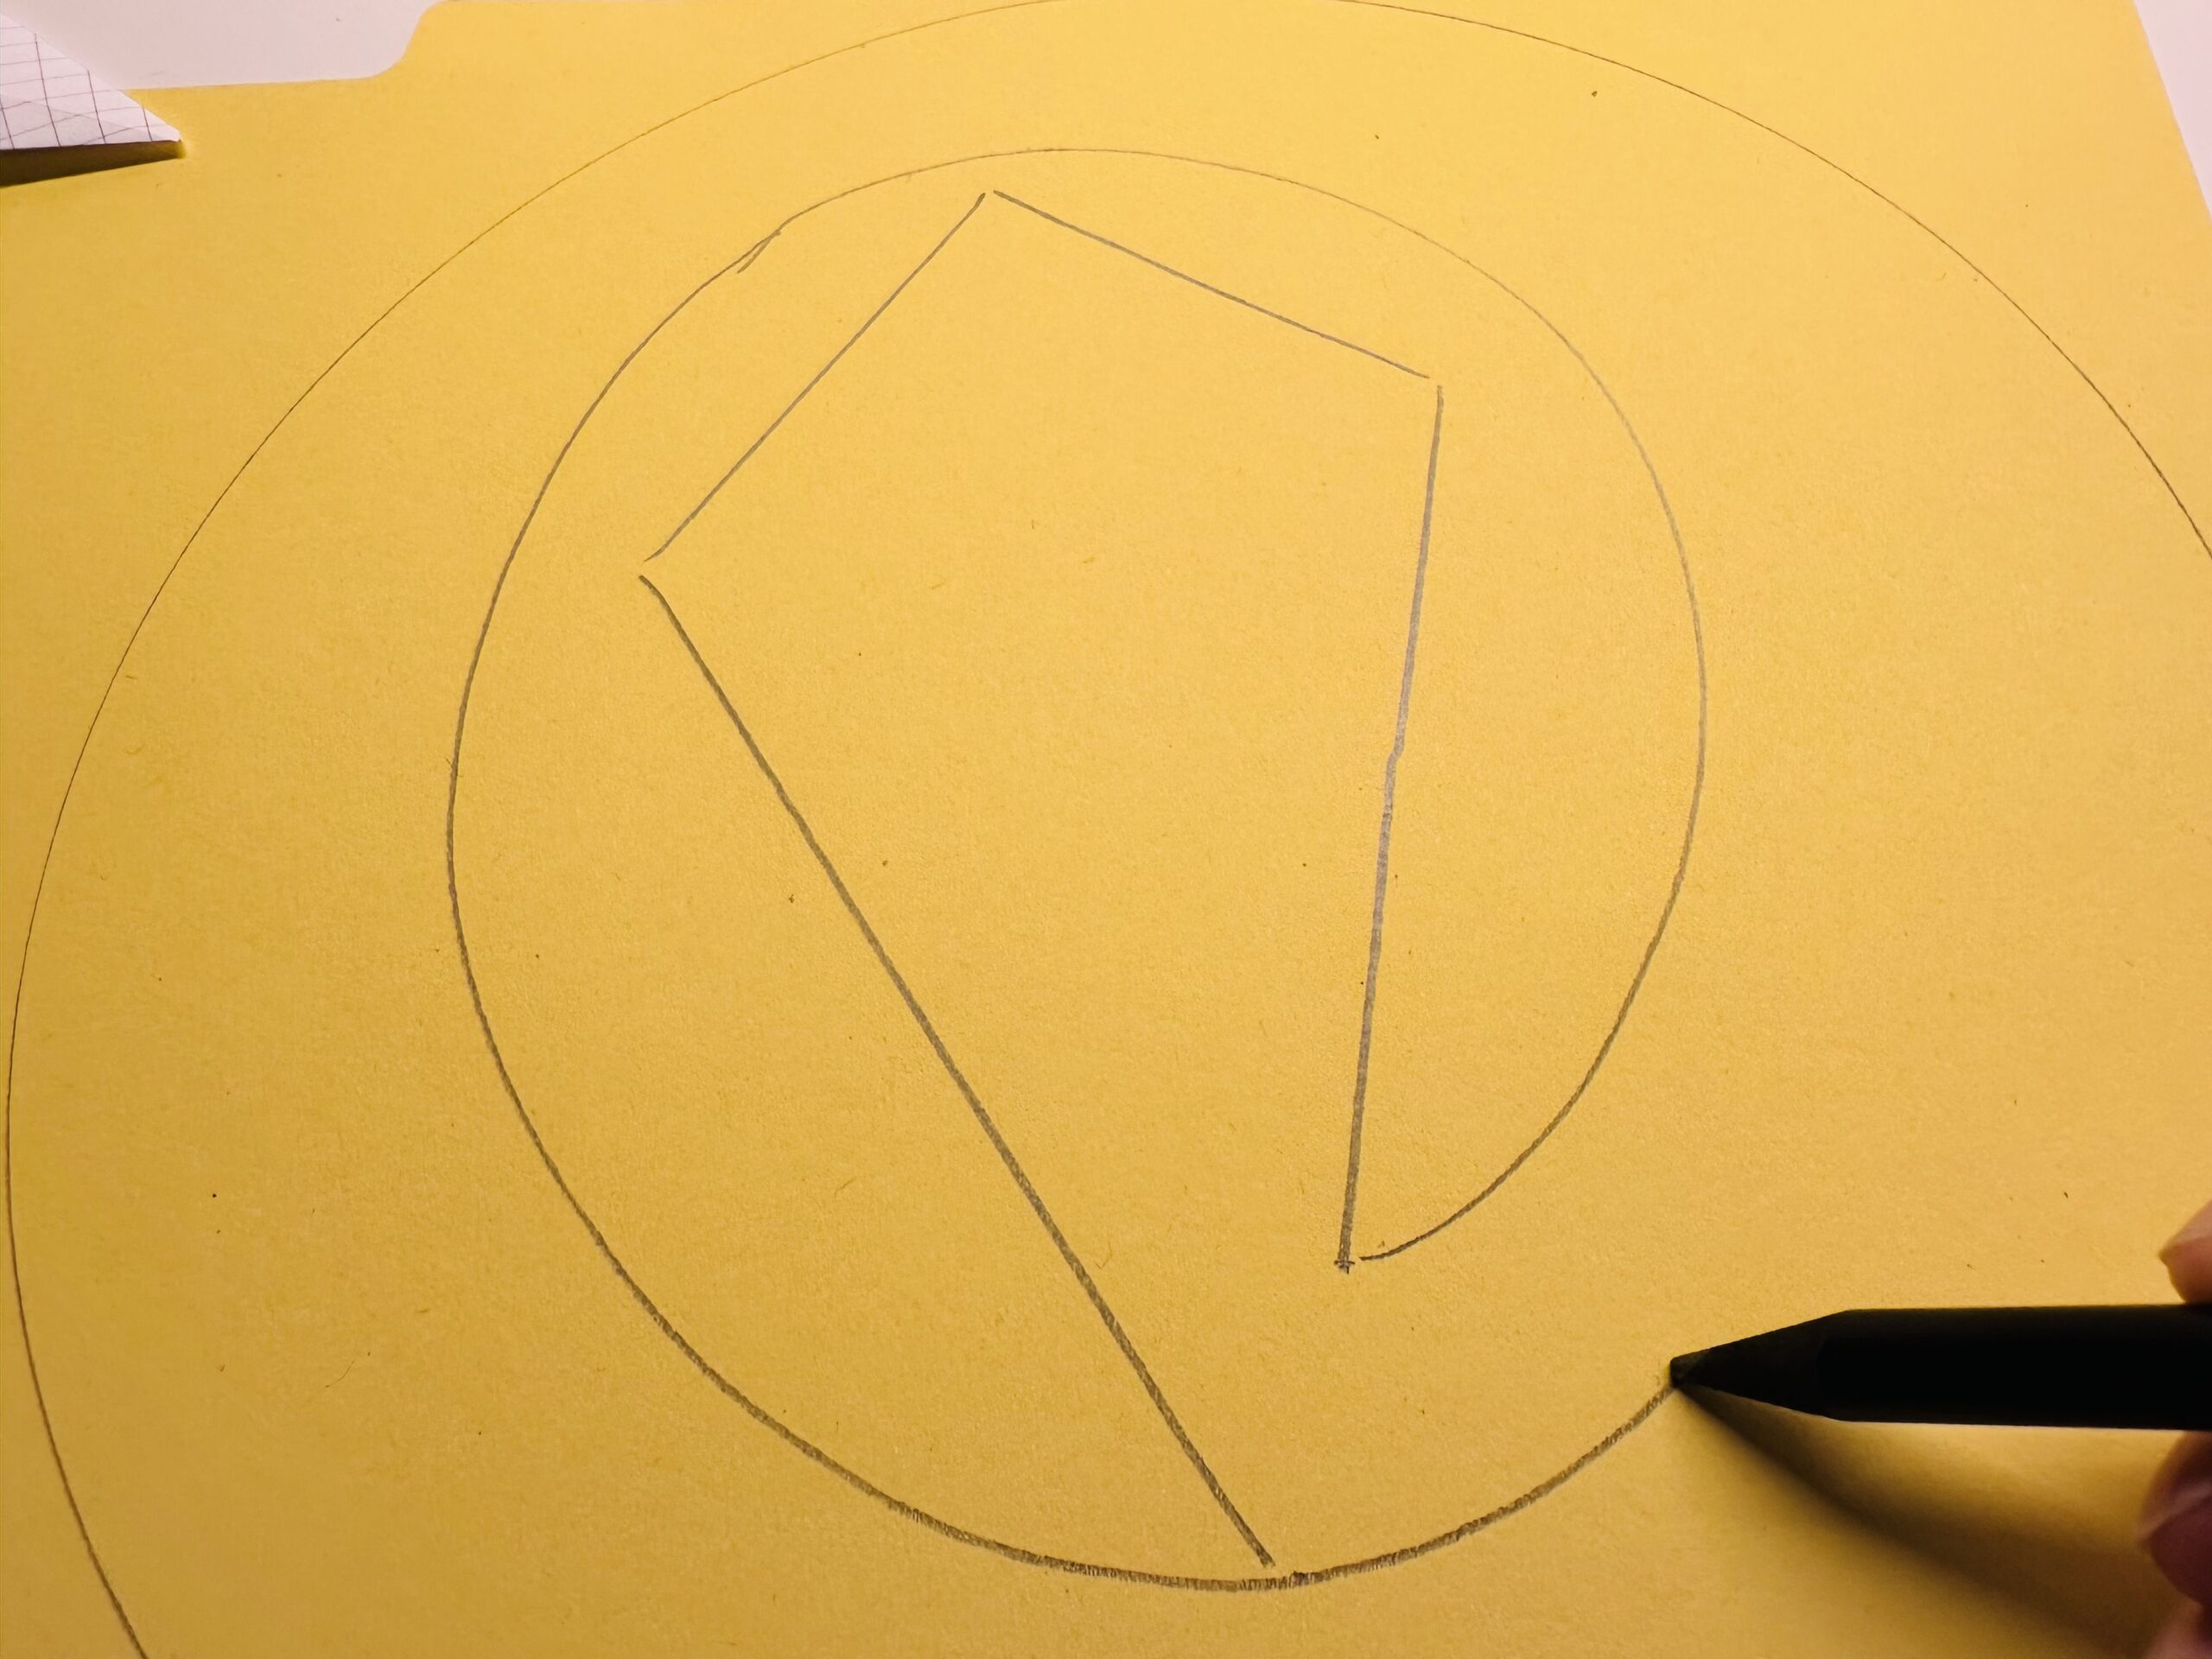
Bild zum Schritt 21 für das Bastel- und DIY-Abenteuer für Kinder: 'Ummale den Drachen mit großen Kreisen. Der erste Kreis schließt...'

20

Paint circles around the dragon until you reach the outer line of the circle. Here ends the "dragon cord".
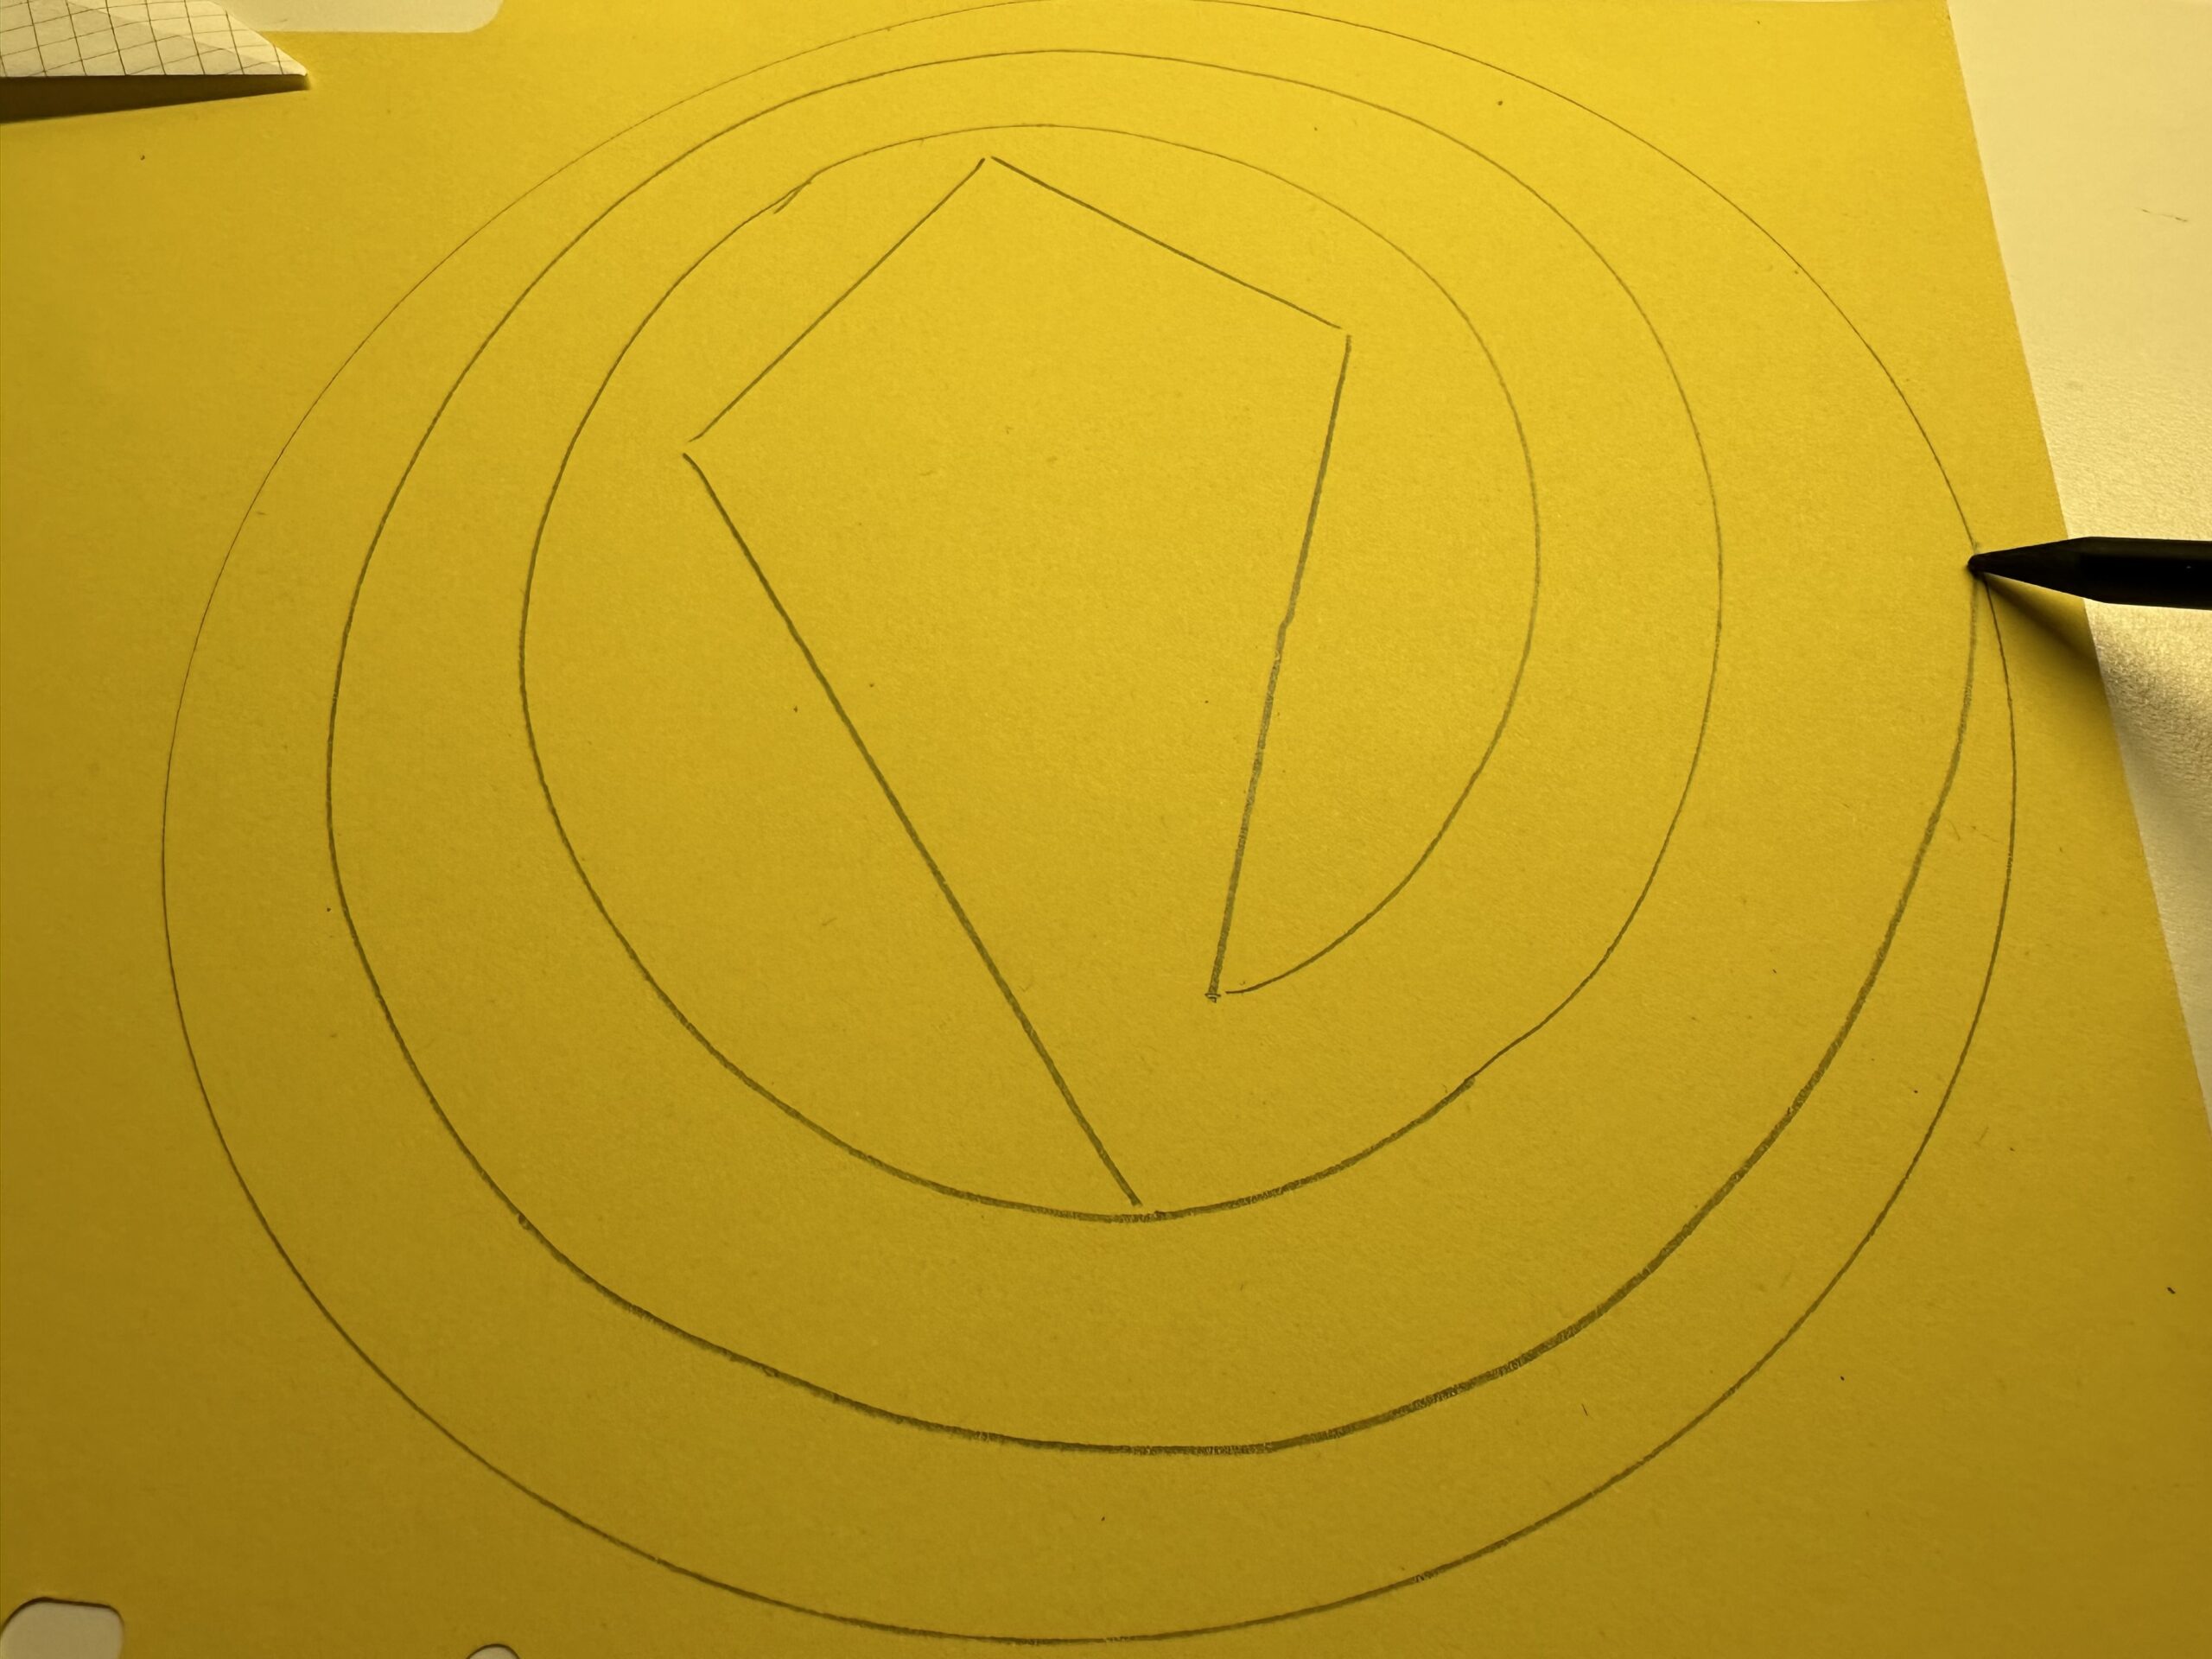
Bild zum Schritt 22 für das Bastel- und DIY-Abenteuer für Kinder: 'Male solange Kreise um den Drachen, bis du an der...'

21

Now you can paint a friendly face on your dragon.
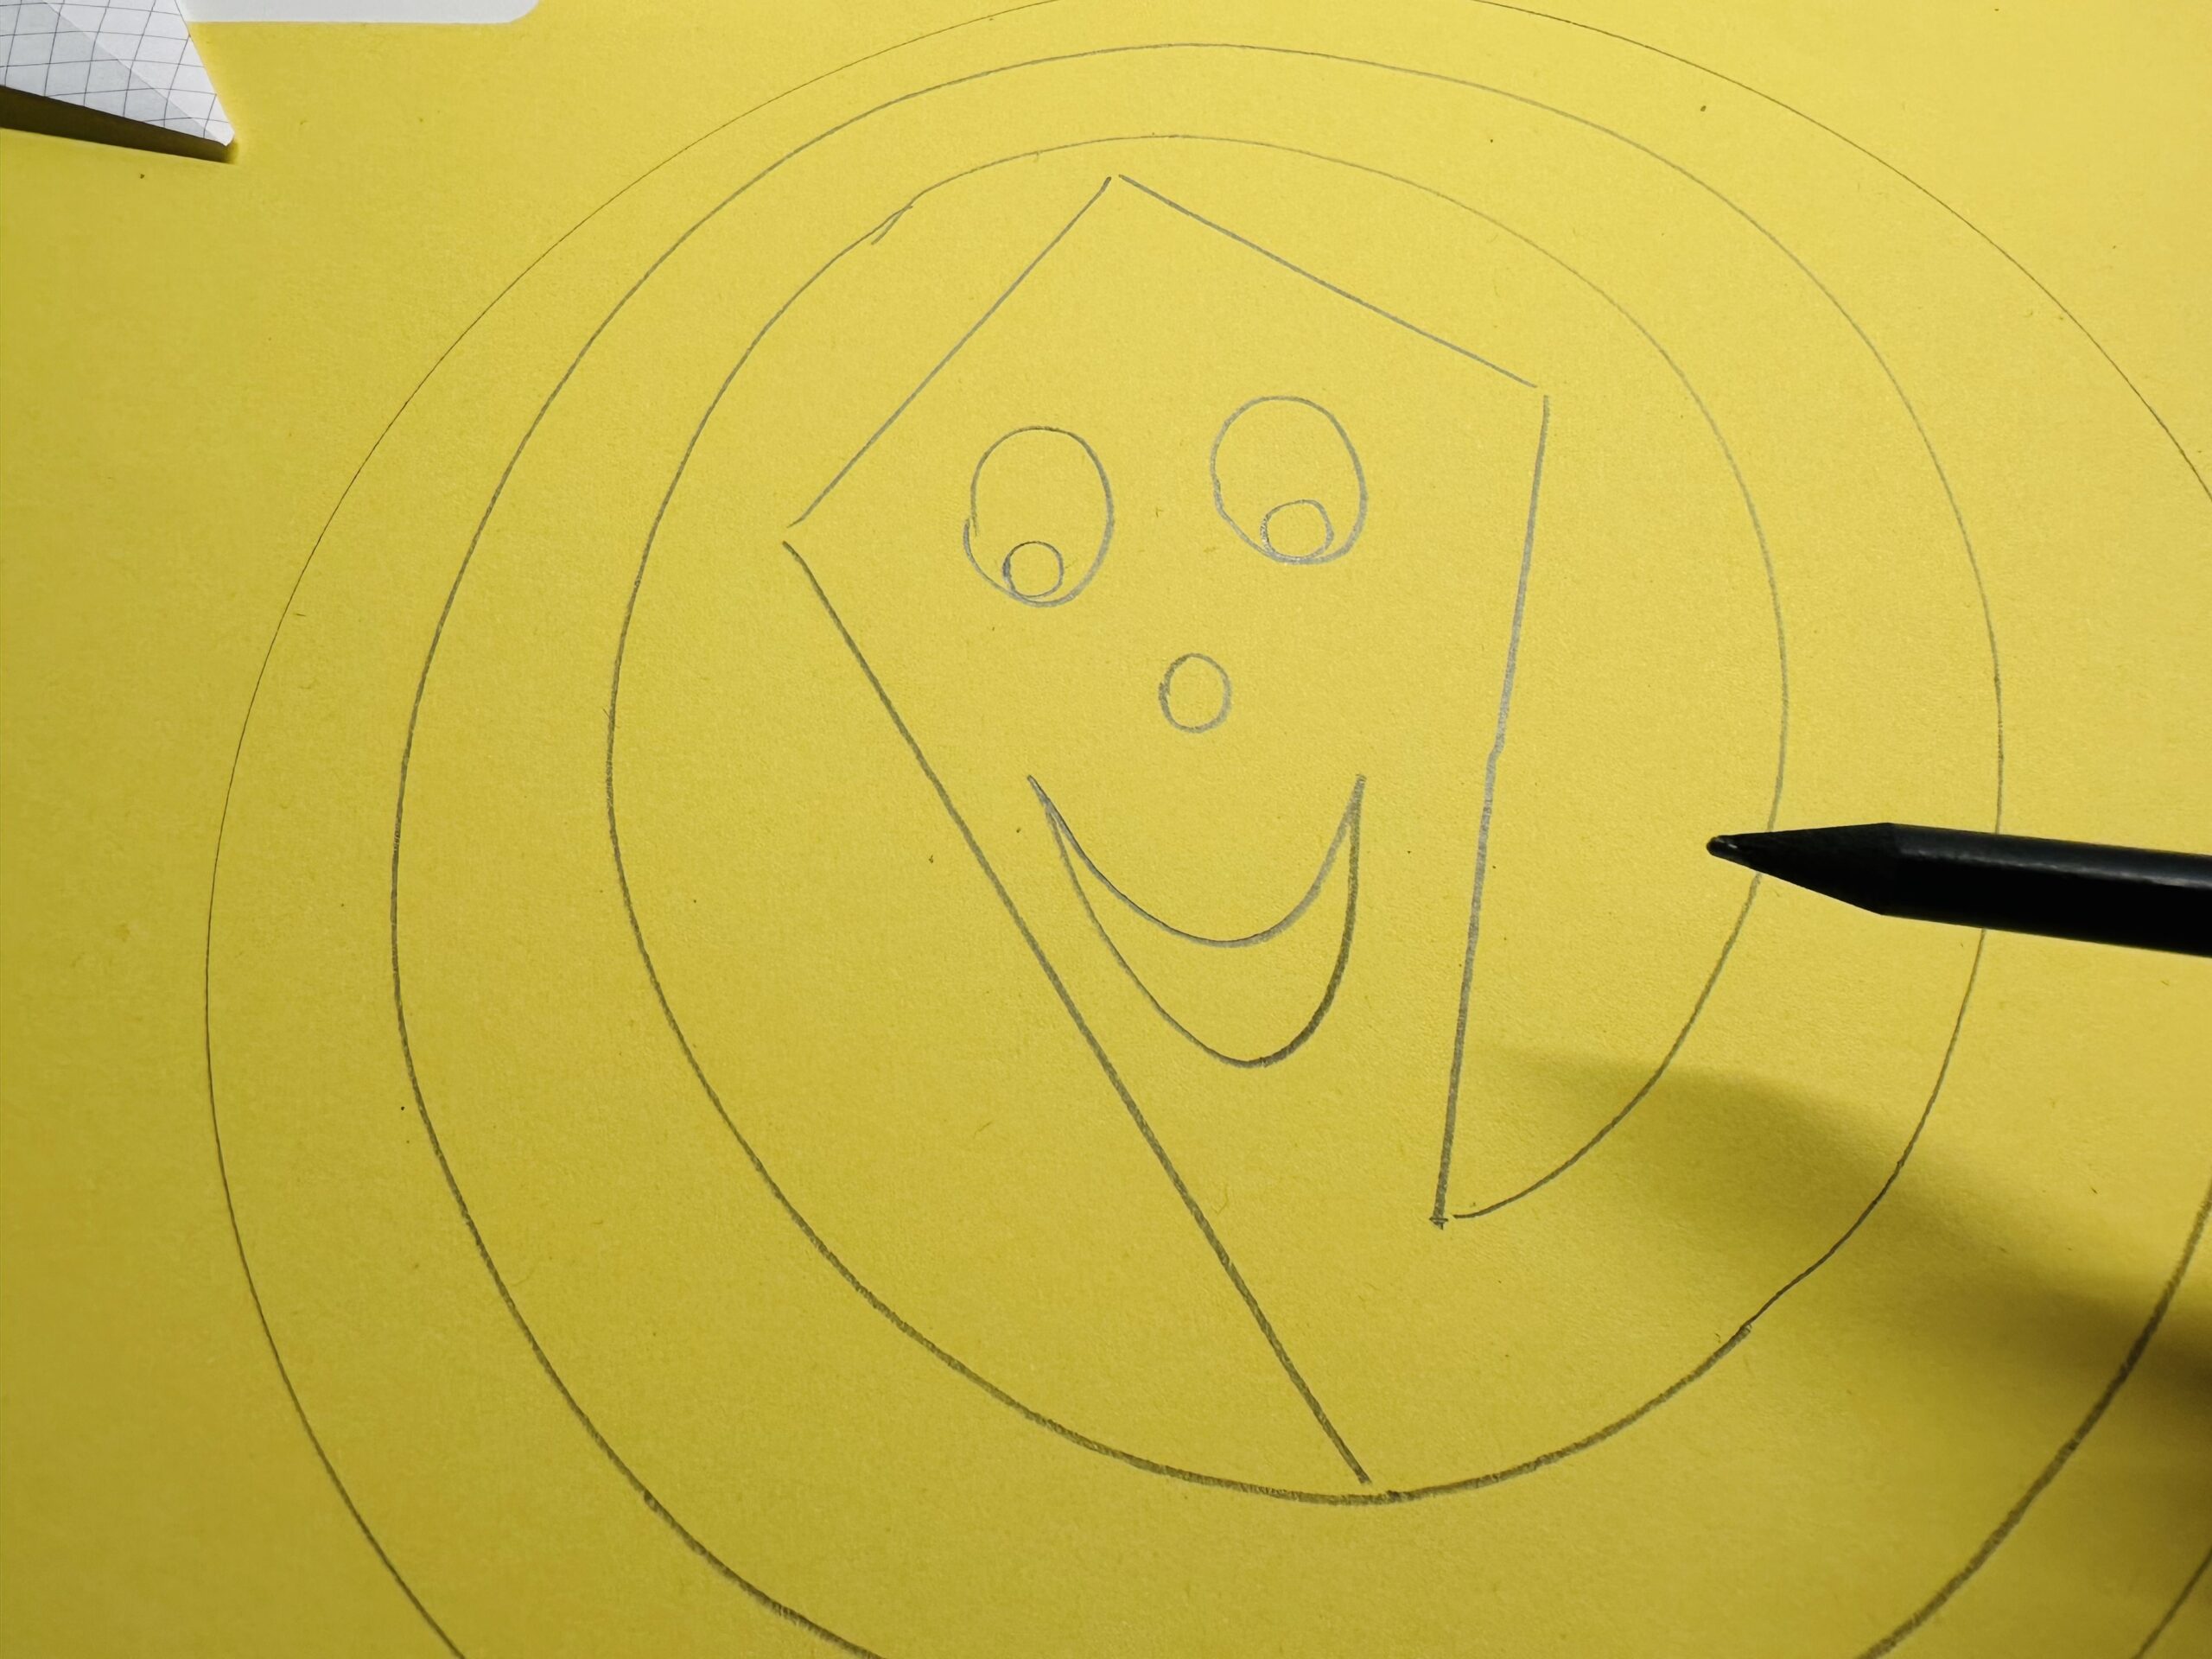
Bild zum Schritt 23 für das Bastel- und DIY-Abenteuer für Kinder: 'Nun kannst du deinem Drachen ein freundliches Gesicht aufmalen.'

22

Cut out the outer circle with the scissors once completely.
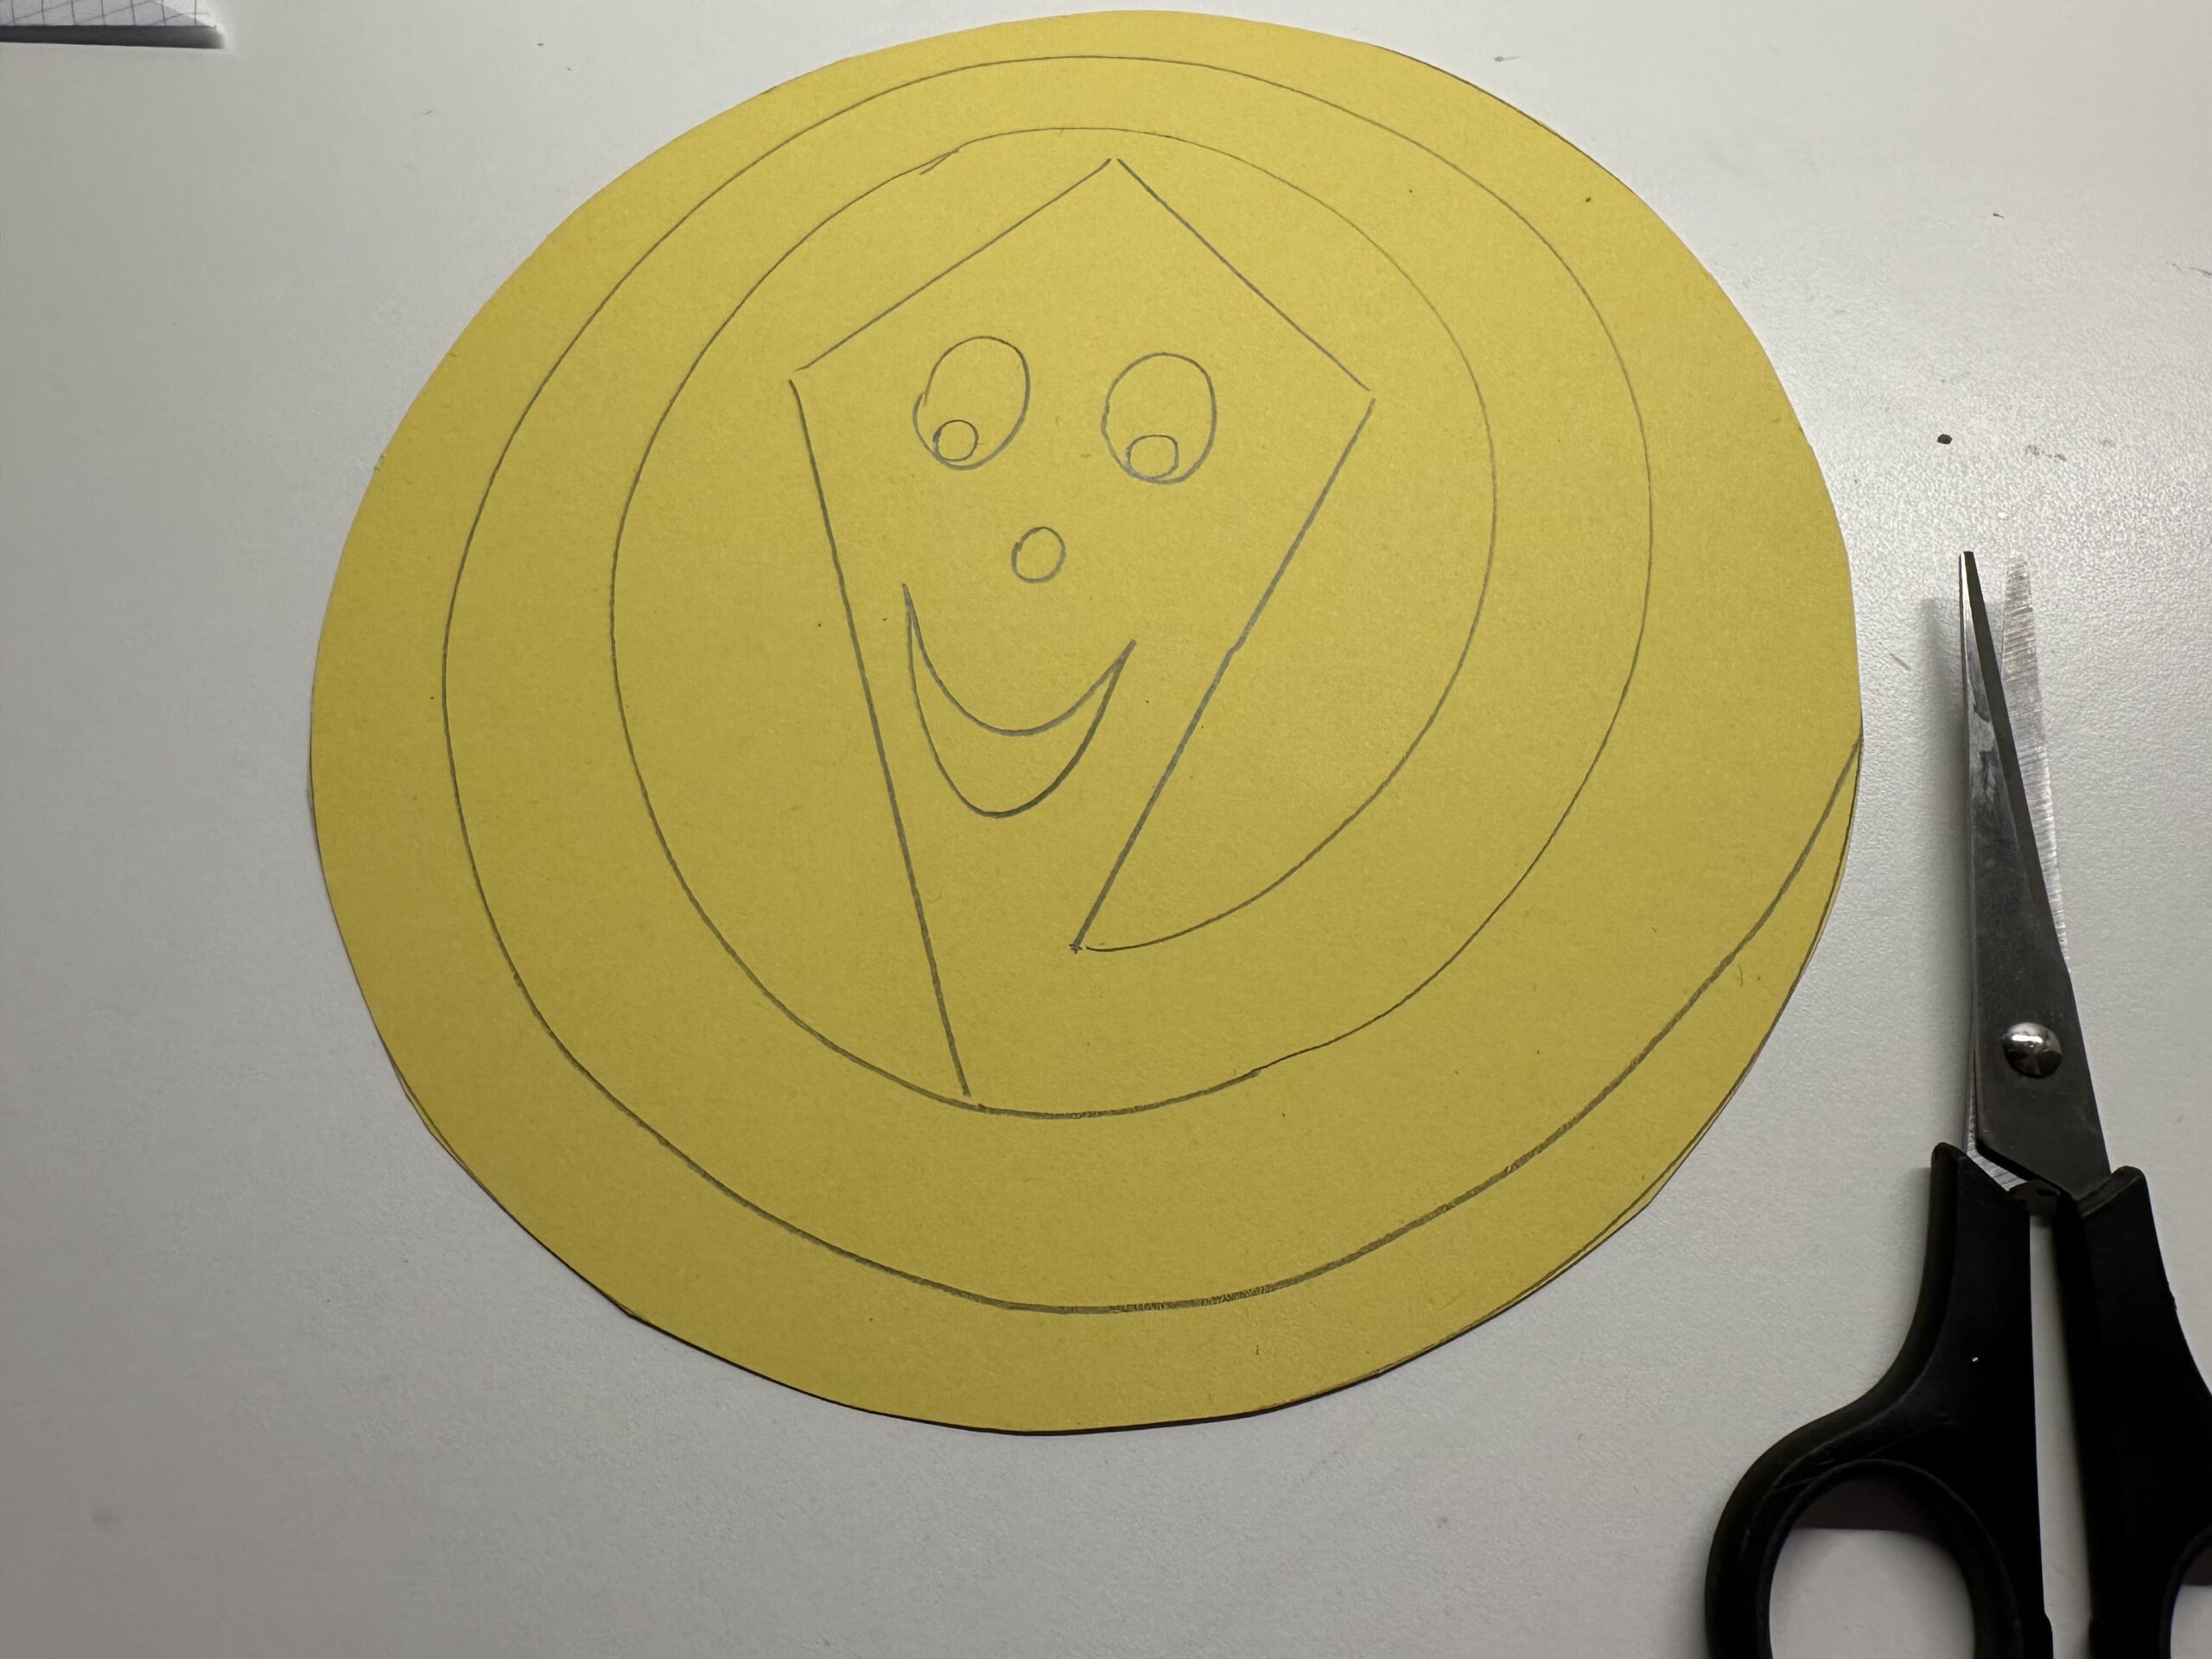
Bild zum Schritt 24 für das Bastel- und DIY-Abenteuer für Kinder: 'Schneide mit der Schere den äußeren Kreis einmal komplett aus.'

23

Now start cutting at the line that touches the outer circle. See picture.
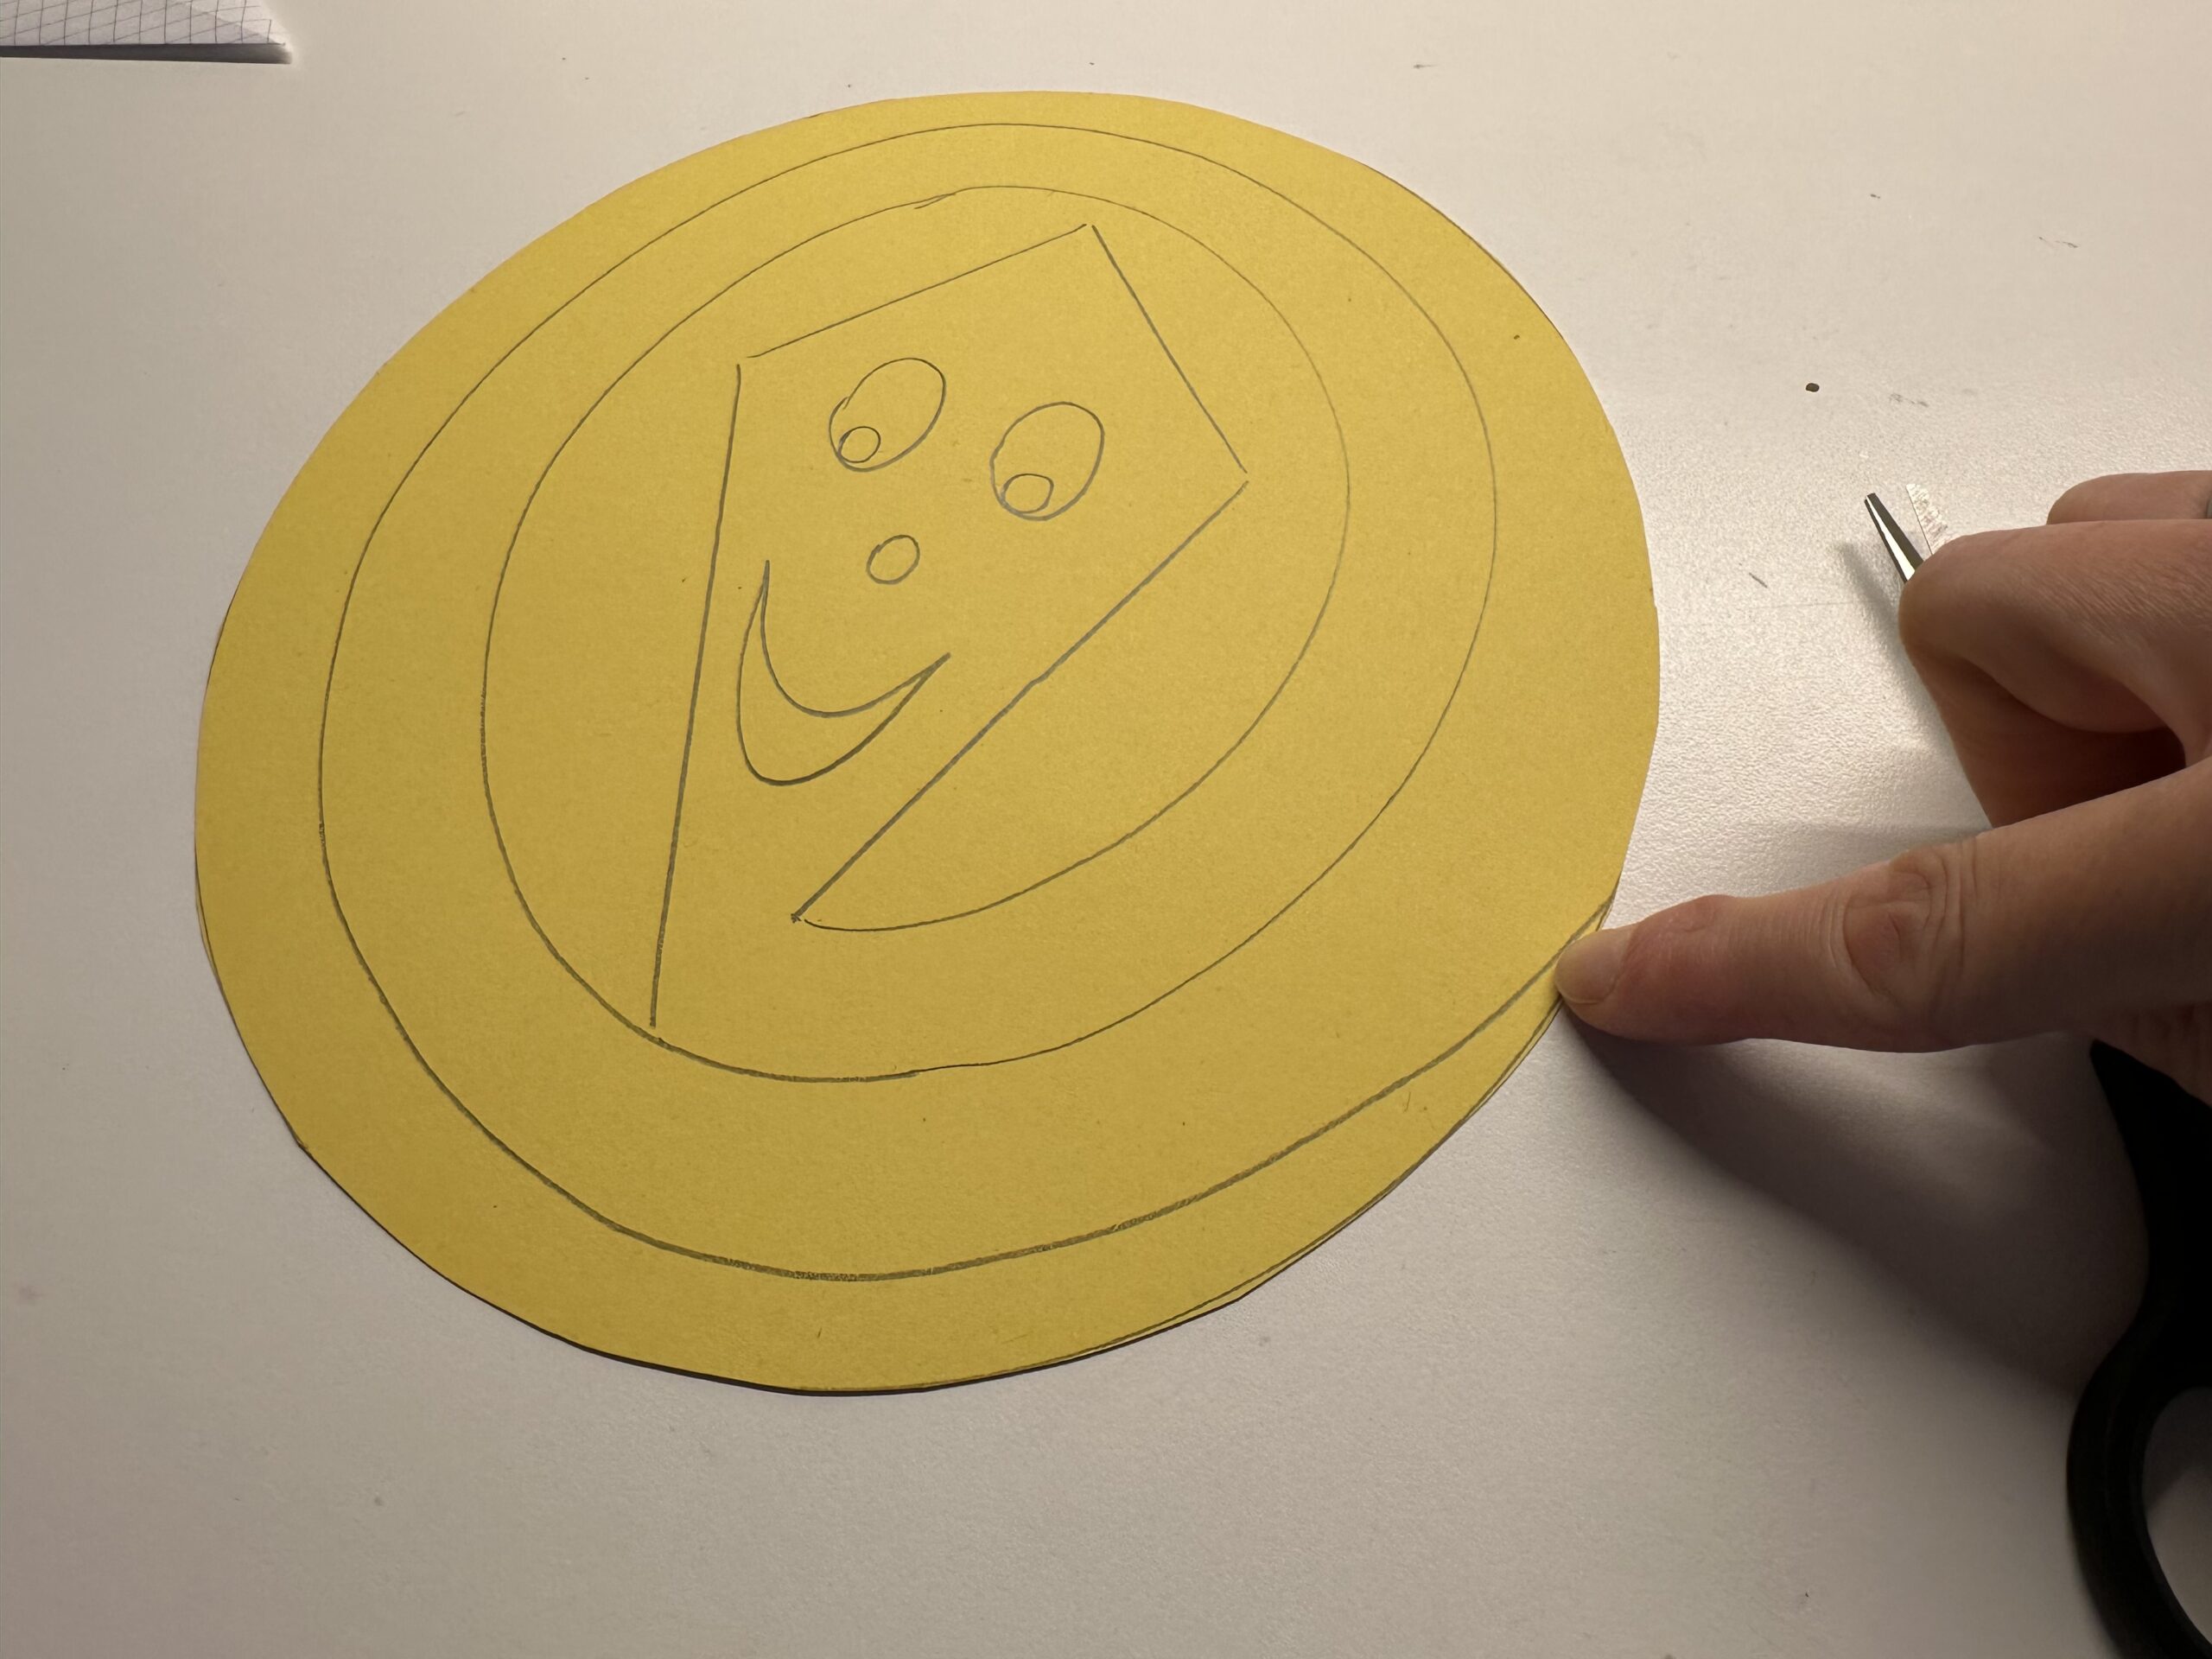
Bild zum Schritt 25 für das Bastel- und DIY-Abenteuer für Kinder: 'Beginne nun an der Linie, die den äußeren Kreis berührt,...'

24

Cut from the outside to the inside of the line. Turn the paper circle again and again so that you can cut well.
Cut to the beginning of the dragon.
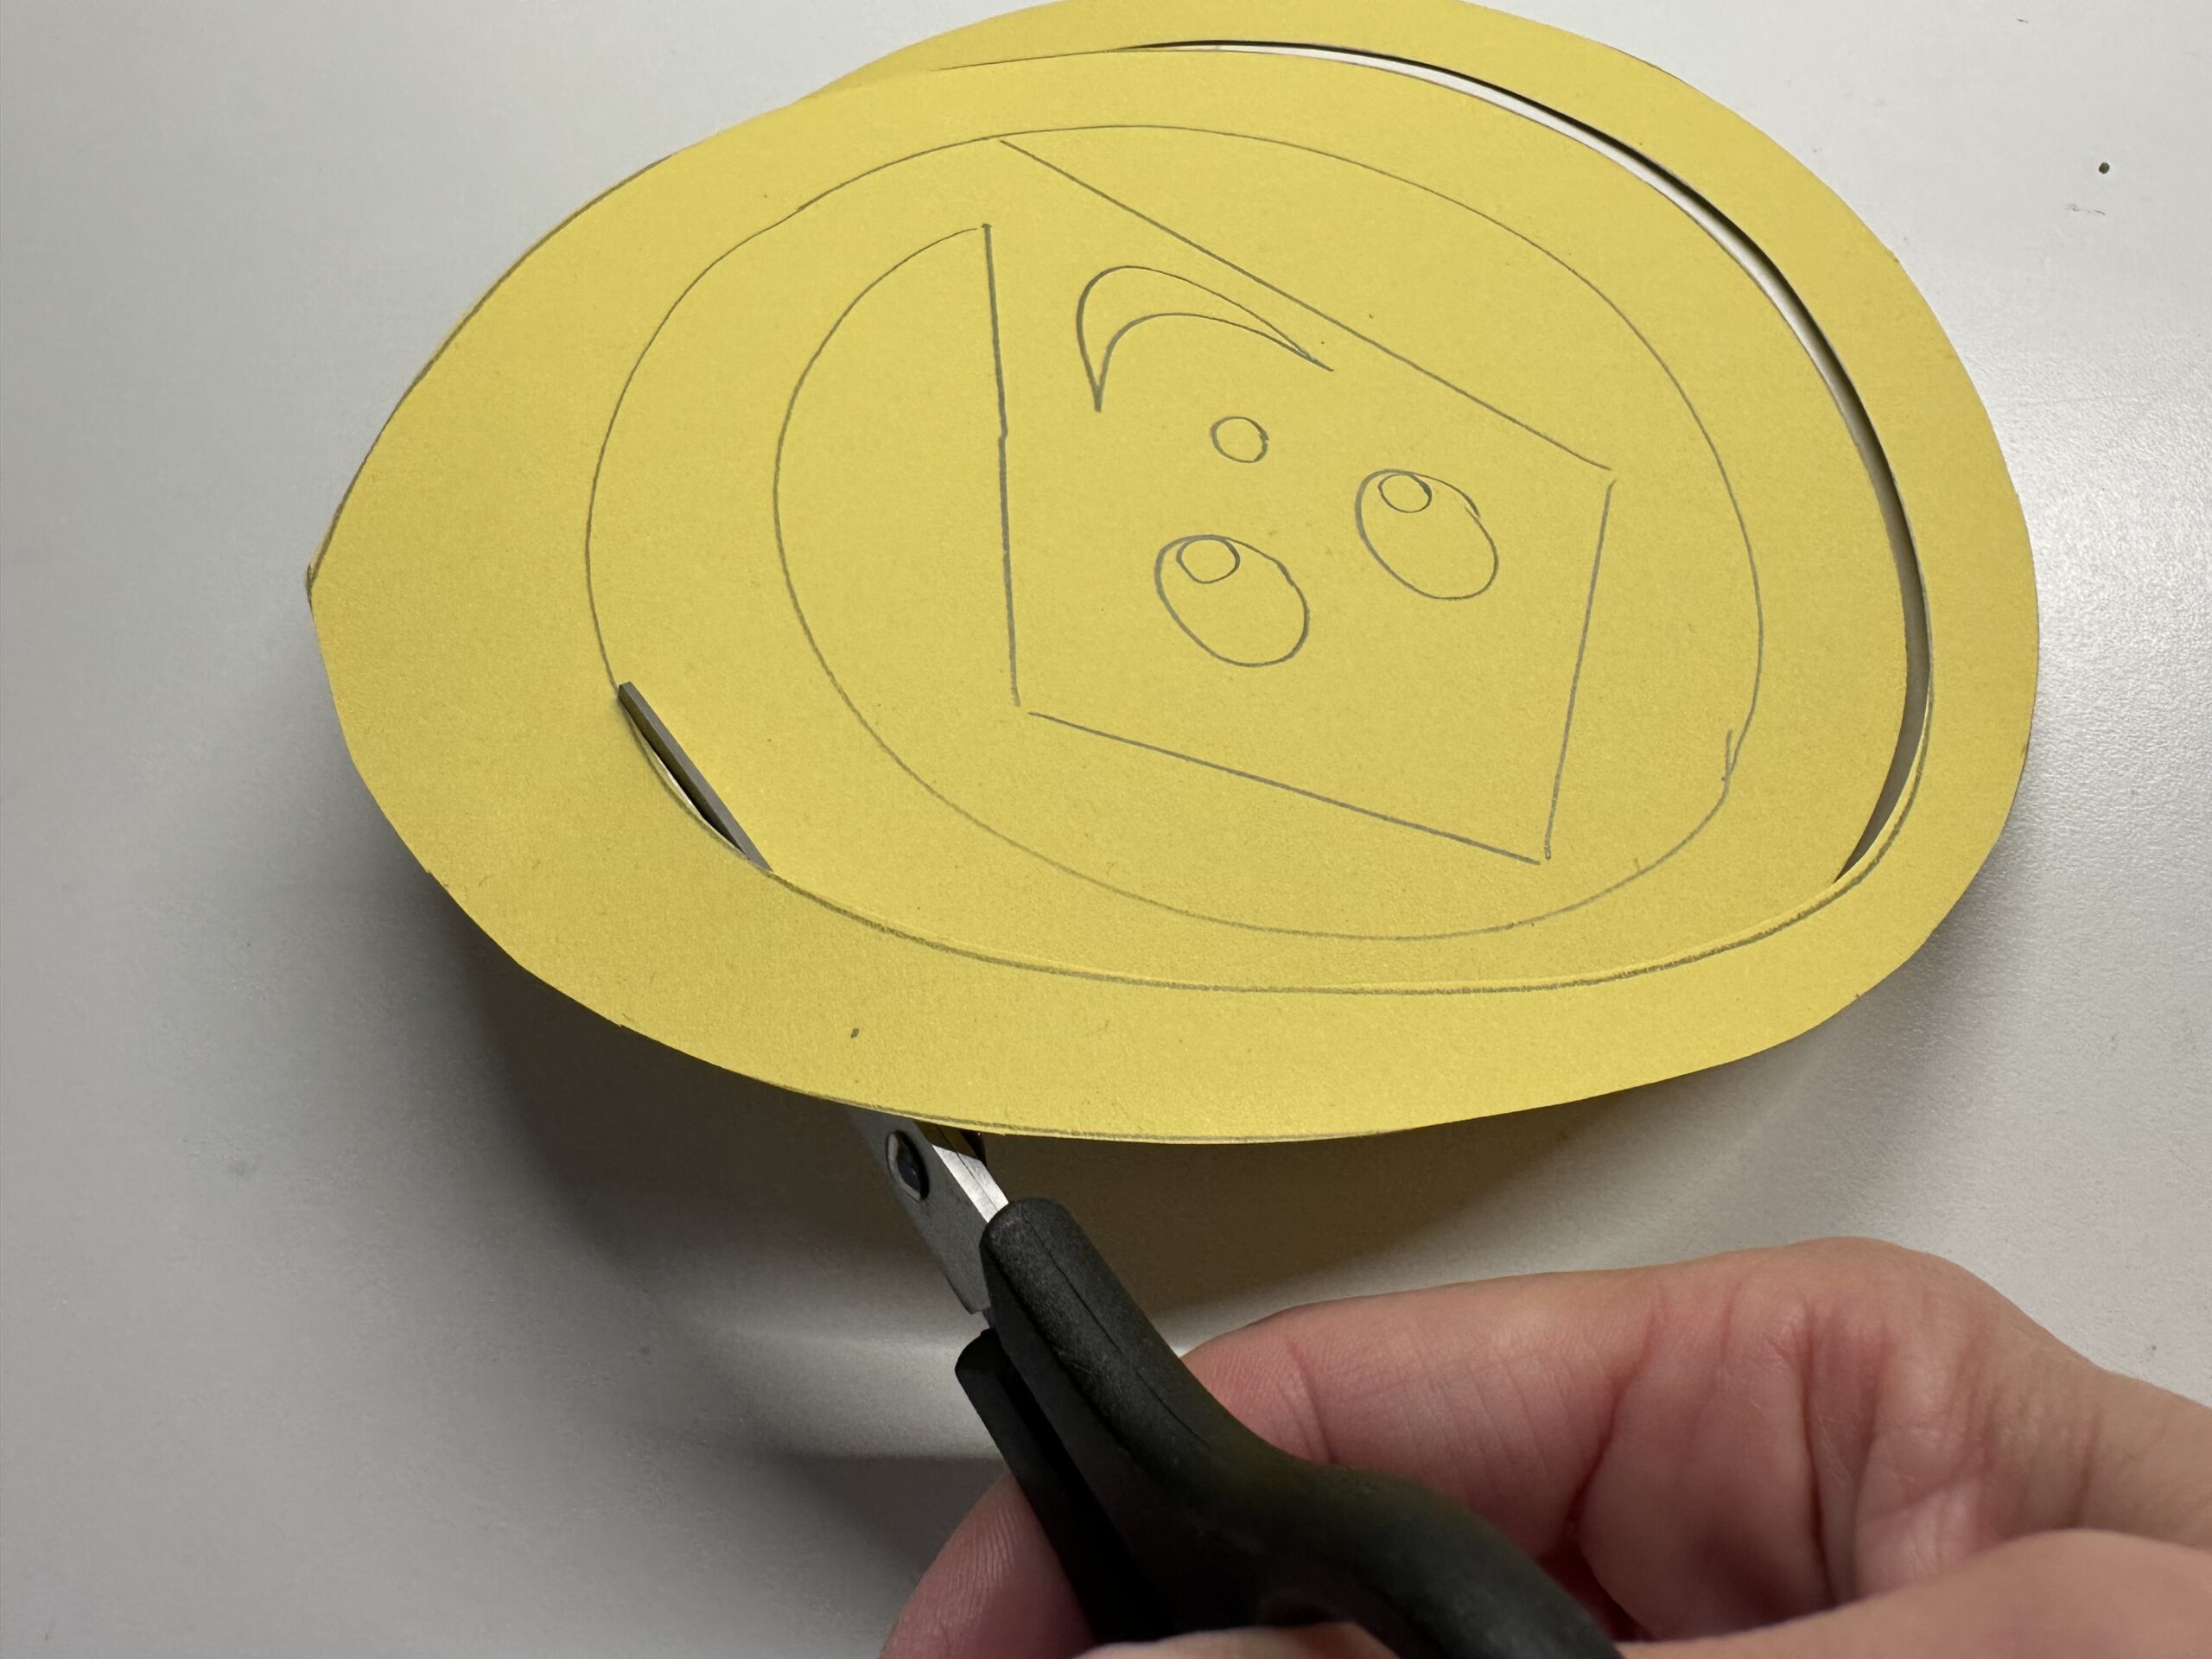
Bild zum Schritt 26 für das Bastel- und DIY-Abenteuer für Kinder: 'Schneide von außen nach innen der Linie nach. Drehe dabei...'

25

Now you can cut out the dragon. Follow the line you painted before.
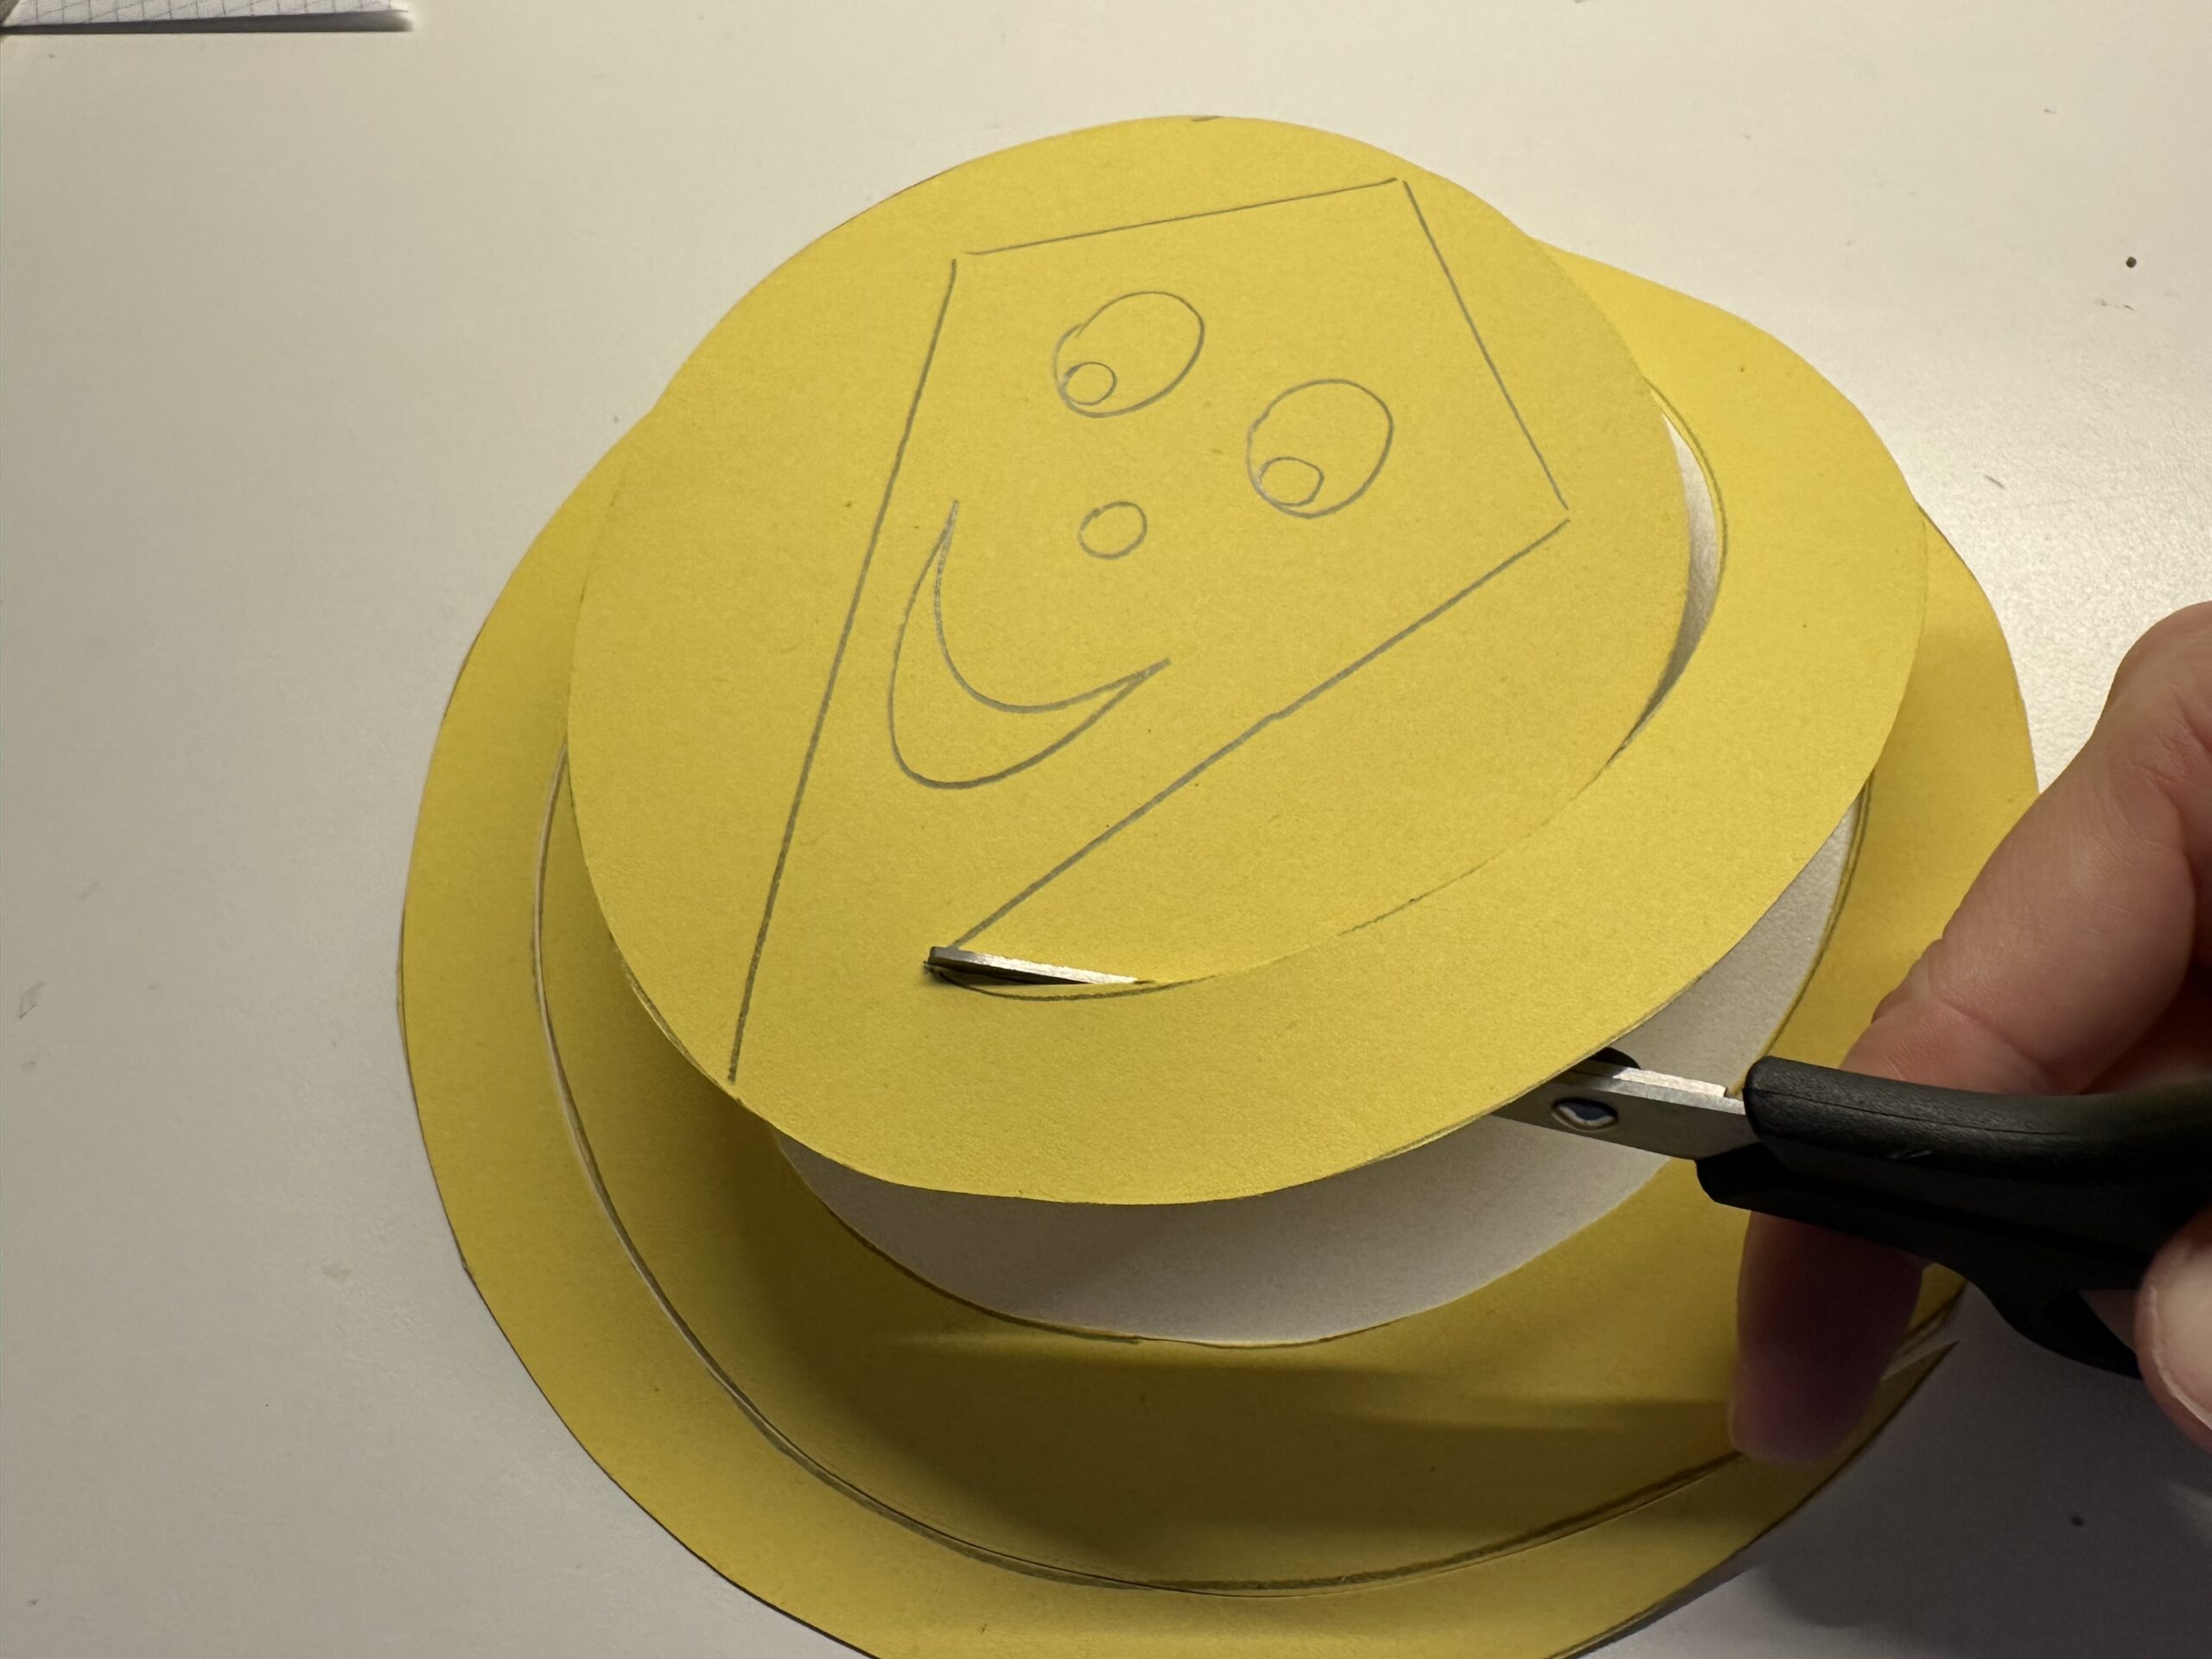
Bild zum Schritt 27 für das Bastel- und DIY-Abenteuer für Kinder: 'Nun kannst du den Drachen ausschneiden. Folge der Linie die...'

26

The dragon "hangs" right on the long strip you cut along.
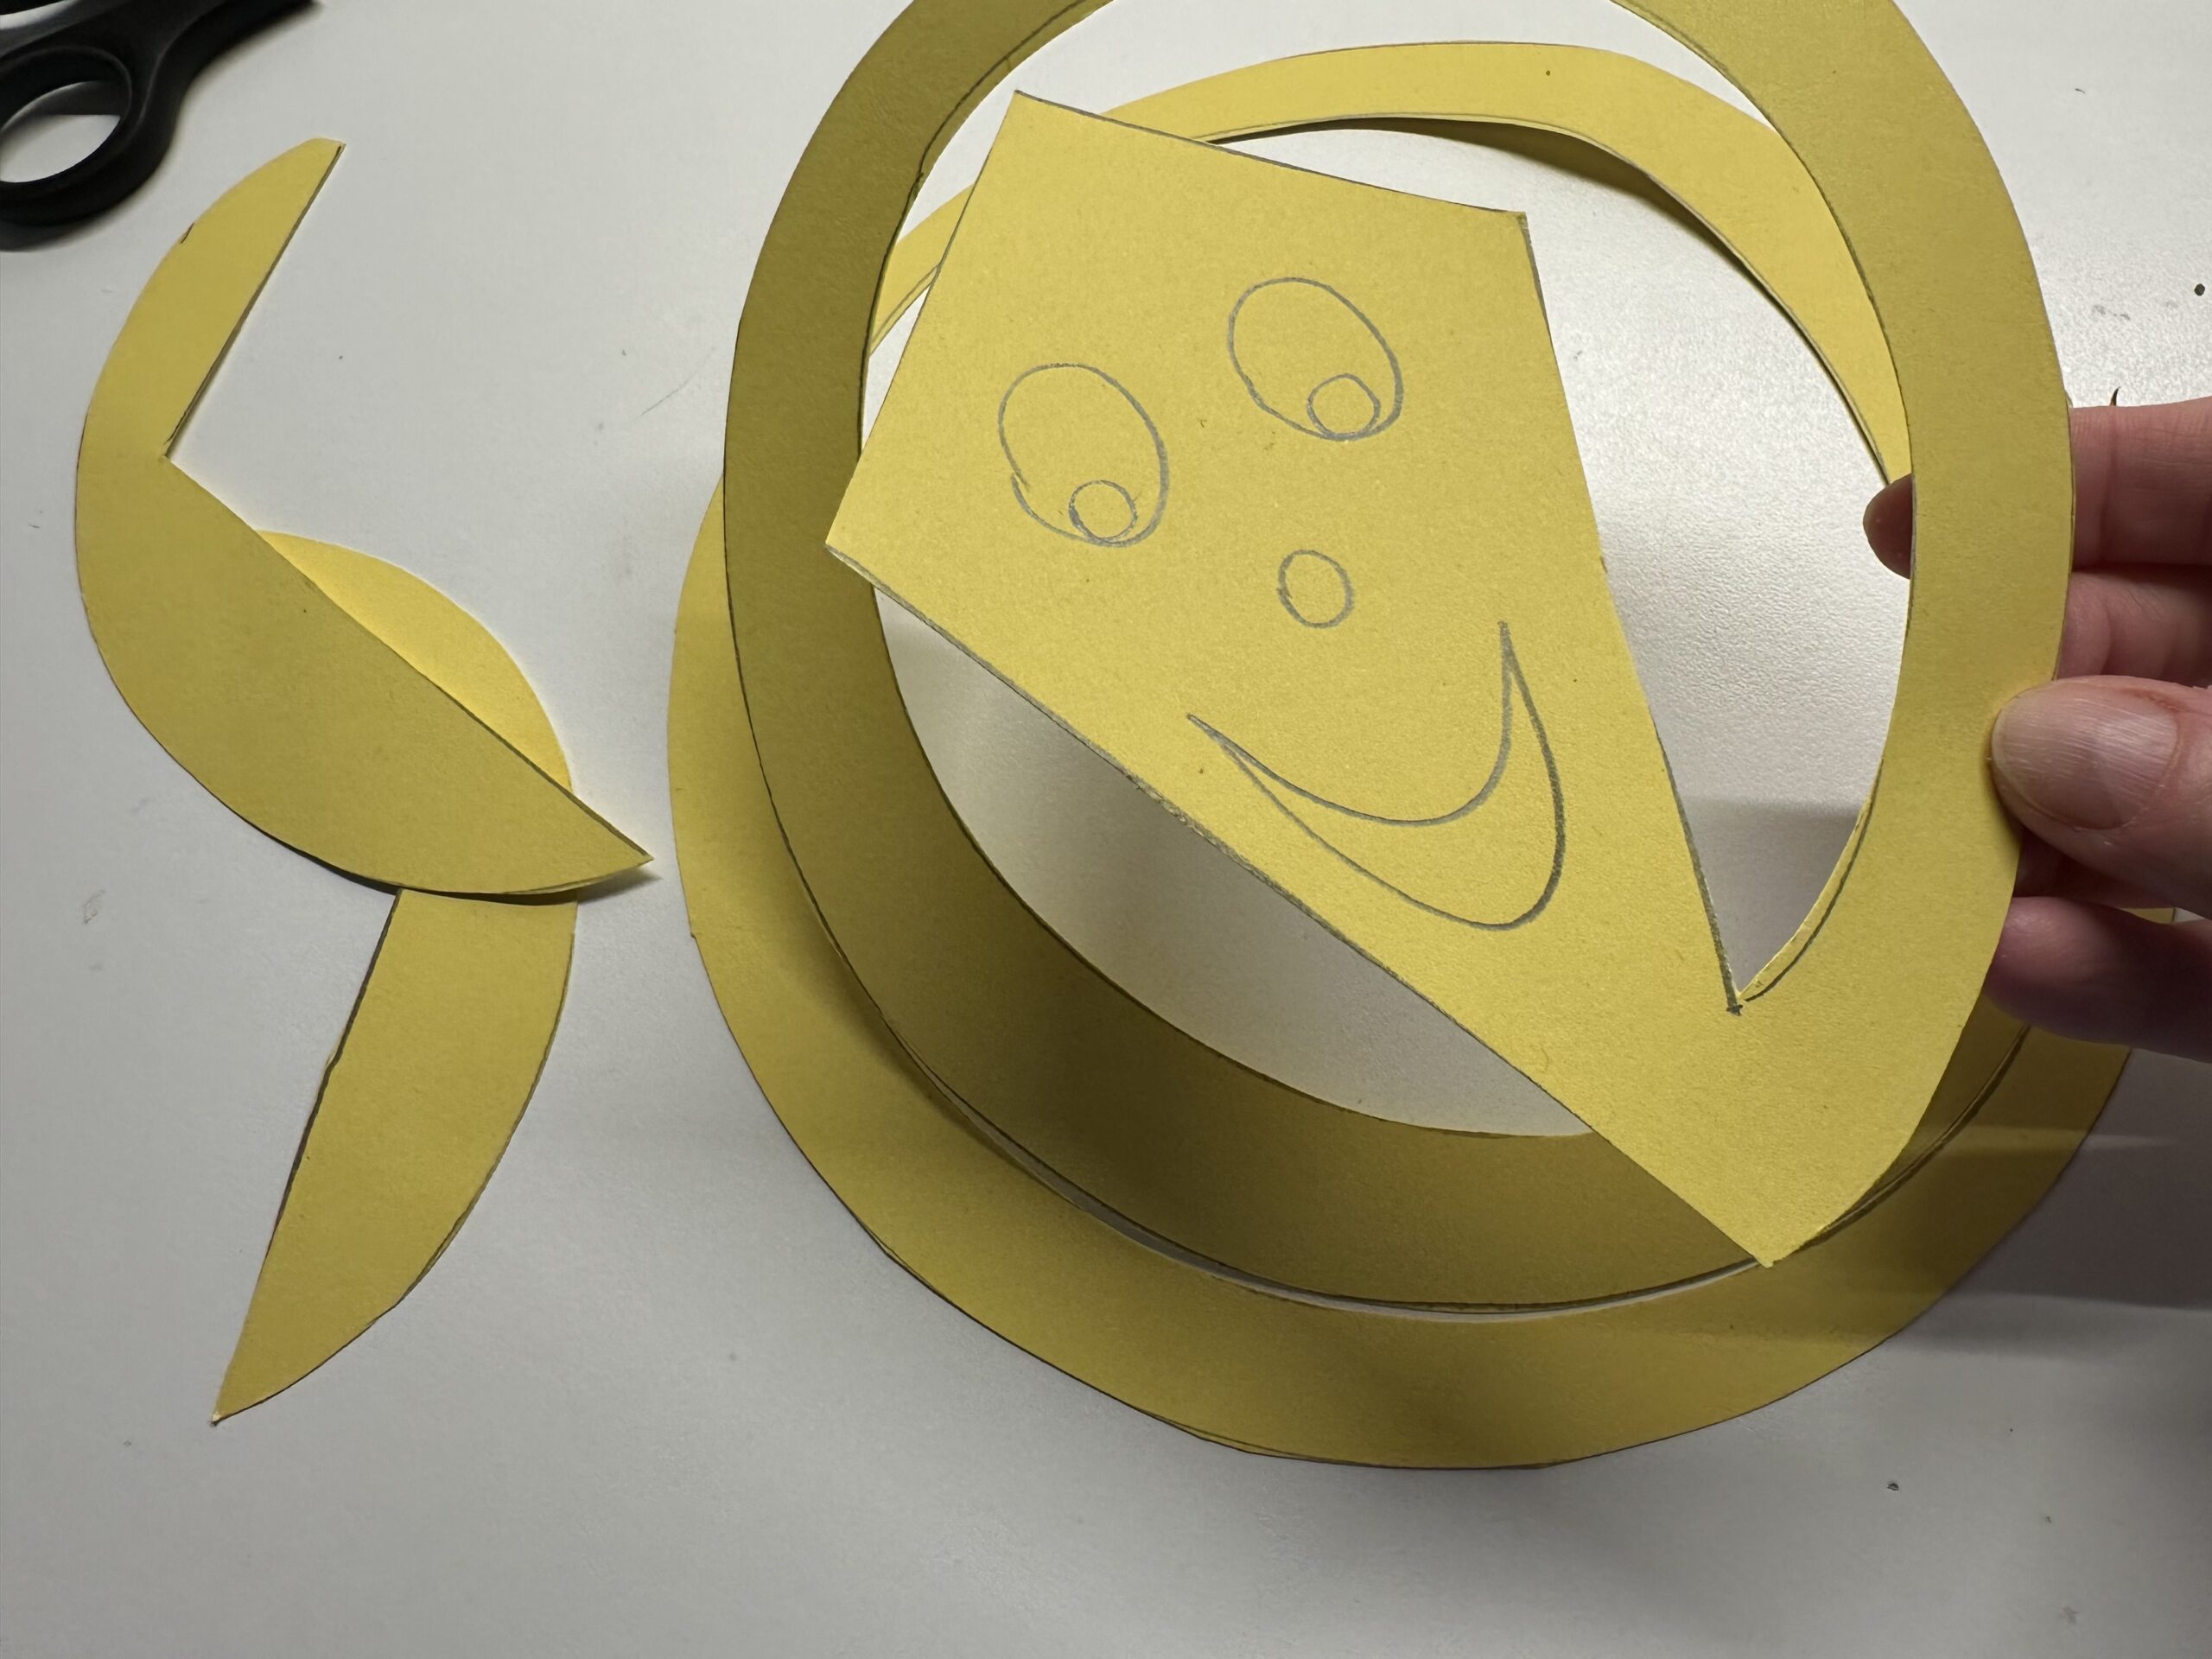
Bild zum Schritt 28 für das Bastel- und DIY-Abenteuer für Kinder: 'Der Drache "hängt" direkt am langen Streifen an dem du...'

27

This is what the cut out looks like. Now you can still paint your dragon face colorfully. Use bright colors here possibly even felt pens.
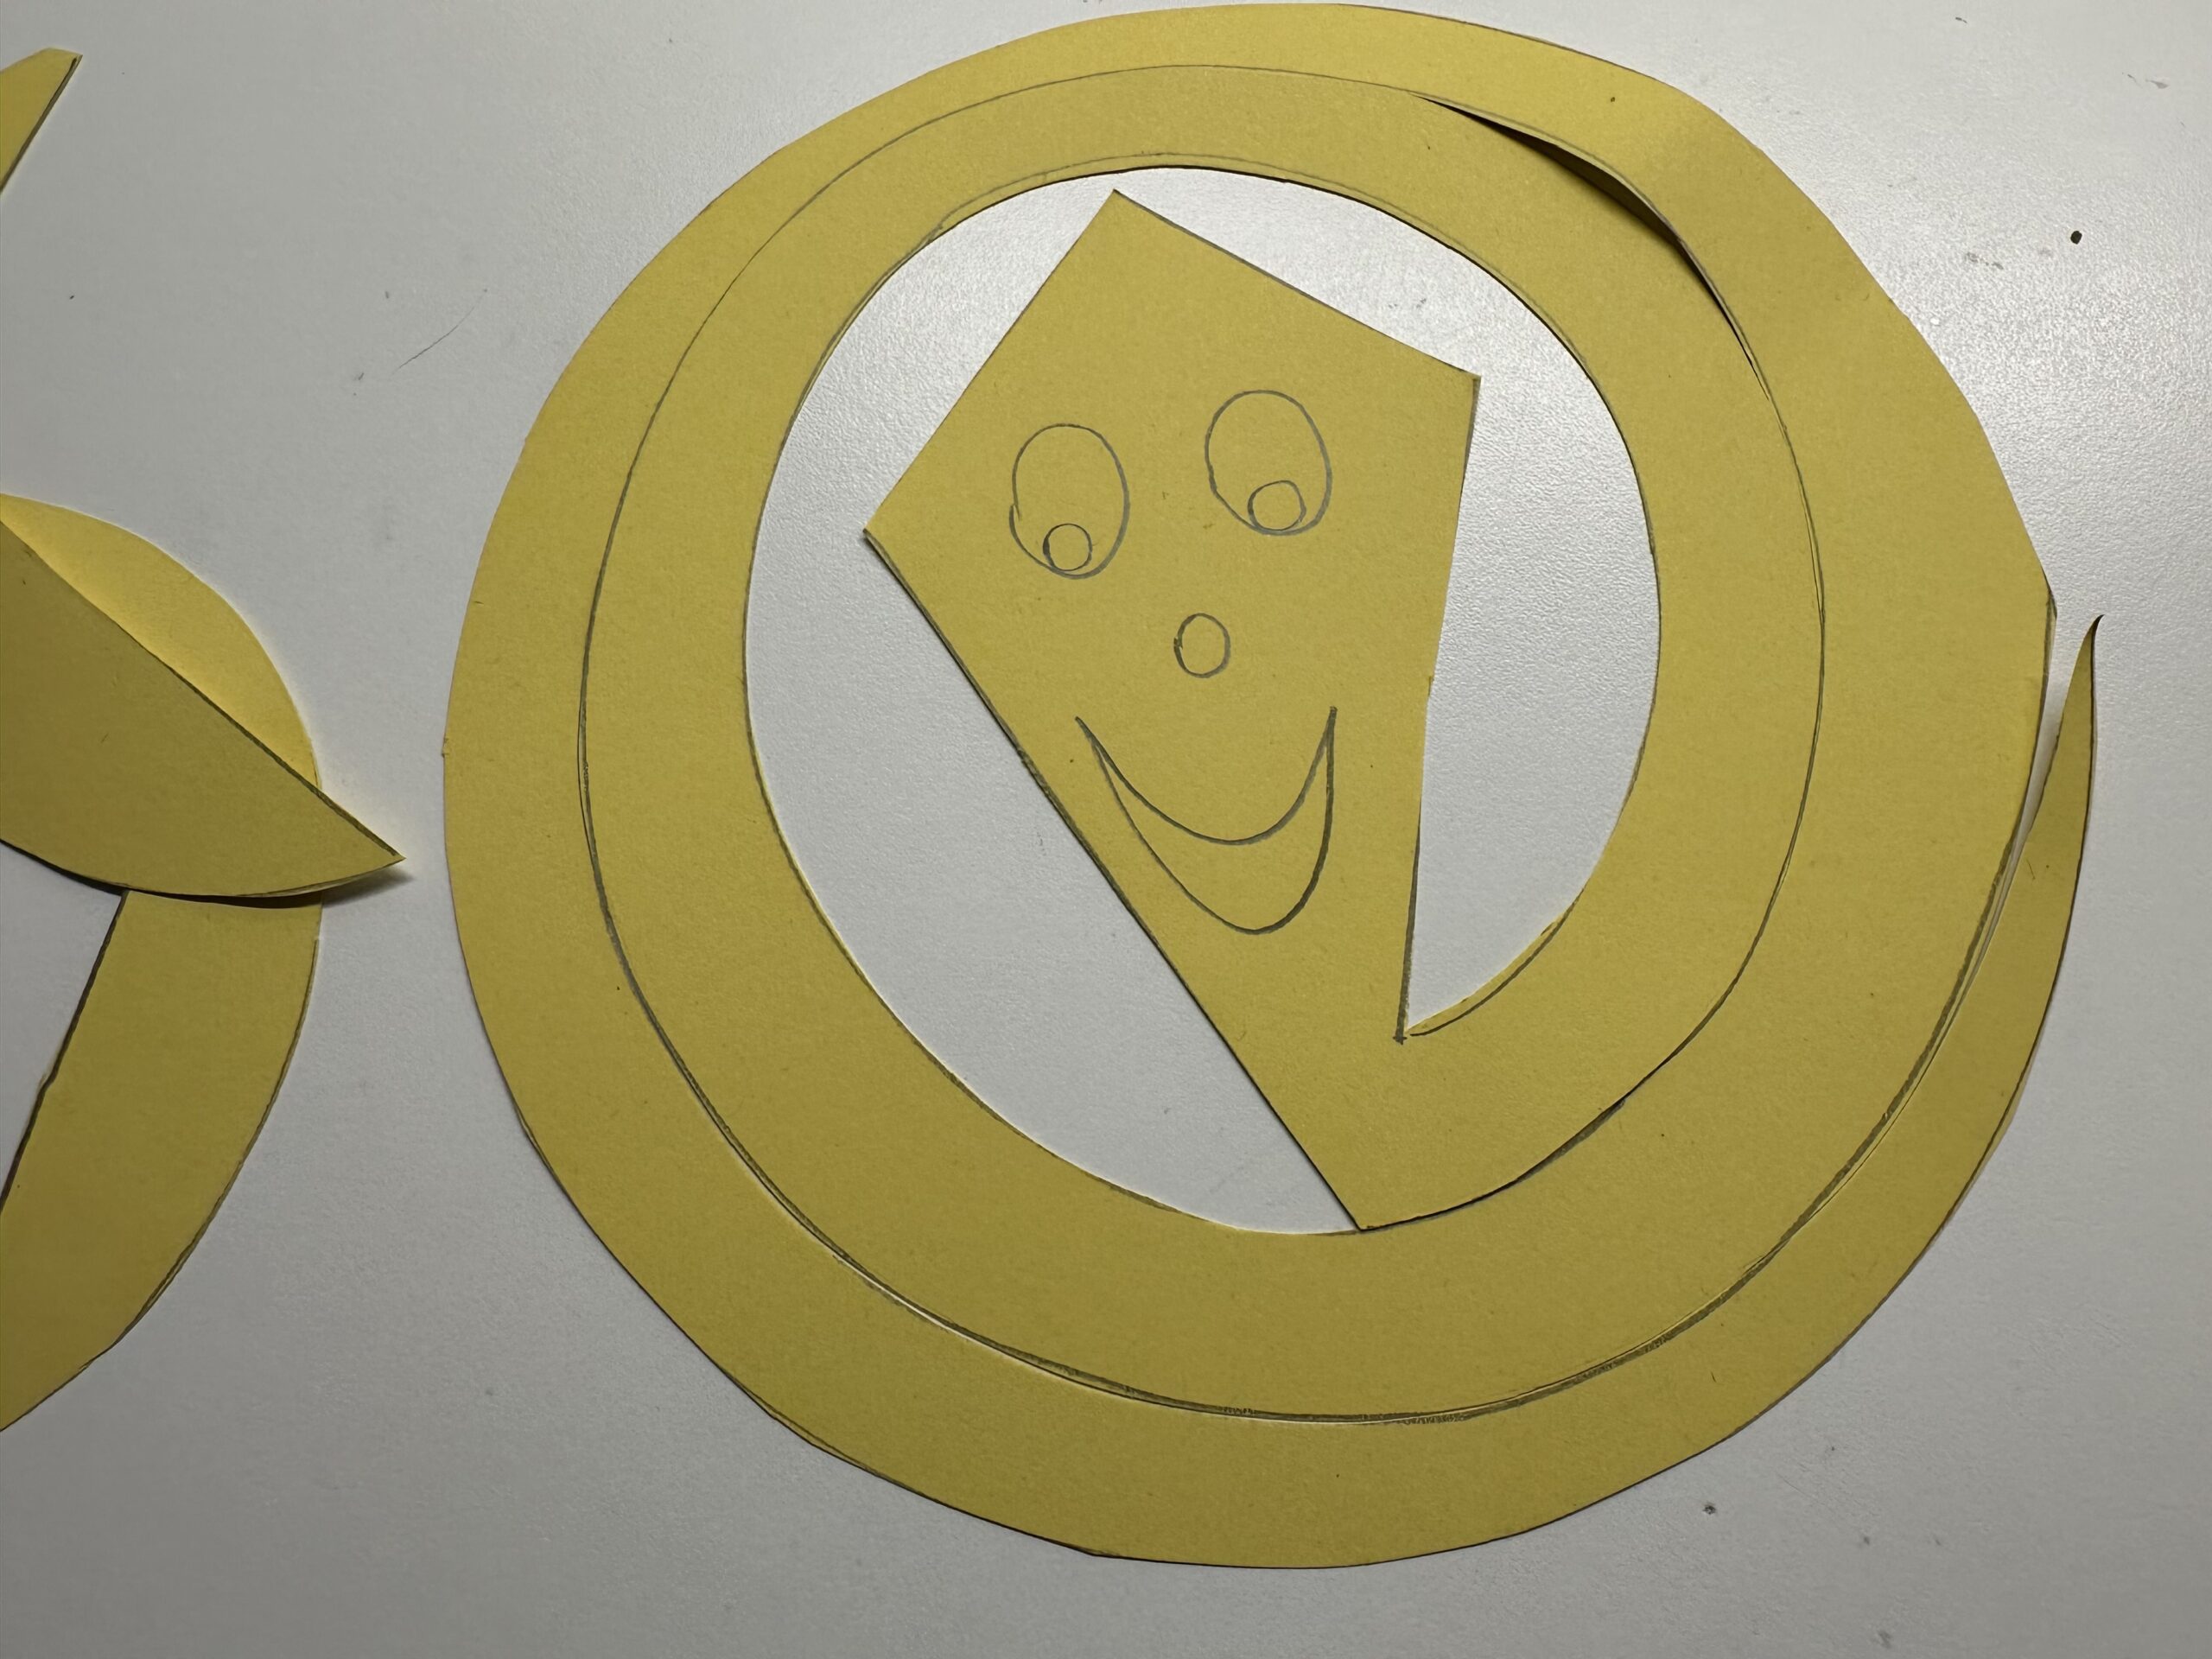
Bild zum Schritt 29 für das Bastel- und DIY-Abenteuer für Kinder: 'So sieht dann das Ausgeschnittene aus. Jetzt kannst du noch...'

28

On the sides (where the ears lie) of the dragon Franzen are now attached.
Make a hole in the side with a perforator. Make sure that the hole is attached with sufficient distance to the edge.
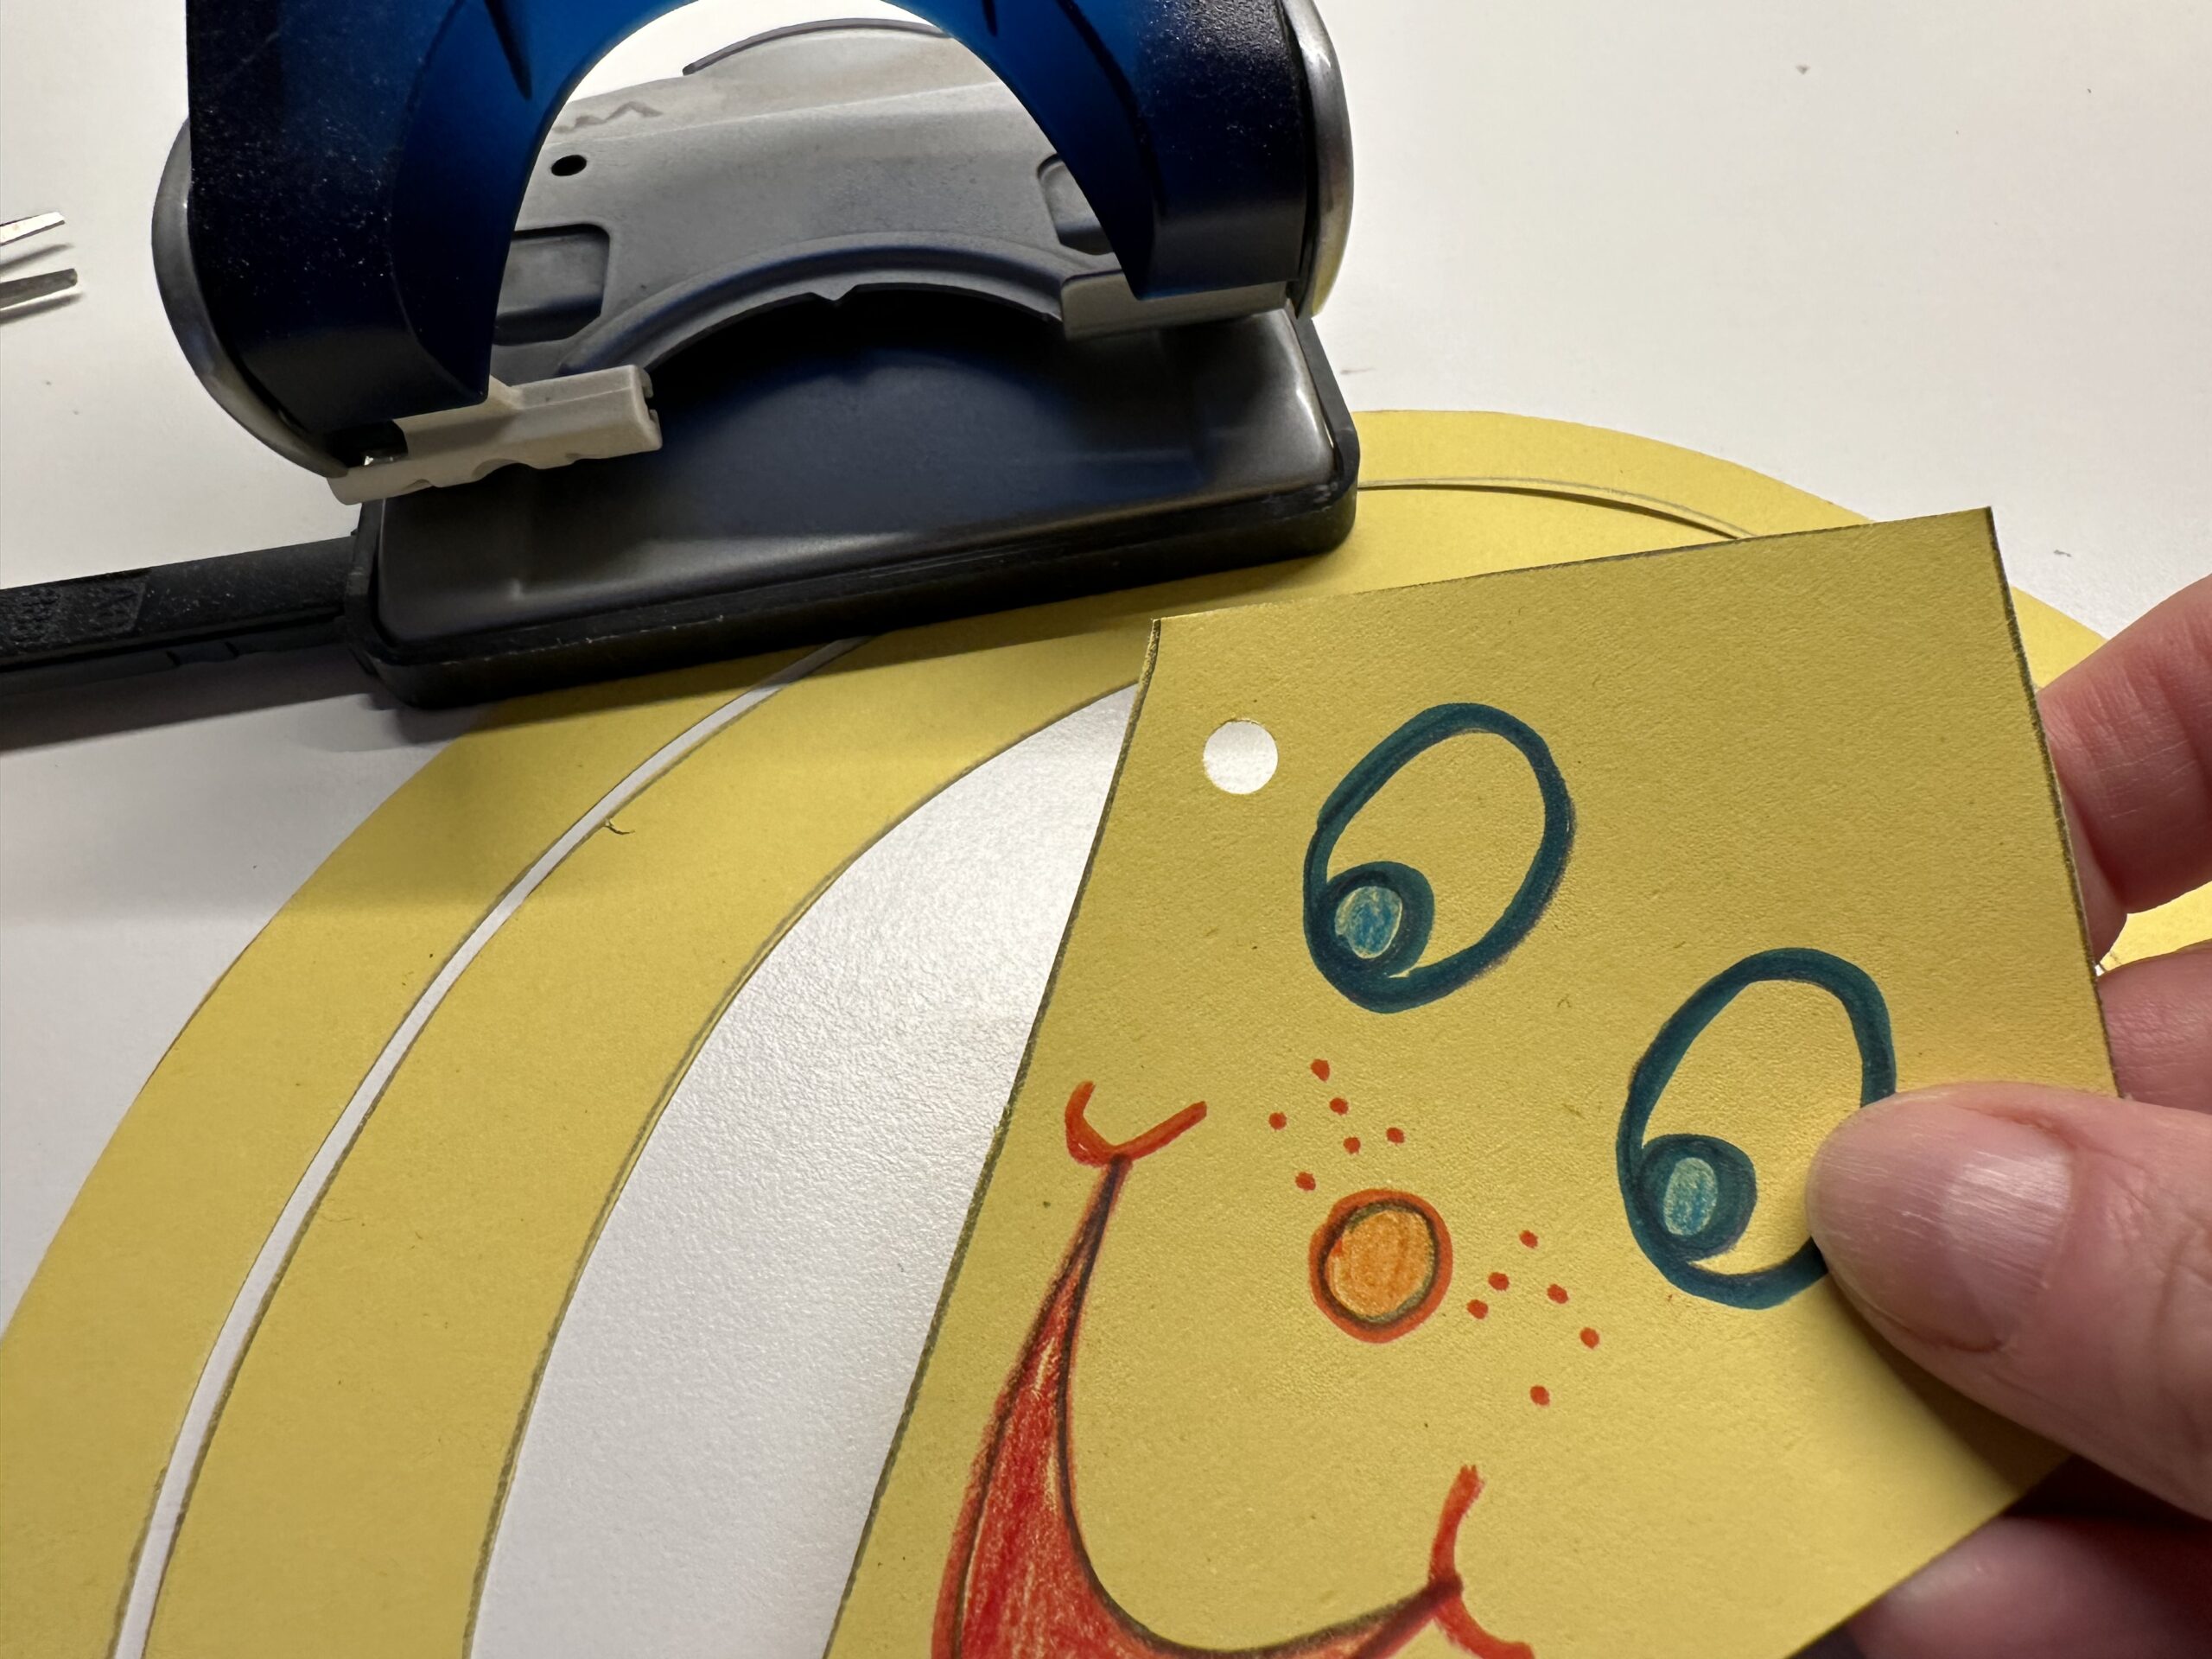
Bild zum Schritt 30 für das Bastel- und DIY-Abenteuer für Kinder: 'An den Seiten (wo die Ohren liegen) des Drachens werden...'

29

Also make a hole on the opposite side.
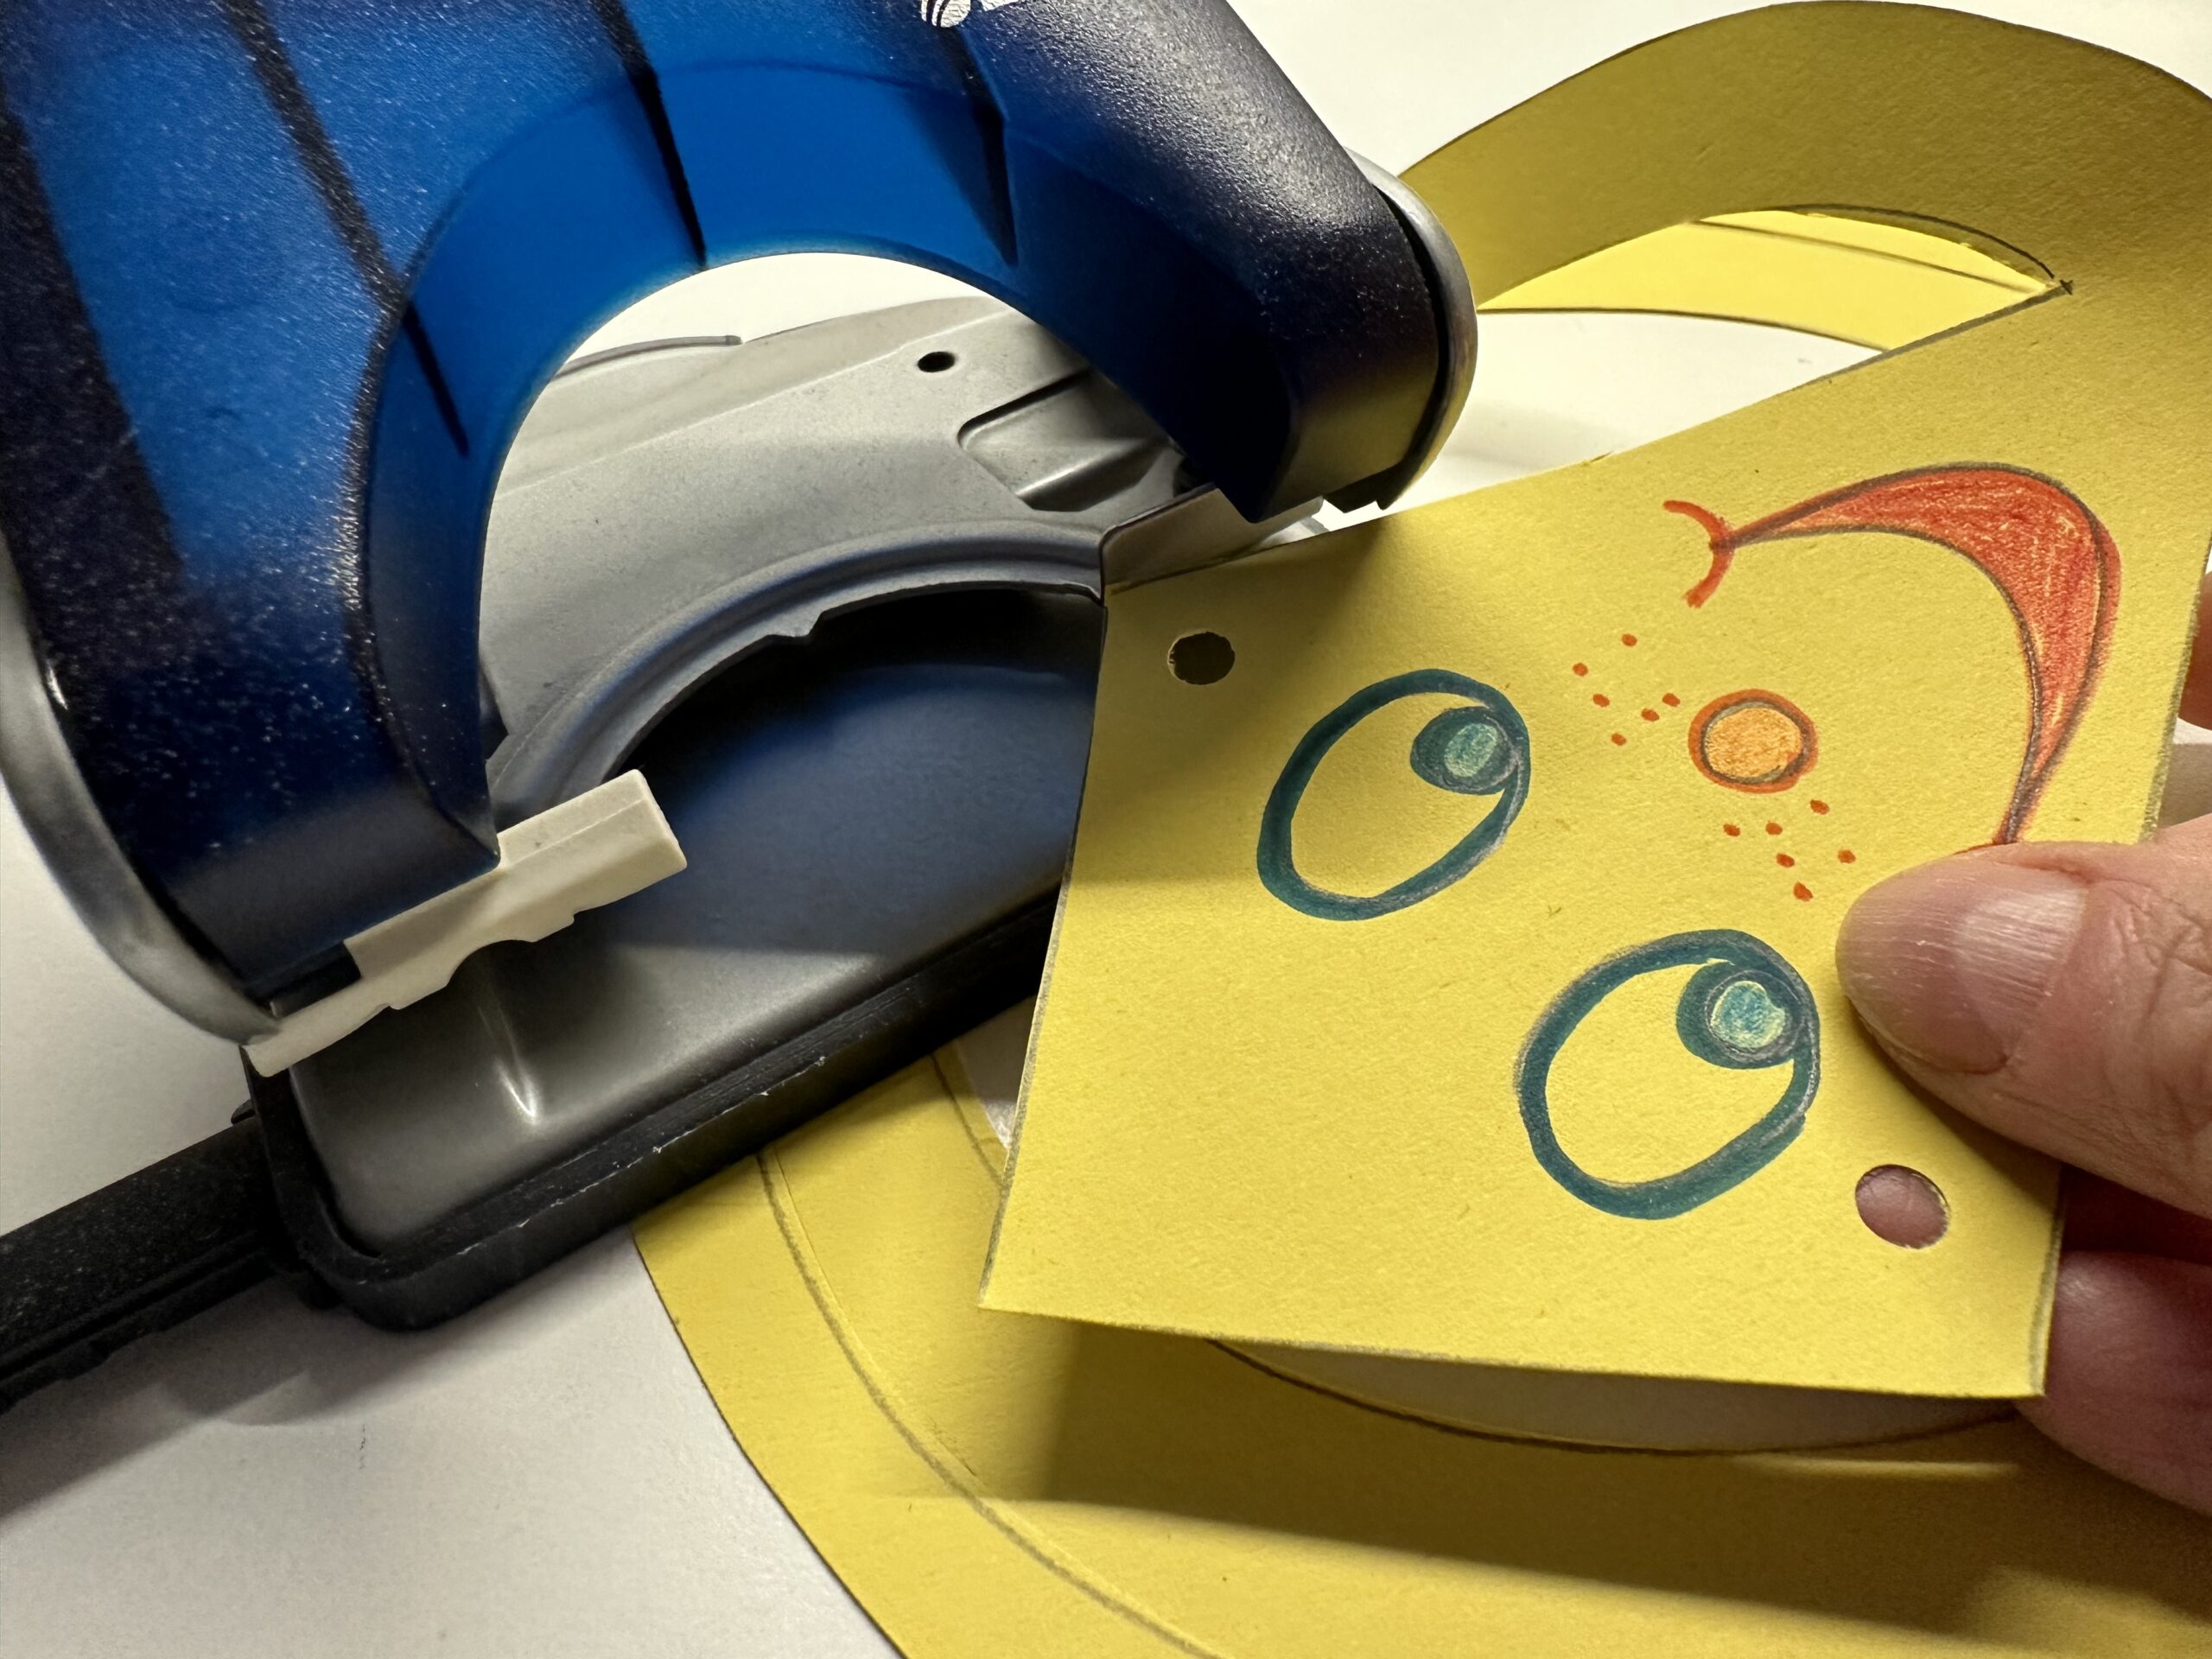
Bild zum Schritt 31 für das Bastel- und DIY-Abenteuer für Kinder: 'Mache auch auf der gegenüberliegende Seite ein Loch.'

30

That's what the dragon looks like.
Now you need colorful wool.
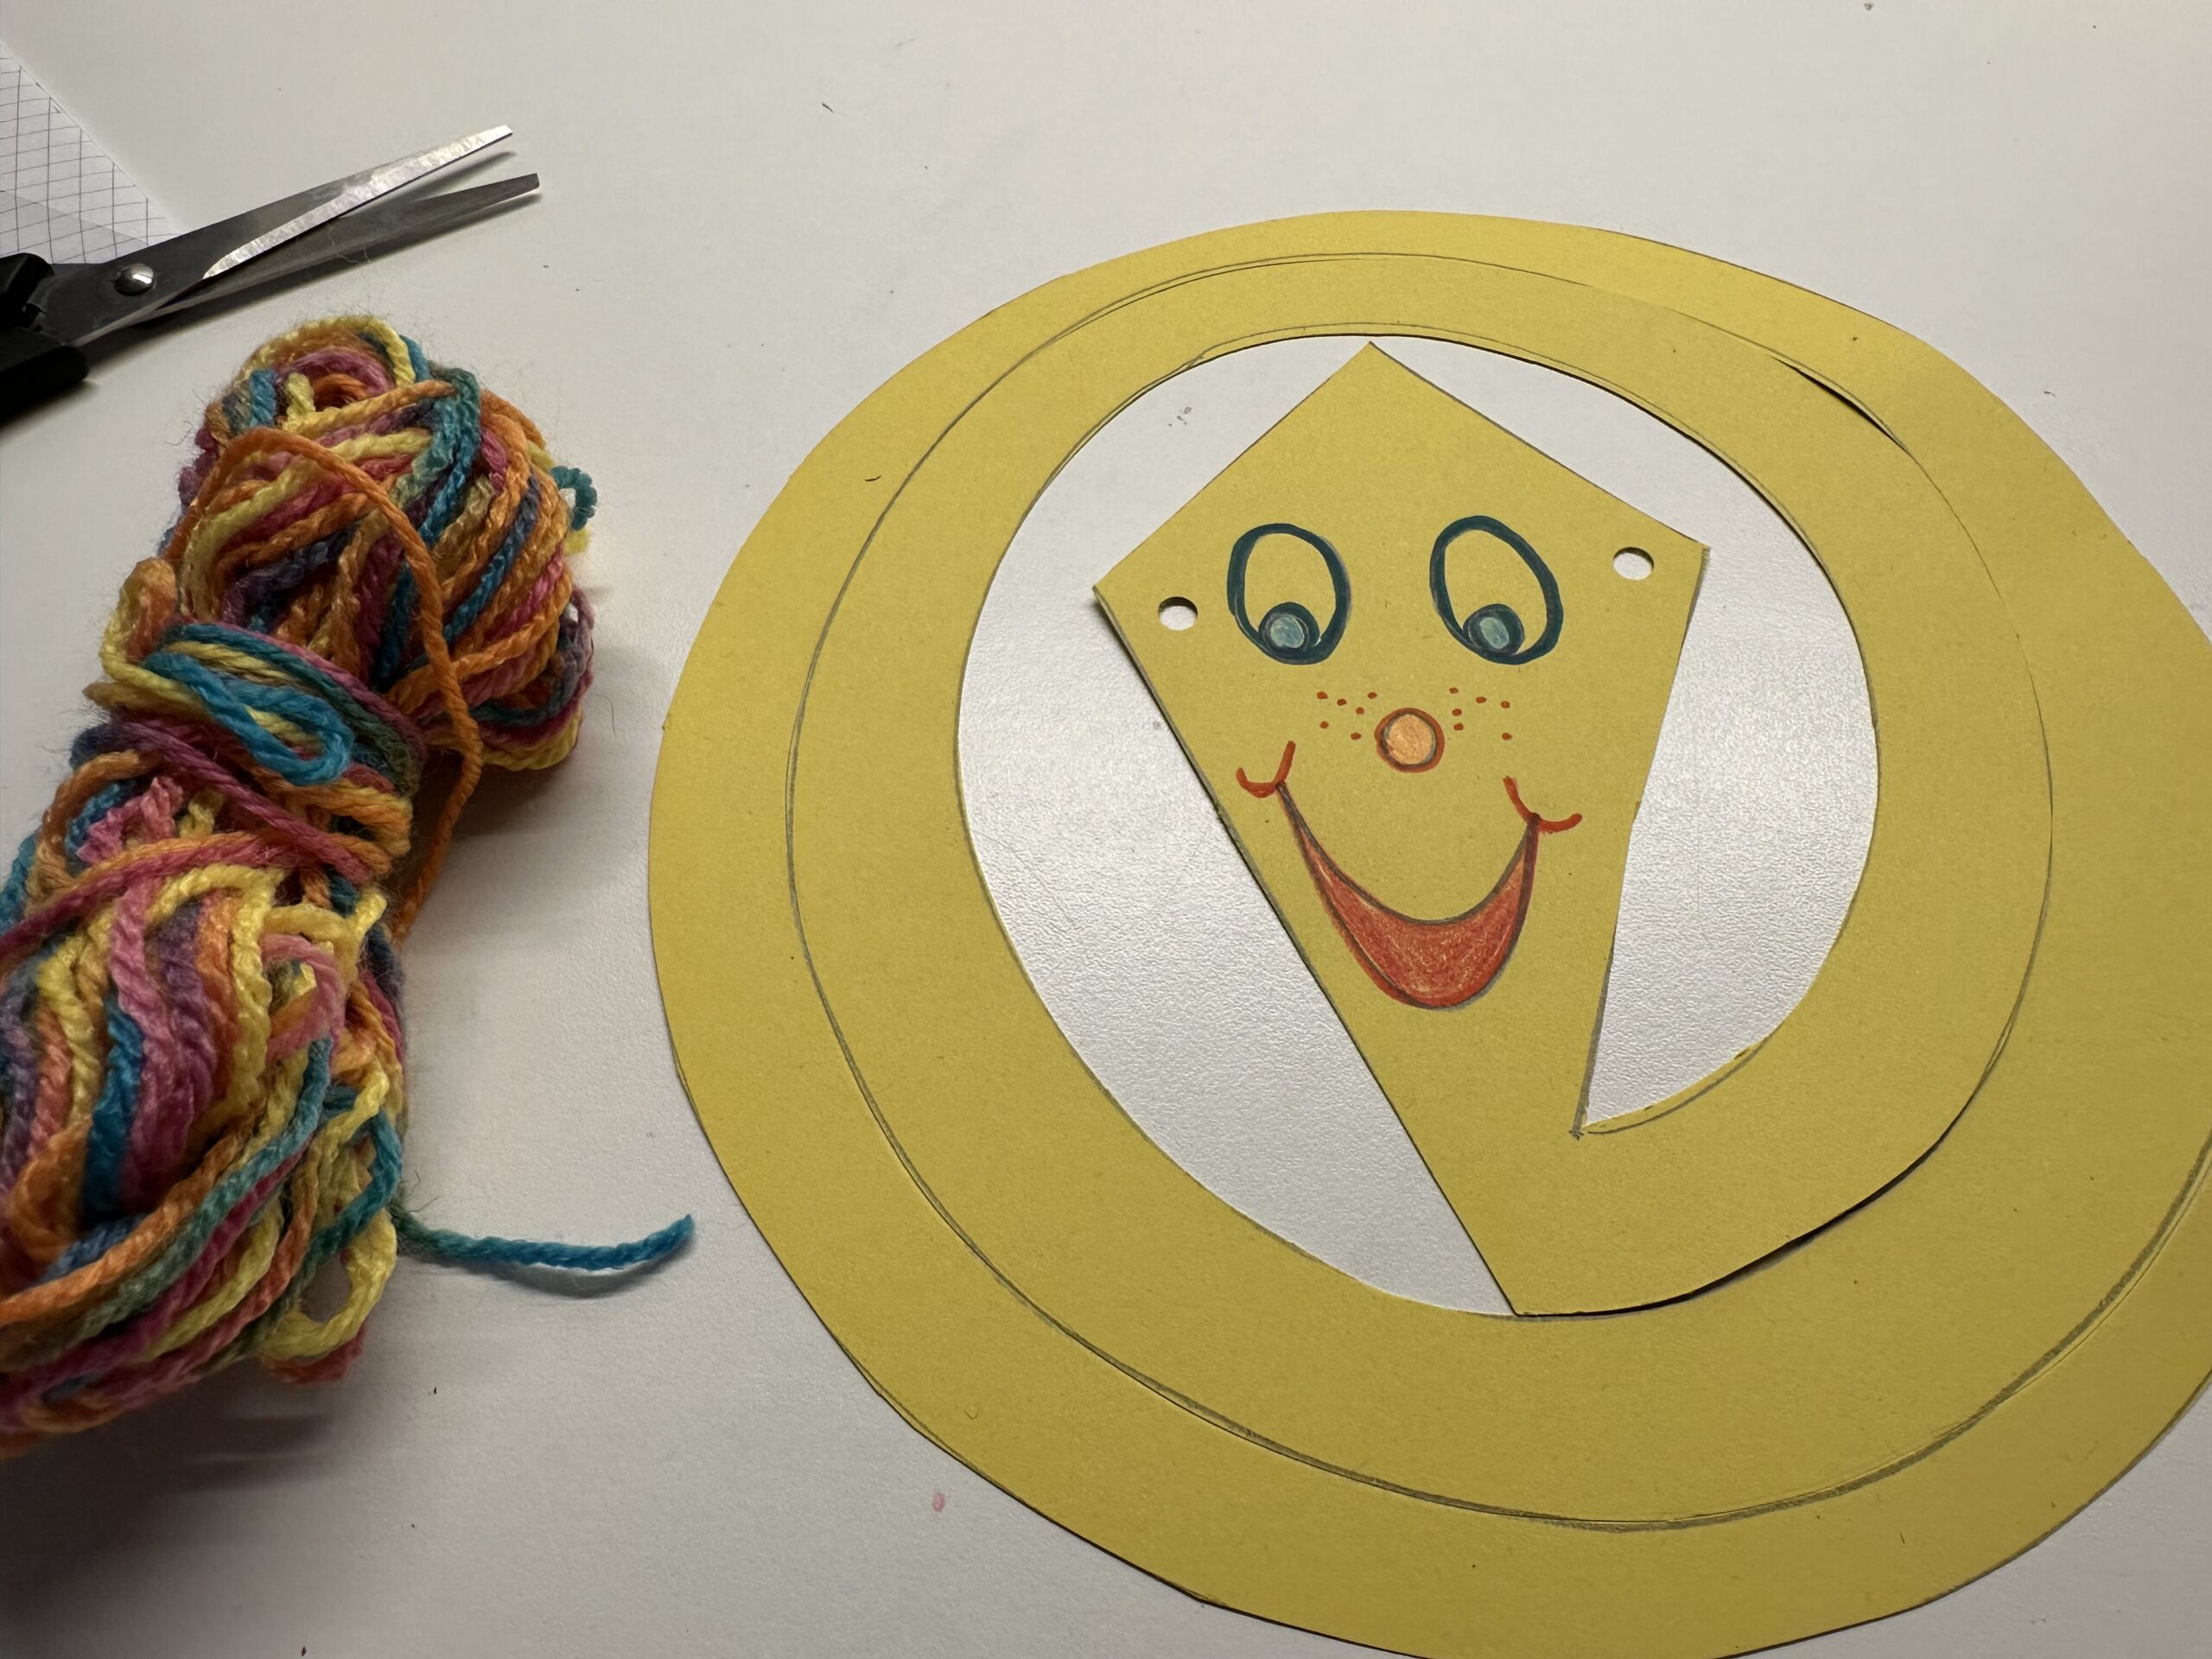
Bild zum Schritt 32 für das Bastel- und DIY-Abenteuer für Kinder: 'So sieht der Drache dann aus.  Jetzt brauchst du...'

31

Wrap the wool thread several times loosely around the fingers of your hand. Hold the beginning of the thread well.
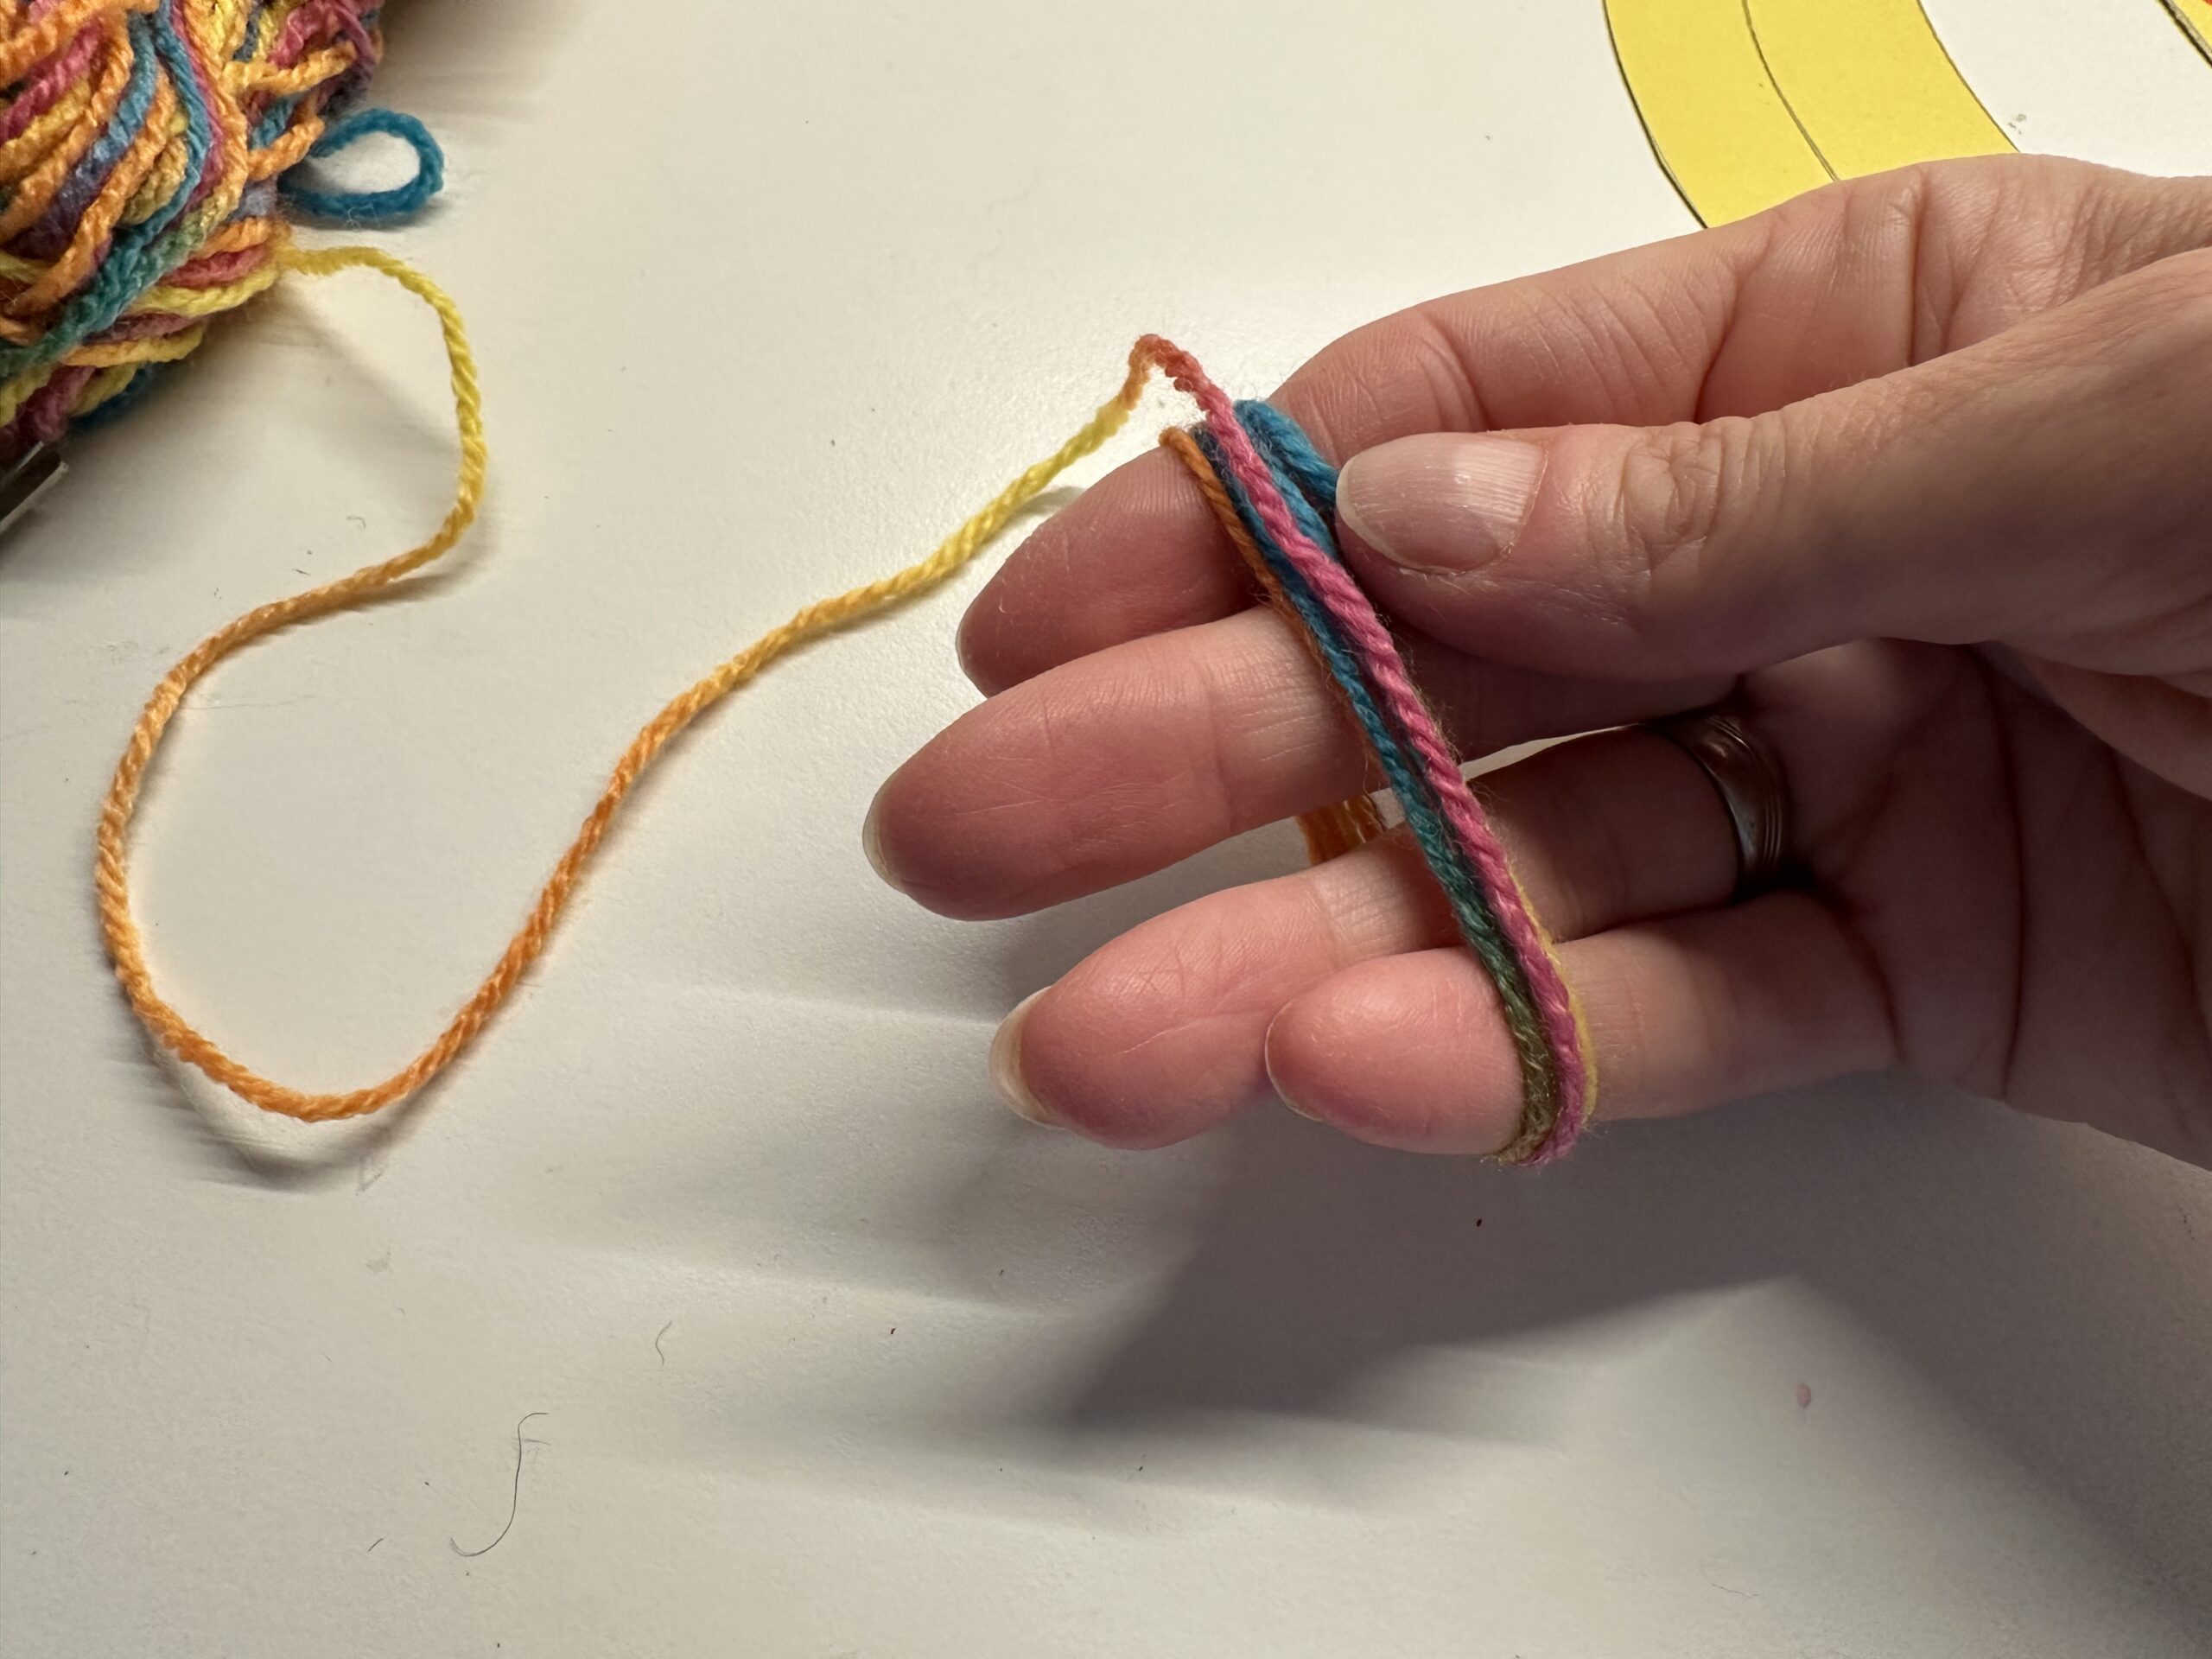
Bild zum Schritt 33 für das Bastel- und DIY-Abenteuer für Kinder: 'Wickel dir den Wollfaden mehrmals locker um die Finger deiner...'

32

Hold the thread bundle with your thumb and cut the thread off.
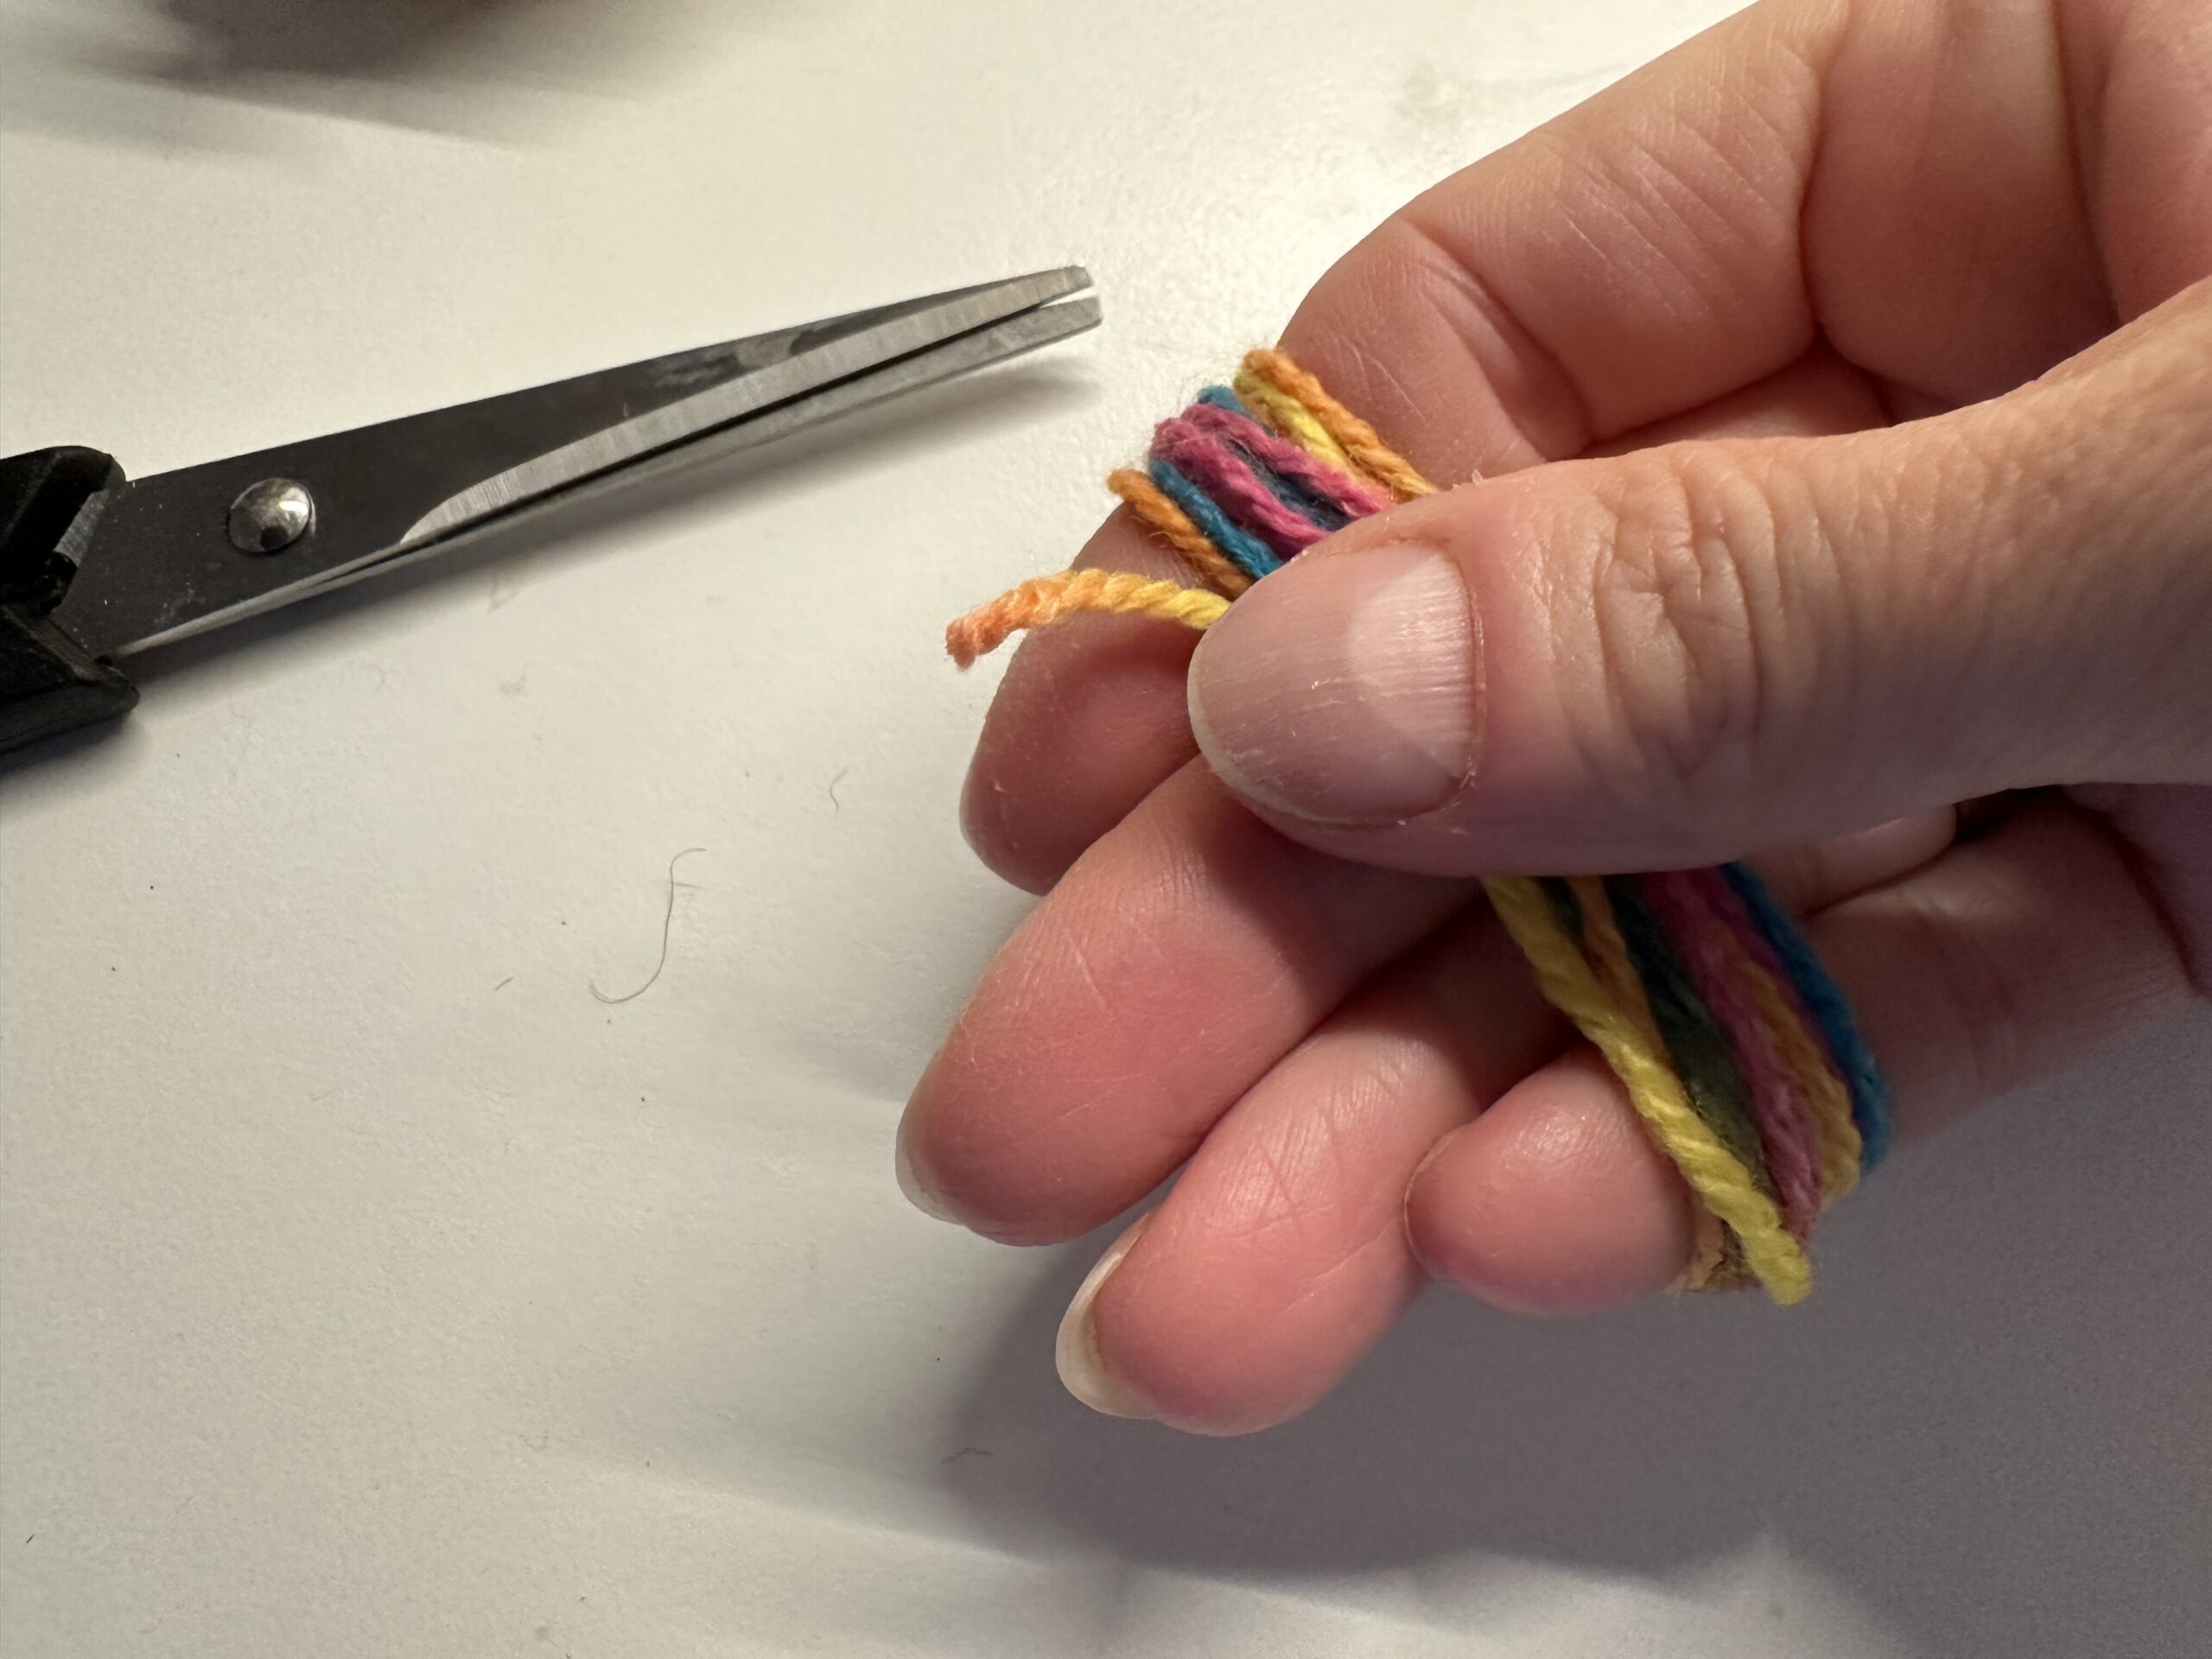
Bild zum Schritt 34 für das Bastel- und DIY-Abenteuer für Kinder: 'Halte das Fadenbündel mit dem Daumen fest und schneide den...'

33

Cut the entire bundle of threads with the scissors, so you'll fall for the same length of fan pieces.
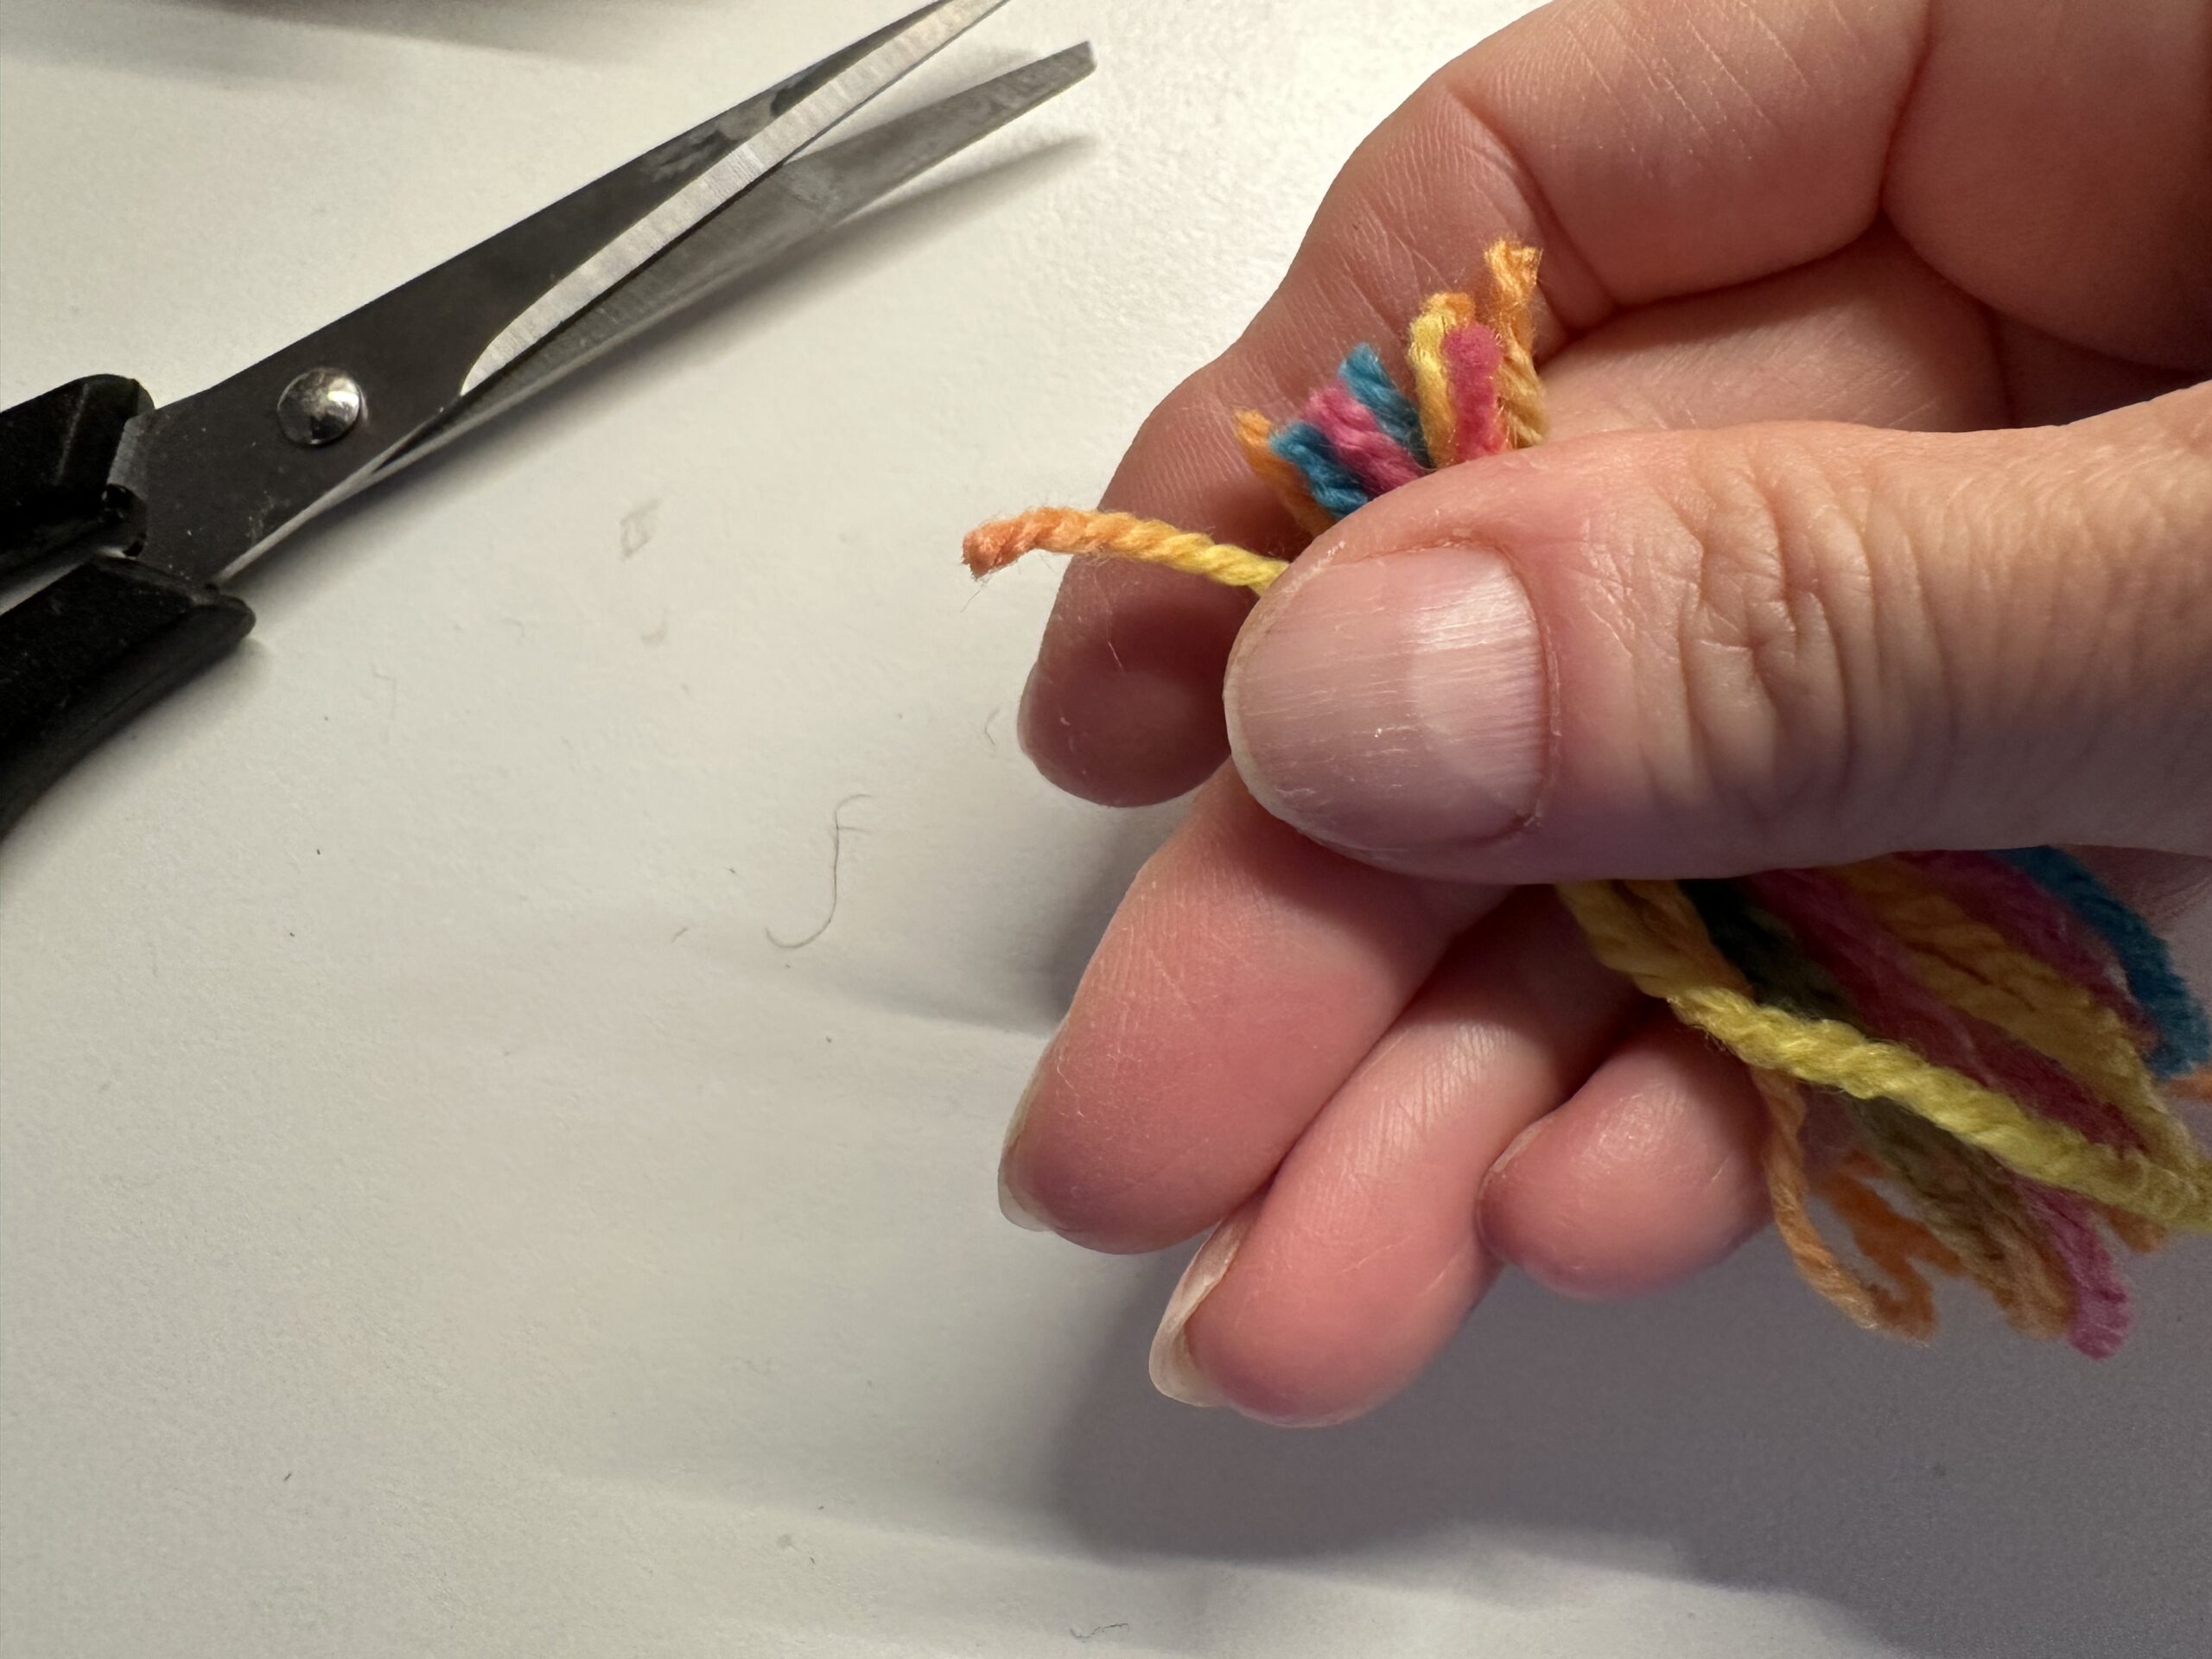
Bild zum Schritt 35 für das Bastel- und DIY-Abenteuer für Kinder: 'Schneide mit der Schere das komplette Fadenbündel durch. So erhällst...'

34

Put the threads on the table.

Bild zum Schritt 36 für das Bastel- und DIY-Abenteuer für Kinder: 'Lege die Fäden auf den Tisch.'

35

Divide the threads into two identical parts.
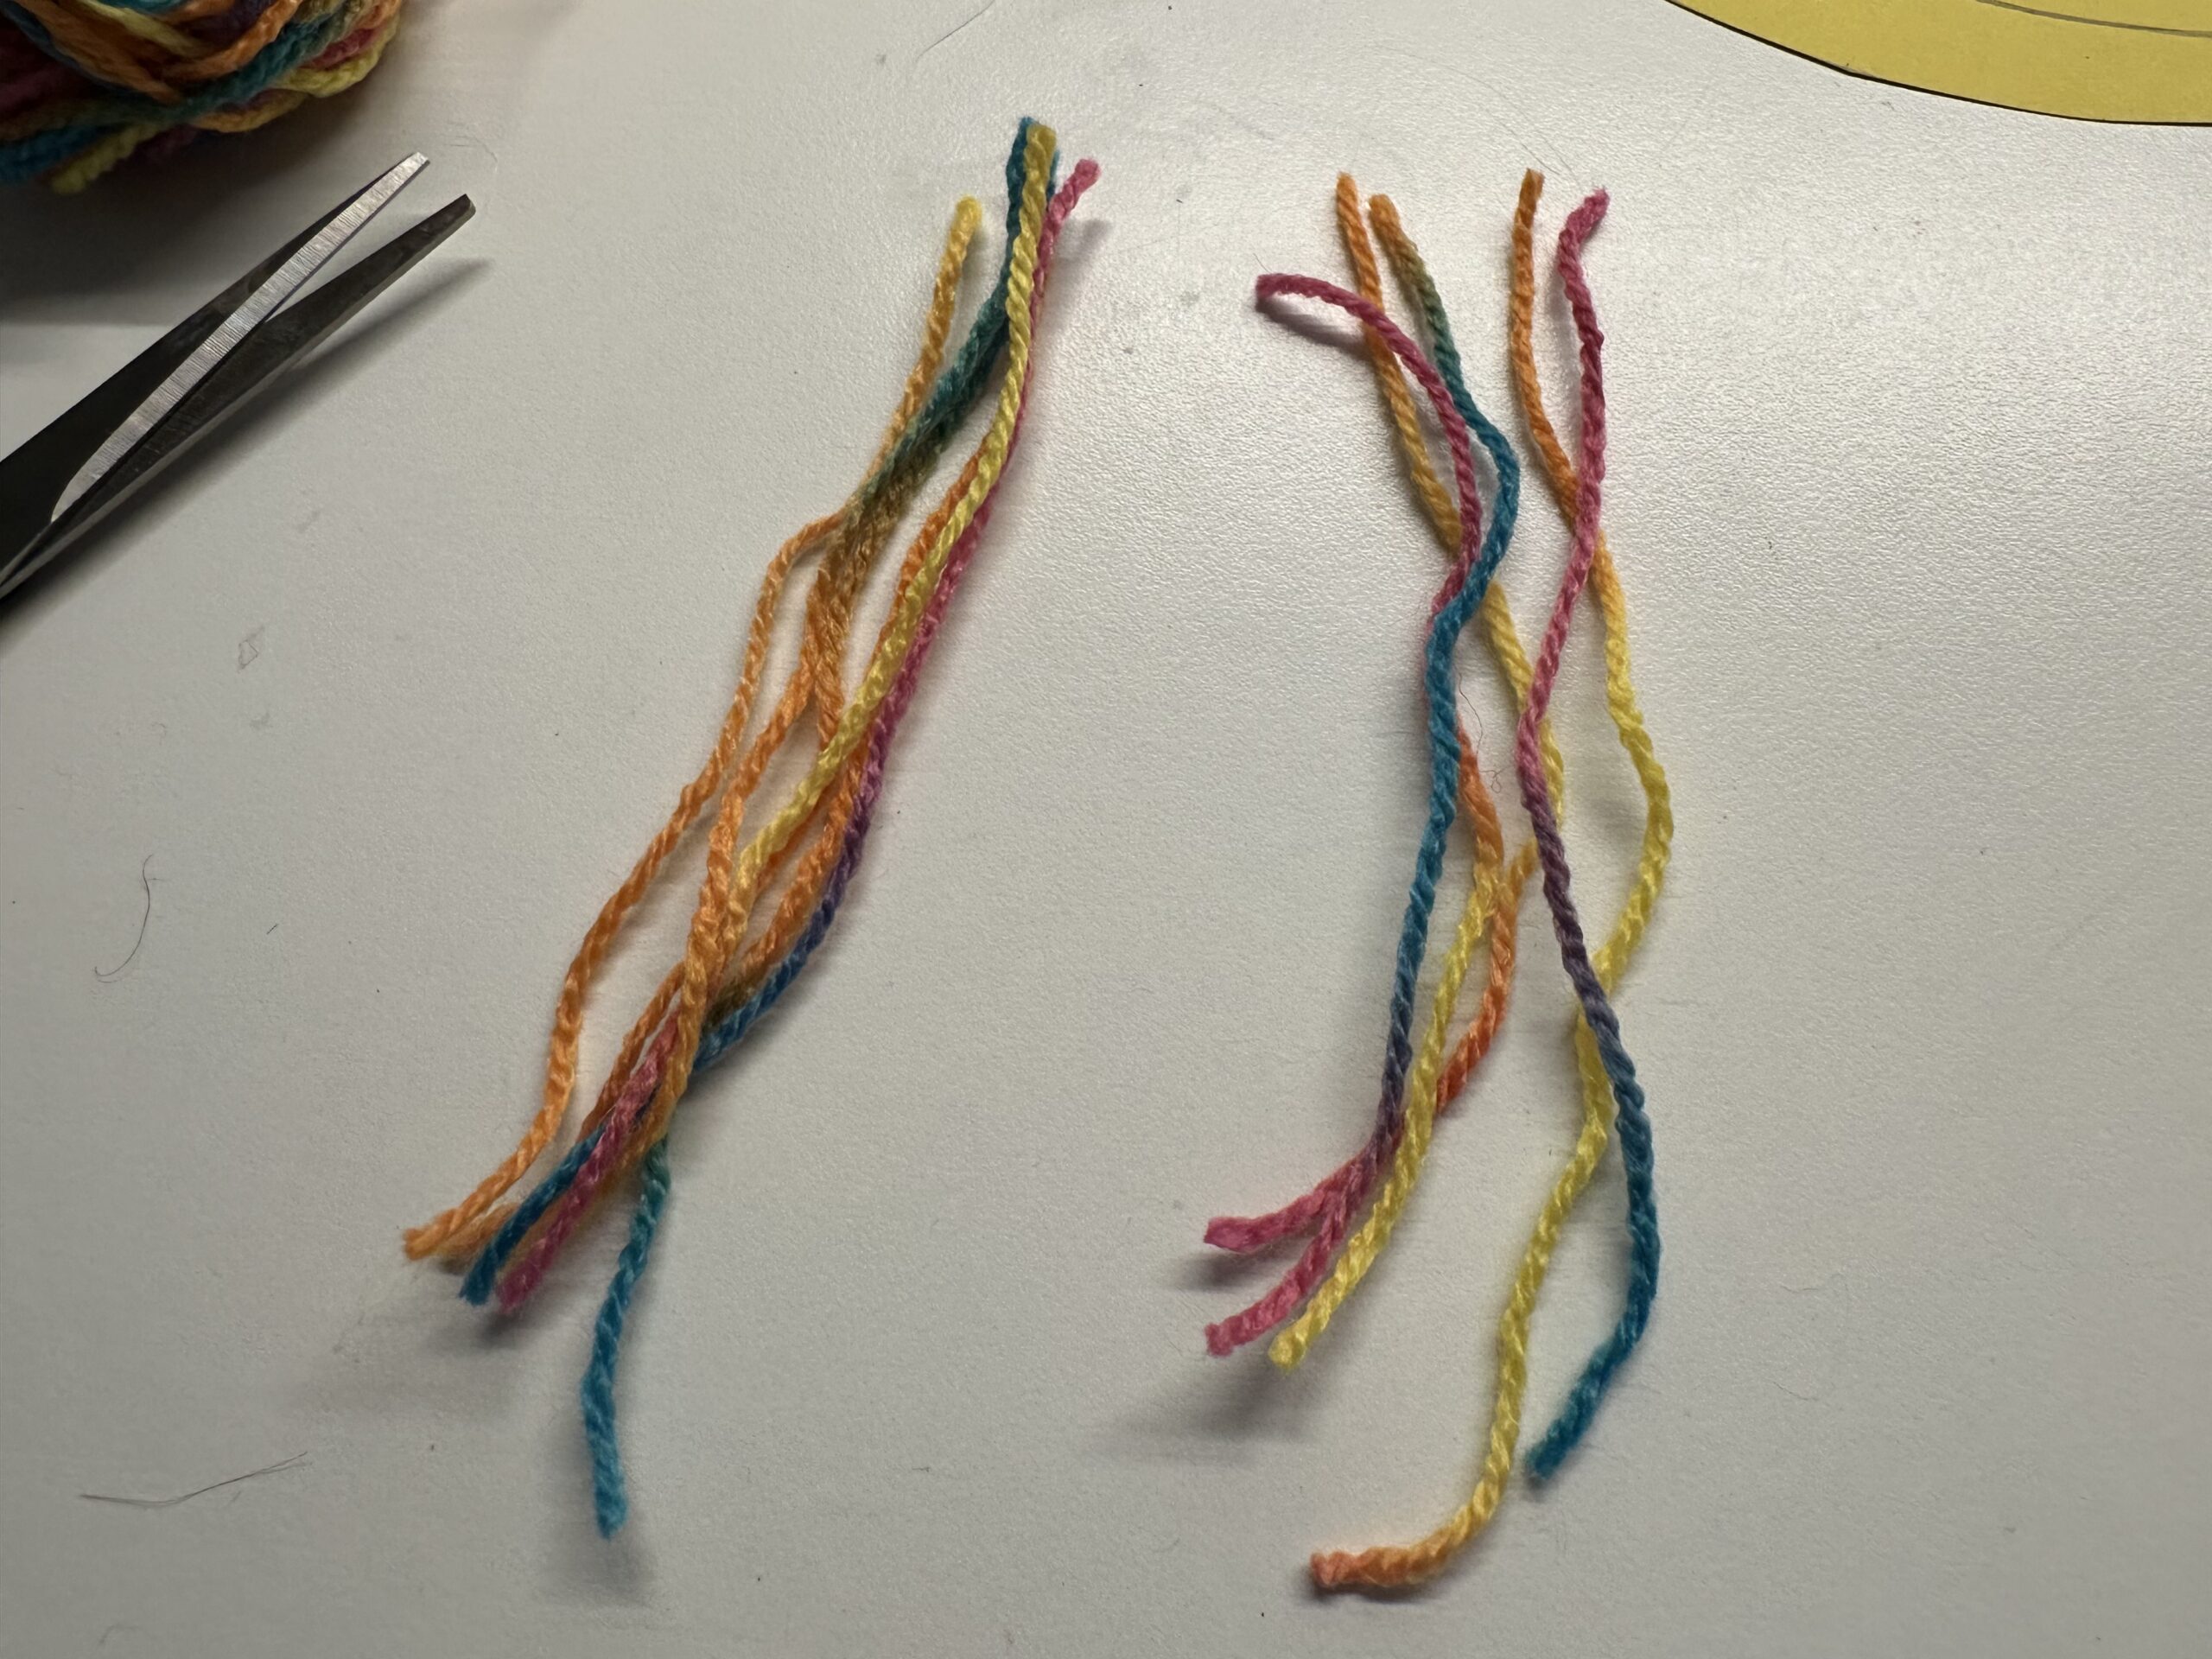
Bild zum Schritt 37 für das Bastel- und DIY-Abenteuer für Kinder: 'Teile die Fäden in zwei gleiche Teile.'

36

Take a thread tangle and put it through the one hole. For this you can use a pen. With this you can push the threads more easily through the small hole.
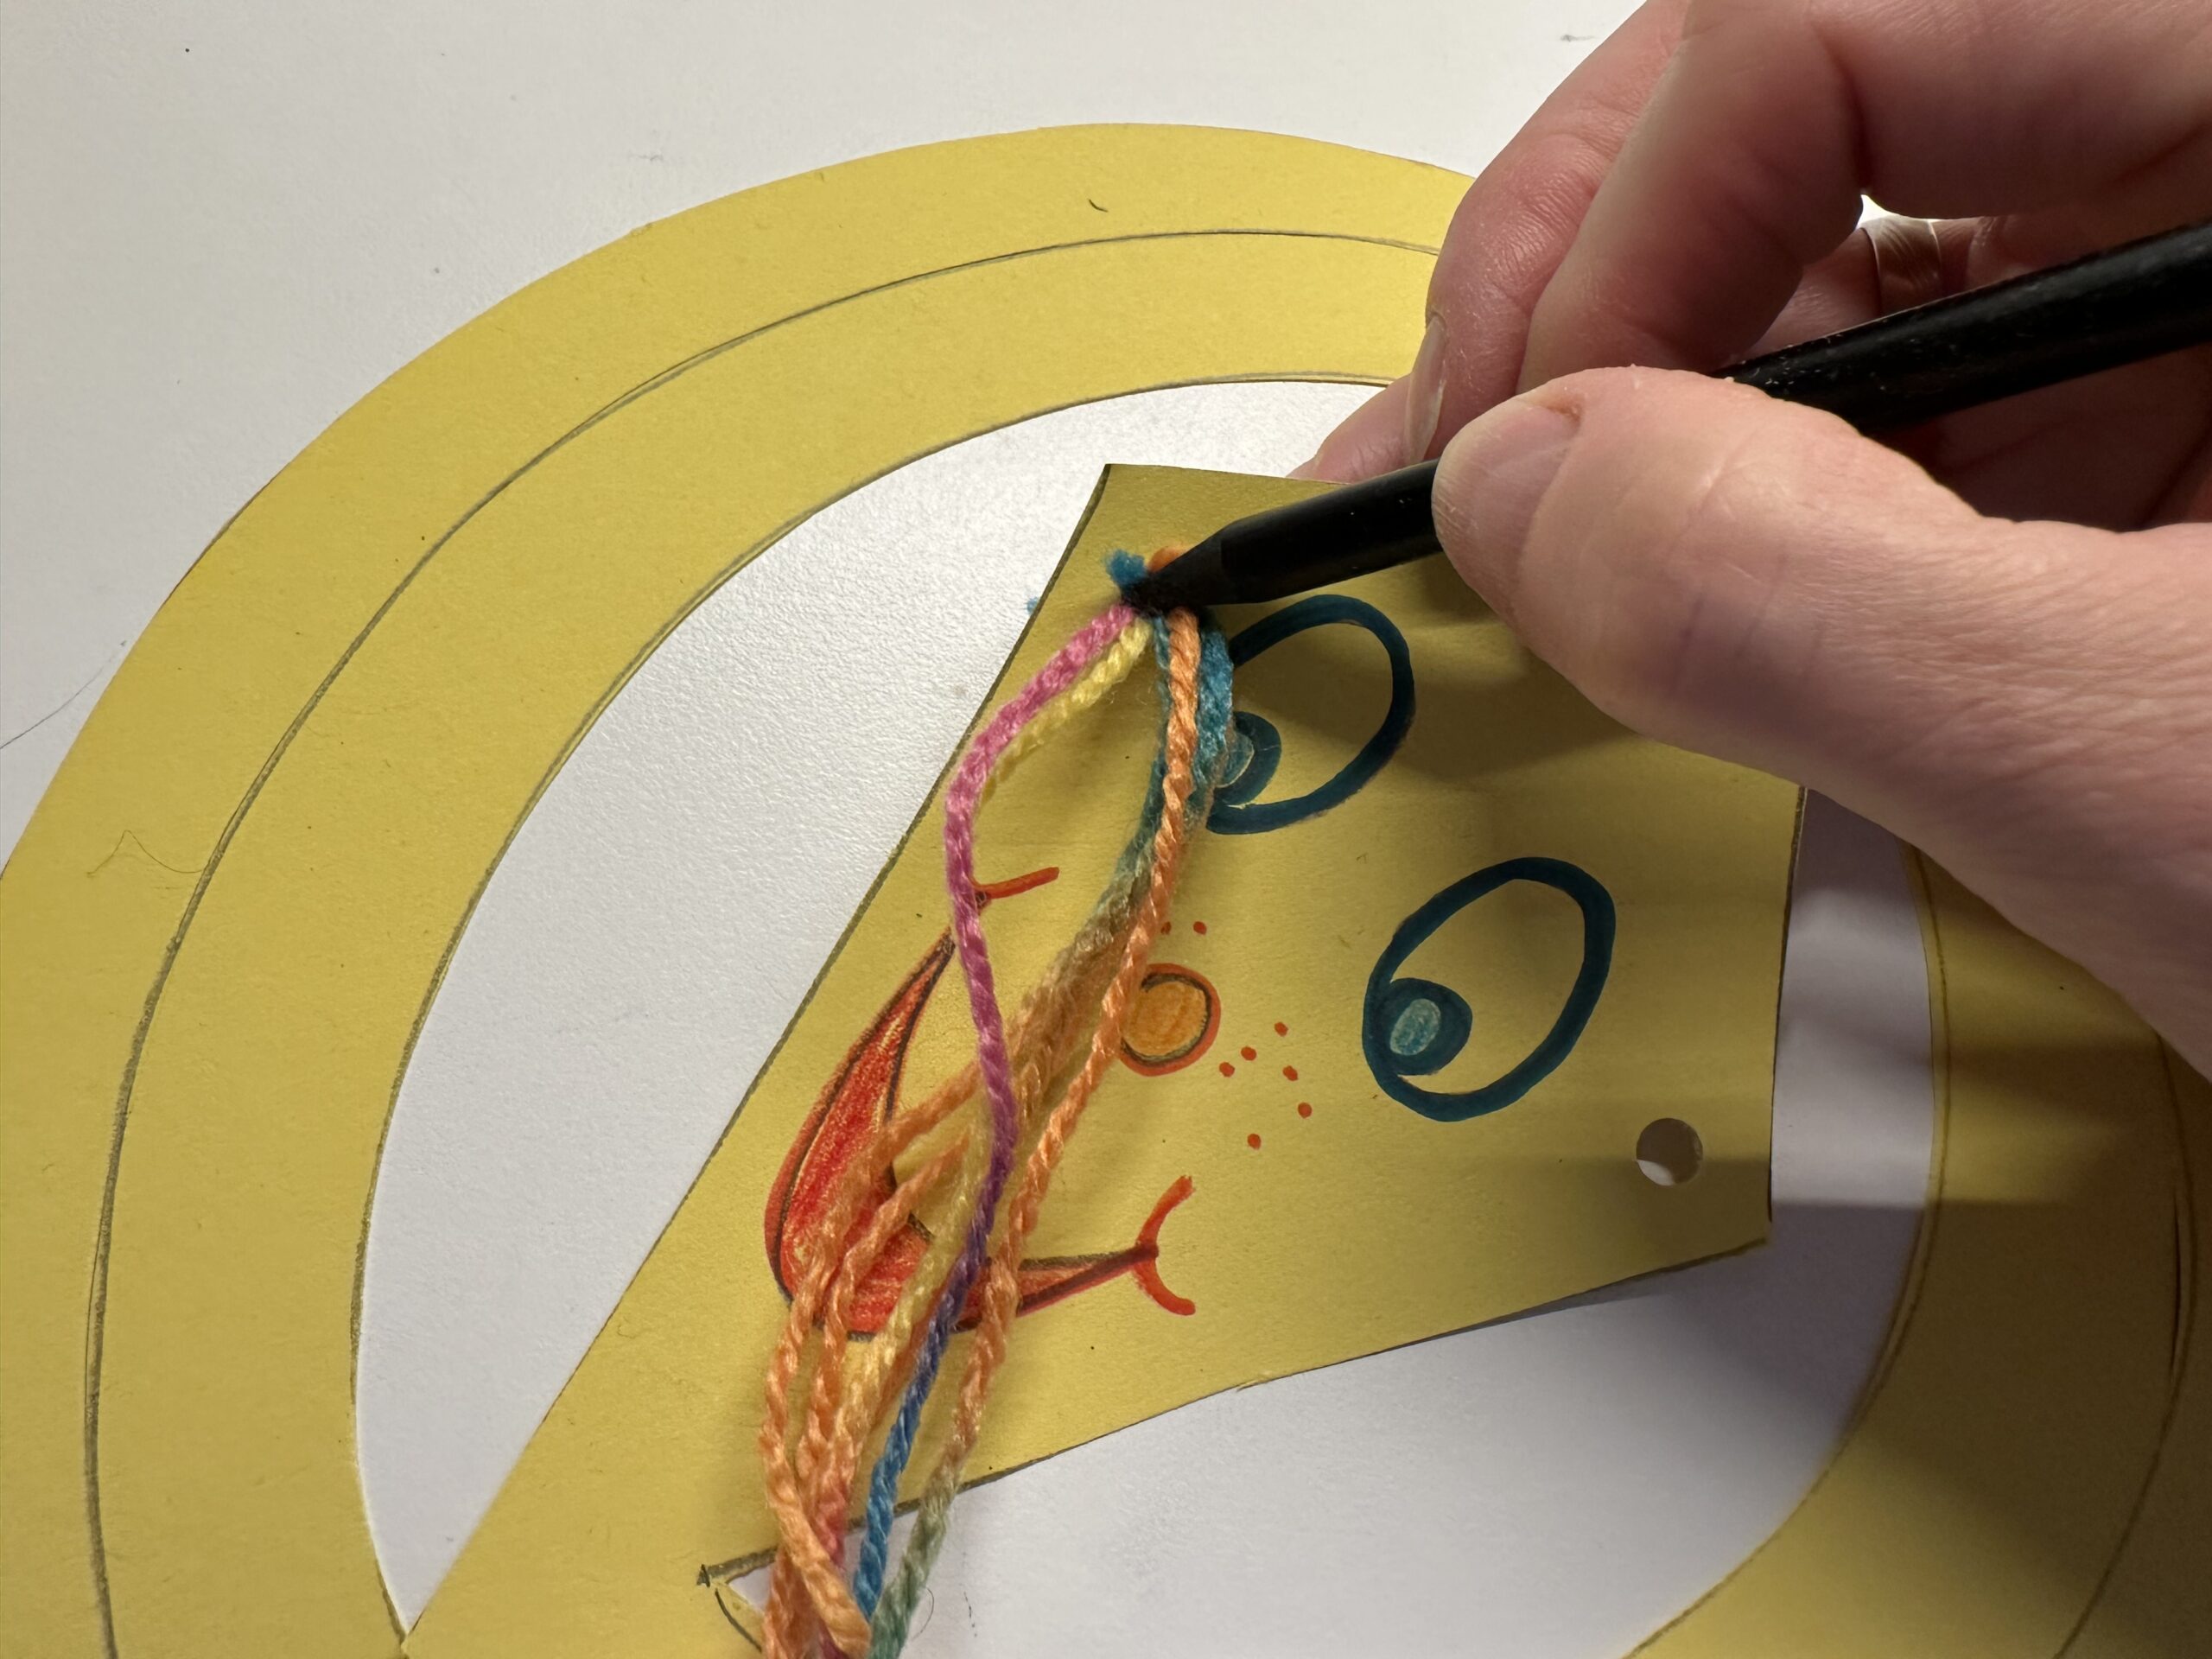
Bild zum Schritt 38 für das Bastel- und DIY-Abenteuer für Kinder: 'Nimm ein Fadenbündle und stecke es durch das eine Loch....'

37

Pull the threads halfway through the hole.
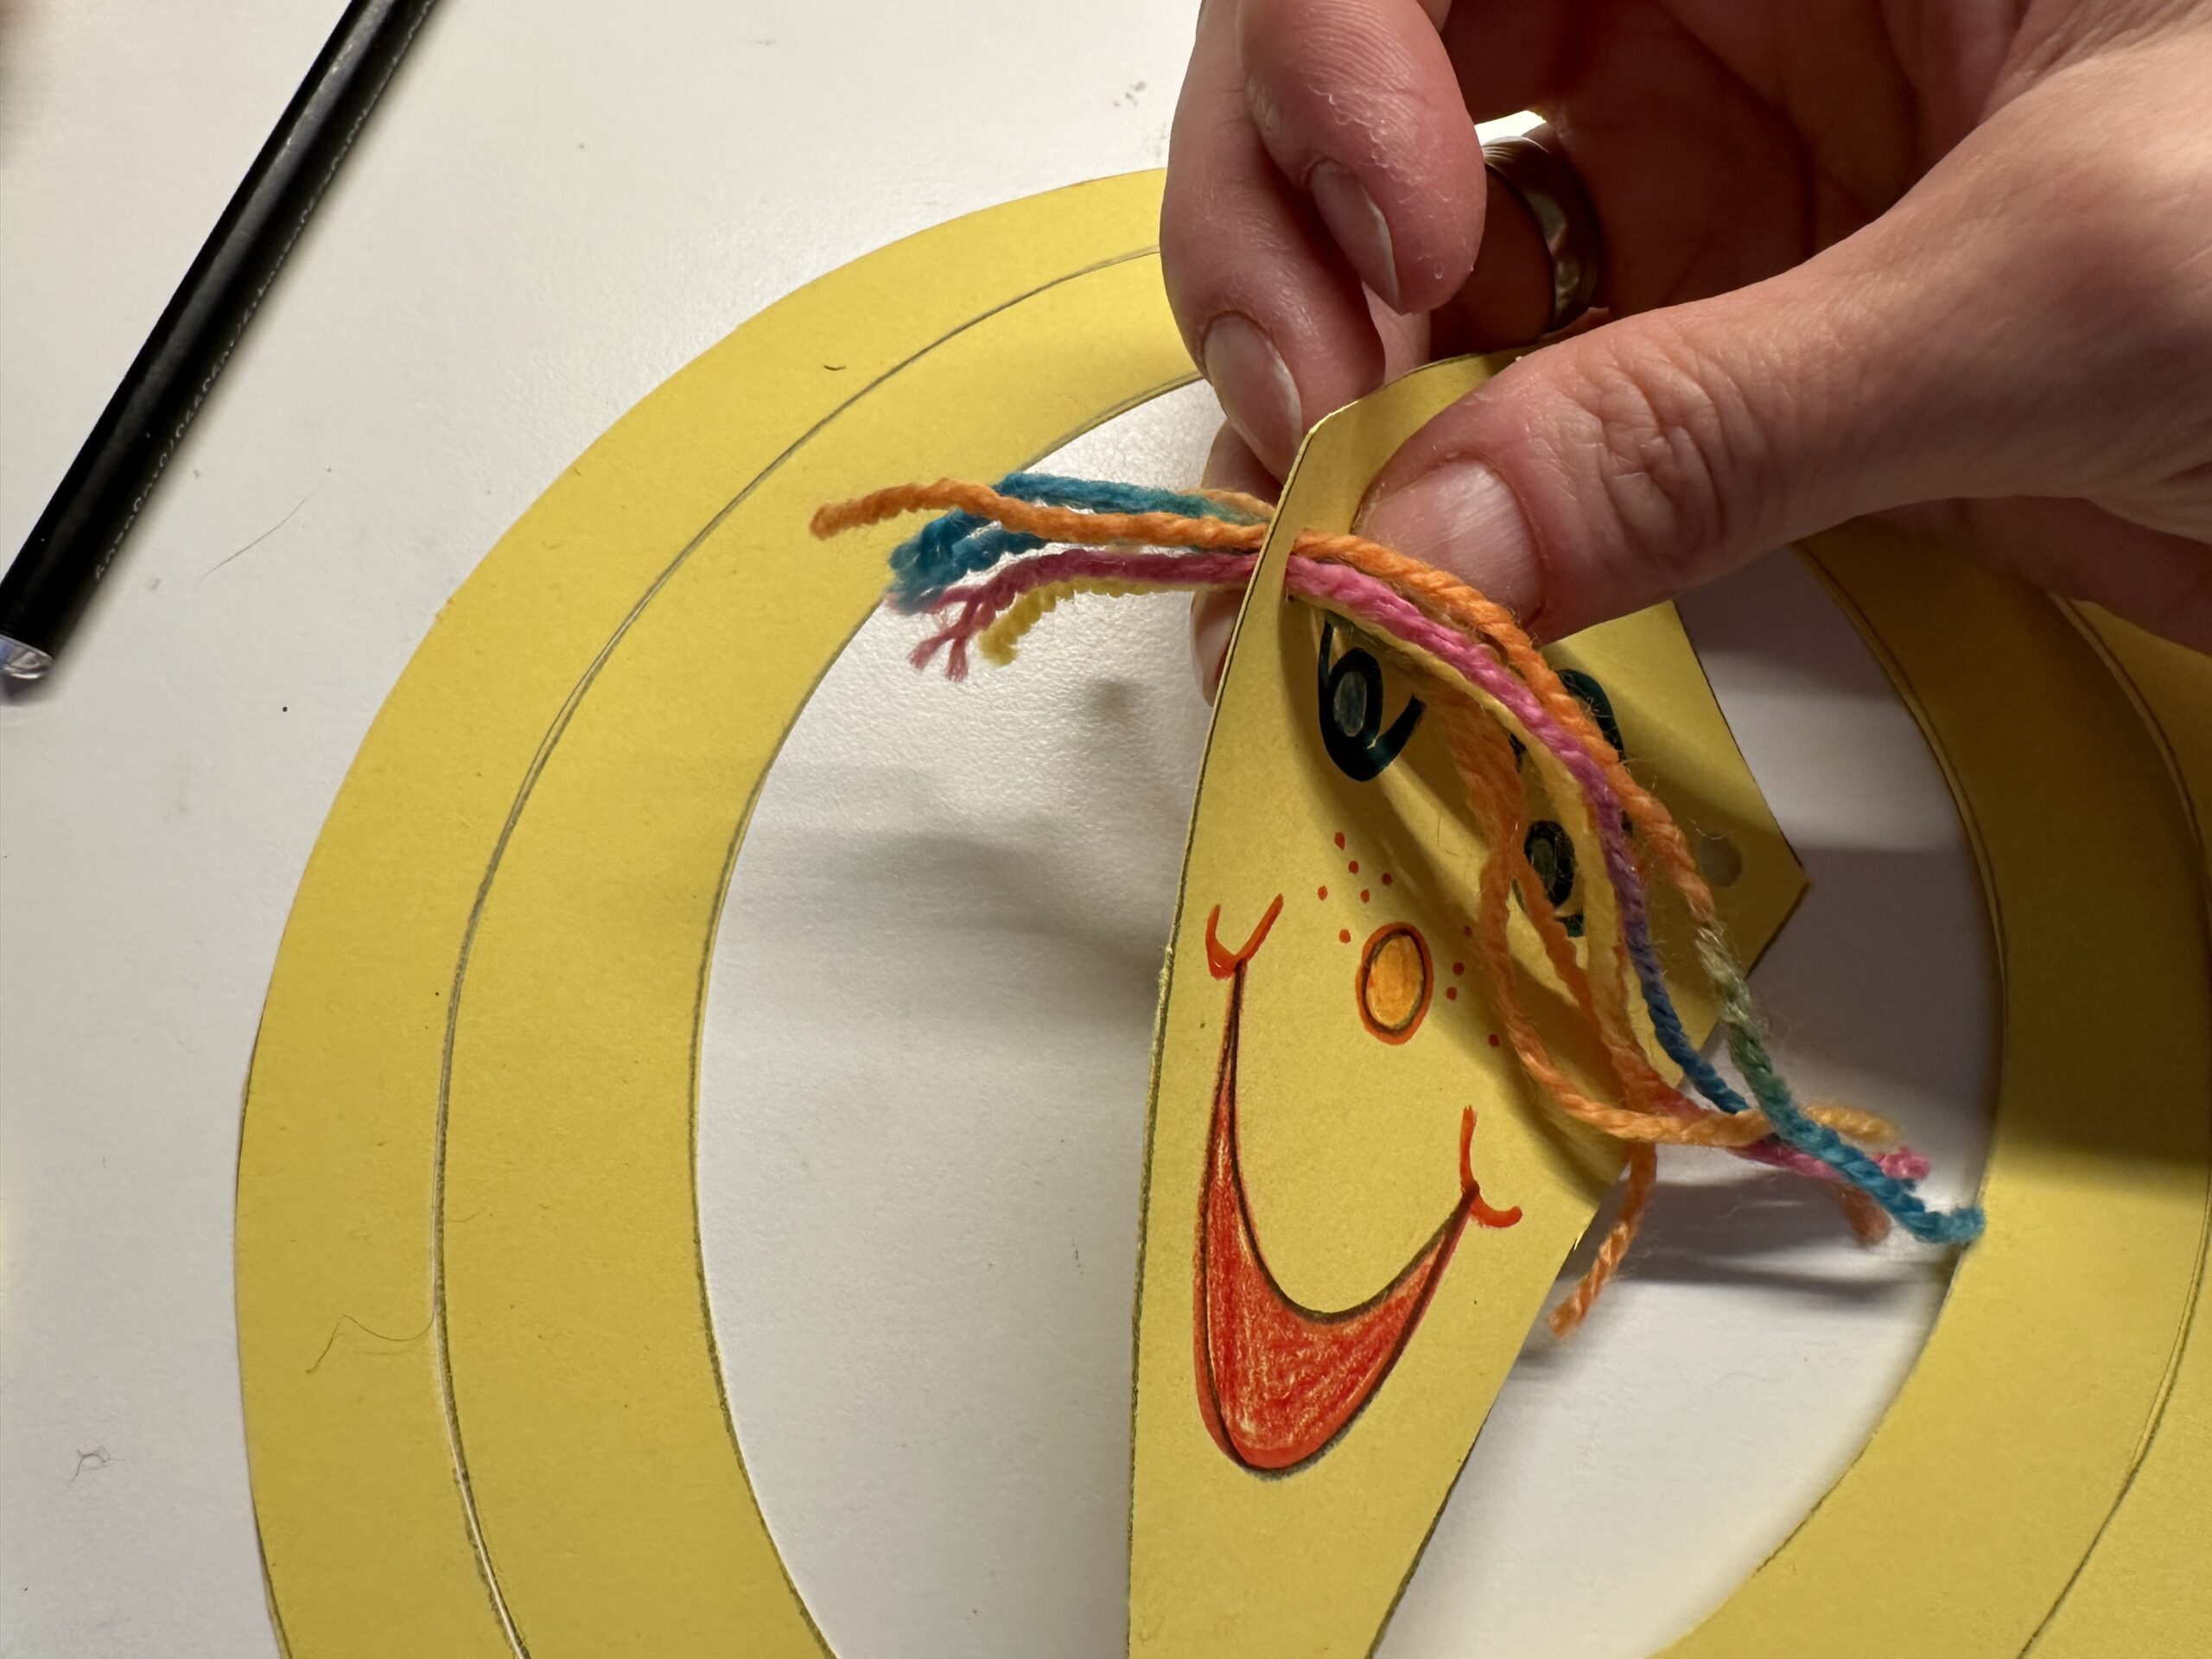
Bild zum Schritt 39 für das Bastel- und DIY-Abenteuer für Kinder: 'Ziehe die Fäden zur Hälfte durch das Loch.'

38

Place both ends of the thread on top of each other and knot them together. Possibly make a double knot.
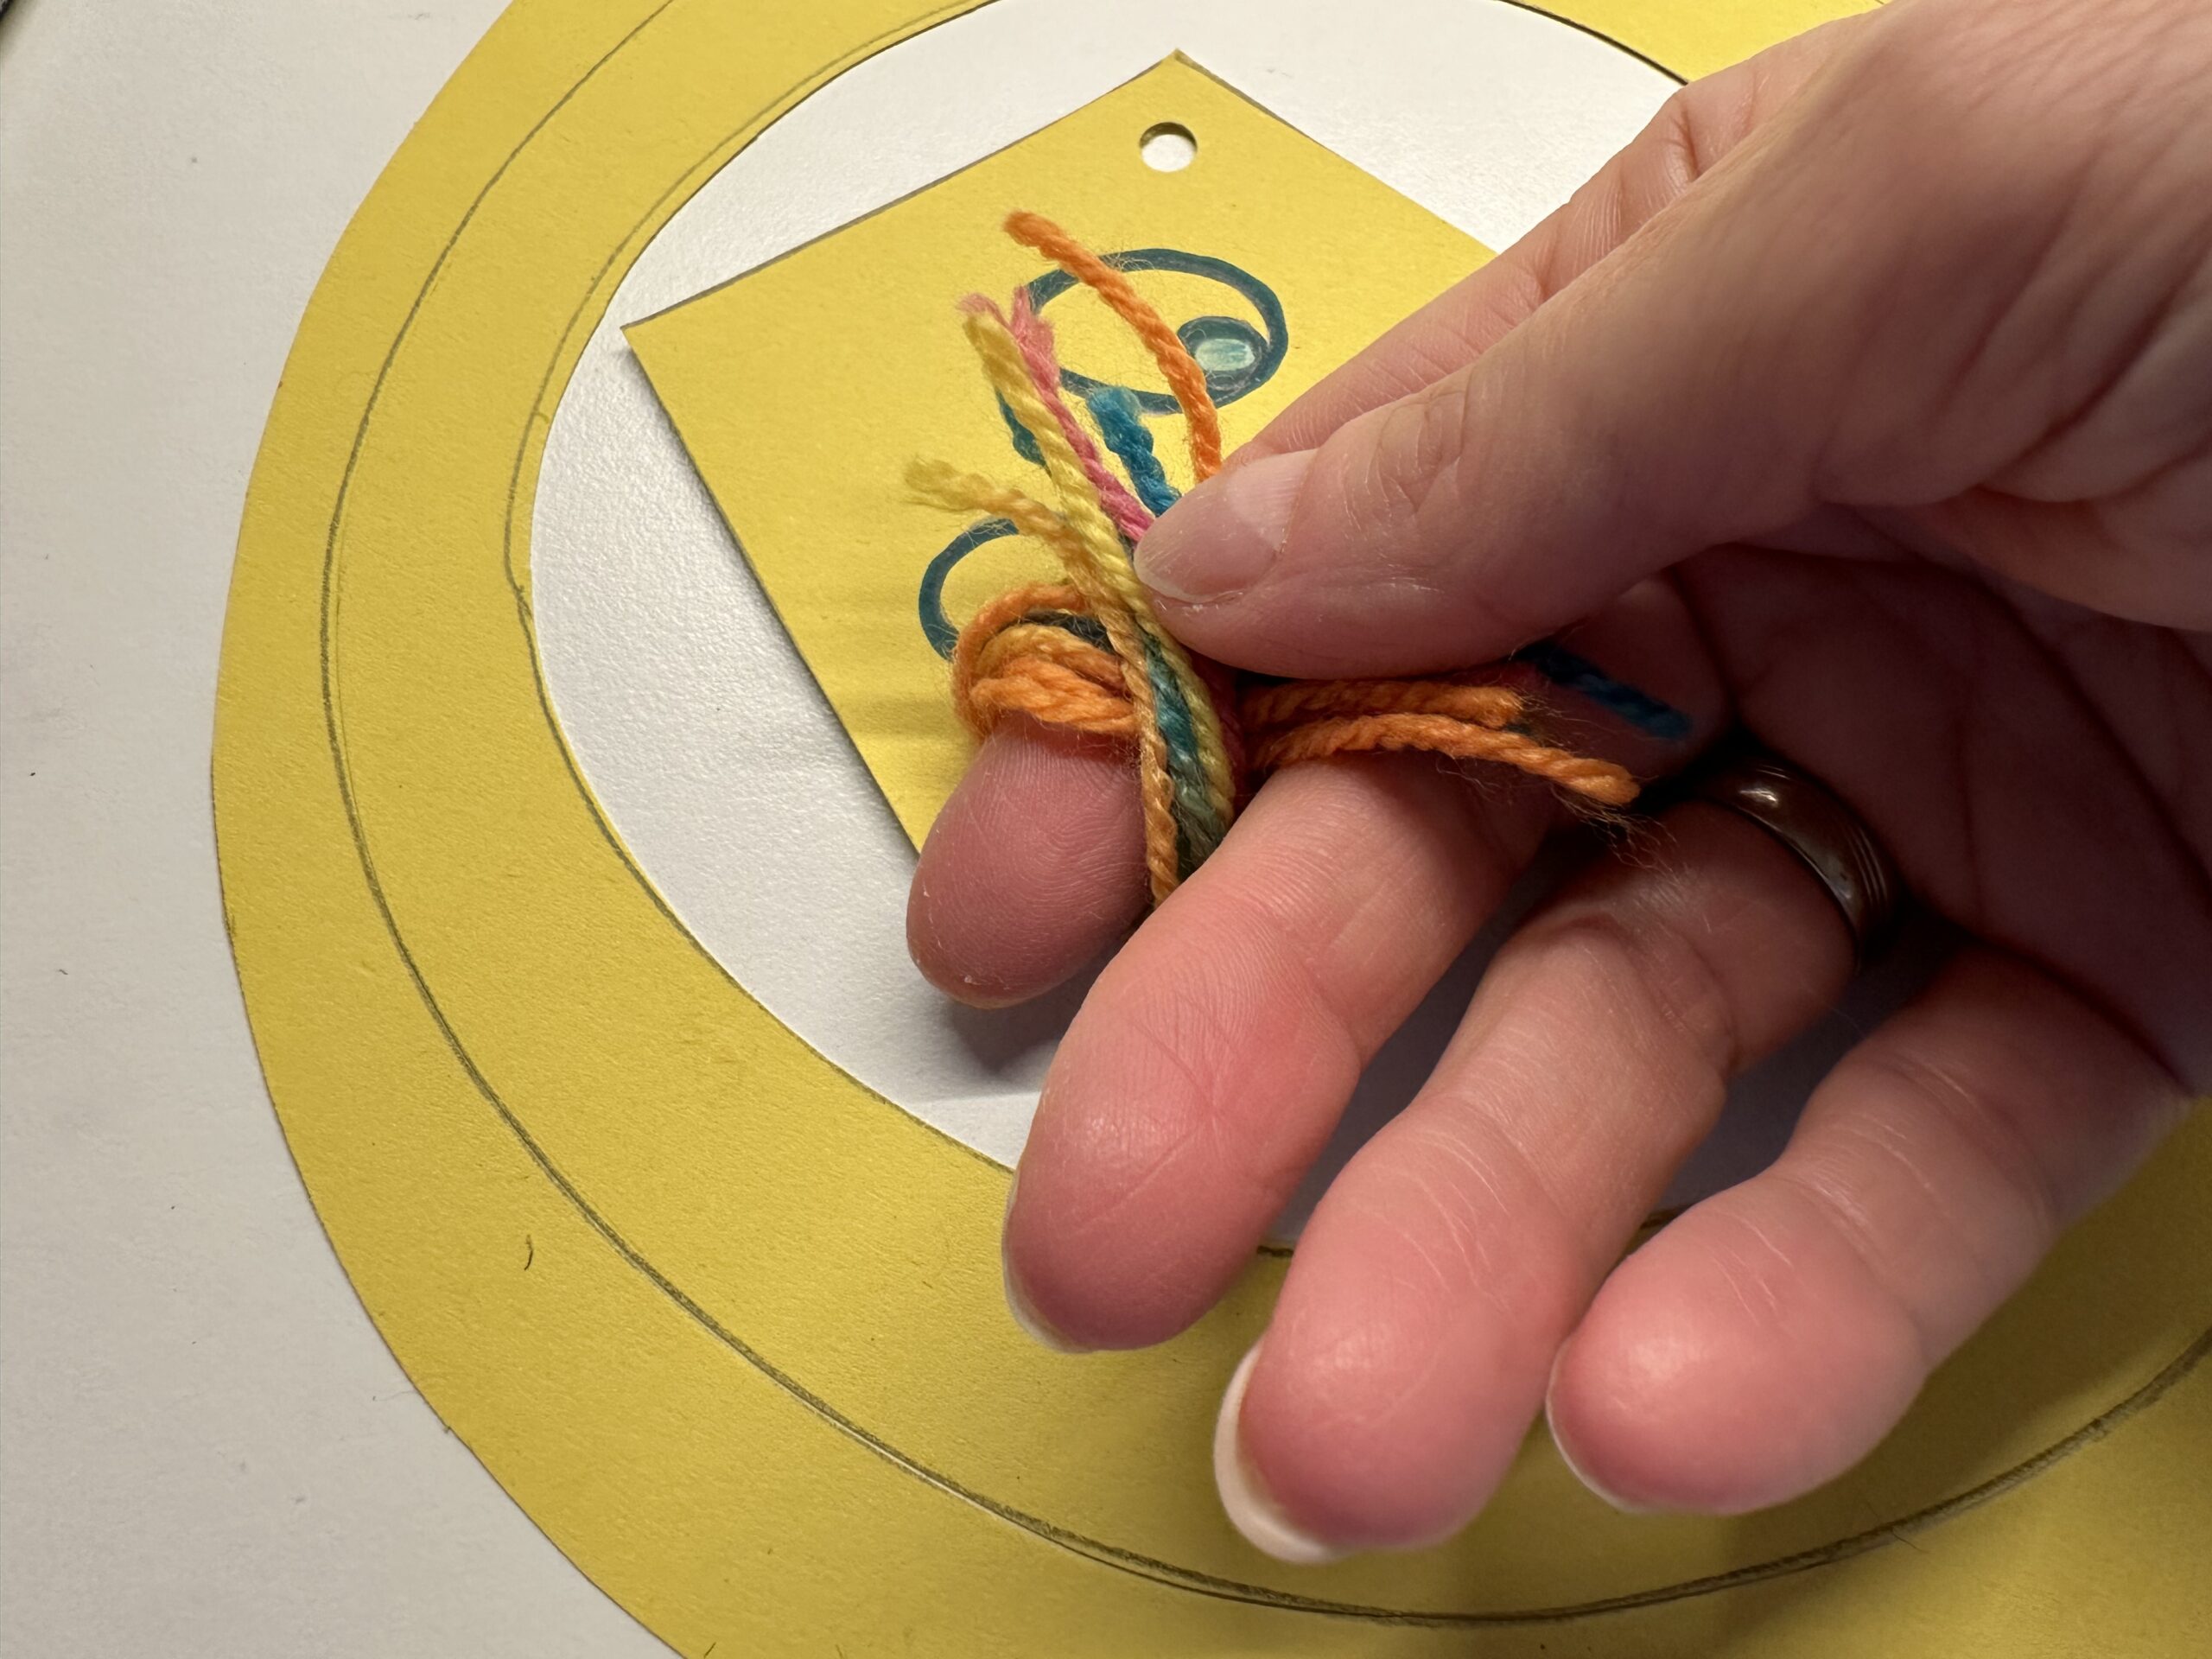
Bild zum Schritt 40 für das Bastel- und DIY-Abenteuer für Kinder: 'Lege beide Fadenenden übereinander und verknote sie miteinander. Mache evtl....'

39

Direct the knot so that the overhanging threads stand sideways.
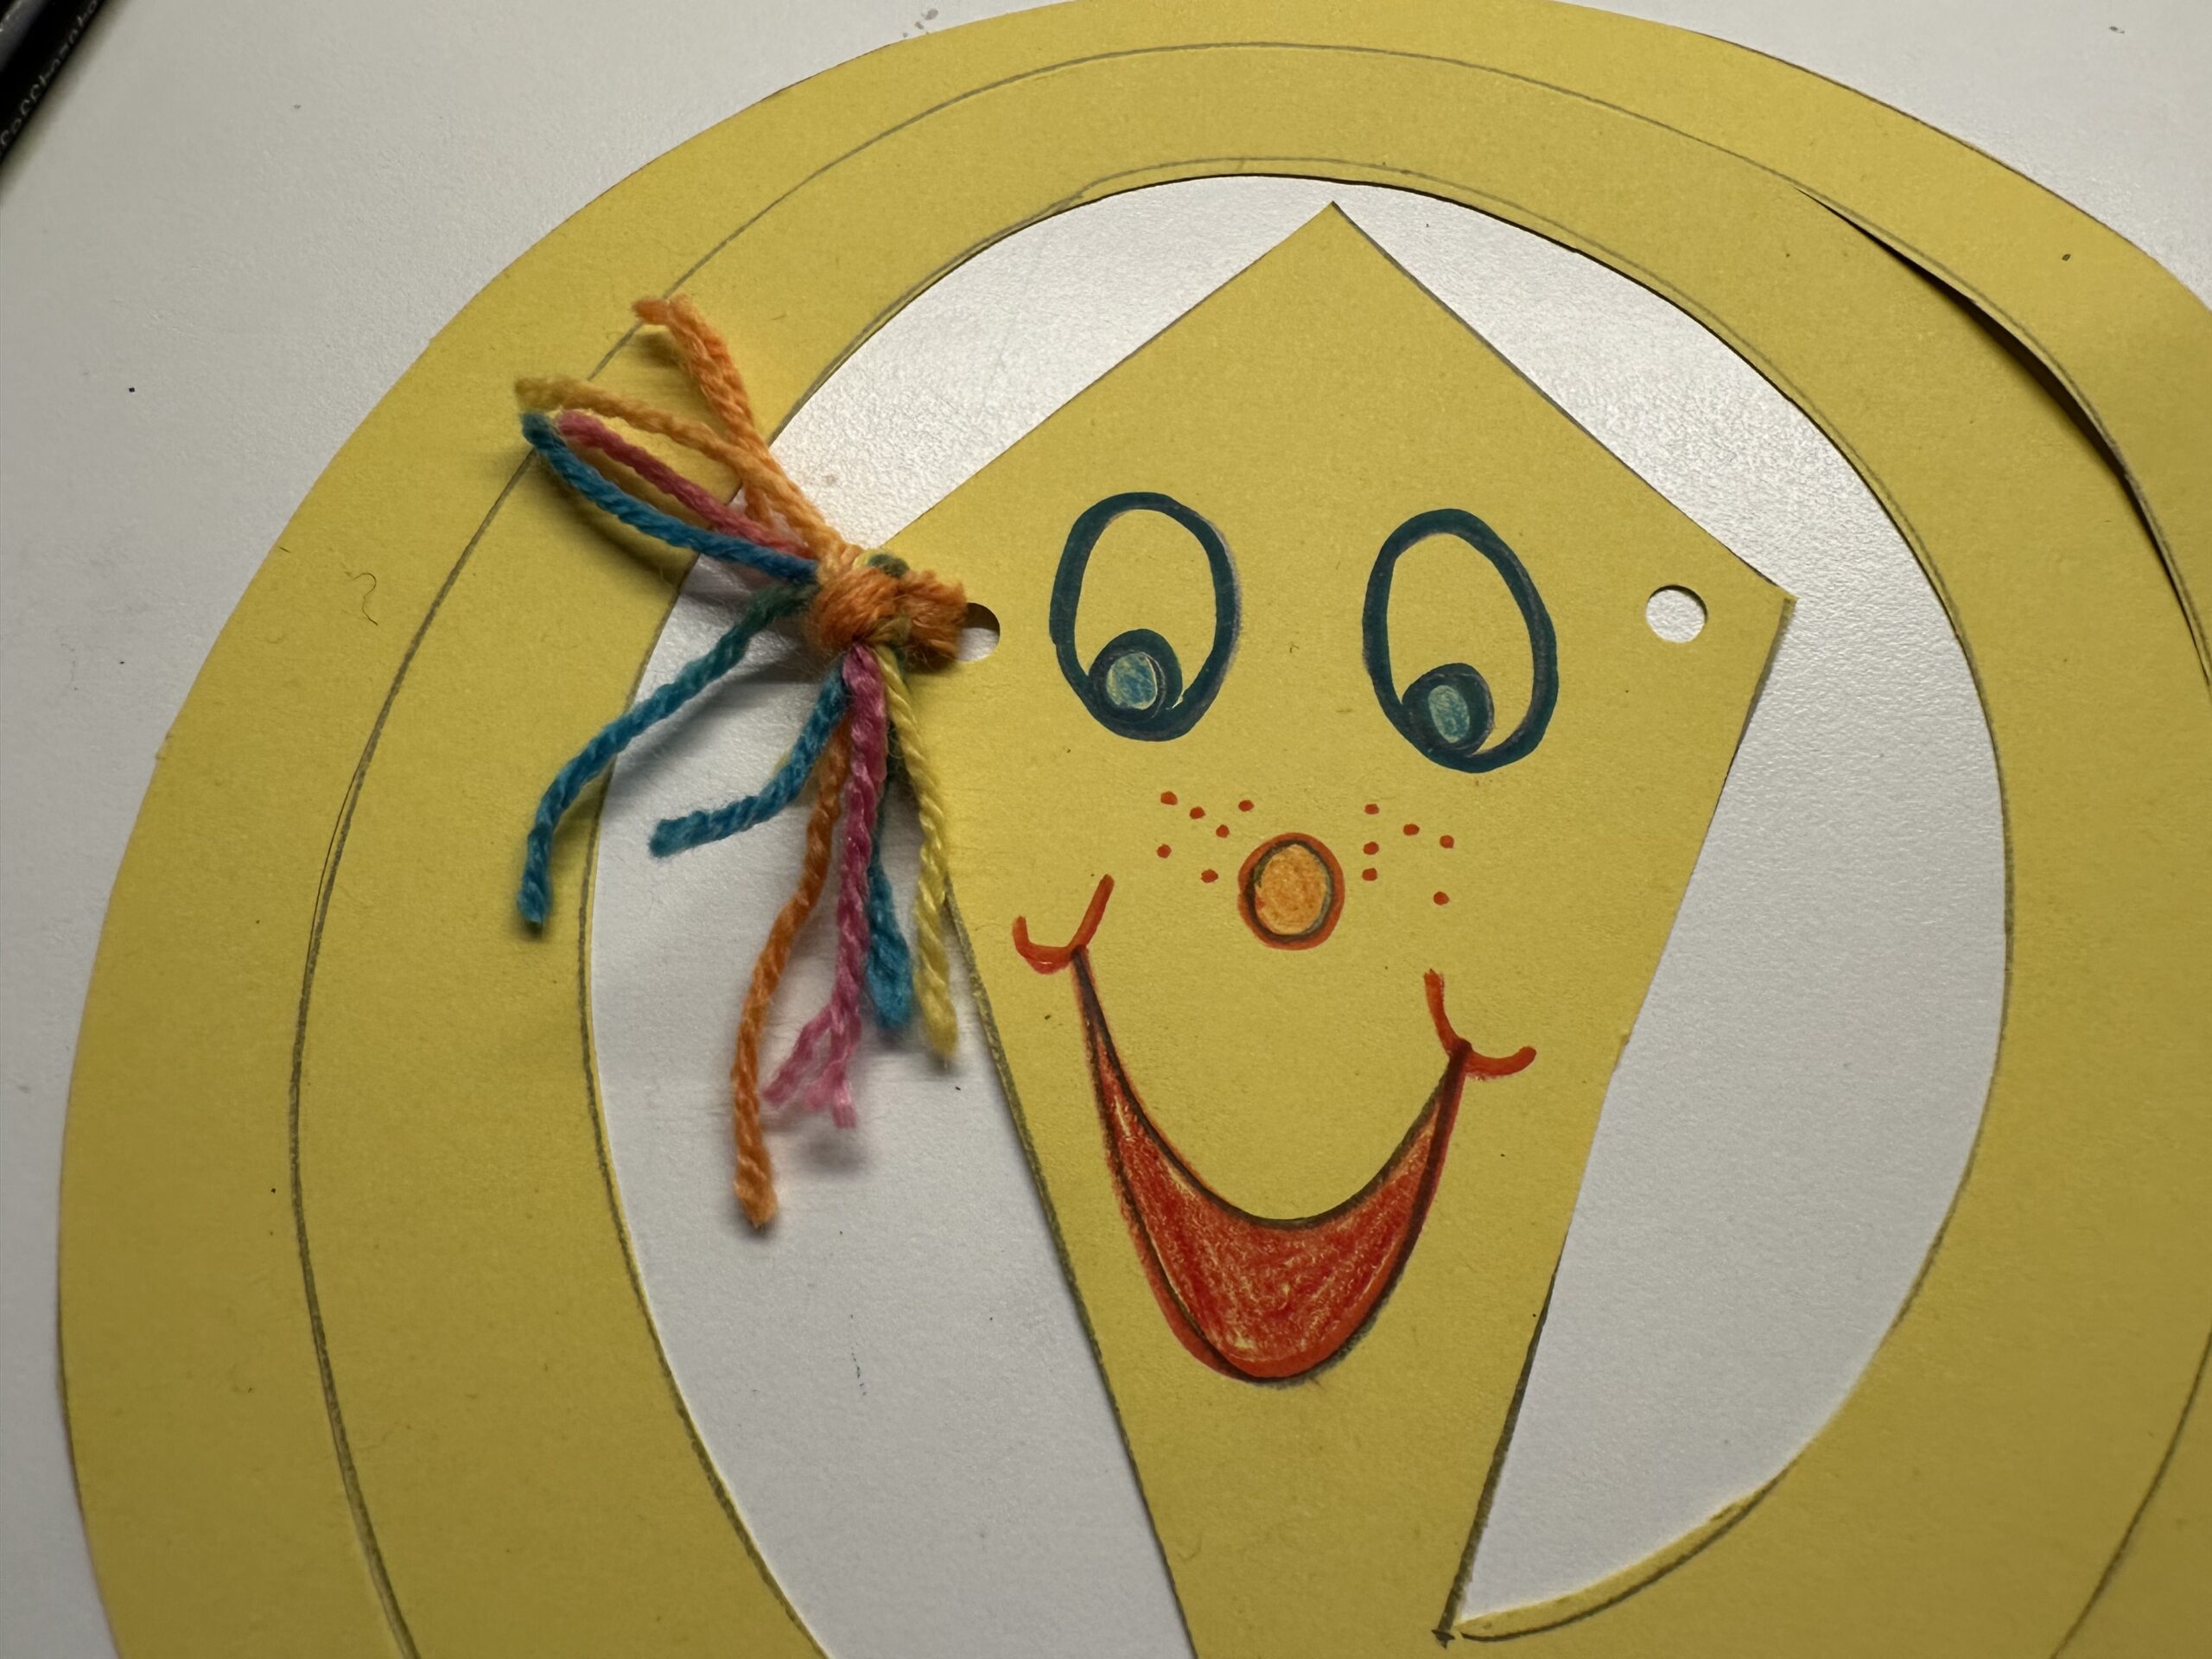
Bild zum Schritt 41 für das Bastel- und DIY-Abenteuer für Kinder: 'Richte den Knoten so, dass die überstehenden Fäden seitlich abstehen.'

40

Repeat the whole with the second thread bundle on the opposite hole.
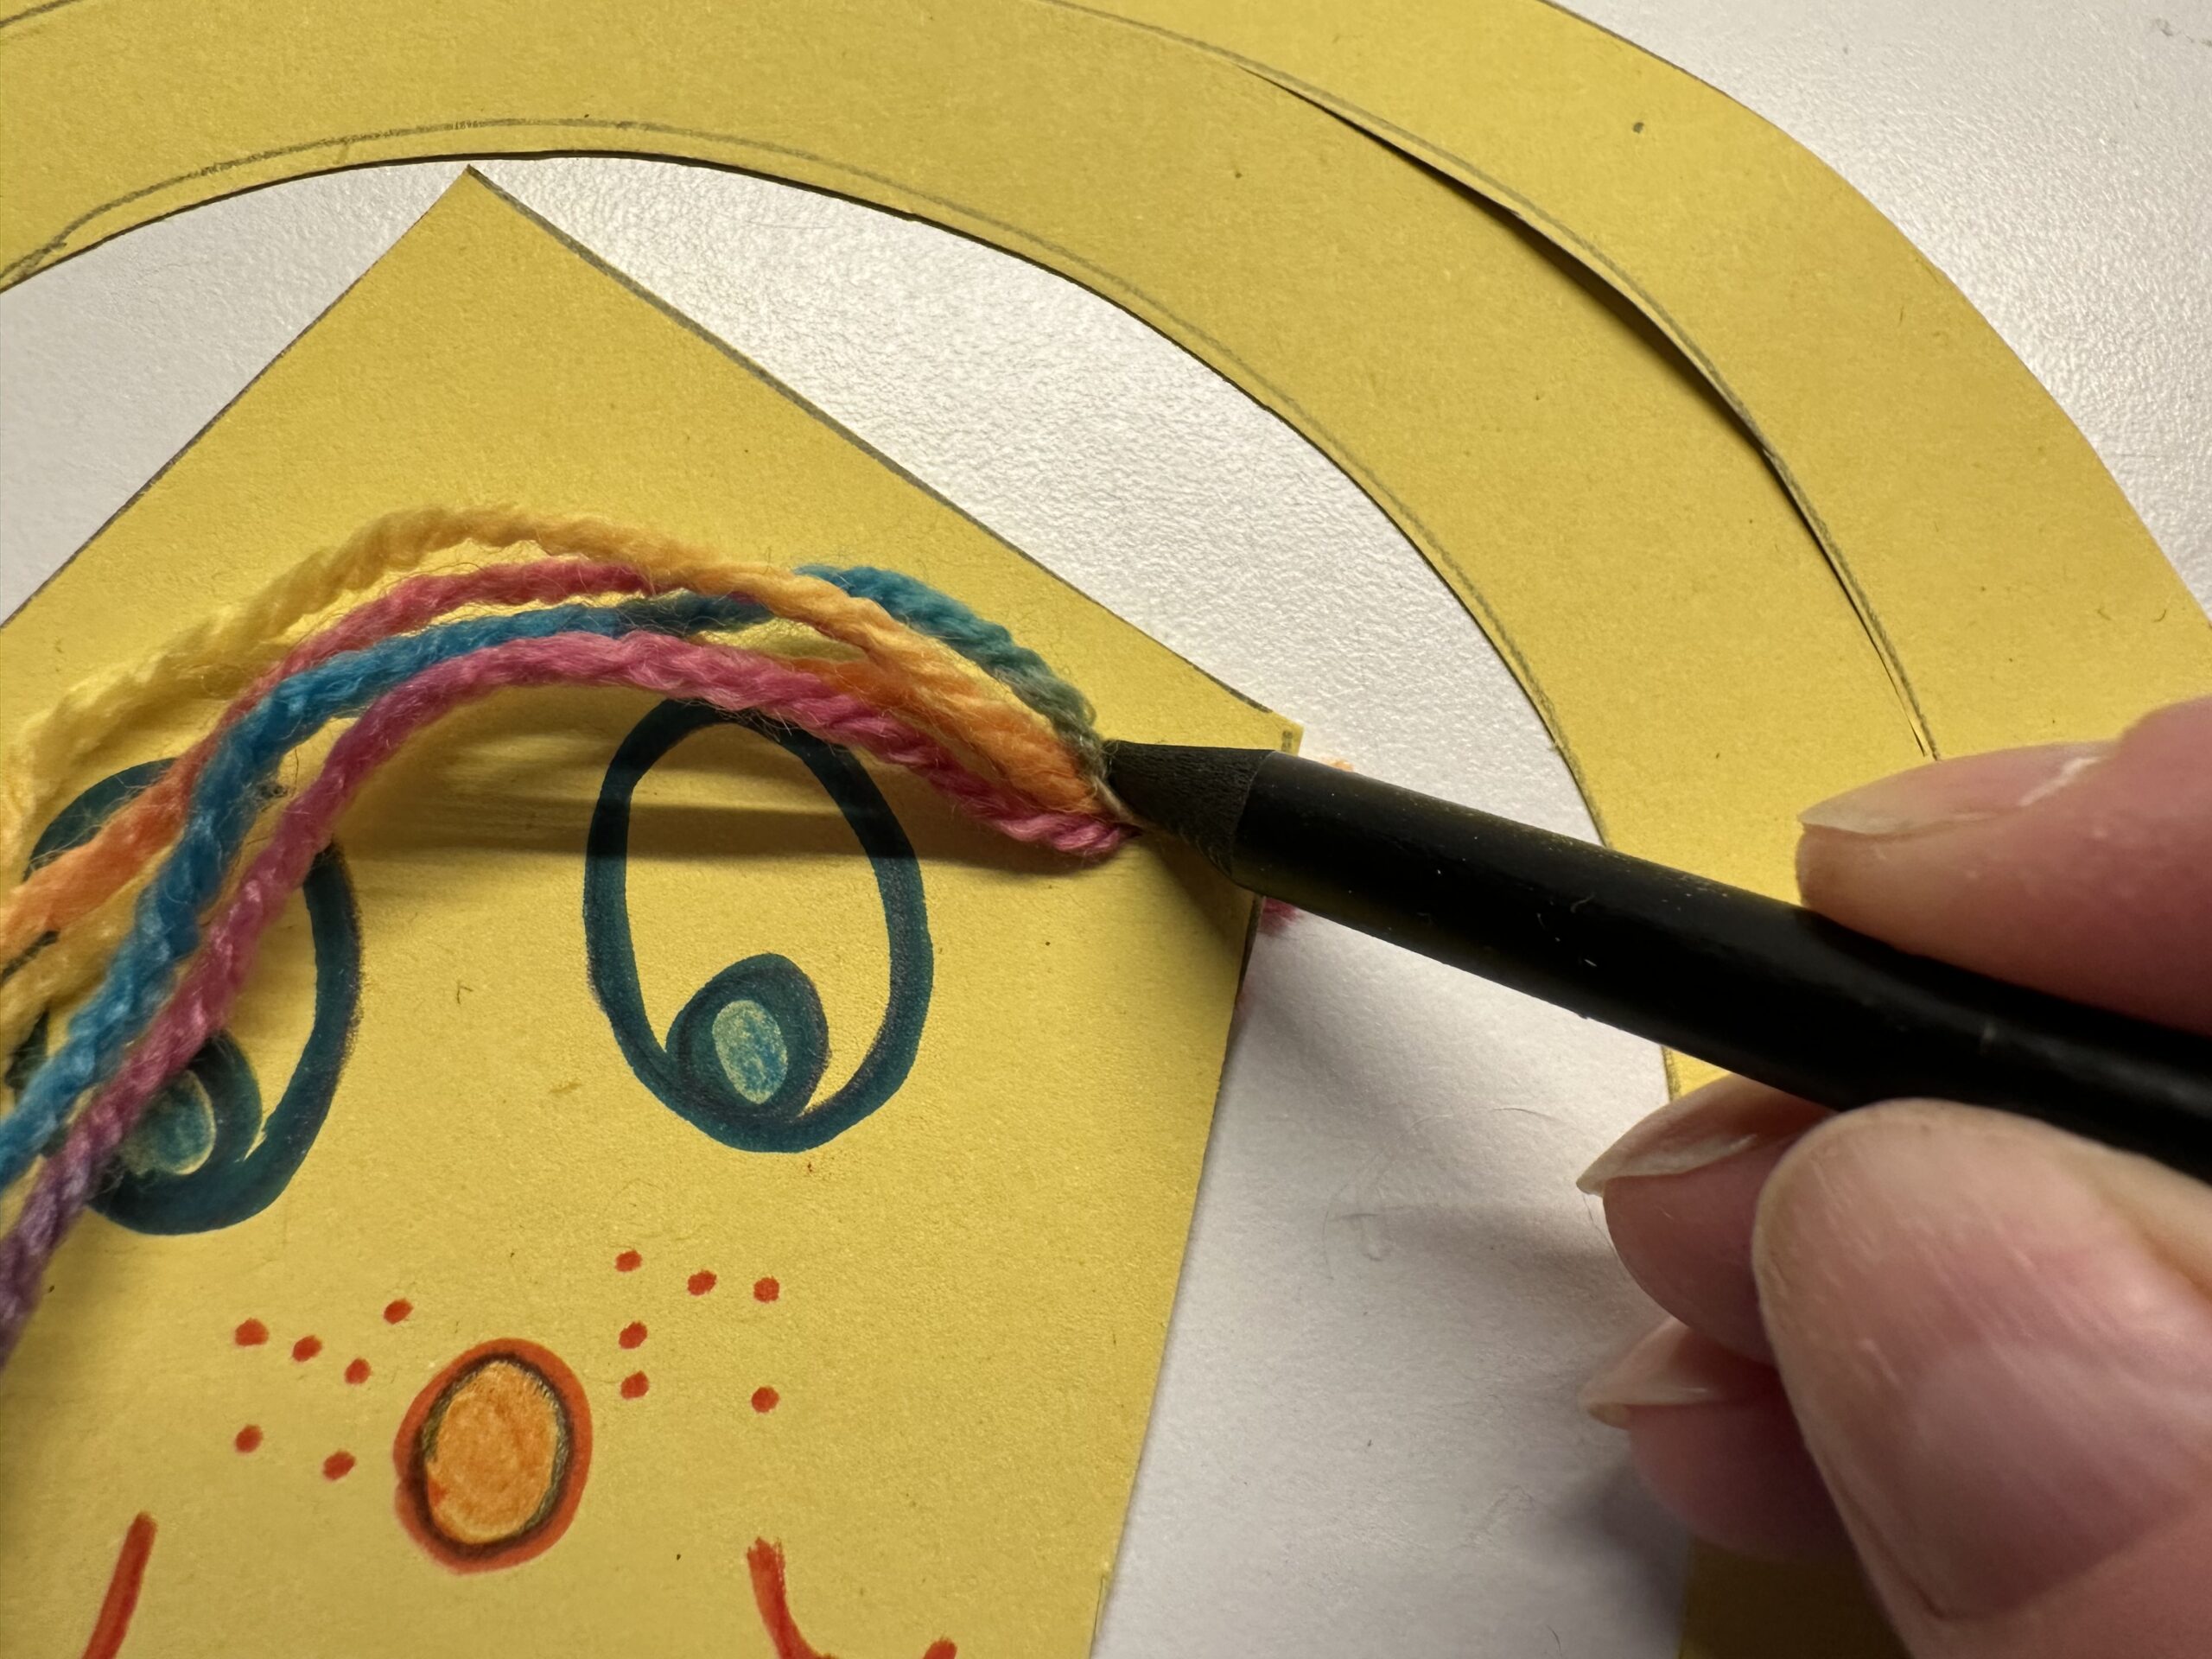
Bild zum Schritt 42 für das Bastel- und DIY-Abenteuer für Kinder: 'Wiederhole das ganze auch mit dem zweiten Fadenbündel am gegenüberliegenden...'

41

Make a knot here, too.

Bild zum Schritt 43 für das Bastel- und DIY-Abenteuer für Kinder: 'Mache auch hier einen Knoten.'

42

You may still be able to shorten the remaining Franzes with the scissors.
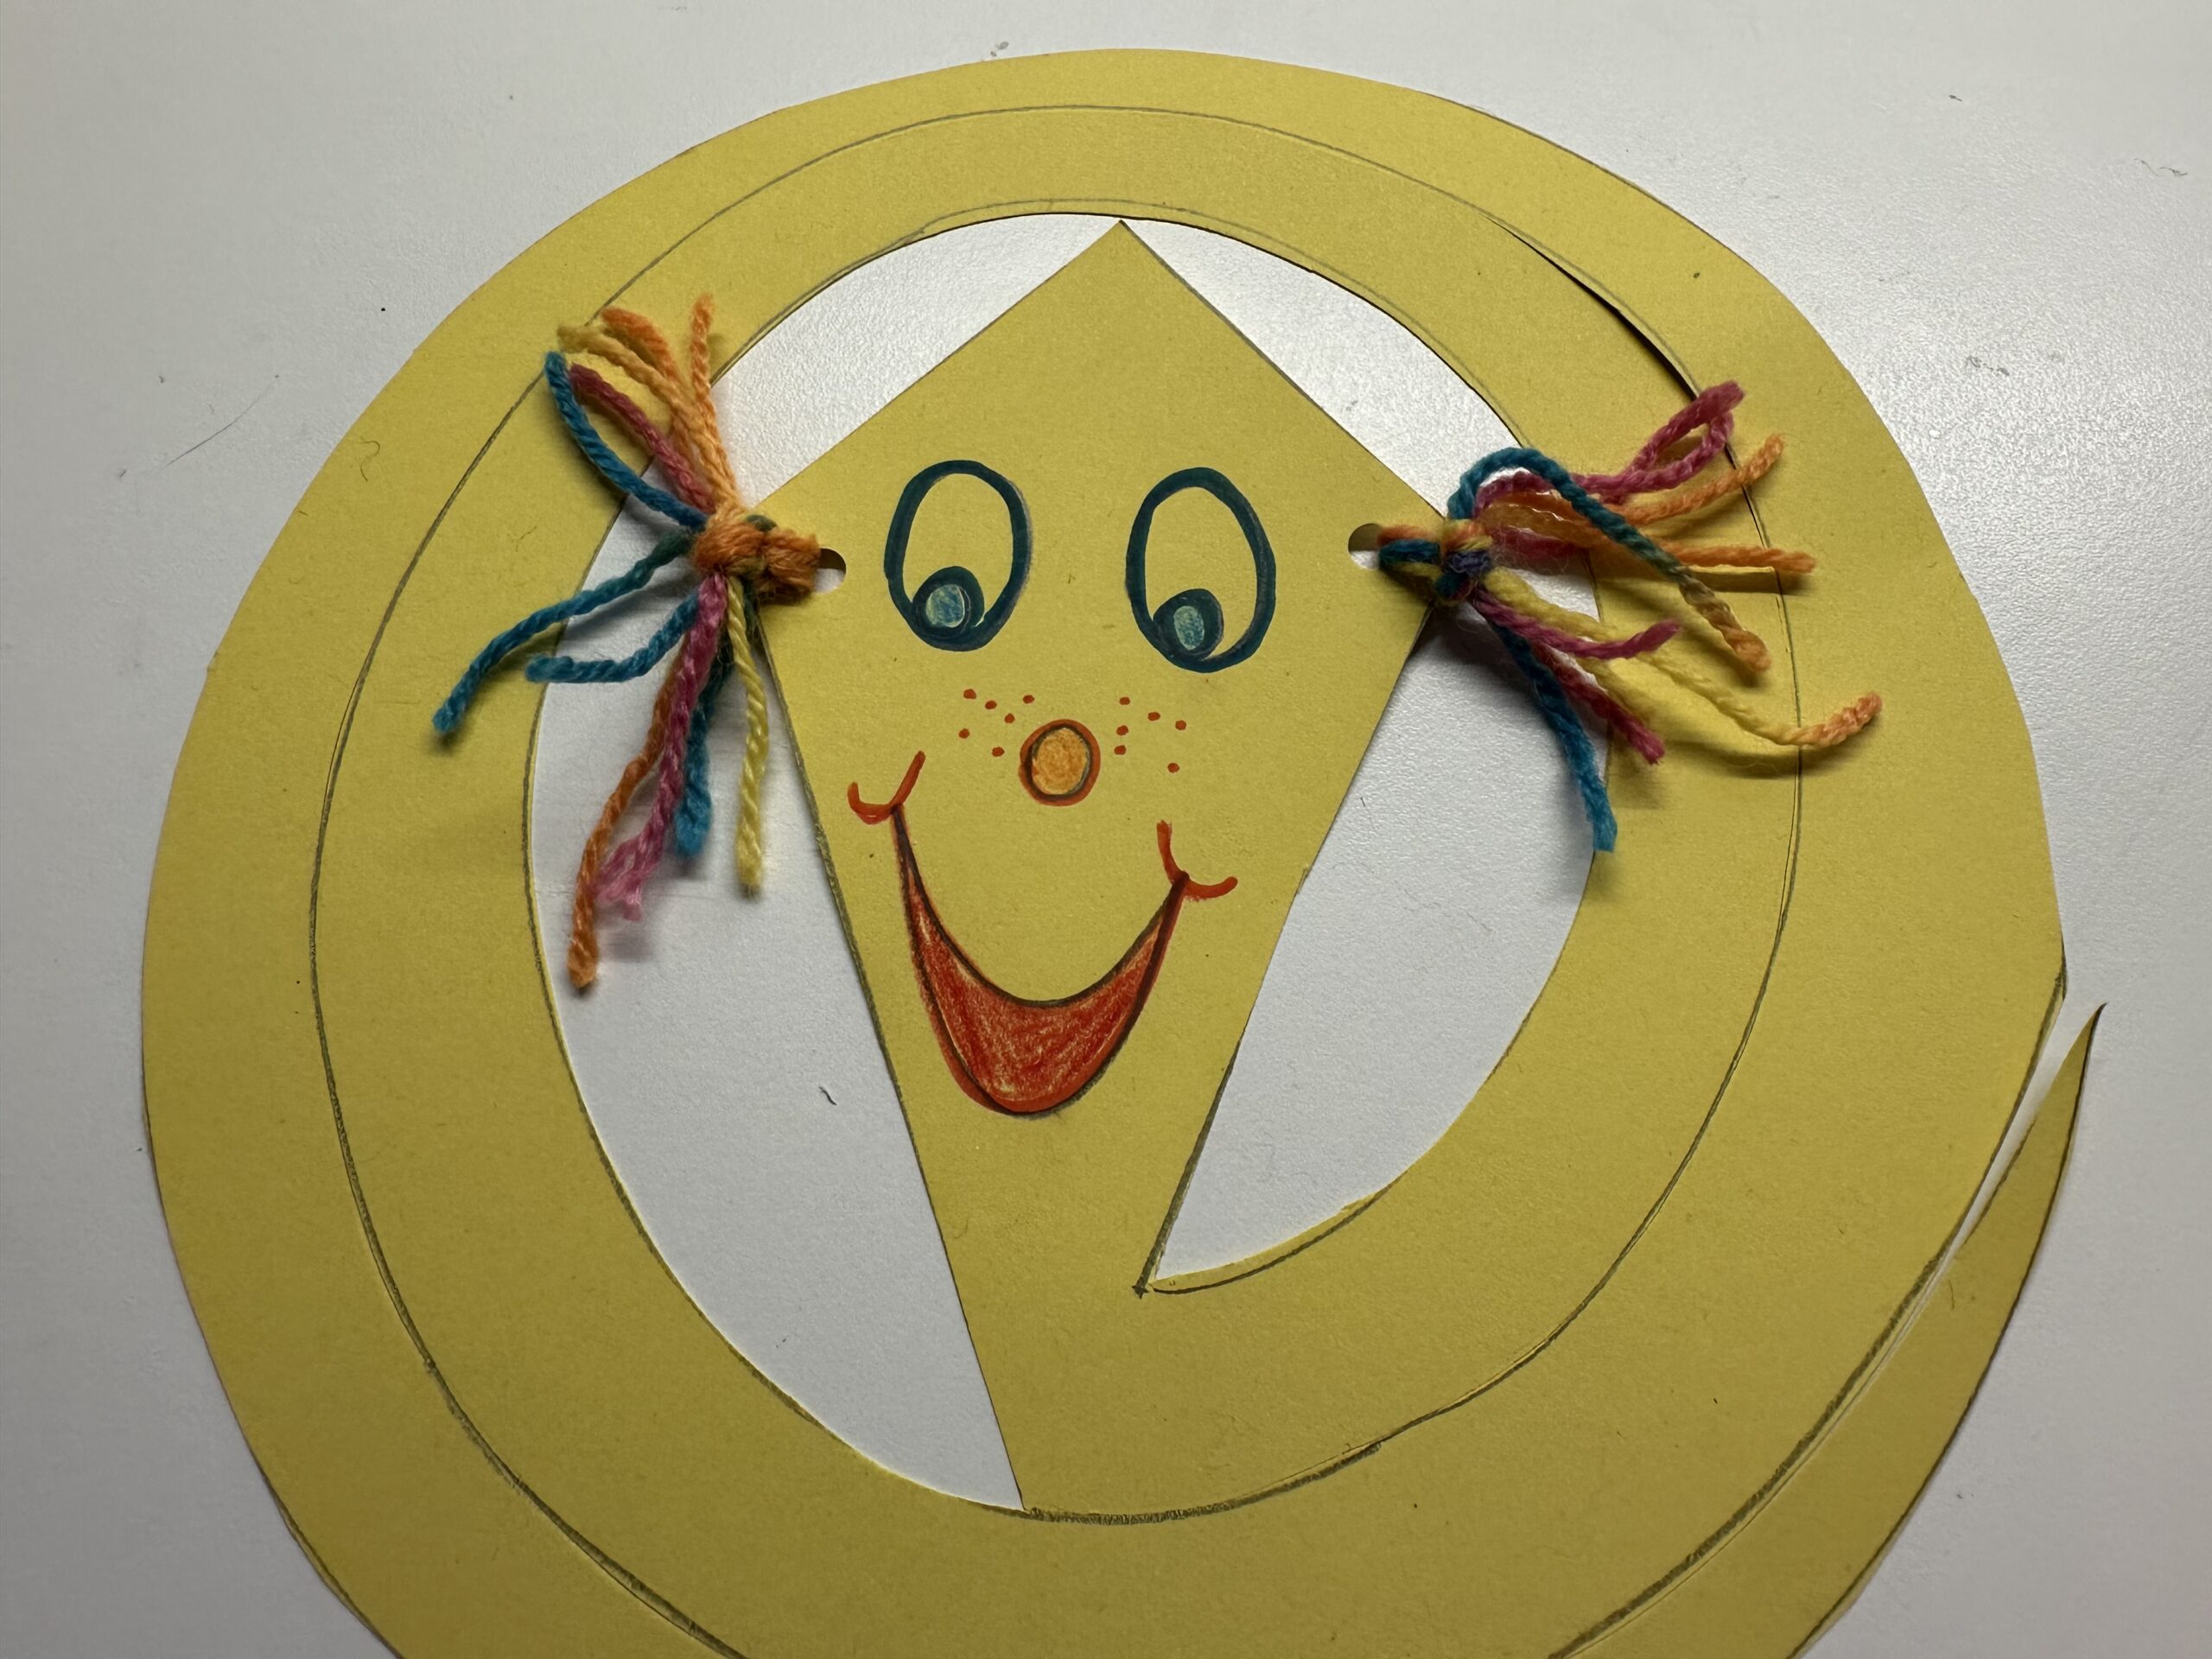
Bild zum Schritt 44 für das Bastel- und DIY-Abenteuer für Kinder: 'Die überstehenden Franzen kannst du evtl. noch mit der Schere...'

43

Make a hole with the hole at the upper end of the dragon's head. You can hang the dragon on this one later.
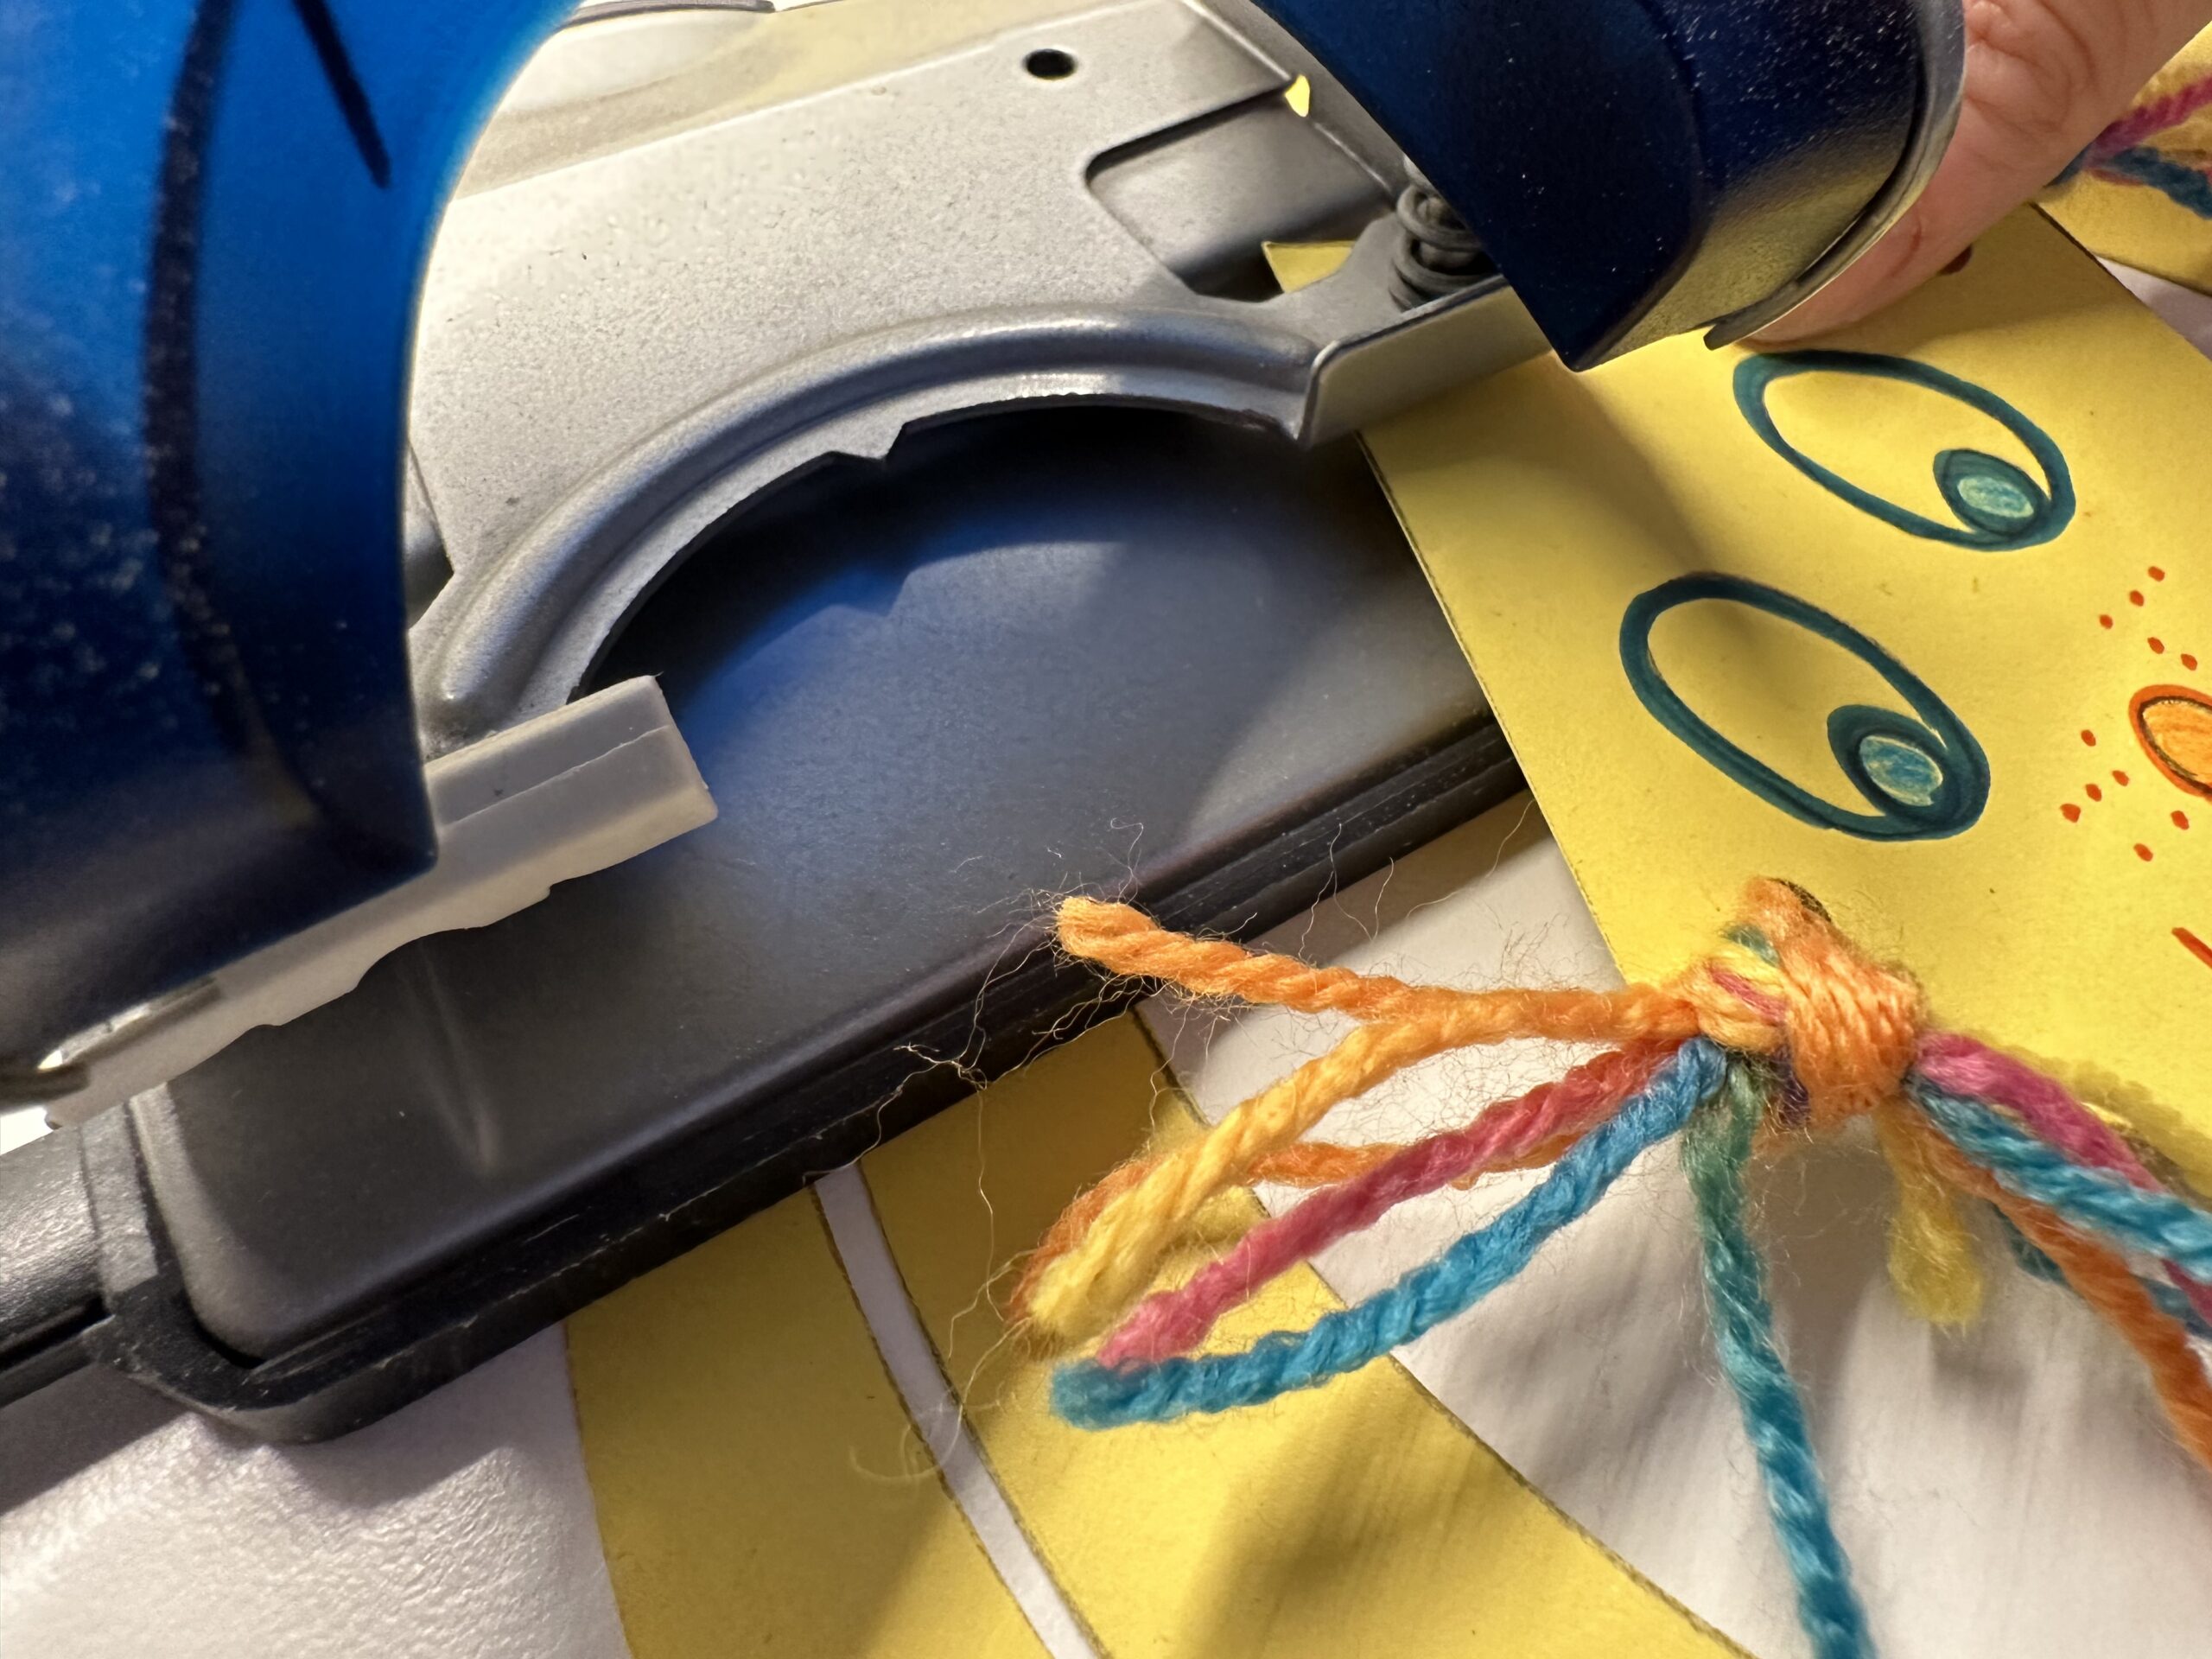
Bild zum Schritt 45 für das Bastel- und DIY-Abenteuer für Kinder: 'Mache mit dem Locher am oberen Ende des Drachenkopfes mittig...'

44

That's what it looks like.

Bild zum Schritt 46 für das Bastel- und DIY-Abenteuer für Kinder: 'So sieht das dann aus.'

45

Only small loops are missing on the kite line. You can easily make them out of triangles. Cut small triangles of clay paper remnants. These should be 2 to 3 centimeters in size. You can also use different colors, so your dragon becomes beautiful colorful.
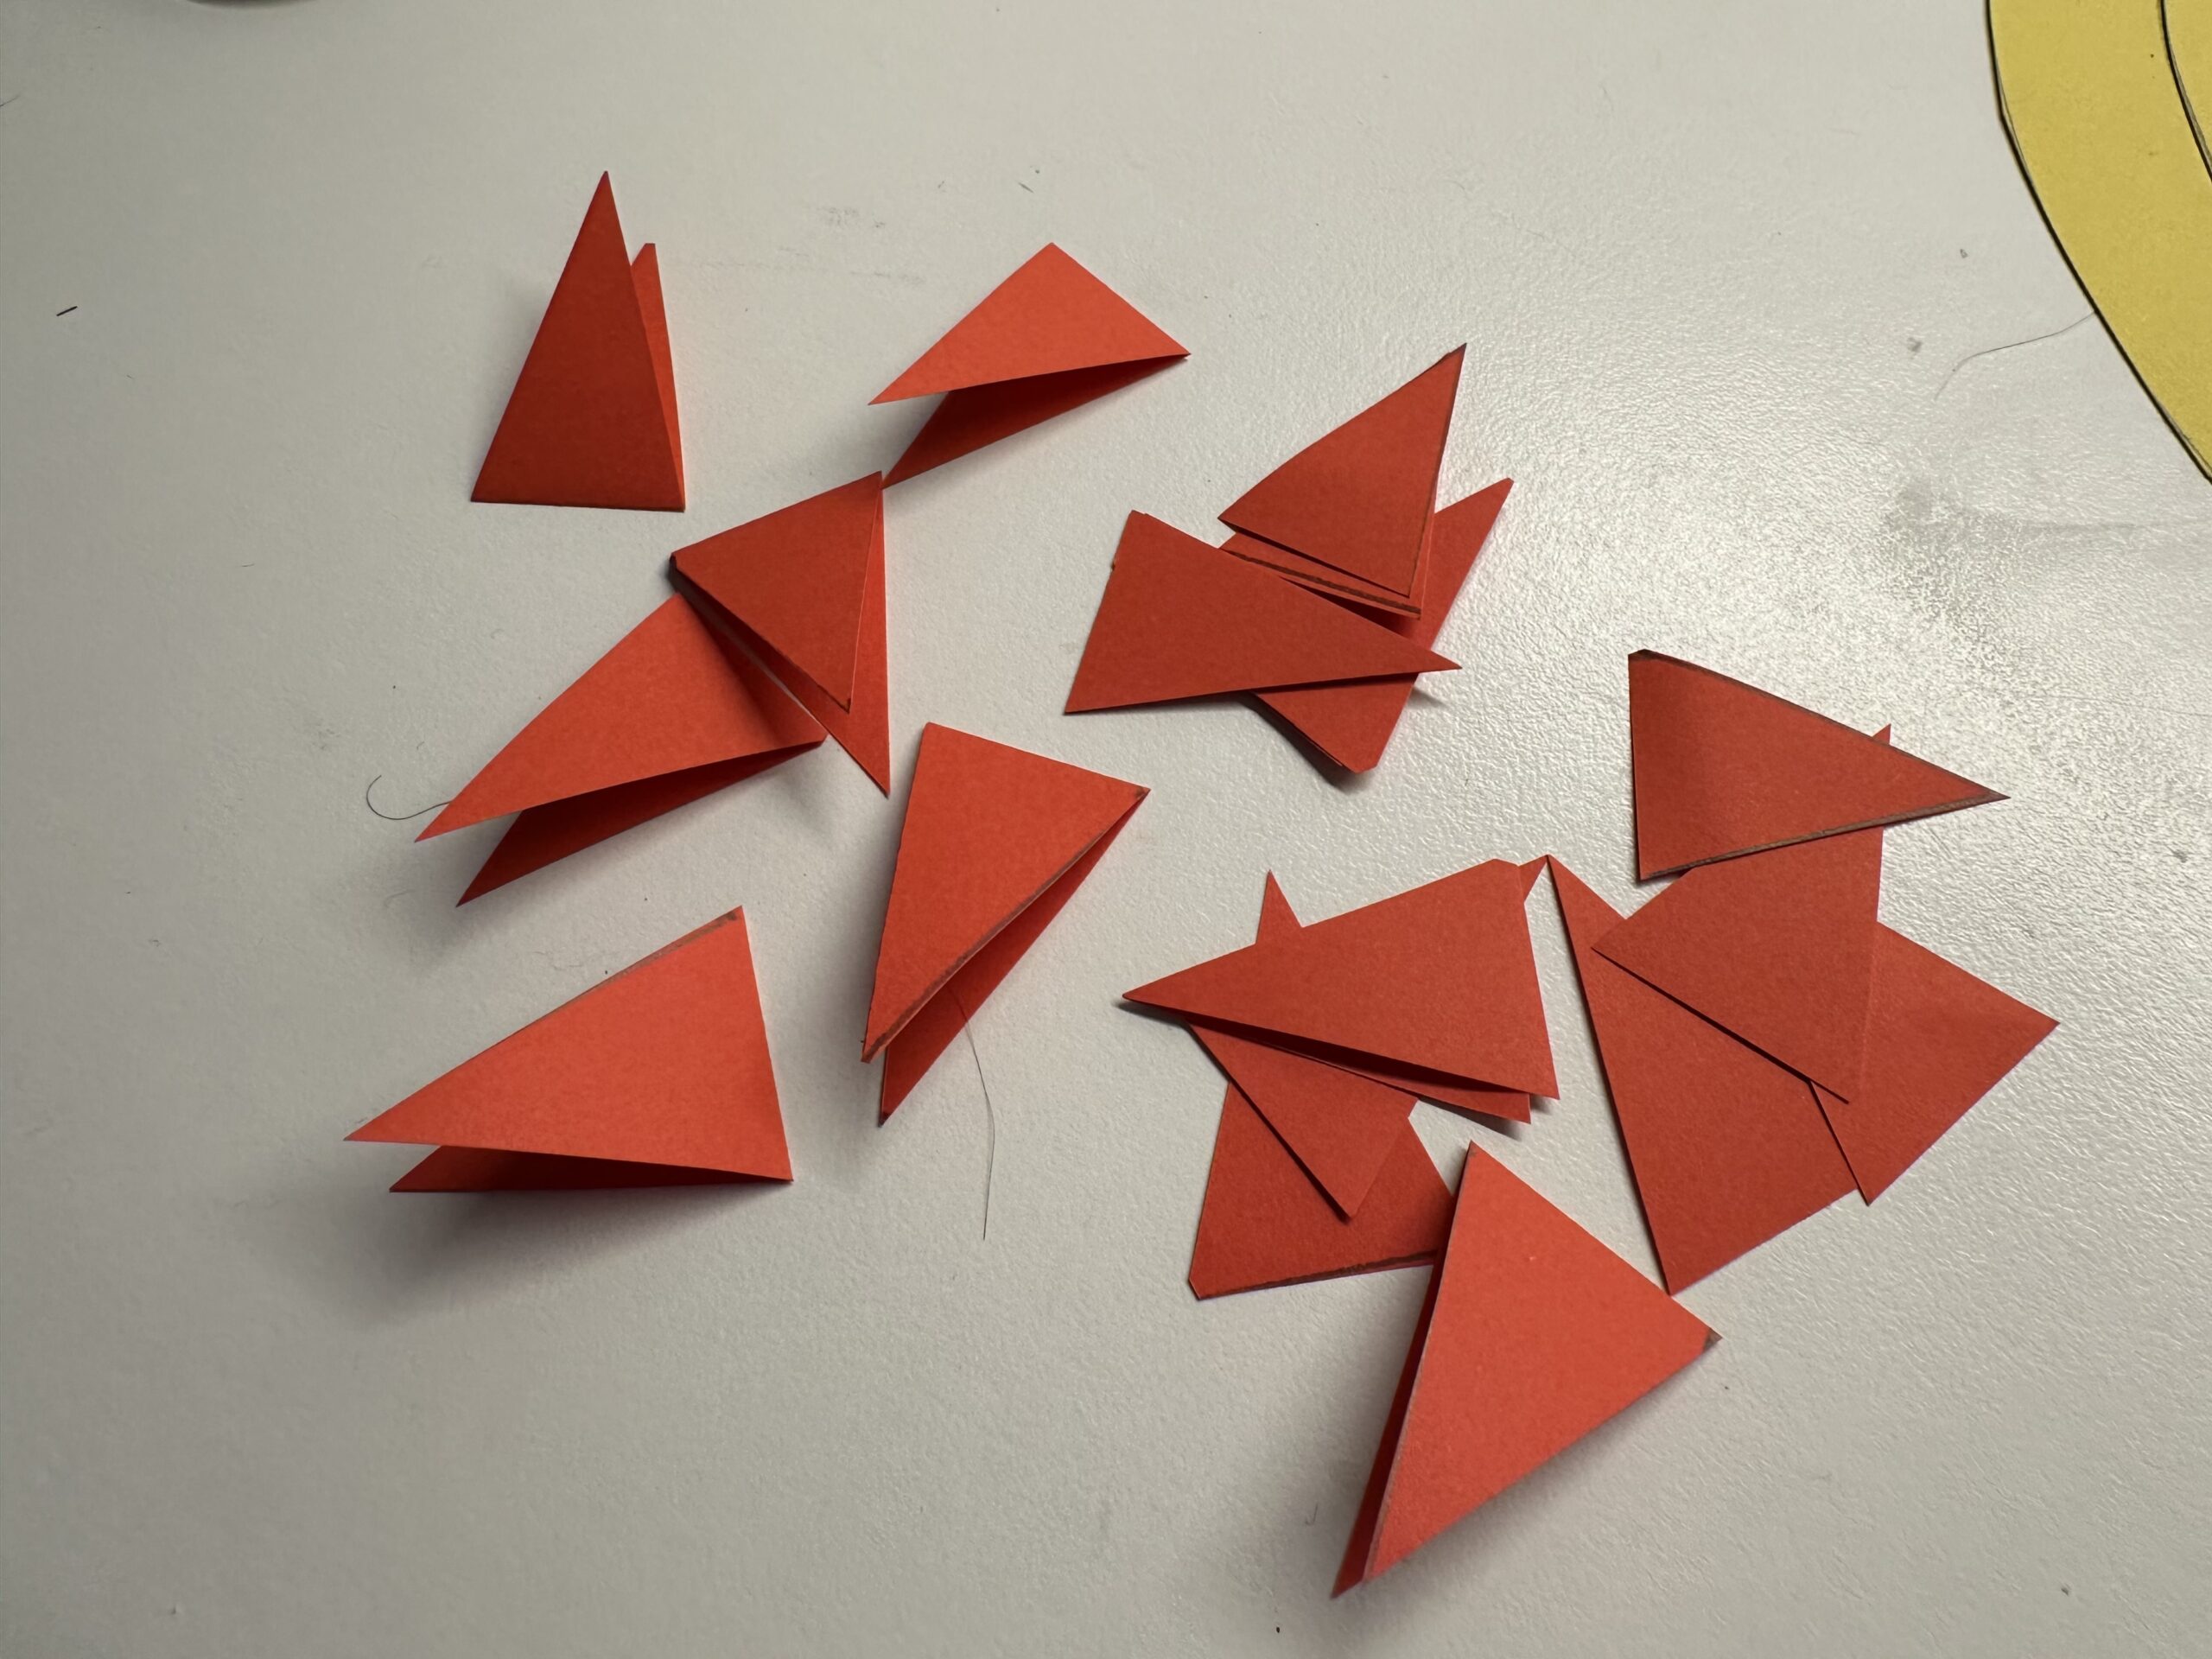
Bild zum Schritt 47 für das Bastel- und DIY-Abenteuer für Kinder: 'An der Drachenschnur fehlen nun nur noch kleine Schleifen. Diese...'

46

If your dragon lies in front of you, the kite line is still flat on the table. So you should leave it lying. Because here you can easily stick the loops on.
Take a felt pen and paint points on the kite line. Leave at least 5 centimetres of space between the individual points, so the loops have a good distance. Follow the kite line circularly when painting the points and start painting in the middle (see picture).
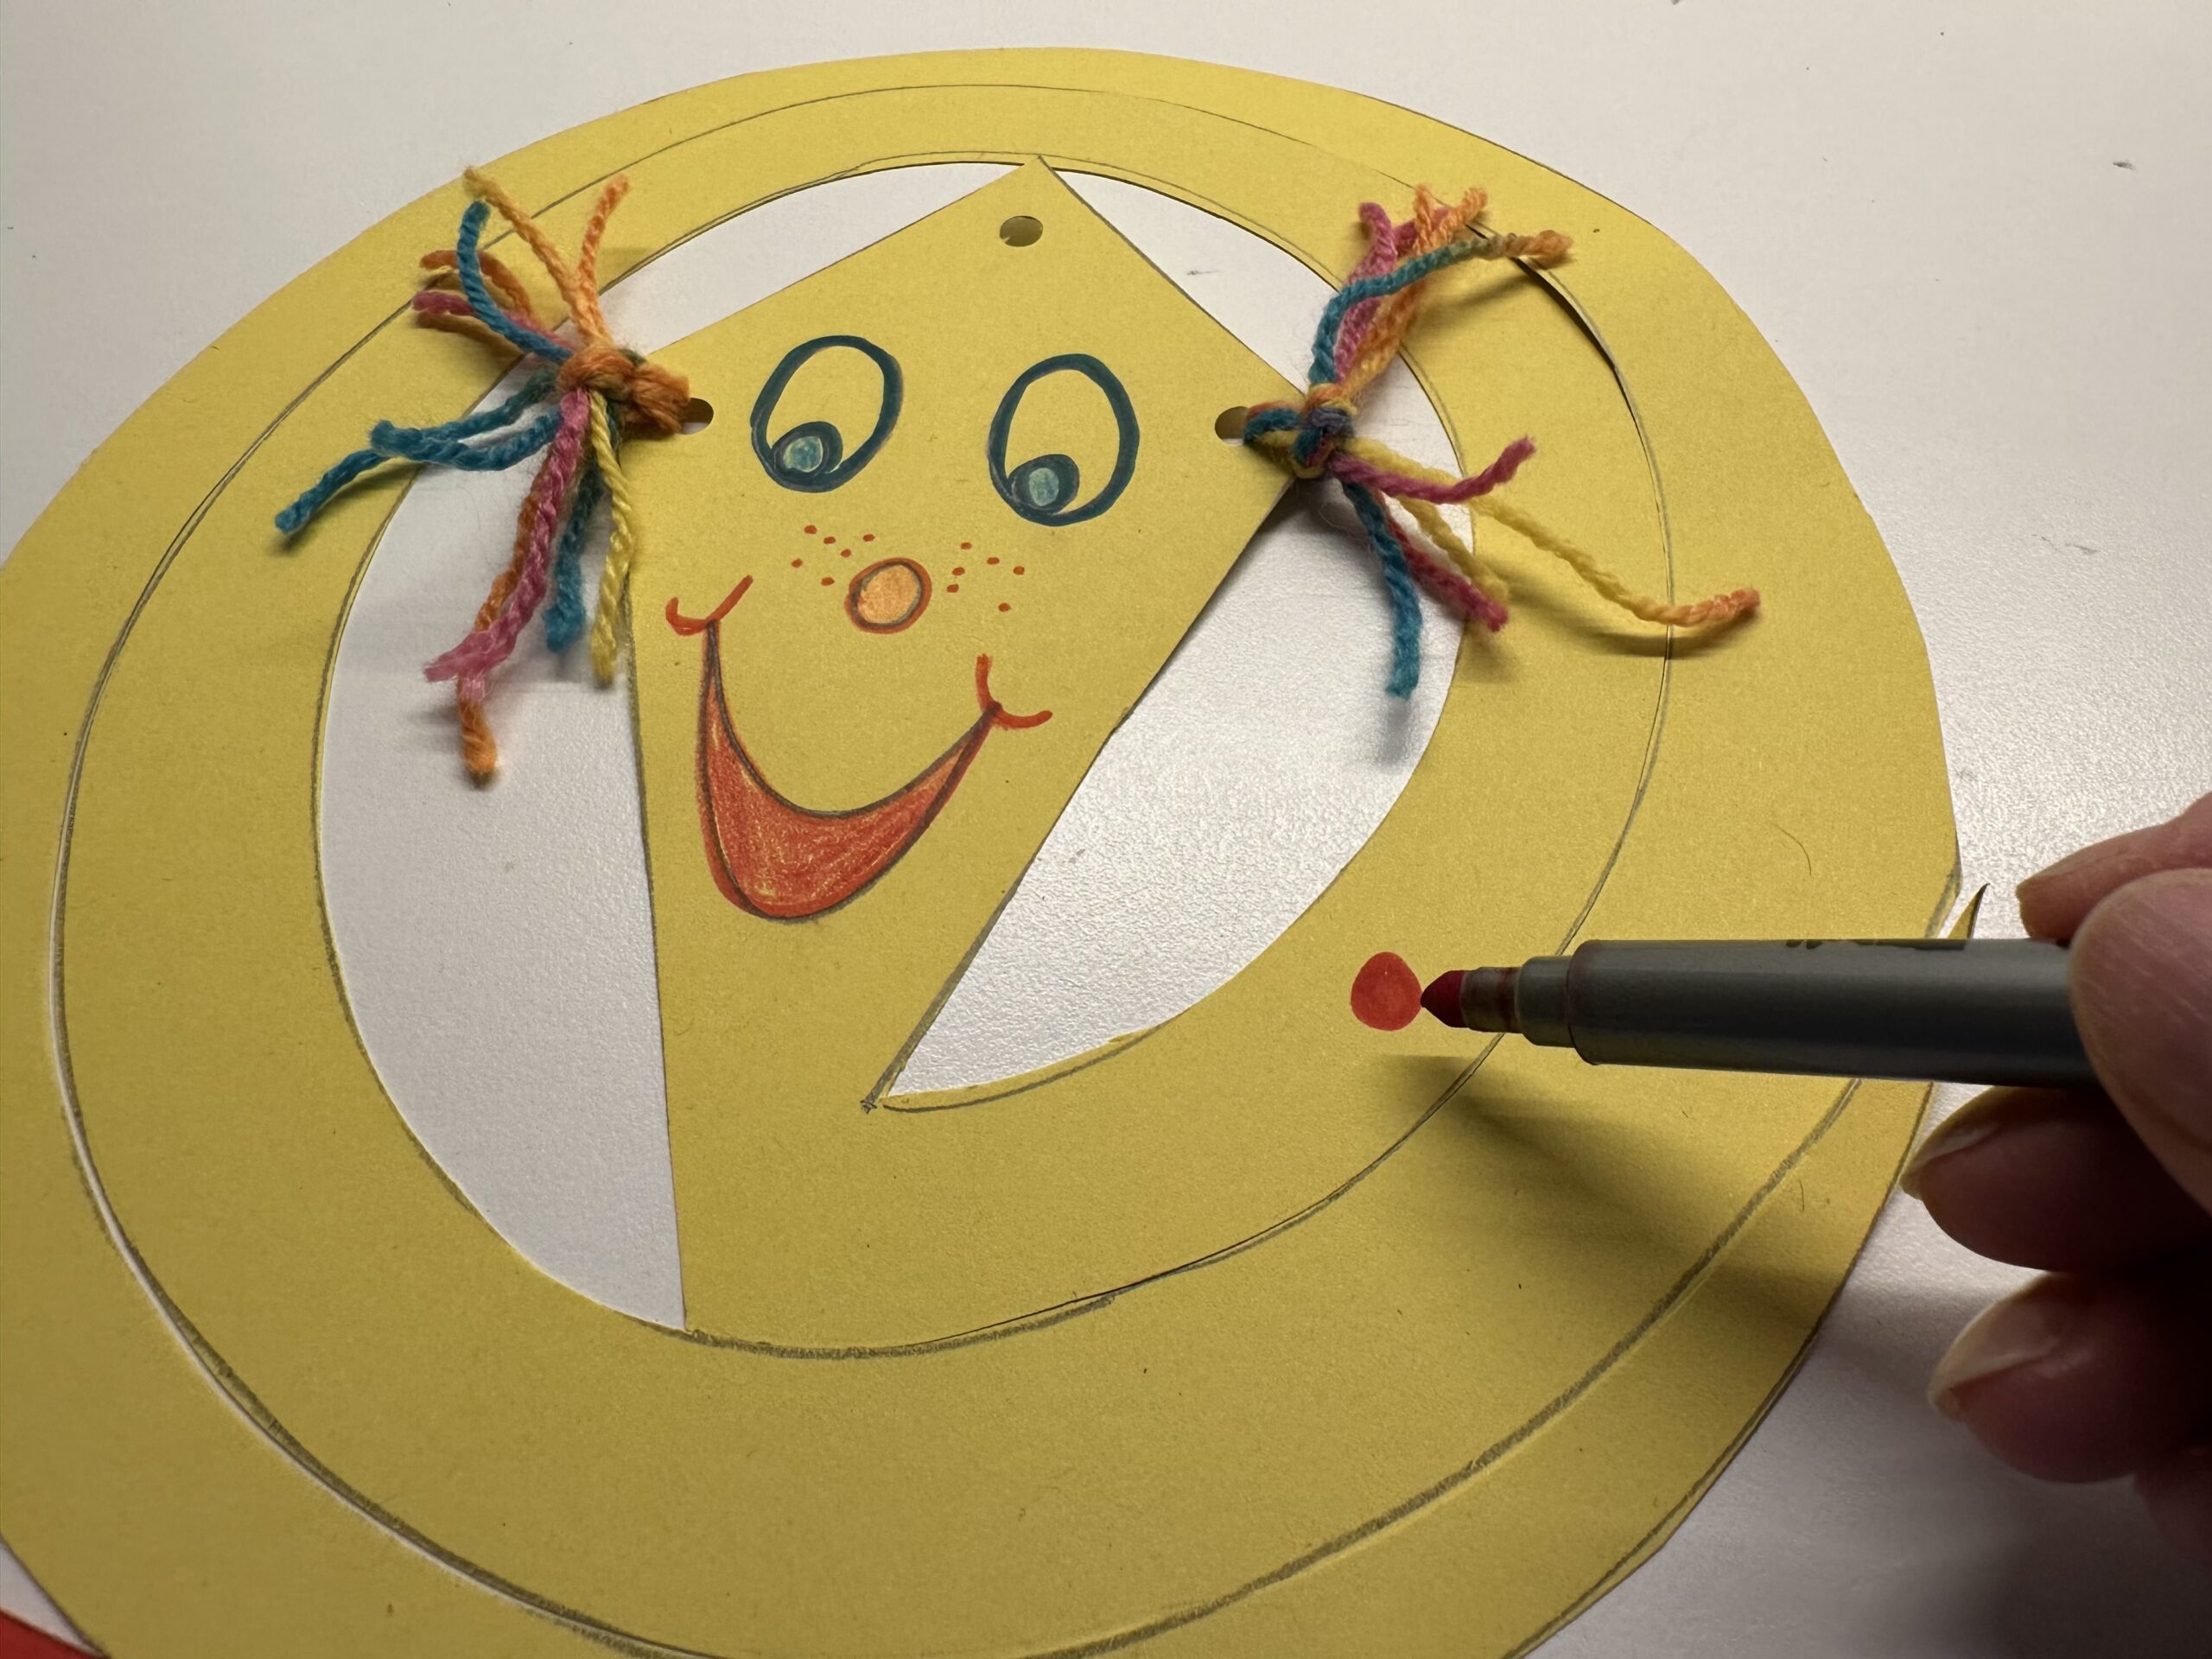
Bild zum Schritt 48 für das Bastel- und DIY-Abenteuer für Kinder: 'Wenn dein Drache vor dir liegt, liegt auch die Drachenschnur...'

47

The dots show you where the loops are when you stick on.
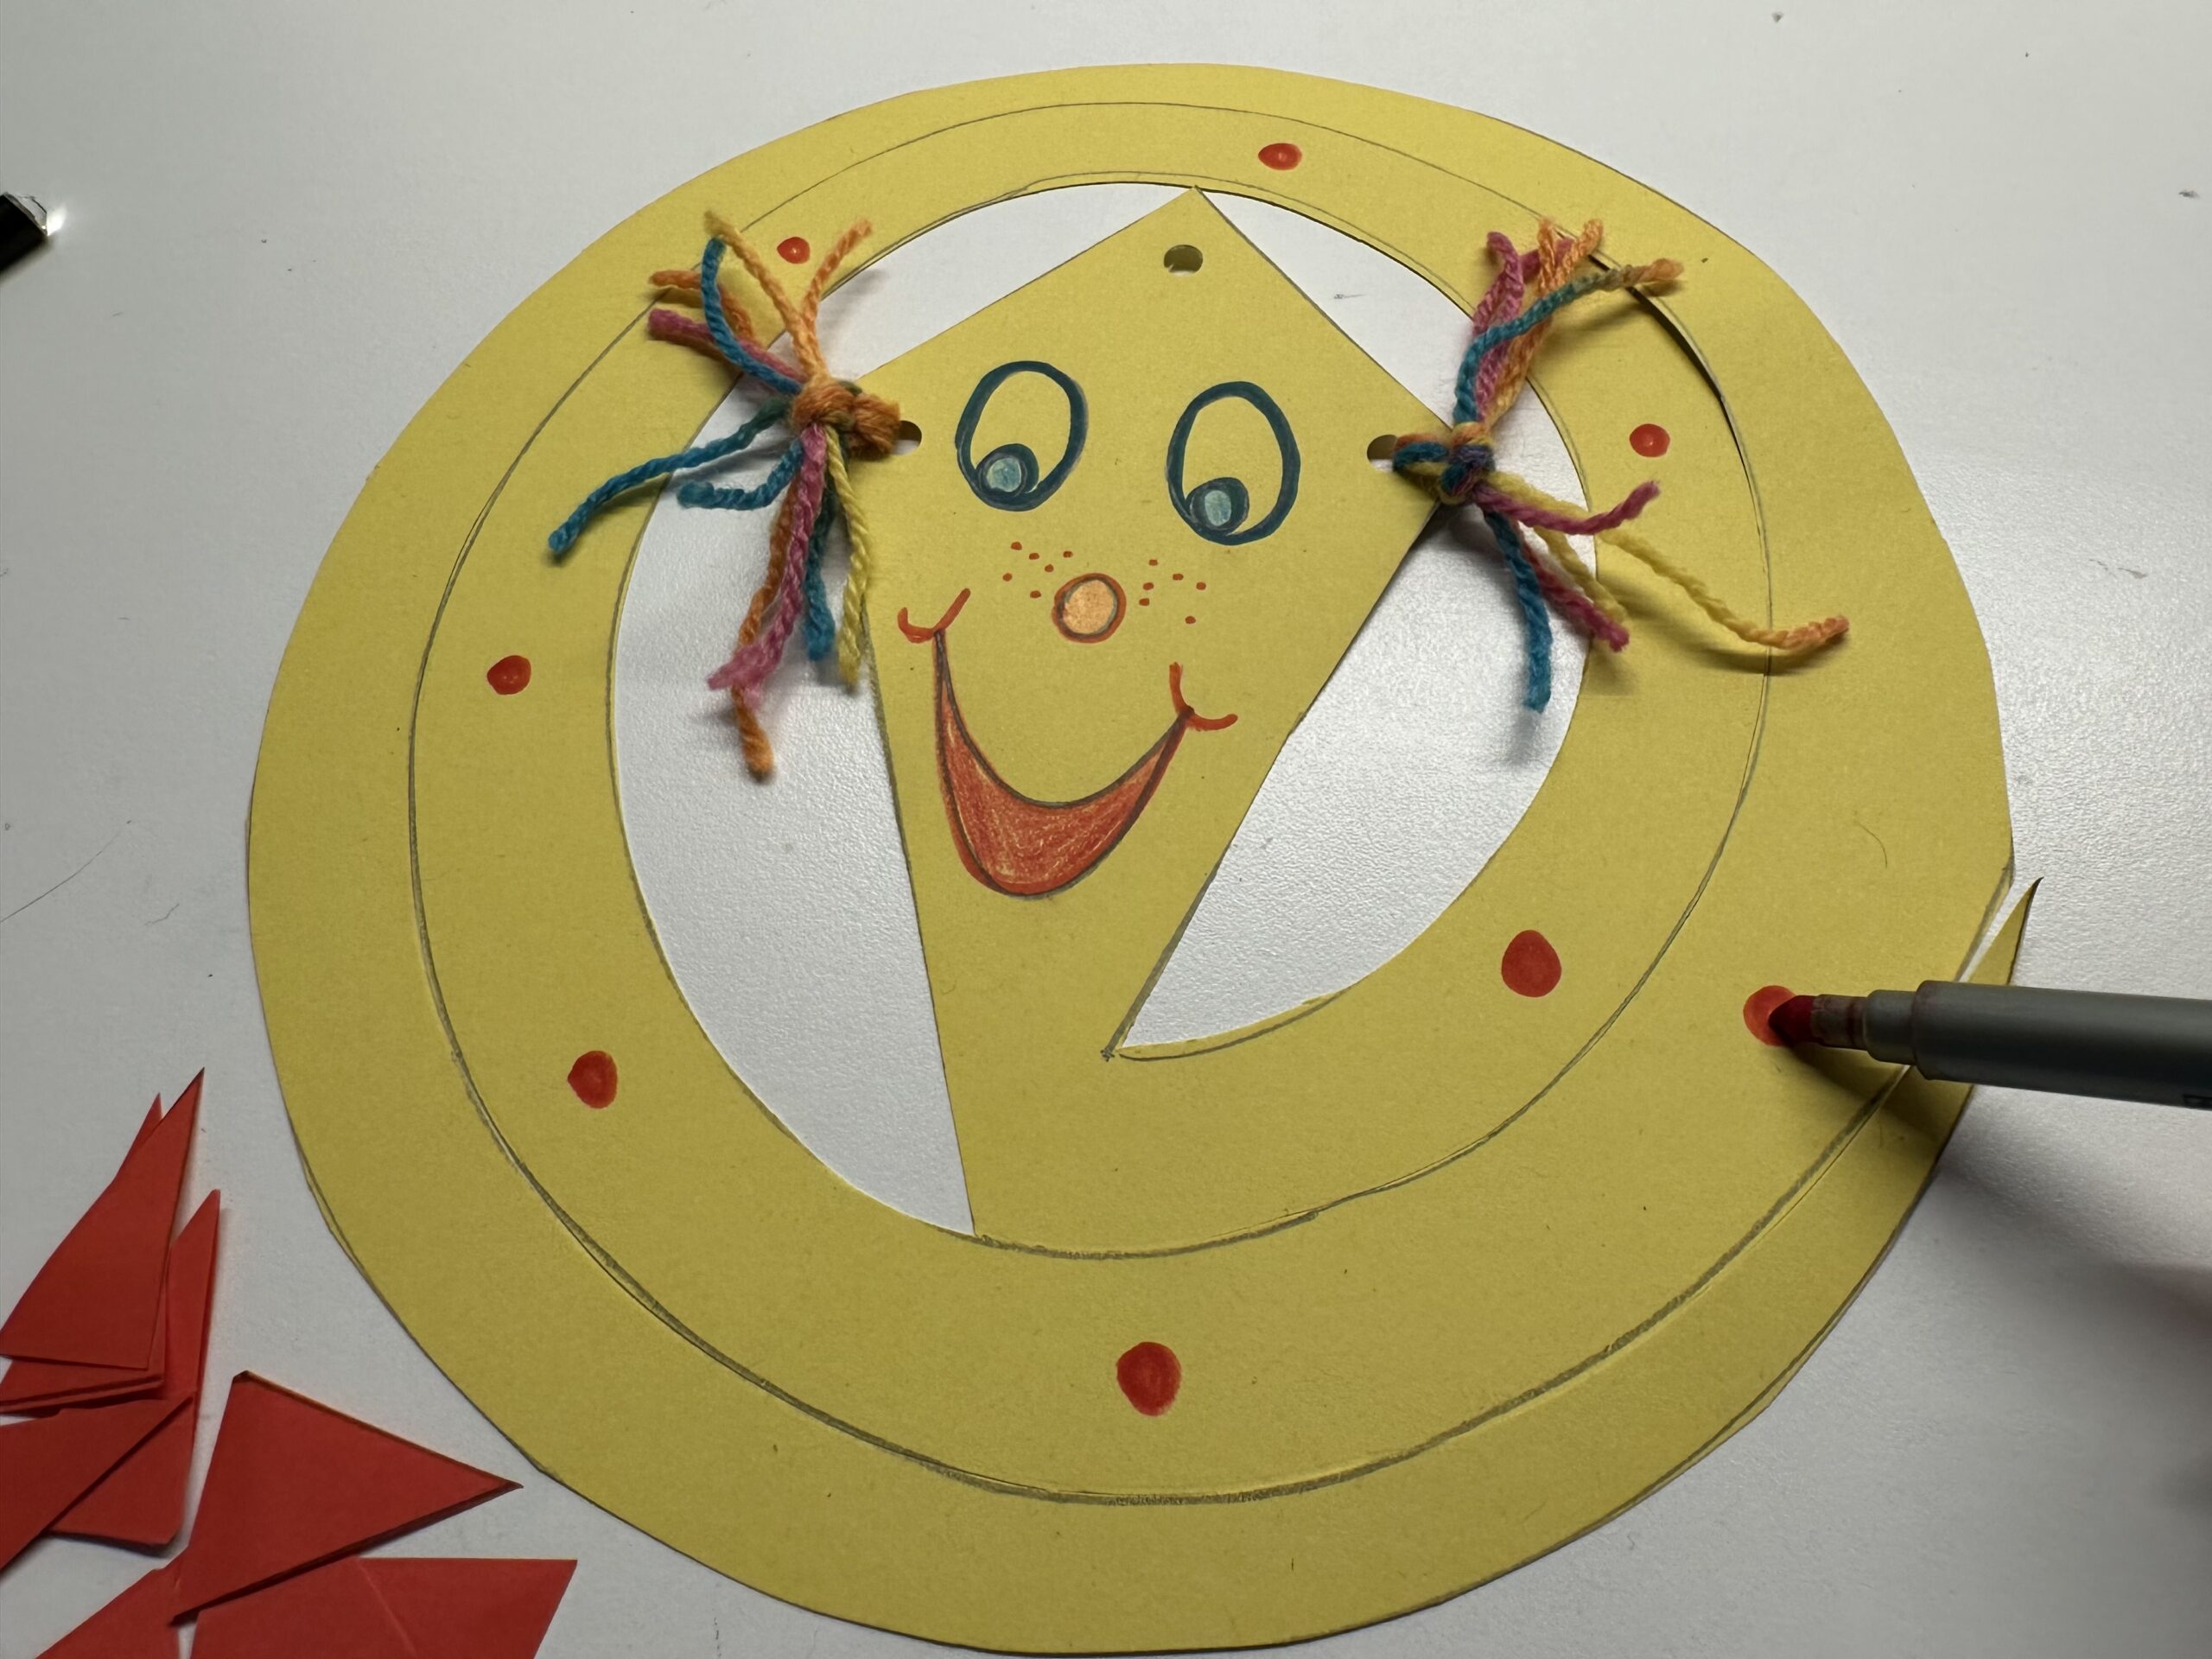
Bild zum Schritt 49 für das Bastel- und DIY-Abenteuer für Kinder: 'Die Punkte zeigen dir beim Aufkleben wo die Schleifen sitzen.'

48

At each point, two small triangles are glued inwards with a tip, creating a small loop. Make sure that you only apply glue on the painted point and not on the triangles.
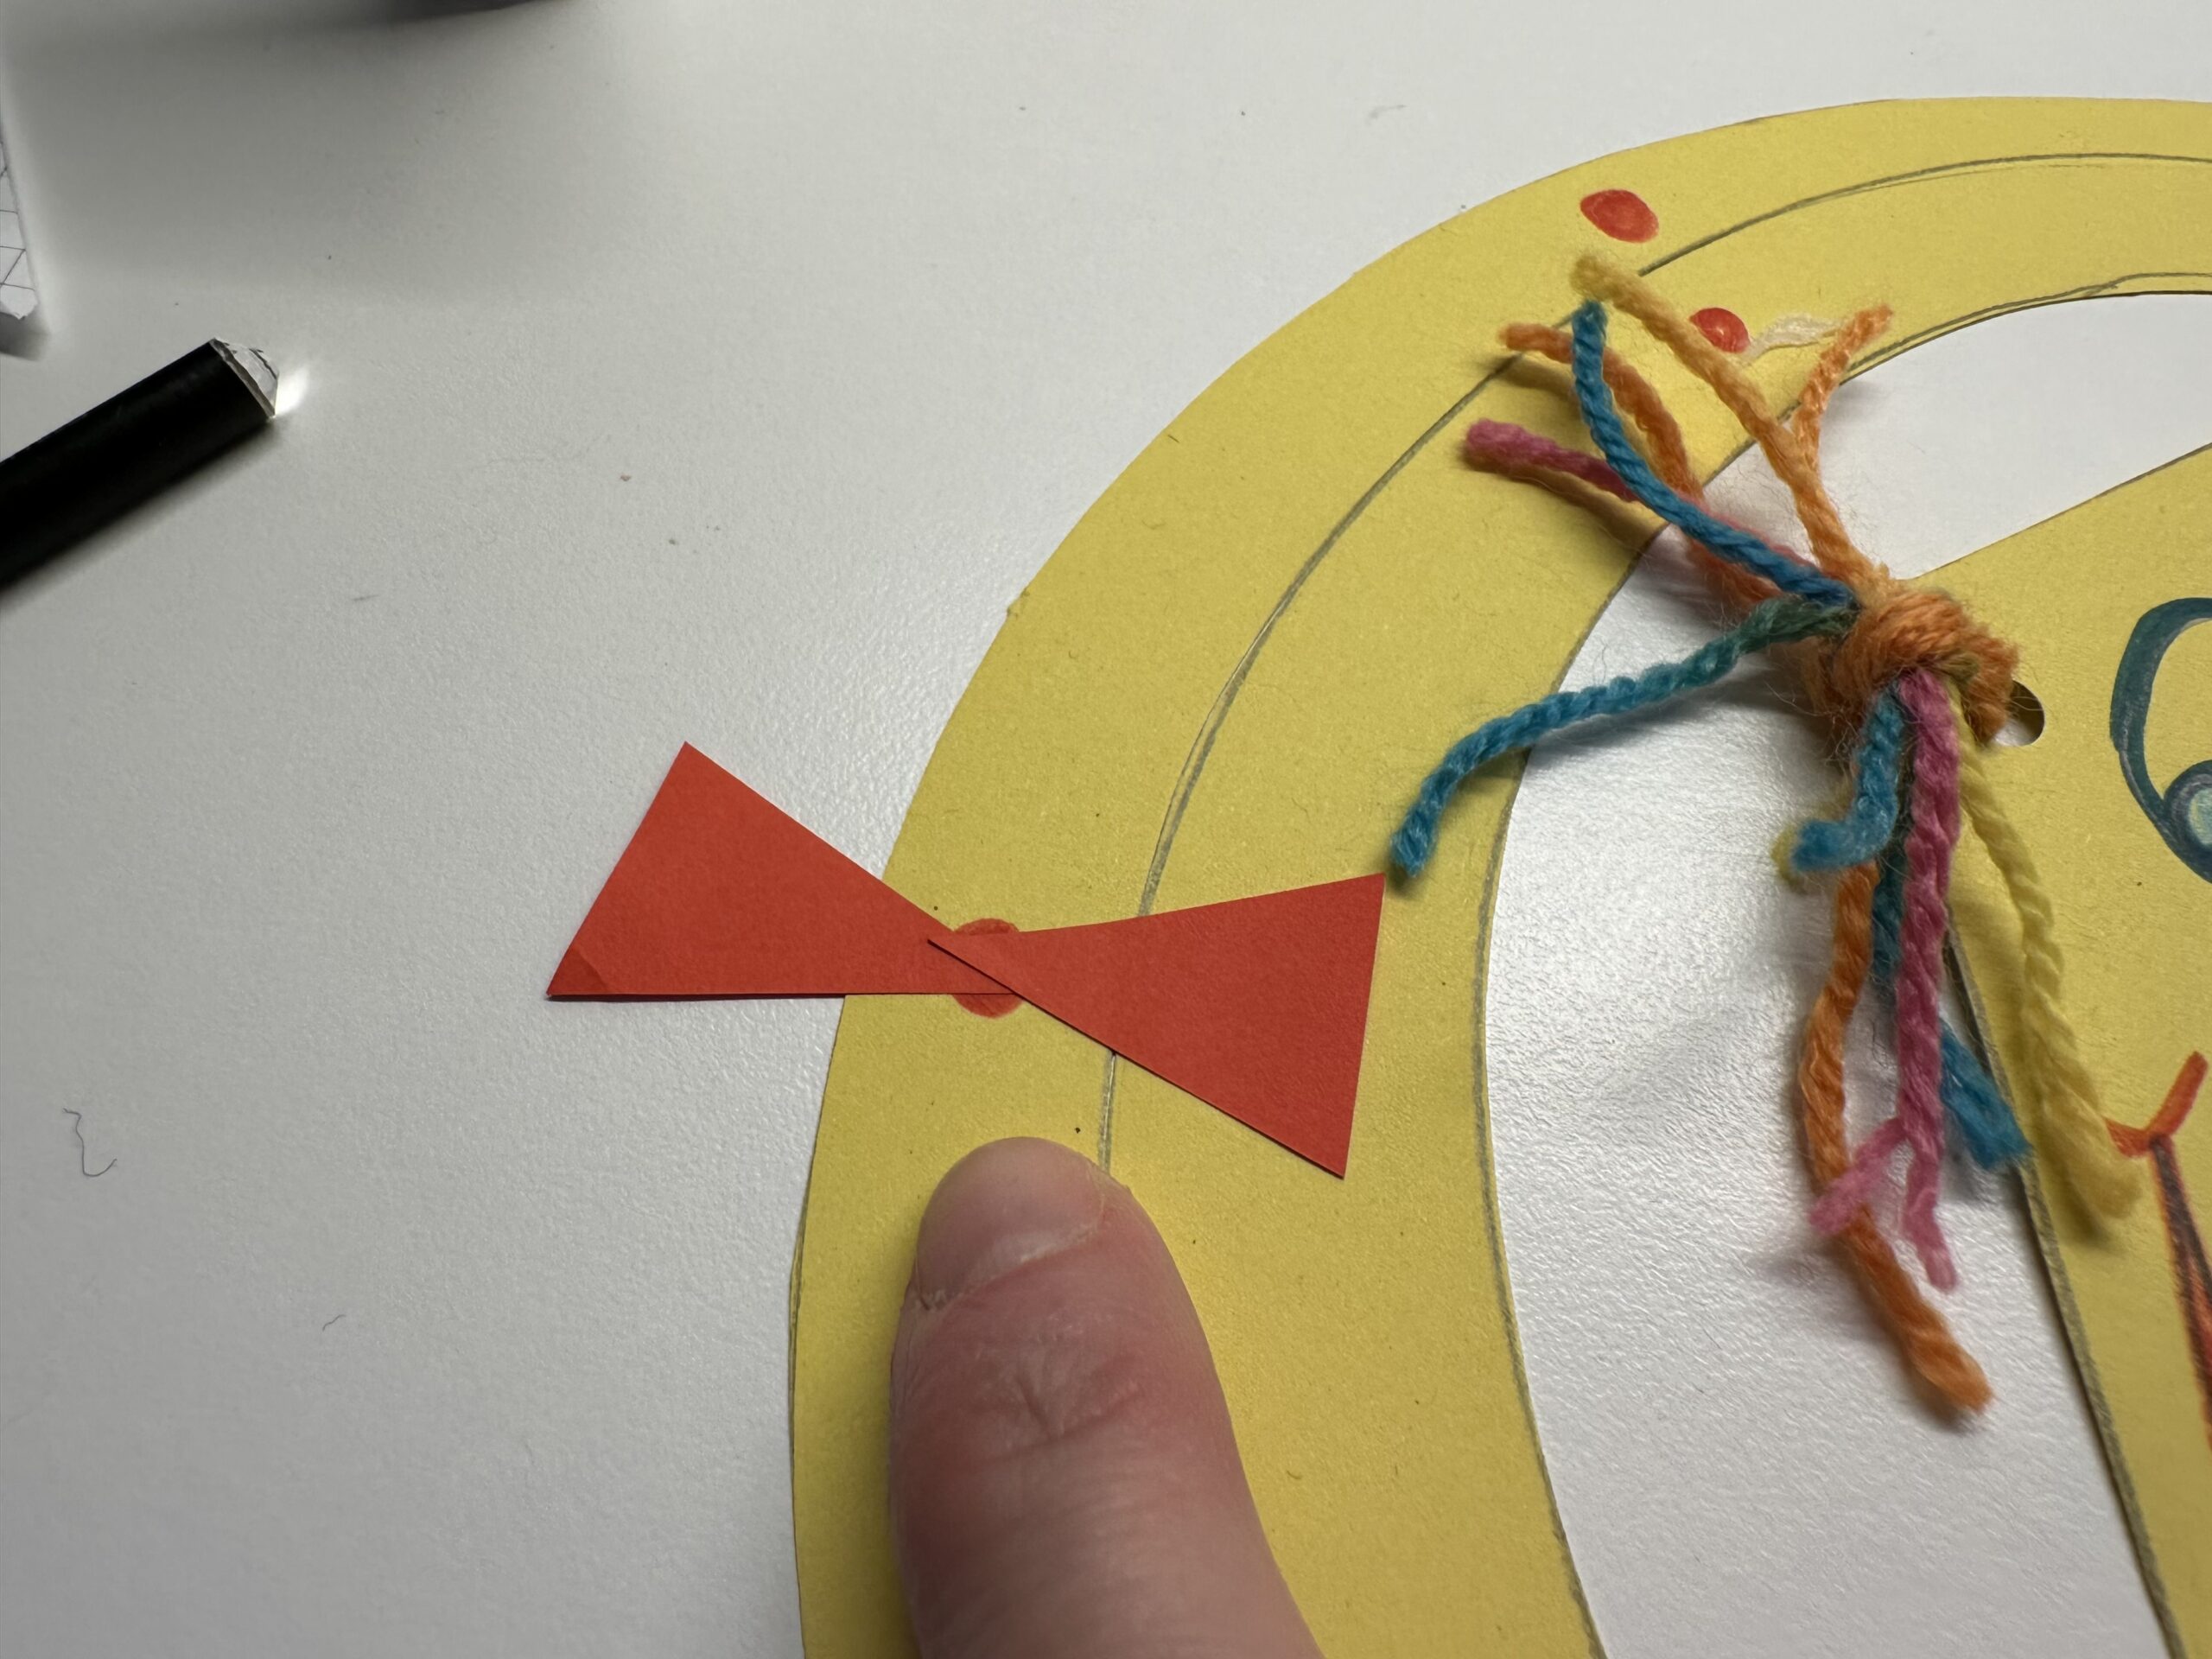
Bild zum Schritt 50 für das Bastel- und DIY-Abenteuer für Kinder: 'An jedem Punkt werden nun zwei kleine Dreiecke mit einer...'

49

That's what your finished dragon might look like.
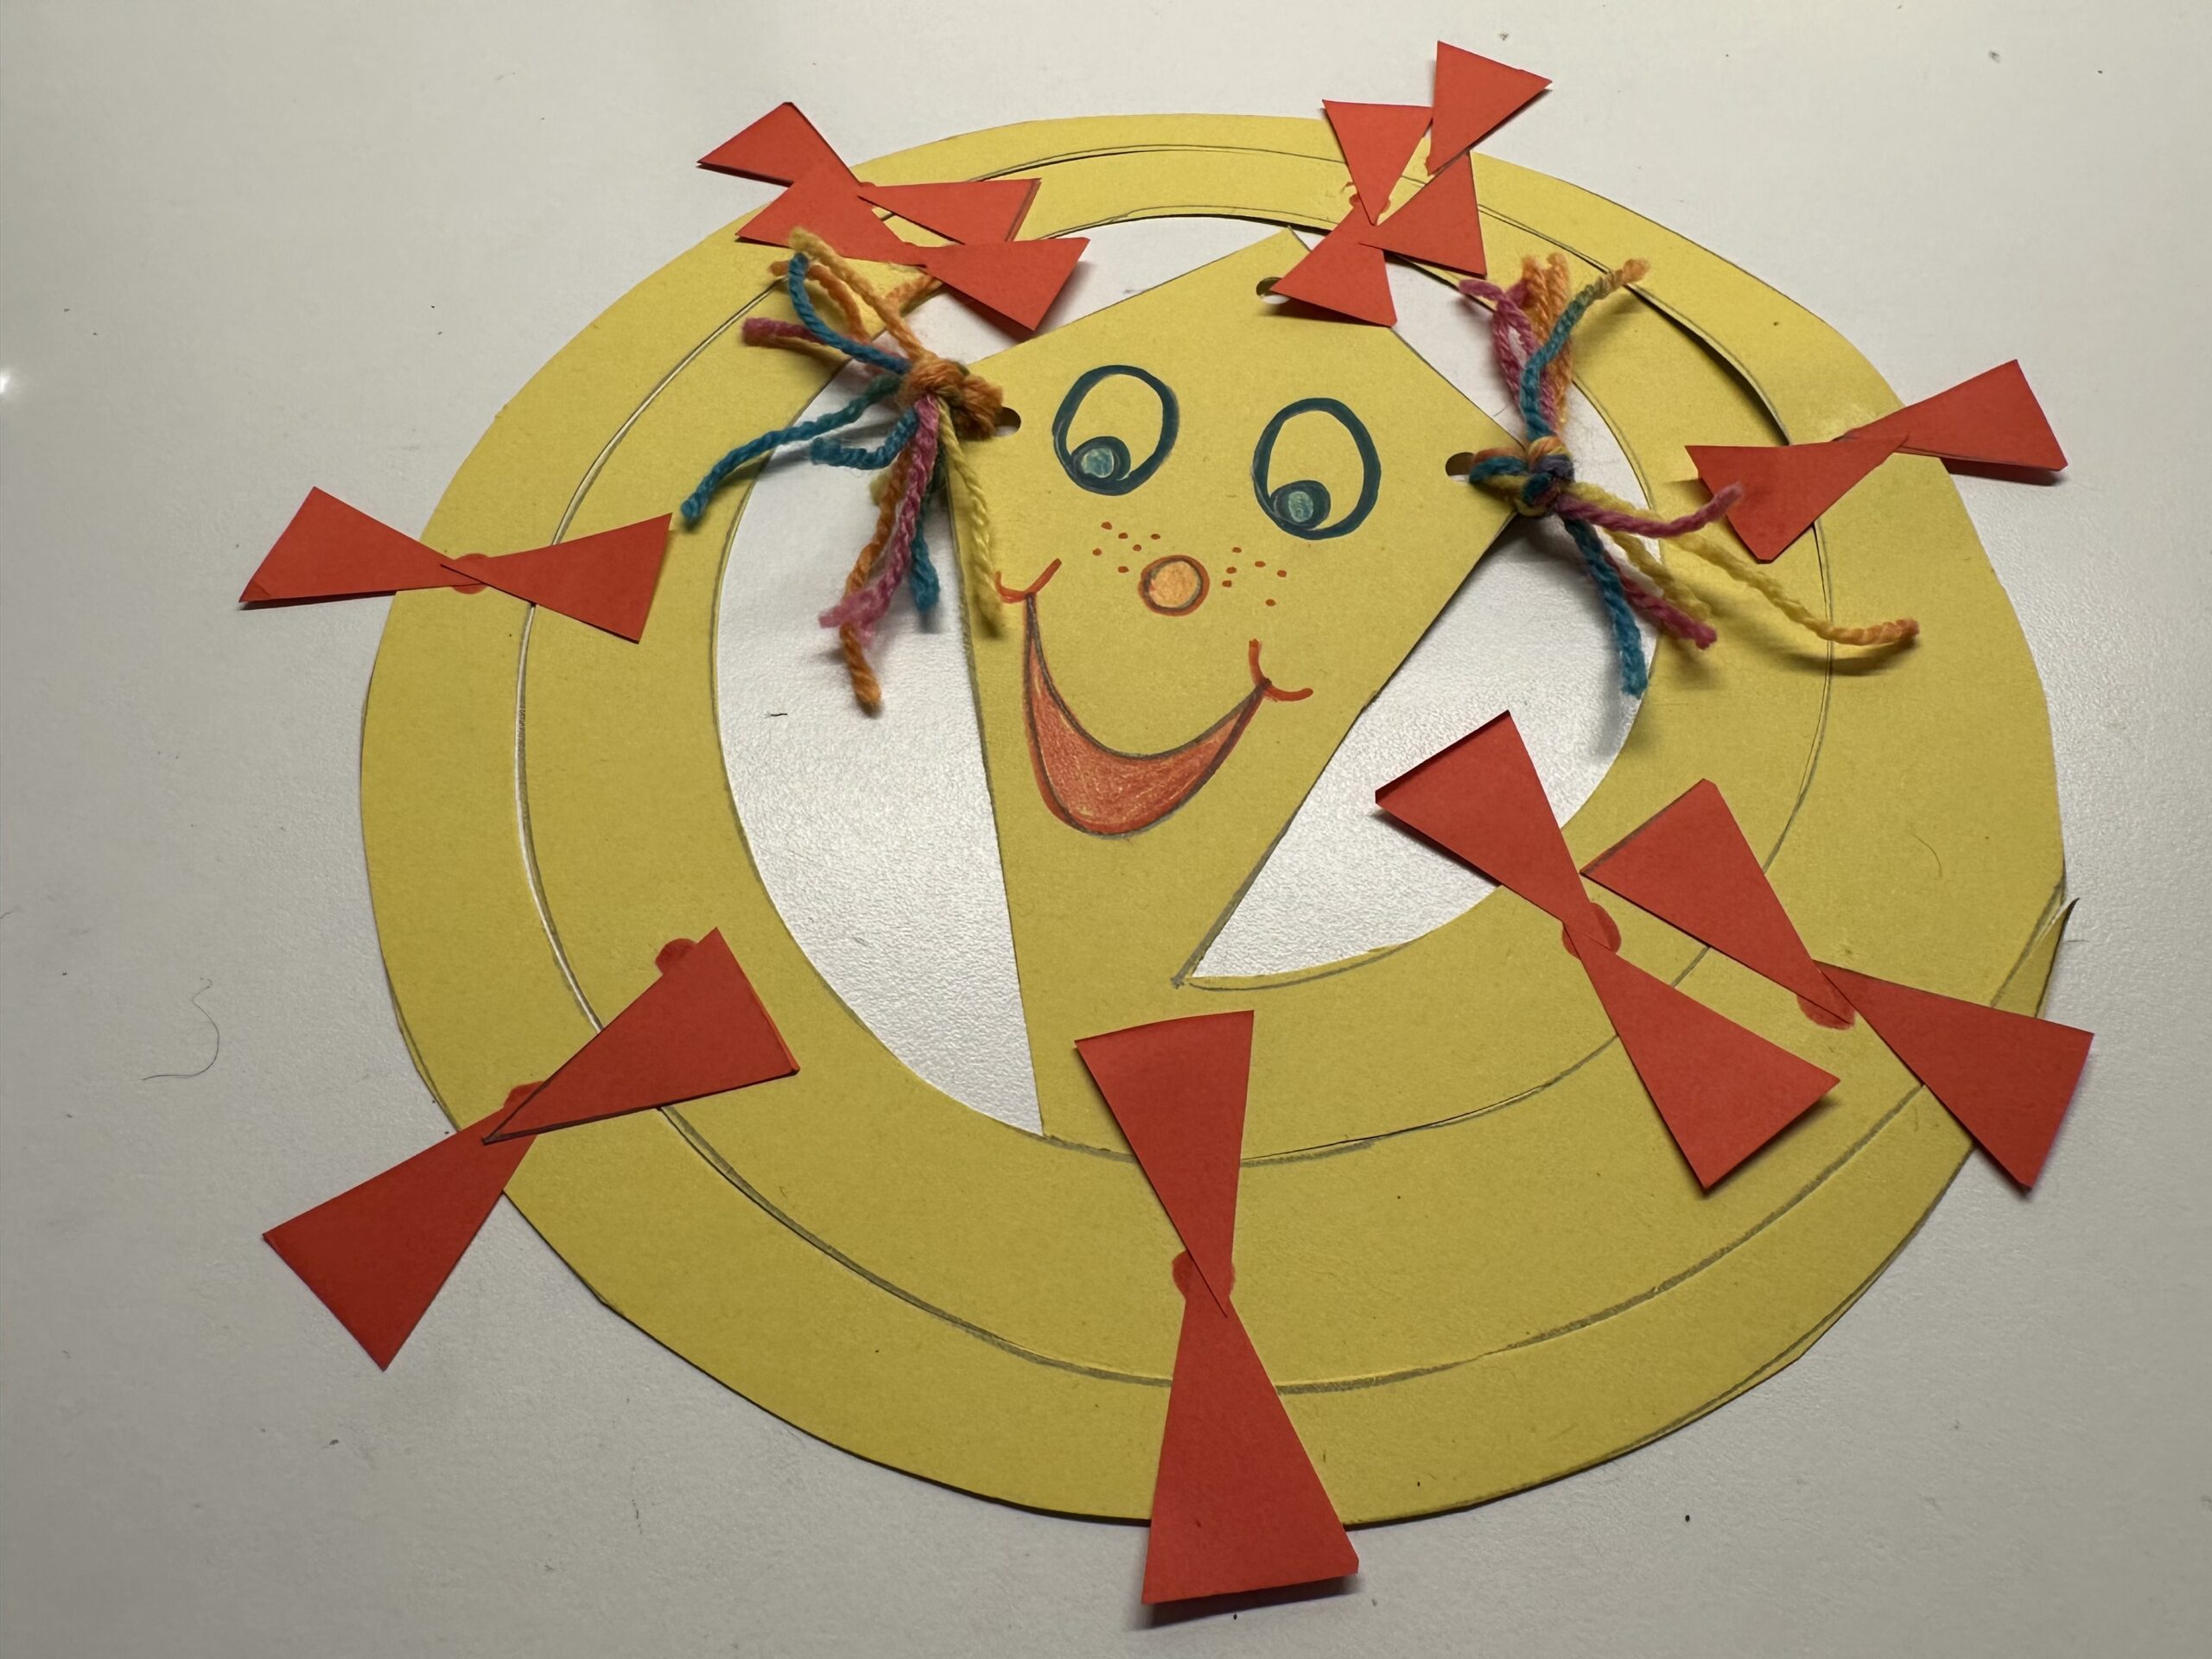
Bild zum Schritt 51 für das Bastel- und DIY-Abenteuer für Kinder: 'So könnte dein fertiger Drache aussehen.'

50

Take the dragon in your hand and slowly lift it up.

Bild zum Schritt 52 für das Bastel- und DIY-Abenteuer für Kinder: 'Nimm den Drache in die Hand und hebe ihn langsam...'

51

So the kite line unfolds. Make sure that you don't tear off accidentally glued loops again. Be very careful with it.
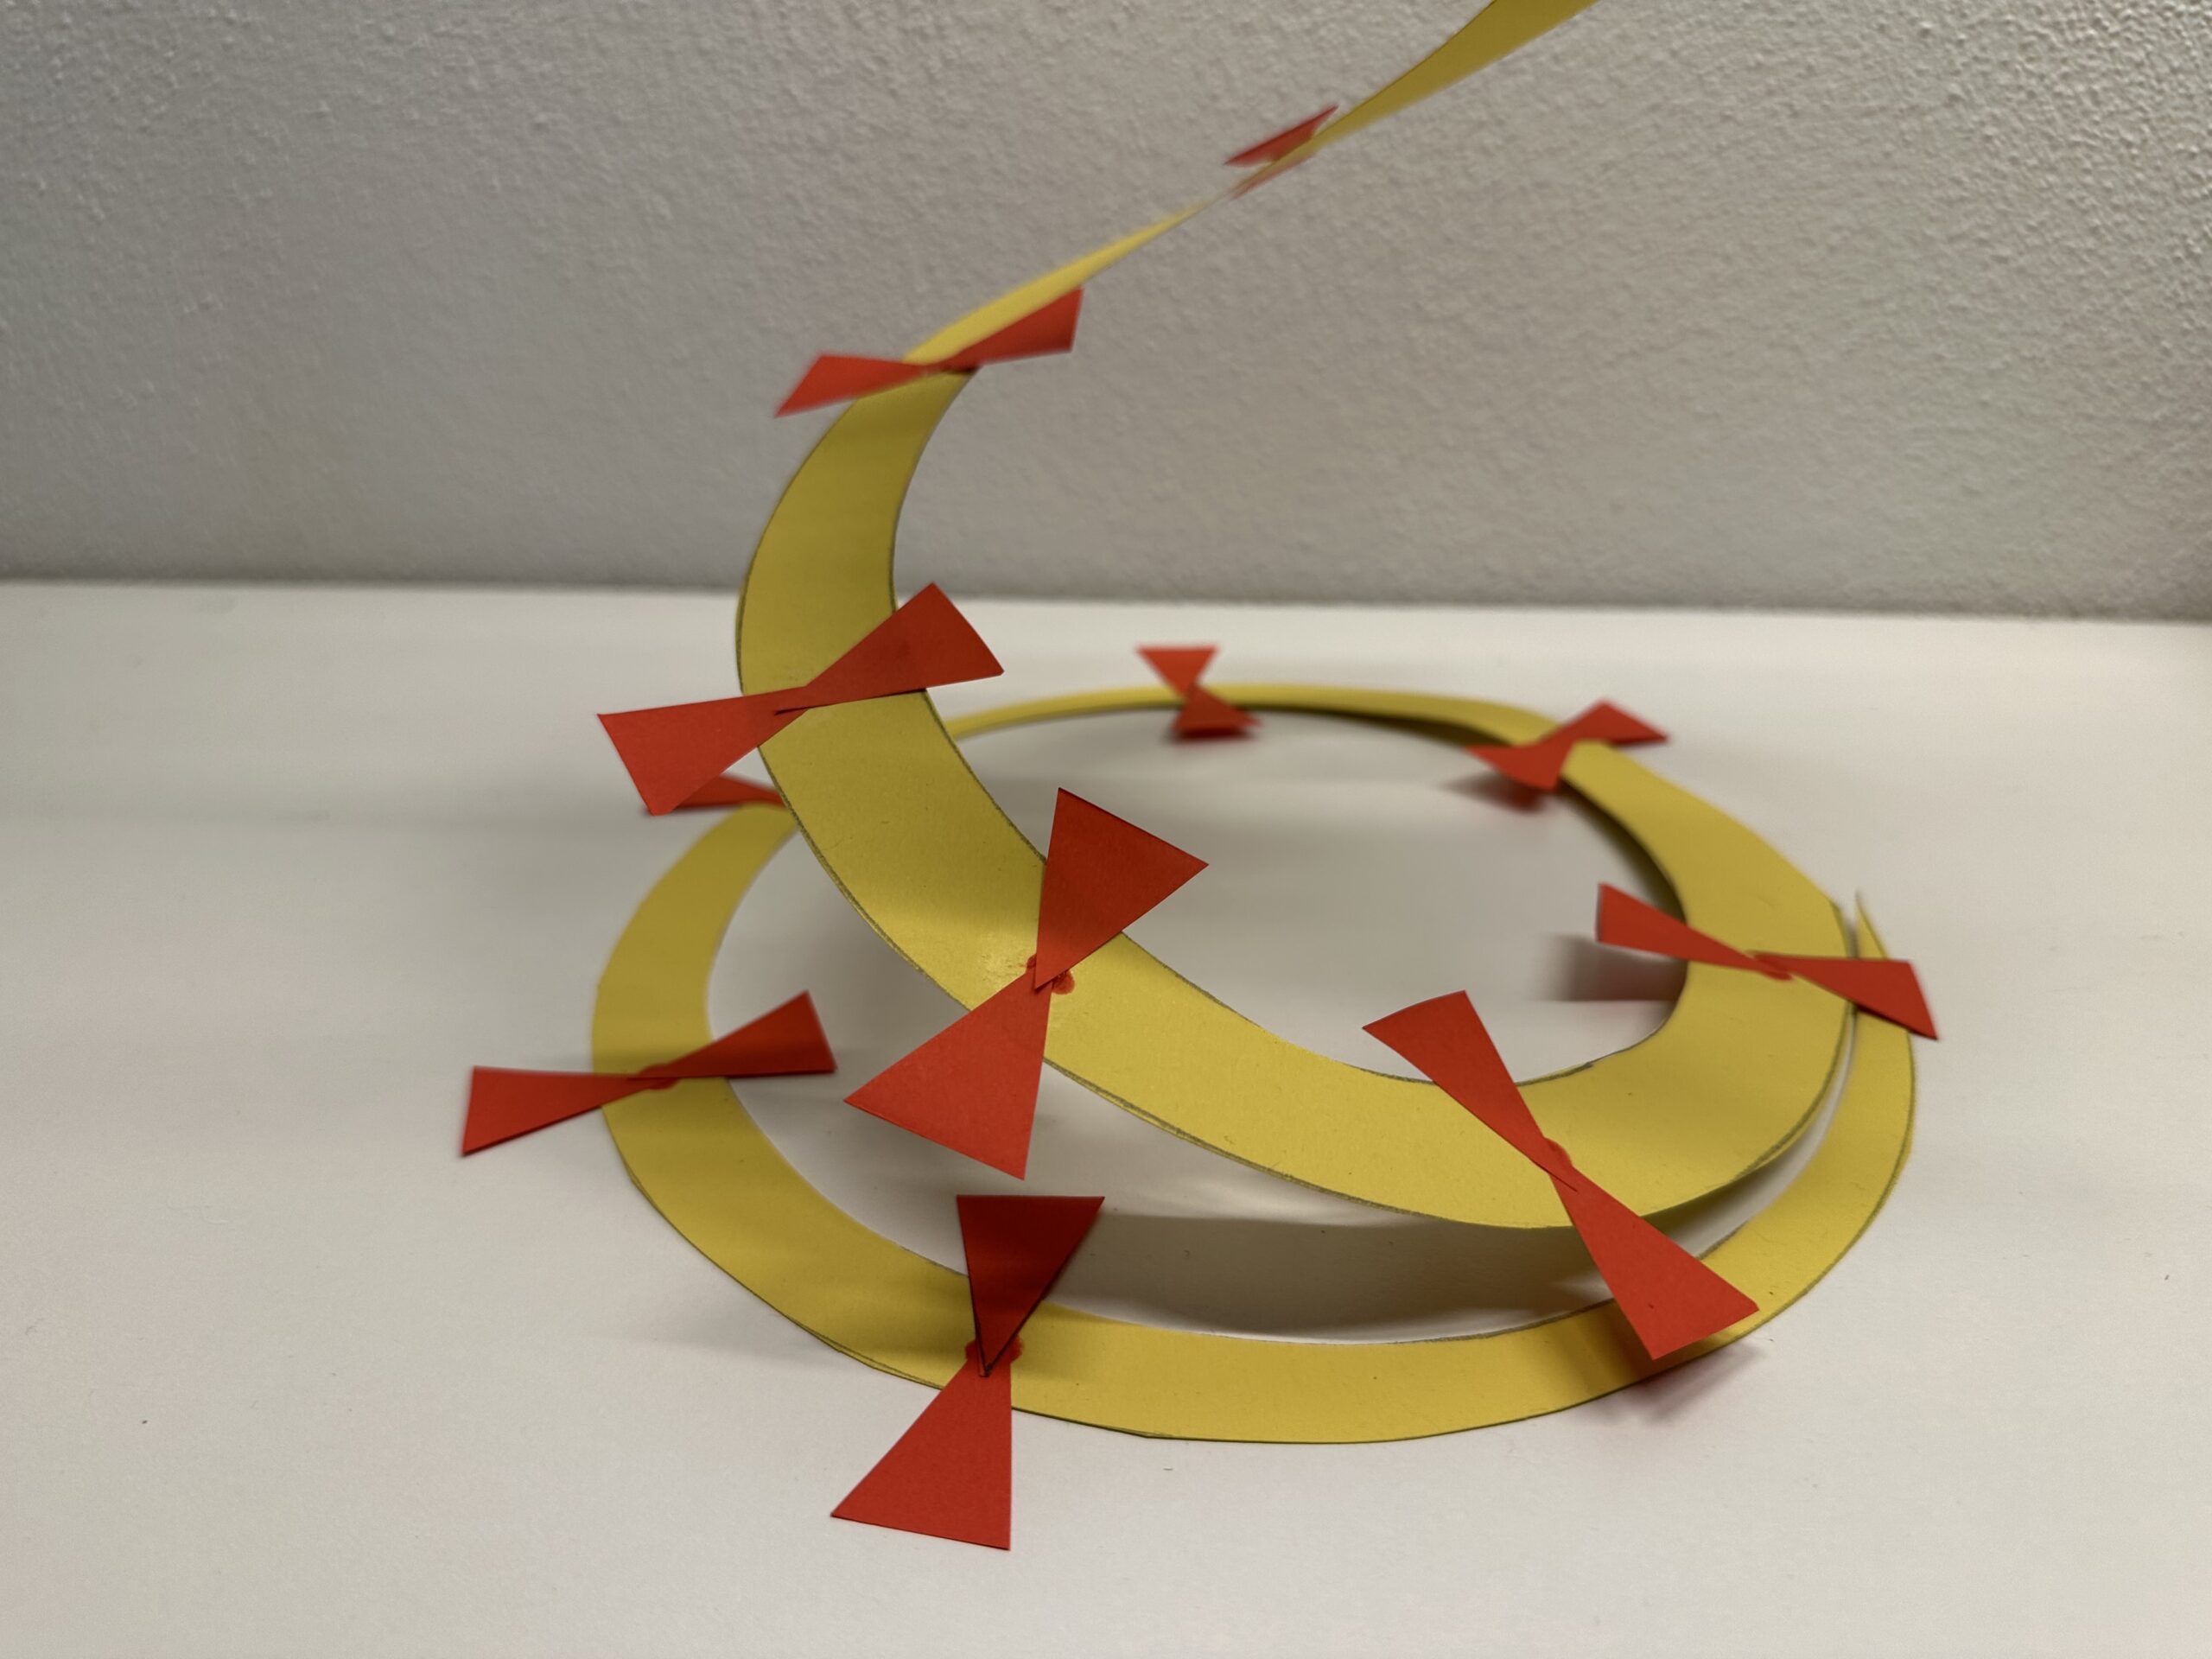
Bild zum Schritt 53 für das Bastel- und DIY-Abenteuer für Kinder: 'So entfaltet sich die Drachenschnur. Achte darauf, dass du nicht...'

52

Your dragon is ready. Find a place to hang up. Evlt. you can hang it up with a cord on a curtain rod. At the window it can move and "dance" nicely in the airflow of the radiator.
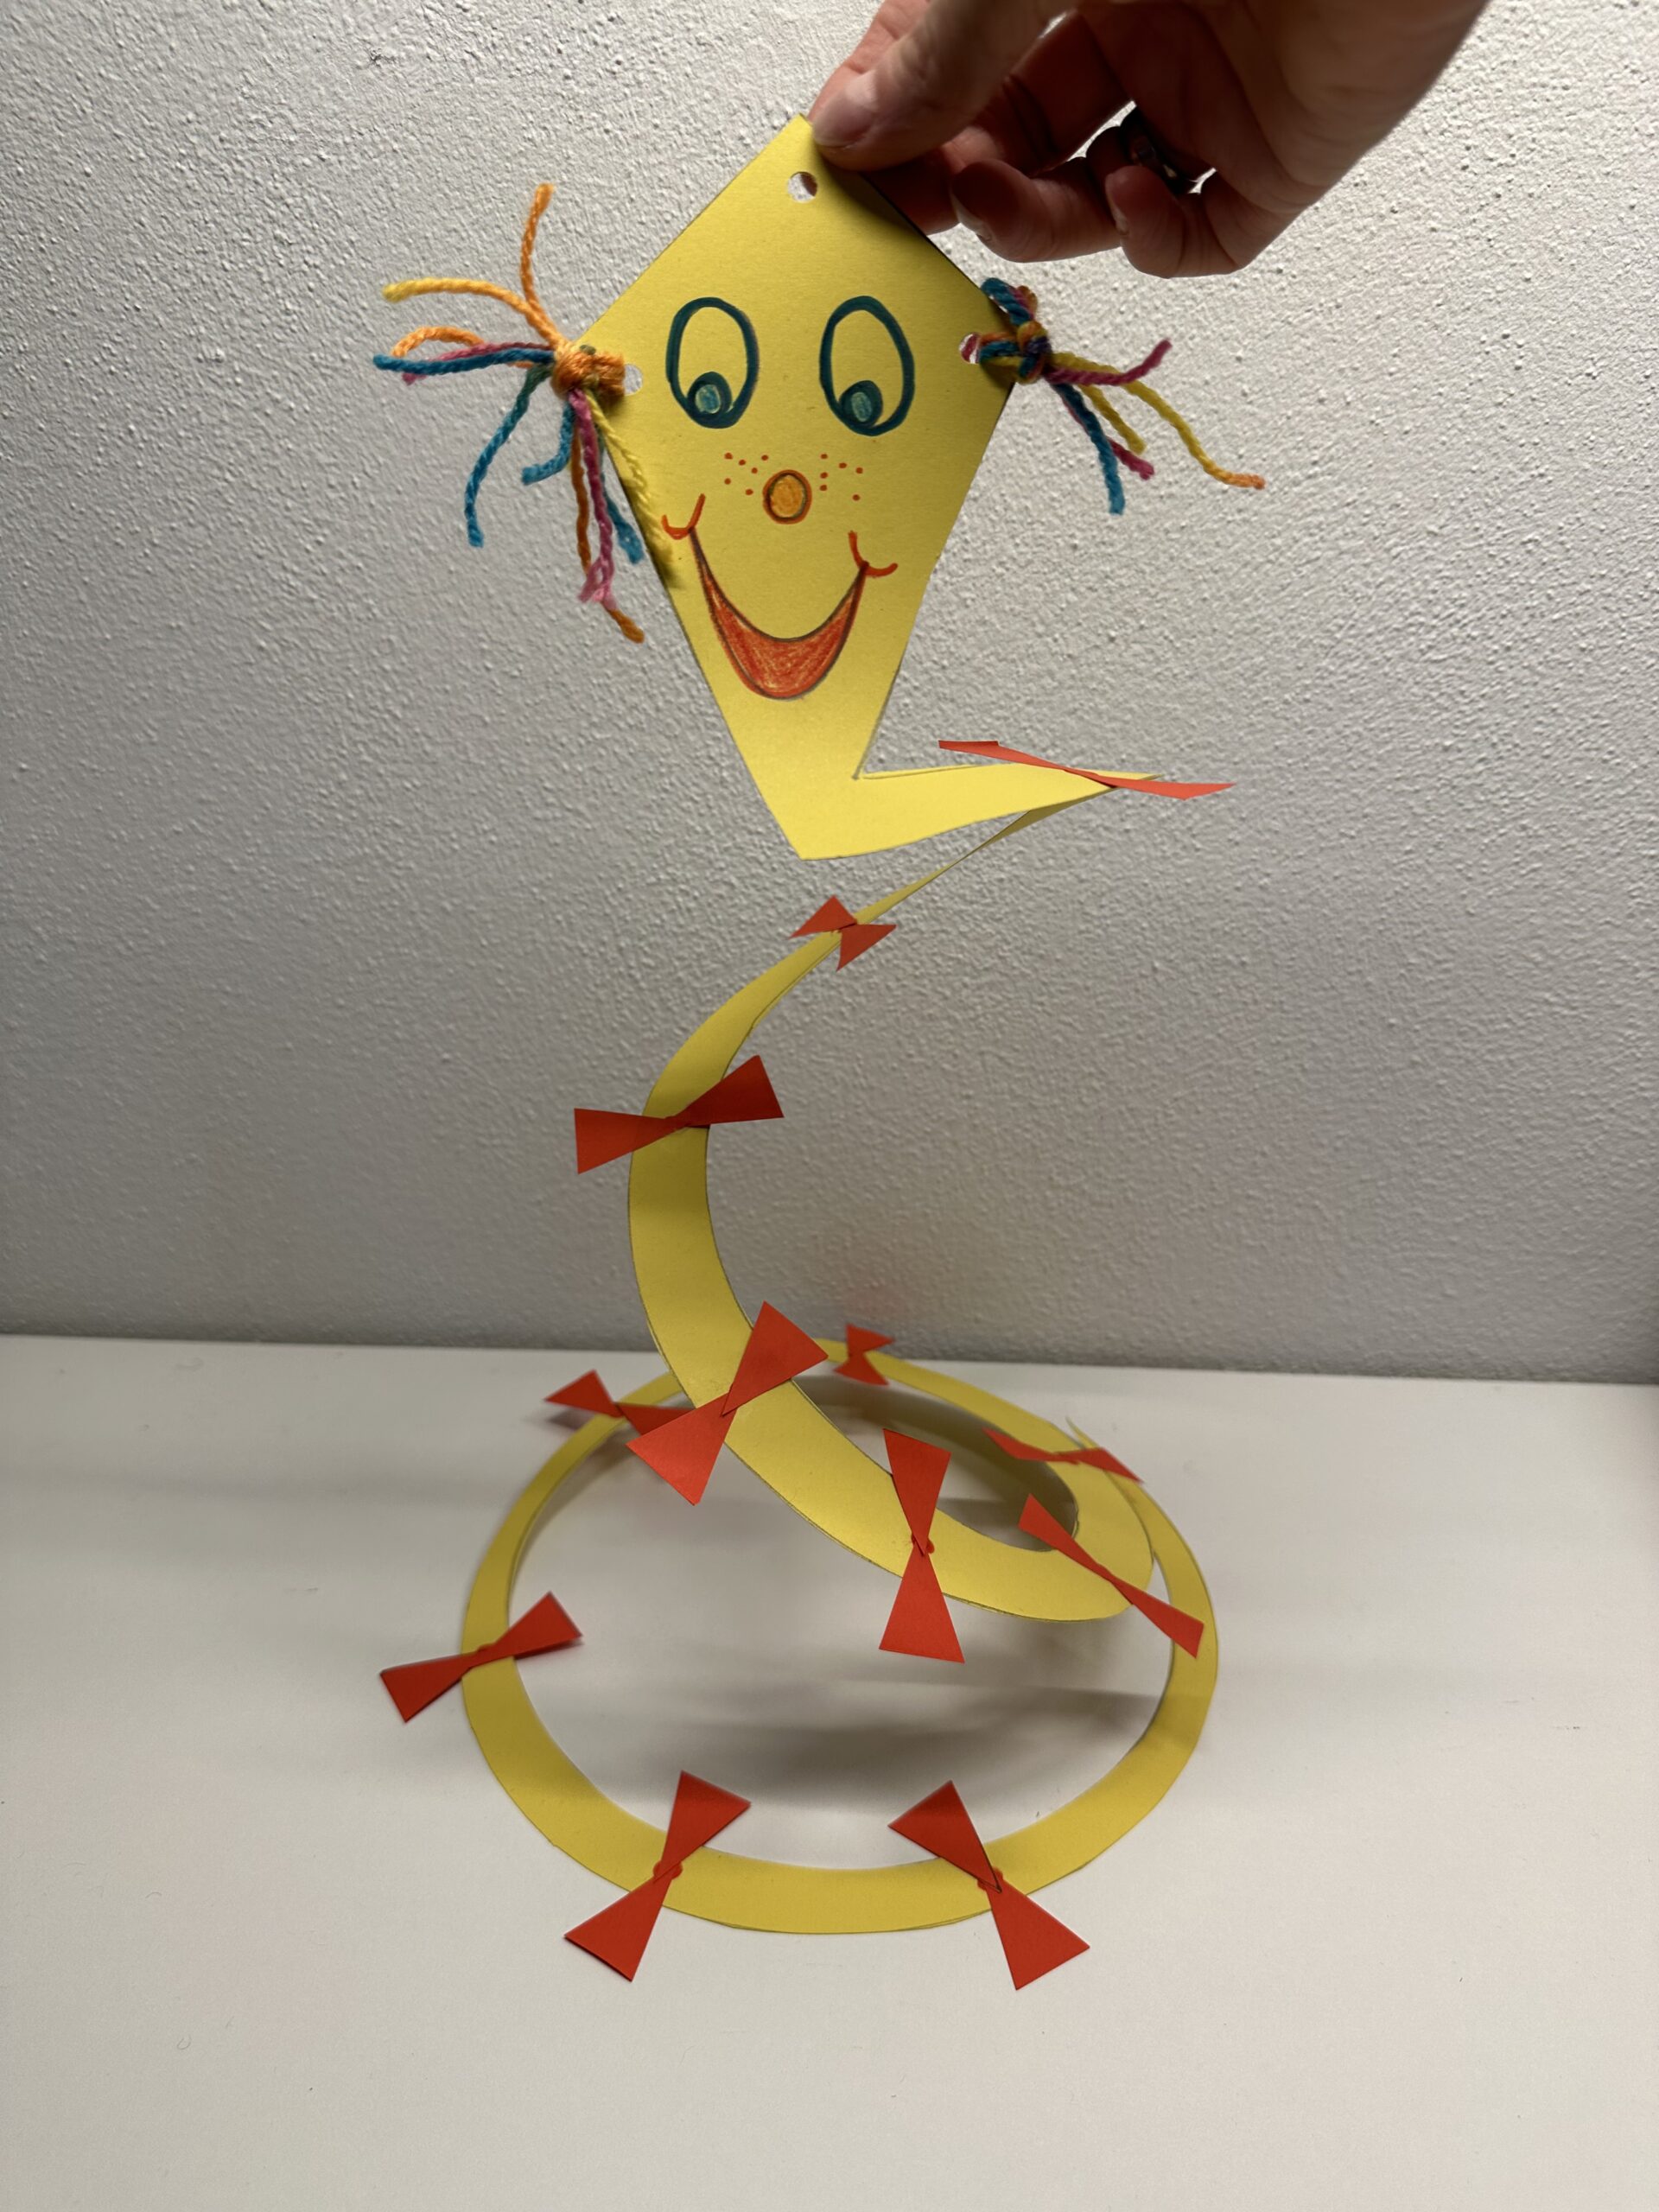
Bild zum Schritt 54 für das Bastel- und DIY-Abenteuer für Kinder: 'Dein Drache ist fertig. Suche dir einen Platz zum Aufhängen....'

"Let dragons rise" make

Follow us on Facebook , Instagram and Pinterest
Don't miss any more adventures: Our bottle mail

Leave a Reply

Your email address will not be published.

The maximum upload file size: 5 MB. You can upload: image, document. Drop file here