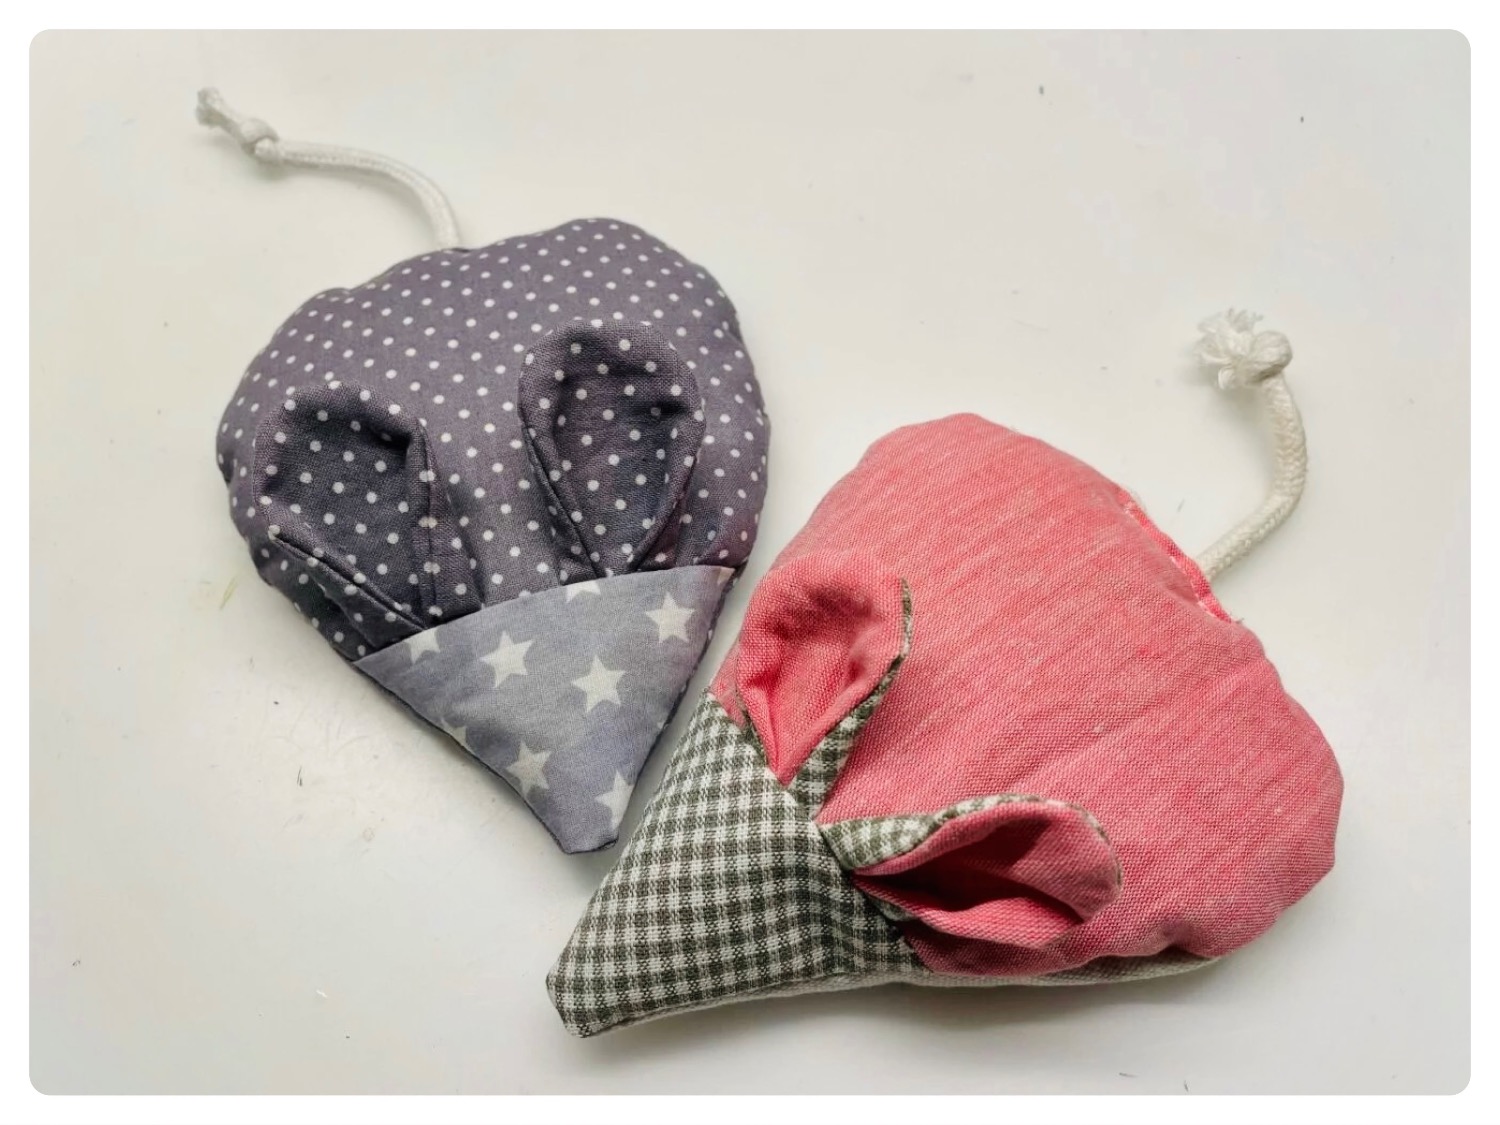
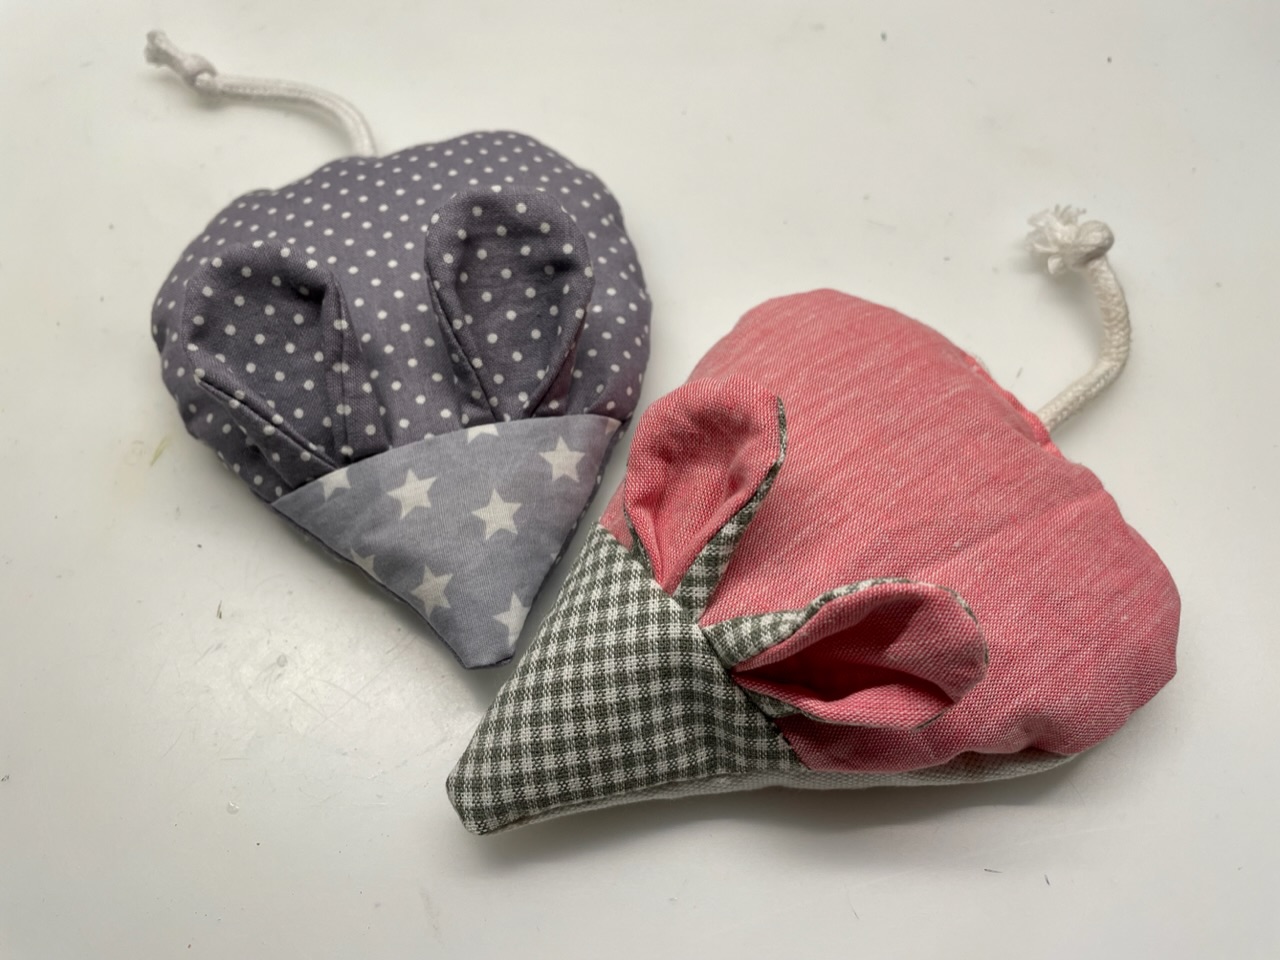
These spelt mice are small spelt cushions that can be used as a warm bottle. Due to their size, they are ideal for small children or babies. Whether in a stroller or as a heat cushion for bloating, they are also a nice and practical gift.
With this step-by-step guide, you will surely succeed in this sewing project. Have fun trying out.
Media Education for Kindergarten and Hort

Relief in everyday life, targeted promotion of individual children, independent learning and - without any pre-knowledge already usable by the youngest!
Put everything in place, print out the templates.
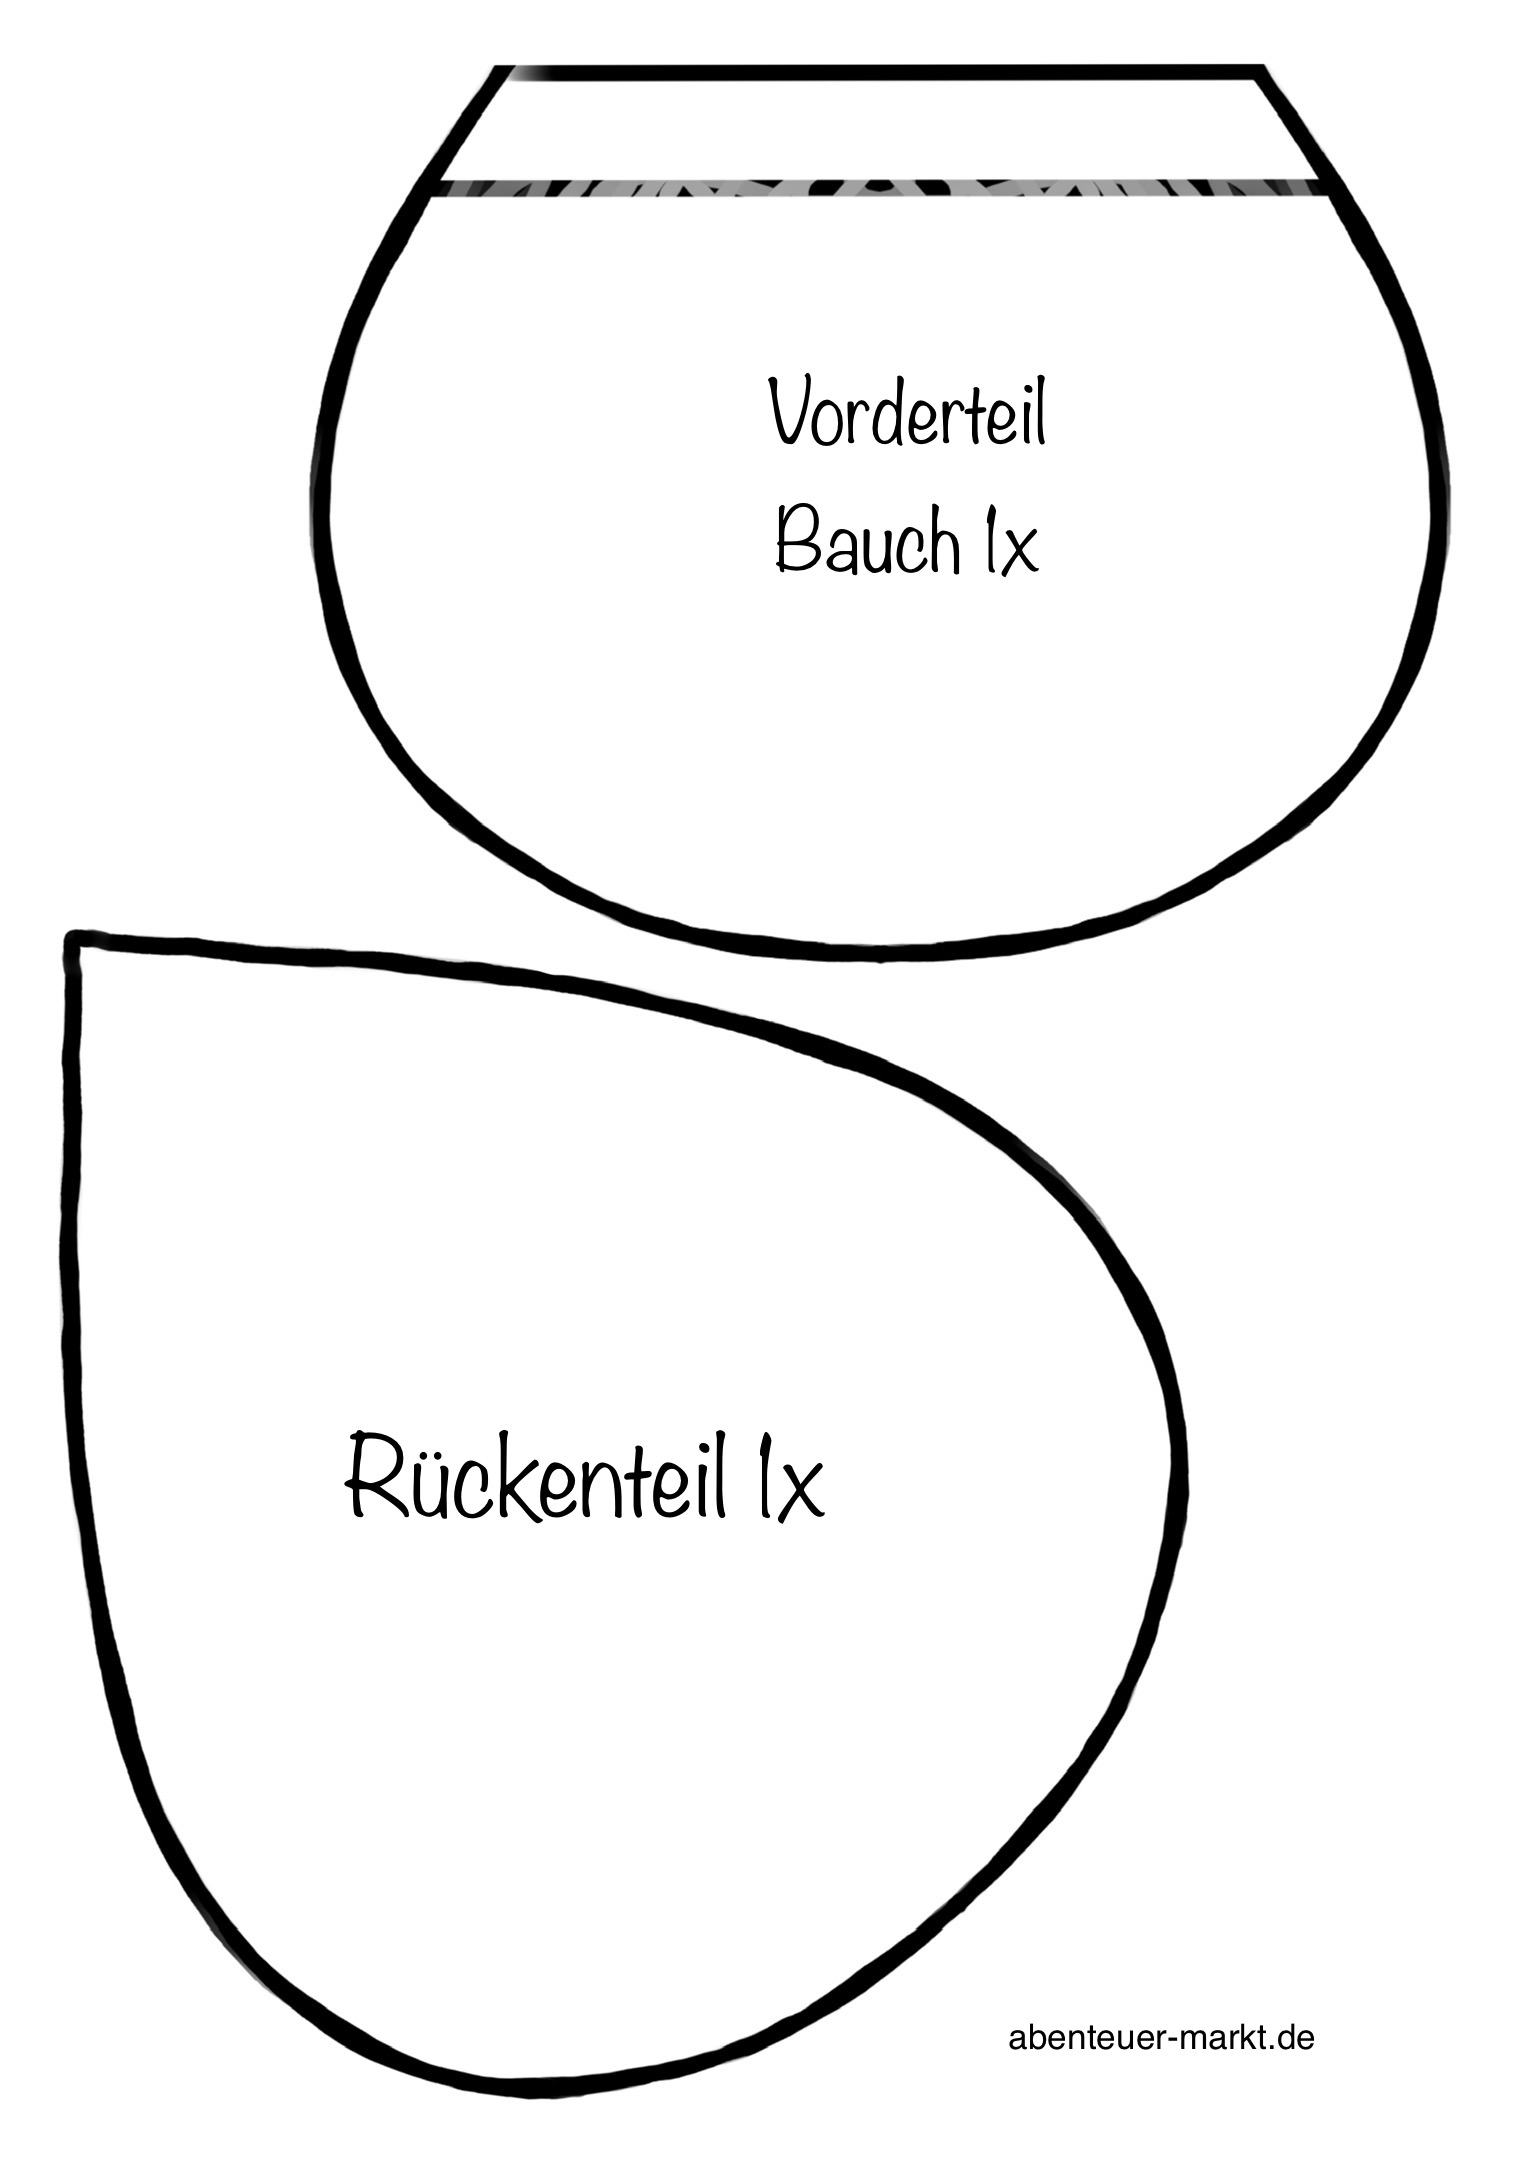
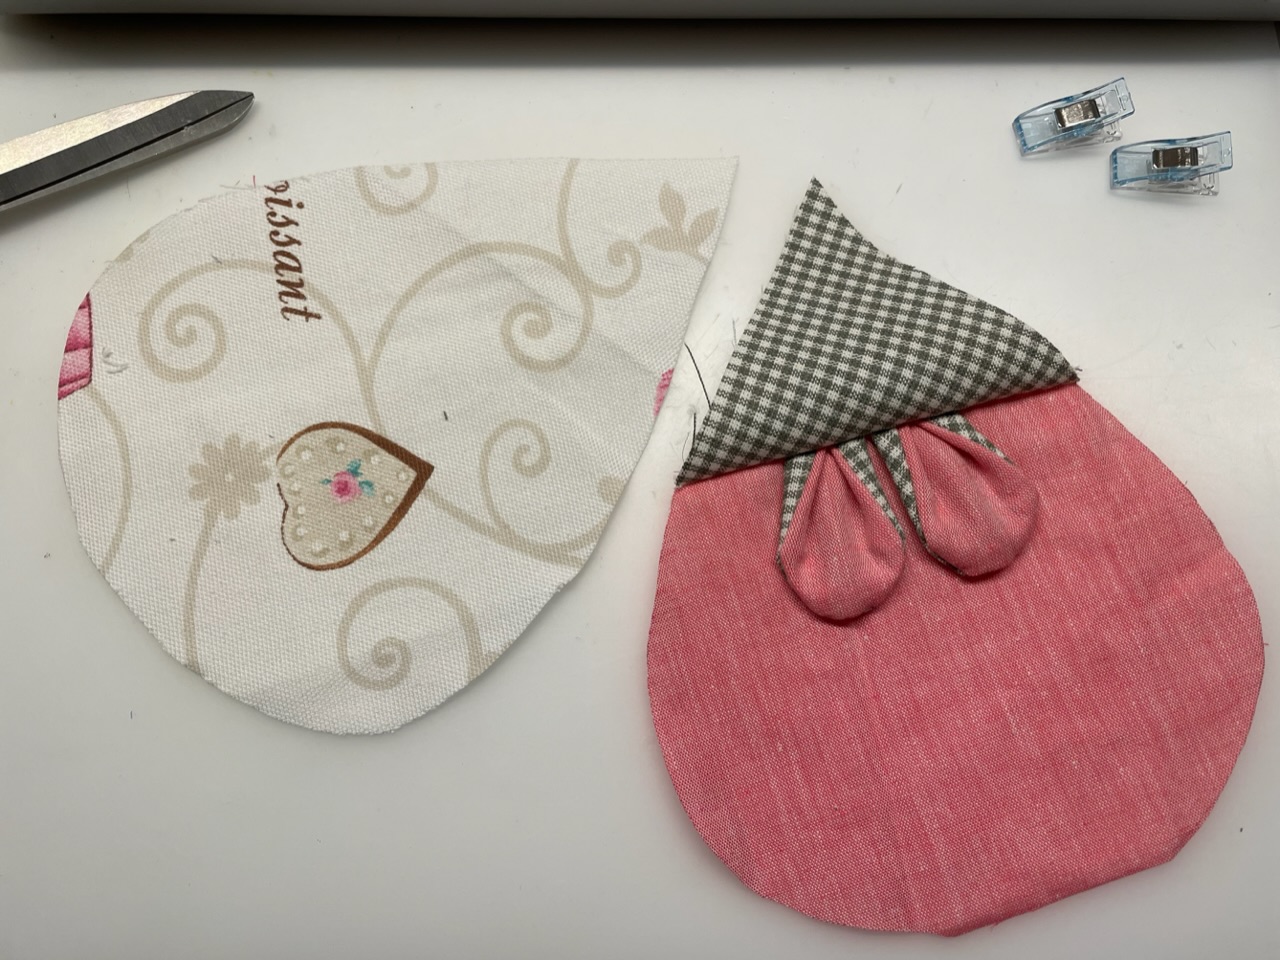
Different cotton fabrics can be combined. Choose what you like.

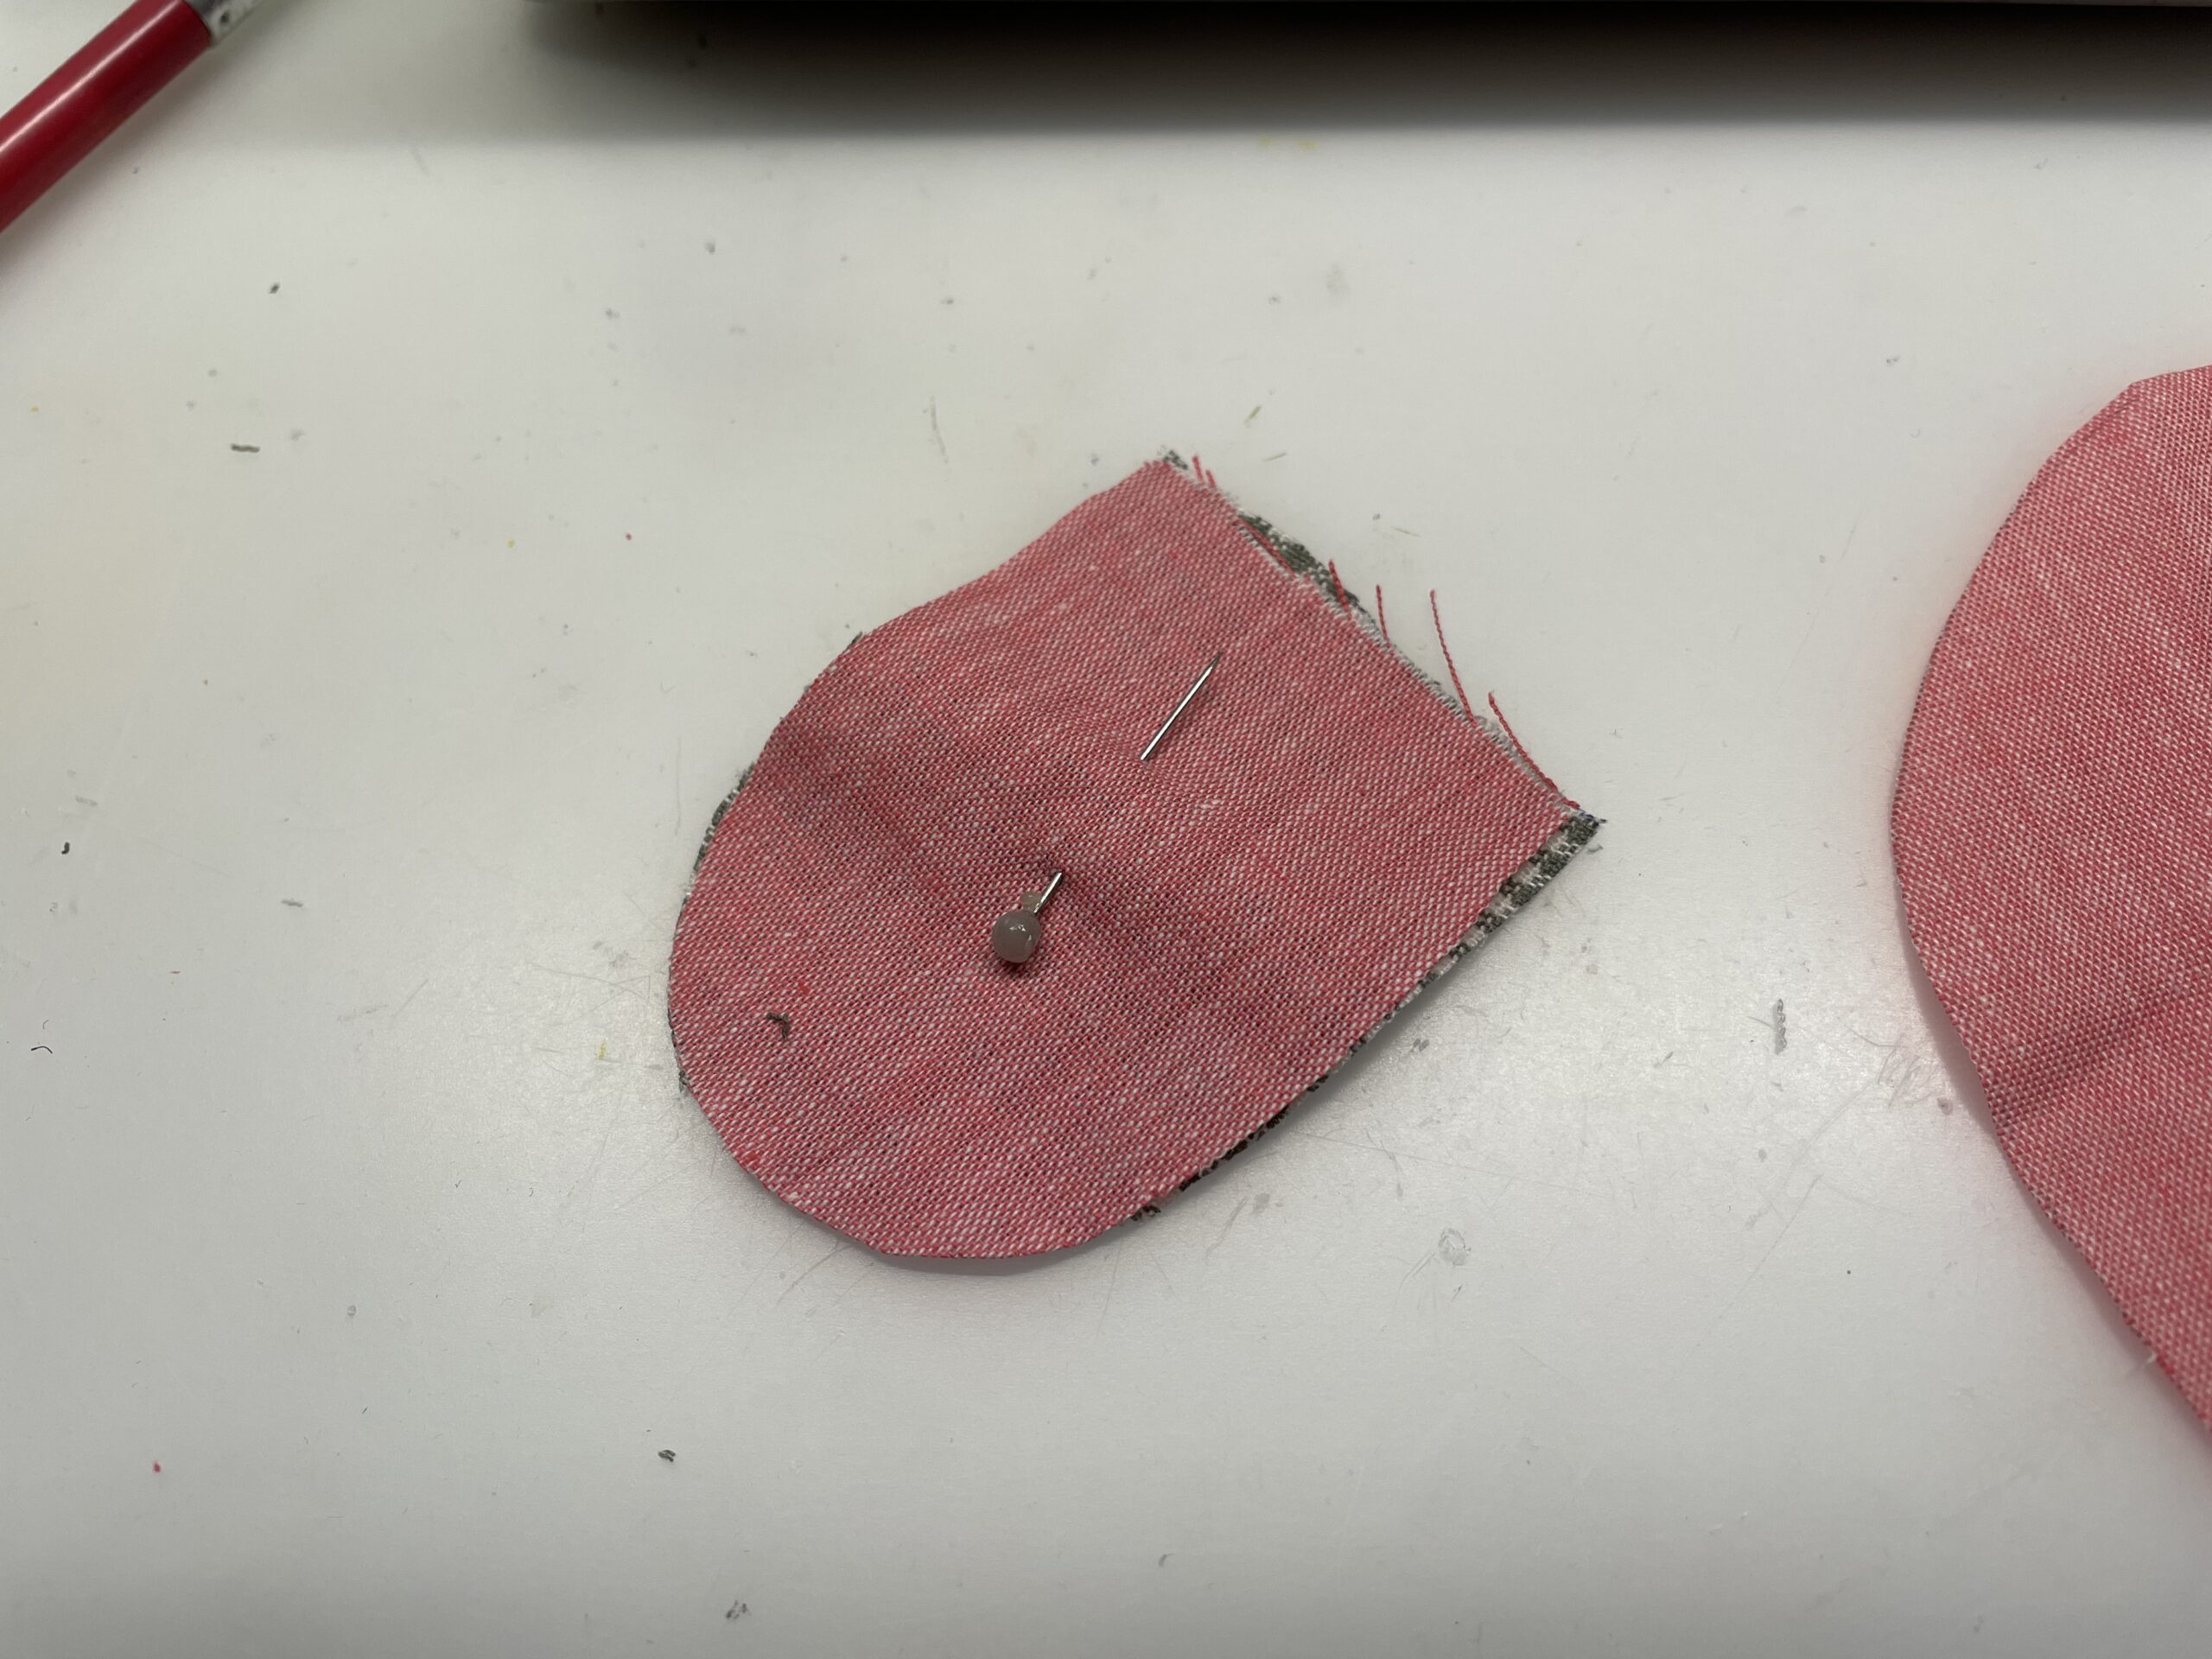
Cut the rear part of the mouse once. And both parts for the front part.
For the ears two parts of fabric are cut each ear. Perhaps from two different fabrics.
Put two earpieces together with the beautiful fabric sides. Put them together with a pins.
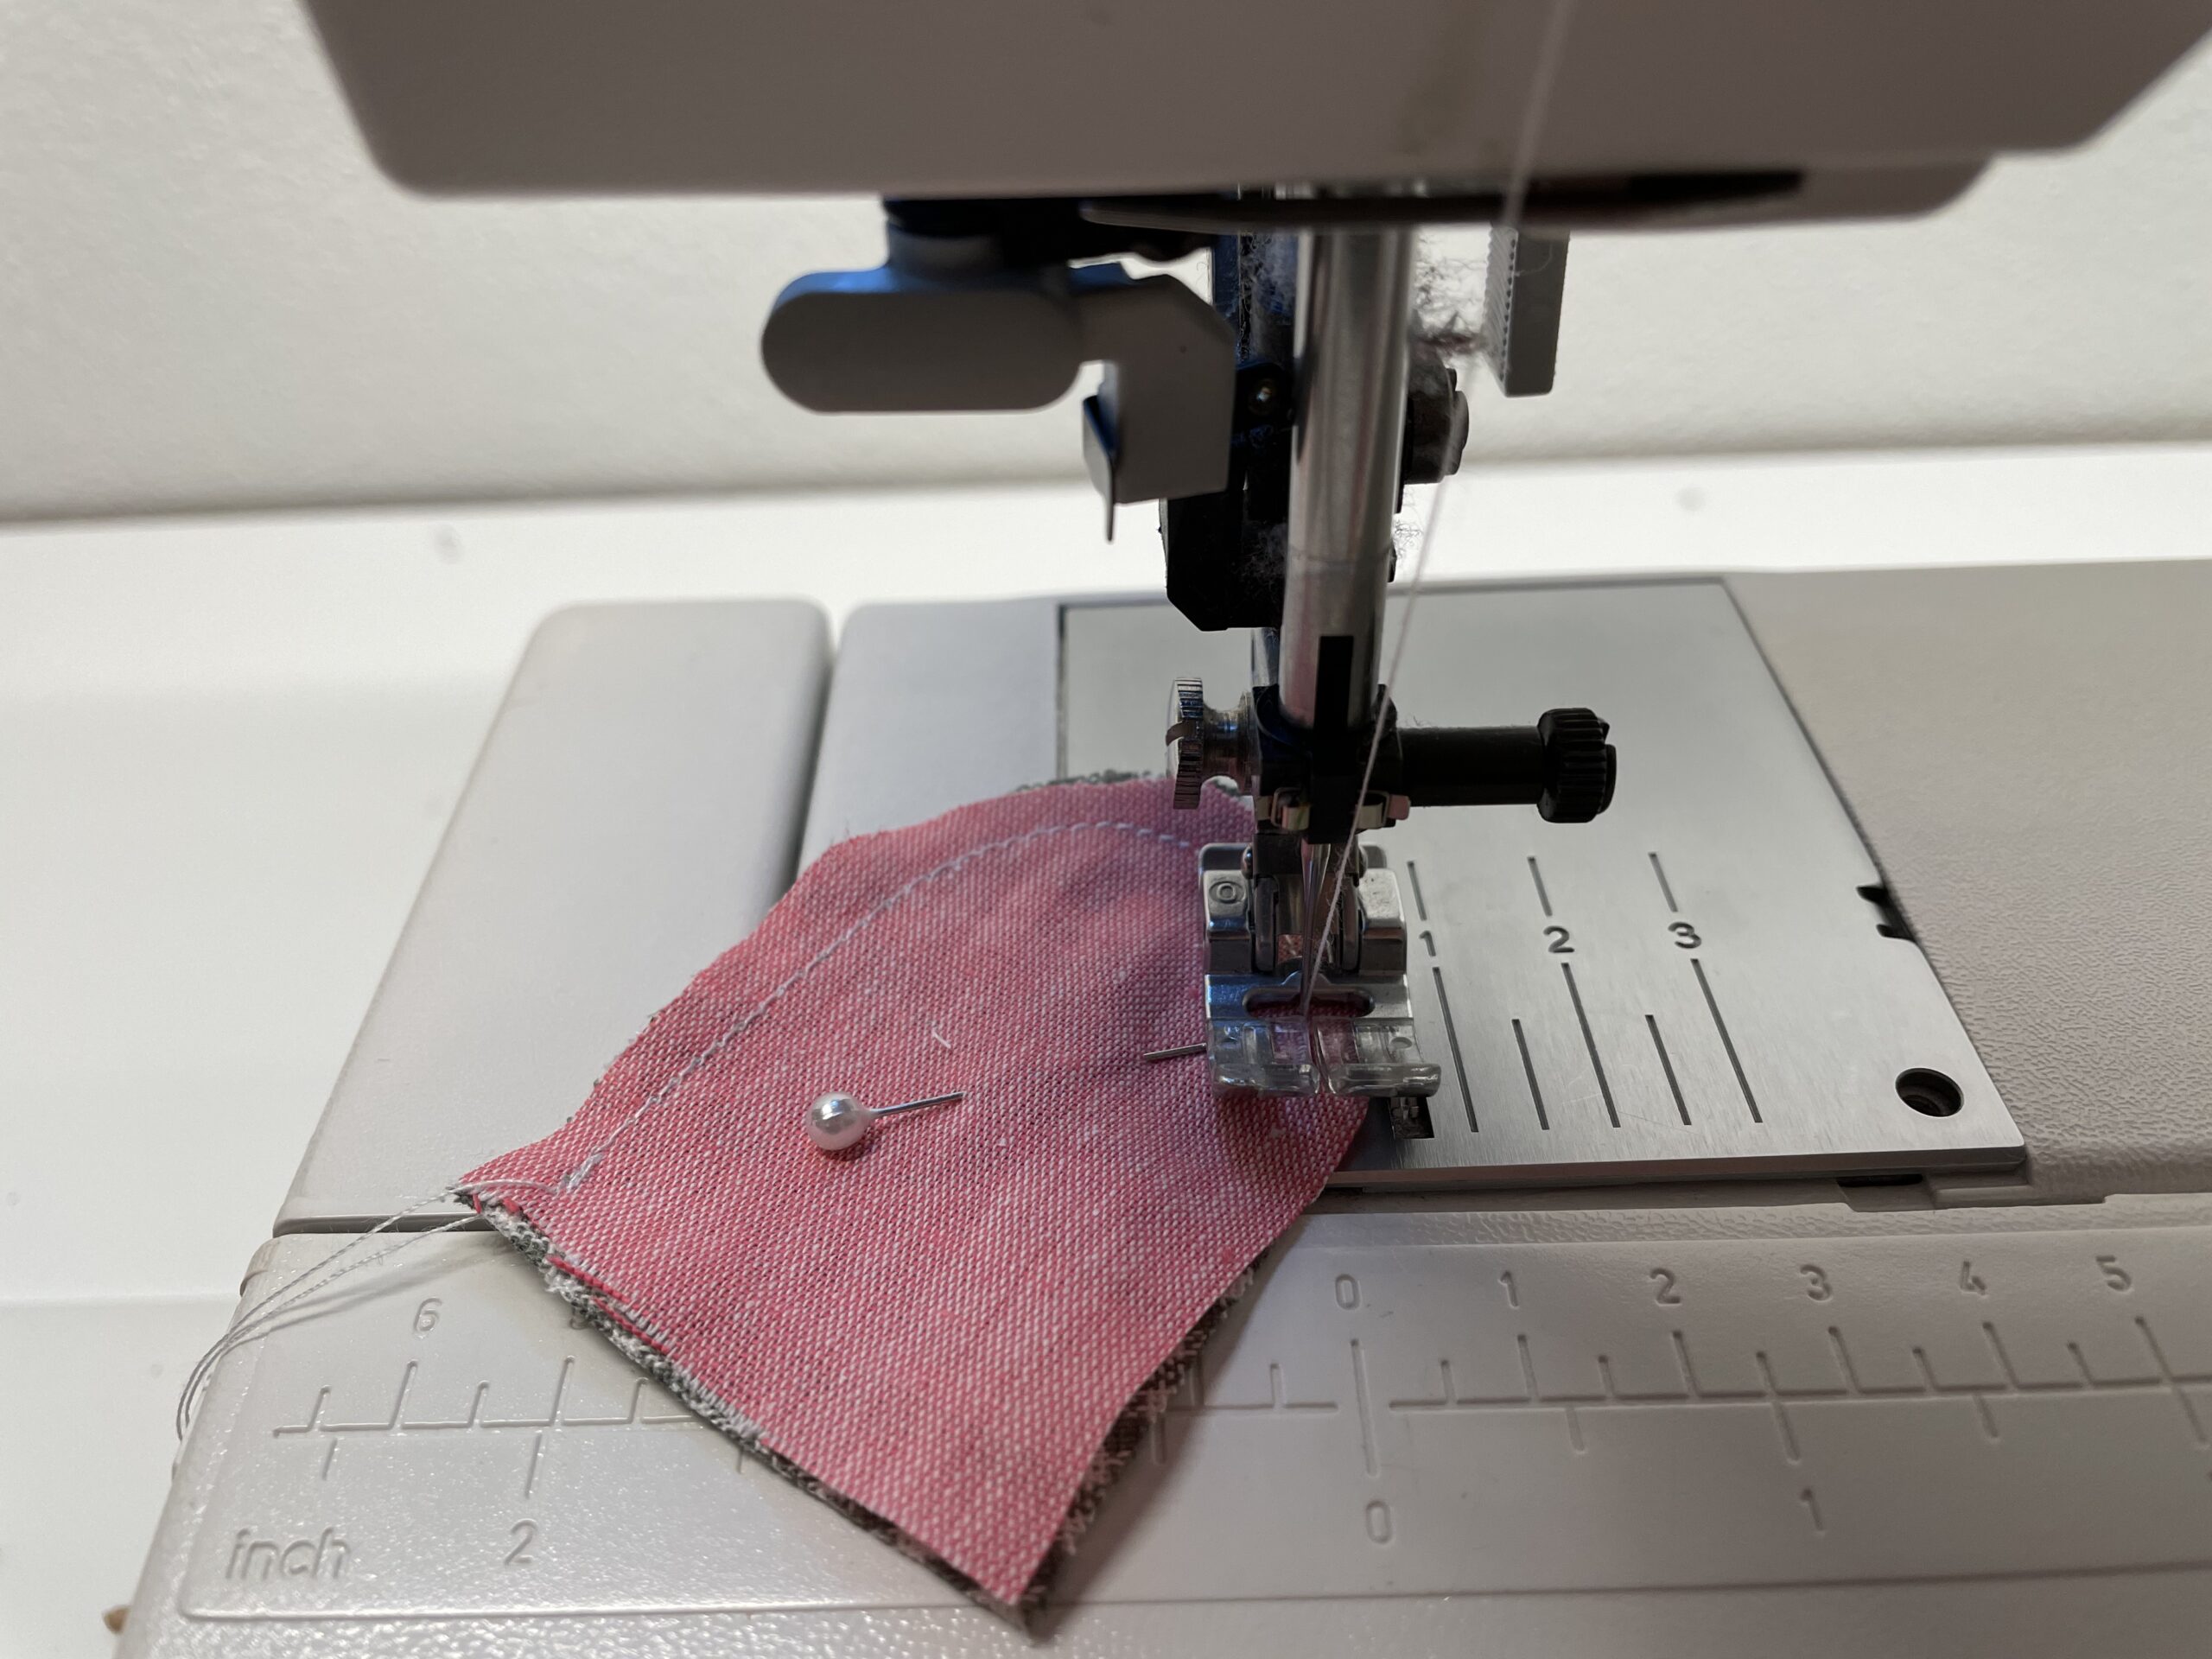
Sew the ears together. The straight underside remains open.
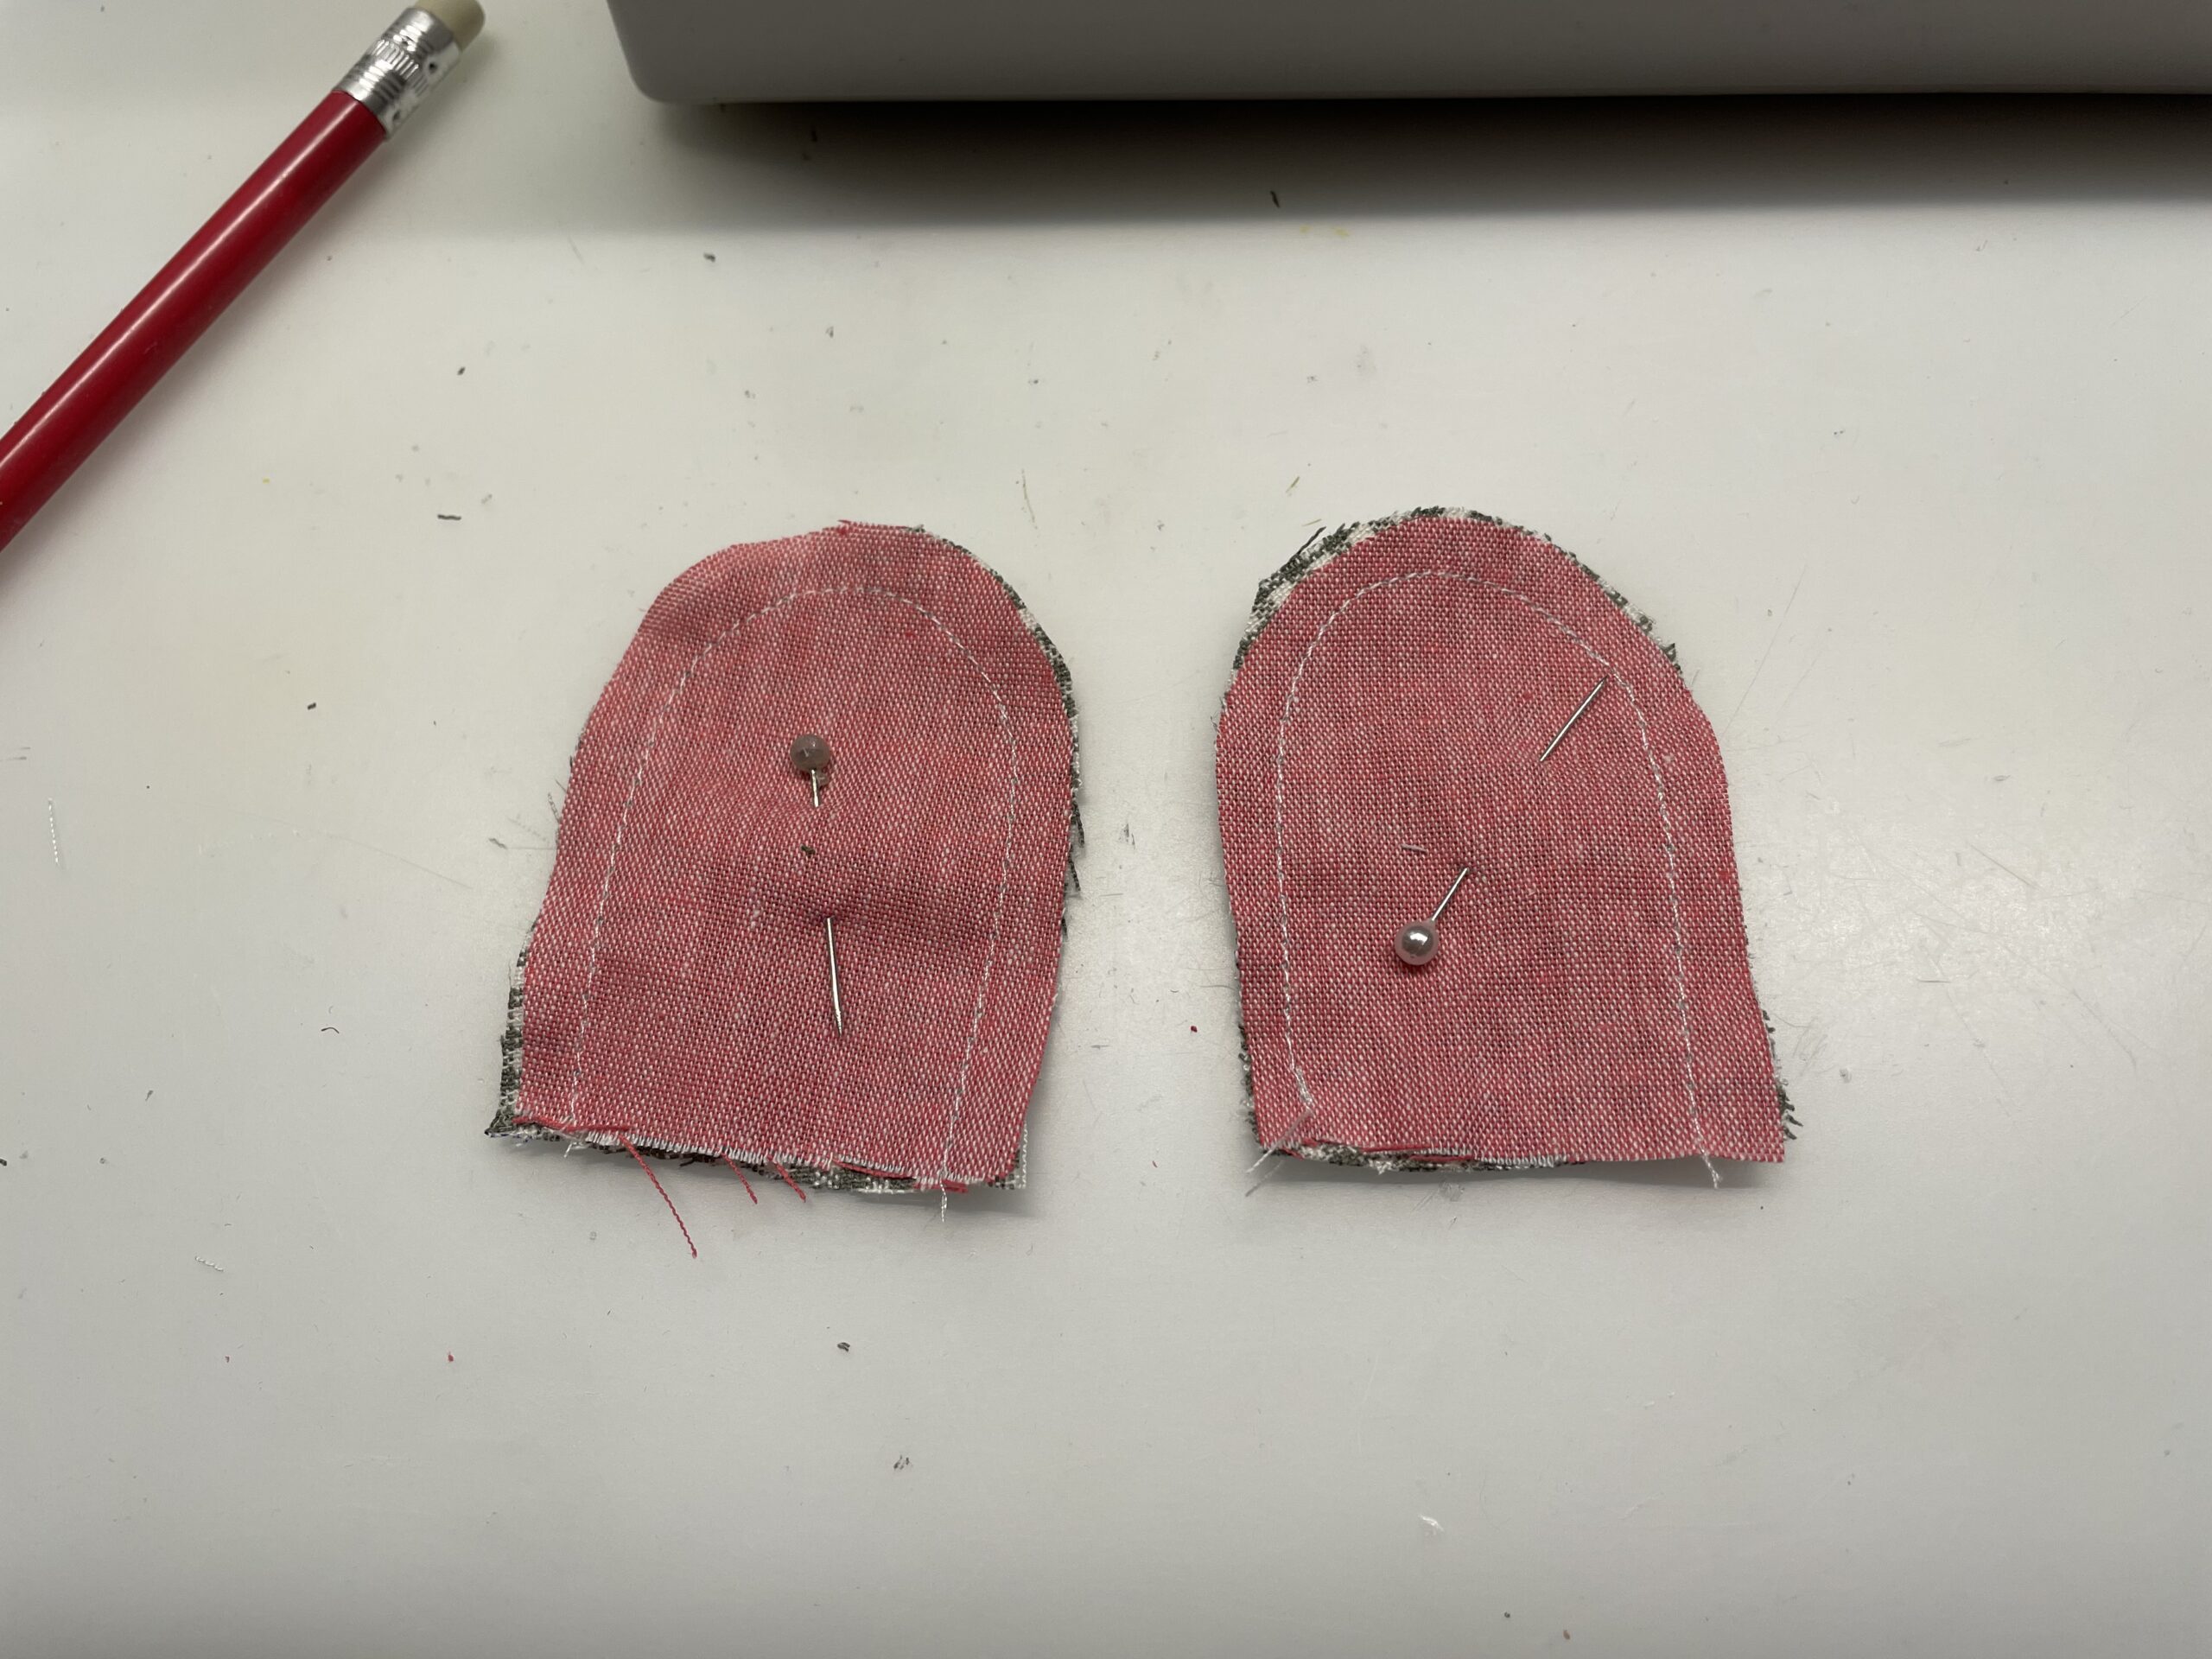
That's what both ears look like now.
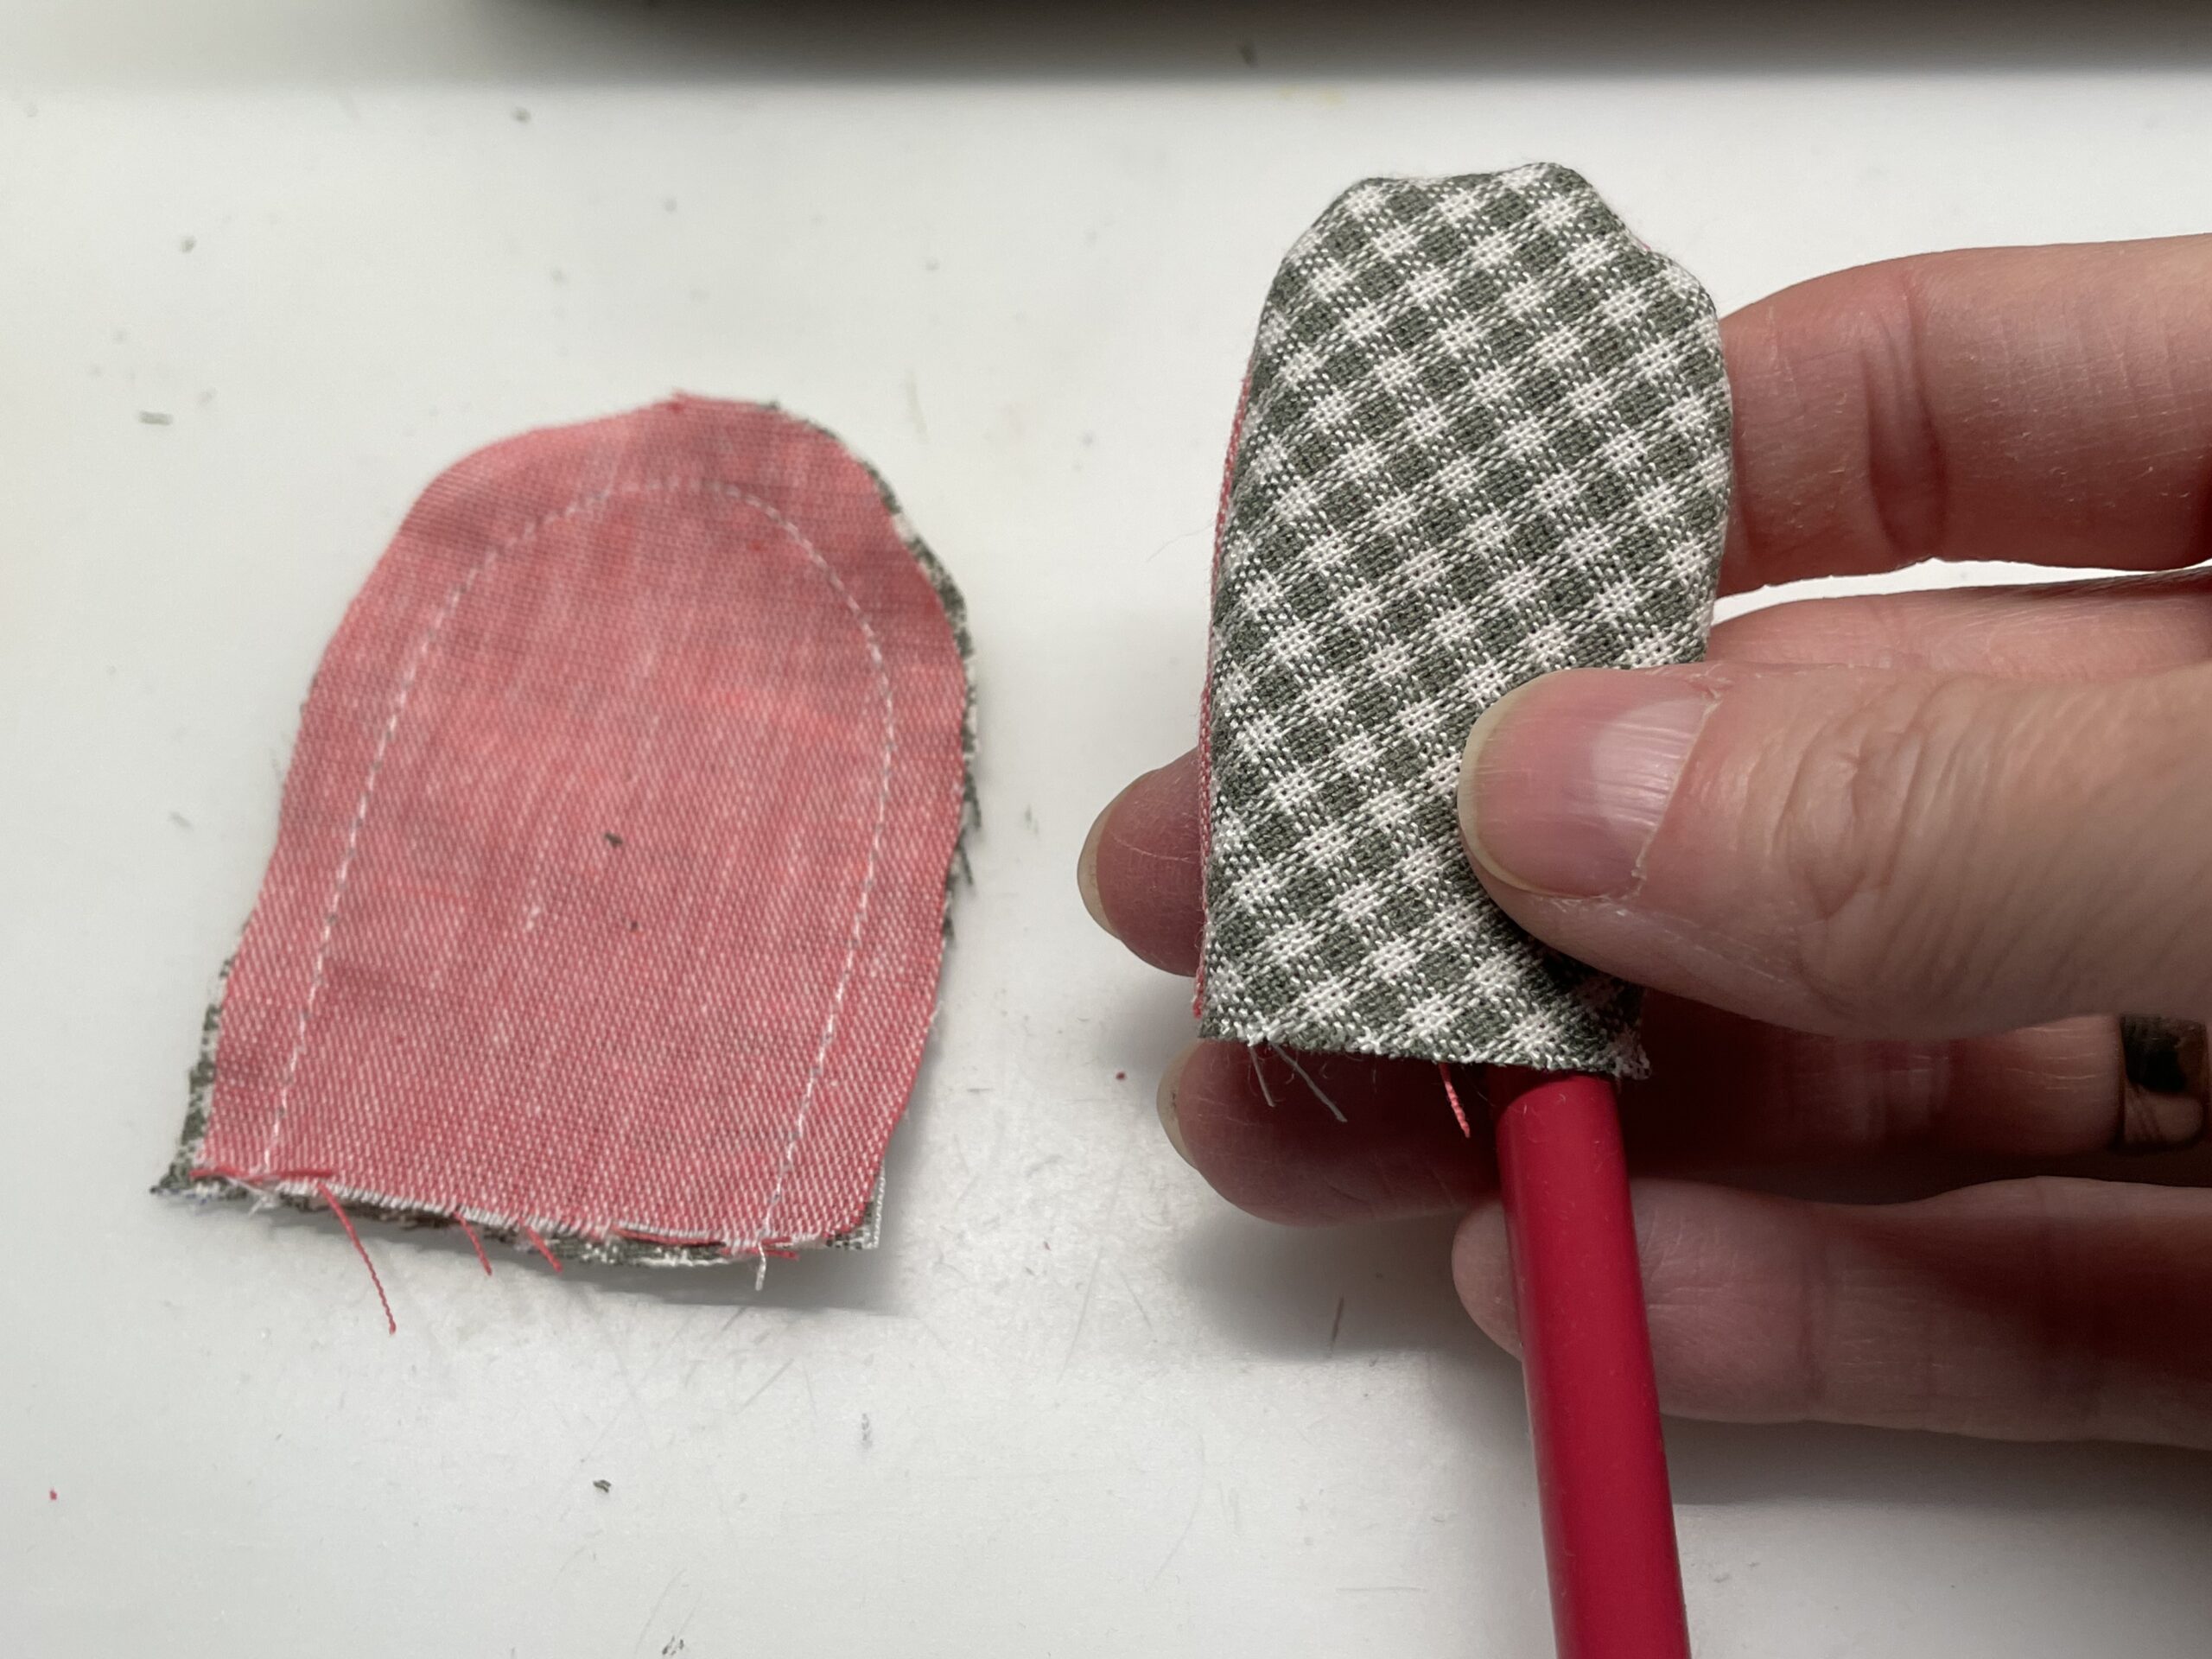
Now turn both sewn ears.
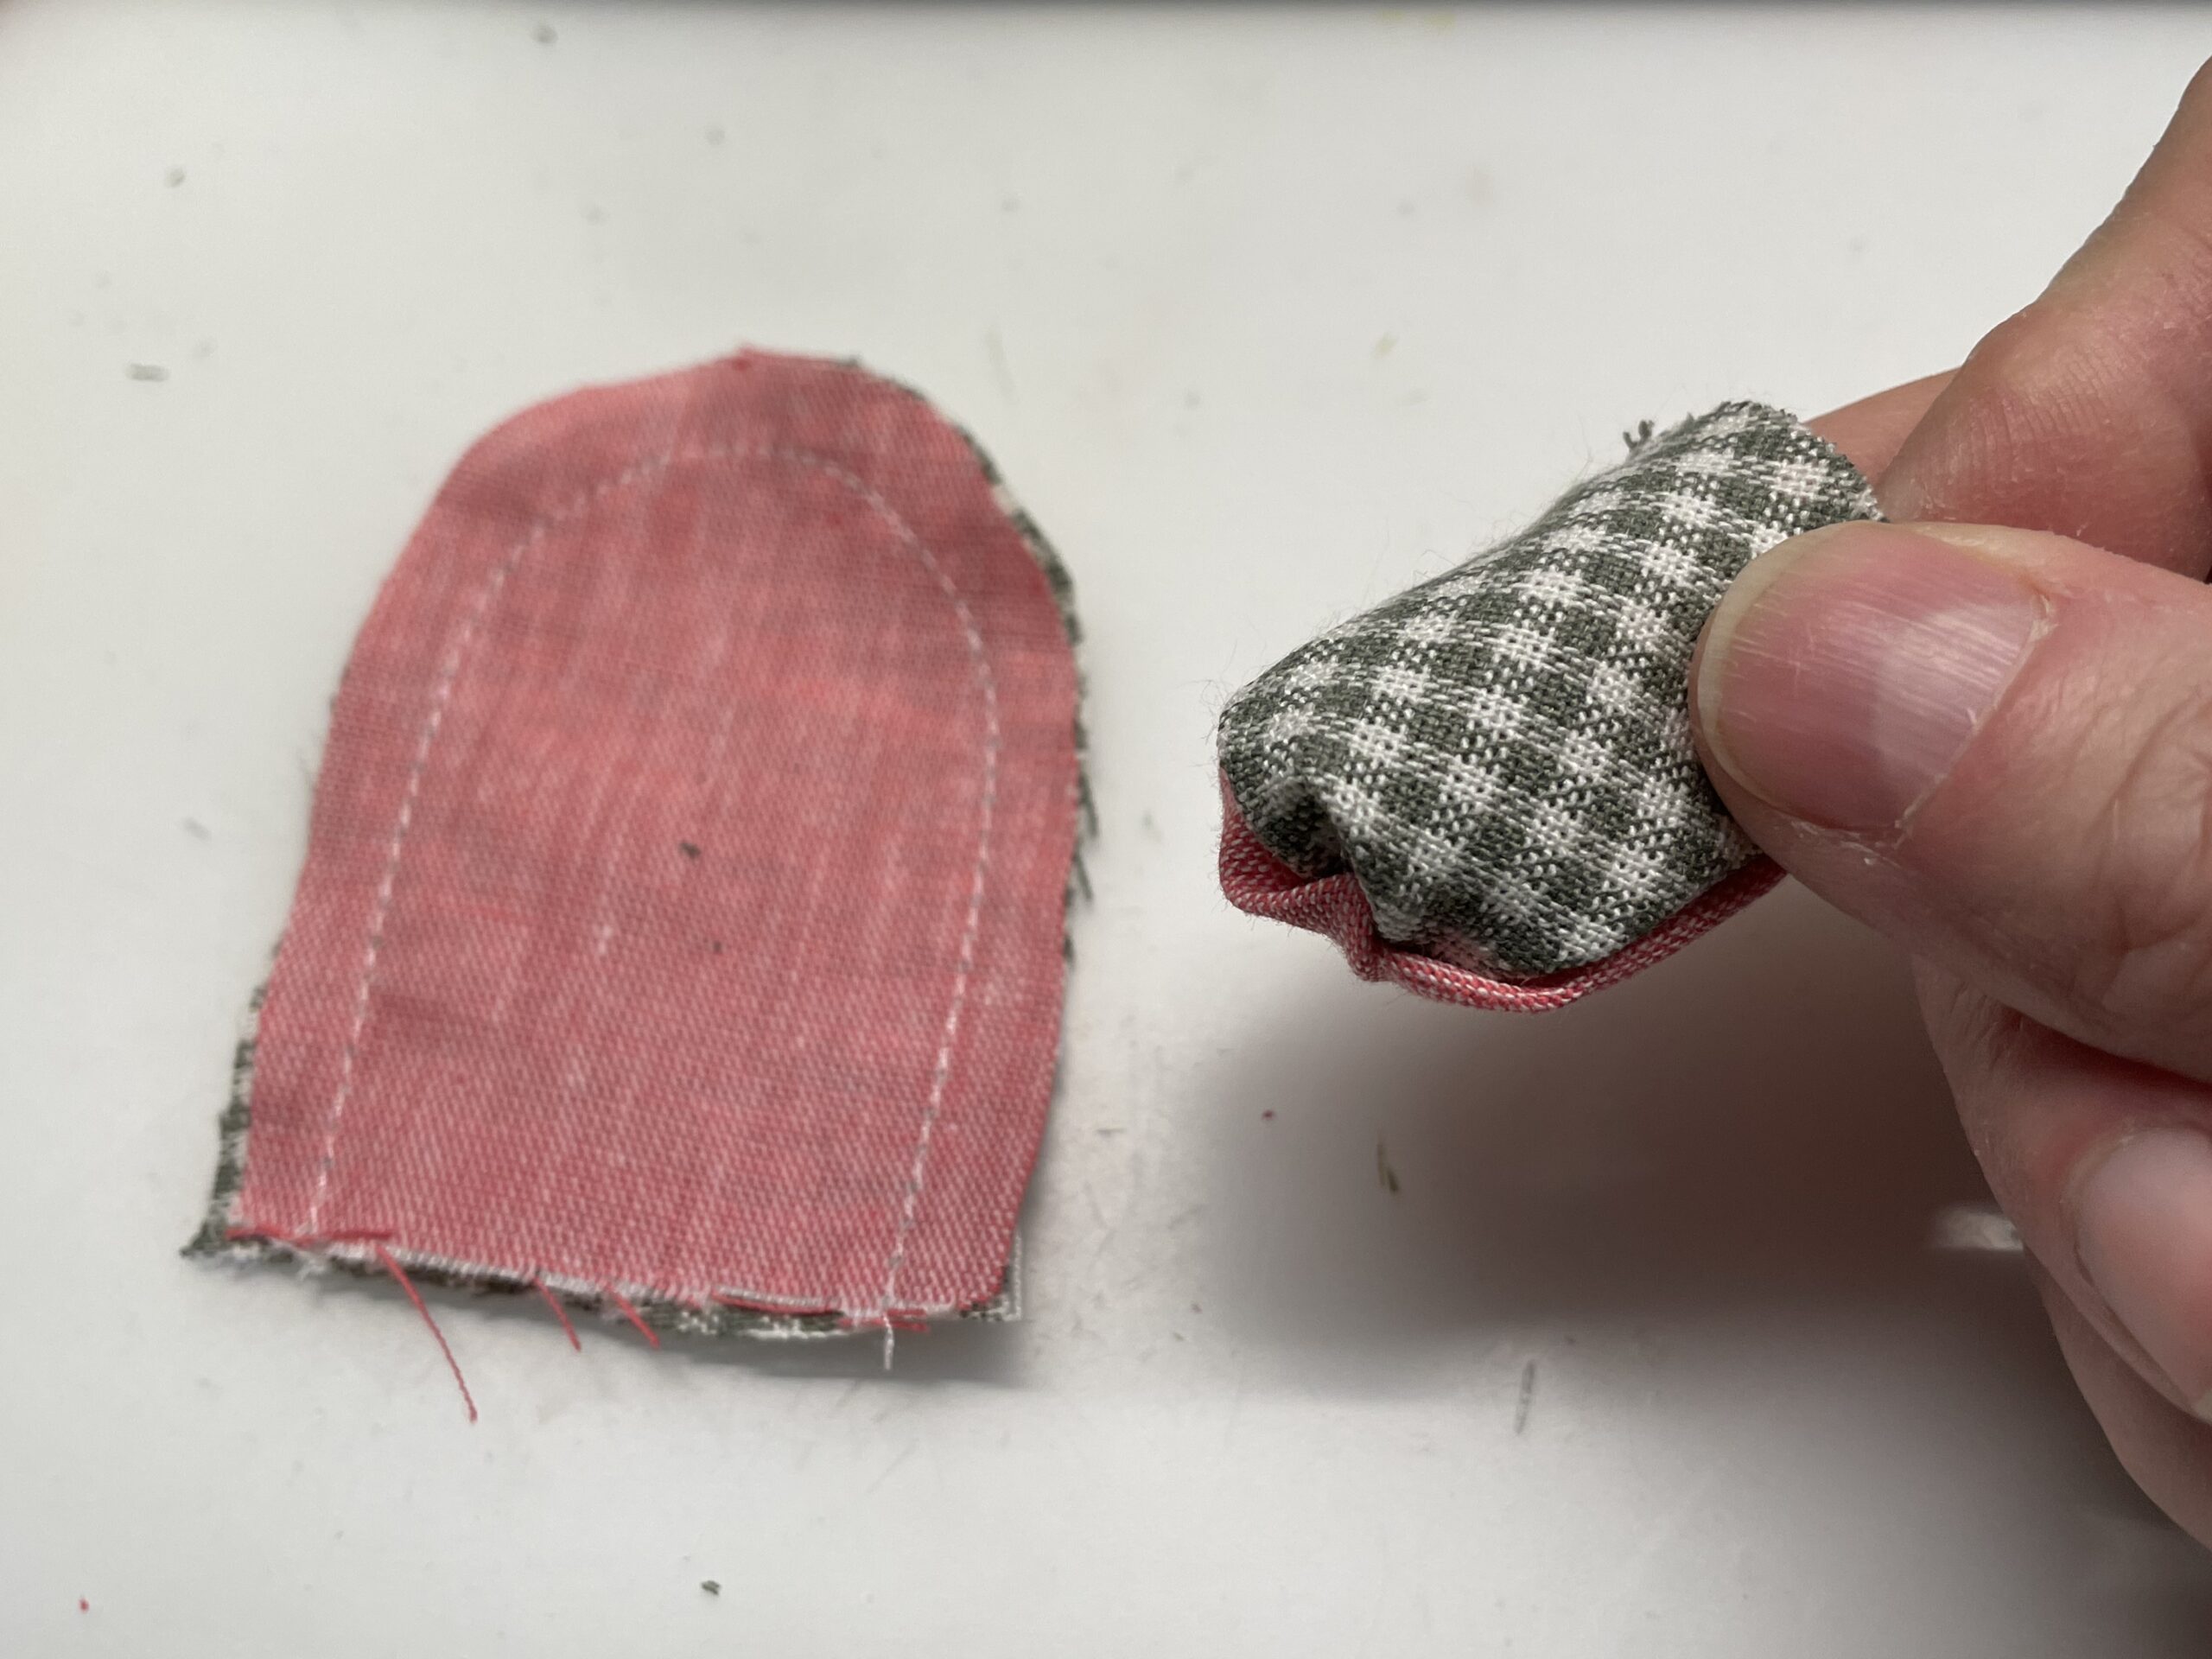
Bevel the curves well with a pen or a finger.

Folds the outsides of the ears inside and fixes the open bottom with a clamp.
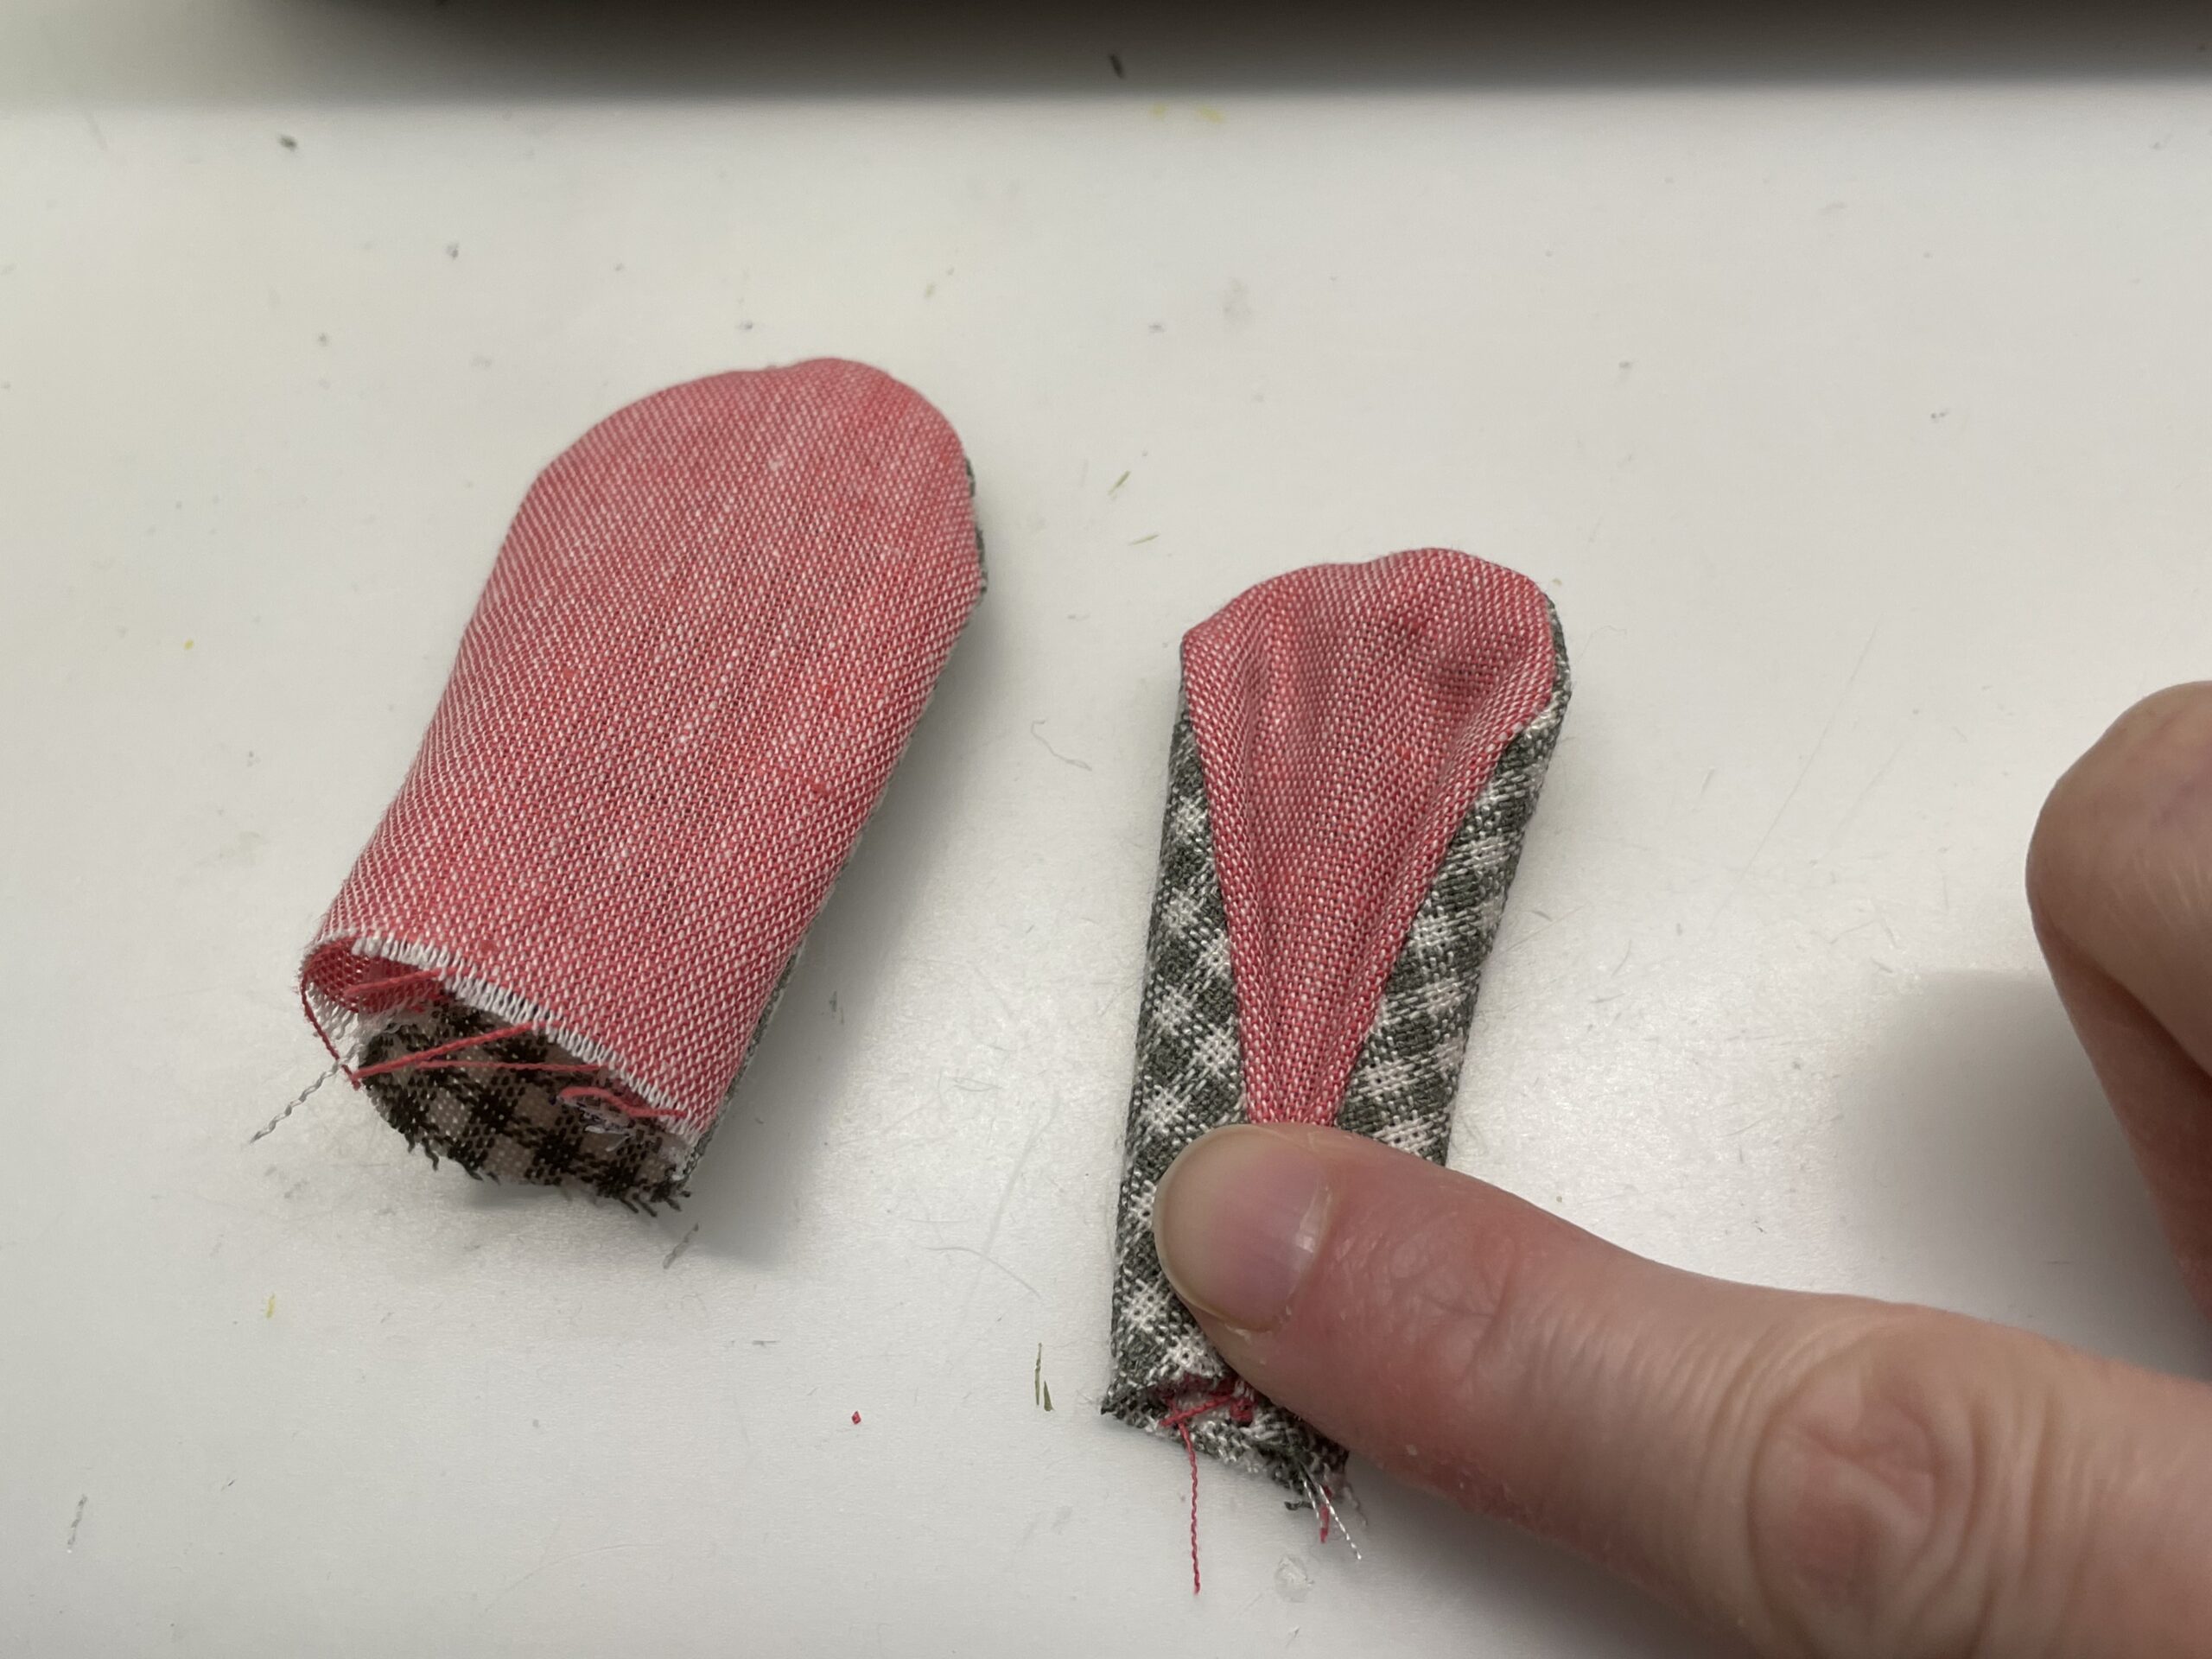
That's how you do it on both ears.
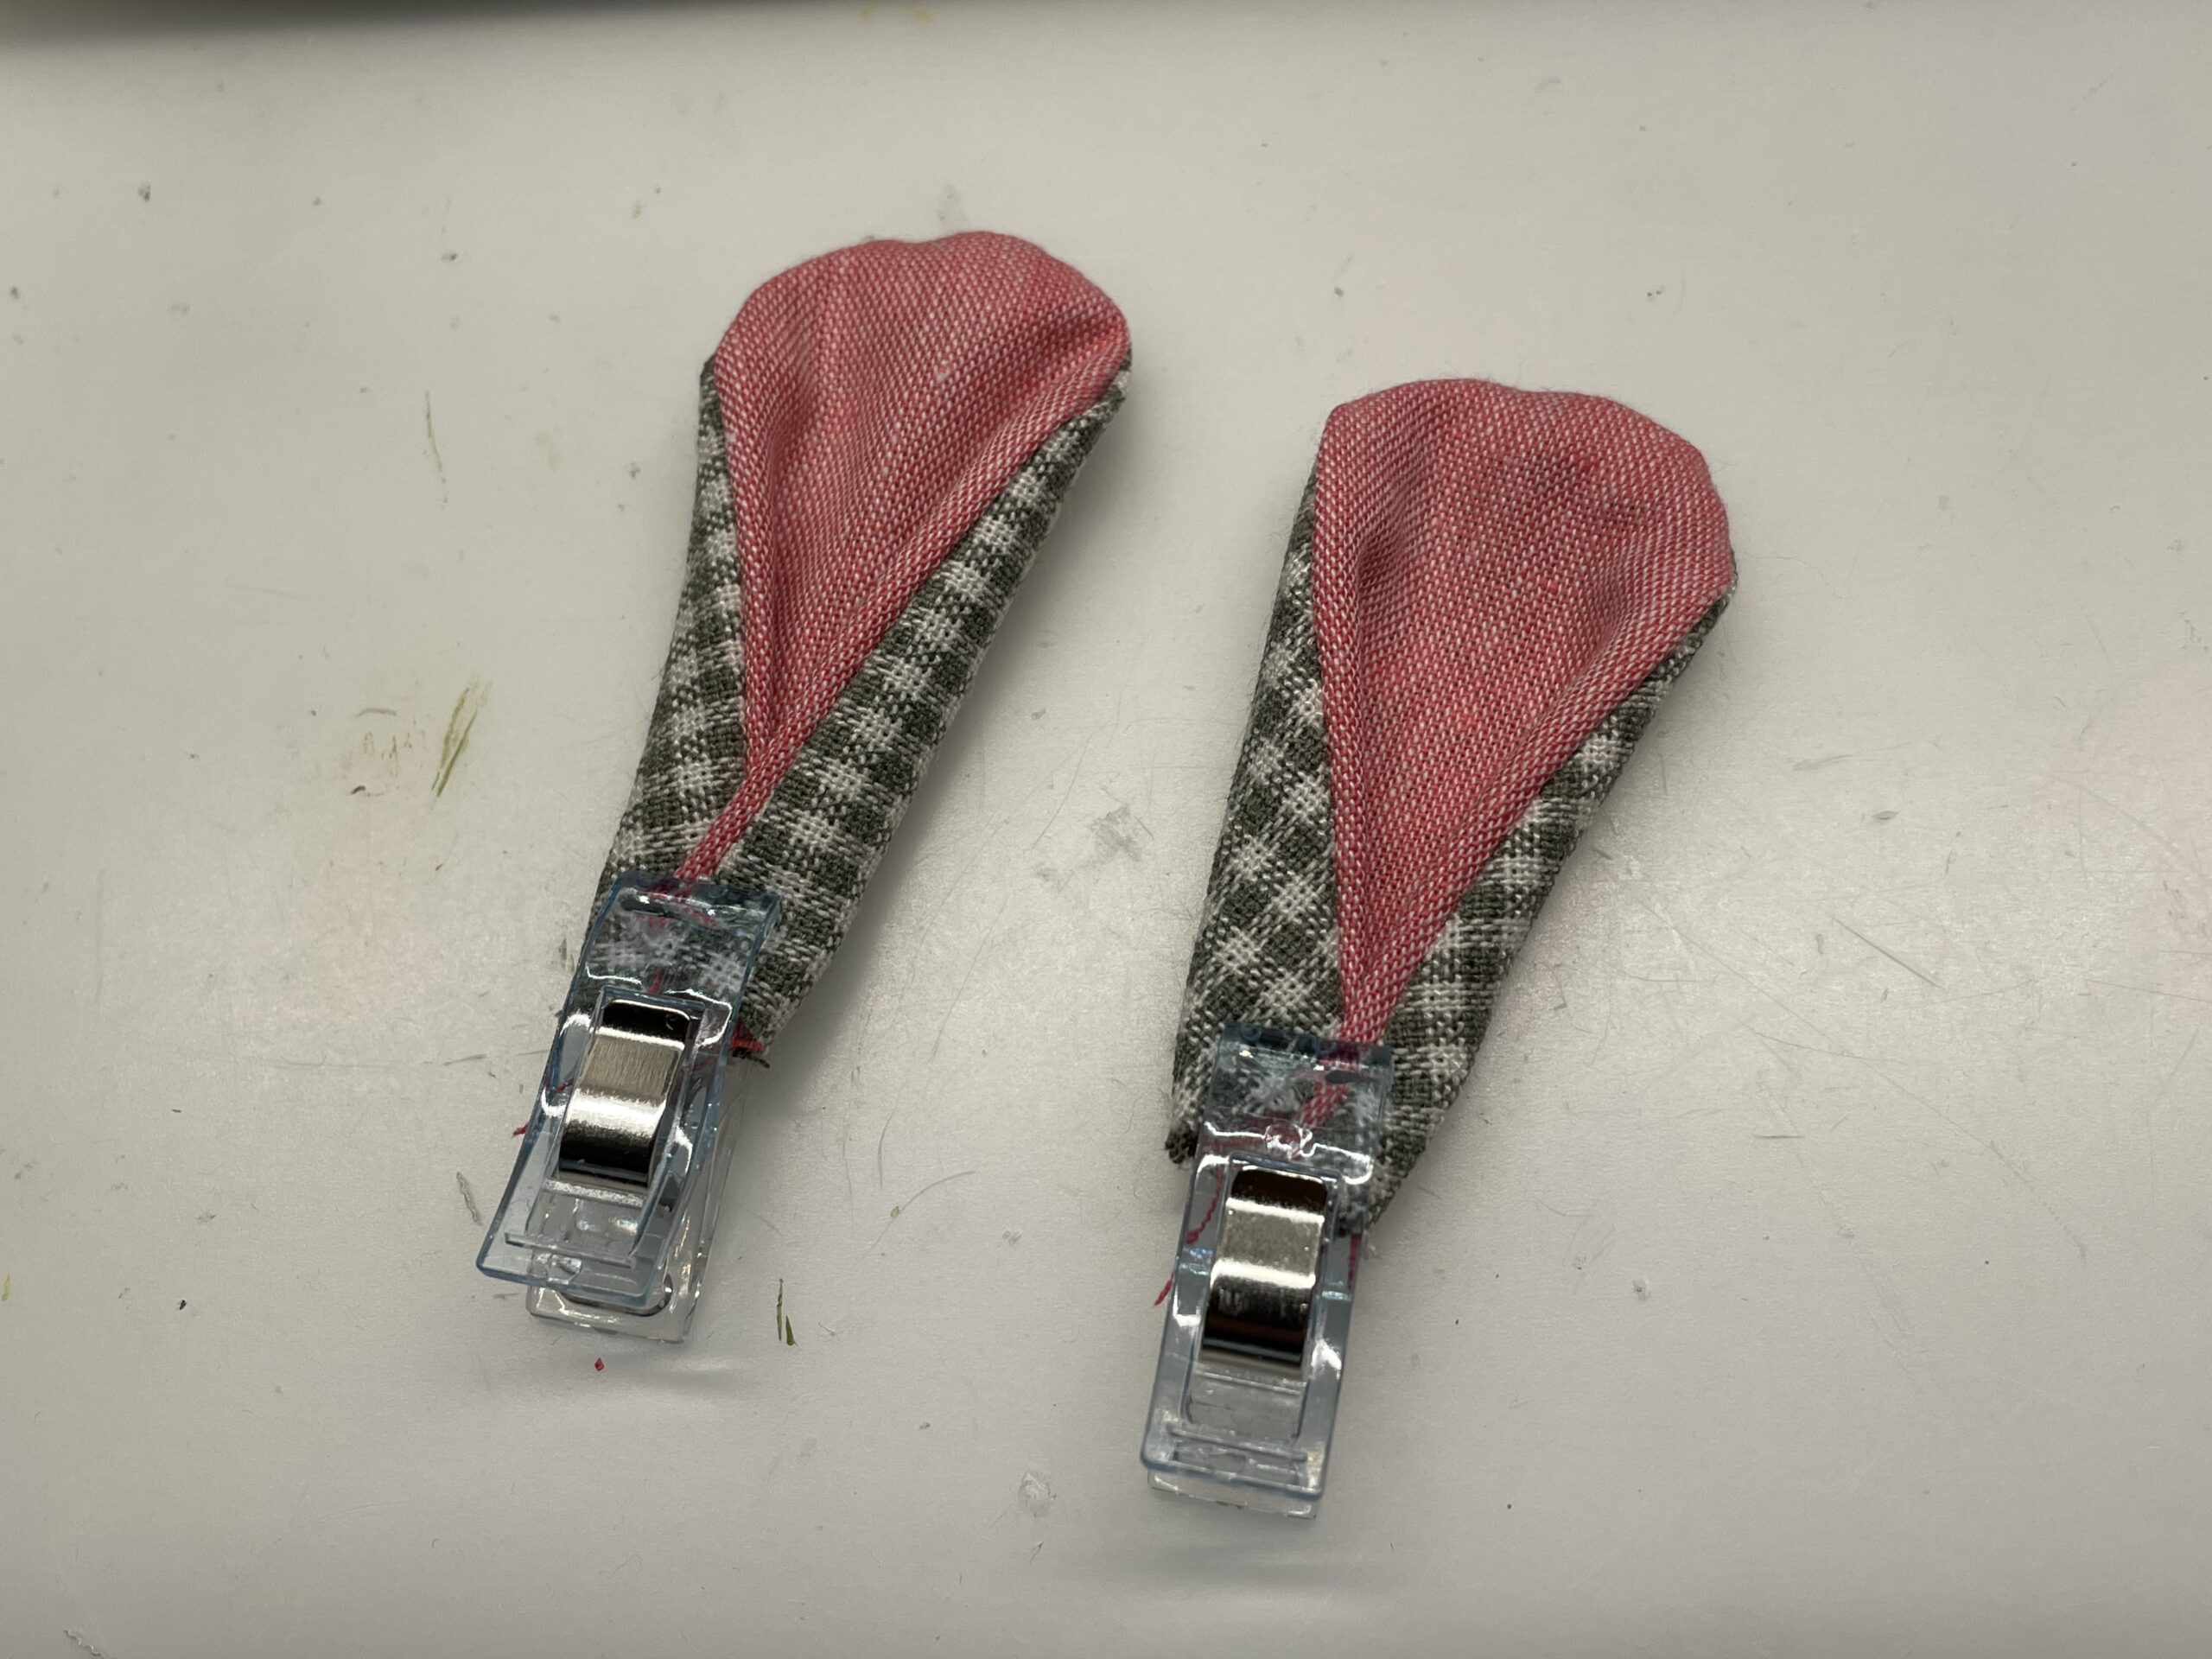
Now sew over the undersides of the ears. Put both ears together on the sewing machine and sew the ears directly one after the other, so they hang together with the thread.

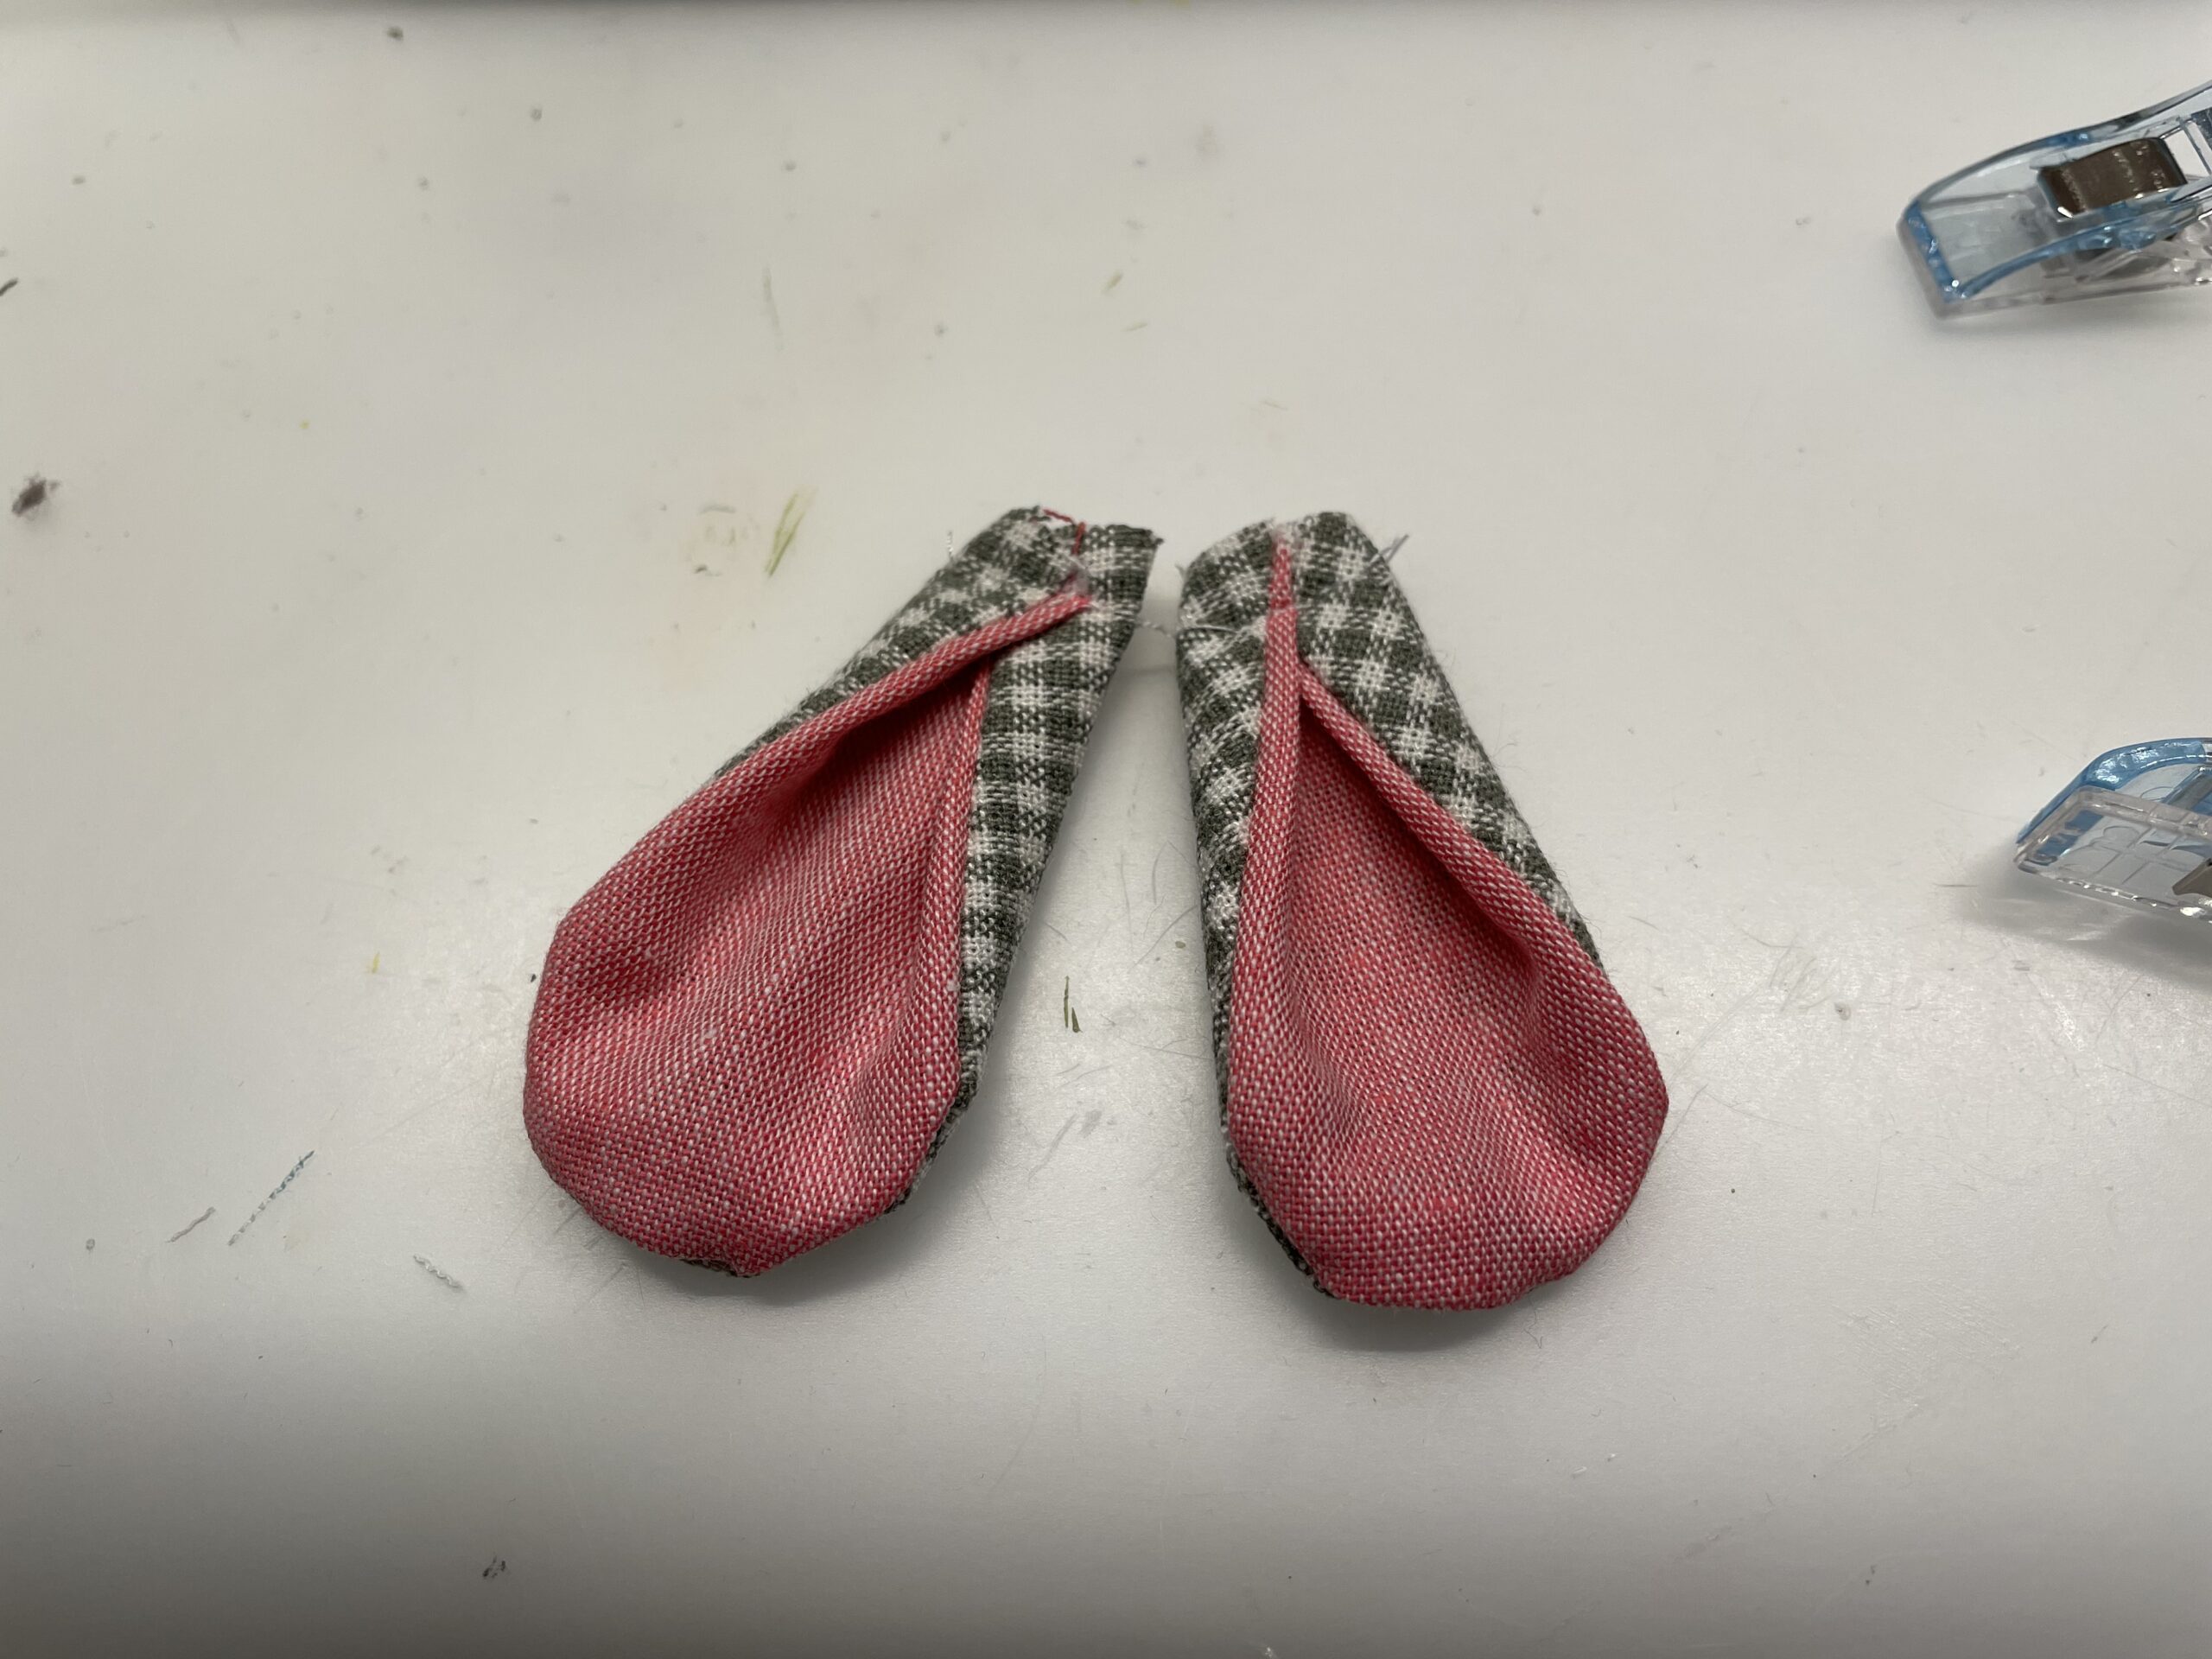
The ears are ready.
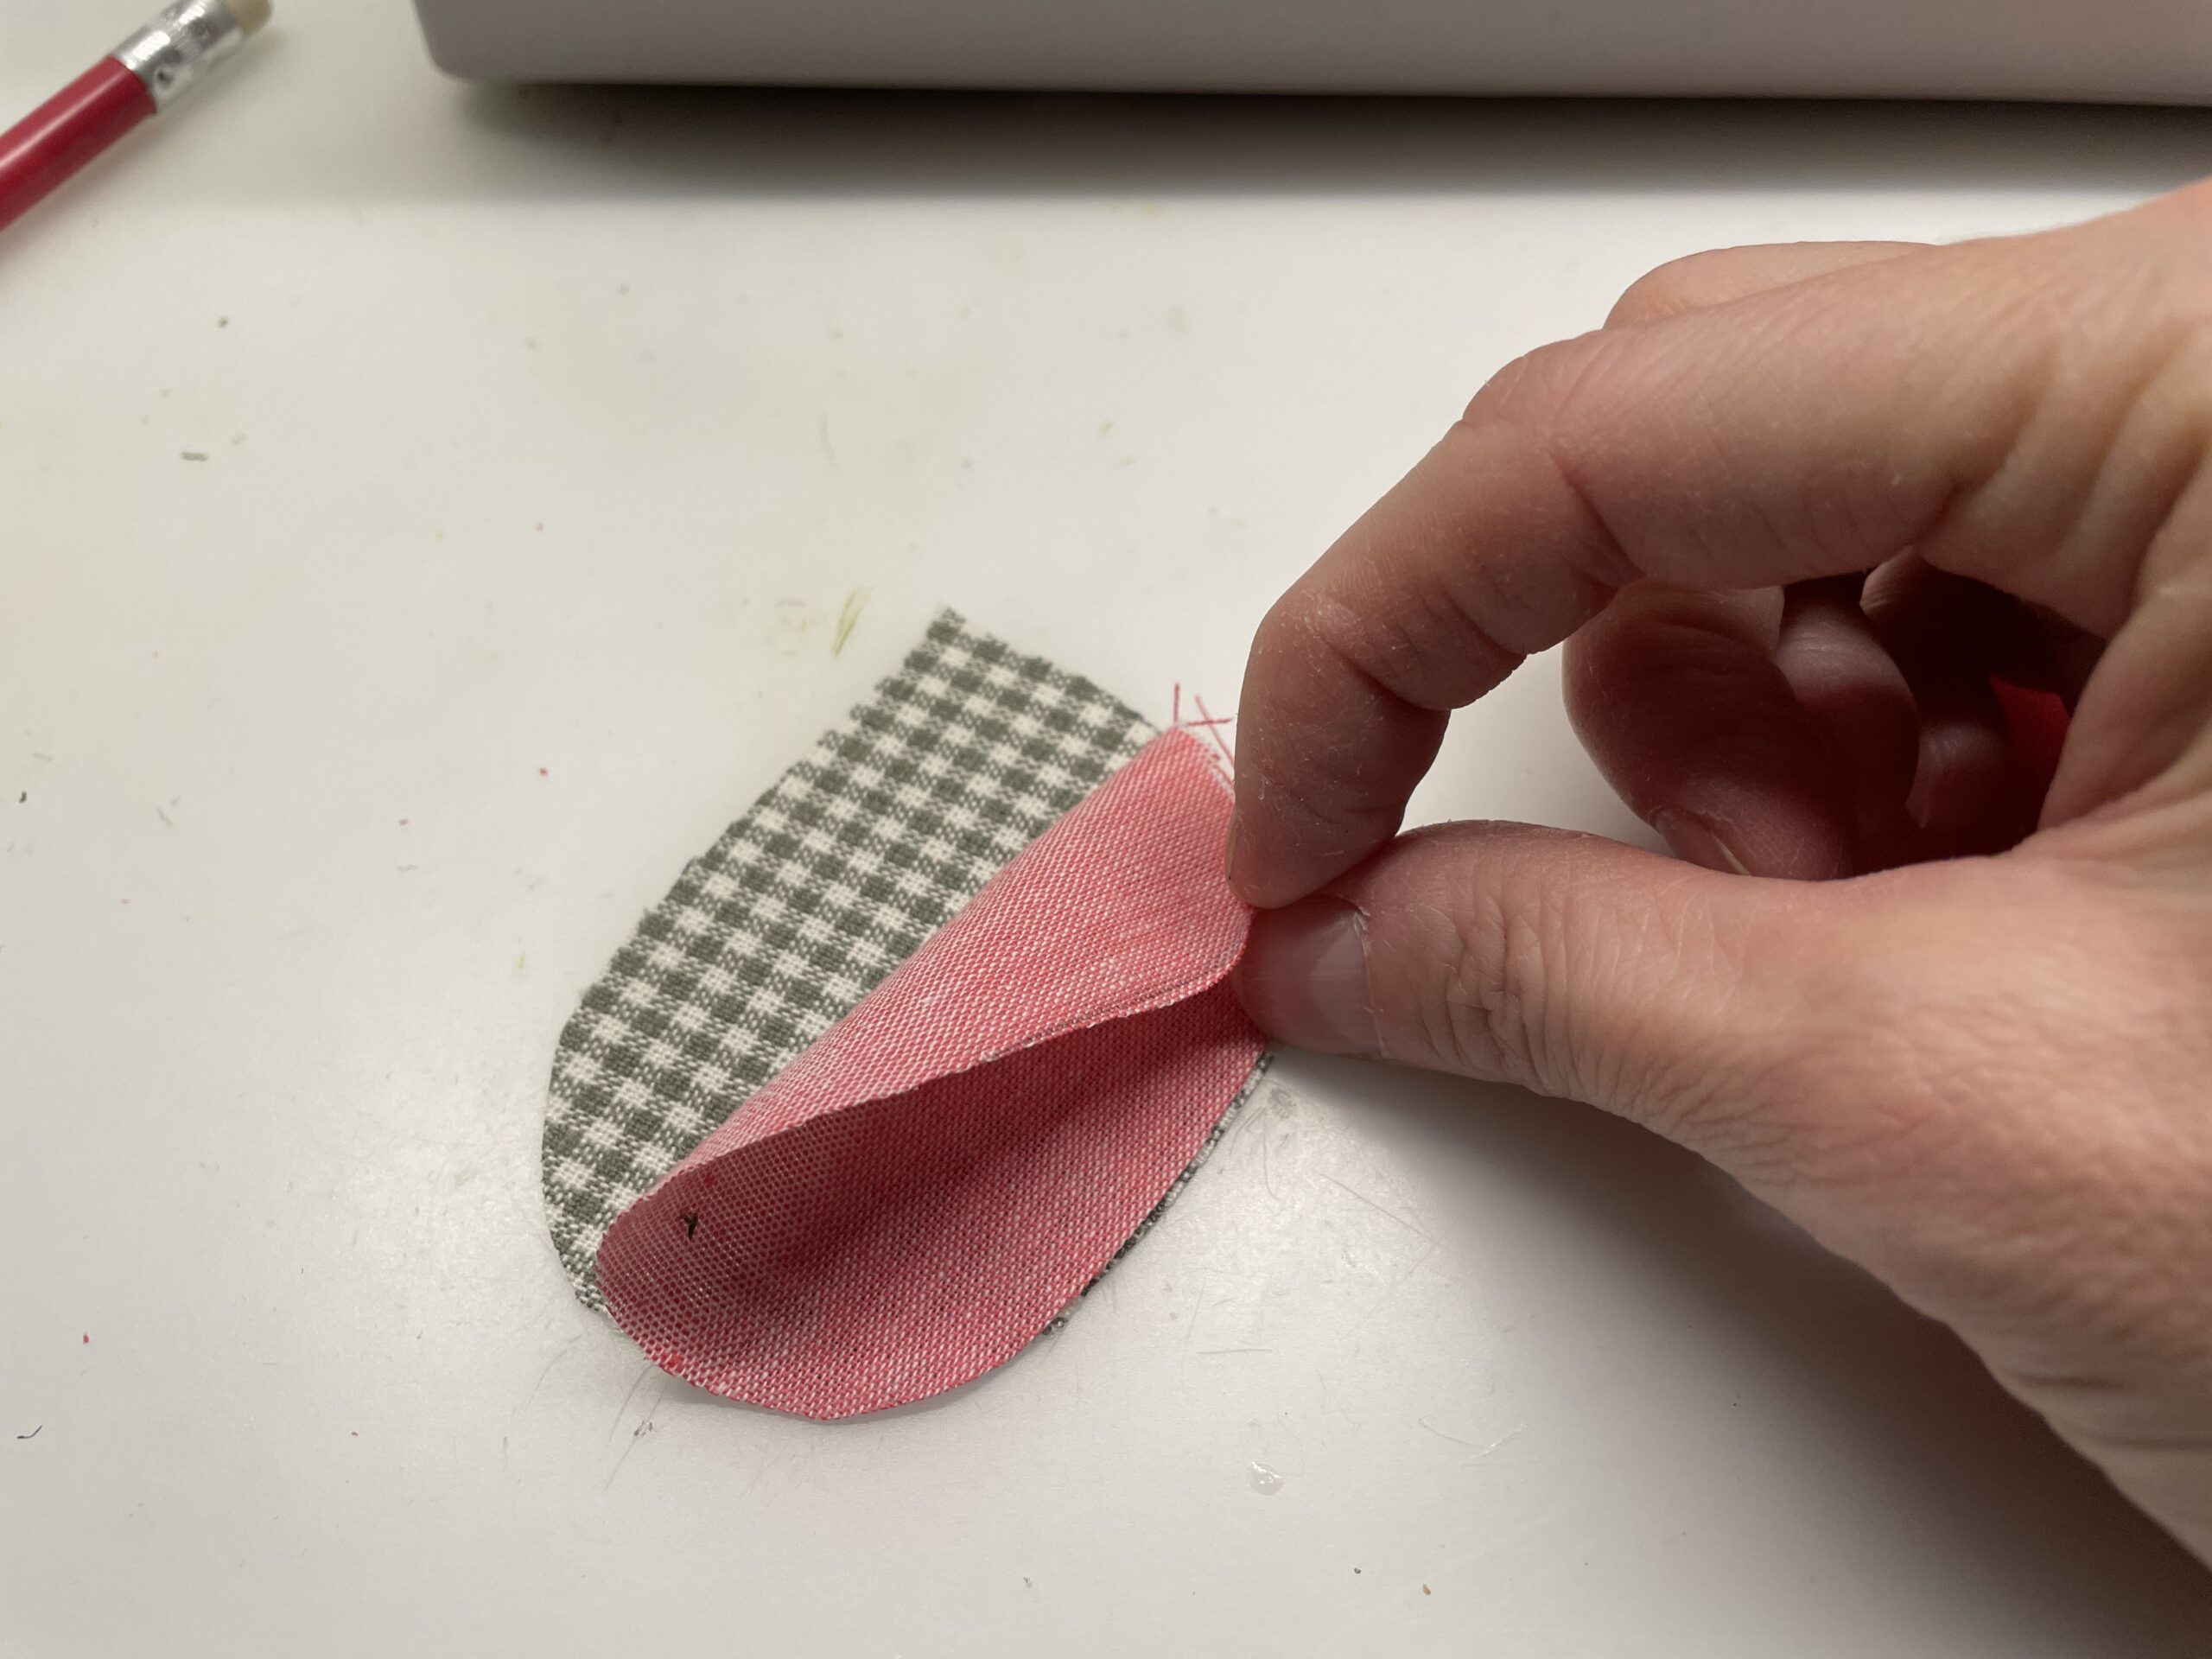
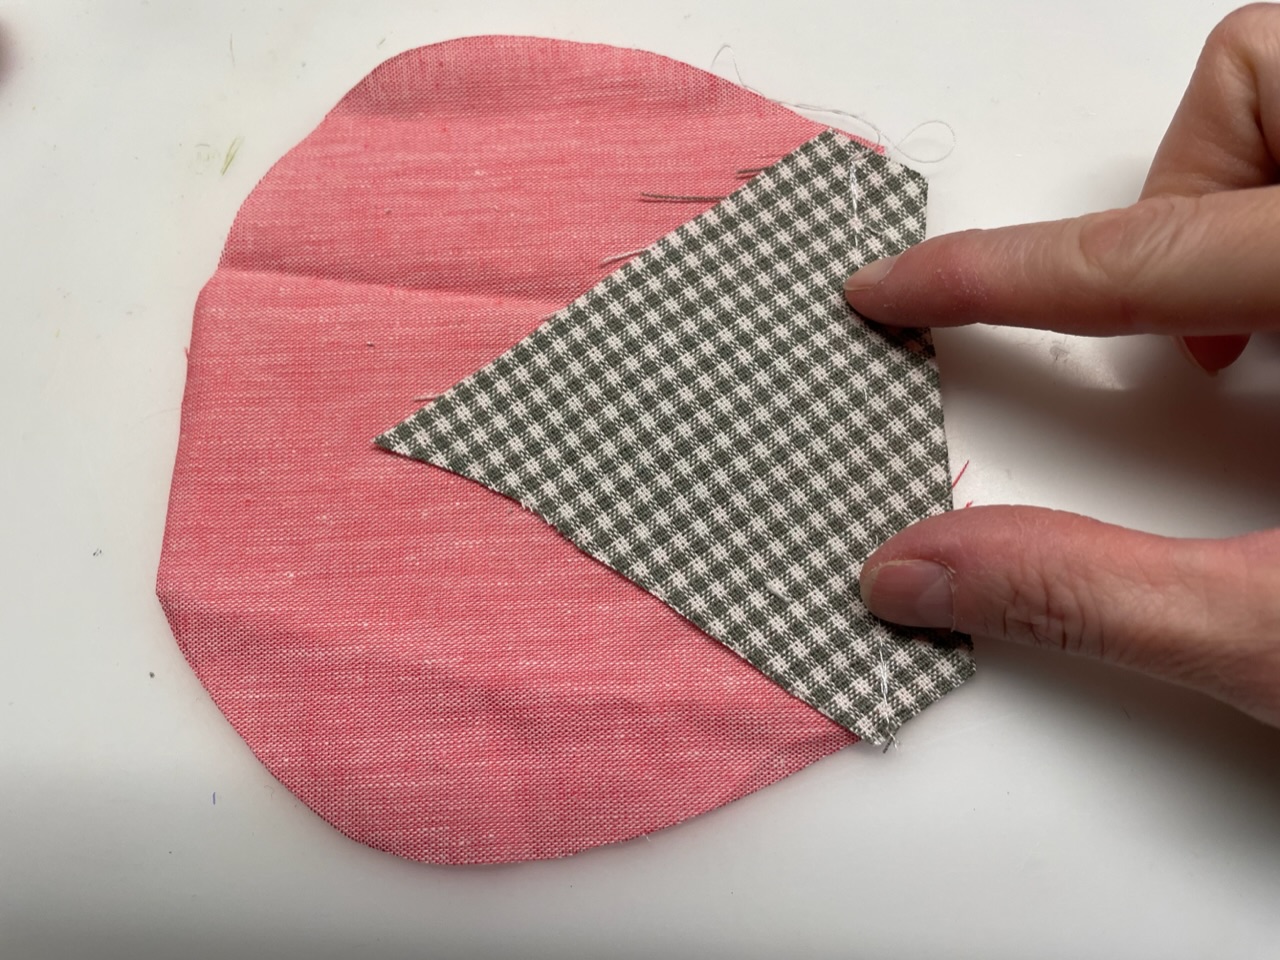
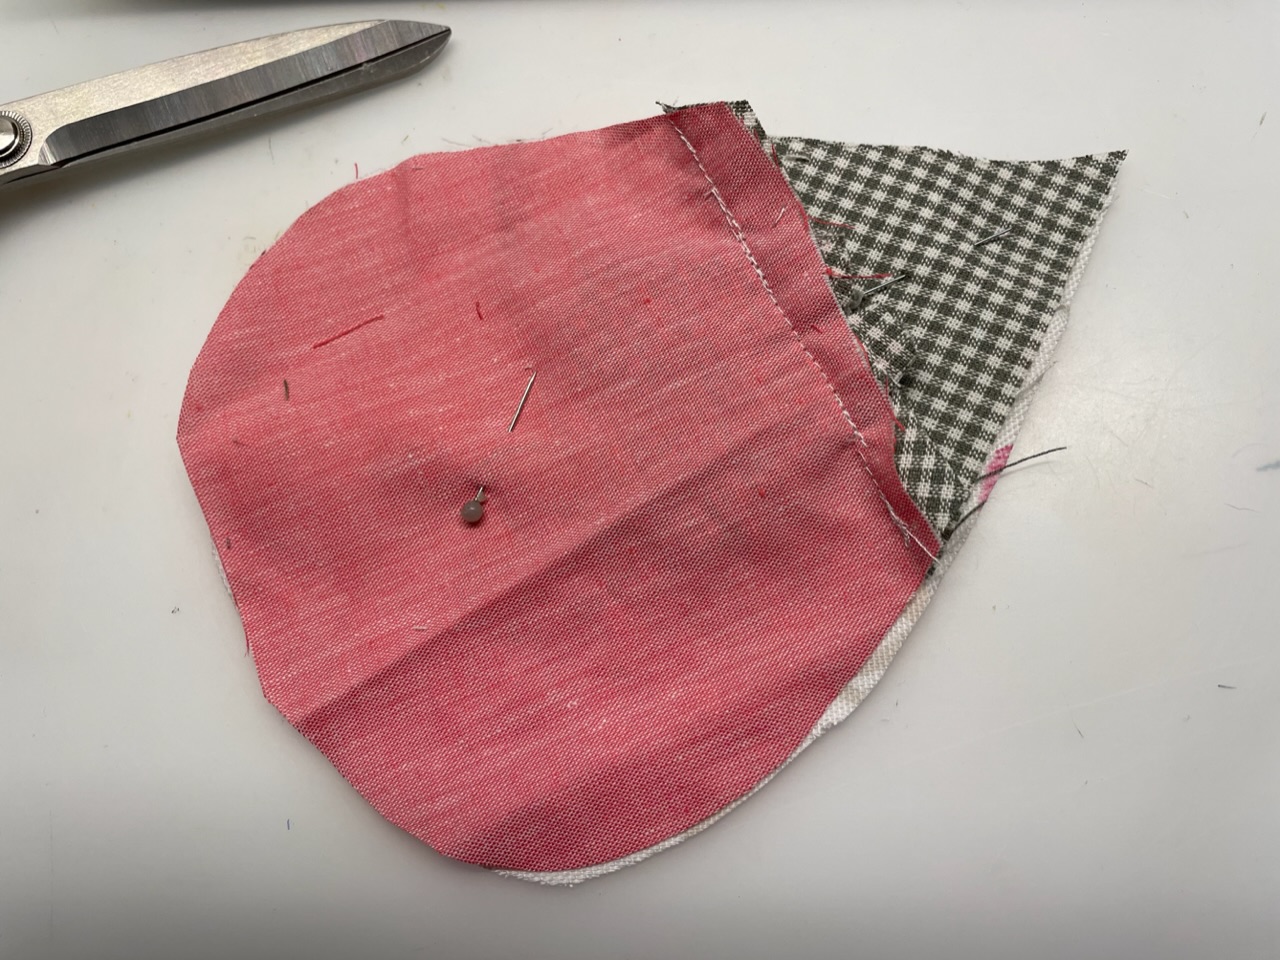
Then you place the belly part and the triangular head part on each other on the straight side. The beautiful sides lie on each other. Now, however, both pieces of fabric do not yet sew together! Fix both parts only with a clamp or pins.

Folds the headboard (triangle) and controls the size, this should be the same size as the backboard.

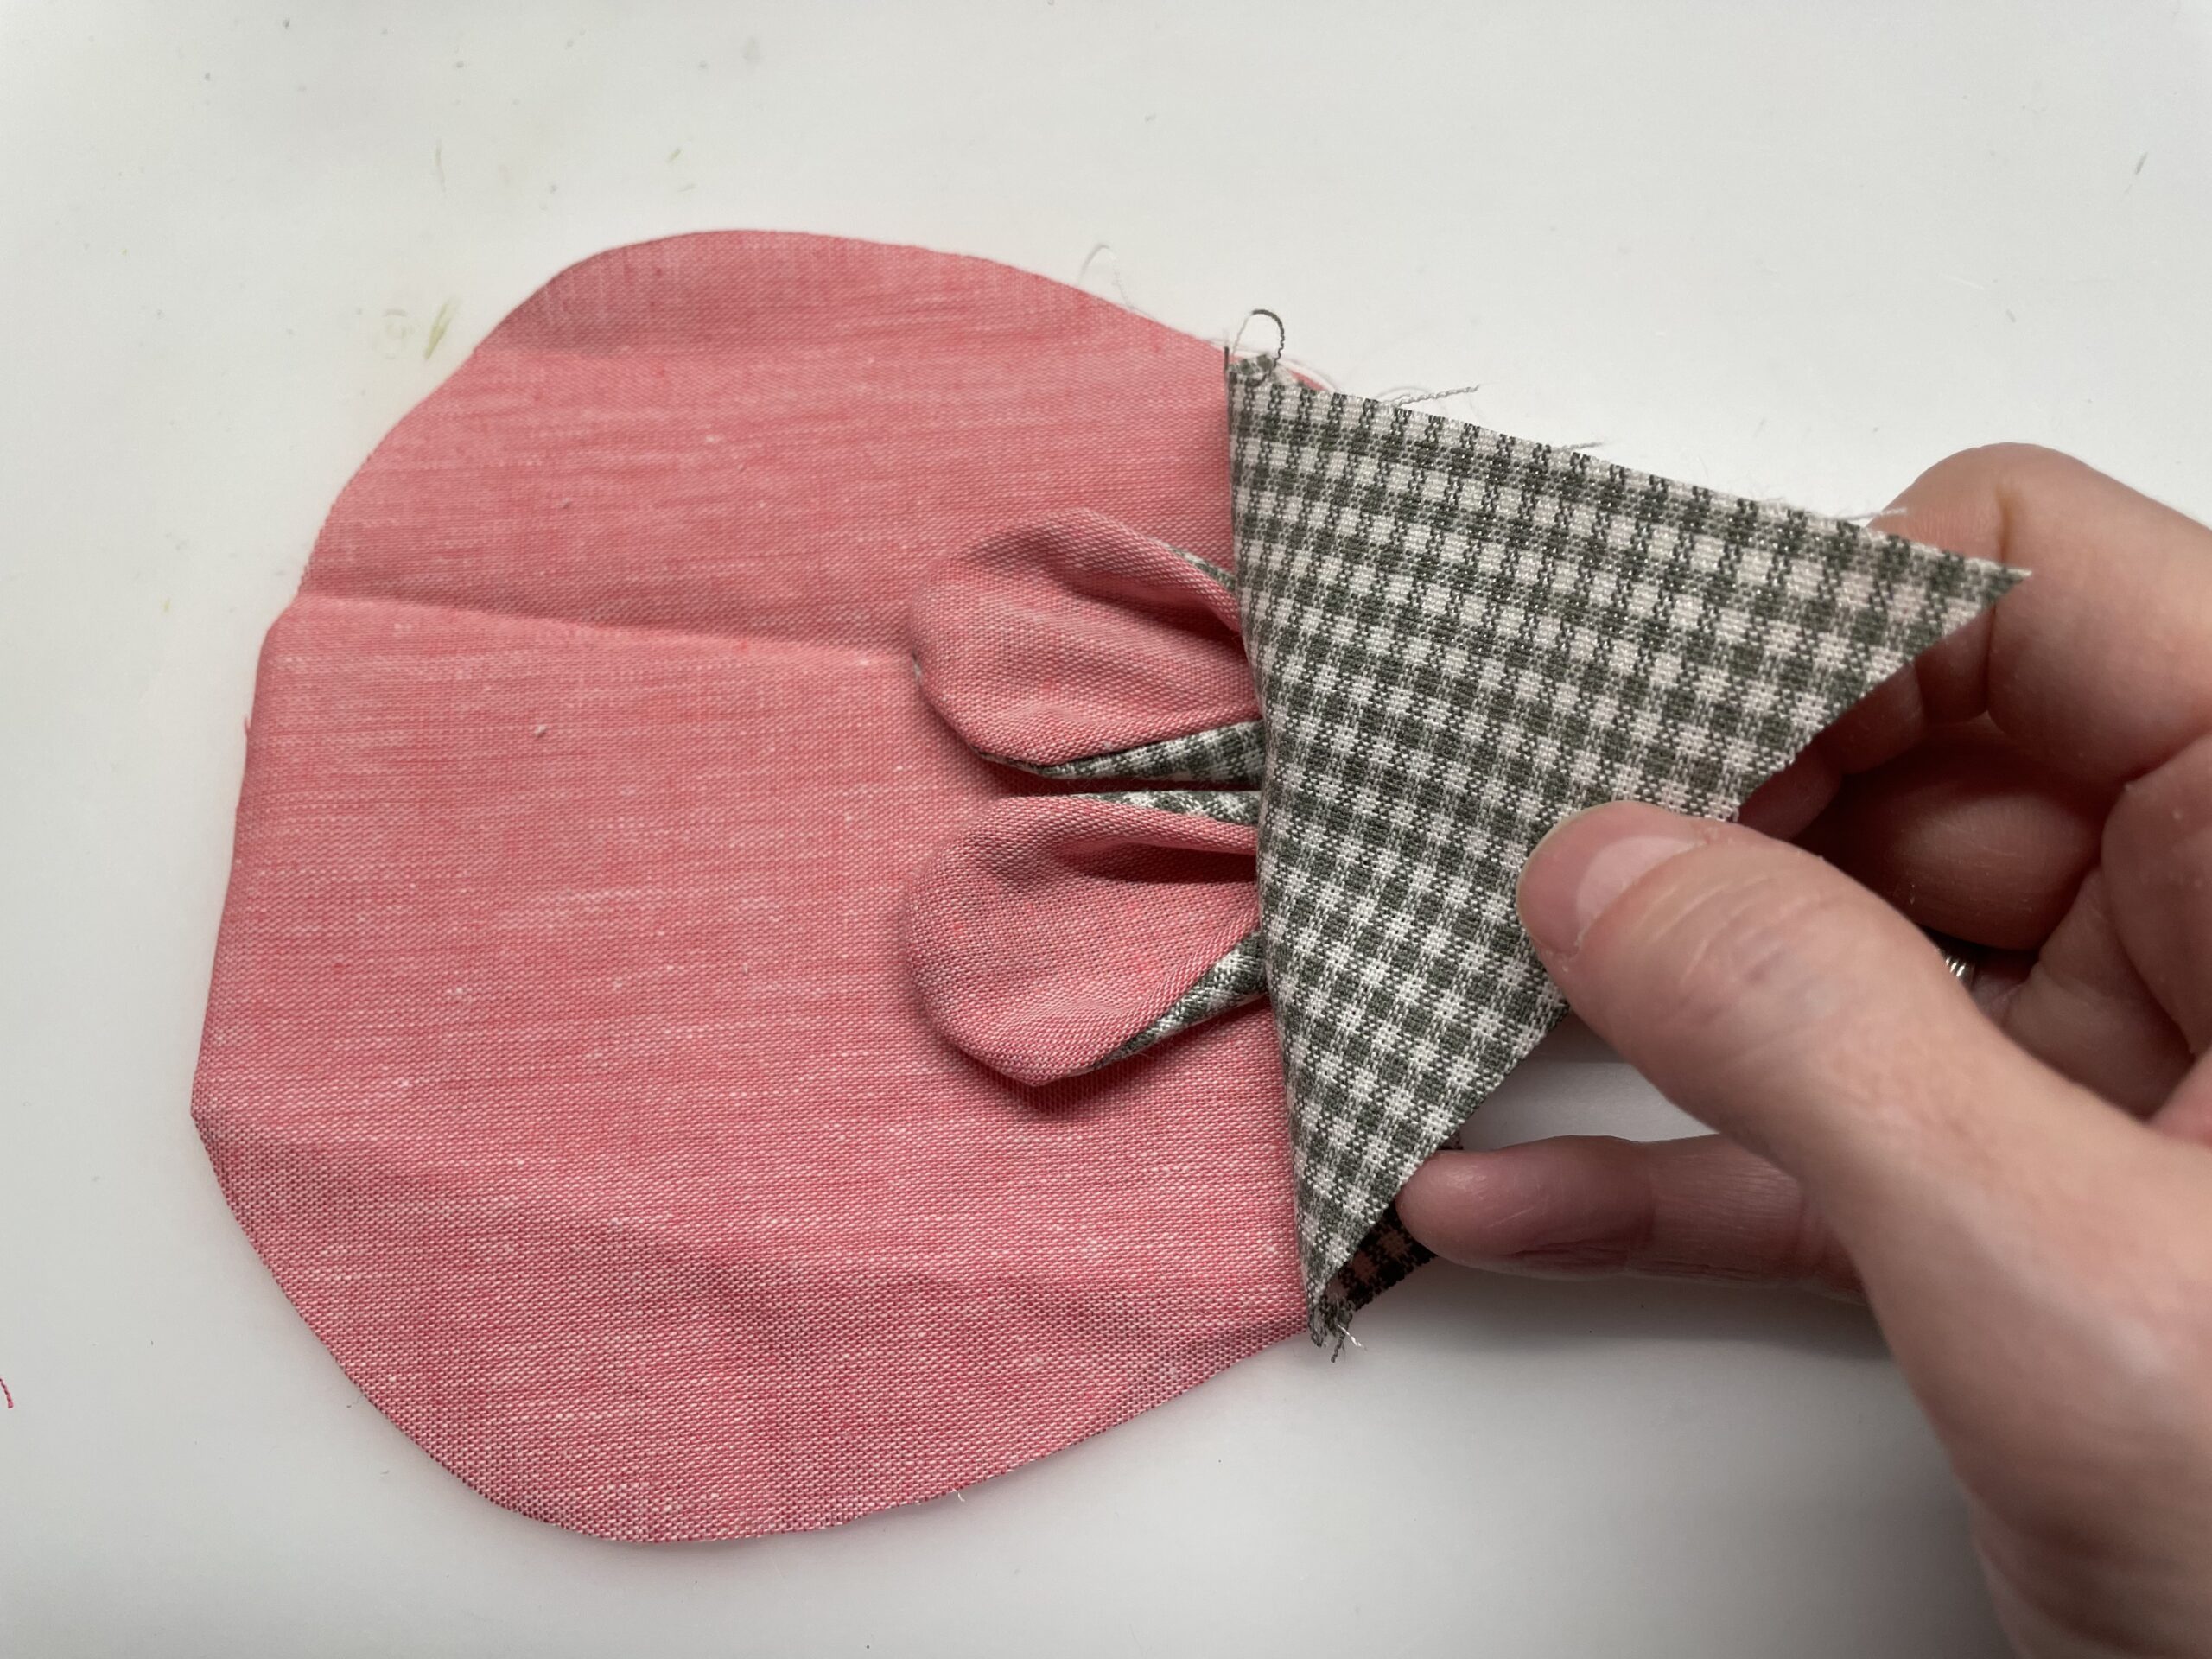
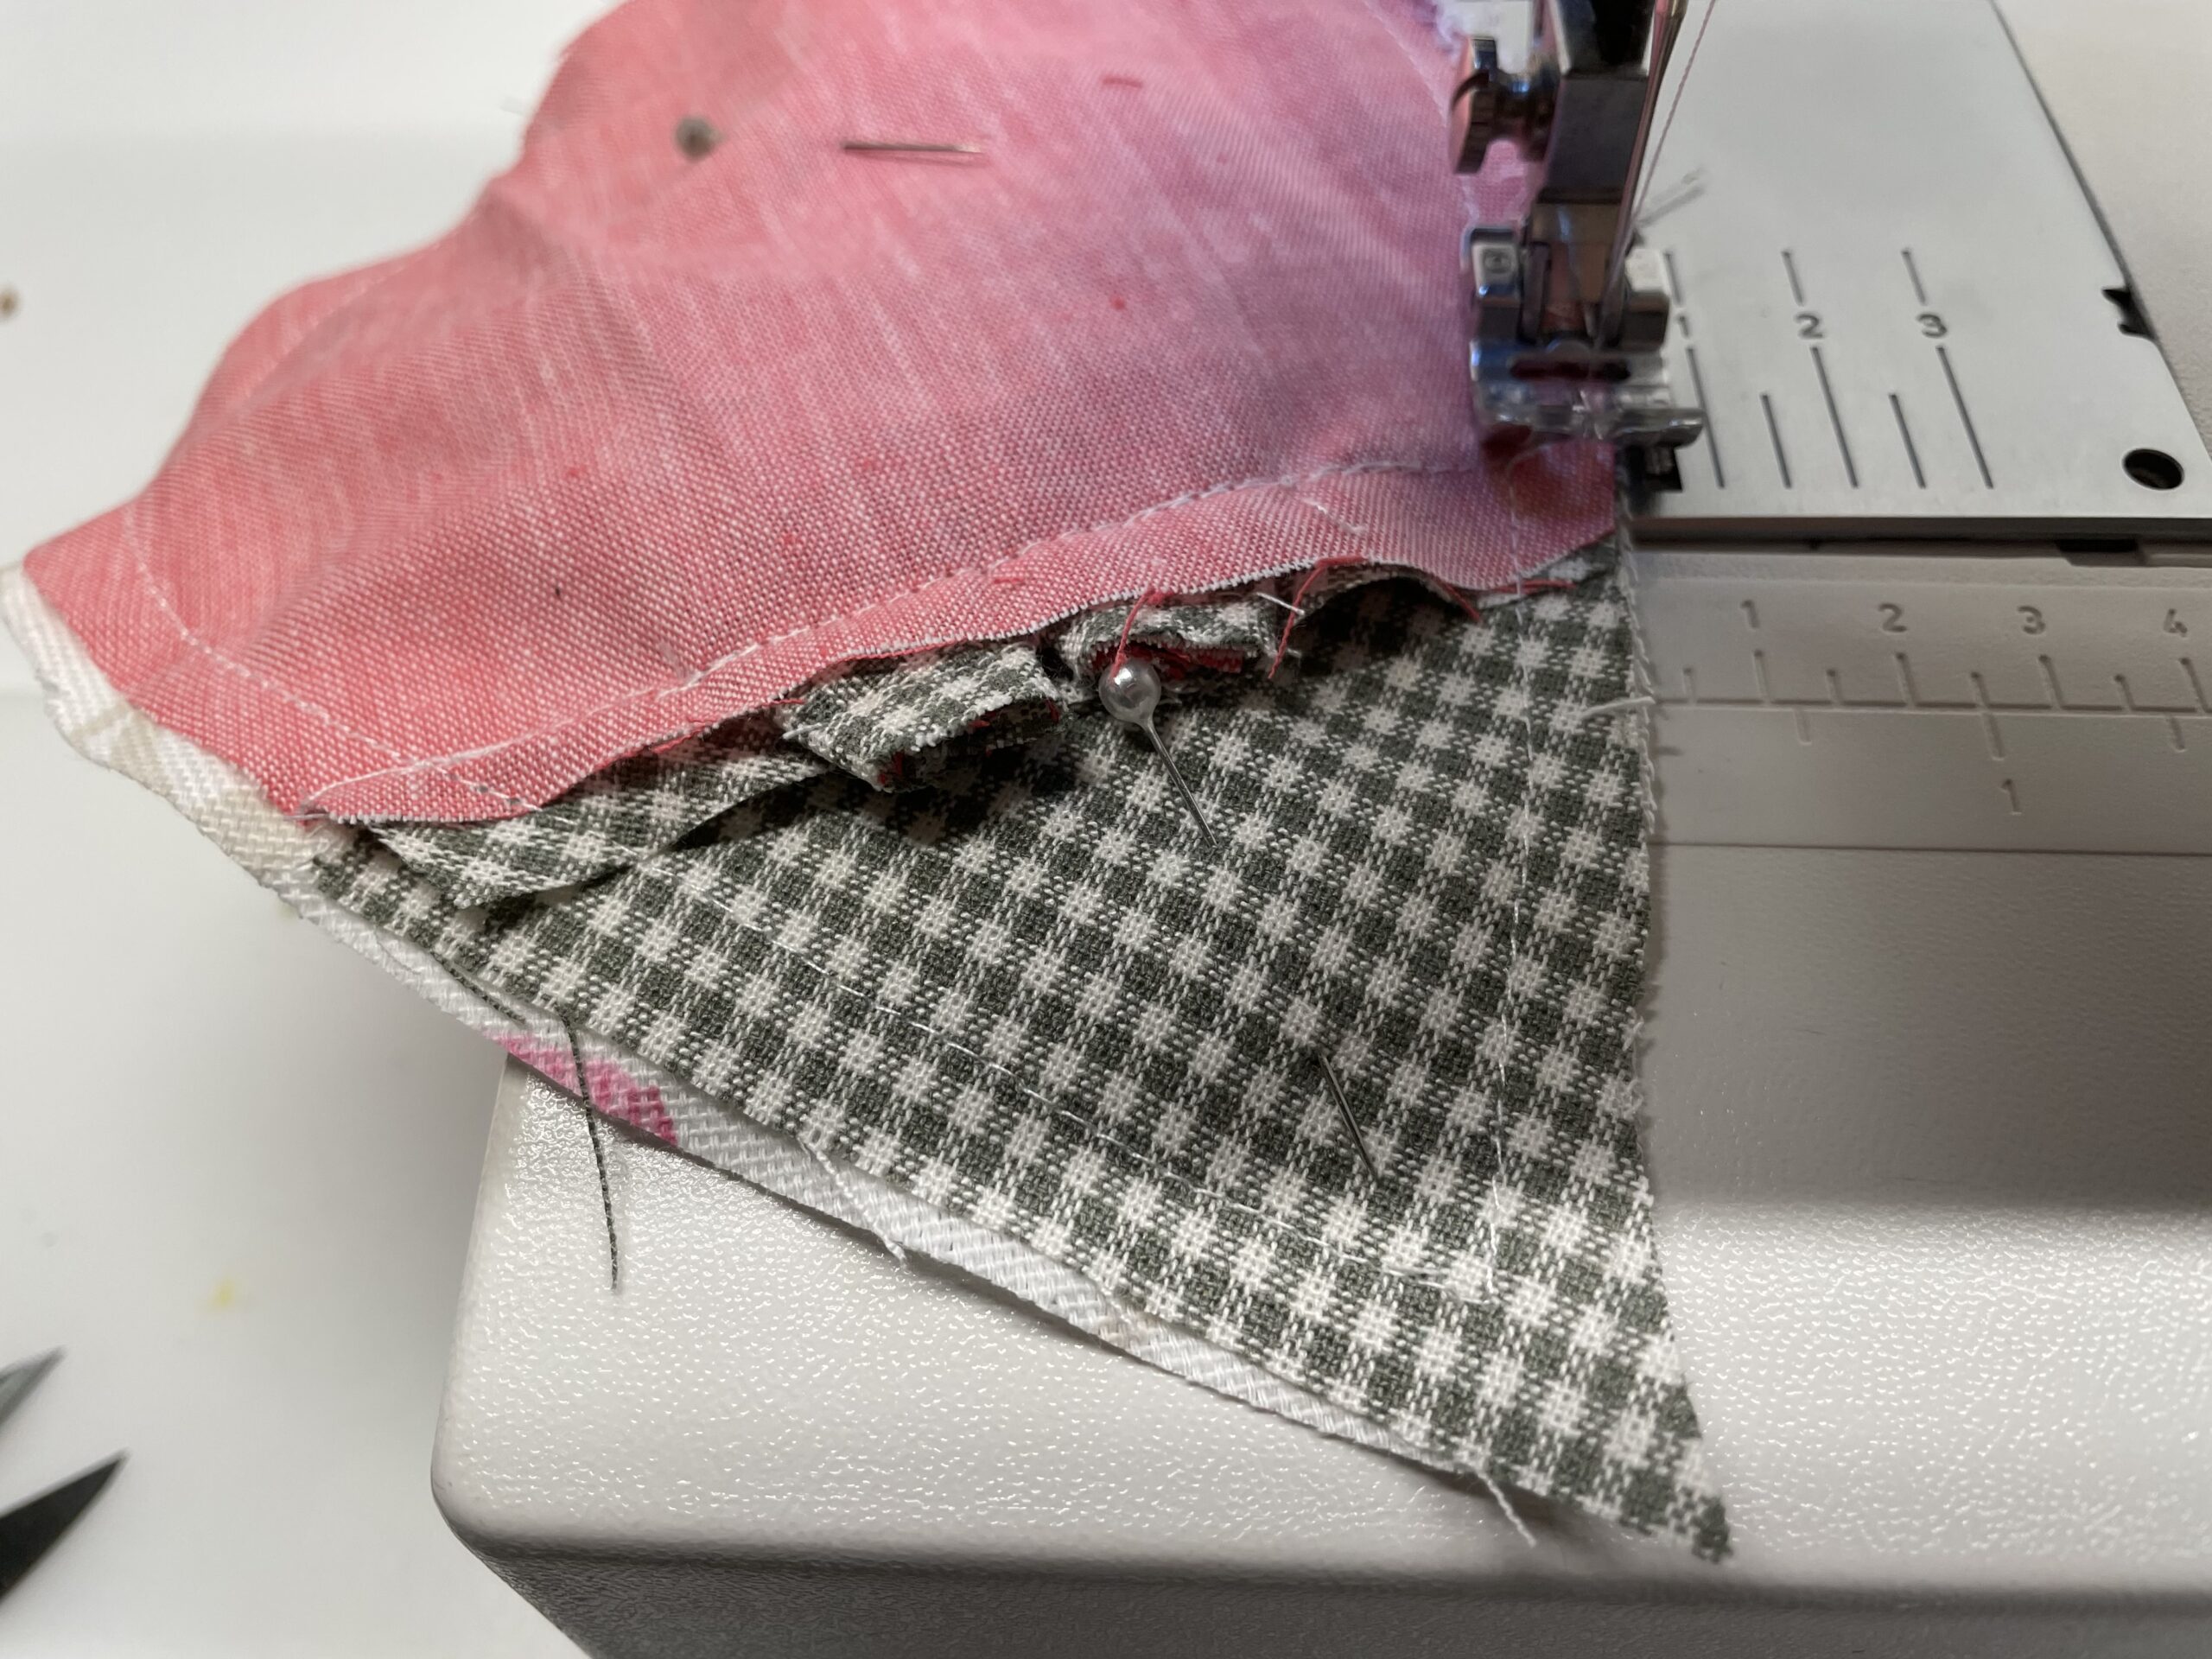
Now sew on from both sides about 1-2 cm and leave a wide slit open in the middle. Here the ears are inserted.

The middle is not yet sewn together!
Now fold the sewn up again and put the pair of ears into the gap. Make sure that the beautiful side of the ears points upwards. Push the ears so deep into the fabric that they are sewn well firmly when sewing and cannot slip out.
Then sew a seam in the extension of the already sewn pieces on the sides.
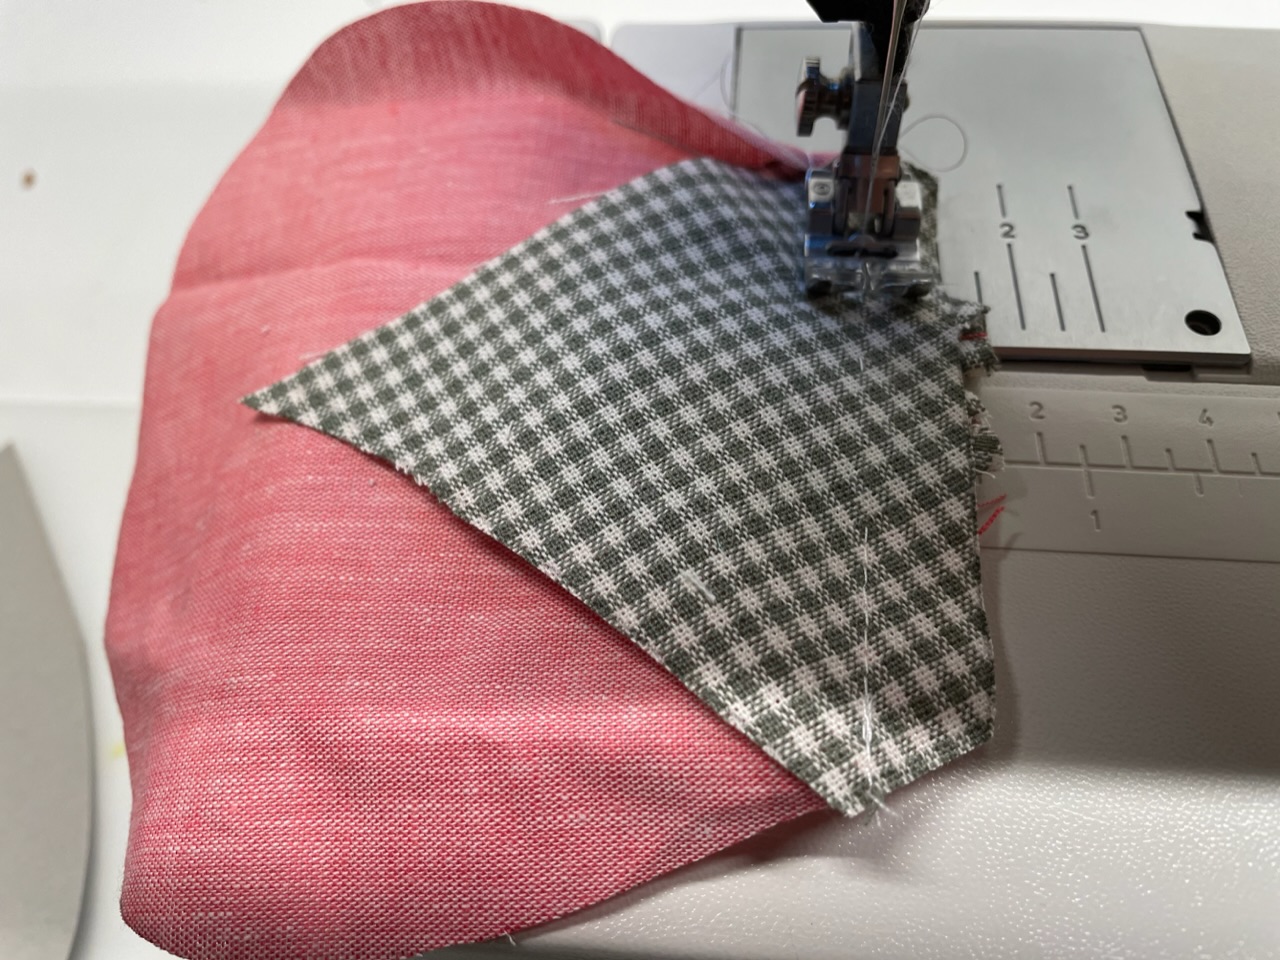
Now the front part is already finished. Front part and back part are now the same size.
Put both mouse parts together with the beautiful sides. Stitch the two fabric parts together with pins. So they can not slip when sewing.
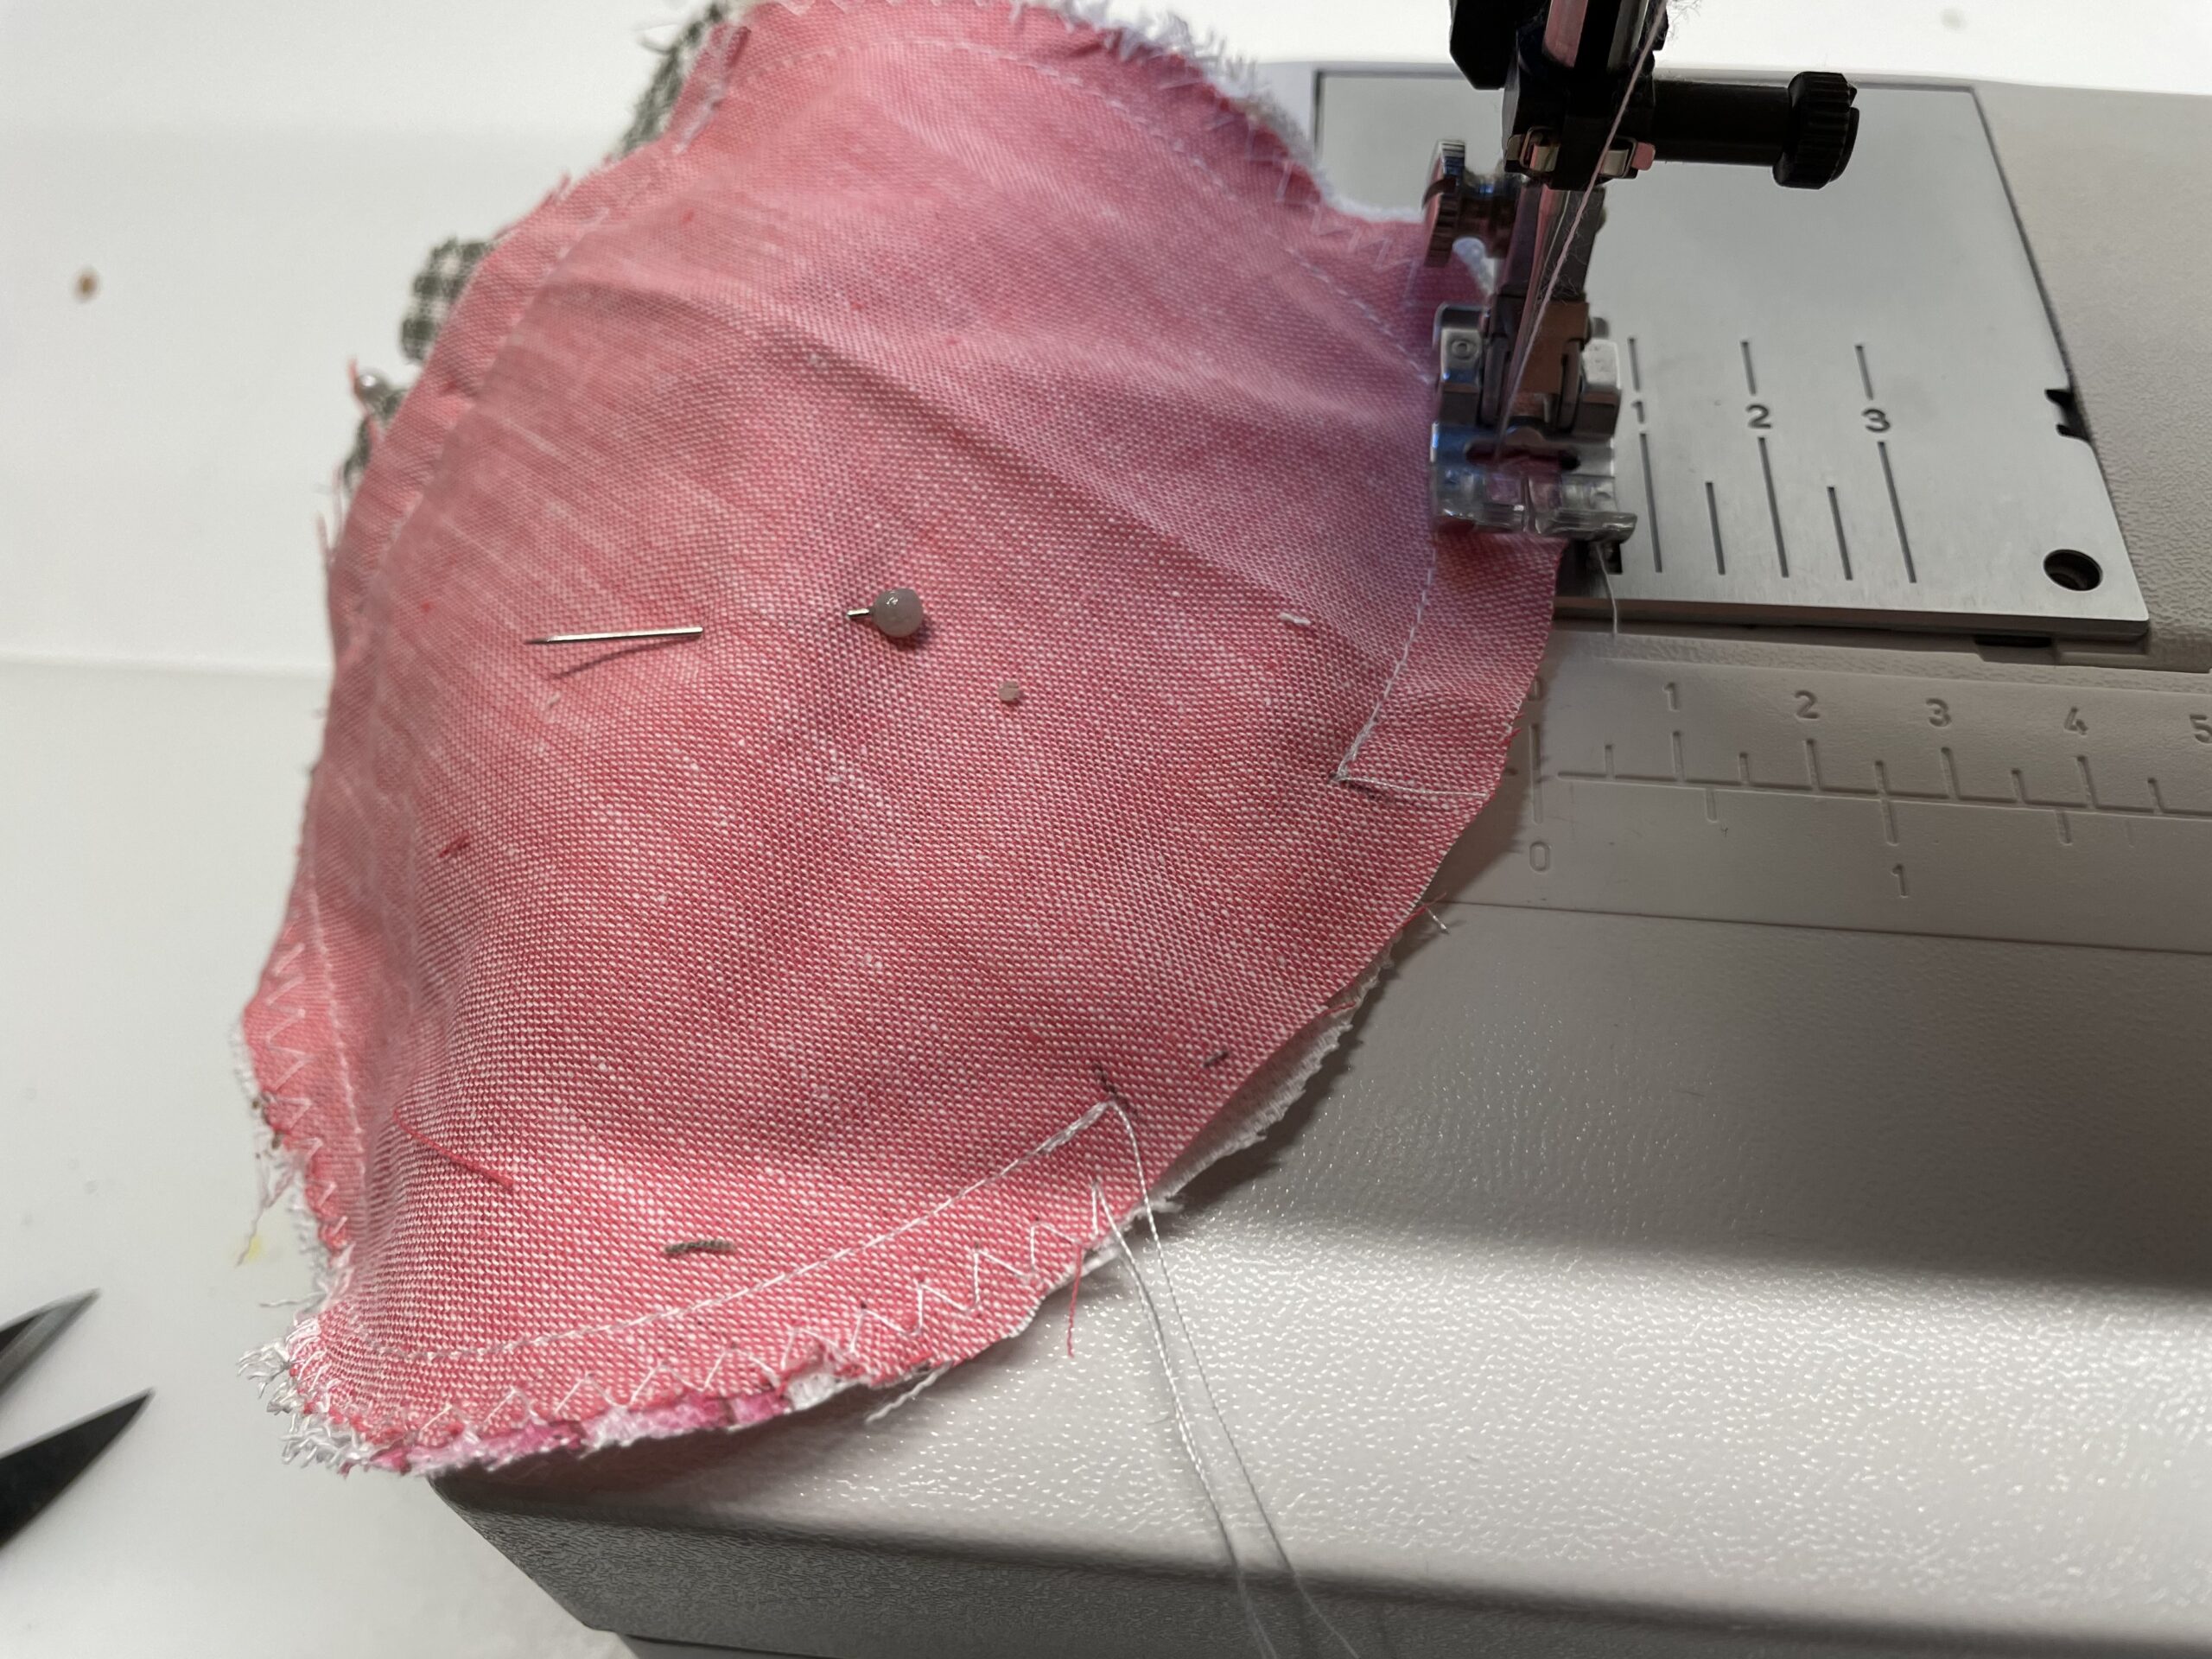
Start the mouse now to sew the widest part (does not start in the middle with sewing).
At the tip (nose of the mouse) stop briefly, leave the needle in the fabric and lift the sewing machine feet. So you can easily turn the fabric to sew the tip back on the other side.
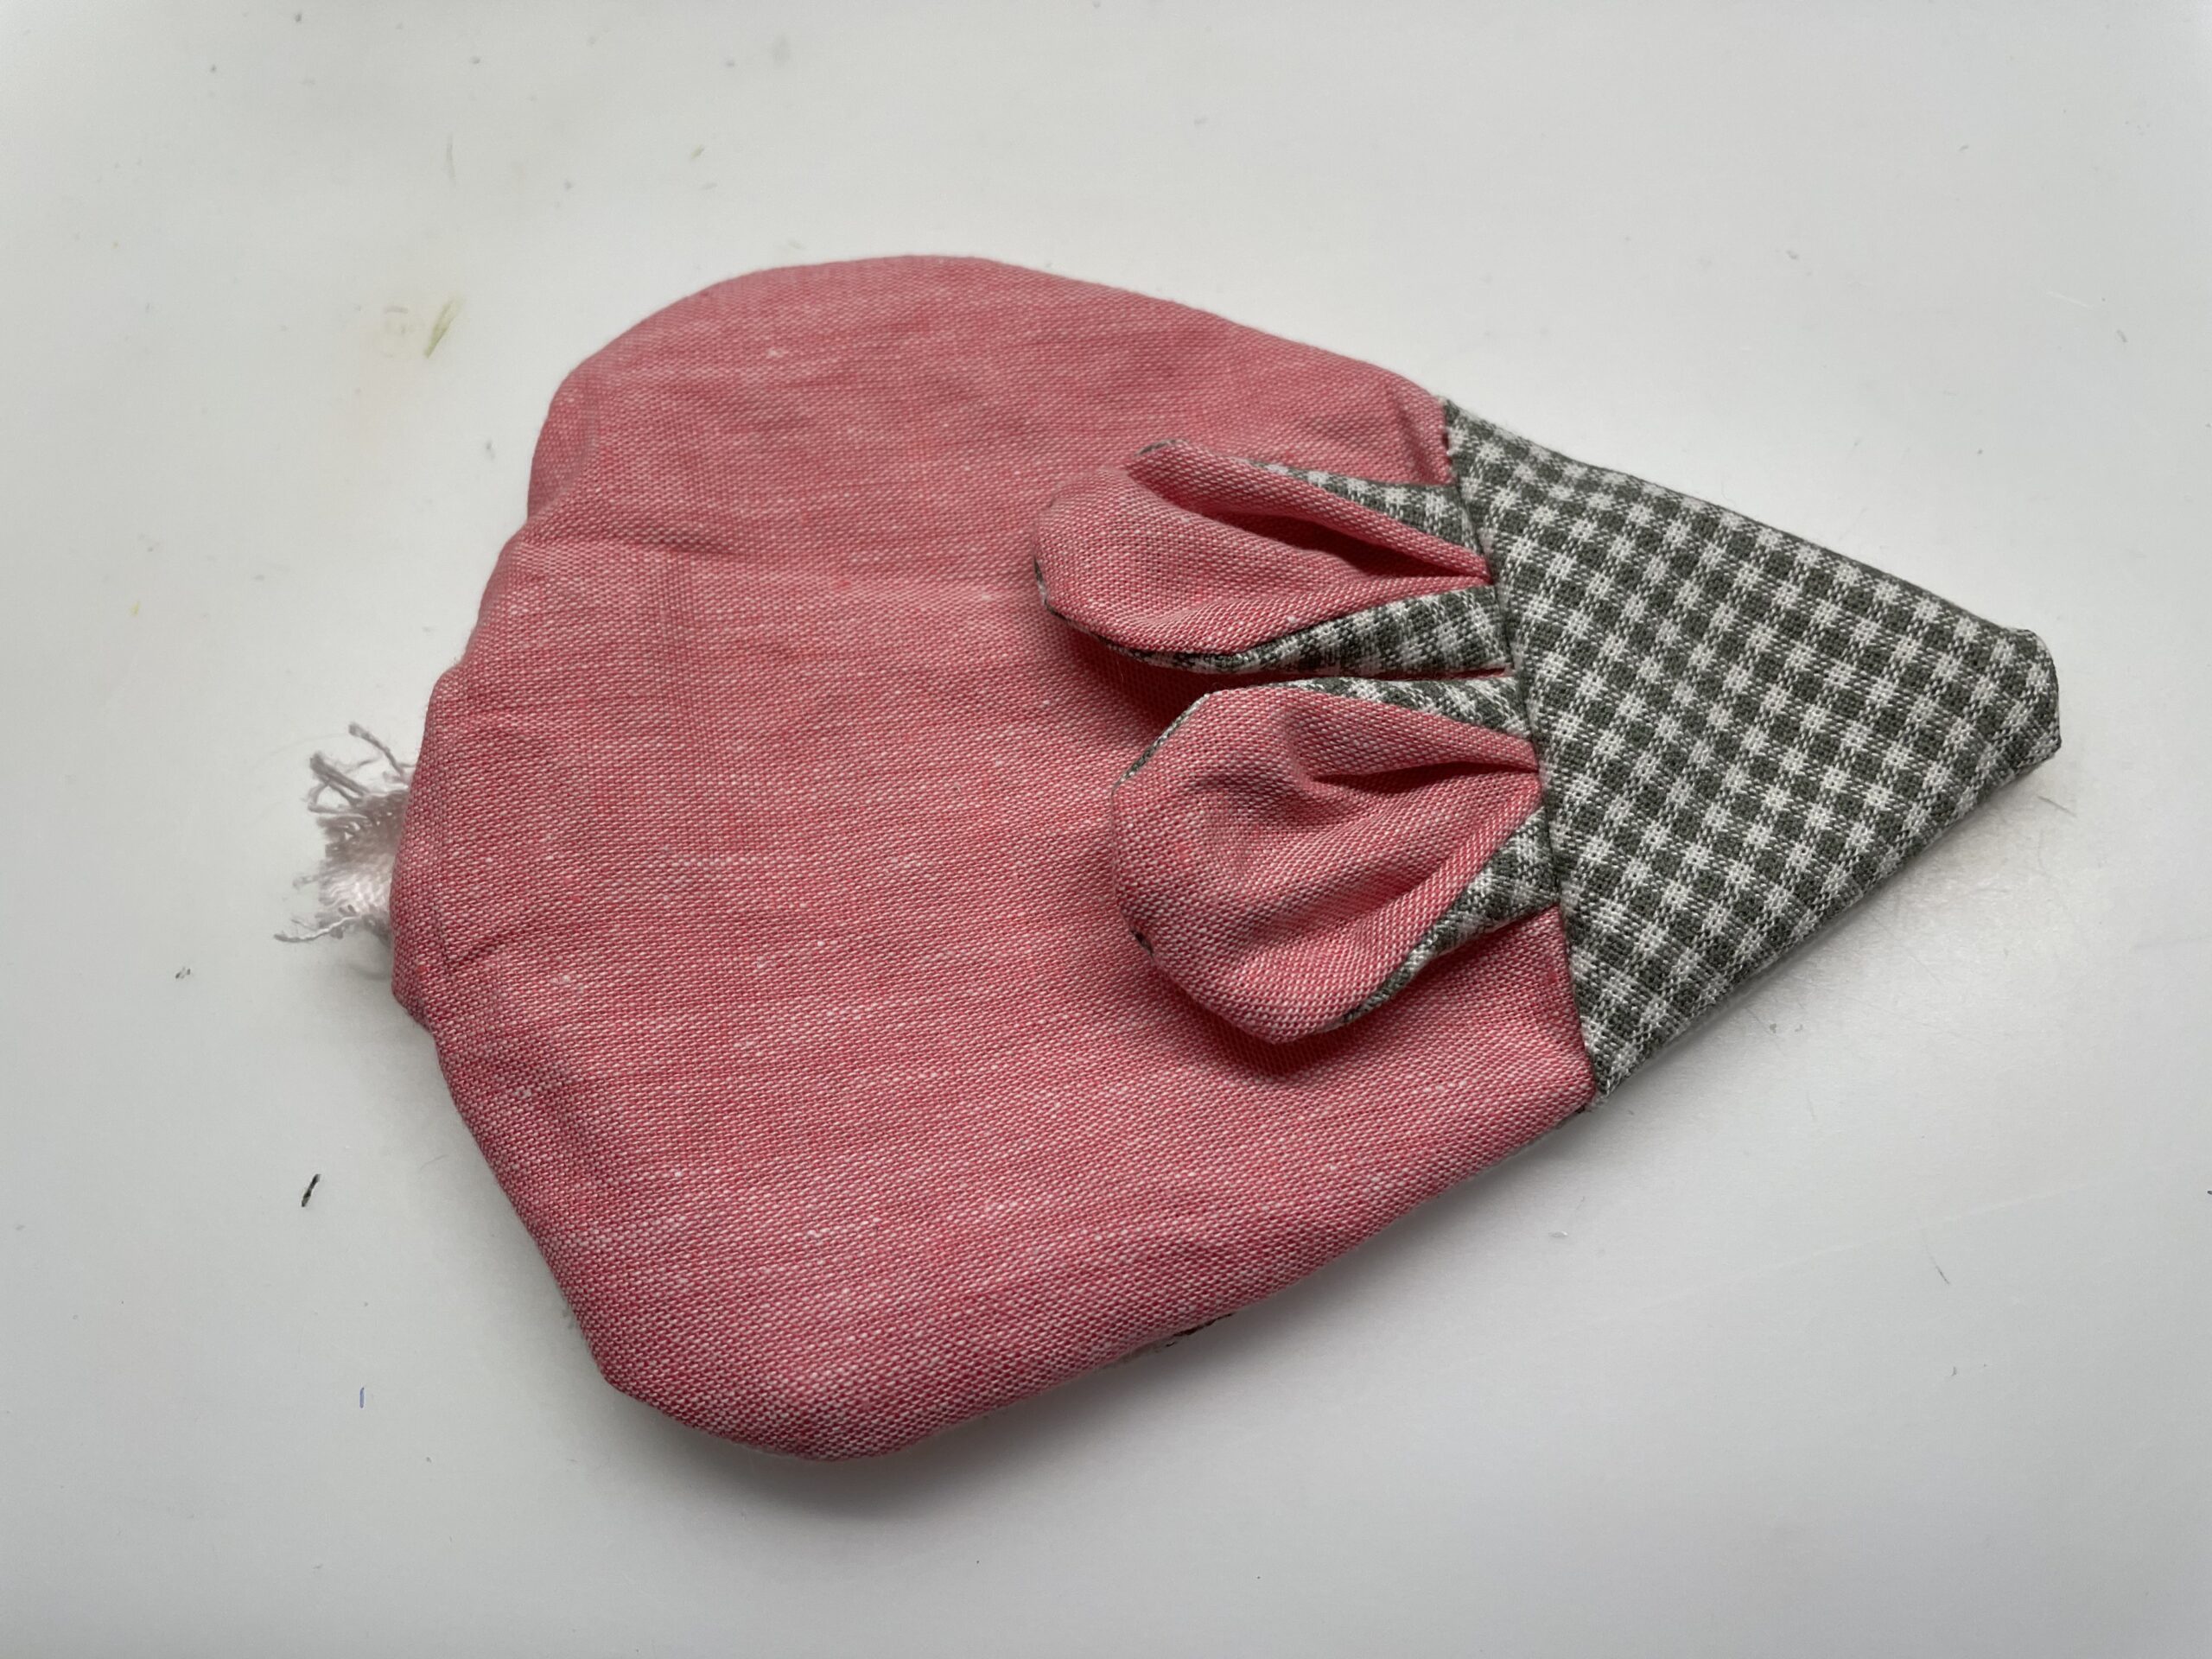
When sewn around, leave a turning opening at the end. This should remain open about 3 centimeters wide.
Finished is the stitching.

Through the turning opening you can now turn the mouse around.
So that all seams are well bulged, you can drive the seams from the inside with a cooking spoon style. You can also model the tip nose so well.
Now take Dinklekörner and a funnel and fill the mouse through the turning opening.
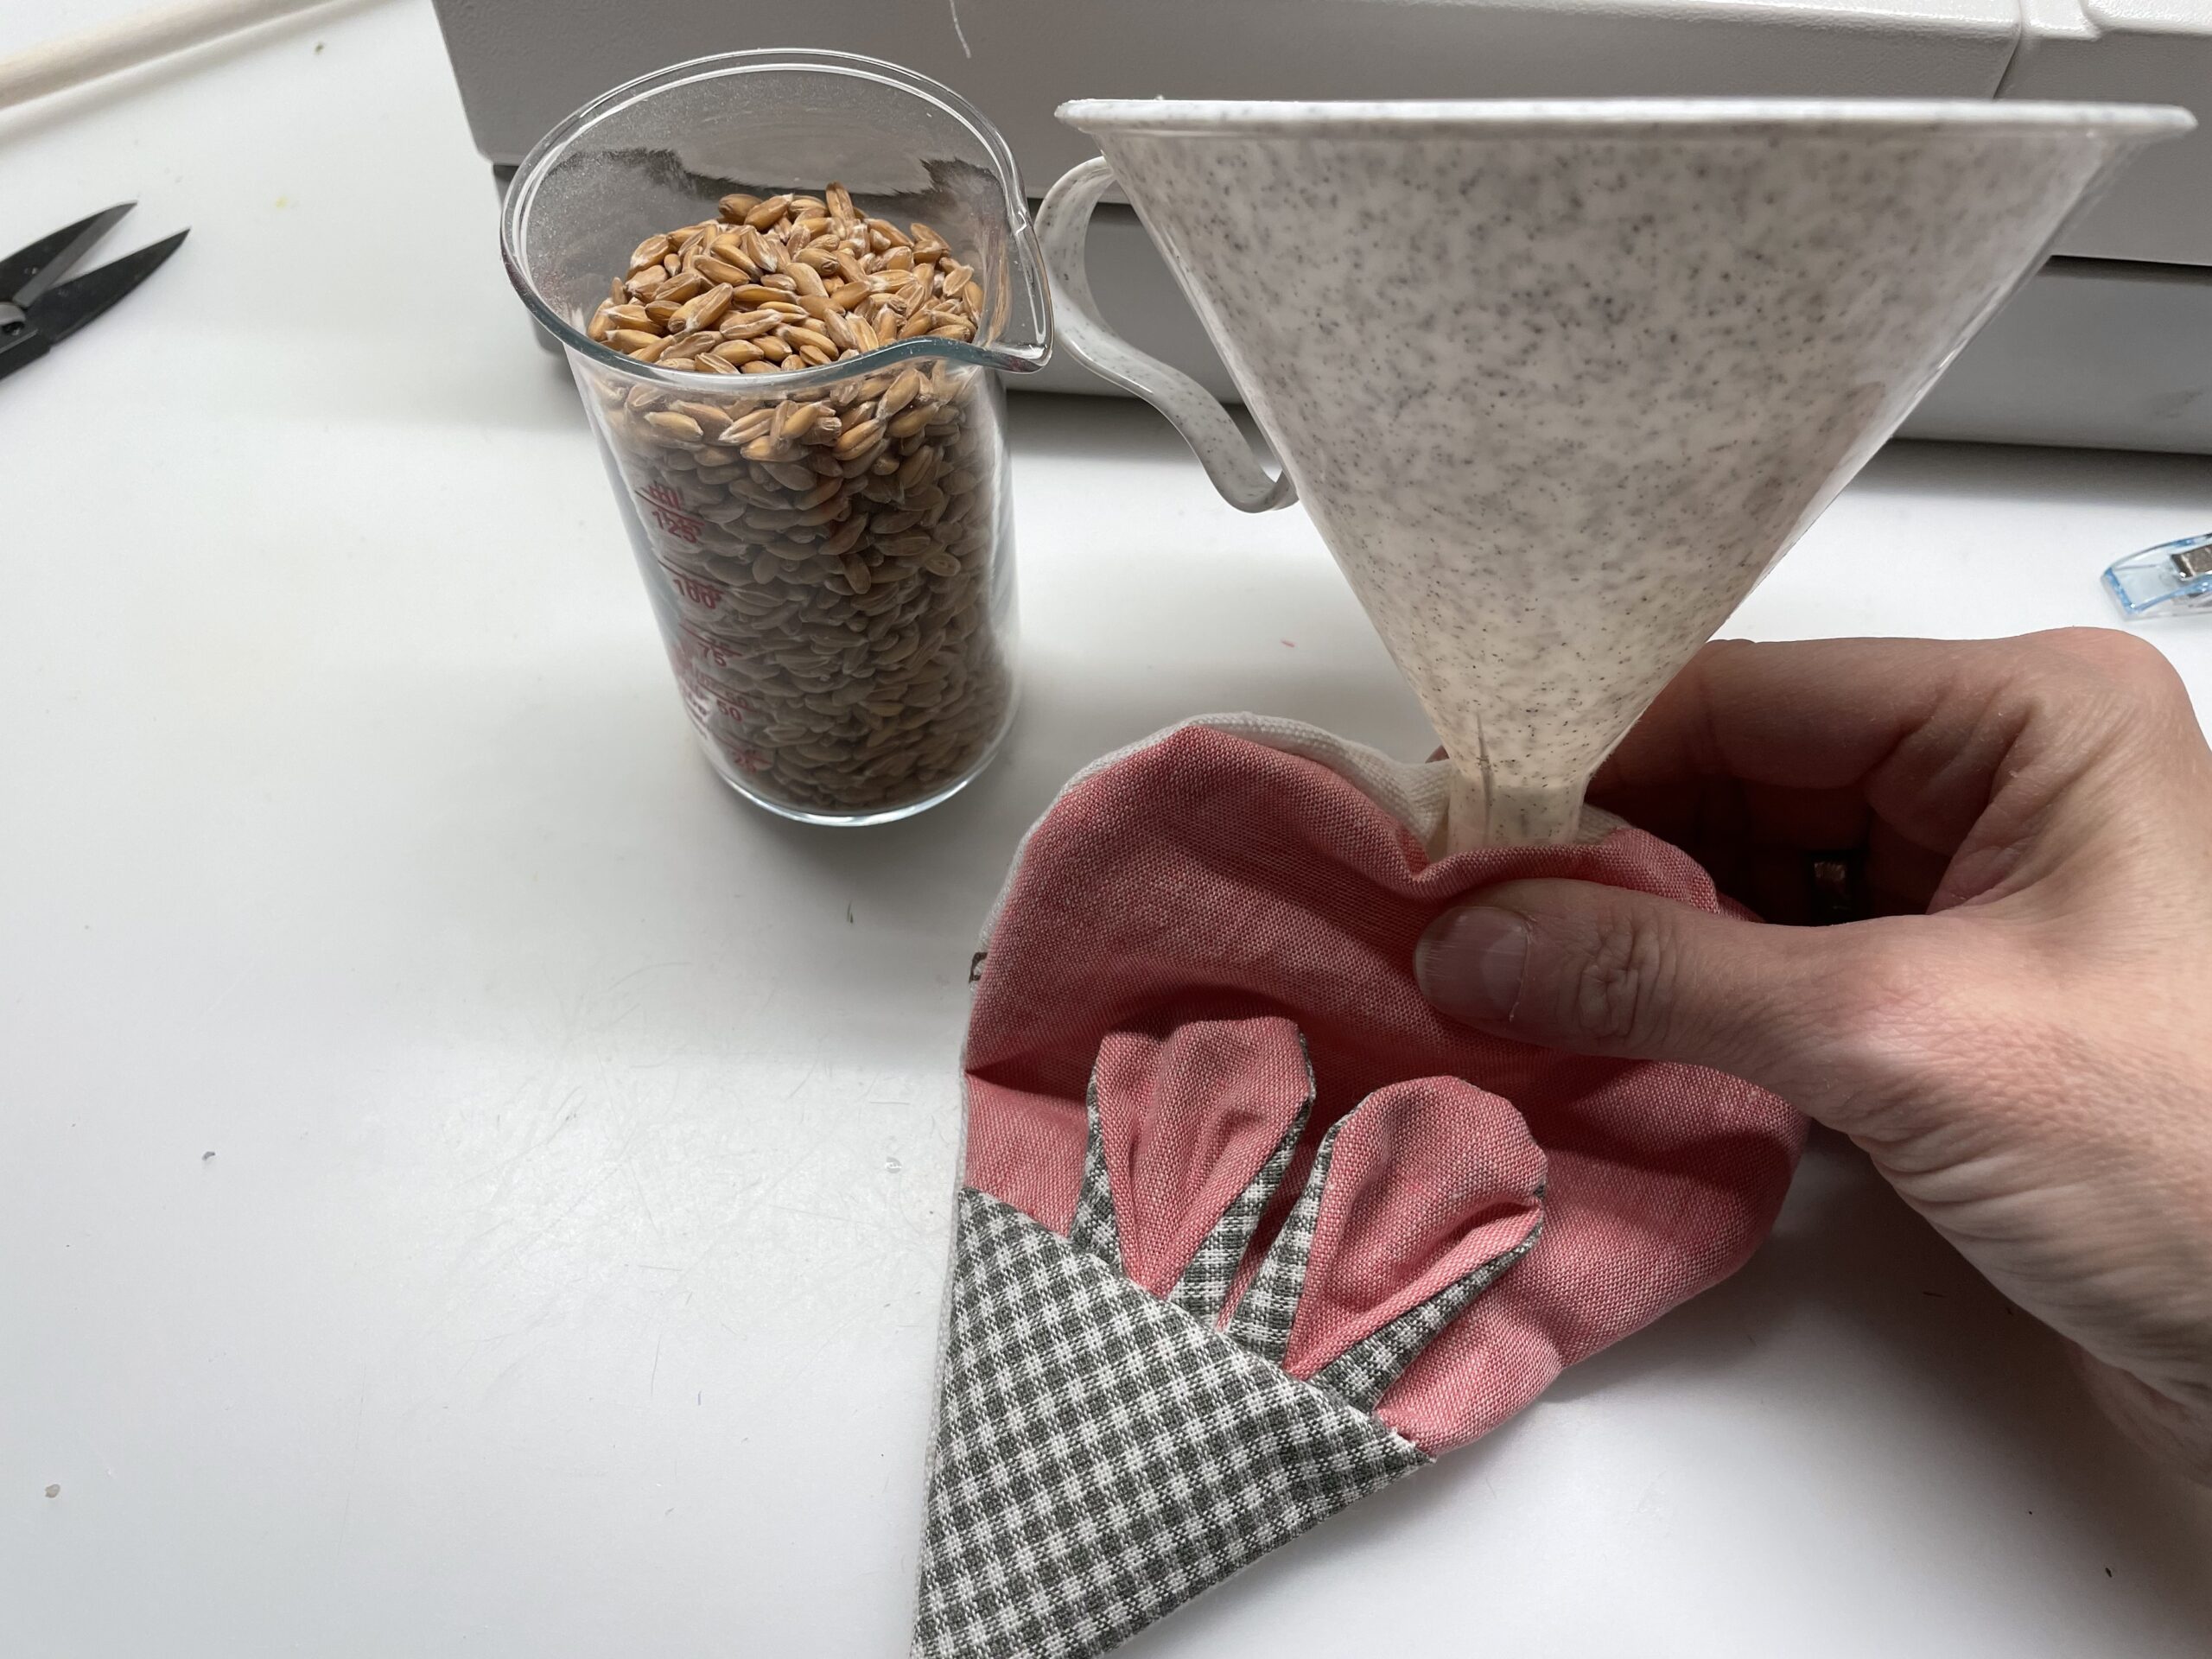
Now let the spelt slowly pour into it, so the funnel does not clog constantly. Fill the mouse until it is thick enough for you.
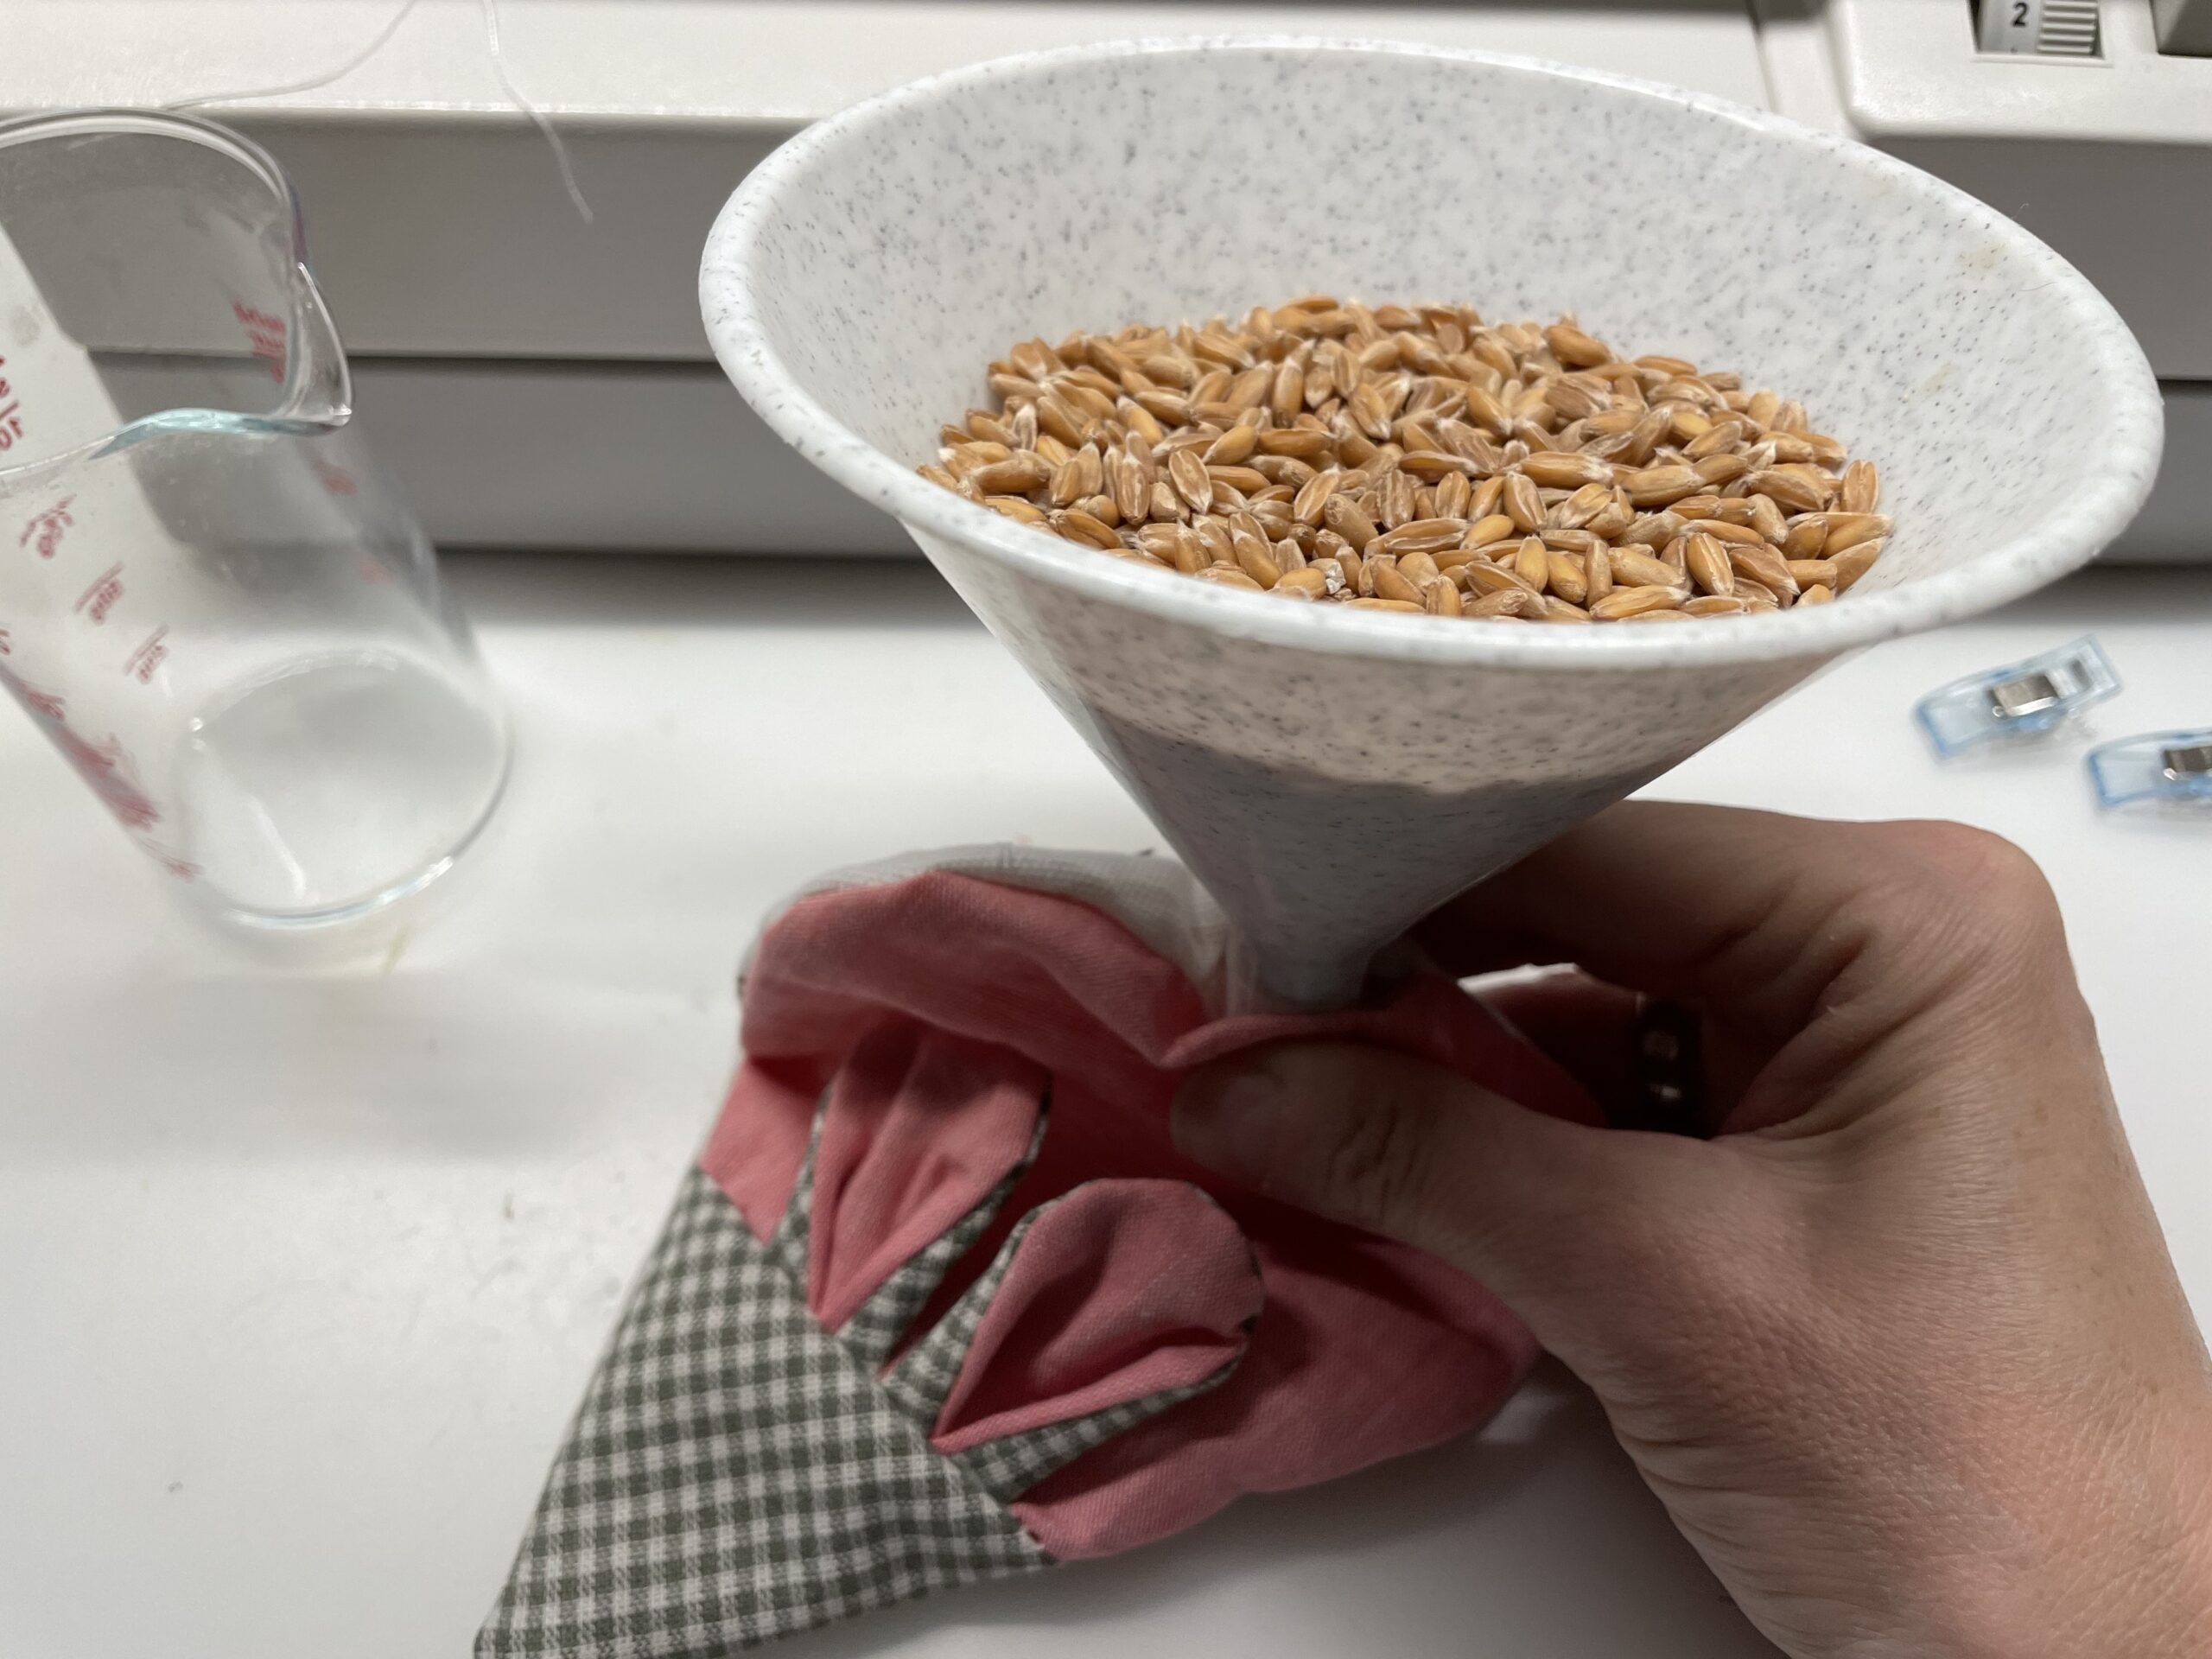
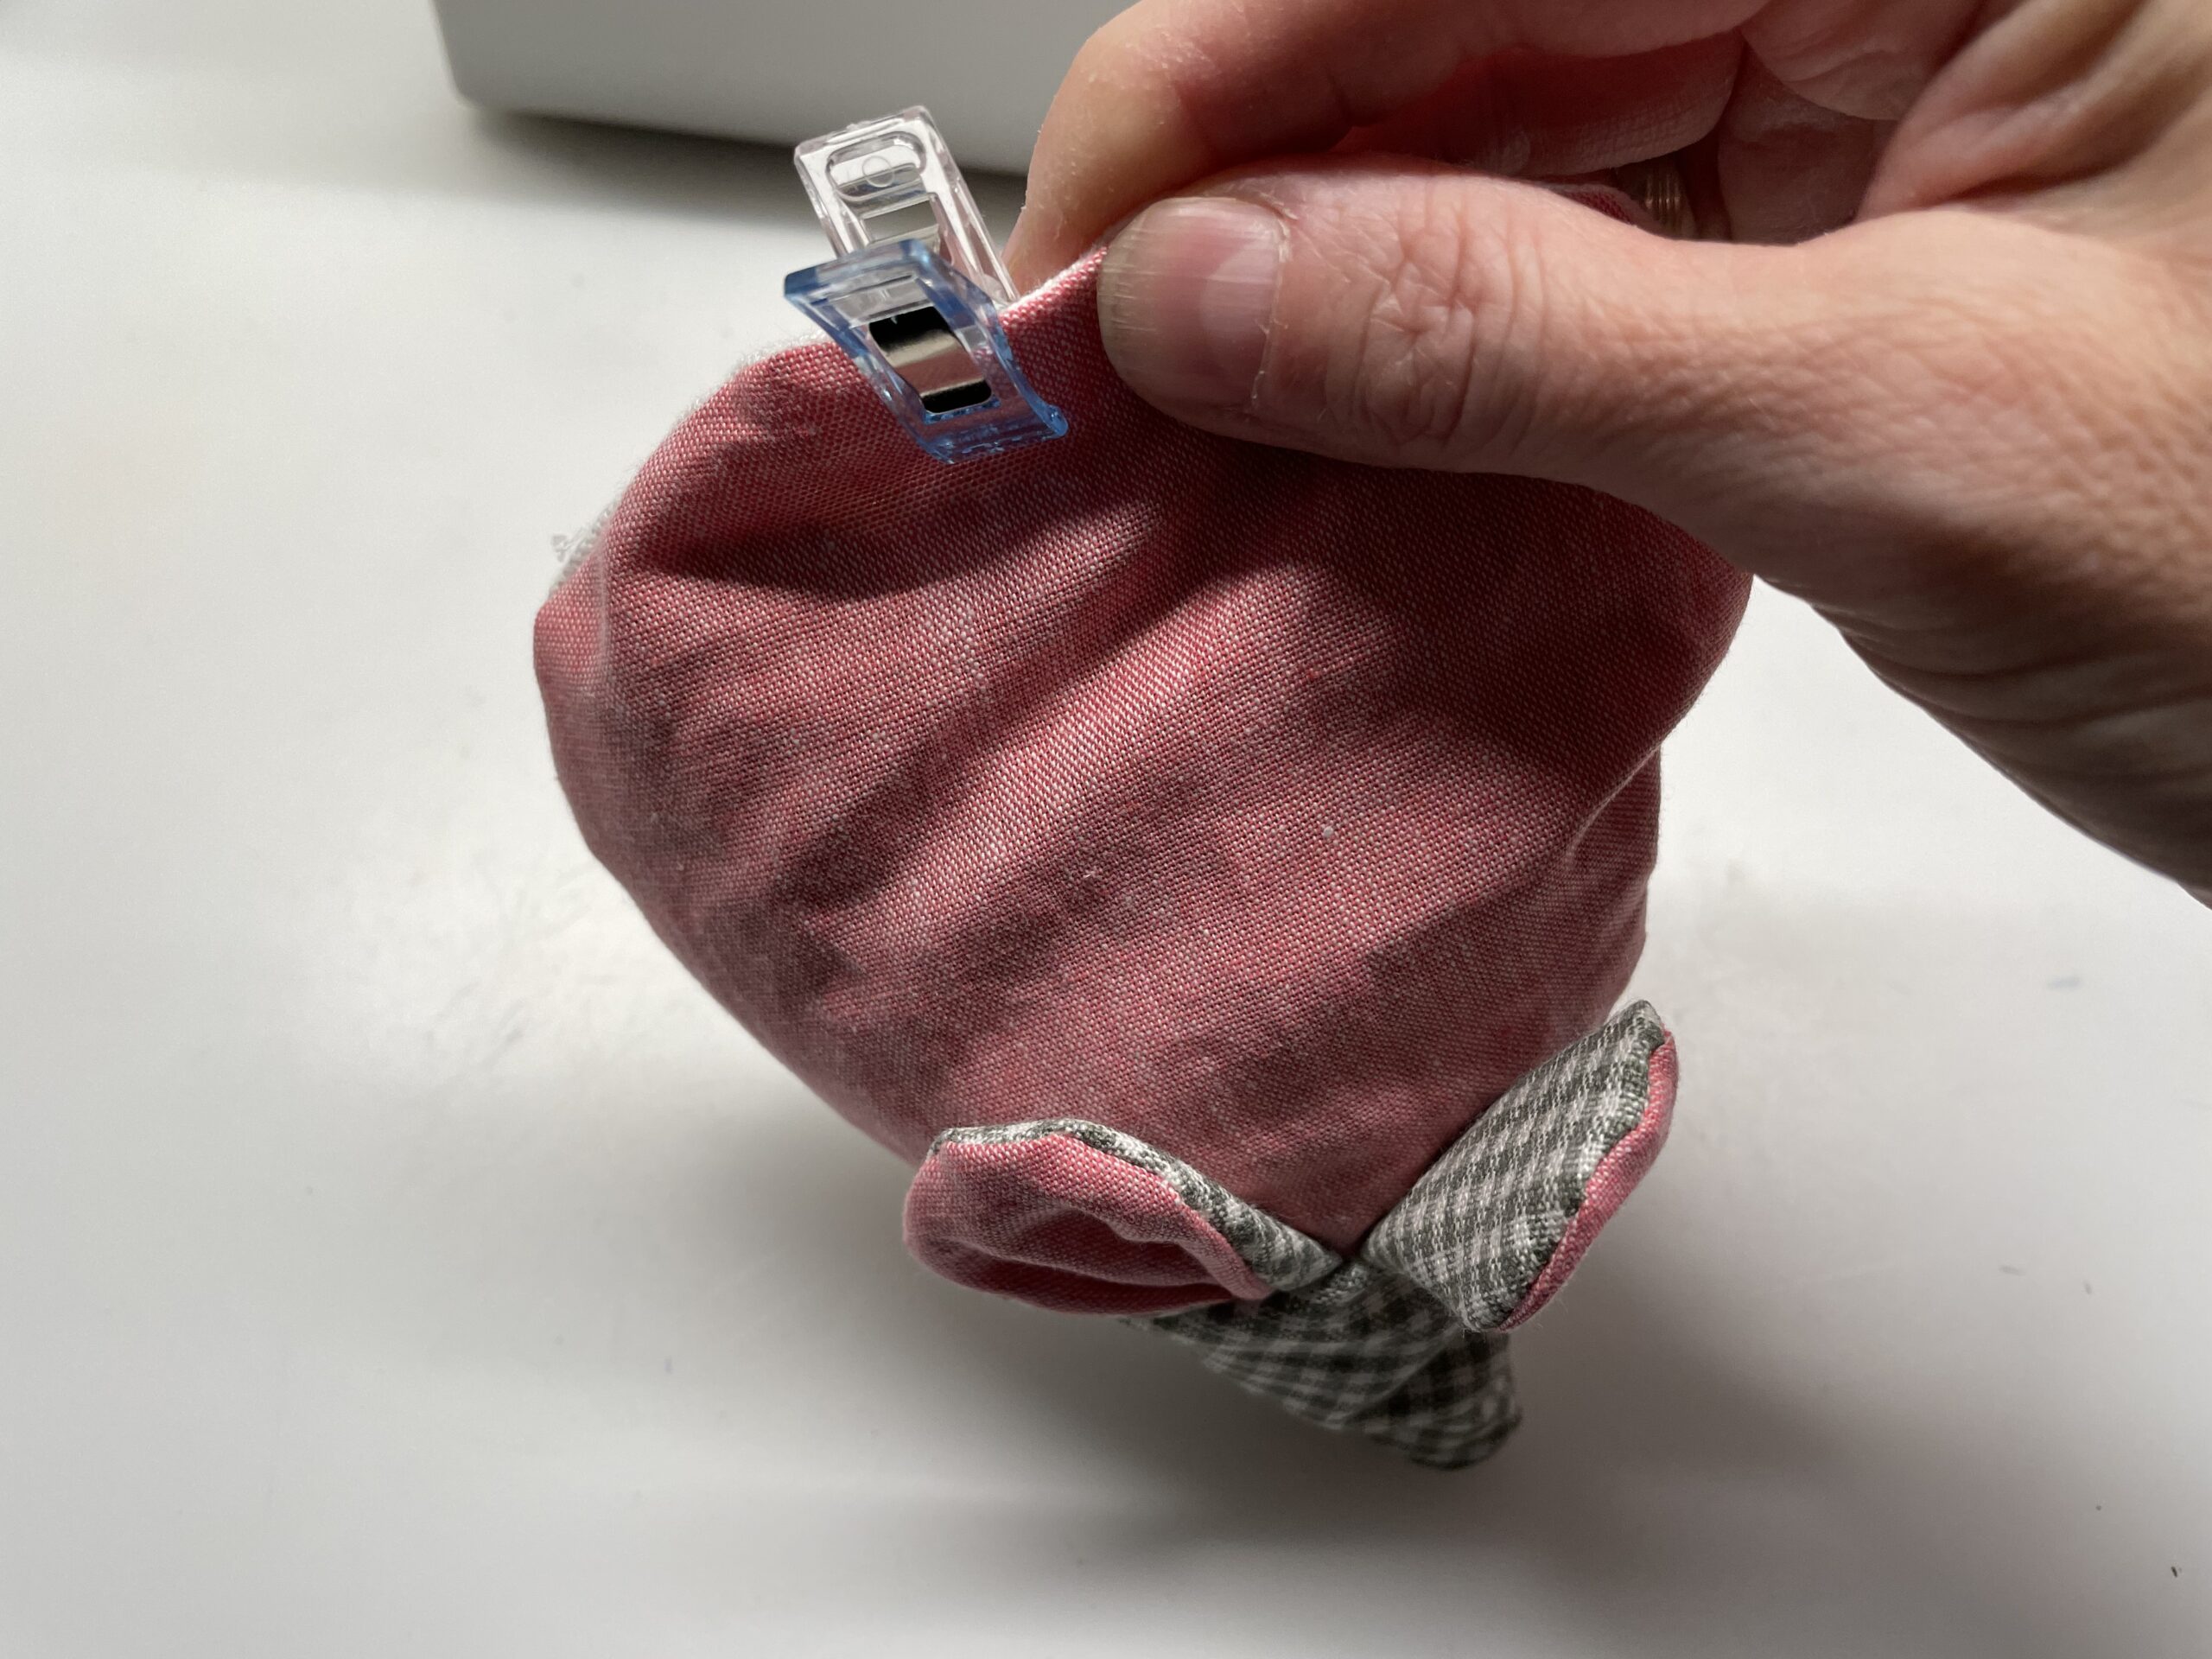
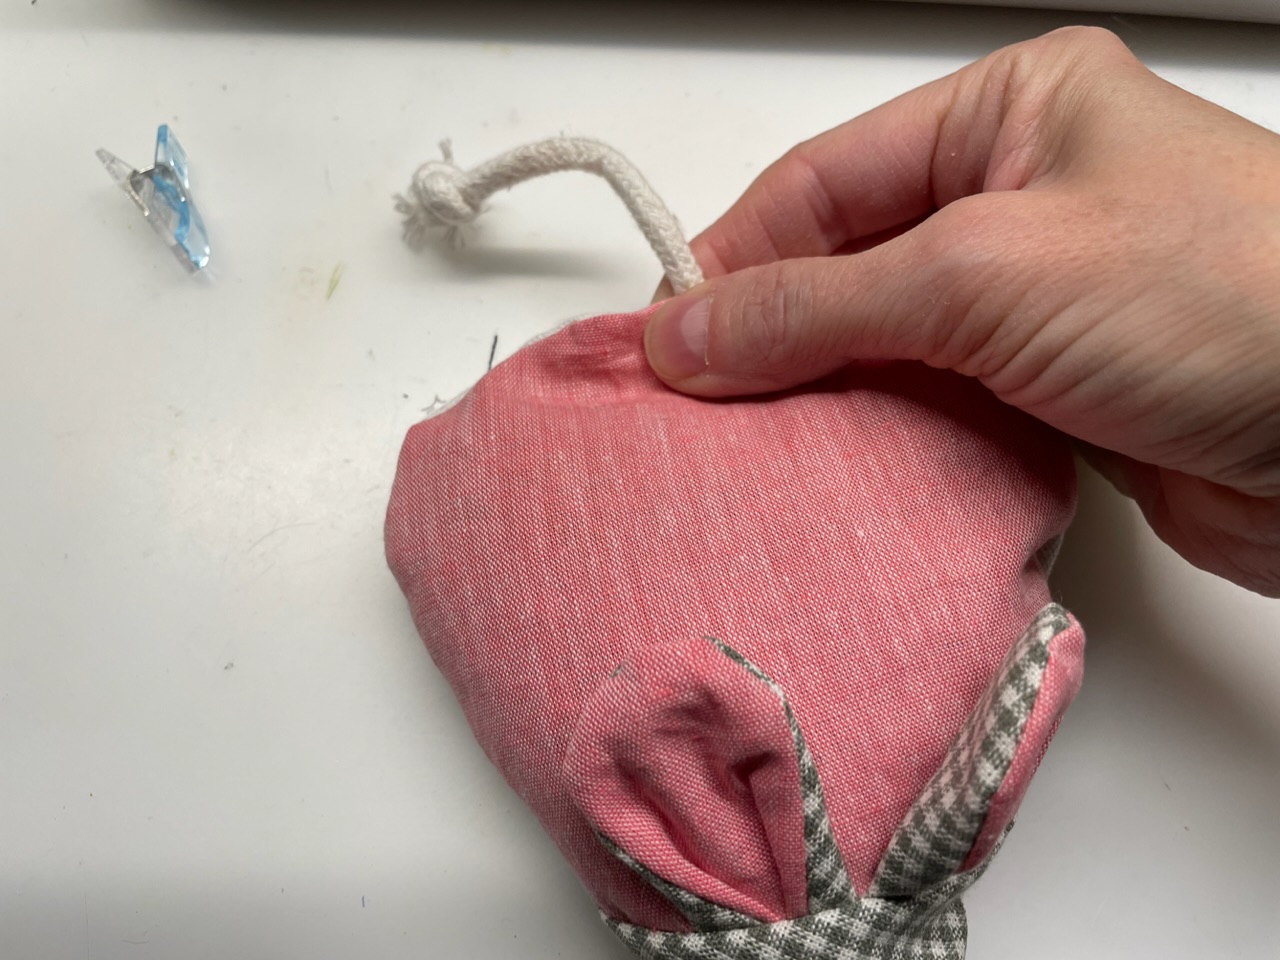
If the mouse is sufficiently filled, close the turning opening with a clamp or pin. Make sure that the fabrics lie cleanly on each other.
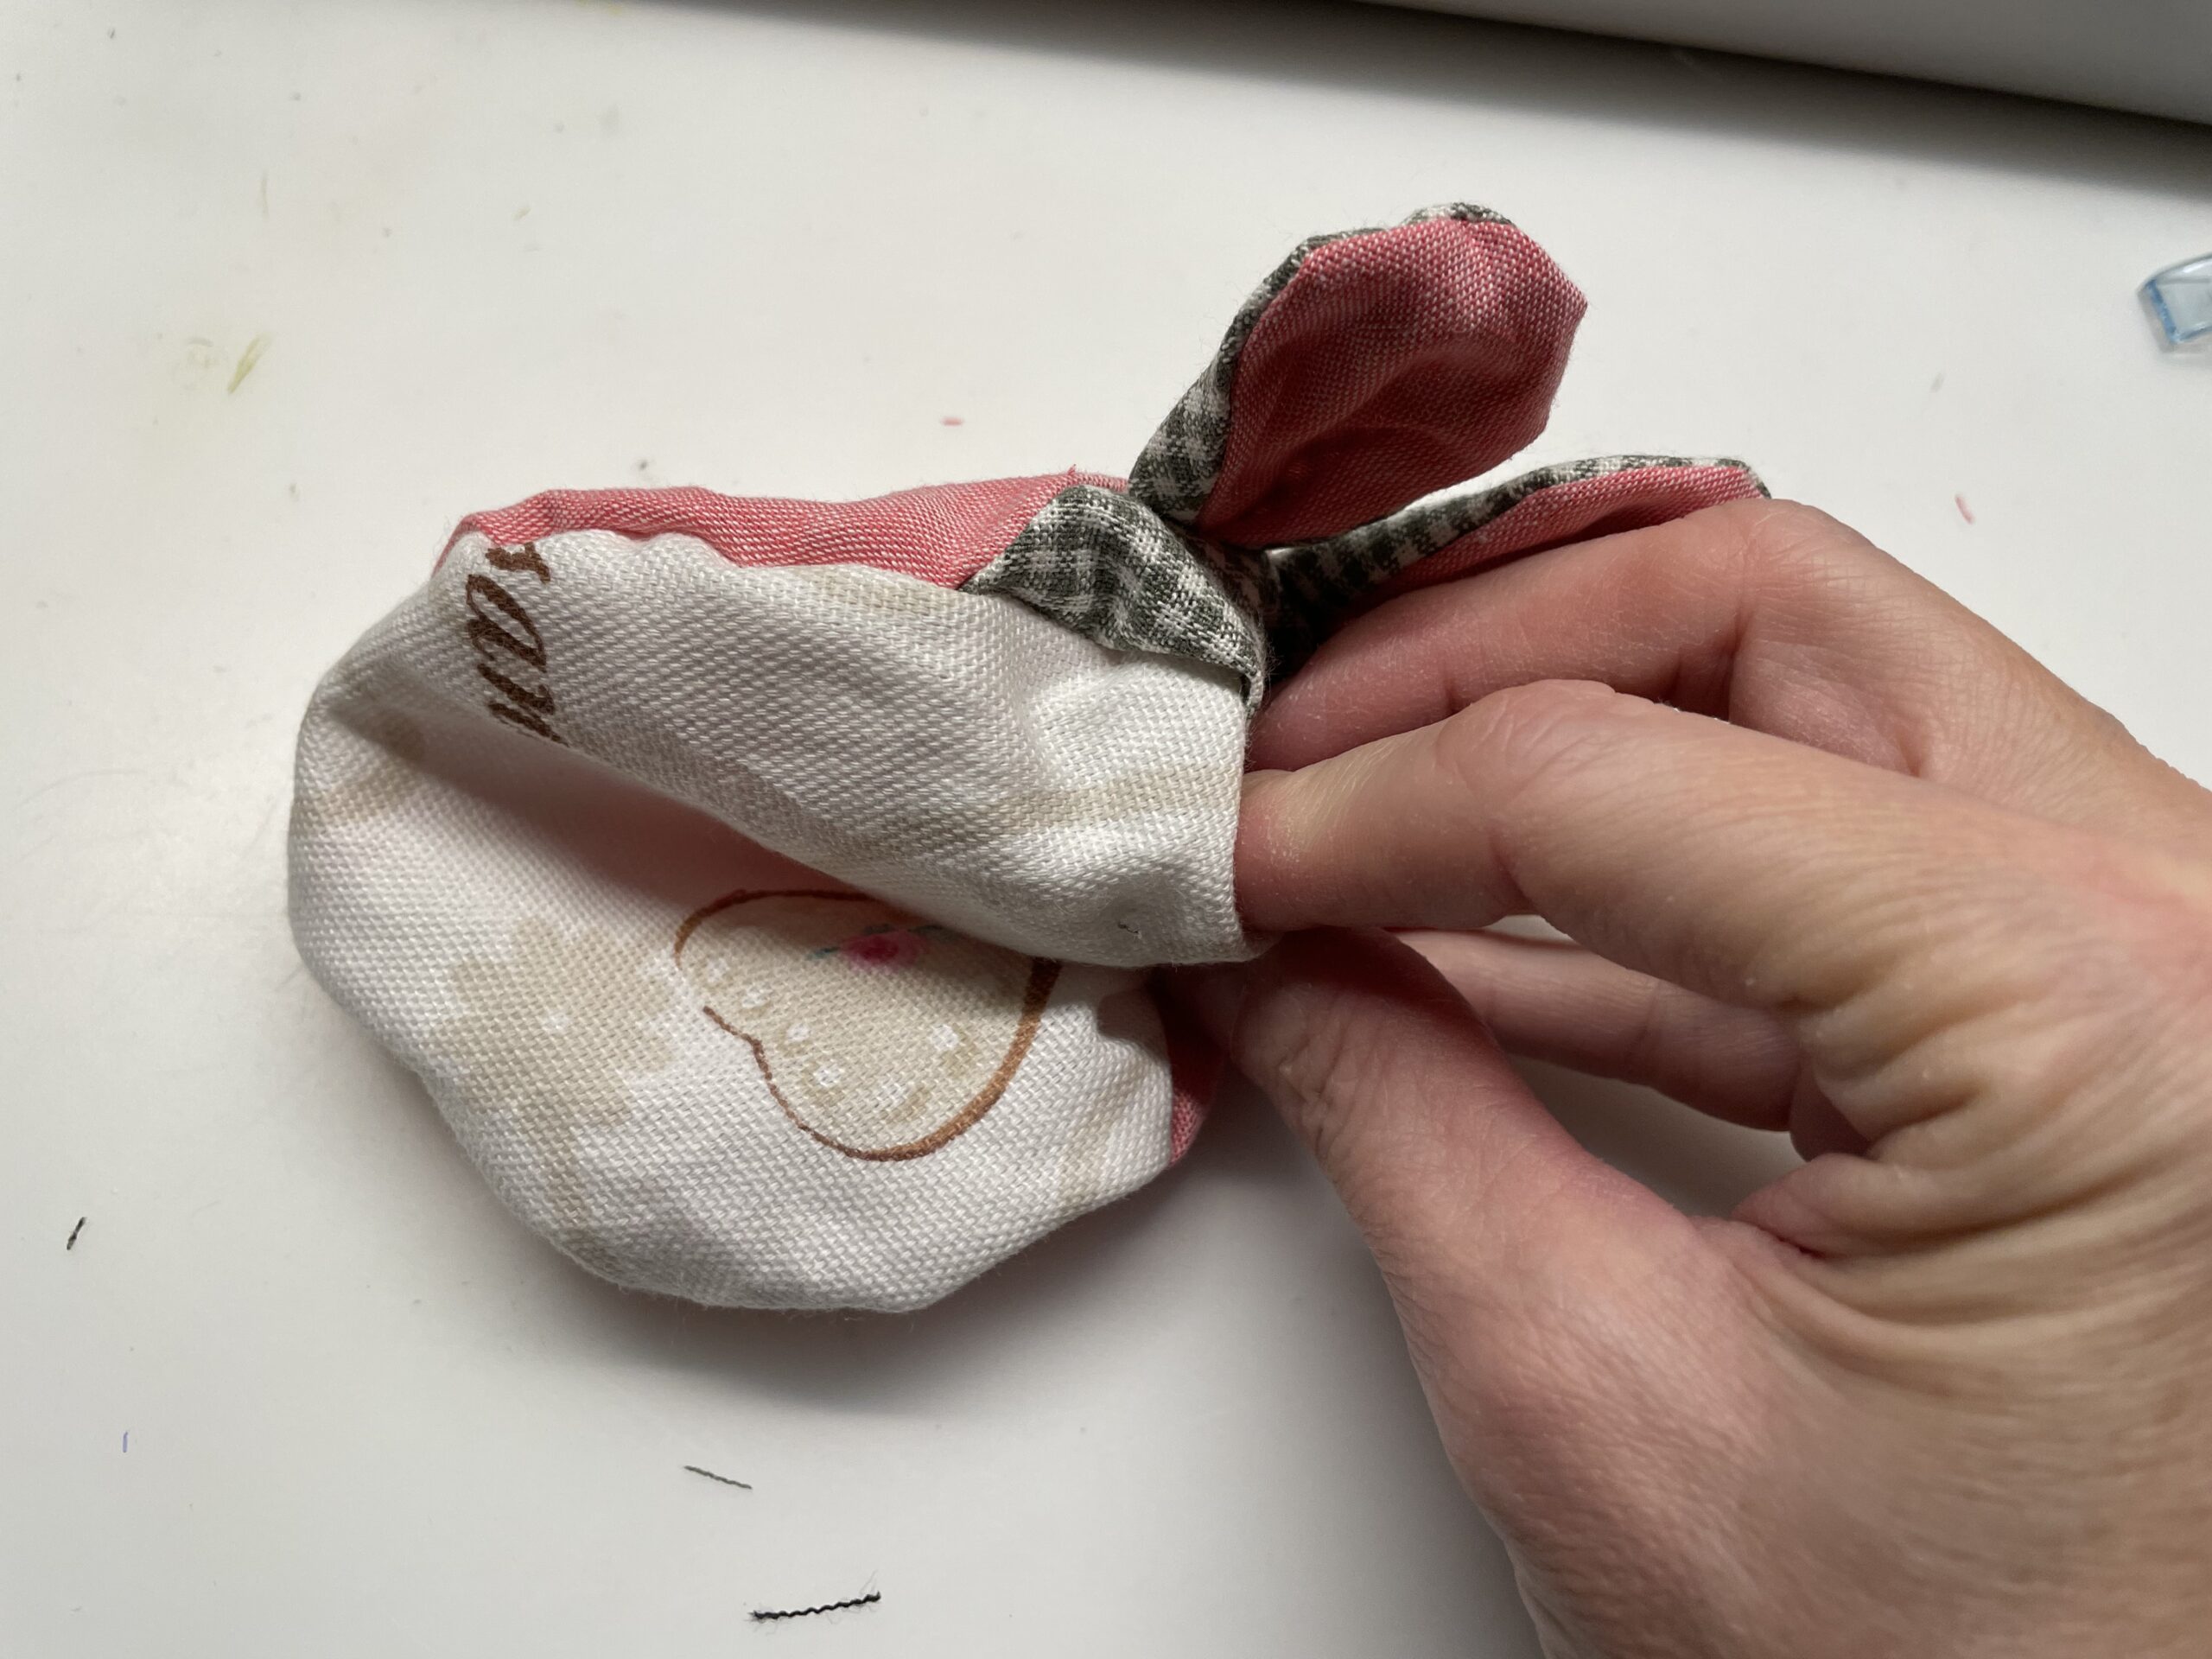
The mouse now only needs one tail. Cuts a cord with 10 centimeters length and makes a knot in the end. The tail is sewn to the mouse in the middle, for this the turning opening is ideal.
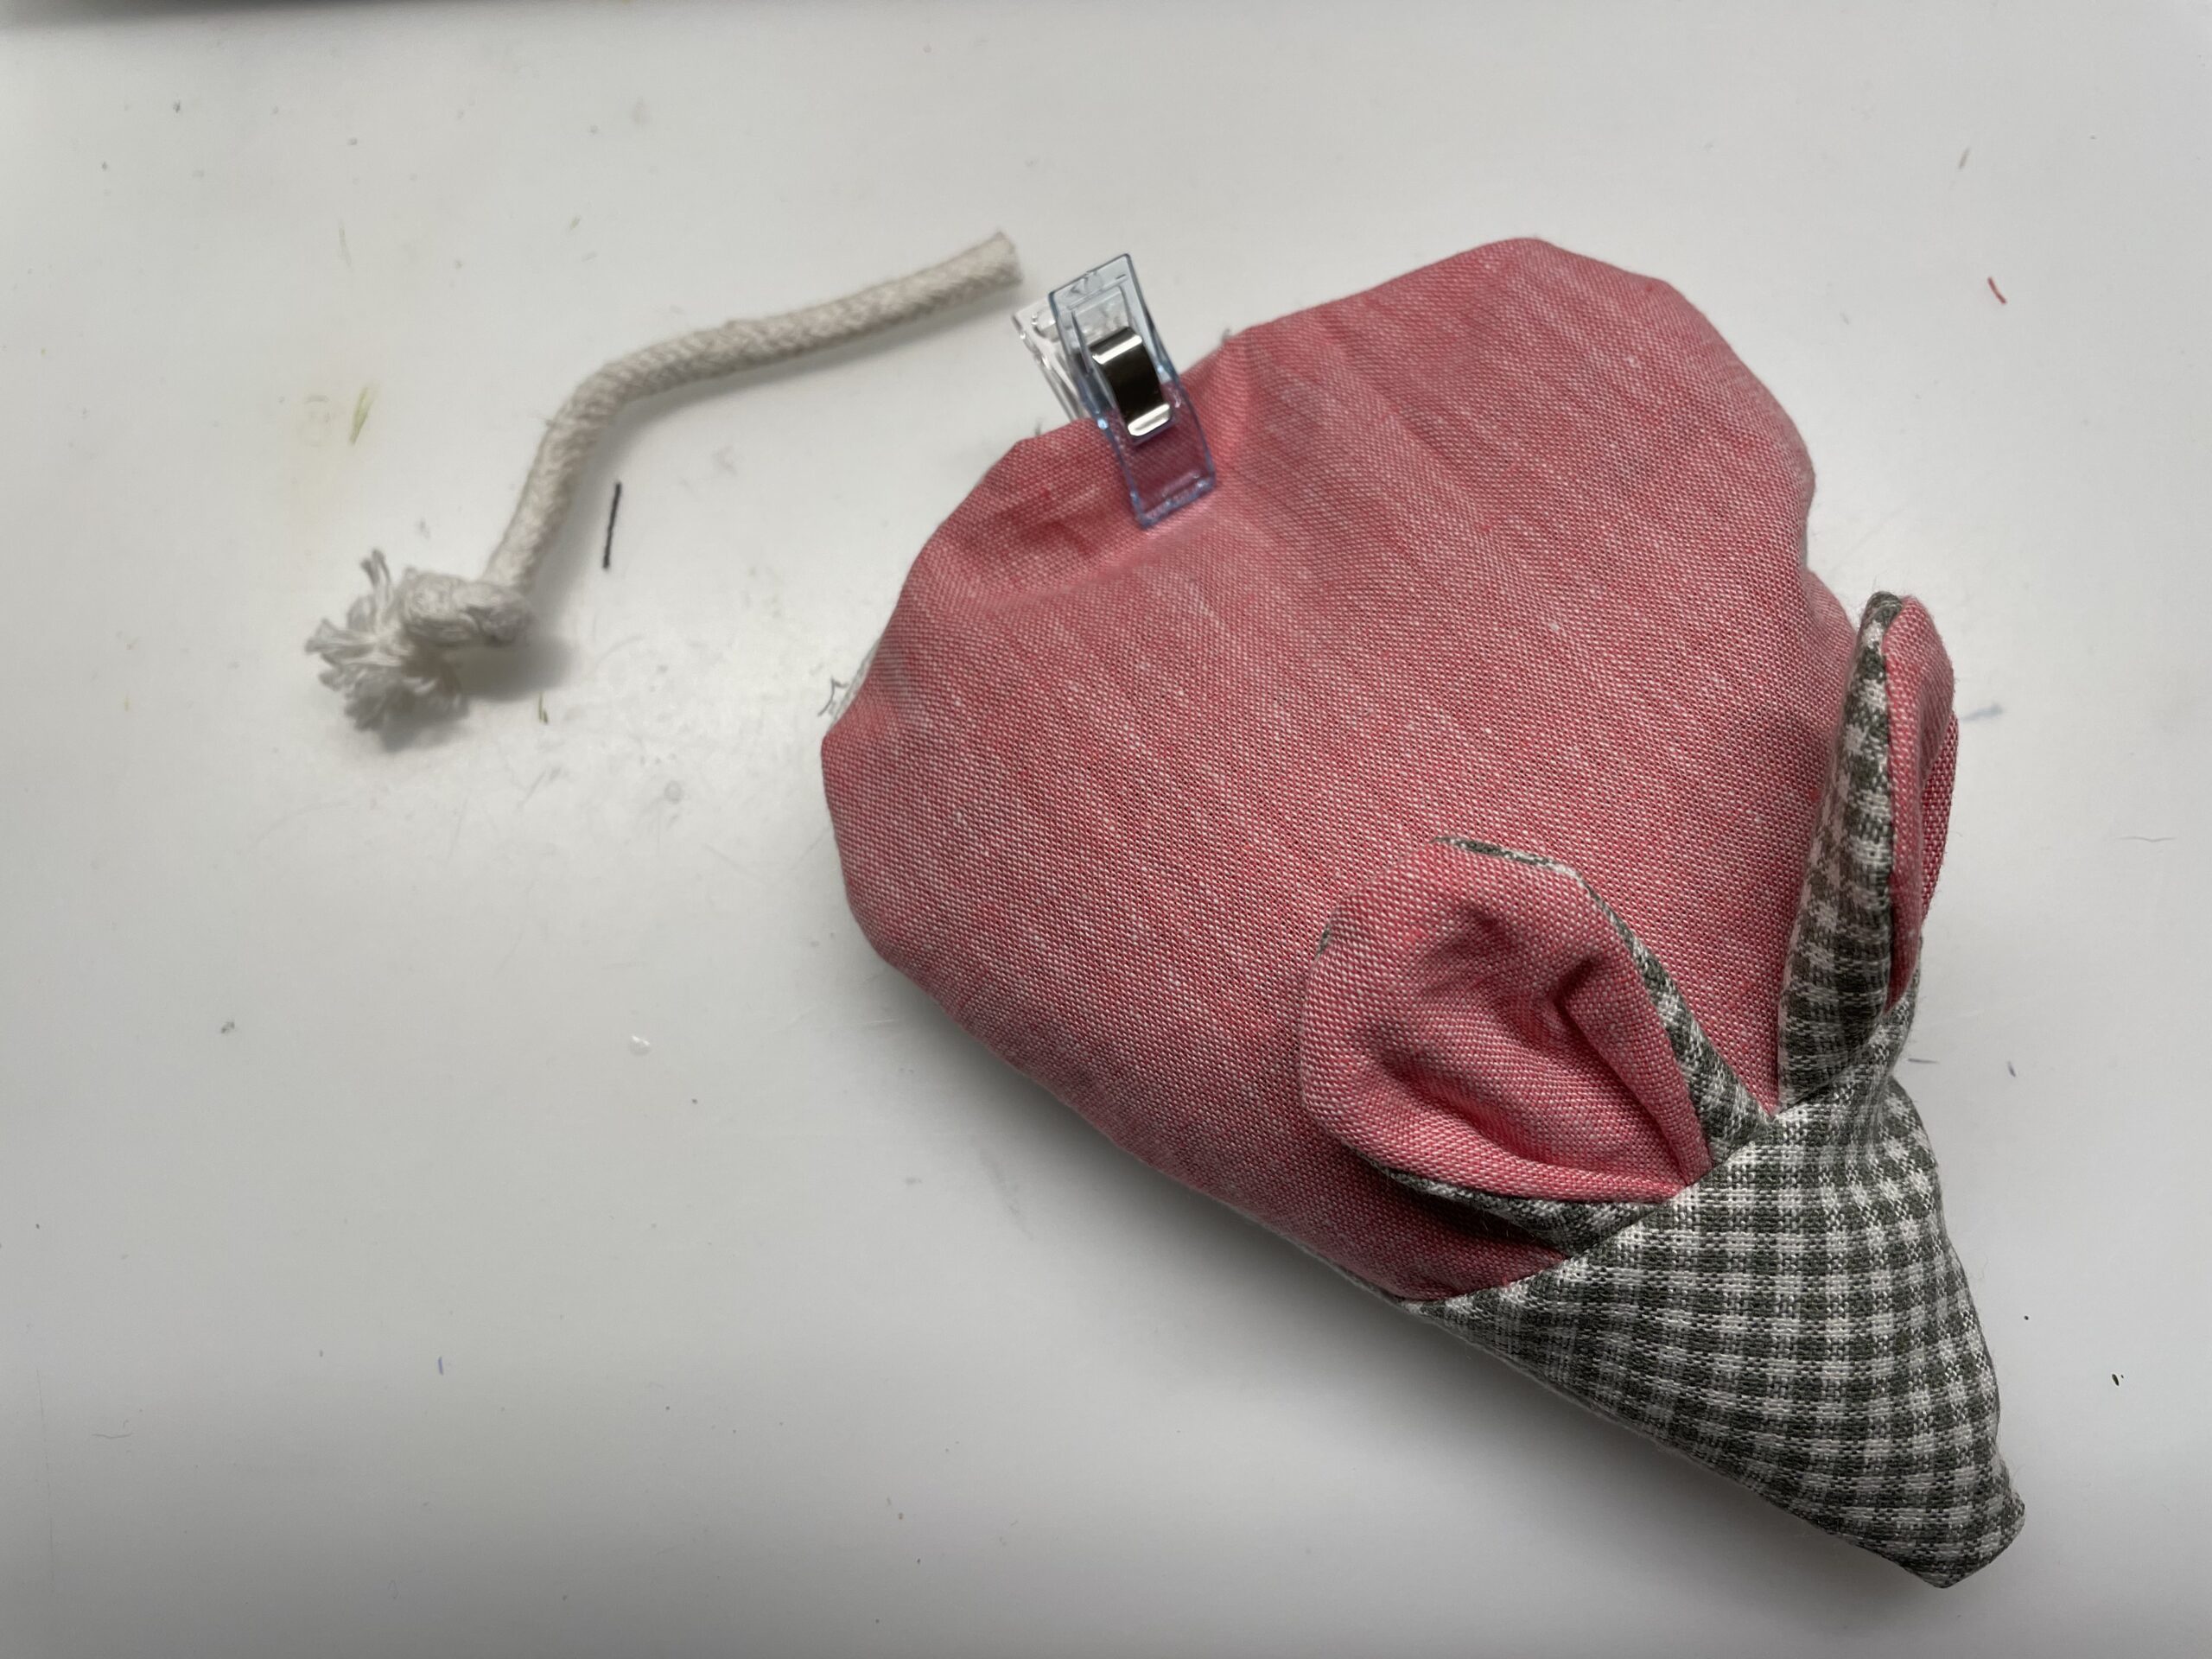
Position the tail in the turning opening and sew with the sewing machine over the opening. For this you can fix the fabrics and the tail beforehand with pins or brackets.
The mouse is ready.
Have fun sewing many more mice.
Tip: Put the mouse on the radiator, so you always have a warming dinghy at hand. Ideal also for the stroller or as a small warm bottle in case of abdominal pain. Due to the size it is ideal for small children.
Materials
Directions
Put everything in place, print out the templates.
Different cotton fabrics can be combined. Choose what you like.
Cut the rear part of the mouse once. And both parts for the front part.
For the ears two parts of fabric are cut each ear. Perhaps from two different fabrics.
Put two earpieces together with the beautiful fabric sides. Put them together with a pins.
Sew the ears together. The straight underside remains open.
That's what both ears look like now.
Now turn both sewn ears.
Bevel the curves well with a pen or a finger.
Folds the outsides of the ears inside and fixes the open bottom with a clamp.
That's how you do it on both ears.
Now sew over the undersides of the ears. Put both ears together on the sewing machine and sew the ears directly one after the other, so they hang together with the thread.
The ears are ready.
Then you place the belly part and the triangular head part on each other on the straight side. The beautiful sides lie on each other. Now, however, both pieces of fabric do not yet sew together! Fix both parts only with a clamp or pins.
Folds the headboard (triangle) and controls the size, this should be the same size as the backboard.
Now sew on from both sides about 1-2 cm and leave a wide slit open in the middle. Here the ears are inserted.
The middle is not yet sewn together!
Now fold the sewn up again and put the pair of ears into the gap. Make sure that the beautiful side of the ears points upwards. Push the ears so deep into the fabric that they are sewn well firmly when sewing and cannot slip out.
Then sew a seam in the extension of the already sewn pieces on the sides.
Now the front part is already finished. Front part and back part are now the same size.
Put both mouse parts together with the beautiful sides. Stitch the two fabric parts together with pins. So they can not slip when sewing.
Start the mouse now to sew the widest part (does not start in the middle with sewing).
At the tip (nose of the mouse) stop briefly, leave the needle in the fabric and lift the sewing machine feet. So you can easily turn the fabric to sew the tip back on the other side.
When sewn around, leave a turning opening at the end. This should remain open about 3 centimeters wide.
Finished is the stitching.
Through the turning opening you can now turn the mouse around.
So that all seams are well bulged, you can drive the seams from the inside with a cooking spoon style. You can also model the tip nose so well.
Now take Dinklekörner and a funnel and fill the mouse through the turning opening.
Now let the spelt slowly pour into it, so the funnel does not clog constantly. Fill the mouse until it is thick enough for you.
If the mouse is sufficiently filled, close the turning opening with a clamp or pin. Make sure that the fabrics lie cleanly on each other.
The mouse now only needs one tail. Cuts a cord with 10 centimeters length and makes a knot in the end. The tail is sewn to the mouse in the middle, for this the turning opening is ideal.
Position the tail in the turning opening and sew with the sewing machine over the opening. For this you can fix the fabrics and the tail beforehand with pins or brackets.
The mouse is ready.
Have fun sewing many more mice.
Tip: Put the mouse on the radiator, so you always have a warming dinghy at hand. Ideal also for the stroller or as a small warm bottle in case of abdominal pain. Due to the size it is ideal for small children.
Follow us on Facebook , Instagram and Pinterest
Don't miss any more adventures: Our bottle mail