Butternuts (3 variants)

AdventurerKatzi
Rating5.013.2 thousand times & (1) DifficultyAdvanced

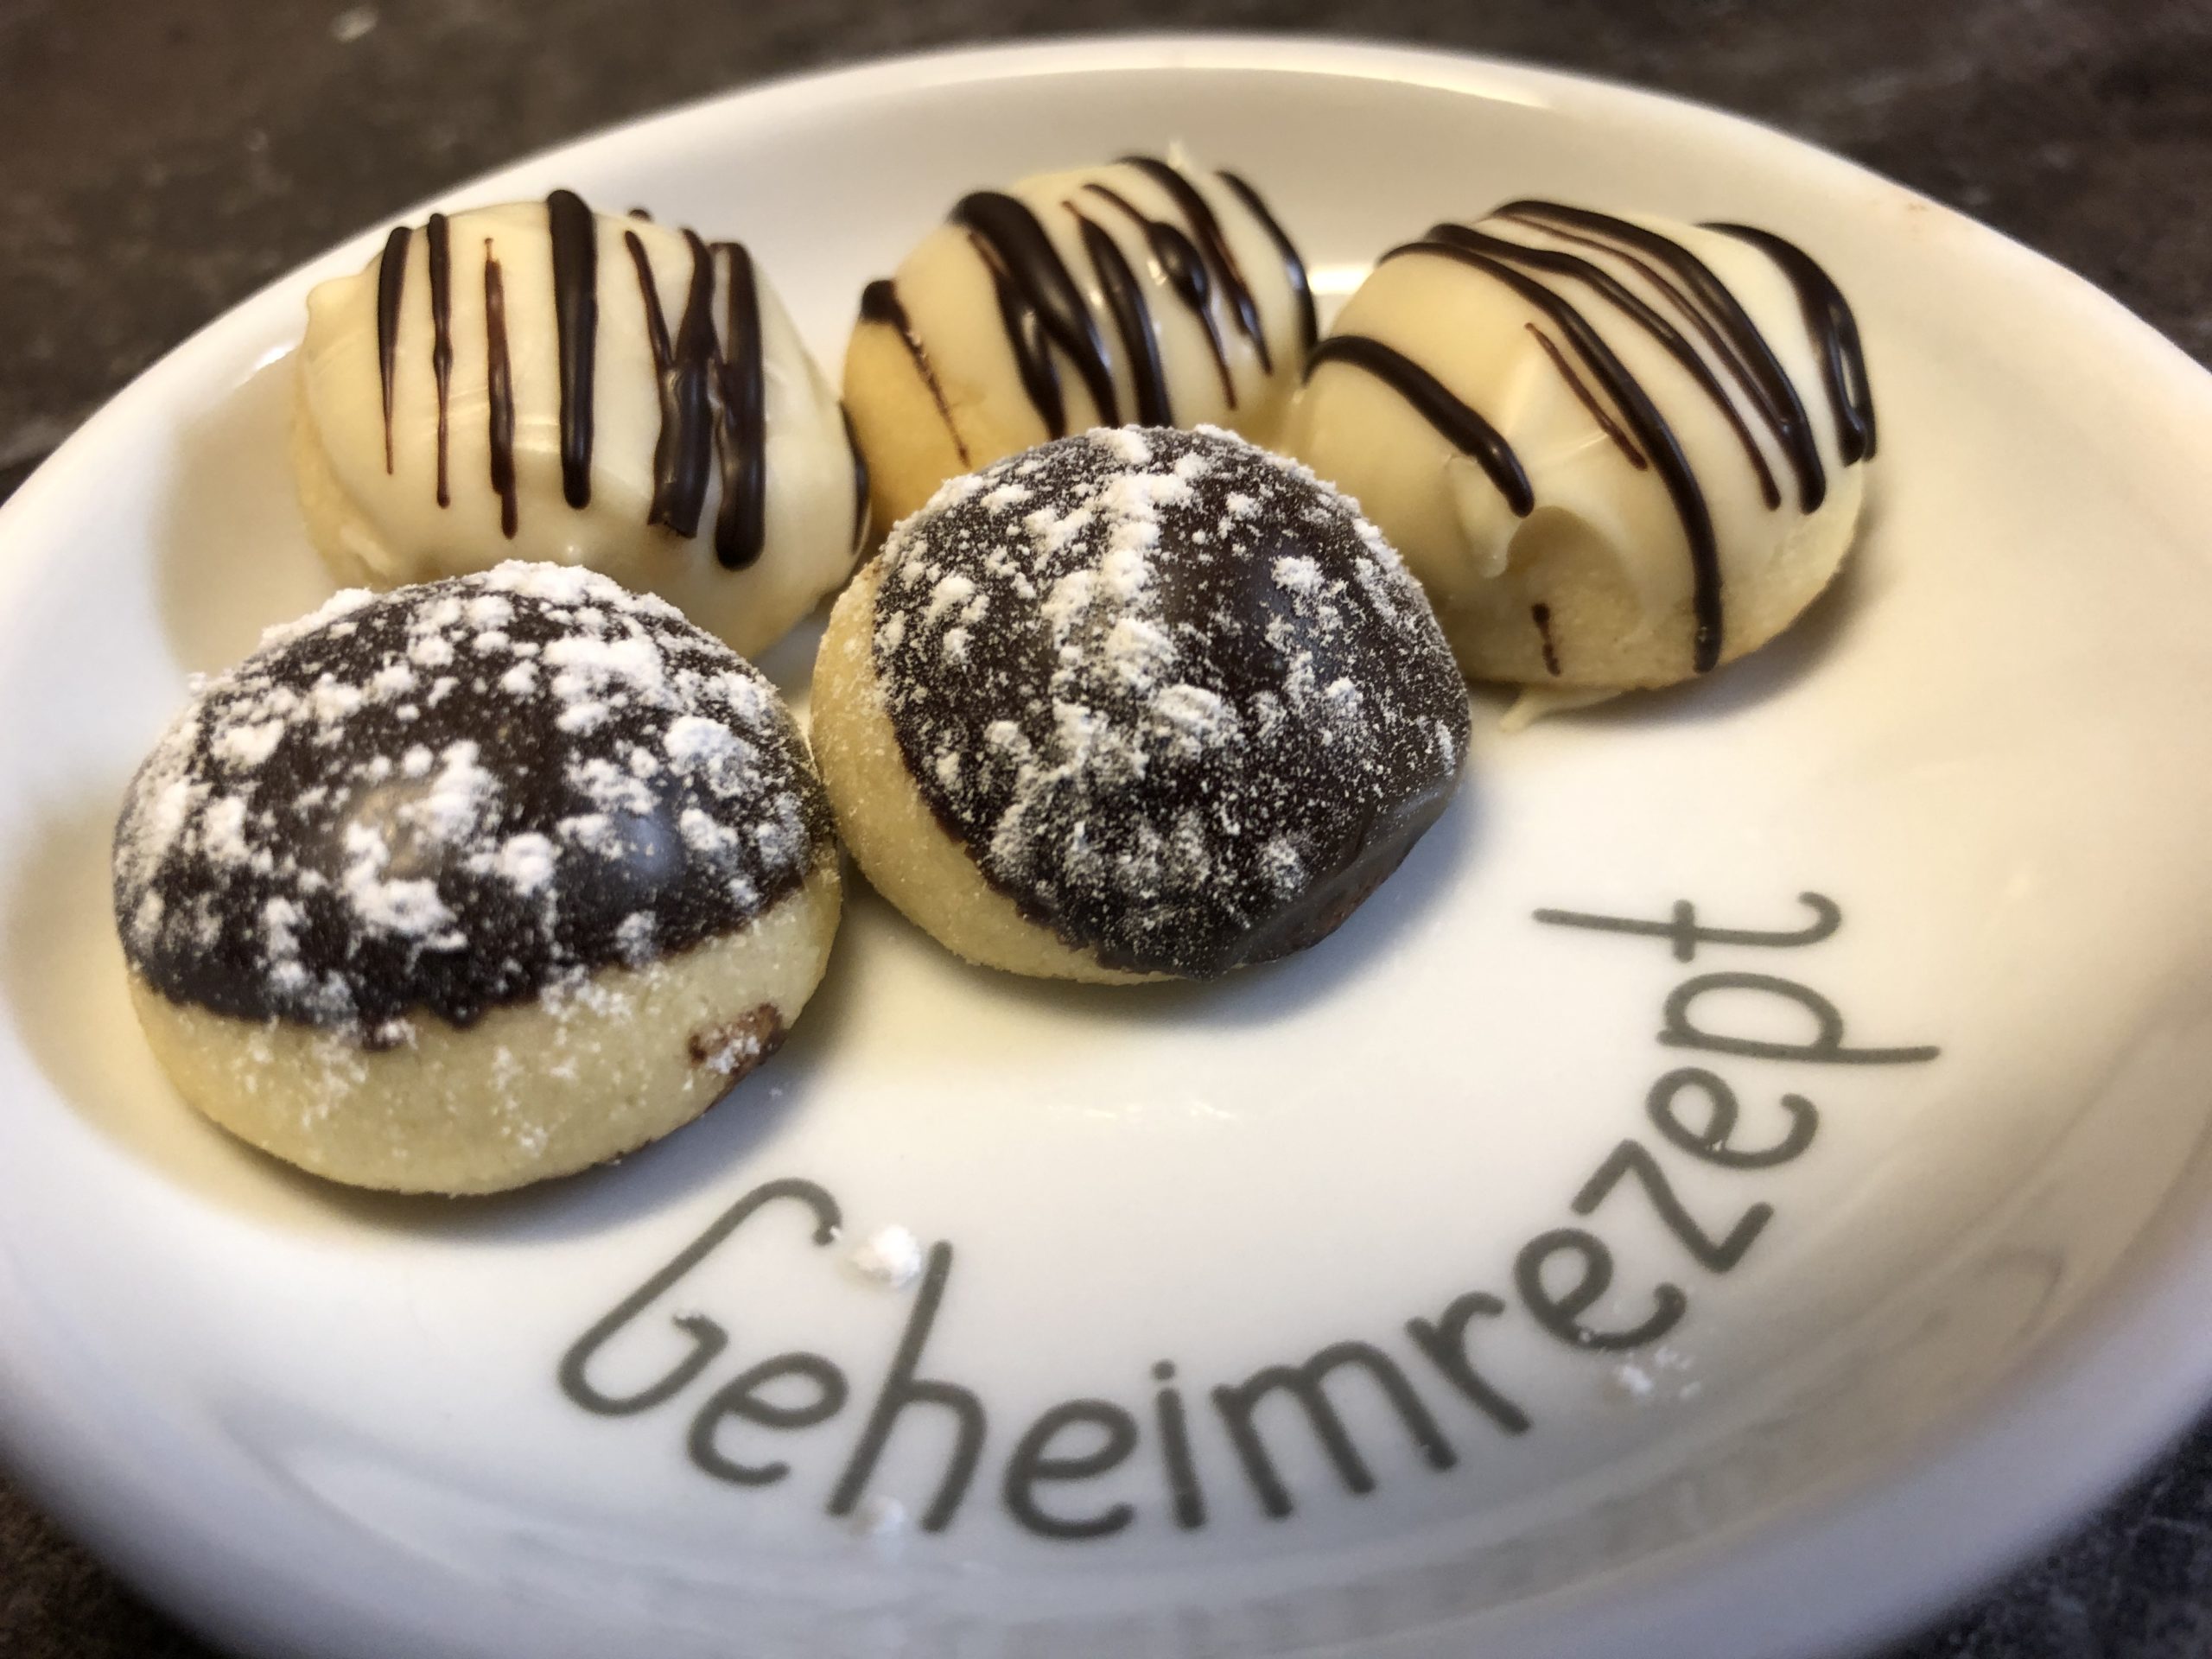
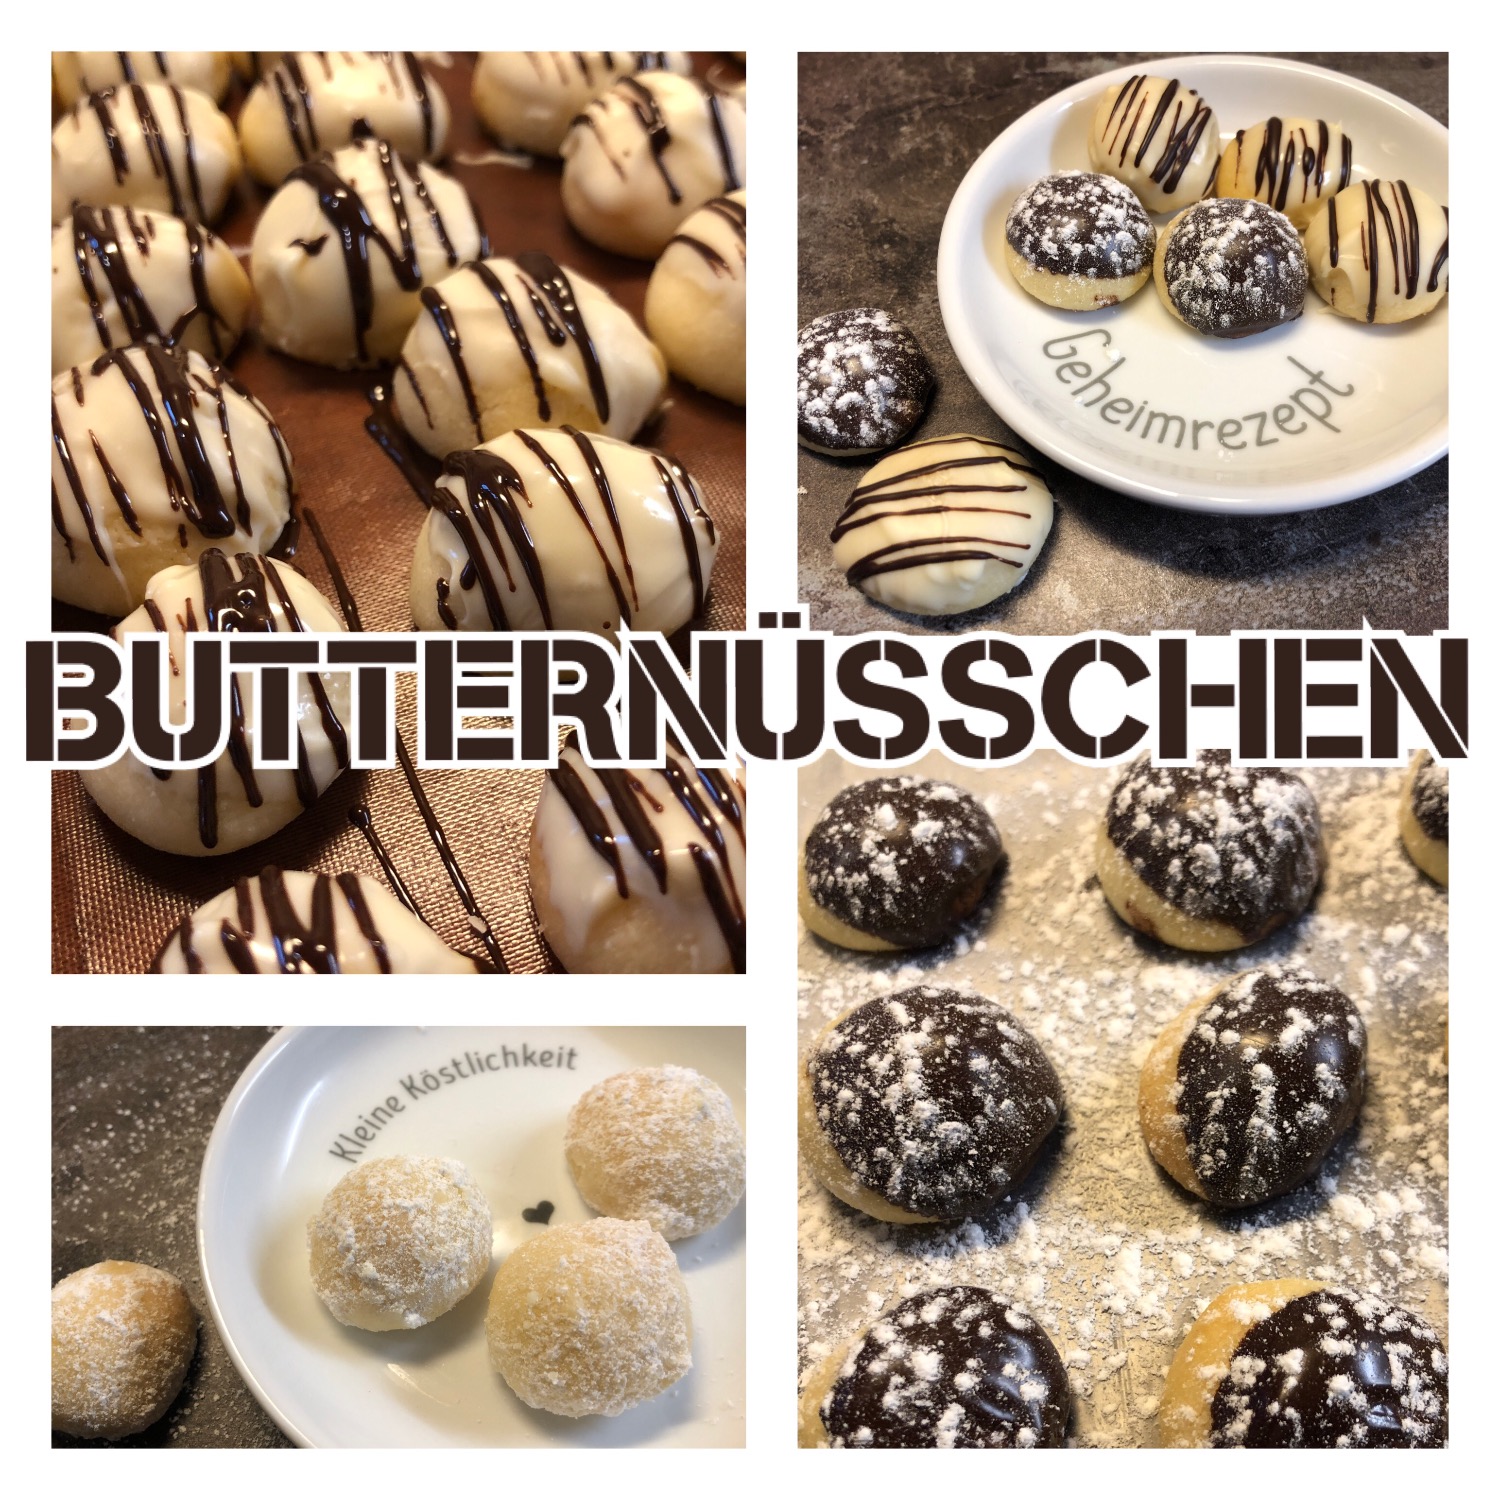
A cookie as big as a small praline - it melts delicately on the tongue.
These cookies are quickly baked. When decorating, you can choose the quick variant and turn the baked balls into powder sugar, or you give everything and create small works of art. Check out the offer and decide for yourself! Enjoy baking!

Media Education for Kindergarten and Hort

Kind bastelt eine Rassel mit dem Navi
The Adventure Navi, the app for DIY projects, enables media education for the youngest.

Relief in everyday life, targeted promotion of individual children, independent learning and - without any pre-knowledge already usable by the youngest!


Titelbild zur Bastel- und DIY-Idee für Kinder '(535) Butternüsschen (3 Varianten)'
Material for1 Child
Prep Time10 min.Adv. Time40 min.Total Time50 min.
Ingredients for the dough:
 250 g Butter
 2 gals Vanilla sugar
 a few drops of Rumaroma
 1 tbsp Baking powder
 350 g Flour
For decorating:
 1. powdered sugar mixed with vanill sugar
 2. white couverture and chocolate glaze
 3. dark chocolate glaze and powdered sugar
That's what you need.
 Kitchen machine
 Sheet with baking paper or continuous baking film
 Small bowl
 Spoonor pointed knife for decorating
 Cup to melt the chocolate
 Aprons
All links marked with a shopping cart lead to Amazon - here we have selected products that we would order ourselves and in part also ordered. In a qualified purchase via the advertising link, we as Amazon partner receive a commission, for you there are no costs. You thus support our cost- and advertising banner-free, educational offer.
1

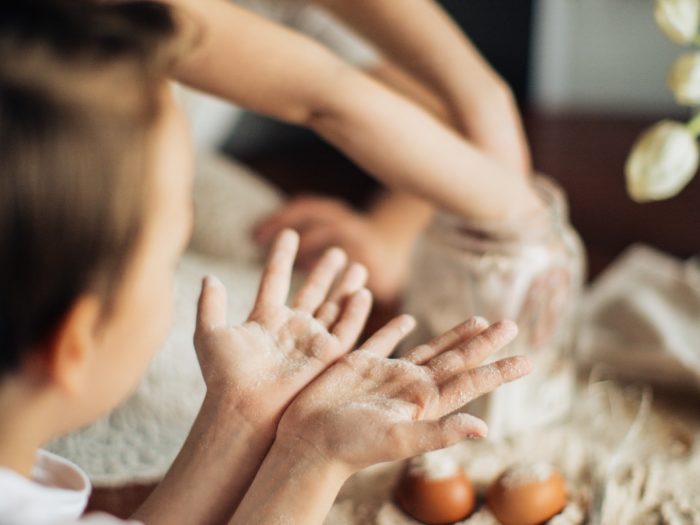
First send the children to wash their hands. Then the aprons are put on and then it can start.
Weighs all the ingredients and puts them in a mixing bowl.
Then knead all the ingredients with the kitchen machine to a smooth dough.
Tip: You can also let the children knead with your hands, which is great fun for many children!
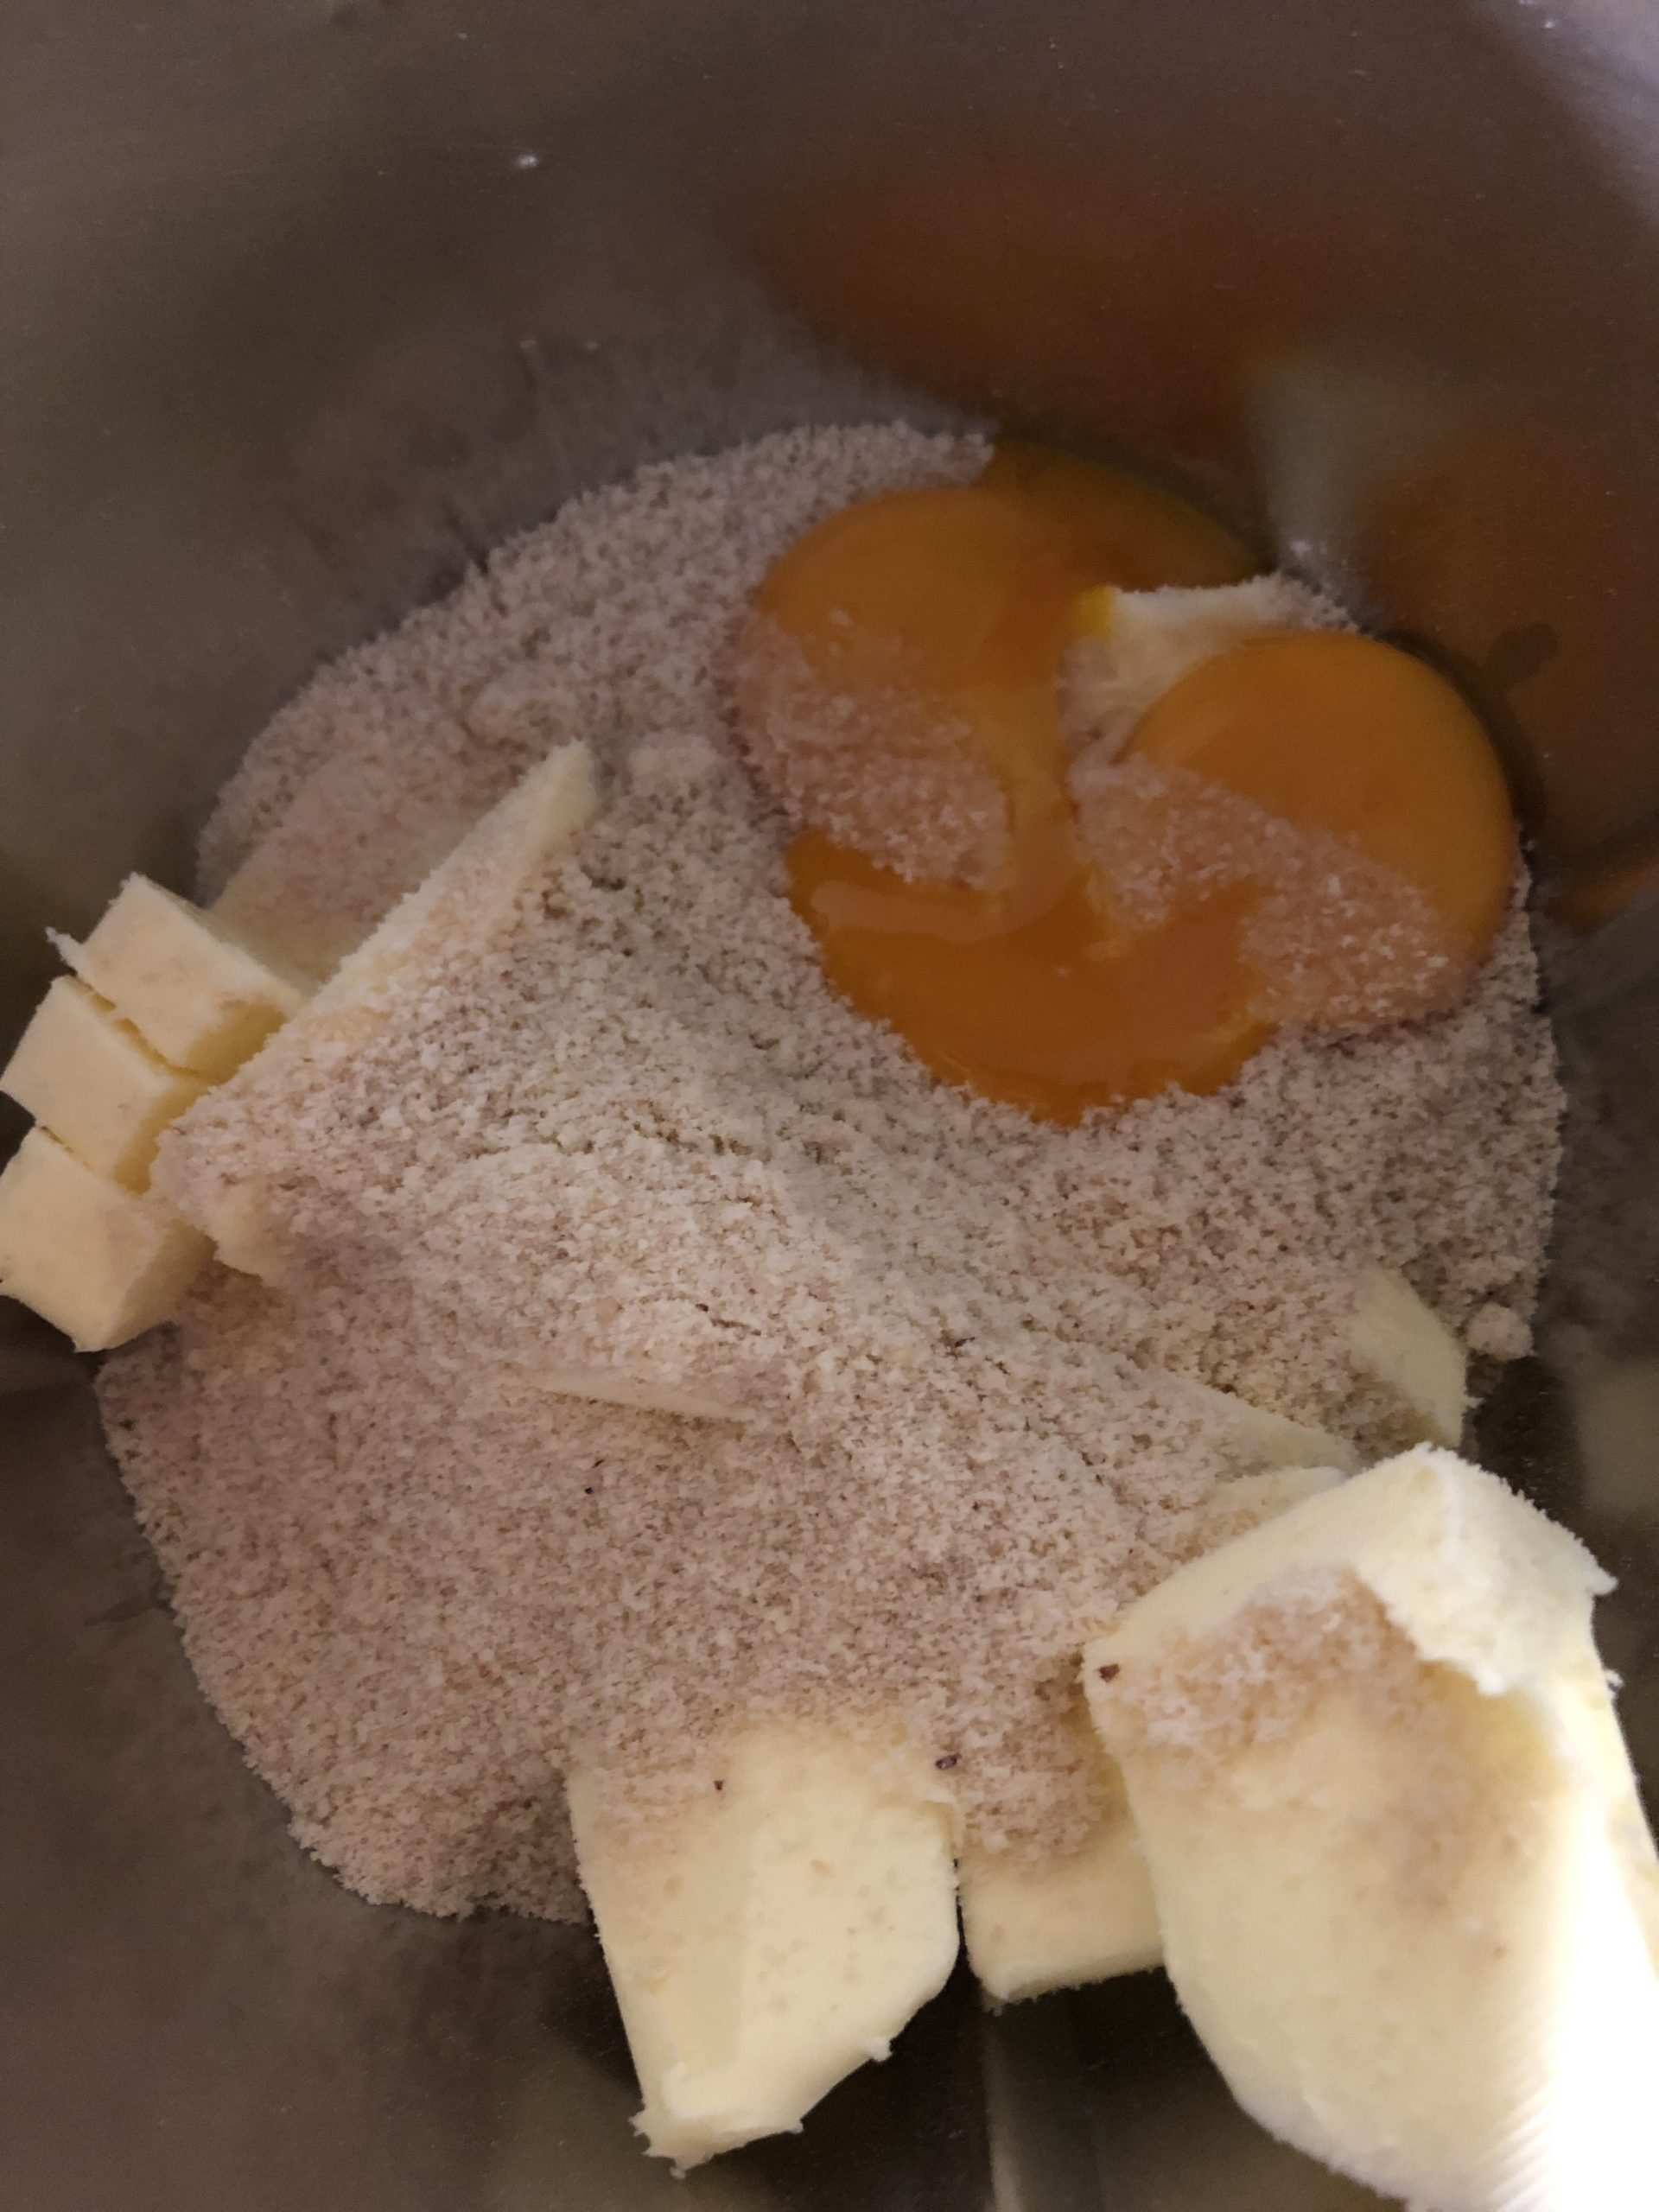
Bild zum Schritt 1 für das Bastel- und DIY-Abenteuer für Kinder: 'Schickt die Kinder zuerst zum Händewaschen. Dann werden die Schürzen...'

2

At first, the dough becomes very fine and crumbly during processing.
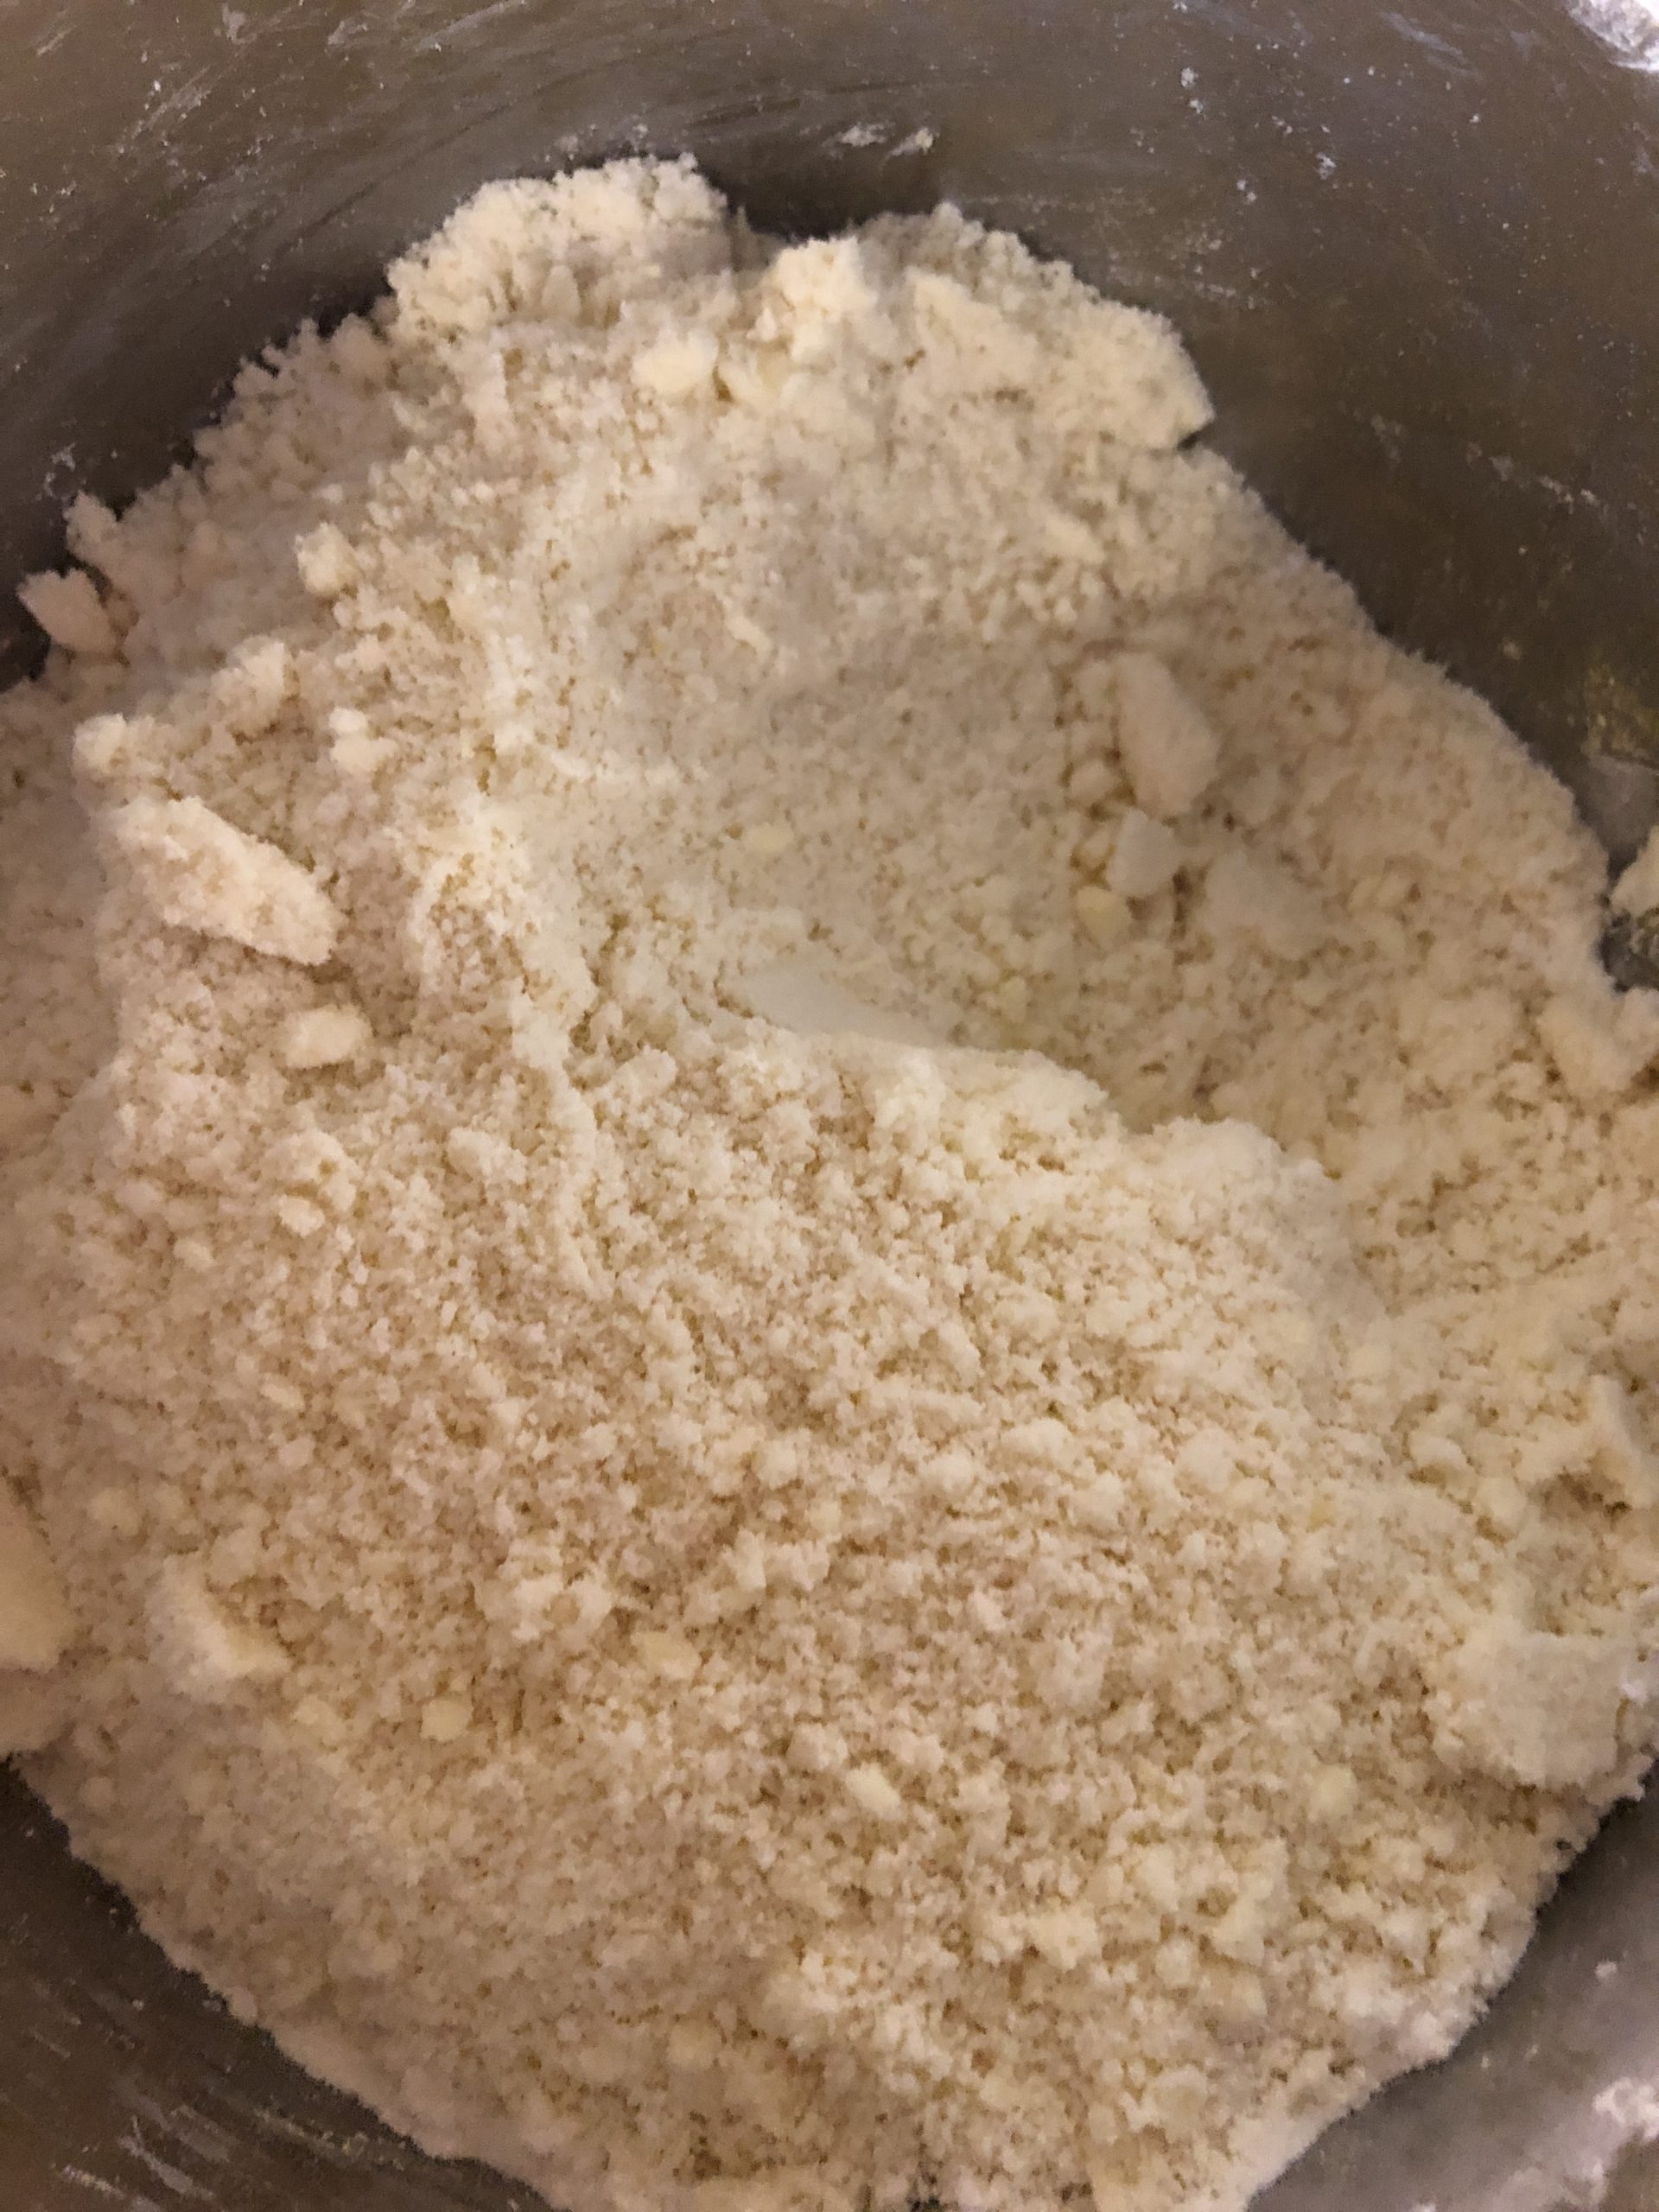
Bild zum Schritt 2 für das Bastel- und DIY-Abenteuer für Kinder: 'Anfangs wird der Teig beim Verarbeiten sehr fein und bröselig.'

3

The longer the dough is kneaded, the stronger it becomes.

Bild zum Schritt 3 für das Bastel- und DIY-Abenteuer für Kinder: 'Je länger der Teig geknetet wird, umso fester wird er.'

4

Finally form the dough into a large ball and place it cold for 20 minutes.

Bild zum Schritt 4 für das Bastel- und DIY-Abenteuer für Kinder: 'Den Teig abschließend zu einer großen Kugel formen und für...'

5

Cut off a piece of the dough and roll a long snake from it.

Bild zum Schritt 5 für das Bastel- und DIY-Abenteuer für Kinder: 'Schneidet euch ein Stück des Teiges ab und rollt daraus...'

6

Now cut the snake into evenly large pieces (circa 2cm).

Bild zum Schritt 6 für das Bastel- und DIY-Abenteuer für Kinder: 'Jetzt schneidet die Schlange in gleichmäßig große Stücke (circa 2cm).'

7

From each piece you now roll a ball in your palms. The ball should not be larger than 2cm.

Bild zum Schritt 7 für das Bastel- und DIY-Abenteuer für Kinder: 'Aus jedem Stück rollt ihr nun eine Kugel in euren...'

8

Place the balls with sufficient distance on a sheet with continuous baking foil or baking paper.

Bild zum Schritt 8 für das Bastel- und DIY-Abenteuer für Kinder: 'Setzt die Kugeln mit ausreichend Abstand auf ein Blech mit...'

Heats the oven to 180 degrees hot air and bakes the butternuts for about 10 minutes.
9

After baking, let the cookies cool down on the sheet for a little while, break them, take them off too hot.

Bild zum Schritt 10 für das Bastel- und DIY-Abenteuer für Kinder: 'Nach dem Backen lasst ihr die Plätzchen auf dem Blech...'

Simplest variant:
10

The still warm cookies can be turned in a mixture of powdered sugar and vanilla sugar. Be careful because they are very fragile!

Bild zum Schritt 12 für das Bastel- und DIY-Abenteuer für Kinder: 'Die noch warmen Plätzchen könnt ihr in einem Gemisch aus...'

11

Put them next to each other to cool down.

Bild zum Schritt 13 für das Bastel- und DIY-Abenteuer für Kinder: 'Legt sie zum Auskühlen nebeneinander.'

12

This very fast variant is ready.
This is particularly suitable if children want to try quickly or the children no longer have stamina to bake.

Bild zum Schritt 14 für das Bastel- und DIY-Abenteuer für Kinder: 'Fertig ist diese sehr schnelle Variante.   Diese ist...'

More elaborate variant:
13

Let the cookies cool down really well!
Then melts white envelope. For this, put the envelope into a cup and place the cup in a pot with hot water. Then stir until the envelope melts. Now dive the spot with the top into the envelope.

Bild zum Schritt 16 für das Bastel- und DIY-Abenteuer für Kinder: 'Lasst die Plätzchen richtig gut auskühlen!   Dann schmelzt...'

14

Gently strip off the excess chocolate on the side of the cup.

Bild zum Schritt 17 für das Bastel- und DIY-Abenteuer für Kinder: 'Streift die überschüssige Schokolade am Tassenrand vorsichtig ab.'

15

Now put it on the baking paper for drying.

Bild zum Schritt 18 für das Bastel- und DIY-Abenteuer für Kinder: 'Legt sie nun auf das Backpapier zum Trocknen.'

16

Then you melt the dark chocolate glaze and sprinkle it on the cookies.

Bild zum Schritt 19 für das Bastel- und DIY-Abenteuer für Kinder: 'Anschließend schmelzt ihr die dunkle Schokoladenglasur und sprenkelt diese auf...'

17

For this you take a pointed knife and dip the tip into the liquid chocolate glaze. Then you move the knife over the spots back and forth. Dive the knife tip again and again into the chocolate glaze and repeat the process until you like the result.

Bild zum Schritt 20 für das Bastel- und DIY-Abenteuer für Kinder: 'Dafür nehmt ihr ein spitzes Messer und taucht die Spitze...'

18

Let the cookie pralines dry well.
Finally, put her in a can to store.
Tip: Place in butterbread paper between the floors for stacking, otherwise they stick to each other.

Bild zum Schritt 21 für das Bastel- und DIY-Abenteuer für Kinder: 'Lasst die Plätzchen-Pralinen gut trocknen.  Abschließend legt ihr sie...'

19

2. Bild zum Schritt 21 für das Bastel- und DIY-Abenteuer für Kinder: 'Lasst die Plätzchen-Pralinen gut trocknen.  Abschließend legt ihr sie...'

Alternative variant:
20

You prefer dark chocolate? Then the cookies dip into a dark chocolate glaze. For this, you put the chocolate in a cup and put the cup in a pot with hot water. Then stir until the chocolate melts.

Bild zum Schritt 24 für das Bastel- und DIY-Abenteuer für Kinder: 'Ihr bevorzugt dunkle Schokolade? Dann taucht die Plätzchen in eine...'

21

After drying, you pollinate the cookies with some powdered sugar.
Attention: white cuverture is not so good for decorating on the chocolate glaze. The reason is that it is firmer in consistency than the chocolate glaze.

Bild zum Schritt 25 für das Bastel- und DIY-Abenteuer für Kinder: 'Nach dem Trocknen bestäubt ihr die Plätzchen mit etwas Puderzucker....'

22

Enjoy baking!

Bild zum Schritt 26 für das Bastel- und DIY-Abenteuer für Kinder: 'Viel Freude beim Backen!'

23

Stay creative and try out. Surely you have more ideas to beautify your cookies.
You're welcome to write to me.

Materials

Ingredients for the dough:
 250 g Butter
 2 gals Vanilla sugar
 a few drops of Rumaroma
 1 tbsp Baking powder
 350 g Flour
For decorating:
 1. powdered sugar mixed with vanill sugar
 2. white couverture and chocolate glaze
 3. dark chocolate glaze and powdered sugar
That's what you need.
 Kitchen machine
 Sheet with baking paper or continuous baking film
 Small bowl
 Spoonor pointed knife for decorating
 Cup to melt the chocolate
 Aprons
All links marked with a shopping cart lead to Amazon - here we have selected products that we would order ourselves and in part also ordered. In a qualified purchase via the advertising link, we as Amazon partner receive a commission, for you there are no costs. You thus support our cost- and advertising banner-free, educational offer.

Directions

1

First send the children to wash their hands. Then the aprons are put on and then it can start.
Weighs all the ingredients and puts them in a mixing bowl.
Then knead all the ingredients with the kitchen machine to a smooth dough.
Tip: You can also let the children knead with your hands, which is great fun for many children!

Bild zum Schritt 1 für das Bastel- und DIY-Abenteuer für Kinder: 'Schickt die Kinder zuerst zum Händewaschen. Dann werden die Schürzen...'

2

At first, the dough becomes very fine and crumbly during processing.

Bild zum Schritt 2 für das Bastel- und DIY-Abenteuer für Kinder: 'Anfangs wird der Teig beim Verarbeiten sehr fein und bröselig.'

3

The longer the dough is kneaded, the stronger it becomes.
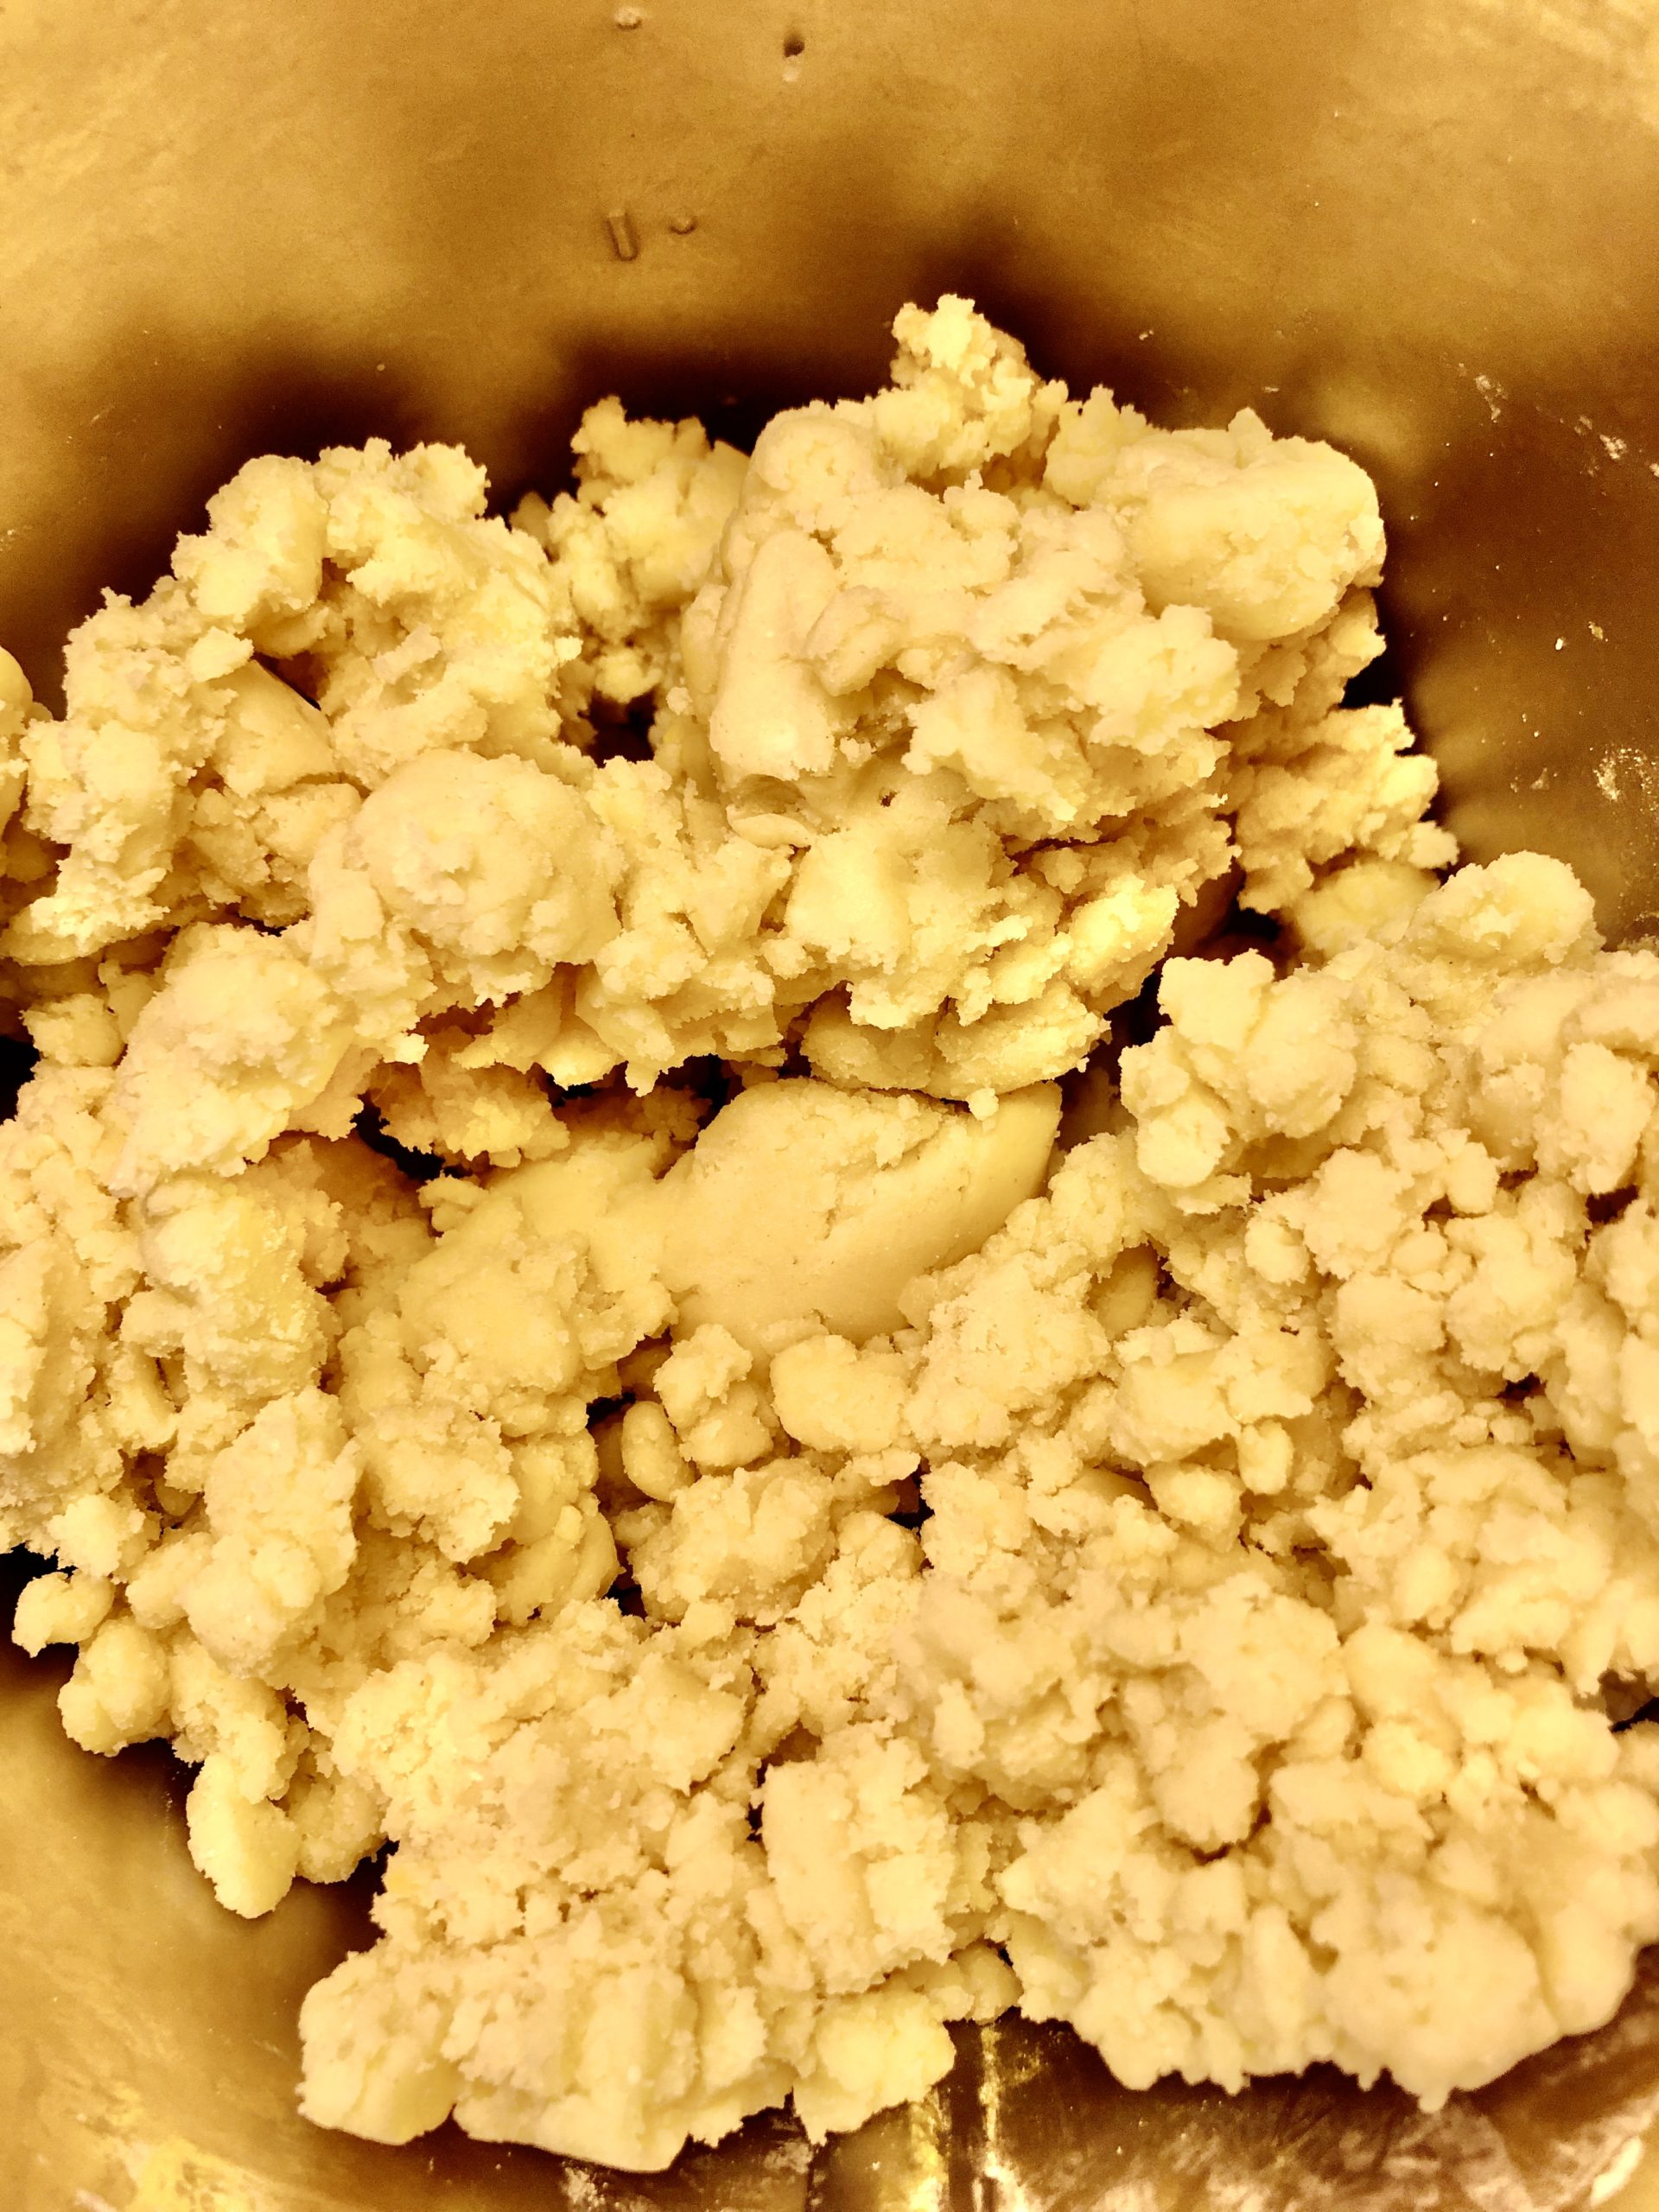
Bild zum Schritt 3 für das Bastel- und DIY-Abenteuer für Kinder: 'Je länger der Teig geknetet wird, umso fester wird er.'

4

Finally form the dough into a large ball and place it cold for 20 minutes.
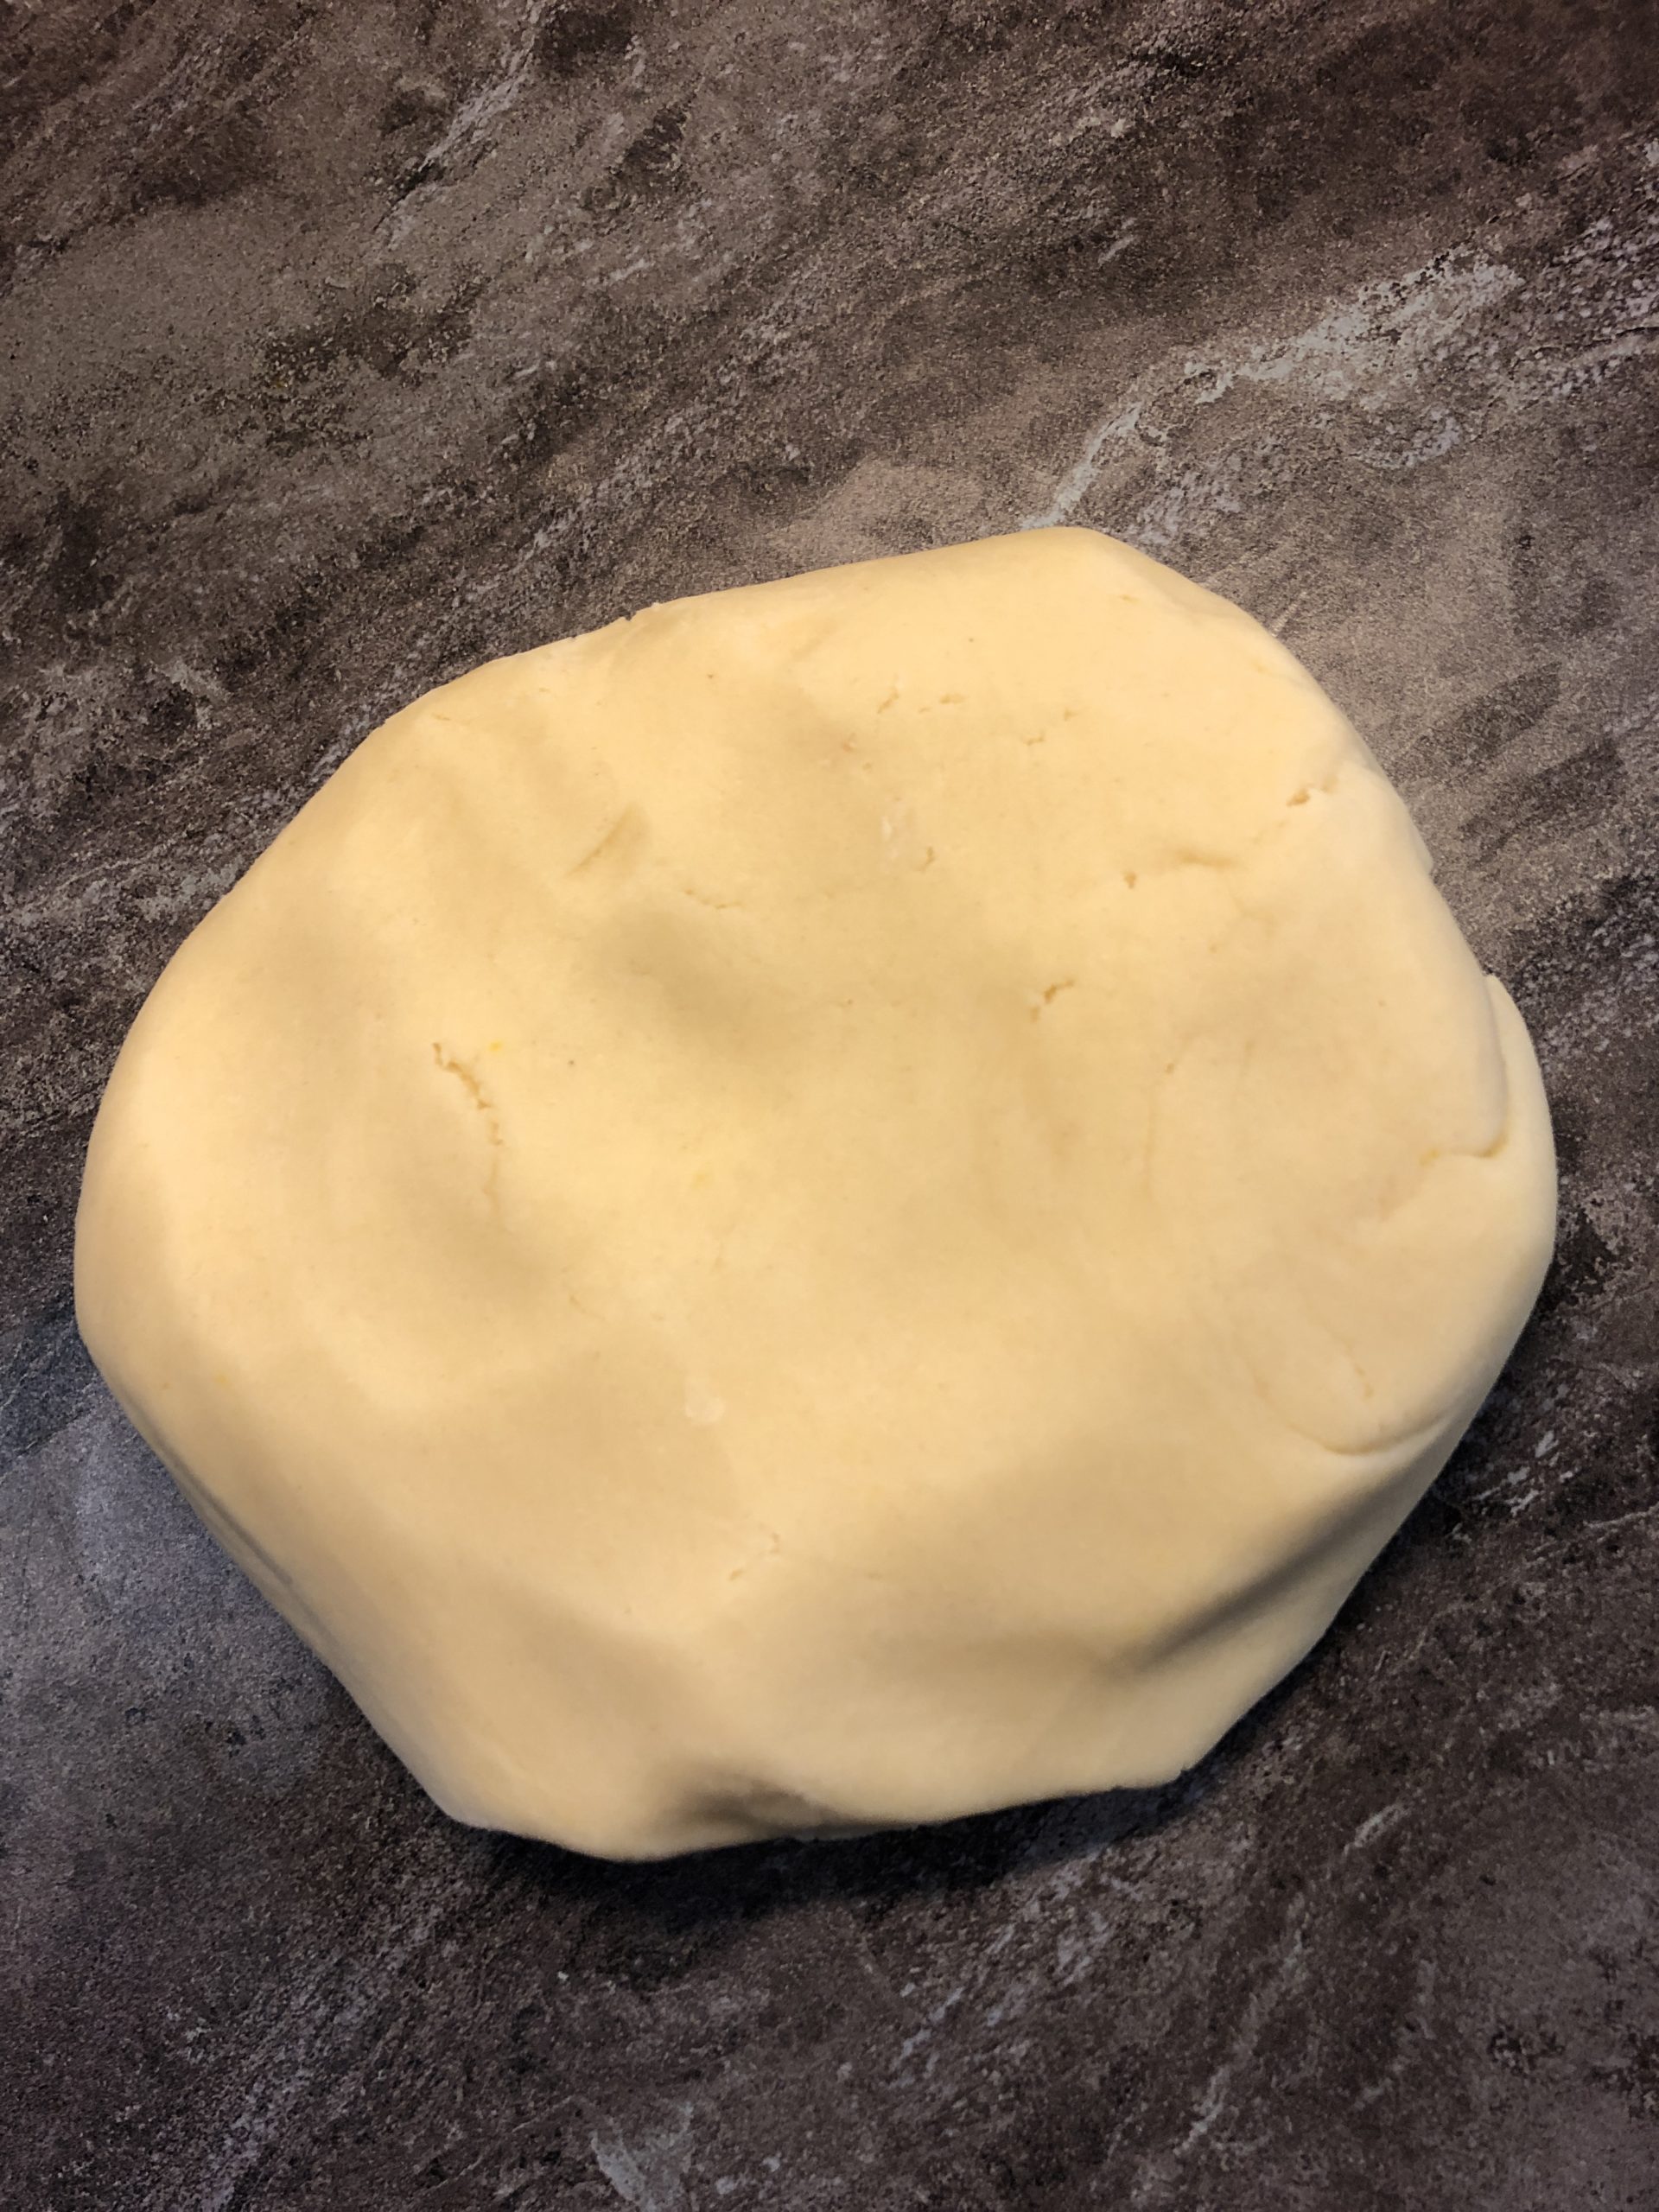
Bild zum Schritt 4 für das Bastel- und DIY-Abenteuer für Kinder: 'Den Teig abschließend zu einer großen Kugel formen und für...'

5

Cut off a piece of the dough and roll a long snake from it.
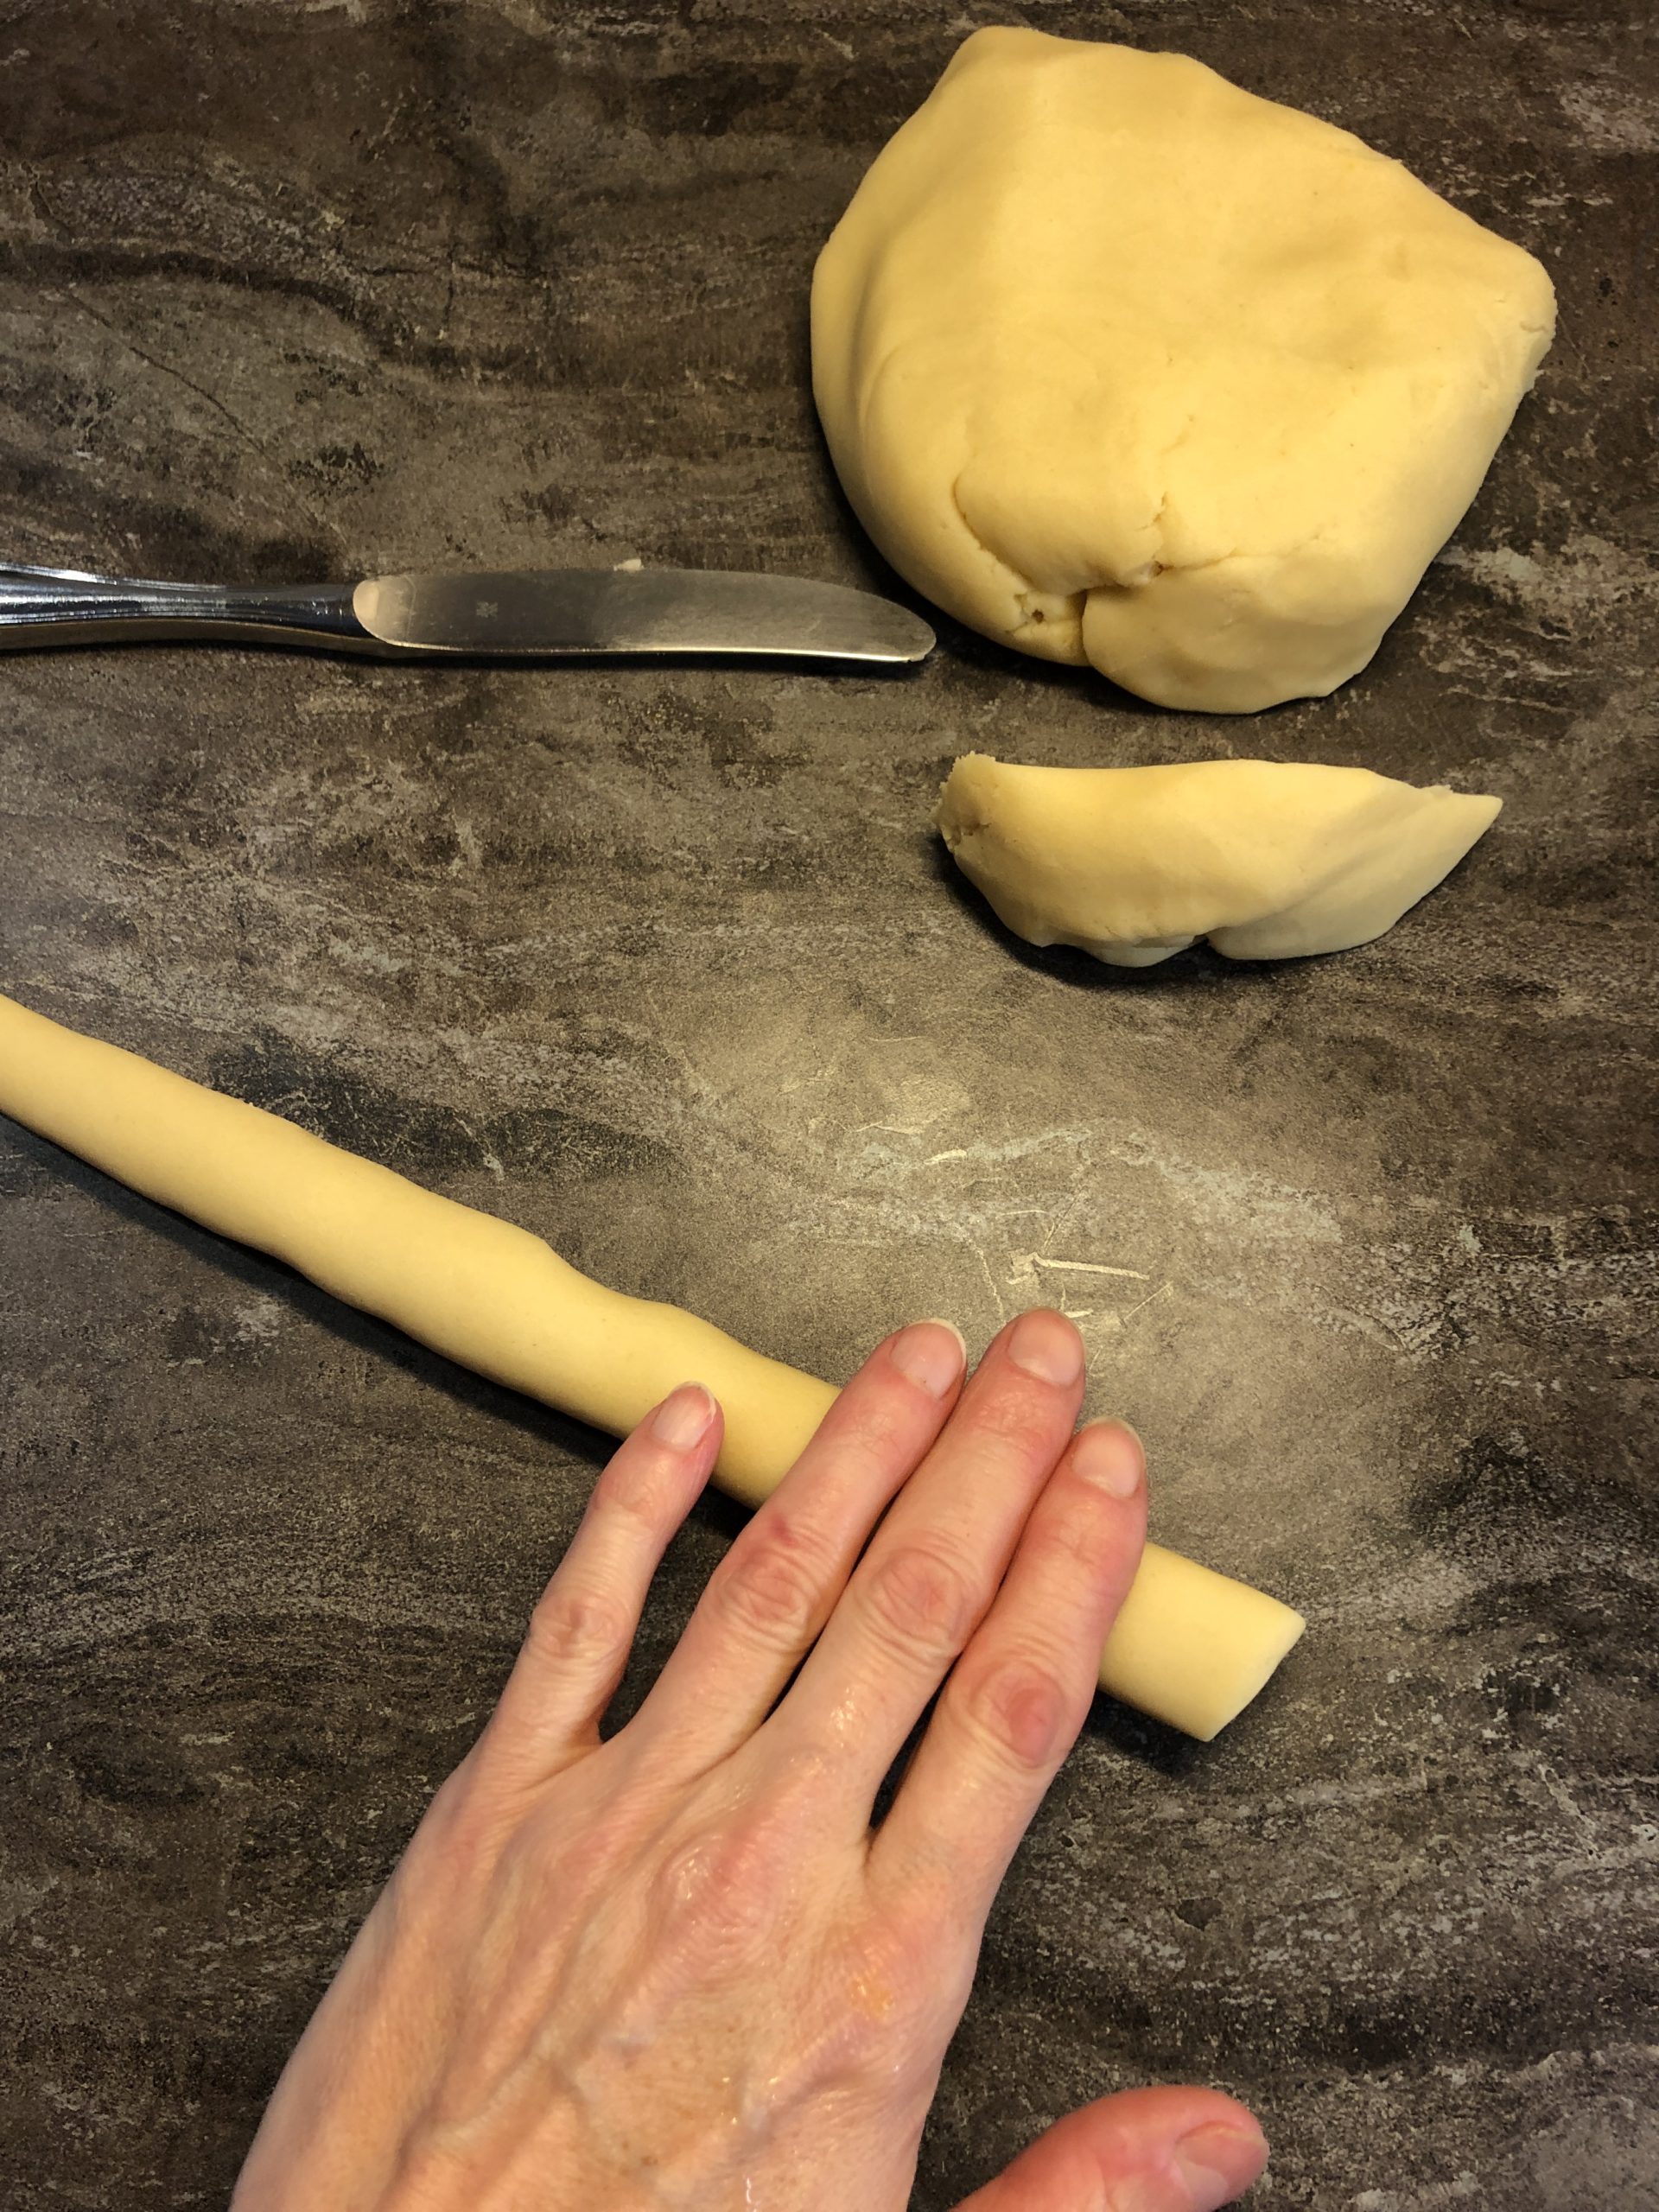
Bild zum Schritt 5 für das Bastel- und DIY-Abenteuer für Kinder: 'Schneidet euch ein Stück des Teiges ab und rollt daraus...'

6

Now cut the snake into evenly large pieces (circa 2cm).
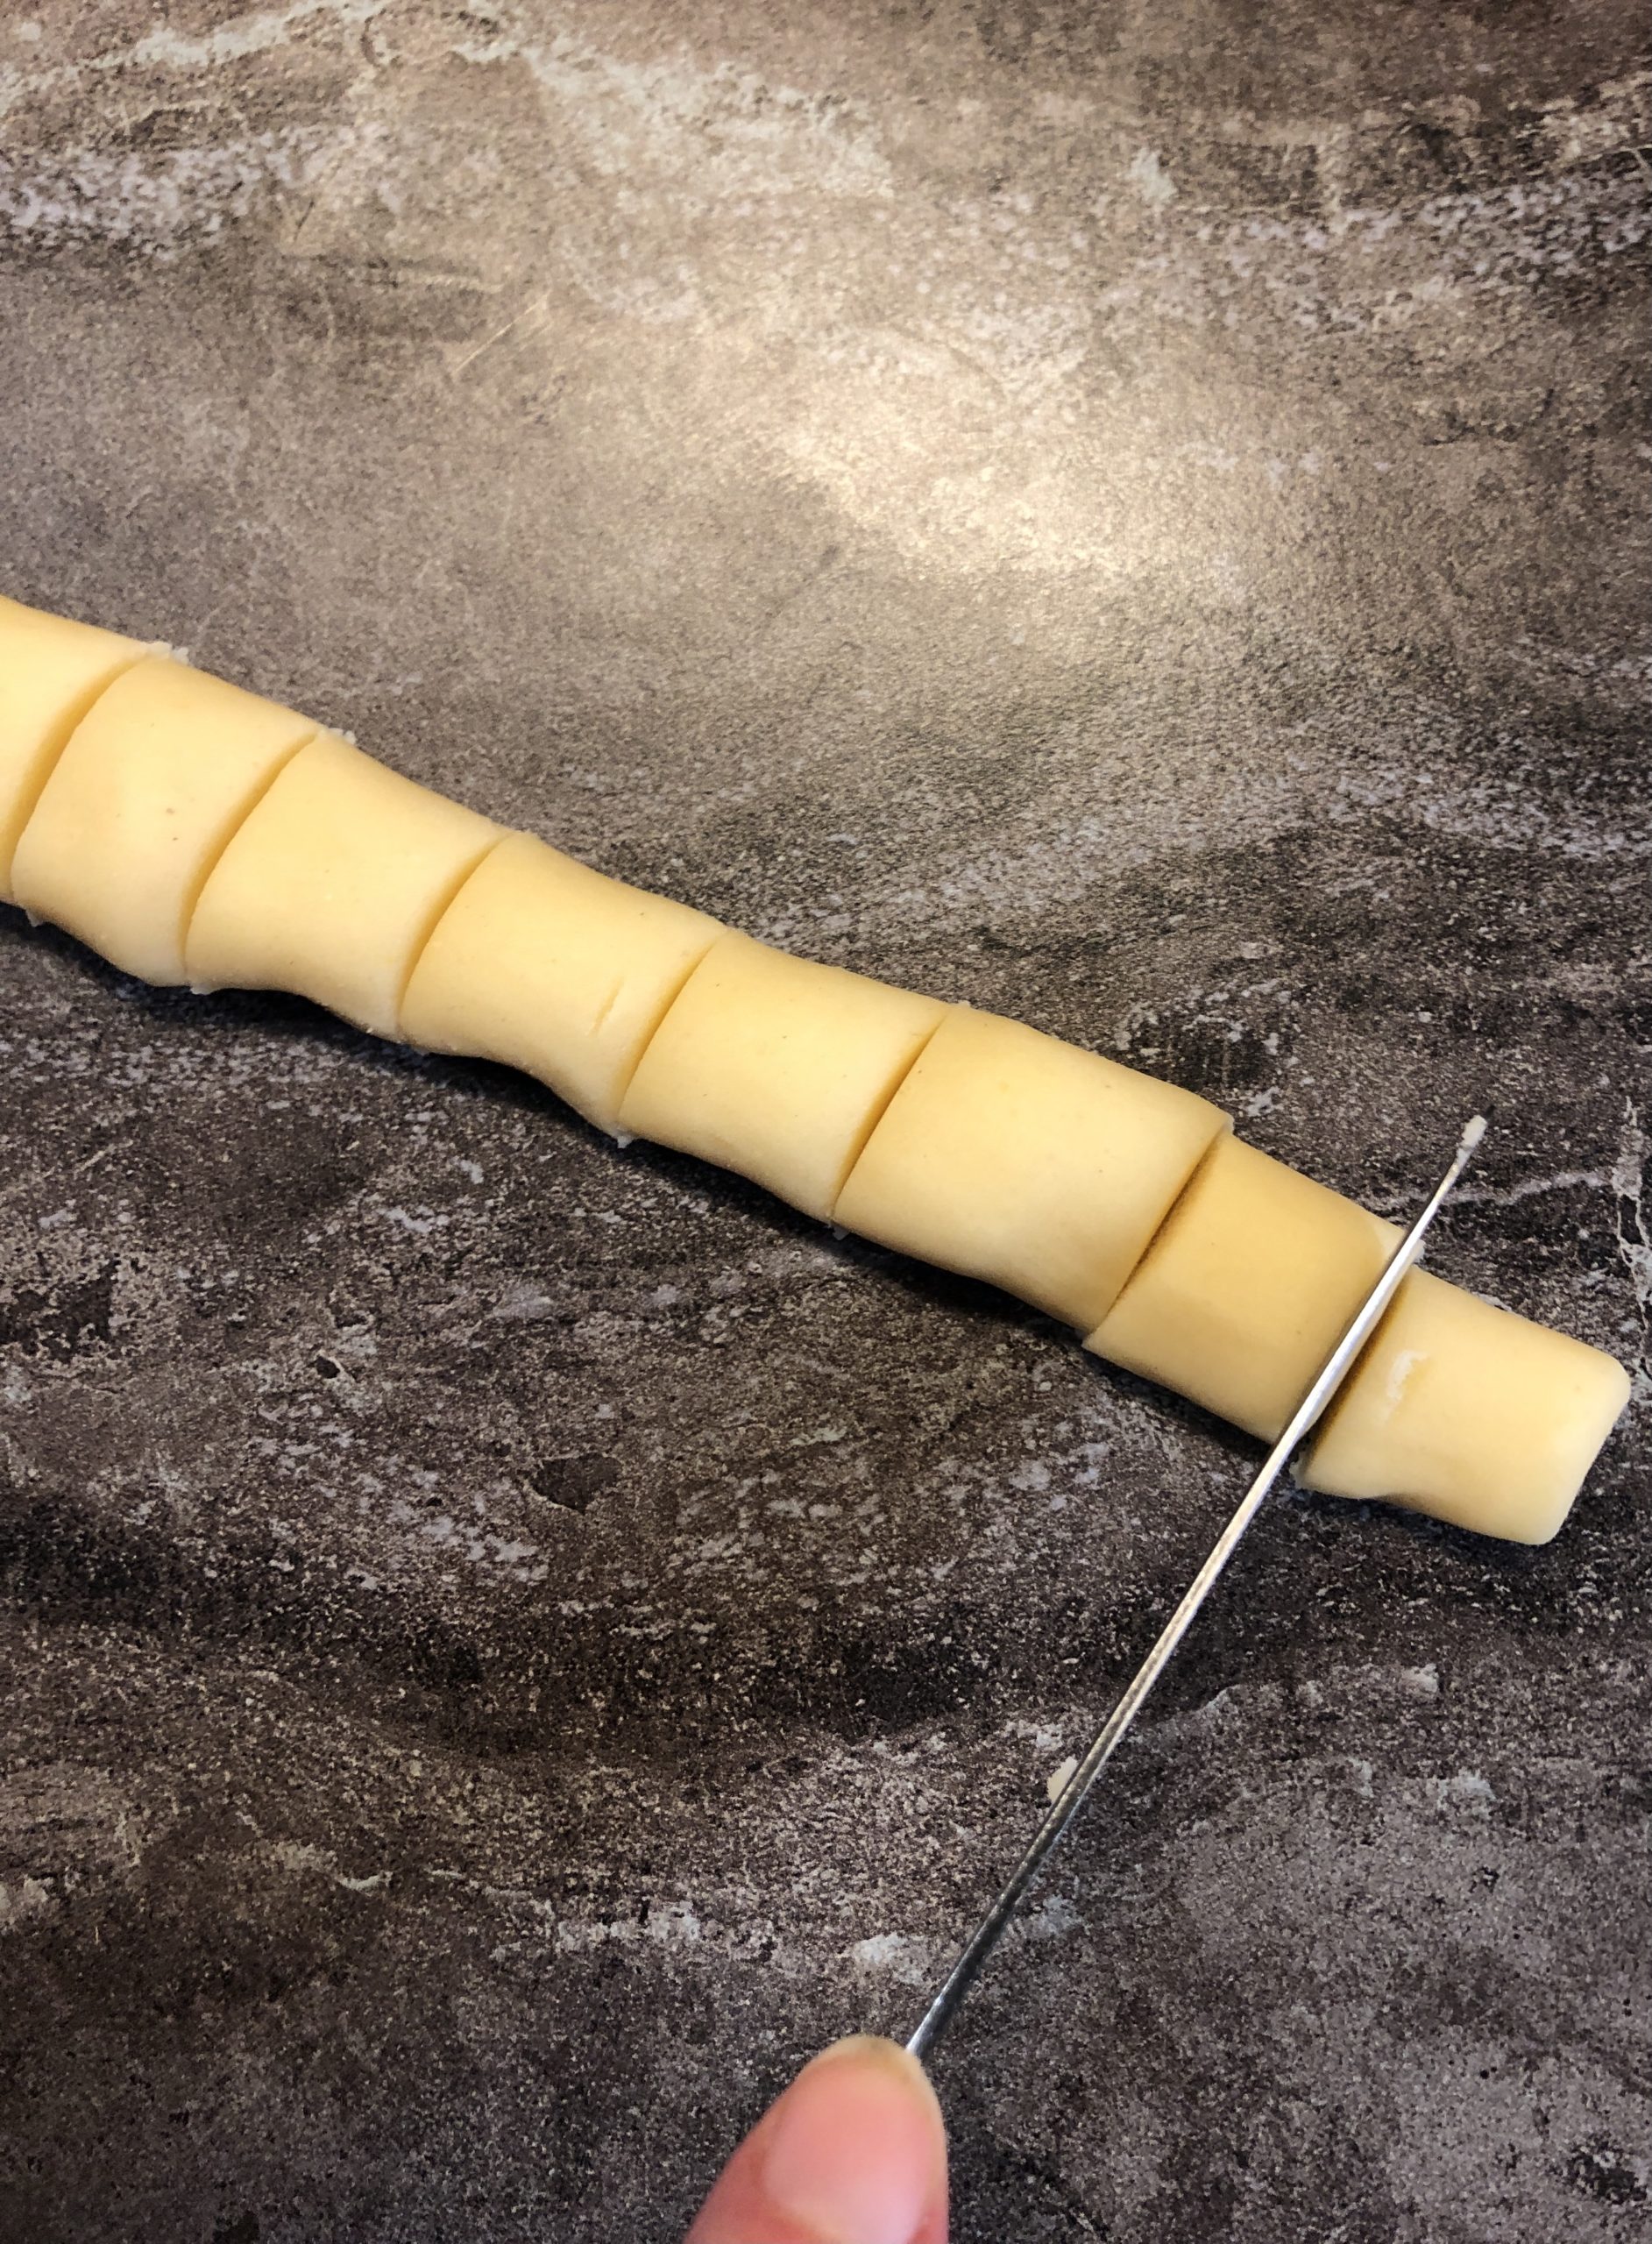
Bild zum Schritt 6 für das Bastel- und DIY-Abenteuer für Kinder: 'Jetzt schneidet die Schlange in gleichmäßig große Stücke (circa 2cm).'

7

From each piece you now roll a ball in your palms. The ball should not be larger than 2cm.
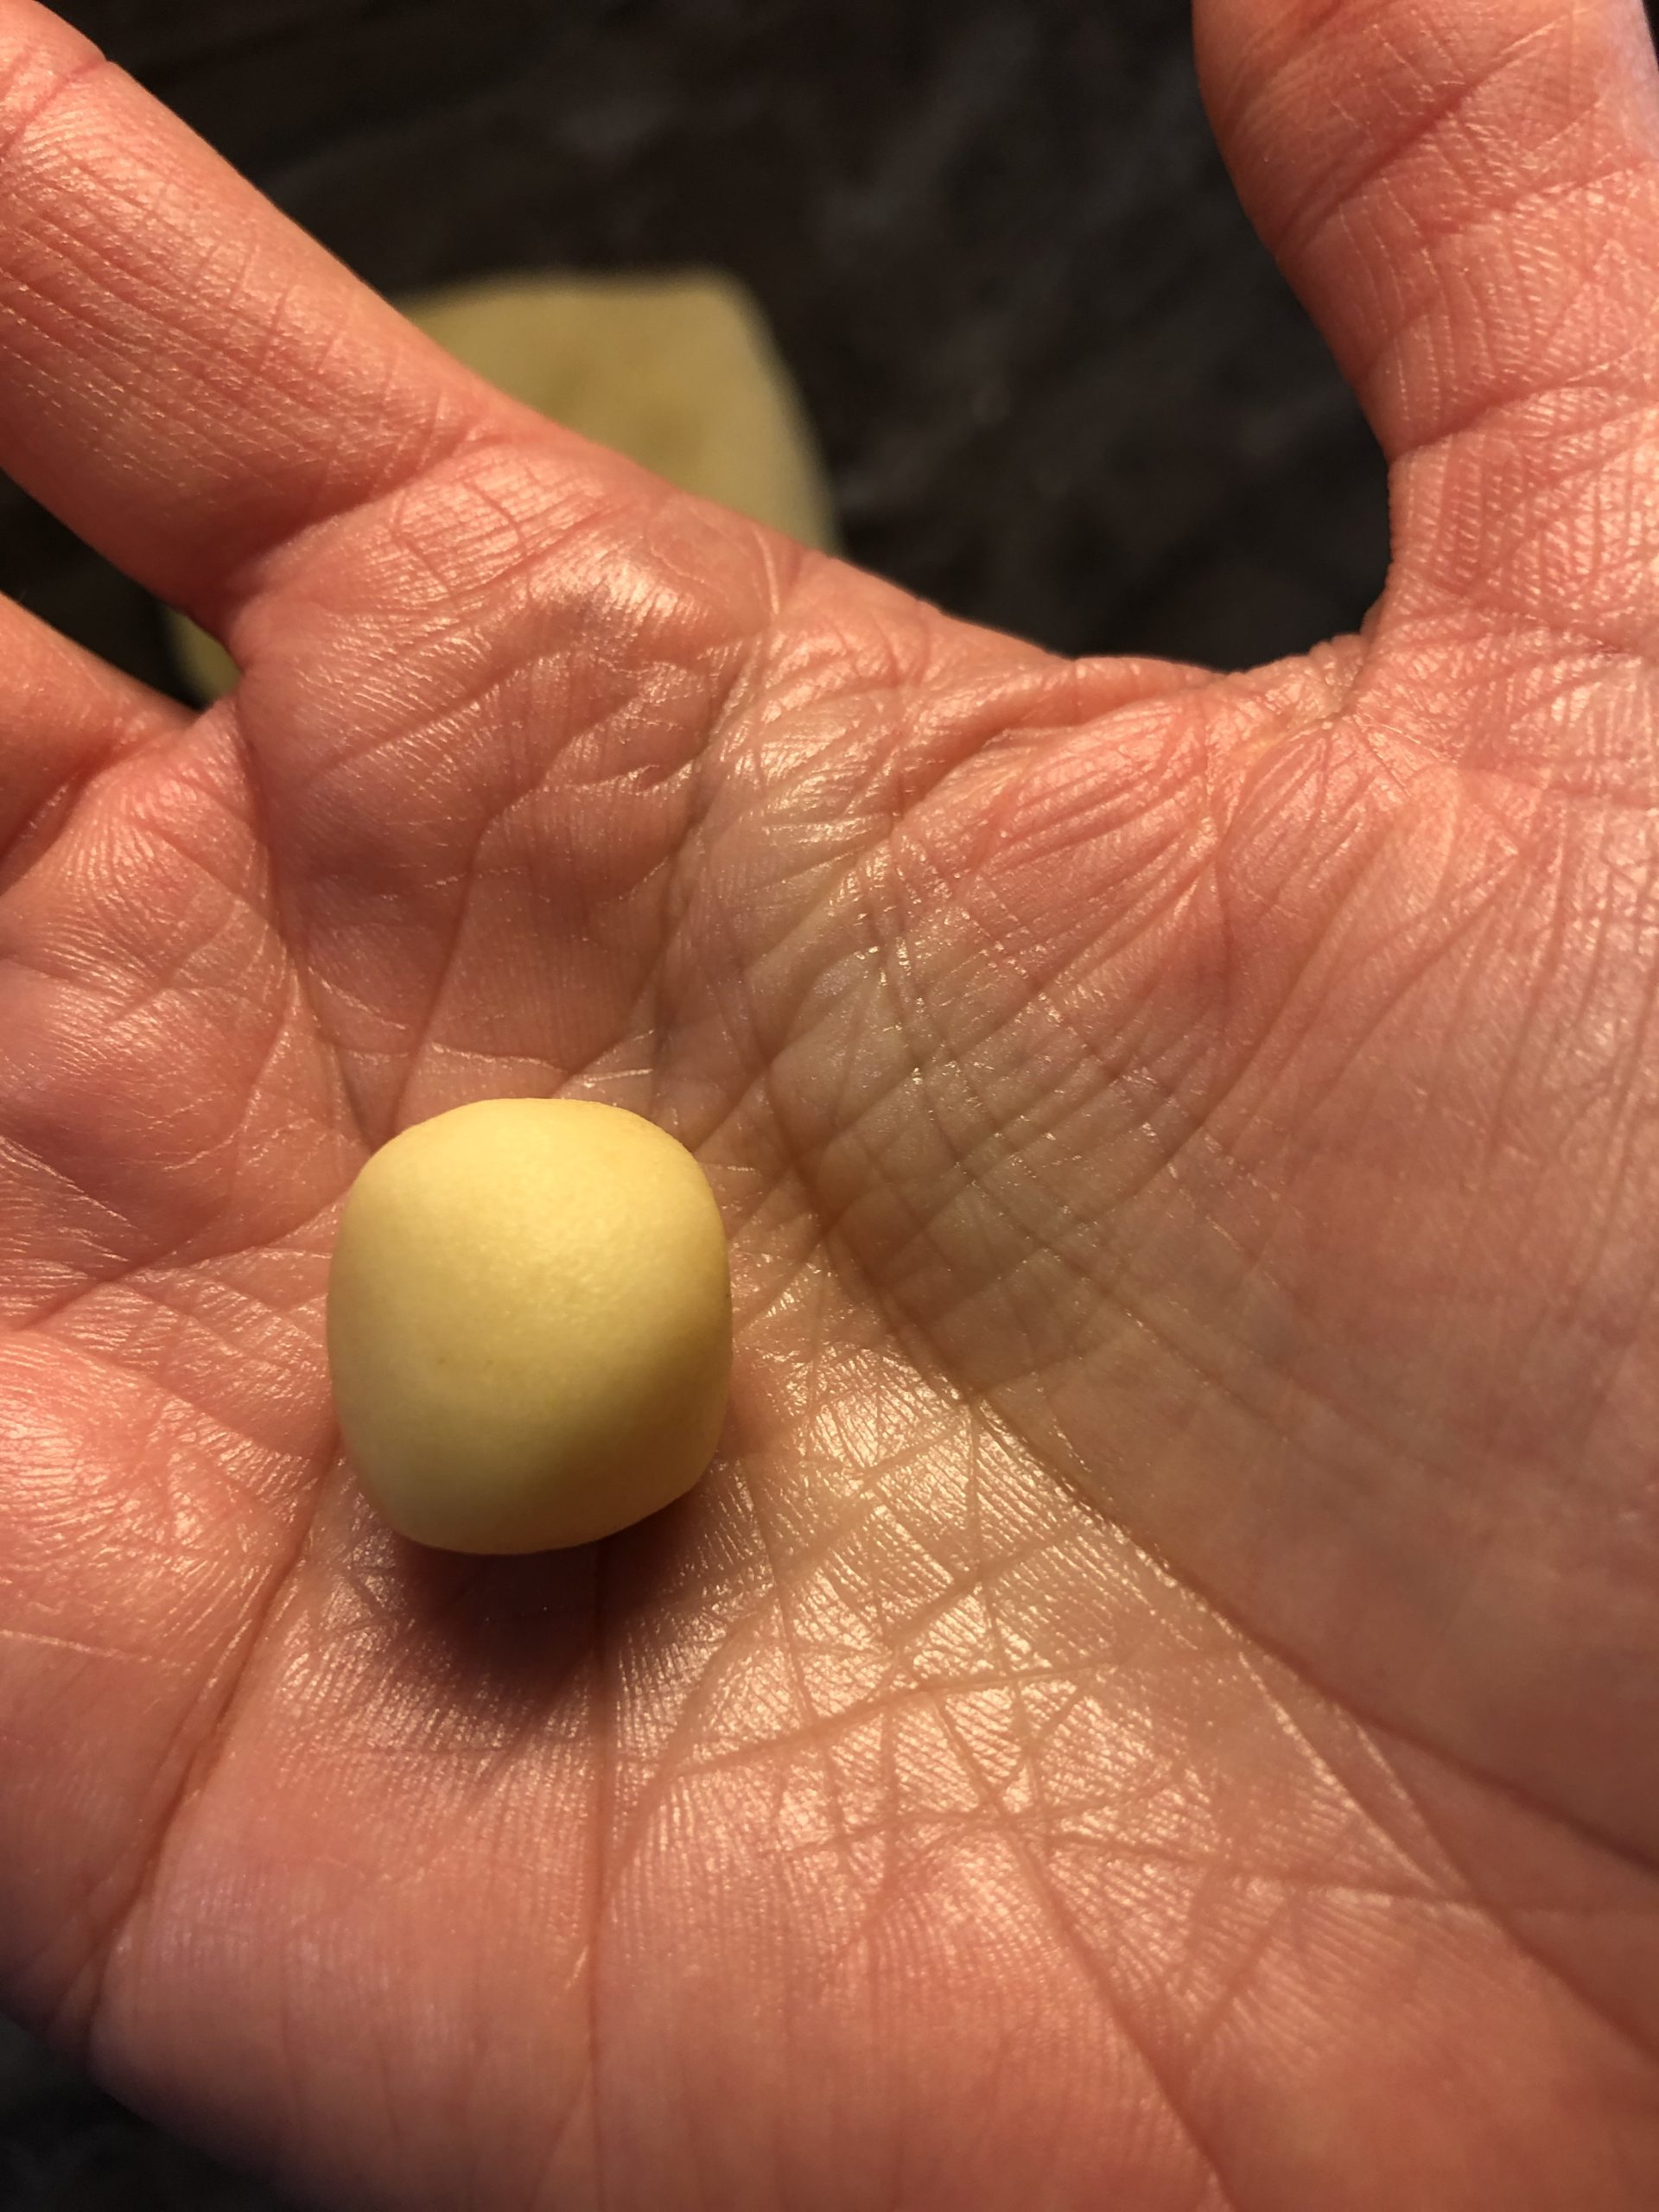
Bild zum Schritt 7 für das Bastel- und DIY-Abenteuer für Kinder: 'Aus jedem Stück rollt ihr nun eine Kugel in euren...'

8

Place the balls with sufficient distance on a sheet with continuous baking foil or baking paper.
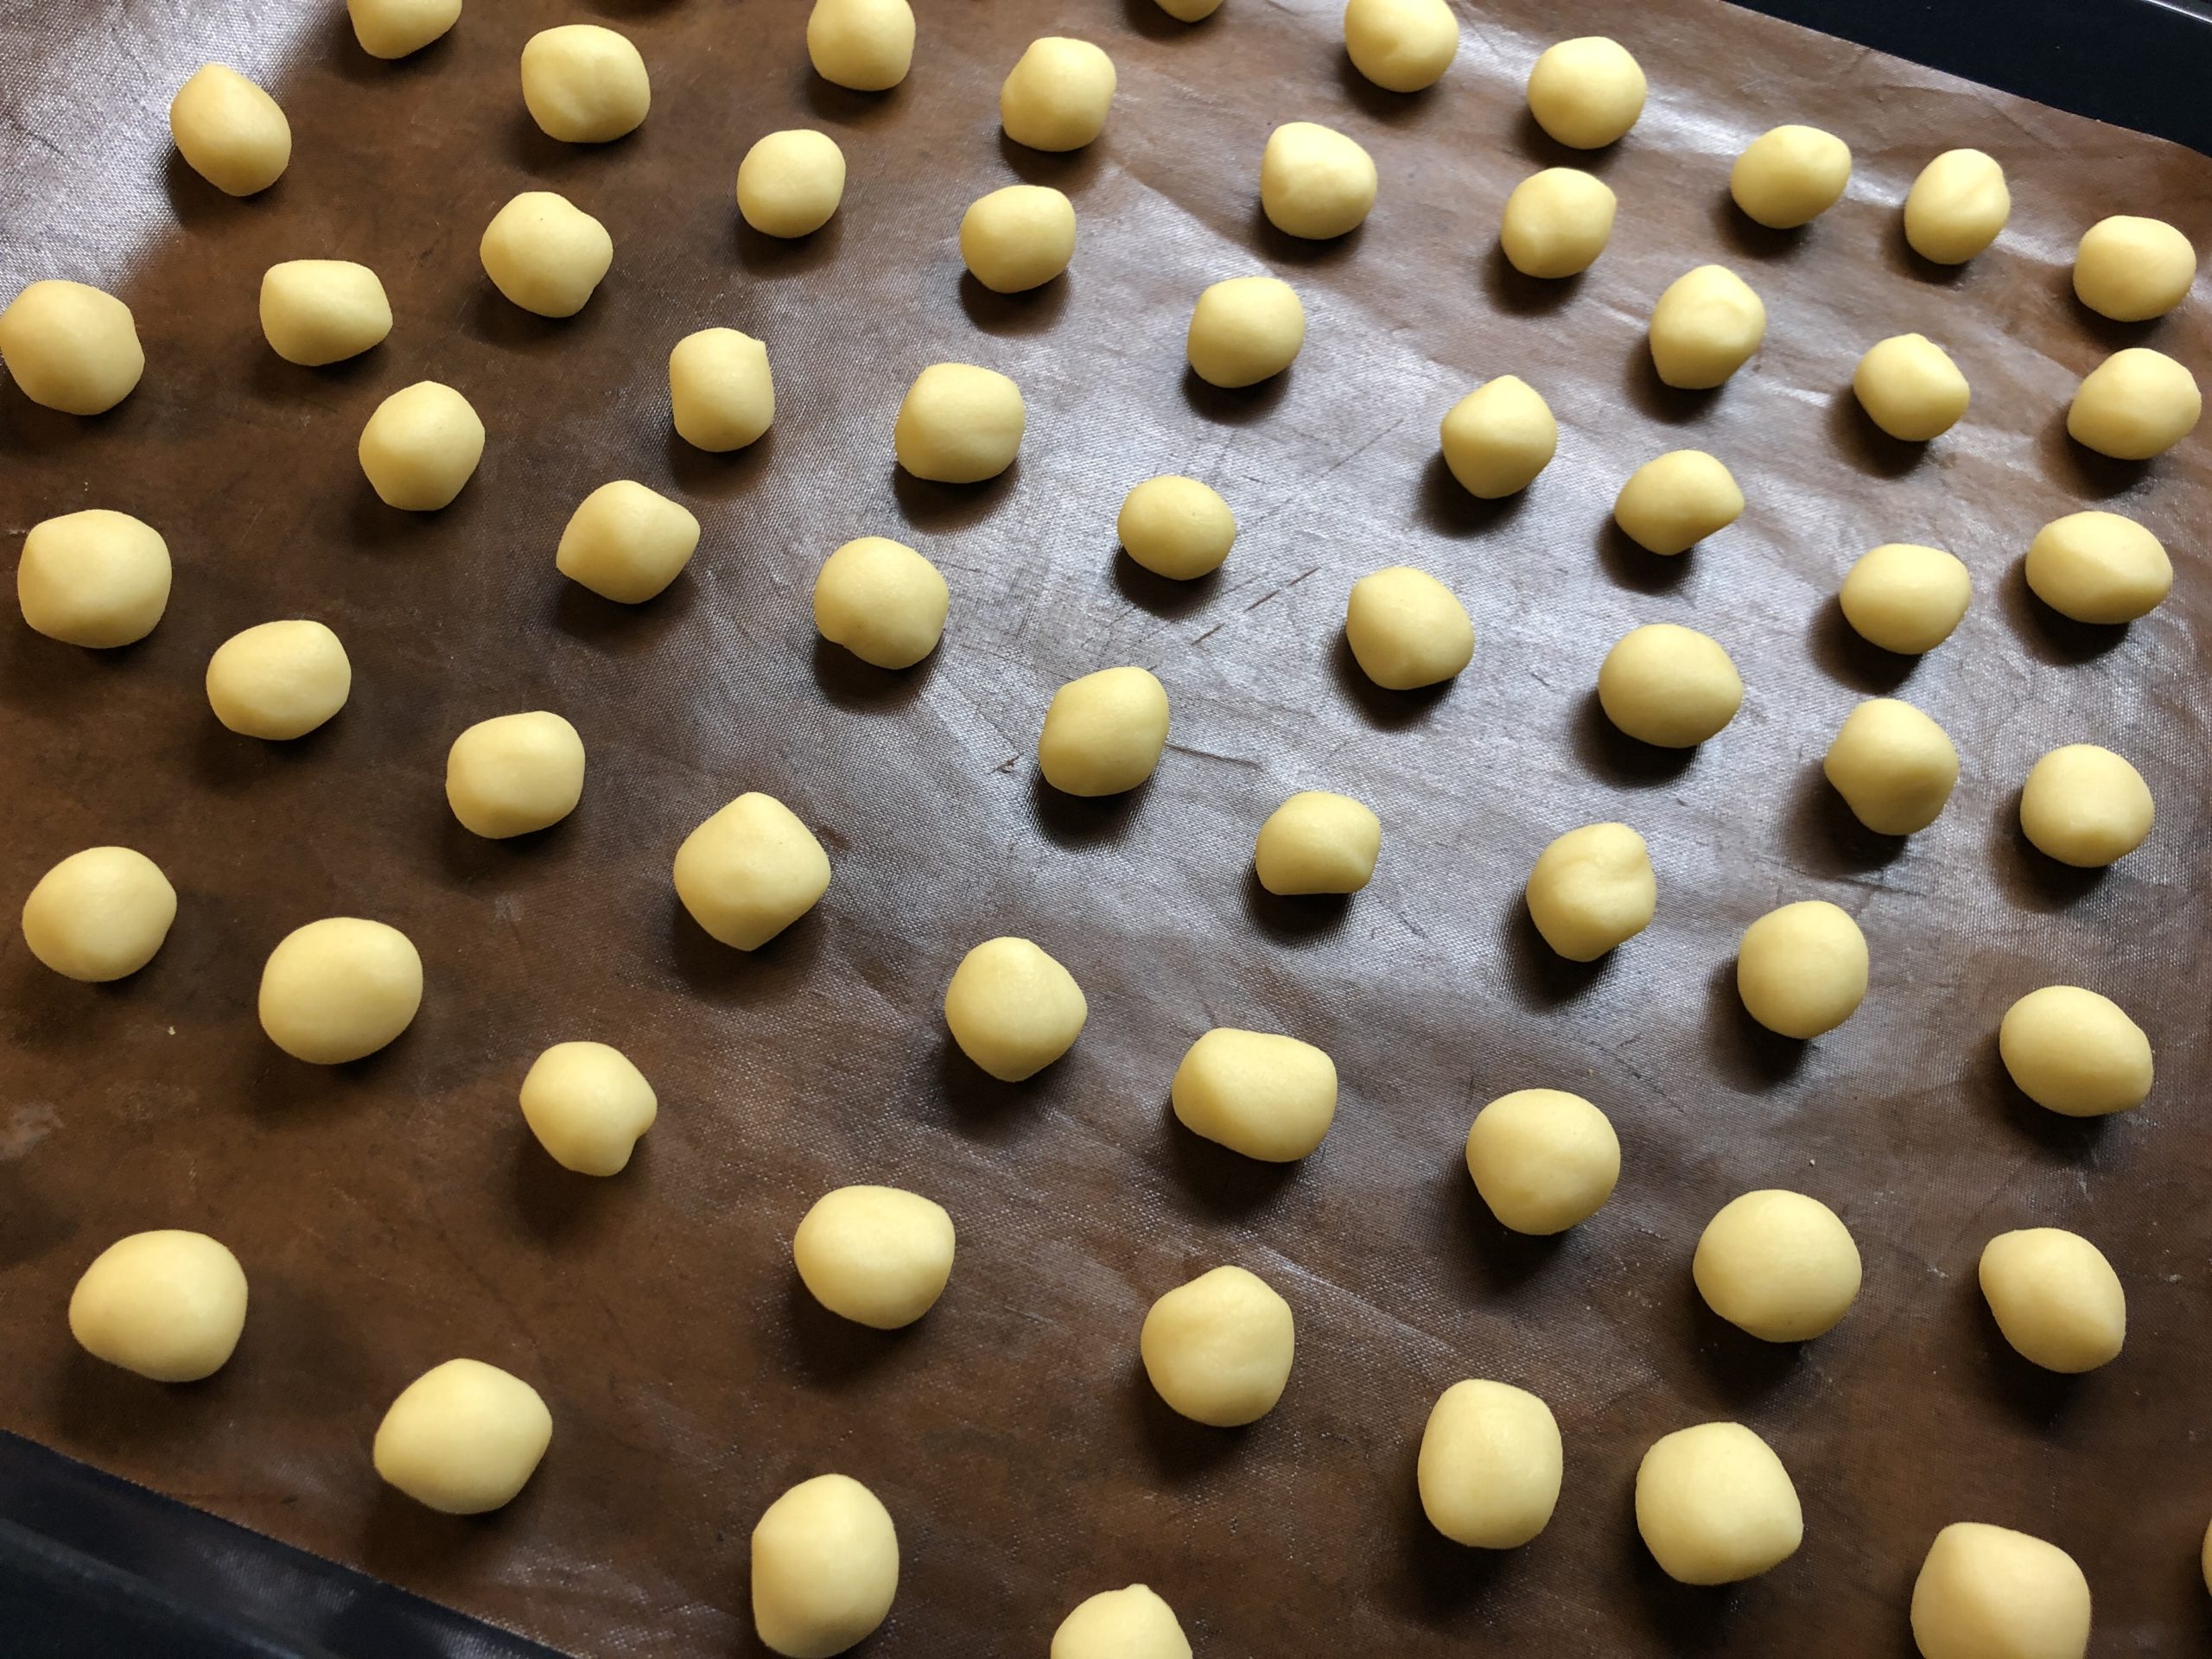
Bild zum Schritt 8 für das Bastel- und DIY-Abenteuer für Kinder: 'Setzt die Kugeln mit ausreichend Abstand auf ein Blech mit...'

Heats the oven to 180 degrees hot air and bakes the butternuts for about 10 minutes.
9

After baking, let the cookies cool down on the sheet for a little while, break them, take them off too hot.
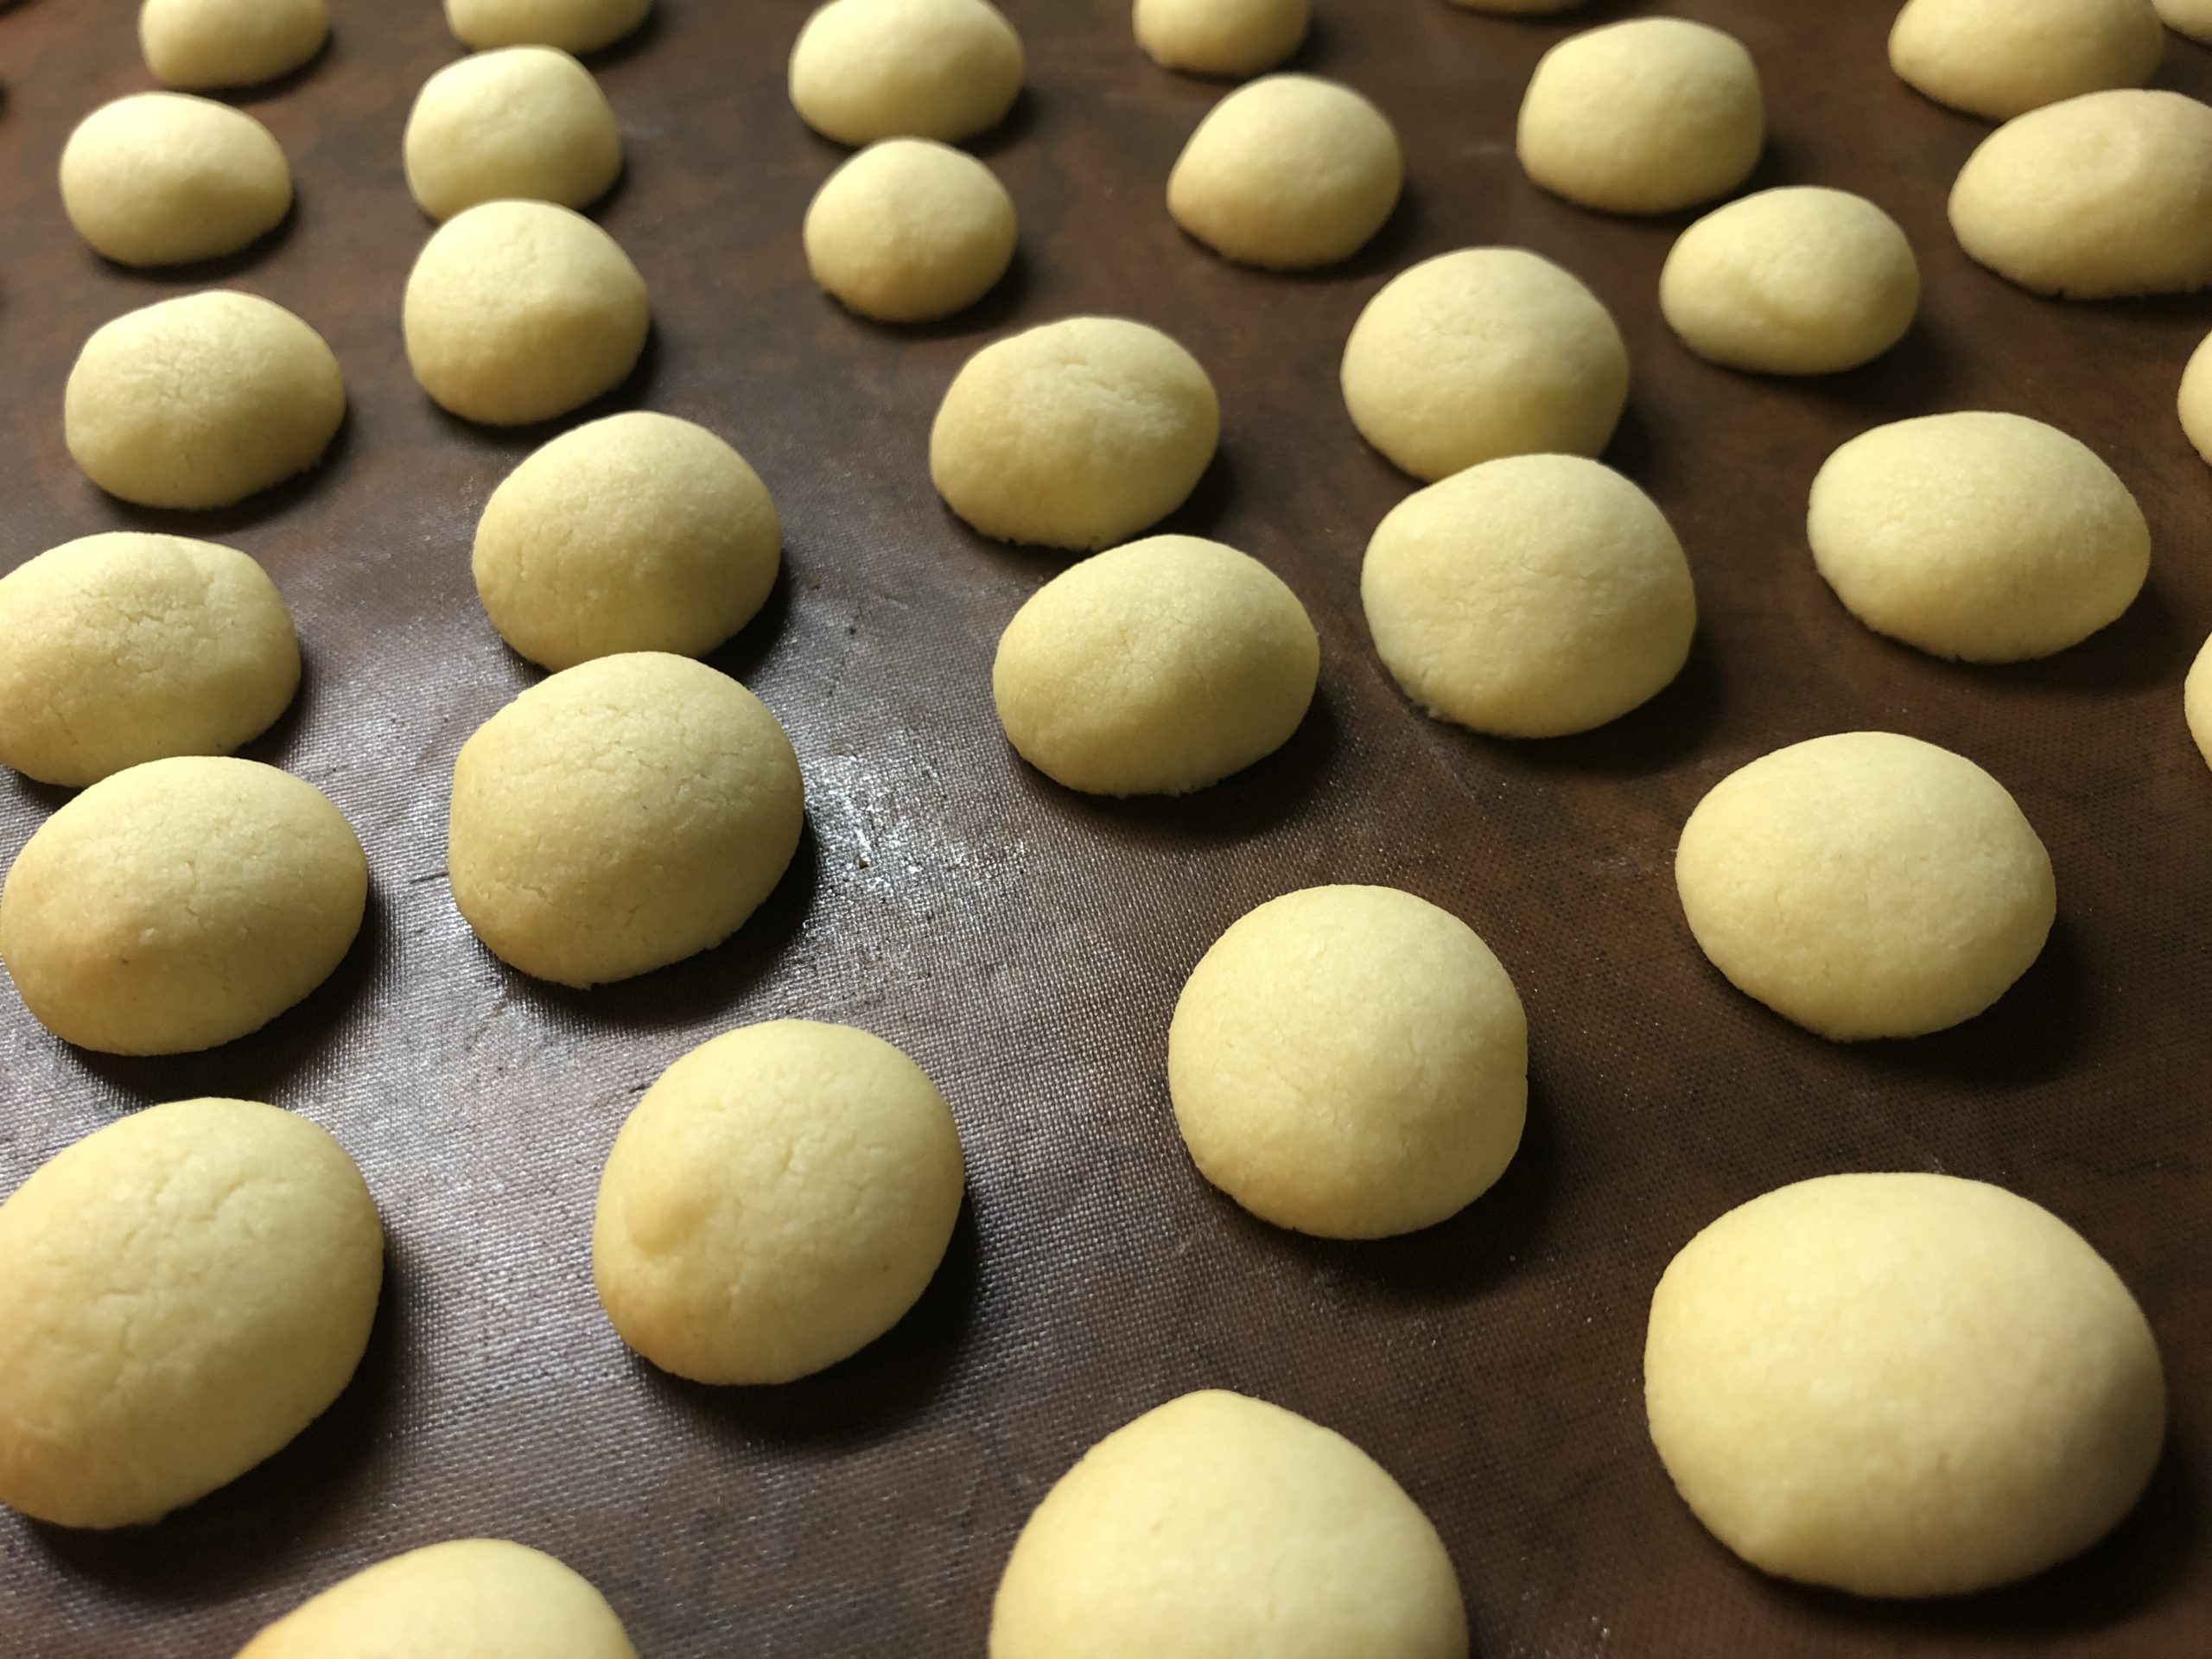
Bild zum Schritt 10 für das Bastel- und DIY-Abenteuer für Kinder: 'Nach dem Backen lasst ihr die Plätzchen auf dem Blech...'

Simplest variant:
10

The still warm cookies can be turned in a mixture of powdered sugar and vanilla sugar. Be careful because they are very fragile!
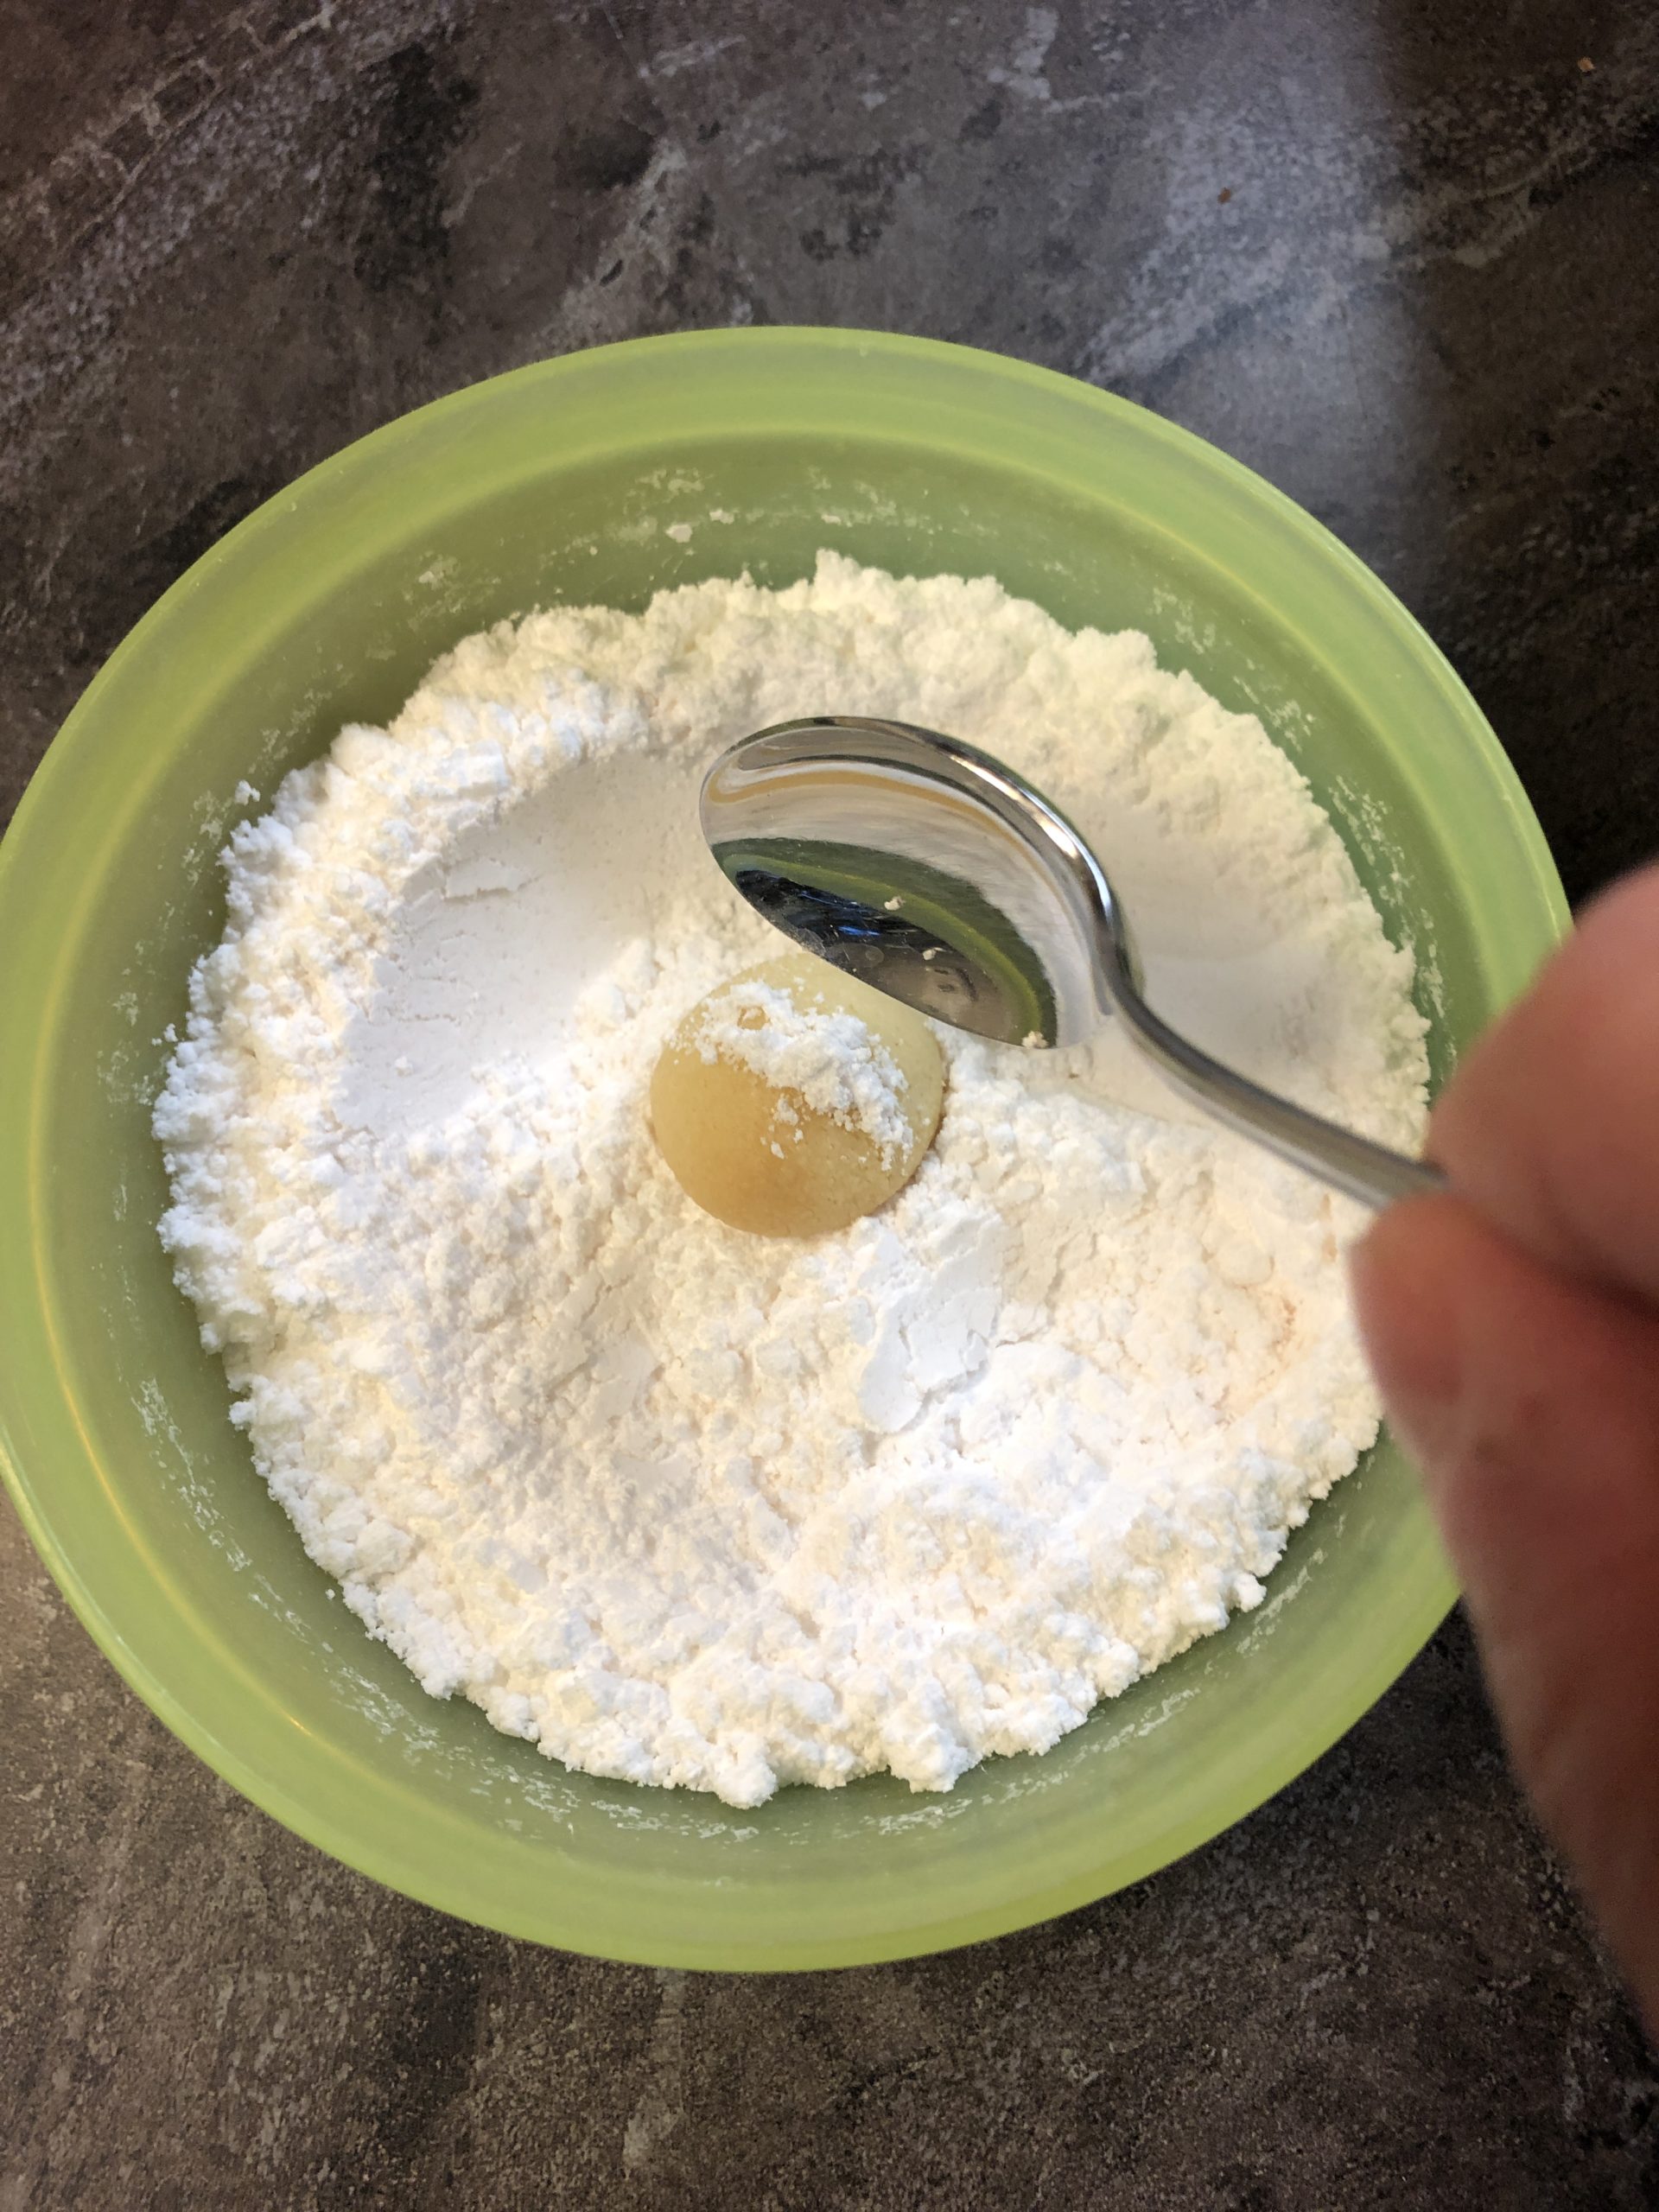
Bild zum Schritt 12 für das Bastel- und DIY-Abenteuer für Kinder: 'Die noch warmen Plätzchen könnt ihr in einem Gemisch aus...'

11

Put them next to each other to cool down.
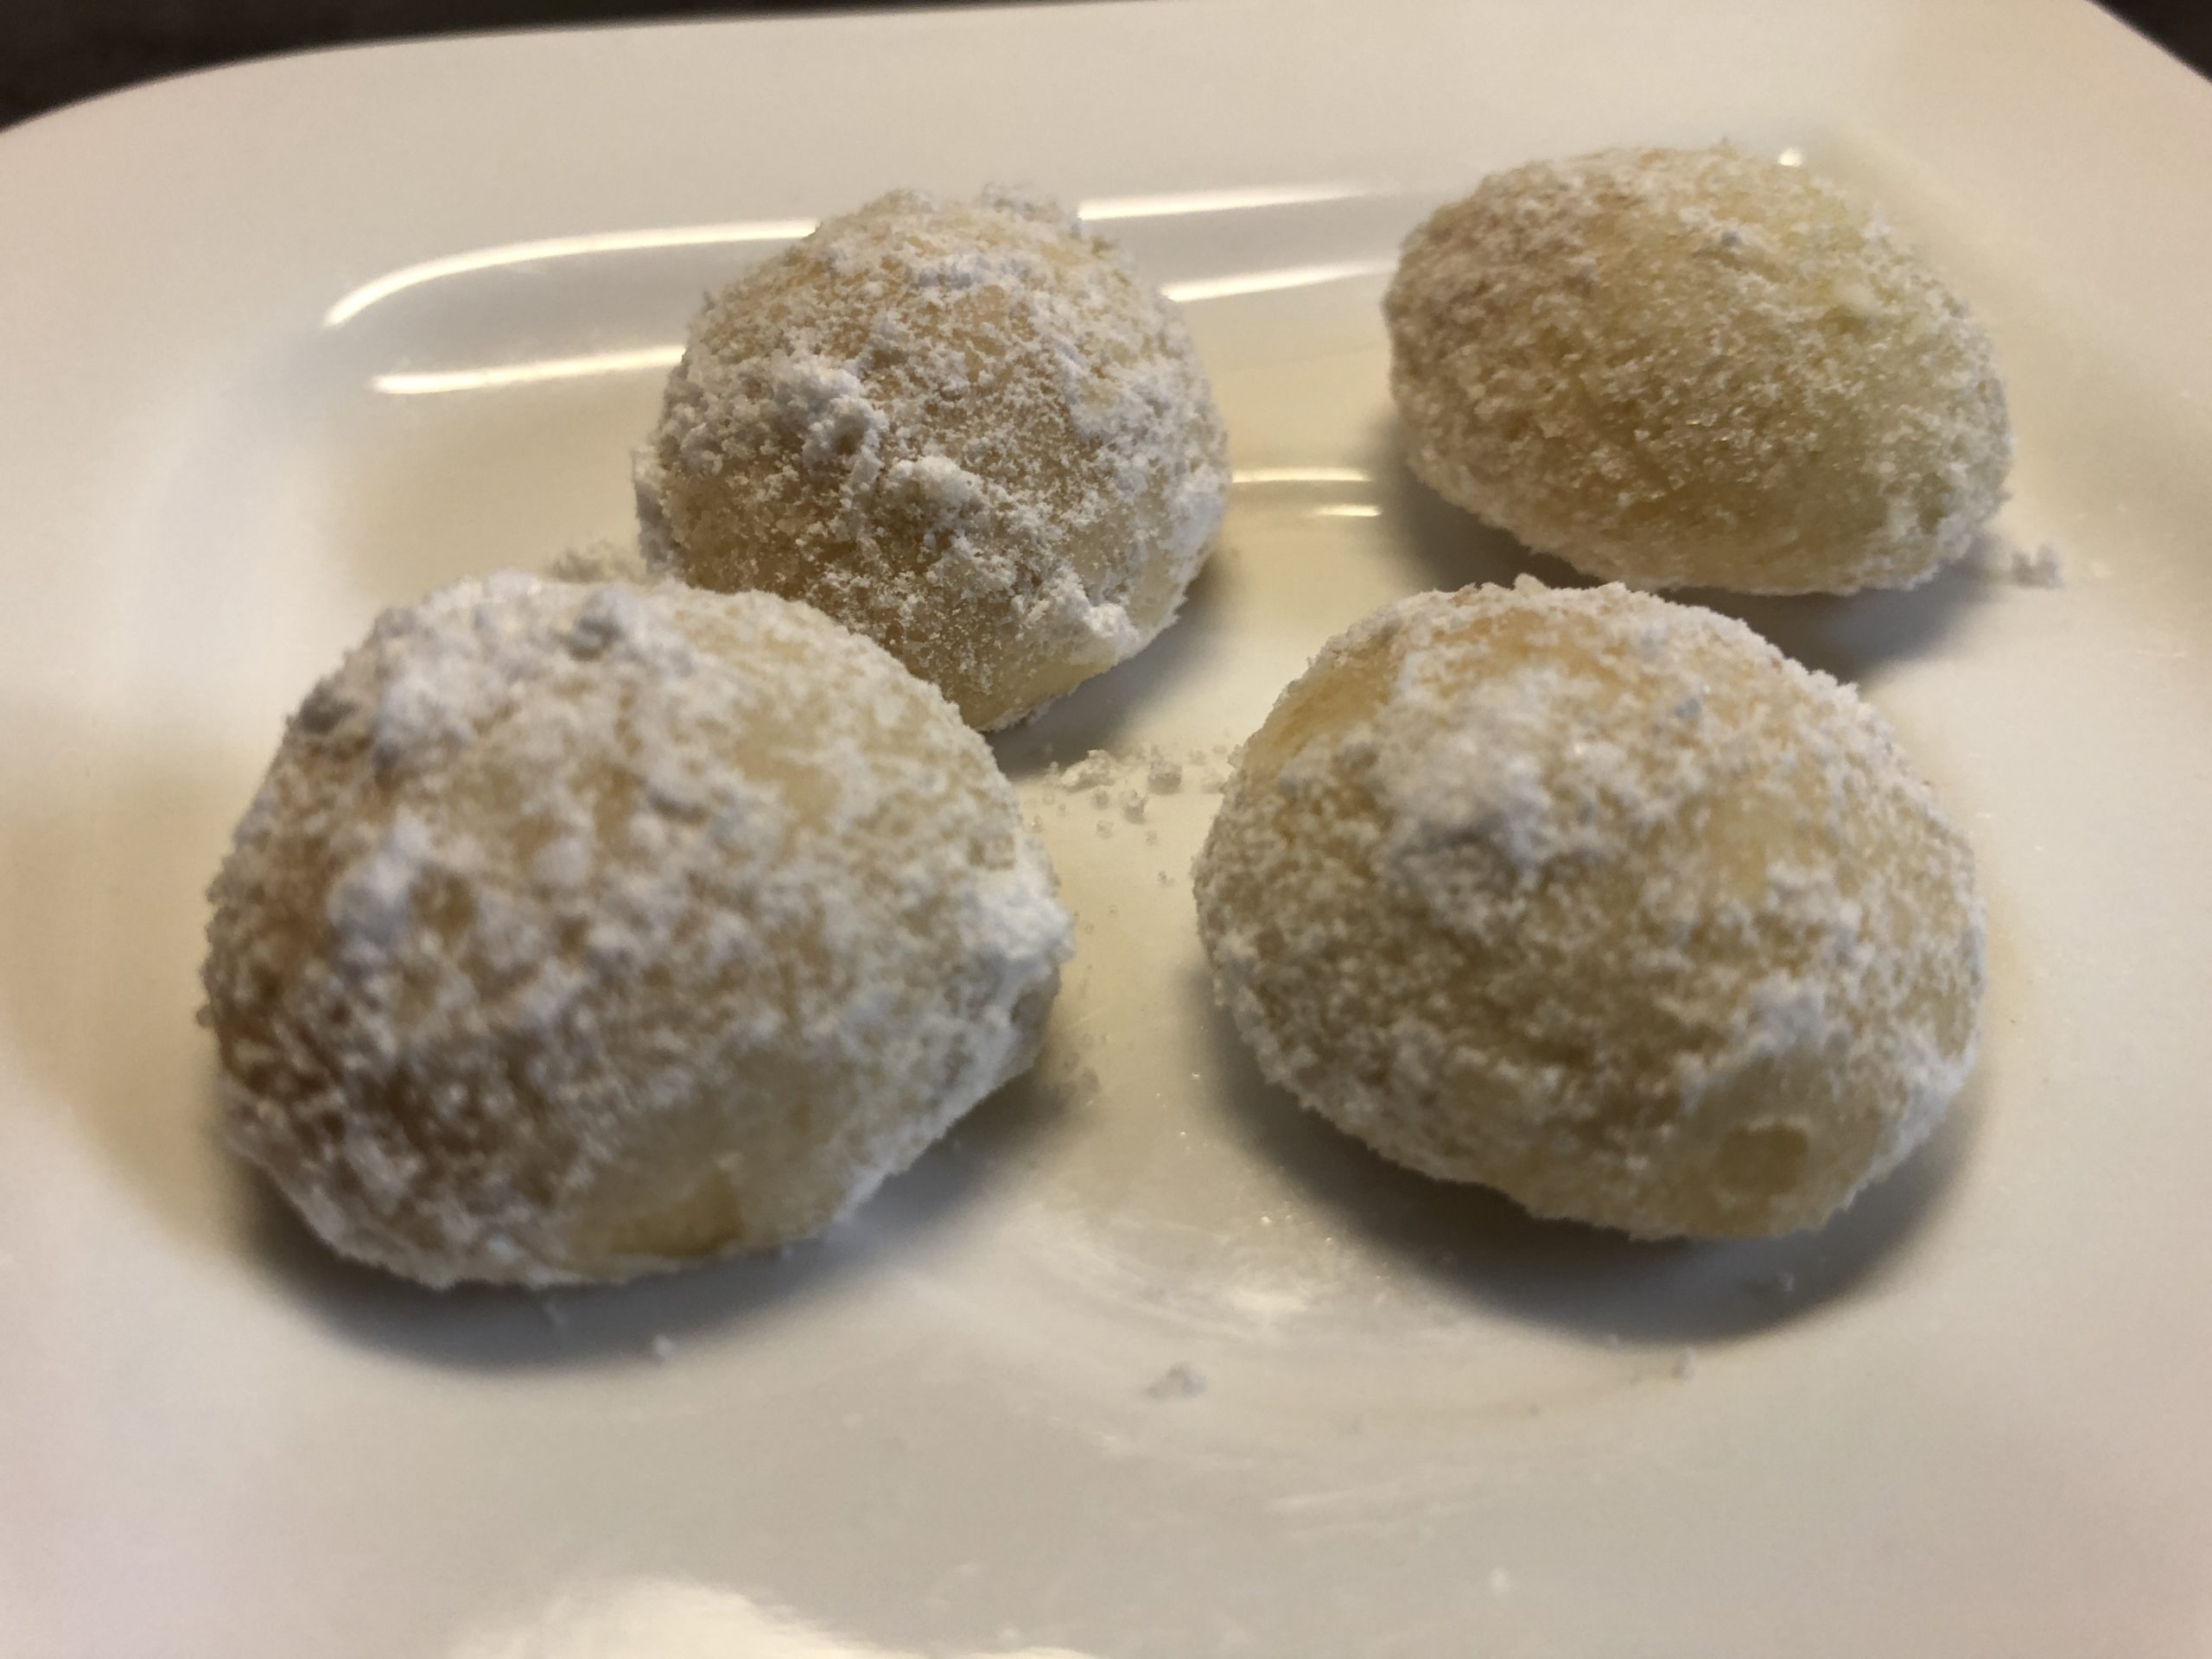
Bild zum Schritt 13 für das Bastel- und DIY-Abenteuer für Kinder: 'Legt sie zum Auskühlen nebeneinander.'

12

This very fast variant is ready.
This is particularly suitable if children want to try quickly or the children no longer have stamina to bake.
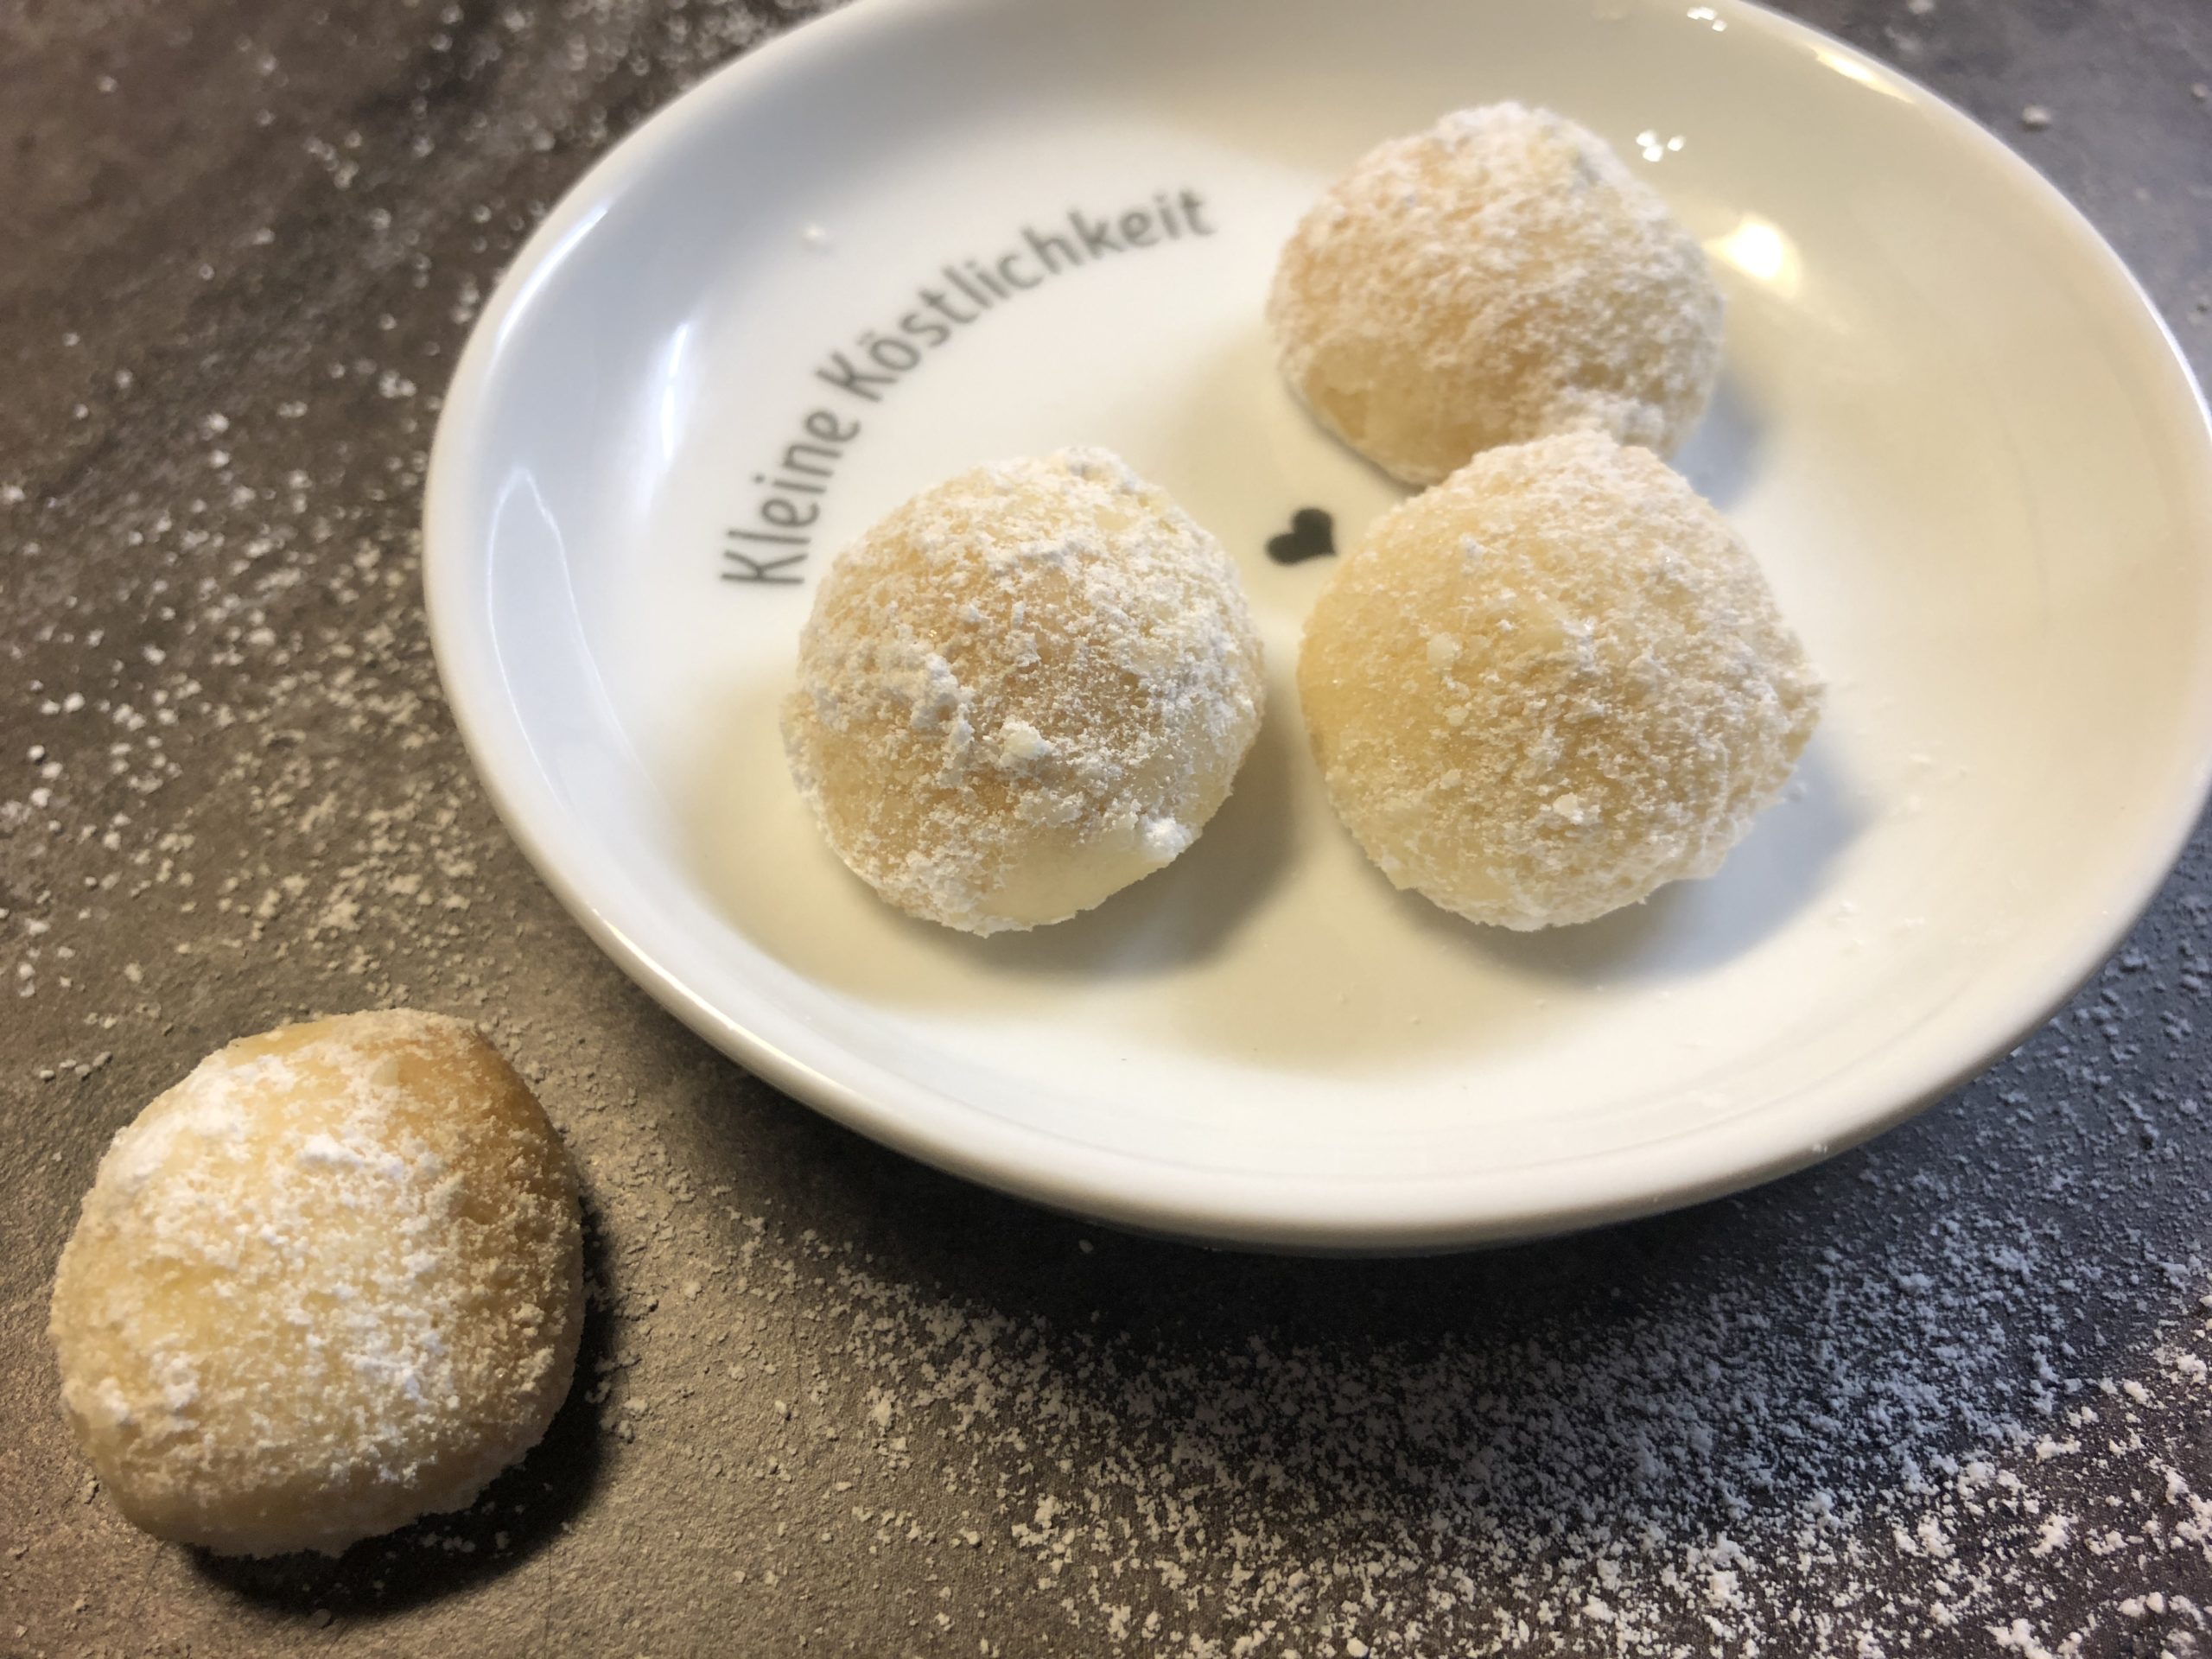
Bild zum Schritt 14 für das Bastel- und DIY-Abenteuer für Kinder: 'Fertig ist diese sehr schnelle Variante.   Diese ist...'

More elaborate variant:
13

Let the cookies cool down really well!
Then melts white envelope. For this, put the envelope into a cup and place the cup in a pot with hot water. Then stir until the envelope melts. Now dive the spot with the top into the envelope.
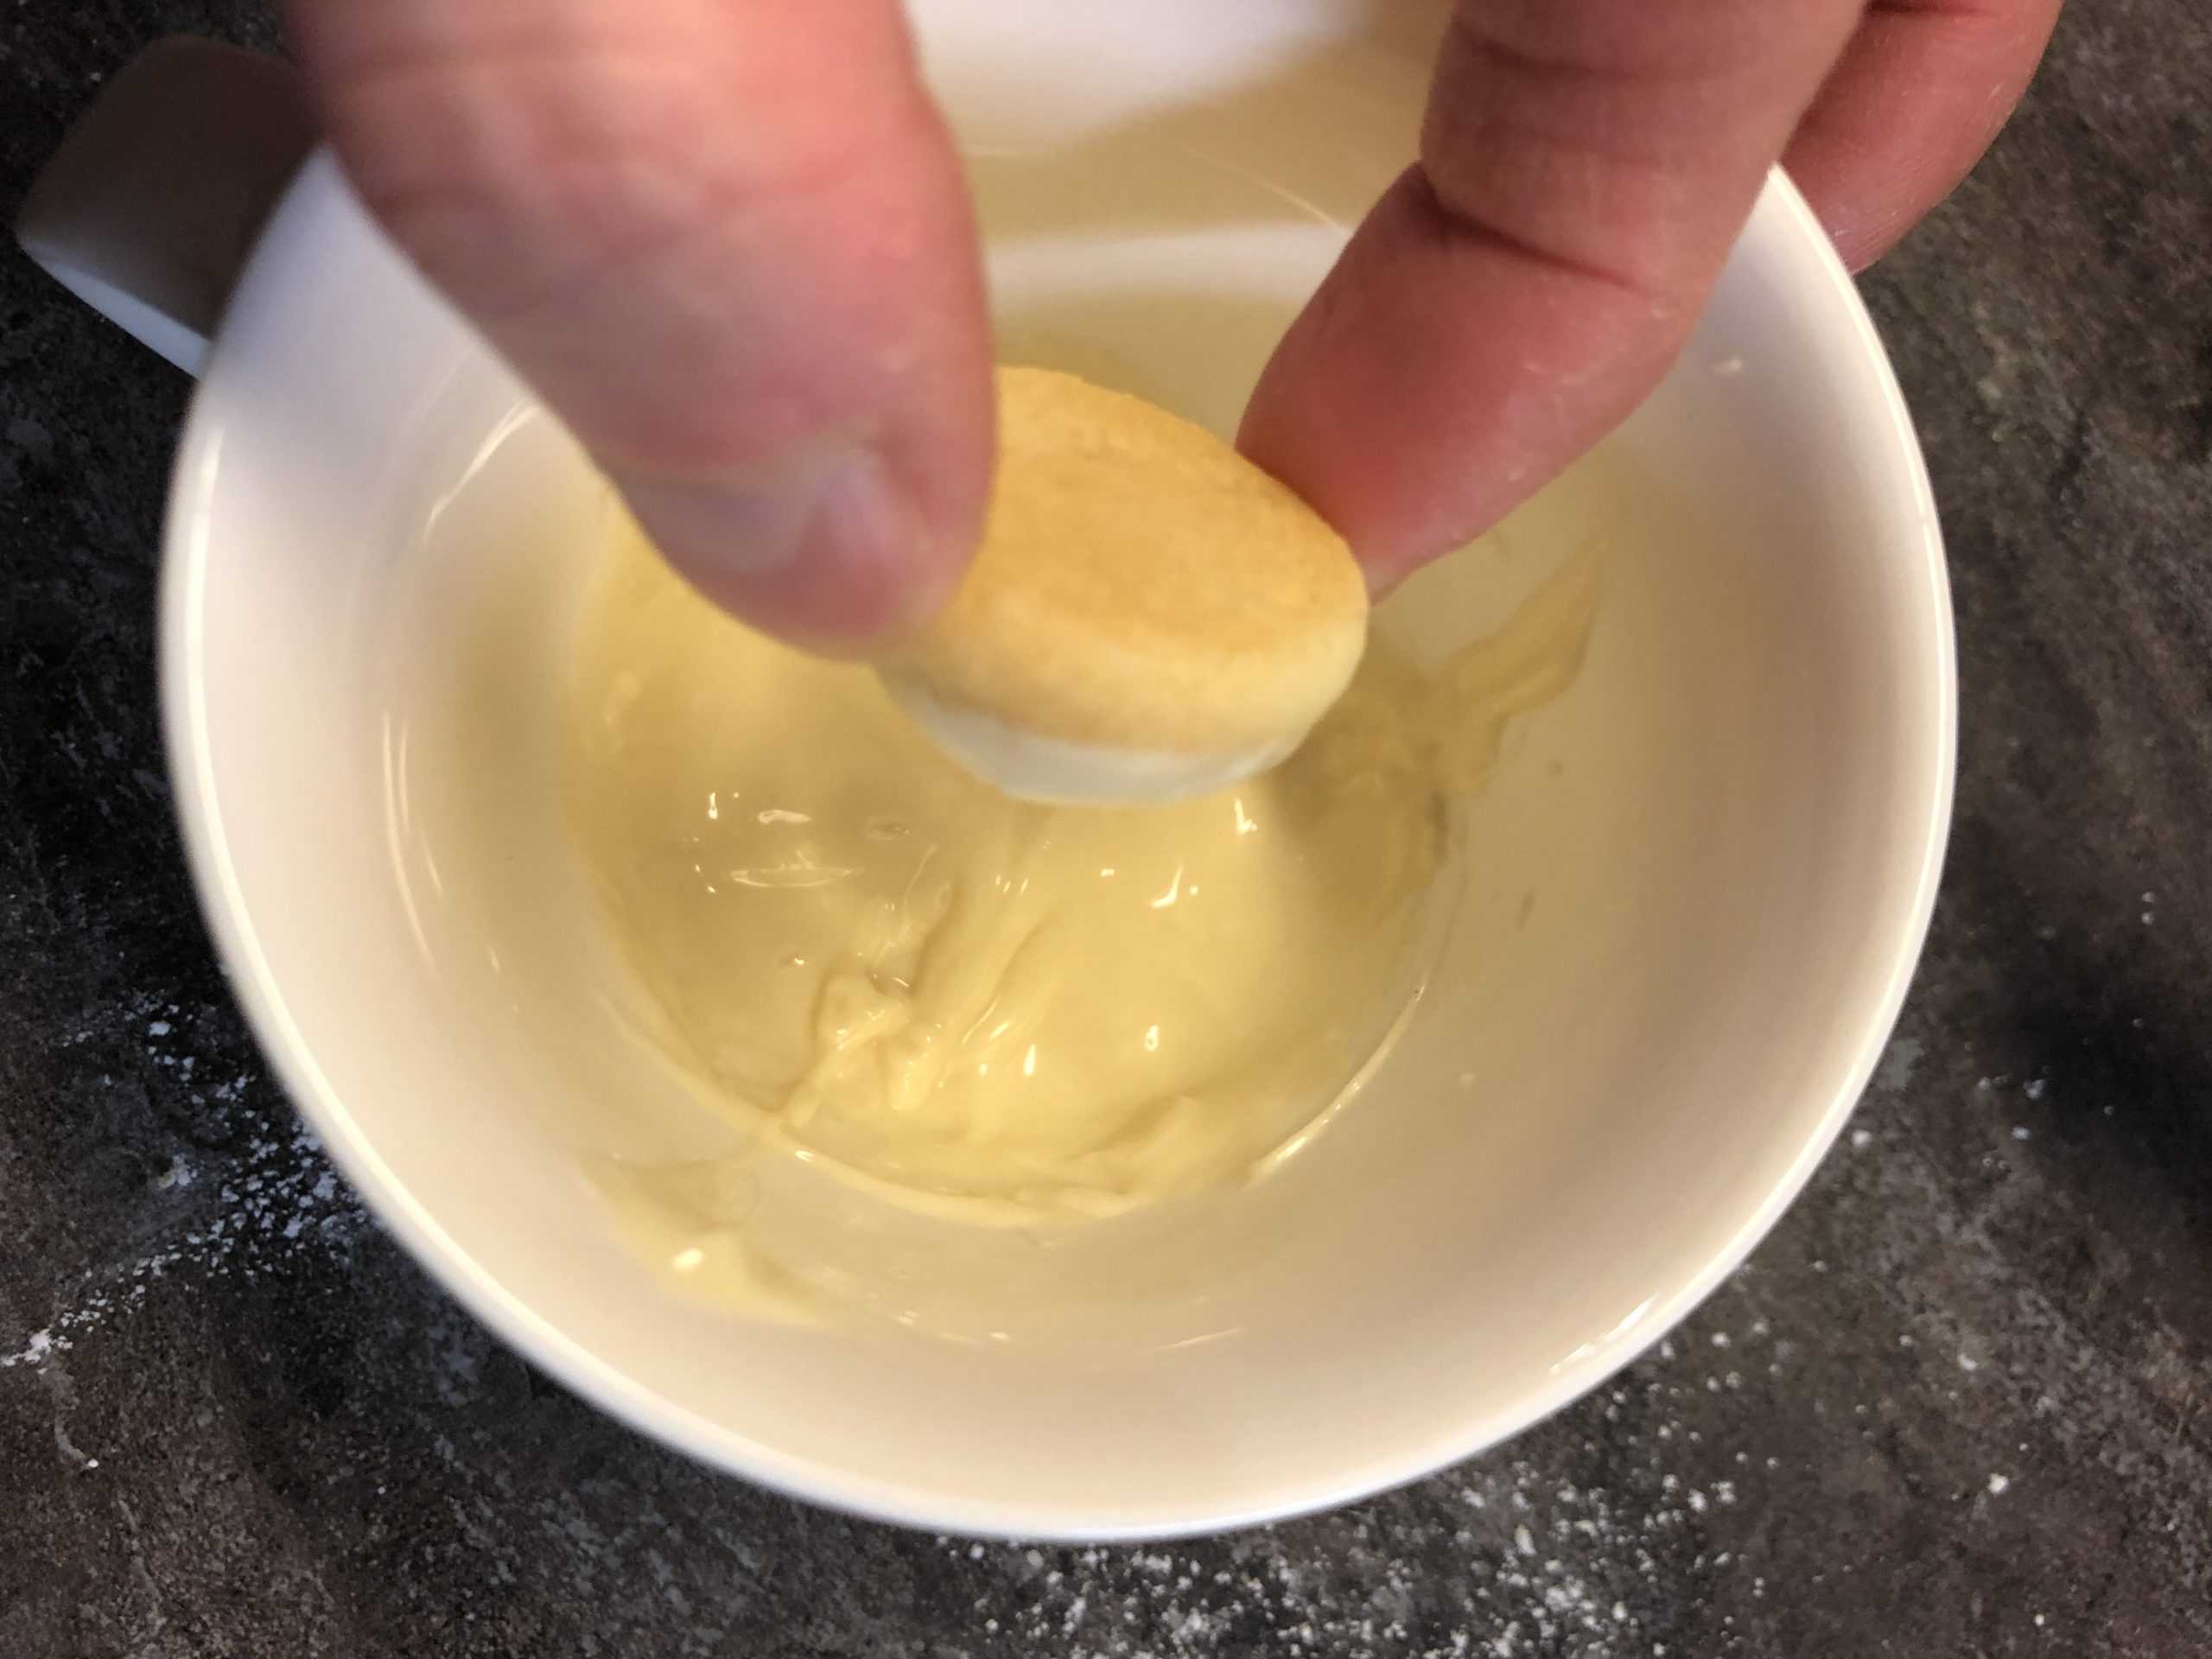
Bild zum Schritt 16 für das Bastel- und DIY-Abenteuer für Kinder: 'Lasst die Plätzchen richtig gut auskühlen!   Dann schmelzt...'

14

Gently strip off the excess chocolate on the side of the cup.
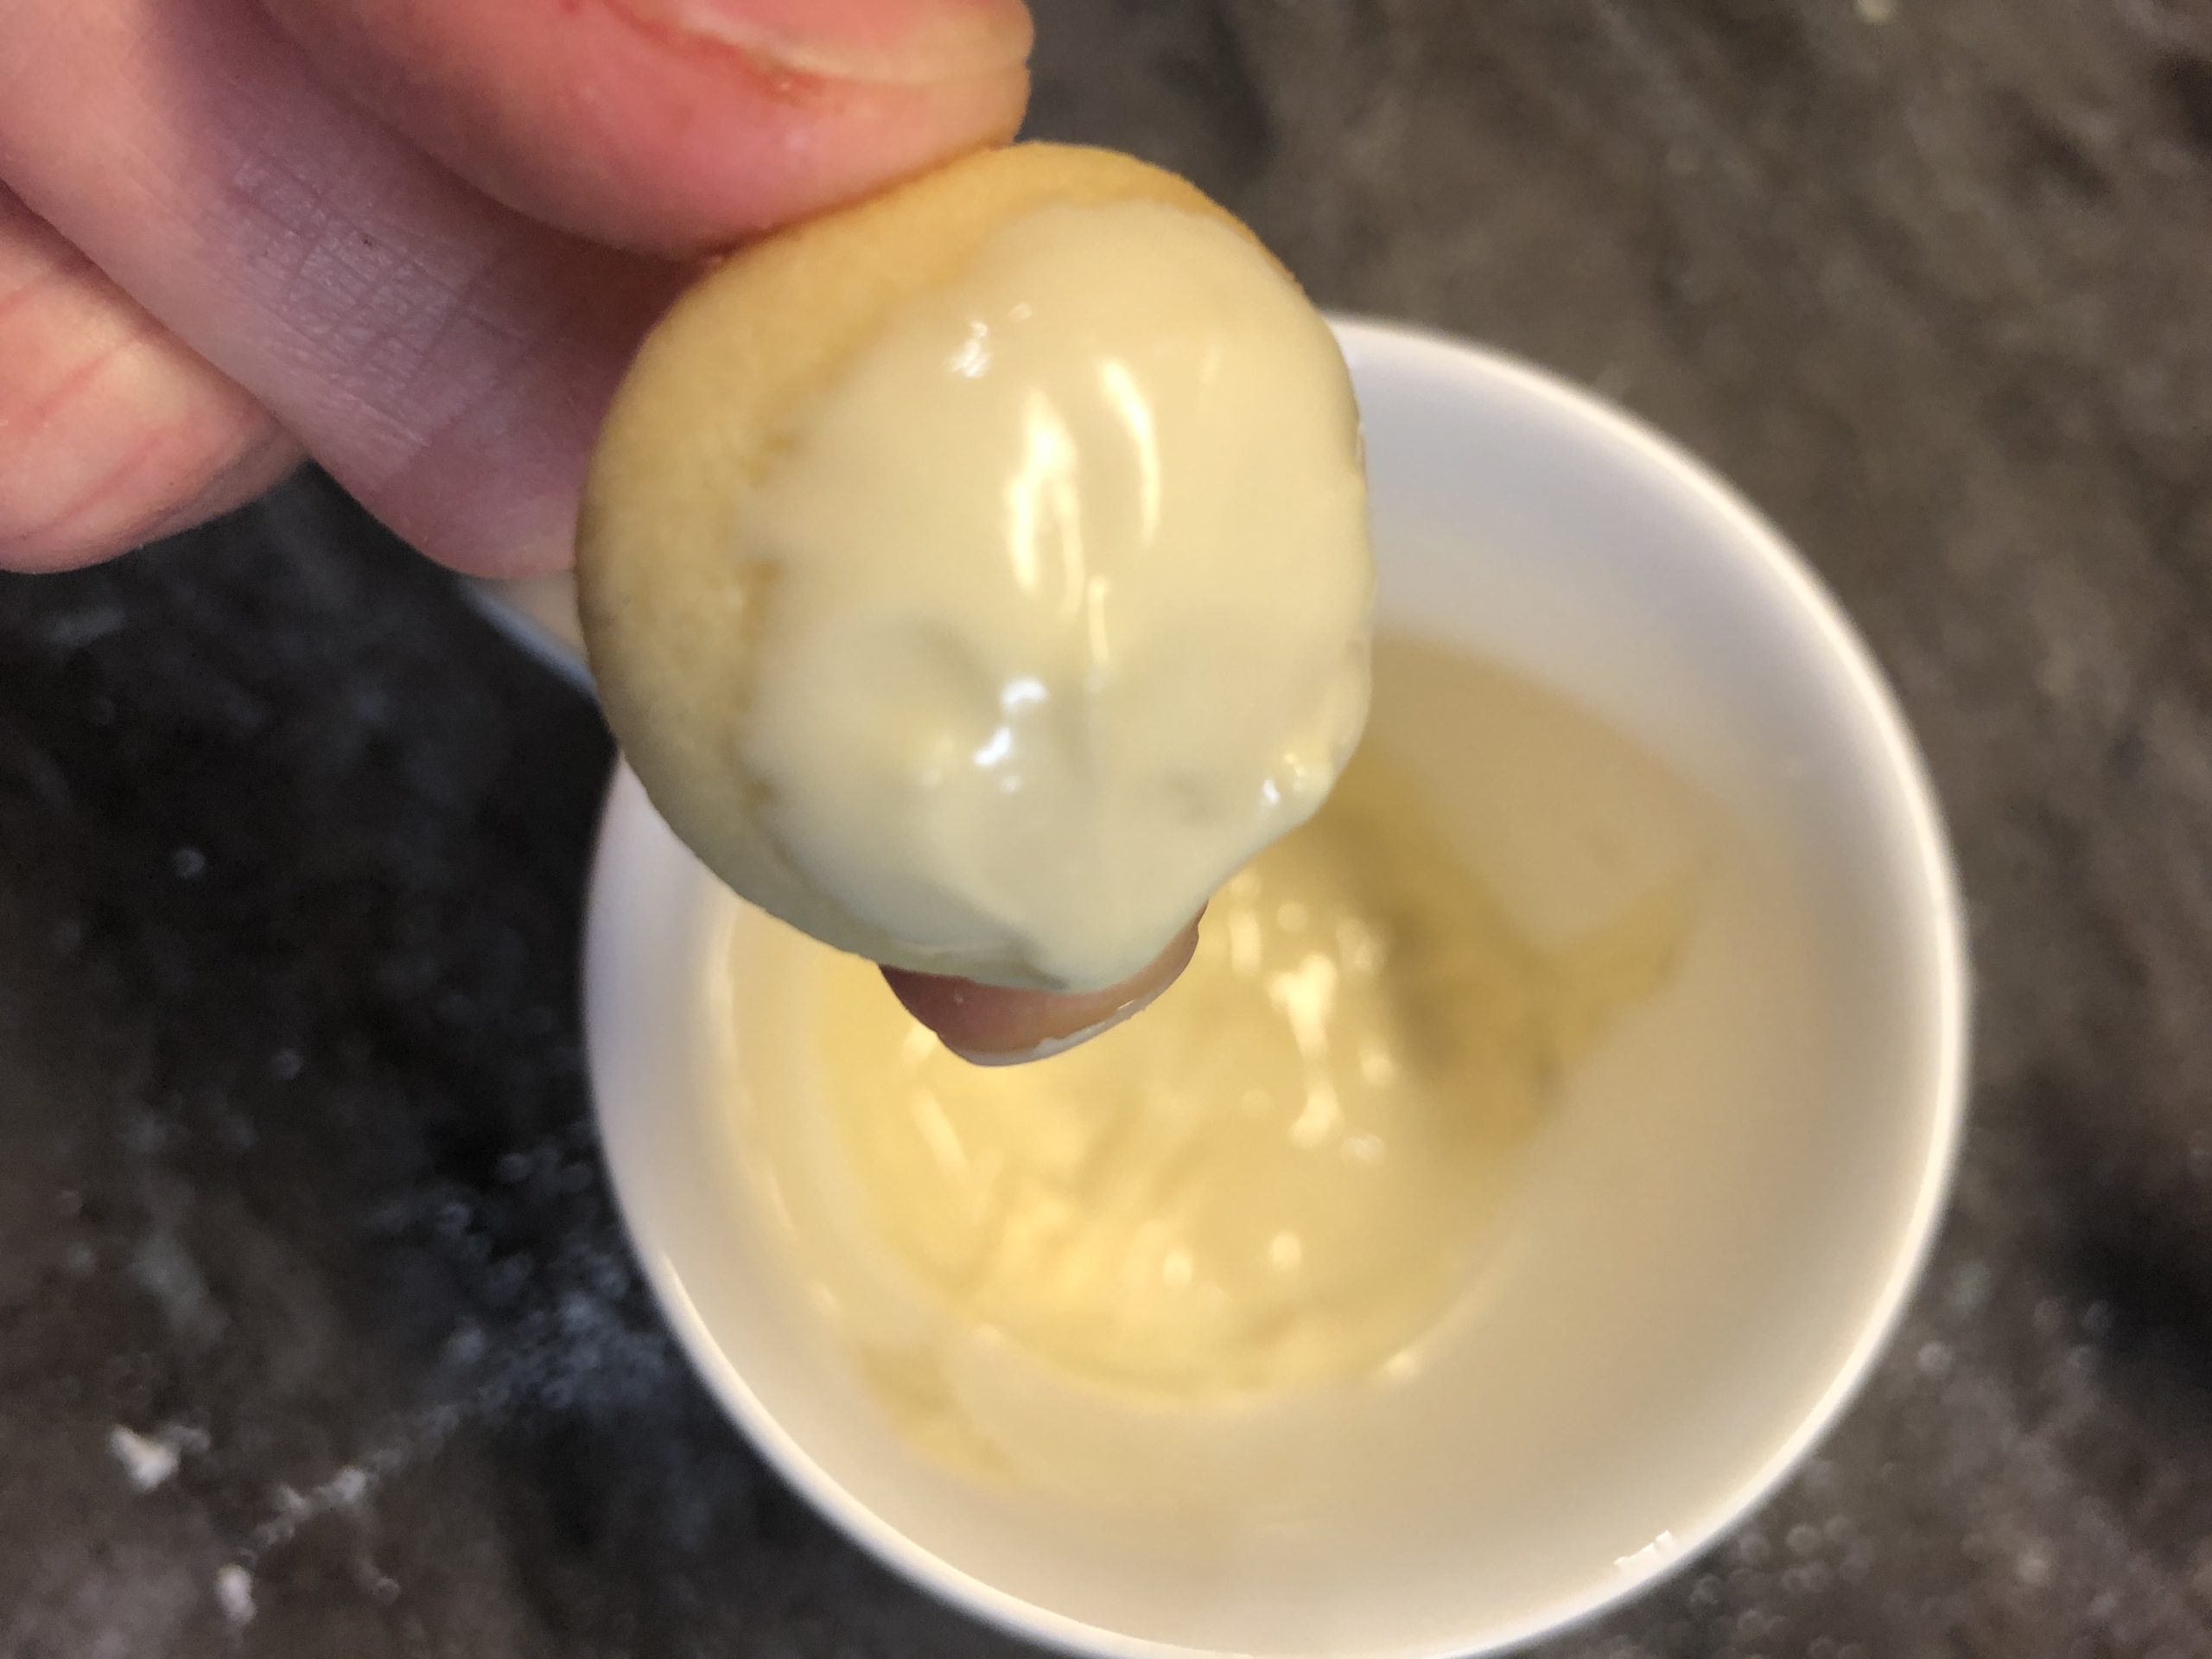
Bild zum Schritt 17 für das Bastel- und DIY-Abenteuer für Kinder: 'Streift die überschüssige Schokolade am Tassenrand vorsichtig ab.'

15

Now put it on the baking paper for drying.
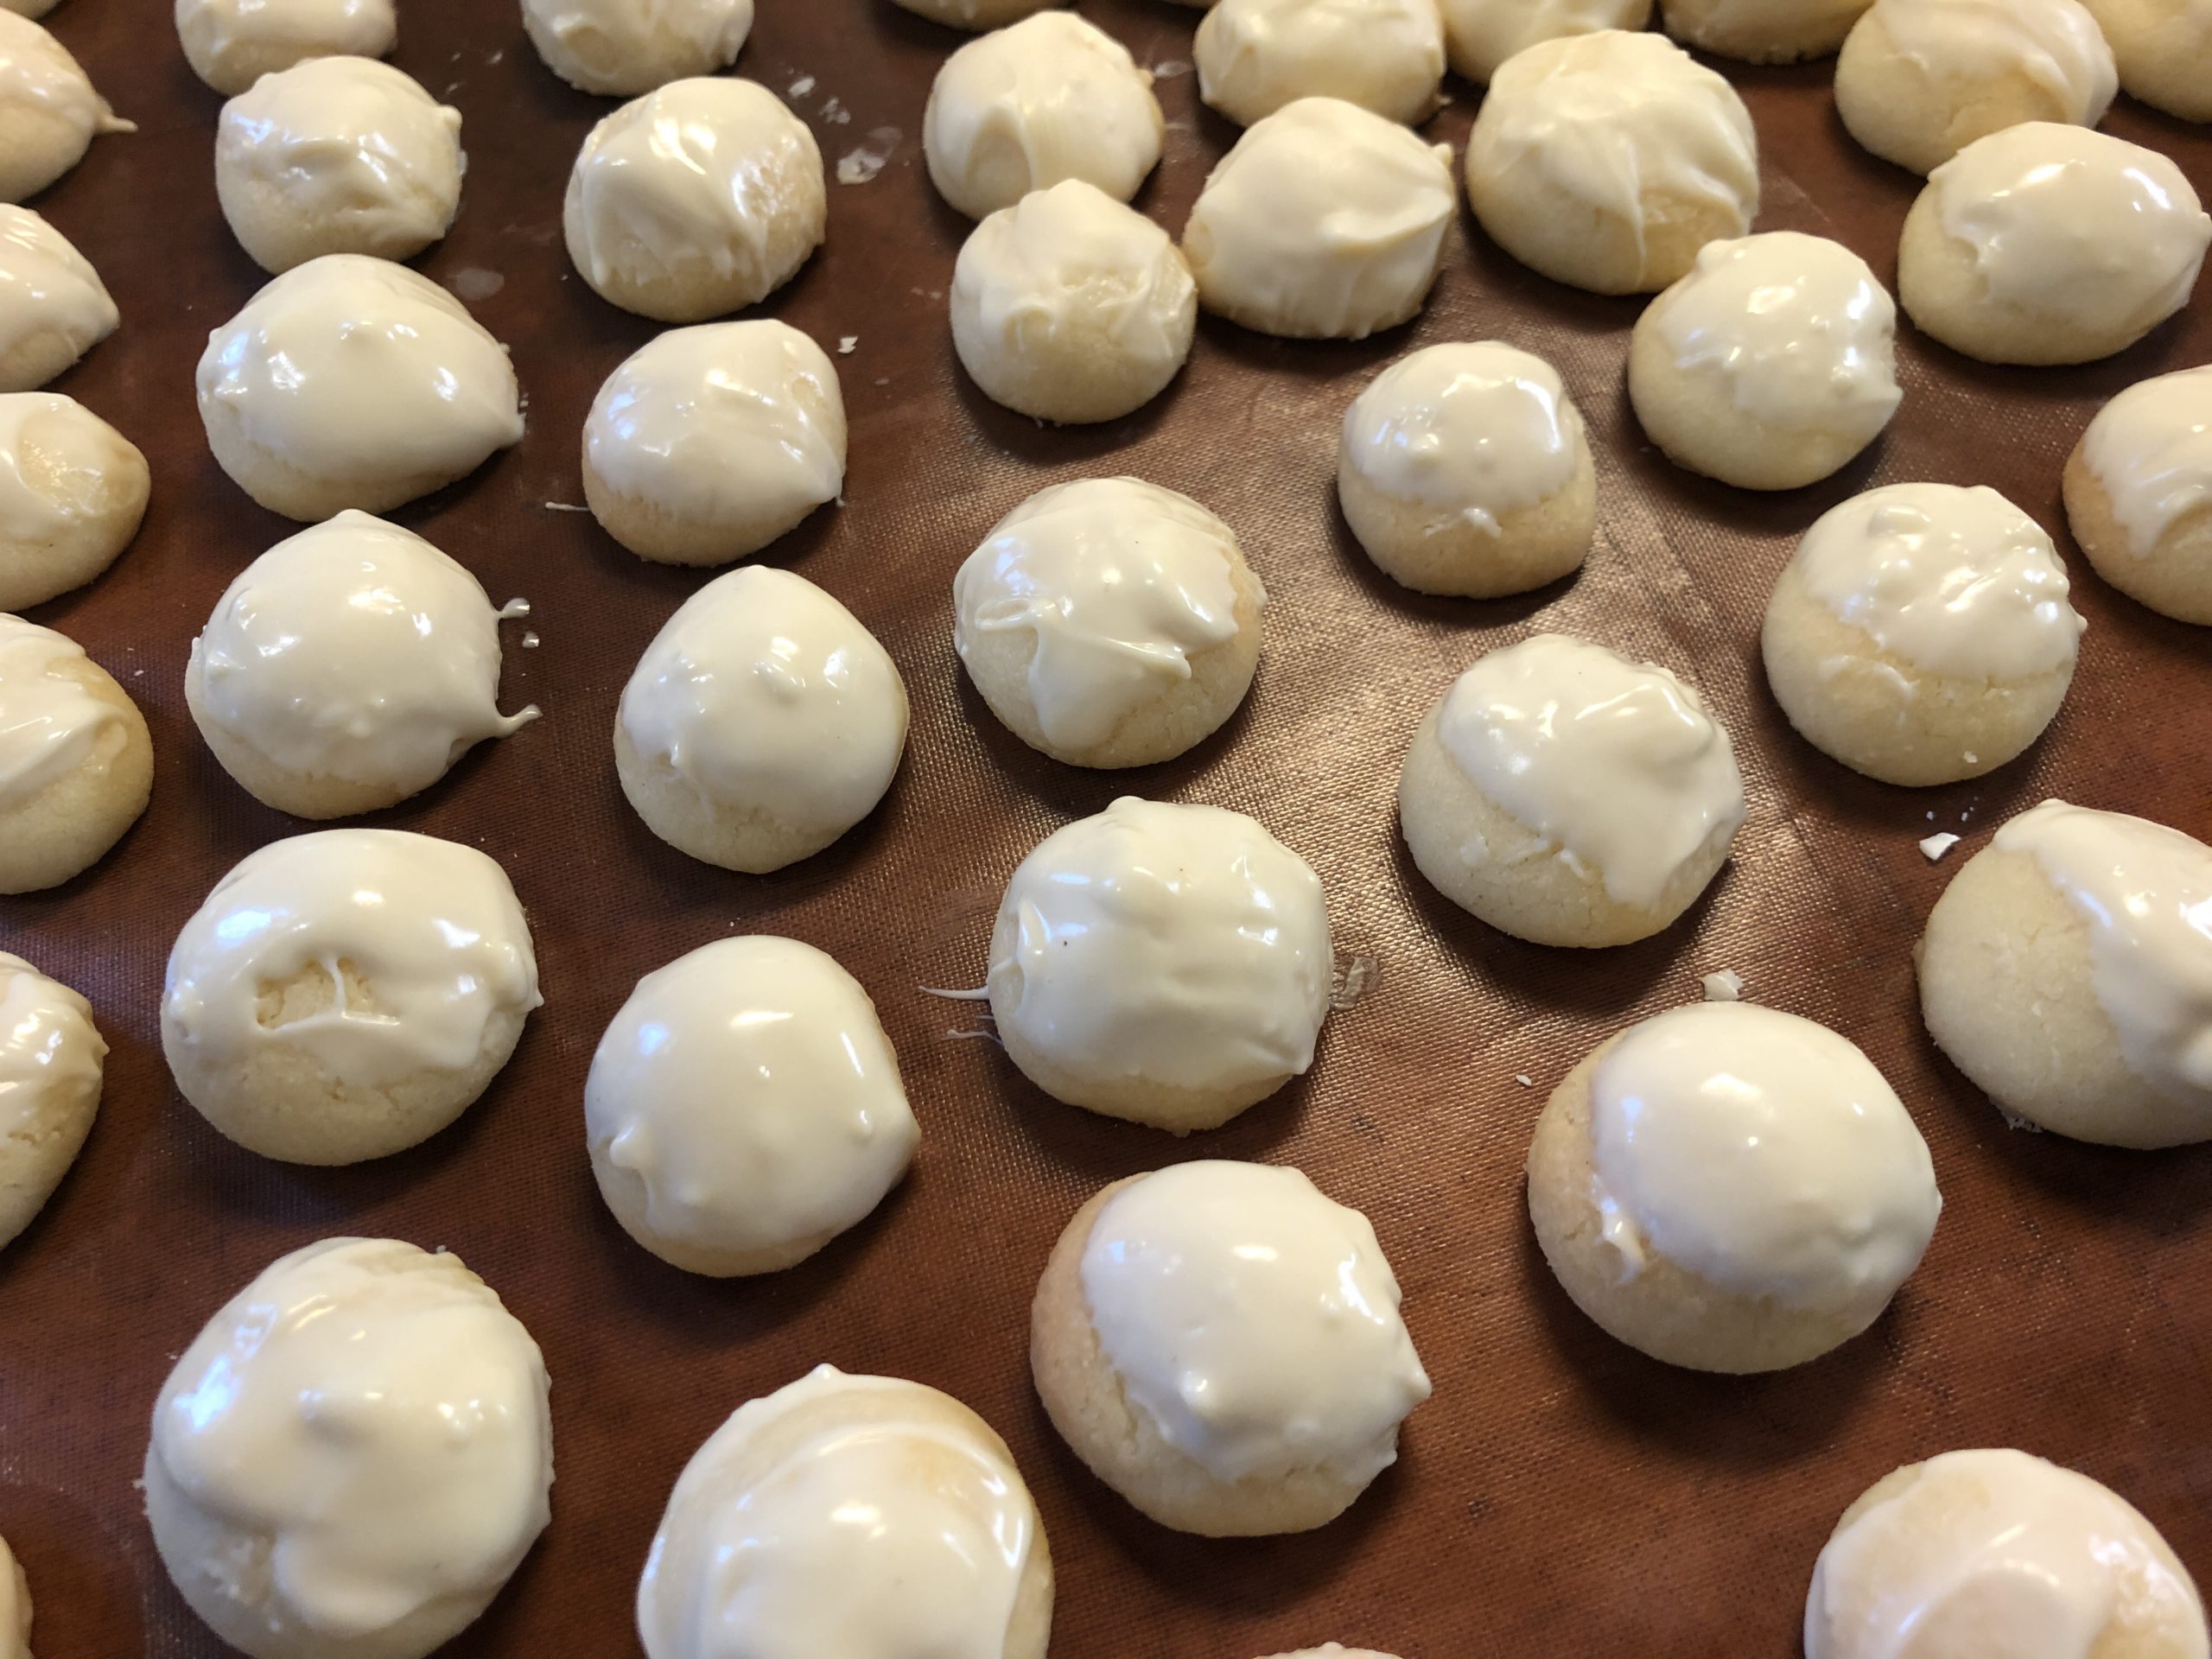
Bild zum Schritt 18 für das Bastel- und DIY-Abenteuer für Kinder: 'Legt sie nun auf das Backpapier zum Trocknen.'

16

Then you melt the dark chocolate glaze and sprinkle it on the cookies.
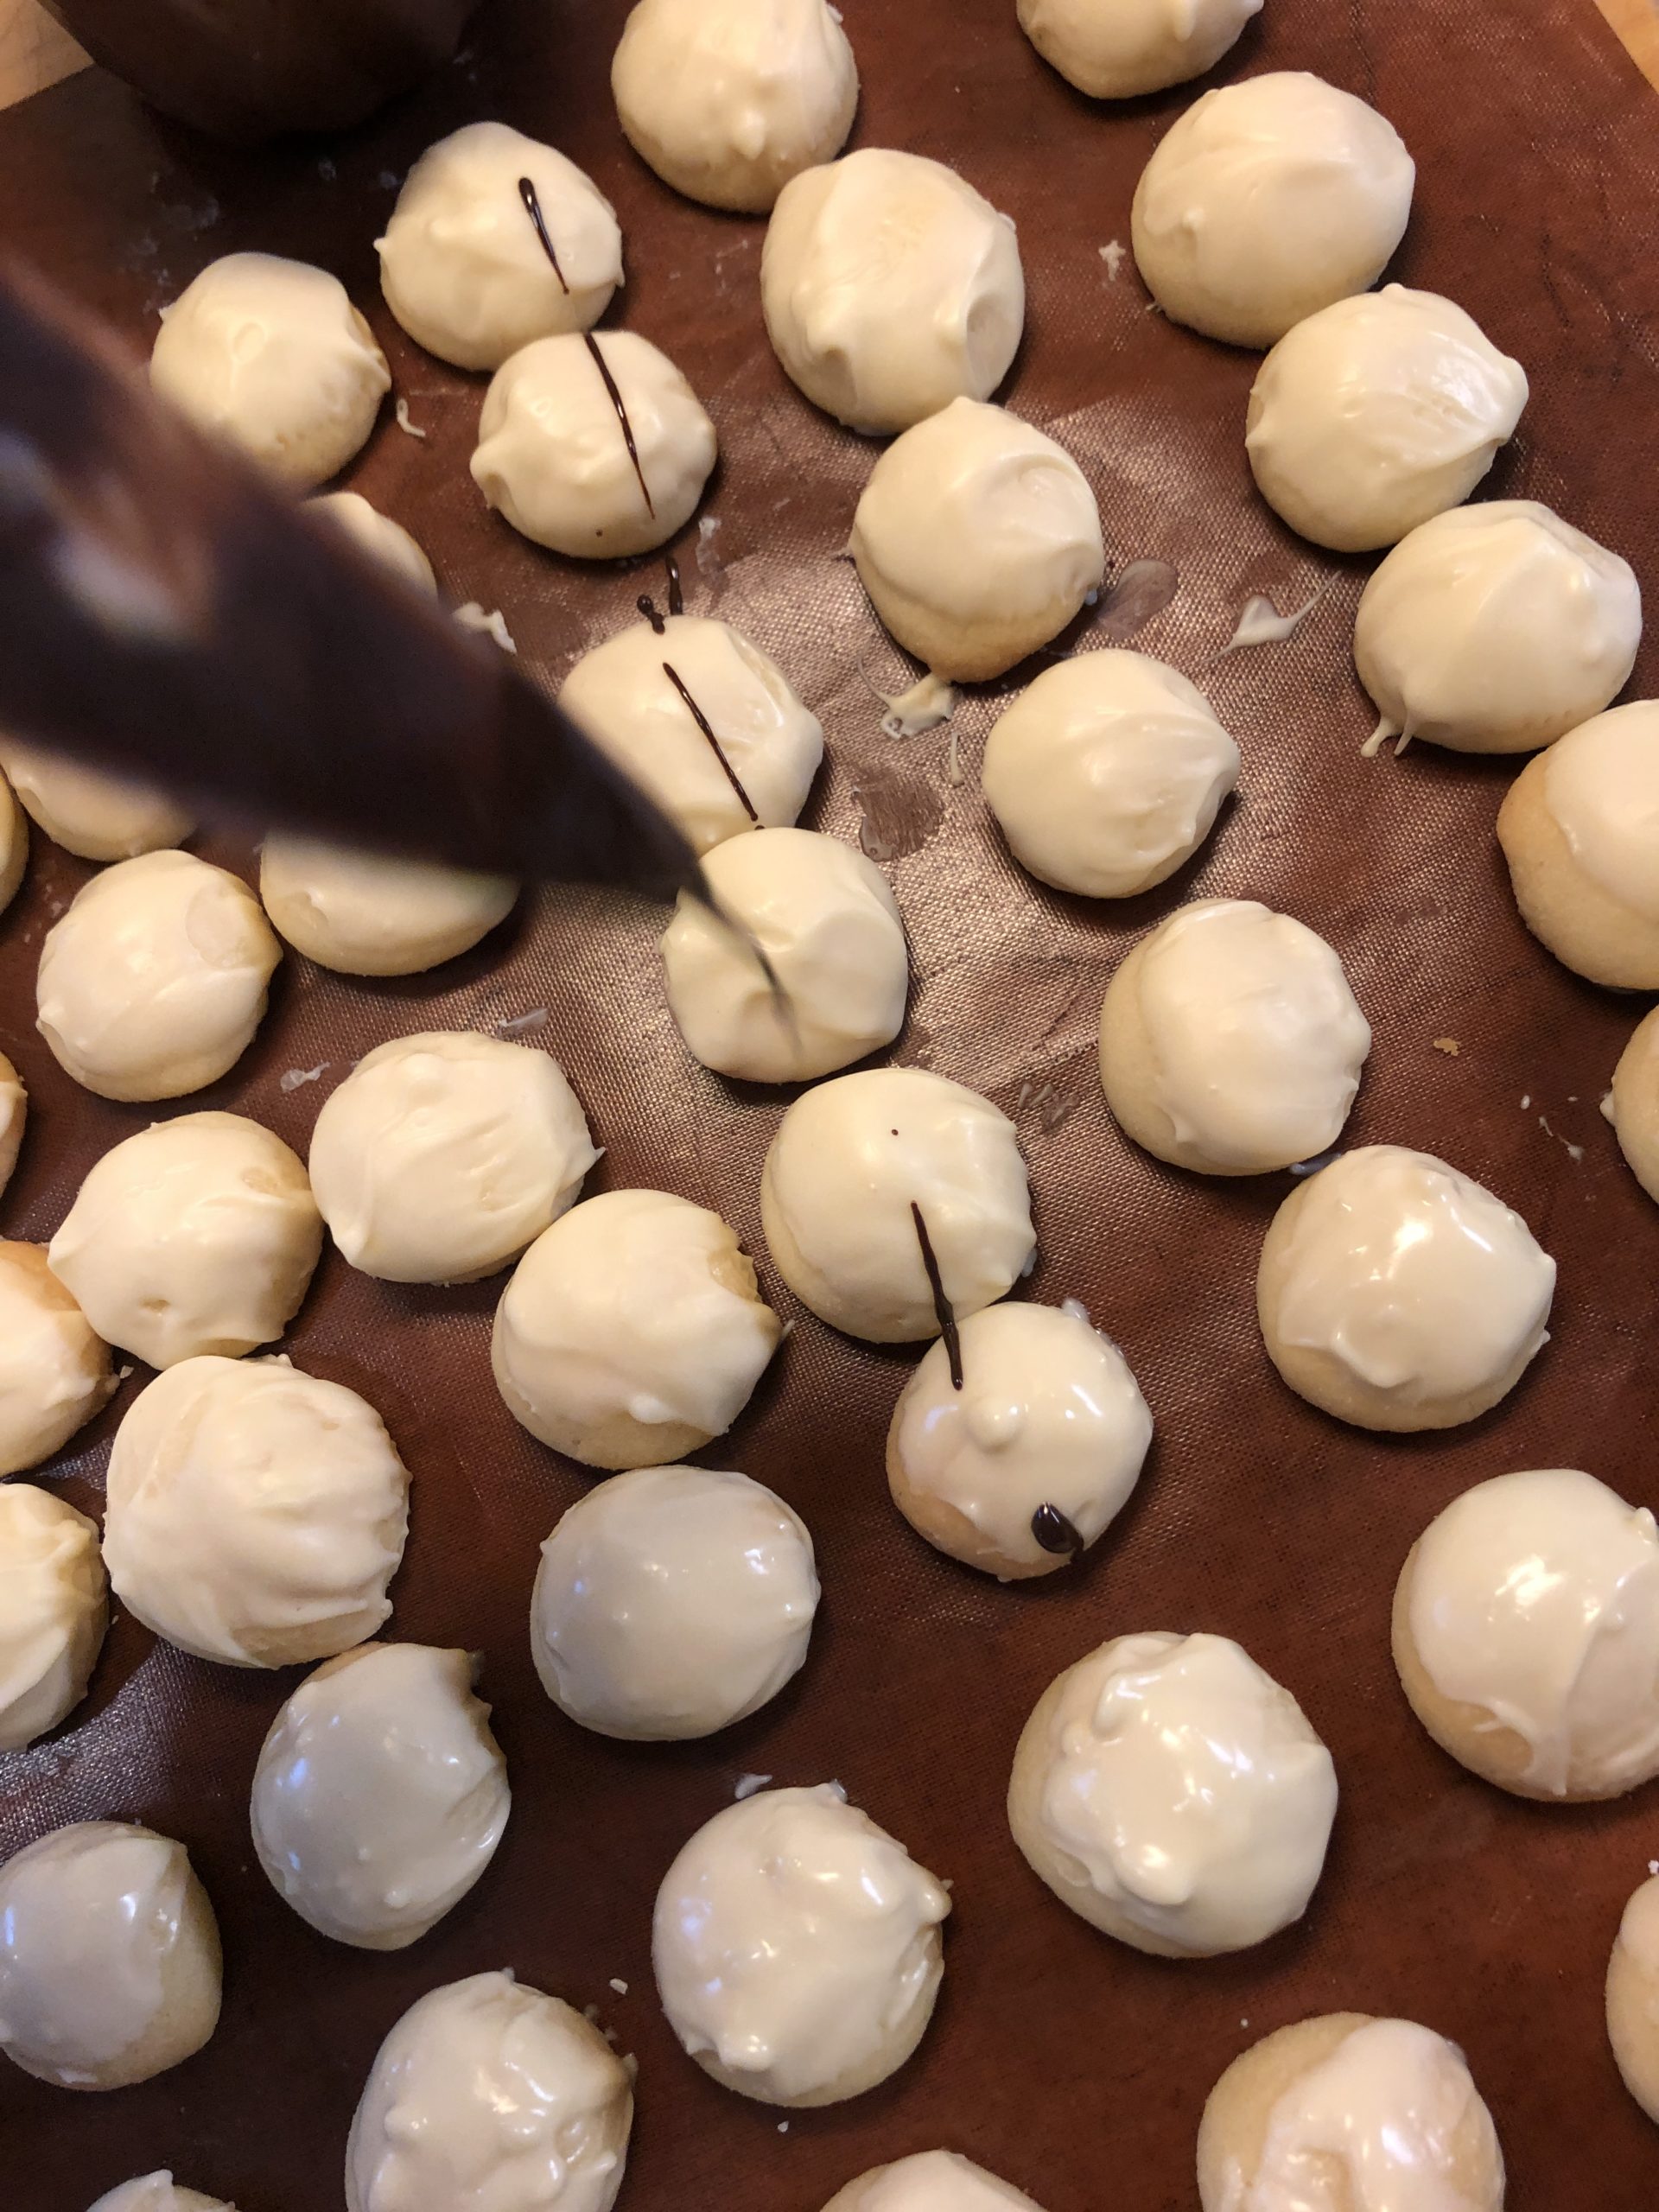
Bild zum Schritt 19 für das Bastel- und DIY-Abenteuer für Kinder: 'Anschließend schmelzt ihr die dunkle Schokoladenglasur und sprenkelt diese auf...'

17

For this you take a pointed knife and dip the tip into the liquid chocolate glaze. Then you move the knife over the spots back and forth. Dive the knife tip again and again into the chocolate glaze and repeat the process until you like the result.
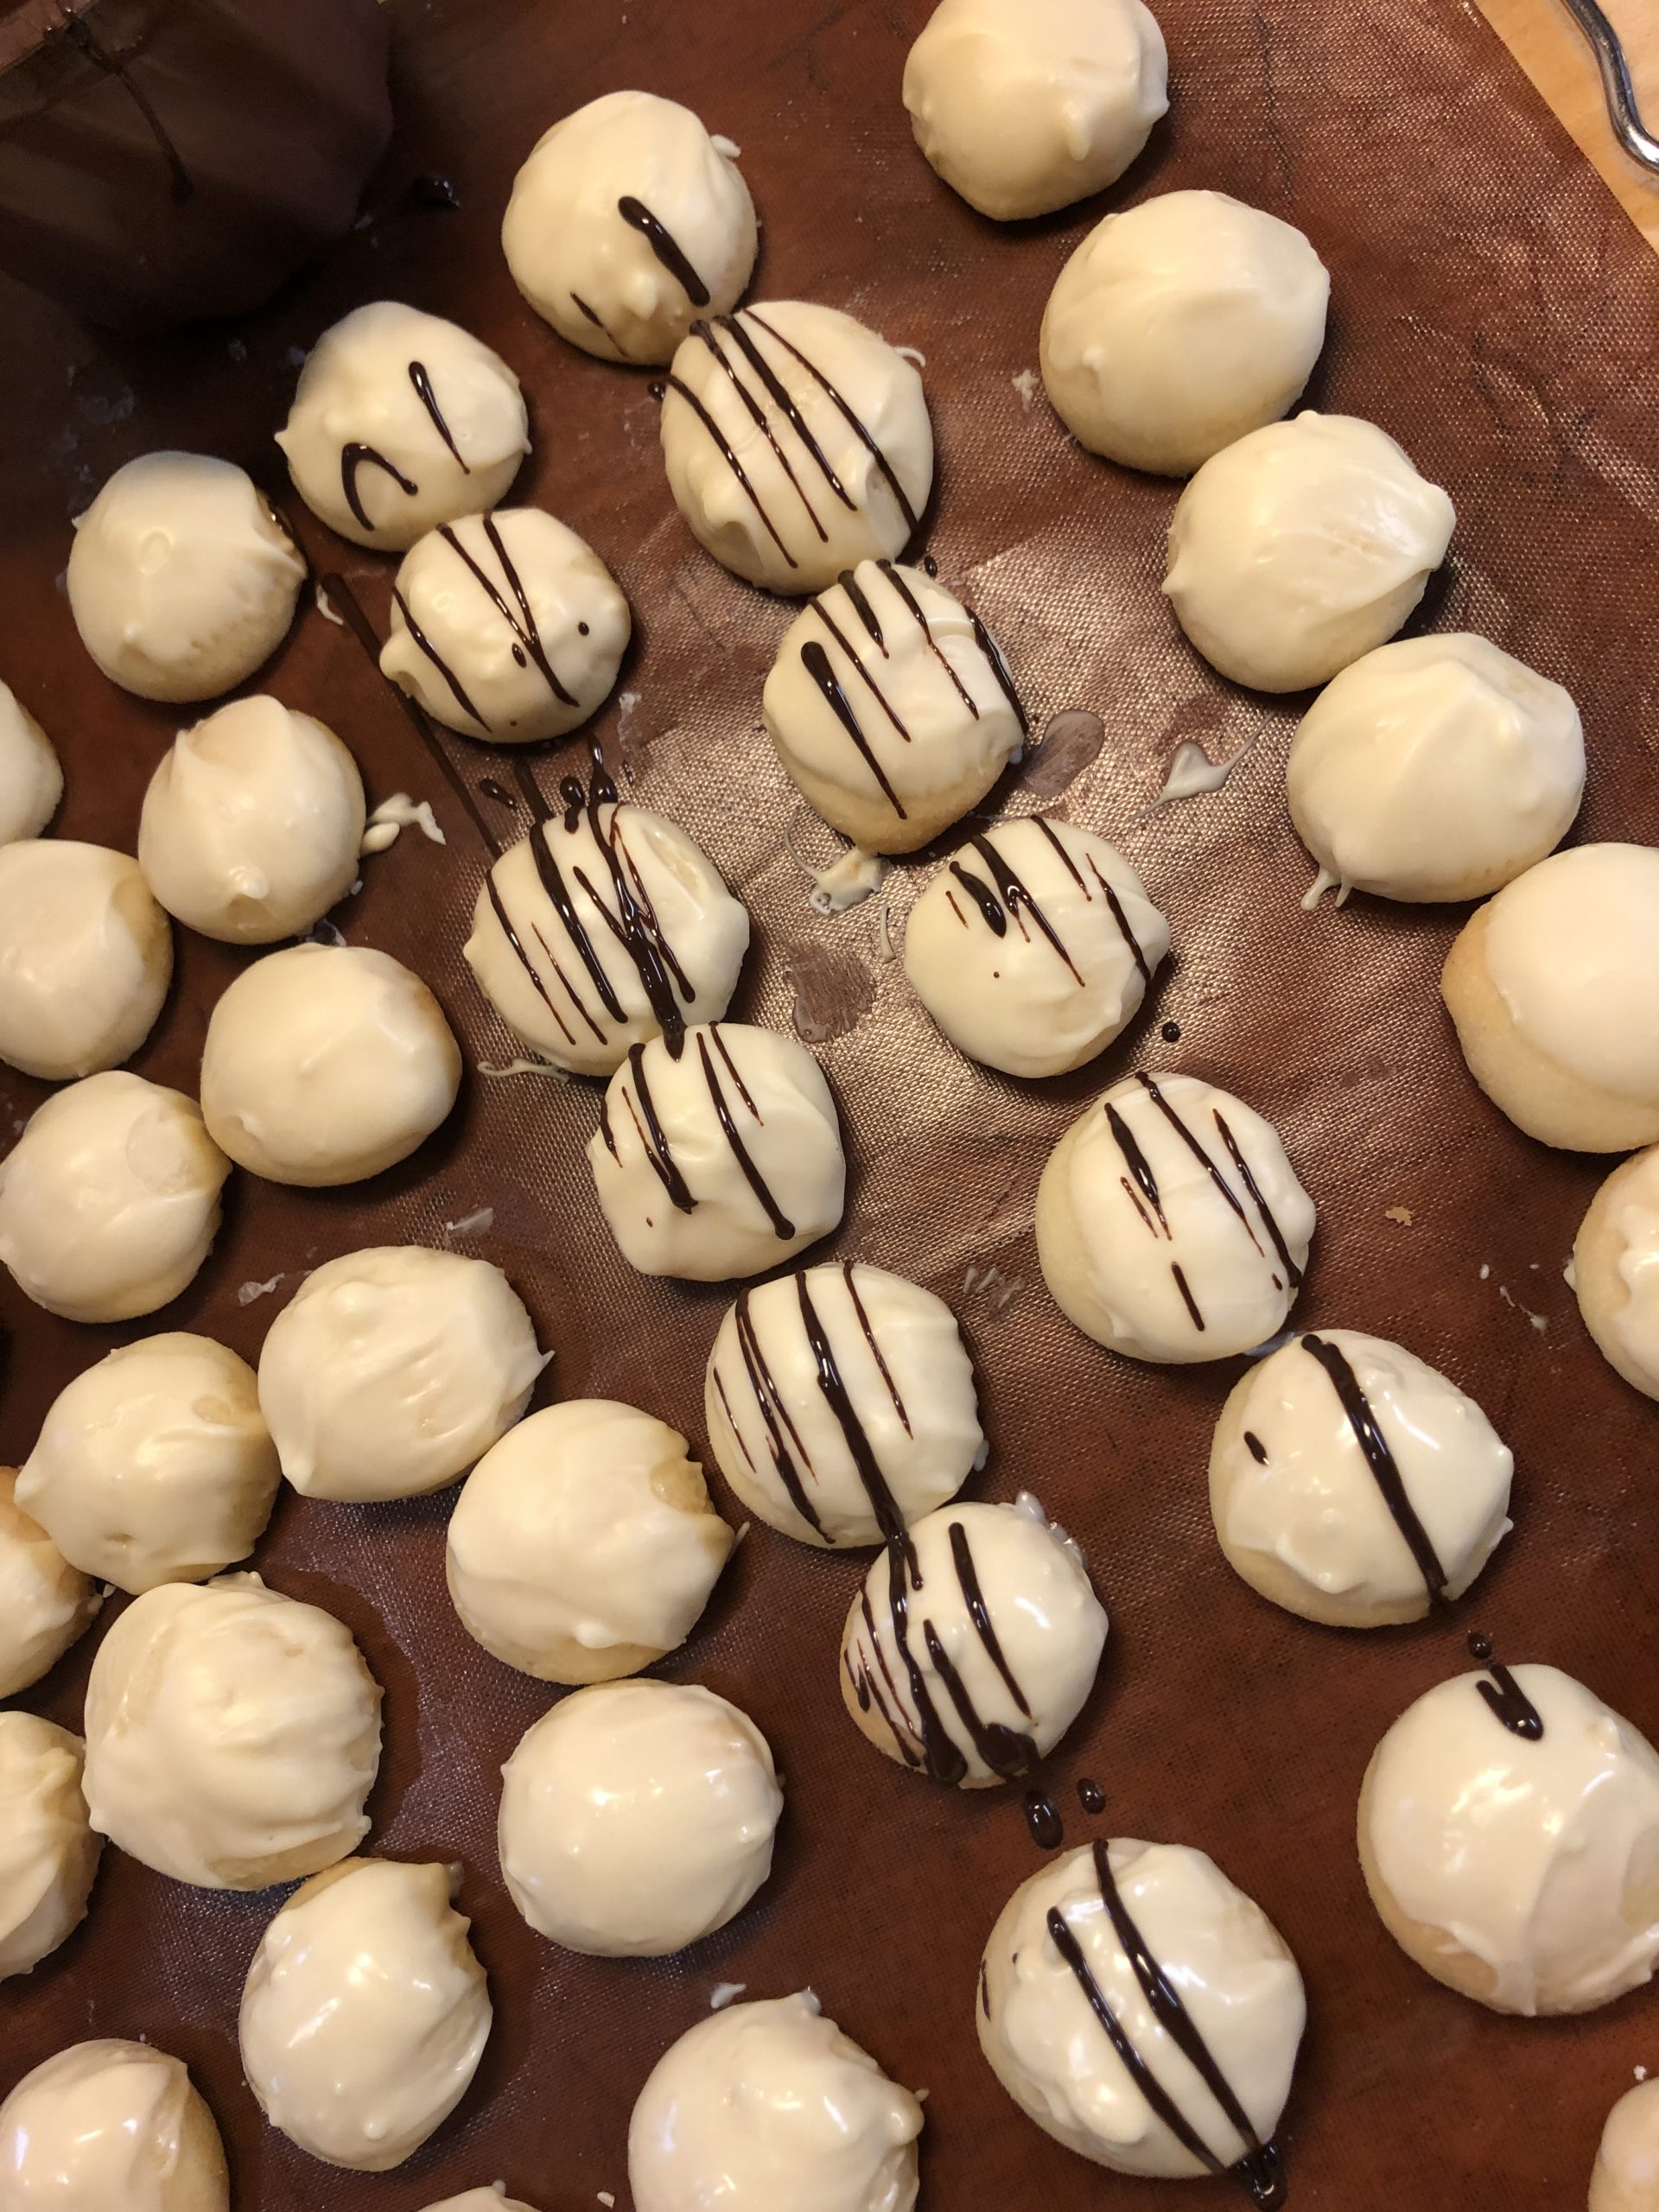
Bild zum Schritt 20 für das Bastel- und DIY-Abenteuer für Kinder: 'Dafür nehmt ihr ein spitzes Messer und taucht die Spitze...'

18

Let the cookie pralines dry well.
Finally, put her in a can to store.
Tip: Place in butterbread paper between the floors for stacking, otherwise they stick to each other.
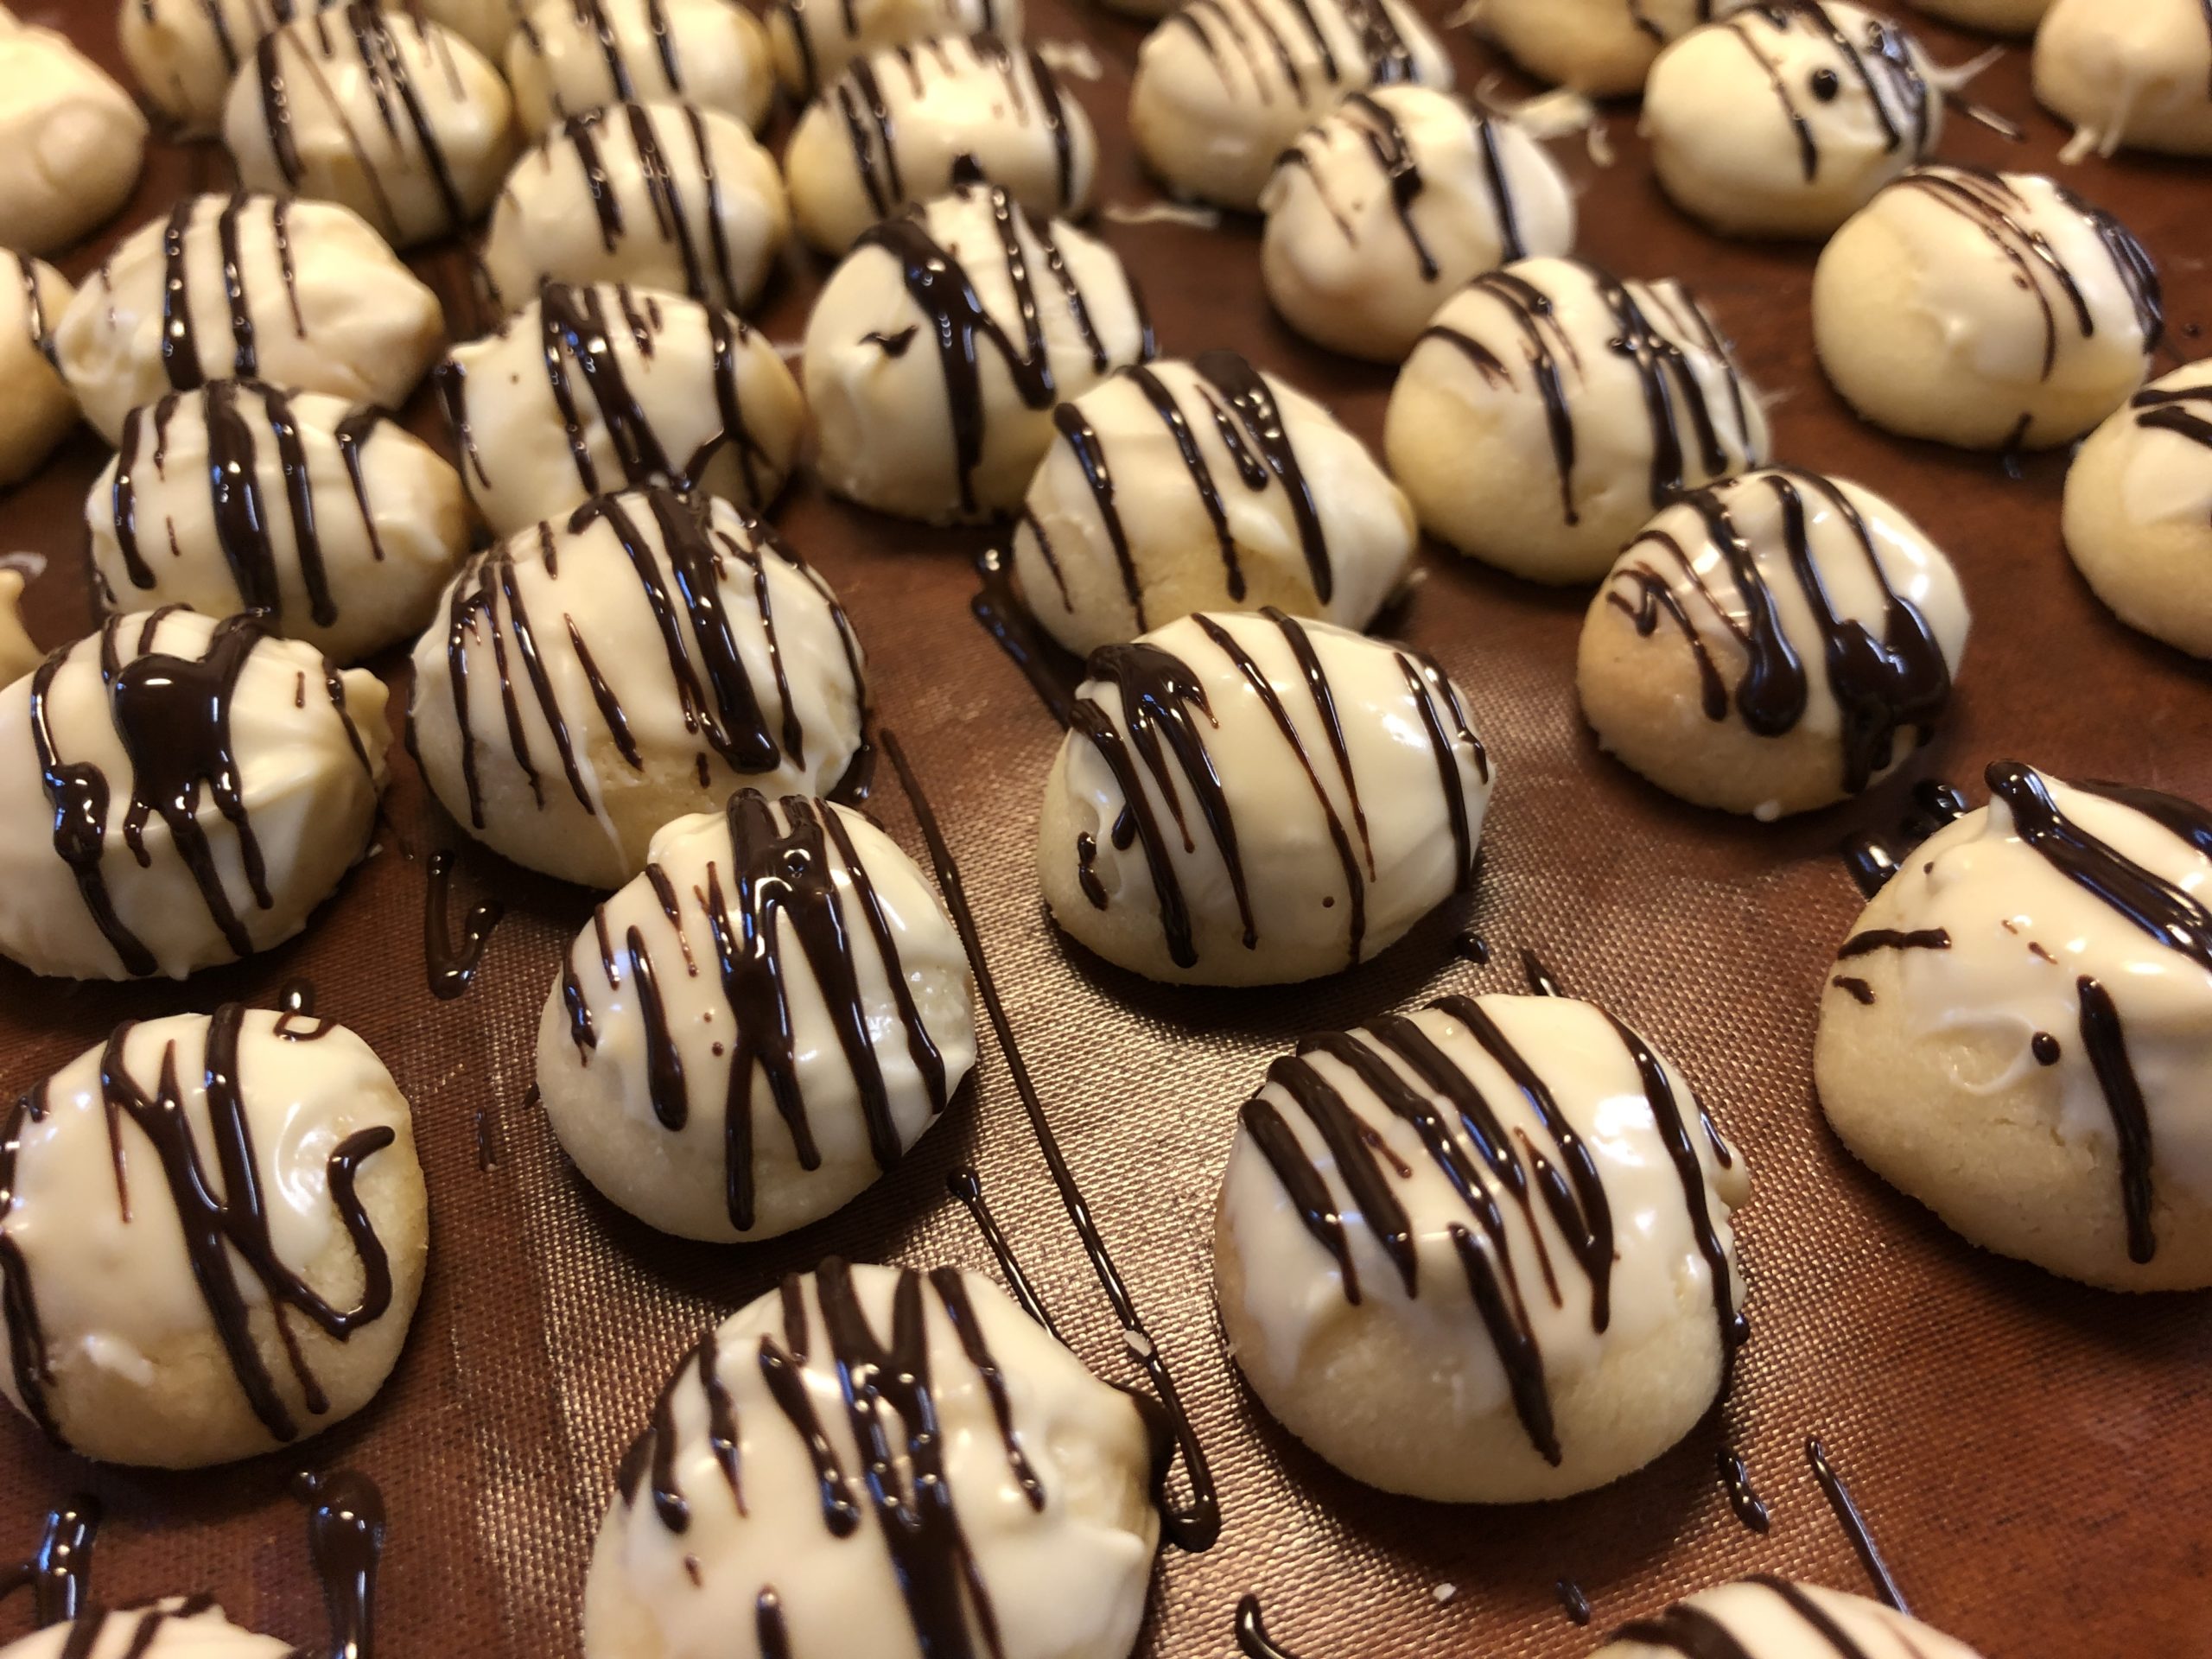
Bild zum Schritt 21 für das Bastel- und DIY-Abenteuer für Kinder: 'Lasst die Plätzchen-Pralinen gut trocknen.  Abschließend legt ihr sie...'

19

2. Bild zum Schritt 21 für das Bastel- und DIY-Abenteuer für Kinder: 'Lasst die Plätzchen-Pralinen gut trocknen.  Abschließend legt ihr sie...'

Alternative variant:
20

You prefer dark chocolate? Then the cookies dip into a dark chocolate glaze. For this, you put the chocolate in a cup and put the cup in a pot with hot water. Then stir until the chocolate melts.
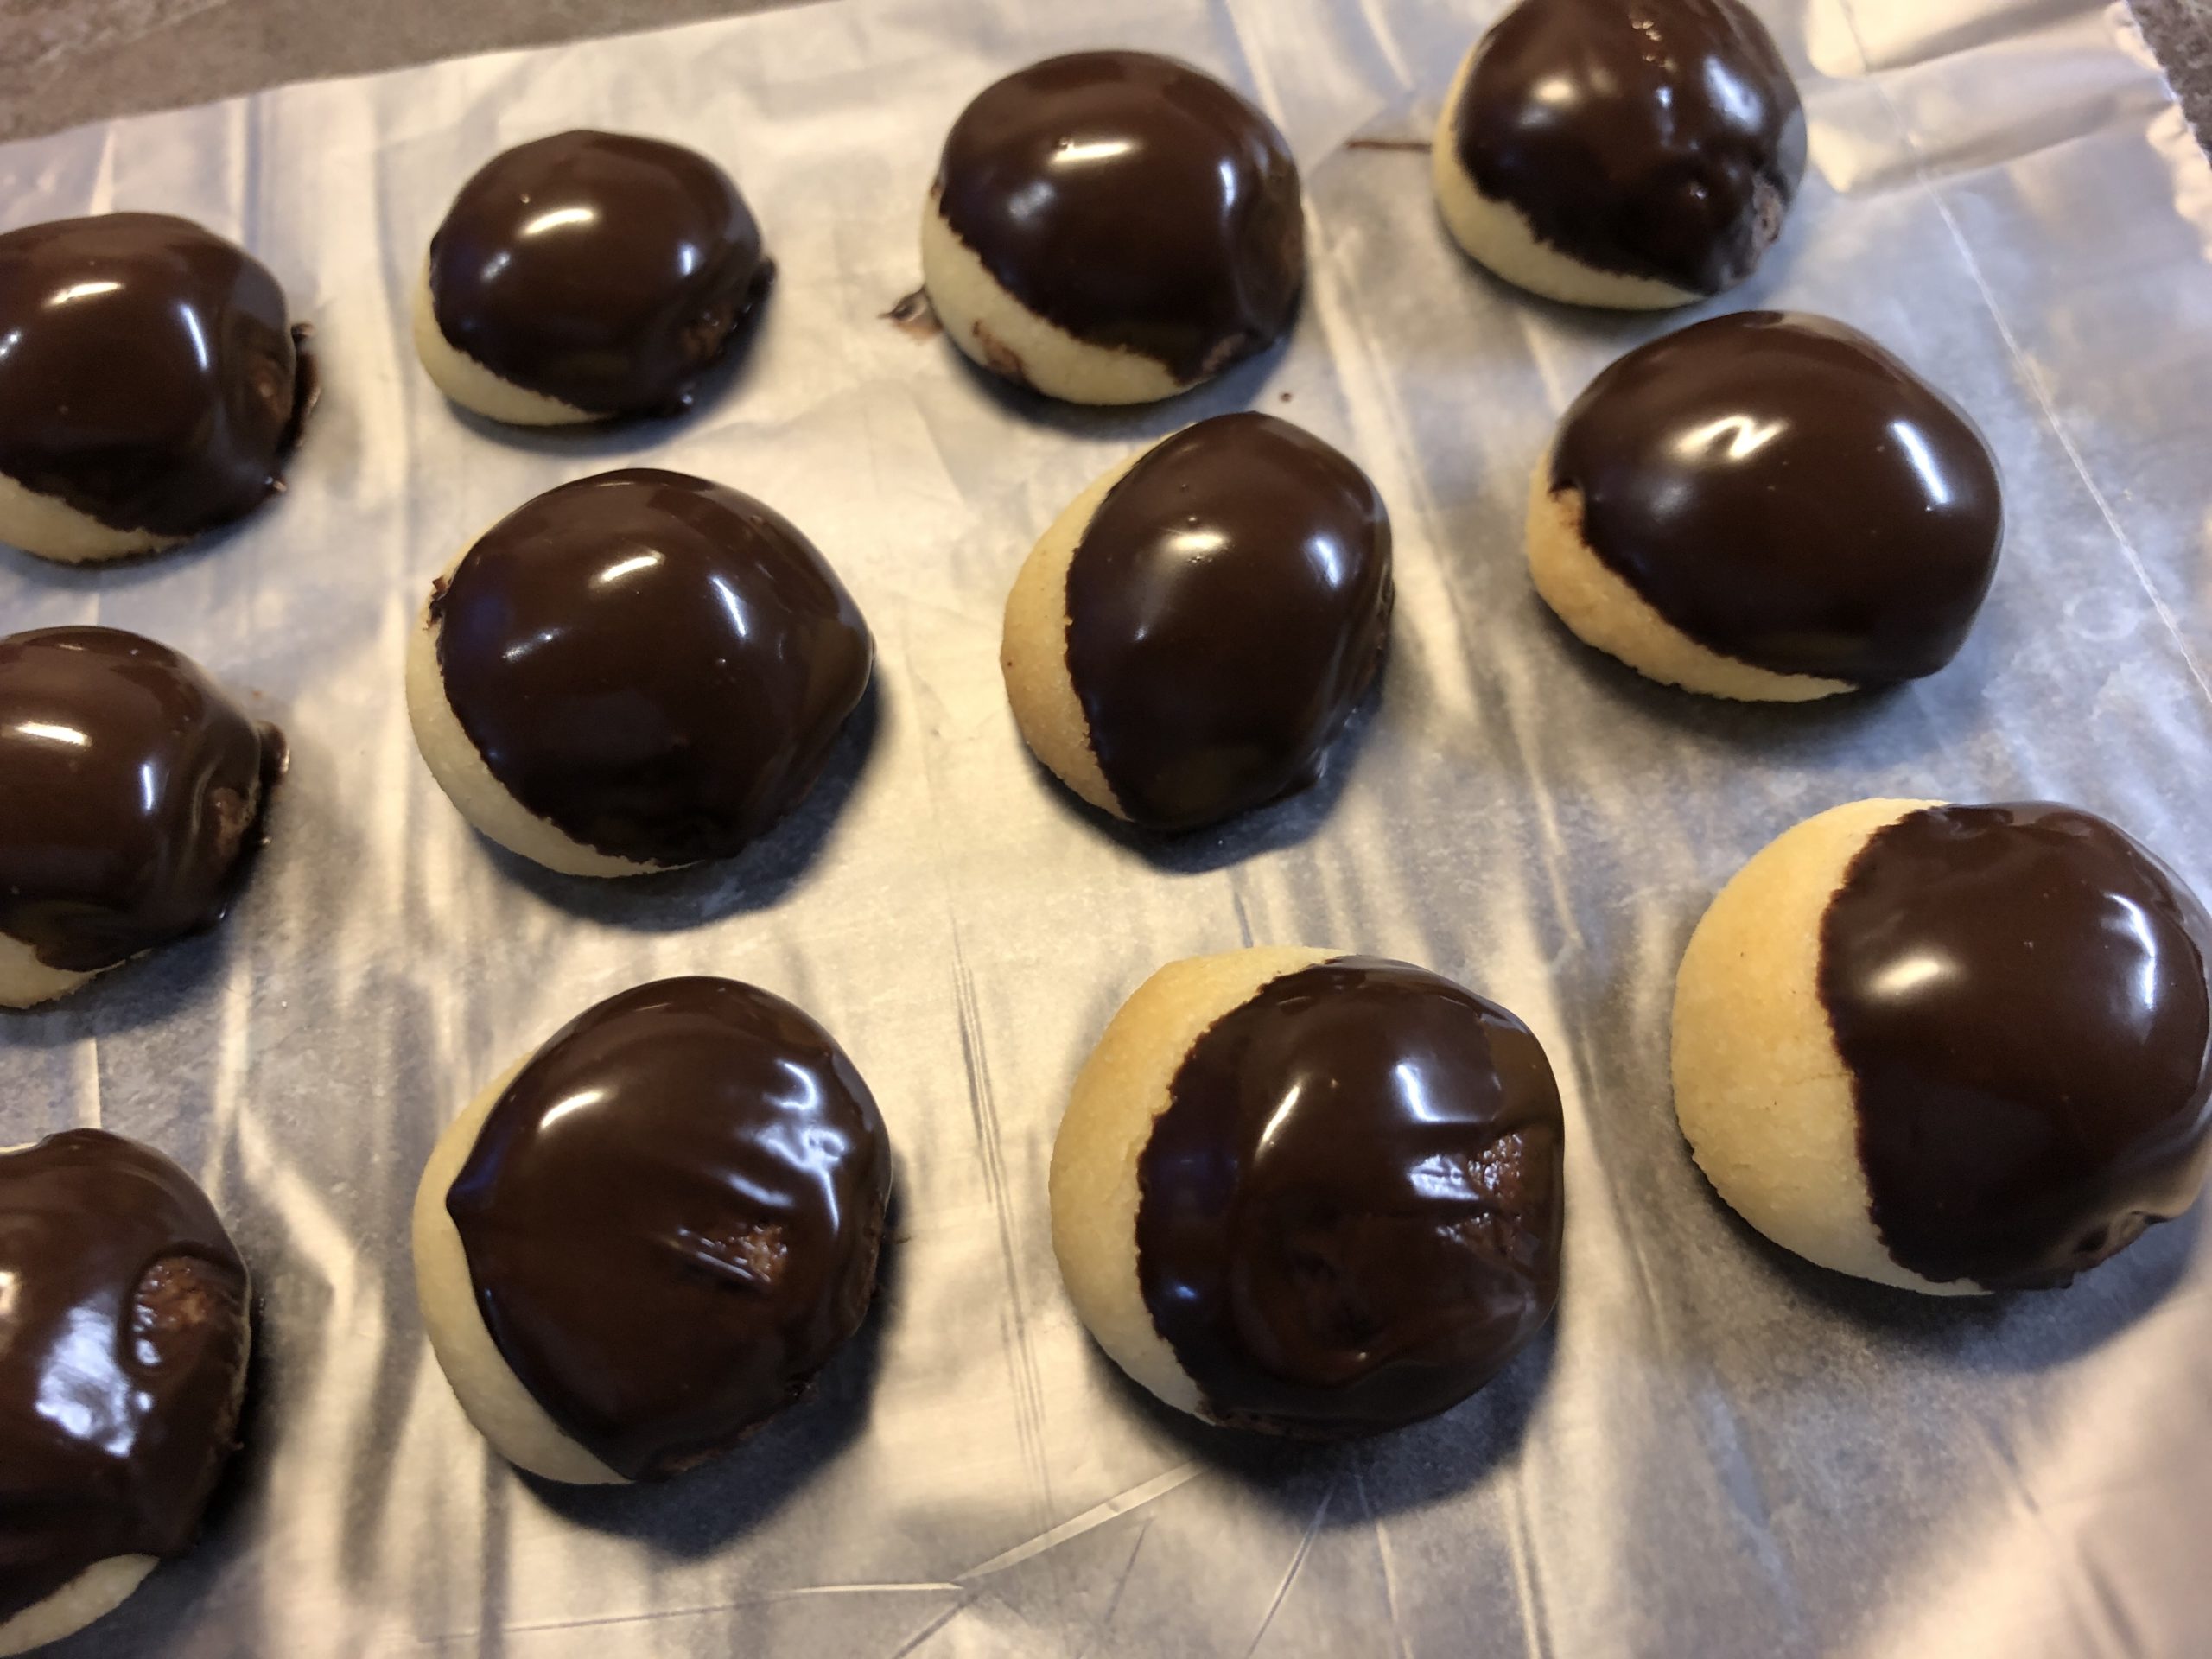
Bild zum Schritt 24 für das Bastel- und DIY-Abenteuer für Kinder: 'Ihr bevorzugt dunkle Schokolade? Dann taucht die Plätzchen in eine...'

21

After drying, you pollinate the cookies with some powdered sugar.
Attention: white cuverture is not so good for decorating on the chocolate glaze. The reason is that it is firmer in consistency than the chocolate glaze.
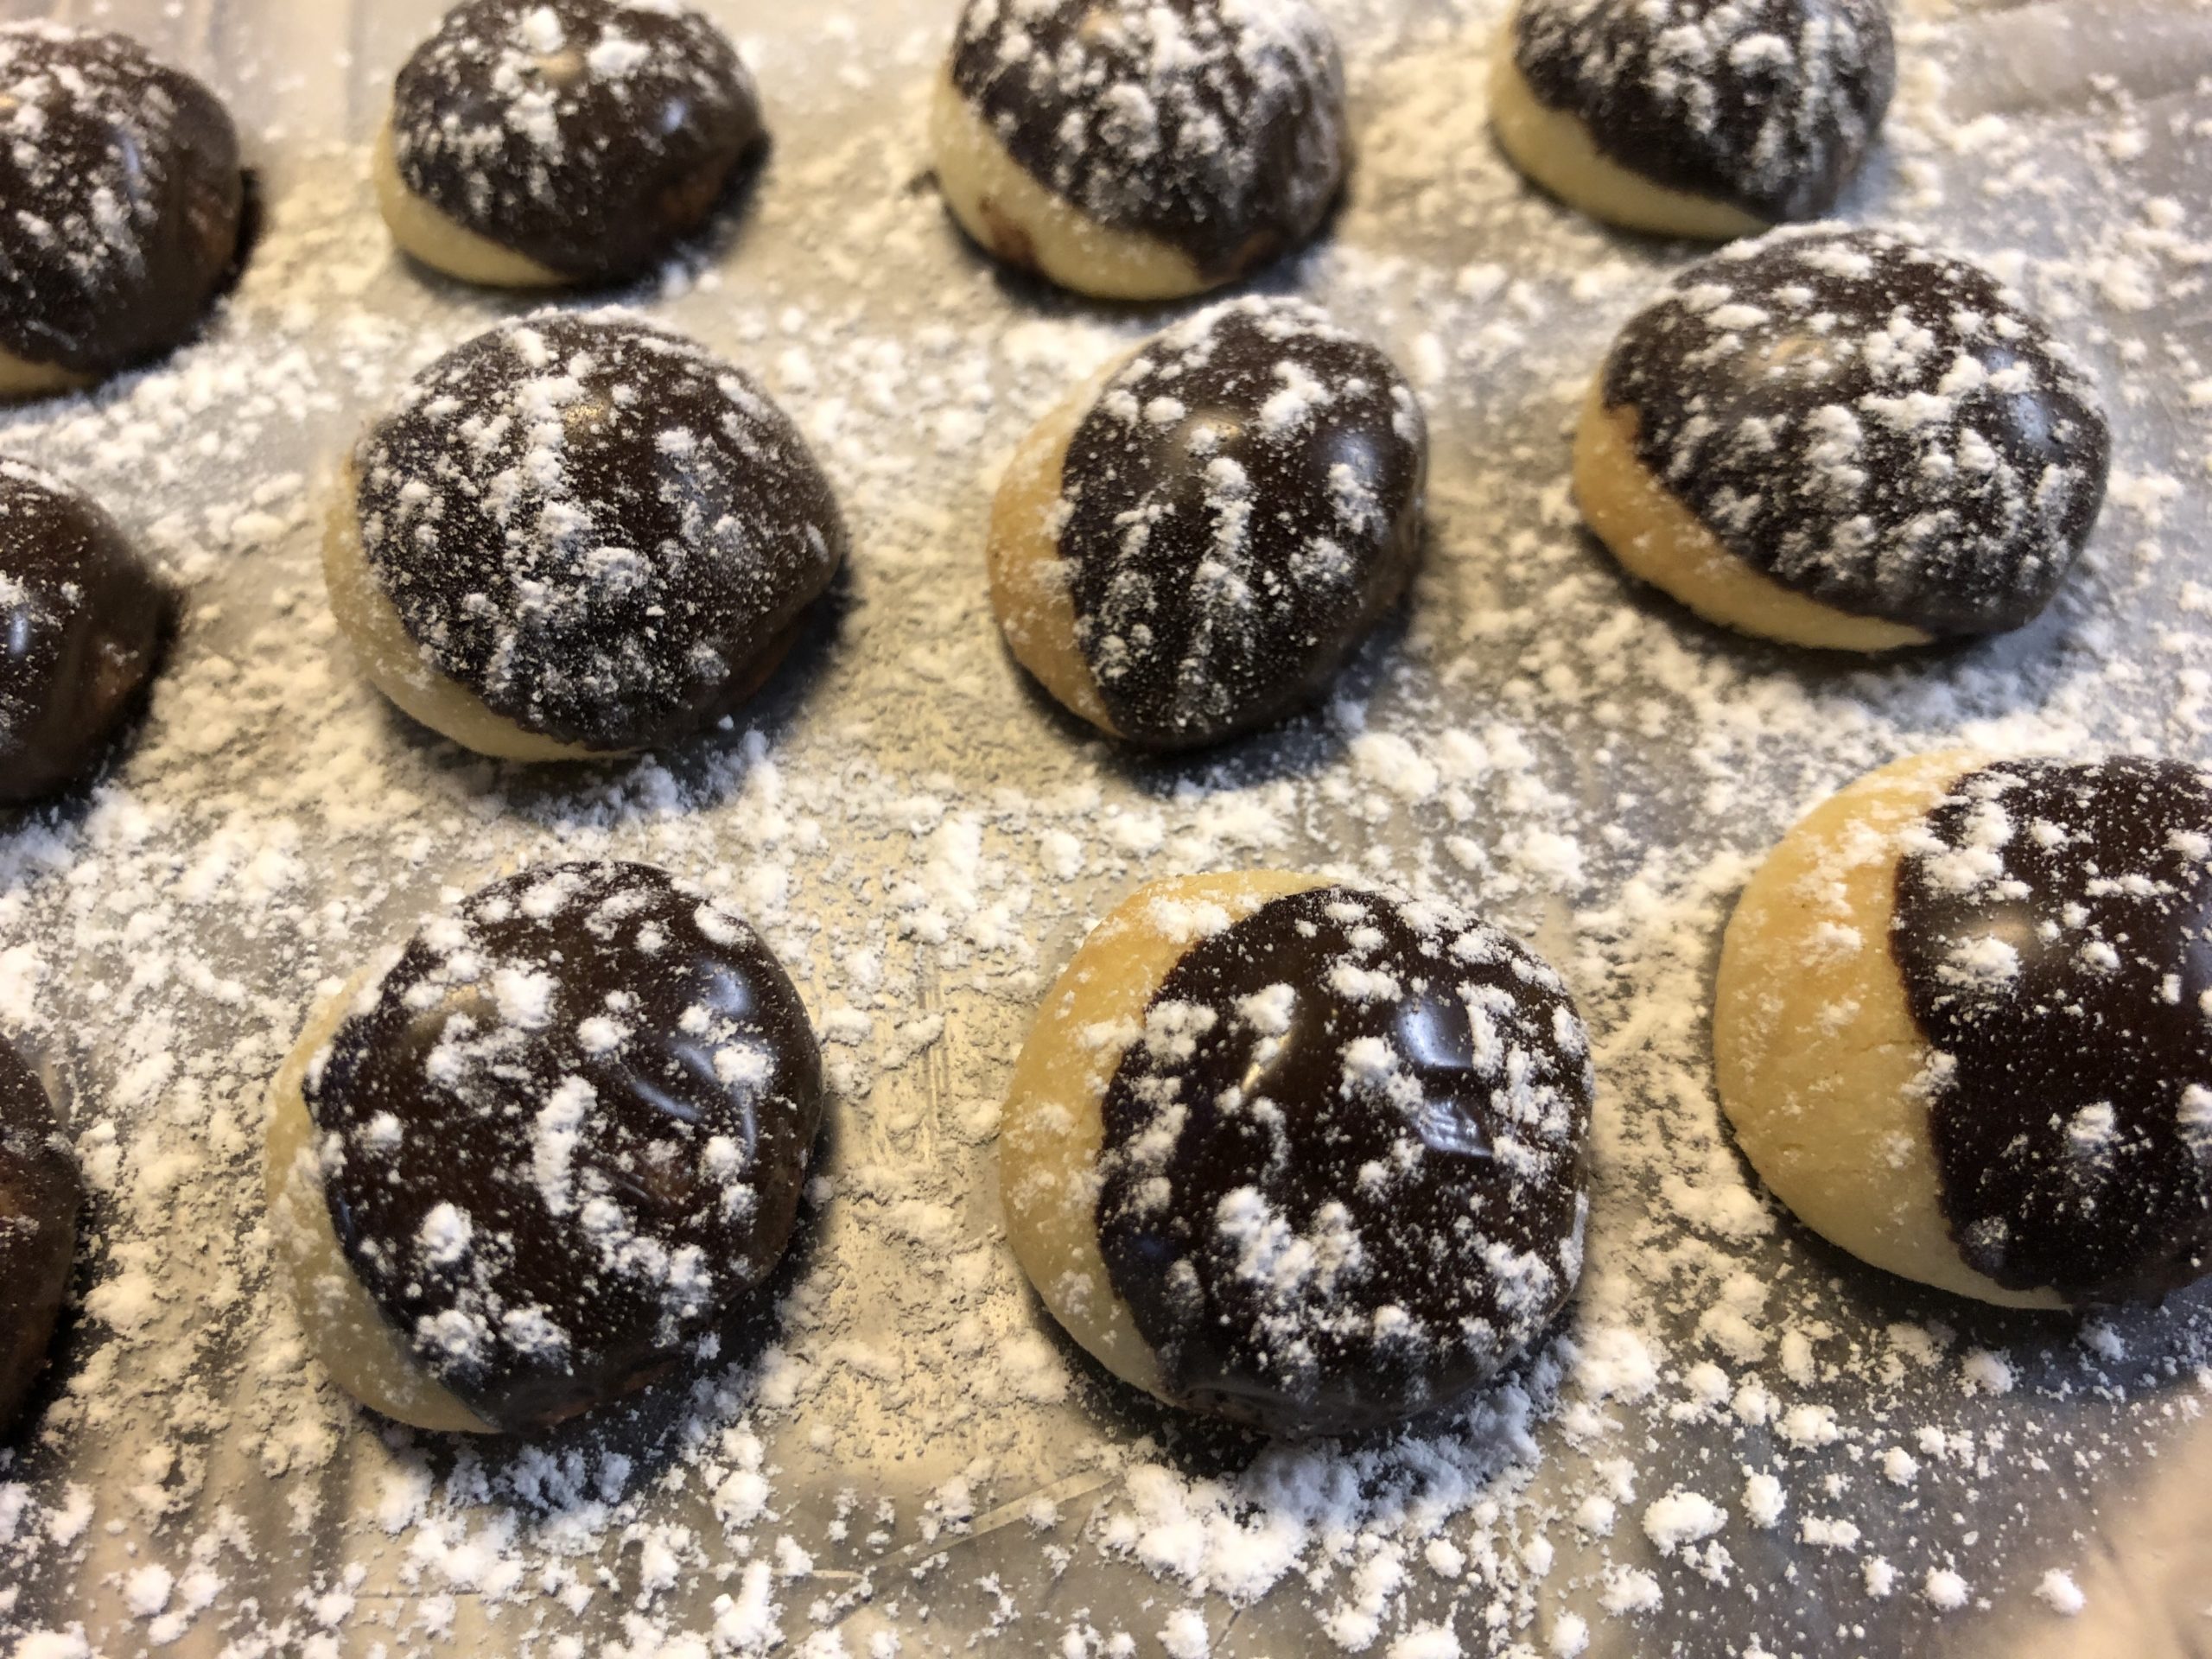
Bild zum Schritt 25 für das Bastel- und DIY-Abenteuer für Kinder: 'Nach dem Trocknen bestäubt ihr die Plätzchen mit etwas Puderzucker....'

22

Enjoy baking!

Bild zum Schritt 26 für das Bastel- und DIY-Abenteuer für Kinder: 'Viel Freude beim Backen!'

23

Stay creative and try out. Surely you have more ideas to beautify your cookies.
You're welcome to write to me.

Butternuts (3 variants)

Follow us on Facebook , Instagram and Pinterest
Don't miss any more adventures: Our bottle mail

Leave a Reply

Your email address will not be published.

The maximum upload file size: 5 MB. You can upload: image, document. Drop file here