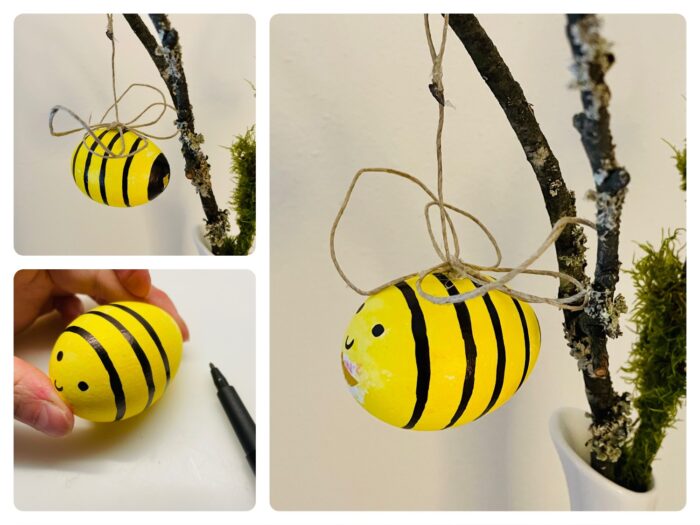
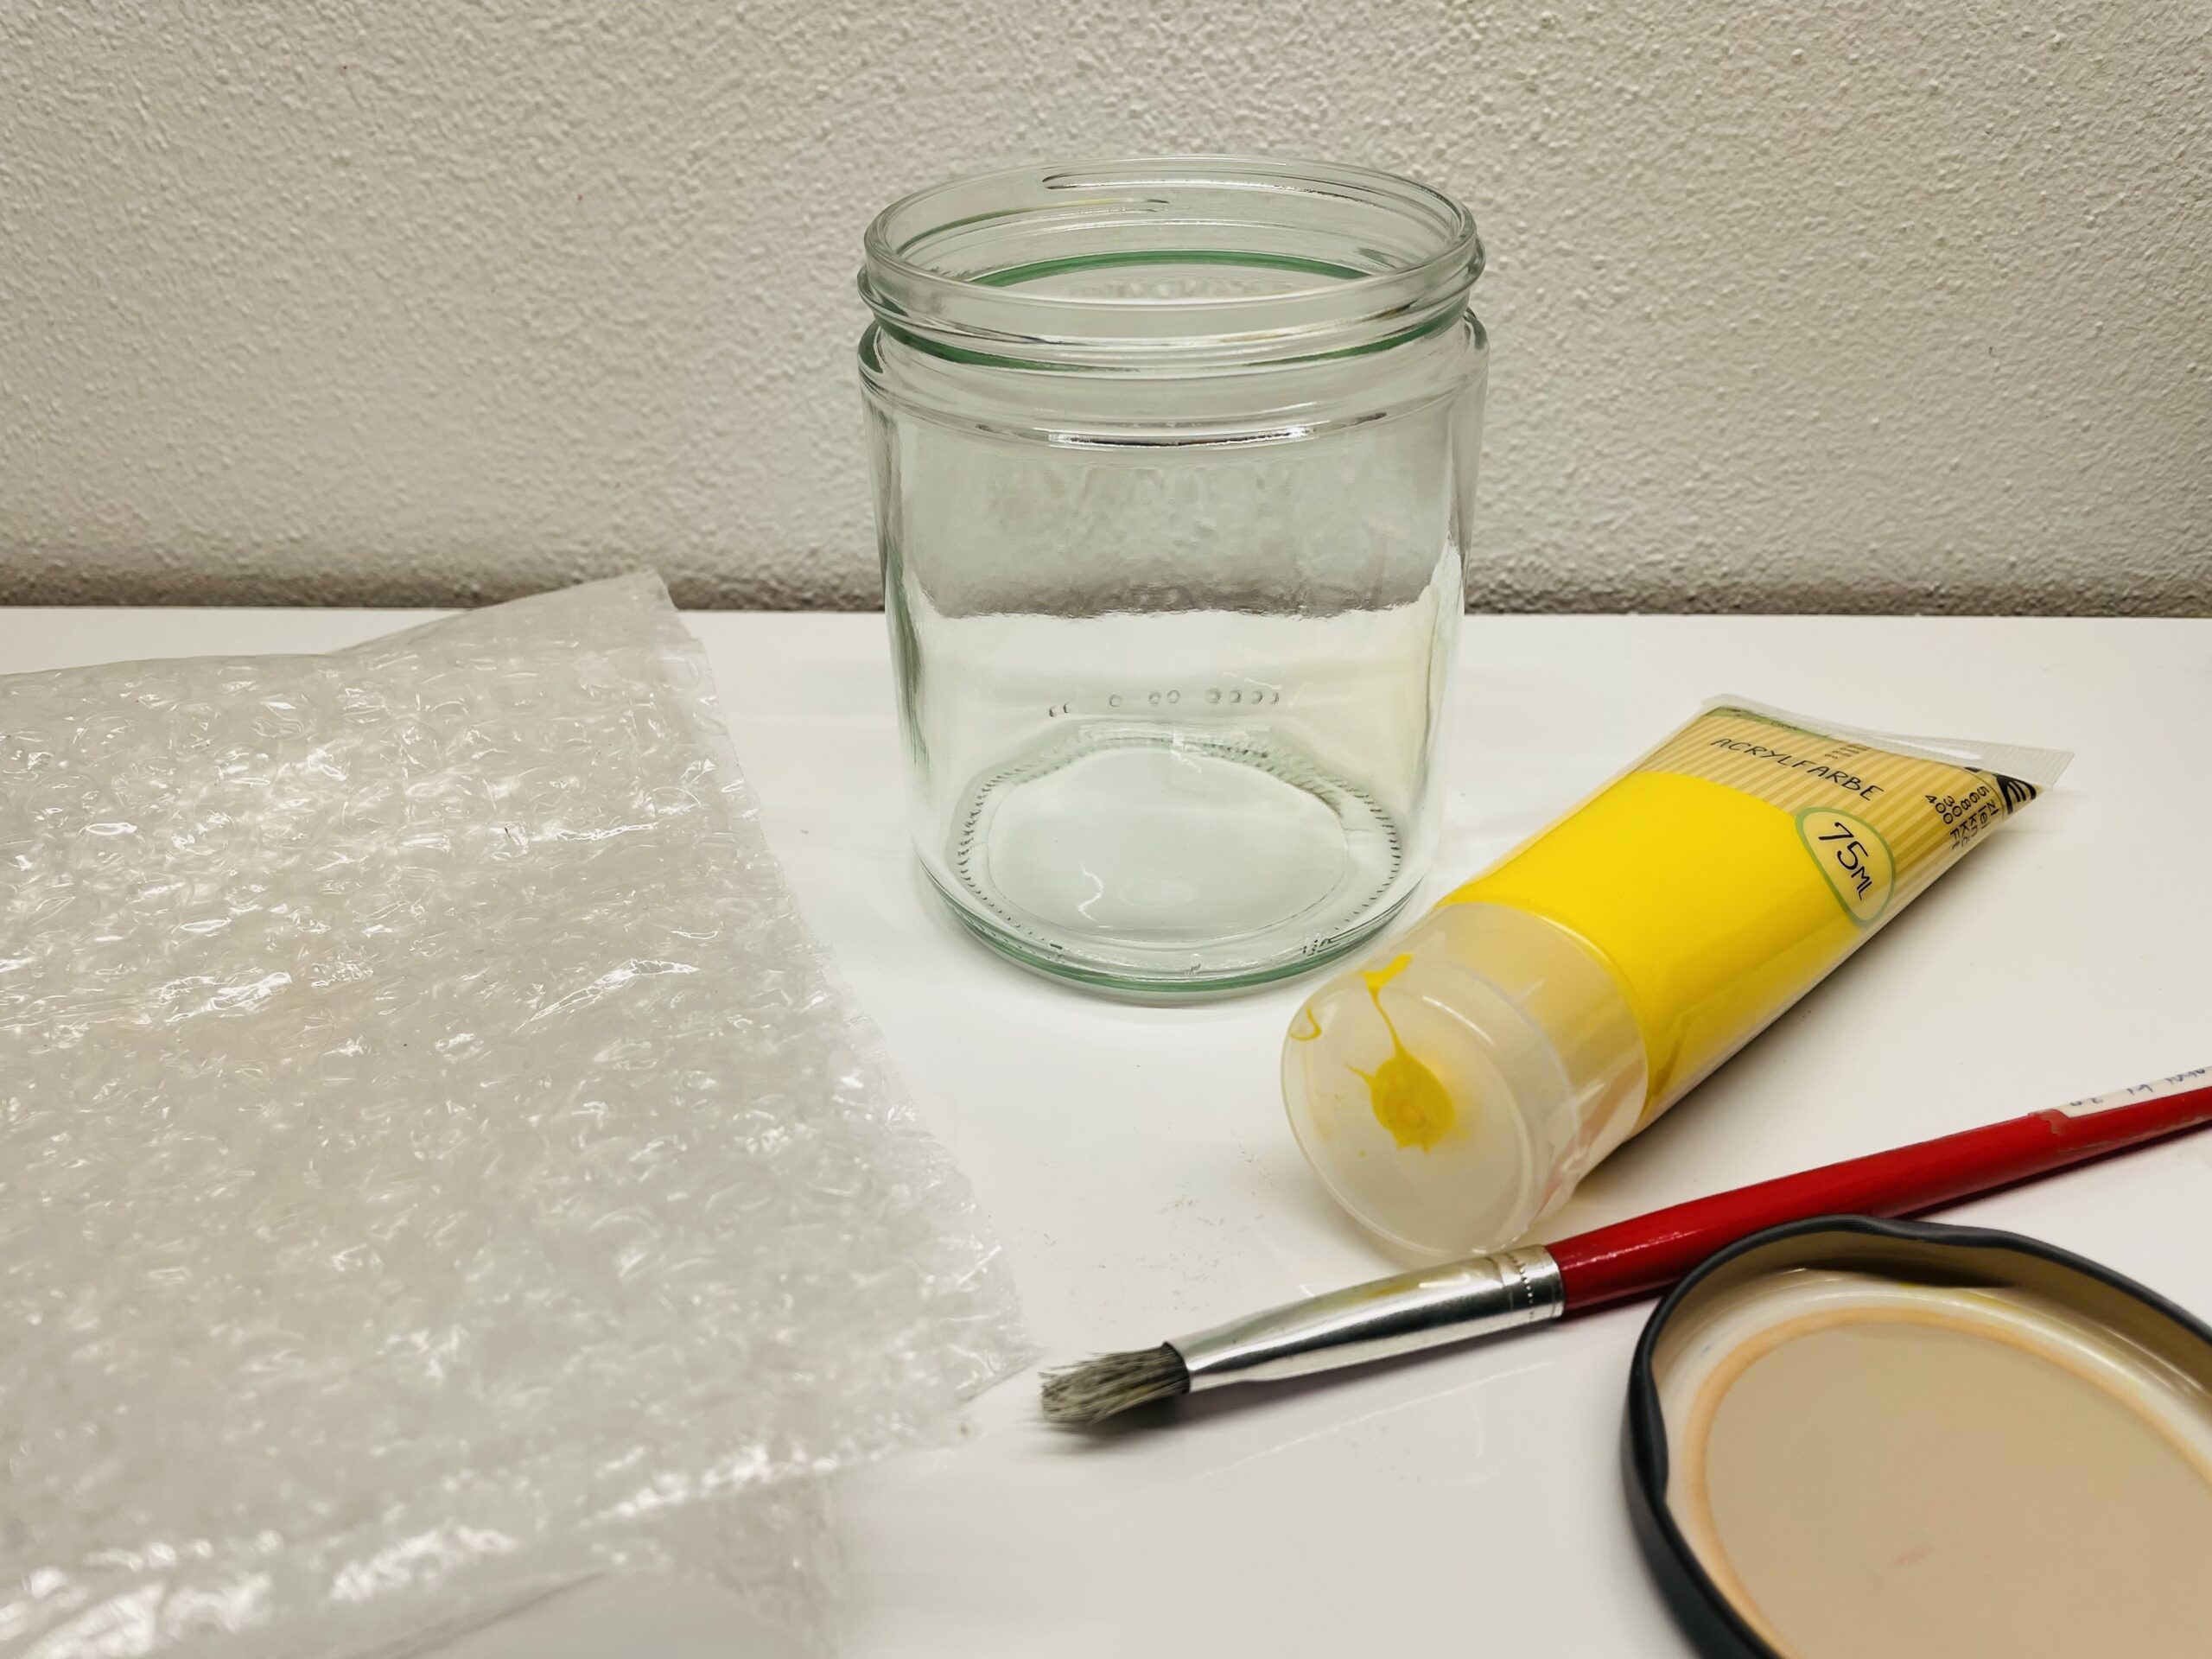
A summery windlight is a highlight of a garden party. This bee honeycomb glass is a shining eye-catcher. What you need are a large, empty jam glass, a piece of bubble wrap (packaging material), yellow clay paper, a piece of a bast cord and small decorative bees (e.g. made of stones). You can find the exact step-by-step instructions here. Have fun crafting and decorating.
Media Education for Kindergarten and Hort

Relief in everyday life, targeted promotion of individual children, independent learning and - without any pre-knowledge already usable by the youngest!

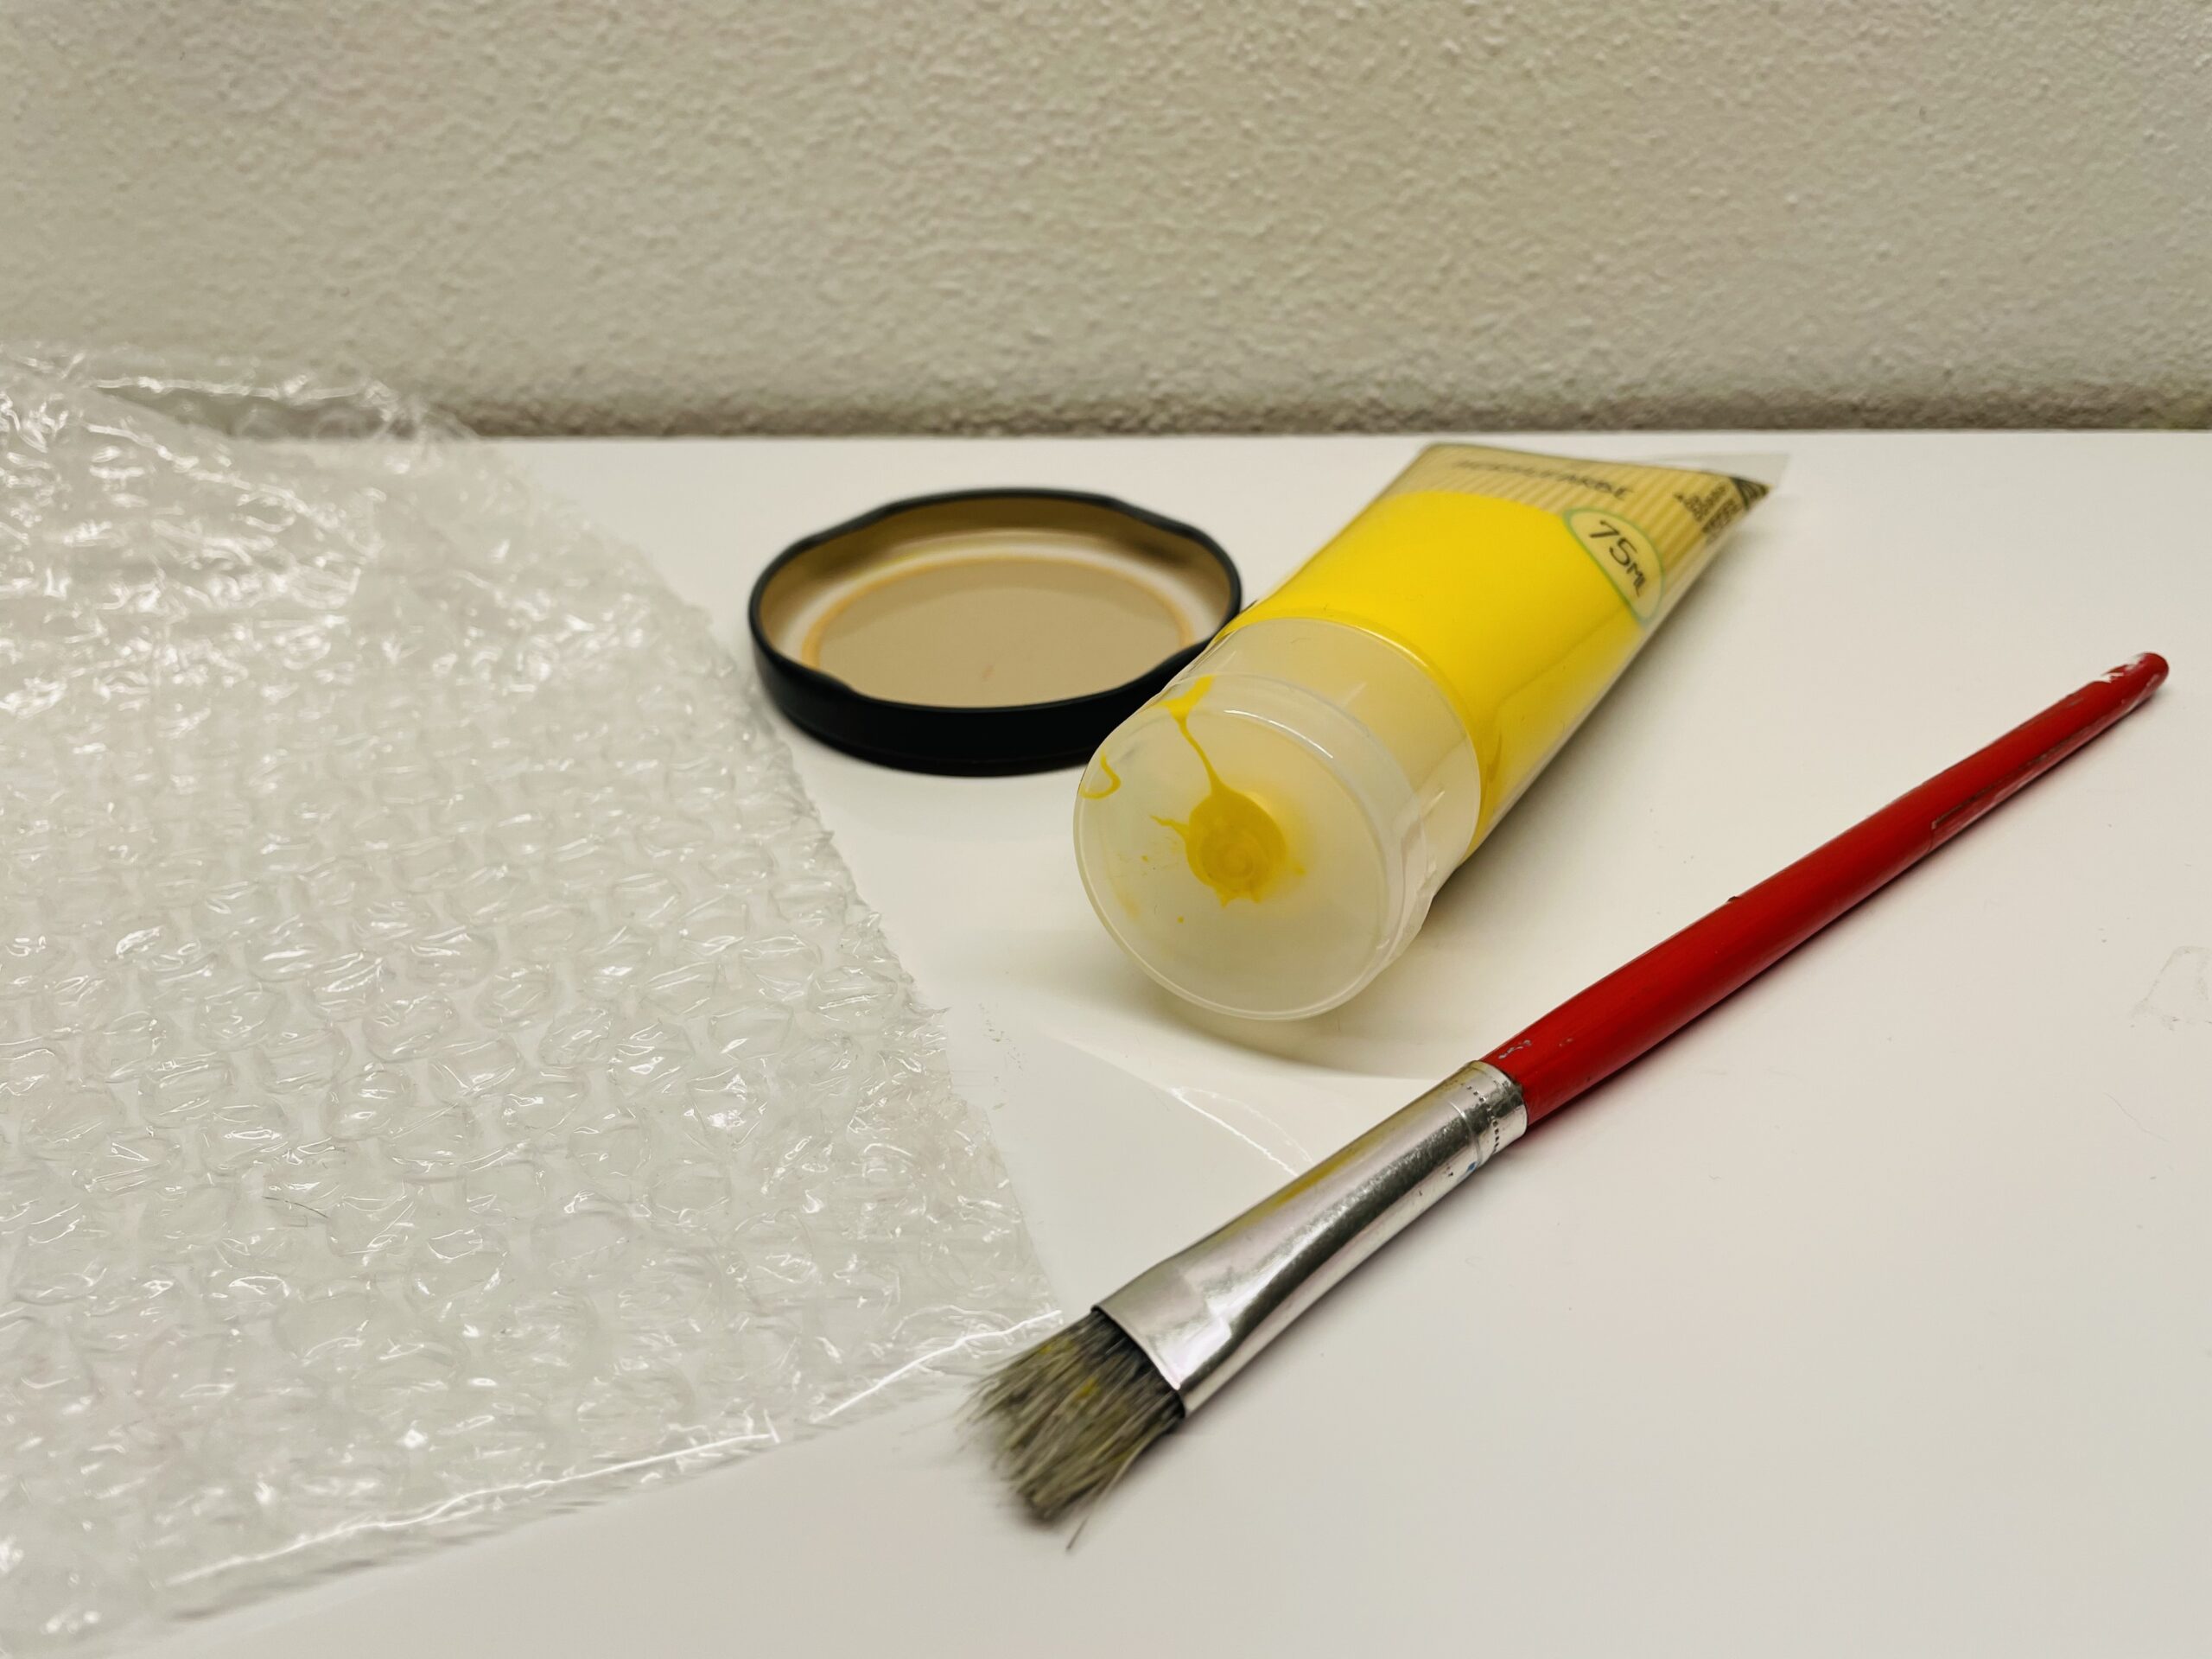
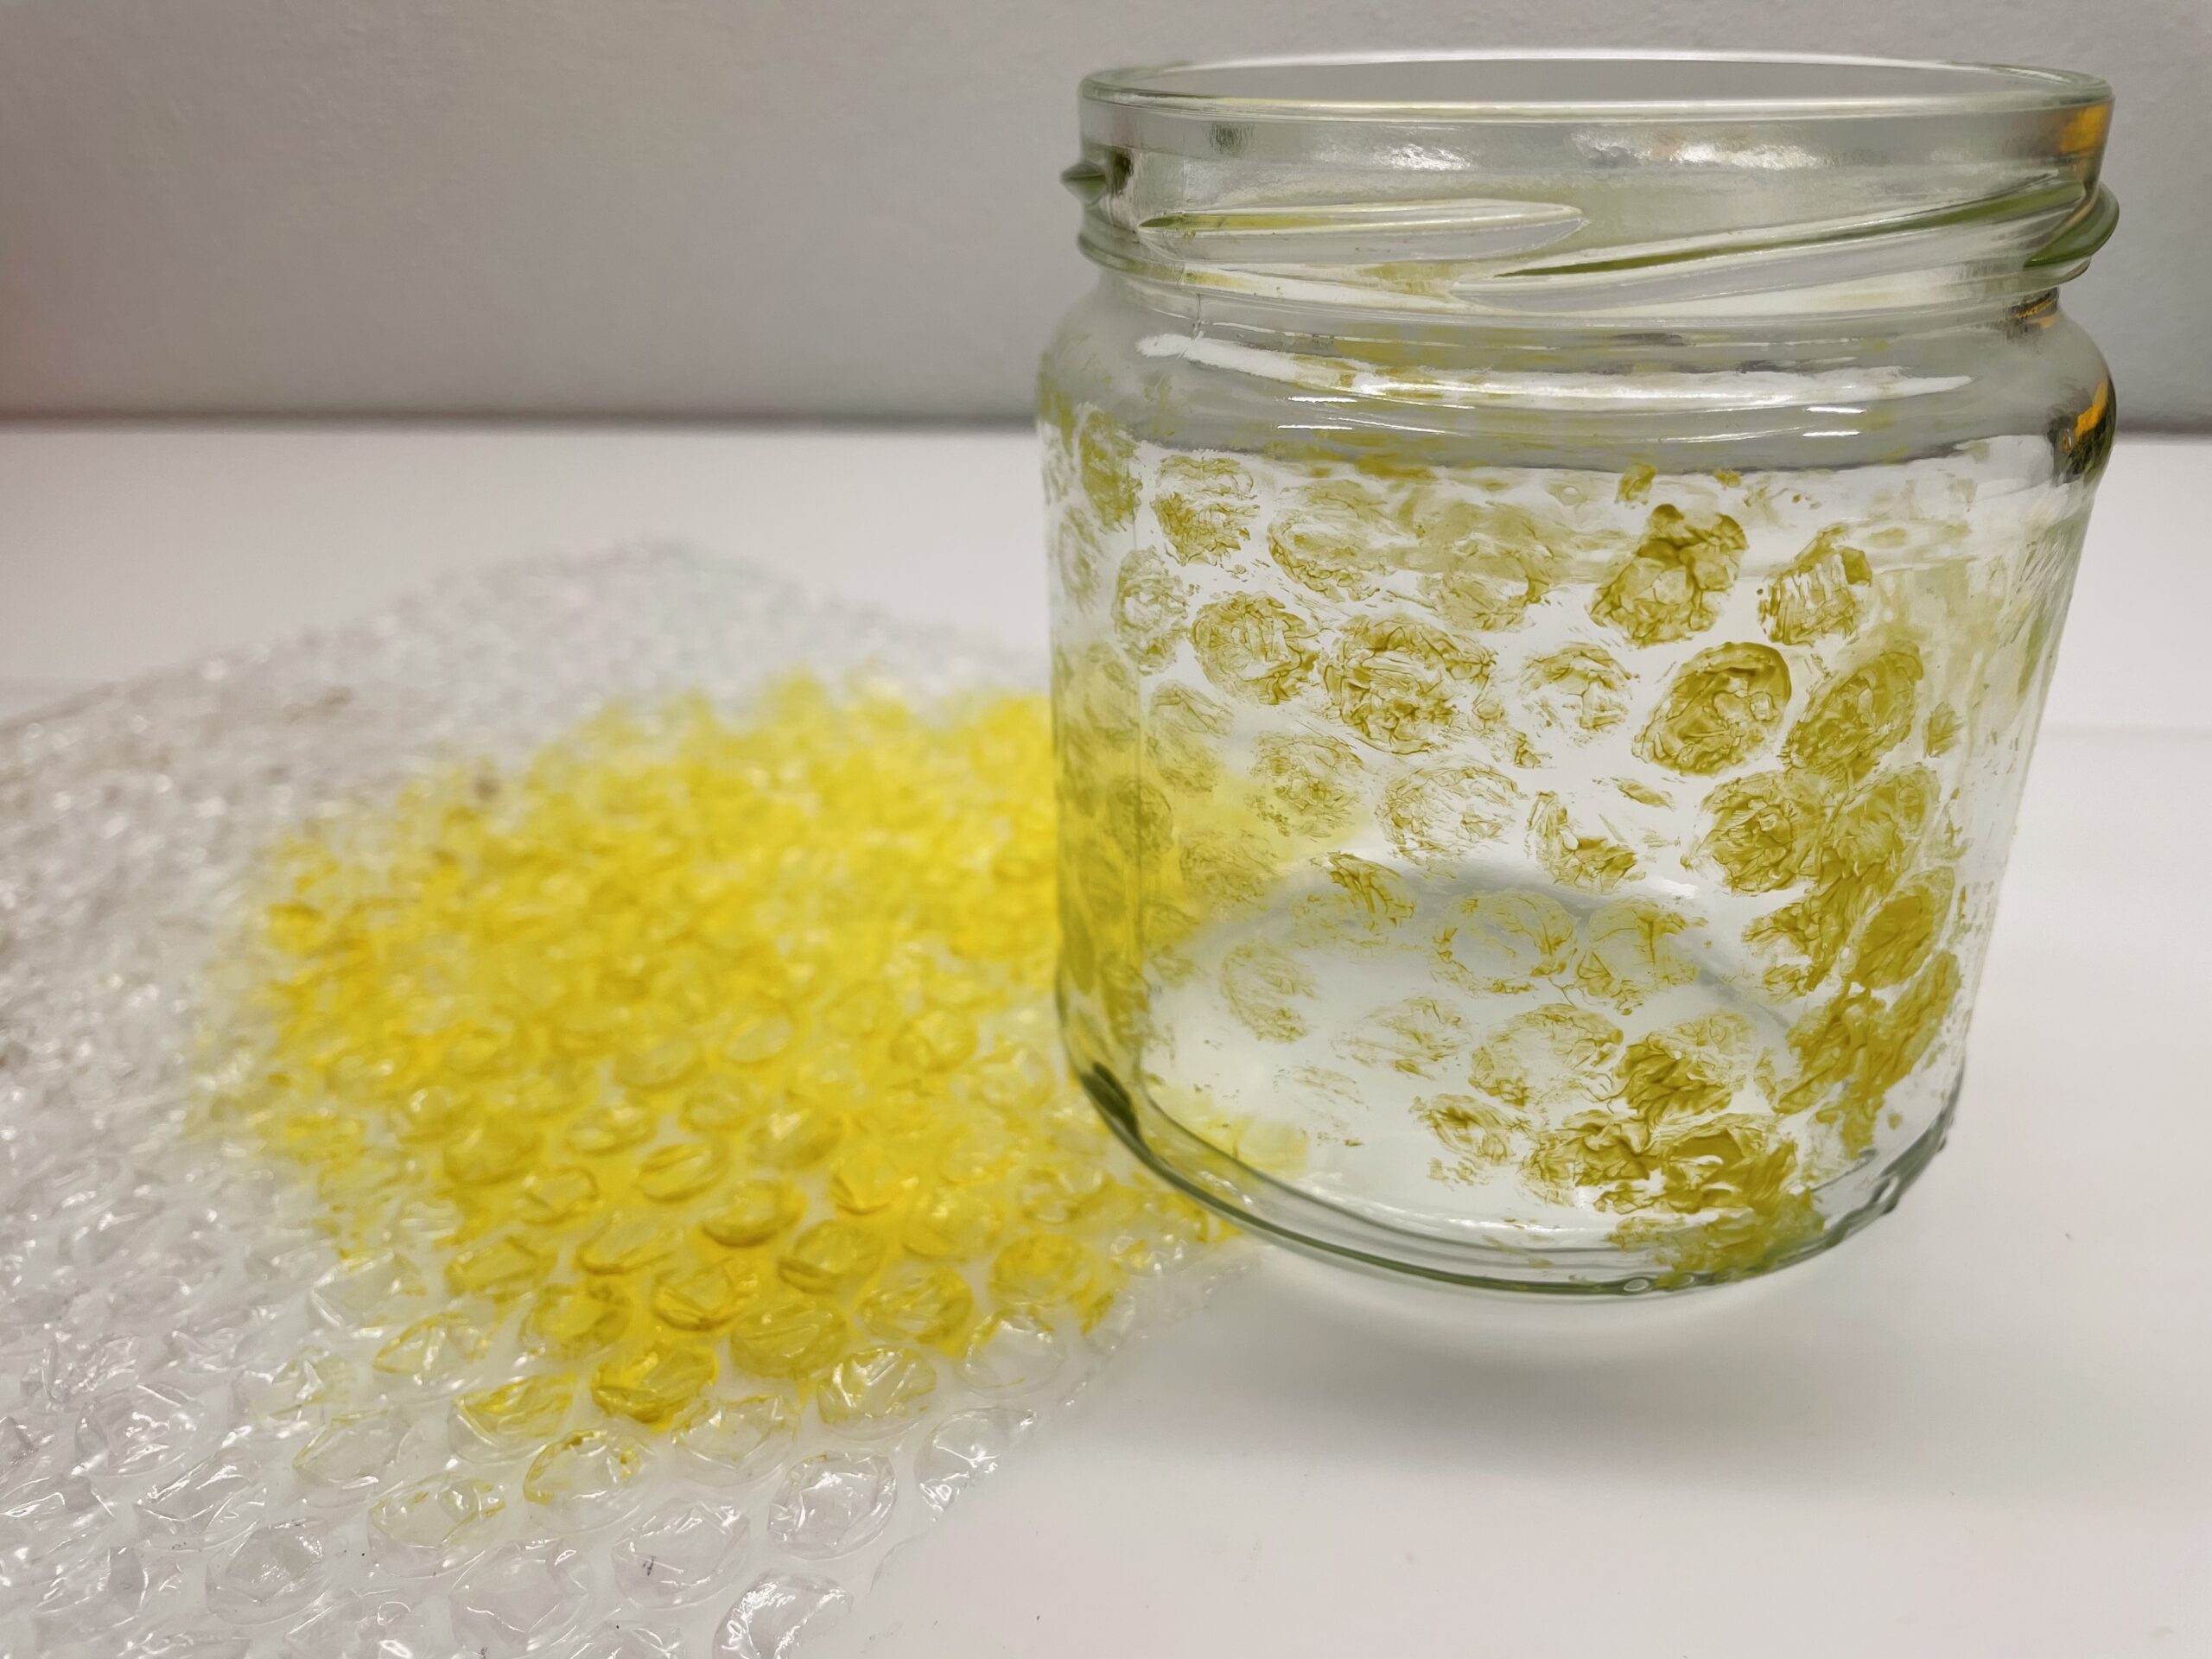
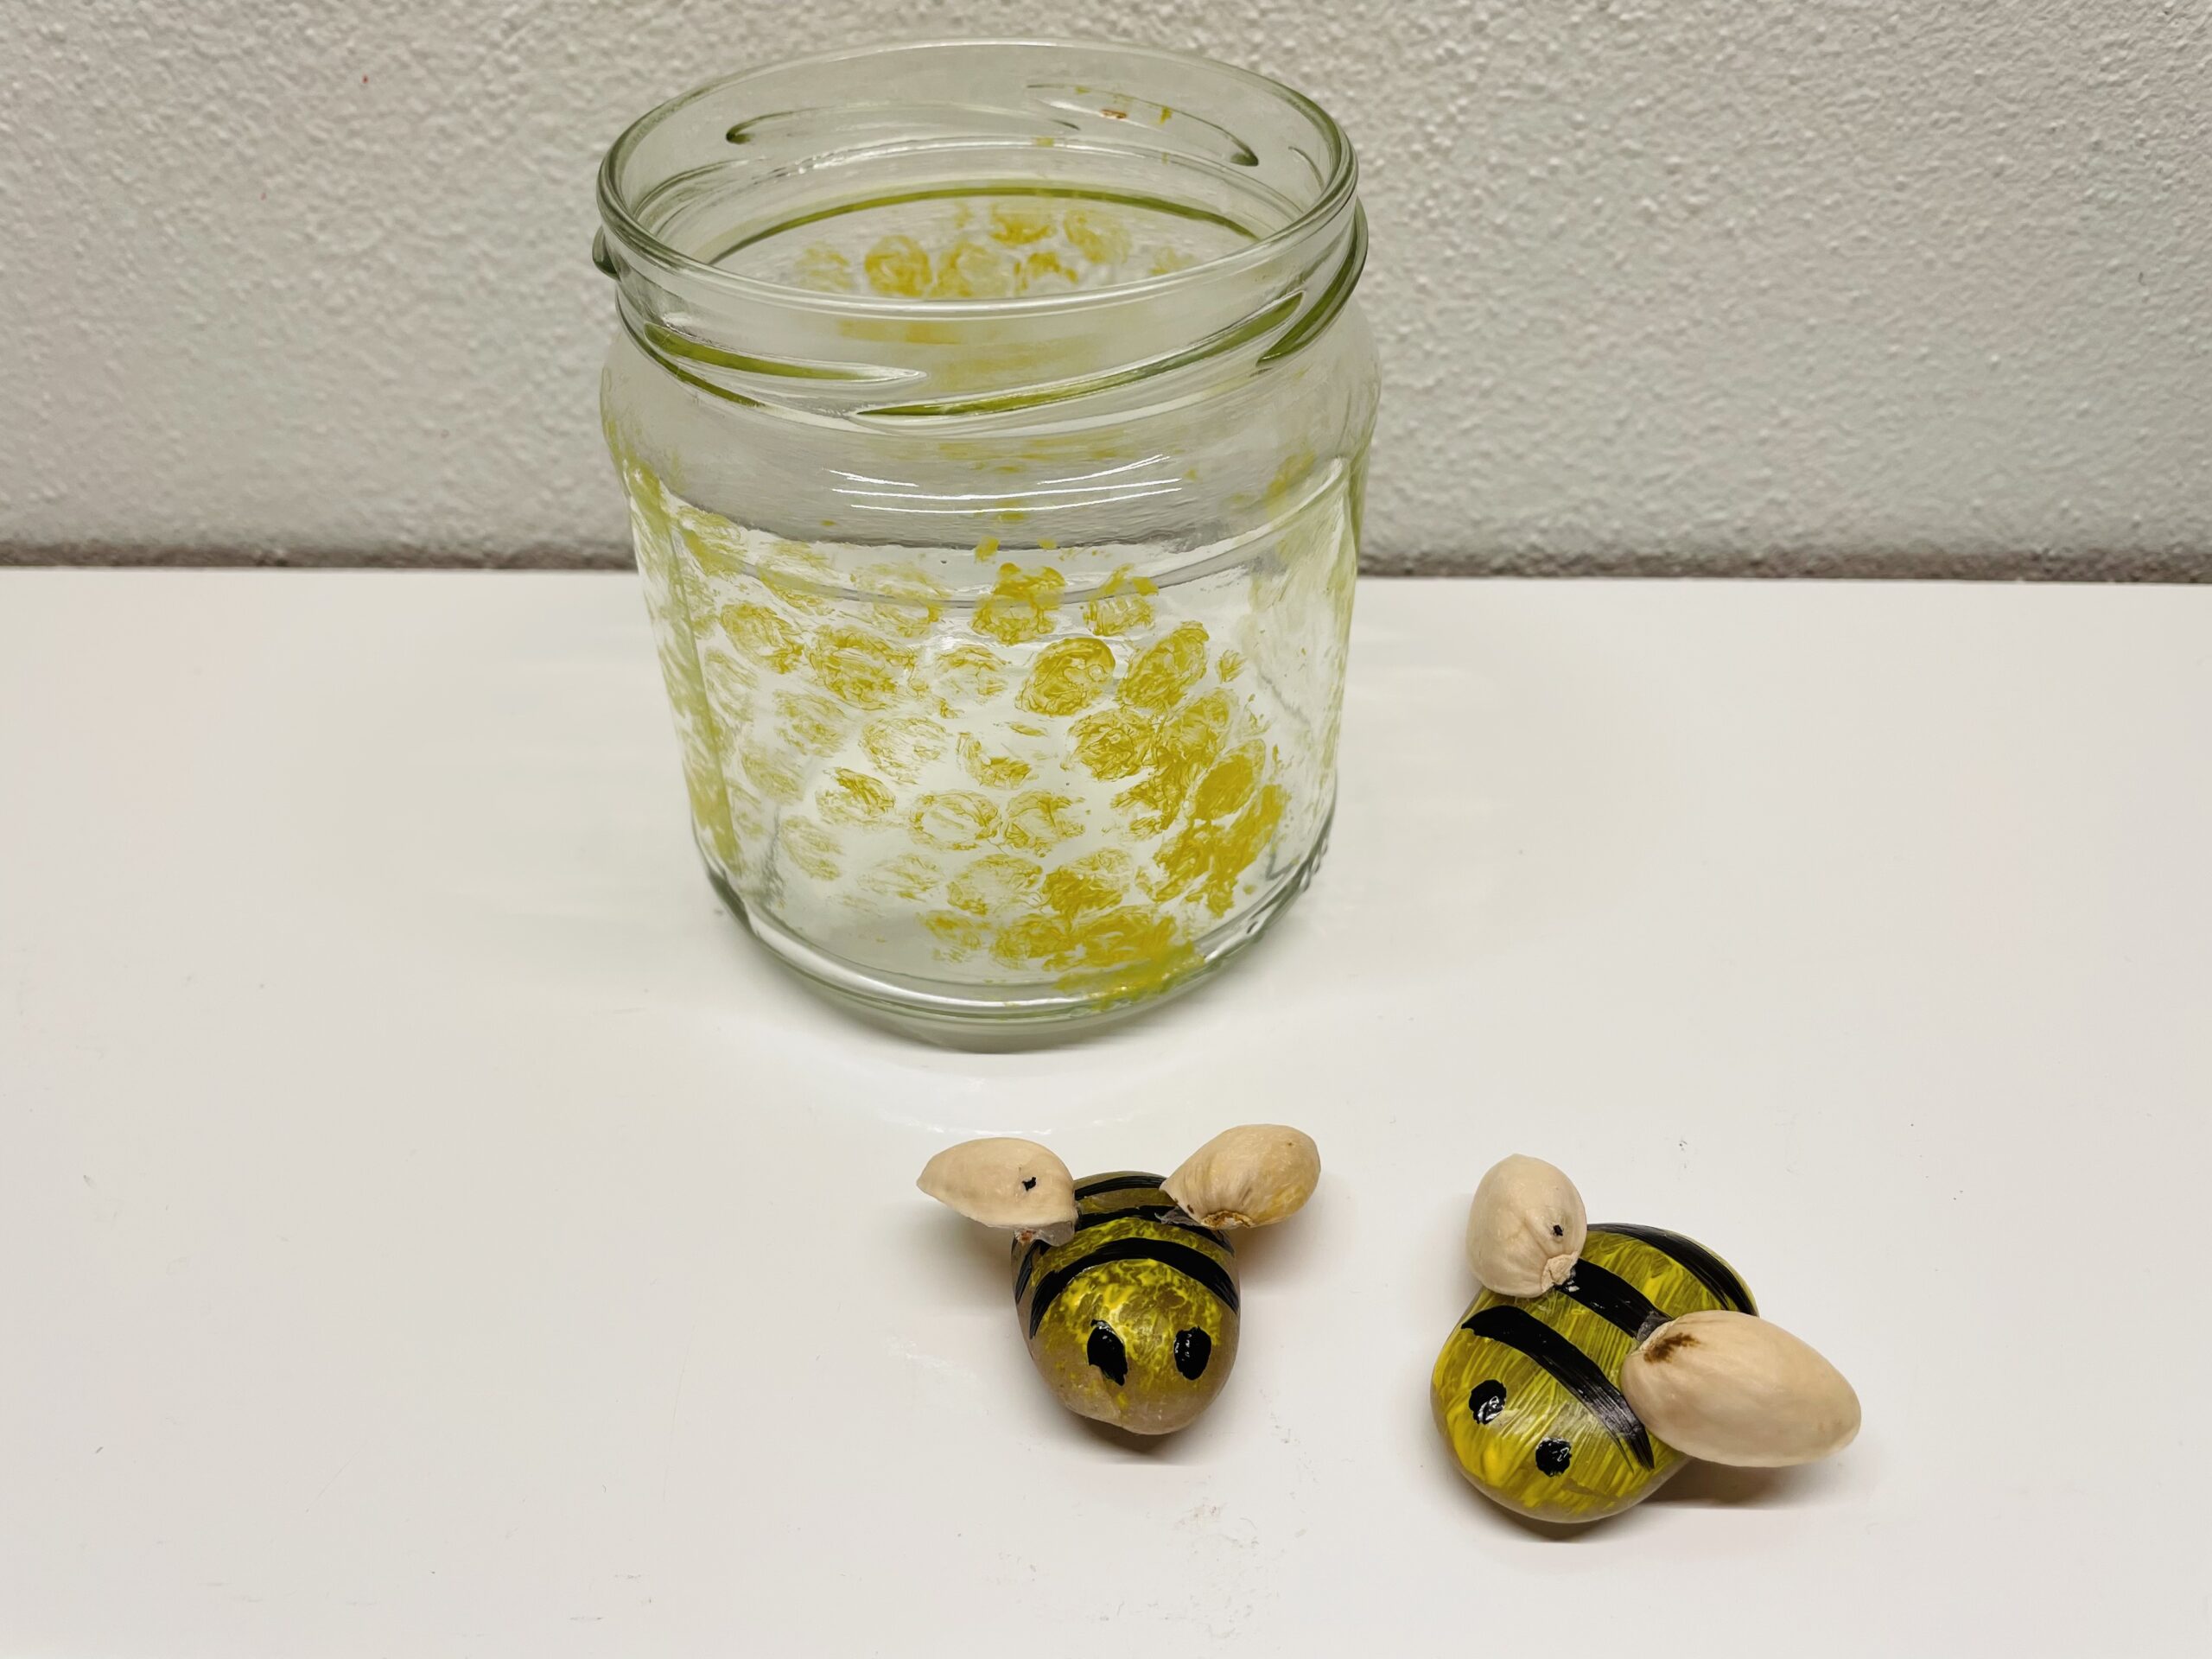
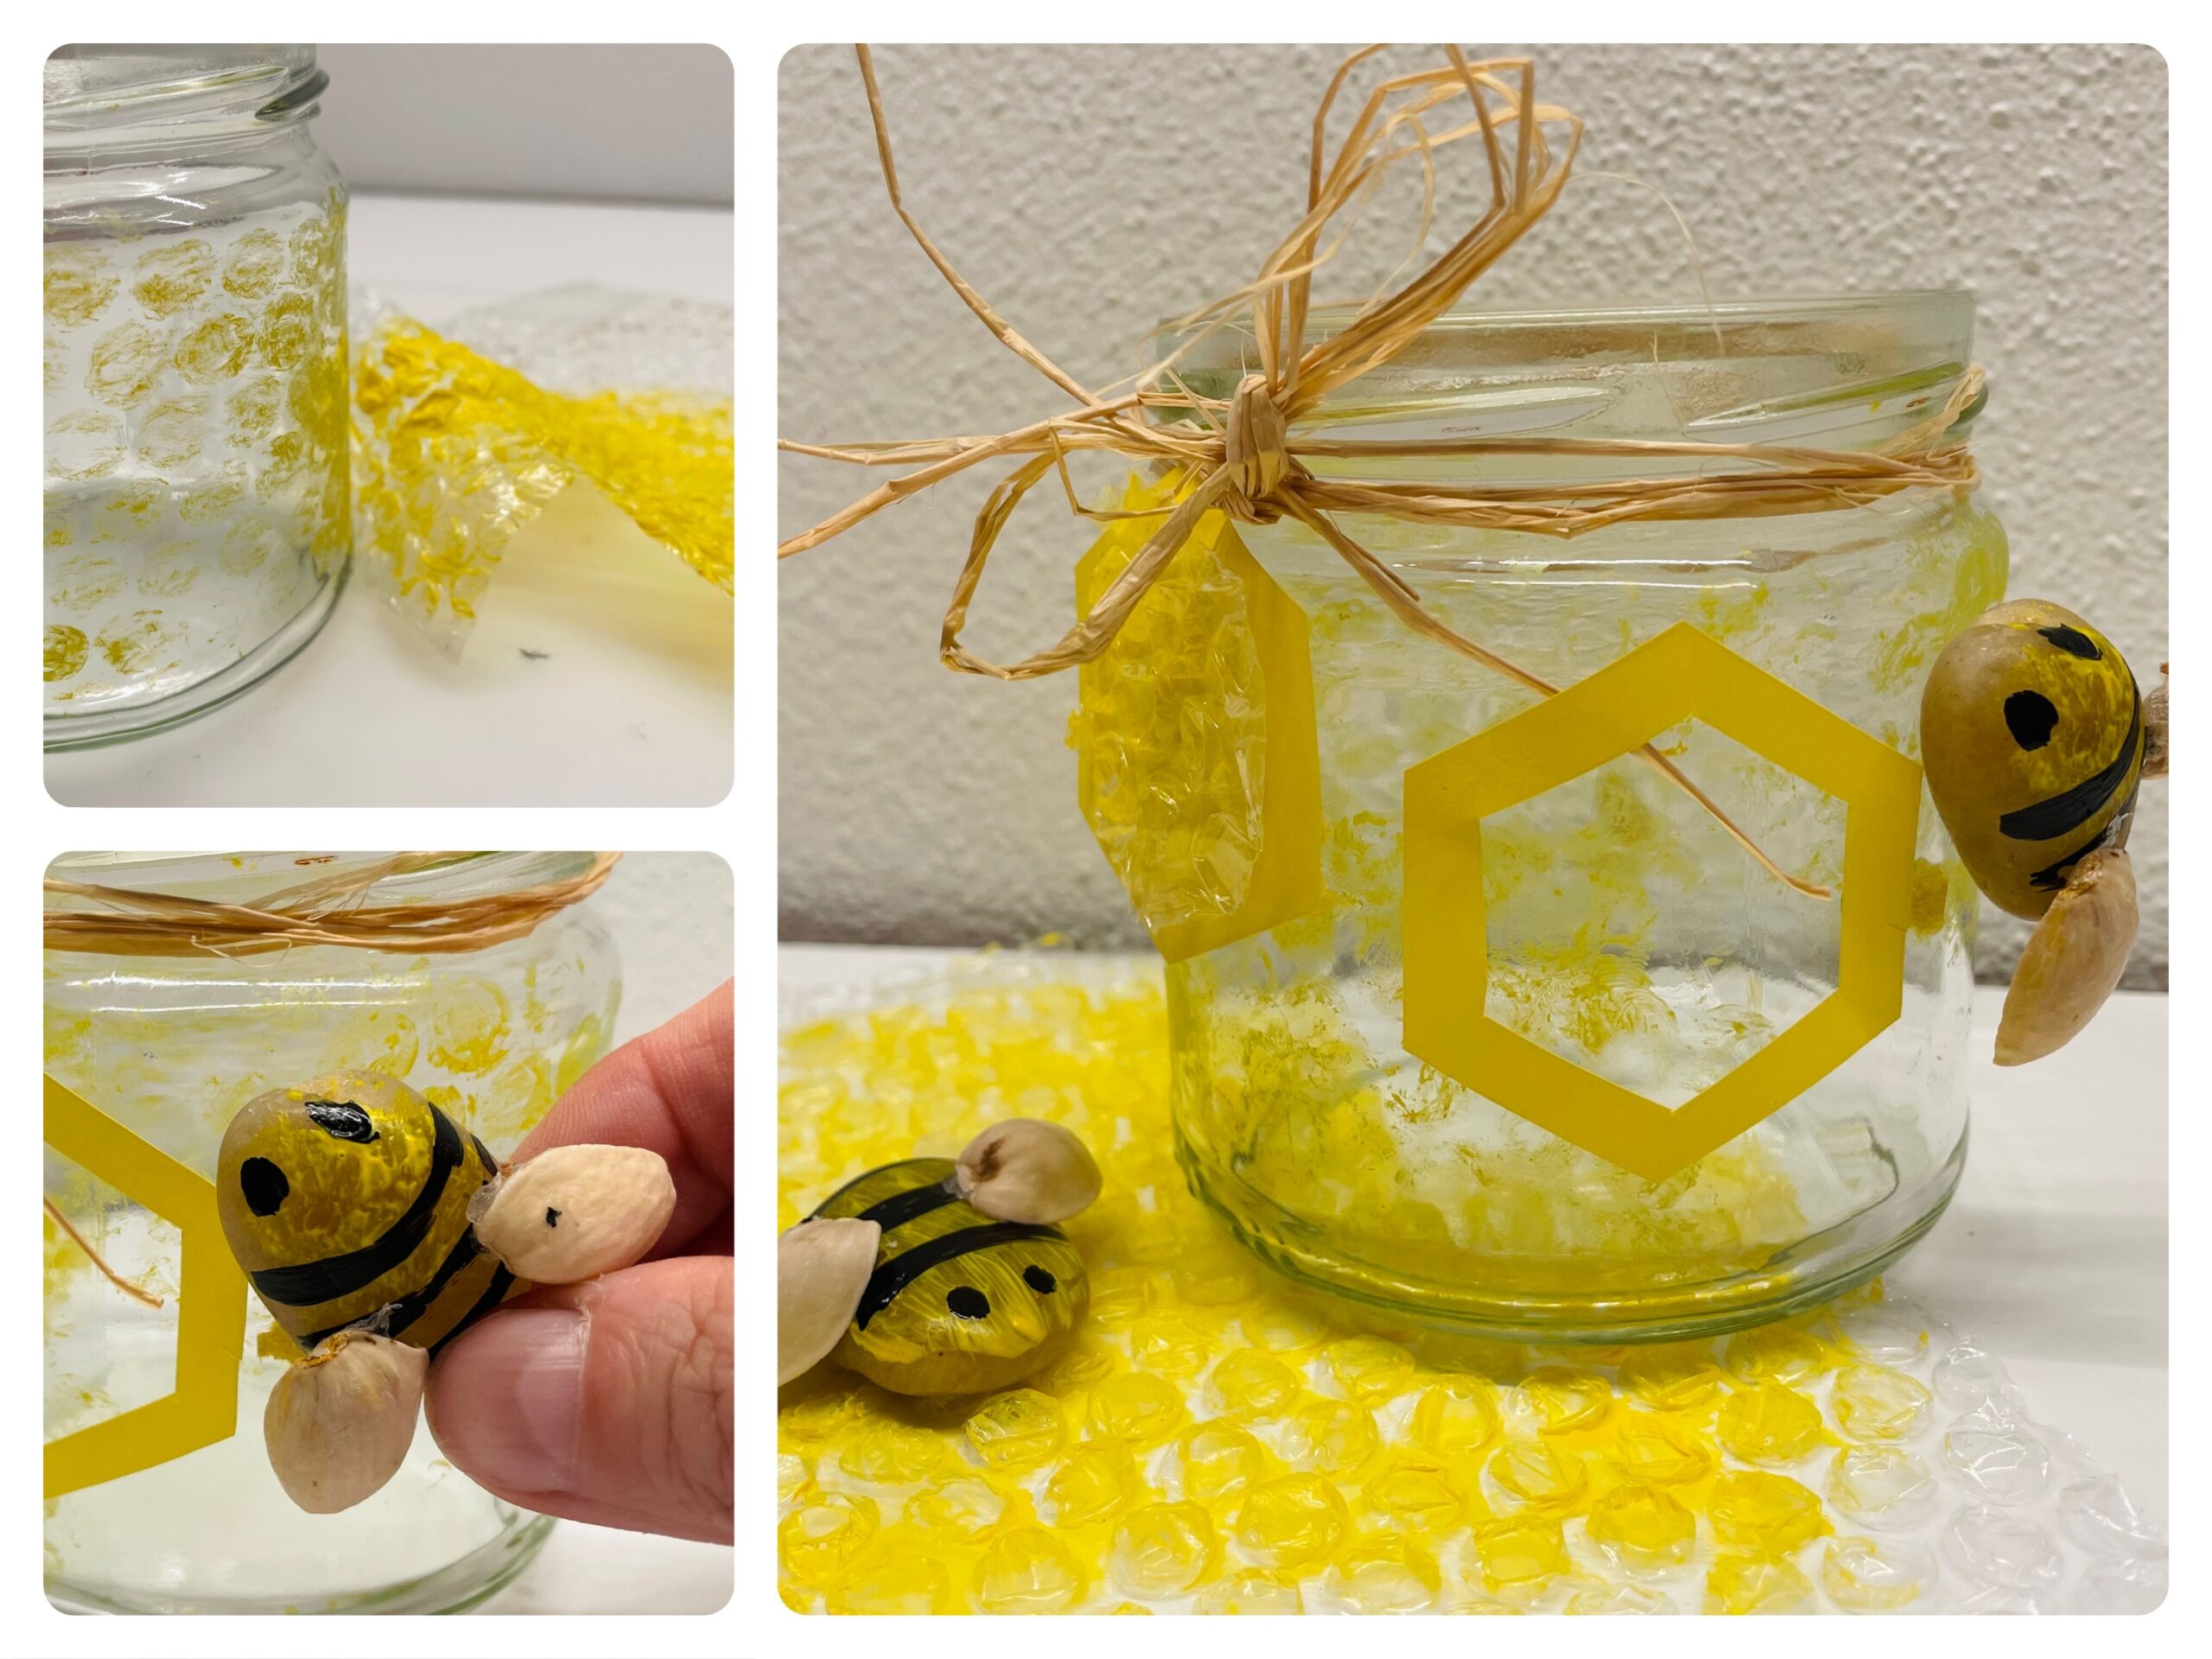
First you prepare the jam jar, the craft pad and the bubble wrap. A small piece of the bubble wrap is enough.
Now you print a honeycomb pattern on the glass with the foil and the paint.
You have to work fast for this:
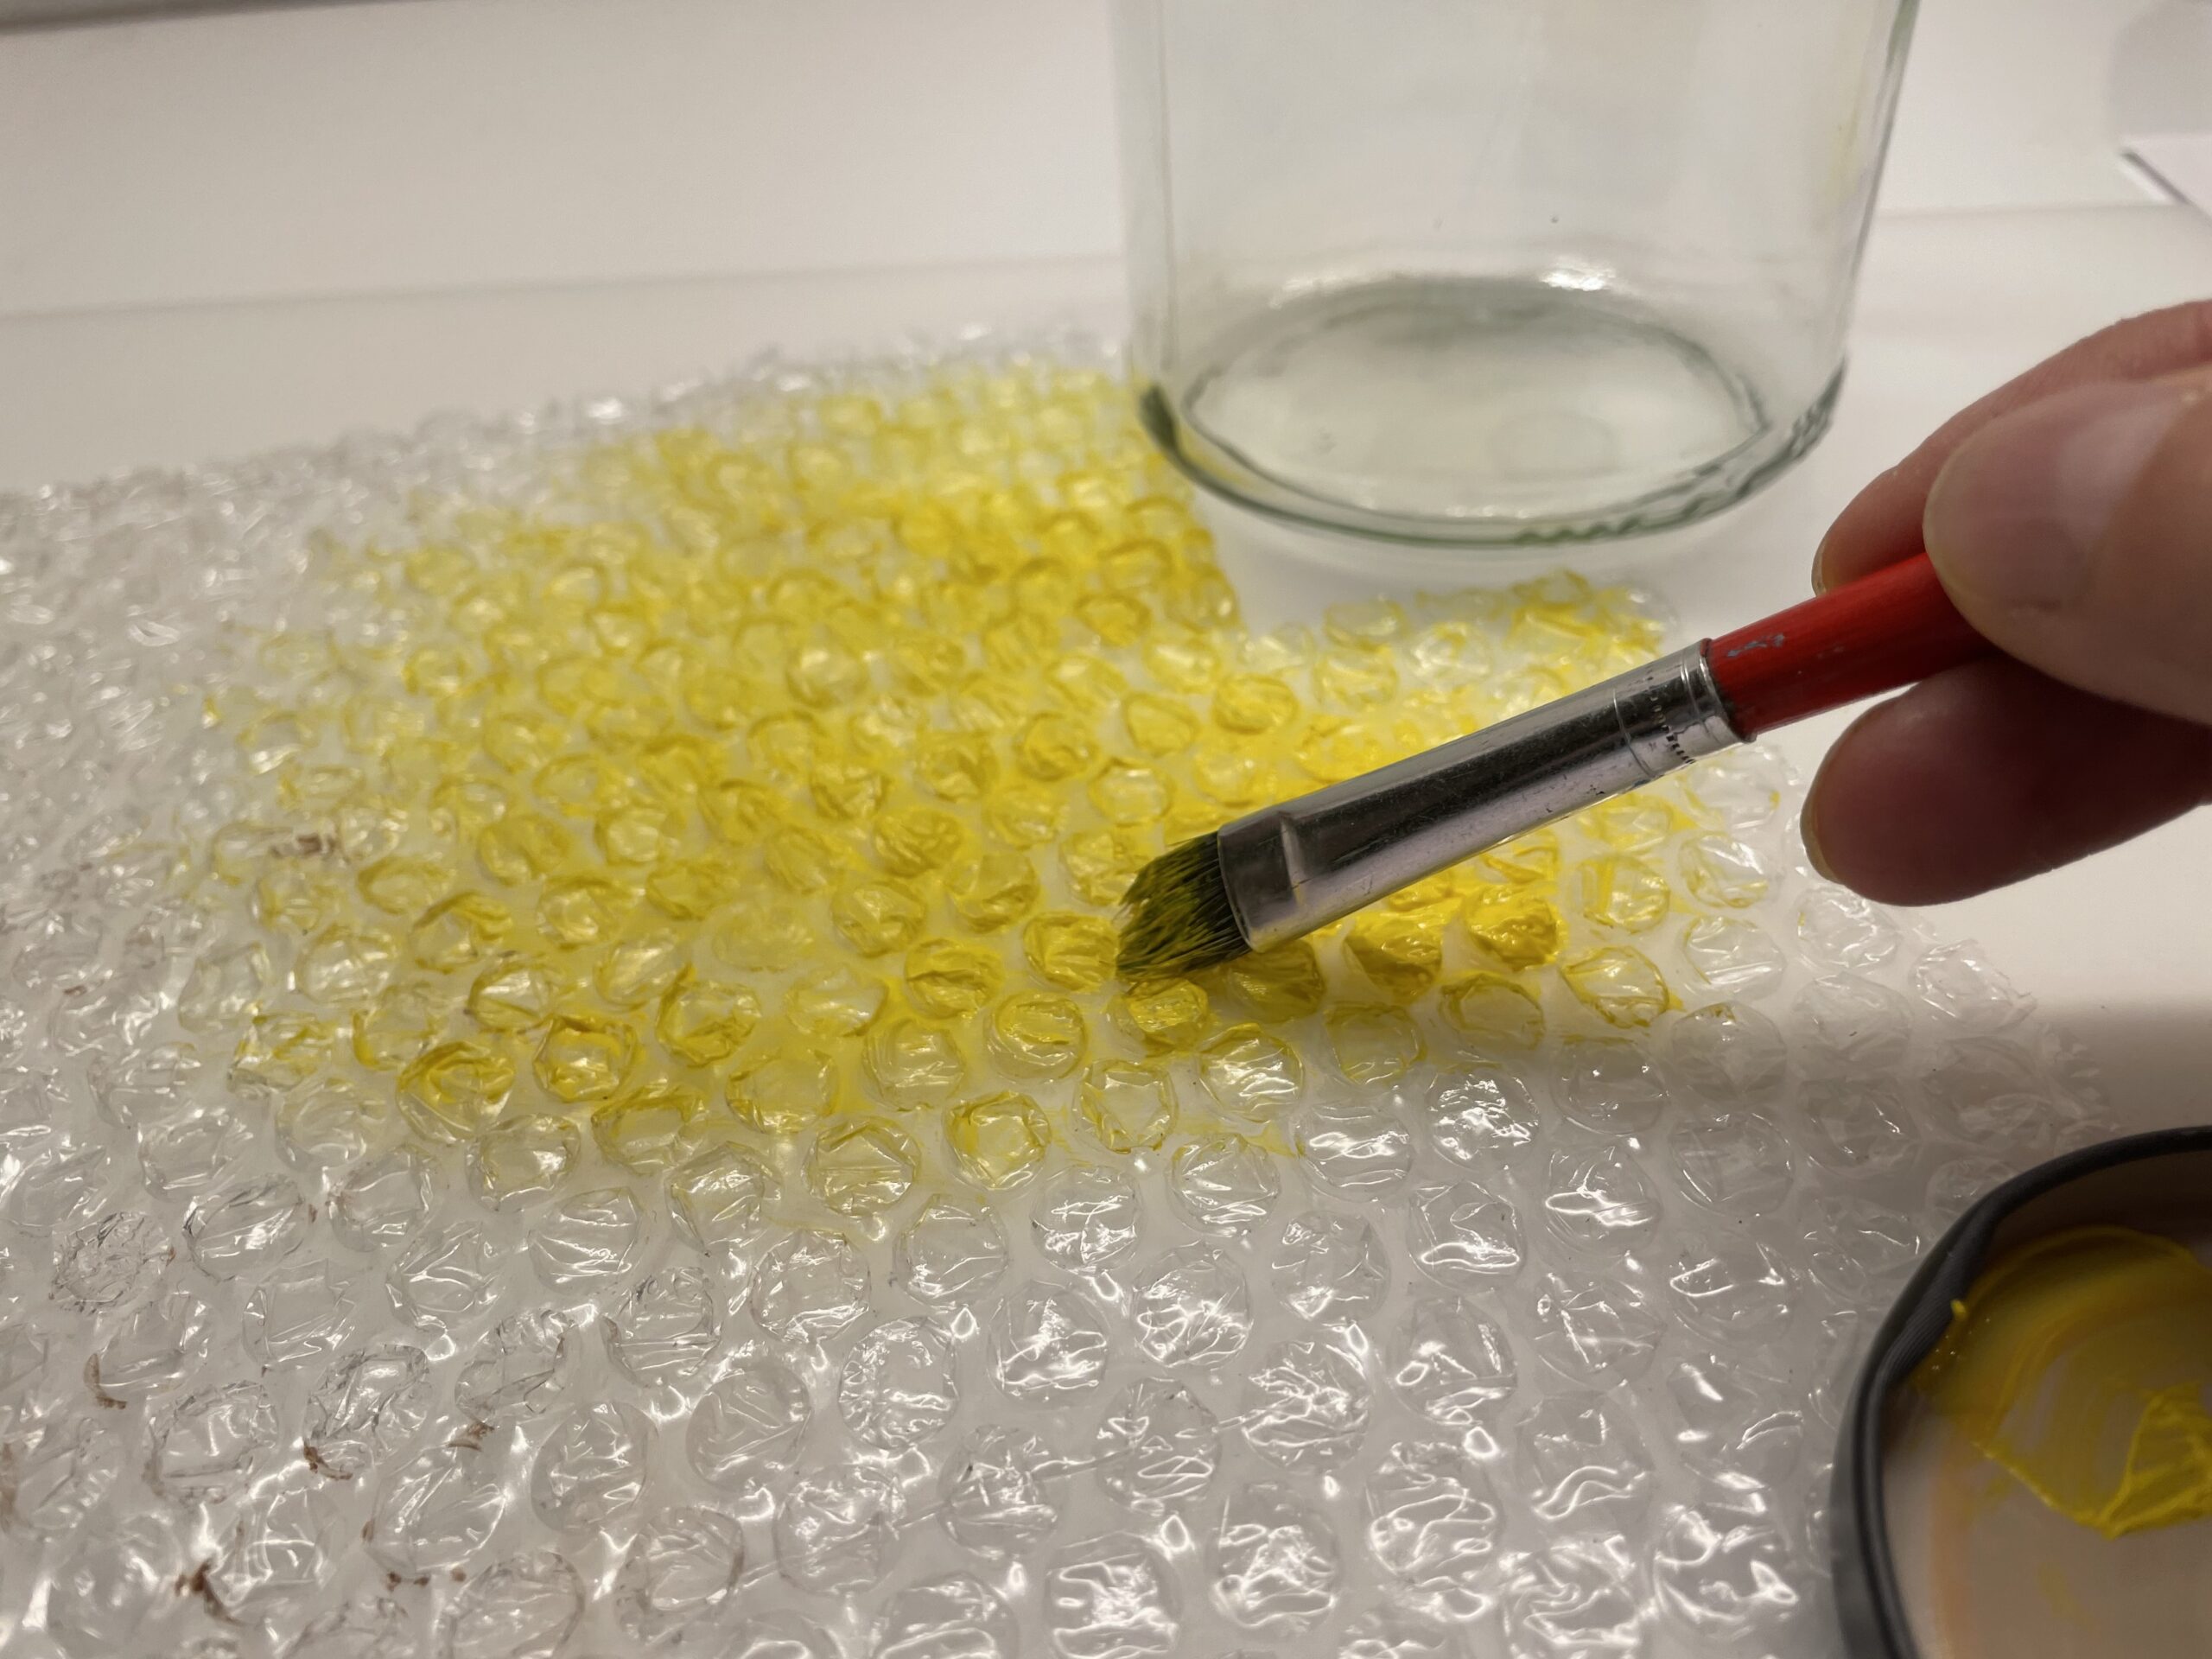
First paint the bubble wrap on one side with the yellow color.
Tip: Just apply the color roughly and extensively.
Then you press the painted still moist foil on the glass.
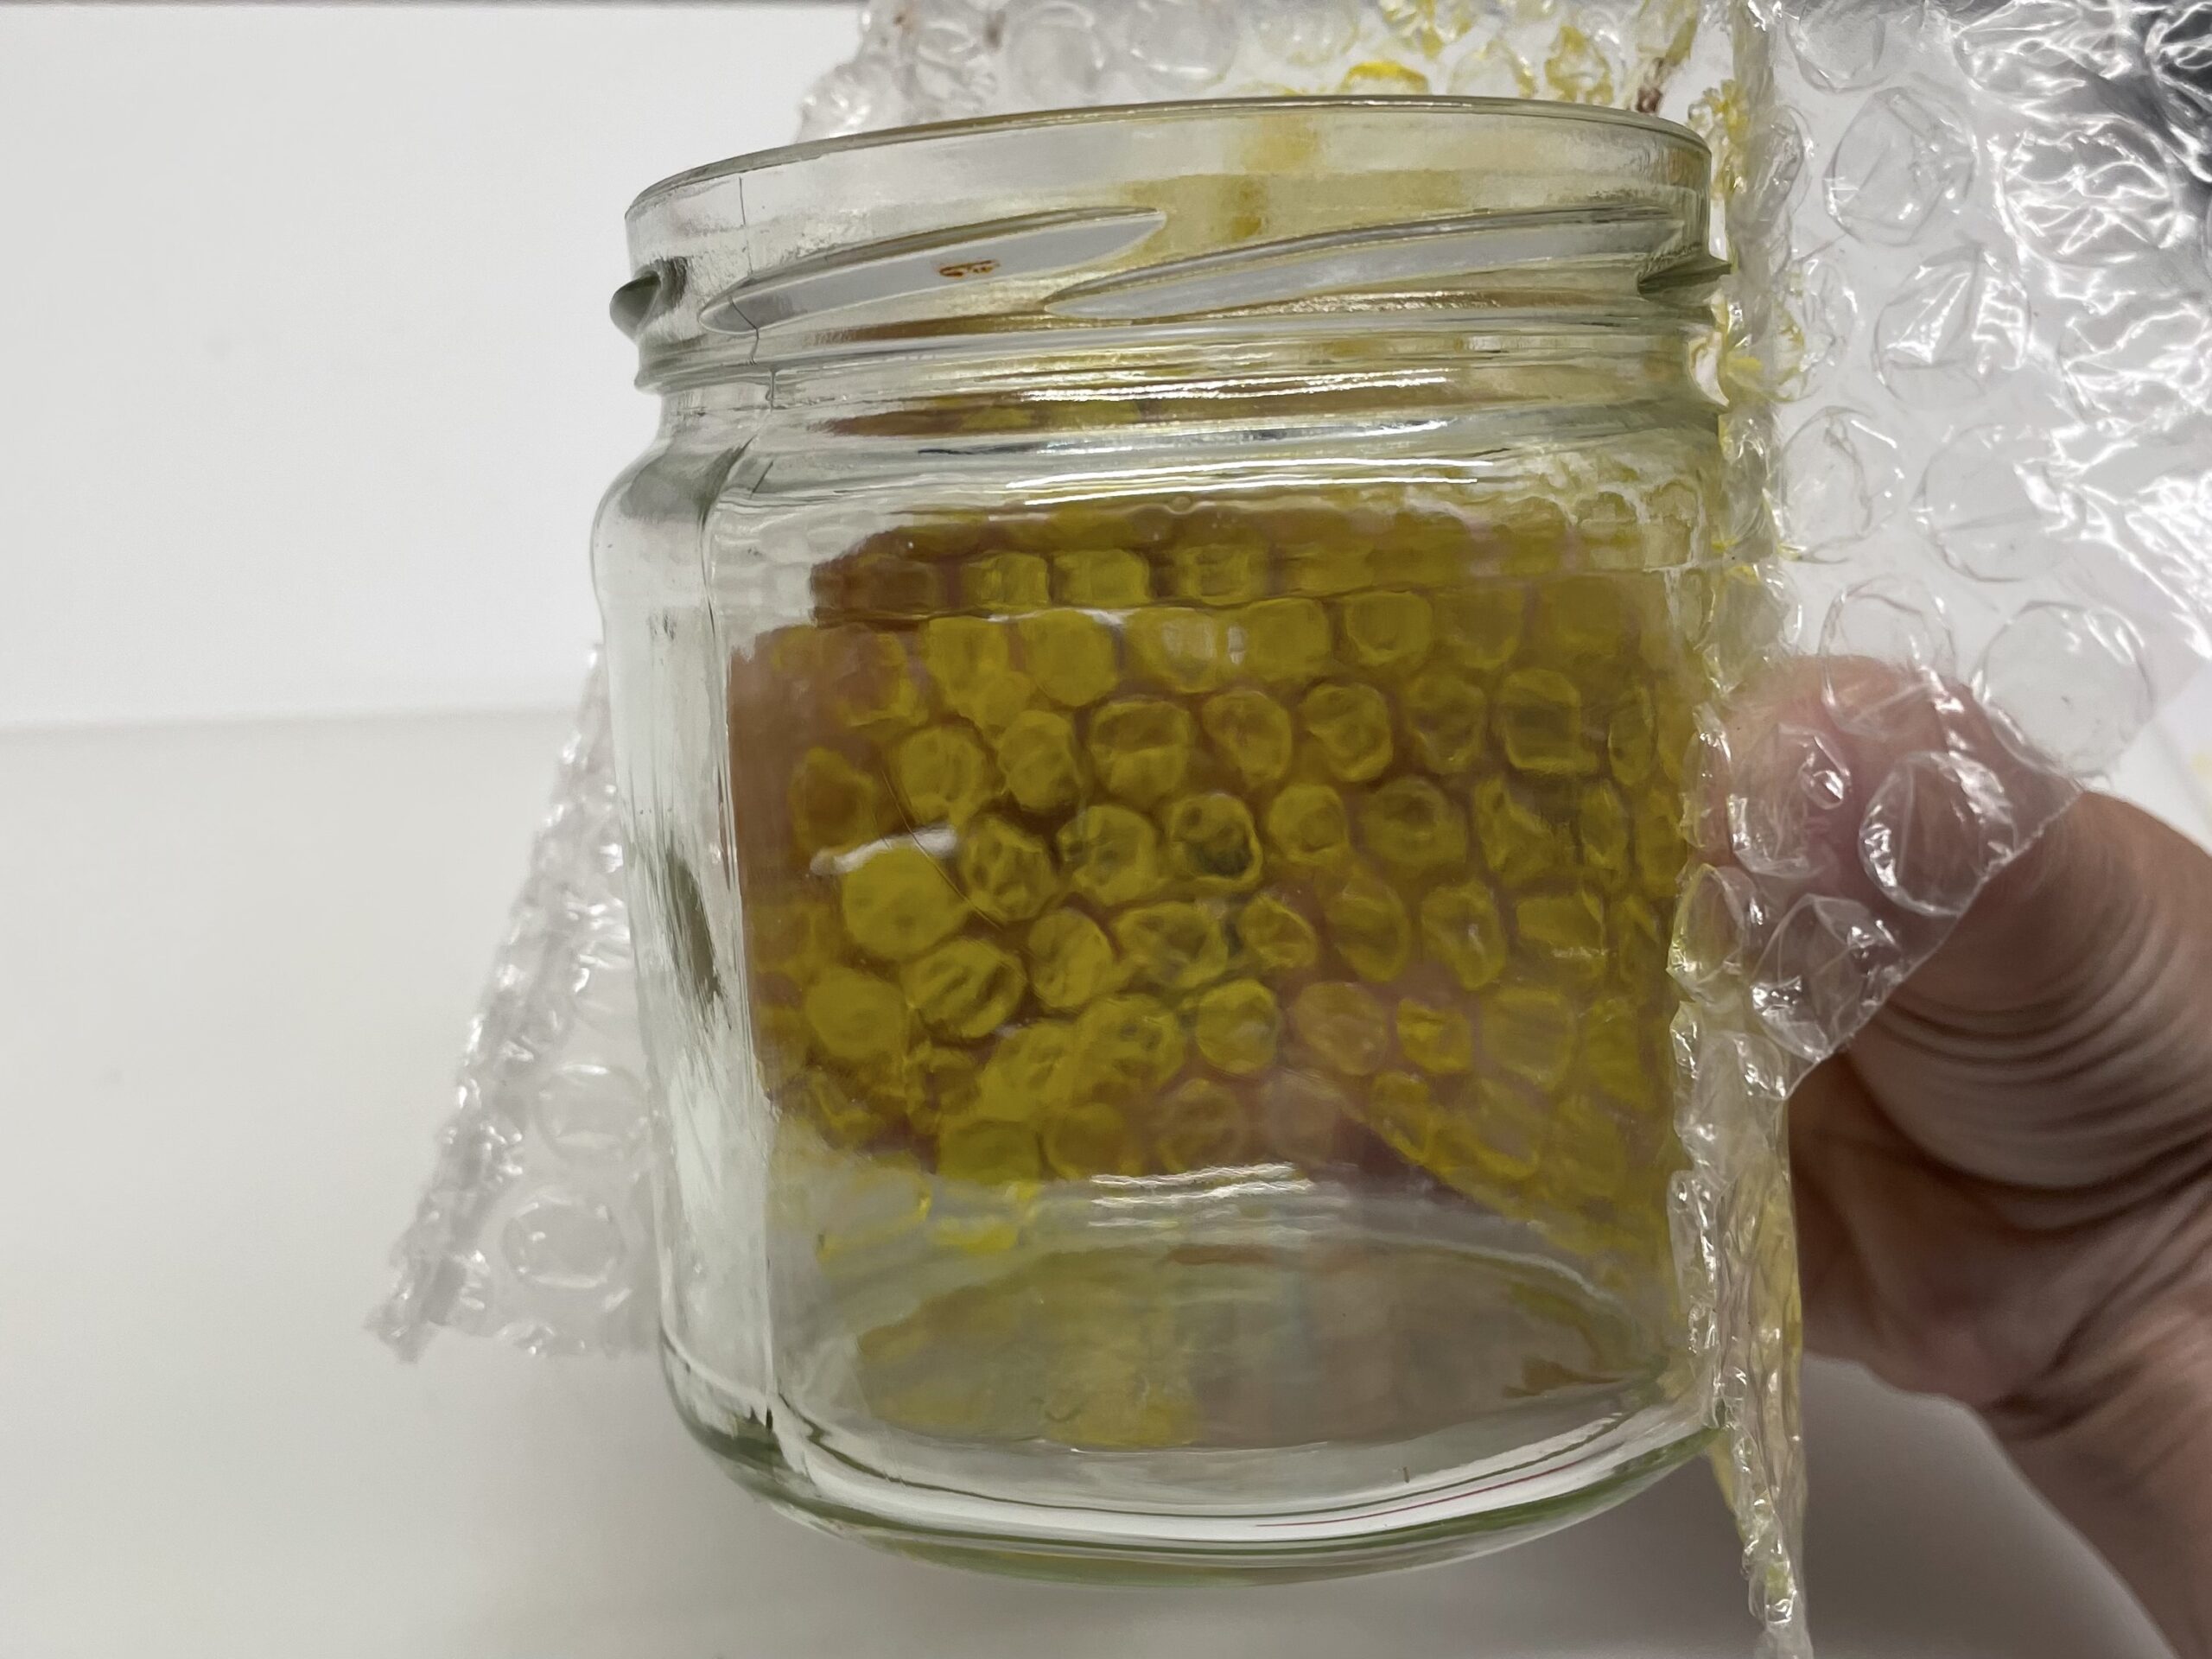
Then pull the foil off again.
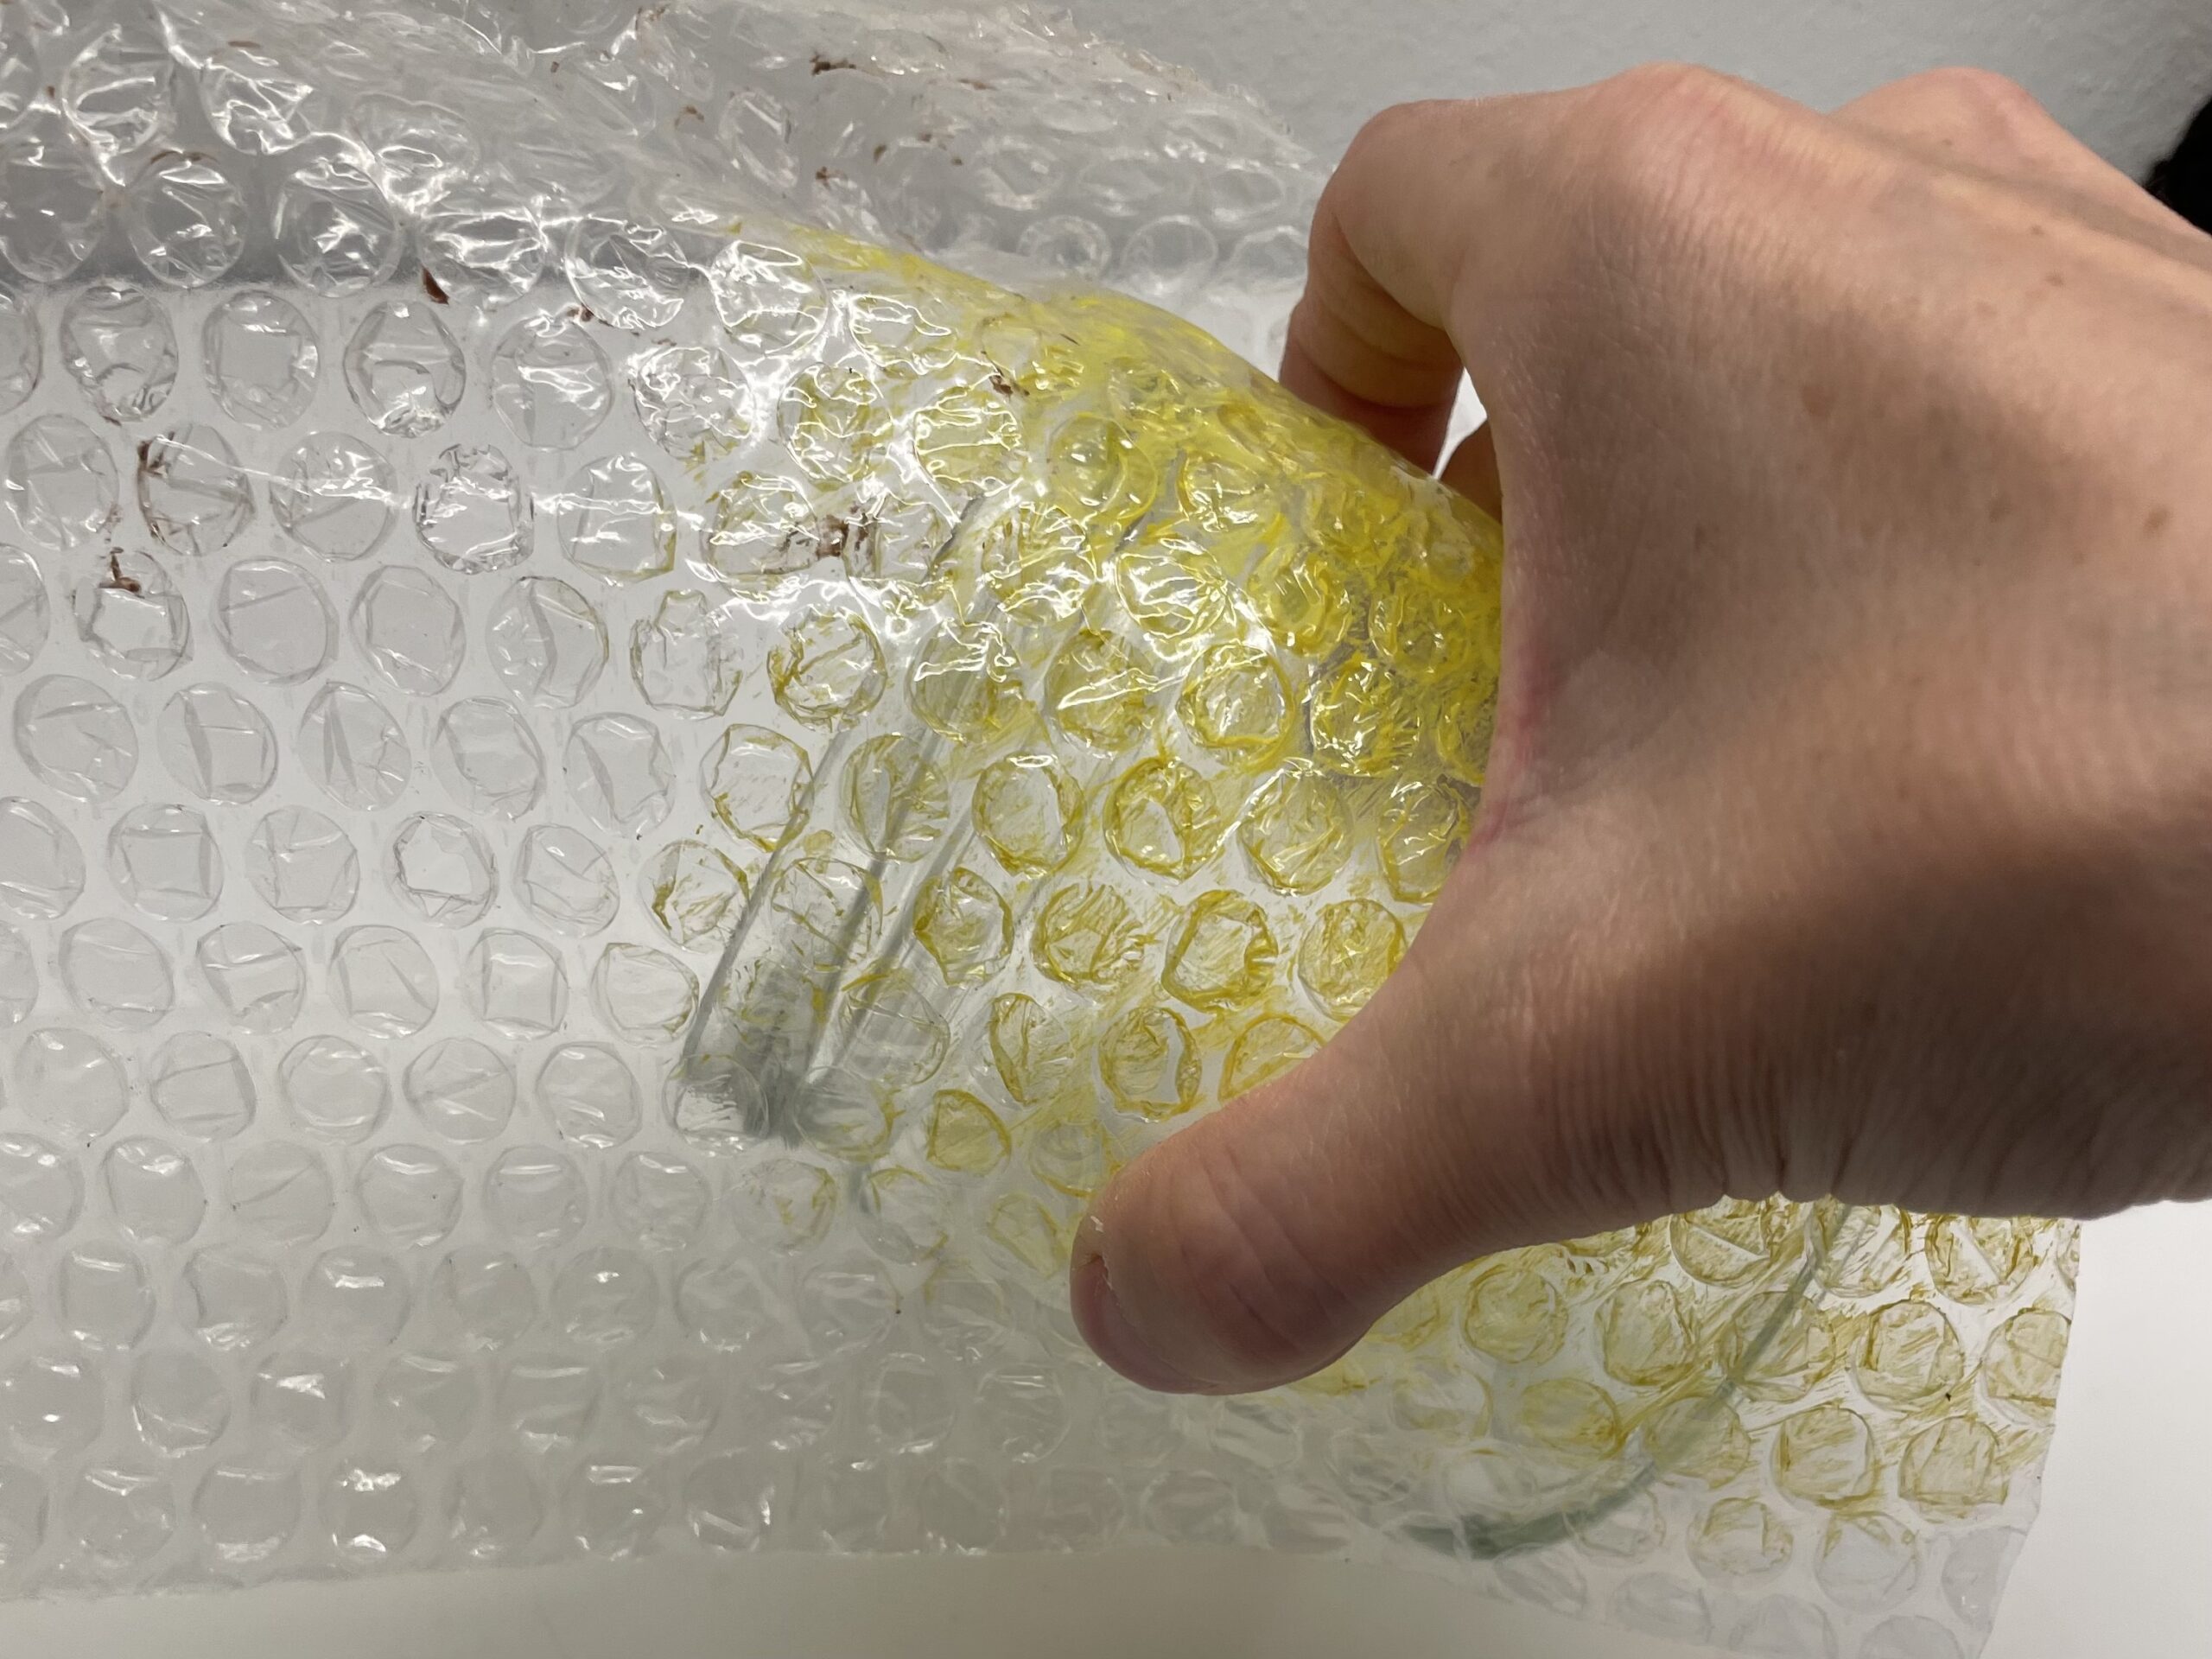
When pulling off, the foil sticks to the glass. Just pull vigorously and then you see the pattern.
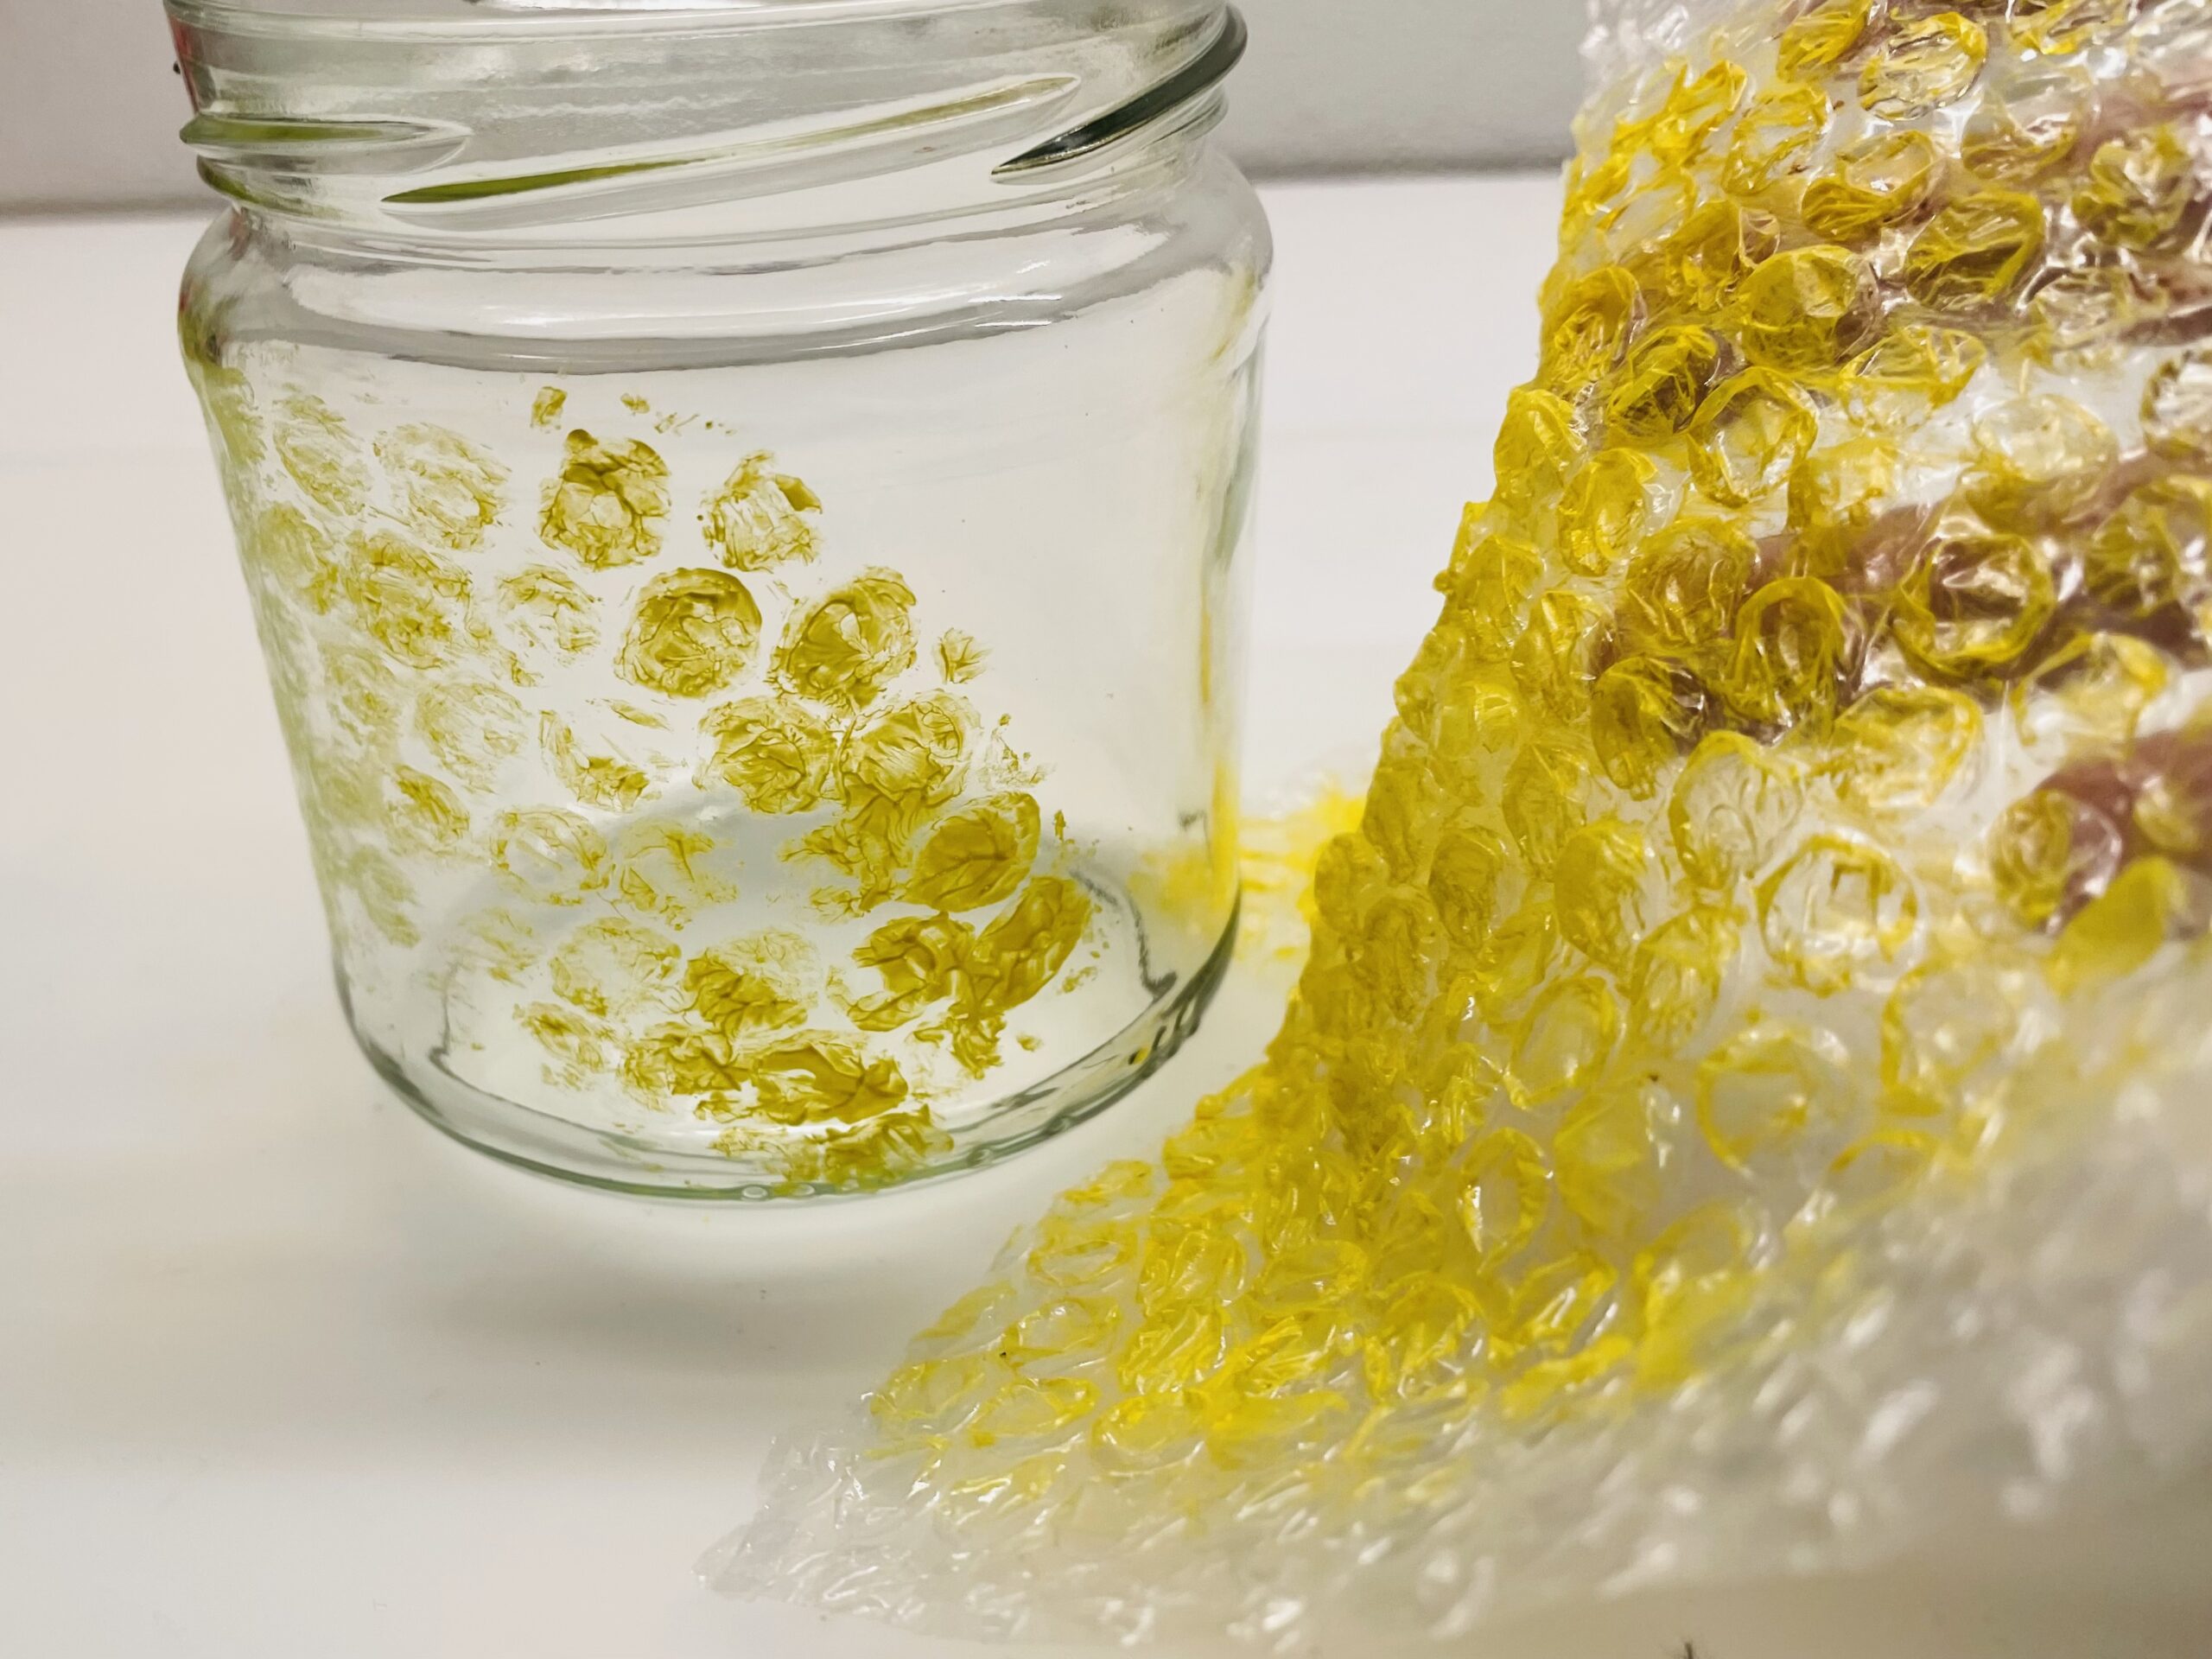
Repeat the process and make sure that you do not print the same spot several times, otherwise you will no longer recognize the honeycomb pattern.
If the glass is printed all around, put the glass to dry.
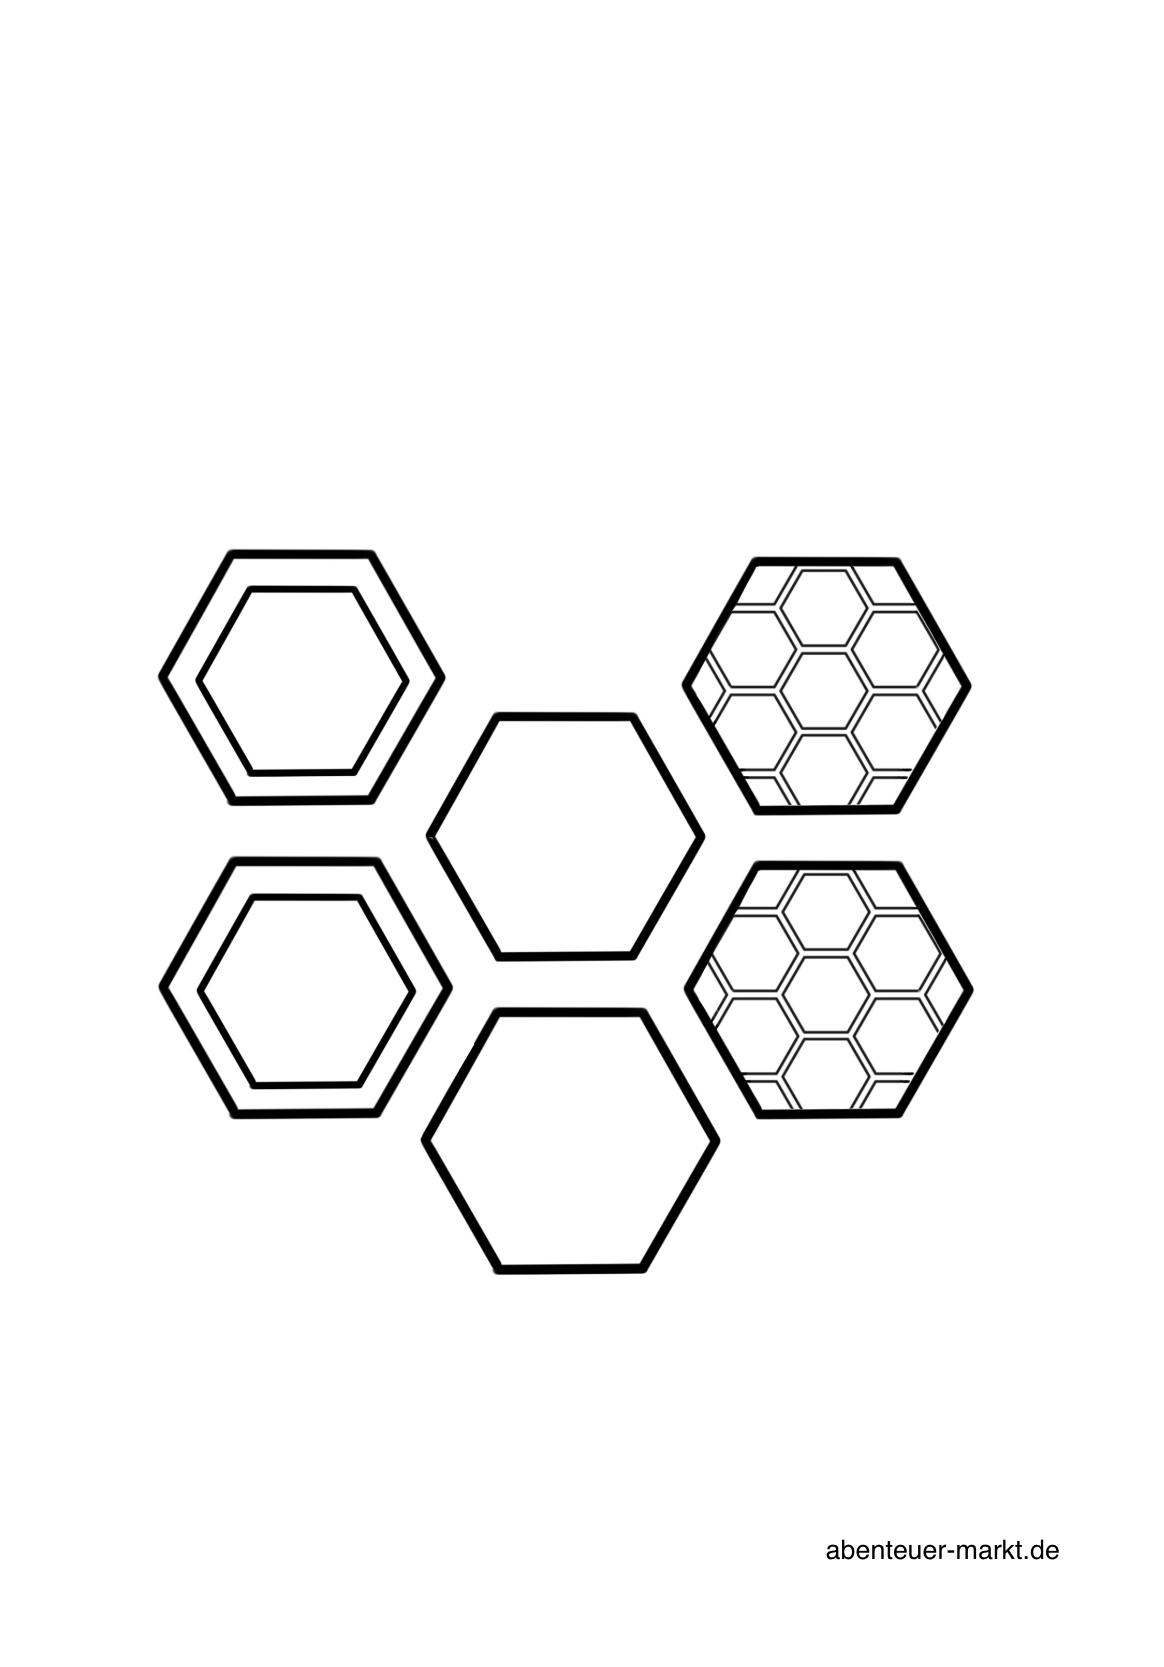
While the glass dries, you can make large honeycombs, which you later attach to the glass.
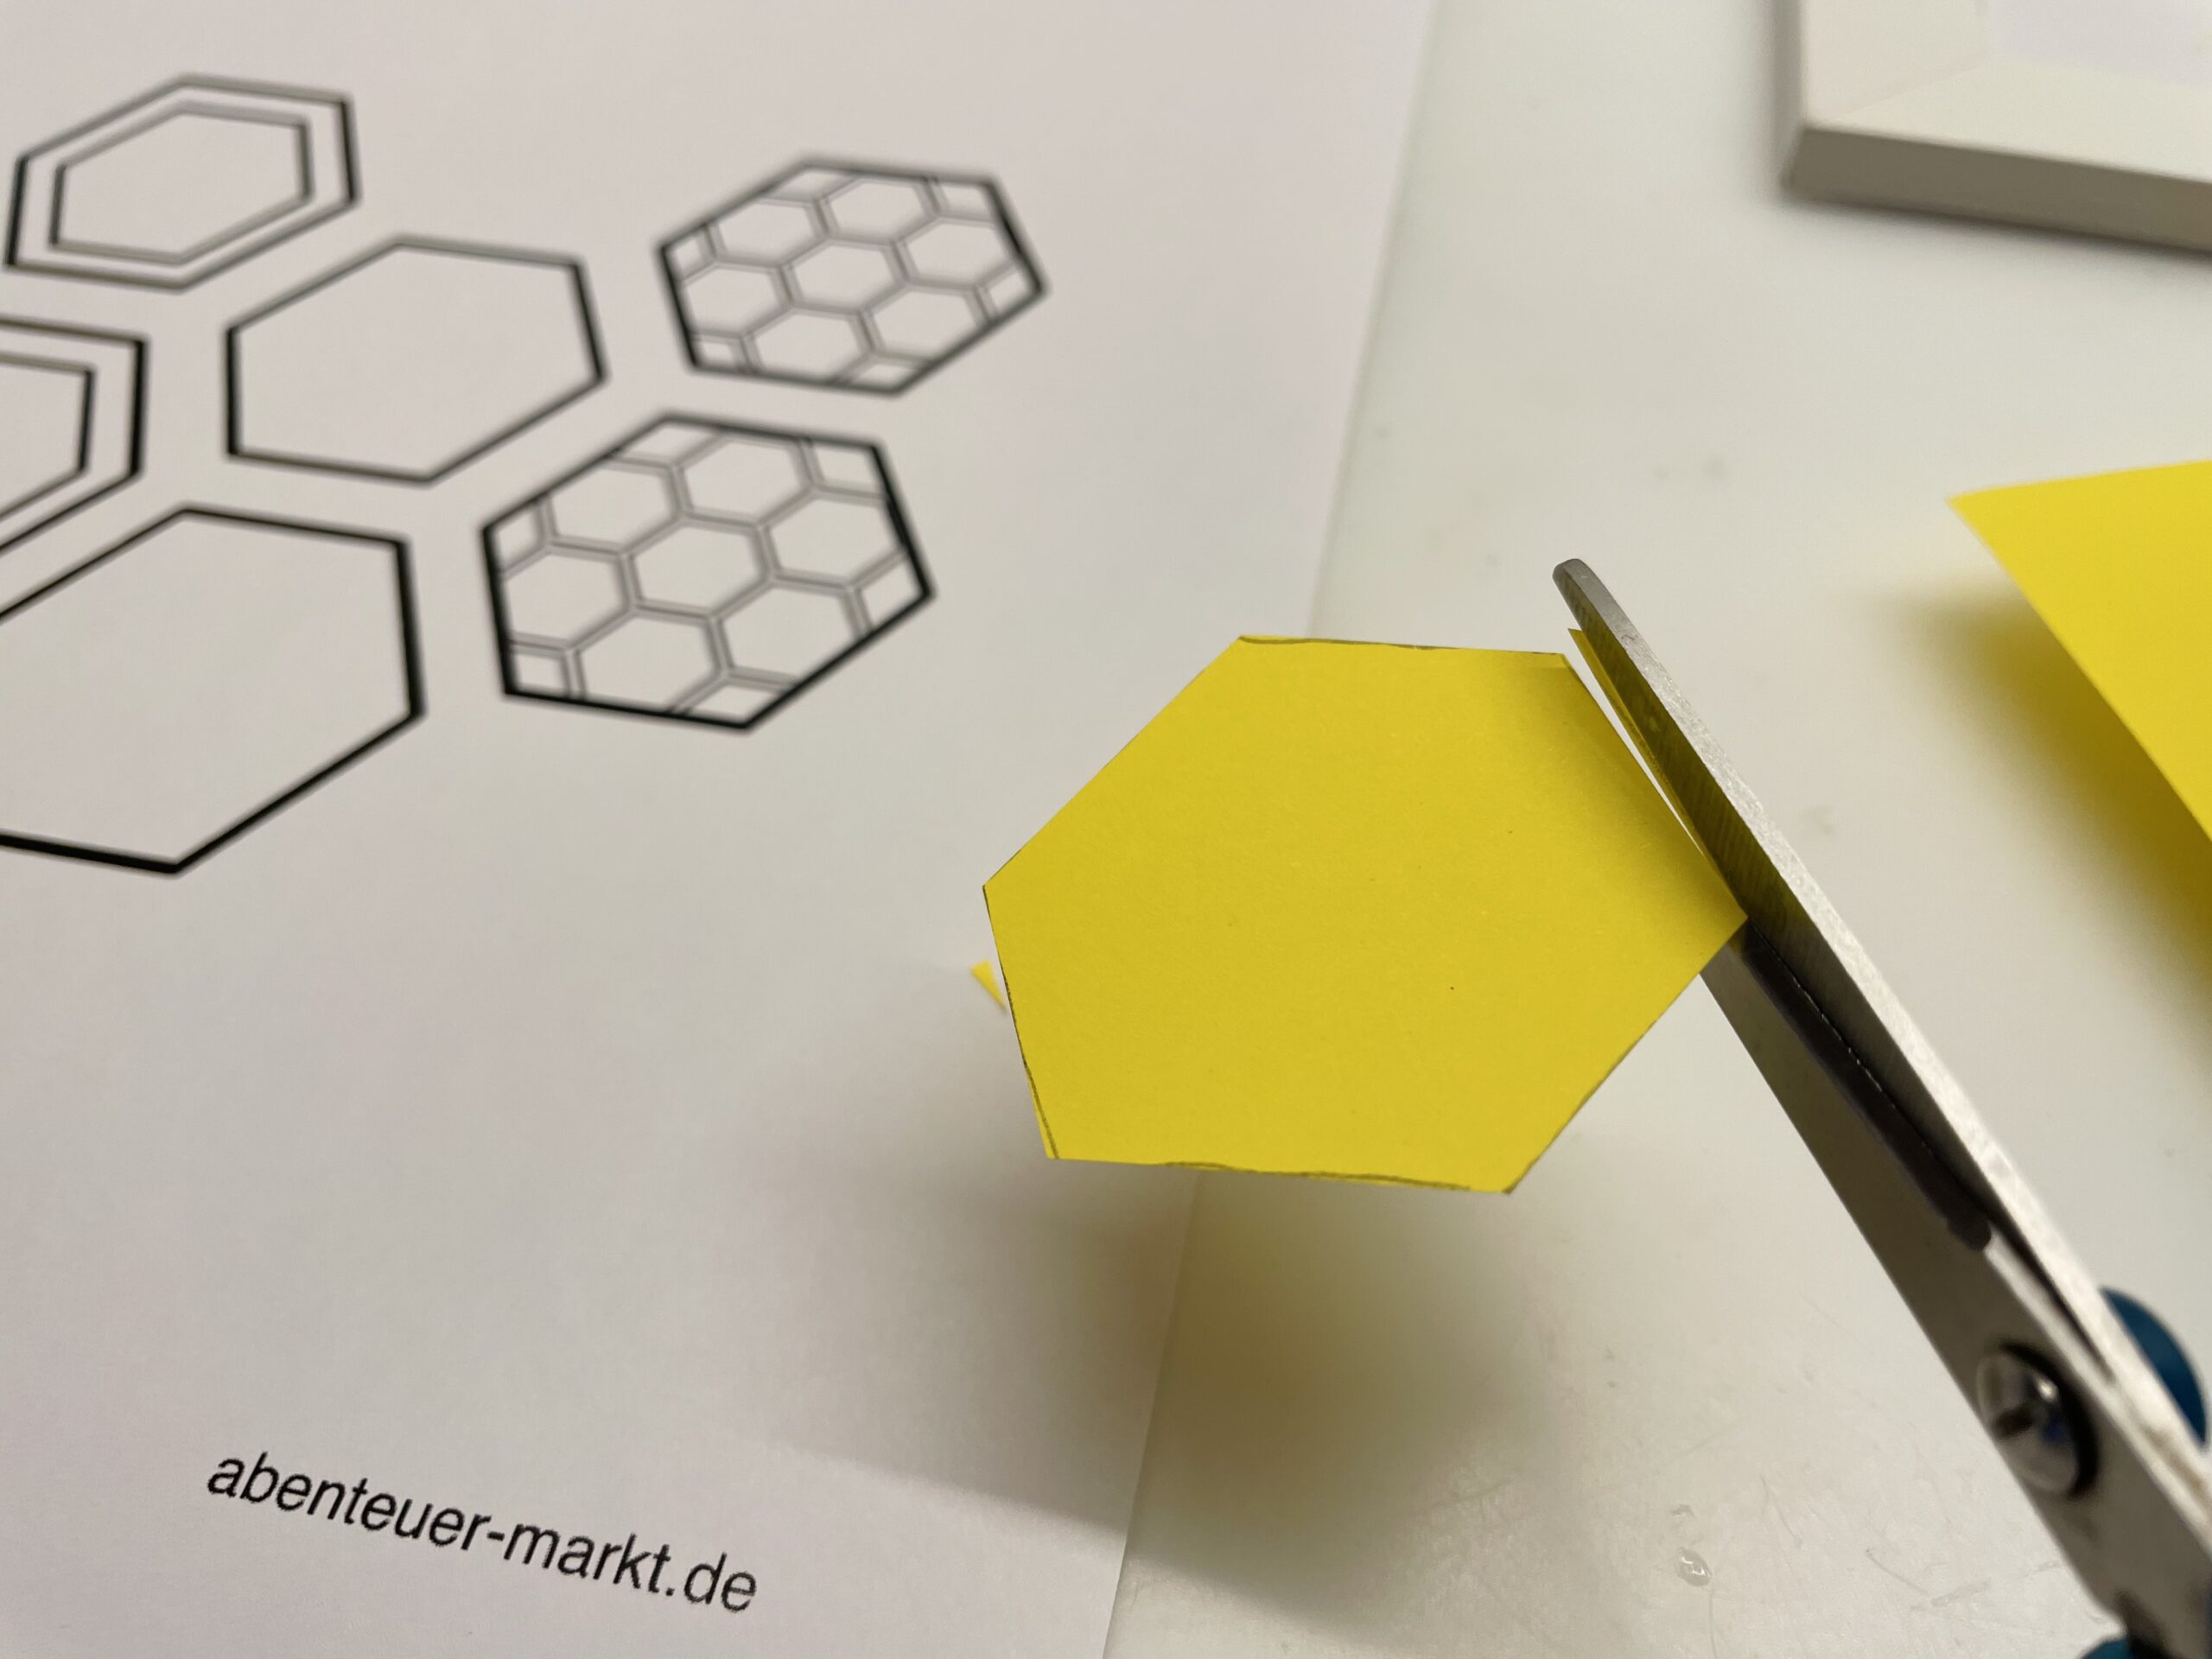
Print out this honeycomb template.
If you want, you can also print the template on yellow copy paper.
Take yellow thin paper.
Tip: This also includes clay paper residues.
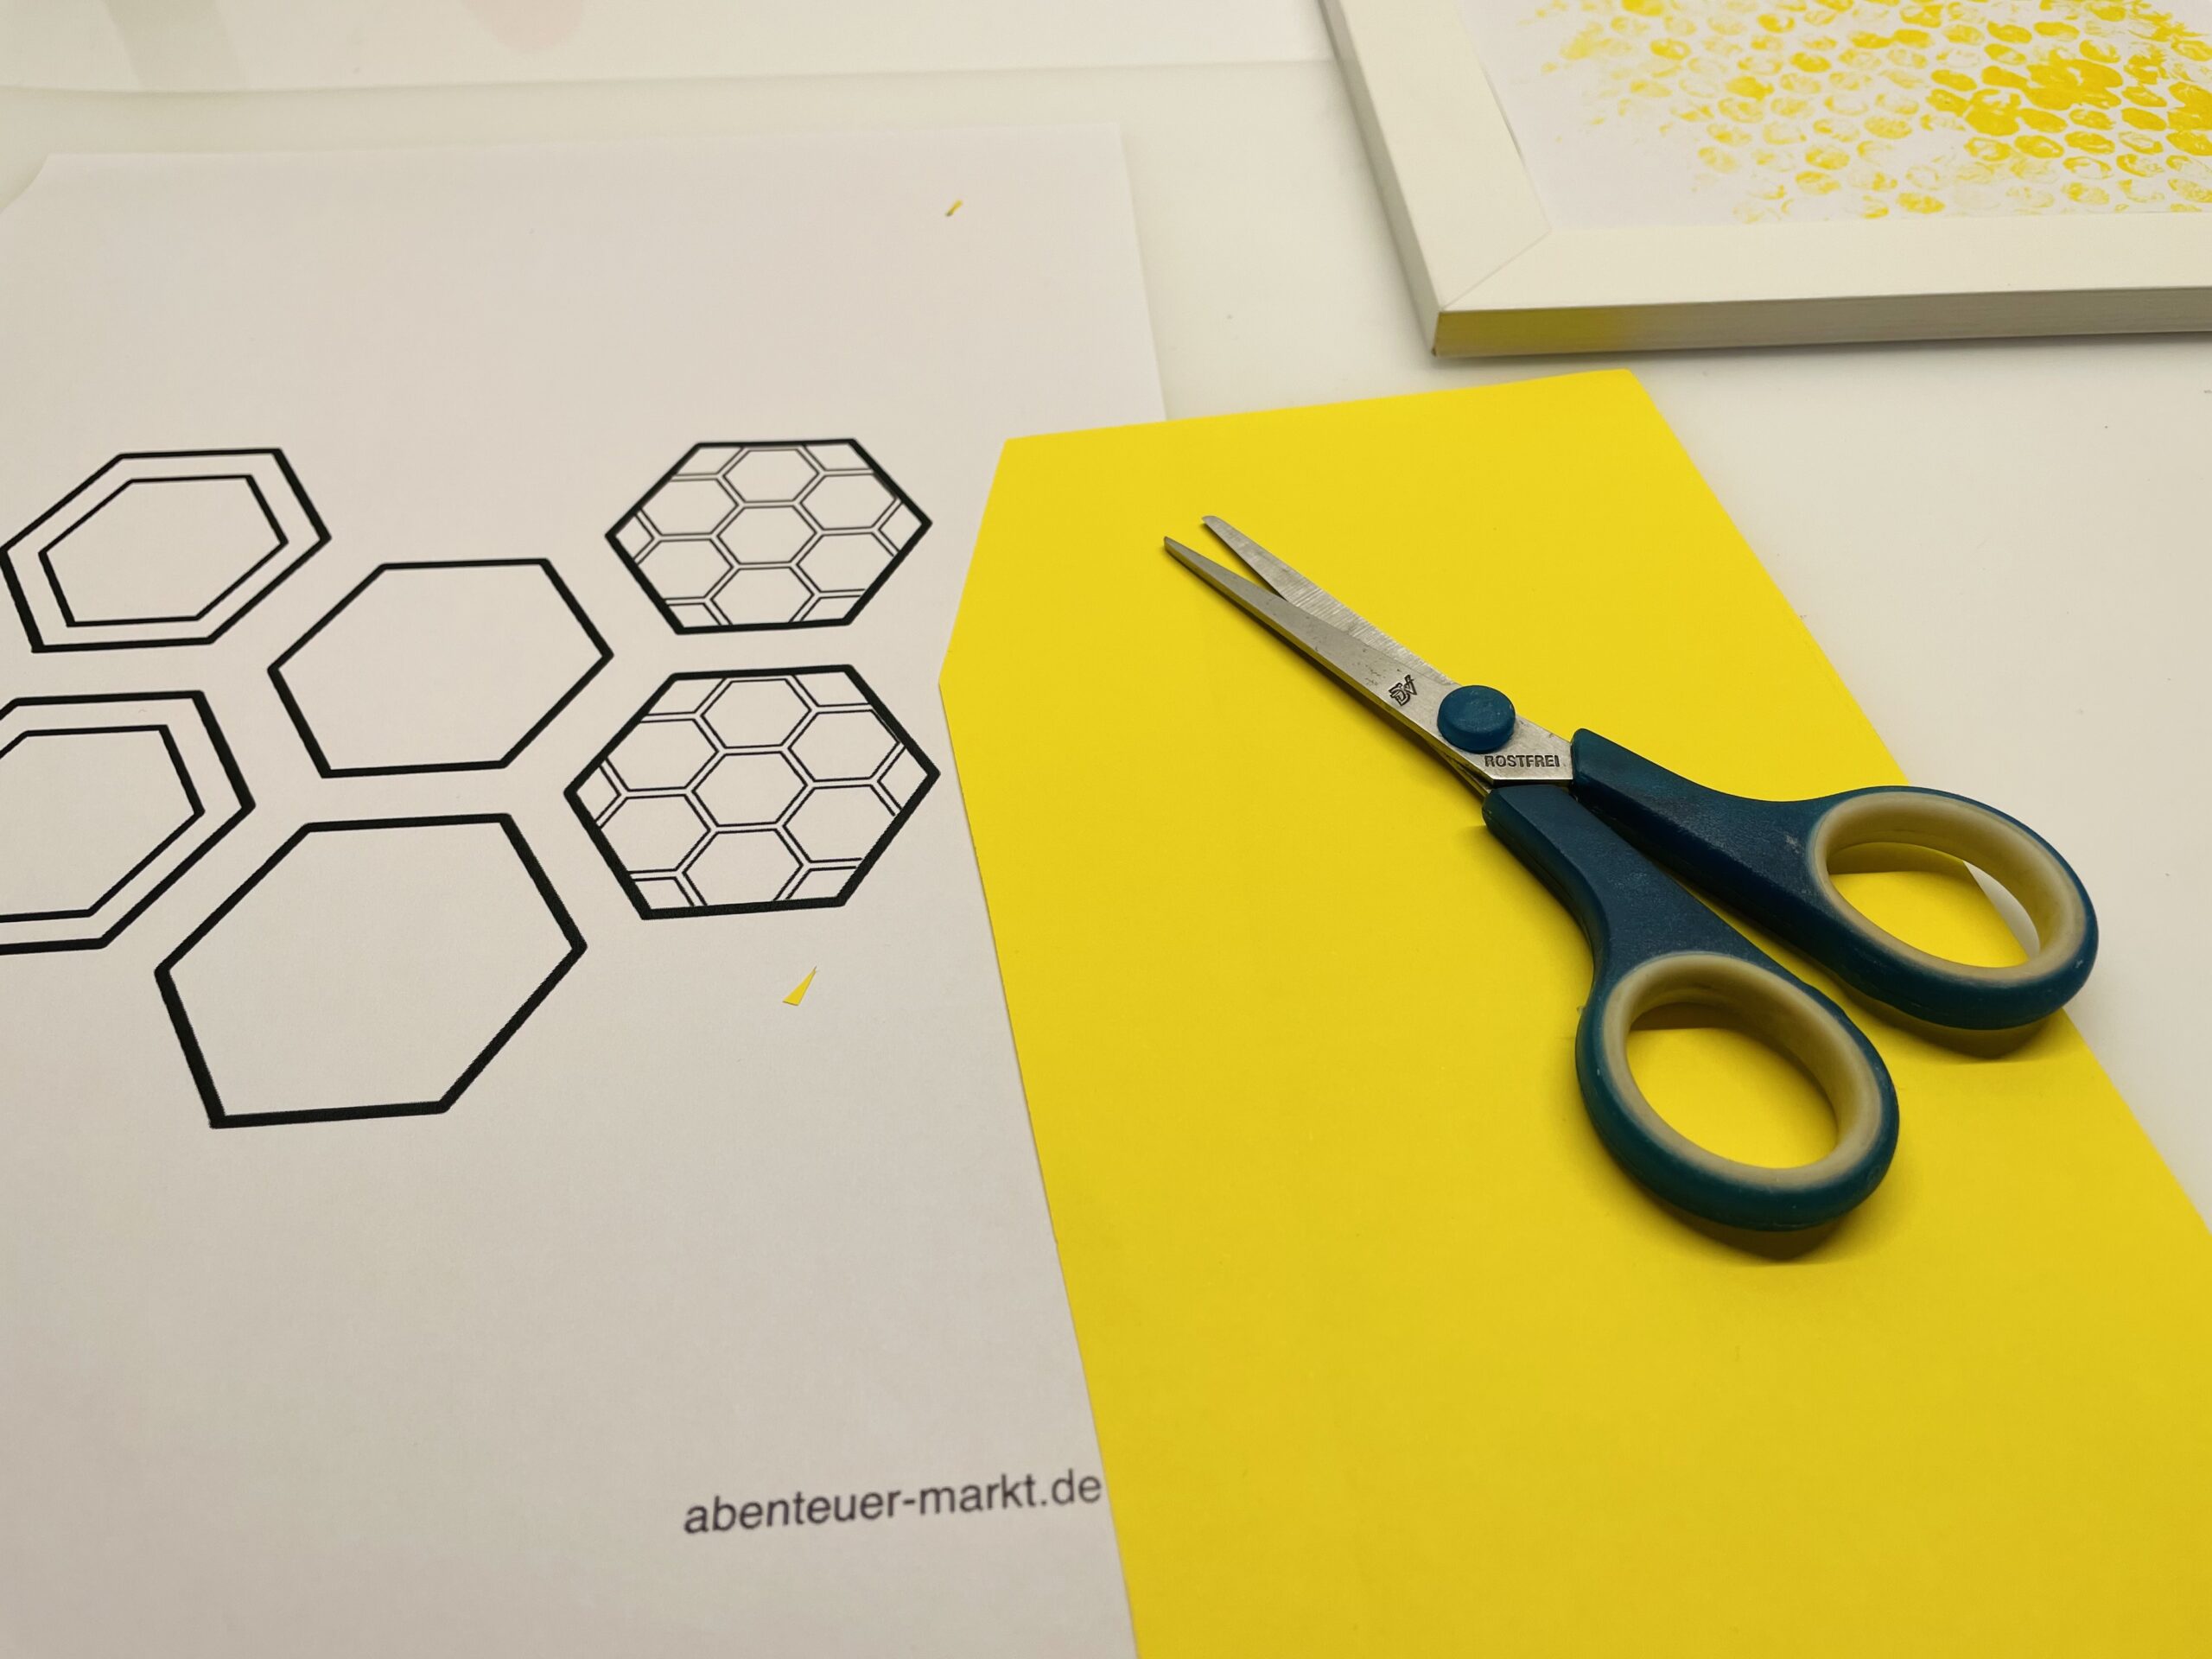
If you use yellow thin paper, place it on the template and draw the honeycombs with a pencil.
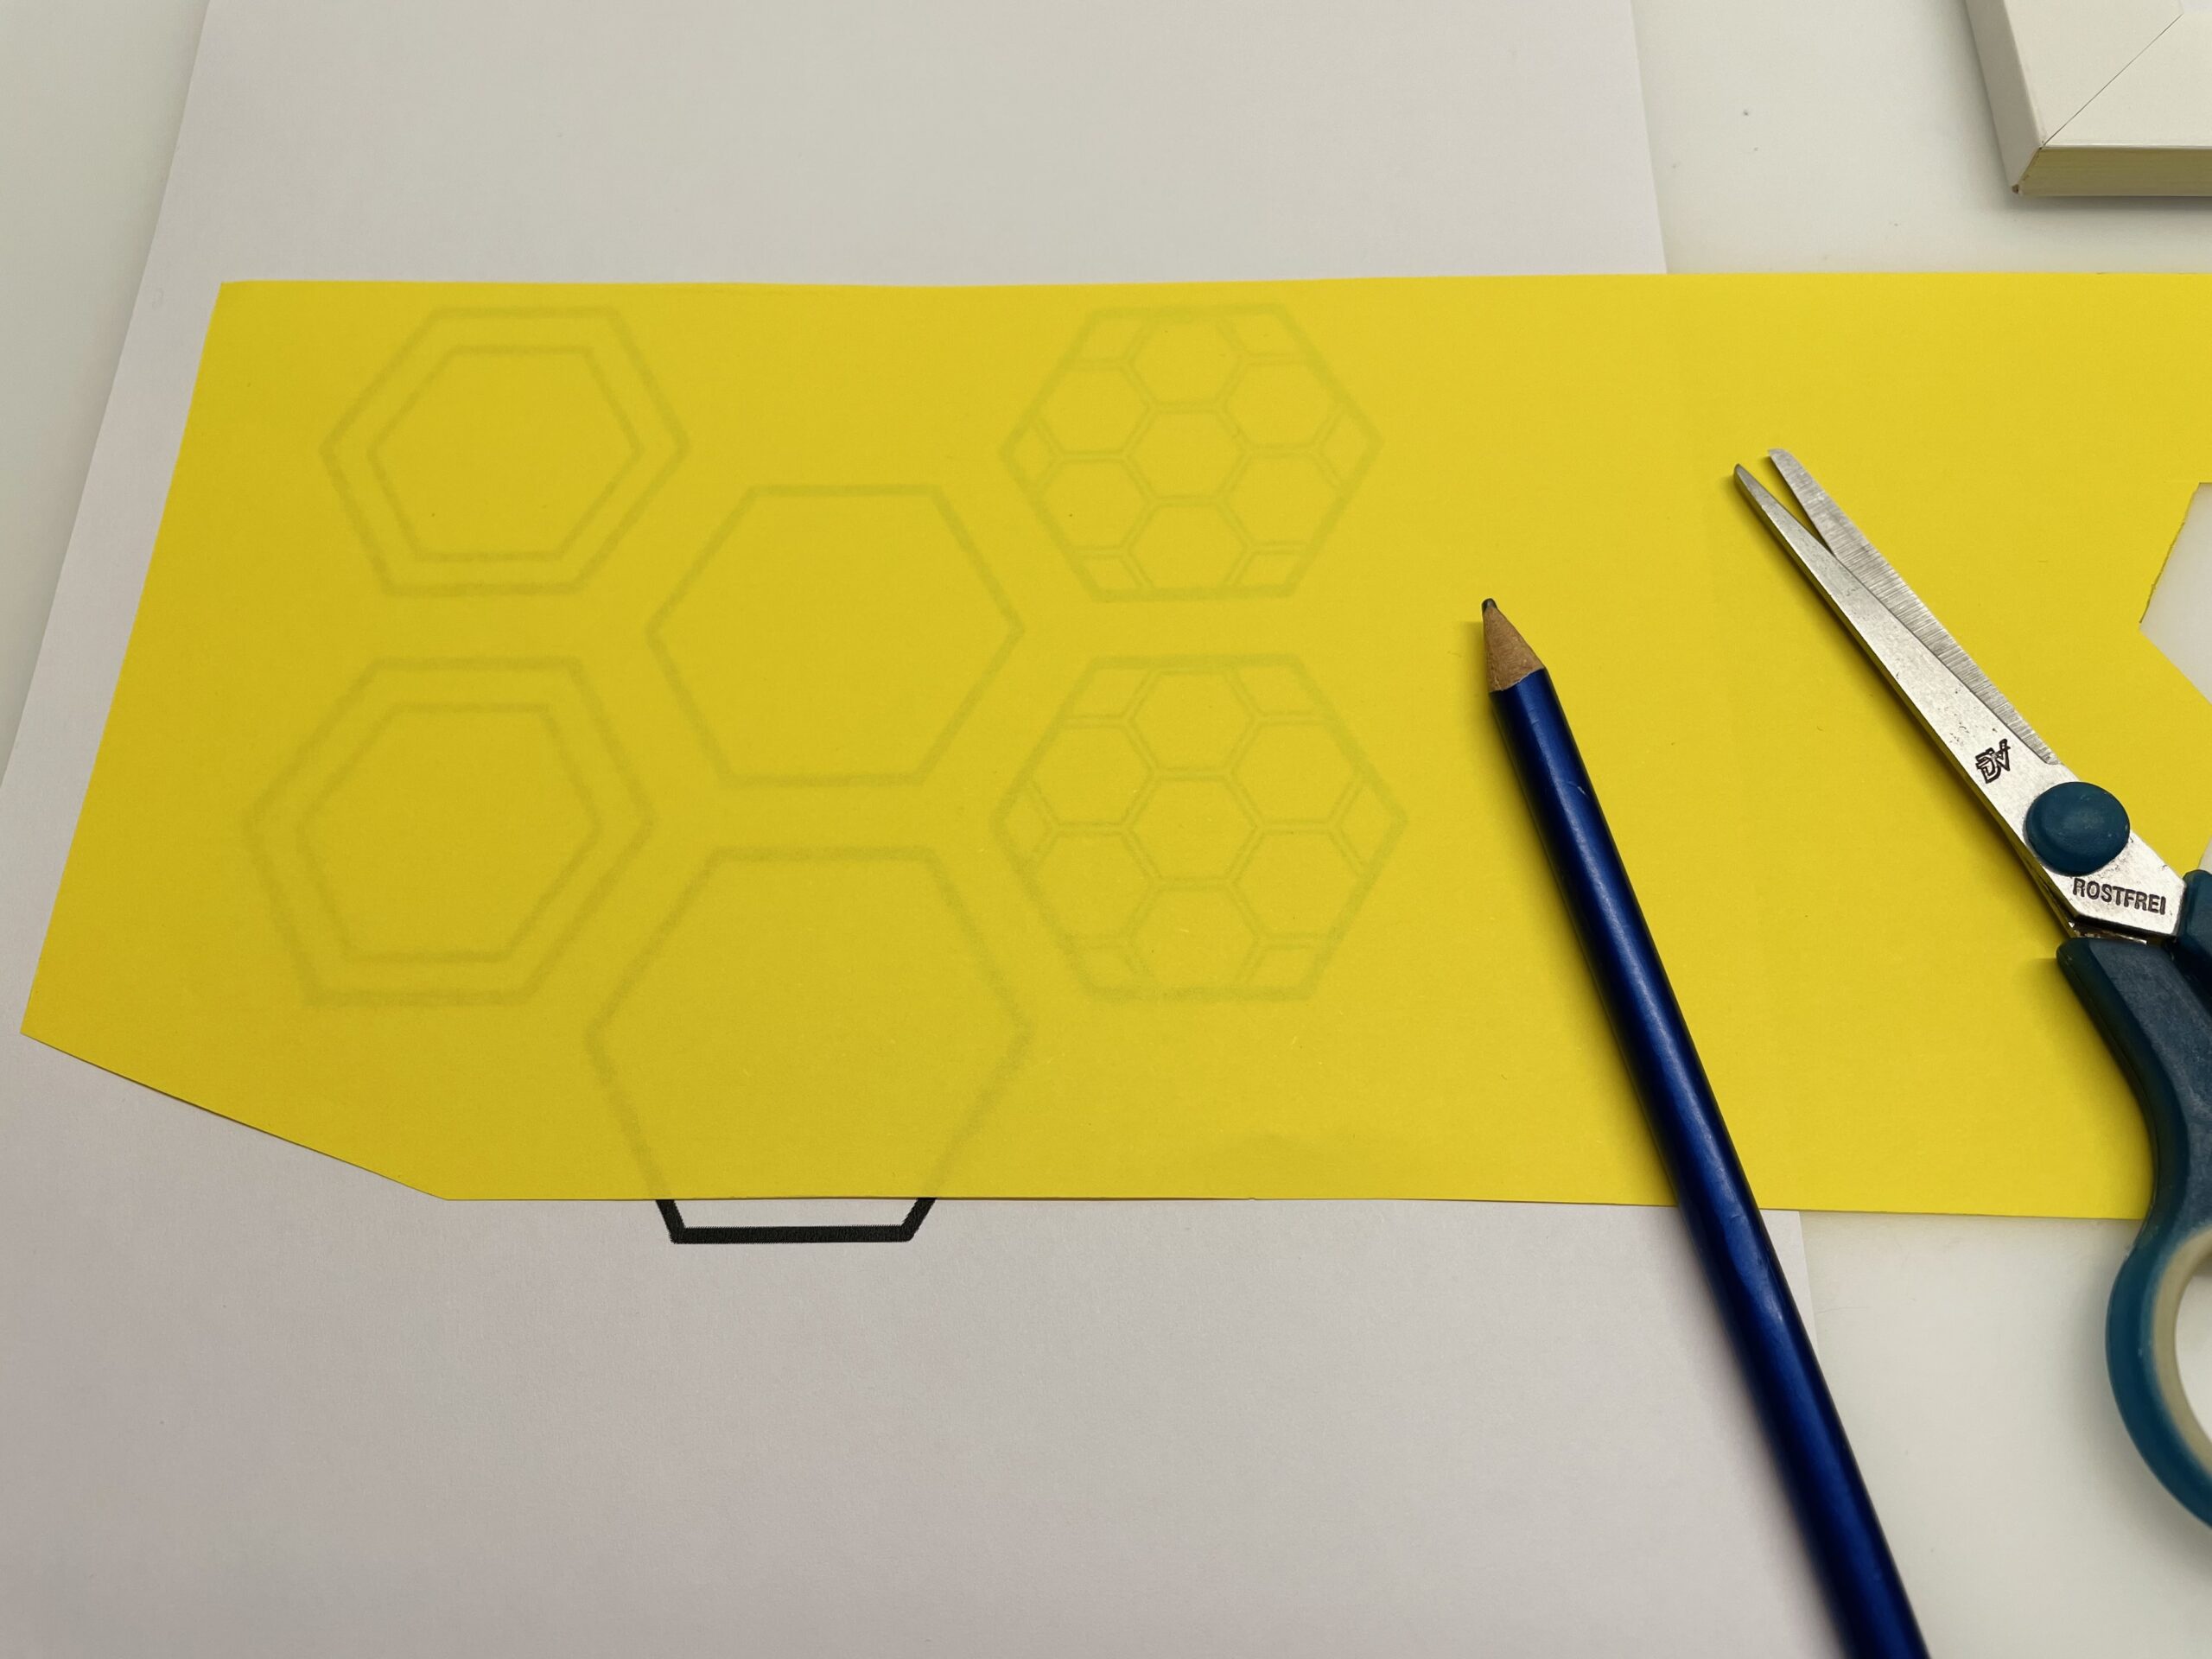
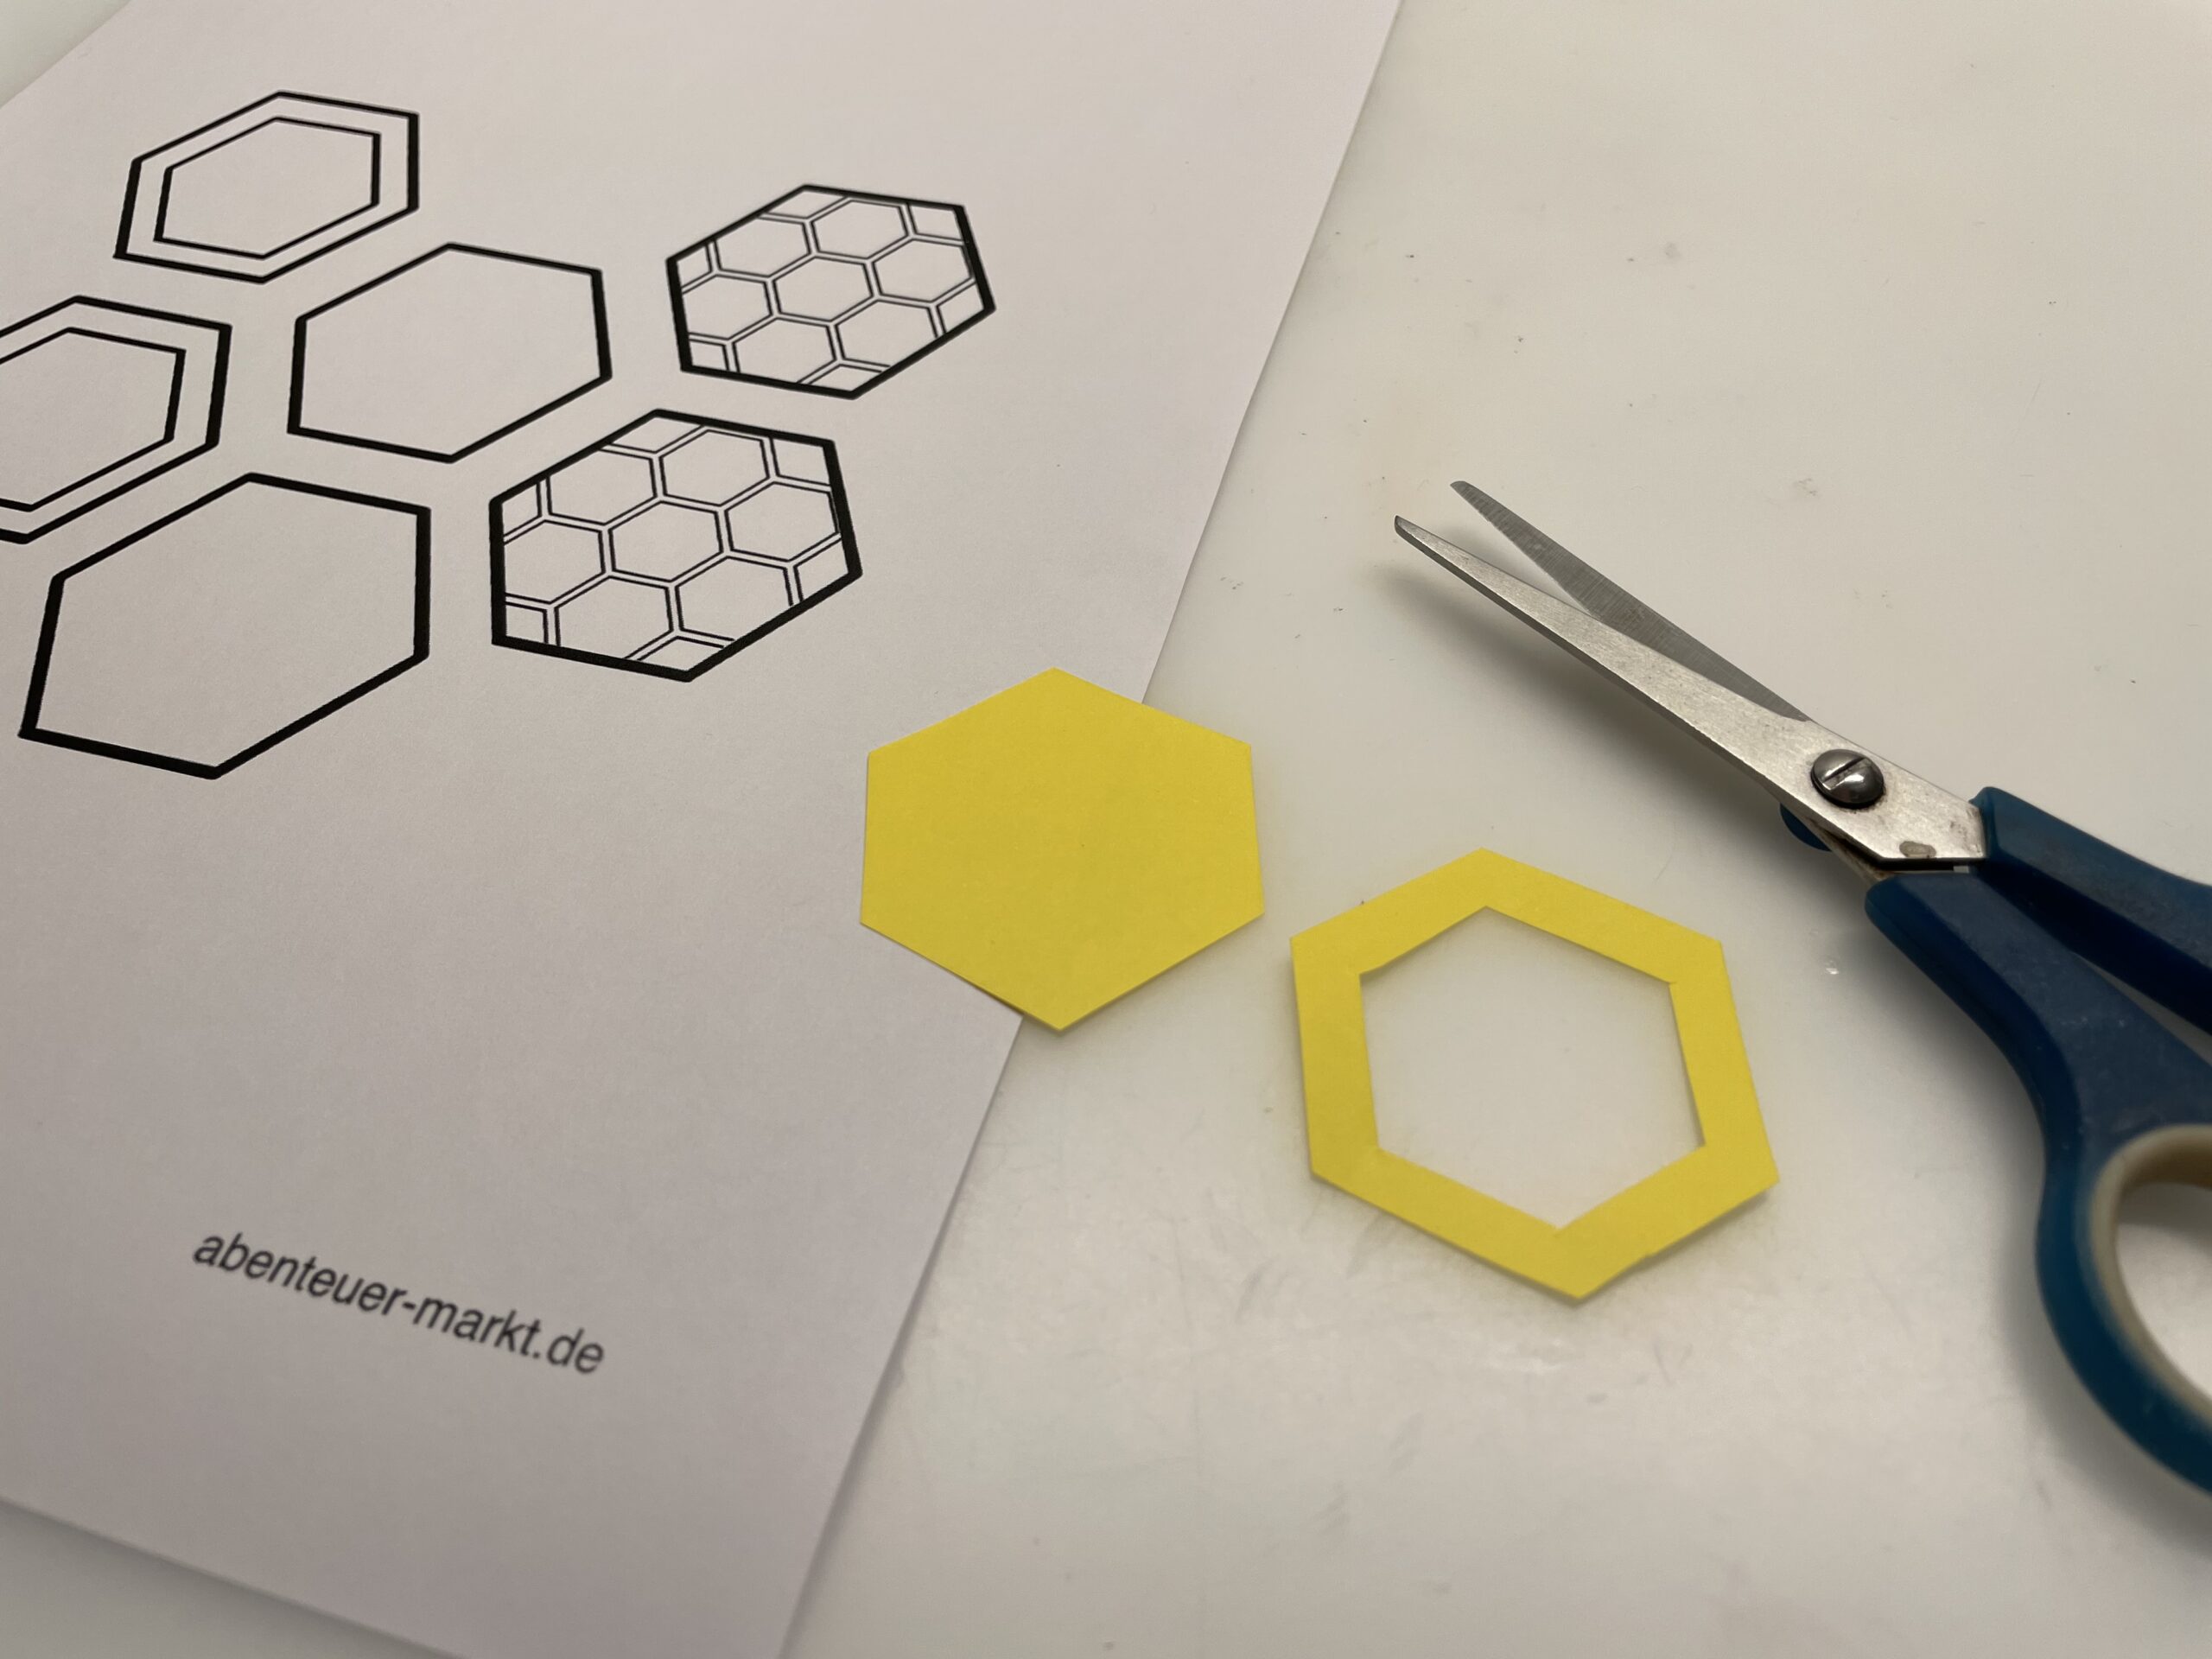
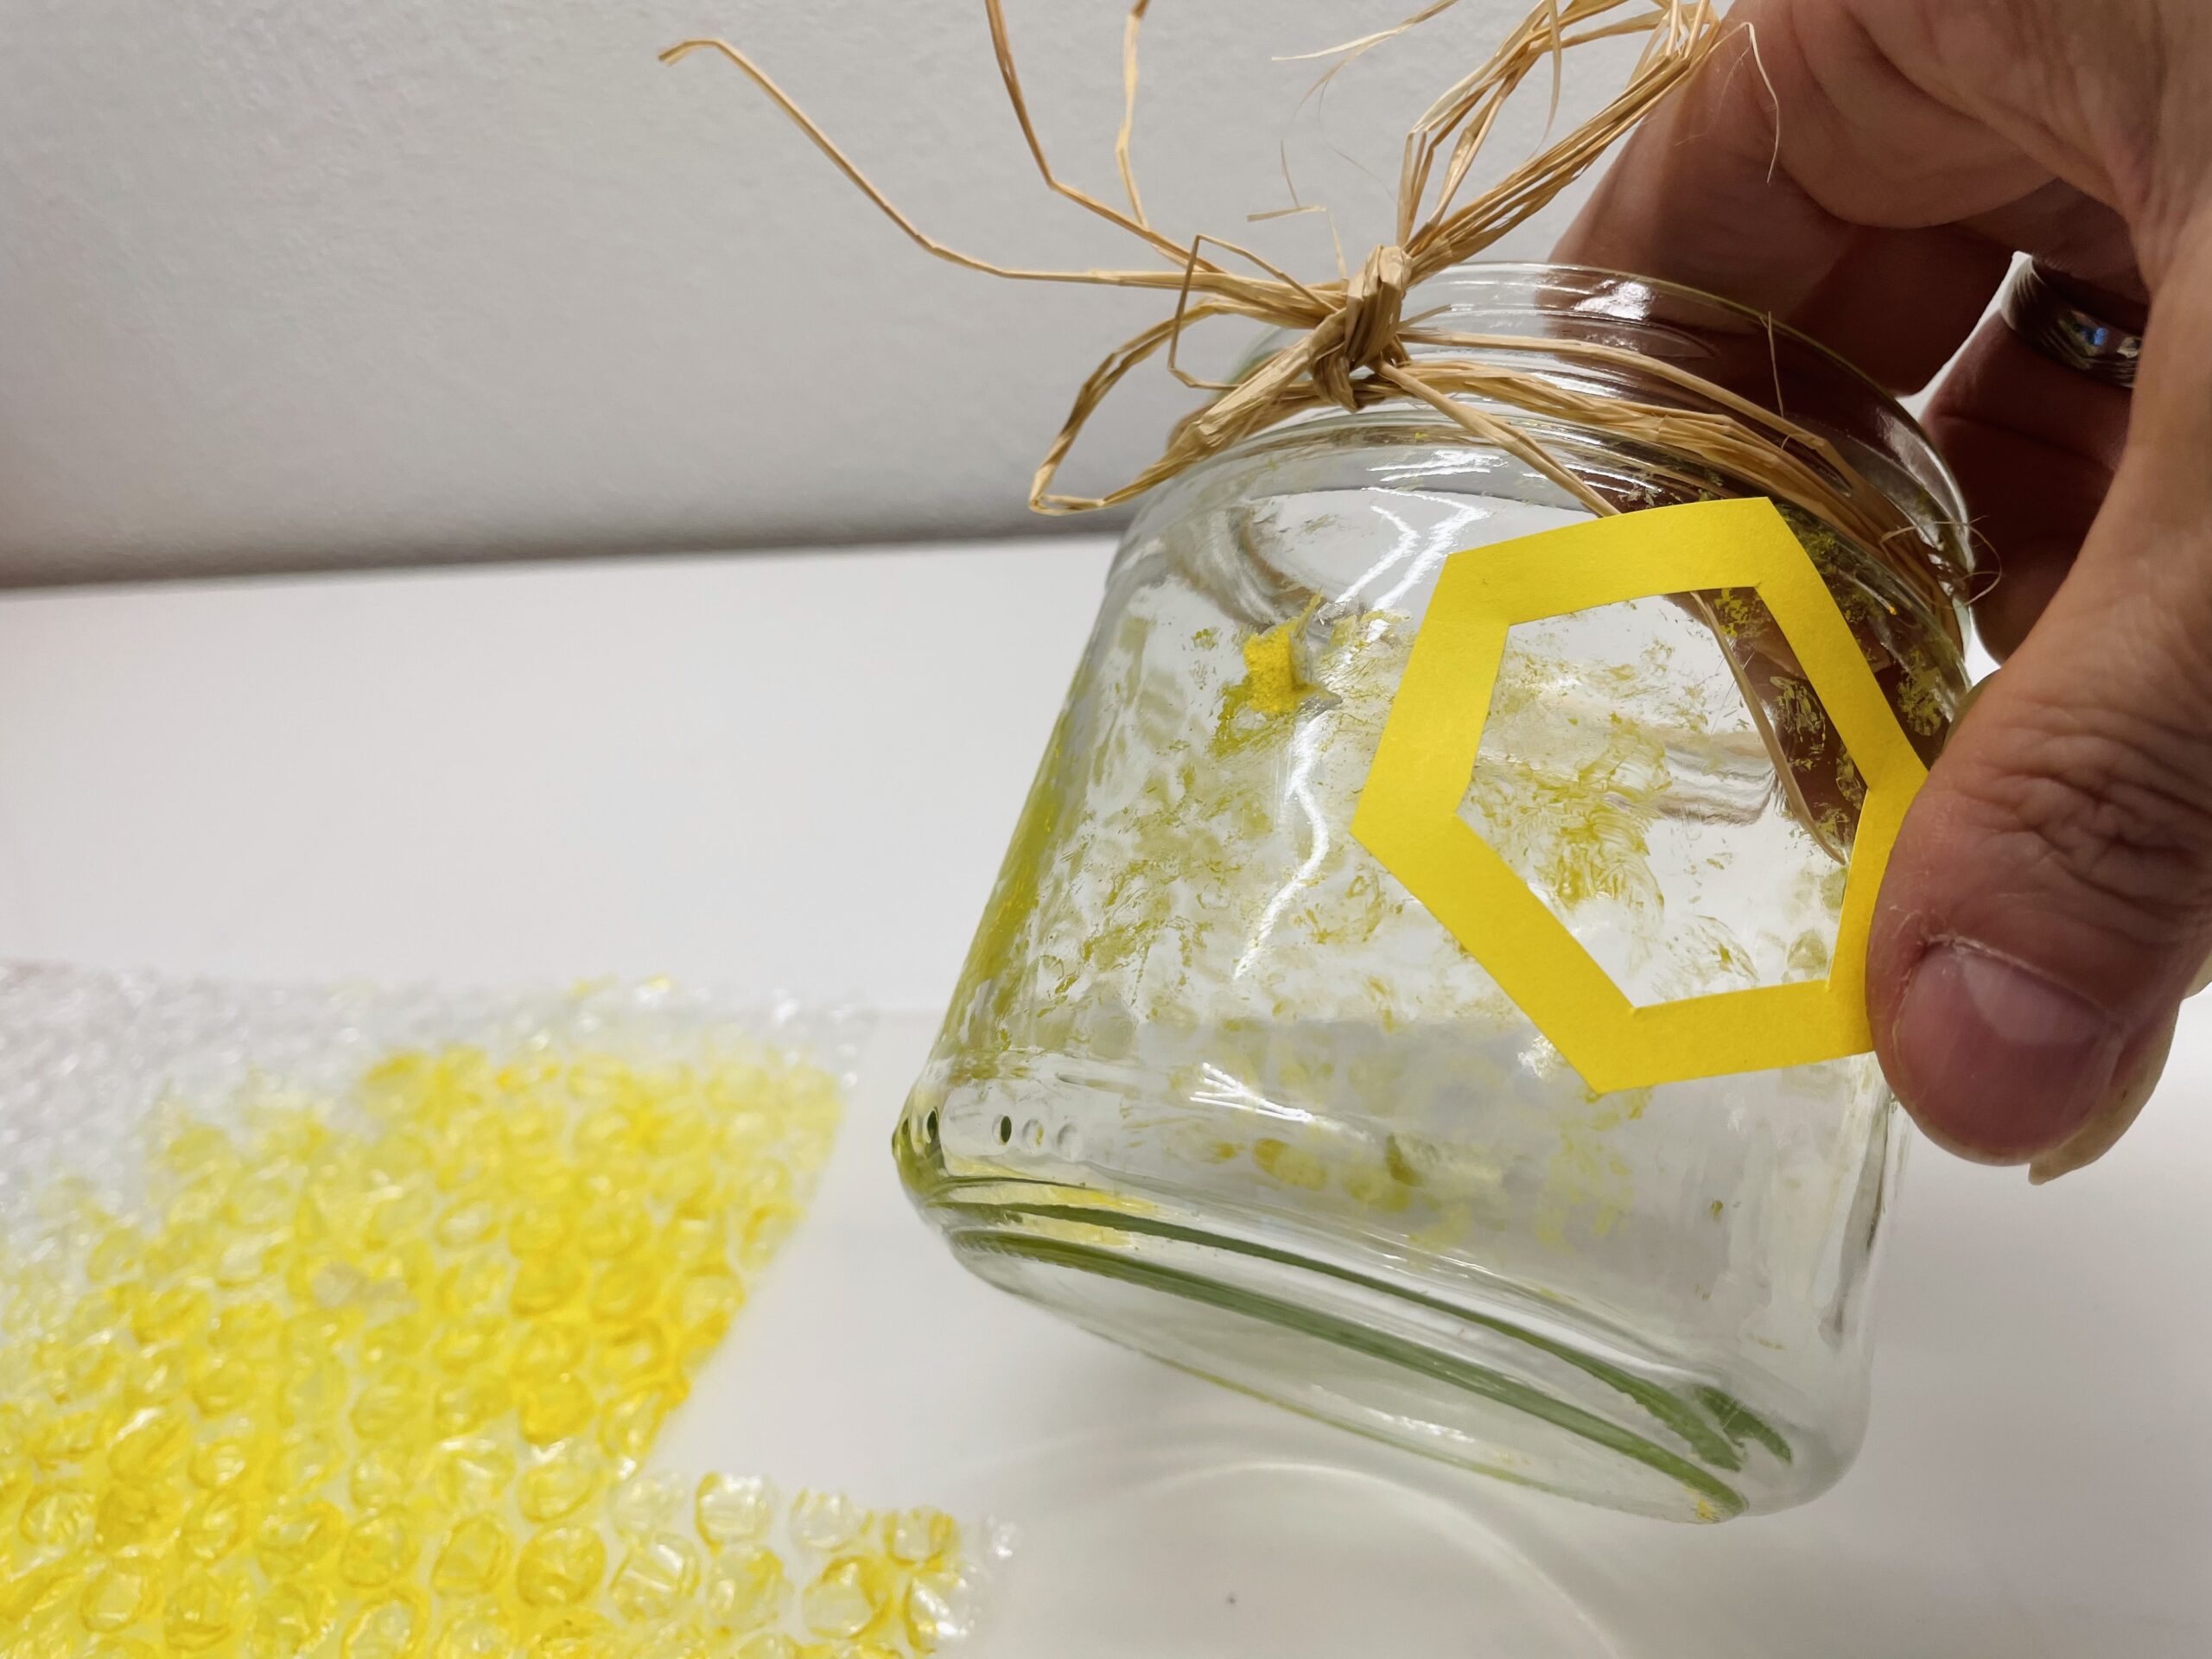
After that you cut out the previously painted honeycombs.
Here you can cut out different types of honeycombs.
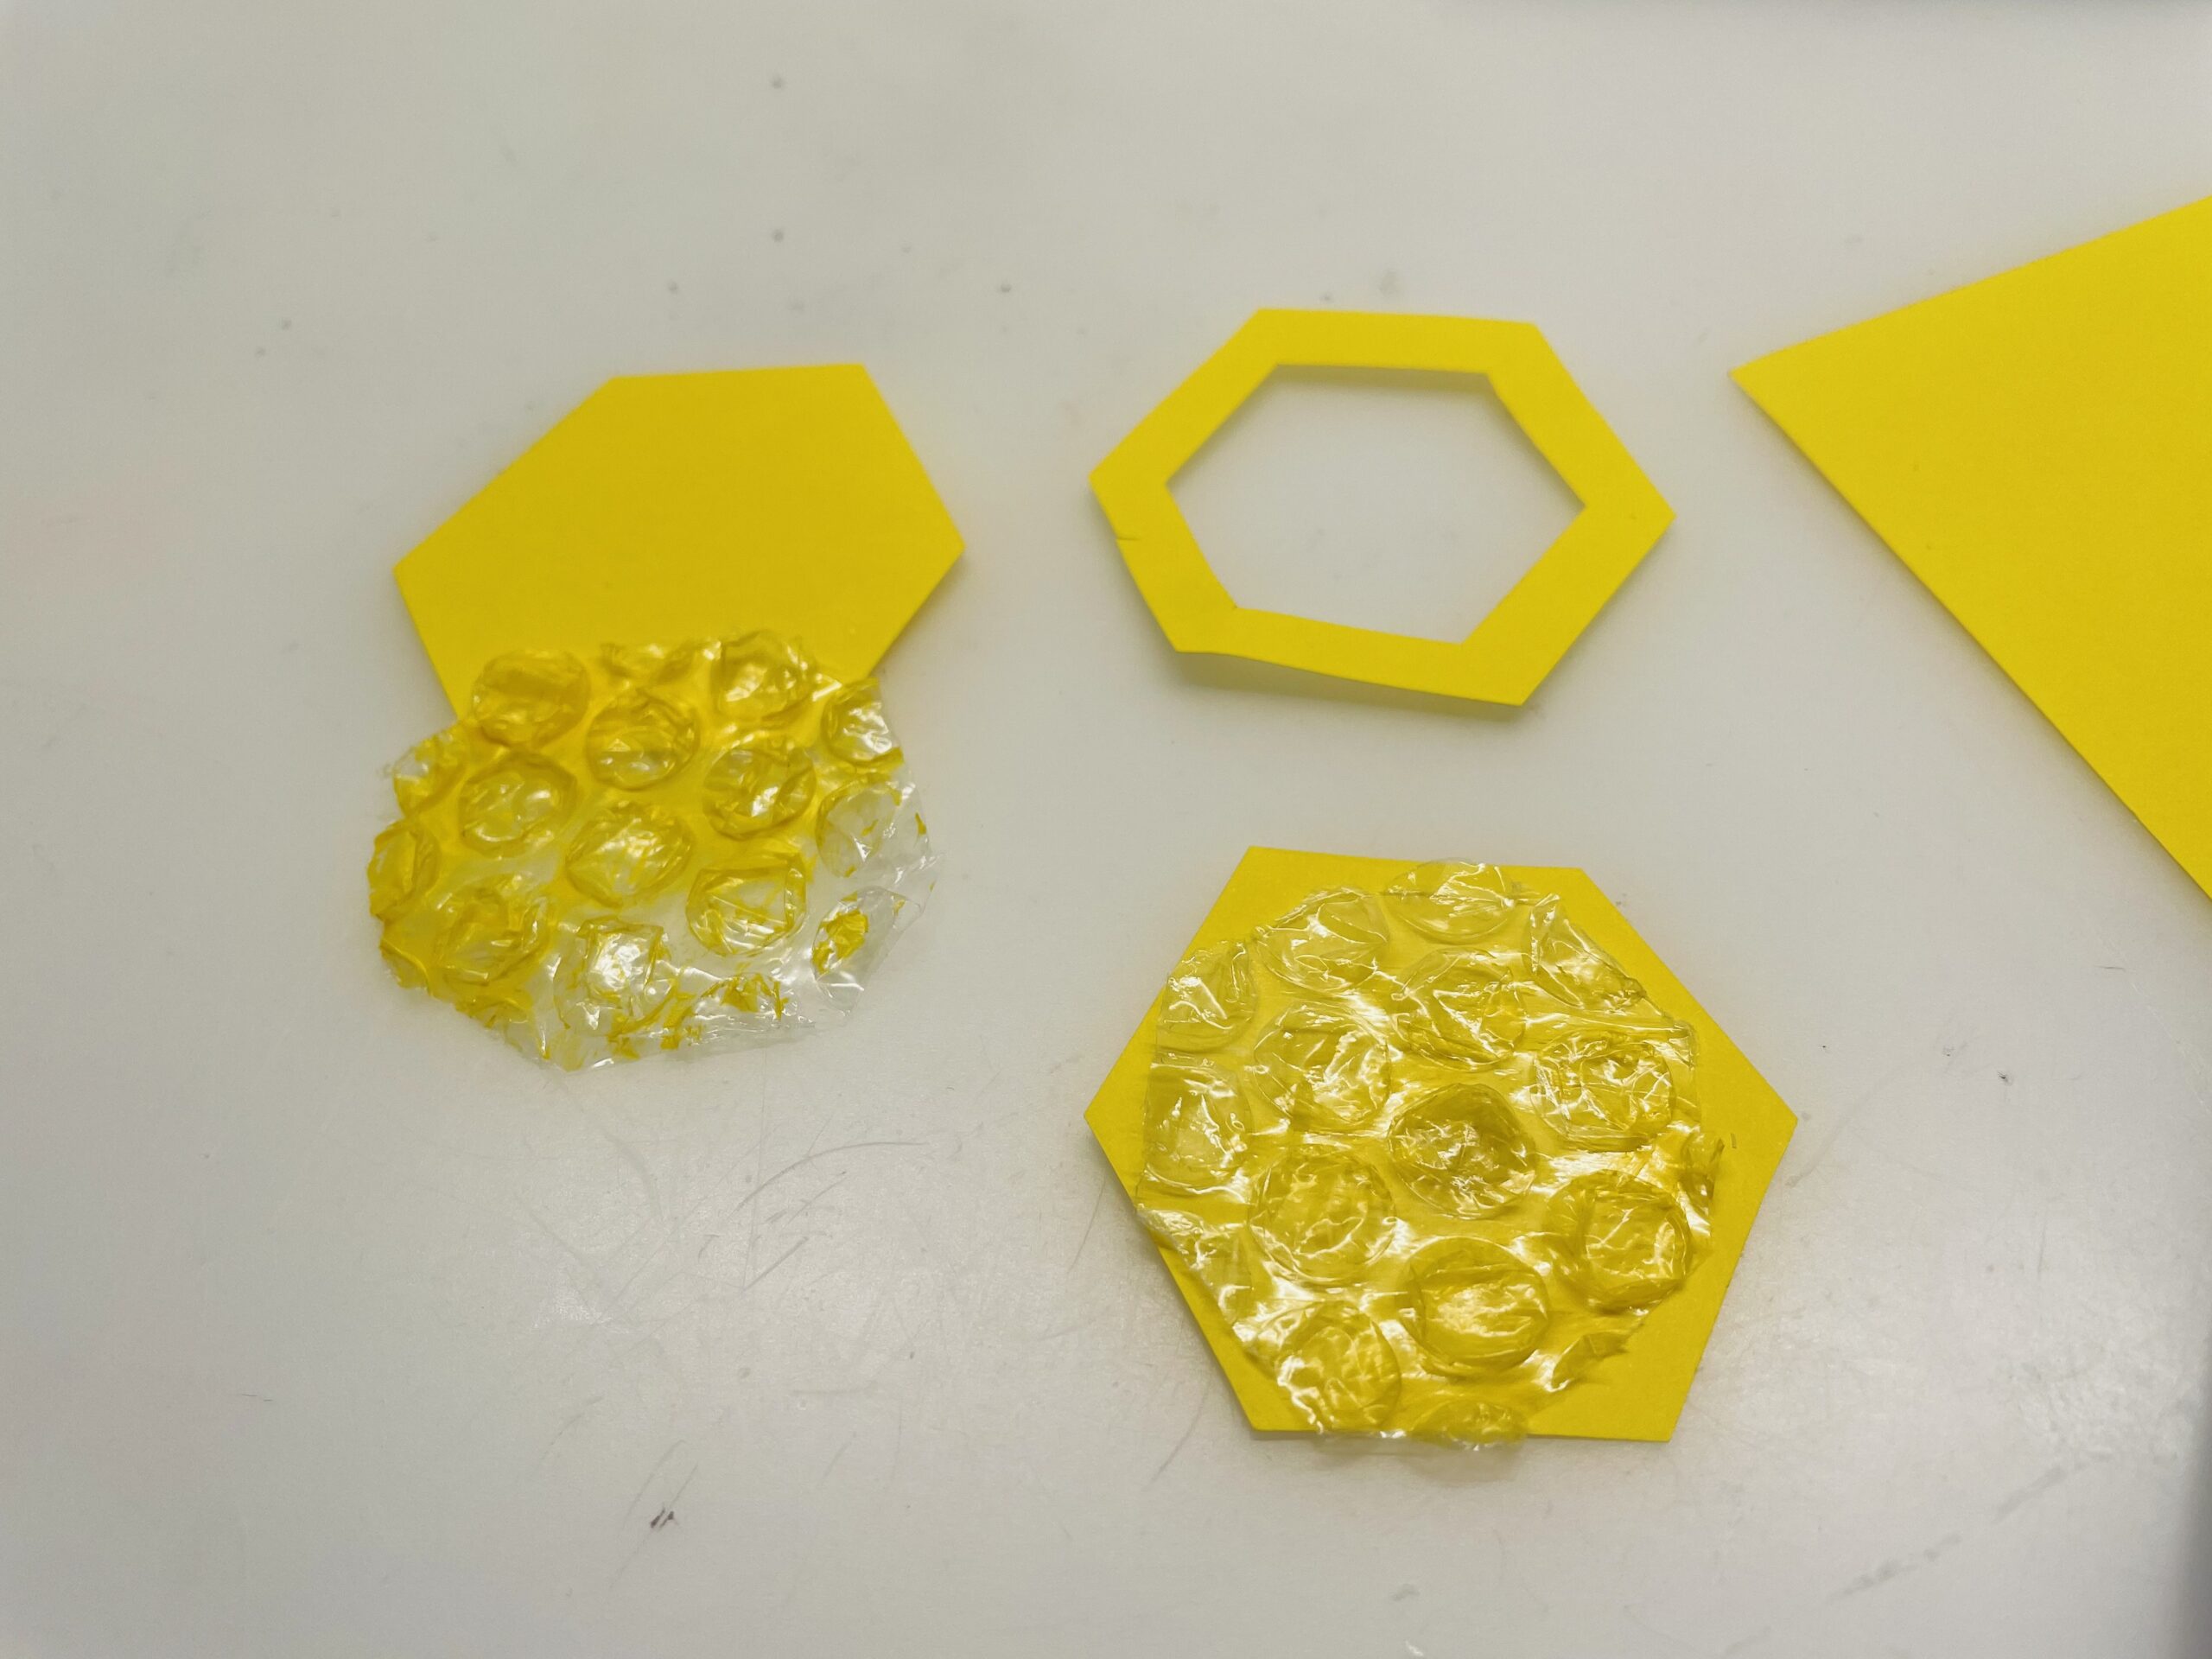
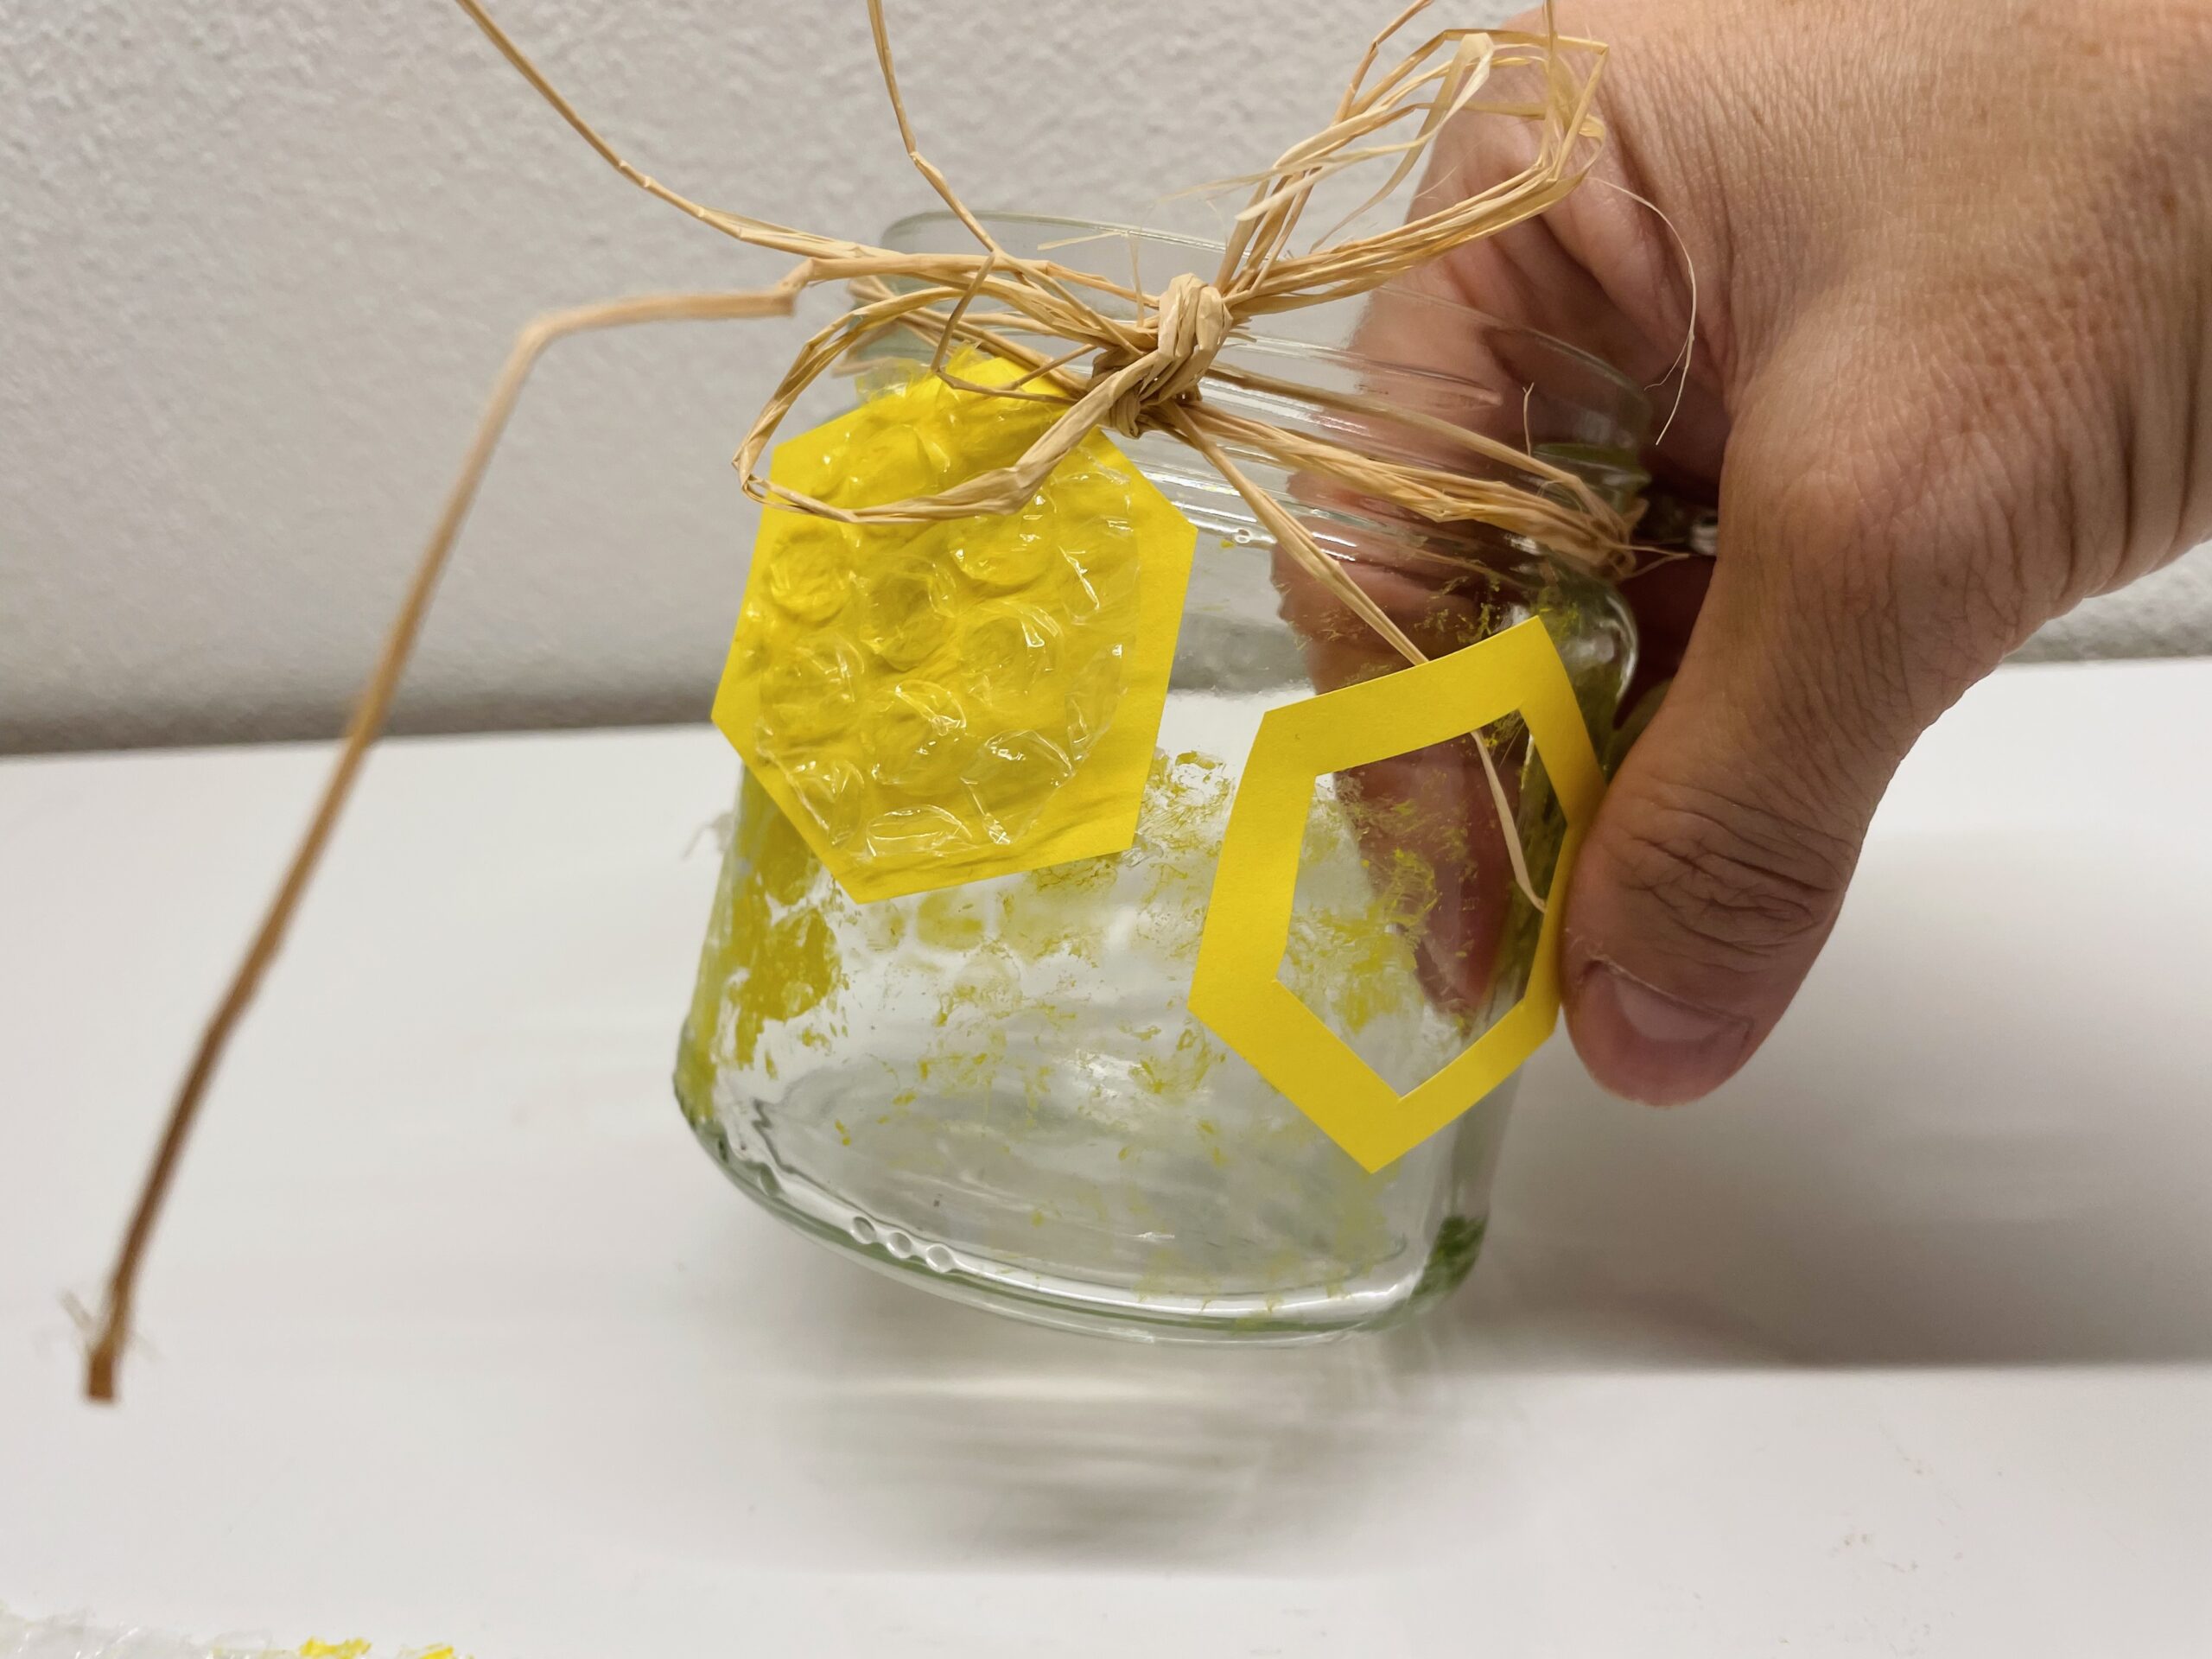
In addition, you glue some bubble wrap on individual honeycombs, which also cuts it in the form of a honeycomb. This makes the honeycombs look plastic.

Tip: Different honeycombs look more varied than a single form.
Choose for yourself what you like.
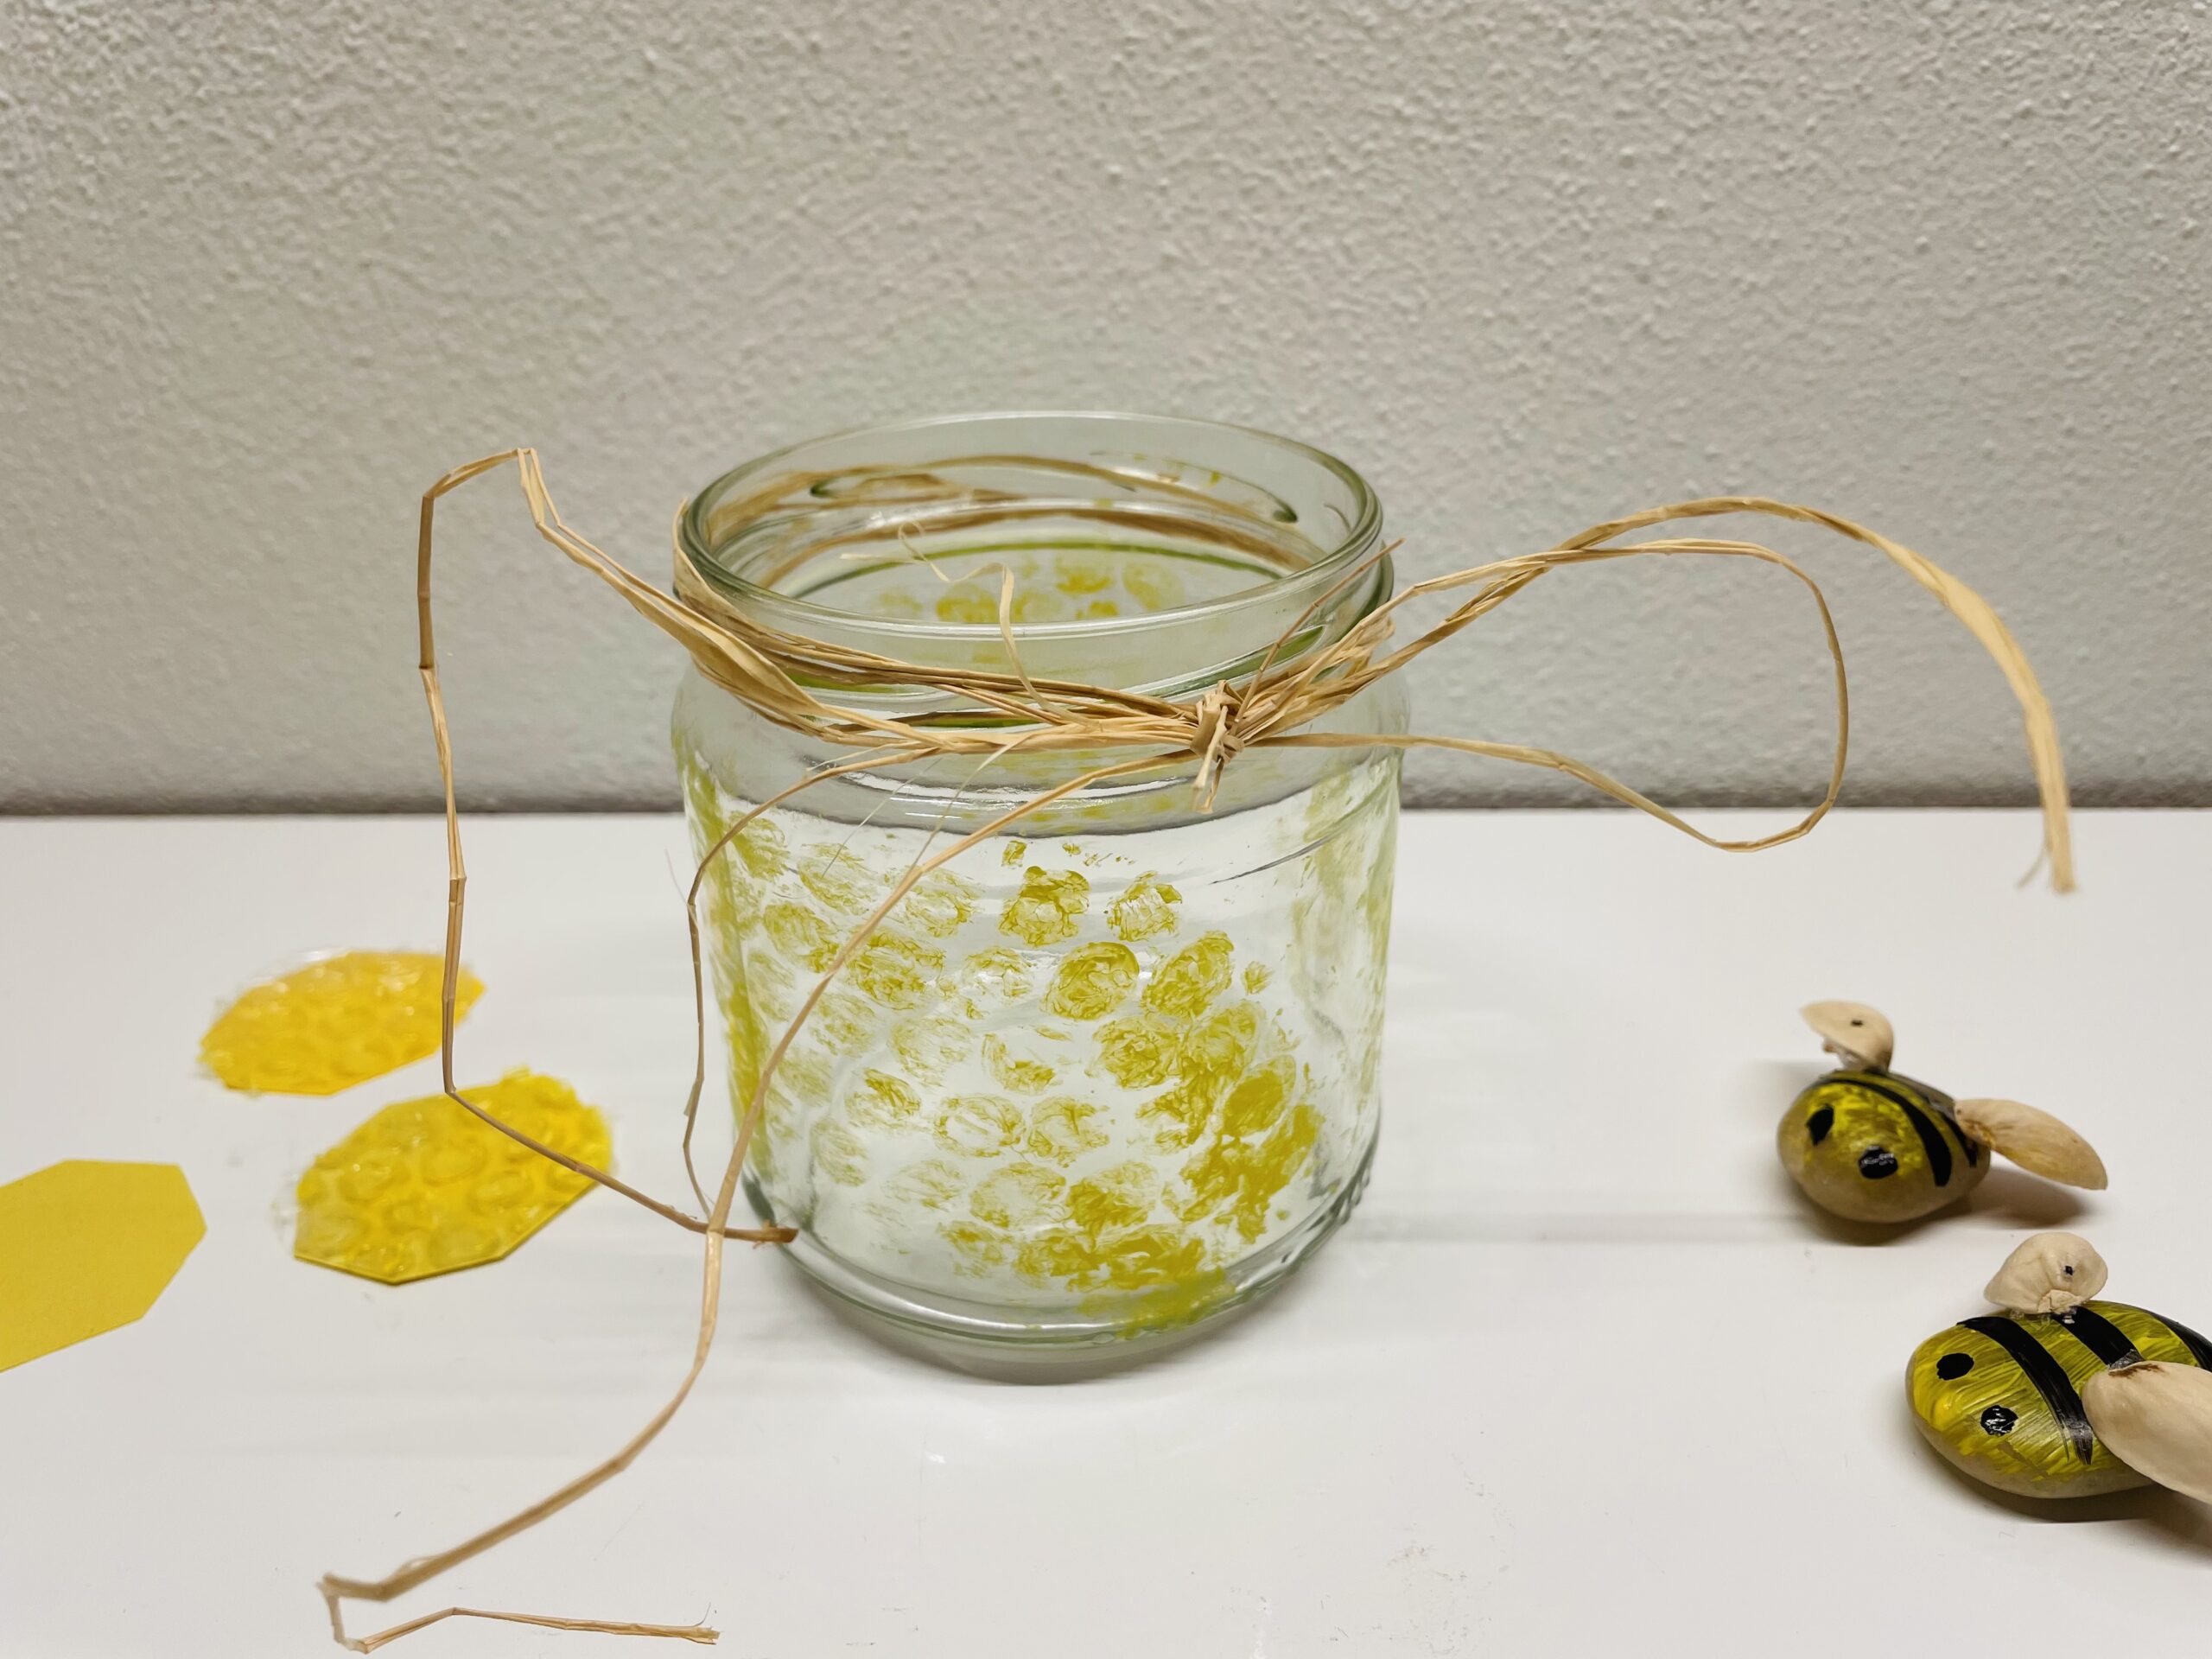
Then tie a bast cord around the upper edge of the glass. Wrap the cord several times around the glass edge and knot the ends together.
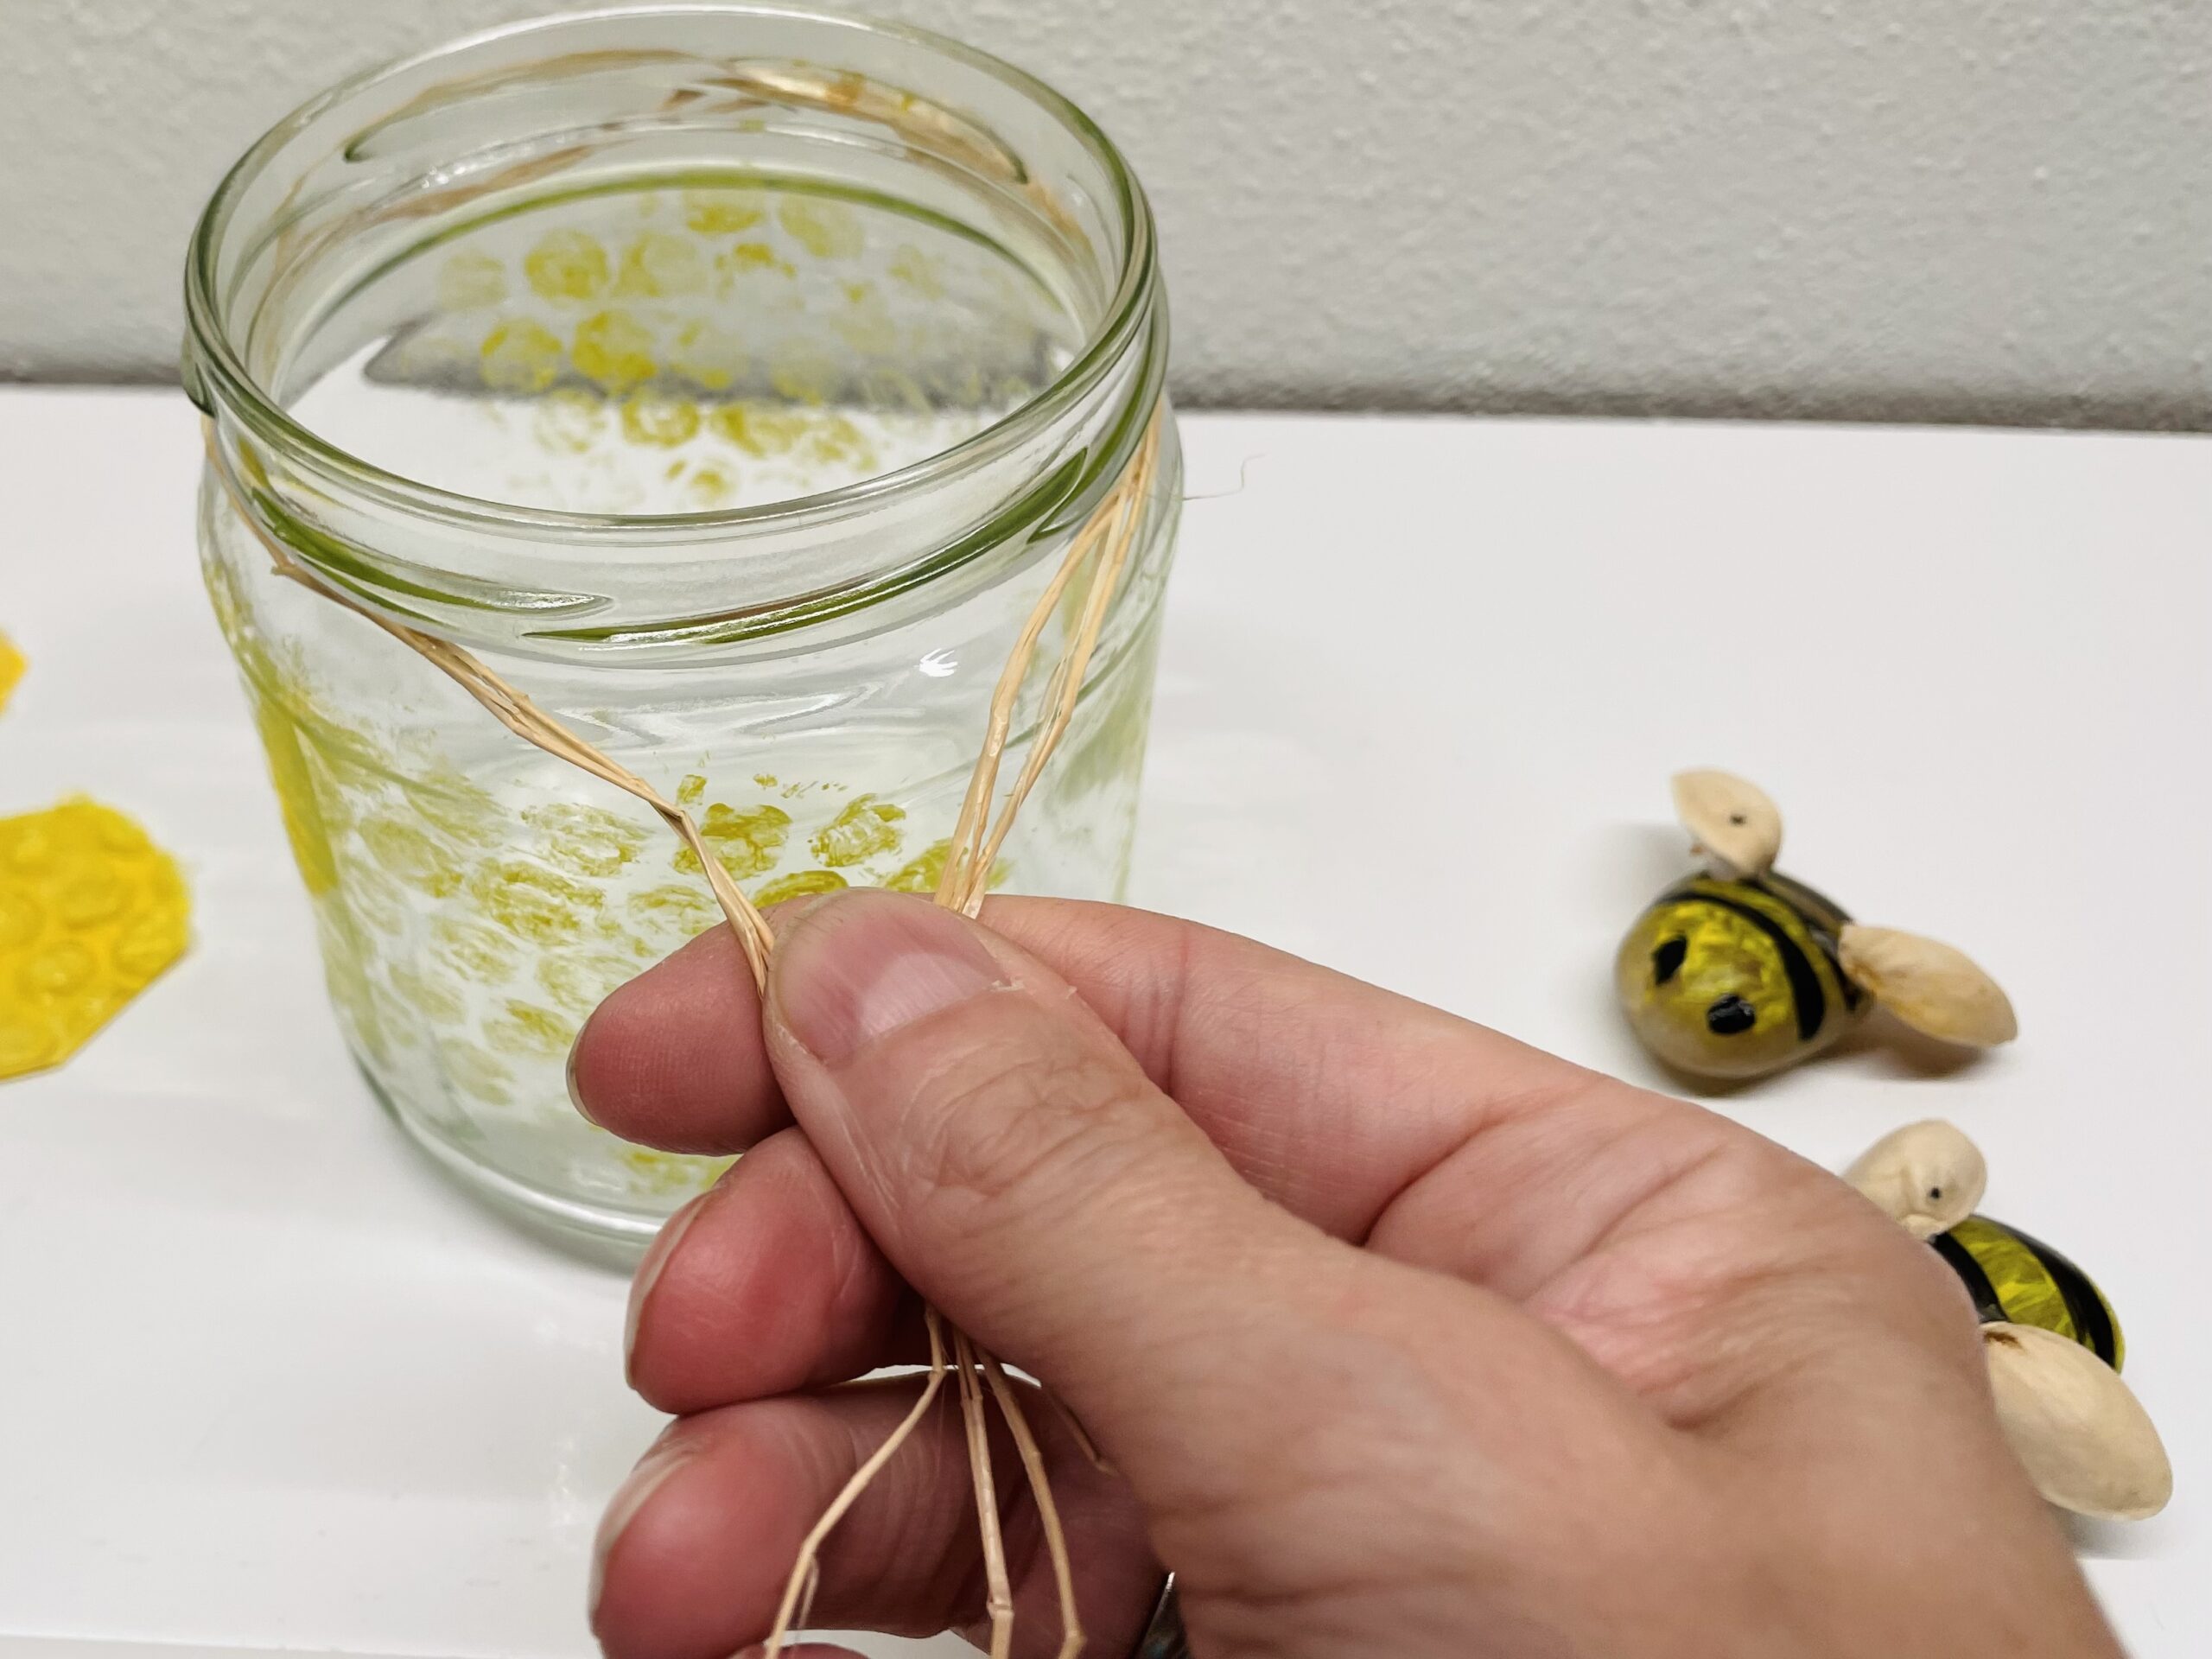
Finally, tie a loop.
After that, you put the honeycombs on the glass.
You order the honeycombs moved.
Finally, you stick the bees to it. You might have to use the hot glue gun for this.
Attention when handling the hot glue - risk of injury!
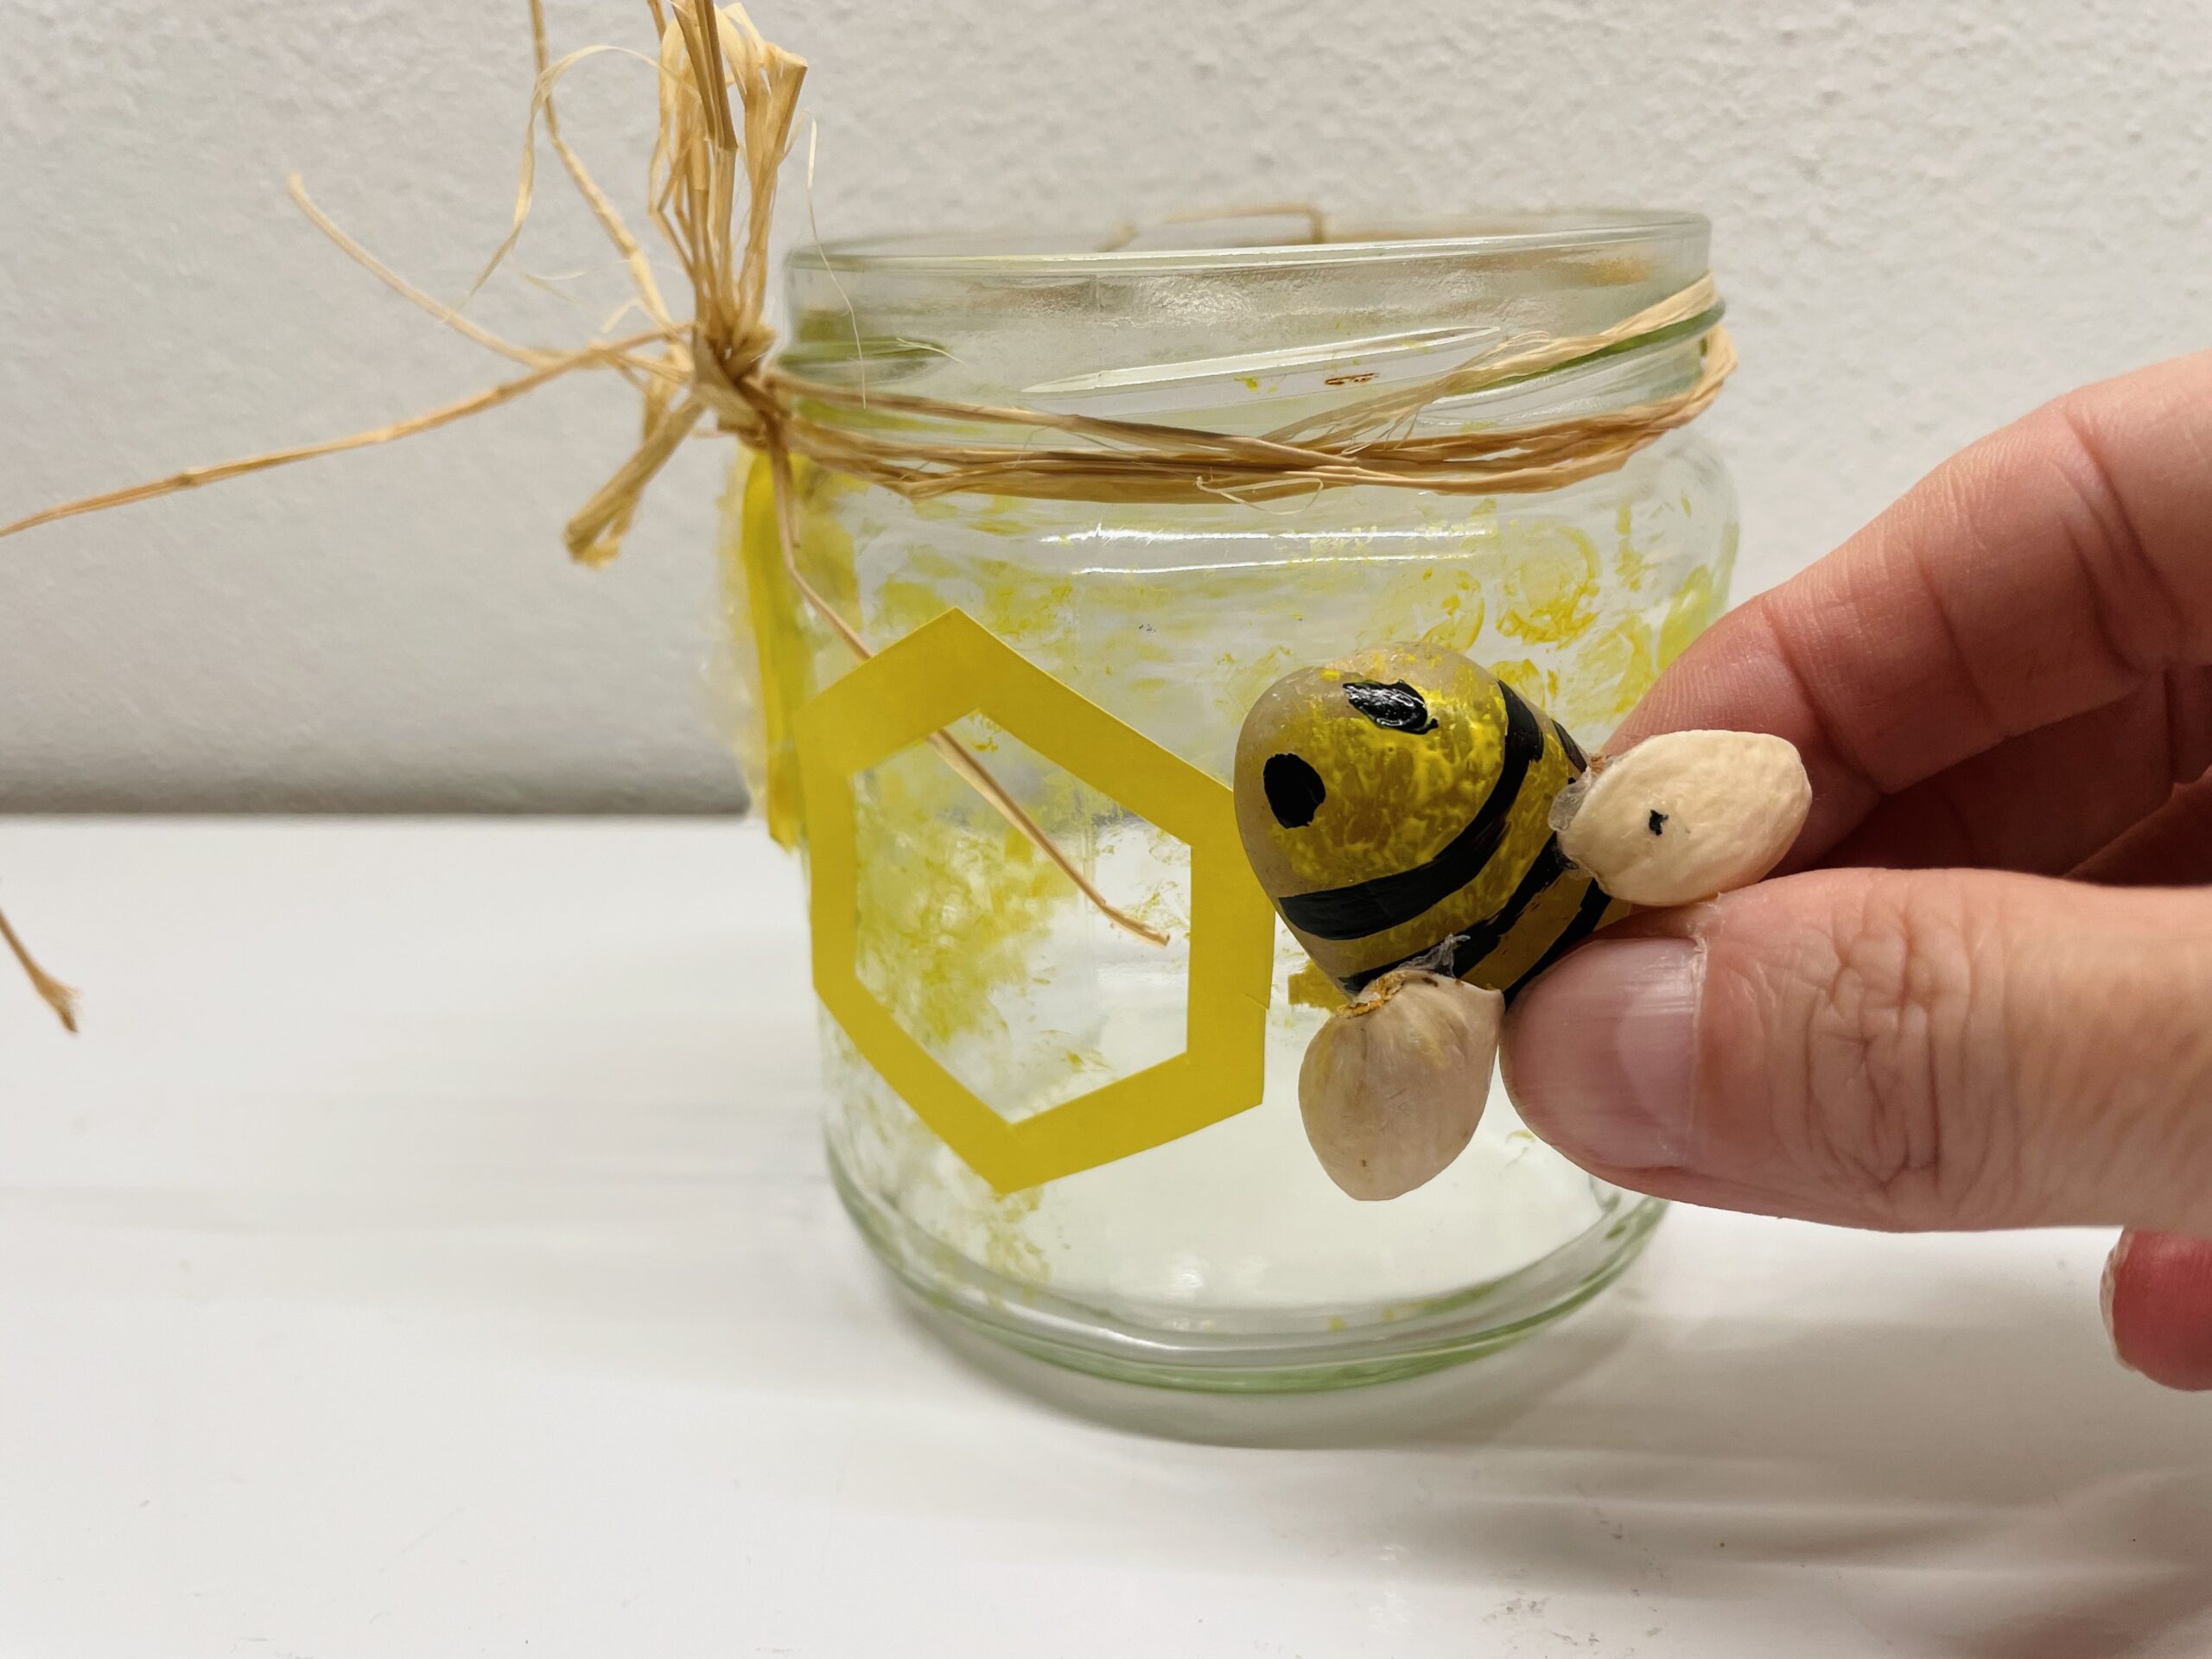
The bee honeycomb glass is ready. You can place the glass on a piece of painted foil or use a yellow napkin and place it under.

Have fun crafting the lantern and decorating the lantern.
So the next party can come.
Materials
Directions
First you prepare the jam jar, the craft pad and the bubble wrap. A small piece of the bubble wrap is enough.
Now you print a honeycomb pattern on the glass with the foil and the paint.
You have to work fast for this:
First paint the bubble wrap on one side with the yellow color.
Tip: Just apply the color roughly and extensively.
Then you press the painted still moist foil on the glass.
Then pull the foil off again.
When pulling off, the foil sticks to the glass. Just pull vigorously and then you see the pattern.
Repeat the process and make sure that you do not print the same spot several times, otherwise you will no longer recognize the honeycomb pattern.
If the glass is printed all around, put the glass to dry.
While the glass dries, you can make large honeycombs, which you later attach to the glass.
Print out this honeycomb template.
If you want, you can also print the template on yellow copy paper.
Take yellow thin paper.
Tip: This also includes clay paper residues.
If you use yellow thin paper, place it on the template and draw the honeycombs with a pencil.
After that you cut out the previously painted honeycombs.
Here you can cut out different types of honeycombs.
In addition, you glue some bubble wrap on individual honeycombs, which also cuts it in the form of a honeycomb. This makes the honeycombs look plastic.
Tip: Different honeycombs look more varied than a single form.
Choose for yourself what you like.
Then tie a bast cord around the upper edge of the glass. Wrap the cord several times around the glass edge and knot the ends together.
Finally, tie a loop.
After that, you put the honeycombs on the glass.
You order the honeycombs moved.
Finally, you stick the bees to it. You might have to use the hot glue gun for this.
Attention when handling the hot glue - risk of injury!
The bee honeycomb glass is ready. You can place the glass on a piece of painted foil or use a yellow napkin and place it under.
Have fun crafting the lantern and decorating the lantern.
So the next party can come.
Follow us on Facebook , Instagram and Pinterest
Don't miss any more adventures: Our bottle mail