Bee made of button and wire

AdventurerKatzi
Rating0.03.4 Thousand times & (0) DifficultyAdvanced

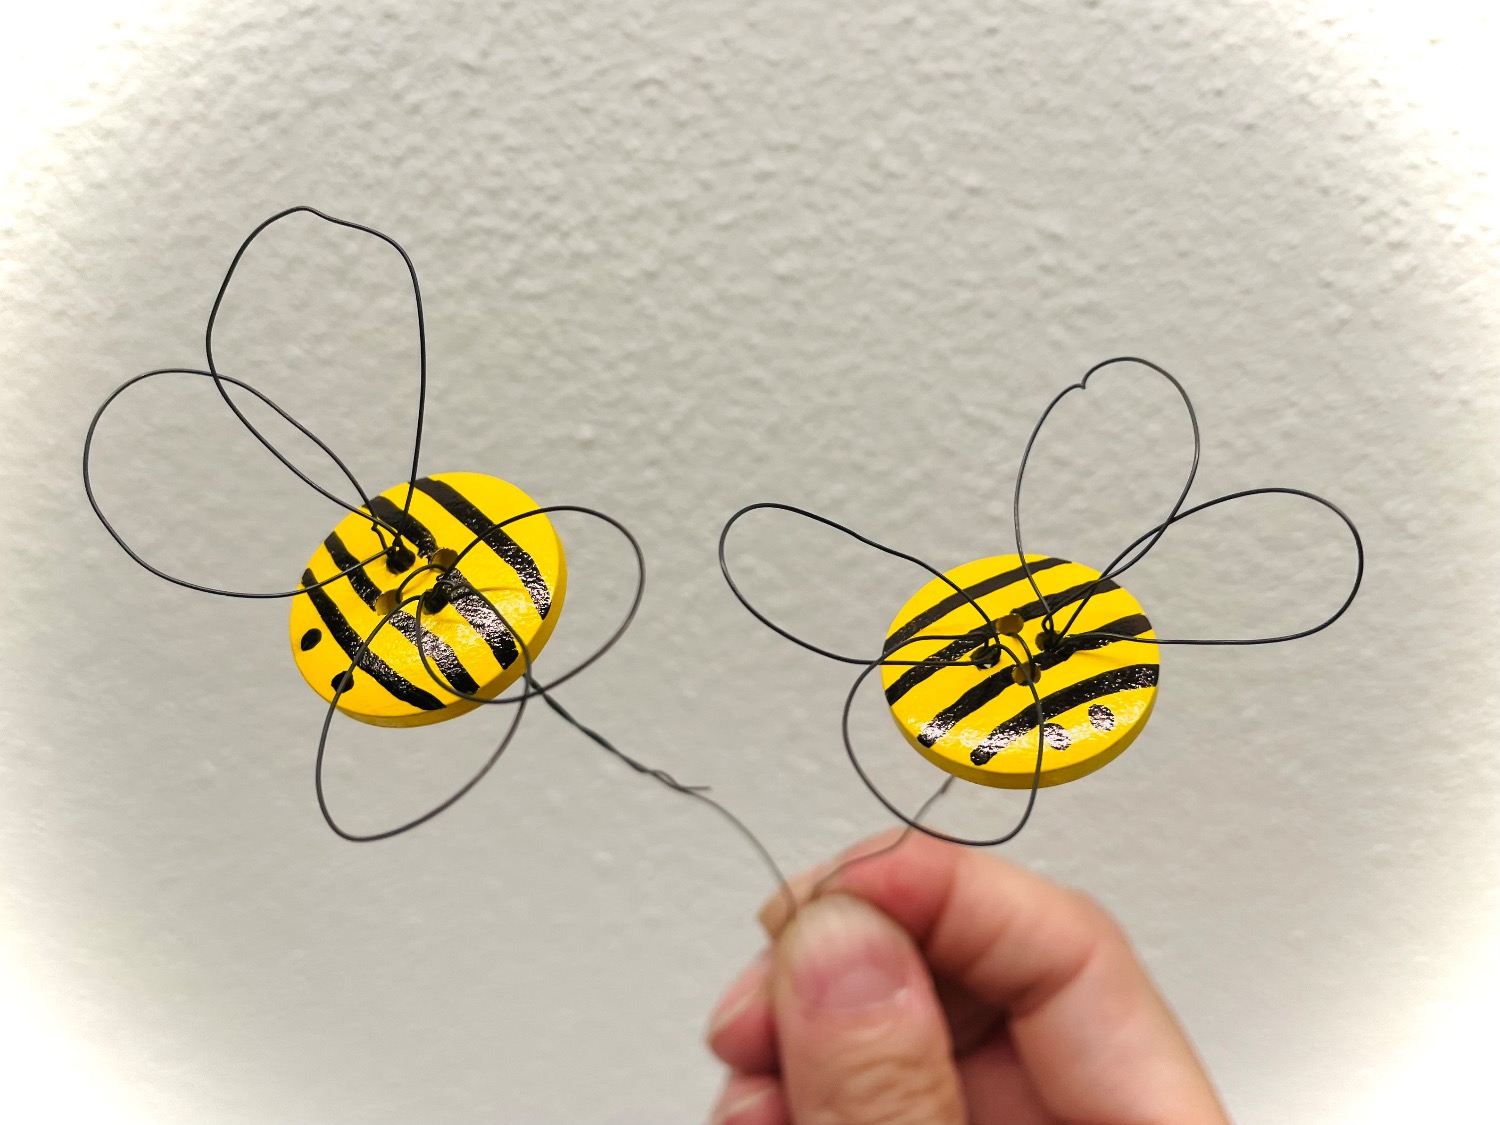
This bee is made of a button and flower wire. The wings of the bee are easy to make after the instruction, look at the step by step instruction and make the best with it, then it is not so difficult. You can paint the button first or at the end. With a waterproof pen the stripes of the small bee are also suitable for outside.
You can use the bee as a decoration for a door wreath, for table decoration or in a bouquet of flowers. Also as an eye-catcher on a gift the bee looks very nice. Have fun trying out.

Media Education for Kindergarten and Hort

Kind bastelt eine Rassel mit dem Navi
The Adventure Navi, the app for DIY projects, enables media education for the youngest.

Relief in everyday life, targeted promotion of individual children, independent learning and - without any pre-knowledge already usable by the youngest!


Titelbild zur Bastel- und DIY-Idee für Kinder '(1141) Biene aus Knopf und Draht basteln'
Material for1 Child
Prep Time5 min.Adv. Time25 min.Total Time30 min.
 1 Button yellow
 Floral wire
 Wire shears
 1 Ruler
1

First, get ready for all the materials and the craft material.
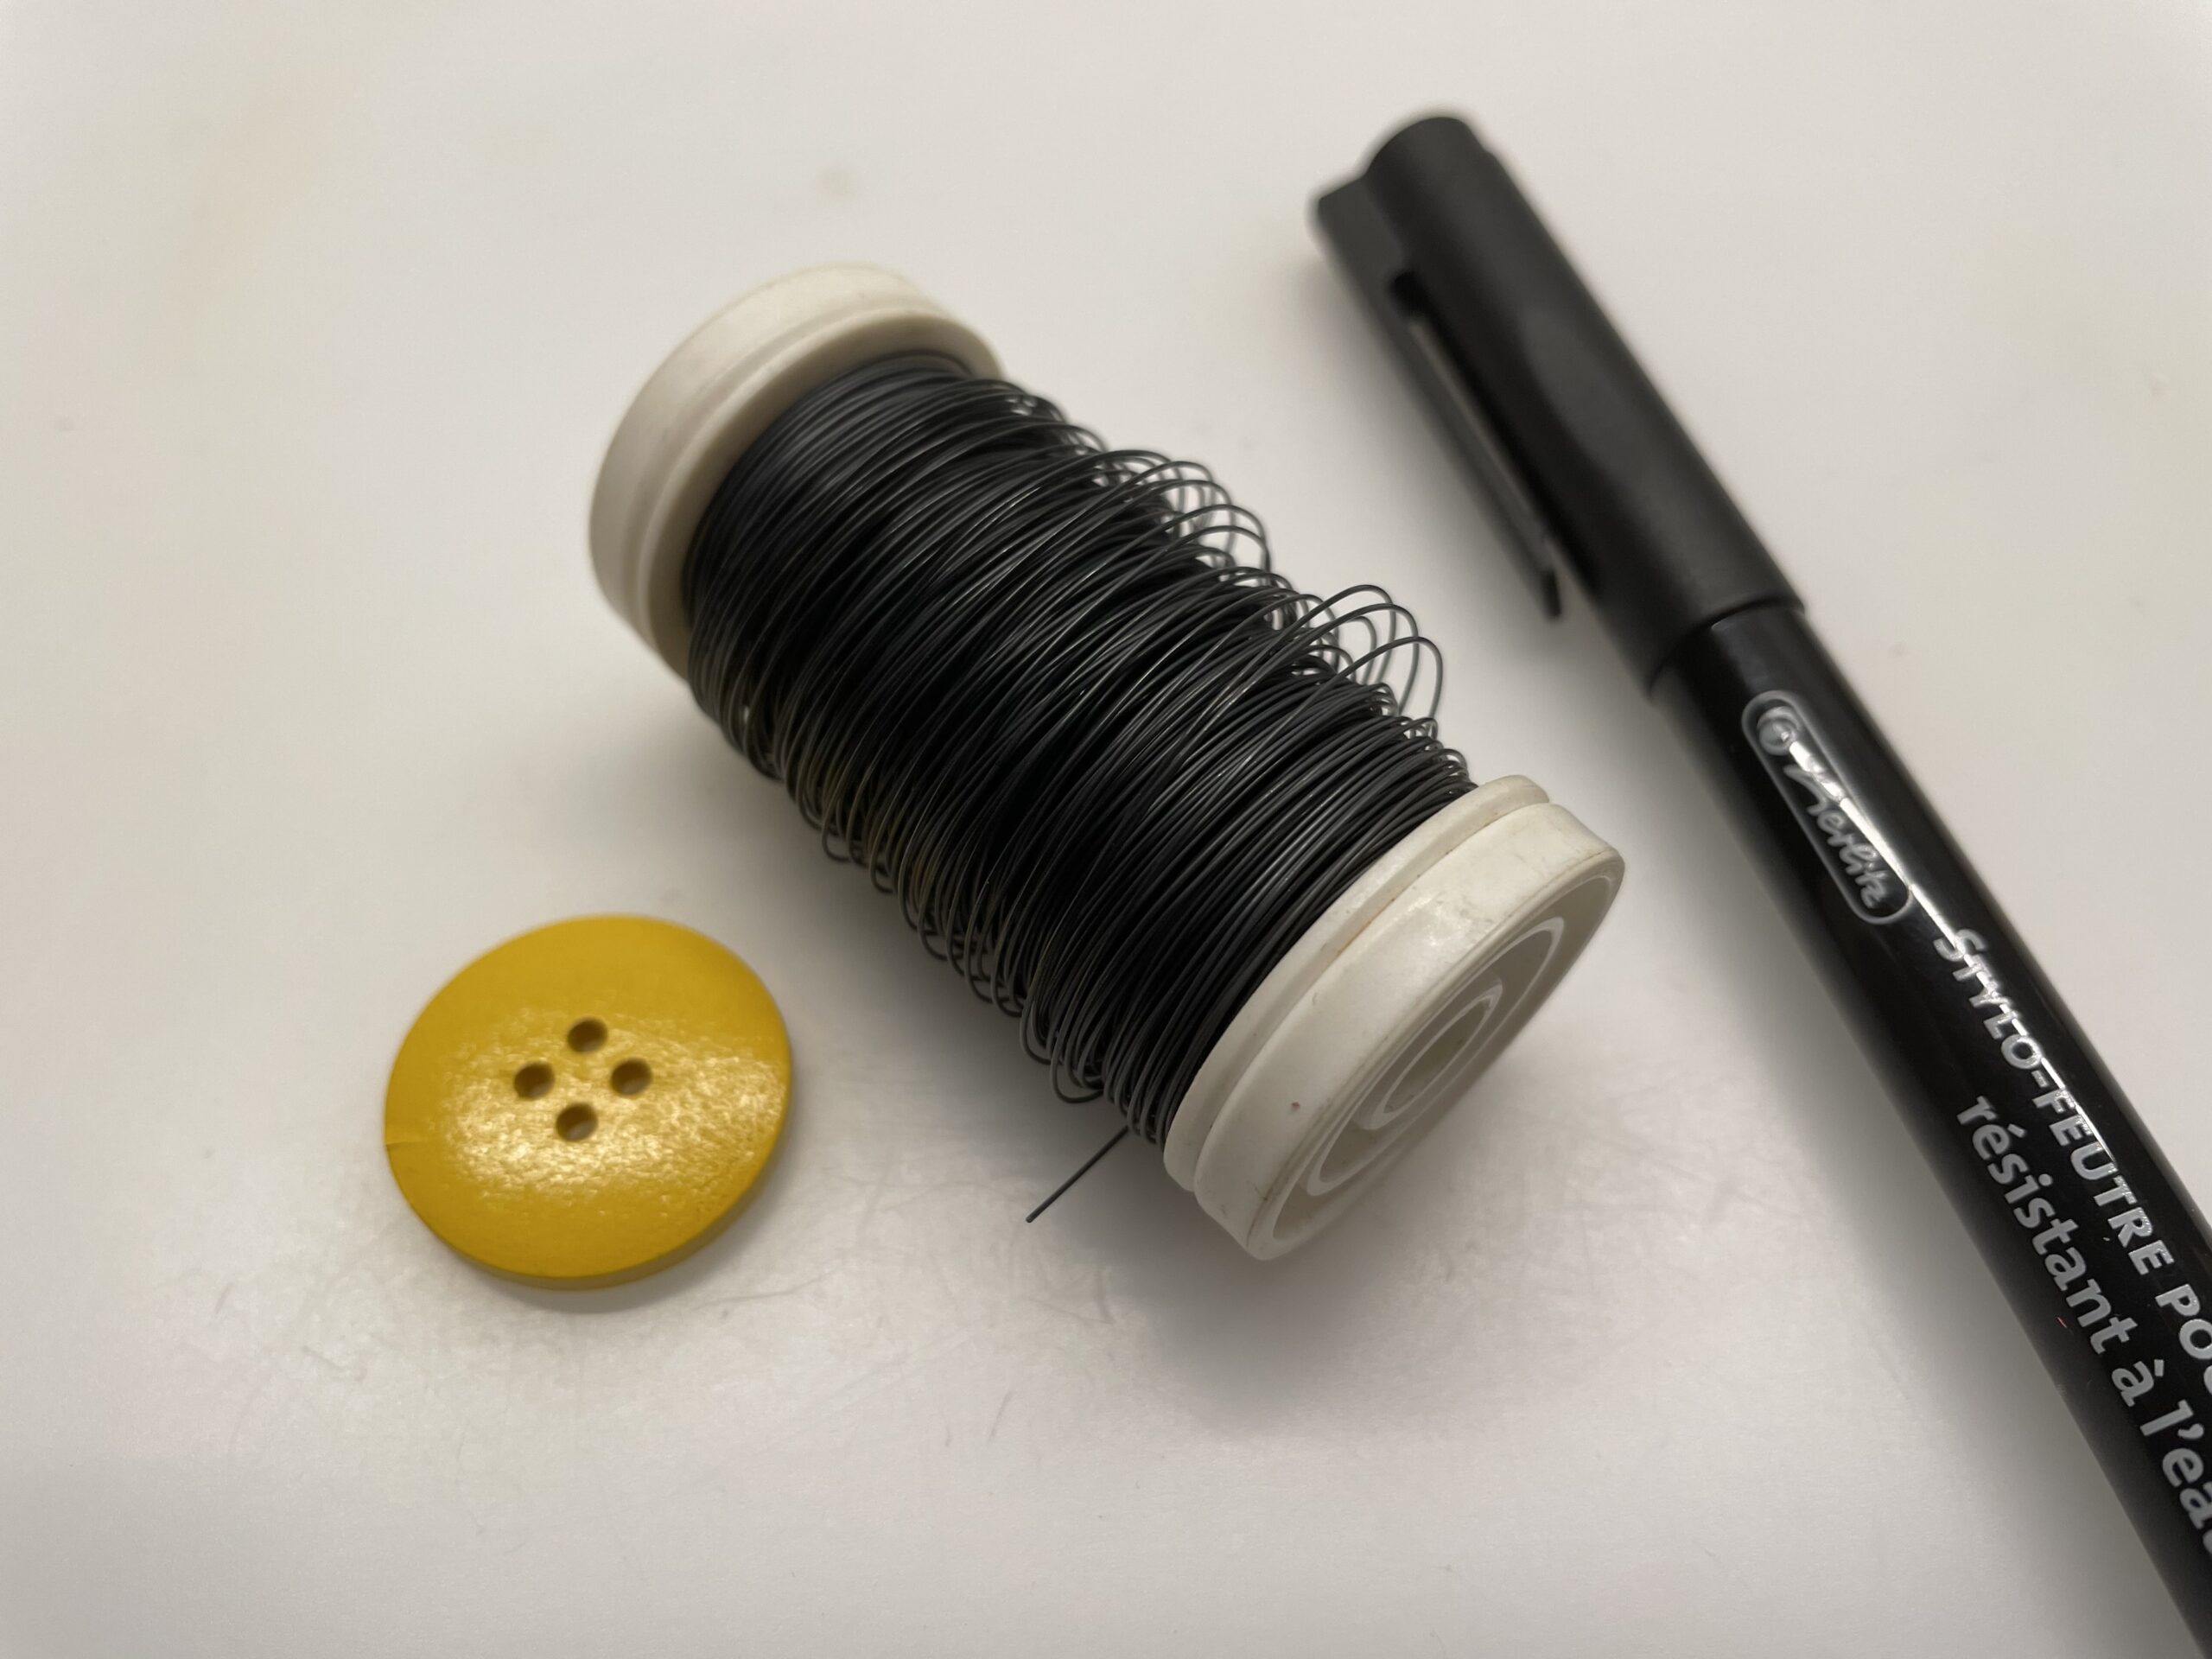
Bild zum Schritt 1 für das Bastel- und DIY-Abenteuer für Kinder: 'Legt euch zuerst alle Materialien und die Bastelunterlage bereit.'

2

The top of the button is the side that is smooth. Cuts off a piece of wire, about 10cm. Now insert the wire from the back to the front through the button.

Bild zum Schritt 2 für das Bastel- und DIY-Abenteuer für Kinder: 'Die Oberseite des Knopfes ist die Seite, die glatt ist....'

3

Then you put the wire back through the second button hole. Then you pull the resulting loop of wire close to the top of the button.

Bild zum Schritt 3 für das Bastel- und DIY-Abenteuer für Kinder: 'Anschließend steckt ihr den Draht wieder zurück durch das zweite...'

4

Then twist both wires together on the back of the button. For this, both wires lie in one hand and you turn the button with the other hand. Turn the wire and the button in the opposite direction.

Bild zum Schritt 4 für das Bastel- und DIY-Abenteuer für Kinder: 'Danach verdreht ihr beide Drähte miteinander auf der Rückseite des...'

5

Now the wire is fixed to the button. Now you cut a new wire to a length of about 40cm.

Bild zum Schritt 5 für das Bastel- und DIY-Abenteuer für Kinder: 'Nun ist der Draht am Knopf fixiert. Jetzt schneidet ihr...'

6

Then you put the long wire from the back to the front through a buttonhole.

Bild zum Schritt 6 für das Bastel- und DIY-Abenteuer für Kinder: 'Im Anschluss daran steckt ihr den langen Draht von hinten...'

7

Now put the wire back through the same hole and leave a small loop (which will be a wing) of wire.

Bild zum Schritt 7 für das Bastel- und DIY-Abenteuer für Kinder: 'Steckt den Draht jetzt wieder durch das gleiche Loch zurück...'

8

Now you grab the loop with one hand and turn it around yourself several times. This creates a wing.

Bild zum Schritt 8 für das Bastel- und DIY-Abenteuer für Kinder: 'Nun fasst ihr die Schlaufe mit einer Hand und dreht...'

9

Take the long wire and put it through the other hole again forward pulls it completely through.

Bild zum Schritt 9 für das Bastel- und DIY-Abenteuer für Kinder: 'Nehmt den langen Draht und steckt ihn durch das andere...'

10

Put the wire back through the same hole and leave a loop for the second wing again.

Bild zum Schritt 10 für das Bastel- und DIY-Abenteuer für Kinder: 'Steckt den Draht durch das gleiche Loch wieder zurück ...'

11

Grab the resulting wing with one hand and turn it around itself again. So it is fixed.

Bild zum Schritt 11 für das Bastel- und DIY-Abenteuer für Kinder: 'Greift den entstandenen Flügel mit einer Hand und dreht ihn...'

12

Through the other two holes in the button you can make two more wings in the same way.

Bild zum Schritt 12 für das Bastel- und DIY-Abenteuer für Kinder: 'Durch die beiden anderen Löcher im Knopf könnt ihr auf...'

13

Aligns the wings in a suitable shape.

Bild zum Schritt 13 für das Bastel- und DIY-Abenteuer für Kinder: 'Richtet die Flügel in eine passende Form aus.'

14

Let a piece of wire survive on the back. Possibly twist it with the initial wire.

Bild zum Schritt 14 für das Bastel- und DIY-Abenteuer für Kinder: 'Lasst auf der Rückseite ein Stück Draht überstehen. Eventuell verdreht...'

15

Then you can paint on the yellow button with a black or brown marker stripes.

Bild zum Schritt 15 für das Bastel- und DIY-Abenteuer für Kinder: 'Dann könnt ihr auf den gelben Knopf mit einem schwarzen...'

16

On one side two small dots are painted as eyes and the bee is finished.

Bild zum Schritt 16 für das Bastel- und DIY-Abenteuer für Kinder: 'An einer Seite werden noch zwei kleine Punkte als Augen...'

17

You can use the bee as a gift, for example.

Bild zum Schritt 17 für das Bastel- und DIY-Abenteuer für Kinder: 'Ihr könnt die Biene z.B. als Geschenk verwenden.'

18

Or you could put her in a bouquet with a long wire.

Bild zum Schritt 18 für das Bastel- und DIY-Abenteuer für Kinder: 'Oder ihr steckt sie mit einem langen Draht in einen...'

19

Surely you will also find a nice place to decorate.

Bild zum Schritt 19 für das Bastel- und DIY-Abenteuer für Kinder: 'Sicher findet ihr auch einen schönen Platz zur Dekoration.'

20

Or for a windlight with honeycomb motif as an additional highlight.

Bild zum Schritt 20 für das Bastel- und DIY-Abenteuer für Kinder: 'Oder für ein Windlicht mit Wabenmotiv als zusätzliches Highlight.'

21

Have fun ahscropping.

Materials

 1 Button yellow
 Floral wire
 Wire shears
 1 Ruler

Directions

1

First, get ready for all the materials and the craft material.

Bild zum Schritt 1 für das Bastel- und DIY-Abenteuer für Kinder: 'Legt euch zuerst alle Materialien und die Bastelunterlage bereit.'

2

The top of the button is the side that is smooth. Cuts off a piece of wire, about 10cm. Now insert the wire from the back to the front through the button.

Bild zum Schritt 2 für das Bastel- und DIY-Abenteuer für Kinder: 'Die Oberseite des Knopfes ist die Seite, die glatt ist....'

3

Then you put the wire back through the second button hole. Then you pull the resulting loop of wire close to the top of the button.

Bild zum Schritt 3 für das Bastel- und DIY-Abenteuer für Kinder: 'Anschließend steckt ihr den Draht wieder zurück durch das zweite...'

4

Then twist both wires together on the back of the button. For this, both wires lie in one hand and you turn the button with the other hand. Turn the wire and the button in the opposite direction.
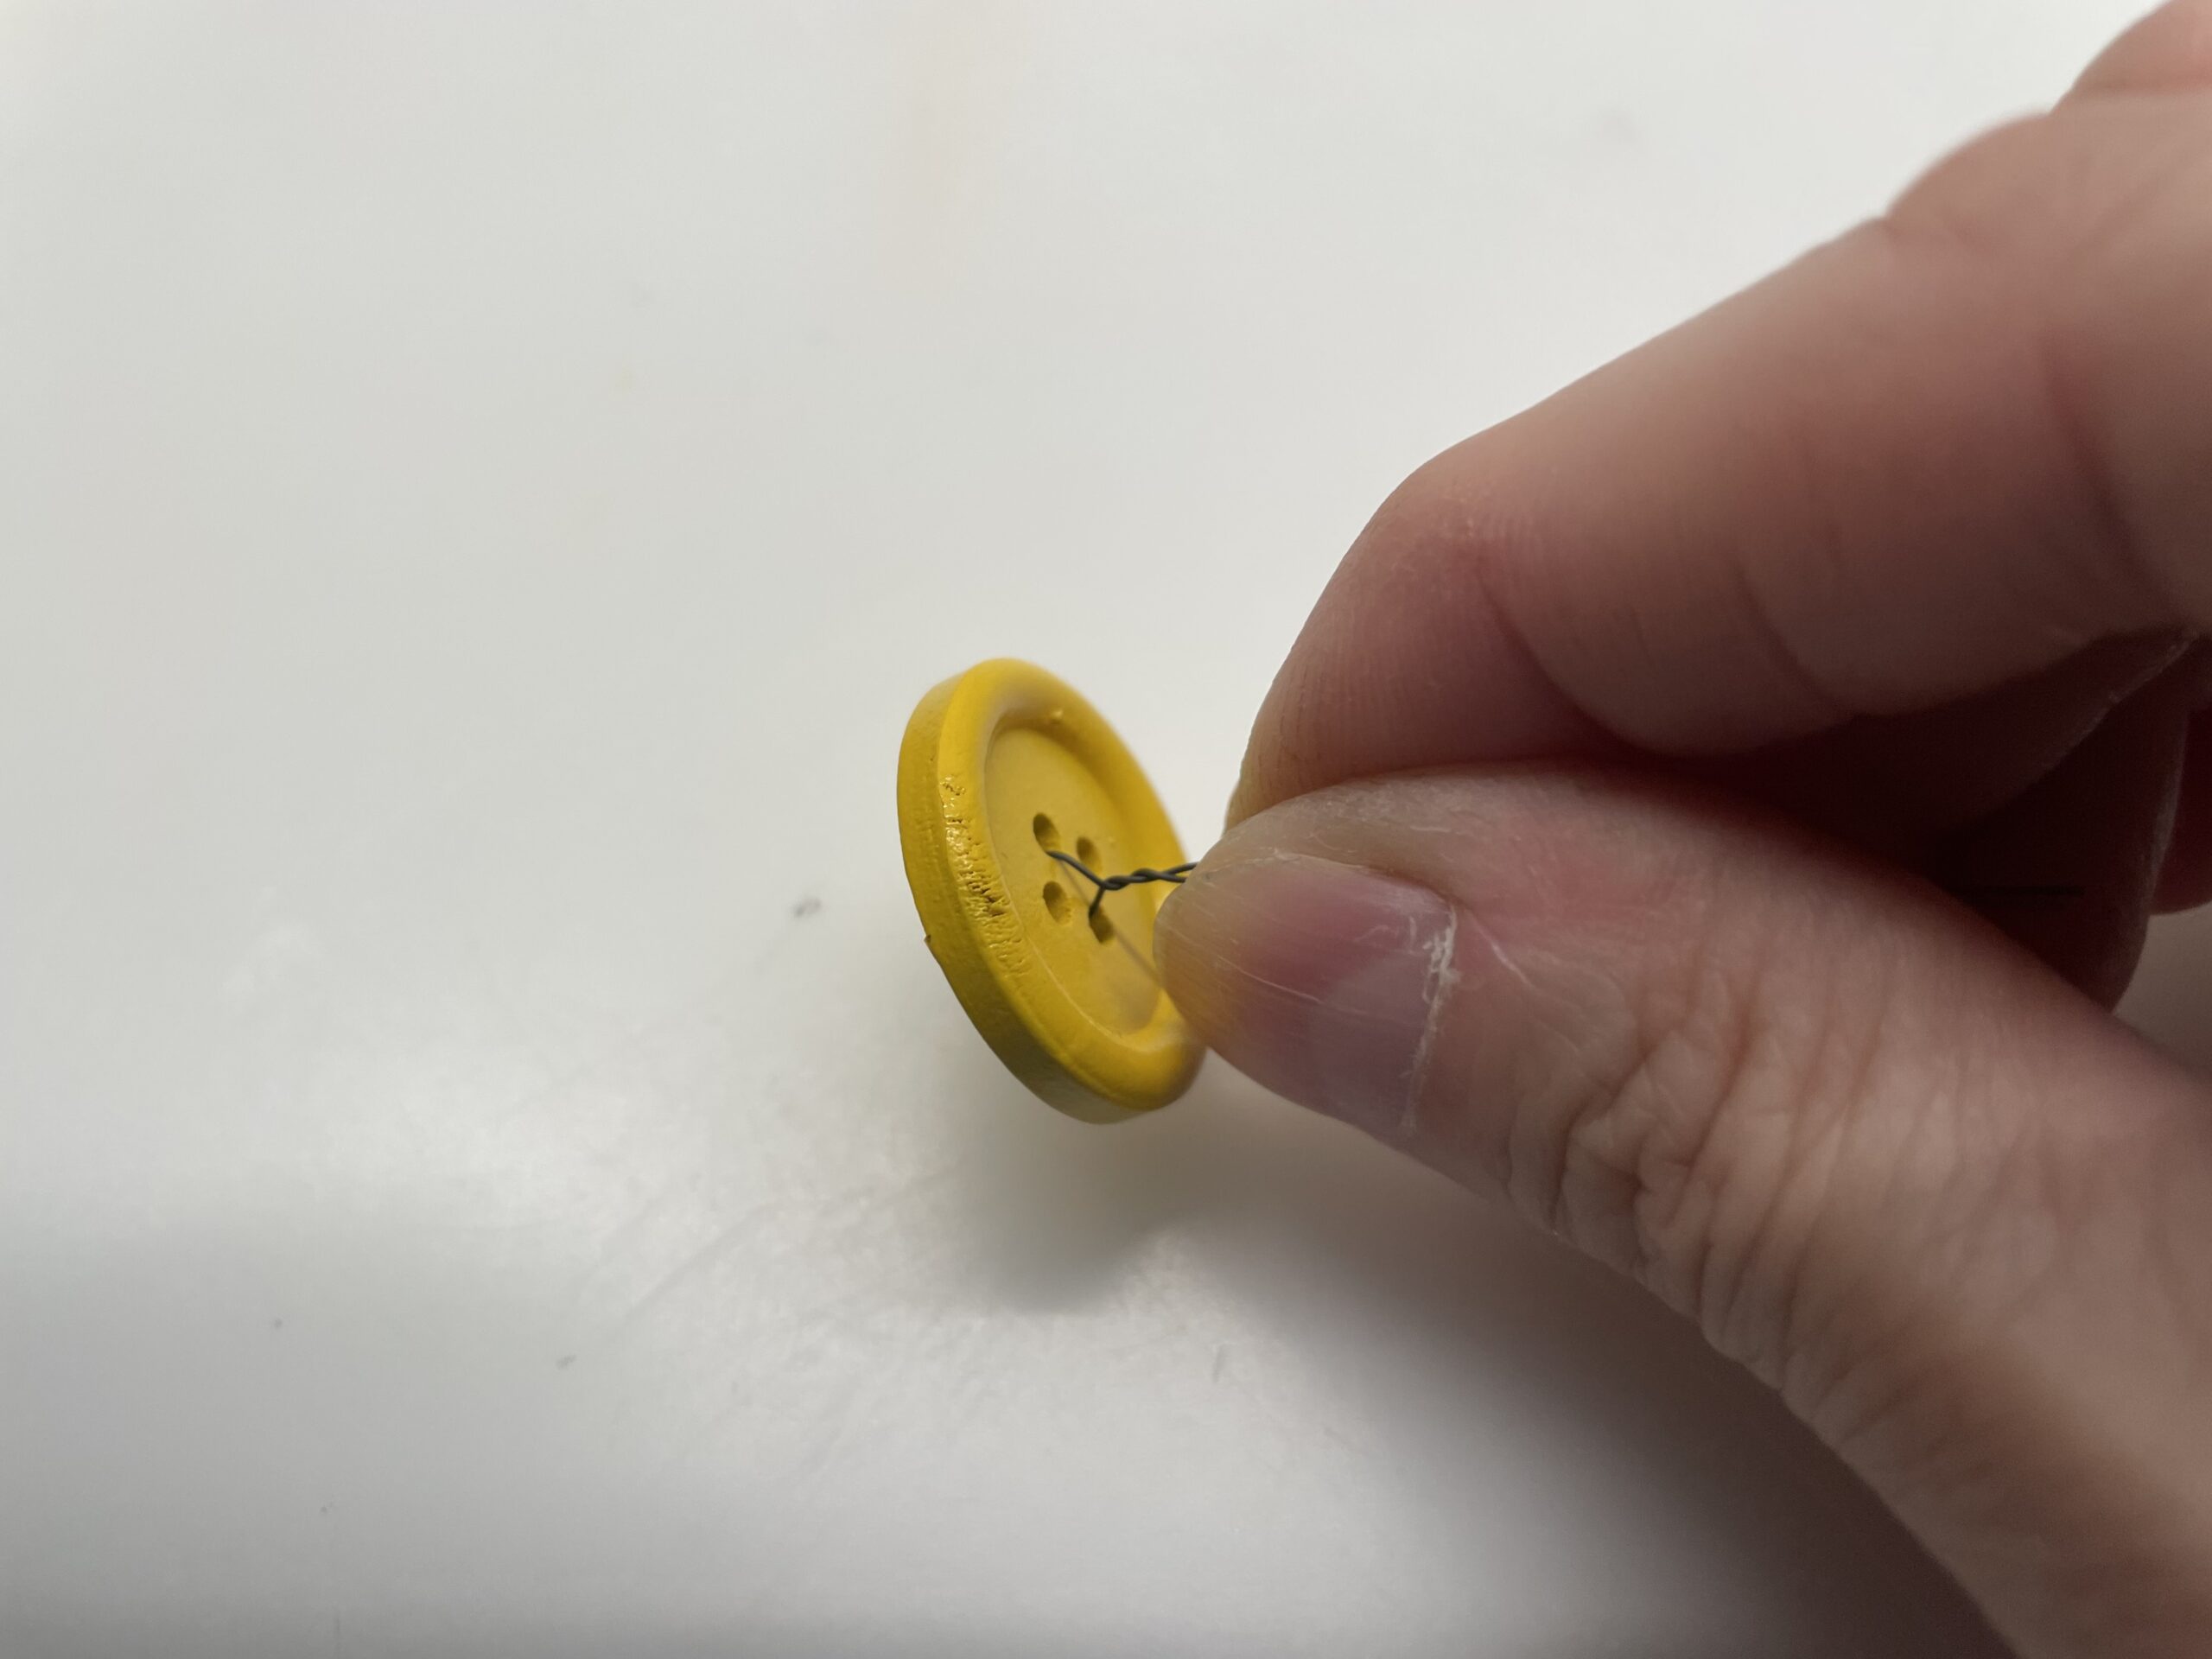
Bild zum Schritt 4 für das Bastel- und DIY-Abenteuer für Kinder: 'Danach verdreht ihr beide Drähte miteinander auf der Rückseite des...'

5

Now the wire is fixed to the button. Now you cut a new wire to a length of about 40cm.

Bild zum Schritt 5 für das Bastel- und DIY-Abenteuer für Kinder: 'Nun ist der Draht am Knopf fixiert. Jetzt schneidet ihr...'

6

Then you put the long wire from the back to the front through a buttonhole.

Bild zum Schritt 6 für das Bastel- und DIY-Abenteuer für Kinder: 'Im Anschluss daran steckt ihr den langen Draht von hinten...'

7

Now put the wire back through the same hole and leave a small loop (which will be a wing) of wire.
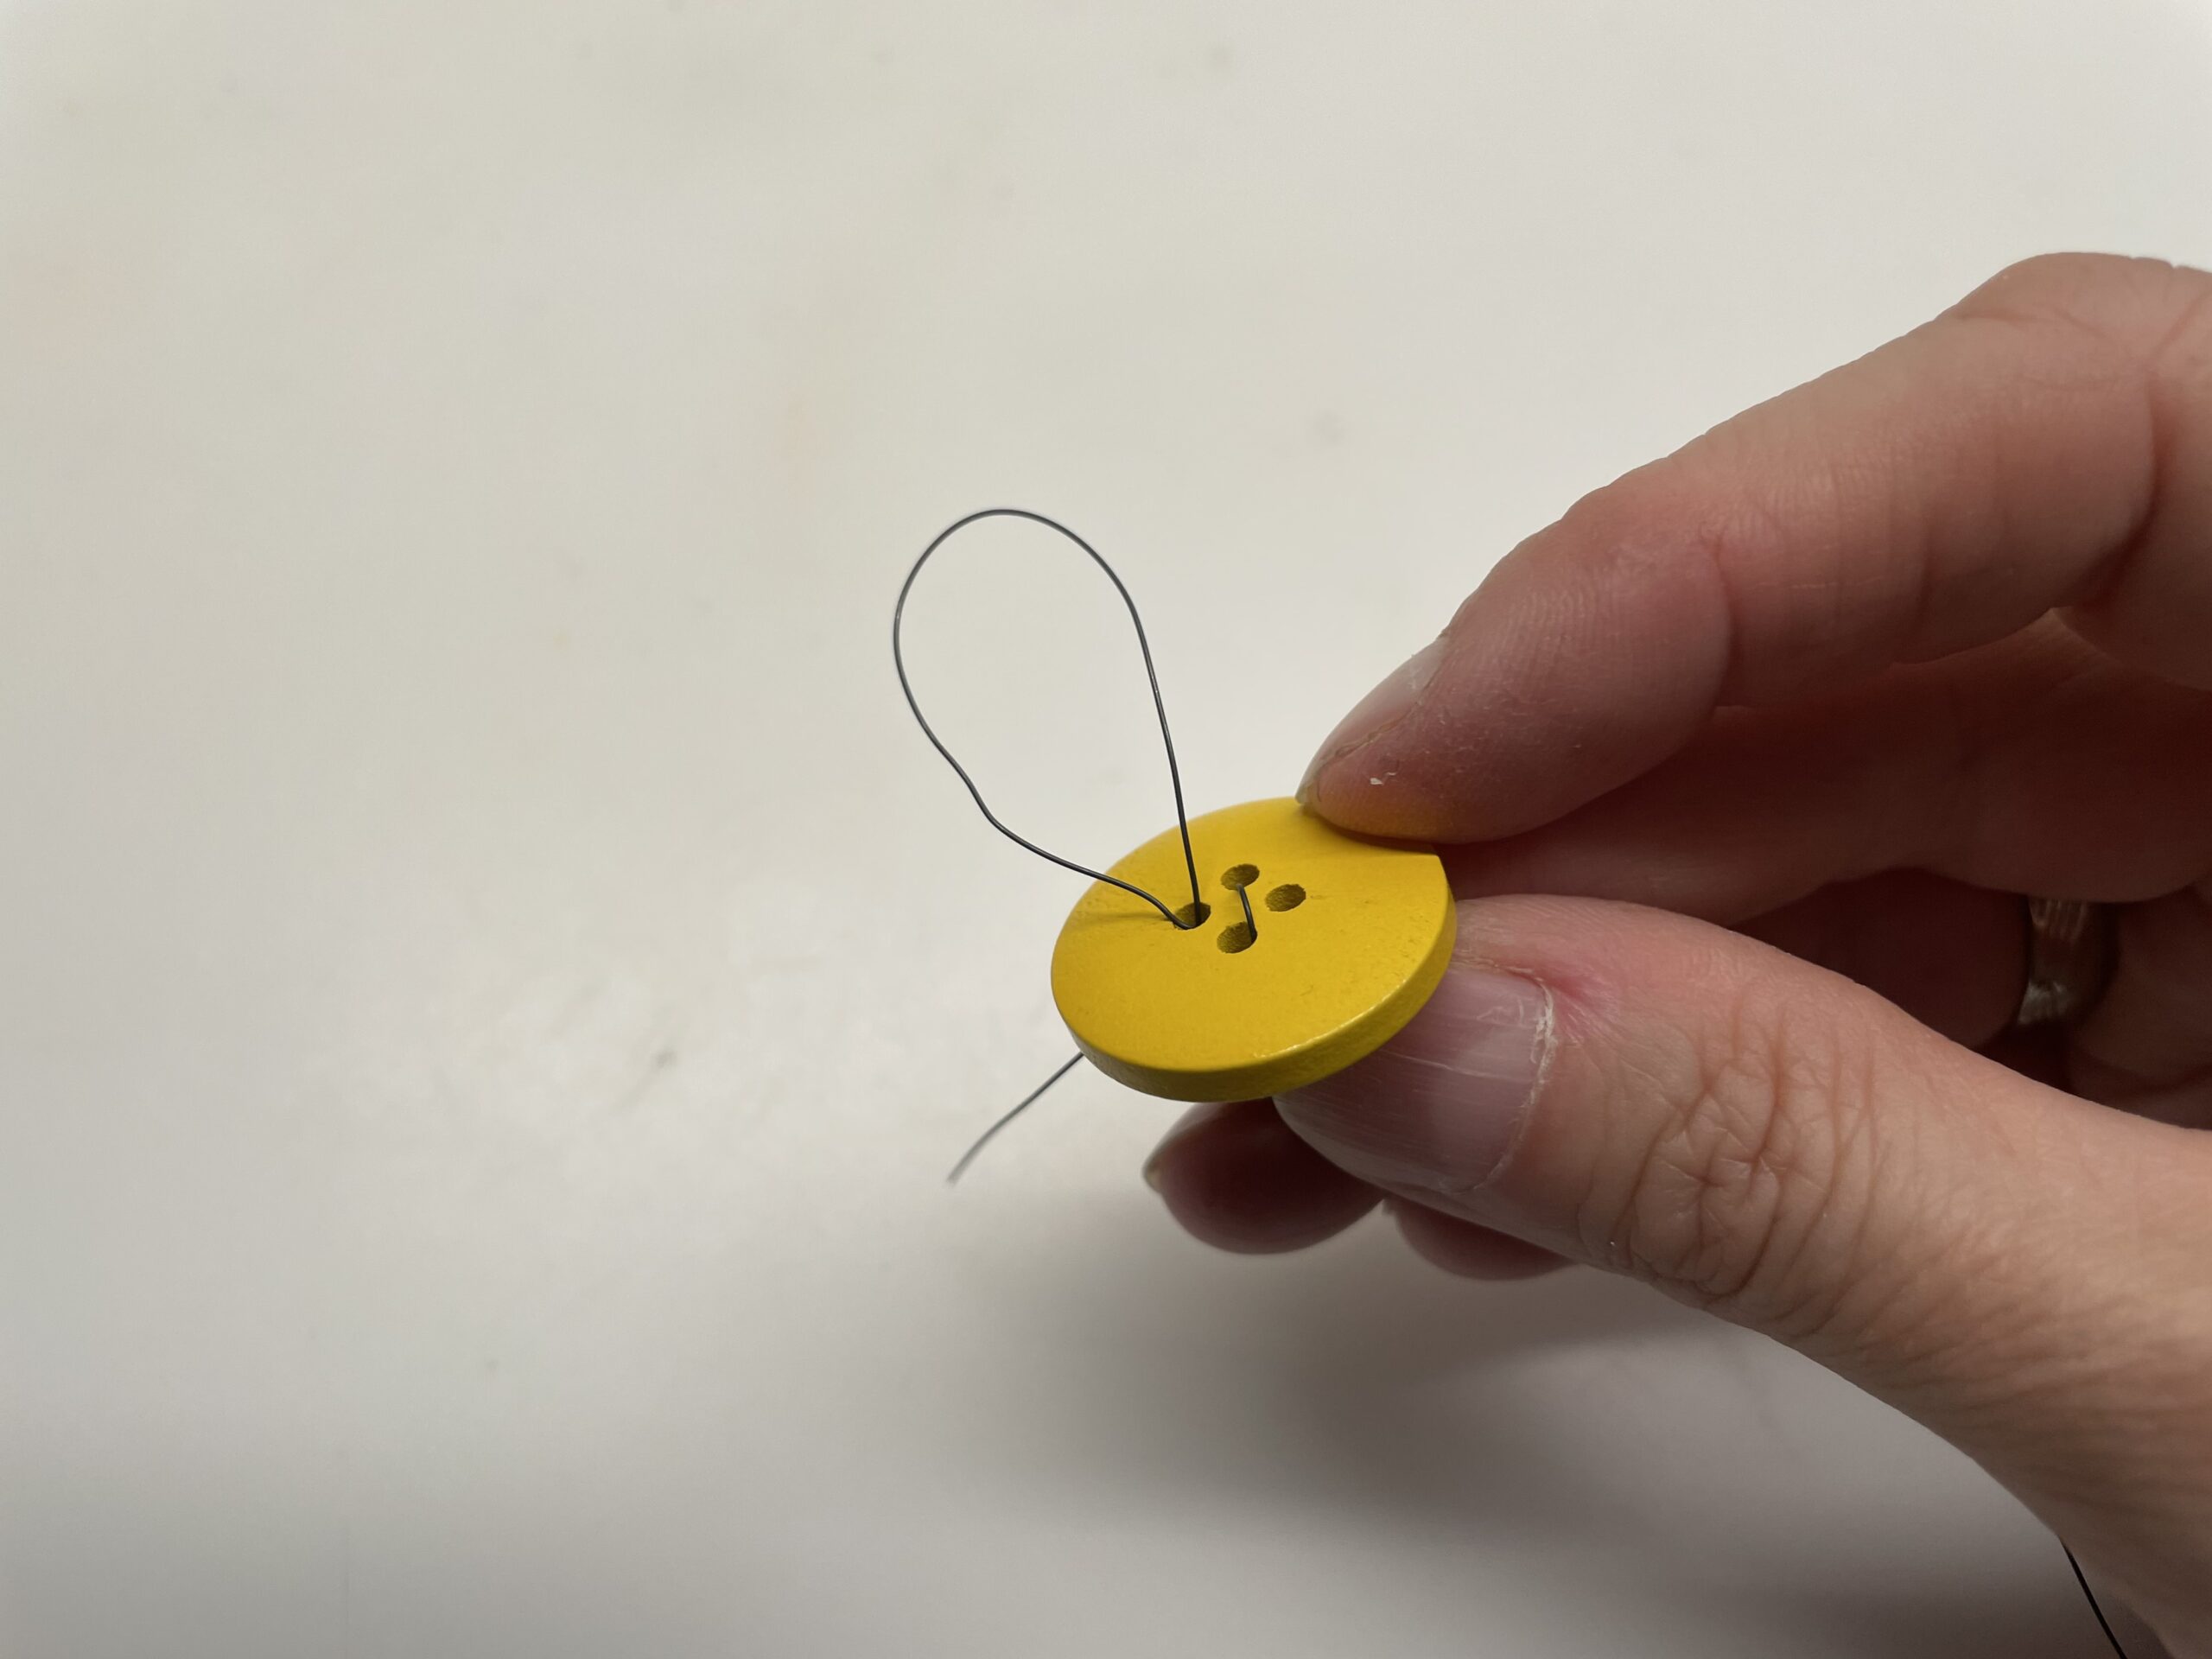
Bild zum Schritt 7 für das Bastel- und DIY-Abenteuer für Kinder: 'Steckt den Draht jetzt wieder durch das gleiche Loch zurück...'

8

Now you grab the loop with one hand and turn it around yourself several times. This creates a wing.
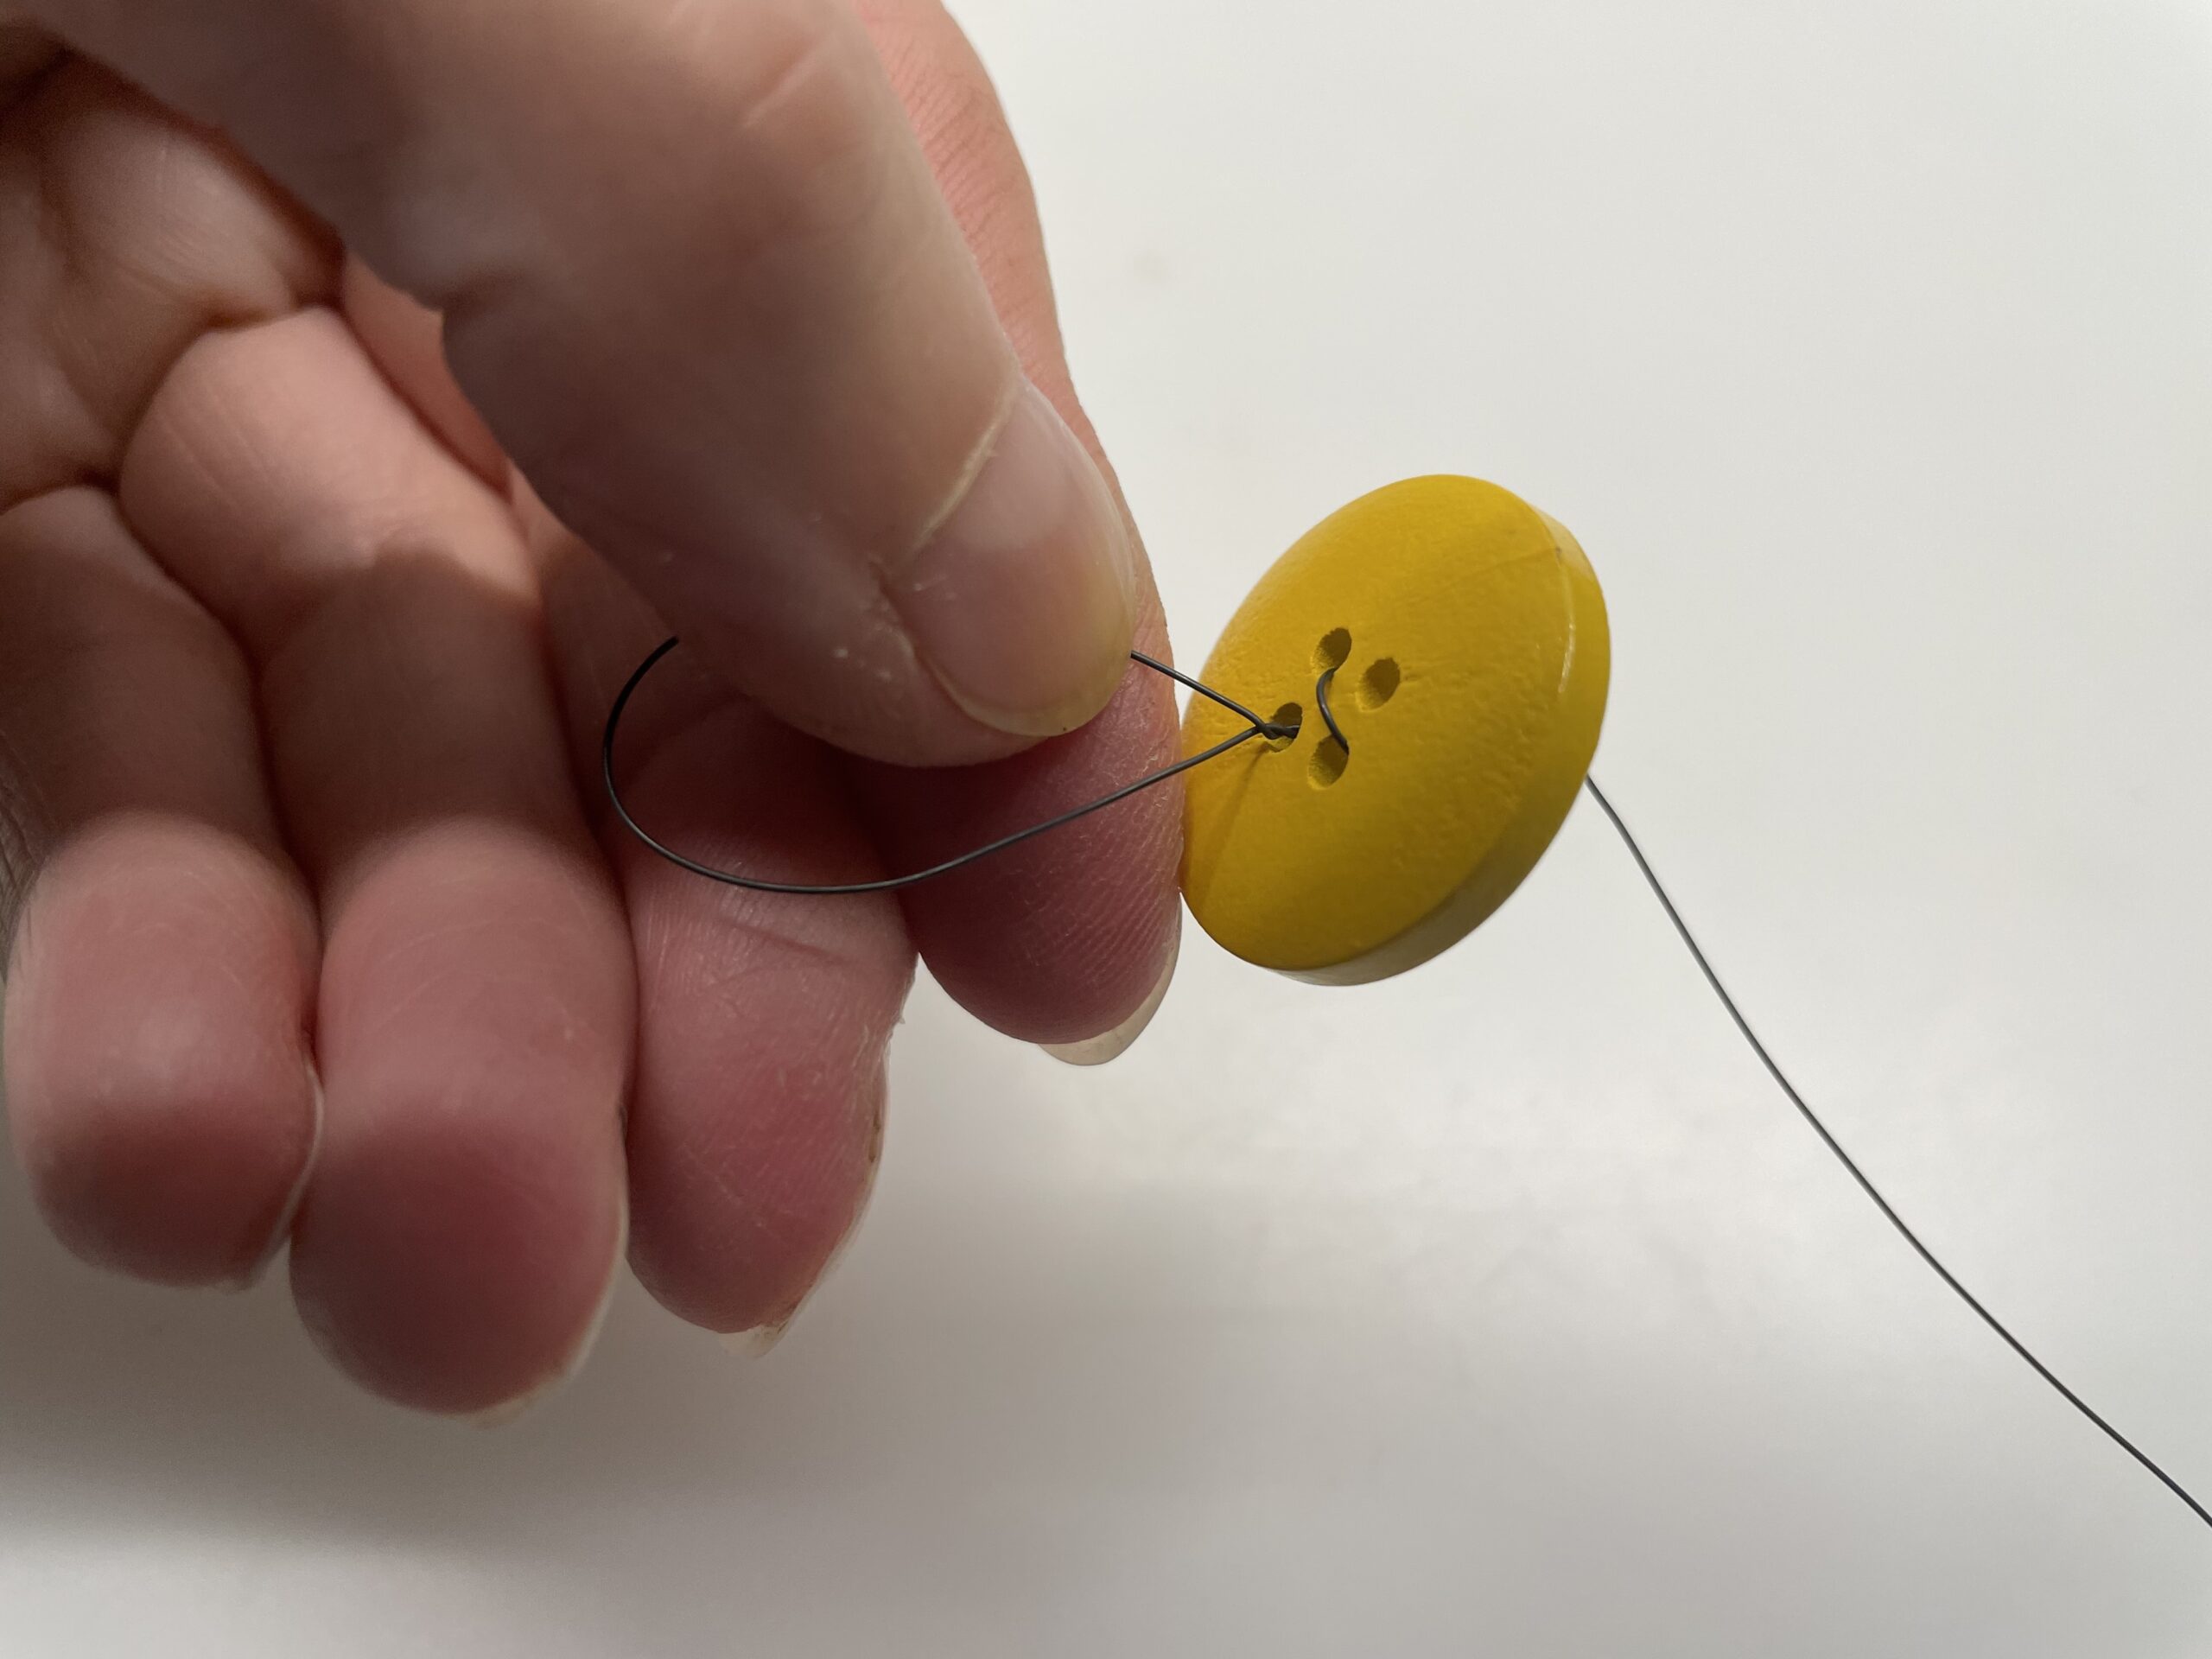
Bild zum Schritt 8 für das Bastel- und DIY-Abenteuer für Kinder: 'Nun fasst ihr die Schlaufe mit einer Hand und dreht...'

9

Take the long wire and put it through the other hole again forward pulls it completely through.
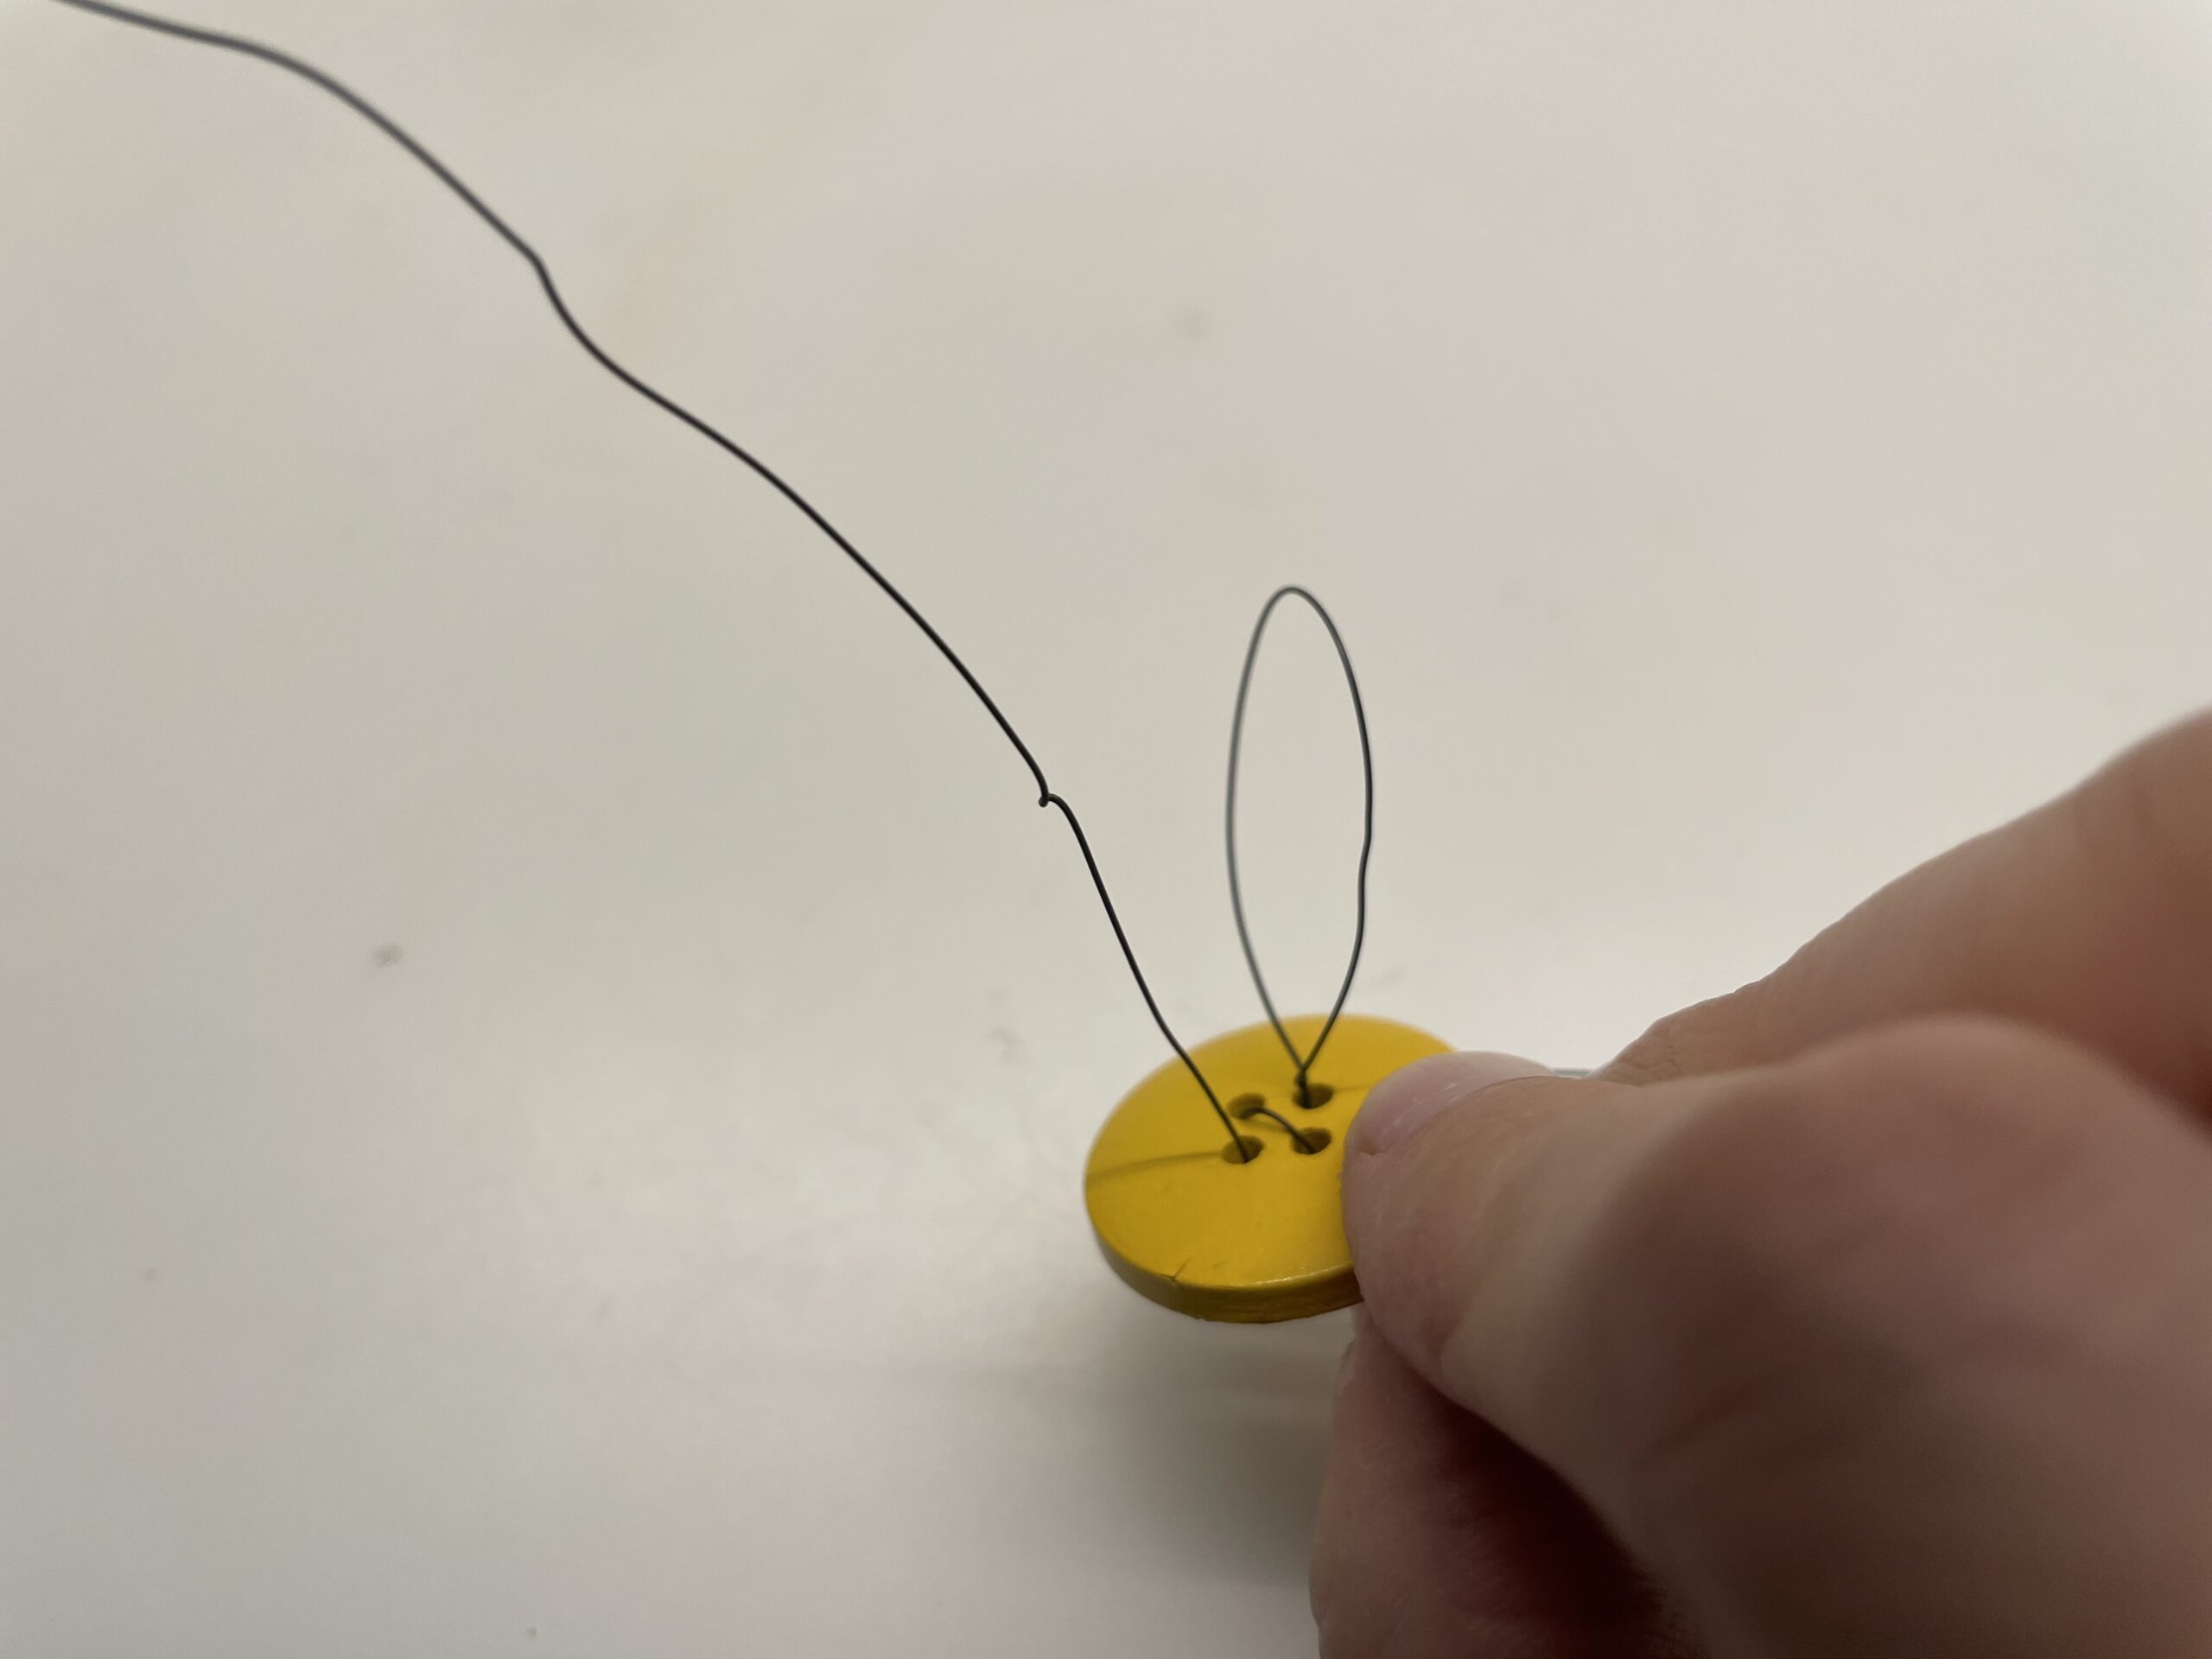
Bild zum Schritt 9 für das Bastel- und DIY-Abenteuer für Kinder: 'Nehmt den langen Draht und steckt ihn durch das andere...'

10

Put the wire back through the same hole and leave a loop for the second wing again.
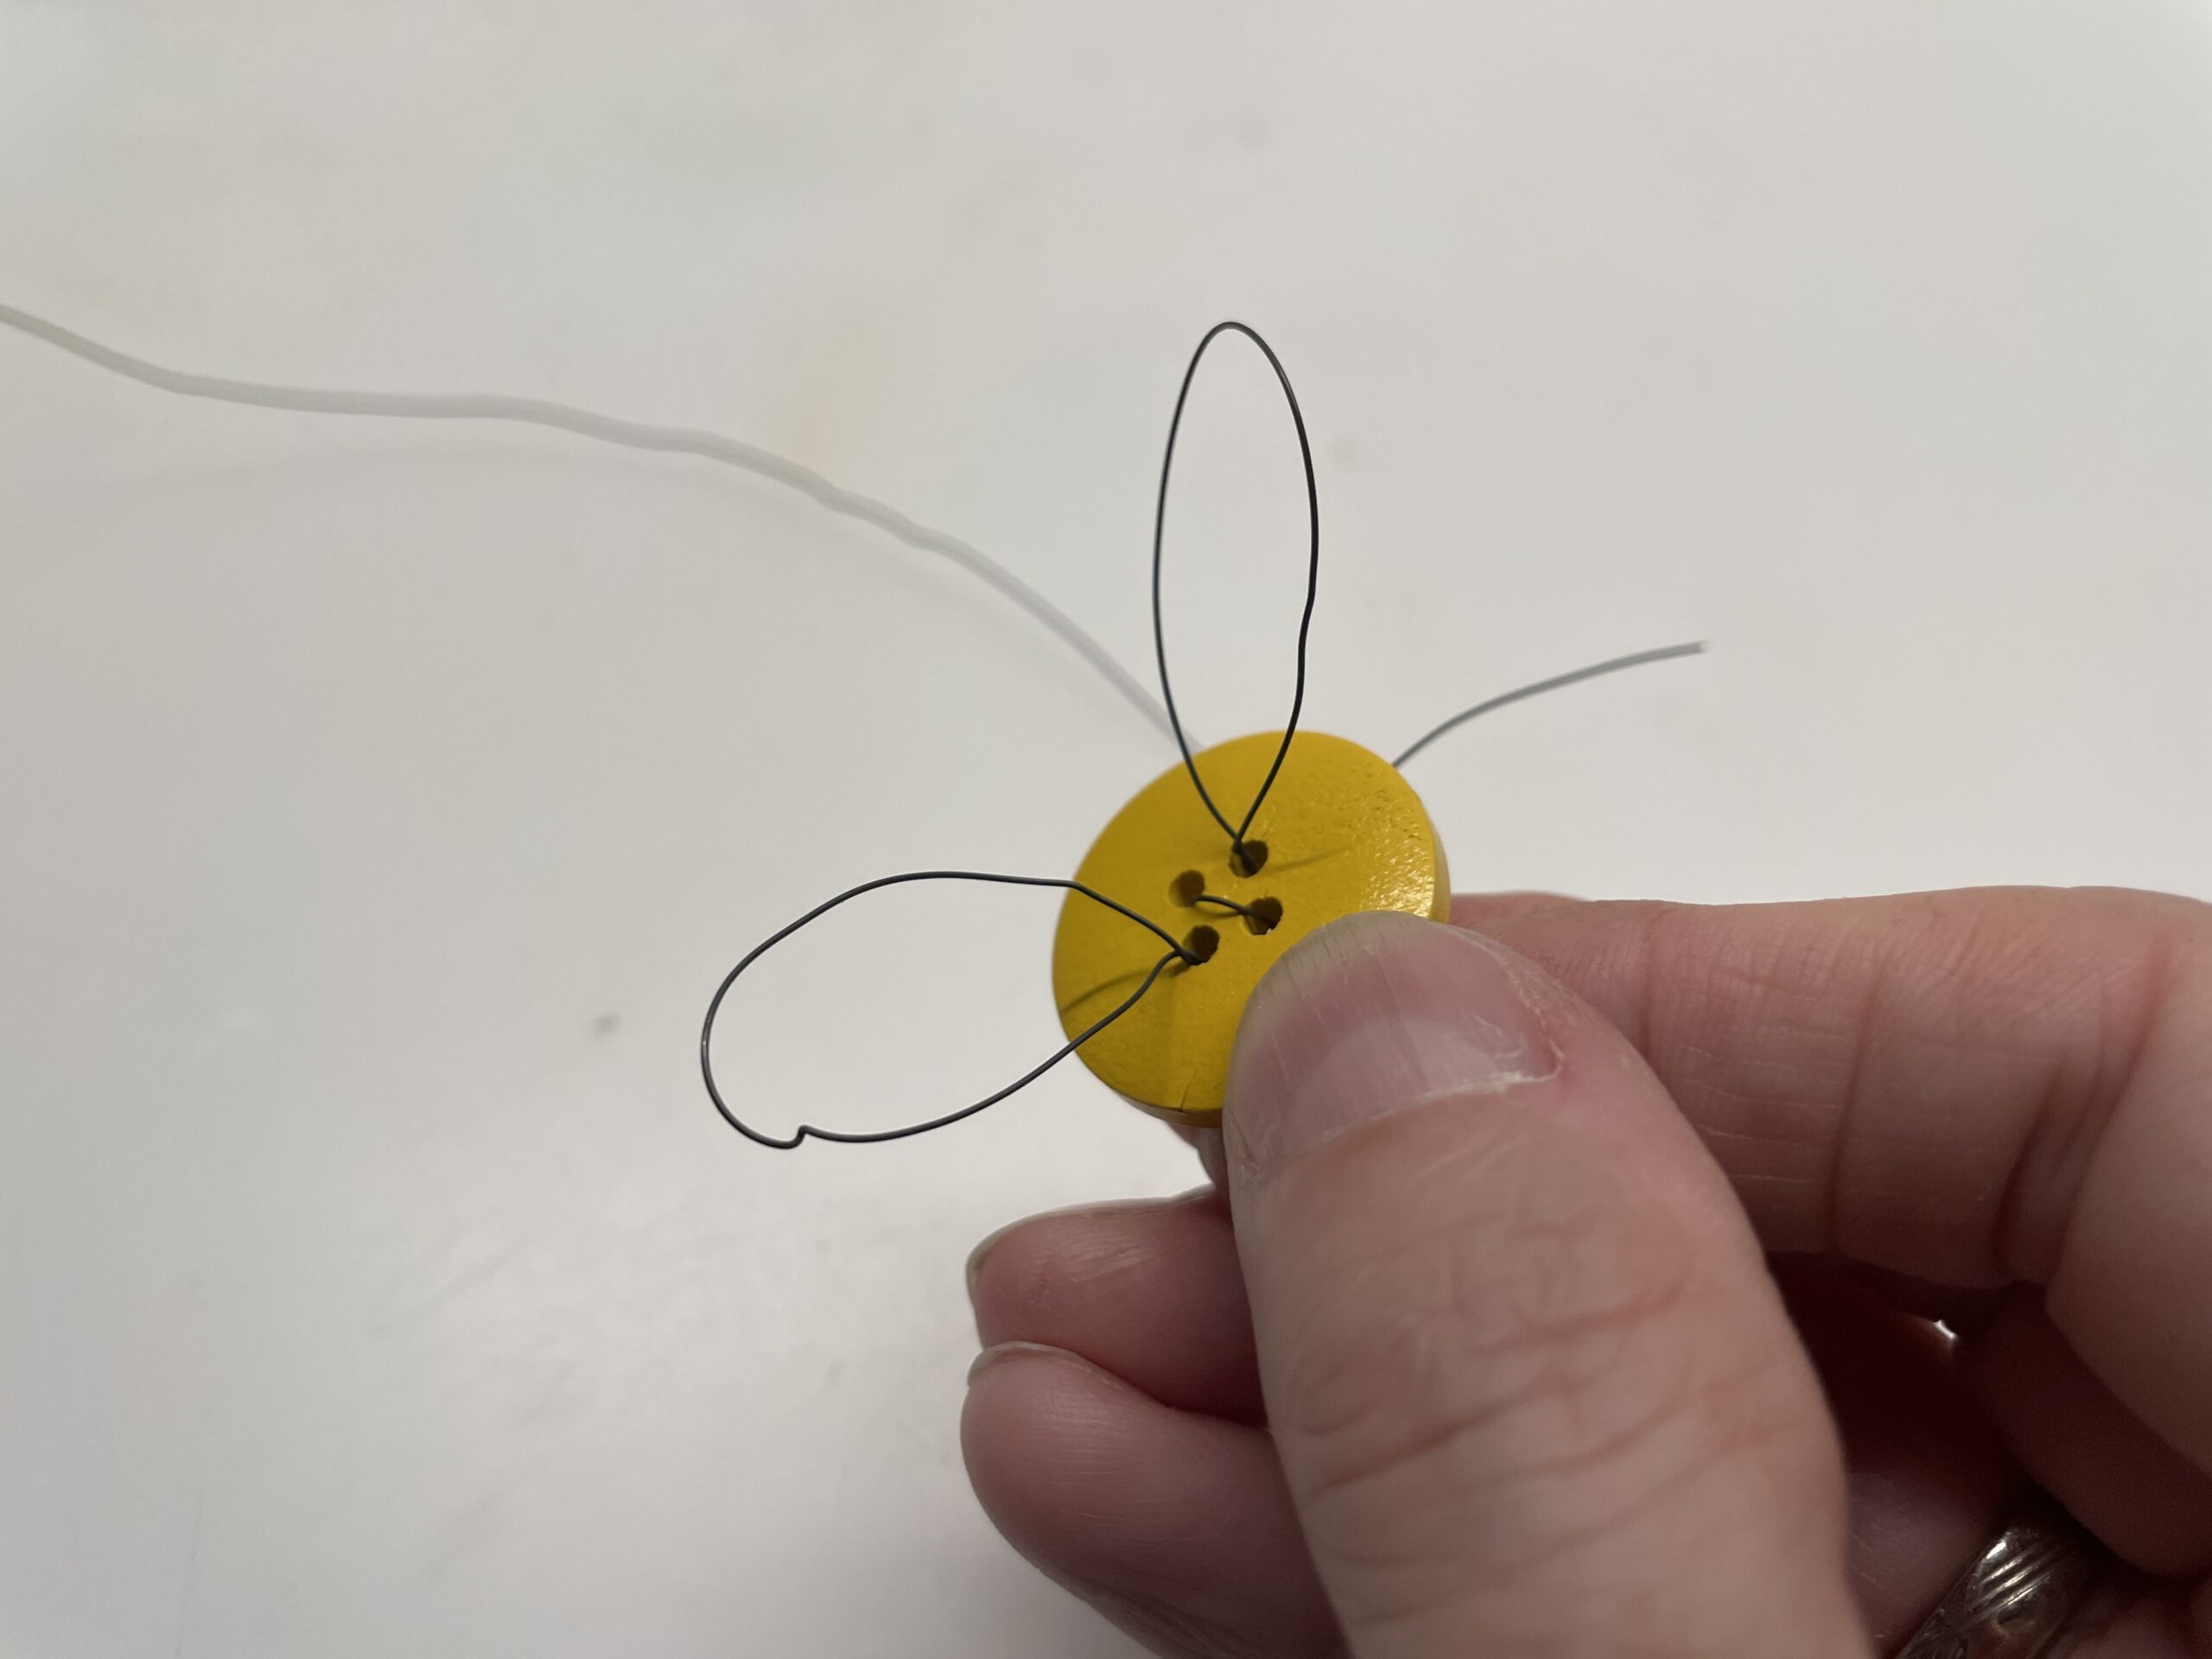
Bild zum Schritt 10 für das Bastel- und DIY-Abenteuer für Kinder: 'Steckt den Draht durch das gleiche Loch wieder zurück ...'

11

Grab the resulting wing with one hand and turn it around itself again. So it is fixed.
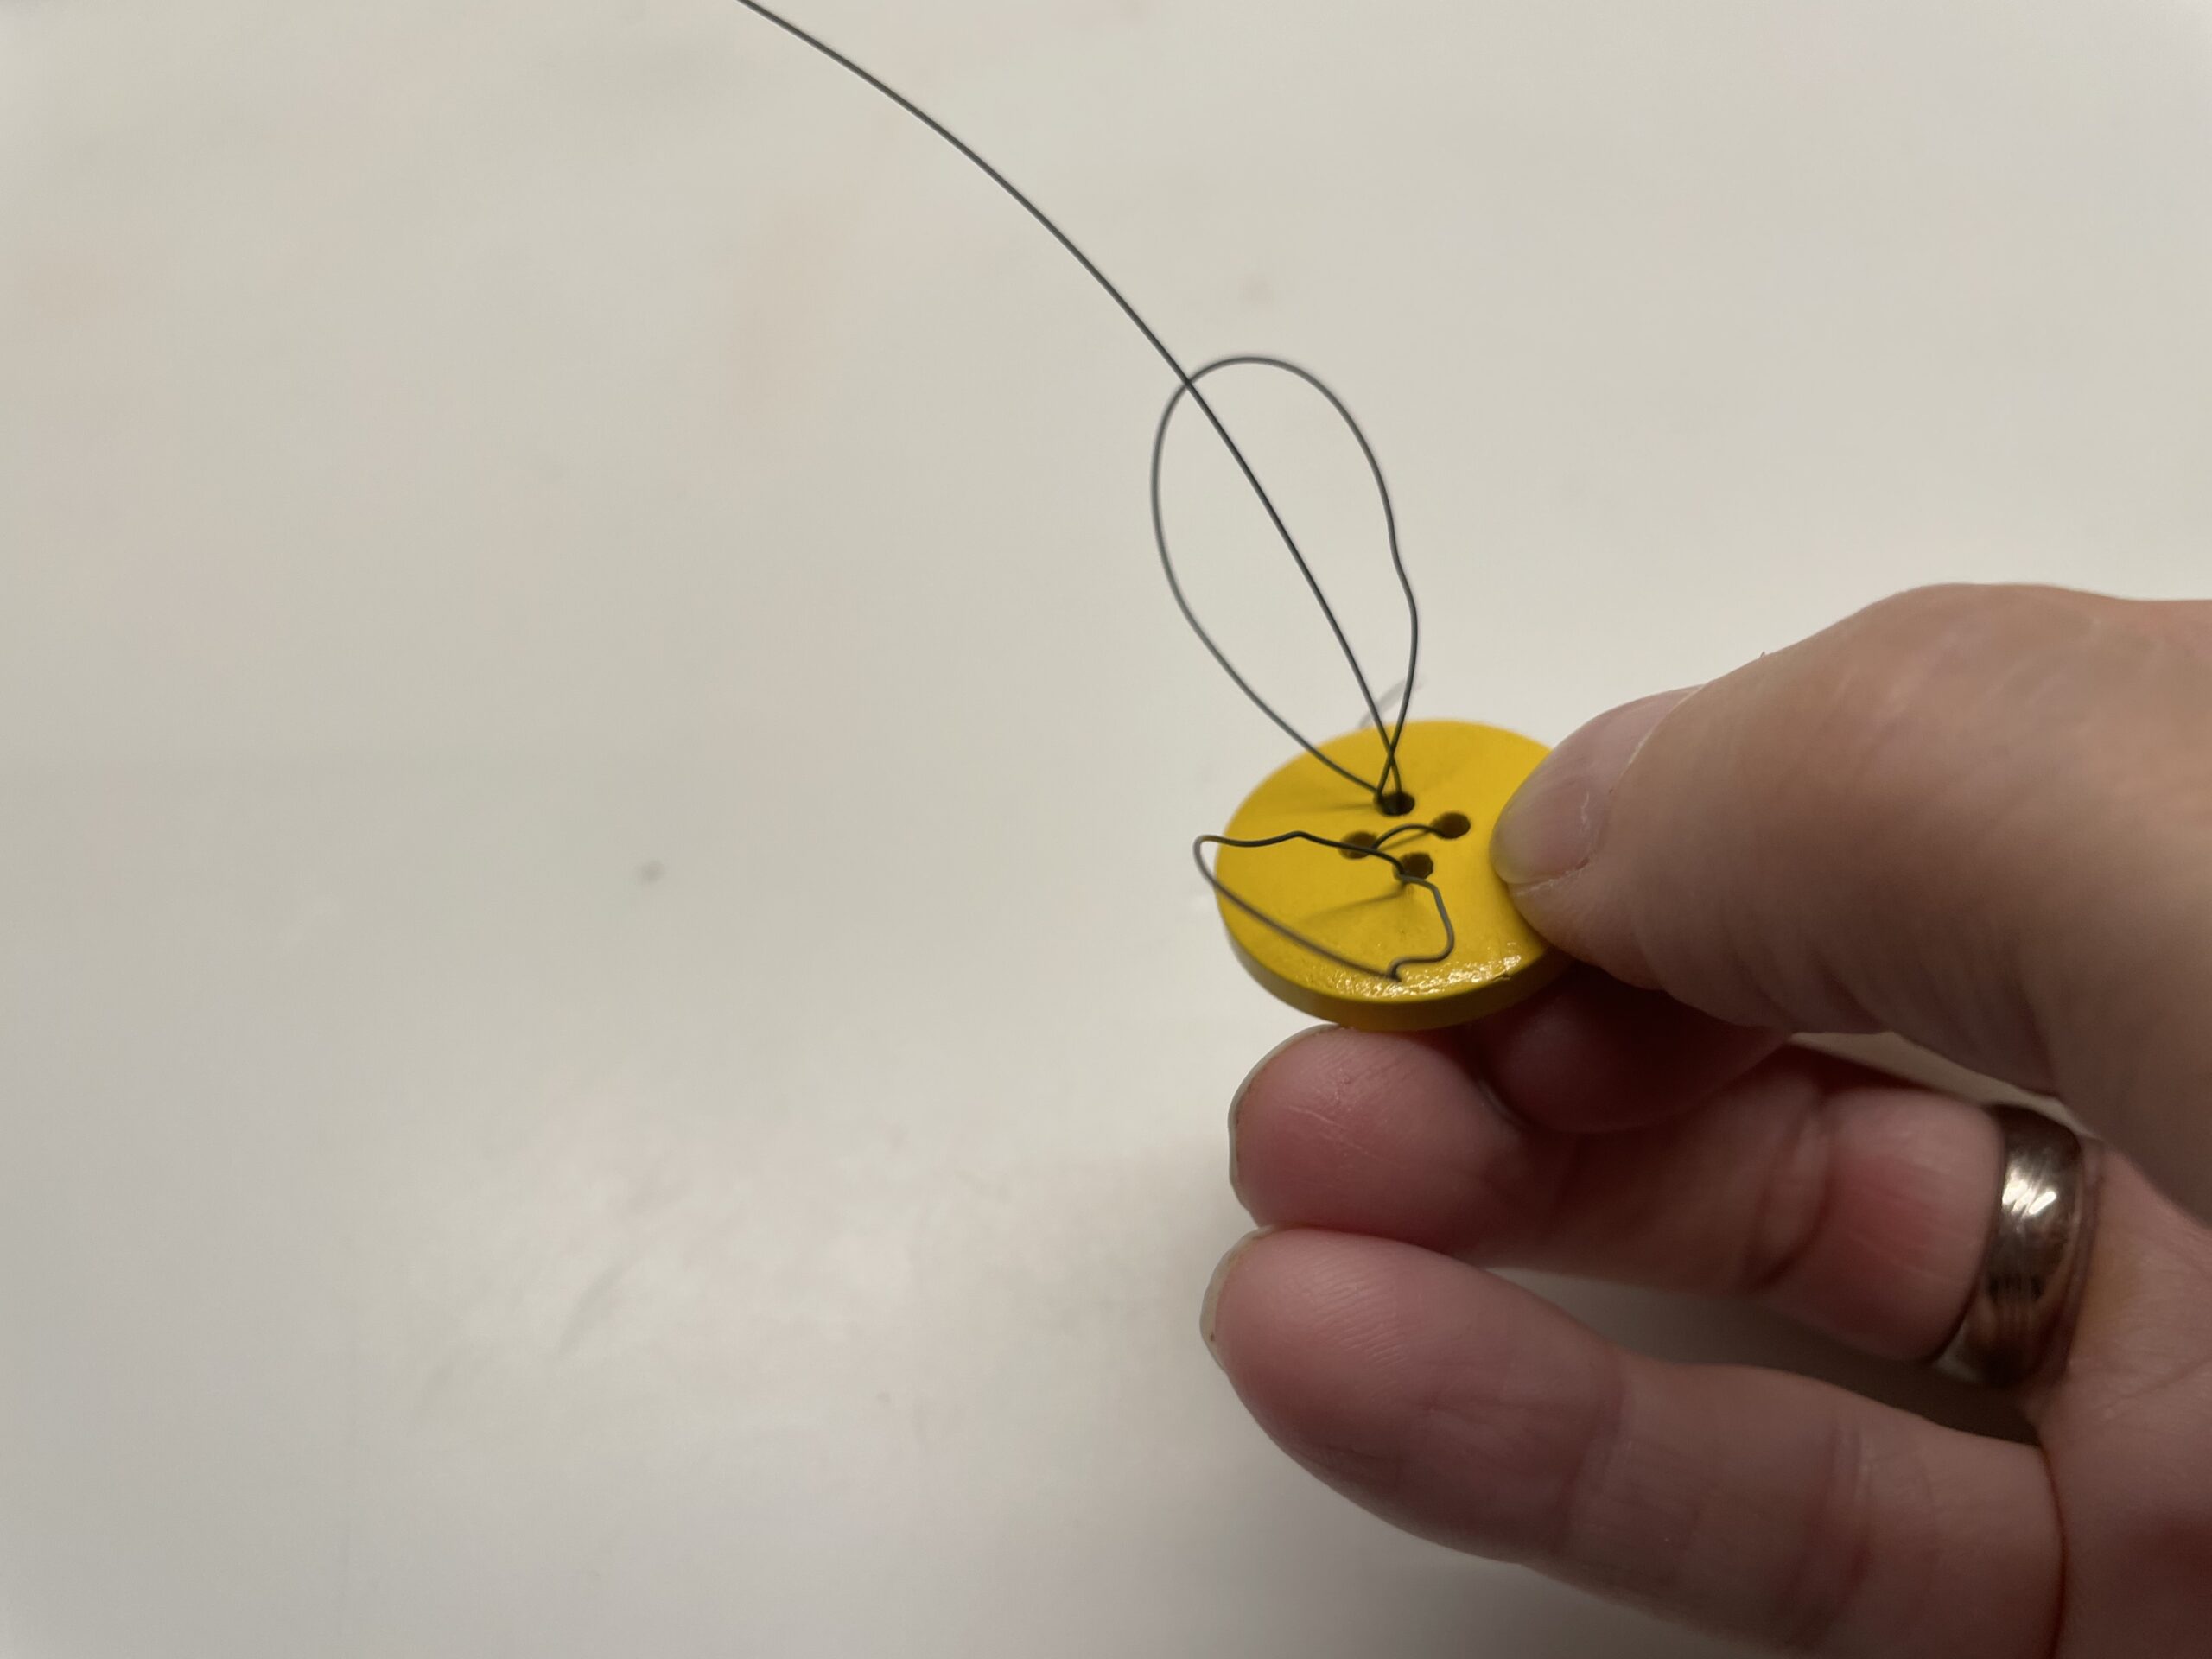
Bild zum Schritt 11 für das Bastel- und DIY-Abenteuer für Kinder: 'Greift den entstandenen Flügel mit einer Hand und dreht ihn...'

12

Through the other two holes in the button you can make two more wings in the same way.
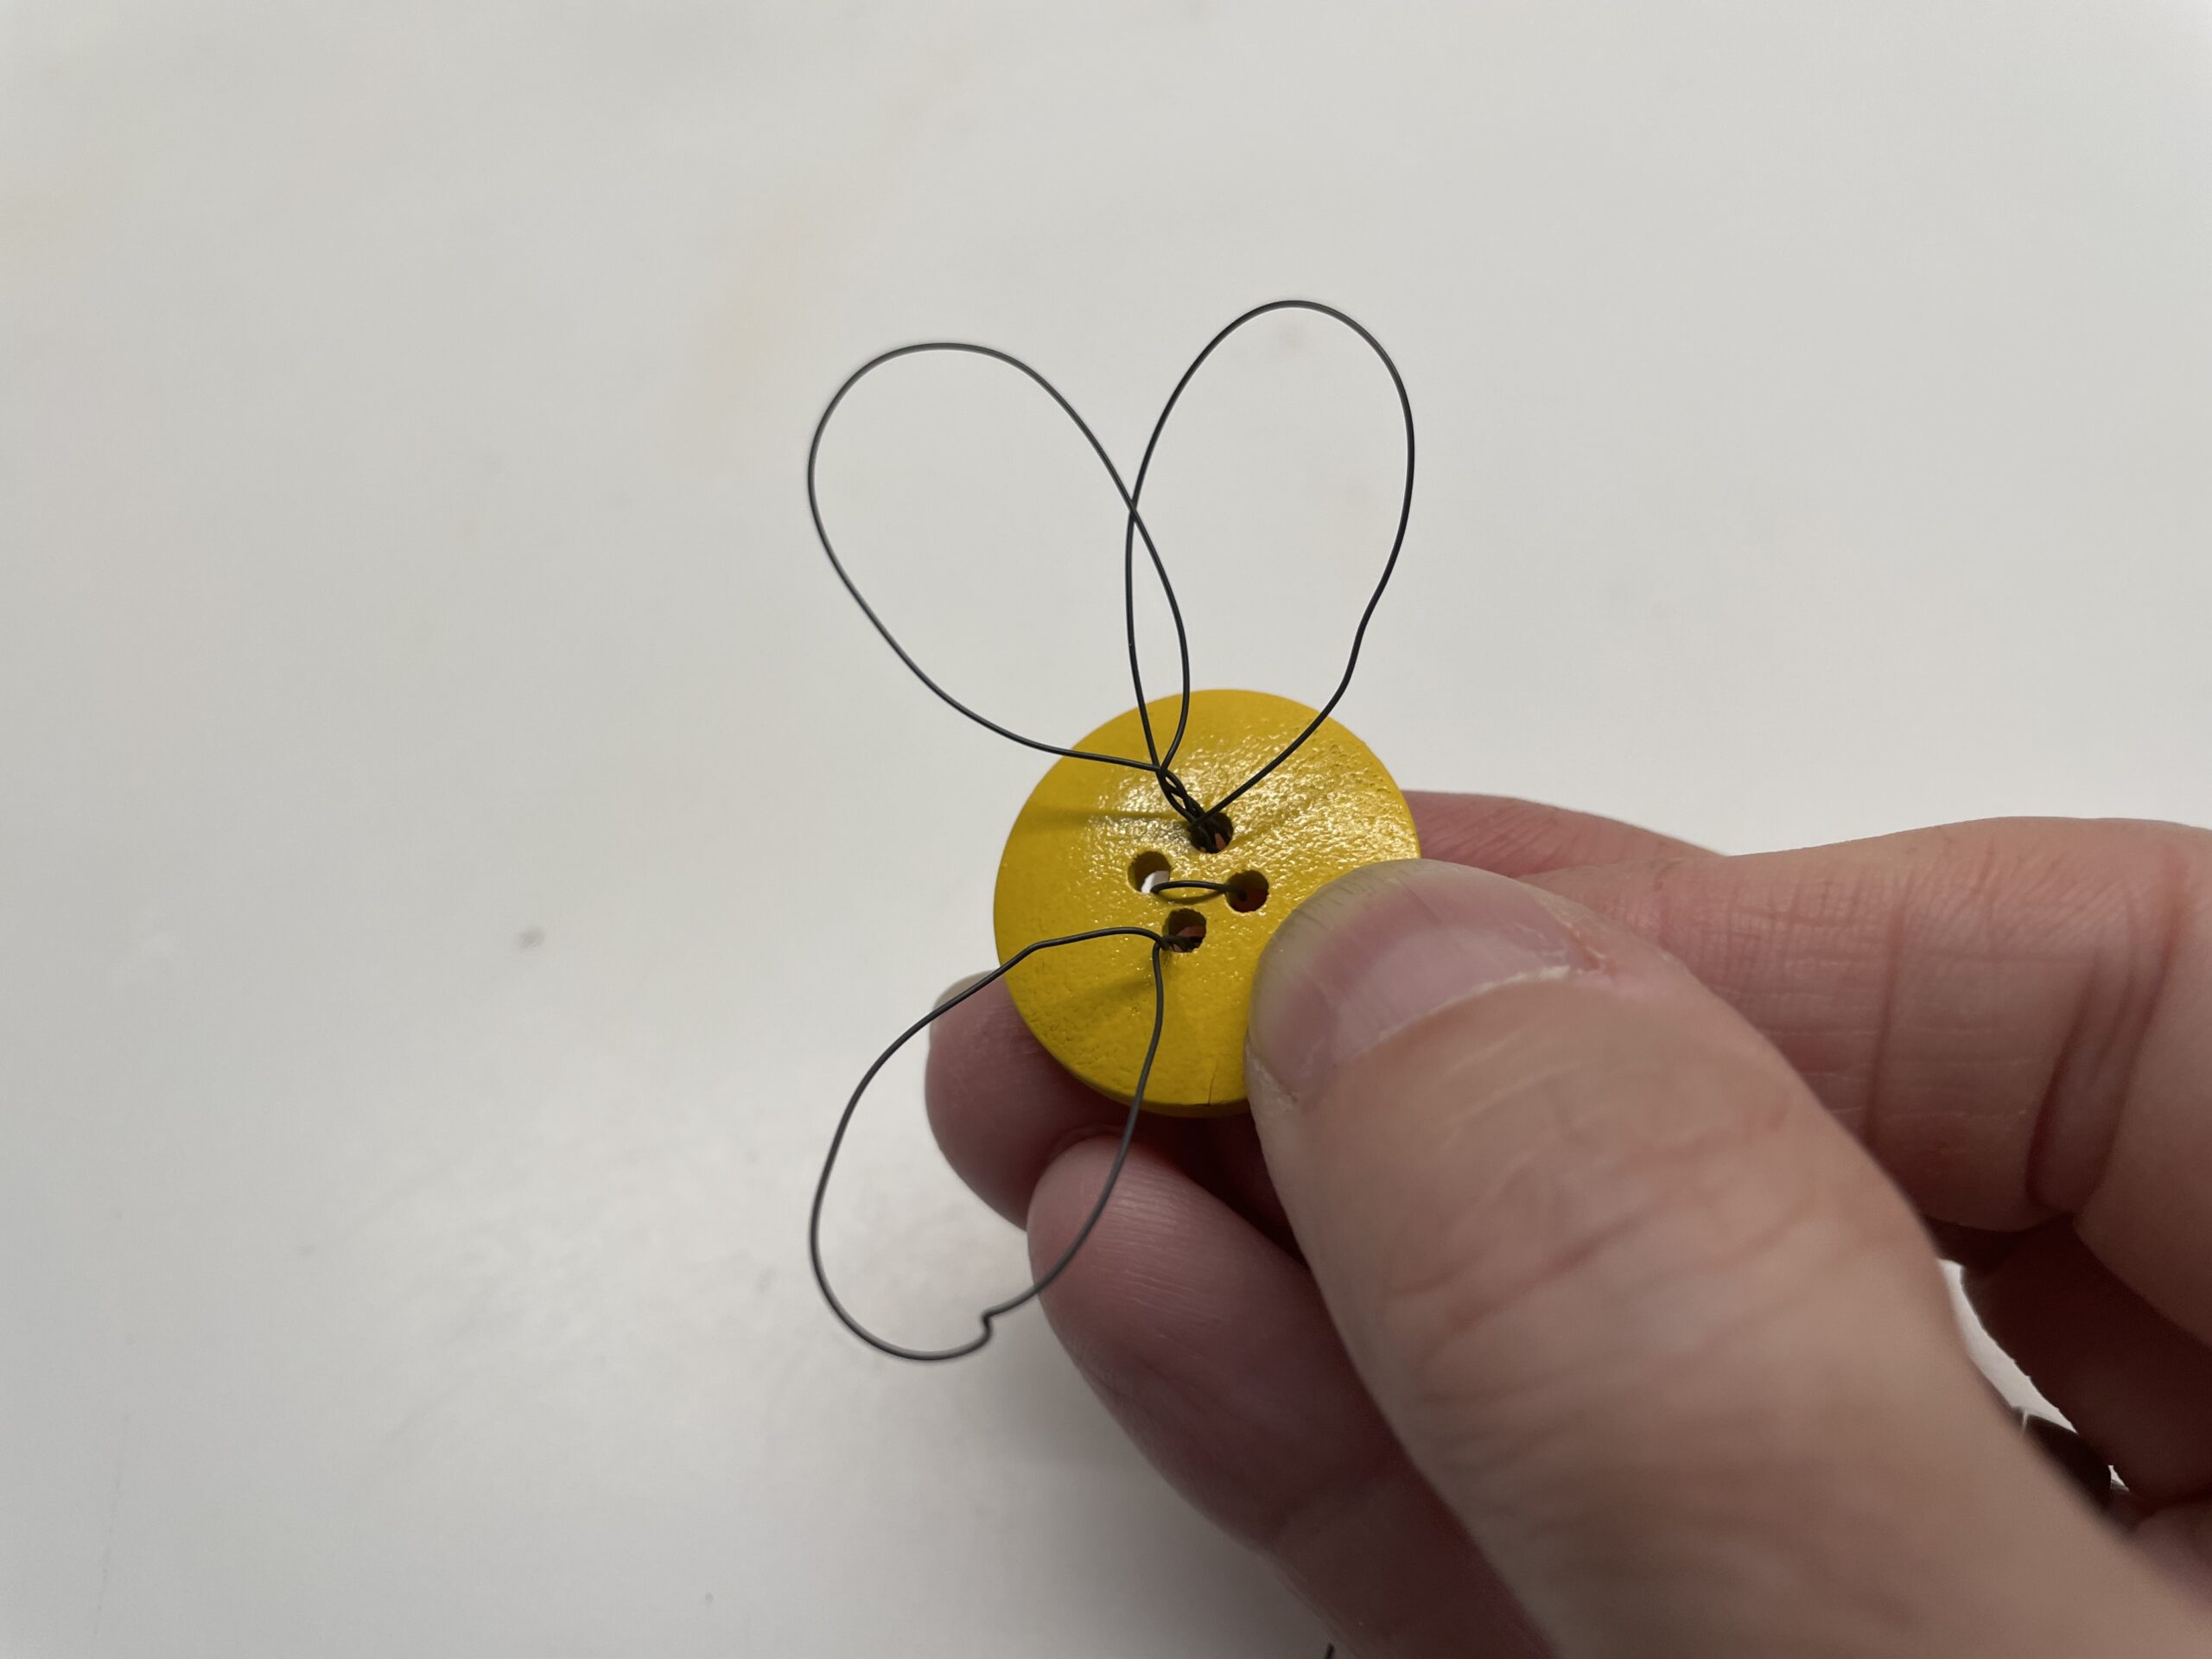
Bild zum Schritt 12 für das Bastel- und DIY-Abenteuer für Kinder: 'Durch die beiden anderen Löcher im Knopf könnt ihr auf...'

13

Aligns the wings in a suitable shape.
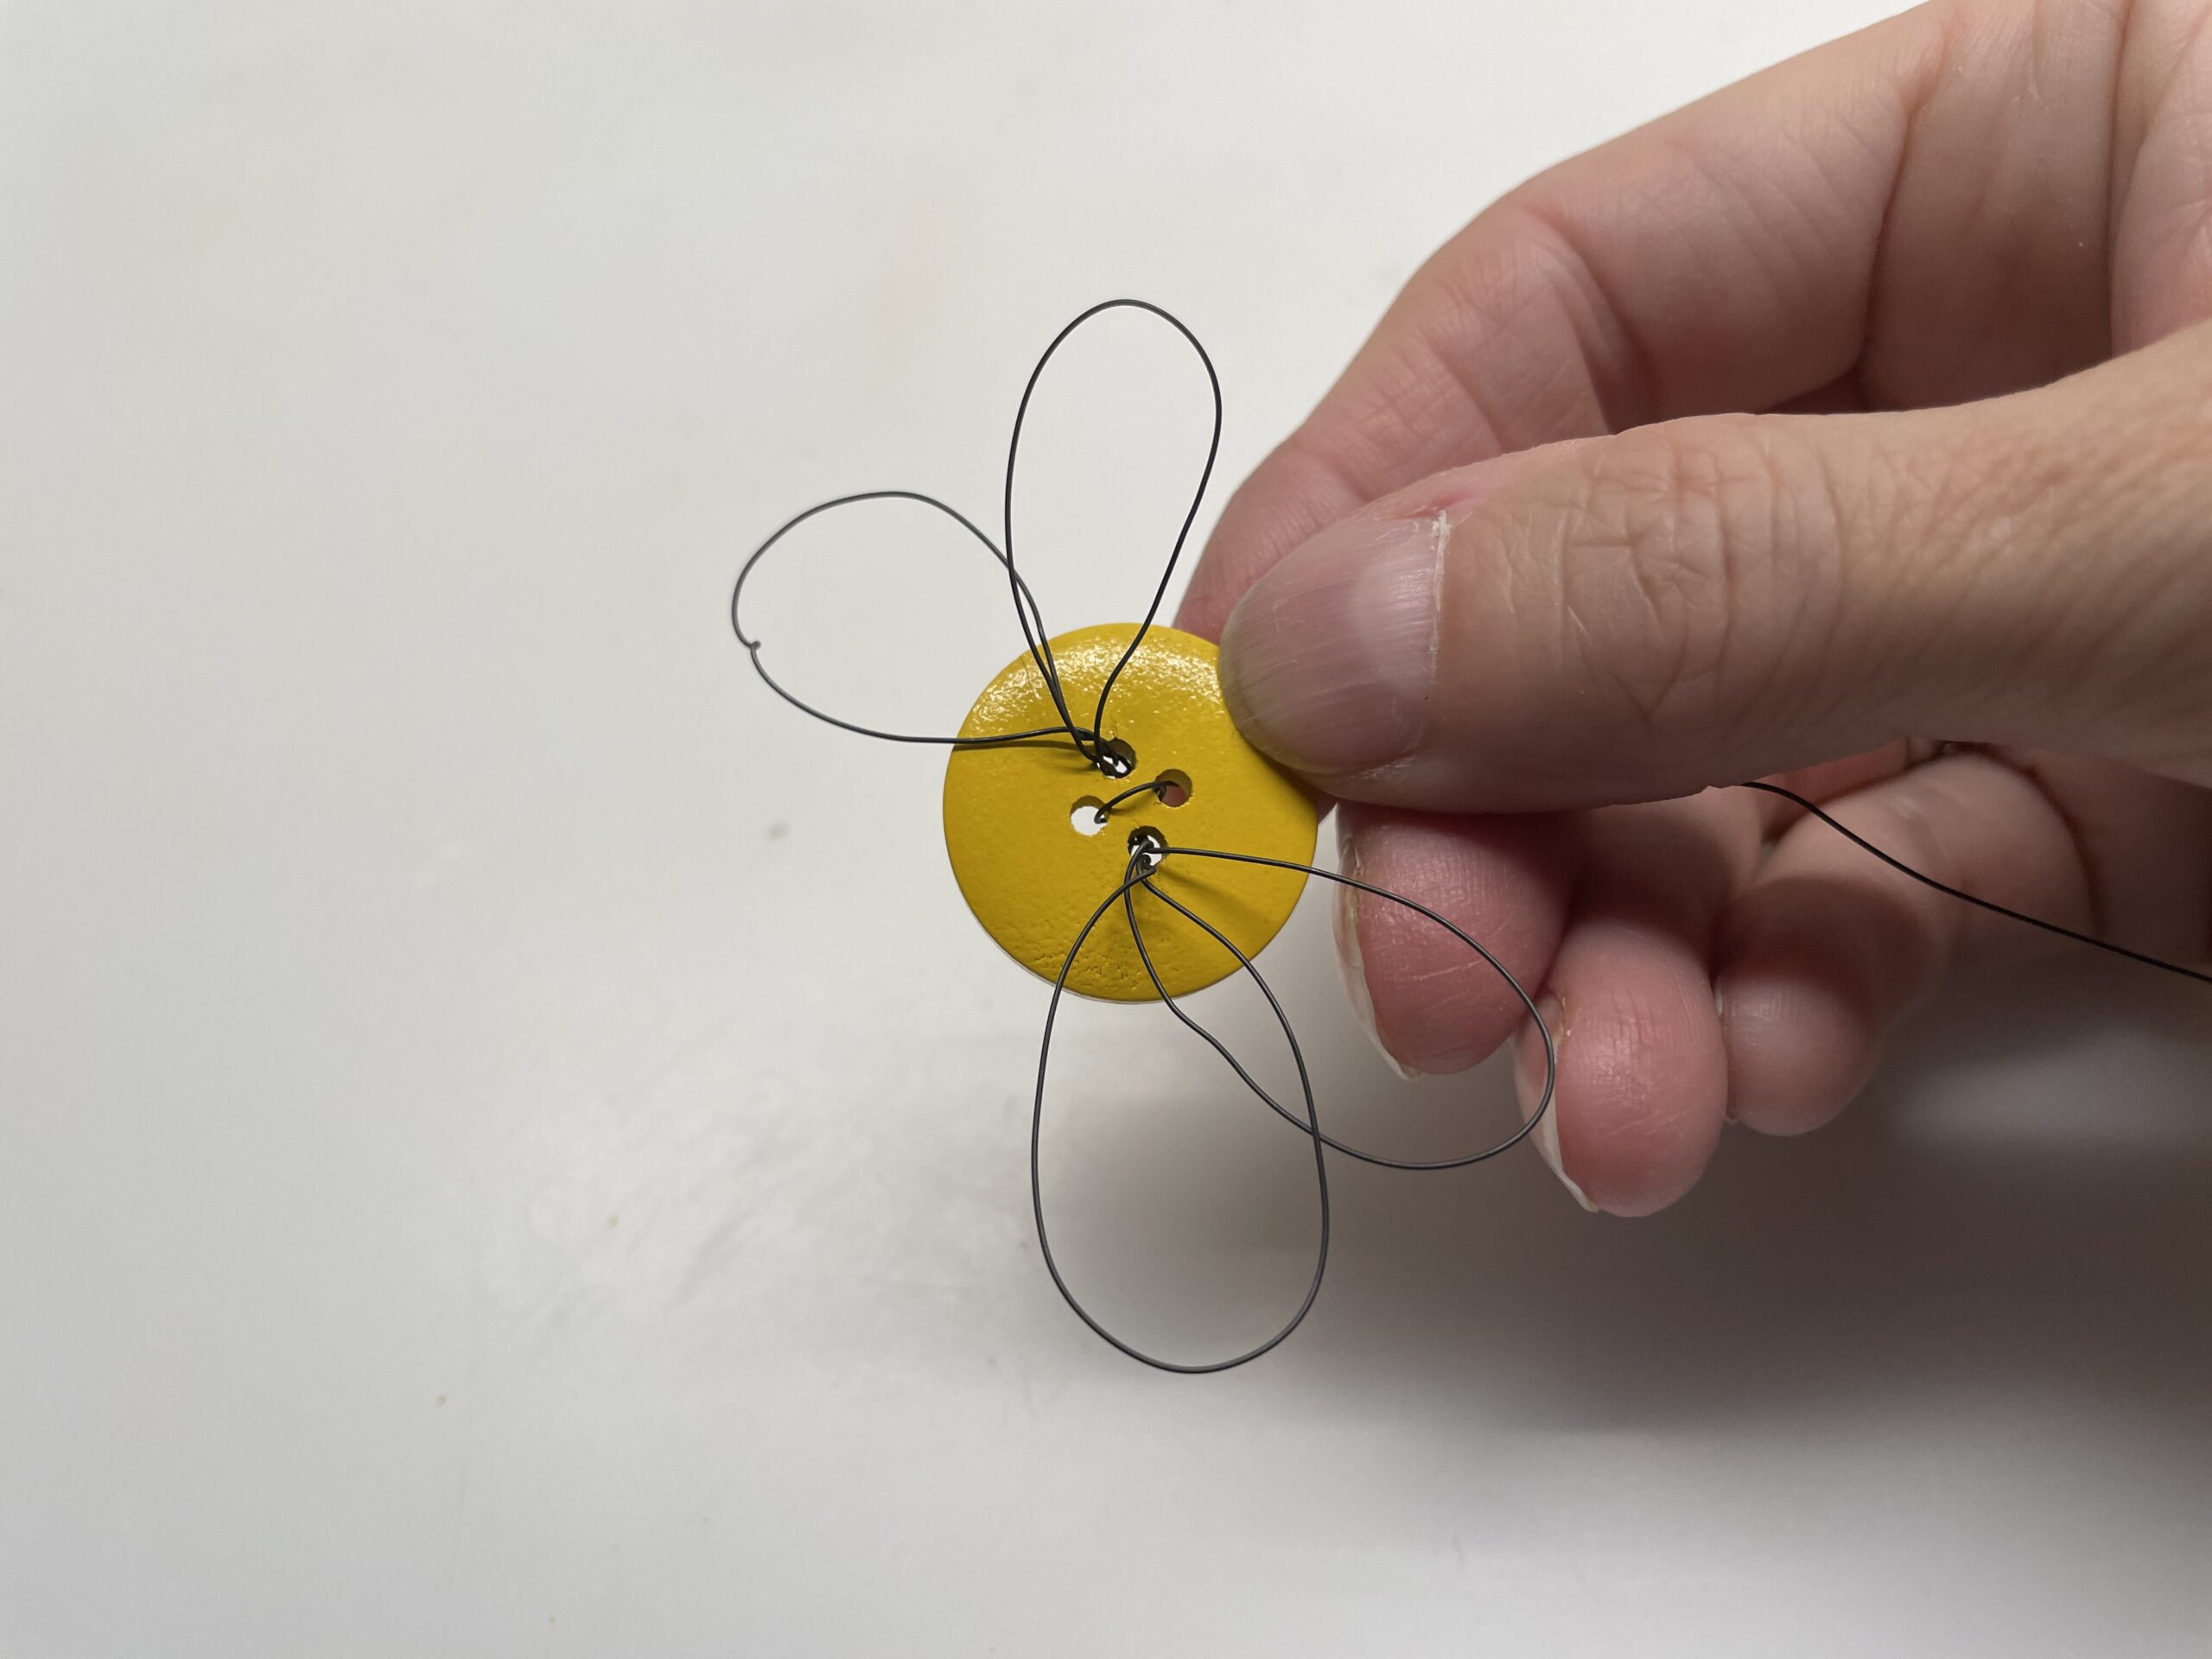
Bild zum Schritt 13 für das Bastel- und DIY-Abenteuer für Kinder: 'Richtet die Flügel in eine passende Form aus.'

14

Let a piece of wire survive on the back. Possibly twist it with the initial wire.
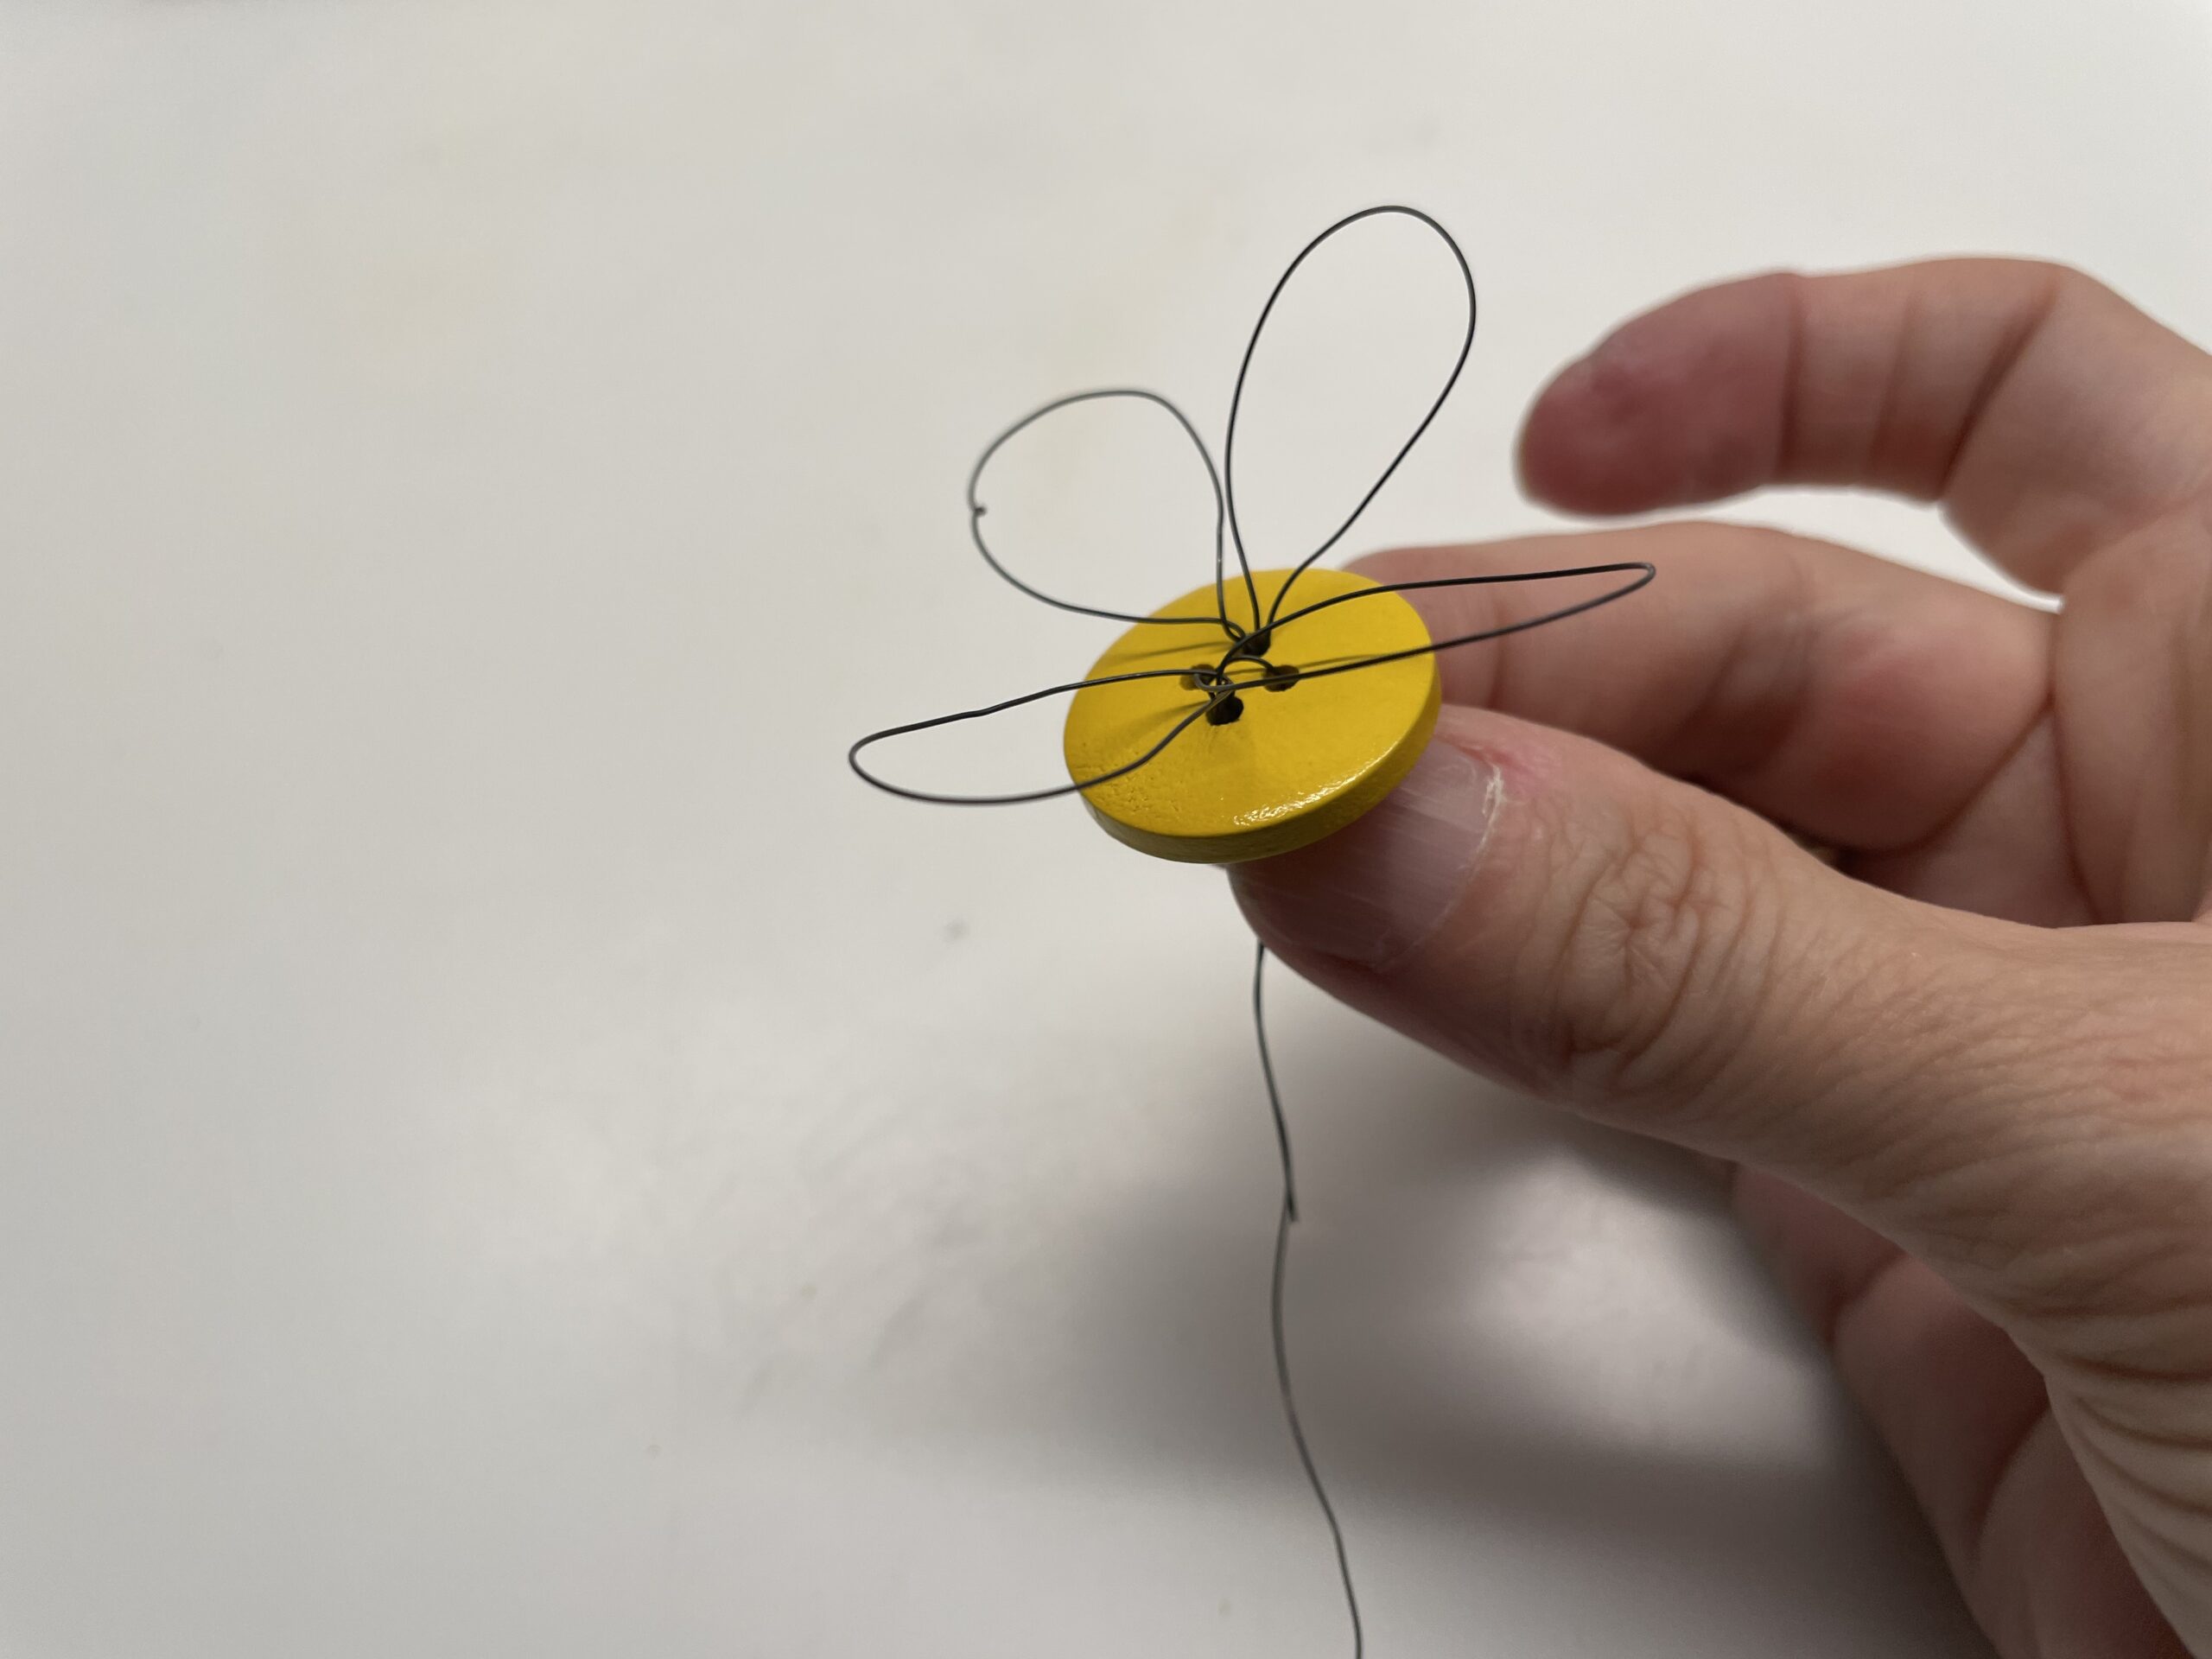
Bild zum Schritt 14 für das Bastel- und DIY-Abenteuer für Kinder: 'Lasst auf der Rückseite ein Stück Draht überstehen. Eventuell verdreht...'

15

Then you can paint on the yellow button with a black or brown marker stripes.
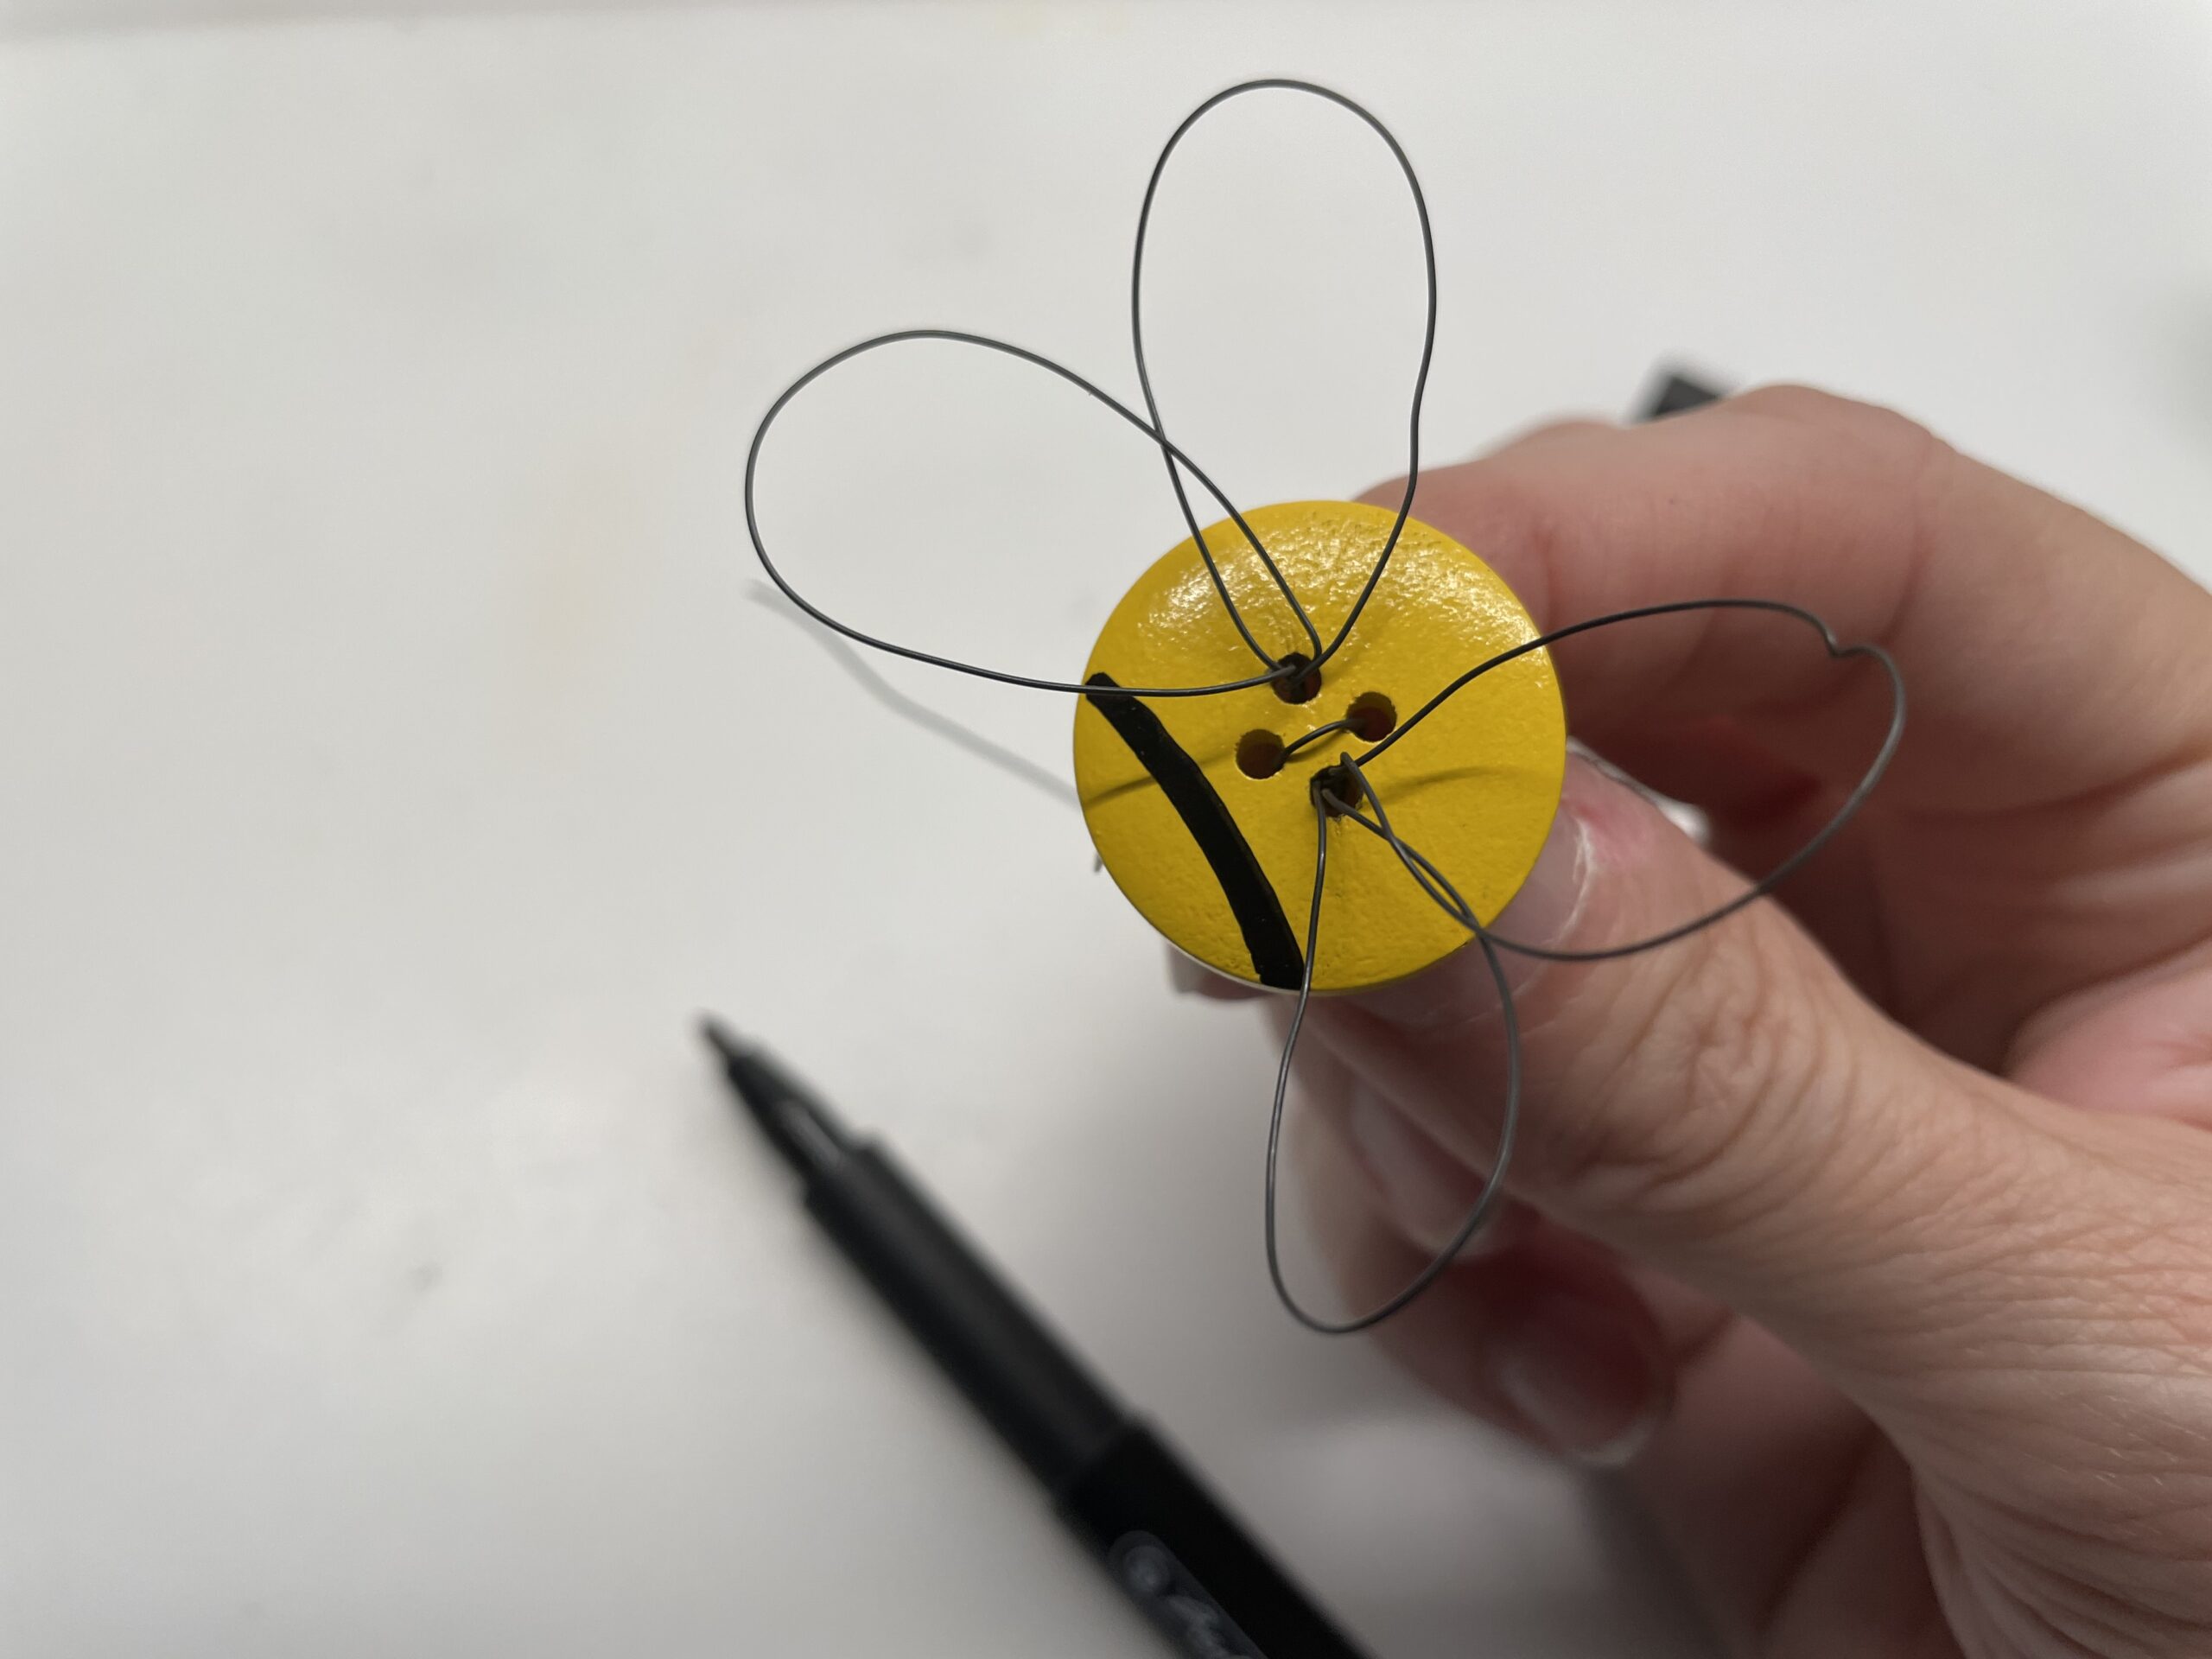
Bild zum Schritt 15 für das Bastel- und DIY-Abenteuer für Kinder: 'Dann könnt ihr auf den gelben Knopf mit einem schwarzen...'

16

On one side two small dots are painted as eyes and the bee is finished.
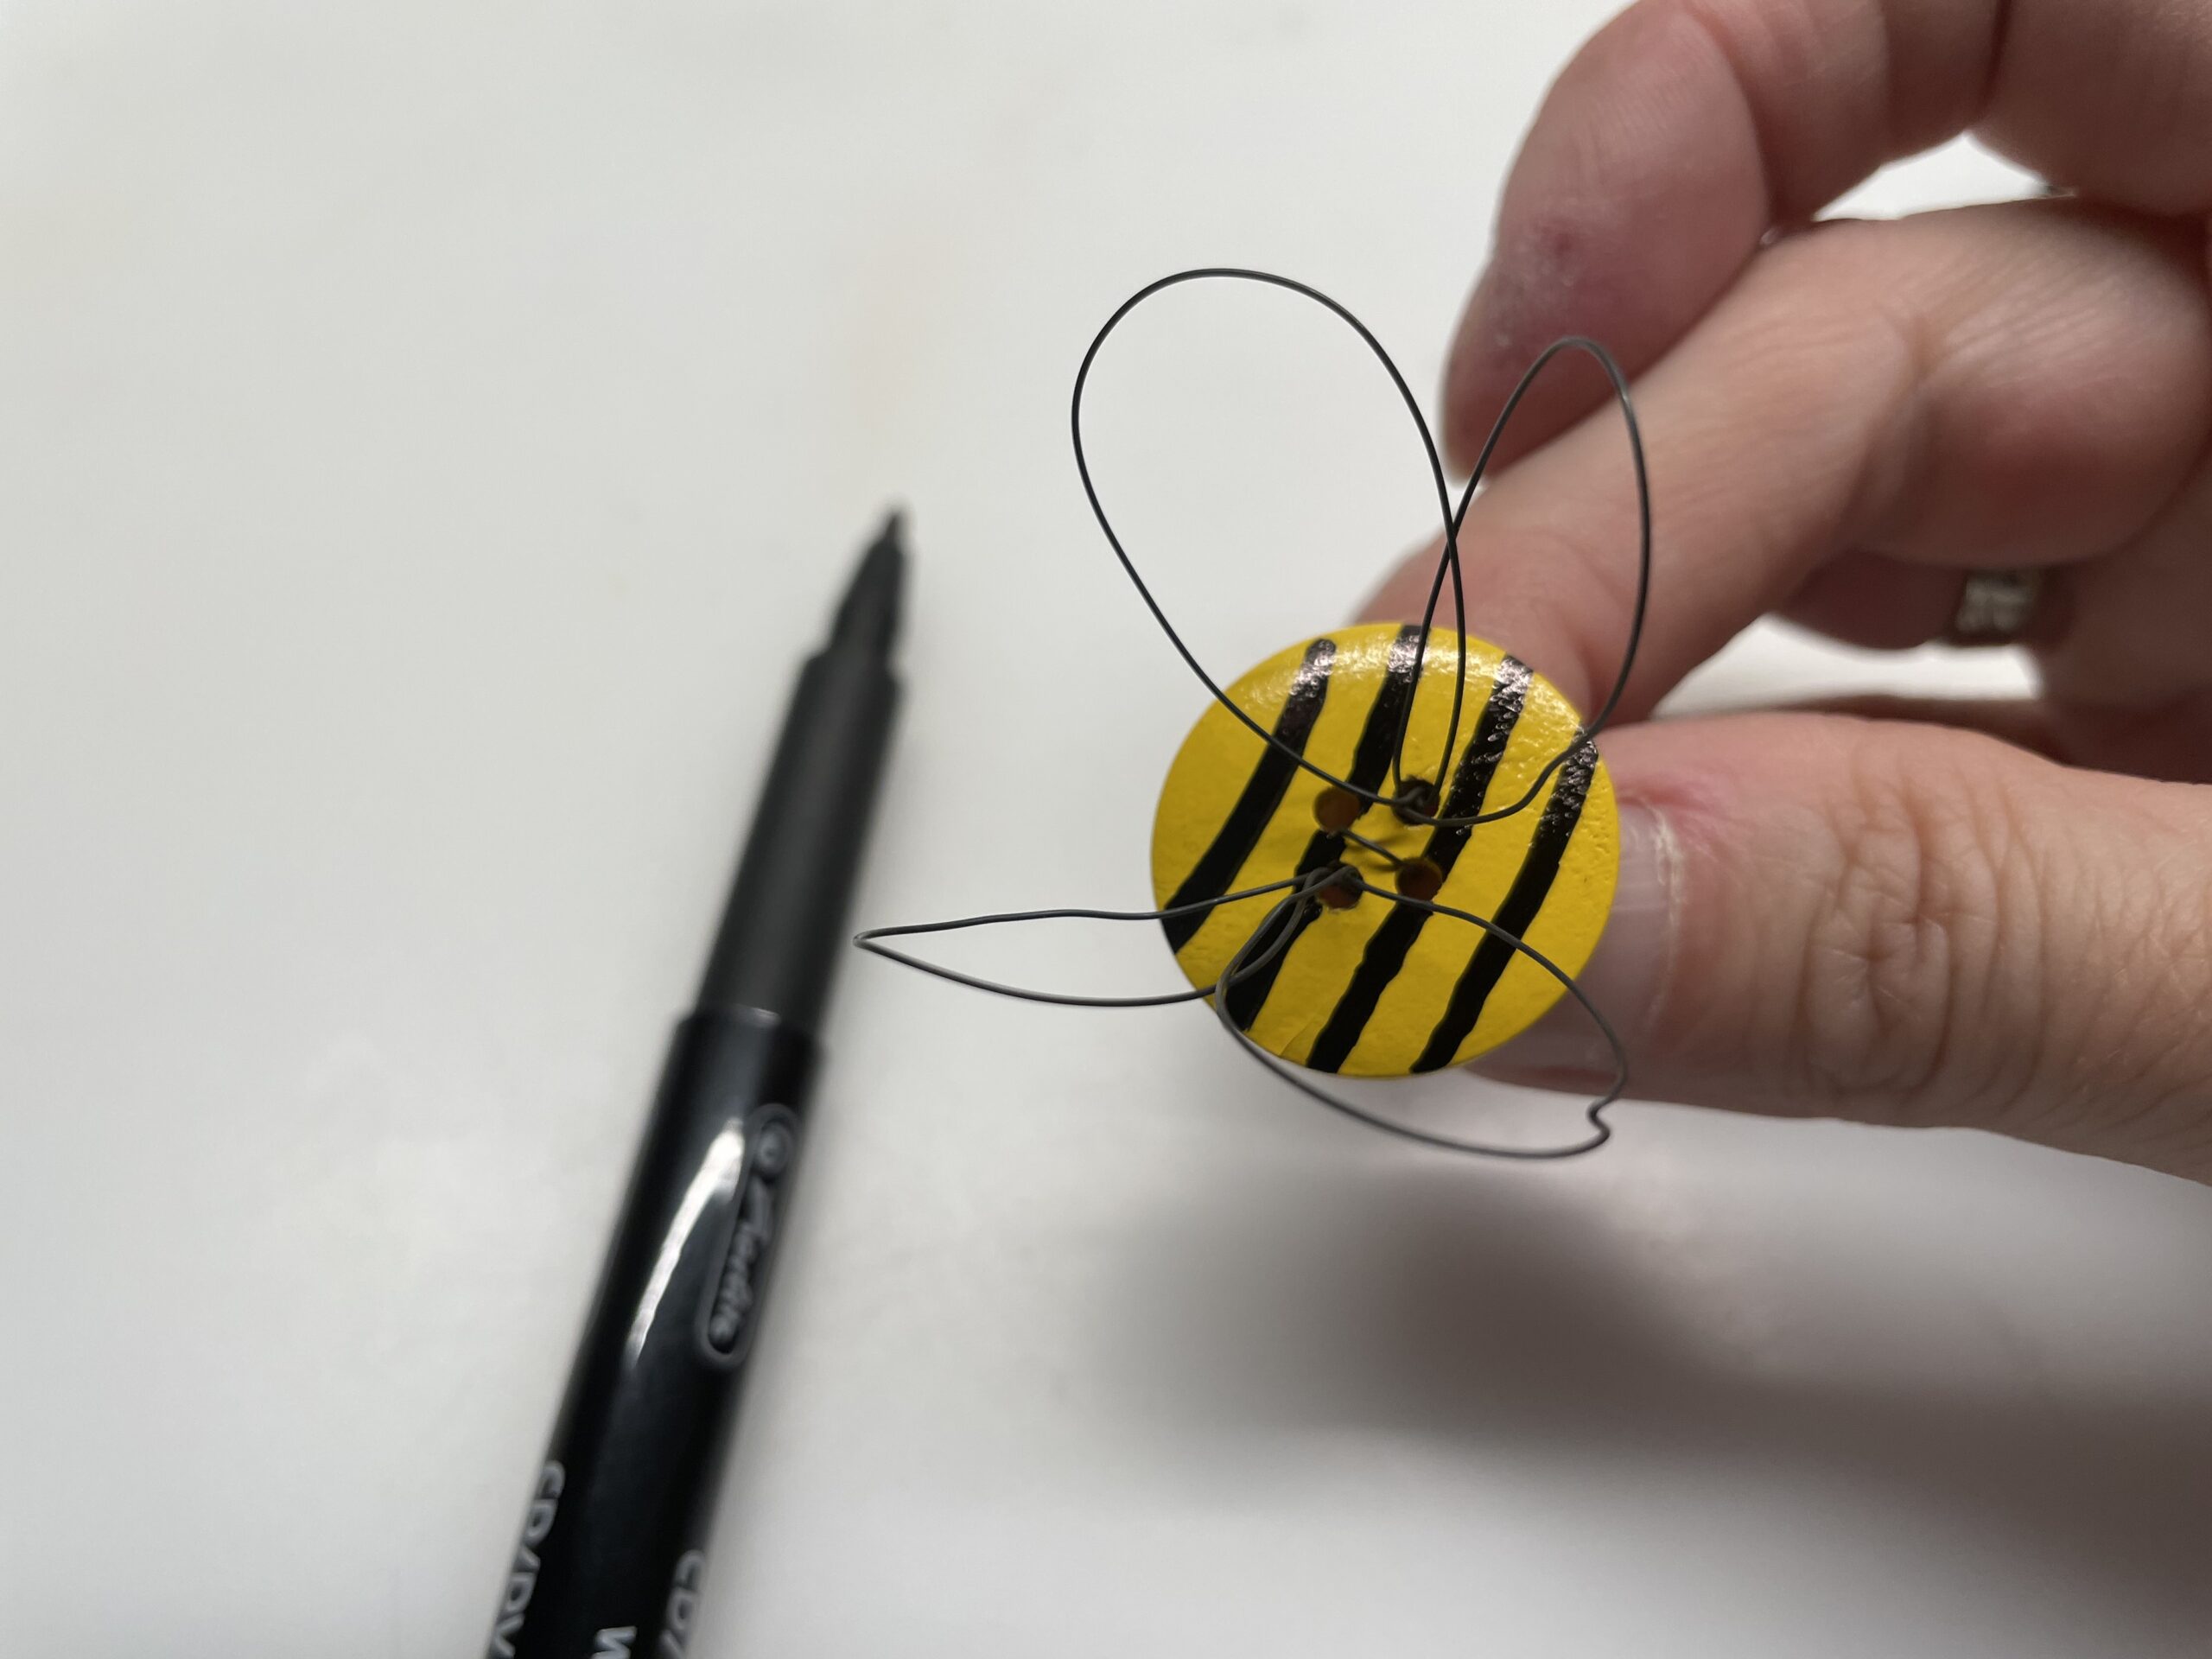
Bild zum Schritt 16 für das Bastel- und DIY-Abenteuer für Kinder: 'An einer Seite werden noch zwei kleine Punkte als Augen...'

17

You can use the bee as a gift, for example.
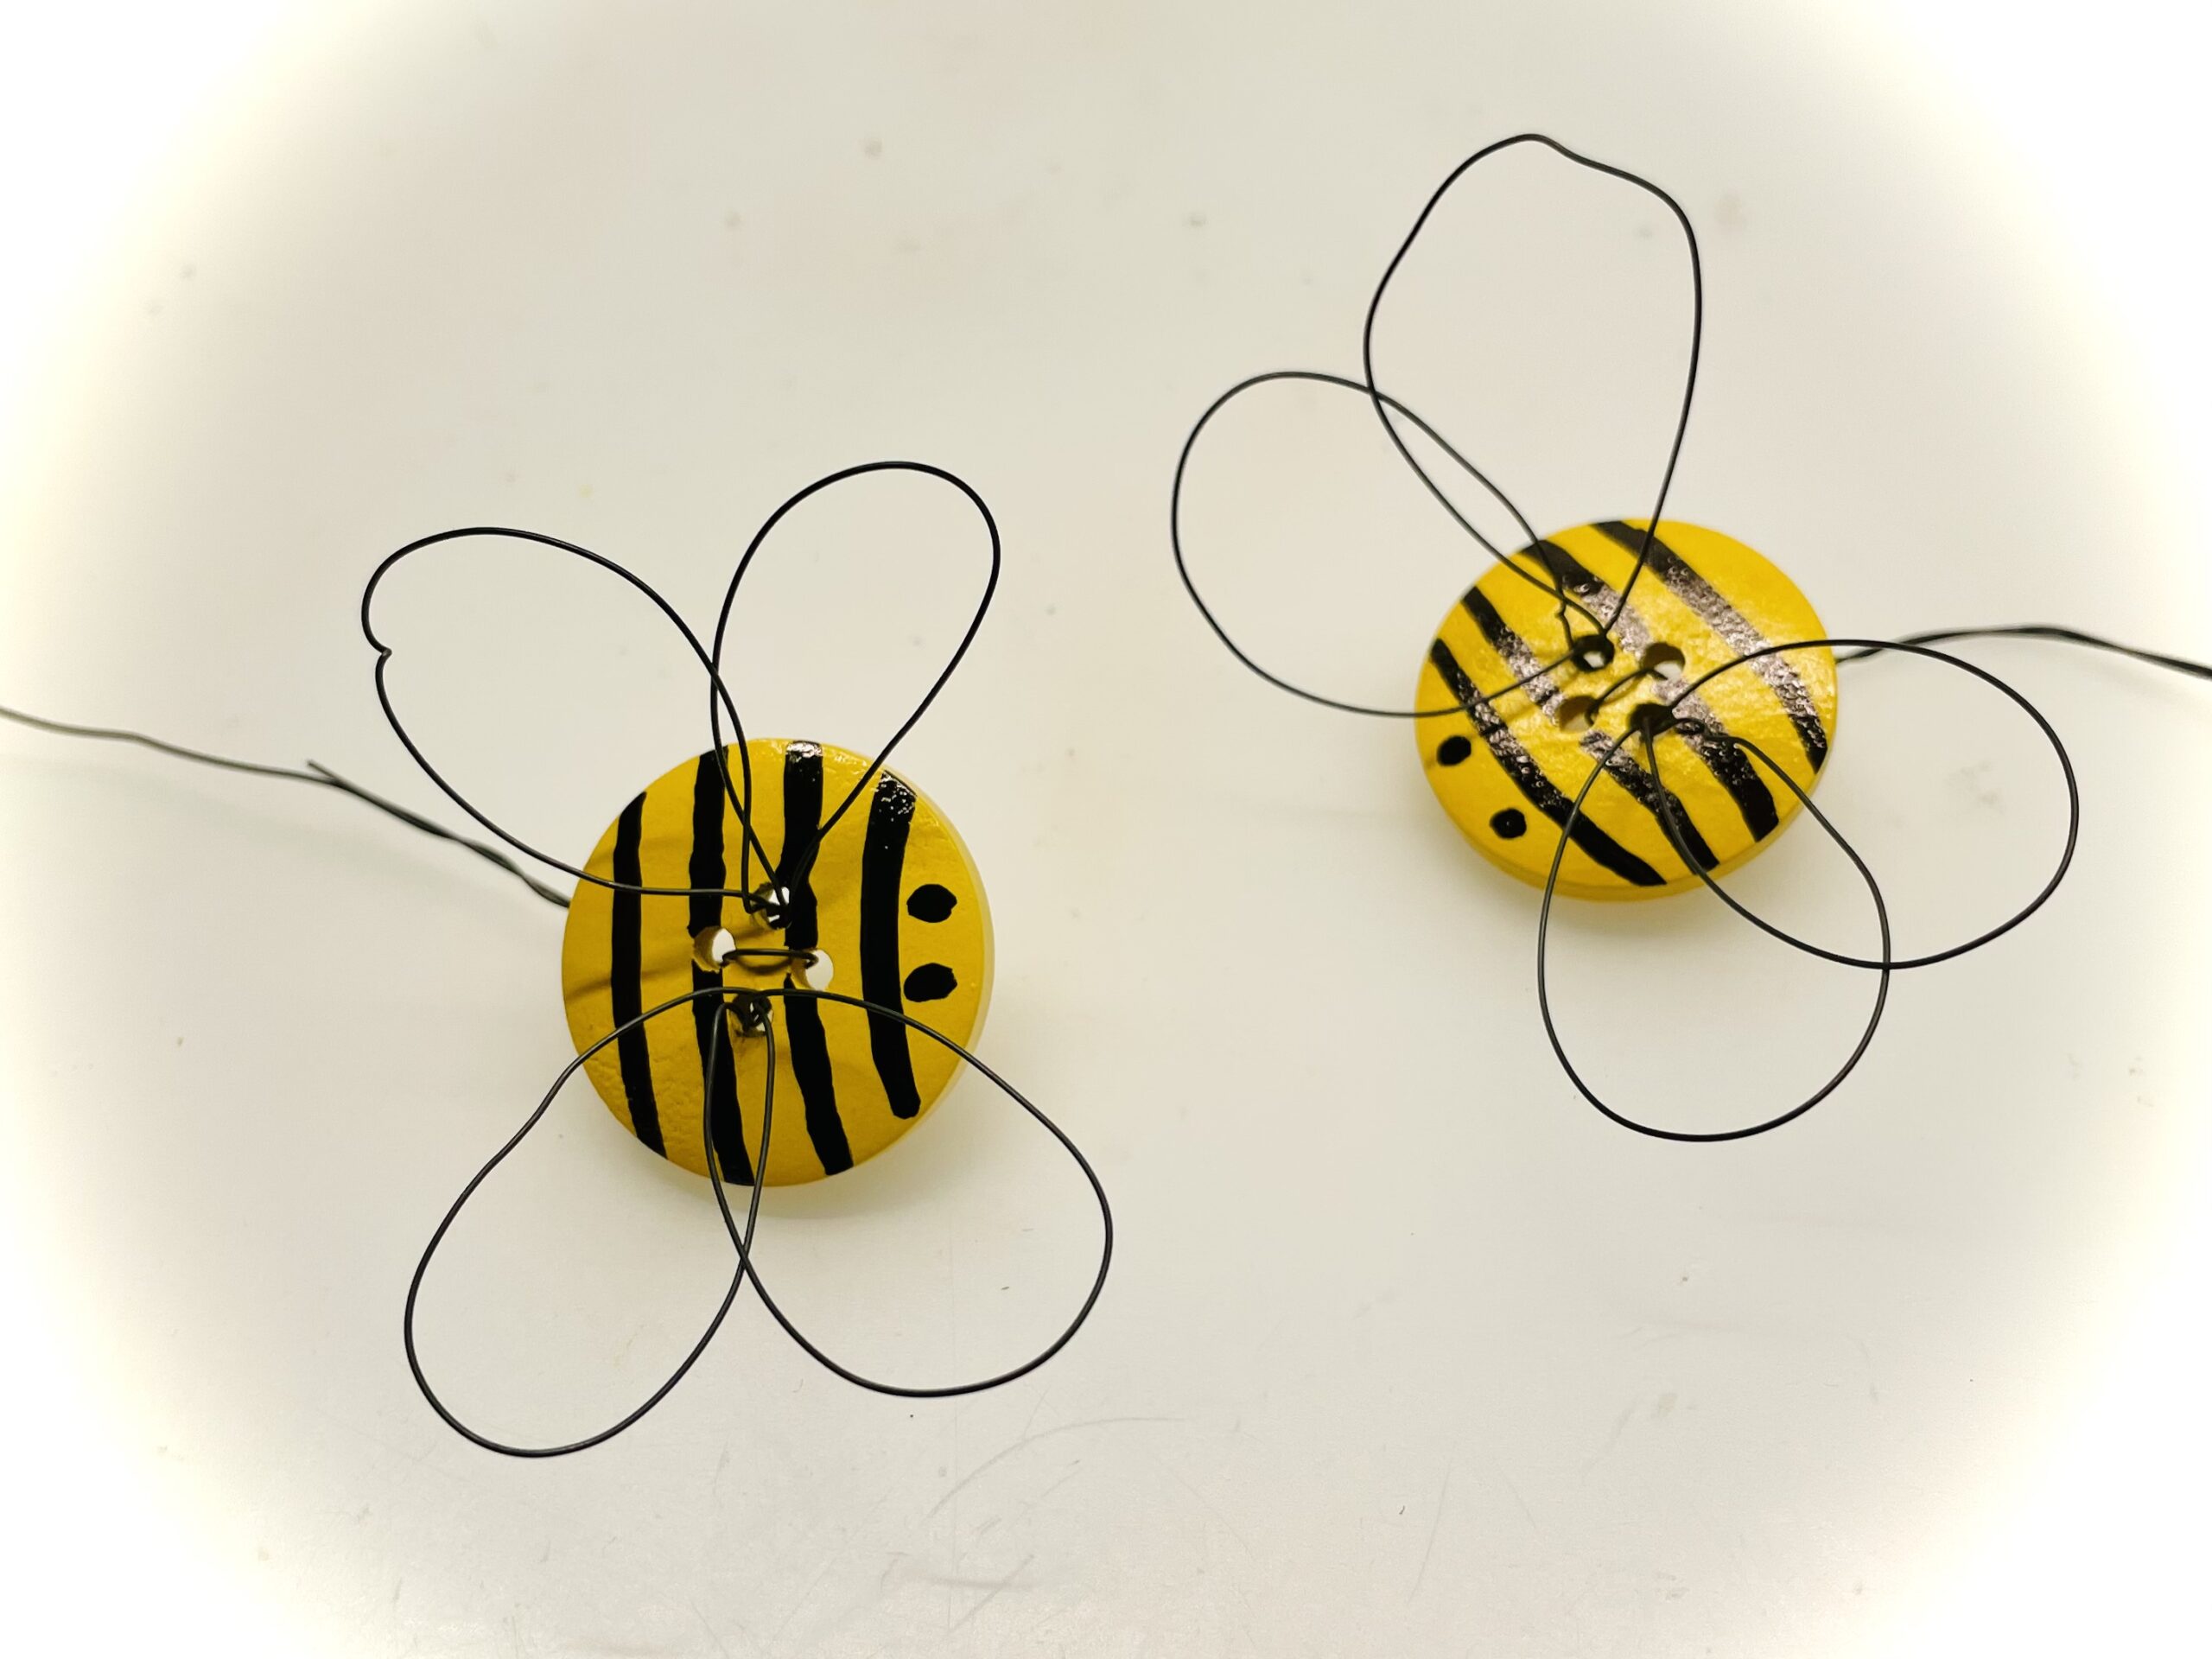
Bild zum Schritt 17 für das Bastel- und DIY-Abenteuer für Kinder: 'Ihr könnt die Biene z.B. als Geschenk verwenden.'

18

Or you could put her in a bouquet with a long wire.
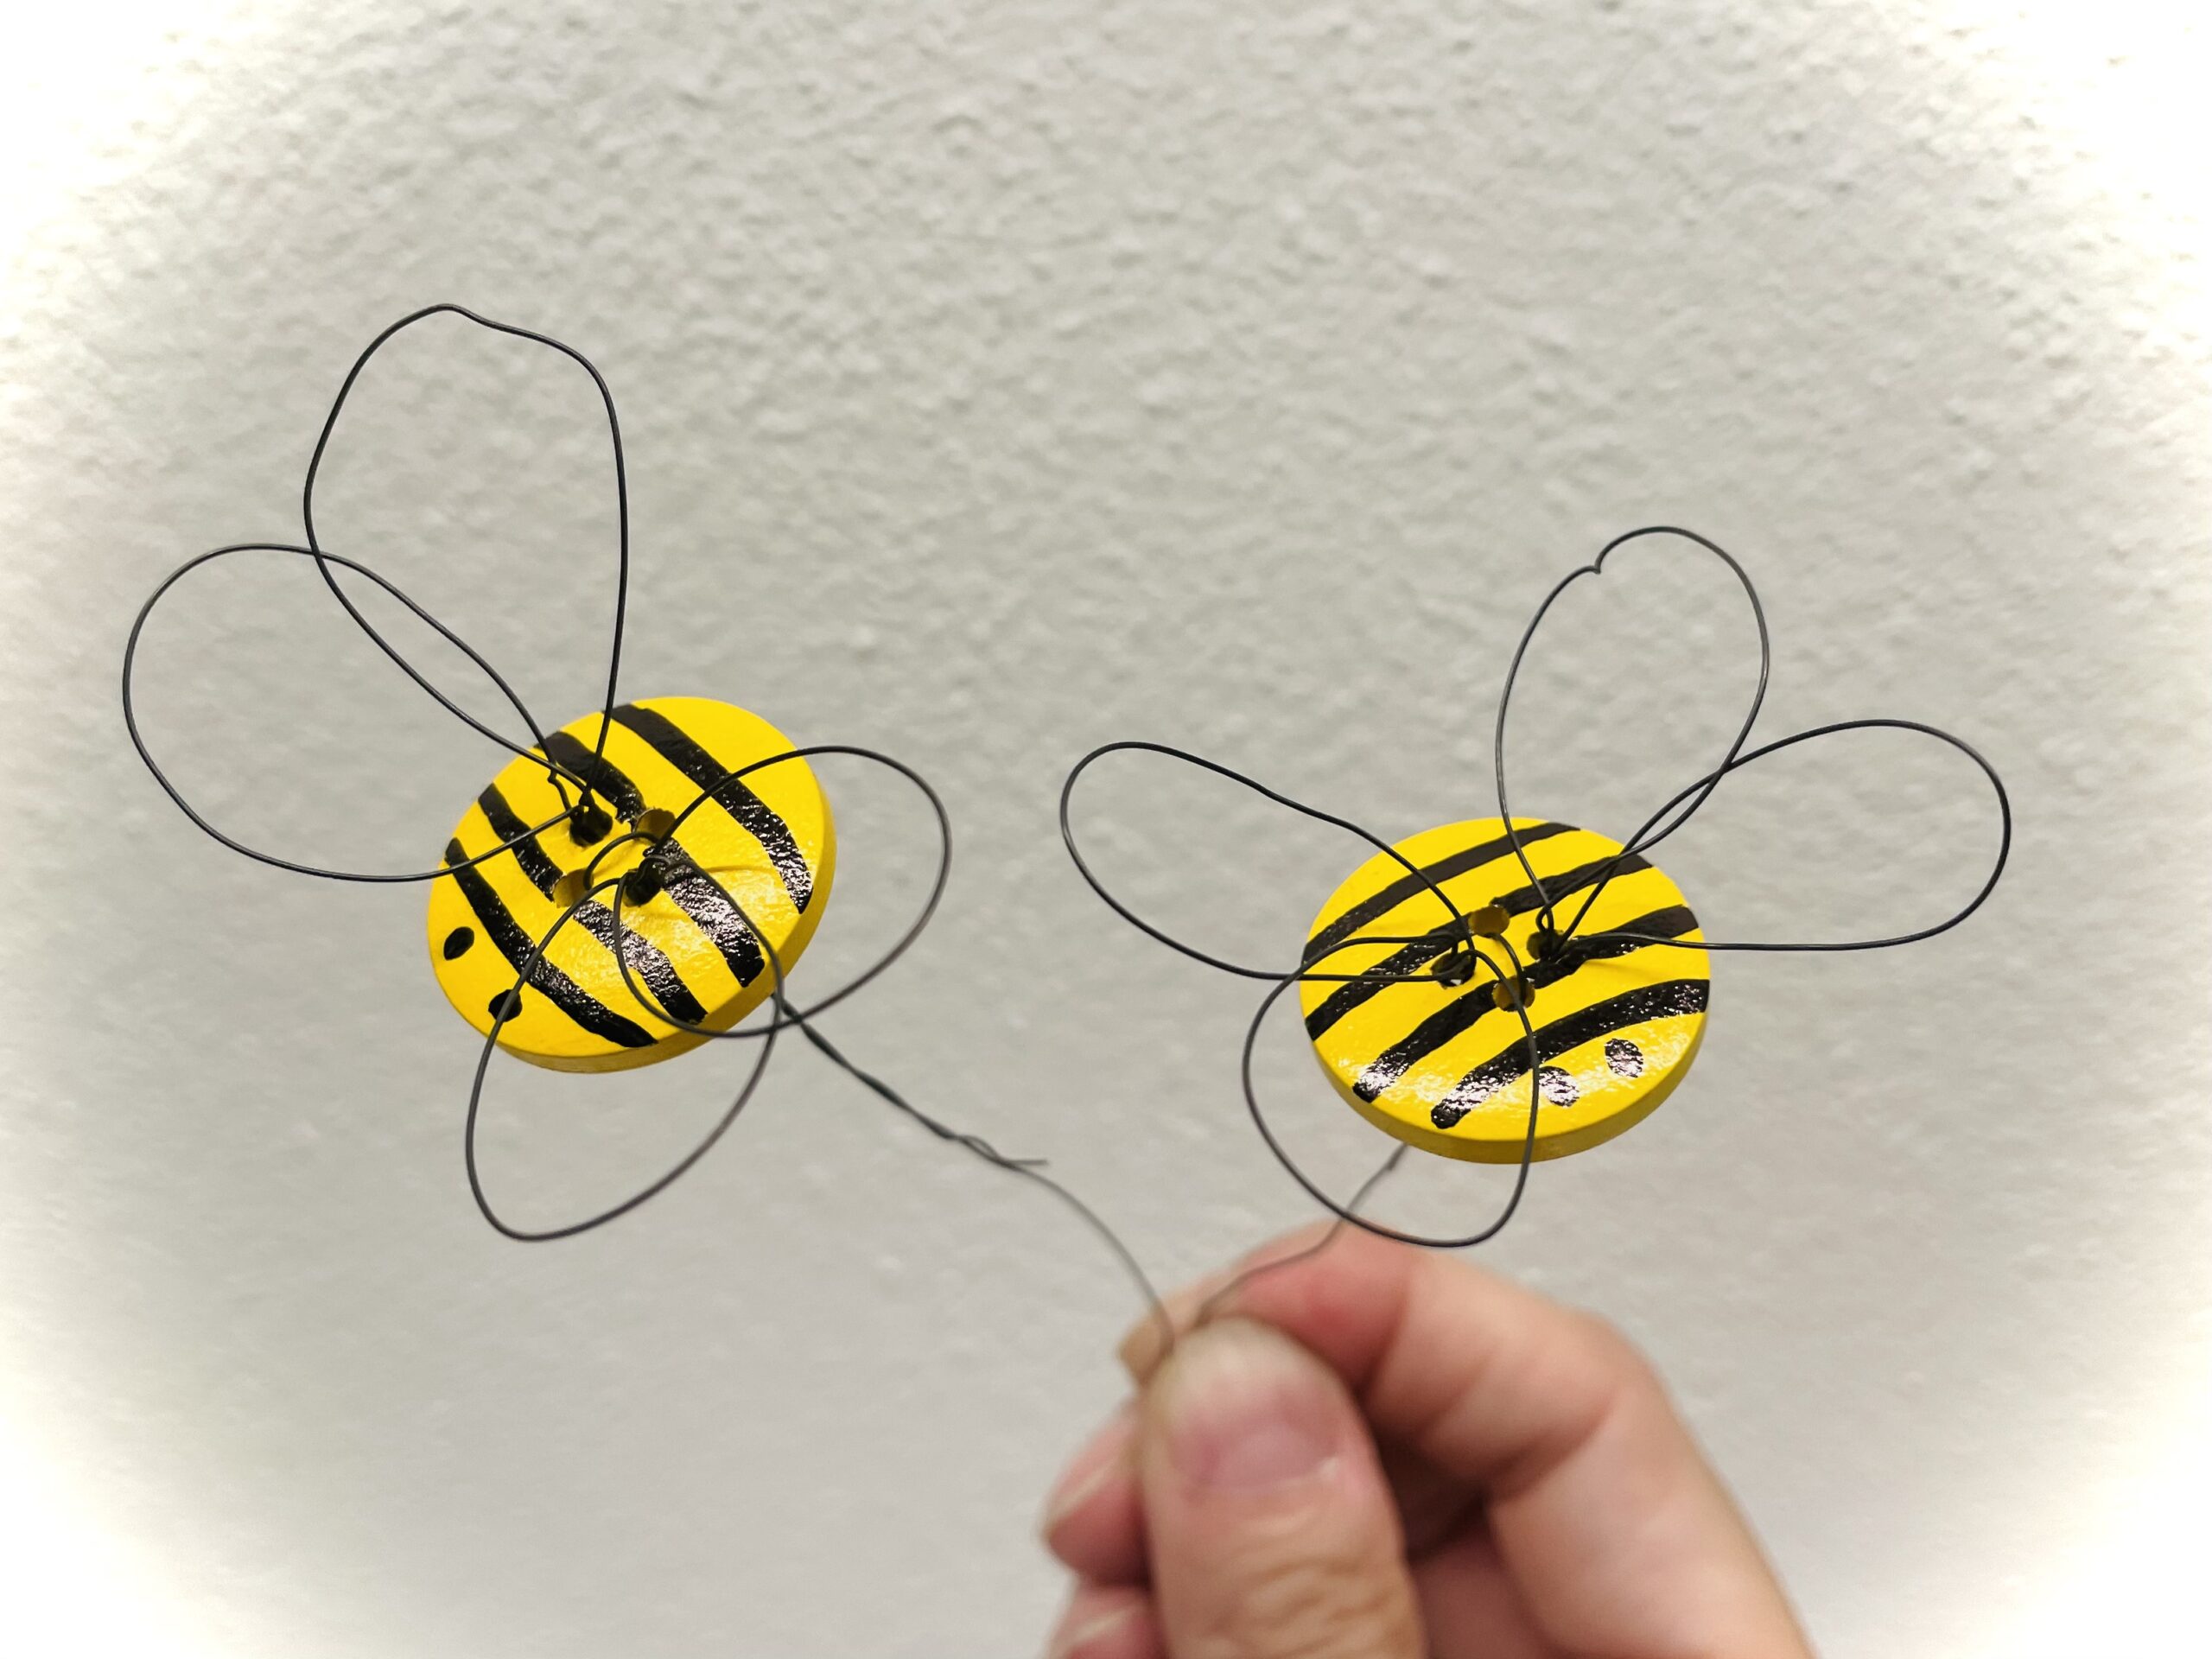
Bild zum Schritt 18 für das Bastel- und DIY-Abenteuer für Kinder: 'Oder ihr steckt sie mit einem langen Draht in einen...'

19

Surely you will also find a nice place to decorate.
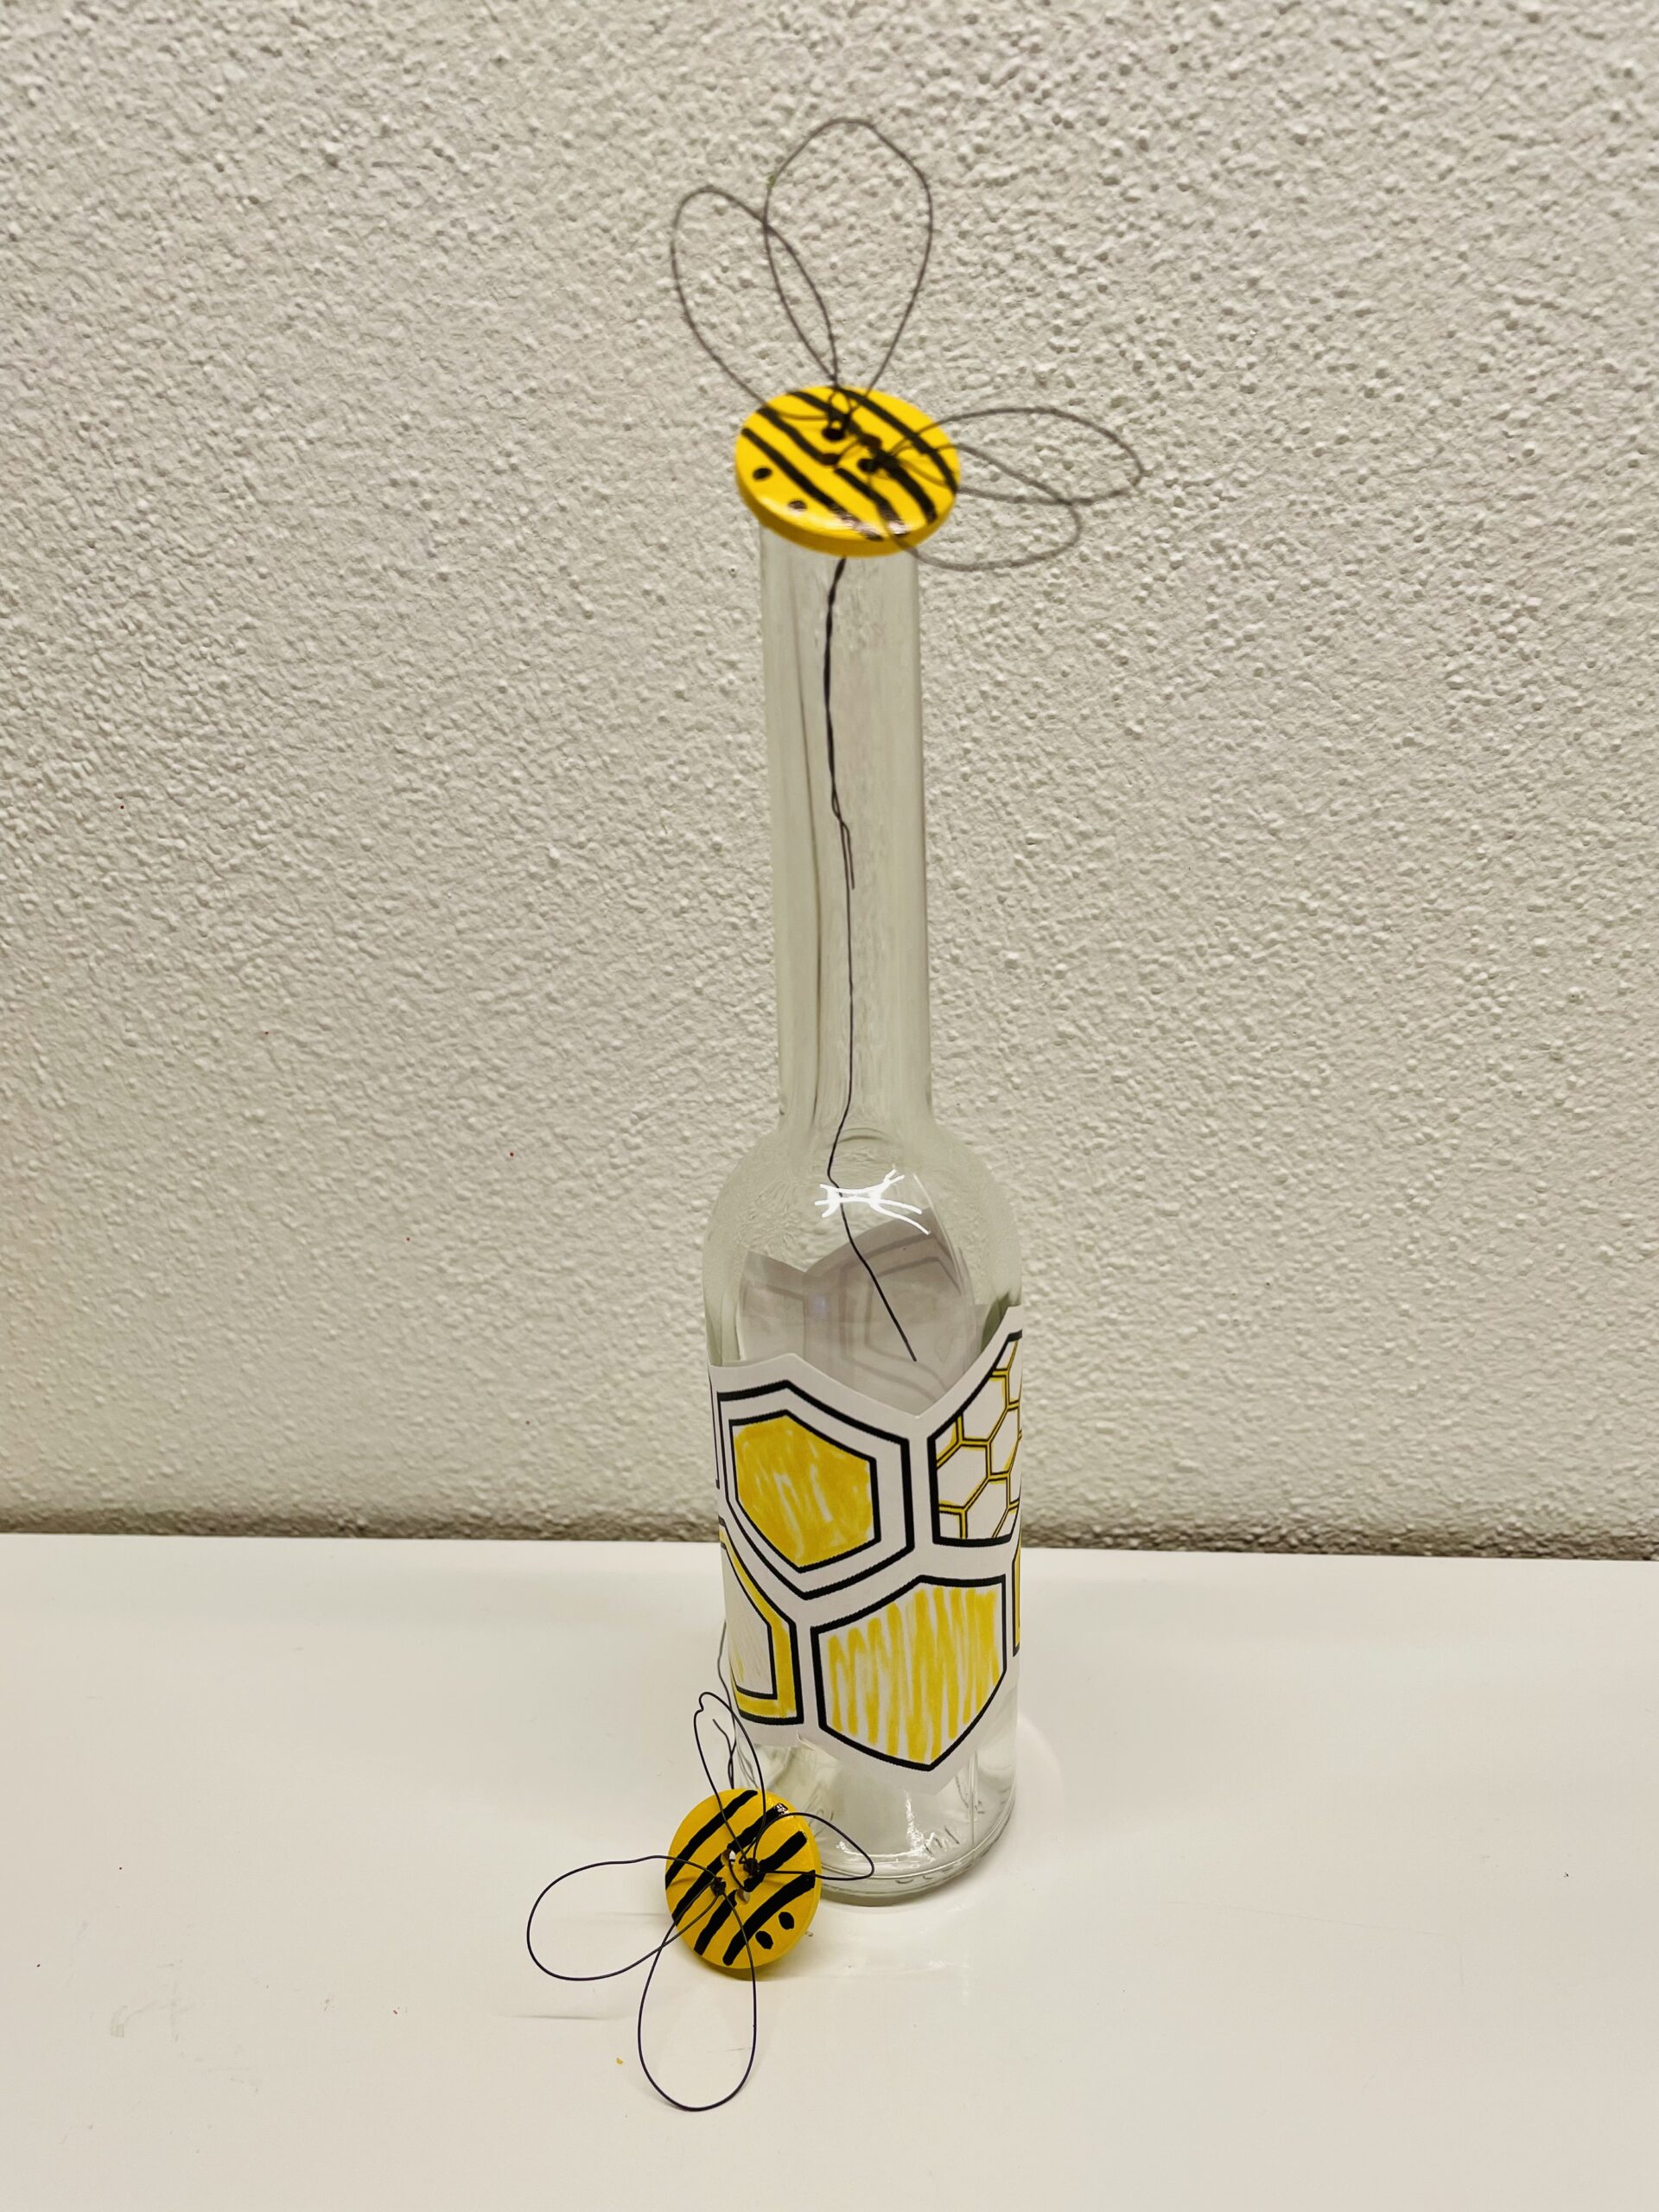
Bild zum Schritt 19 für das Bastel- und DIY-Abenteuer für Kinder: 'Sicher findet ihr auch einen schönen Platz zur Dekoration.'

20

Or for a windlight with honeycomb motif as an additional highlight.
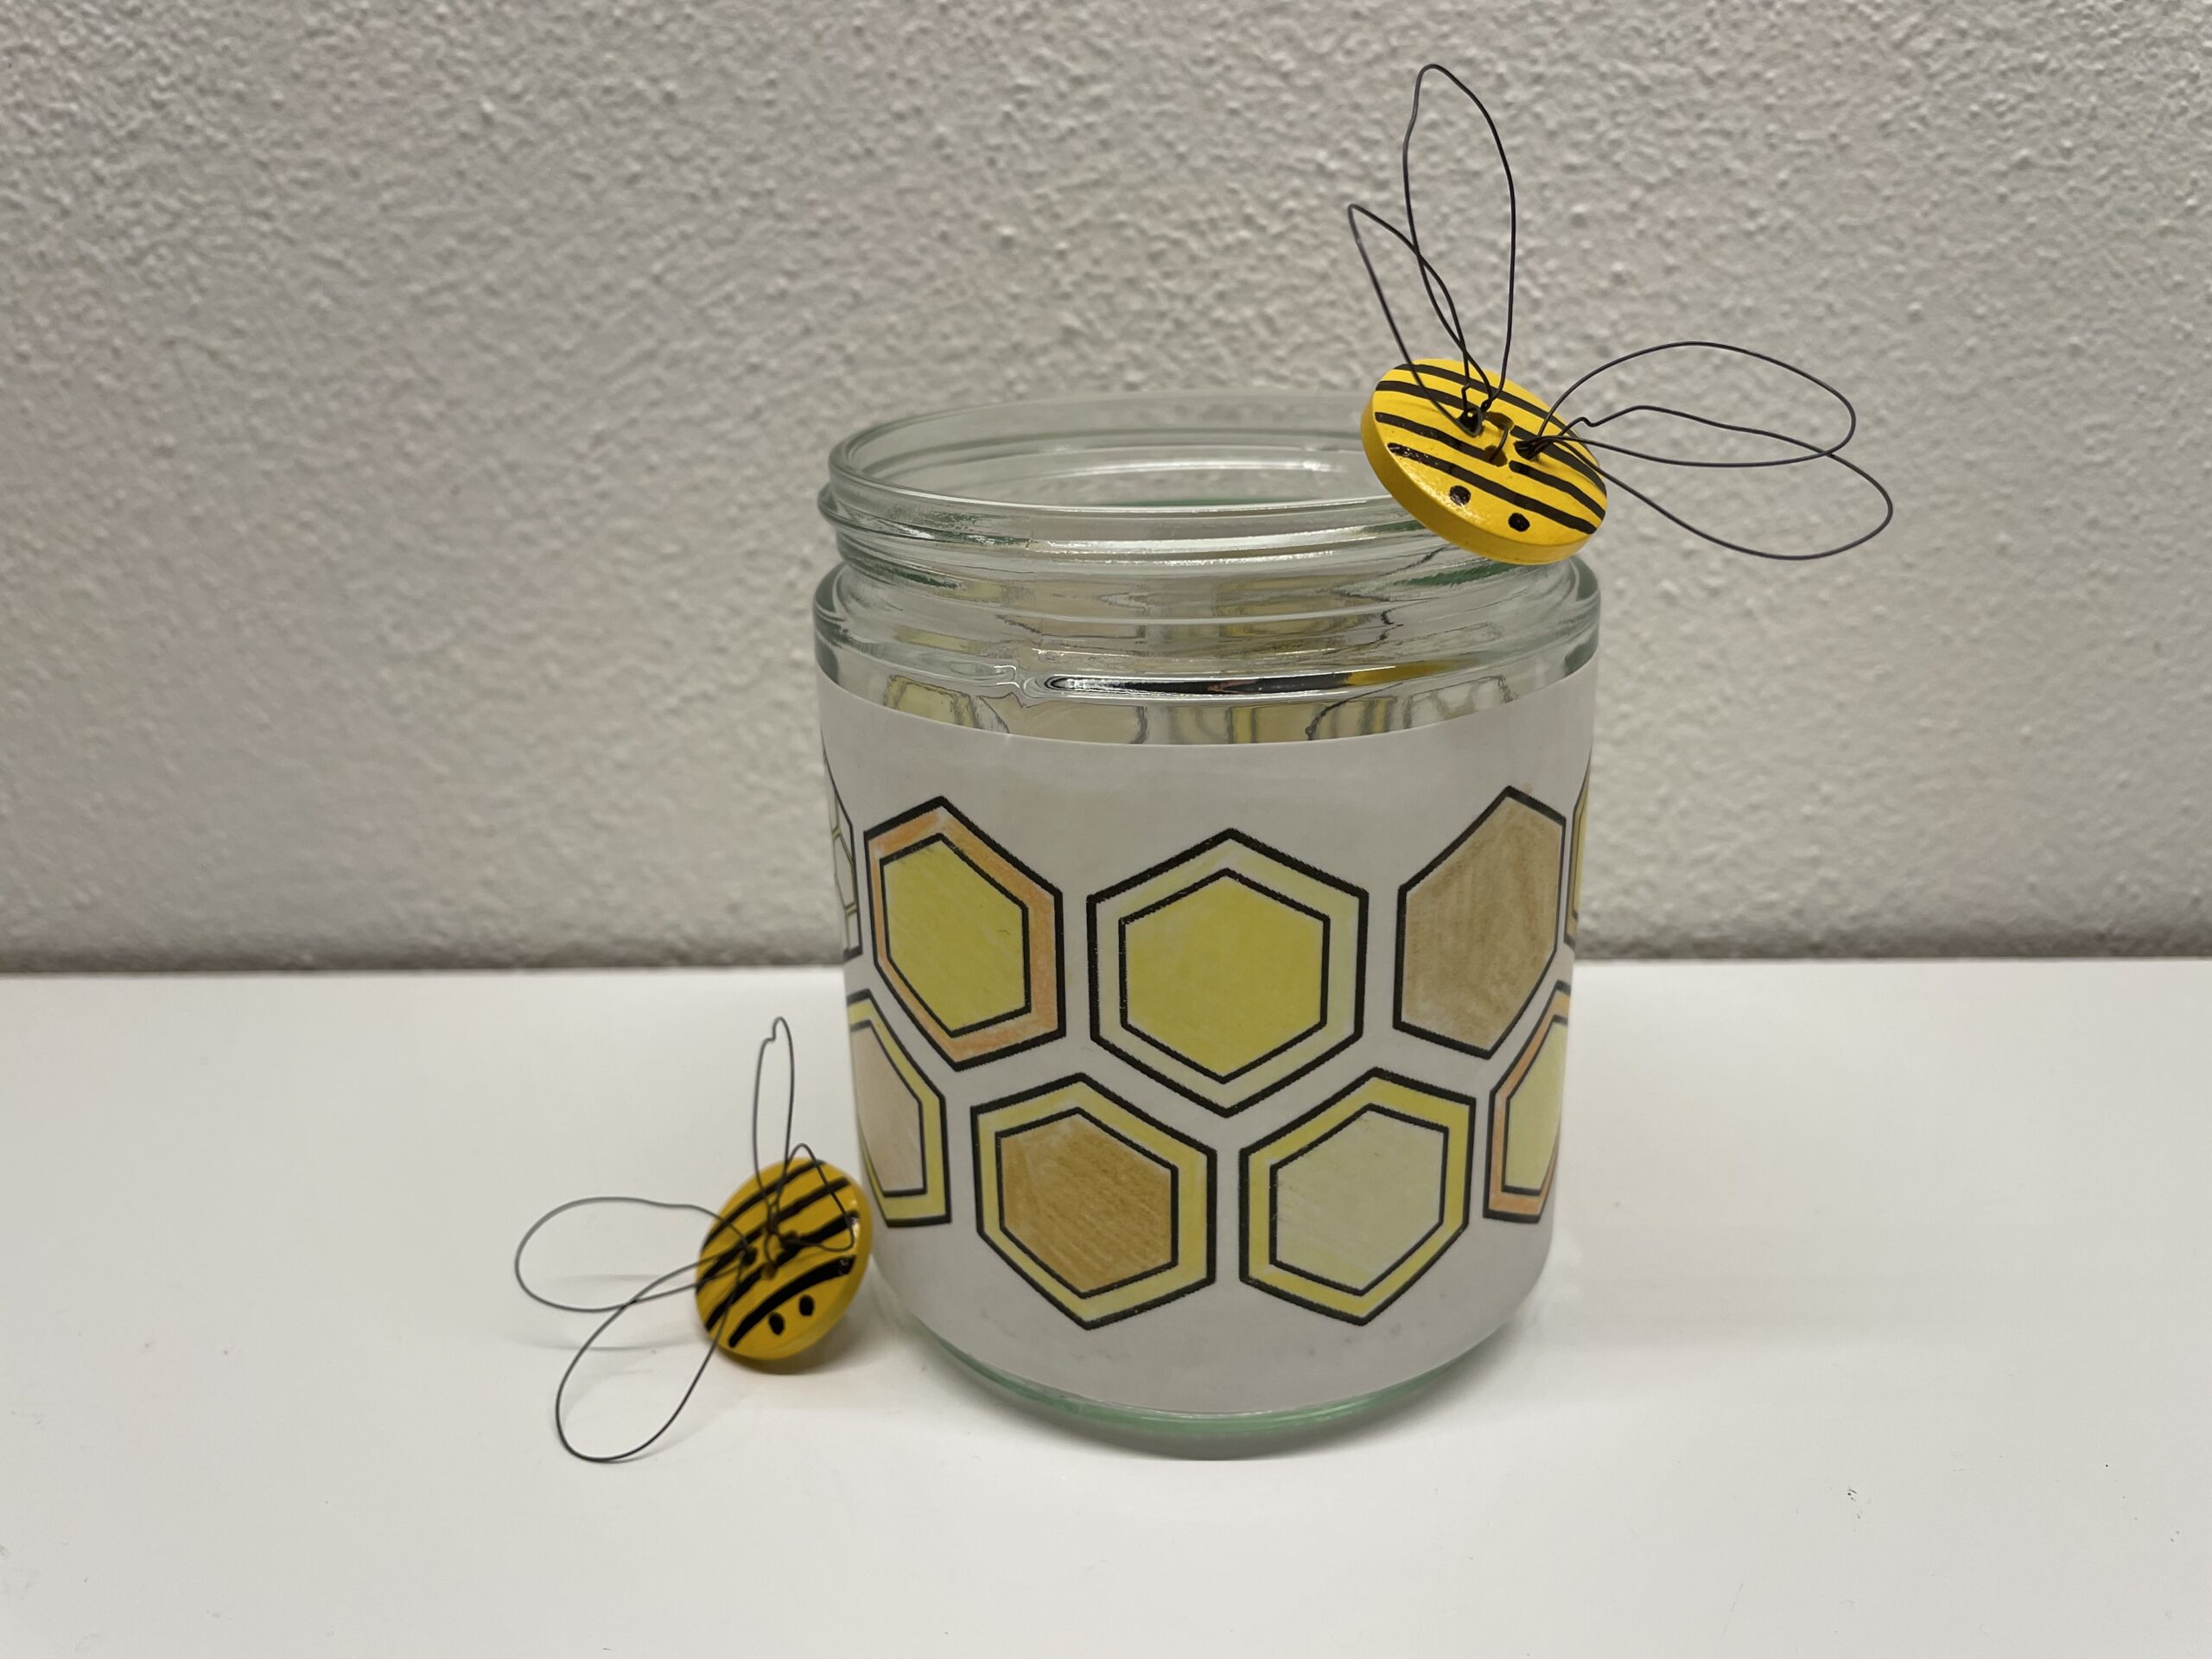
Bild zum Schritt 20 für das Bastel- und DIY-Abenteuer für Kinder: 'Oder für ein Windlicht mit Wabenmotiv als zusätzliches Highlight.'

21

Have fun ahscropping.

Bee made of button and wire

Follow us on Facebook , Instagram and Pinterest
Don't miss any more adventures: Our bottle mail

Leave a Reply

Your email address will not be published.

The maximum upload file size: 5 MB. You can upload: image, document. Drop file here