The home screen i.e. the home screen on the iPhone is very confusing for children in the factory setting and therefore difficult to capture. We give you a suggestion how this home screen can be built up in a child-friendly way. We explain this step by step with many pictures.
This offer is possible from the iPhone 5s (more precisely from iOS 12). Please write to us if you would like an offer for an Android device. Then we would create one in time.
Media Education for Kindergarten and Hort

Relief in everyday life, targeted promotion of individual children, independent learning and - without any pre-knowledge already usable by the youngest!
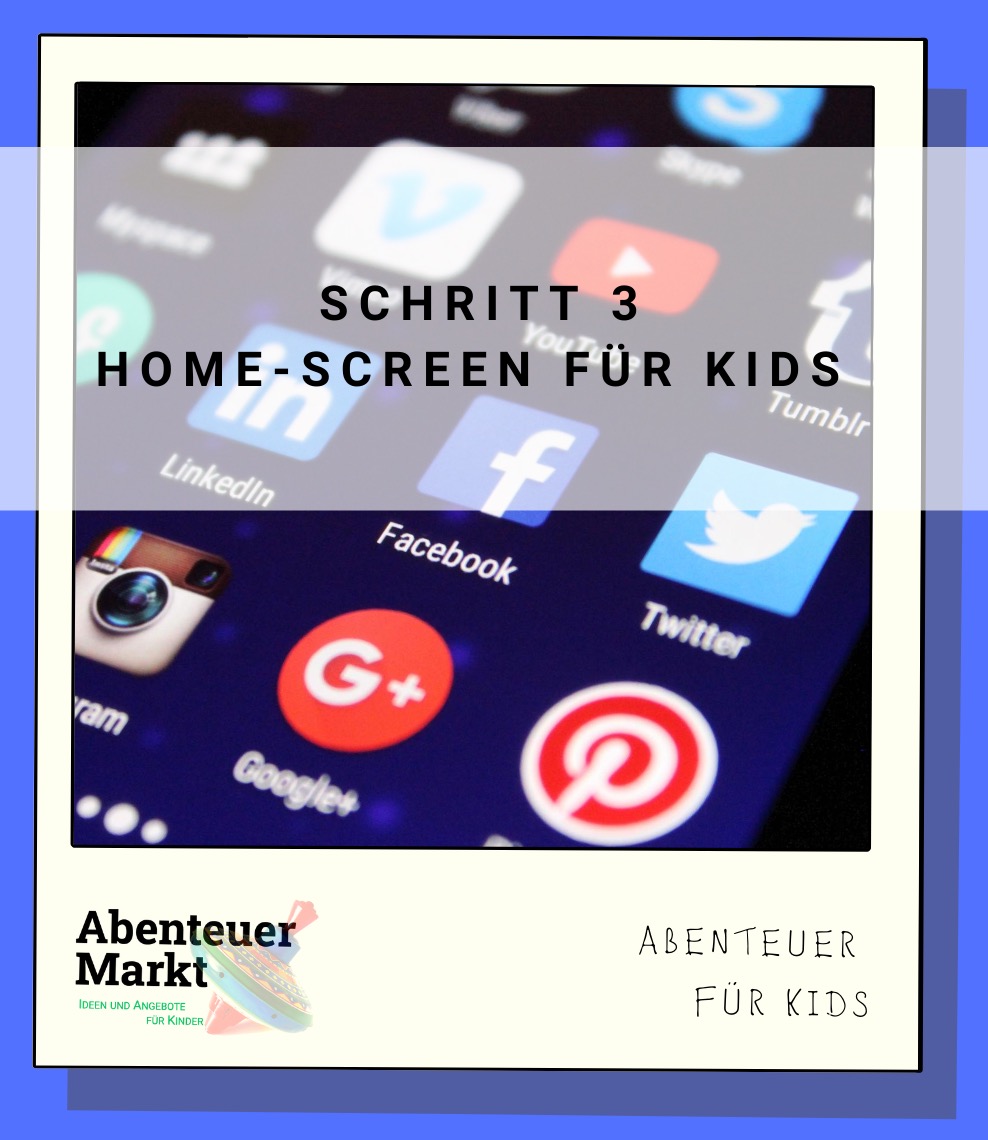
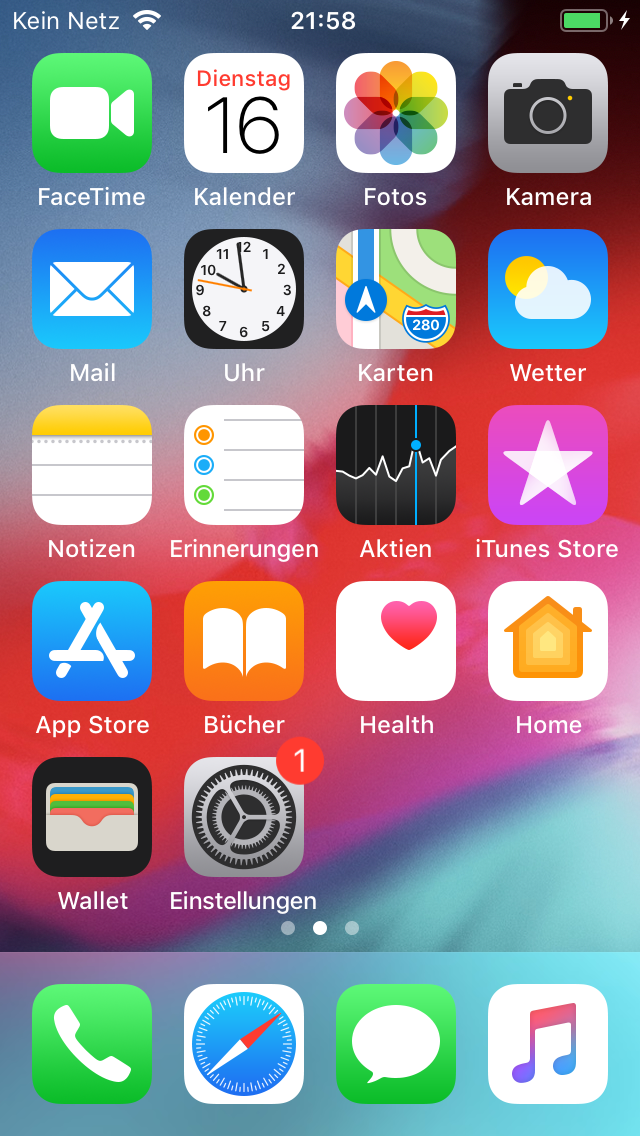
Click on the home butt and enter your passcode if necessary. Now you are on the home screen. In the factory setting it looks like the one on the picture.
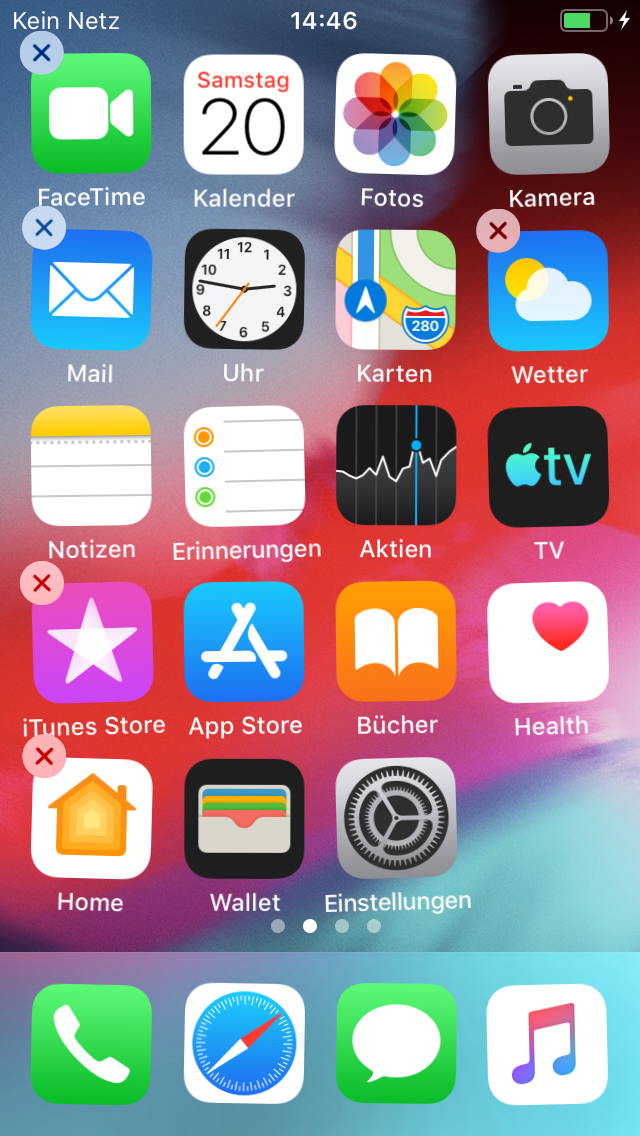
Click on any symbol with your finger until the symbols shake and display an x.
Then we create folders. To do this, push the "App Store icon" over the "Settings" icon.


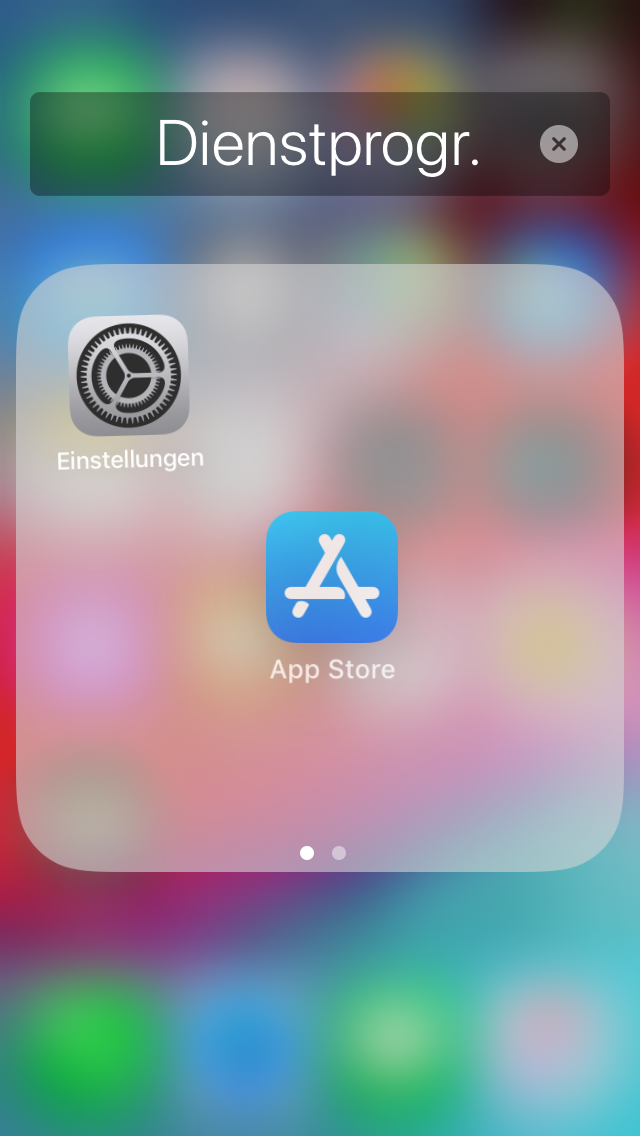
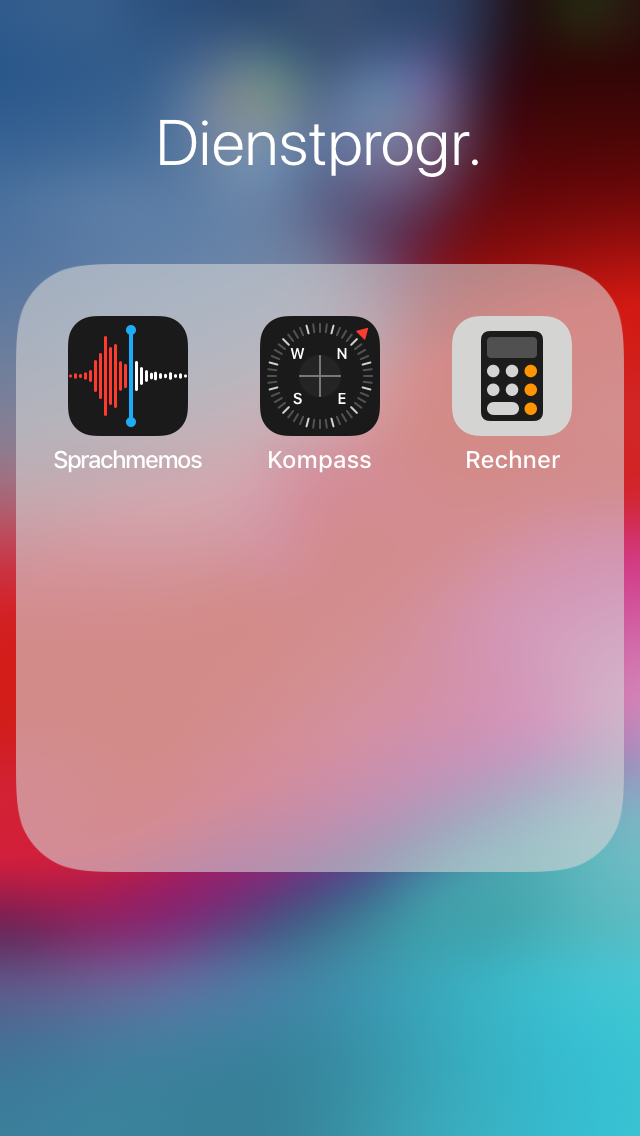
This automatically creates the folder "Utilities".
Press below the gray box and move the "iTunes Store icon" to the folder.
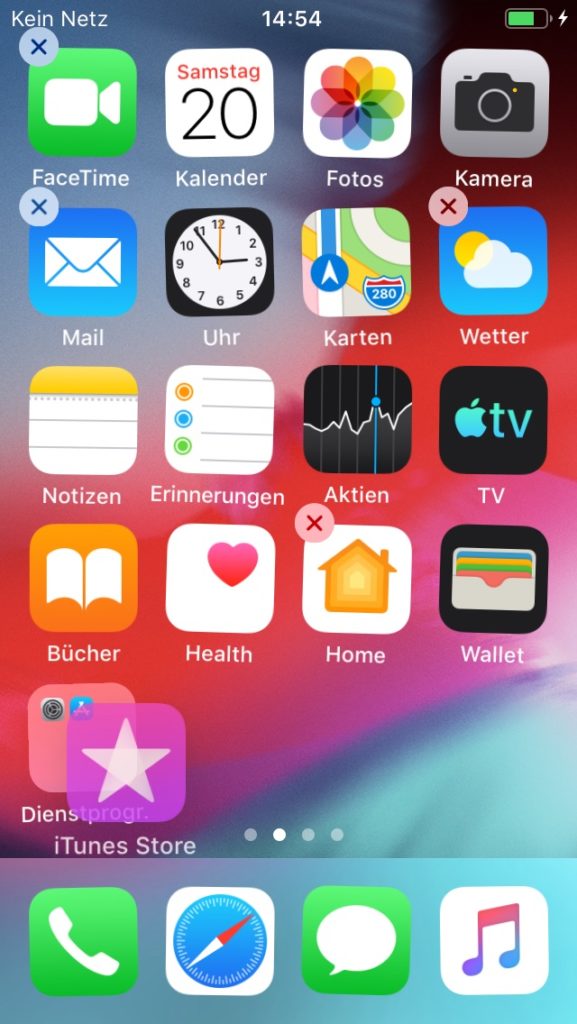


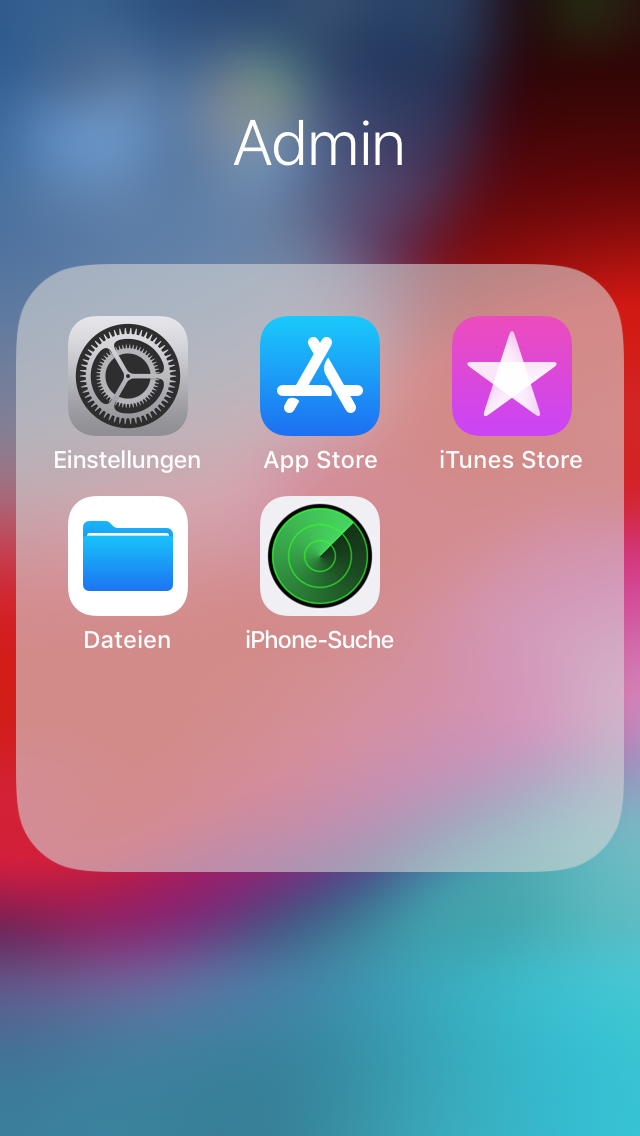
To do this, simply click on the name "Utilities" with your finger for longer. If the icons are wobbly, you can simply click on the font line. With the x on the right side of the font line you can delete the name. Then, rename the folder to "Admin". We select this name as an abbreviation for administrator. In this folder, you will need programs that you need again and again (e.g. to change settings), but your child should not use.
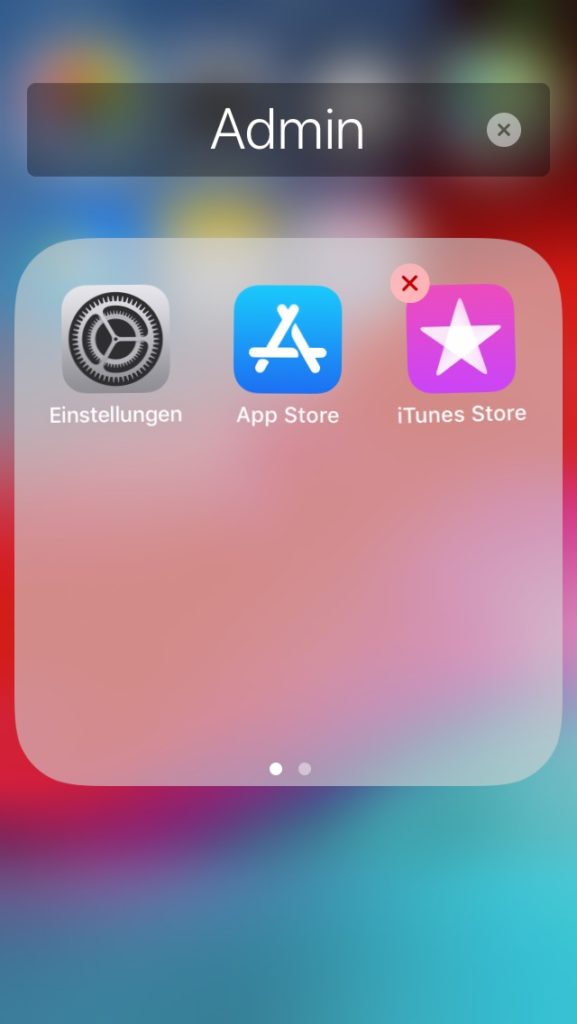


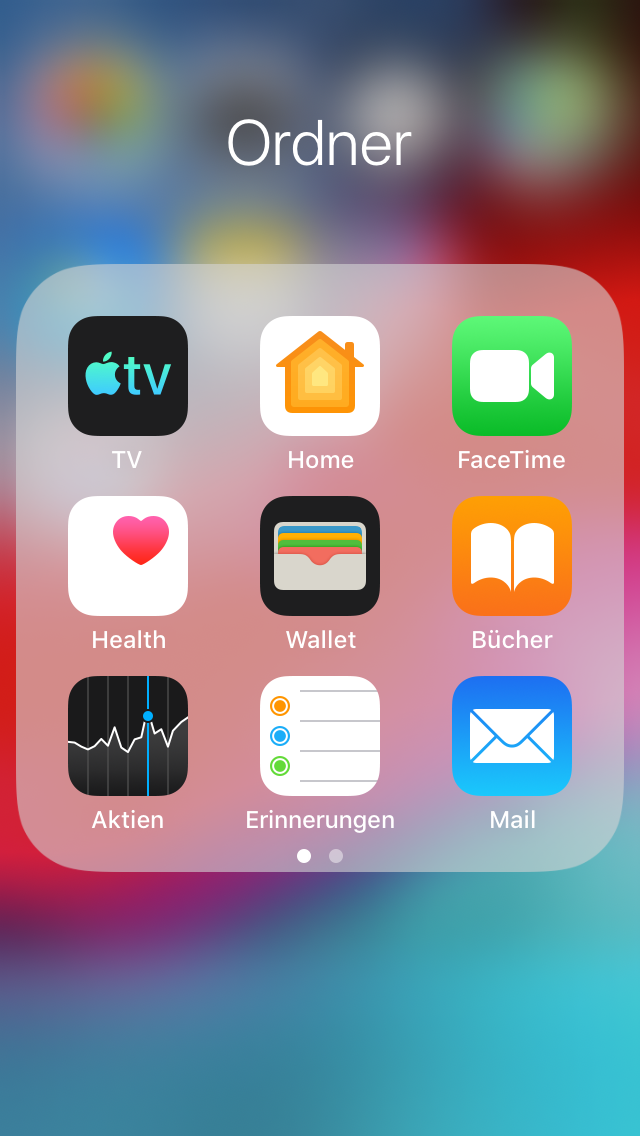
Now create a new folder with apps that your child doesn't need 'current'. For this, for example, move the TV icon to the home icon.
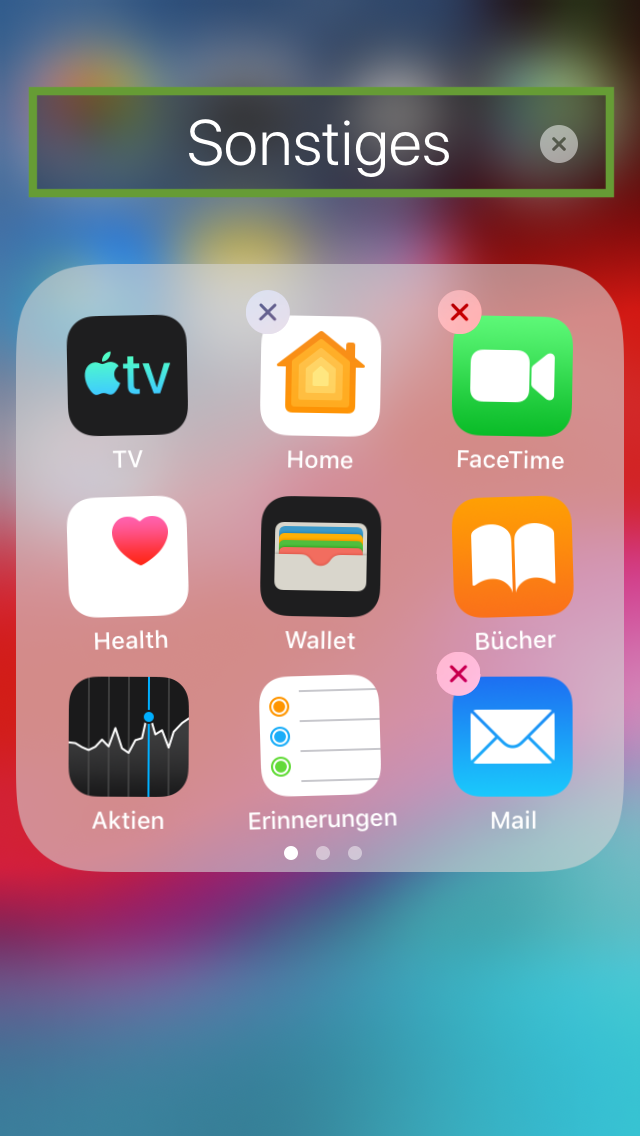
In this folder we recommend to push the following apps for kindergarten children: Face-Time, Wallet, Books, Stocks, Memories, Mail, Safari, Phone, Messages and Calendar.
For primary school children, you can let out phones and messages.
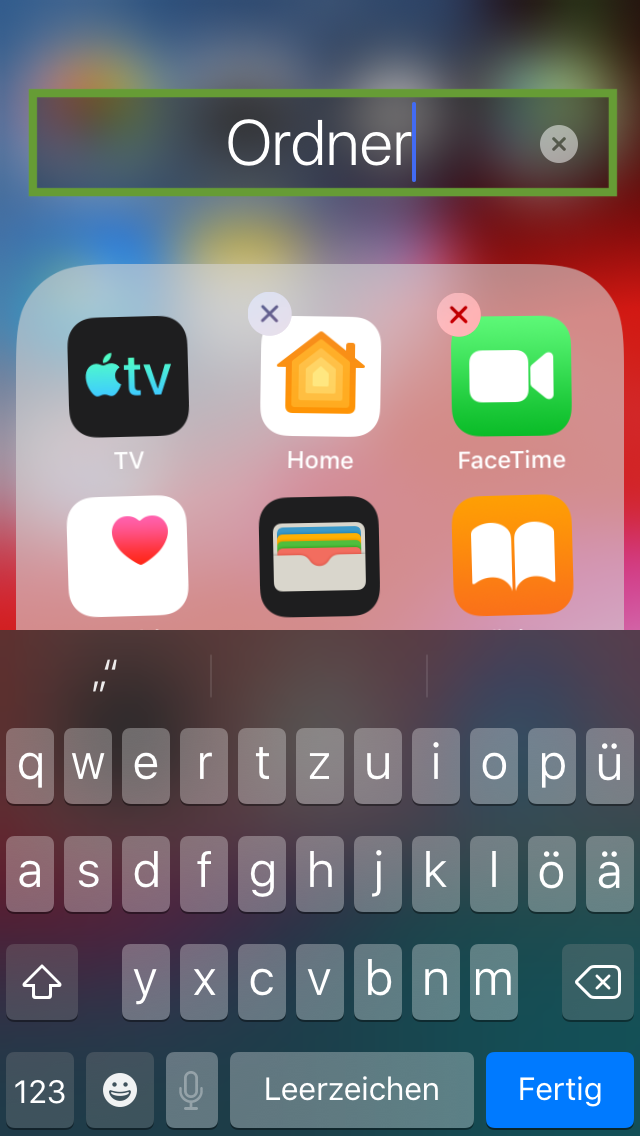
To rename the folder, just click on the name with your finger for longer. Then you can name it according to your wishes.
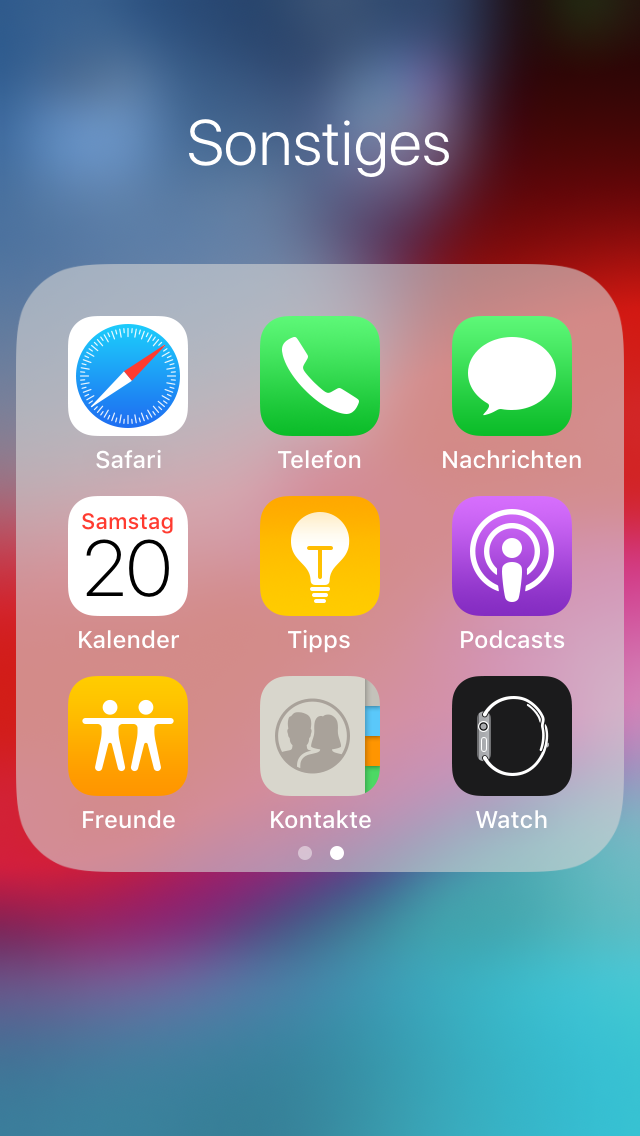
We have called it "Other". Since not all symbols are visible on one page, there is a second page where we have the symbols Safari, Phone, Calendar and Messages.
Now take the "Other" folder and push it with your finger to the right edge of the screen and thus to the second screen.
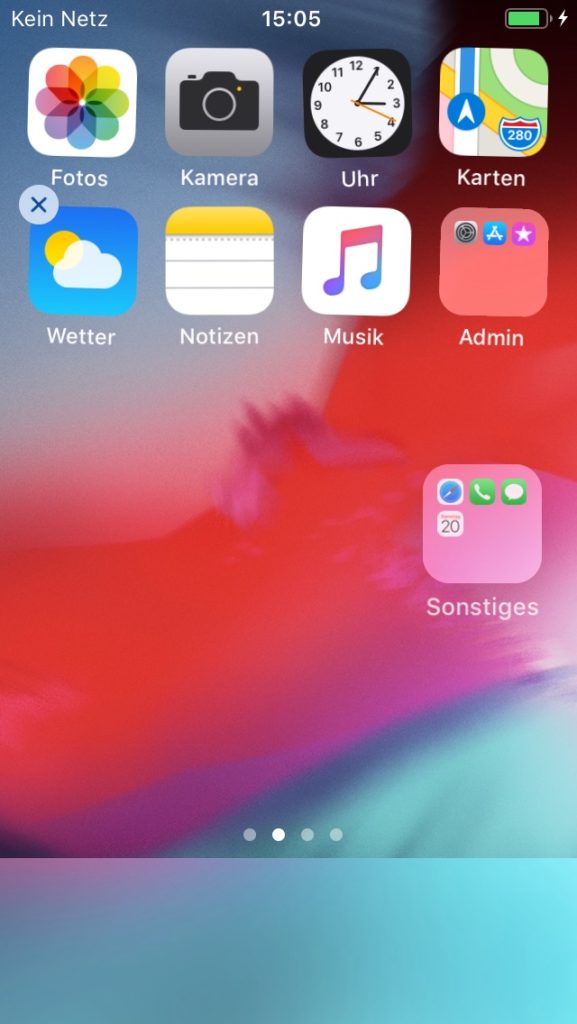


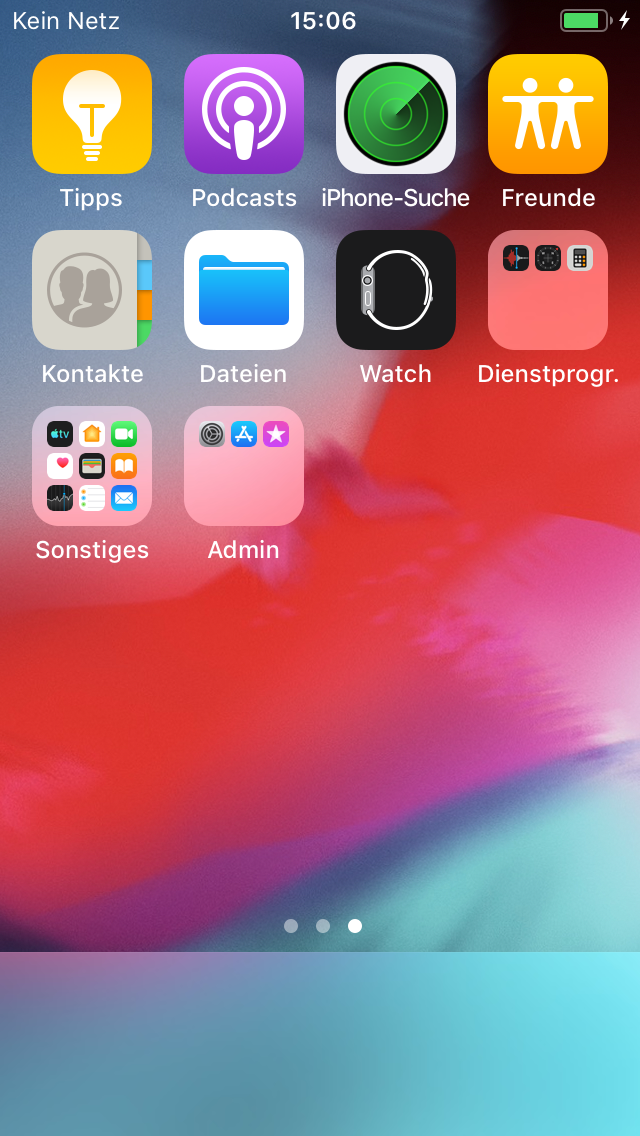
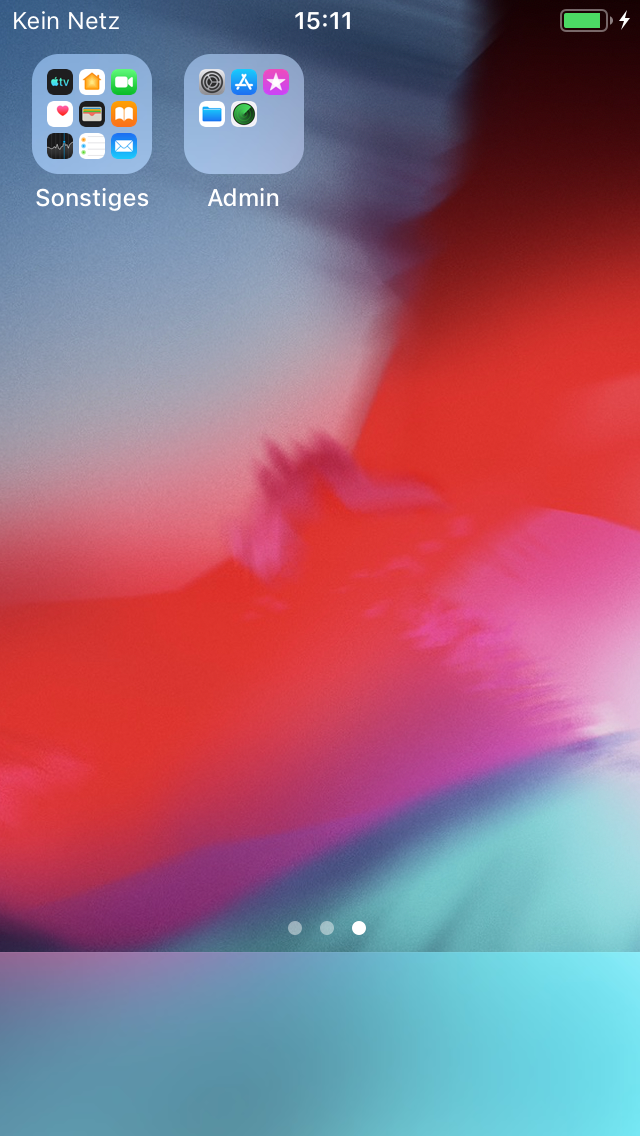
Move the folder "Admin" to the right screen as well. This is how the second screen looks now.
Then move tips, podcasts, friends, contacts and watch to the folder "Others"
The icons files and iPhone search move to the folder "Admin".
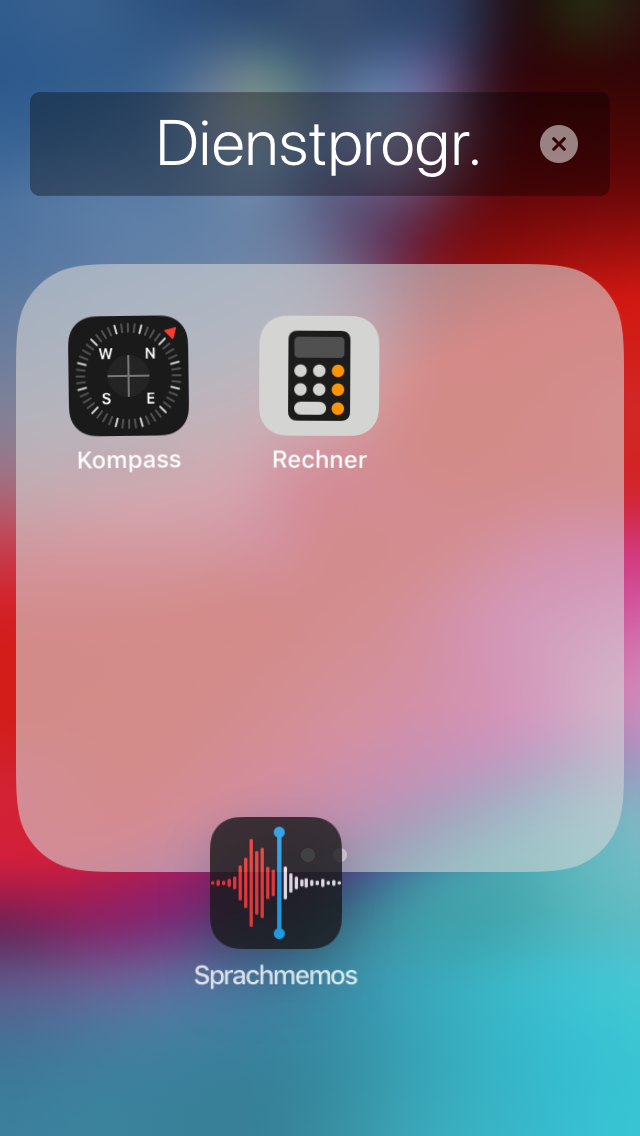
Then go to the "Utilities" folder. Press any symbol for longer and push the "Language Memos" outside the gray box.
Then push the "compass" and the "computer" out of the gray box from the folder "Utilities".
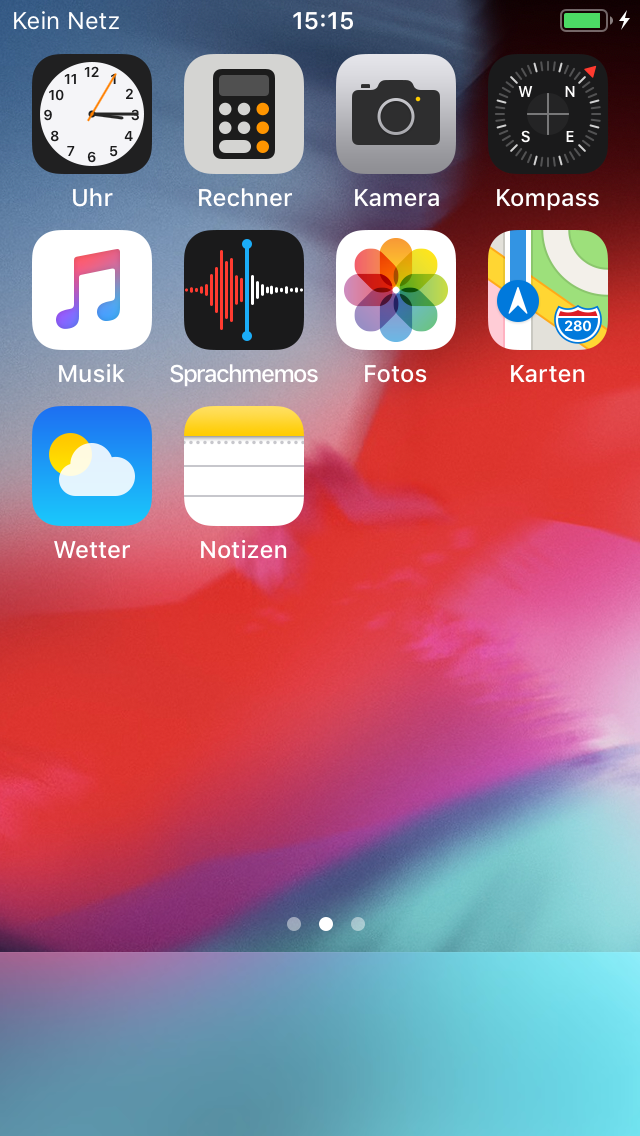
Now move the symbols "Calculator", "Language Memos" and "Compass" to the first screen. Now you have all the apps that kindergarten children can actively use on one side. These apps work without a SIM card and without any cost. You need WLAN access for the card app and the weather app. For primary school children we recommend to take the phone and the messages. But for that you also need a SIM card.
On your right screen, the second one, there are now all apps in the Admin folder that you should be able to access, but which are not important for your child. In the "Other" folder, there are apps that you can gradually introduce.
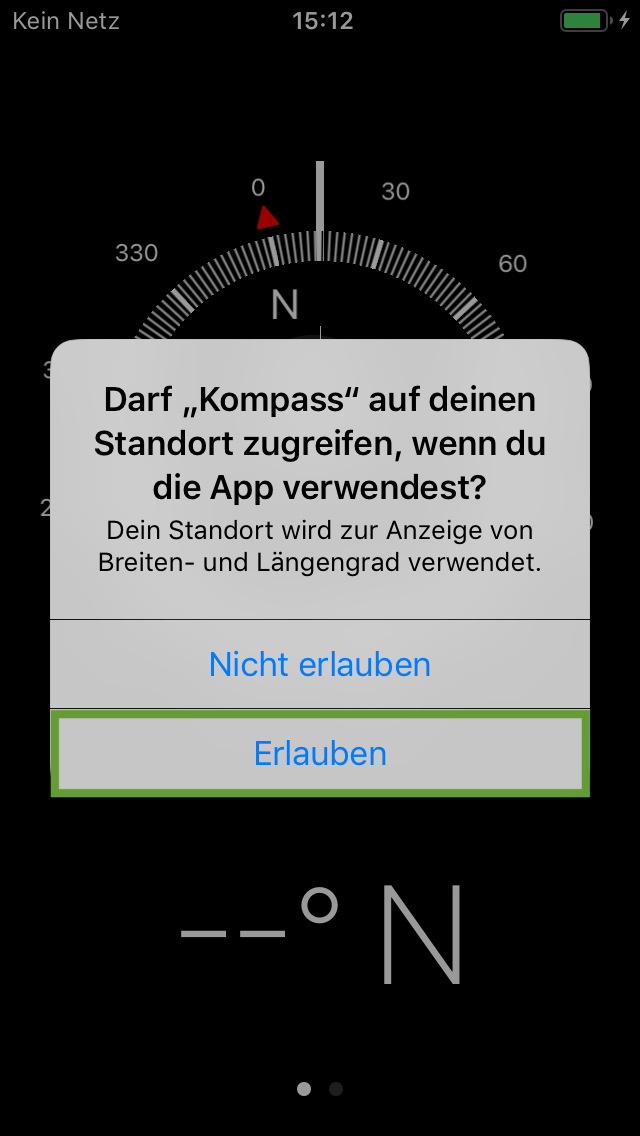
Click on all the apps that are on the start screen, because so that your child can use them, you have to click them all once. Because often at the beginning, what the app can (new) or it is asked for releases is explained. In the example, you will see the App Compass, which asks for the location. We would allow it - but if you are against tracking services, then click on "Do not allow".
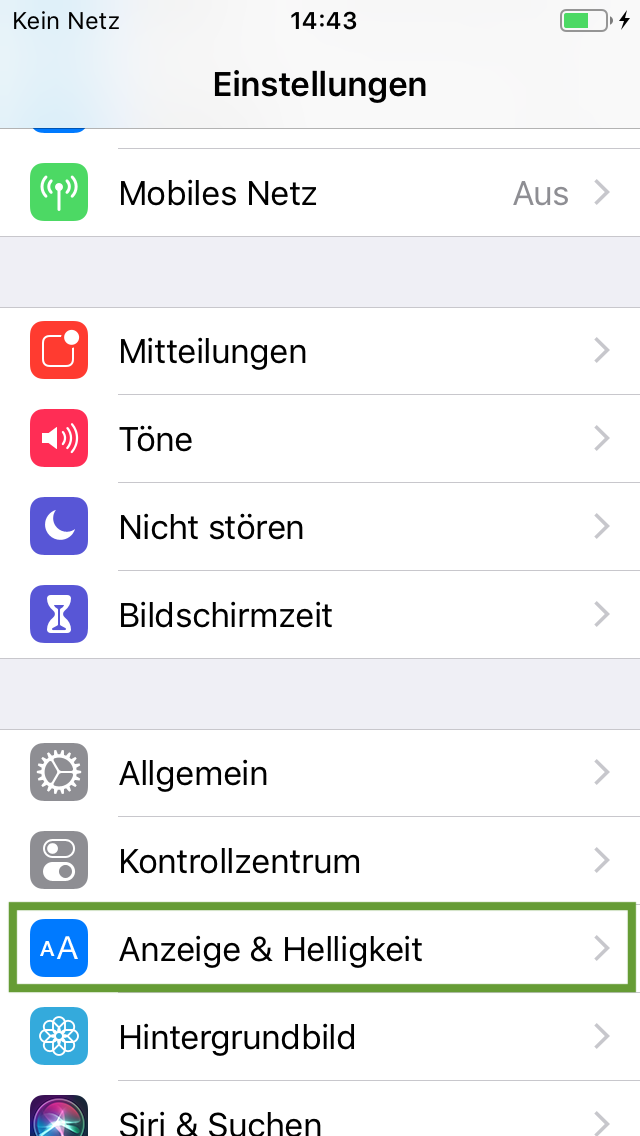
Tip: Finally, change the time of the "automatic lock". For this, press the "Settings" icon. Below you click on "Display and brightness".
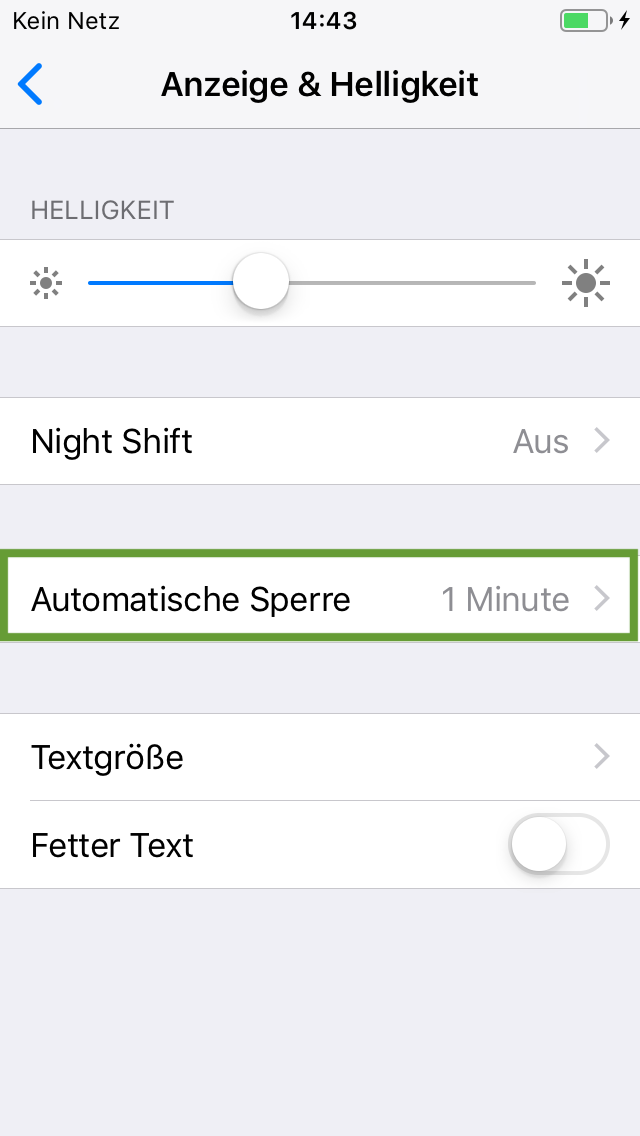
Now you can increase the "automatic lock" to 5 minutes. This extension of the lock time is especially important for kindergarten children. Because they sometimes need a little longer or deal with others in between.
And it goes on with Part 4: Set up Family Sharing (including Apple ID and Payment Sharing).
Materials
Directions
Click on the home butt and enter your passcode if necessary. Now you are on the home screen. In the factory setting it looks like the one on the picture.
Click on any symbol with your finger until the symbols shake and display an x.
Then we create folders. To do this, push the "App Store icon" over the "Settings" icon.


This automatically creates the folder "Utilities".
Press below the gray box and move the "iTunes Store icon" to the folder.


To do this, simply click on the name "Utilities" with your finger for longer. If the icons are wobbly, you can simply click on the font line. With the x on the right side of the font line you can delete the name. Then, rename the folder to "Admin". We select this name as an abbreviation for administrator. In this folder, you will need programs that you need again and again (e.g. to change settings), but your child should not use.


Now create a new folder with apps that your child doesn't need 'current'. For this, for example, move the TV icon to the home icon.
In this folder we recommend to push the following apps for kindergarten children: Face-Time, Wallet, Books, Stocks, Memories, Mail, Safari, Phone, Messages and Calendar.
For primary school children, you can let out phones and messages.
To rename the folder, just click on the name with your finger for longer. Then you can name it according to your wishes.
We have called it "Other". Since not all symbols are visible on one page, there is a second page where we have the symbols Safari, Phone, Calendar and Messages.
Now take the "Other" folder and push it with your finger to the right edge of the screen and thus to the second screen.


Move the folder "Admin" to the right screen as well. This is how the second screen looks now.
Then move tips, podcasts, friends, contacts and watch to the folder "Others"
The icons files and iPhone search move to the folder "Admin".
Then go to the "Utilities" folder. Press any symbol for longer and push the "Language Memos" outside the gray box.
Then push the "compass" and the "computer" out of the gray box from the folder "Utilities".
Now move the symbols "Calculator", "Language Memos" and "Compass" to the first screen. Now you have all the apps that kindergarten children can actively use on one side. These apps work without a SIM card and without any cost. You need WLAN access for the card app and the weather app. For primary school children we recommend to take the phone and the messages. But for that you also need a SIM card.
On your right screen, the second one, there are now all apps in the Admin folder that you should be able to access, but which are not important for your child. In the "Other" folder, there are apps that you can gradually introduce.
Click on all the apps that are on the start screen, because so that your child can use them, you have to click them all once. Because often at the beginning, what the app can (new) or it is asked for releases is explained. In the example, you will see the App Compass, which asks for the location. We would allow it - but if you are against tracking services, then click on "Do not allow".
Tip: Finally, change the time of the "automatic lock". For this, press the "Settings" icon. Below you click on "Display and brightness".
Now you can increase the "automatic lock" to 5 minutes. This extension of the lock time is especially important for kindergarten children. Because they sometimes need a little longer or deal with others in between.
And it goes on with Part 4: Set up Family Sharing (including Apple ID and Payment Sharing).
Follow us on Facebook , Instagram and Pinterest
Don't miss any more adventures: Our bottle mail


