Advent wreath for the smallest

AdventurerKatzi
Rating5.016.8 thousand times & (2) DifficultyAdvanced

This Advent wreath is ideal for toddlers! A wreath to touch and discover!
The candles are stitched down and the flames can be removed. So you can put up another flame every Sunday of Advent.
Look at the illustrated offer! It is also very elaborate for sewing exercises, but the work is worth it, because you have really long something of this Advent wreath!

Media Education for Kindergarten and Hort

Kind bastelt eine Rassel mit dem Navi
The Adventure Navi, the app for DIY projects, enables media education for the youngest.

Relief in everyday life, targeted promotion of individual children, independent learning and - without any pre-knowledge already usable by the youngest!
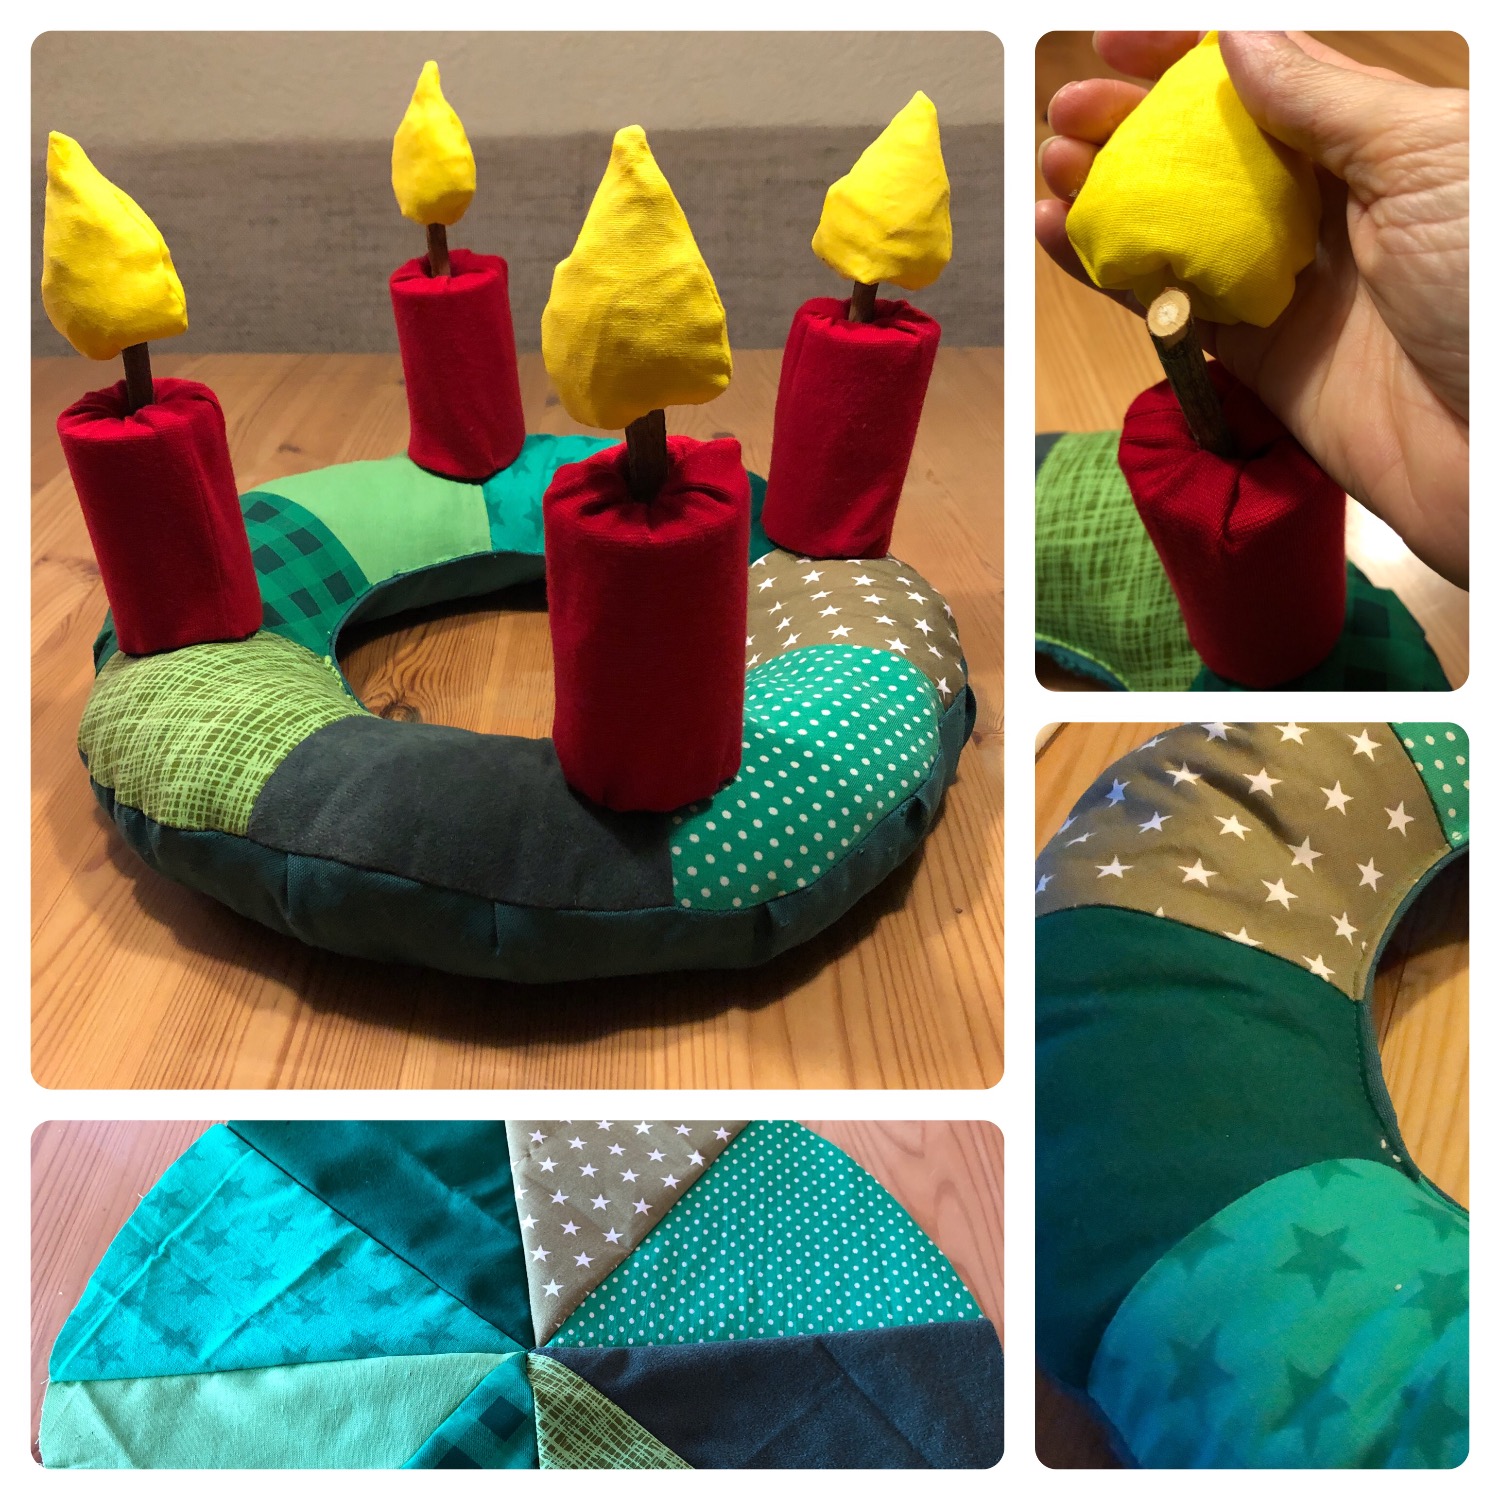


Titelbild zur Bastel- und DIY-Idee für Kinder '(505) Adventskranz für die Kleinsten'
Material for1 Child
Prep Time30 min.Adv. Time3 hoursTotal Time3 hours 30 min.
 Paper shears
 Substance shears
 Pen
 Sewing machine with matching yarn (green, red and yellow)
For the wreath:
 various green substancesPrinted and monochrome fabrics
 Cut Template
 Filling material: e.g. fabric residues, filling floss or similar
 Needle for sewing
 Pins and pins
 Possibly toilet paper roll and cooking spoon For filling out the cranny
For the stomped candles and the wick:
 red fabric + firmer fabric for the candle floor
 Tube insulation 4x approx.12 cm long
 4 thin plugs
 Knives and garden shears
For the removable flames:
 Yellow fabric
 Cut pattern: flame
 Filling wadding or waste materialor paper handkerchiefs, wadding pads or the like
1

Make a template for the circle segment of the wreath. Eight segments result in a circle.
Or print out the template and cut it out.

Bild zum Schritt 1 für das Bastel- und DIY-Abenteuer für Kinder: 'Macht euch eine Vorlage für das Kreissegment des Kranzes. Acht...'

2

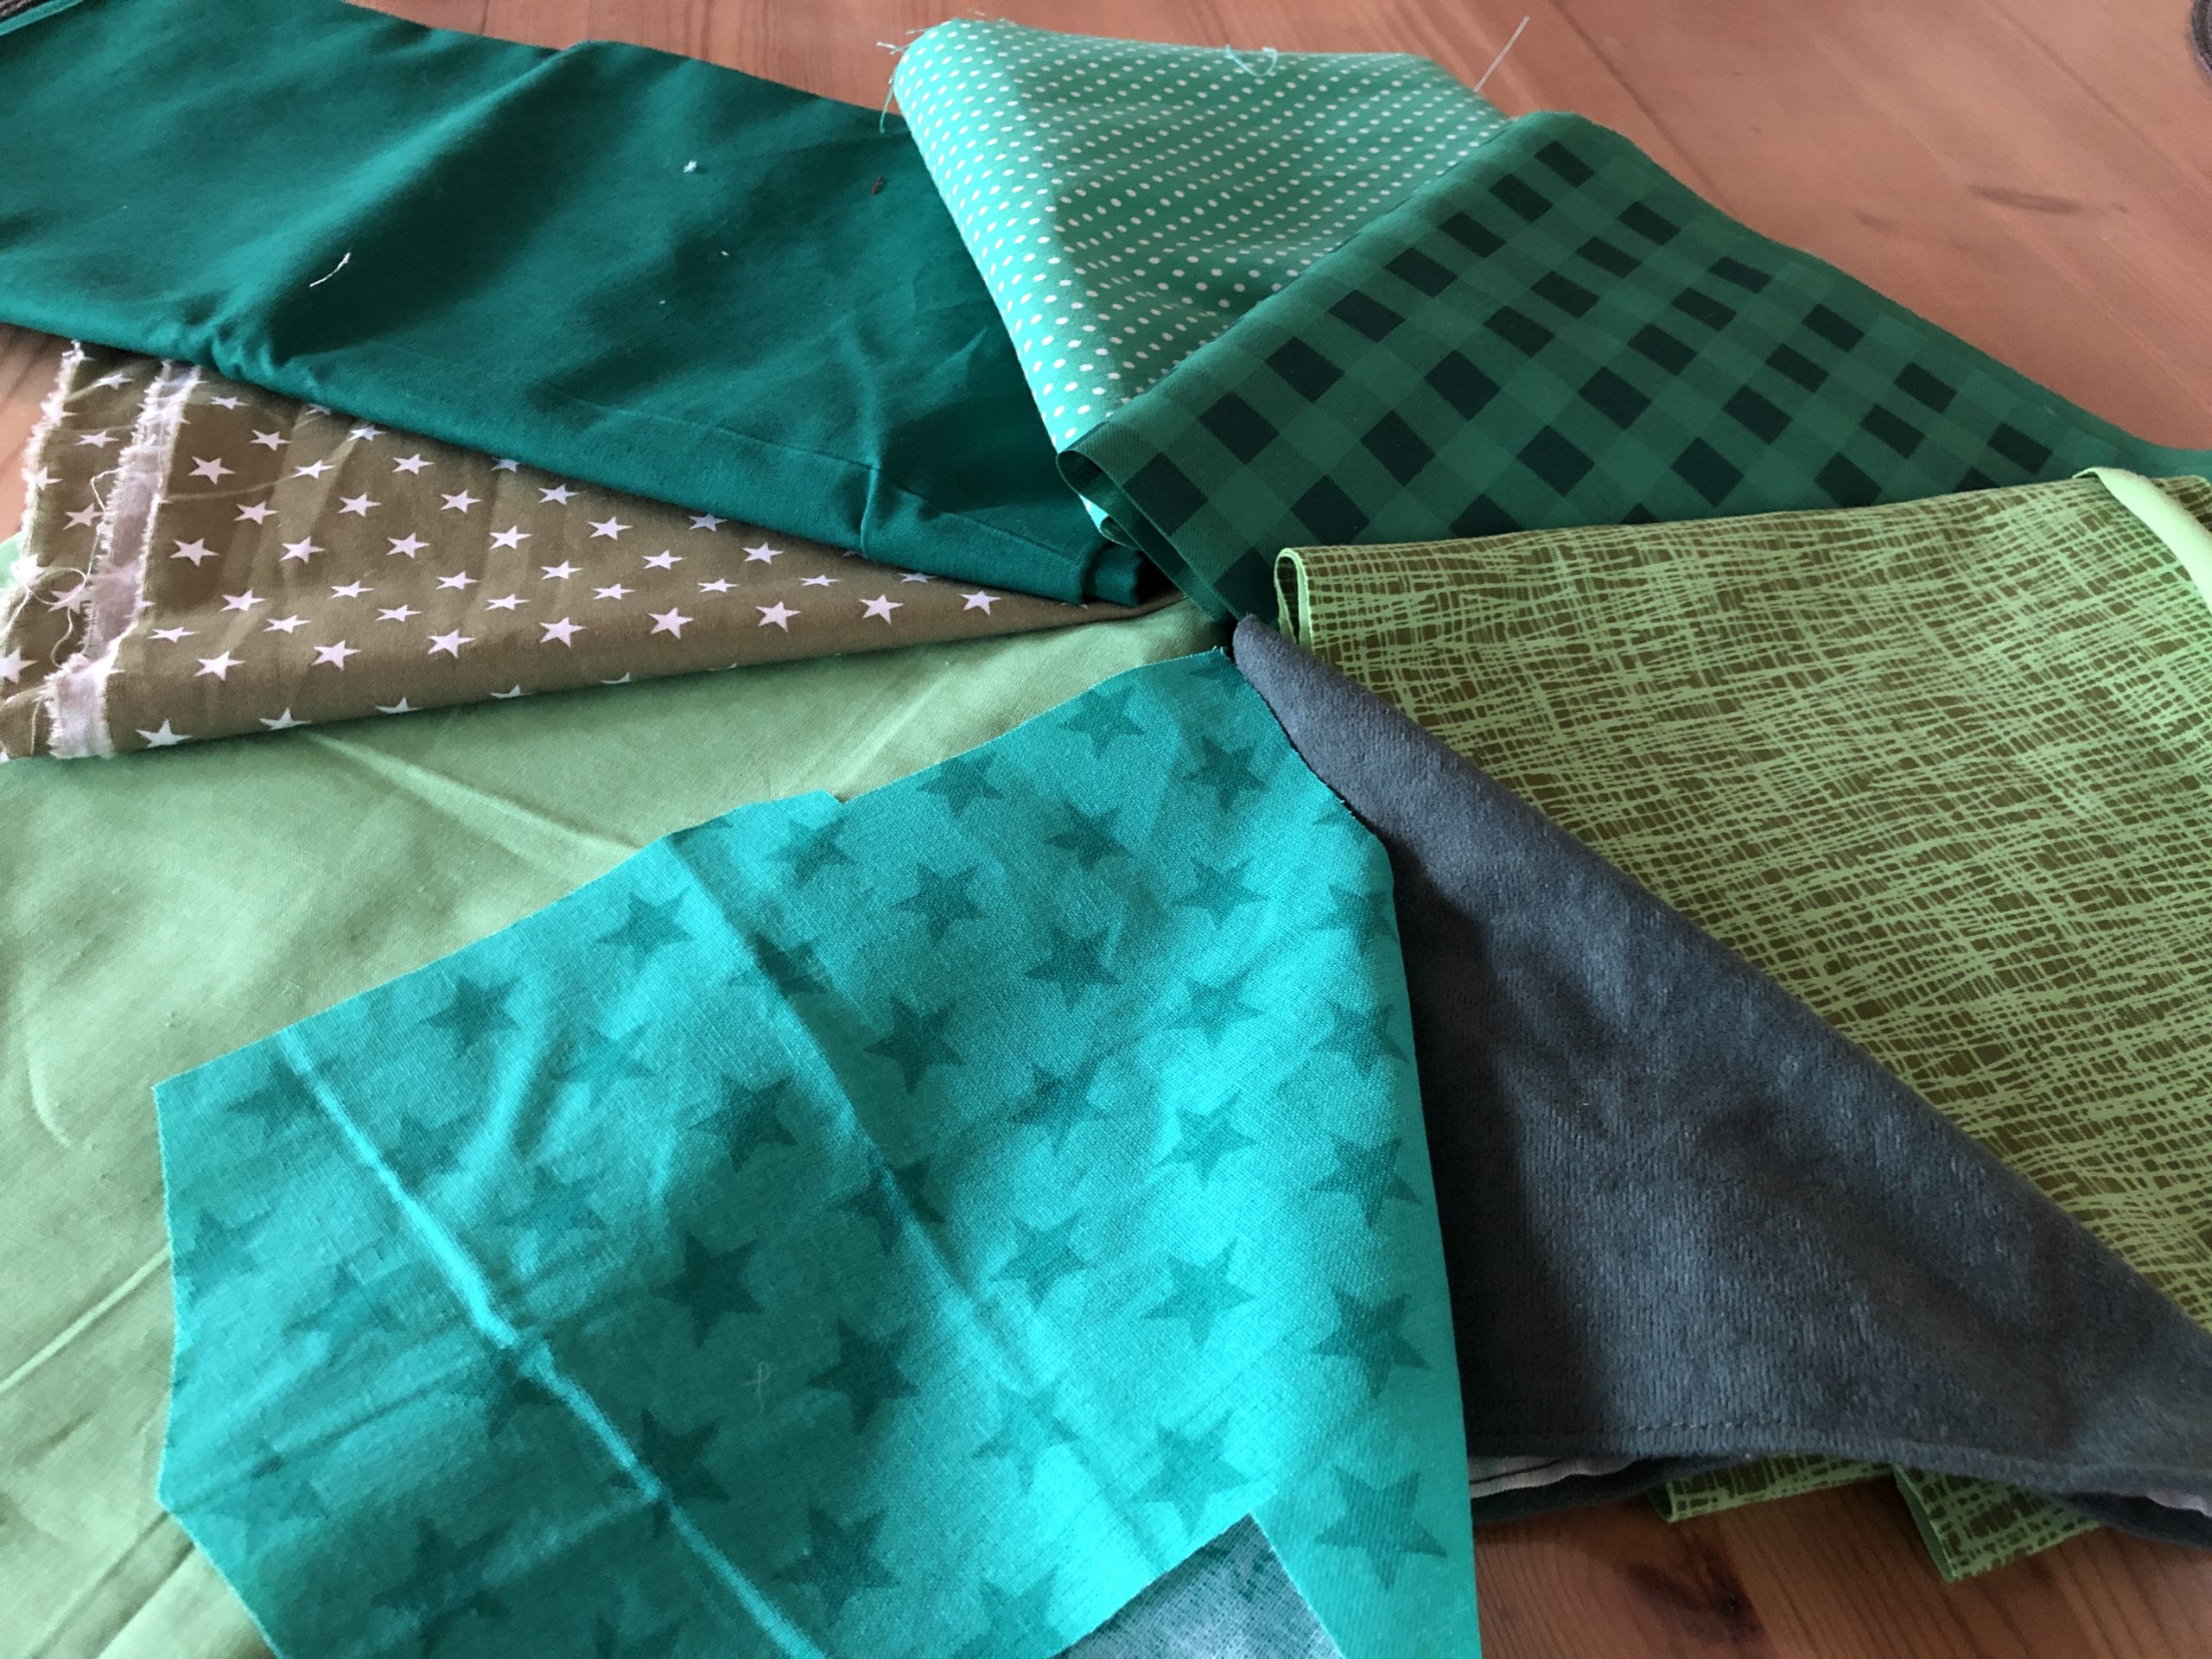
Choose your fabrics.

Bild zum Schritt 2 für das Bastel- und DIY-Abenteuer für Kinder: 'Wählt eure Stoffe.'

3

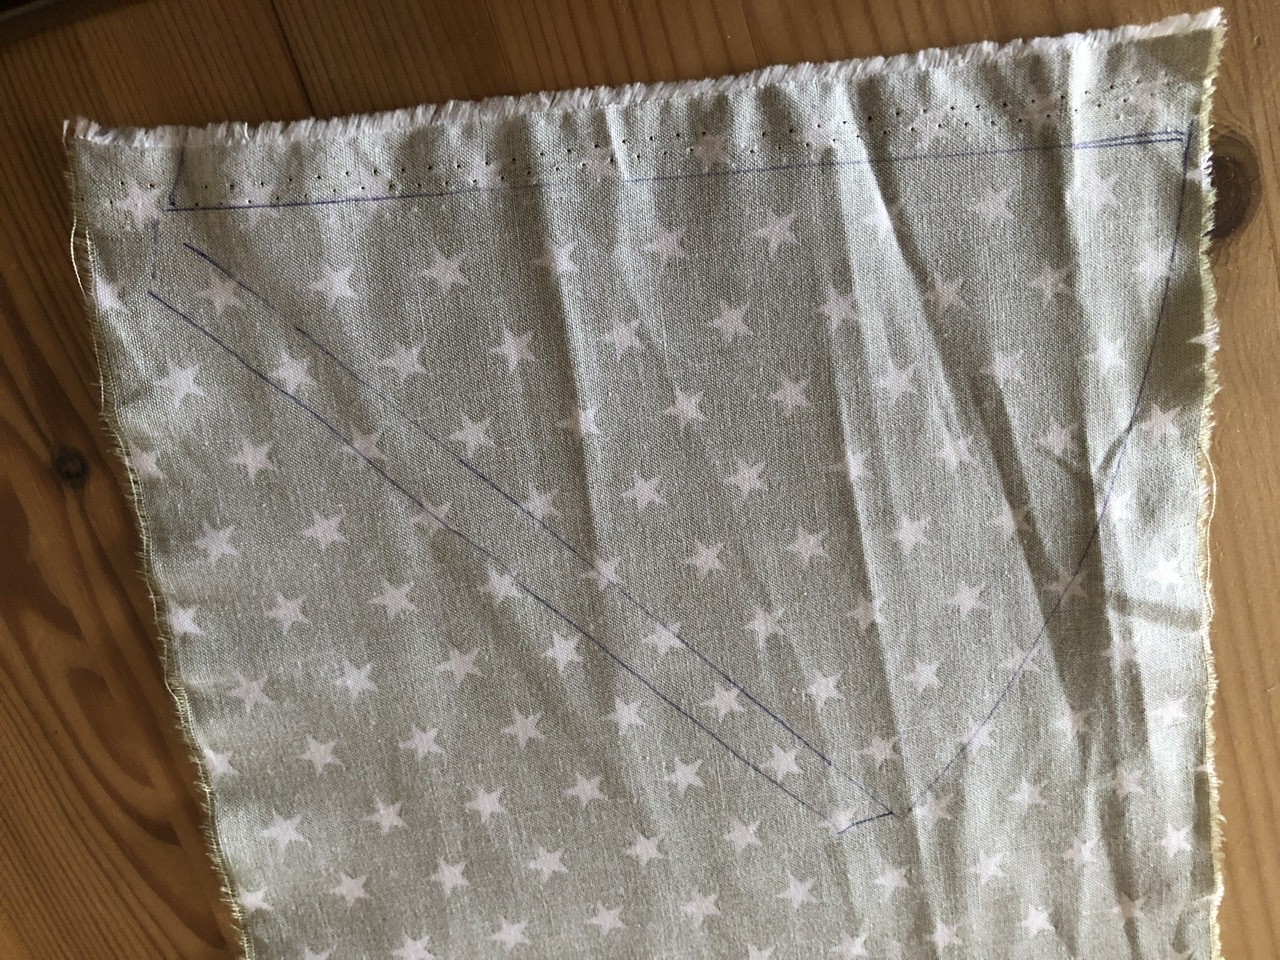
Cut four parts from different materials (patterns). Transfer the template to the fabric. Place the template and border it one centimetre larger. Then cut the fabrics.
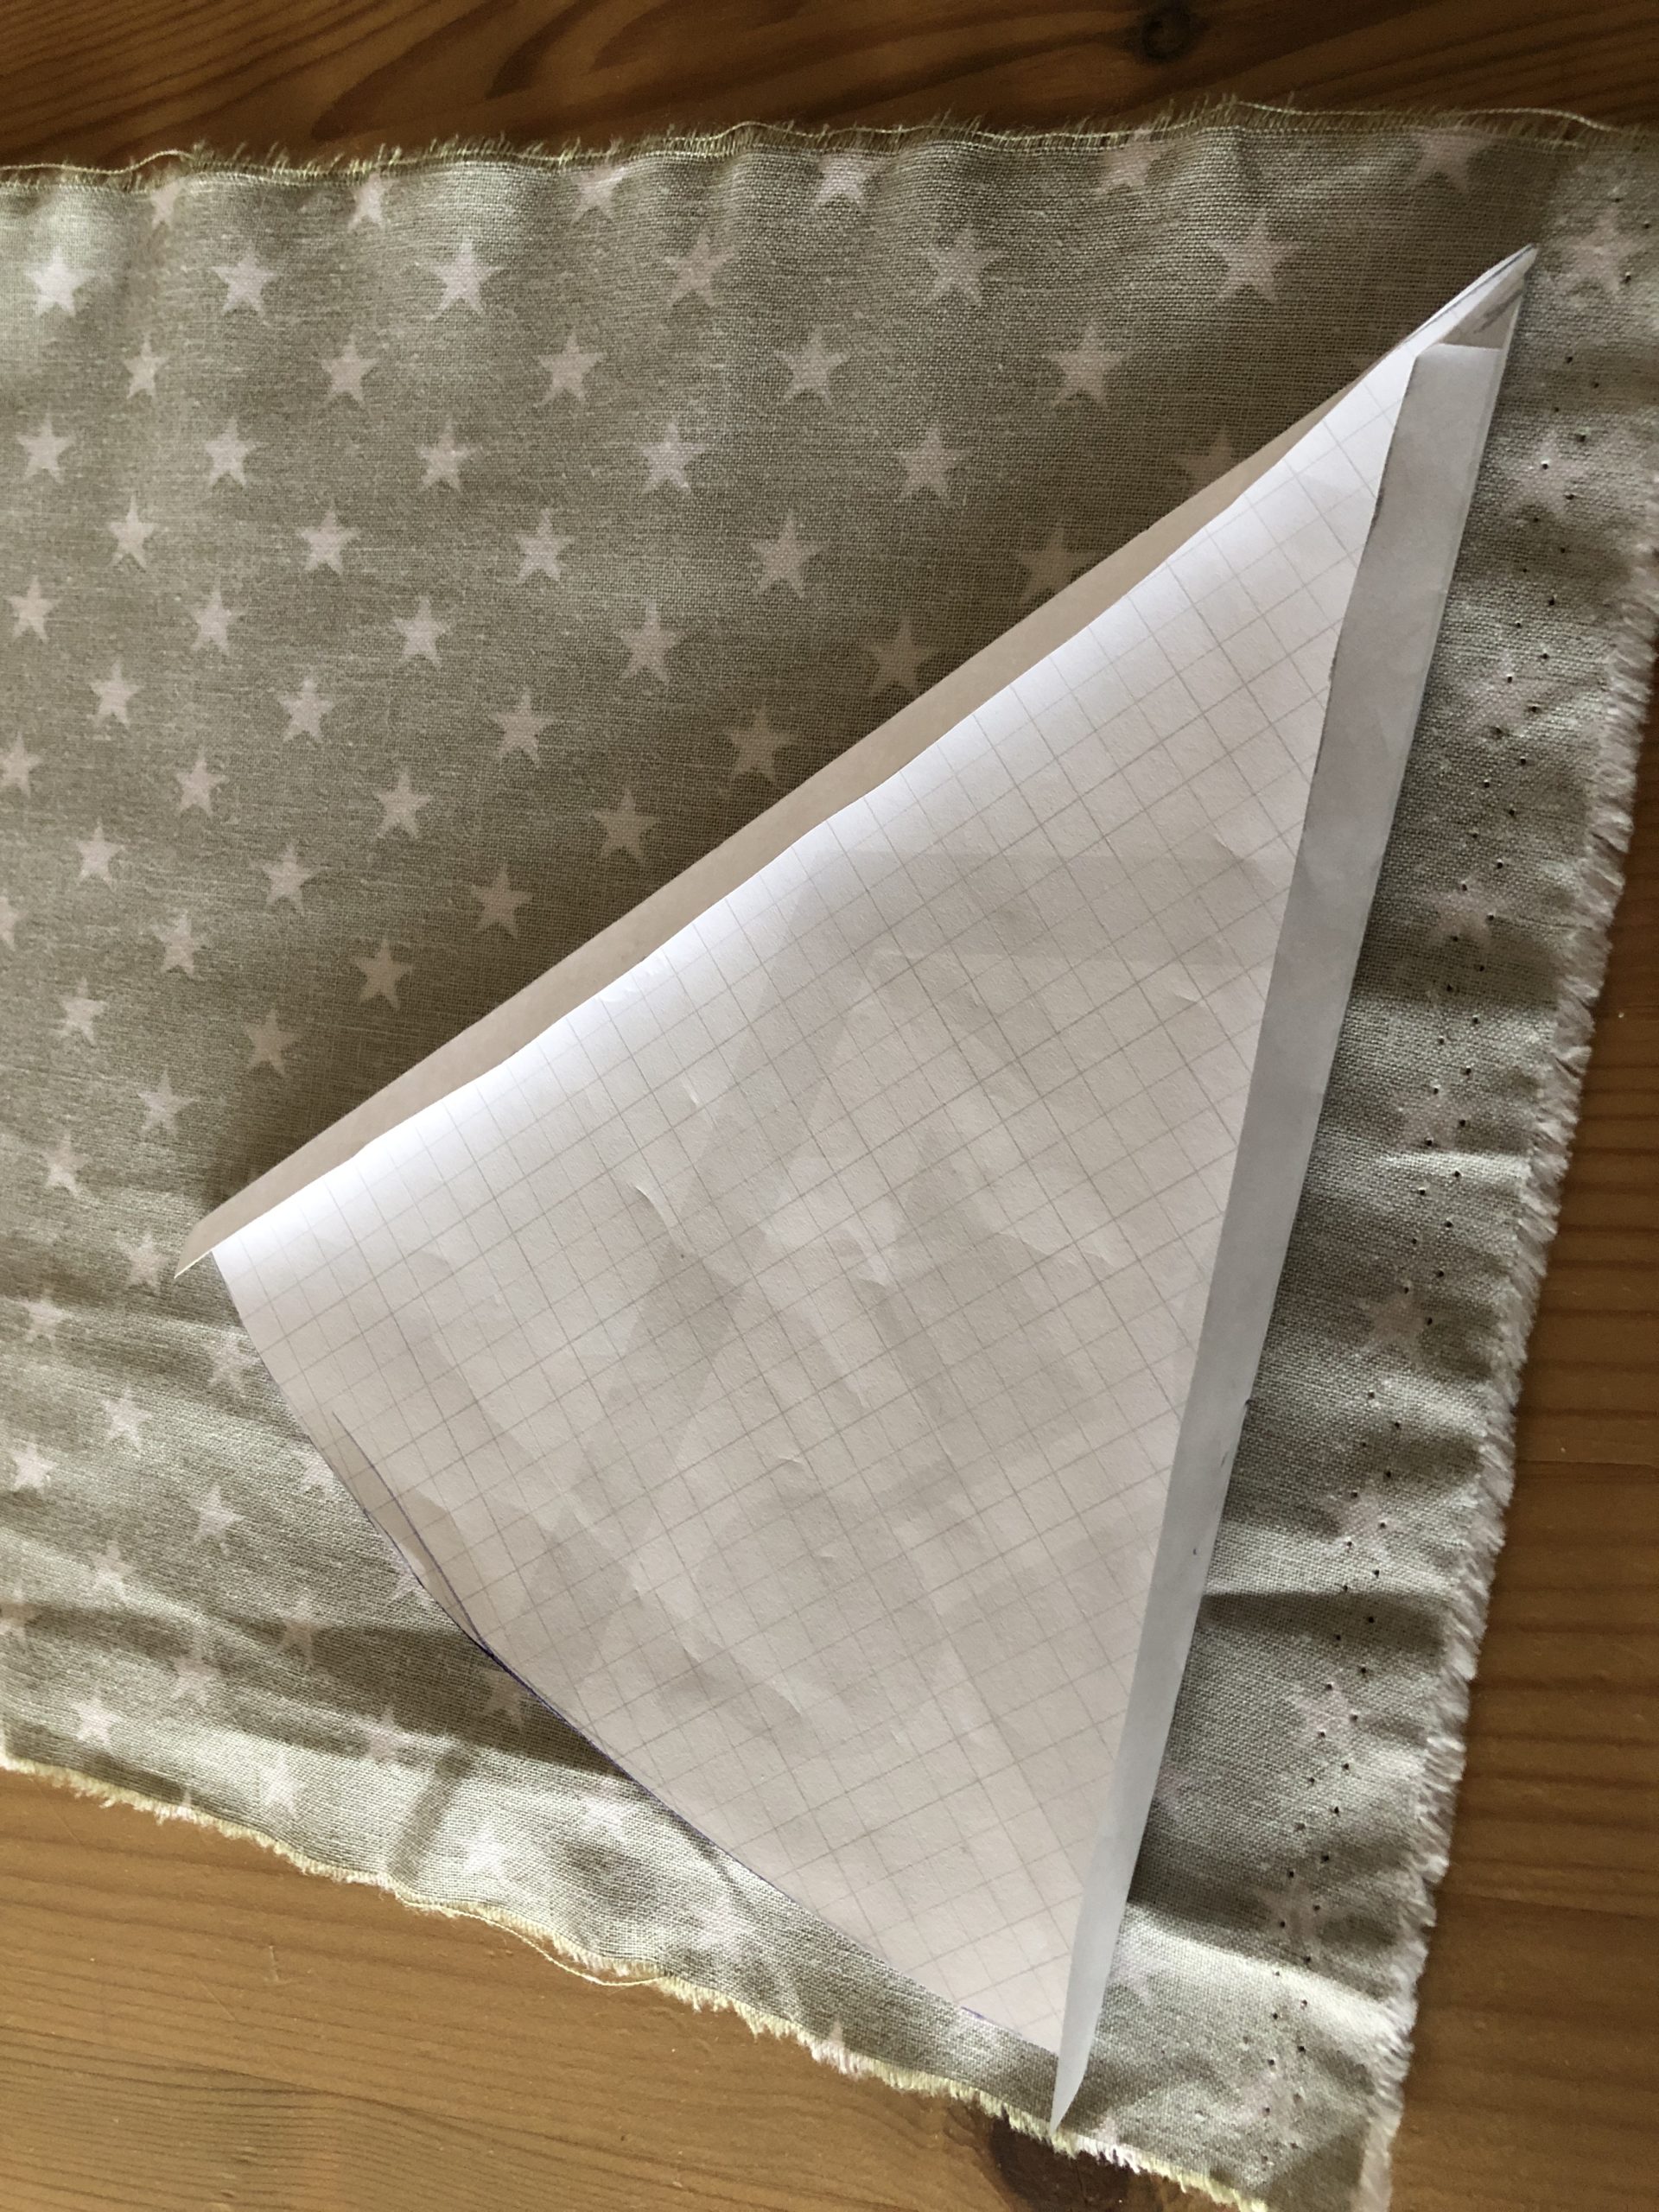
Bild zum Schritt 3 für das Bastel- und DIY-Abenteuer für Kinder: 'Schneidet vier Teile aus unterschiedlichen Stoffen (Mustern) zu. Übertragt dafür...'

4

2. Bild zum Schritt 3 für das Bastel- und DIY-Abenteuer für Kinder: 'Schneidet vier Teile aus unterschiedlichen Stoffen (Mustern) zu. Übertragt dafür...'

5

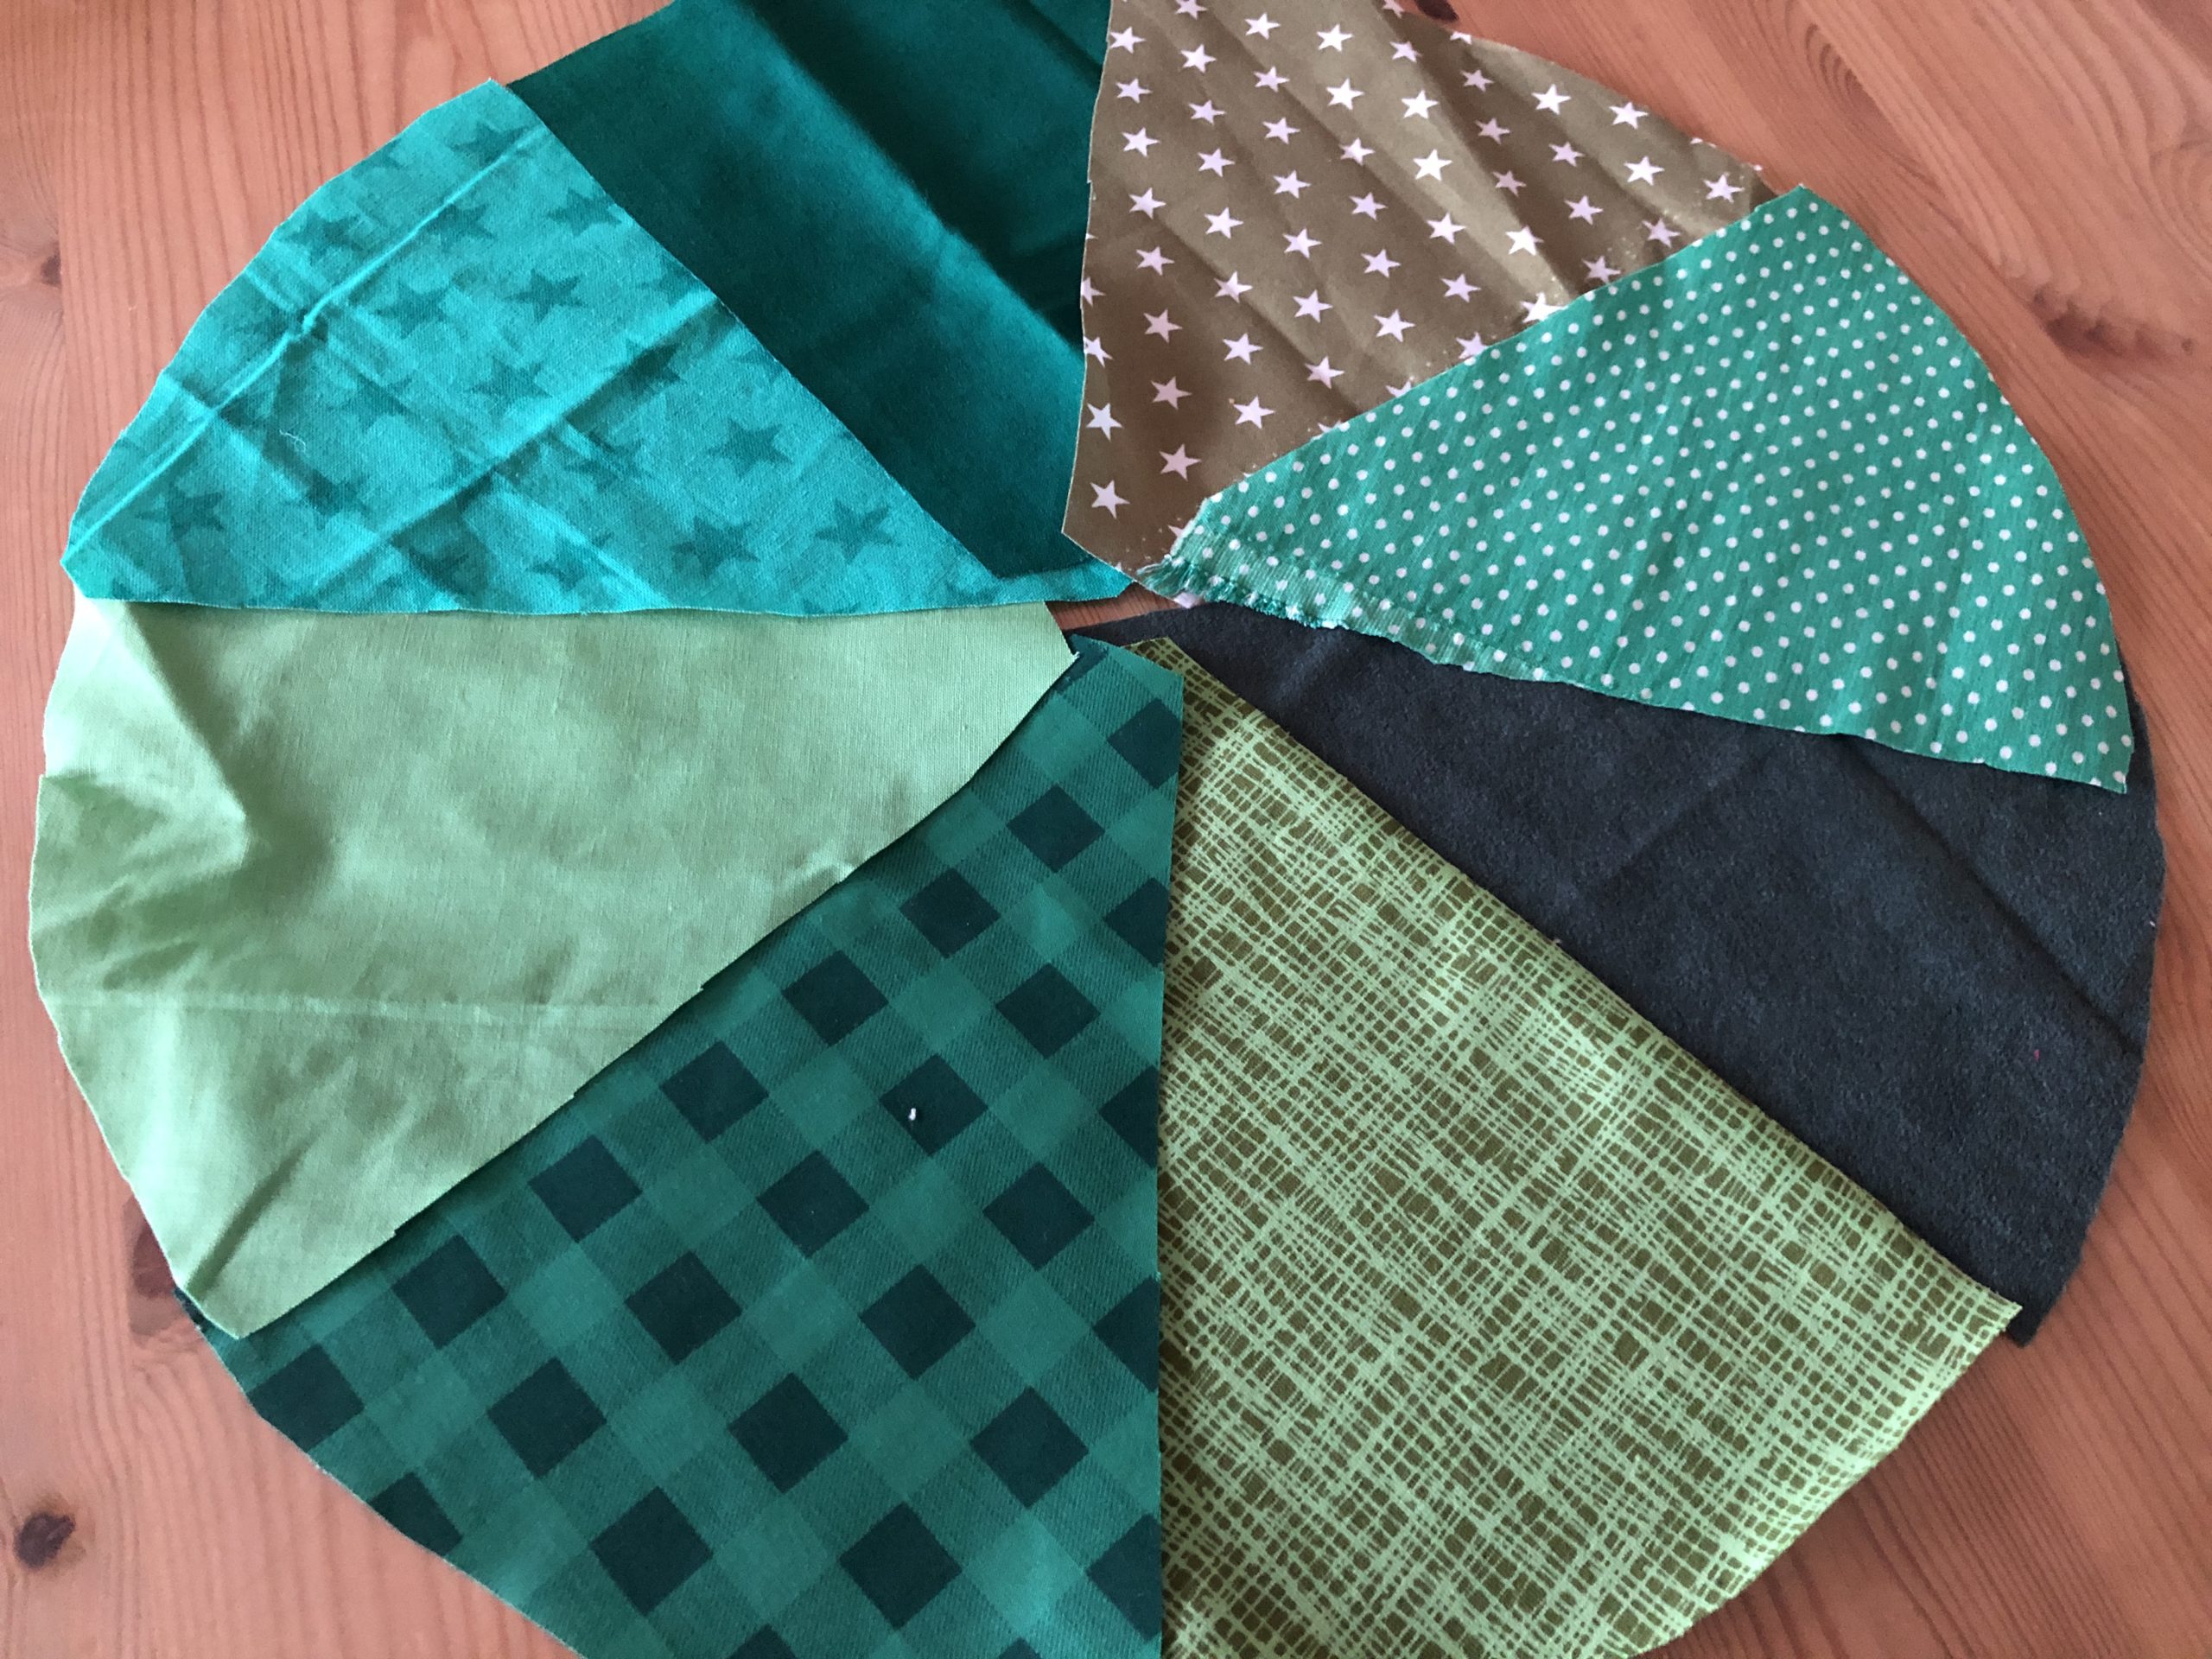
Put your stuffed parts together in a circle.

Bild zum Schritt 5 für das Bastel- und DIY-Abenteuer für Kinder: 'Legt eure Stoffteile zu einem Kreis zusammen.'

6

2. Bild zum Schritt 5 für das Bastel- und DIY-Abenteuer für Kinder: 'Legt eure Stoffteile zu einem Kreis zusammen.'

7

Cuts out a second circle from a piece of fabric.
This should be about 3cm larger all around.

Bild zum Schritt 7 für das Bastel- und DIY-Abenteuer für Kinder: 'Schneidet nun noch einen zweiten Kreis aus einem Stoffstück aus....'

8

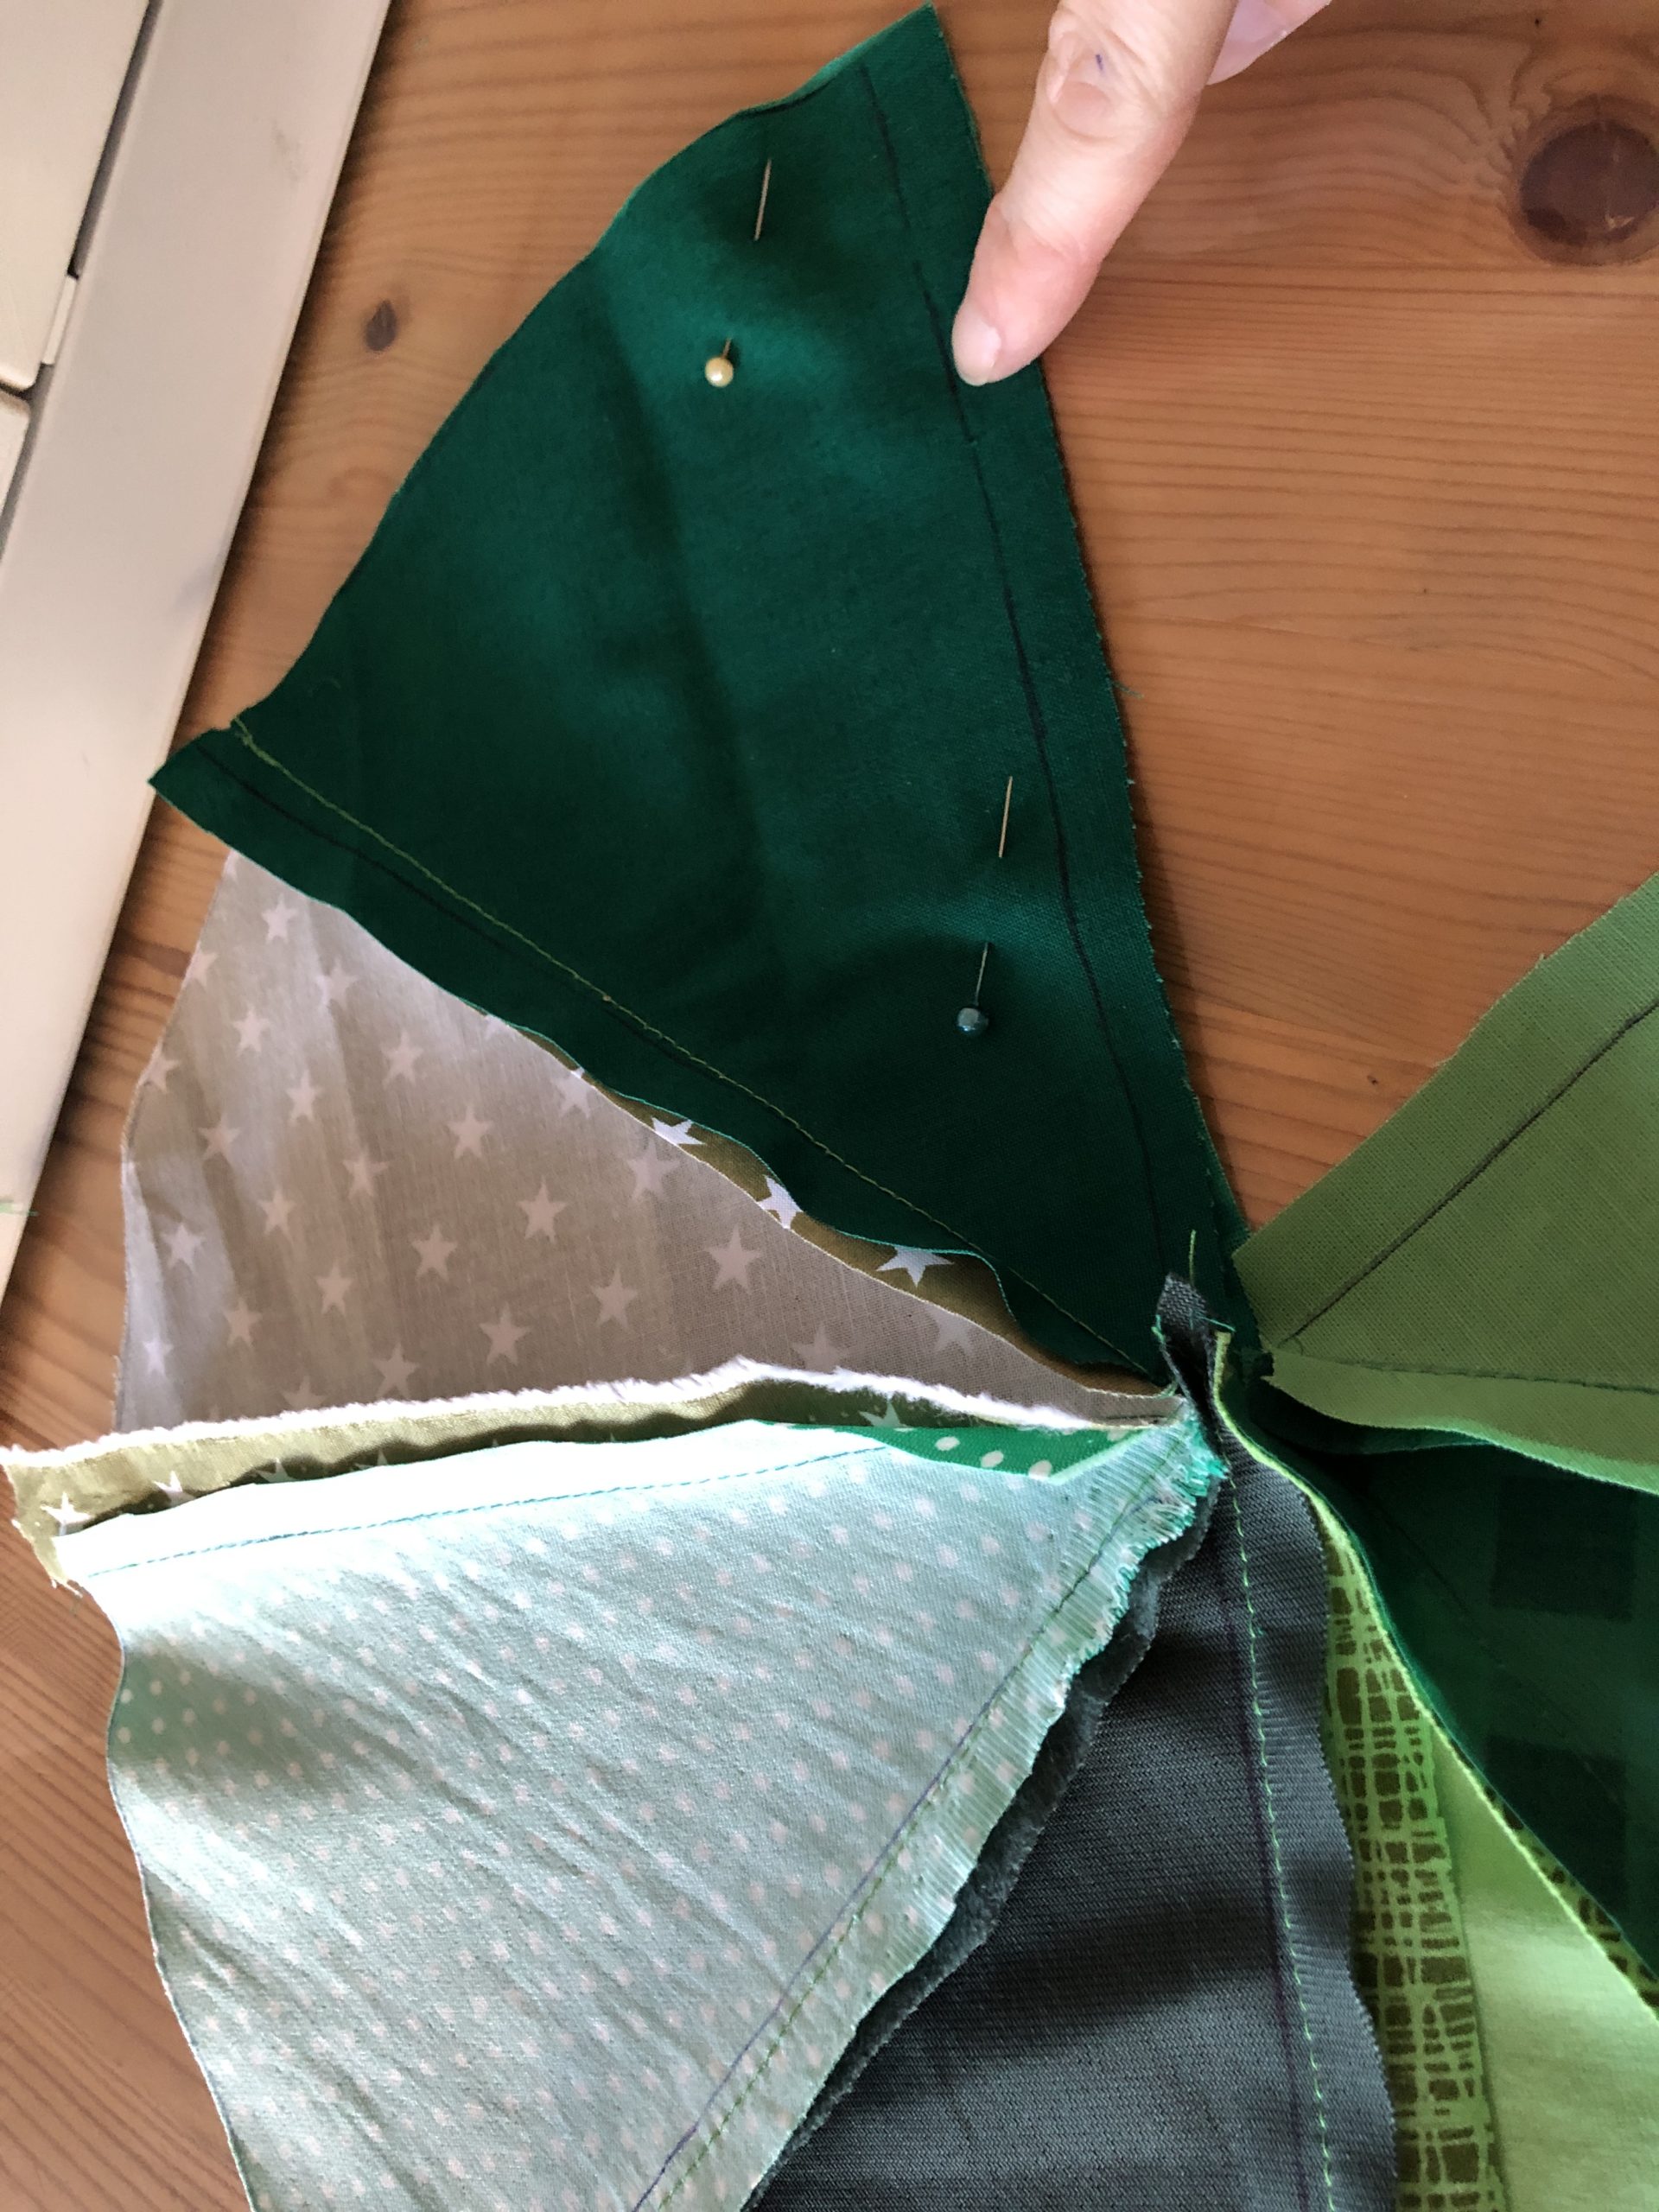
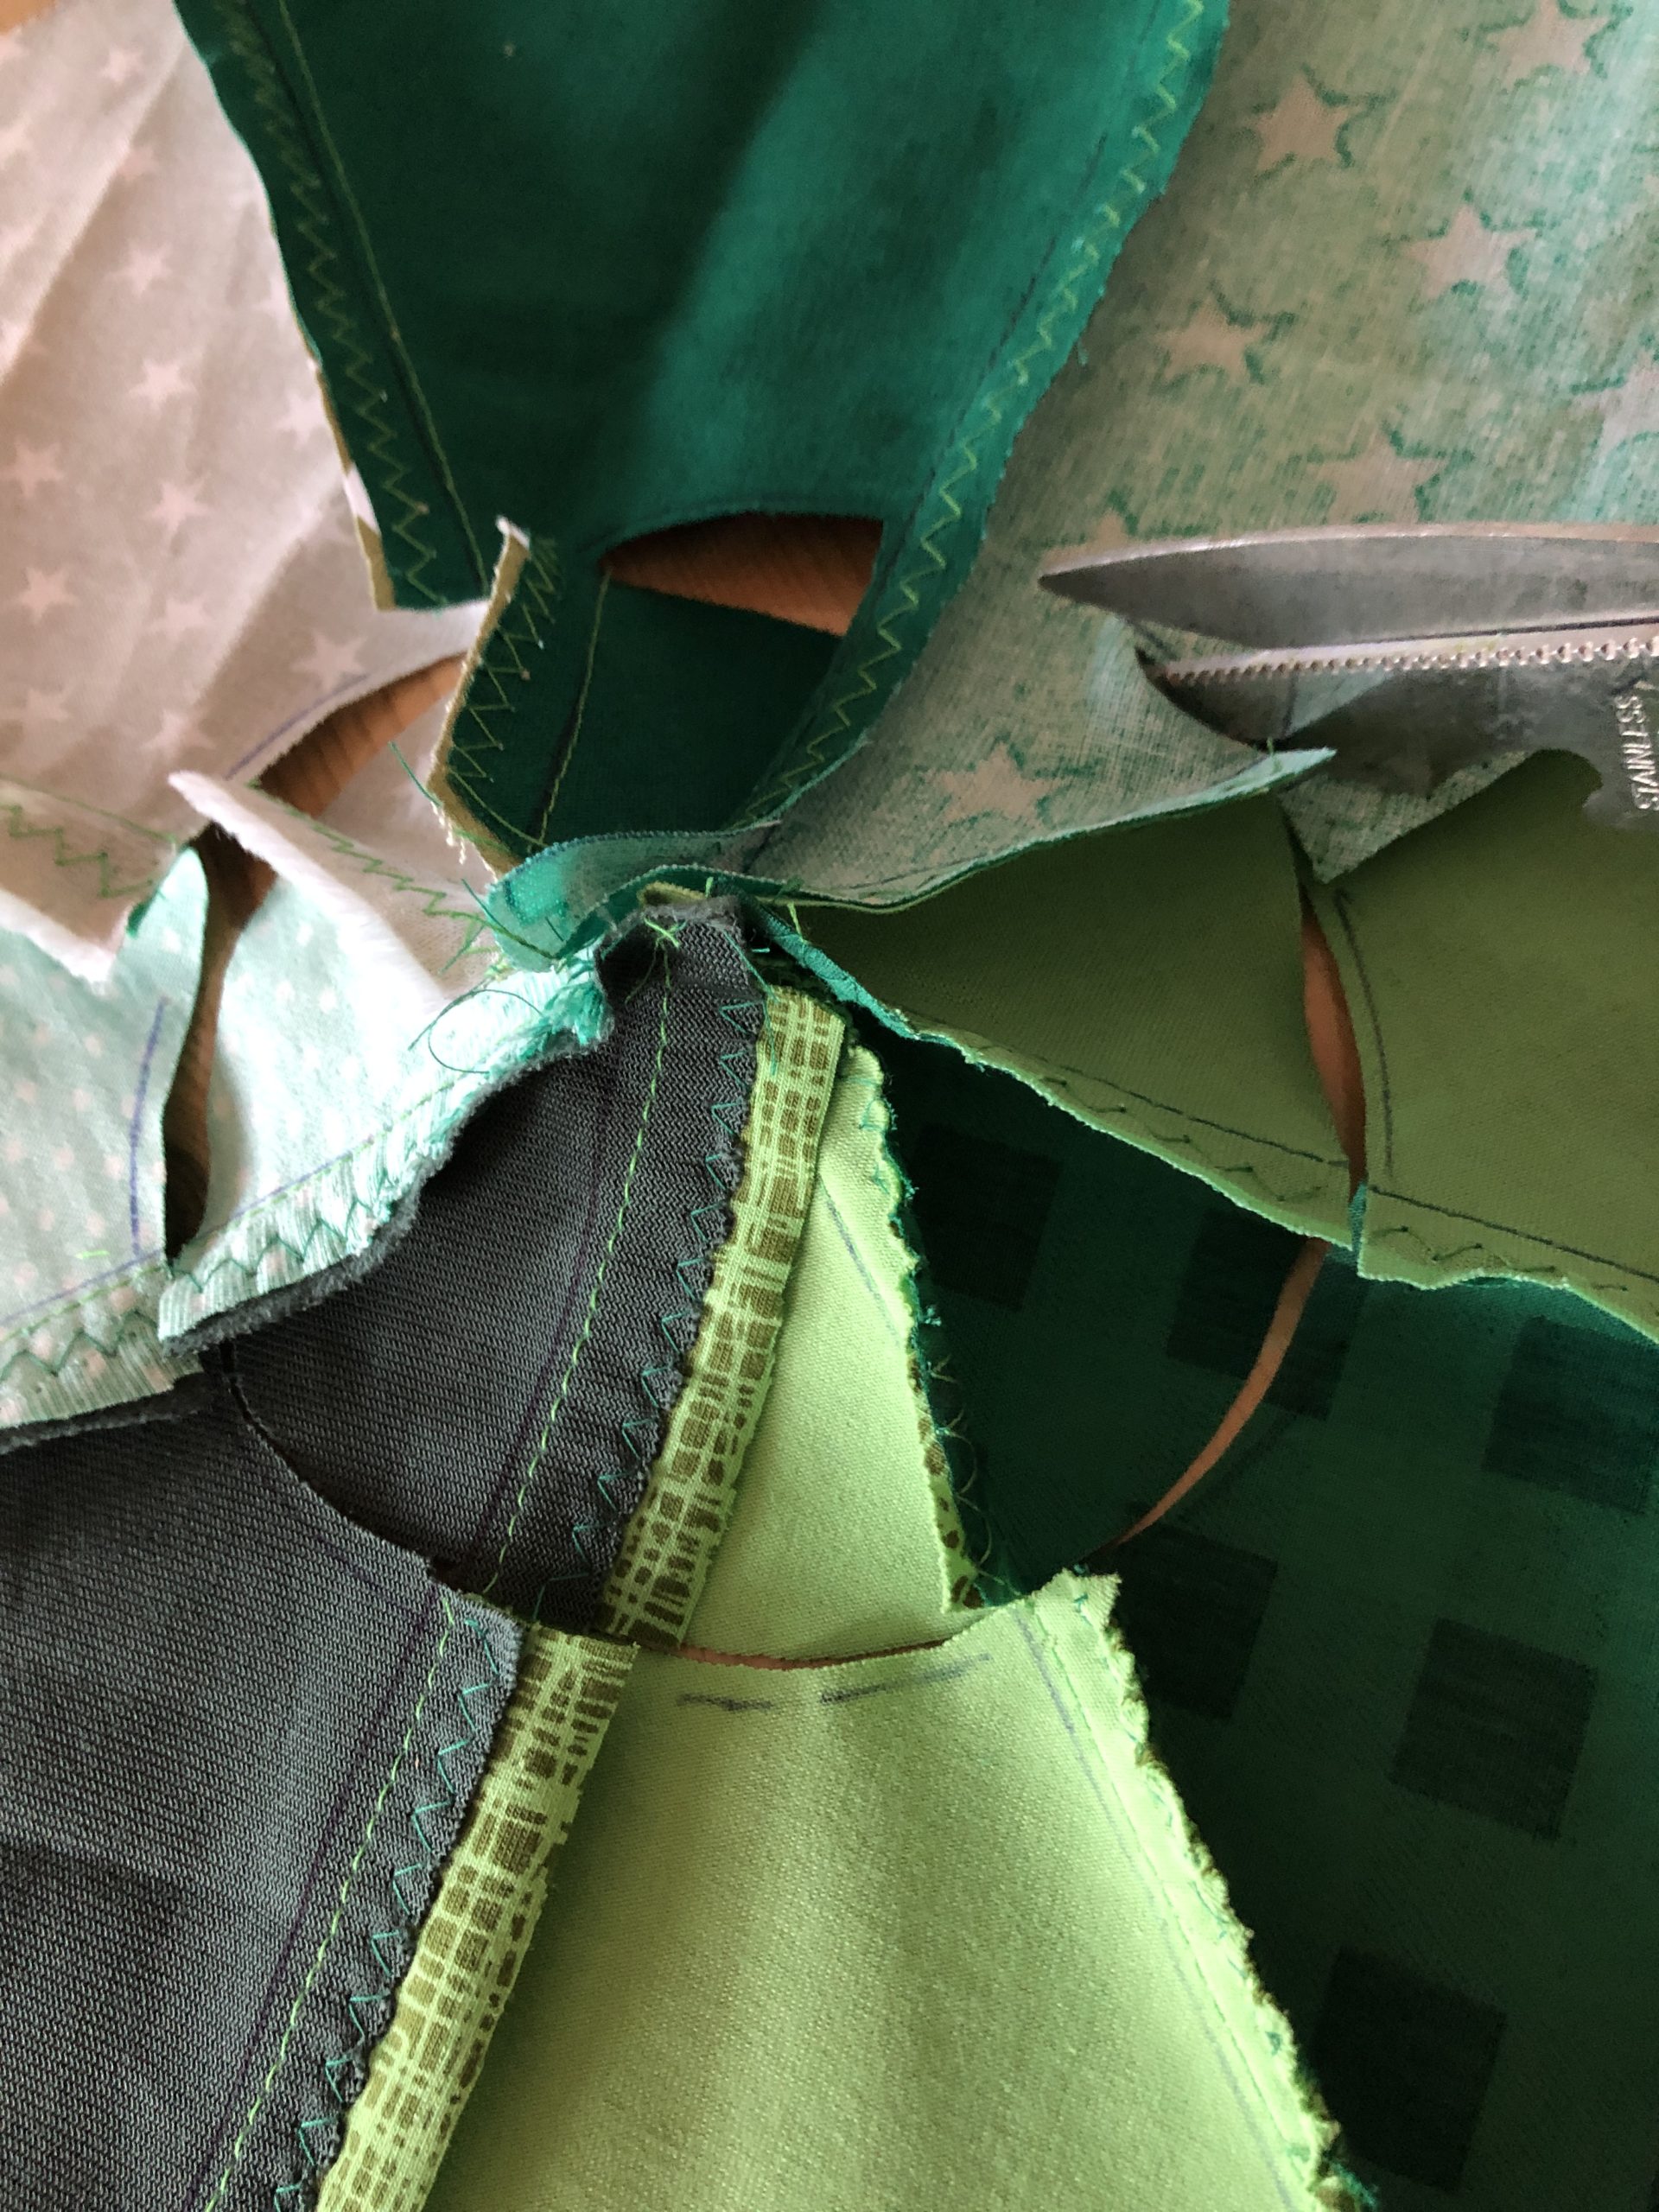
Now the fabric parts are sewn together one after the other. To do this, place two pieces of fabric with the beautiful side (right) on each other. Then sew one side together with the sewing machine.

Bild zum Schritt 8 für das Bastel- und DIY-Abenteuer für Kinder: 'Jetzt werden die Stoffteile nacheinander zusammen genäht. Hierzu zwei Stoffstücke...'

9

Fix the two pieces of fabric with a pin.

Bild zum Schritt 9 für das Bastel- und DIY-Abenteuer für Kinder: 'Fixiert dabei die beiden Stoffstücke mit einer Stecknadel.'

10

You can still sew off the sewn side with a zigzag stitch.

Bild zum Schritt 10 für das Bastel- und DIY-Abenteuer für Kinder: 'Die genähte Seite könnt ihr noch mit Zickzack-Stich abnähen. So...'

11

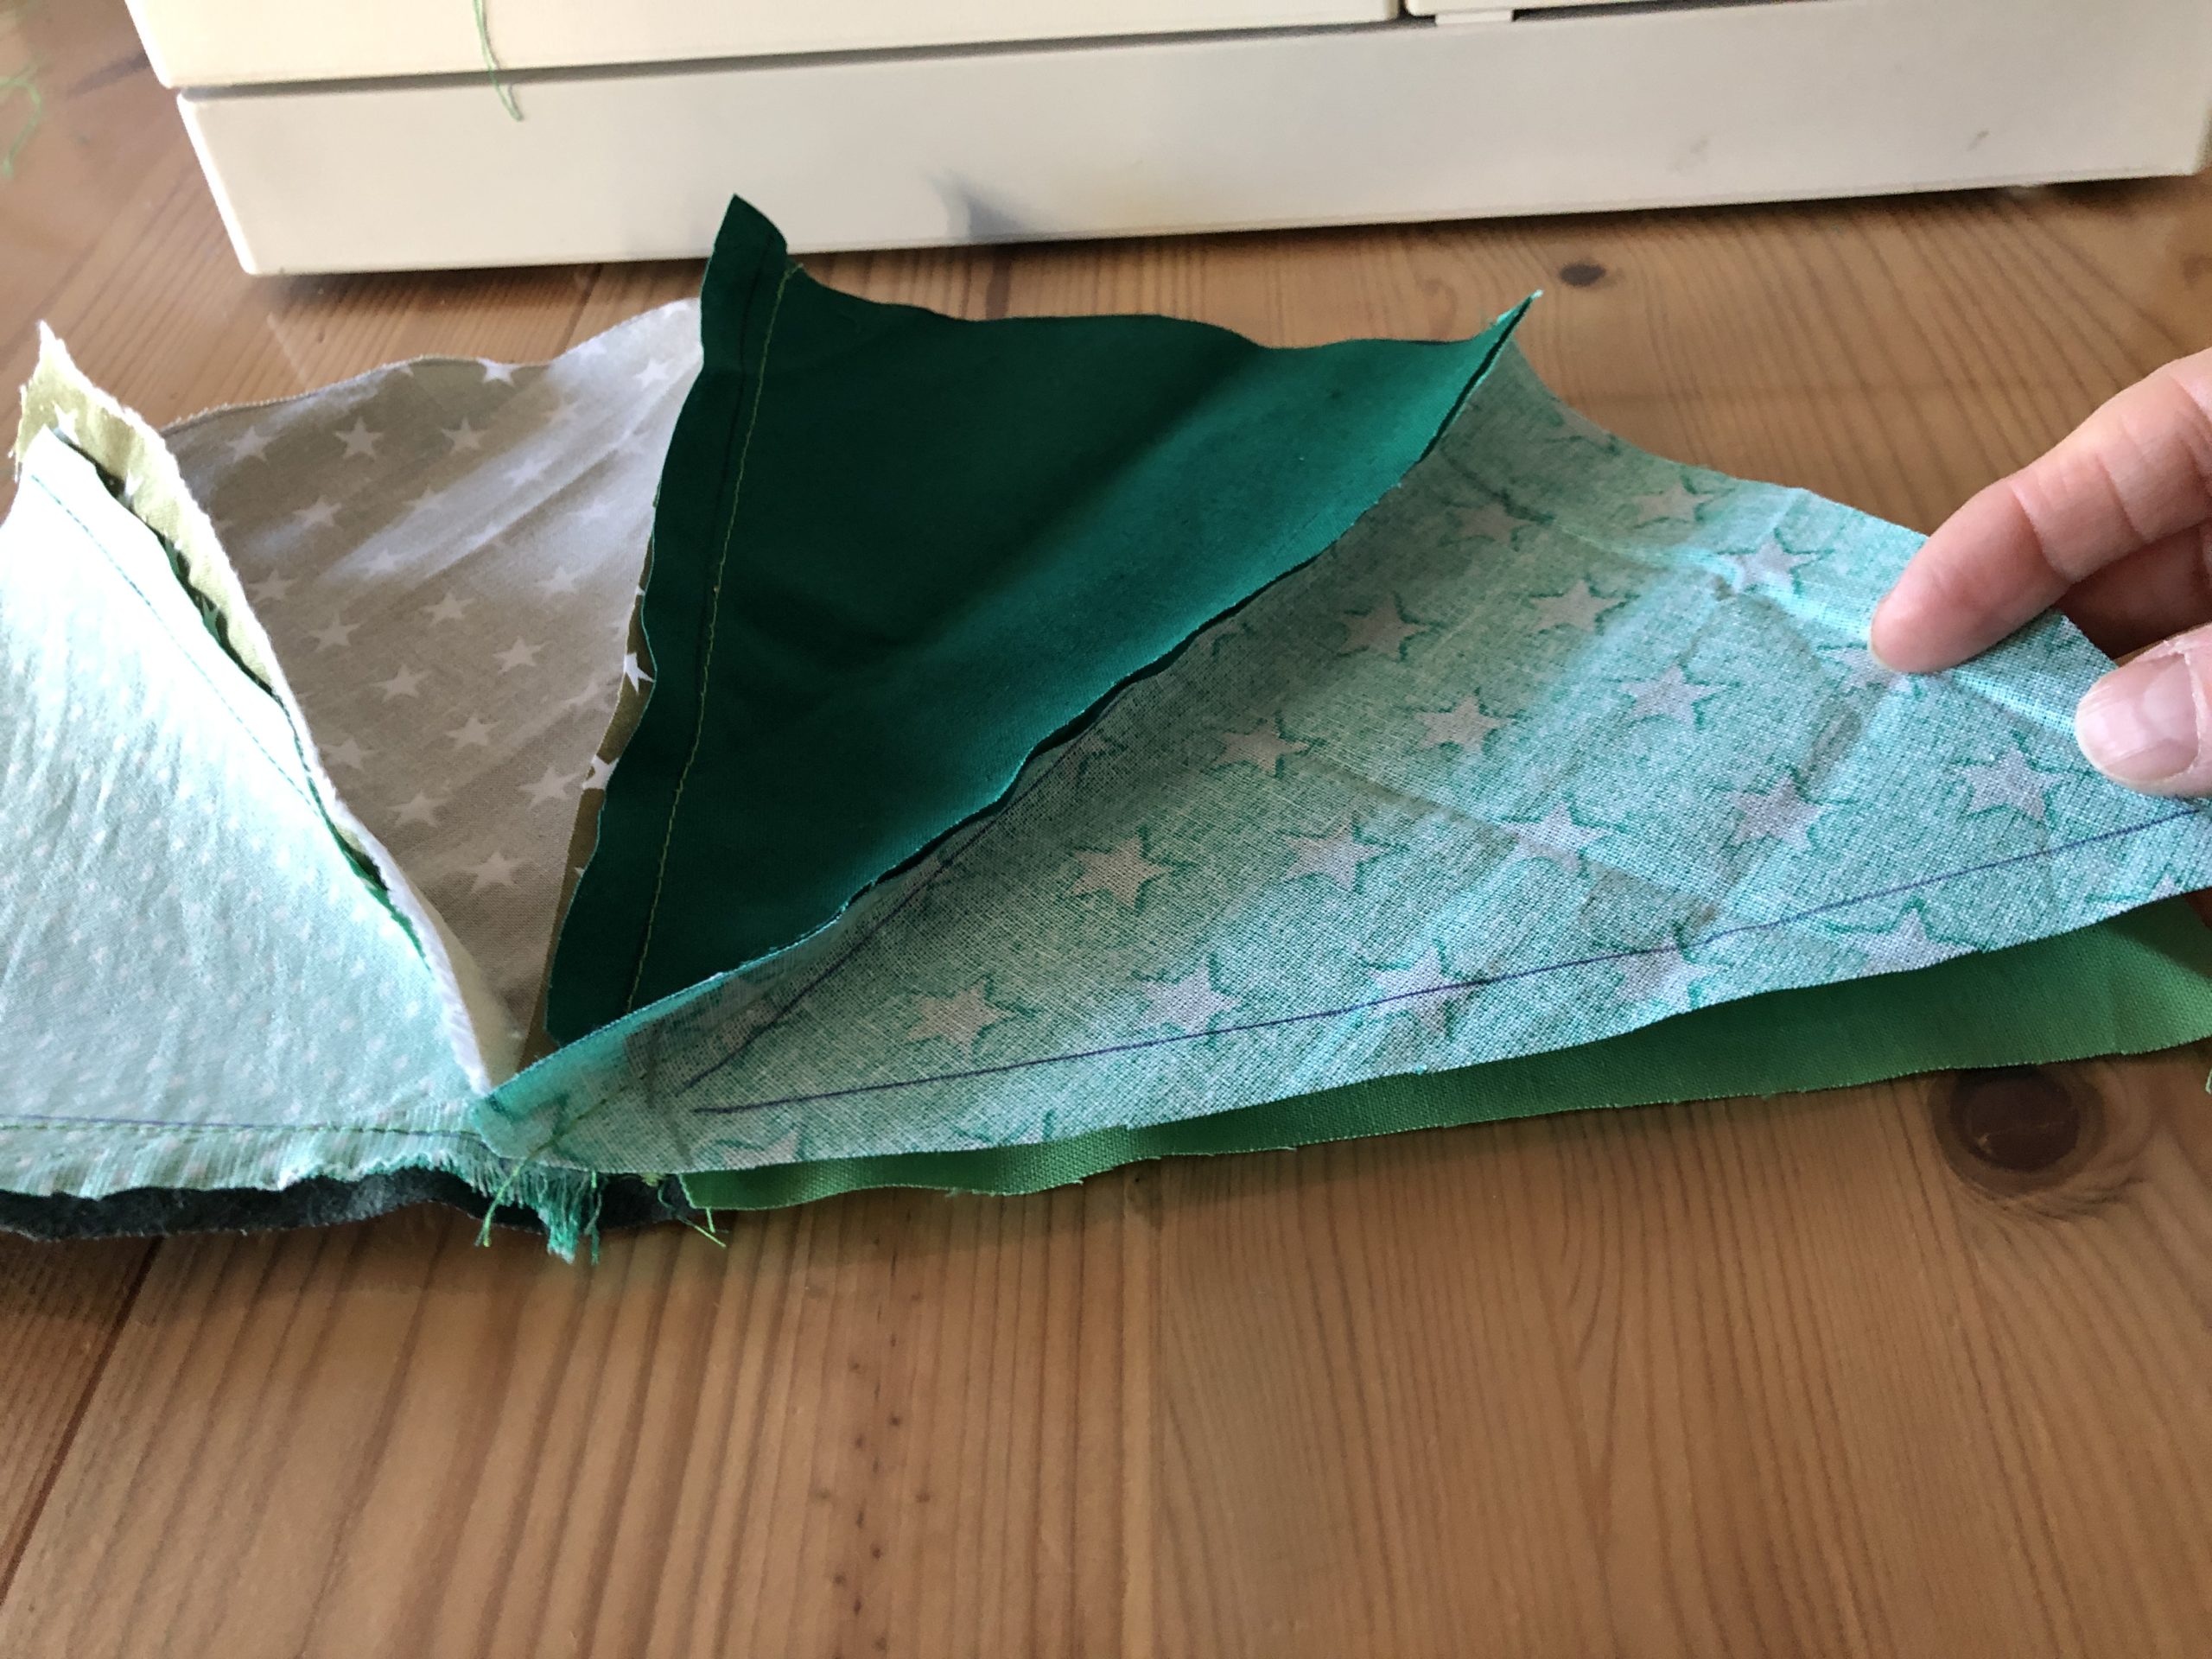
Then she folds the fabric part apart.

Bild zum Schritt 11 für das Bastel- und DIY-Abenteuer für Kinder: 'Anschließend klappt ihr das Stoffteil auseinander.'

12

Put together another piece of fabric (with the beautiful sides on top of each other) and sew it together at the following side.

Bild zum Schritt 12 für das Bastel- und DIY-Abenteuer für Kinder: 'Legt ein weiteres Stoffteil (mit den schönen Seiten aufeinander) zusammen...'

13

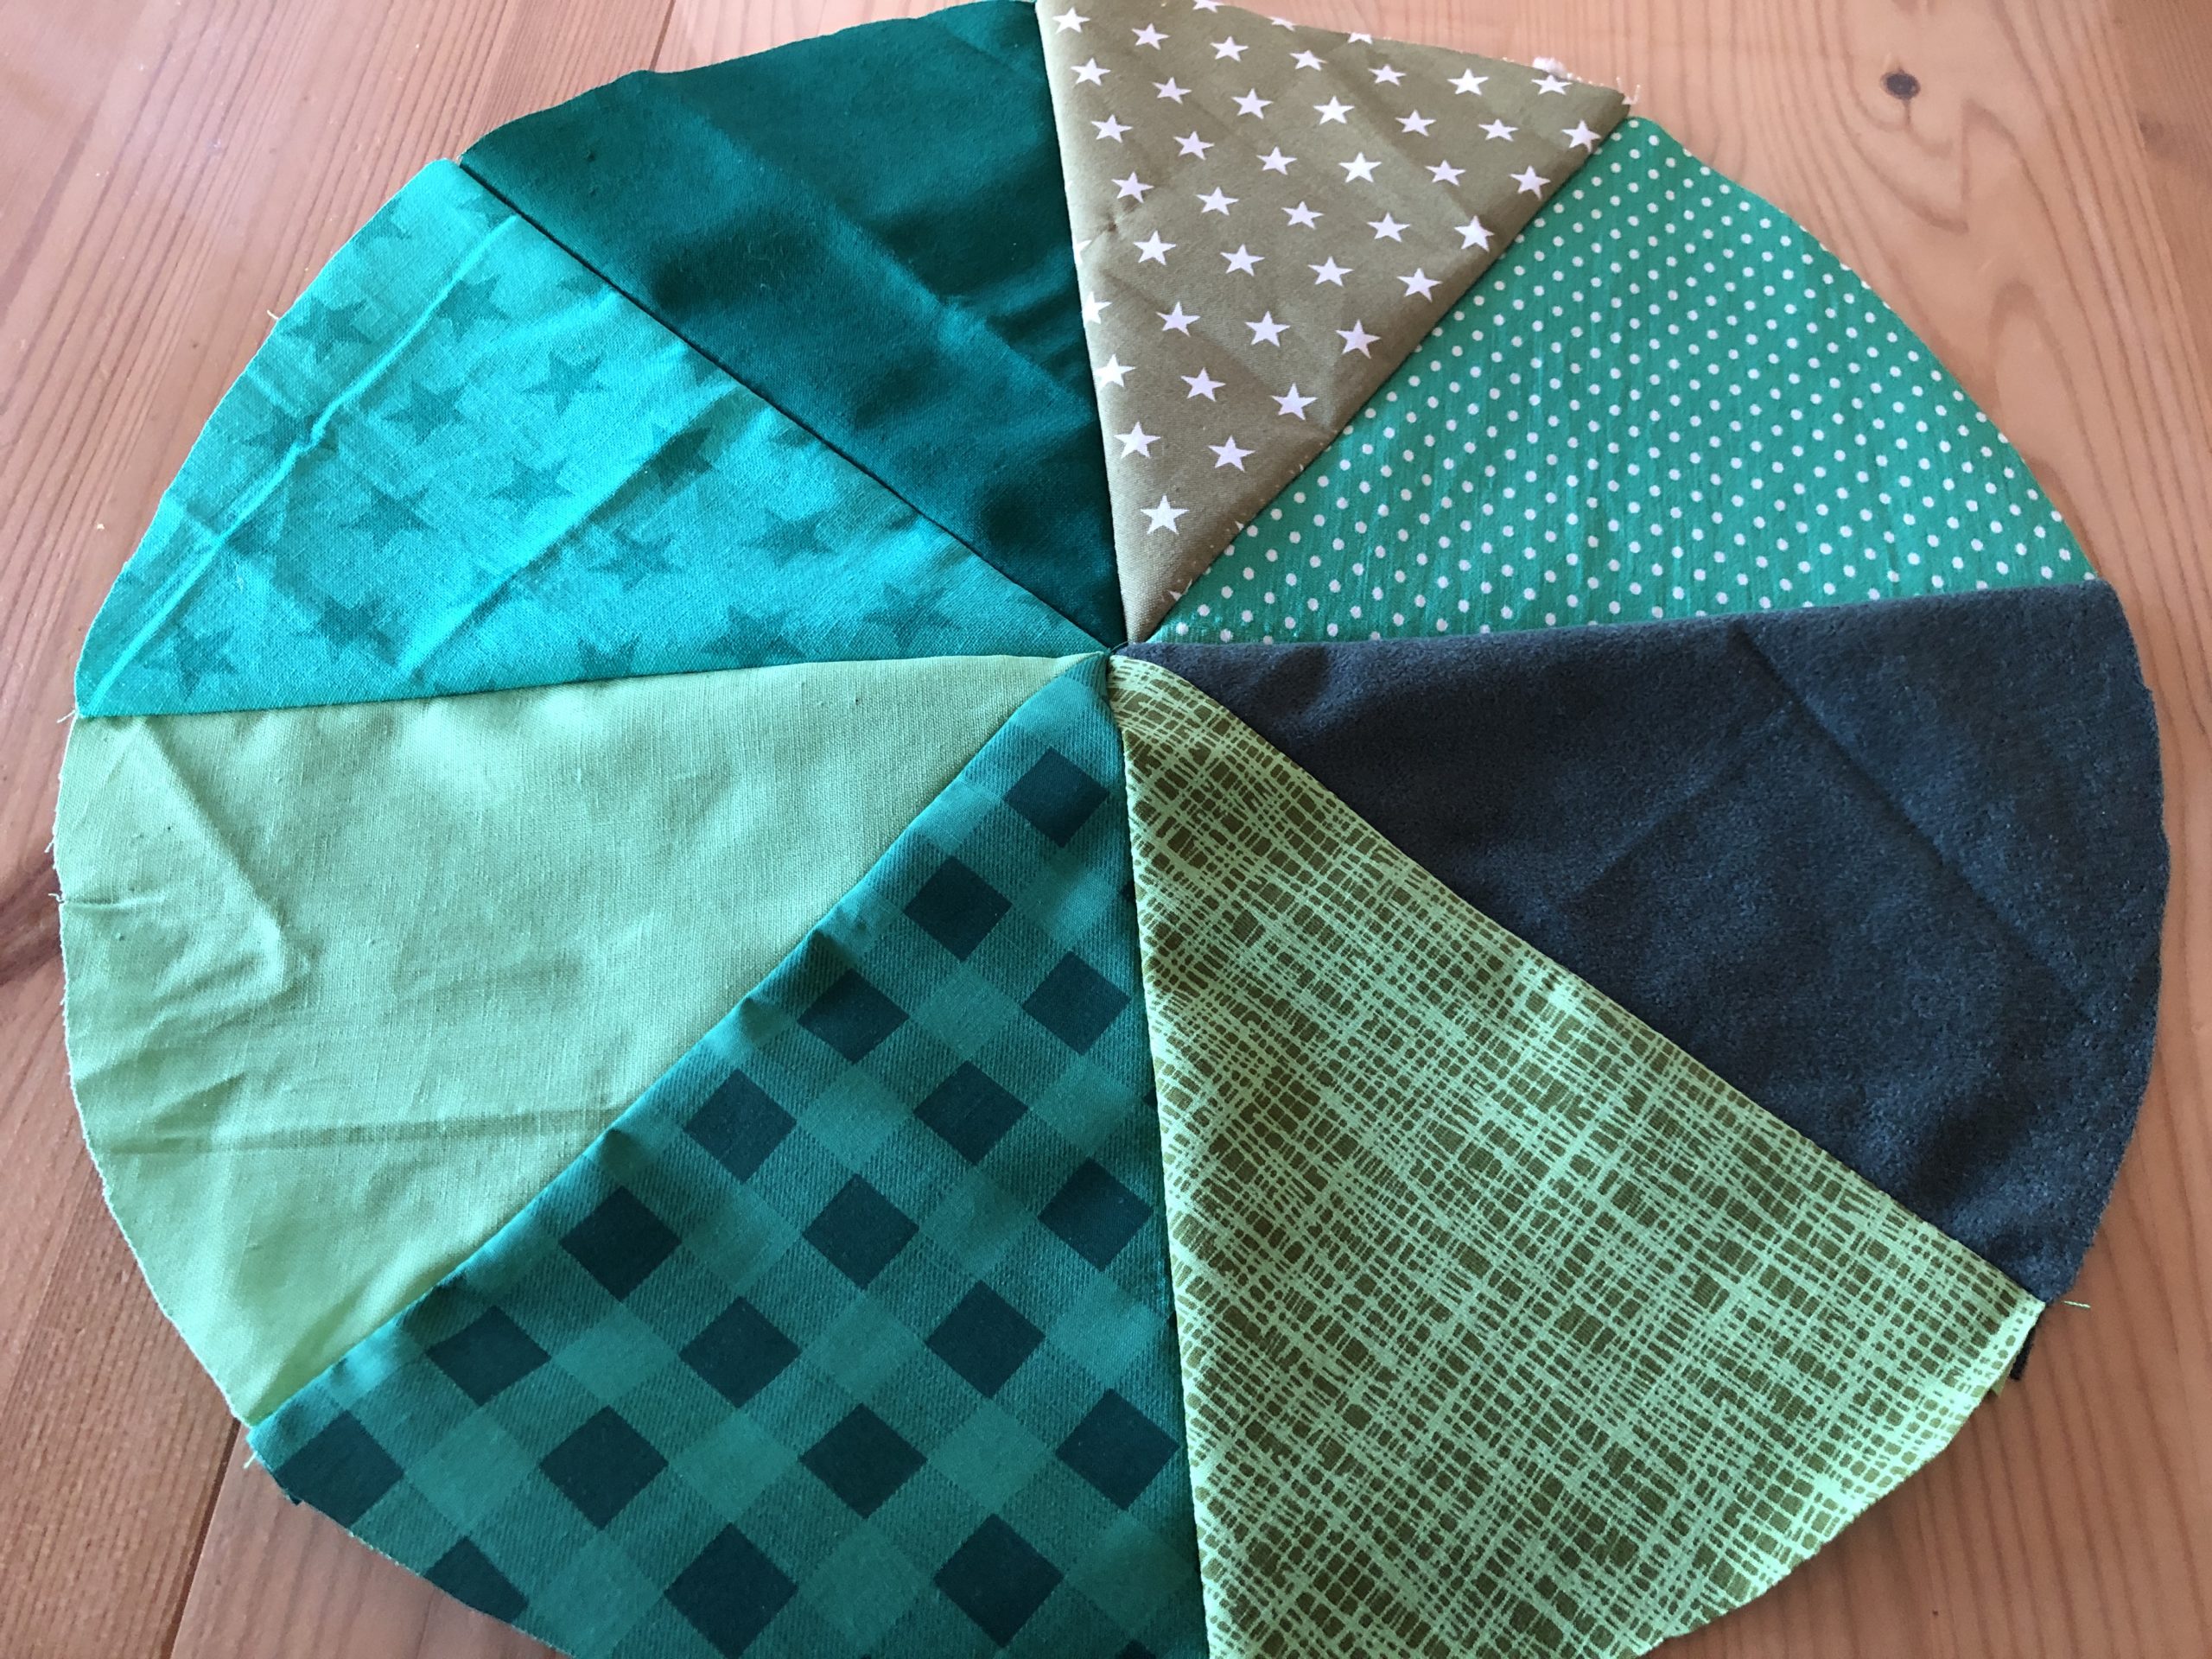
So sew all the fabric parts together all around until the circle is closed.

Bild zum Schritt 13 für das Bastel- und DIY-Abenteuer für Kinder: 'Näht so rundherum alle Stoffteile zusammen, bis der Kreis geschlossen...'

14

2. Bild zum Schritt 13 für das Bastel- und DIY-Abenteuer für Kinder: 'Näht so rundherum alle Stoffteile zusammen, bis der Kreis geschlossen...'

15

3. Bild zum Schritt 14 für das Bastel- und DIY-Abenteuer für Kinder: 'Näht so rundherum alle Stoffteile zusammen, bis der Kreis geschlossen...'

16

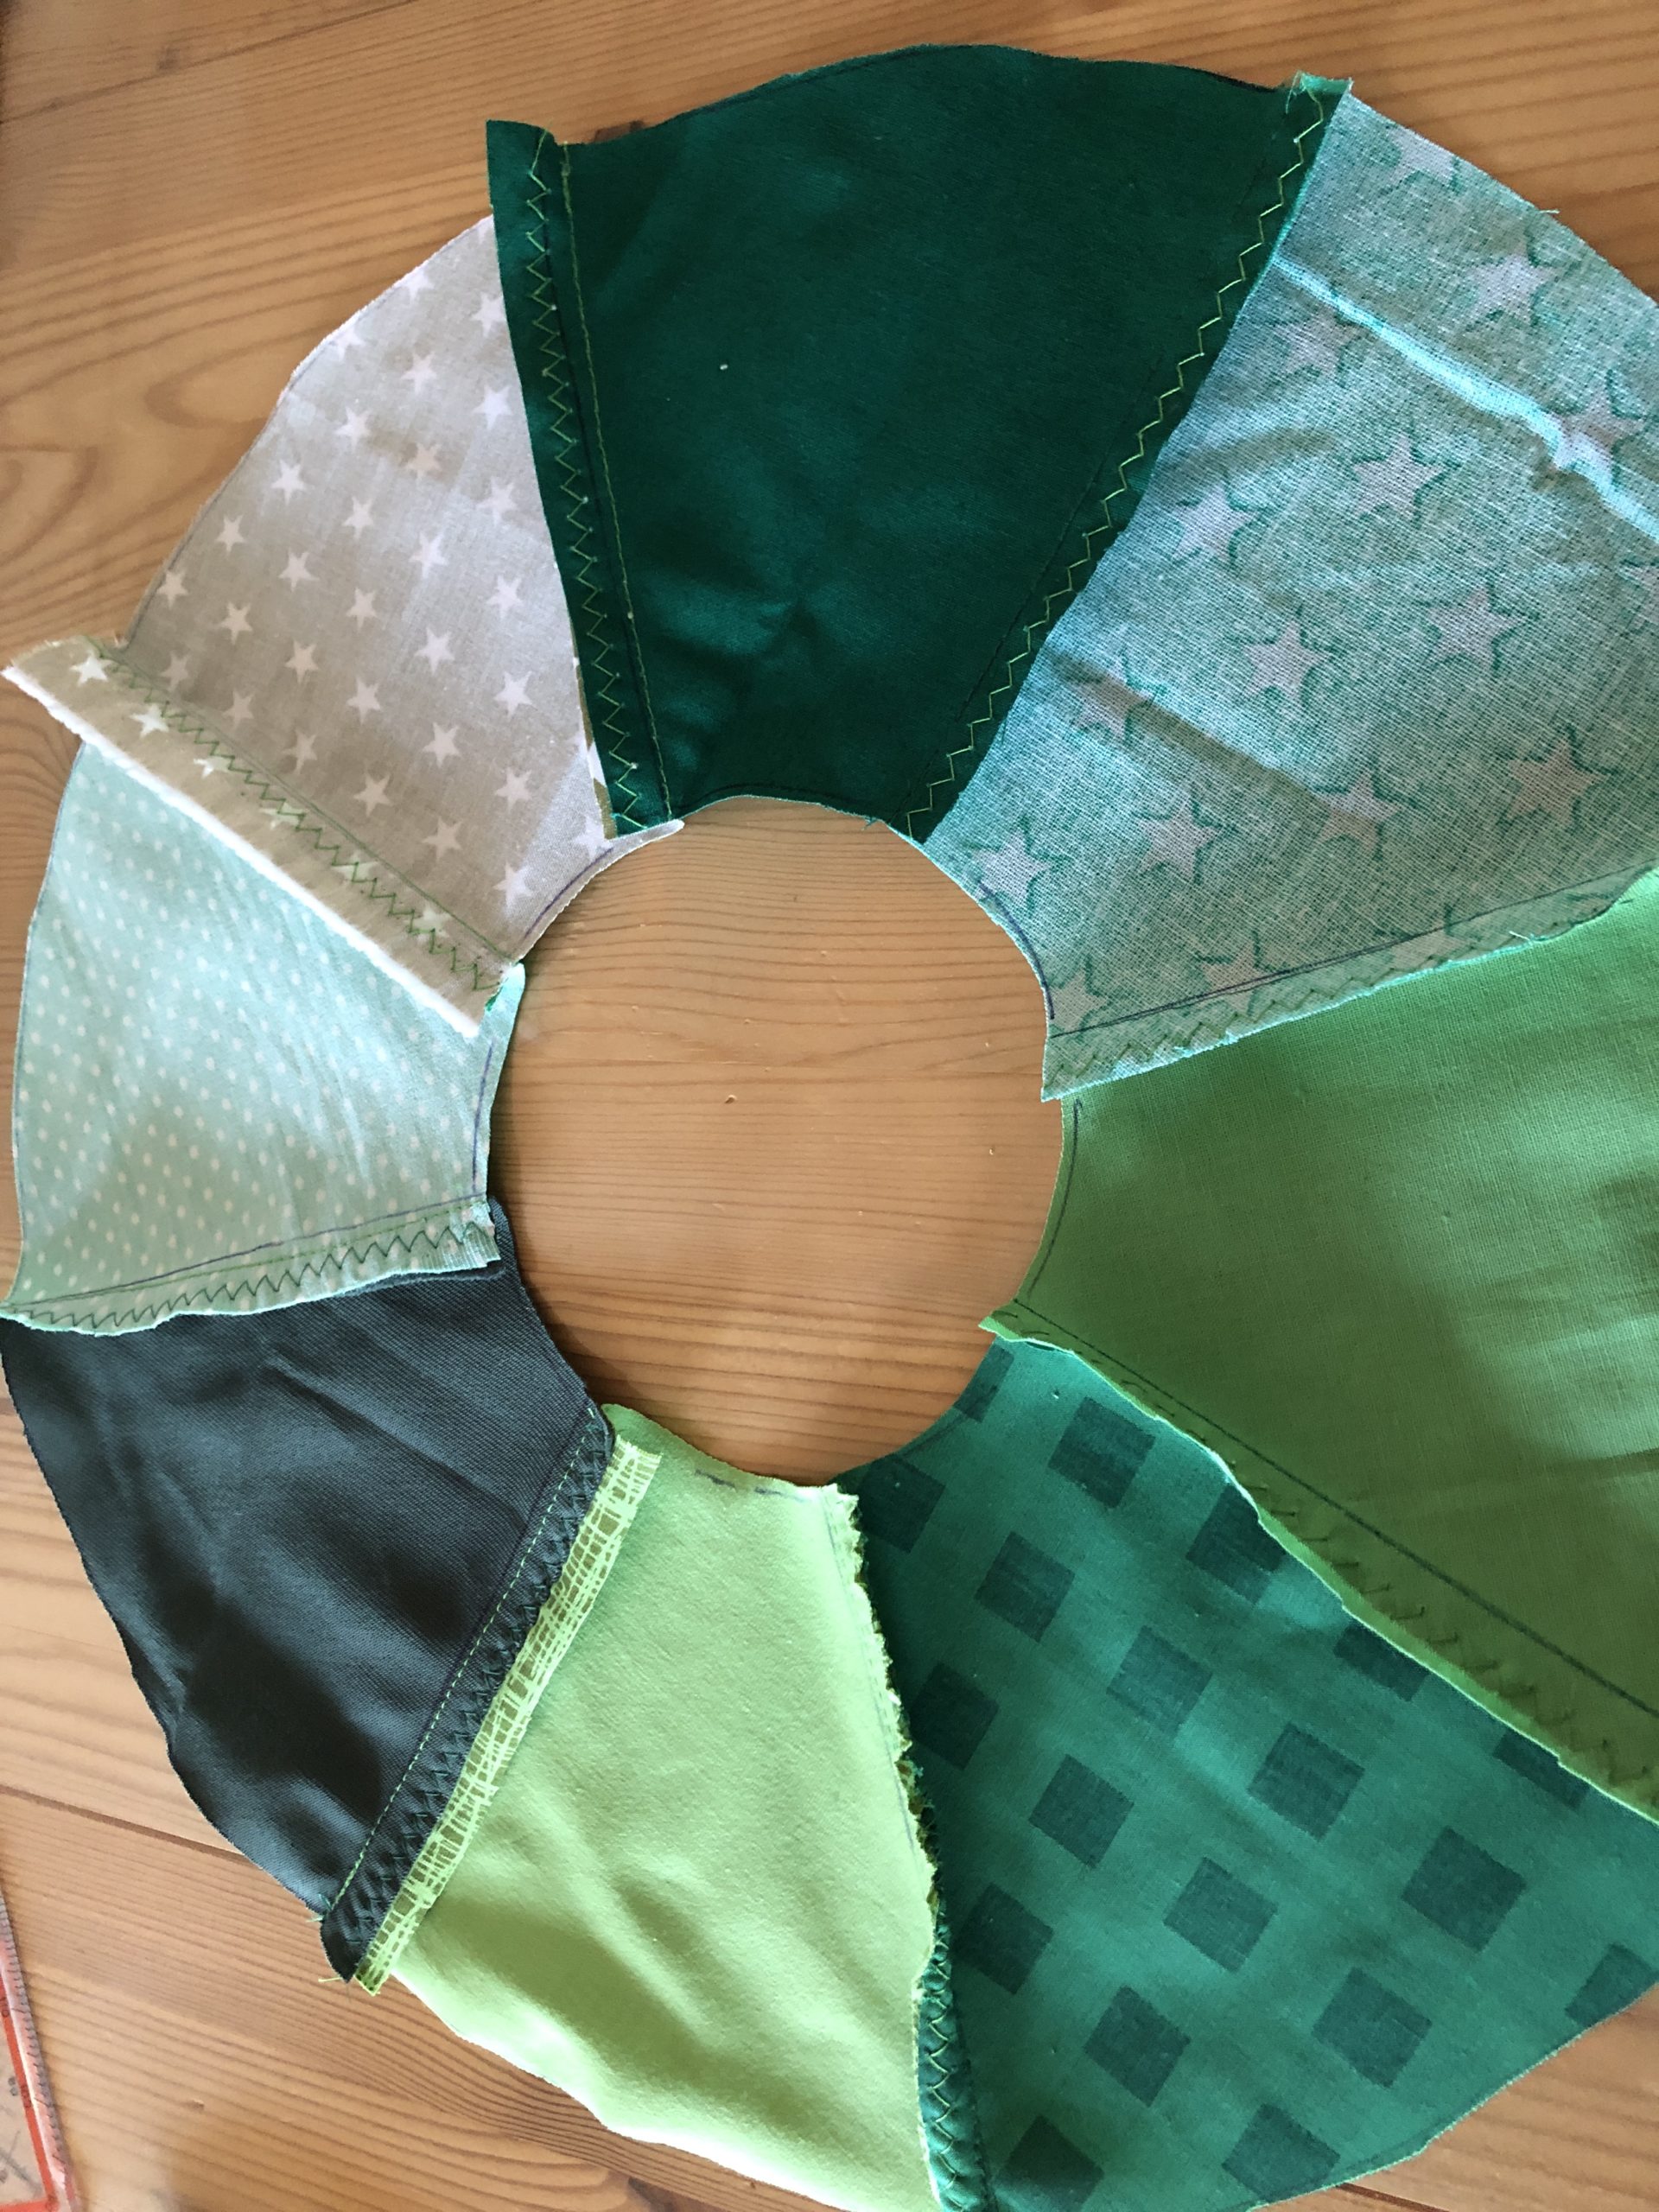
Now the circle is closed.

Bild zum Schritt 16 für das Bastel- und DIY-Abenteuer für Kinder: 'Nun ist der Kreis geschlossen.'

17

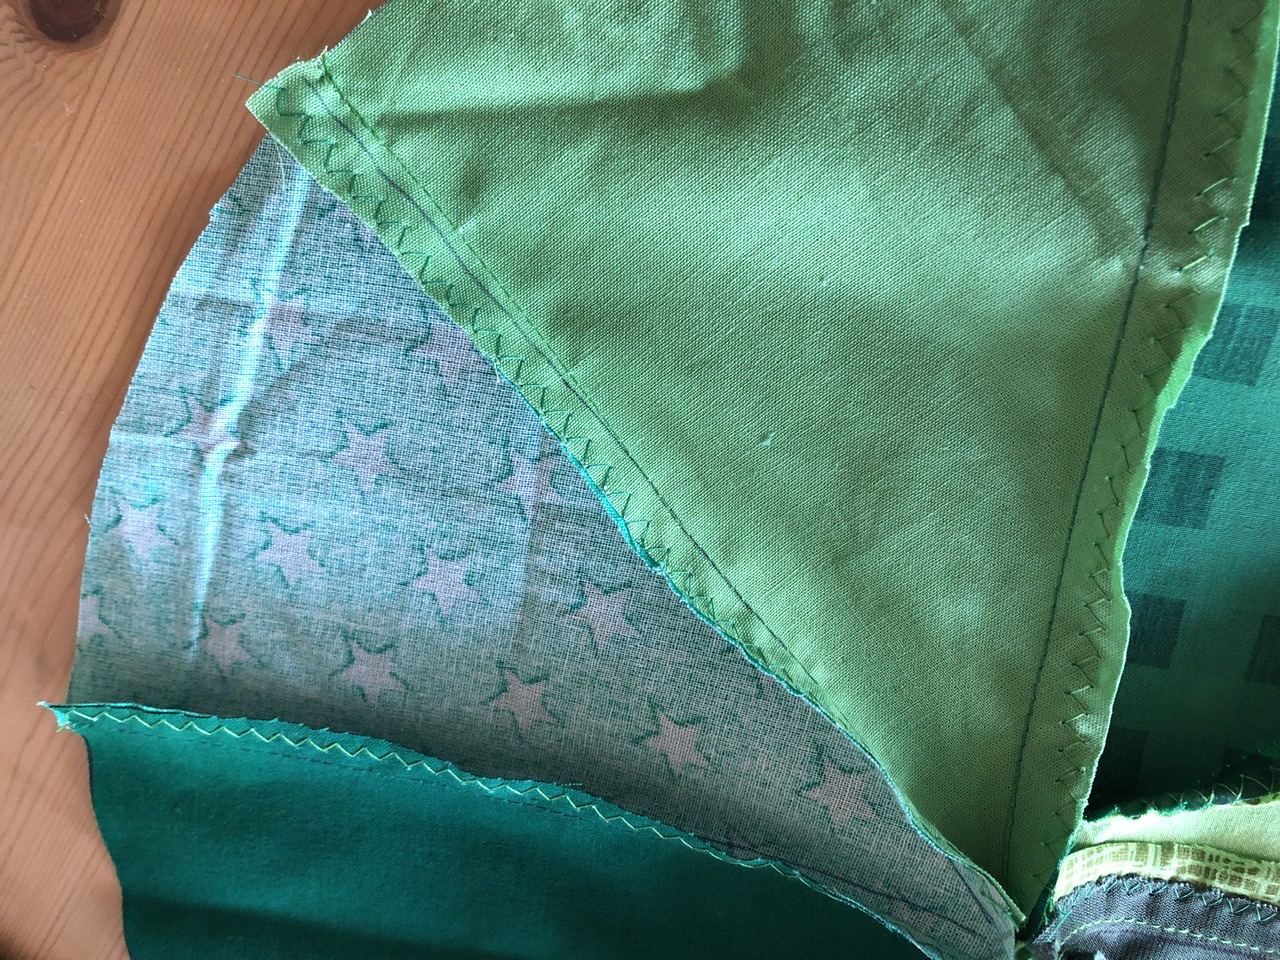
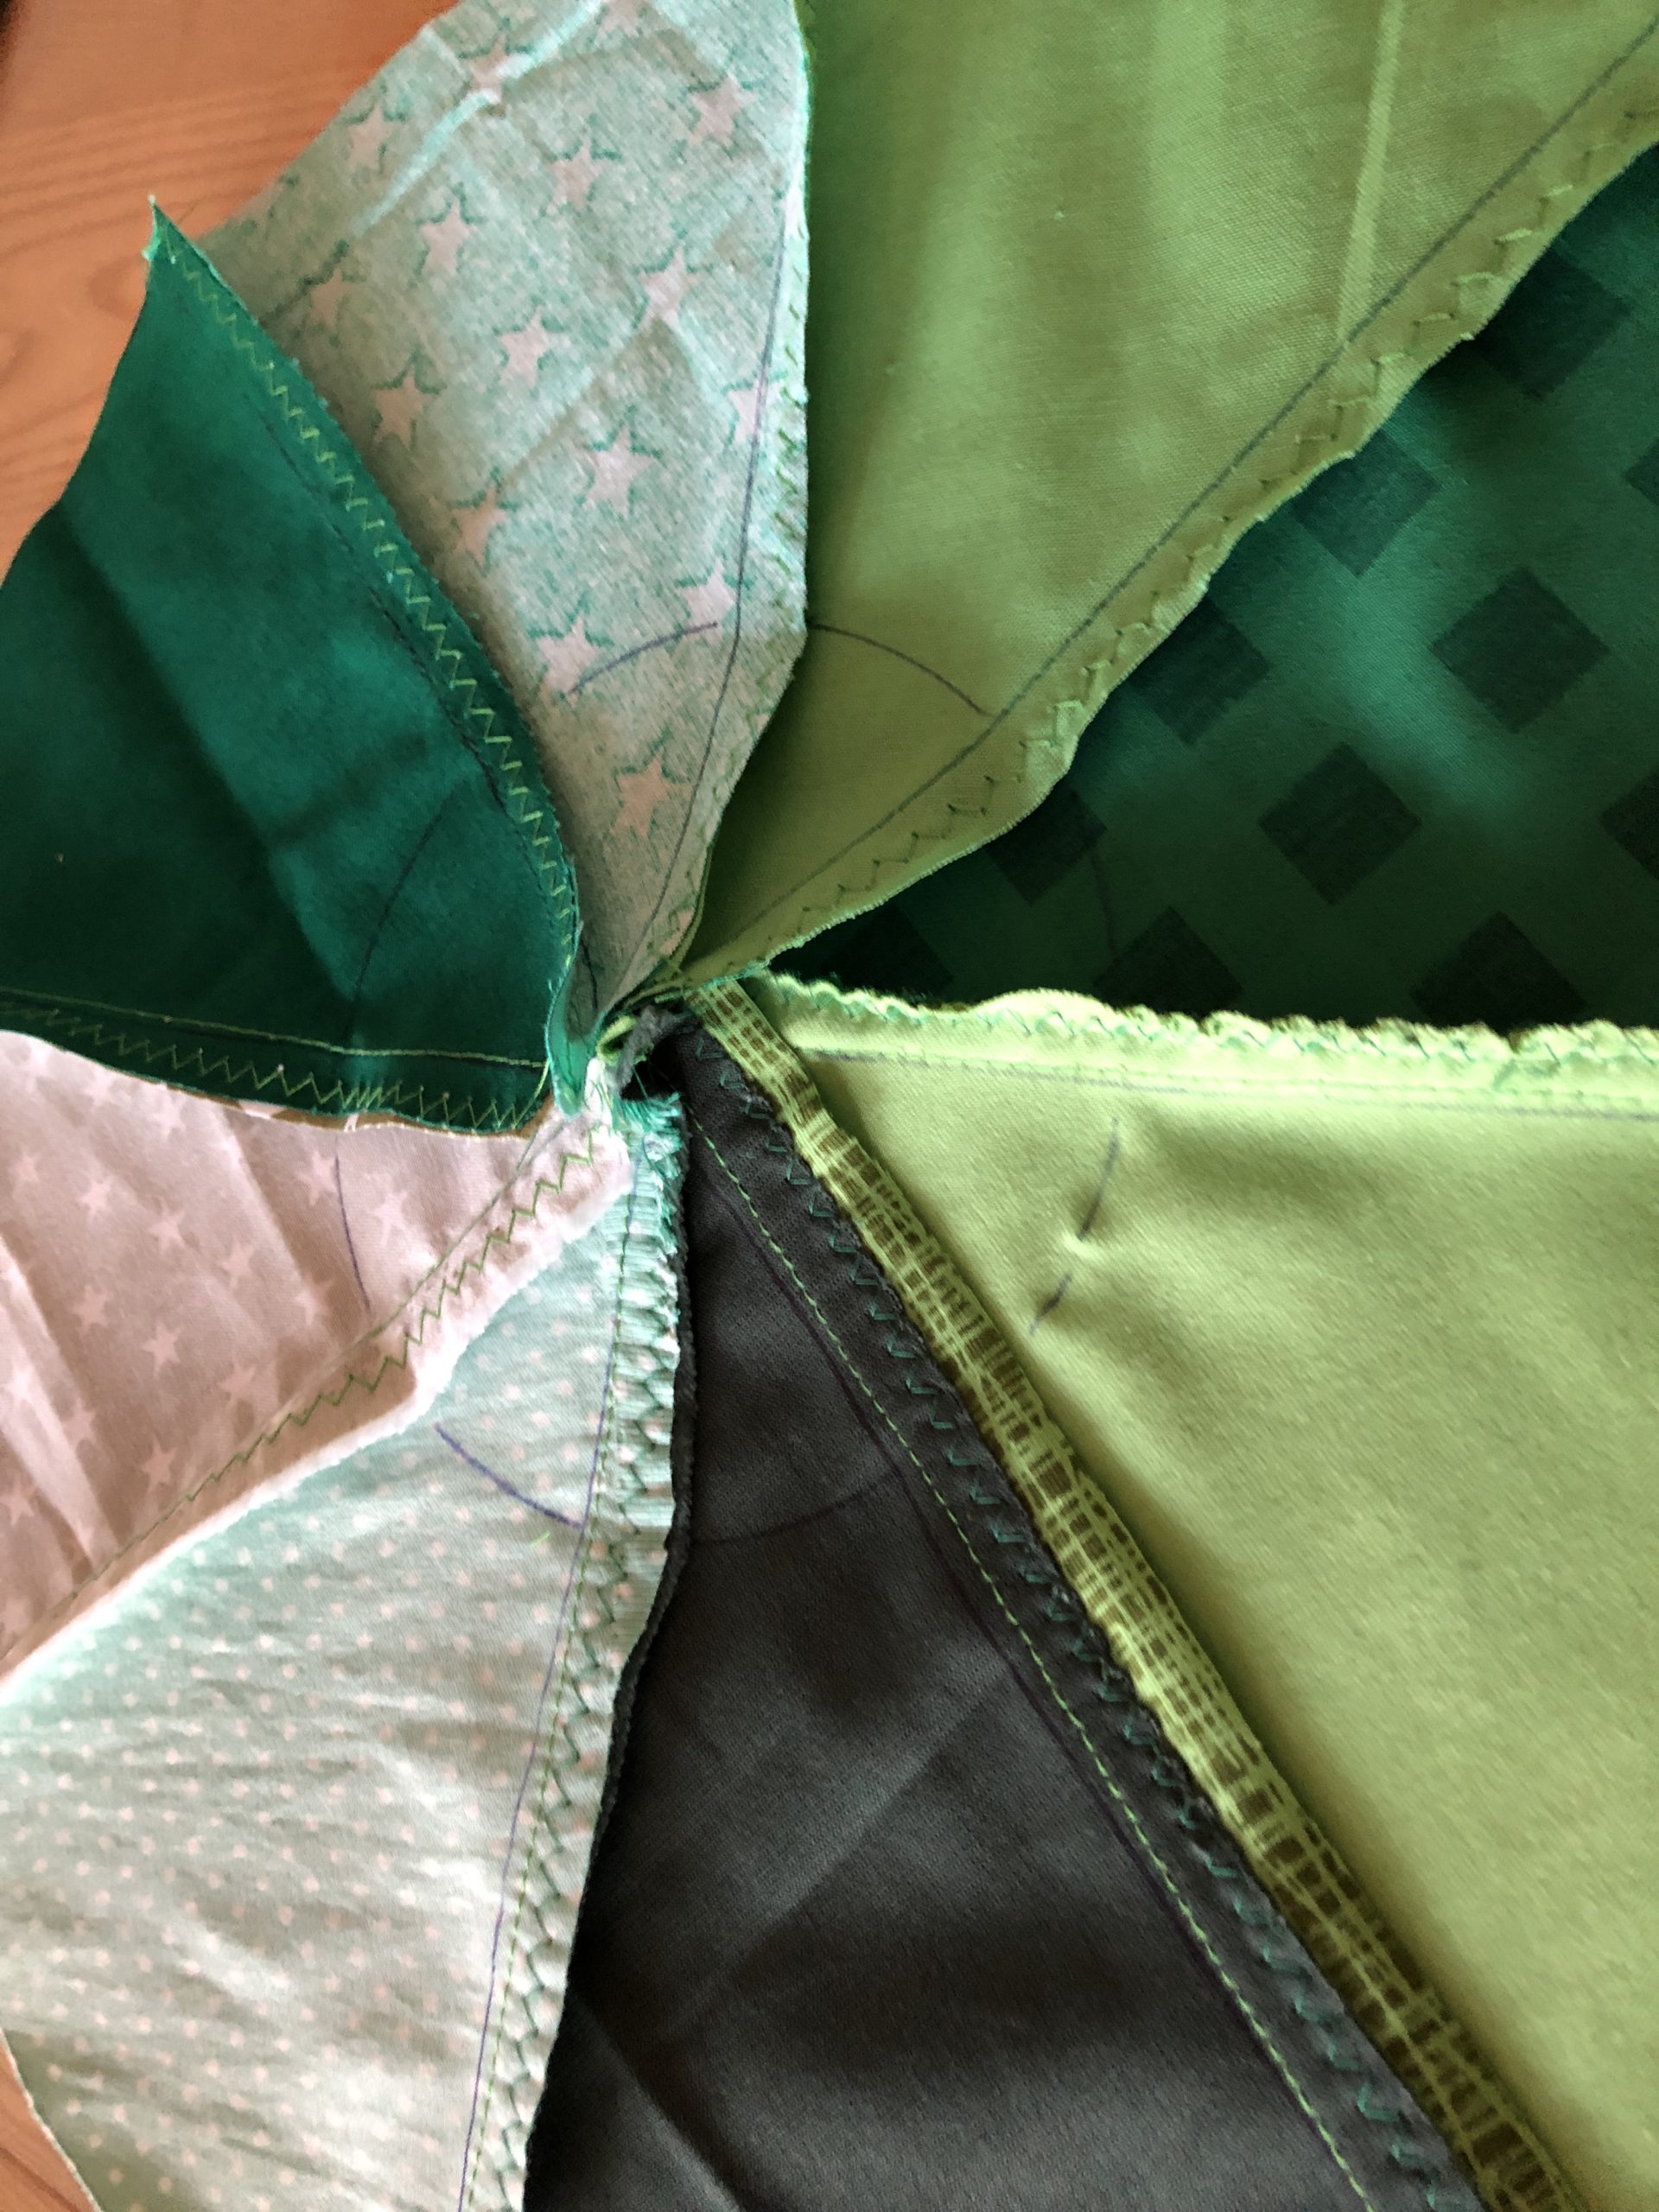
Do not forget to line the individual seams with a zigzag stitch.

Bild zum Schritt 17 für das Bastel- und DIY-Abenteuer für Kinder: 'Vergesst nicht die einzelnen Nähte mit einem Zickzack-Stich zu einzusäumen.'

18

2. Bild zum Schritt 17 für das Bastel- und DIY-Abenteuer für Kinder: 'Vergesst nicht die einzelnen Nähte mit einem Zickzack-Stich zu einzusäumen.'

19

In the center of the circle a small circle has to be cut out.
This is how a wreath is created. Take a cup or a bowl to draw on.

Bild zum Schritt 19 für das Bastel- und DIY-Abenteuer für Kinder: 'In der Kreismitte muss nun ein Kleiner Kreis heraus geschnitten...'

20

2. Bild zum Schritt 19 für das Bastel- und DIY-Abenteuer für Kinder: 'In der Kreismitte muss nun ein Kleiner Kreis heraus geschnitten...'

21

Cut out the circle.

Bild zum Schritt 21 für das Bastel- und DIY-Abenteuer für Kinder: 'Schneidet den Kreis heraus.'

22

2. Bild zum Schritt 21 für das Bastel- und DIY-Abenteuer für Kinder: 'Schneidet den Kreis heraus.'

23

Now iron the seams on the back.

Bild zum Schritt 23 für das Bastel- und DIY-Abenteuer für Kinder: 'Jetzt bügelt die Nähte auf der Rückseite.'

24

Then also cuts out a small circle from the rear part.

Bild zum Schritt 24 für das Bastel- und DIY-Abenteuer für Kinder: 'Dann schneidet auch aus dem Rückteil ein kleinen Kreis heraus.'

25

Put the two circles together with the beautiful sides (right).
Then she's stuck with pins.

Bild zum Schritt 25 für das Bastel- und DIY-Abenteuer für Kinder: 'Legt die beiden Kreise mit den schönen Seiten (rechts) aufeinander....'

26

Then you also fix the fabric around the outside with pins.
Make sure that you take out the edge of the fabric and always stick in the middle of the fabric with needles.

Bild zum Schritt 26 für das Bastel- und DIY-Abenteuer für Kinder: 'Anschließend fixiert ihr den Stoff außen herum ebenfalls mit Stecknadeln....'

27

2. Bild zum Schritt 26 für das Bastel- und DIY-Abenteuer für Kinder: 'Anschließend fixiert ihr den Stoff außen herum ebenfalls mit Stecknadeln....'

28

Now you sew the outer edge together with the sewing machine.

Bild zum Schritt 28 für das Bastel- und DIY-Abenteuer für Kinder: 'Jetzt näht ihr den äußeren Rand mit der Nähmaschine zusammen.'

29

2. Bild zum Schritt 28 für das Bastel- und DIY-Abenteuer für Kinder: 'Jetzt näht ihr den äußeren Rand mit der Nähmaschine zusammen.'

30

Then you turn the circle of cloth.

Bild zum Schritt 30 für das Bastel- und DIY-Abenteuer für Kinder: 'Dann wendet ihr den Stoffkreis.'

31

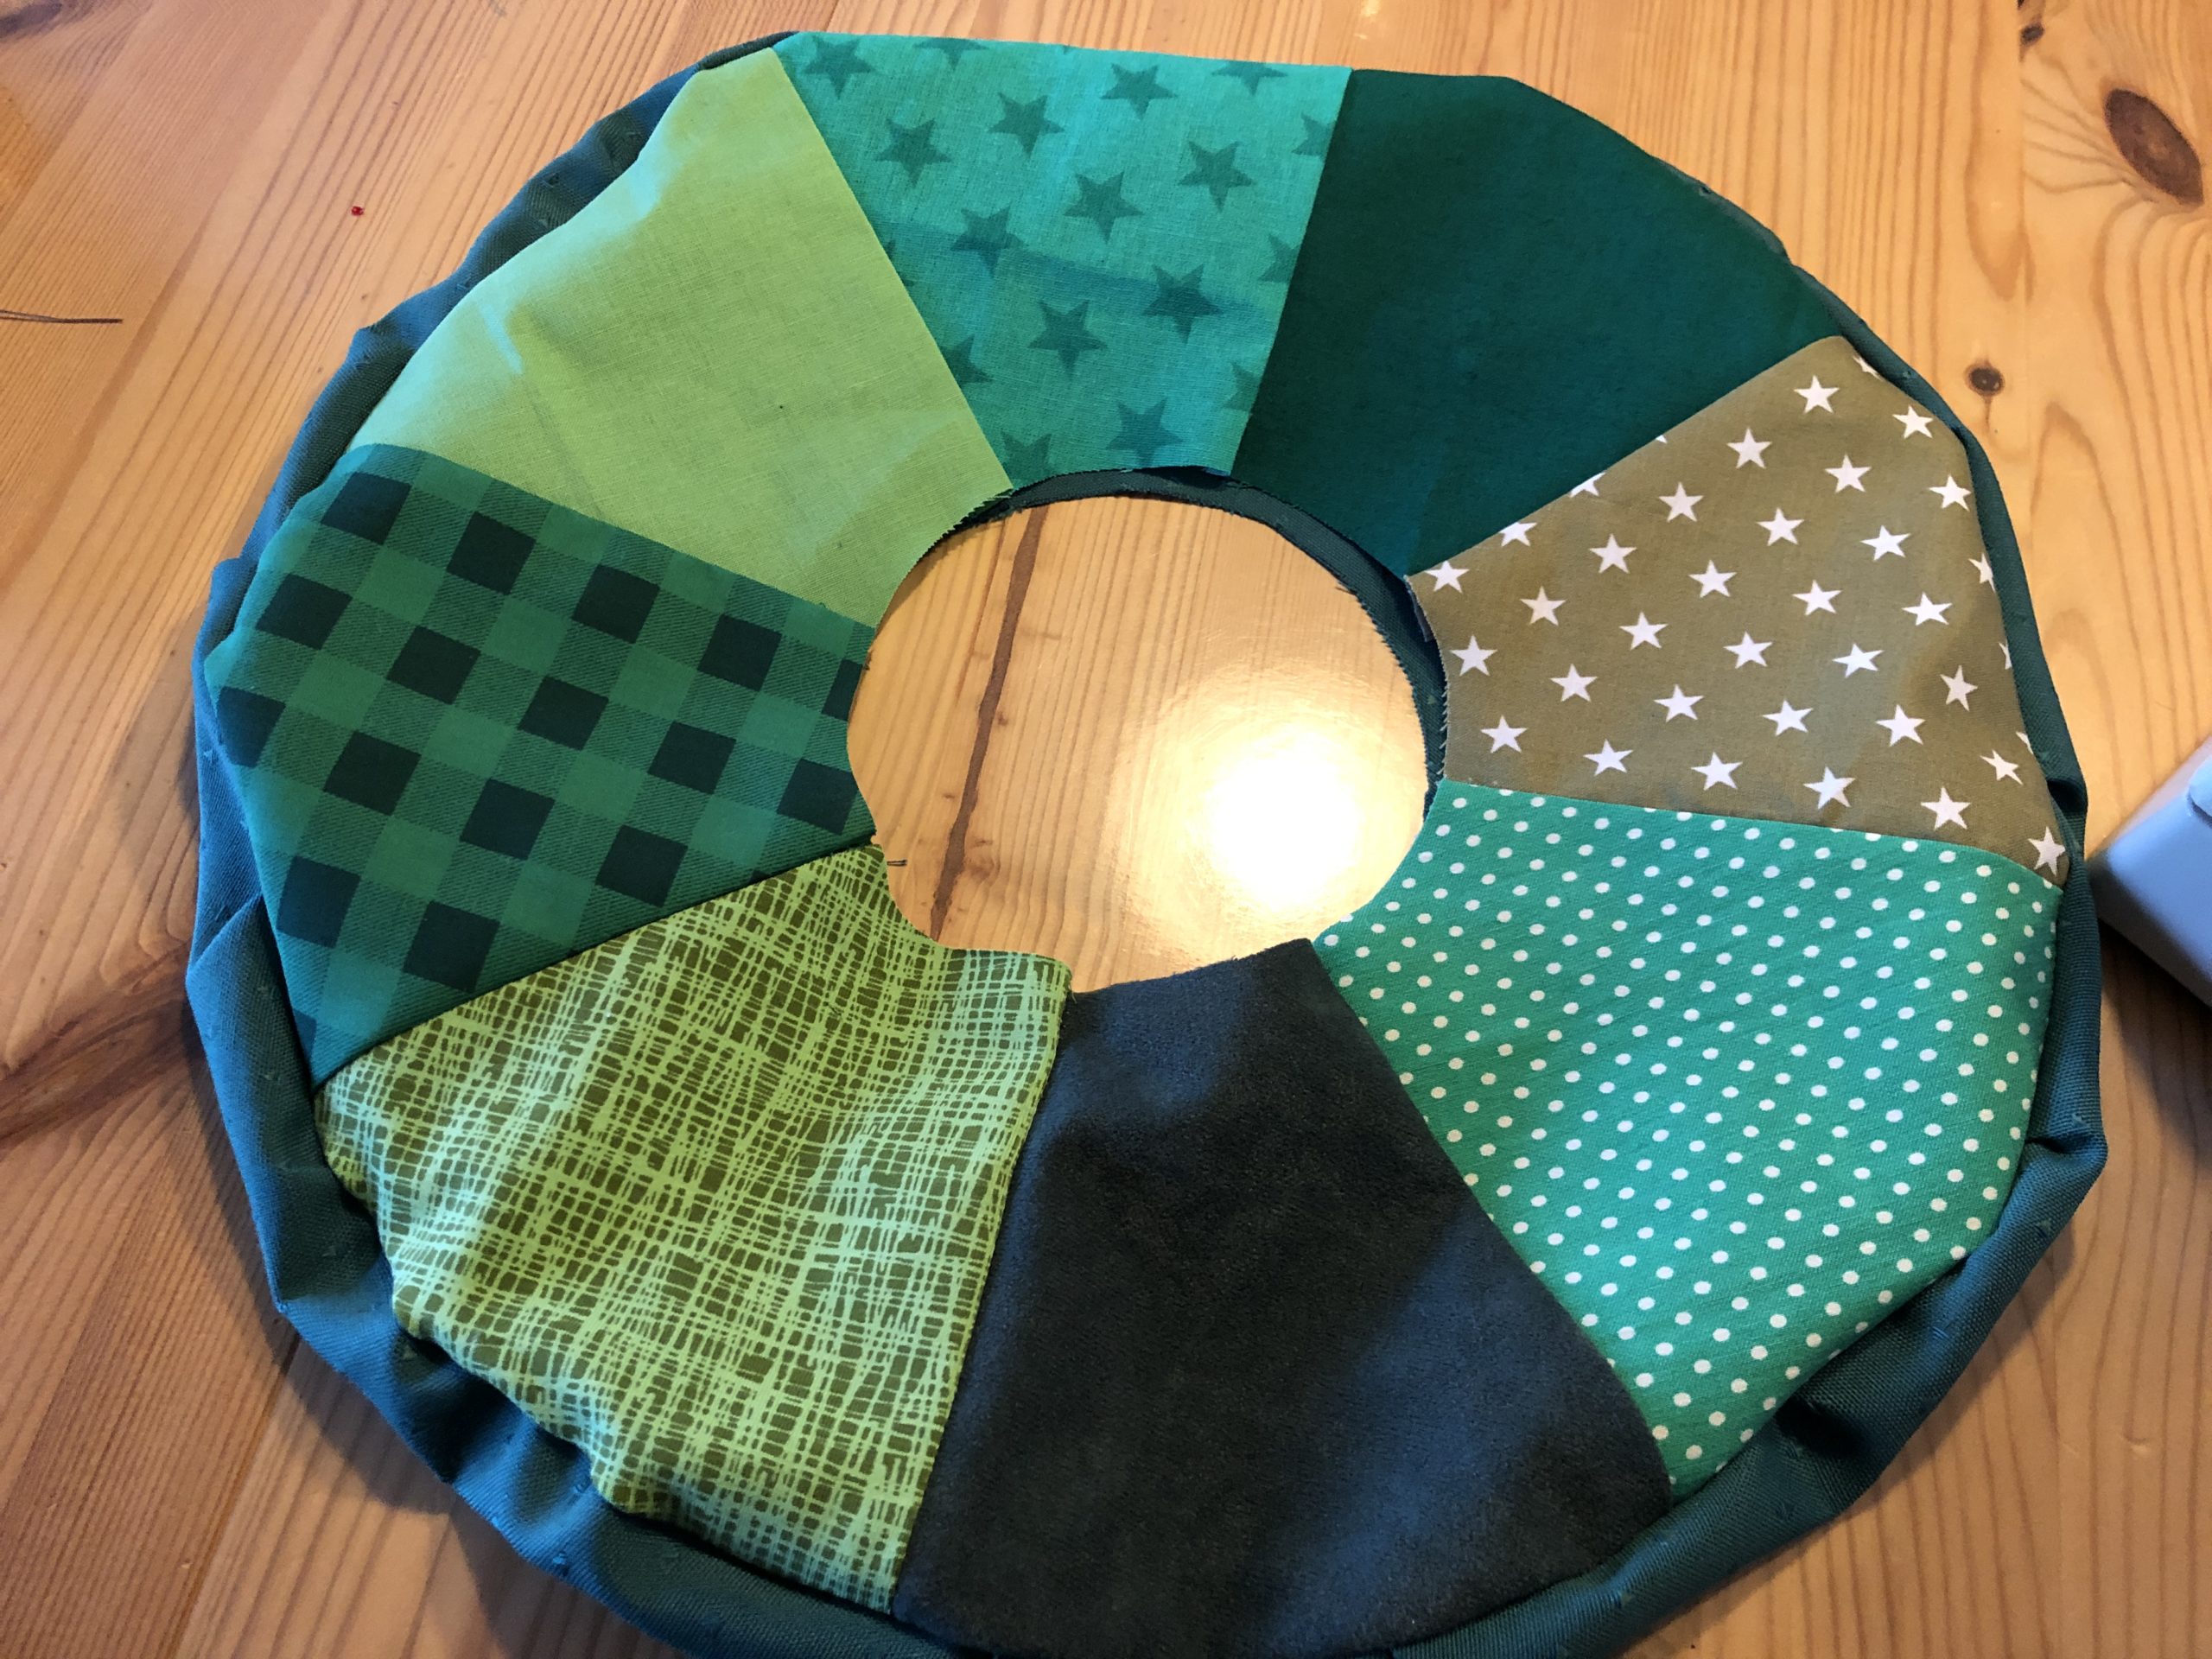
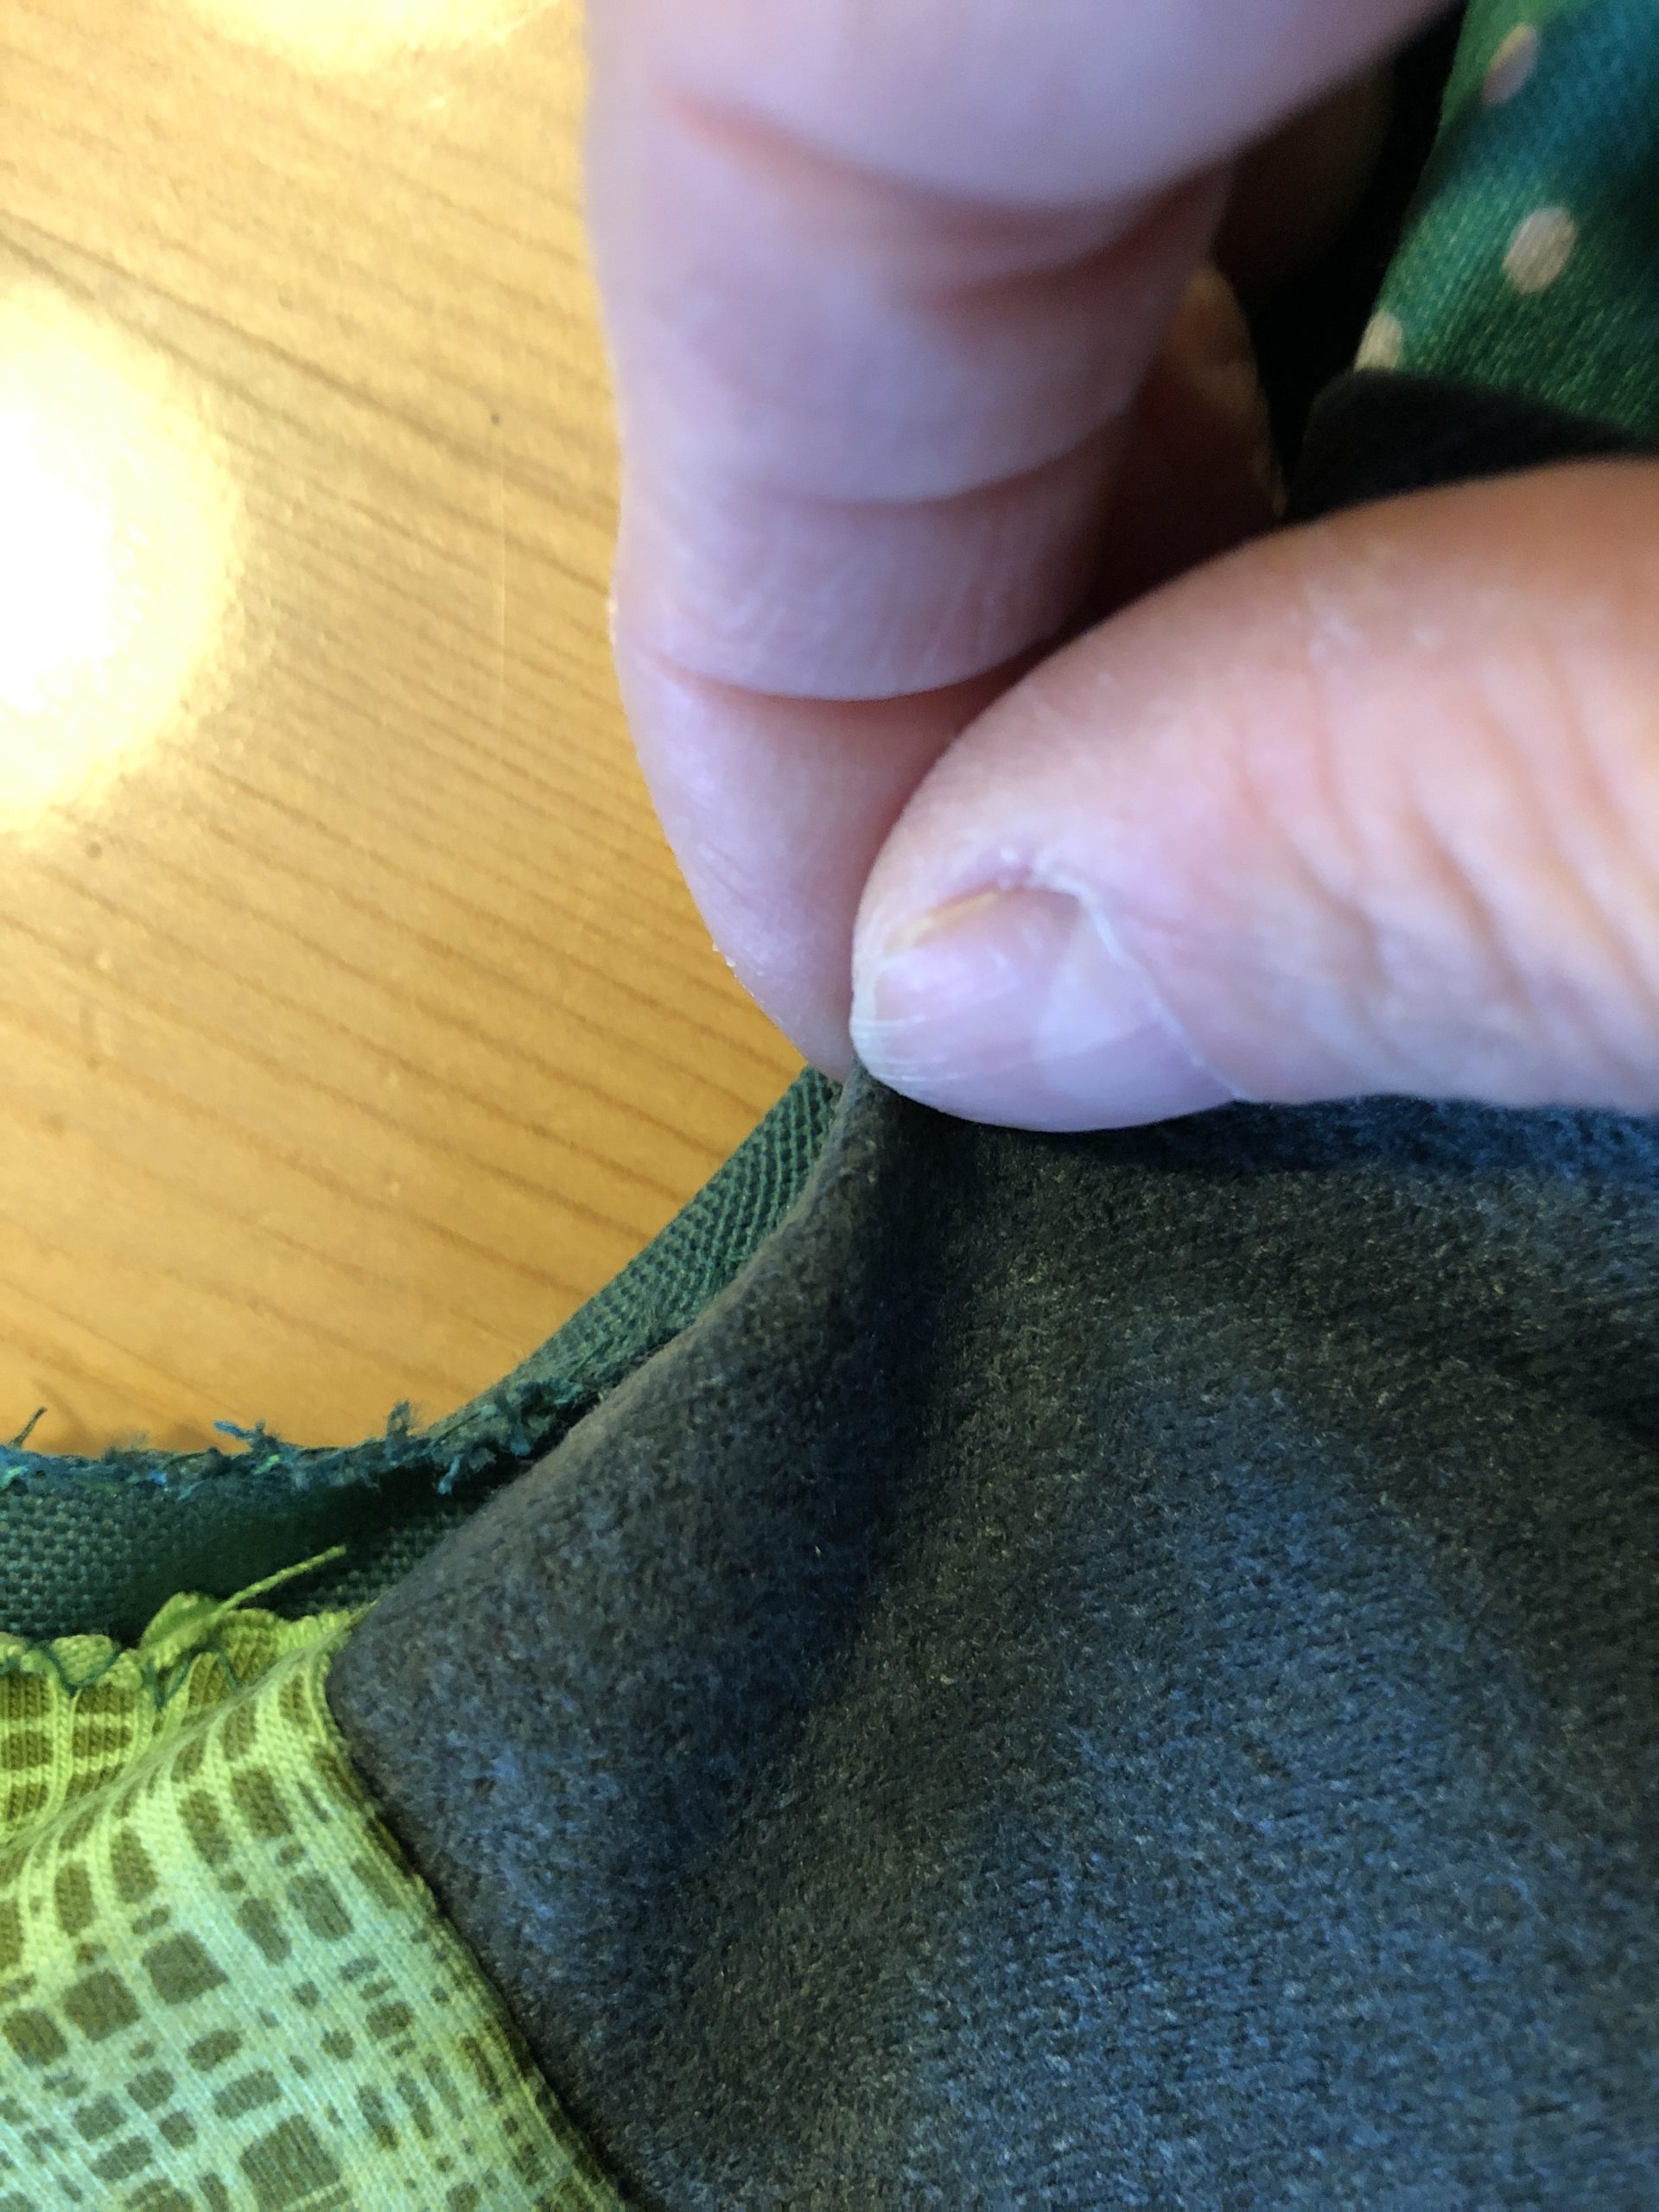
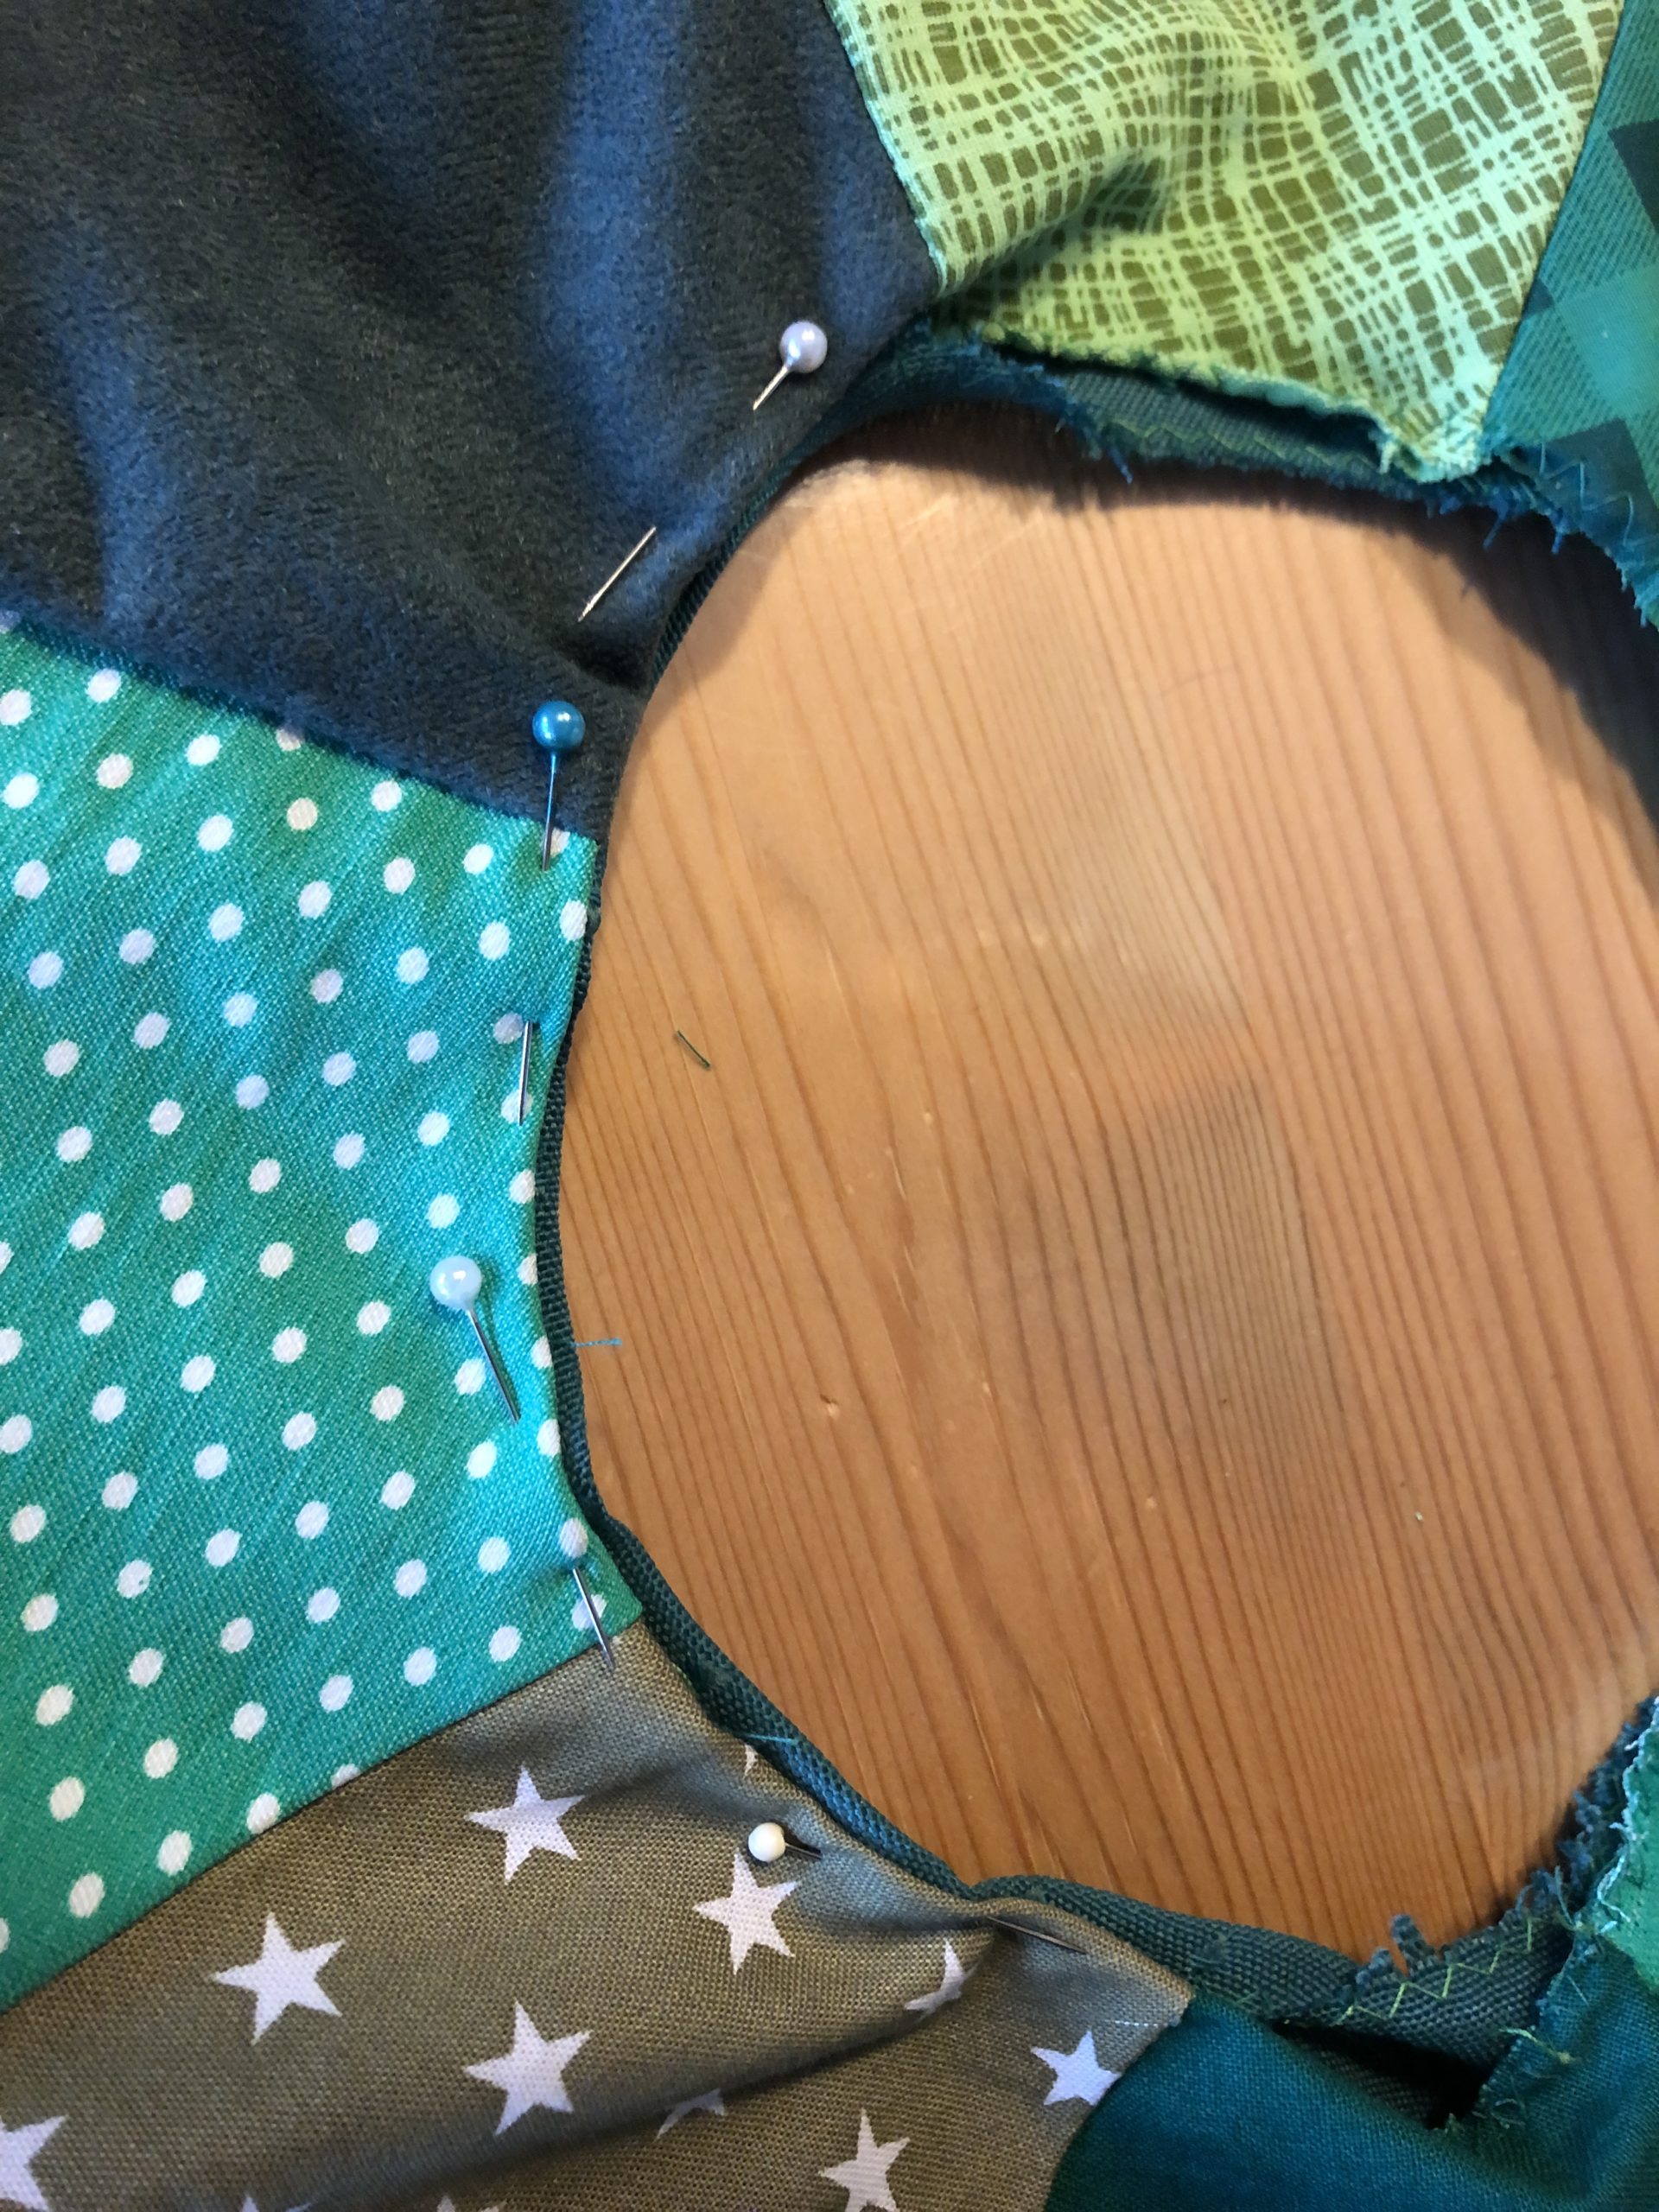
The inner open edges of the ring are now about half a centimetre from both sides and stick it together with pins.

Bild zum Schritt 31 für das Bastel- und DIY-Abenteuer für Kinder: 'Die  inneren offenen Ränder des Ringes schlagt ihr nun...'

32

2. Bild zum Schritt 31 für das Bastel- und DIY-Abenteuer für Kinder: 'Die  inneren offenen Ränder des Ringes schlagt ihr nun...'

33

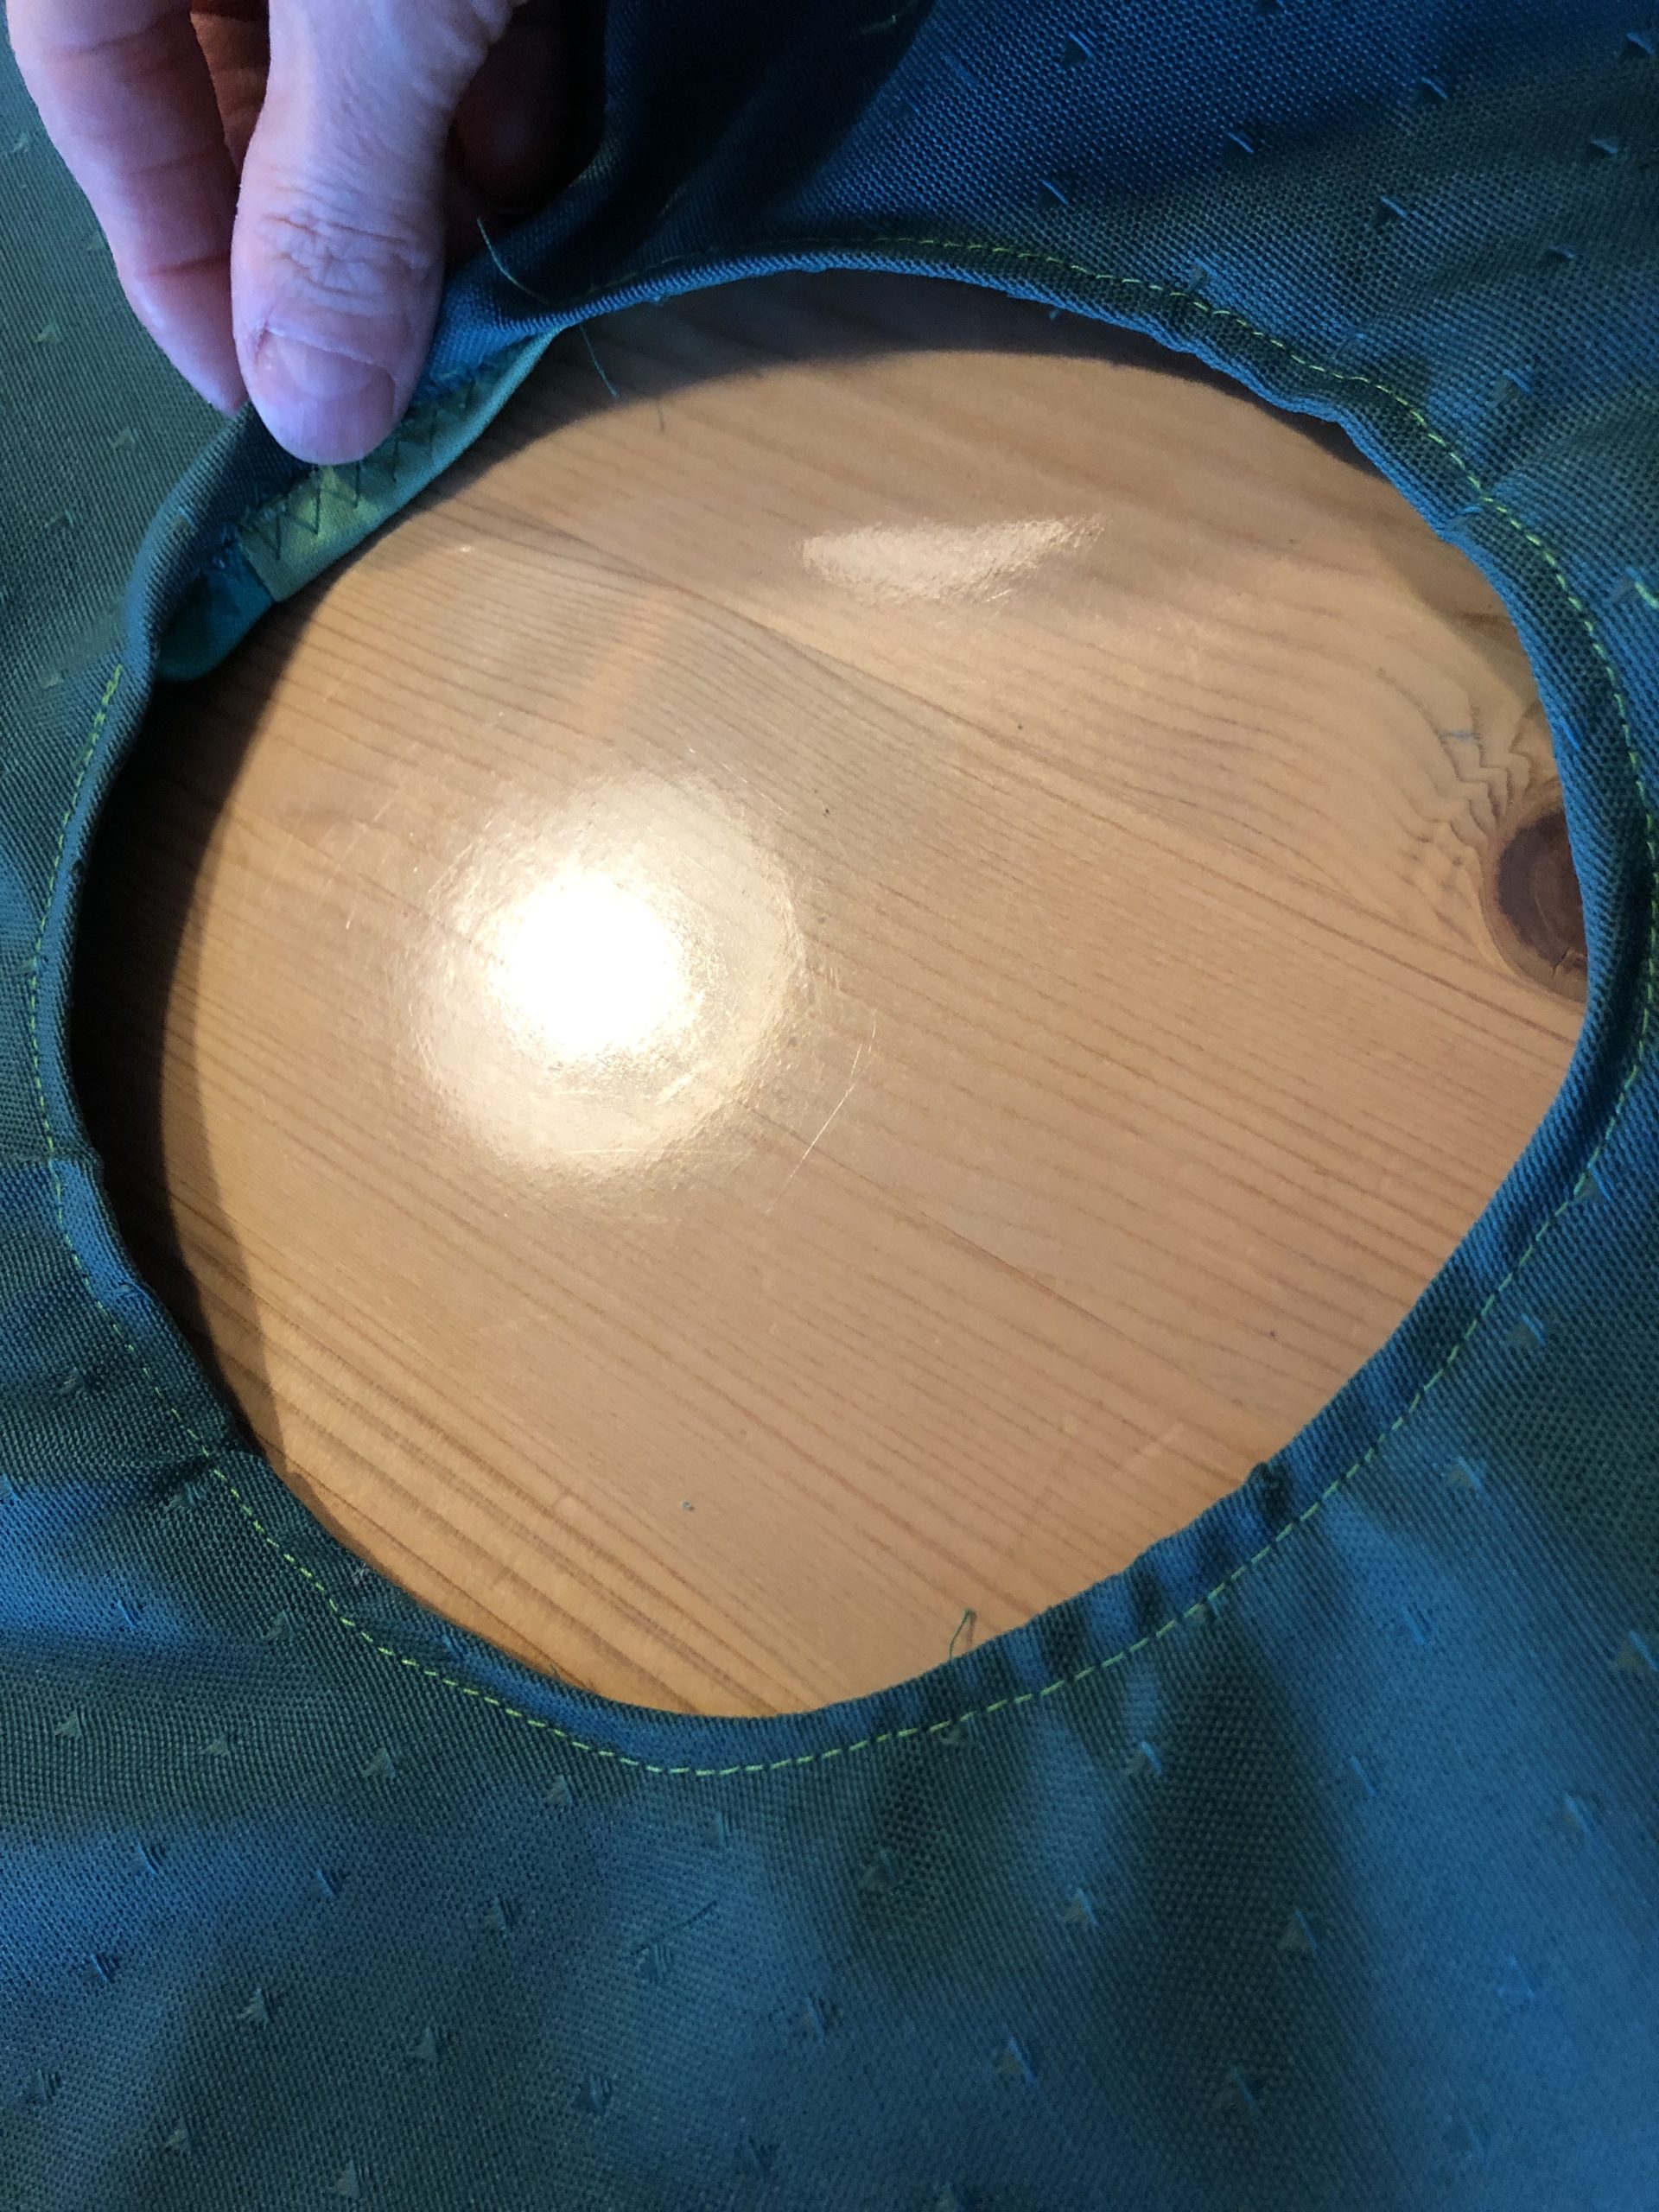
Now you sew it together with the sewing machine.
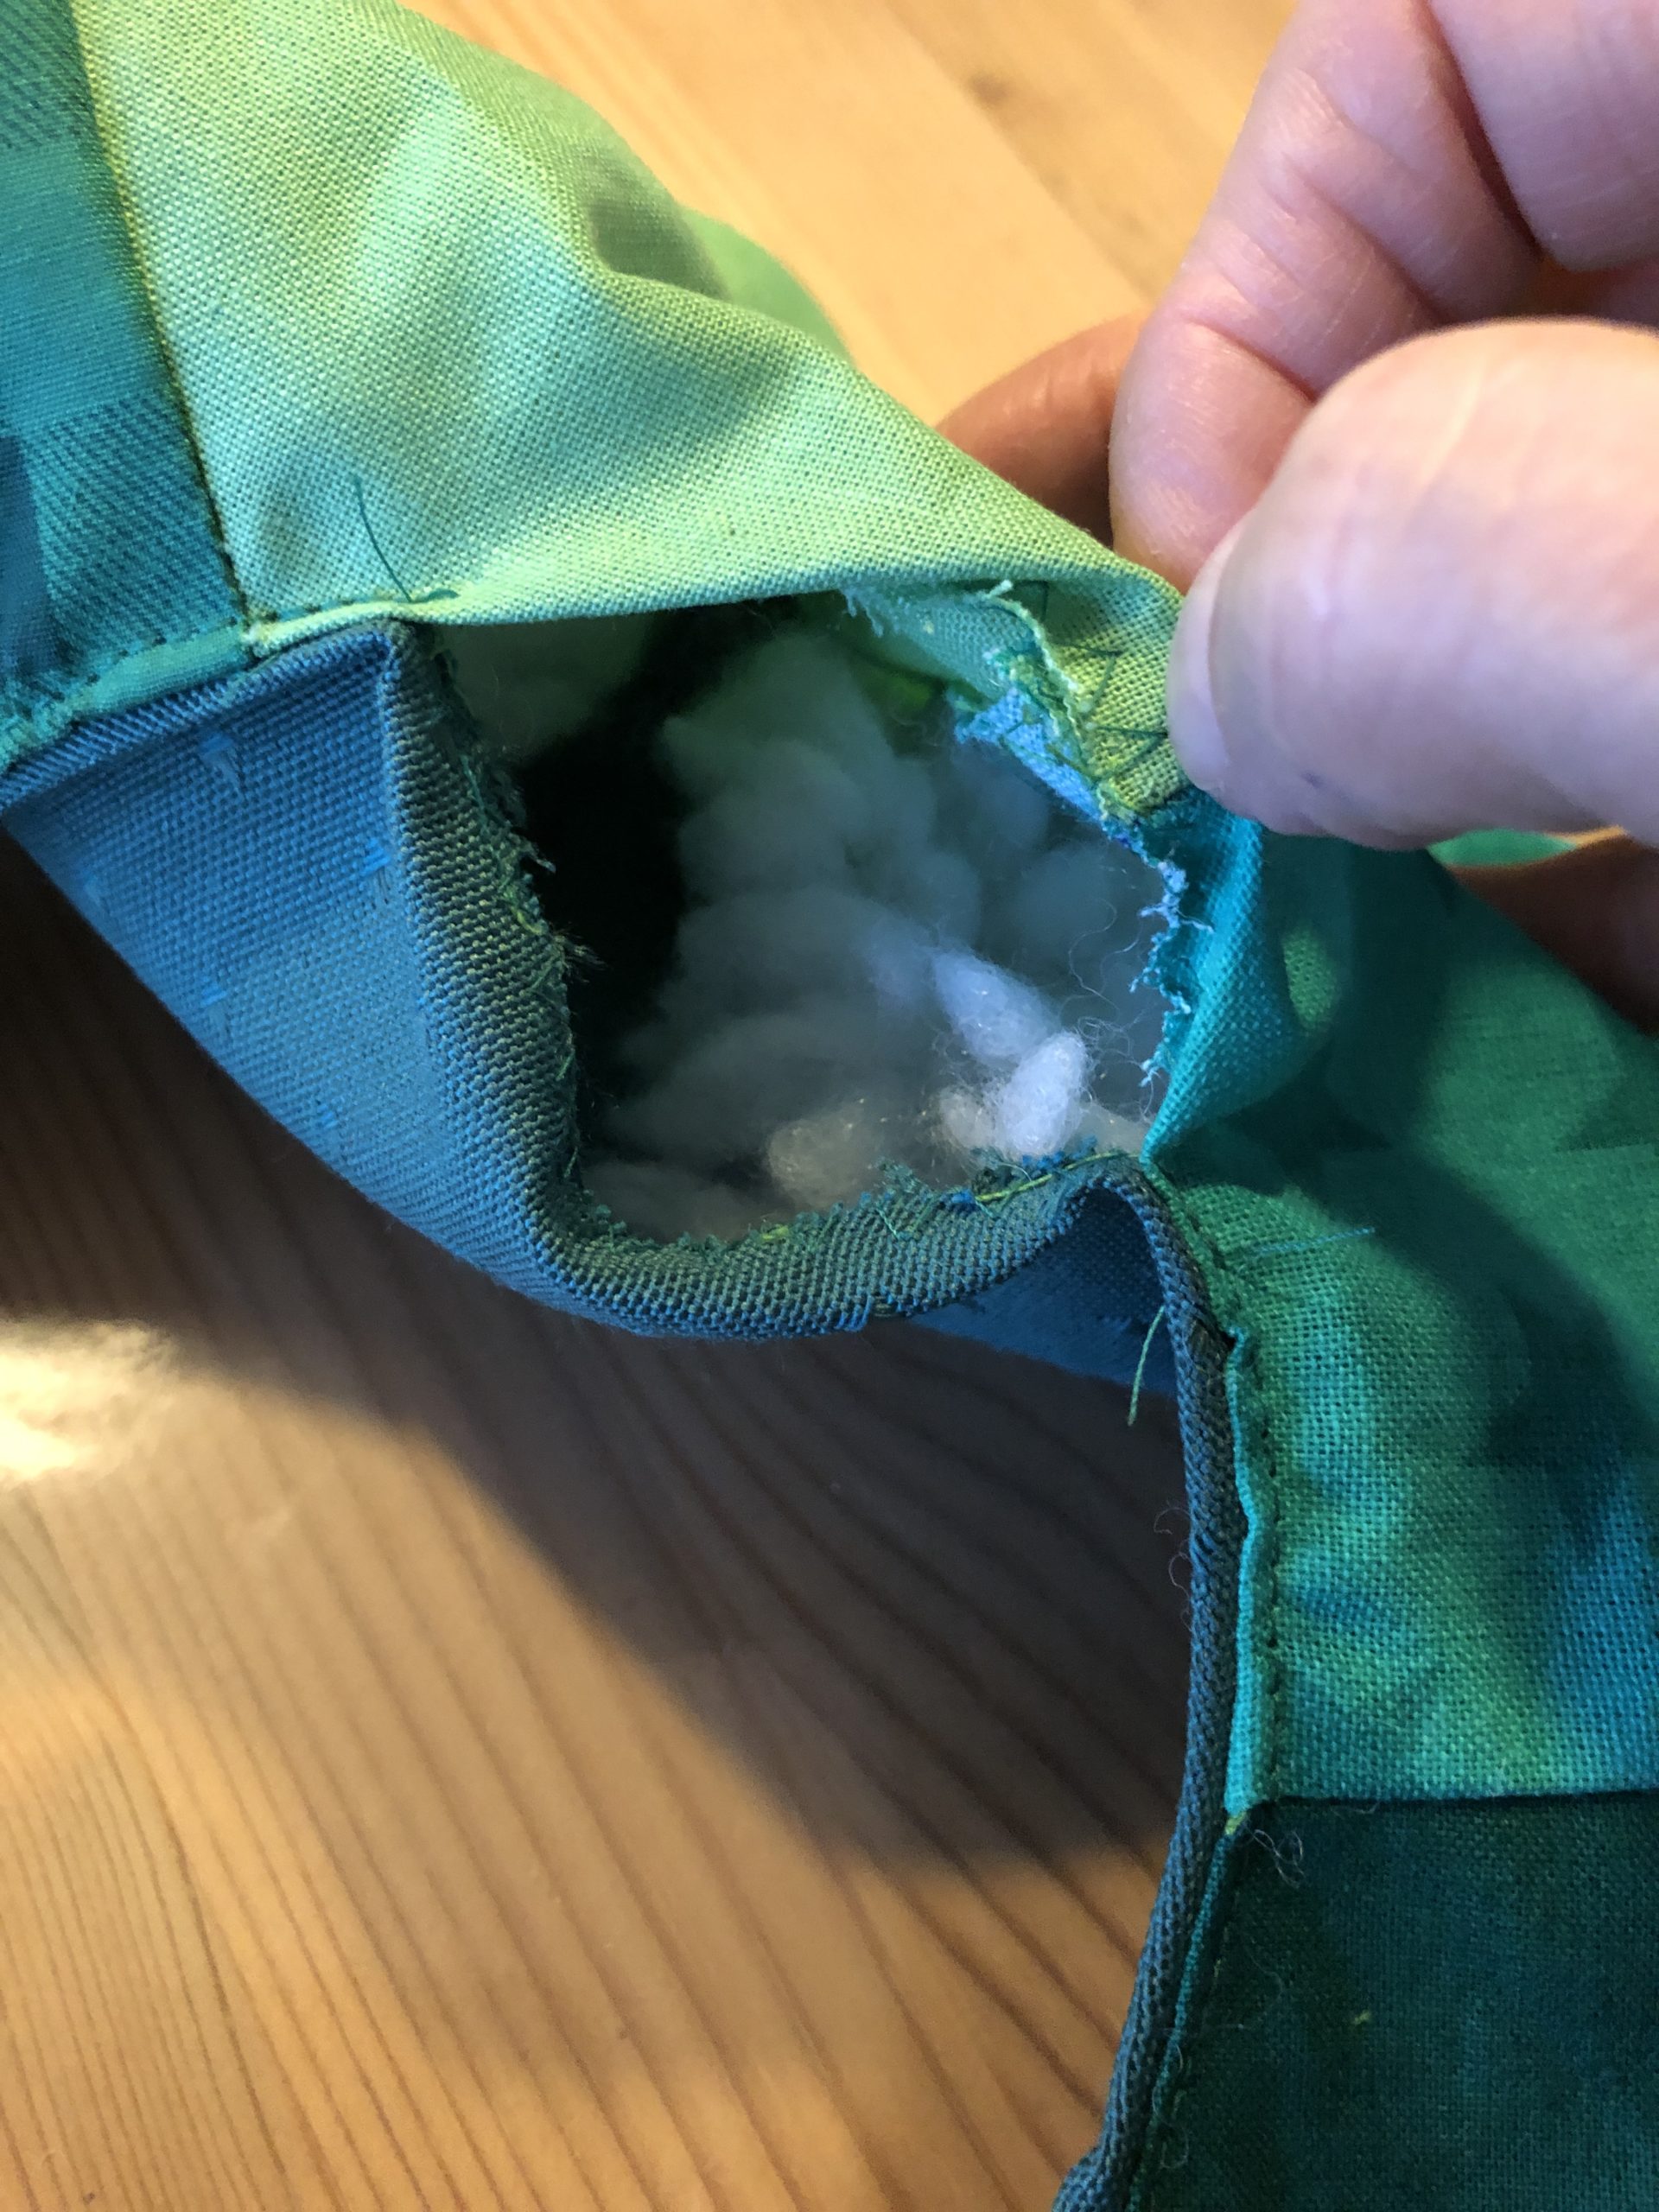
Leave at least 5 cm of seam open for filling.

Bild zum Schritt 33 für das Bastel- und DIY-Abenteuer für Kinder: 'Jetzt näht ihr ihn mit der Nähmaschine zusammen.  ...'

34

2. Bild zum Schritt 33 für das Bastel- und DIY-Abenteuer für Kinder: 'Jetzt näht ihr ihn mit der Nähmaschine zusammen.  ...'

35

Through the open seam, the fabric wreath is now stuffed with filling material.

Bild zum Schritt 35 für das Bastel- und DIY-Abenteuer für Kinder: 'Durch die offene Naht wird nun der Stoffkranz mit Füllmaterial...'

36

2. Bild zum Schritt 35 für das Bastel- und DIY-Abenteuer für Kinder: 'Durch die offene Naht wird nun der Stoffkranz mit Füllmaterial...'

37

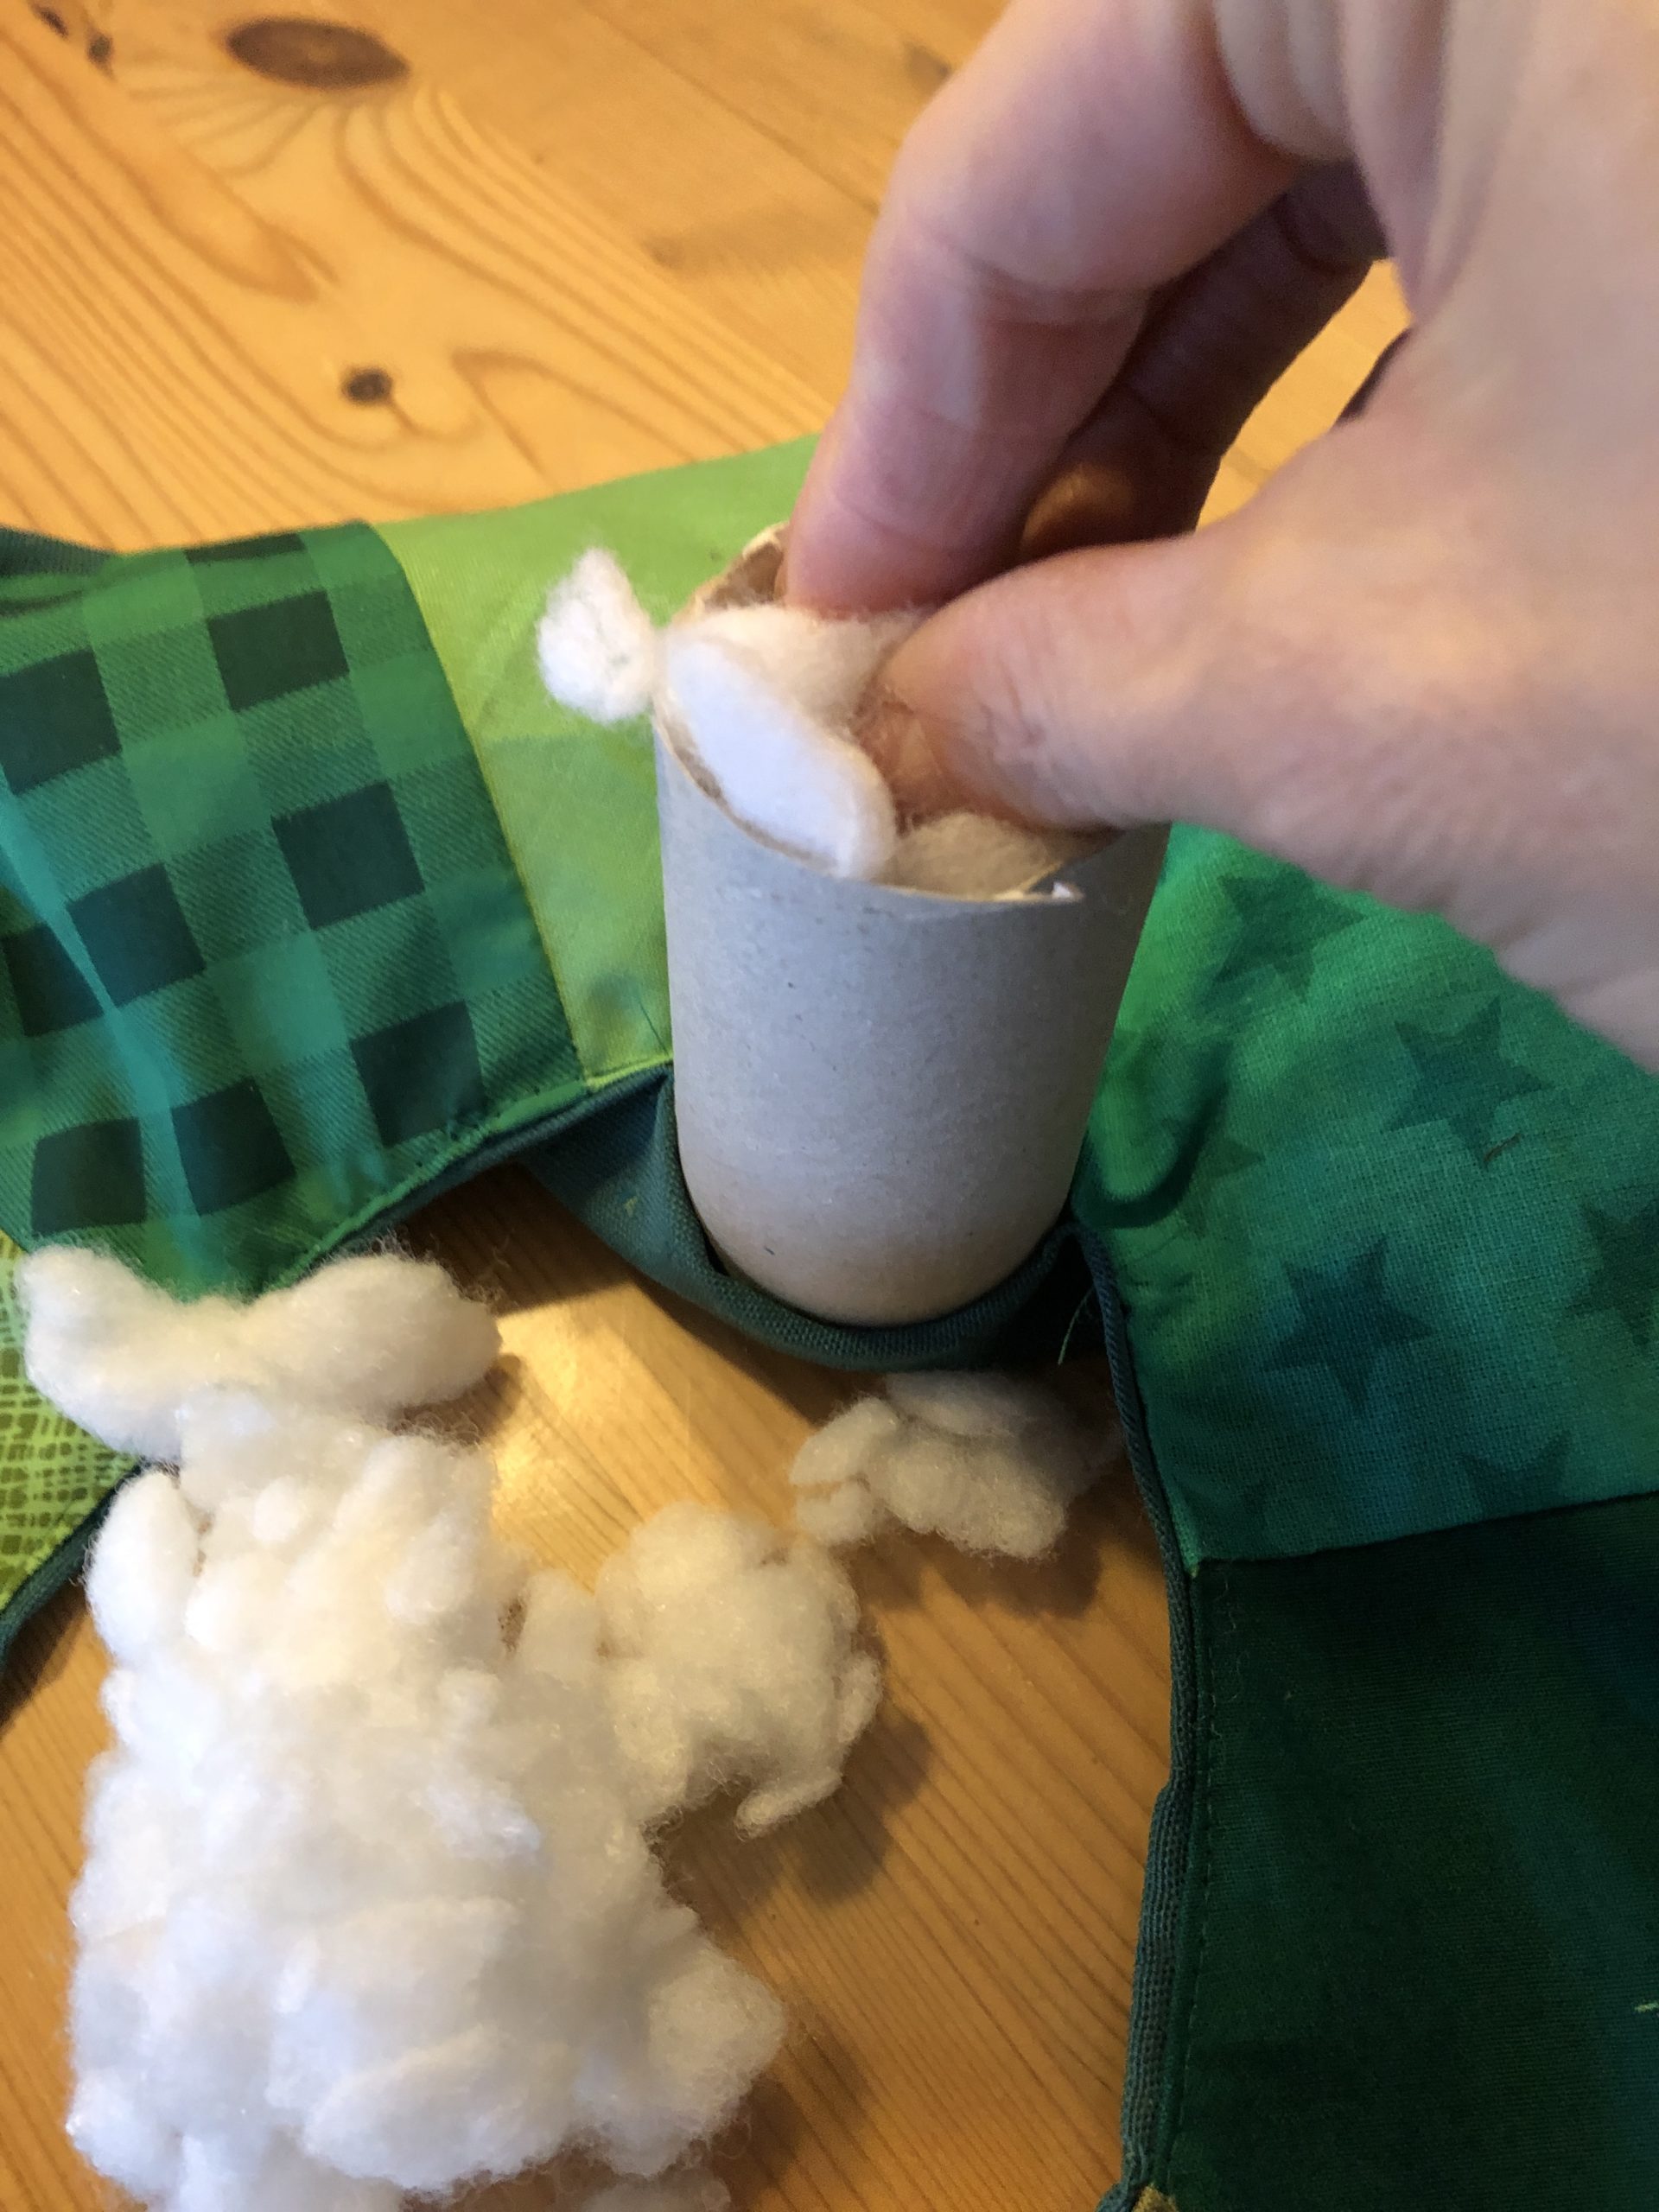
A toilet roll and a cooking spoon are suitable as an aid for filling.

Bild zum Schritt 37 für das Bastel- und DIY-Abenteuer für Kinder: 'Als Hilfestellung zum Befüllen eignen sich eine Klorolle und ein...'

38

2. Bild zum Schritt 37 für das Bastel- und DIY-Abenteuer für Kinder: 'Als Hilfestellung zum Befüllen eignen sich eine Klorolle und ein...'

39

Push the filling material through the toilet roll into the curvatures of the wreath with a cooking spoon.

Bild zum Schritt 39 für das Bastel- und DIY-Abenteuer für Kinder: 'Schiebt mit einem Kochlöffel das Füllmaterial durch die Klorolle in...'

40

If the wreath is evenly filled, the open seam is closed with needle and thread.

Bild zum Schritt 40 für das Bastel- und DIY-Abenteuer für Kinder: 'Ist der Kranz gleichmäßig befüllt, wird die offene Naht mit...'

41

The wreath is ready!

Candles:
42

First cut a piece of foam pipe insulation to the desired length of the candle. This works very well with a cutter knife.
Then cut the fabric for the candle. To do this, wrap the foam with the fabric and add 2cm of fabric at the top, bottom and side.

Bild zum Schritt 43 für das Bastel- und DIY-Abenteuer für Kinder: 'Schneidet zuerst ein Stück Schaumstoff Rohrisolierung auf die gewünschte Länge...'

43

Put the fabric with the beautiful side (right) up on the table. Then wrap the roll with it. The beautiful side is inside, directly on the foam.
Now you mark yourself with a pen on the longitudinal side, where you sew the fabric together afterwards. Let the fabric lie loose so that you don't draw too tight. Otherwise you won't get the fabric over the roll afterwards.

Bild zum Schritt 44 für das Bastel- und DIY-Abenteuer für Kinder: 'Legt den Stoff mit der schönen Seite (rechts) nach oben...'

44

Remove the roll. Then sew the fabric lengthwise to a hose. Up and down the hose remains open.

Bild zum Schritt 45 für das Bastel- und DIY-Abenteuer für Kinder: 'Entfernt die Rolle. Dann näht ihr den Stoff der Länge...'

45

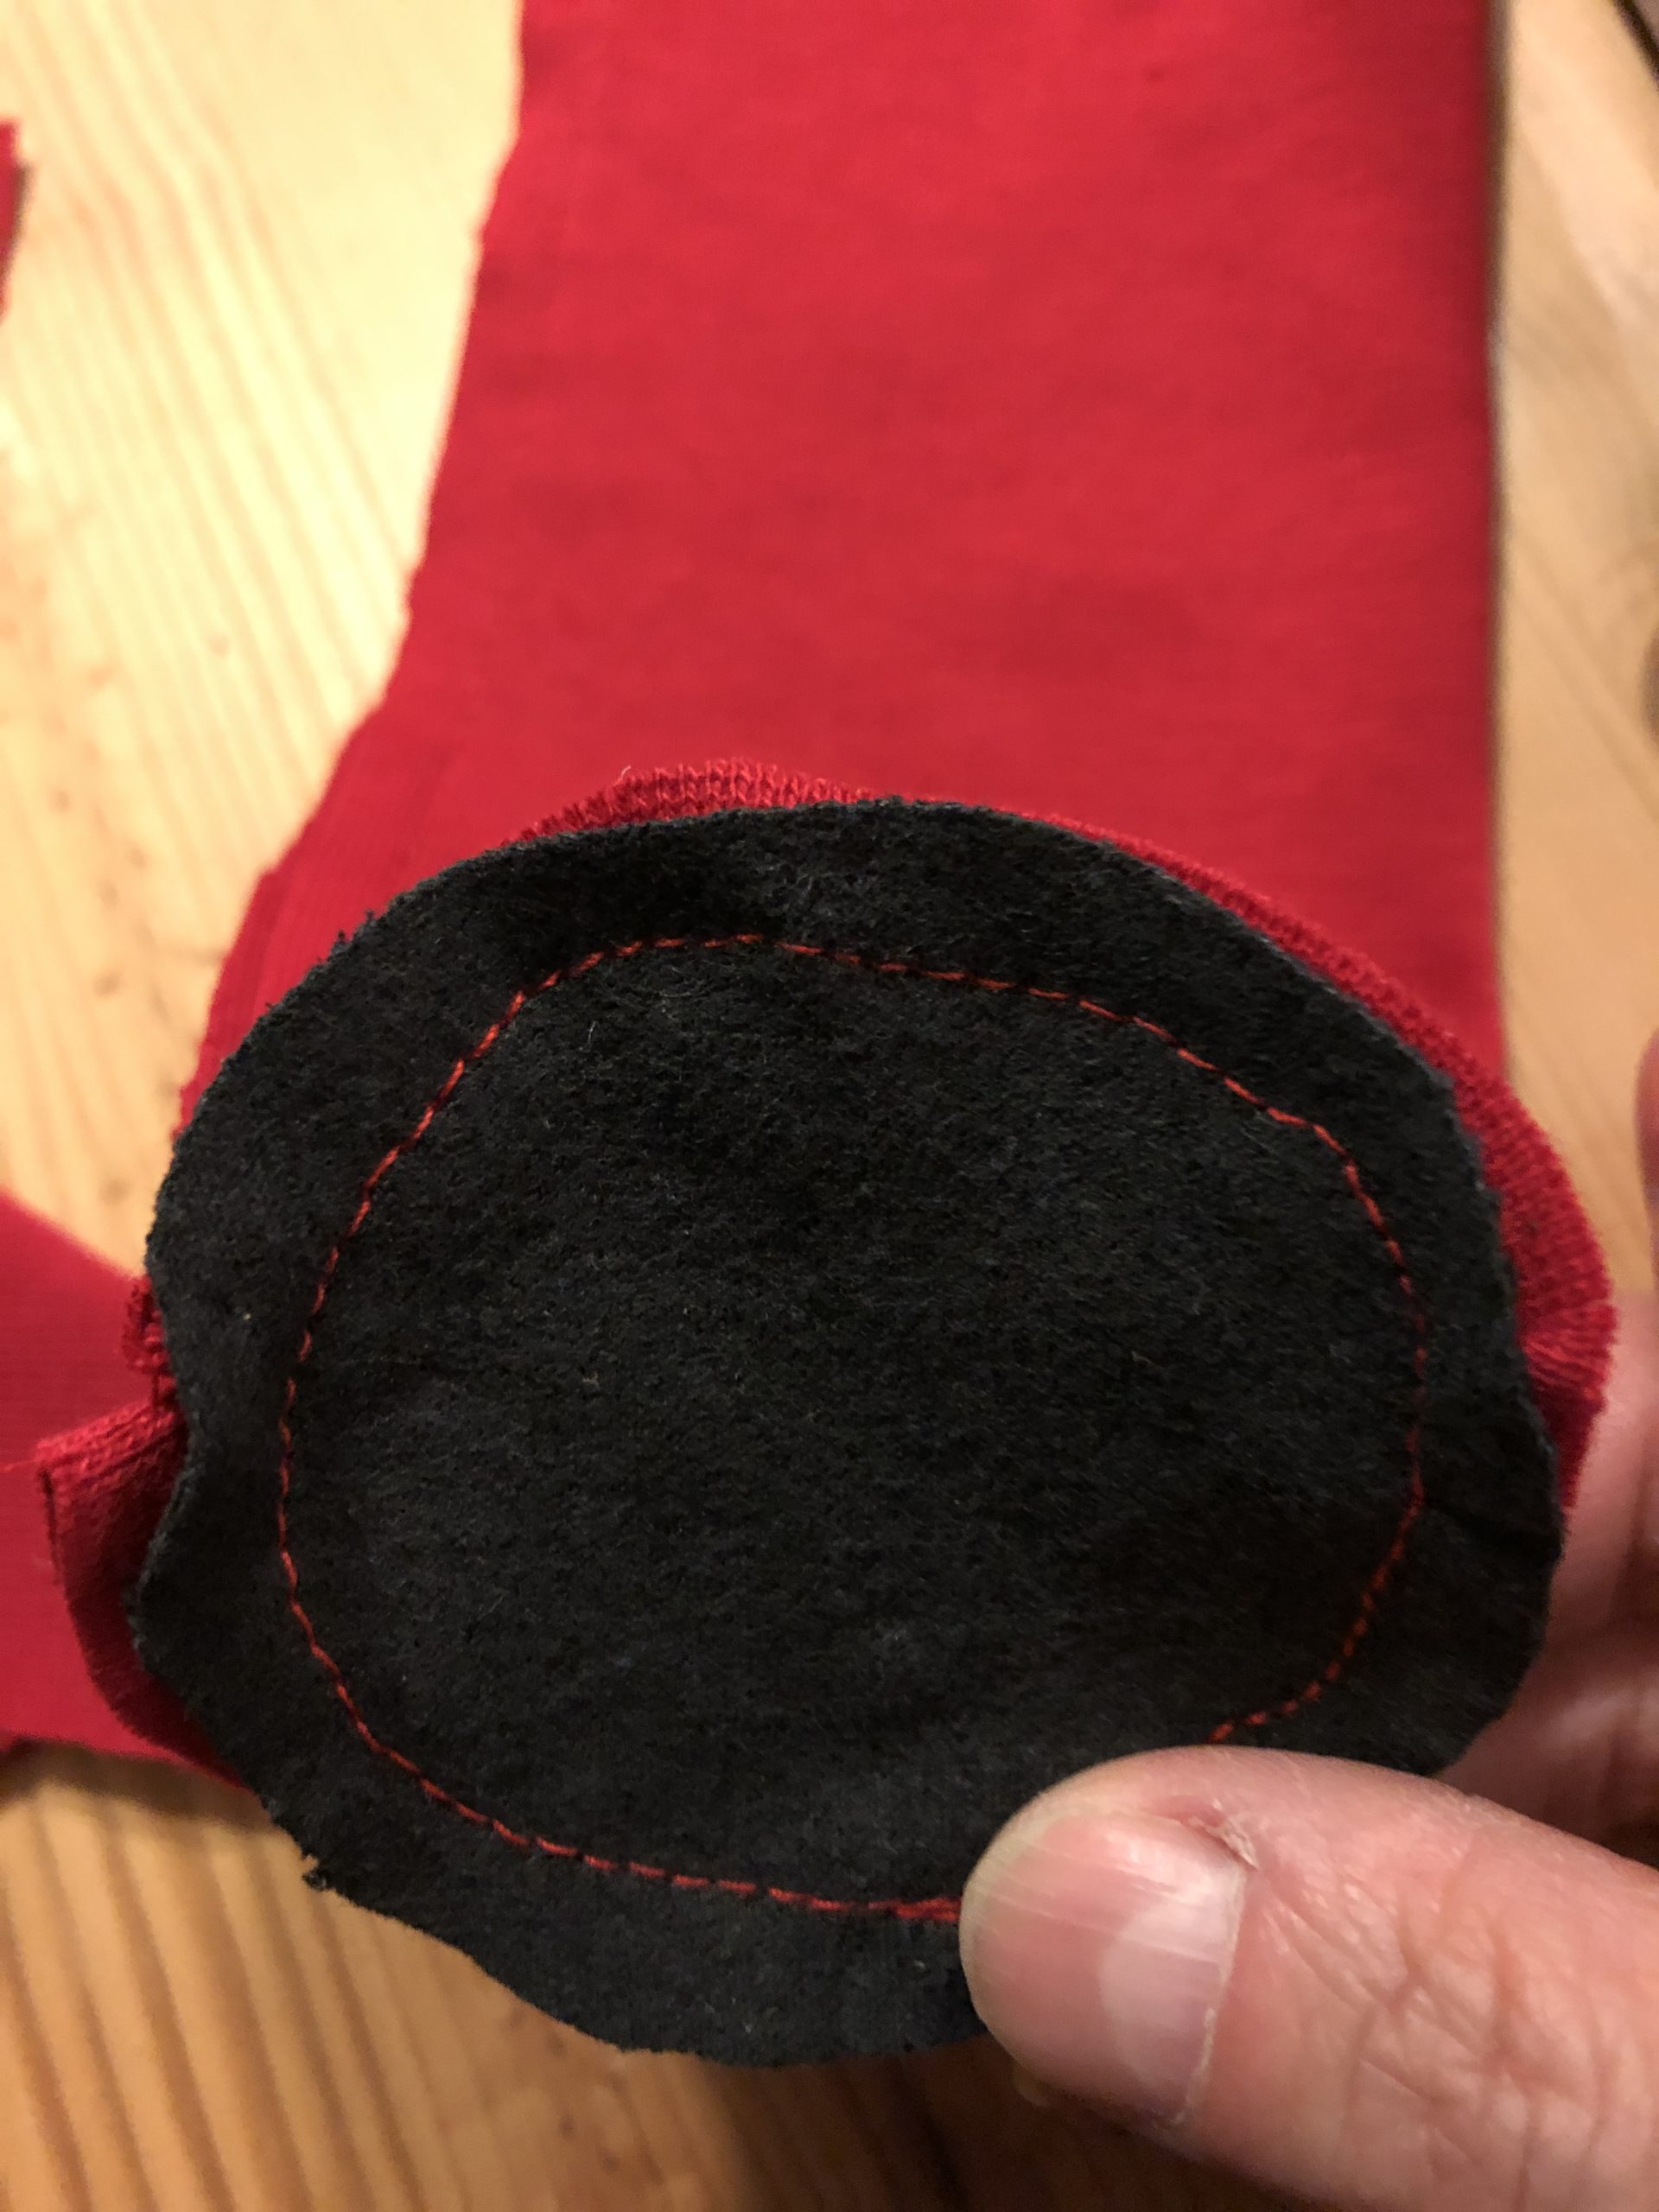
A circle in the diameter of the pipe insulation is required from a solid fabric. Paint it up and cut it out.

Bild zum Schritt 46 für das Bastel- und DIY-Abenteuer für Kinder: 'Aus einem festen Stoff wird ein Kreis im Durchmesser der...'

46

Now attach the circle to one end of the red tube.

Bild zum Schritt 47 für das Bastel- und DIY-Abenteuer für Kinder: 'Steckt nun den Kreis an einem Ende des roten Schlauches...'

47

Now you sew this one.

Bild zum Schritt 48 für das Bastel- und DIY-Abenteuer für Kinder: 'Diesen näht ihr nun fest.'

48

Now you turn the red fabric around.

Bild zum Schritt 49 für das Bastel- und DIY-Abenteuer für Kinder: 'Jetzt dreht ihr den roten Stoff um.'

49

She hasn't put the pipe insulation in her candle shell yet.

Bild zum Schritt 50 für das Bastel- und DIY-Abenteuer für Kinder: 'Die Rohrisolierung steckt ihr noch nicht in die Kerzenhülle.'

50

For first you sew the candle cover with your hand and needle and thread on the wreath.

Bild zum Schritt 51 für das Bastel- und DIY-Abenteuer für Kinder: 'Denn zuerst näht ihr die Kerzenhülle mit mit der Hand...'

51

2. Bild zum Schritt 51 für das Bastel- und DIY-Abenteuer für Kinder: 'Denn zuerst näht ihr die Kerzenhülle mit mit der Hand...'

52

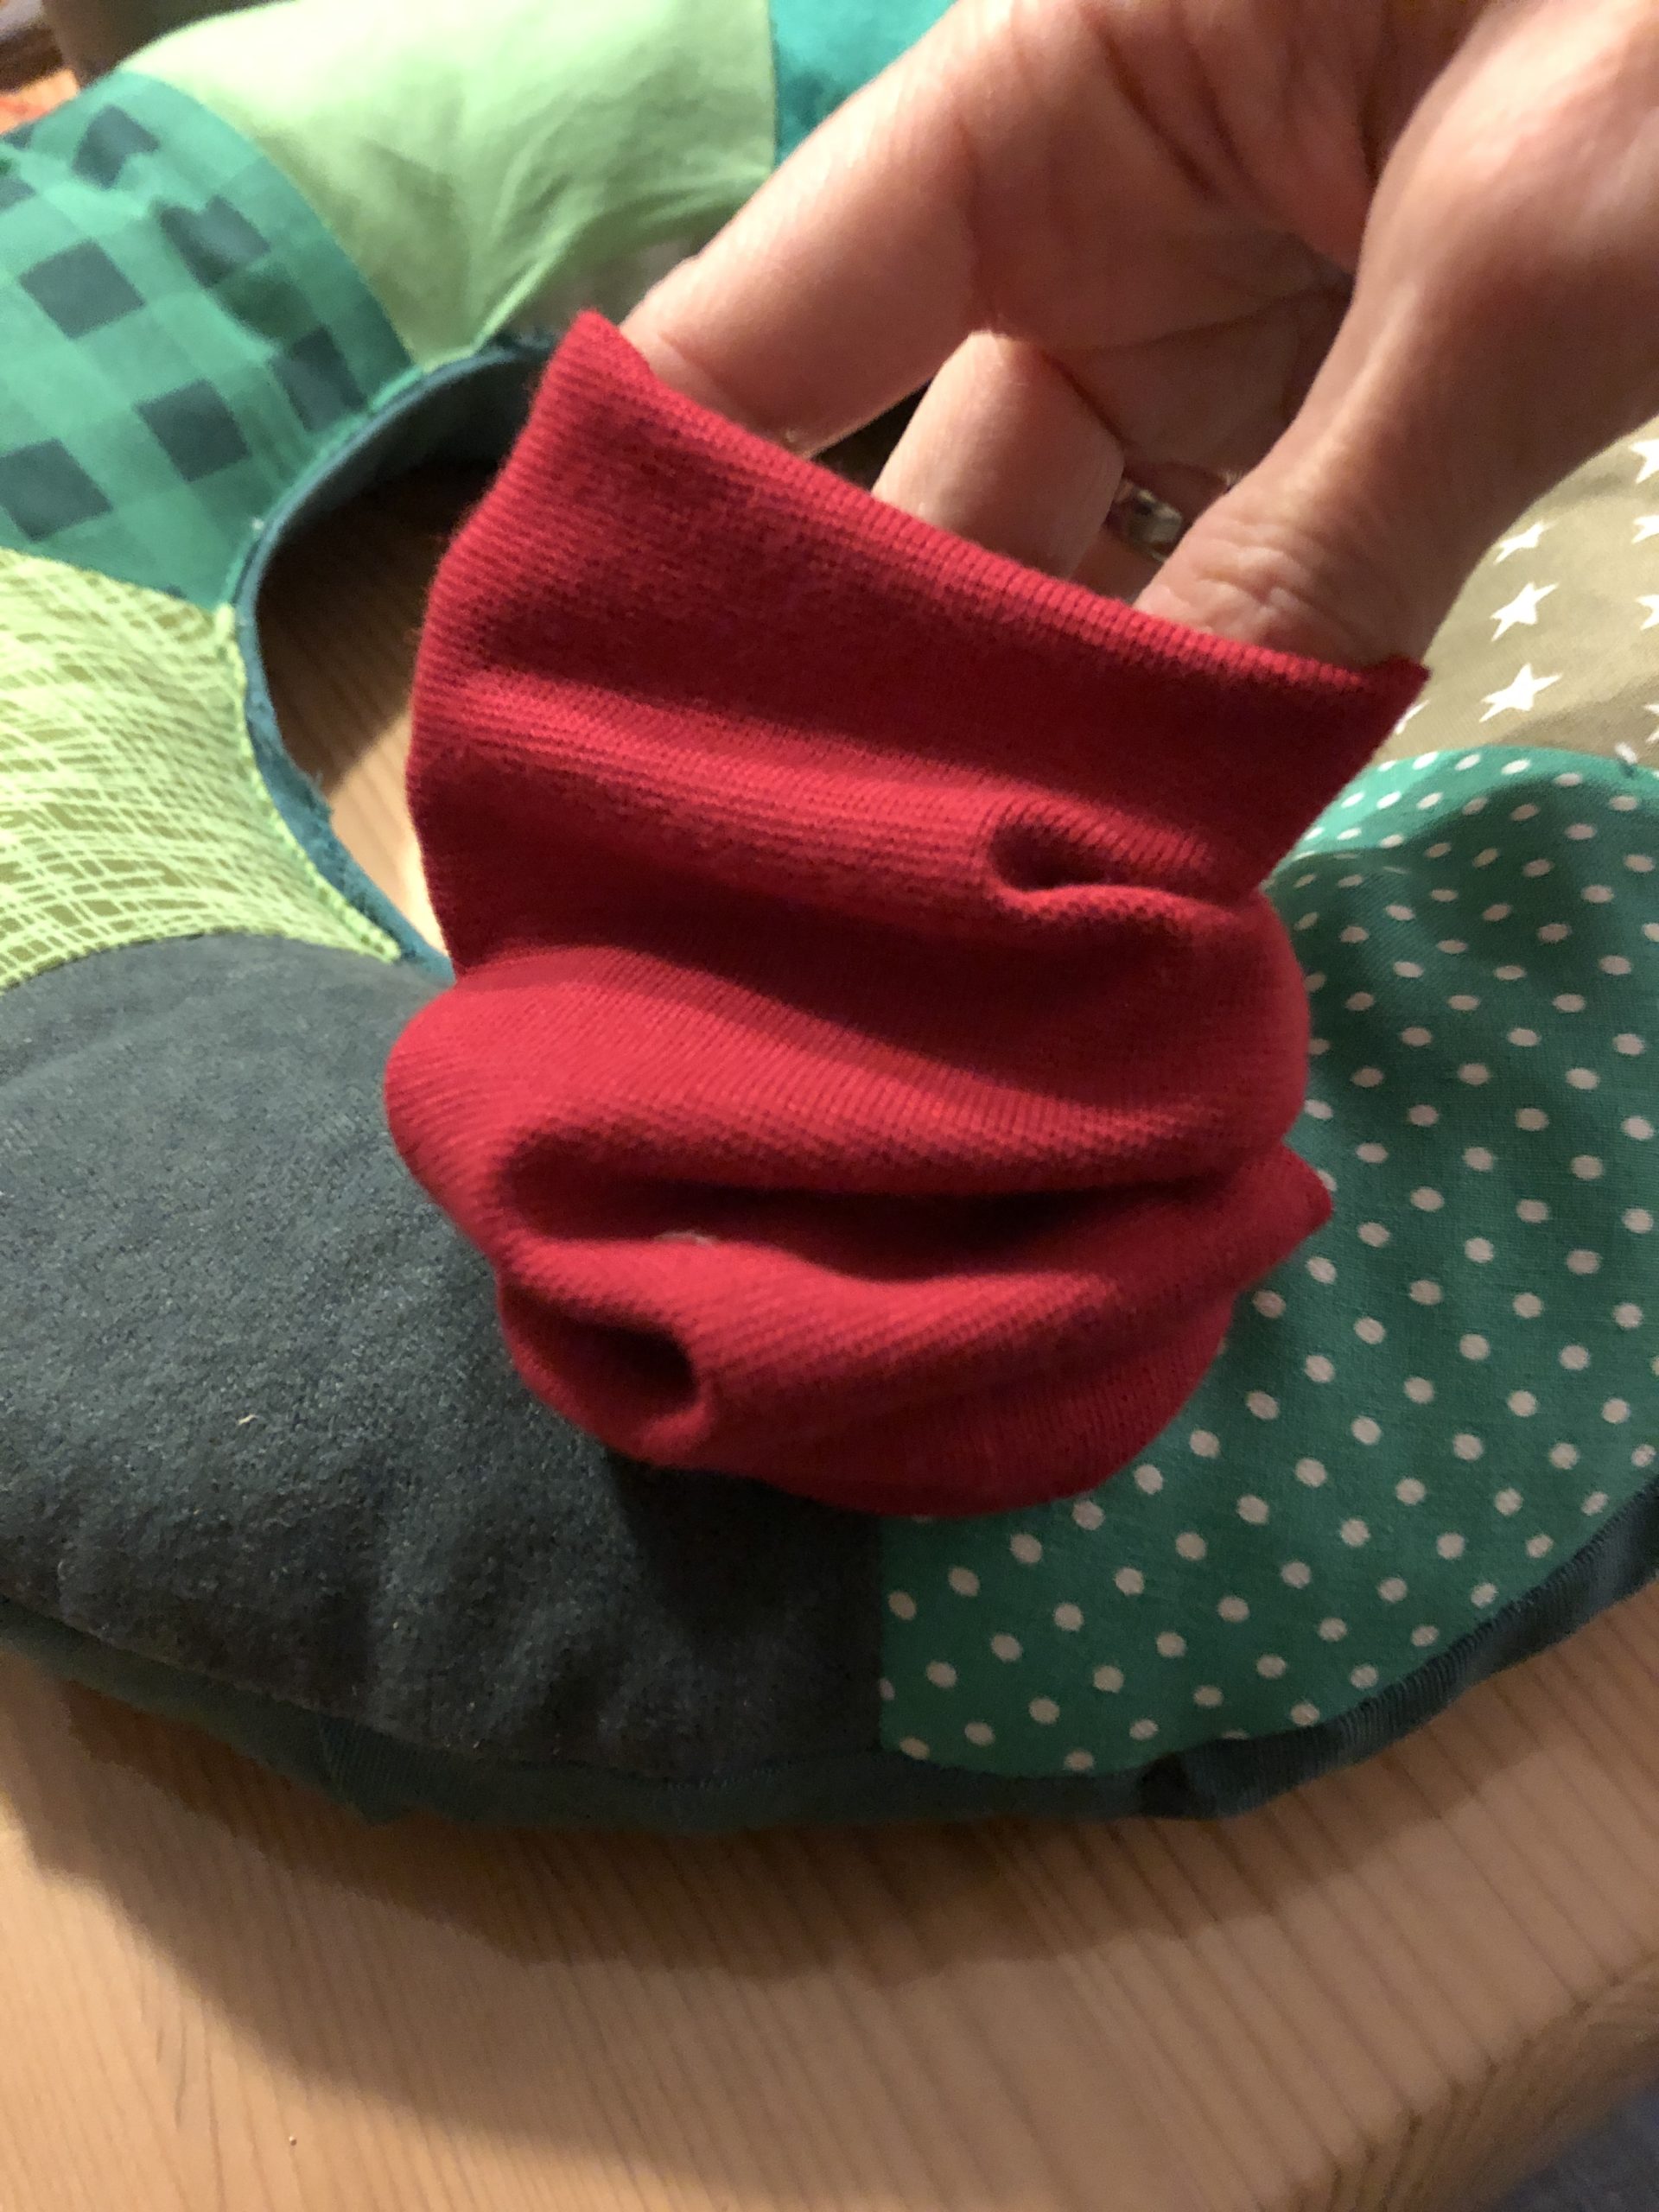
Then you can insert the pipe insulation.

Bild zum Schritt 53 für das Bastel- und DIY-Abenteuer für Kinder: 'Anschließend könnt ihr die Rohrisolierung einstecken.'

53

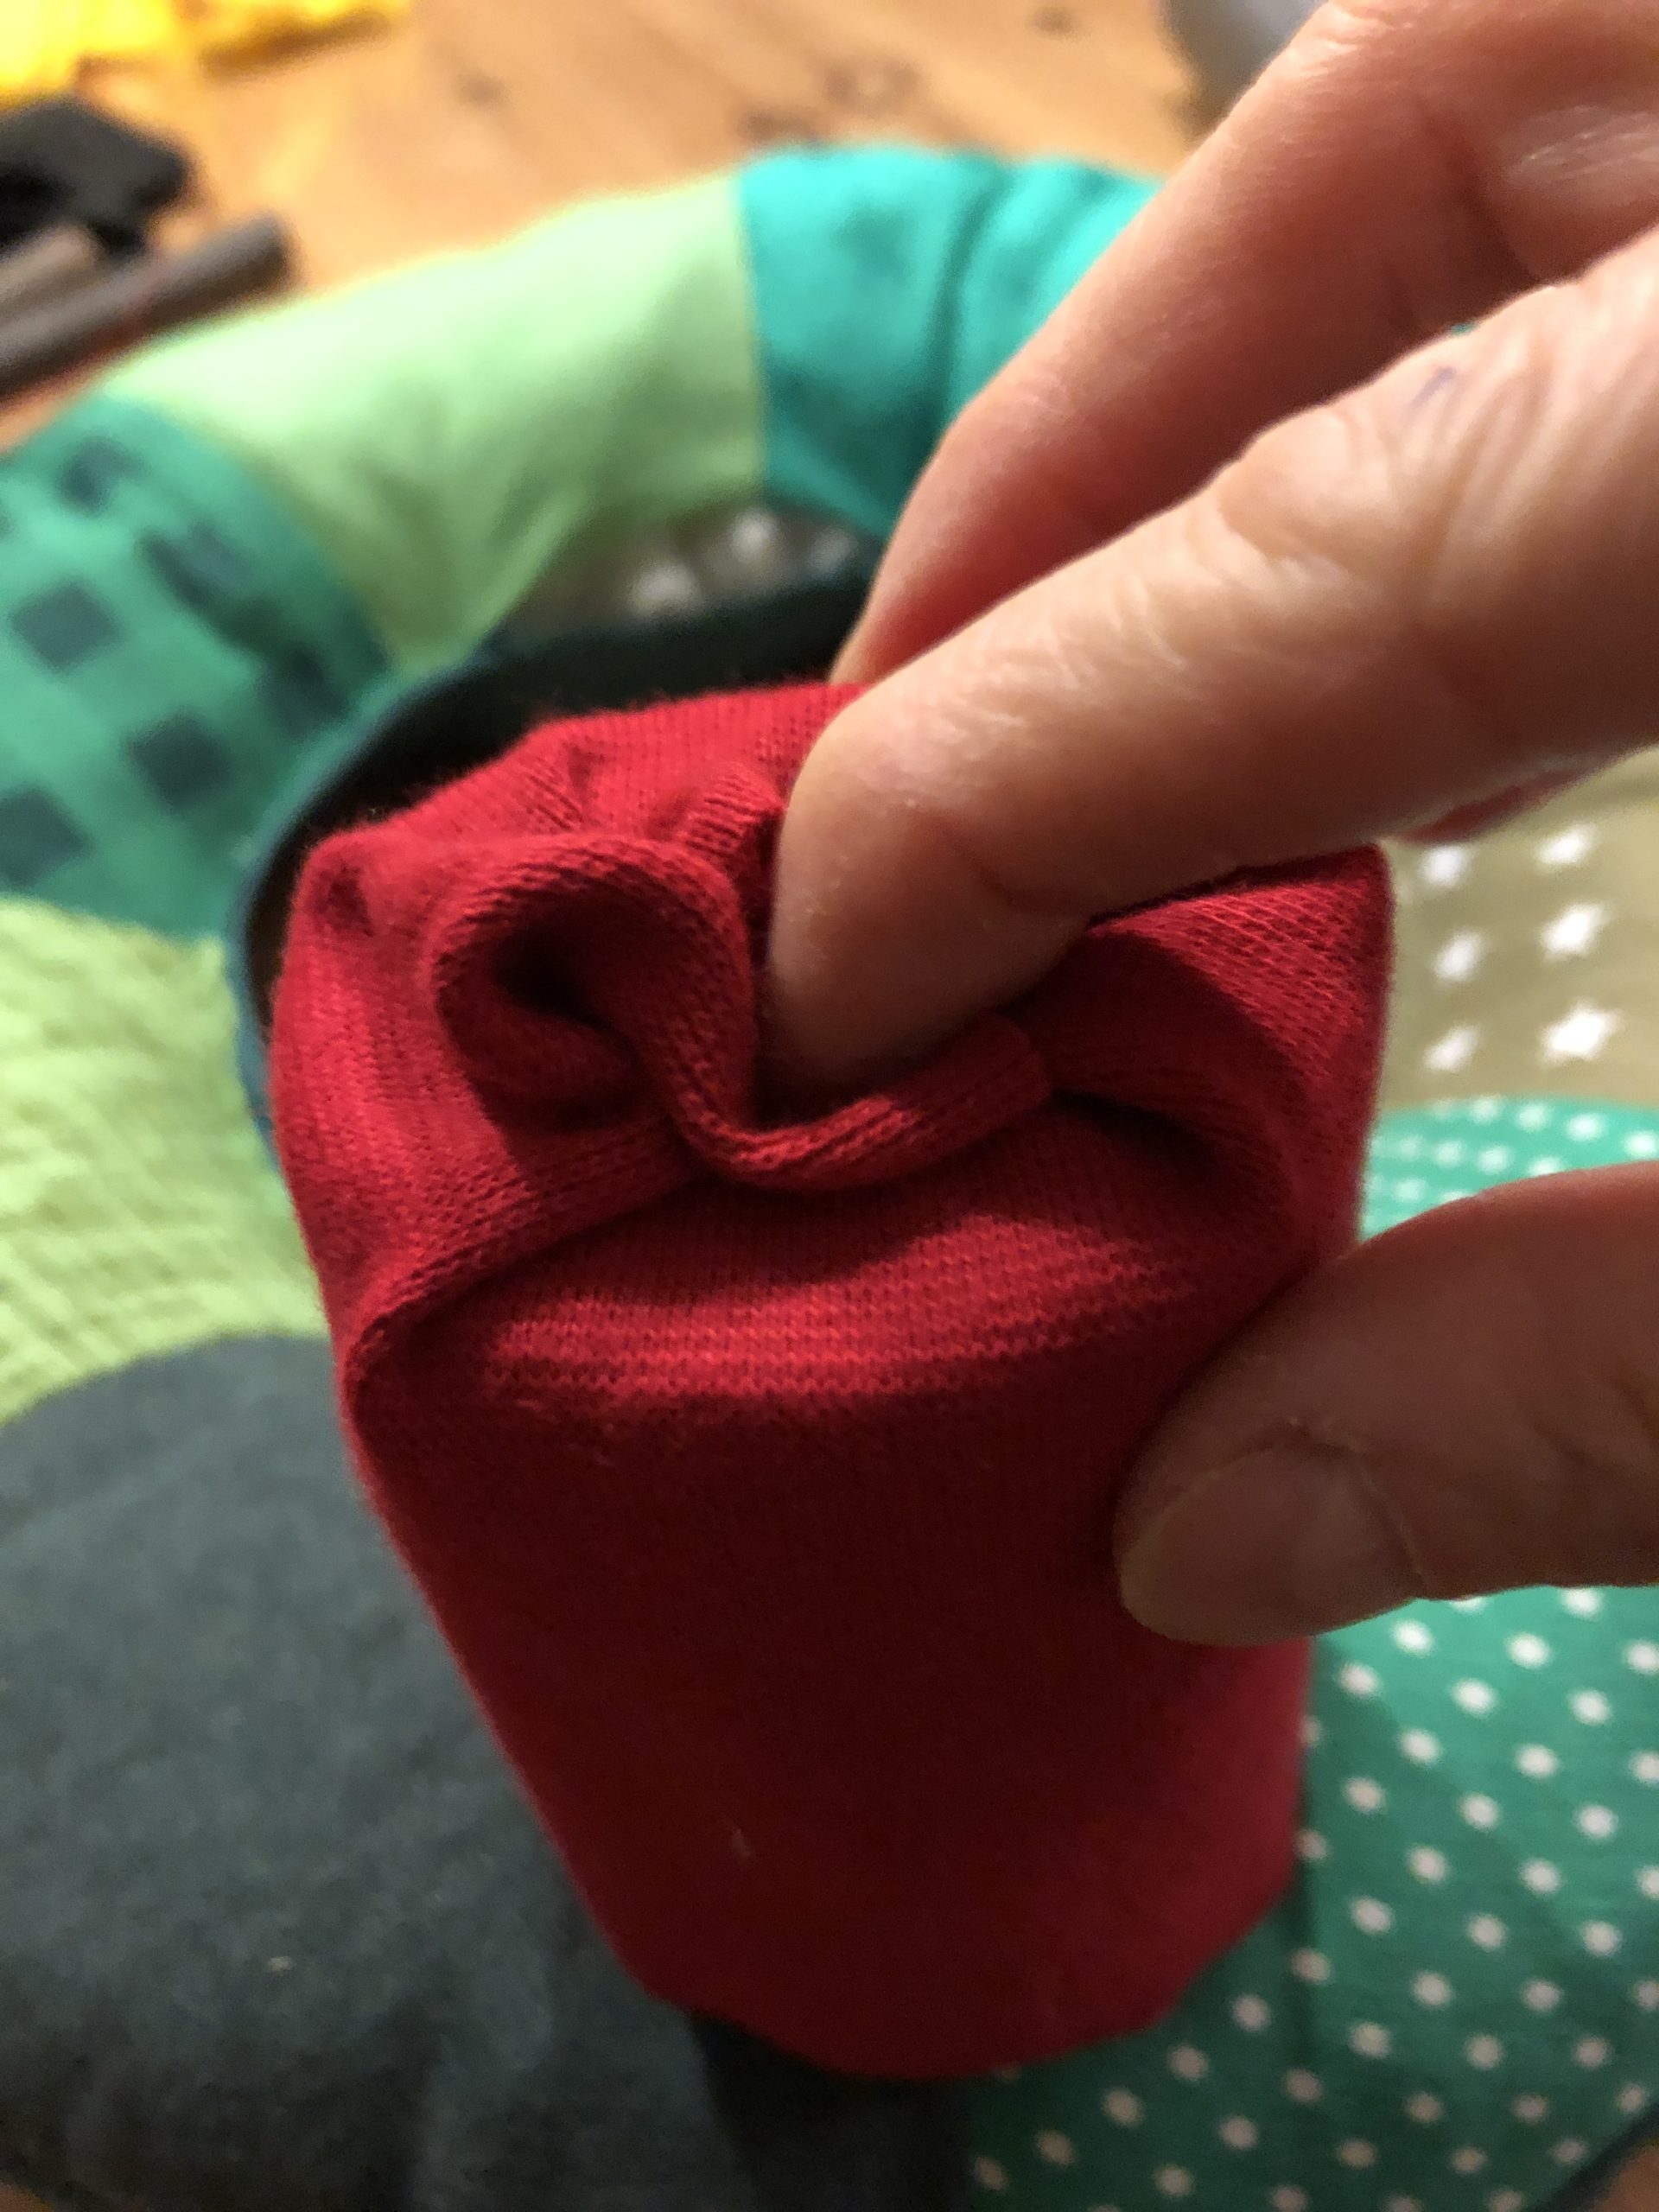
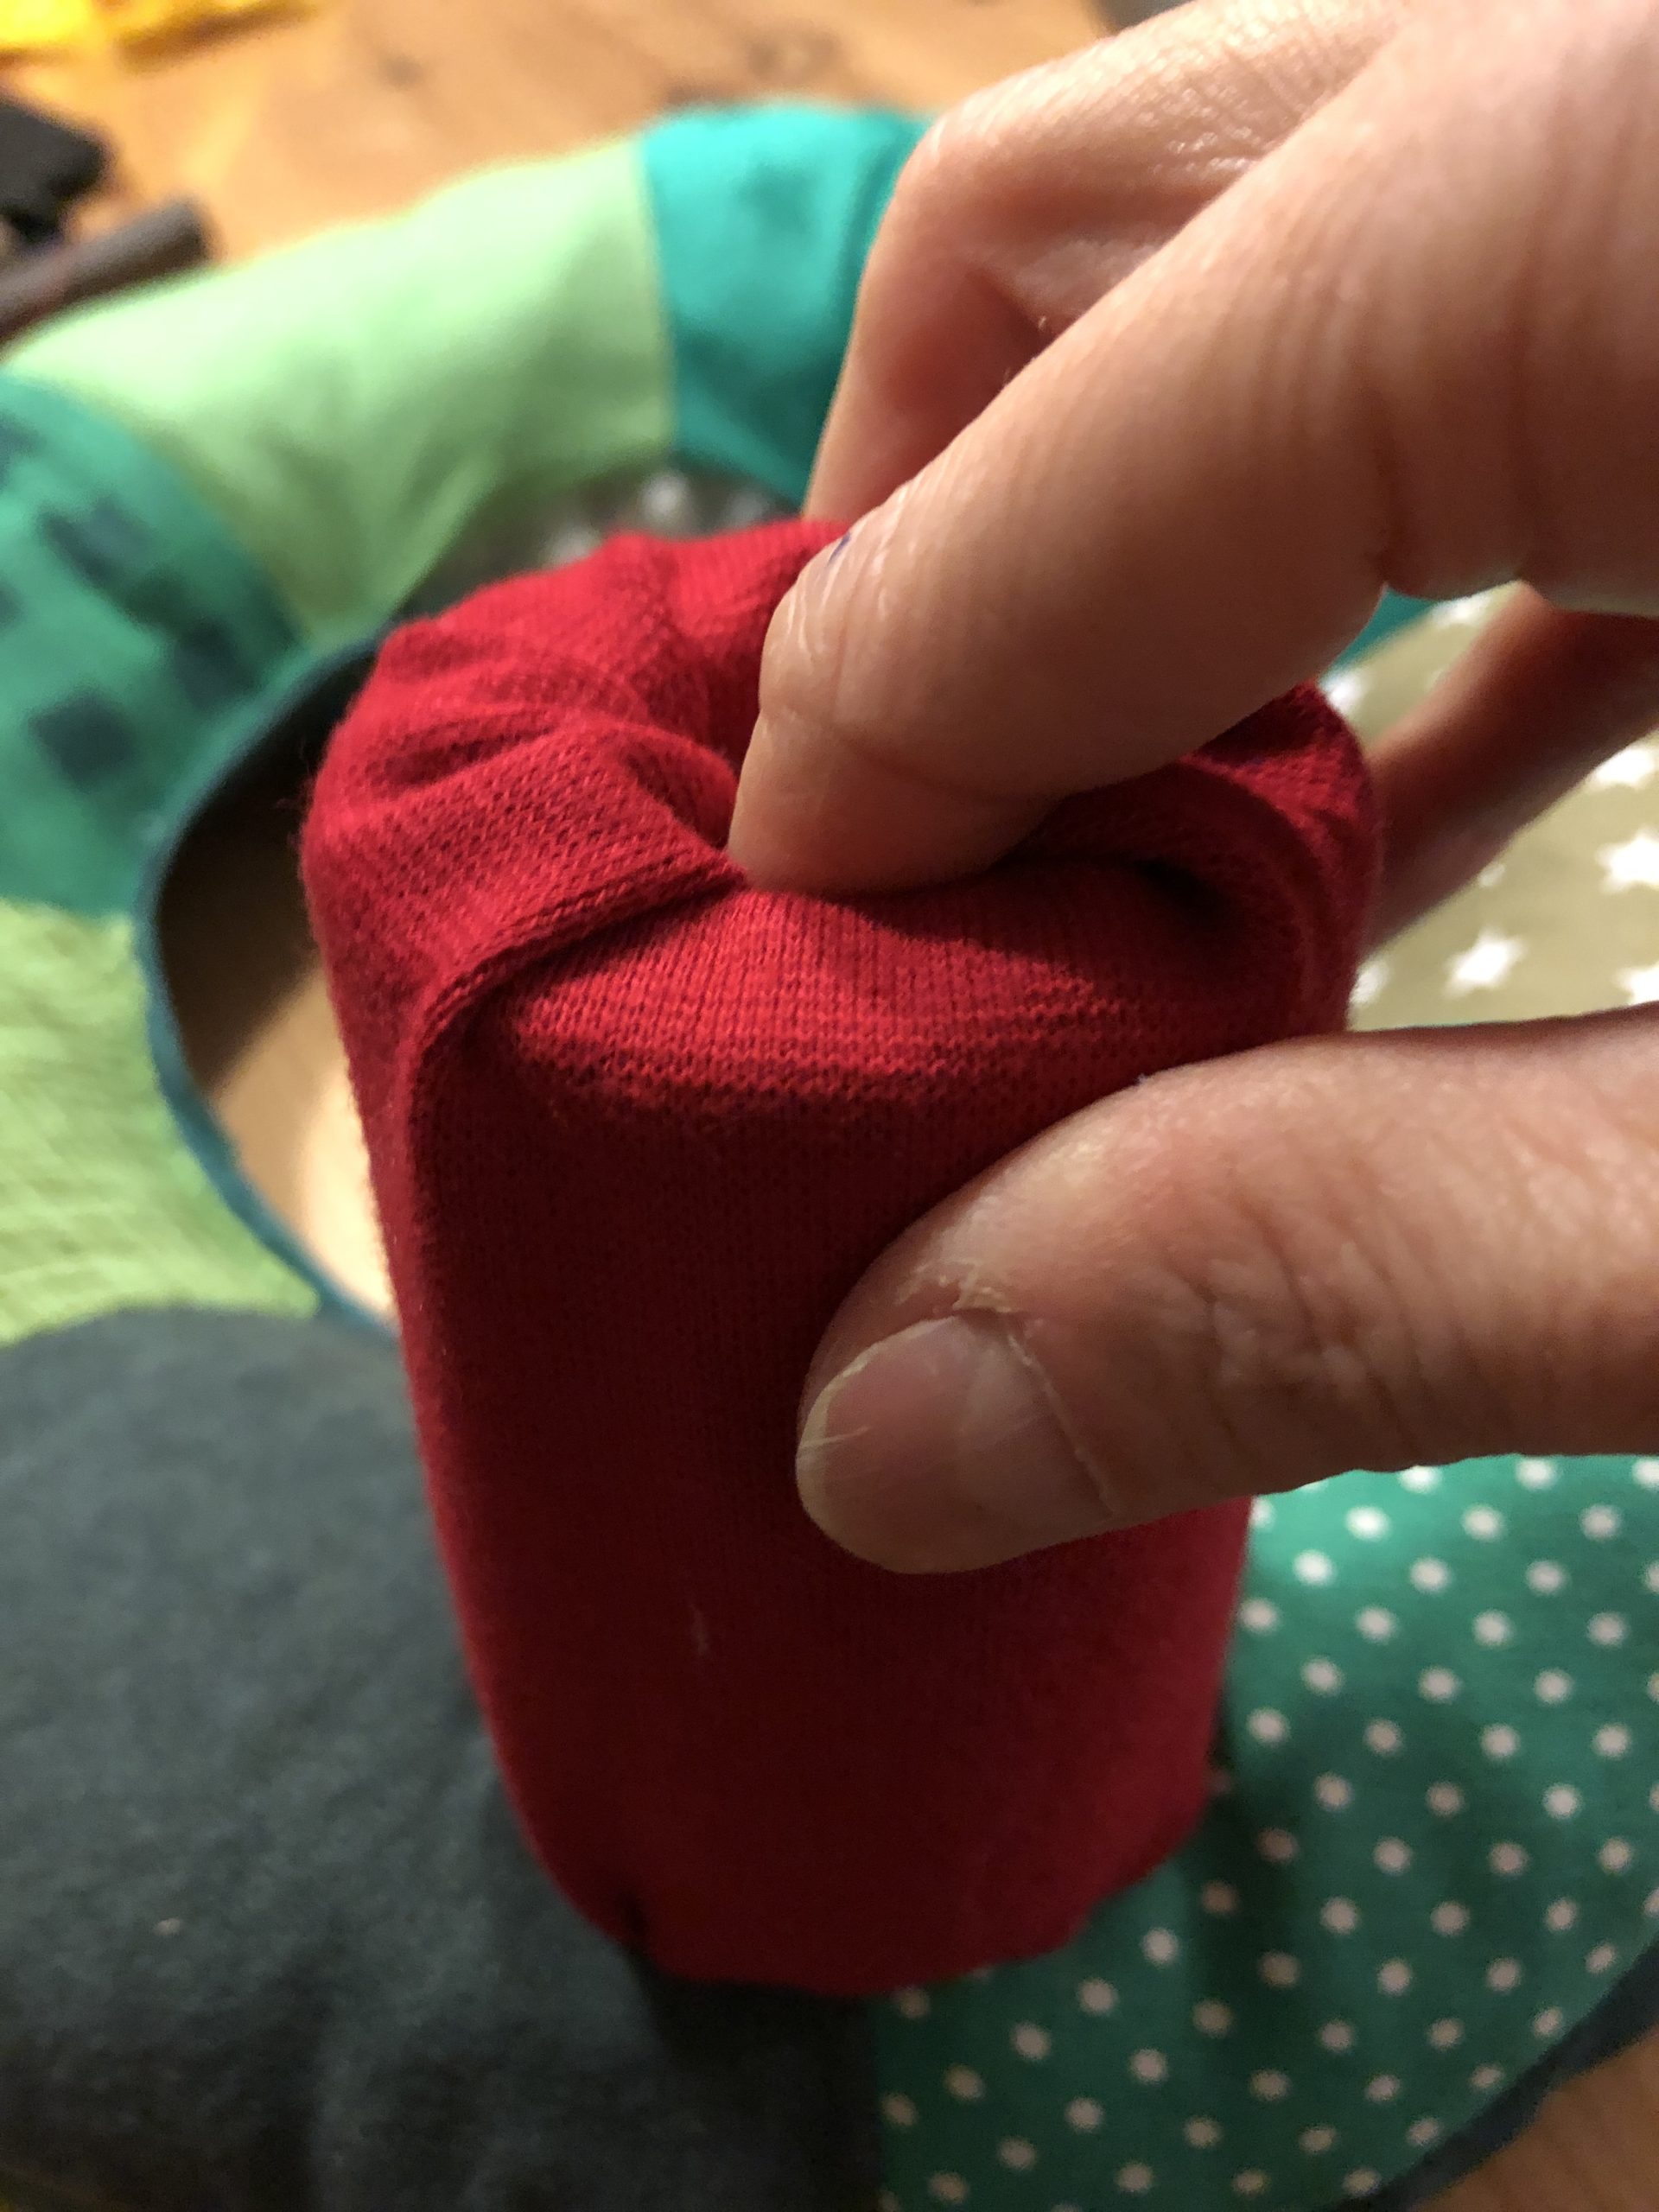
Push the pipe insulation all the way down and stuff the overhanging fabric into the middle of the hole.

Bild zum Schritt 54 für das Bastel- und DIY-Abenteuer für Kinder: 'Schiebt die Rohrisolierung ganz nach unten und stopft den überstehenden...'

54

2. Bild zum Schritt 54 für das Bastel- und DIY-Abenteuer für Kinder: 'Schiebt die Rohrisolierung ganz nach unten und stopft den überstehenden...'

55

3. Bild zum Schritt 55 für das Bastel- und DIY-Abenteuer für Kinder: 'Schiebt die Rohrisolierung ganz nach unten und stopft den überstehenden...'

56

Uses a piece of branch with approx.15cm length, so that the candles stand stable with the flame.

Bild zum Schritt 57 für das Bastel- und DIY-Abenteuer für Kinder: 'Verwendet ein Stück Ast mit ca.15cm Länge, damit die Kerzen...'

57

Now you put this one in the hole.

Bild zum Schritt 58 für das Bastel- und DIY-Abenteuer für Kinder: 'Diesen steckt ihr nun in das Loch.'

58

This is the wick of the candle.

Bild zum Schritt 59 für das Bastel- und DIY-Abenteuer für Kinder: 'Das ist der Docht der Kerze.'

59

Then you sew all four candles after exactly the same process.

Bild zum Schritt 60 für das Bastel- und DIY-Abenteuer für Kinder: 'Dann näht ihr alle vier Kerzen nach genau dem selben...'

60

Now all we need is the flames of the candles.

Flames:
61

Print out the template for the flame or paint yourself a flame of this kind.
Tip: Make sure that the straight shaft is not too narrow, otherwise you can't turn your sewn flame around!

Bild zum Schritt 63 für das Bastel- und DIY-Abenteuer für Kinder: 'Druckt euch die Vorlage für die Flamme aus oder malt...'

62

Transfer the cut to the fabric and cut two parts of the template. Cuts on the outer line. The inner line symbolizes the sewing seam.

Bild zum Schritt 64 für das Bastel- und DIY-Abenteuer für Kinder: 'Übertragt den Schnitt auf den Stoff und schneidet zwei Teile...'

63

Now you put both pieces of fabric together with the beautiful side (right).

Bild zum Schritt 65 für das Bastel- und DIY-Abenteuer für Kinder: 'Beide Stoffteile legt ihr nun mit der schönen Seite (rechts)...'

64

With a pin you fix the fabrics.
With the sewing machine you sew the two fabric parts together. For this you sew on the inner line of the template.
The straight side at the lower end remains open!

Bild zum Schritt 66 für das Bastel- und DIY-Abenteuer für Kinder: 'Mit einer Stecknadel fixiert ihr die Stoffe.  Mit der...'

65

Now you're turning the flame around.

Bild zum Schritt 67 für das Bastel- und DIY-Abenteuer für Kinder: 'Jetzt dreht ihr die Flamme um.'

66

Take a pen to squeeze out the flame.

Bild zum Schritt 68 für das Bastel- und DIY-Abenteuer für Kinder: 'Nehmt euch einen Stift, mit dem ihr die Flamme herausdrücken...'

67

Now fill the flame with fabric residue.
The straight part of the flame is not filled.

Bild zum Schritt 69 für das Bastel- und DIY-Abenteuer für Kinder: 'Jetzt füllt die Flamme mit Stoffresten.  Der gerade Teil...'

68

The filled piece of the flame is sewn with a zigzag stitch. This seam doesn't have to be perfect, it is pushed inward and is not visible!

Bild zum Schritt 70 für das Bastel- und DIY-Abenteuer für Kinder: 'Das gefüllte Stück der Flamme wird mit einem Zickzack-Stich zugenäht....'

69

2. Bild zum Schritt 70 für das Bastel- und DIY-Abenteuer für Kinder: 'Das gefüllte Stück der Flamme wird mit einem Zickzack-Stich zugenäht....'

70

3. Bild zum Schritt 71 für das Bastel- und DIY-Abenteuer für Kinder: 'Das gefüllte Stück der Flamme wird mit einem Zickzack-Stich zugenäht....'

71

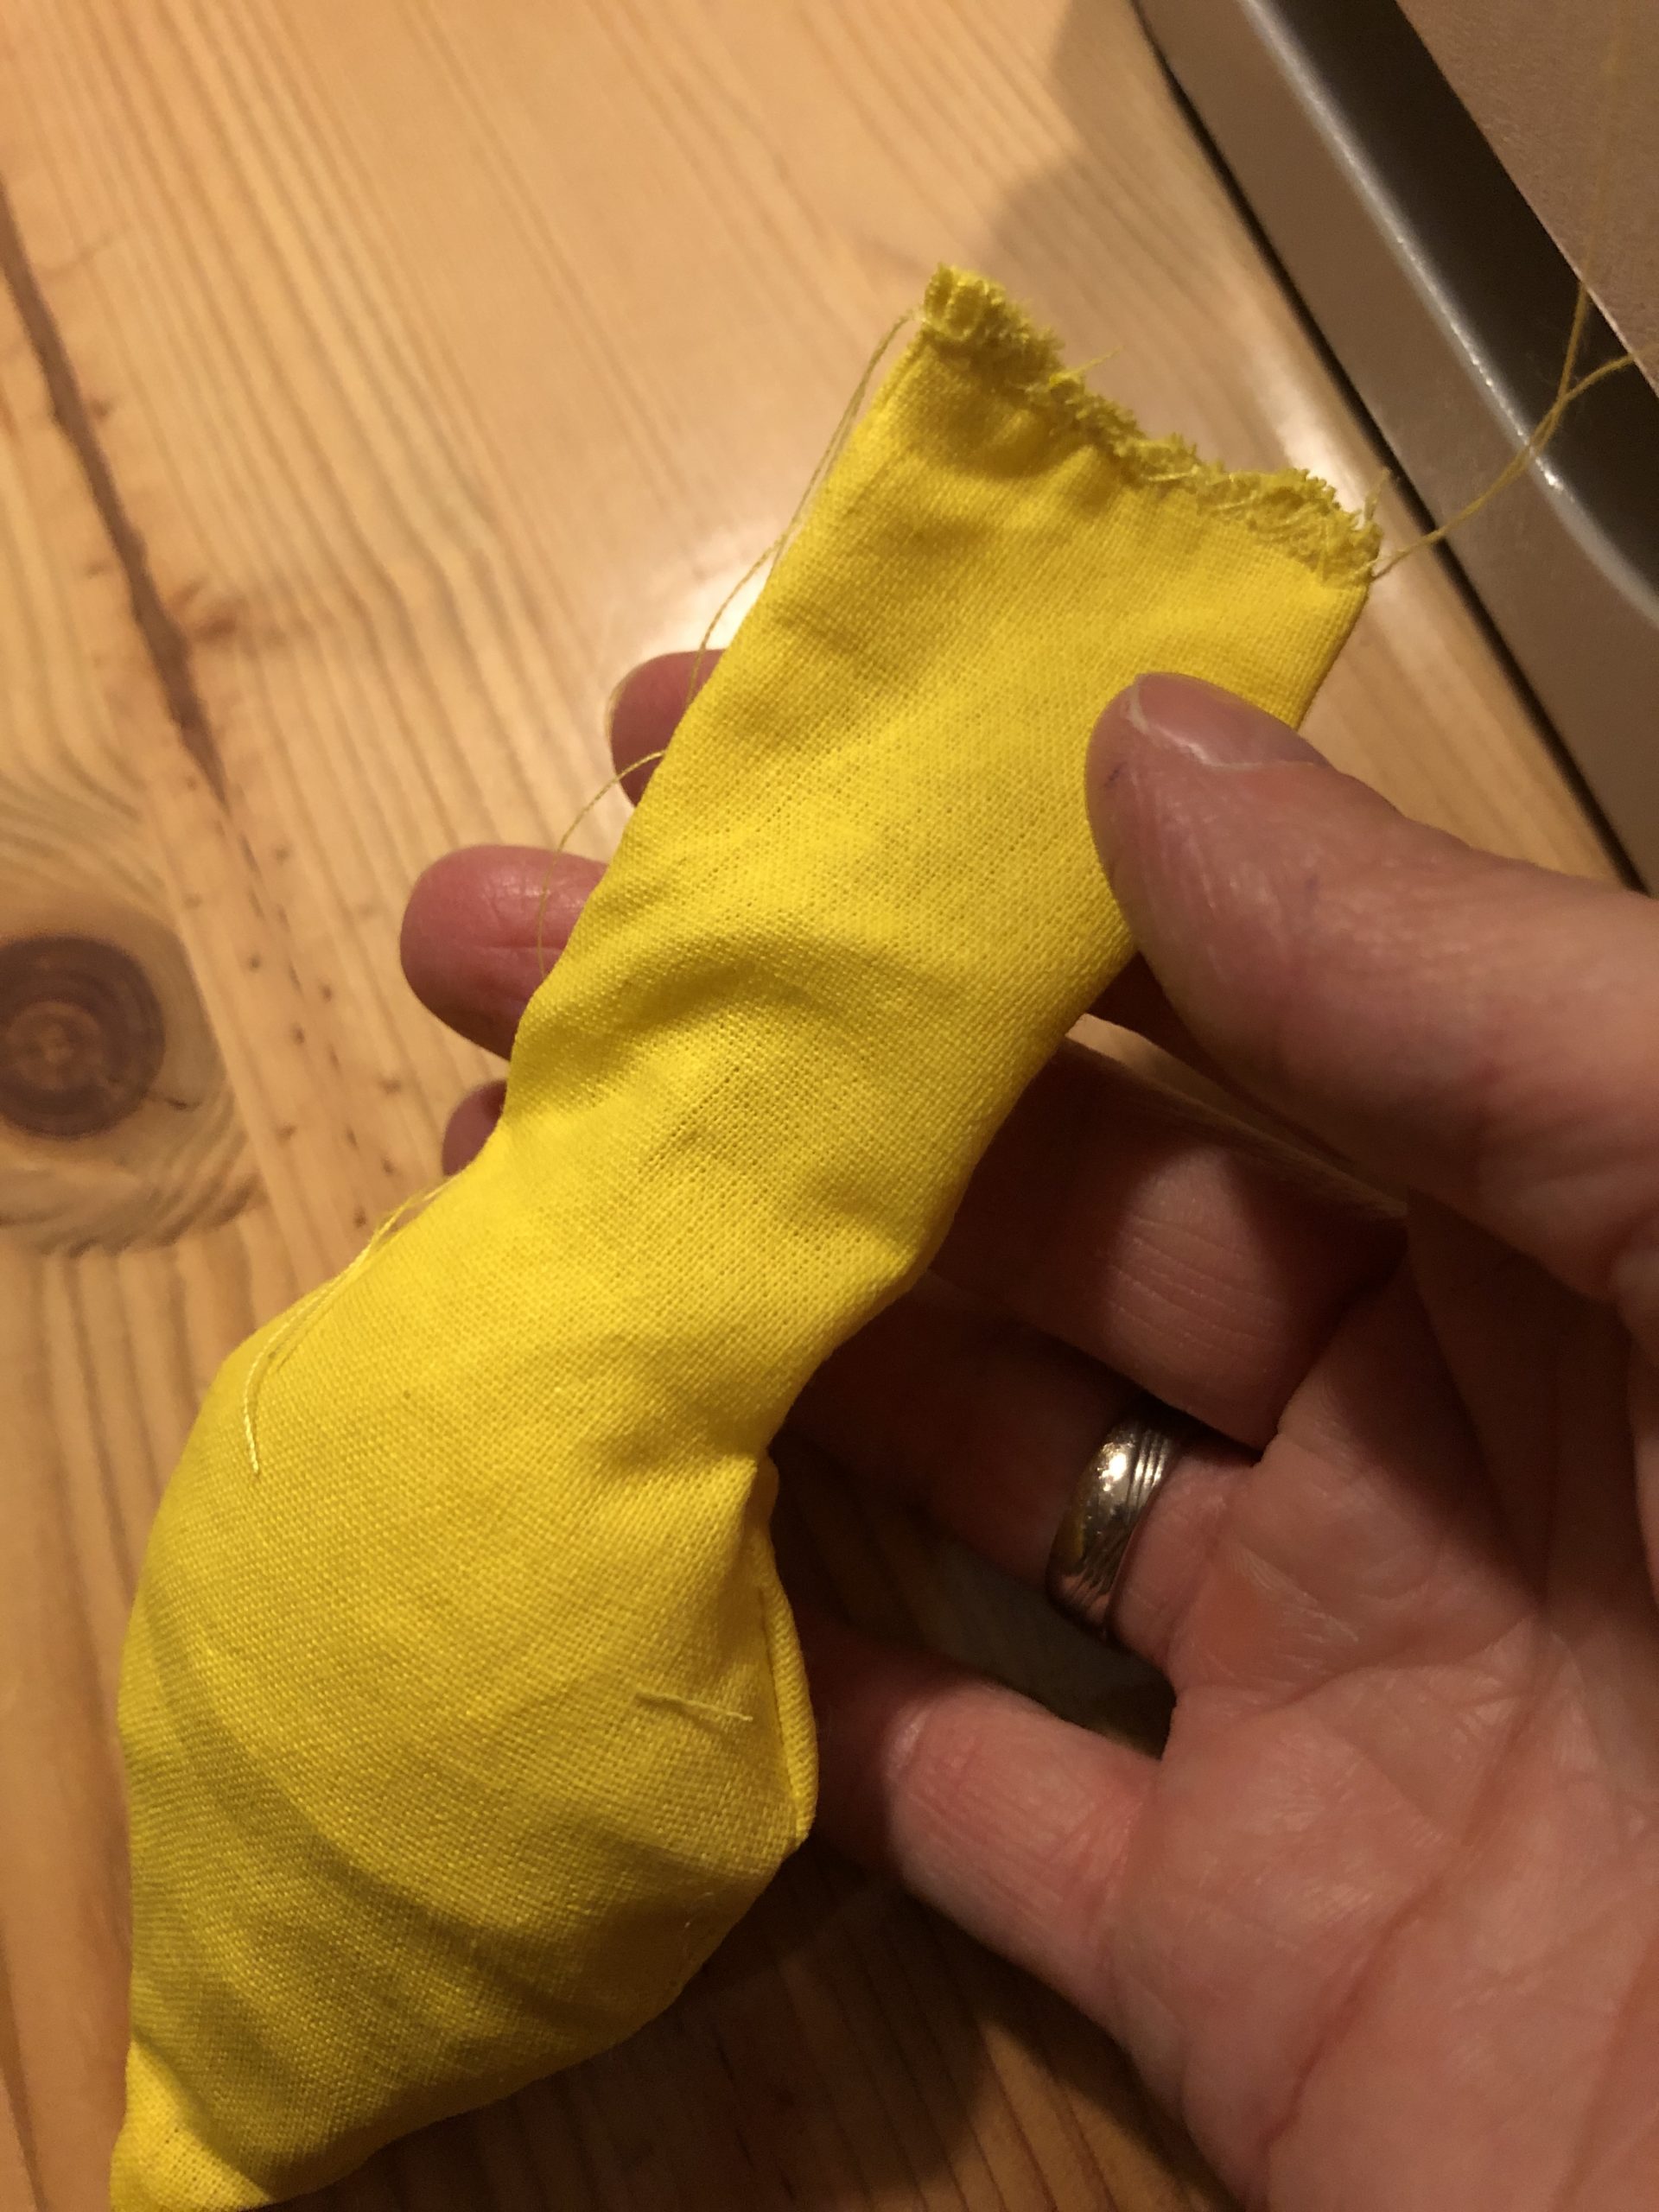
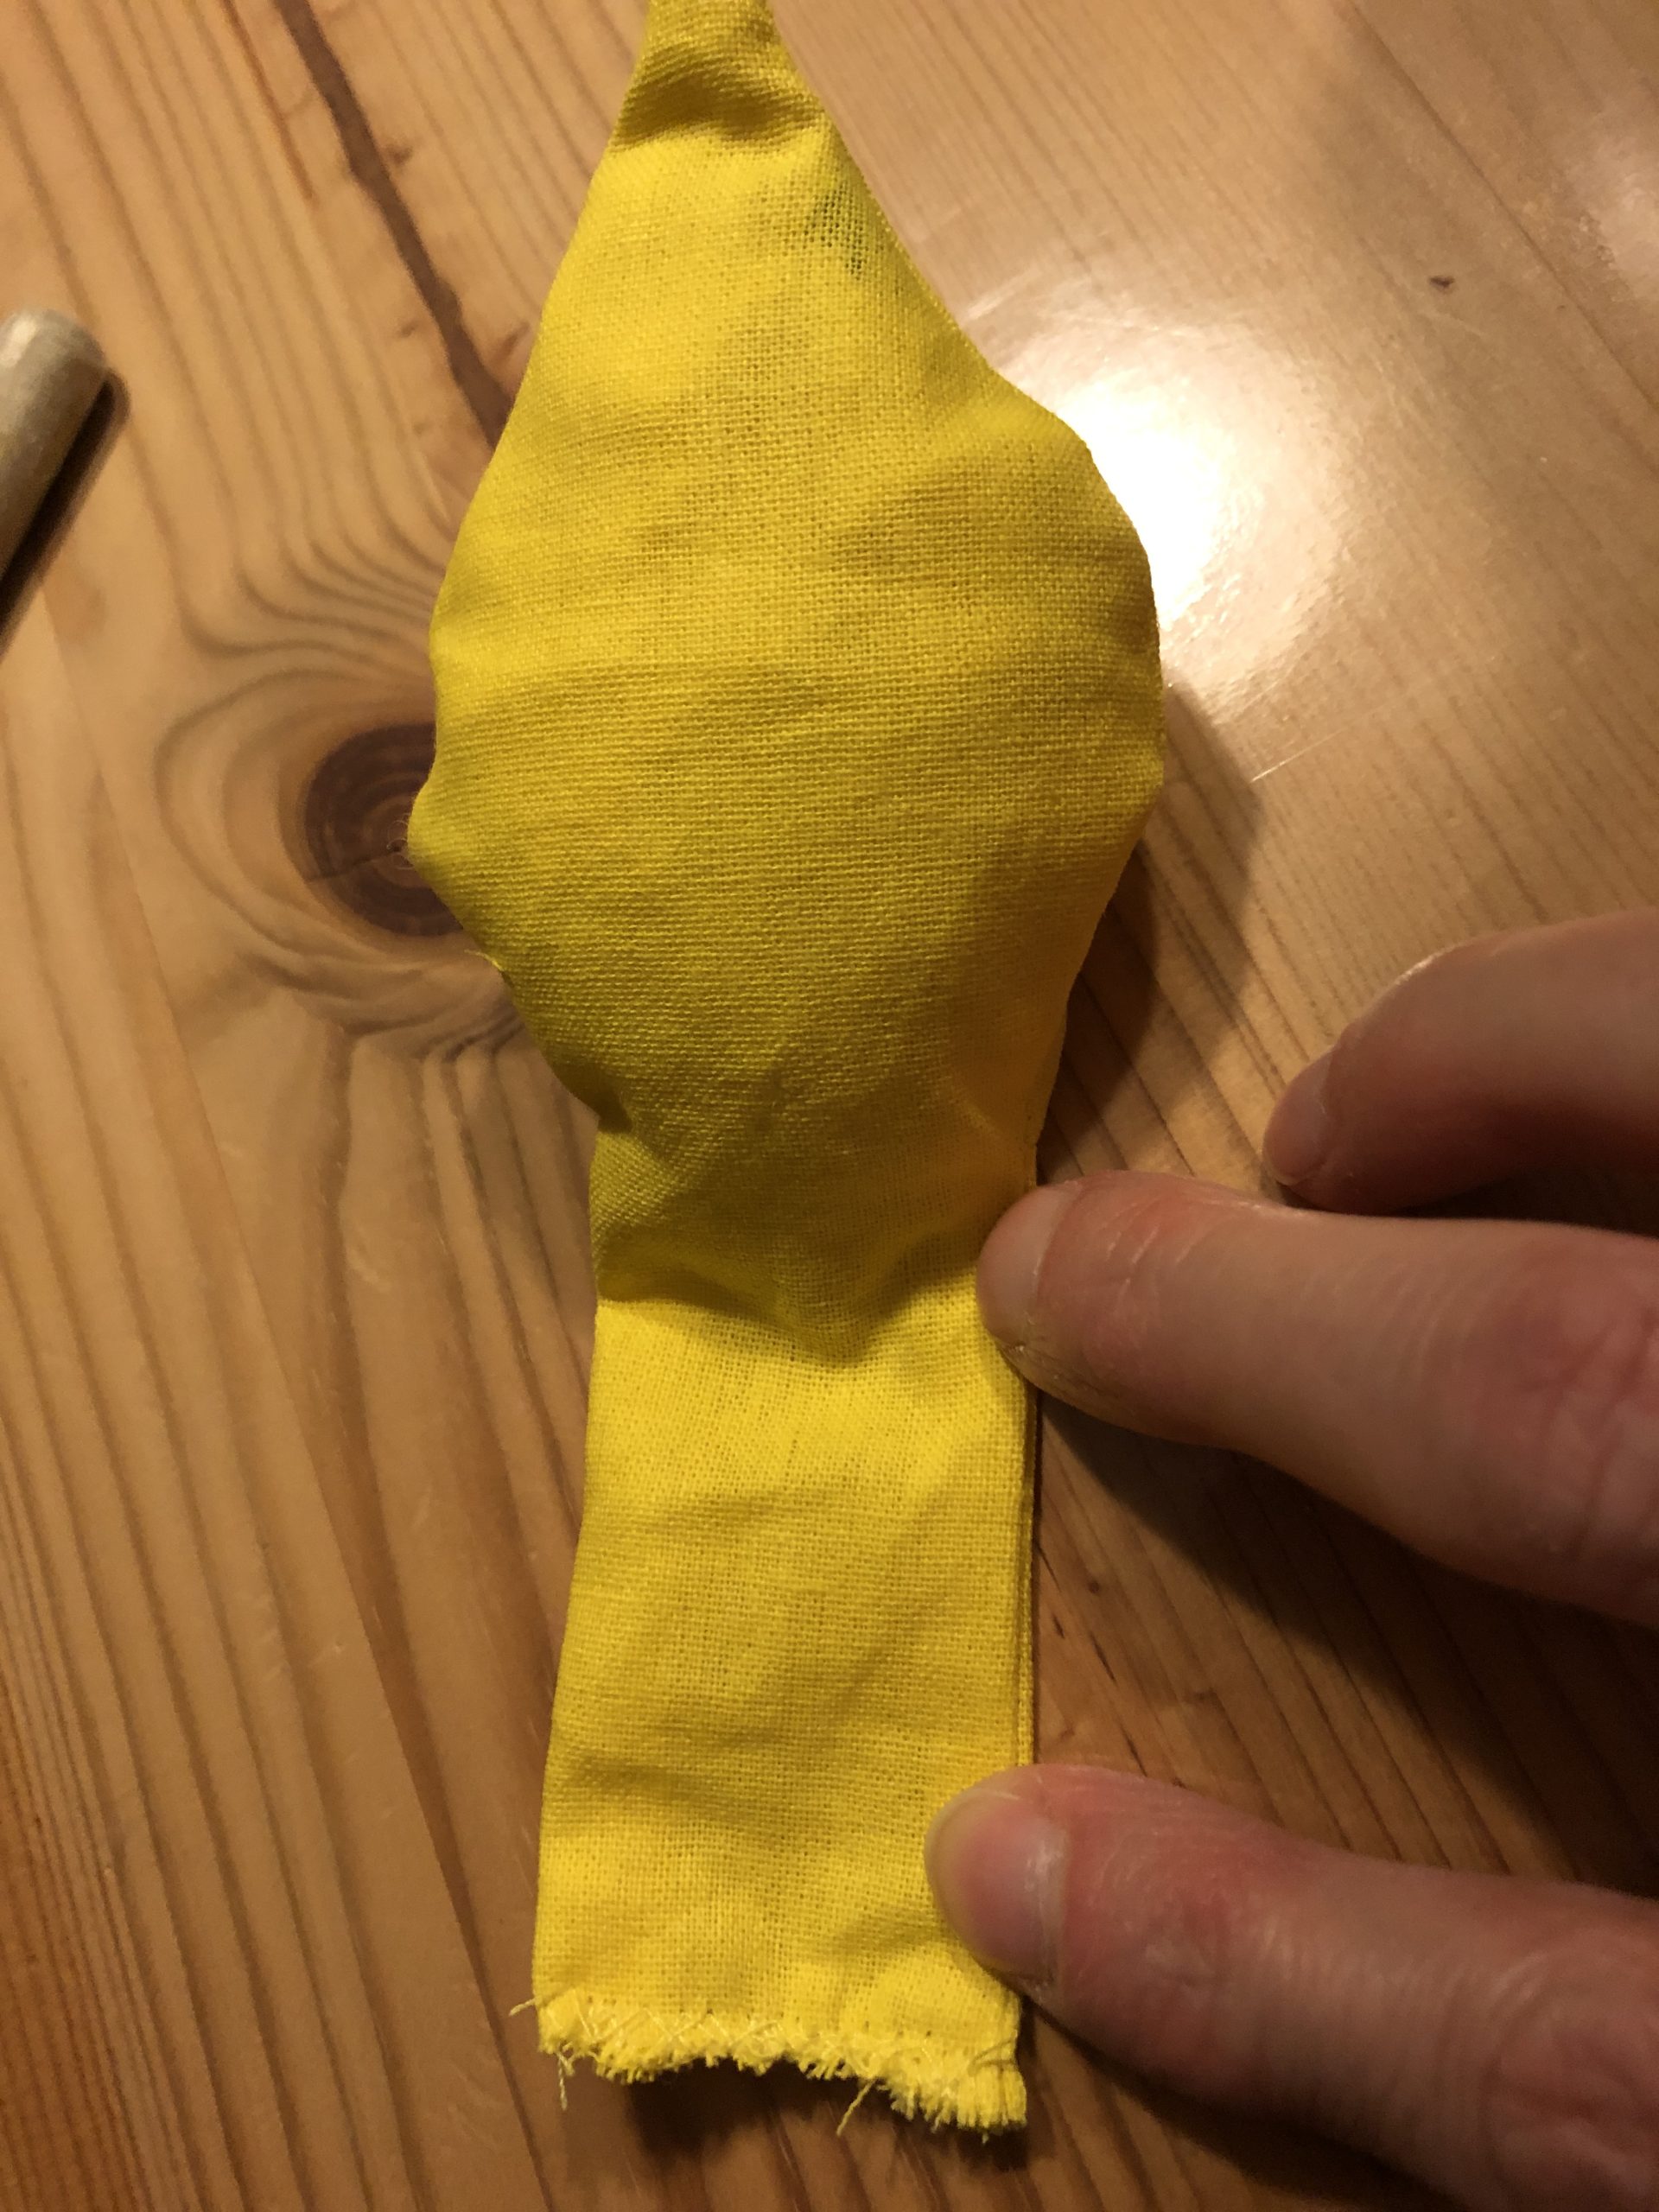
With one finger you now carefully push the straight piece inwards (as with a finger doll!?)

Bild zum Schritt 73 für das Bastel- und DIY-Abenteuer für Kinder: 'Mit einem Finger schiebt ihr nun vorsichtig das gerade Stück...'

72

So the straight part disappears almost completely.

Bild zum Schritt 74 für das Bastel- und DIY-Abenteuer für Kinder: 'So verschwindet der gerade Teil fast komplett.'

73

The flame is ready!
You need these four times.

Bild zum Schritt 75 für das Bastel- und DIY-Abenteuer für Kinder: 'Fertig ist die Flamme!   Diese braucht ihr 4...'

74

Now put the flames on the wick of candles.

Bild zum Schritt 76 für das Bastel- und DIY-Abenteuer für Kinder: 'Steckt die Flammen nun auf den Docht der Kerzen.'

75

Push it to the wick to keep it good!

Bild zum Schritt 77 für das Bastel- und DIY-Abenteuer für Kinder: 'Schiebt sie soweit auf den Docht, dass sie gut hält!'

76

Every Advent Sunday you can put on another flame.

Bild zum Schritt 78 für das Bastel- und DIY-Abenteuer für Kinder: 'An jedem Adventssonntag könnt ihr eine weitere Flamme aufstecken.'

77

Have a lot of joy with this long-lasting Advent wreath.
And let the little ones experiment. This wreath is for touching and experiencing.
Have fun!

Bild zum Schritt 79 für das Bastel- und DIY-Abenteuer für Kinder: 'Habt viel Freude mit diesem langlebigen Adventskranz.   Und...'

Materials

 Paper shears
 Substance shears
 Pen
 Sewing machine with matching yarn (green, red and yellow)
For the wreath:
 various green substancesPrinted and monochrome fabrics
 Cut Template
 Filling material: e.g. fabric residues, filling floss or similar
 Needle for sewing
 Pins and pins
 Possibly toilet paper roll and cooking spoon For filling out the cranny
For the stomped candles and the wick:
 red fabric + firmer fabric for the candle floor
 Tube insulation 4x approx.12 cm long
 4 thin plugs
 Knives and garden shears
For the removable flames:
 Yellow fabric
 Cut pattern: flame
 Filling wadding or waste materialor paper handkerchiefs, wadding pads or the like

Directions

1

Make a template for the circle segment of the wreath. Eight segments result in a circle.
Or print out the template and cut it out.

Bild zum Schritt 1 für das Bastel- und DIY-Abenteuer für Kinder: 'Macht euch eine Vorlage für das Kreissegment des Kranzes. Acht...'

2

Choose your fabrics.

Bild zum Schritt 2 für das Bastel- und DIY-Abenteuer für Kinder: 'Wählt eure Stoffe.'

3

Cut four parts from different materials (patterns). Transfer the template to the fabric. Place the template and border it one centimetre larger. Then cut the fabrics.

Bild zum Schritt 3 für das Bastel- und DIY-Abenteuer für Kinder: 'Schneidet vier Teile aus unterschiedlichen Stoffen (Mustern) zu. Übertragt dafür...'

4

2. Bild zum Schritt 3 für das Bastel- und DIY-Abenteuer für Kinder: 'Schneidet vier Teile aus unterschiedlichen Stoffen (Mustern) zu. Übertragt dafür...'

5

Put your stuffed parts together in a circle.
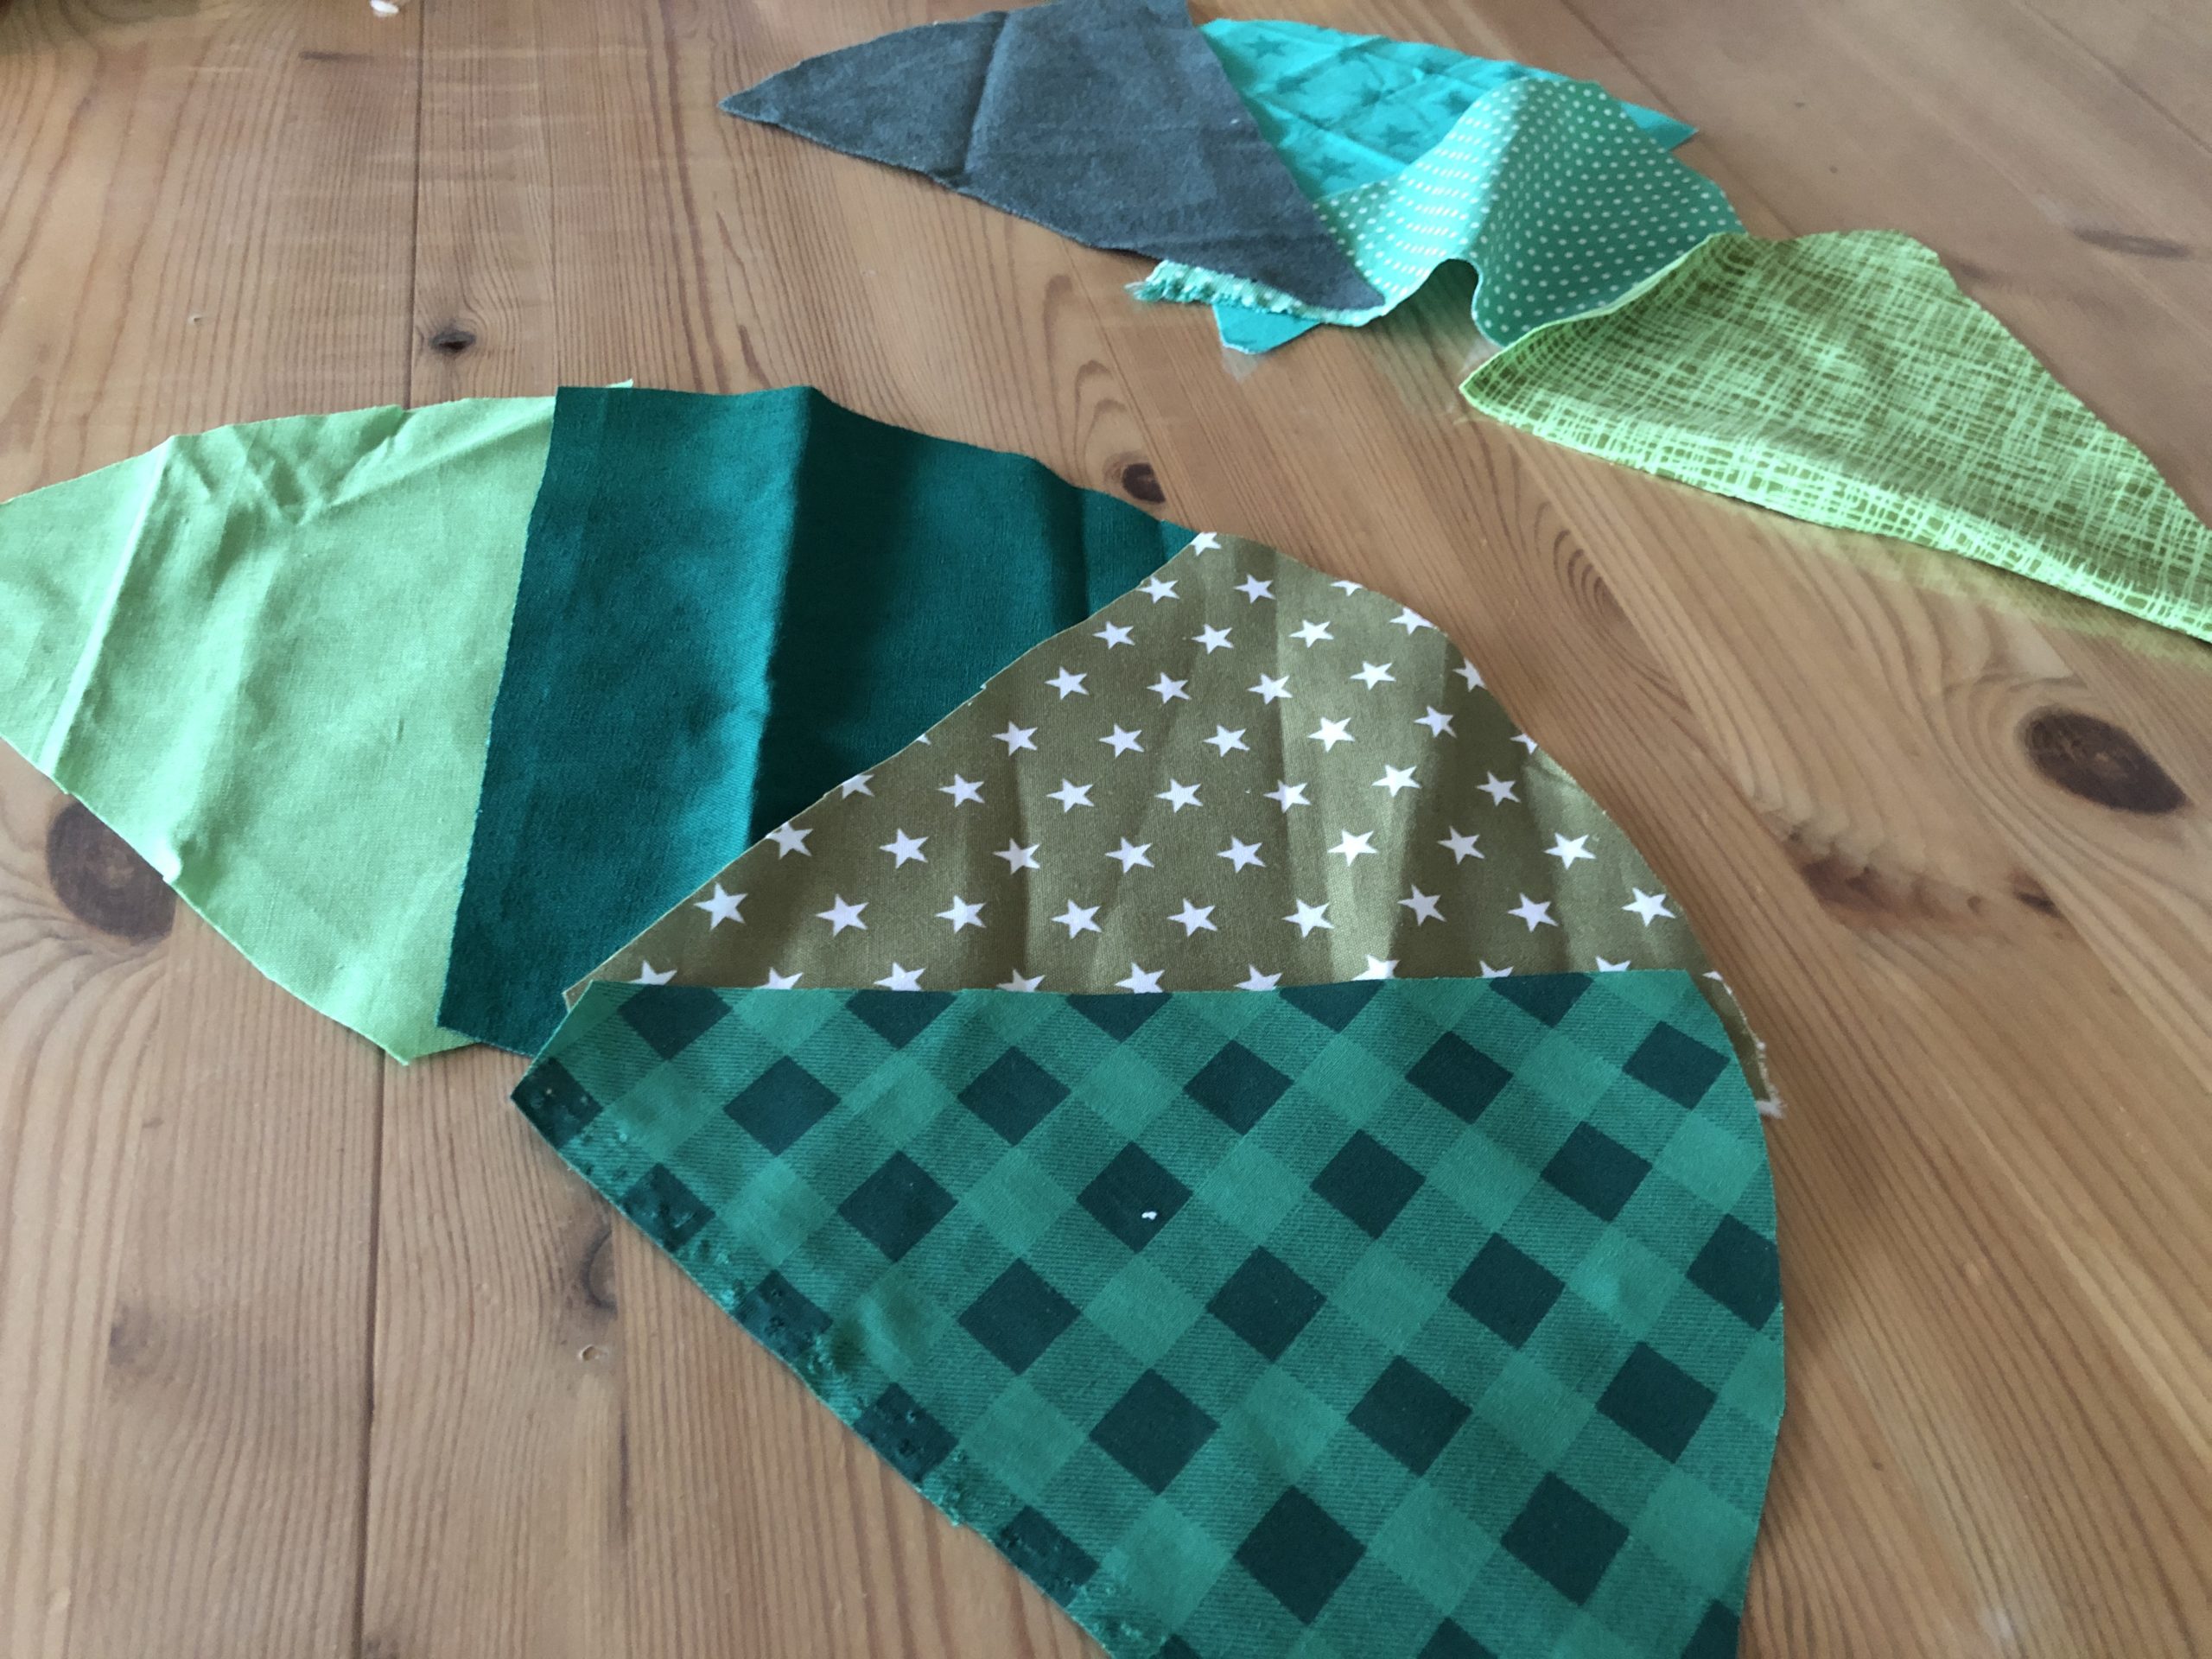
Bild zum Schritt 5 für das Bastel- und DIY-Abenteuer für Kinder: 'Legt eure Stoffteile zu einem Kreis zusammen.'

6

2. Bild zum Schritt 5 für das Bastel- und DIY-Abenteuer für Kinder: 'Legt eure Stoffteile zu einem Kreis zusammen.'

7

Cuts out a second circle from a piece of fabric.
This should be about 3cm larger all around.

Bild zum Schritt 7 für das Bastel- und DIY-Abenteuer für Kinder: 'Schneidet nun noch einen zweiten Kreis aus einem Stoffstück aus....'

8

Now the fabric parts are sewn together one after the other. To do this, place two pieces of fabric with the beautiful side (right) on each other. Then sew one side together with the sewing machine.
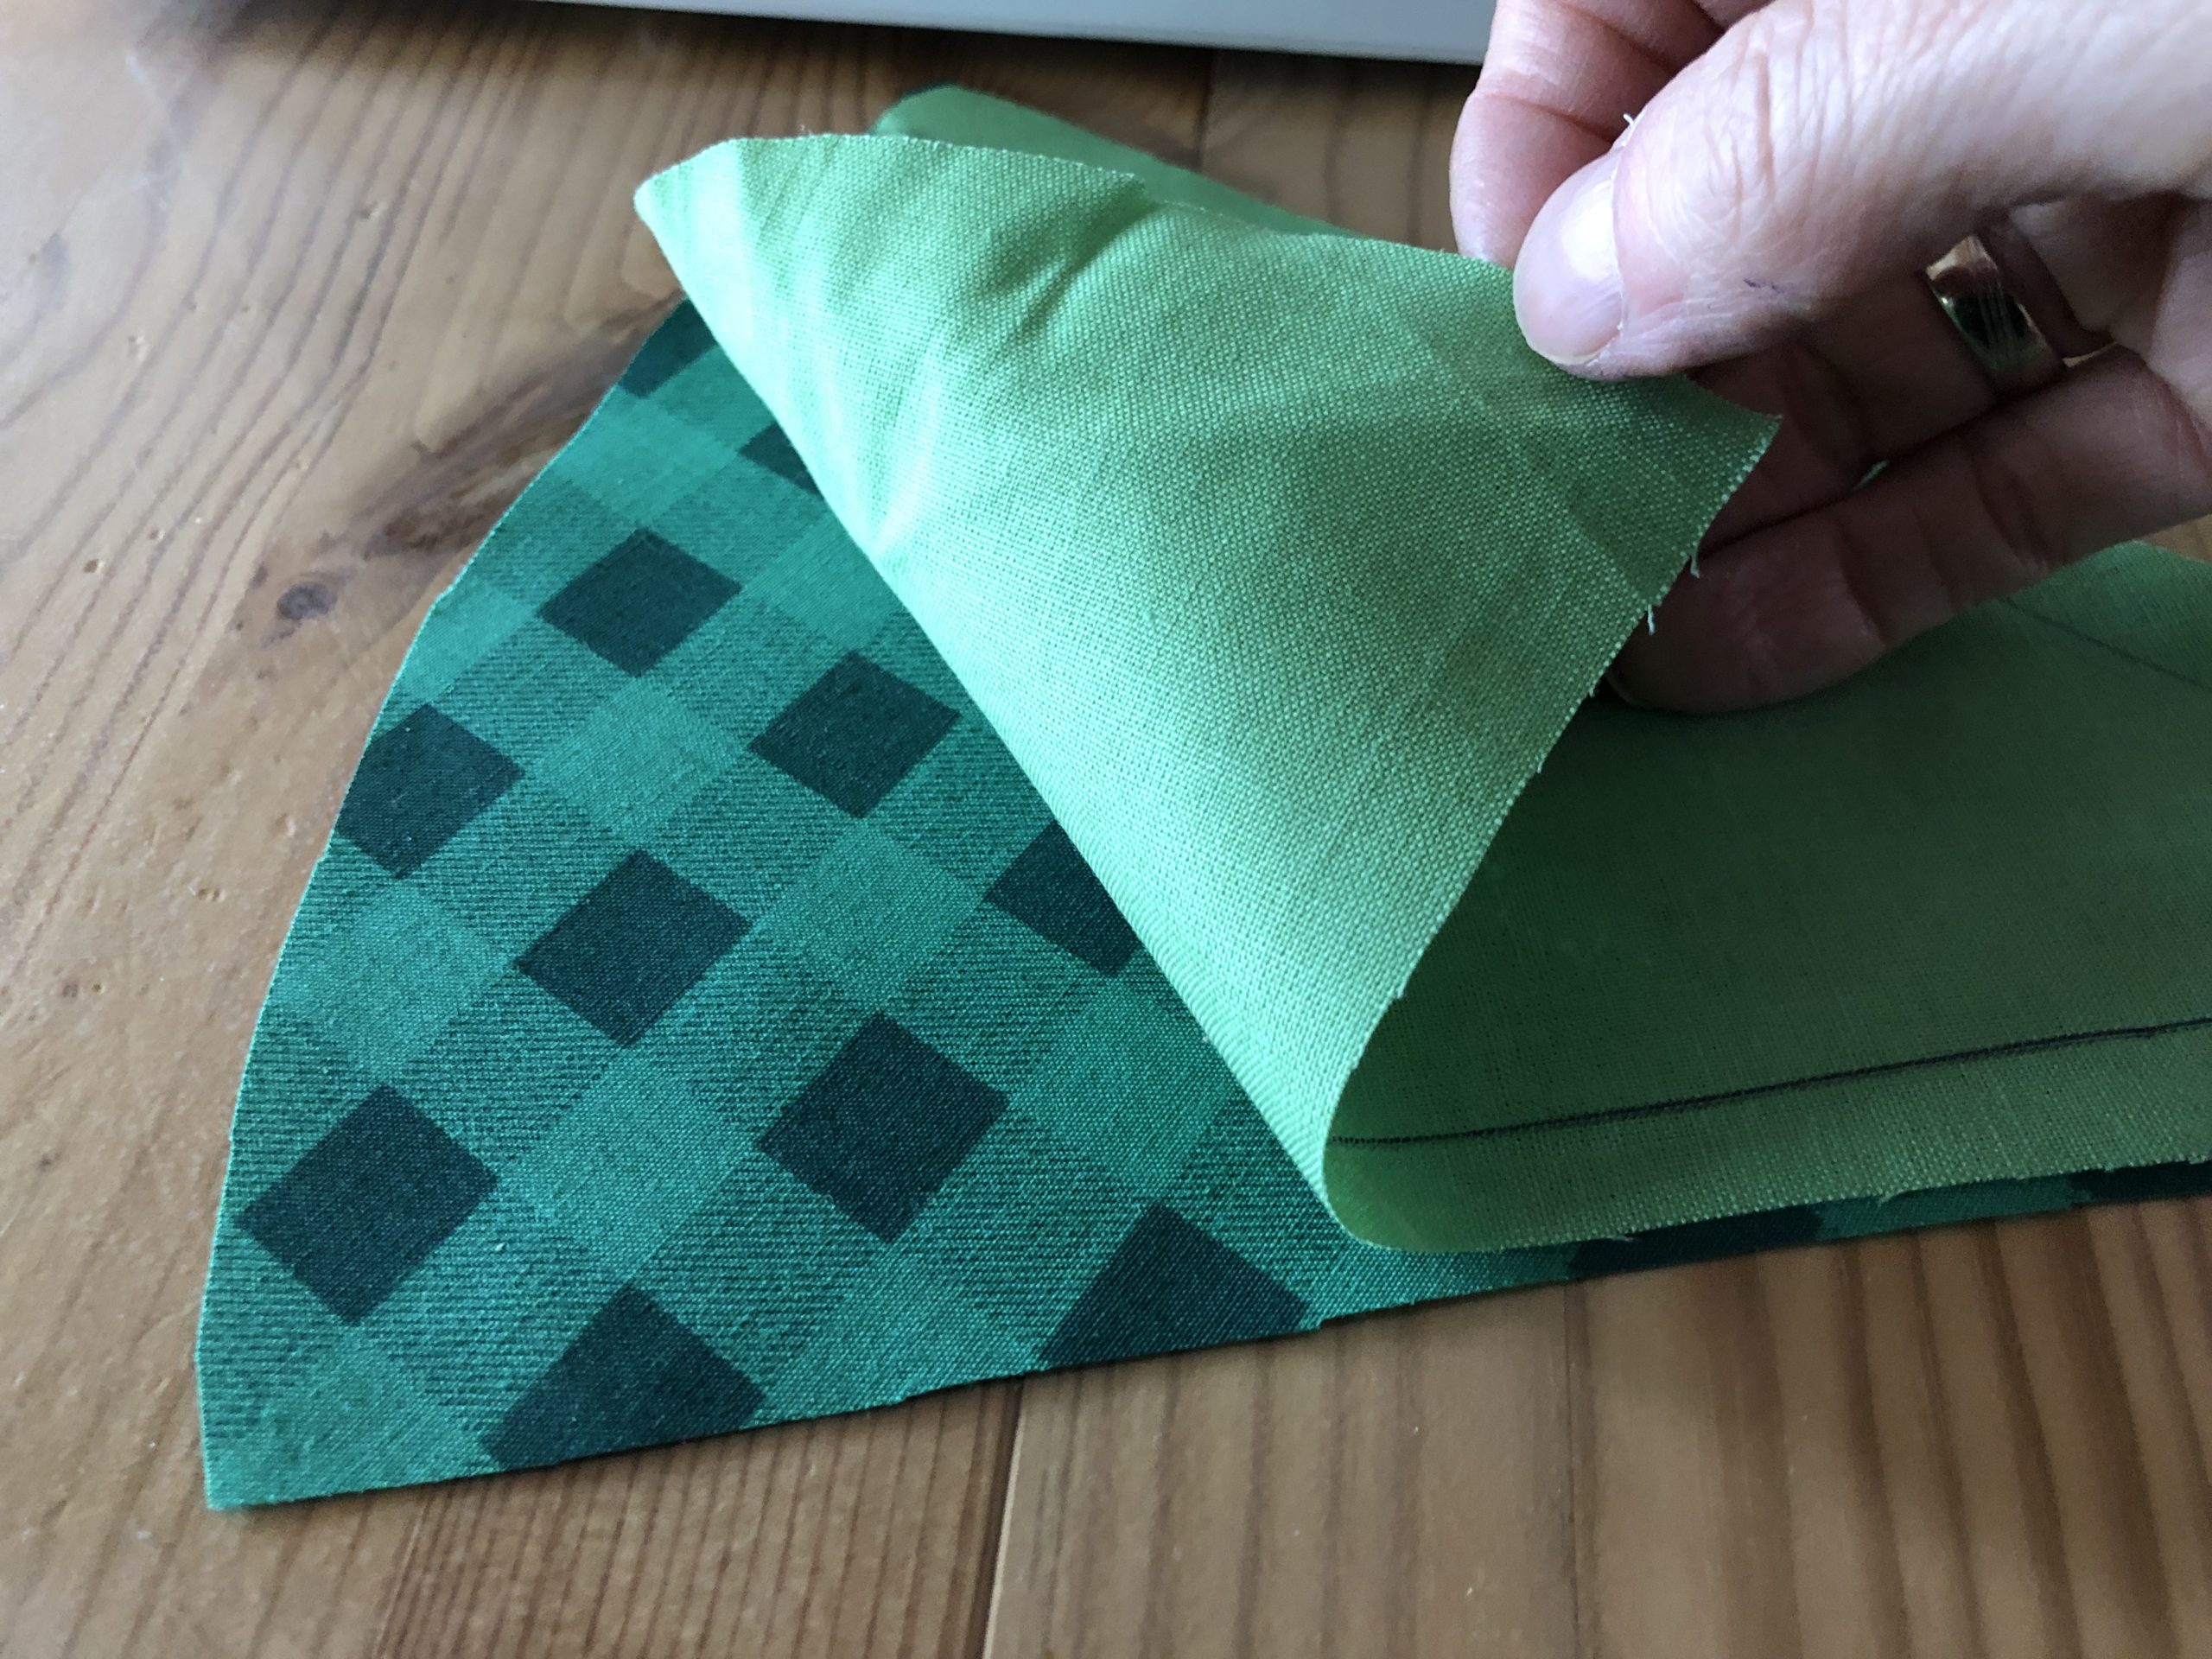
Bild zum Schritt 8 für das Bastel- und DIY-Abenteuer für Kinder: 'Jetzt werden die Stoffteile nacheinander zusammen genäht. Hierzu zwei Stoffstücke...'

9

Fix the two pieces of fabric with a pin.
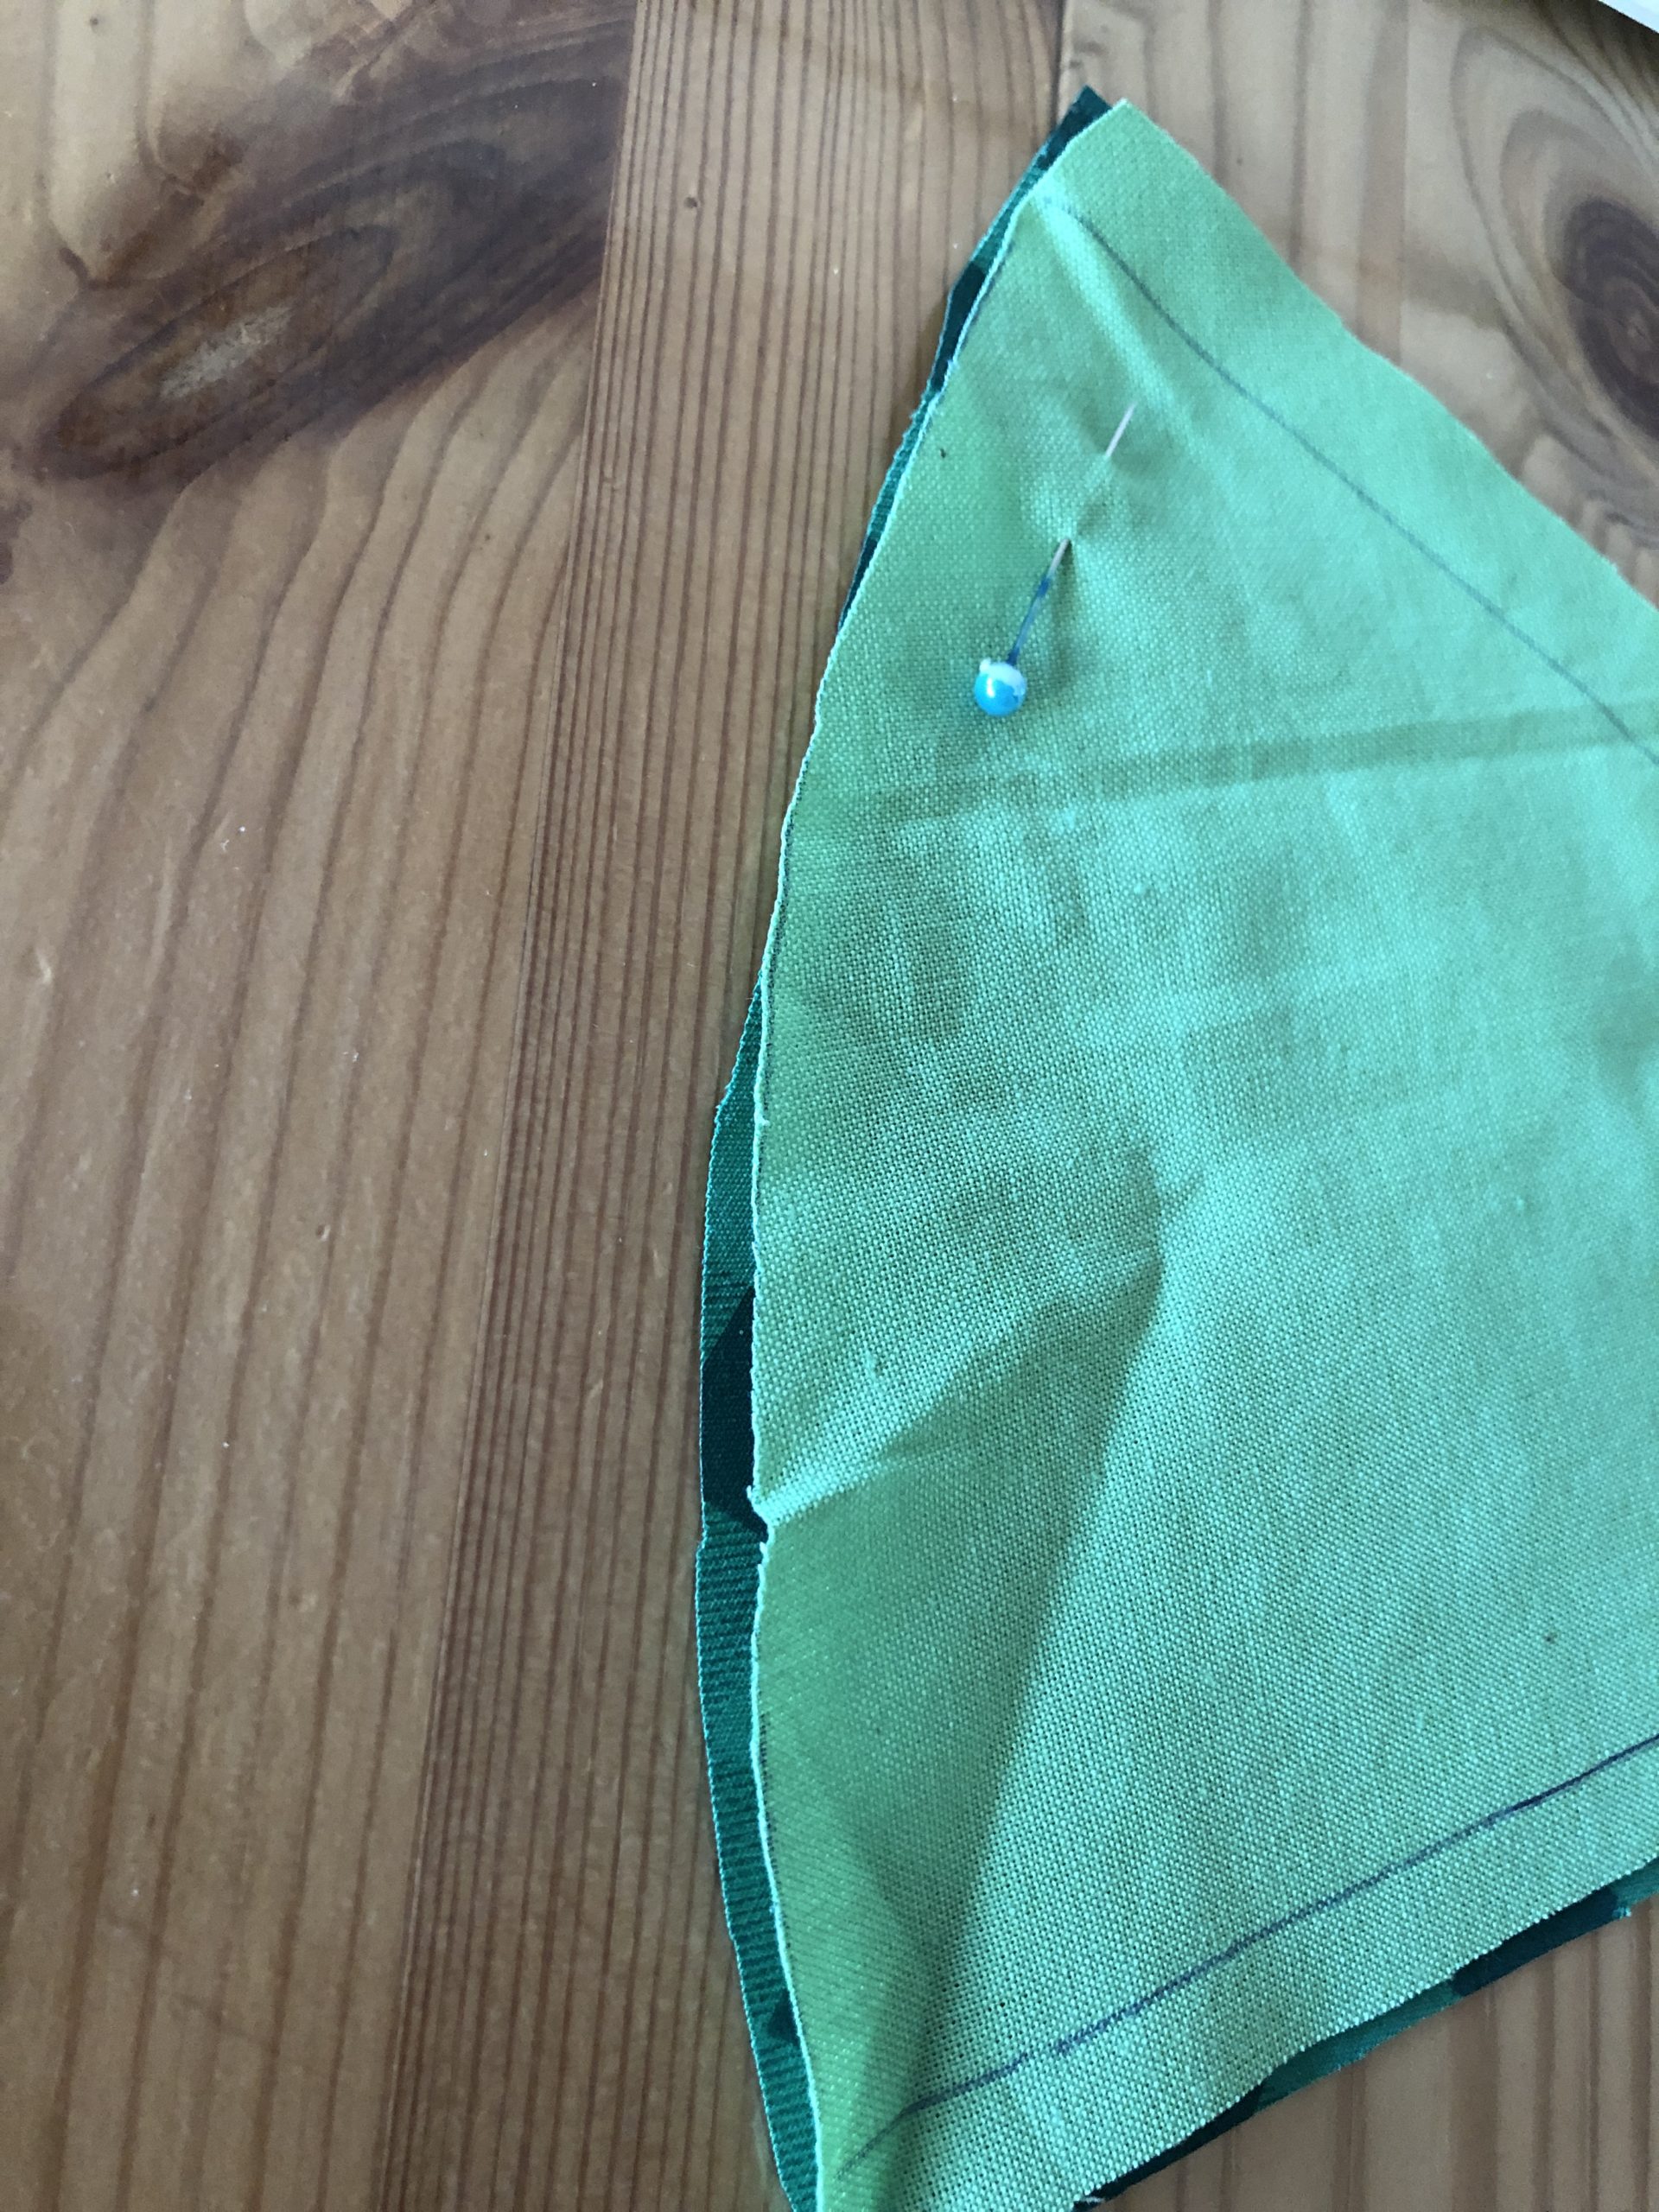
Bild zum Schritt 9 für das Bastel- und DIY-Abenteuer für Kinder: 'Fixiert dabei die beiden Stoffstücke mit einer Stecknadel.'

10

You can still sew off the sewn side with a zigzag stitch.
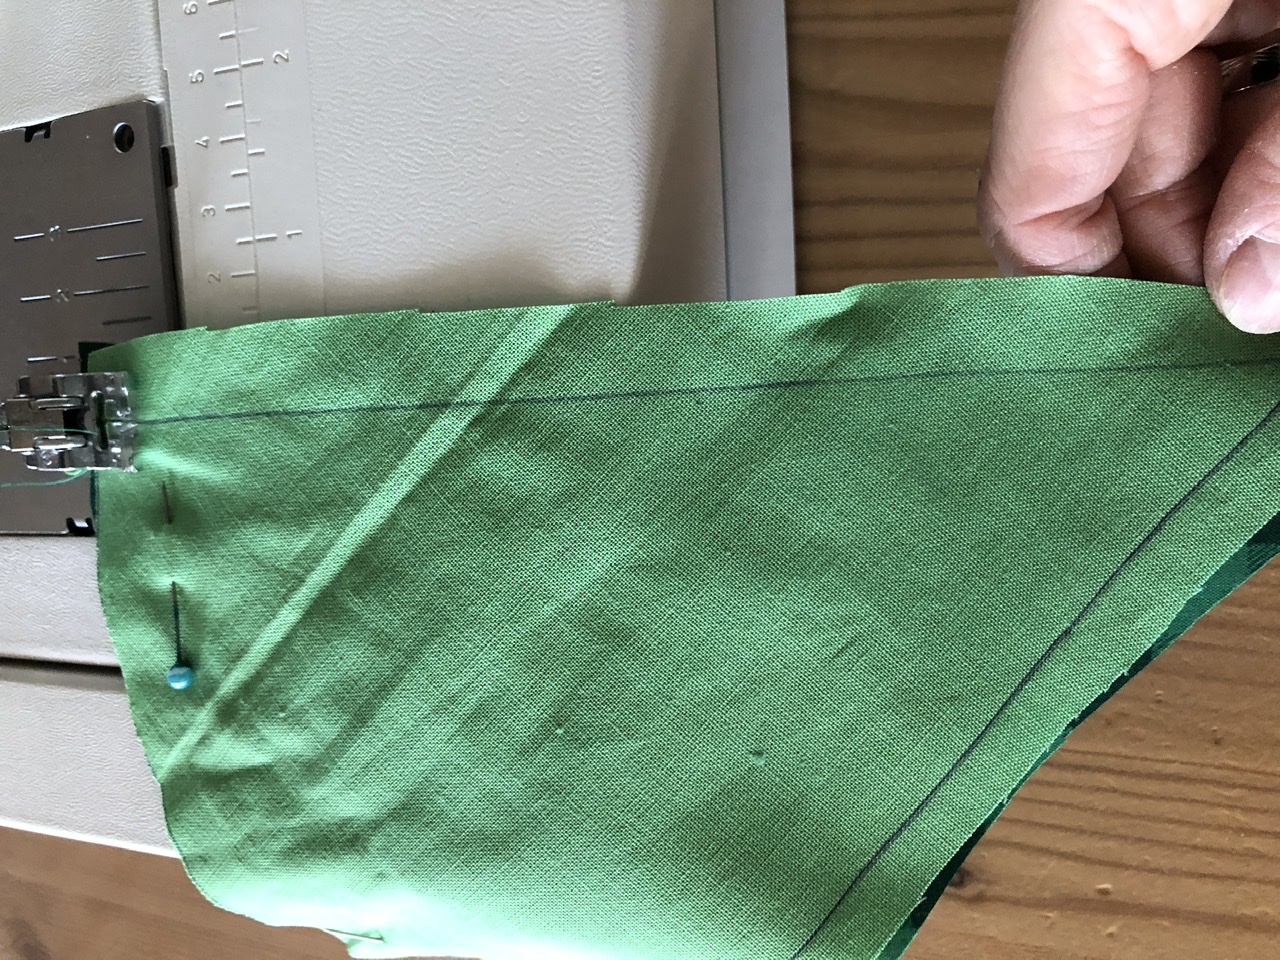
Bild zum Schritt 10 für das Bastel- und DIY-Abenteuer für Kinder: 'Die genähte Seite könnt ihr noch mit Zickzack-Stich abnähen. So...'

11

Then she folds the fabric part apart.
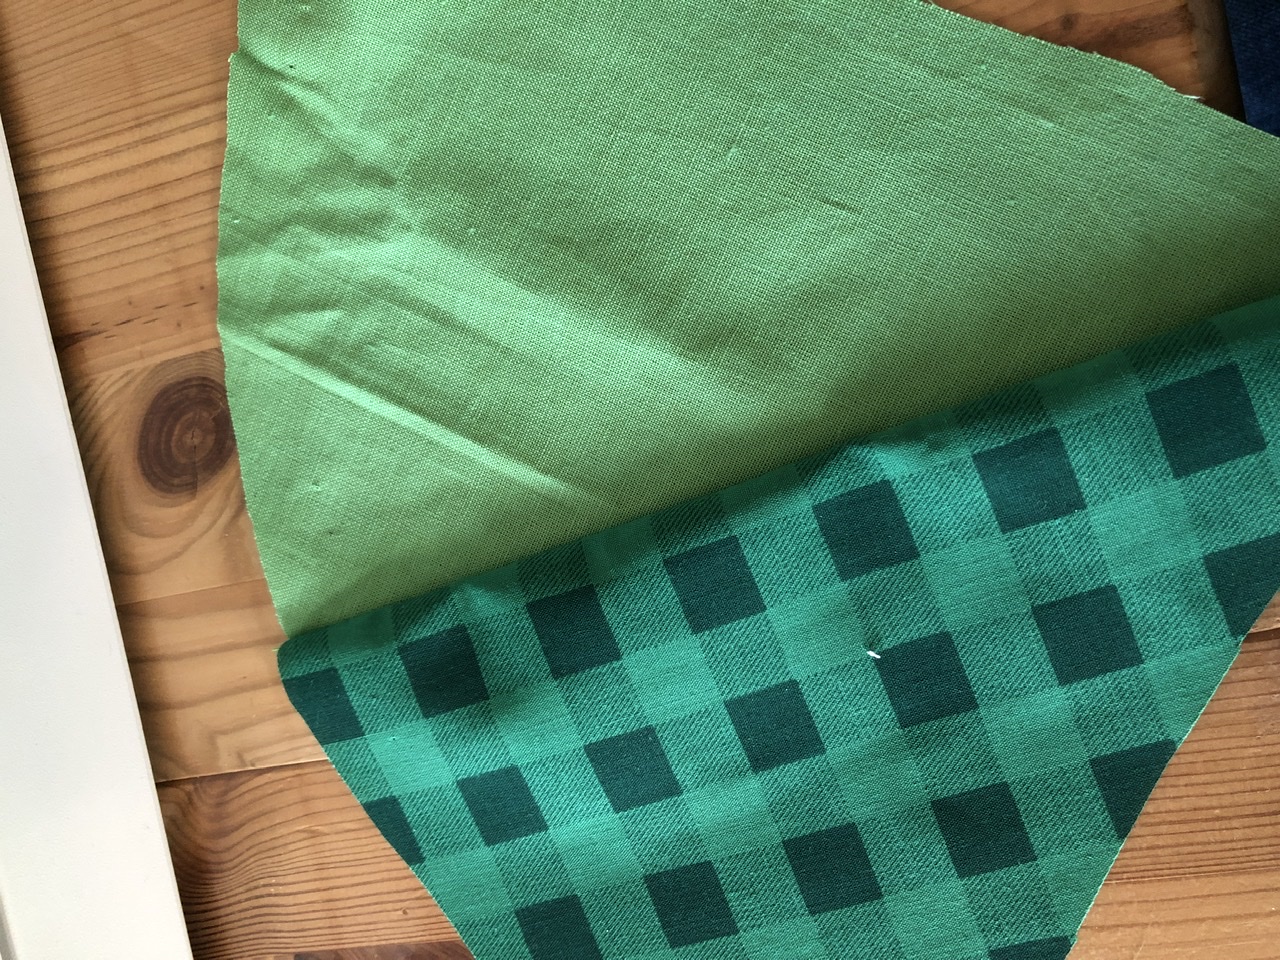
Bild zum Schritt 11 für das Bastel- und DIY-Abenteuer für Kinder: 'Anschließend klappt ihr das Stoffteil auseinander.'

12

Put together another piece of fabric (with the beautiful sides on top of each other) and sew it together at the following side.
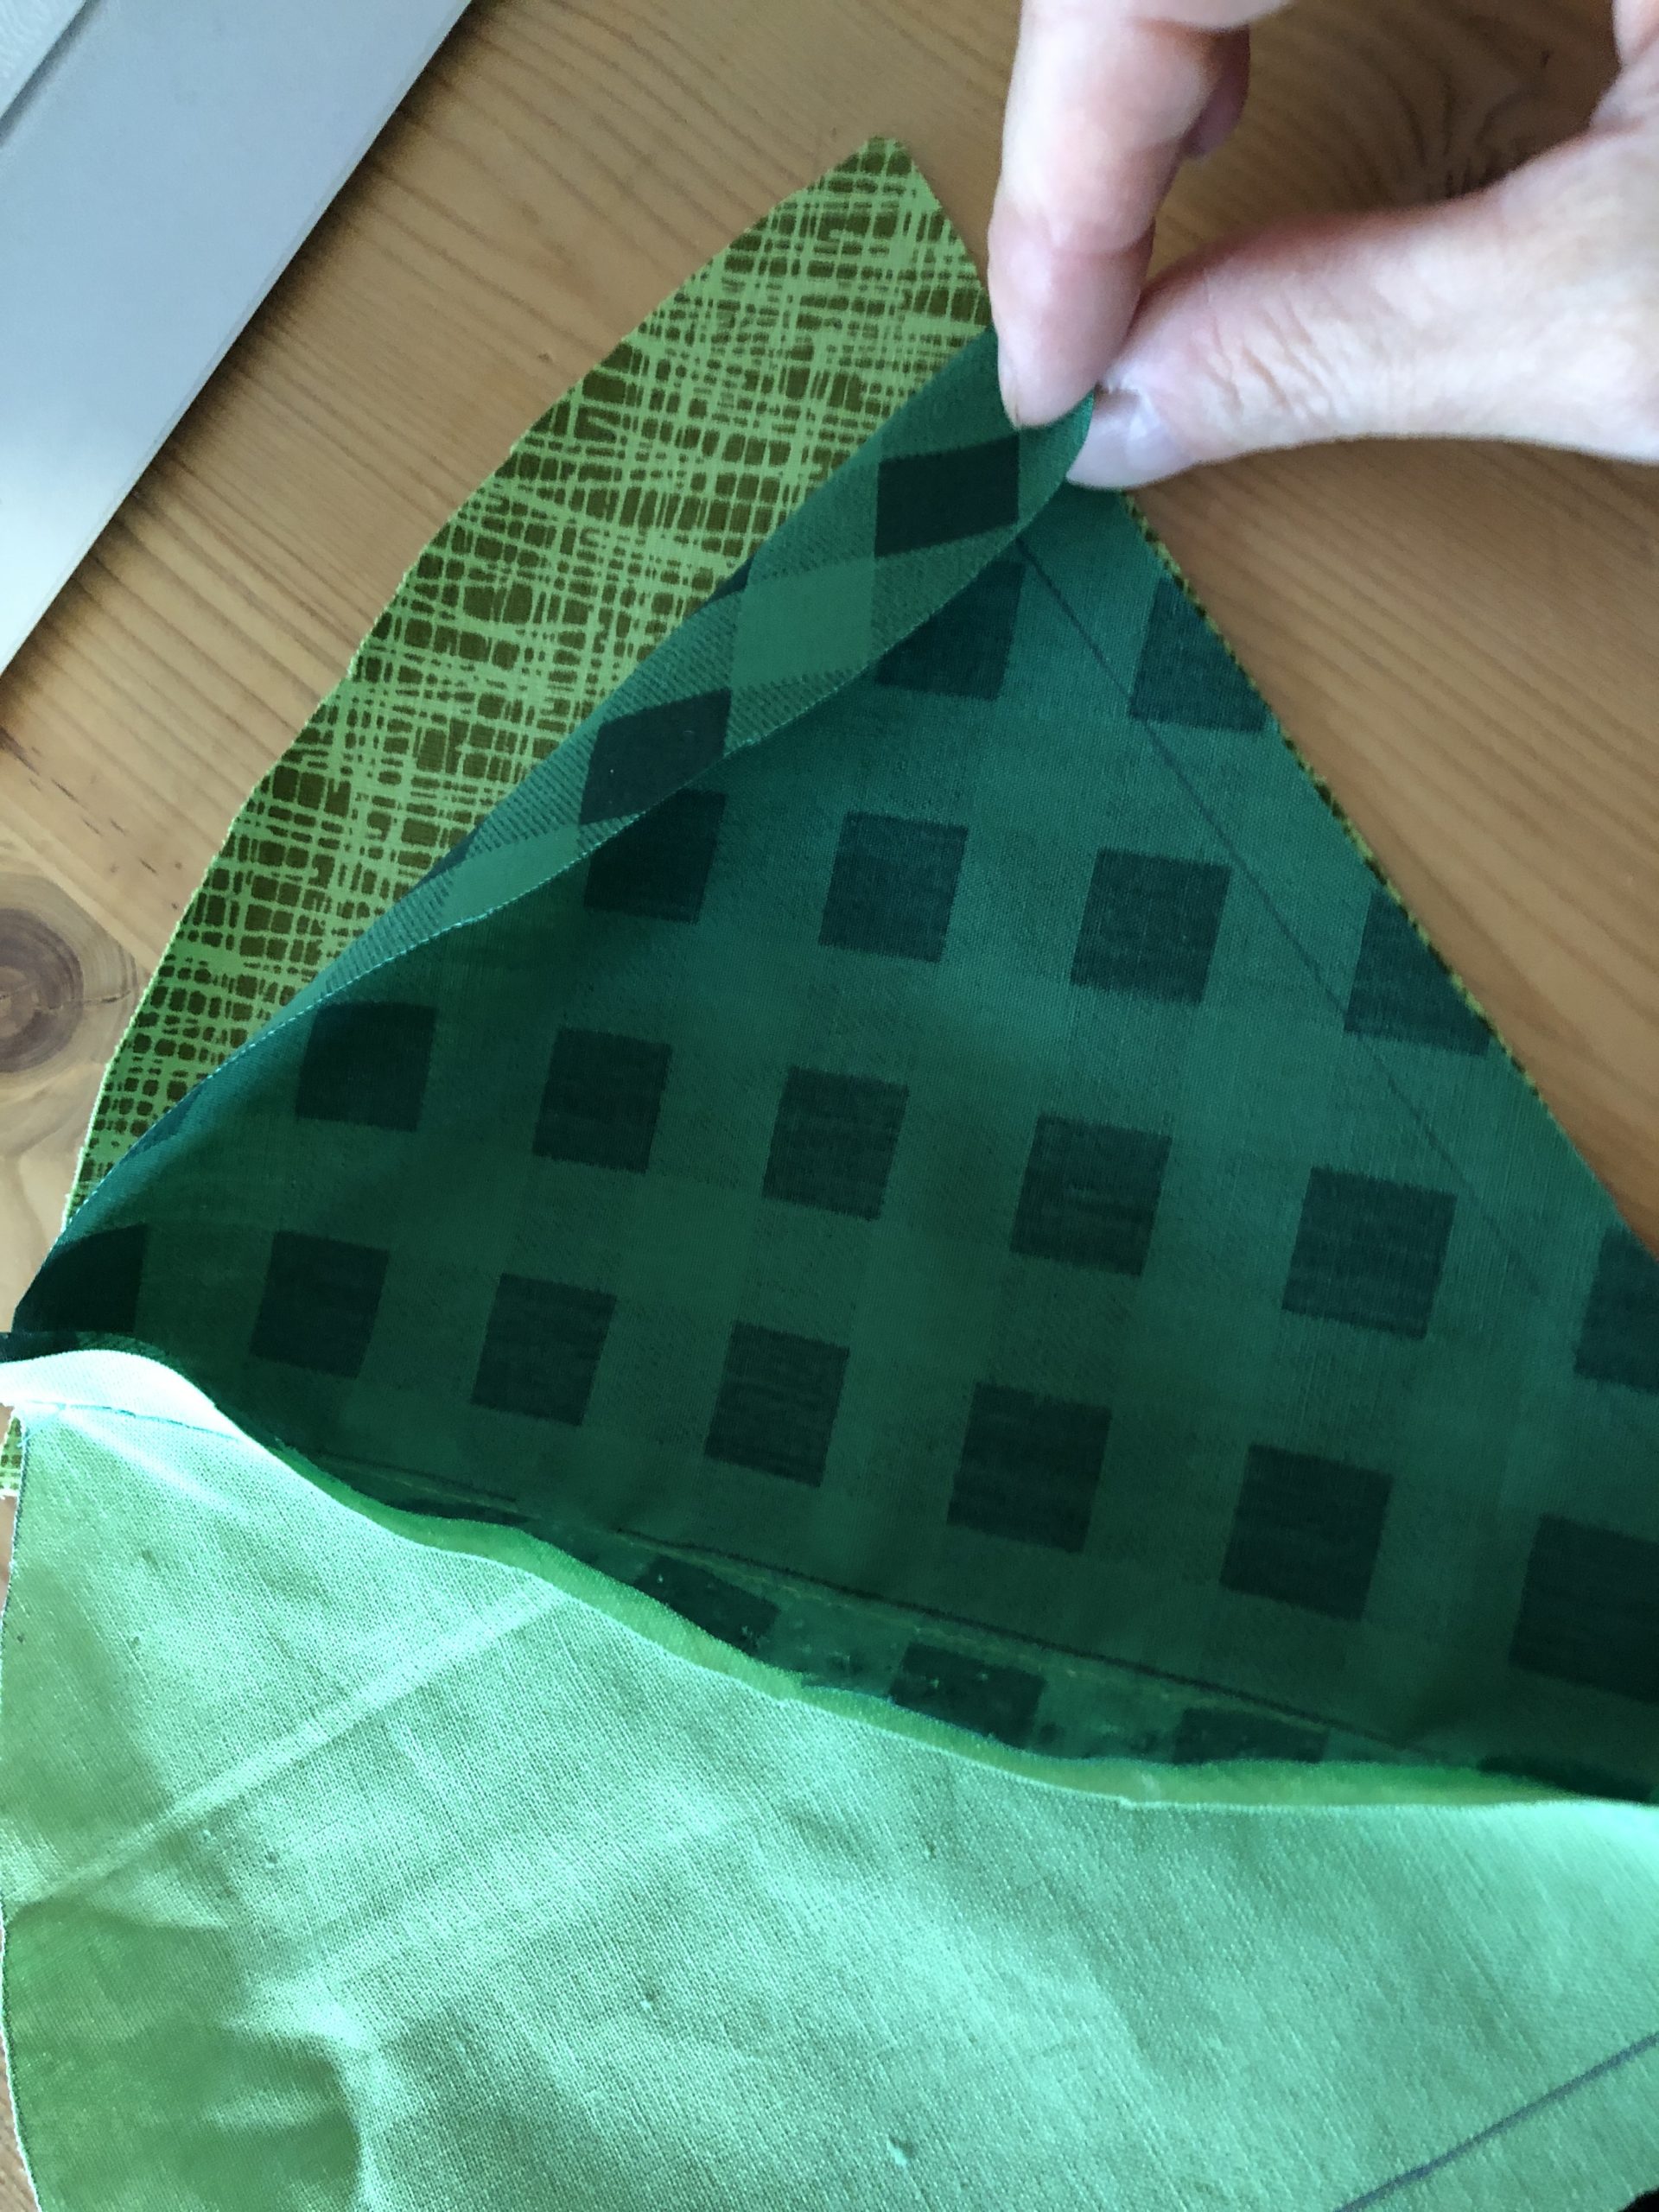
Bild zum Schritt 12 für das Bastel- und DIY-Abenteuer für Kinder: 'Legt ein weiteres Stoffteil (mit den schönen Seiten aufeinander) zusammen...'

13

So sew all the fabric parts together all around until the circle is closed.
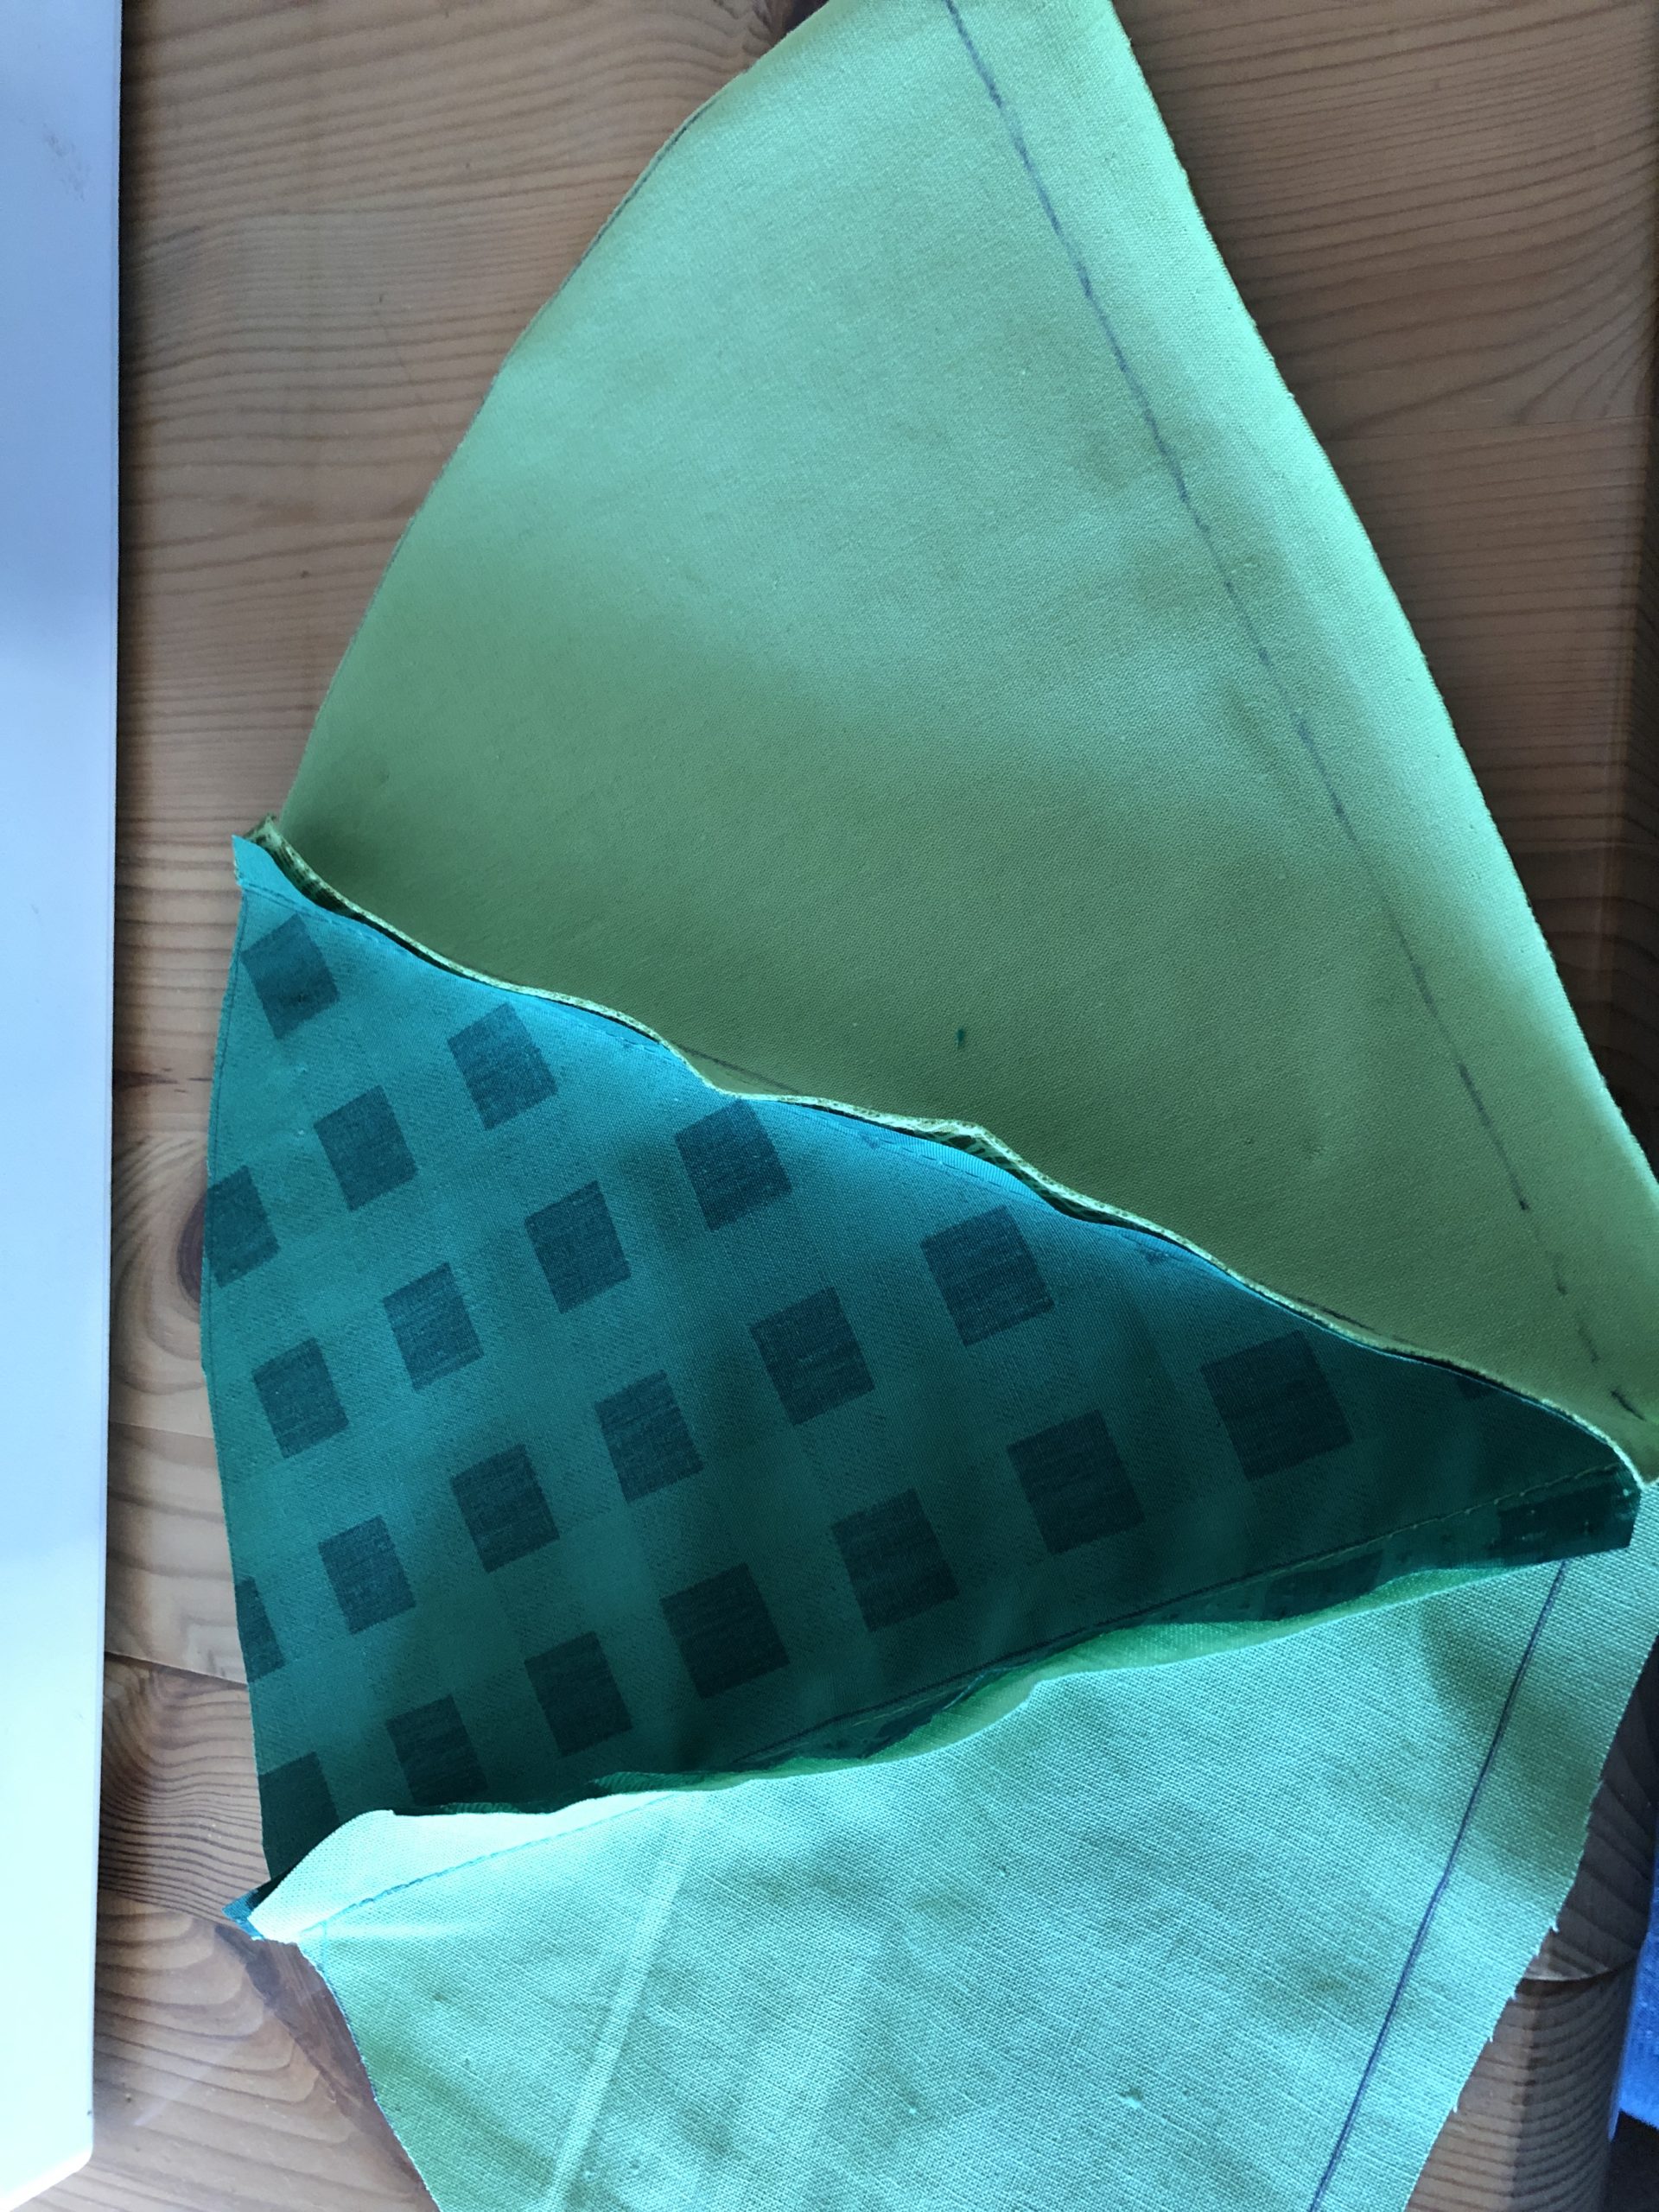
Bild zum Schritt 13 für das Bastel- und DIY-Abenteuer für Kinder: 'Näht so rundherum alle Stoffteile zusammen, bis der Kreis geschlossen...'

14

2. Bild zum Schritt 13 für das Bastel- und DIY-Abenteuer für Kinder: 'Näht so rundherum alle Stoffteile zusammen, bis der Kreis geschlossen...'

15

3. Bild zum Schritt 14 für das Bastel- und DIY-Abenteuer für Kinder: 'Näht so rundherum alle Stoffteile zusammen, bis der Kreis geschlossen...'

16

Now the circle is closed.

Bild zum Schritt 16 für das Bastel- und DIY-Abenteuer für Kinder: 'Nun ist der Kreis geschlossen.'

17

Do not forget to line the individual seams with a zigzag stitch.
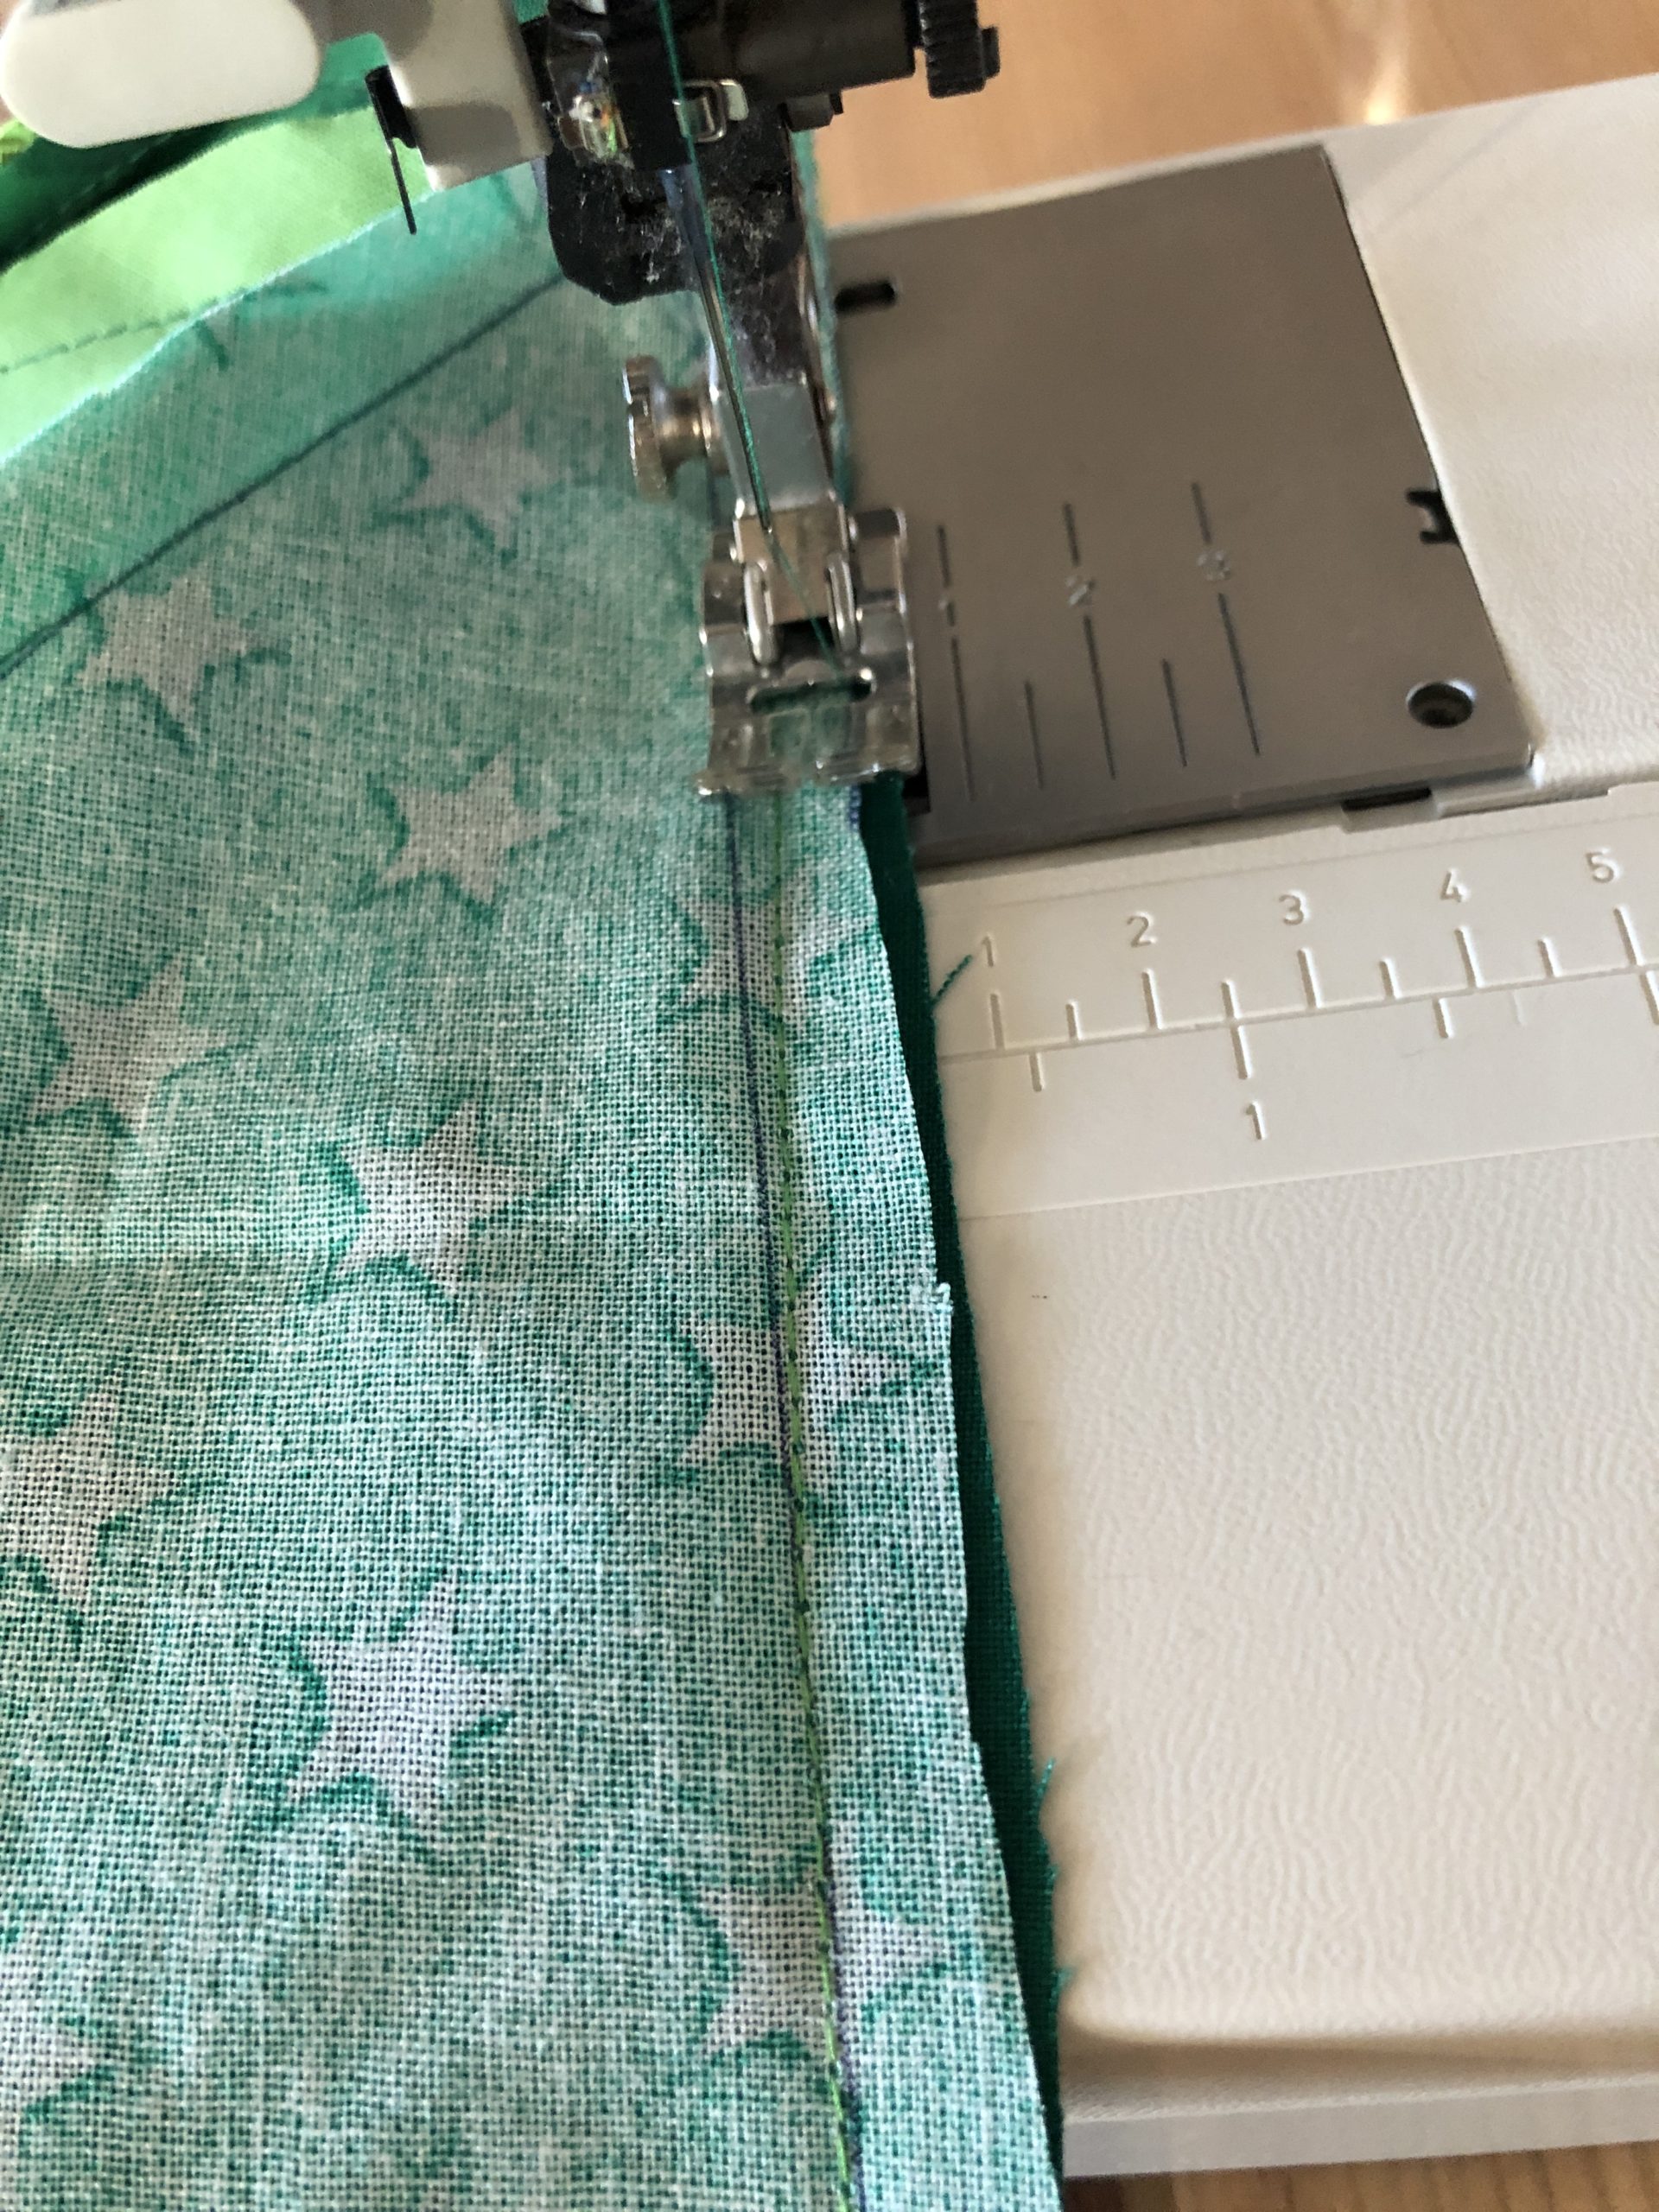
Bild zum Schritt 17 für das Bastel- und DIY-Abenteuer für Kinder: 'Vergesst nicht die einzelnen Nähte mit einem Zickzack-Stich zu einzusäumen.'

18

2. Bild zum Schritt 17 für das Bastel- und DIY-Abenteuer für Kinder: 'Vergesst nicht die einzelnen Nähte mit einem Zickzack-Stich zu einzusäumen.'

19

In the center of the circle a small circle has to be cut out.
This is how a wreath is created. Take a cup or a bowl to draw on.

Bild zum Schritt 19 für das Bastel- und DIY-Abenteuer für Kinder: 'In der Kreismitte muss nun ein Kleiner Kreis heraus geschnitten...'

20

2. Bild zum Schritt 19 für das Bastel- und DIY-Abenteuer für Kinder: 'In der Kreismitte muss nun ein Kleiner Kreis heraus geschnitten...'

21

Cut out the circle.

Bild zum Schritt 21 für das Bastel- und DIY-Abenteuer für Kinder: 'Schneidet den Kreis heraus.'

22

2. Bild zum Schritt 21 für das Bastel- und DIY-Abenteuer für Kinder: 'Schneidet den Kreis heraus.'

23

Now iron the seams on the back.
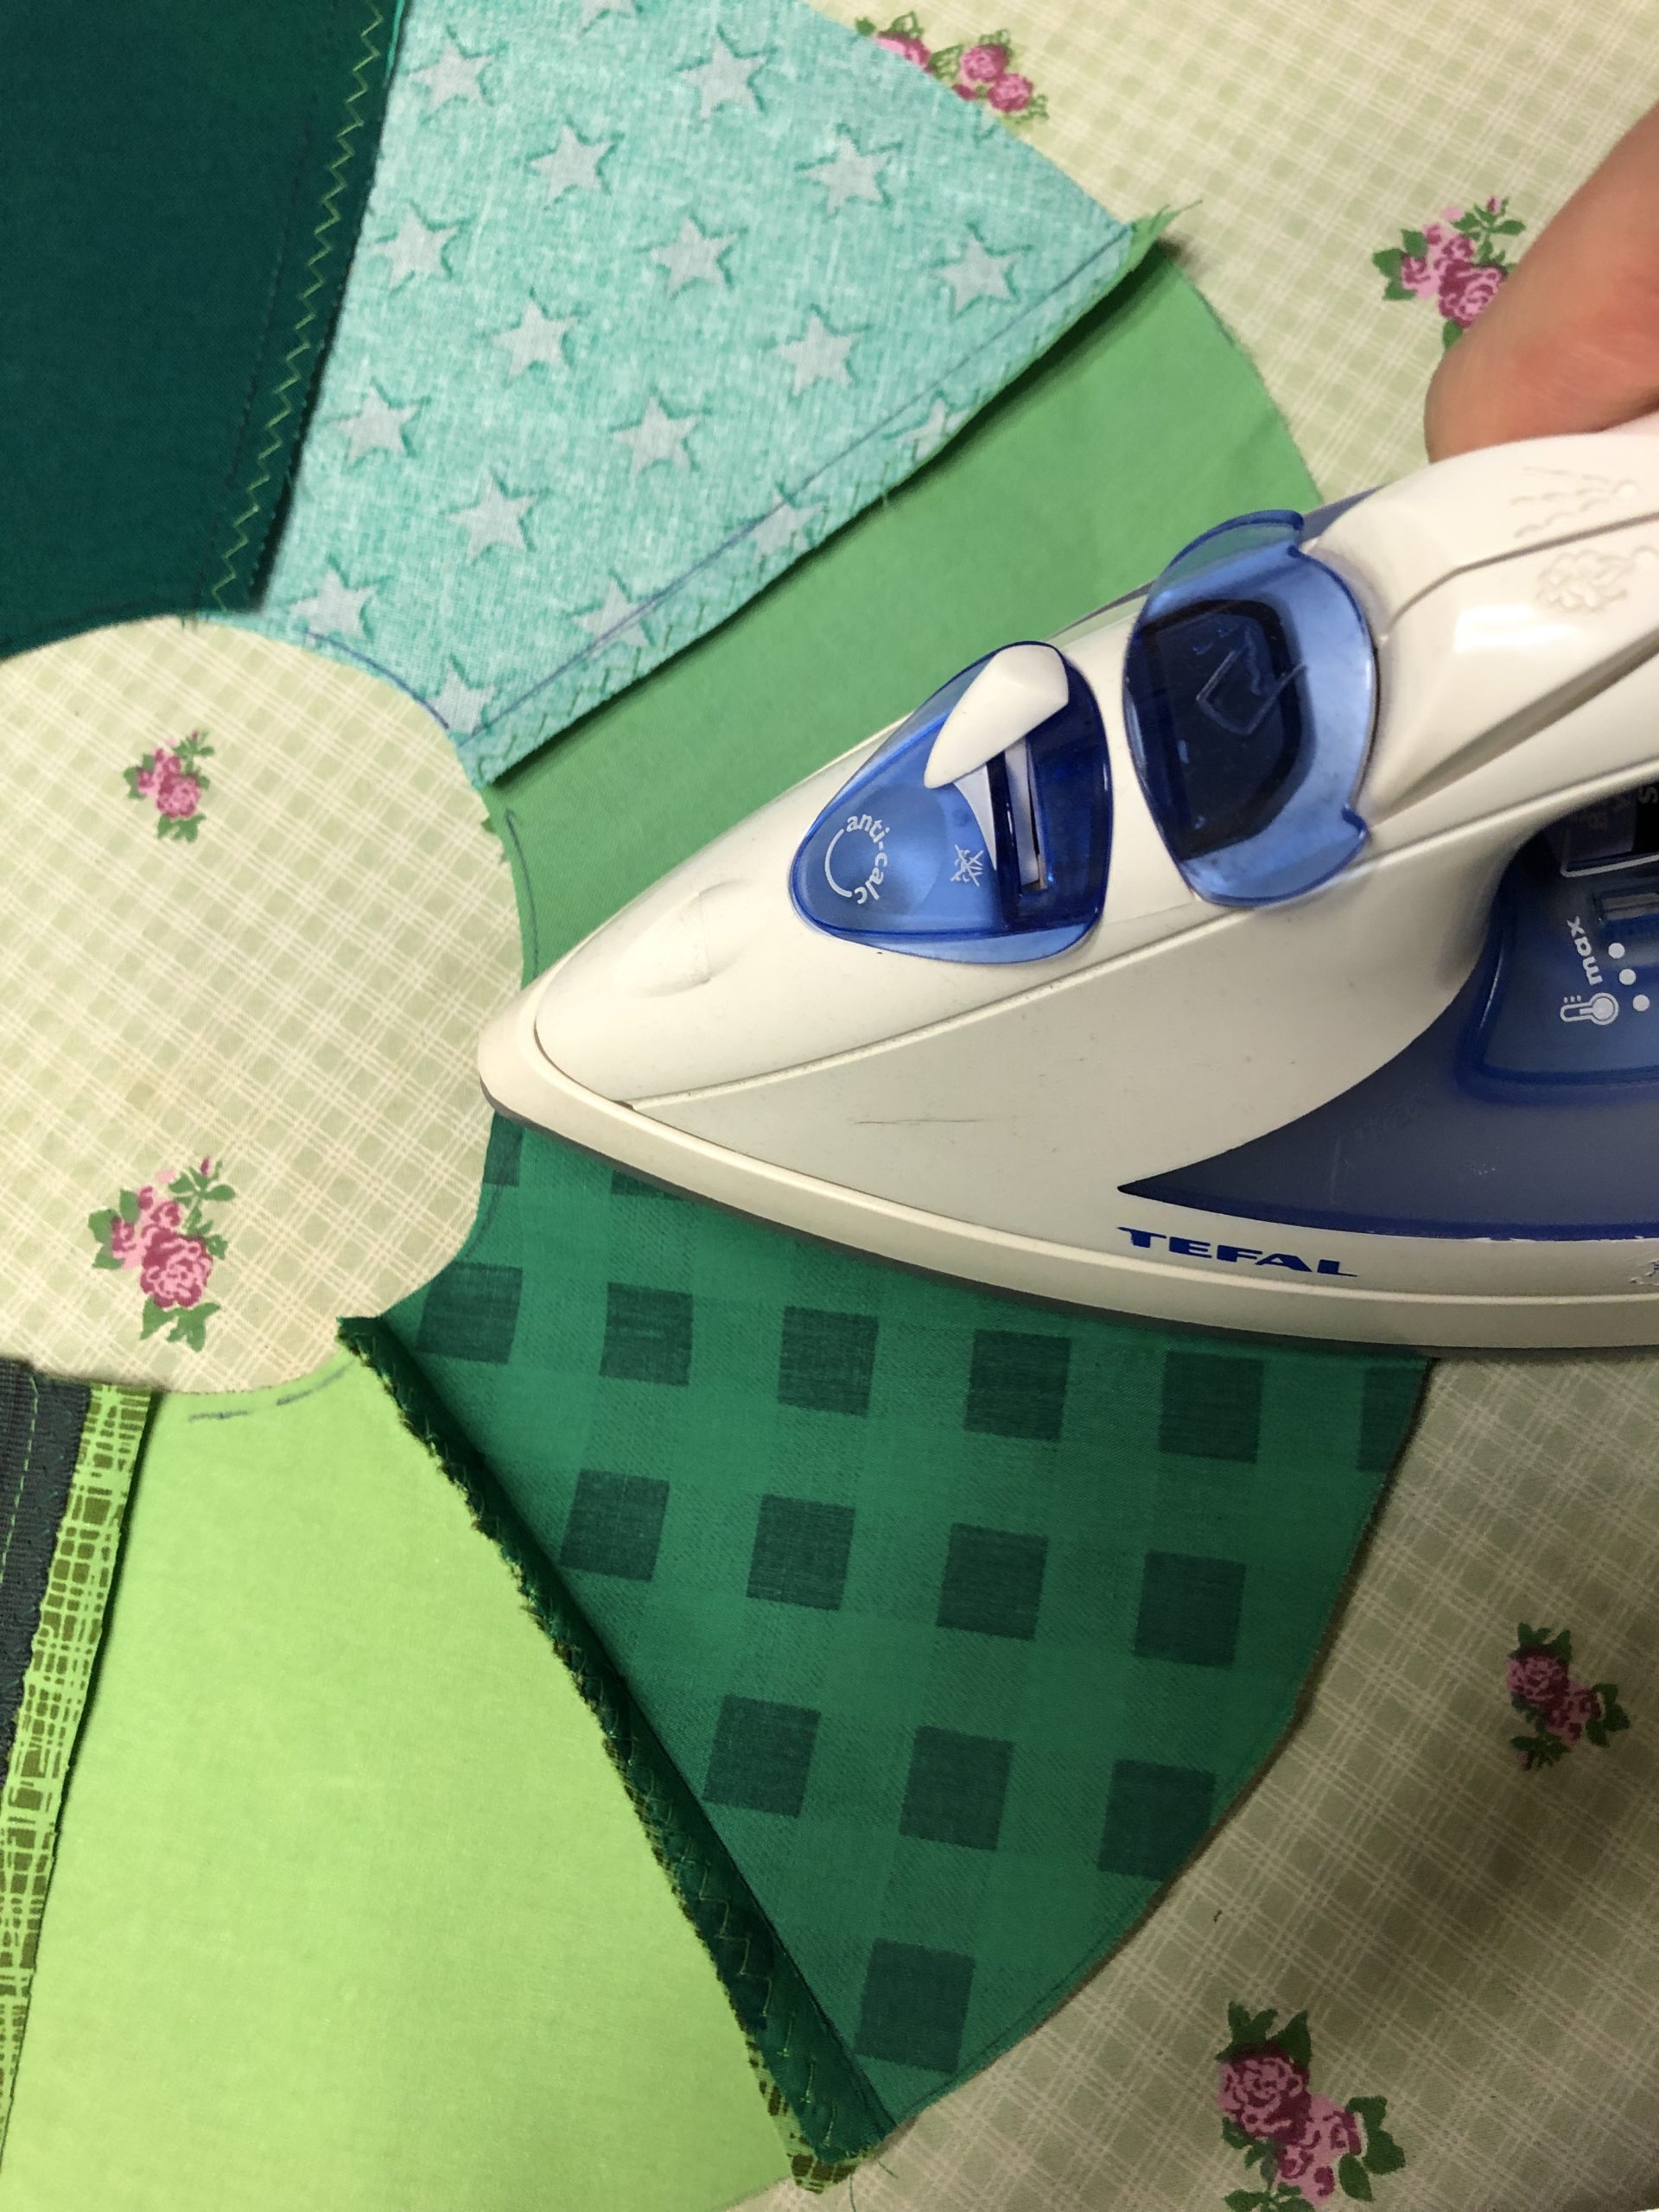
Bild zum Schritt 23 für das Bastel- und DIY-Abenteuer für Kinder: 'Jetzt bügelt die Nähte auf der Rückseite.'

24

Then also cuts out a small circle from the rear part.
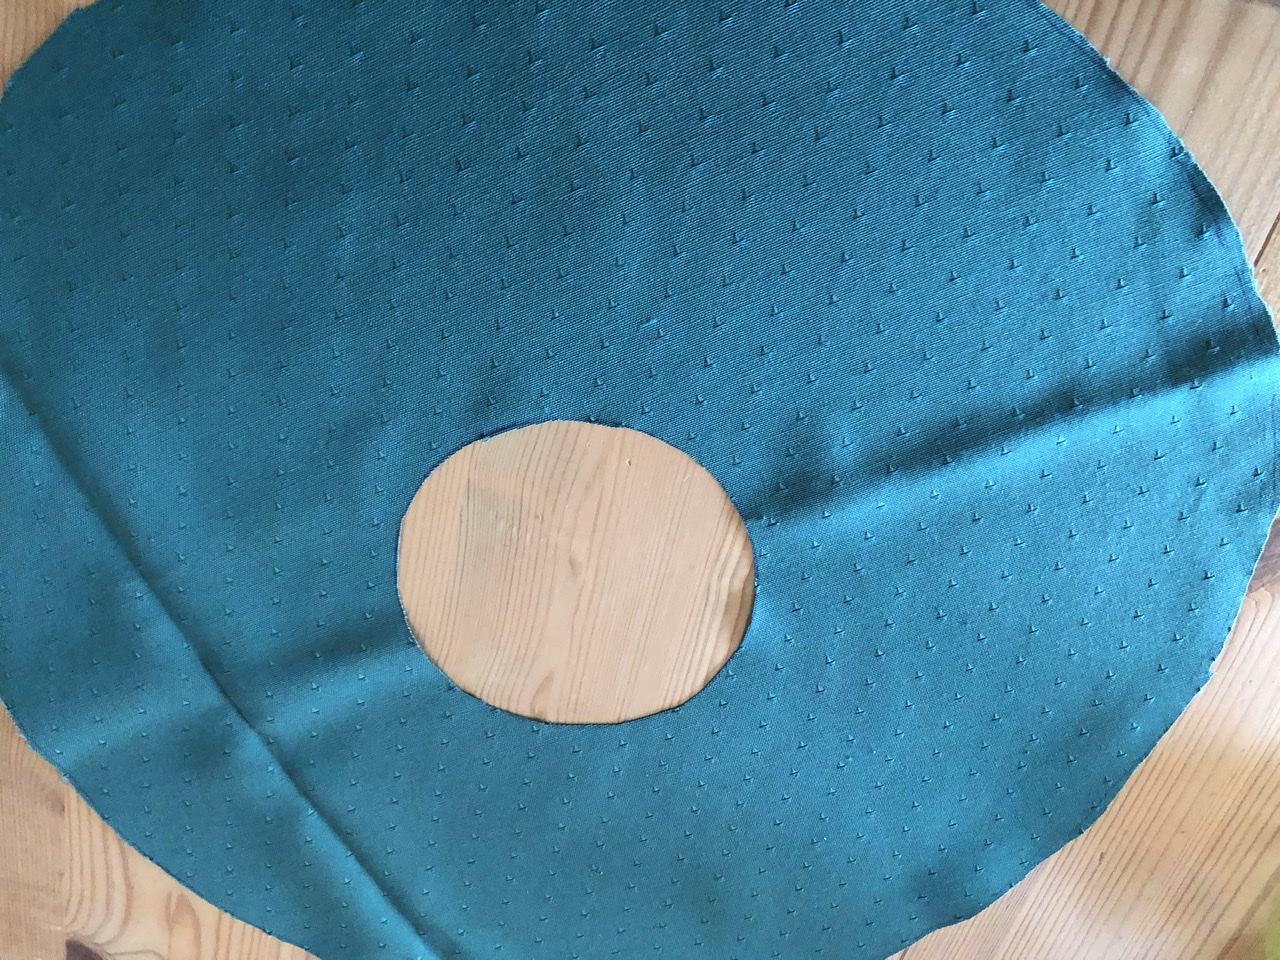
Bild zum Schritt 24 für das Bastel- und DIY-Abenteuer für Kinder: 'Dann schneidet auch aus dem Rückteil ein kleinen Kreis heraus.'

25

Put the two circles together with the beautiful sides (right).
Then she's stuck with pins.
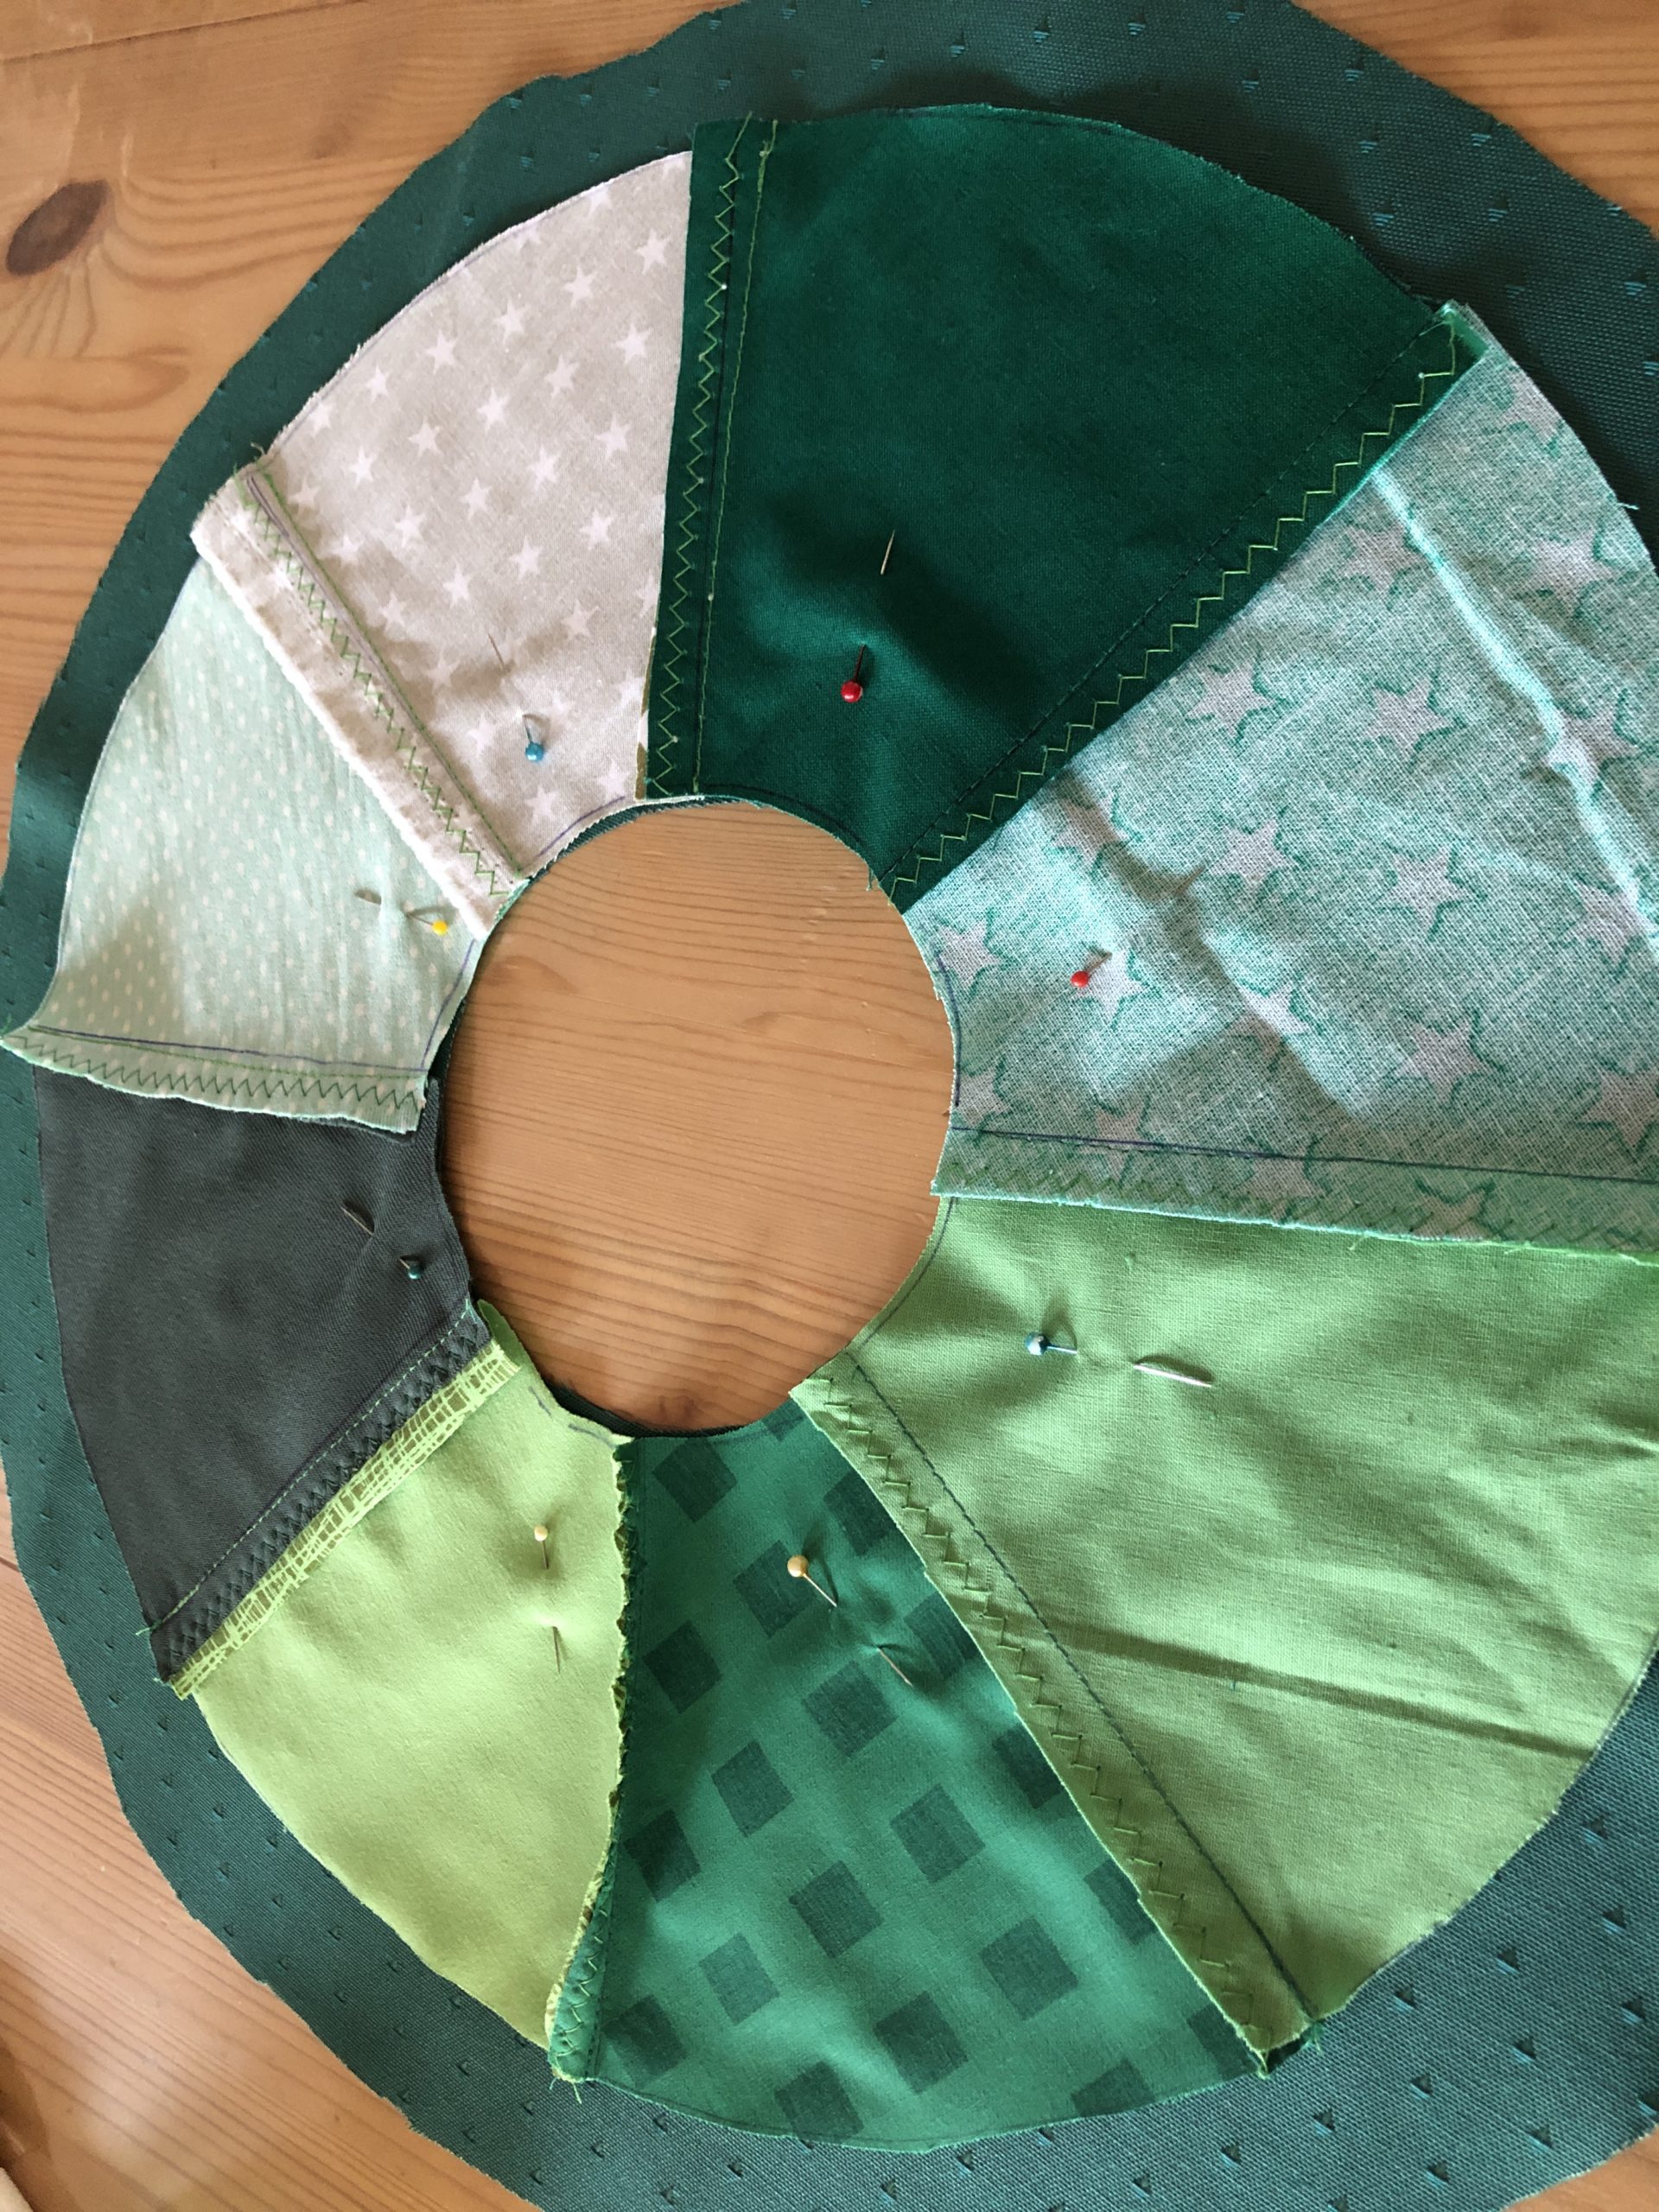
Bild zum Schritt 25 für das Bastel- und DIY-Abenteuer für Kinder: 'Legt die beiden Kreise mit den schönen Seiten (rechts) aufeinander....'

26

Then you also fix the fabric around the outside with pins.
Make sure that you take out the edge of the fabric and always stick in the middle of the fabric with needles.

Bild zum Schritt 26 für das Bastel- und DIY-Abenteuer für Kinder: 'Anschließend fixiert ihr den Stoff außen herum ebenfalls mit Stecknadeln....'

27

2. Bild zum Schritt 26 für das Bastel- und DIY-Abenteuer für Kinder: 'Anschließend fixiert ihr den Stoff außen herum ebenfalls mit Stecknadeln....'

28

Now you sew the outer edge together with the sewing machine.
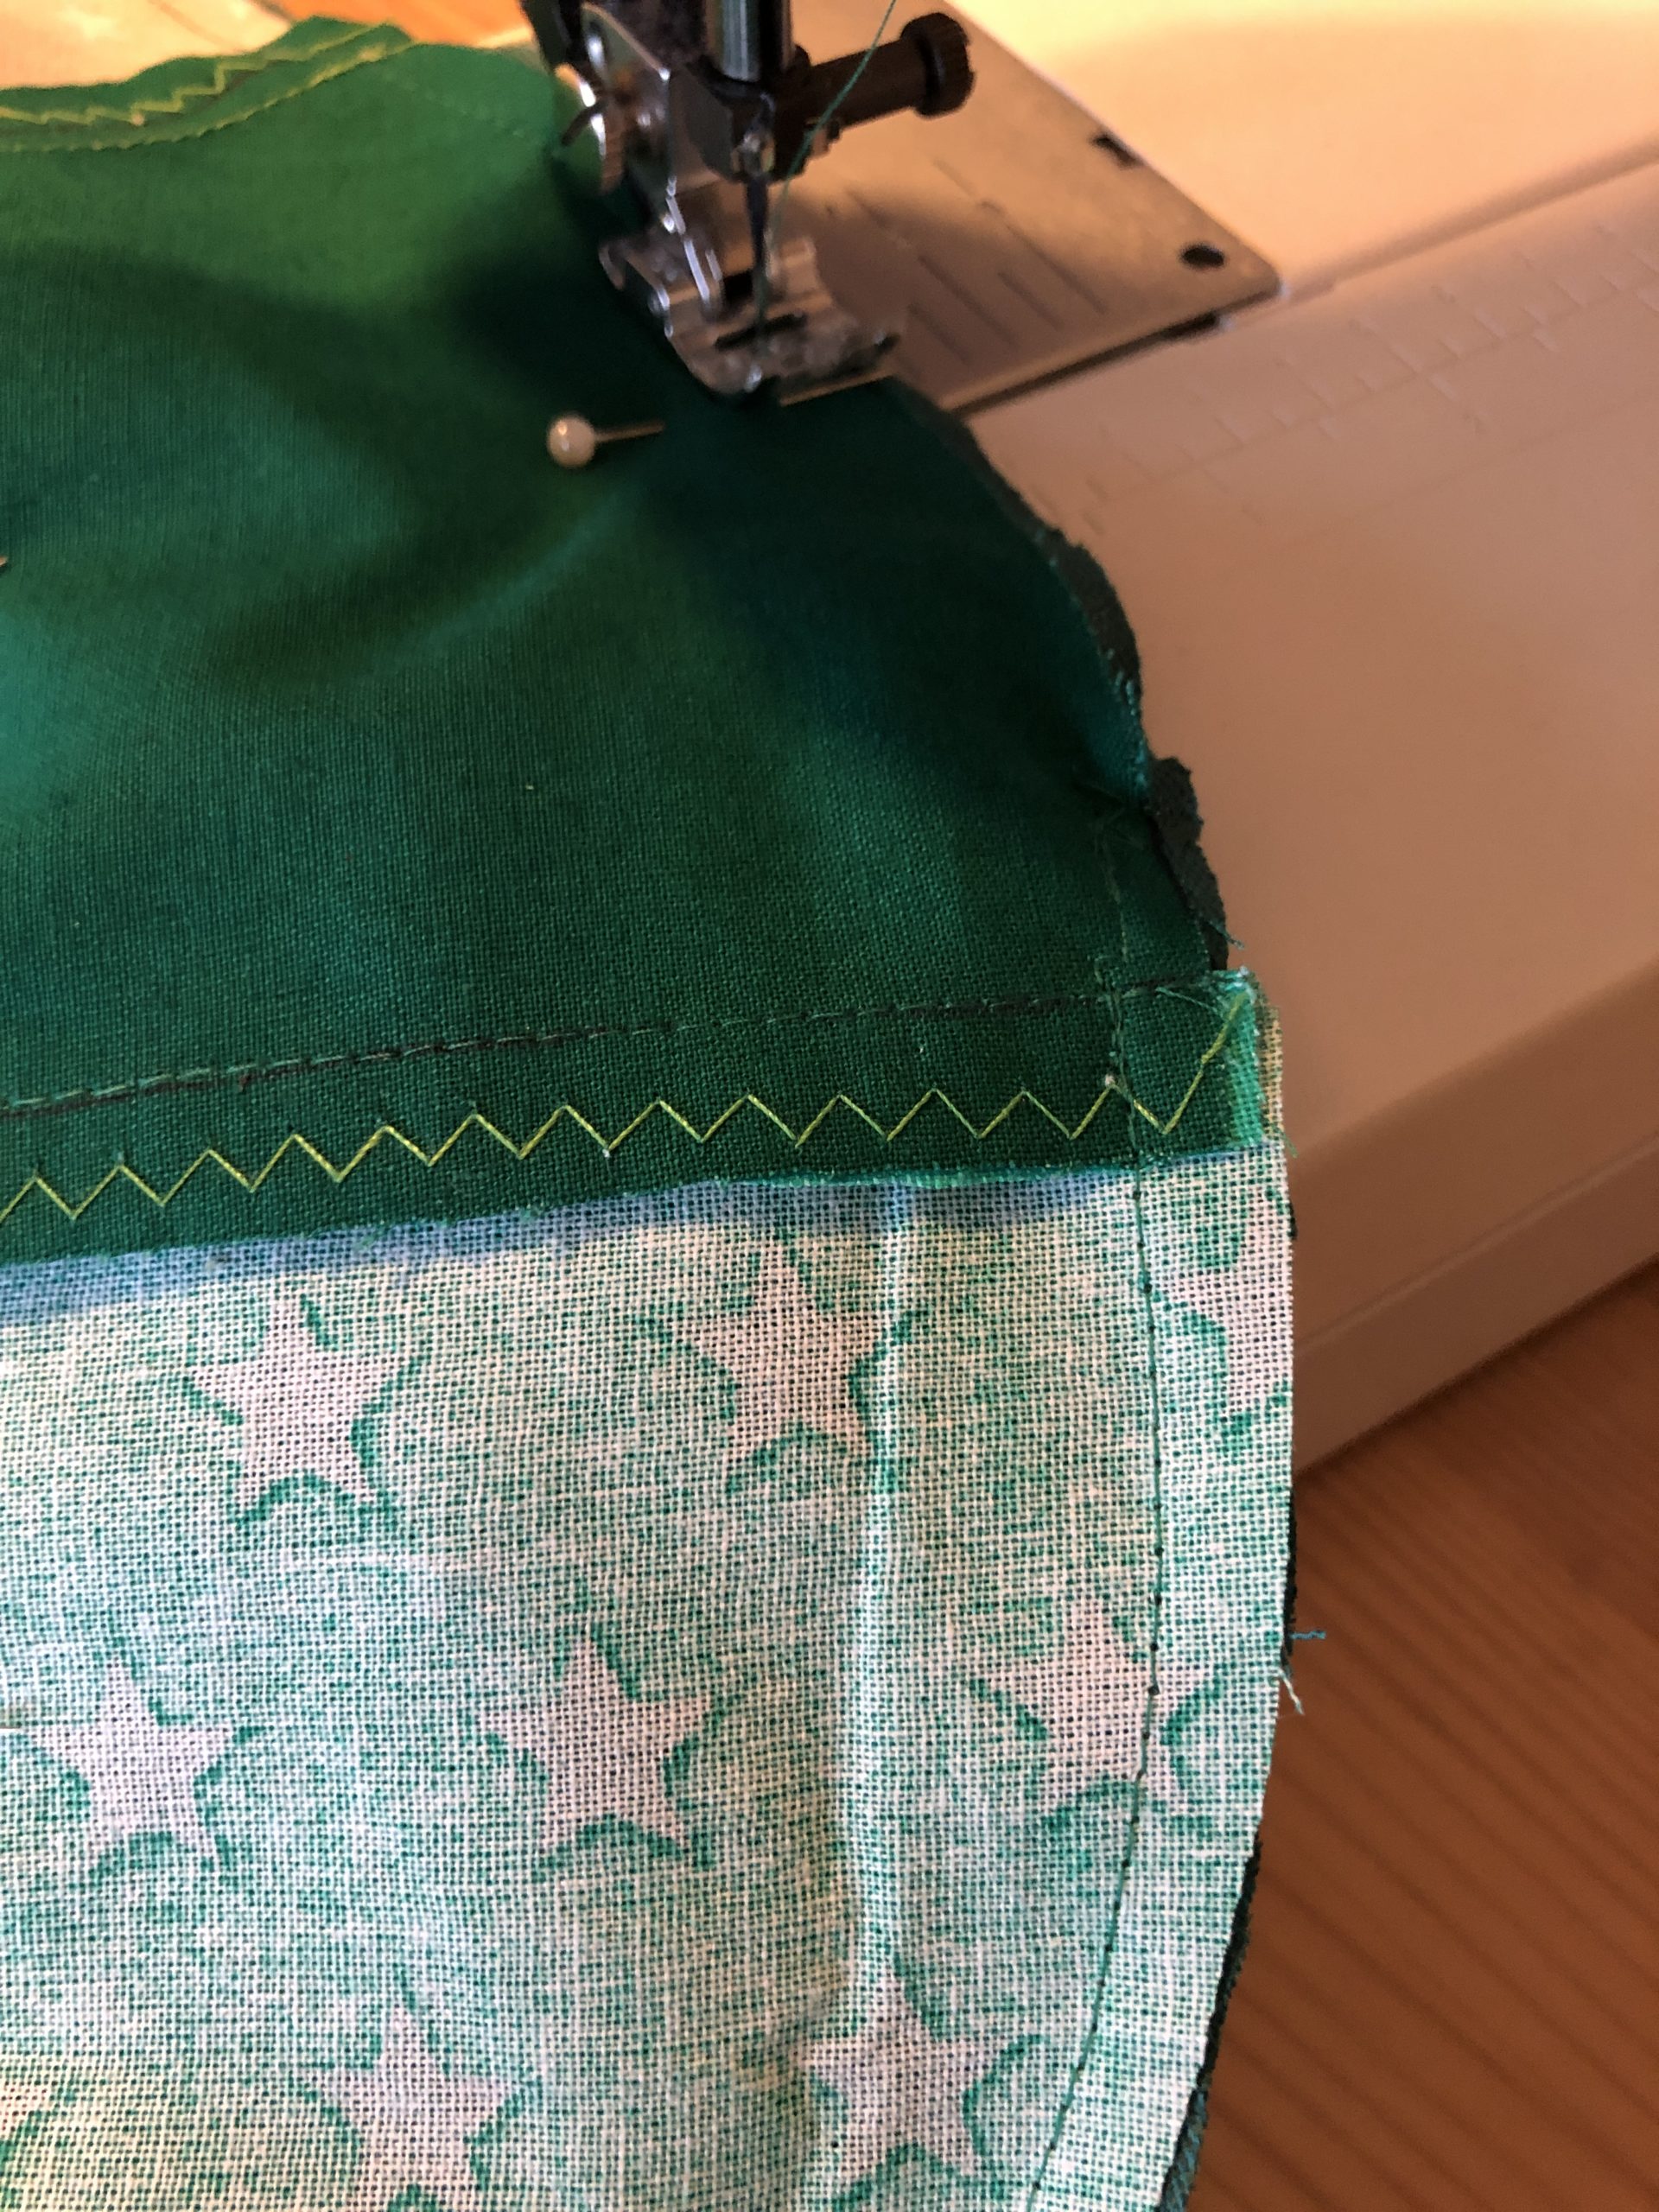
Bild zum Schritt 28 für das Bastel- und DIY-Abenteuer für Kinder: 'Jetzt näht ihr den äußeren Rand mit der Nähmaschine zusammen.'

29

2. Bild zum Schritt 28 für das Bastel- und DIY-Abenteuer für Kinder: 'Jetzt näht ihr den äußeren Rand mit der Nähmaschine zusammen.'

30

Then you turn the circle of cloth.

Bild zum Schritt 30 für das Bastel- und DIY-Abenteuer für Kinder: 'Dann wendet ihr den Stoffkreis.'

31

The inner open edges of the ring are now about half a centimetre from both sides and stick it together with pins.

Bild zum Schritt 31 für das Bastel- und DIY-Abenteuer für Kinder: 'Die  inneren offenen Ränder des Ringes schlagt ihr nun...'

32

2. Bild zum Schritt 31 für das Bastel- und DIY-Abenteuer für Kinder: 'Die  inneren offenen Ränder des Ringes schlagt ihr nun...'

33

Now you sew it together with the sewing machine.
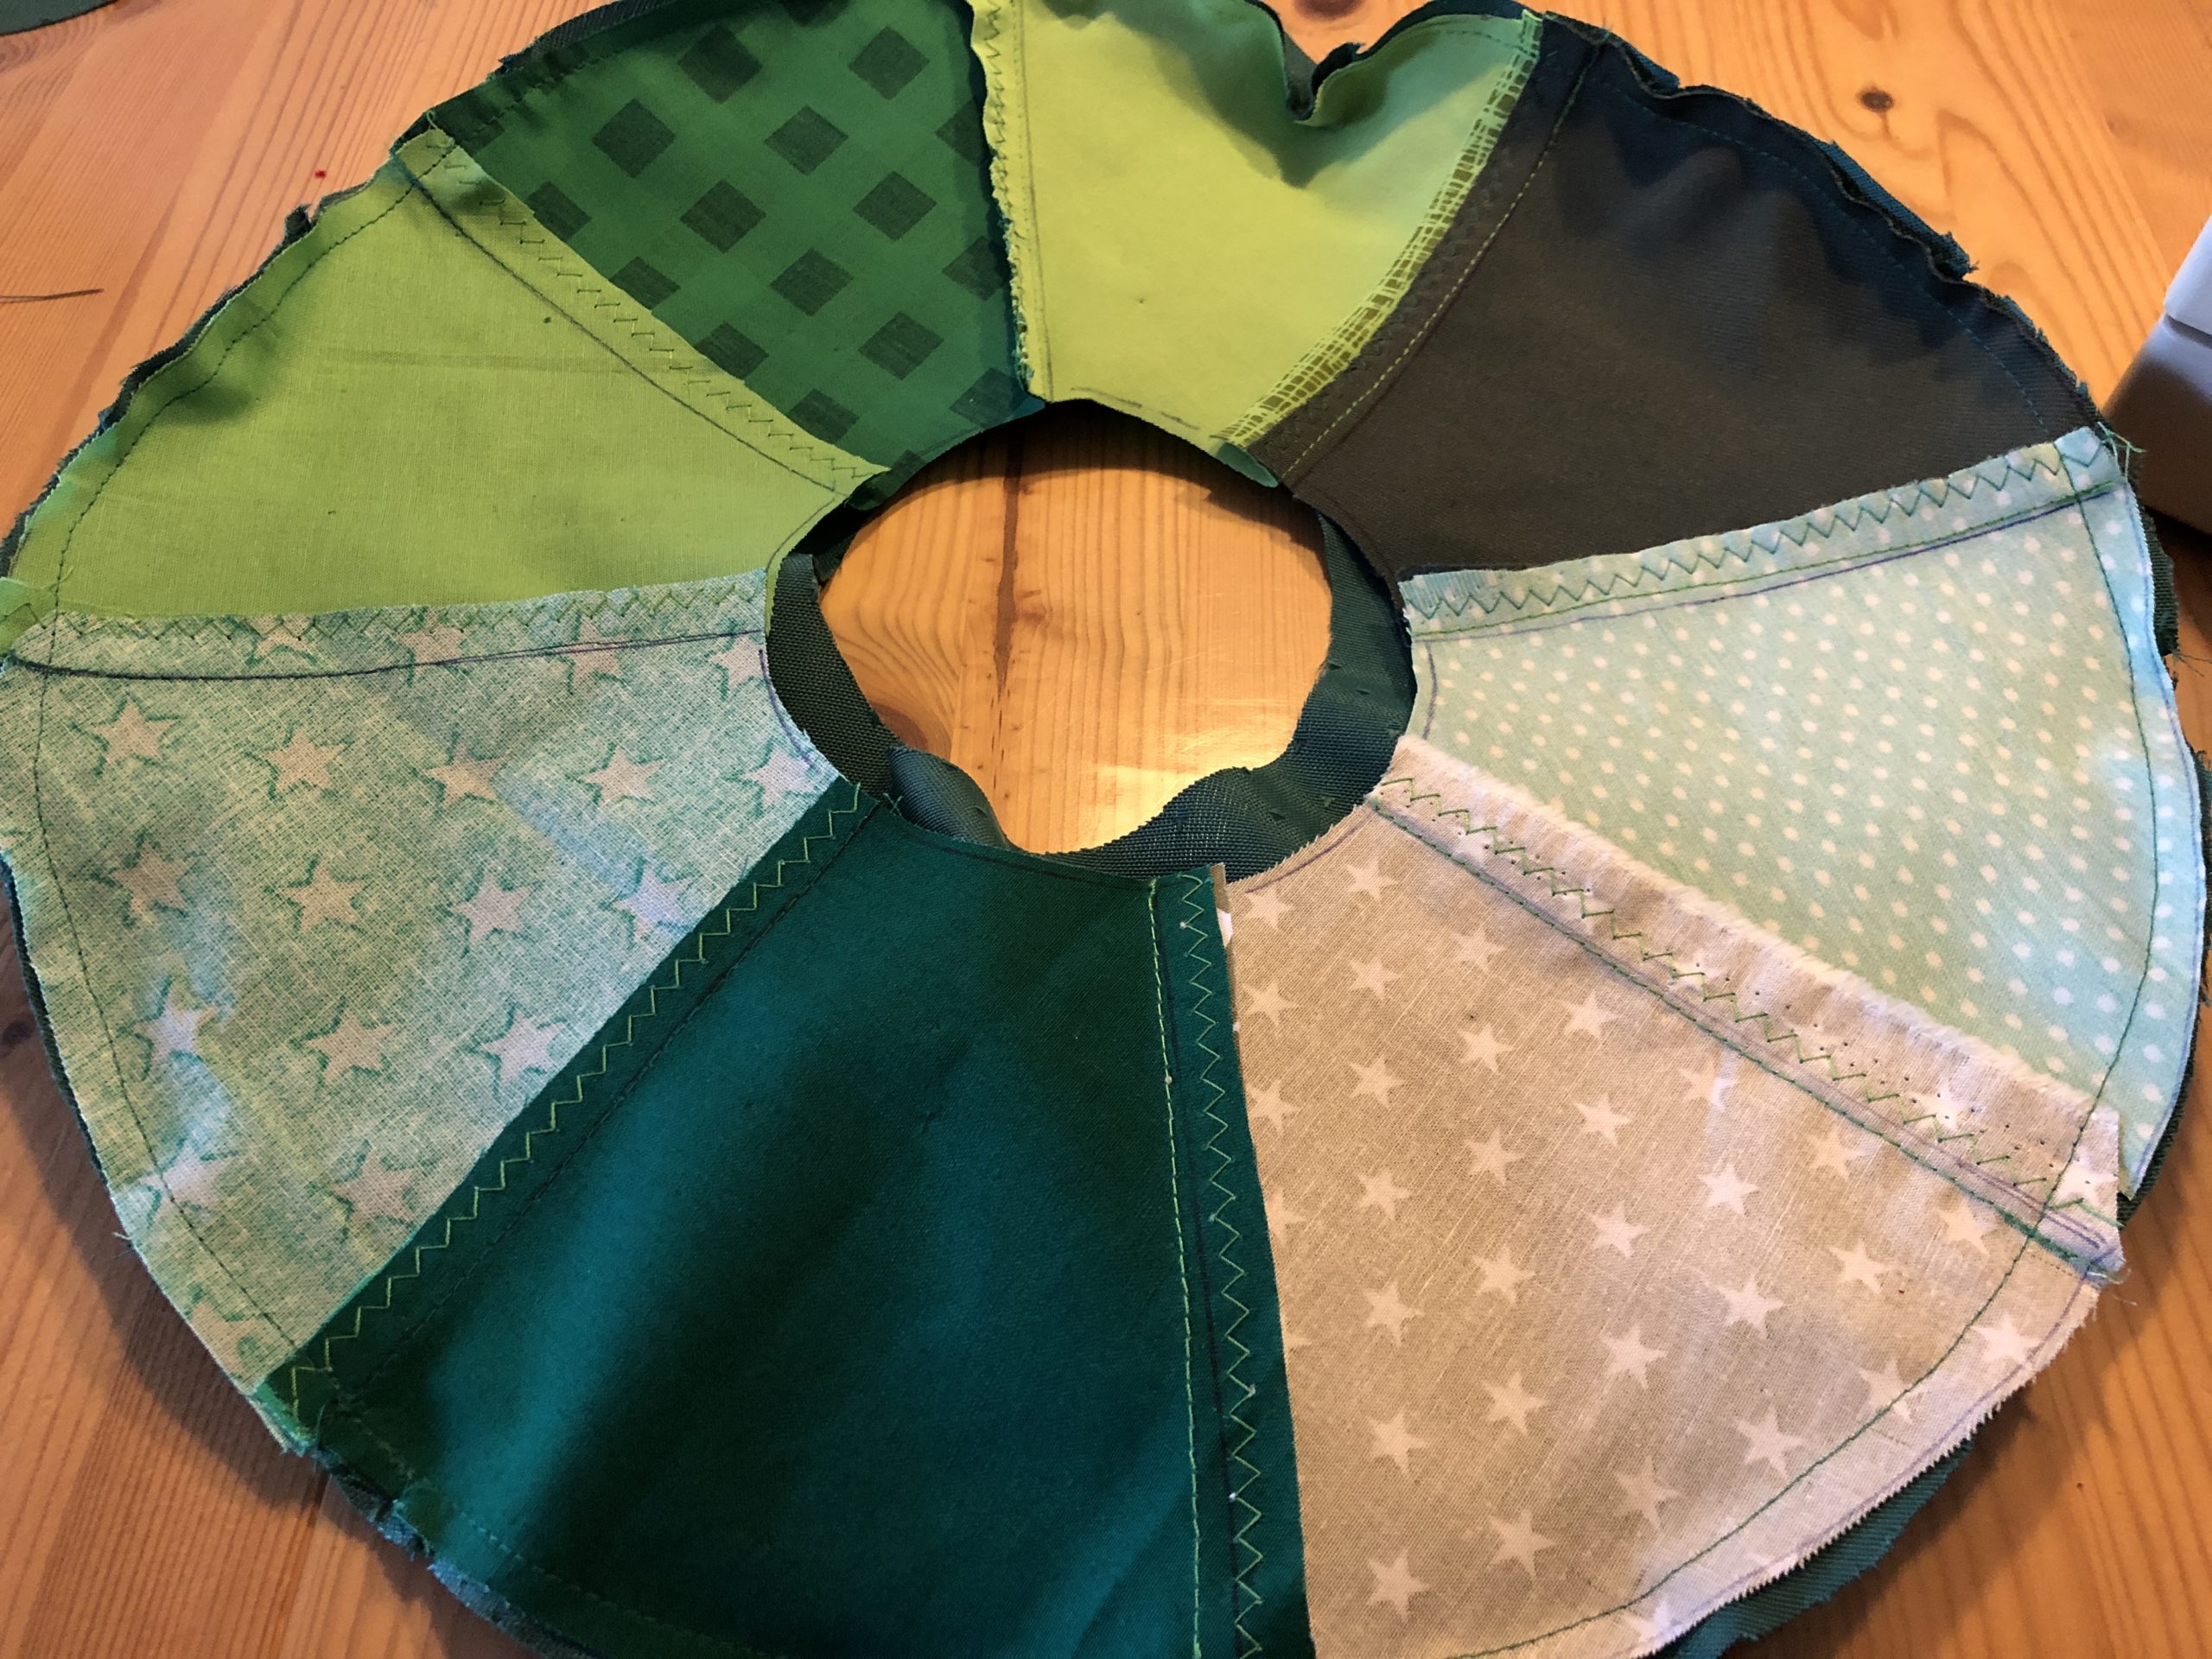
Leave at least 5 cm of seam open for filling.
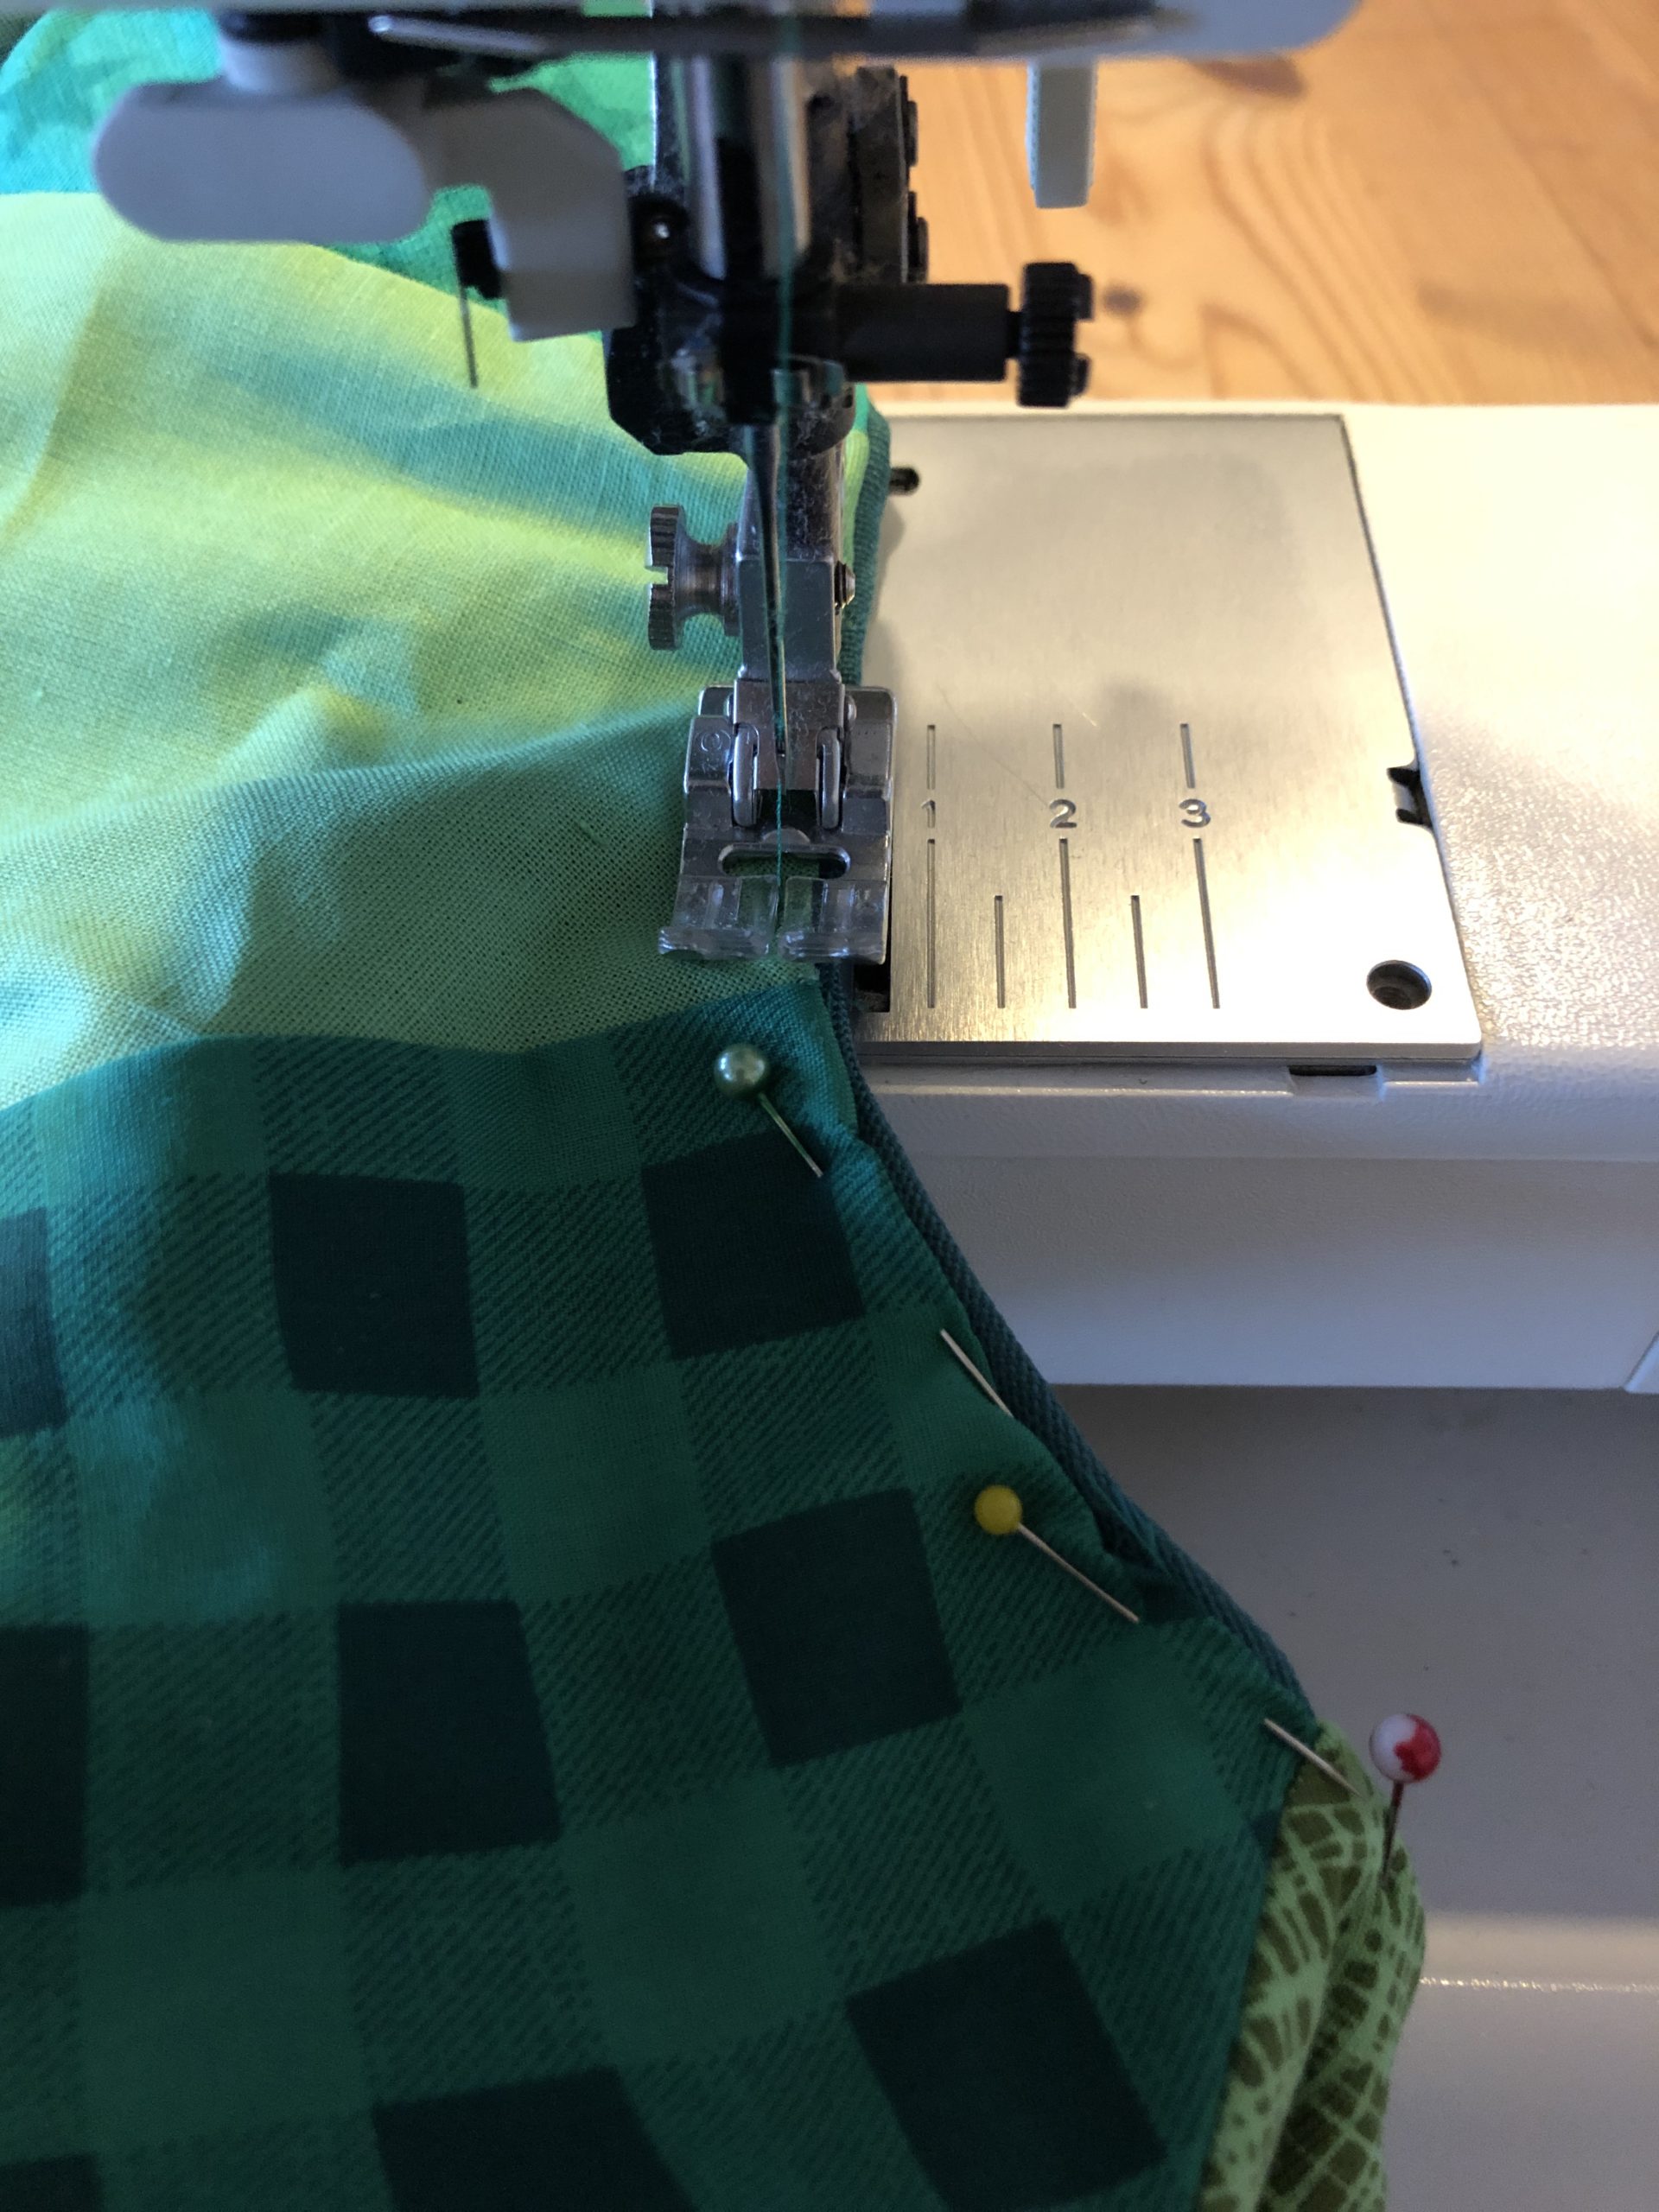
Bild zum Schritt 33 für das Bastel- und DIY-Abenteuer für Kinder: 'Jetzt näht ihr ihn mit der Nähmaschine zusammen.  ...'

34

2. Bild zum Schritt 33 für das Bastel- und DIY-Abenteuer für Kinder: 'Jetzt näht ihr ihn mit der Nähmaschine zusammen.  ...'

35

Through the open seam, the fabric wreath is now stuffed with filling material.

Bild zum Schritt 35 für das Bastel- und DIY-Abenteuer für Kinder: 'Durch die offene Naht wird nun der Stoffkranz mit Füllmaterial...'

36

2. Bild zum Schritt 35 für das Bastel- und DIY-Abenteuer für Kinder: 'Durch die offene Naht wird nun der Stoffkranz mit Füllmaterial...'

37

A toilet roll and a cooking spoon are suitable as an aid for filling.
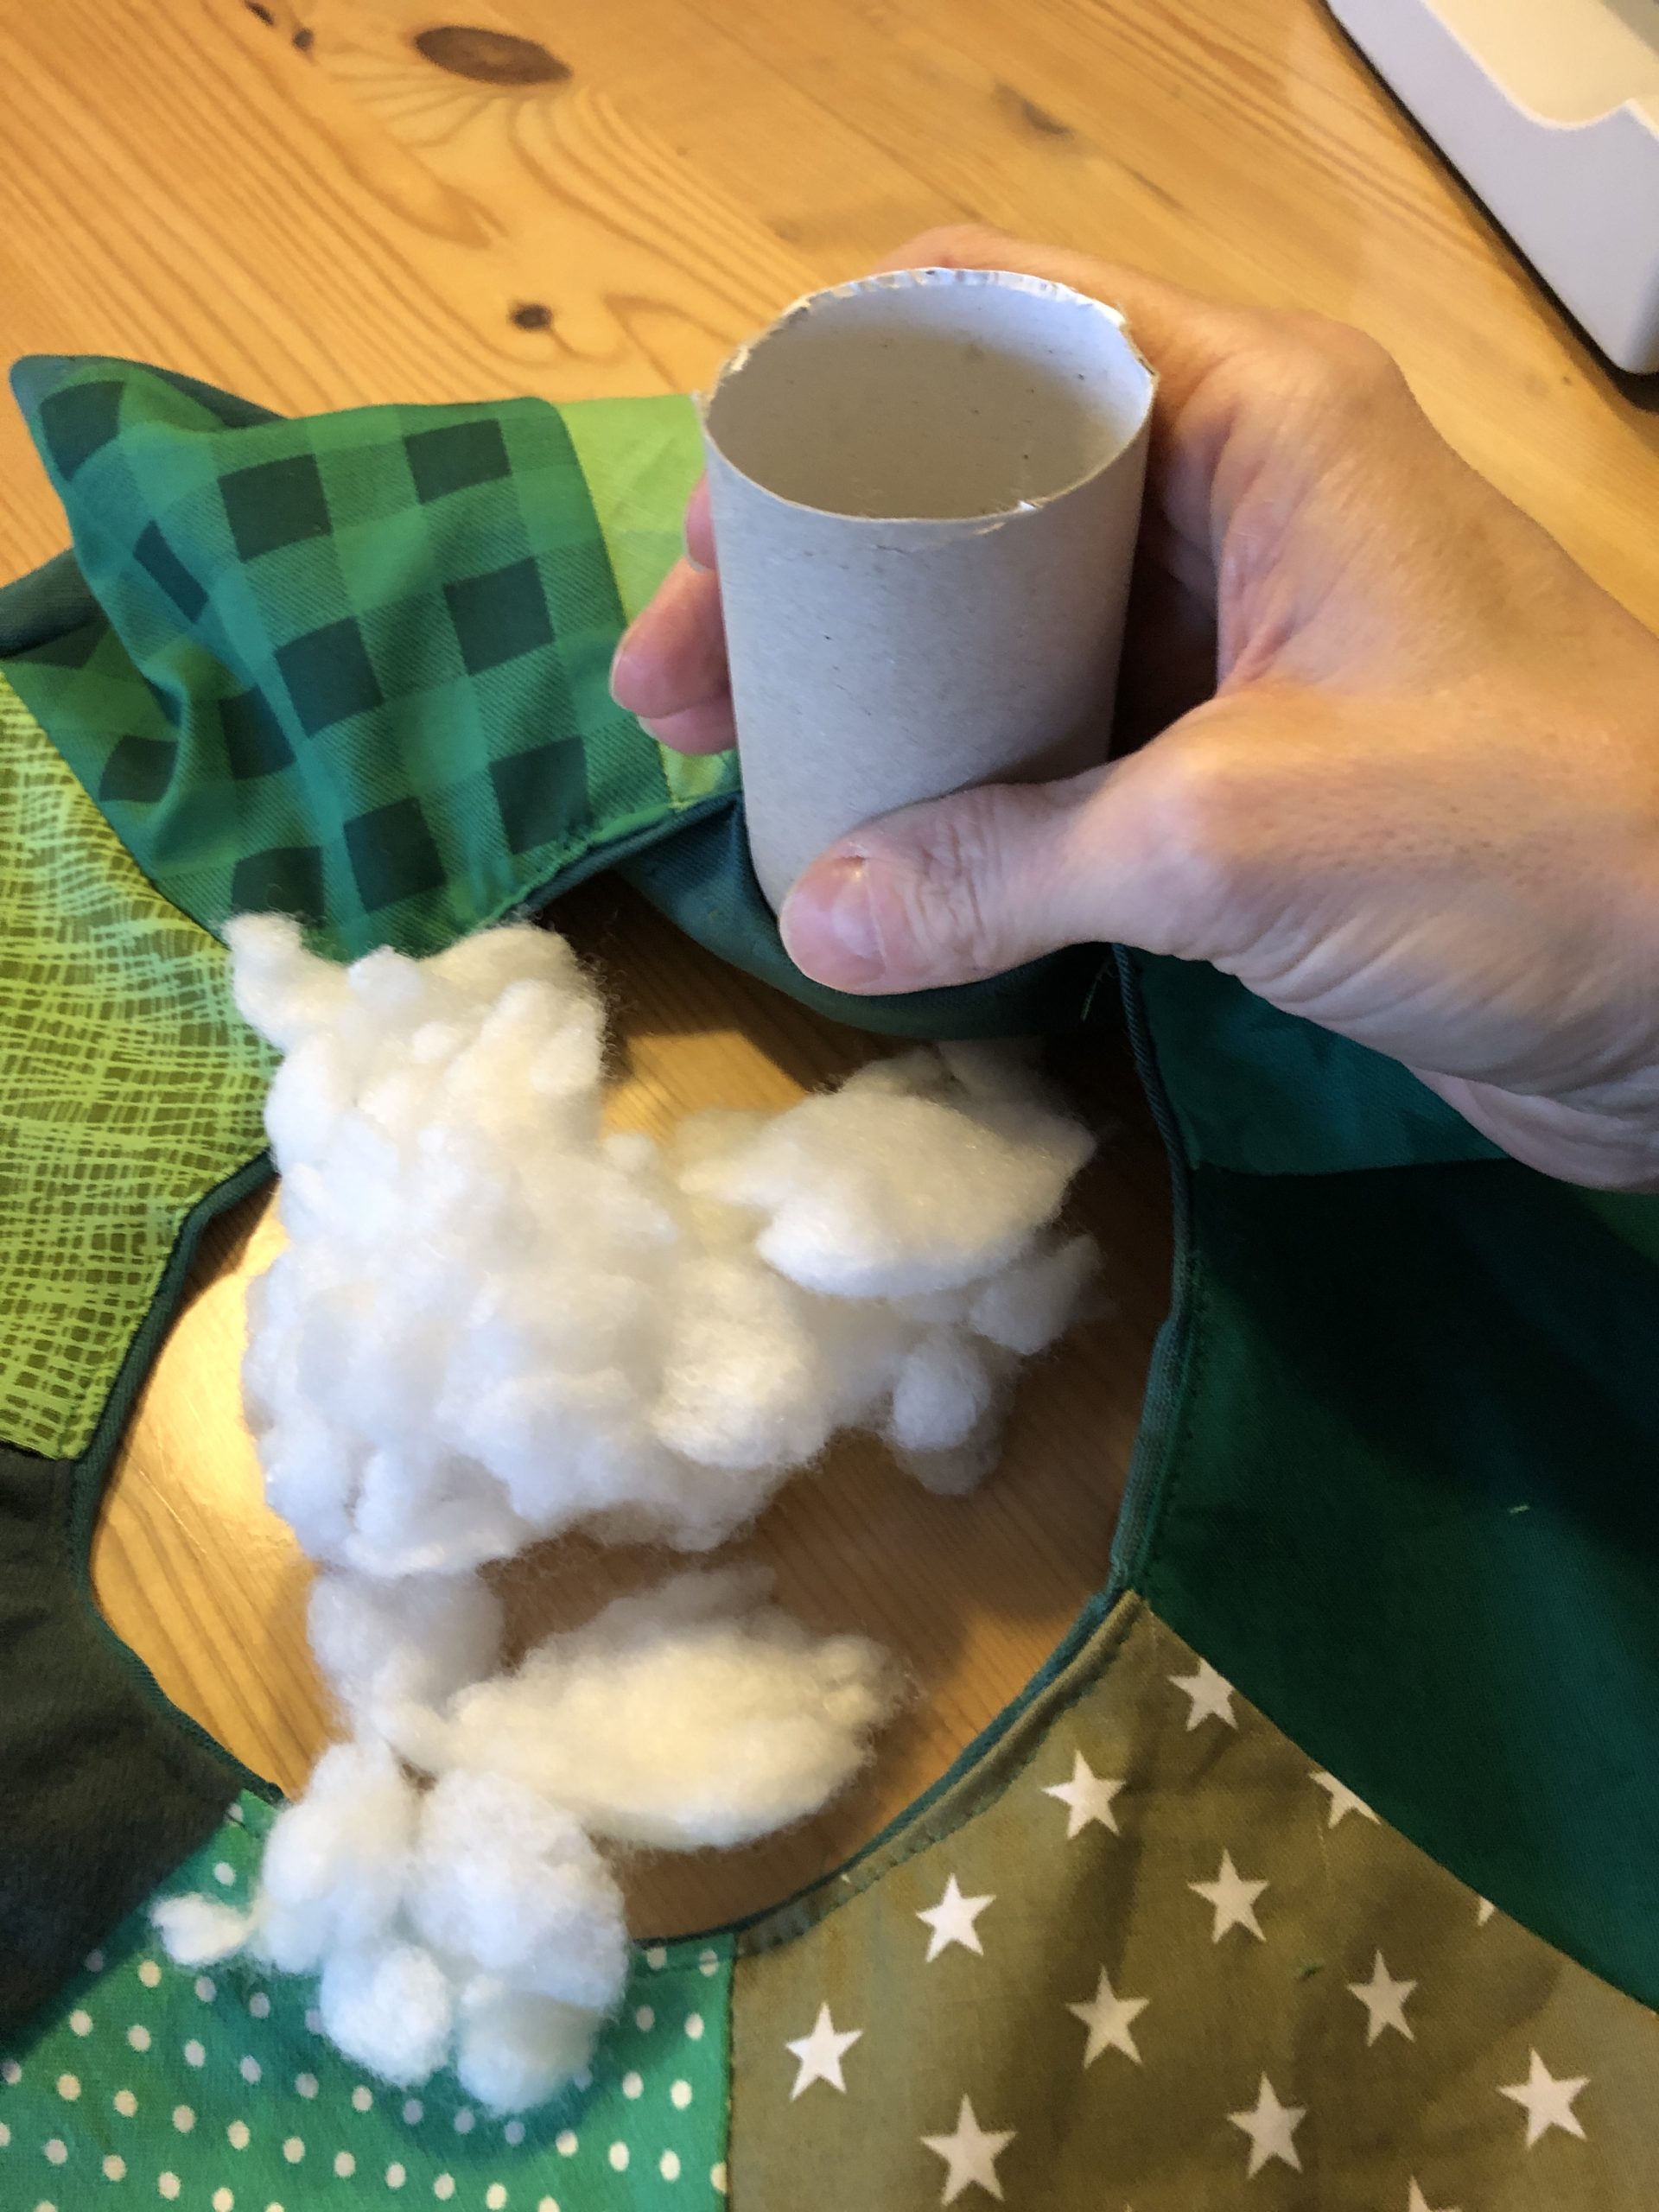
Bild zum Schritt 37 für das Bastel- und DIY-Abenteuer für Kinder: 'Als Hilfestellung zum Befüllen eignen sich eine Klorolle und ein...'

38

2. Bild zum Schritt 37 für das Bastel- und DIY-Abenteuer für Kinder: 'Als Hilfestellung zum Befüllen eignen sich eine Klorolle und ein...'

39

Push the filling material through the toilet roll into the curvatures of the wreath with a cooking spoon.
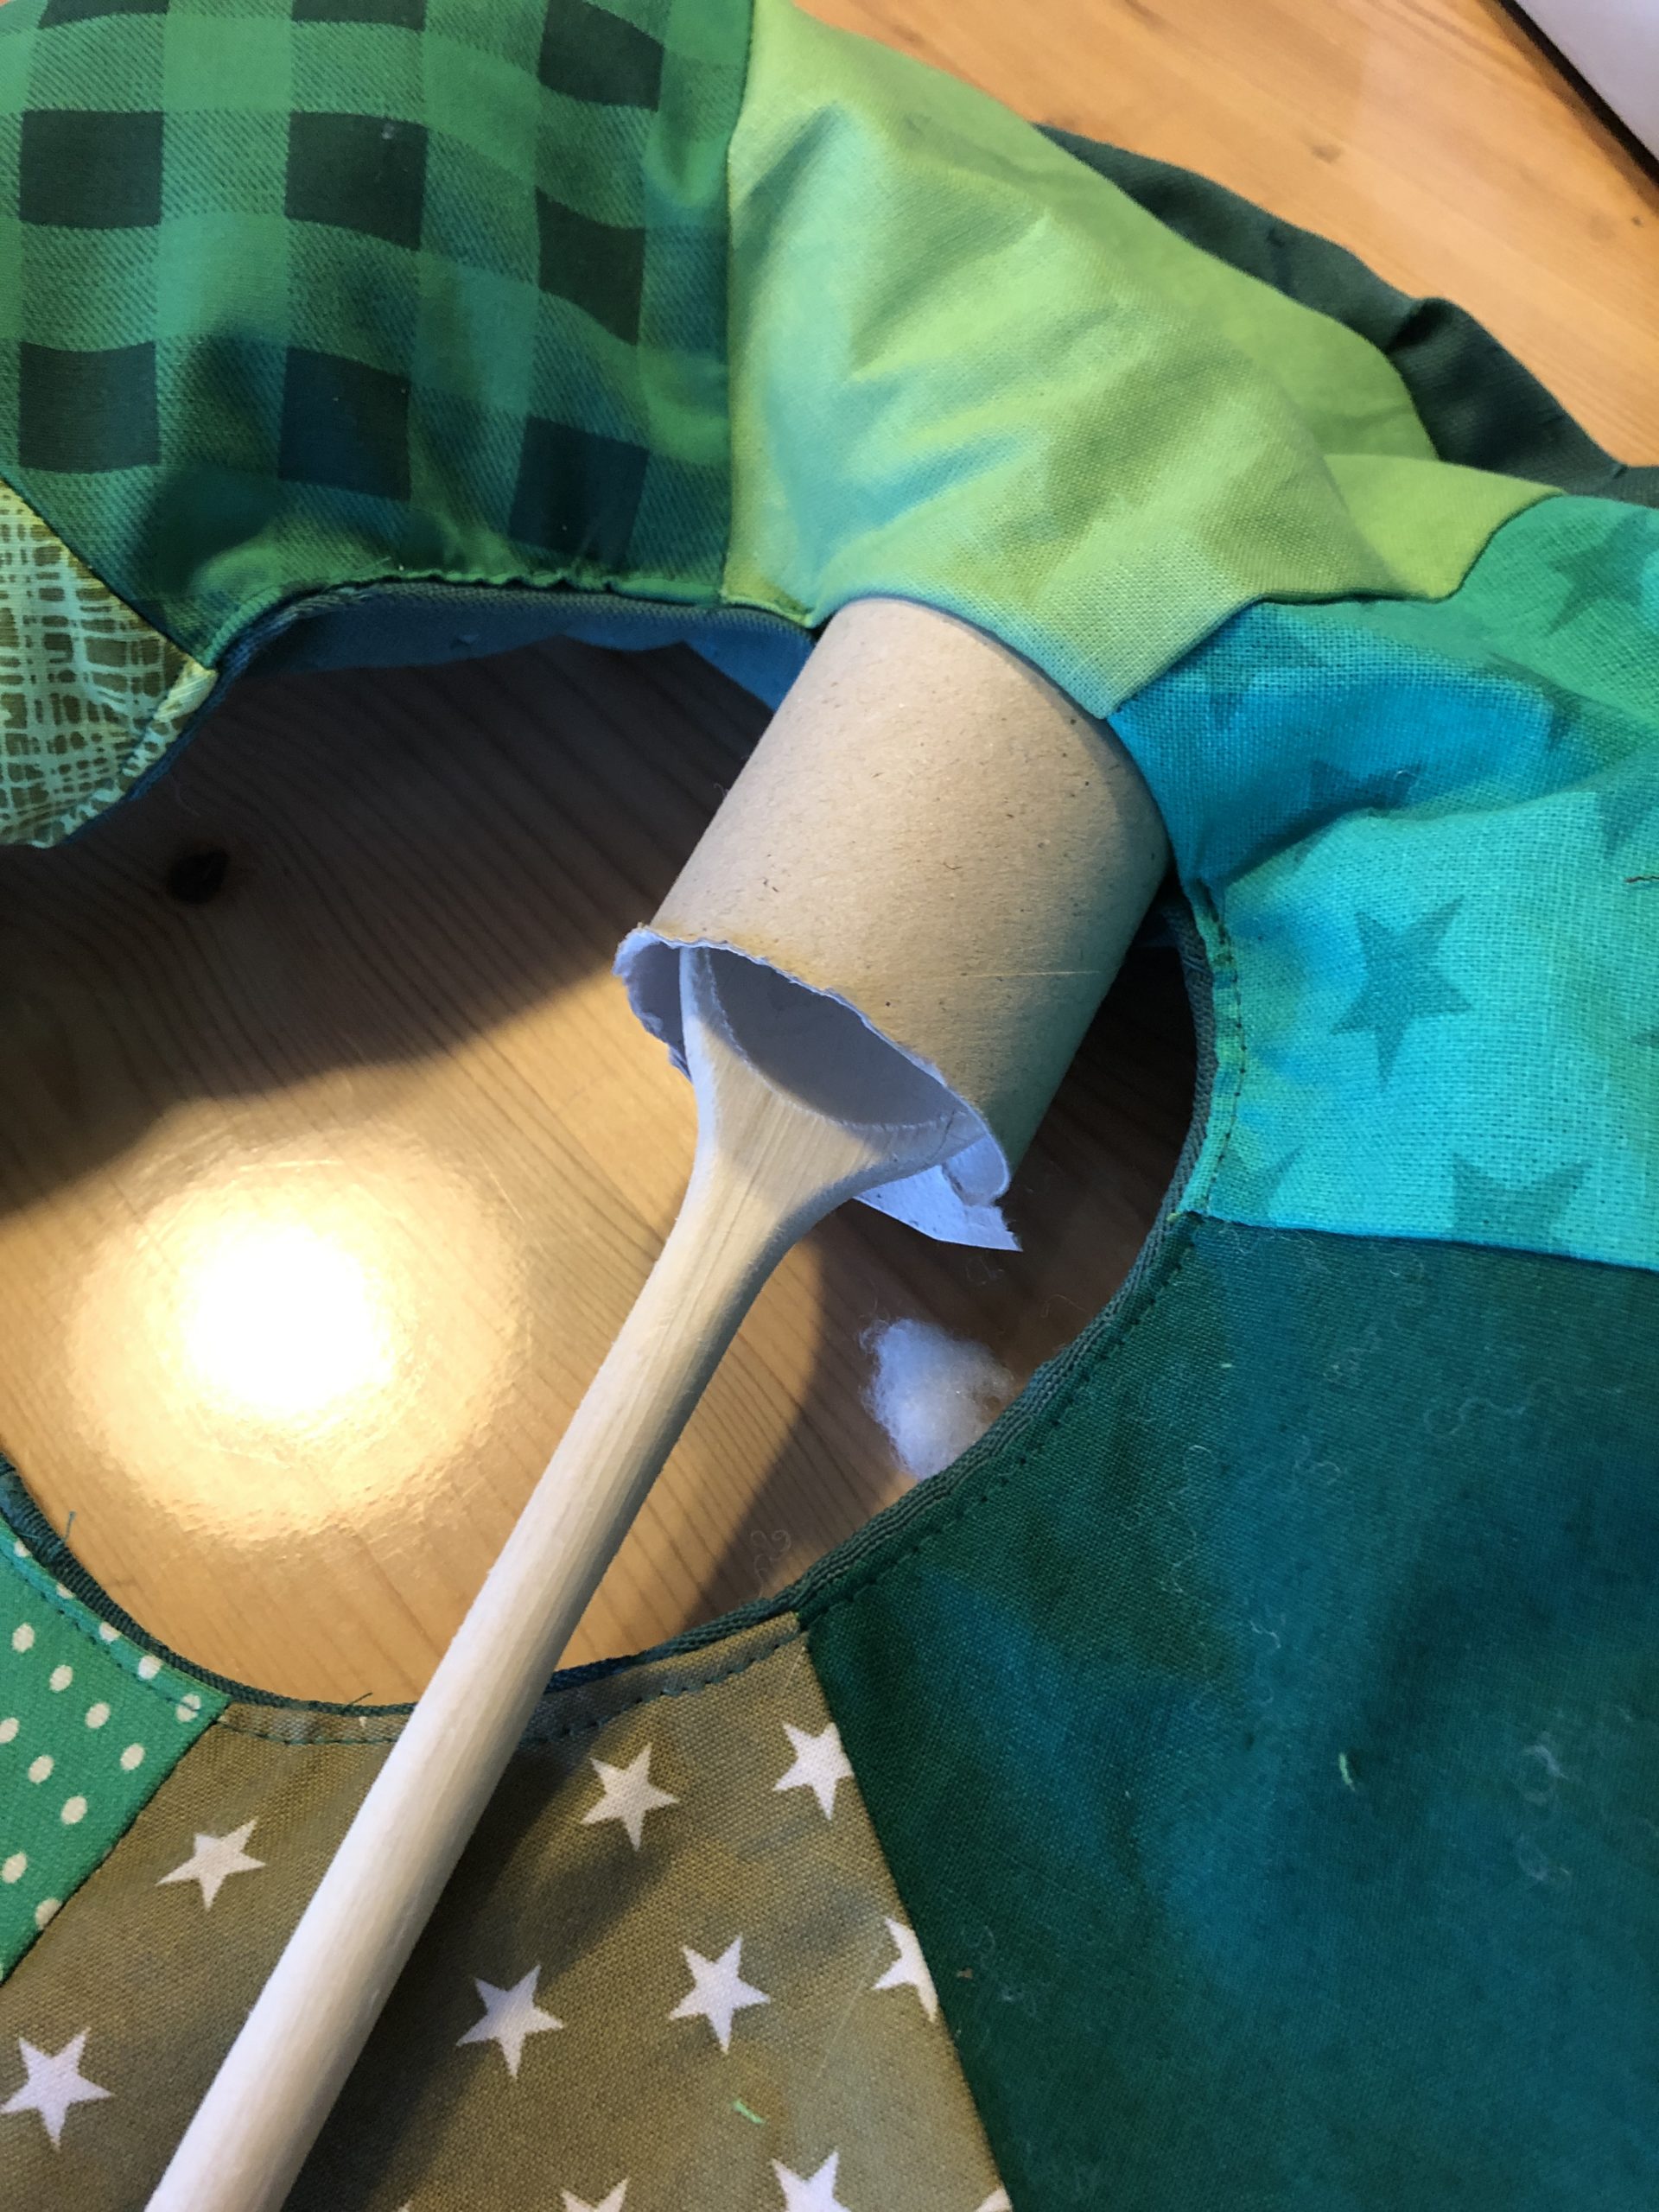
Bild zum Schritt 39 für das Bastel- und DIY-Abenteuer für Kinder: 'Schiebt mit einem Kochlöffel das Füllmaterial durch die Klorolle in...'

40

If the wreath is evenly filled, the open seam is closed with needle and thread.
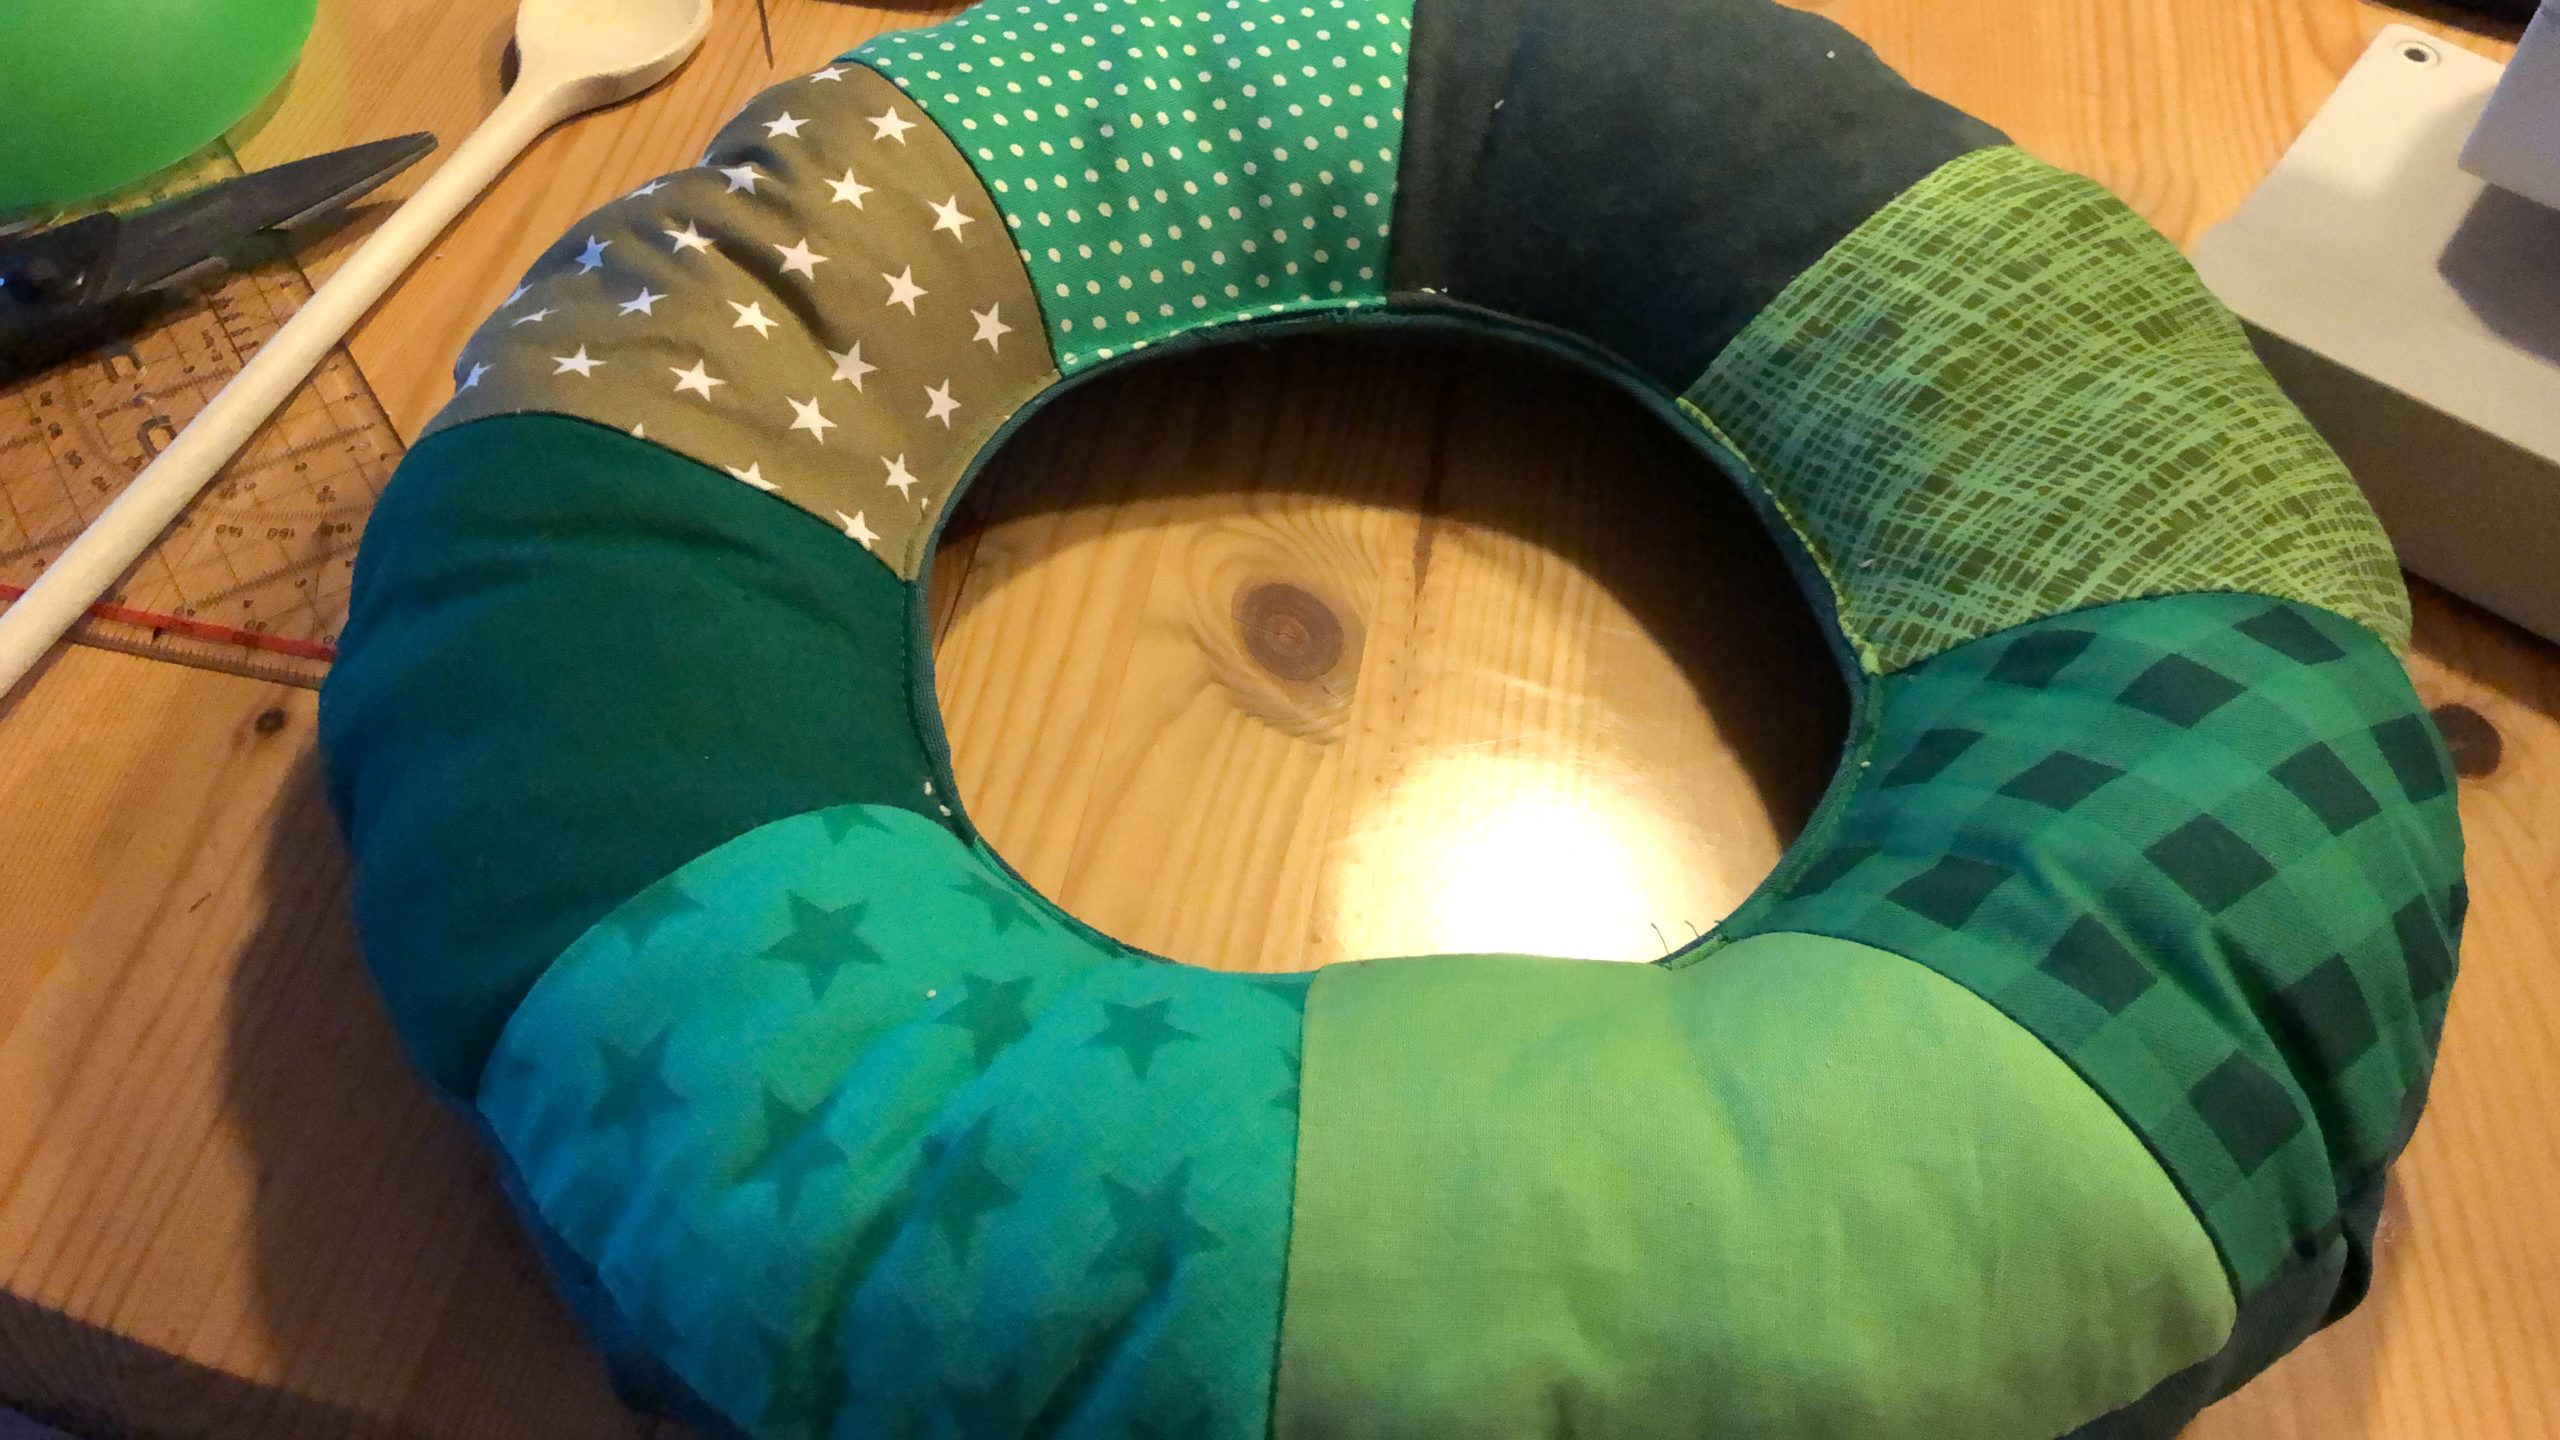
Bild zum Schritt 40 für das Bastel- und DIY-Abenteuer für Kinder: 'Ist der Kranz gleichmäßig befüllt, wird die offene Naht mit...'

41

The wreath is ready!

Candles:
42

First cut a piece of foam pipe insulation to the desired length of the candle. This works very well with a cutter knife.
Then cut the fabric for the candle. To do this, wrap the foam with the fabric and add 2cm of fabric at the top, bottom and side.

Bild zum Schritt 43 für das Bastel- und DIY-Abenteuer für Kinder: 'Schneidet zuerst ein Stück Schaumstoff Rohrisolierung auf die gewünschte Länge...'

43

Put the fabric with the beautiful side (right) up on the table. Then wrap the roll with it. The beautiful side is inside, directly on the foam.
Now you mark yourself with a pen on the longitudinal side, where you sew the fabric together afterwards. Let the fabric lie loose so that you don't draw too tight. Otherwise you won't get the fabric over the roll afterwards.
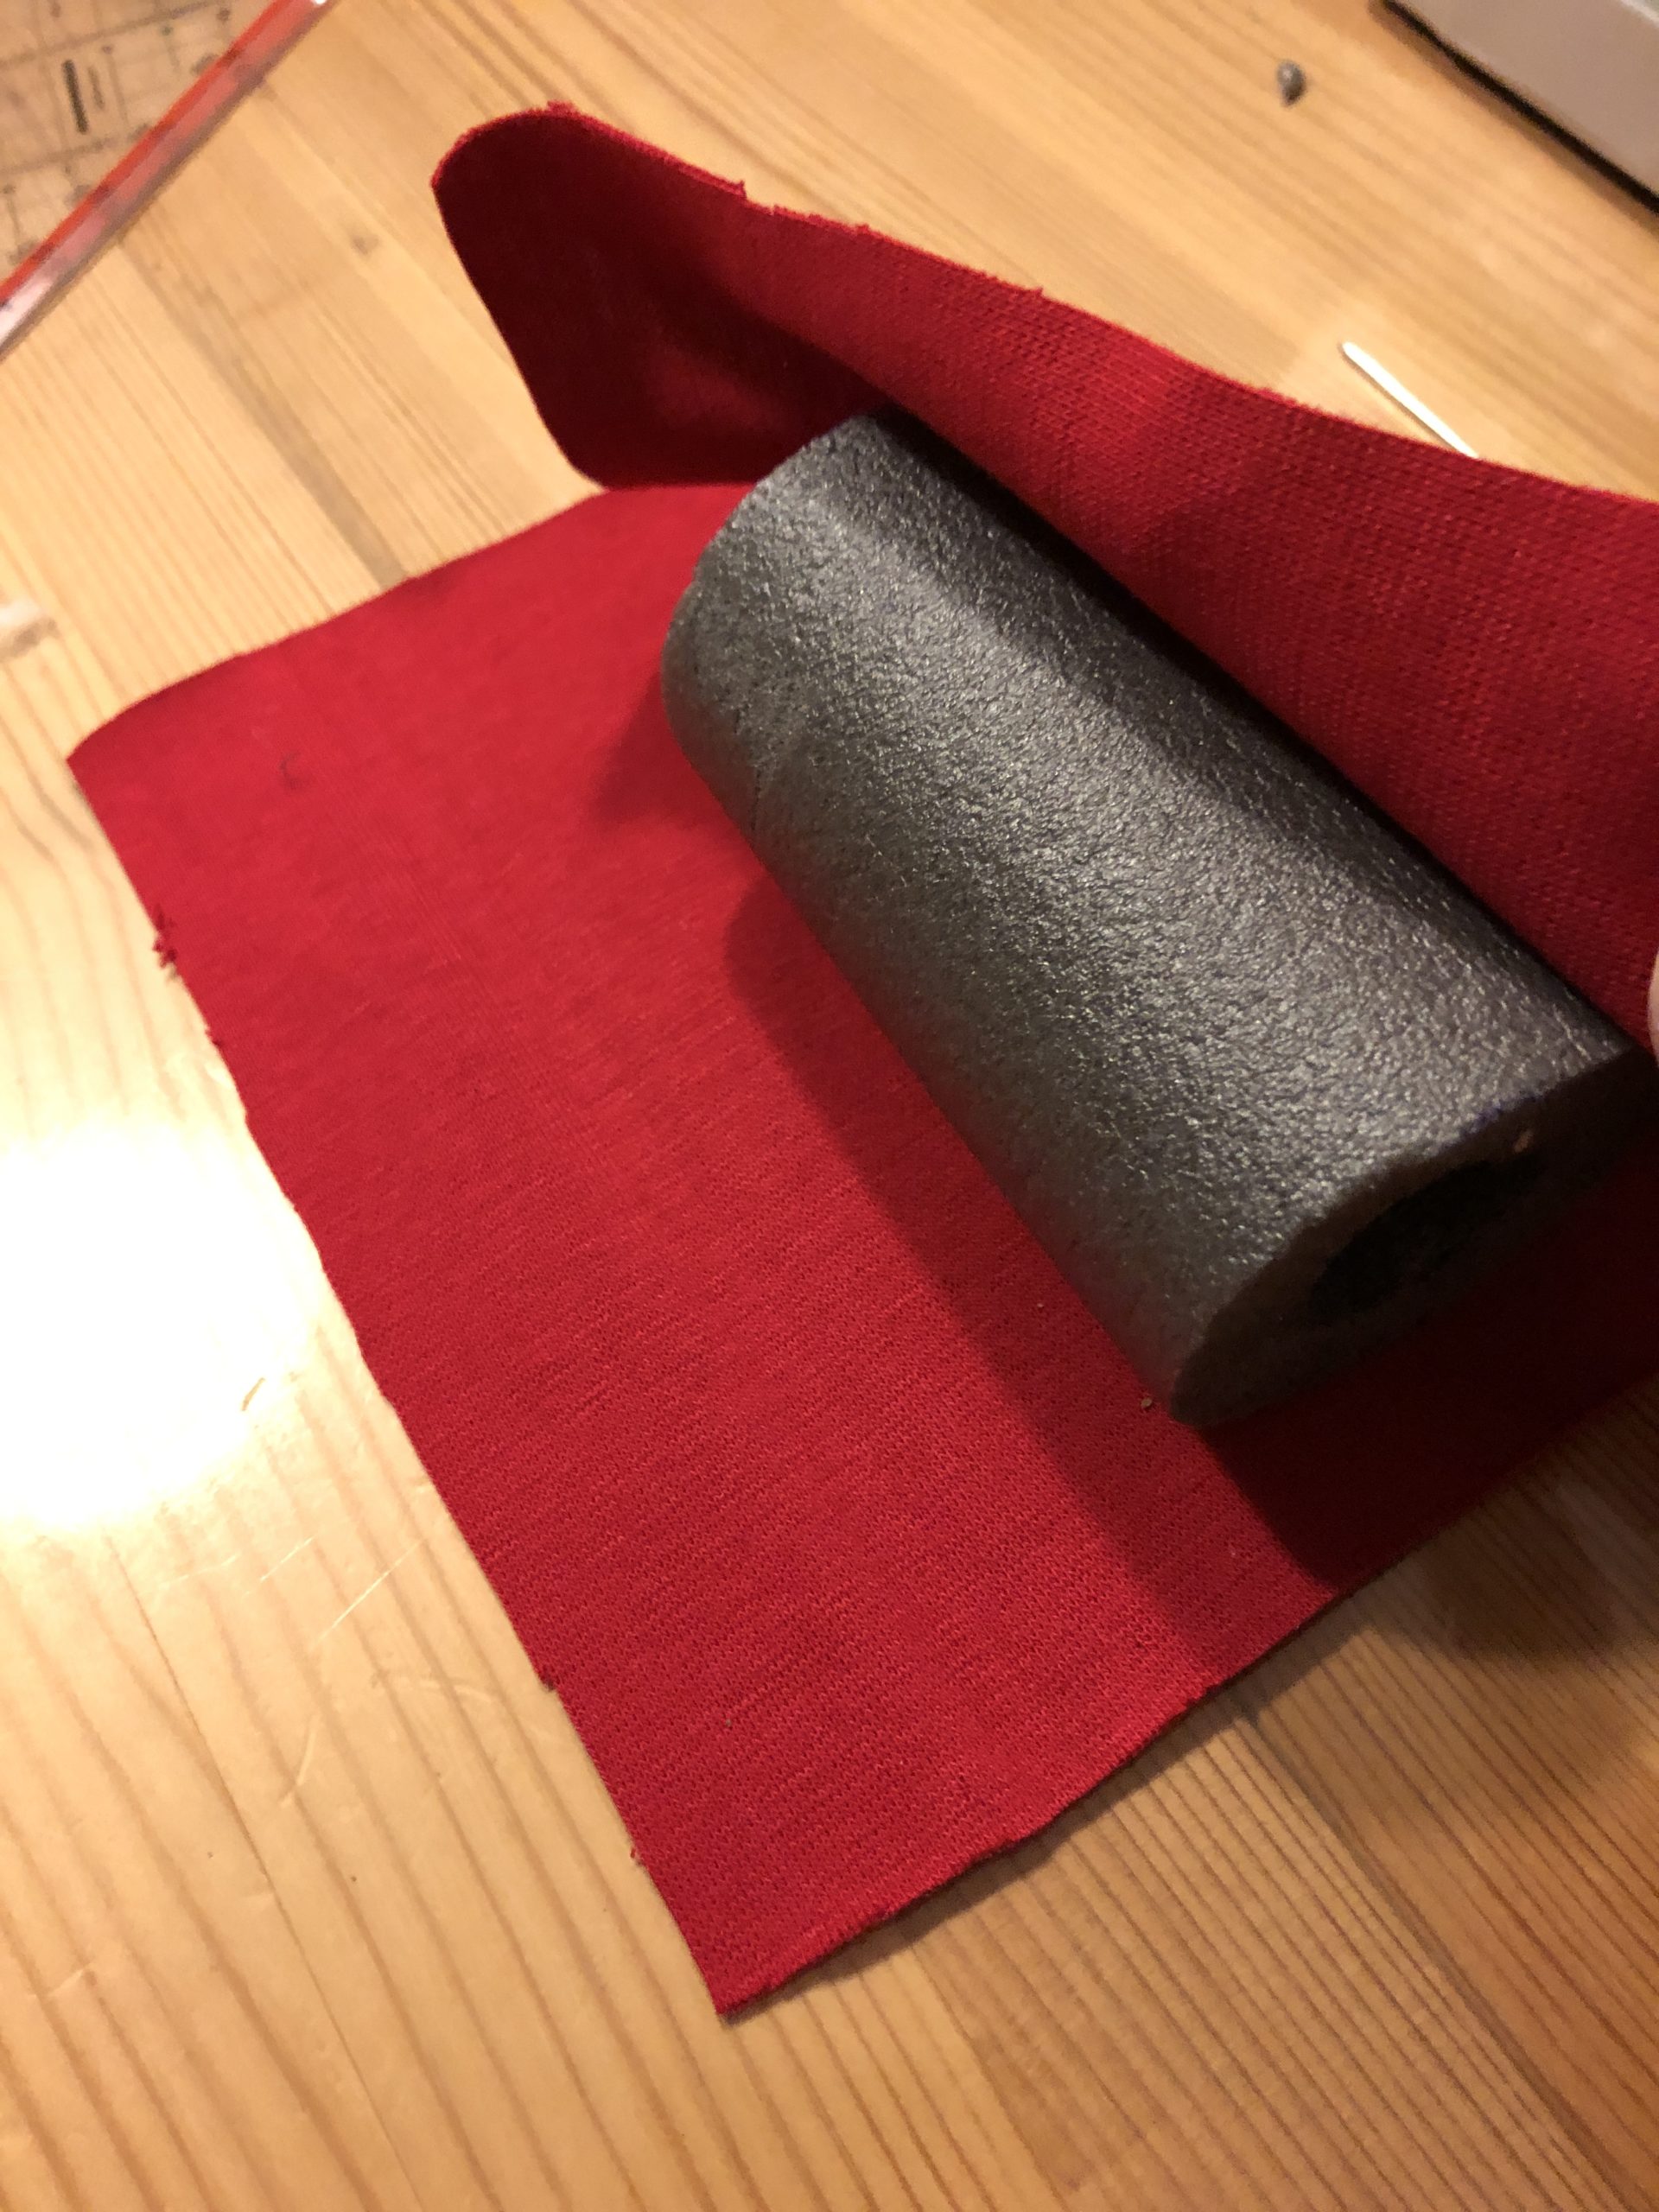
Bild zum Schritt 44 für das Bastel- und DIY-Abenteuer für Kinder: 'Legt den Stoff mit der schönen Seite (rechts) nach oben...'

44

Remove the roll. Then sew the fabric lengthwise to a hose. Up and down the hose remains open.
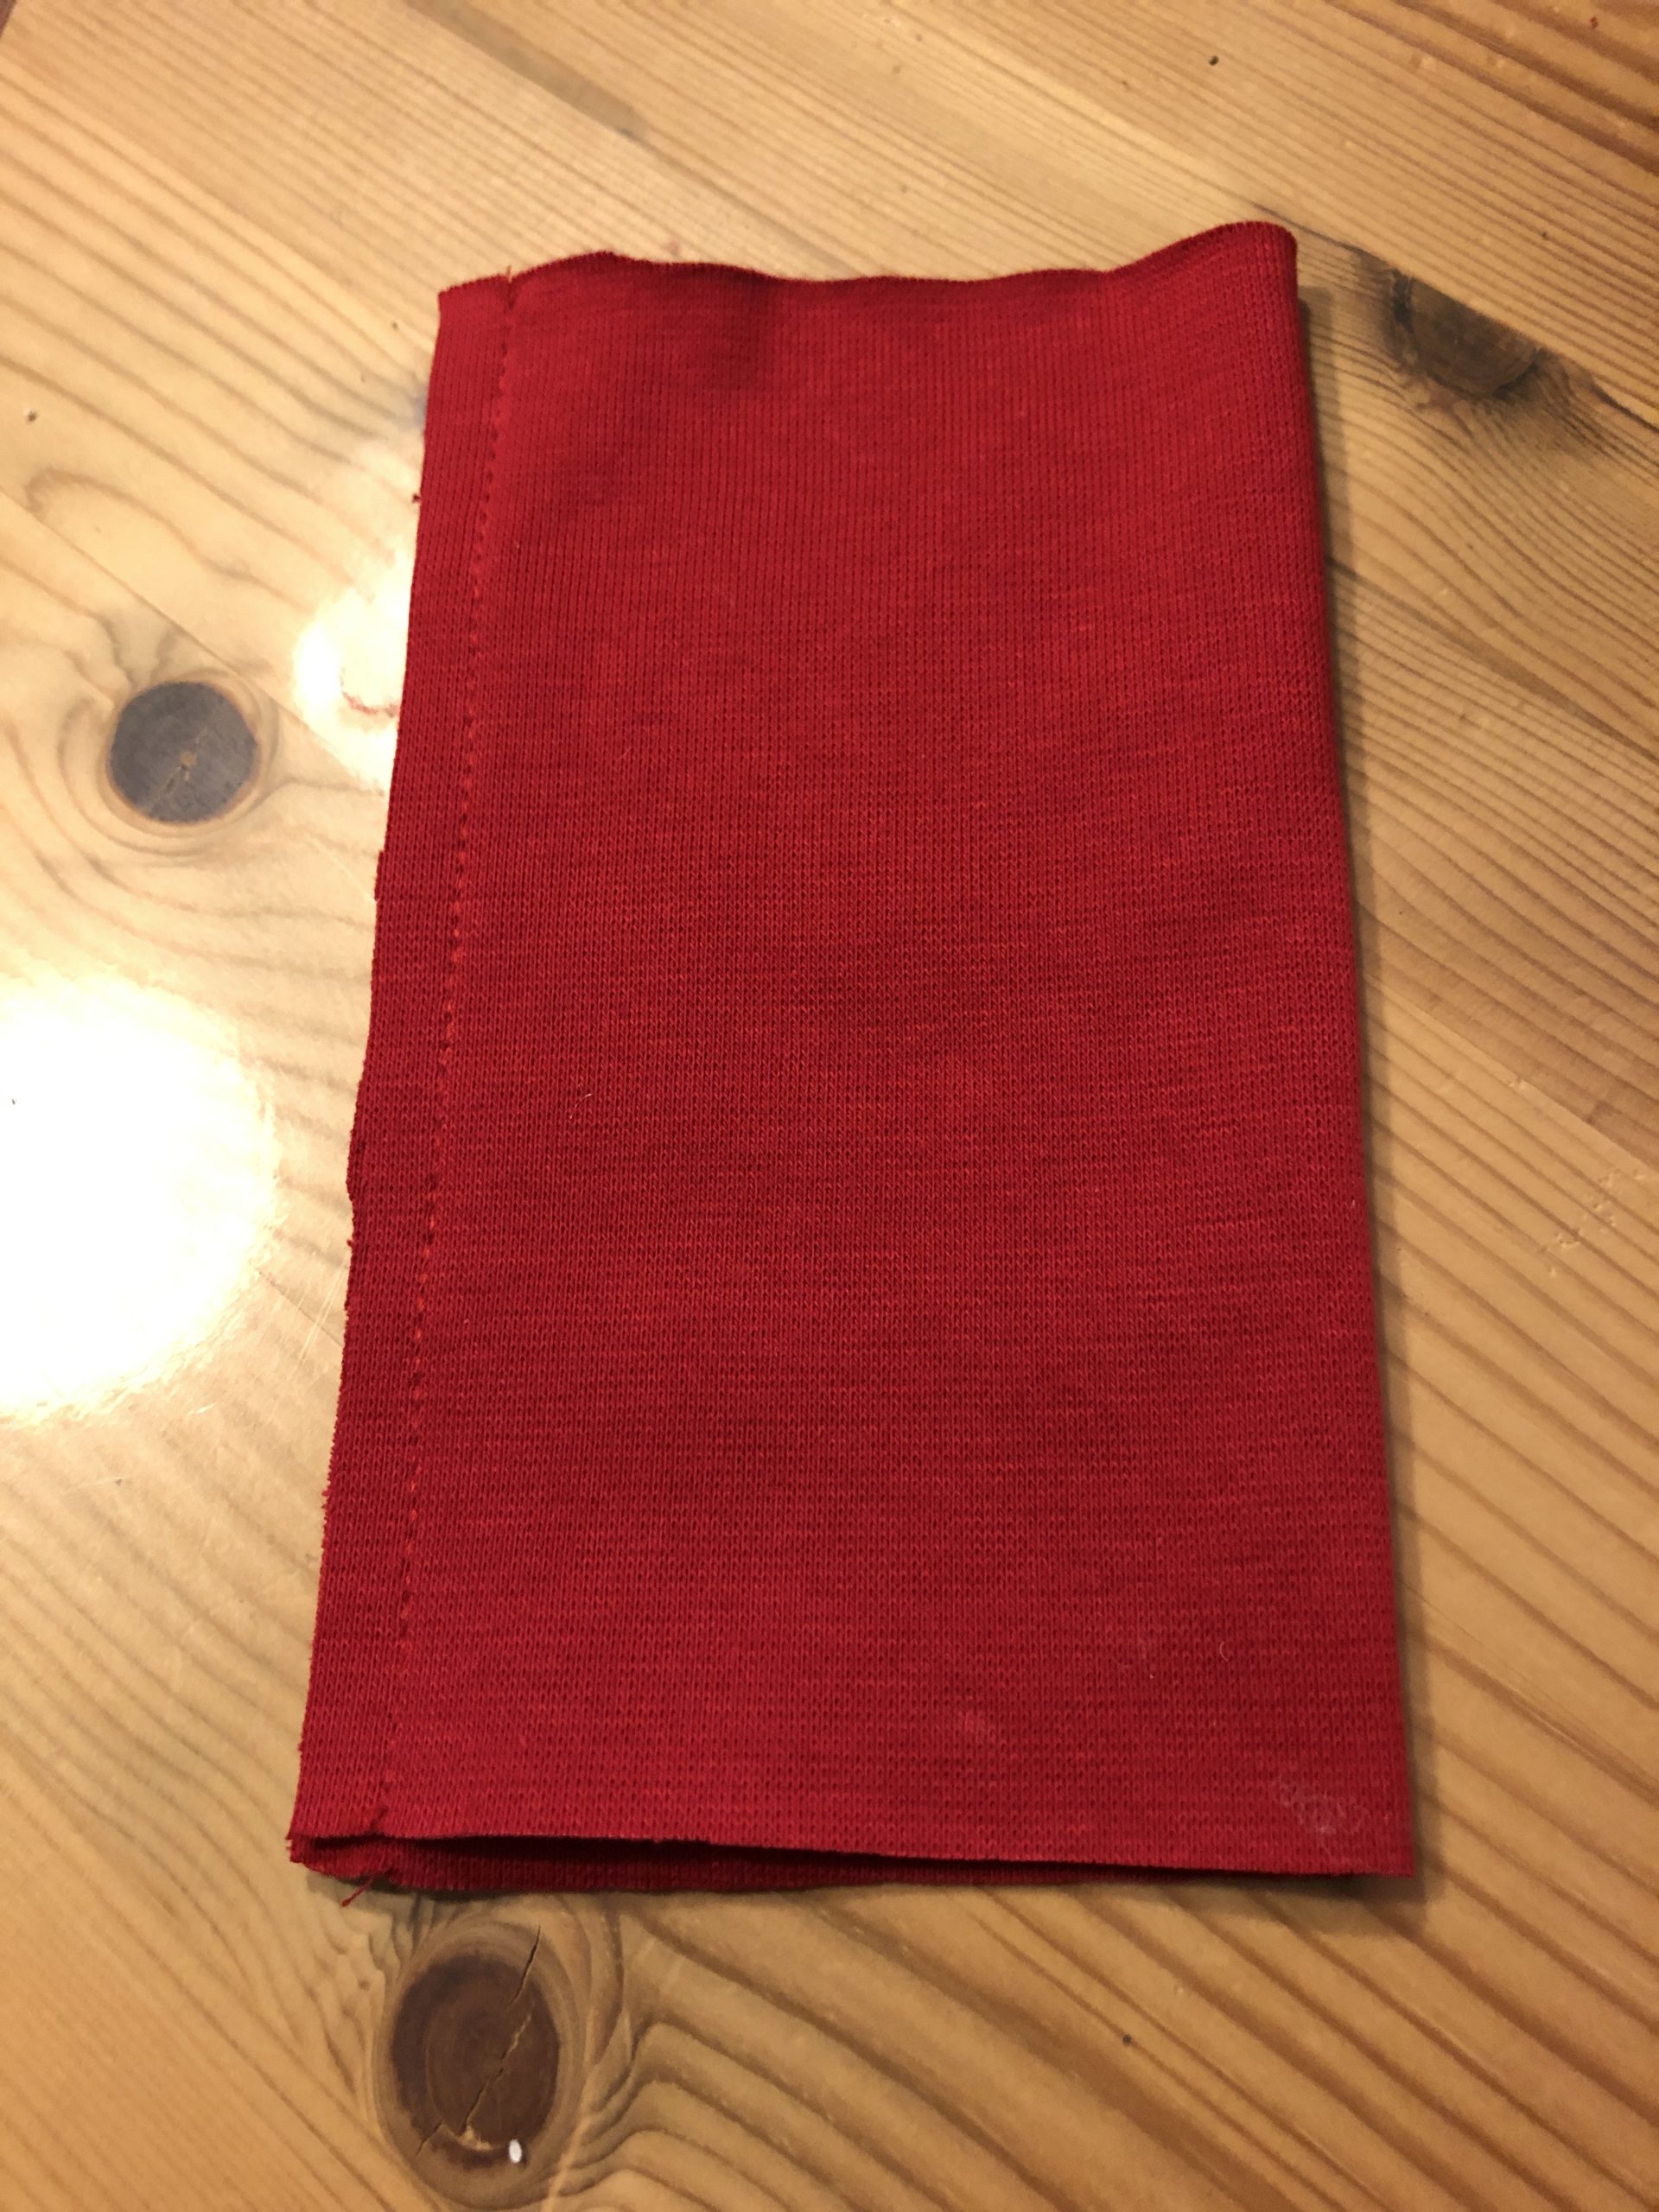
Bild zum Schritt 45 für das Bastel- und DIY-Abenteuer für Kinder: 'Entfernt die Rolle. Dann näht ihr den Stoff der Länge...'

45

A circle in the diameter of the pipe insulation is required from a solid fabric. Paint it up and cut it out.
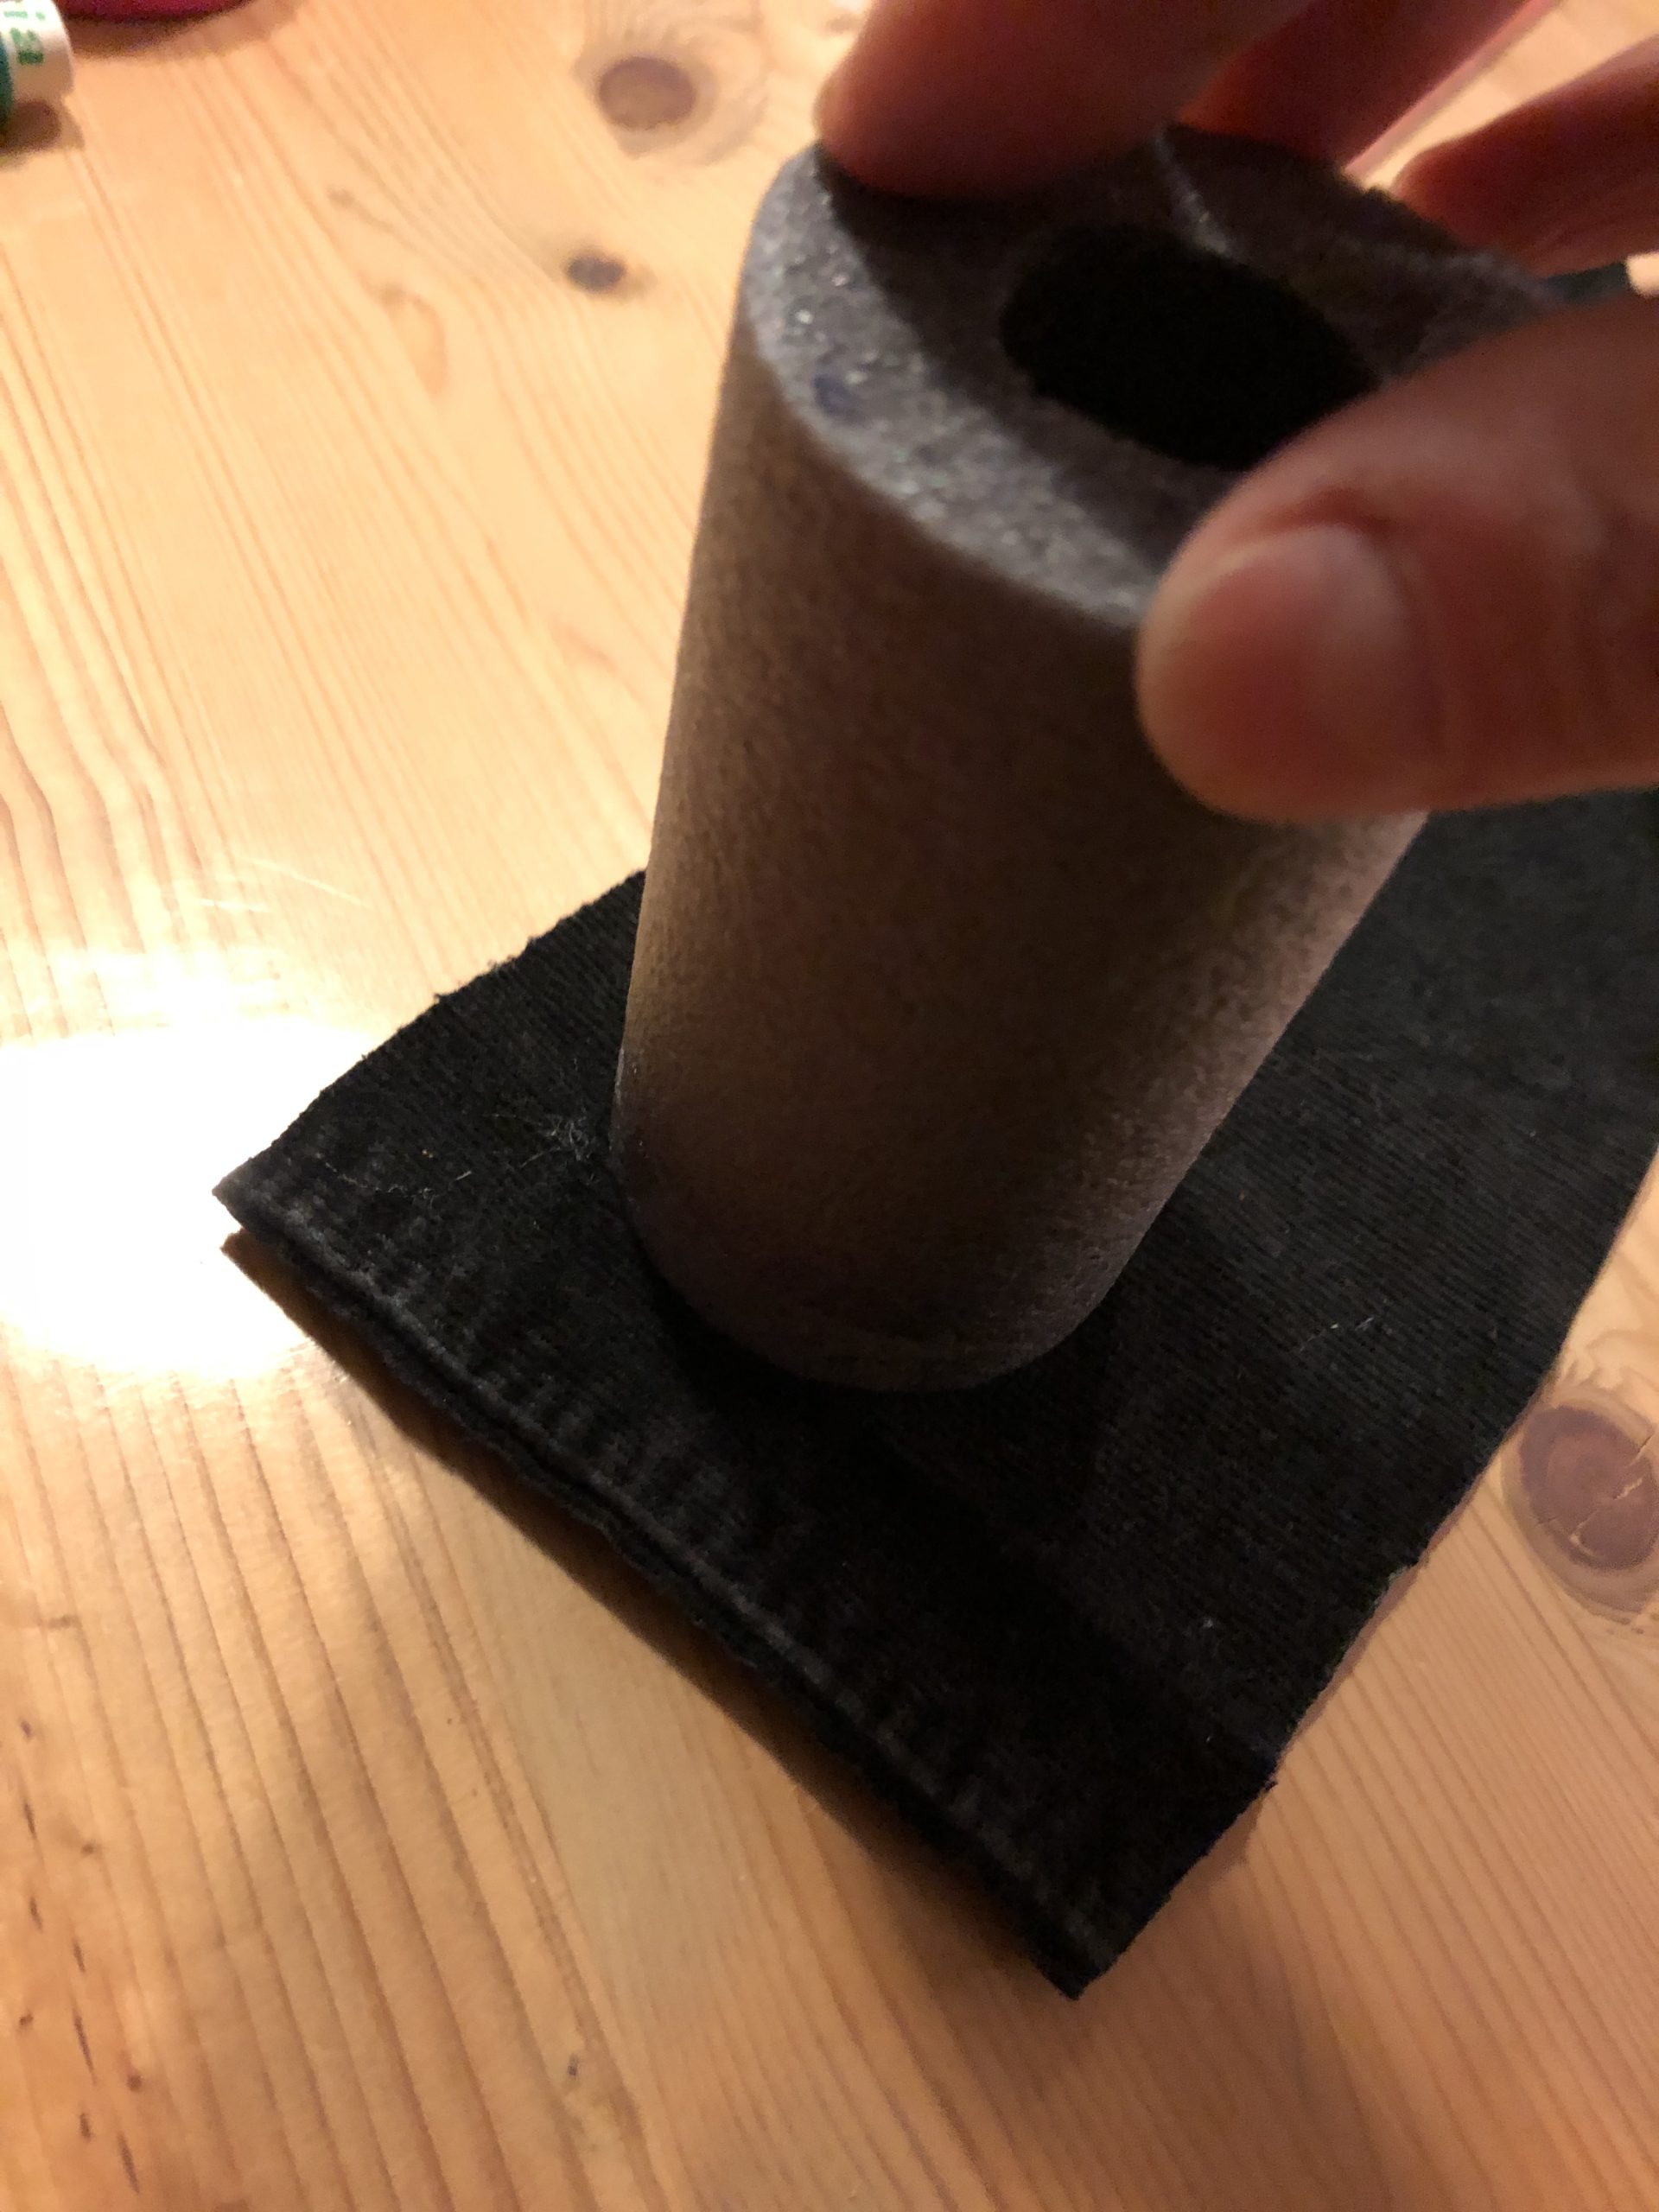
Bild zum Schritt 46 für das Bastel- und DIY-Abenteuer für Kinder: 'Aus einem festen Stoff wird ein Kreis im Durchmesser der...'

46

Now attach the circle to one end of the red tube.
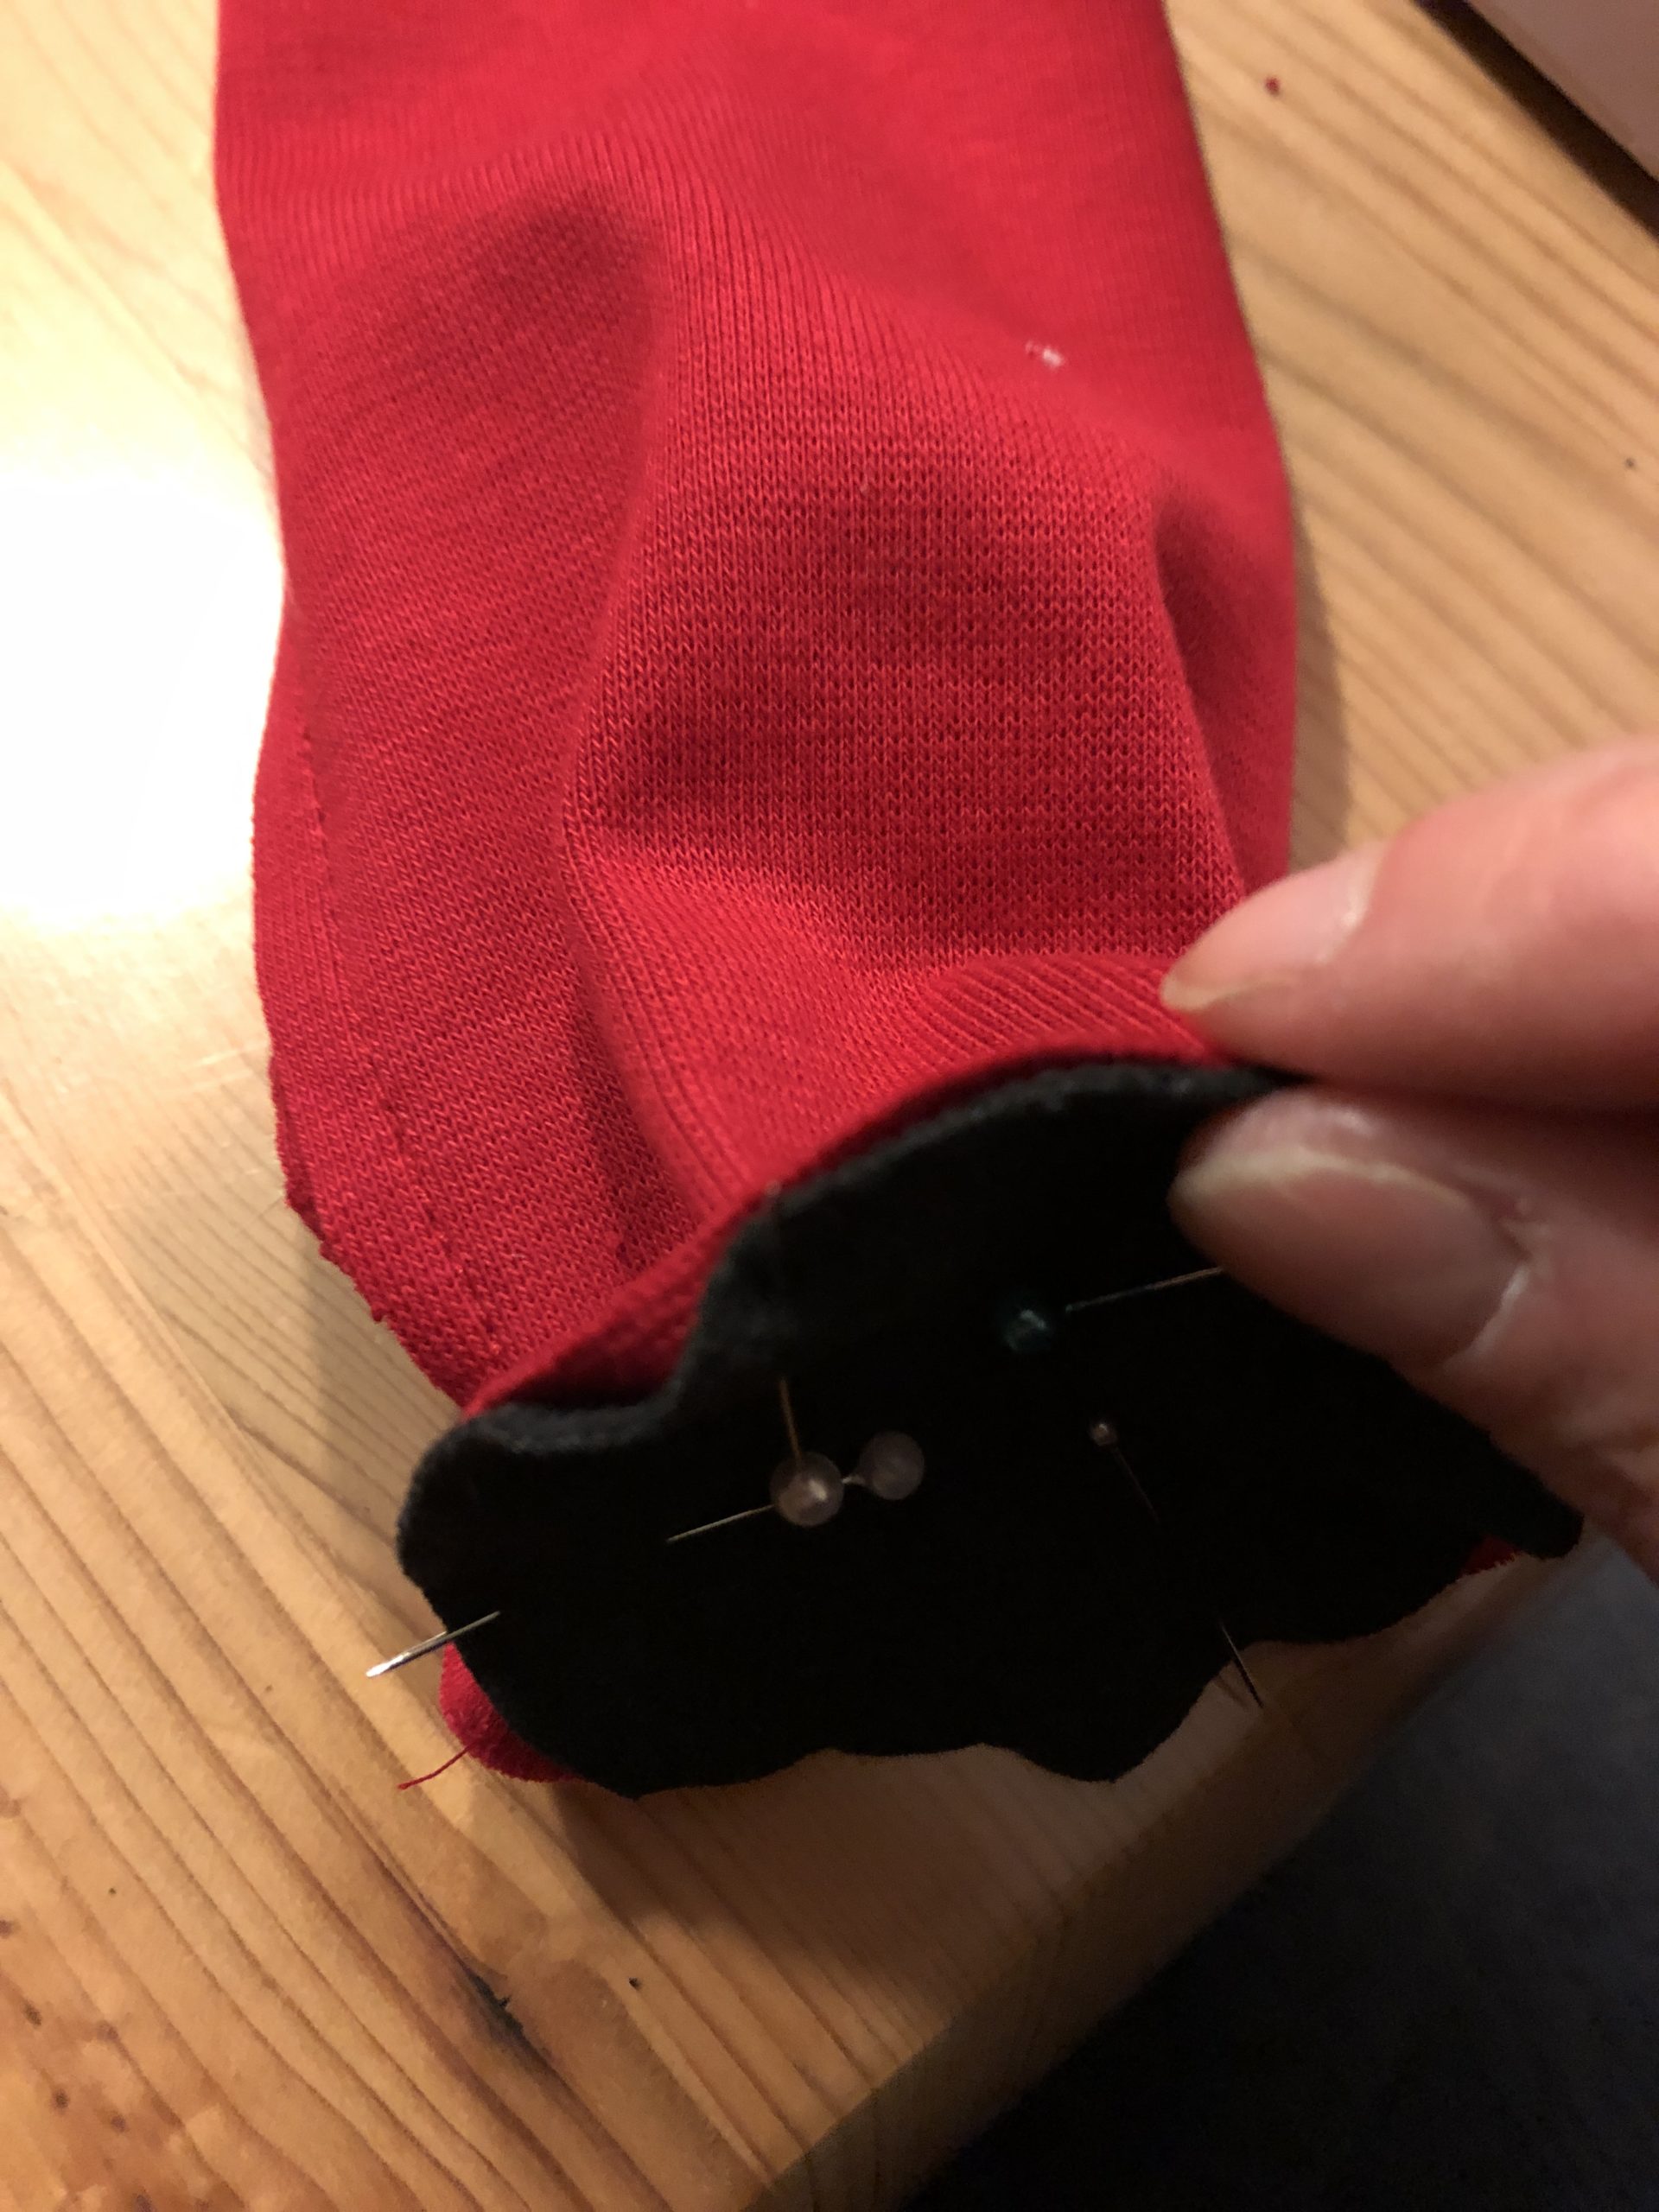
Bild zum Schritt 47 für das Bastel- und DIY-Abenteuer für Kinder: 'Steckt nun den Kreis an einem Ende des roten Schlauches...'

47

Now you sew this one.

Bild zum Schritt 48 für das Bastel- und DIY-Abenteuer für Kinder: 'Diesen näht ihr nun fest.'

48

Now you turn the red fabric around.
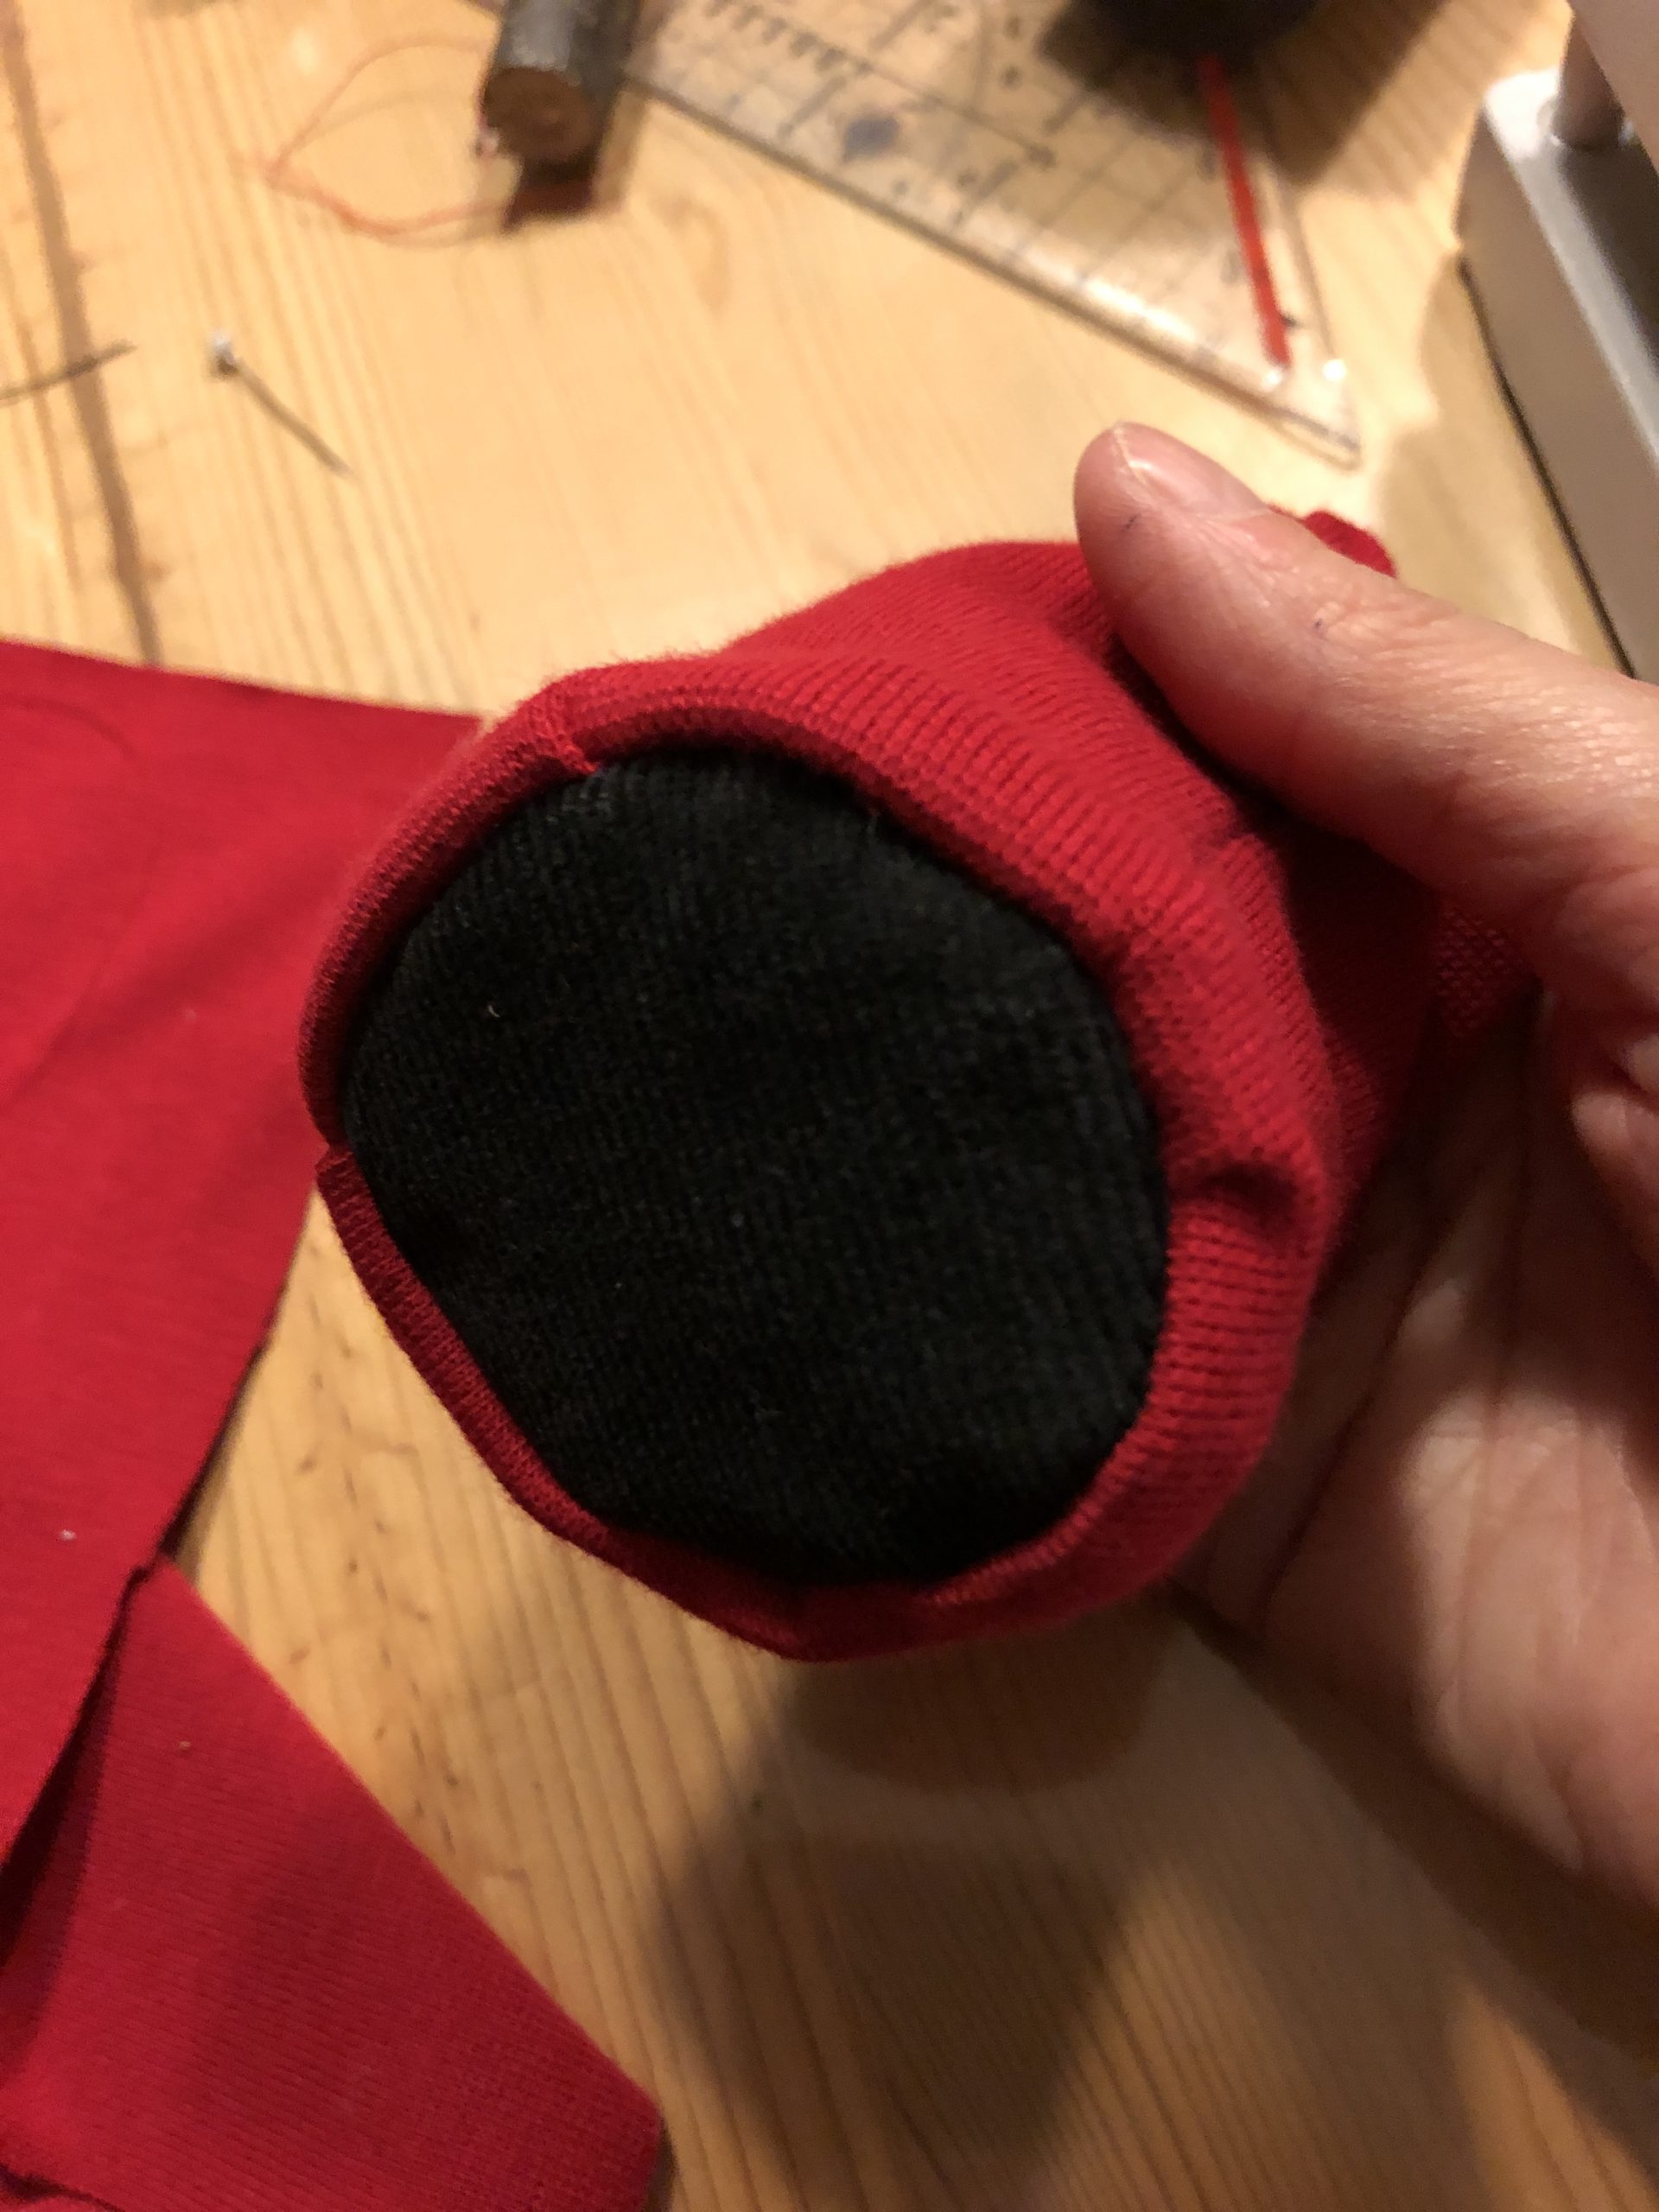
Bild zum Schritt 49 für das Bastel- und DIY-Abenteuer für Kinder: 'Jetzt dreht ihr den roten Stoff um.'

49

She hasn't put the pipe insulation in her candle shell yet.
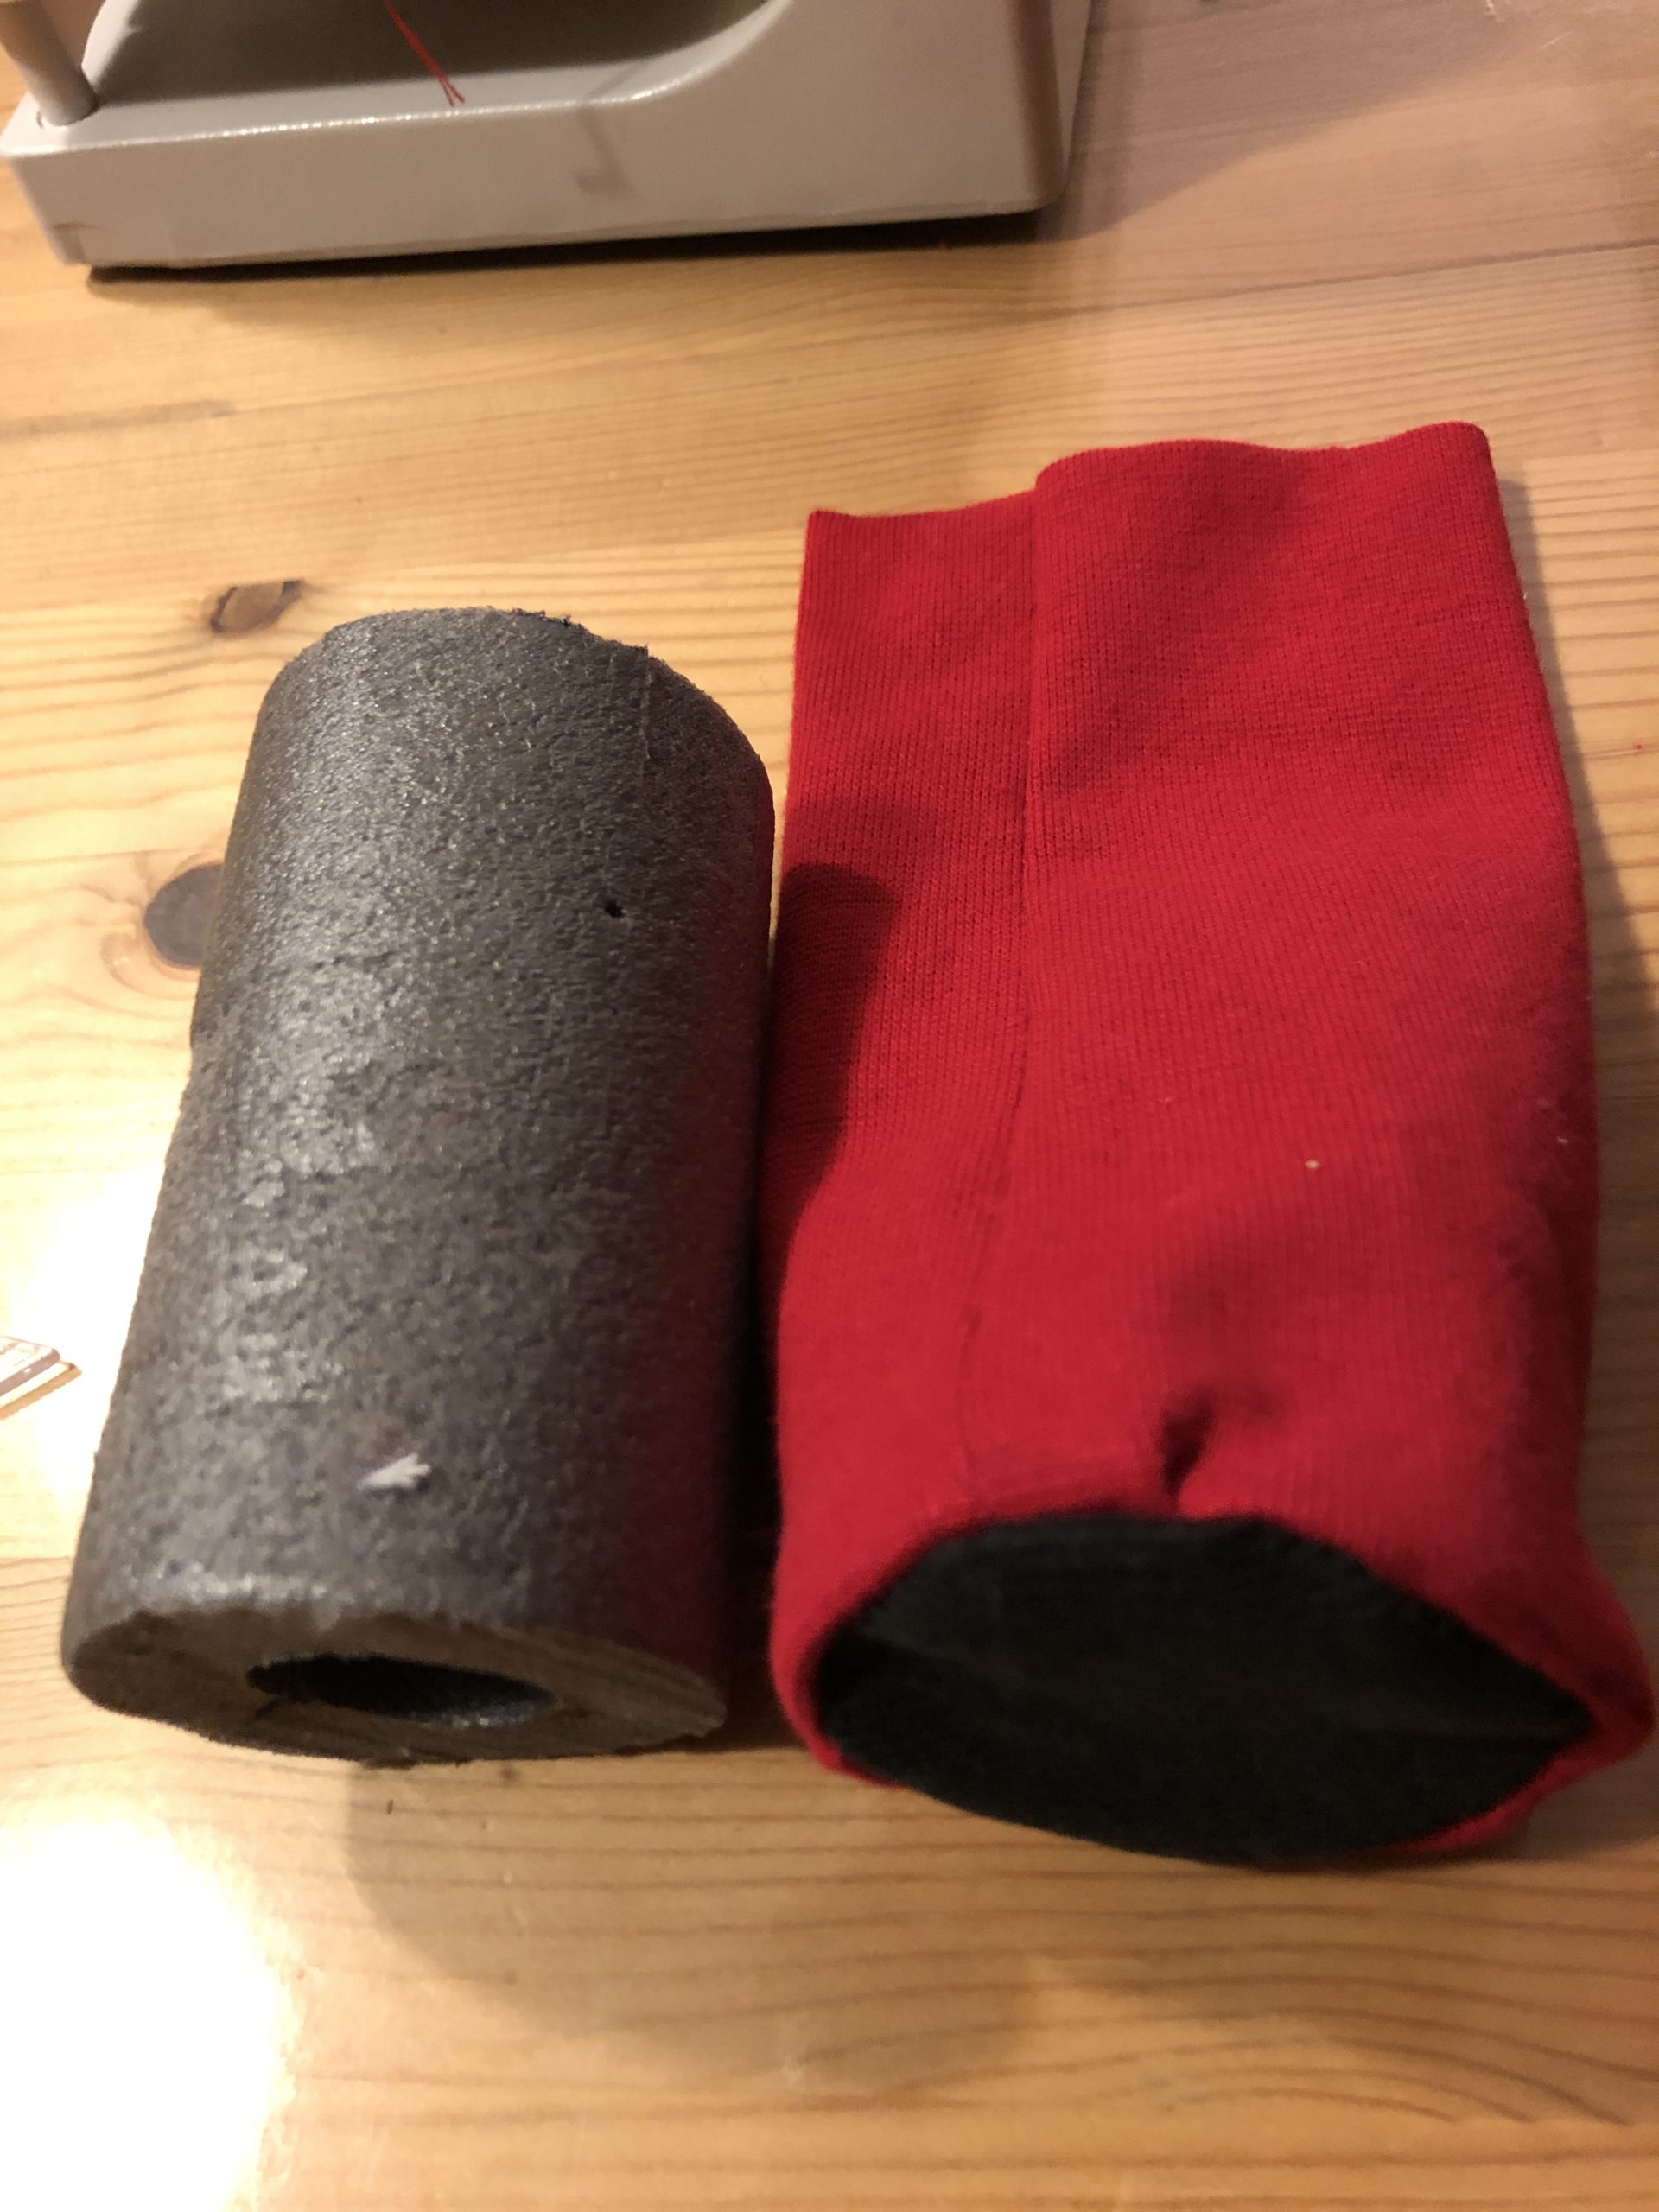
Bild zum Schritt 50 für das Bastel- und DIY-Abenteuer für Kinder: 'Die Rohrisolierung steckt ihr noch nicht in die Kerzenhülle.'

50

For first you sew the candle cover with your hand and needle and thread on the wreath.
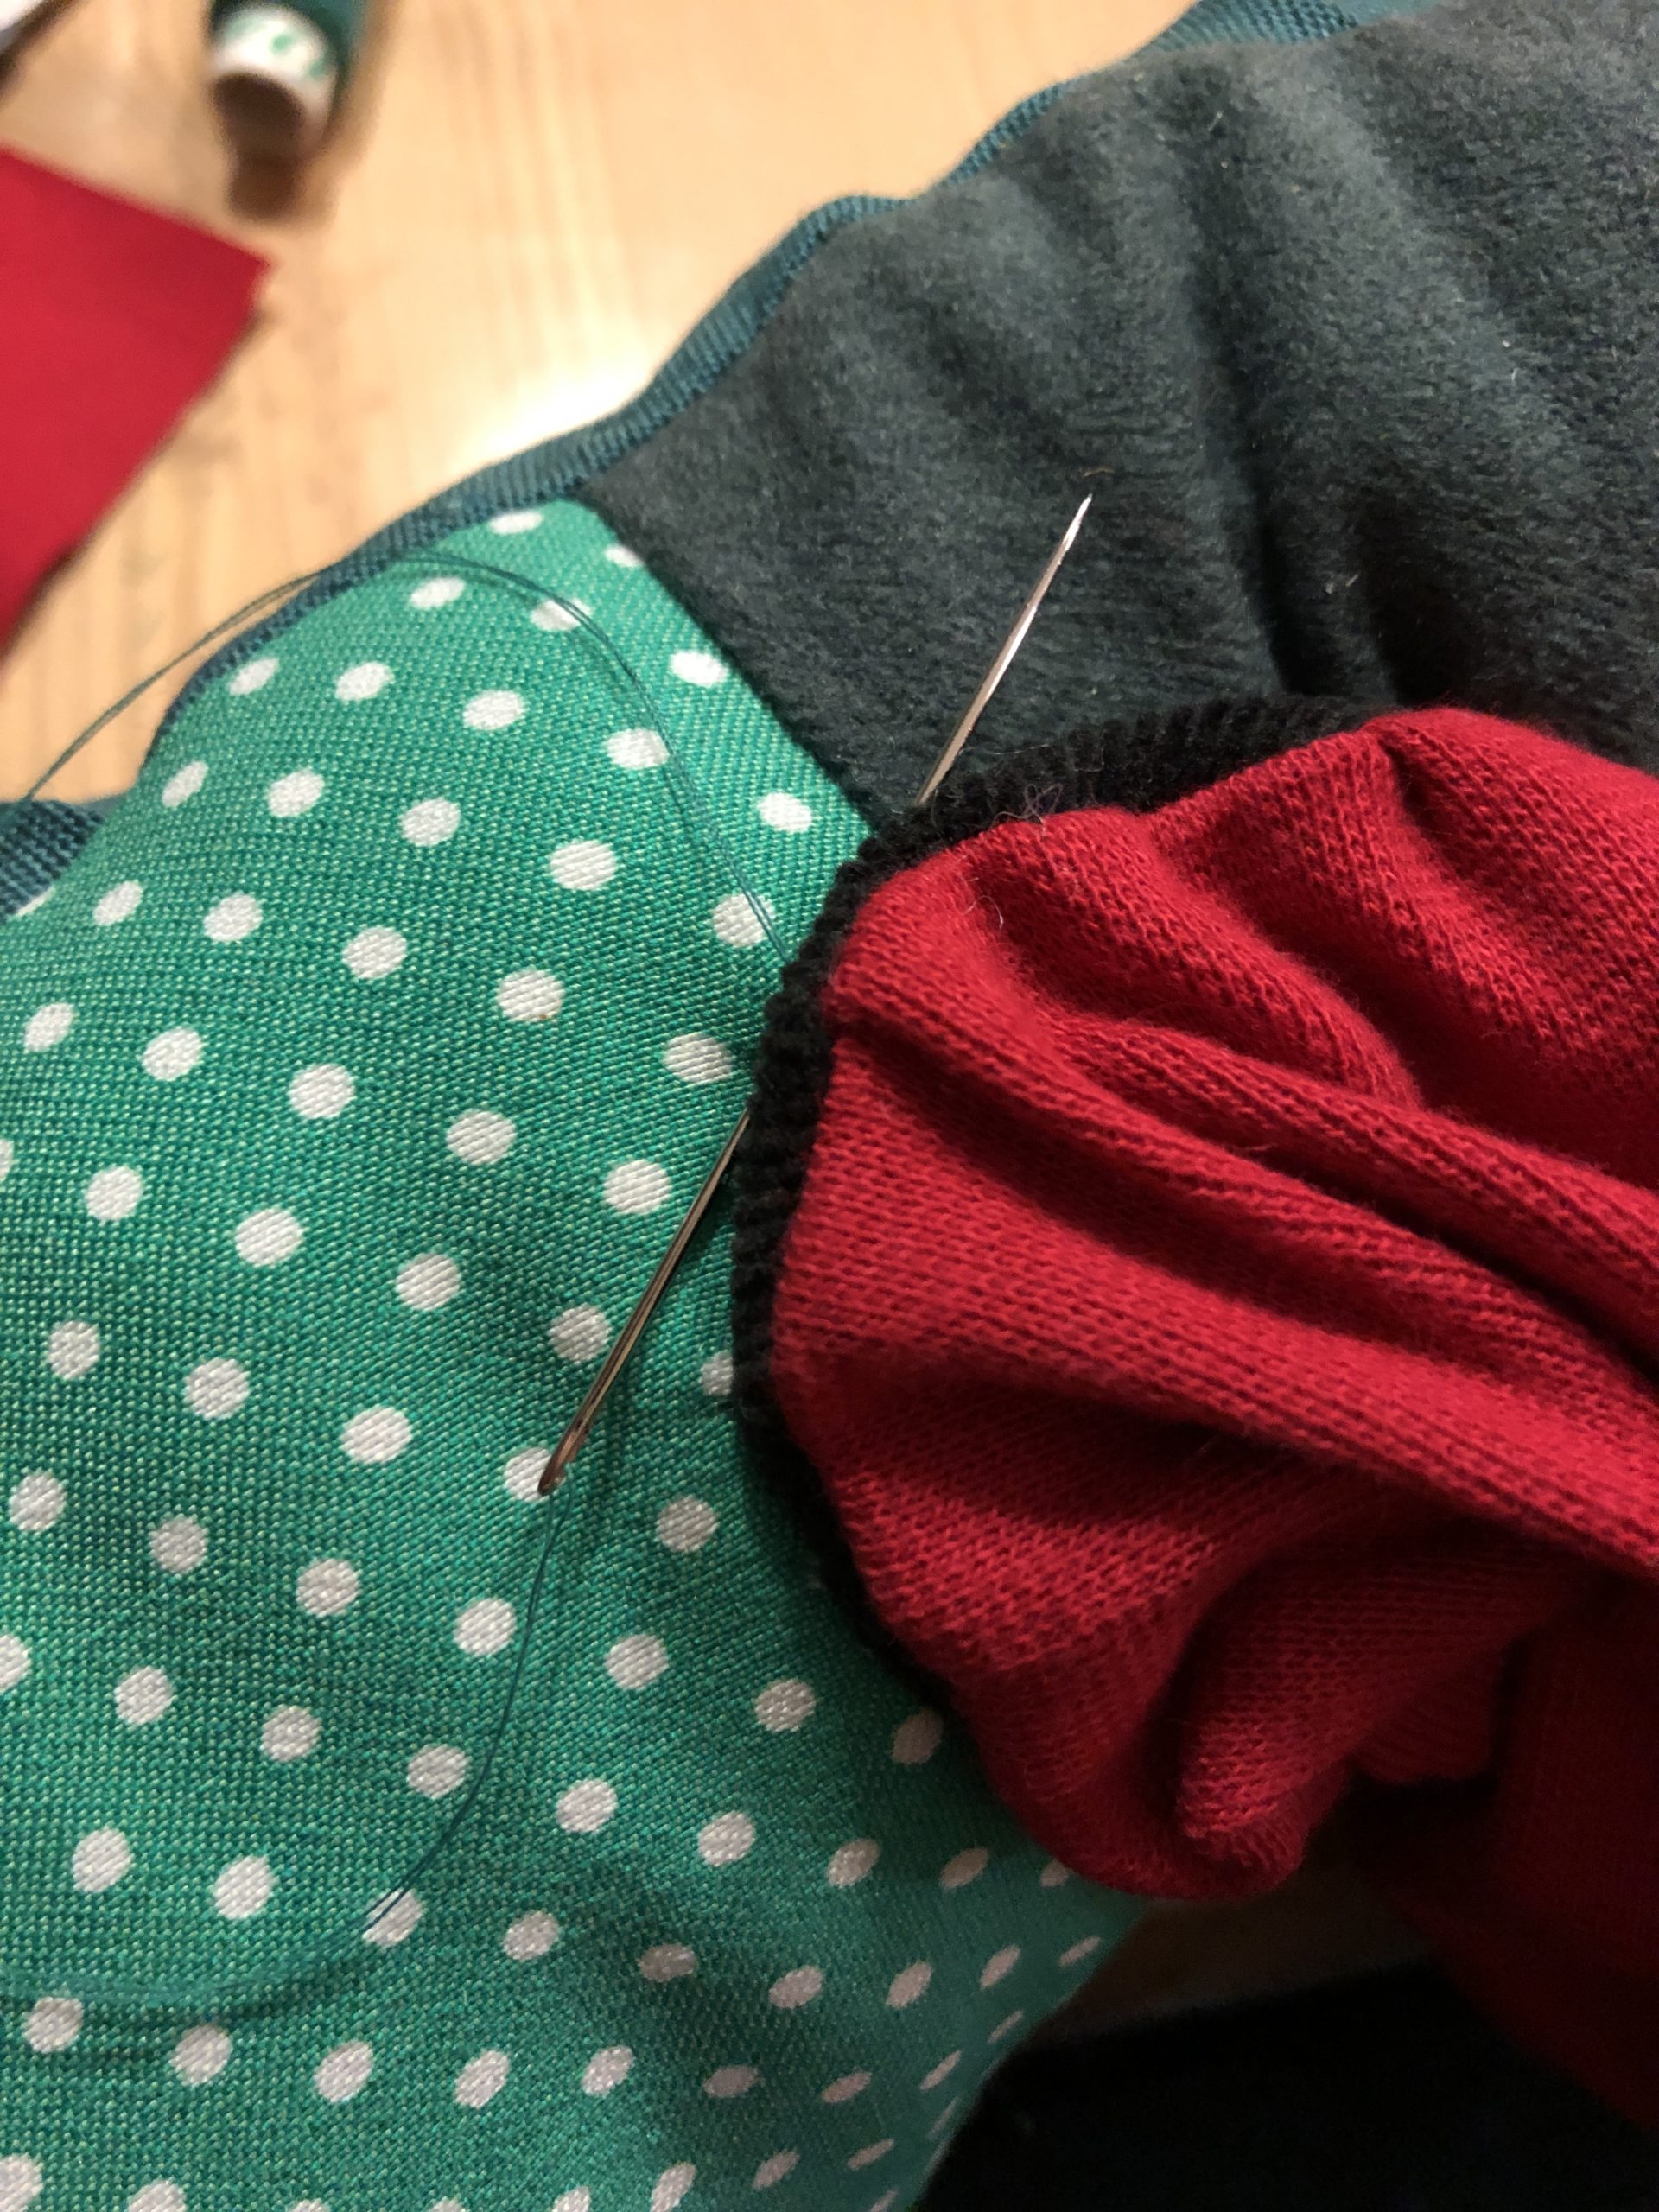
Bild zum Schritt 51 für das Bastel- und DIY-Abenteuer für Kinder: 'Denn zuerst näht ihr die Kerzenhülle mit mit der Hand...'

51

2. Bild zum Schritt 51 für das Bastel- und DIY-Abenteuer für Kinder: 'Denn zuerst näht ihr die Kerzenhülle mit mit der Hand...'

52

Then you can insert the pipe insulation.
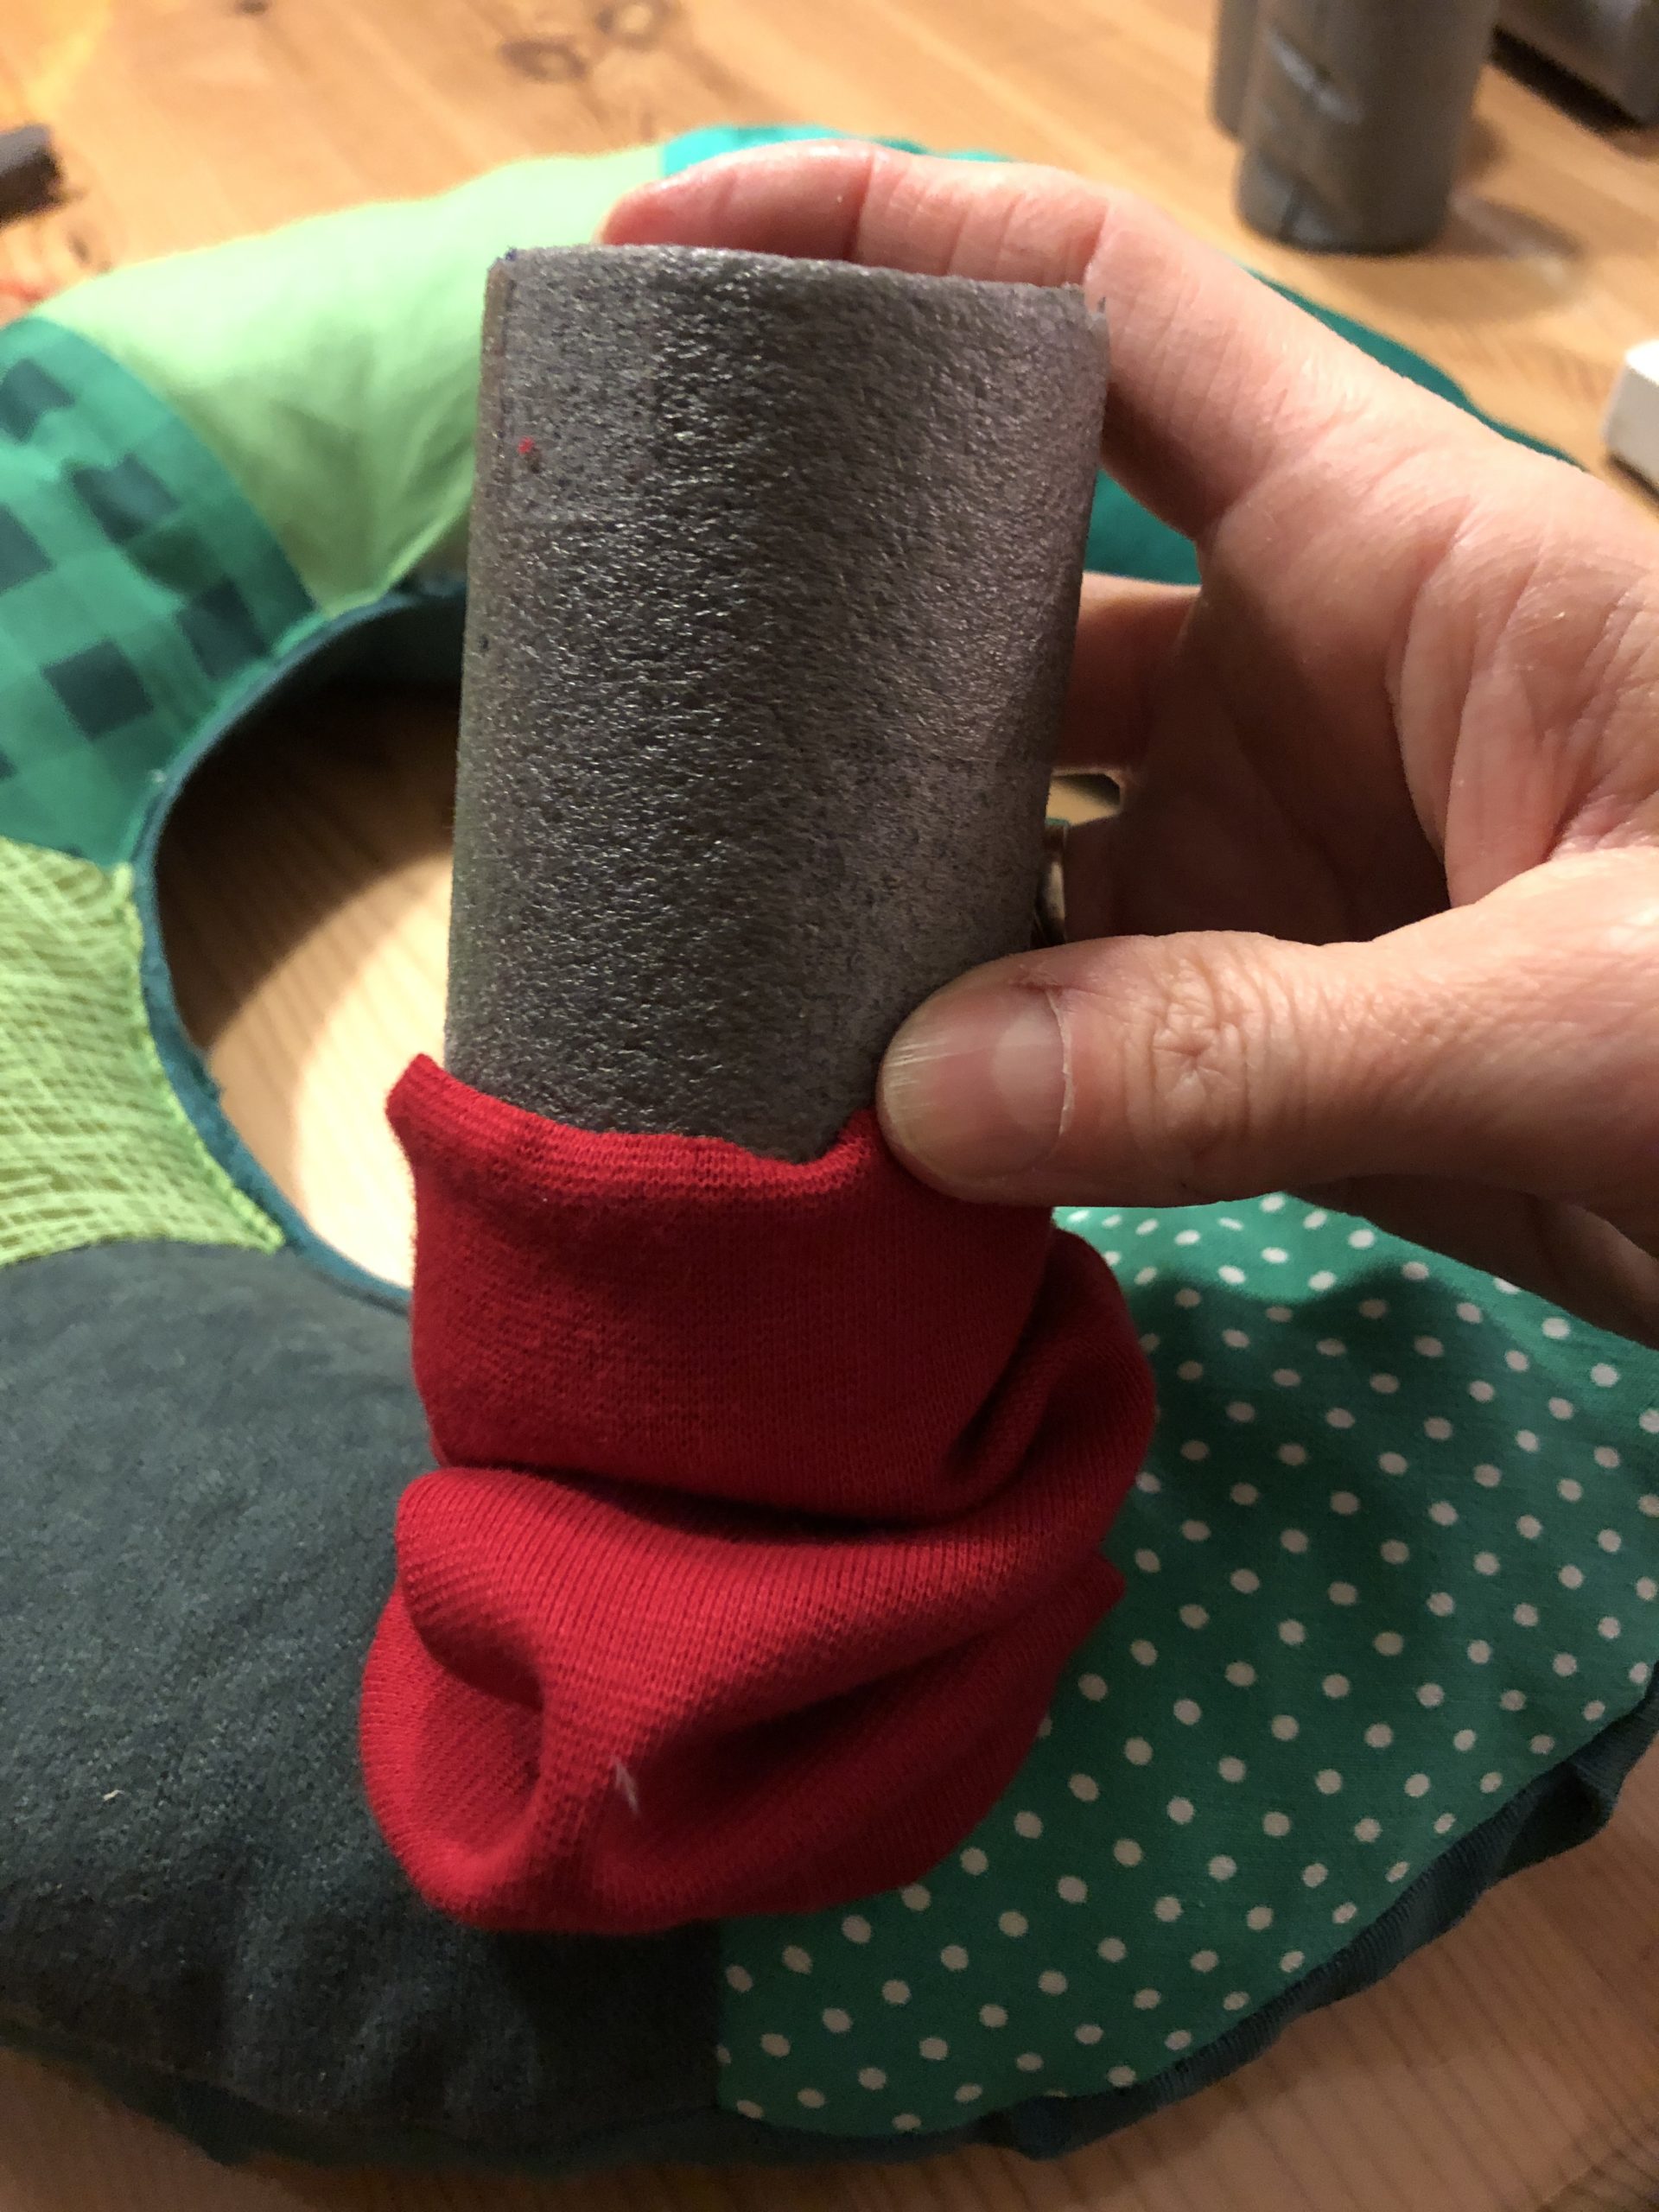
Bild zum Schritt 53 für das Bastel- und DIY-Abenteuer für Kinder: 'Anschließend könnt ihr die Rohrisolierung einstecken.'

53

Push the pipe insulation all the way down and stuff the overhanging fabric into the middle of the hole.
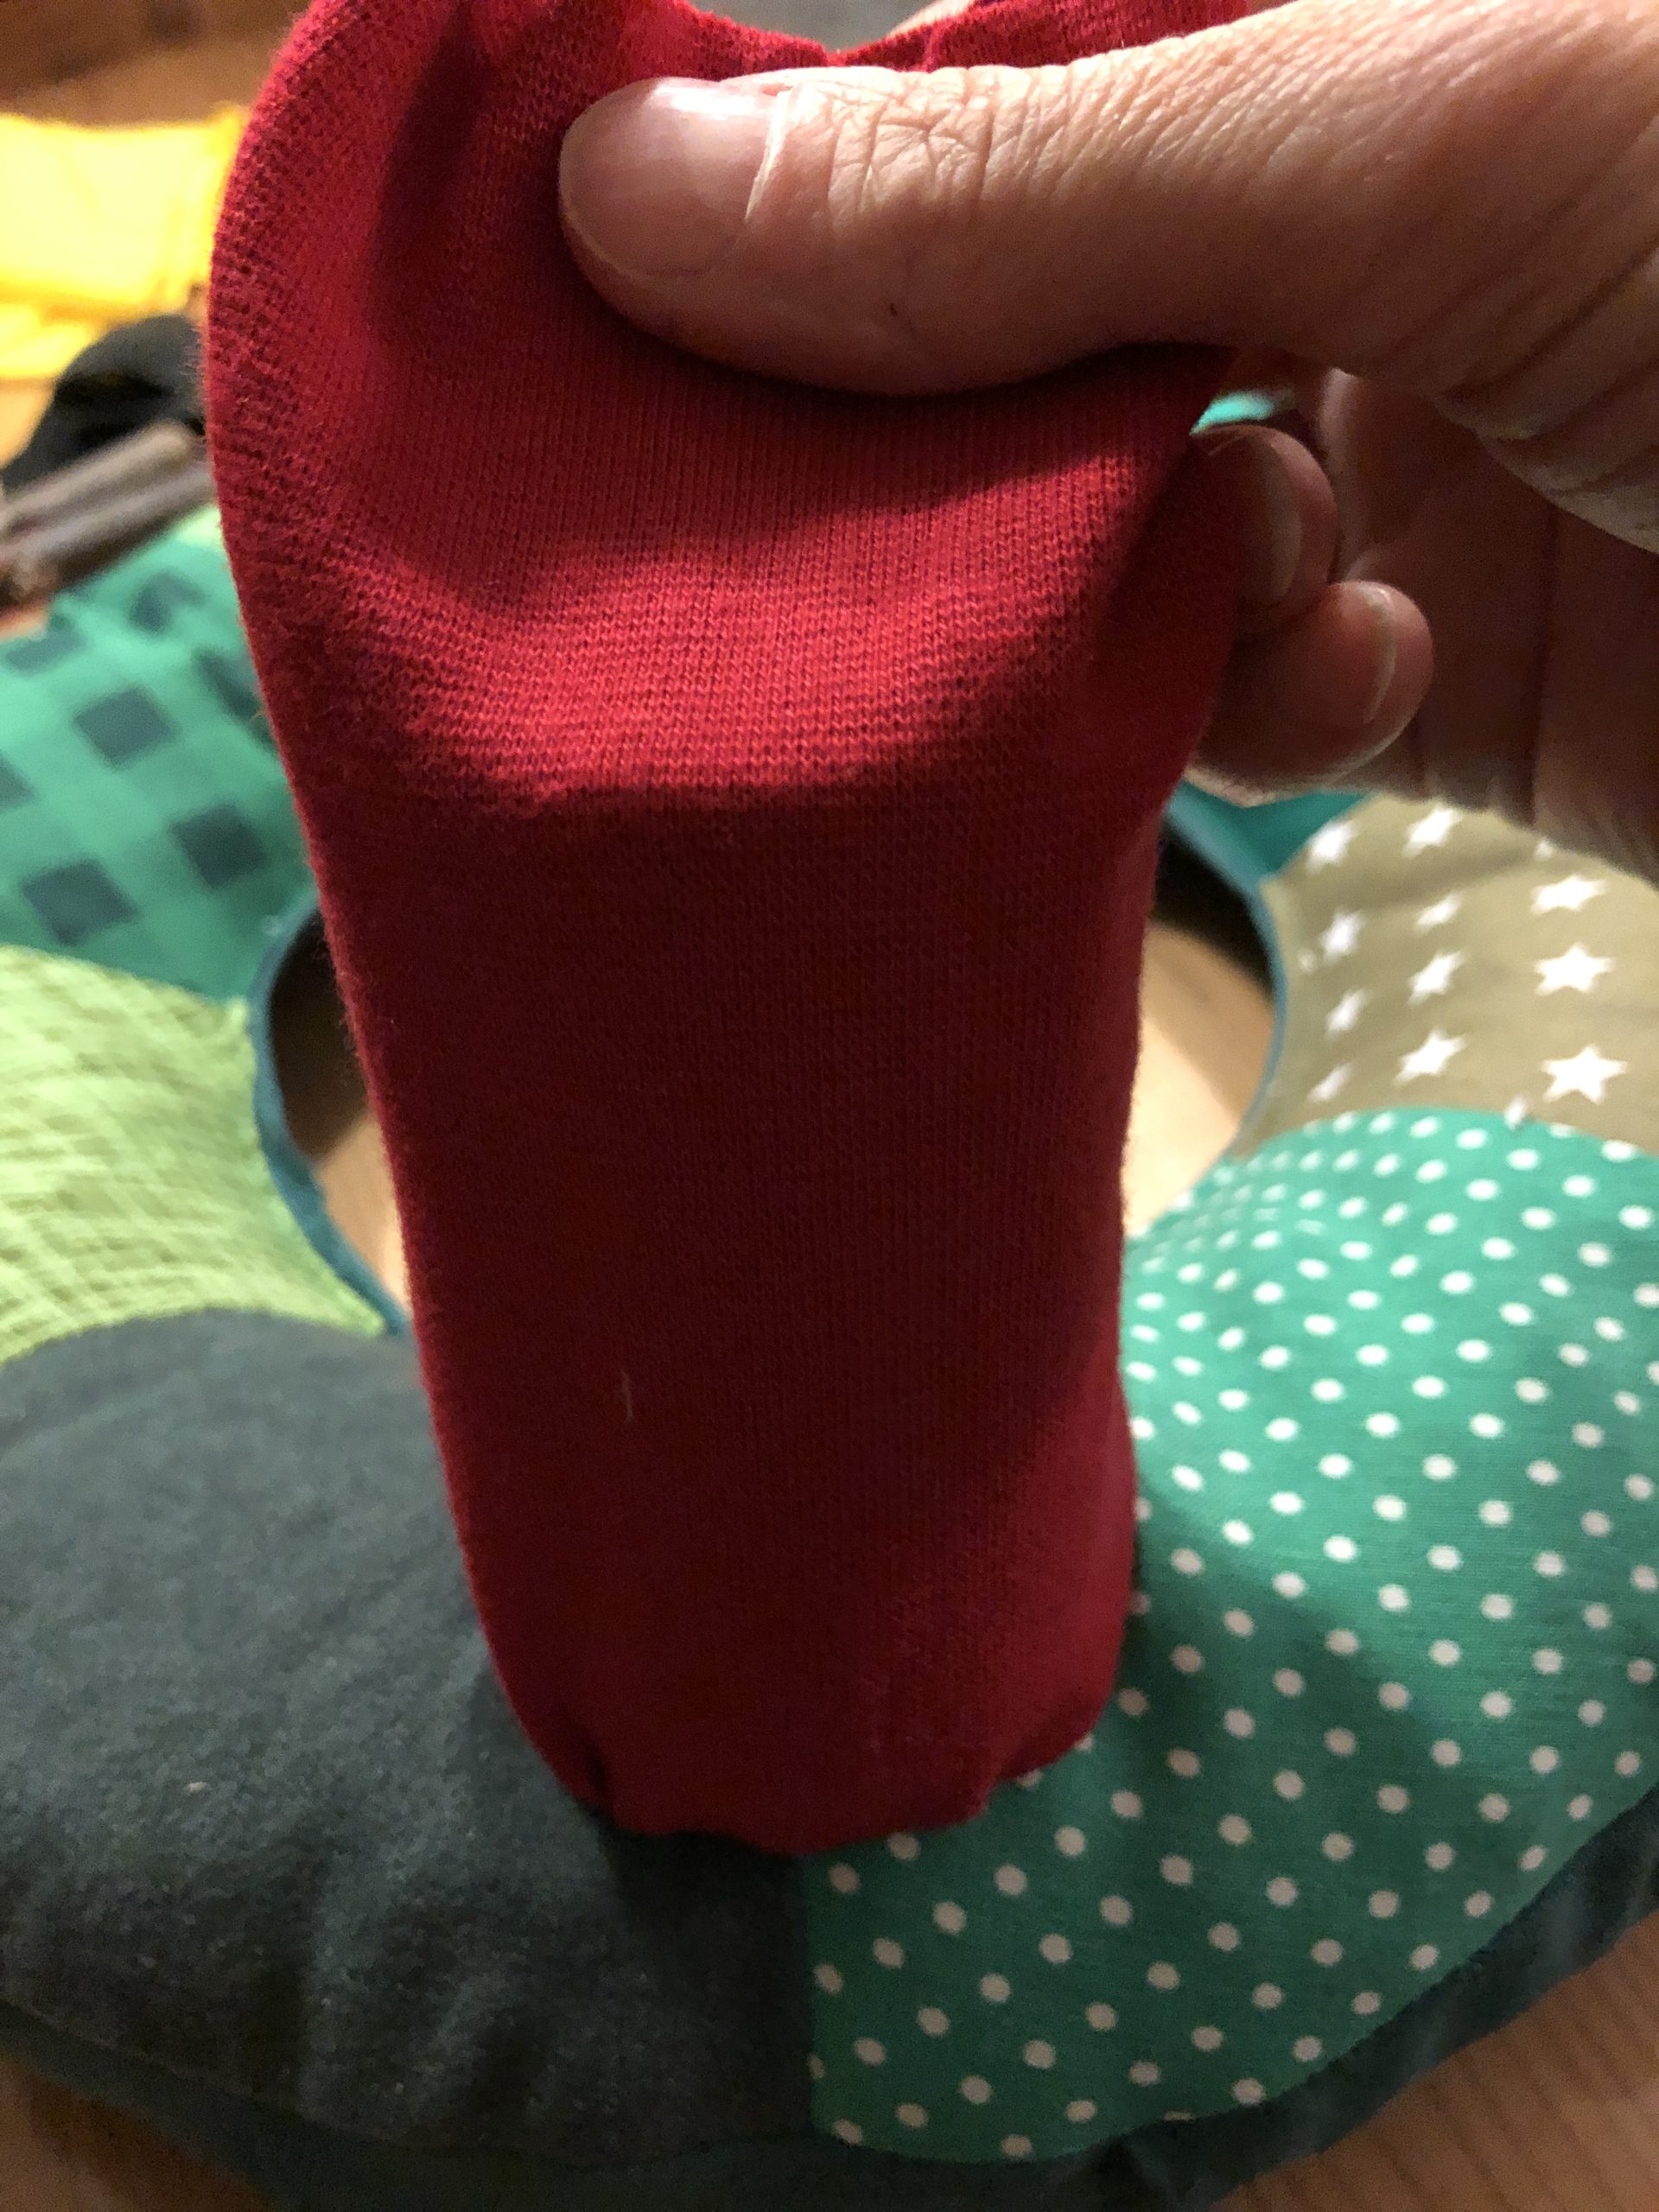
Bild zum Schritt 54 für das Bastel- und DIY-Abenteuer für Kinder: 'Schiebt die Rohrisolierung ganz nach unten und stopft den überstehenden...'

54

2. Bild zum Schritt 54 für das Bastel- und DIY-Abenteuer für Kinder: 'Schiebt die Rohrisolierung ganz nach unten und stopft den überstehenden...'

55

3. Bild zum Schritt 55 für das Bastel- und DIY-Abenteuer für Kinder: 'Schiebt die Rohrisolierung ganz nach unten und stopft den überstehenden...'

56

Uses a piece of branch with approx.15cm length, so that the candles stand stable with the flame.
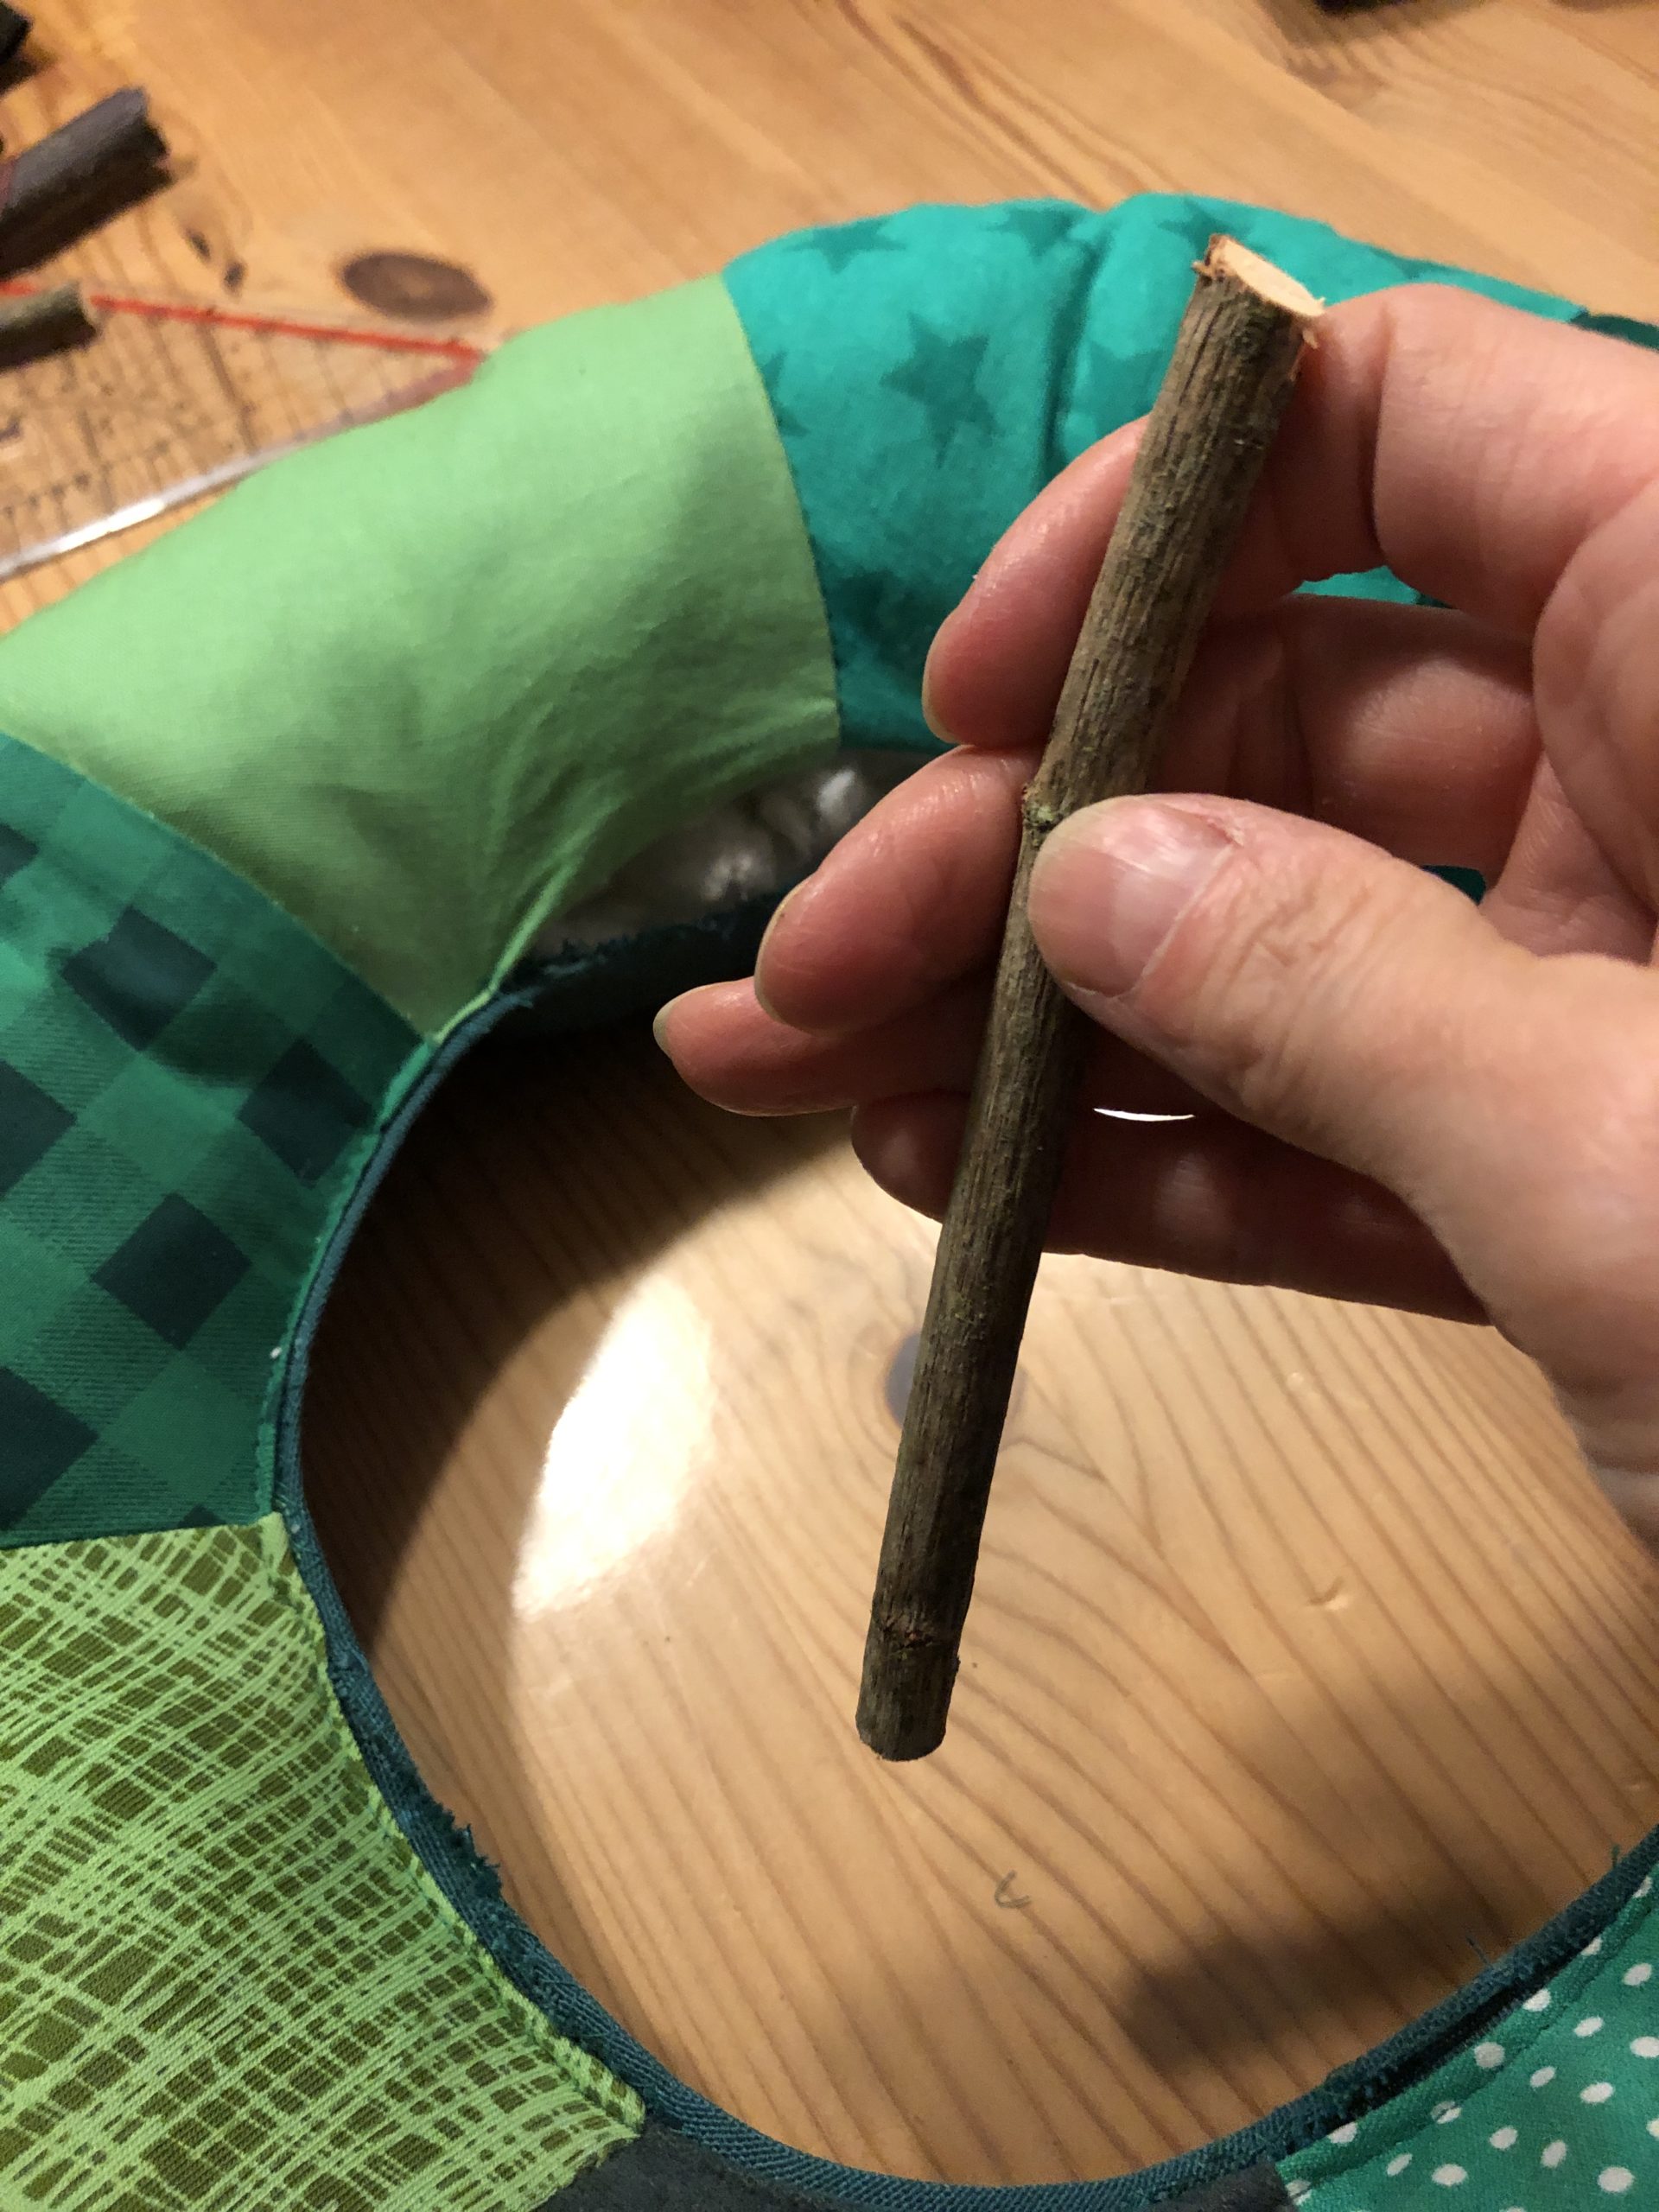
Bild zum Schritt 57 für das Bastel- und DIY-Abenteuer für Kinder: 'Verwendet ein Stück Ast mit ca.15cm Länge, damit die Kerzen...'

57

Now you put this one in the hole.
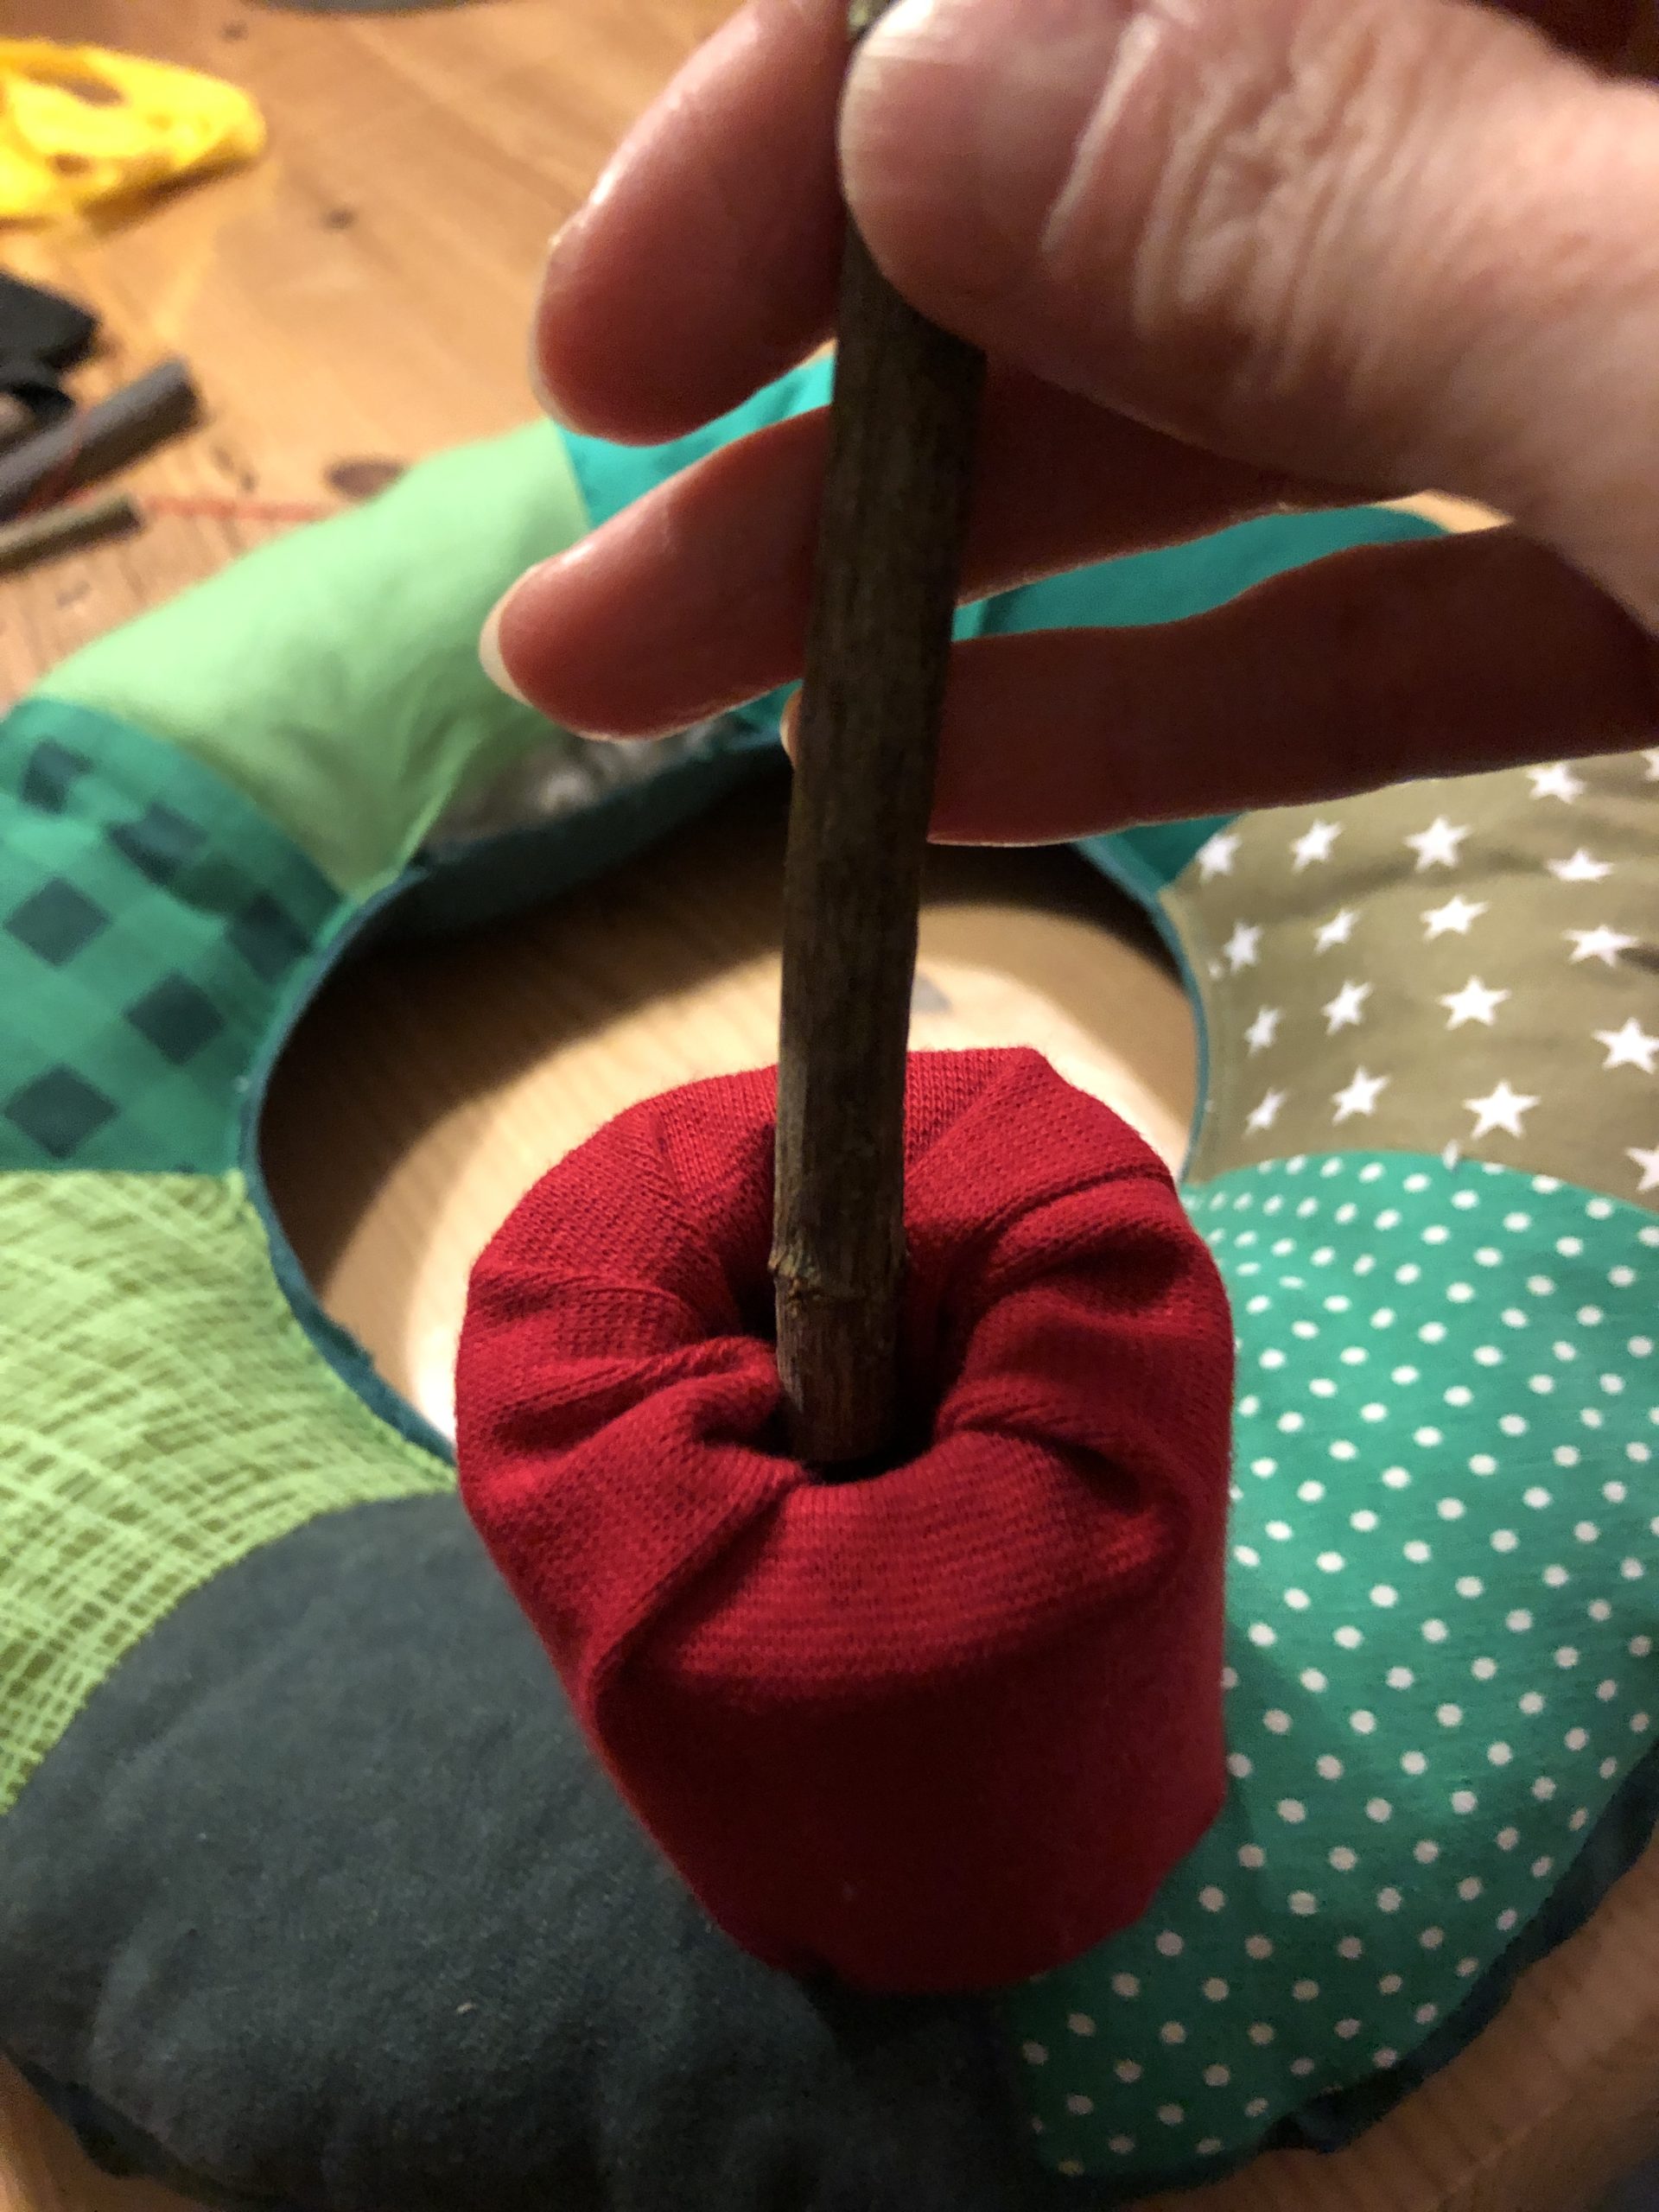
Bild zum Schritt 58 für das Bastel- und DIY-Abenteuer für Kinder: 'Diesen steckt ihr nun in das Loch.'

58

This is the wick of the candle.

Bild zum Schritt 59 für das Bastel- und DIY-Abenteuer für Kinder: 'Das ist der Docht der Kerze.'

59

Then you sew all four candles after exactly the same process.
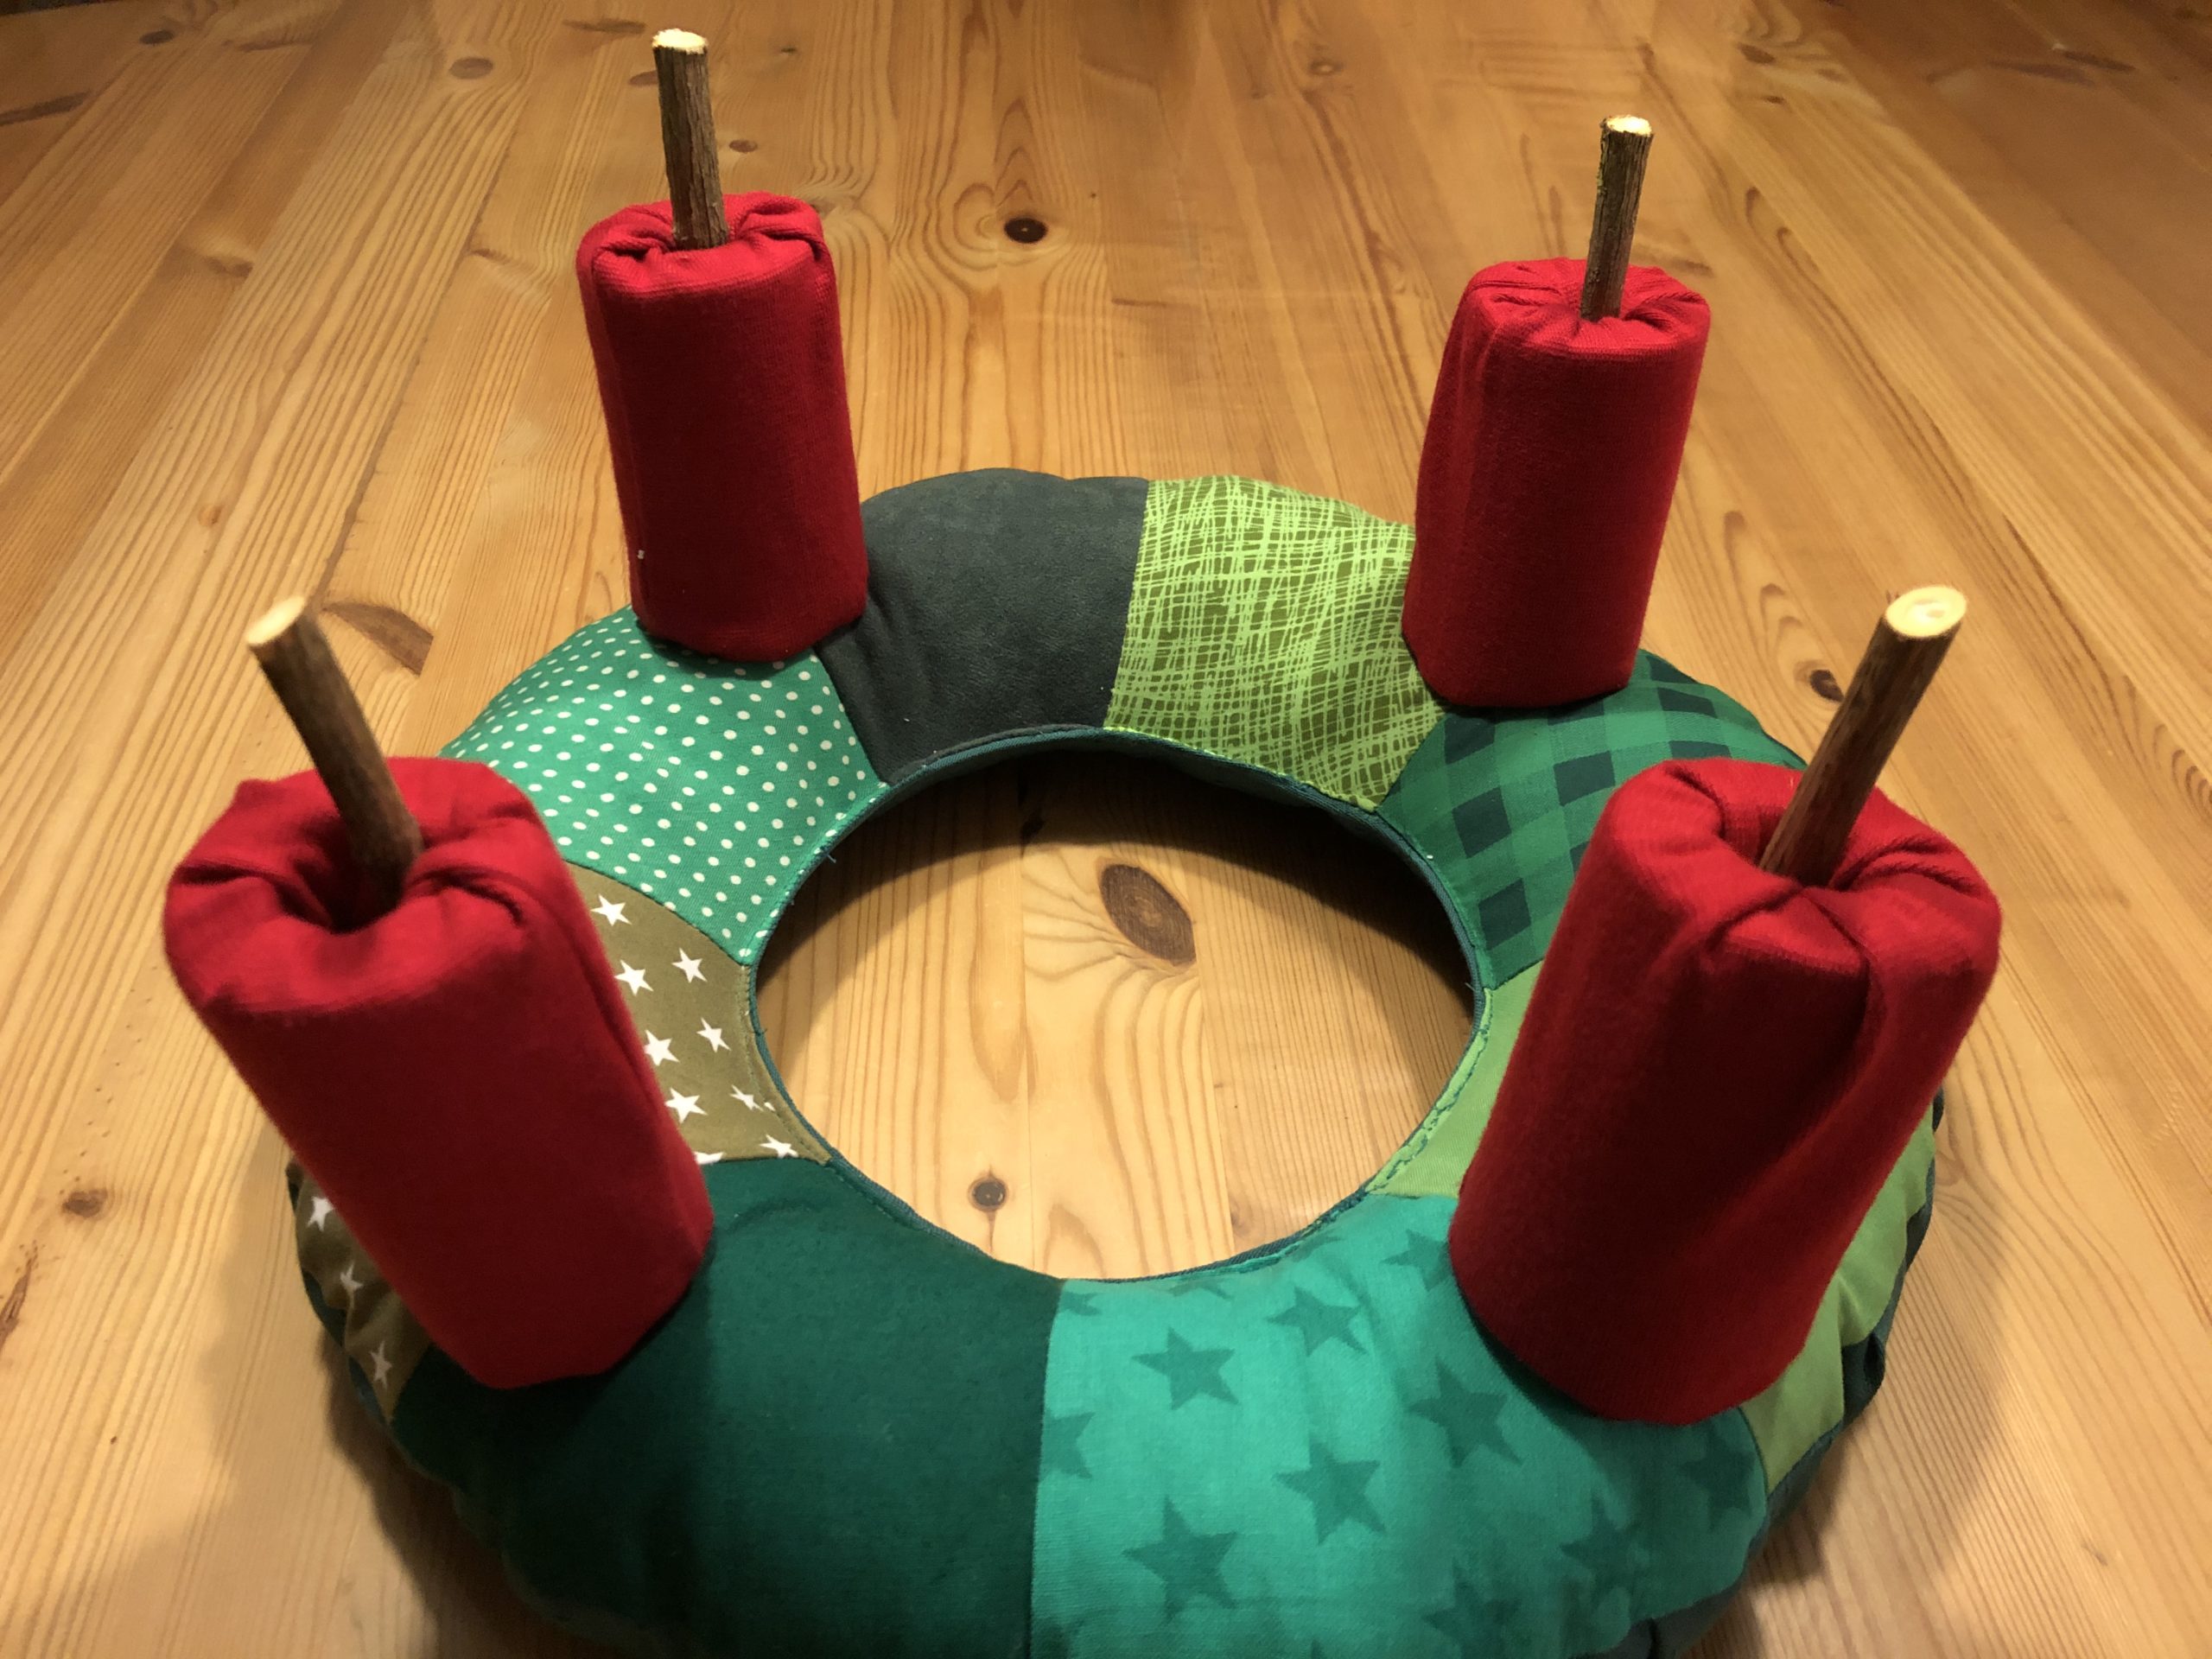
Bild zum Schritt 60 für das Bastel- und DIY-Abenteuer für Kinder: 'Dann näht ihr alle vier Kerzen nach genau dem selben...'

60

Now all we need is the flames of the candles.

Flames:
61

Print out the template for the flame or paint yourself a flame of this kind.
Tip: Make sure that the straight shaft is not too narrow, otherwise you can't turn your sewn flame around!
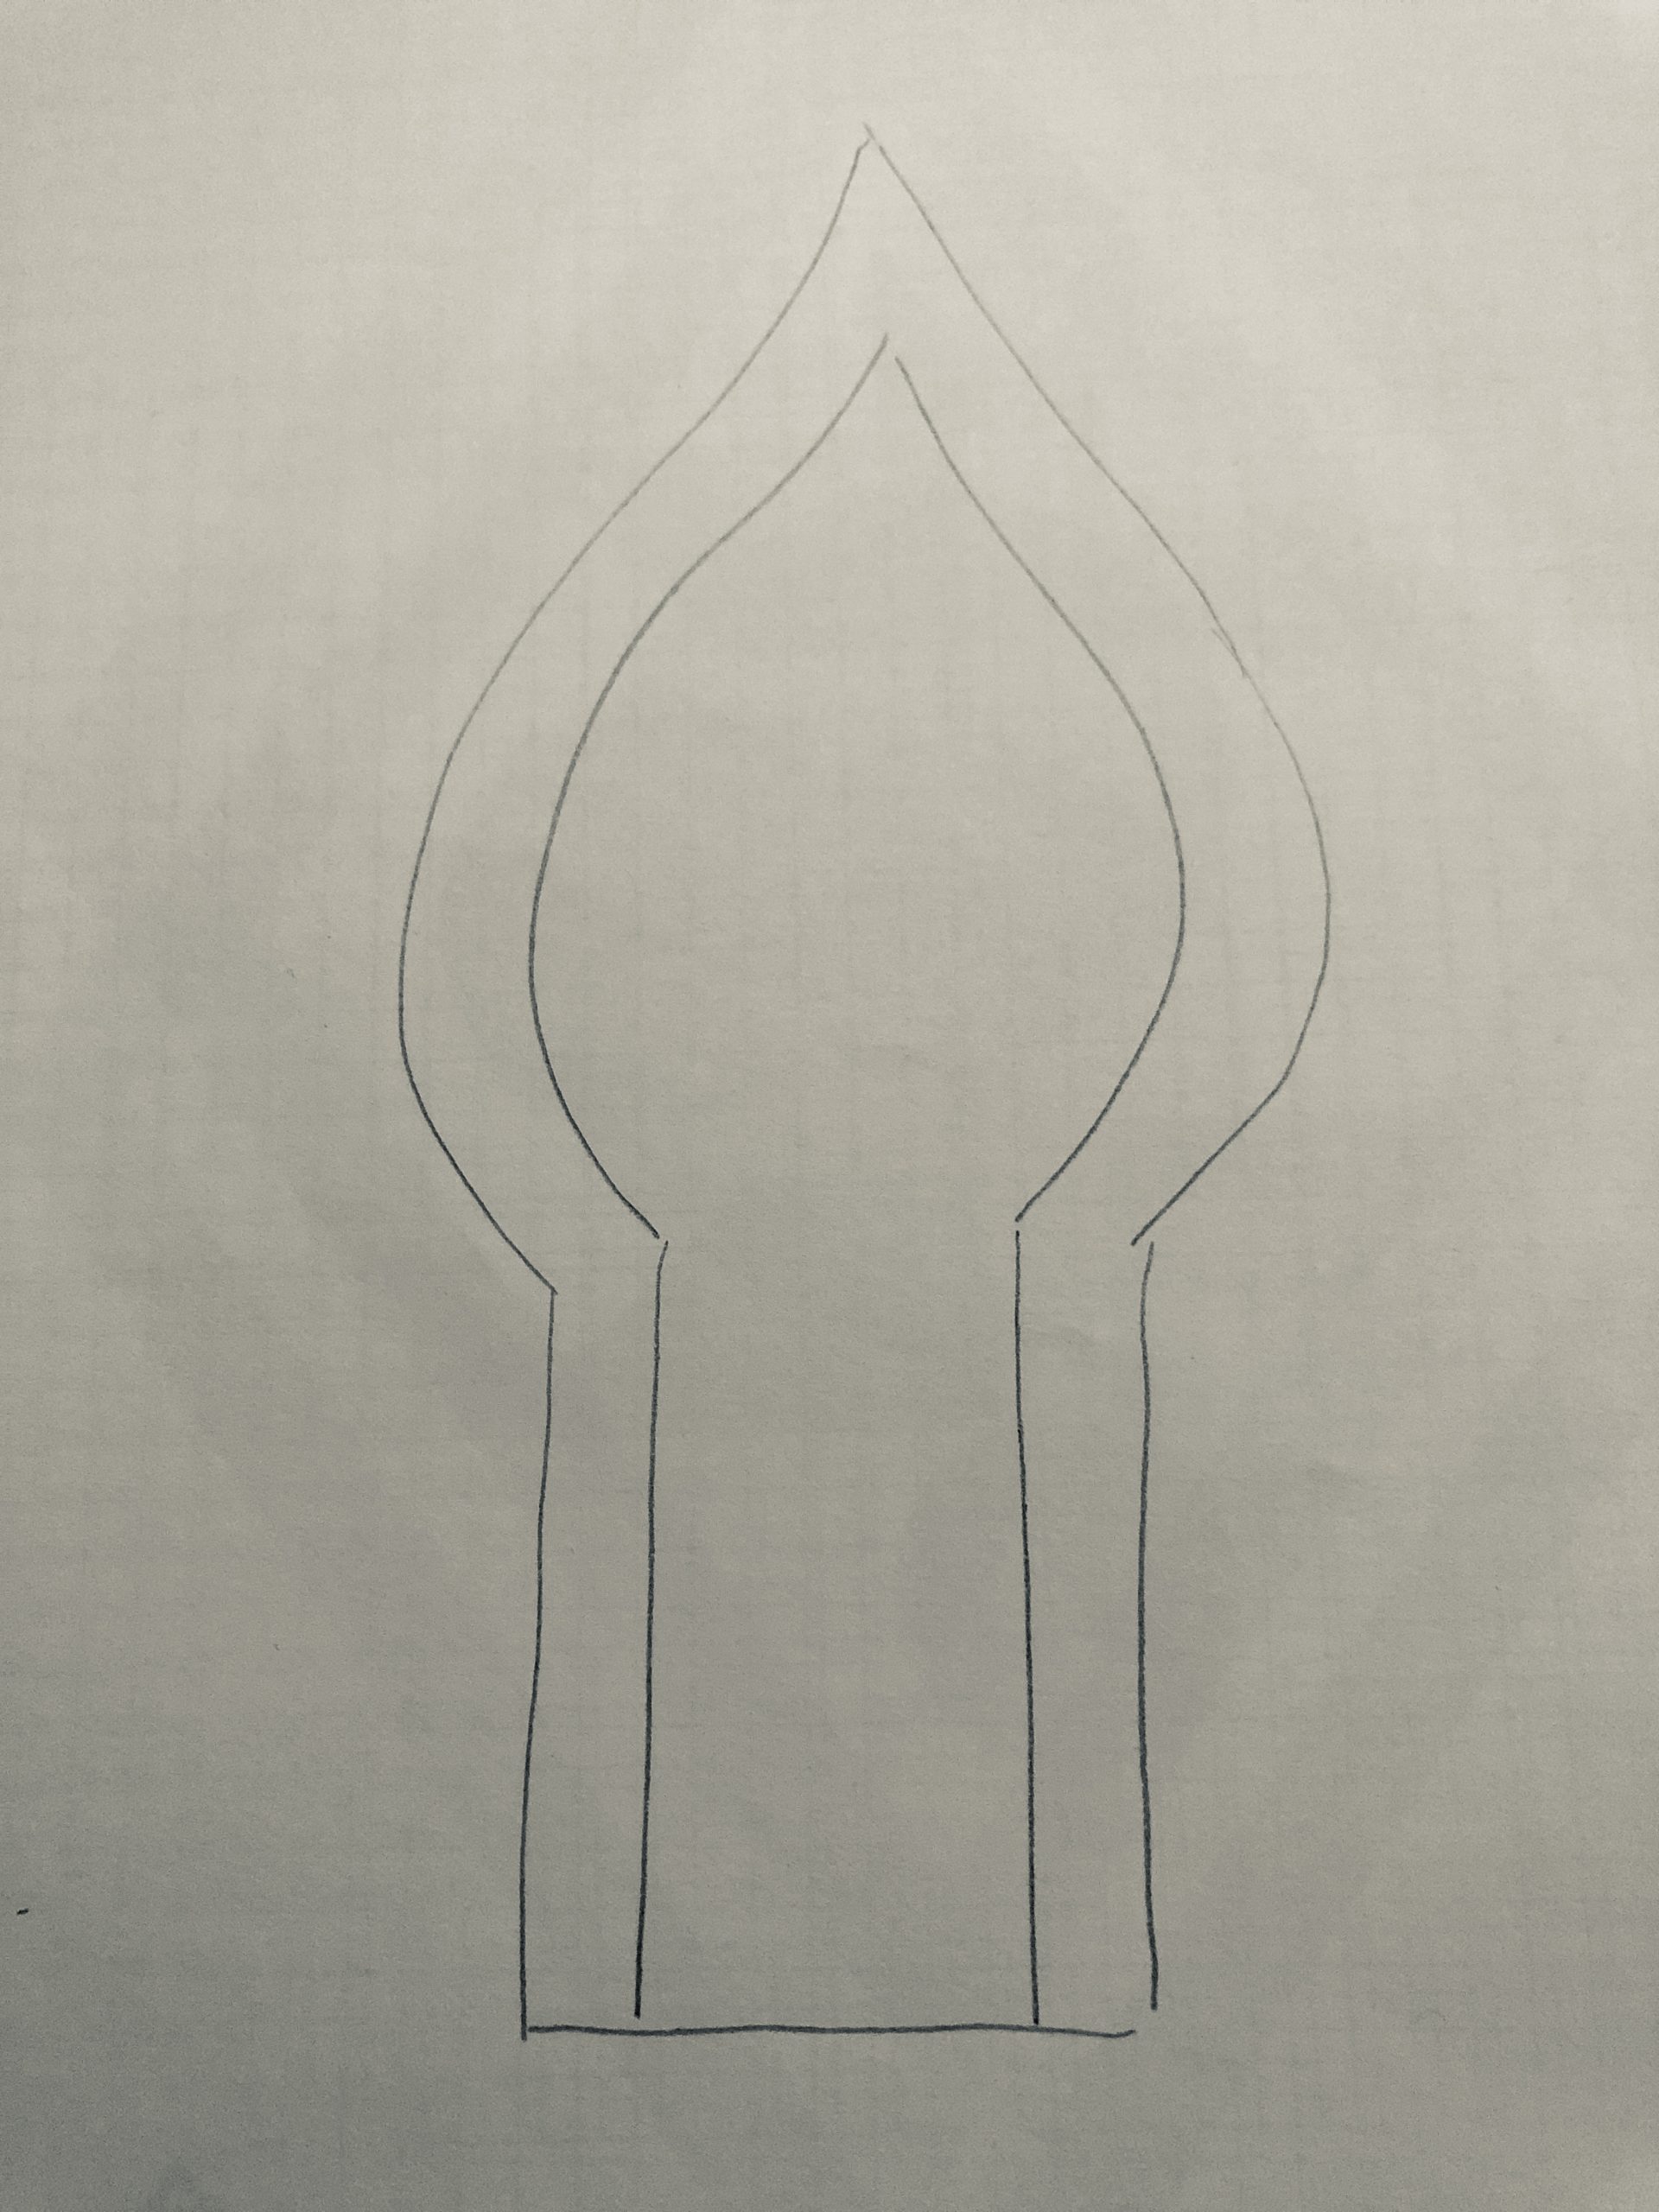
Bild zum Schritt 63 für das Bastel- und DIY-Abenteuer für Kinder: 'Druckt euch die Vorlage für die Flamme aus oder malt...'

62

Transfer the cut to the fabric and cut two parts of the template. Cuts on the outer line. The inner line symbolizes the sewing seam.
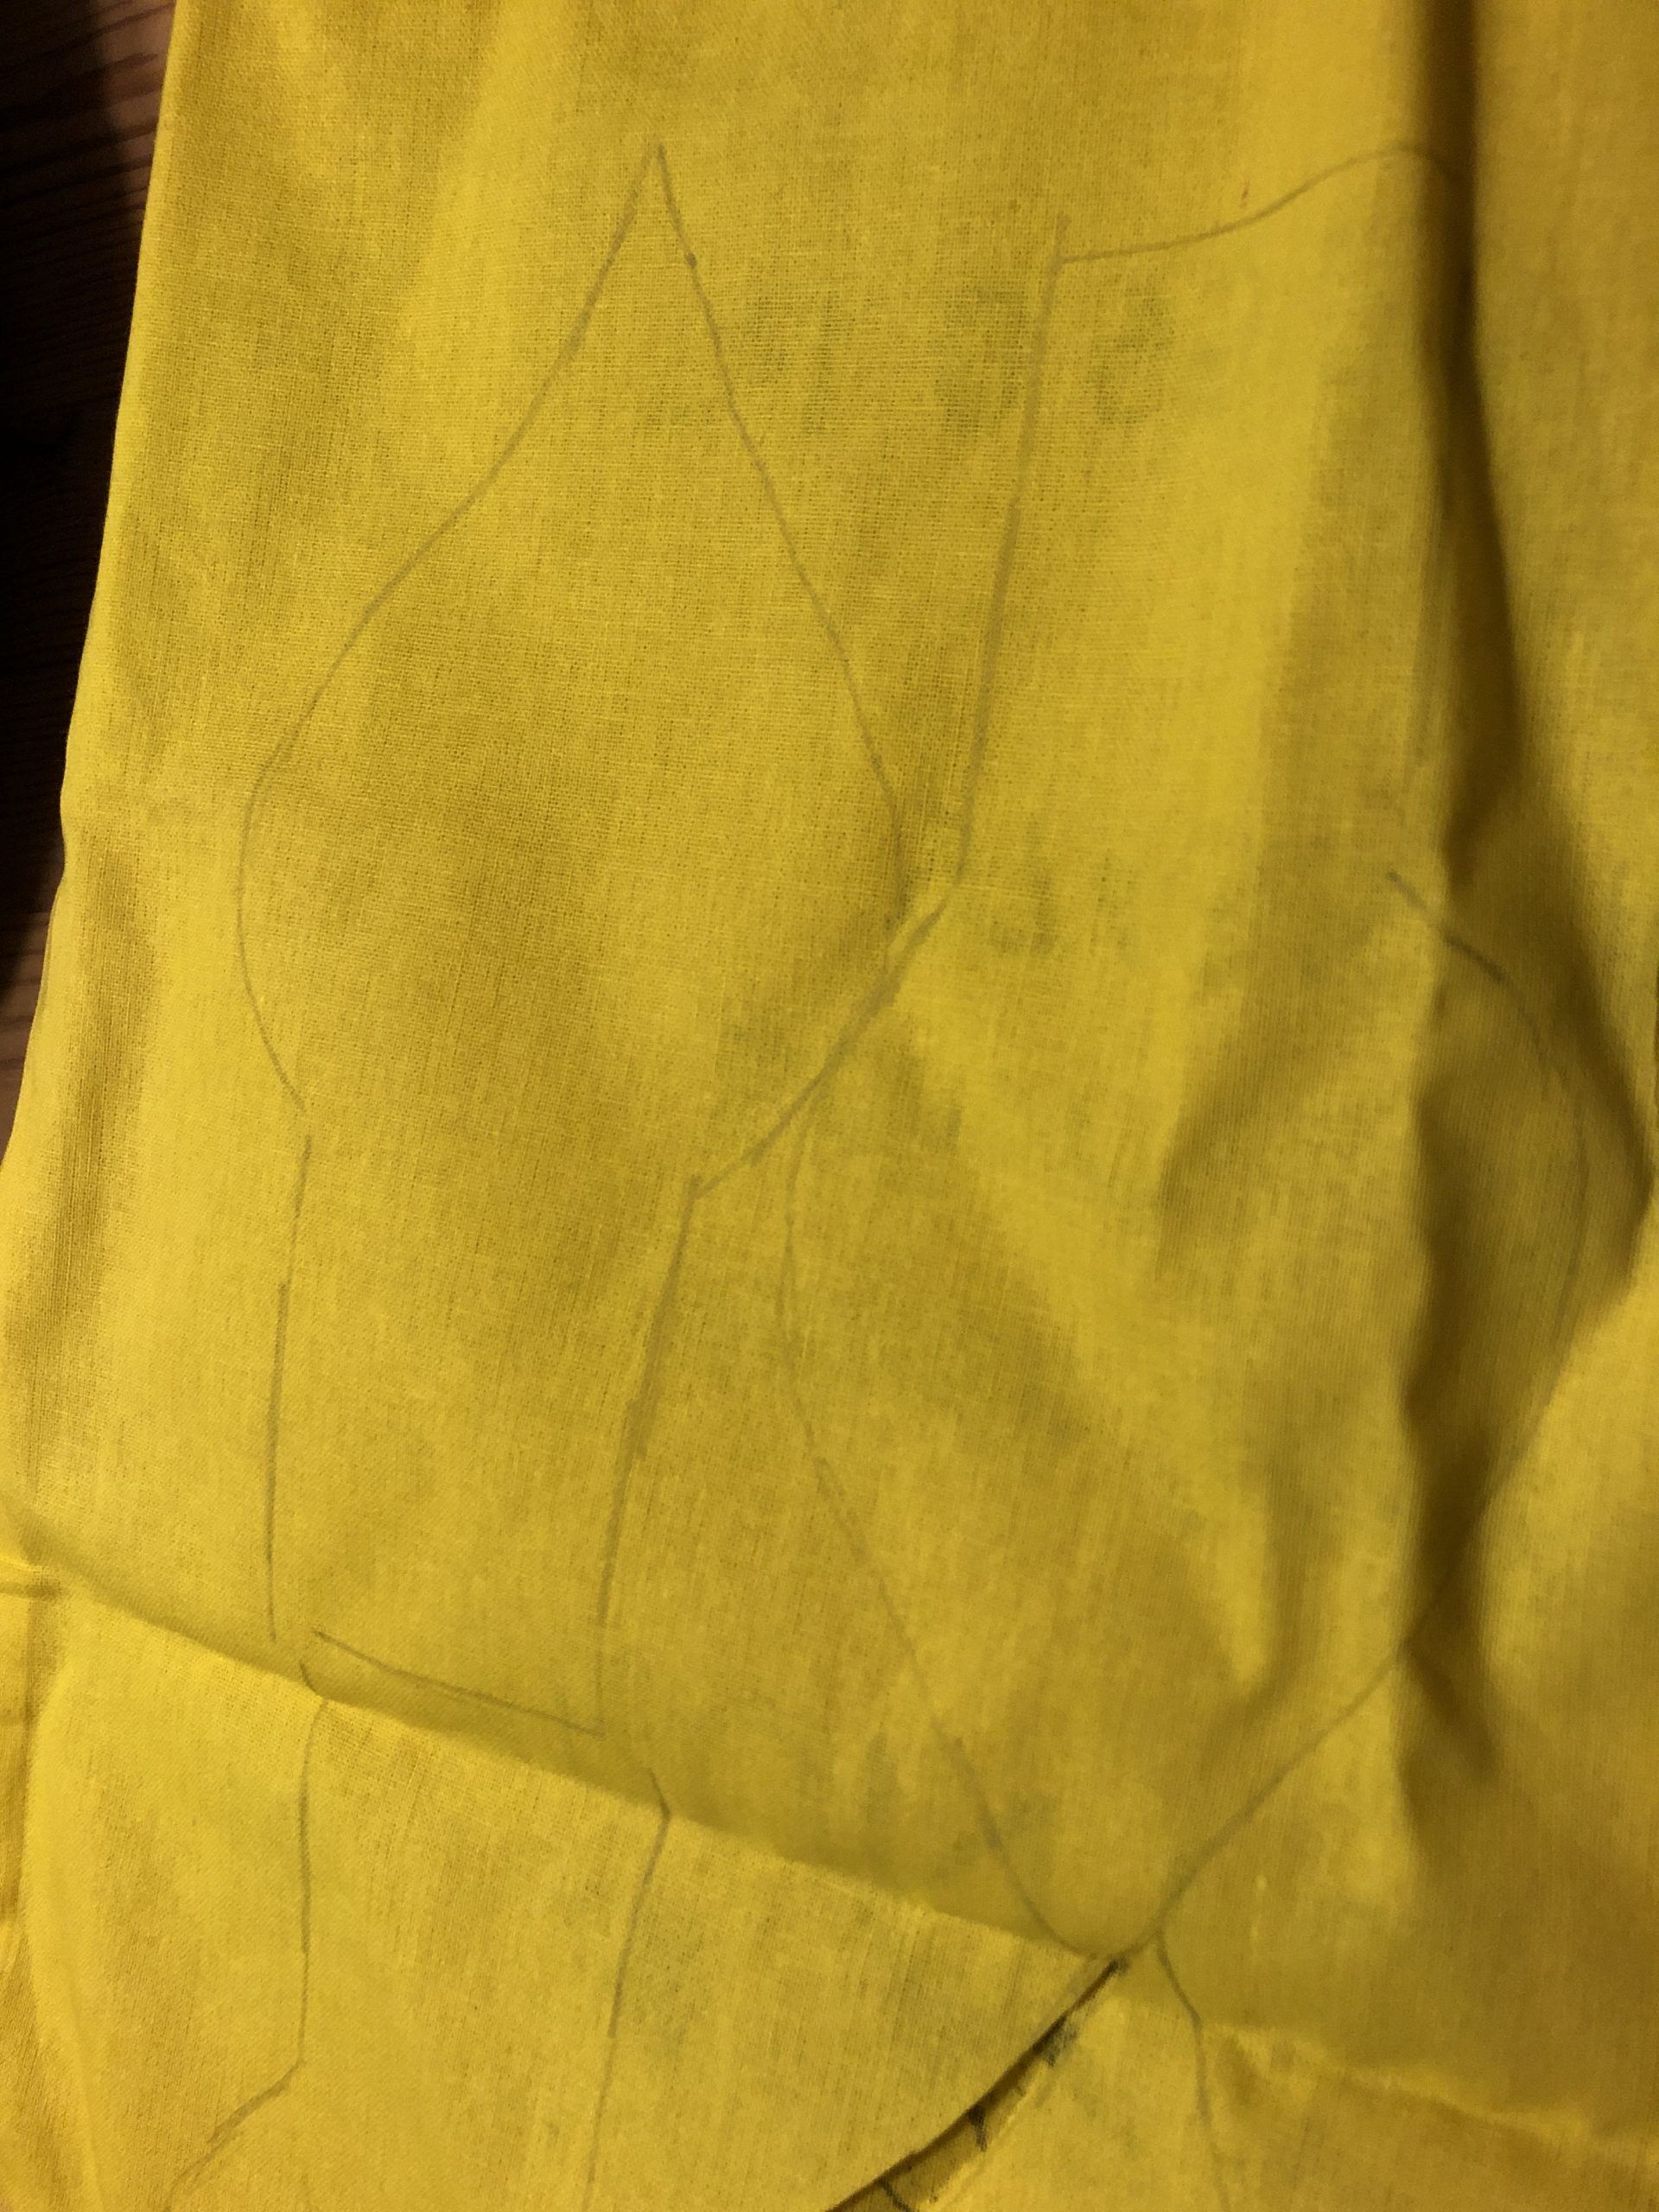
Bild zum Schritt 64 für das Bastel- und DIY-Abenteuer für Kinder: 'Übertragt den Schnitt auf den Stoff und schneidet zwei Teile...'

63

Now you put both pieces of fabric together with the beautiful side (right).
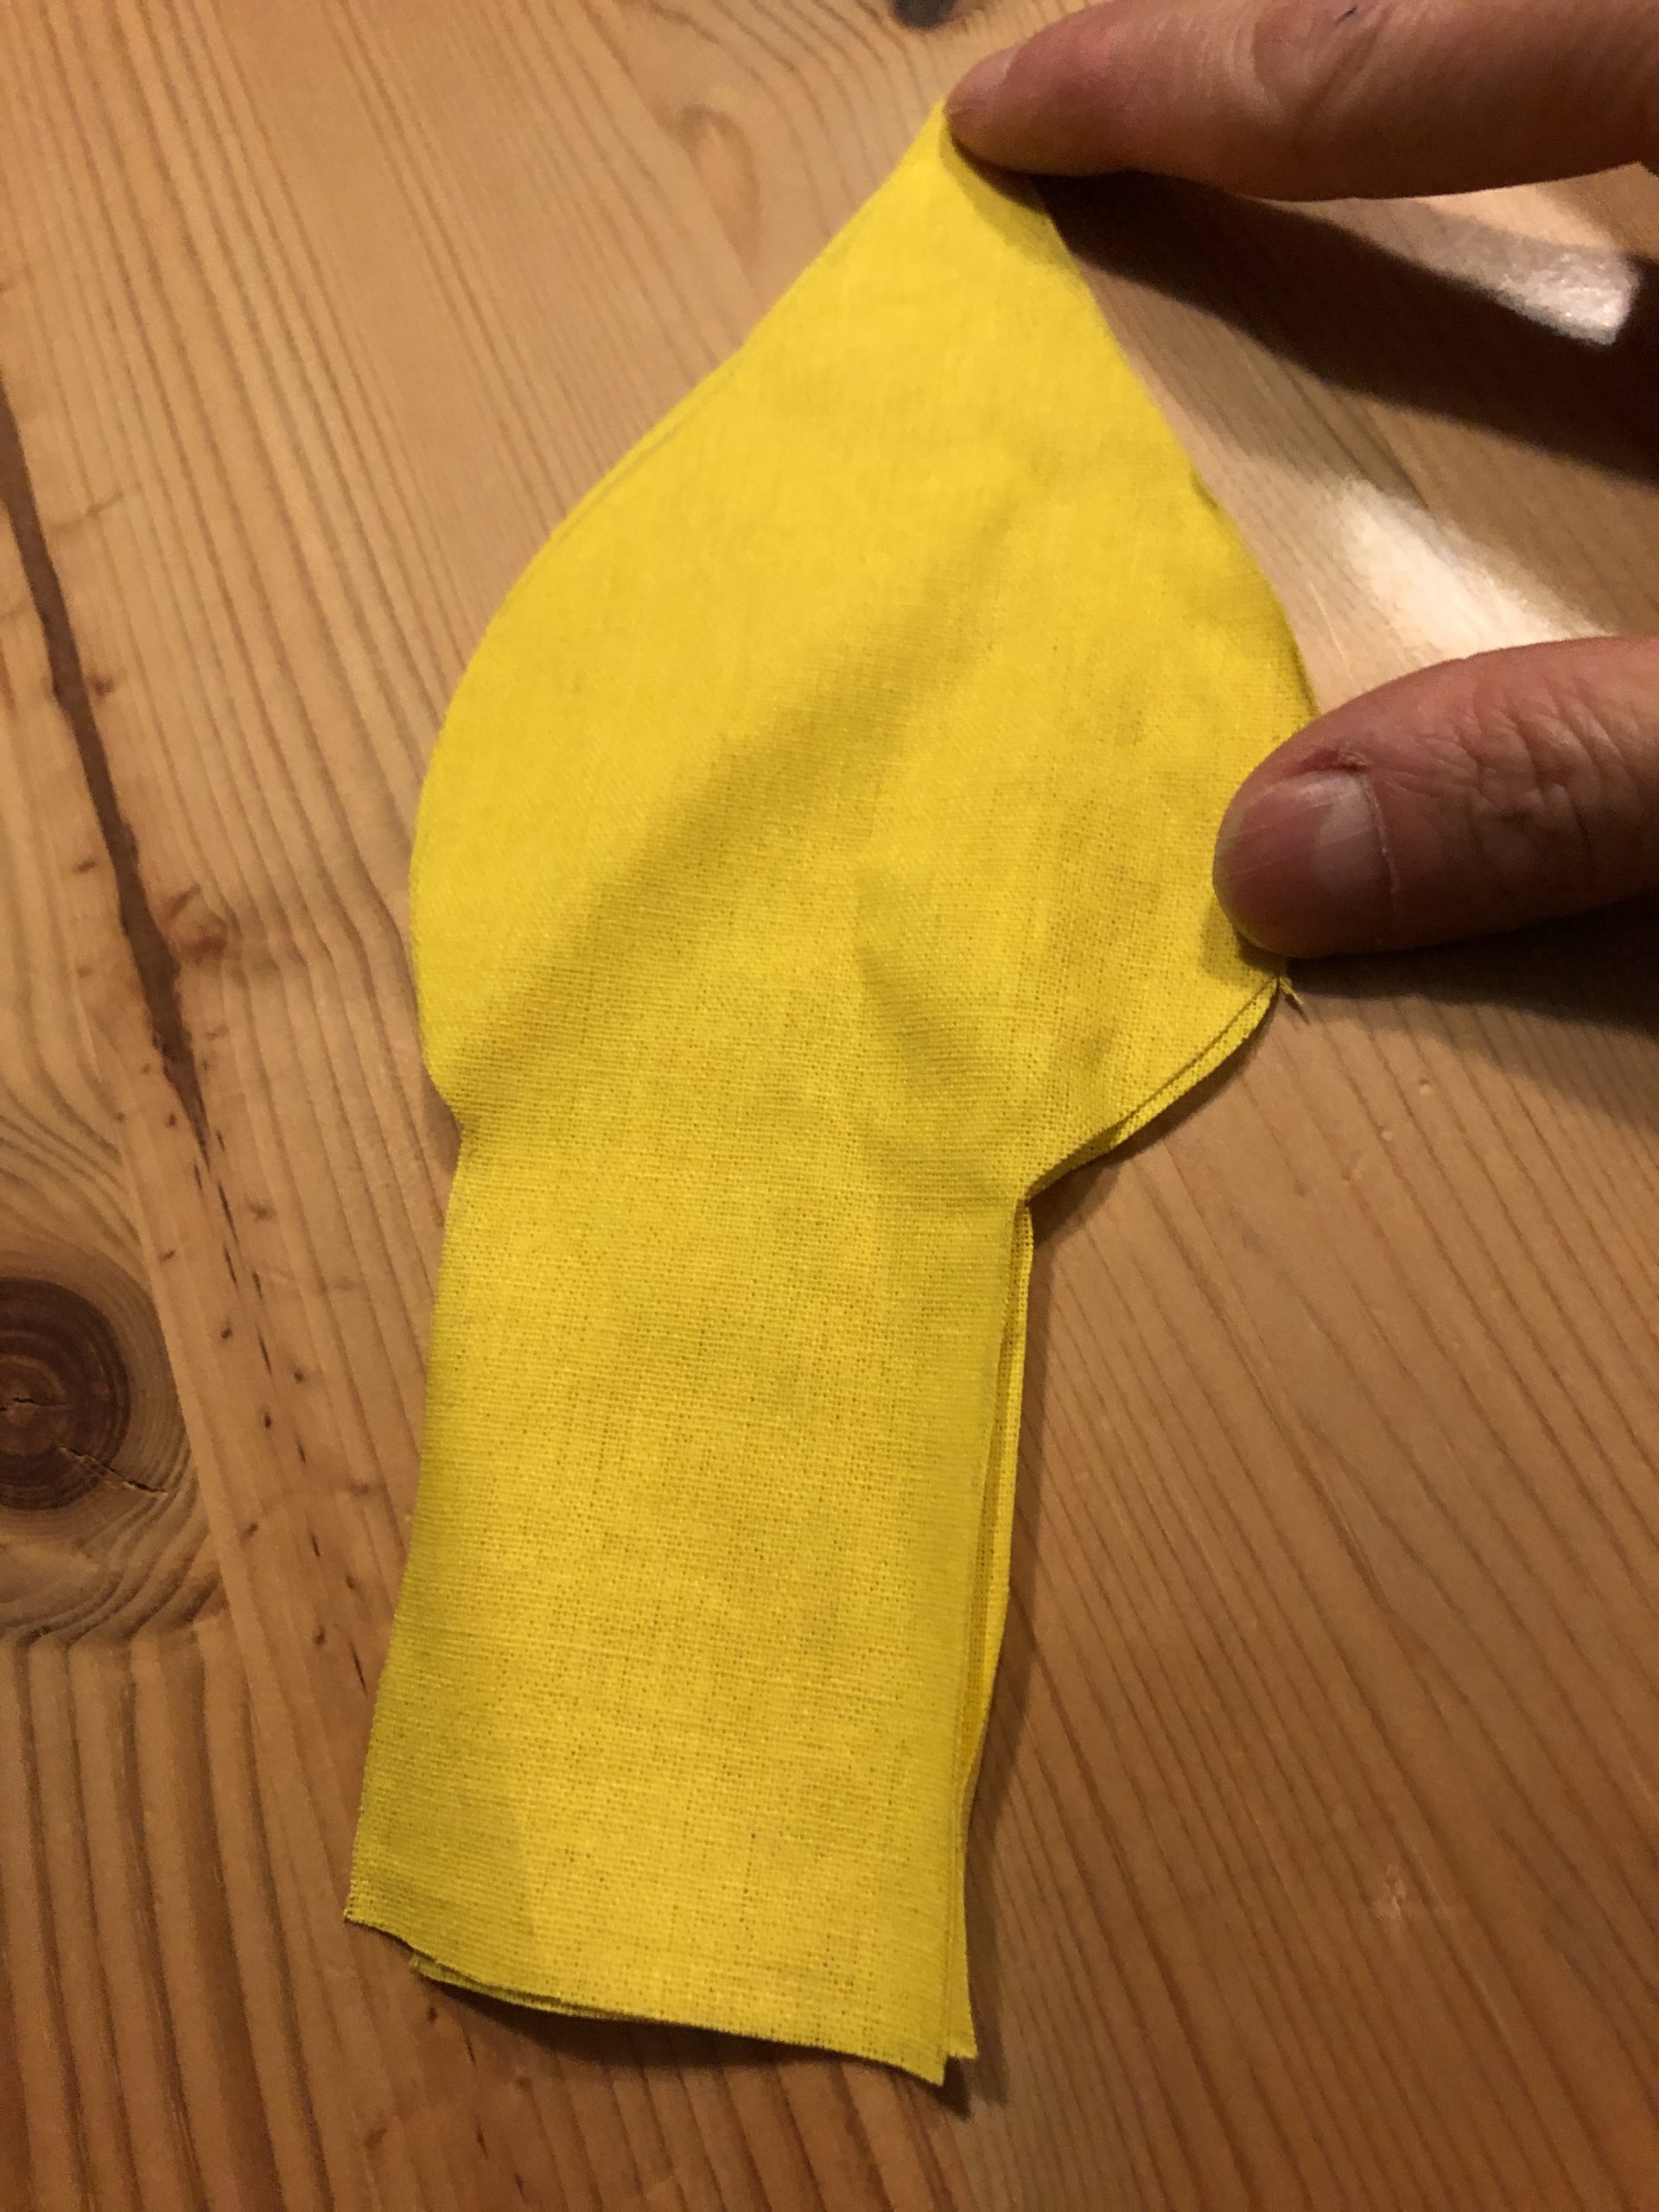
Bild zum Schritt 65 für das Bastel- und DIY-Abenteuer für Kinder: 'Beide Stoffteile legt ihr nun mit der schönen Seite (rechts)...'

64

With a pin you fix the fabrics.
With the sewing machine you sew the two fabric parts together. For this you sew on the inner line of the template.
The straight side at the lower end remains open!
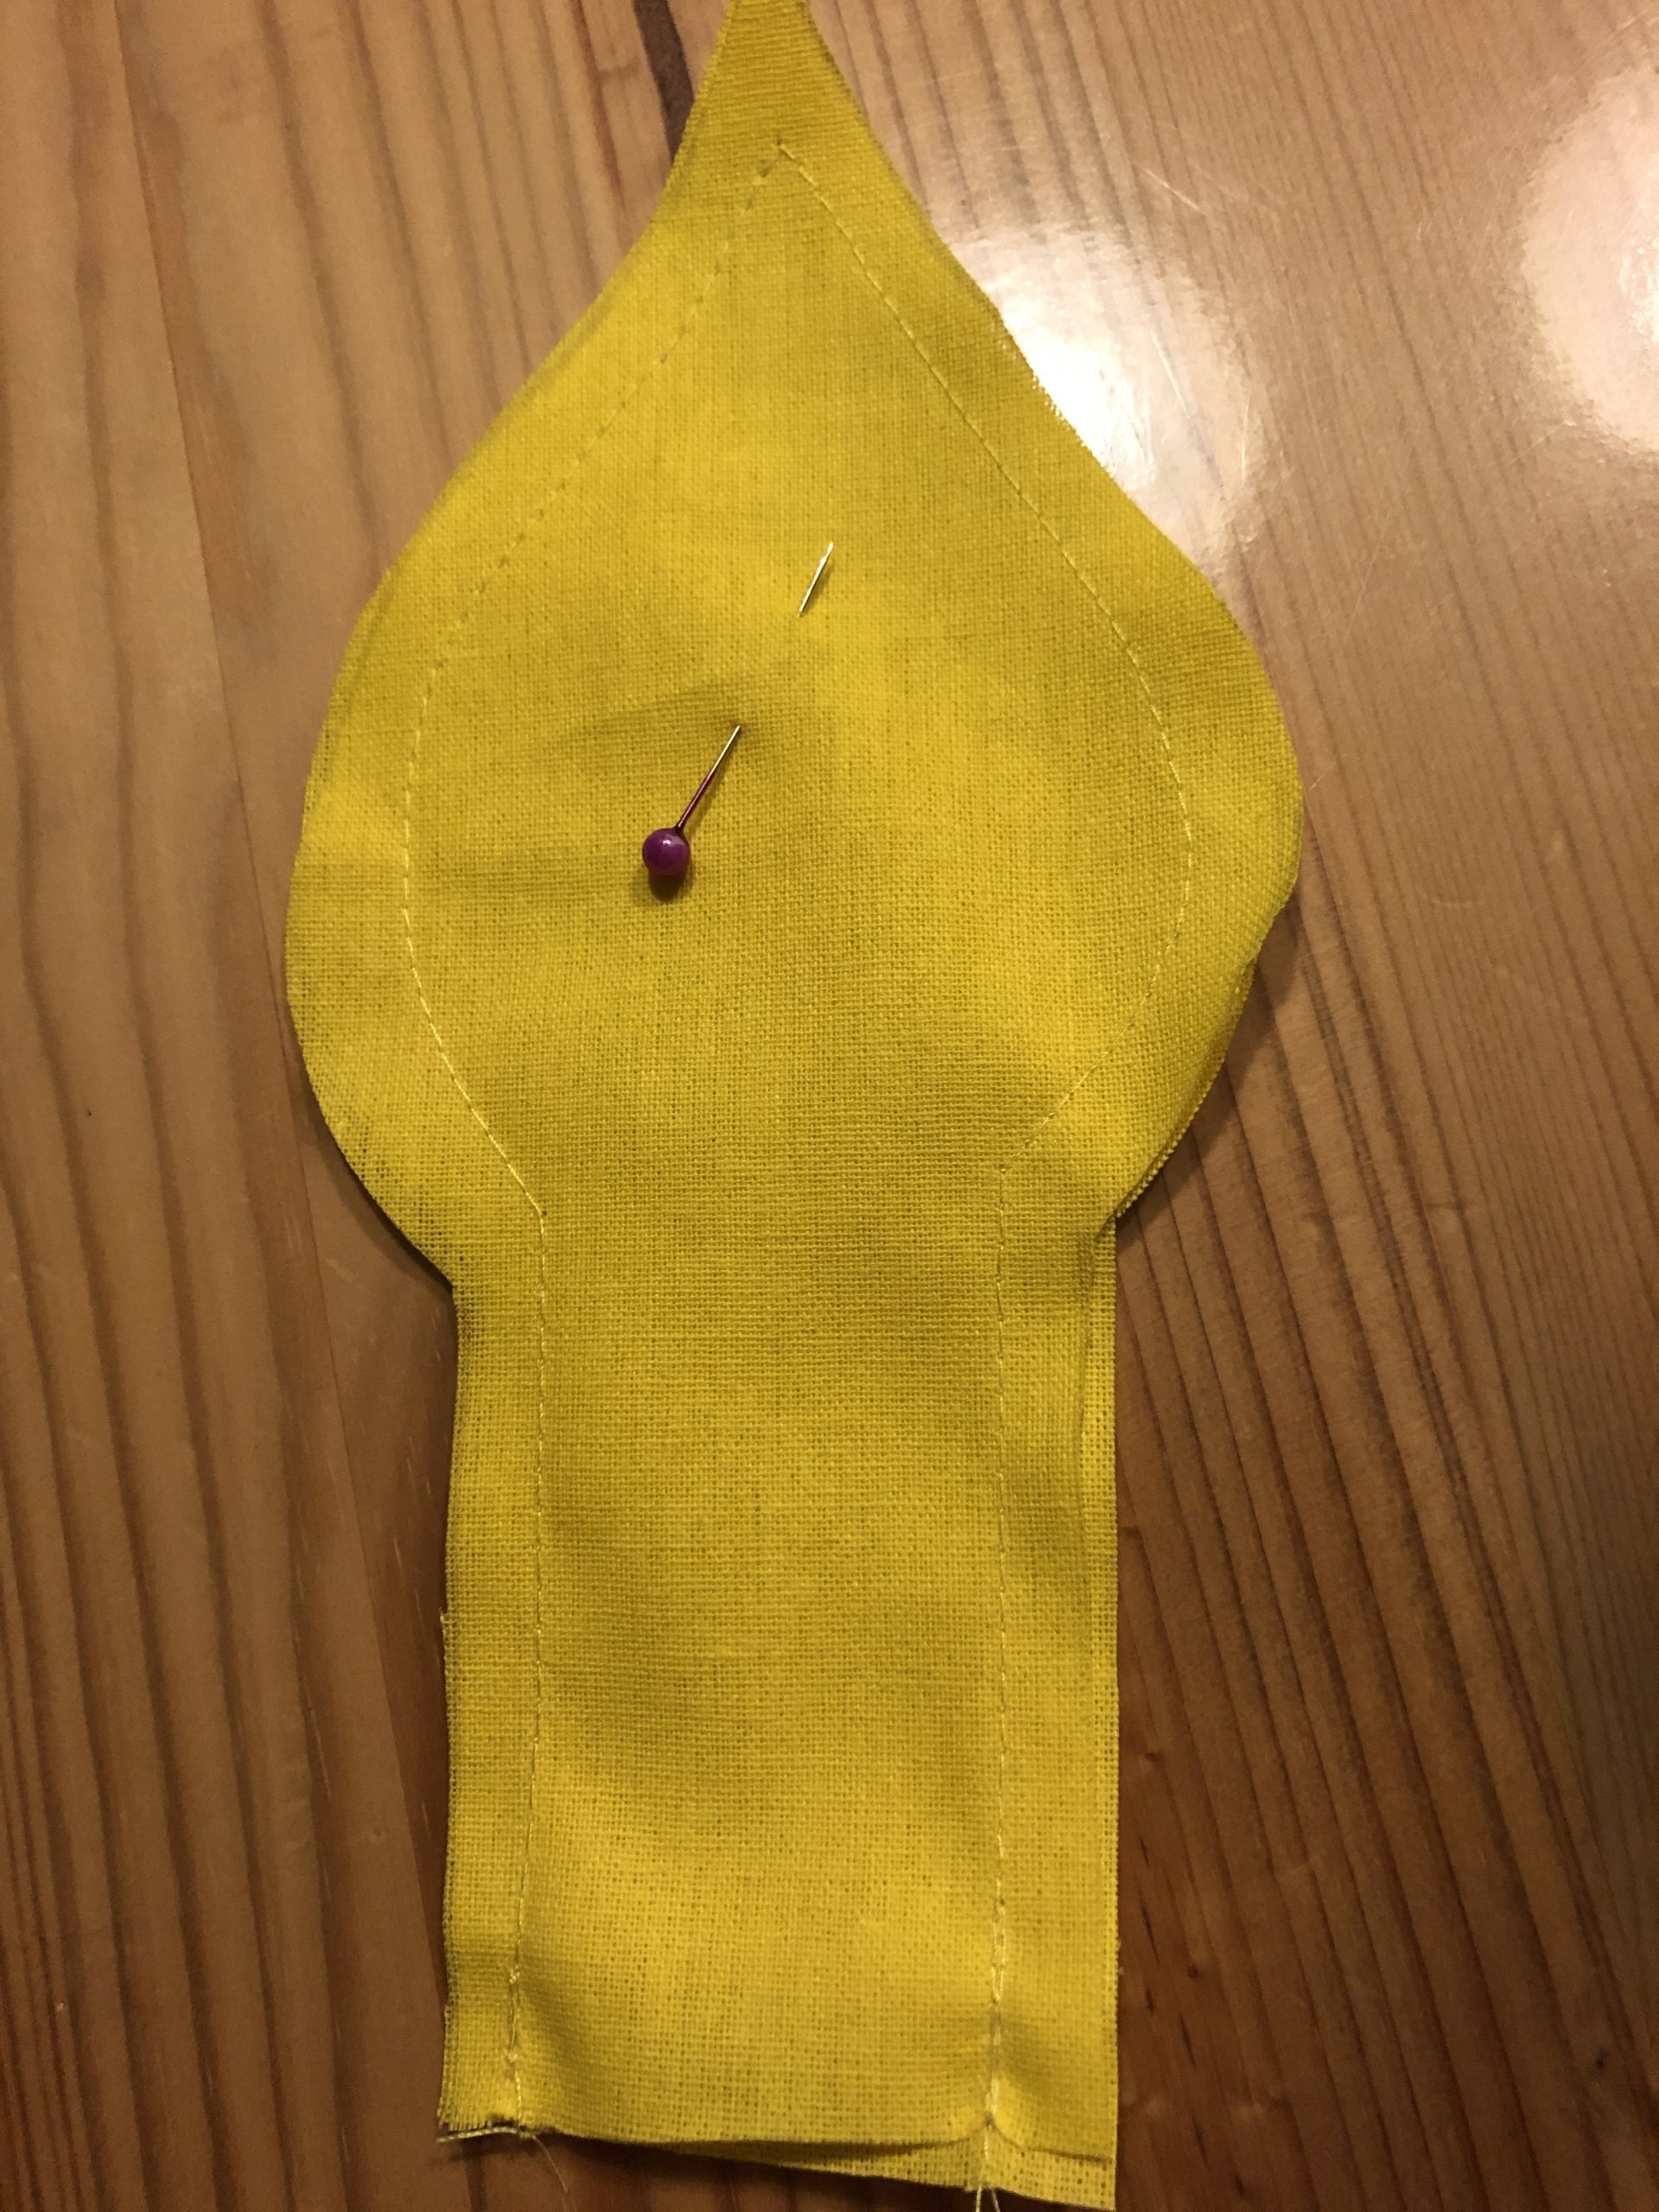
Bild zum Schritt 66 für das Bastel- und DIY-Abenteuer für Kinder: 'Mit einer Stecknadel fixiert ihr die Stoffe.  Mit der...'

65

Now you're turning the flame around.
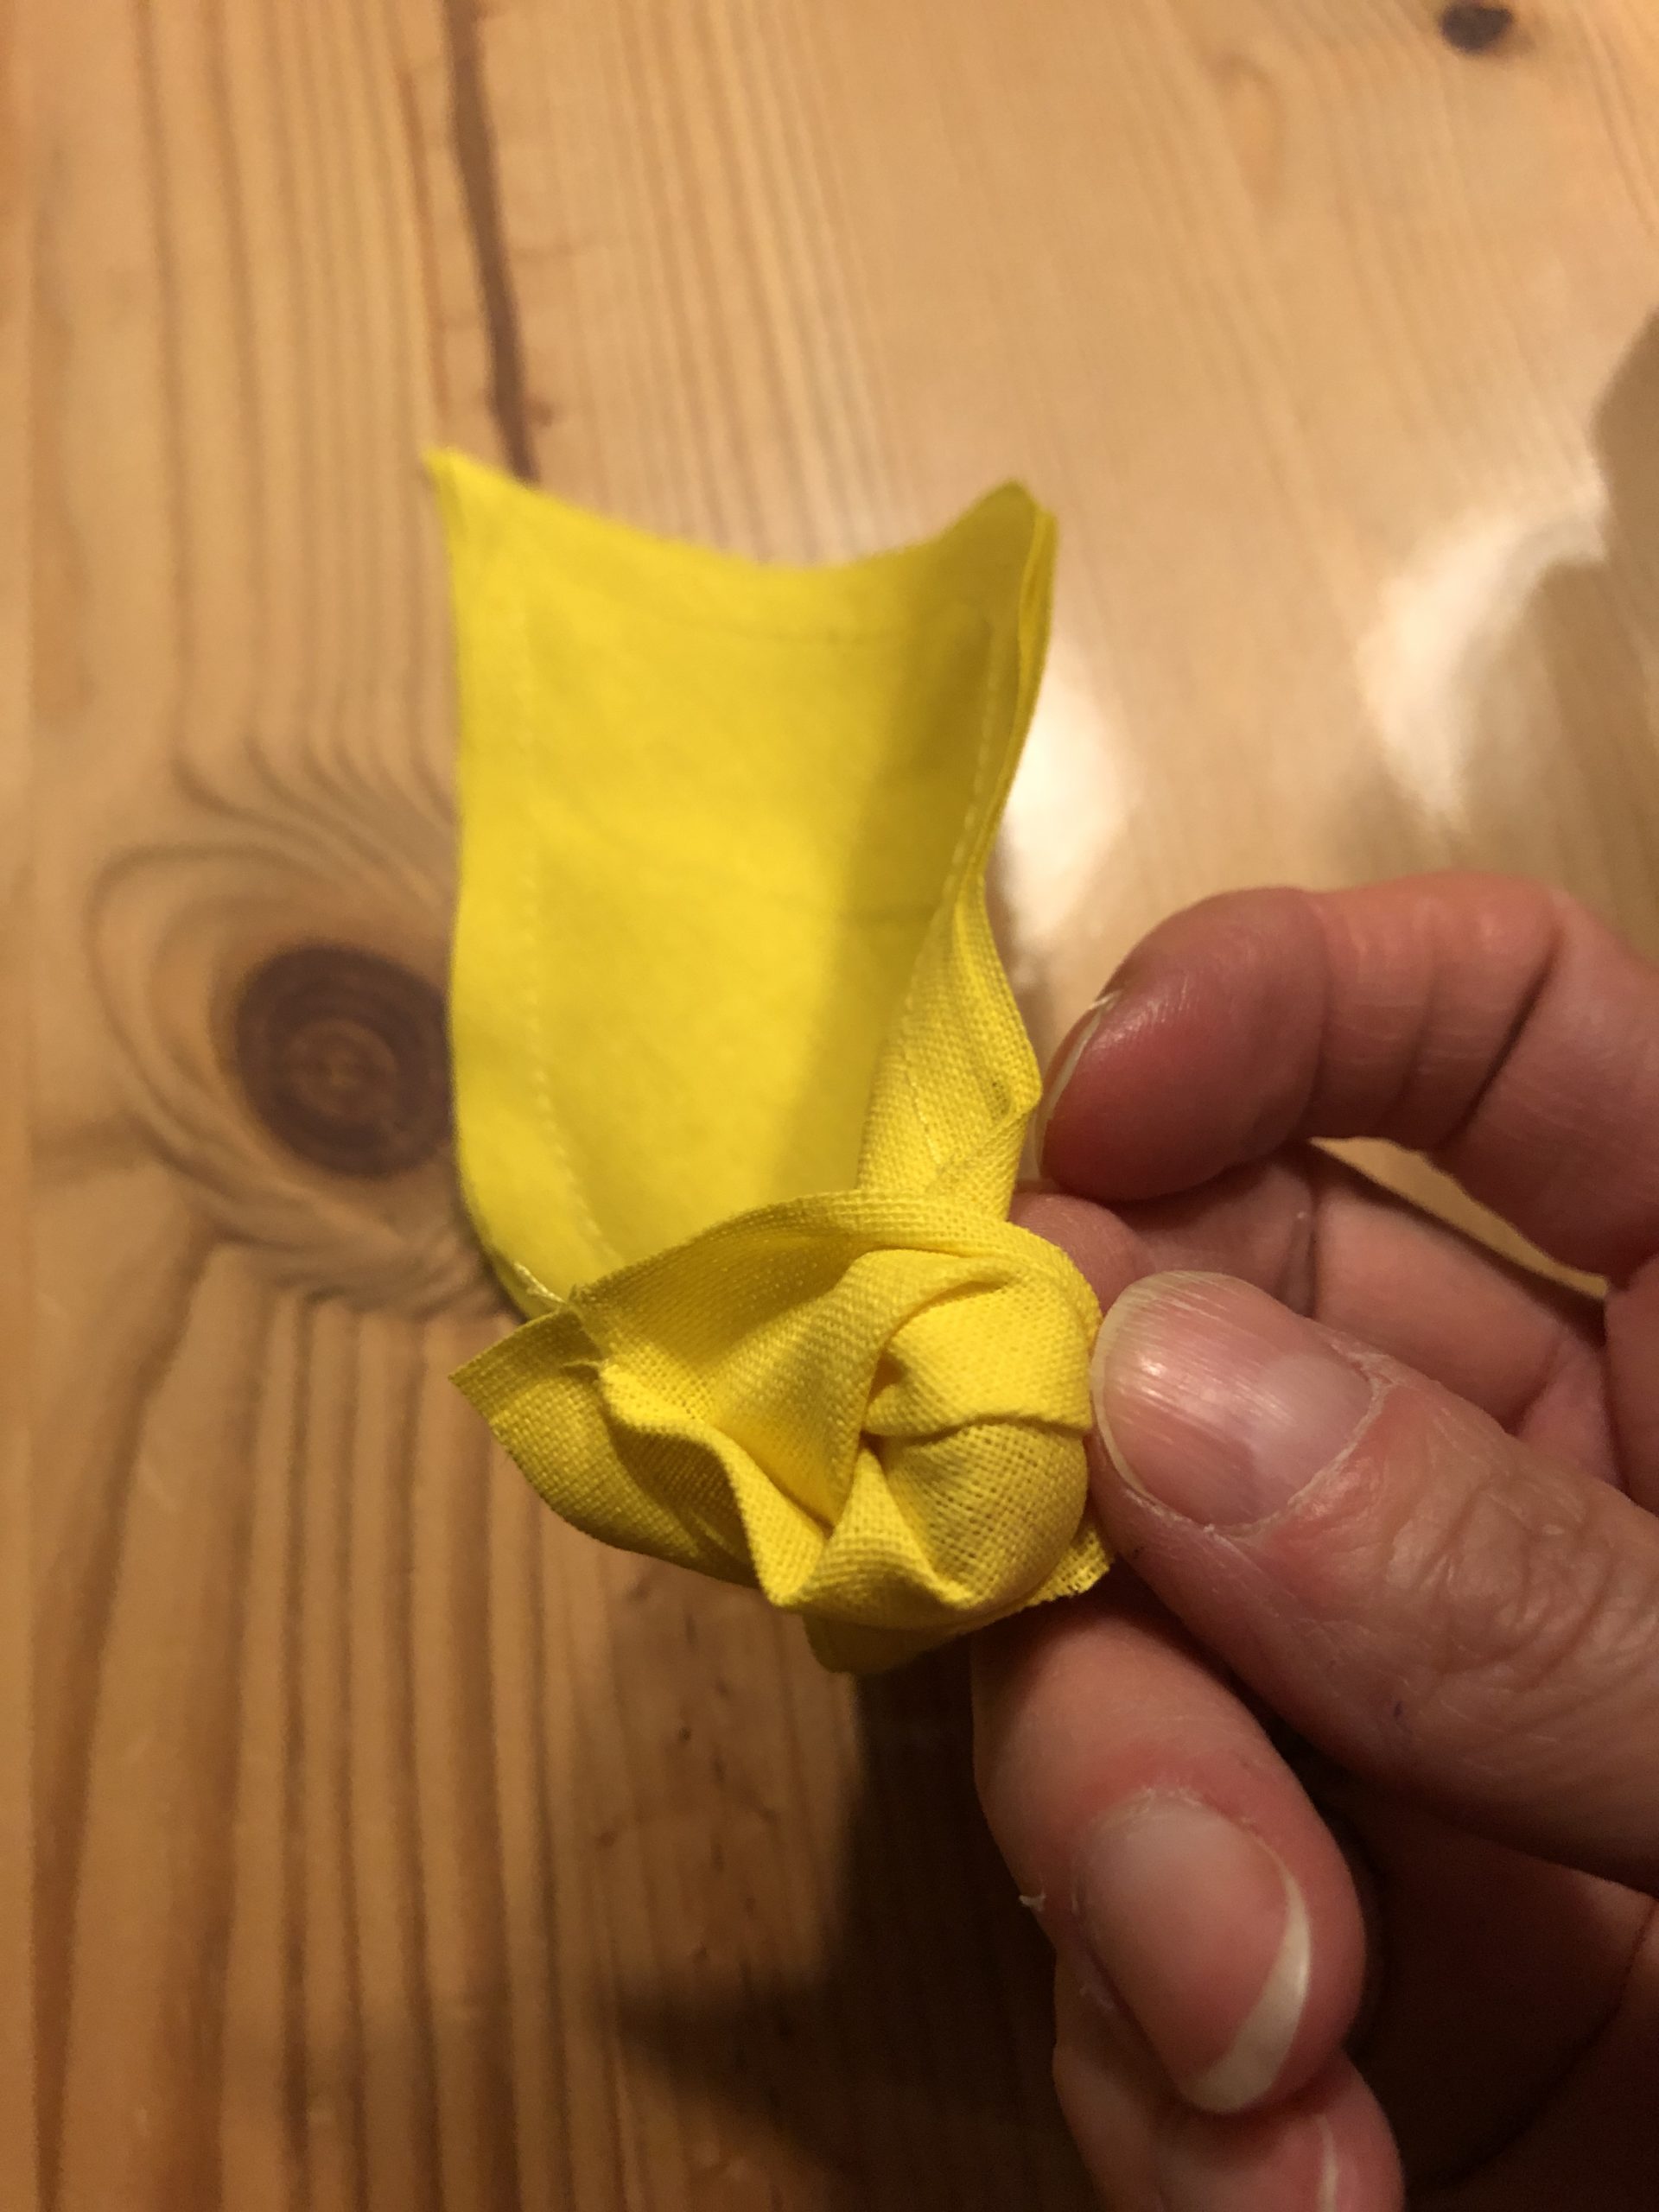
Bild zum Schritt 67 für das Bastel- und DIY-Abenteuer für Kinder: 'Jetzt dreht ihr die Flamme um.'

66

Take a pen to squeeze out the flame.
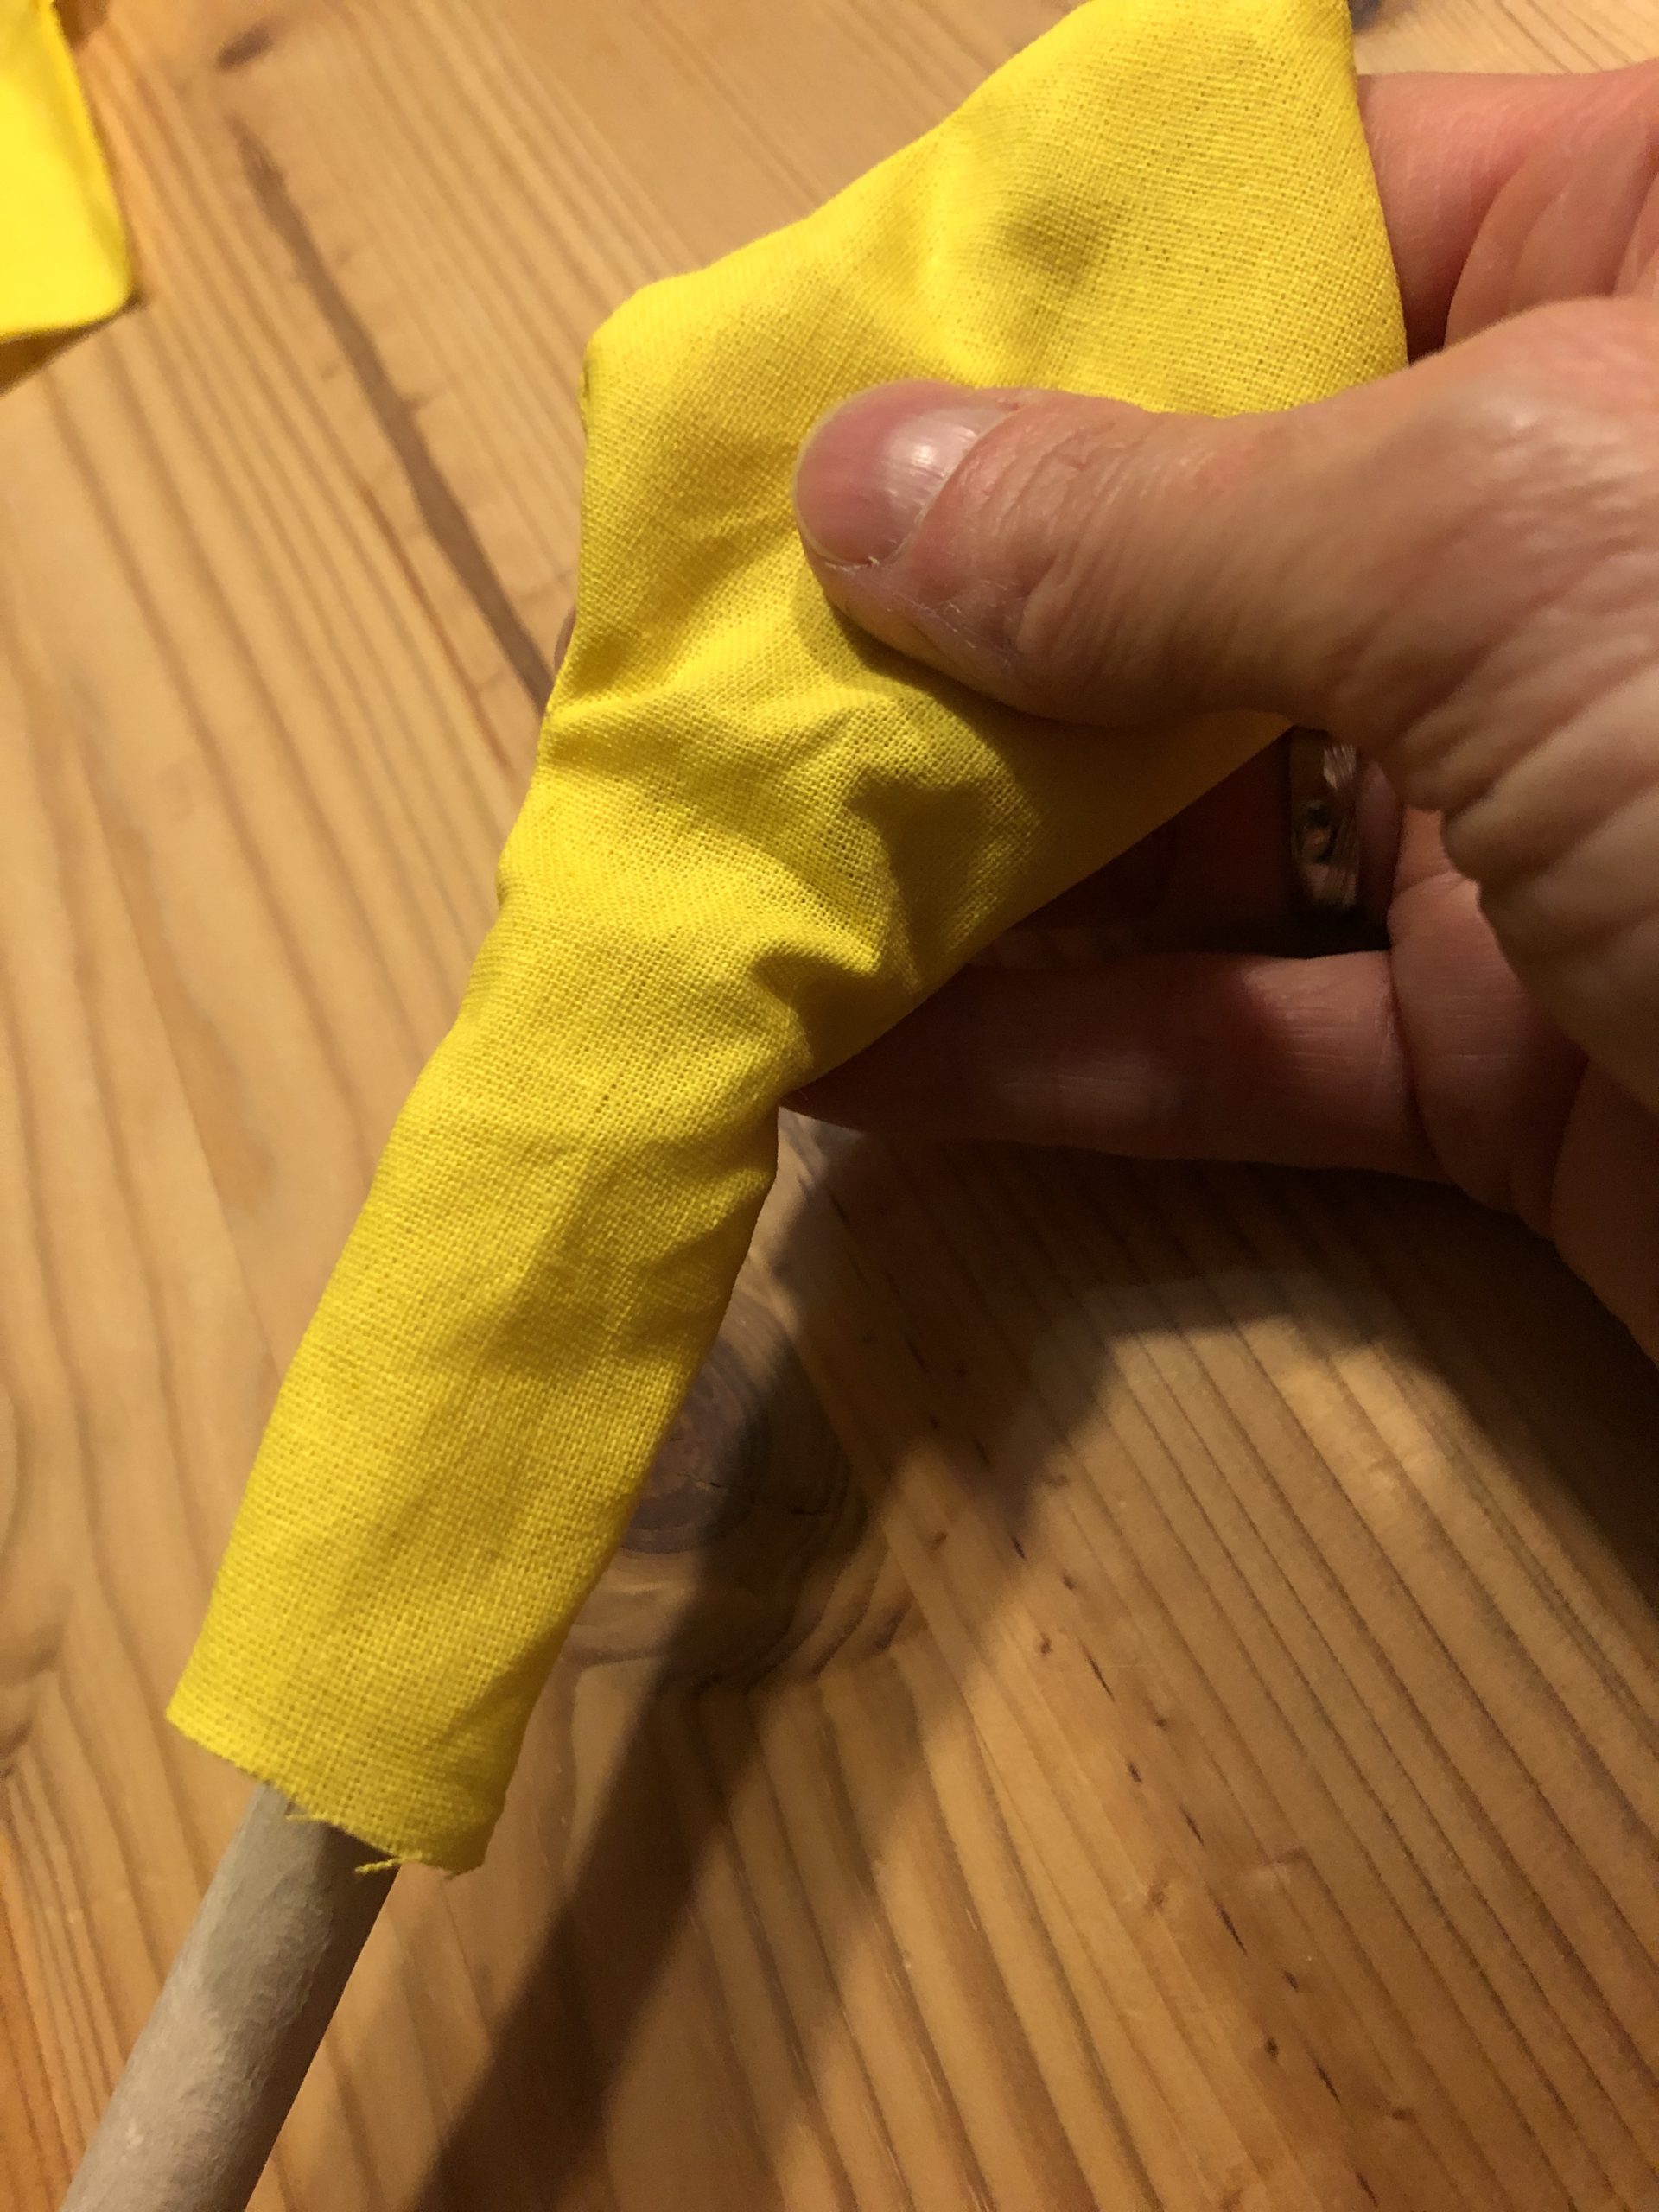
Bild zum Schritt 68 für das Bastel- und DIY-Abenteuer für Kinder: 'Nehmt euch einen Stift, mit dem ihr die Flamme herausdrücken...'

67

Now fill the flame with fabric residue.
The straight part of the flame is not filled.
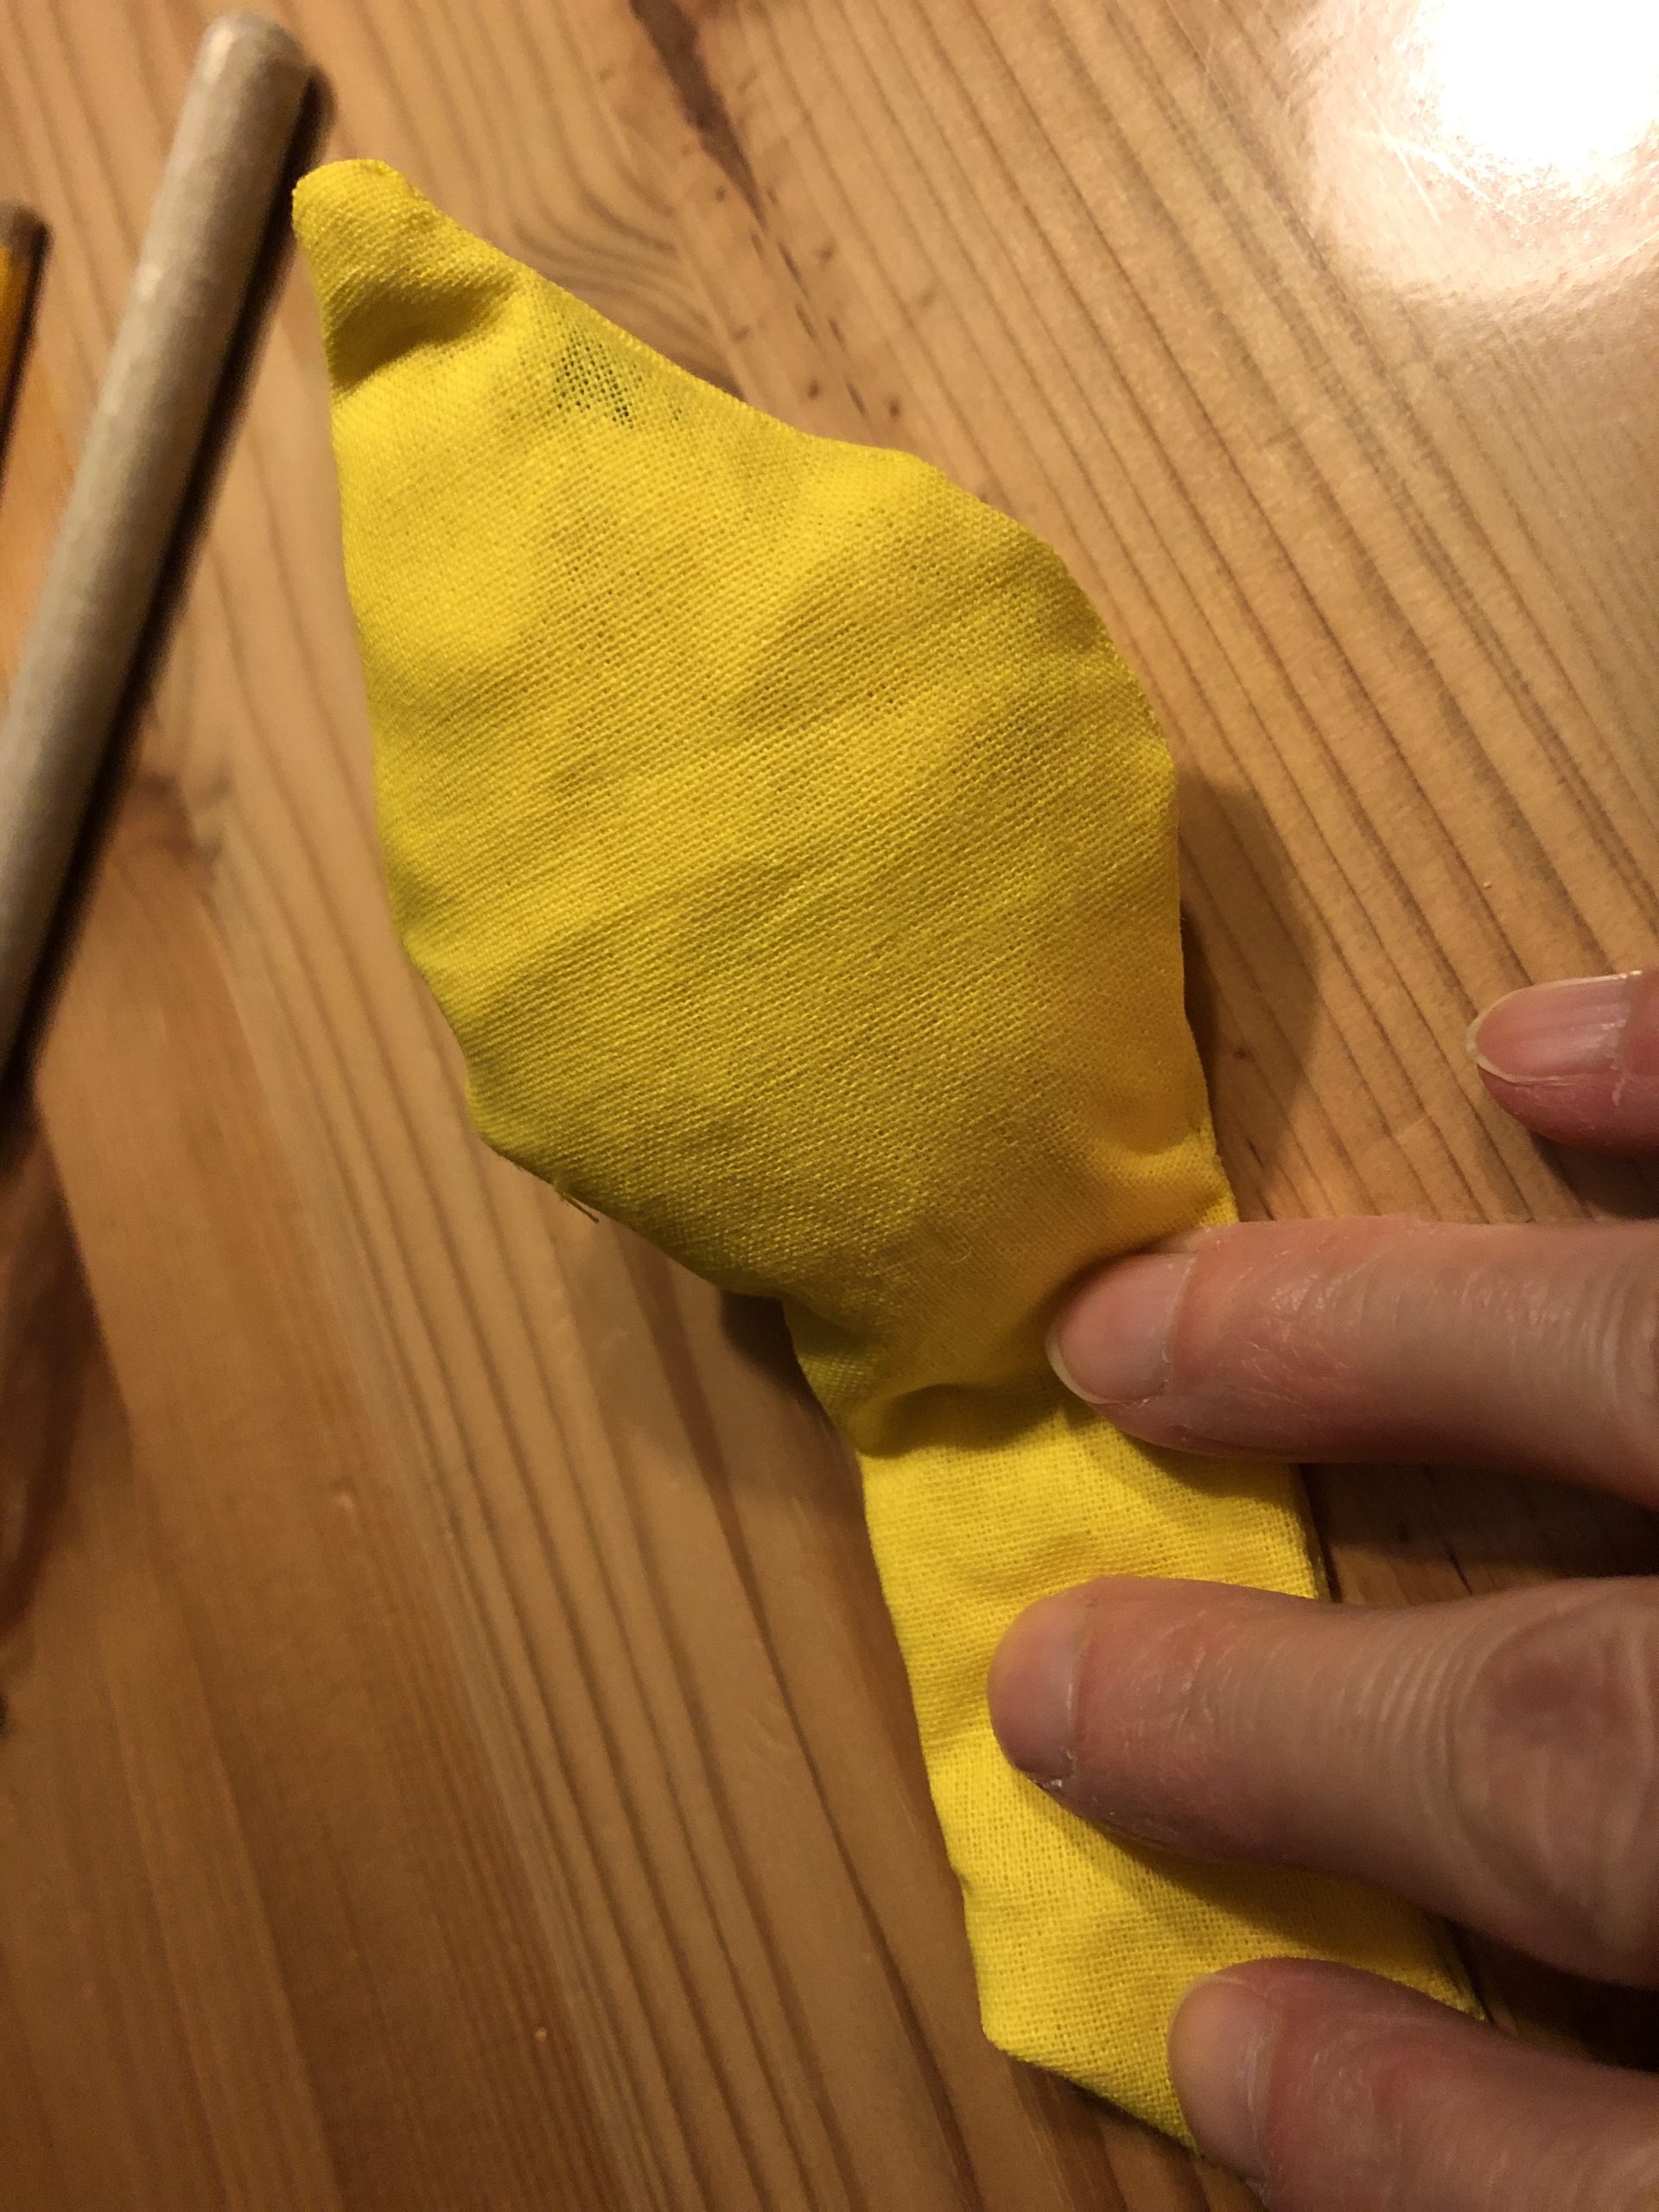
Bild zum Schritt 69 für das Bastel- und DIY-Abenteuer für Kinder: 'Jetzt füllt die Flamme mit Stoffresten.  Der gerade Teil...'

68

The filled piece of the flame is sewn with a zigzag stitch. This seam doesn't have to be perfect, it is pushed inward and is not visible!
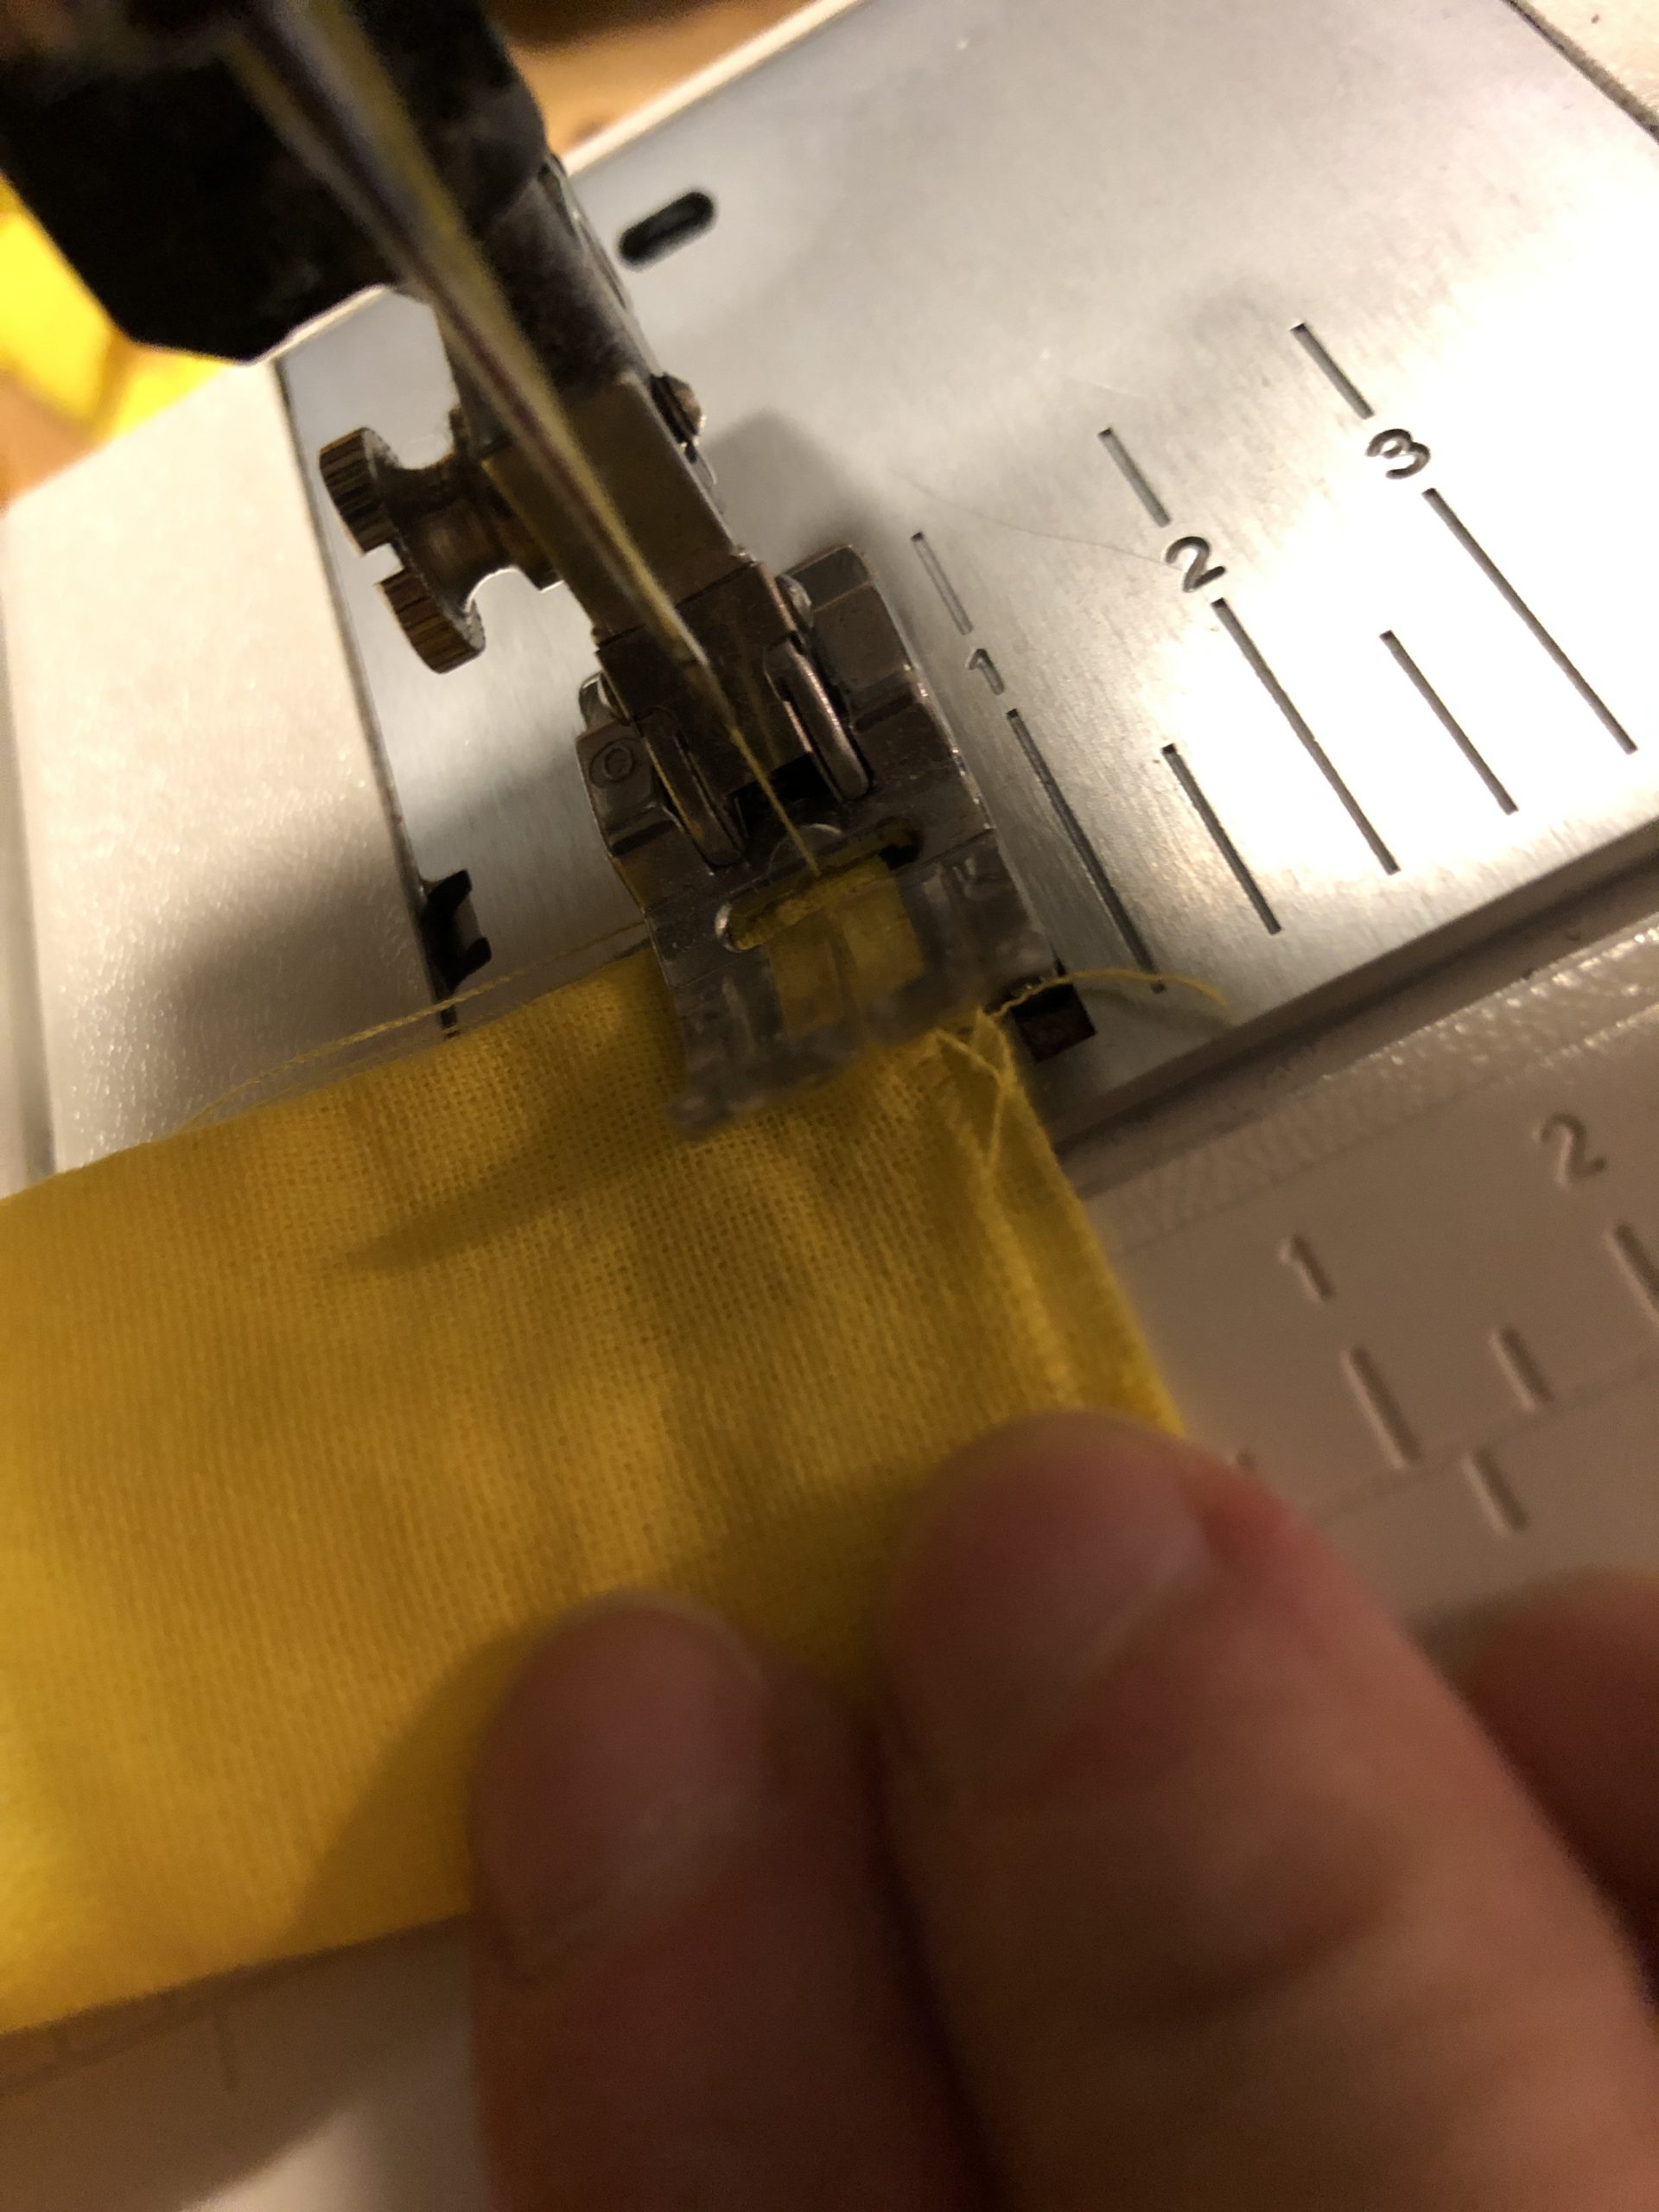
Bild zum Schritt 70 für das Bastel- und DIY-Abenteuer für Kinder: 'Das gefüllte Stück der Flamme wird mit einem Zickzack-Stich zugenäht....'

69

2. Bild zum Schritt 70 für das Bastel- und DIY-Abenteuer für Kinder: 'Das gefüllte Stück der Flamme wird mit einem Zickzack-Stich zugenäht....'

70

3. Bild zum Schritt 71 für das Bastel- und DIY-Abenteuer für Kinder: 'Das gefüllte Stück der Flamme wird mit einem Zickzack-Stich zugenäht....'

71

With one finger you now carefully push the straight piece inwards (as with a finger doll!?)
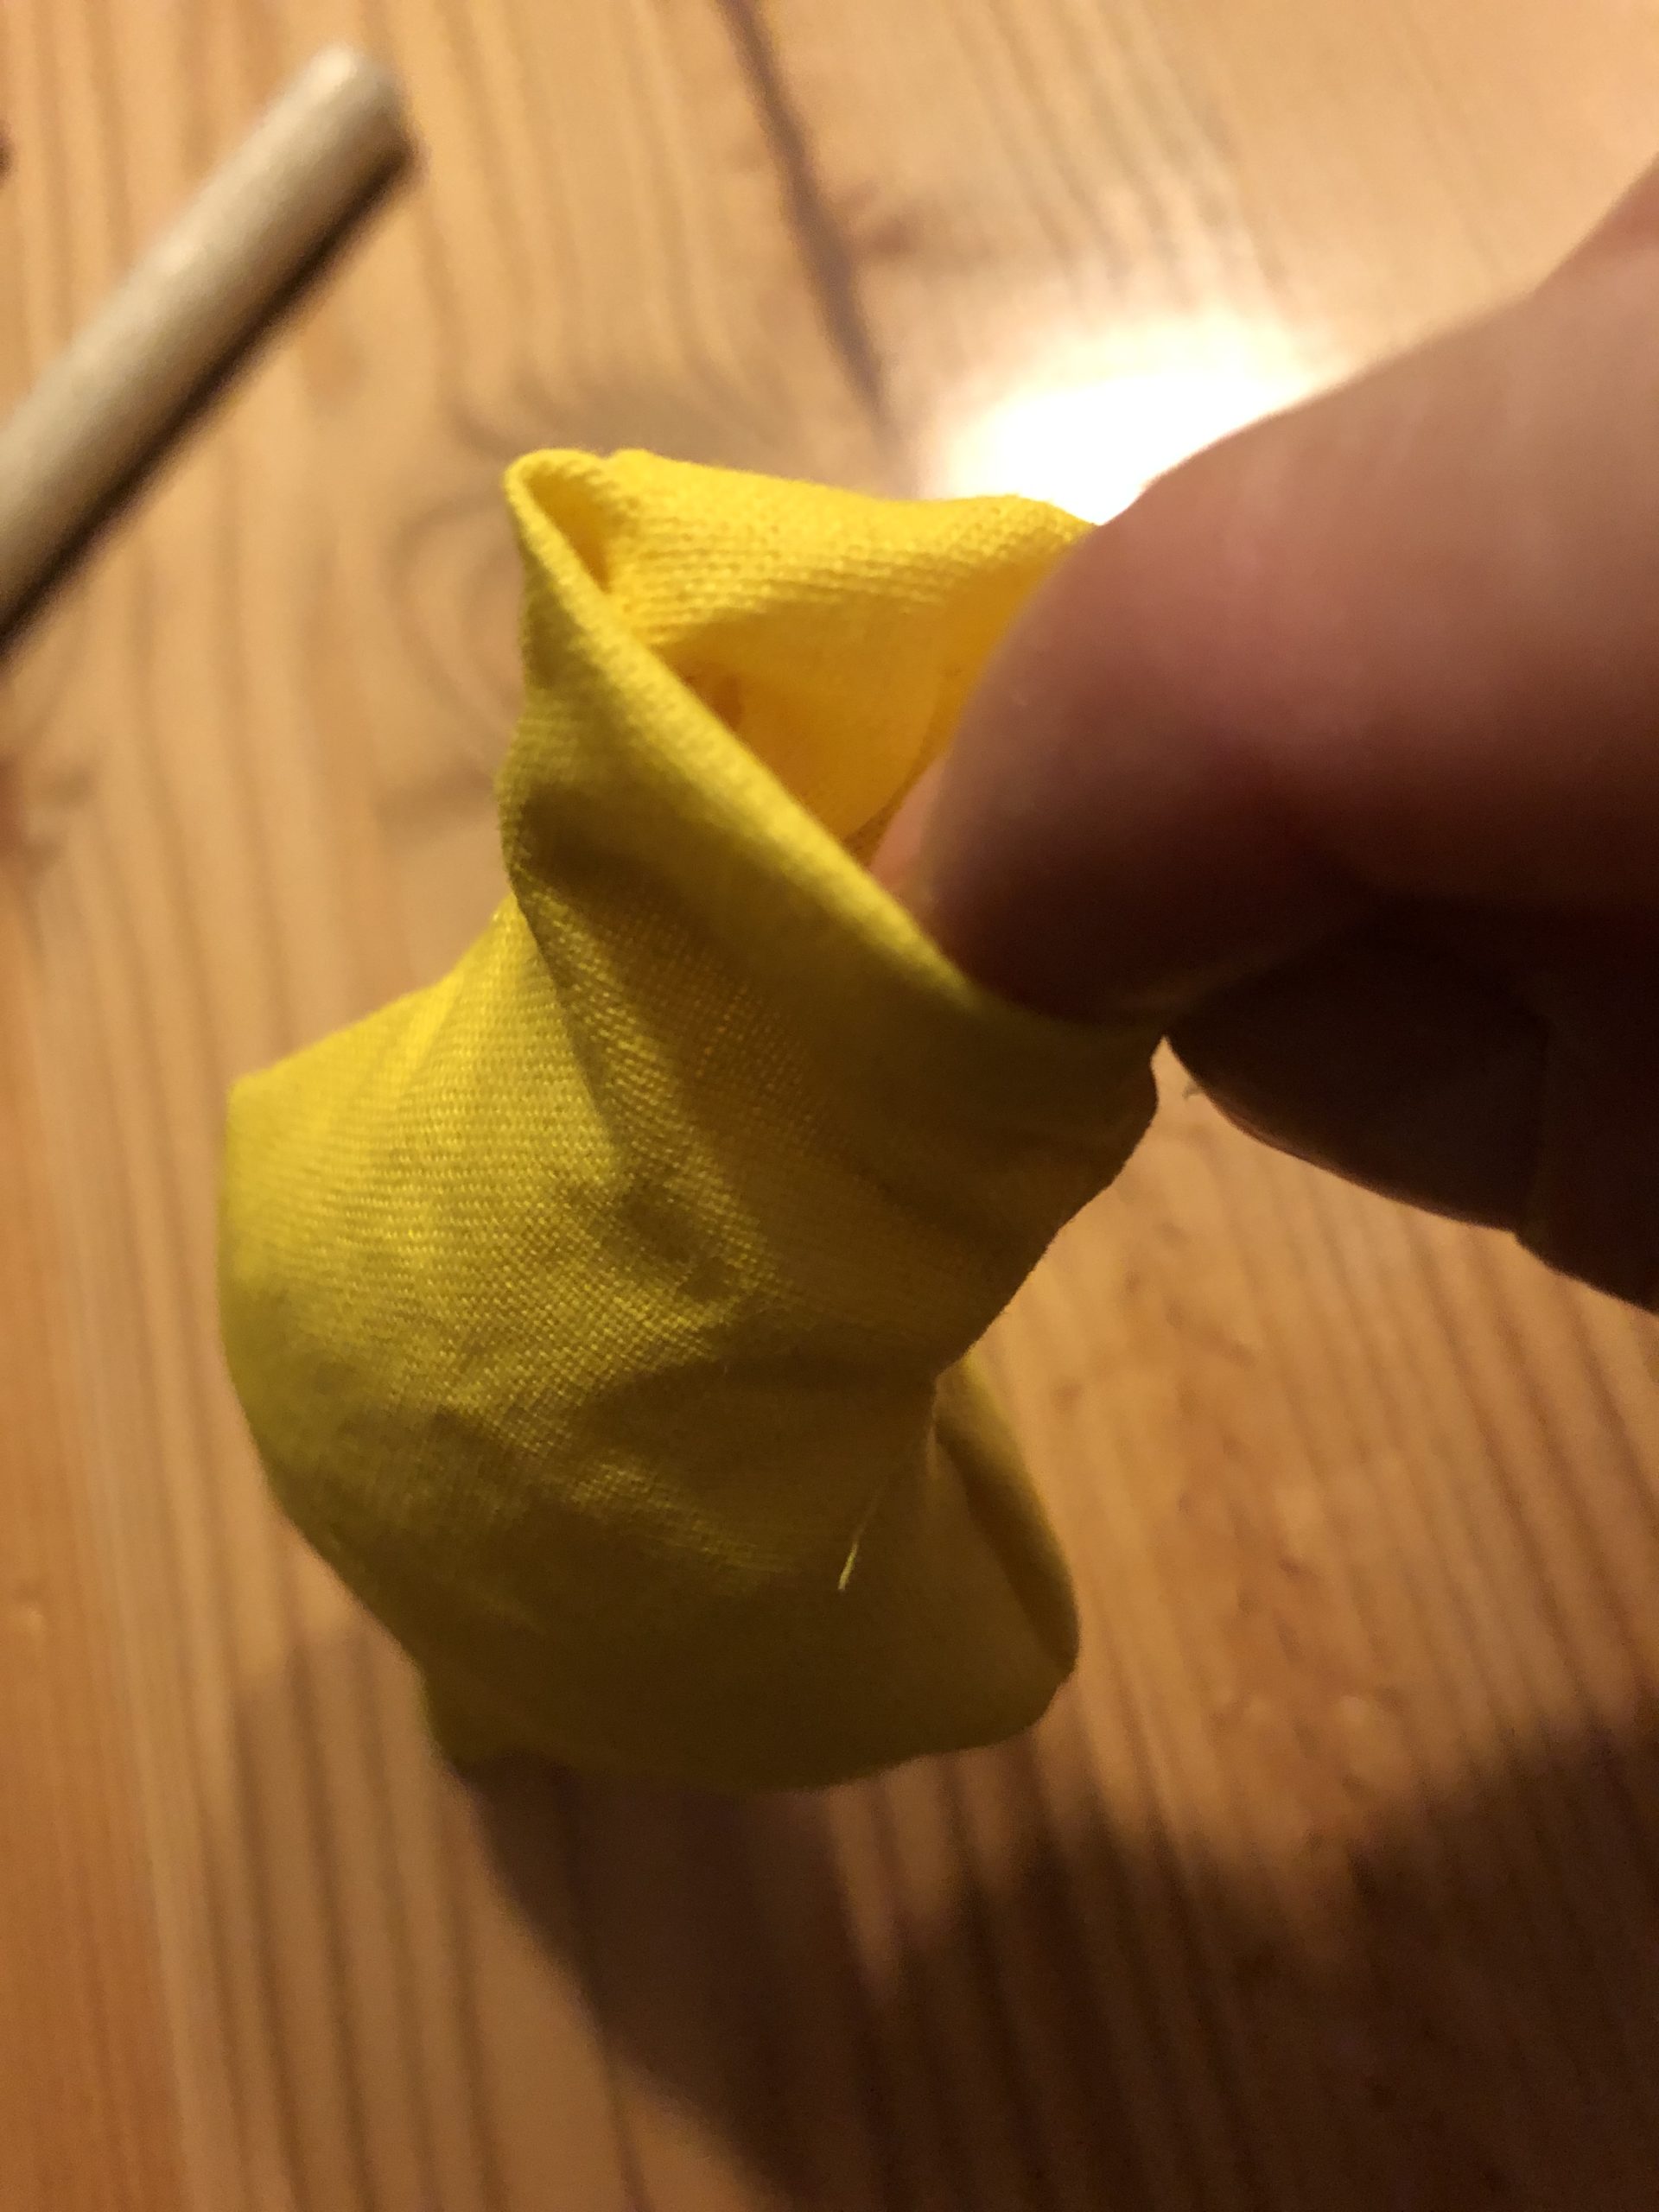
Bild zum Schritt 73 für das Bastel- und DIY-Abenteuer für Kinder: 'Mit einem Finger schiebt ihr nun vorsichtig das gerade Stück...'

72

So the straight part disappears almost completely.
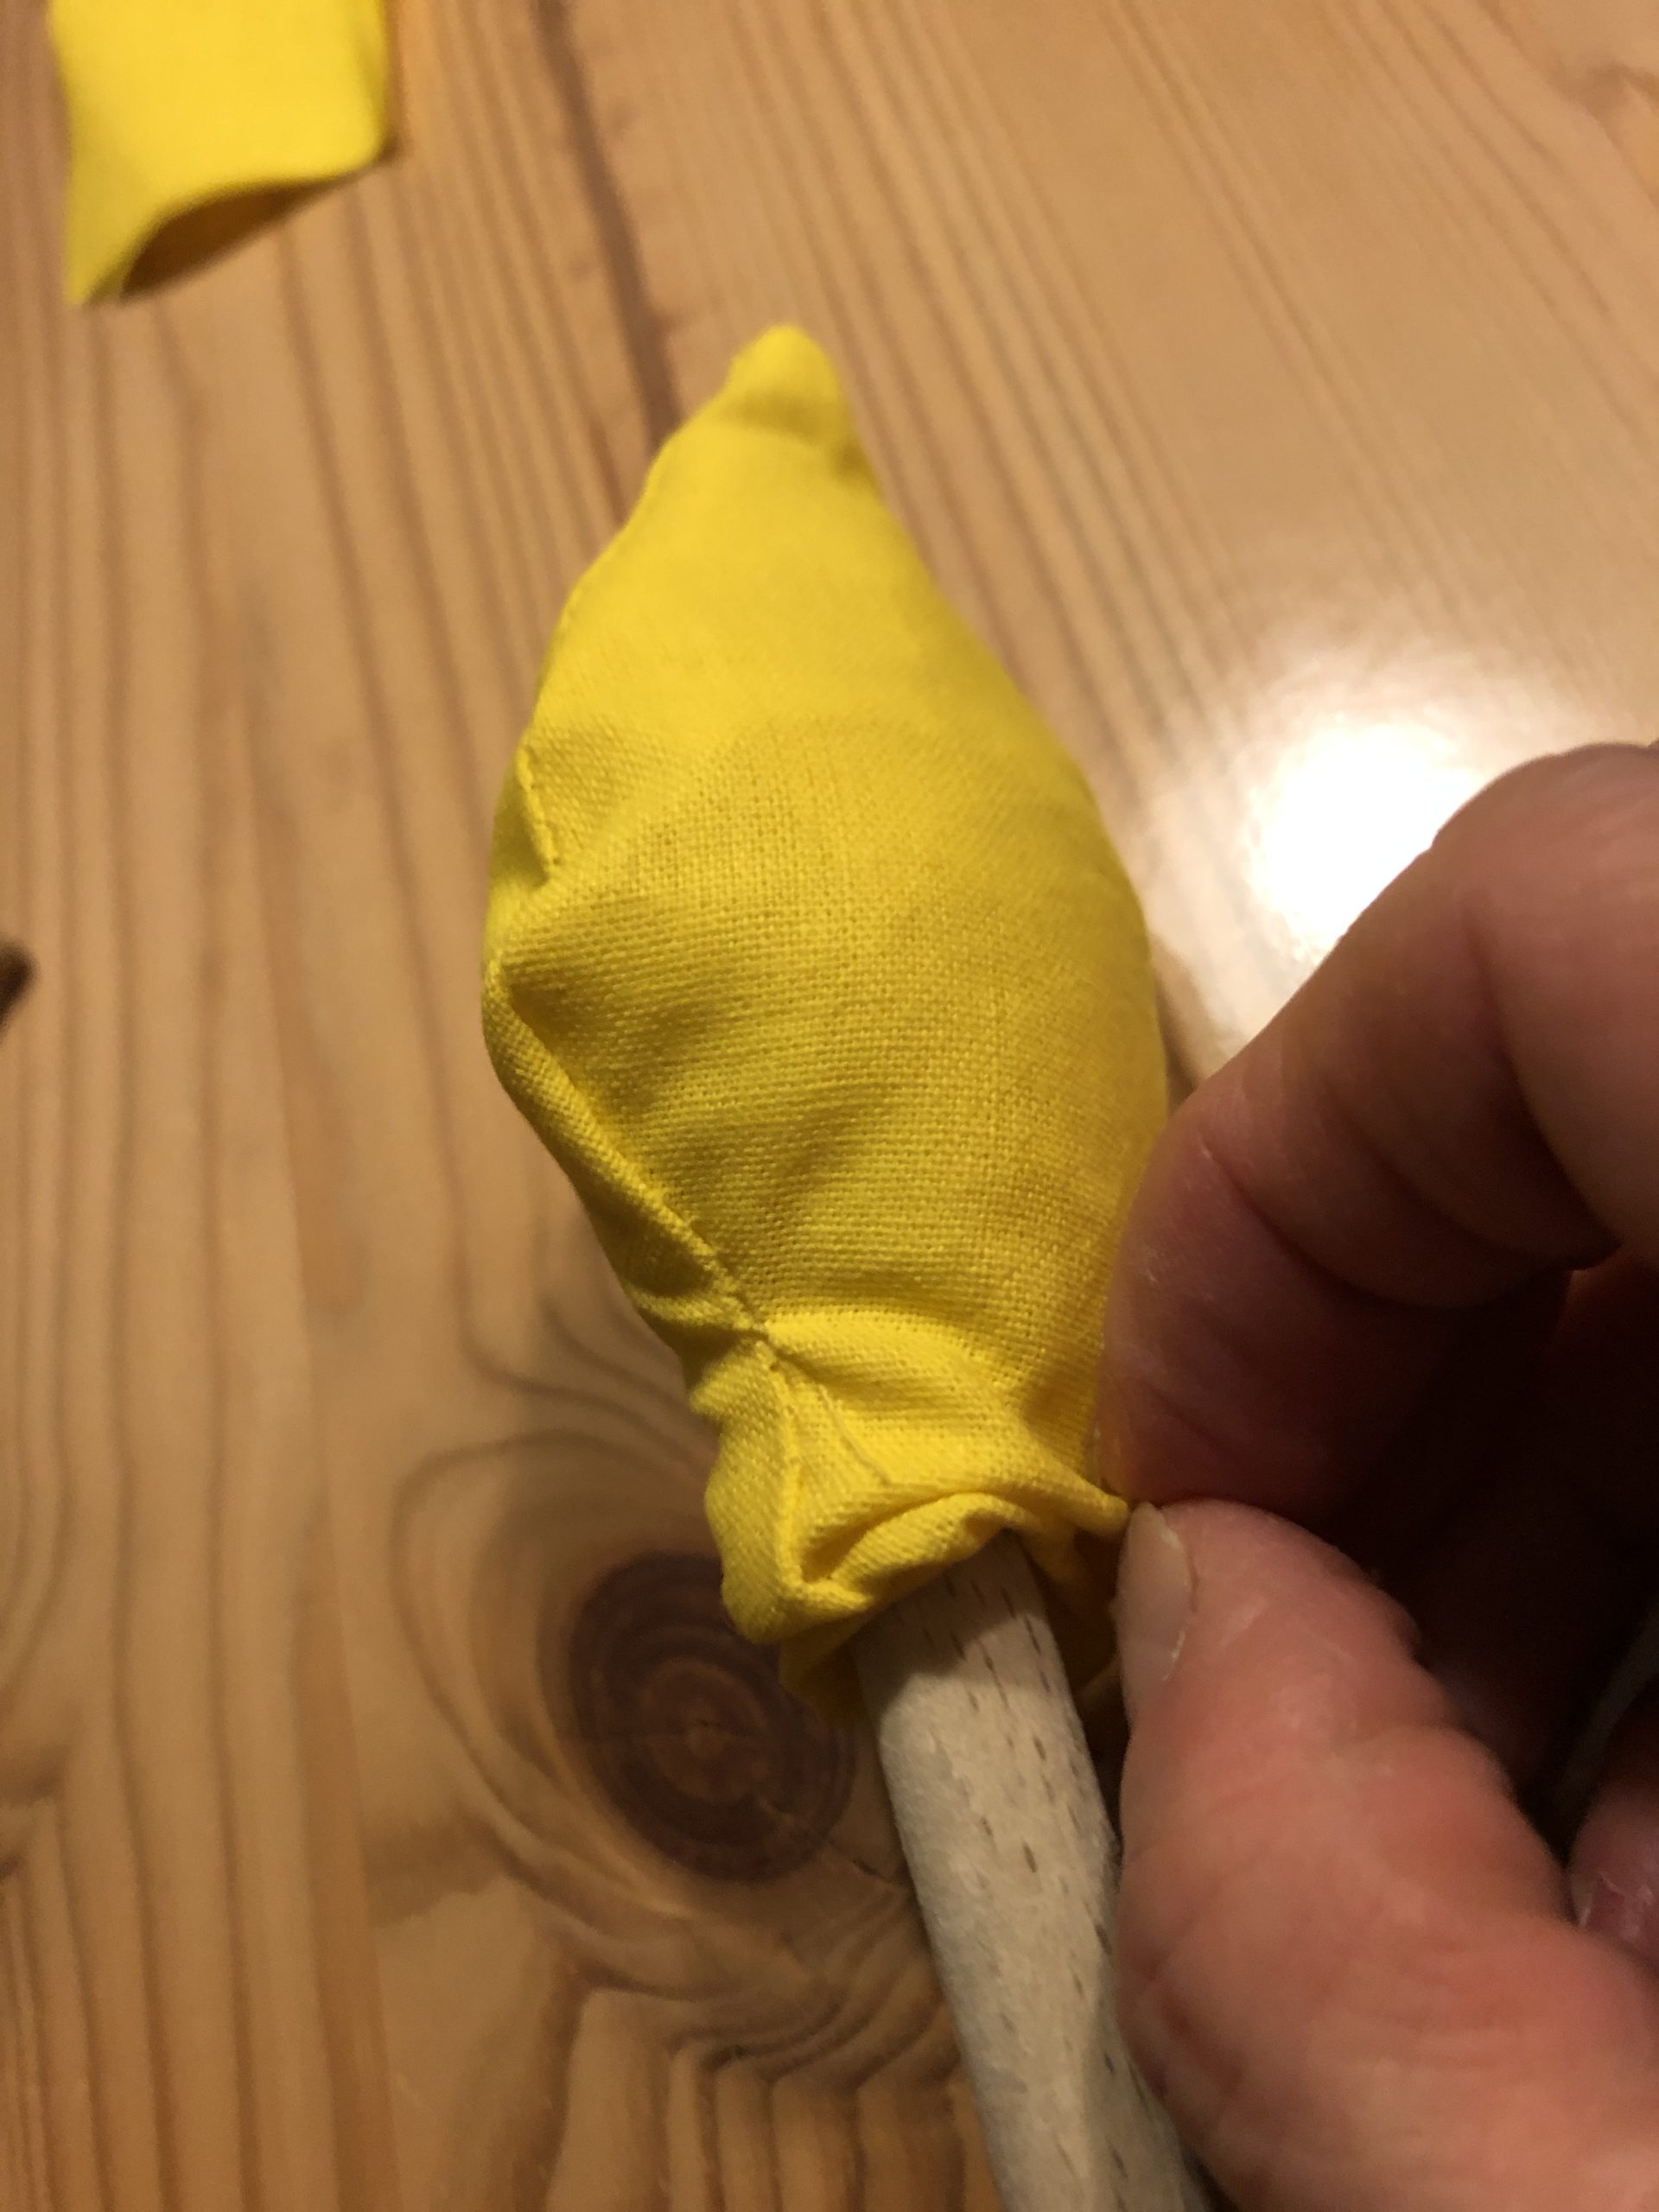
Bild zum Schritt 74 für das Bastel- und DIY-Abenteuer für Kinder: 'So verschwindet der gerade Teil fast komplett.'

73

The flame is ready!
You need these four times.

Bild zum Schritt 75 für das Bastel- und DIY-Abenteuer für Kinder: 'Fertig ist die Flamme!   Diese braucht ihr 4...'

74

Now put the flames on the wick of candles.
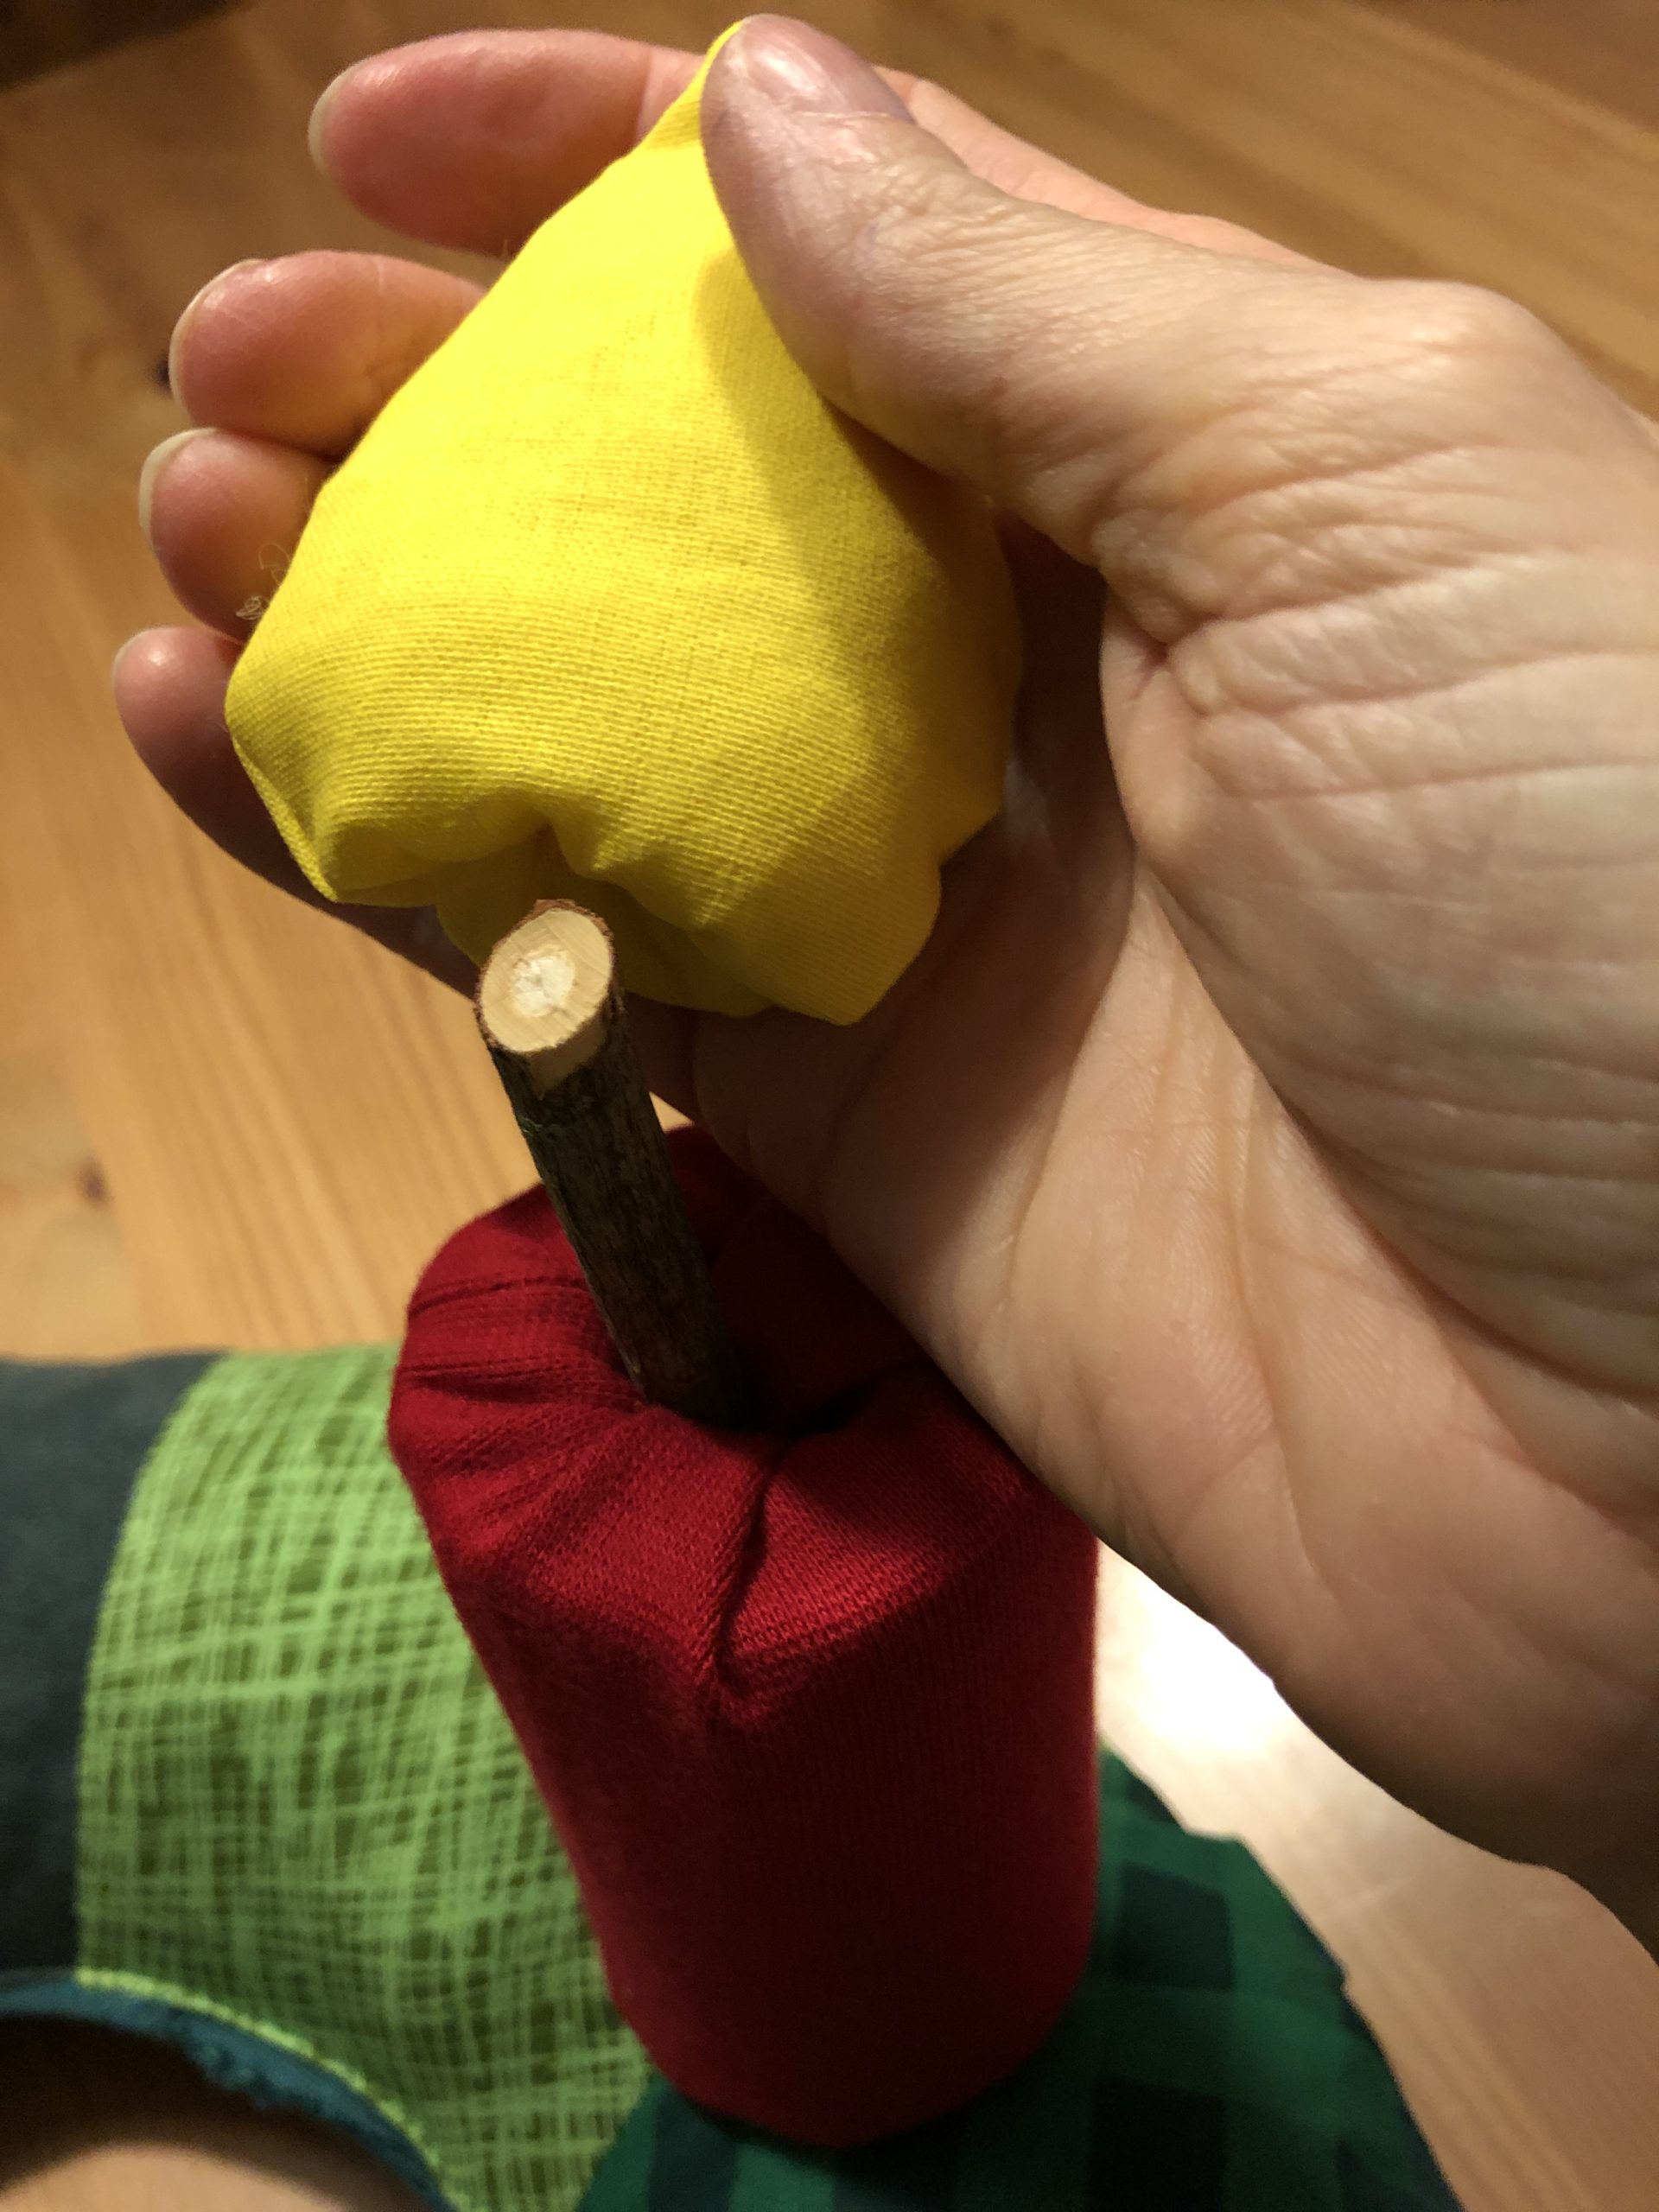
Bild zum Schritt 76 für das Bastel- und DIY-Abenteuer für Kinder: 'Steckt die Flammen nun auf den Docht der Kerzen.'

75

Push it to the wick to keep it good!
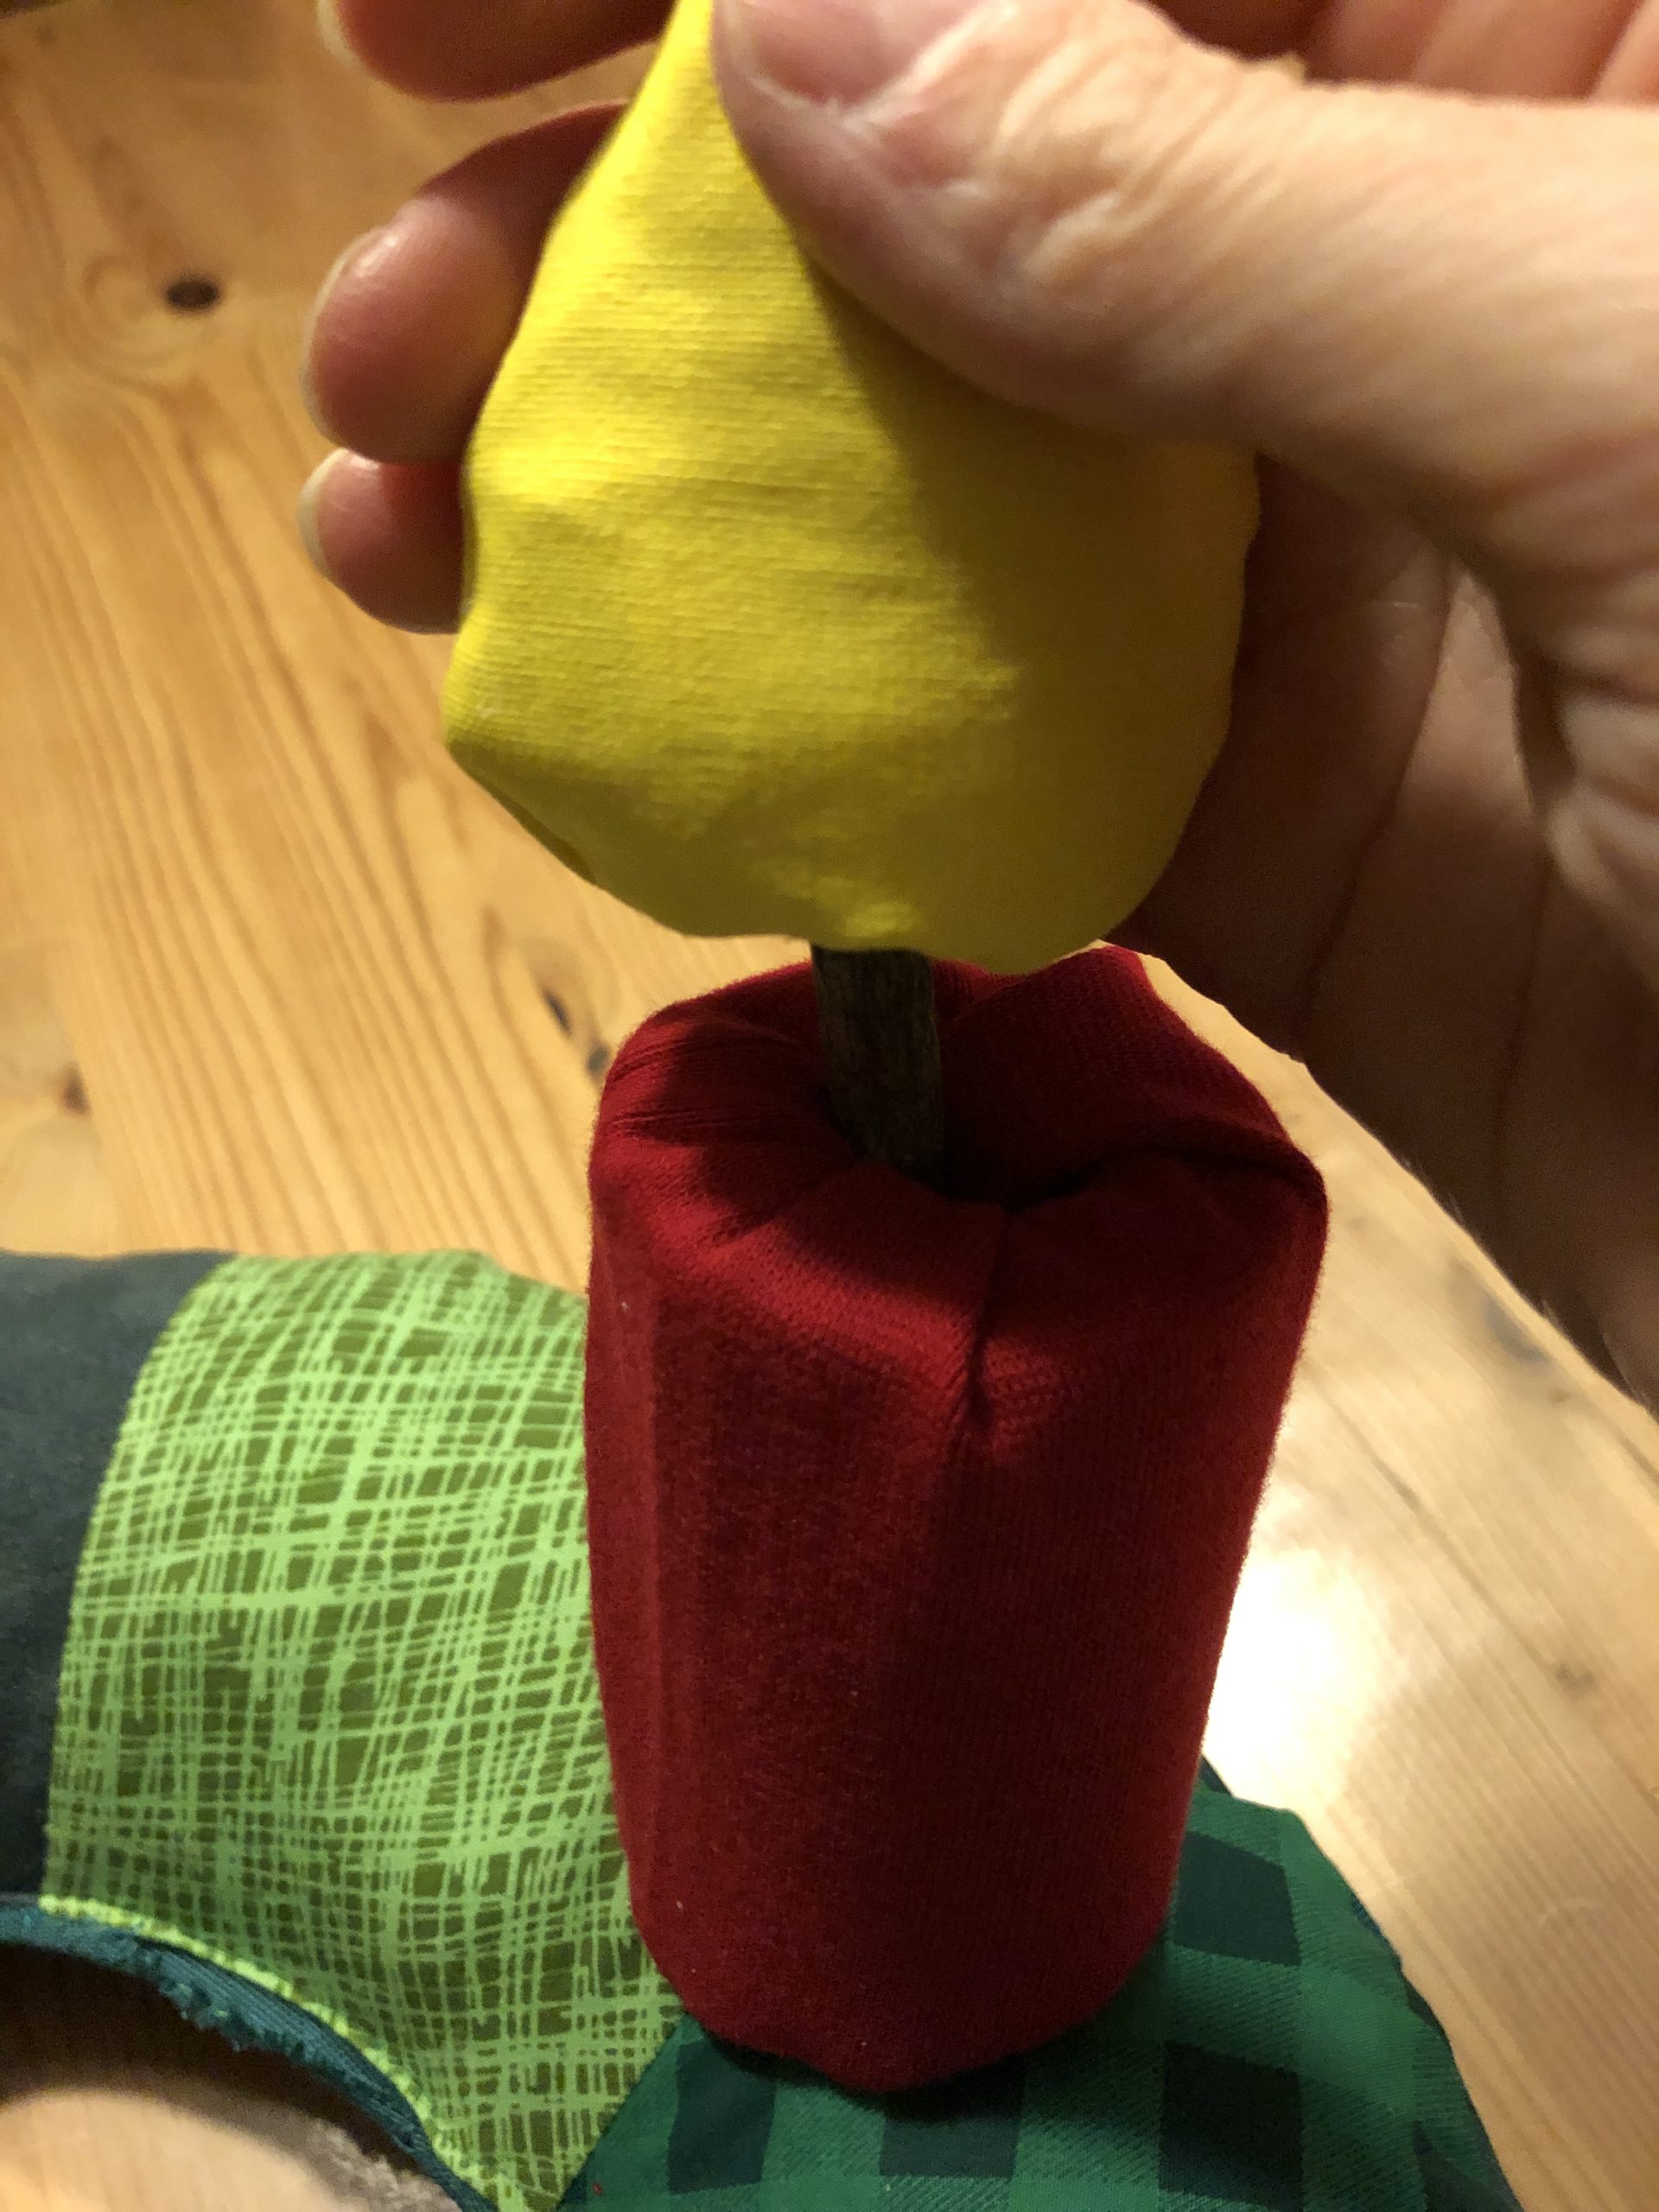
Bild zum Schritt 77 für das Bastel- und DIY-Abenteuer für Kinder: 'Schiebt sie soweit auf den Docht, dass sie gut hält!'

76

Every Advent Sunday you can put on another flame.
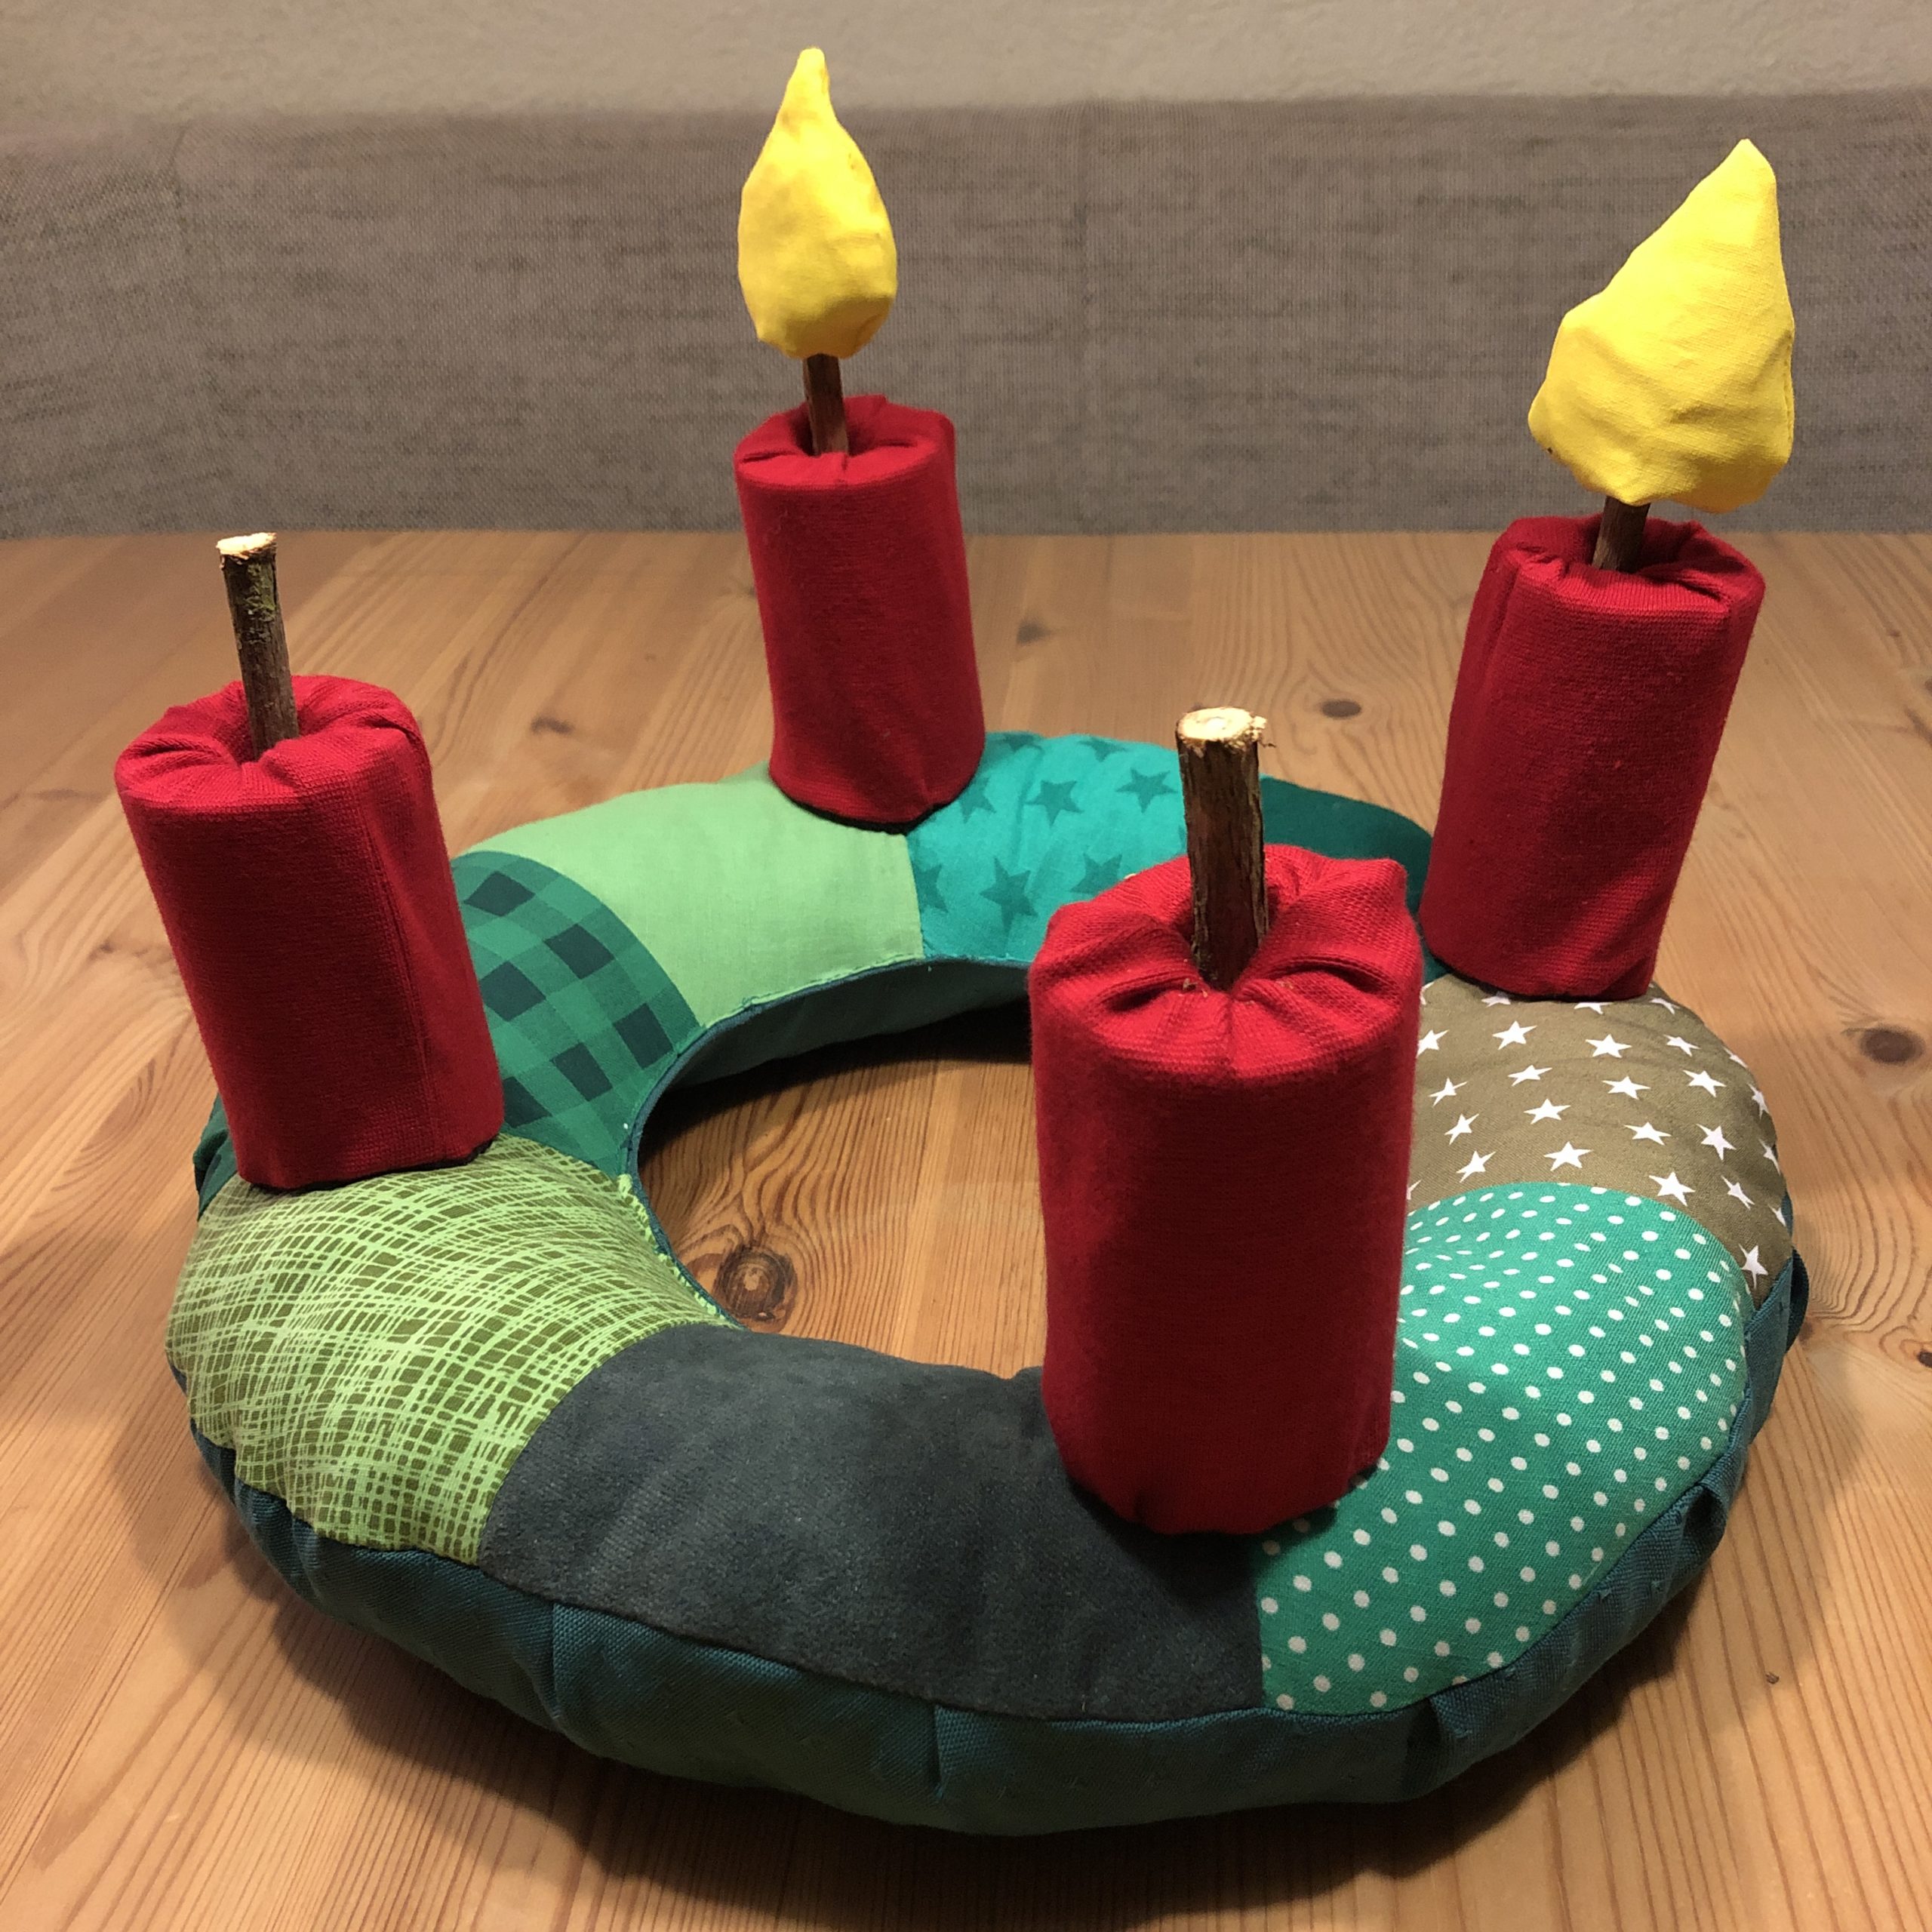
Bild zum Schritt 78 für das Bastel- und DIY-Abenteuer für Kinder: 'An jedem Adventssonntag könnt ihr eine weitere Flamme aufstecken.'

77

Have a lot of joy with this long-lasting Advent wreath.
And let the little ones experiment. This wreath is for touching and experiencing.
Have fun!
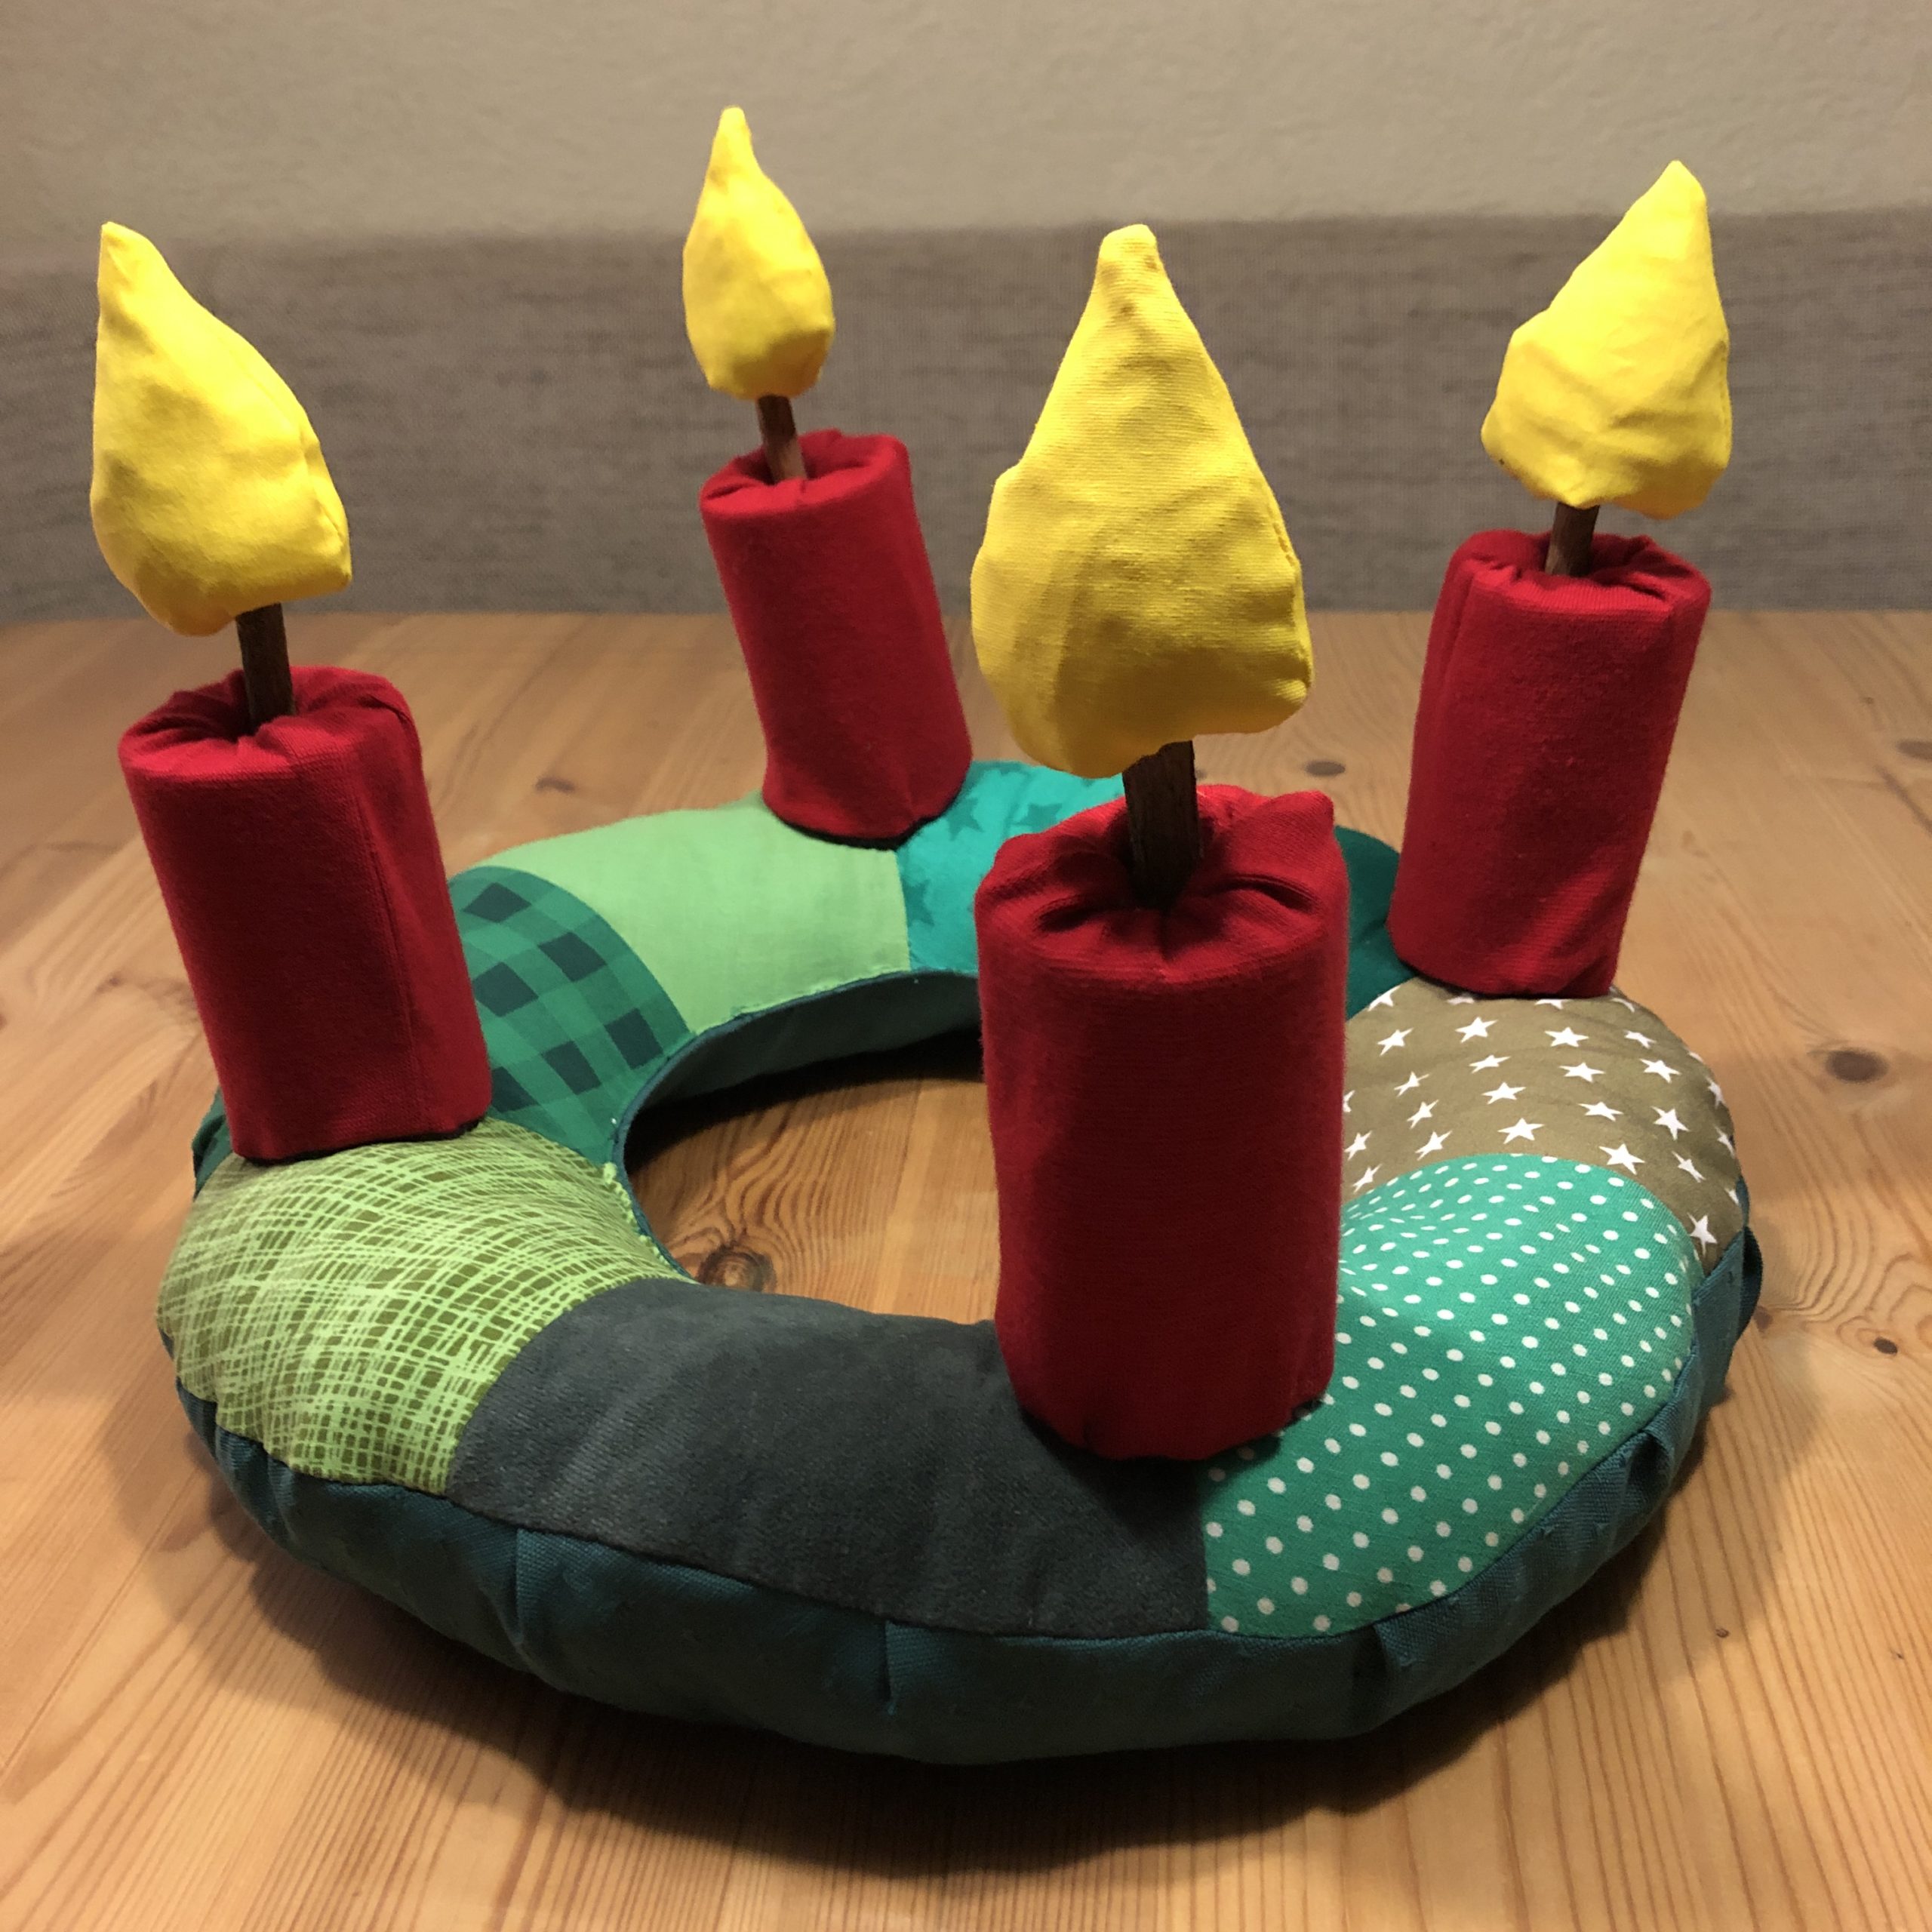
Bild zum Schritt 79 für das Bastel- und DIY-Abenteuer für Kinder: 'Habt viel Freude mit diesem langlebigen Adventskranz.   Und...'

Advent wreath for the smallest

Follow us on Facebook , Instagram and Pinterest
Don't miss any more adventures: Our bottle mail

One Comment

  1. 2.0 thousand times & ()

    Dear Katzi,
    This is a tremendous adventure – beautiful!
    I'm sorry, I'm sorry, but I'm sorry, but I'm sorry, but I'm sorry, but I'm sorry, but I'm sorry.

Leave a Reply

Your email address will not be published.

The maximum upload file size: 5 MB. You can upload: image, document. Drop file here