Zupf-Schachtel – Build instruments yourself

AdventurerKatzi
Rating5.07.3 Thousand times & (1) DifficultyAdvanced

Make a handkerchief box with a puffing instrument. This looks very simple, but you'd rather let an adult help you punch the holes. The punching, the pulling in of the rubber threads is described here, as well as every further step.
Have fun building your own instrument and playing music.

Media Education for Kindergarten and Hort

Kind bastelt eine Rassel mit dem Navi
The Adventure Navi, the app for DIY projects, enables media education for the youngest.

Relief in everyday life, targeted promotion of individual children, independent learning and - without any pre-knowledge already usable by the youngest!


Titelbild zur Bastel- und DIY-Idee für Kinder '(660) Zupf-Schachtel – Instrumente selbst bauen'
Material for1 Child
Prep Time5 min.Adv. Time20 min.Total Time25 min.
 1 empty handkerchief boxFor teats
 1 Hole pliers
 Hat rubber
 2 Beads
 possibly stuffing needle(This is a blunt needle)
 1 Pencil
 1 Ruler
All links marked with a shopping cart lead to Amazon - here we have selected products that we would order ourselves and in part also ordered. In a qualified purchase via the advertising link, we as Amazon partner receive a commission, for you there are no costs. You thus support our cost- and advertising banner-free, educational offer.
1

First, remove the paper or foil from the opening of the empty handkerchief box.
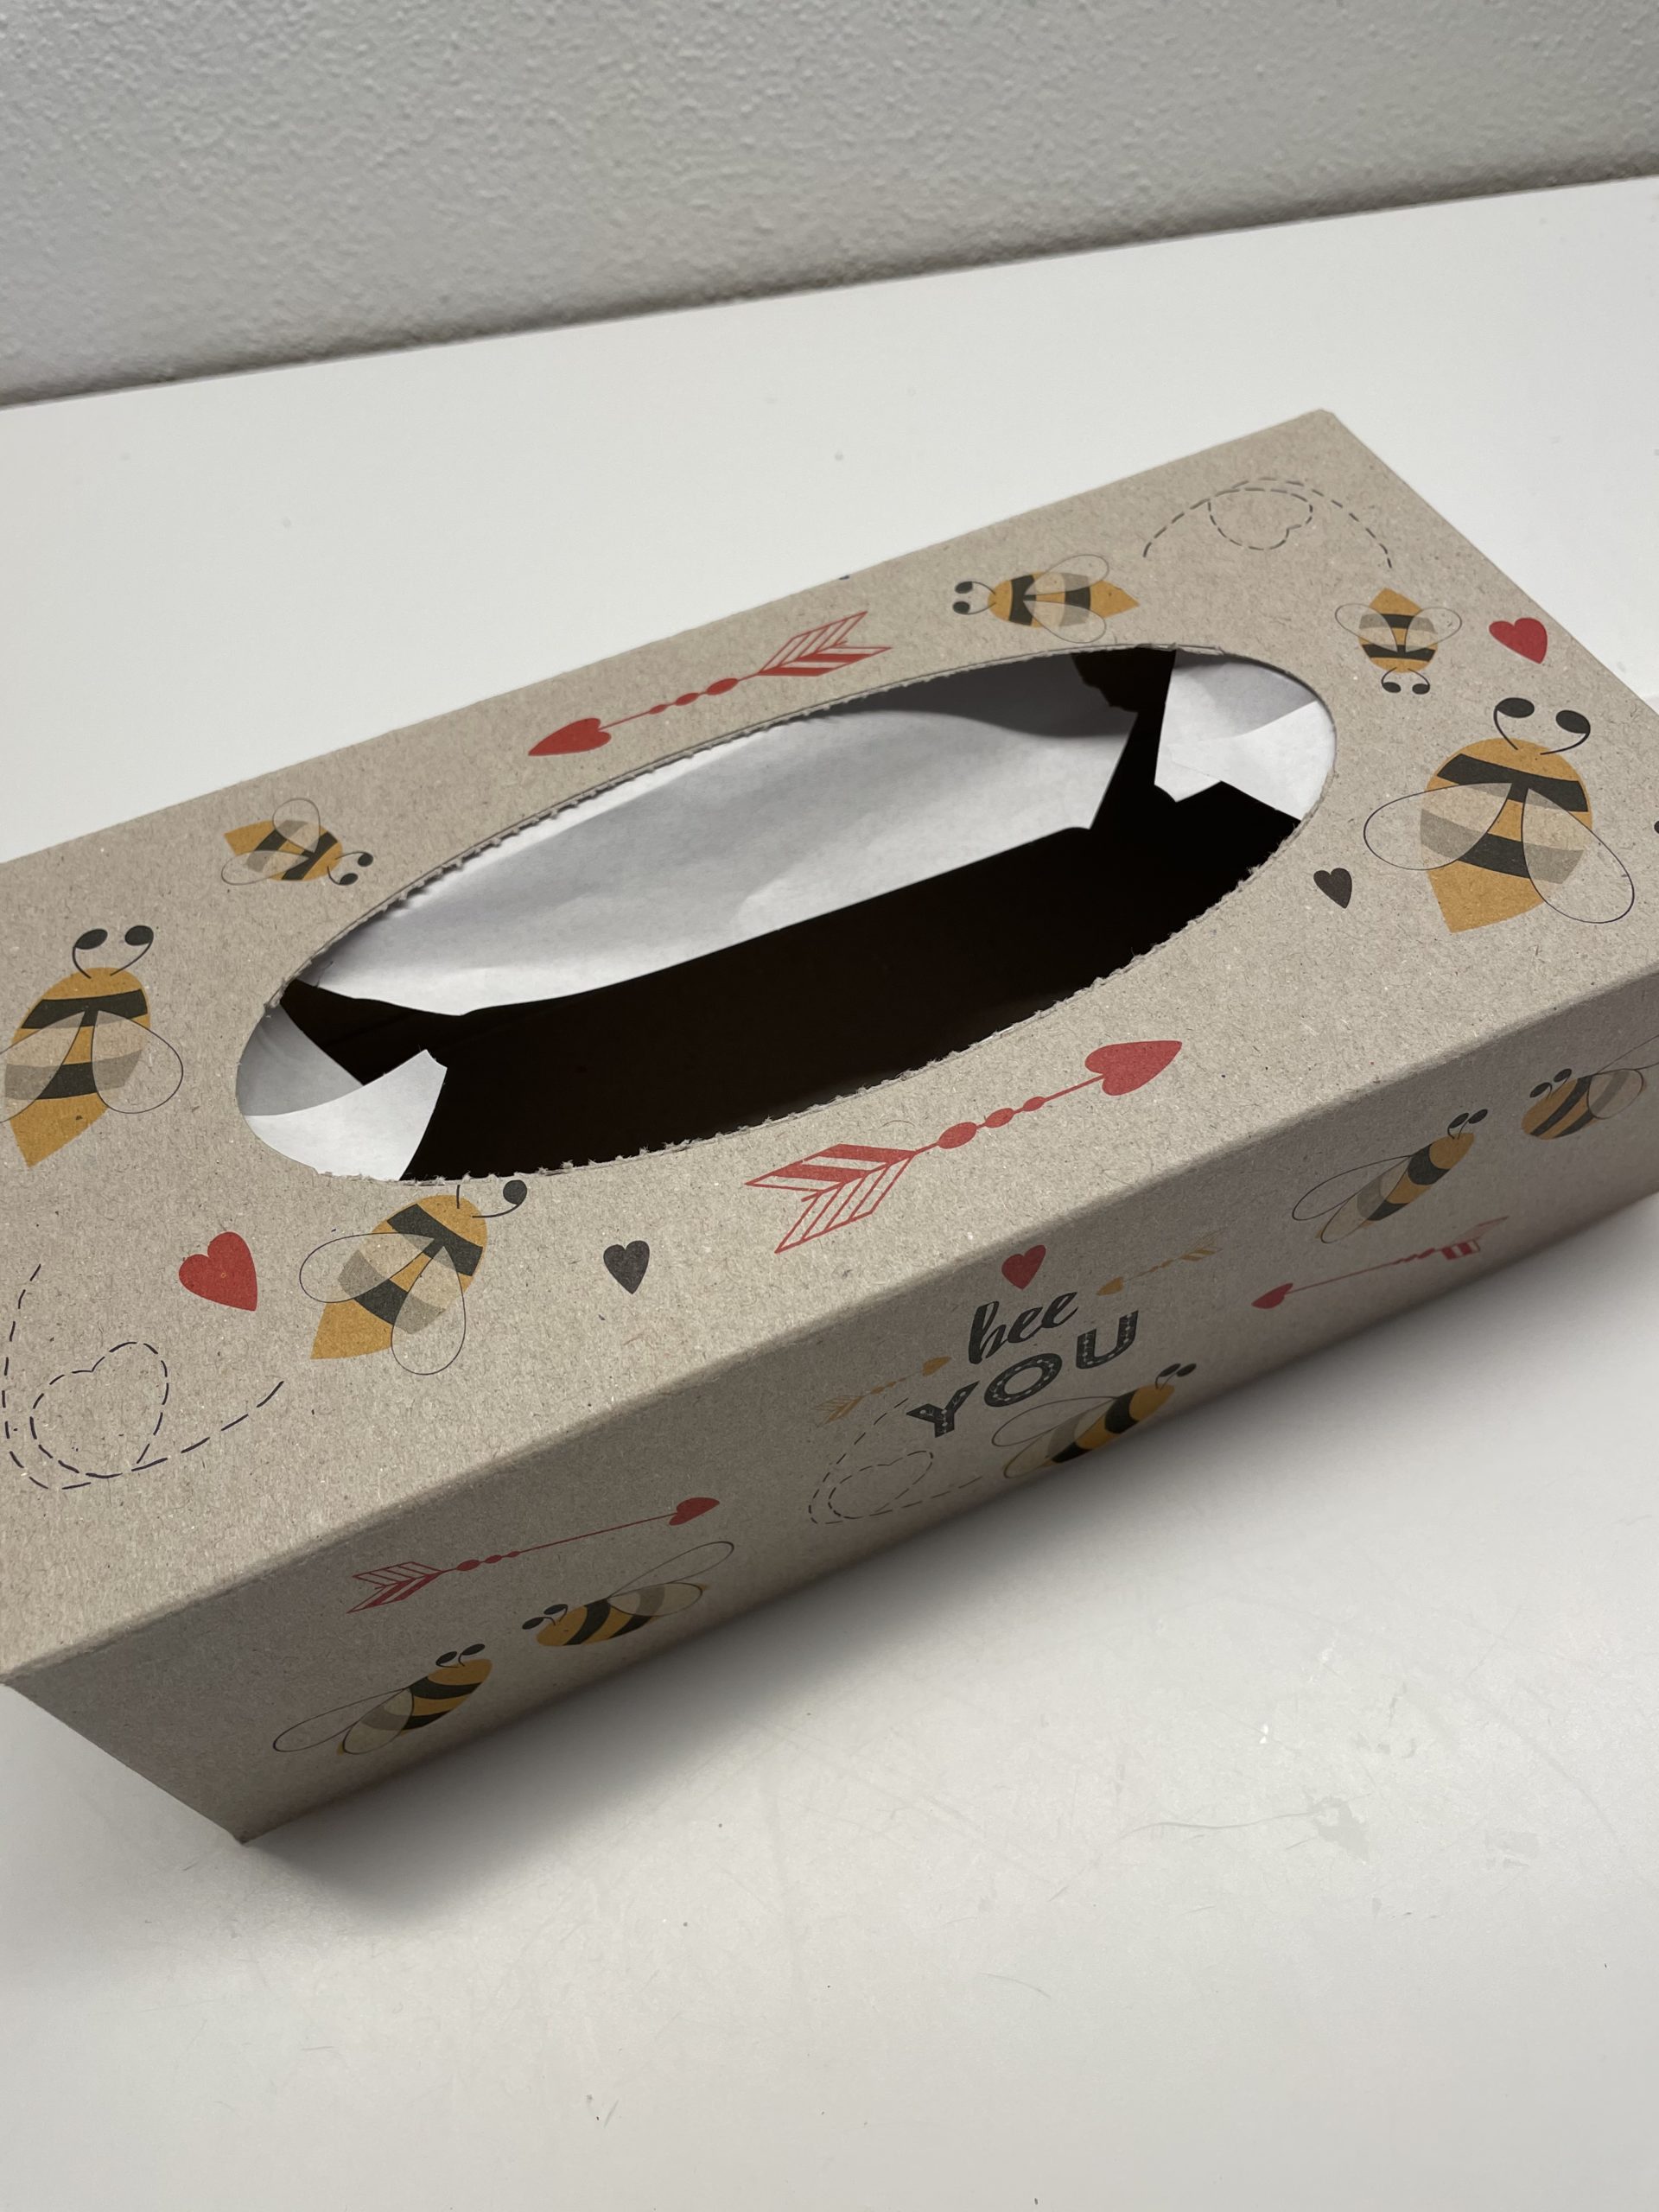
Bild zum Schritt 1 für das Bastel- und DIY-Abenteuer für Kinder: 'Zuerst entfernt ihr das Papier oder die Folie am Eingriffsloch...'

2

Then you embellish and design the box as you like it. You can paint or glue the box. I used the box as it was because I like it so much.
The box must be dry and clean for further processing.
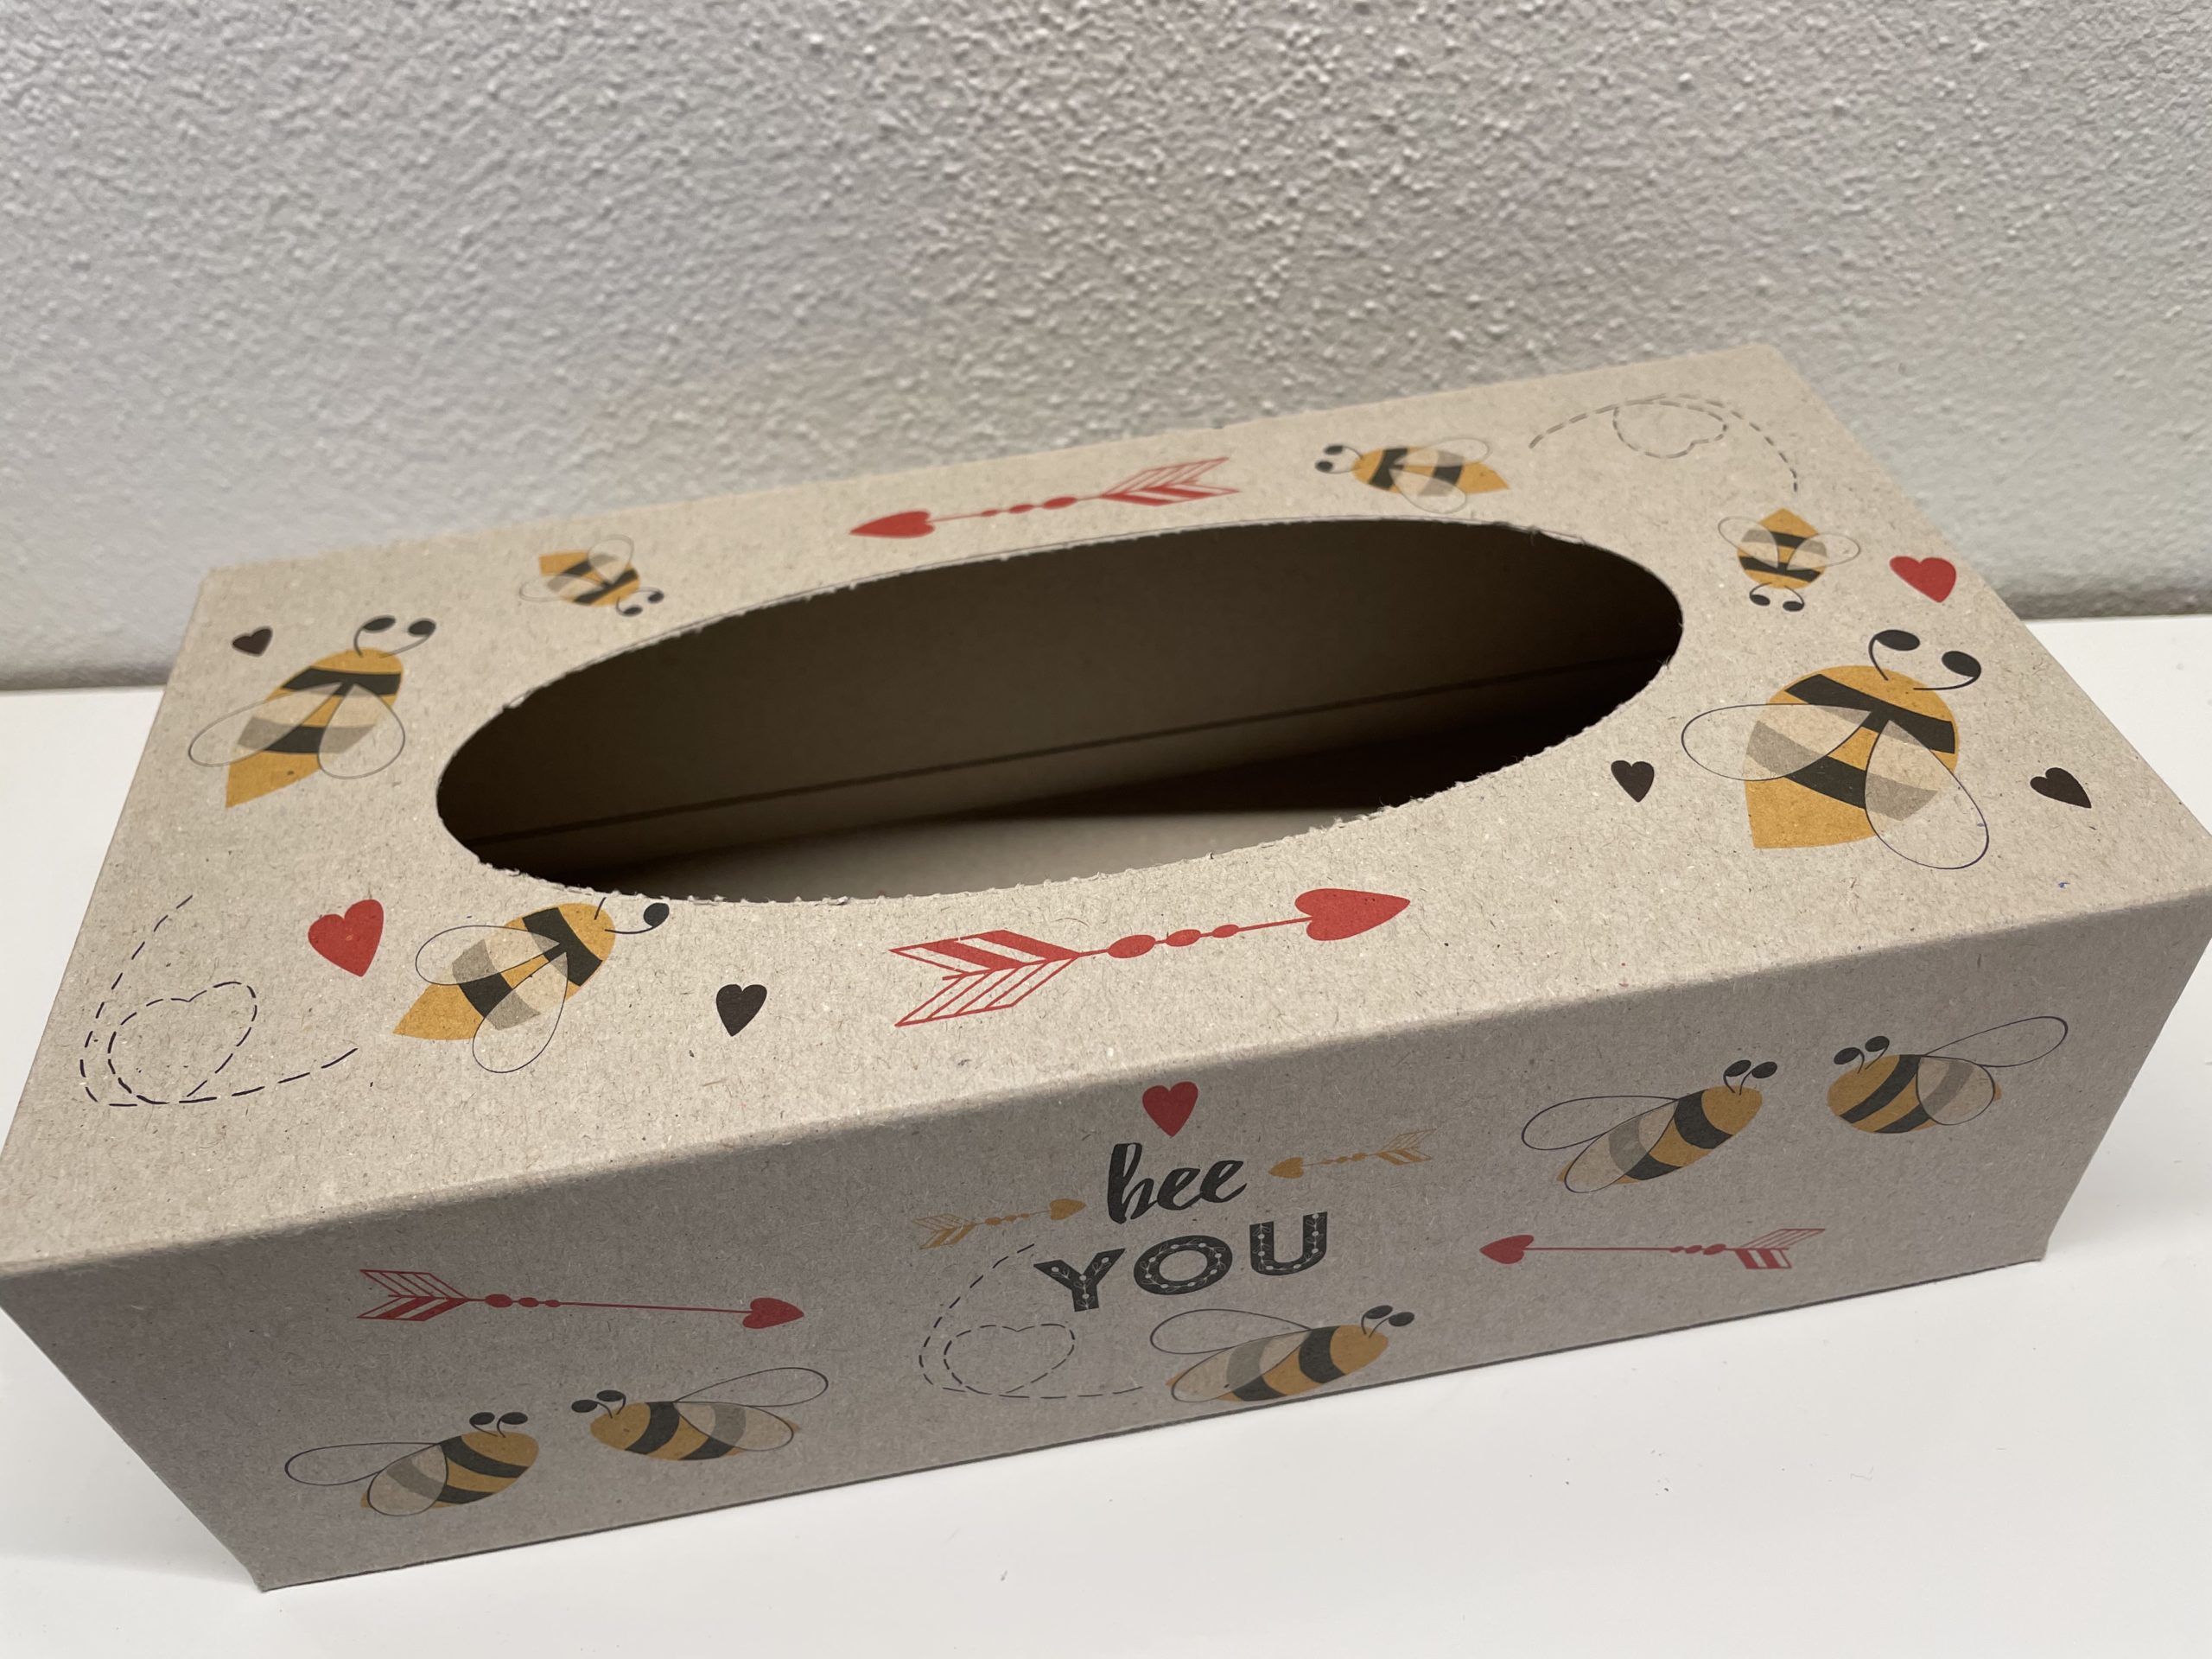
Bild zum Schritt 2 für das Bastel- und DIY-Abenteuer für Kinder: 'Dann verschönert und gestaltet ihr die Box so wie es...'

3

Now you only punch the two long sides of the hole with about 9 holes per side. First mark the position of the holes with pencil. Then you punch with the punch plier and with the help of an adult, because the cardboard box is very tight.

Bild zum Schritt 3 für das Bastel- und DIY-Abenteuer für Kinder: 'Jetzt locht ihr nur die zwei langen Seiten am Eingriffsloch...'

4

Here you can see the holes on one side. The short rounding is not perforated (see picture)!

Bild zum Schritt 4 für das Bastel- und DIY-Abenteuer für Kinder: 'Hier seht ihr die Löcher einer Seite. Die kurze Rundung...'

5

Now you're punching the other long side.

Bild zum Schritt 5 für das Bastel- und DIY-Abenteuer für Kinder: 'Jetzt locht ihr noch die andere langen Seite.'

6

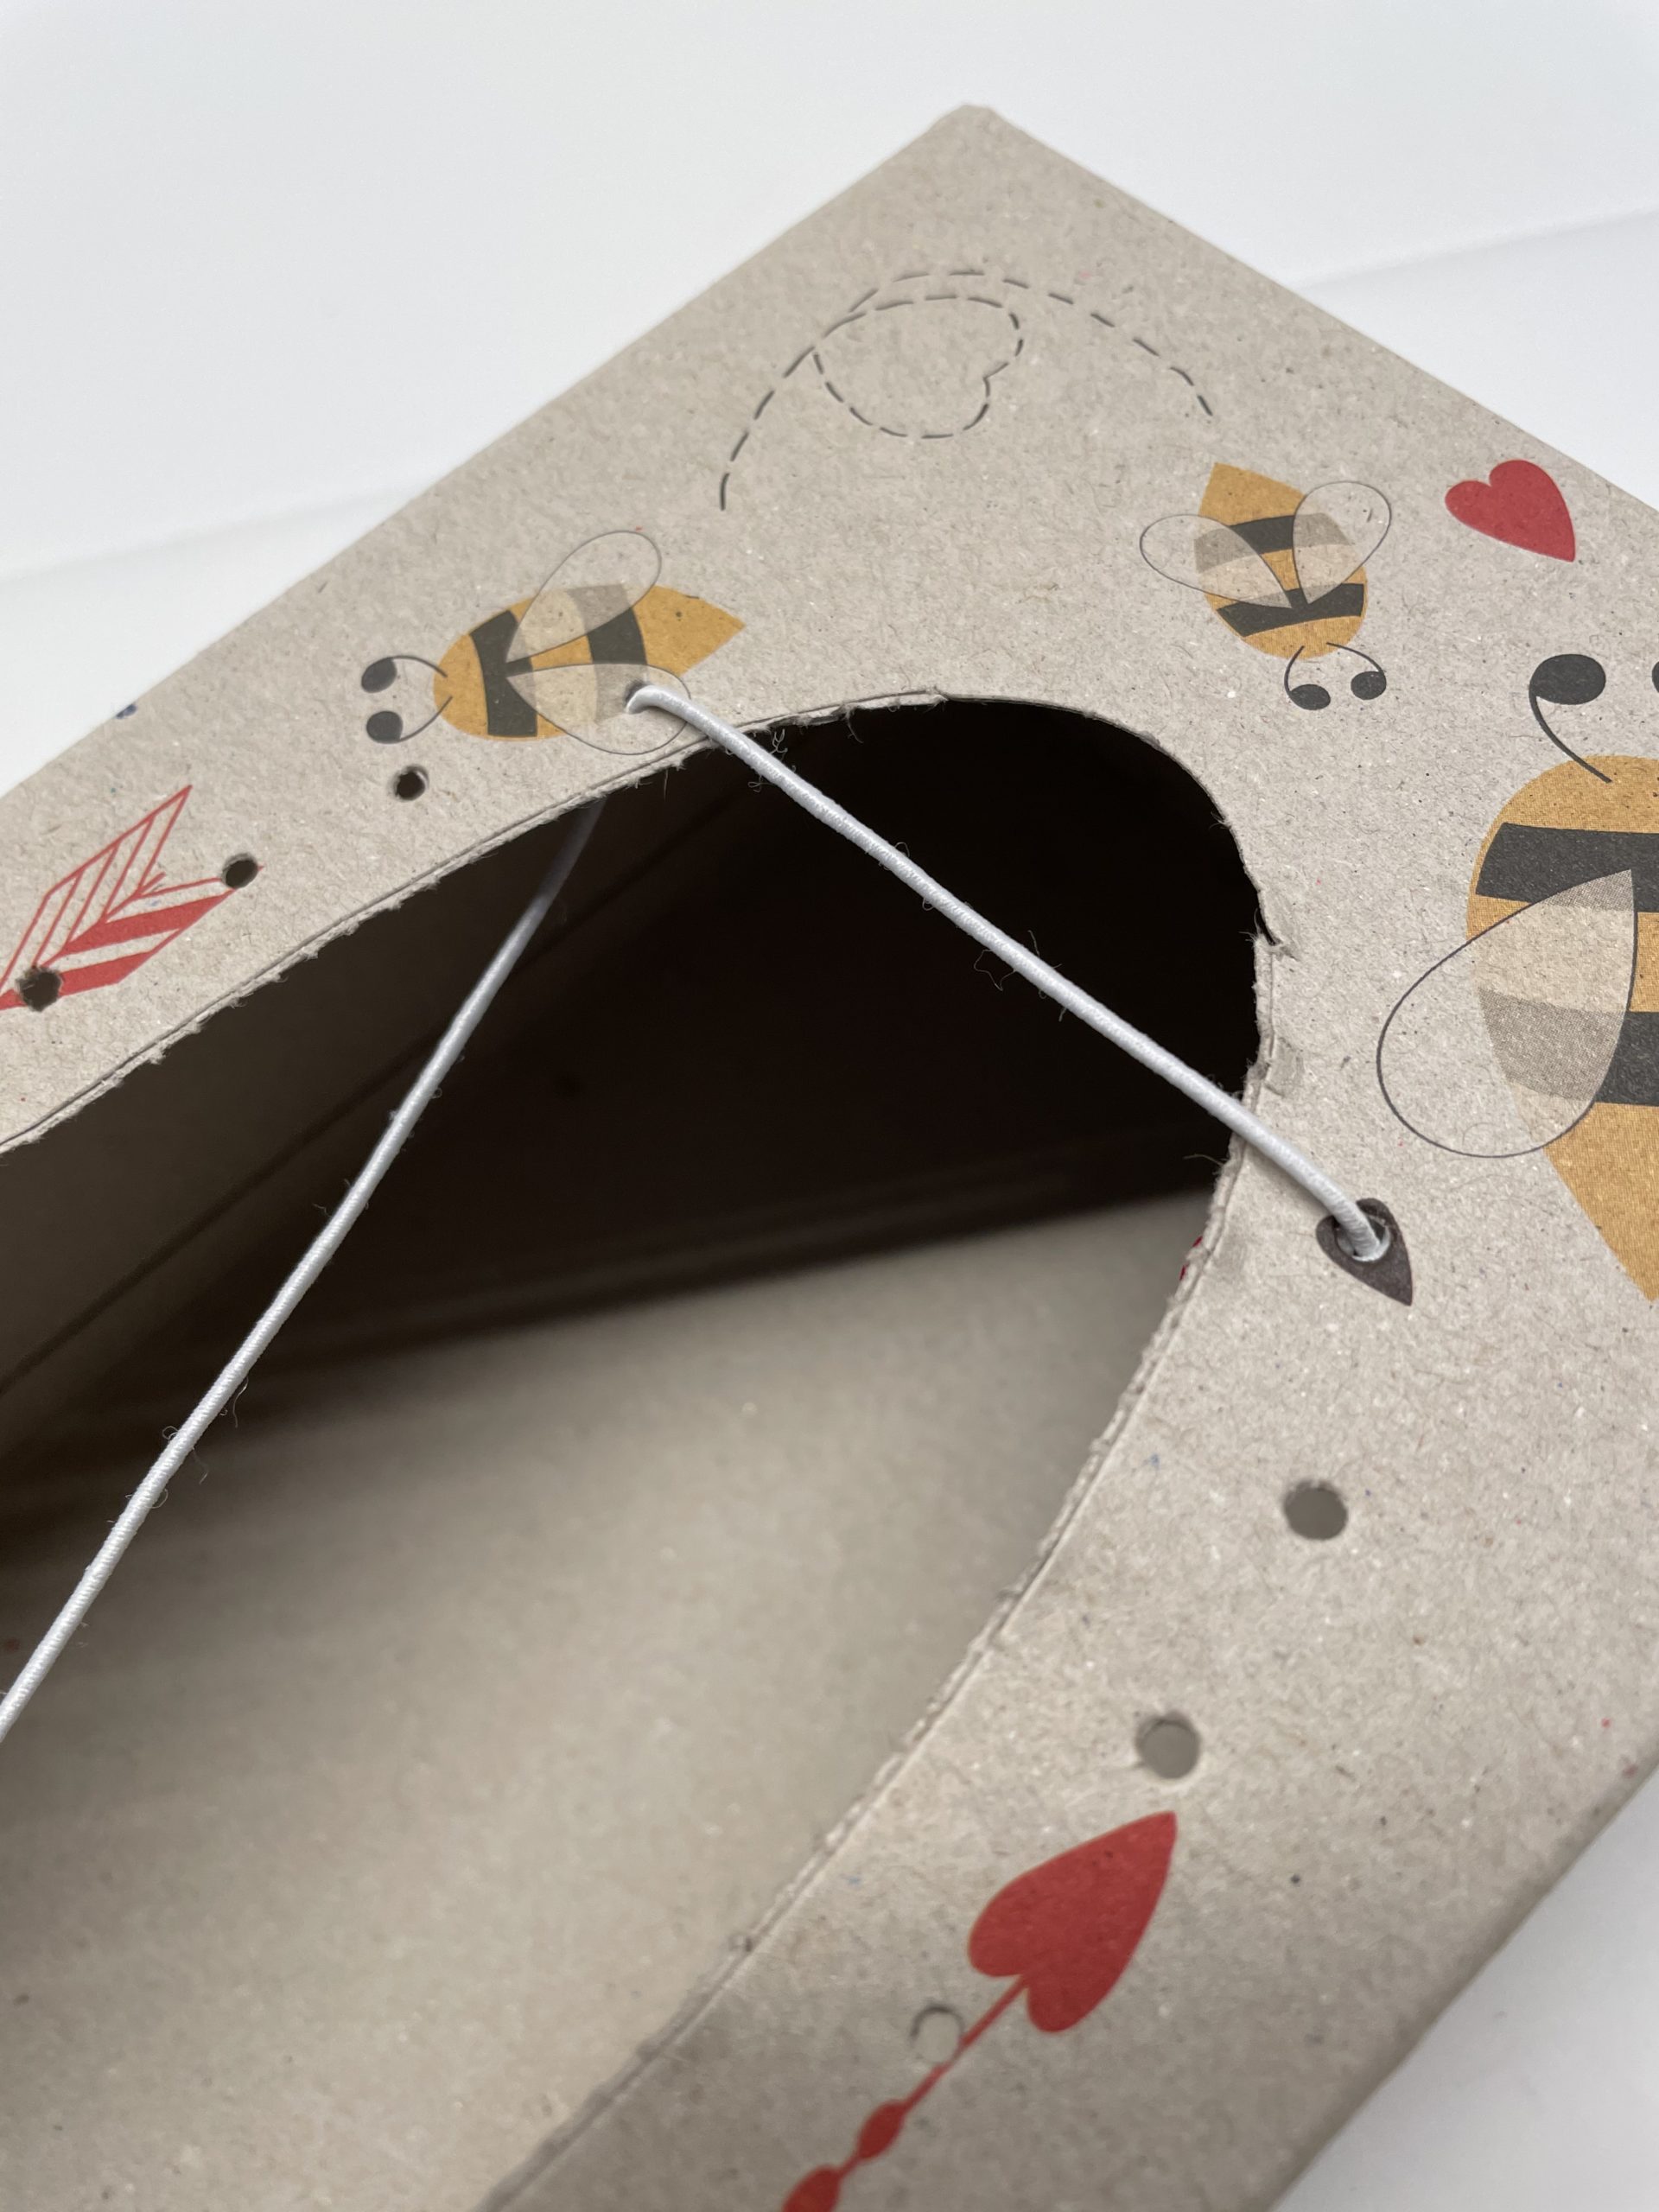
Then pull the hat rubber through the first hole on any side. Do not cut the rubber off, but leave it on the coil. Then thread it from top to bottom through the first hole.

Bild zum Schritt 6 für das Bastel- und DIY-Abenteuer für Kinder: 'Anschließend zieht ihr den Hutgummi durch das erste Loch auf...'

7

Pull the beginning of the thread about 10cm through the opening.

Bild zum Schritt 7 für das Bastel- und DIY-Abenteuer für Kinder: 'Zieht den Fadenanfang ca. 10cm durch die Öffnung.'

8

Then you thread a pearl on the beginning of the thread.

Bild zum Schritt 8 für das Bastel- und DIY-Abenteuer für Kinder: 'Dann fädelt ihr auf den Fadenanfang eine Perle.'

9

Then knot the pearl several times with the hat rubber.

Bild zum Schritt 9 für das Bastel- und DIY-Abenteuer für Kinder: 'Verknotet die Perle anschließend mehrmals mit dem Hutgummi.'

10

Now pull the beginning of the thread back through the hole until the pearl lies on the inside of the box.

Bild zum Schritt 10 für das Bastel- und DIY-Abenteuer für Kinder: 'Jetzt zieht ihr den Fadenanfang wieder zurück durch das Loch,...'

11

Unwrap the rubber from the coil and thread with the other end of the rubber.

Bild zum Schritt 11 für das Bastel- und DIY-Abenteuer für Kinder: 'Wickelt den Hutgummi von der Spule ab und fädelt nun...'

12

Now thread the end of the hat rubber from top to bottom into the opposite hole.

Bild zum Schritt 12 für das Bastel- und DIY-Abenteuer für Kinder: 'Fädelt jetzt das Ende des Hutgummis von oben nach unten...'

13

Pull the rubber through until it covers the opening smoothly and loosely.

Bild zum Schritt 13 für das Bastel- und DIY-Abenteuer für Kinder: 'Zieht den Gummi soweit durch, bis er glatt und locker...'

14

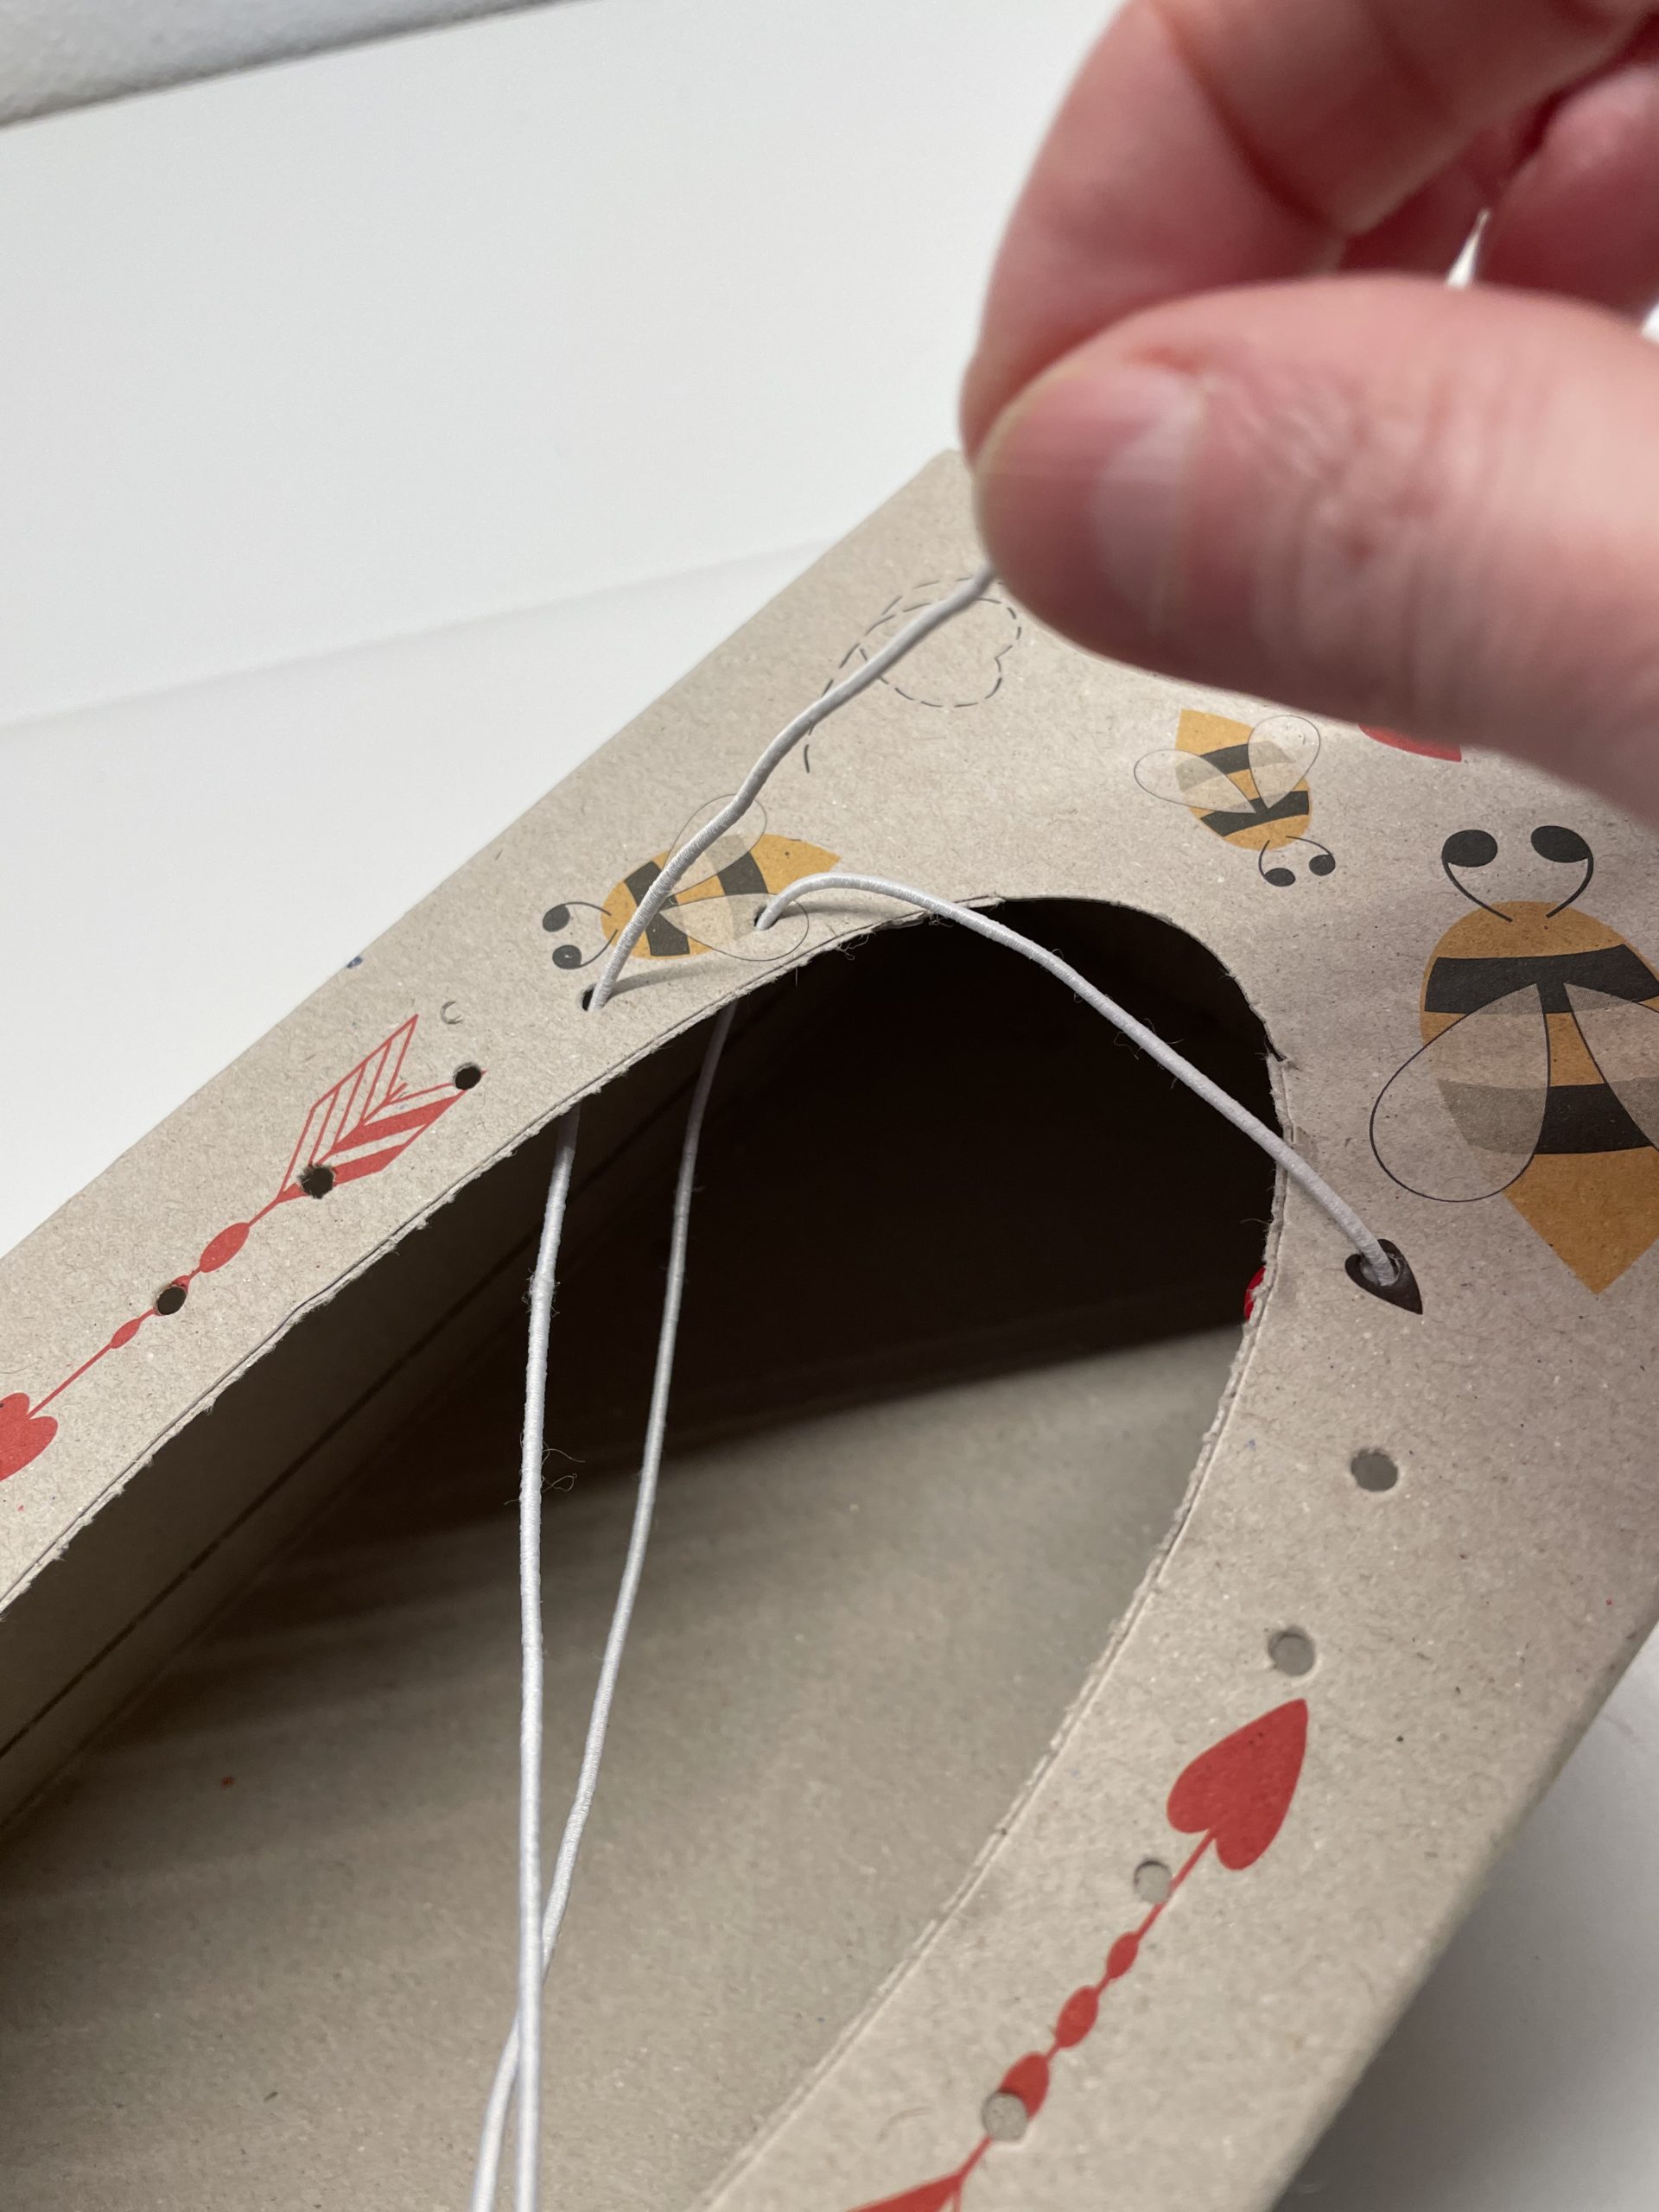
Now thread the thread directly through the adjacent hole from bottom to top. Pull the rubber back completely.

Bild zum Schritt 14 für das Bastel- und DIY-Abenteuer für Kinder: 'Fädelt nun den Faden direkt durch das danebenliegenden Loch von...'

15

On the opposite side it is threaded again from top to bottom through the hole. Pulls the rubber to lie two parallel rubber cords loosely above the opening.

Bild zum Schritt 15 für das Bastel- und DIY-Abenteuer für Kinder: 'Auf der gegenüberliegenden Seite wird er wieder von oben nach...'

16

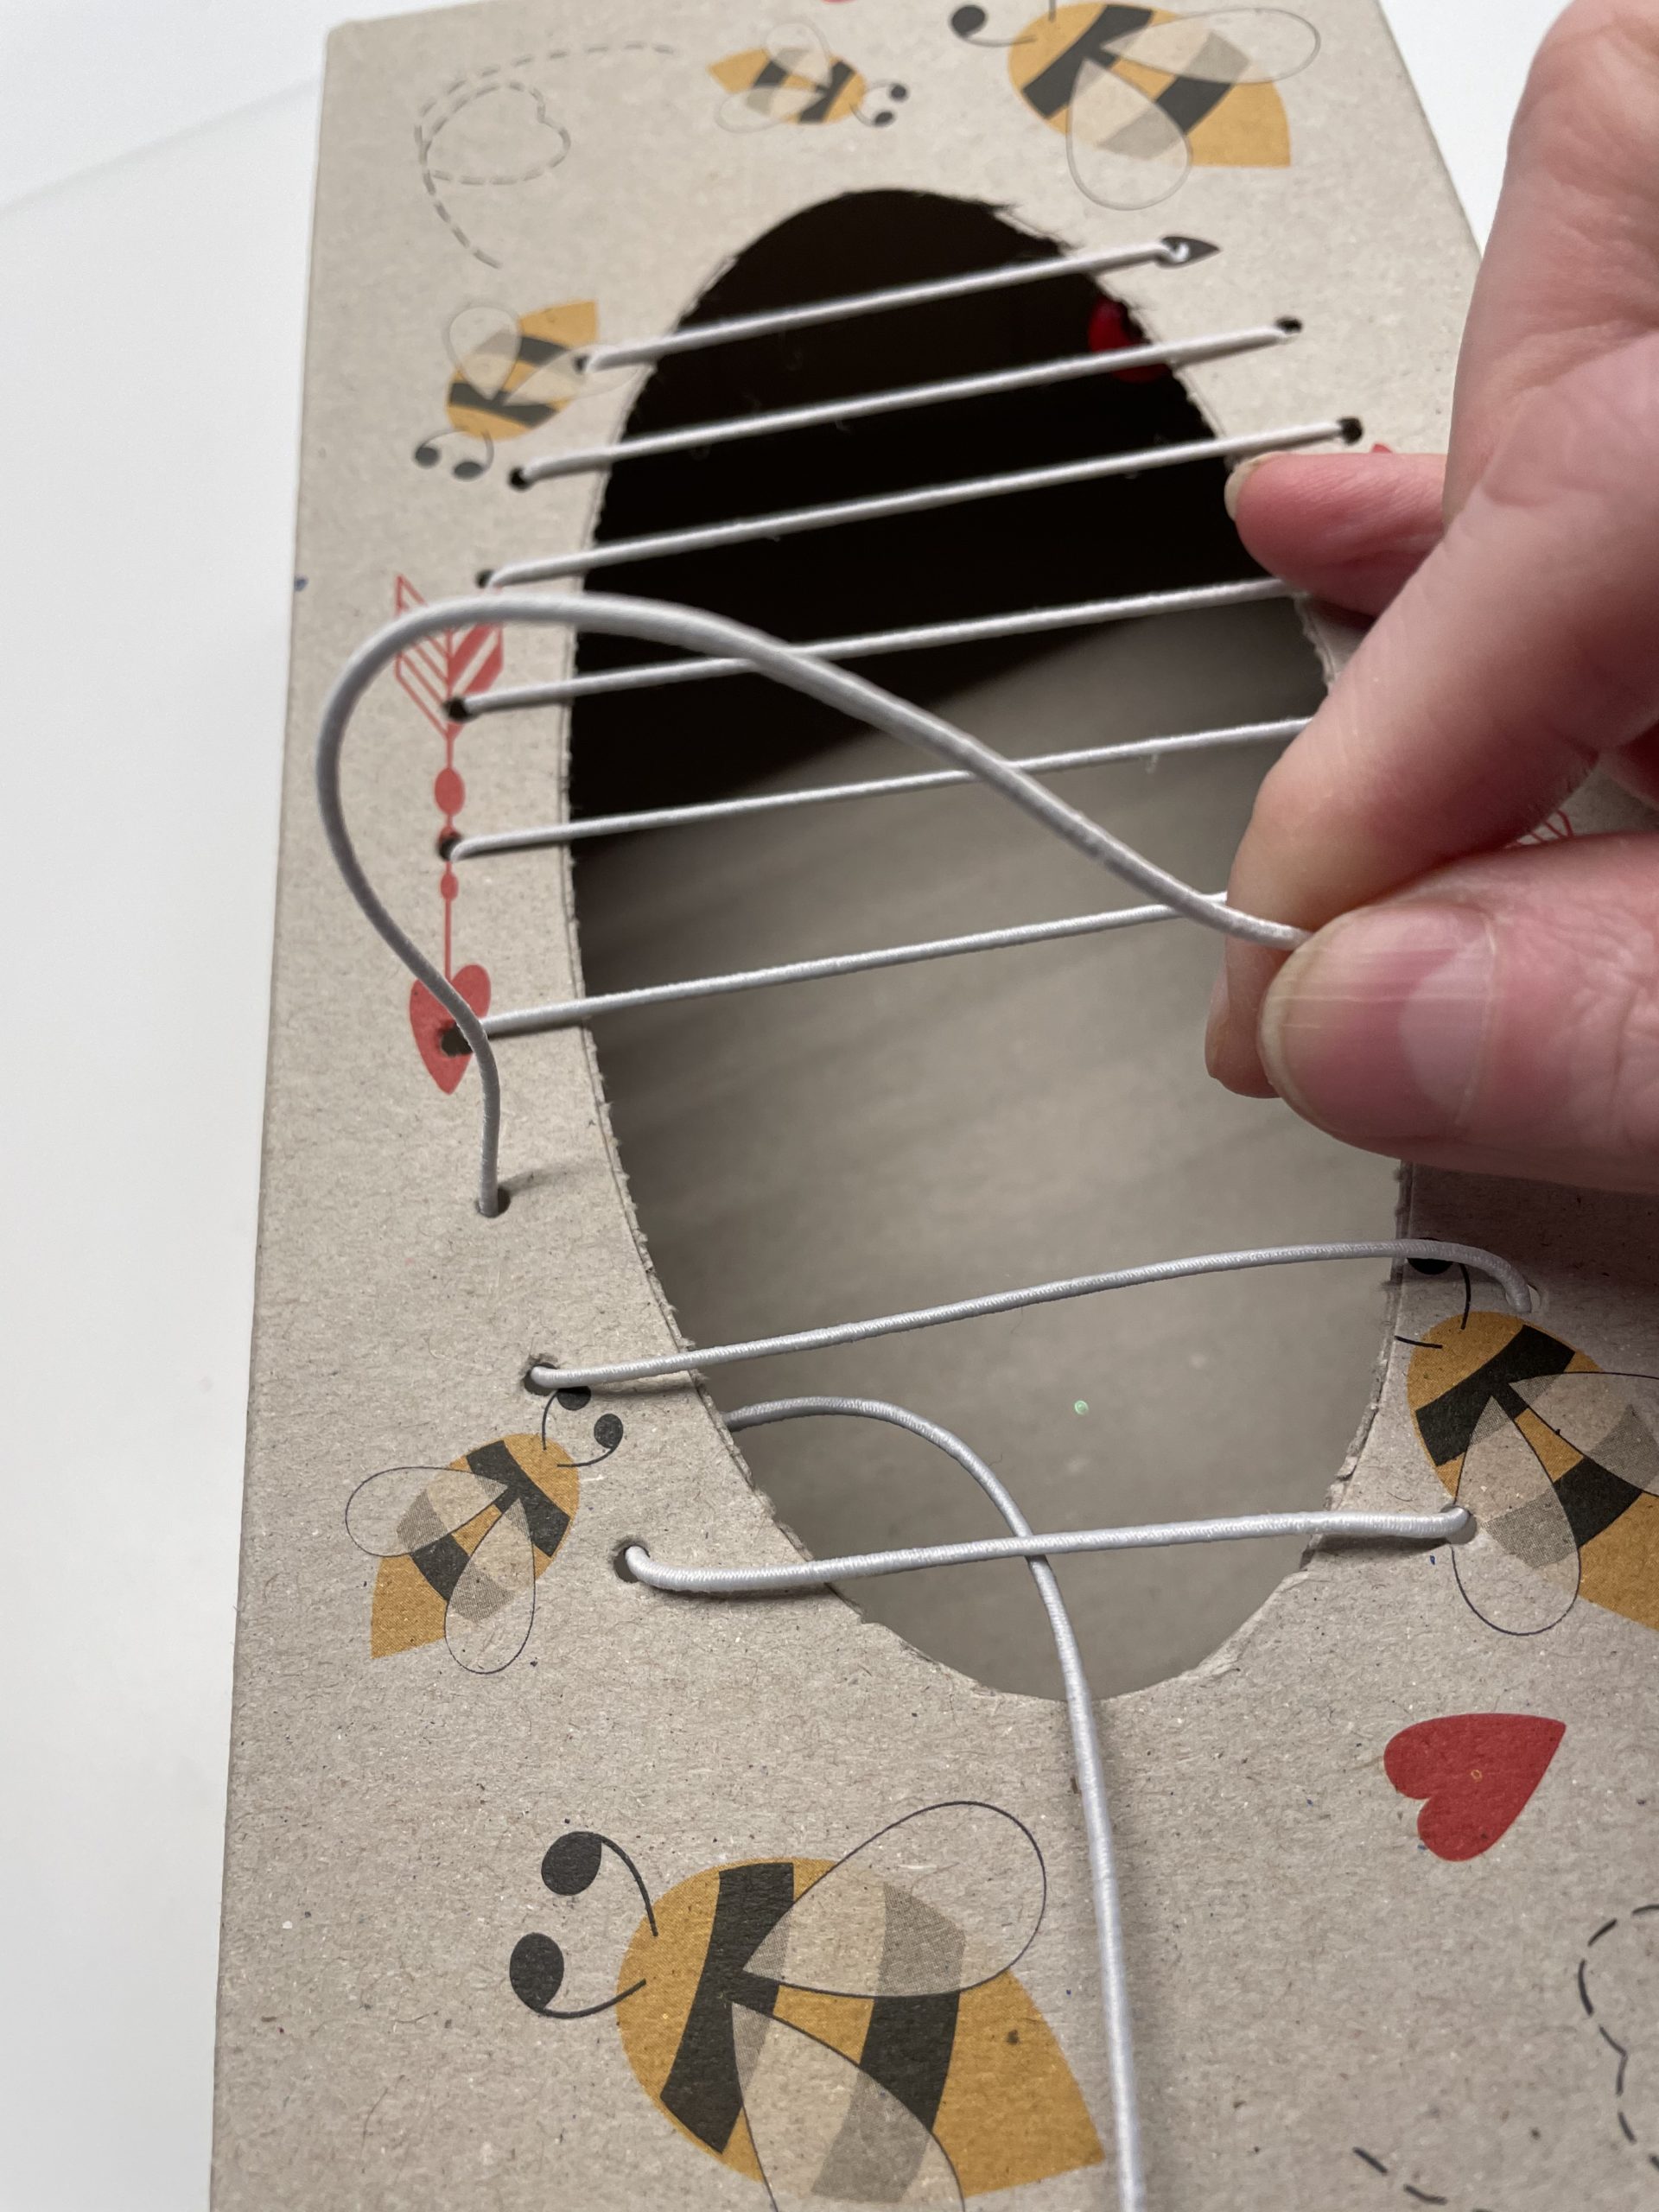
Again thread the thread from bottom to top through the adjacent hole and then from top to bottom into the opposite hole.

Bild zum Schritt 16 für das Bastel- und DIY-Abenteuer für Kinder: 'Fädelt erneut den Faden von unten nach oben durch das...'

17

Repeat the process until you reach the last hole.

Bild zum Schritt 17 für das Bastel- und DIY-Abenteuer für Kinder: 'Wiederholt den Vorgang so lange, bis ihr am letzten Loch...'

18

Make sure that all rubber threads lie loosely above the opening without tension.
The rubber cord ends inside. Leave the thread still long!

Bild zum Schritt 18 für das Bastel- und DIY-Abenteuer für Kinder: 'Achtet darauf, dass alle Gummifäden ohne Spannung locker über der...'

19

Now the gunmi is strained. Begins at the first hole.
For this, tighten the rubber piece by piece. Hold the pulled hat rubber well and work your way forward.

Bild zum Schritt 19 für das Bastel- und DIY-Abenteuer für Kinder: 'Nun wird der Gunmi gespannt. Beginnt am ersten Loch. ...'

20

Pull the thread again and again!

Bild zum Schritt 20 für das Bastel- und DIY-Abenteuer für Kinder: 'Zieht den Faden immer wieder nach!'

21

The complete strings of your supply box are now firmly tensed.
Holds the end well and shortens the overhanging rubber to a length of about 10-15cm.

Bild zum Schritt 21 für das Bastel- und DIY-Abenteuer für Kinder: 'Die kompletten Saiten eurer Zupfdose sind nun fest gespannt. ...'

22

Now you're threading a pearl on the end of the thread.

Bild zum Schritt 22 für das Bastel- und DIY-Abenteuer für Kinder: 'Jetzt fädelt ihr auf das Fadenende eine Perle.'

23

Then you tie this pearl several times as close as possible to the last hole.
Remember that the pearl is on the inside of the last hole!

Bild zum Schritt 23 für das Bastel- und DIY-Abenteuer für Kinder: 'Dann verknotet ihr diese Perle mehrmals so nah wie möglich...'

24

Keep the thread still in your hand. Check whether the rubber hat is tight enough before you release it. Only when all the strings are strongly tightened and the pearl is well knotted can you cut off the overhanging rubber thread about 1cm after the knot.

Bild zum Schritt 24 für das Bastel- und DIY-Abenteuer für Kinder: 'Haltet den Faden noch immer in der Hand. Prüft, ob...'

25

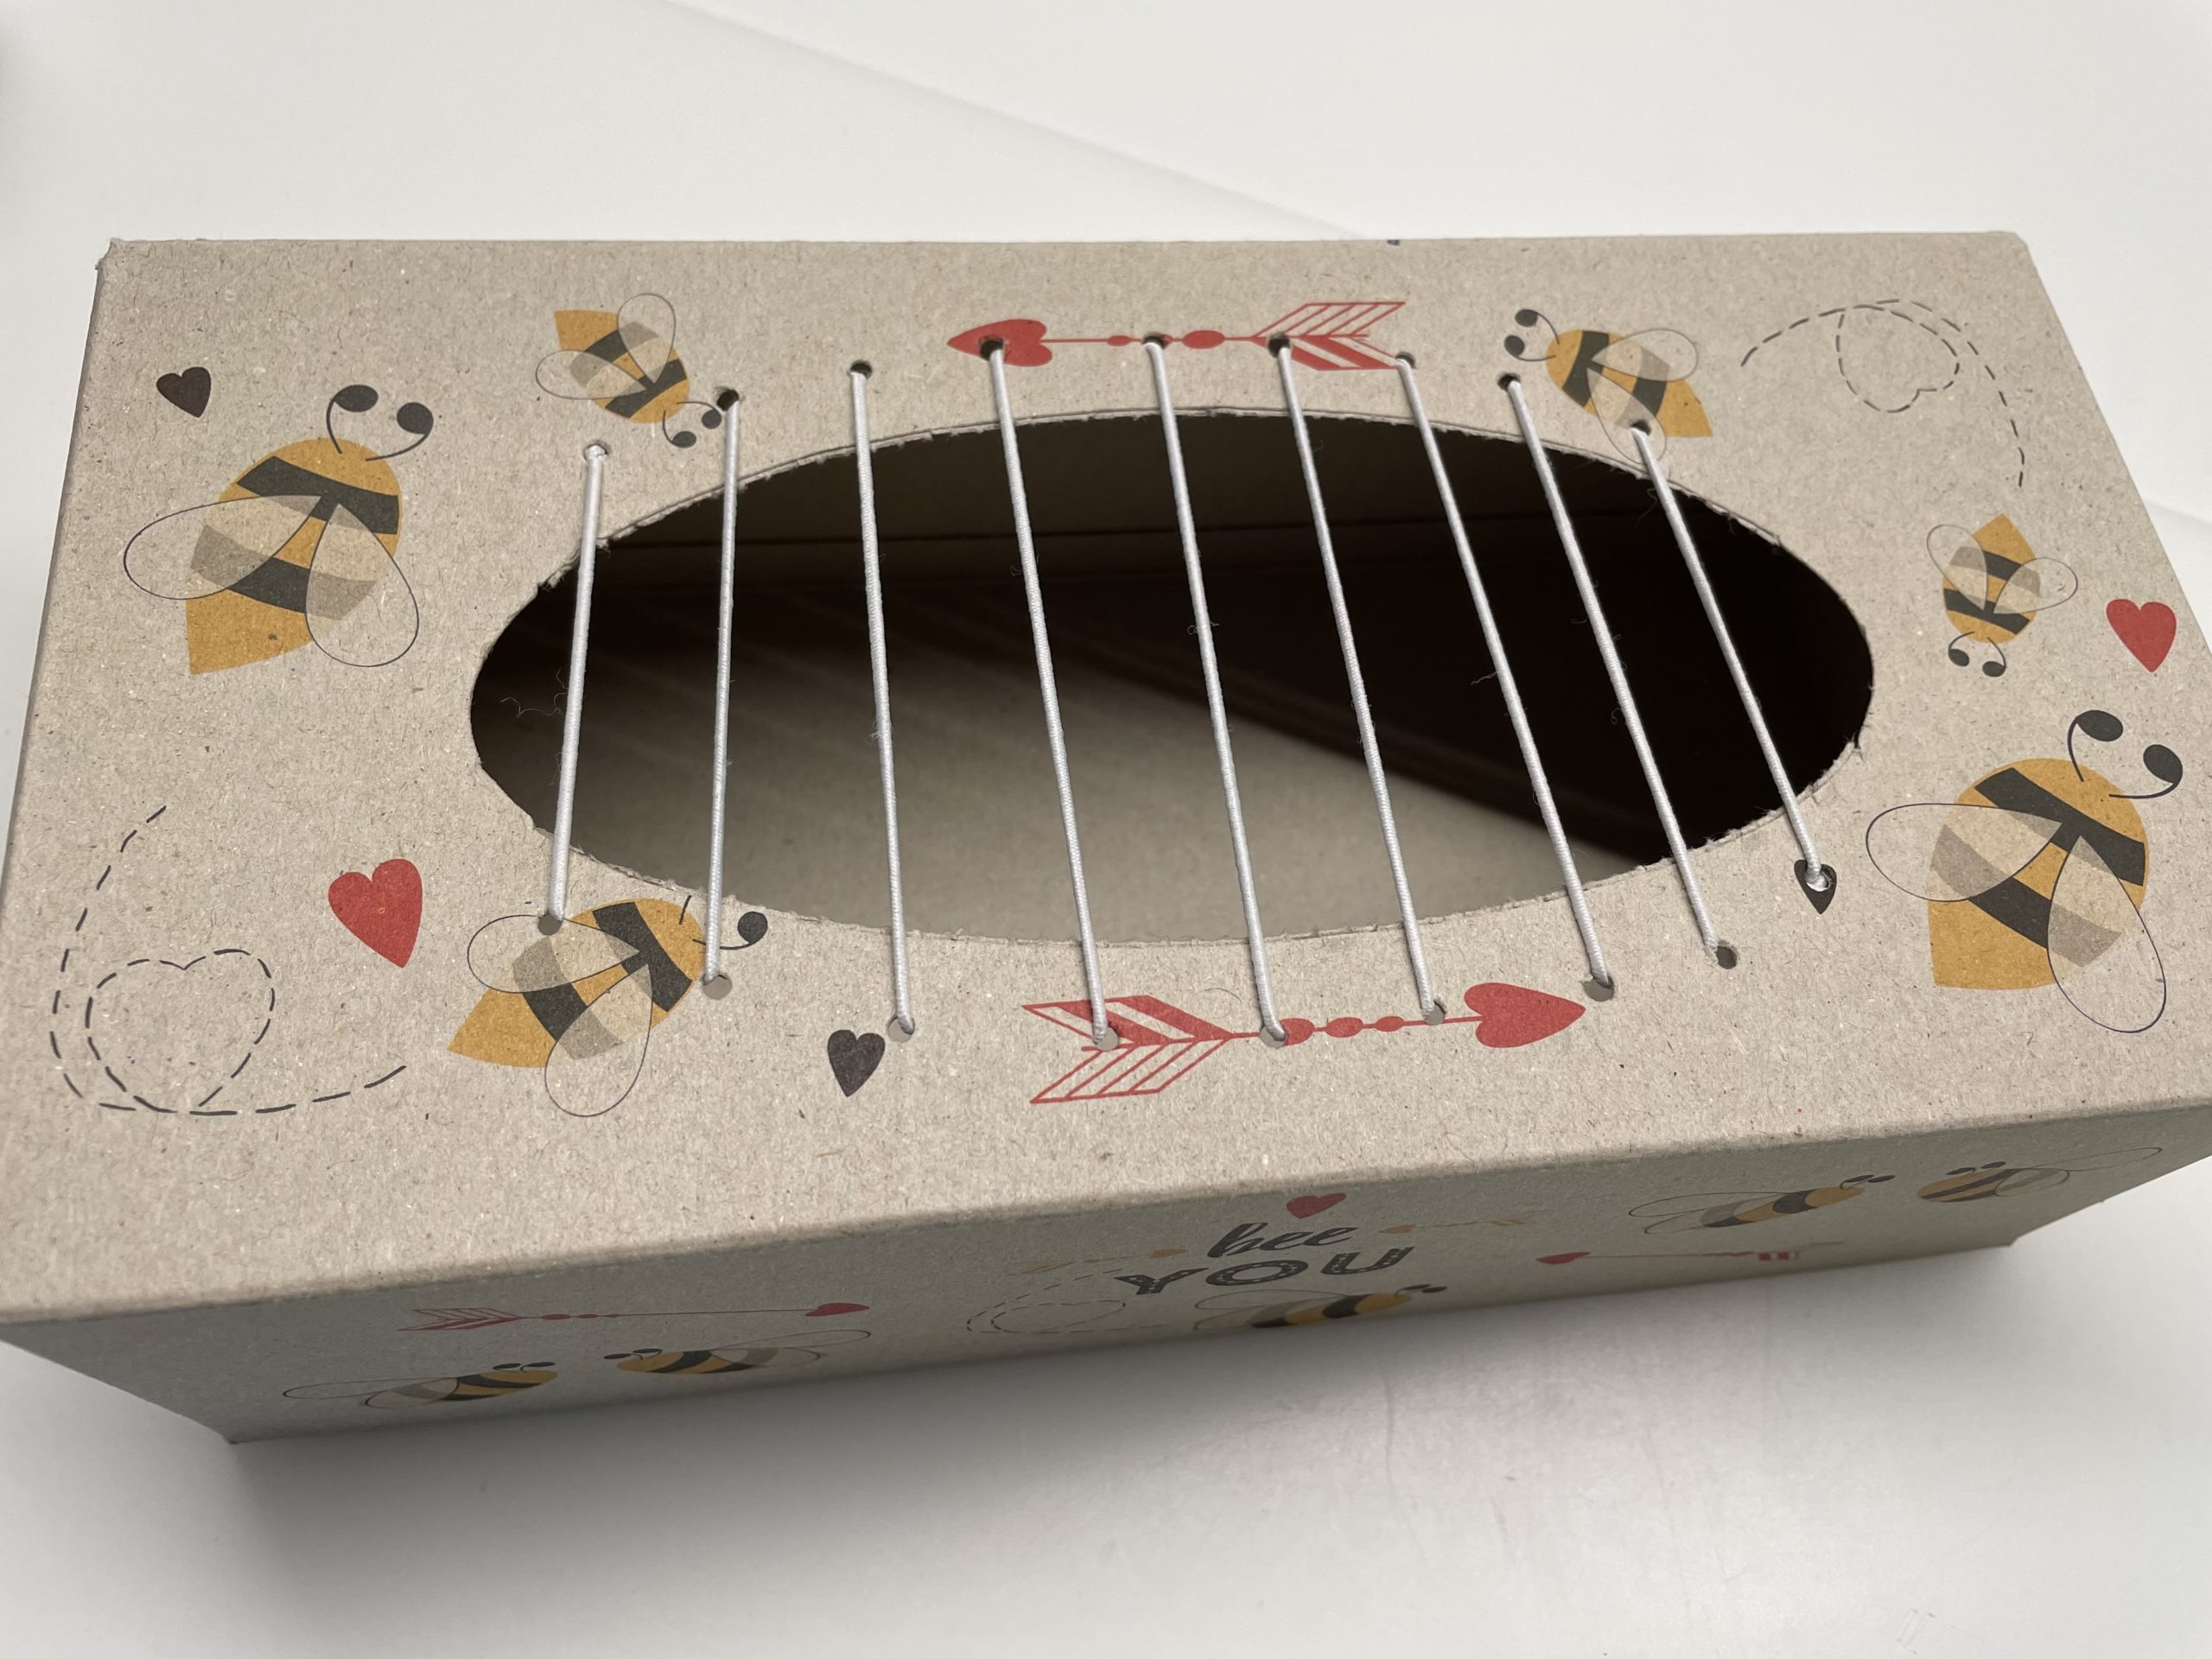
Your can is ready.

Bild zum Schritt 25 für das Bastel- und DIY-Abenteuer für Kinder: 'Fertig ist eure Zupfdose.'

26

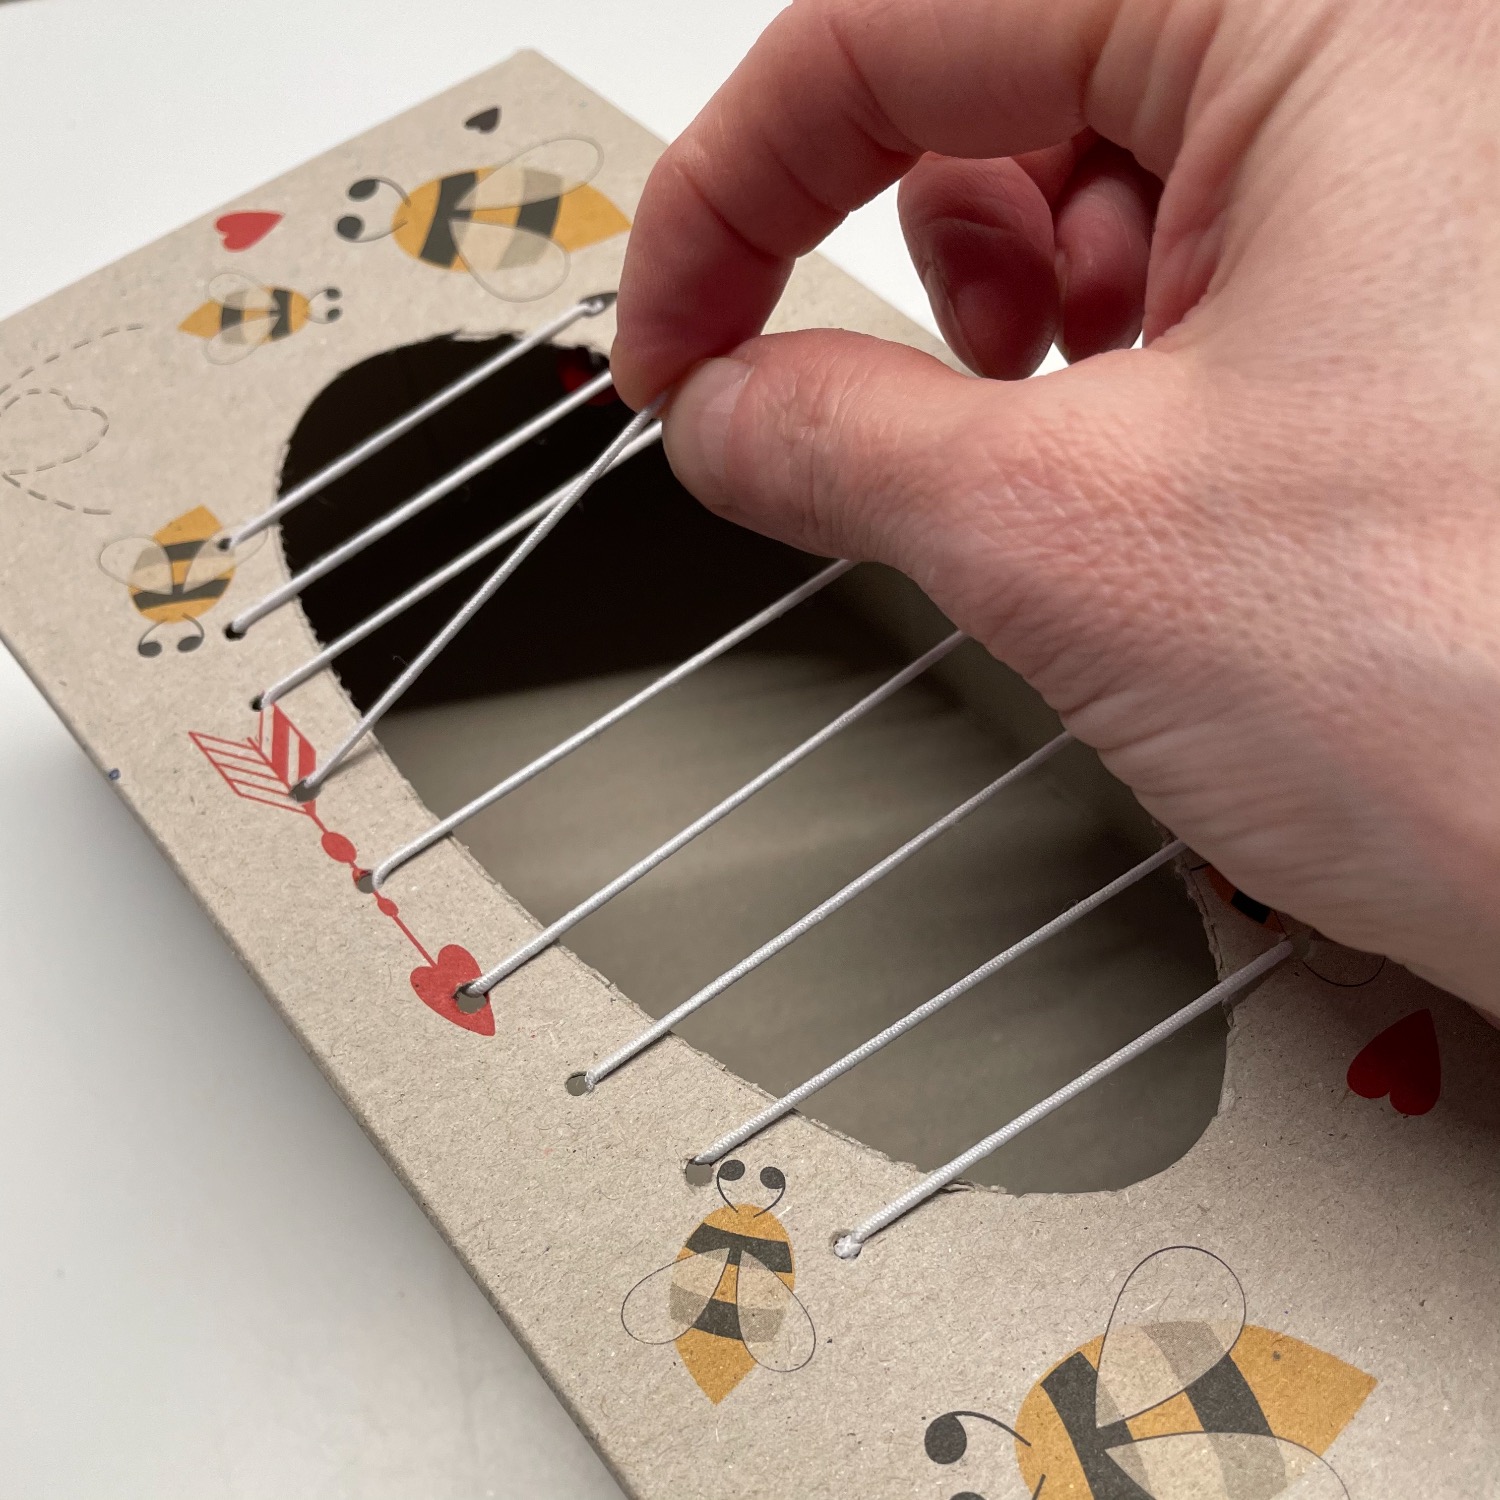
Try to raise the threads with two fingers and let them buckle. The rubber threads become strings and the plucking of the rubber threads creates tones.

Bild zum Schritt 26 für das Bastel- und DIY-Abenteuer für Kinder: 'Probiert die Fäden mit zwei Fingern etwas anzuheben und schnalzen...'

27

Or you can move your finger over the strings of your instrument. Small children's hands can also move over the strings with the flat hand. The vibration of the strings under their hands fascinates children.

Bild zum Schritt 27 für das Bastel- und DIY-Abenteuer für Kinder: 'Oder ihr streift mit einem Finger über die Saiten eures...'

28

Accompany songs with the Zupf box. Experiment with the sounds and make your own music!

29

Have fun playing music!

Materials

 1 empty handkerchief boxFor teats
 1 Hole pliers
 Hat rubber
 2 Beads
 possibly stuffing needle(This is a blunt needle)
 1 Pencil
 1 Ruler
All links marked with a shopping cart lead to Amazon - here we have selected products that we would order ourselves and in part also ordered. In a qualified purchase via the advertising link, we as Amazon partner receive a commission, for you there are no costs. You thus support our cost- and advertising banner-free, educational offer.

Directions

1

First, remove the paper or foil from the opening of the empty handkerchief box.

Bild zum Schritt 1 für das Bastel- und DIY-Abenteuer für Kinder: 'Zuerst entfernt ihr das Papier oder die Folie am Eingriffsloch...'

2

Then you embellish and design the box as you like it. You can paint or glue the box. I used the box as it was because I like it so much.
The box must be dry and clean for further processing.

Bild zum Schritt 2 für das Bastel- und DIY-Abenteuer für Kinder: 'Dann verschönert und gestaltet ihr die Box so wie es...'

3

Now you only punch the two long sides of the hole with about 9 holes per side. First mark the position of the holes with pencil. Then you punch with the punch plier and with the help of an adult, because the cardboard box is very tight.
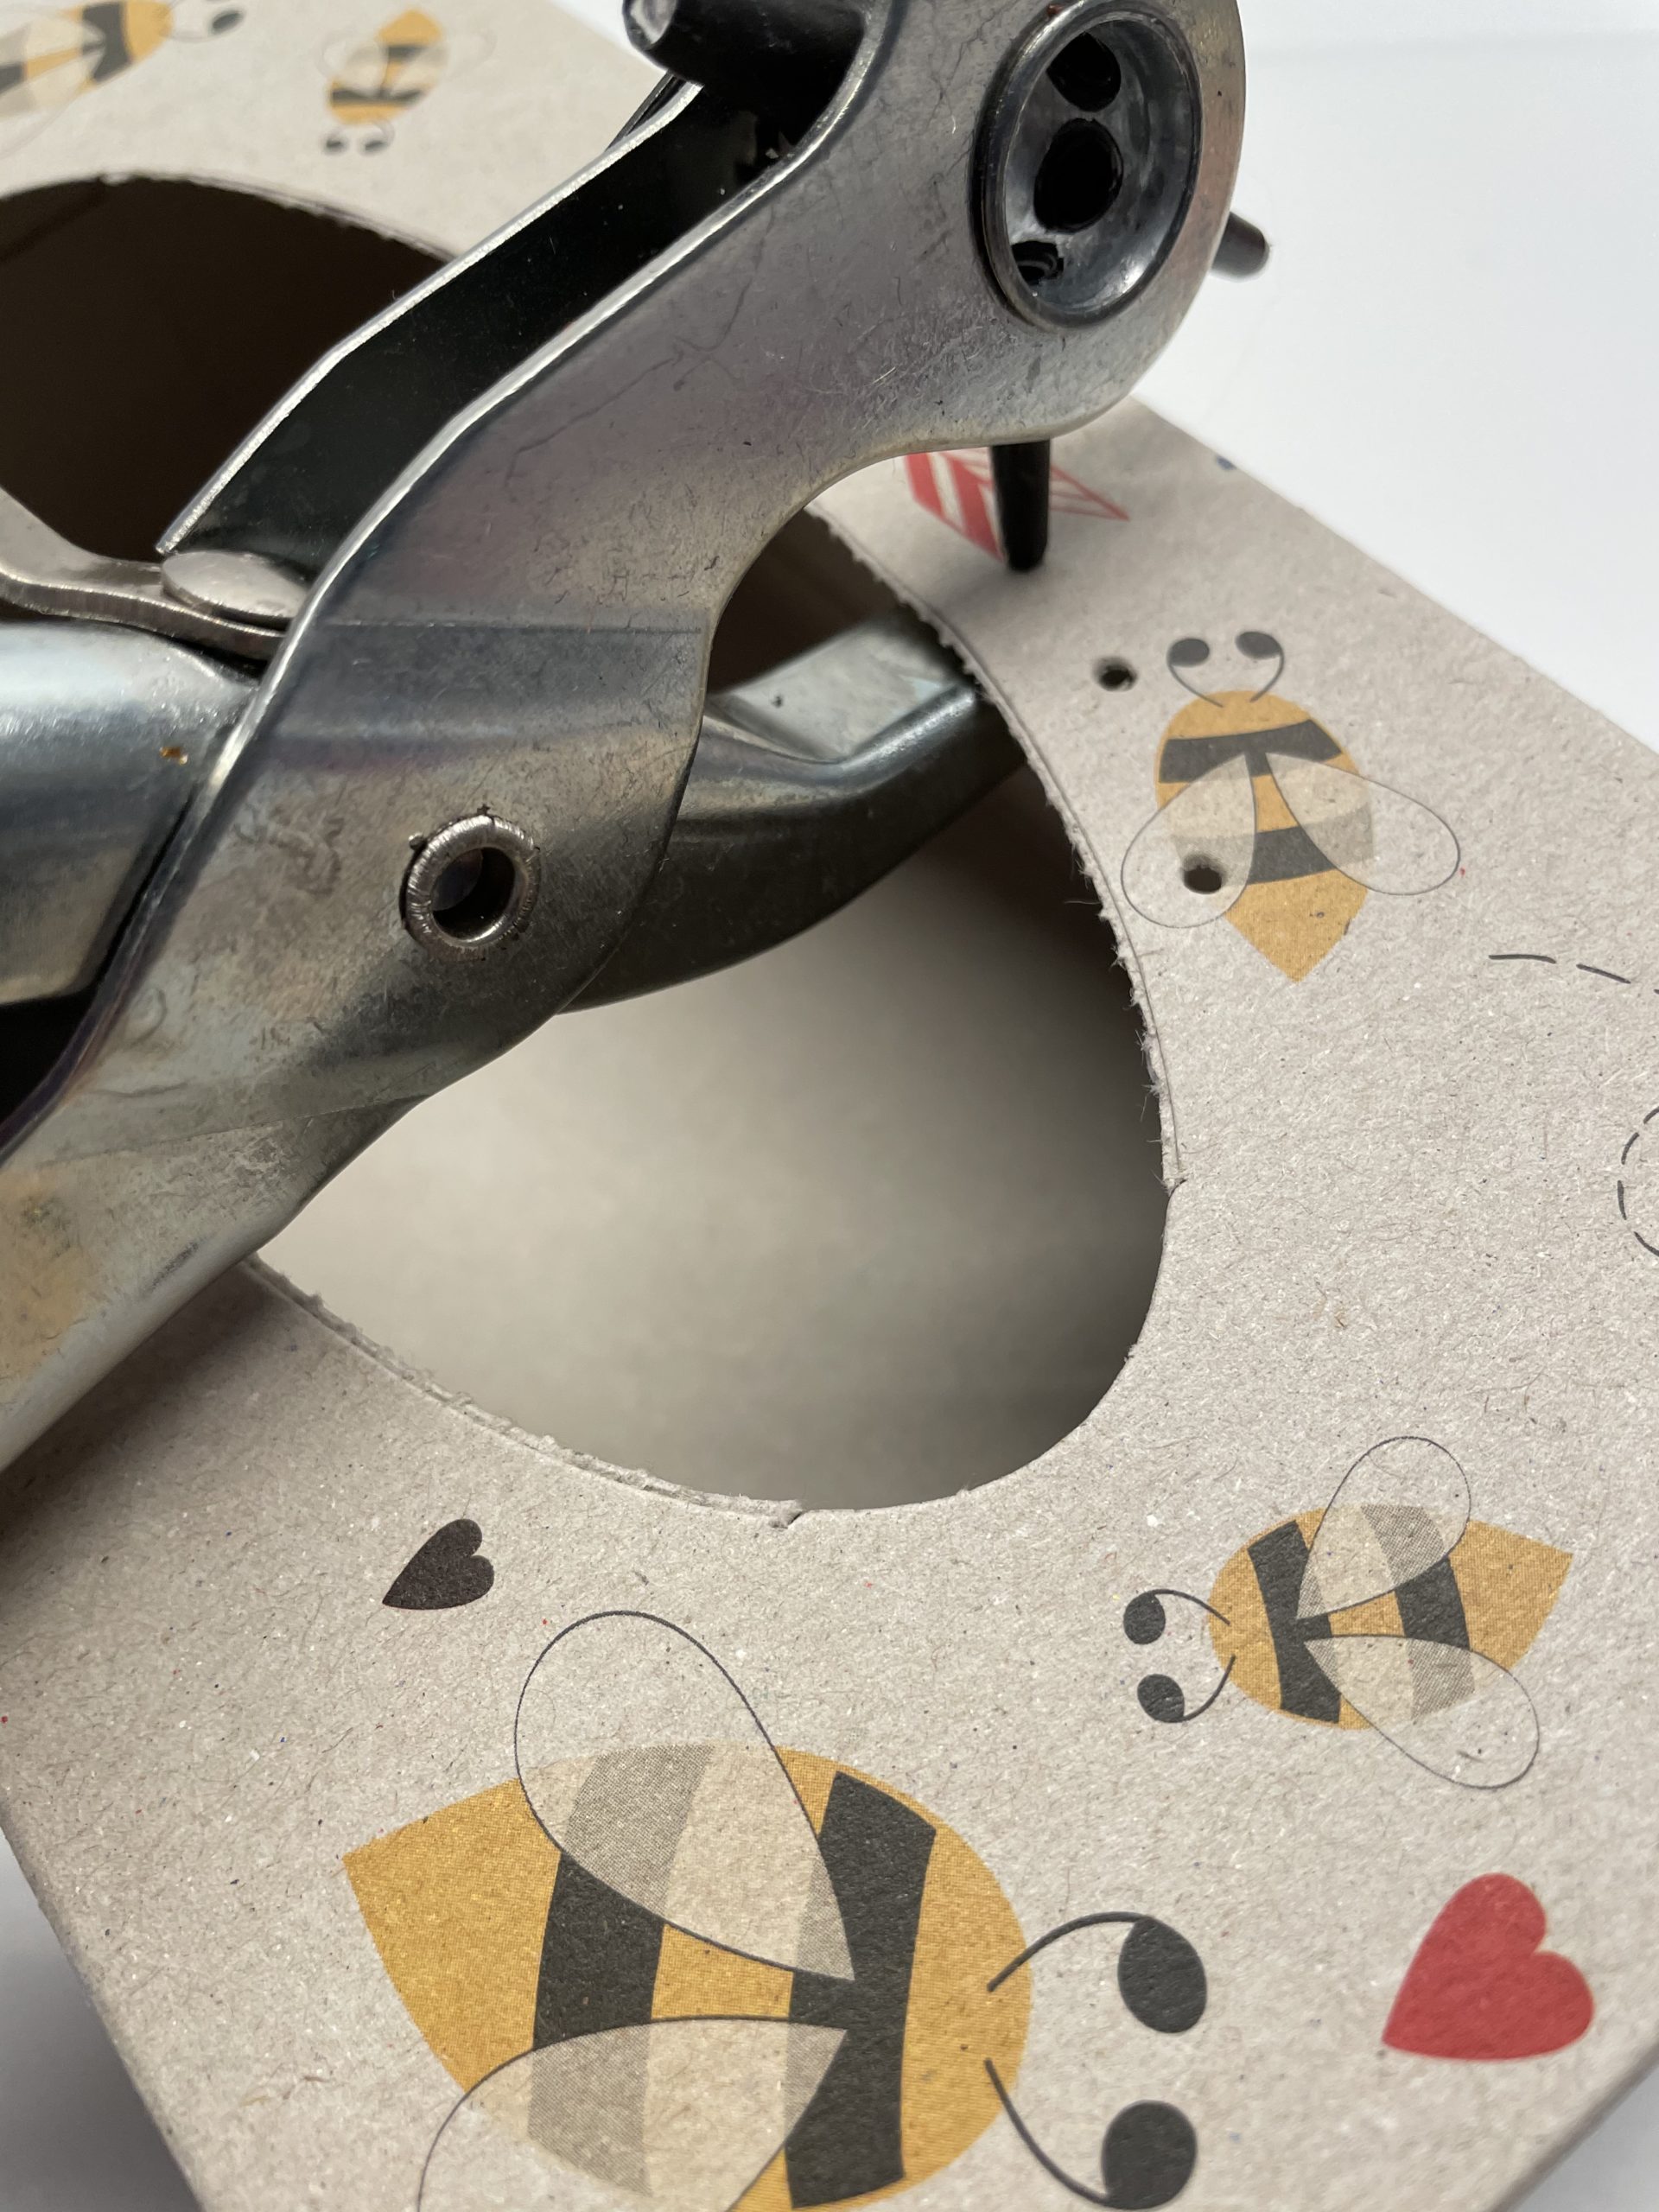
Bild zum Schritt 3 für das Bastel- und DIY-Abenteuer für Kinder: 'Jetzt locht ihr nur die zwei langen Seiten am Eingriffsloch...'

4

Here you can see the holes on one side. The short rounding is not perforated (see picture)!
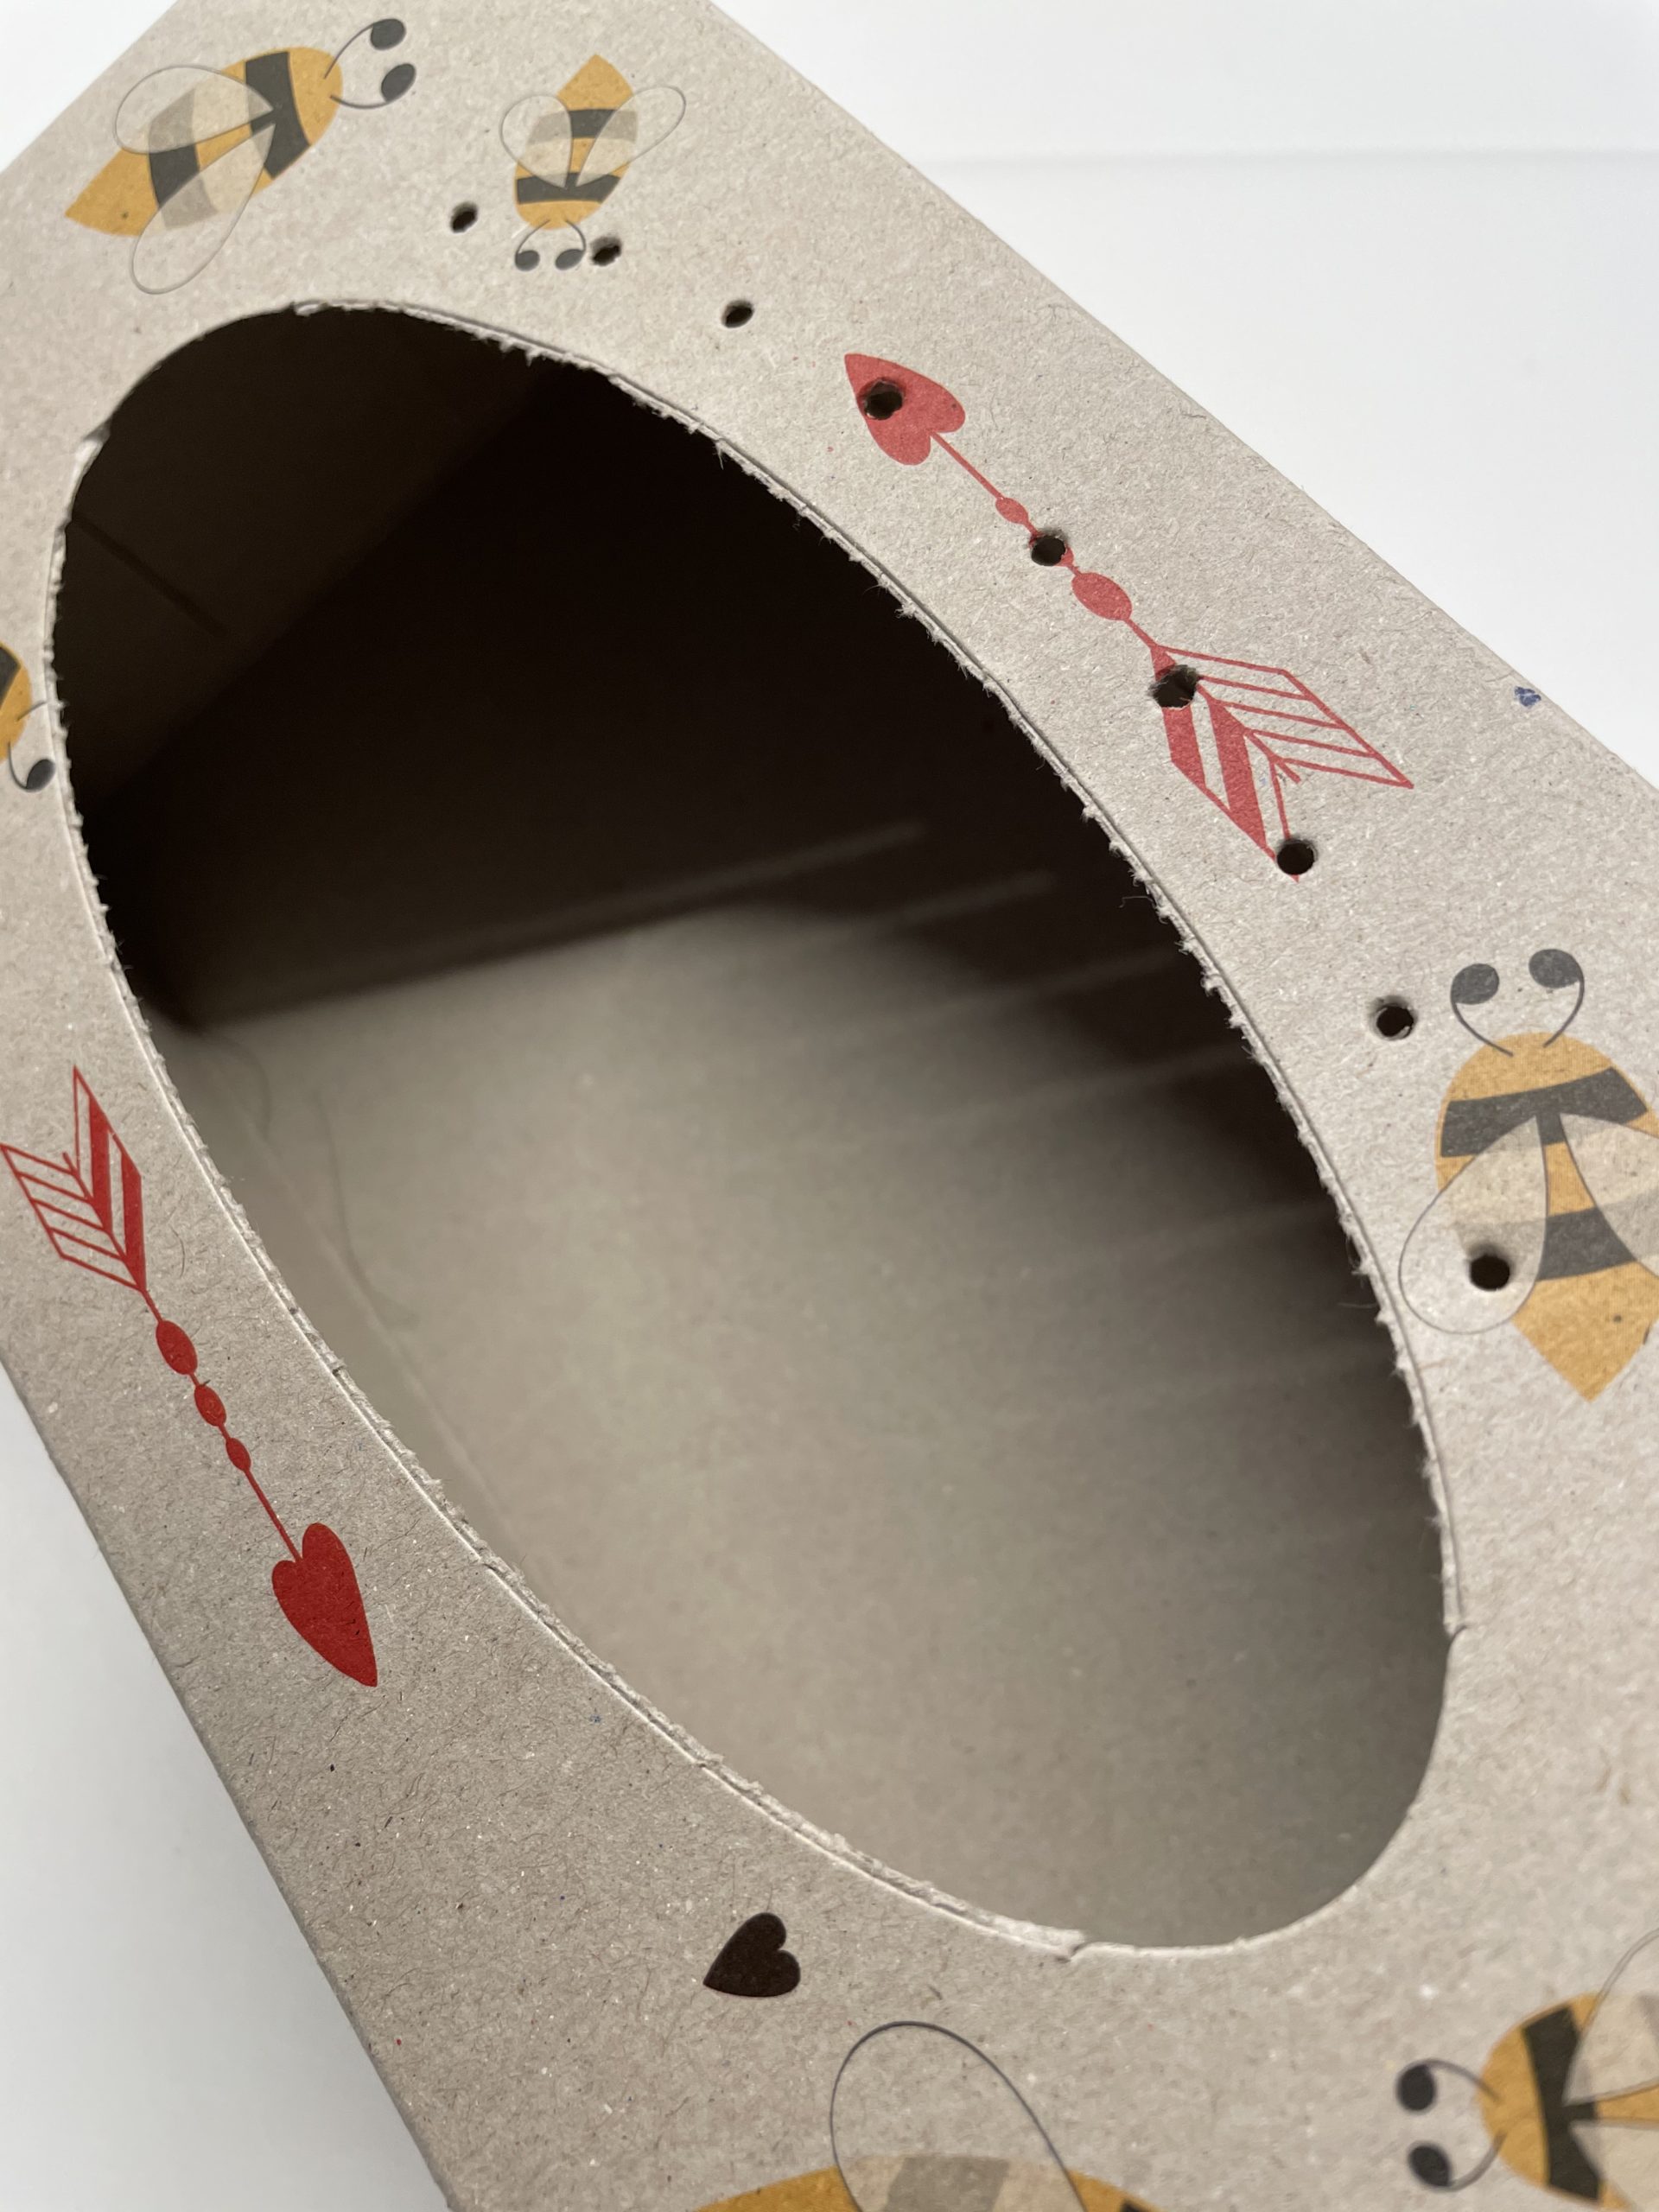
Bild zum Schritt 4 für das Bastel- und DIY-Abenteuer für Kinder: 'Hier seht ihr die Löcher einer Seite. Die kurze Rundung...'

5

Now you're punching the other long side.
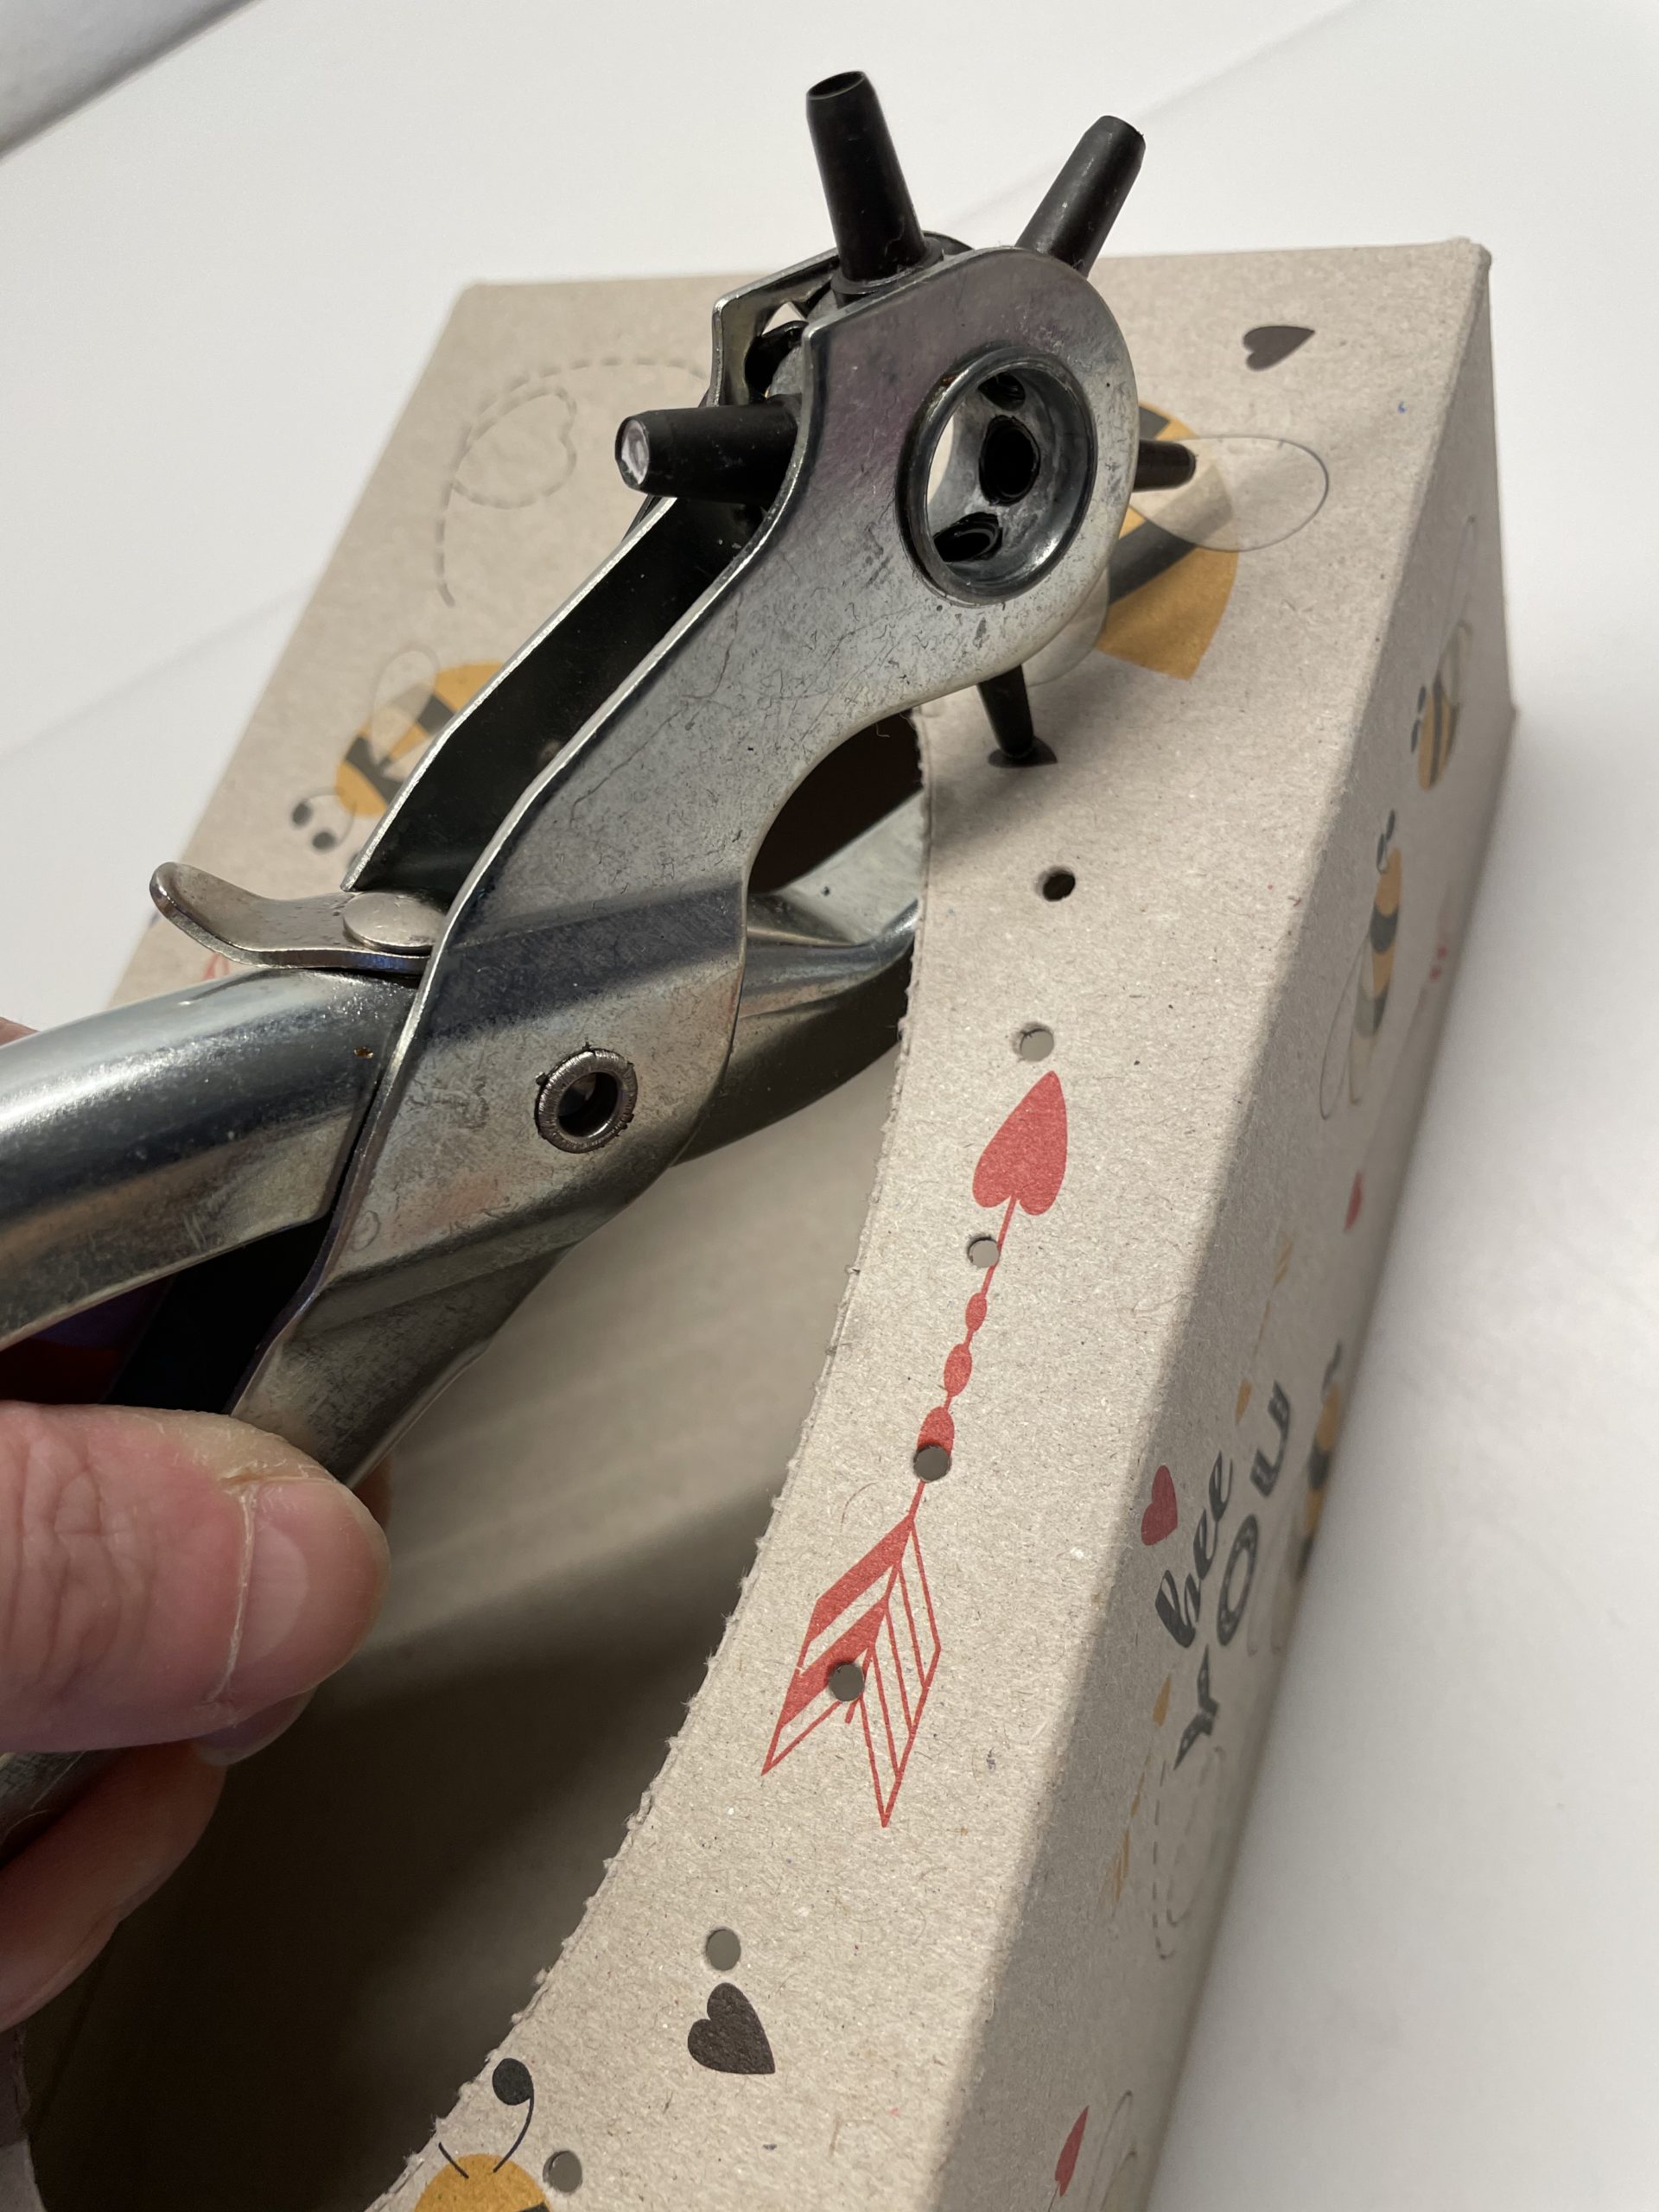
Bild zum Schritt 5 für das Bastel- und DIY-Abenteuer für Kinder: 'Jetzt locht ihr noch die andere langen Seite.'

6

Then pull the hat rubber through the first hole on any side. Do not cut the rubber off, but leave it on the coil. Then thread it from top to bottom through the first hole.
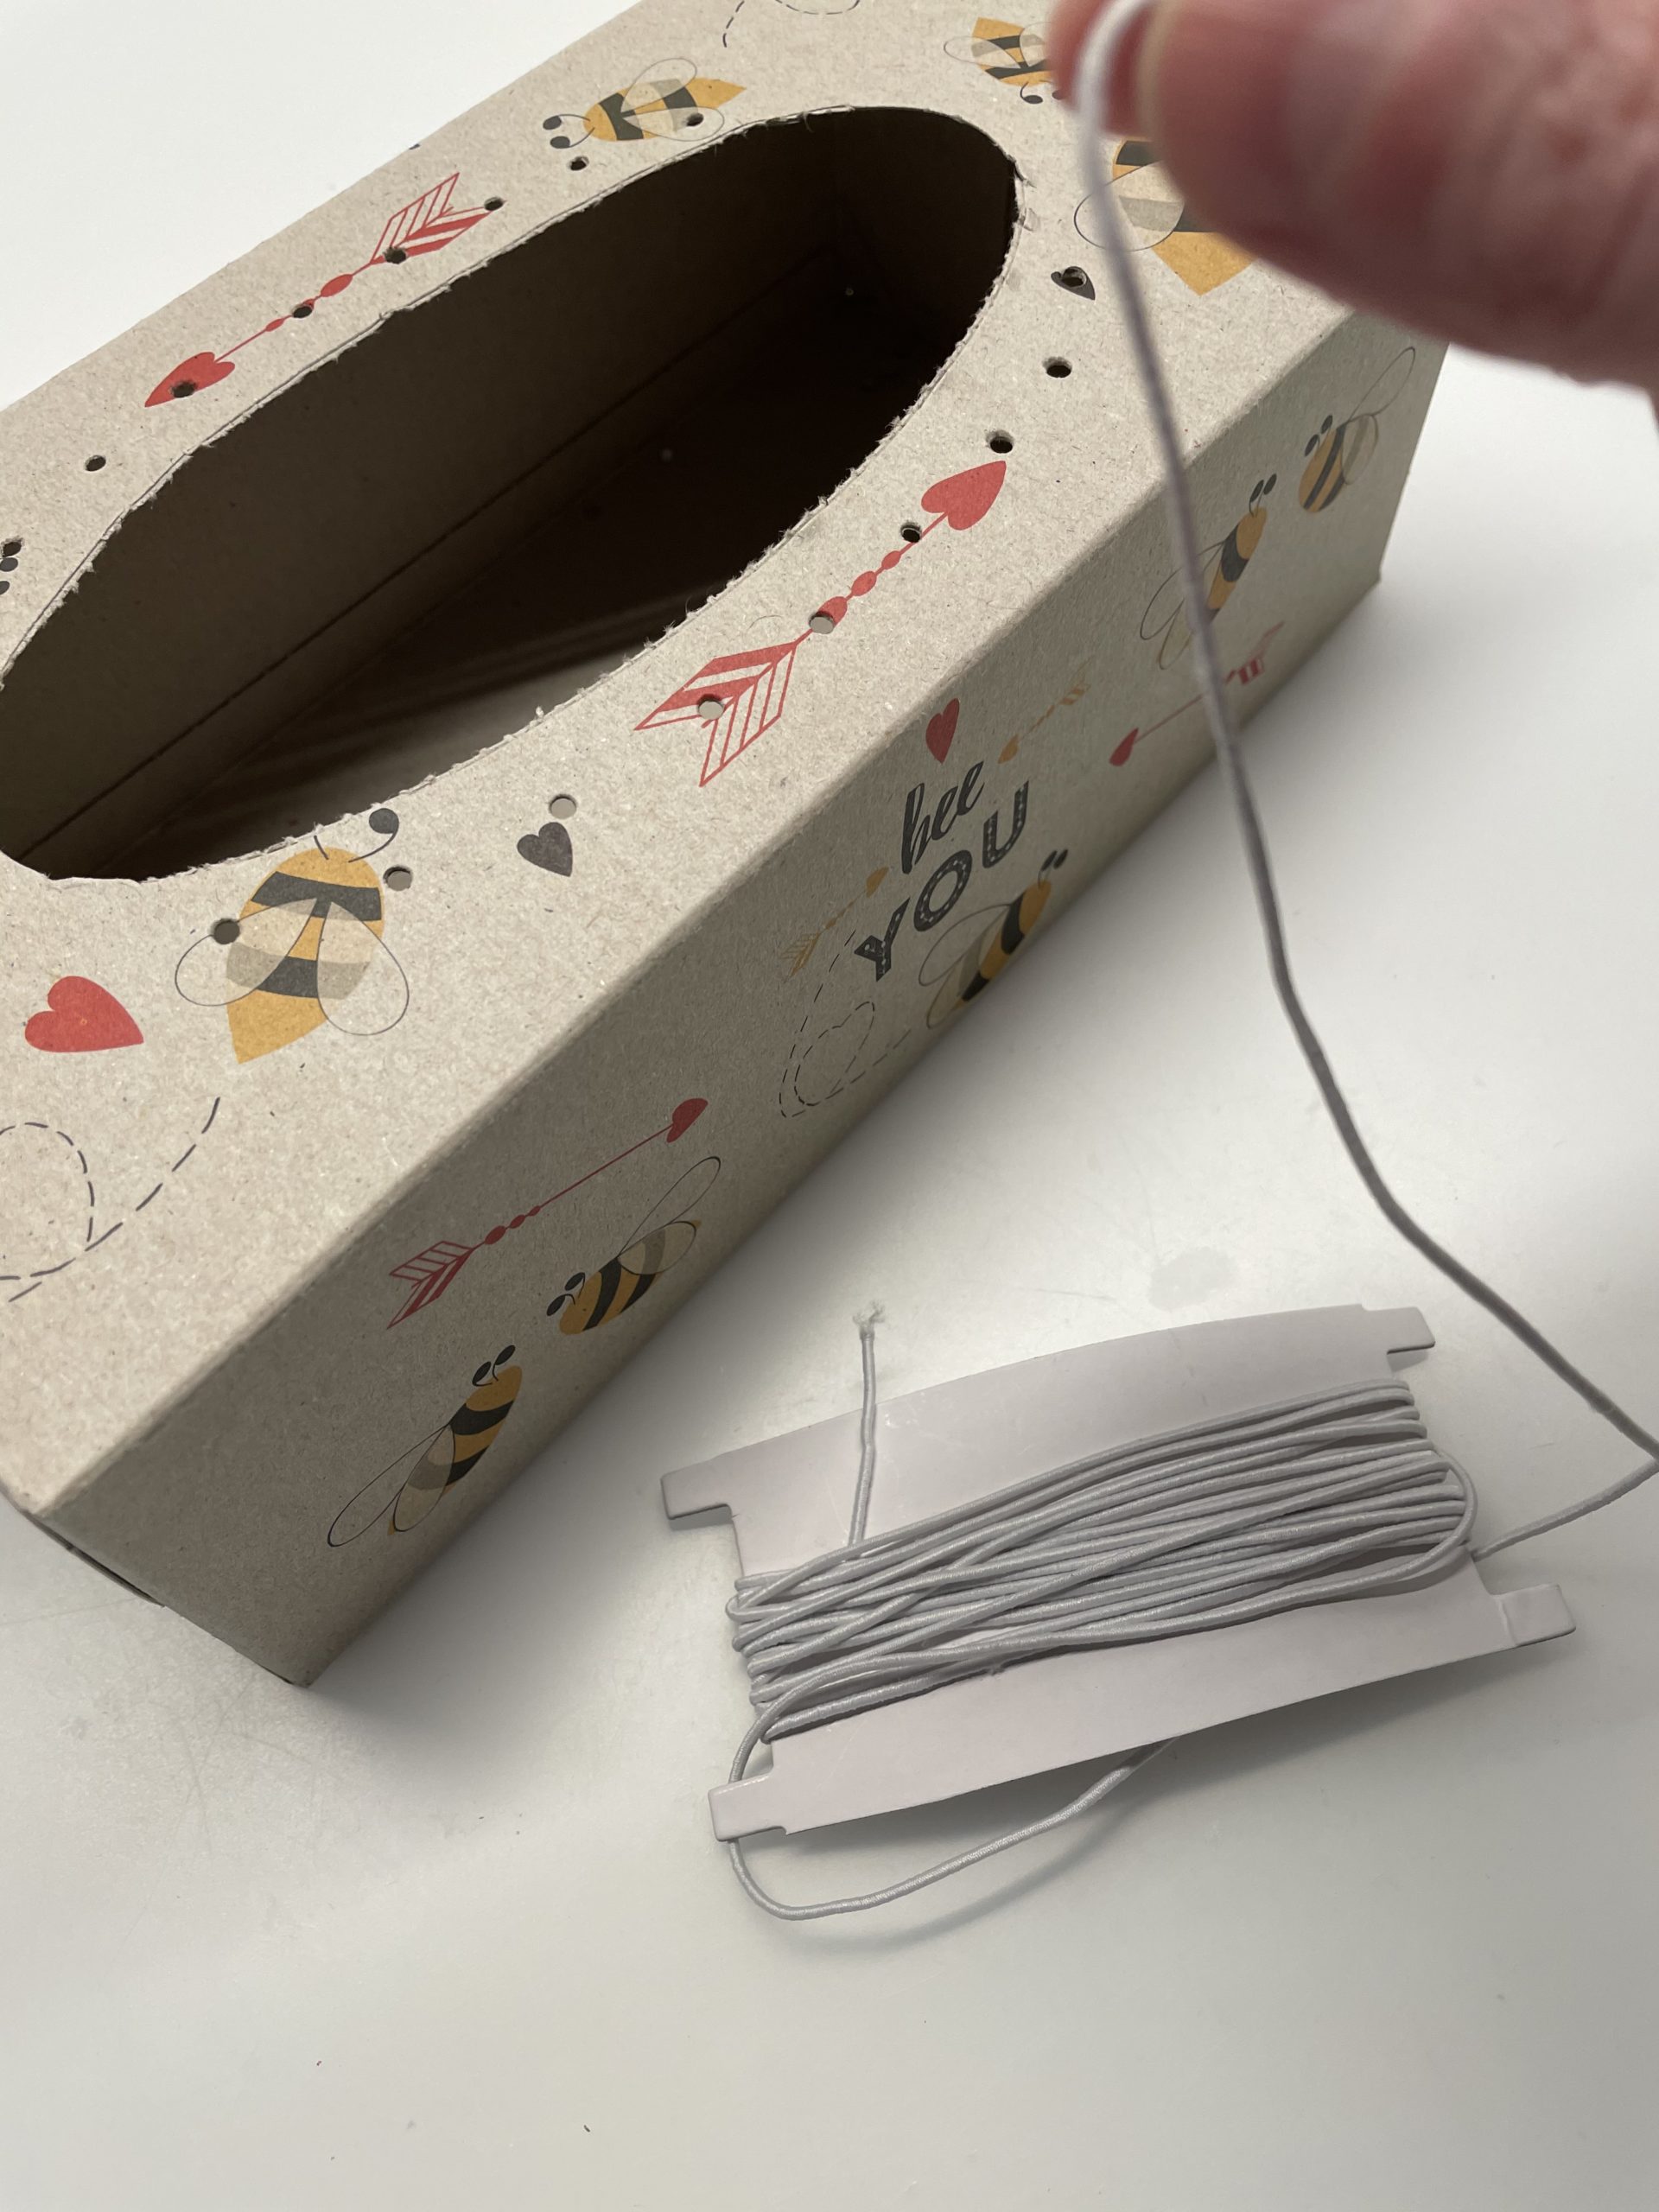
Bild zum Schritt 6 für das Bastel- und DIY-Abenteuer für Kinder: 'Anschließend zieht ihr den Hutgummi durch das erste Loch auf...'

7

Pull the beginning of the thread about 10cm through the opening.
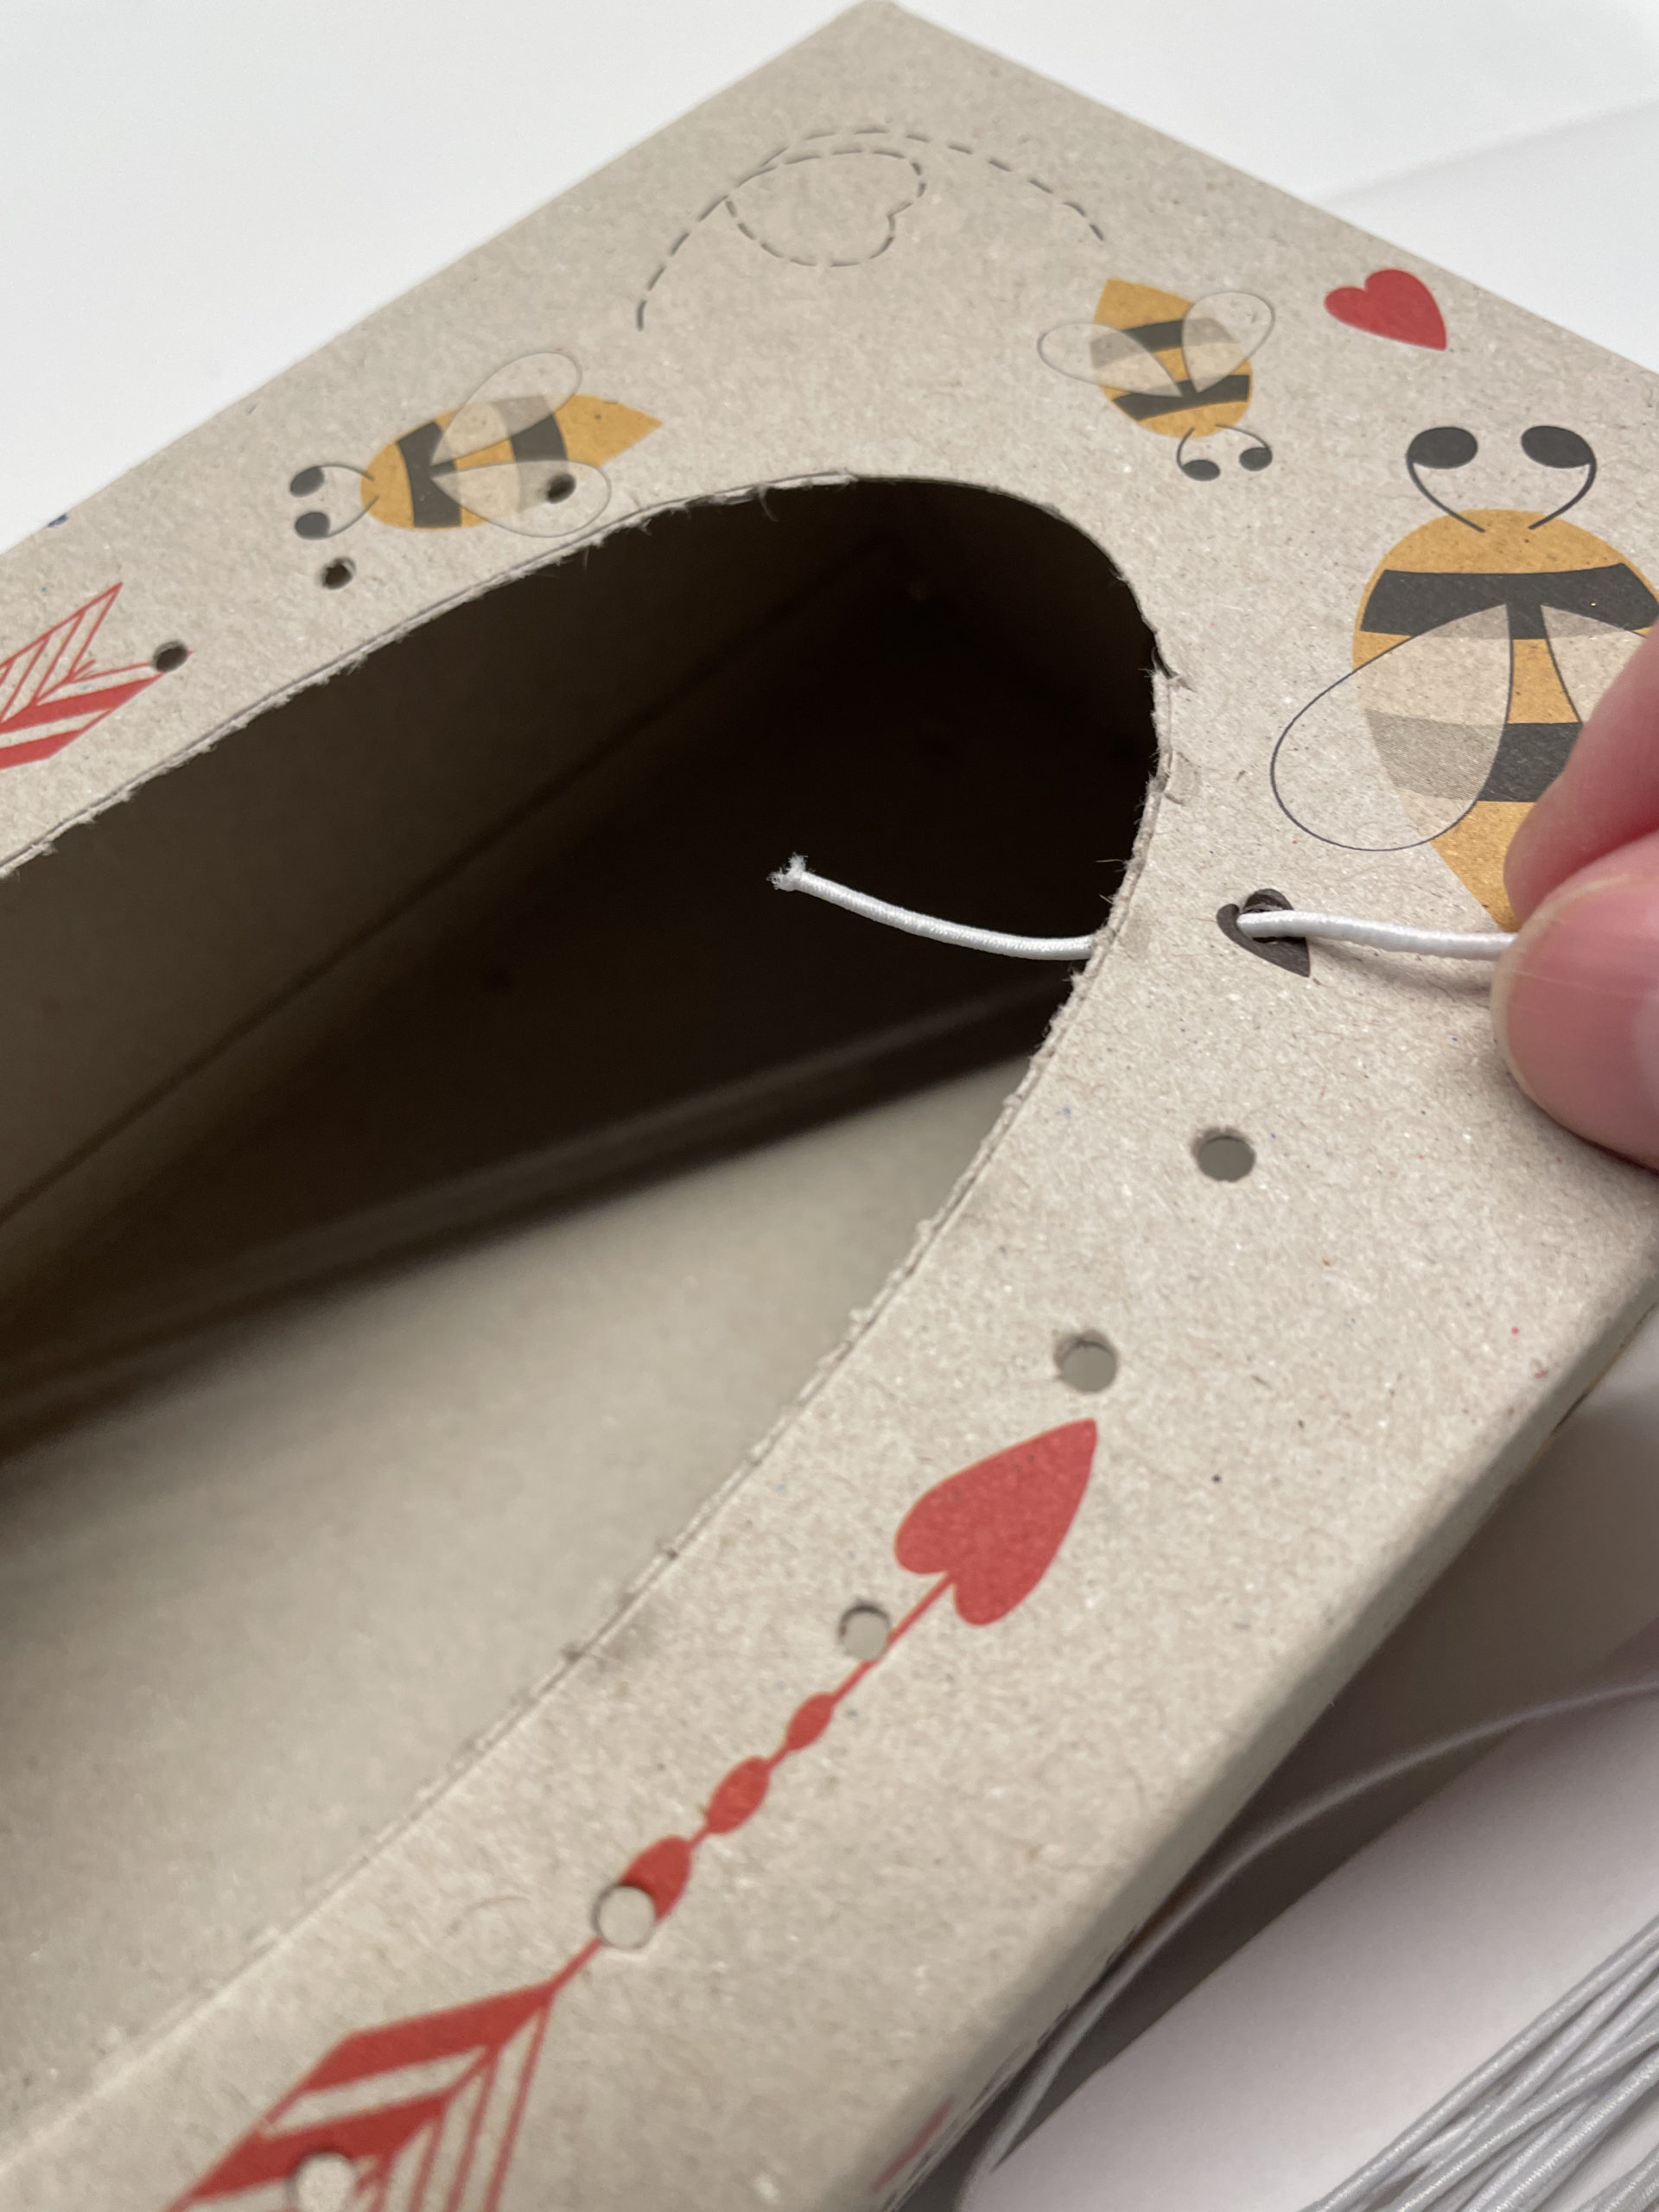
Bild zum Schritt 7 für das Bastel- und DIY-Abenteuer für Kinder: 'Zieht den Fadenanfang ca. 10cm durch die Öffnung.'

8

Then you thread a pearl on the beginning of the thread.

Bild zum Schritt 8 für das Bastel- und DIY-Abenteuer für Kinder: 'Dann fädelt ihr auf den Fadenanfang eine Perle.'

9

Then knot the pearl several times with the hat rubber.
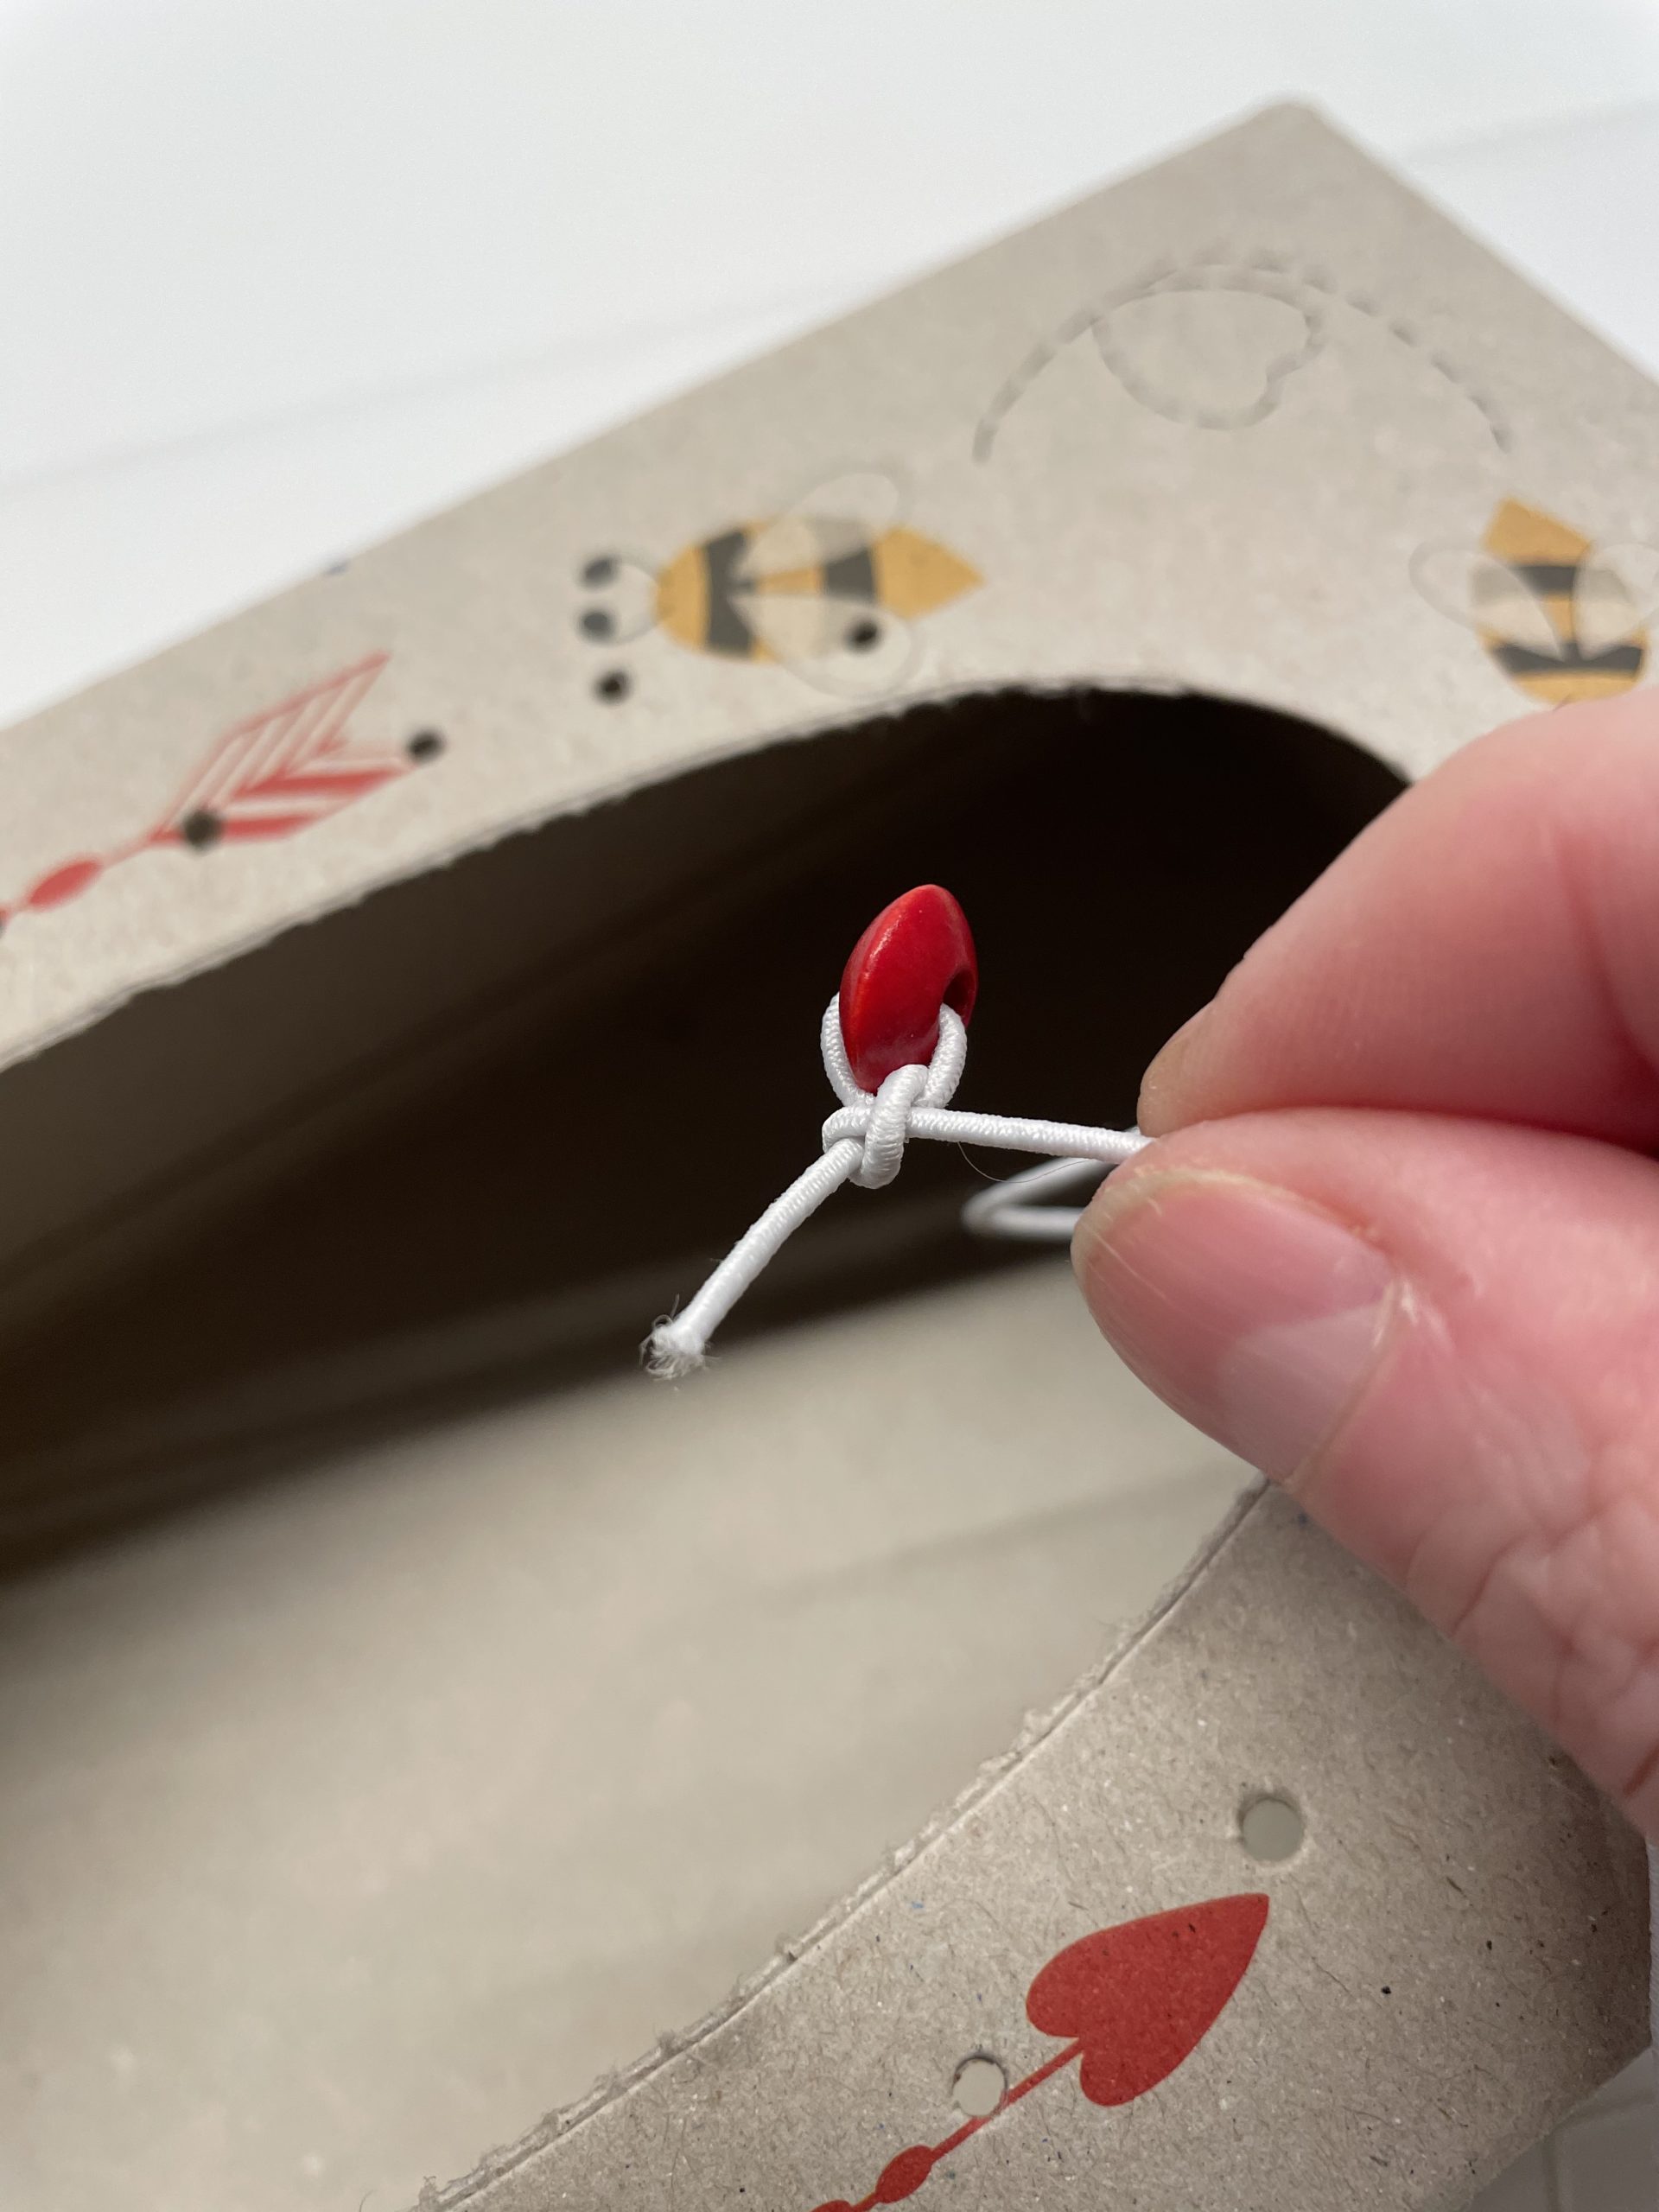
Bild zum Schritt 9 für das Bastel- und DIY-Abenteuer für Kinder: 'Verknotet die Perle anschließend mehrmals mit dem Hutgummi.'

10

Now pull the beginning of the thread back through the hole until the pearl lies on the inside of the box.

Bild zum Schritt 10 für das Bastel- und DIY-Abenteuer für Kinder: 'Jetzt zieht ihr den Fadenanfang wieder zurück durch das Loch,...'

11

Unwrap the rubber from the coil and thread with the other end of the rubber.
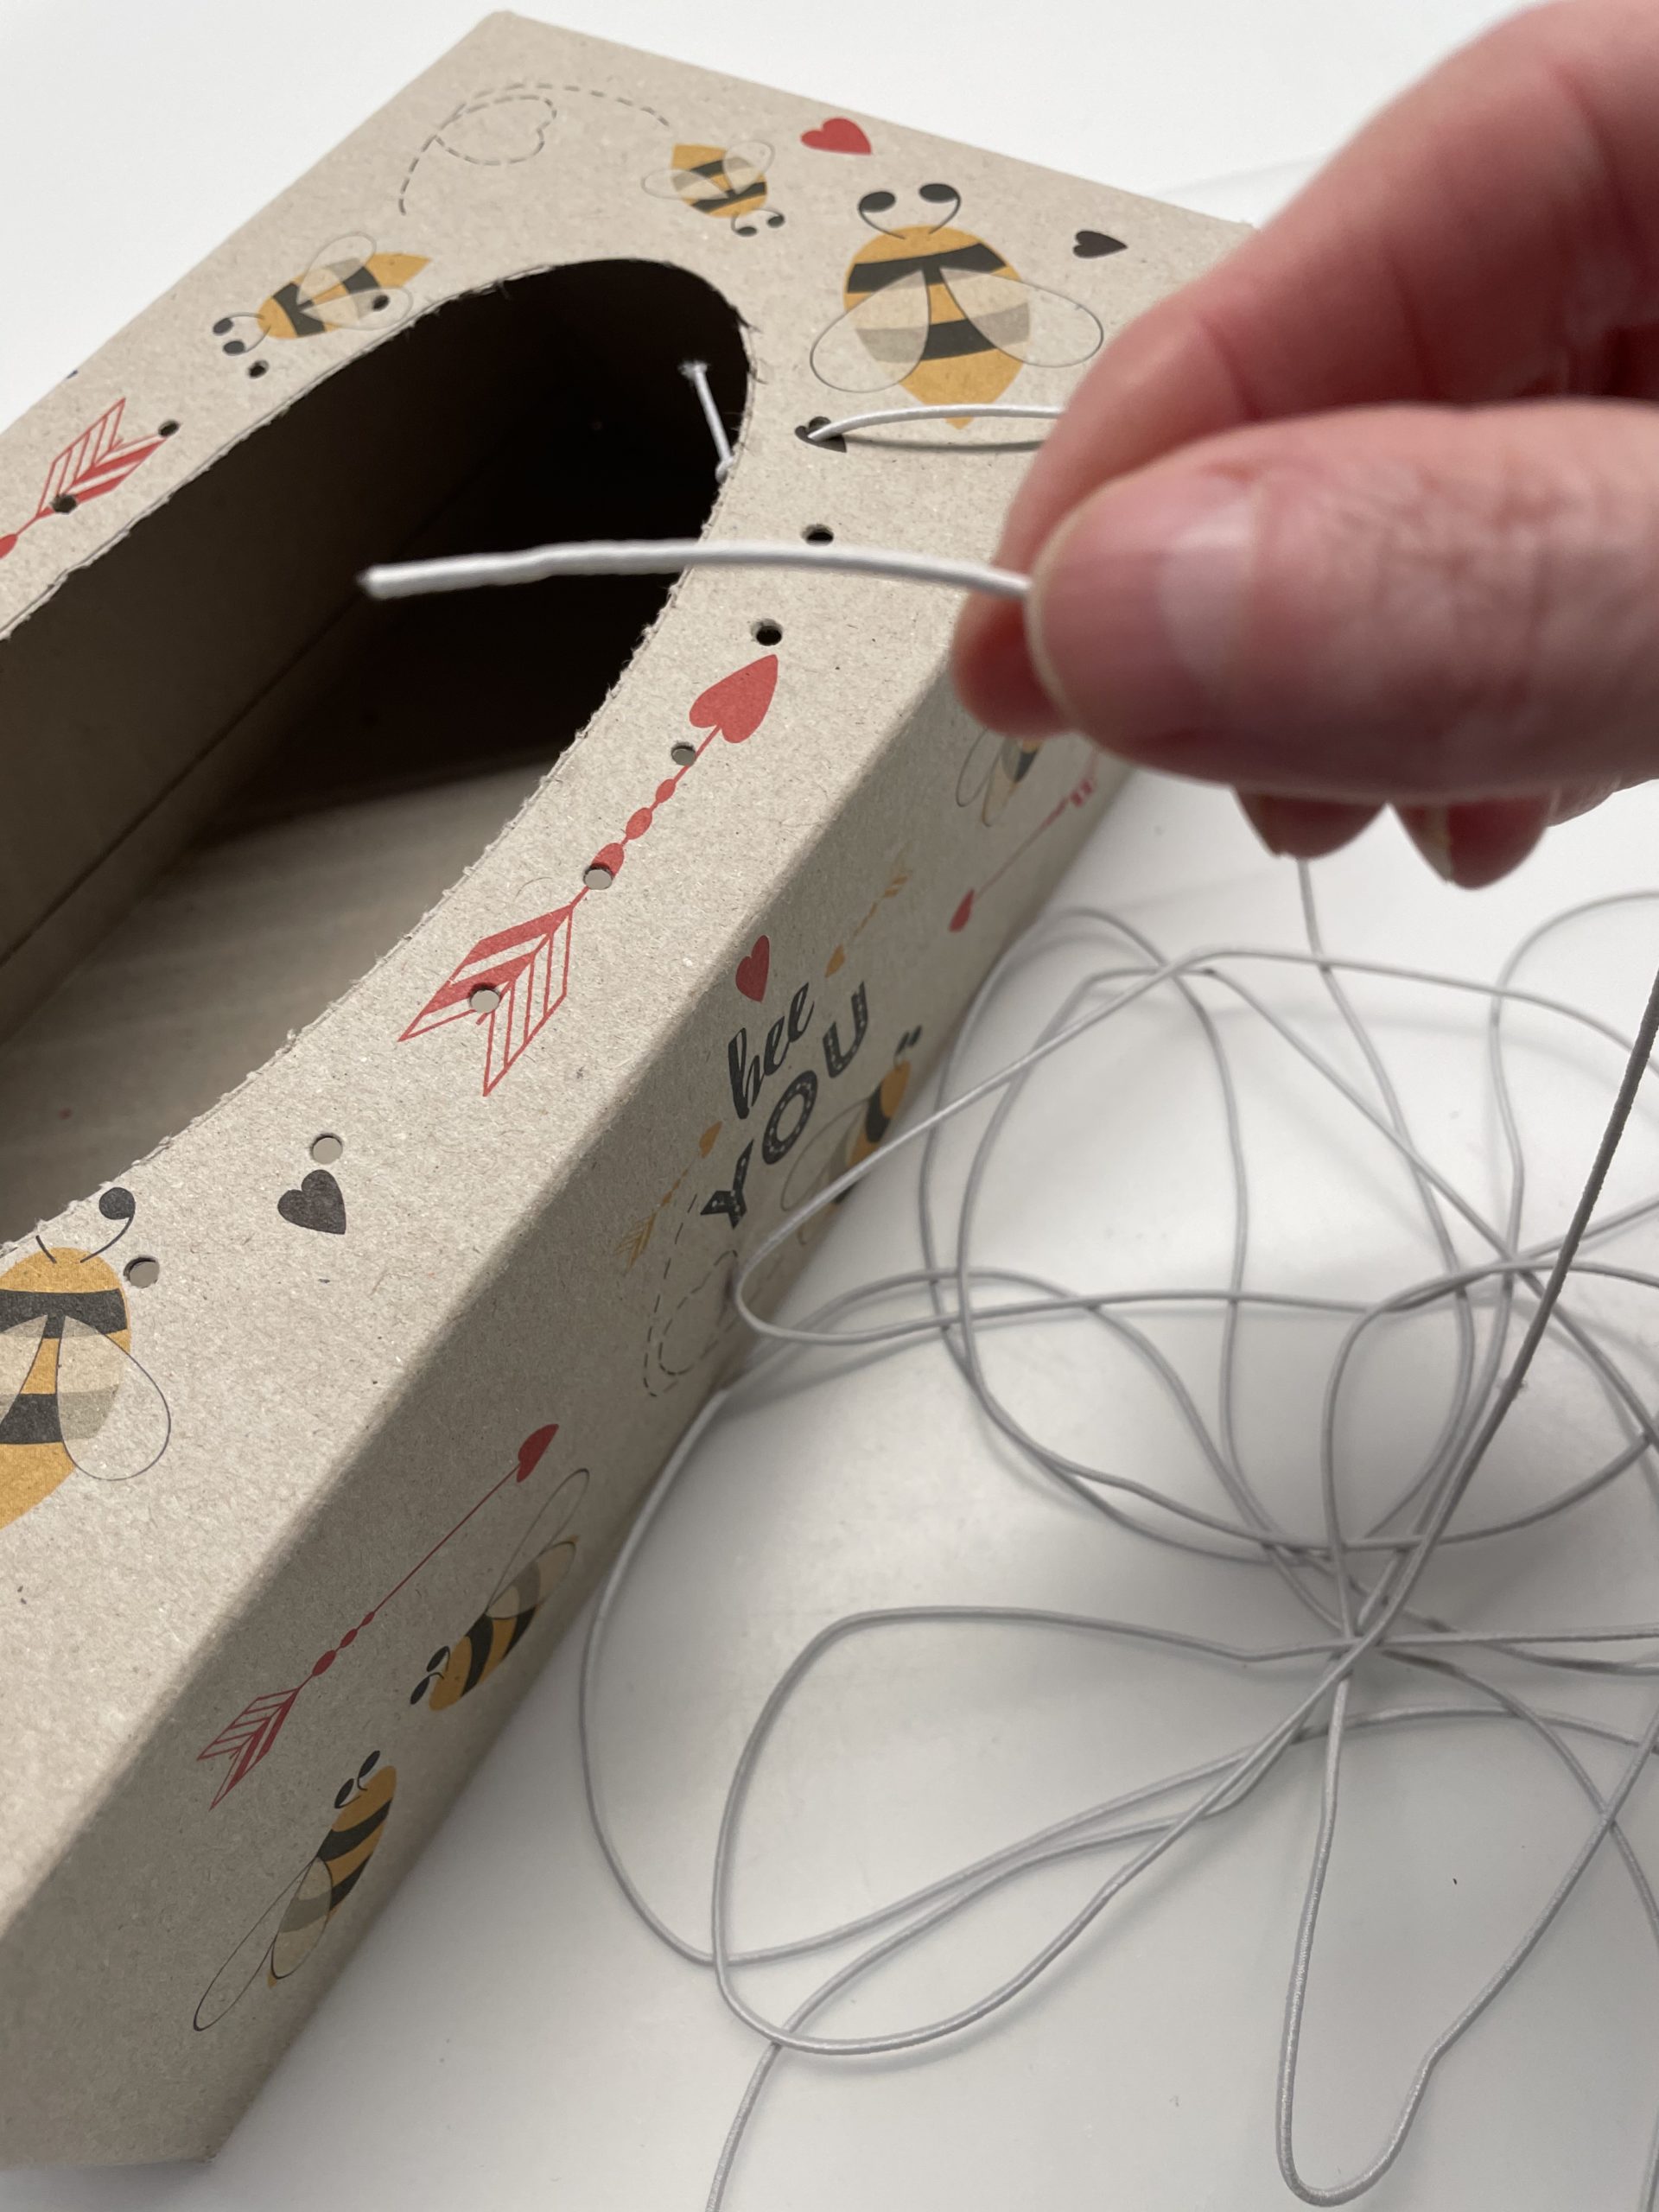
Bild zum Schritt 11 für das Bastel- und DIY-Abenteuer für Kinder: 'Wickelt den Hutgummi von der Spule ab und fädelt nun...'

12

Now thread the end of the hat rubber from top to bottom into the opposite hole.
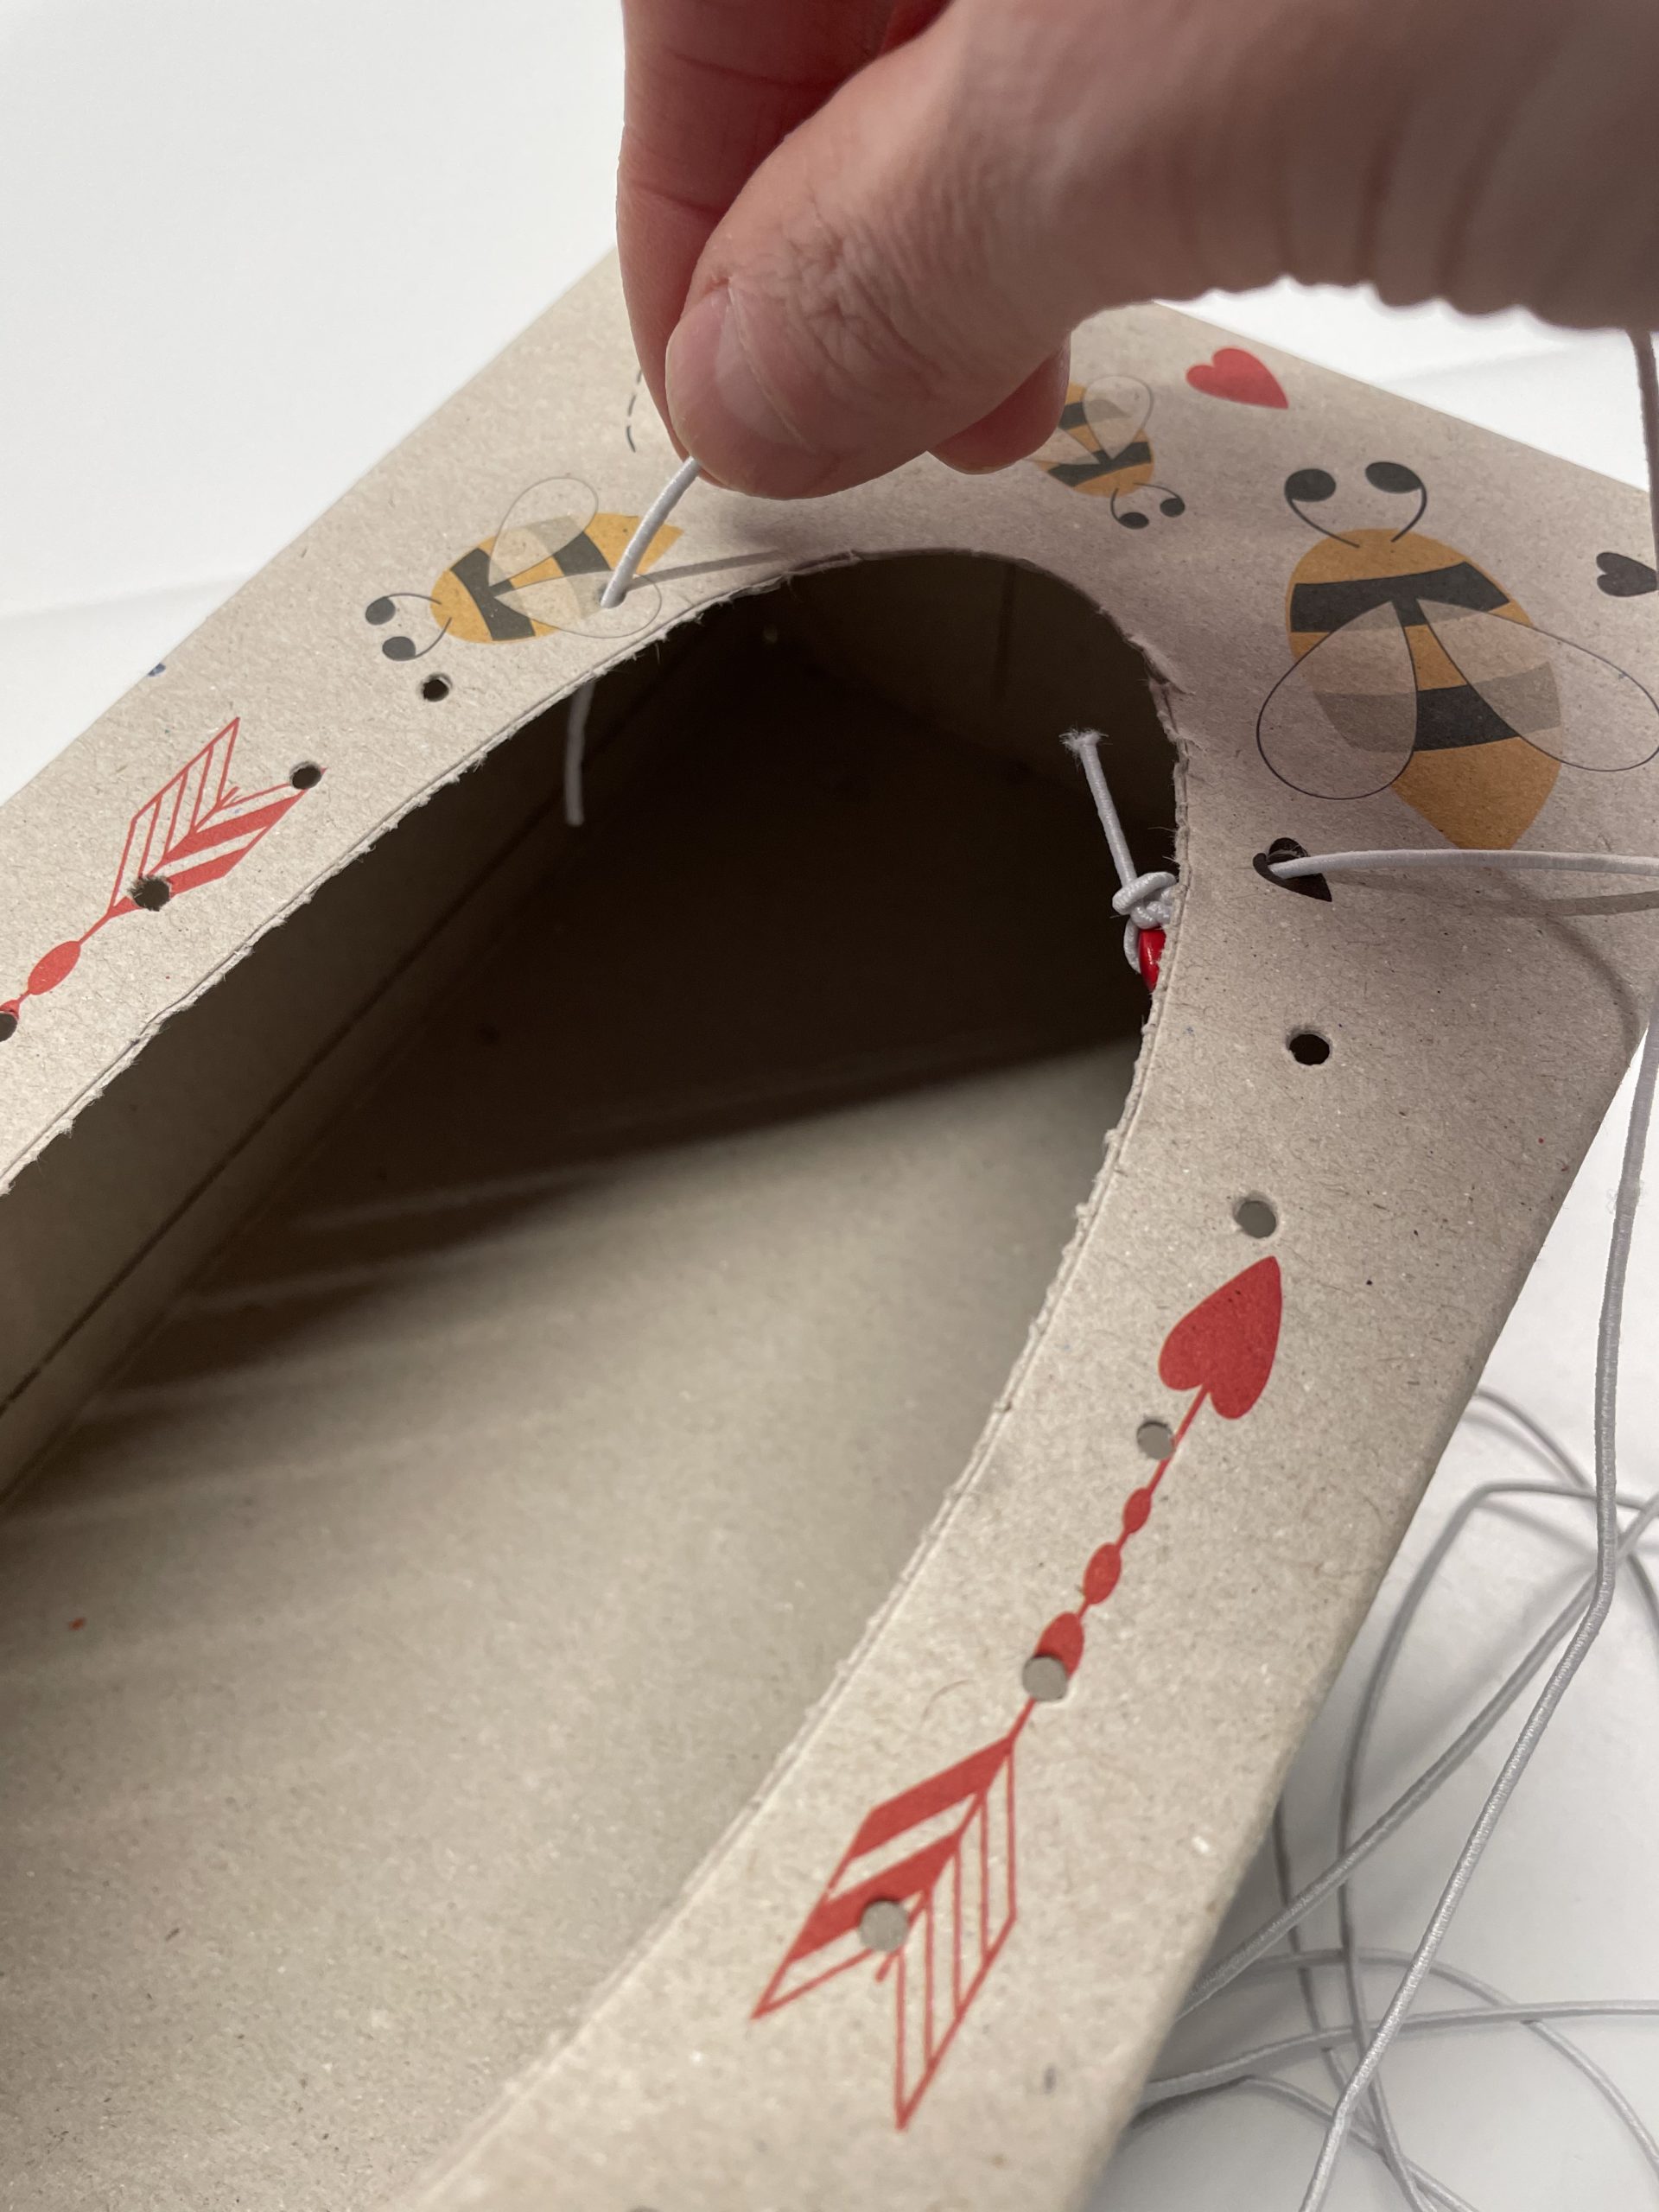
Bild zum Schritt 12 für das Bastel- und DIY-Abenteuer für Kinder: 'Fädelt jetzt das Ende des Hutgummis von oben nach unten...'

13

Pull the rubber through until it covers the opening smoothly and loosely.

Bild zum Schritt 13 für das Bastel- und DIY-Abenteuer für Kinder: 'Zieht den Gummi soweit durch, bis er glatt und locker...'

14

Now thread the thread directly through the adjacent hole from bottom to top. Pull the rubber back completely.

Bild zum Schritt 14 für das Bastel- und DIY-Abenteuer für Kinder: 'Fädelt nun den Faden direkt durch das danebenliegenden Loch von...'

15

On the opposite side it is threaded again from top to bottom through the hole. Pulls the rubber to lie two parallel rubber cords loosely above the opening.

Bild zum Schritt 15 für das Bastel- und DIY-Abenteuer für Kinder: 'Auf der gegenüberliegenden Seite wird er wieder von oben nach...'

16

Again thread the thread from bottom to top through the adjacent hole and then from top to bottom into the opposite hole.

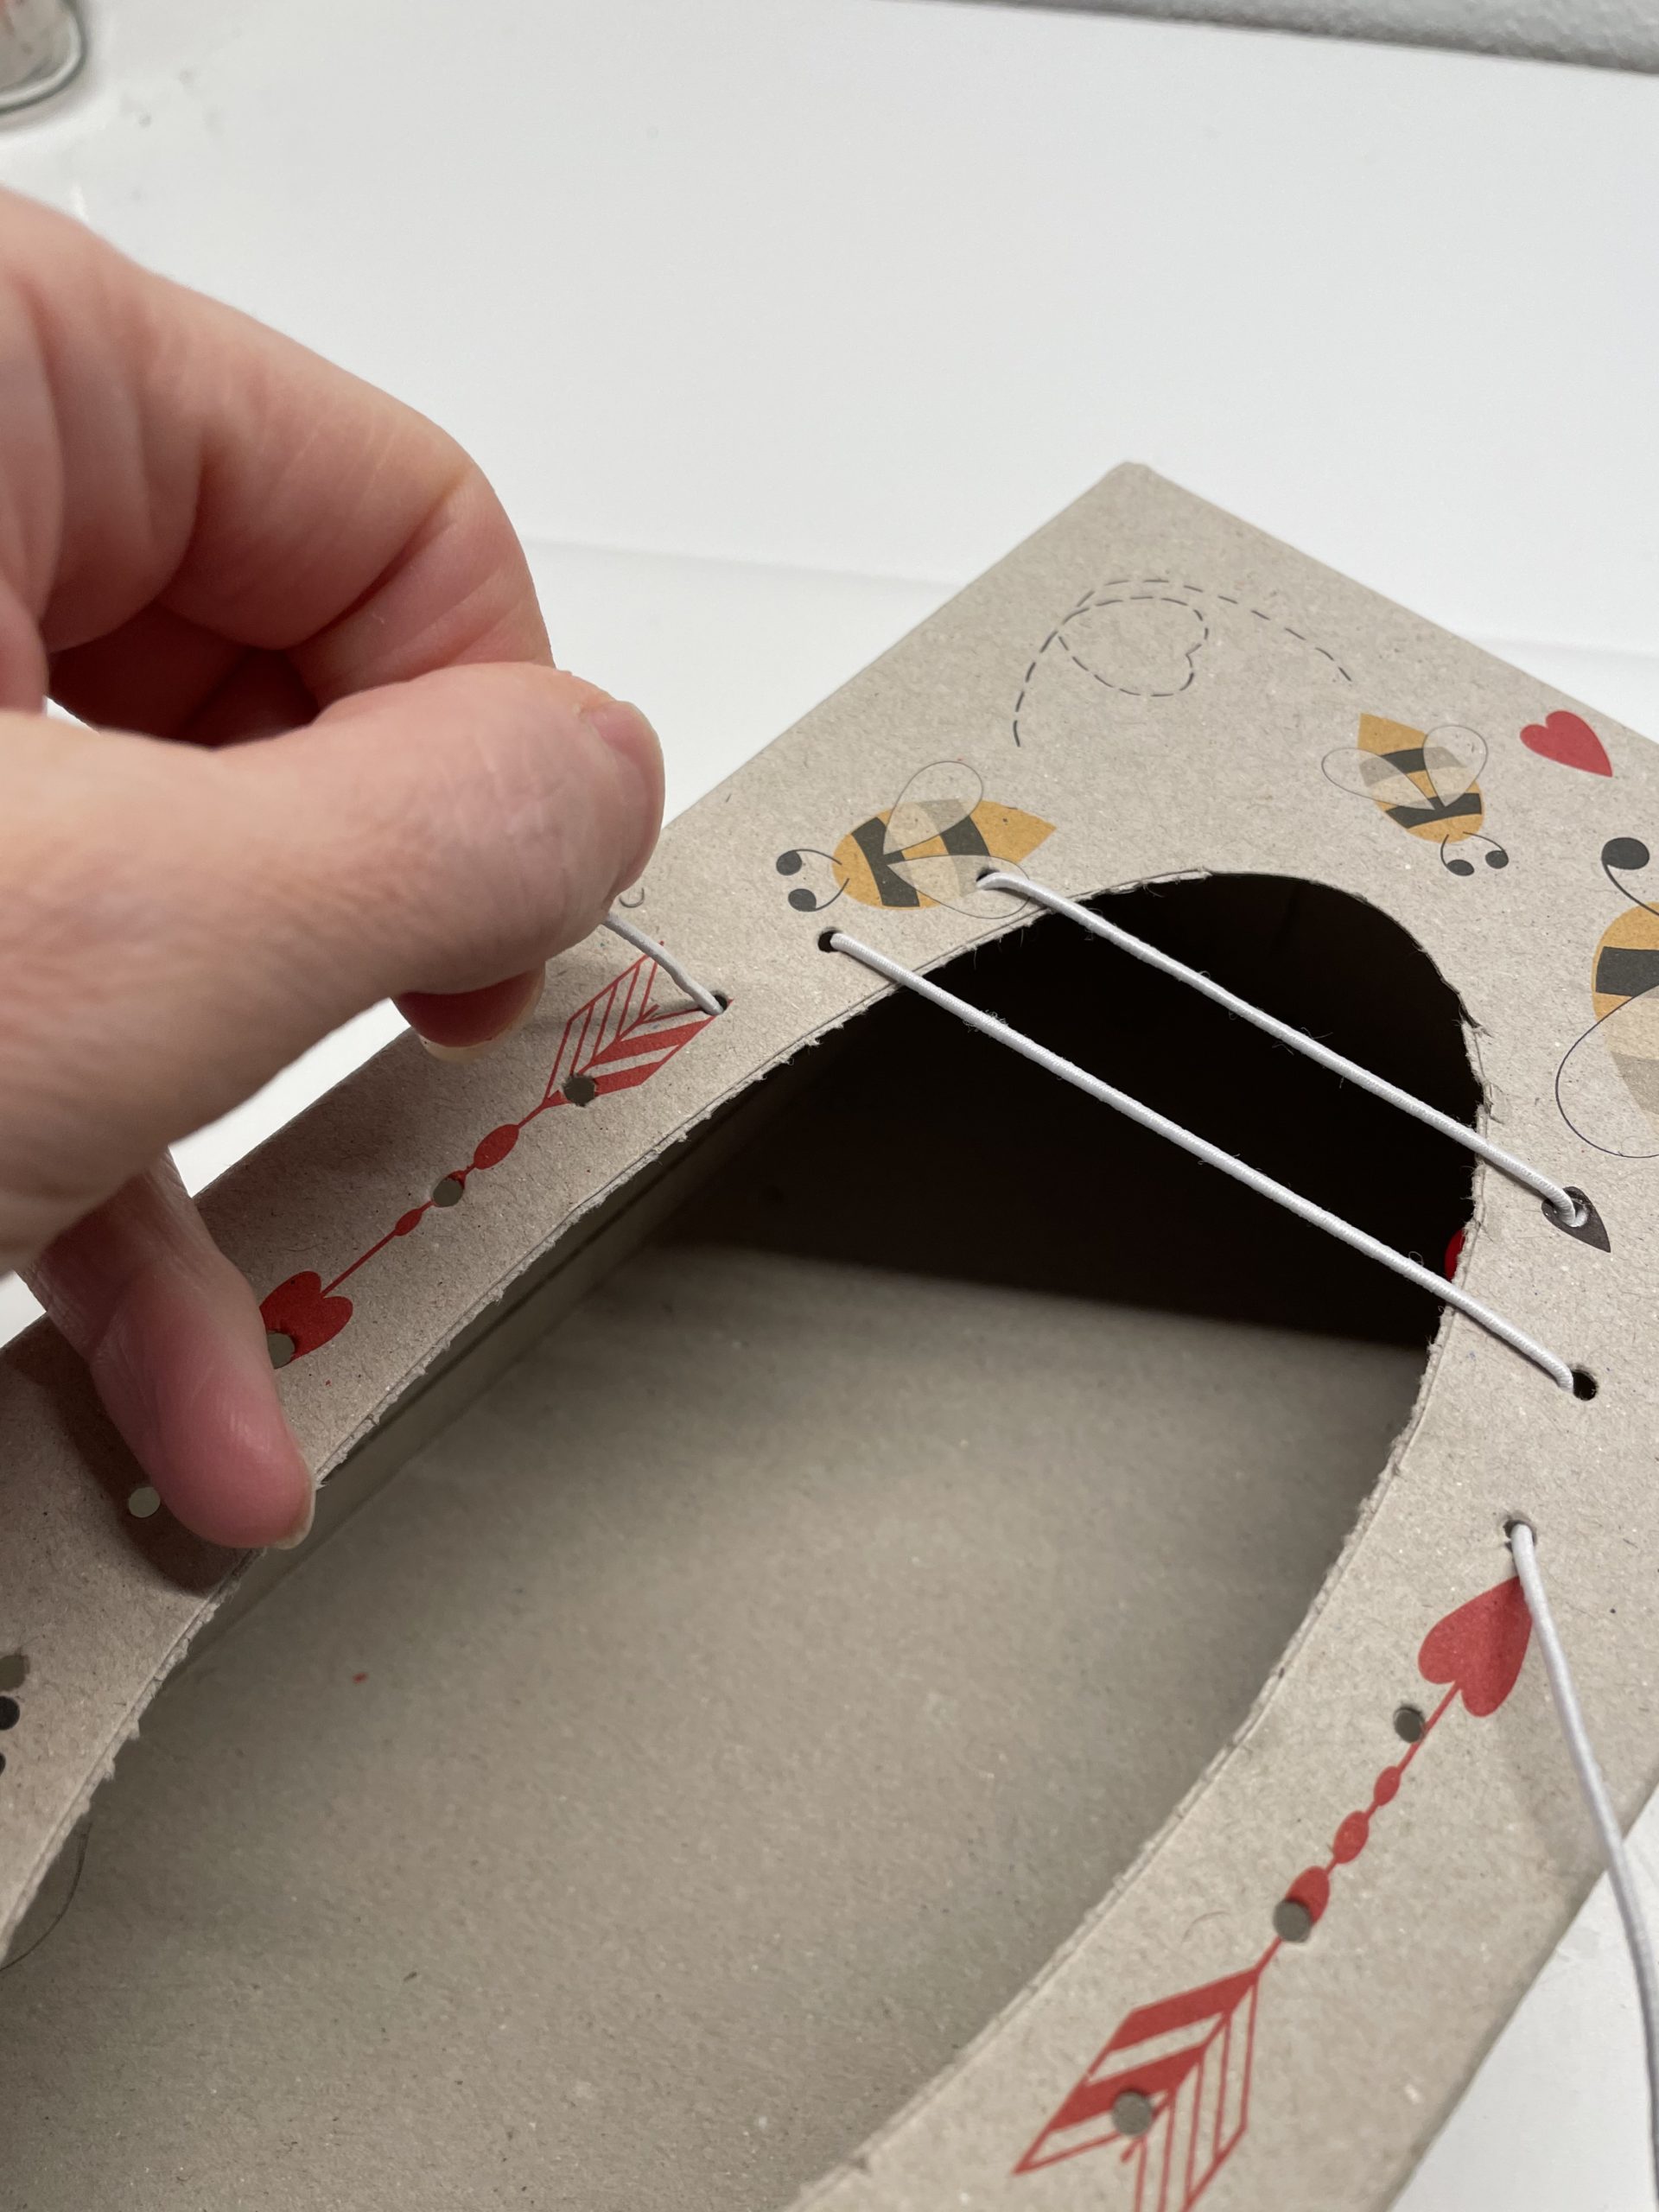
Bild zum Schritt 16 für das Bastel- und DIY-Abenteuer für Kinder: 'Fädelt erneut den Faden von unten nach oben durch das...'

17

Repeat the process until you reach the last hole.
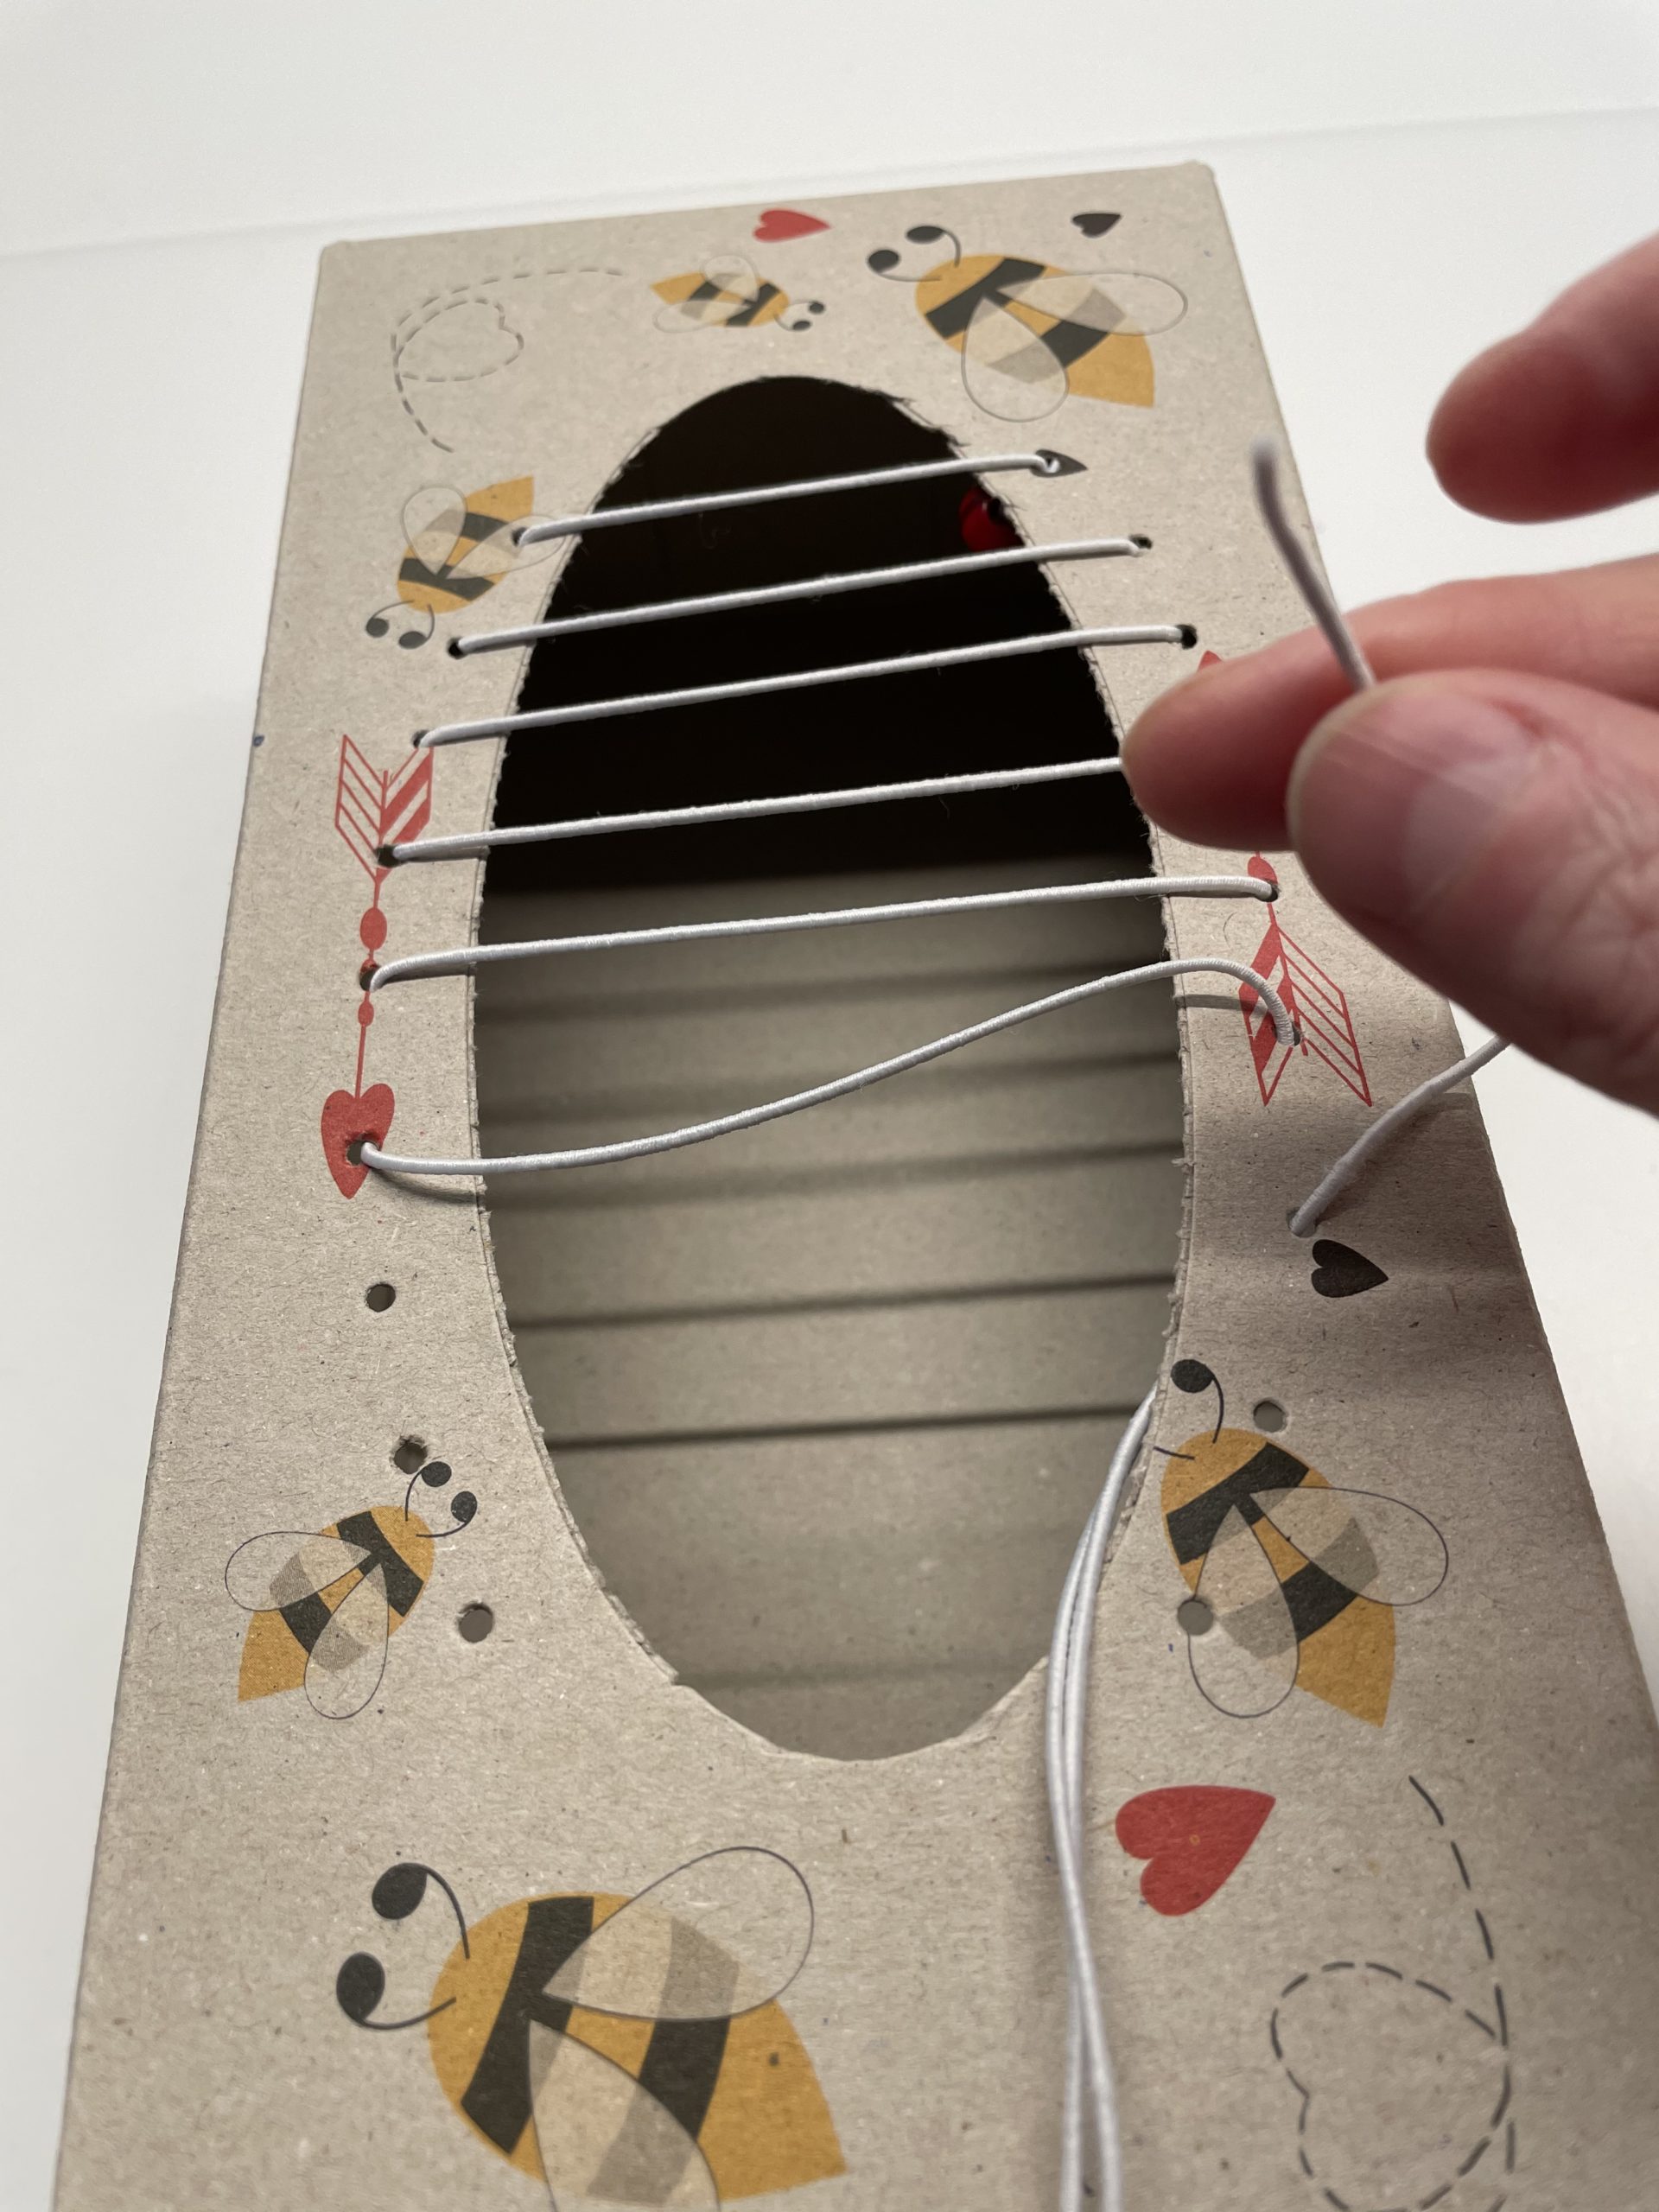
Bild zum Schritt 17 für das Bastel- und DIY-Abenteuer für Kinder: 'Wiederholt den Vorgang so lange, bis ihr am letzten Loch...'

18

Make sure that all rubber threads lie loosely above the opening without tension.
The rubber cord ends inside. Leave the thread still long!
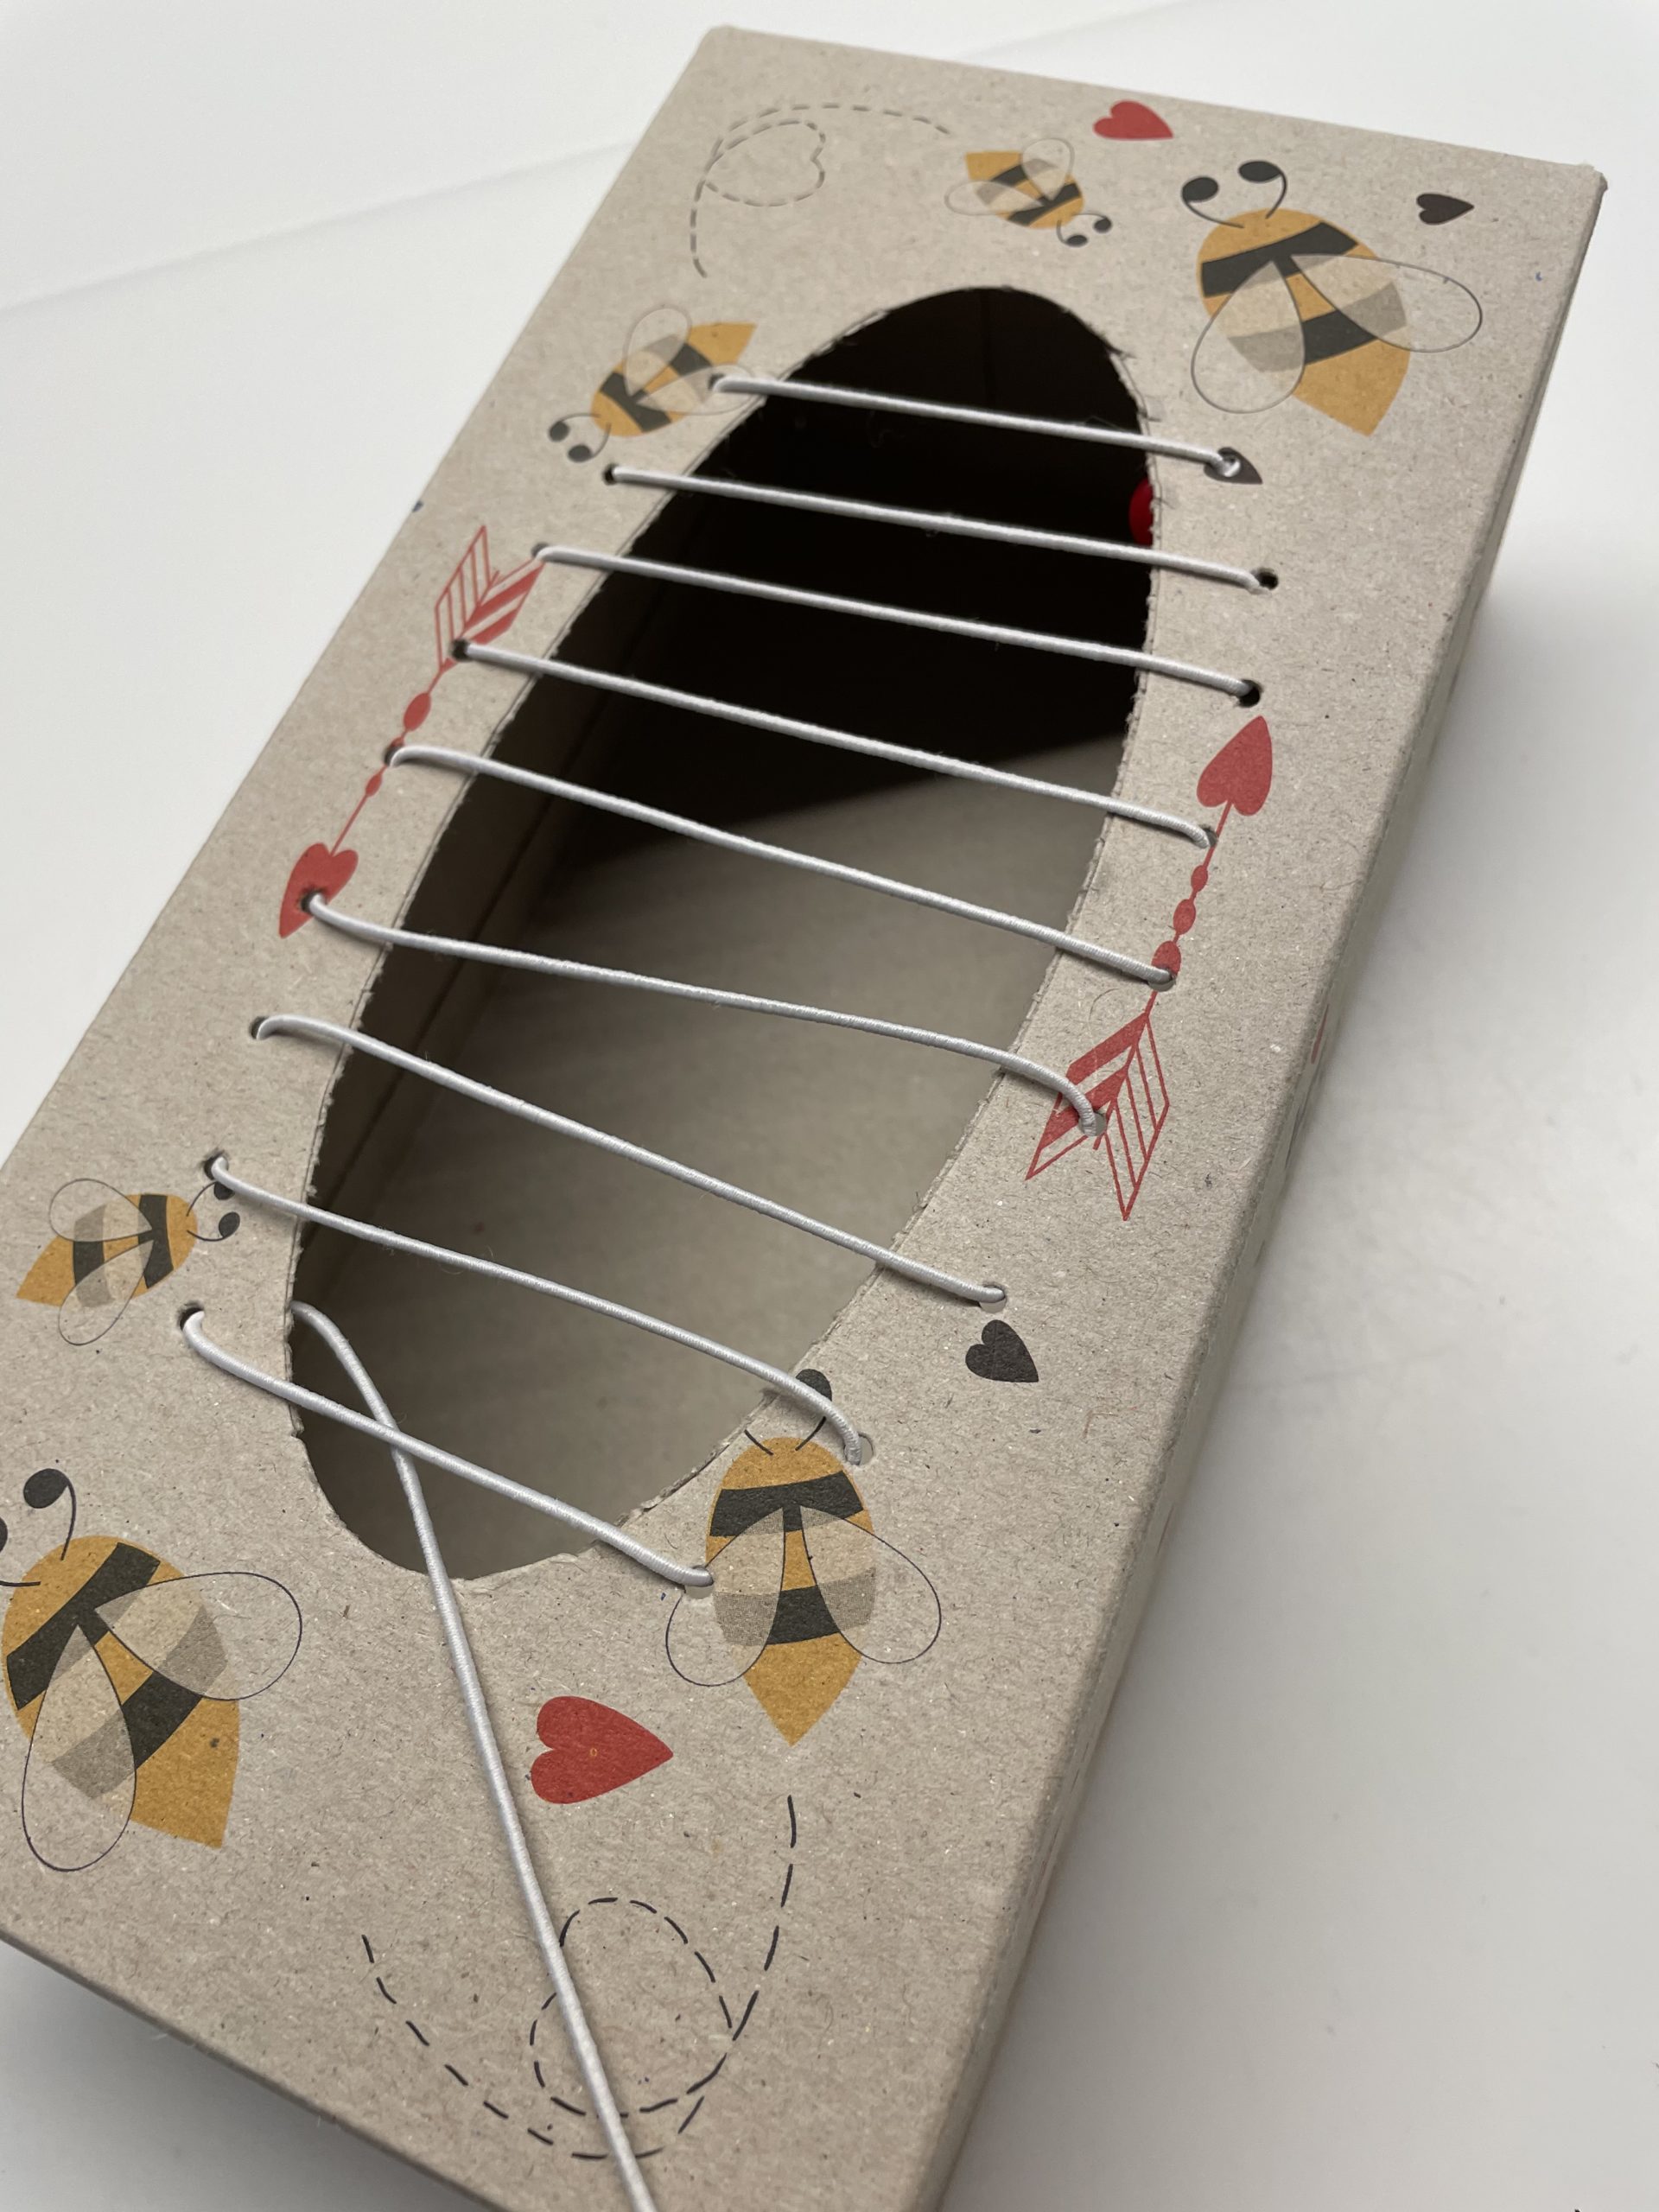
Bild zum Schritt 18 für das Bastel- und DIY-Abenteuer für Kinder: 'Achtet darauf, dass alle Gummifäden ohne Spannung locker über der...'

19

Now the gunmi is strained. Begins at the first hole.
For this, tighten the rubber piece by piece. Hold the pulled hat rubber well and work your way forward.
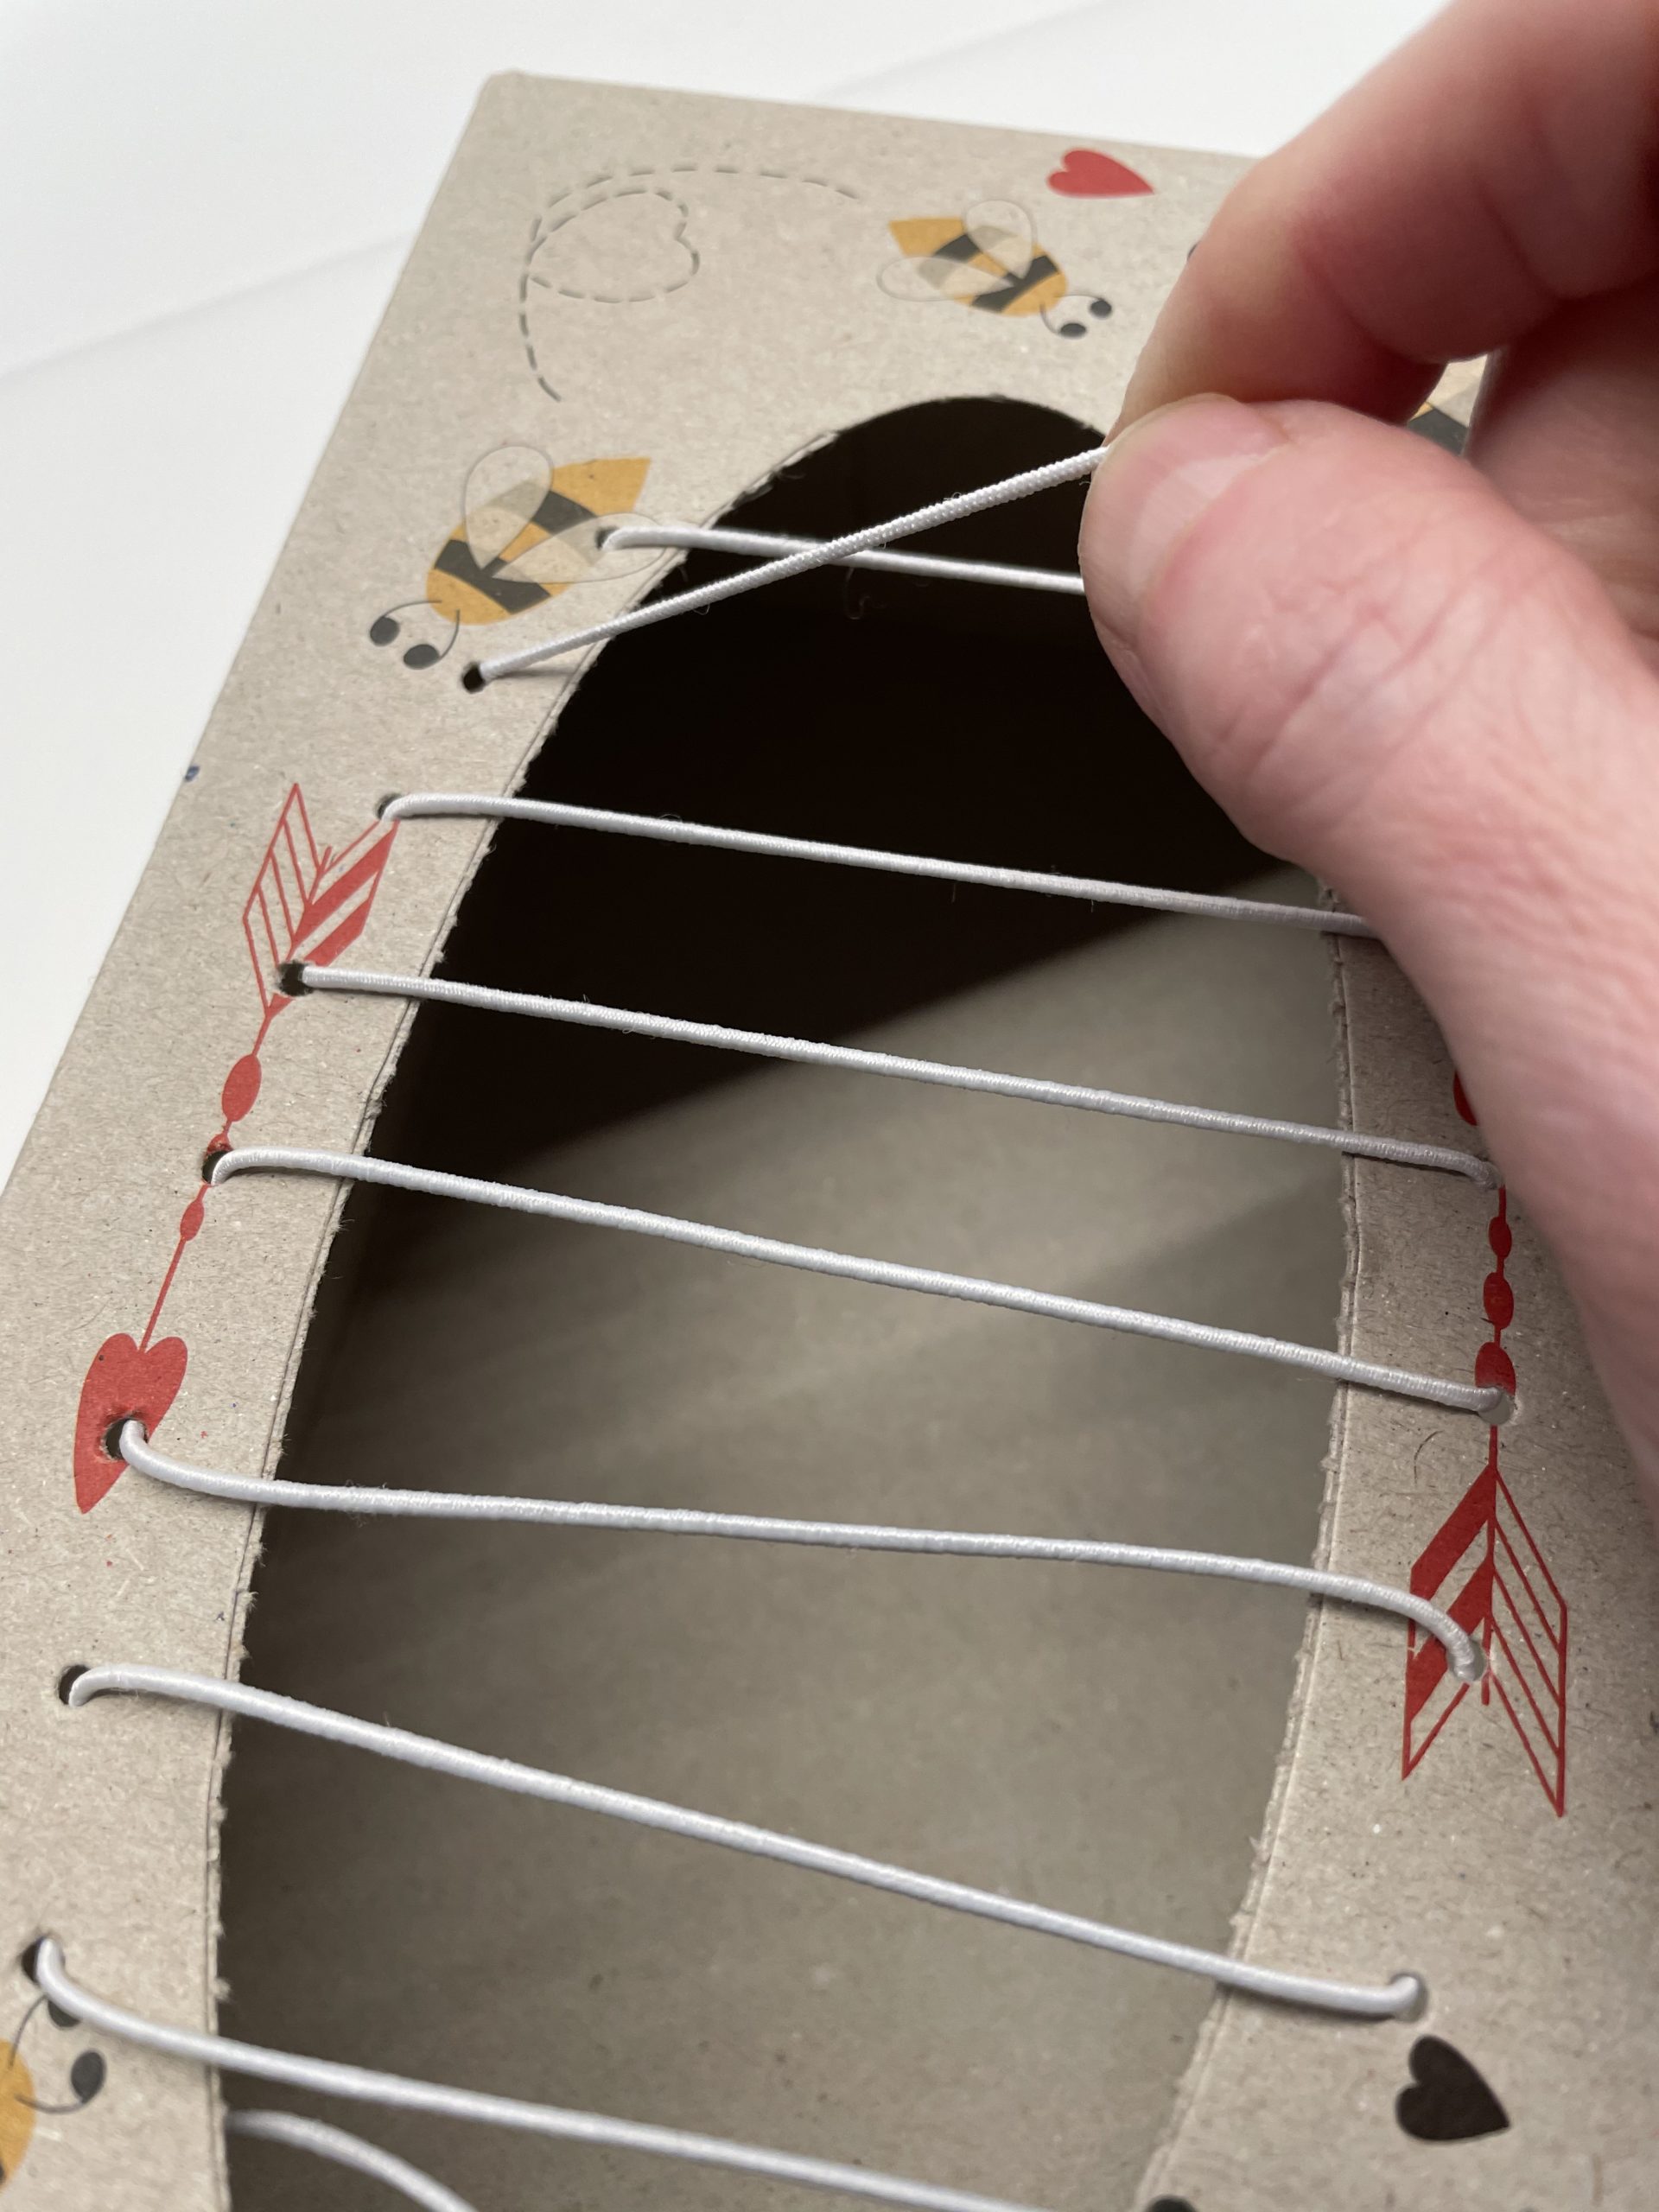
Bild zum Schritt 19 für das Bastel- und DIY-Abenteuer für Kinder: 'Nun wird der Gunmi gespannt. Beginnt am ersten Loch. ...'

20

Pull the thread again and again!

Bild zum Schritt 20 für das Bastel- und DIY-Abenteuer für Kinder: 'Zieht den Faden immer wieder nach!'

21

The complete strings of your supply box are now firmly tensed.
Holds the end well and shortens the overhanging rubber to a length of about 10-15cm.
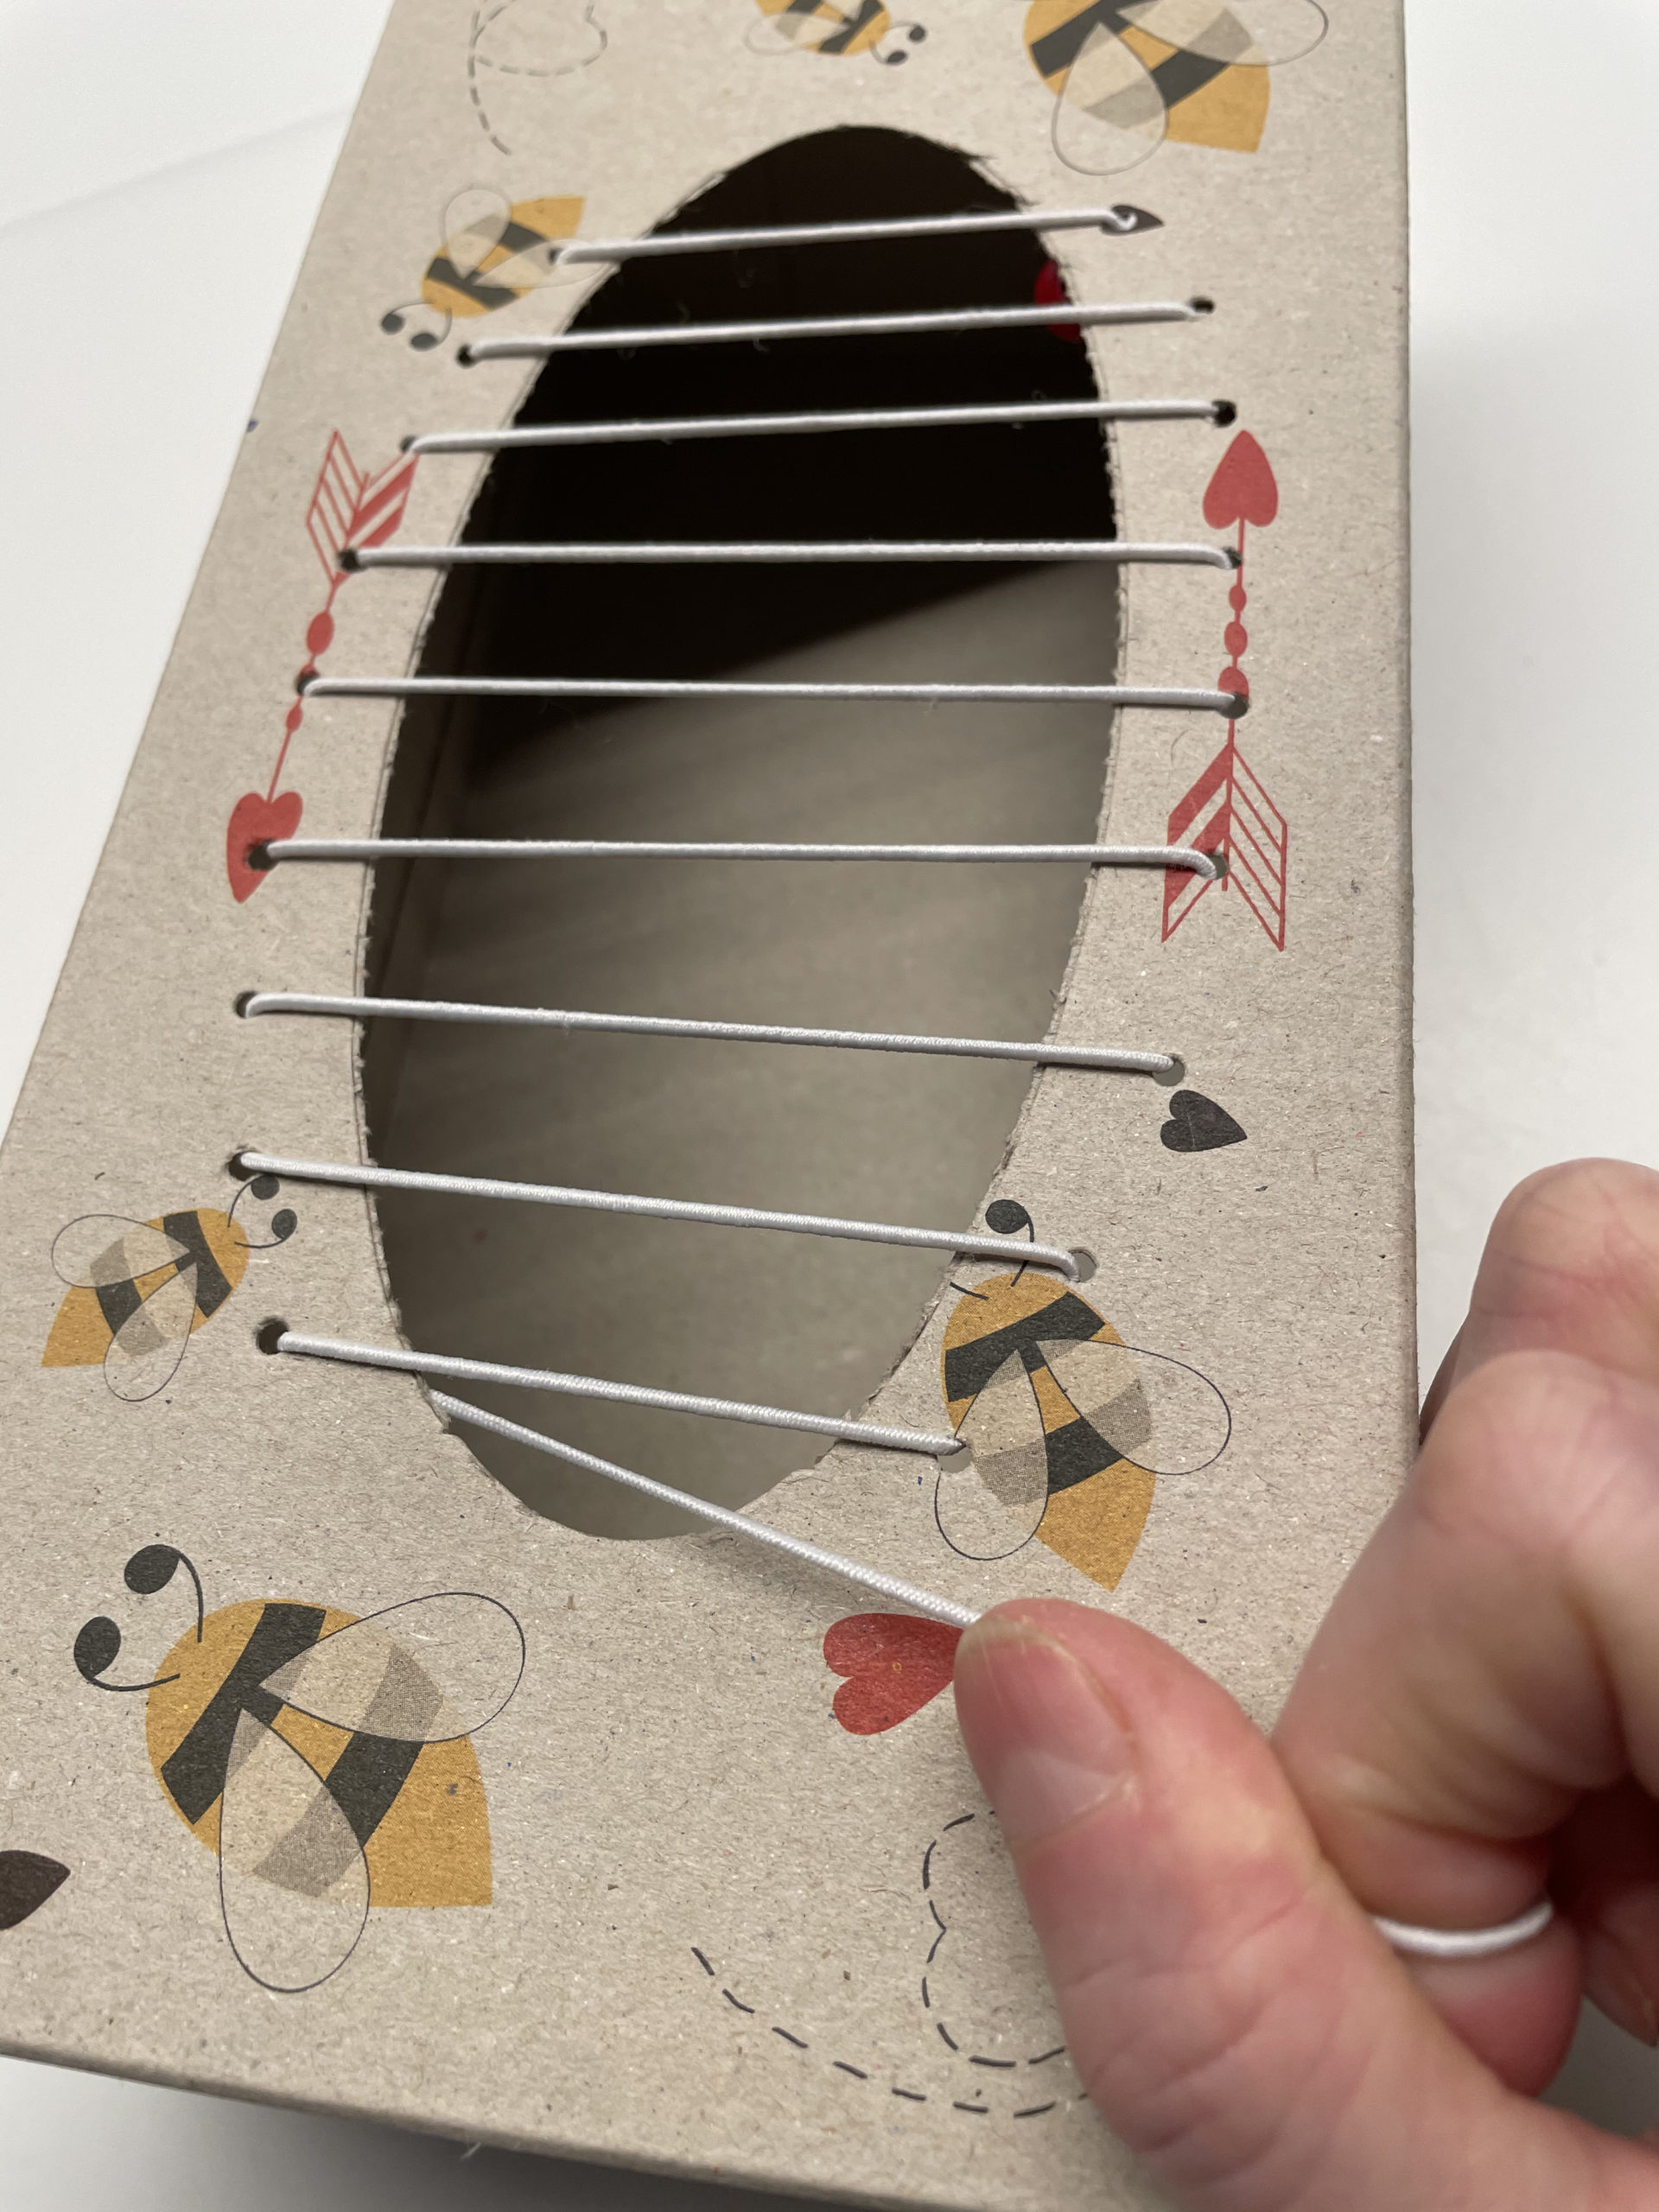
Bild zum Schritt 21 für das Bastel- und DIY-Abenteuer für Kinder: 'Die kompletten Saiten eurer Zupfdose sind nun fest gespannt. ...'

22

Now you're threading a pearl on the end of the thread.
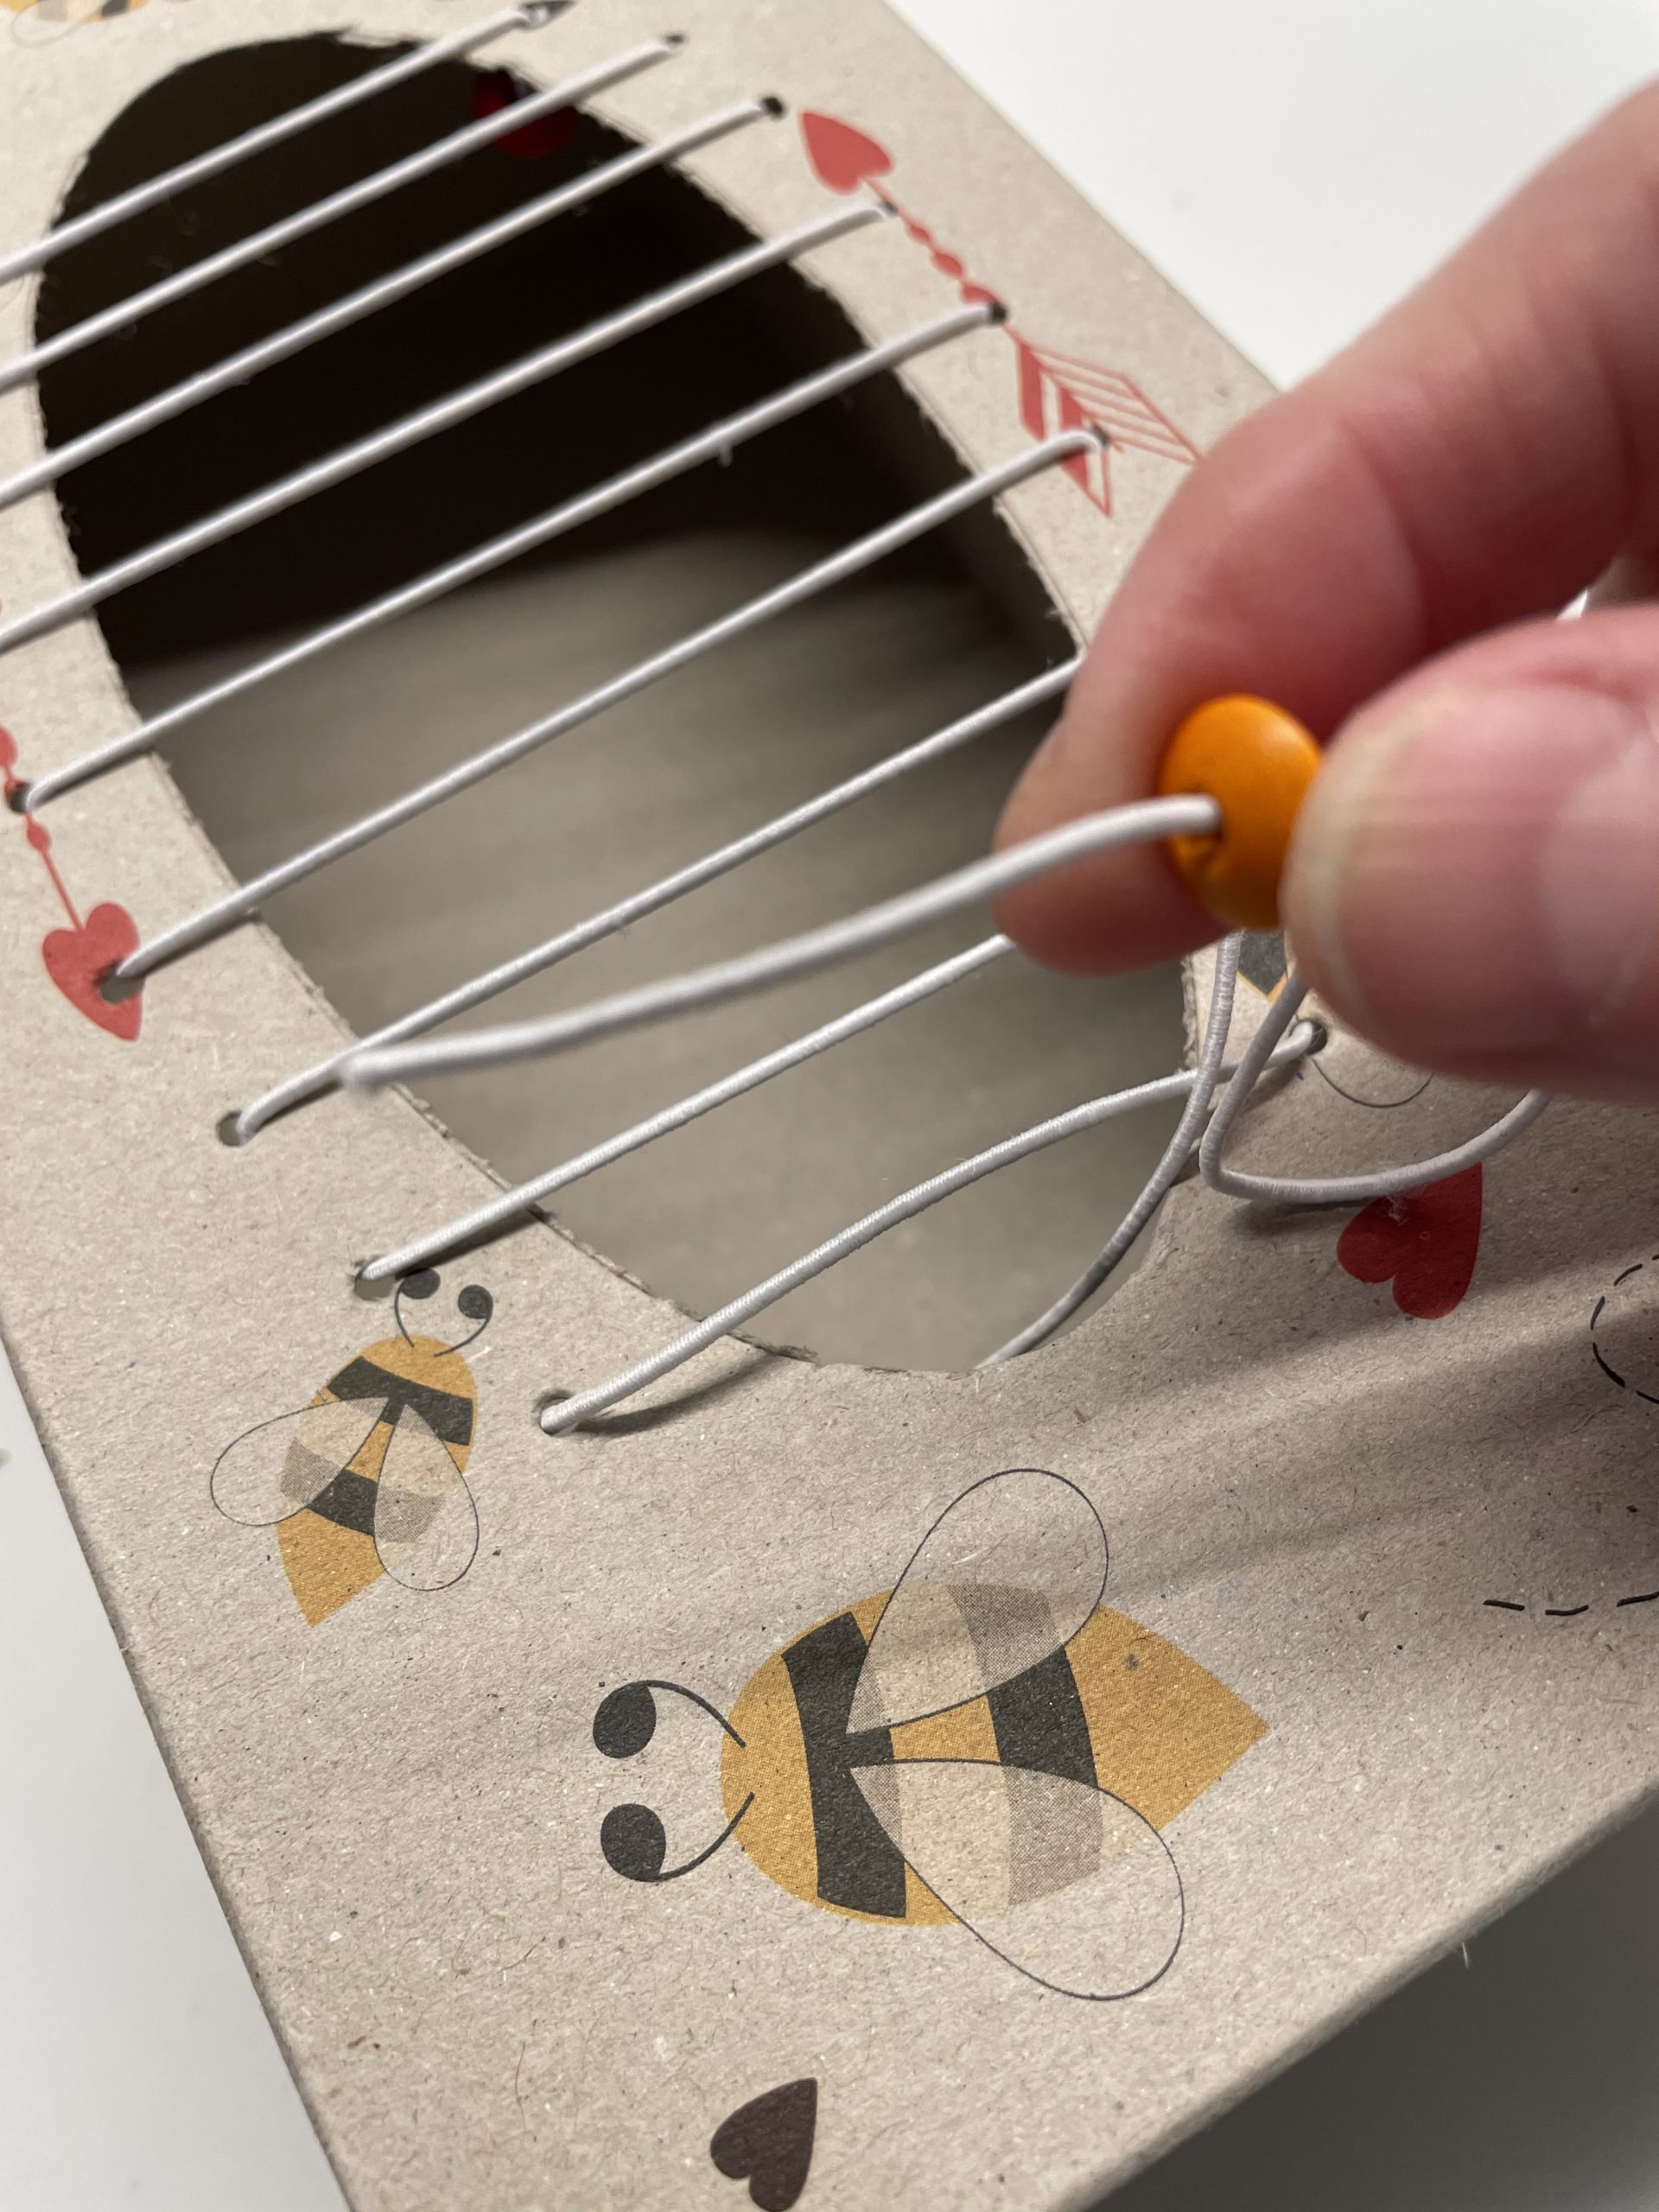
Bild zum Schritt 22 für das Bastel- und DIY-Abenteuer für Kinder: 'Jetzt fädelt ihr auf das Fadenende eine Perle.'

23

Then you tie this pearl several times as close as possible to the last hole.
Remember that the pearl is on the inside of the last hole!
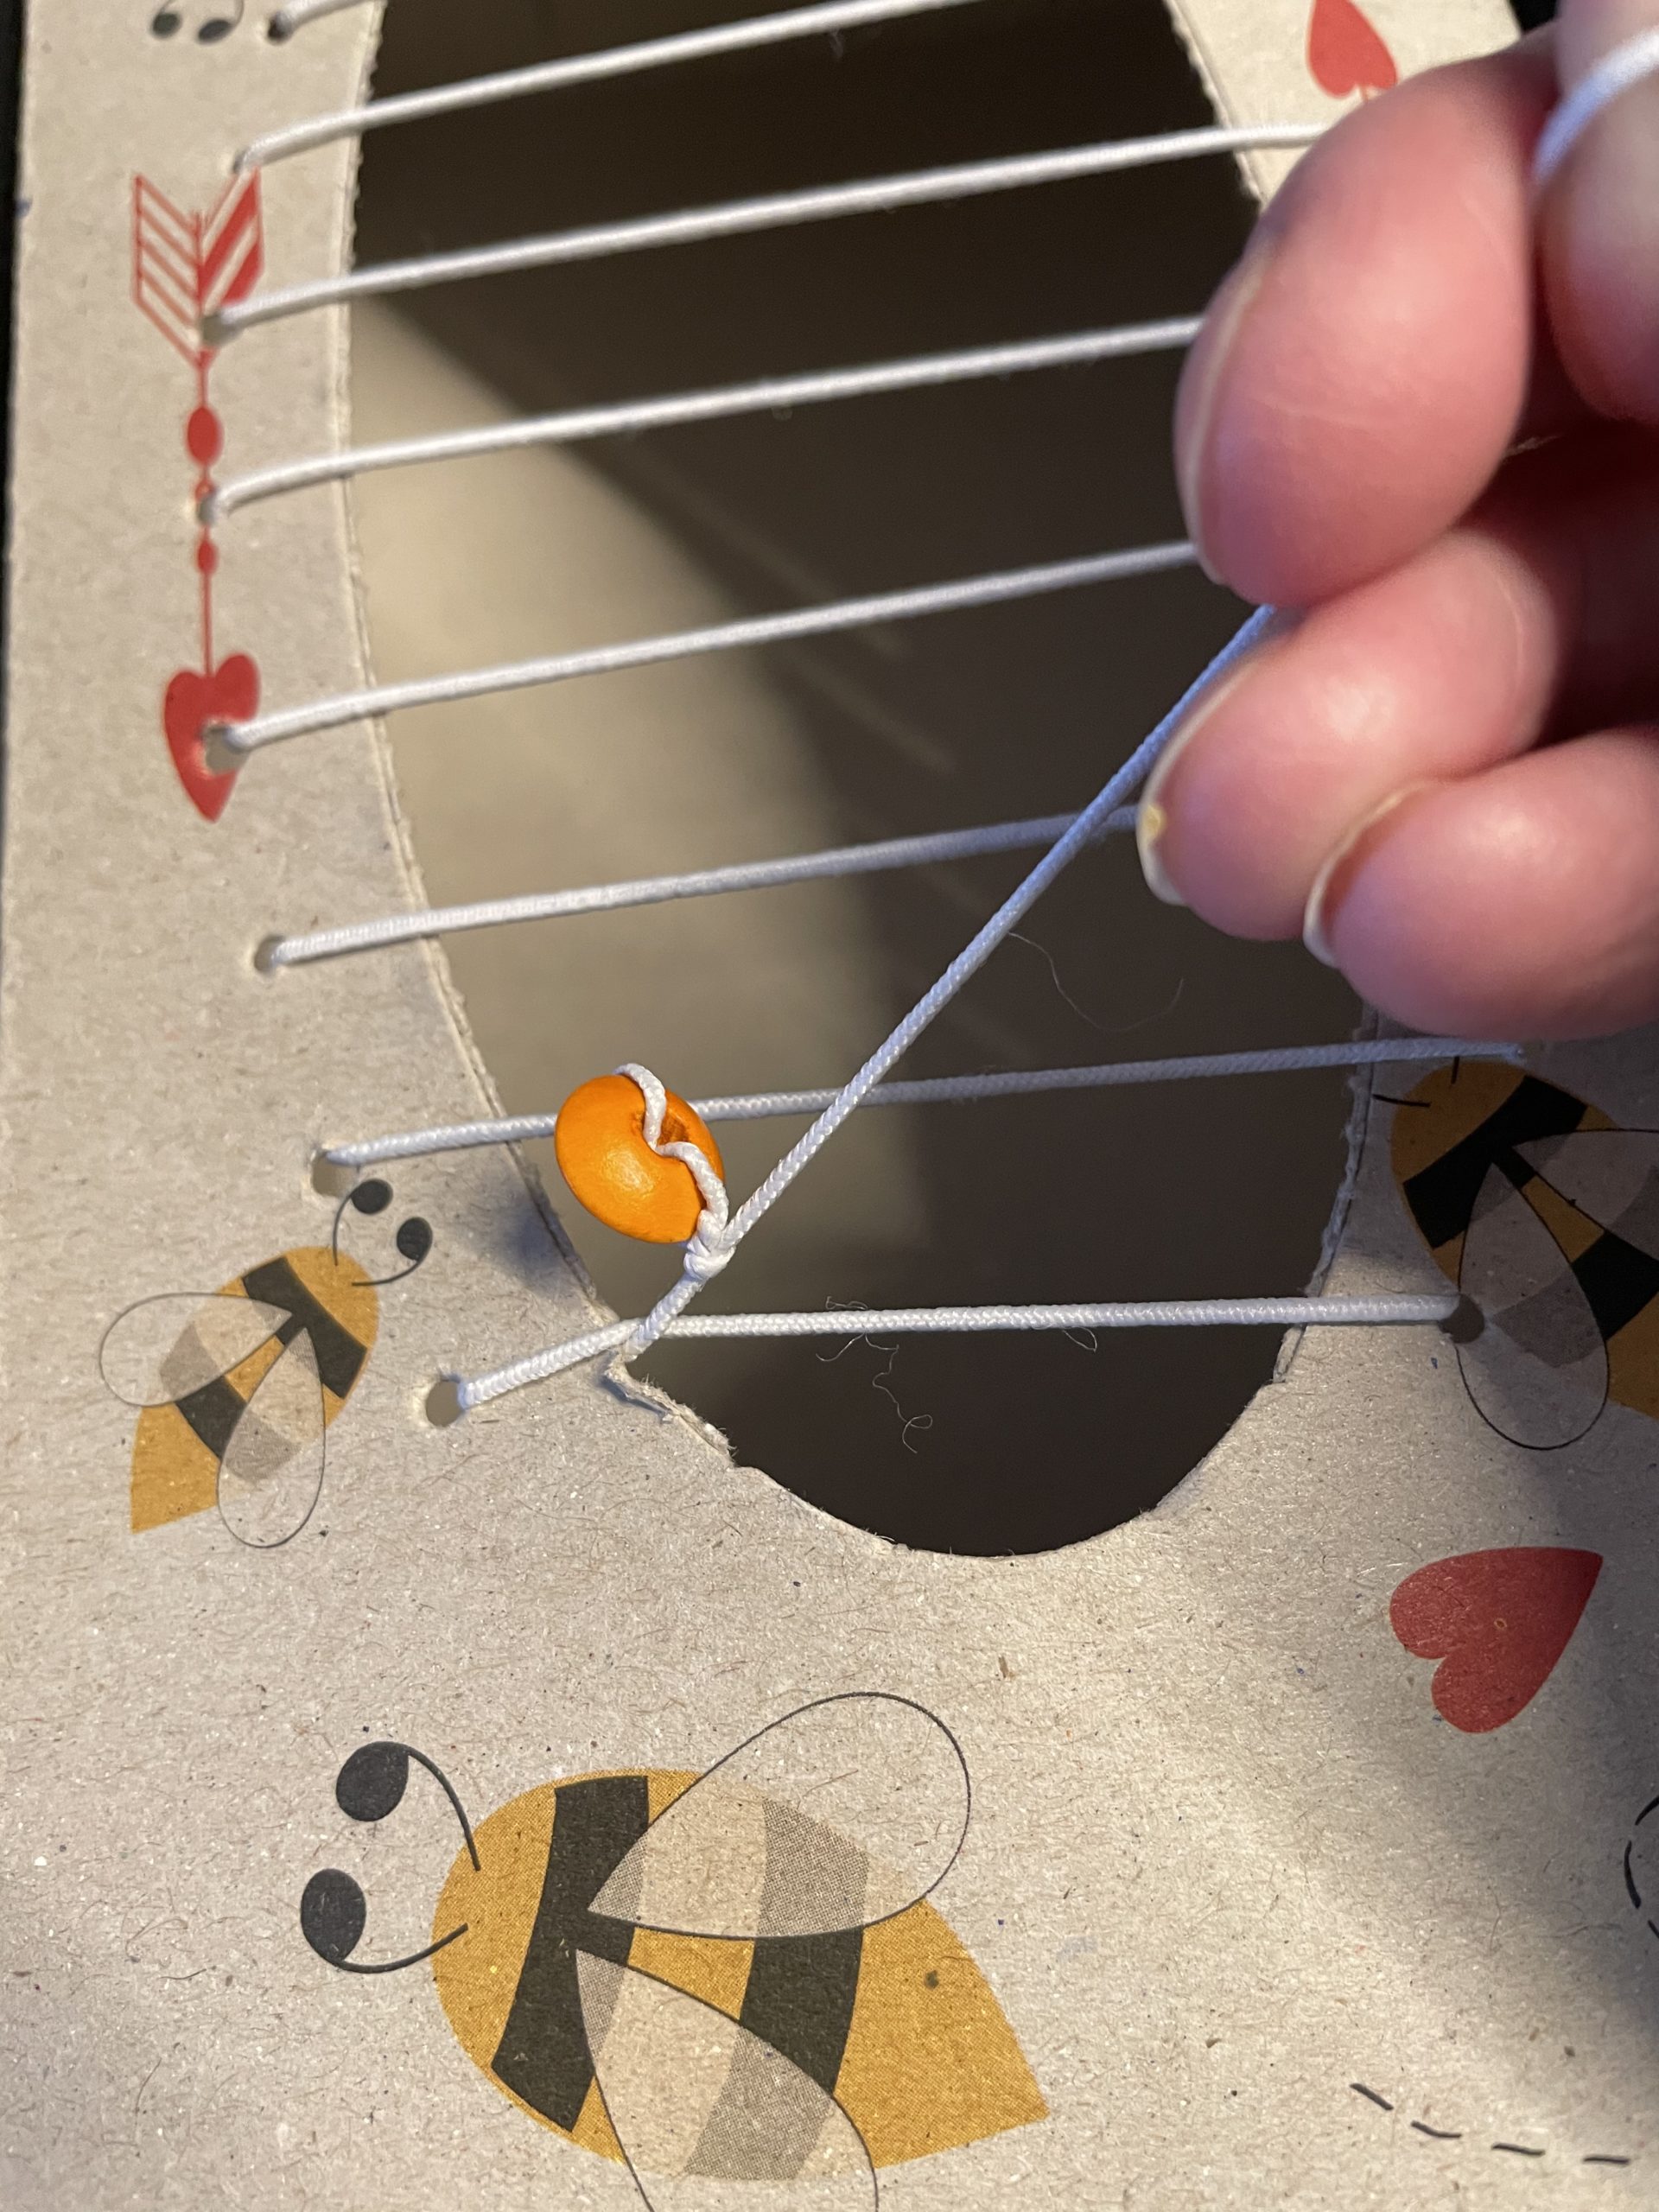
Bild zum Schritt 23 für das Bastel- und DIY-Abenteuer für Kinder: 'Dann verknotet ihr diese Perle mehrmals so nah wie möglich...'

24

Keep the thread still in your hand. Check whether the rubber hat is tight enough before you release it. Only when all the strings are strongly tightened and the pearl is well knotted can you cut off the overhanging rubber thread about 1cm after the knot.
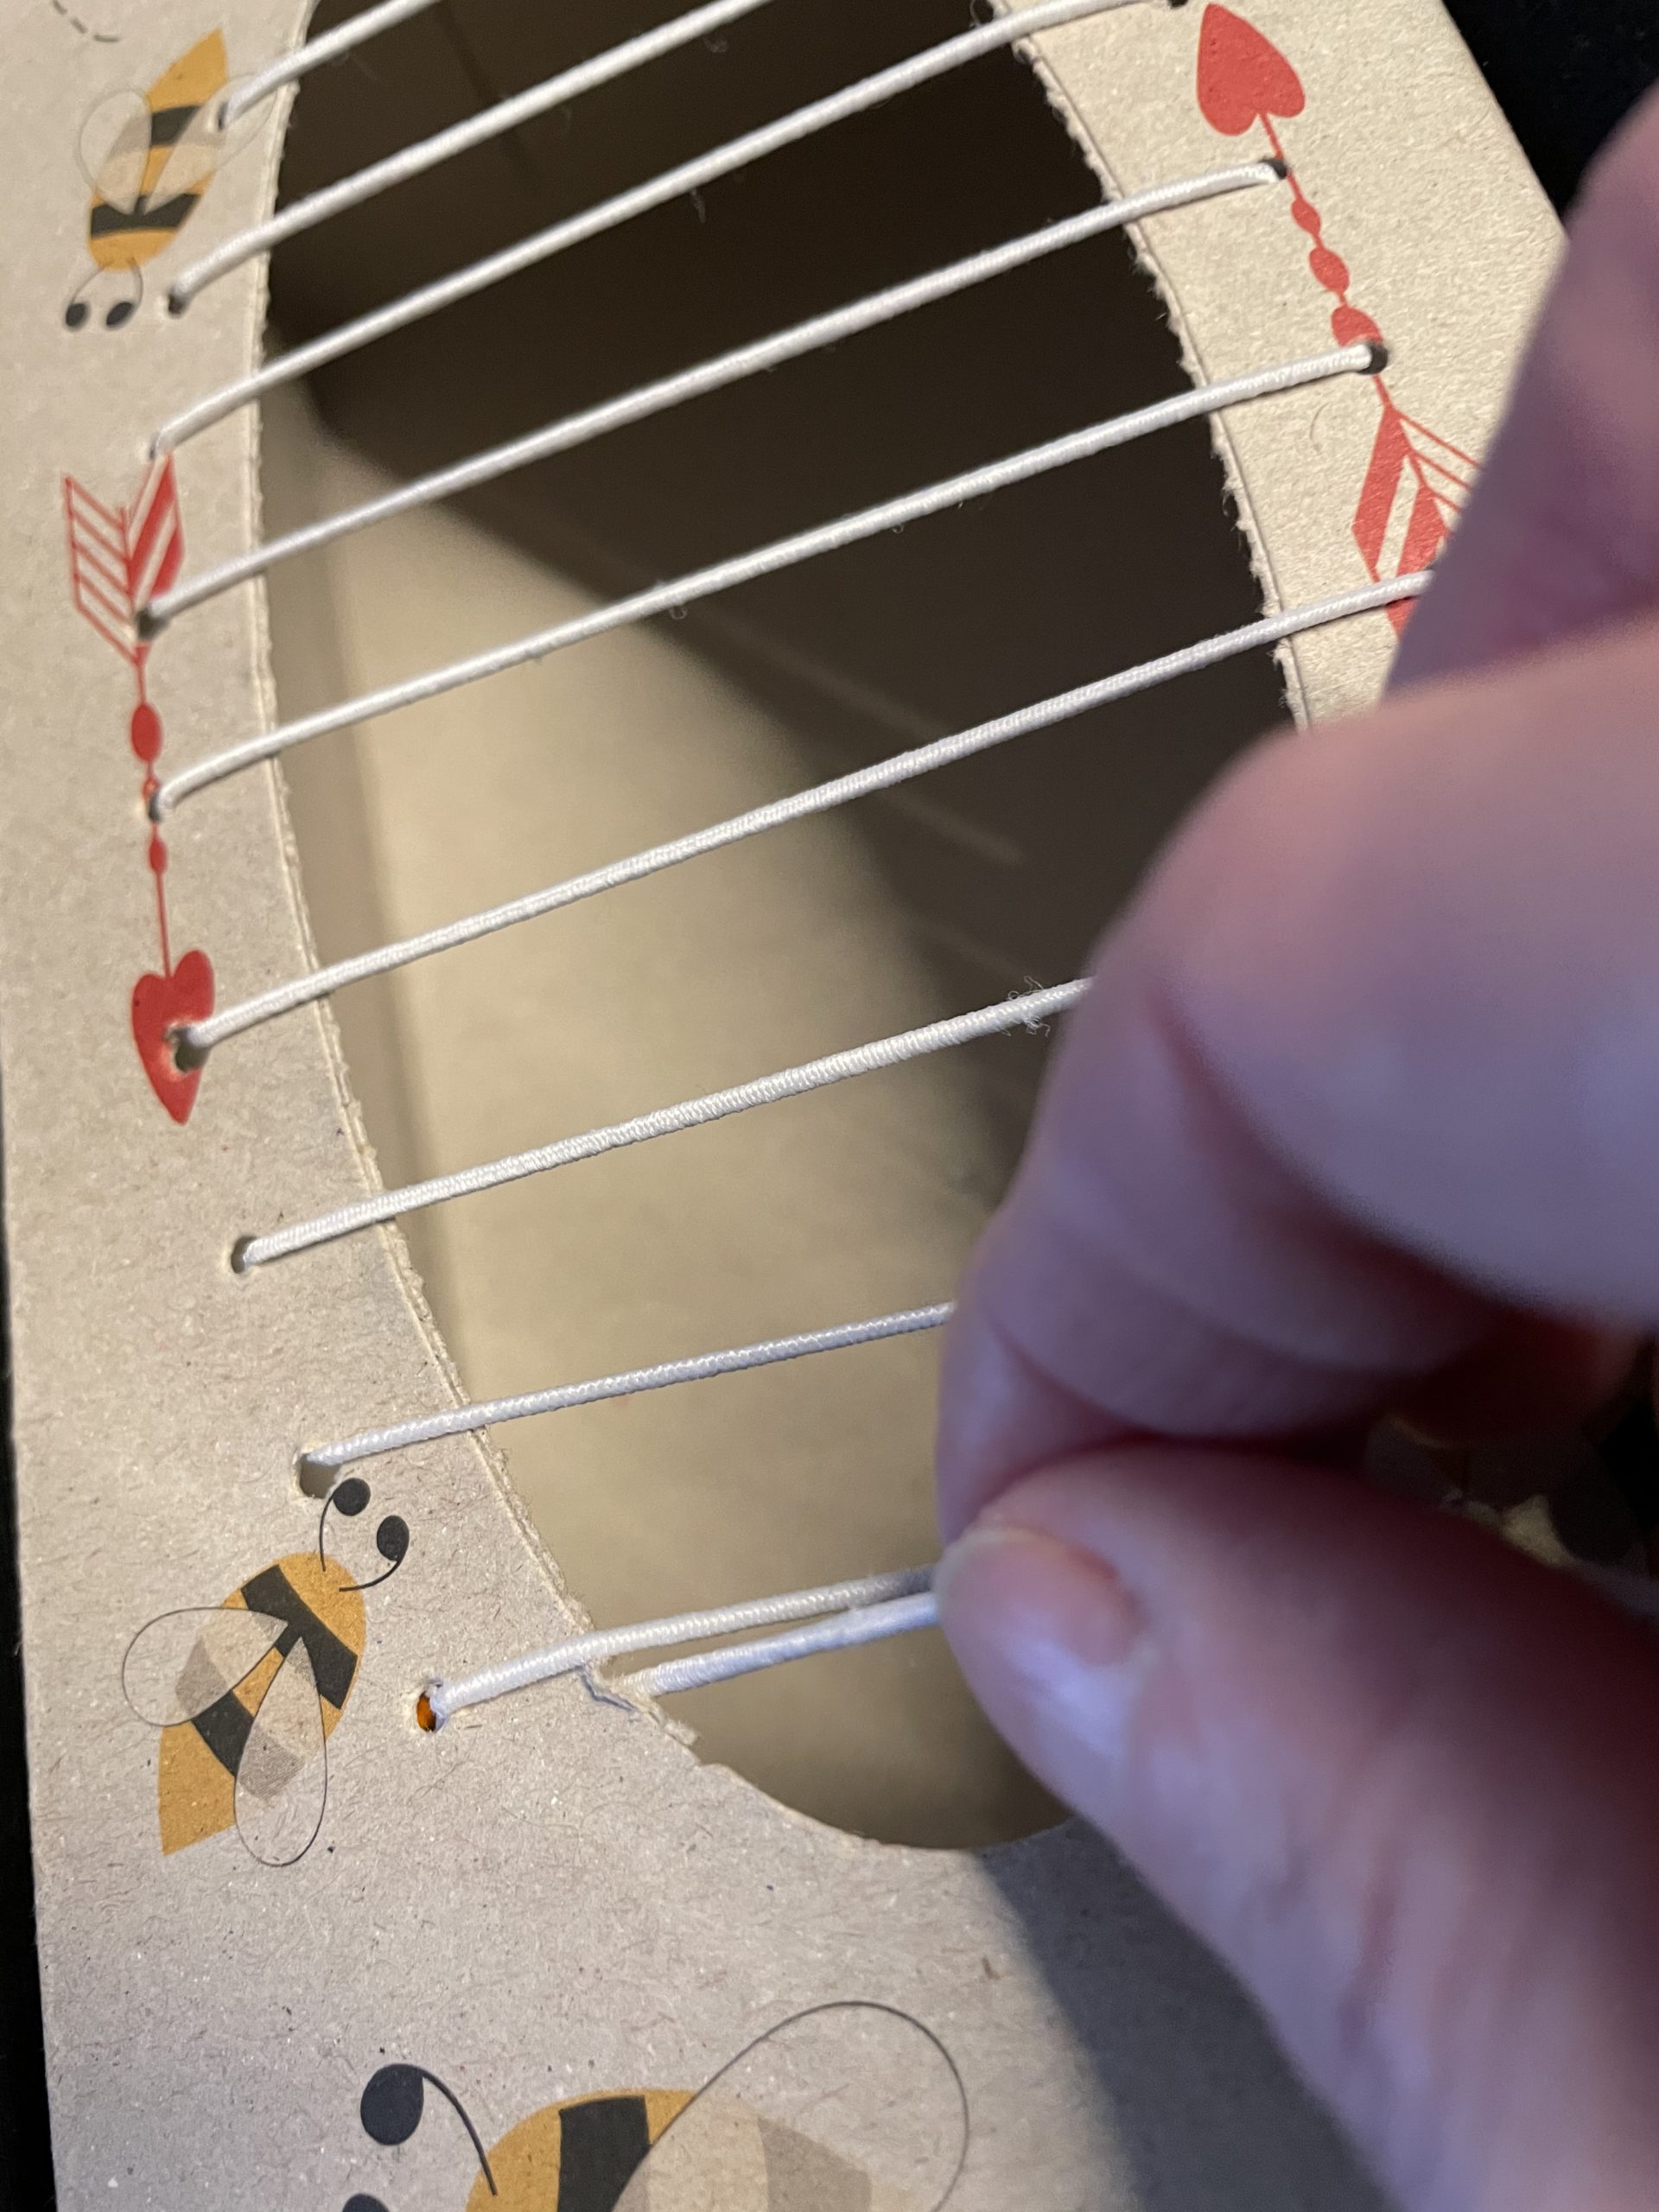
Bild zum Schritt 24 für das Bastel- und DIY-Abenteuer für Kinder: 'Haltet den Faden noch immer in der Hand. Prüft, ob...'

25

Your can is ready.

Bild zum Schritt 25 für das Bastel- und DIY-Abenteuer für Kinder: 'Fertig ist eure Zupfdose.'

26

Try to raise the threads with two fingers and let them buckle. The rubber threads become strings and the plucking of the rubber threads creates tones.

Bild zum Schritt 26 für das Bastel- und DIY-Abenteuer für Kinder: 'Probiert die Fäden mit zwei Fingern etwas anzuheben und schnalzen...'

27

Or you can move your finger over the strings of your instrument. Small children's hands can also move over the strings with the flat hand. The vibration of the strings under their hands fascinates children.
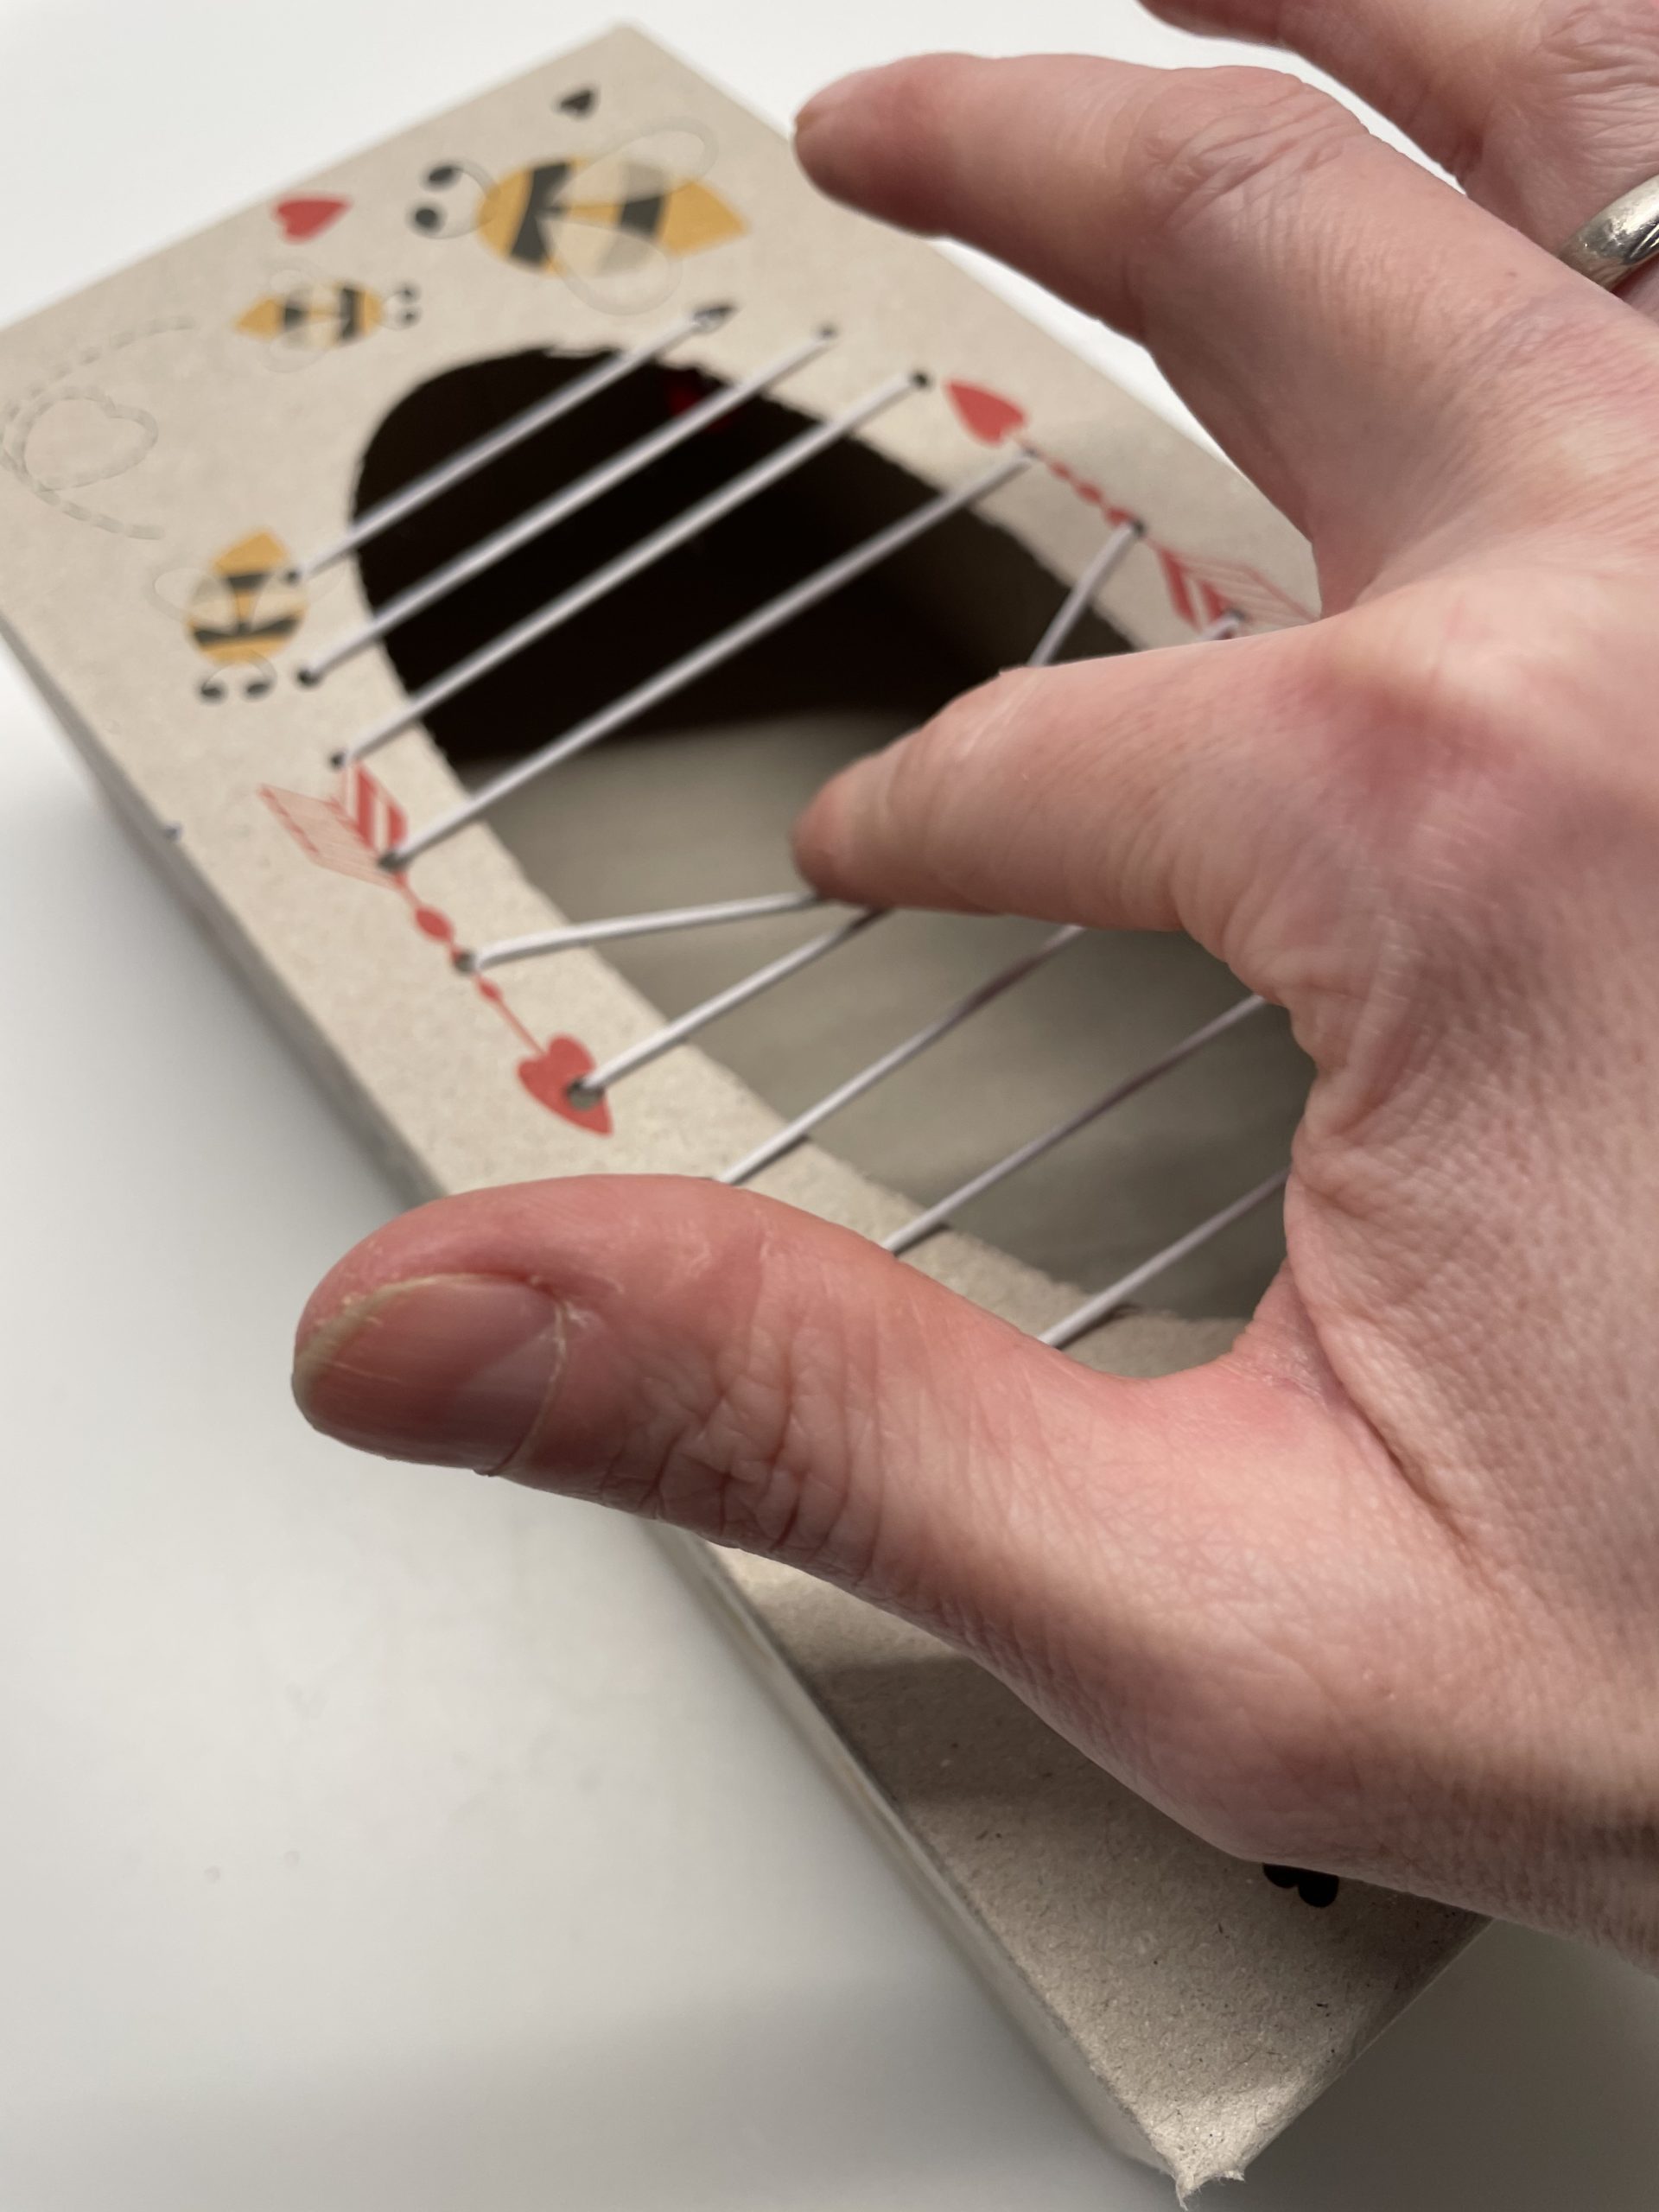
Bild zum Schritt 27 für das Bastel- und DIY-Abenteuer für Kinder: 'Oder ihr streift mit einem Finger über die Saiten eures...'

28

Accompany songs with the Zupf box. Experiment with the sounds and make your own music!

29

Have fun playing music!

Zupf-Schachtel – Build instruments yourself

Follow us on Facebook , Instagram and Pinterest
Don't miss any more adventures: Our bottle mail

Leave a Reply

Your email address will not be published.

The maximum upload file size: 5 MB. You can upload: image, document. Drop file here