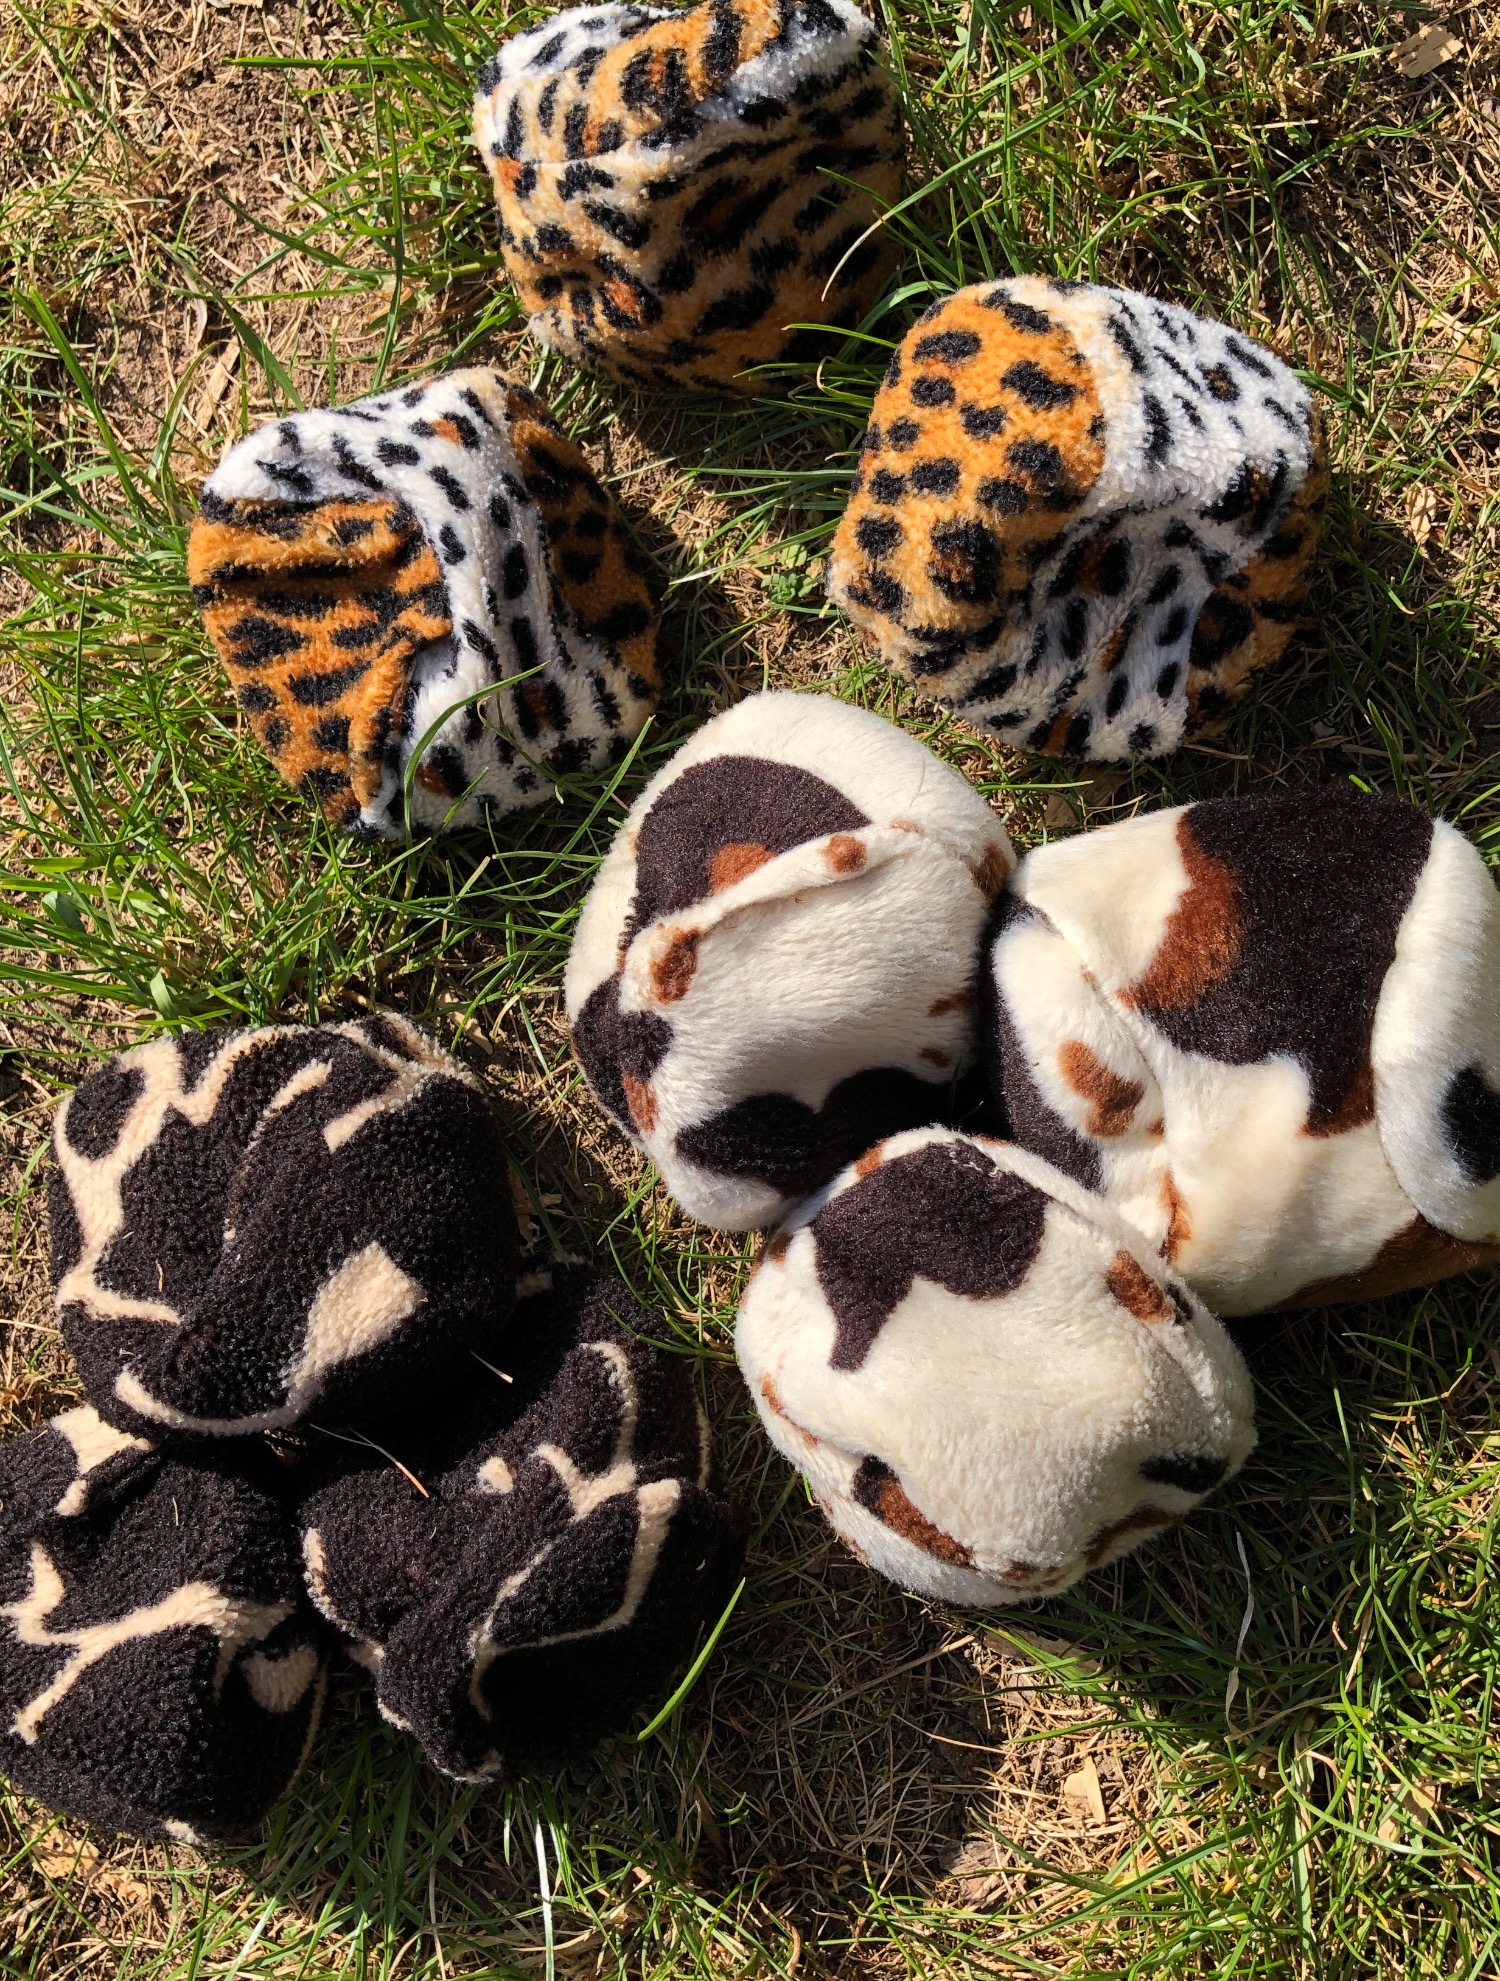
From colorful animalprint plush fabrics we sew balls for e.g. cans, crossboules or juggles. The balls filled with spelt or rice grains are handy and versatile!
Media Education for Kindergarten and Hort

Relief in everyday life, targeted promotion of individual children, independent learning and - without any pre-knowledge already usable by the youngest!
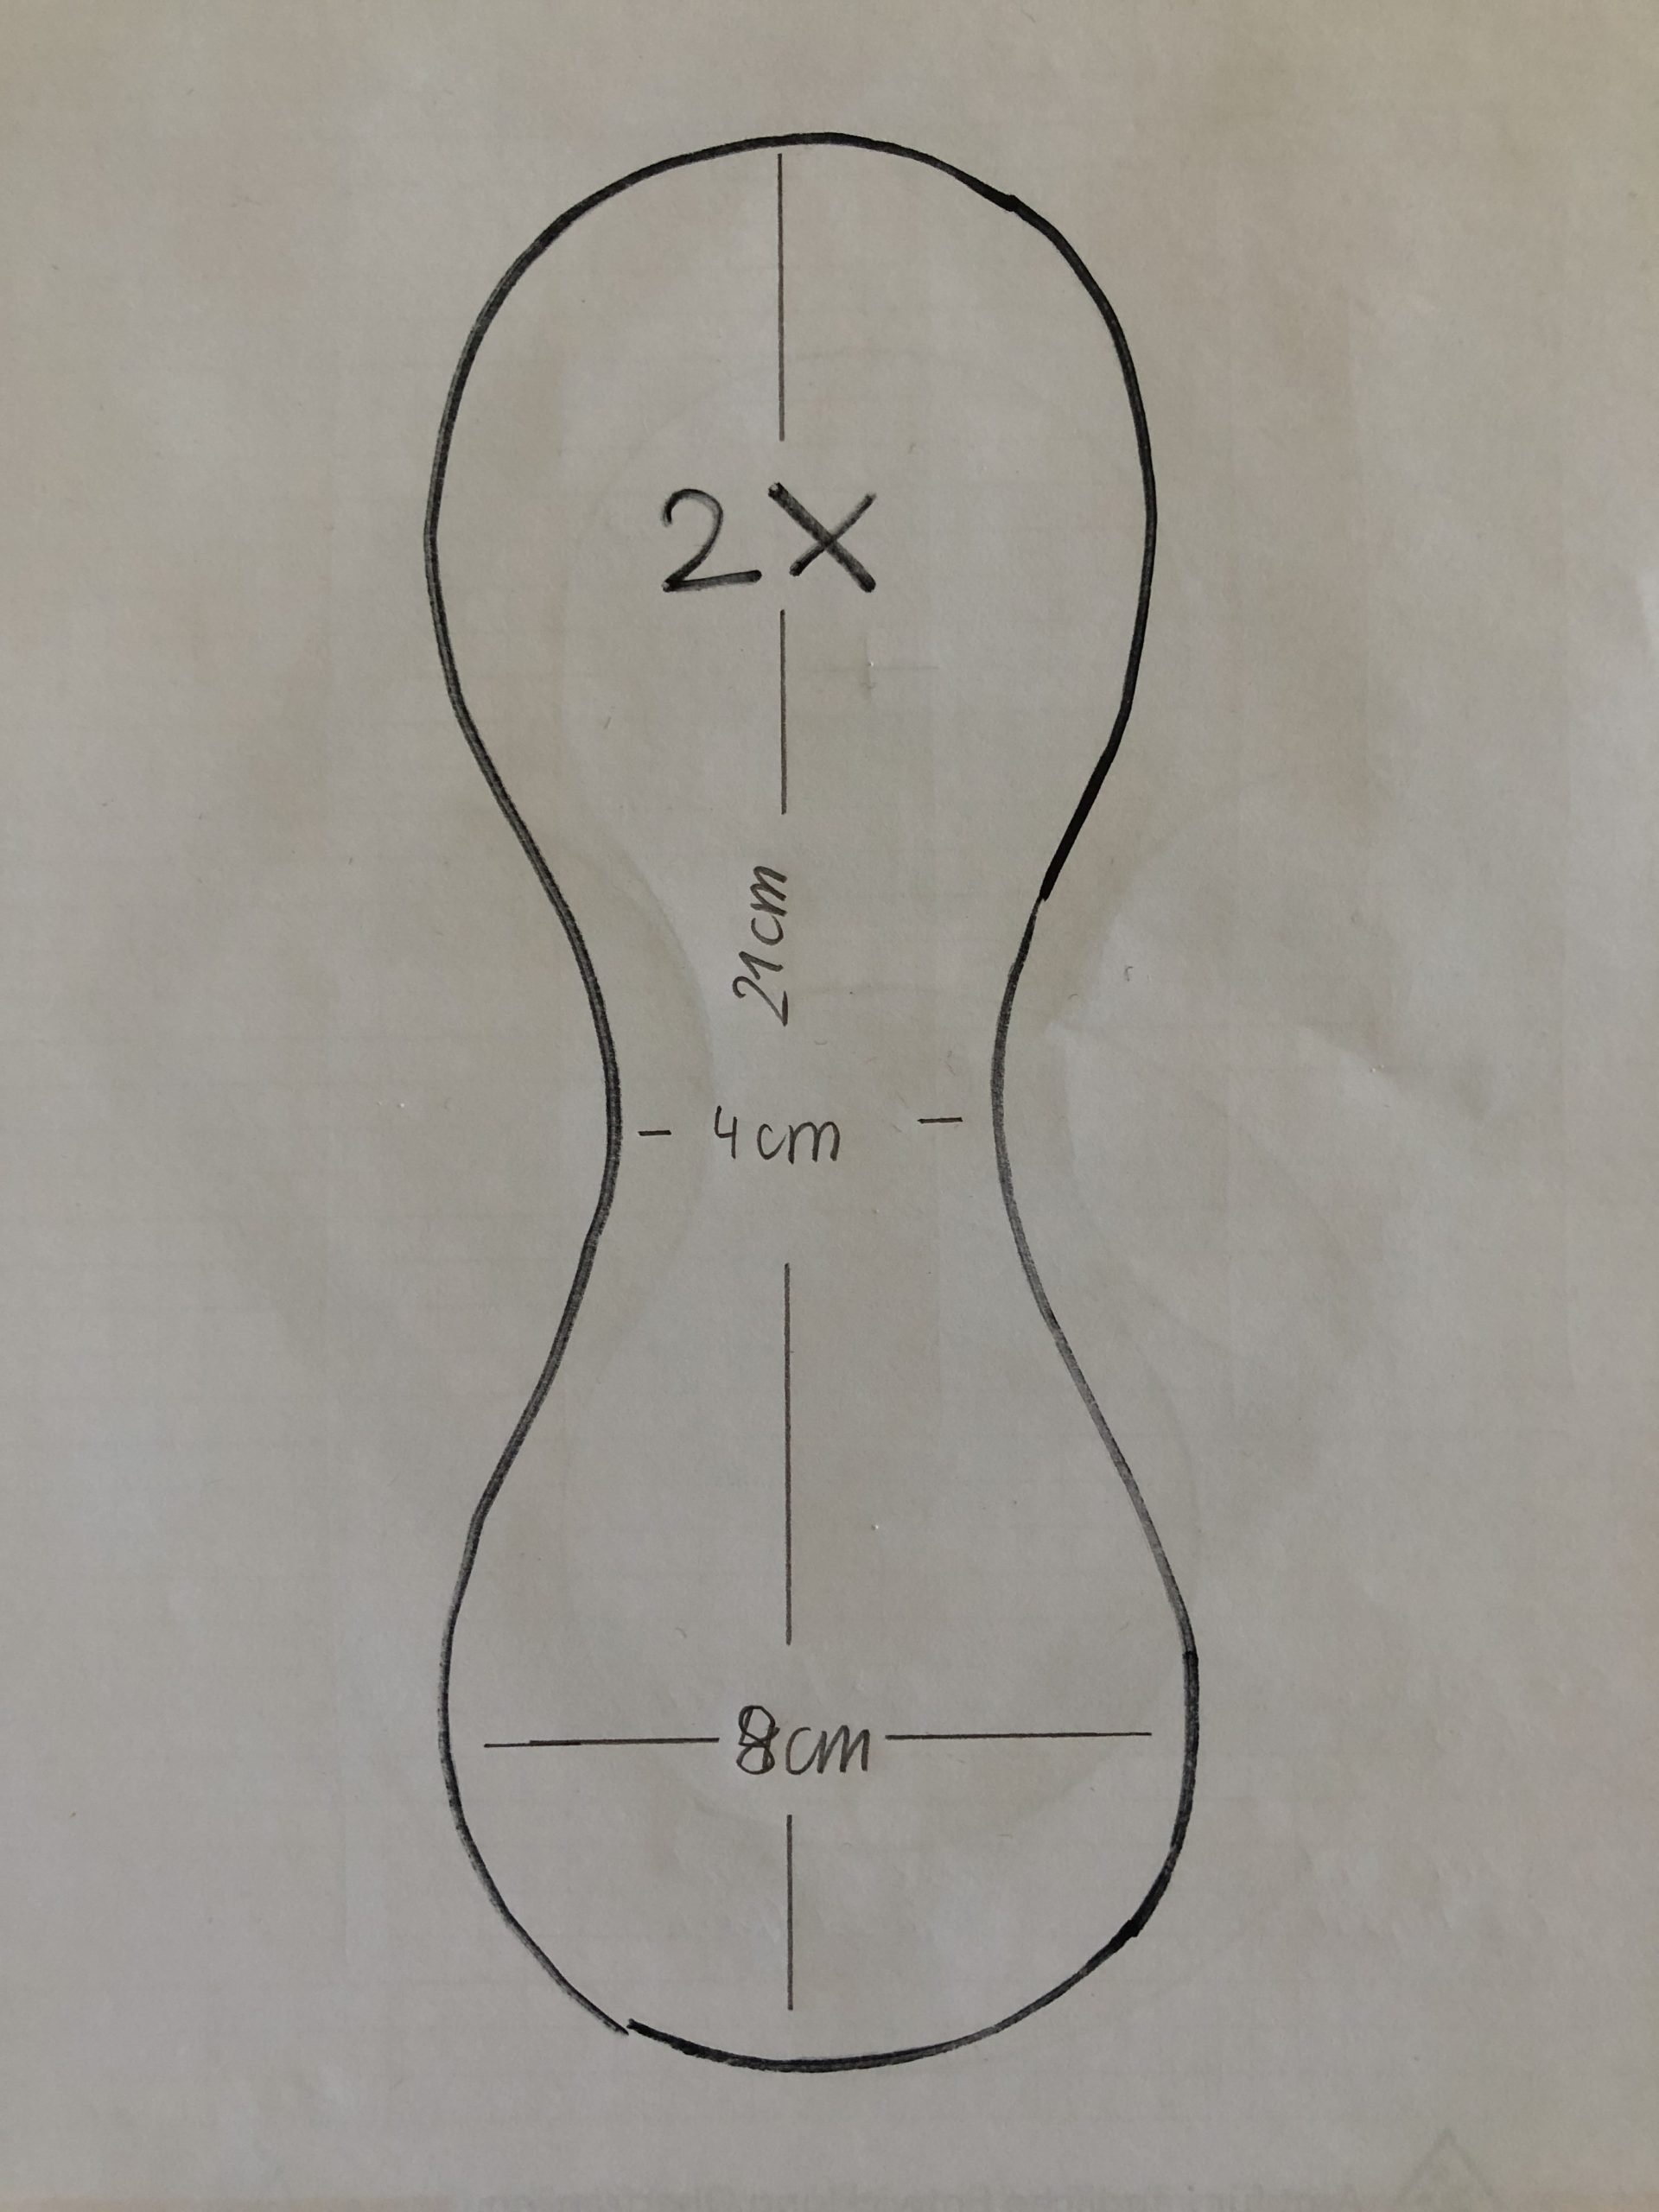
Make or print cut patterns, size can also be varied.
(With this size, sewing works best, if you make the balls smaller, the fabric is a little less handy when sewing...)
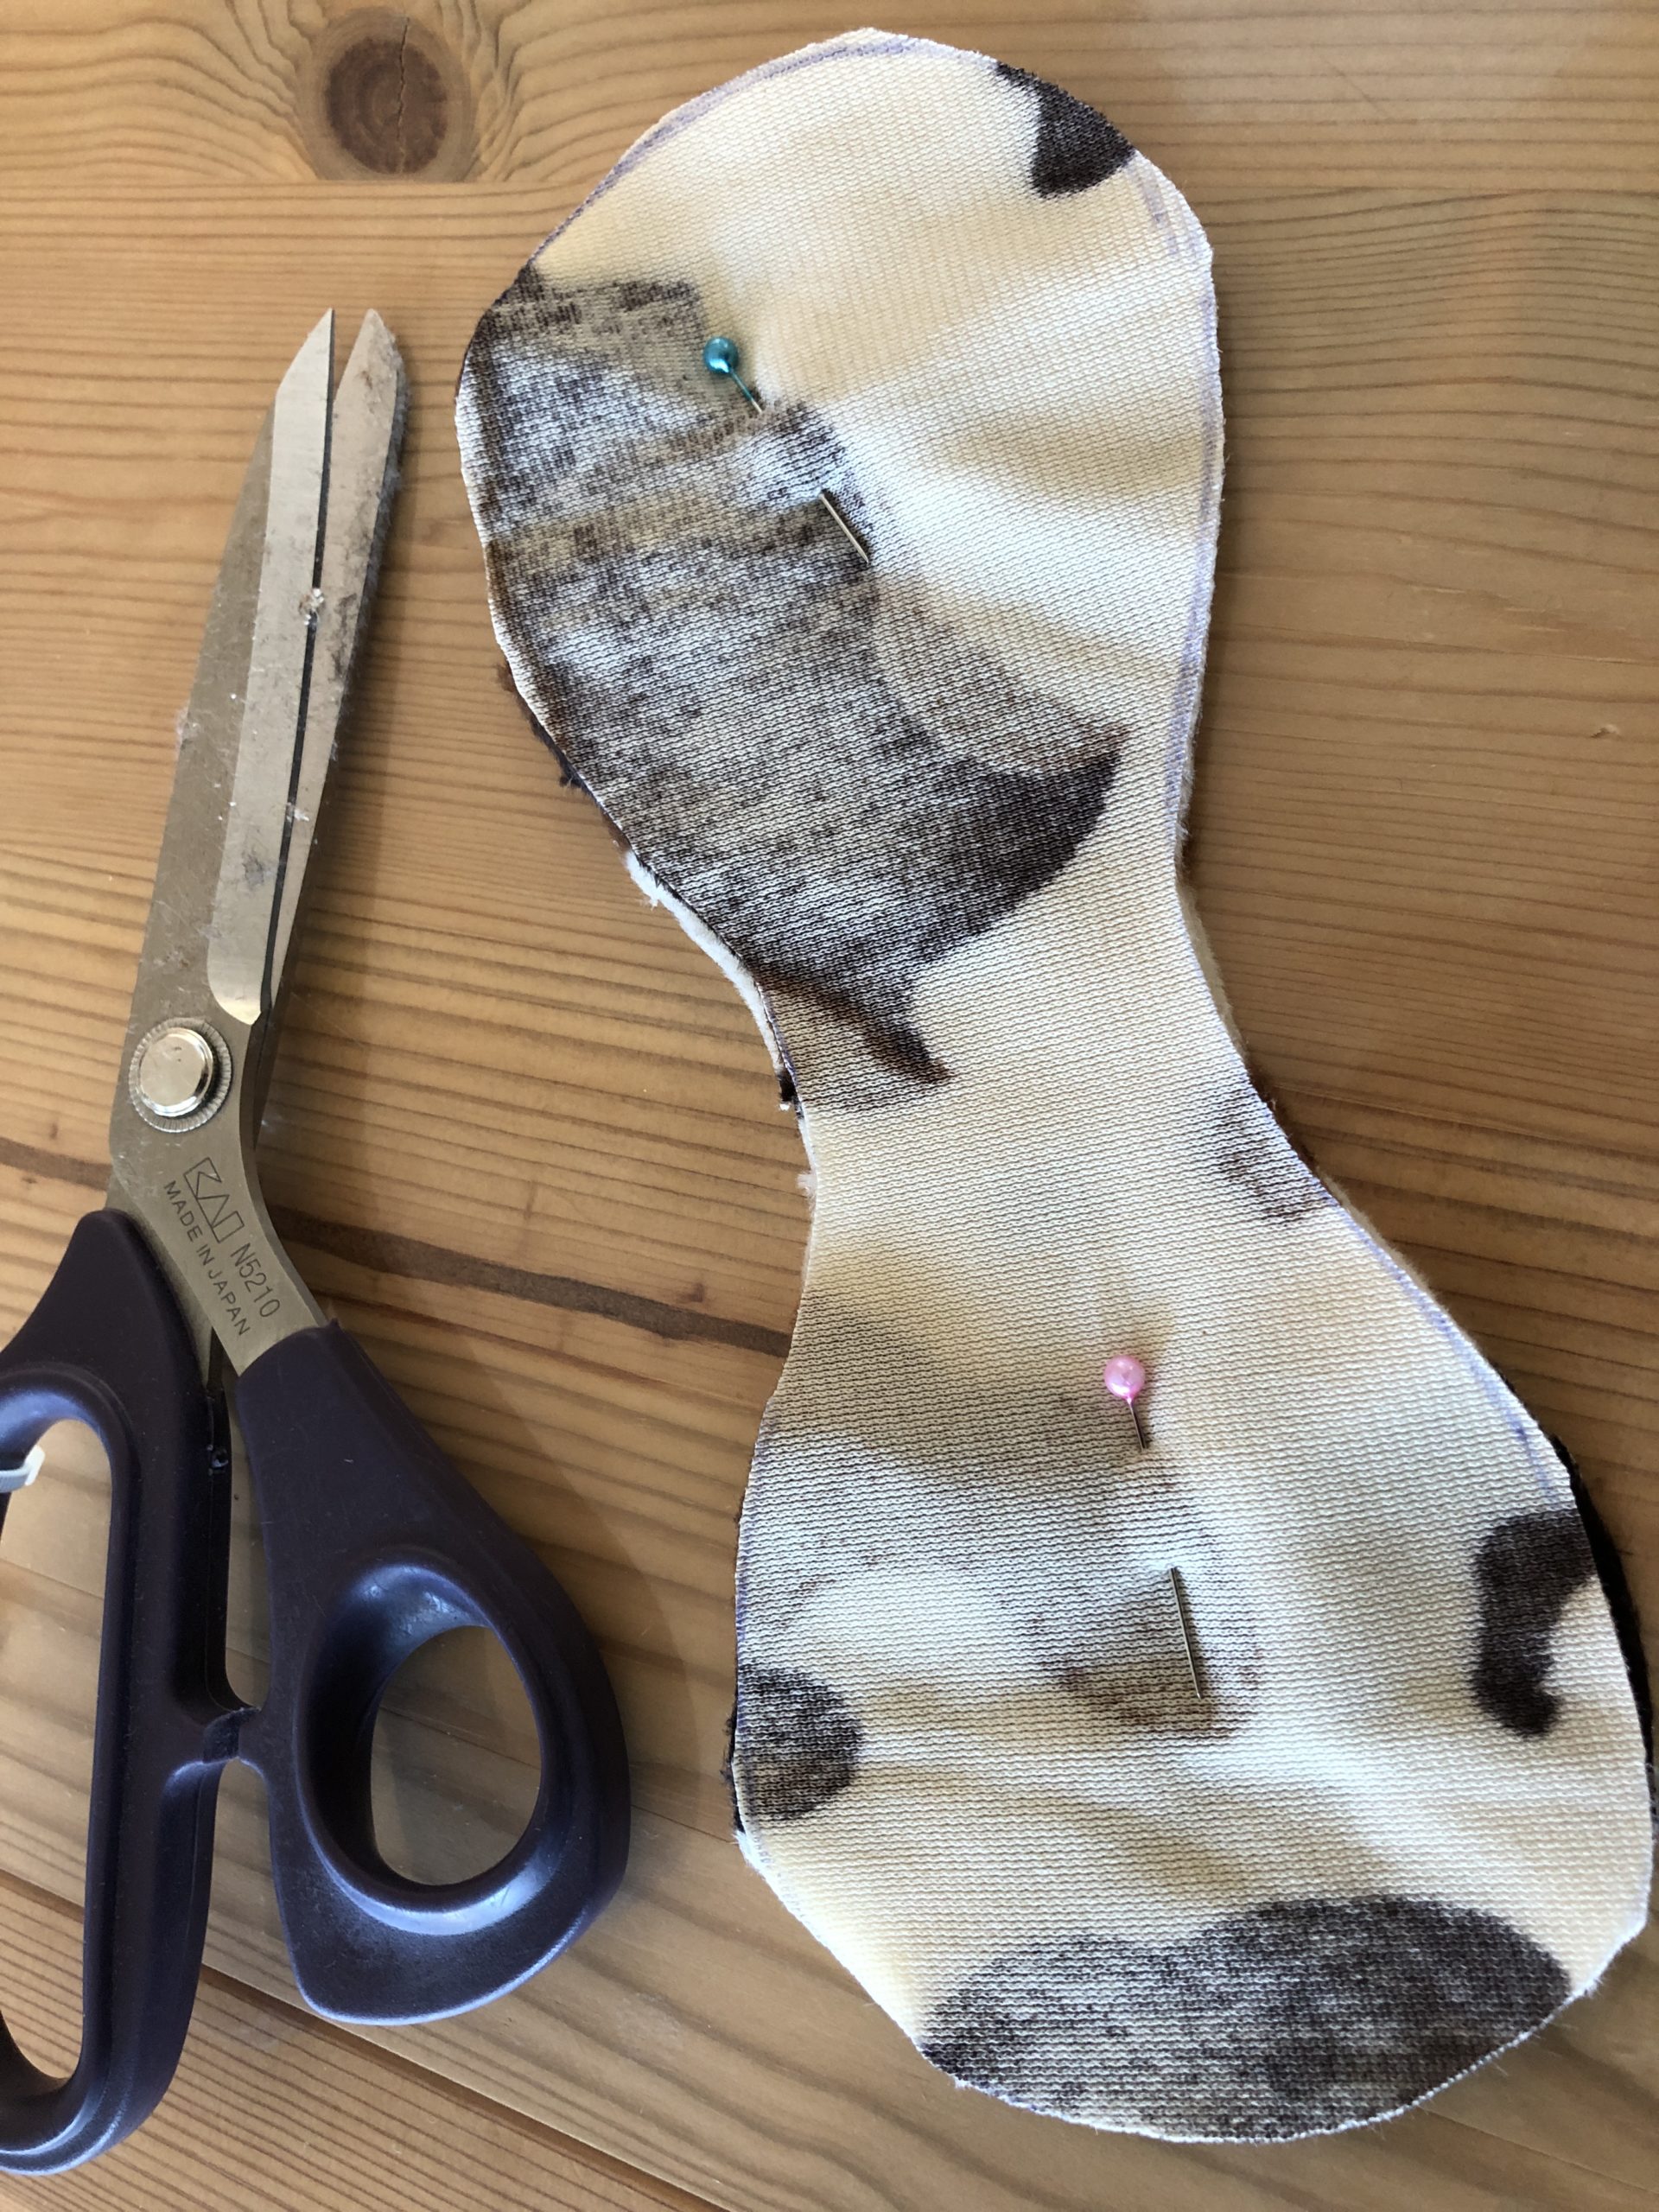
Cut the cut template. Place the piece of fabric twice (the outsides of the ball are on top of each other) and transfer the cut pattern to the fabric.
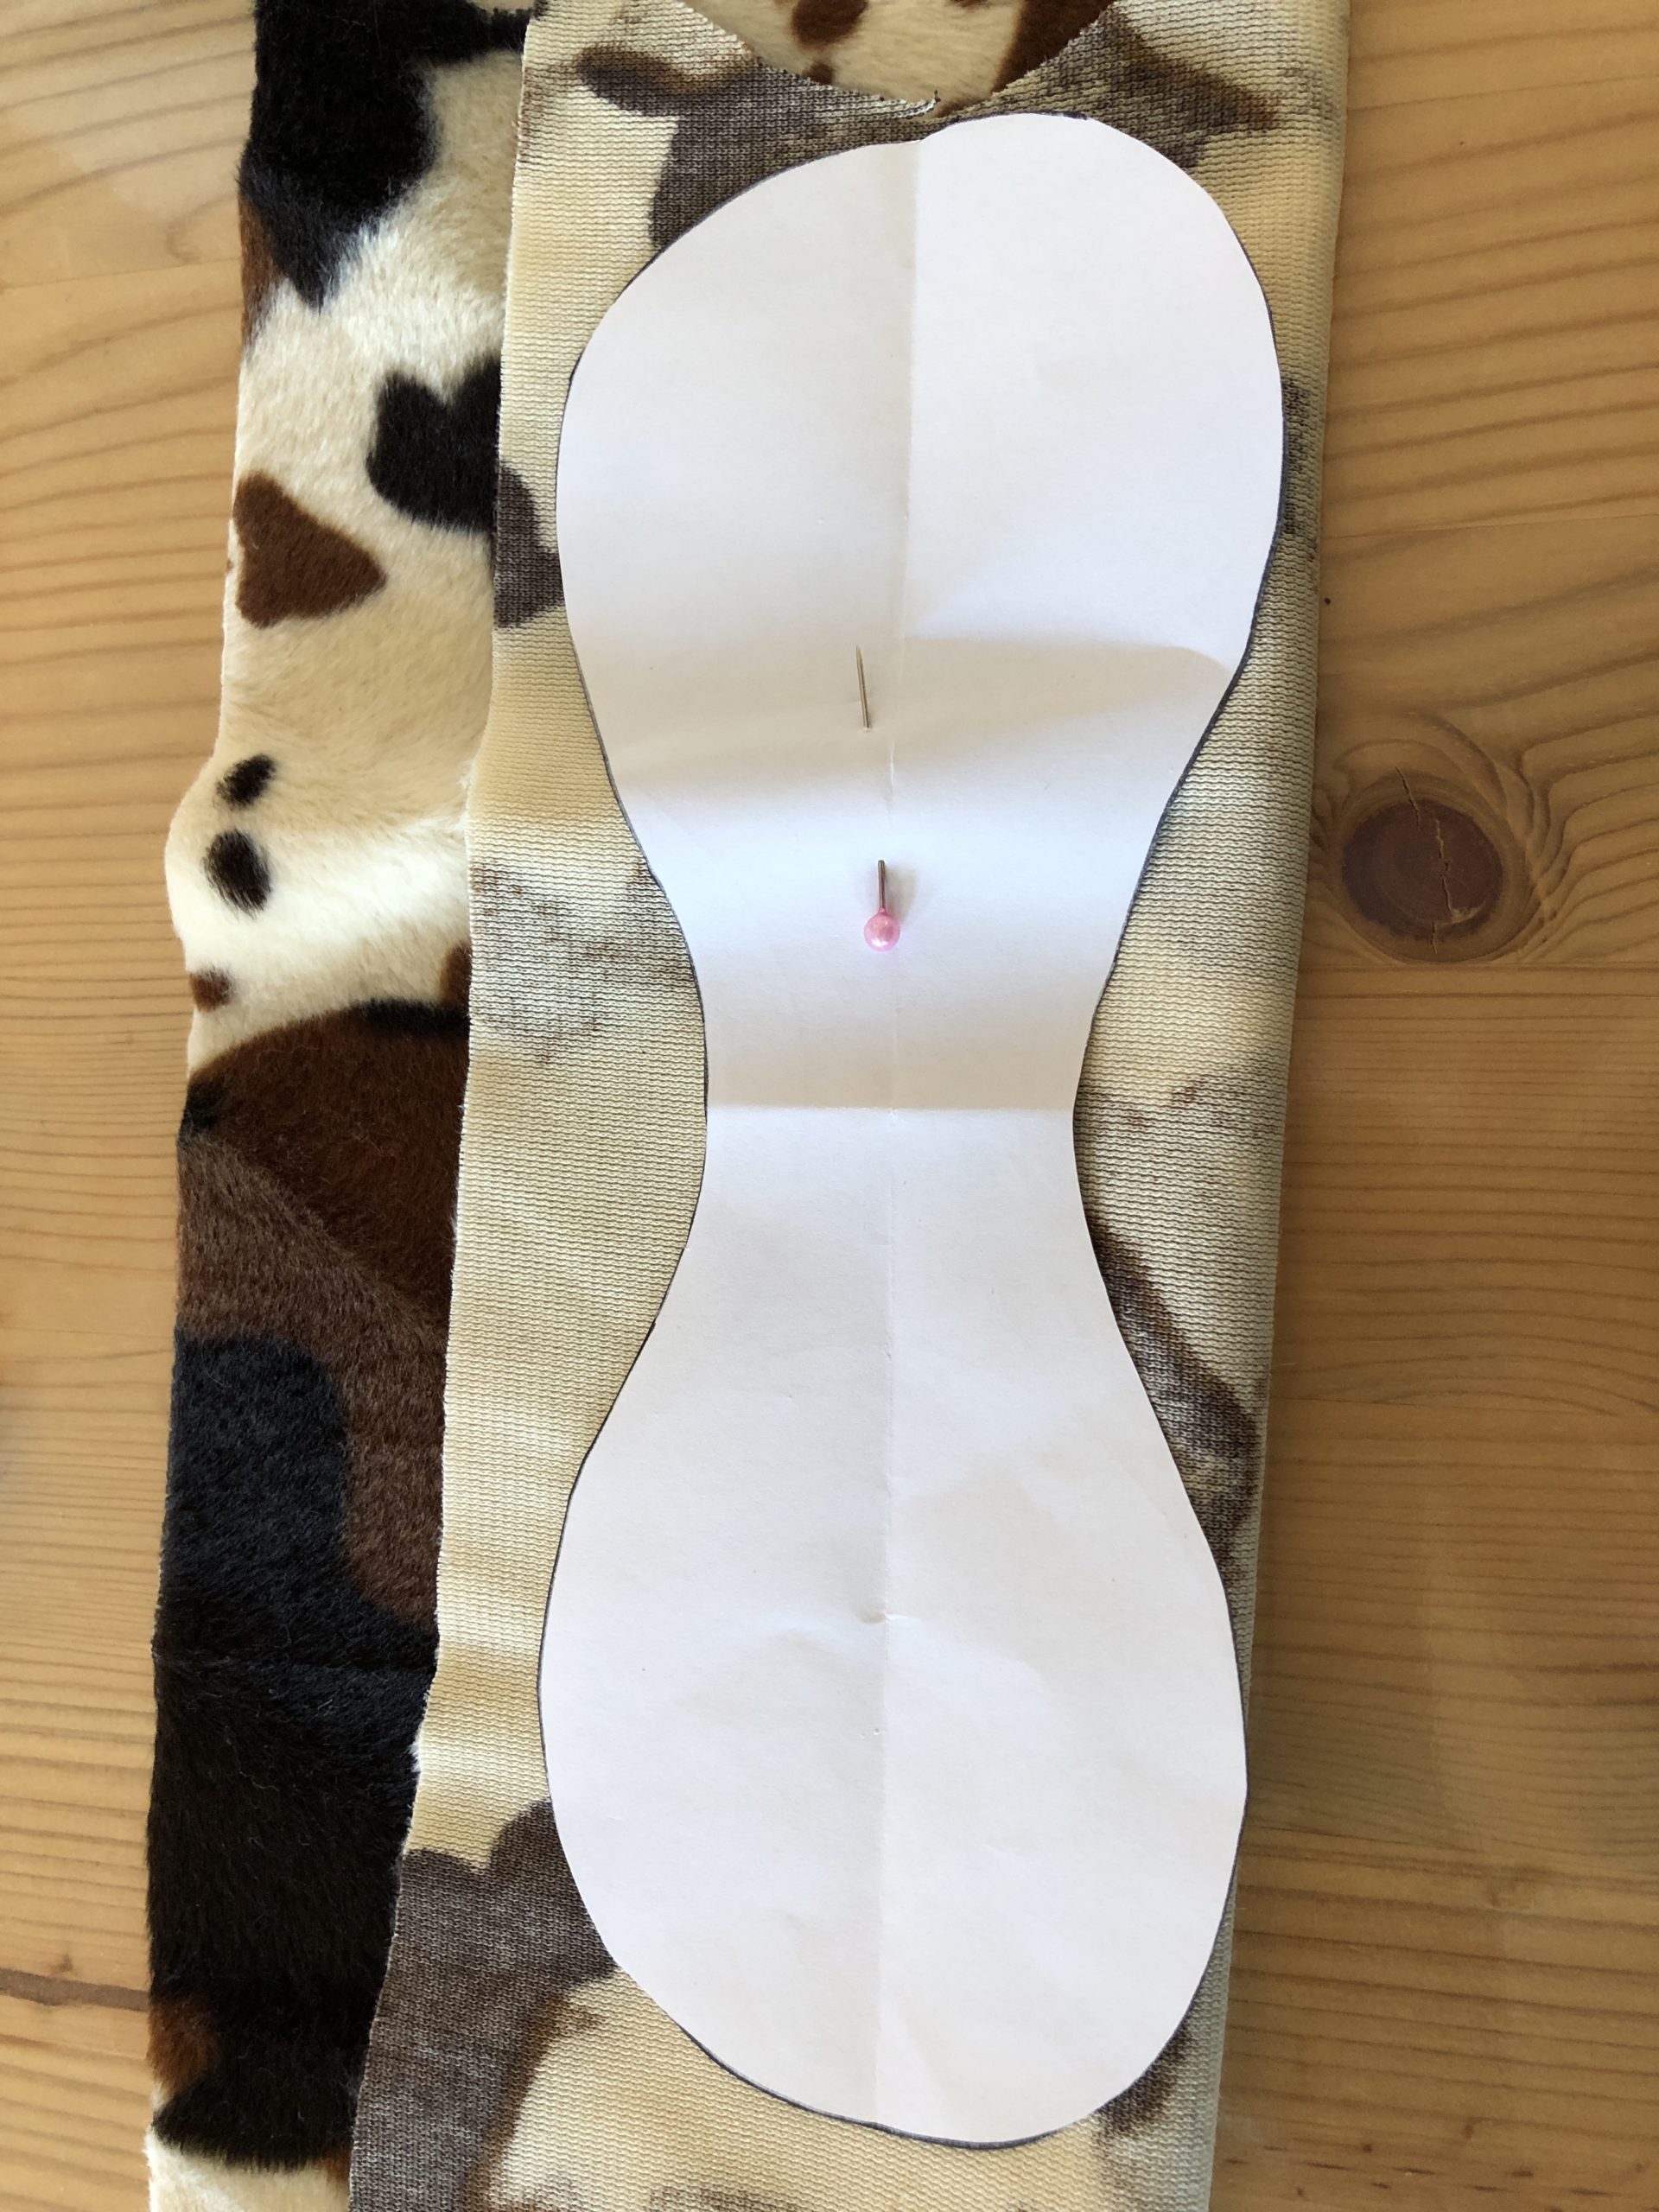
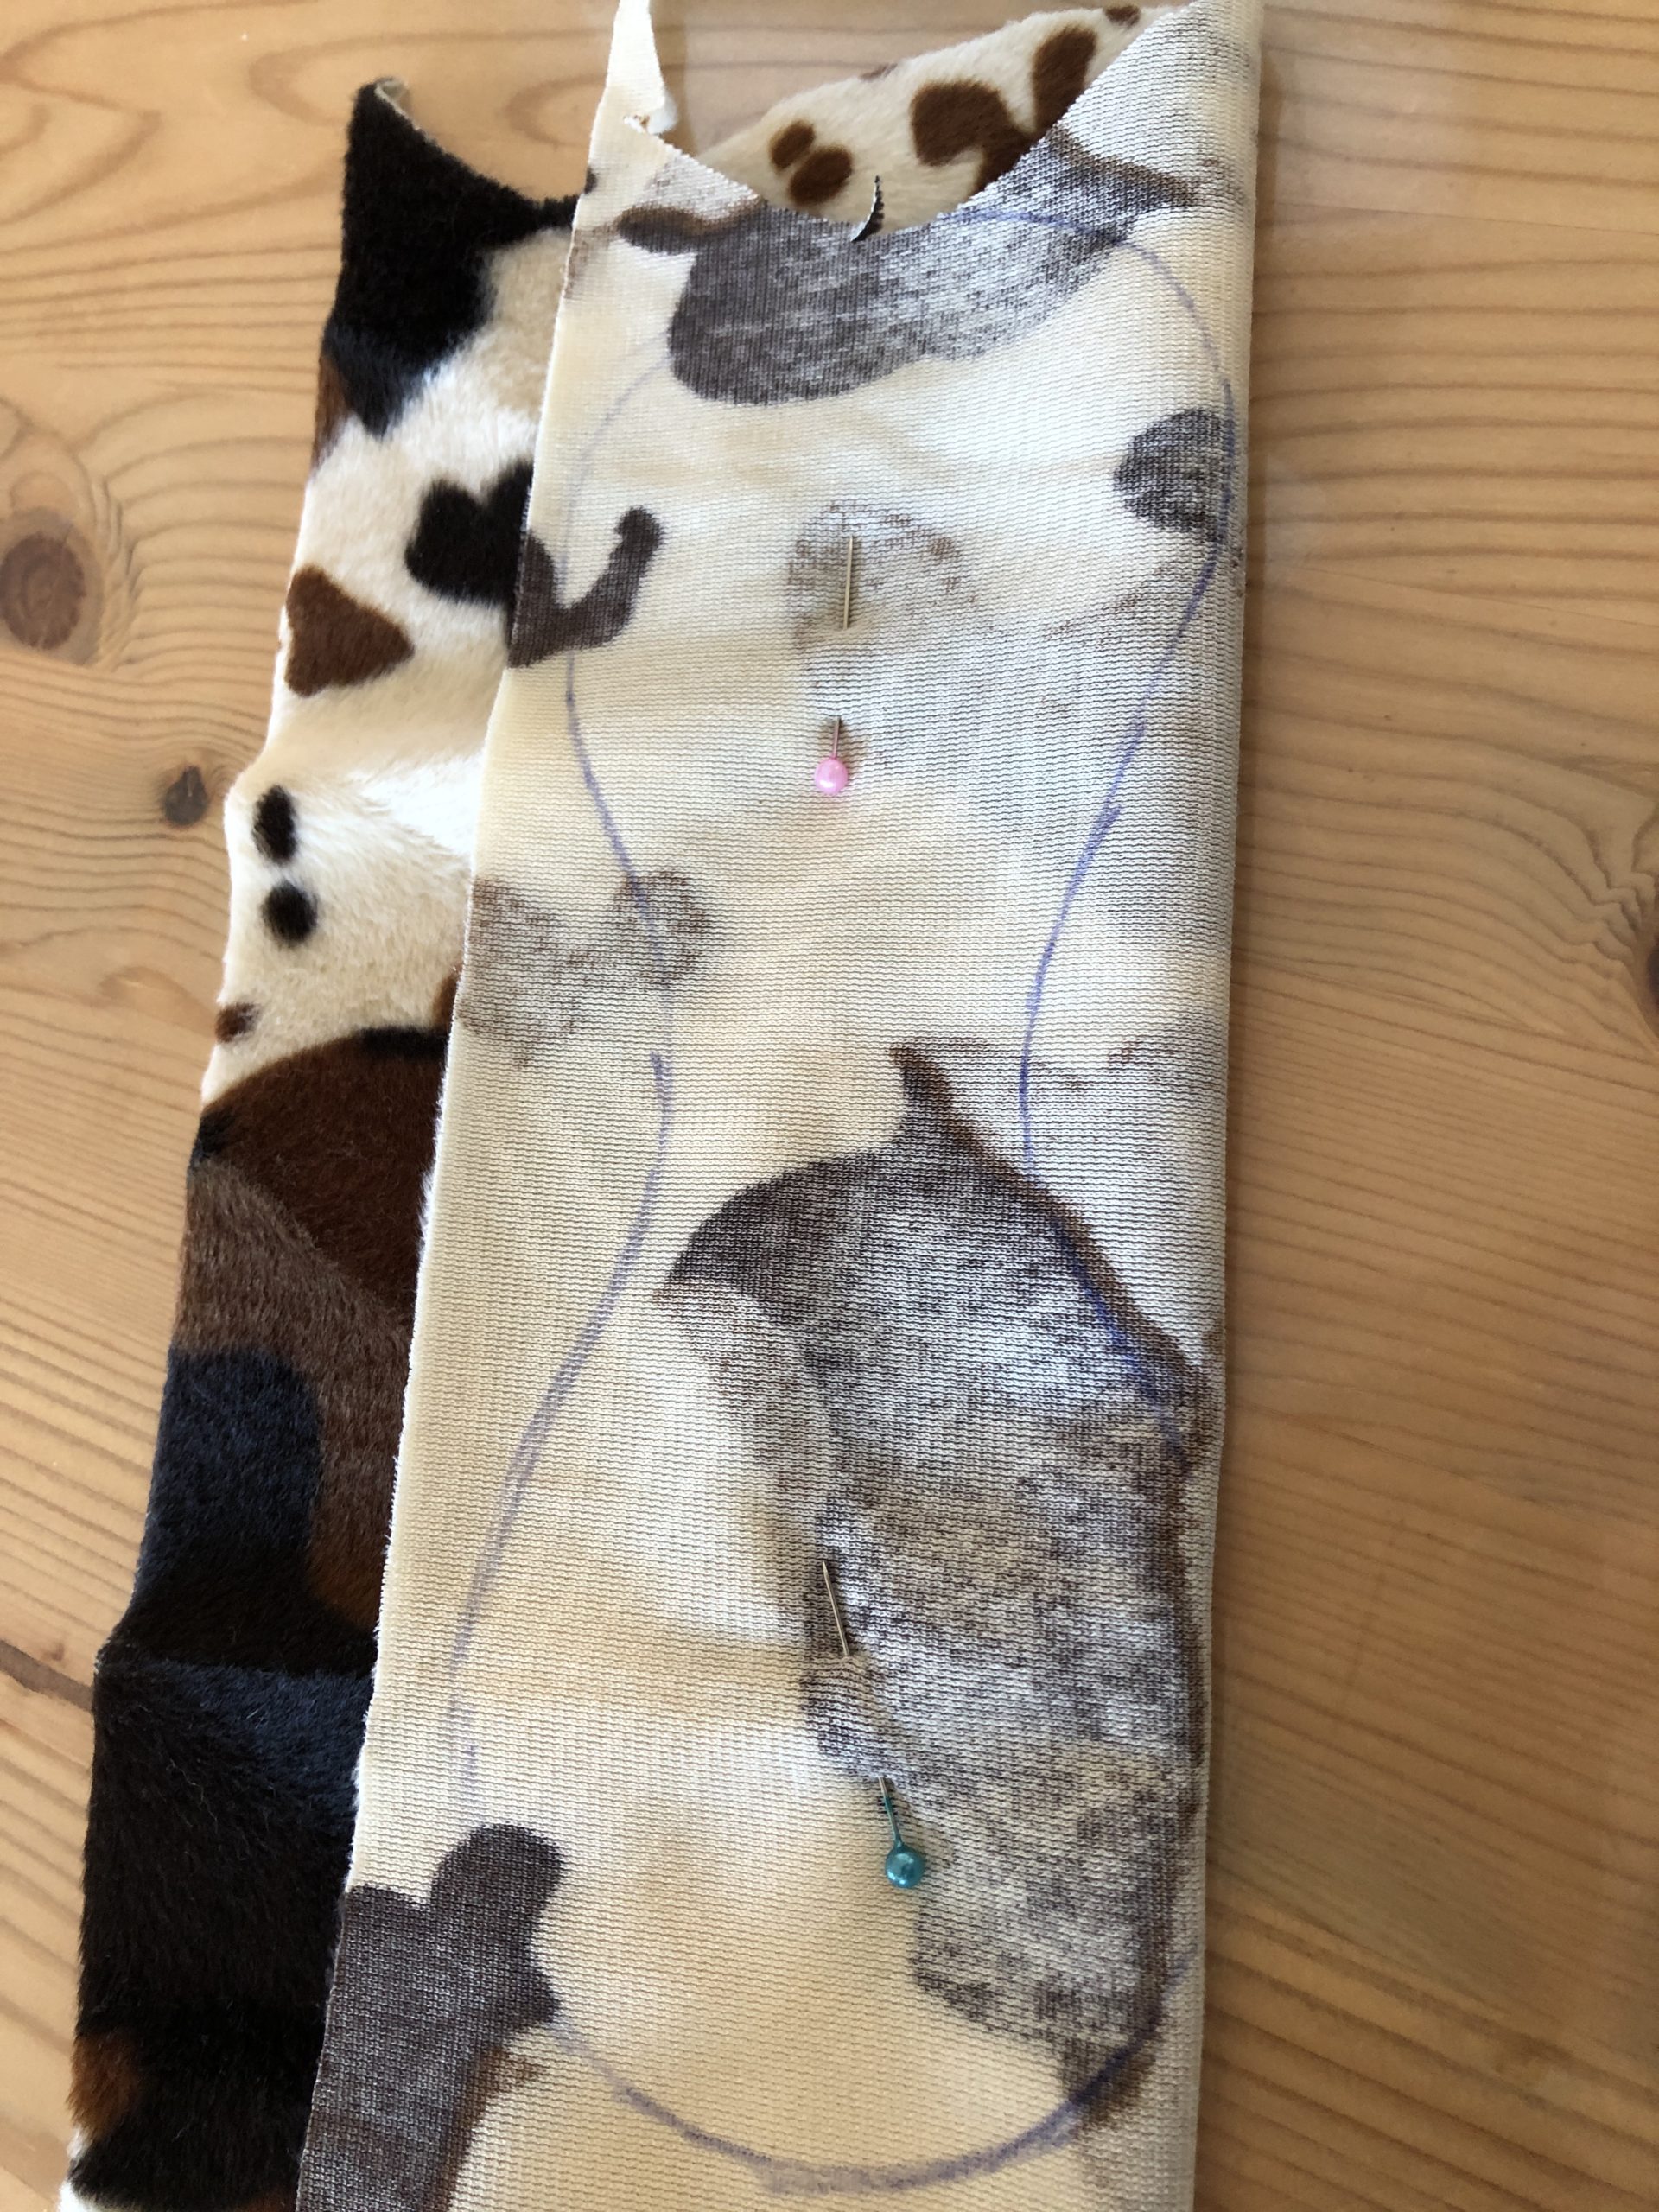
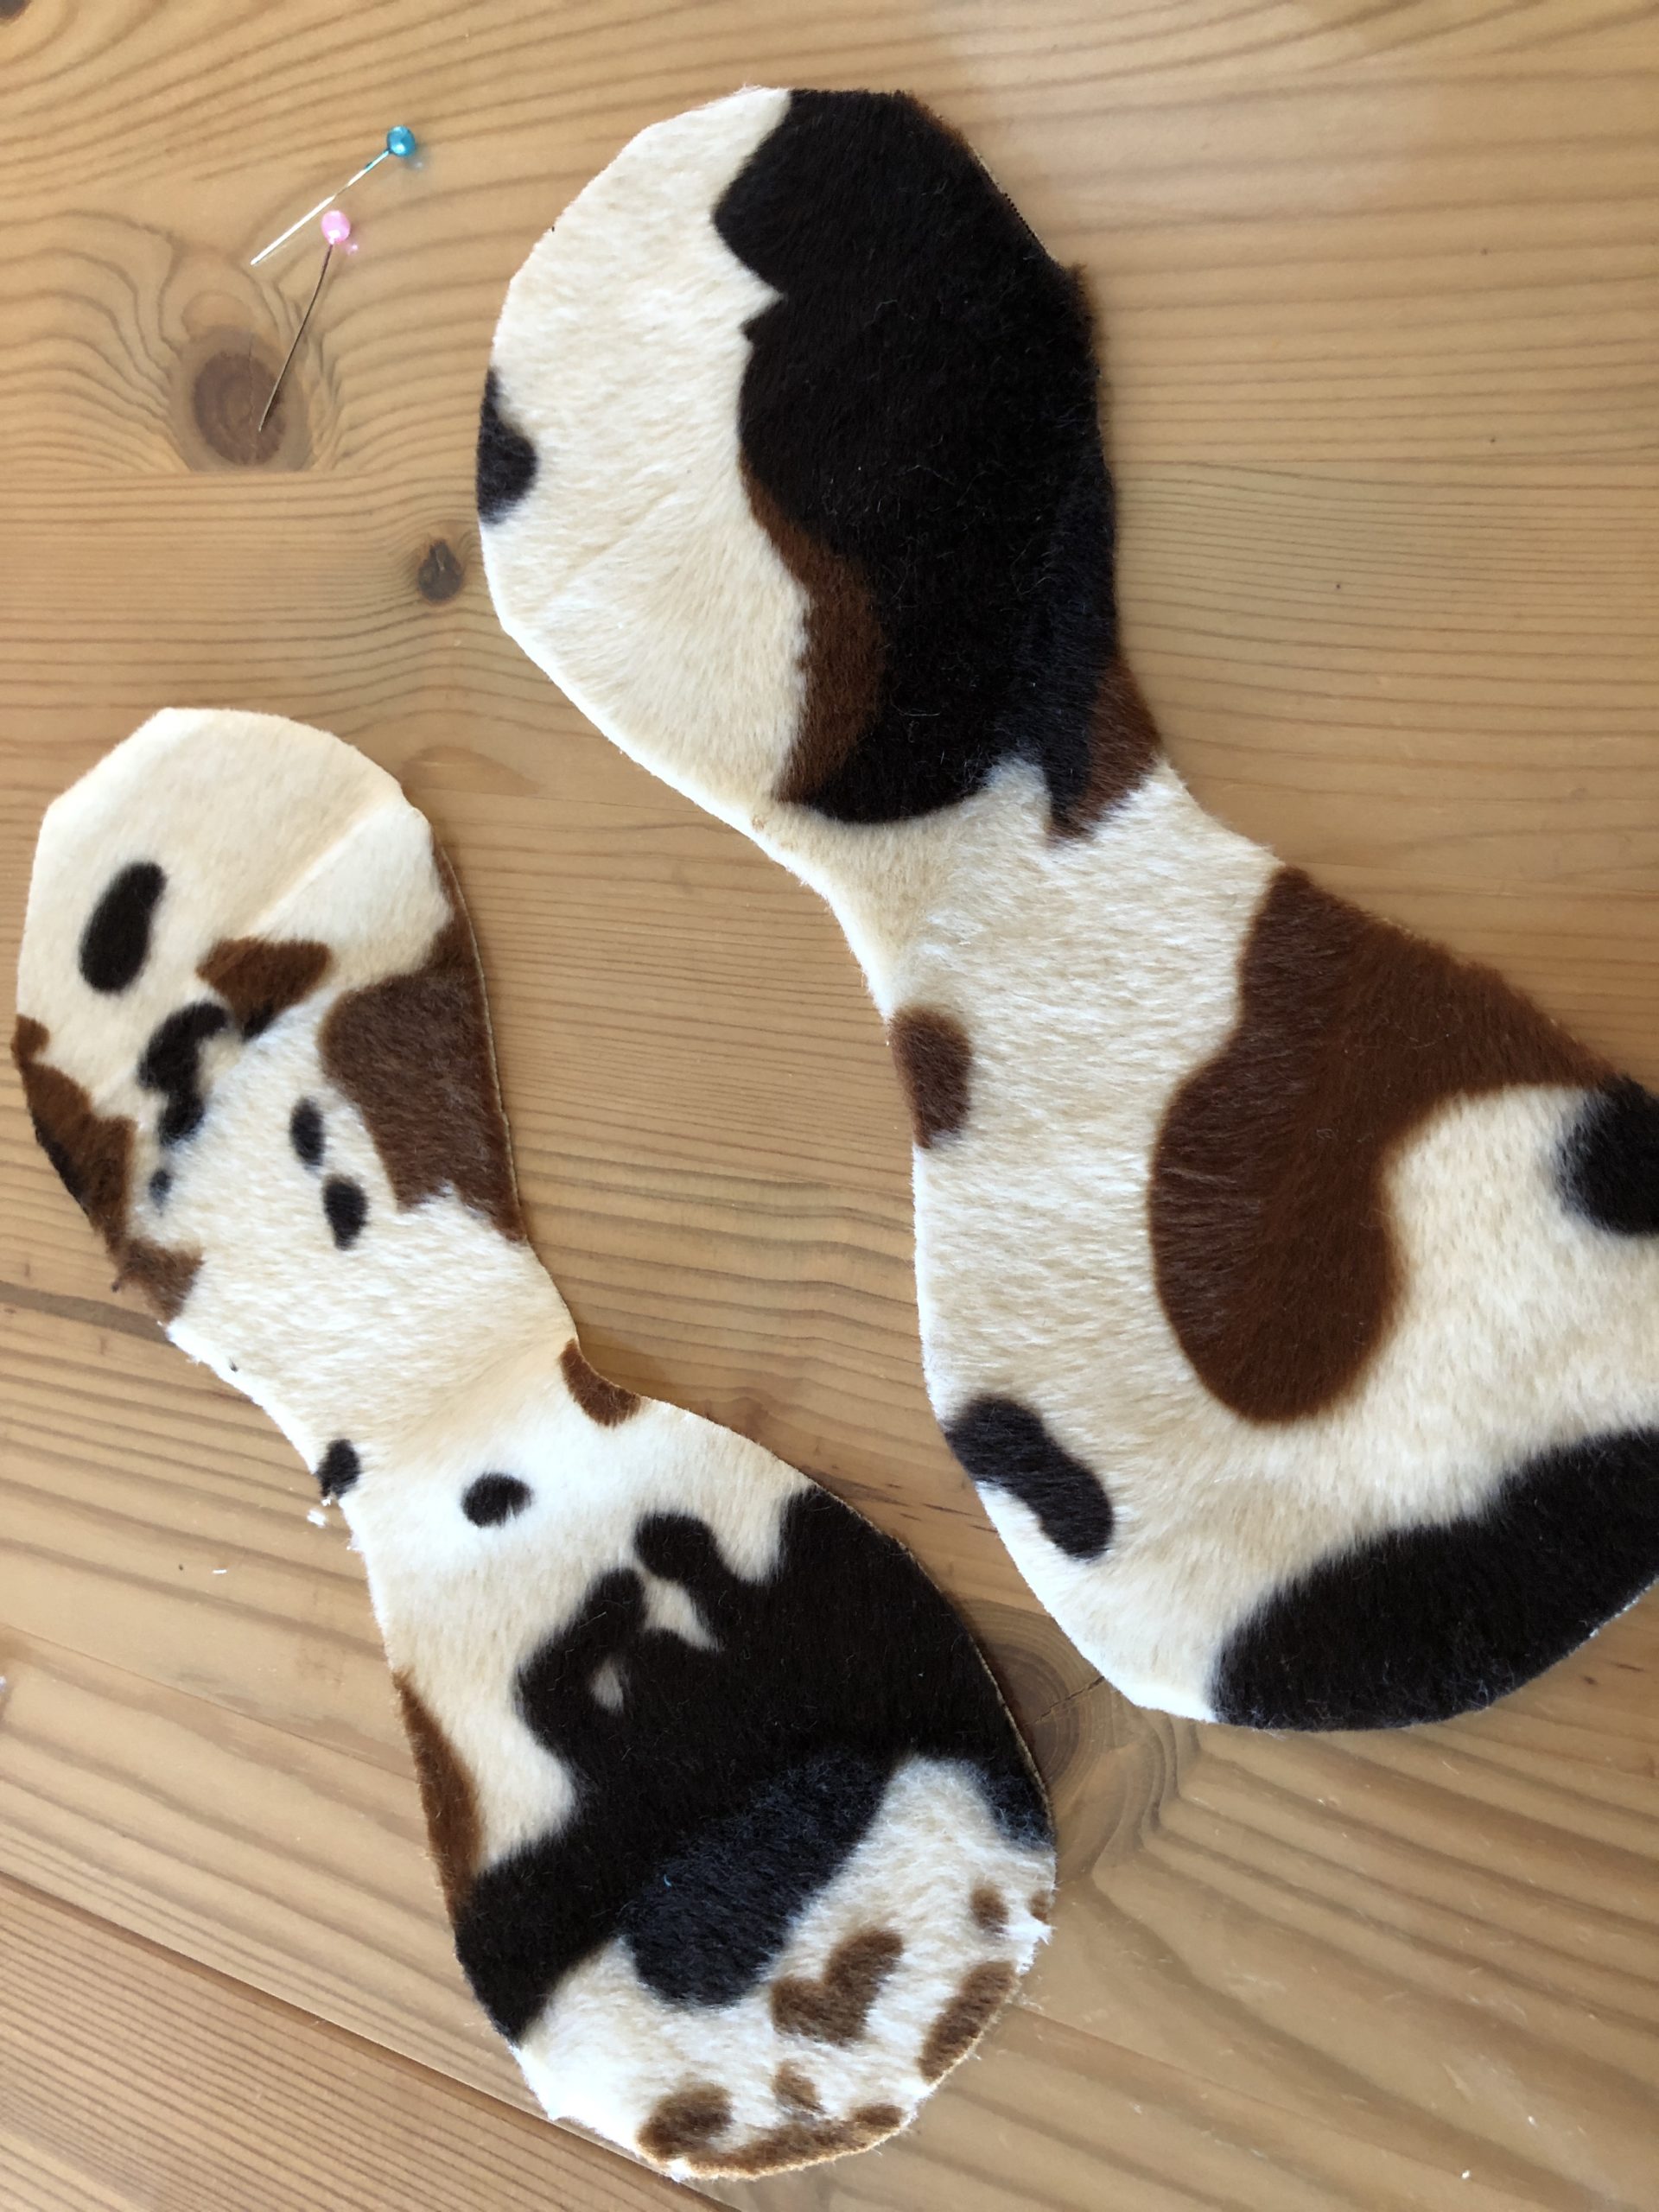
Cut out both pieces of fabric.
Now you can sew the two pieces of fabric together as follows!
Very important: Here (arrow!) is started with sewing!
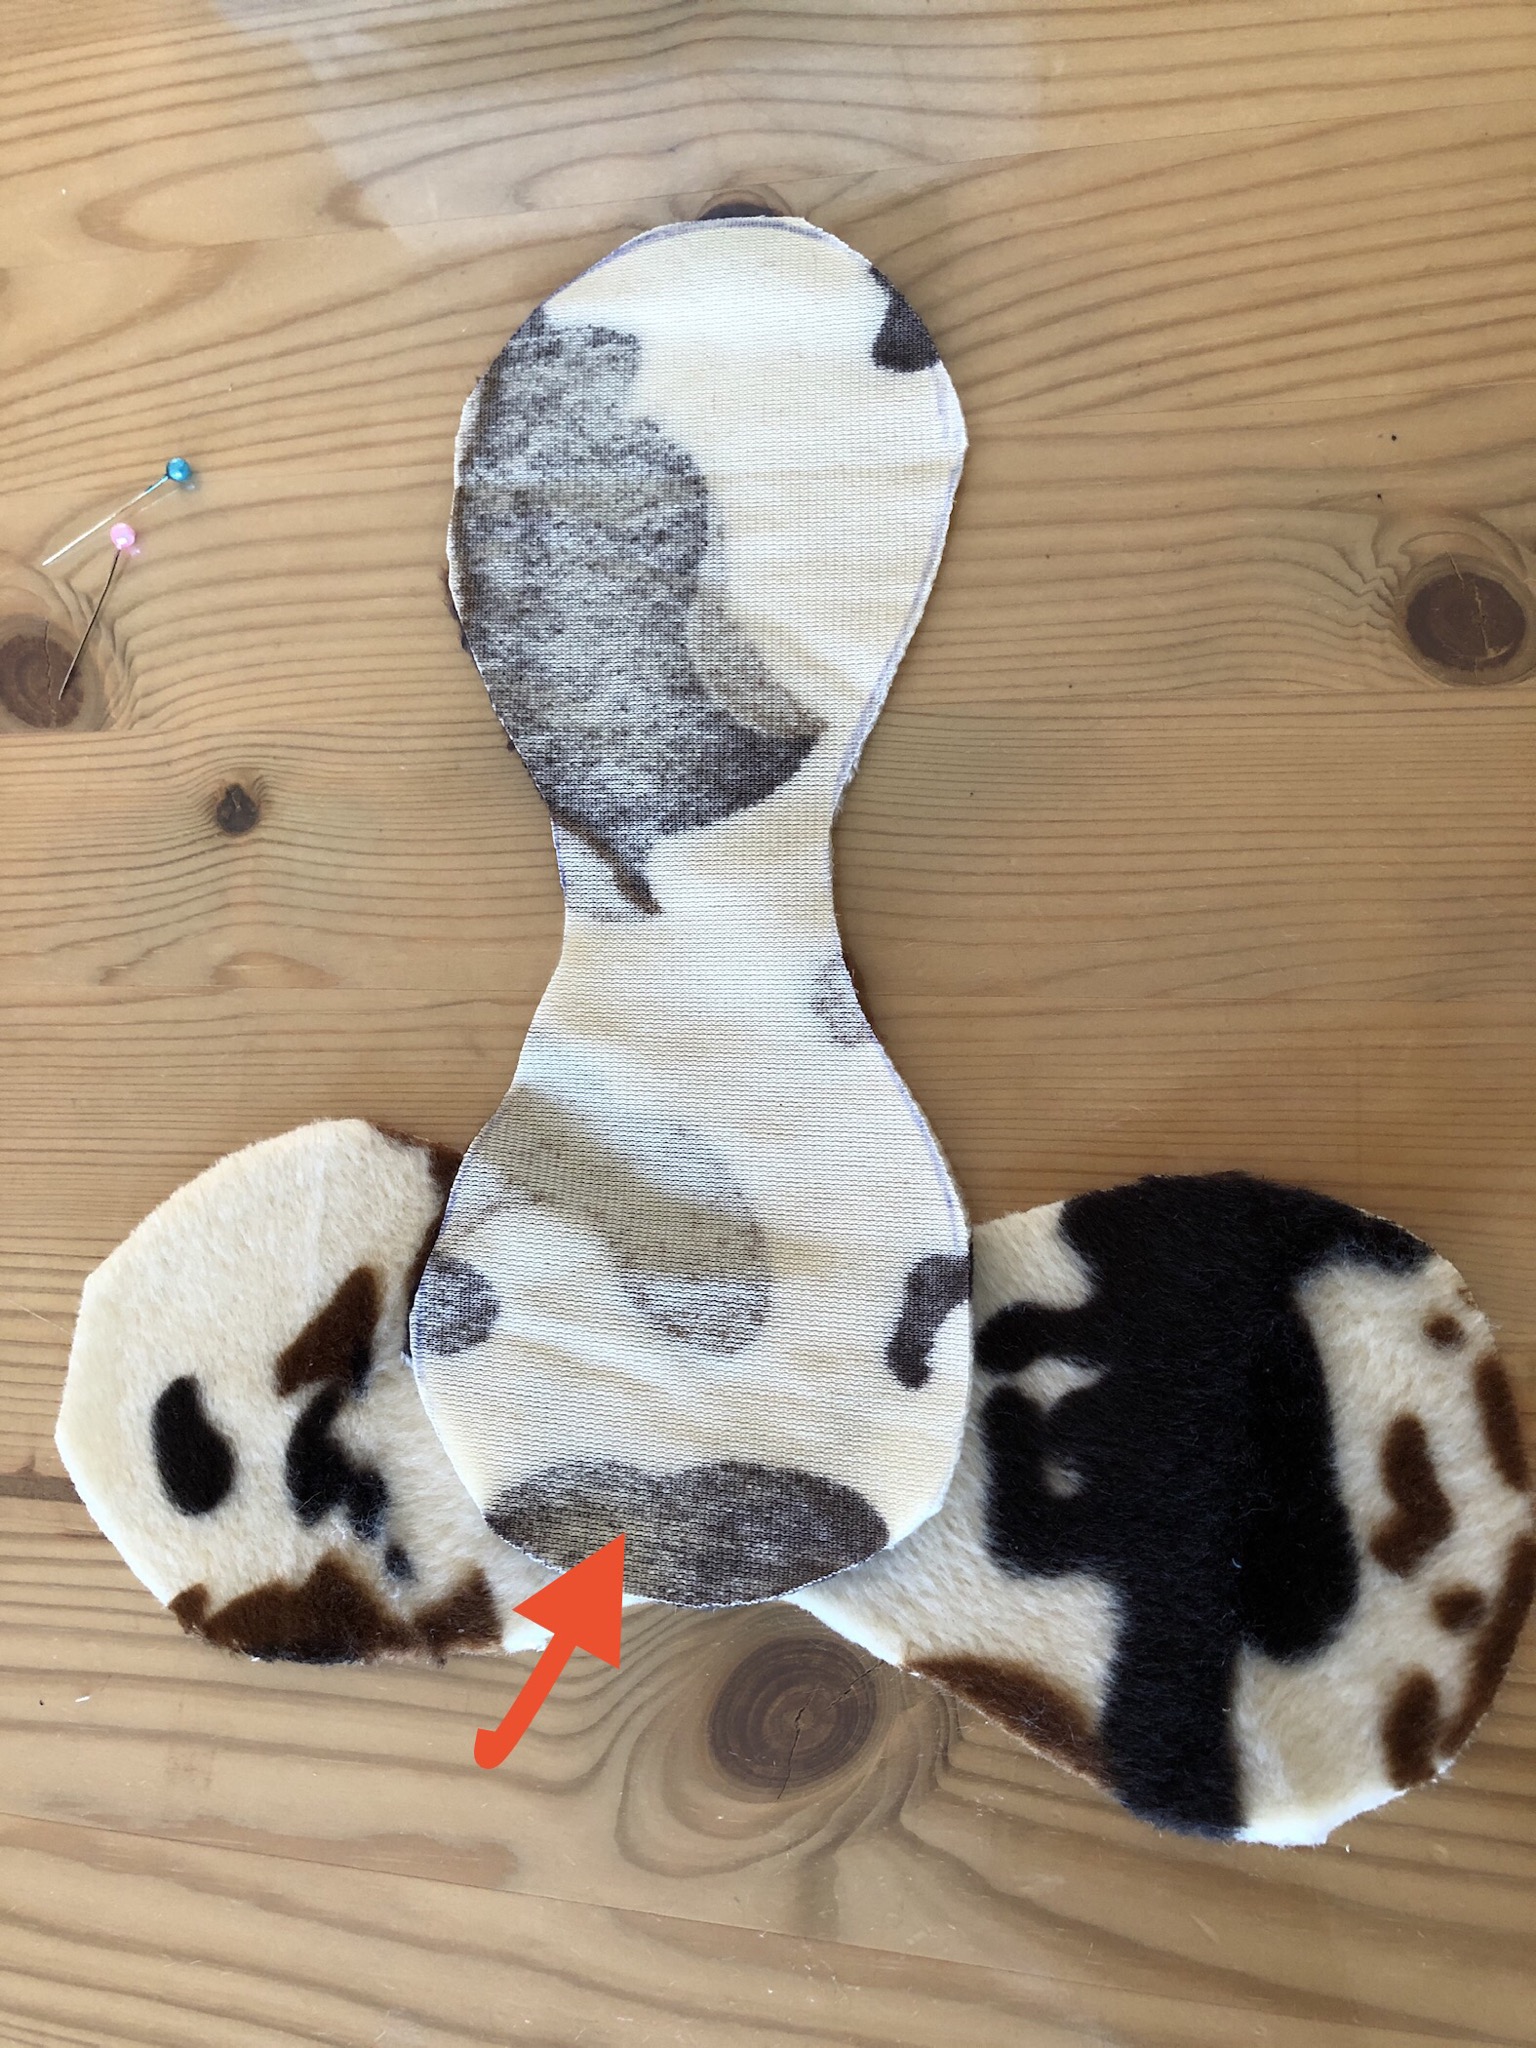
Put the fabric together and hold it together as above. At the arrow start sewing and always slowly push the upper fabric edge onto the bottom that the two edges are sewn nicely to each other.

Look at the picture!
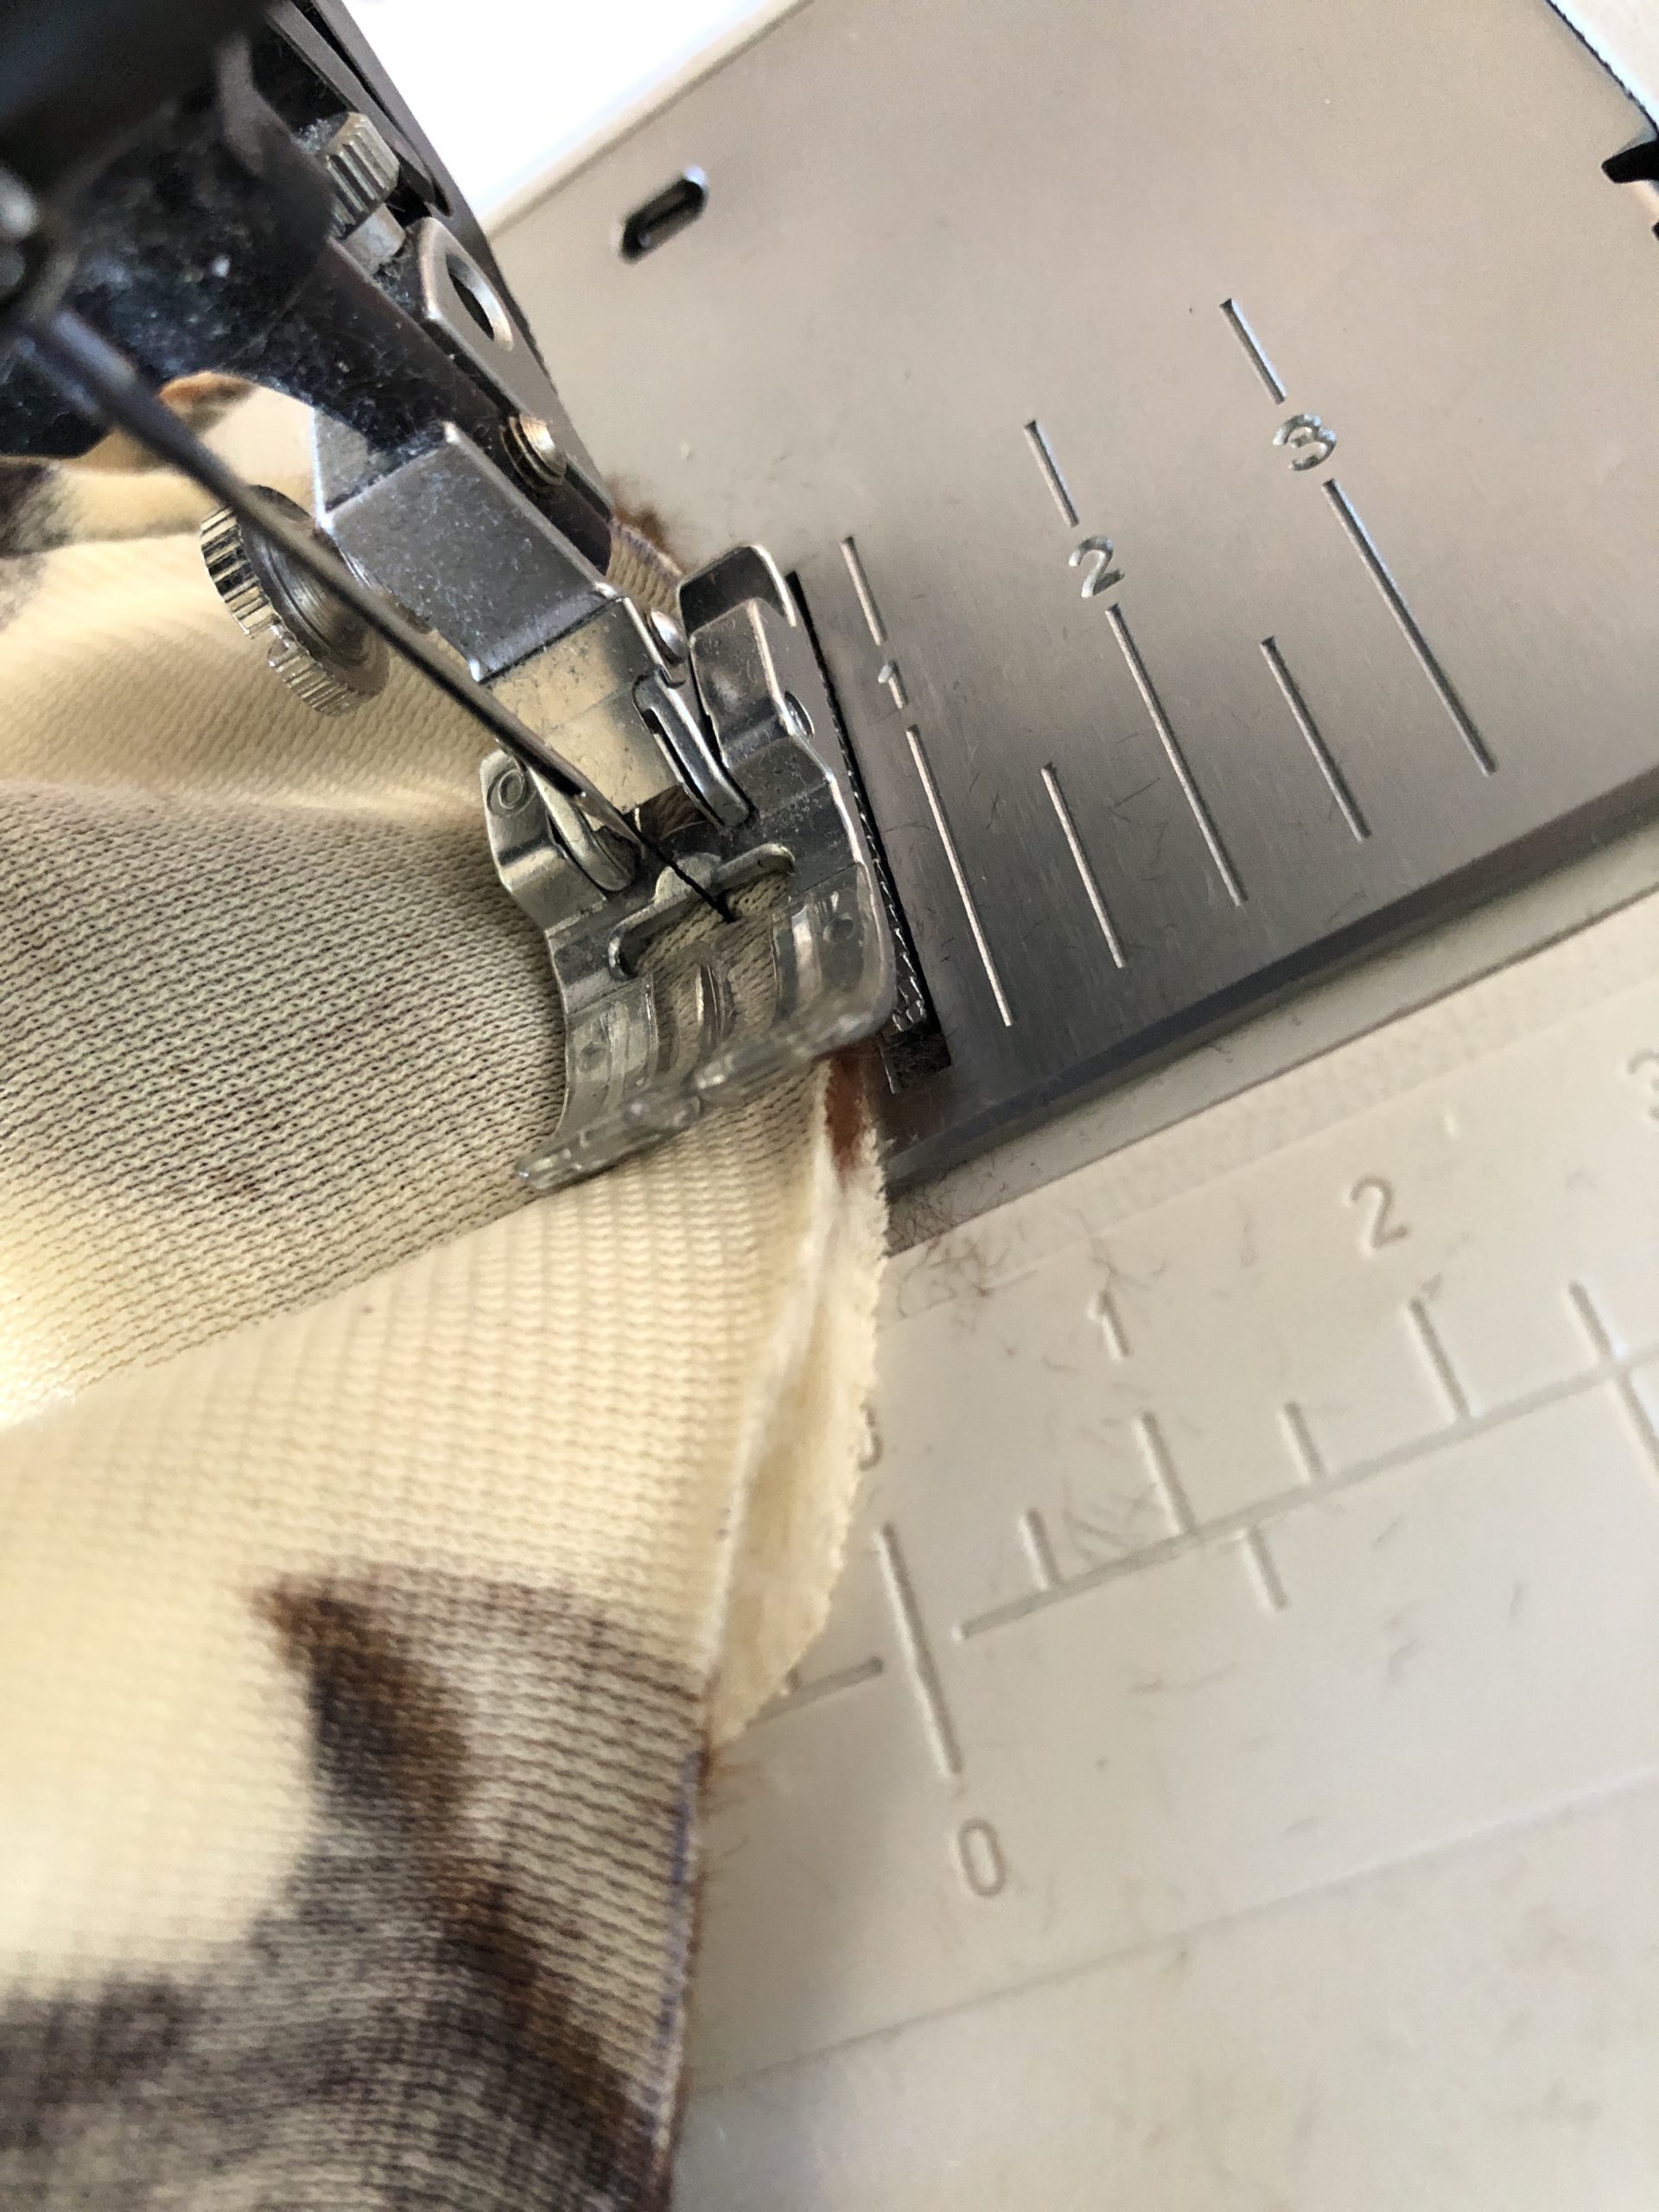
This creates an evenly sewn edge!
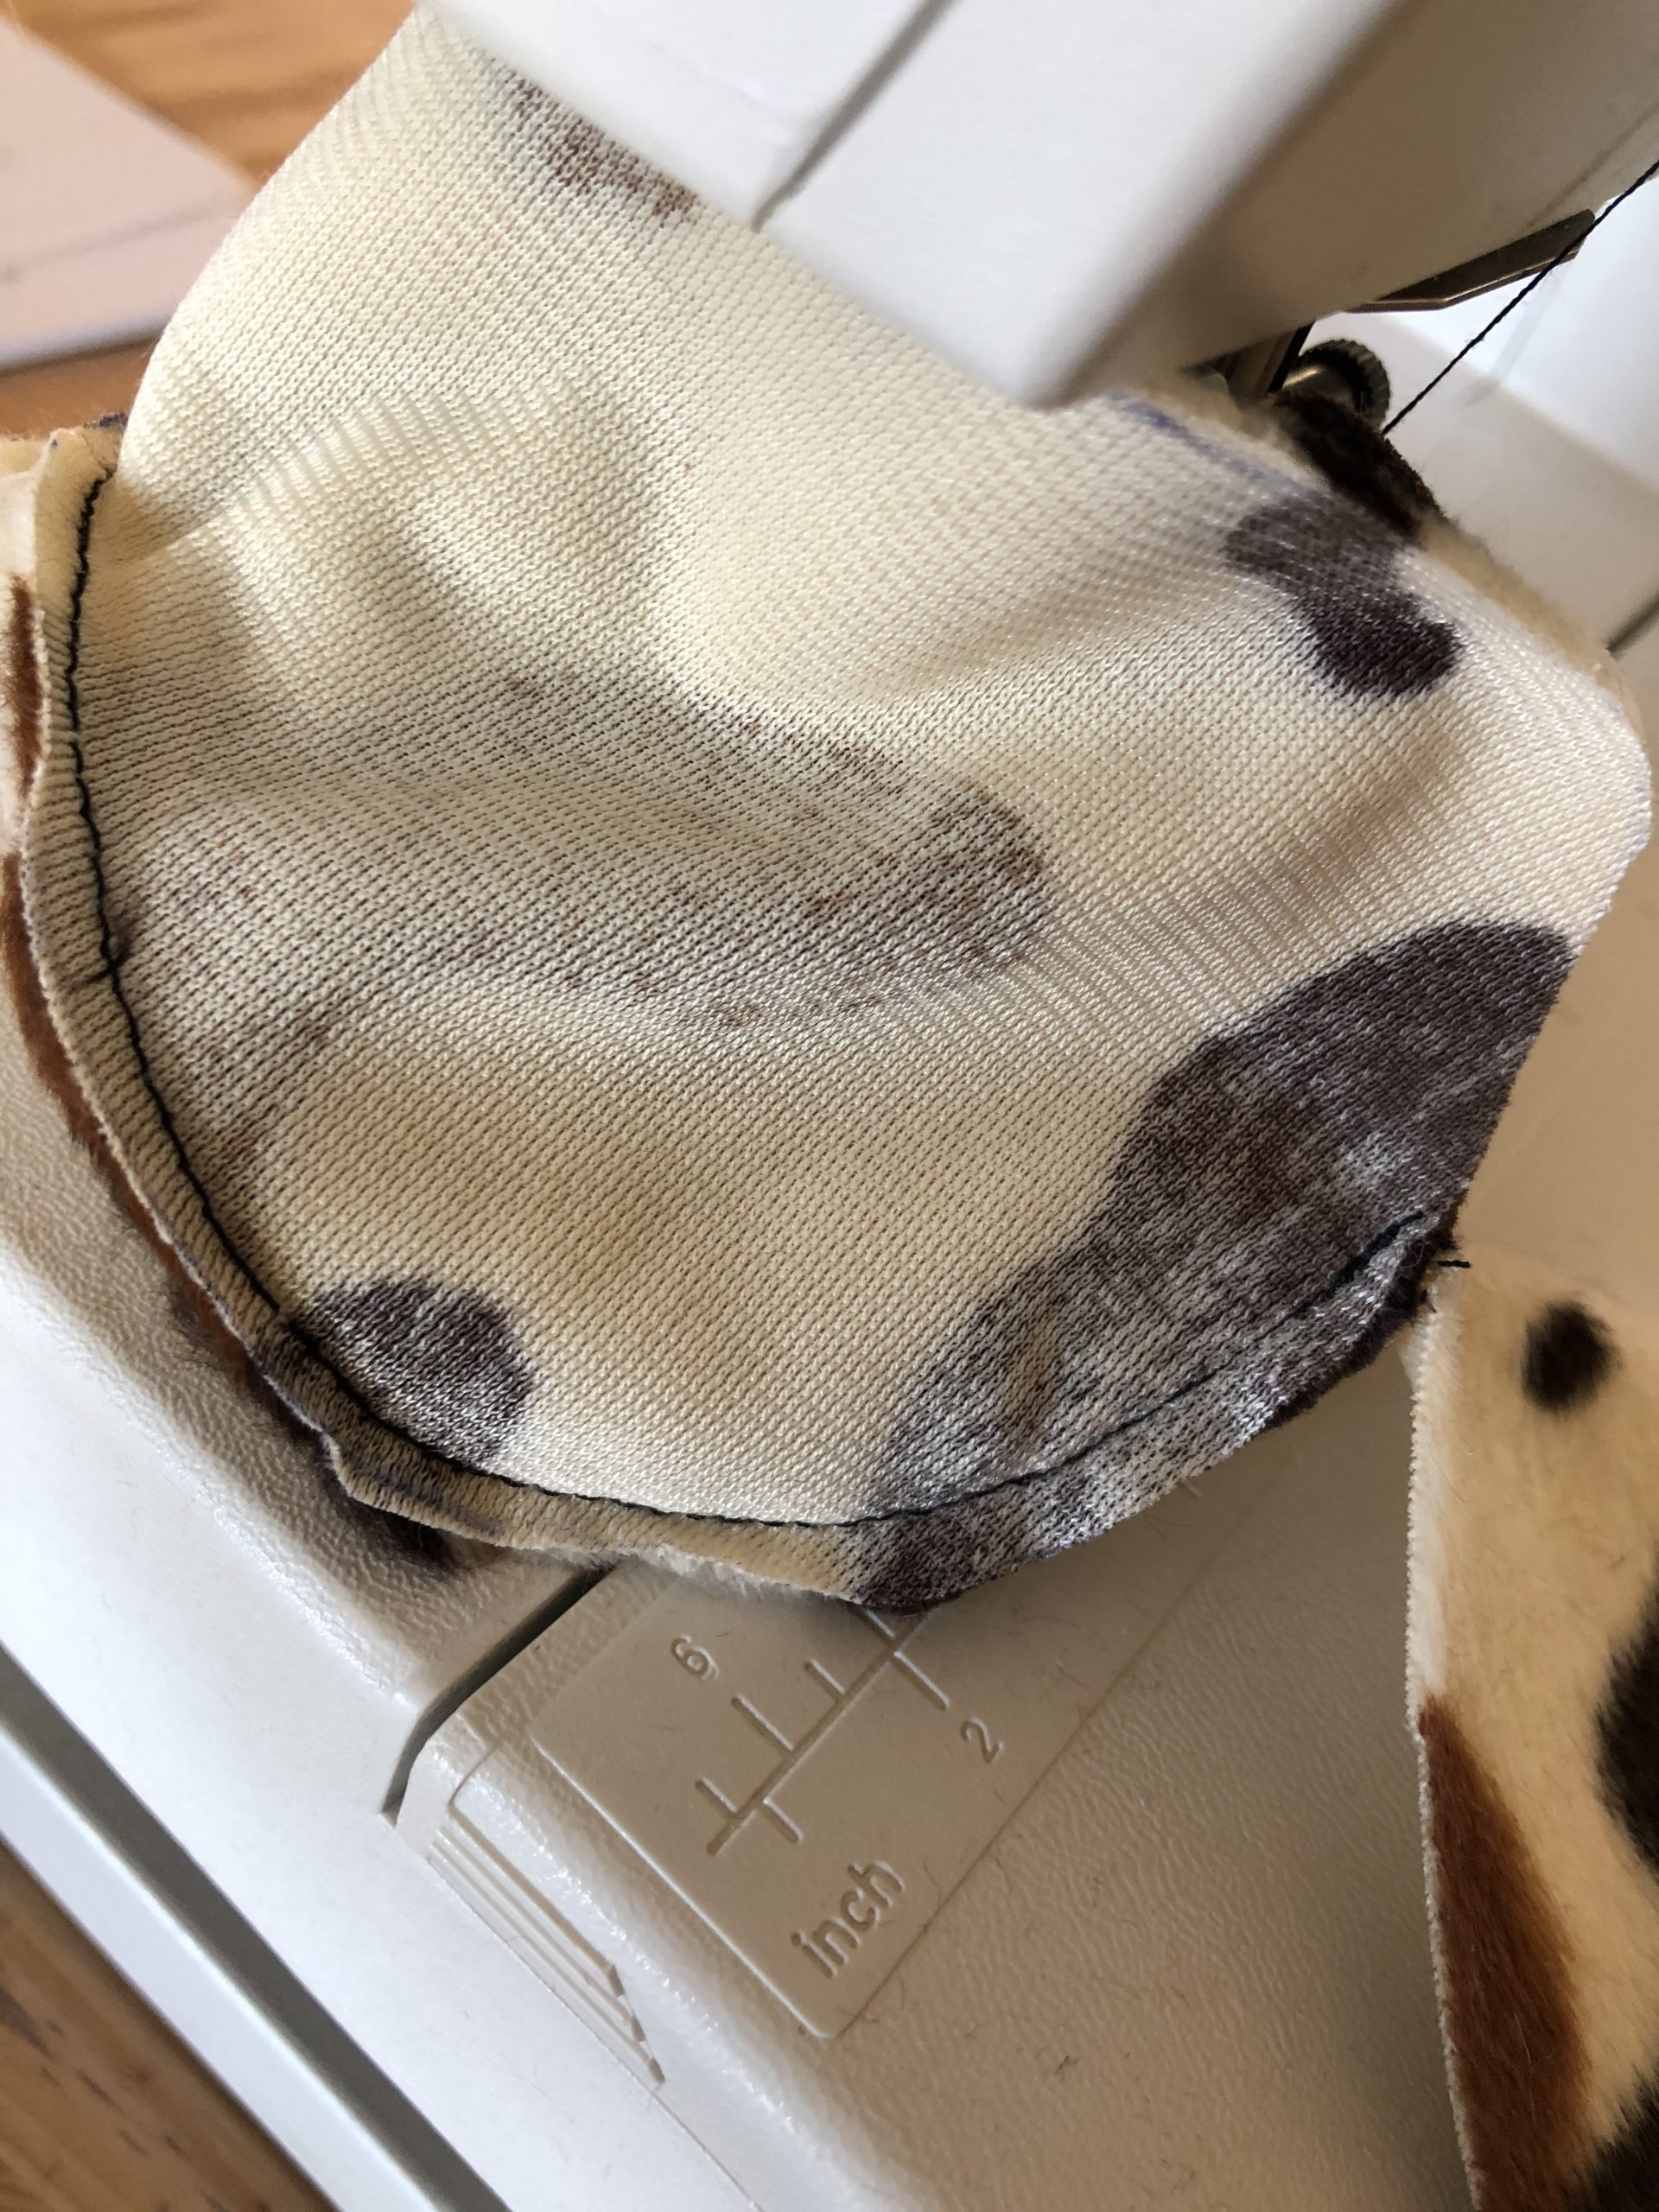
Continue to sew until only a small turning opening (approx. 2-3 cm) is open.
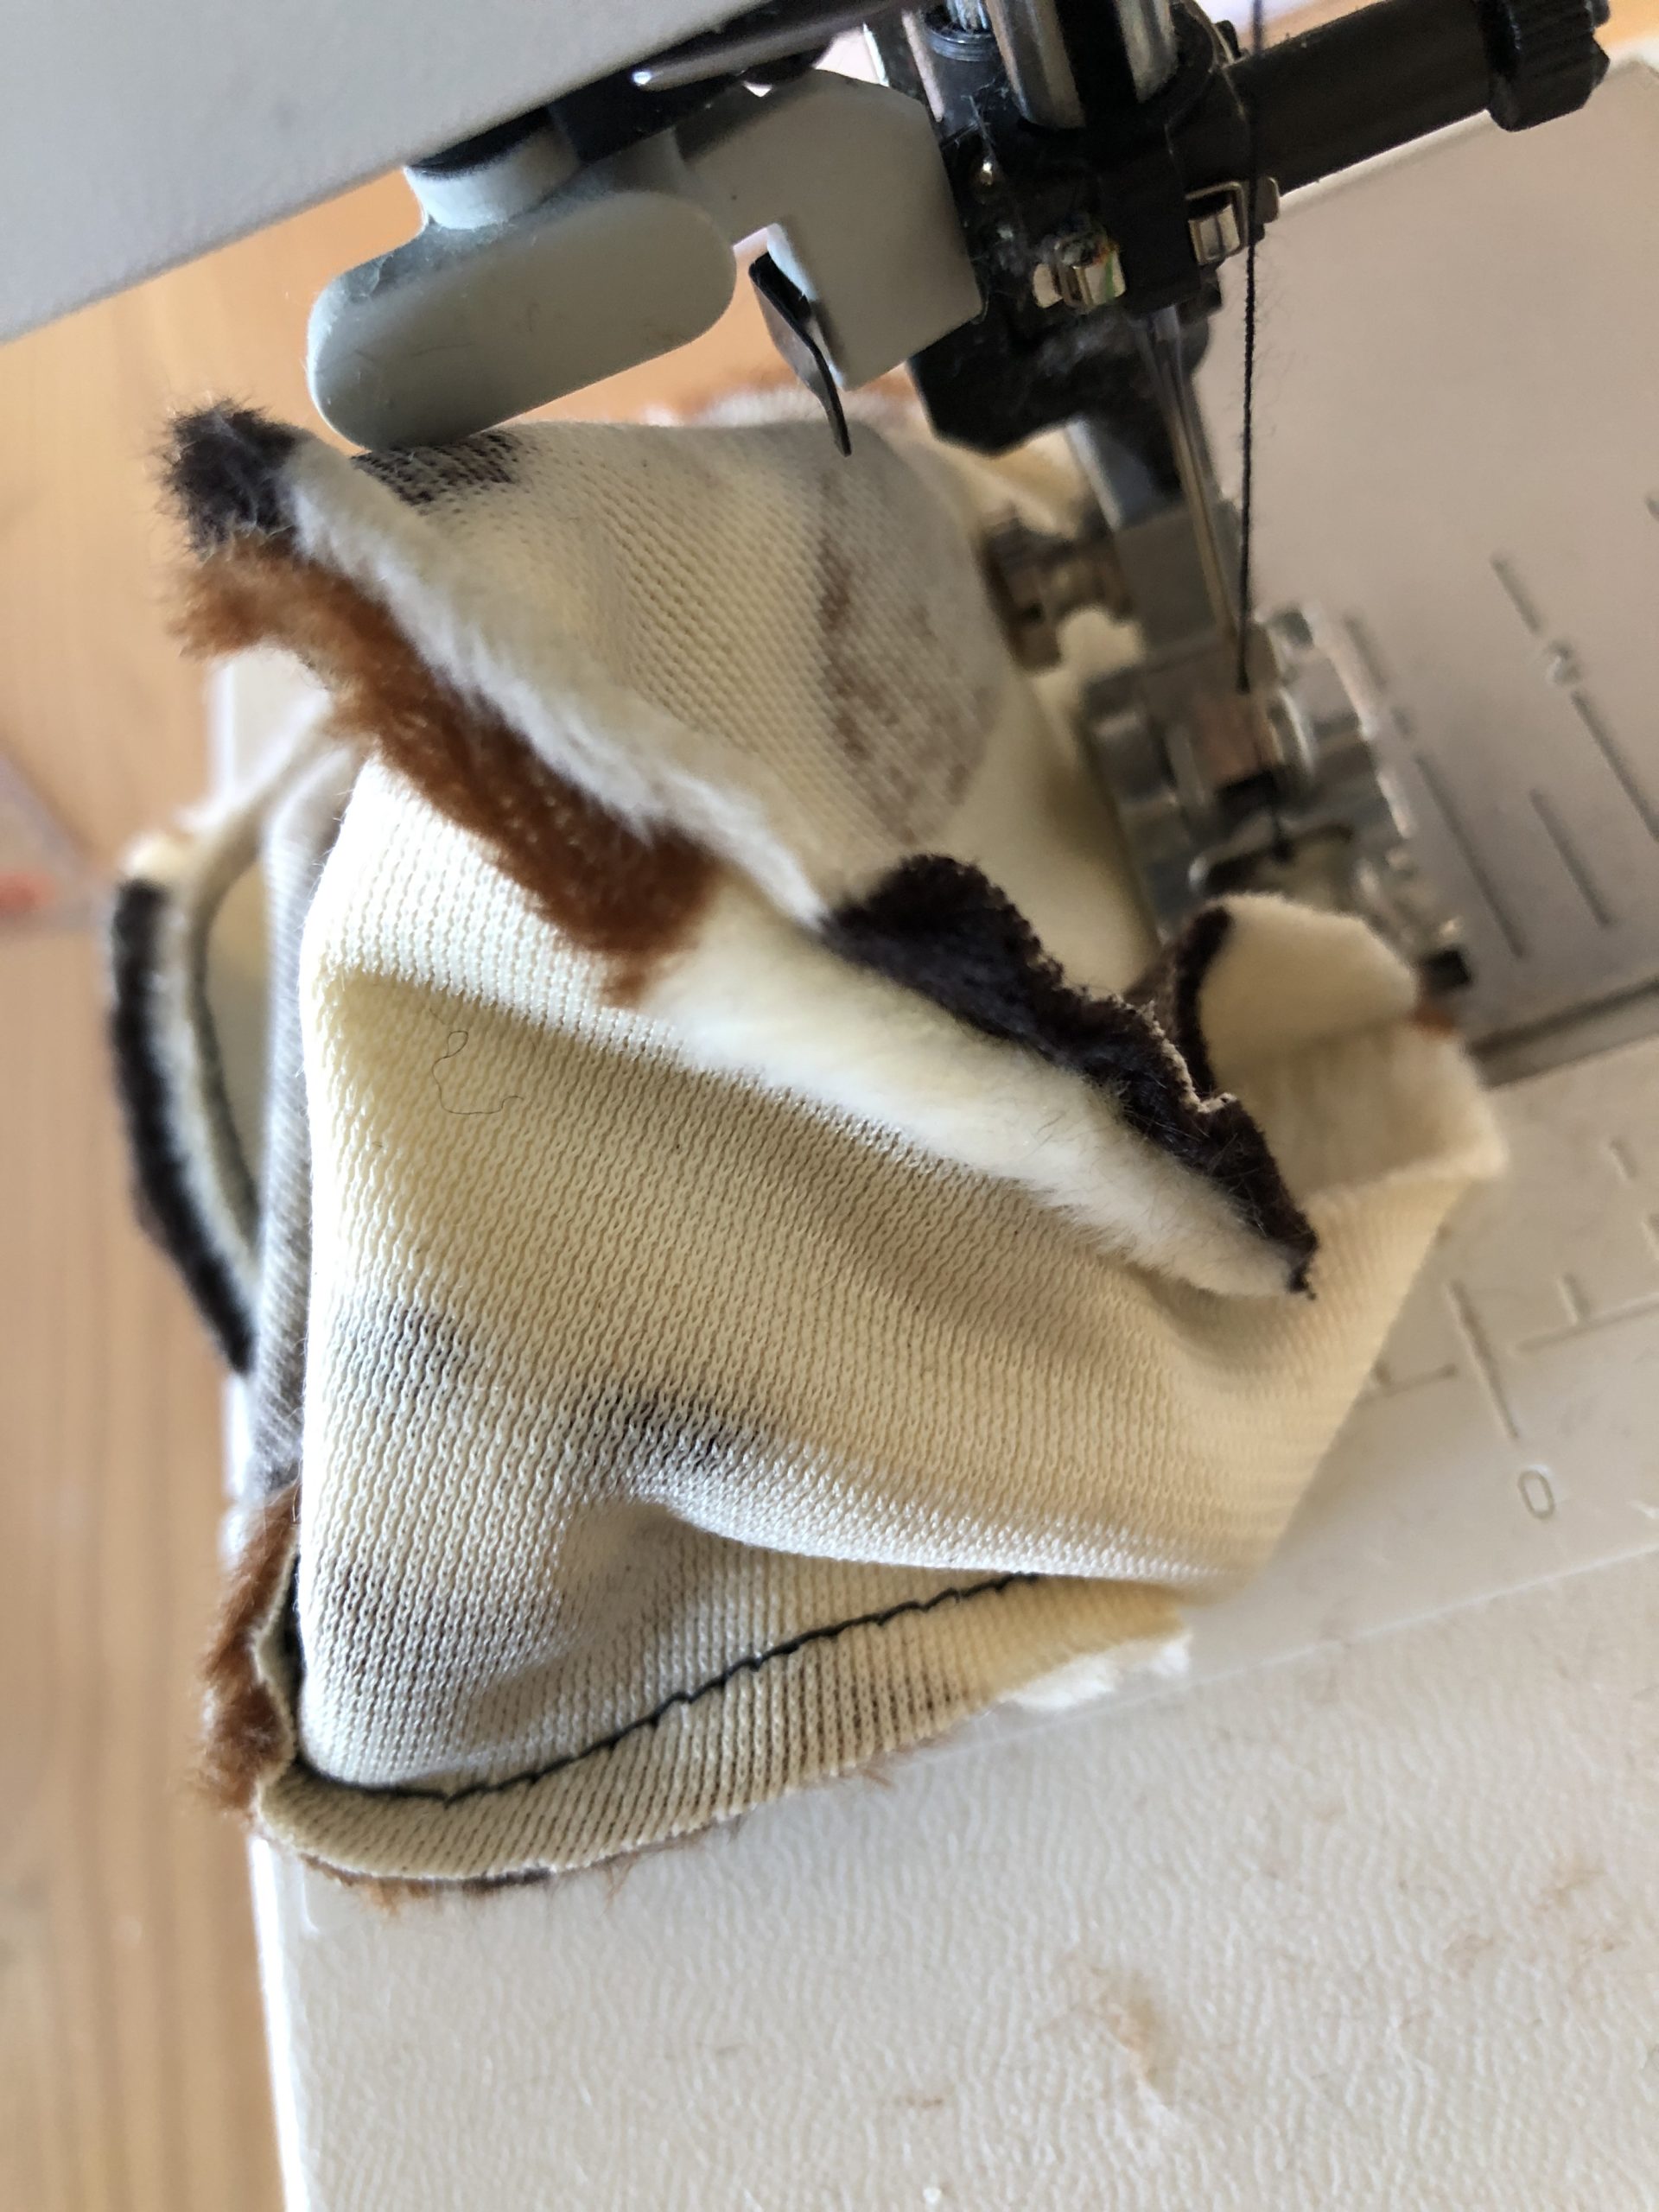
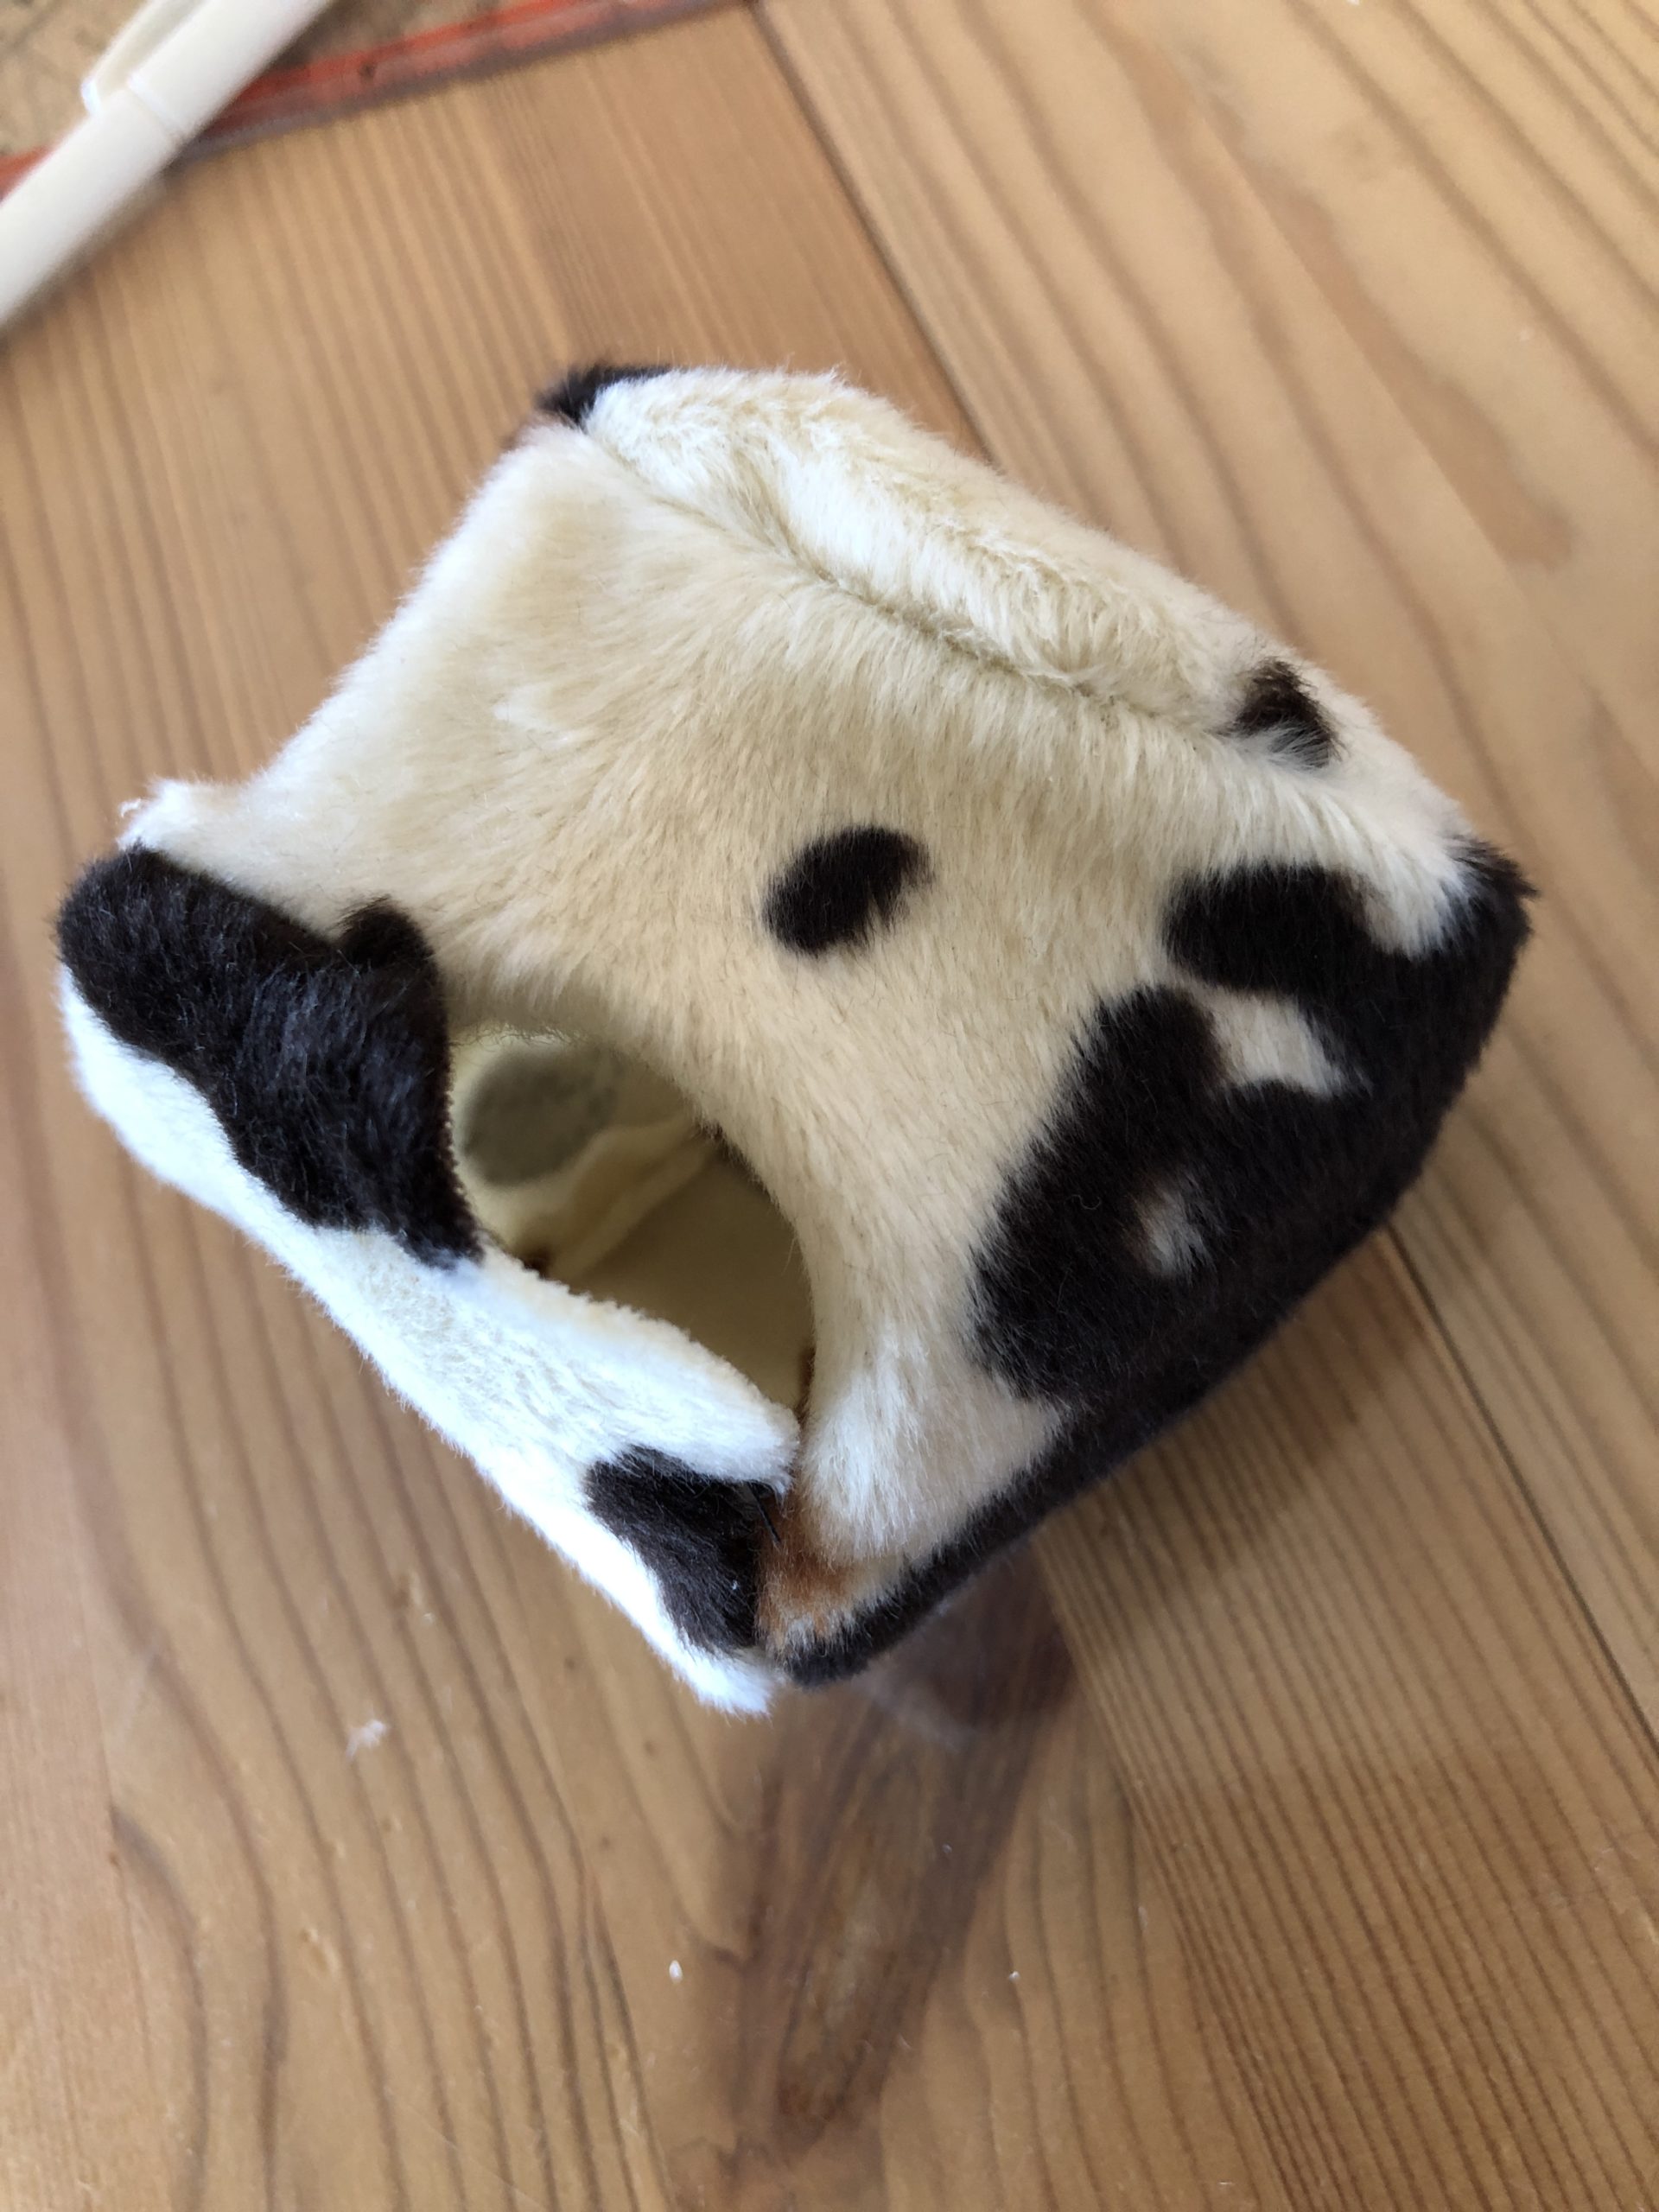
Turn the fabric through the opening.
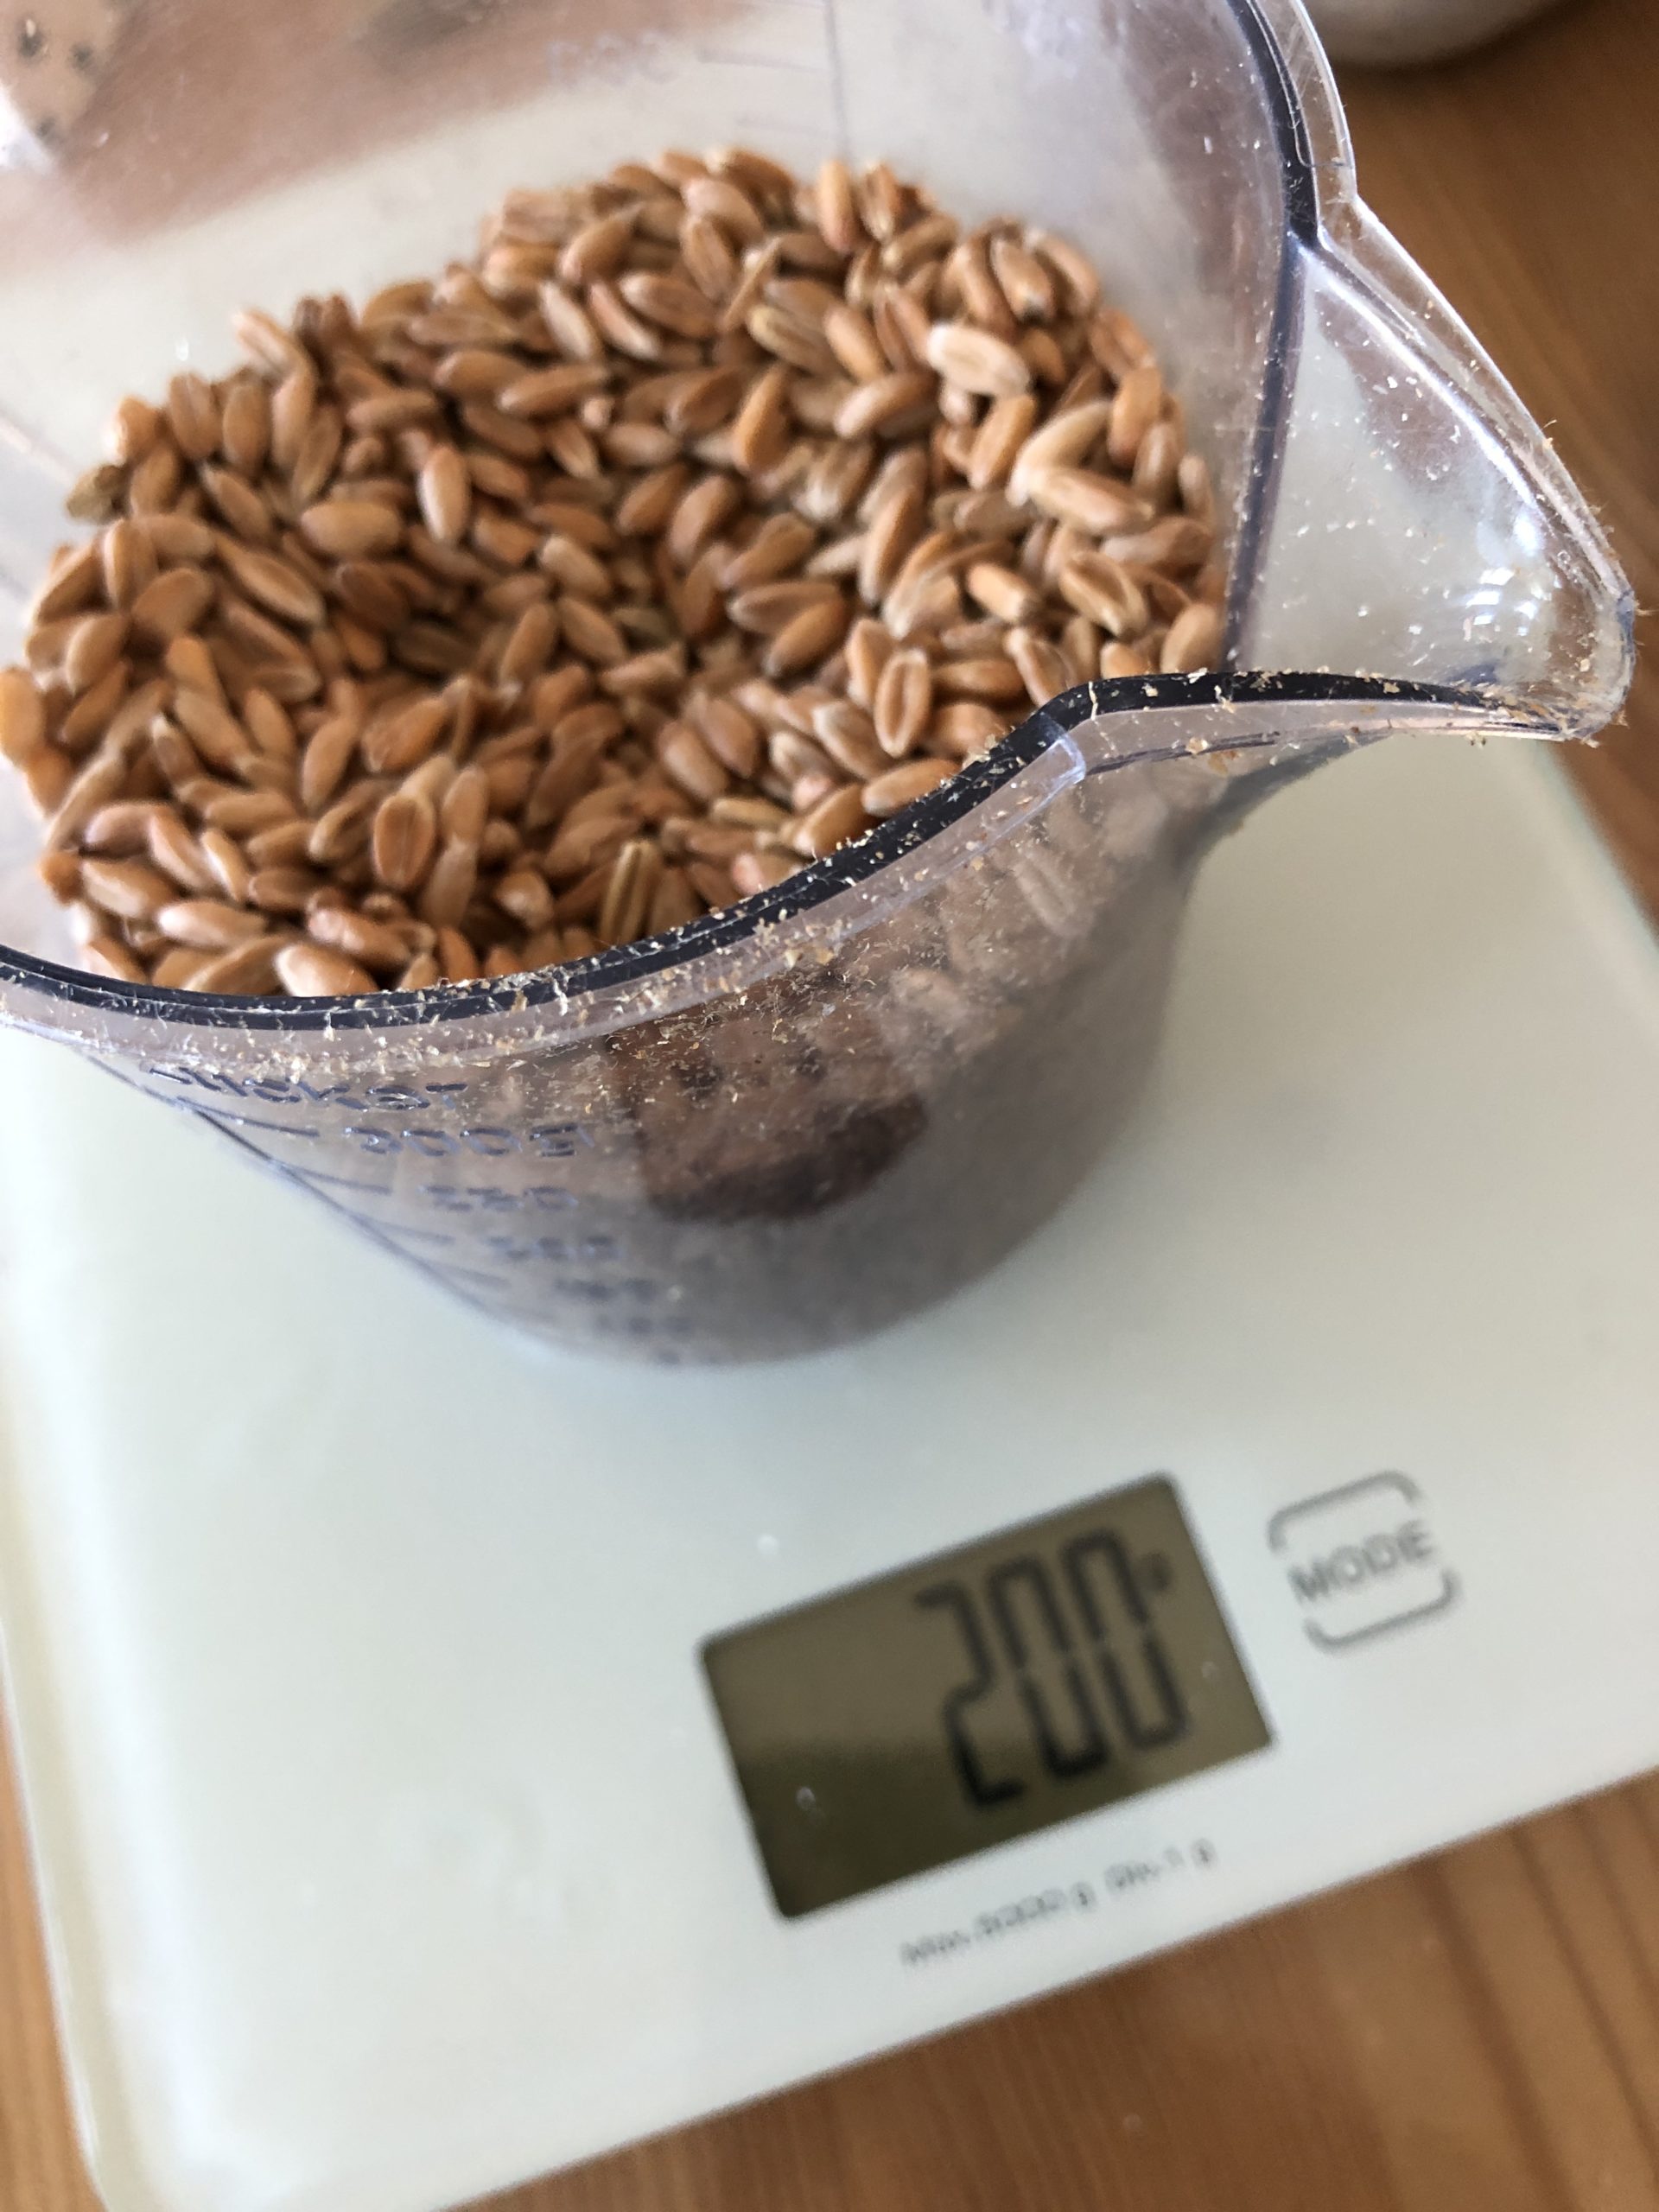
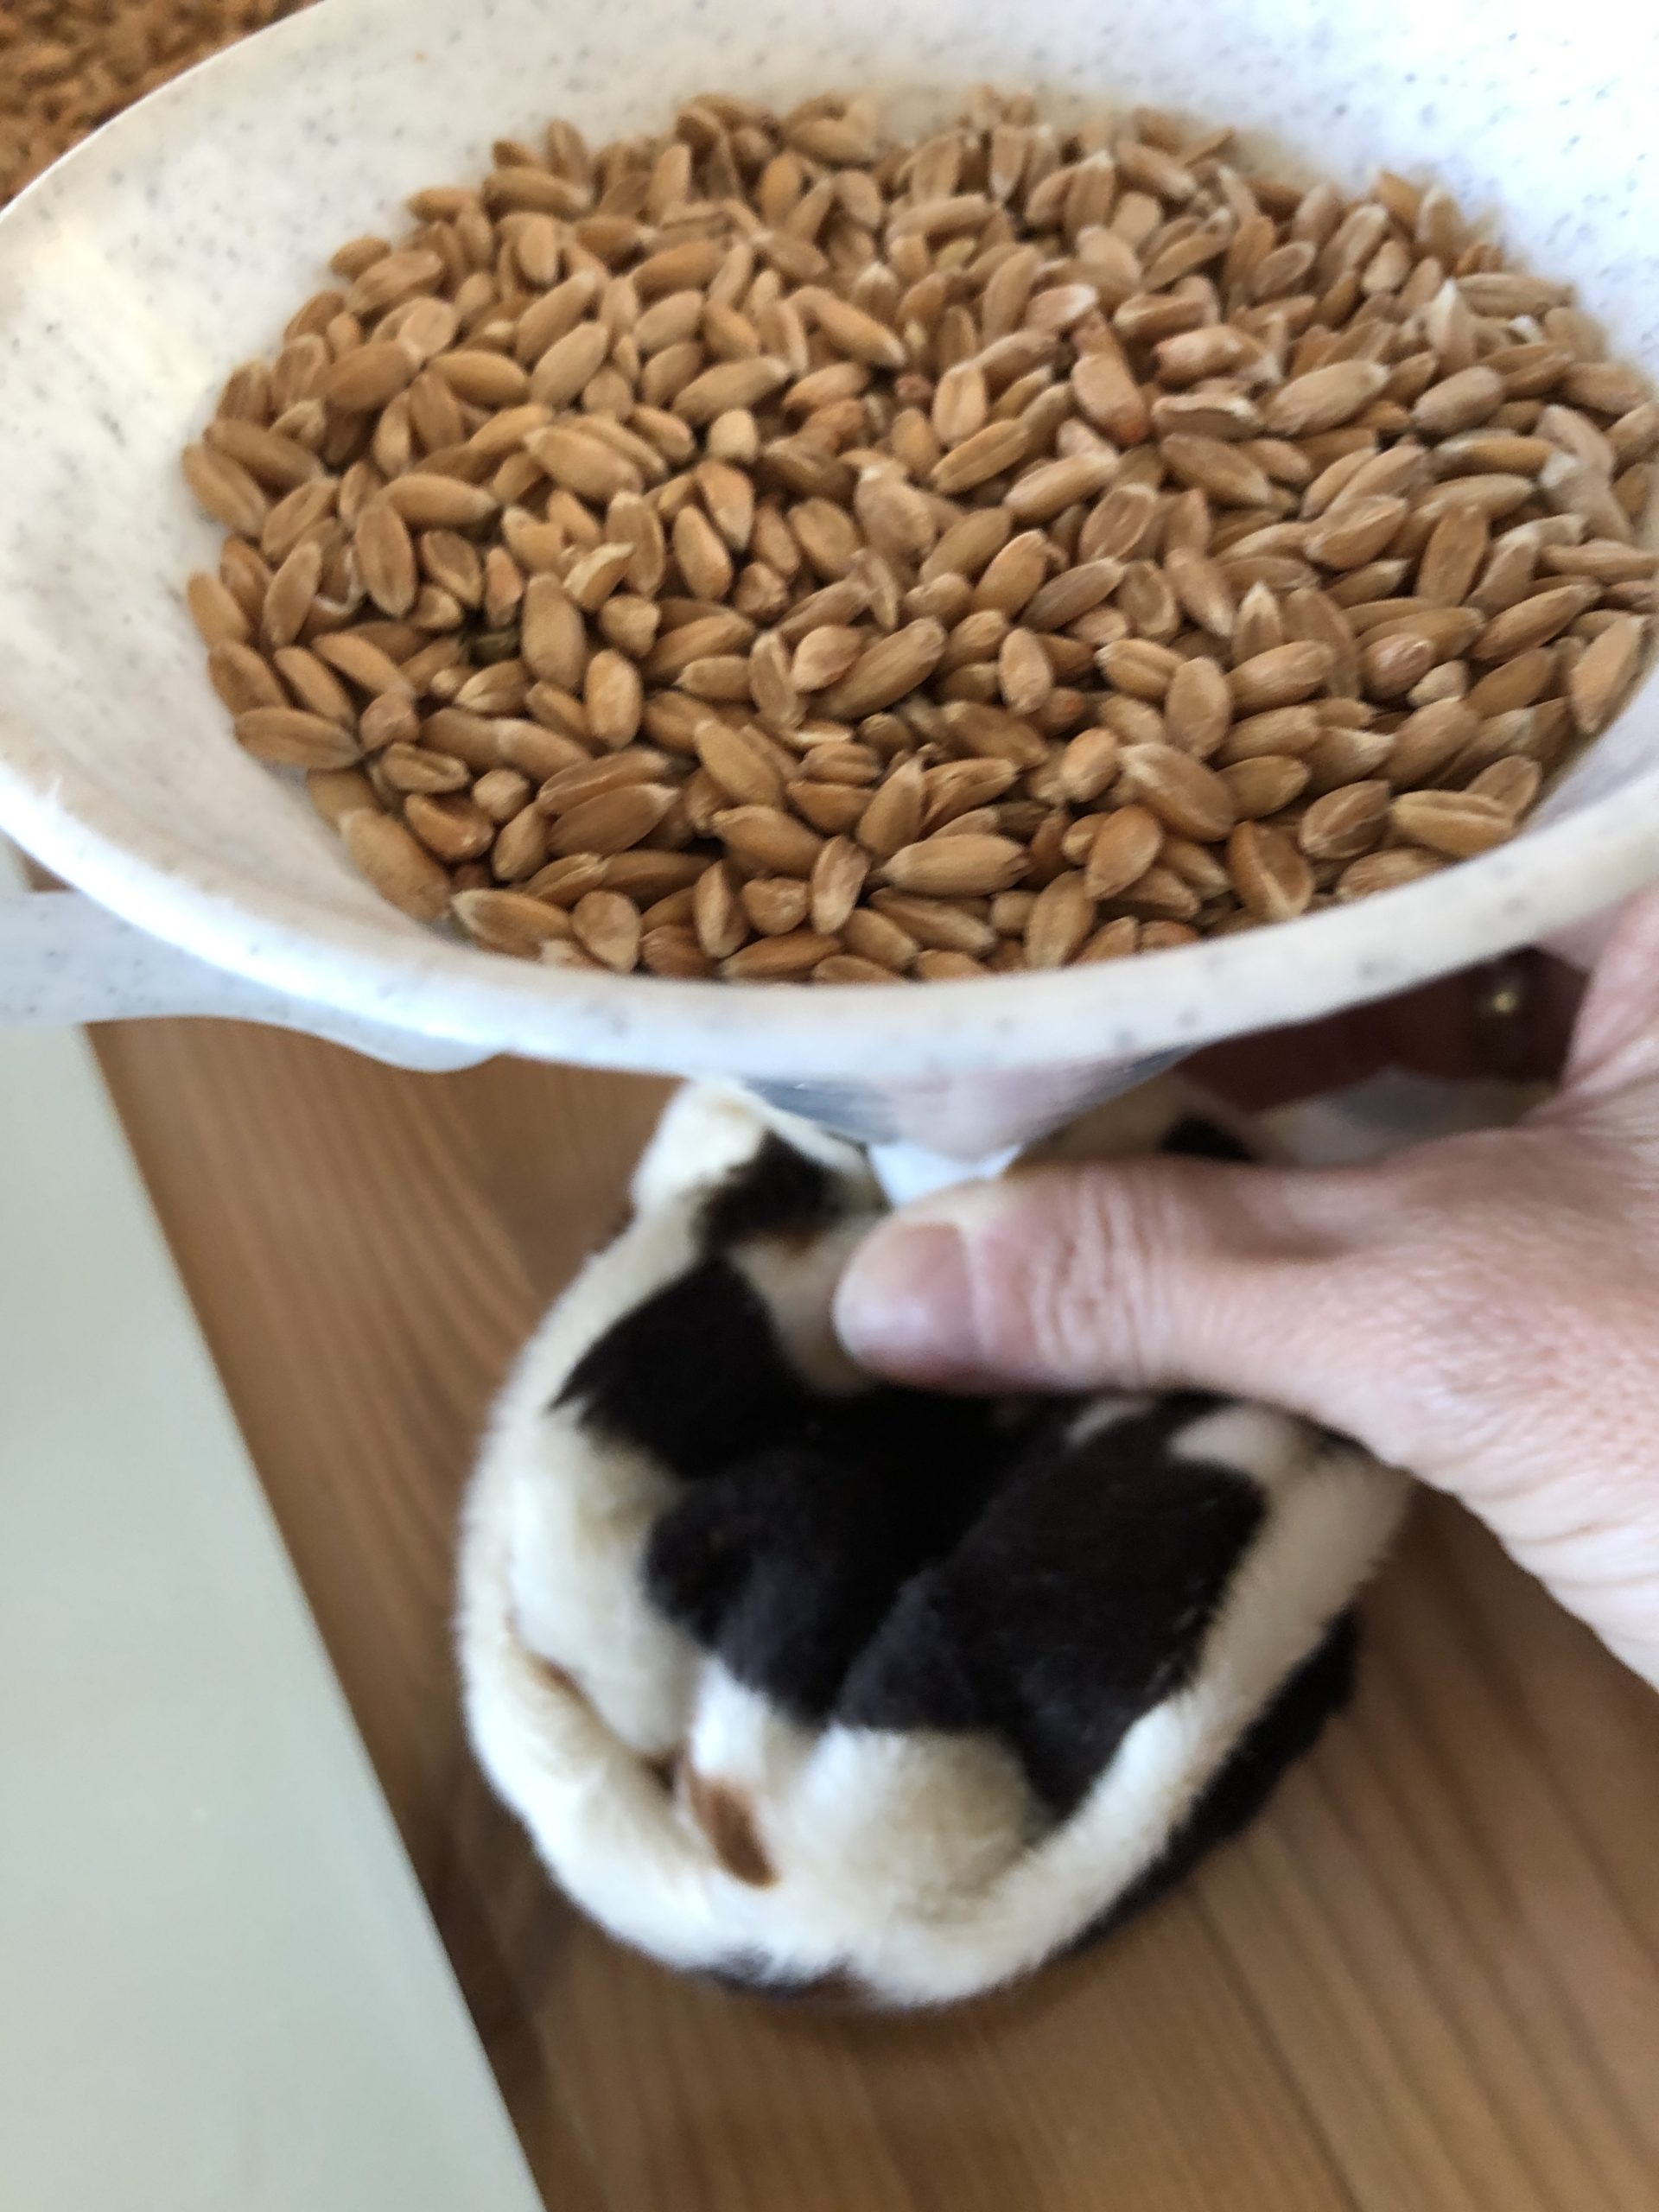
Weigh about 200g spelt (or rice) and fill into the ball.
The best way to do this is to use a funnel.
Evaluate the filling amount yourself... depending on how heavy or bulging the ball is going to be!
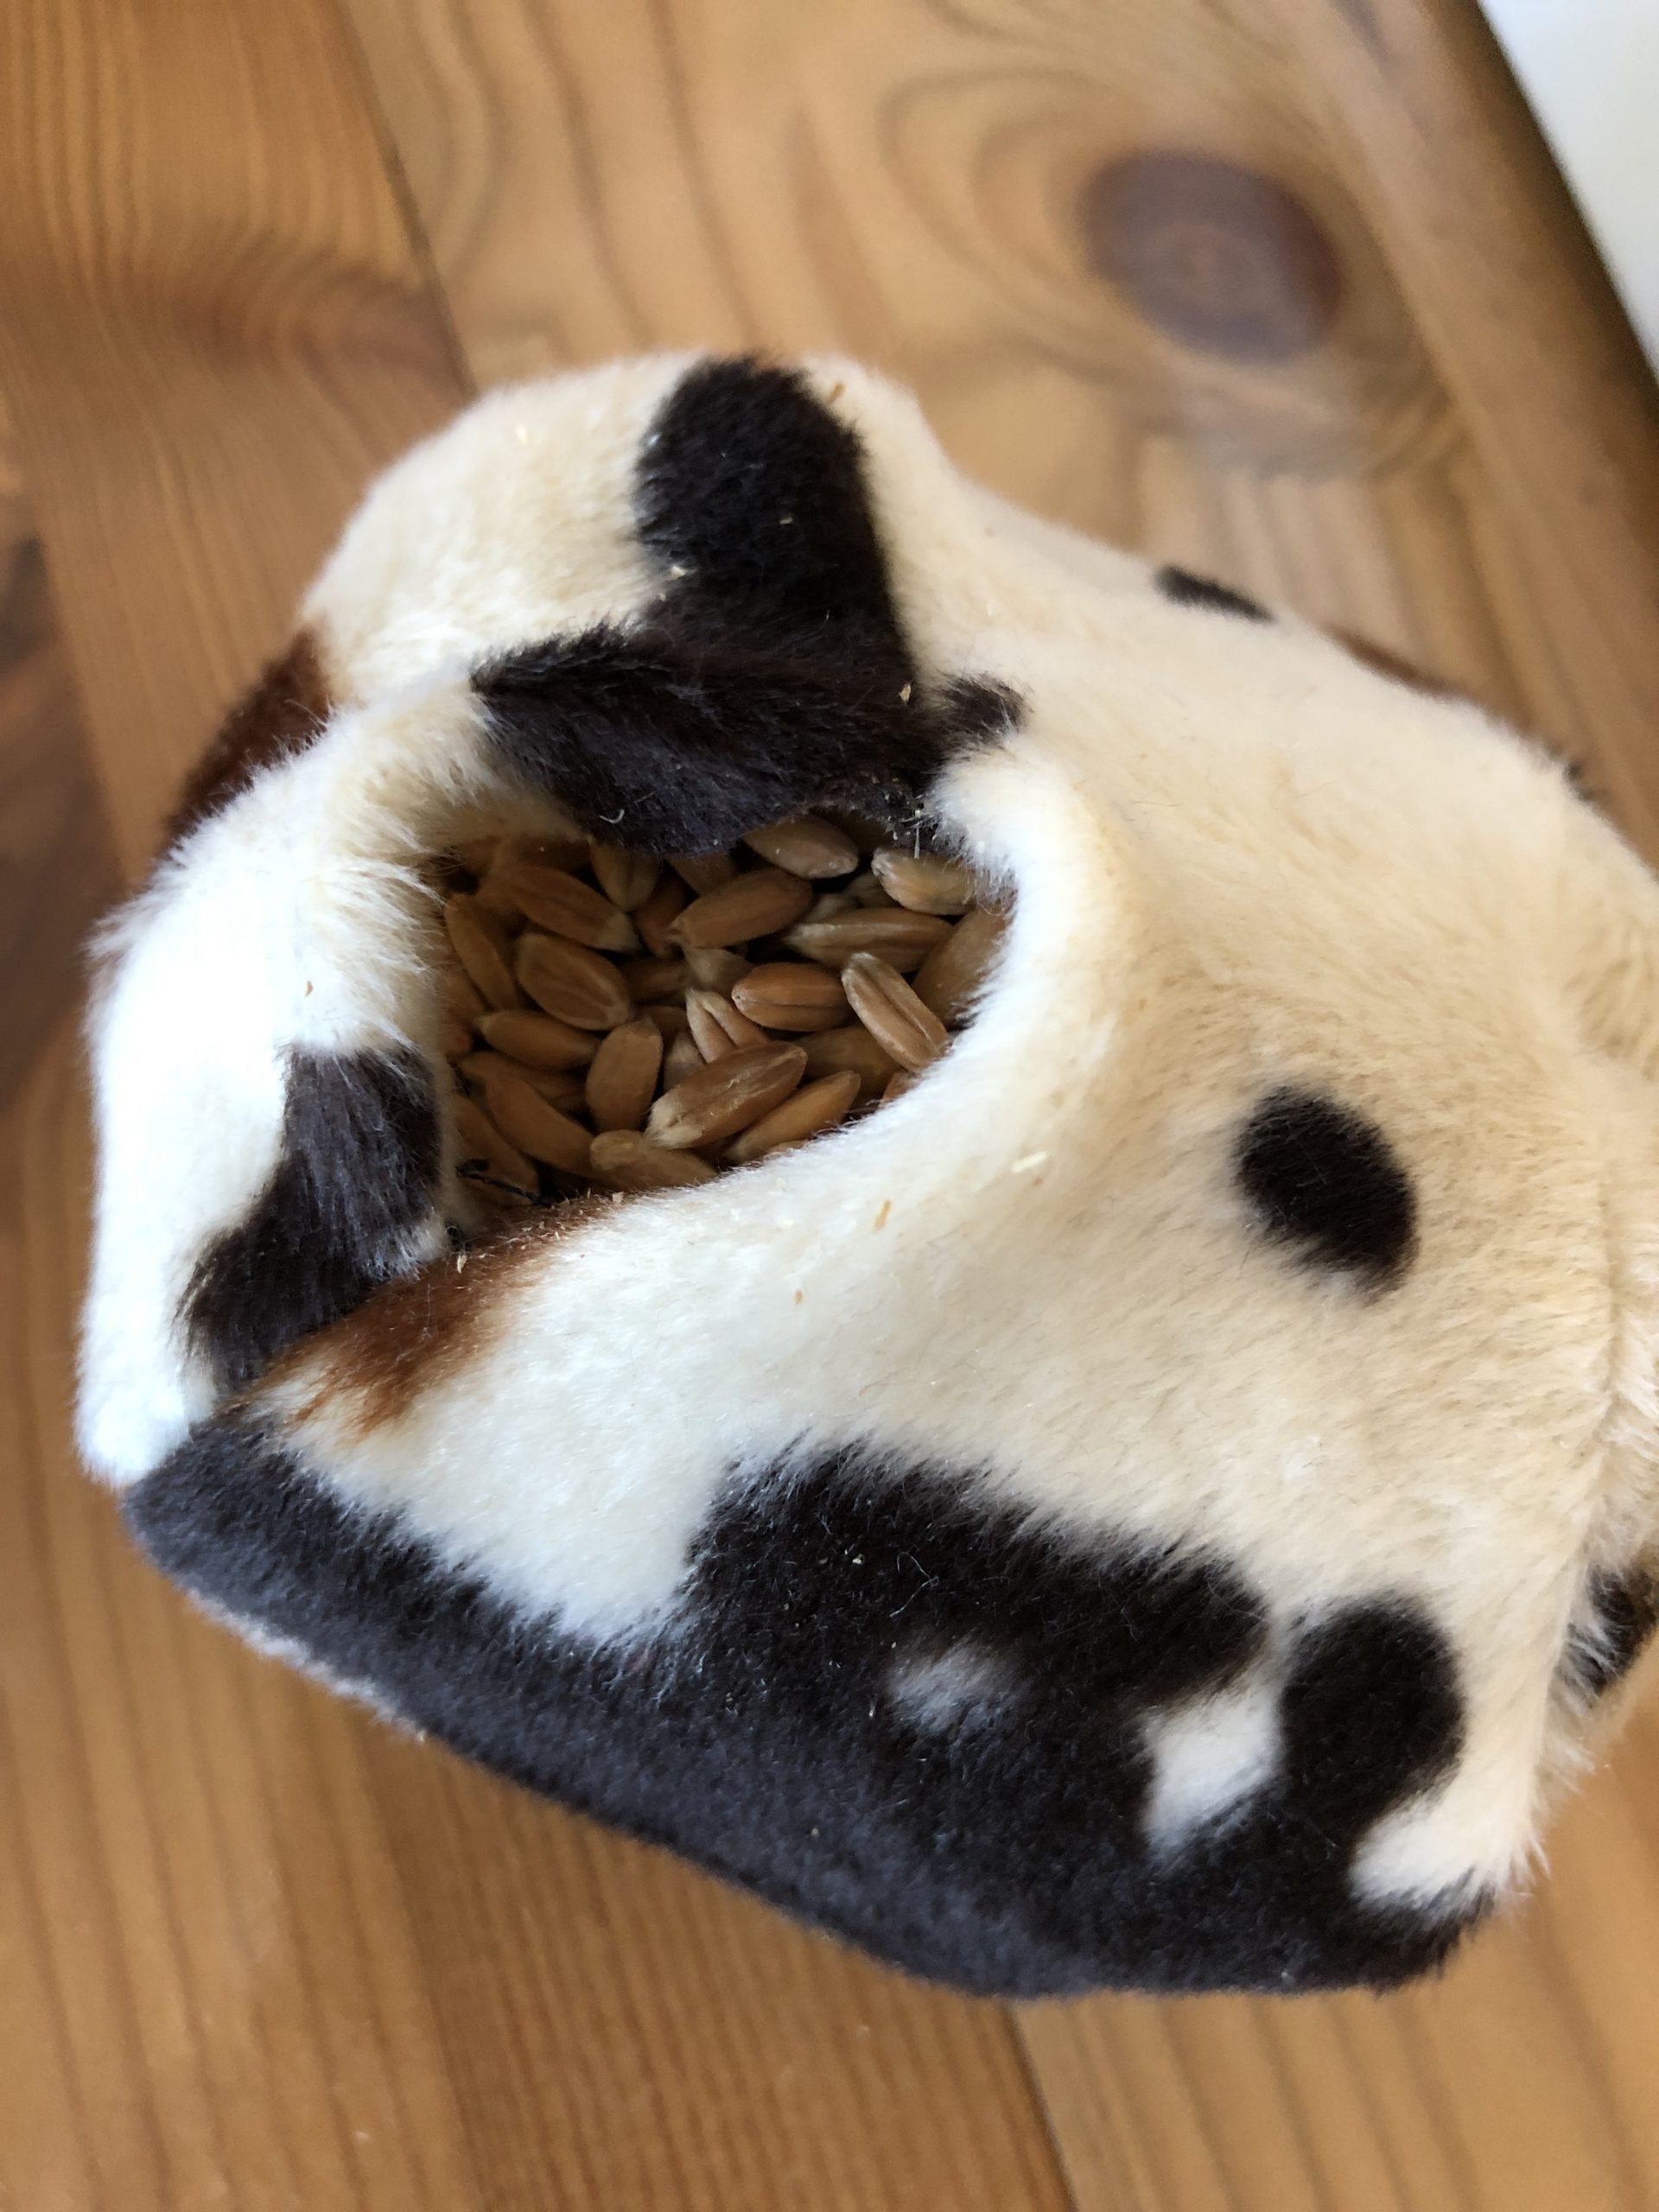
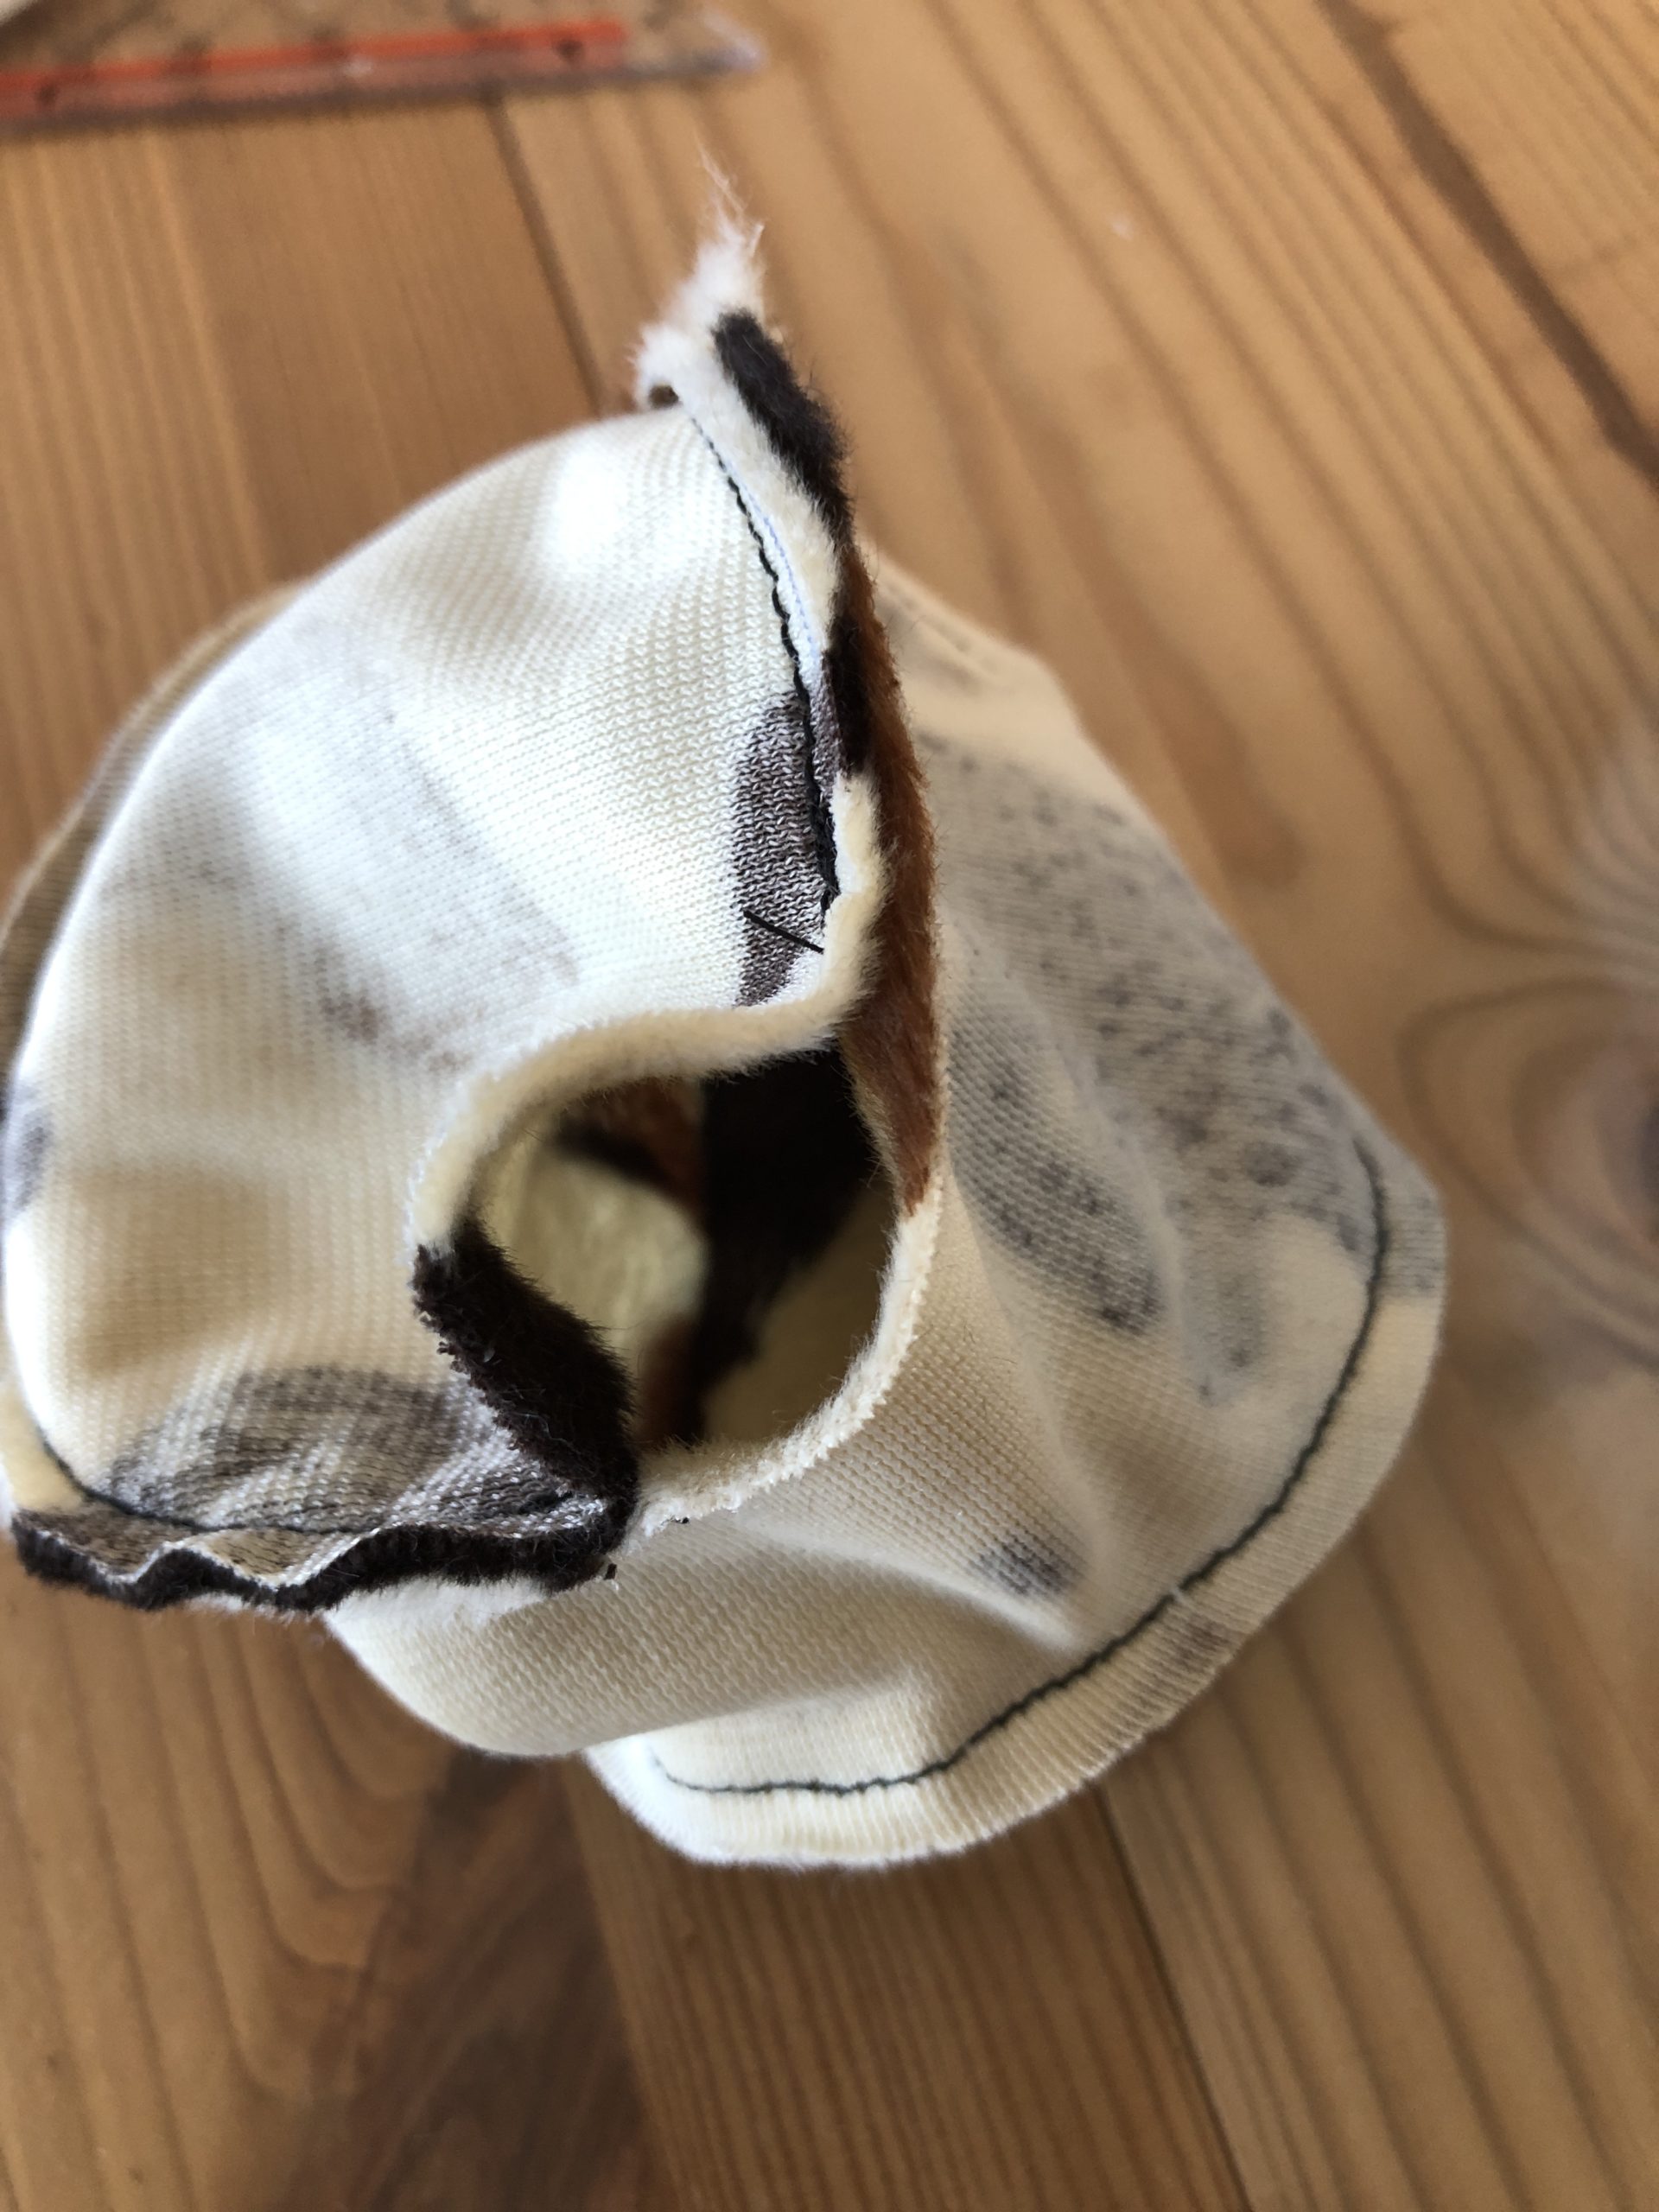
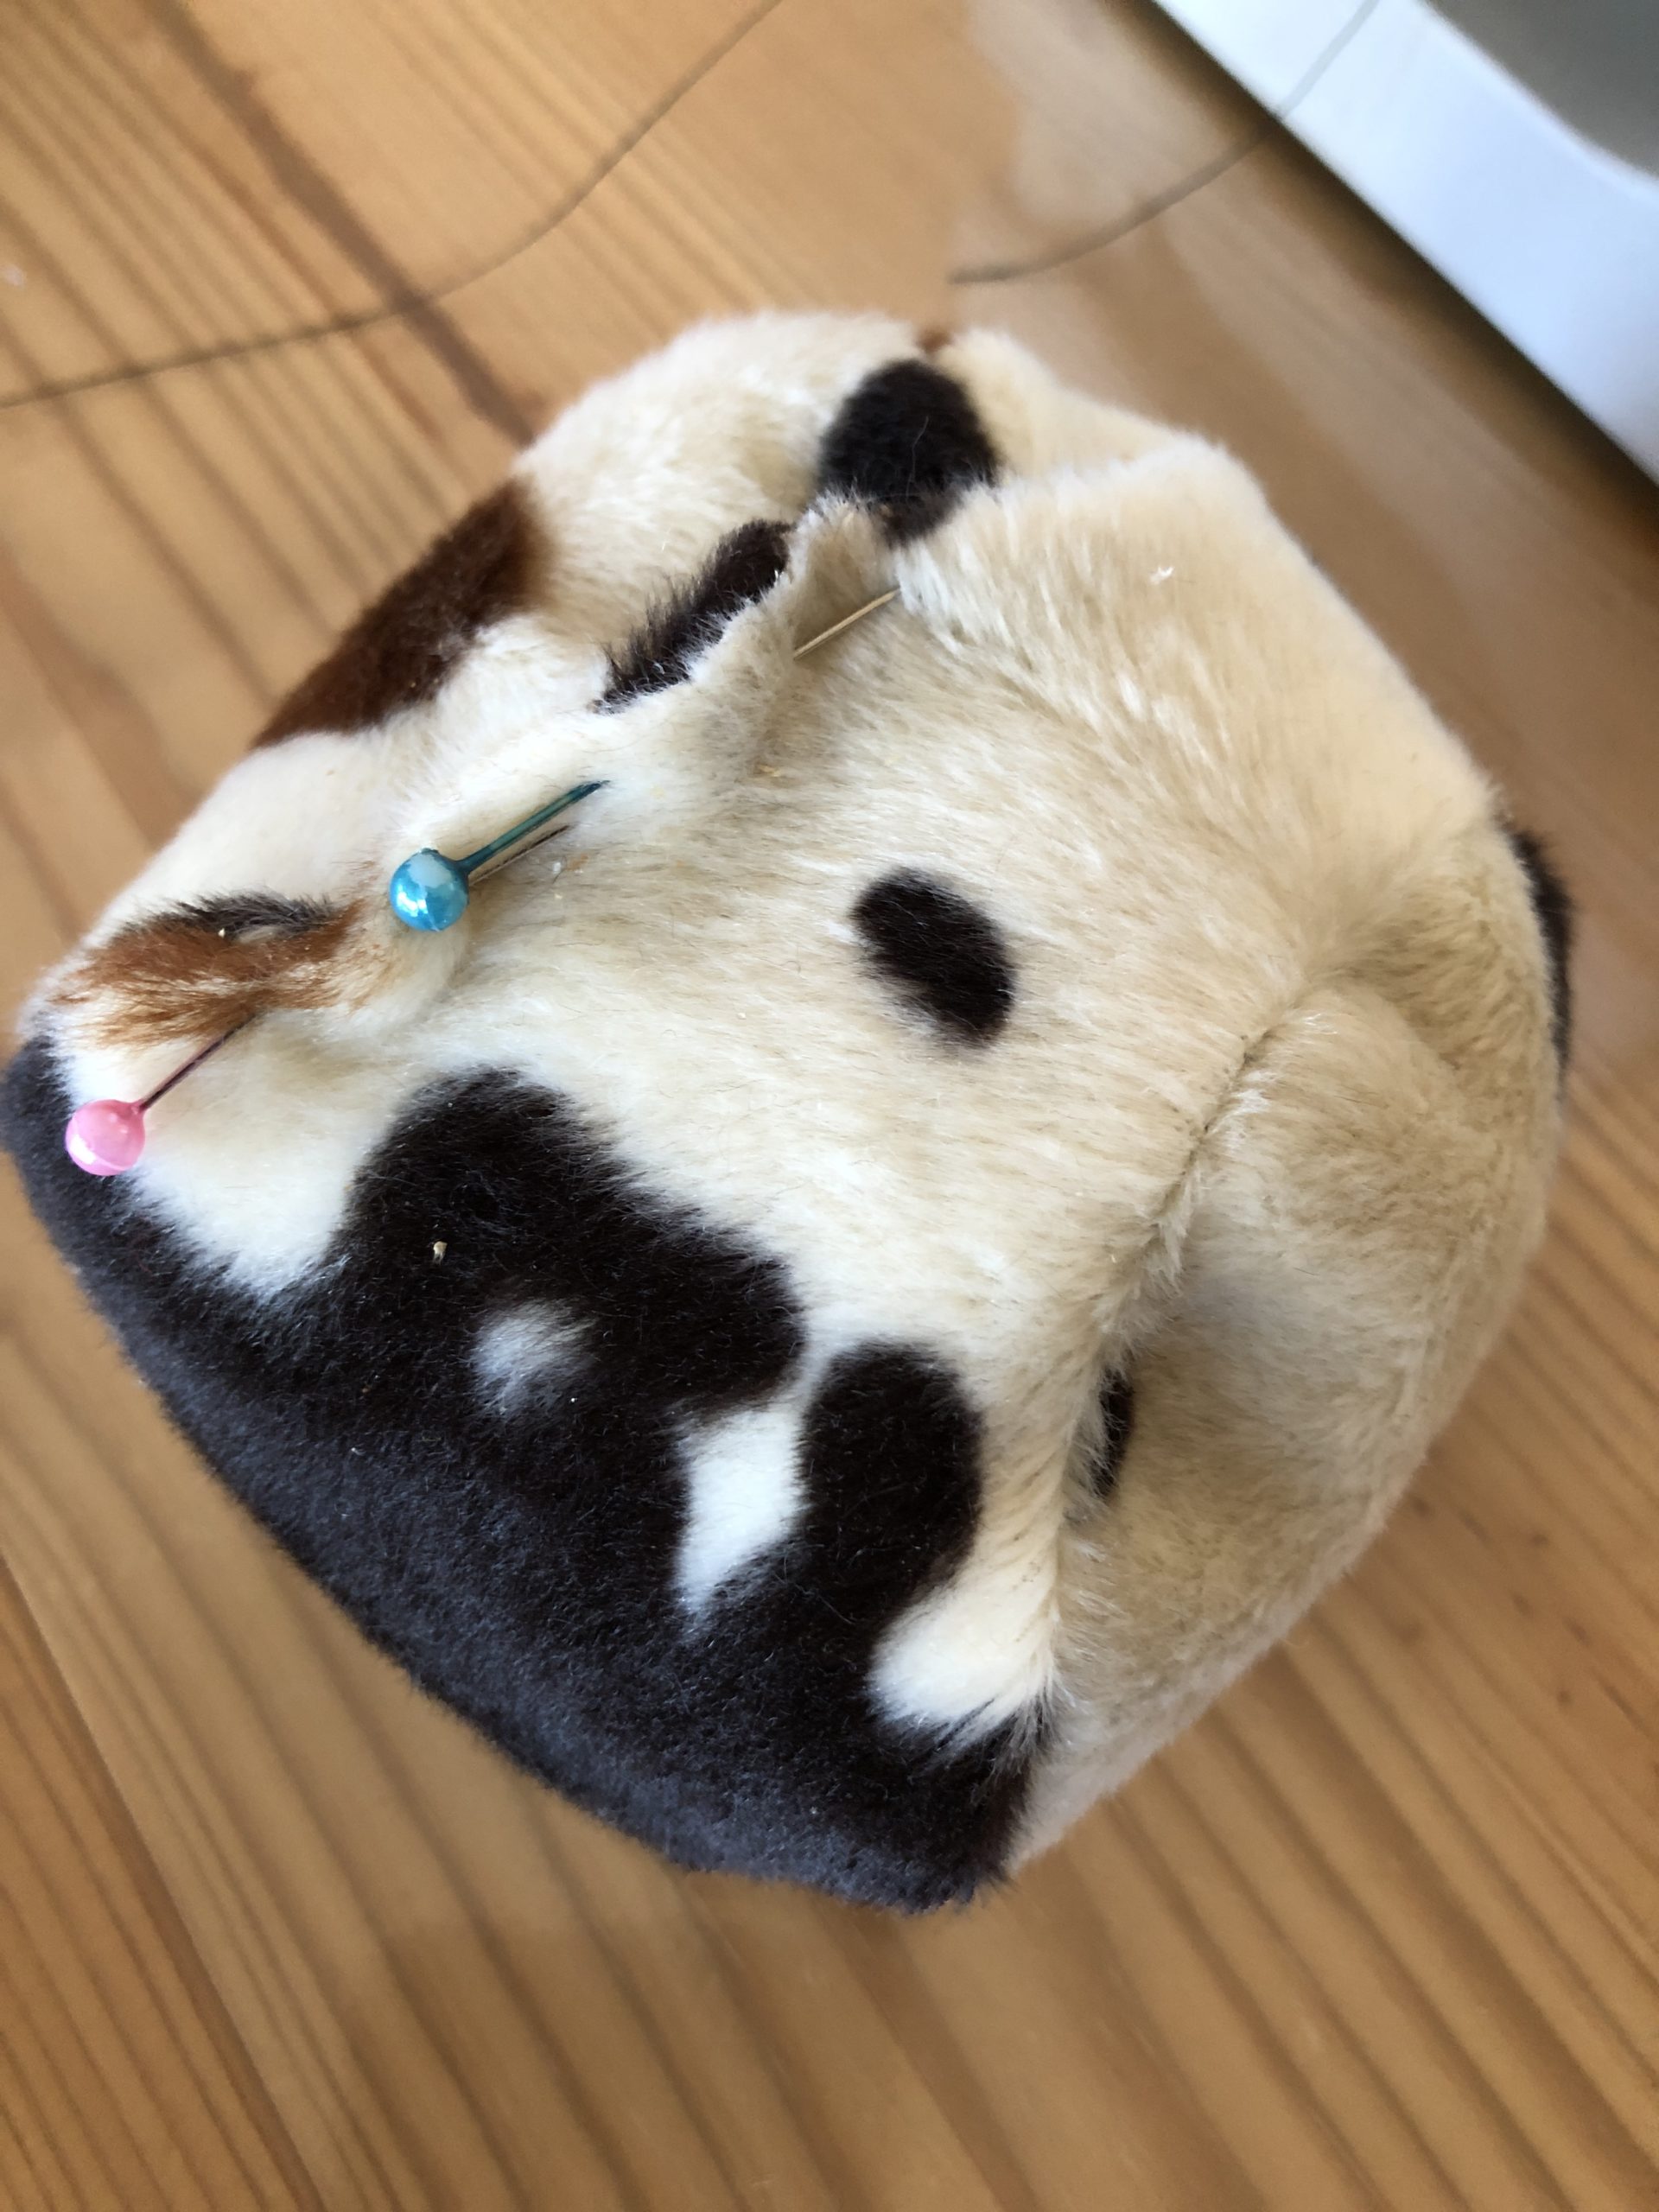
At the opening hole insert the fabric a bit inwards and then fix the open seam with pins.
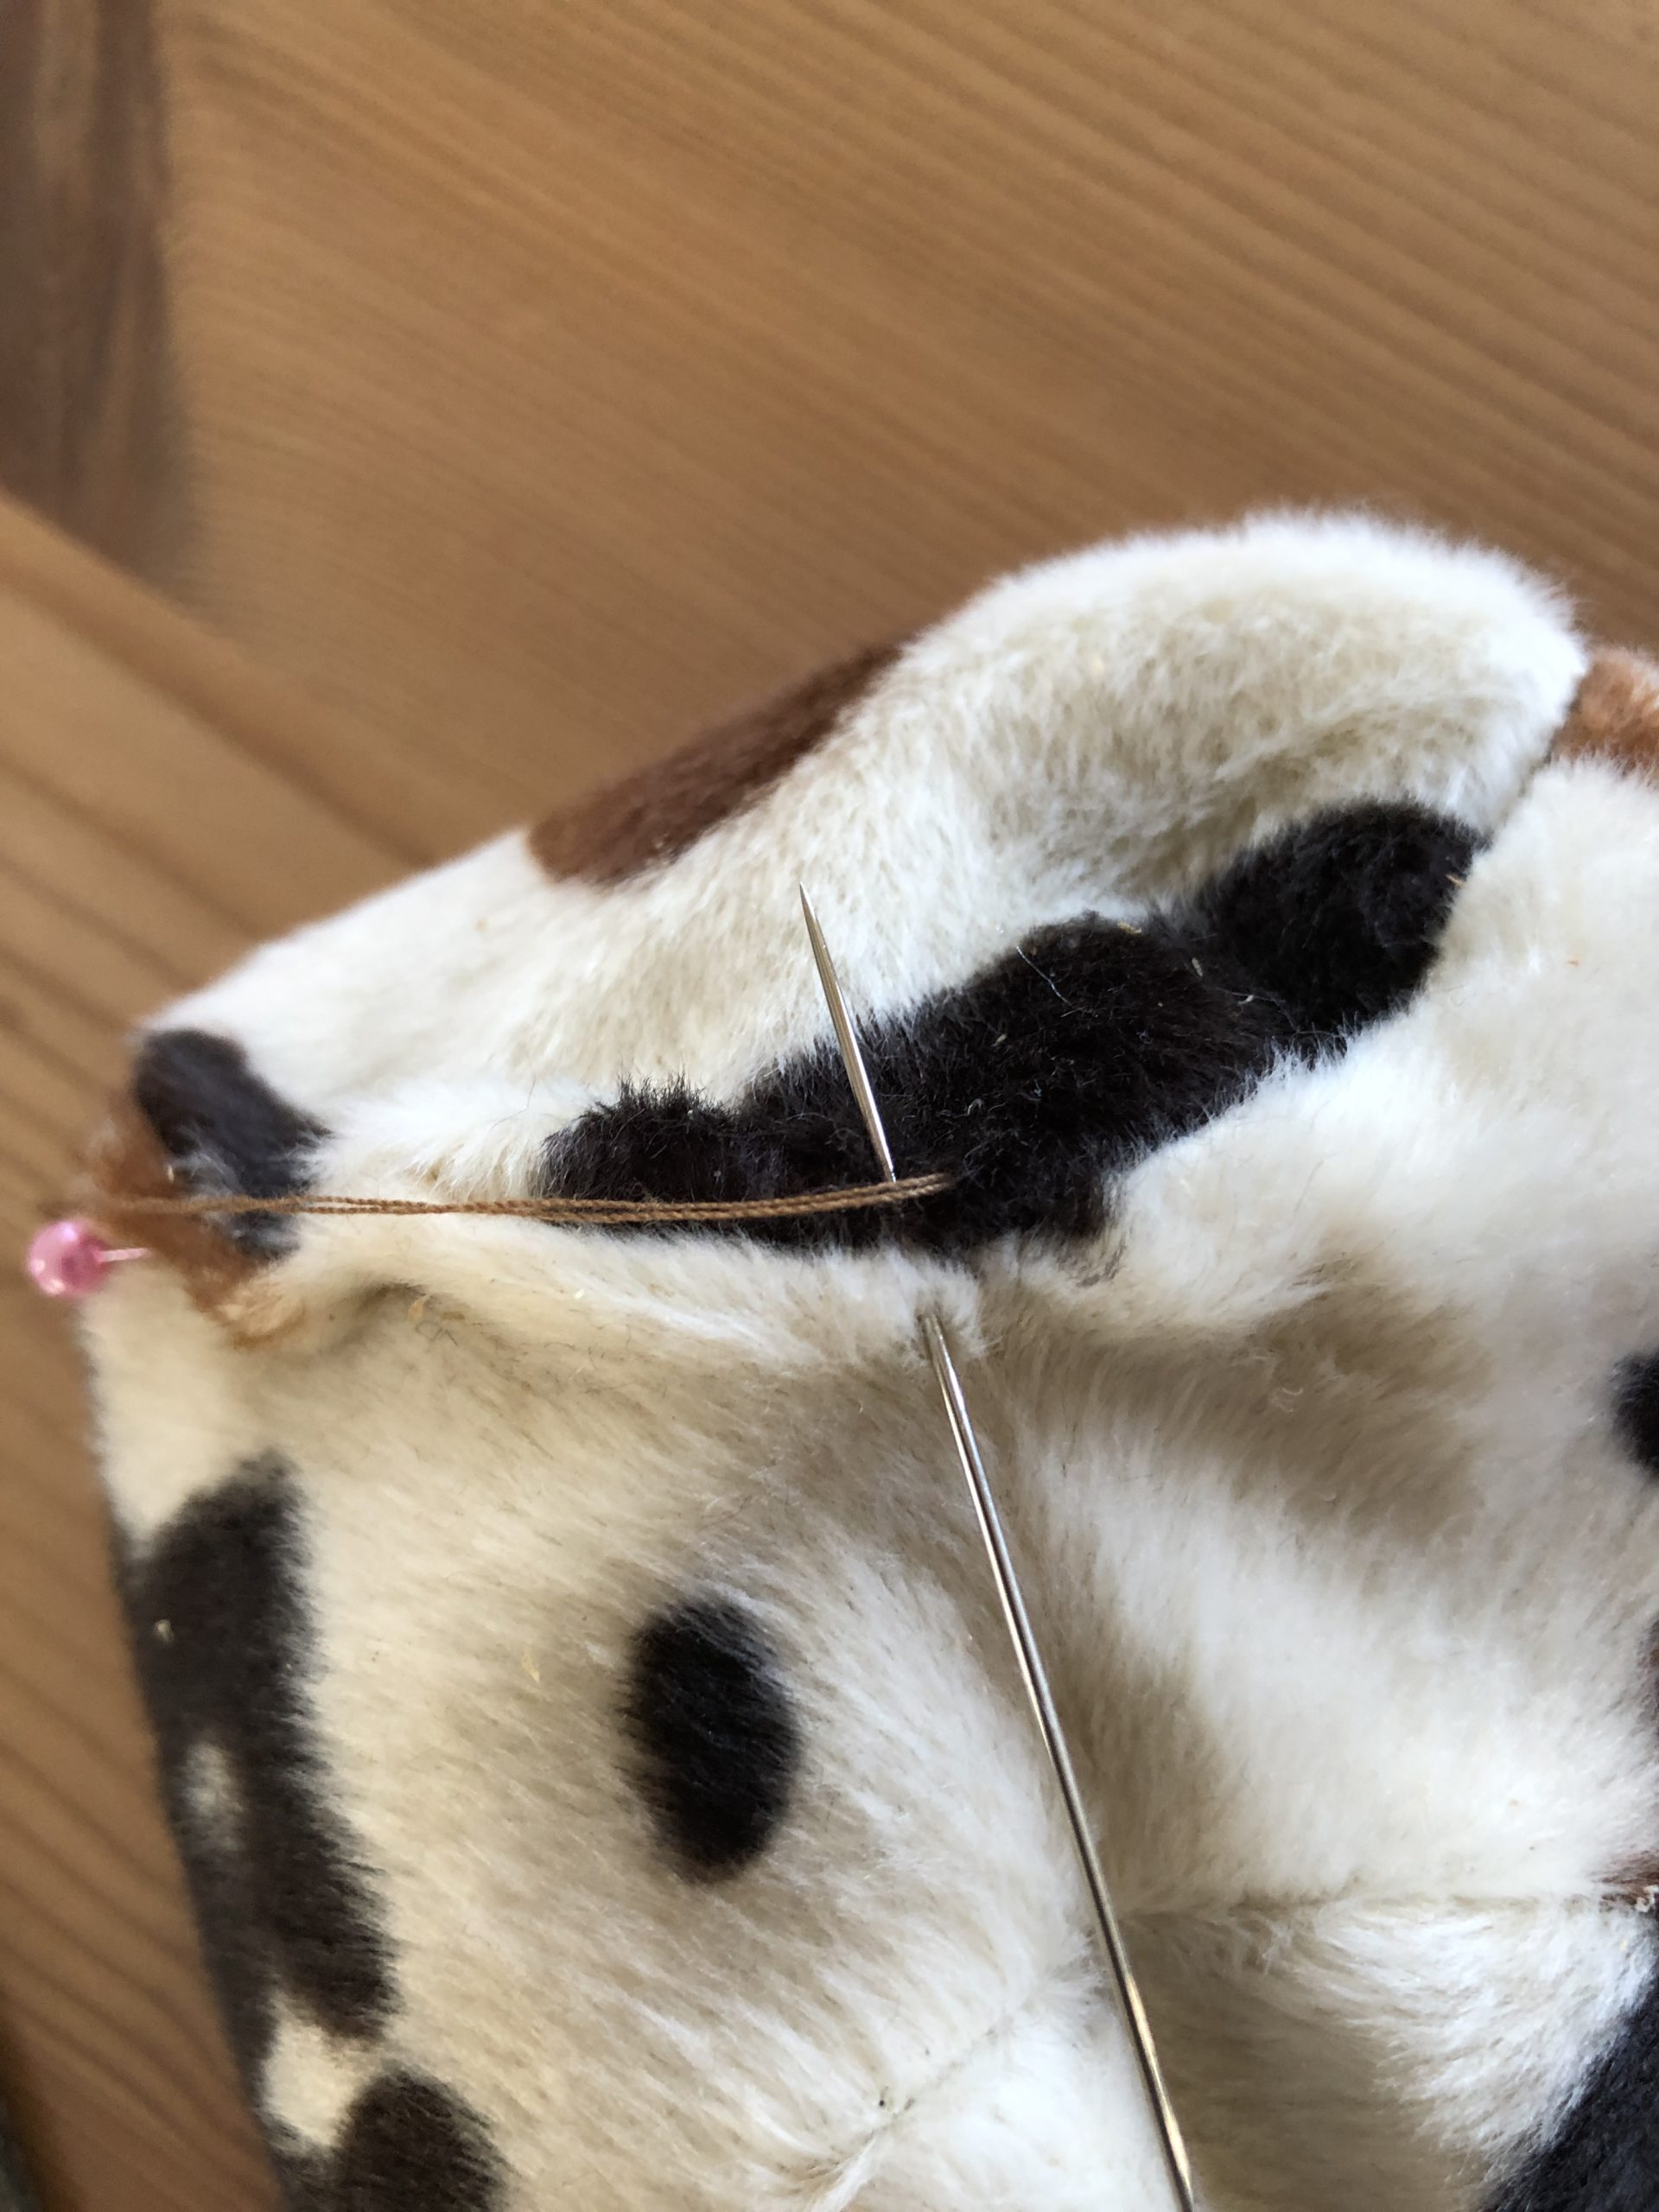
Sew with needle and thread (or with the sewing machine).

Sew as much as possible so that you can't see the seam.
The throwing ball is ready!
If you want to sew several, you can use them for cross-bouling, juggling or dropping cans. Have fun in creative games!

Materials
Directions
Make or print cut patterns, size can also be varied.
(With this size, sewing works best, if you make the balls smaller, the fabric is a little less handy when sewing...)
Cut the cut template. Place the piece of fabric twice (the outsides of the ball are on top of each other) and transfer the cut pattern to the fabric.
Cut out both pieces of fabric.
Now you can sew the two pieces of fabric together as follows!
Very important: Here (arrow!) is started with sewing!
Put the fabric together and hold it together as above. At the arrow start sewing and always slowly push the upper fabric edge onto the bottom that the two edges are sewn nicely to each other.
Look at the picture!
This creates an evenly sewn edge!
Continue to sew until only a small turning opening (approx. 2-3 cm) is open.
Turn the fabric through the opening.
Weigh about 200g spelt (or rice) and fill into the ball.
The best way to do this is to use a funnel.
Evaluate the filling amount yourself... depending on how heavy or bulging the ball is going to be!
At the opening hole insert the fabric a bit inwards and then fix the open seam with pins.
Sew with needle and thread (or with the sewing machine).
Sew as much as possible so that you can't see the seam.
The throwing ball is ready!
If you want to sew several, you can use them for cross-bouling, juggling or dropping cans. Have fun in creative games!
Follow us on Facebook , Instagram and Pinterest
Don't miss any more adventures: Our bottle mail