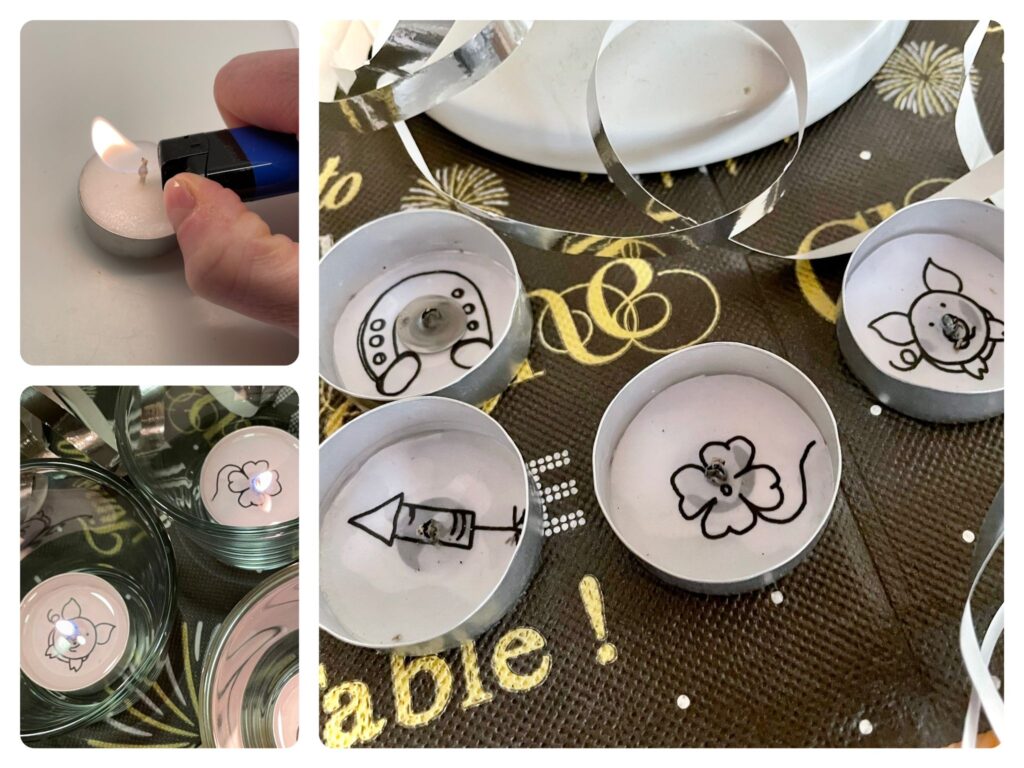
Magic Tealights for New Year's Eve and New Year's Eve

AdventurerKatzi
Rating5.04.2 thousand times & (1) DifficultyIntermediate

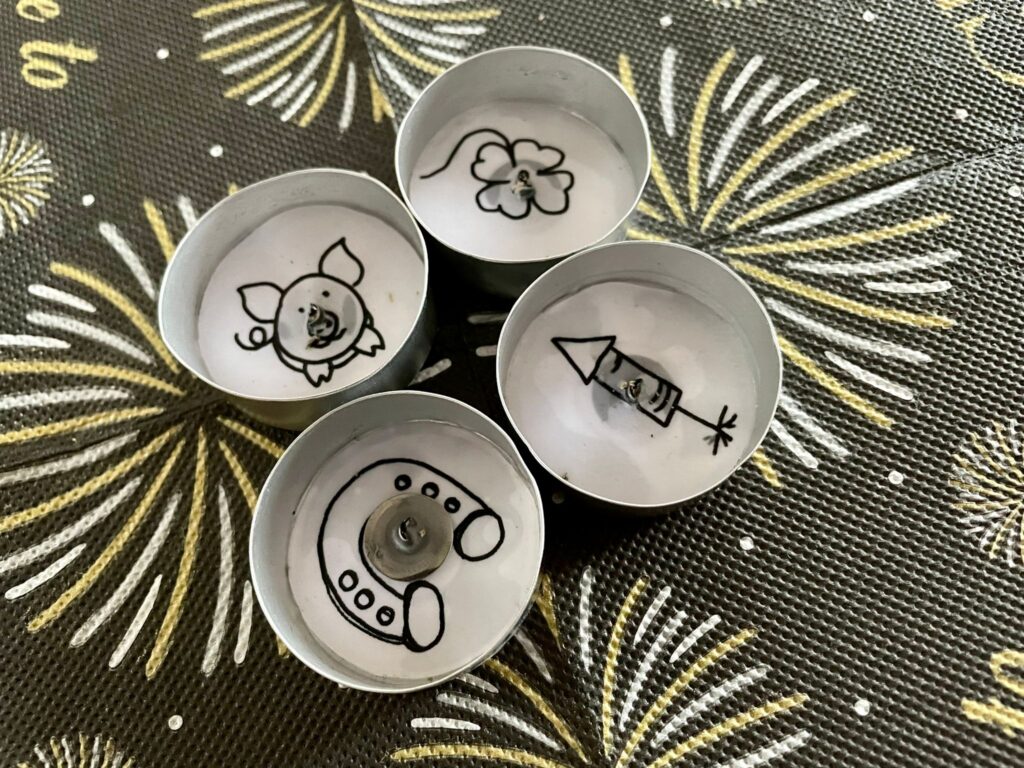
Give away happiness! With this small surprise of lights you can give away New Year's Eve or at the beginning of the year and bring joy. Print out the template, cut out the circles and put every paper circle into a tea light. As you insert the paper appropriately, we show you here. As soon as the wax becomes liquid, it becomes transparent and the motif becomes visible. Let yourself be surprised what motive you discover under it. Have fun designing and giving away!

For many children, watching and discovering the motif is fascinating. In addition, the magic tealight also brings a calm mood after a hectic day. Stay with it and discover together what is coming to light!

Media Education for Kindergarten and Hort

Kind bastelt eine Rassel mit dem Navi
The Adventure Navi, the app for DIY projects, enables media education for the youngest.

Relief in everyday life, targeted promotion of individual children, independent learning and - without any pre-knowledge already usable by the youngest!


Titelbild zur Bastel- und DIY-Idee für Kinder '(926) Zauber-Teelichter für Silvester und Neujahr'
Material for1 Child
Prep Time5 min.Adv. Time15 min.Total Time20 min.
 1 Printable template
 Coloured pencilsor felt pencils
 Tea lightsOne tealight per motif circle
 1 Needle pointedor toothpicks
All links marked with a shopping cart lead to Amazon - here we have selected products that we would order ourselves and in part also ordered. In a qualified purchase via the advertising link, we as Amazon partner receive a commission, for you there are no costs. You thus support our cost- and advertising banner-free, educational offer.
1

Print the template first.

2

Now select a motif or paint one in an empty field.
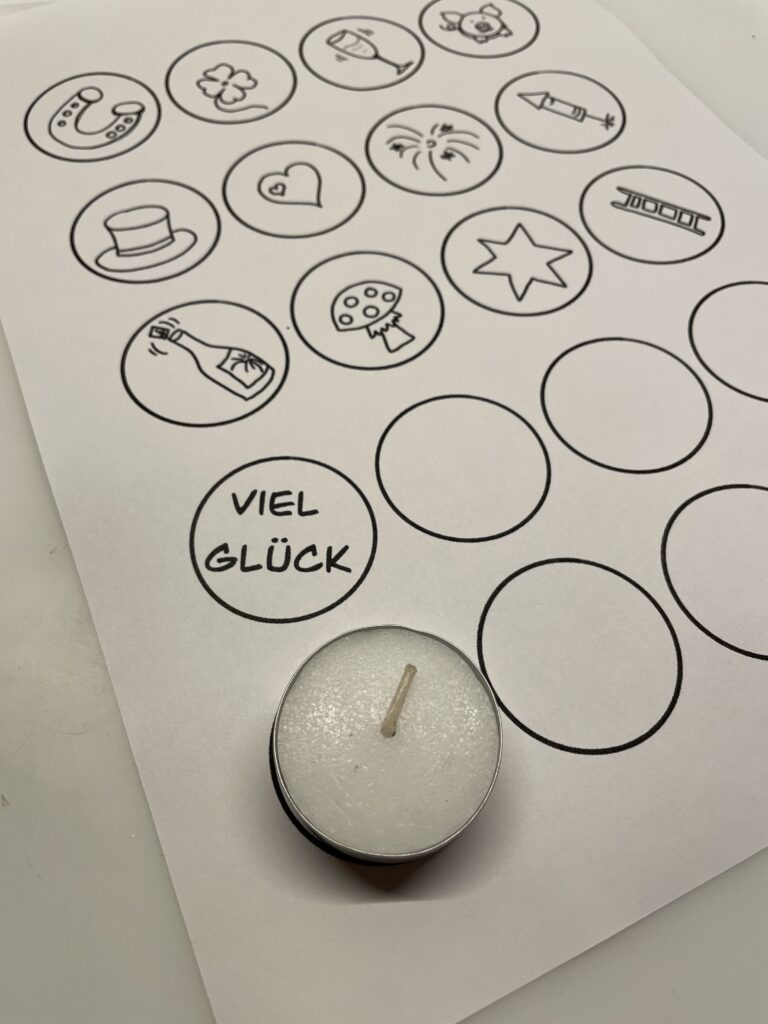
Bild zum Schritt 2 für das Bastel- und DIY-Abenteuer für Kinder: 'Wählt nun ein Motiv aus oder malt selbst eines in...'

3

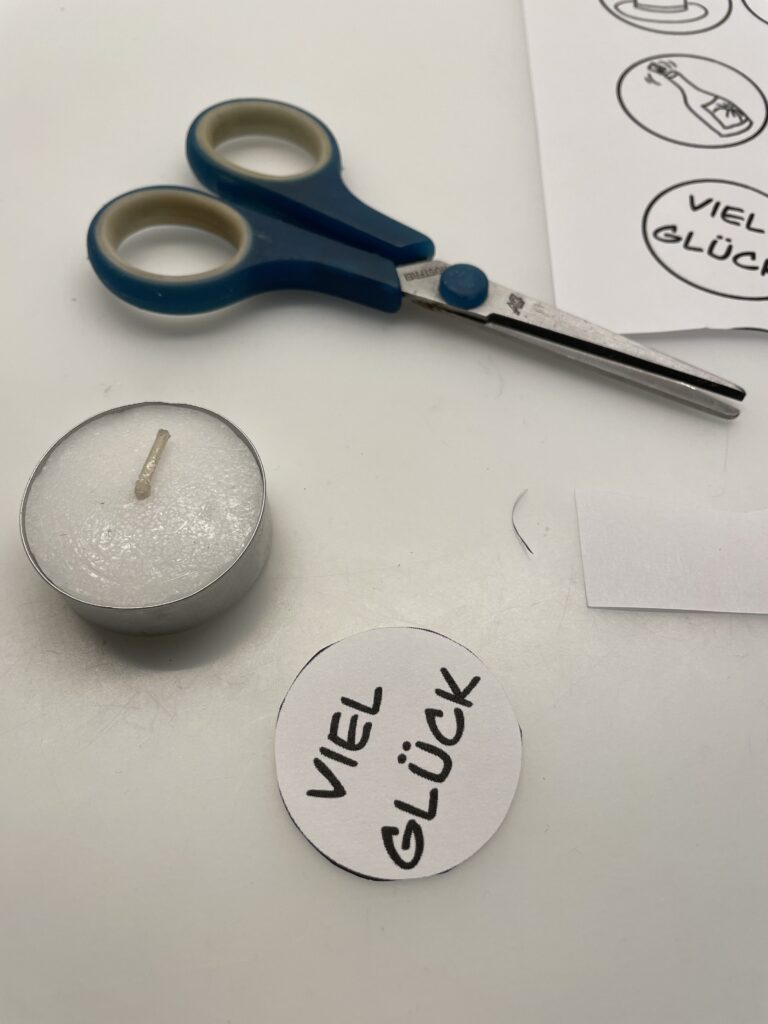
Then cut out the motif.

Bild zum Schritt 3 für das Bastel- und DIY-Abenteuer für Kinder: 'Schneidet anschließend das Motiv aus.'

4

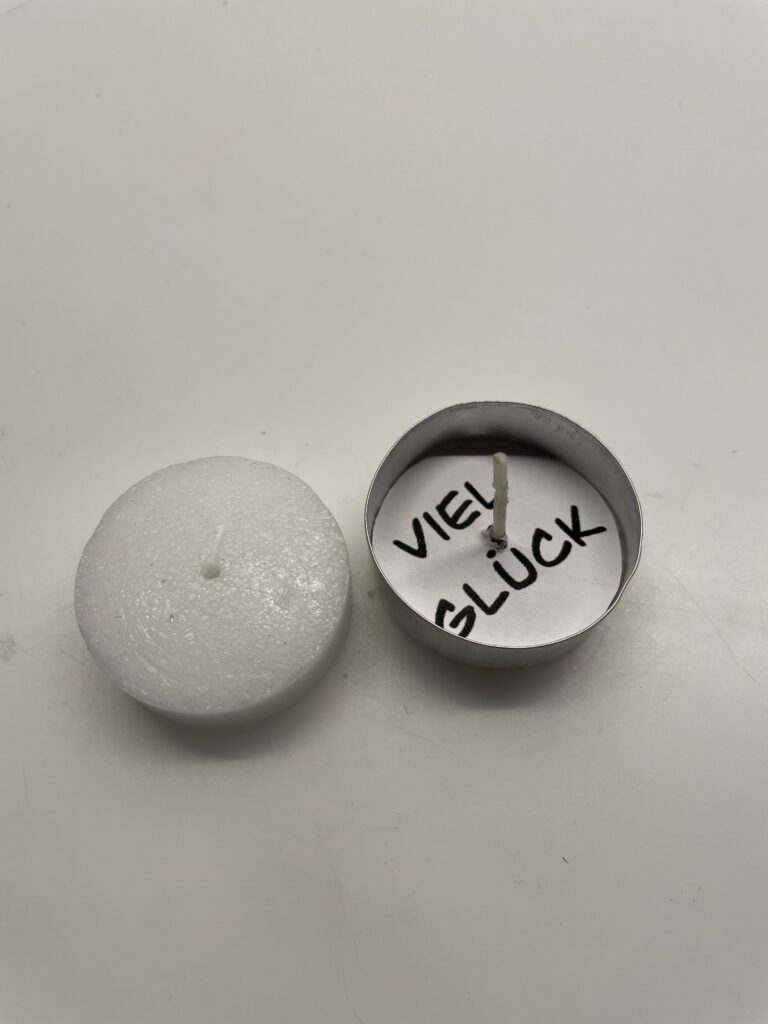
Now you're cutting a tealight into his pieces.
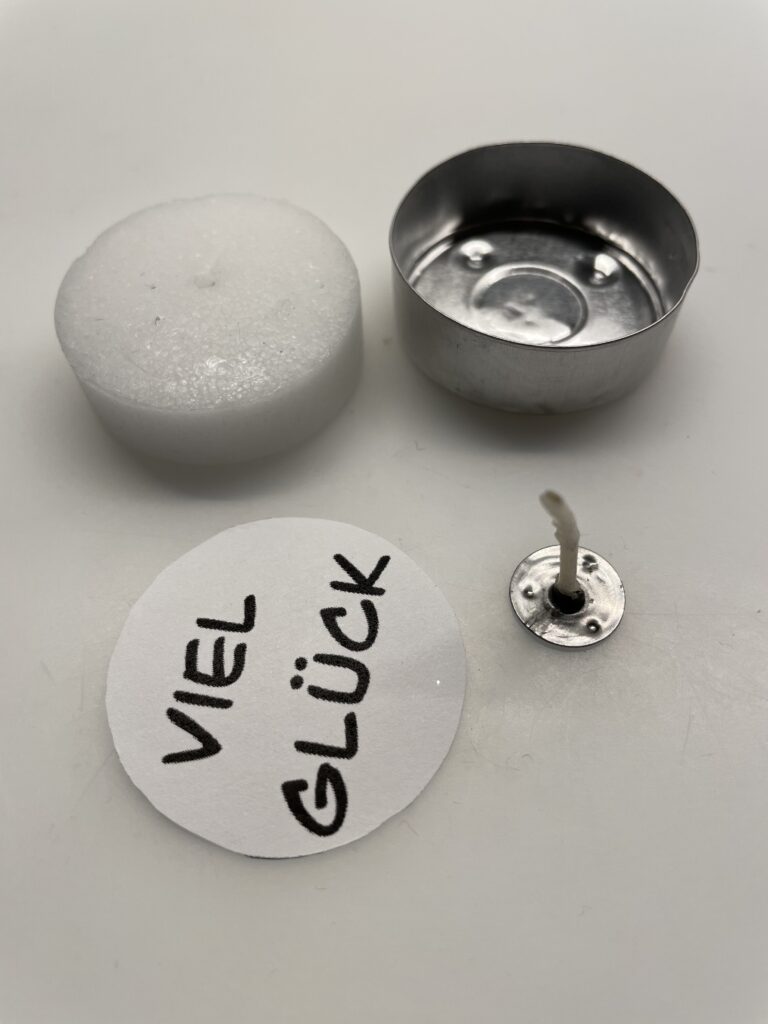
Bild zum Schritt 4 für das Bastel- und DIY-Abenteuer für Kinder: 'Jetzt zerlegt ihr ein Teelicht in seine Einzelteile.'

5

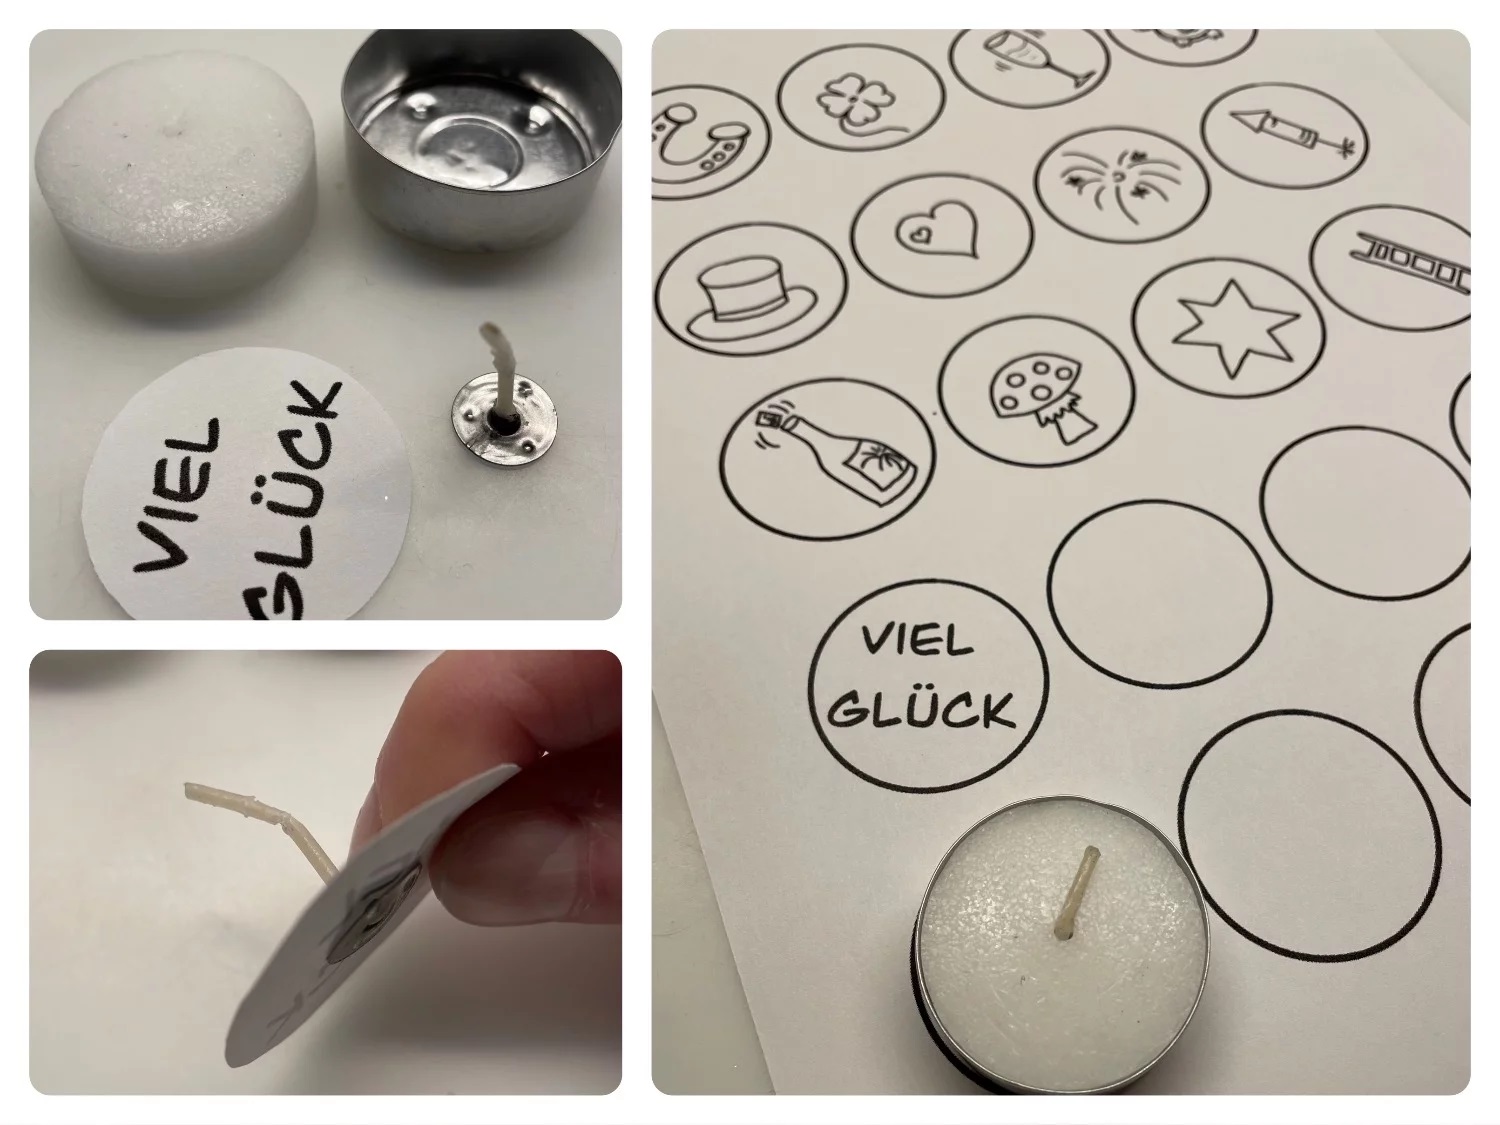
Stitch a hole through the middle of your circle with a needle. It must be so large that the wick fits through.

Bild zum Schritt 5 für das Bastel- und DIY-Abenteuer für Kinder: 'Stecht durch die Mitte eures Kreises ein Loch mit einer...'

6

If something is circled with the needle, the hole becomes larger.

Bild zum Schritt 6 für das Bastel- und DIY-Abenteuer für Kinder: 'Kreist dafür etwas mit der Nadel, so wird das Loch...'

7

Then you put the wick through the paper from behind.

Bild zum Schritt 7 für das Bastel- und DIY-Abenteuer für Kinder: 'Anschließend steckt ihr von hinten den Docht durch das Papier.'

8

The round sheet metal part is now flush on the paper.

Bild zum Schritt 8 für das Bastel- und DIY-Abenteuer für Kinder: 'Das runde Blechteil liegt jetzt bündig am Papier an.'

9

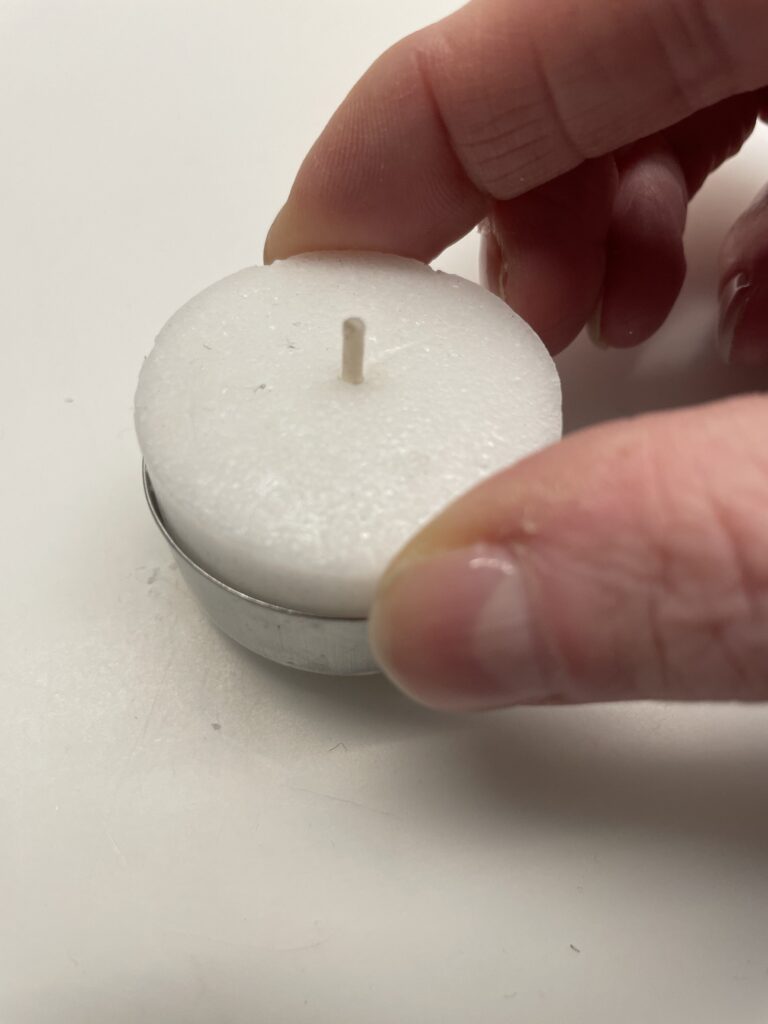
Now you put the parts of the tealight together again.

Bild zum Schritt 9 für das Bastel- und DIY-Abenteuer für Kinder: 'Nun fügt ihr die Teile des Teelichtes wieder zusammen.'

10

First you put the motif image with the wick back into the aluminium shell.

Bild zum Schritt 10 für das Bastel- und DIY-Abenteuer für Kinder: 'Dabei setzt ihr zuerst das Motivbild mit dem Docht zurück...'

11

Then you put the wax on it.

Bild zum Schritt 11 für das Bastel- und DIY-Abenteuer für Kinder: 'Anschließend steckt ihr das Wachsteil darauf.'

12

2. Bild zum Schritt 11 für das Bastel- und DIY-Abenteuer für Kinder: 'Anschließend steckt ihr das Wachsteil darauf.'

13

Finished is the magic tealight. Let yourselves be surprised after the burning, which motive comes to light.

Bild zum Schritt 13 für das Bastel- und DIY-Abenteuer für Kinder: 'Fertig ist das Zauberteelicht. Lasst euch nach dem Abbrennen überraschen,...'

14

2. Bild zum Schritt 13 für das Bastel- und DIY-Abenteuer für Kinder: 'Fertig ist das Zauberteelicht. Lasst euch nach dem Abbrennen überraschen,...'

15

3. Bild zum Schritt 14 für das Bastel- und DIY-Abenteuer für Kinder: 'Fertig ist das Zauberteelicht. Lasst euch nach dem Abbrennen überraschen,...'

16

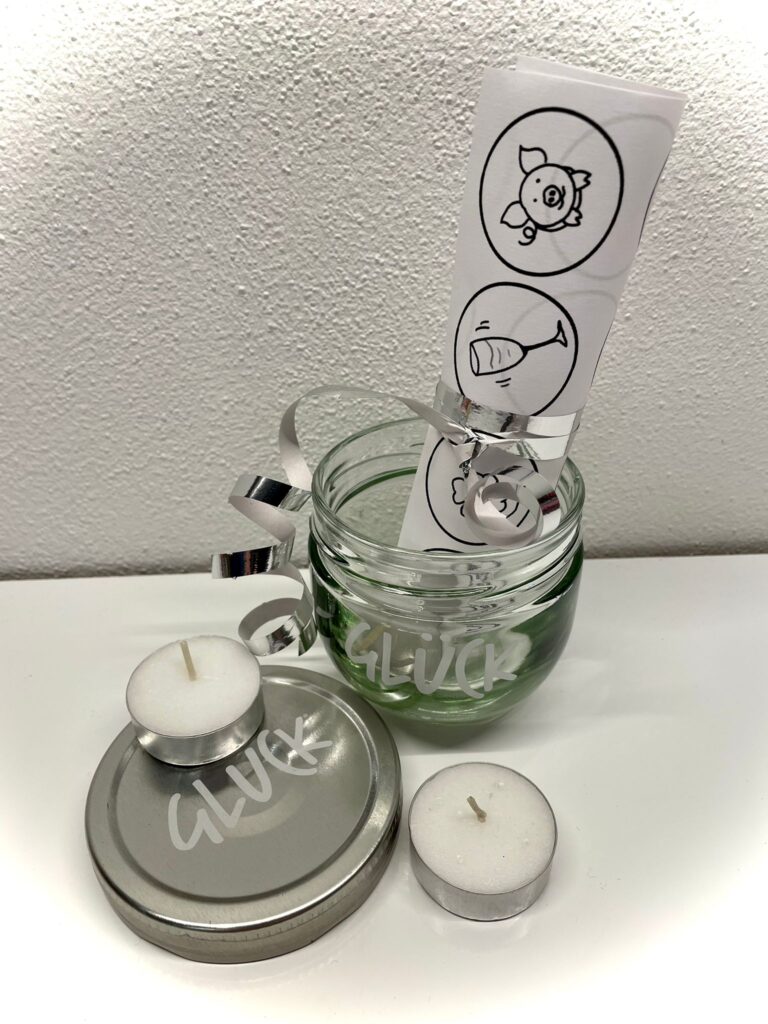
Gift idea: Makes 3 magic tealights and also gives away a template bow for self-designing the magic tealights.

Bild zum Schritt 16 für das Bastel- und DIY-Abenteuer für Kinder: 'Geschenkidee: Bastelt 3 Zauber-Teelichter und verschenkt zusätzlich noch einen Vorlage-Bogen...'

17

2. Bild zum Schritt 16 für das Bastel- und DIY-Abenteuer für Kinder: 'Geschenkidee: Bastelt 3 Zauber-Teelichter und verschenkt zusätzlich noch einen Vorlage-Bogen...'

18

Stay curious and have fun giving away!

Materials

 1 Printable template
 Coloured pencilsor felt pencils
 Tea lightsOne tealight per motif circle
 1 Needle pointedor toothpicks
All links marked with a shopping cart lead to Amazon - here we have selected products that we would order ourselves and in part also ordered. In a qualified purchase via the advertising link, we as Amazon partner receive a commission, for you there are no costs. You thus support our cost- and advertising banner-free, educational offer.

Directions

1

Print the template first.

2

Now select a motif or paint one in an empty field.

Bild zum Schritt 2 für das Bastel- und DIY-Abenteuer für Kinder: 'Wählt nun ein Motiv aus oder malt selbst eines in...'

3

Then cut out the motif.

Bild zum Schritt 3 für das Bastel- und DIY-Abenteuer für Kinder: 'Schneidet anschließend das Motiv aus.'

4

Now you're cutting a tealight into his pieces.

Bild zum Schritt 4 für das Bastel- und DIY-Abenteuer für Kinder: 'Jetzt zerlegt ihr ein Teelicht in seine Einzelteile.'

5

Stitch a hole through the middle of your circle with a needle. It must be so large that the wick fits through.
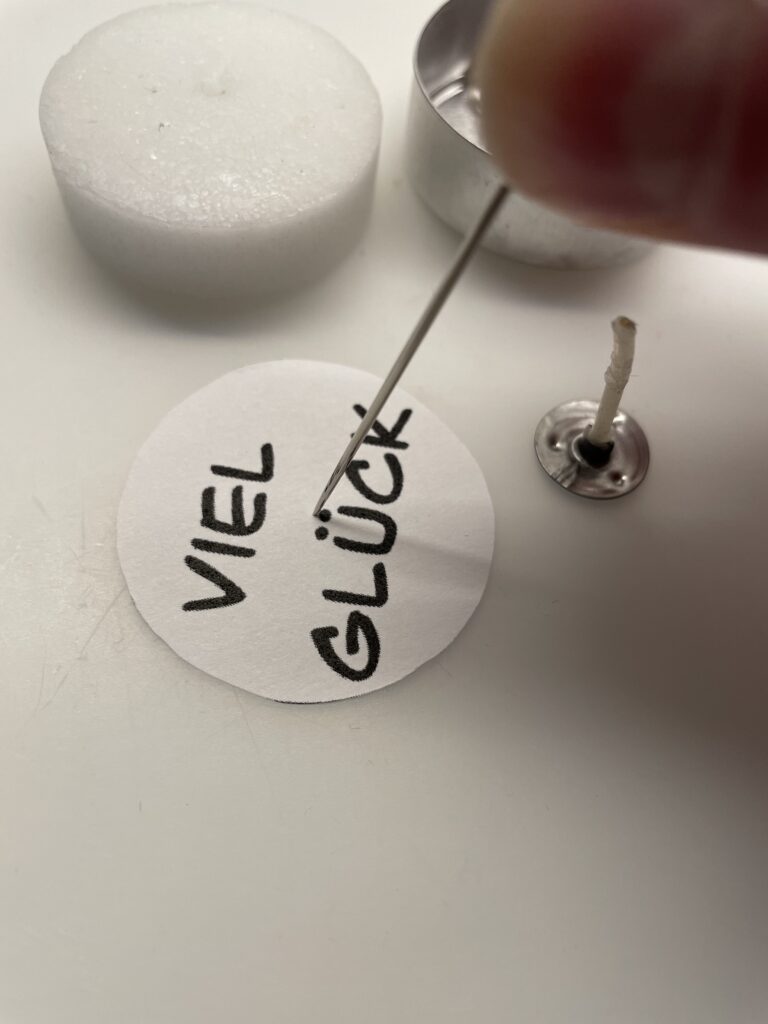
Bild zum Schritt 5 für das Bastel- und DIY-Abenteuer für Kinder: 'Stecht durch die Mitte eures Kreises ein Loch mit einer...'

6

If something is circled with the needle, the hole becomes larger.
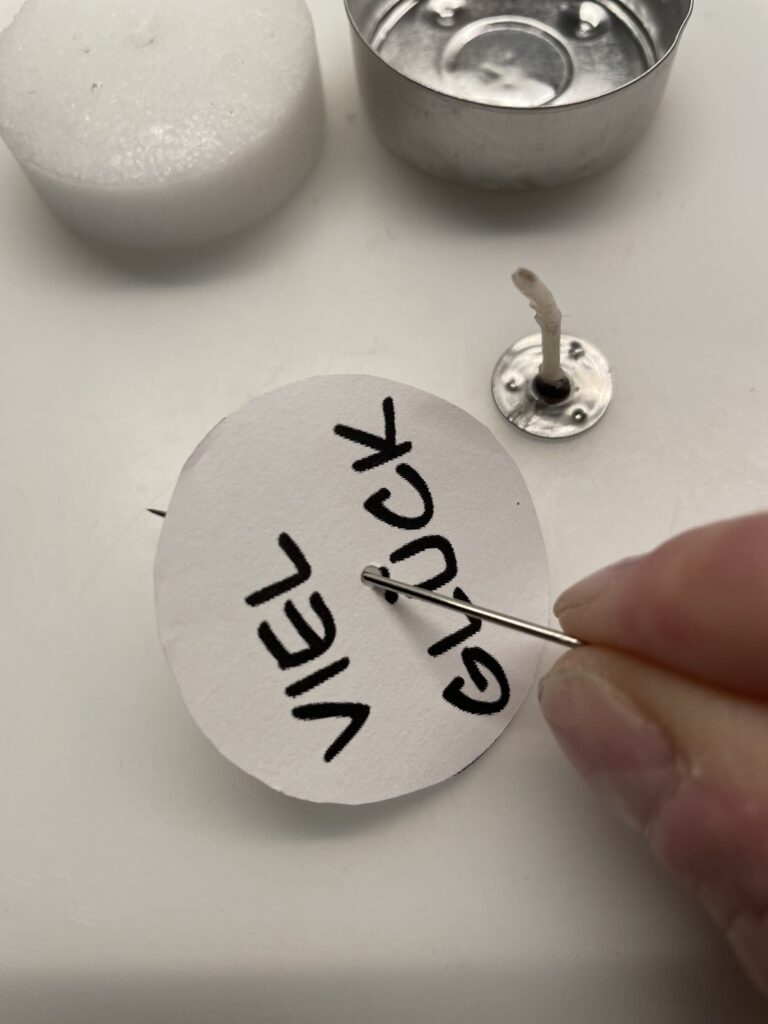
Bild zum Schritt 6 für das Bastel- und DIY-Abenteuer für Kinder: 'Kreist dafür etwas mit der Nadel, so wird das Loch...'

7

Then you put the wick through the paper from behind.
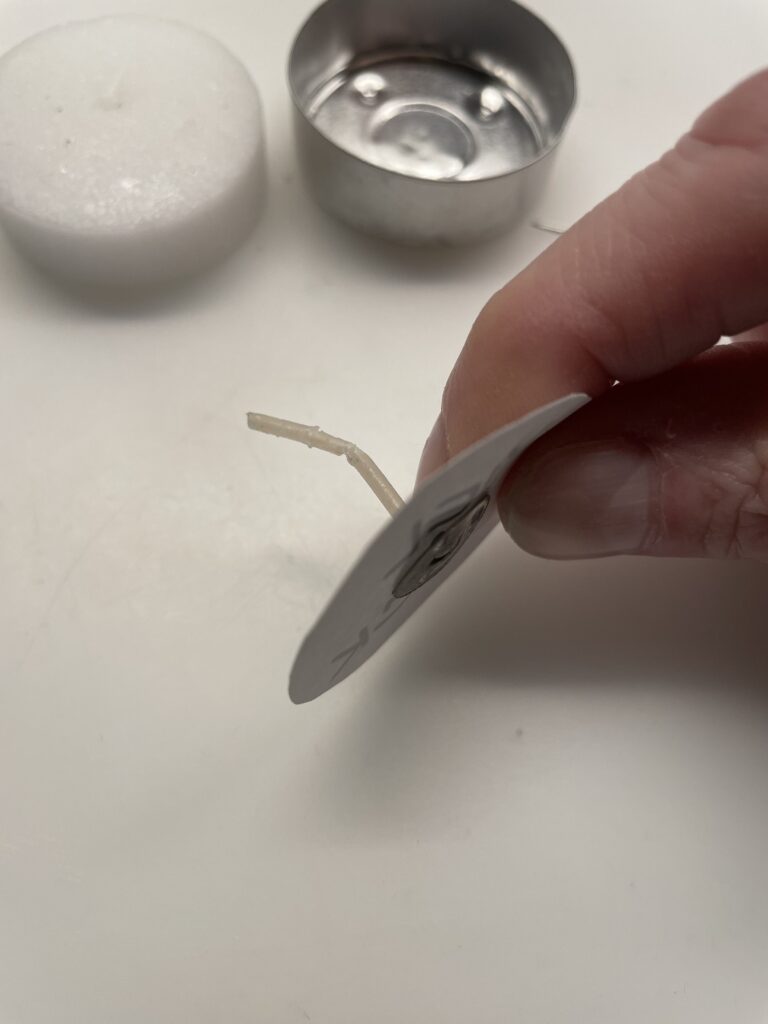
Bild zum Schritt 7 für das Bastel- und DIY-Abenteuer für Kinder: 'Anschließend steckt ihr von hinten den Docht durch das Papier.'

8

The round sheet metal part is now flush on the paper.
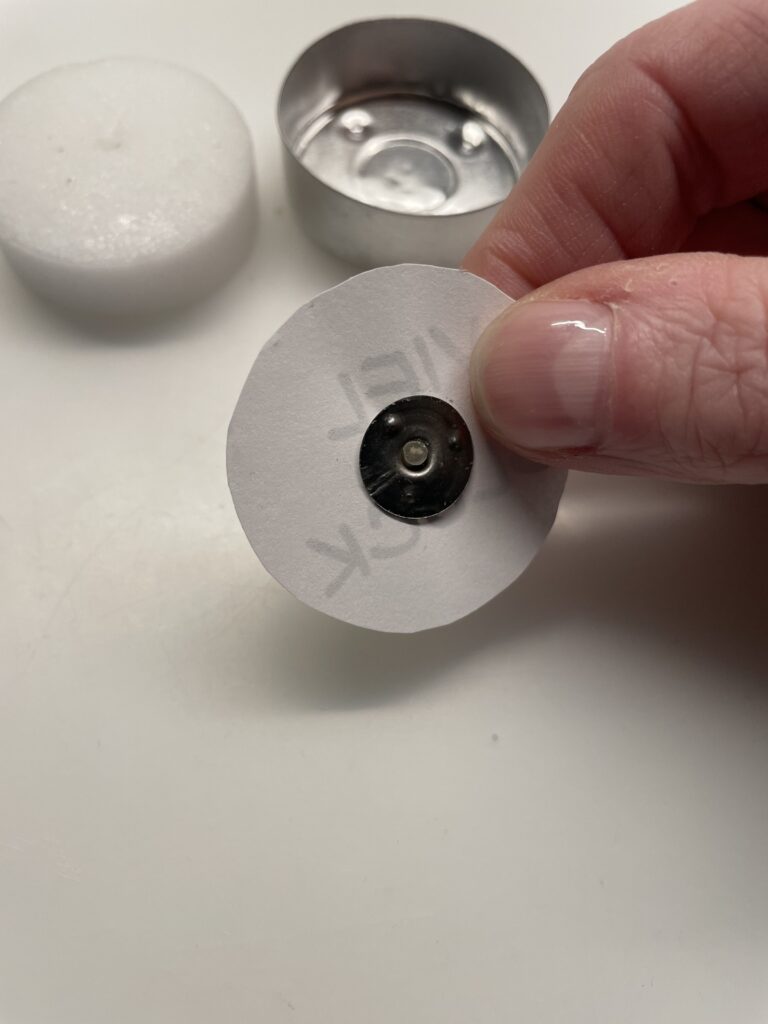
Bild zum Schritt 8 für das Bastel- und DIY-Abenteuer für Kinder: 'Das runde Blechteil liegt jetzt bündig am Papier an.'

9

Now you put the parts of the tealight together again.
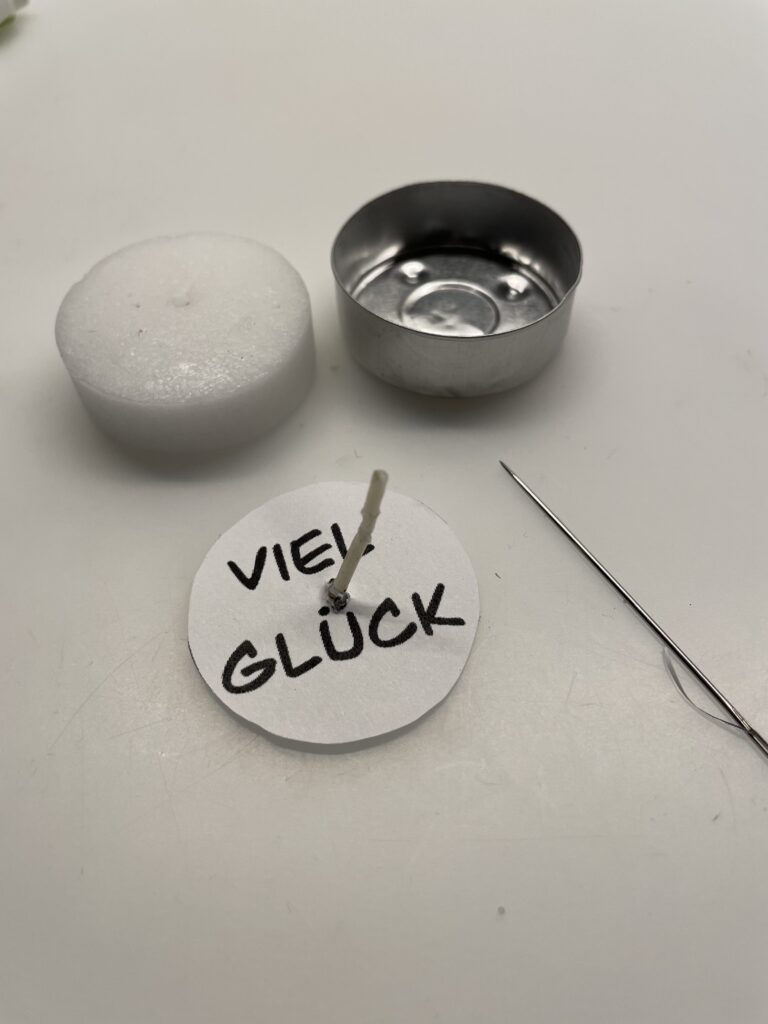
Bild zum Schritt 9 für das Bastel- und DIY-Abenteuer für Kinder: 'Nun fügt ihr die Teile des Teelichtes wieder zusammen.'

10

First you put the motif image with the wick back into the aluminium shell.

Bild zum Schritt 10 für das Bastel- und DIY-Abenteuer für Kinder: 'Dabei setzt ihr zuerst das Motivbild mit dem Docht zurück...'

11

Then you put the wax on it.

Bild zum Schritt 11 für das Bastel- und DIY-Abenteuer für Kinder: 'Anschließend steckt ihr das Wachsteil darauf.'

12

2. Bild zum Schritt 11 für das Bastel- und DIY-Abenteuer für Kinder: 'Anschließend steckt ihr das Wachsteil darauf.'

13

Finished is the magic tealight. Let yourselves be surprised after the burning, which motive comes to light.

Bild zum Schritt 13 für das Bastel- und DIY-Abenteuer für Kinder: 'Fertig ist das Zauberteelicht. Lasst euch nach dem Abbrennen überraschen,...'

14

2. Bild zum Schritt 13 für das Bastel- und DIY-Abenteuer für Kinder: 'Fertig ist das Zauberteelicht. Lasst euch nach dem Abbrennen überraschen,...'

15

3. Bild zum Schritt 14 für das Bastel- und DIY-Abenteuer für Kinder: 'Fertig ist das Zauberteelicht. Lasst euch nach dem Abbrennen überraschen,...'

16

Gift idea: Makes 3 magic tealights and also gives away a template bow for self-designing the magic tealights.
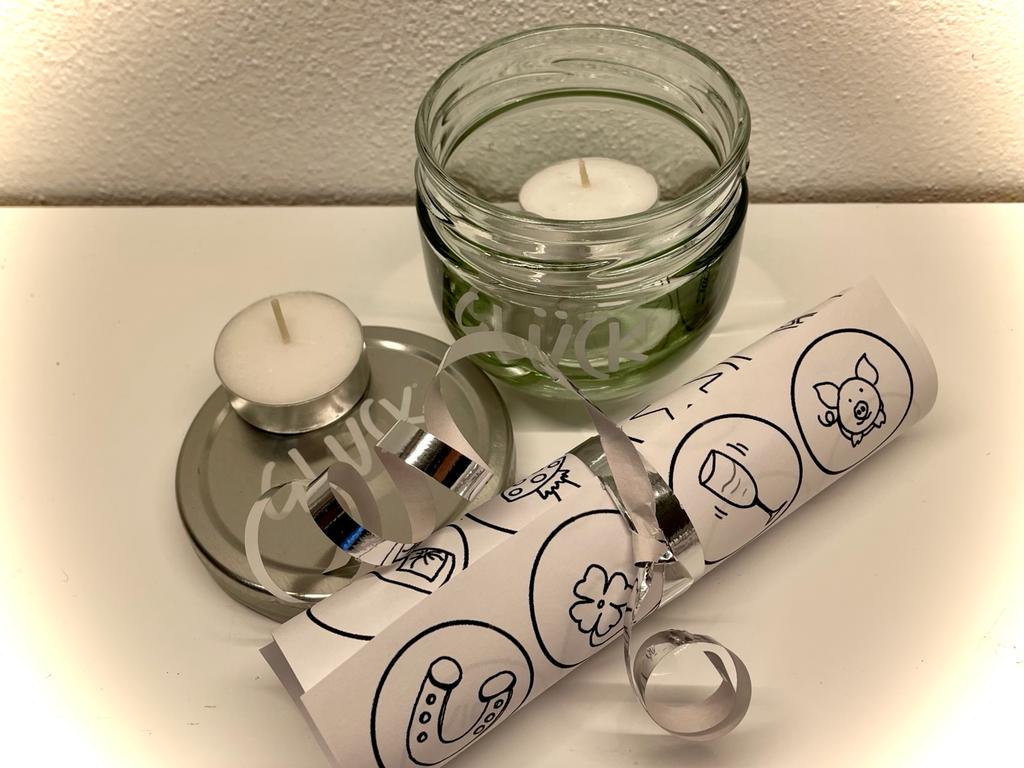
Bild zum Schritt 16 für das Bastel- und DIY-Abenteuer für Kinder: 'Geschenkidee: Bastelt 3 Zauber-Teelichter und verschenkt zusätzlich noch einen Vorlage-Bogen...'

17

2. Bild zum Schritt 16 für das Bastel- und DIY-Abenteuer für Kinder: 'Geschenkidee: Bastelt 3 Zauber-Teelichter und verschenkt zusätzlich noch einen Vorlage-Bogen...'

18

Stay curious and have fun giving away!

Magic Tealights for New Year's Eve and New Year's Eve

Follow us on Facebook , Instagram and Pinterest
Don't miss any more adventures: Our bottle mail

Leave a Reply

Your email address will not be published.

The maximum upload file size: 5 MB. You can upload: image, document. Drop file here