A fir tree made of Lego stones. Build something different from houses and vehicles. A fir tree is available for Christmas.
You will learn to construct the most important techniques in a stable and stable way. When the stones were stacked together, as well as when the entire area and the stability of the tree trunk were built evenly.
Why don't you just try and have fun?
Media Education for Kindergarten and Hort

Relief in everyday life, targeted promotion of individual children, independent learning and - without any pre-knowledge already usable by the youngest!
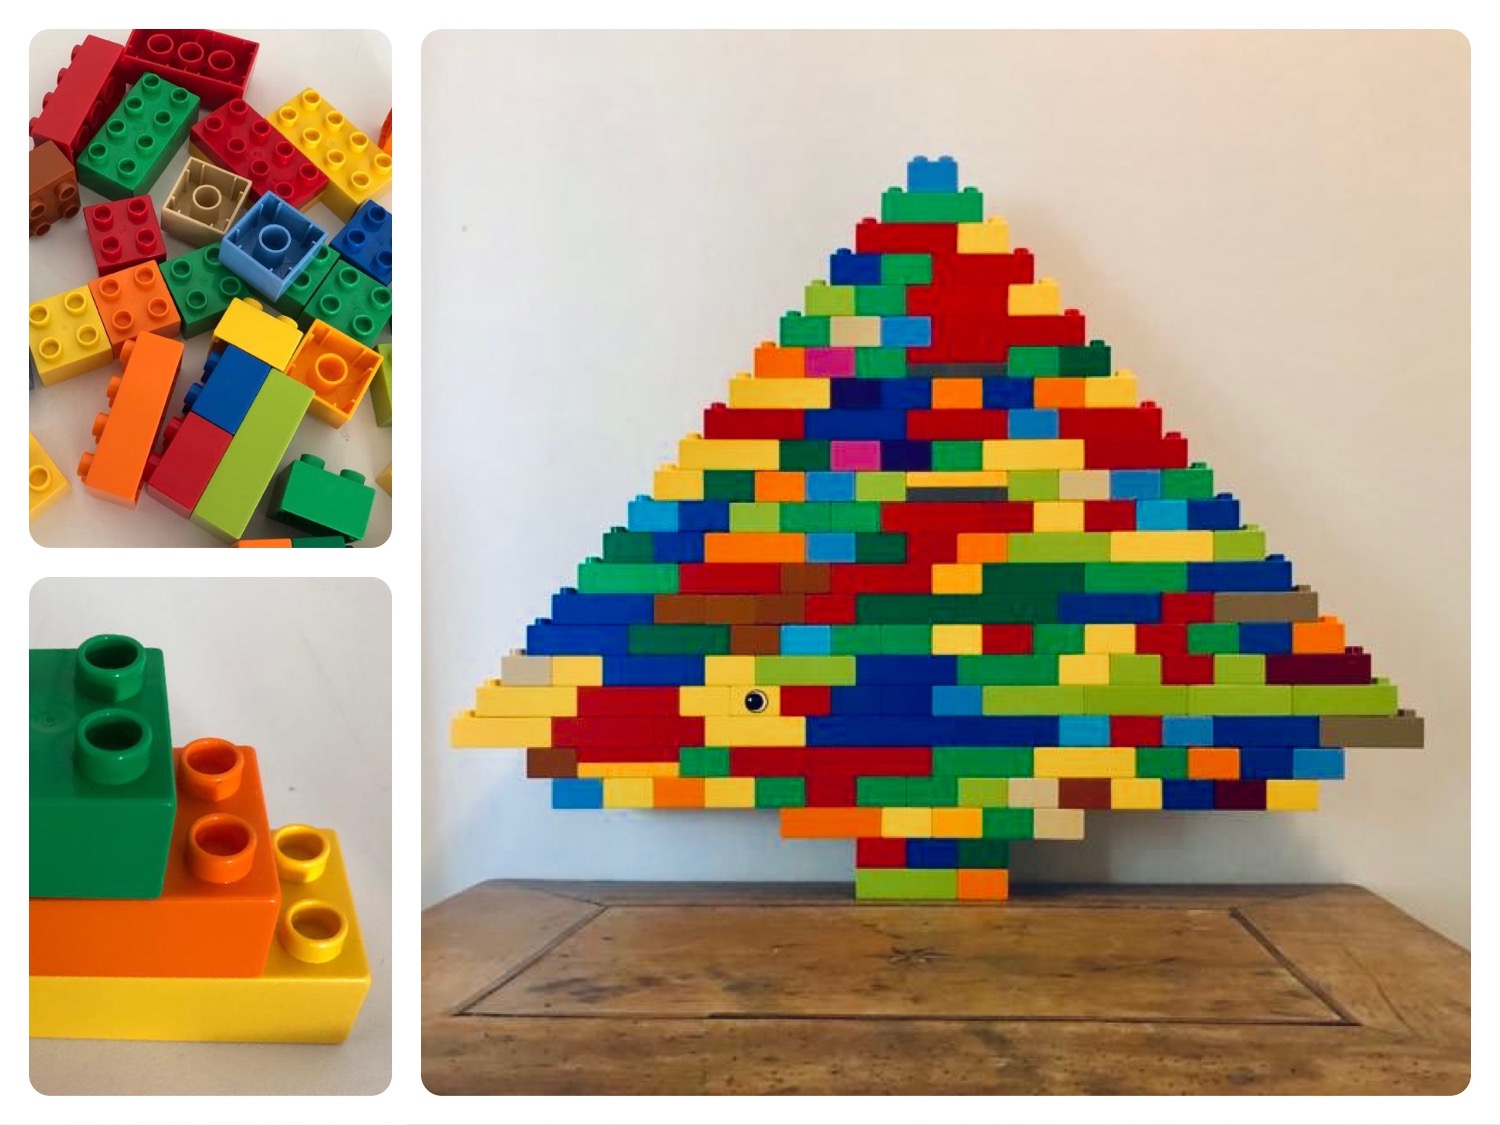
You need a lot of Lego stones. If you have a lot of them, you can also build a completely green duplo stones with the fir tree. But with colorful stones it looks just as great.

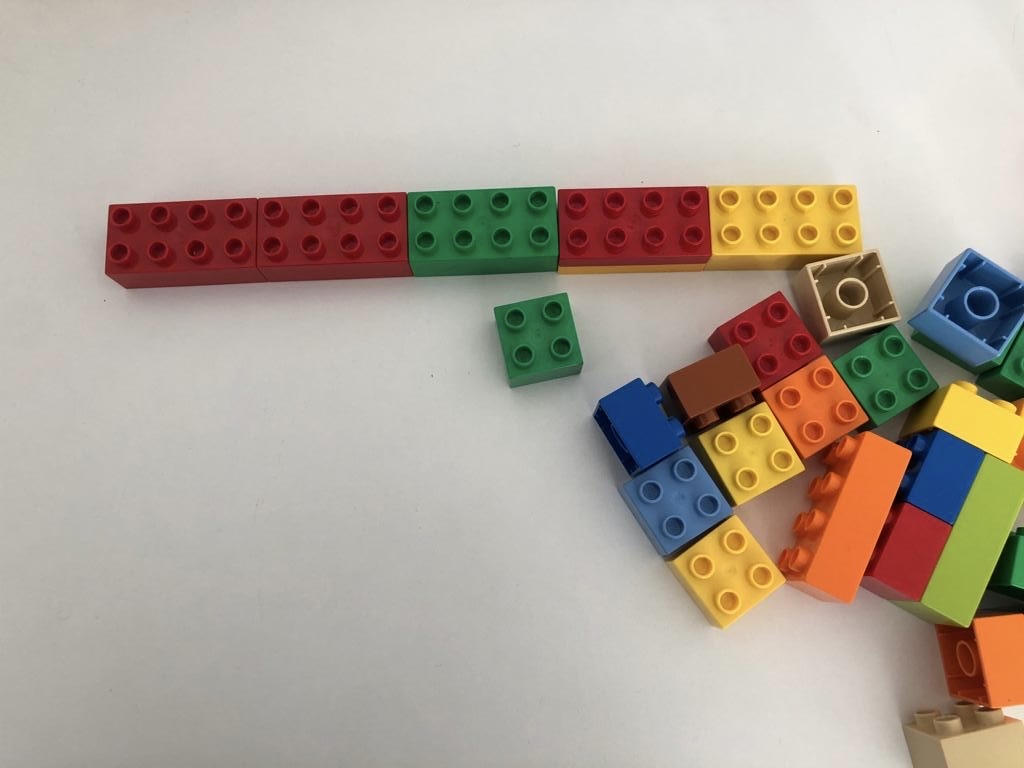
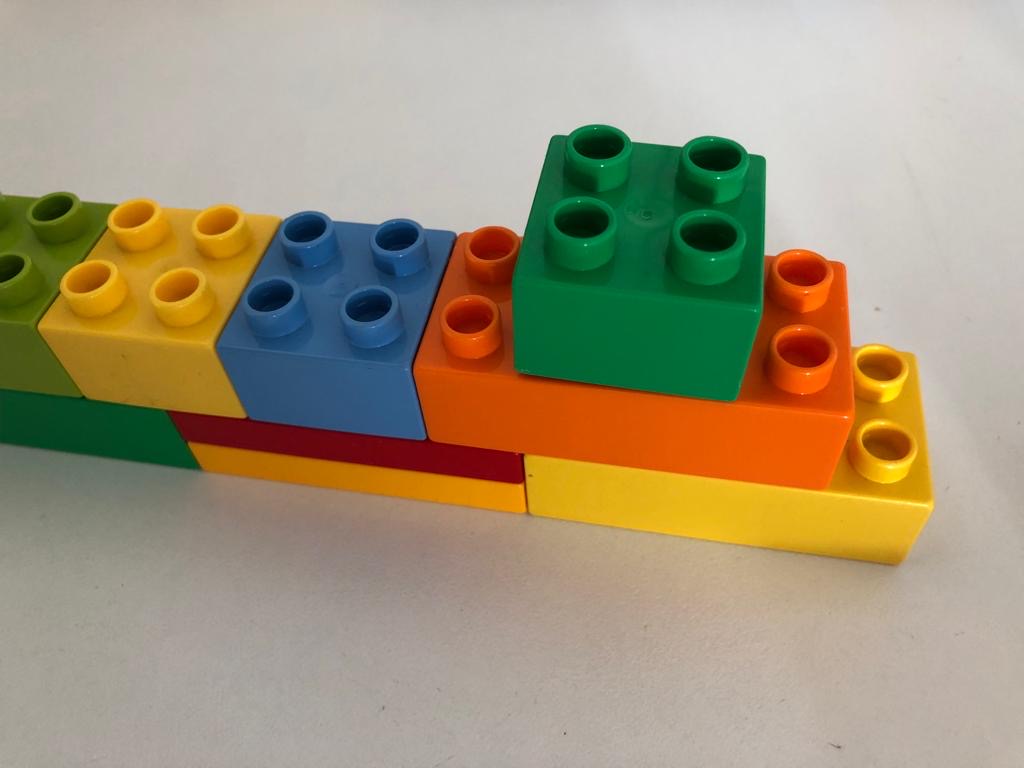
Start by laying a row of Lego stones. The length of the row determines the size of your tree.
On the first row the tree is built. In places where stones lie side by side, a stone is placed in the middle above it. Thus the tree gets hold.
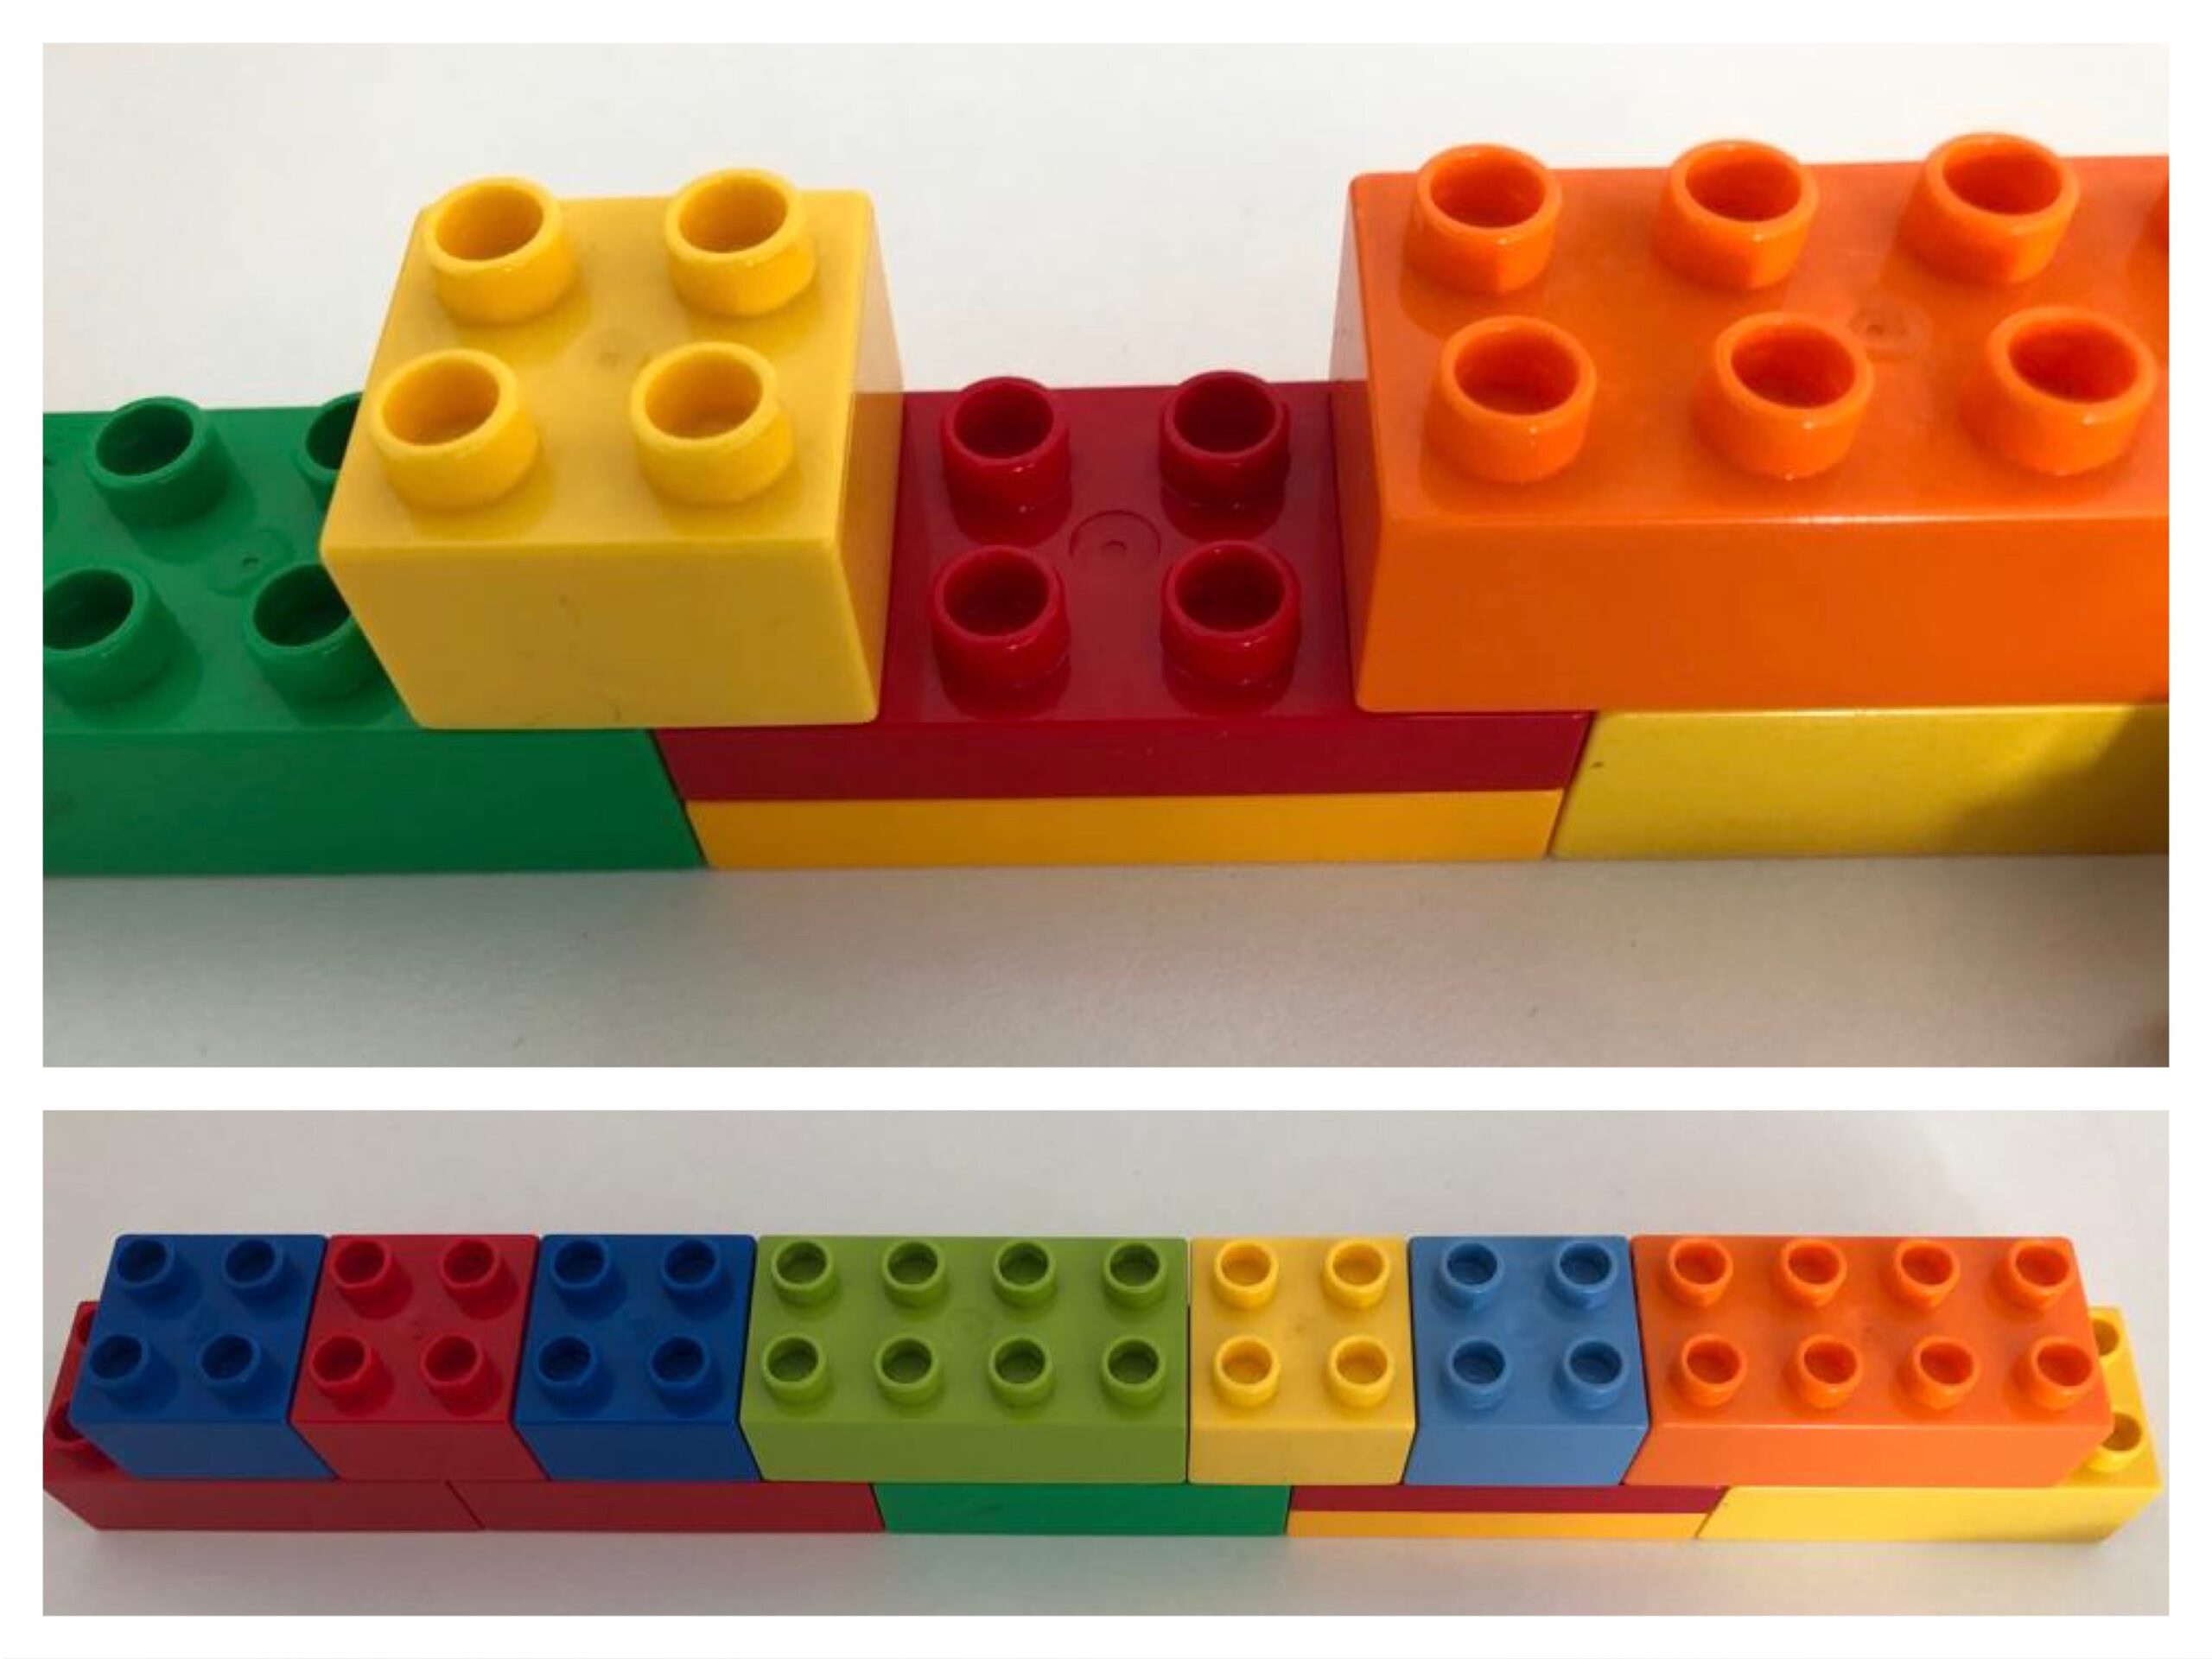
On both sides each row is started by a half (4er) stone moved upwards. So you get the triangle shape of the fir tree.
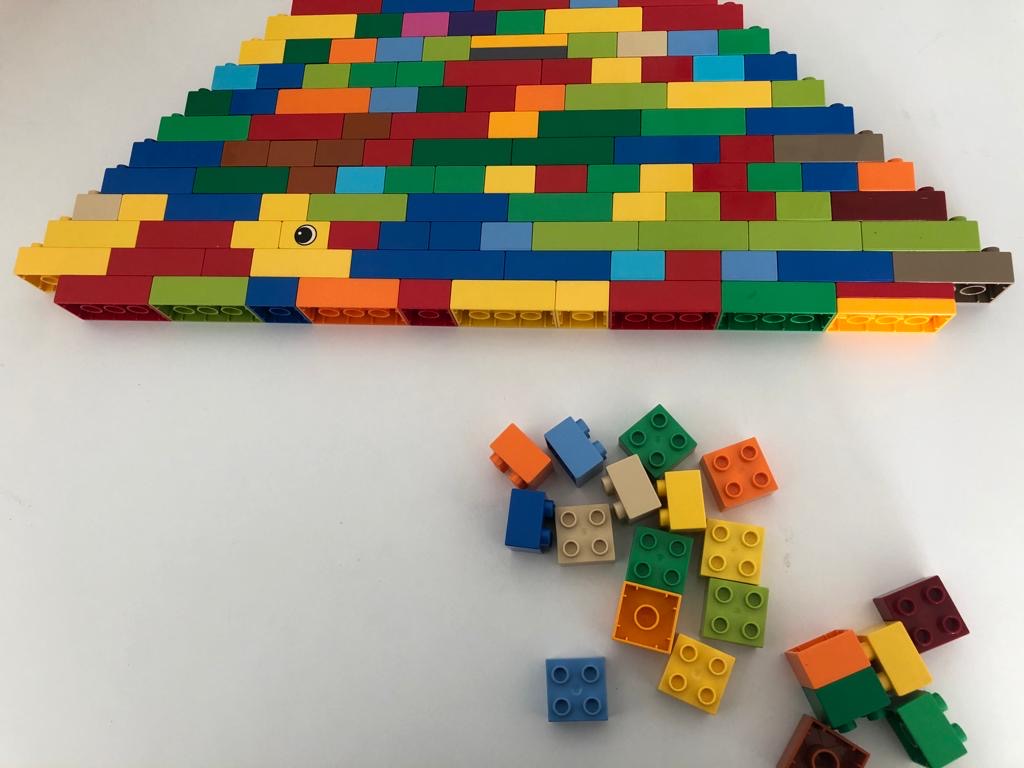
Place stones on each other until you arrive at the top. The top stone is a 4 stone.
Tilt the tree carefully so that it lies on the side.
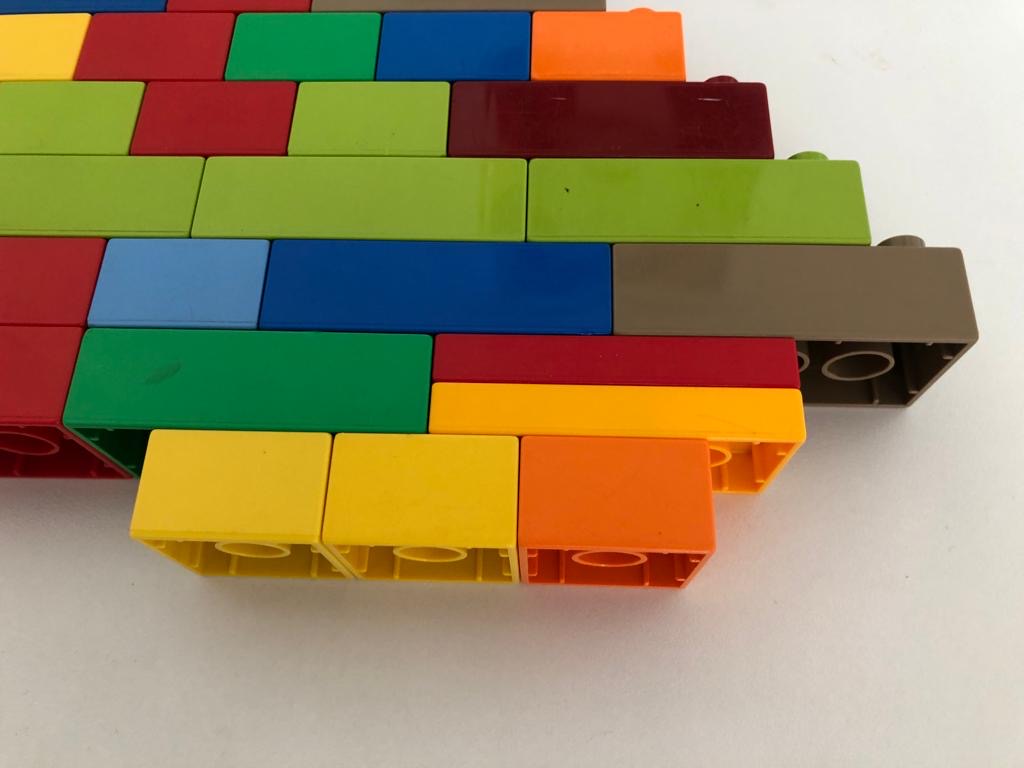
At the lowest row of stones is now being built. Starts from the outside with a 4 piece stone offset to grow another row.
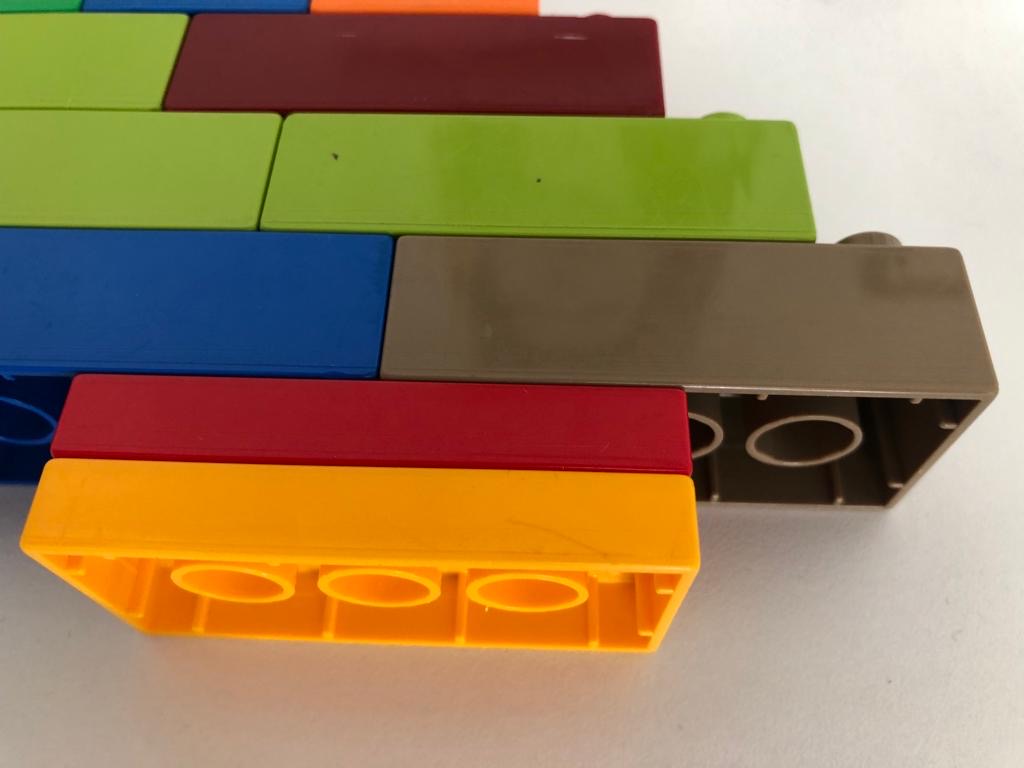
Also pay attention here again to the offset rows of stones.
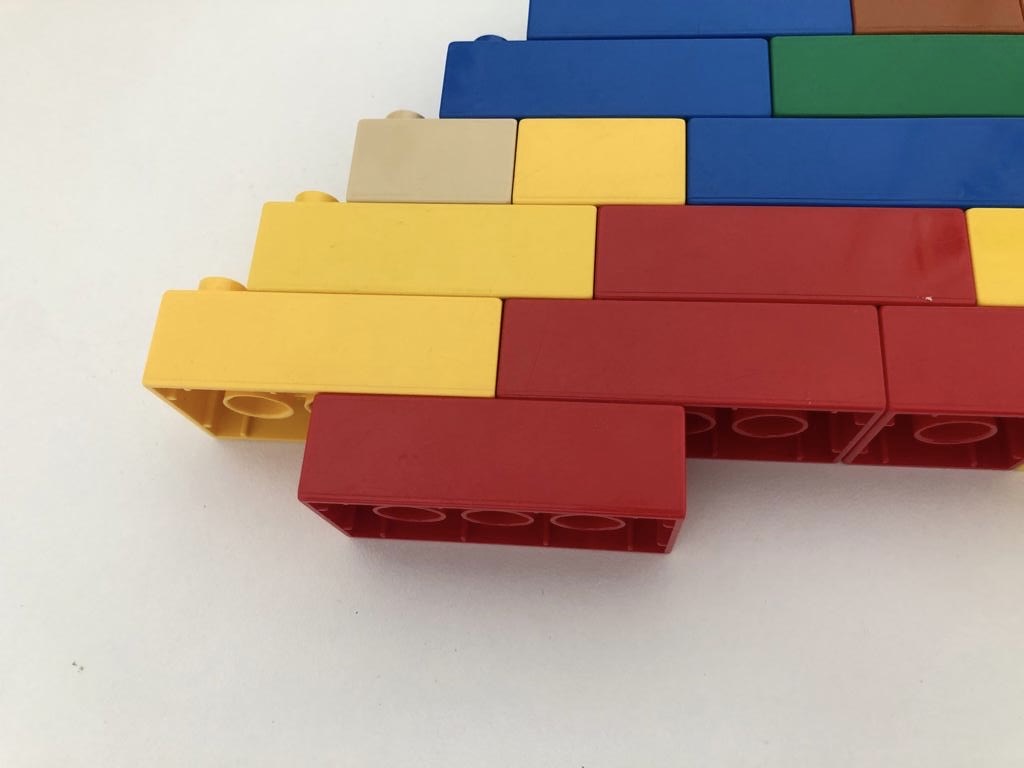
Build another row of stones.
Repeat the whole one more time. This time by half a 4 piece stone moved down.
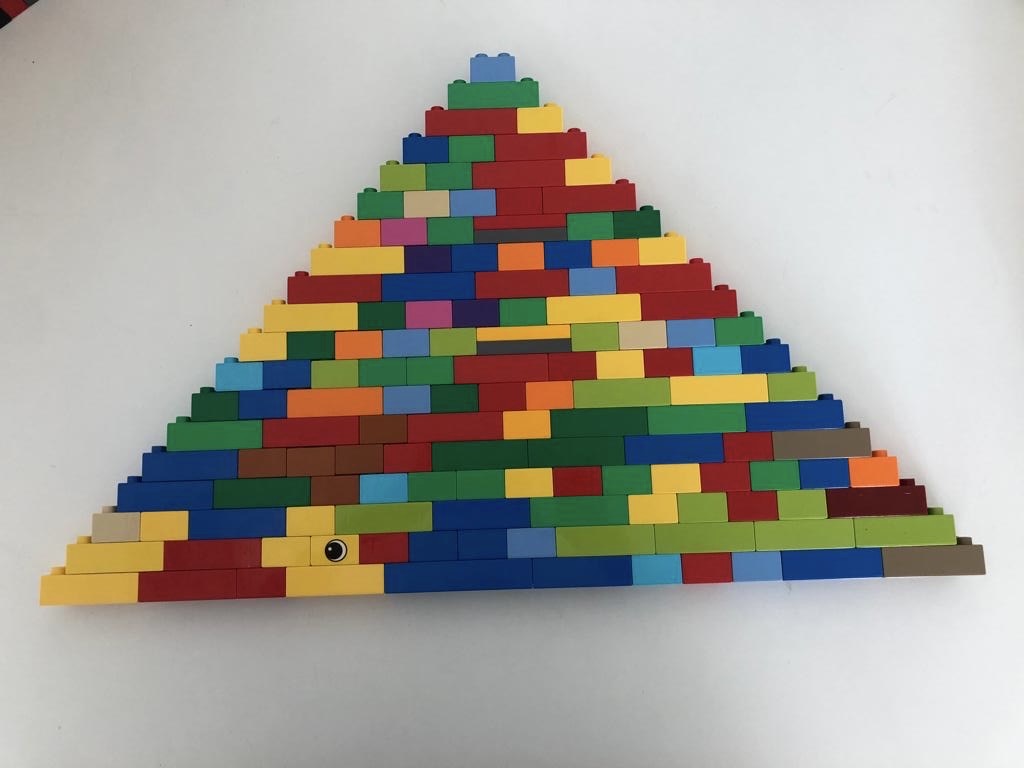
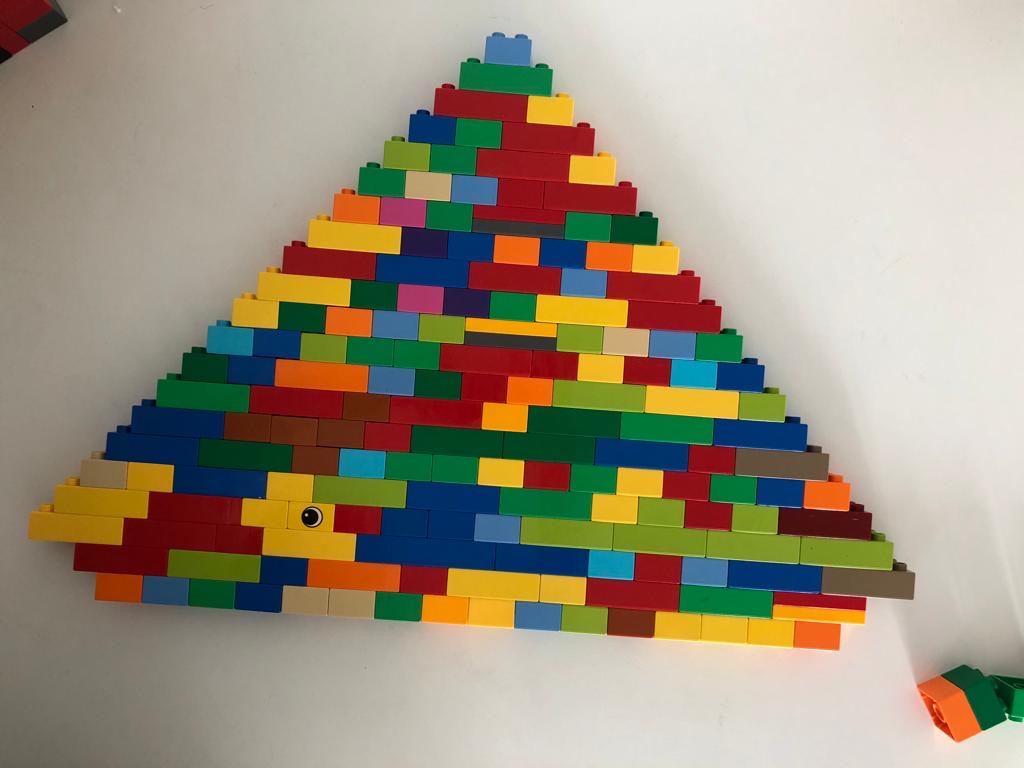
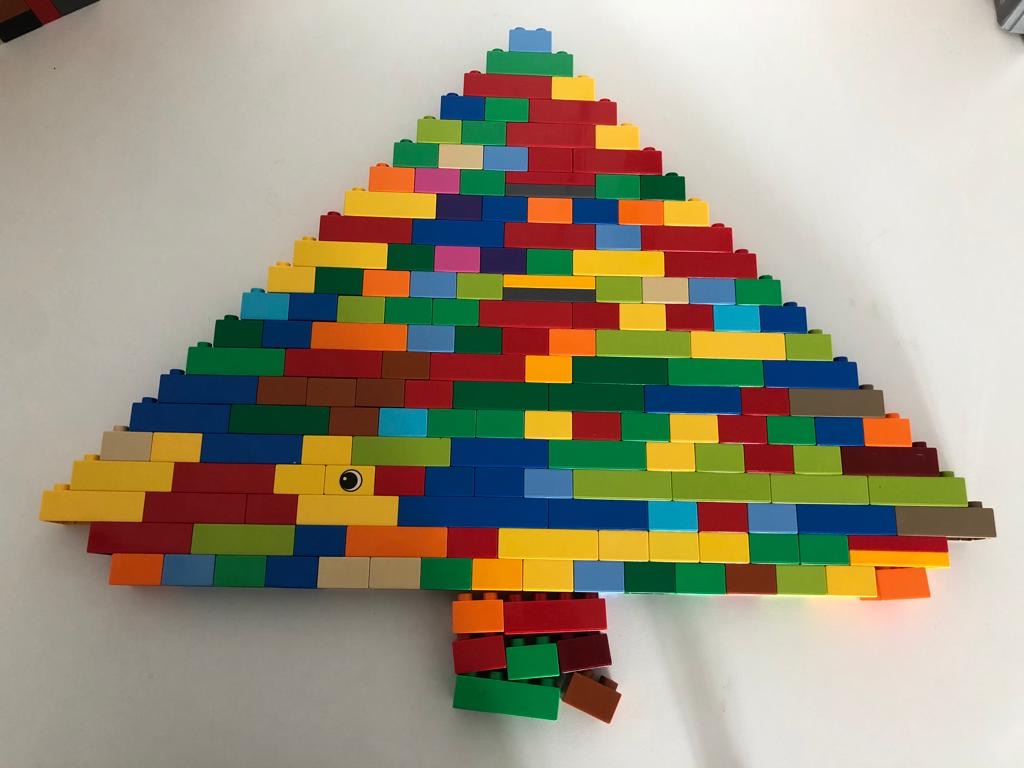
That's what the tree looks like now. It's still flat on the ground.
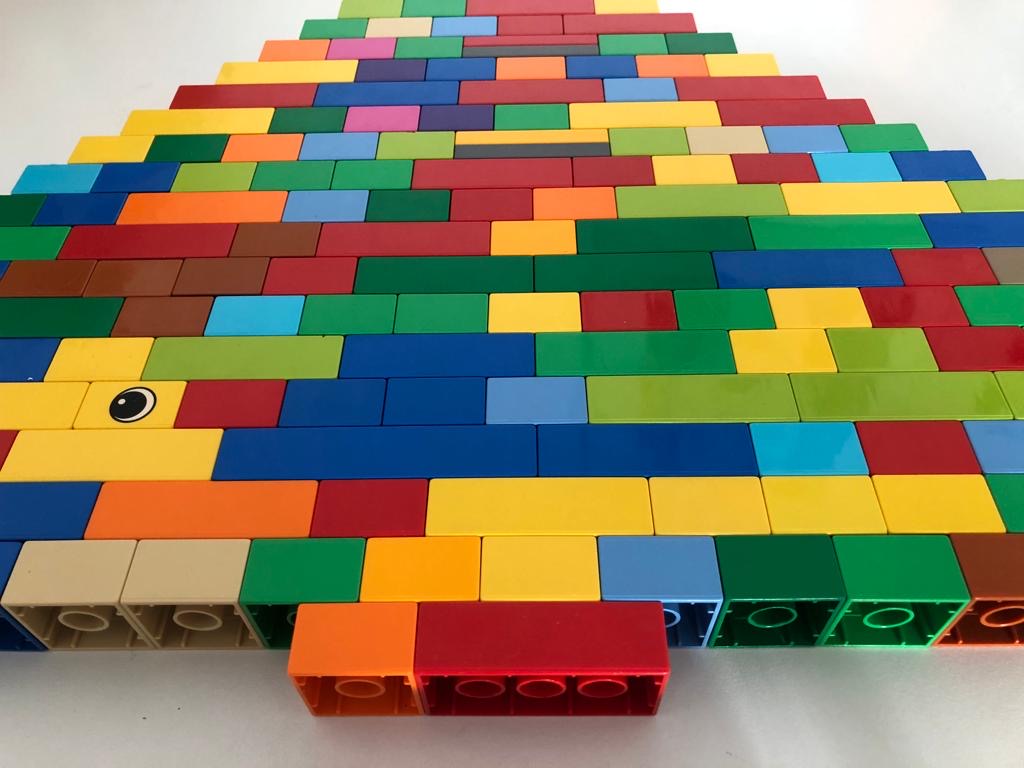
Sit directly at the widest side in front of the tree. This way you will recognize the best place where the center is. Here you will still find stones for the tree trunk.
Make the tree trunk a little wider and not too high. Otherwise the tree falls too lightly.
If it's too big, let it help you set up the tree. Otherwise, it can break apart.
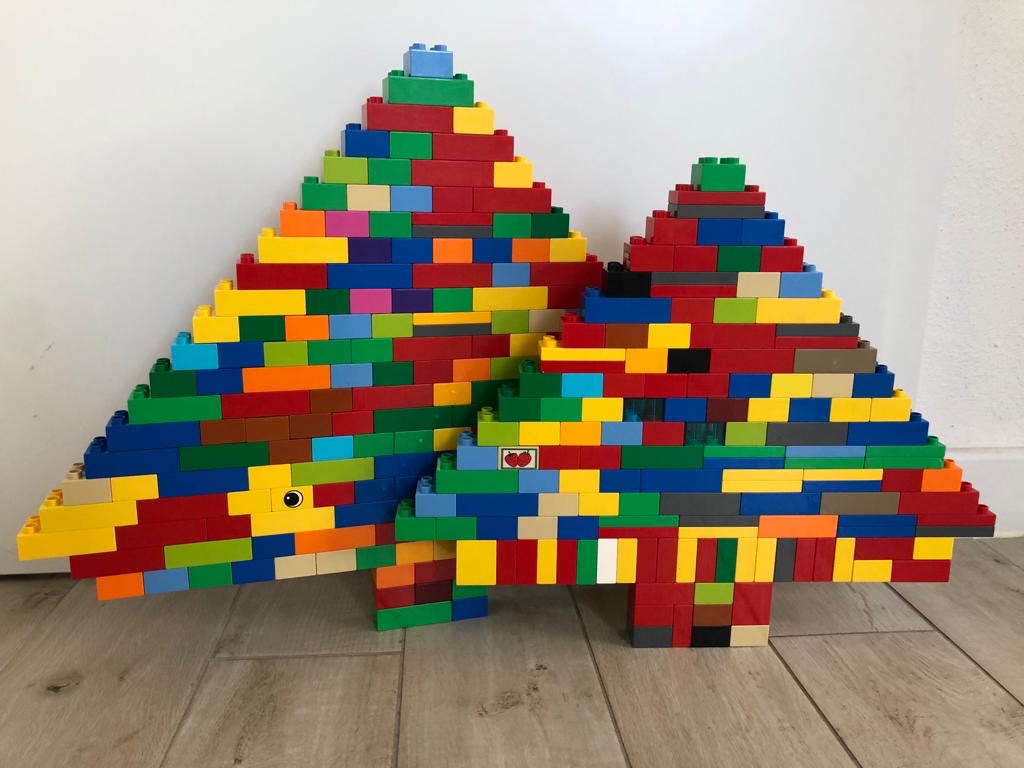
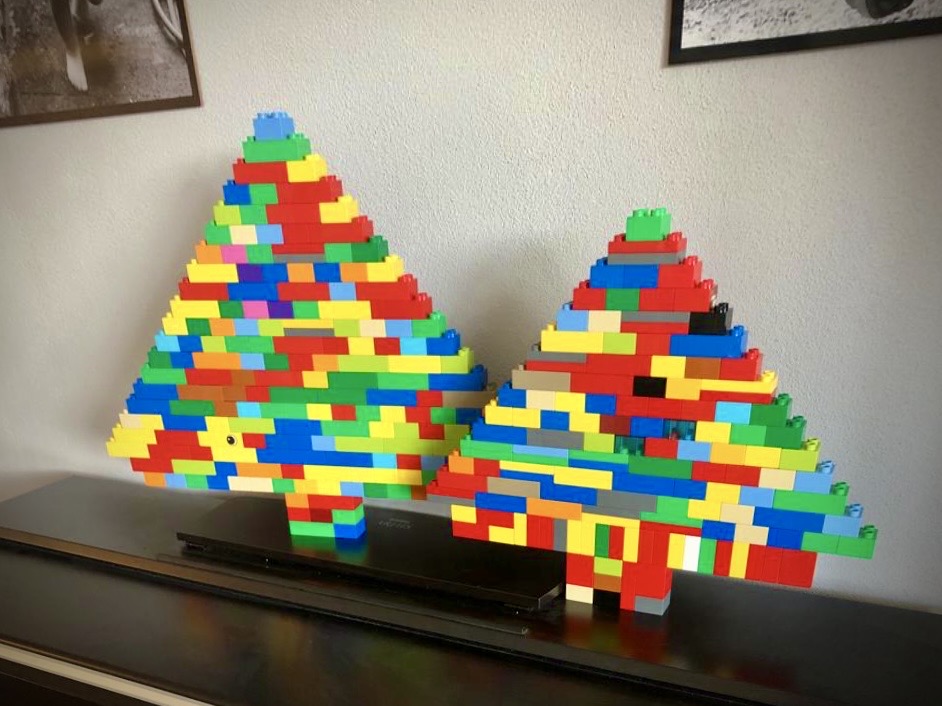
Find a nice place to enjoy your fir tree for a long time.
Have fun building.
Lego stones

Materials
Directions
You need a lot of Lego stones. If you have a lot of them, you can also build a completely green duplo stones with the fir tree. But with colorful stones it looks just as great.
Start by laying a row of Lego stones. The length of the row determines the size of your tree.
On the first row the tree is built. In places where stones lie side by side, a stone is placed in the middle above it. Thus the tree gets hold.
On both sides each row is started by a half (4er) stone moved upwards. So you get the triangle shape of the fir tree.
Place stones on each other until you arrive at the top. The top stone is a 4 stone.
Tilt the tree carefully so that it lies on the side.
At the lowest row of stones is now being built. Starts from the outside with a 4 piece stone offset to grow another row.
Also pay attention here again to the offset rows of stones.
Build another row of stones.
Repeat the whole one more time. This time by half a 4 piece stone moved down.
That's what the tree looks like now. It's still flat on the ground.
Sit directly at the widest side in front of the tree. This way you will recognize the best place where the center is. Here you will still find stones for the tree trunk.
Make the tree trunk a little wider and not too high. Otherwise the tree falls too lightly.
If it's too big, let it help you set up the tree. Otherwise, it can break apart.
Find a nice place to enjoy your fir tree for a long time.
Have fun building.
Lego stones
Follow us on Facebook , Instagram and Pinterest
Don't miss any more adventures: Our bottle mail