Build fir tree from branches

AdventurerKatzi
Rating5.04.0 thousand times & (1) DifficultyAdvanced

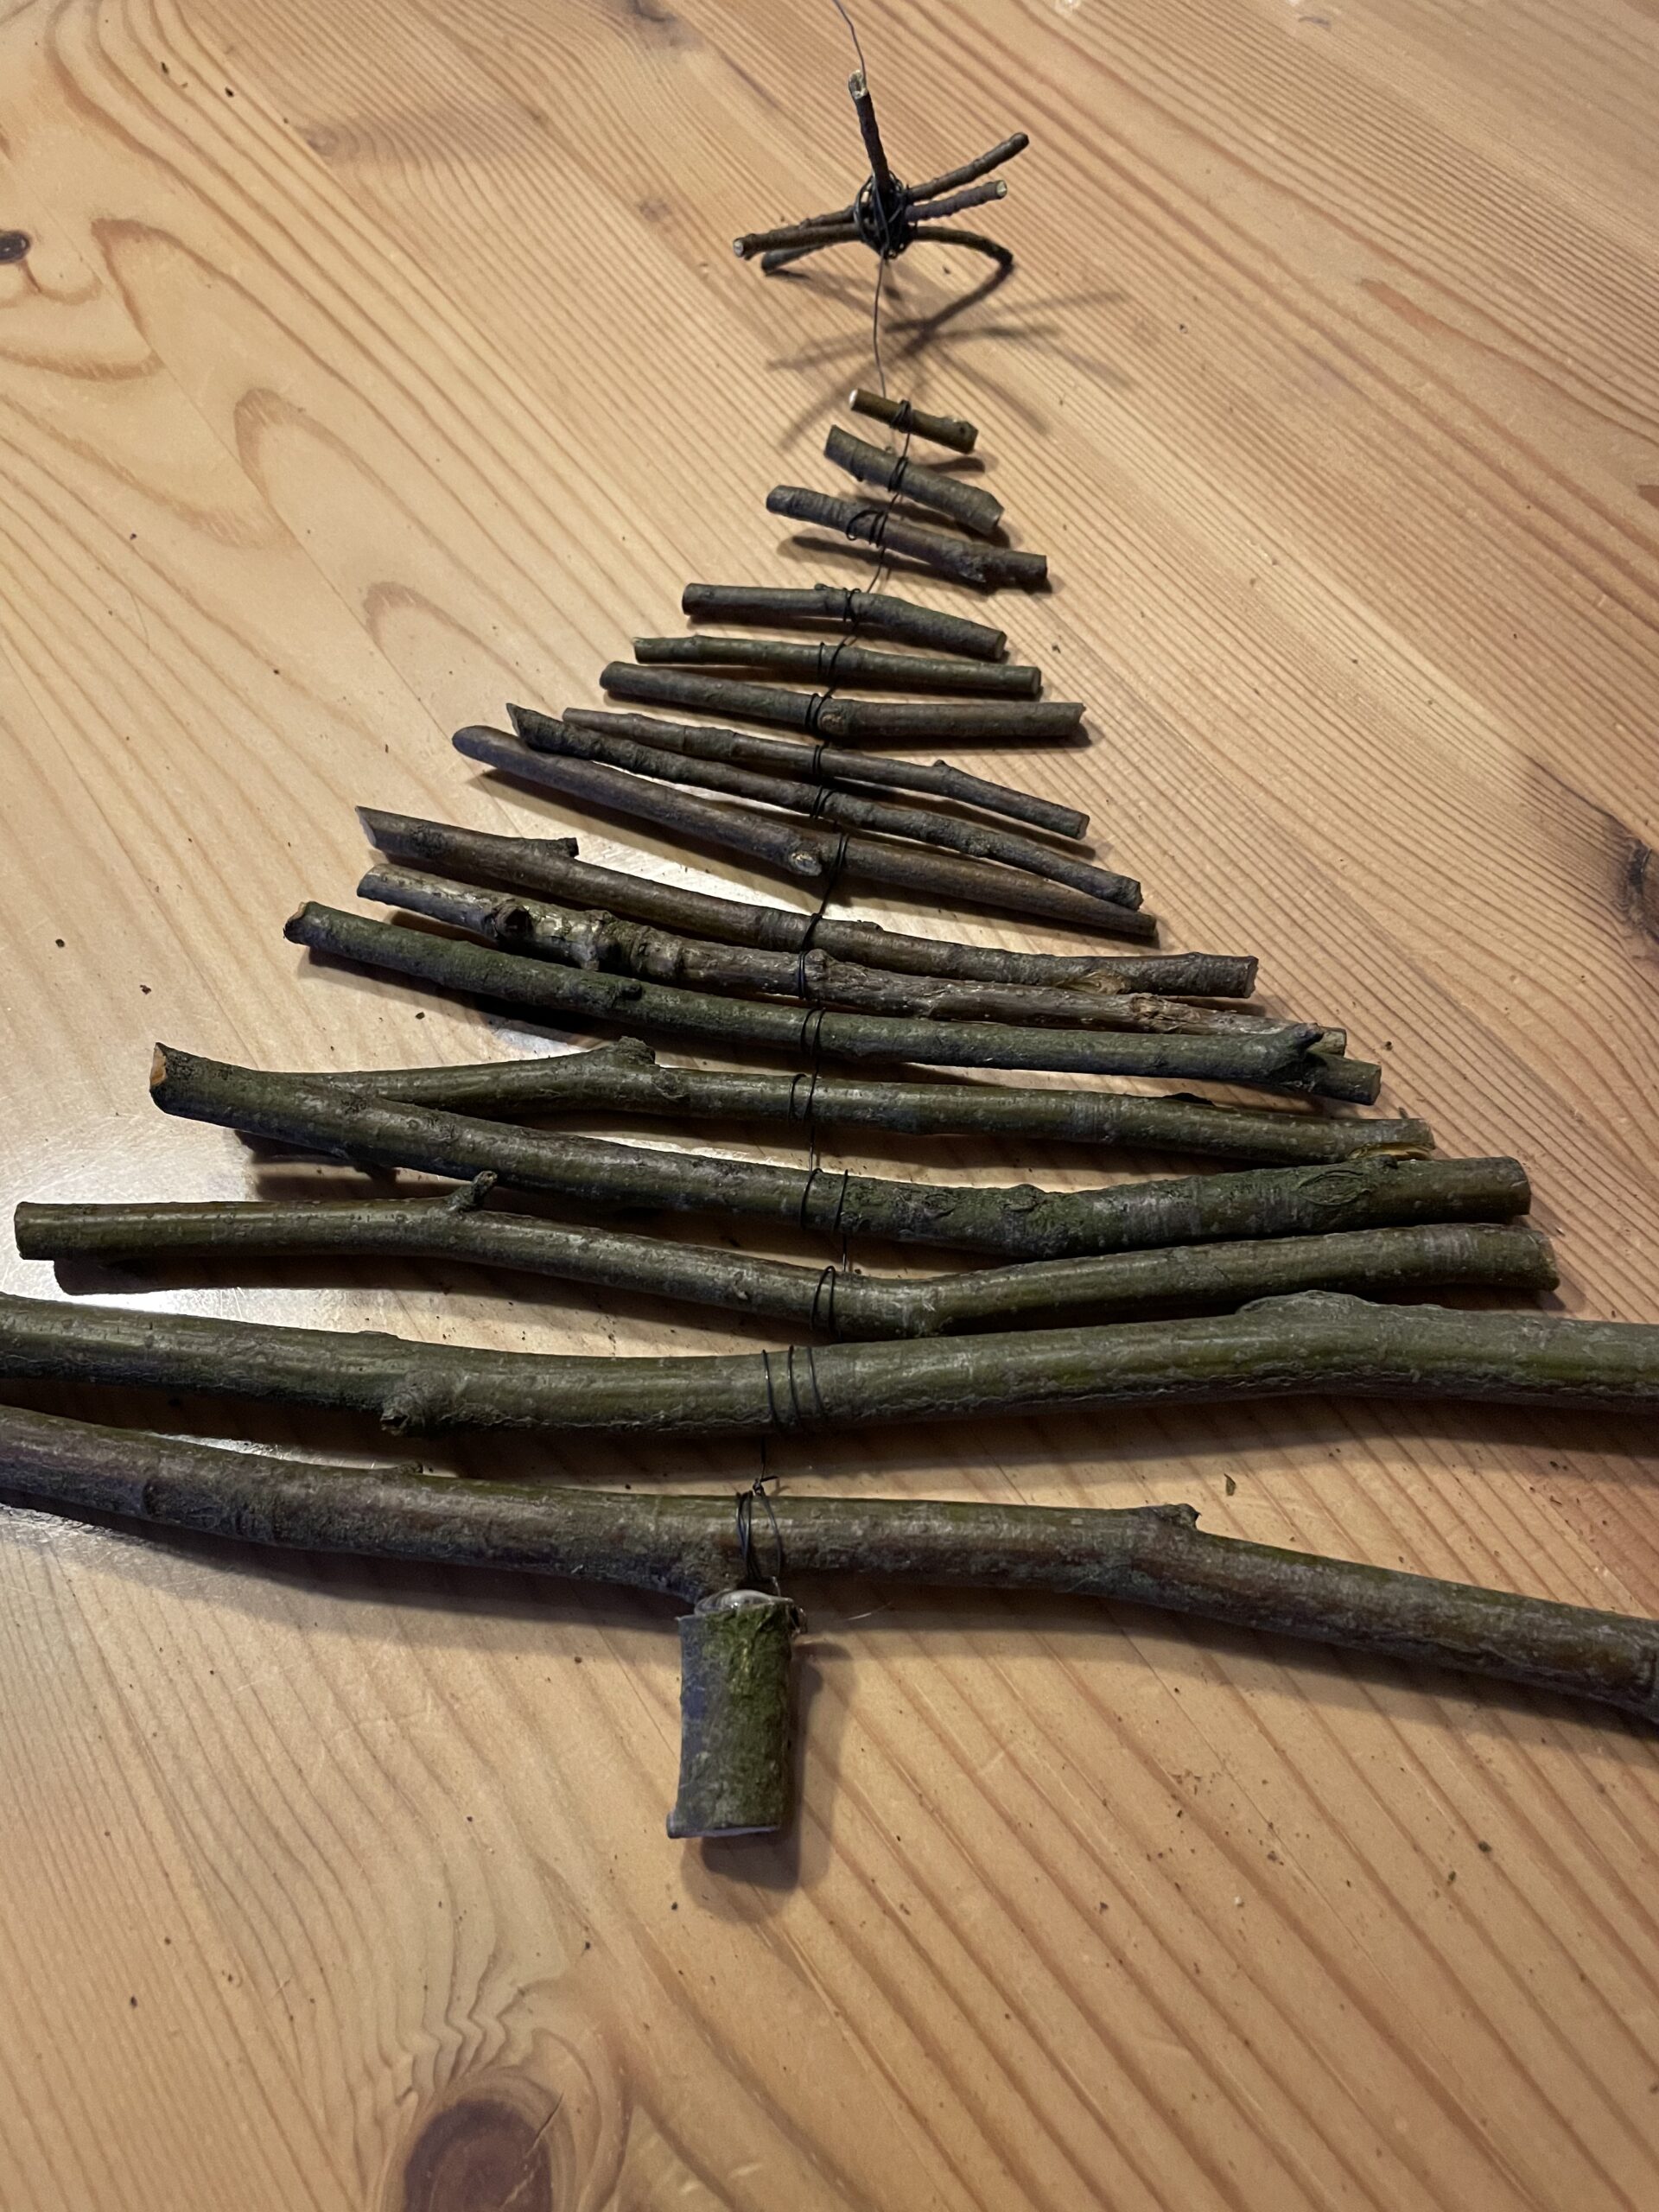
This fir tree is a challenging craft project. For this you need patience, because the handling of the flower wire when connecting the branches needs some practice. Get suggestions for handling in the illustrated guide.
The small fir tree looks beautiful as a decoration during the Advent season and is also suitable as a gift. Take a look at this craft project and have a lot of fun!

Media Education for Kindergarten and Hort

Kind bastelt eine Rassel mit dem Navi
The Adventure Navi, the app for DIY projects, enables media education for the youngest.

Relief in everyday life, targeted promotion of individual children, independent learning and - without any pre-knowledge already usable by the youngest!
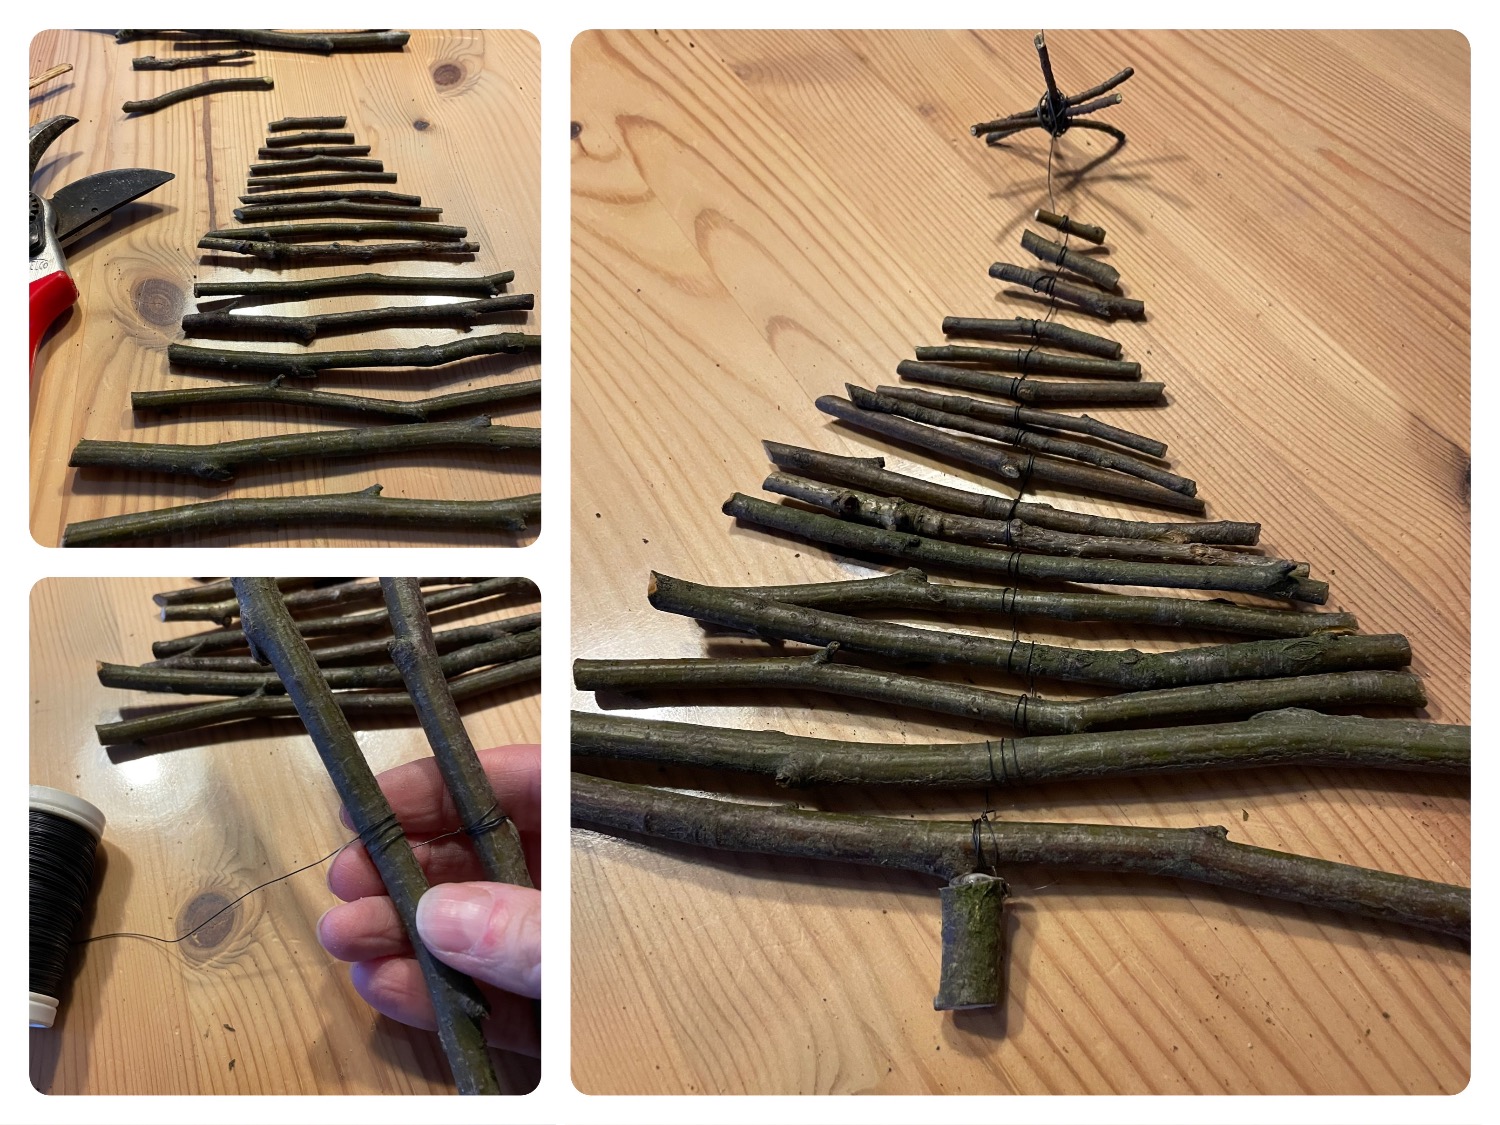


Titelbild zur Bastel- und DIY-Idee für Kinder '(903) Tannenbaum aus Ästen bauen'
Material for1 Child
Prep Time10 min.Adv. Time30 min.Total Time40 min.
 Floral wire
 Branches in the same thicknessBranches
 1 Garten shears
1

Uses as thick branches as possible.
Tip: Thinner branches are easier to cut with the garden shears.
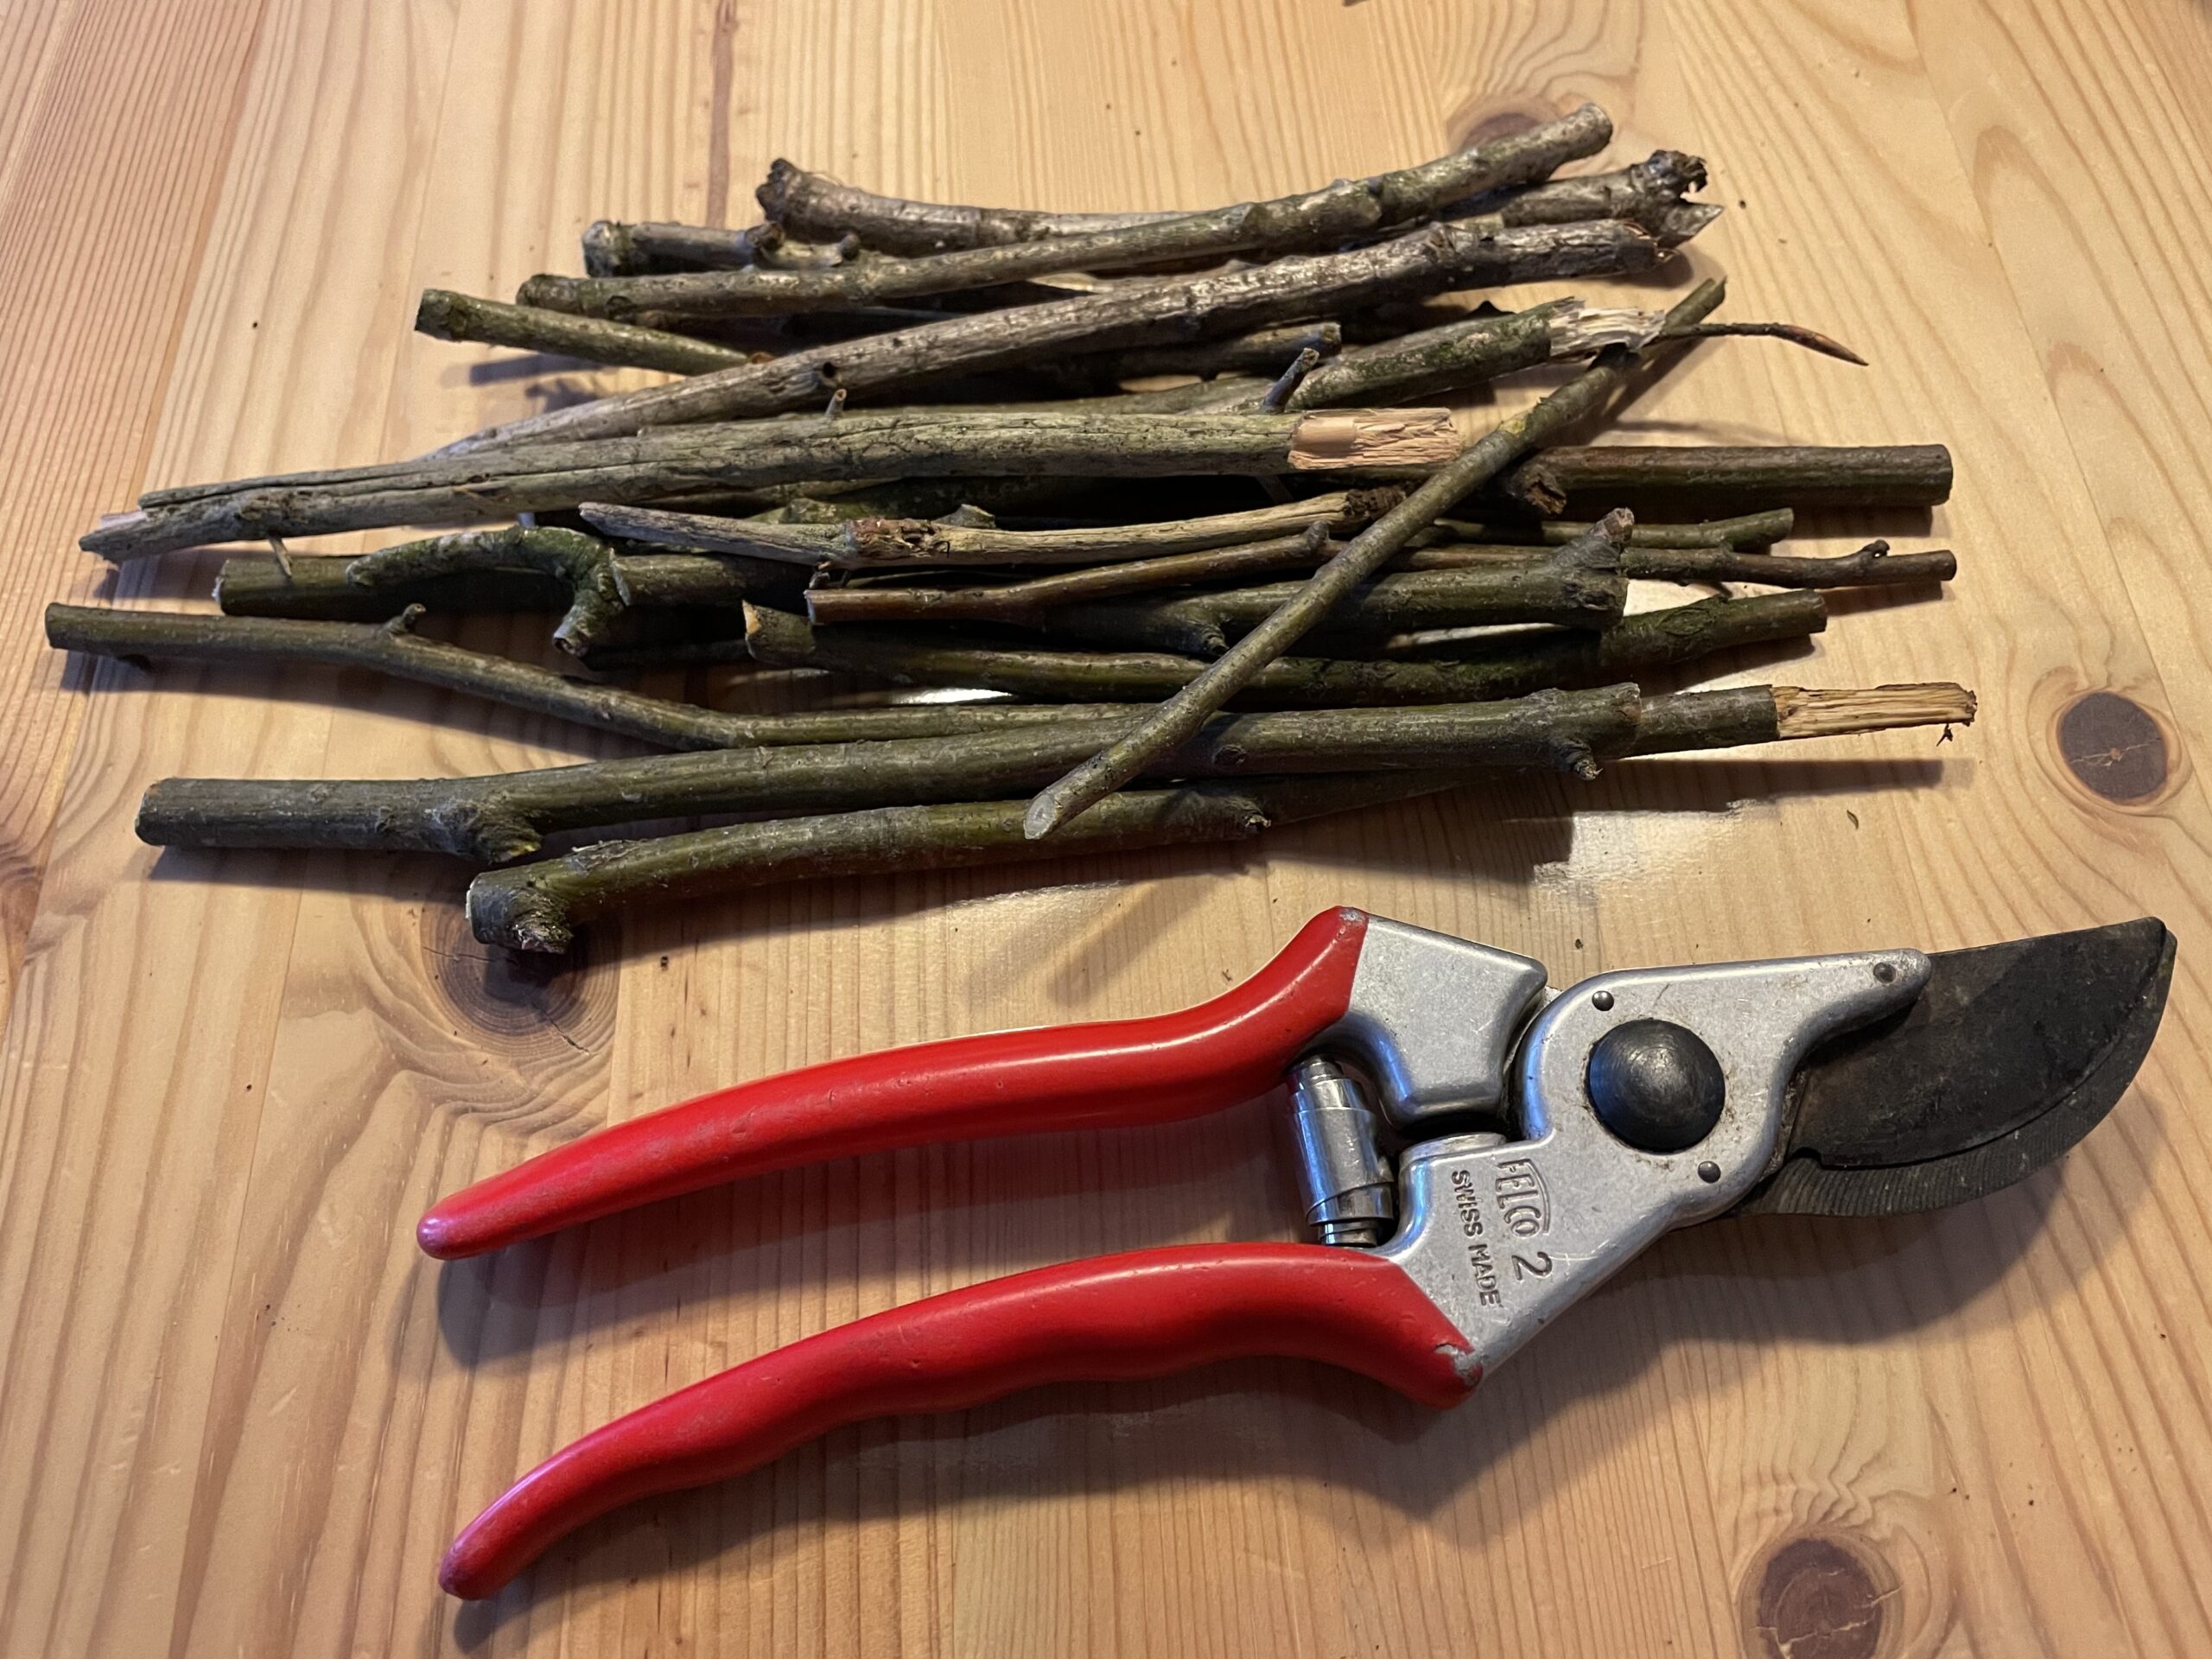
Bild zum Schritt 1 für das Bastel- und DIY-Abenteuer für Kinder: 'Verwendet möglichst gleich dicke Äste.   Tipp: Dünnere Äste...'

2

Select a branch length for the lowest branch and cut each further branch a small piece shorter. This creates a fir tree.
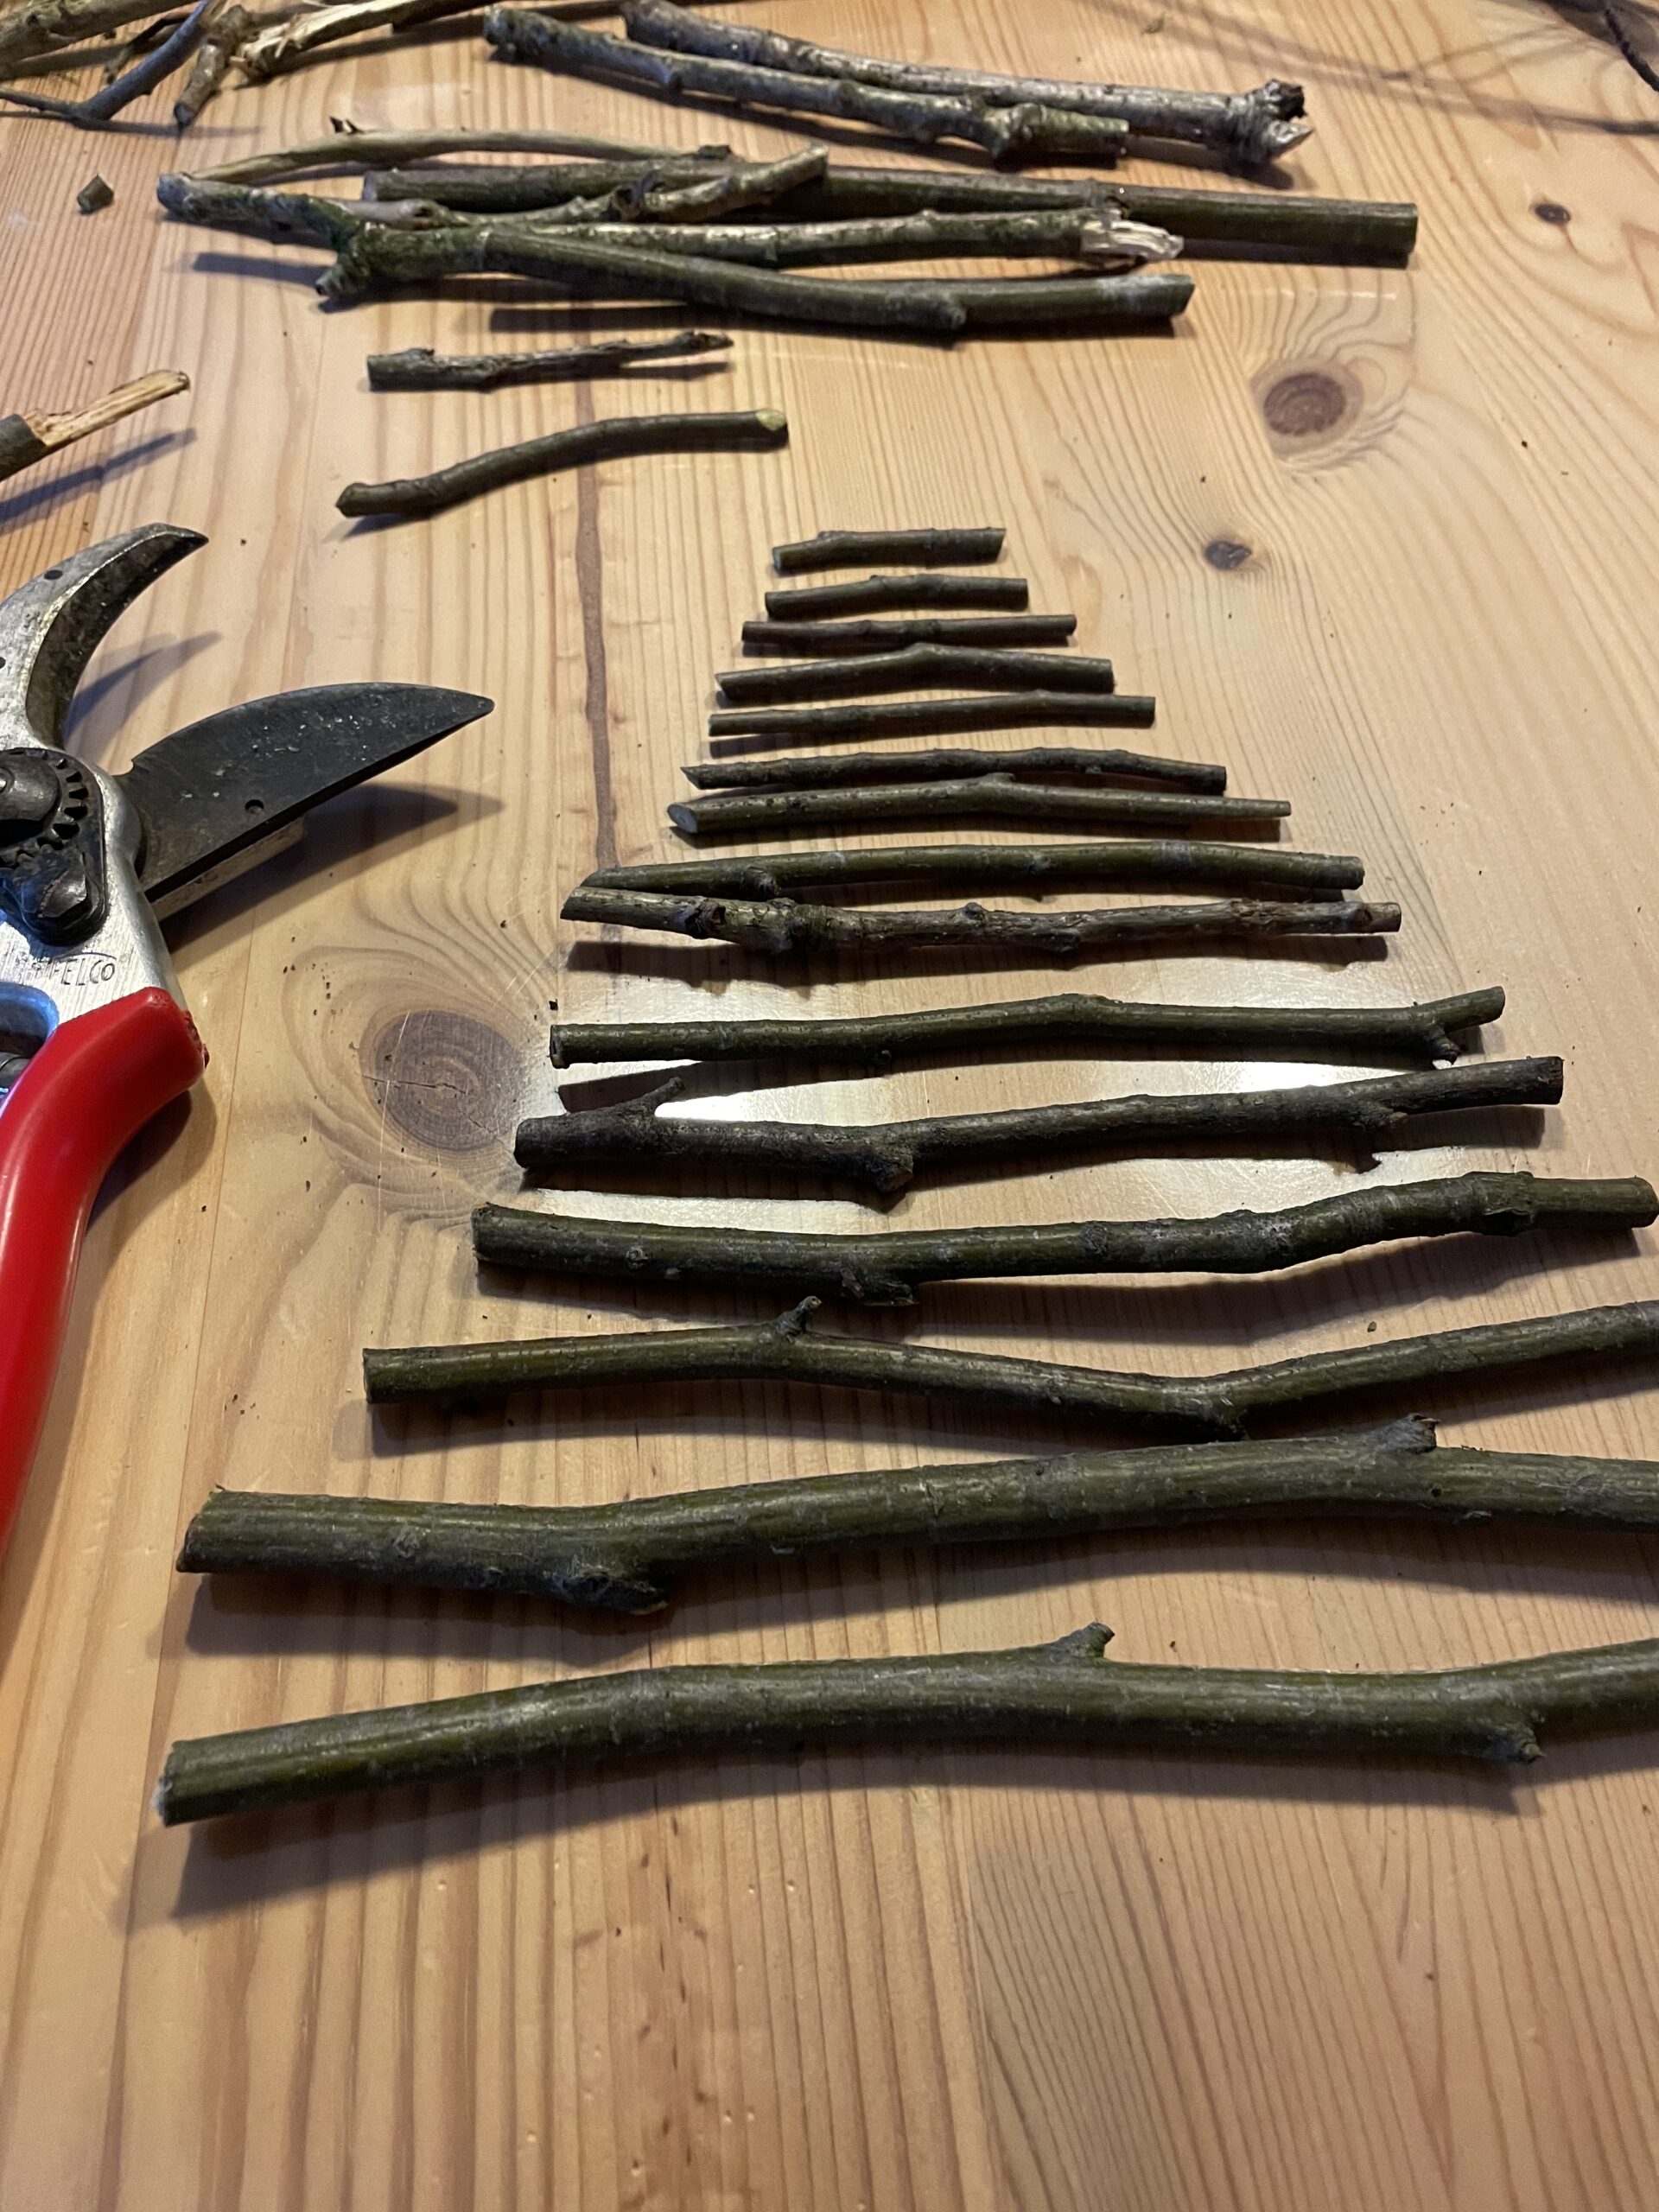
Bild zum Schritt 2 für das Bastel- und DIY-Abenteuer für Kinder: 'Wählt eine Astlänge für den untersten Ast aus und schneidet...'

3

Then you make a small star for the fir tree. First you bind two small branches across the cross and then you put another cross of small branches in between and connect them.

Bild zum Schritt 3 für das Bastel- und DIY-Abenteuer für Kinder: 'Anschließend bastelt ihr für den Tannenbaum einen kleinen Stern. Dafür...'

4

Now place the star at the top of the fir tree.

Bild zum Schritt 4 für das Bastel- und DIY-Abenteuer für Kinder: 'Legt nun den Stern an das obere Ende des Tannenbaums.'

5

Now start to connect the individual branches with the wire from the bottom to the top. Knot the wire first in the middle of the lowest branch.

Bild zum Schritt 5 für das Bastel- und DIY-Abenteuer für Kinder: 'Beginnt jetzt mit dem Draht die einzelnen Äste von unten...'

6

After that, you wrap the branch lying above it with wire in the middle and connect both branches with each other.

Bild zum Schritt 6 für das Bastel- und DIY-Abenteuer für Kinder: 'Danach umwickelt ihr den darüber liegenden Ast ebenfalls in der...'

7

Connects one branch at a time. It's enough to wrap the branches with wire.

Bild zum Schritt 7 für das Bastel- und DIY-Abenteuer für Kinder: 'Verbindet so einen Ast nach dem anderen. Es reicht aus,...'

8

Wrap the wire around the branches until you arrive at the last branch.

Bild zum Schritt 8 für das Bastel- und DIY-Abenteuer für Kinder: 'Wickelt den Draht so lange um die Äste bis ihr...'

9

Now you attach the star with the wire at the top by wrapping it as well. Then you bend a loop to hang it up. For this, you let the wire survive for 15cm and then cut it off. Rotate the end of the wire so that no more pieces stand out.

Bild zum Schritt 9 für das Bastel- und DIY-Abenteuer für Kinder: 'Jetzt befestigt ihr den Stern mit dem Draht an der...'

10

With hot glue you now stick a small piece of branch as trunk to the lower branch in the middle.
Attention when handling the hot glue - risk of injury!

Bild zum Schritt 10 für das Bastel- und DIY-Abenteuer für Kinder: 'Mit Heißkleber klebt ihr nun ein kleines Stück Ast als...'

11

The fir tree is ready.

Bild zum Schritt 11 für das Bastel- und DIY-Abenteuer für Kinder: 'Fertig ist der Tannenbaum.'

12

Hang it up and align the individual branches again.

Bild zum Schritt 12 für das Bastel- und DIY-Abenteuer für Kinder: 'Hängt ihn auf und richtet dabei die einzelnen Äste noch...'

13

Have fun trying out and doing this fine motor exercise.

Bild zum Schritt 13 für das Bastel- und DIY-Abenteuer für Kinder: 'Viel Spaß beim Ausprobieren und bei dieser feinmotorischen Übung.'

Materials

 Floral wire
 Branches in the same thicknessBranches
 1 Garten shears

Directions

1

Uses as thick branches as possible.
Tip: Thinner branches are easier to cut with the garden shears.

Bild zum Schritt 1 für das Bastel- und DIY-Abenteuer für Kinder: 'Verwendet möglichst gleich dicke Äste.   Tipp: Dünnere Äste...'

2

Select a branch length for the lowest branch and cut each further branch a small piece shorter. This creates a fir tree.

Bild zum Schritt 2 für das Bastel- und DIY-Abenteuer für Kinder: 'Wählt eine Astlänge für den untersten Ast aus und schneidet...'

3

Then you make a small star for the fir tree. First you bind two small branches across the cross and then you put another cross of small branches in between and connect them.
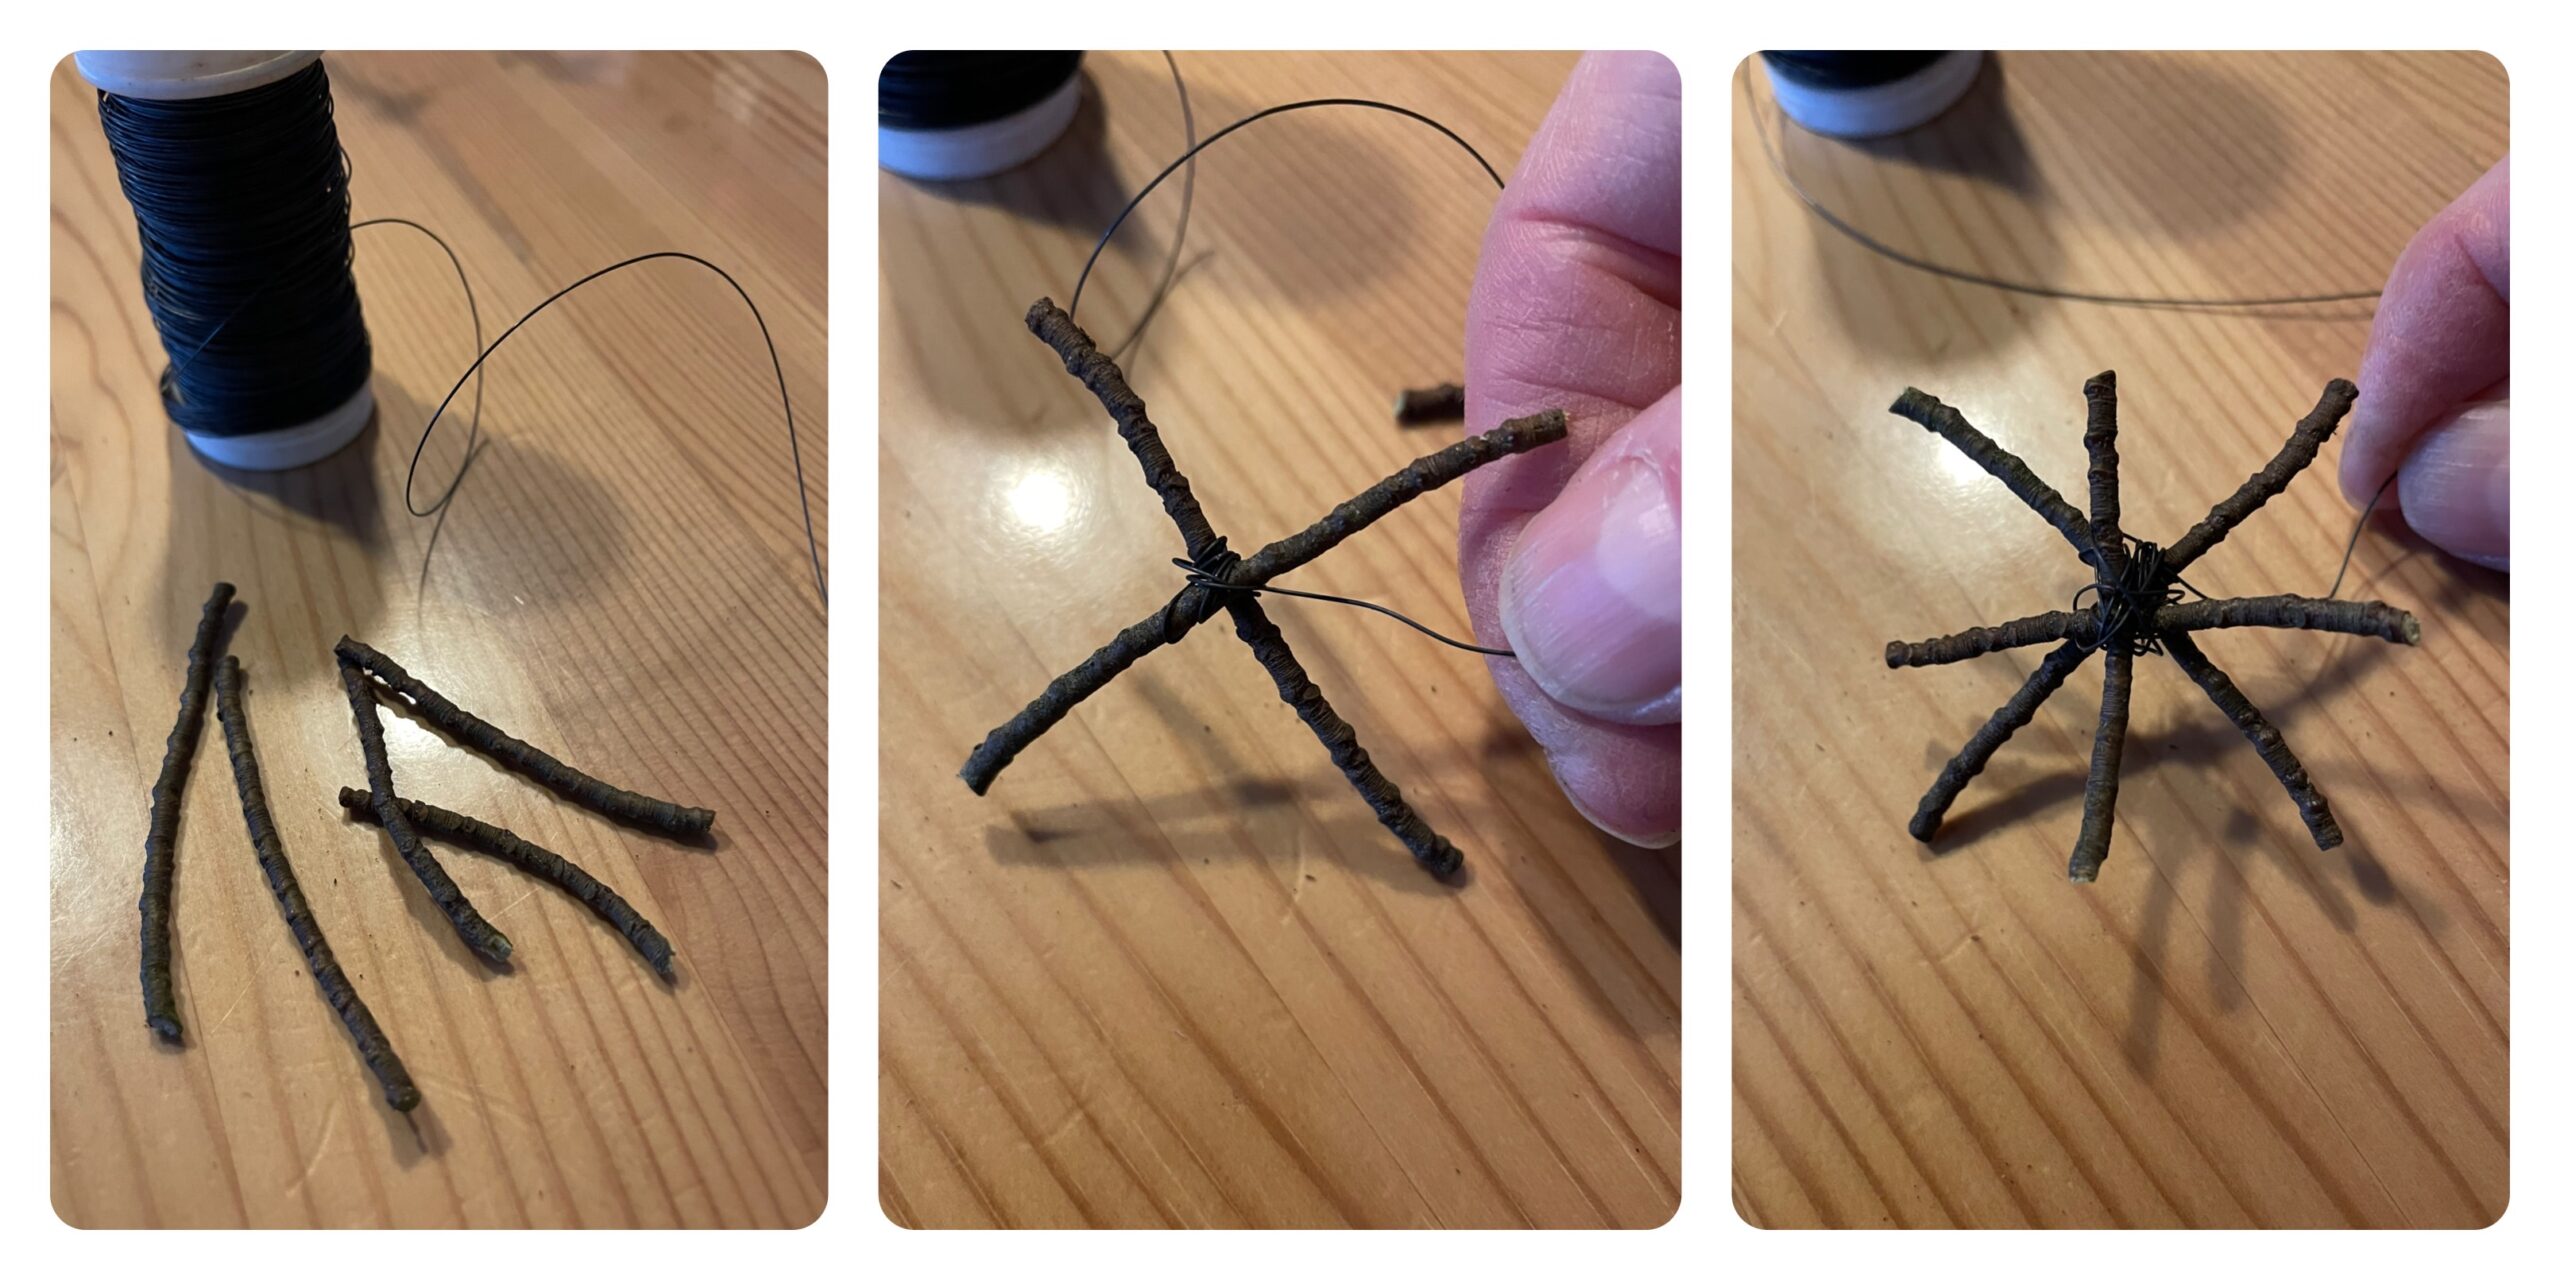
Bild zum Schritt 3 für das Bastel- und DIY-Abenteuer für Kinder: 'Anschließend bastelt ihr für den Tannenbaum einen kleinen Stern. Dafür...'

4

Now place the star at the top of the fir tree.
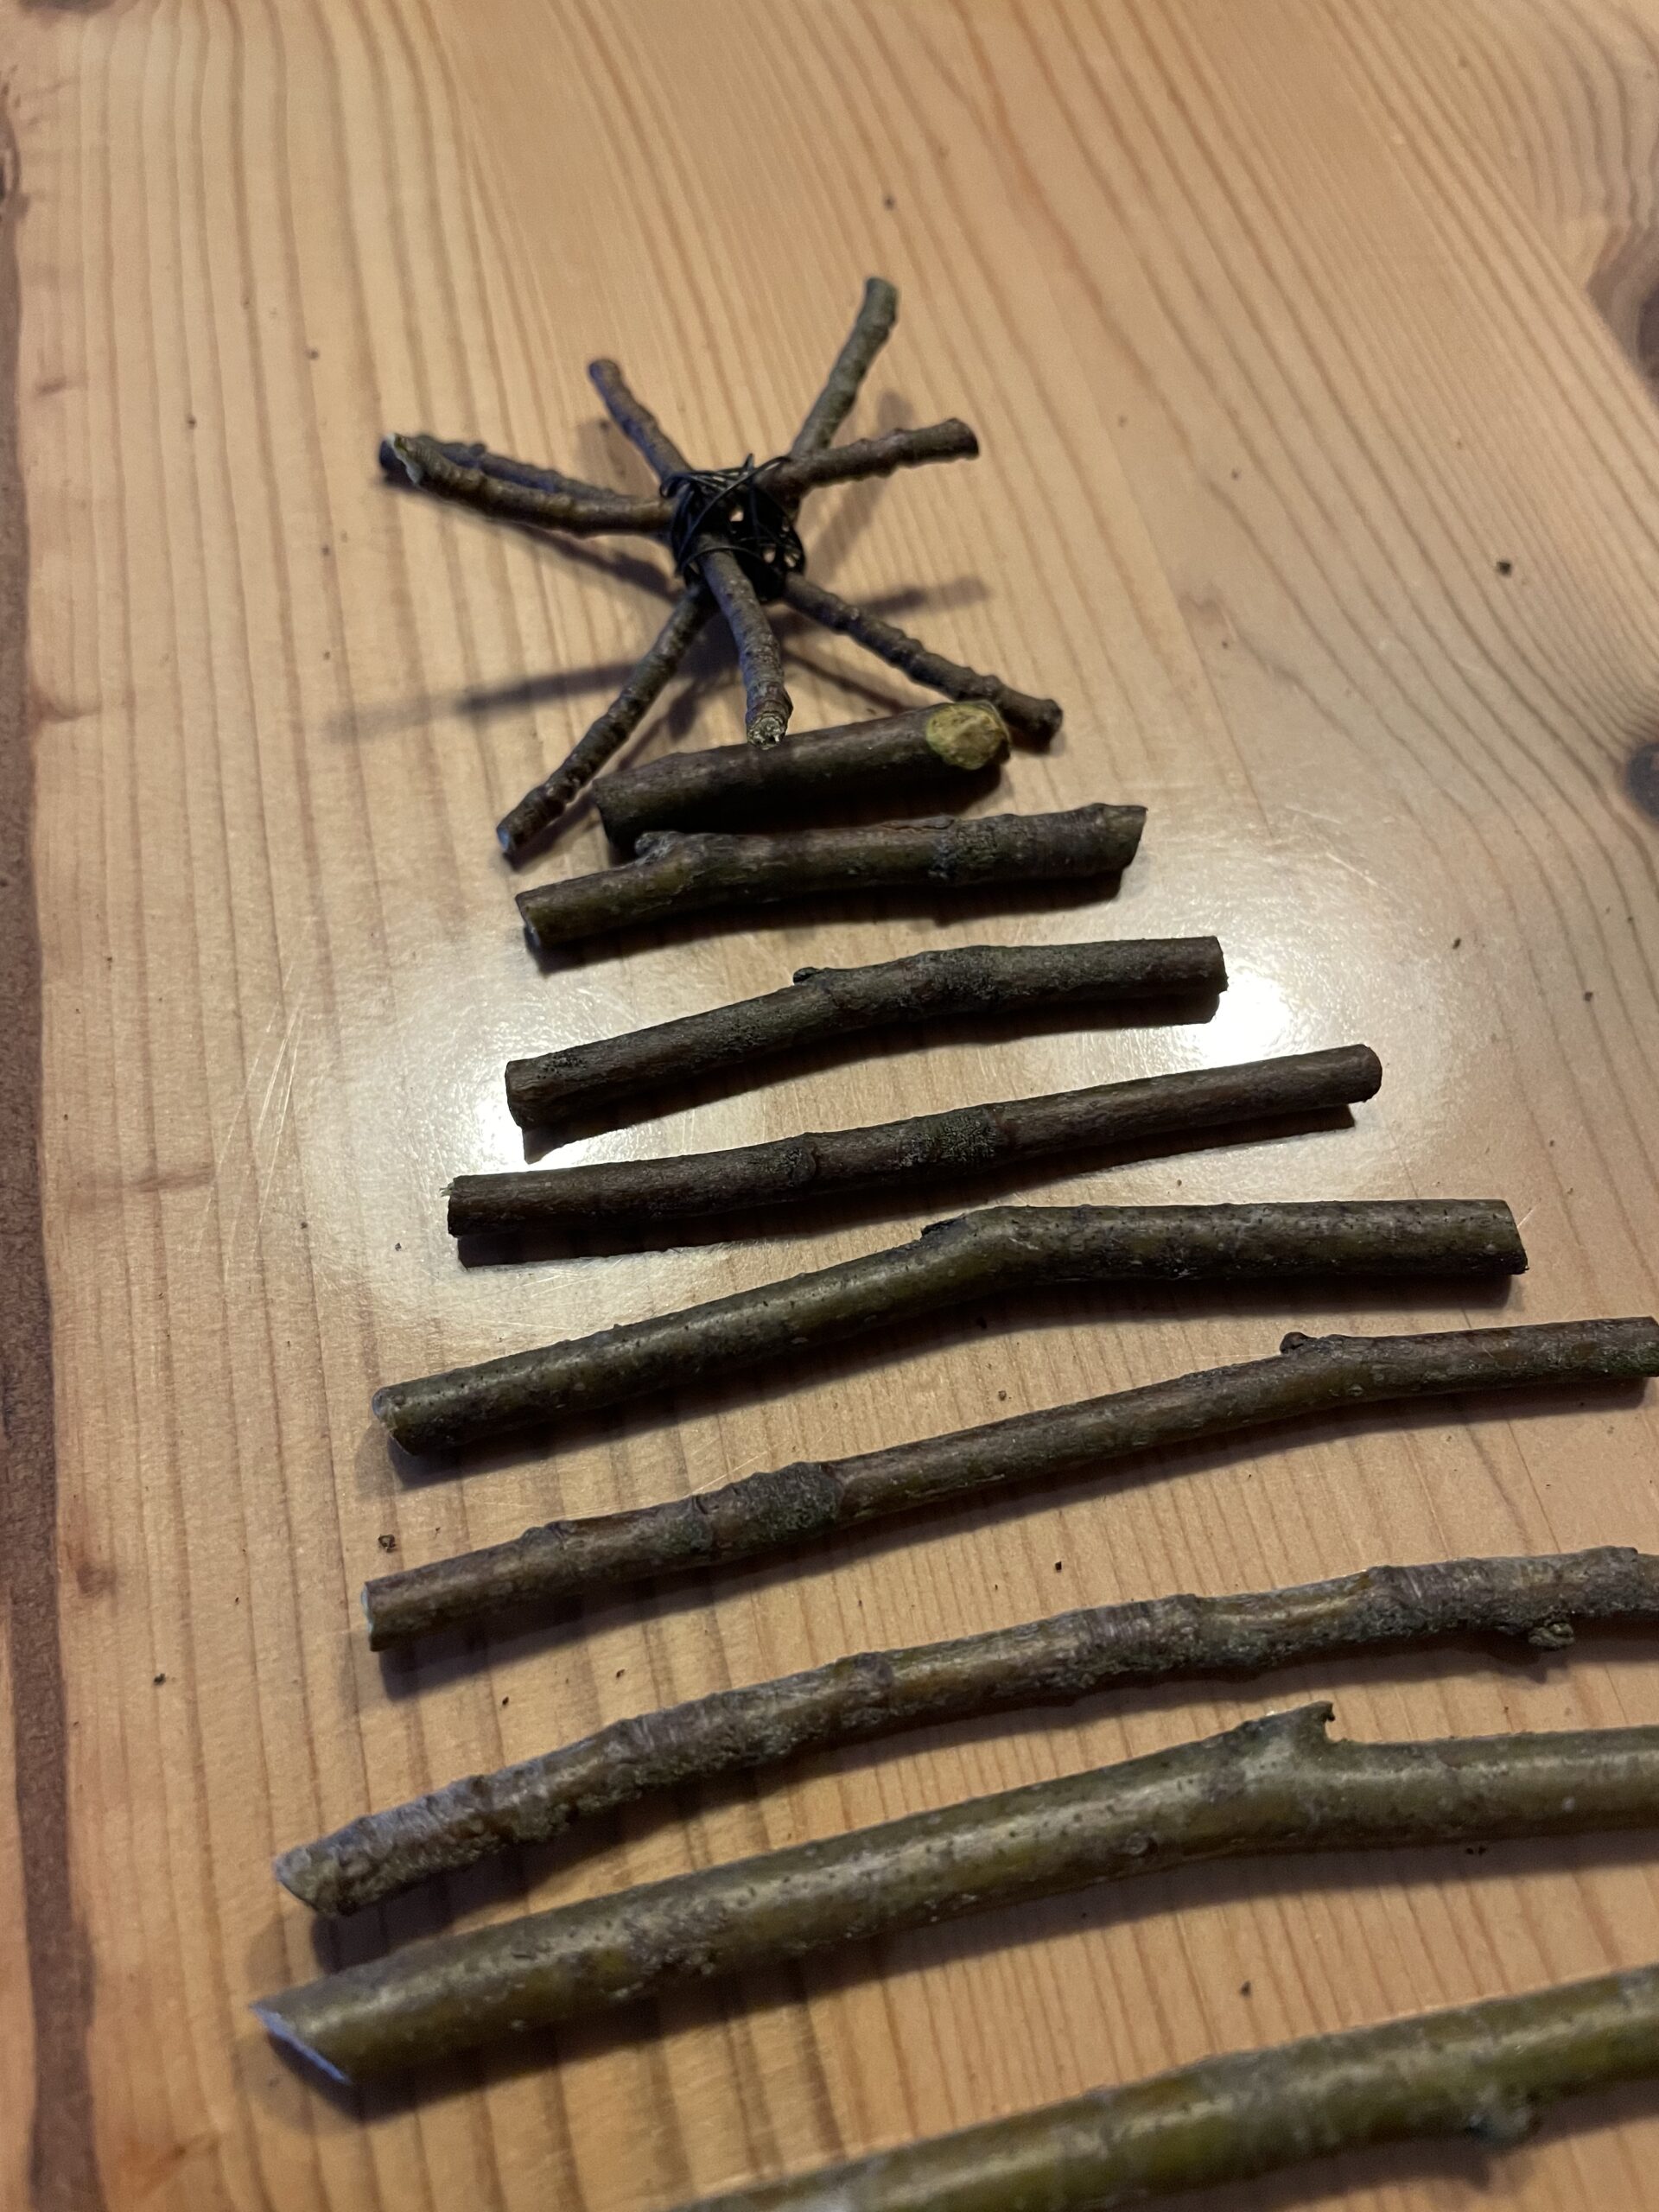
Bild zum Schritt 4 für das Bastel- und DIY-Abenteuer für Kinder: 'Legt nun den Stern an das obere Ende des Tannenbaums.'

5

Now start to connect the individual branches with the wire from the bottom to the top. Knot the wire first in the middle of the lowest branch.
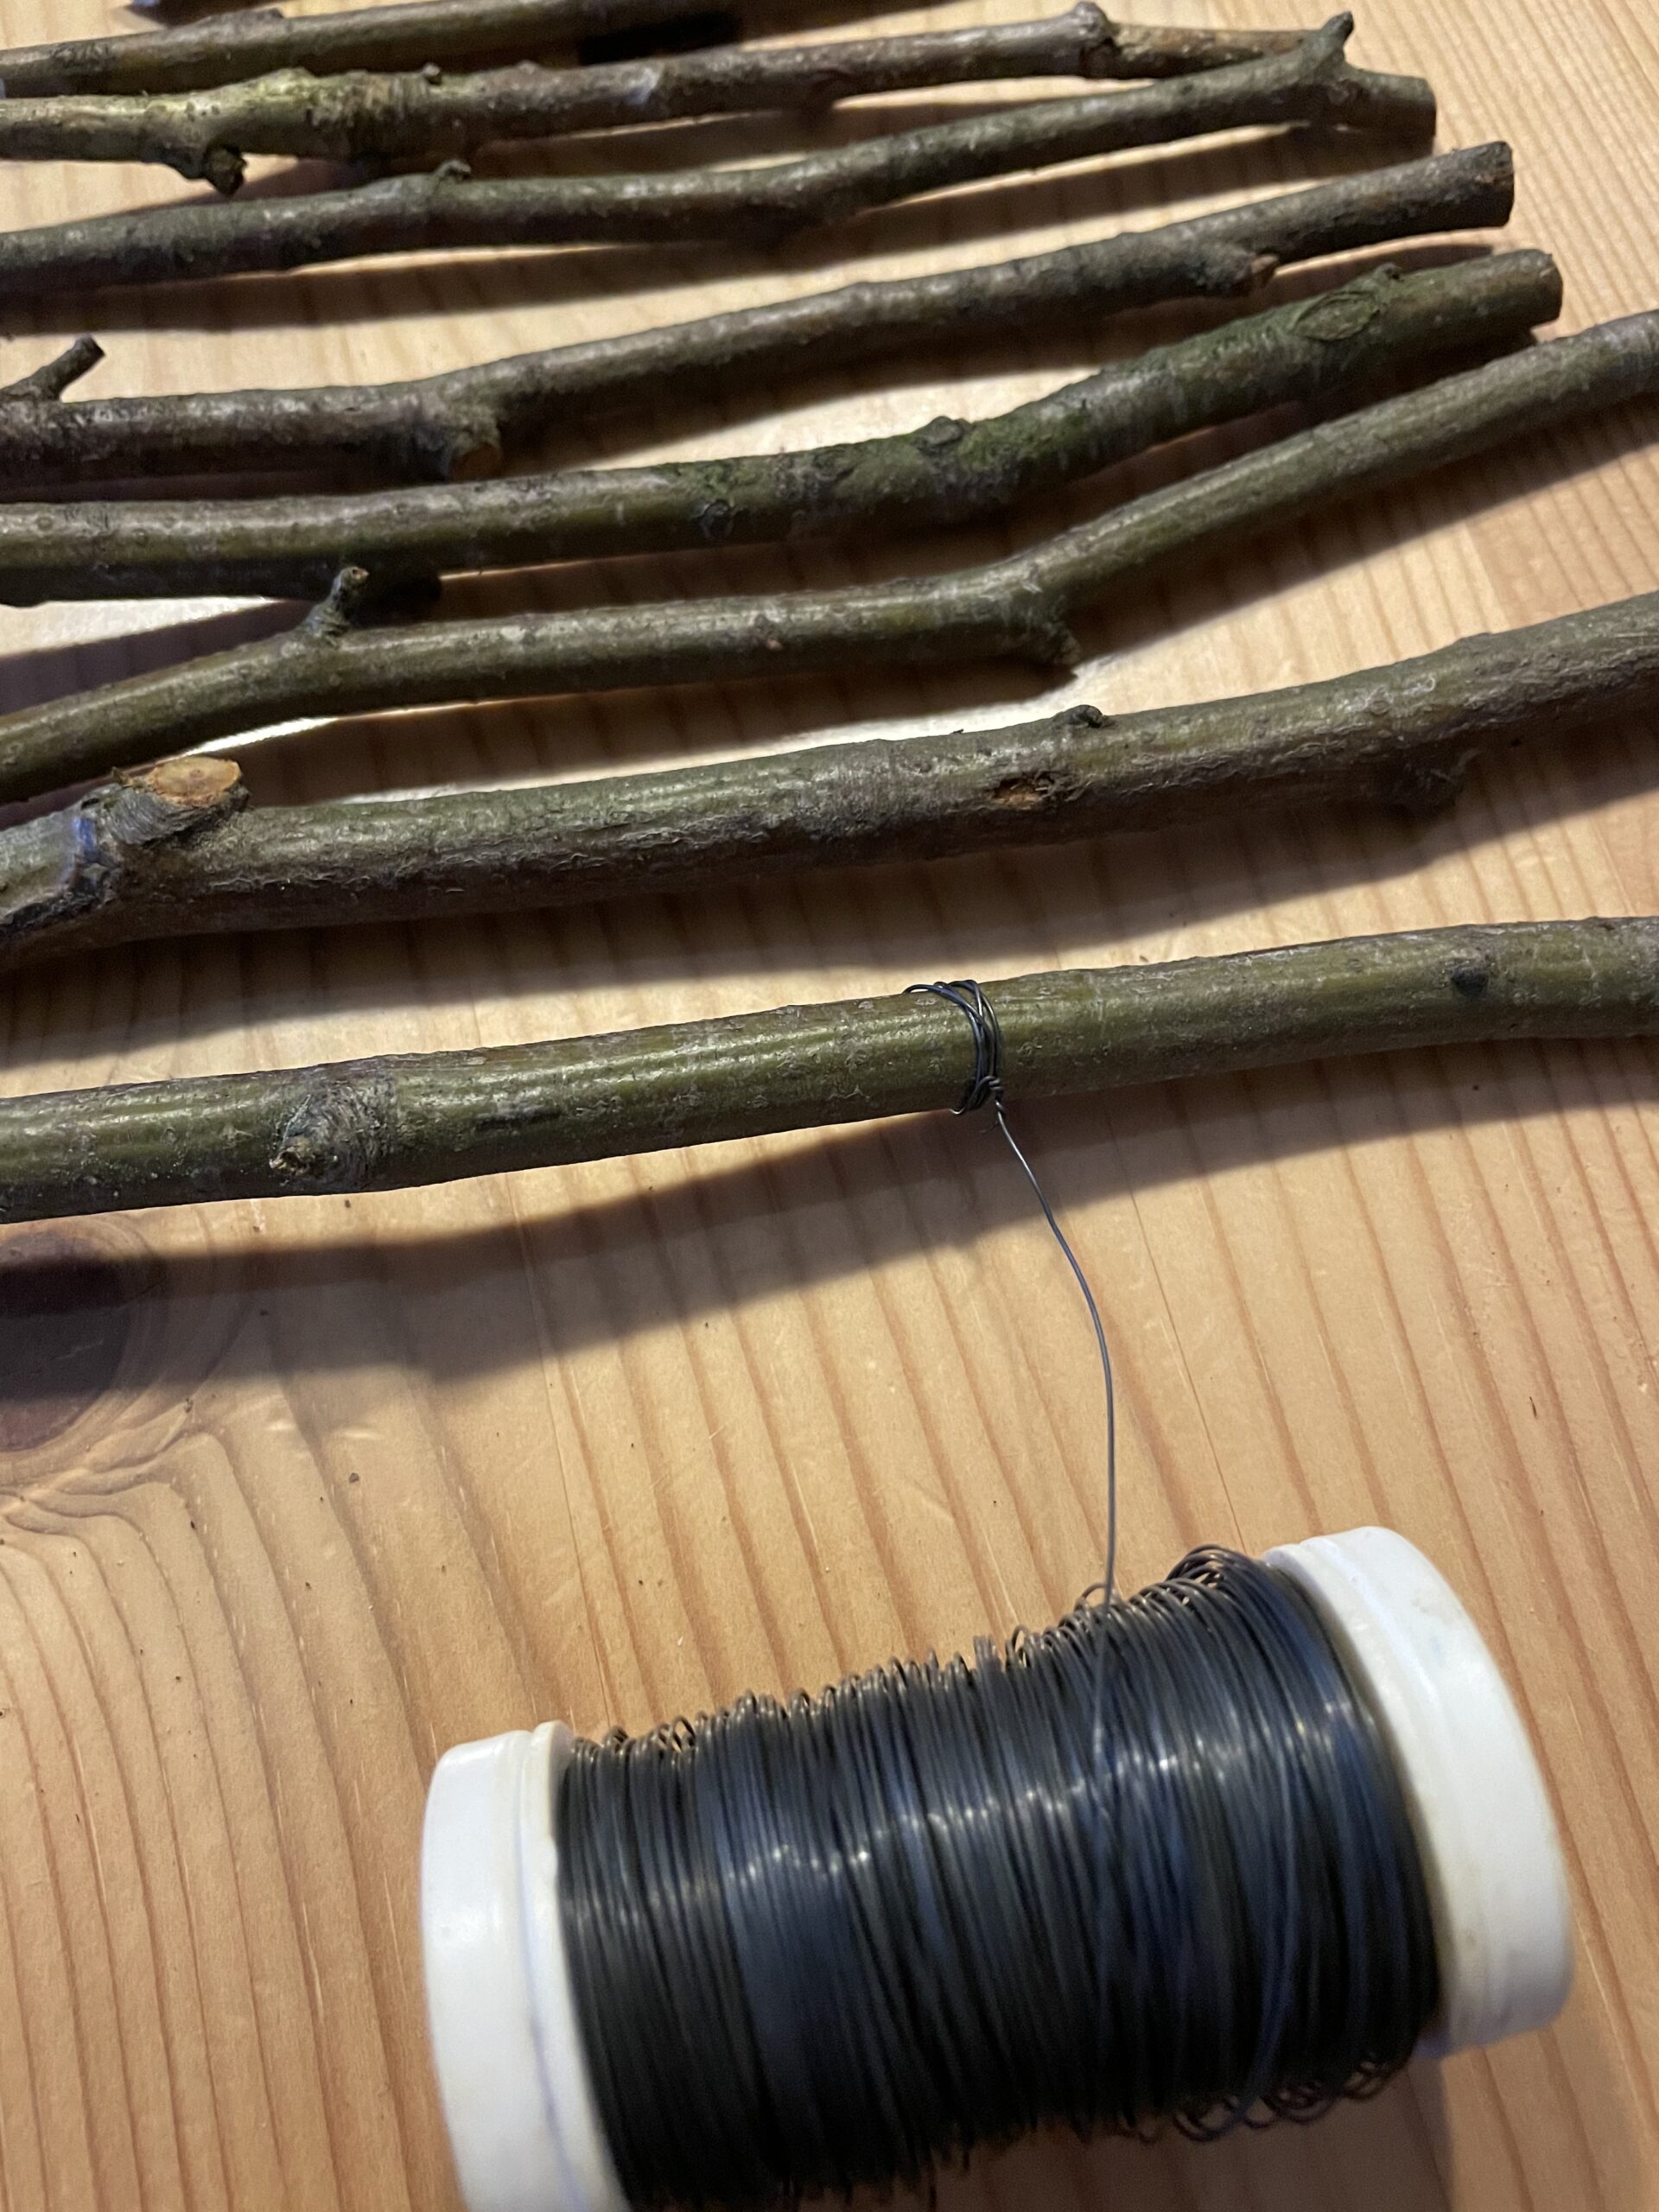
Bild zum Schritt 5 für das Bastel- und DIY-Abenteuer für Kinder: 'Beginnt jetzt mit dem Draht die einzelnen Äste von unten...'

6

After that, you wrap the branch lying above it with wire in the middle and connect both branches with each other.
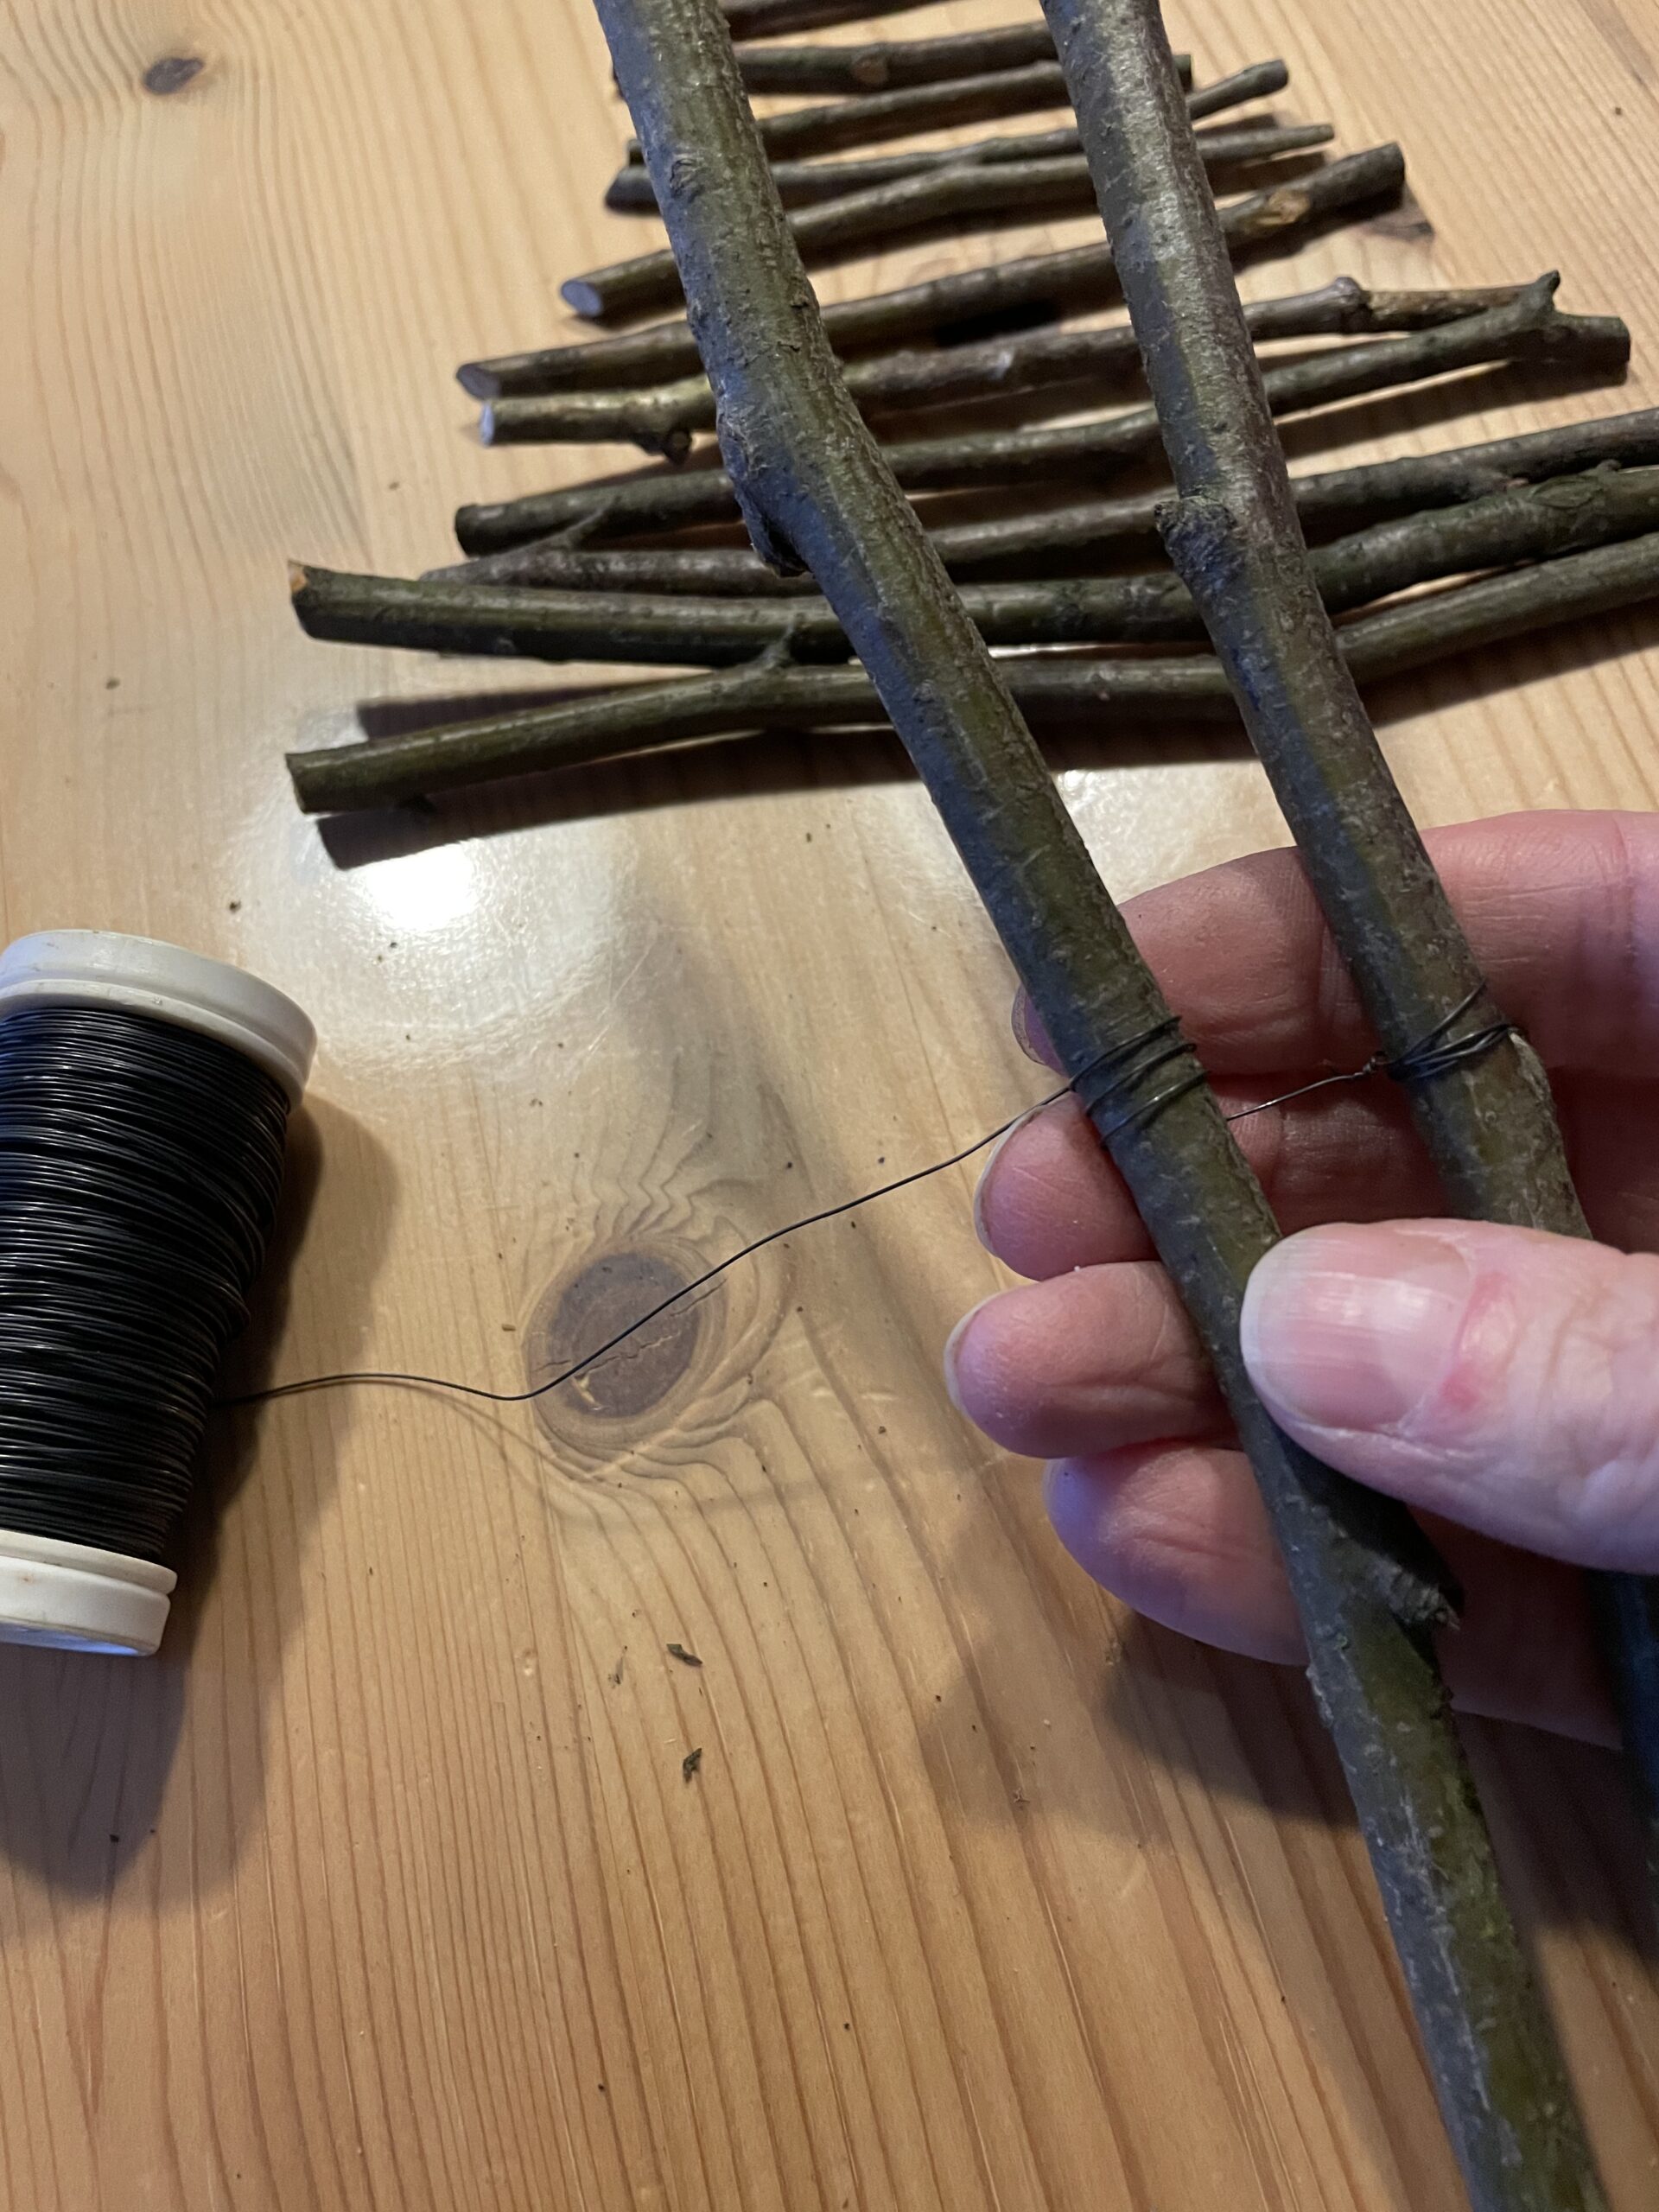
Bild zum Schritt 6 für das Bastel- und DIY-Abenteuer für Kinder: 'Danach umwickelt ihr den darüber liegenden Ast ebenfalls in der...'

7

Connects one branch at a time. It's enough to wrap the branches with wire.
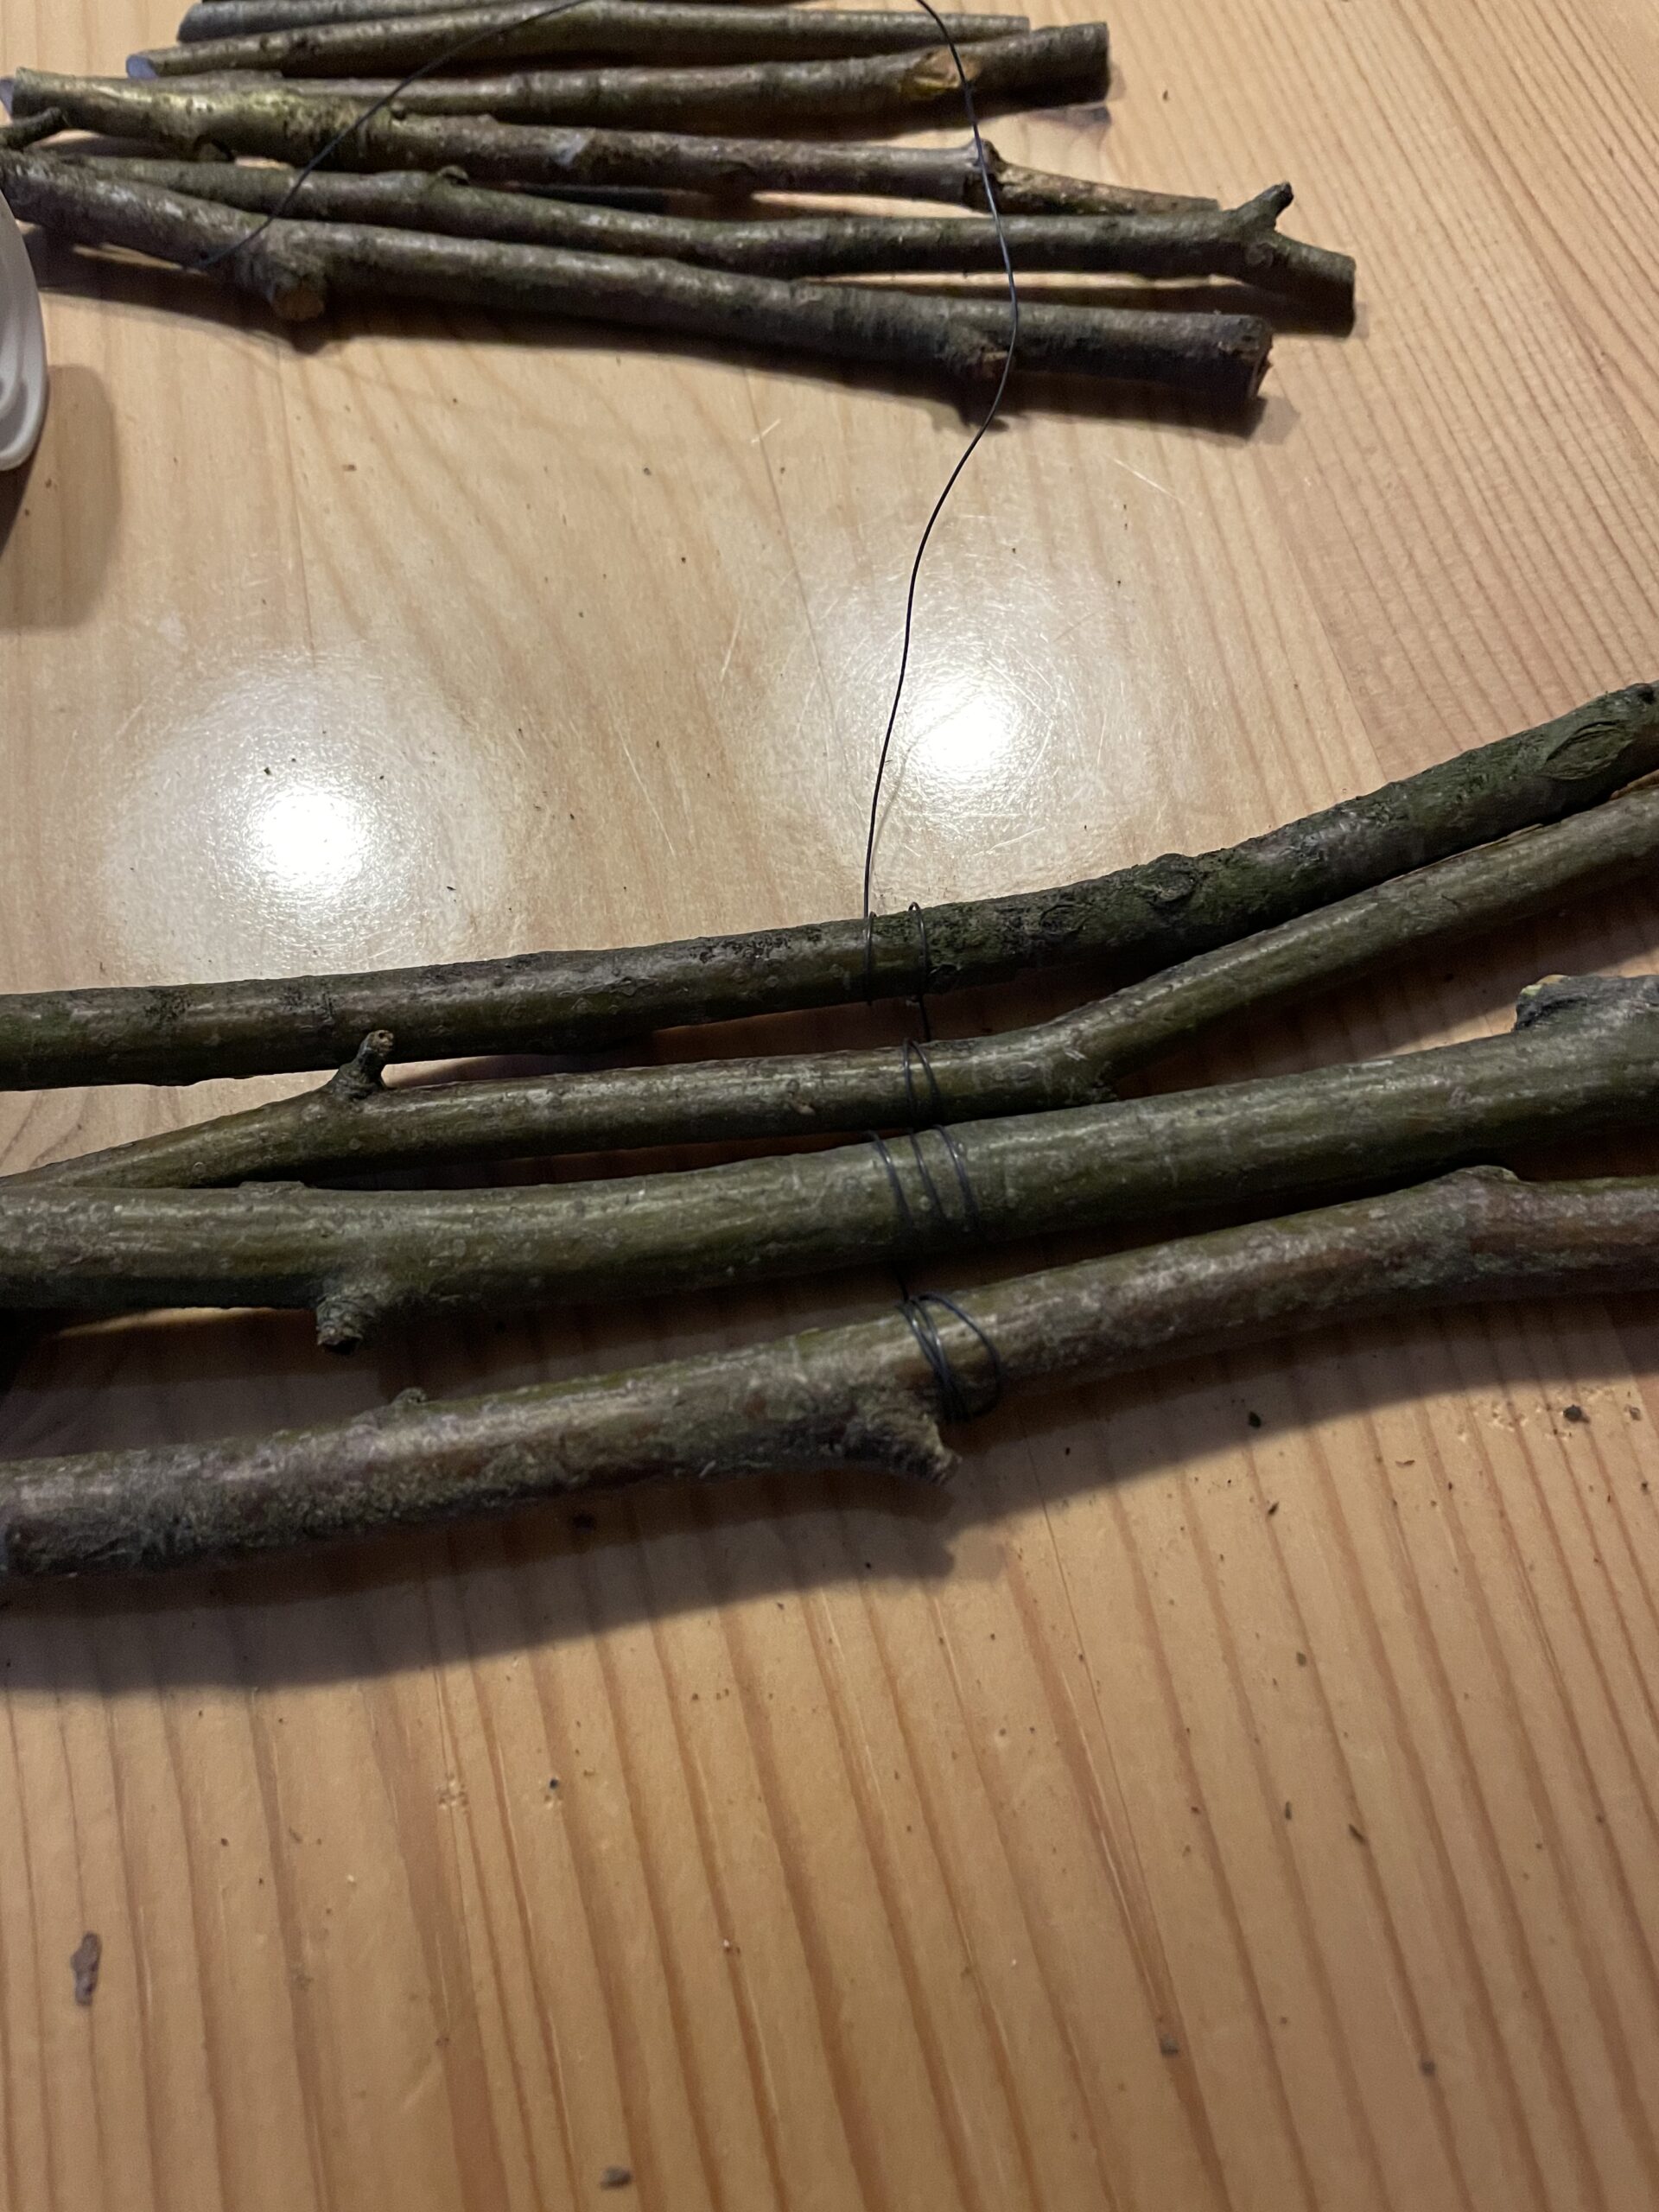
Bild zum Schritt 7 für das Bastel- und DIY-Abenteuer für Kinder: 'Verbindet so einen Ast nach dem anderen. Es reicht aus,...'

8

Wrap the wire around the branches until you arrive at the last branch.
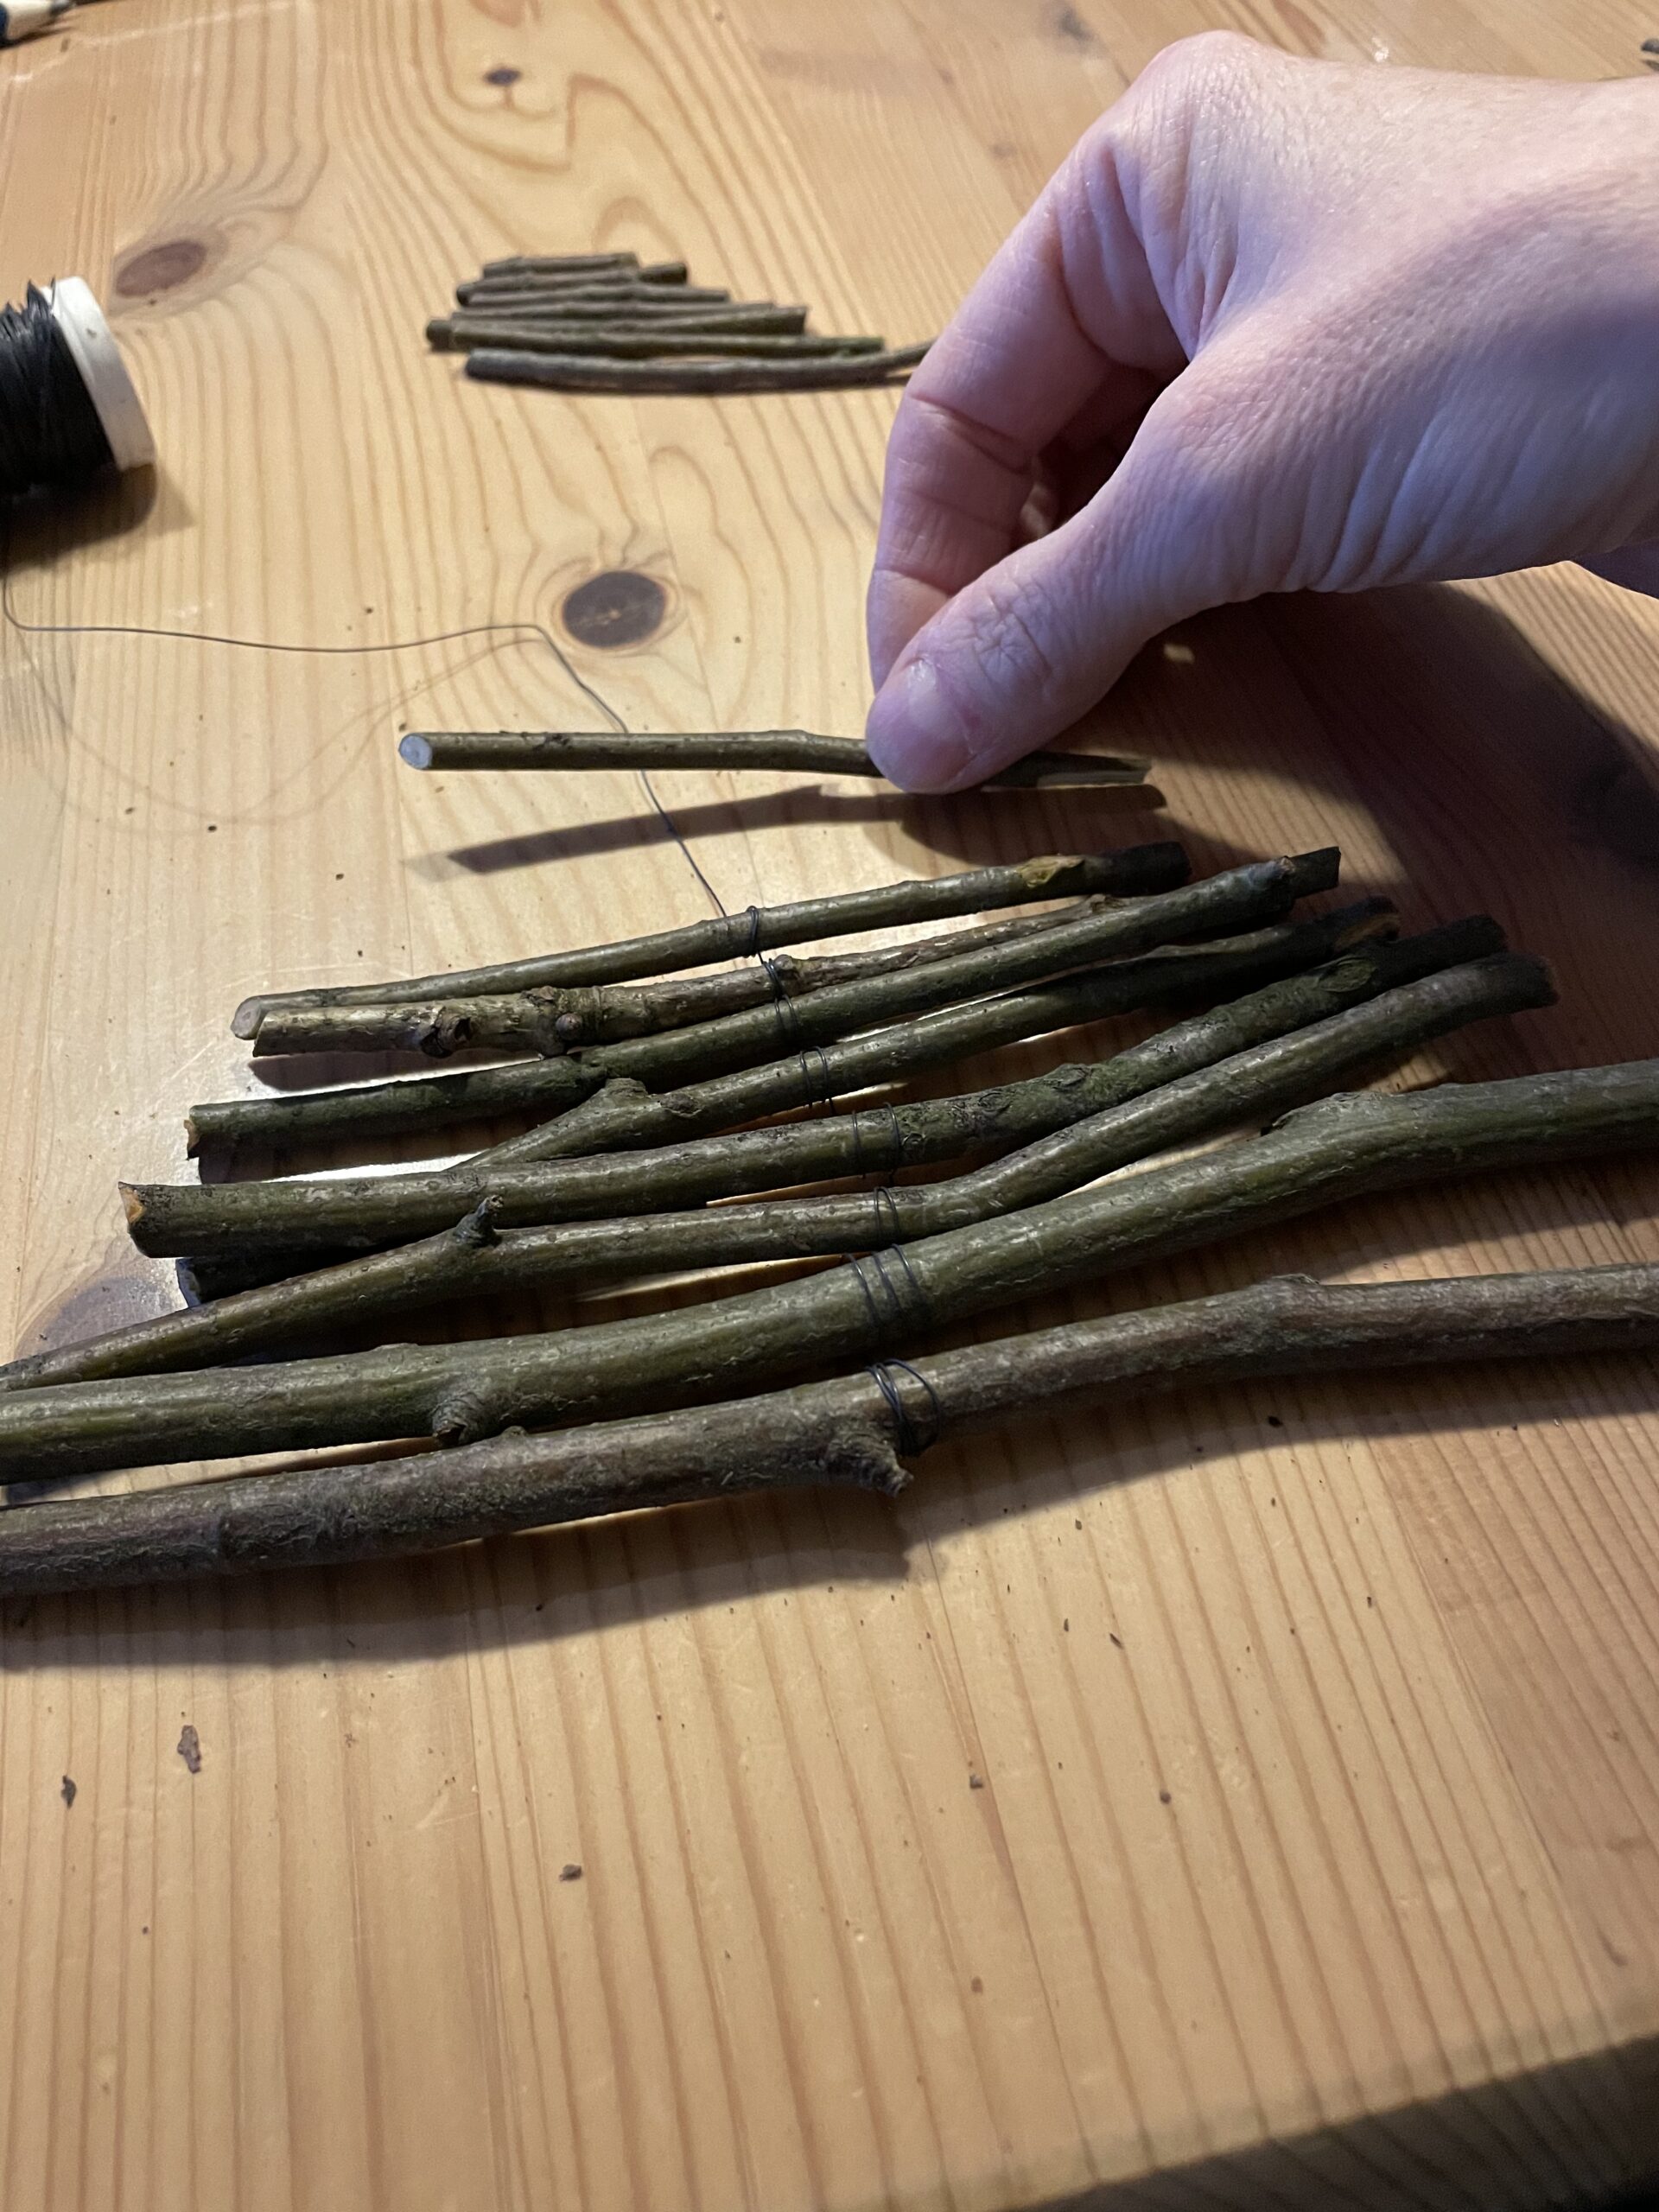
Bild zum Schritt 8 für das Bastel- und DIY-Abenteuer für Kinder: 'Wickelt den Draht so lange um die Äste bis ihr...'

9

Now you attach the star with the wire at the top by wrapping it as well. Then you bend a loop to hang it up. For this, you let the wire survive for 15cm and then cut it off. Rotate the end of the wire so that no more pieces stand out.
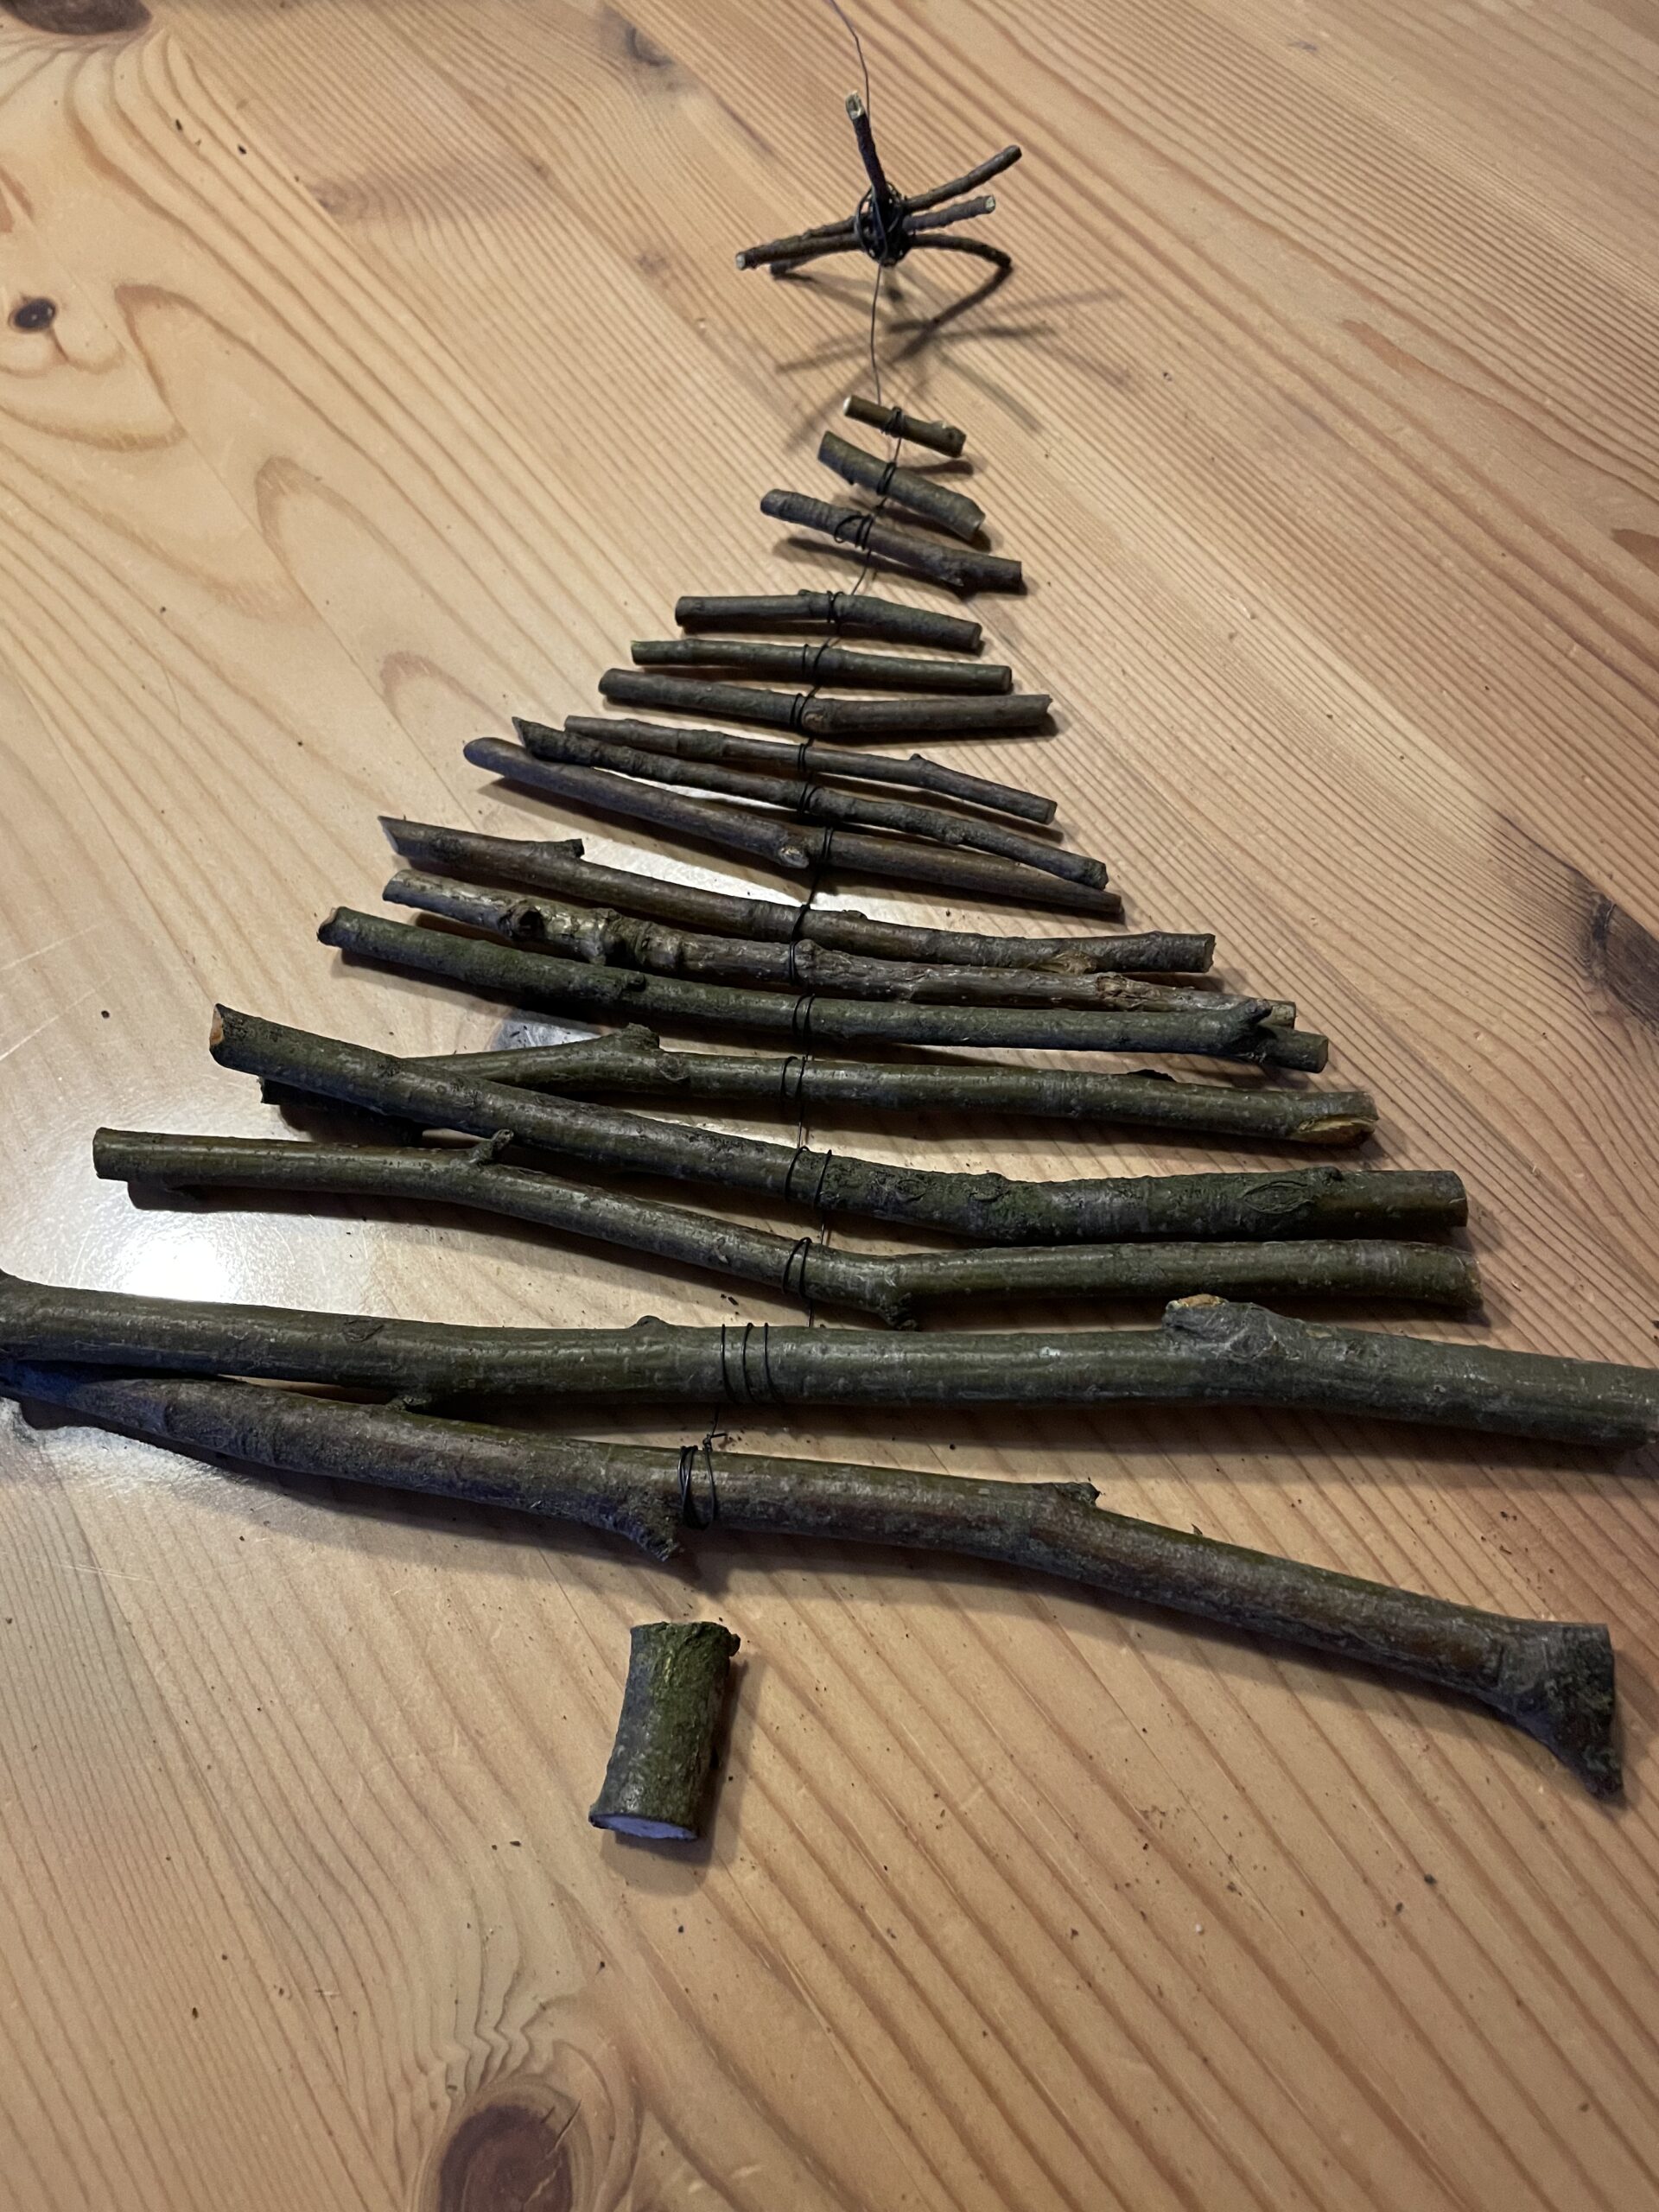
Bild zum Schritt 9 für das Bastel- und DIY-Abenteuer für Kinder: 'Jetzt befestigt ihr den Stern mit dem Draht an der...'

10

With hot glue you now stick a small piece of branch as trunk to the lower branch in the middle.
Attention when handling the hot glue - risk of injury!
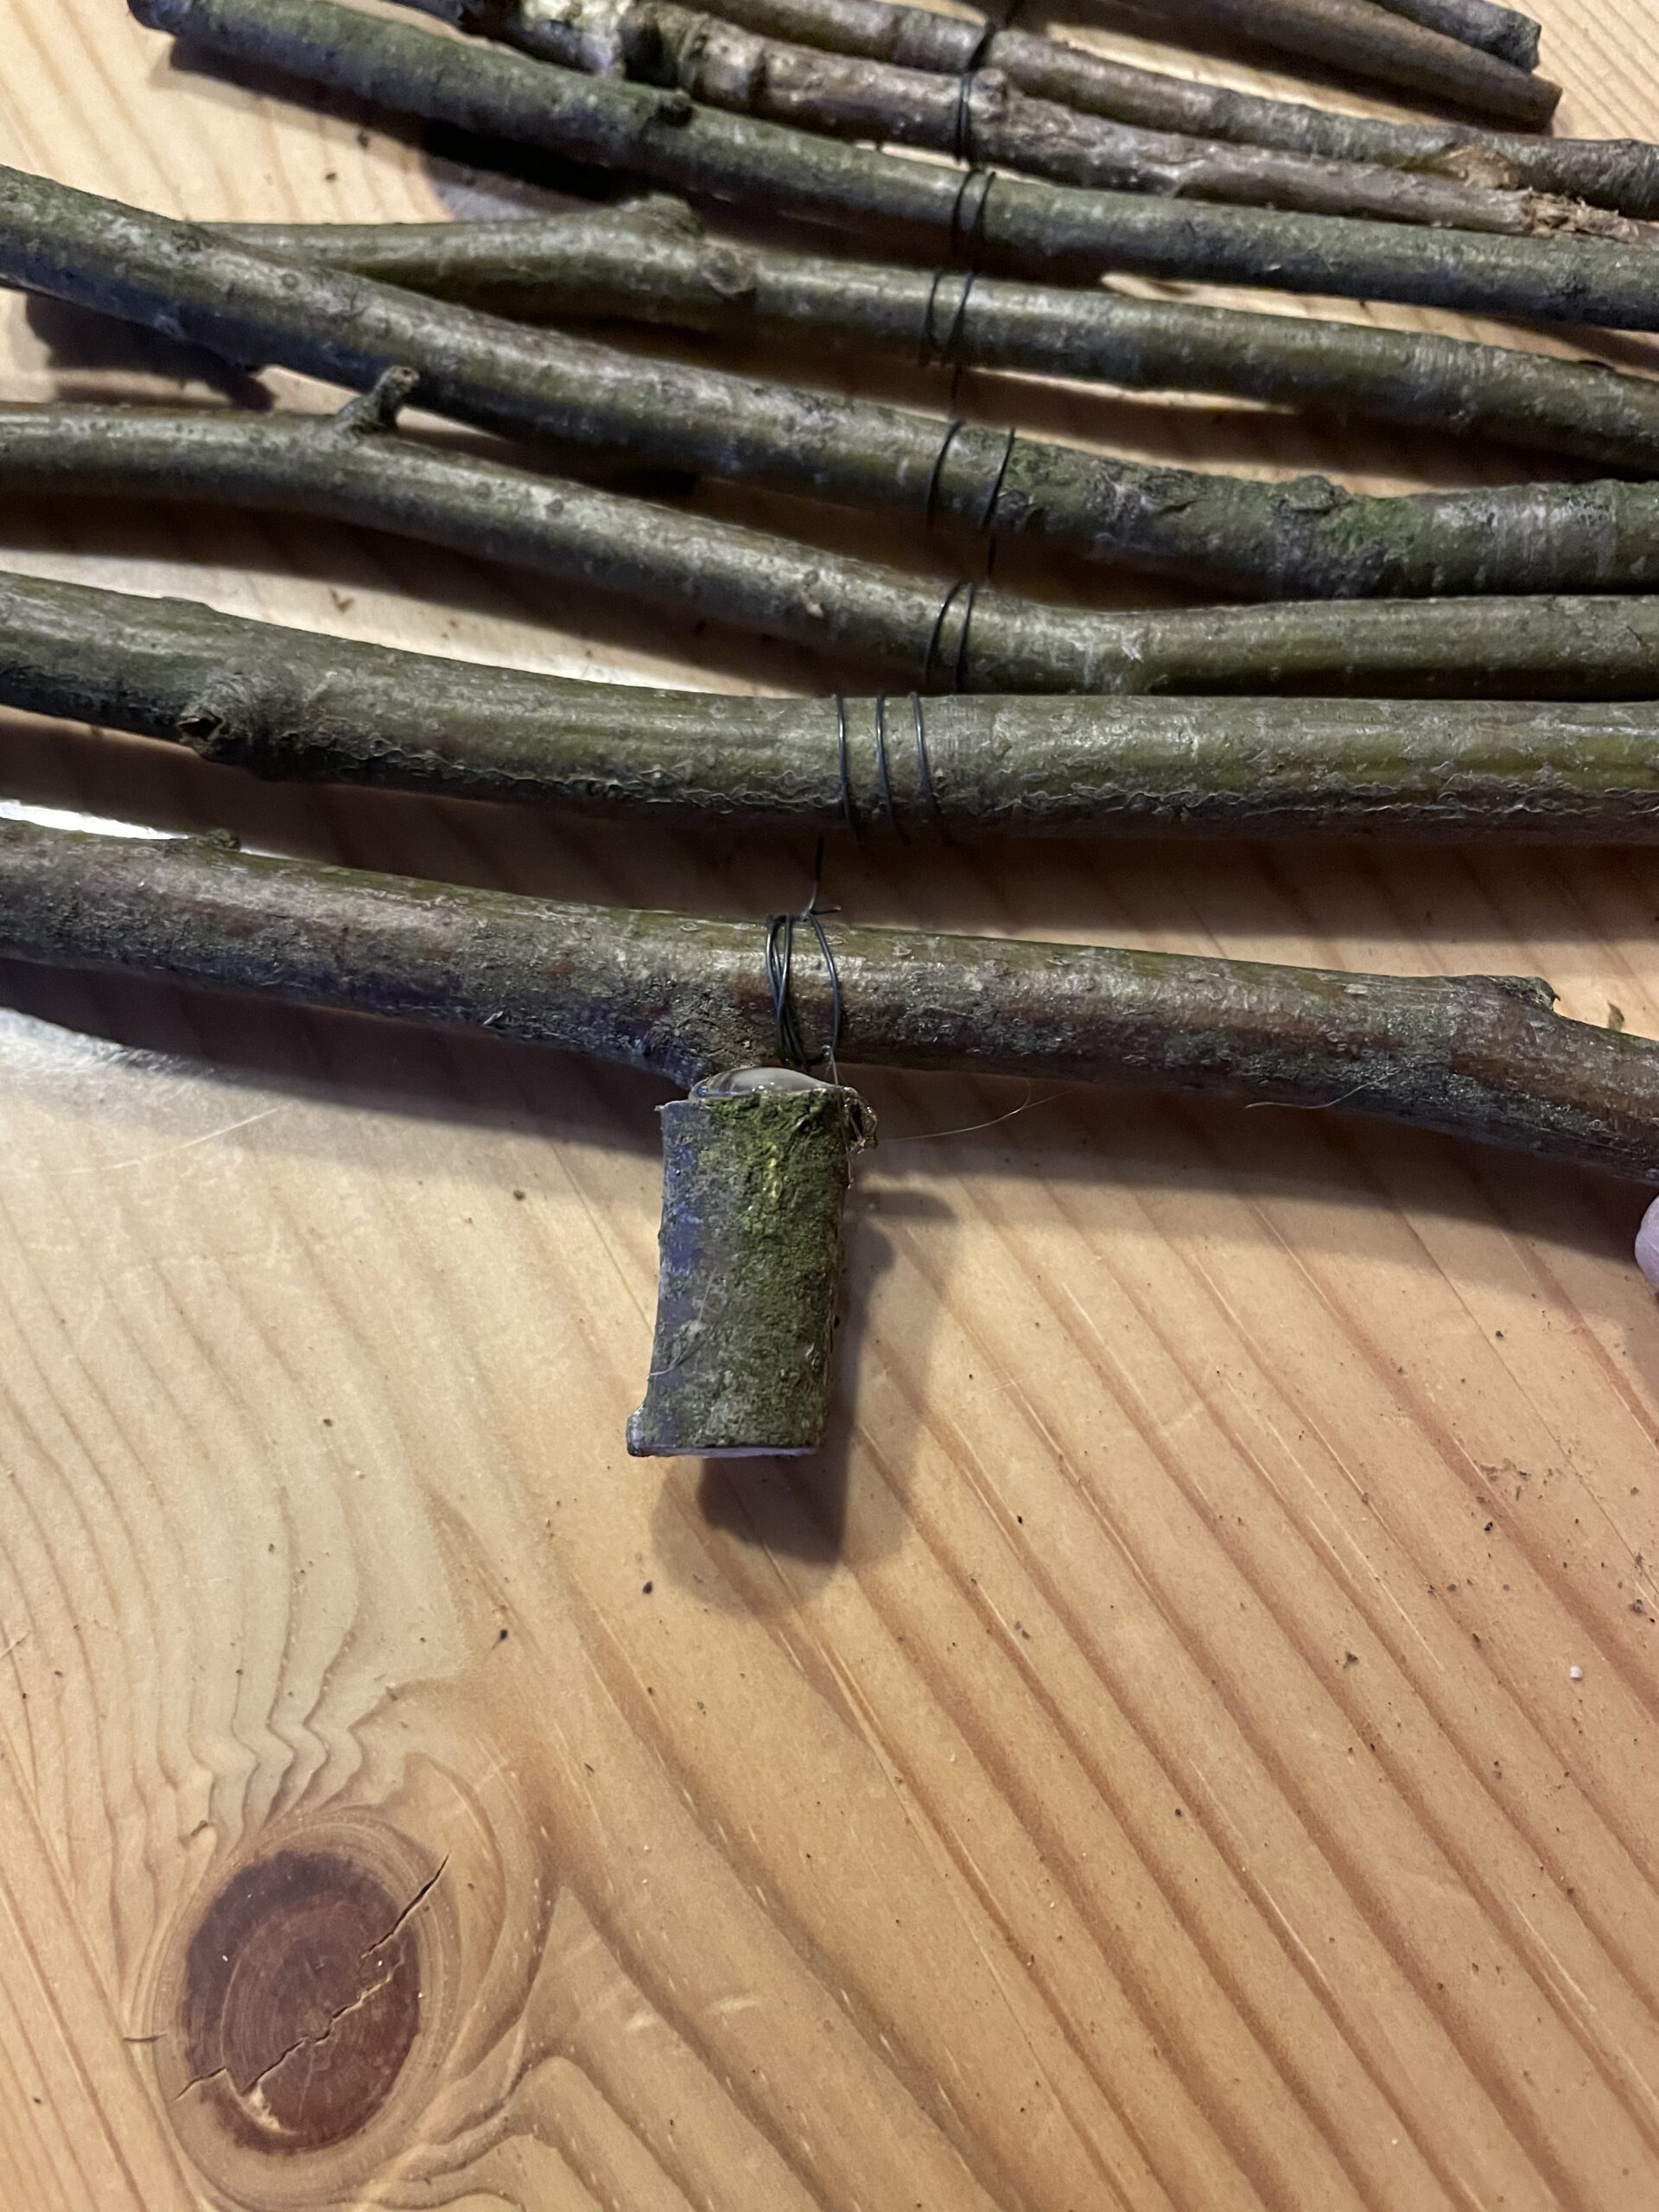
Bild zum Schritt 10 für das Bastel- und DIY-Abenteuer für Kinder: 'Mit Heißkleber klebt ihr nun ein kleines Stück Ast als...'

11

The fir tree is ready.

Bild zum Schritt 11 für das Bastel- und DIY-Abenteuer für Kinder: 'Fertig ist der Tannenbaum.'

12

Hang it up and align the individual branches again.
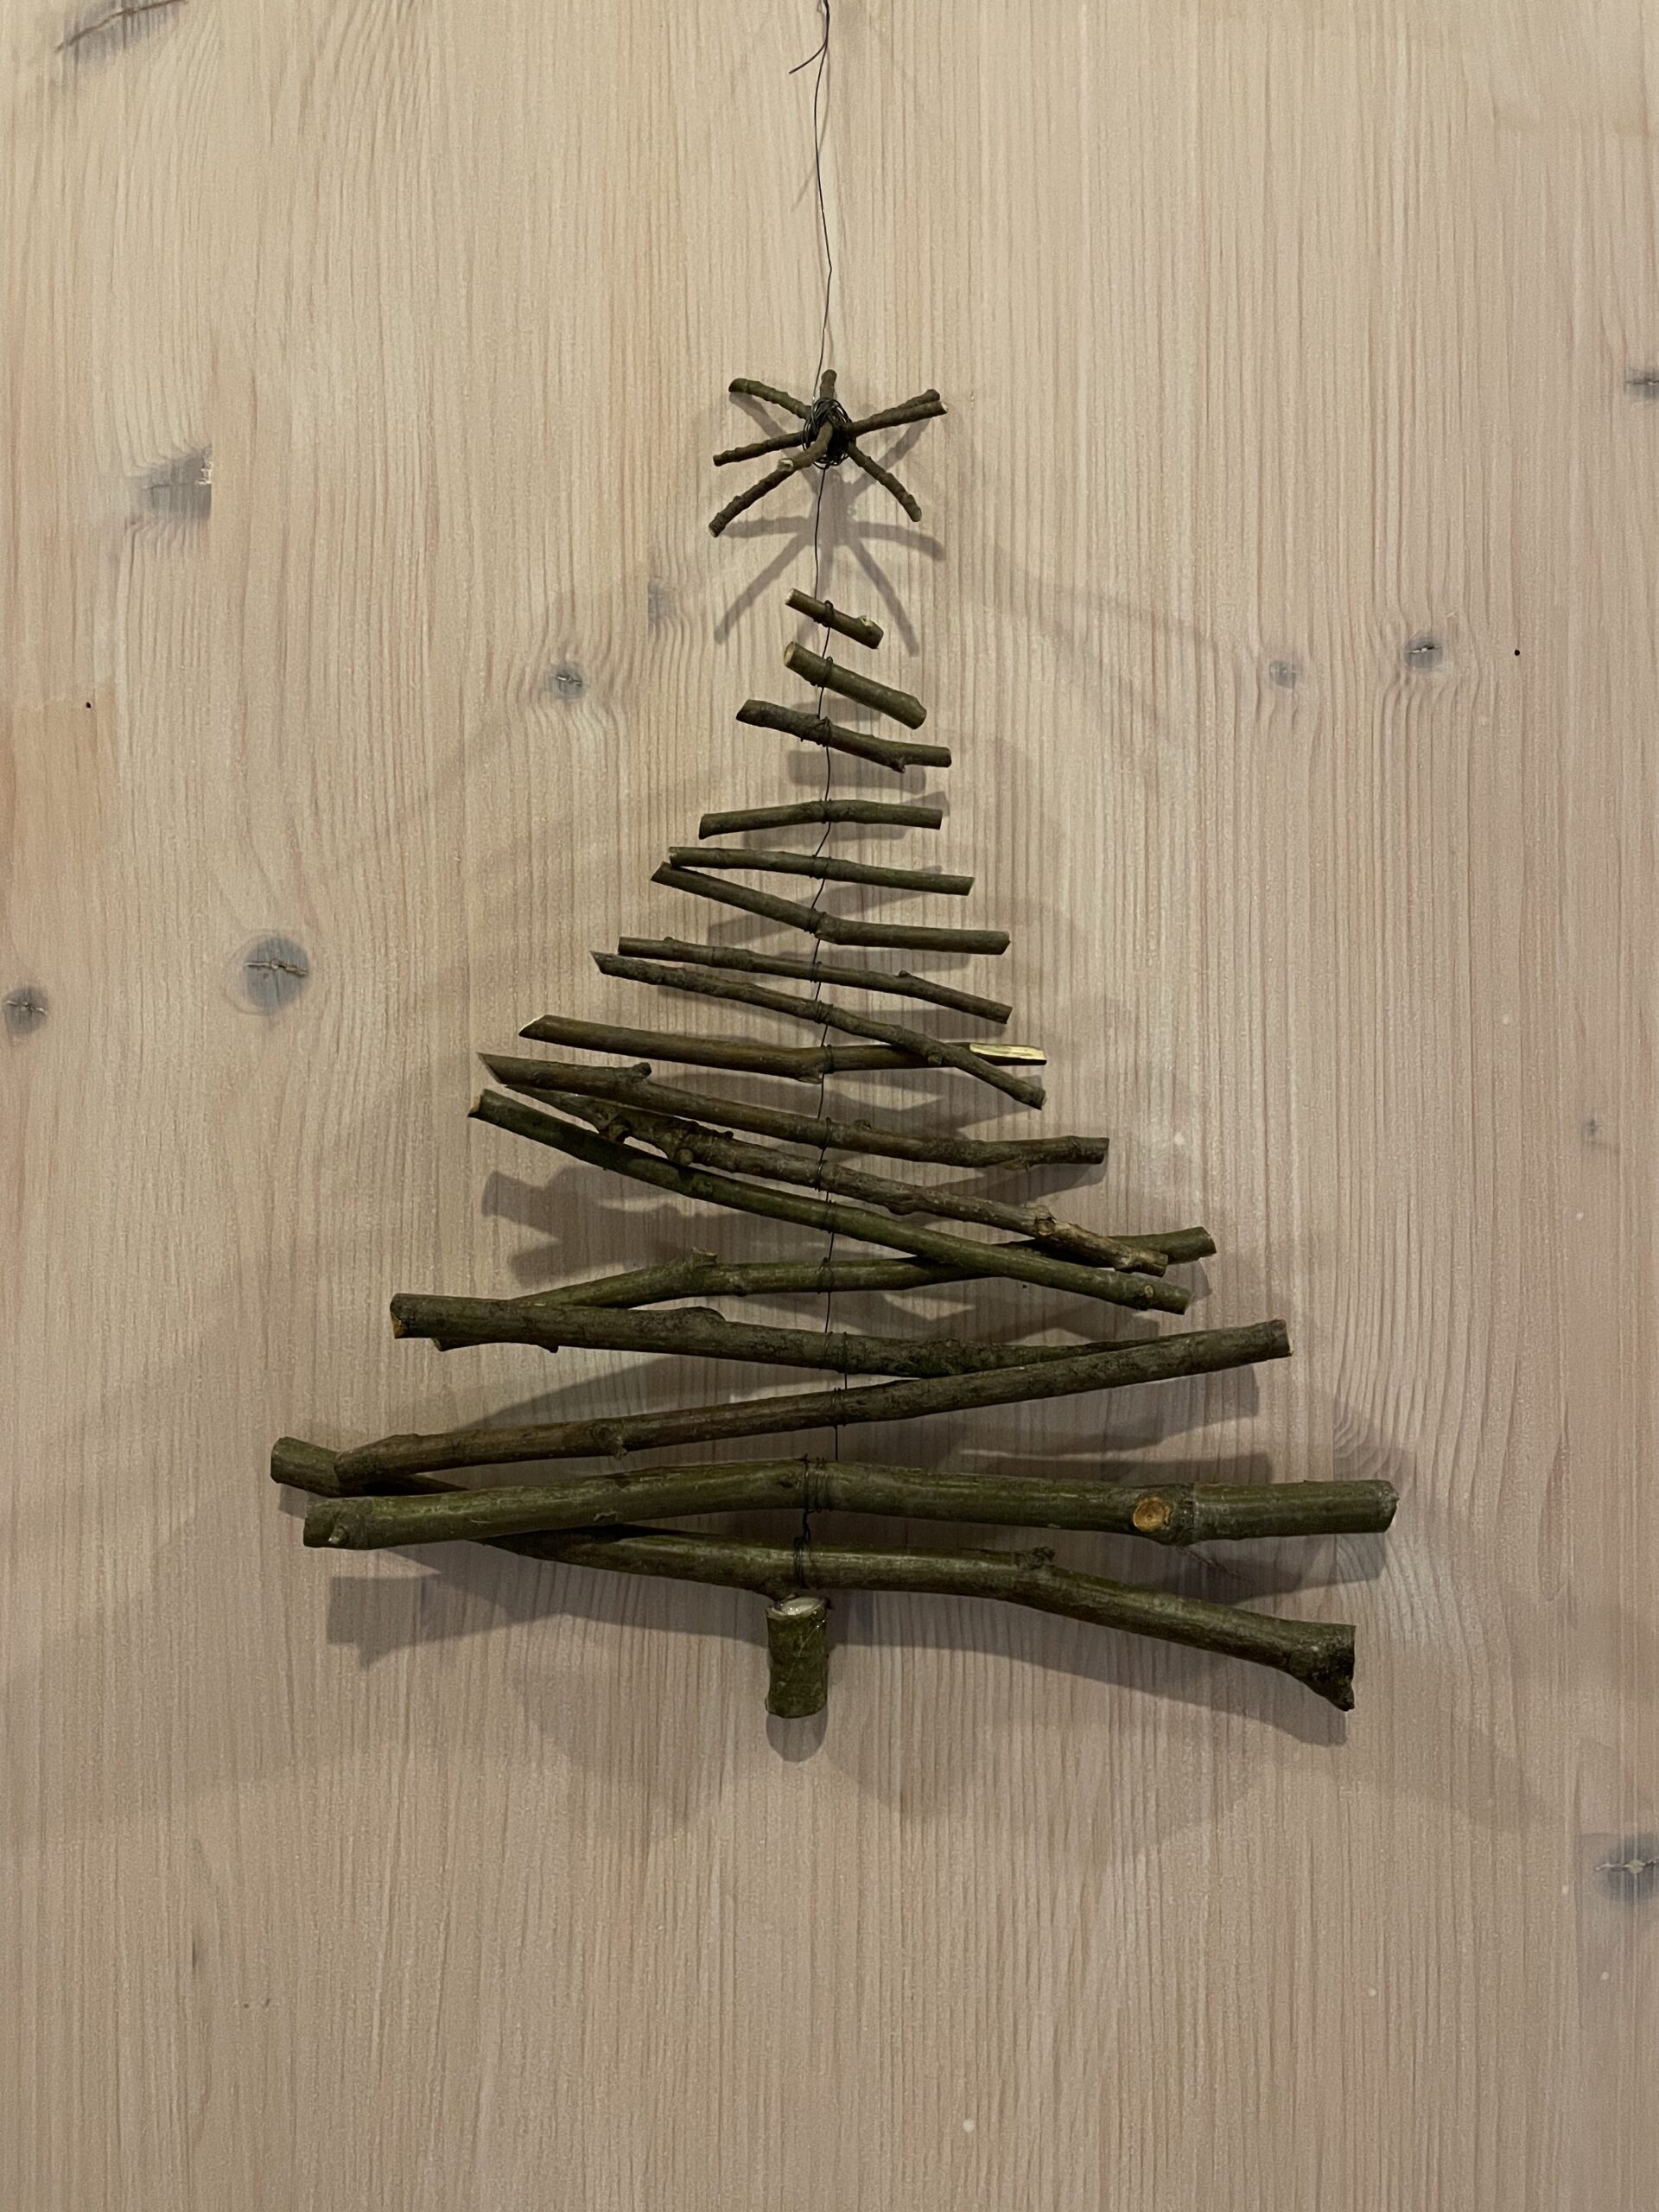
Bild zum Schritt 12 für das Bastel- und DIY-Abenteuer für Kinder: 'Hängt ihn auf und richtet dabei die einzelnen Äste noch...'

13

Have fun trying out and doing this fine motor exercise.
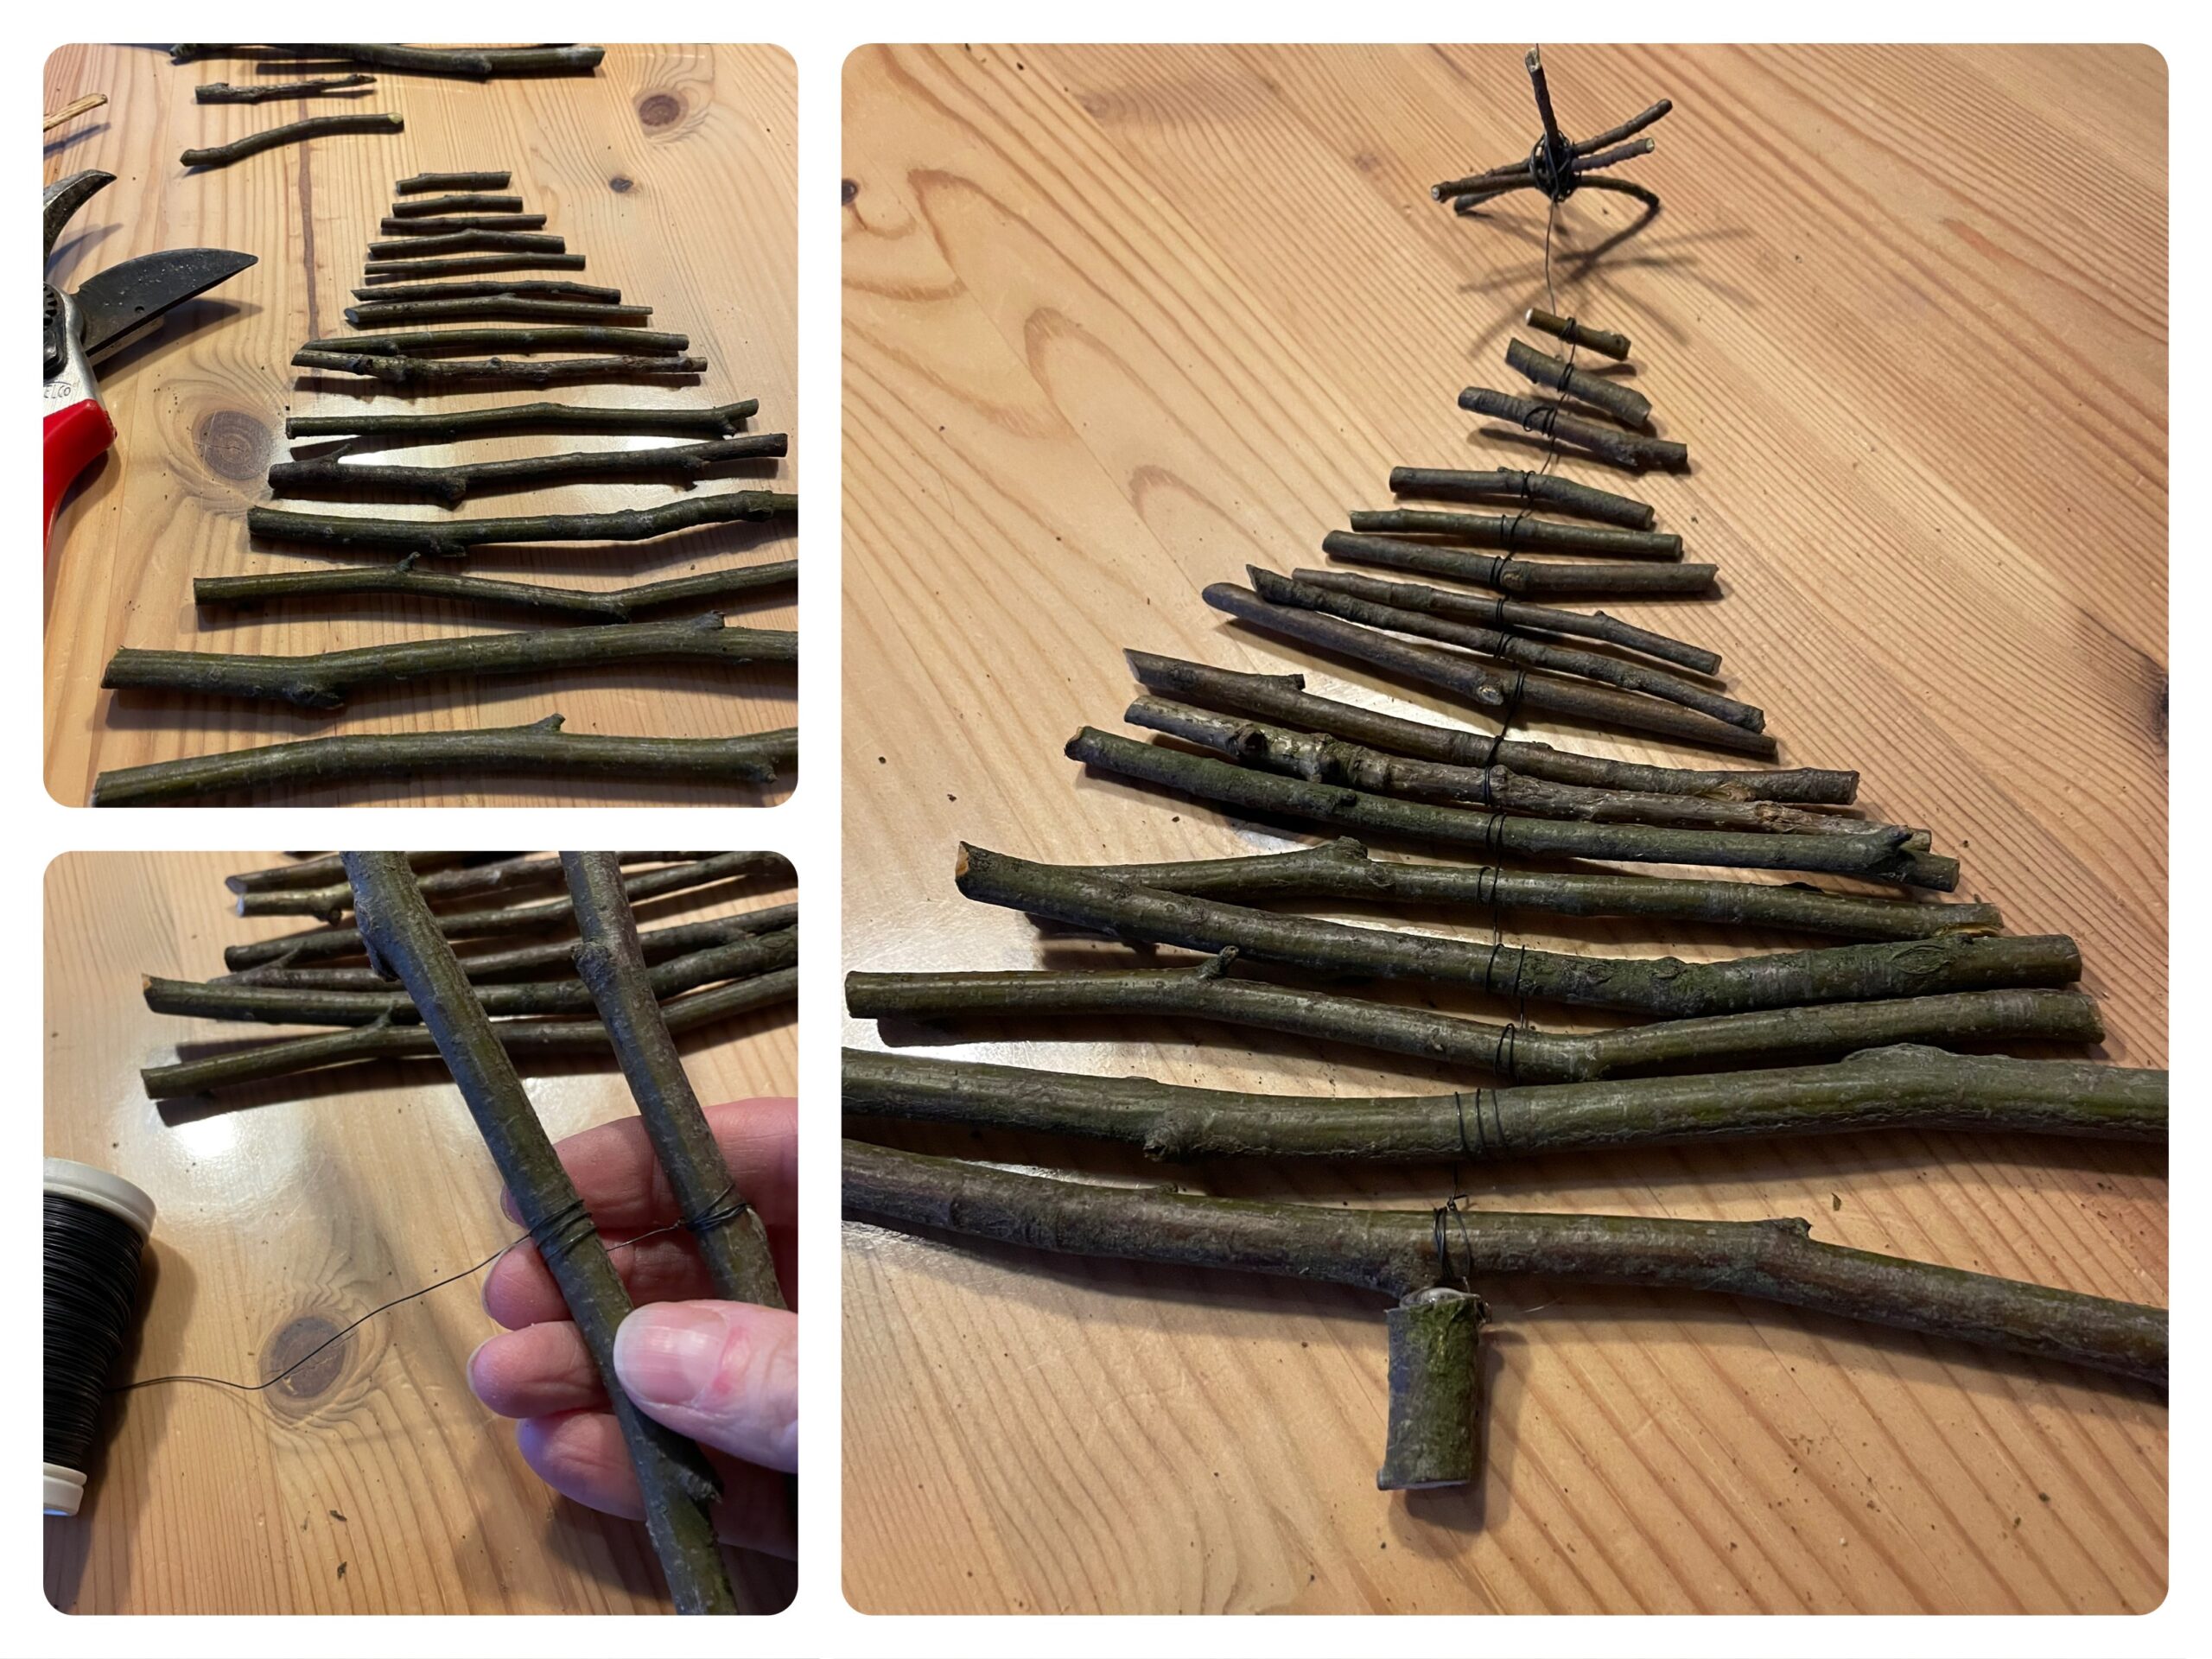
Bild zum Schritt 13 für das Bastel- und DIY-Abenteuer für Kinder: 'Viel Spaß beim Ausprobieren und bei dieser feinmotorischen Übung.'

Build fir tree from branches

Follow us on Facebook , Instagram and Pinterest
Don't miss any more adventures: Our bottle mail

Leave a Reply

Your email address will not be published.

The maximum upload file size: 5 MB. You can upload: image, document. Drop file here