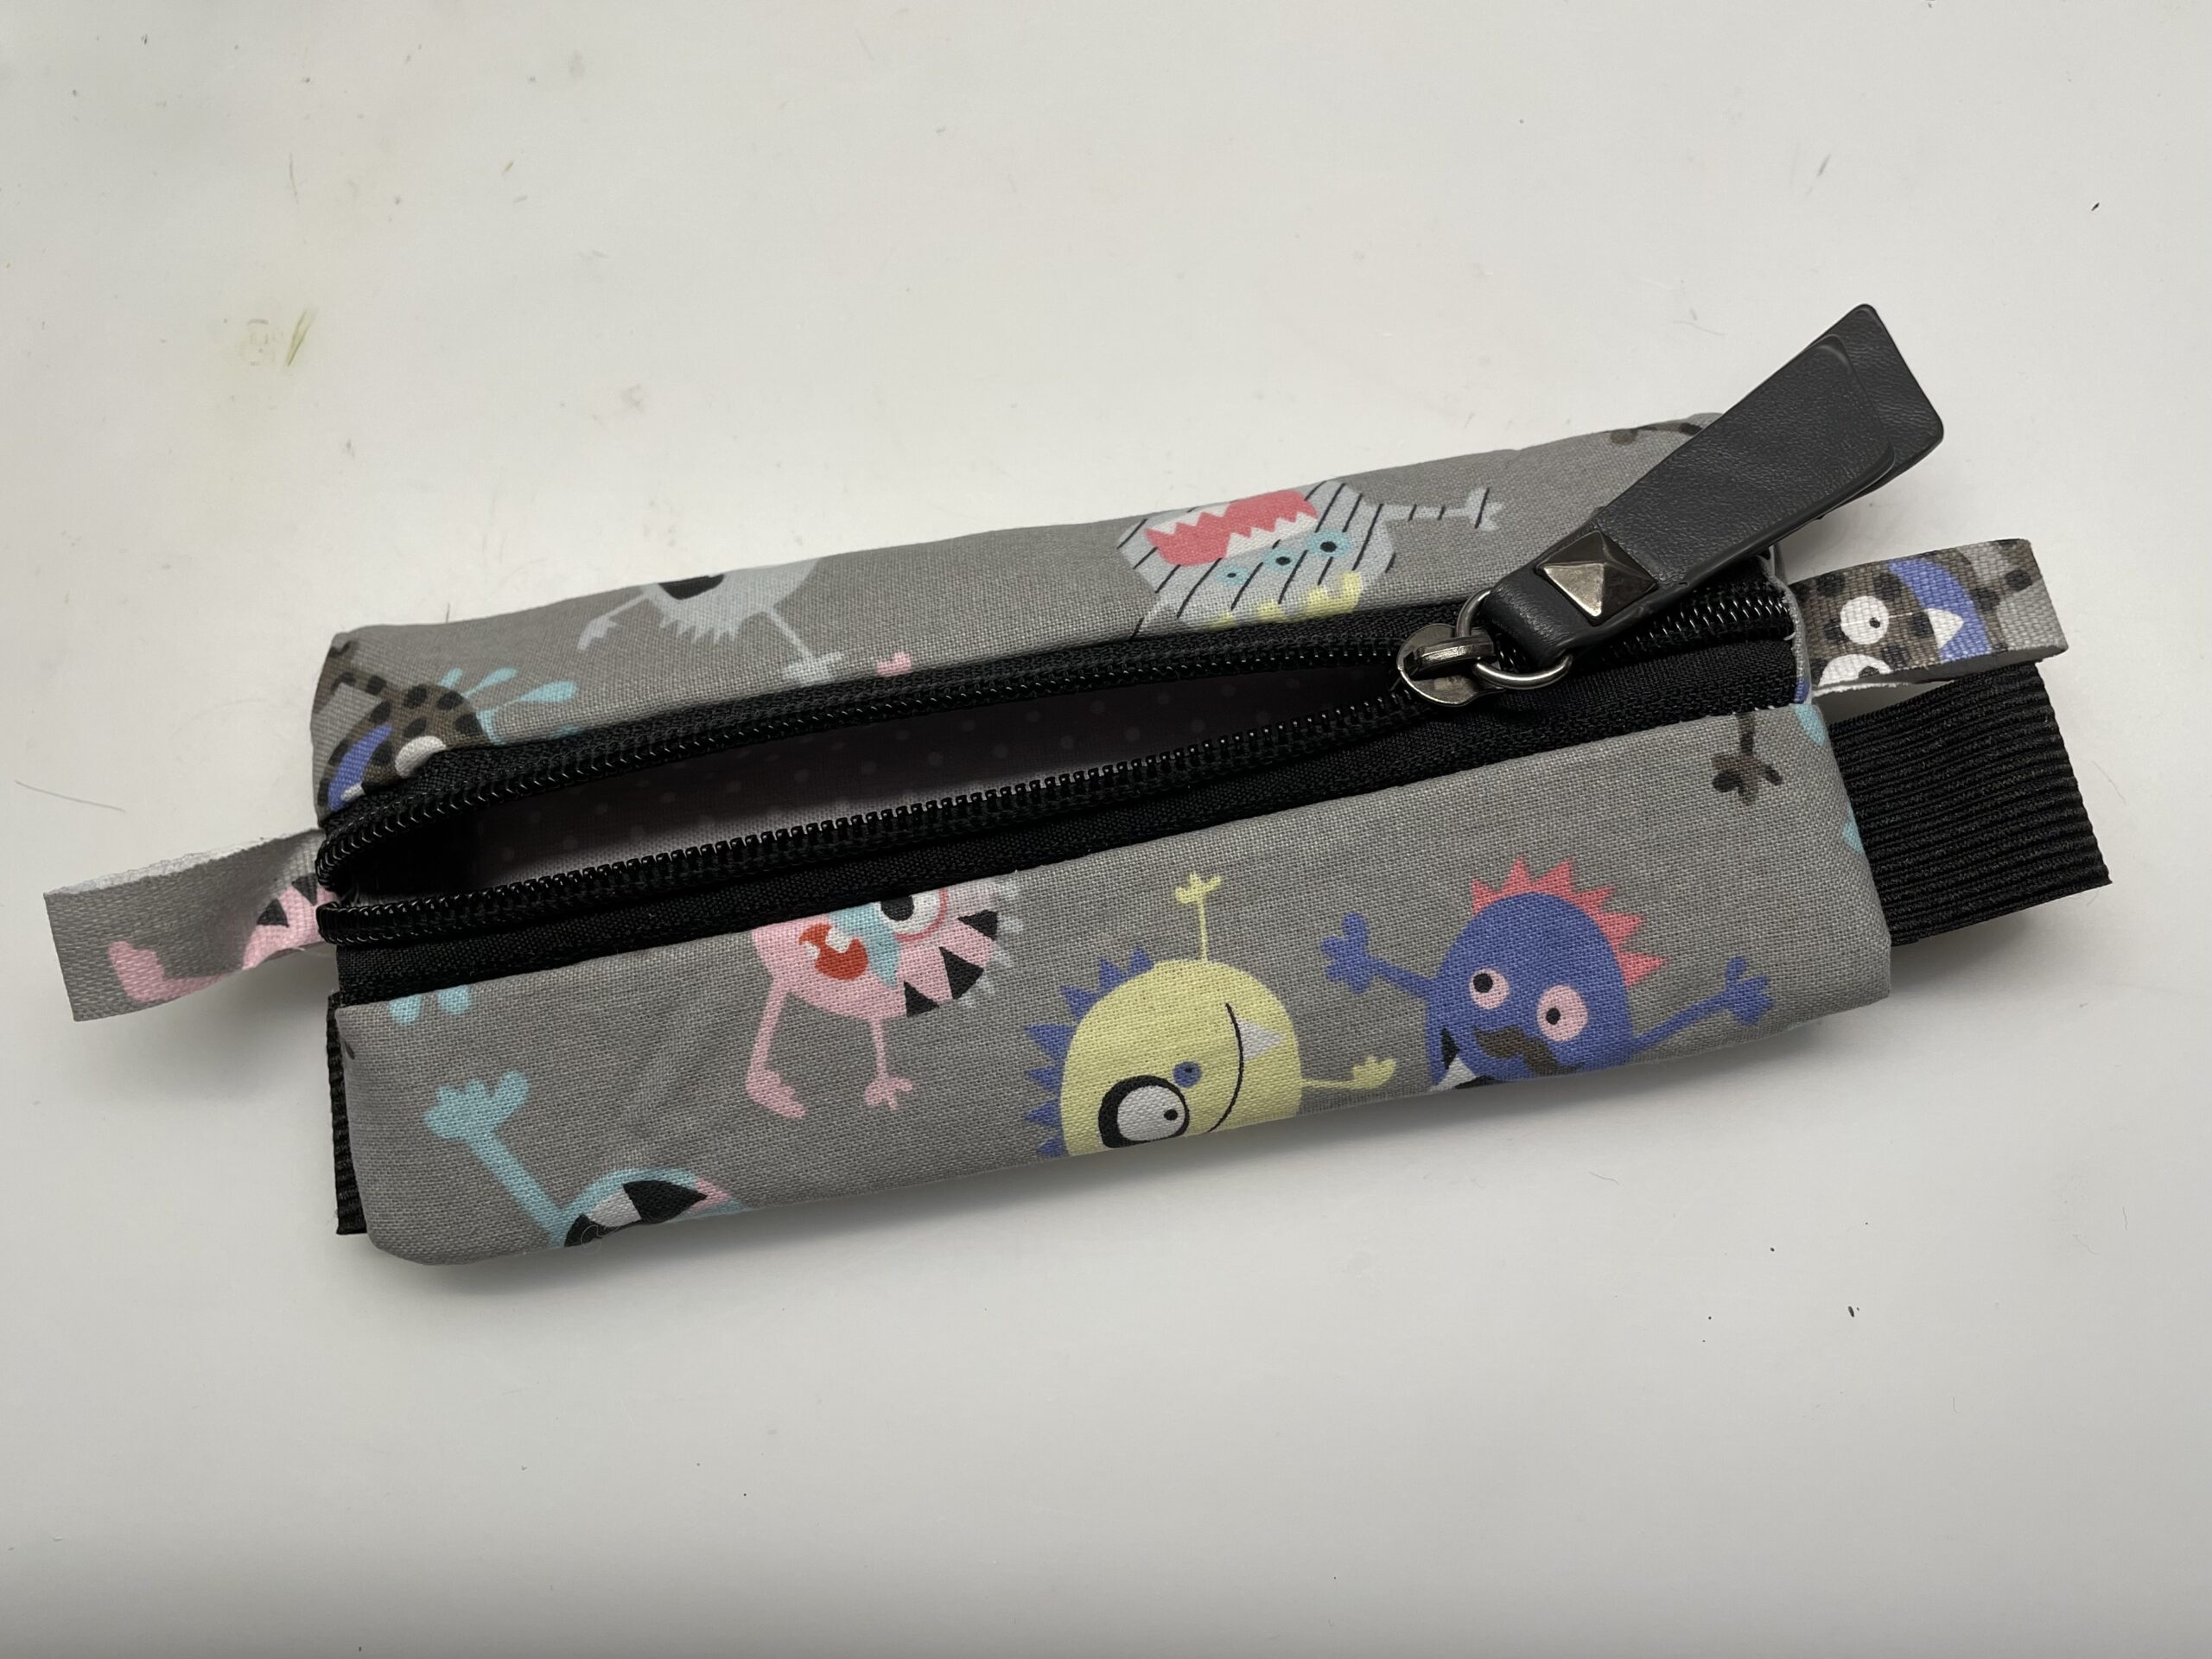
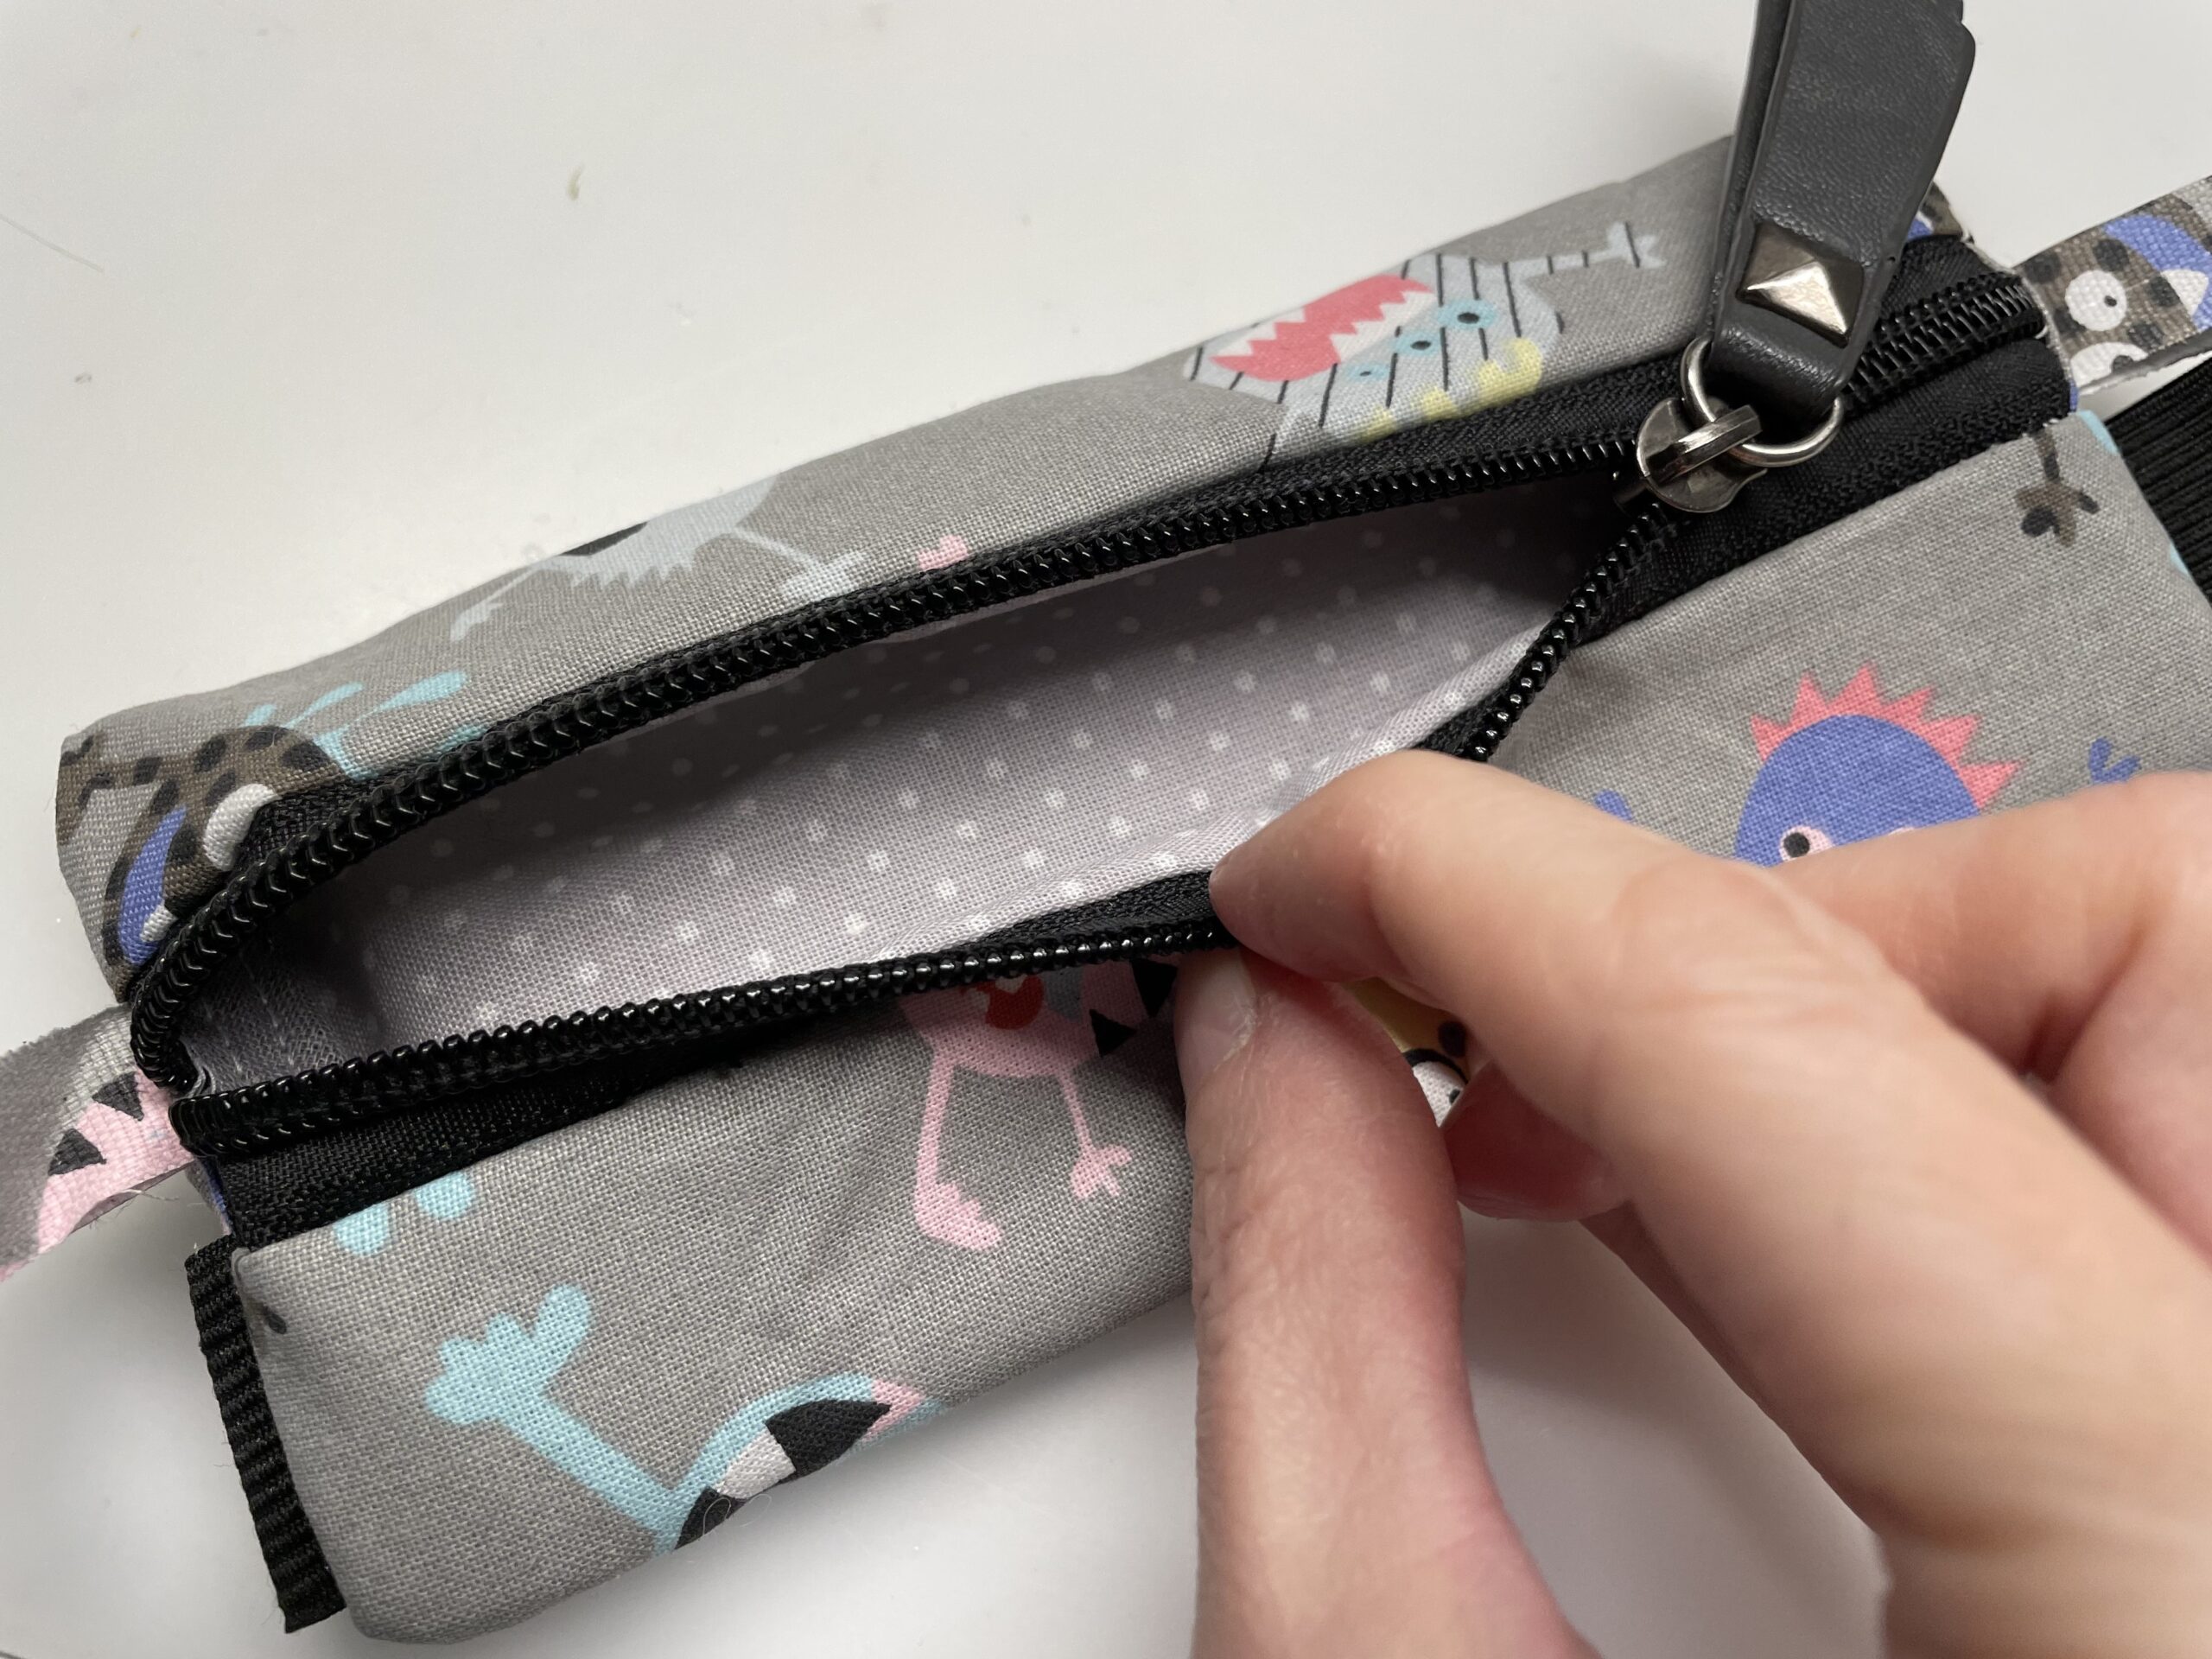
Sew pen mats

AdventurerKatzi
Rating0.02.2 thousand times & (0) DifficultyAdvanced

This sewing project has a simple cut and is still demanding and requires a precise procedure that can be implemented with the help of step by step instructions.
Choose a firmer cotton fabric and a thinner inner fabric. Both fabrics should not be stretchy. A 20cm long zipper and a wide rubber band are also required.
Then you can start already.
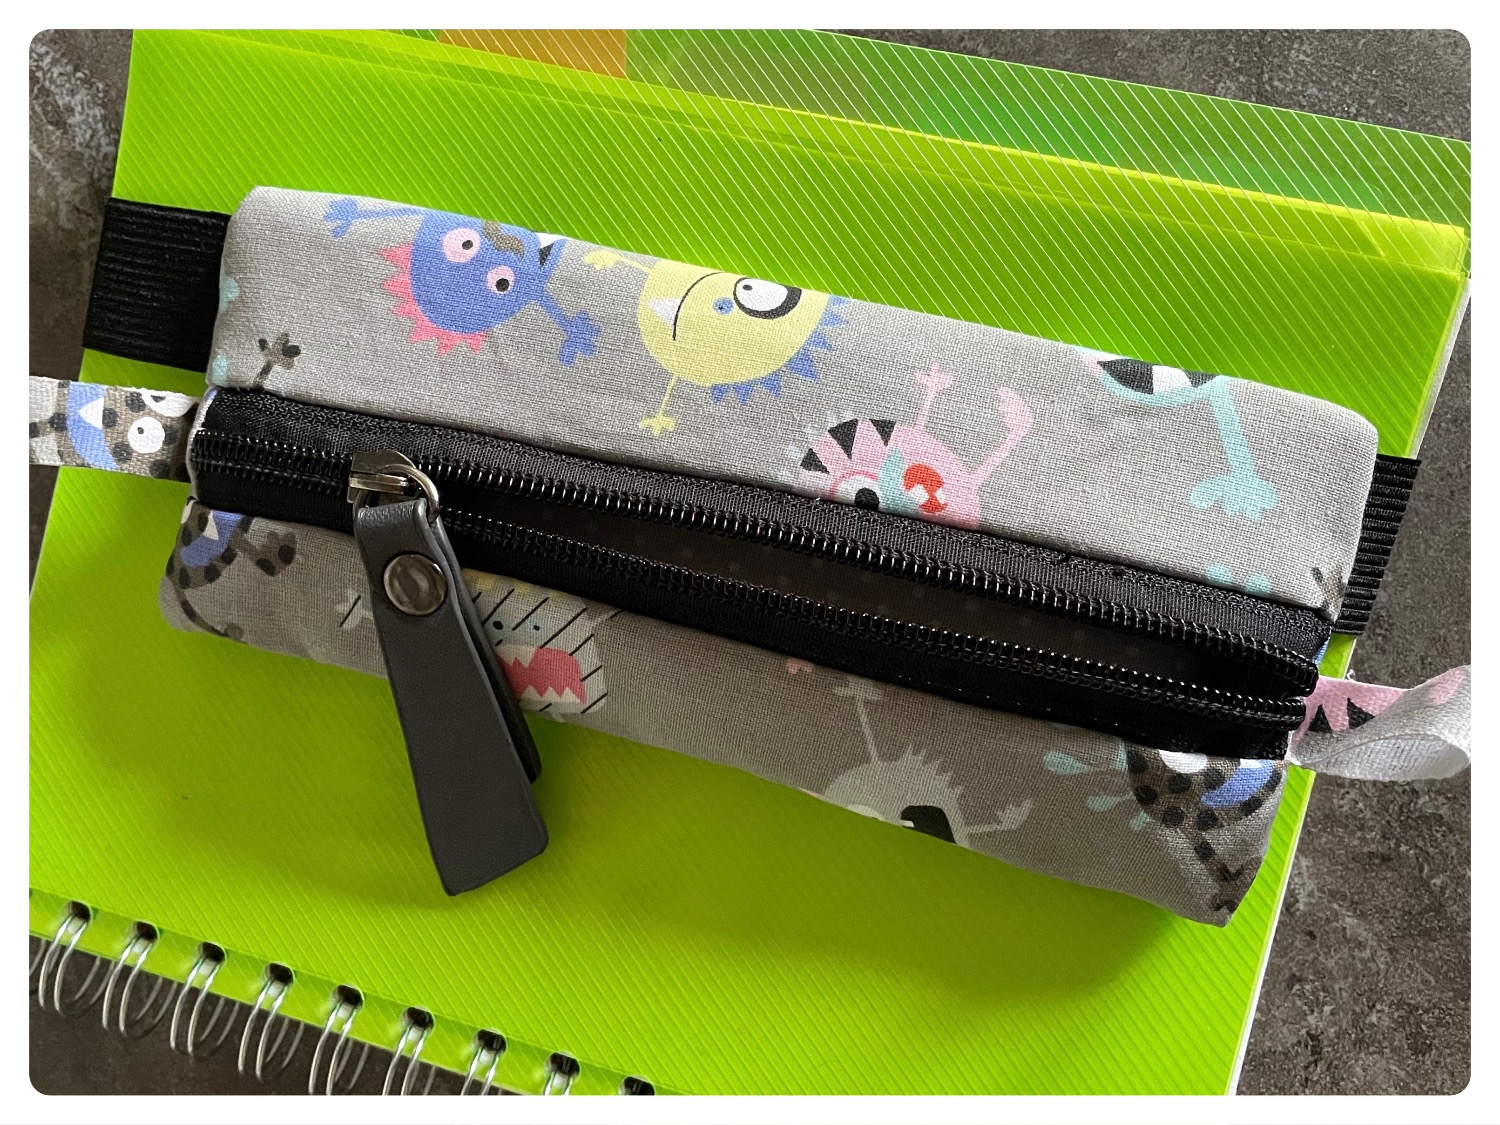
Follow the instructions and you will get a nice pen case which you can attach by a DIN A 5 block. You can fill this case with pens. Have fun trying out.

Media Education for Kindergarten and Hort

Kind bastelt eine Rassel mit dem Navi
The Adventure Navi, the app for DIY projects, enables media education for the youngest.

Relief in everyday life, targeted promotion of individual children, independent learning and - without any pre-knowledge already usable by the youngest!


Titelbild zur Bastel- und DIY-Idee für Kinder '(899) Stiftemäppchen nähen'
Material for1 Child
Prep Time10 min.Adv. Time1 StundeTotal Time1 Stunde 10 min.
 Cotton fabric thickOuter fabric 24cm x 15cm
 Cotton fabric, thinInterior fabric 24cm x 15 cm
 Bars and rods, of iron or non-alloy steel, not further worked than hot-rolled, hot-rolled, hot-rolled, not further worked than hot-rolled, hot-rolled (cold-reduced), hot-rolled, hot-rolled or cold-rolled (cold-reduced), hot-rolled (cold-reduced), hot-rolled (cold-reduced) or cold-rolled (cold-reduced), hot-rolled (cold-reduced) or cold-rolled (cold-reduced), hot-rolled (cold-reduced) or cold-rolled (cold-reduced), hot-rolled (cold-reduced-reduced) or cold-rolled (cold-reduced-reduced) or cold-rolled (cold-reduced-reduced) Or fleece fabric e.g. dishcloths
 1 ZipperNot less than 20 cm long
 1 Substance shears
 1 Ruler
 1 Ballpoint pens
 Pins or clasps
 1 Rubber band wide24 cm long, 1-2 cm wide
 Possibly slanted tape 12 cm longIt doesn't have to be!
 1 Sewing machine
 Matching sewing thread
1

Choose your fabric. It should be a non-stretchable cotton fabric. A firmer fabric can be used as an outer fabric. If the outer fabric is very thin, it will be reinforced by an ironing tile. (Alternatively, you can use a fleece dishcloth! Then just double the fabric!) A thin cotton fabric is suitable for the inner fabric. Cuts one outer part and one inner part each. Both should have a size of 24cm x 15cm each. Here the seam allowance is already included. In addition, you need two small pieces of fabric of approx. 5cm x 2.5 cm from the outer fabric.
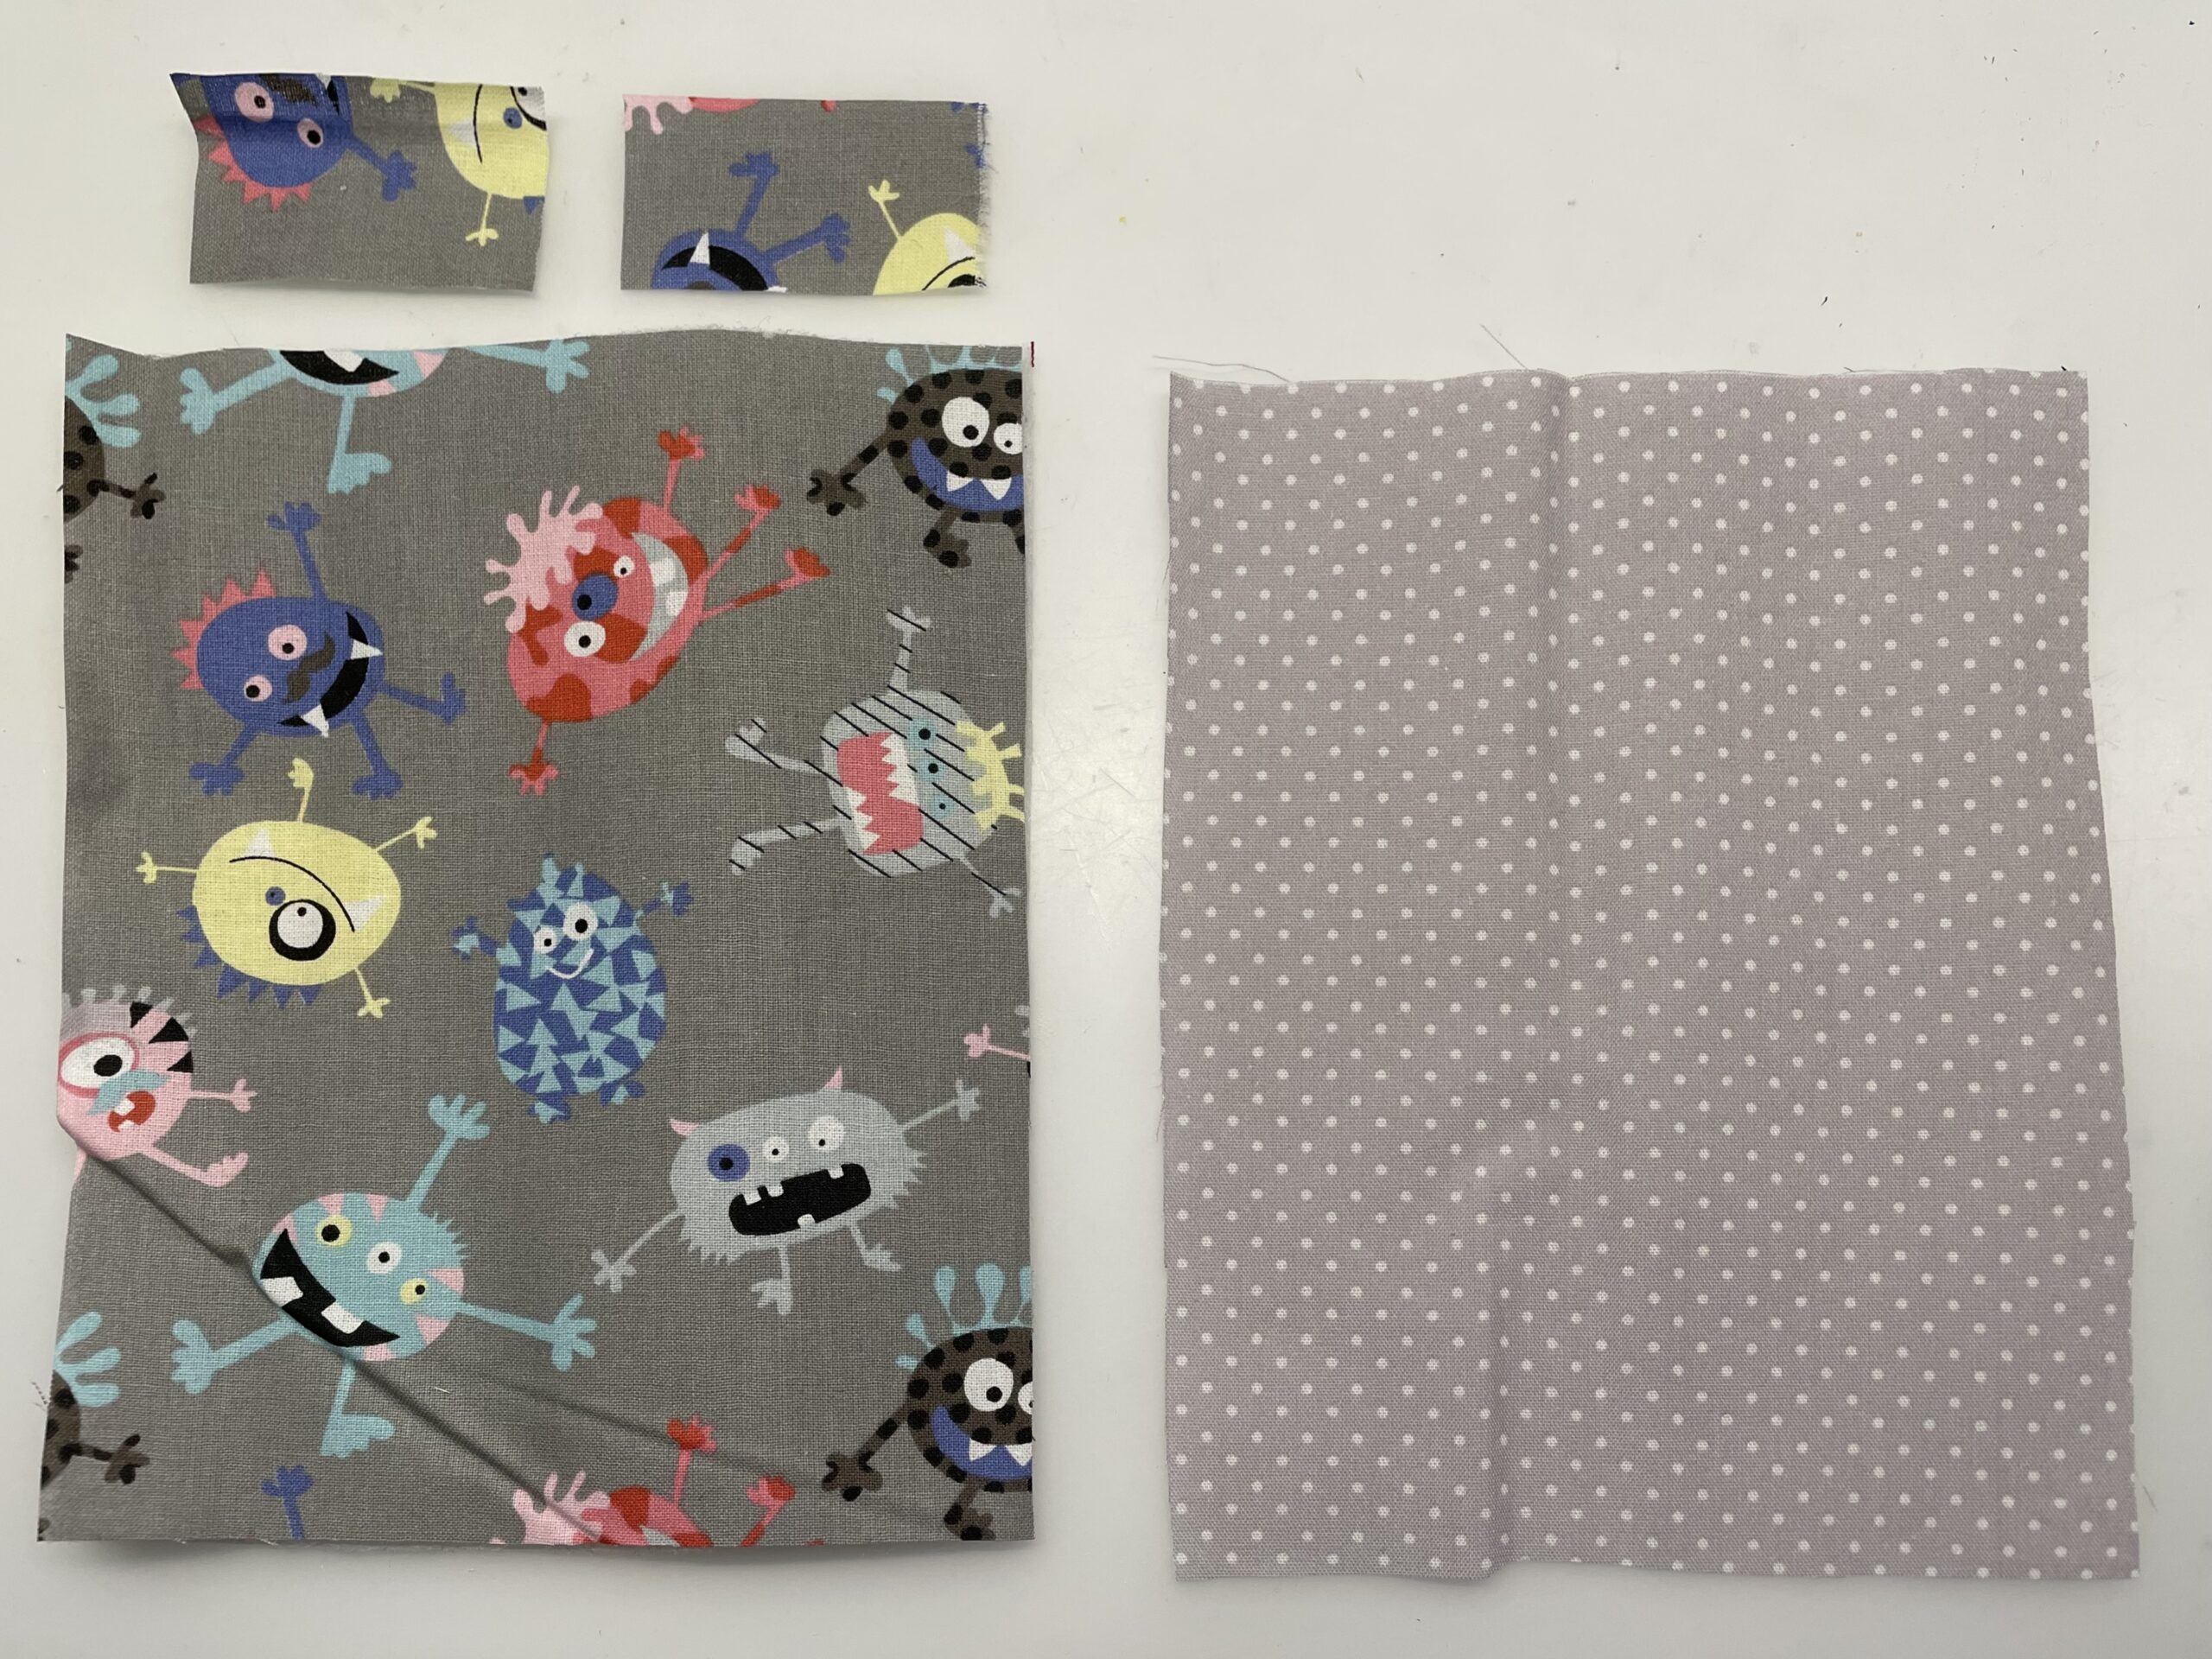
Bild zum Schritt 1 für das Bastel- und DIY-Abenteuer für Kinder: 'Wählt euren Stoff aus. Es sollte ein nicht dehnbarer Baumwollstoff...'

2

A zipper in the length of at least 20cm to 24cm is required and a rubber band with the length of 24cm x 1-2 cm width.
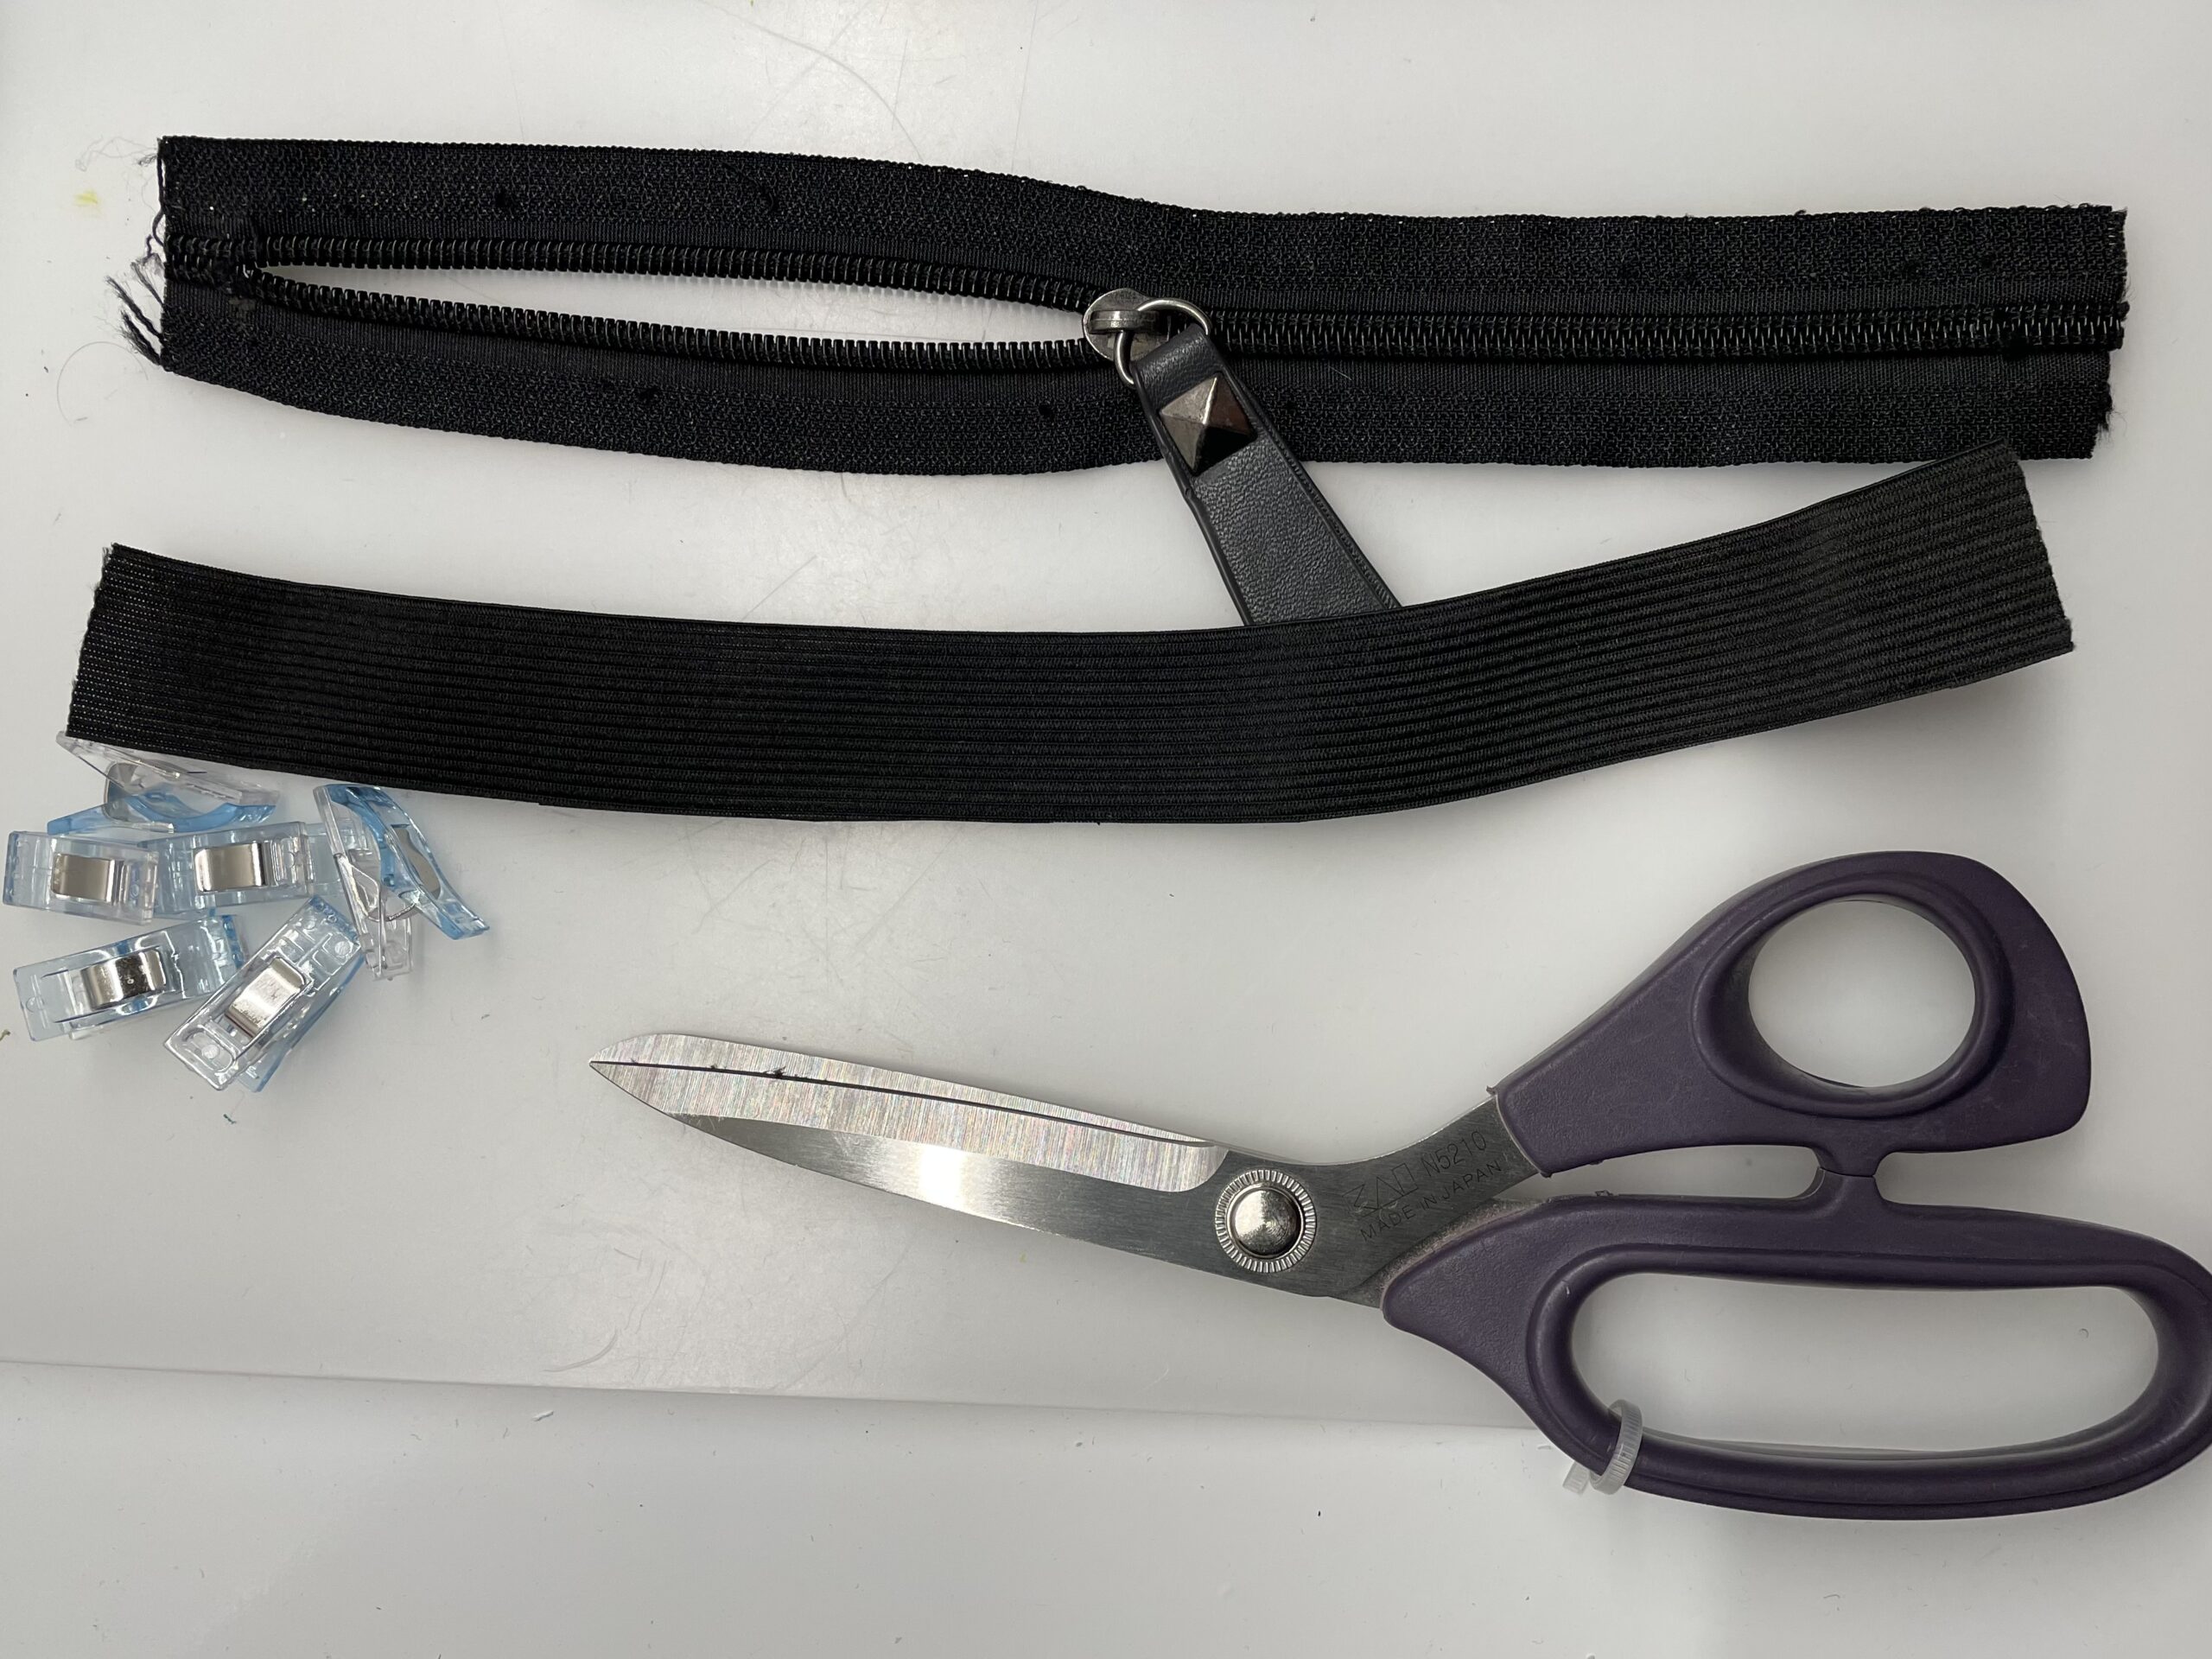
Bild zum Schritt 2 für das Bastel- und DIY-Abenteuer für Kinder: 'Ein Reißverschluss in der Länge von mindestens 20cm bis 24cm...'

3

First take the zipper and two short pieces of fabric. These are sewn to the left and right of the zipper to properly limit the zipper.

Bild zum Schritt 3 für das Bastel- und DIY-Abenteuer für Kinder: 'Nehmt zuerst den Reißverschluss und zwei kurzen Stoffstücke. Diese werden...'

4

Put a strip of fabric with the beautiful side on one side of the zipper. Moves the fabric a small piece from the edge inwards. Fixes the fabric with a clamp or needle.
Tip: first look at the next three pictures before you start sewing!

Bild zum Schritt 4 für das Bastel- und DIY-Abenteuer für Kinder: 'Legt einen Stoffstreifen mit der schönen Seite auf die eine...'

5

Tighten the fabric on the zipper.

Bild zum Schritt 5 für das Bastel- und DIY-Abenteuer für Kinder: 'Näht den Stoff auf dem Reißverschluss fest.'

6

Folds the sewn-on fabric outwards. It limits the zipper.

Bild zum Schritt 6 für das Bastel- und DIY-Abenteuer für Kinder: 'Klappt den angenähten Stoff nach außen. Er begrenzt den Reißverschluss.'

7

The fabric remains folded outwards. (Evtl. Can you iron it)

Bild zum Schritt 7 für das Bastel- und DIY-Abenteuer für Kinder: 'Der Stoff bleibt nach außen geklappt liegen. (Evtl. Könnt ihr...'

8

Repeat sewing of the piece of fabric at the other end of the zipper. First take the fabric of the inner part and mark the position of the second piece of fabric on the zipper. See further picture.

Bild zum Schritt 8 für das Bastel- und DIY-Abenteuer für Kinder: 'Wiederholt das Annähen des Stoffstückes am anderen Ende des Reißverschlusses....'

9

The two tails should be attached to the zipper.

Bild zum Schritt 9 für das Bastel- und DIY-Abenteuer für Kinder: 'So sollen die beiden Endstücke am Reißverschluss angebracht sein.'

10

Now place the zipper with the beautiful side on the upper edge of the inner fabric.

Bild zum Schritt 10 für das Bastel- und DIY-Abenteuer für Kinder: 'Legt den Reißverschluss nun mit der schönen Seite auf den...'

11

The outer fabric we also put on it. Interior fabric, zipper and outer fabric lie cleanly on top of each other and are fixed with clamps.

Bild zum Schritt 11 für das Bastel- und DIY-Abenteuer für Kinder: 'Der Außenstoff wir ebenfalls darauf gelegt. Innenstoff, Reißverschluss und Außenstoff...'

12

Make sure that the fabric width is exactly on top of each other.

Bild zum Schritt 12 für das Bastel- und DIY-Abenteuer für Kinder: 'Achtet darauf, dass die Stoffbreite genau aufeinander liegt.'

13

The reinforcement fleece is also attached here. (As reinforcement of the outer material!)
Seams the top seam with the sewing machine.

Bild zum Schritt 13 für das Bastel- und DIY-Abenteuer für Kinder: 'Auch das Verstärkungsfleece wird hier gleich mit angeheftet. (Als Verstärkung...'

14

Folds the fabric apart. One side of the zipper is now finished sewn.

Bild zum Schritt 14 für das Bastel- und DIY-Abenteuer für Kinder: 'Klappt den Stoff auseinander. Eine Seite des Reißverschlusses ist nun...'

15

Now set up the fabrics for the second part of the zipper. Here are the following pictures:

Bild zum Schritt 15 für das Bastel- und DIY-Abenteuer für Kinder: 'Legt nun die Stoffe für den zweiten Teil des Reißverschlusses...'

16

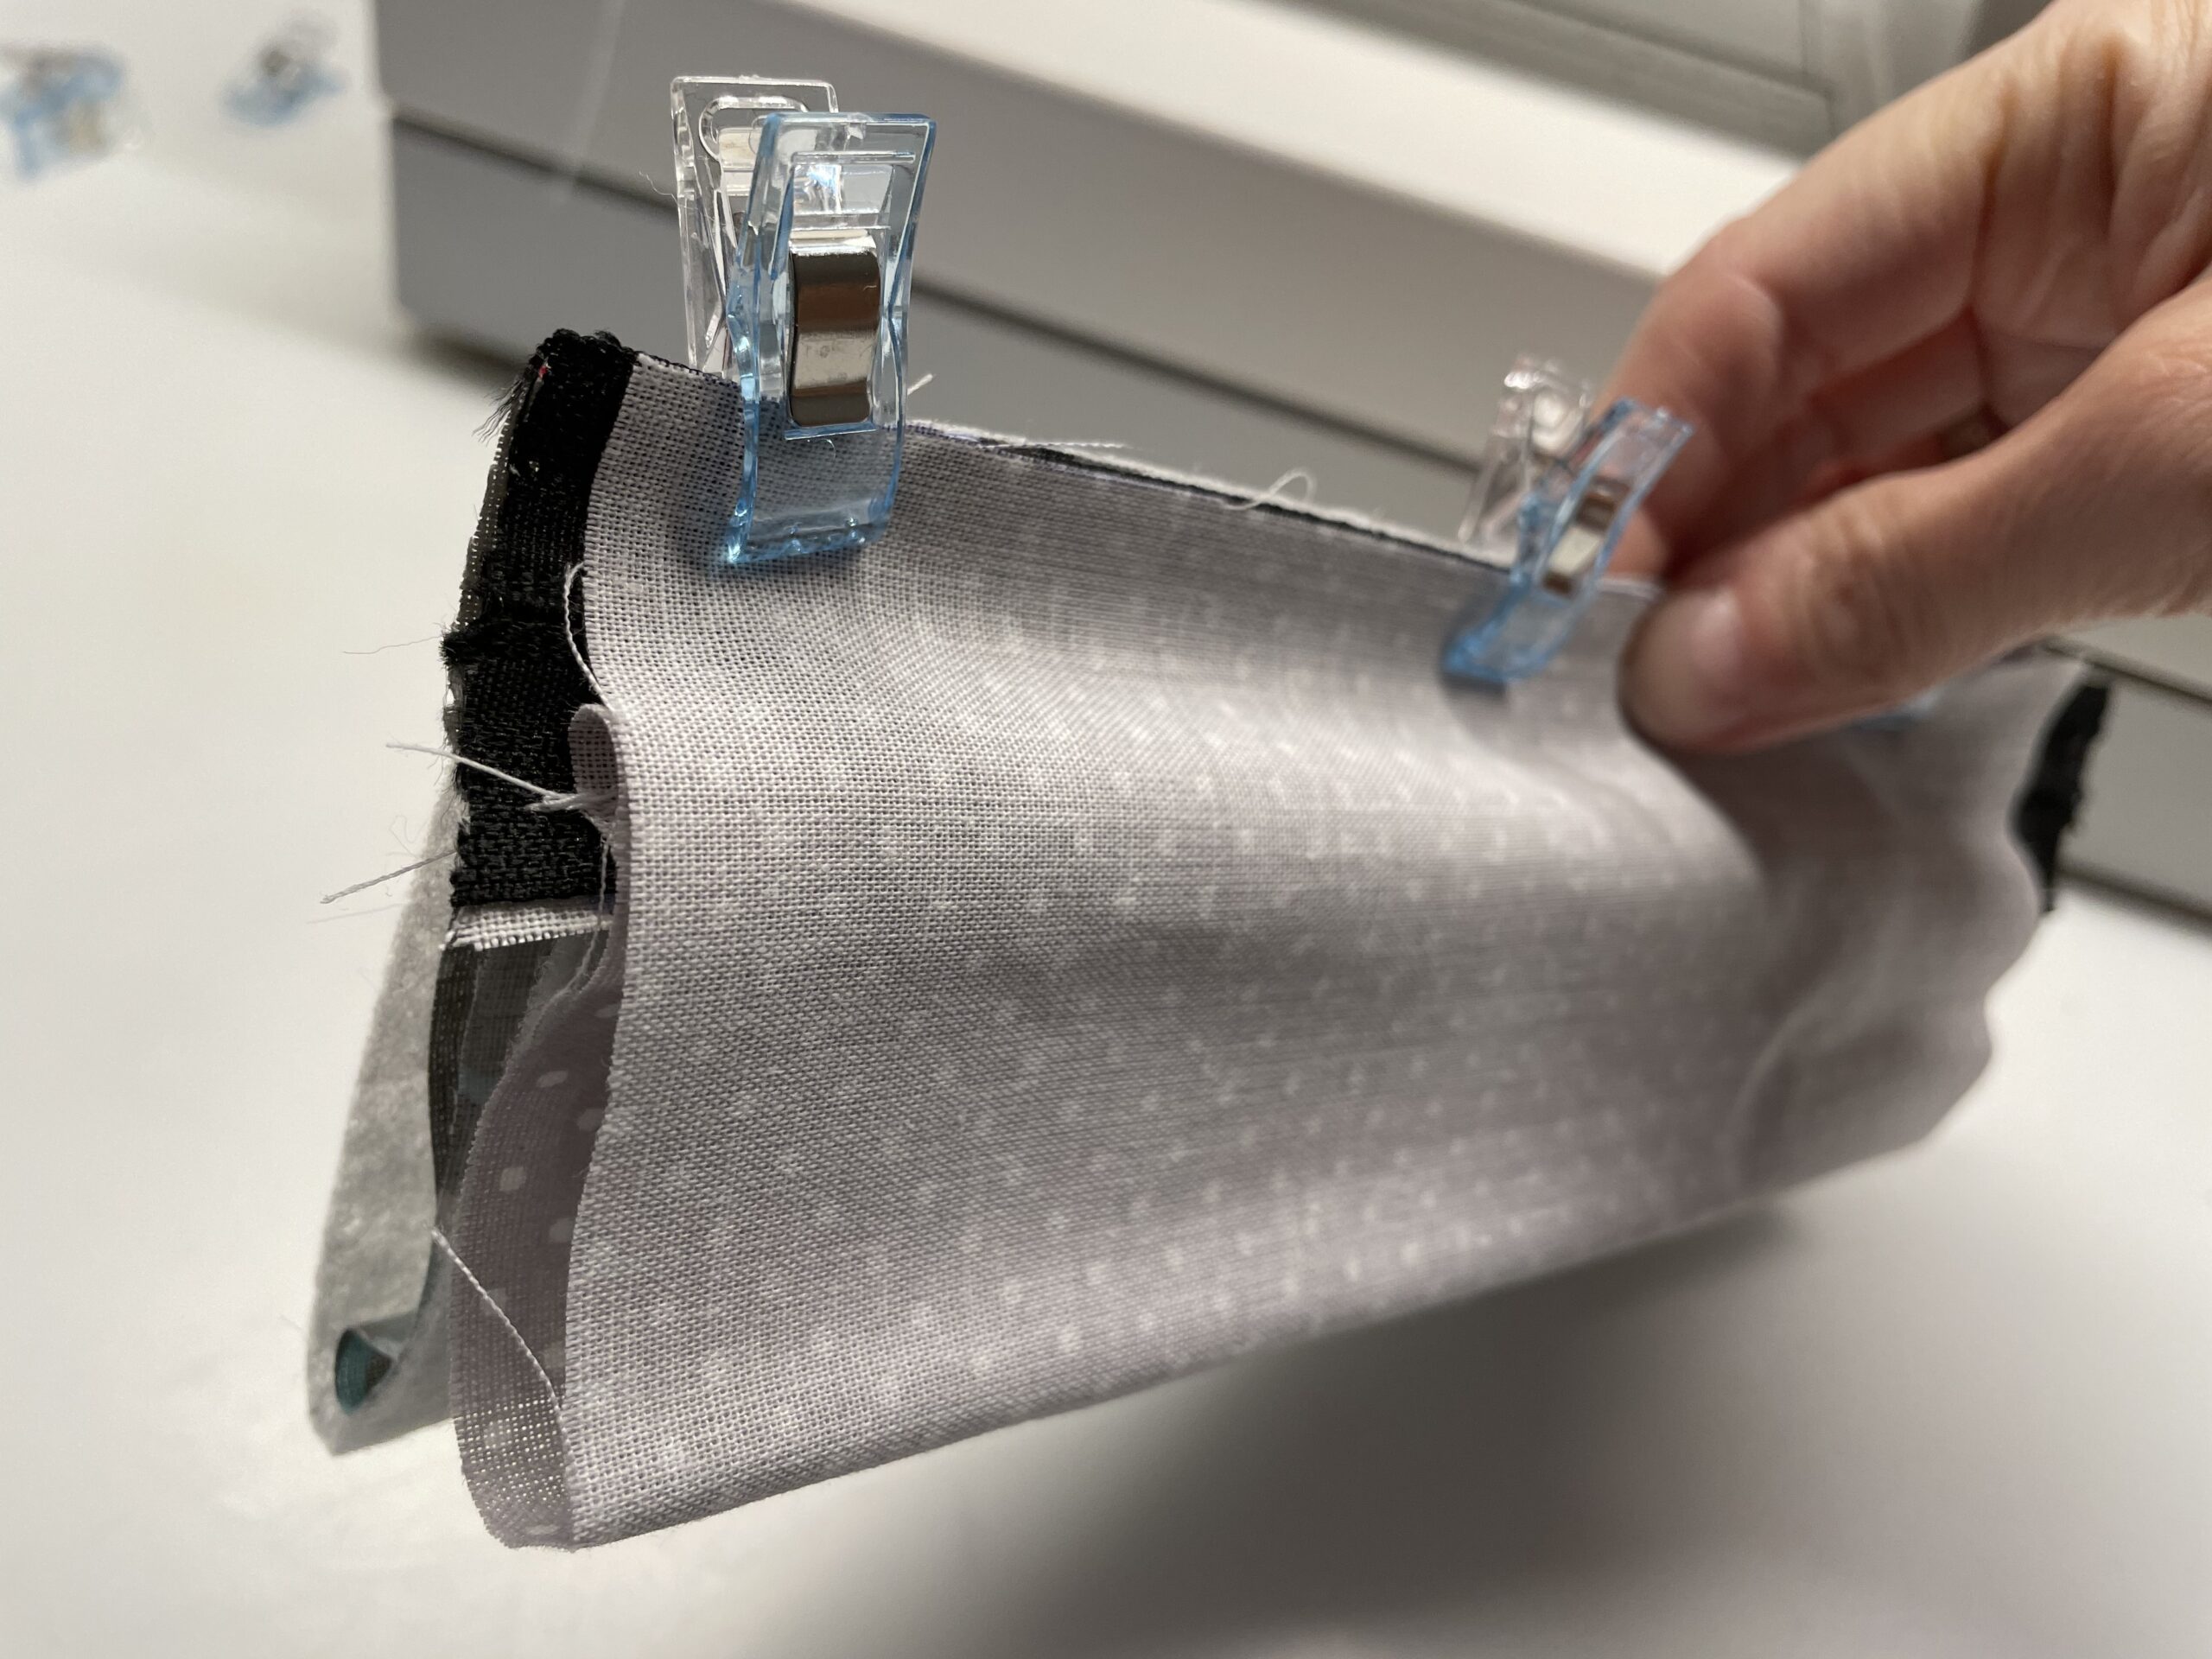
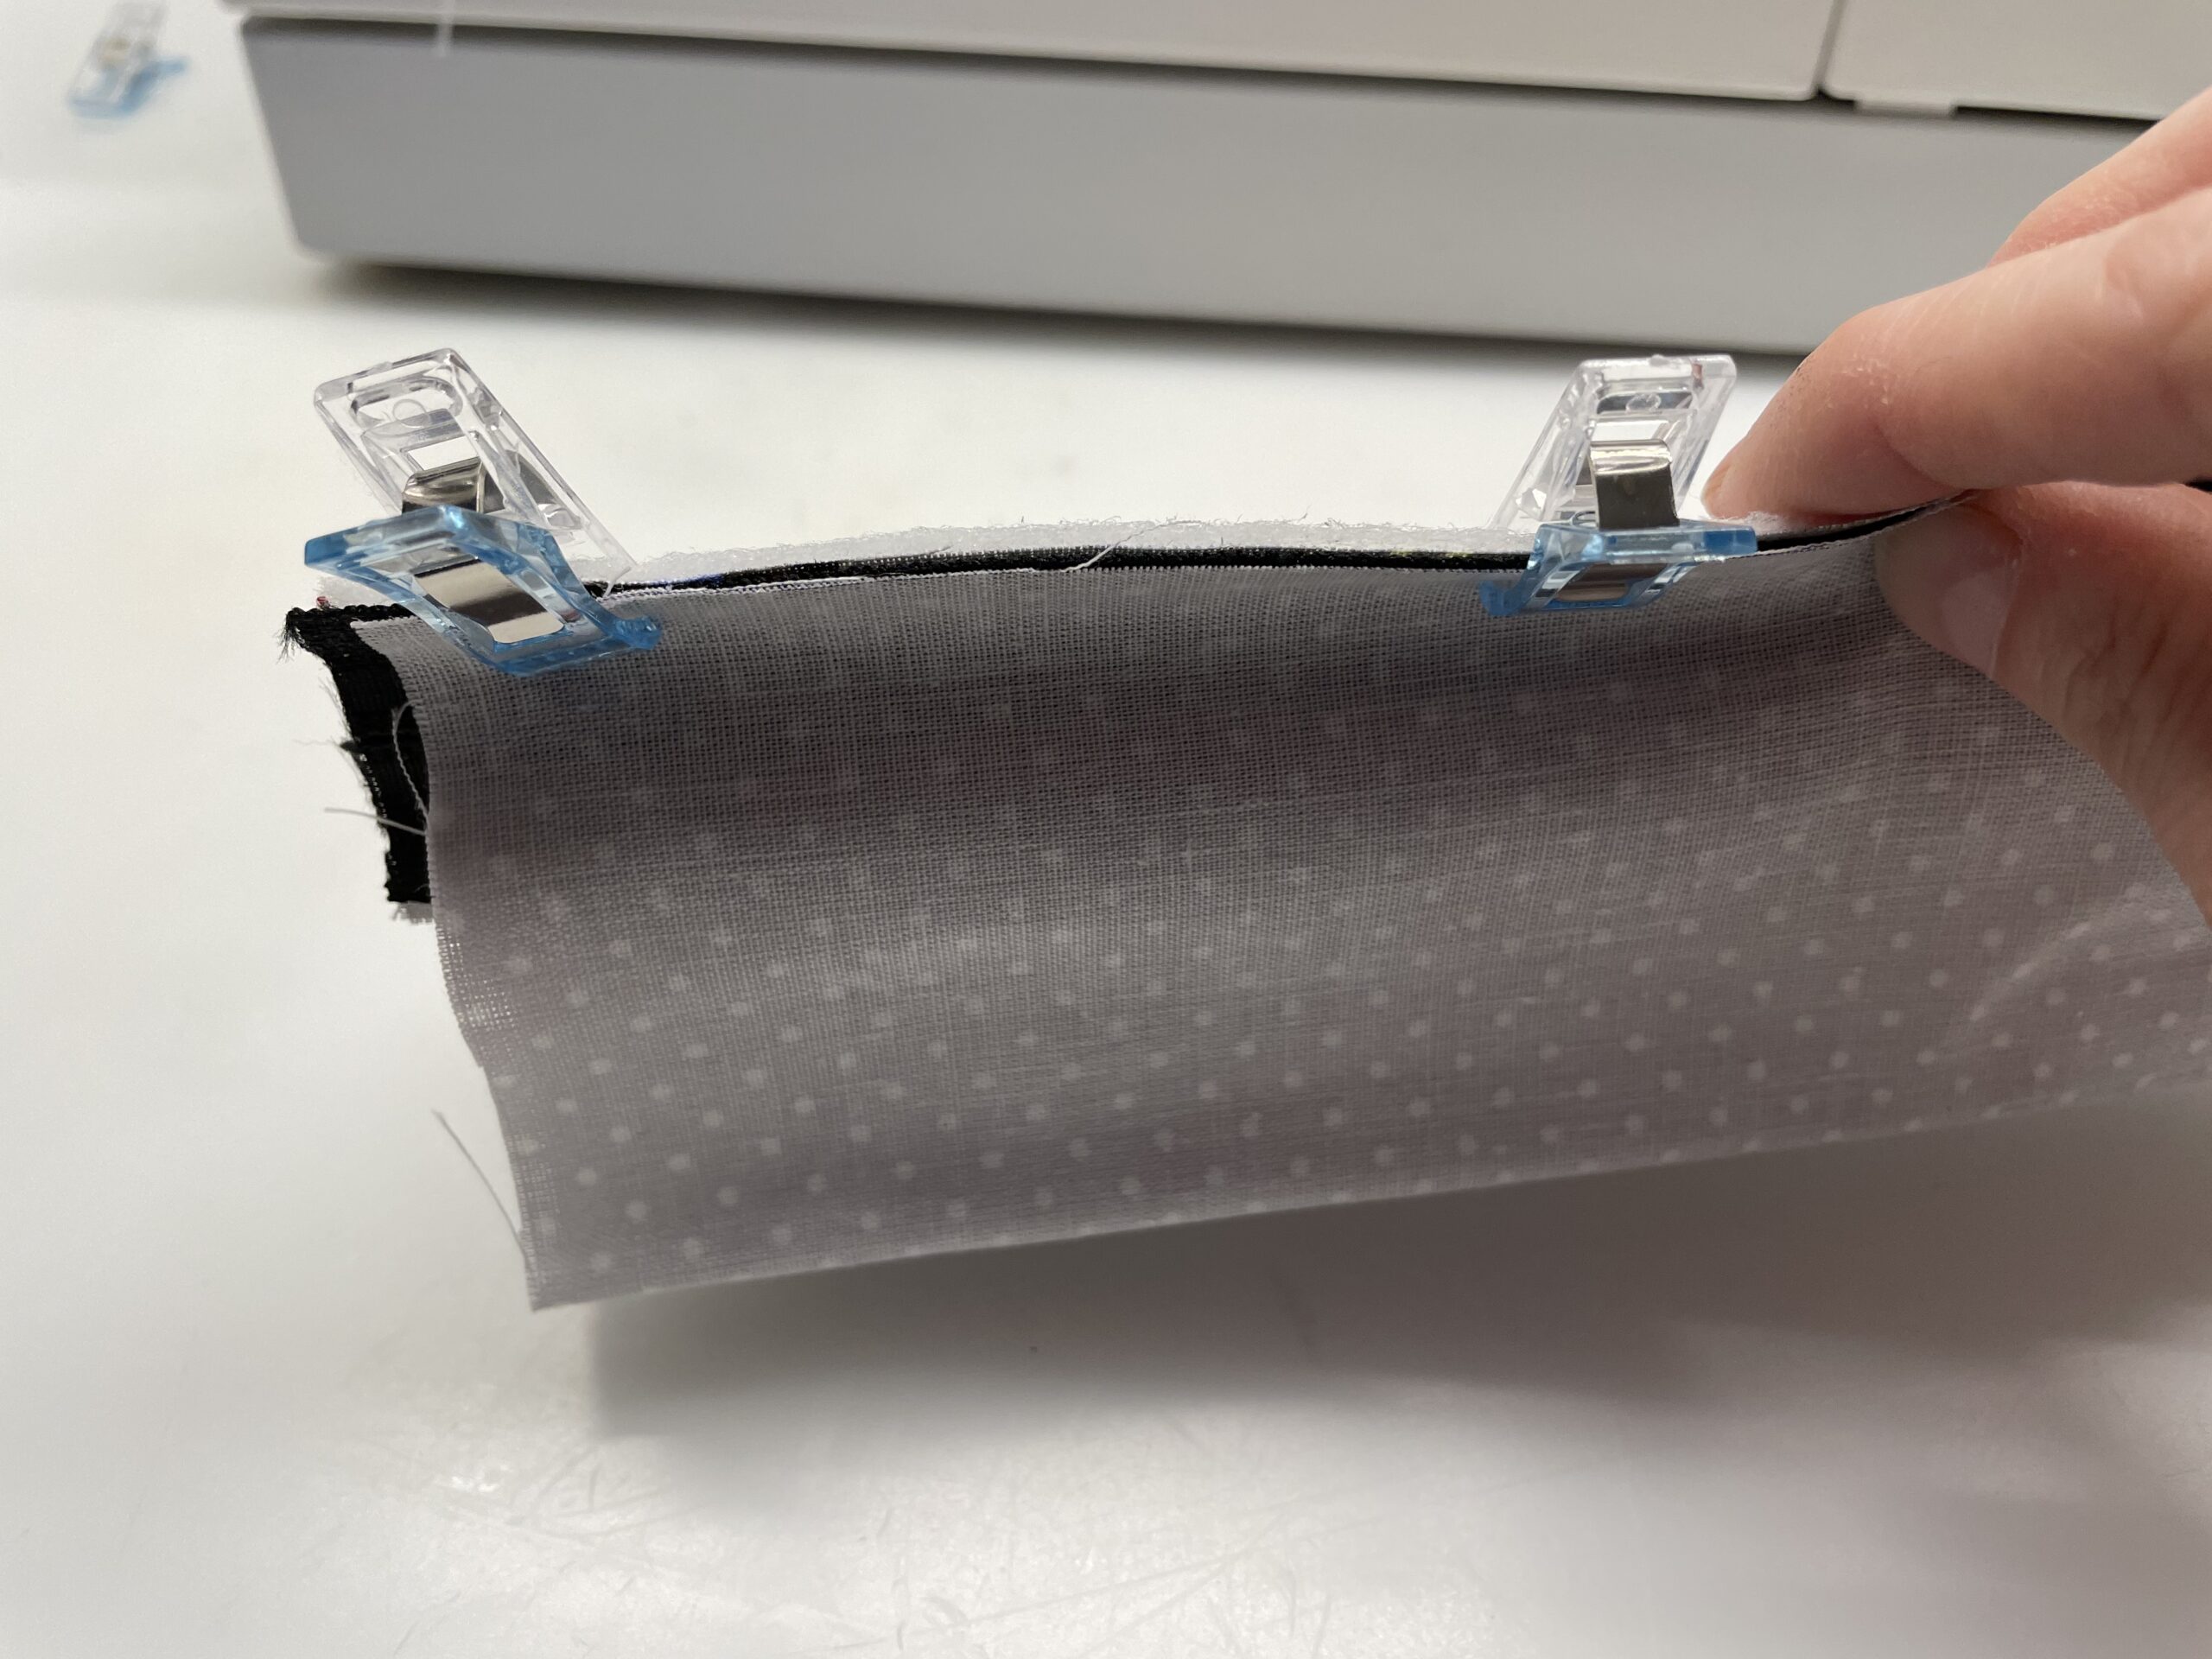
The opposite sides of the fabric are now placed on the other side of the zipper. The inner fabric is folded onto the back and positioned at the back of the zipper. The fabrics always lie on each other with the beautiful sides.

Bild zum Schritt 16 für das Bastel- und DIY-Abenteuer für Kinder: 'Die gegenüberliegenden Stoff- Seiten  werden nun an die andere...'

17

Fixes the position of the later seam with clamps.

Bild zum Schritt 17 für das Bastel- und DIY-Abenteuer für Kinder: 'Fixiert die Stelle der späteren Naht mit Klammern.'

18

2. Bild zum Schritt 17 für das Bastel- und DIY-Abenteuer für Kinder: 'Fixiert die Stelle der späteren Naht mit Klammern.'

19

Sews a seam along the zipper.

Bild zum Schritt 19 für das Bastel- und DIY-Abenteuer für Kinder: 'Näht eine Naht am Reißverschluss entlang.'

20

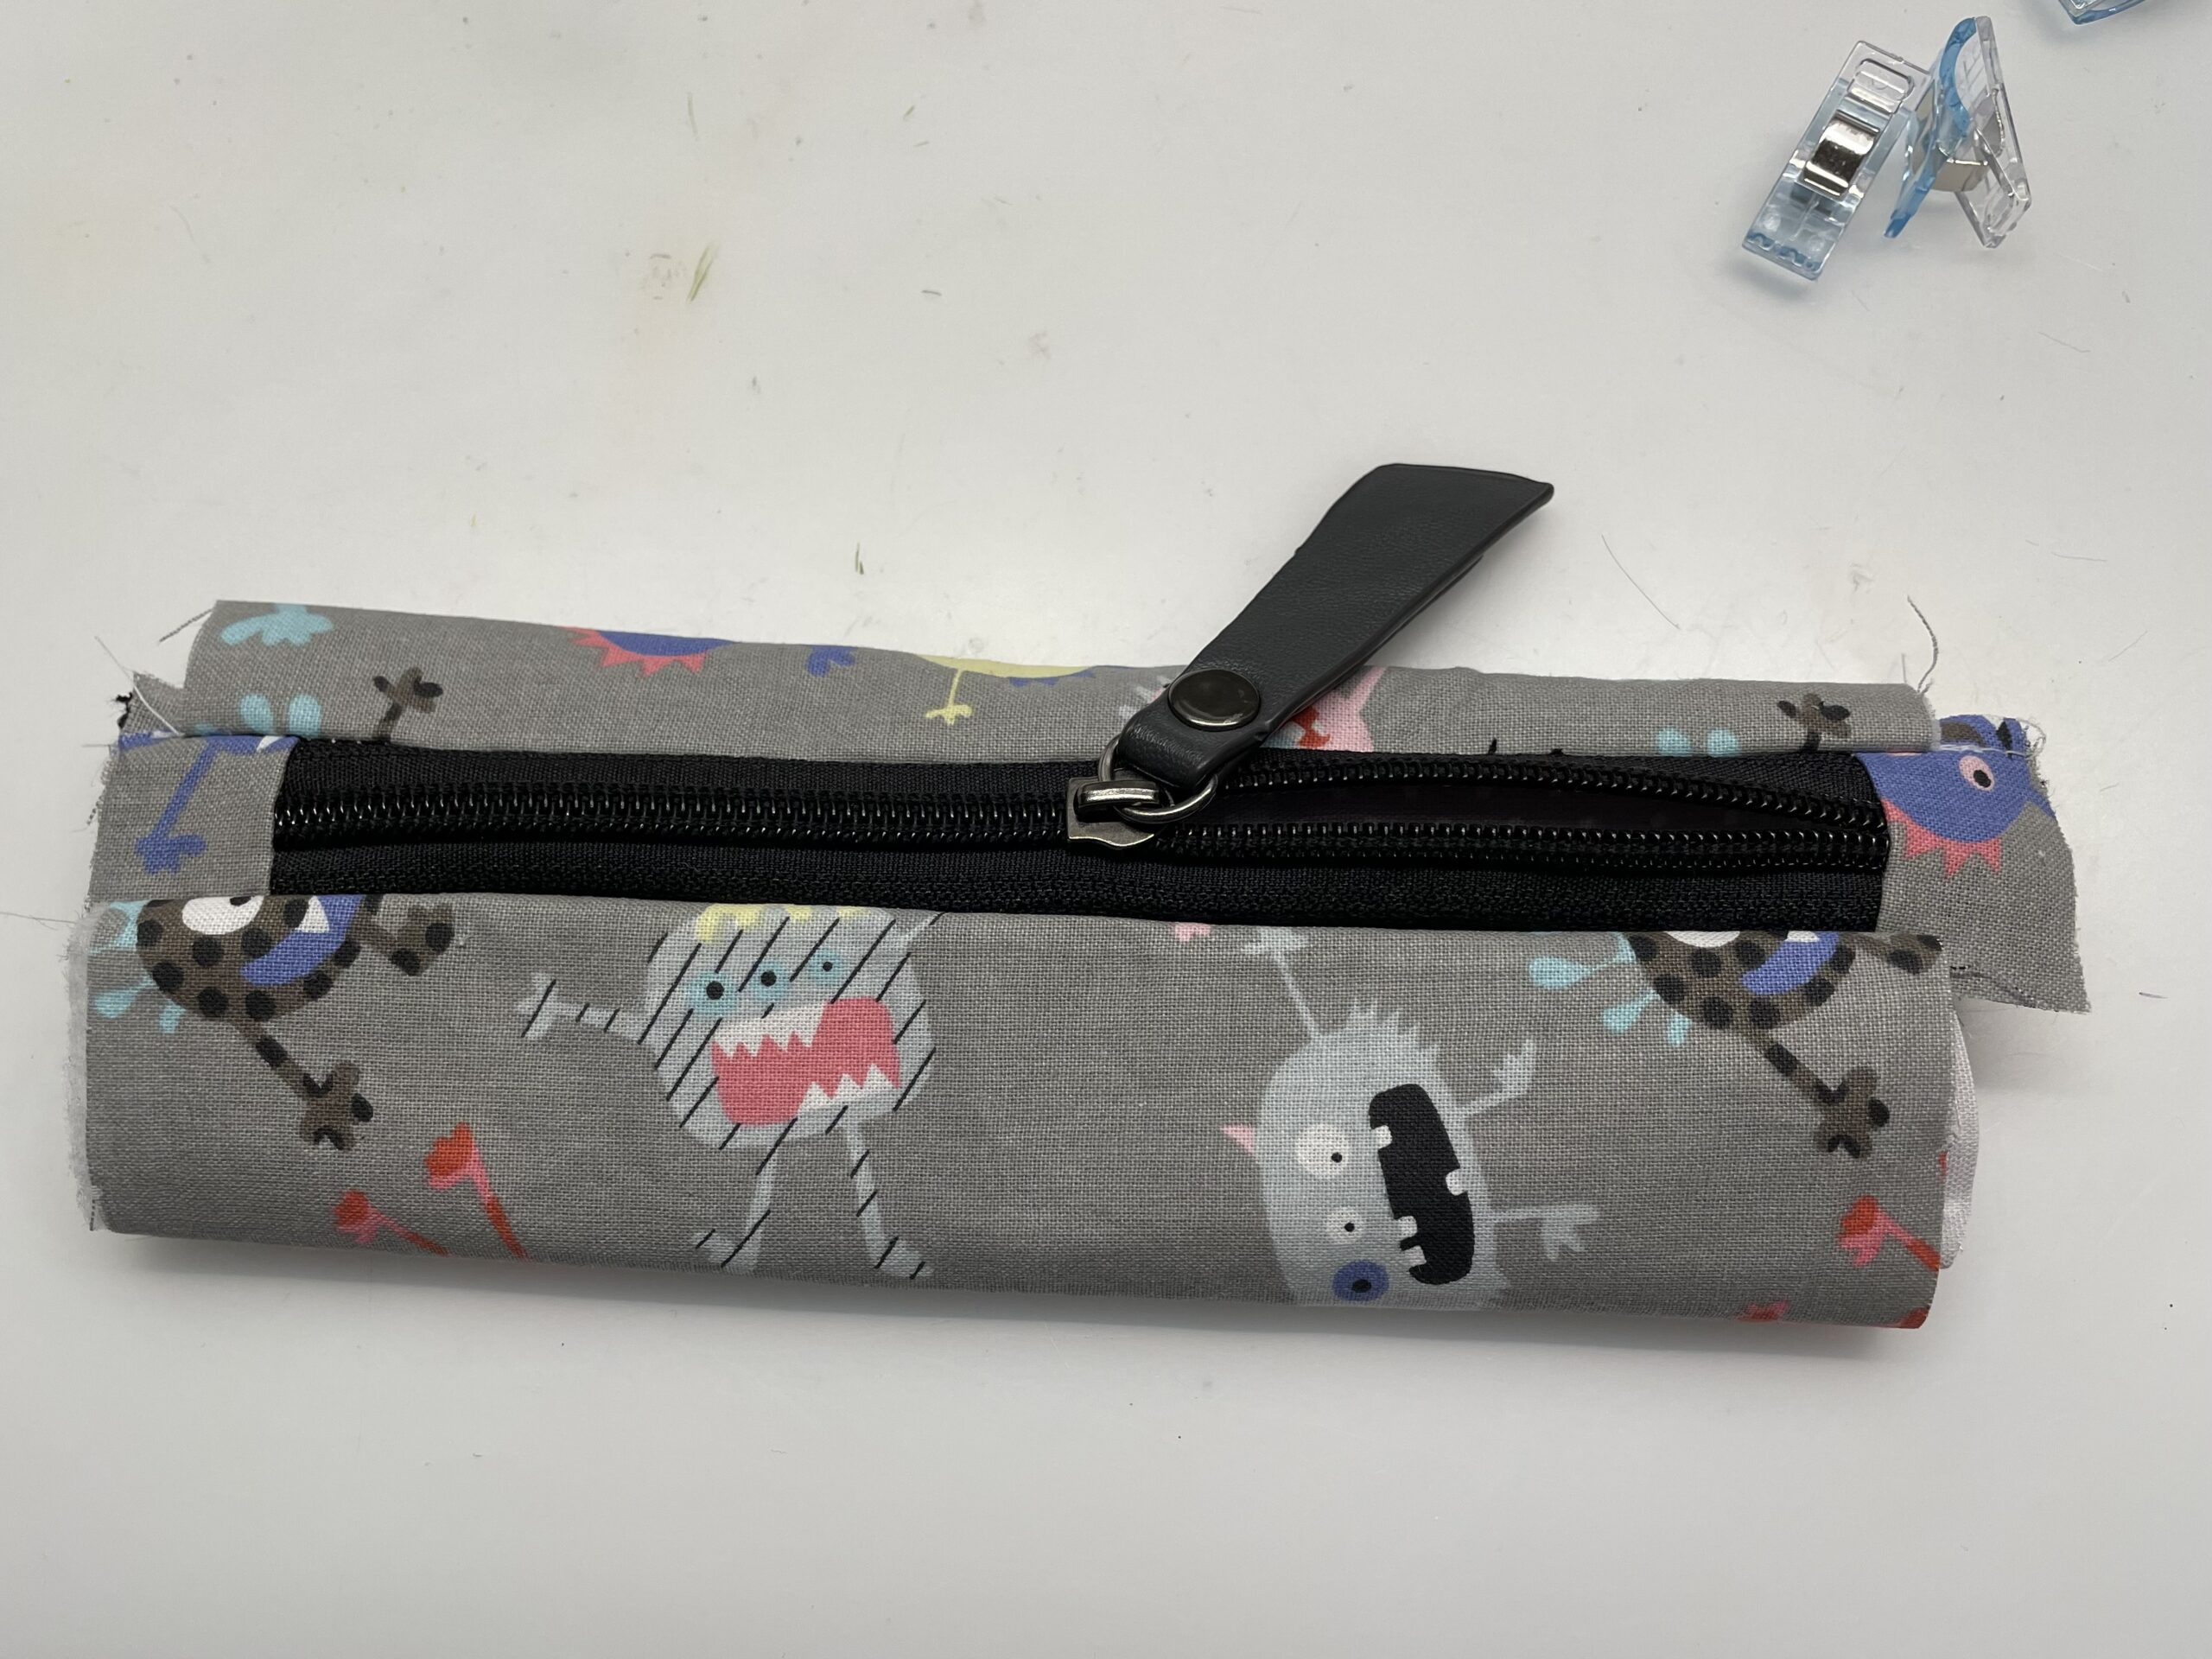
Turns the fabric part after sewing. The outer fabric is placed outwards and the inner side neatly inwards.

Bild zum Schritt 20 für das Bastel- und DIY-Abenteuer für Kinder: 'Wendet das Stoffteil nach dem Nähen. Der Außenstoff wird nach...'

21

Now you can see the little girl.

Bild zum Schritt 21 für das Bastel- und DIY-Abenteuer für Kinder: 'Nun ist das Mäppchen schon gut zu erkennen.'

22

Straighten out the zipper in the middle and flatten the cap.

Bild zum Schritt 22 für das Bastel- und DIY-Abenteuer für Kinder: 'Richtet den Reißverschluss mittig aus und drückt das Mäppchen platt.'

23

On the open sides to the left and right you can add additional loops and sew the rubber band. Make sure that you do not close the opening or sew the fabrics together.

Bild zum Schritt 23 für das Bastel- und DIY-Abenteuer für Kinder: 'An den offenen Seiten links und rechts könnt ihr noch...'

24

Just fix the rubber band and the loops on the top fabric. Sew as far as possible outside!

Bild zum Schritt 24 für das Bastel- und DIY-Abenteuer für Kinder: 'Fixiert lediglich das Gummiband und die Schlaufen am obersten Stoff....'

25

Turn the cap so that the inside is on the outside.

Bild zum Schritt 25 für das Bastel- und DIY-Abenteuer für Kinder: 'Wendet das Mäppchen. So dass die Innenseite außen liegt.'

26

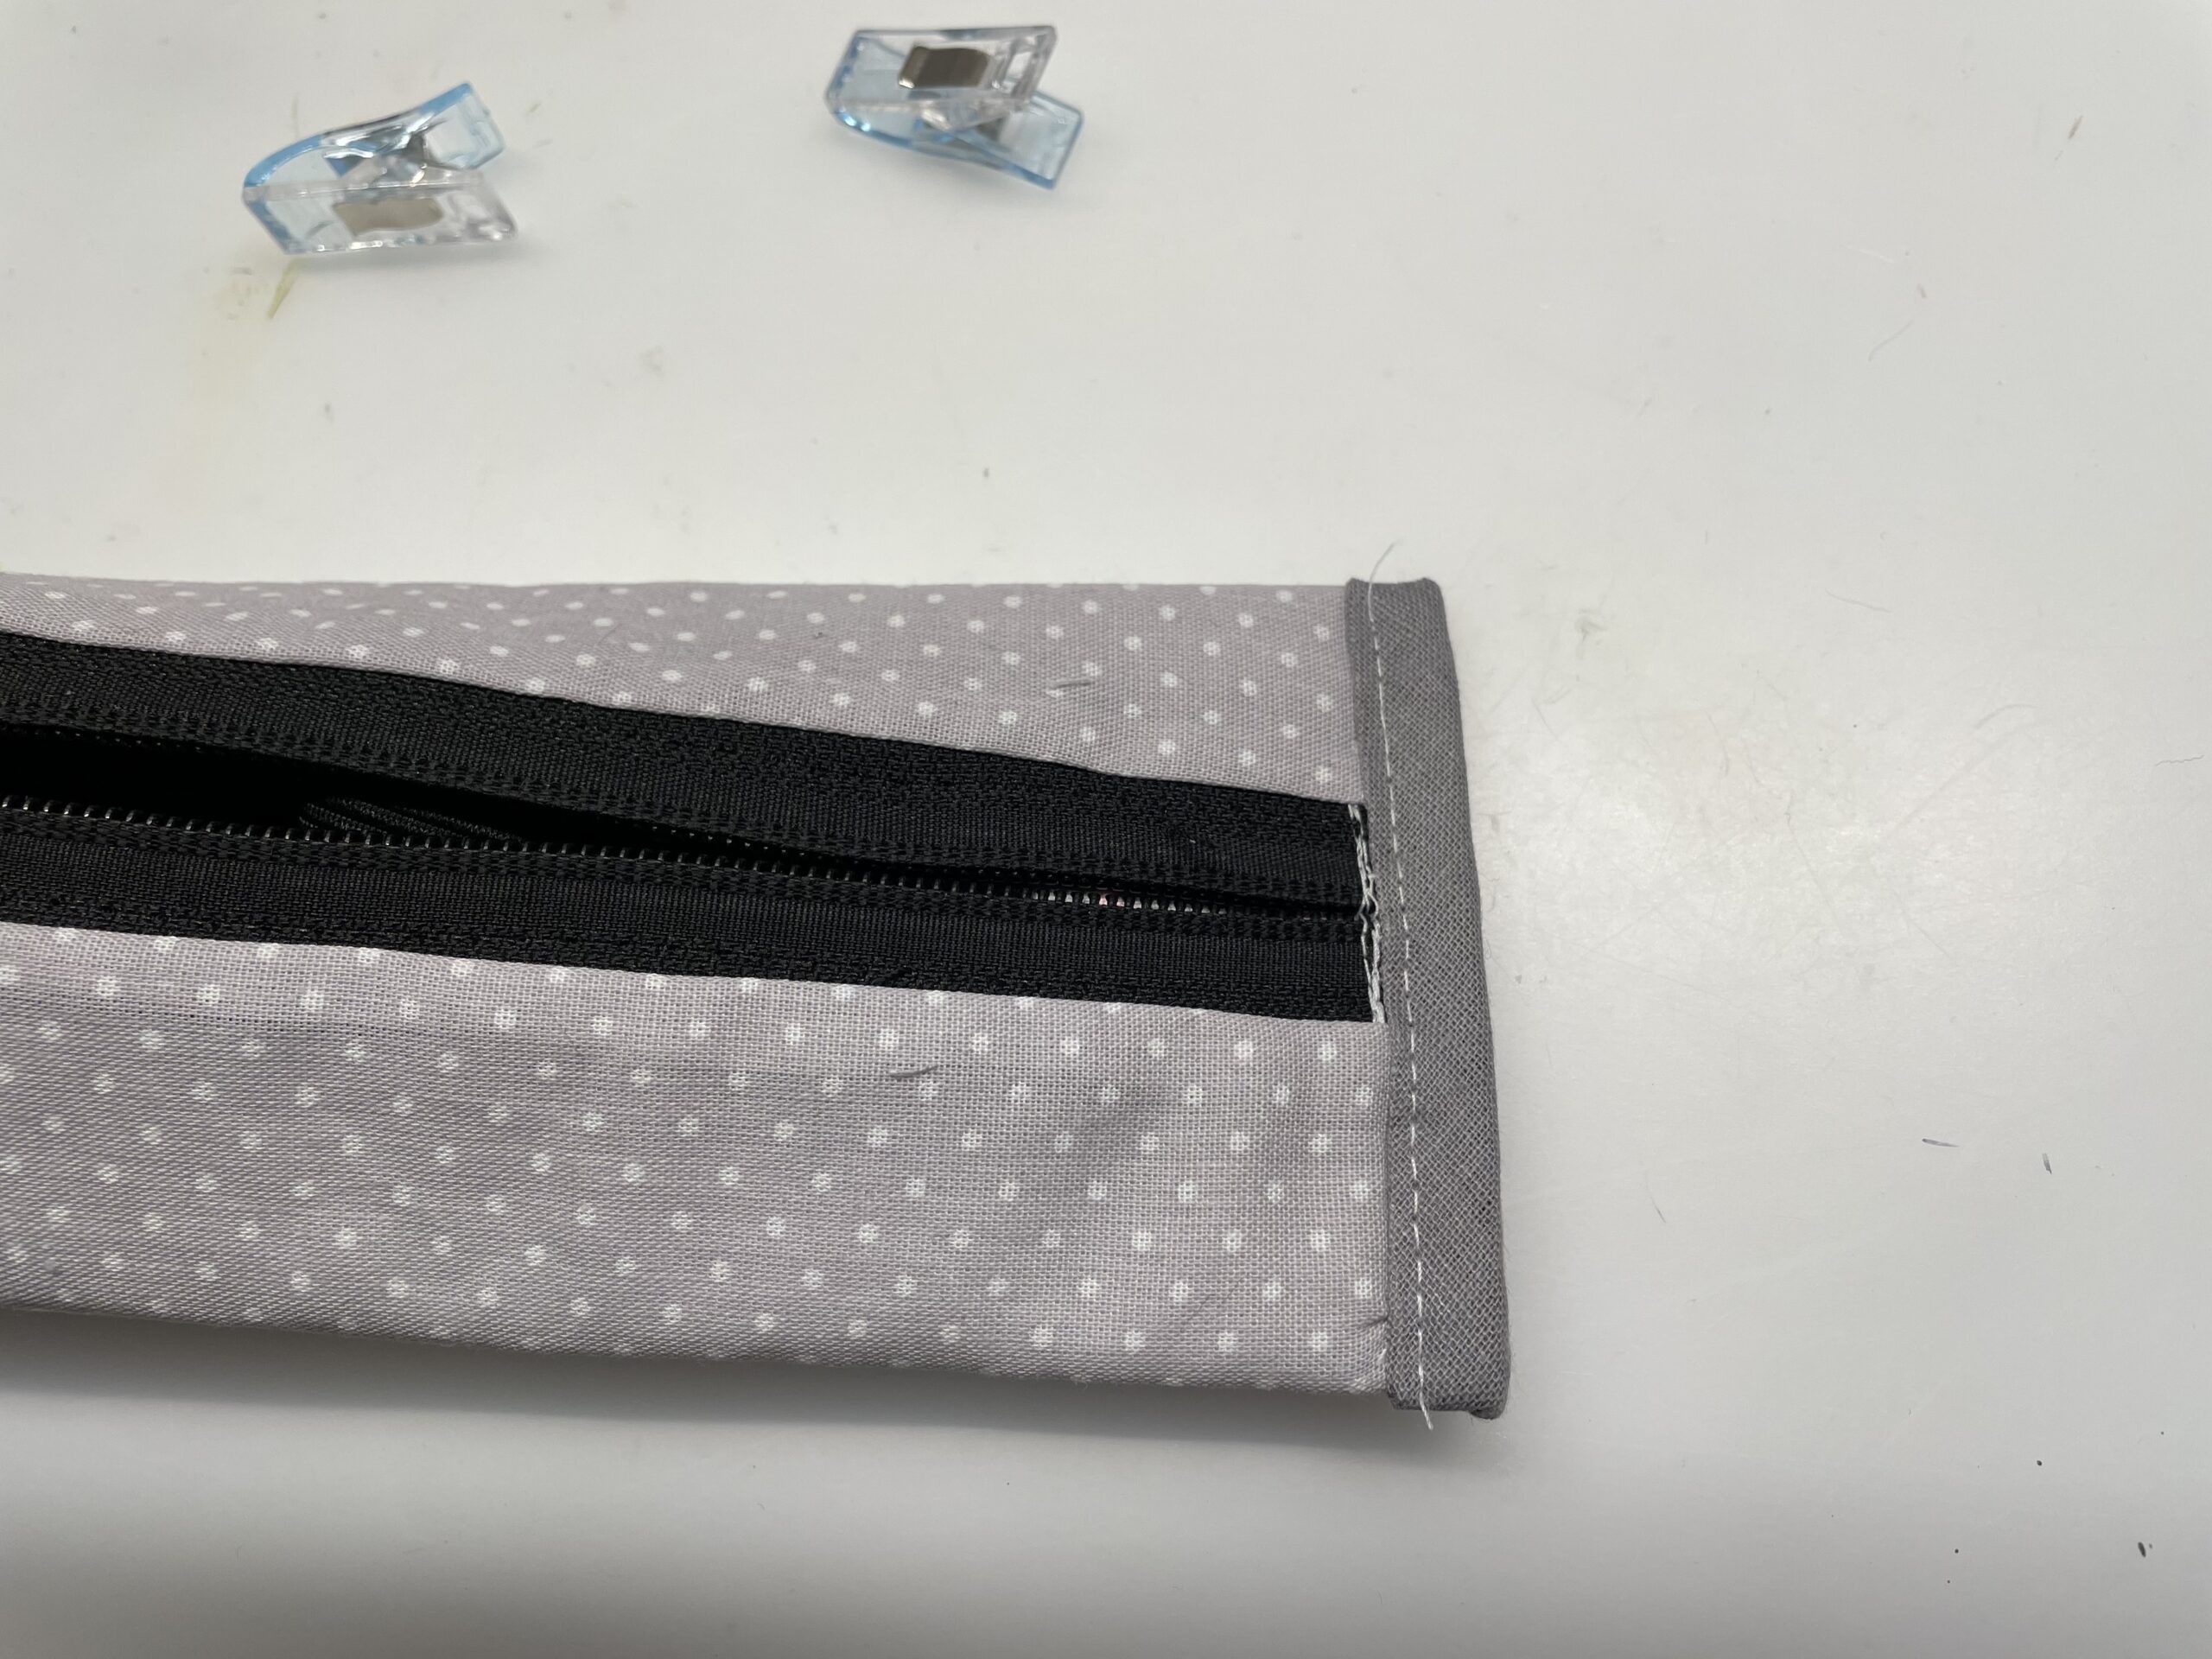
Fixes the cap that the zipper is centered and closes the two open sides. First sew the sides once. Then take a piece of tape and place it over the fabric edge of the side. Sew this firmly.

Bild zum Schritt 26 für das Bastel- und DIY-Abenteuer für Kinder: 'Richtet das Mäppchen wieder, dass der Reißverschluss mittig liegt und...'

27

So the insides are neatly sewn.

Bild zum Schritt 27 für das Bastel- und DIY-Abenteuer für Kinder: 'So sind die Innenseiten sauber vernäht.'

28

Turn the cap around.

Bild zum Schritt 28 für das Bastel- und DIY-Abenteuer für Kinder: 'Wendet das Mäppchen.'

29

The pen case is ready.

Bild zum Schritt 29 für das Bastel- und DIY-Abenteuer für Kinder: 'Beult die Ecken gut aus. Fertig ist das Stiftemäppchen.'

30

The rubber band is used to attach to a DIN A5 block.

Bild zum Schritt 30 für das Bastel- und DIY-Abenteuer für Kinder: 'Das Gummiband dient zum befestigen auf einem DIN A5 Block.'

31

Now pens and other utensils can be stored in it.

Bild zum Schritt 31 für das Bastel- und DIY-Abenteuer für Kinder: 'Nun können Stifte und andere Utensilien darin verstaut werden.'

32

Have fun trying out.

Materials

 Cotton fabric thickOuter fabric 24cm x 15cm
 Cotton fabric, thinInterior fabric 24cm x 15 cm
 Bars and rods, of iron or non-alloy steel, not further worked than hot-rolled, hot-rolled, hot-rolled, not further worked than hot-rolled, hot-rolled (cold-reduced), hot-rolled, hot-rolled or cold-rolled (cold-reduced), hot-rolled (cold-reduced), hot-rolled (cold-reduced) or cold-rolled (cold-reduced), hot-rolled (cold-reduced) or cold-rolled (cold-reduced), hot-rolled (cold-reduced) or cold-rolled (cold-reduced), hot-rolled (cold-reduced-reduced) or cold-rolled (cold-reduced-reduced) or cold-rolled (cold-reduced-reduced) Or fleece fabric e.g. dishcloths
 1 ZipperNot less than 20 cm long
 1 Substance shears
 1 Ruler
 1 Ballpoint pens
 Pins or clasps
 1 Rubber band wide24 cm long, 1-2 cm wide
 Possibly slanted tape 12 cm longIt doesn't have to be!
 1 Sewing machine
 Matching sewing thread

Directions

1

Choose your fabric. It should be a non-stretchable cotton fabric. A firmer fabric can be used as an outer fabric. If the outer fabric is very thin, it will be reinforced by an ironing tile. (Alternatively, you can use a fleece dishcloth! Then just double the fabric!) A thin cotton fabric is suitable for the inner fabric. Cuts one outer part and one inner part each. Both should have a size of 24cm x 15cm each. Here the seam allowance is already included. In addition, you need two small pieces of fabric of approx. 5cm x 2.5 cm from the outer fabric.

Bild zum Schritt 1 für das Bastel- und DIY-Abenteuer für Kinder: 'Wählt euren Stoff aus. Es sollte ein nicht dehnbarer Baumwollstoff...'

2

A zipper in the length of at least 20cm to 24cm is required and a rubber band with the length of 24cm x 1-2 cm width.

Bild zum Schritt 2 für das Bastel- und DIY-Abenteuer für Kinder: 'Ein Reißverschluss in der Länge von mindestens 20cm bis 24cm...'

3

First take the zipper and two short pieces of fabric. These are sewn to the left and right of the zipper to properly limit the zipper.
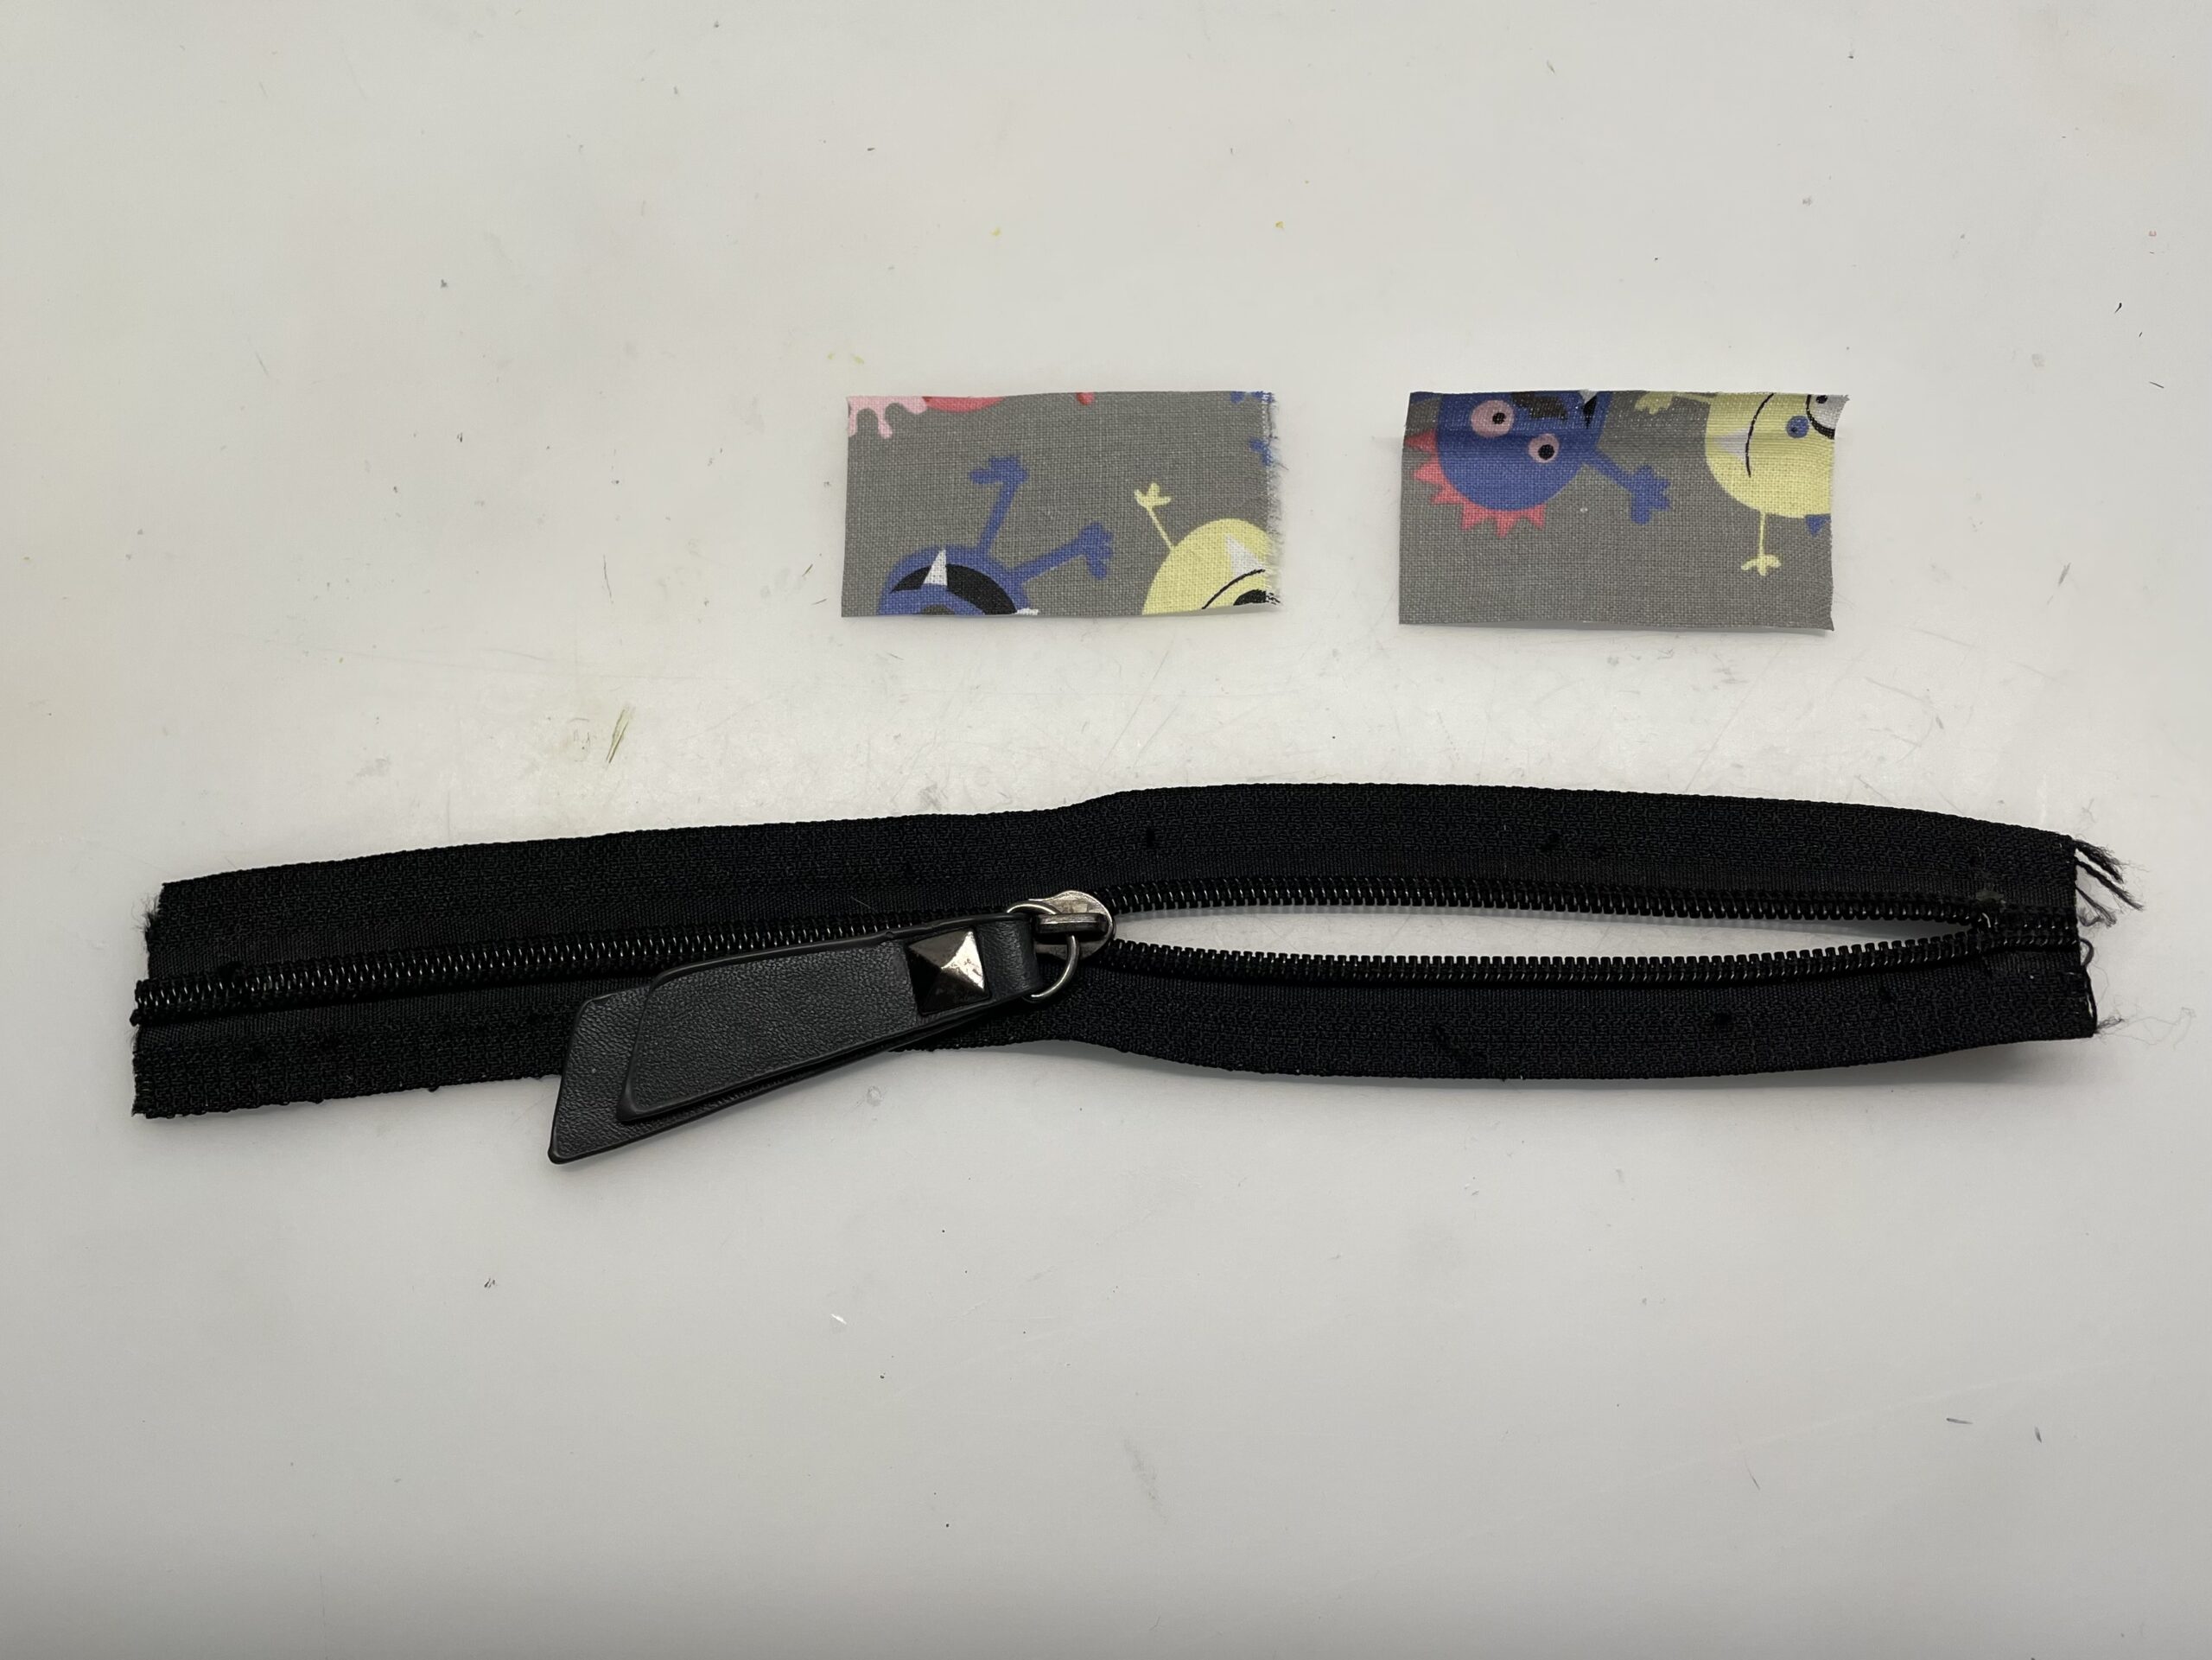
Bild zum Schritt 3 für das Bastel- und DIY-Abenteuer für Kinder: 'Nehmt zuerst den Reißverschluss und zwei kurzen Stoffstücke. Diese werden...'

4

Put a strip of fabric with the beautiful side on one side of the zipper. Moves the fabric a small piece from the edge inwards. Fixes the fabric with a clamp or needle.
Tip: first look at the next three pictures before you start sewing!
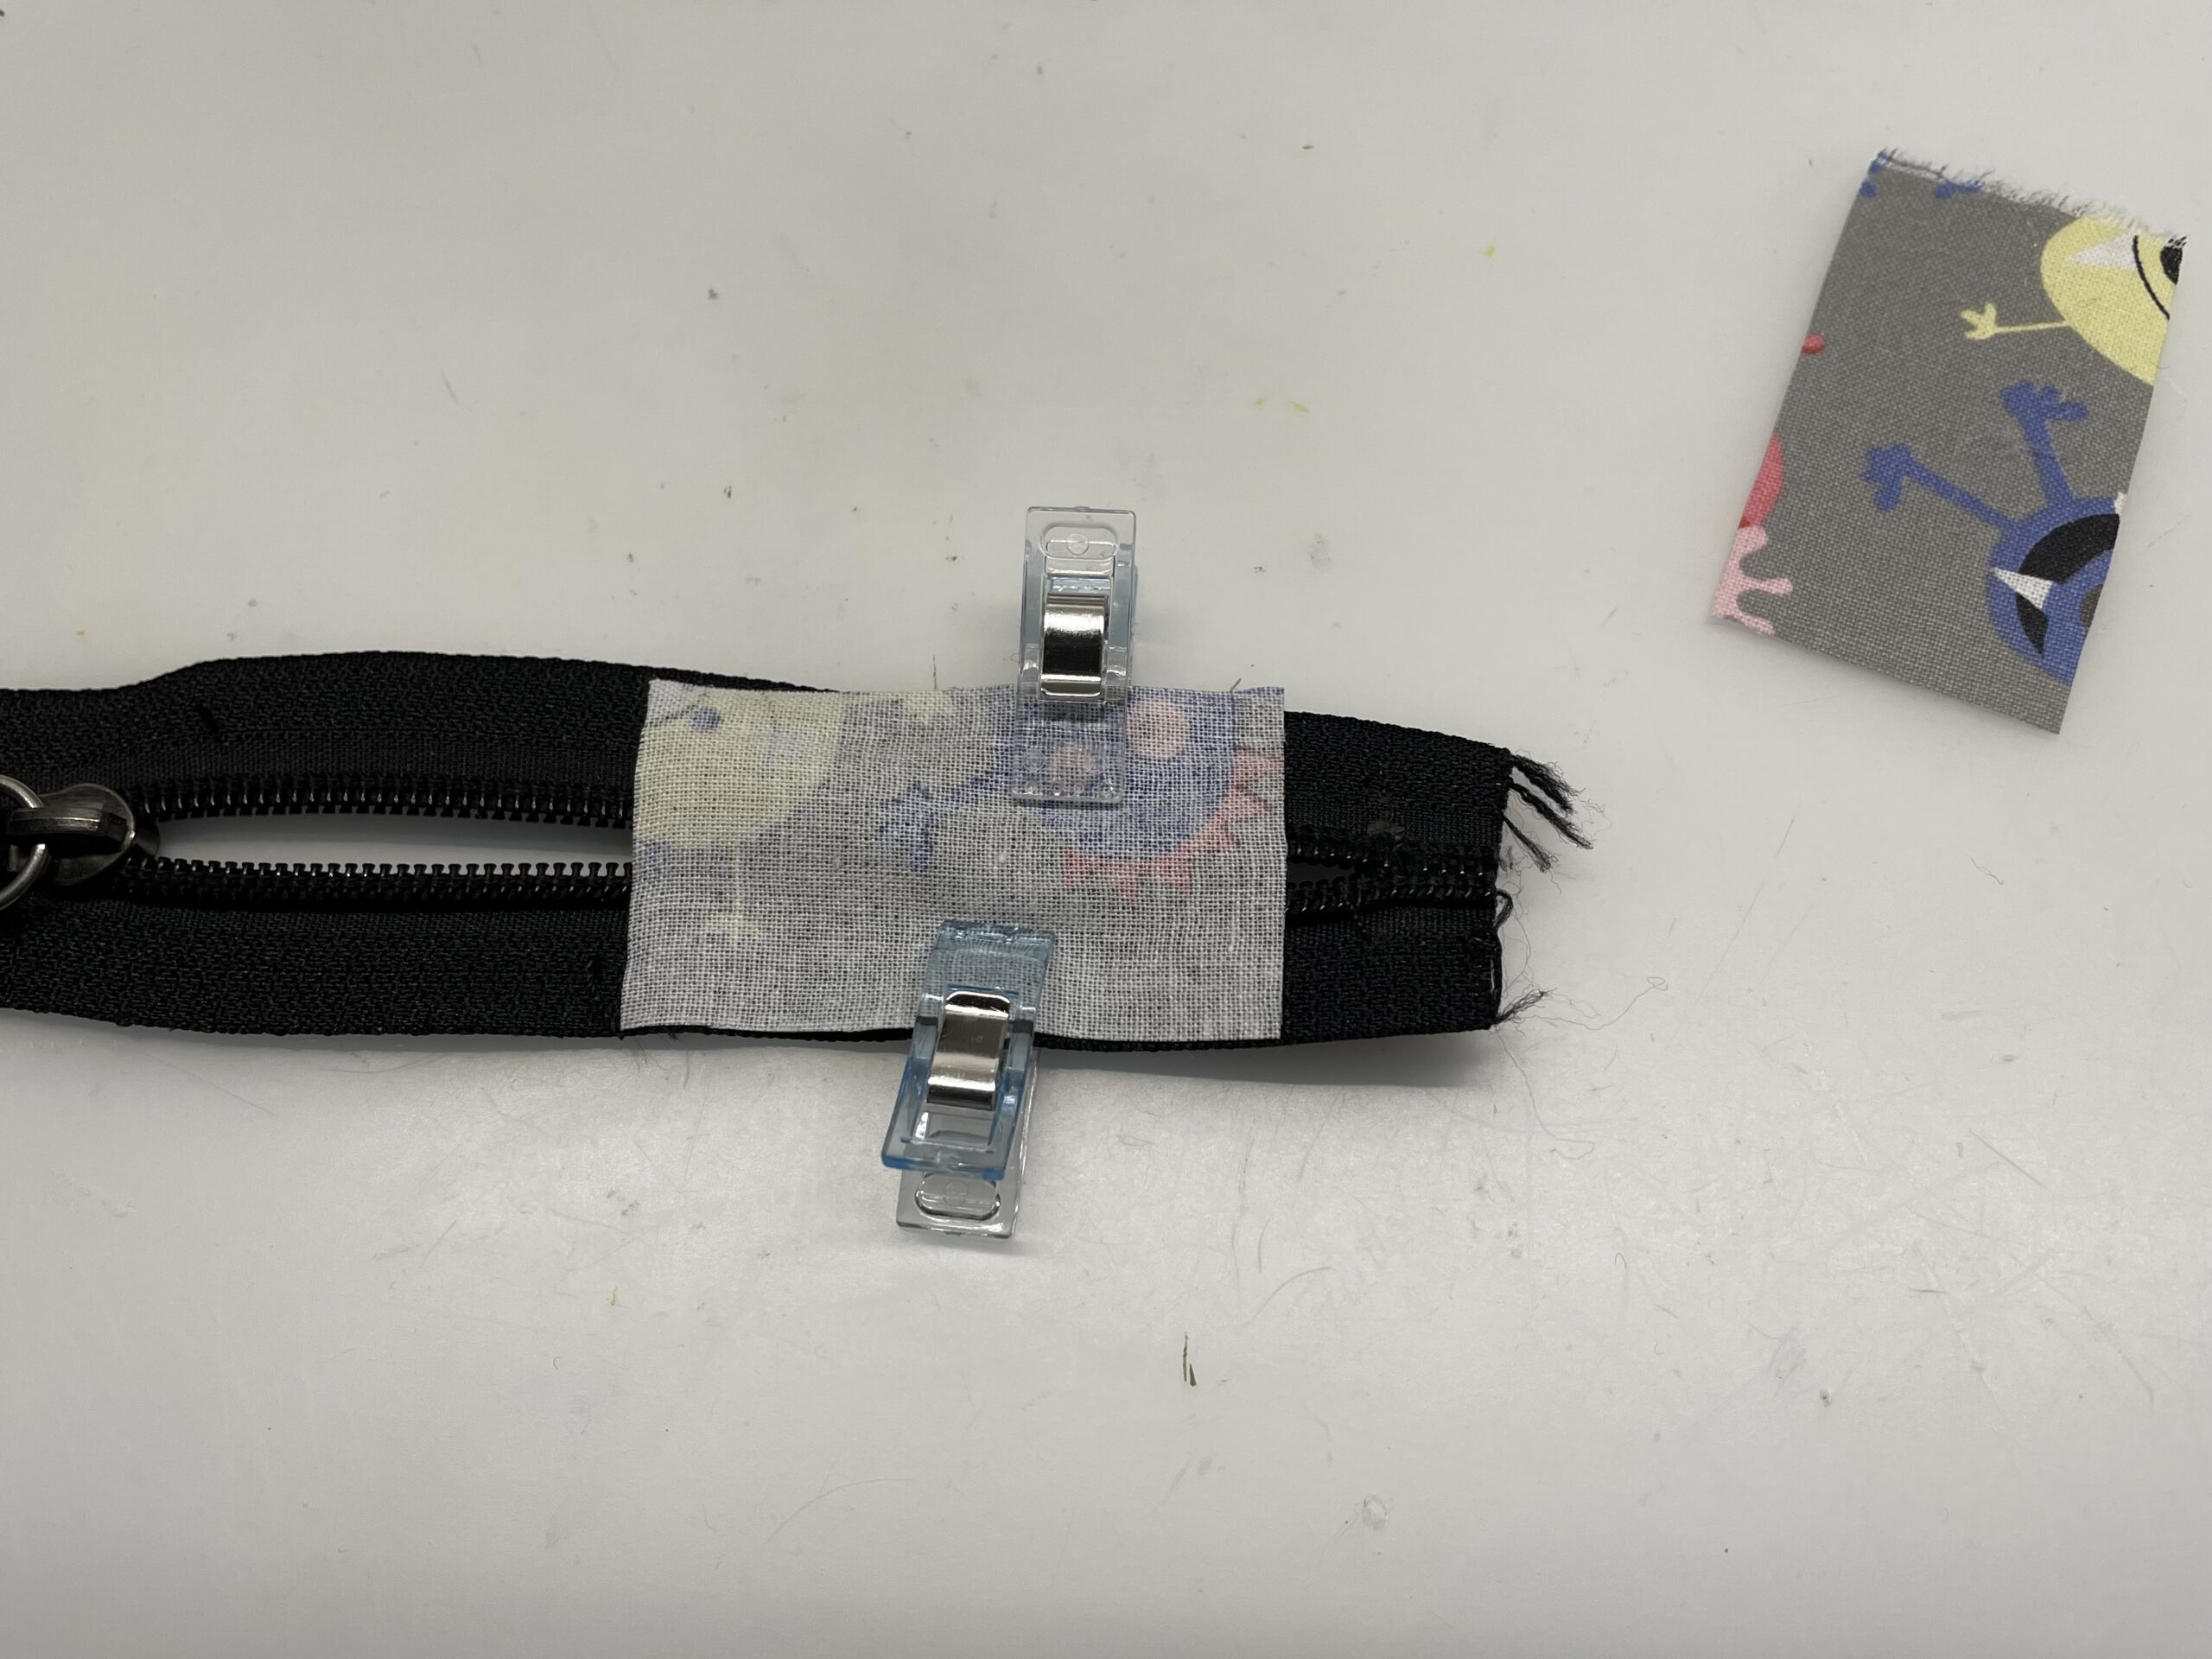
Bild zum Schritt 4 für das Bastel- und DIY-Abenteuer für Kinder: 'Legt einen Stoffstreifen mit der schönen Seite auf die eine...'

5

Tighten the fabric on the zipper.
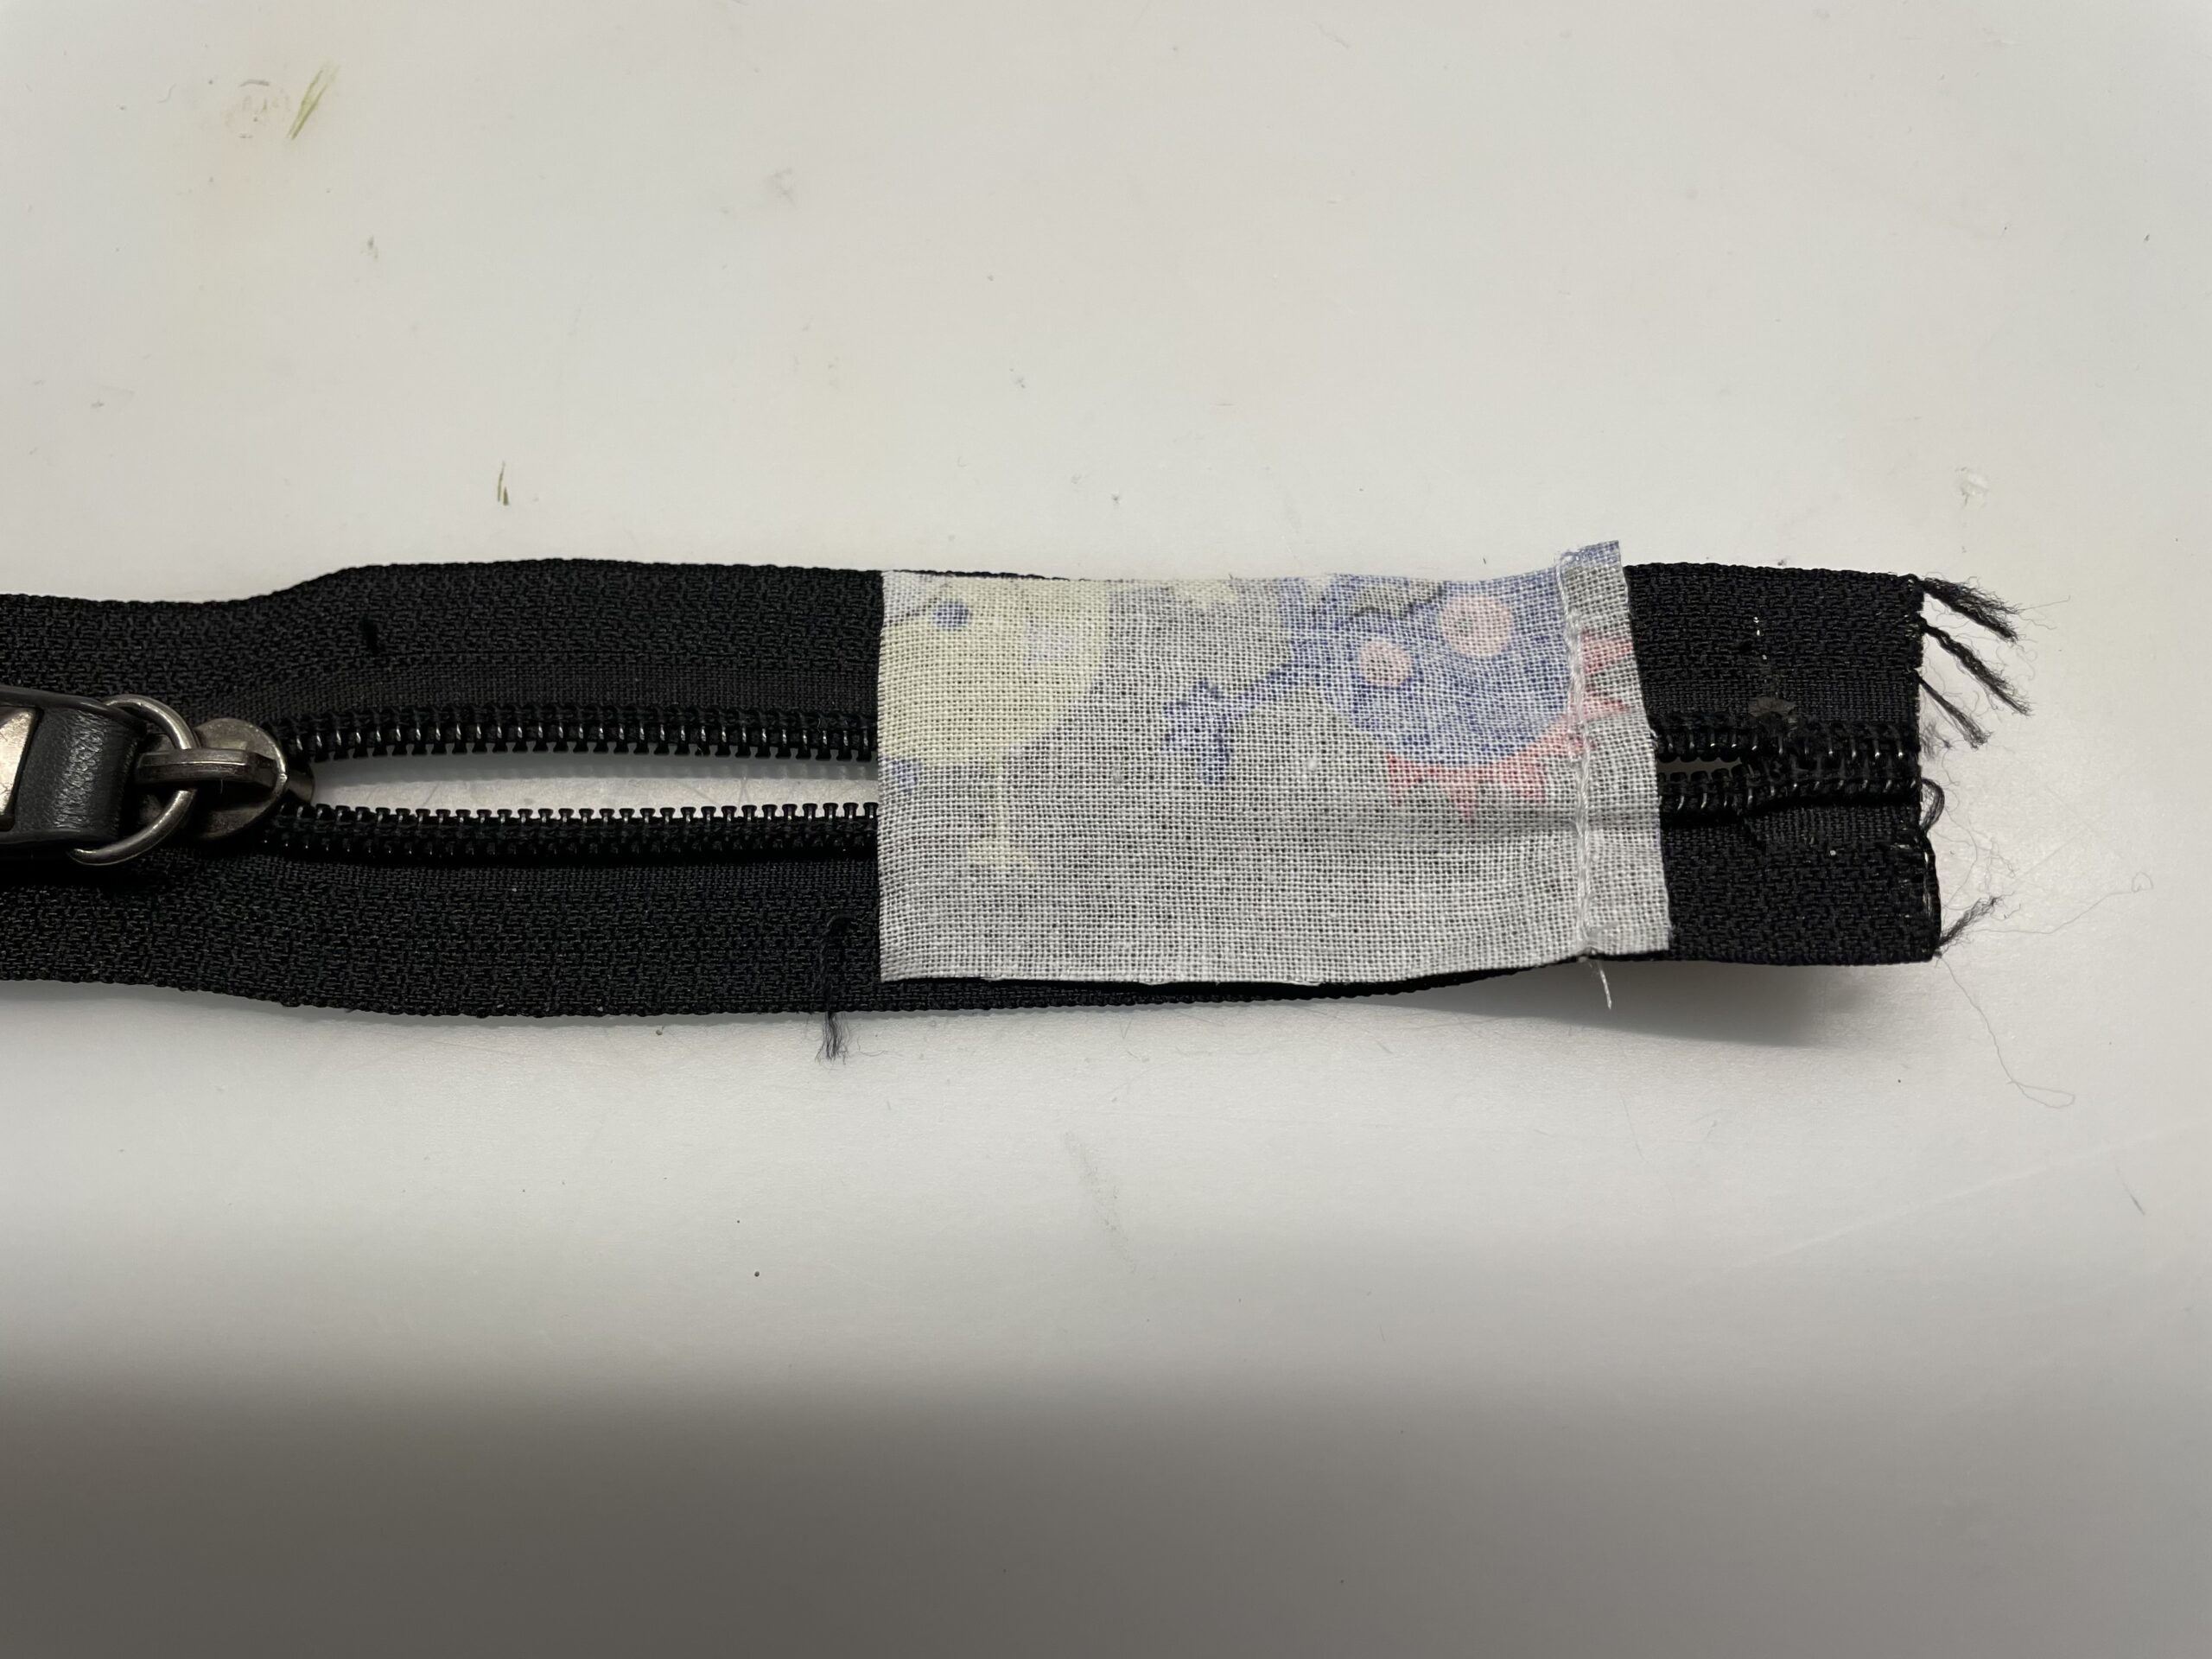
Bild zum Schritt 5 für das Bastel- und DIY-Abenteuer für Kinder: 'Näht den Stoff auf dem Reißverschluss fest.'

6

Folds the sewn-on fabric outwards. It limits the zipper.
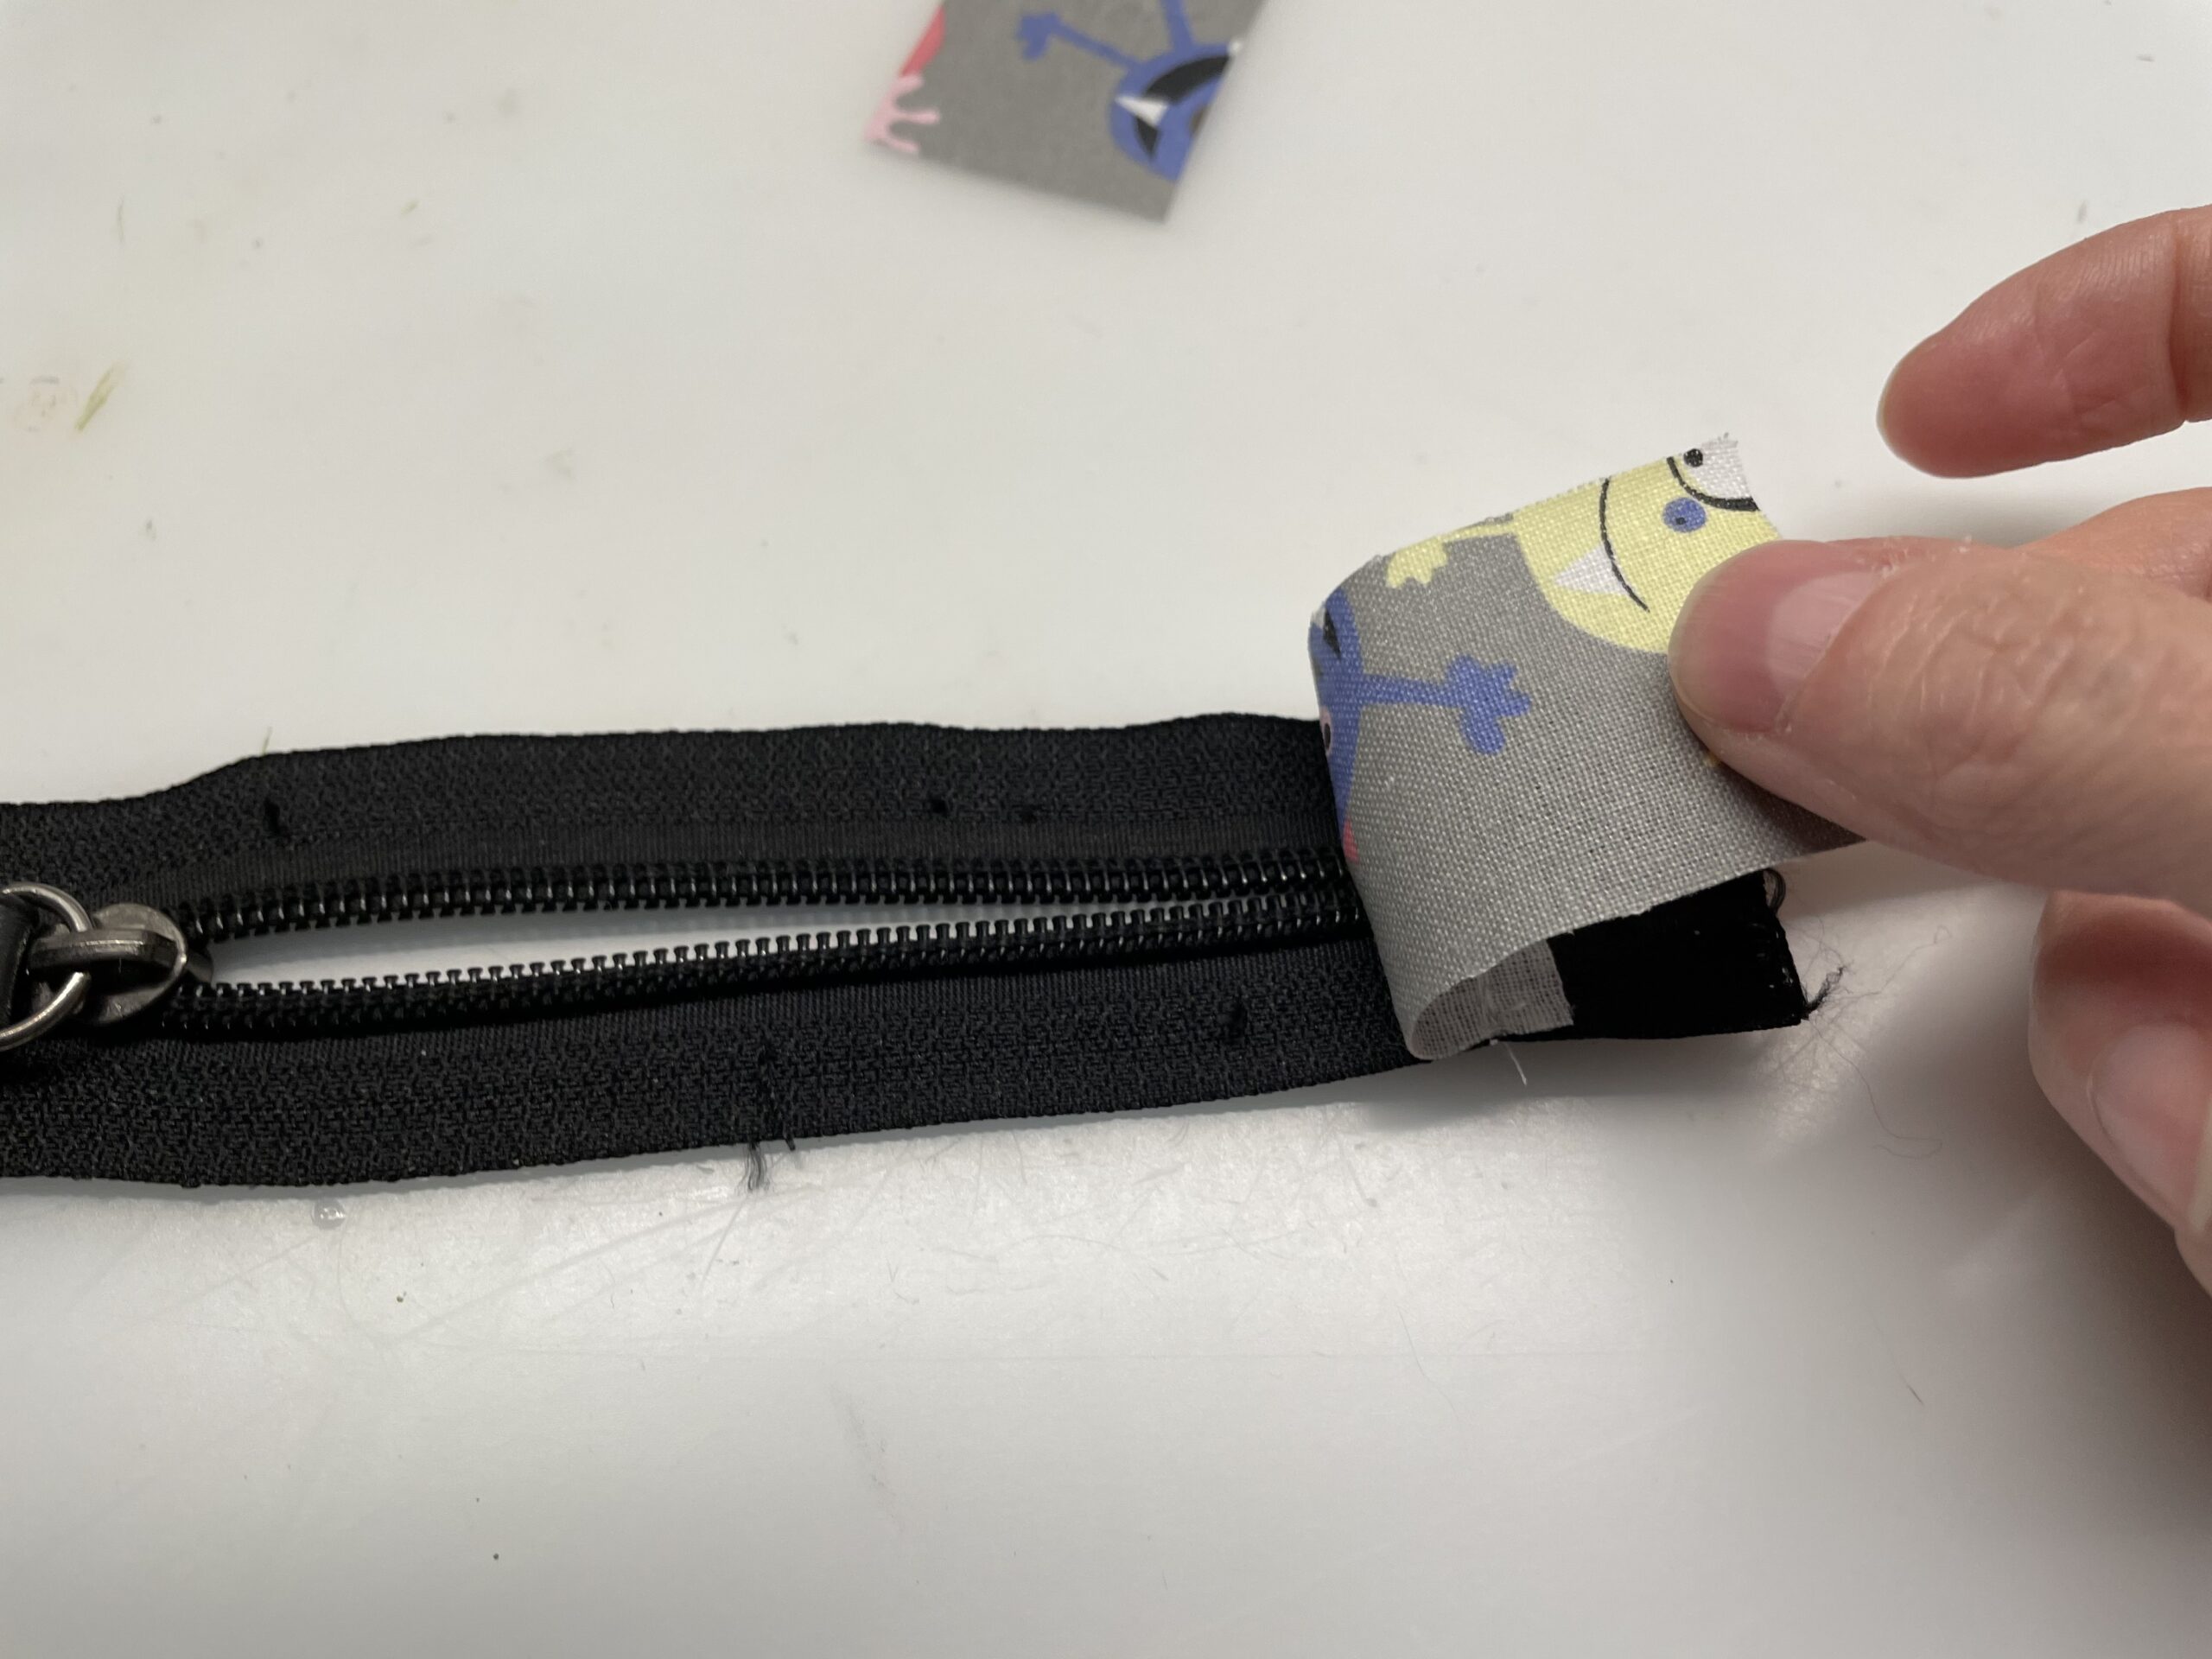
Bild zum Schritt 6 für das Bastel- und DIY-Abenteuer für Kinder: 'Klappt den angenähten Stoff nach außen. Er begrenzt den Reißverschluss.'

7

The fabric remains folded outwards. (Evtl. Can you iron it)
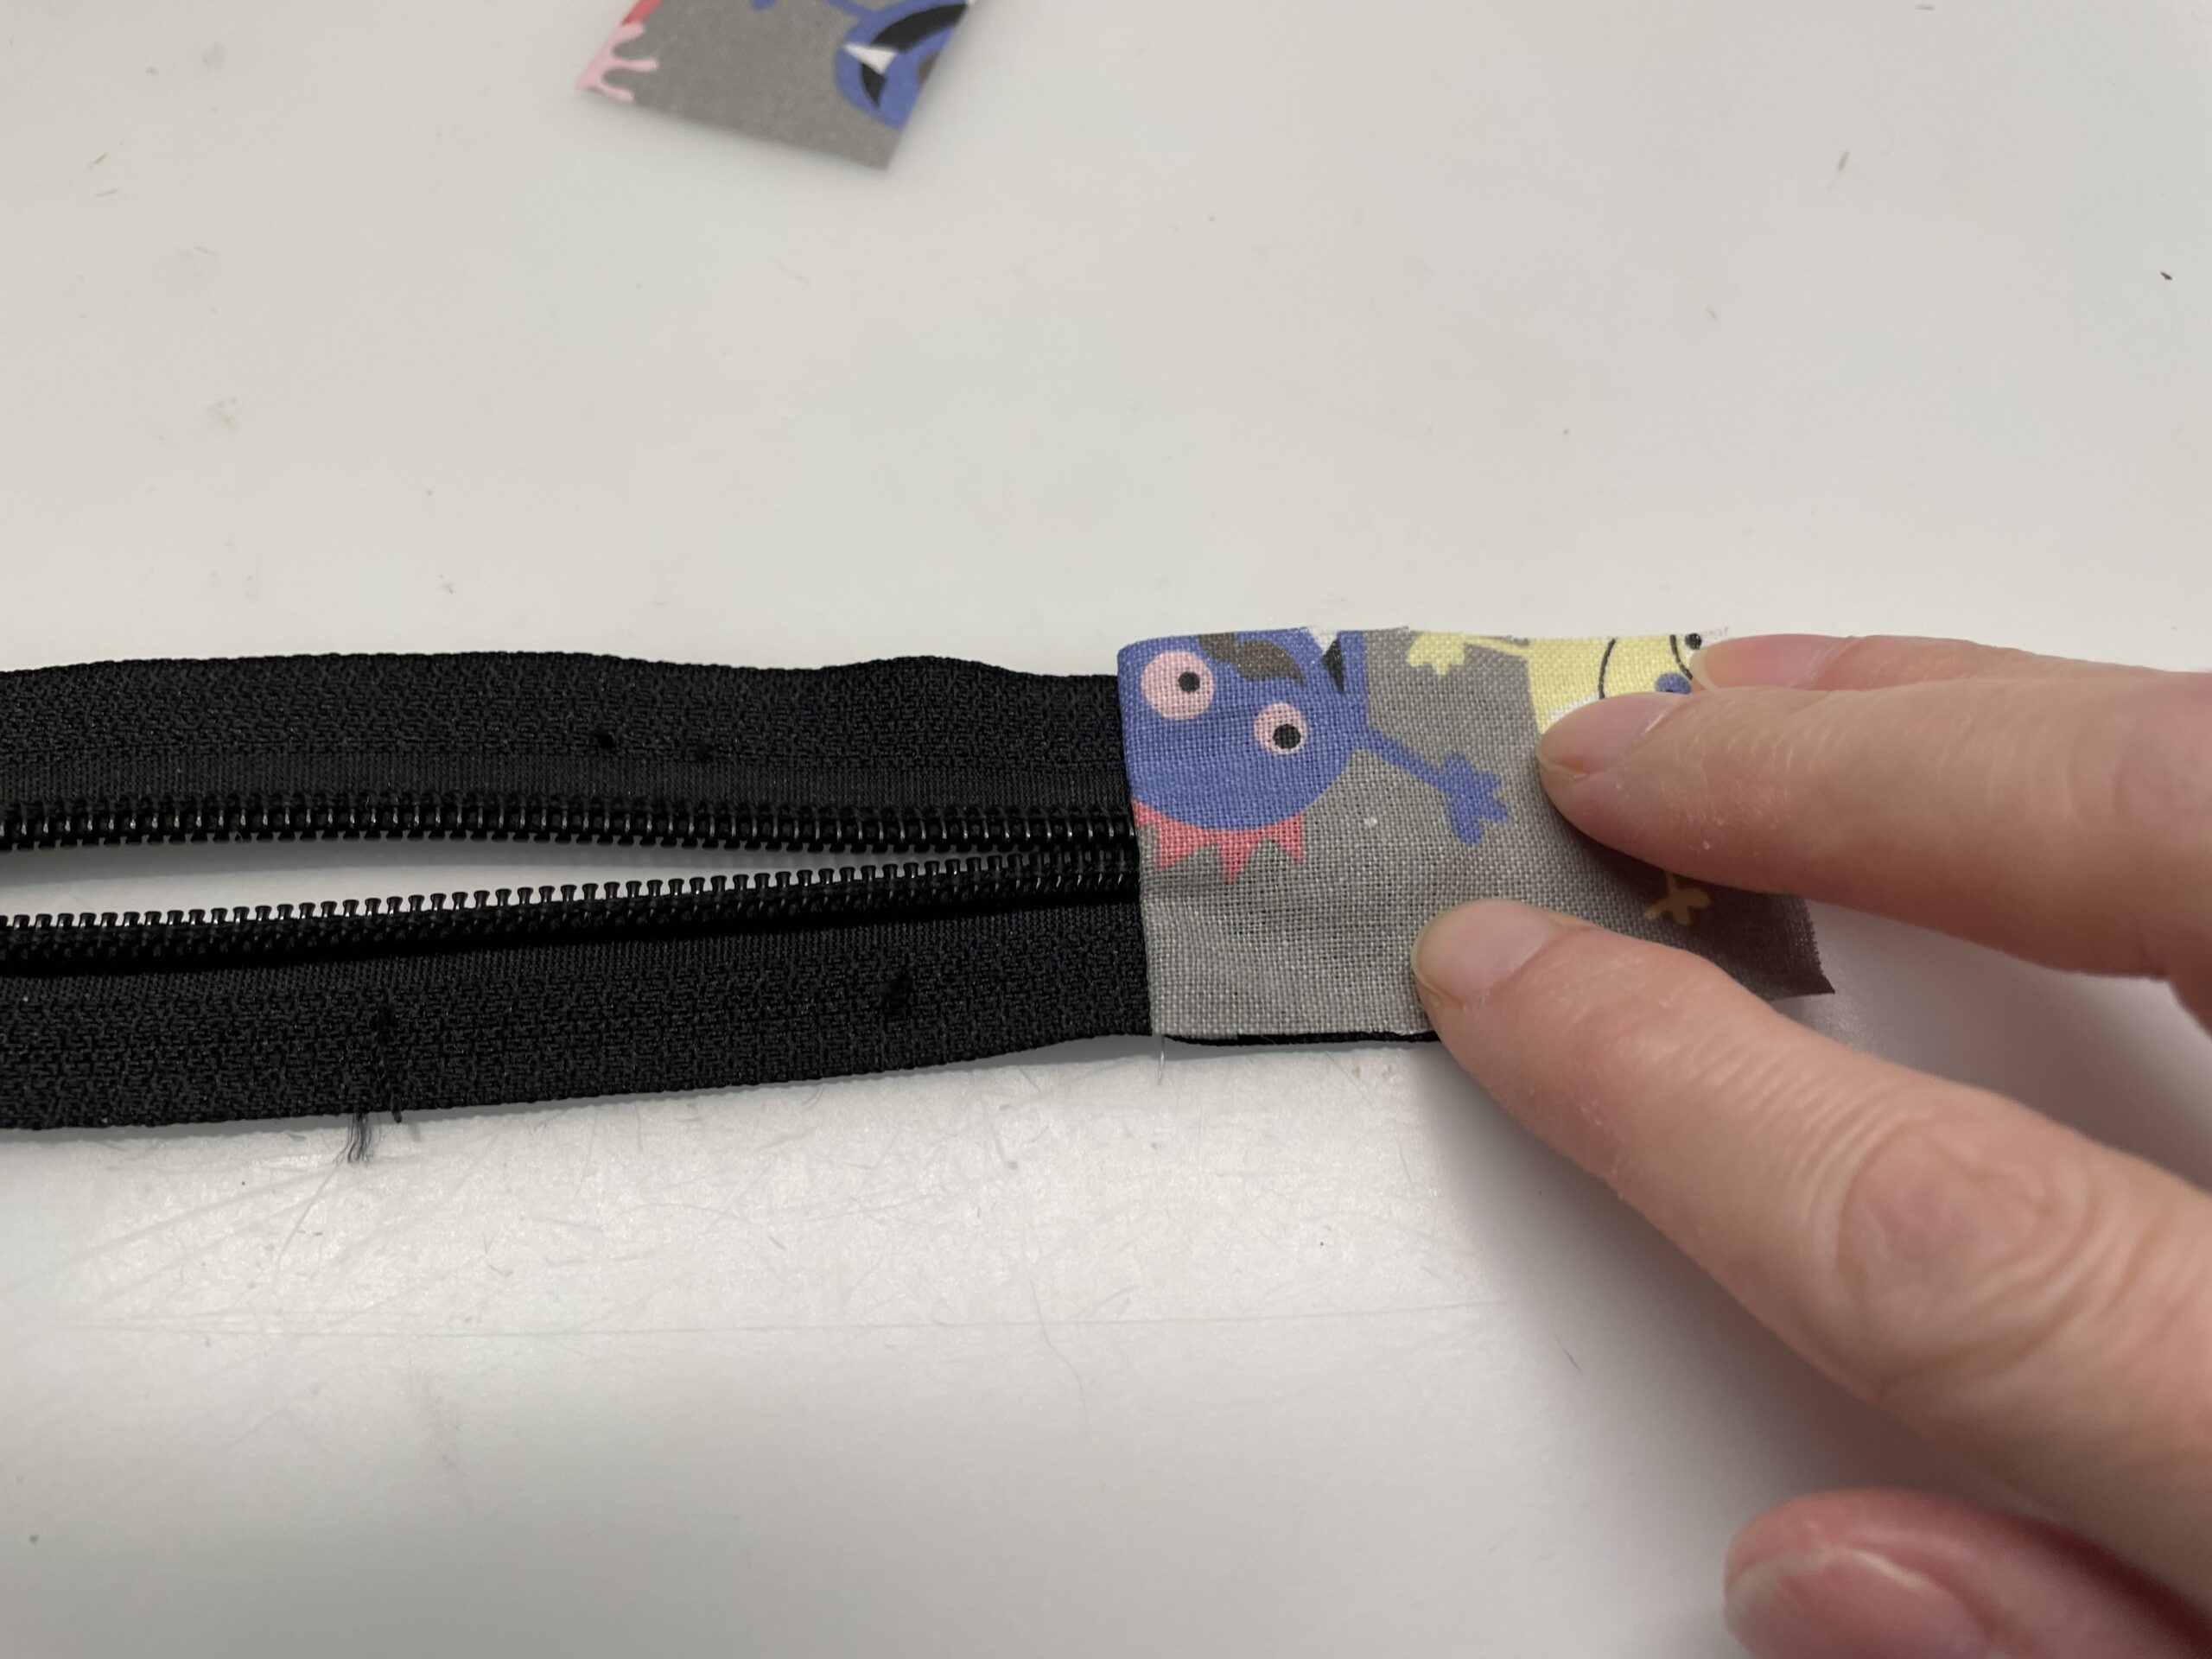
Bild zum Schritt 7 für das Bastel- und DIY-Abenteuer für Kinder: 'Der Stoff bleibt nach außen geklappt liegen. (Evtl. Könnt ihr...'

8

Repeat sewing of the piece of fabric at the other end of the zipper. First take the fabric of the inner part and mark the position of the second piece of fabric on the zipper. See further picture.
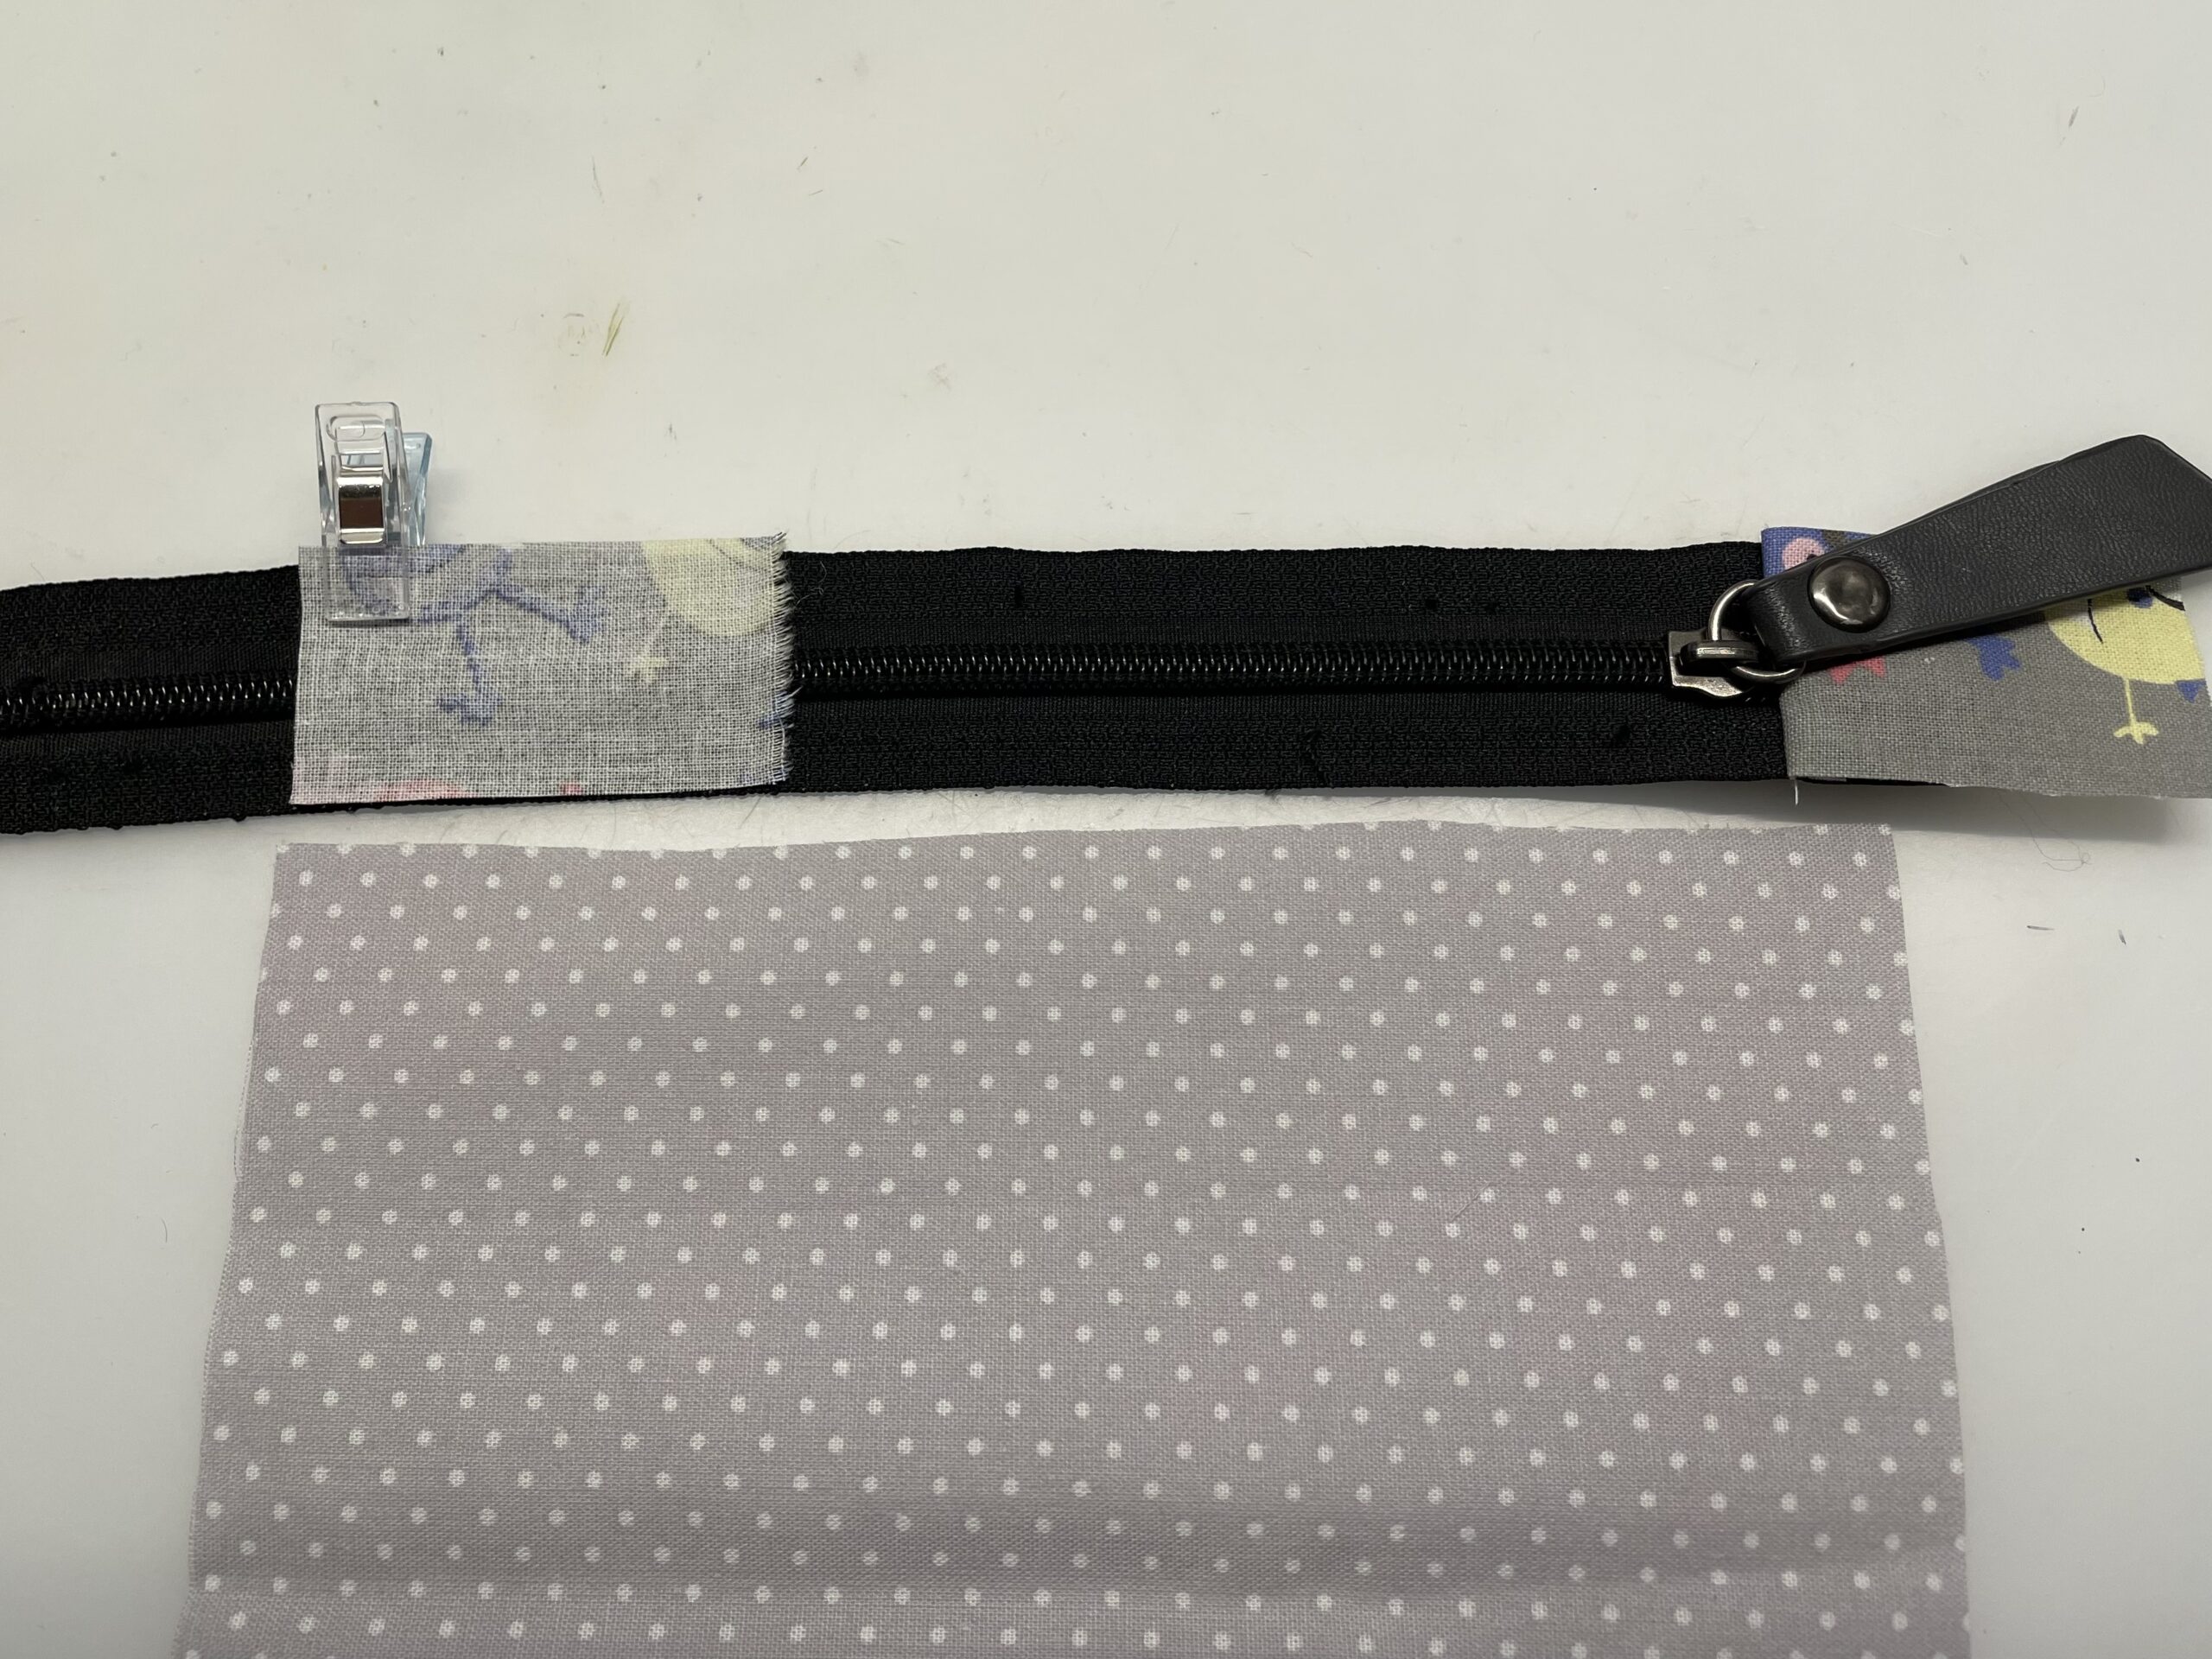
Bild zum Schritt 8 für das Bastel- und DIY-Abenteuer für Kinder: 'Wiederholt das Annähen des Stoffstückes am anderen Ende des Reißverschlusses....'

9

The two tails should be attached to the zipper.
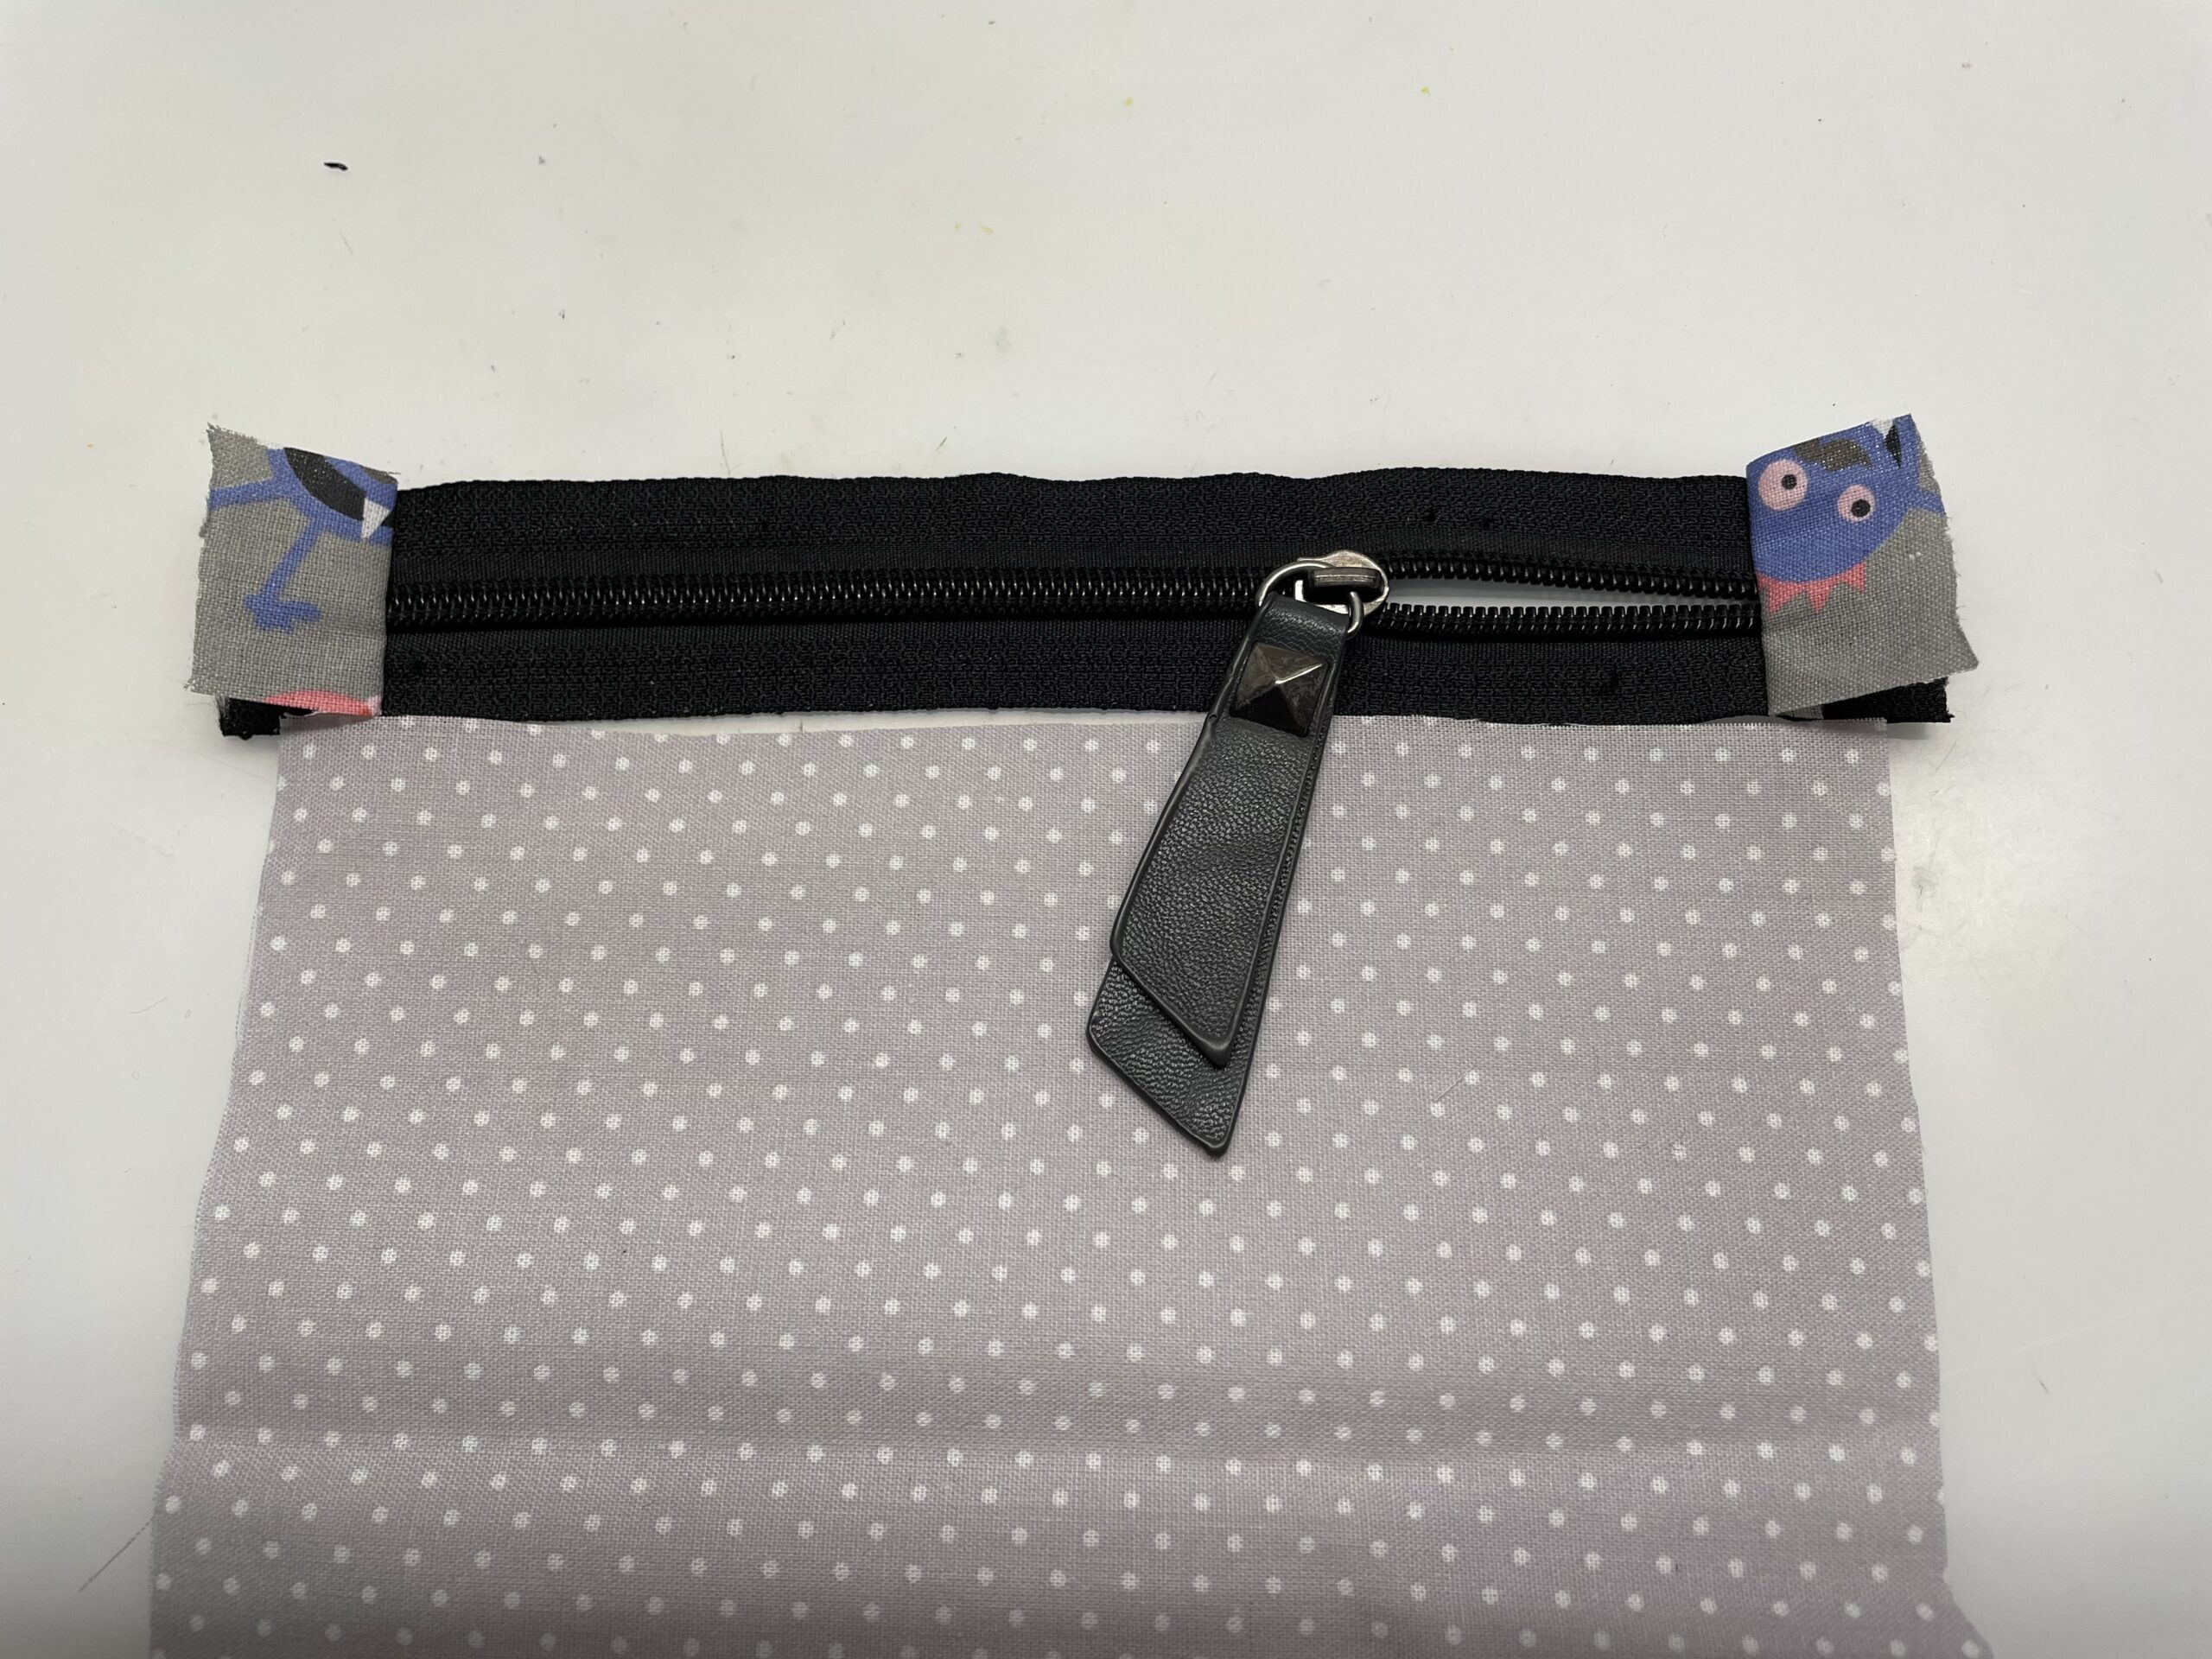
Bild zum Schritt 9 für das Bastel- und DIY-Abenteuer für Kinder: 'So sollen die beiden Endstücke am Reißverschluss angebracht sein.'

10

Now place the zipper with the beautiful side on the upper edge of the inner fabric.
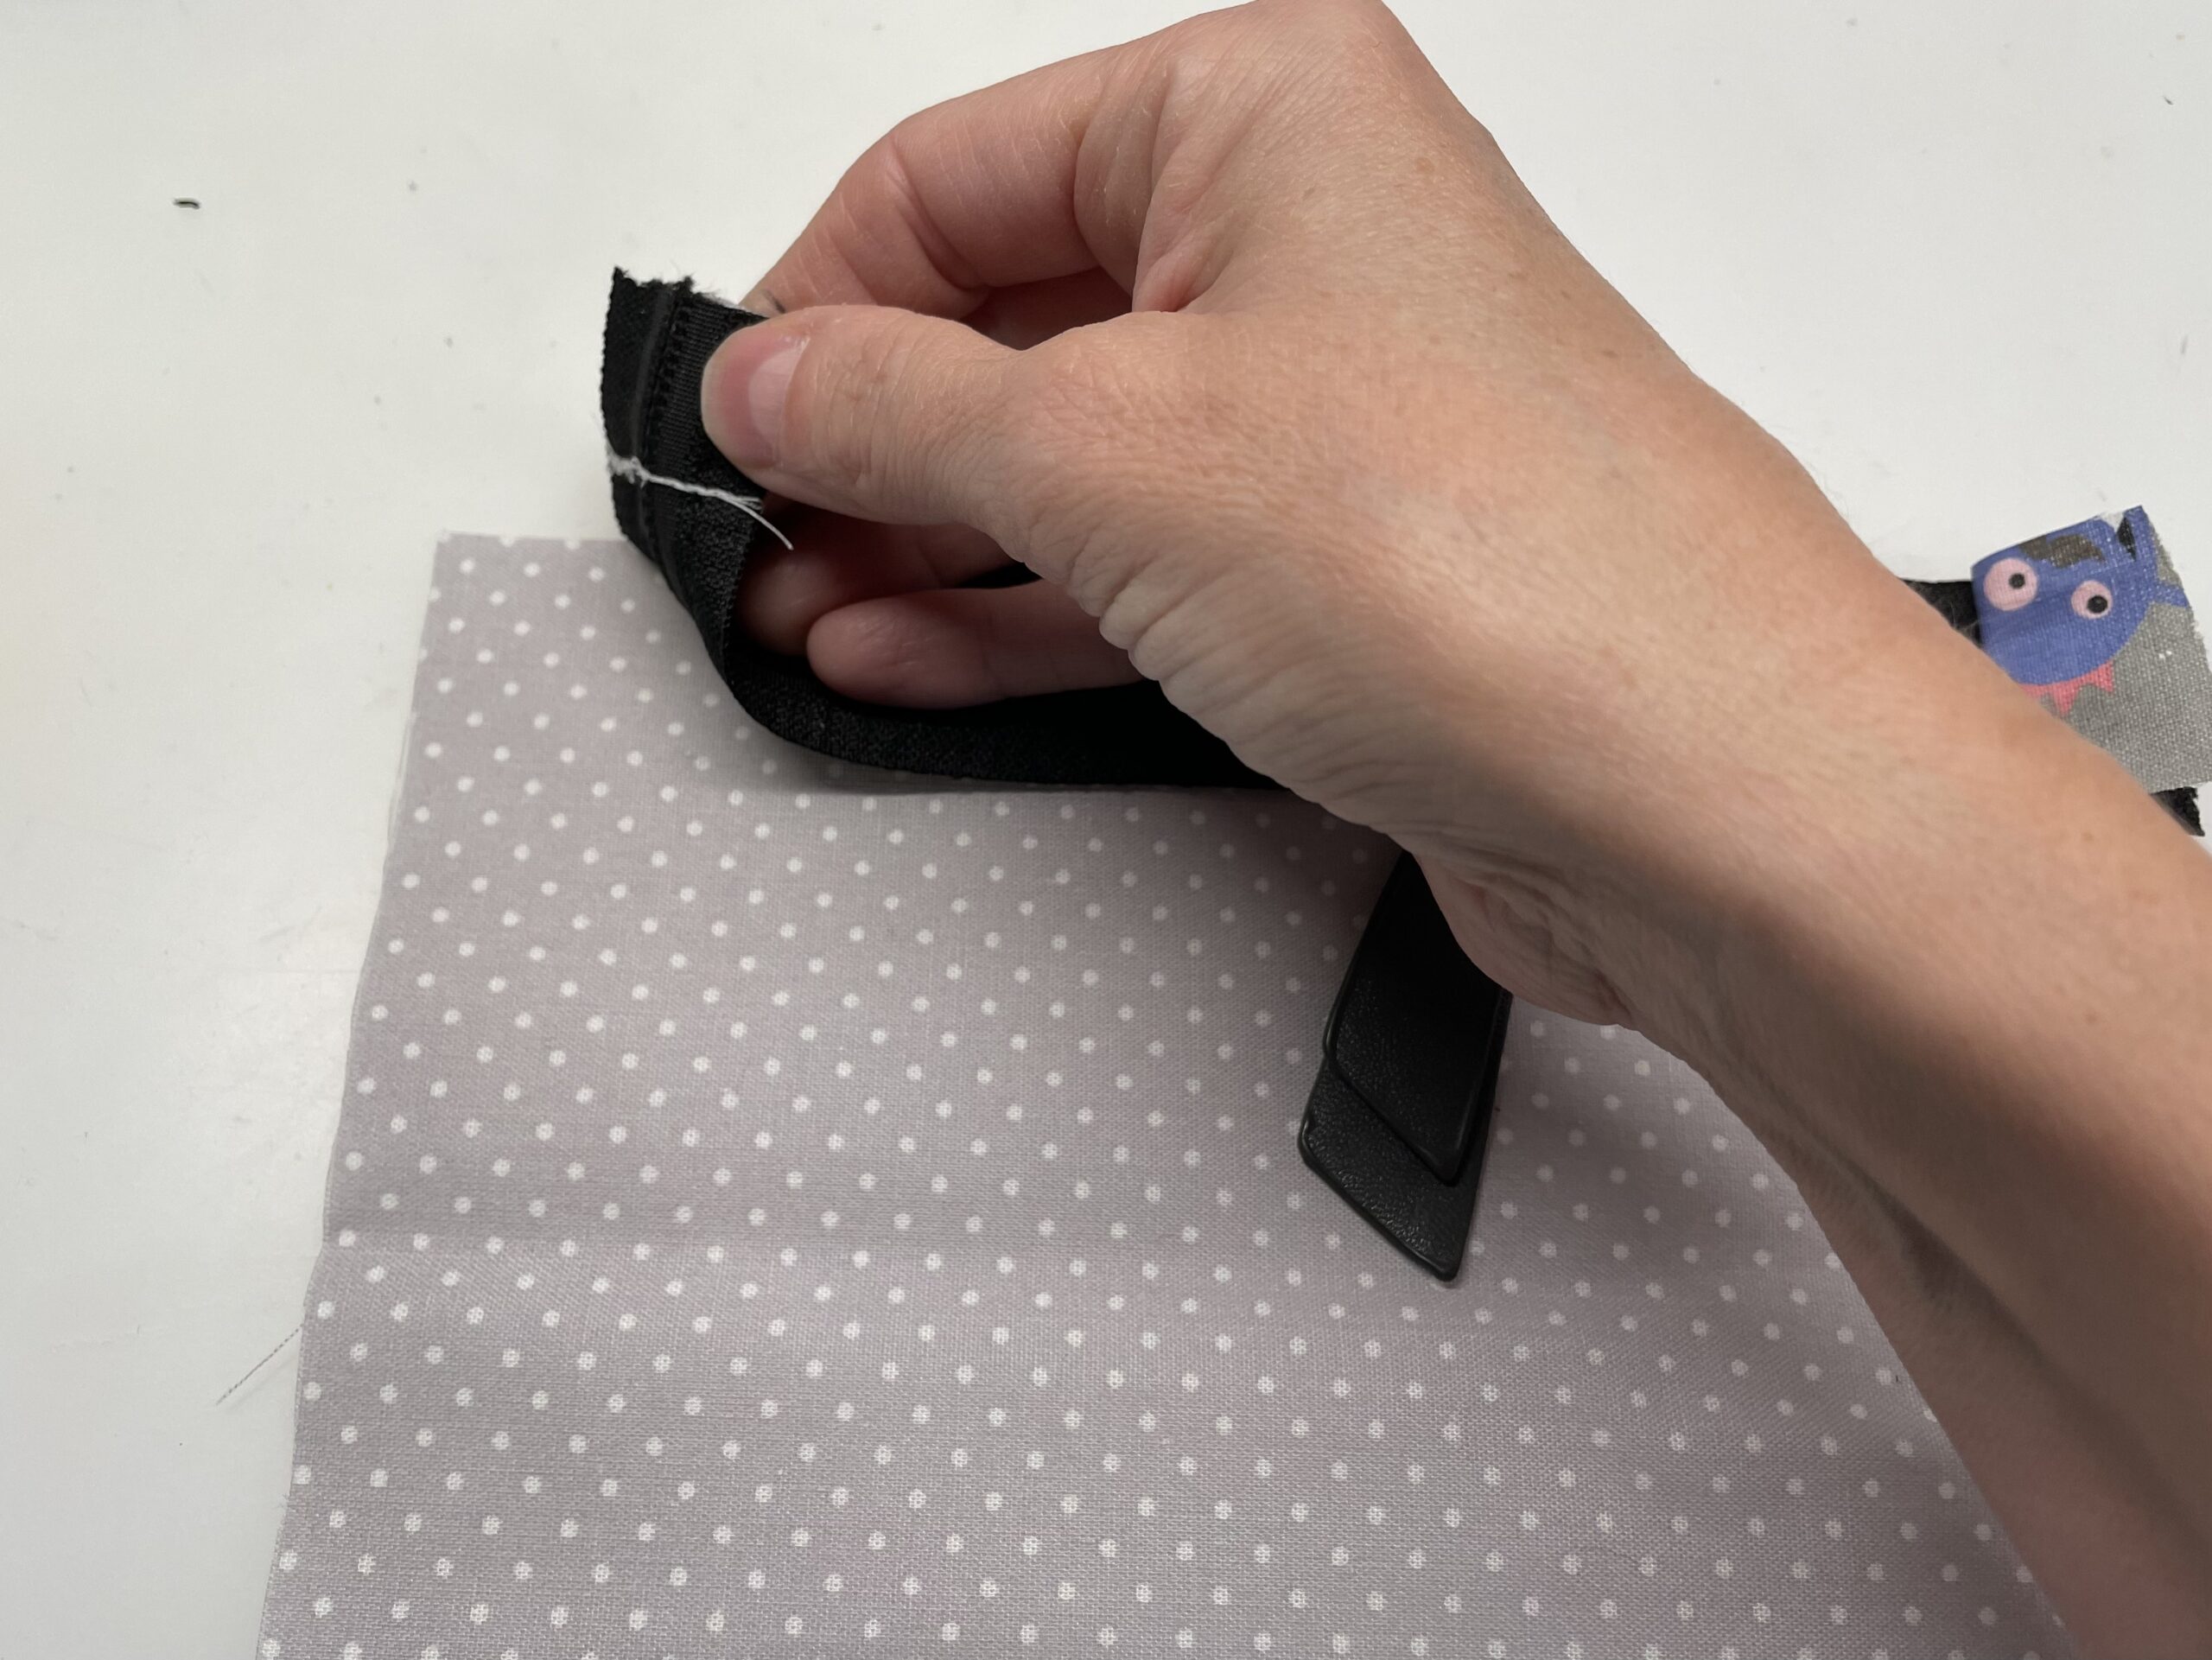
Bild zum Schritt 10 für das Bastel- und DIY-Abenteuer für Kinder: 'Legt den Reißverschluss nun mit der schönen Seite auf den...'

11

The outer fabric we also put on it. Interior fabric, zipper and outer fabric lie cleanly on top of each other and are fixed with clamps.
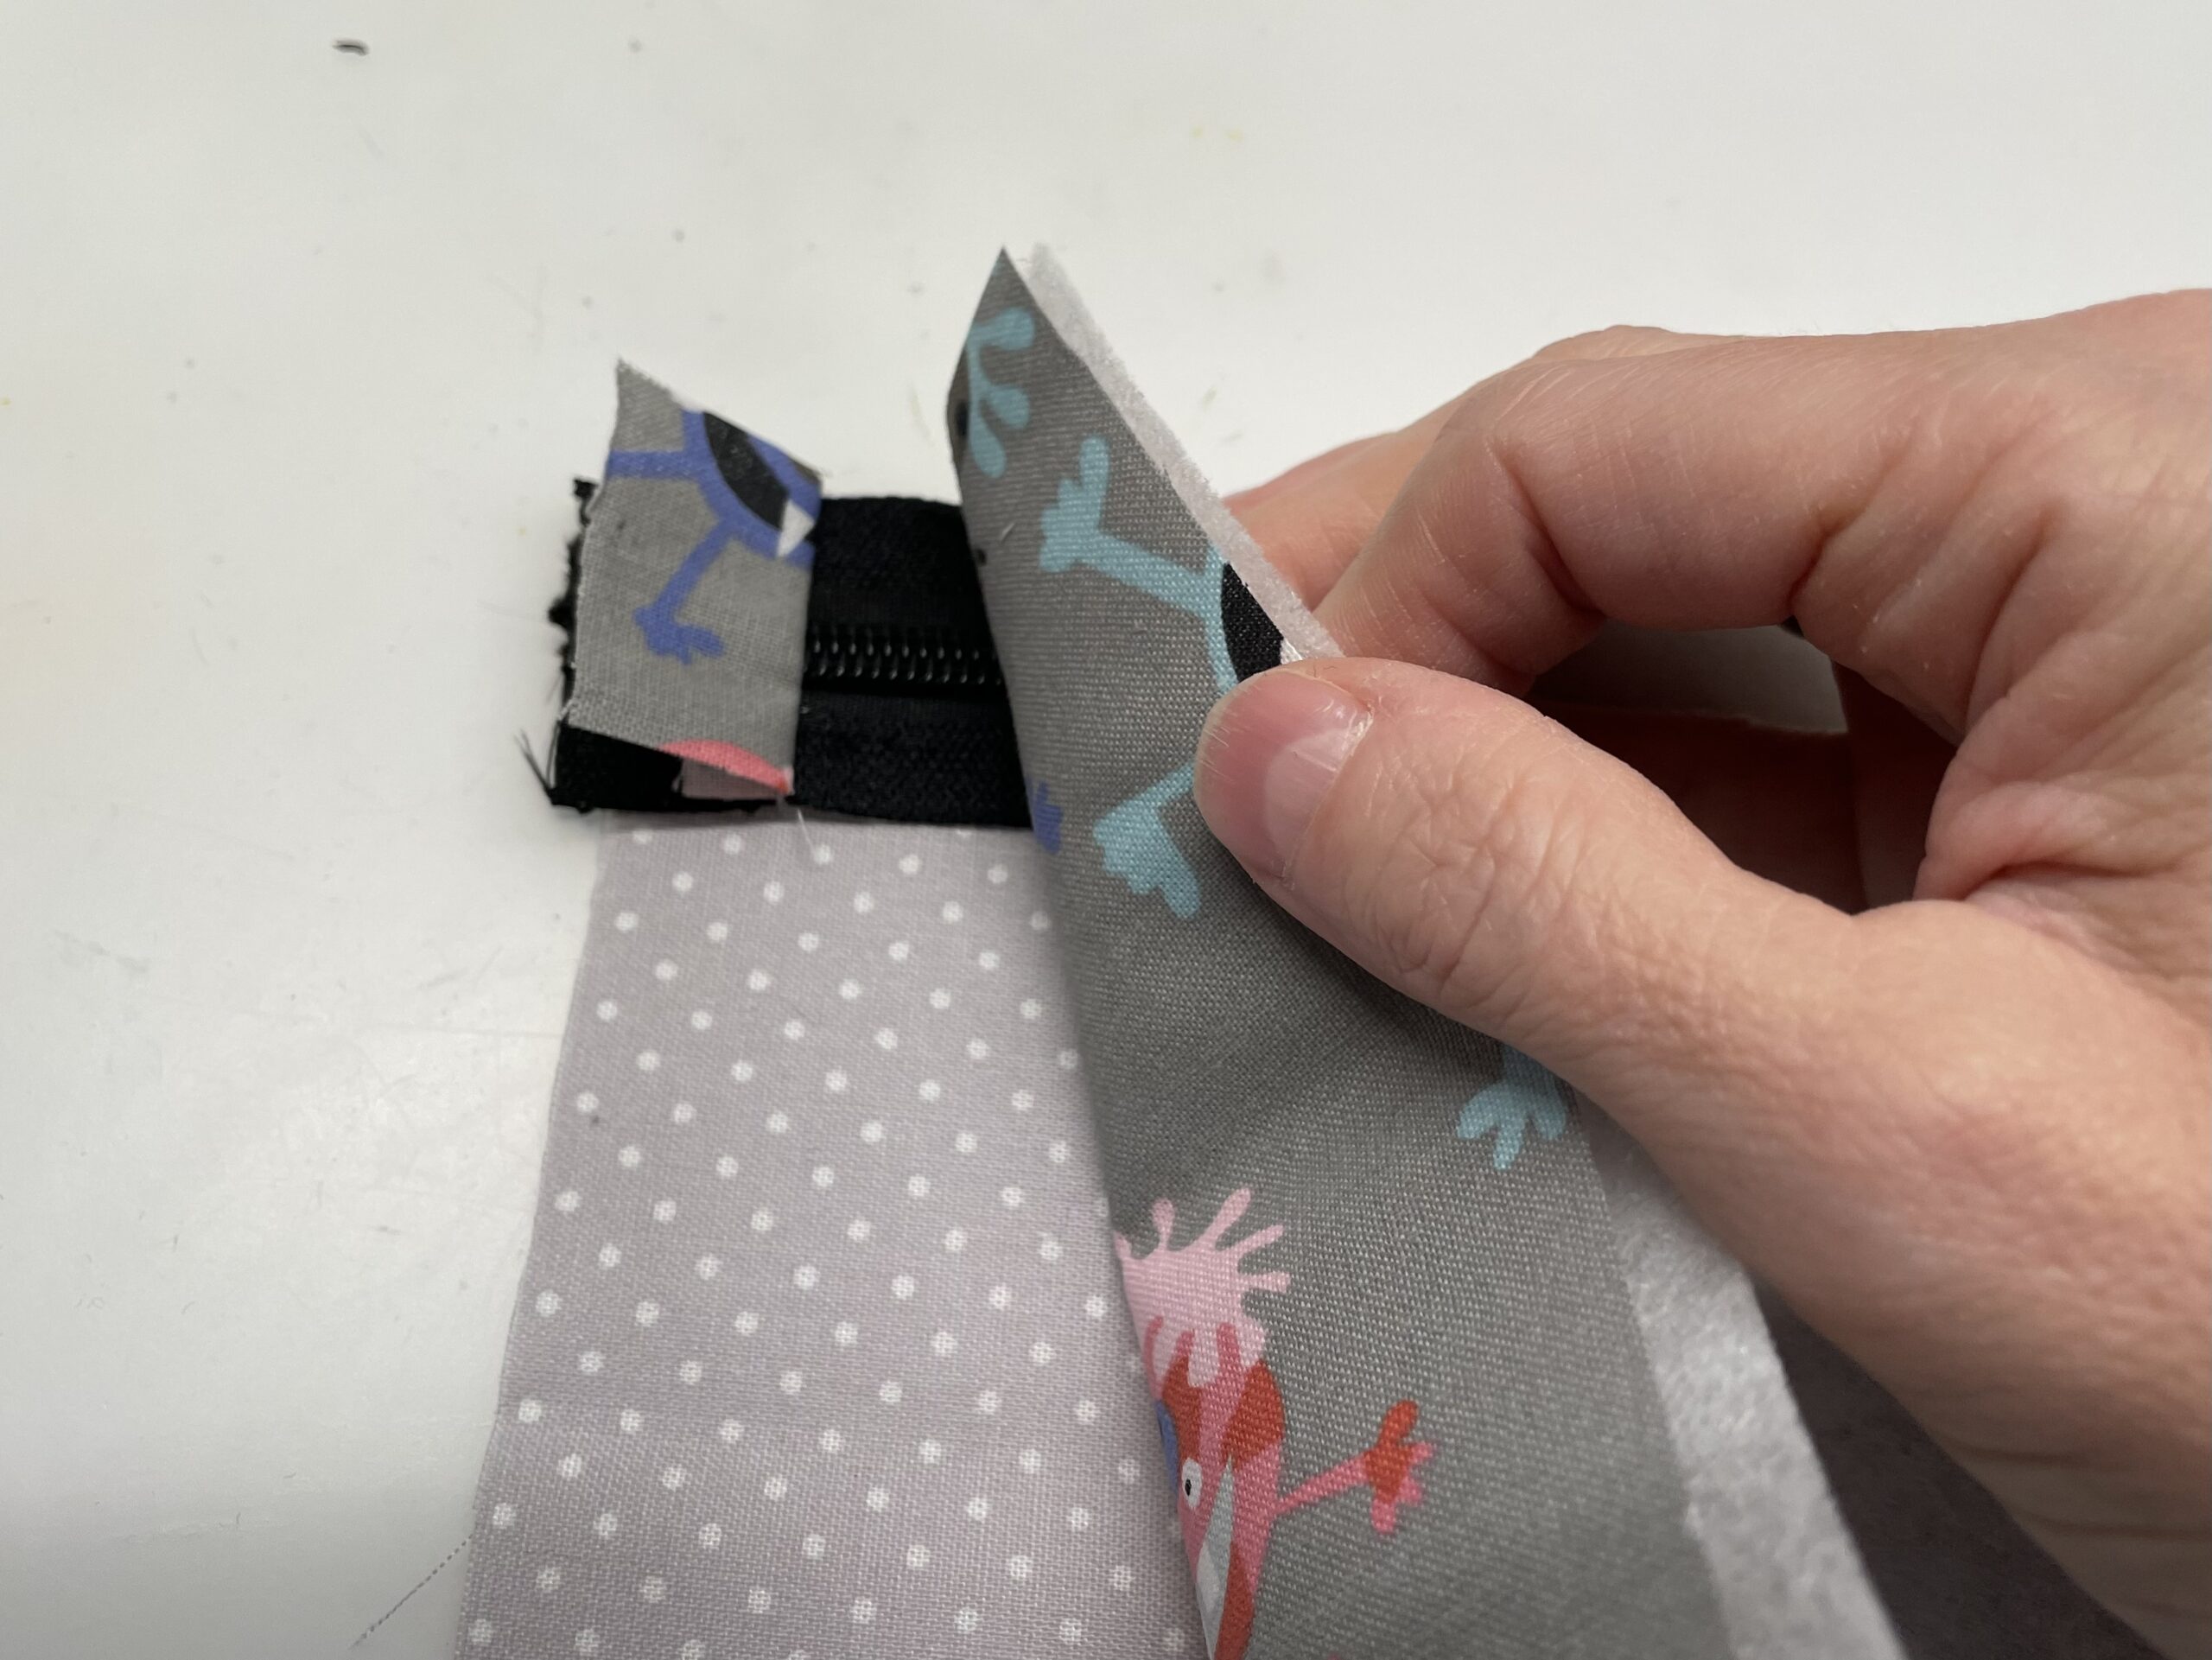
Bild zum Schritt 11 für das Bastel- und DIY-Abenteuer für Kinder: 'Der Außenstoff wir ebenfalls darauf gelegt. Innenstoff, Reißverschluss und Außenstoff...'

12

Make sure that the fabric width is exactly on top of each other.
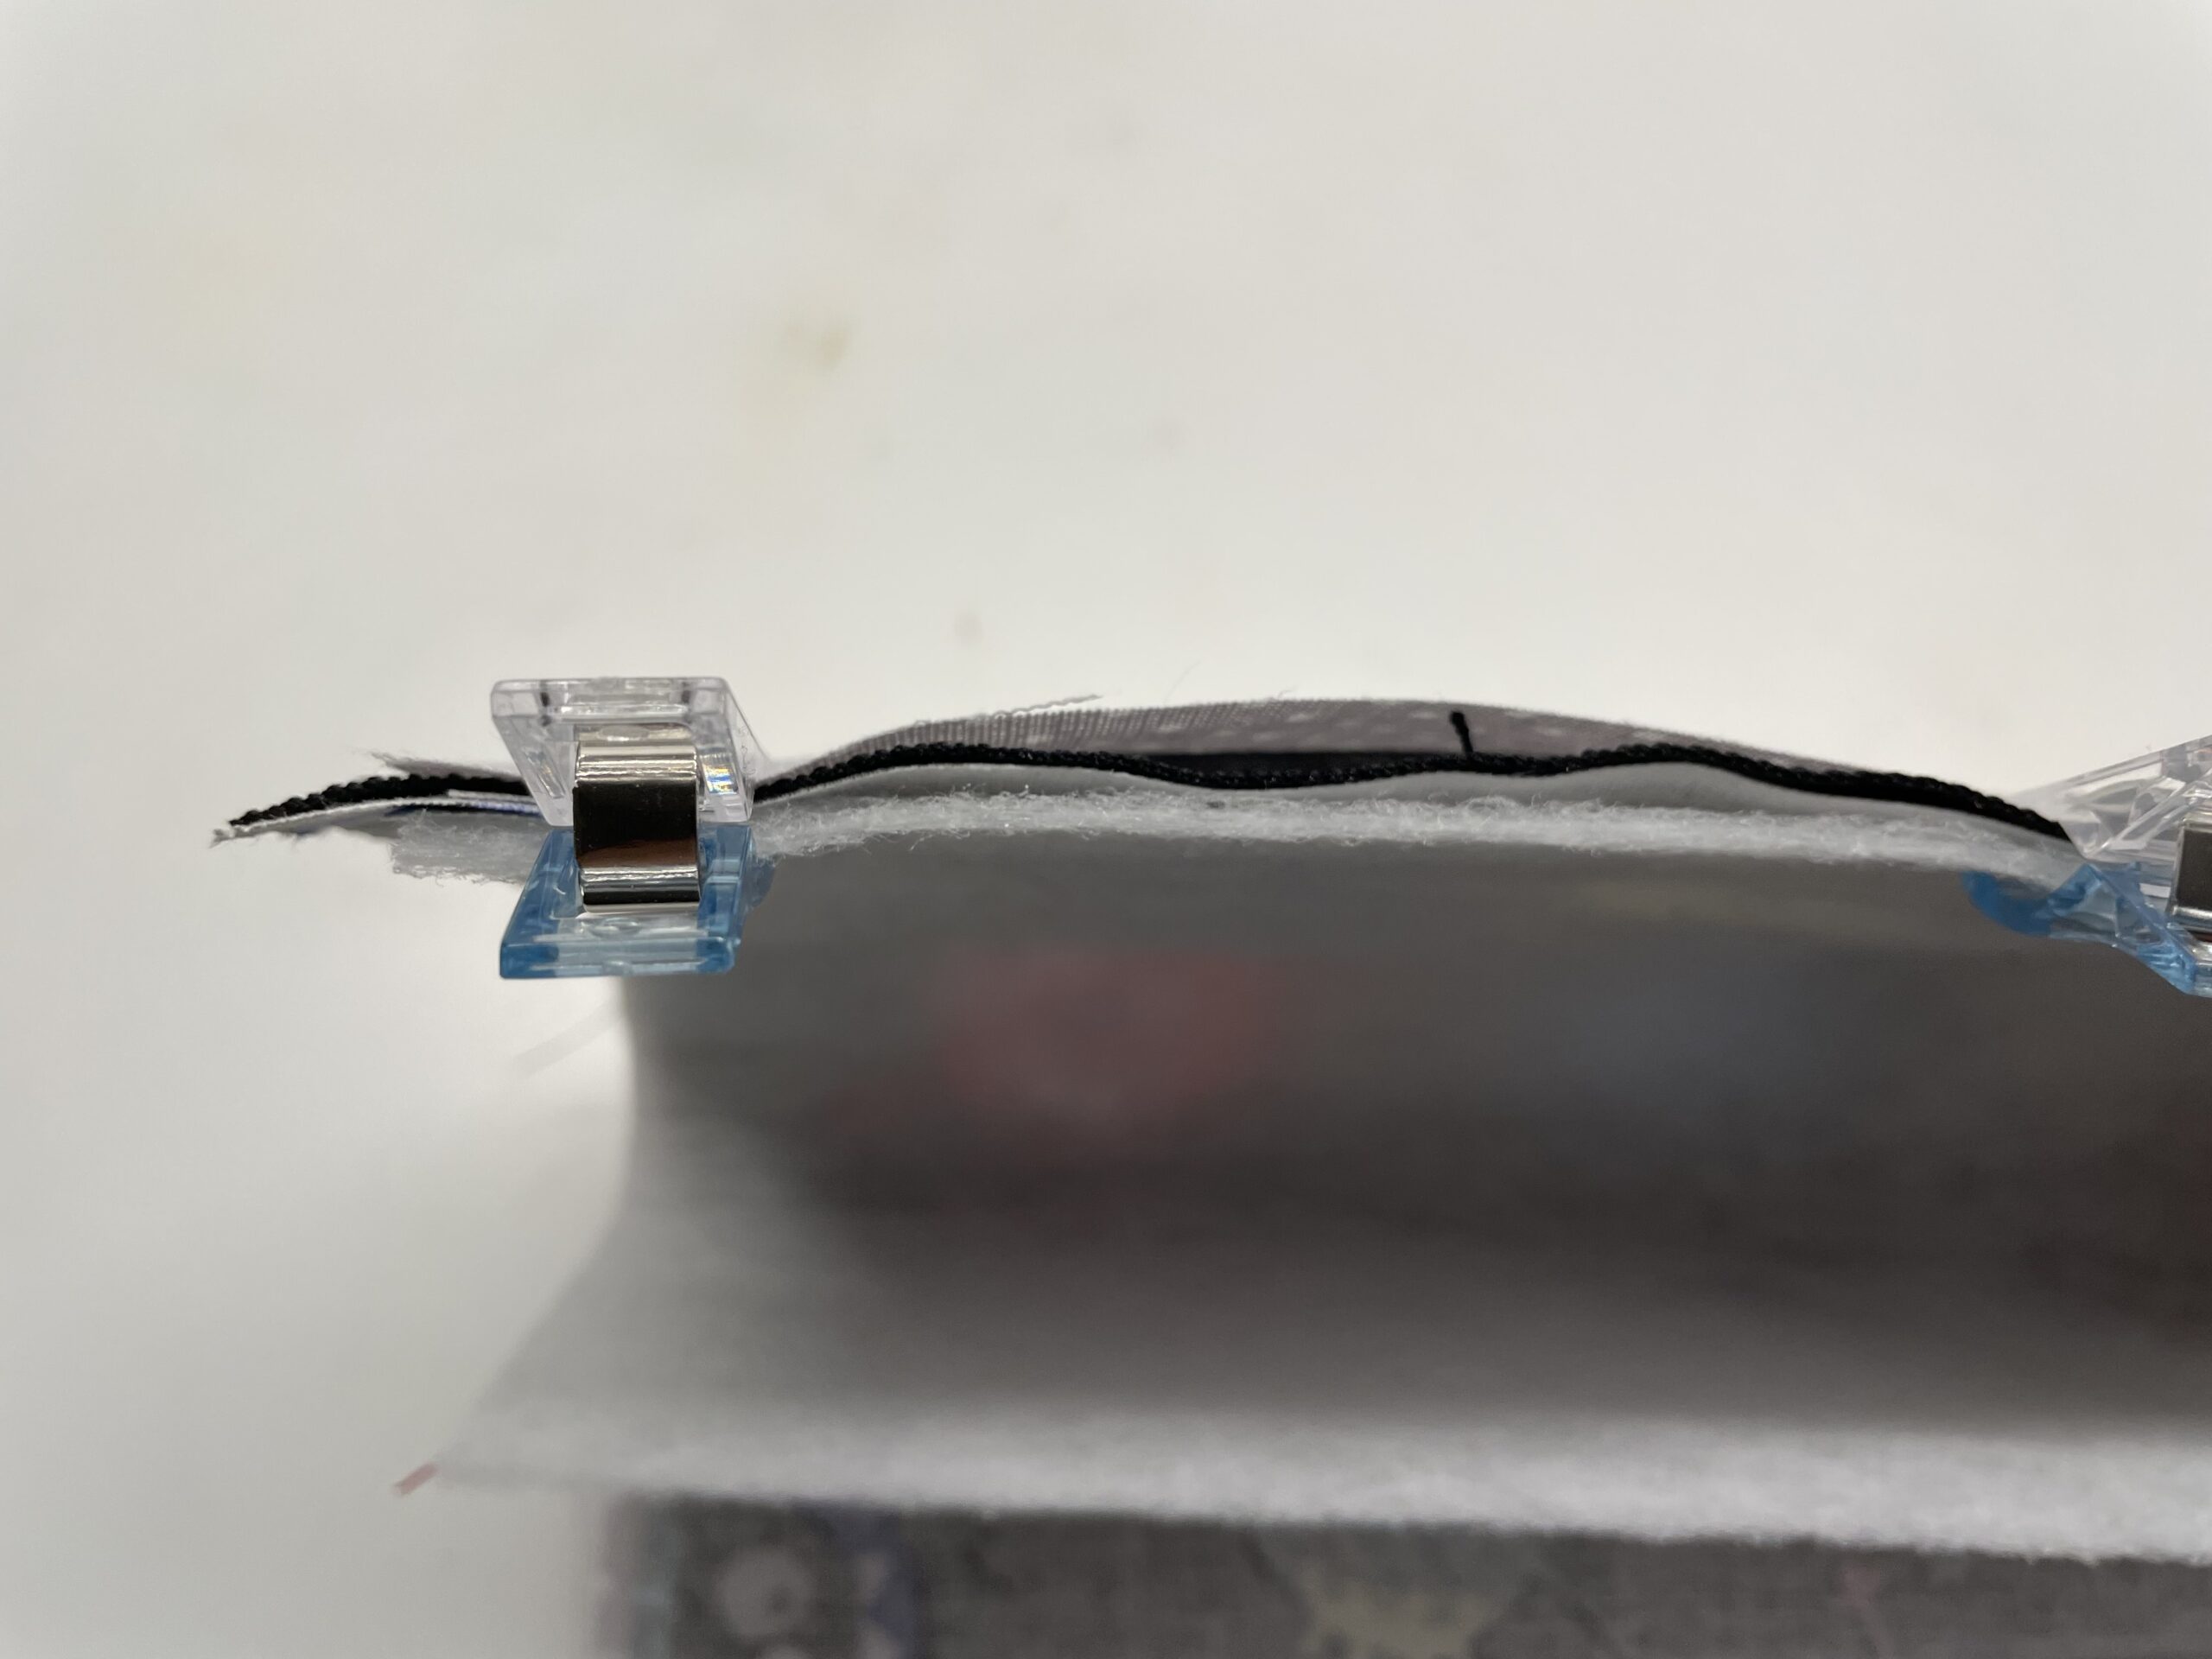
Bild zum Schritt 12 für das Bastel- und DIY-Abenteuer für Kinder: 'Achtet darauf, dass die Stoffbreite genau aufeinander liegt.'

13

The reinforcement fleece is also attached here. (As reinforcement of the outer material!)
Seams the top seam with the sewing machine.
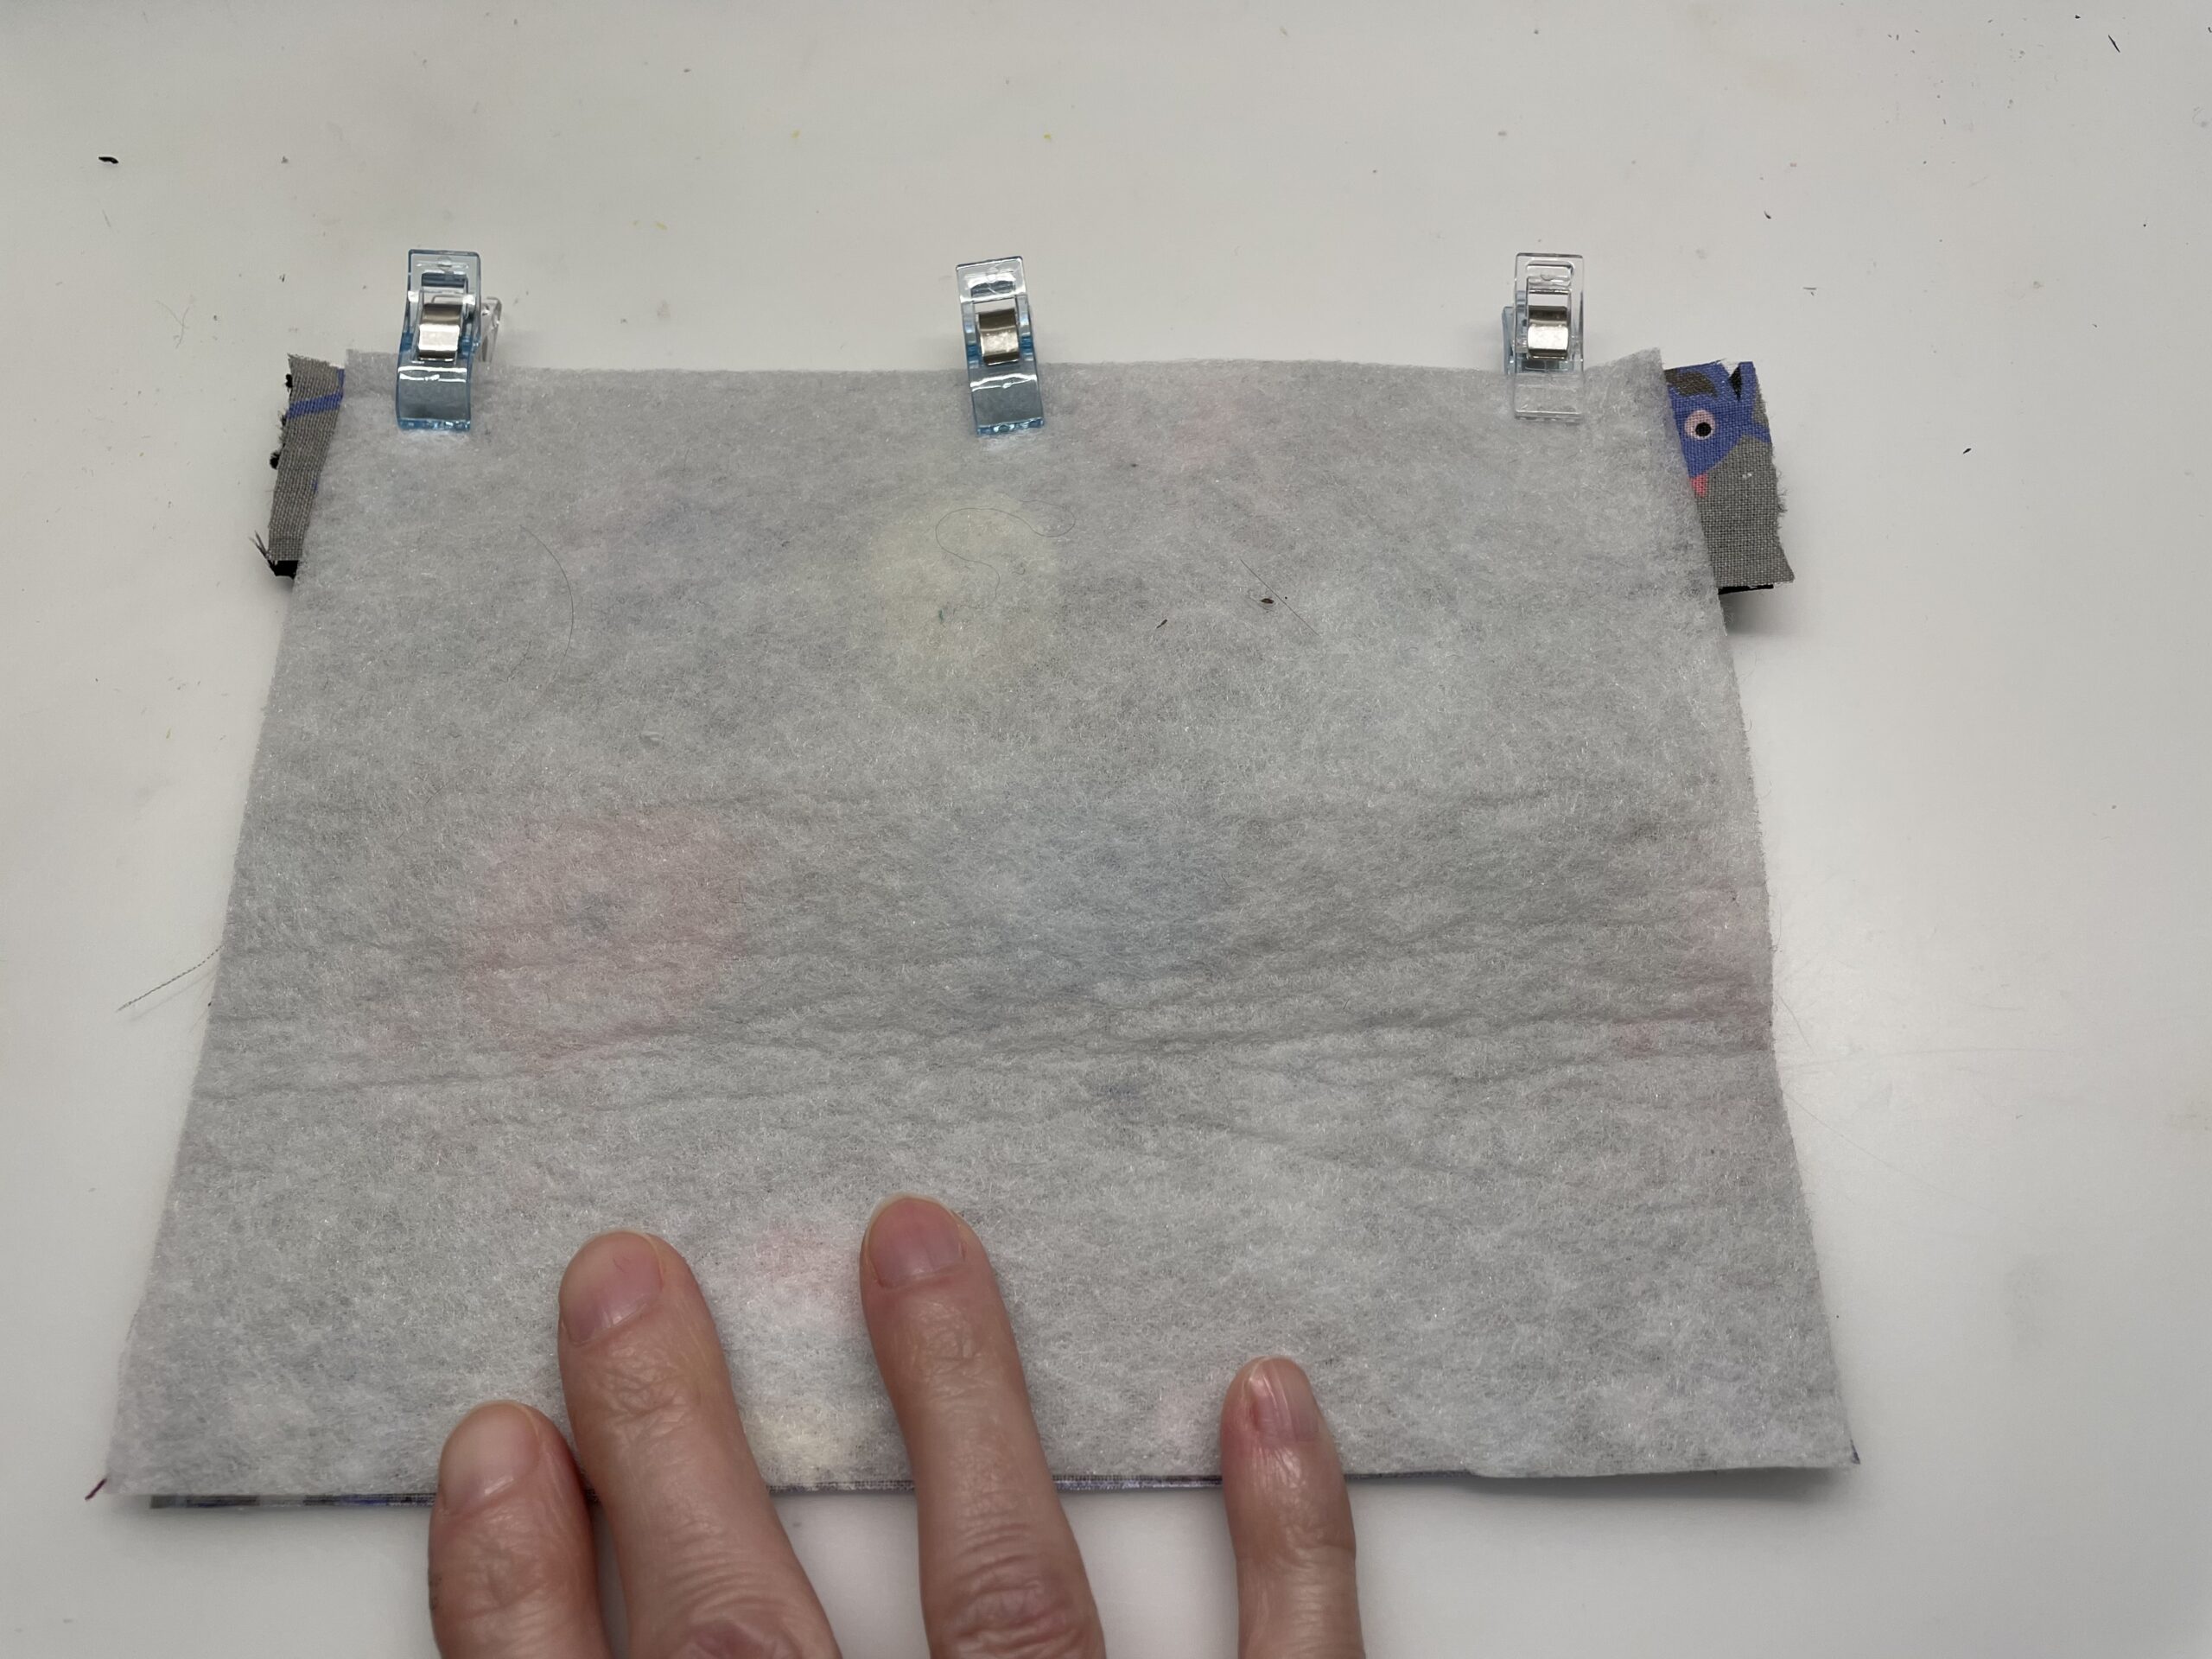
Bild zum Schritt 13 für das Bastel- und DIY-Abenteuer für Kinder: 'Auch das Verstärkungsfleece wird hier gleich mit angeheftet. (Als Verstärkung...'

14

Folds the fabric apart. One side of the zipper is now finished sewn.
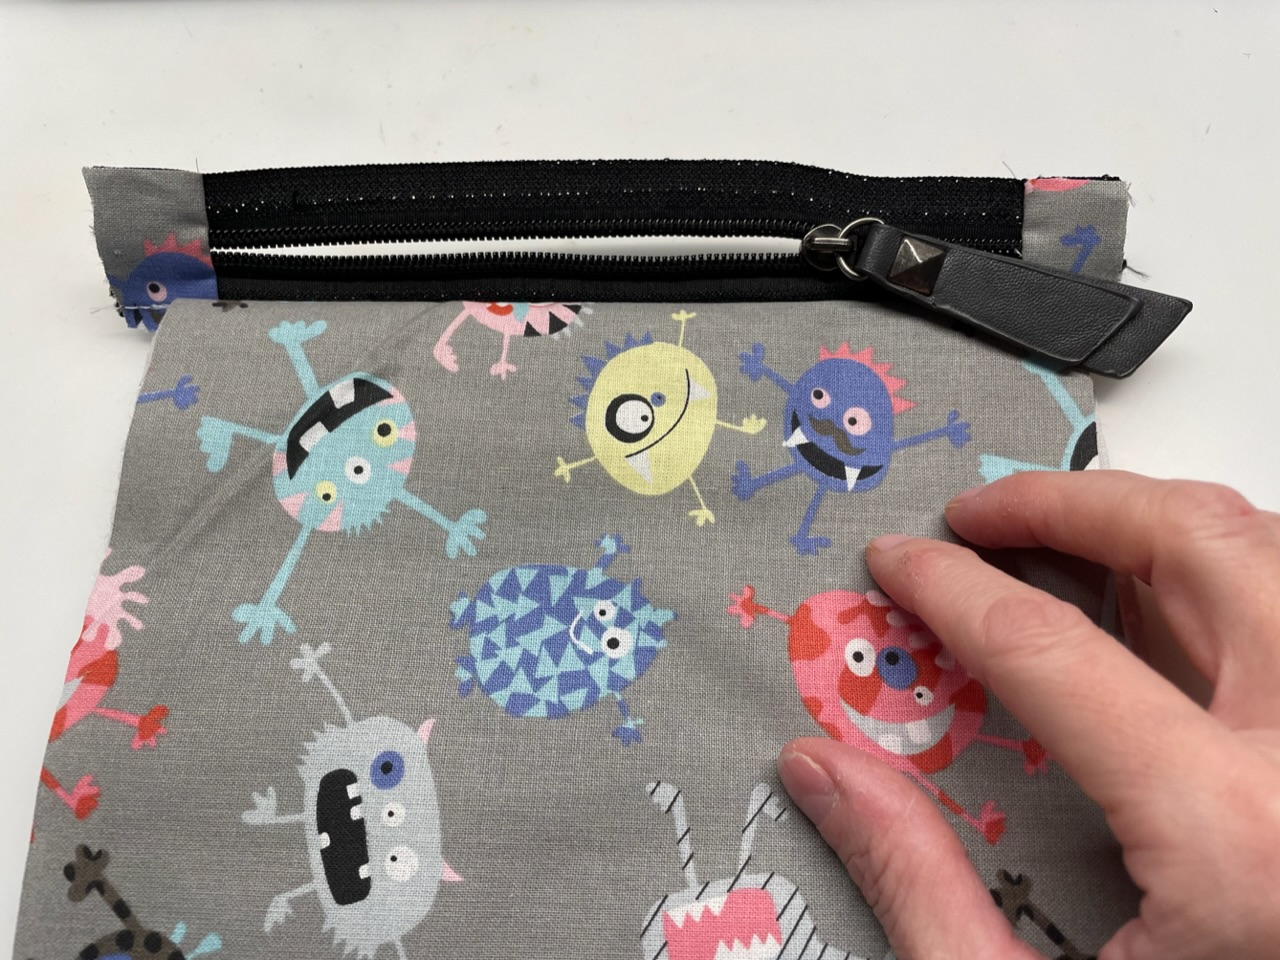
Bild zum Schritt 14 für das Bastel- und DIY-Abenteuer für Kinder: 'Klappt den Stoff auseinander. Eine Seite des Reißverschlusses ist nun...'

15

Now set up the fabrics for the second part of the zipper. Here are the following pictures:
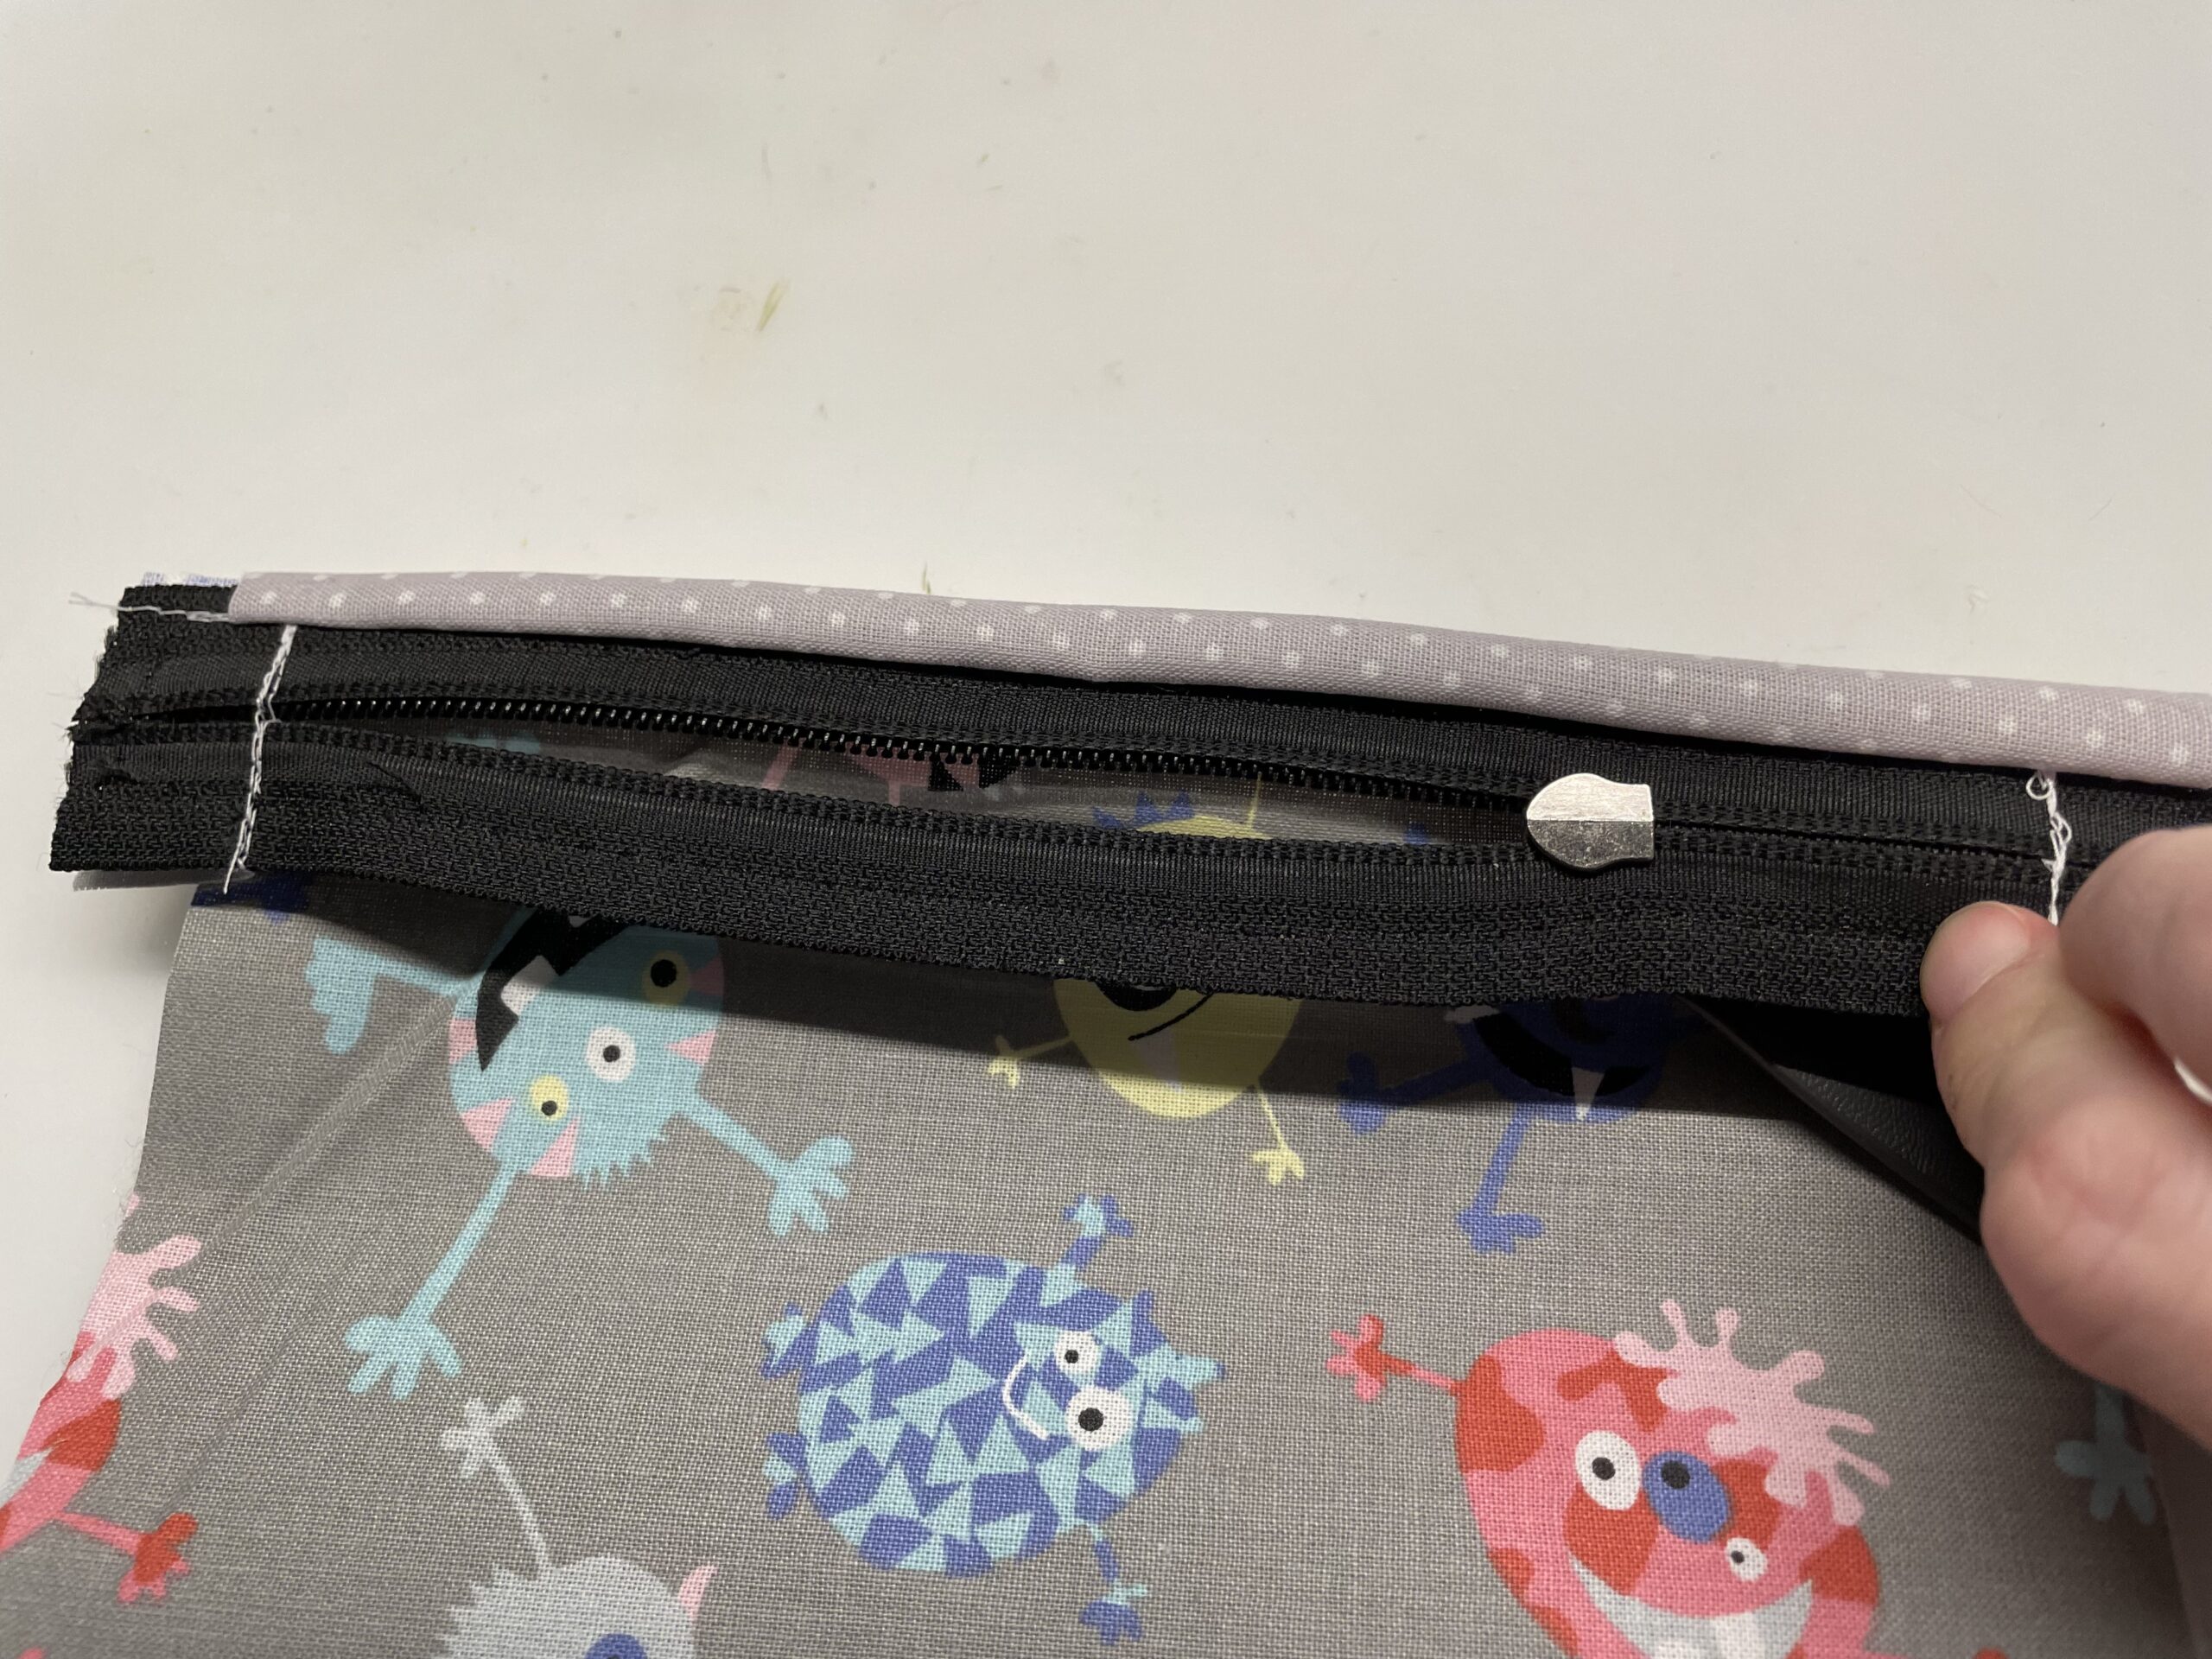
Bild zum Schritt 15 für das Bastel- und DIY-Abenteuer für Kinder: 'Legt nun die Stoffe für den zweiten Teil des Reißverschlusses...'

16

The opposite sides of the fabric are now placed on the other side of the zipper. The inner fabric is folded onto the back and positioned at the back of the zipper. The fabrics always lie on each other with the beautiful sides.

Bild zum Schritt 16 für das Bastel- und DIY-Abenteuer für Kinder: 'Die gegenüberliegenden Stoff- Seiten  werden nun an die andere...'

17

Fixes the position of the later seam with clamps.
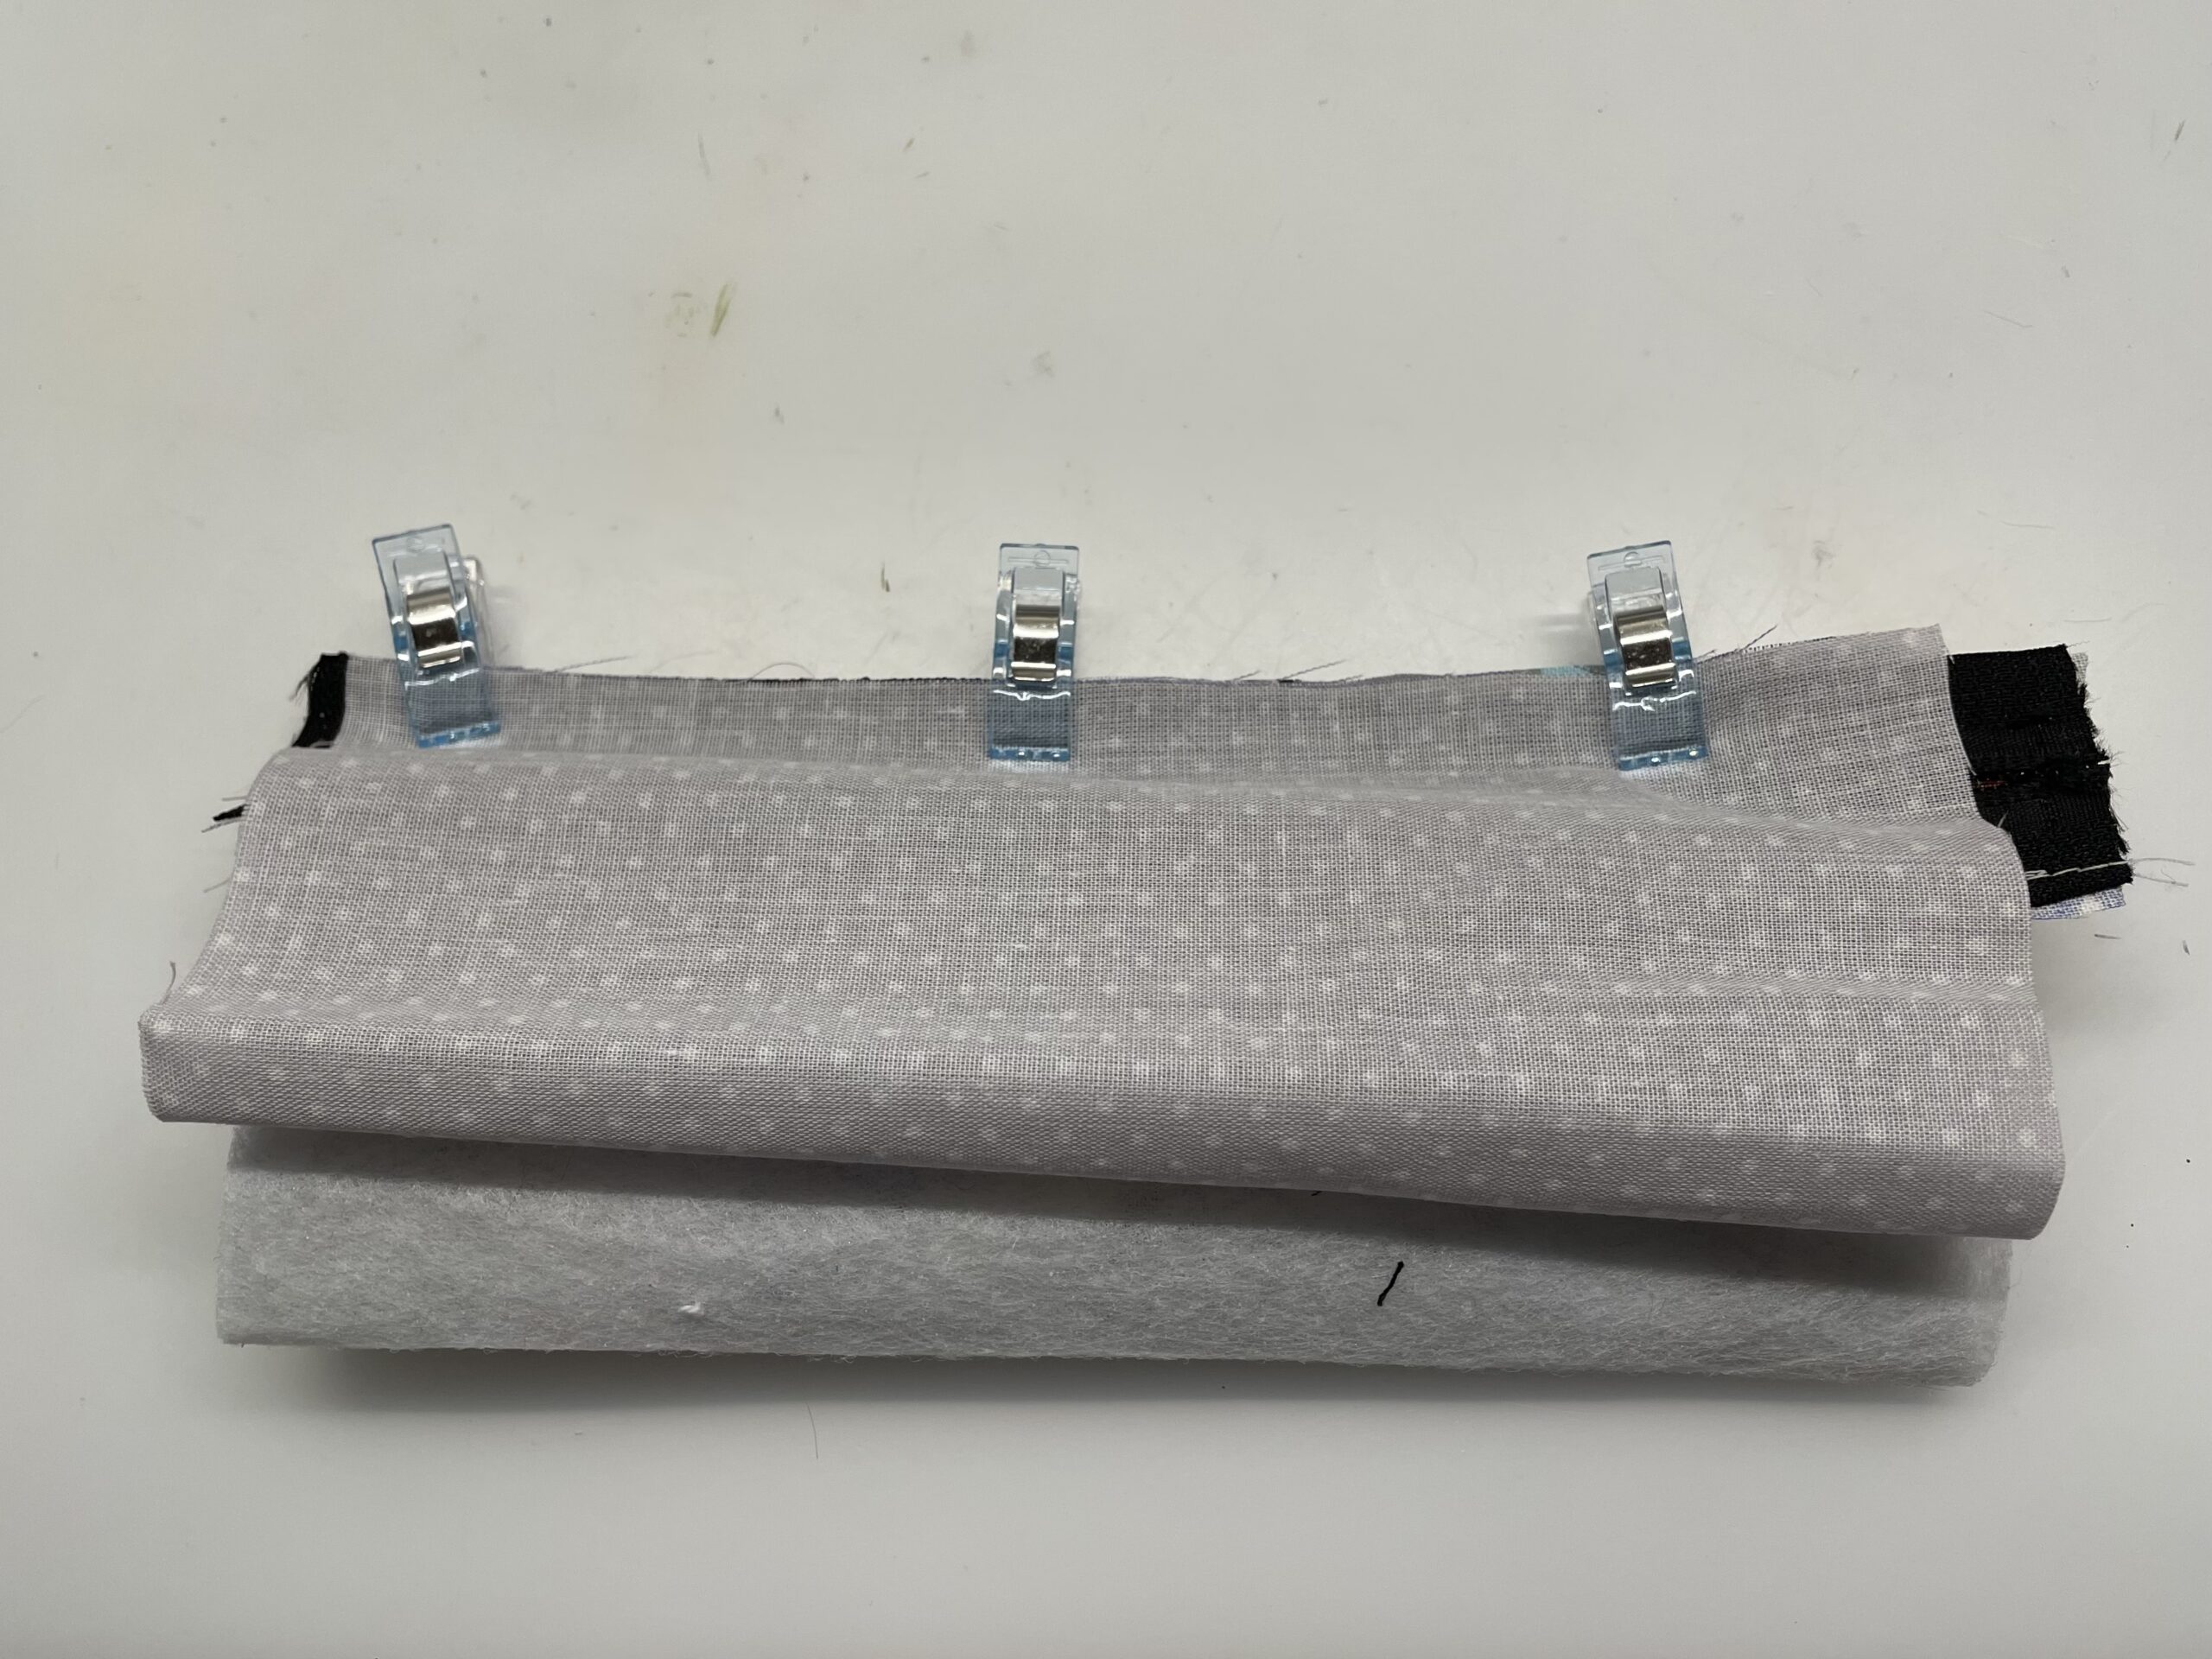
Bild zum Schritt 17 für das Bastel- und DIY-Abenteuer für Kinder: 'Fixiert die Stelle der späteren Naht mit Klammern.'

18

2. Bild zum Schritt 17 für das Bastel- und DIY-Abenteuer für Kinder: 'Fixiert die Stelle der späteren Naht mit Klammern.'

19

Sews a seam along the zipper.

Bild zum Schritt 19 für das Bastel- und DIY-Abenteuer für Kinder: 'Näht eine Naht am Reißverschluss entlang.'

20

Turns the fabric part after sewing. The outer fabric is placed outwards and the inner side neatly inwards.
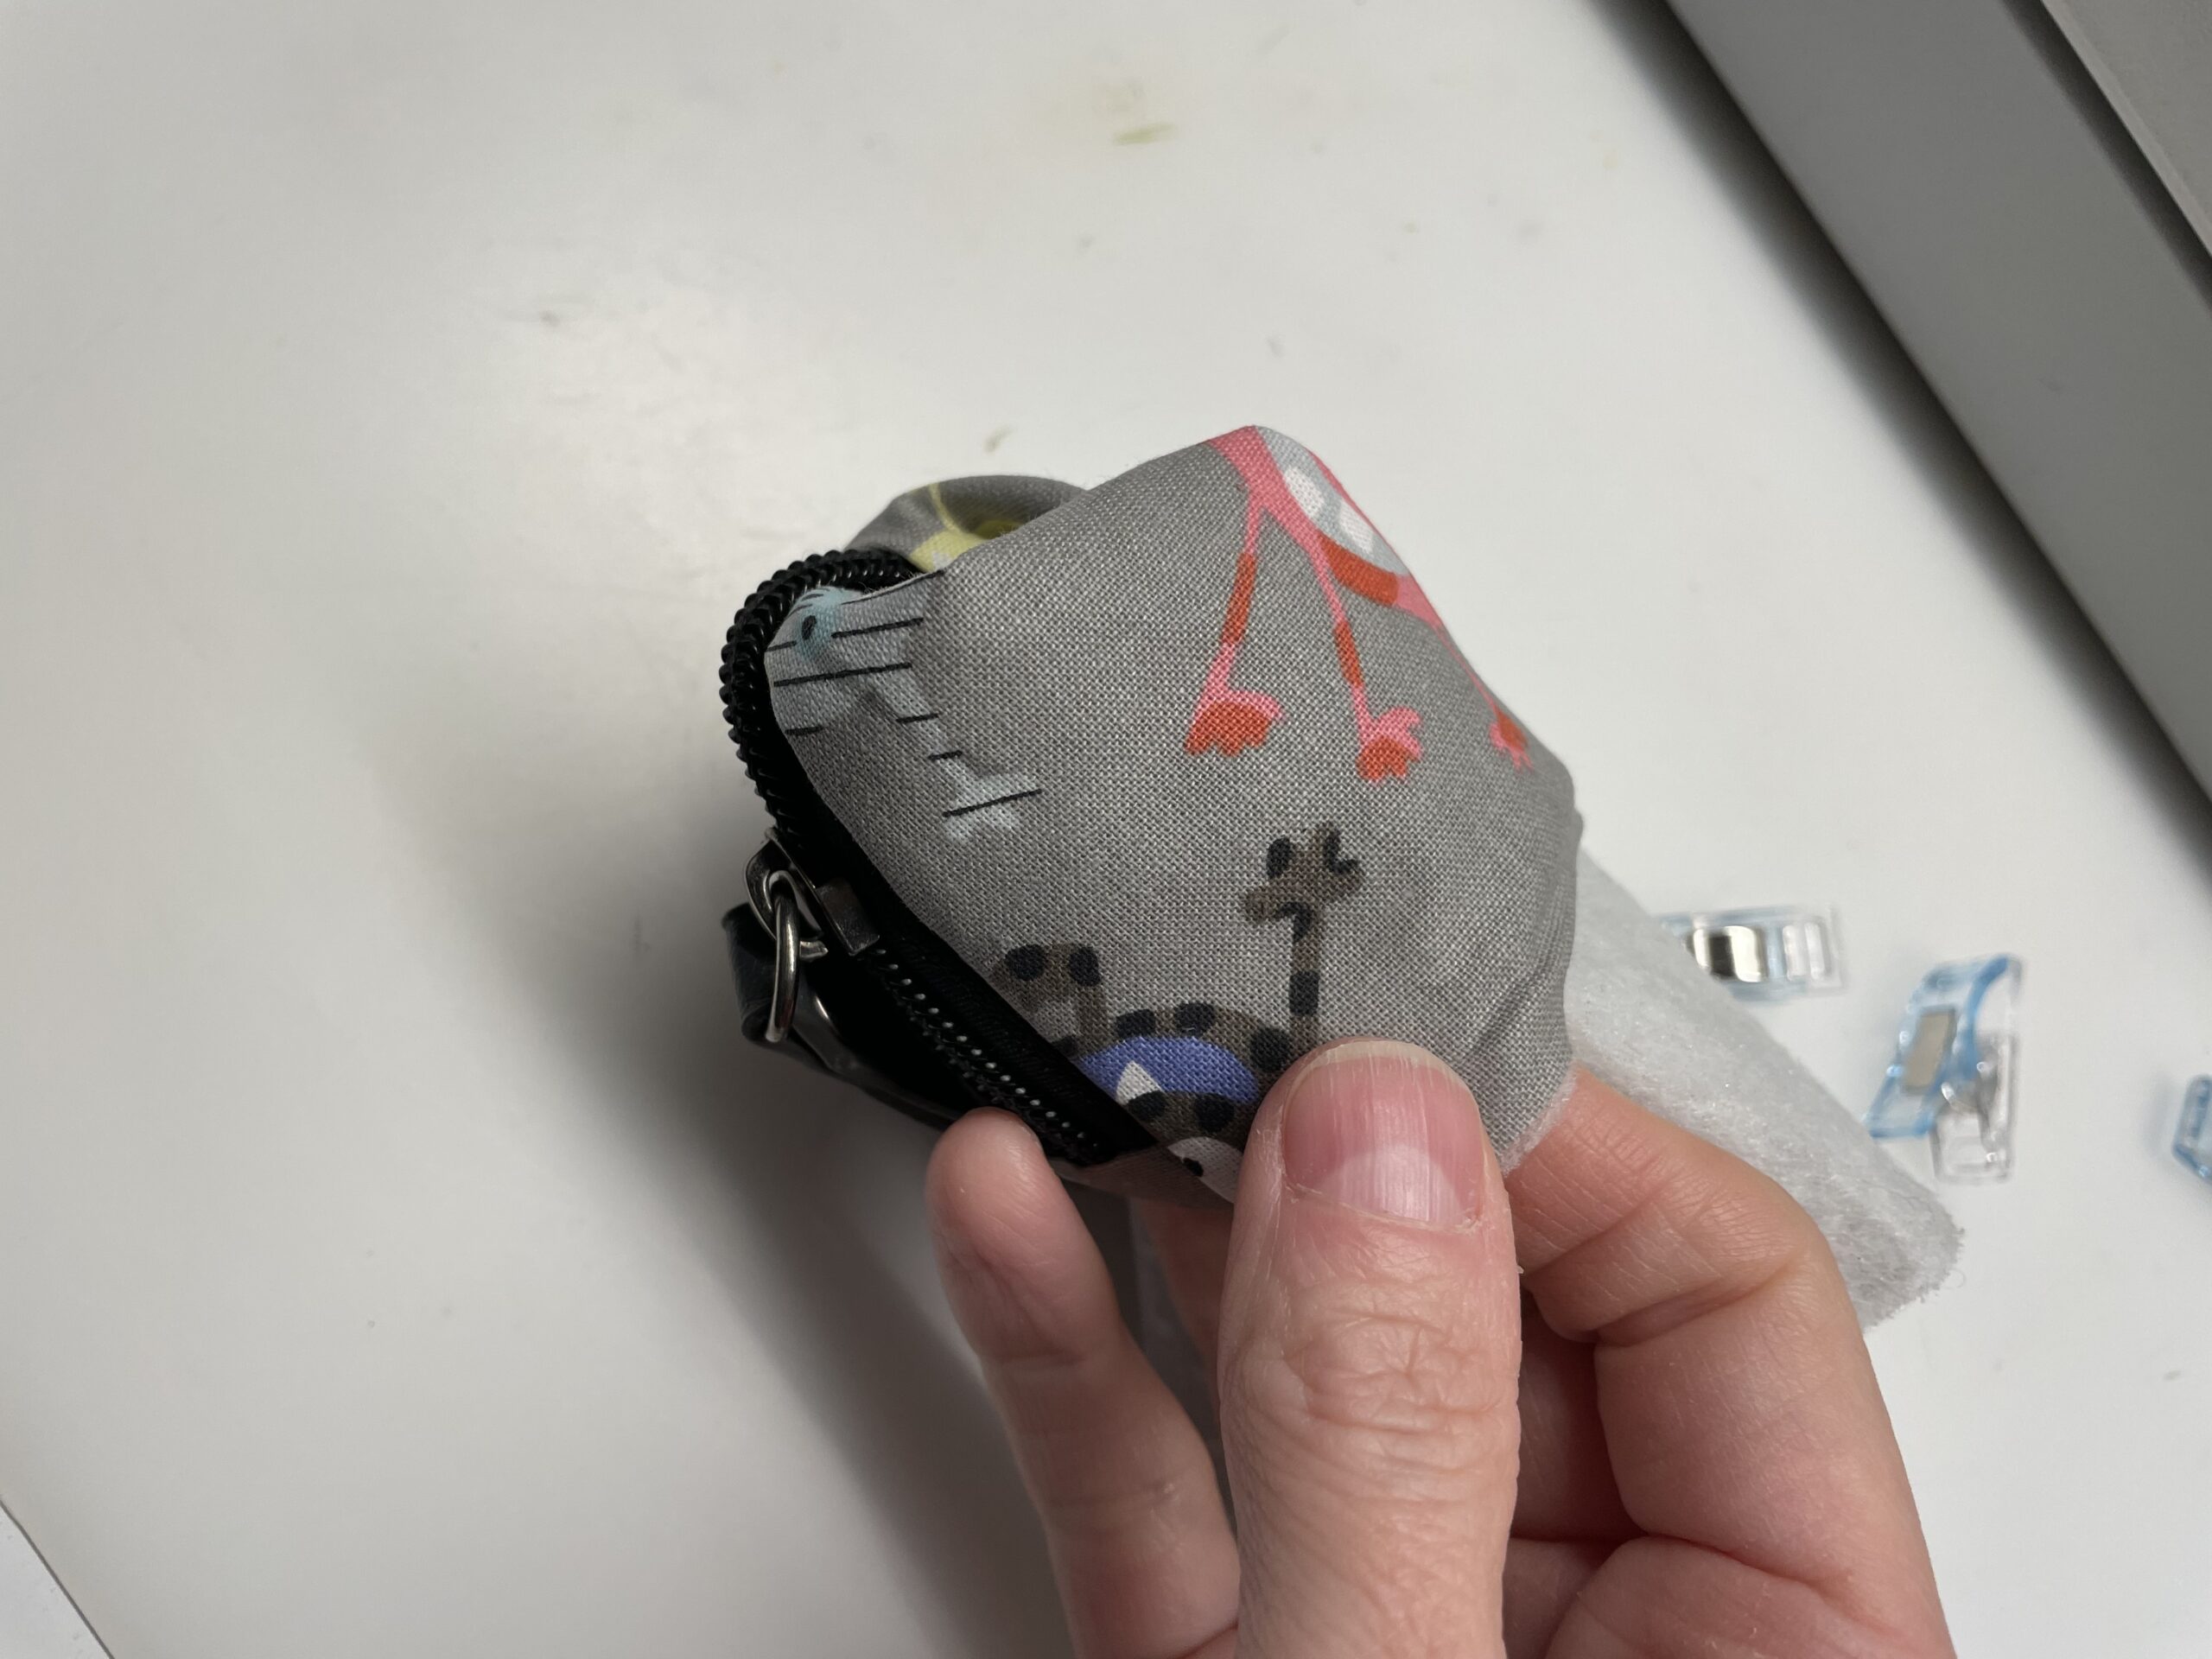
Bild zum Schritt 20 für das Bastel- und DIY-Abenteuer für Kinder: 'Wendet das Stoffteil nach dem Nähen. Der Außenstoff wird nach...'

21

Now you can see the little girl.

Bild zum Schritt 21 für das Bastel- und DIY-Abenteuer für Kinder: 'Nun ist das Mäppchen schon gut zu erkennen.'

22

Straighten out the zipper in the middle and flatten the cap.
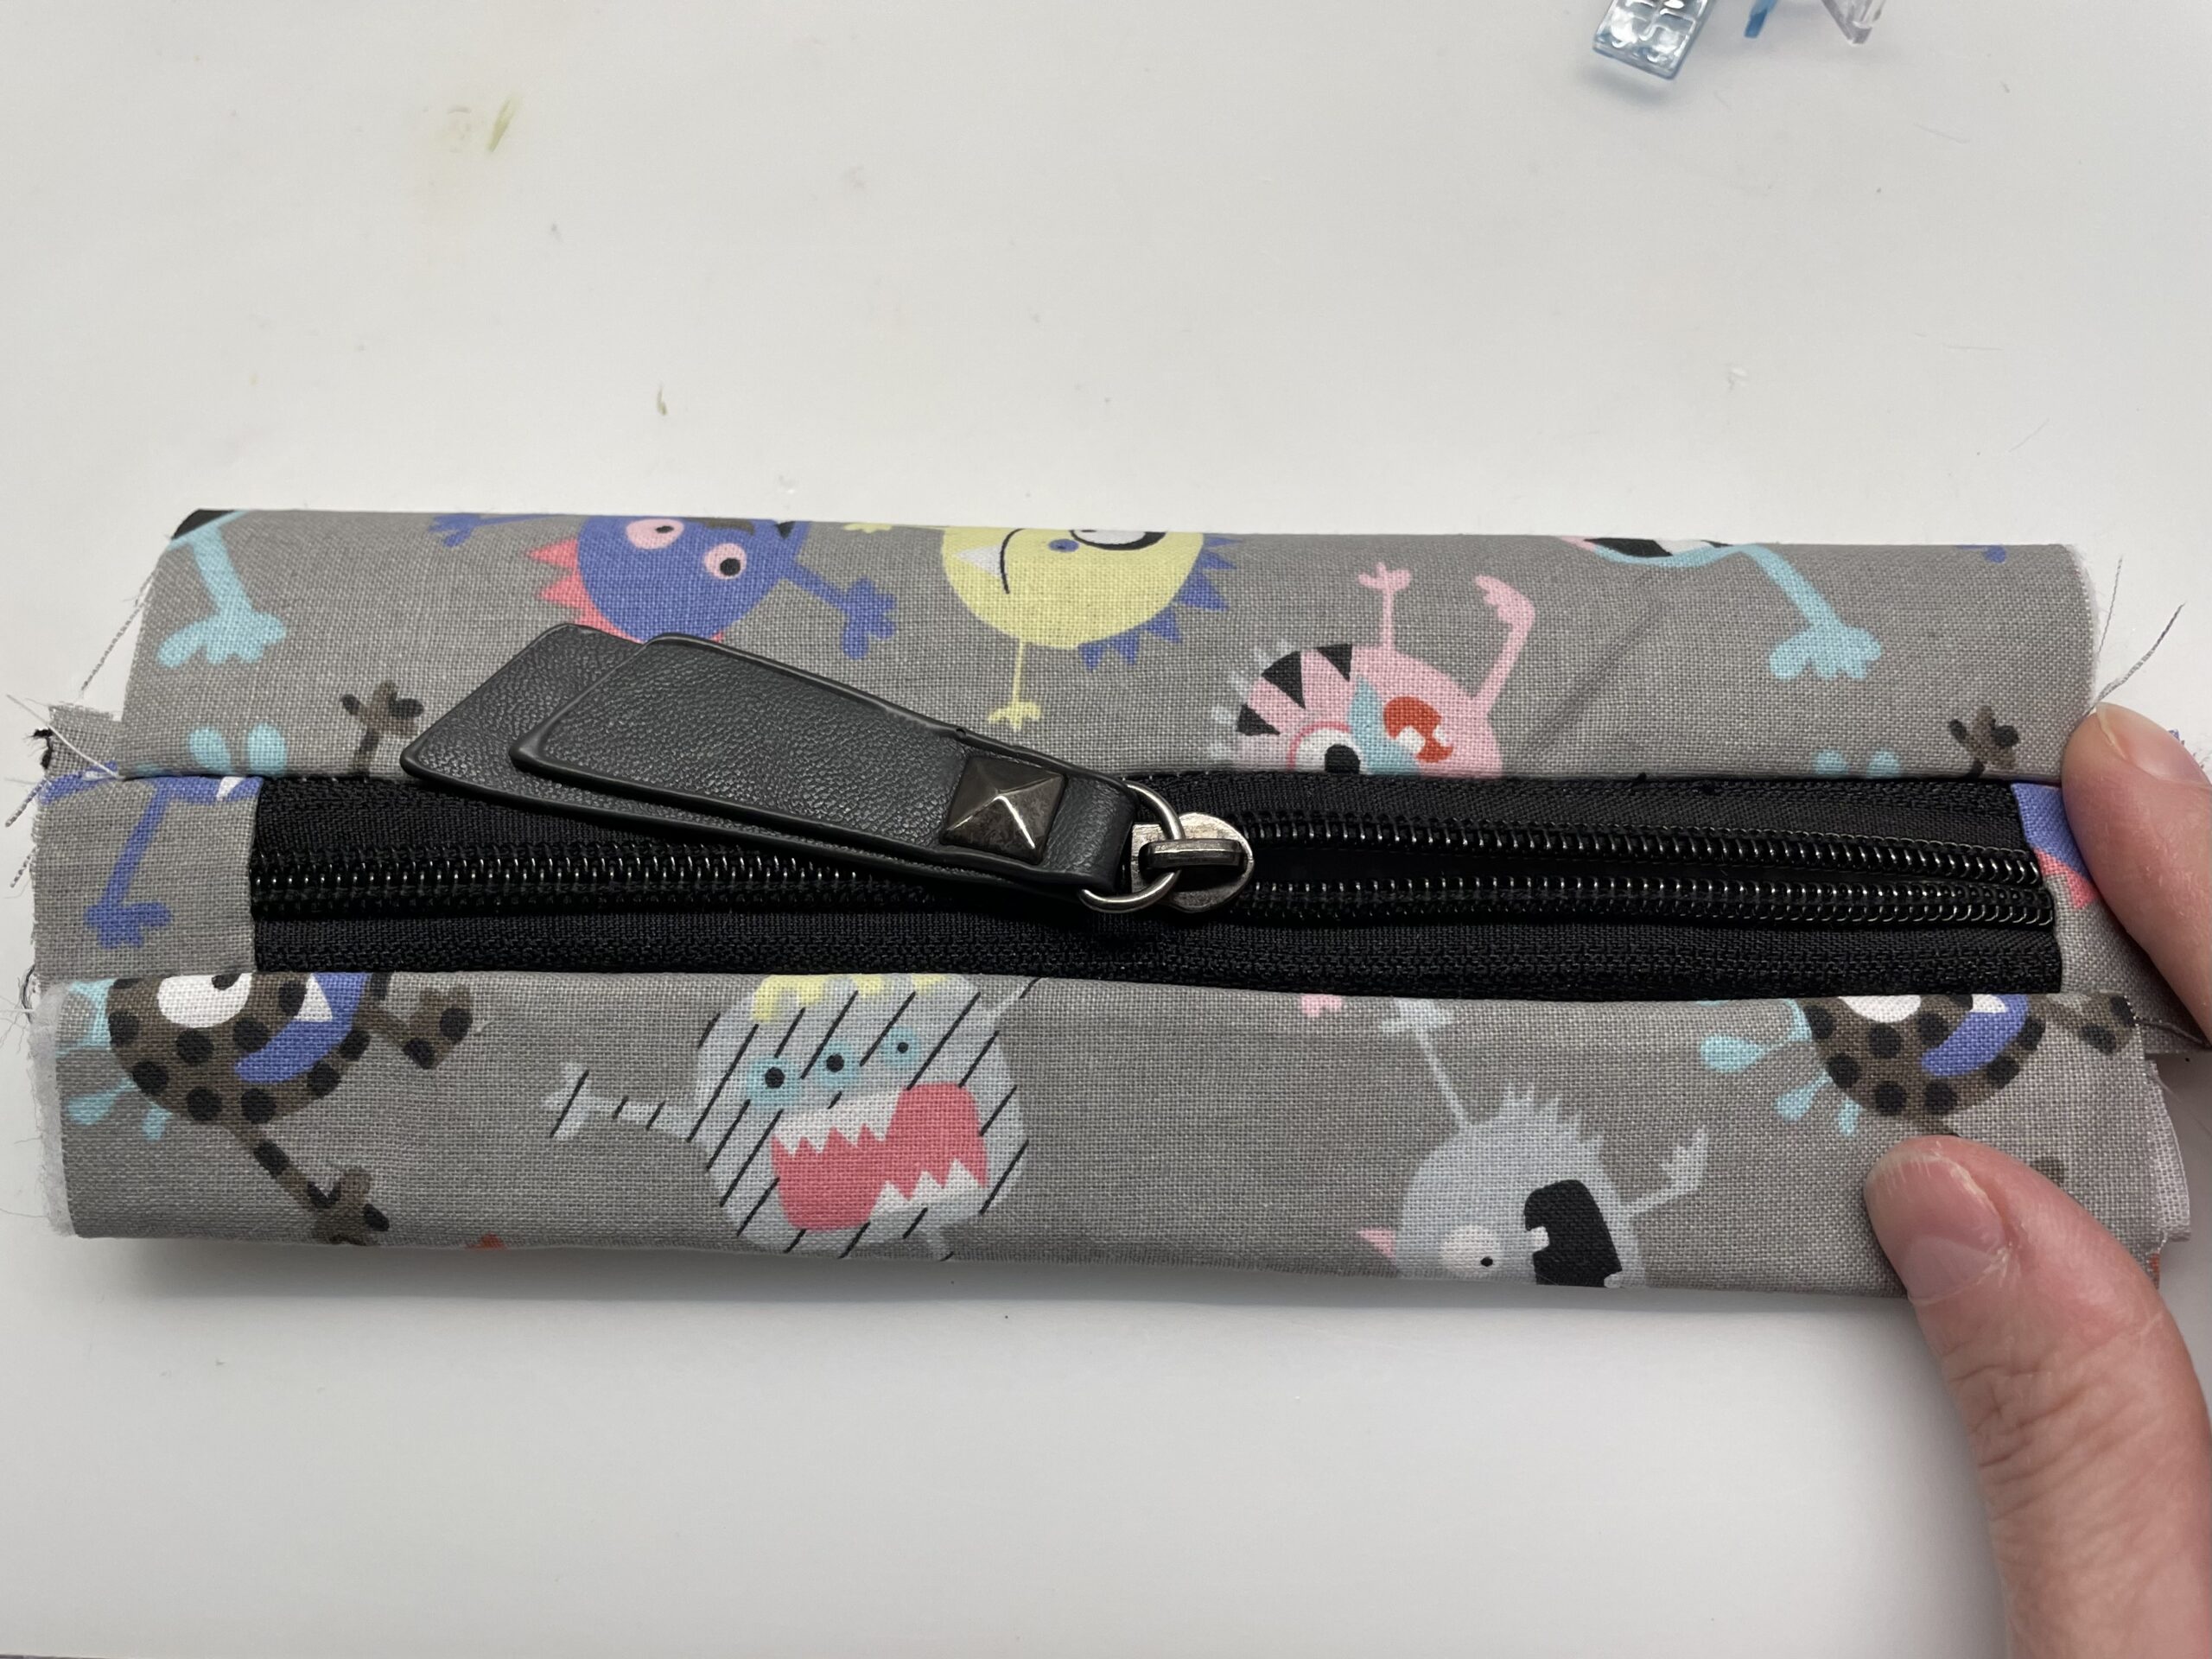
Bild zum Schritt 22 für das Bastel- und DIY-Abenteuer für Kinder: 'Richtet den Reißverschluss mittig aus und drückt das Mäppchen platt.'

23

On the open sides to the left and right you can add additional loops and sew the rubber band. Make sure that you do not close the opening or sew the fabrics together.
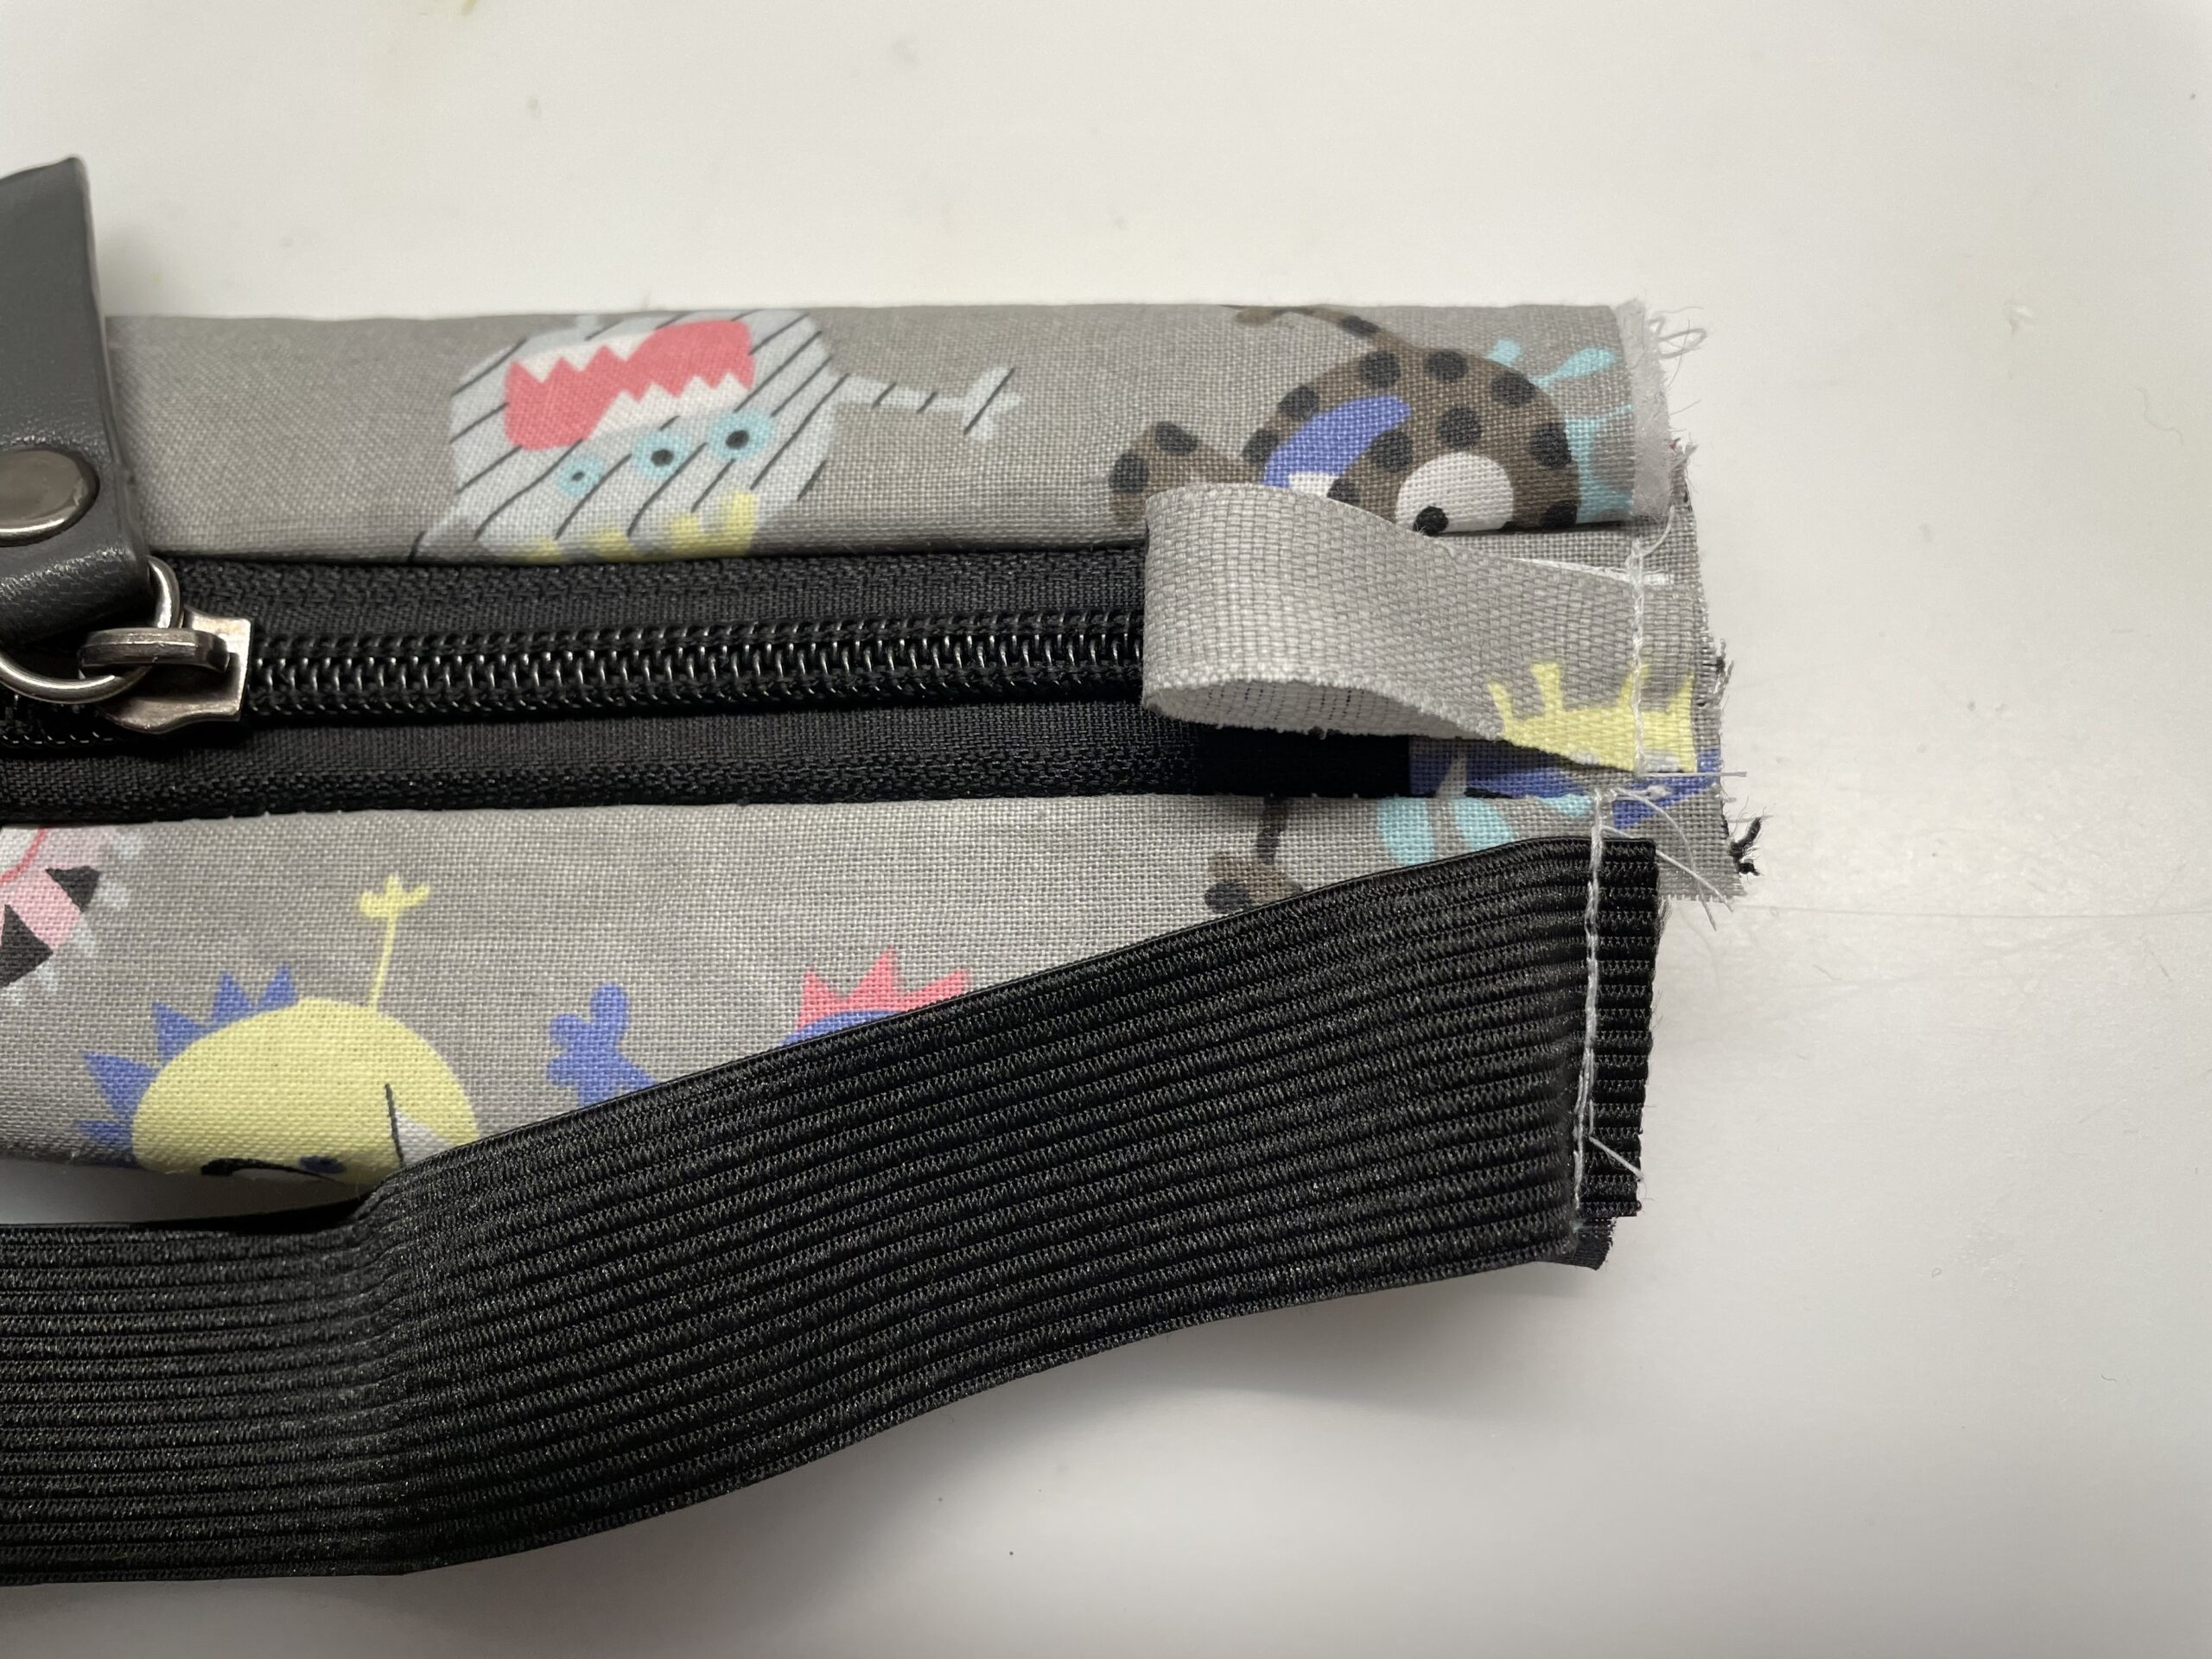
Bild zum Schritt 23 für das Bastel- und DIY-Abenteuer für Kinder: 'An den offenen Seiten links und rechts könnt ihr noch...'

24

Just fix the rubber band and the loops on the top fabric. Sew as far as possible outside!
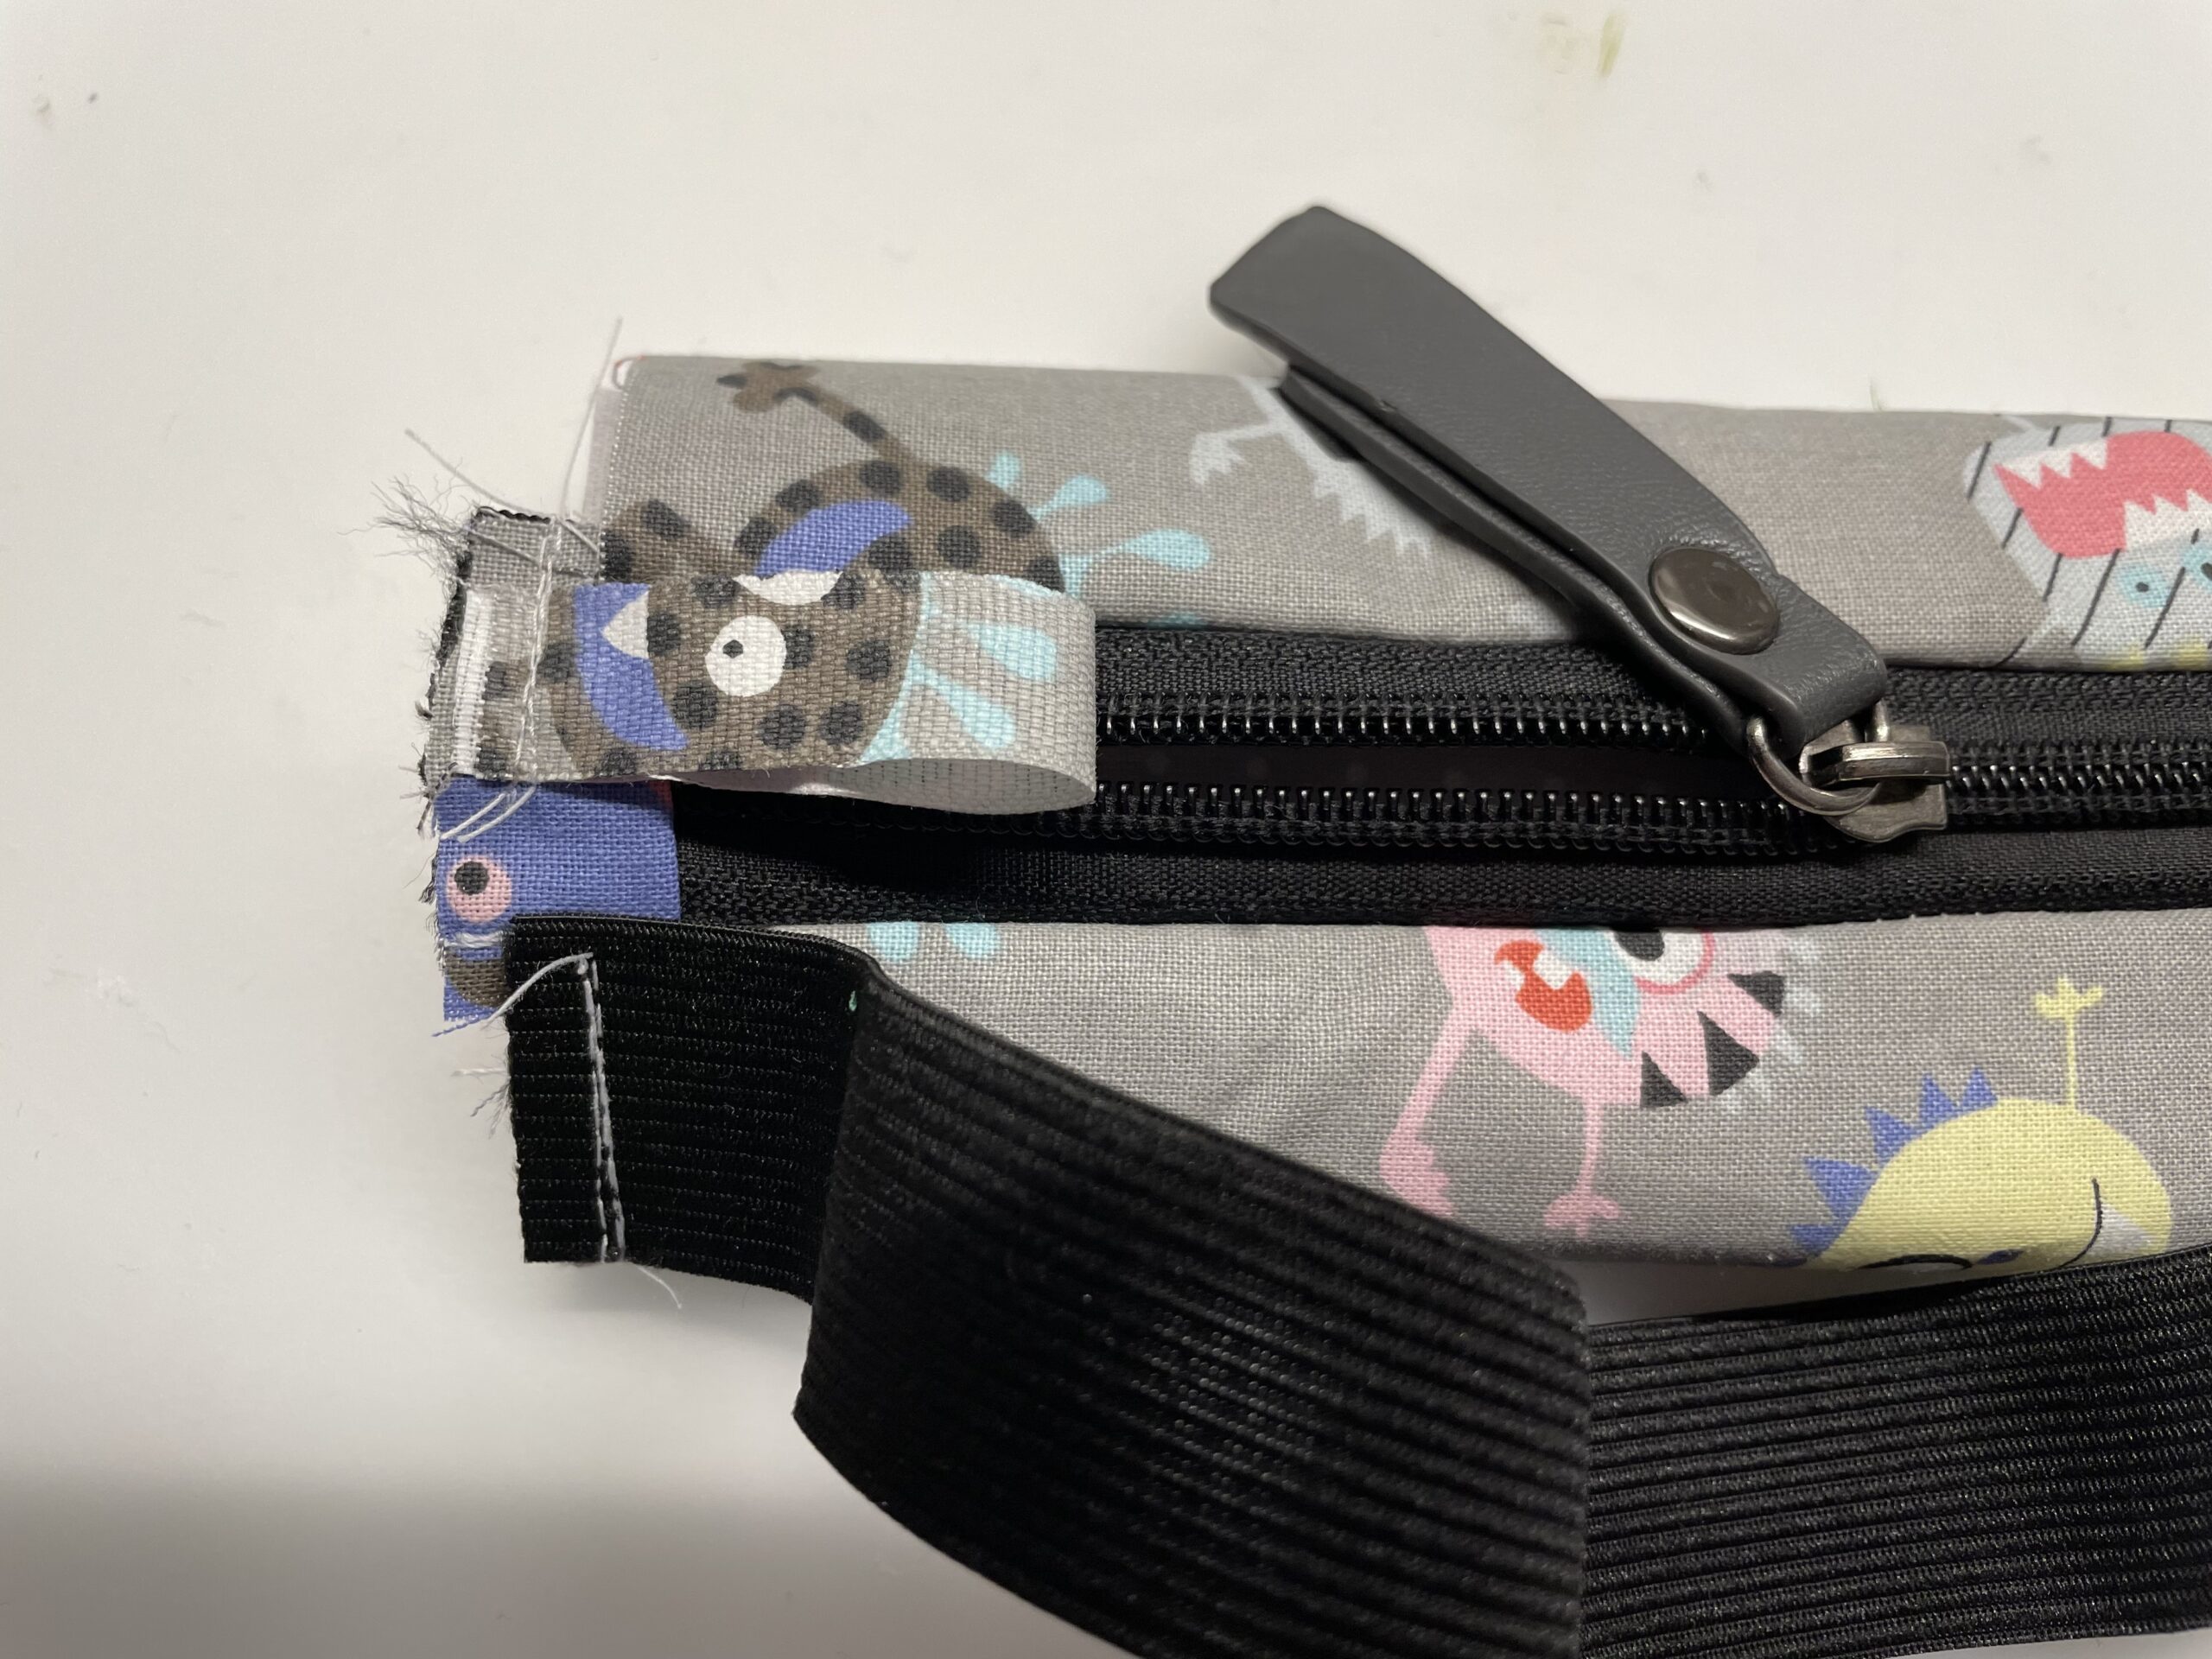
Bild zum Schritt 24 für das Bastel- und DIY-Abenteuer für Kinder: 'Fixiert lediglich das Gummiband und die Schlaufen am obersten Stoff....'

25

Turn the cap so that the inside is on the outside.
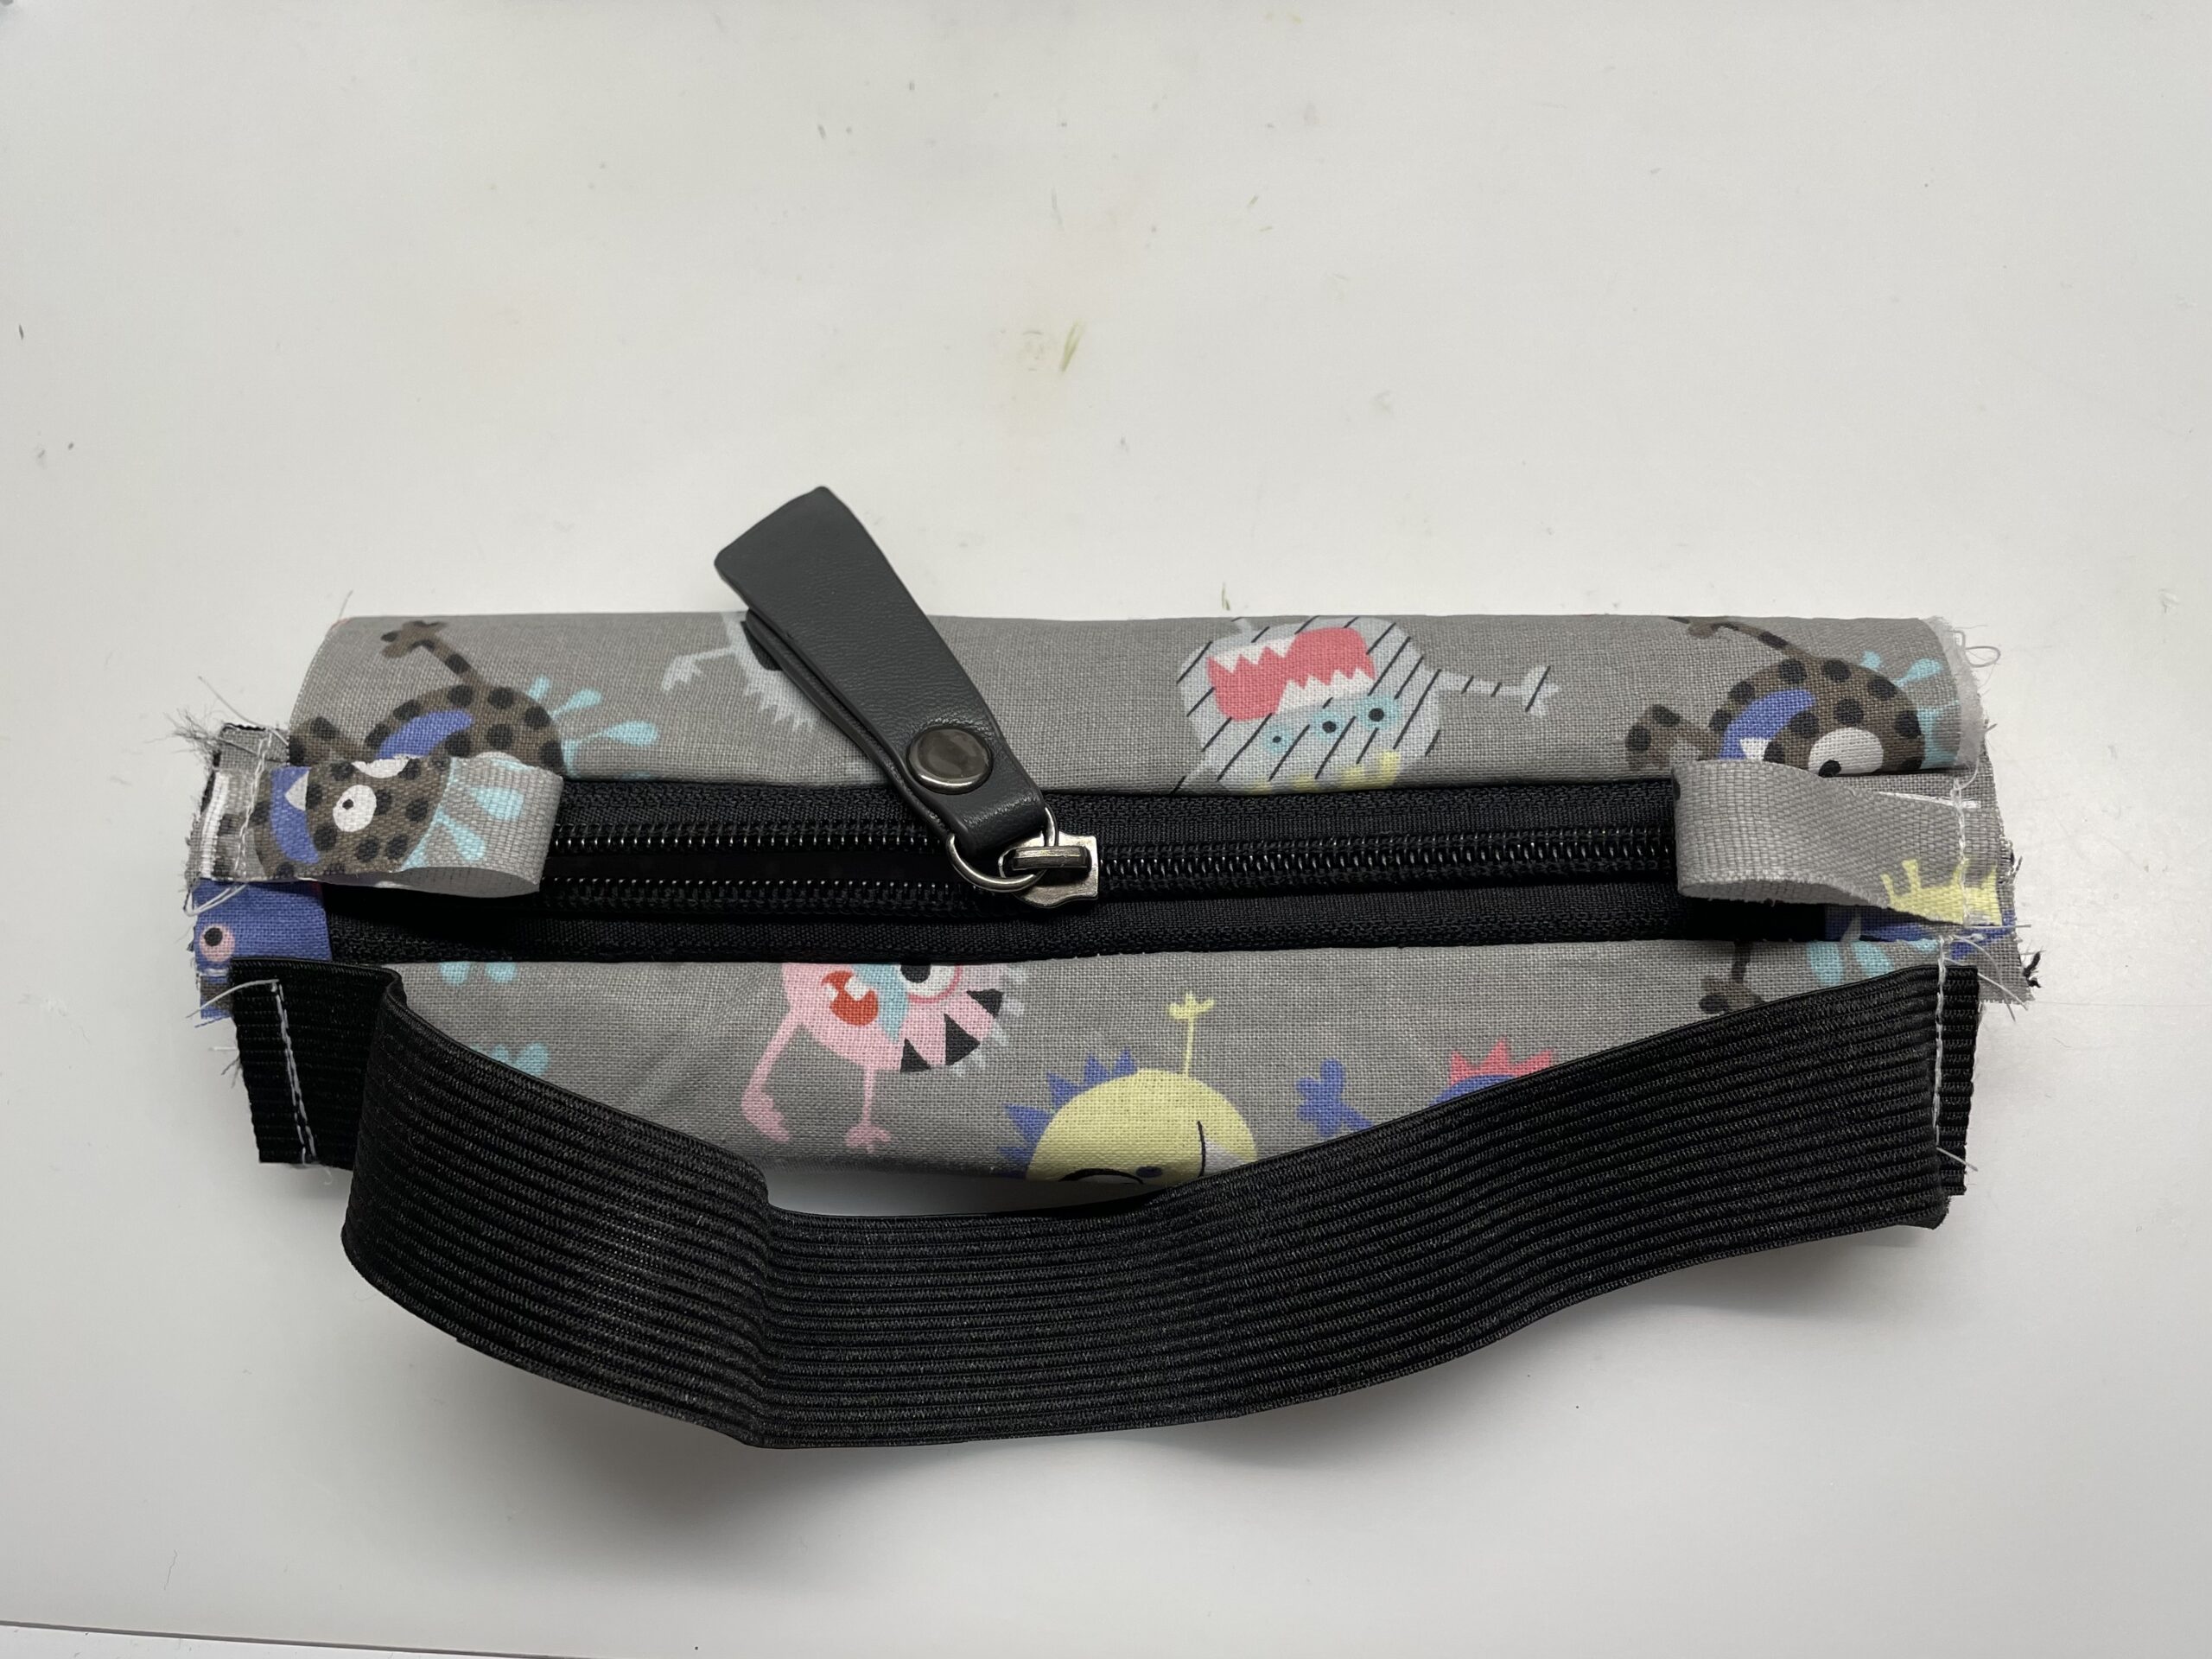
Bild zum Schritt 25 für das Bastel- und DIY-Abenteuer für Kinder: 'Wendet das Mäppchen. So dass die Innenseite außen liegt.'

26

Fixes the cap that the zipper is centered and closes the two open sides. First sew the sides once. Then take a piece of tape and place it over the fabric edge of the side. Sew this firmly.
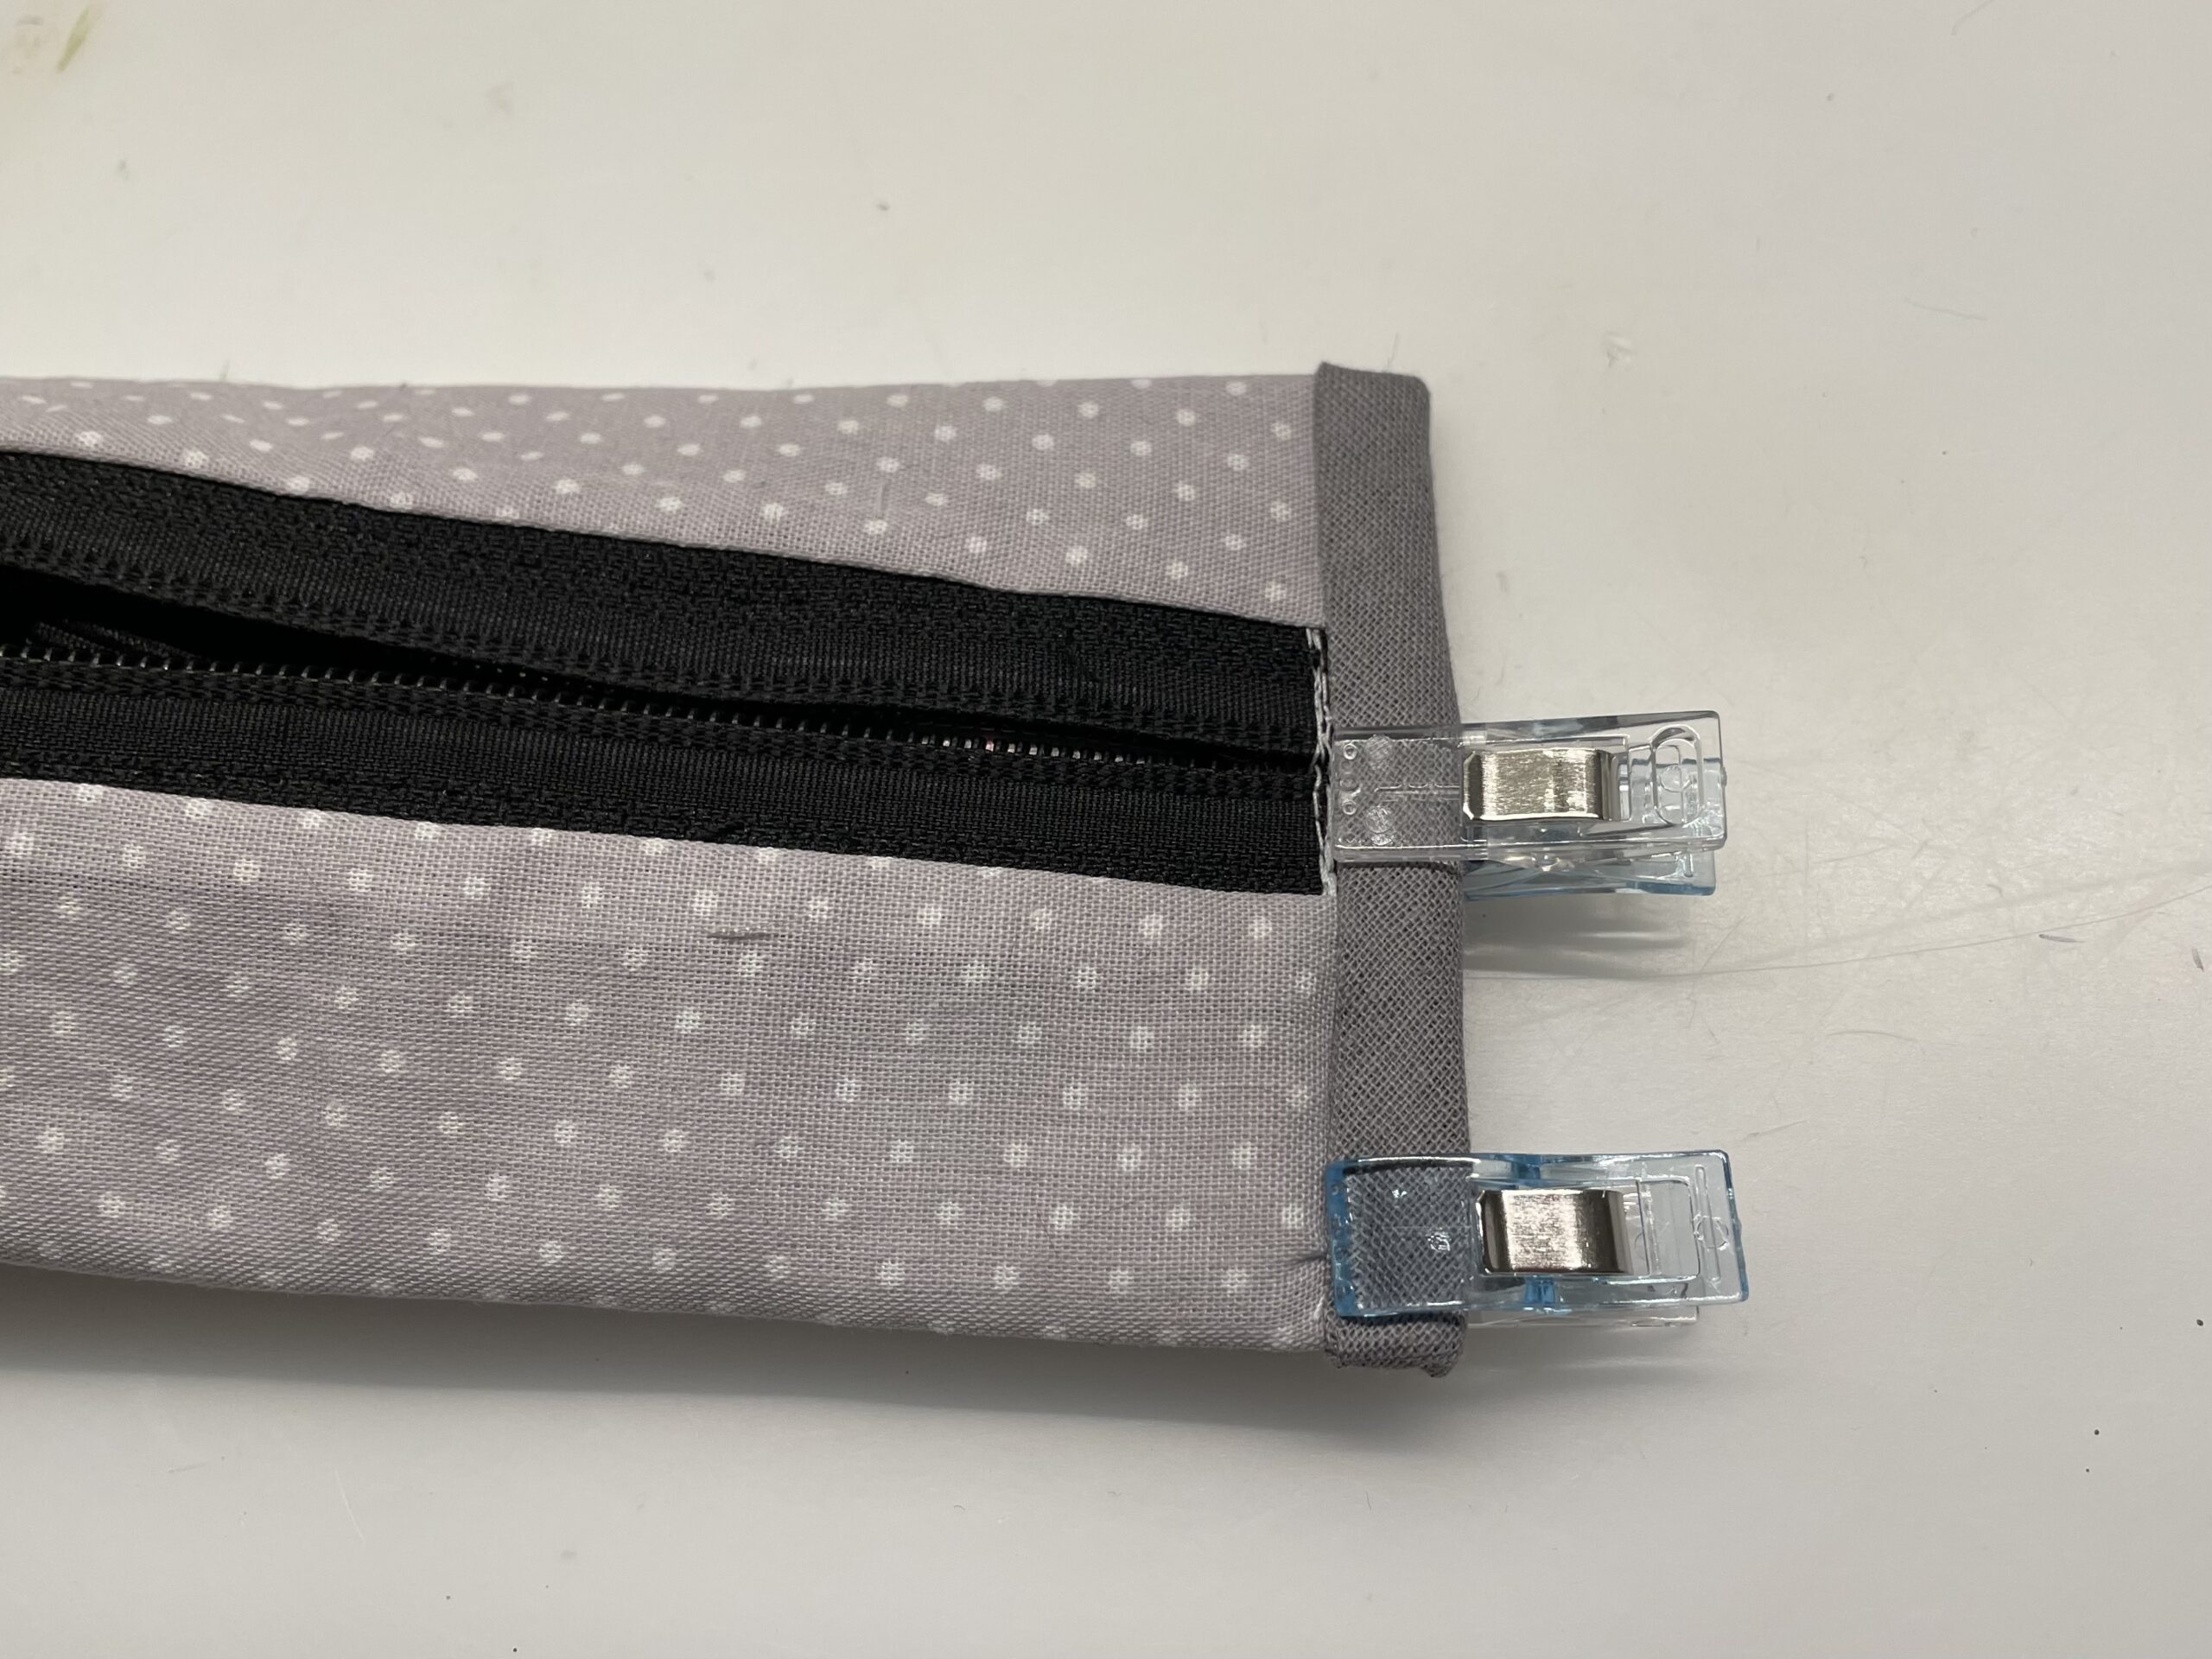
Bild zum Schritt 26 für das Bastel- und DIY-Abenteuer für Kinder: 'Richtet das Mäppchen wieder, dass der Reißverschluss mittig liegt und...'

27

So the insides are neatly sewn.

Bild zum Schritt 27 für das Bastel- und DIY-Abenteuer für Kinder: 'So sind die Innenseiten sauber vernäht.'

28

Turn the cap around.

Bild zum Schritt 28 für das Bastel- und DIY-Abenteuer für Kinder: 'Wendet das Mäppchen.'

29

The pen case is ready.

Bild zum Schritt 29 für das Bastel- und DIY-Abenteuer für Kinder: 'Beult die Ecken gut aus. Fertig ist das Stiftemäppchen.'

30

The rubber band is used to attach to a DIN A5 block.
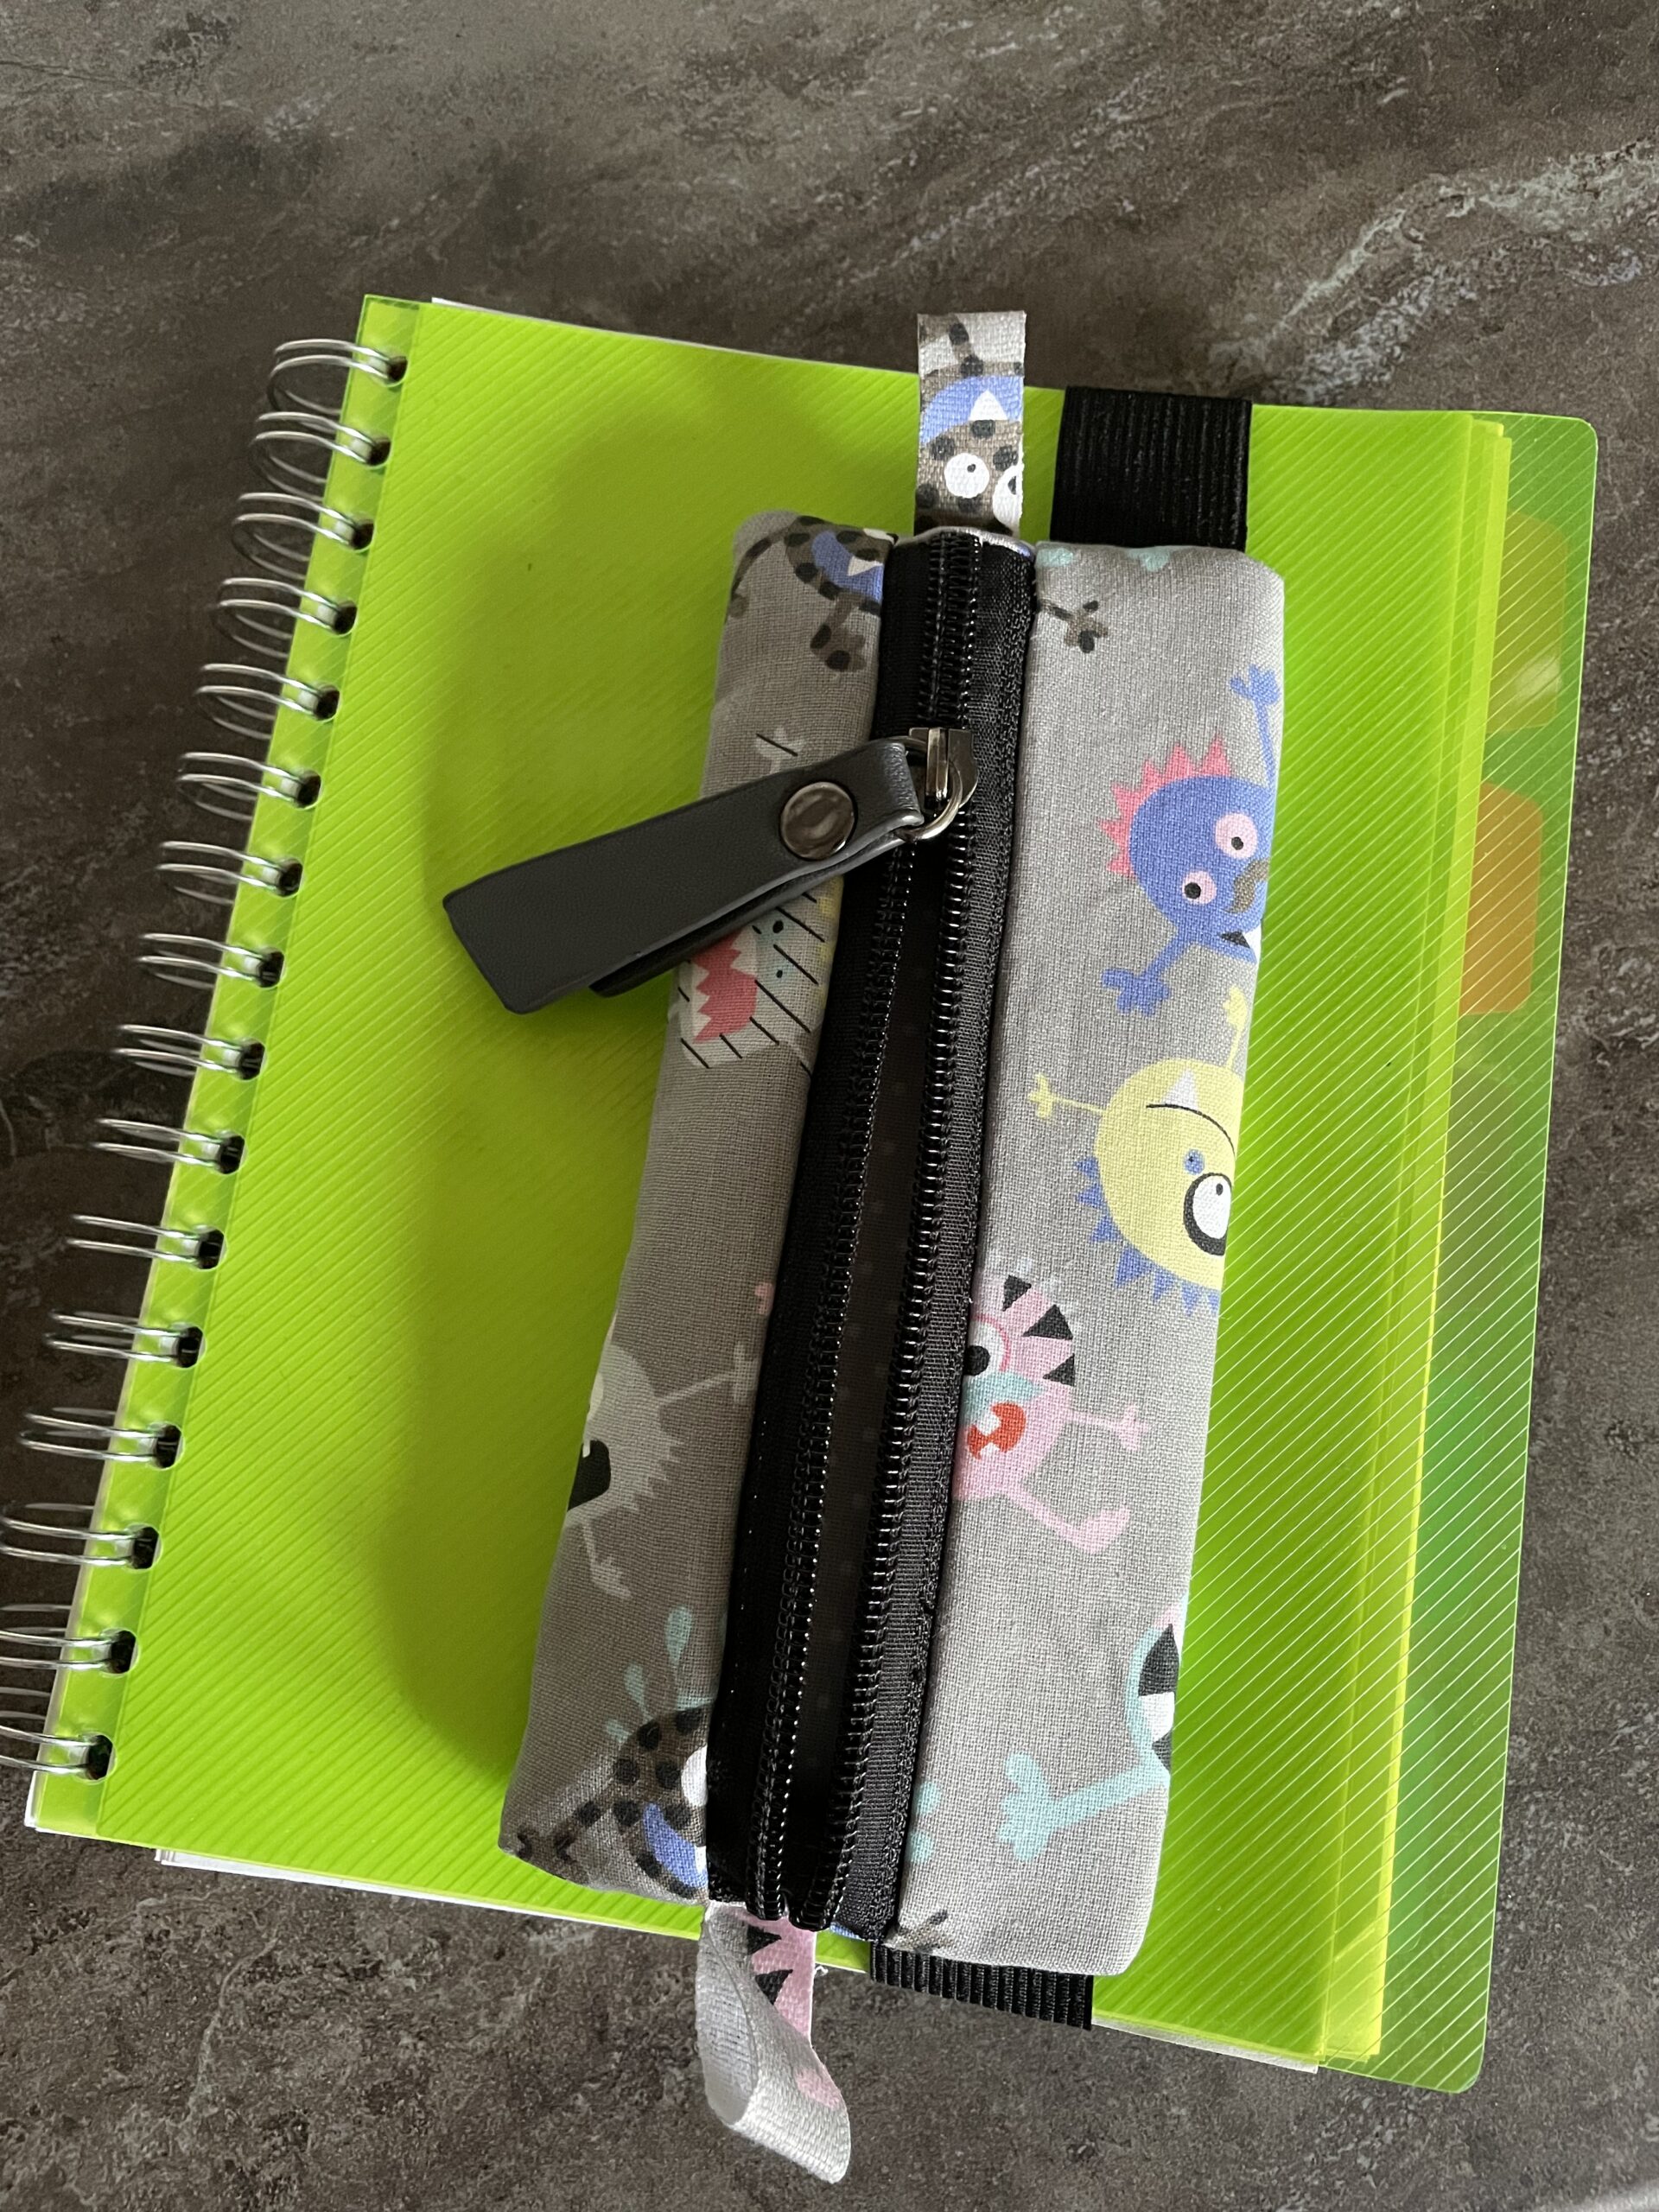
Bild zum Schritt 30 für das Bastel- und DIY-Abenteuer für Kinder: 'Das Gummiband dient zum befestigen auf einem DIN A5 Block.'

31

Now pens and other utensils can be stored in it.

Bild zum Schritt 31 für das Bastel- und DIY-Abenteuer für Kinder: 'Nun können Stifte und andere Utensilien darin verstaut werden.'

32

Have fun trying out.

Sew pen mats

Follow us on Facebook , Instagram and Pinterest
Don't miss any more adventures: Our bottle mail

Leave a Reply

Your email address will not be published.

The maximum upload file size: 5 MB. You can upload: image, document. Drop file here