Make snake (made from cardboard roll)

AdventurerKatzi
Rating5.05.1 Thousand times & (1) DifficultyAdvanced

From cardboard rolls (clorolls or kitchen rolls) these colorful carnival snakes are created in no time. For this you paint the cardboard roll first with crayons, felt pens or water colours colorfully. As soon as the color is dried, you begin to cut the roll around in narrow stripes. This creates a long slanting spiral, which then gently pulls it apart. With shackle eyes and a tongue made of paper, the snake is already finished.
Tip: Several colored snakes are suitable as garlands for a carnival section or a jungle party. Have fun!

Media Education for Kindergarten and Hort

Kind bastelt eine Rassel mit dem Navi
The Adventure Navi, the app for DIY projects, enables media education for the youngest.

Relief in everyday life, targeted promotion of individual children, independent learning and - without any pre-knowledge already usable by the youngest!


Titelbild zur Bastel- und DIY-Idee für Kinder '(996) Schlange basteln (aus Papprolle)'
Material for1 Child
Prep Time5 min.Adv. Time20 min.Total Time25 min.
 1 Rolled paper Toilet roll or kitchen roll
 Felt pencils colorful
 2 Wax eyes small
 1 Red paper e.g. clay paper or folding paper
 1 Pencil
 1 Builder's pad
All links marked with a shopping cart lead to Amazon - here we have selected products that we would order ourselves and in part also ordered. In a qualified purchase via the advertising link, we as Amazon partner receive a commission, for you there are no costs. You thus support our cost- and advertising banner-free, educational offer.
1

First put out your craft pad and a cardboard roll and pencils.
Tip: Alternatively, you can also use water colours!
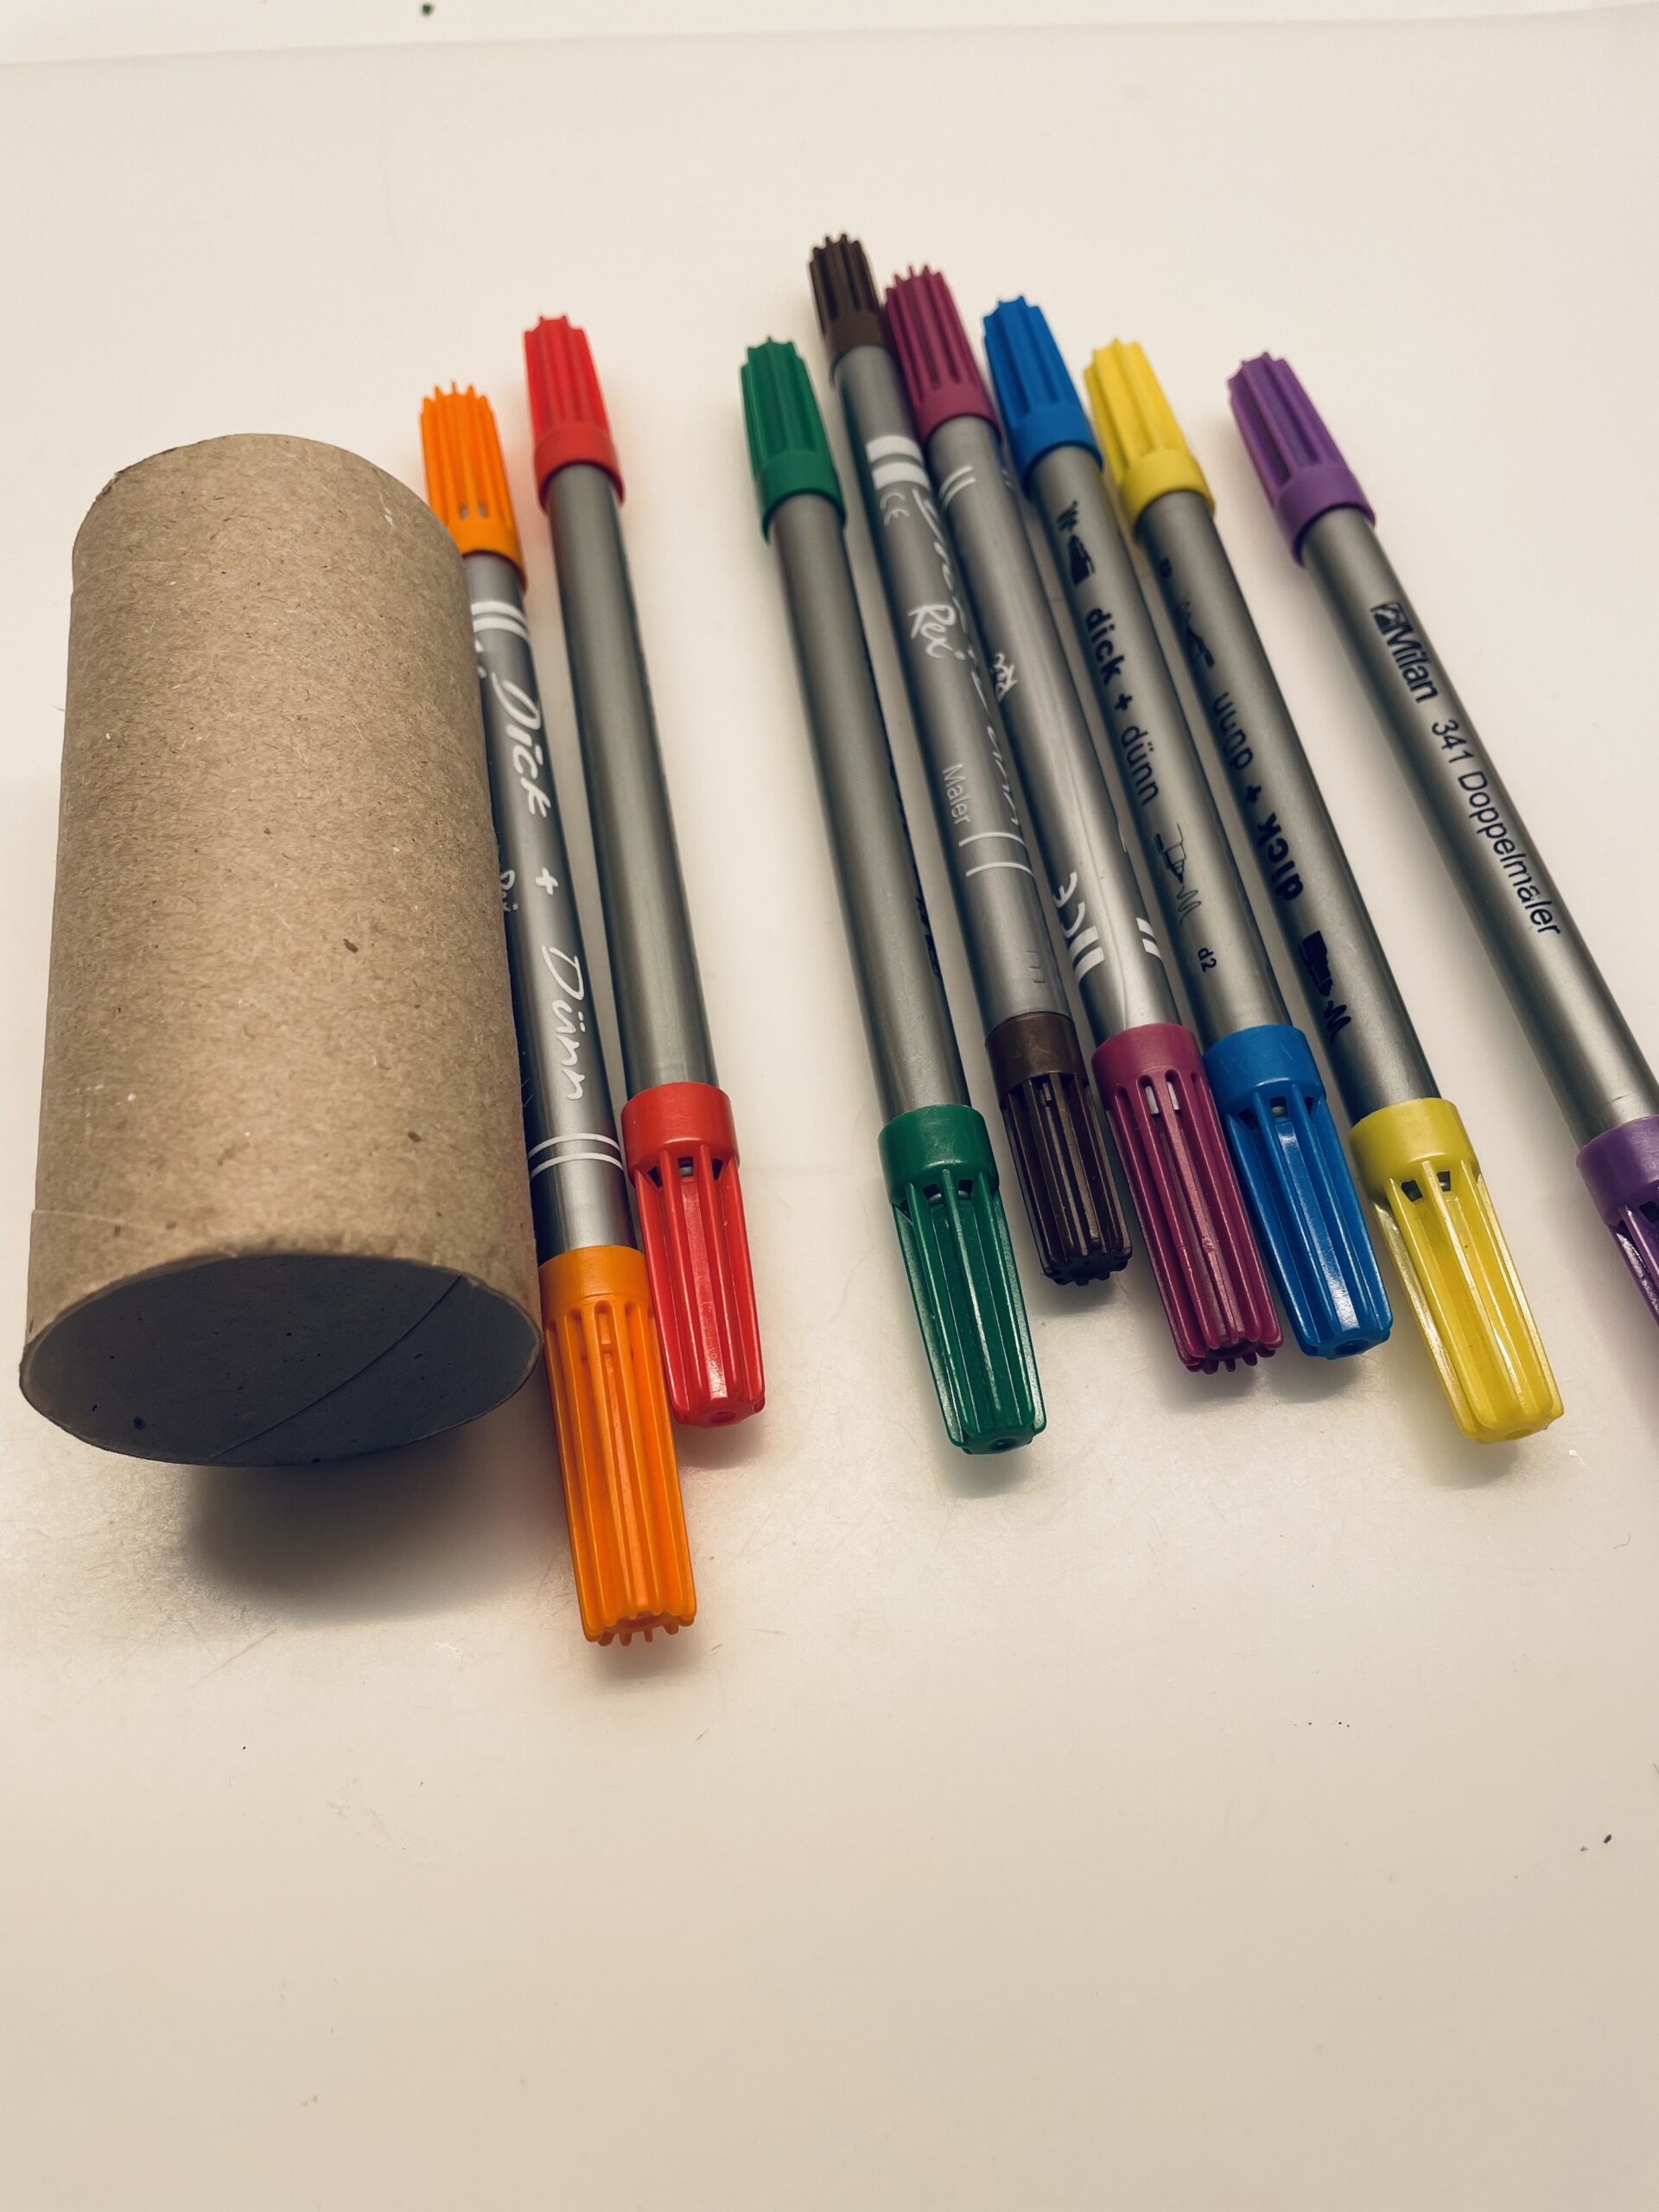
Bild zum Schritt 1 für das Bastel- und DIY-Abenteuer für Kinder: 'Legt zuerst eure Bastelunterlage aus und eine Papprolle und Farbstifte...'

2

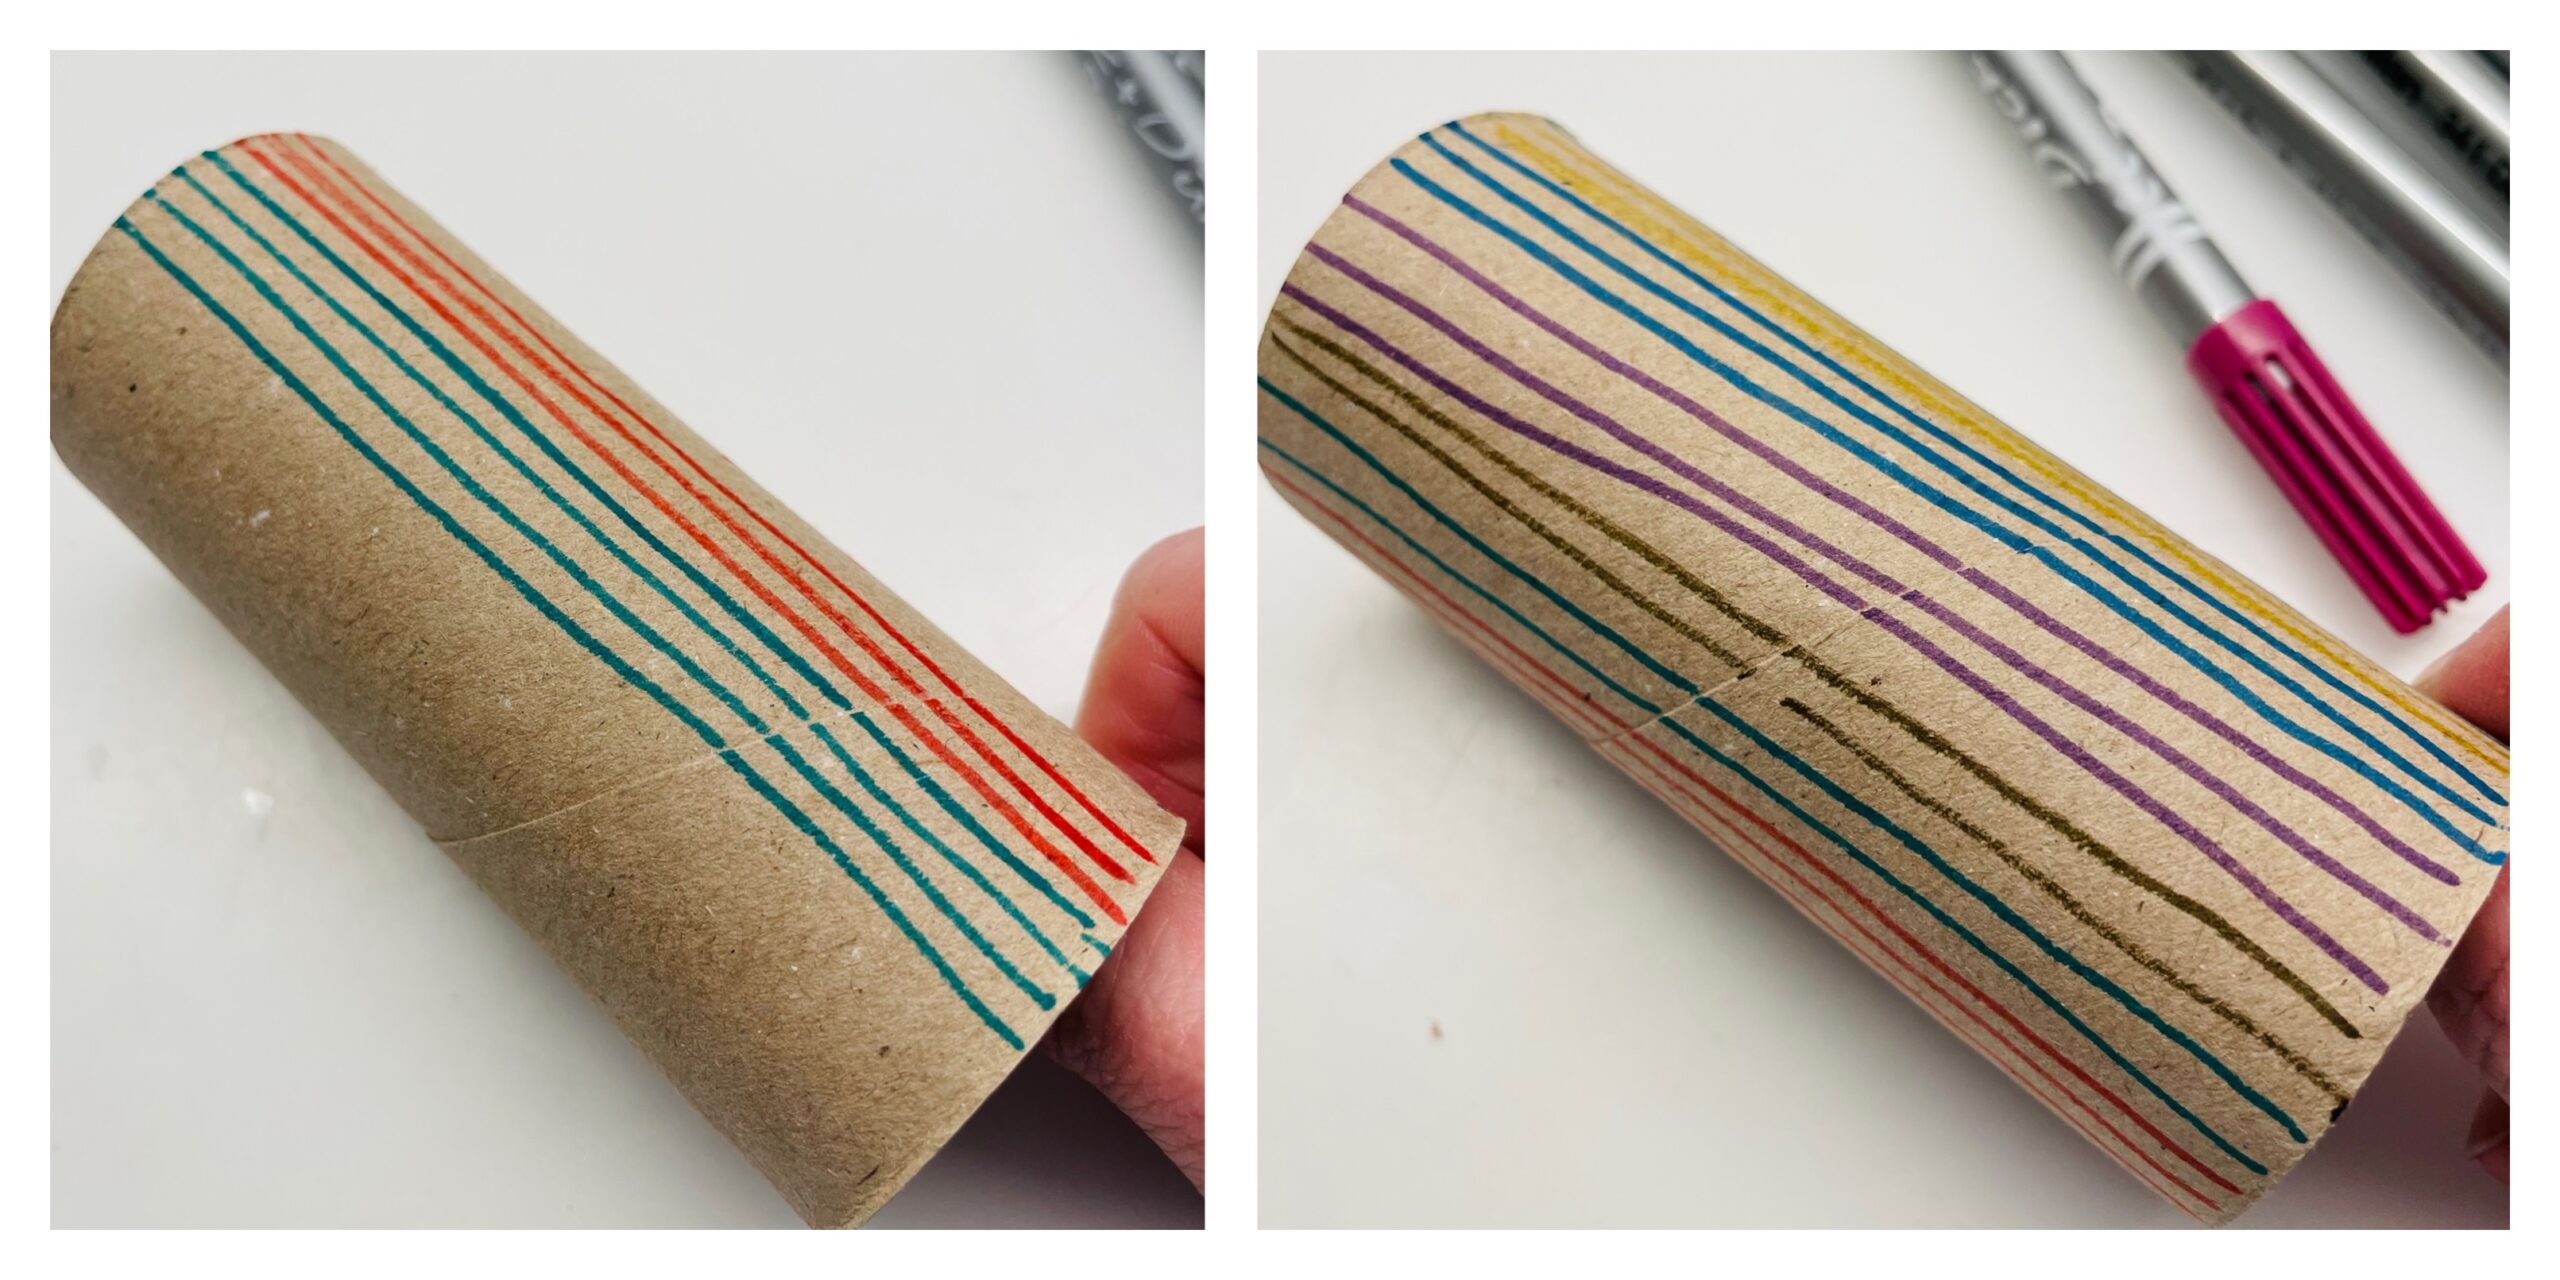
Now you paint patterns on the cardboard roll, such as a zigzag pattern or stripes.
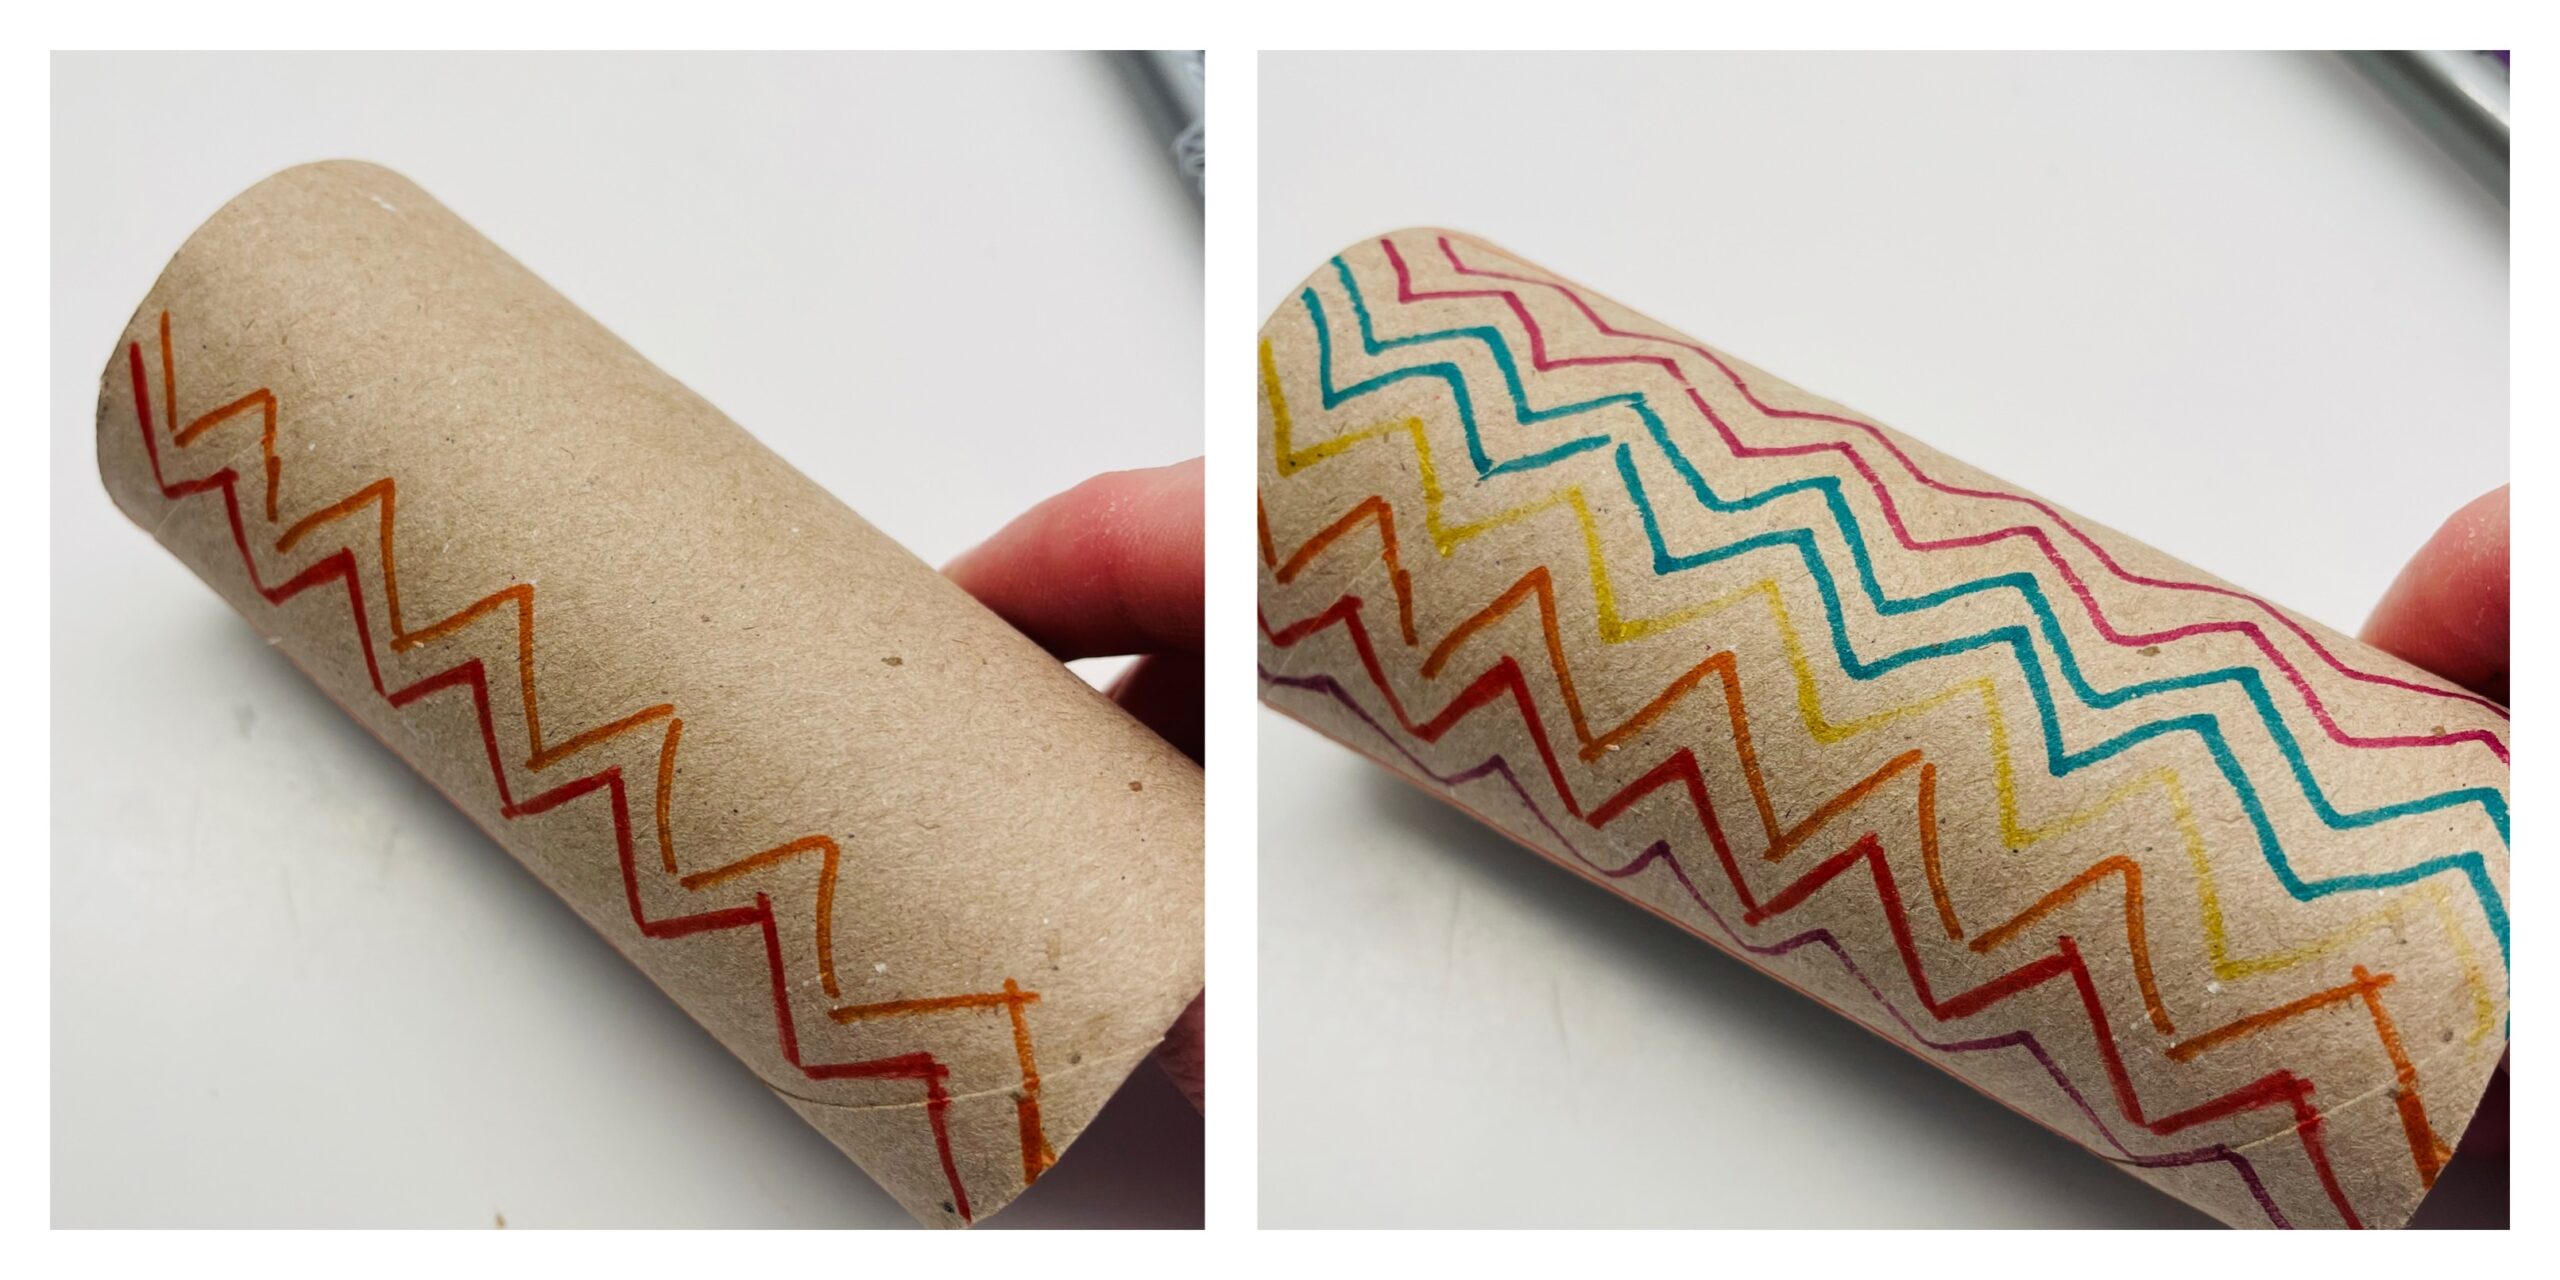
Bild zum Schritt 2 für das Bastel- und DIY-Abenteuer für Kinder: 'Jetzt malt ihr Muster auf die Papprolle, wie z.B. ein...'

3

2. Bild zum Schritt 2 für das Bastel- und DIY-Abenteuer für Kinder: 'Jetzt malt ihr Muster auf die Papprolle, wie z.B. ein...'

4

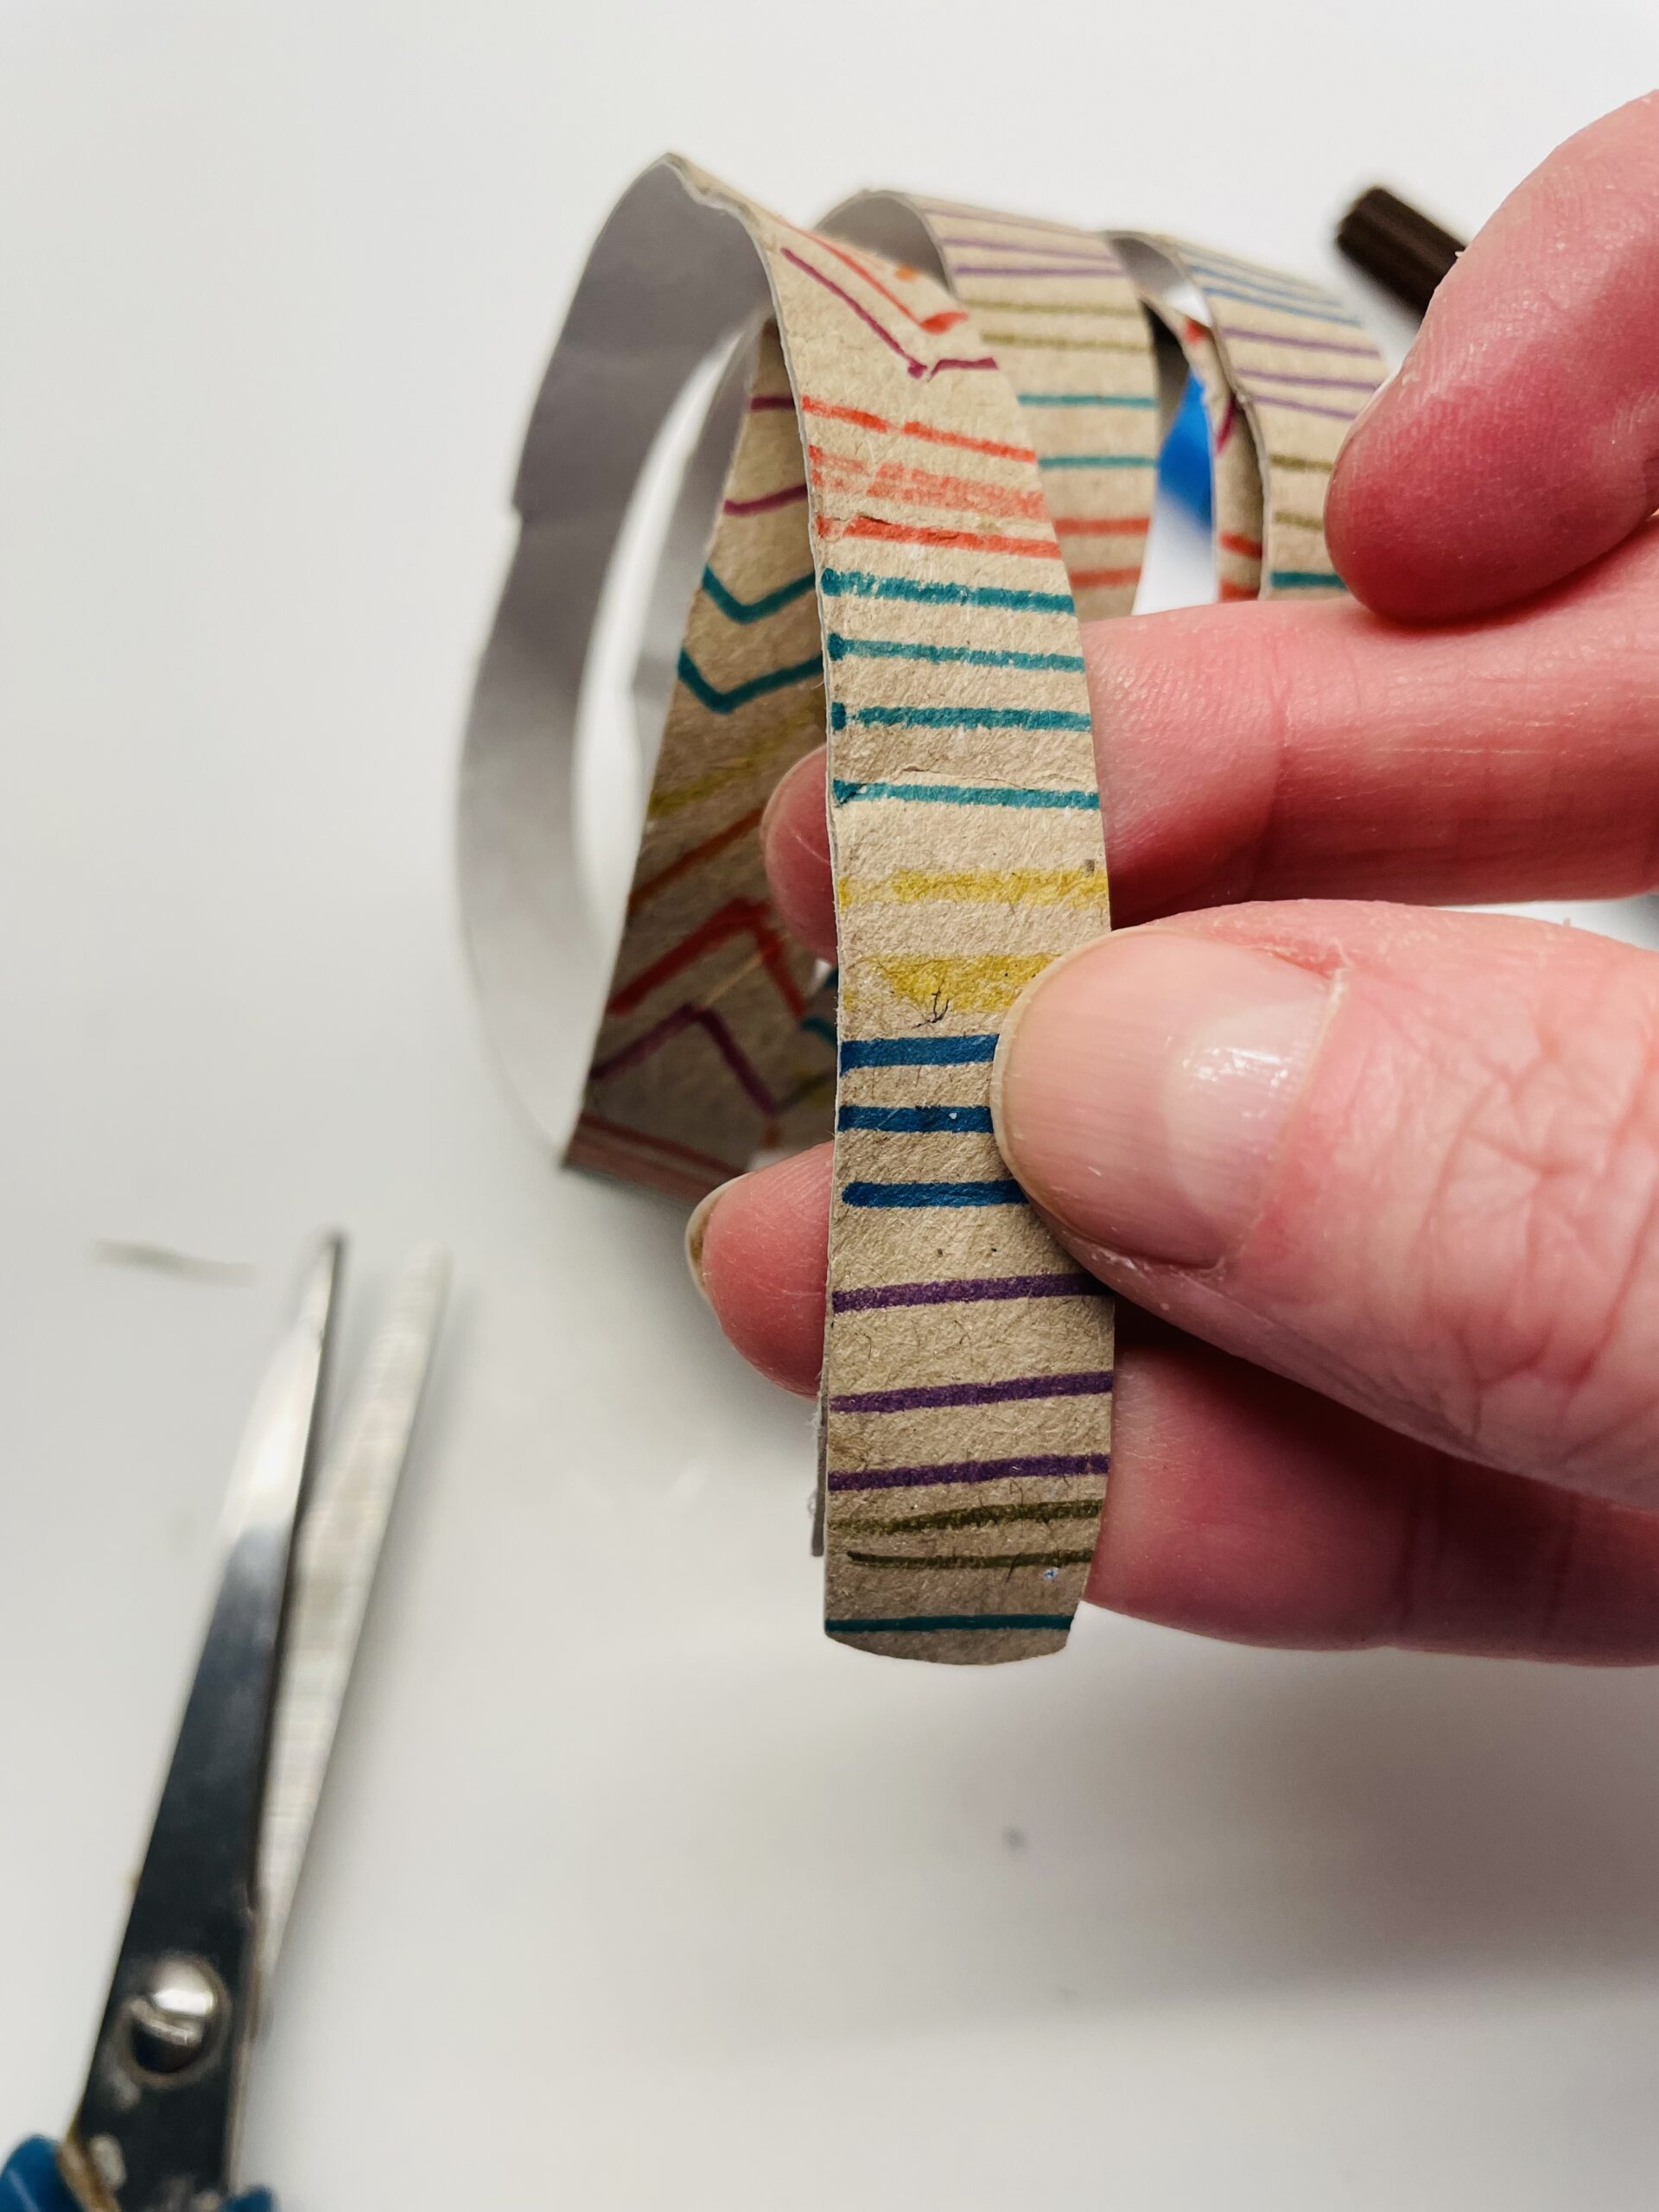
Then you begin to cut the paper roll with the scissors diagonally all around into narrow strips. Start at one side of the paper roll and cut to the other end.

Bild zum Schritt 4 für das Bastel- und DIY-Abenteuer für Kinder: 'Anschließend beginnt ihr die Papprolle mit der Schere schräg rundherum...'

5

At the end of the roll the strip runs out pointed.

Bild zum Schritt 5 für das Bastel- und DIY-Abenteuer für Kinder: 'Am Ende der Rolle angekommen läuft der Streifen spitz aus.'

6

Attention: After the first rounding a small offset can be created. If this is separated with the scissors, a uniformly thick snake is created.

Bild zum Schritt 6 für das Bastel- und DIY-Abenteuer für Kinder: 'Achtung: Nach der ersten Umrundung kann ein kleiner Versatz entstehen....'

7

Now round off your head.

Bild zum Schritt 7 für das Bastel- und DIY-Abenteuer für Kinder: 'Jetzt rundet ihr den Kopf ab.'

8

Then you cut a small tongue out of a red paper. A snake's tongue is split, which is why it has two tips.

Bild zum Schritt 8 für das Bastel- und DIY-Abenteuer für Kinder: 'Dann schneidet ihr aus einem roten Papier eine kleine Zunge....'

9

Now put her tongue on the back of the snake's head.

Bild zum Schritt 9 für das Bastel- und DIY-Abenteuer für Kinder: 'Nun klebt ihr die Zunge auf die Rückseite des Kopfes...'

10

At the front, two wobble eyes are put on her.
Tip: Alternatively, you paint your eyes on white paper and cut them out and stick them on.

Bild zum Schritt 10 für das Bastel- und DIY-Abenteuer für Kinder: 'Vorne klebt ihr zwei Wackelaugen auf.   Tipp: Alternativ...'

11

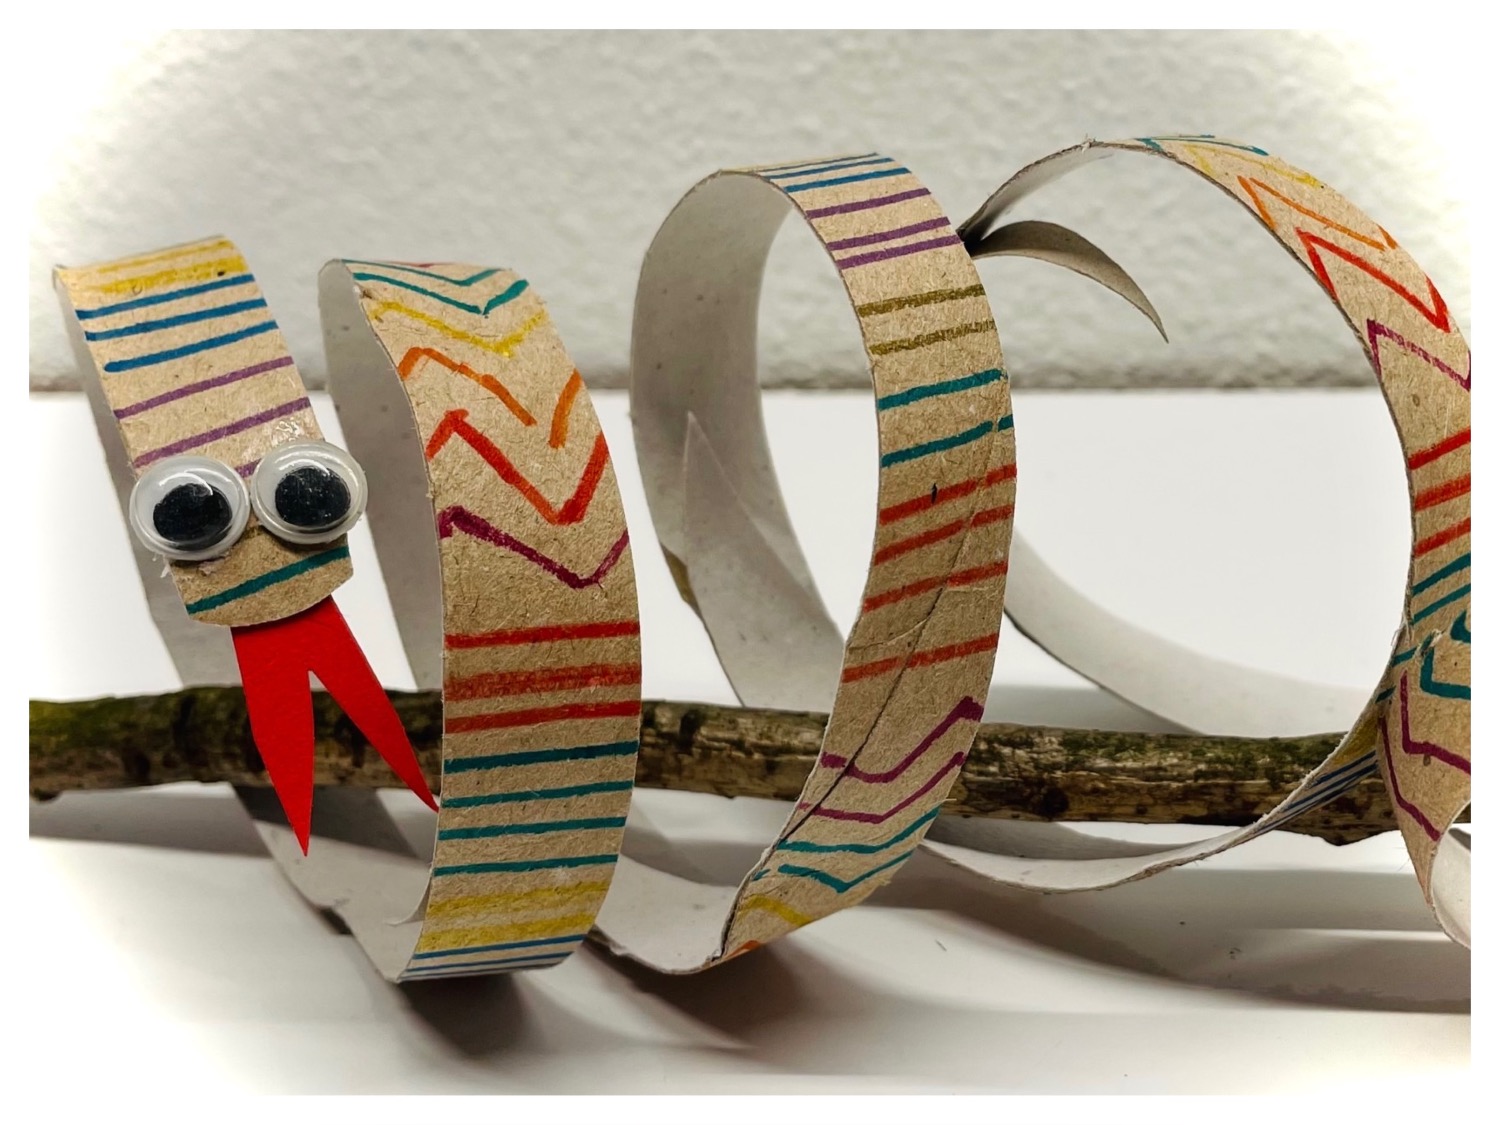
The snake is ready!
Decorates it around a branch and a great decoration for a jungle party or a snake festival is already created.

Bild zum Schritt 11 für das Bastel- und DIY-Abenteuer für Kinder: 'Fertig ist die Schlange!   Dekoriert sie um einen...'

12

Try it out and have a lot of fun with it!

Materials

 1 Rolled paper Toilet roll or kitchen roll
 Felt pencils colorful
 2 Wax eyes small
 1 Red paper e.g. clay paper or folding paper
 1 Pencil
 1 Builder's pad
All links marked with a shopping cart lead to Amazon - here we have selected products that we would order ourselves and in part also ordered. In a qualified purchase via the advertising link, we as Amazon partner receive a commission, for you there are no costs. You thus support our cost- and advertising banner-free, educational offer.

Directions

1

First put out your craft pad and a cardboard roll and pencils.
Tip: Alternatively, you can also use water colours!

Bild zum Schritt 1 für das Bastel- und DIY-Abenteuer für Kinder: 'Legt zuerst eure Bastelunterlage aus und eine Papprolle und Farbstifte...'

2

Now you paint patterns on the cardboard roll, such as a zigzag pattern or stripes.

Bild zum Schritt 2 für das Bastel- und DIY-Abenteuer für Kinder: 'Jetzt malt ihr Muster auf die Papprolle, wie z.B. ein...'

3

2. Bild zum Schritt 2 für das Bastel- und DIY-Abenteuer für Kinder: 'Jetzt malt ihr Muster auf die Papprolle, wie z.B. ein...'

4

Then you begin to cut the paper roll with the scissors diagonally all around into narrow strips. Start at one side of the paper roll and cut to the other end.
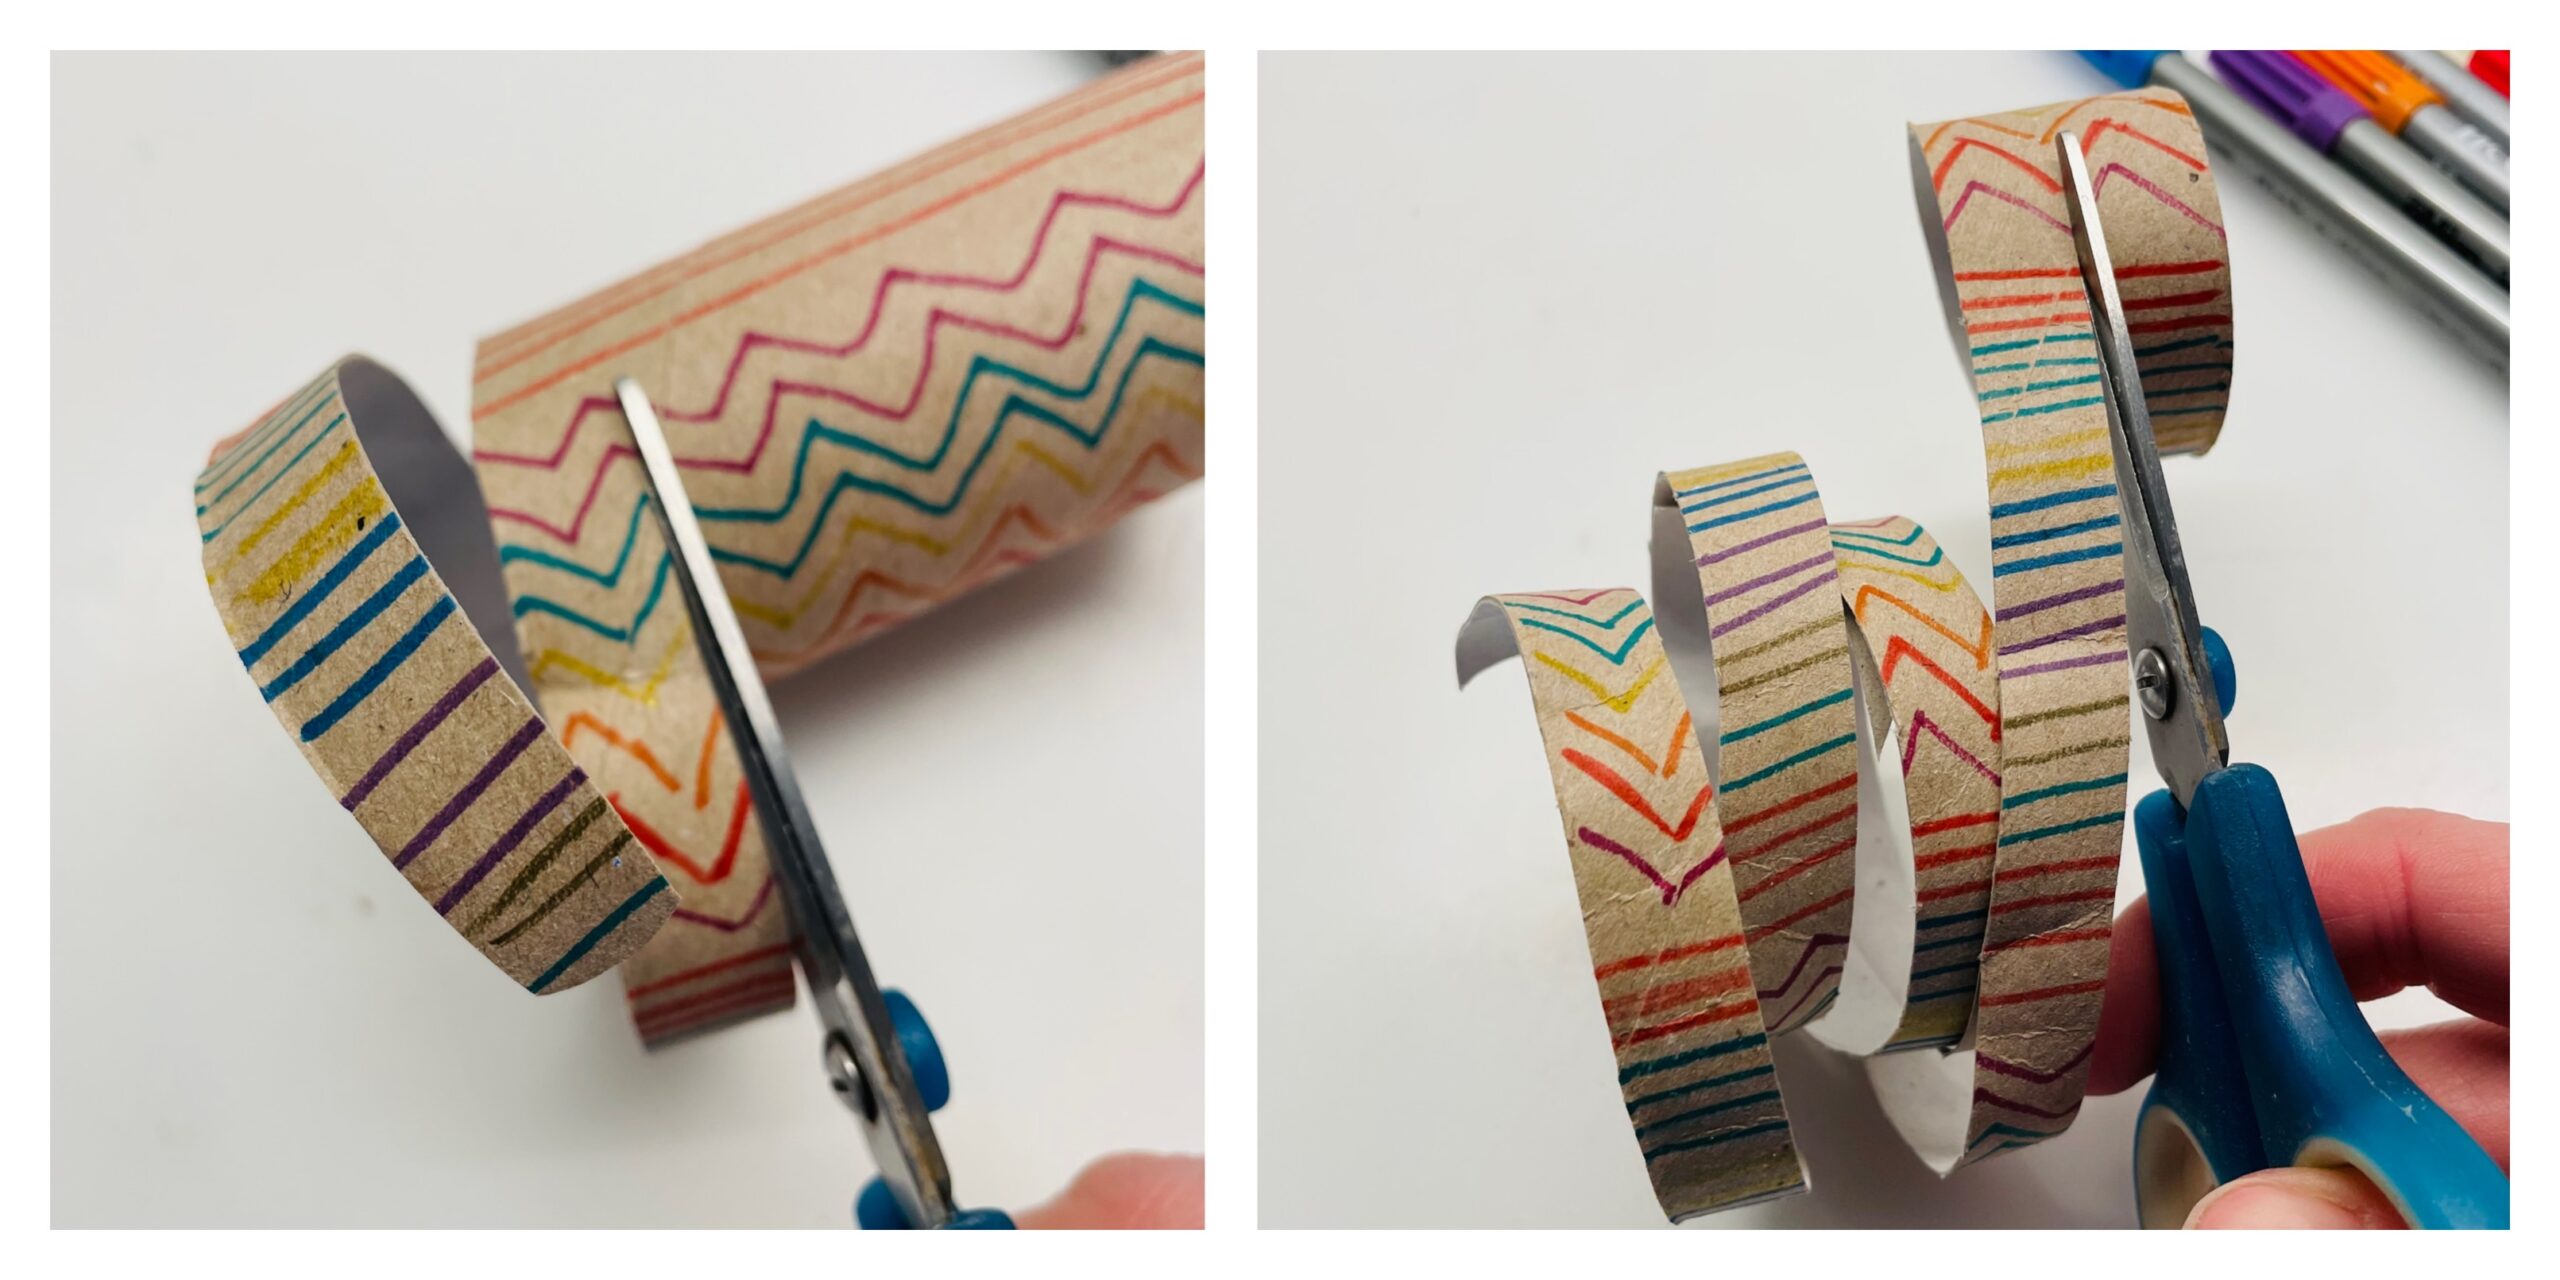
Bild zum Schritt 4 für das Bastel- und DIY-Abenteuer für Kinder: 'Anschließend beginnt ihr die Papprolle mit der Schere schräg rundherum...'

5

At the end of the roll the strip runs out pointed.
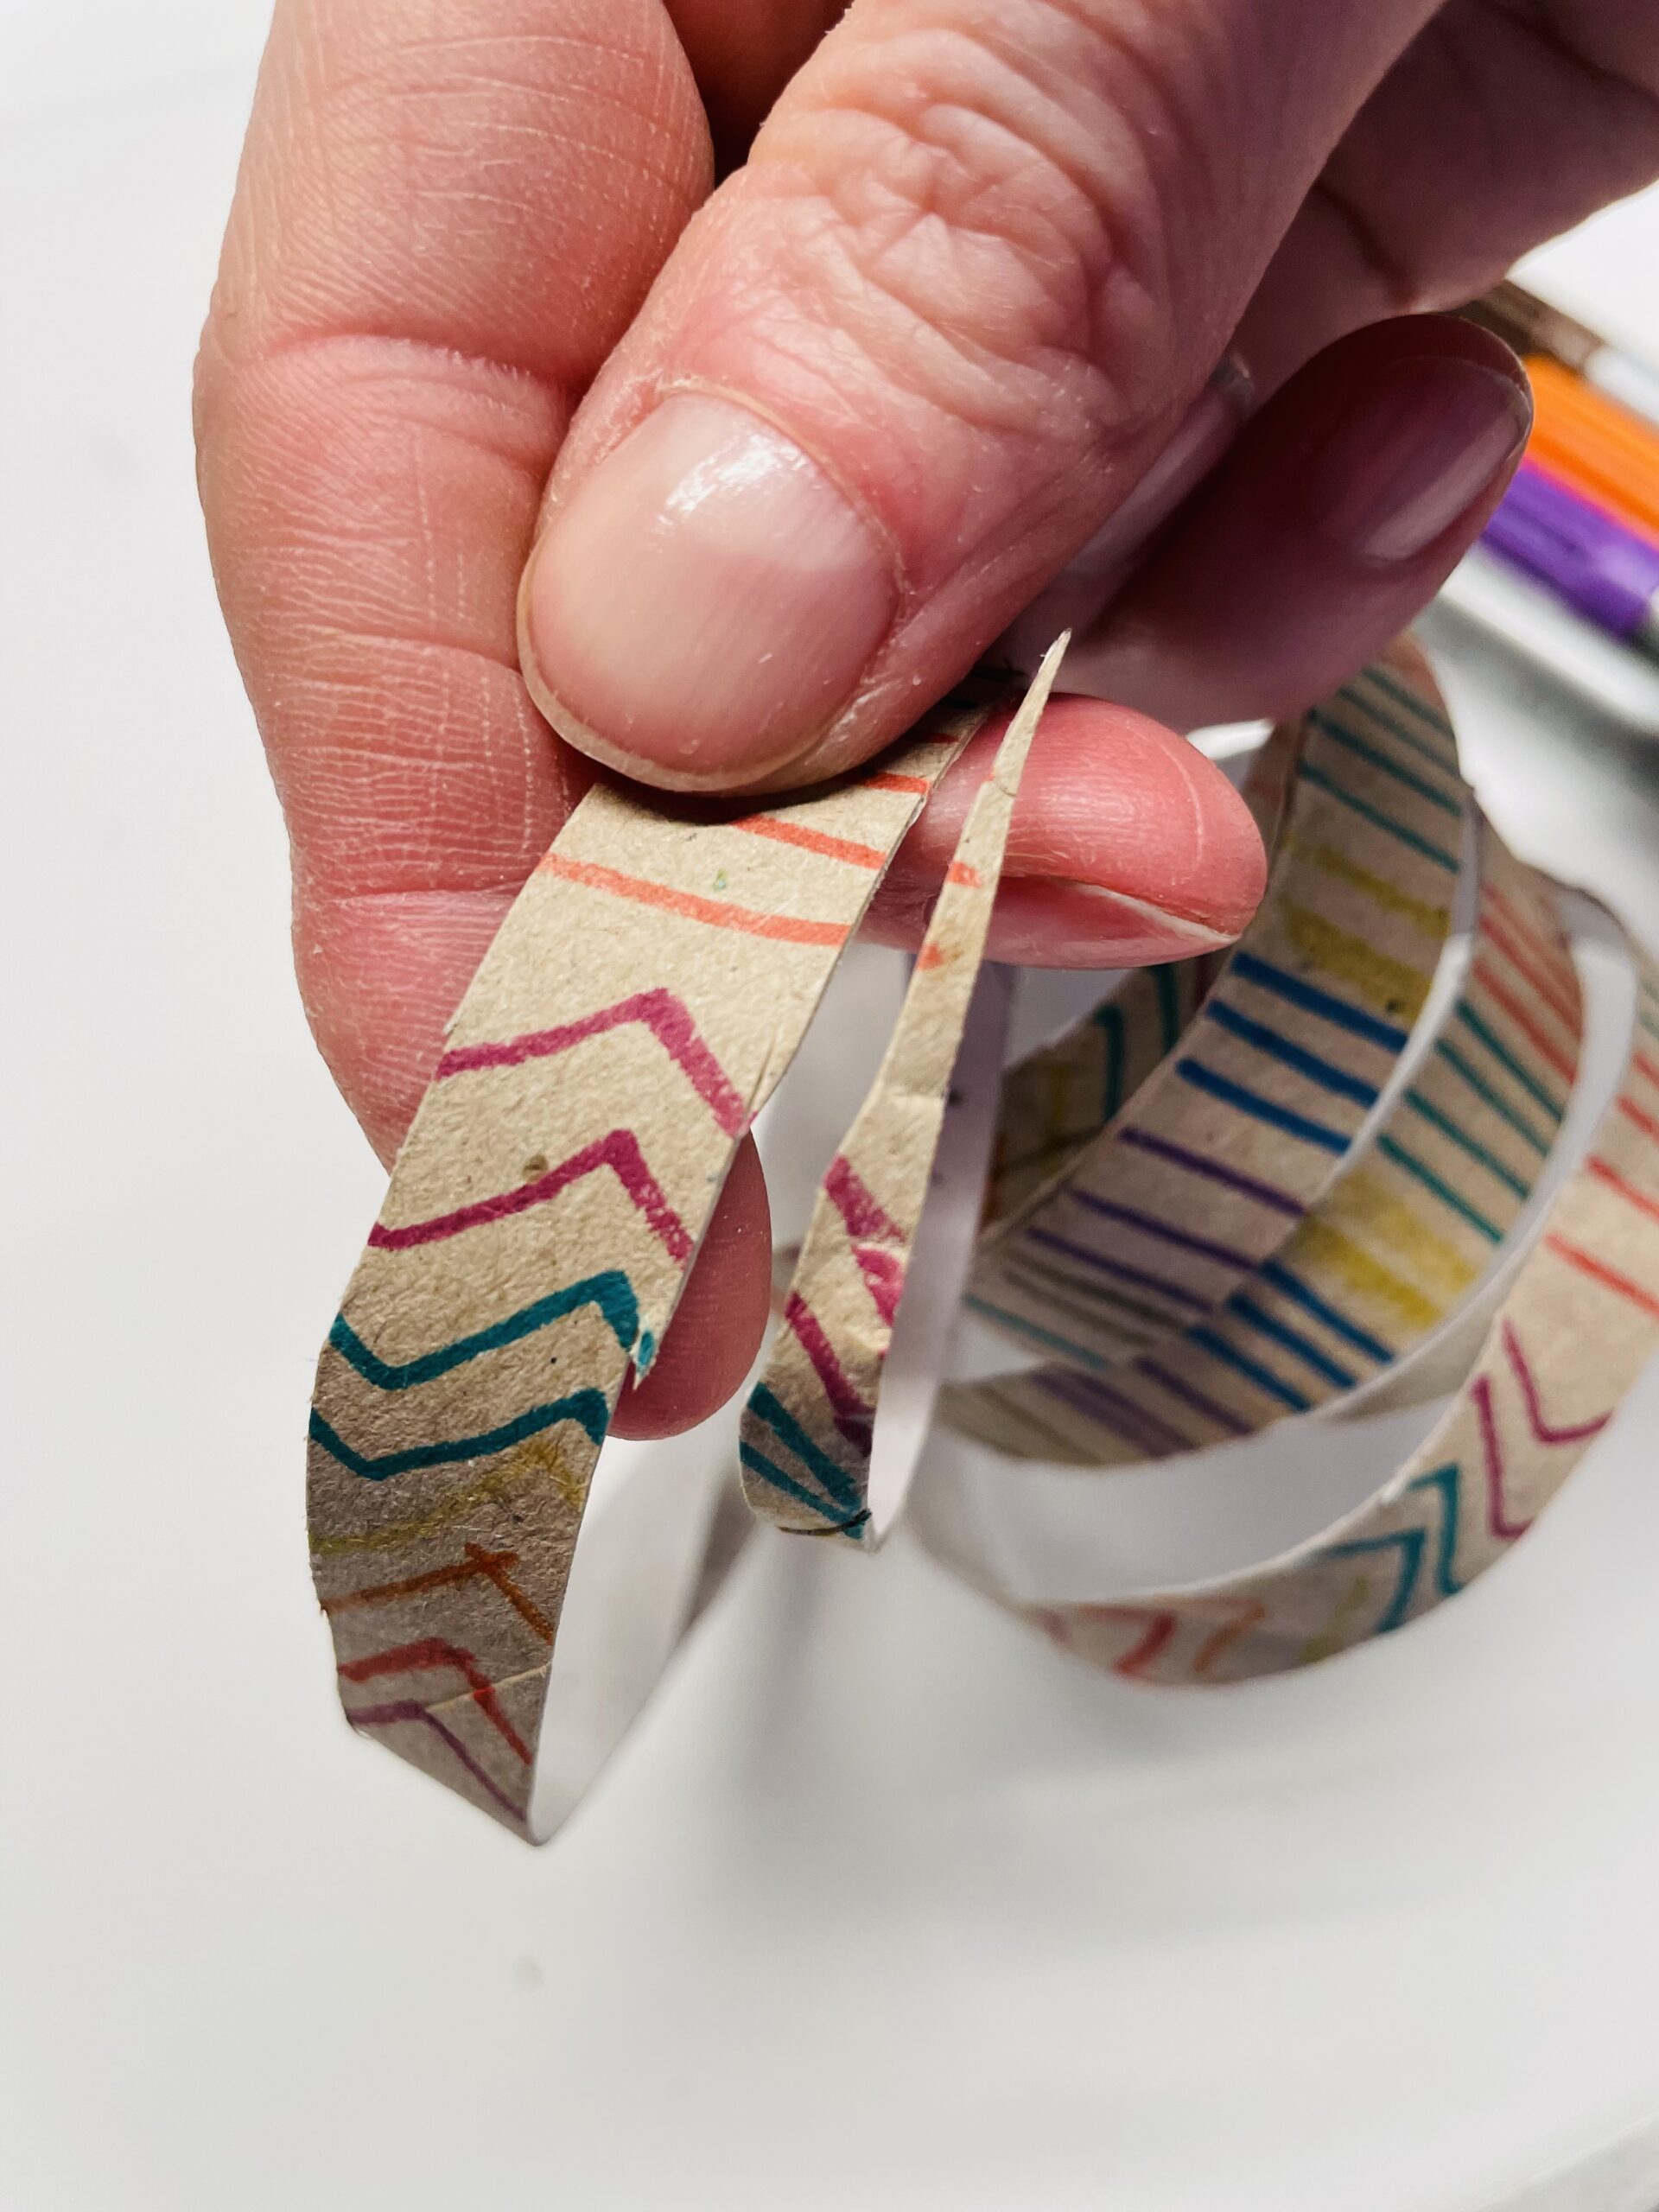
Bild zum Schritt 5 für das Bastel- und DIY-Abenteuer für Kinder: 'Am Ende der Rolle angekommen läuft der Streifen spitz aus.'

6

Attention: After the first rounding a small offset can be created. If this is separated with the scissors, a uniformly thick snake is created.
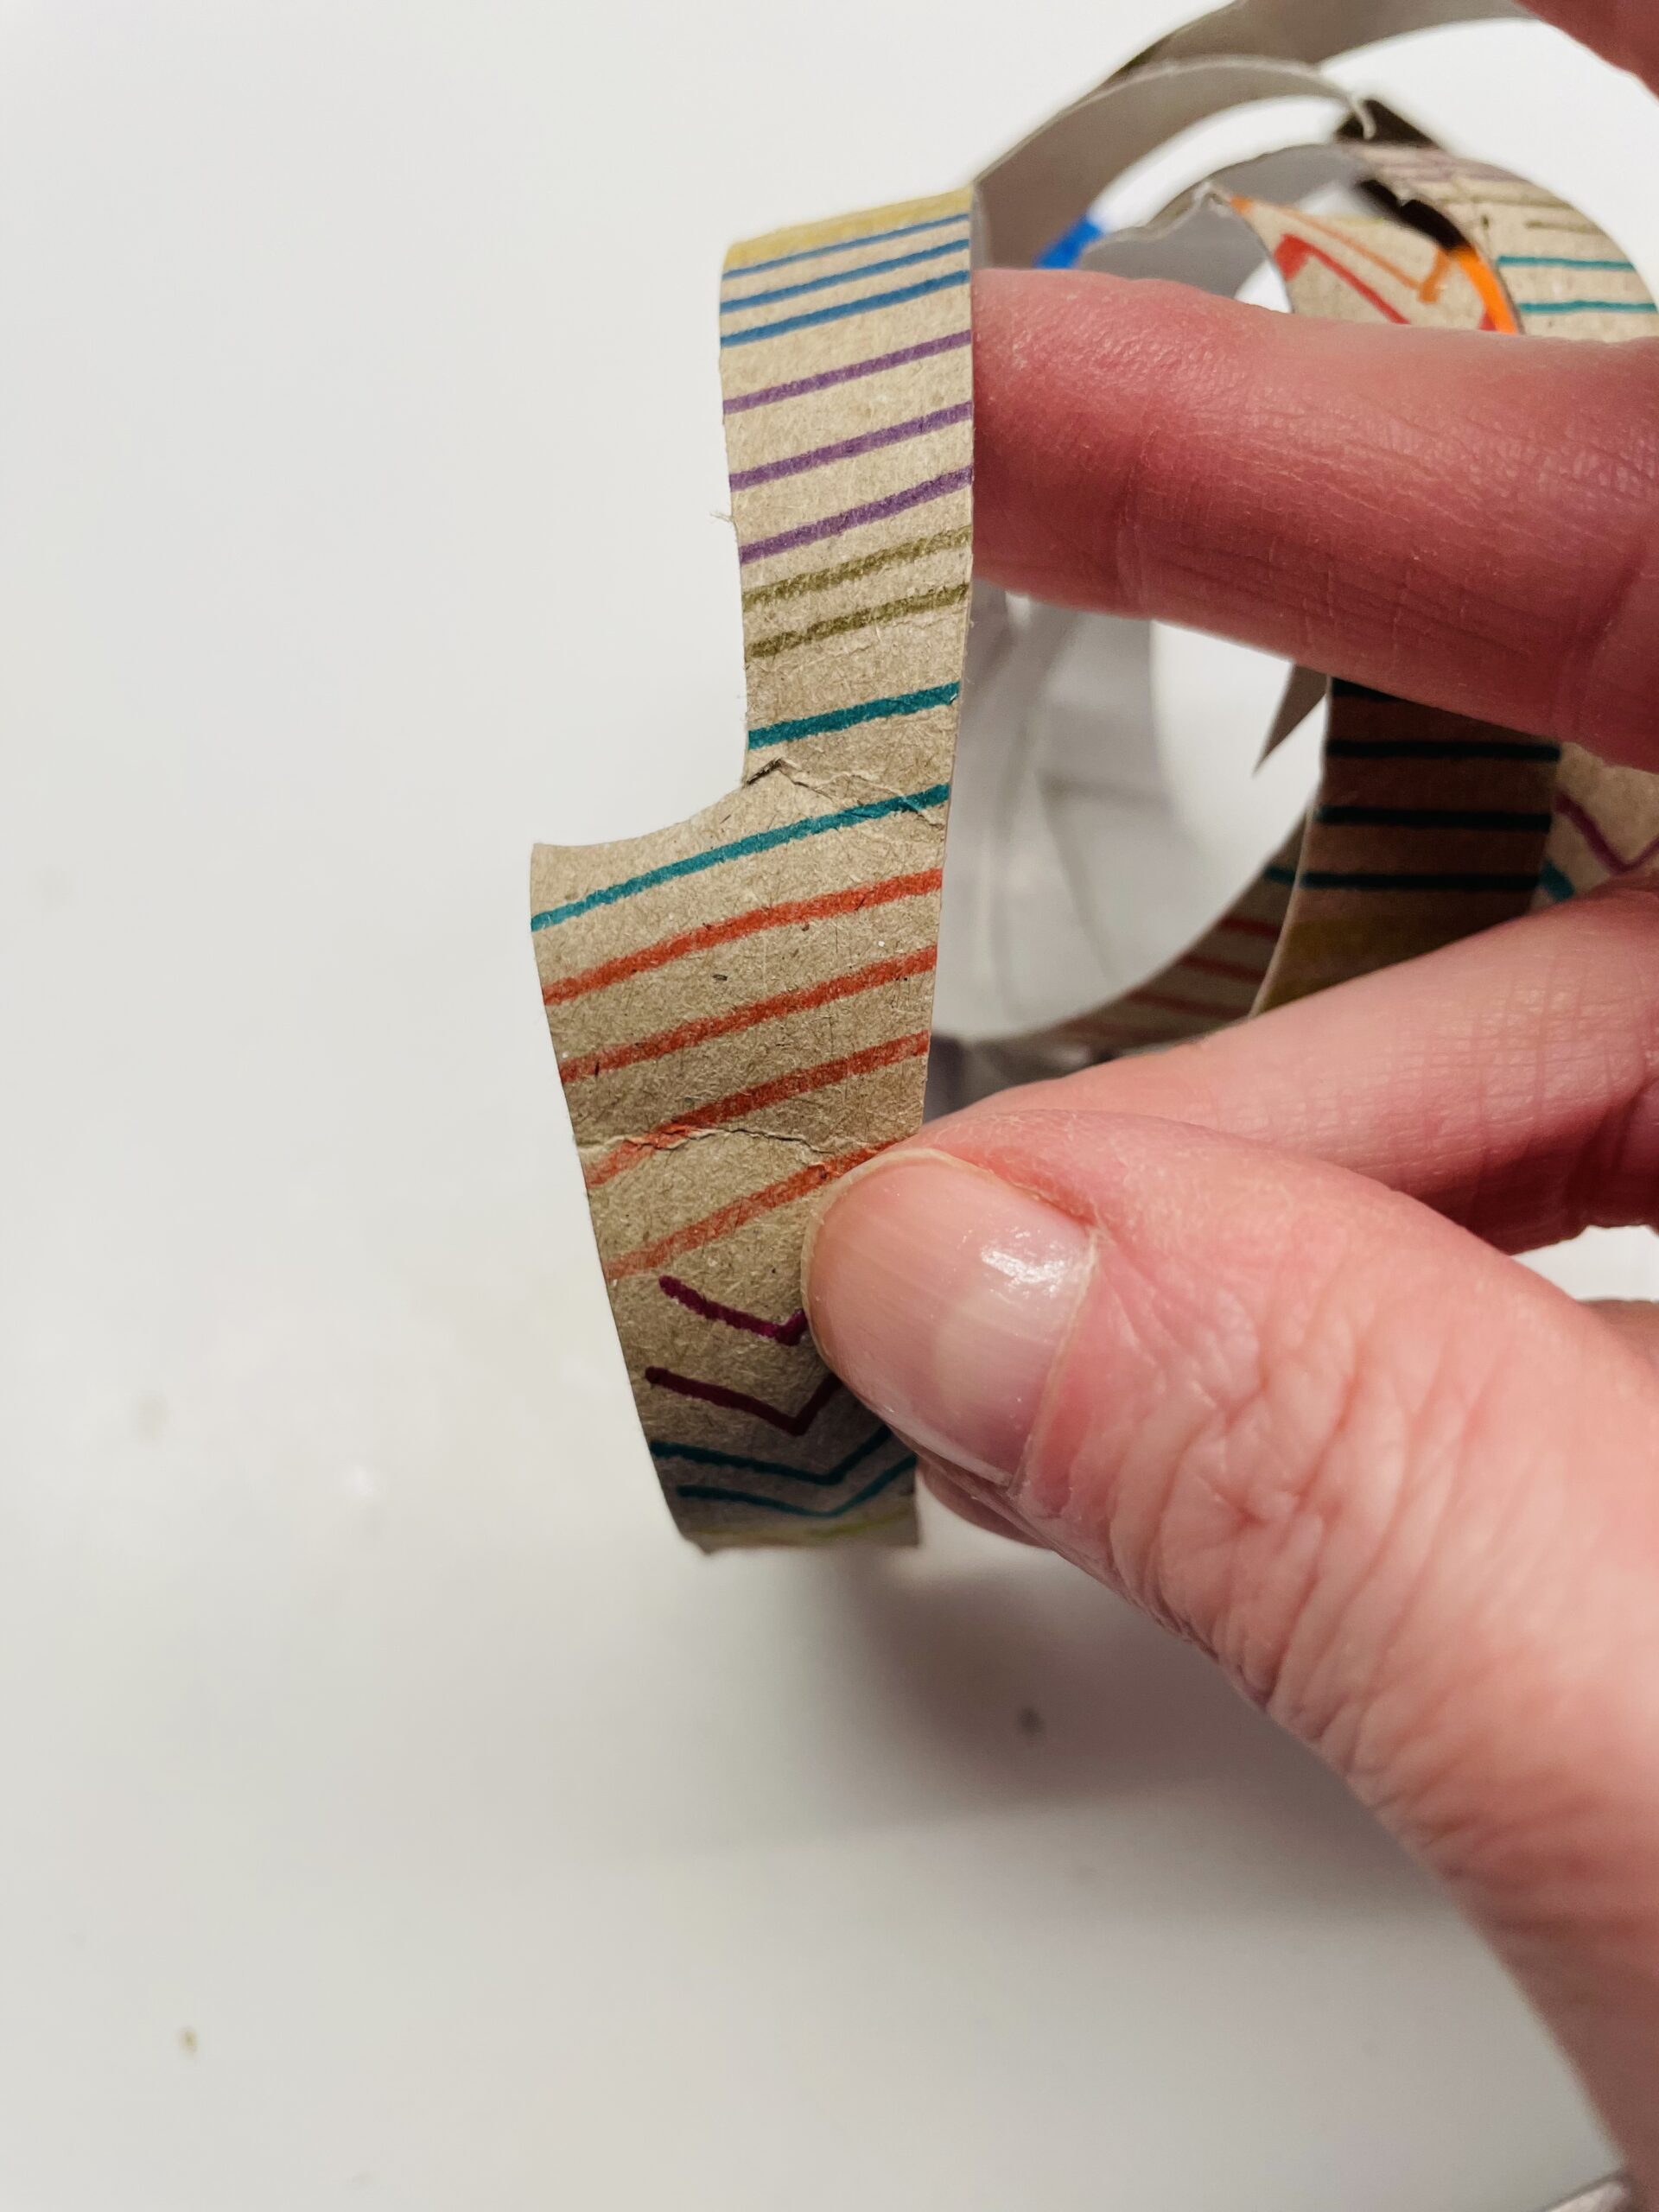
Bild zum Schritt 6 für das Bastel- und DIY-Abenteuer für Kinder: 'Achtung: Nach der ersten Umrundung kann ein kleiner Versatz entstehen....'

7

Now round off your head.

Bild zum Schritt 7 für das Bastel- und DIY-Abenteuer für Kinder: 'Jetzt rundet ihr den Kopf ab.'

8

Then you cut a small tongue out of a red paper. A snake's tongue is split, which is why it has two tips.
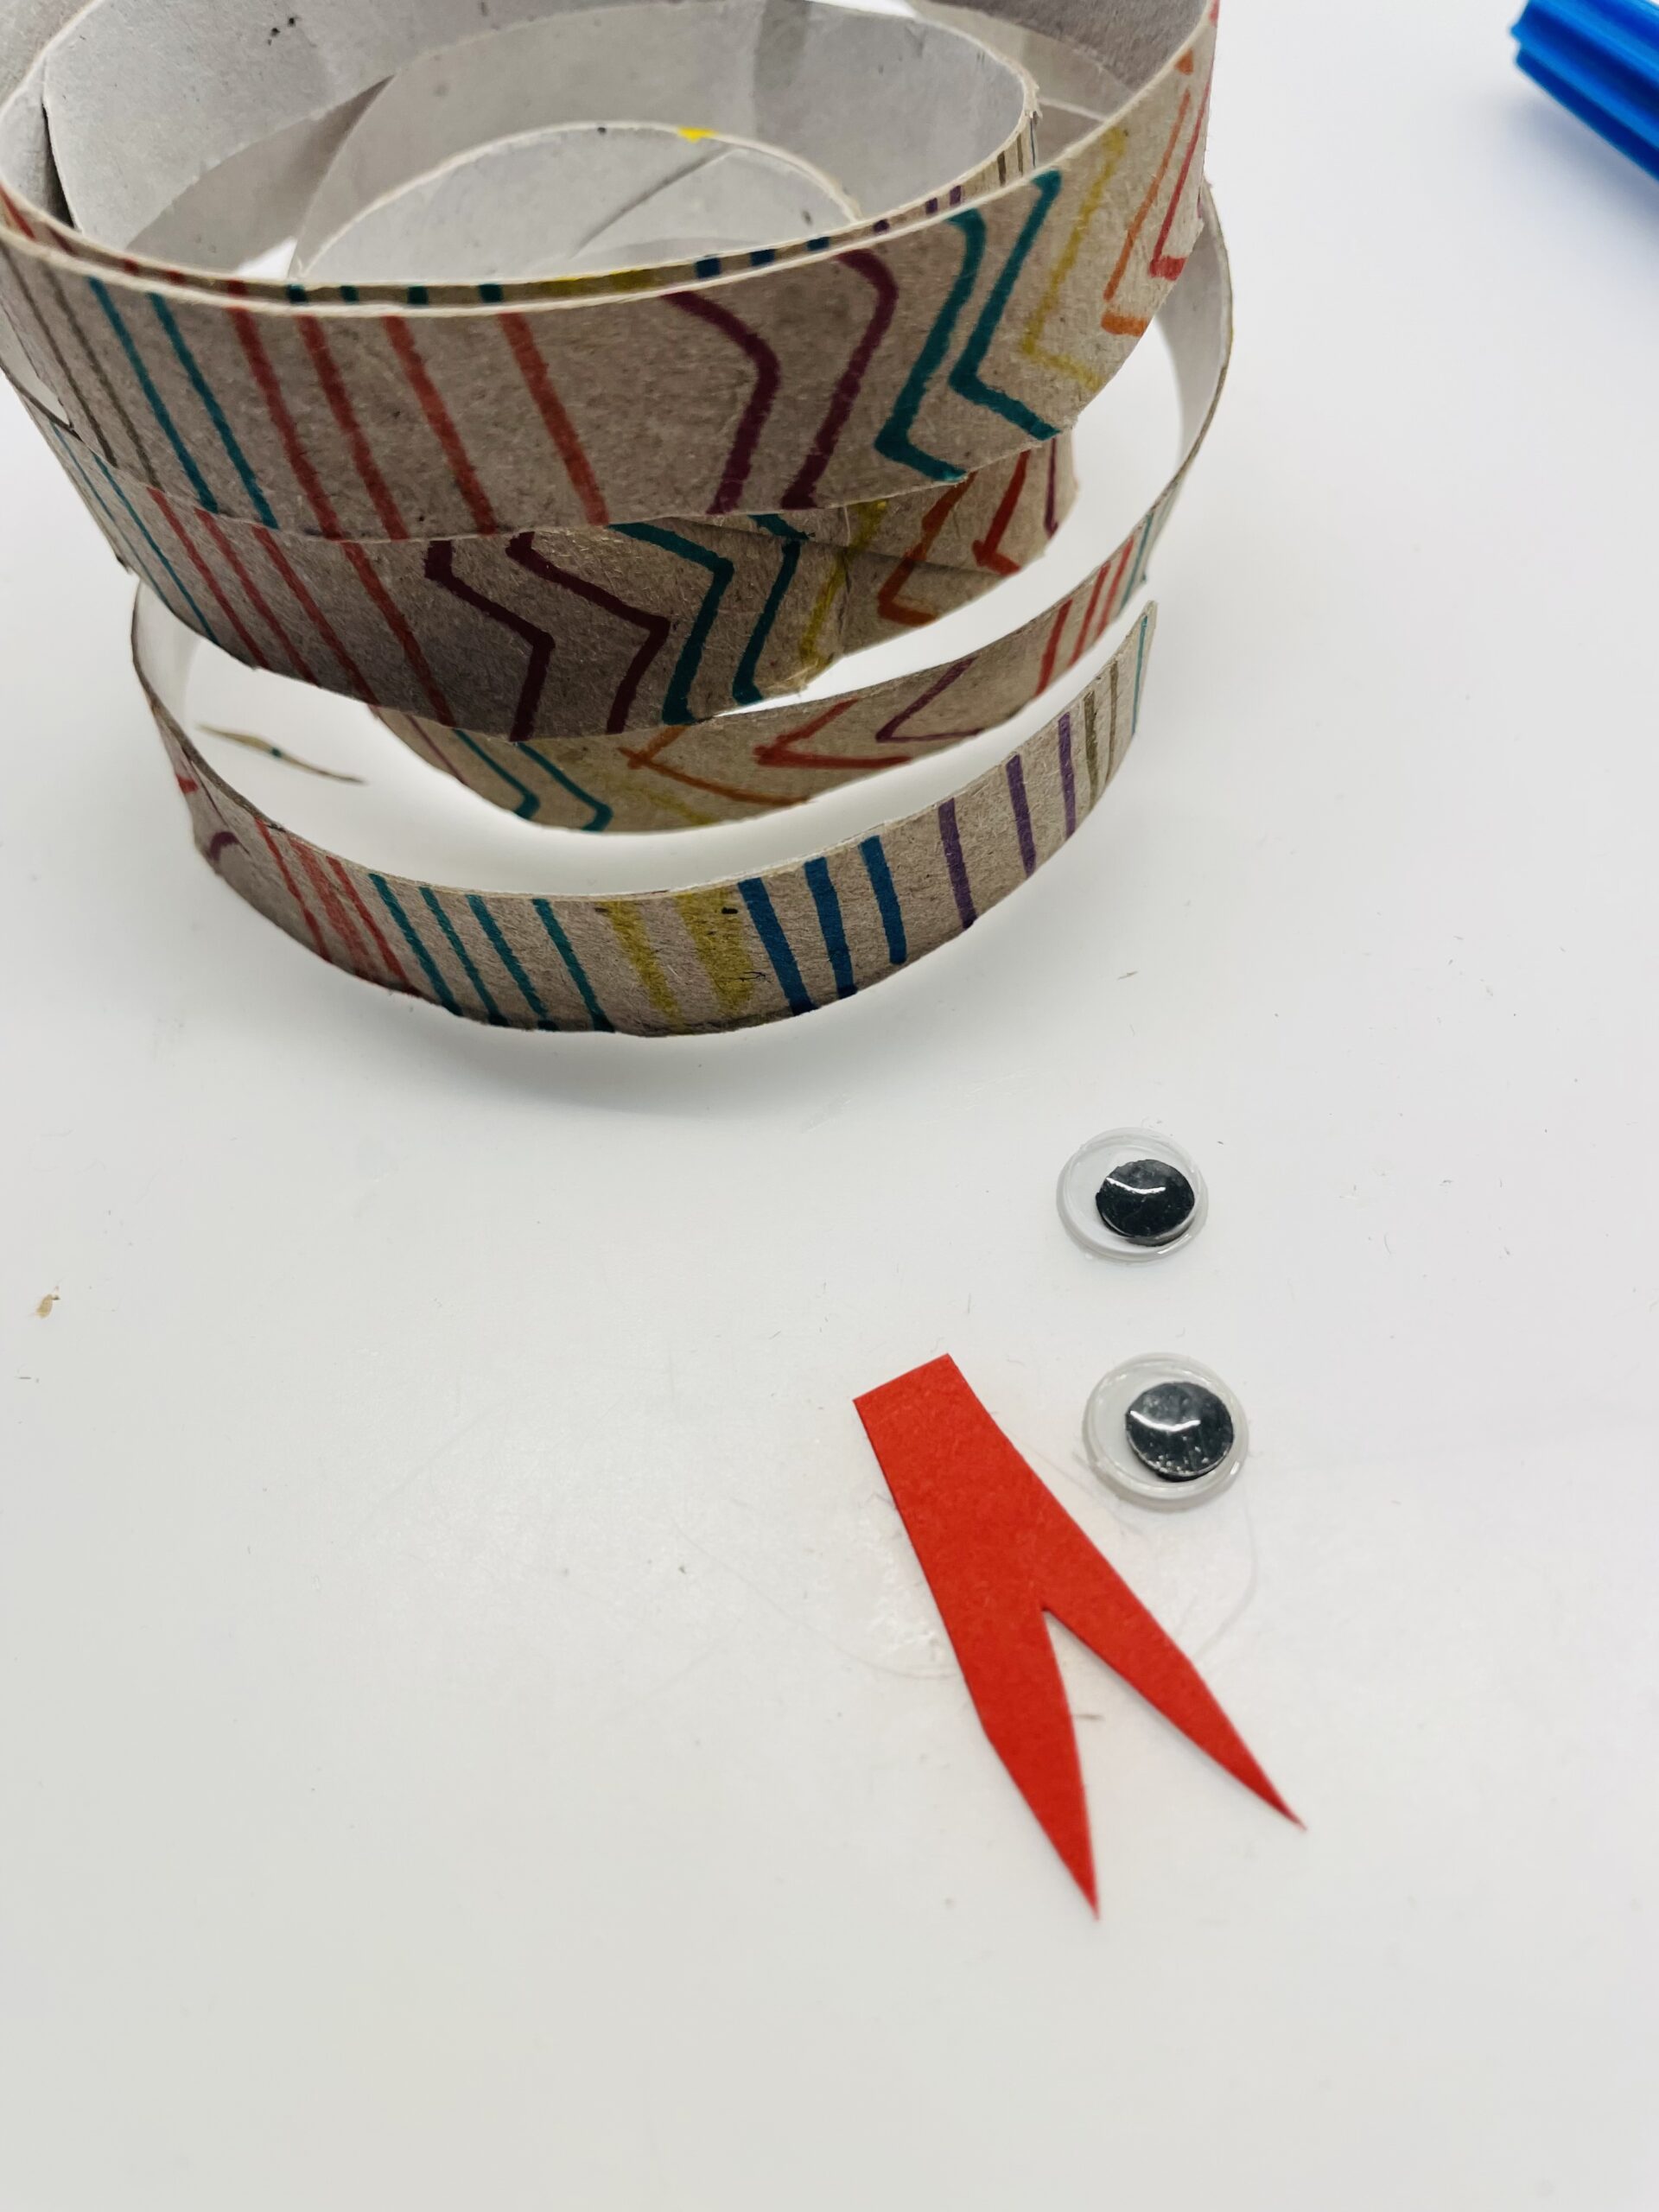
Bild zum Schritt 8 für das Bastel- und DIY-Abenteuer für Kinder: 'Dann schneidet ihr aus einem roten Papier eine kleine Zunge....'

9

Now put her tongue on the back of the snake's head.
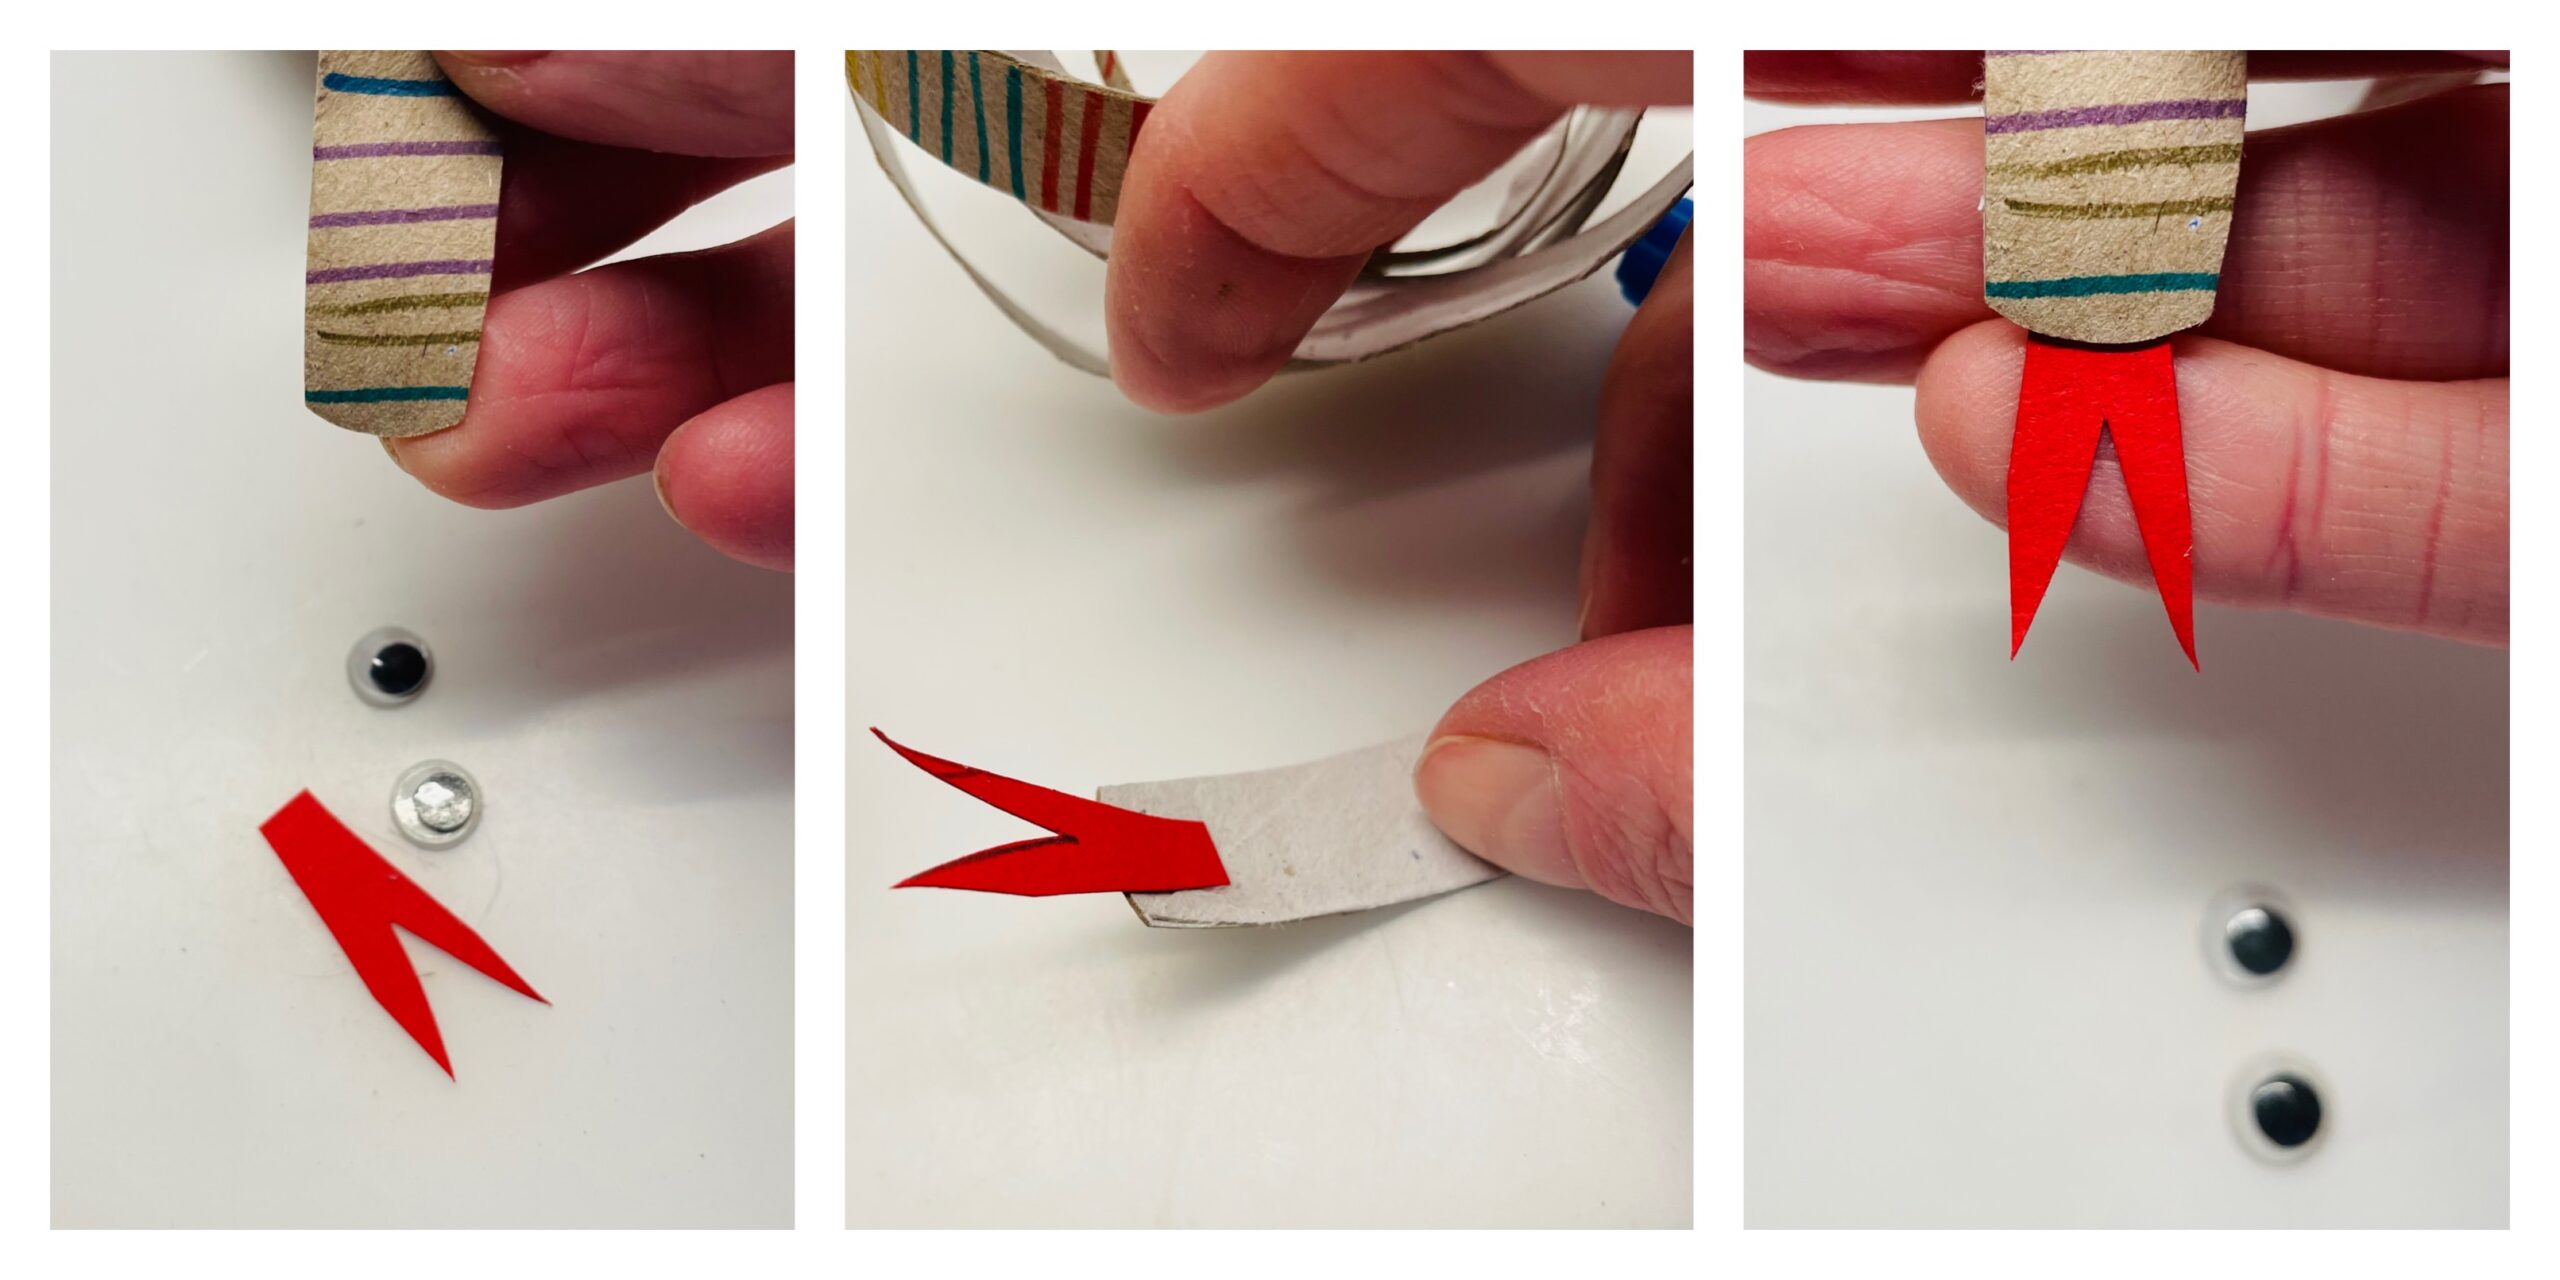
Bild zum Schritt 9 für das Bastel- und DIY-Abenteuer für Kinder: 'Nun klebt ihr die Zunge auf die Rückseite des Kopfes...'

10

At the front, two wobble eyes are put on her.
Tip: Alternatively, you paint your eyes on white paper and cut them out and stick them on.
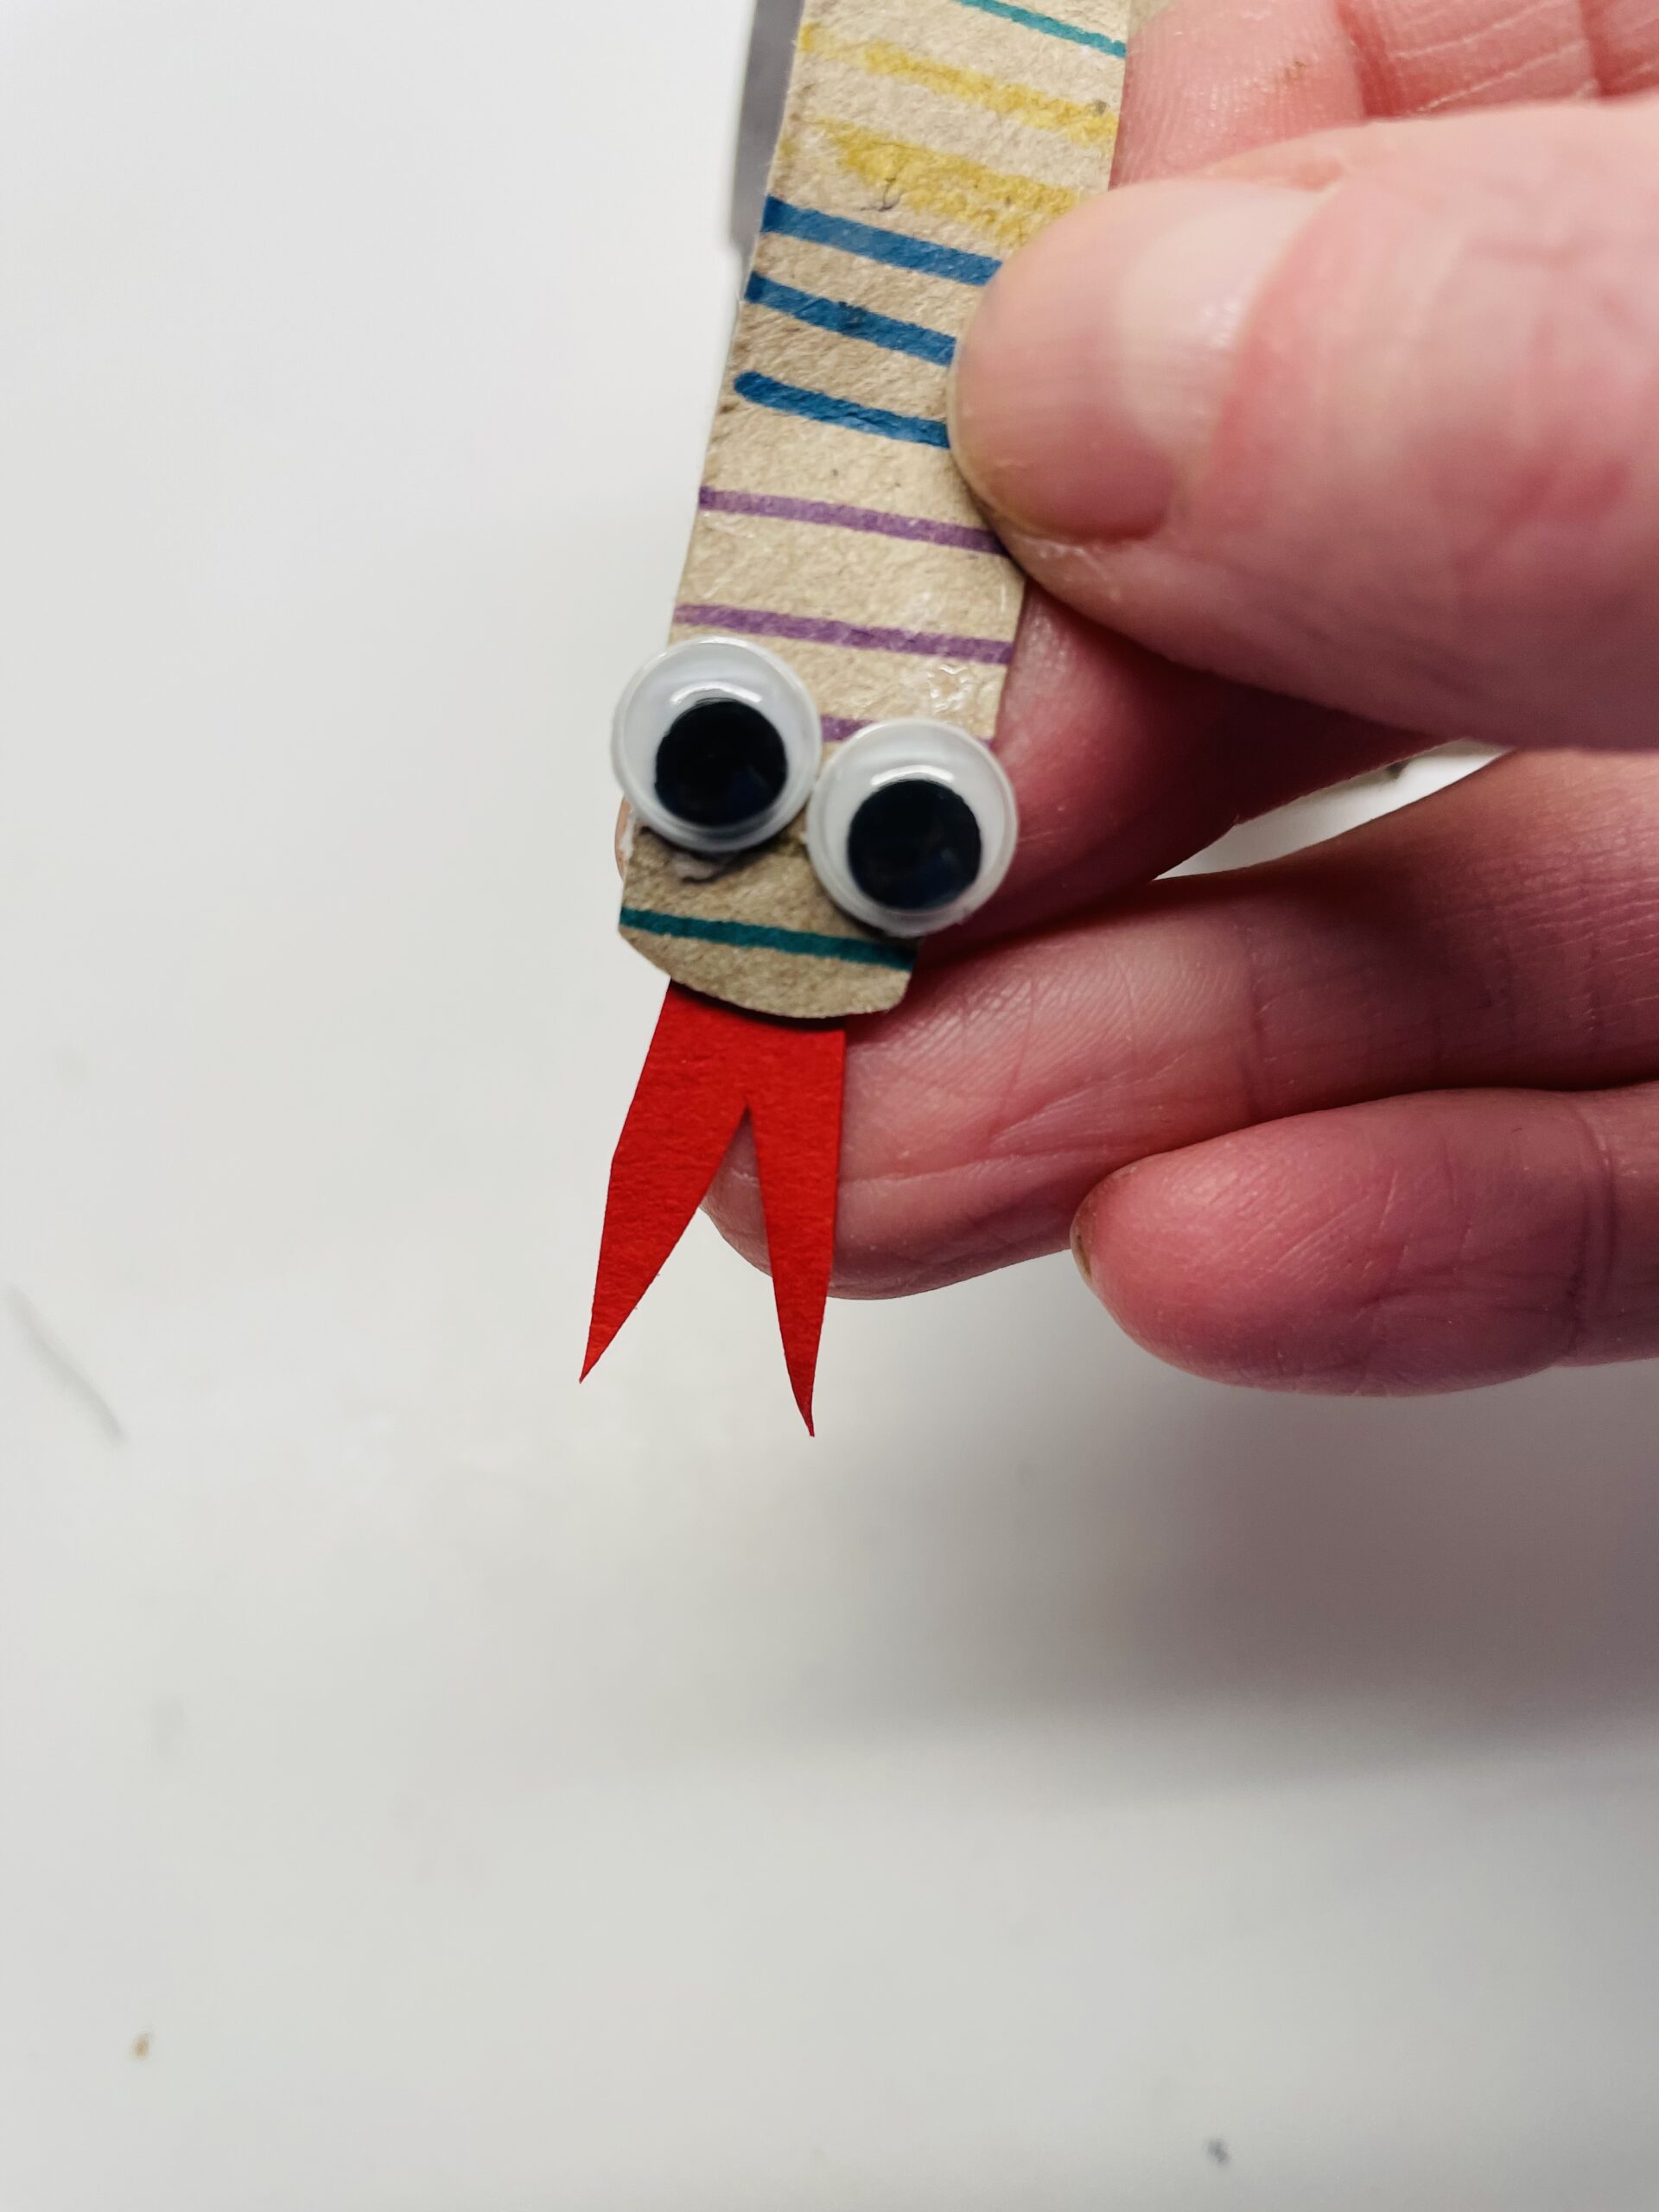
Bild zum Schritt 10 für das Bastel- und DIY-Abenteuer für Kinder: 'Vorne klebt ihr zwei Wackelaugen auf.   Tipp: Alternativ...'

11

The snake is ready!
Decorates it around a branch and a great decoration for a jungle party or a snake festival is already created.
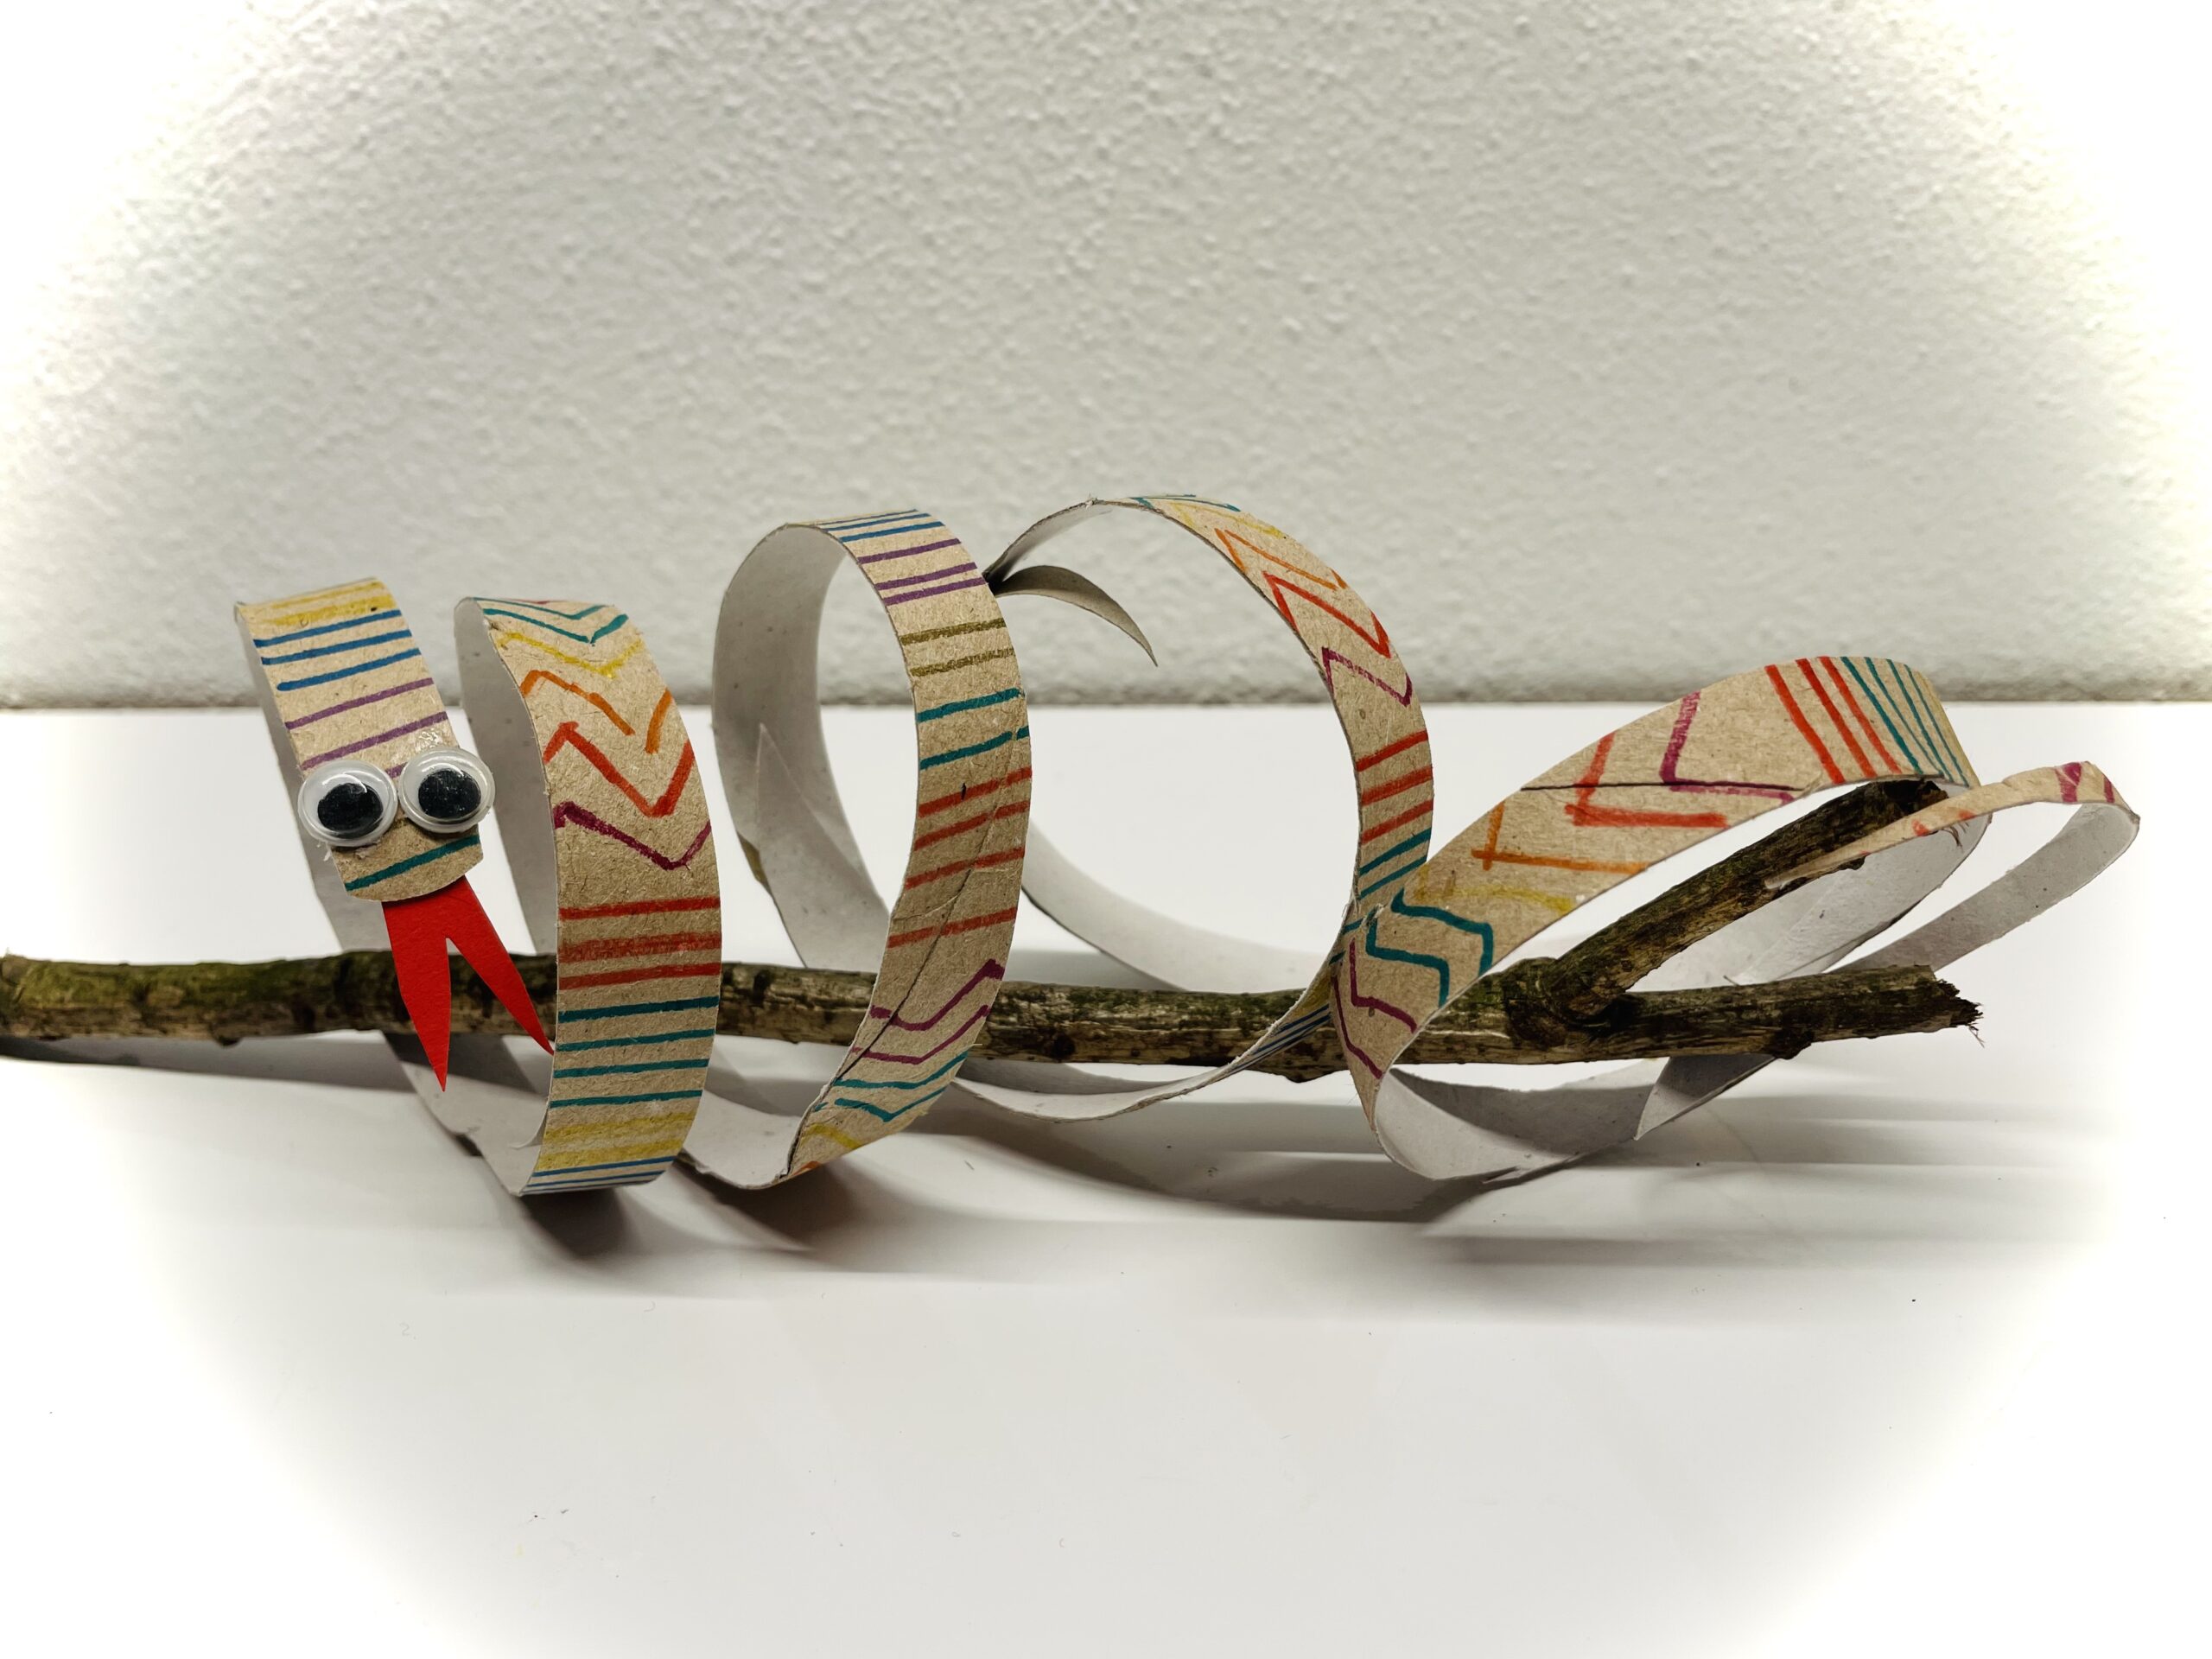
Bild zum Schritt 11 für das Bastel- und DIY-Abenteuer für Kinder: 'Fertig ist die Schlange!   Dekoriert sie um einen...'

12

Try it out and have a lot of fun with it!

Make snake (made from cardboard roll)

Follow us on Facebook , Instagram and Pinterest
Don't miss any more adventures: Our bottle mail

Leave a Reply

Your email address will not be published.

The maximum upload file size: 5 MB. You can upload: image, document. Drop file here