This paper flyer is a small looping dancer. We also call it ringing flyer, because it can rotate very quickly in circles. The craft action is also something for untrained hobbyists. With a few folding steps, the flyer is quickly made. Individuality is obtained by your creativity.
If you don't get the spin with the flying, then take a wool thread at hand. Attach it to the narrowest point. Then you turn slowly in circles with the plane over your head.
Like a flag in the wind, the paper flyer follows you and constantly revolves around himself. It's a spectacle. Makes a small duel out of it, who will be the first to make it? Have fun with the paper flyer and experiment.
Media Education for Kindergarten and Hort

Relief in everyday life, targeted promotion of individual children, independent learning and - without any pre-knowledge already usable by the youngest!

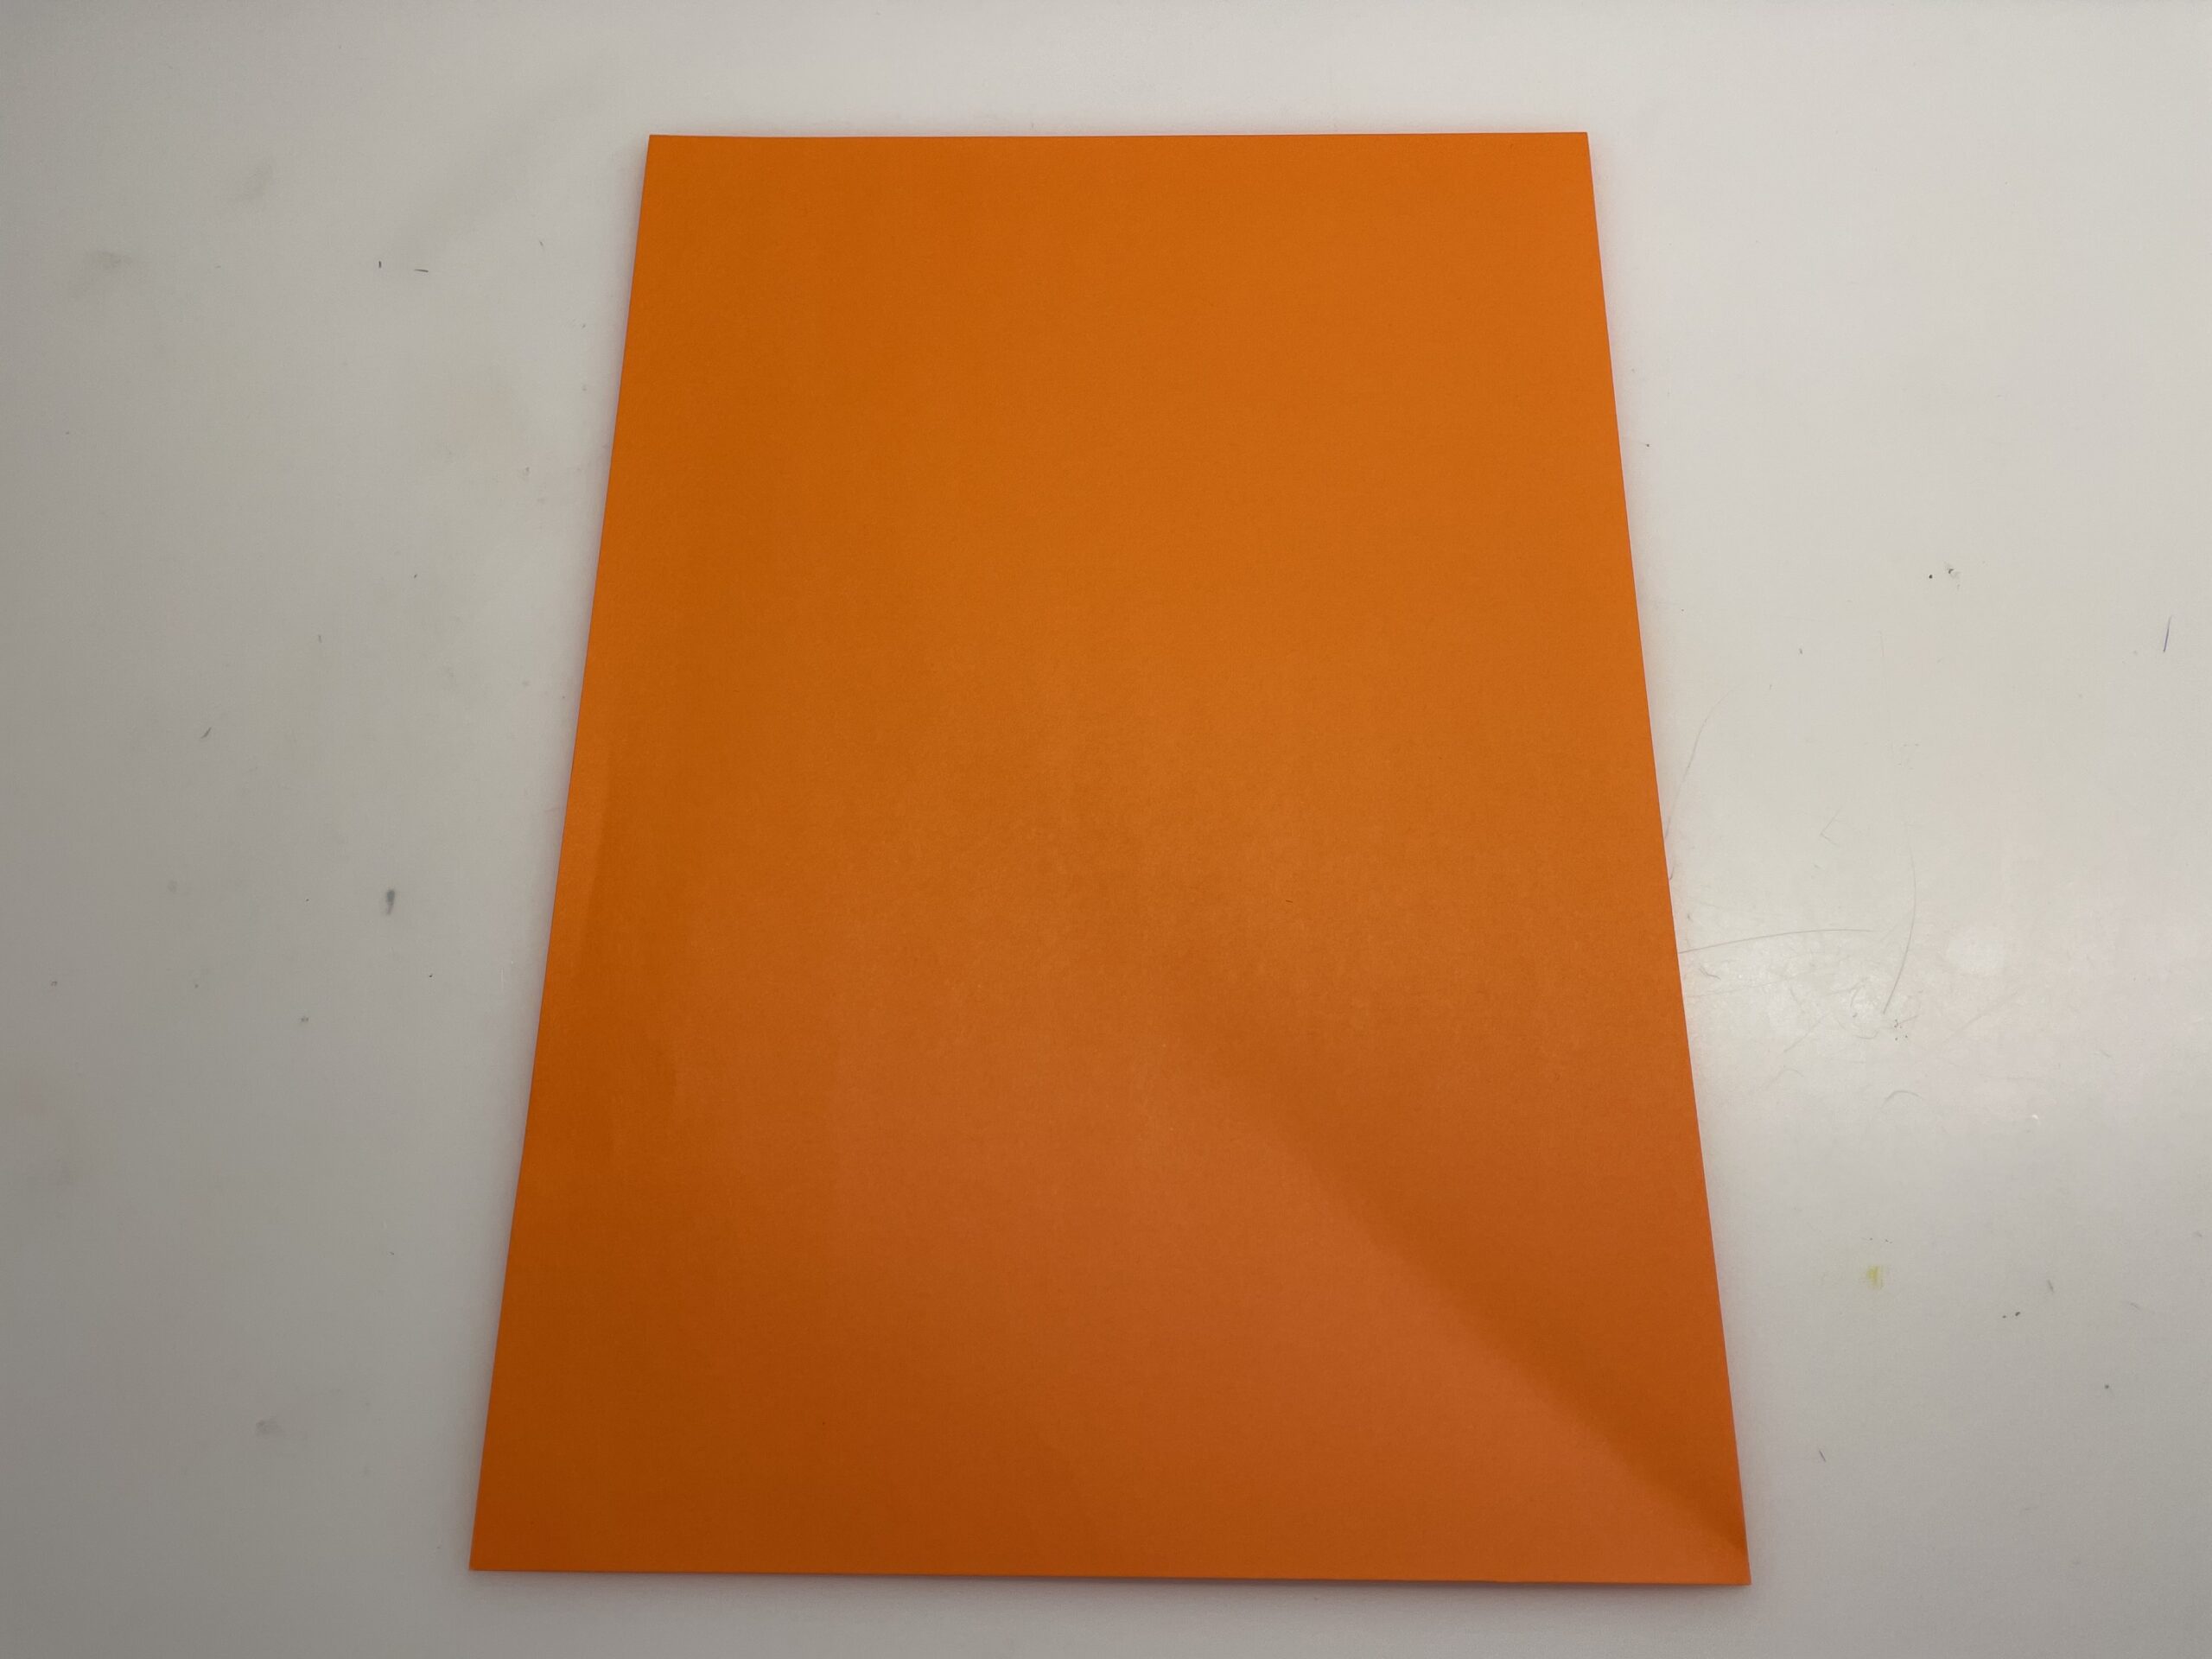
For this plane you need a square sheet of paper.
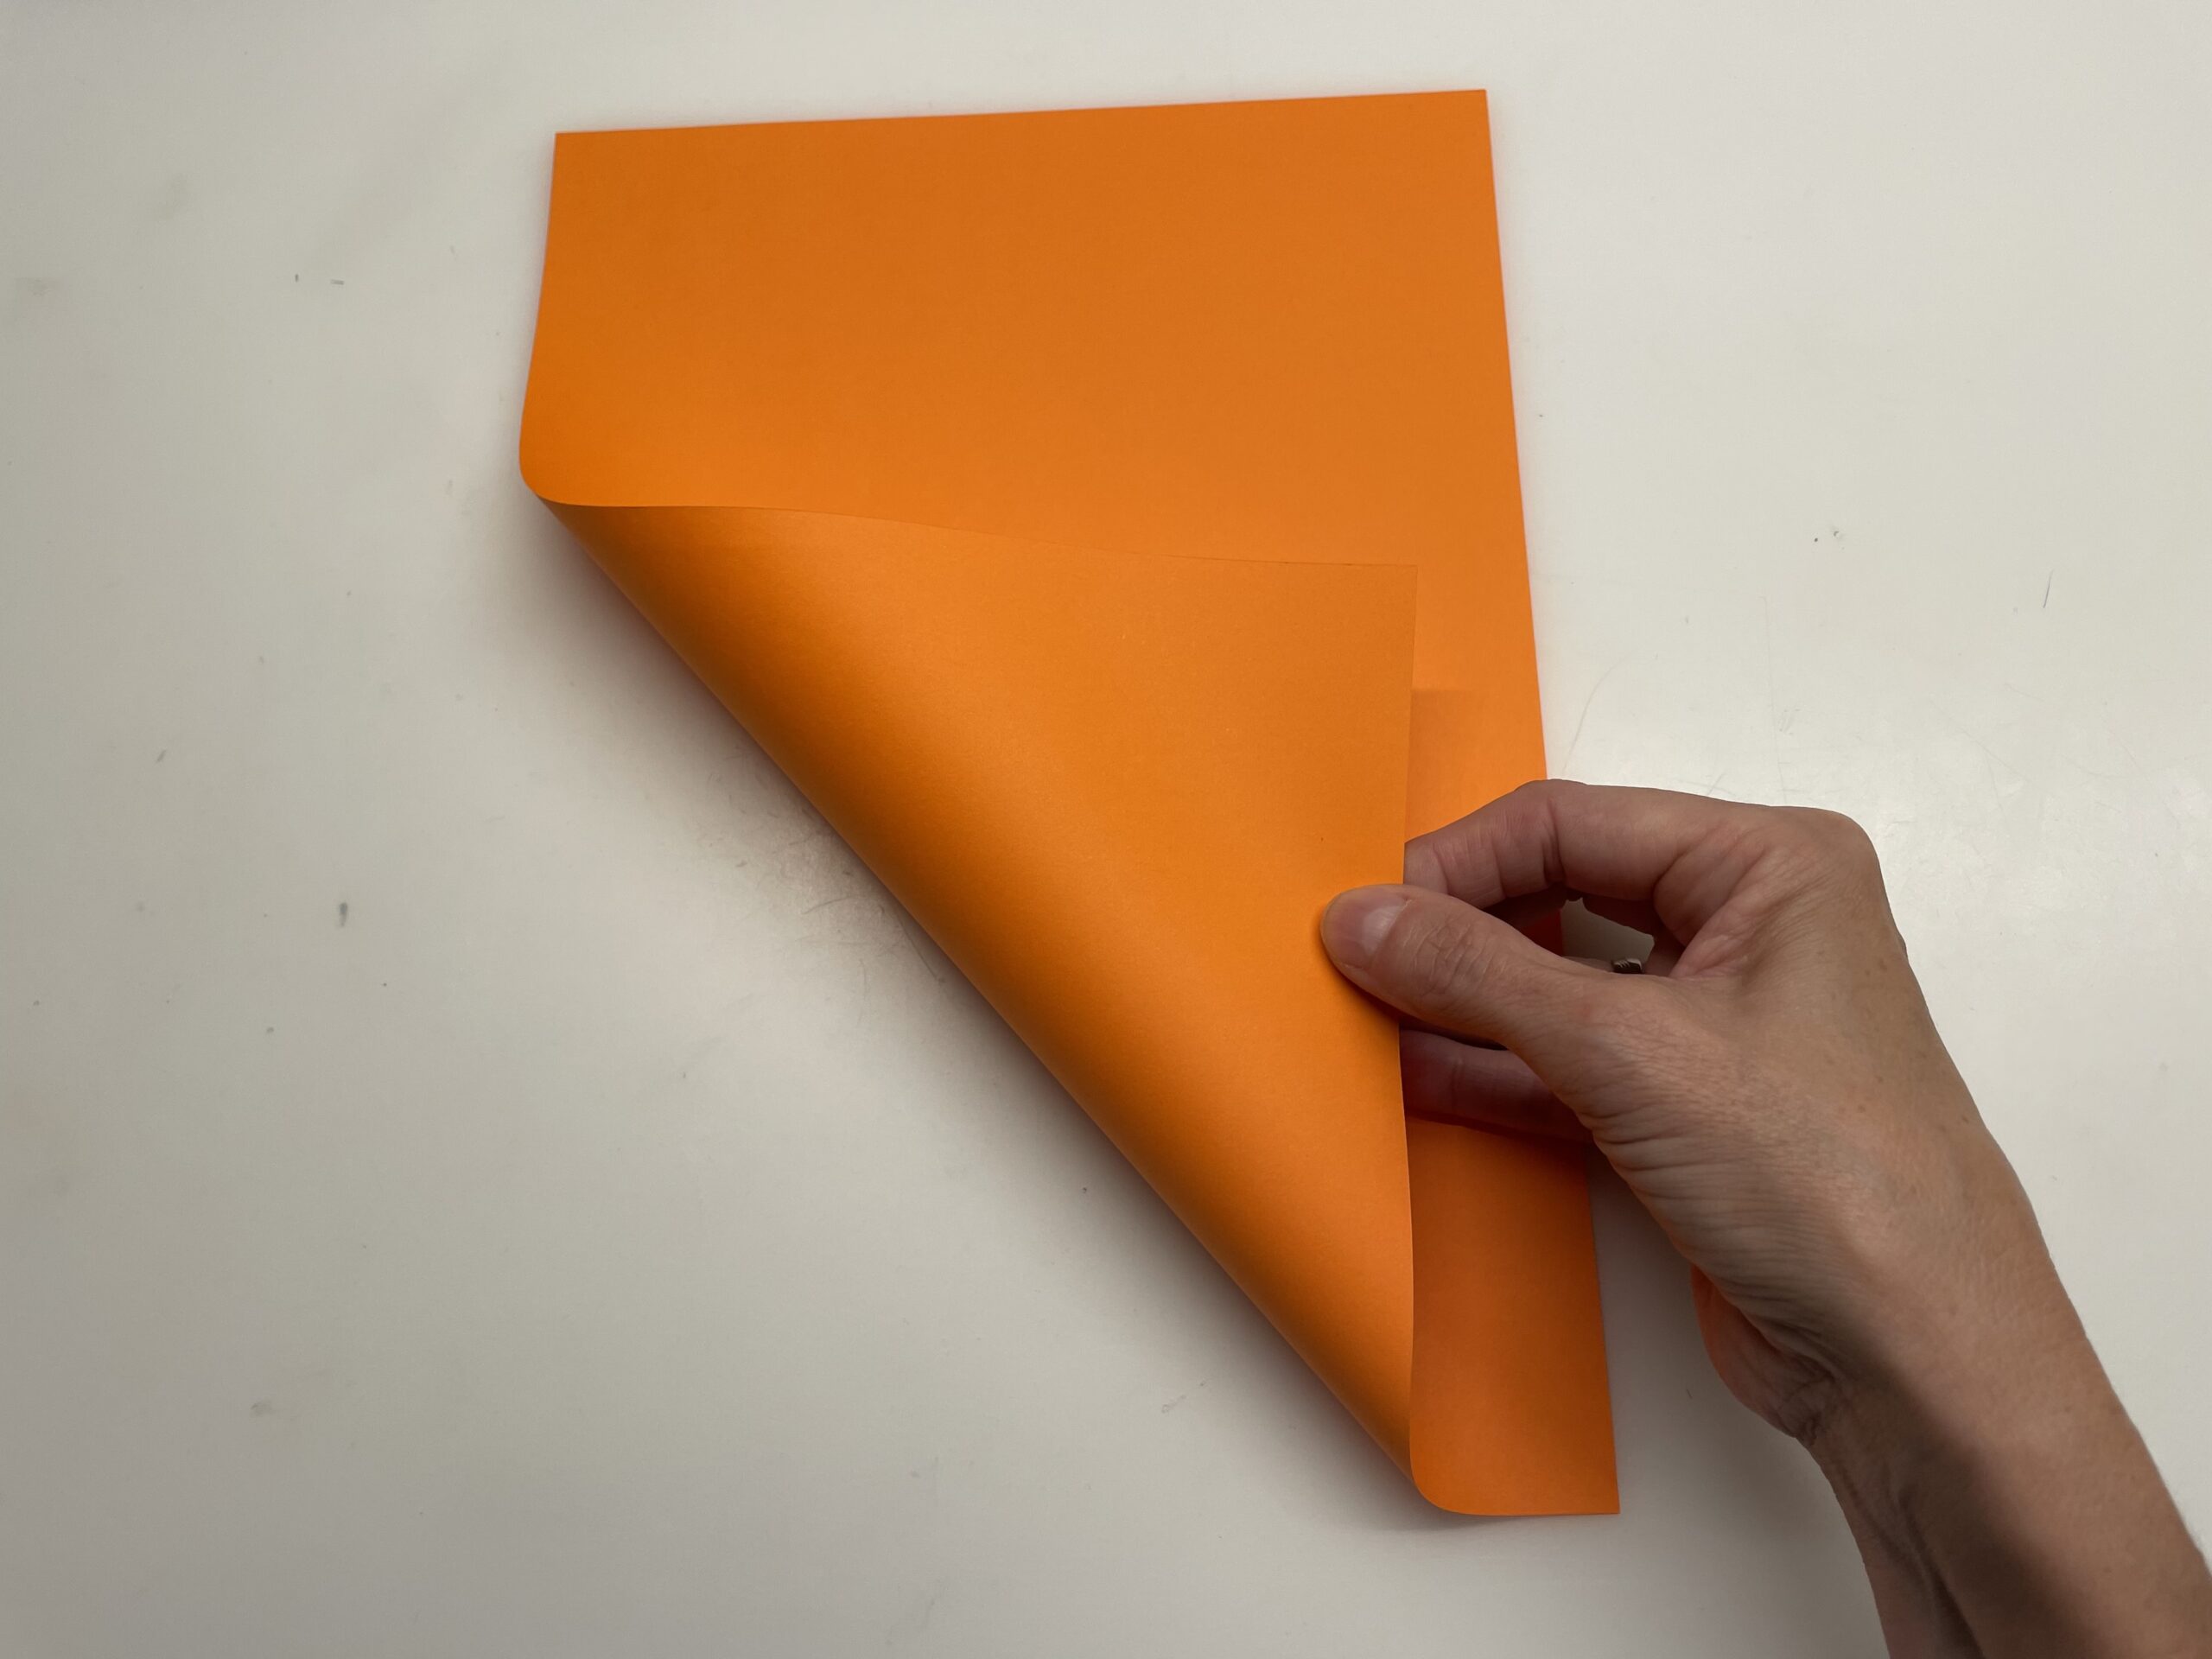
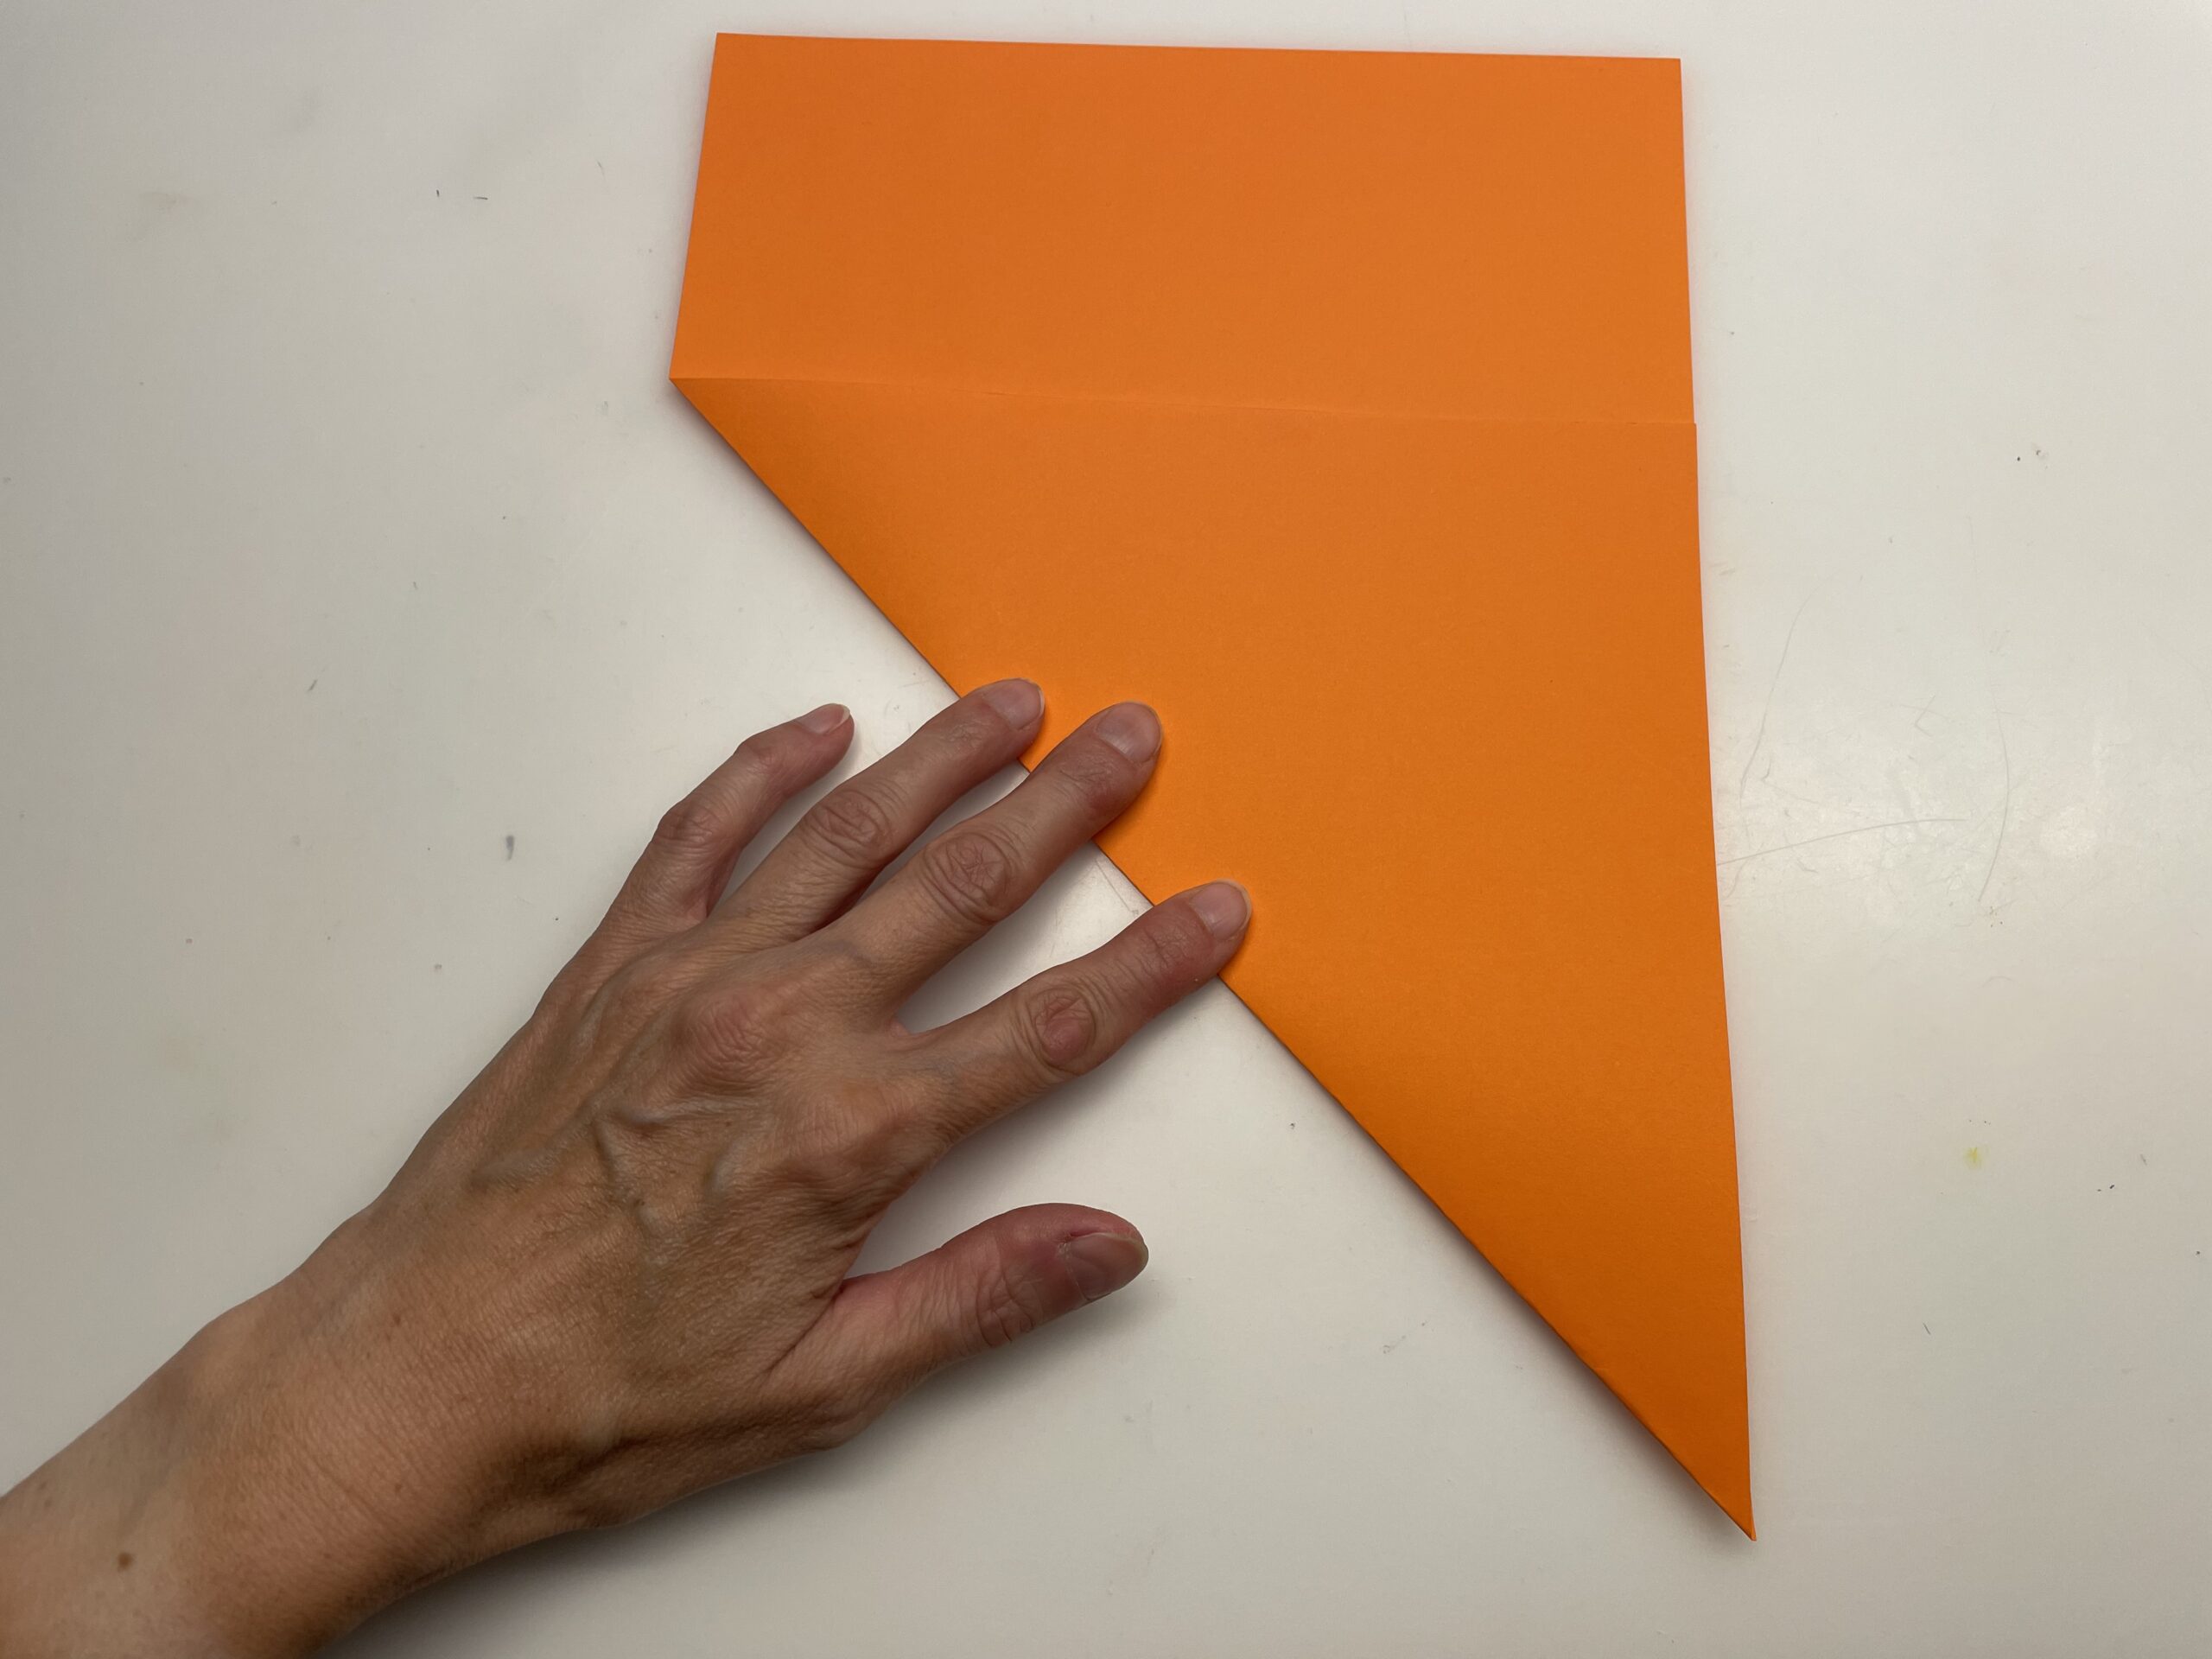
You can simply cut it yourself. For this you put the DinA4 leaf up-edge in front of you. The short side of the leaf is right in front of your stomach.
Then take the lower left corner and place it directly on the right long side. At the bottom in the right corner a tip is created.
Make sure that both edges of the leaf lie exactly on each other.

The resulting diagonal strokes her with the fingers or the flat hand smoothly.
A triangle emerges.
Then cut off the paper strip above the triangle with scissors.
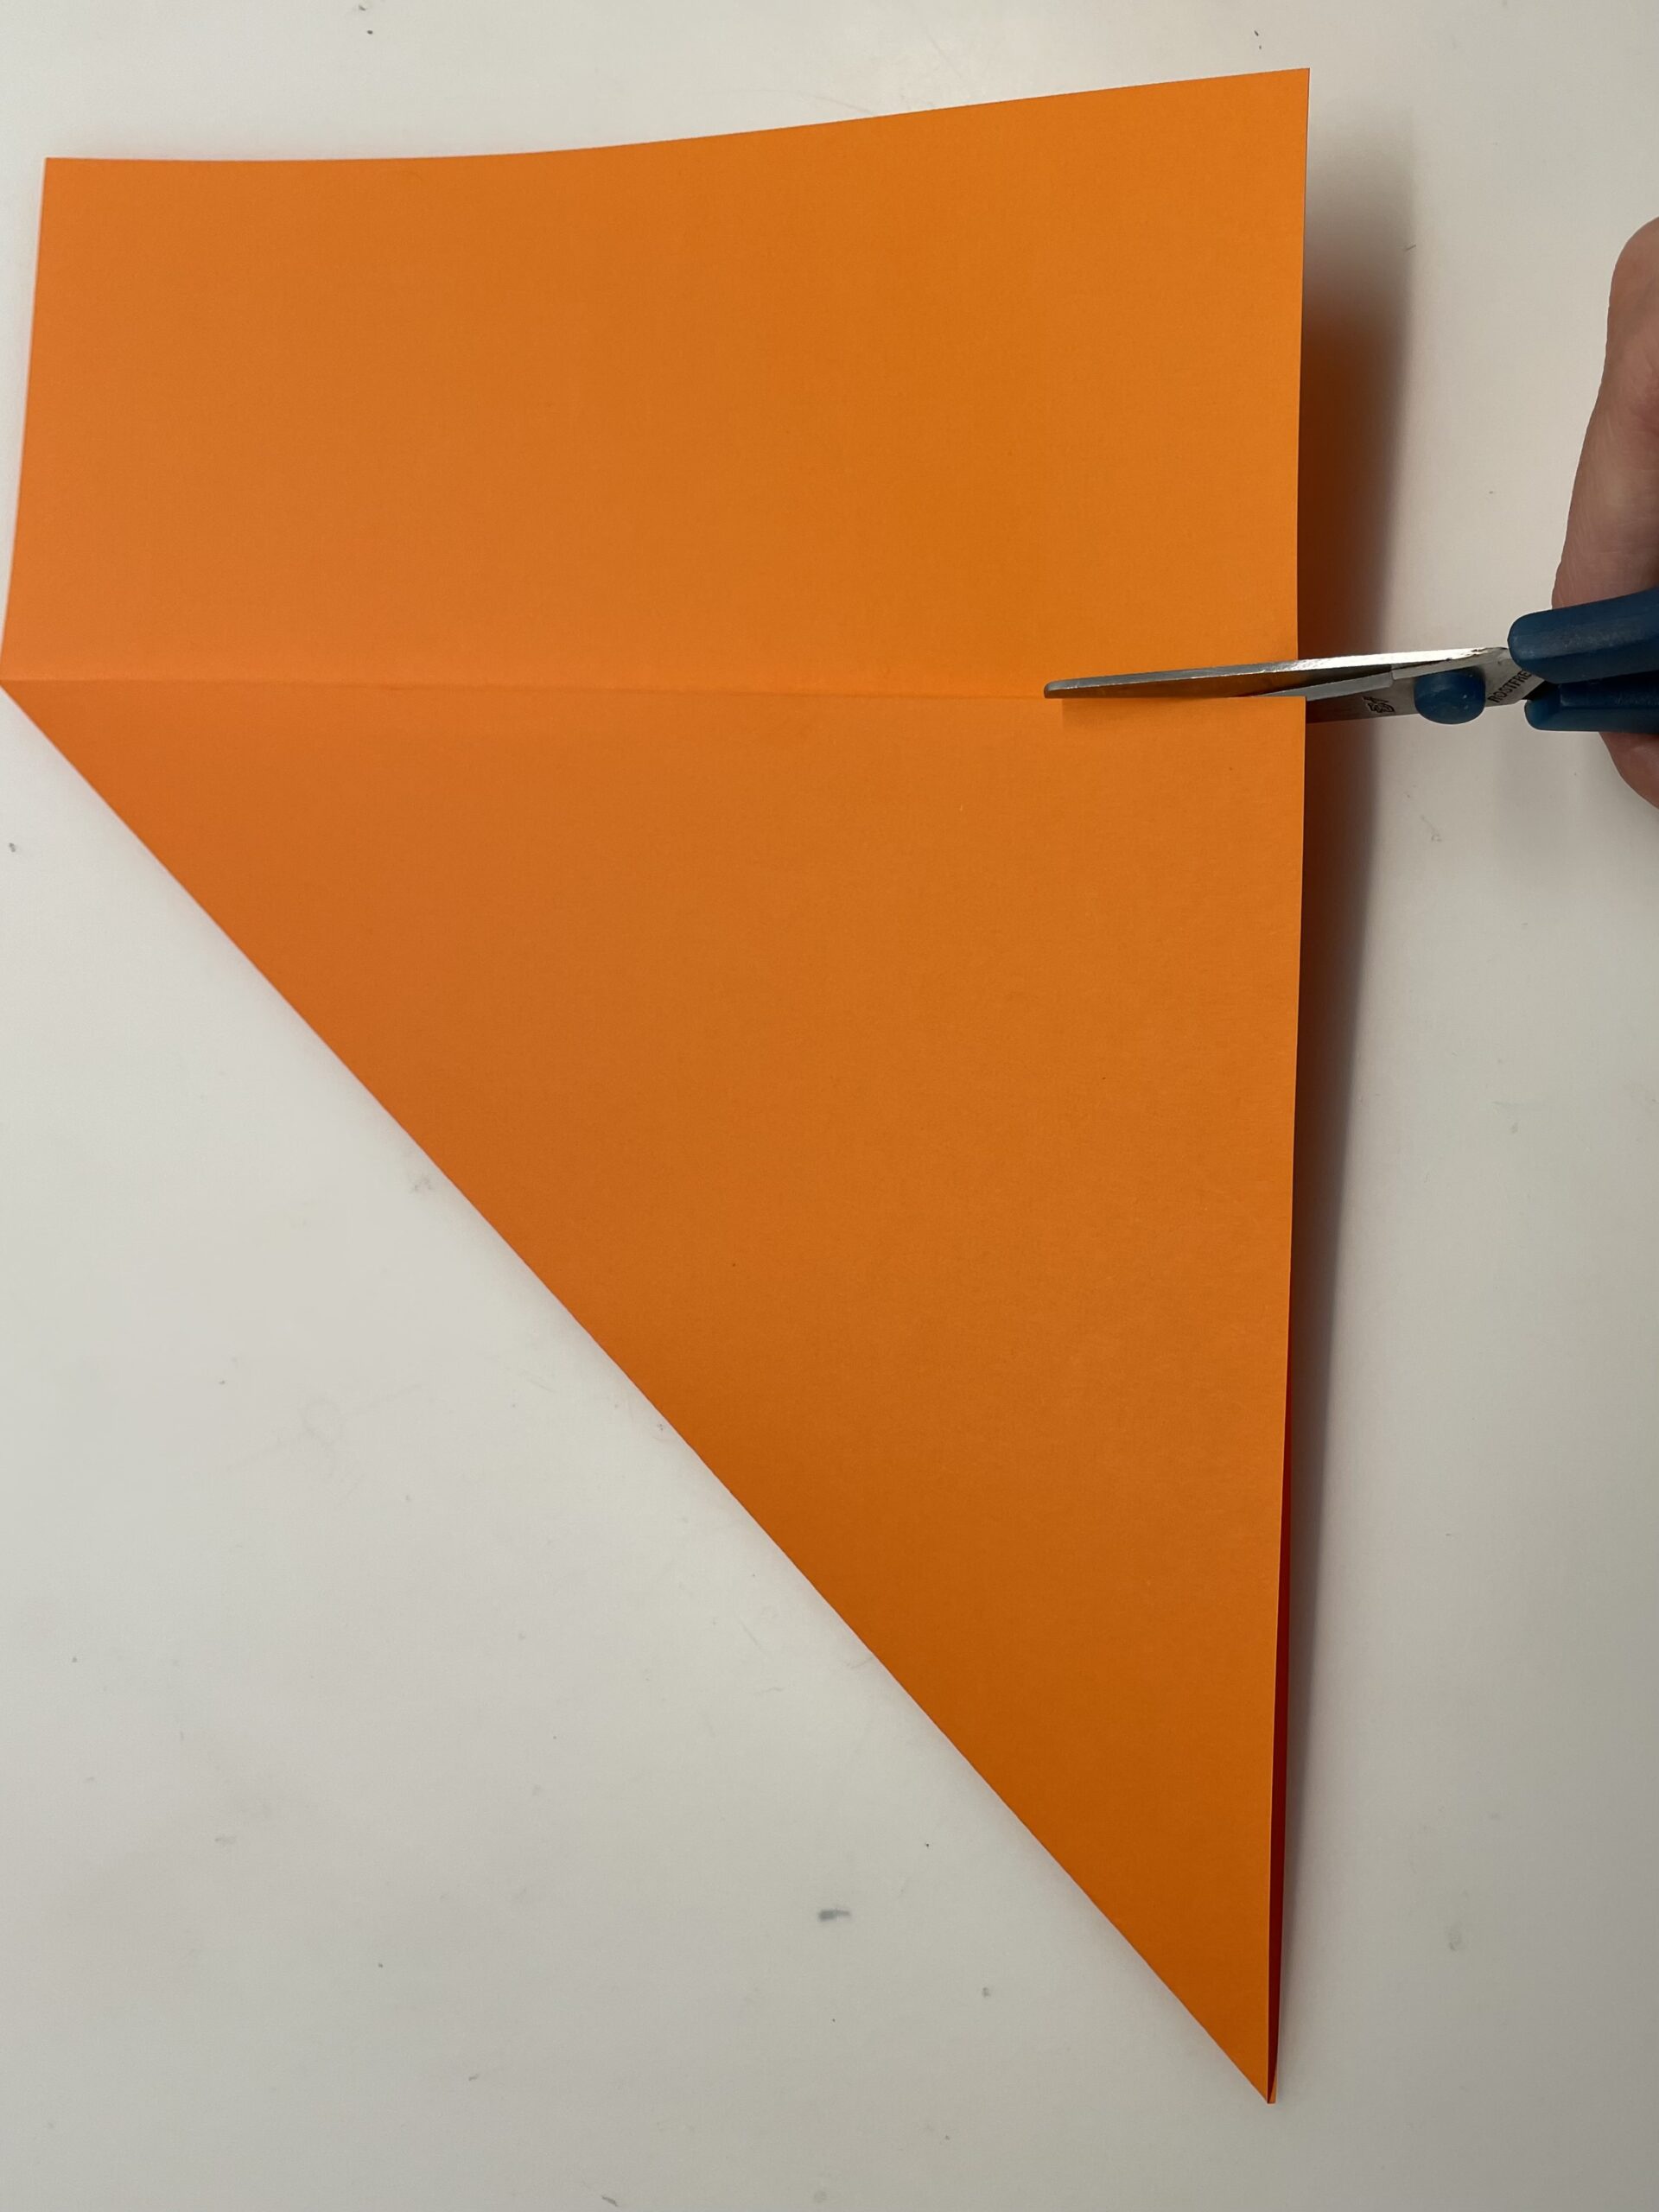
You don't need this strip anymore.
You use the folded triangle for the paper flyer.

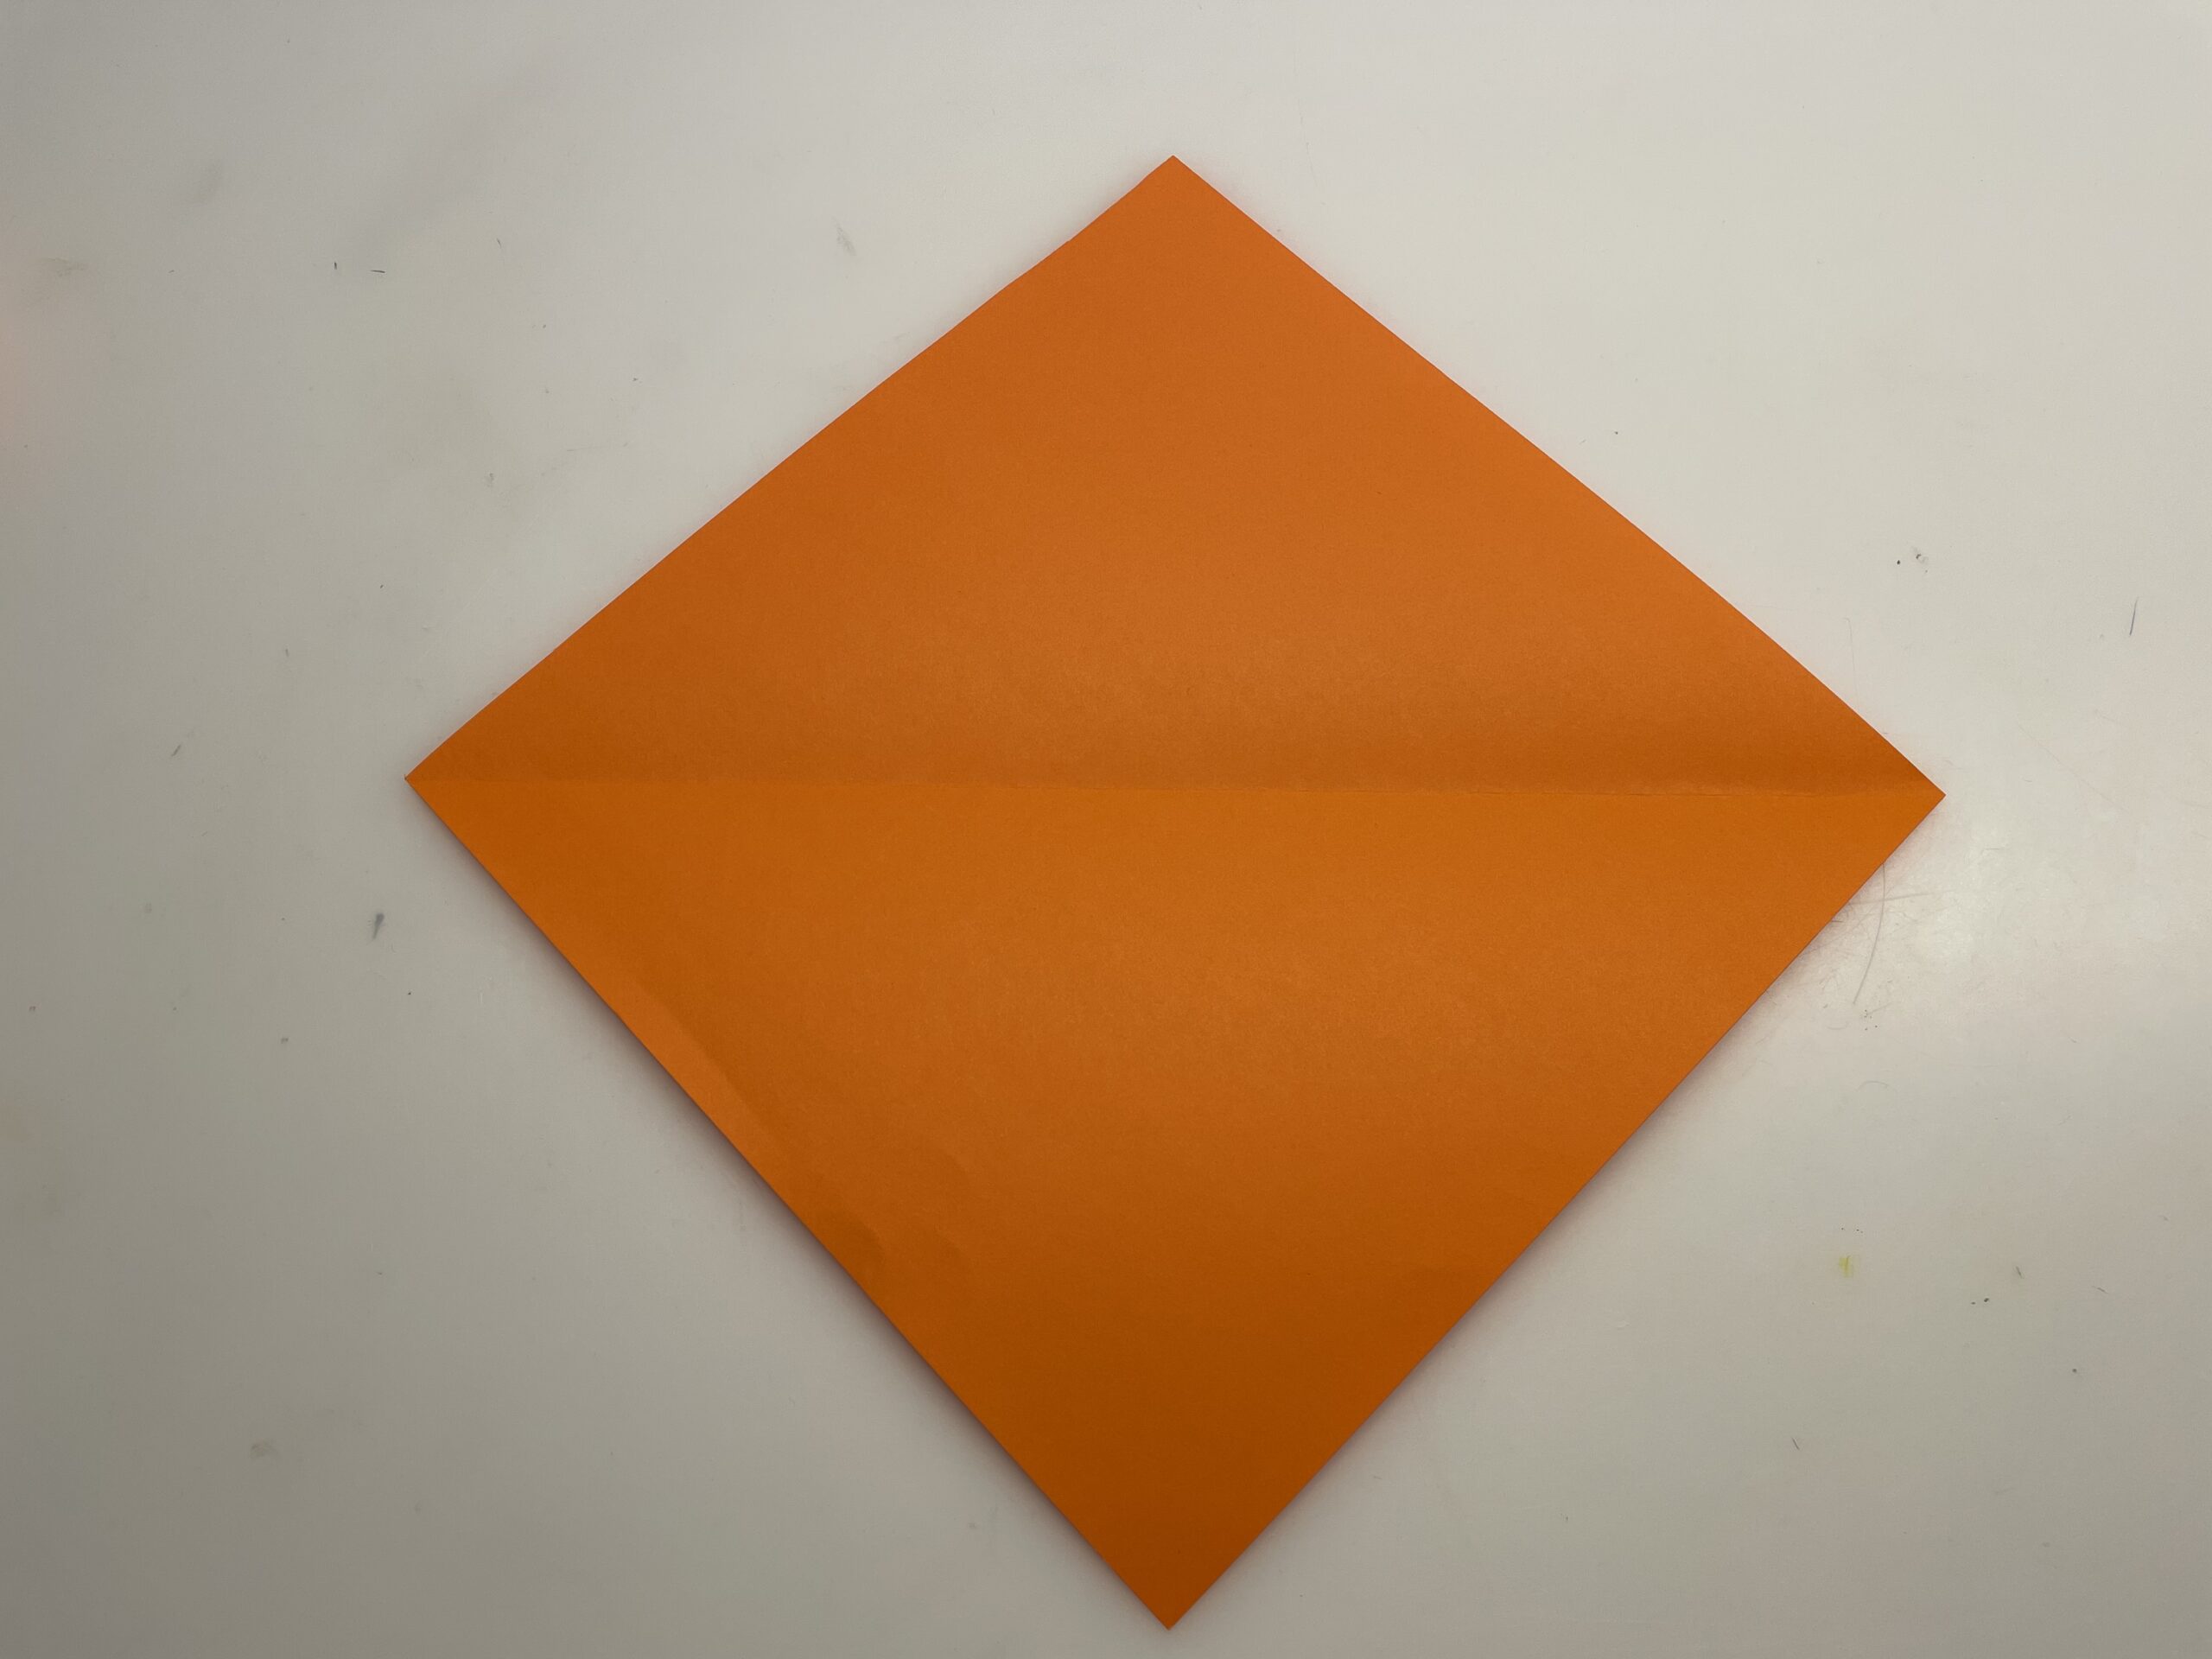
Now she opens the triangle again. The result is a square paper.
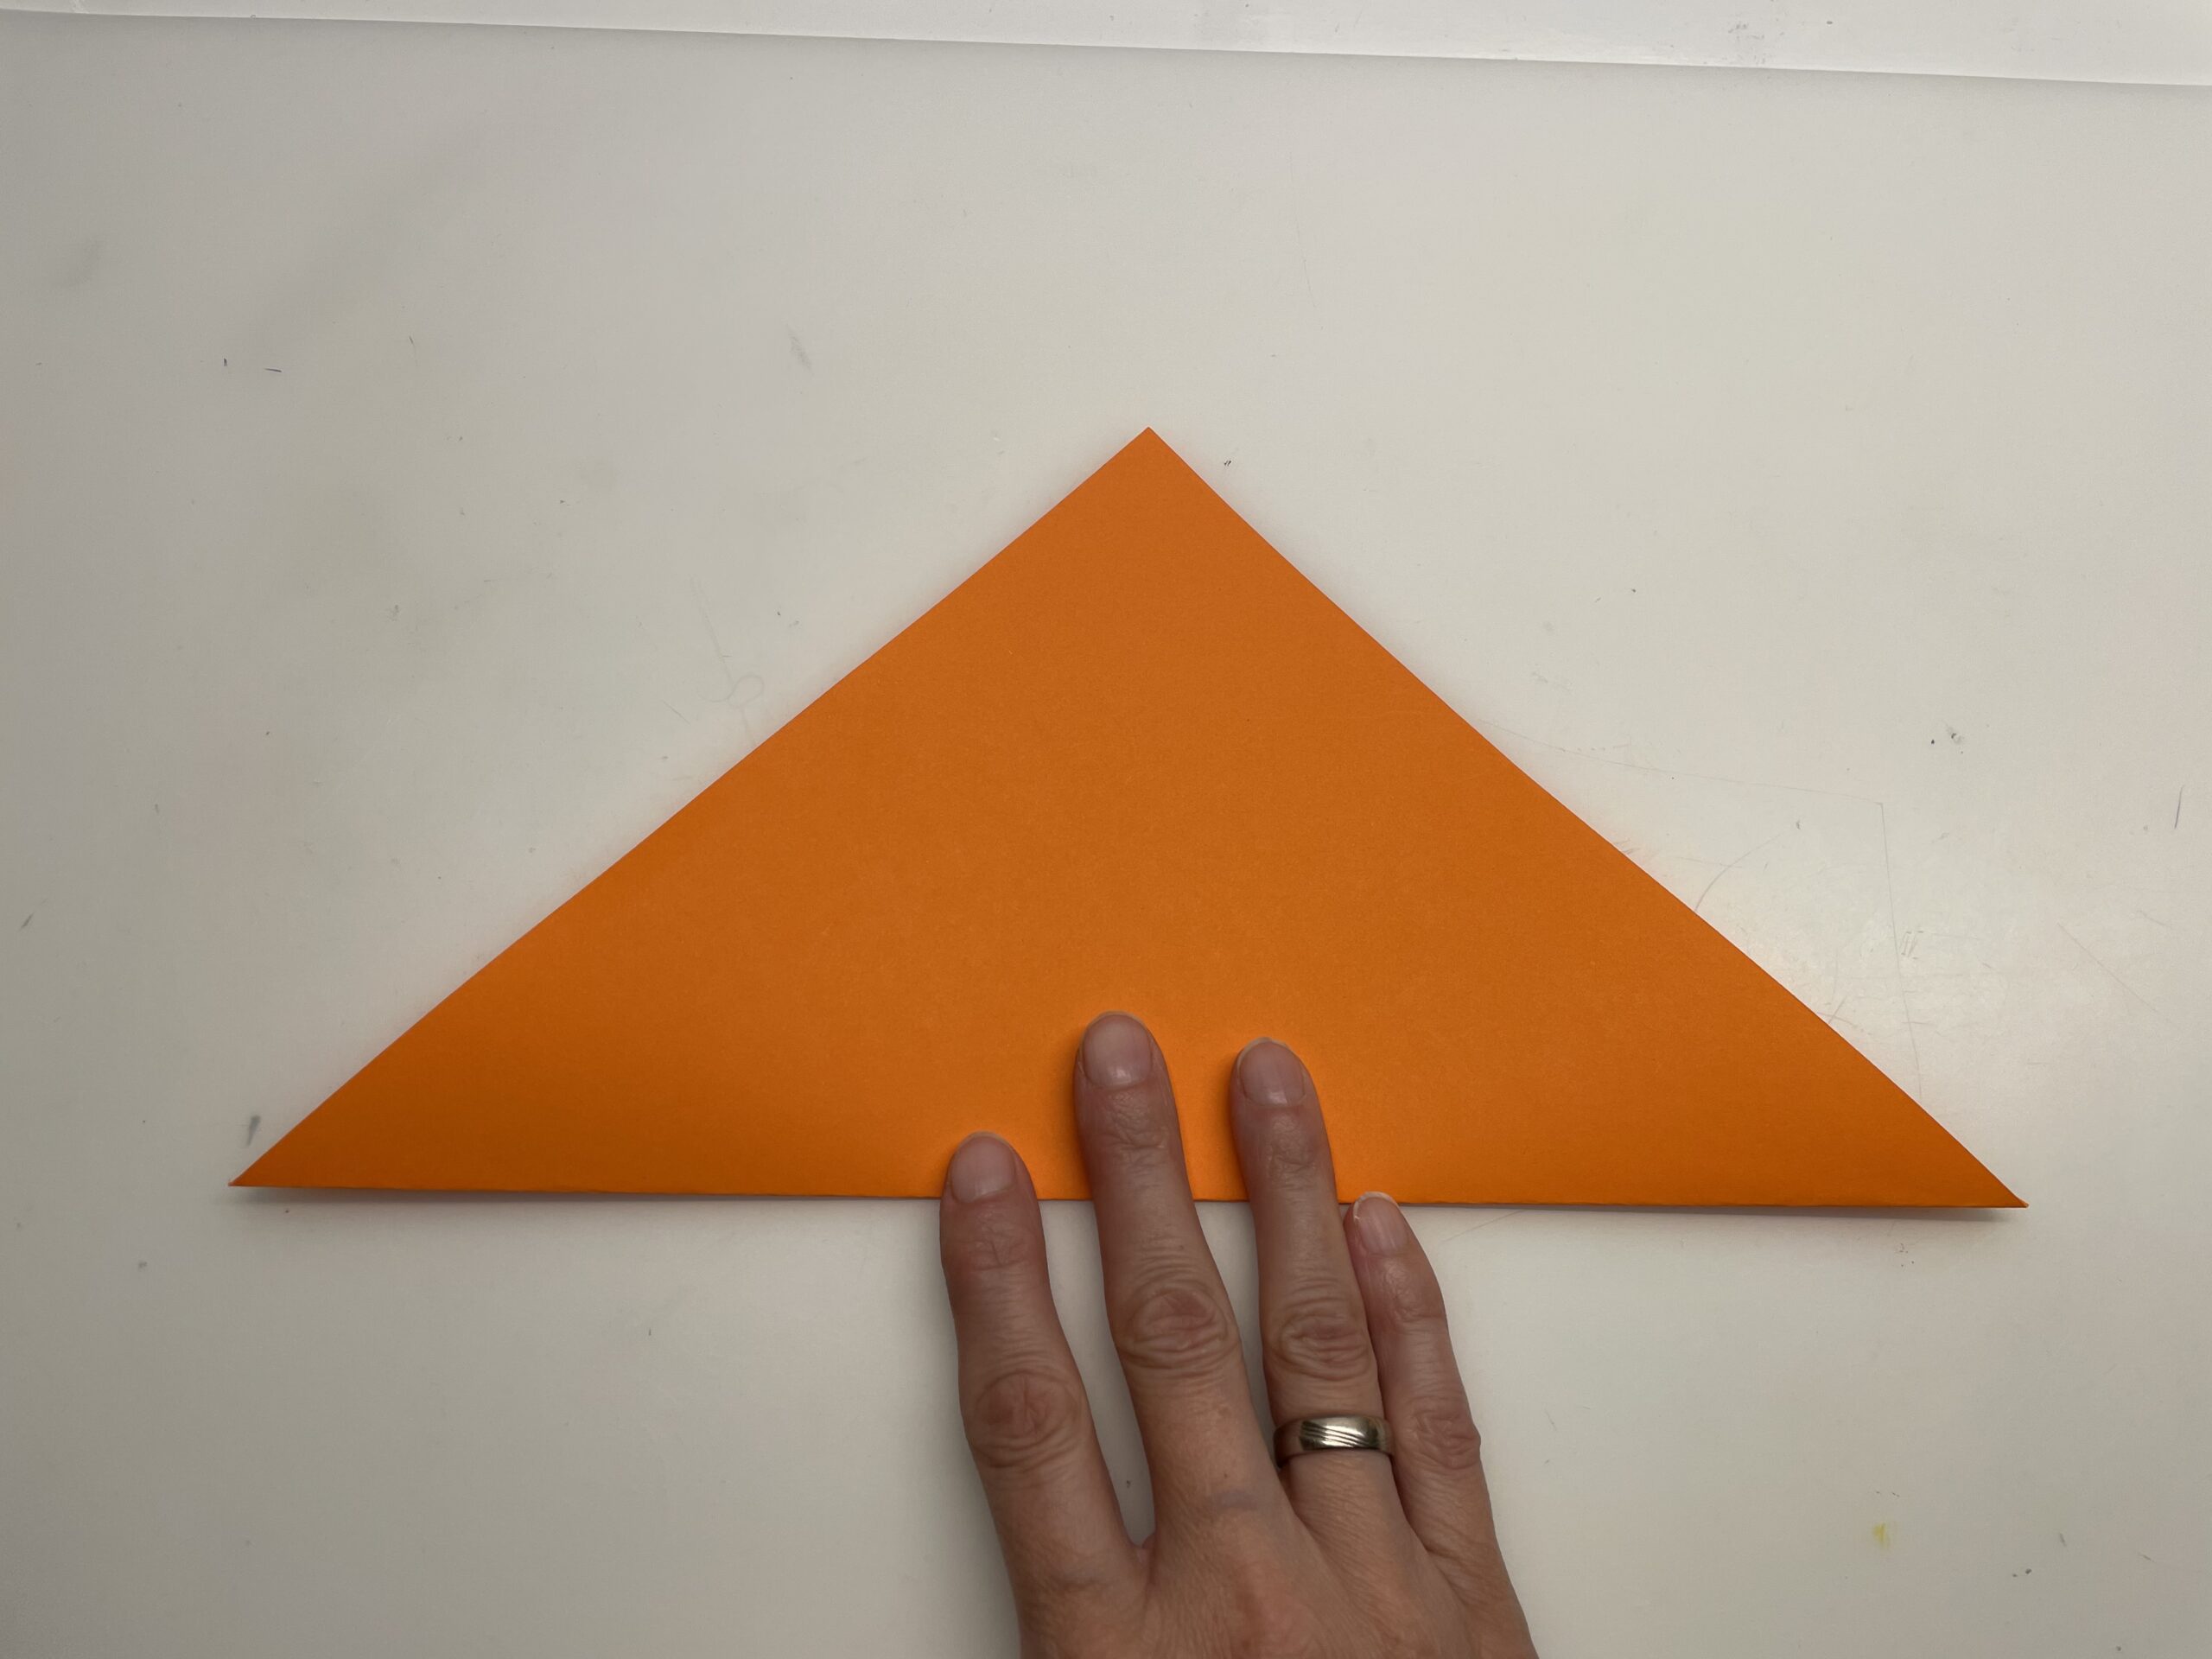
Put the square in front of you so that there's a tip pointing at you.

Now fold the bottom tip upwards and place it exactly on the top tip. Strip the bottom side with your fingers smoothly.
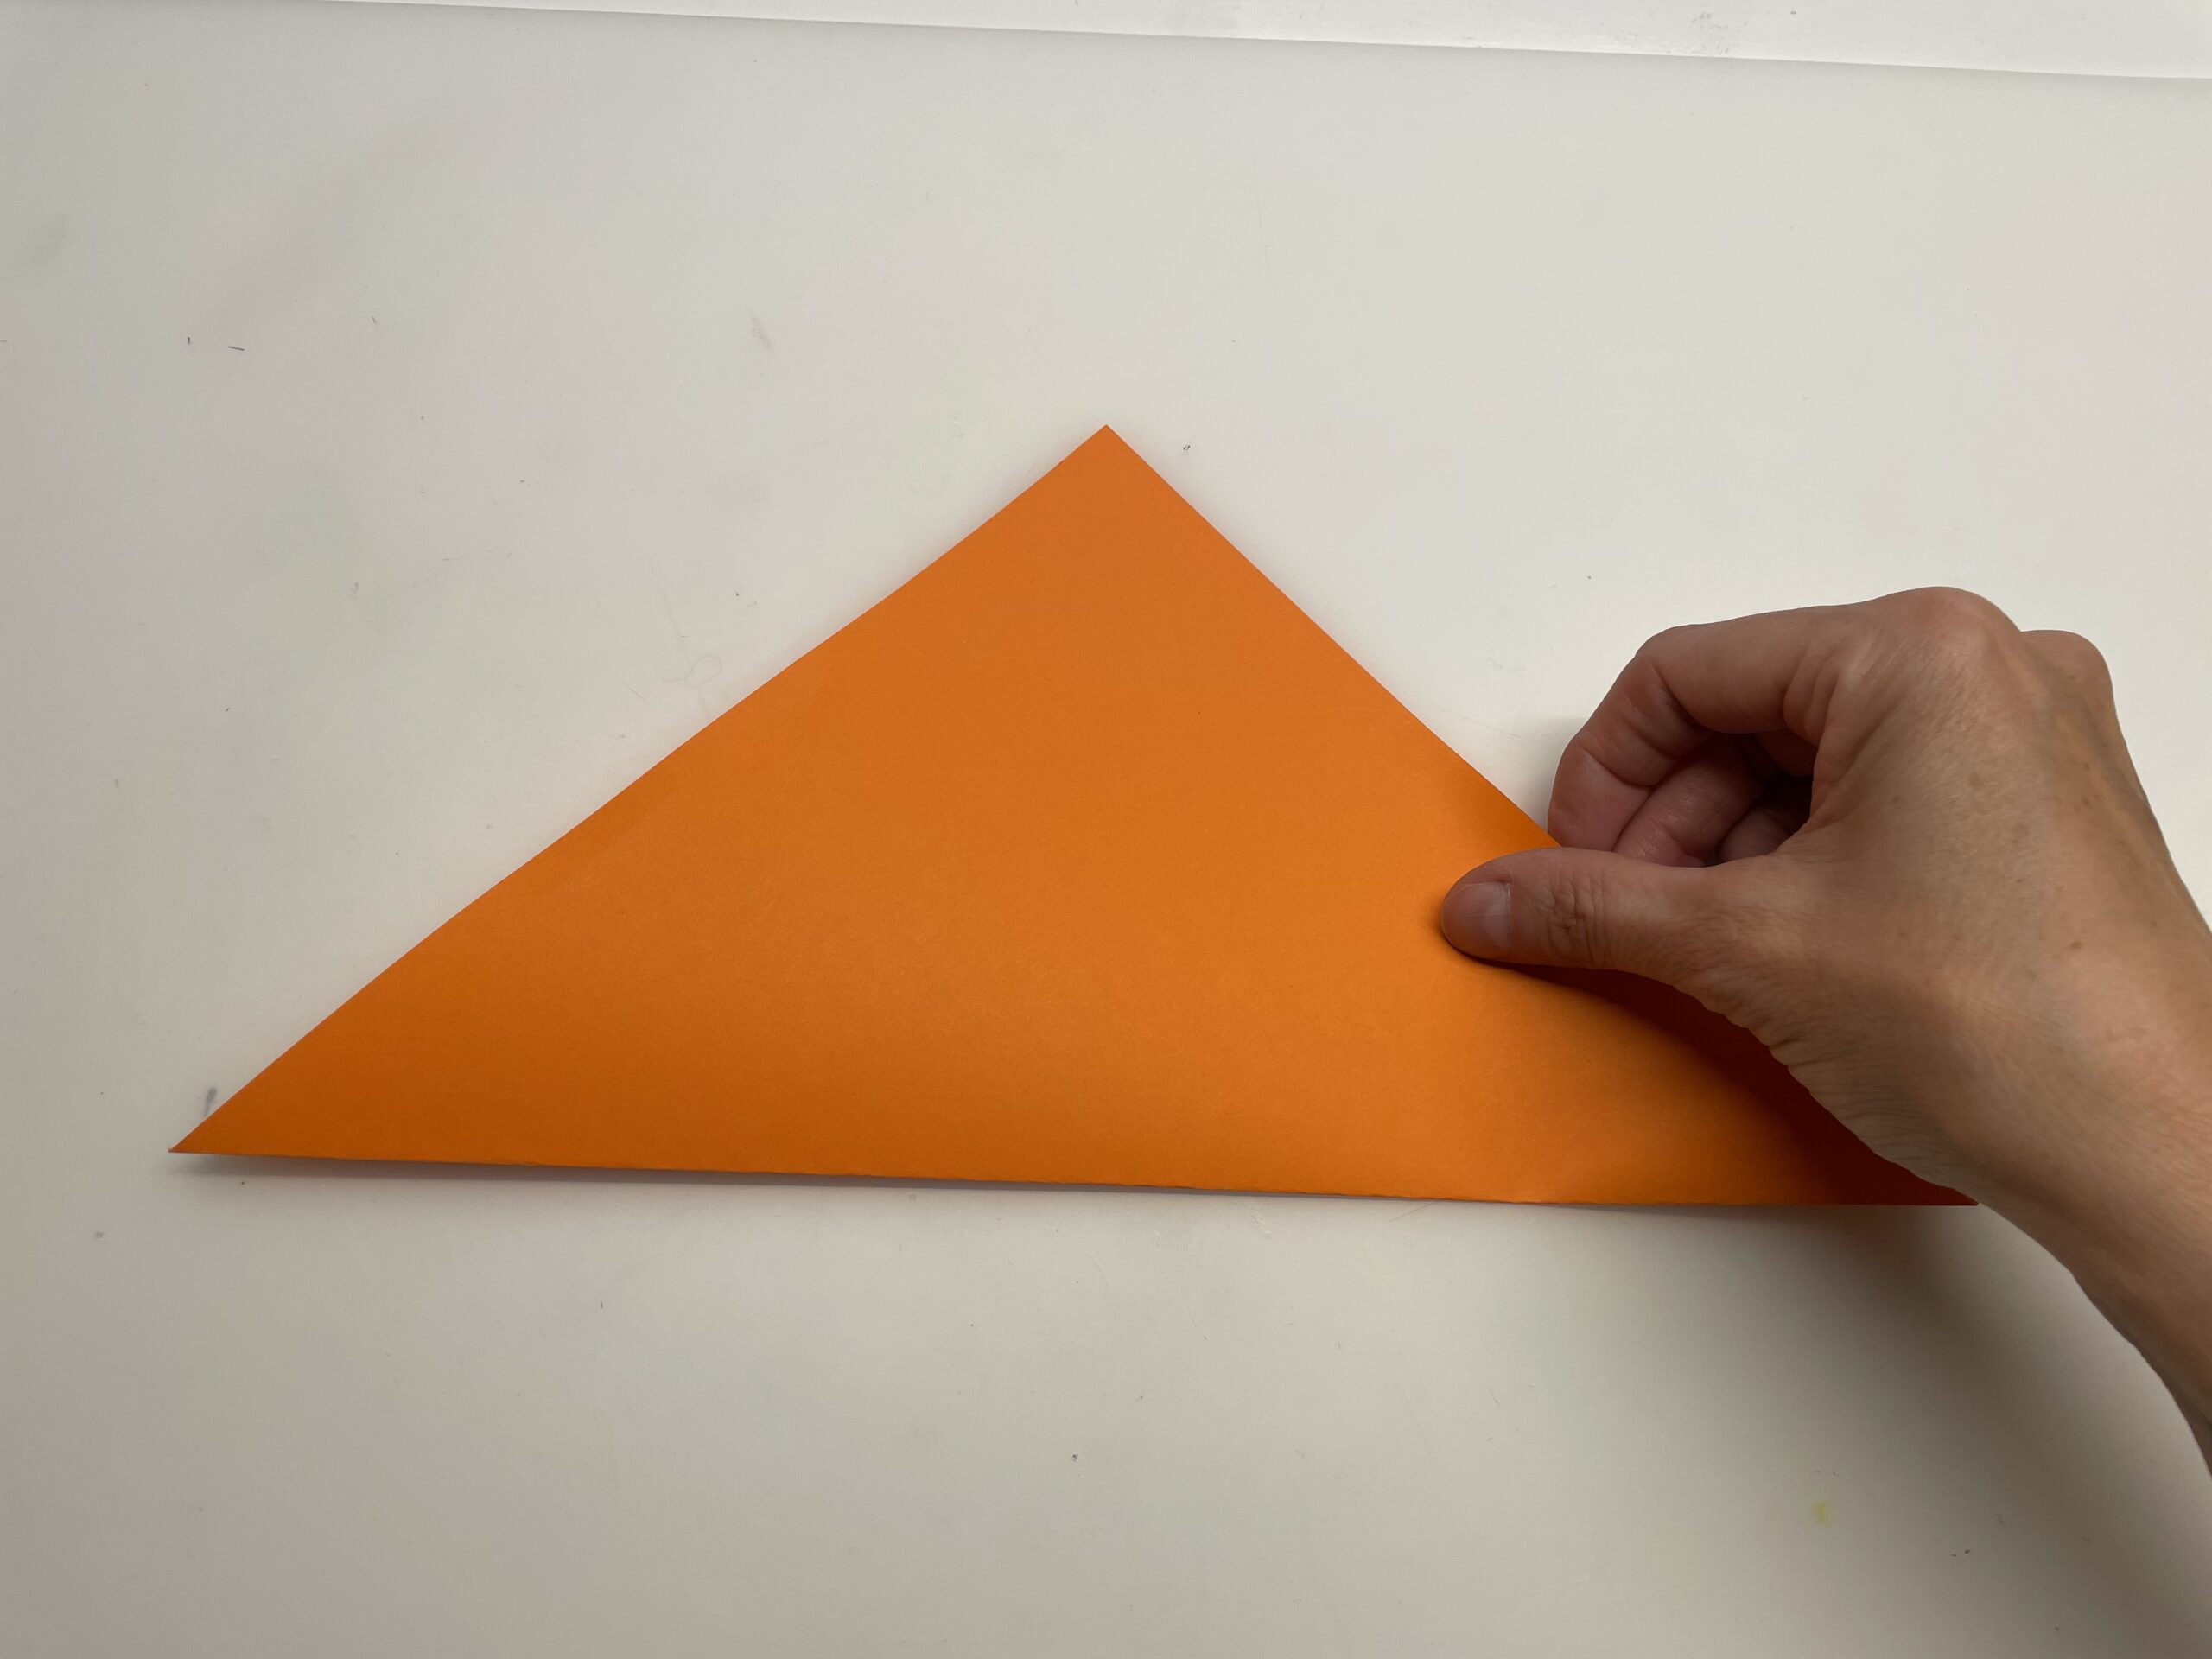
That's how a triangle is created.
Attention: You already have the triangle when you have cut the paper yourself!
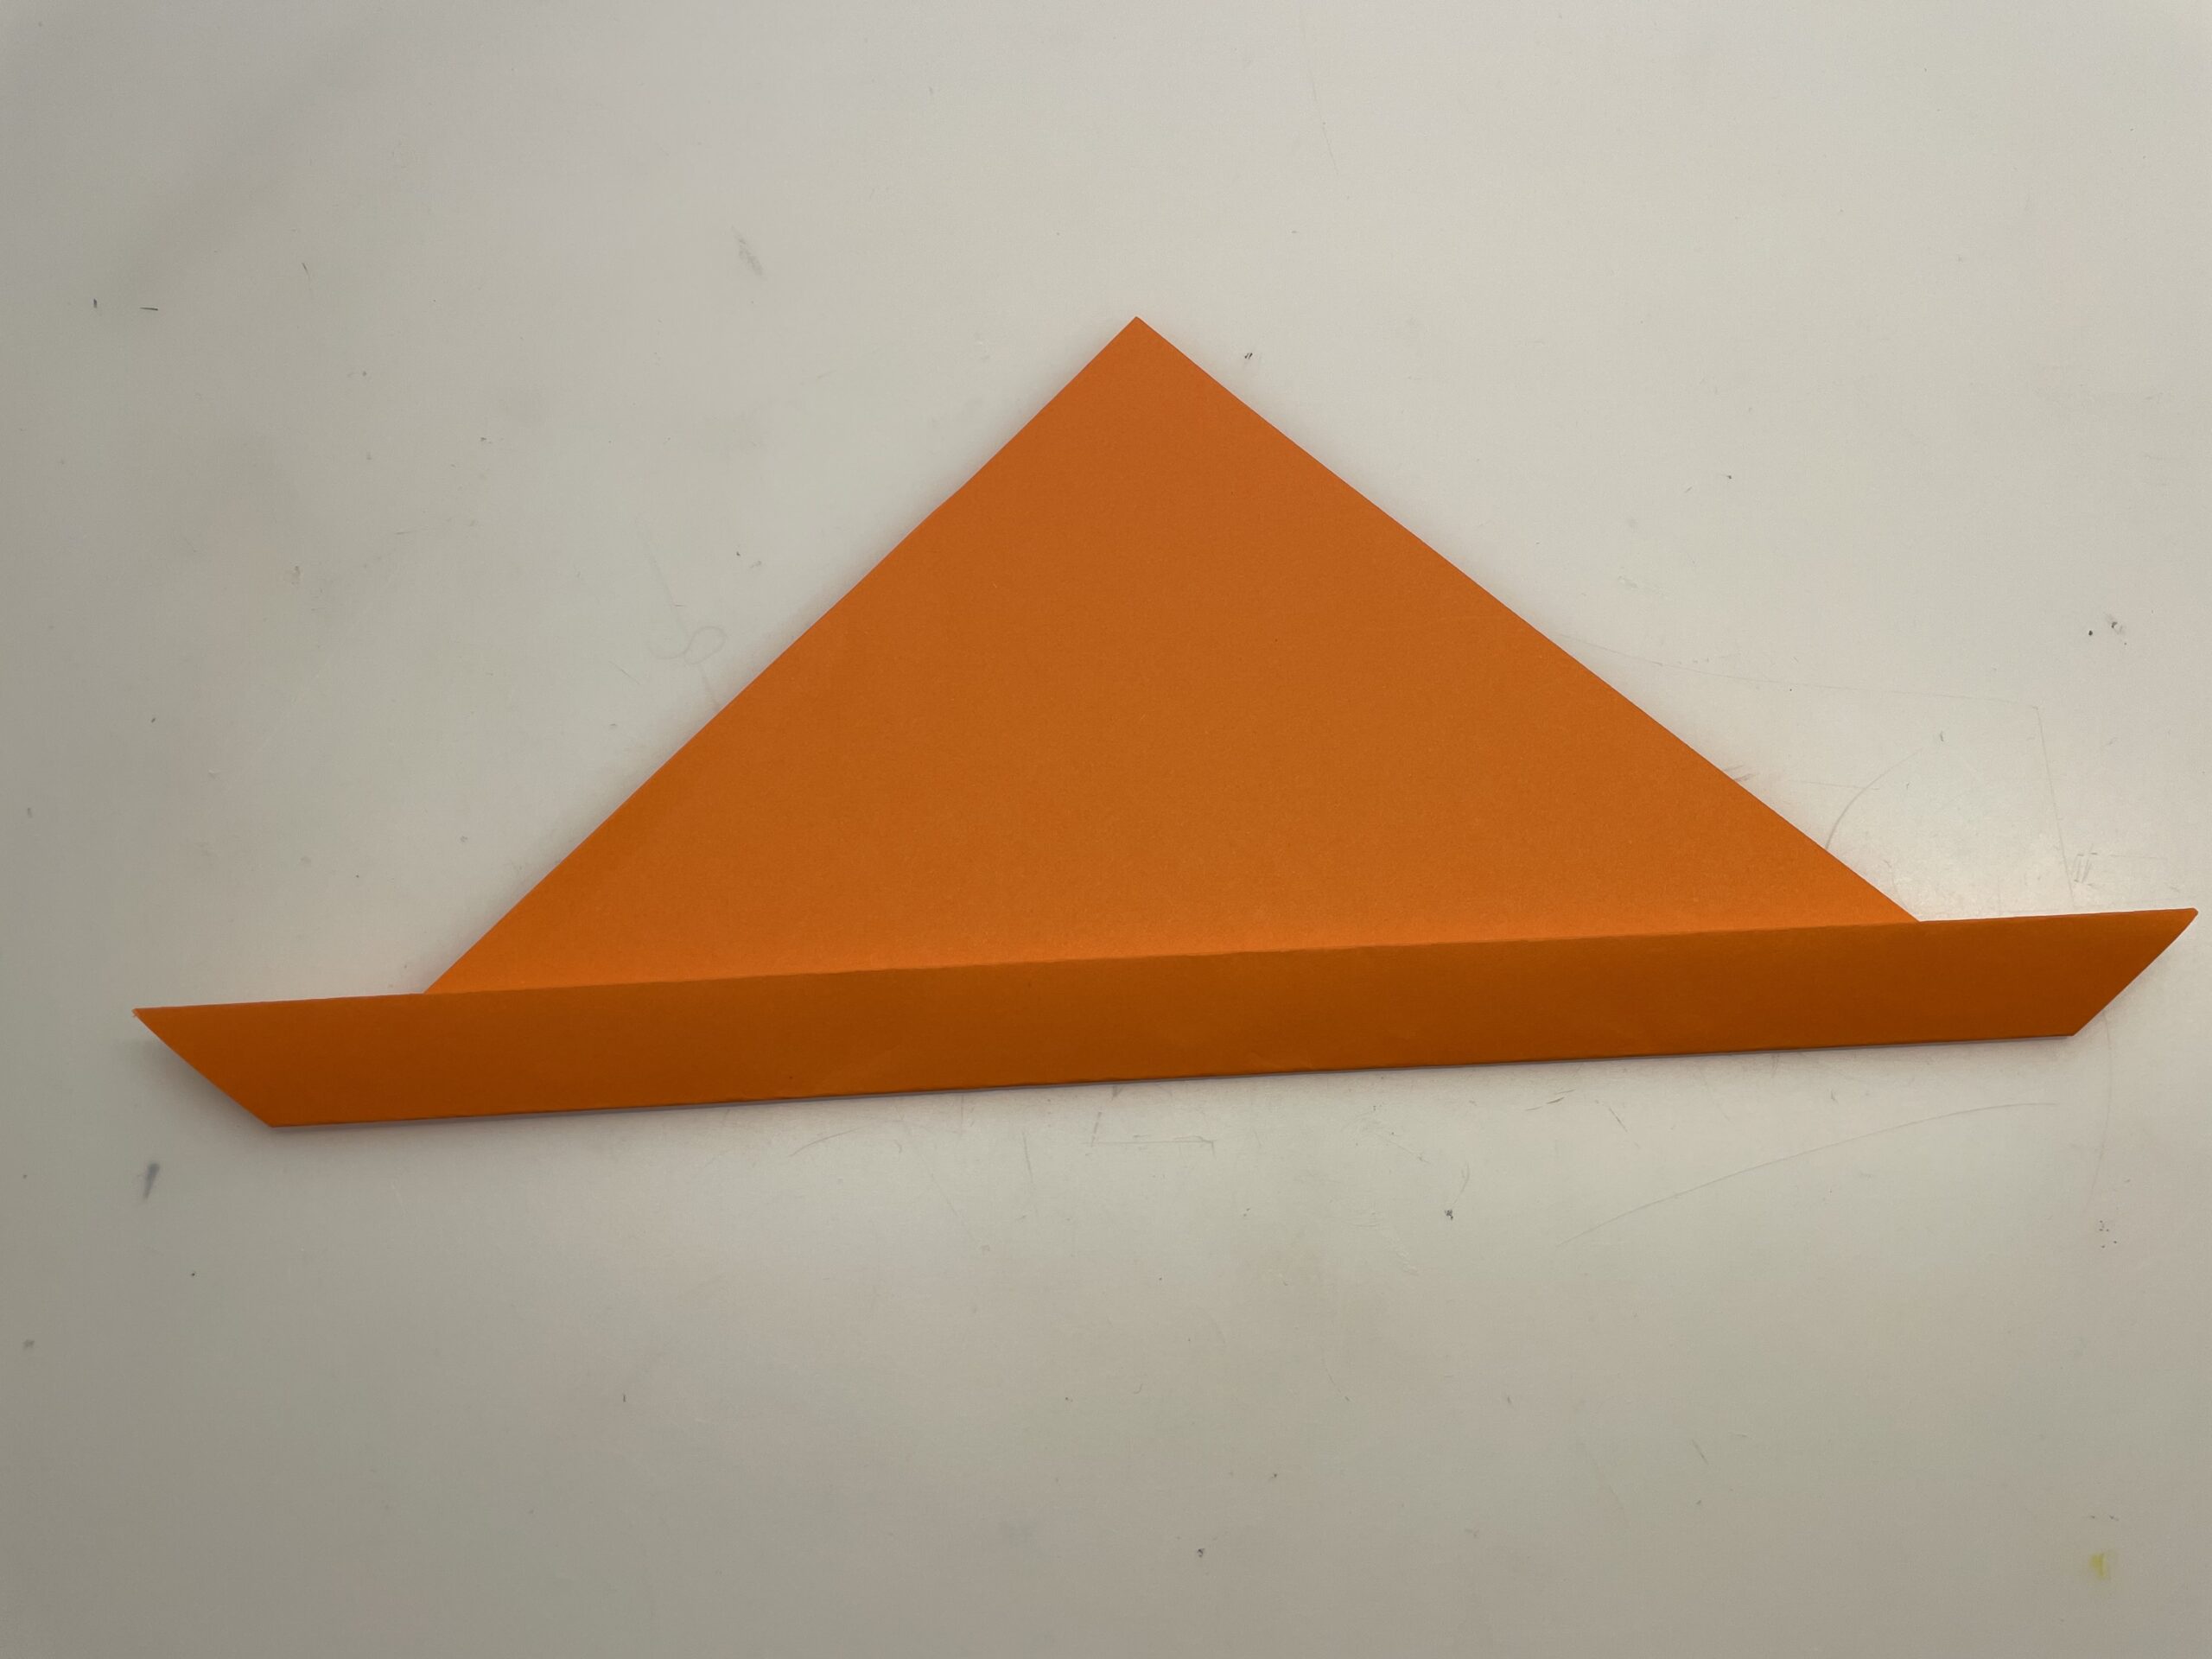
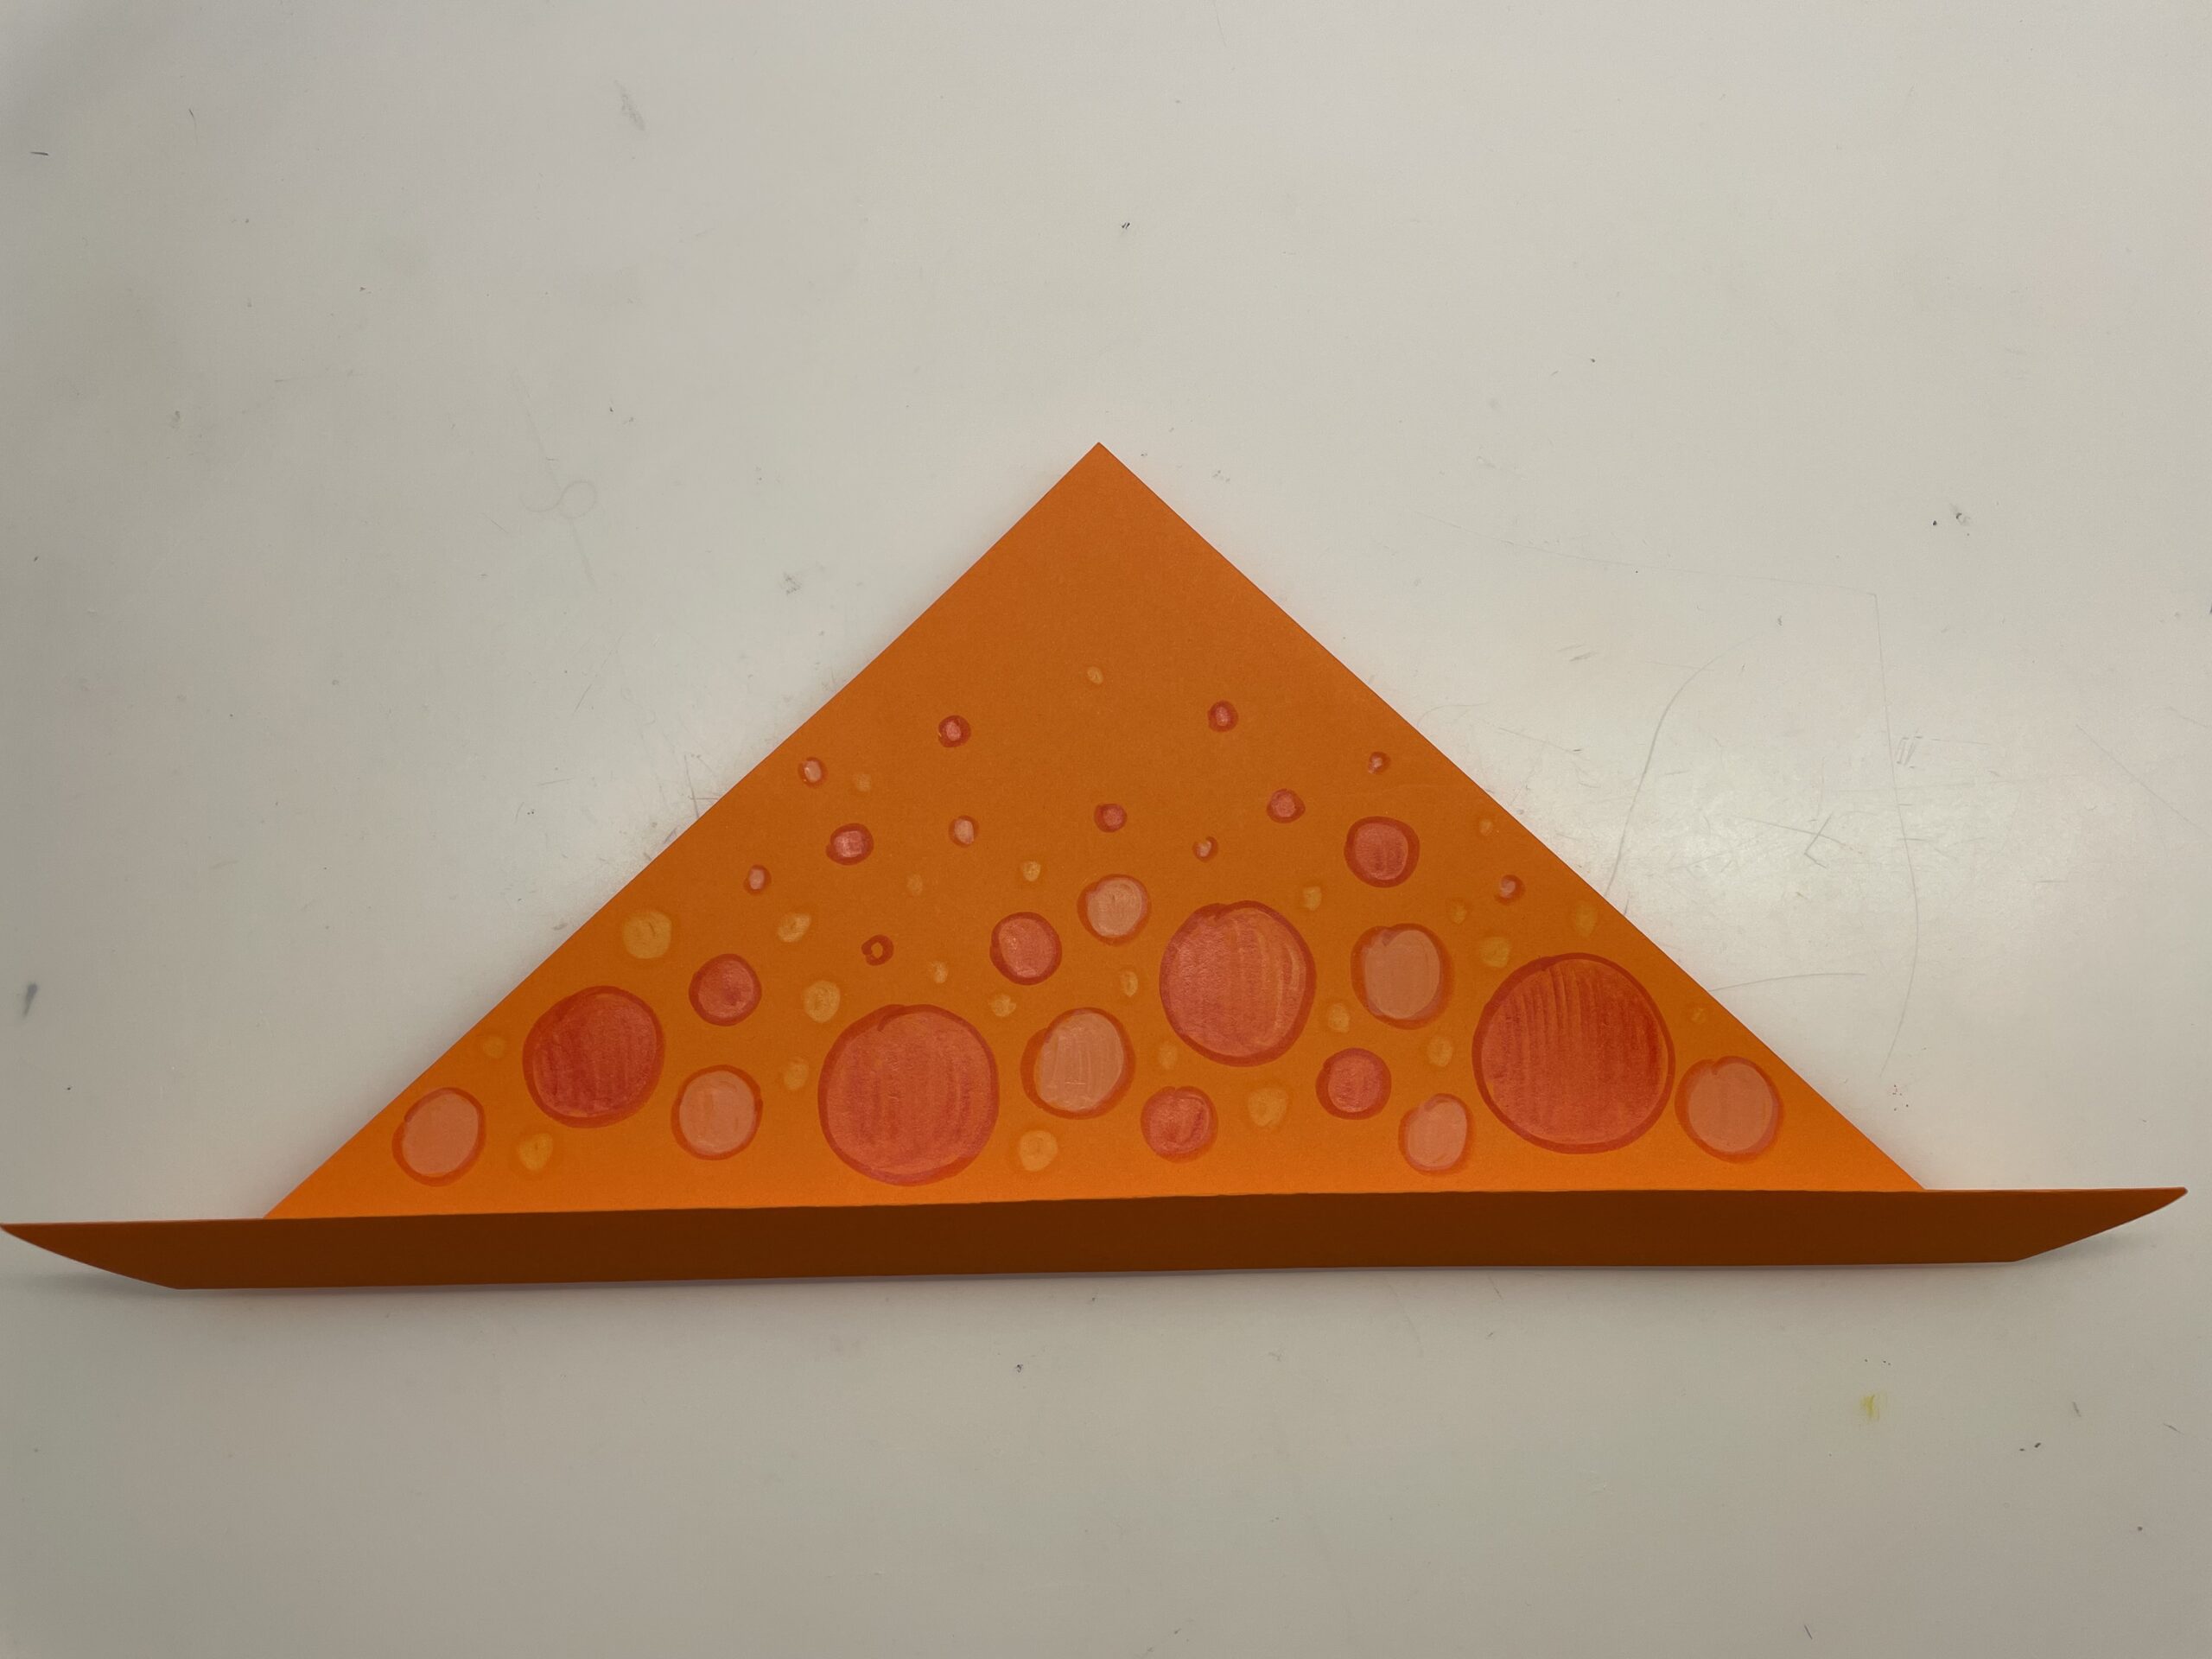
The lower closed edge now folds up about one centimeter wide.
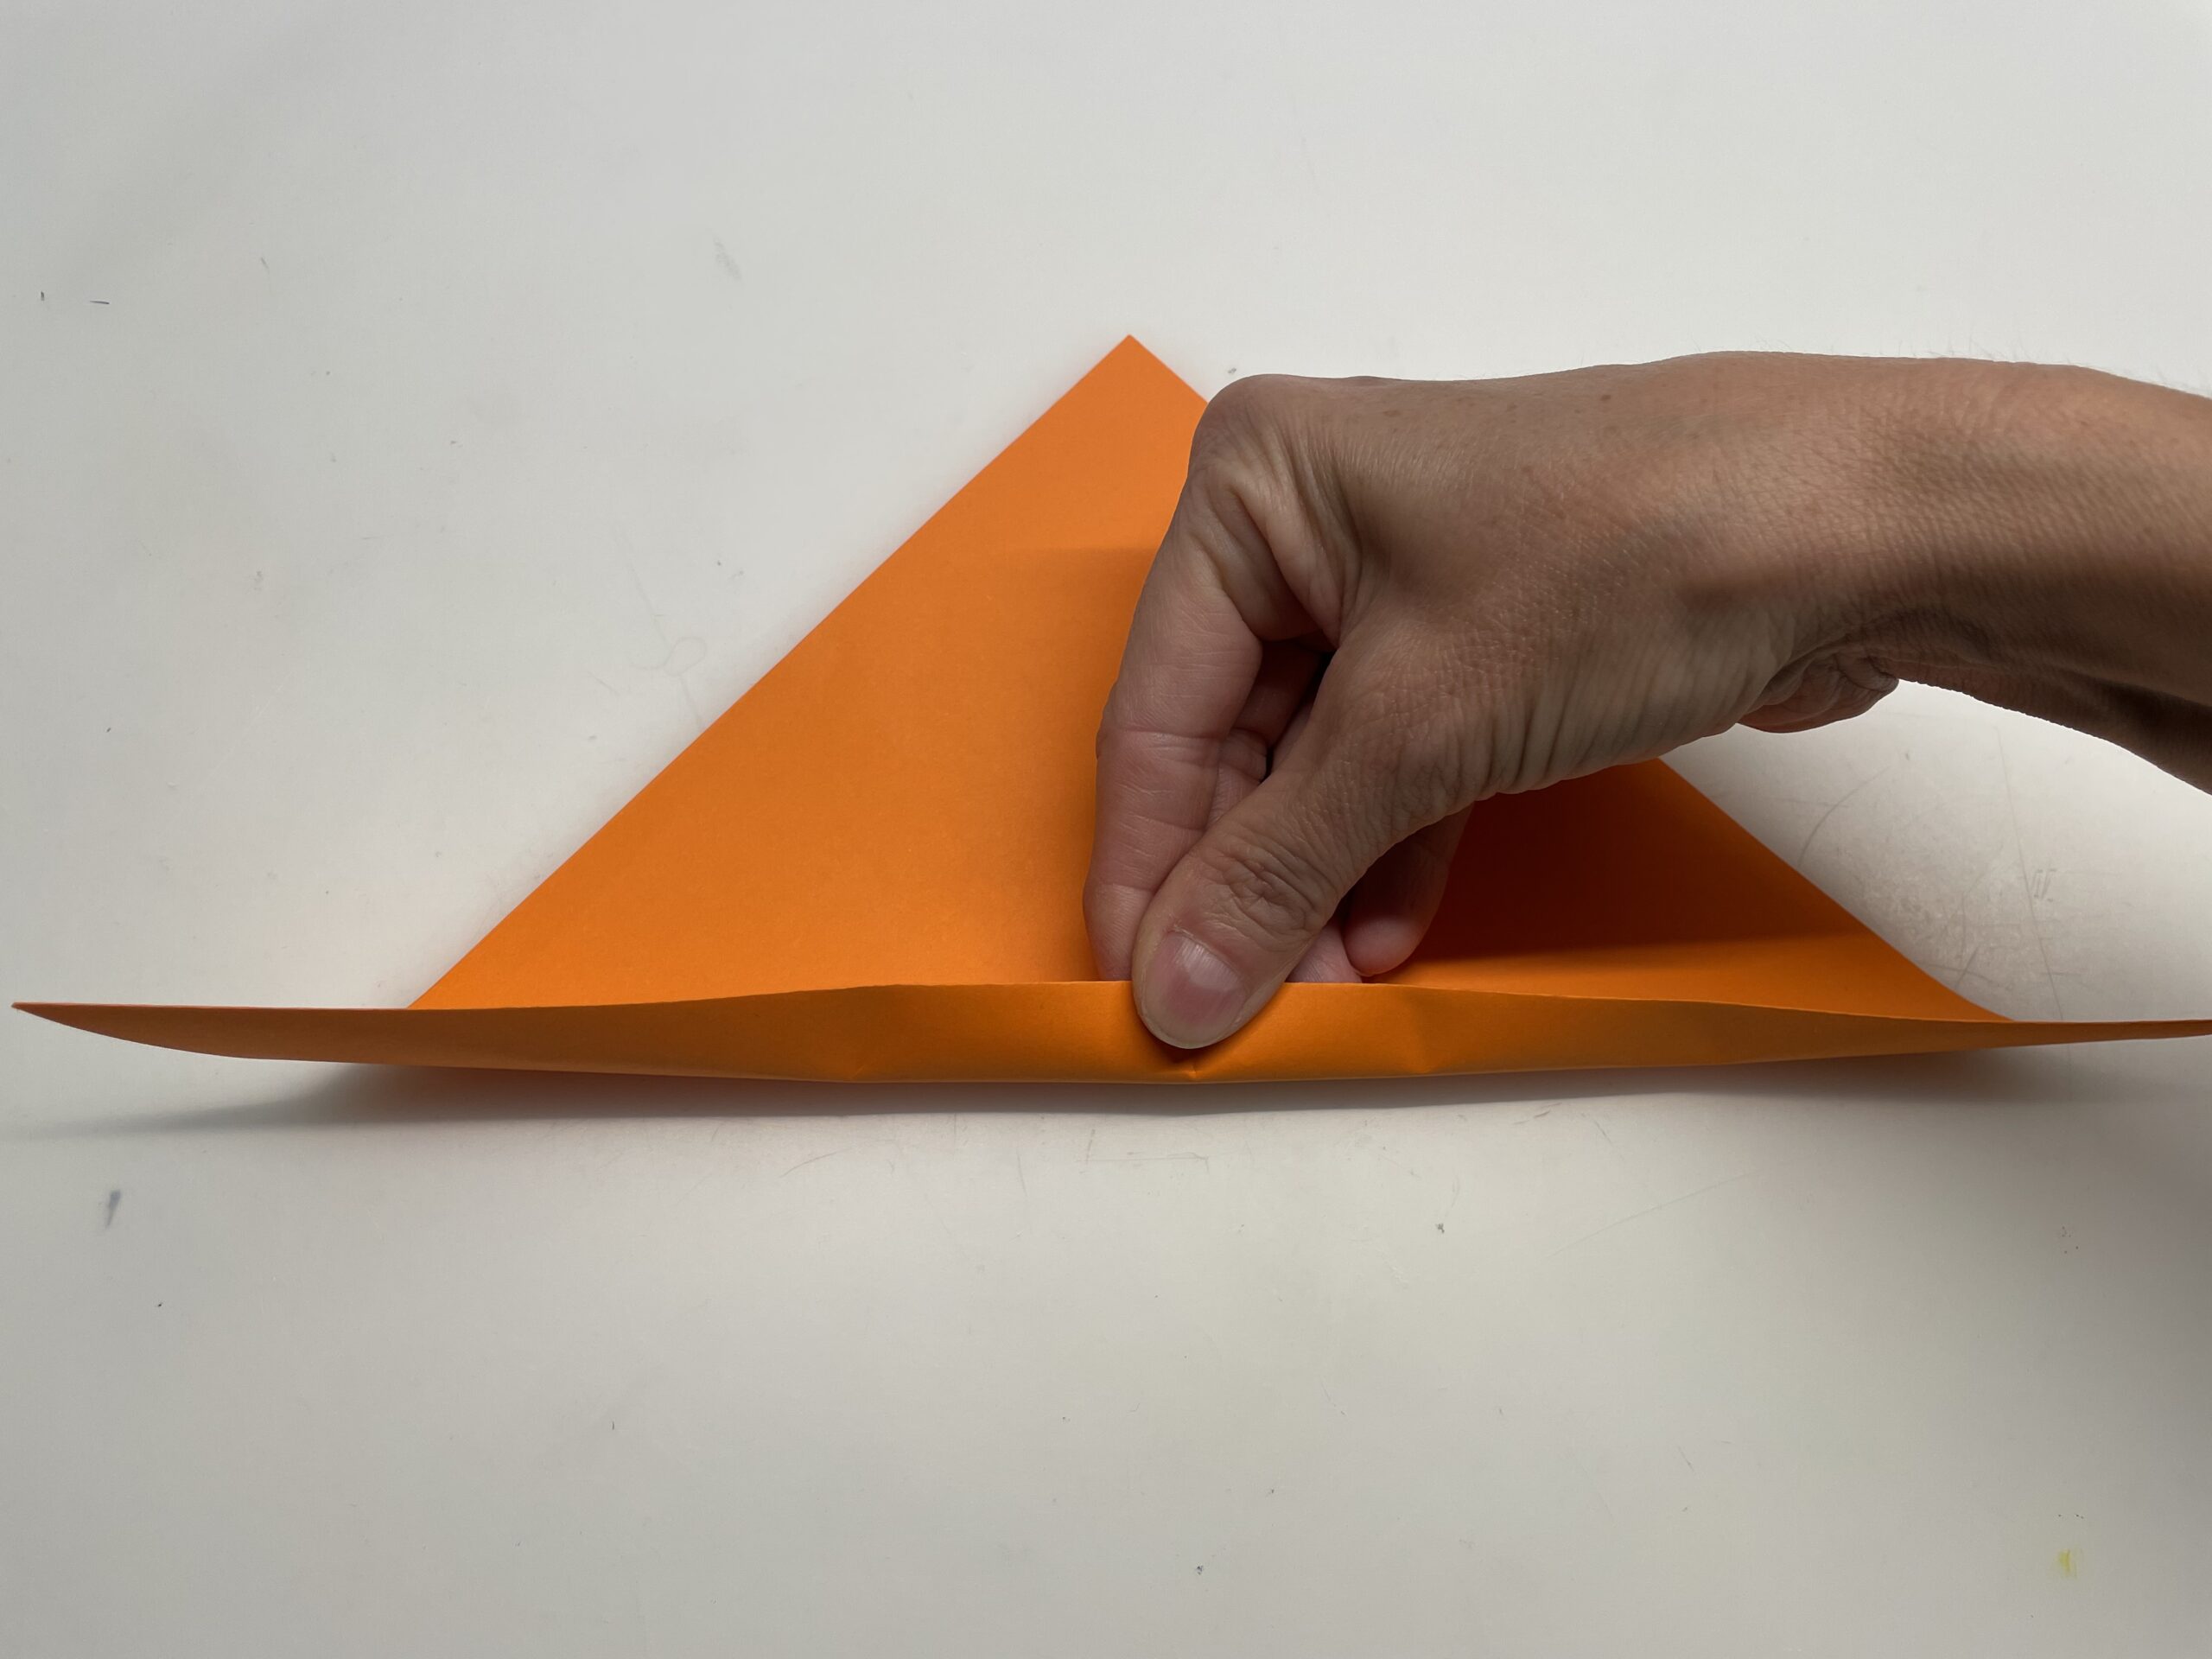
To do this, first hold the strip firmly in the middle and strip with the other hand from the kink outwards. Make sure that a uniformly wide strip is formed.
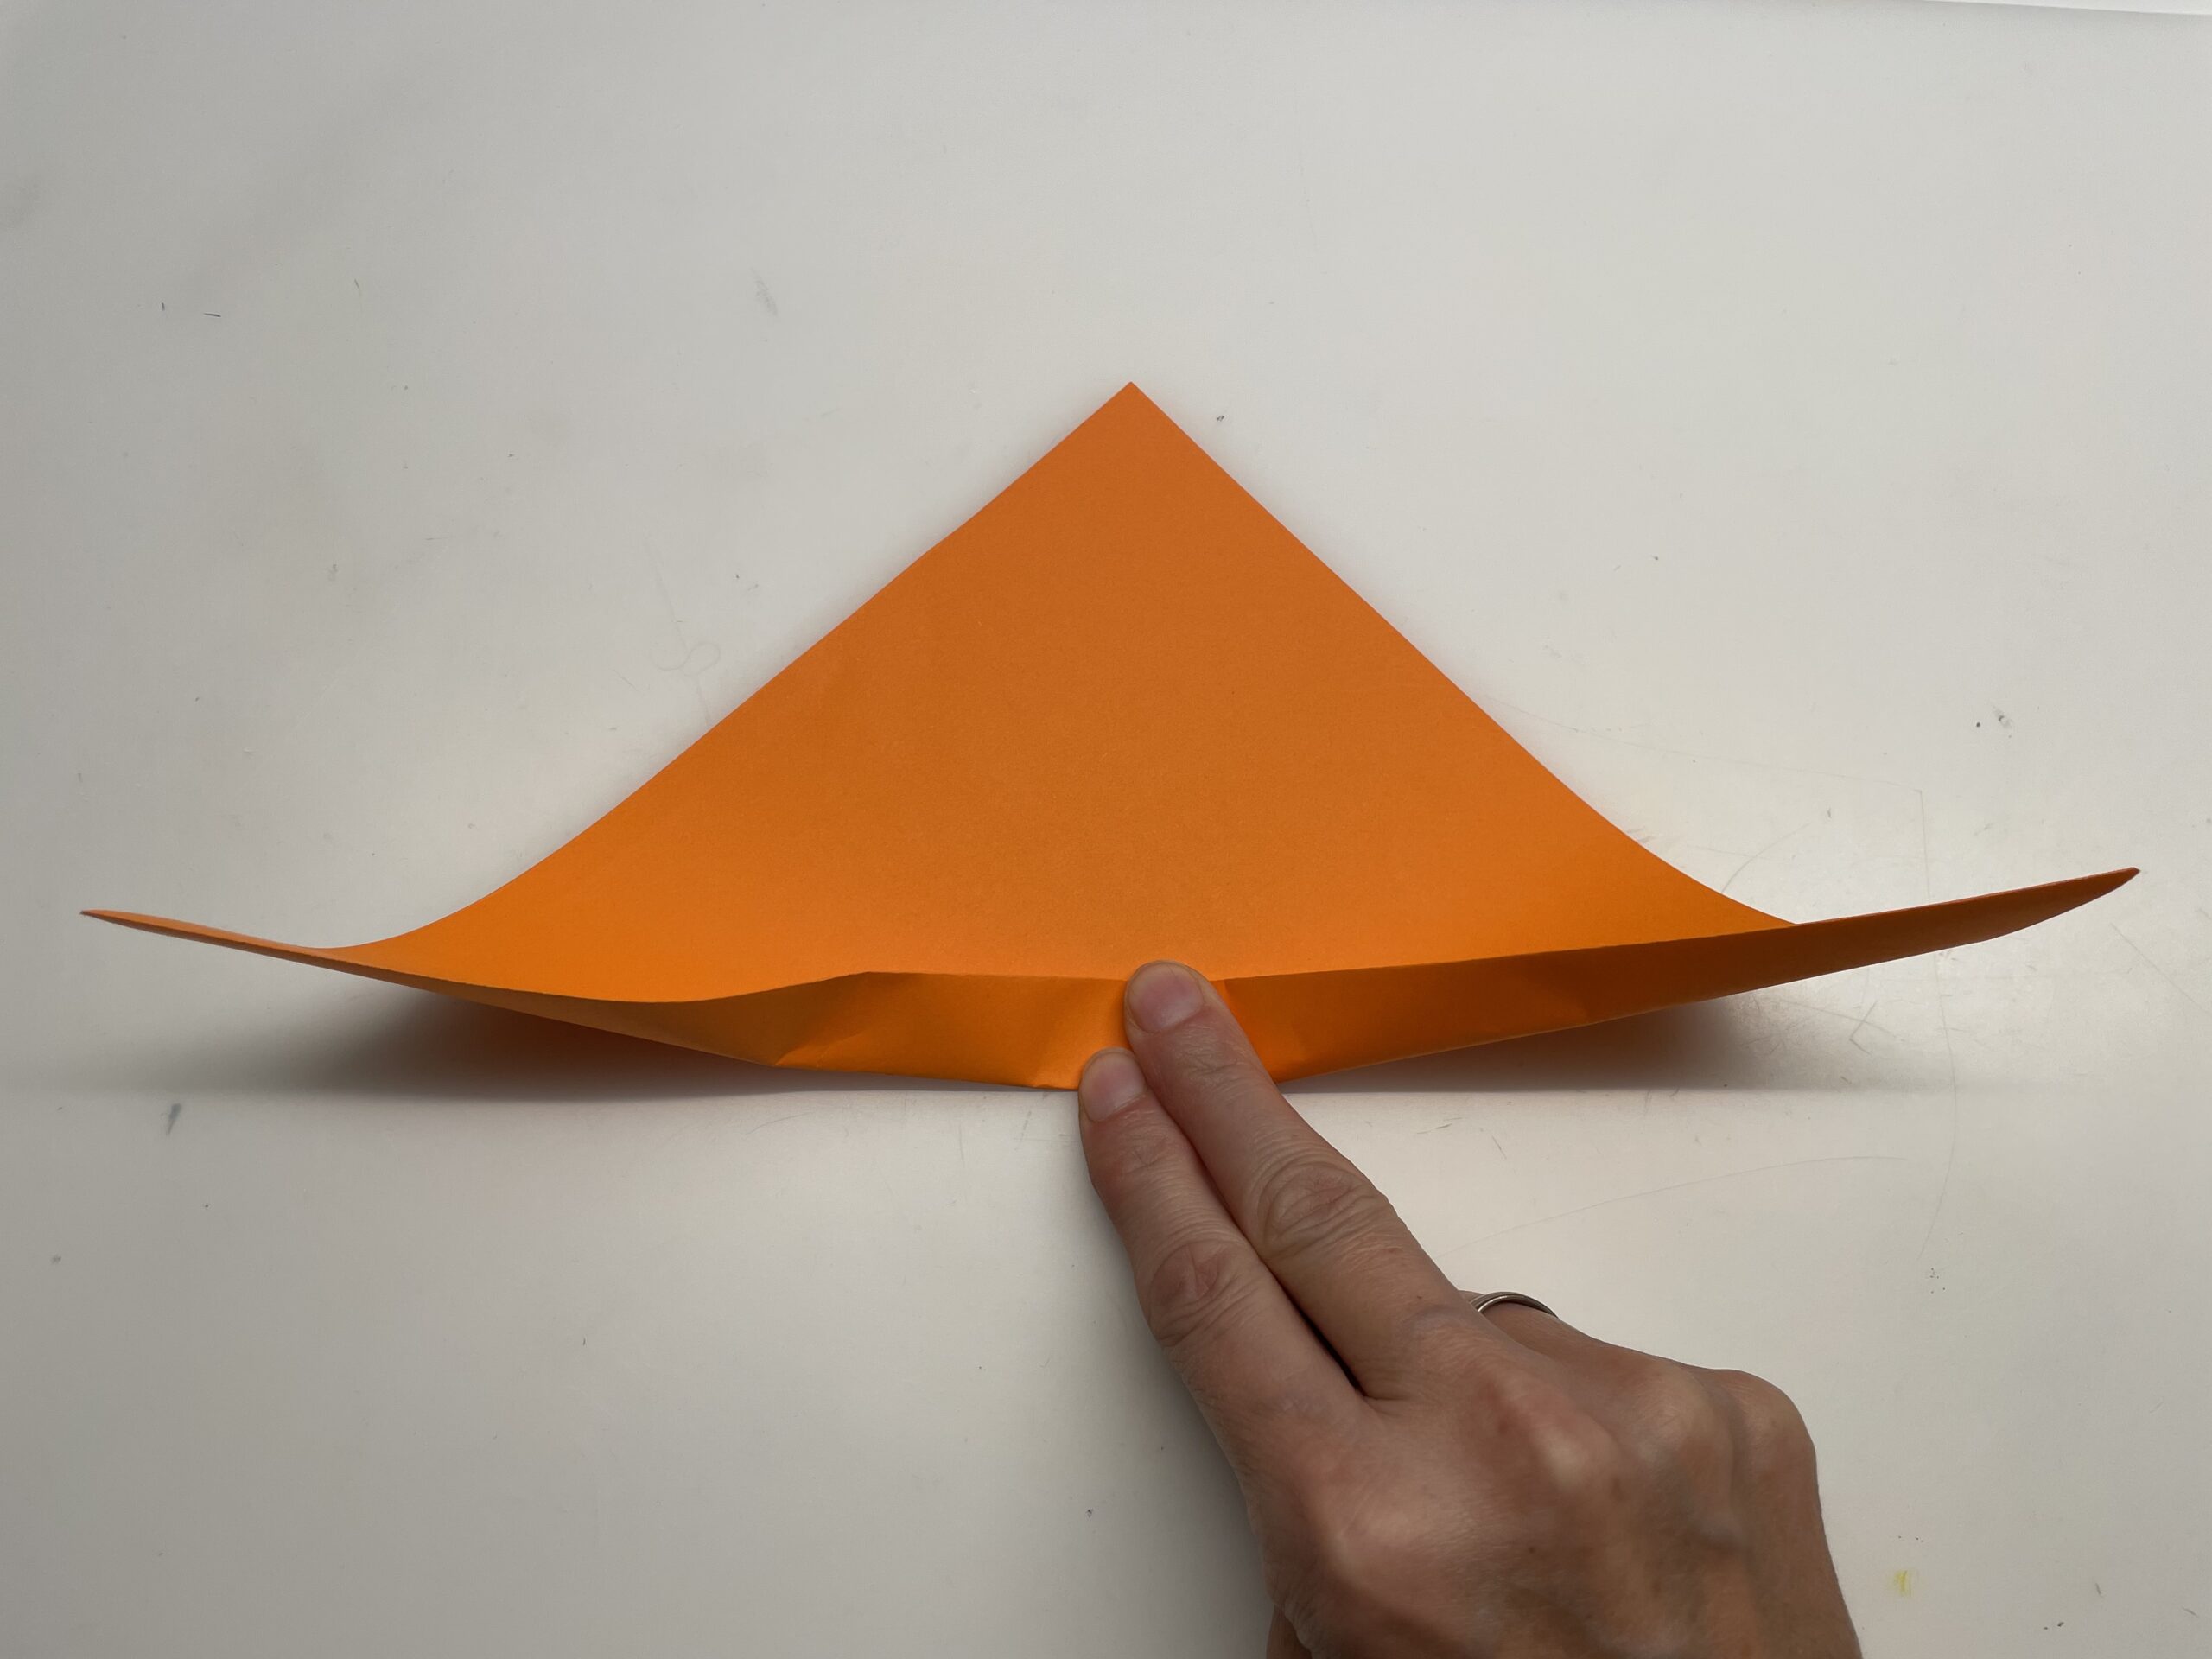
Now you're done wrinkling.
Now you paint the paper flyer colorfully according to your ideas.

There are no limits to your imagination.

Then take the painted triangle in your hand at the bottom.
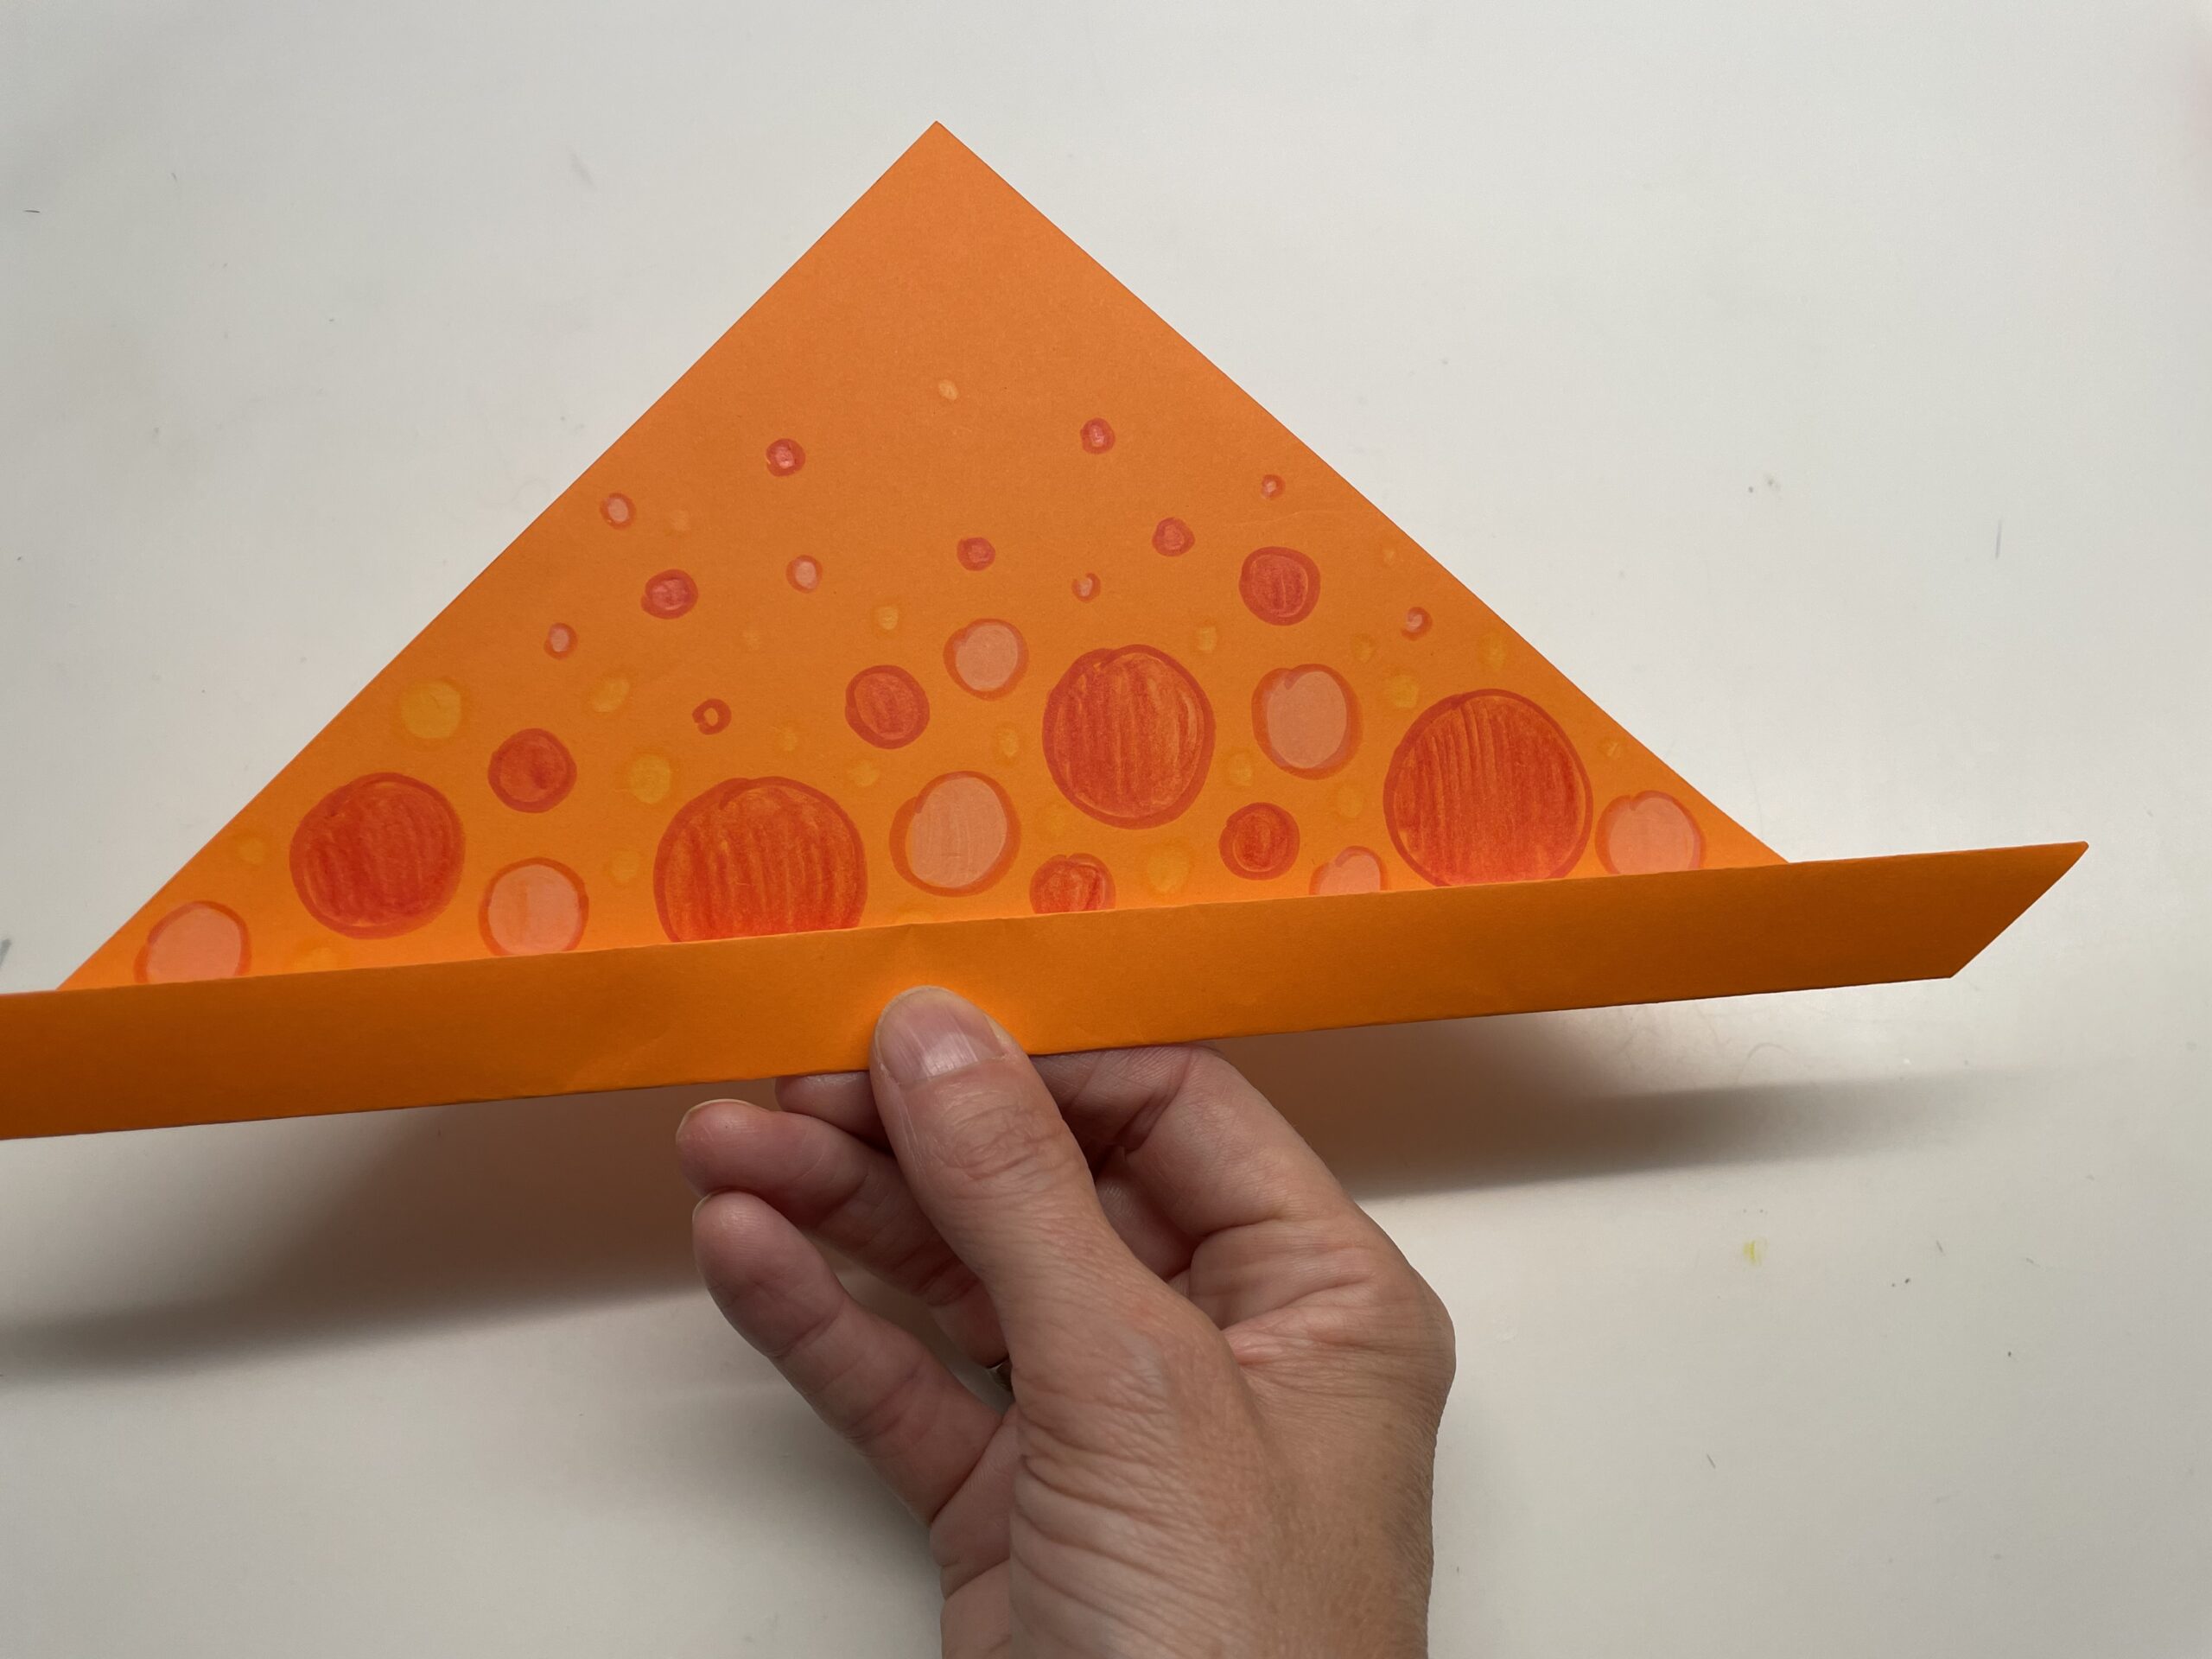
Then put a pen under the paper triangle and hold everything with your thumb. Now pull the paper edge over the pen several times. So bend the paper and the plane can be put together more easily later.
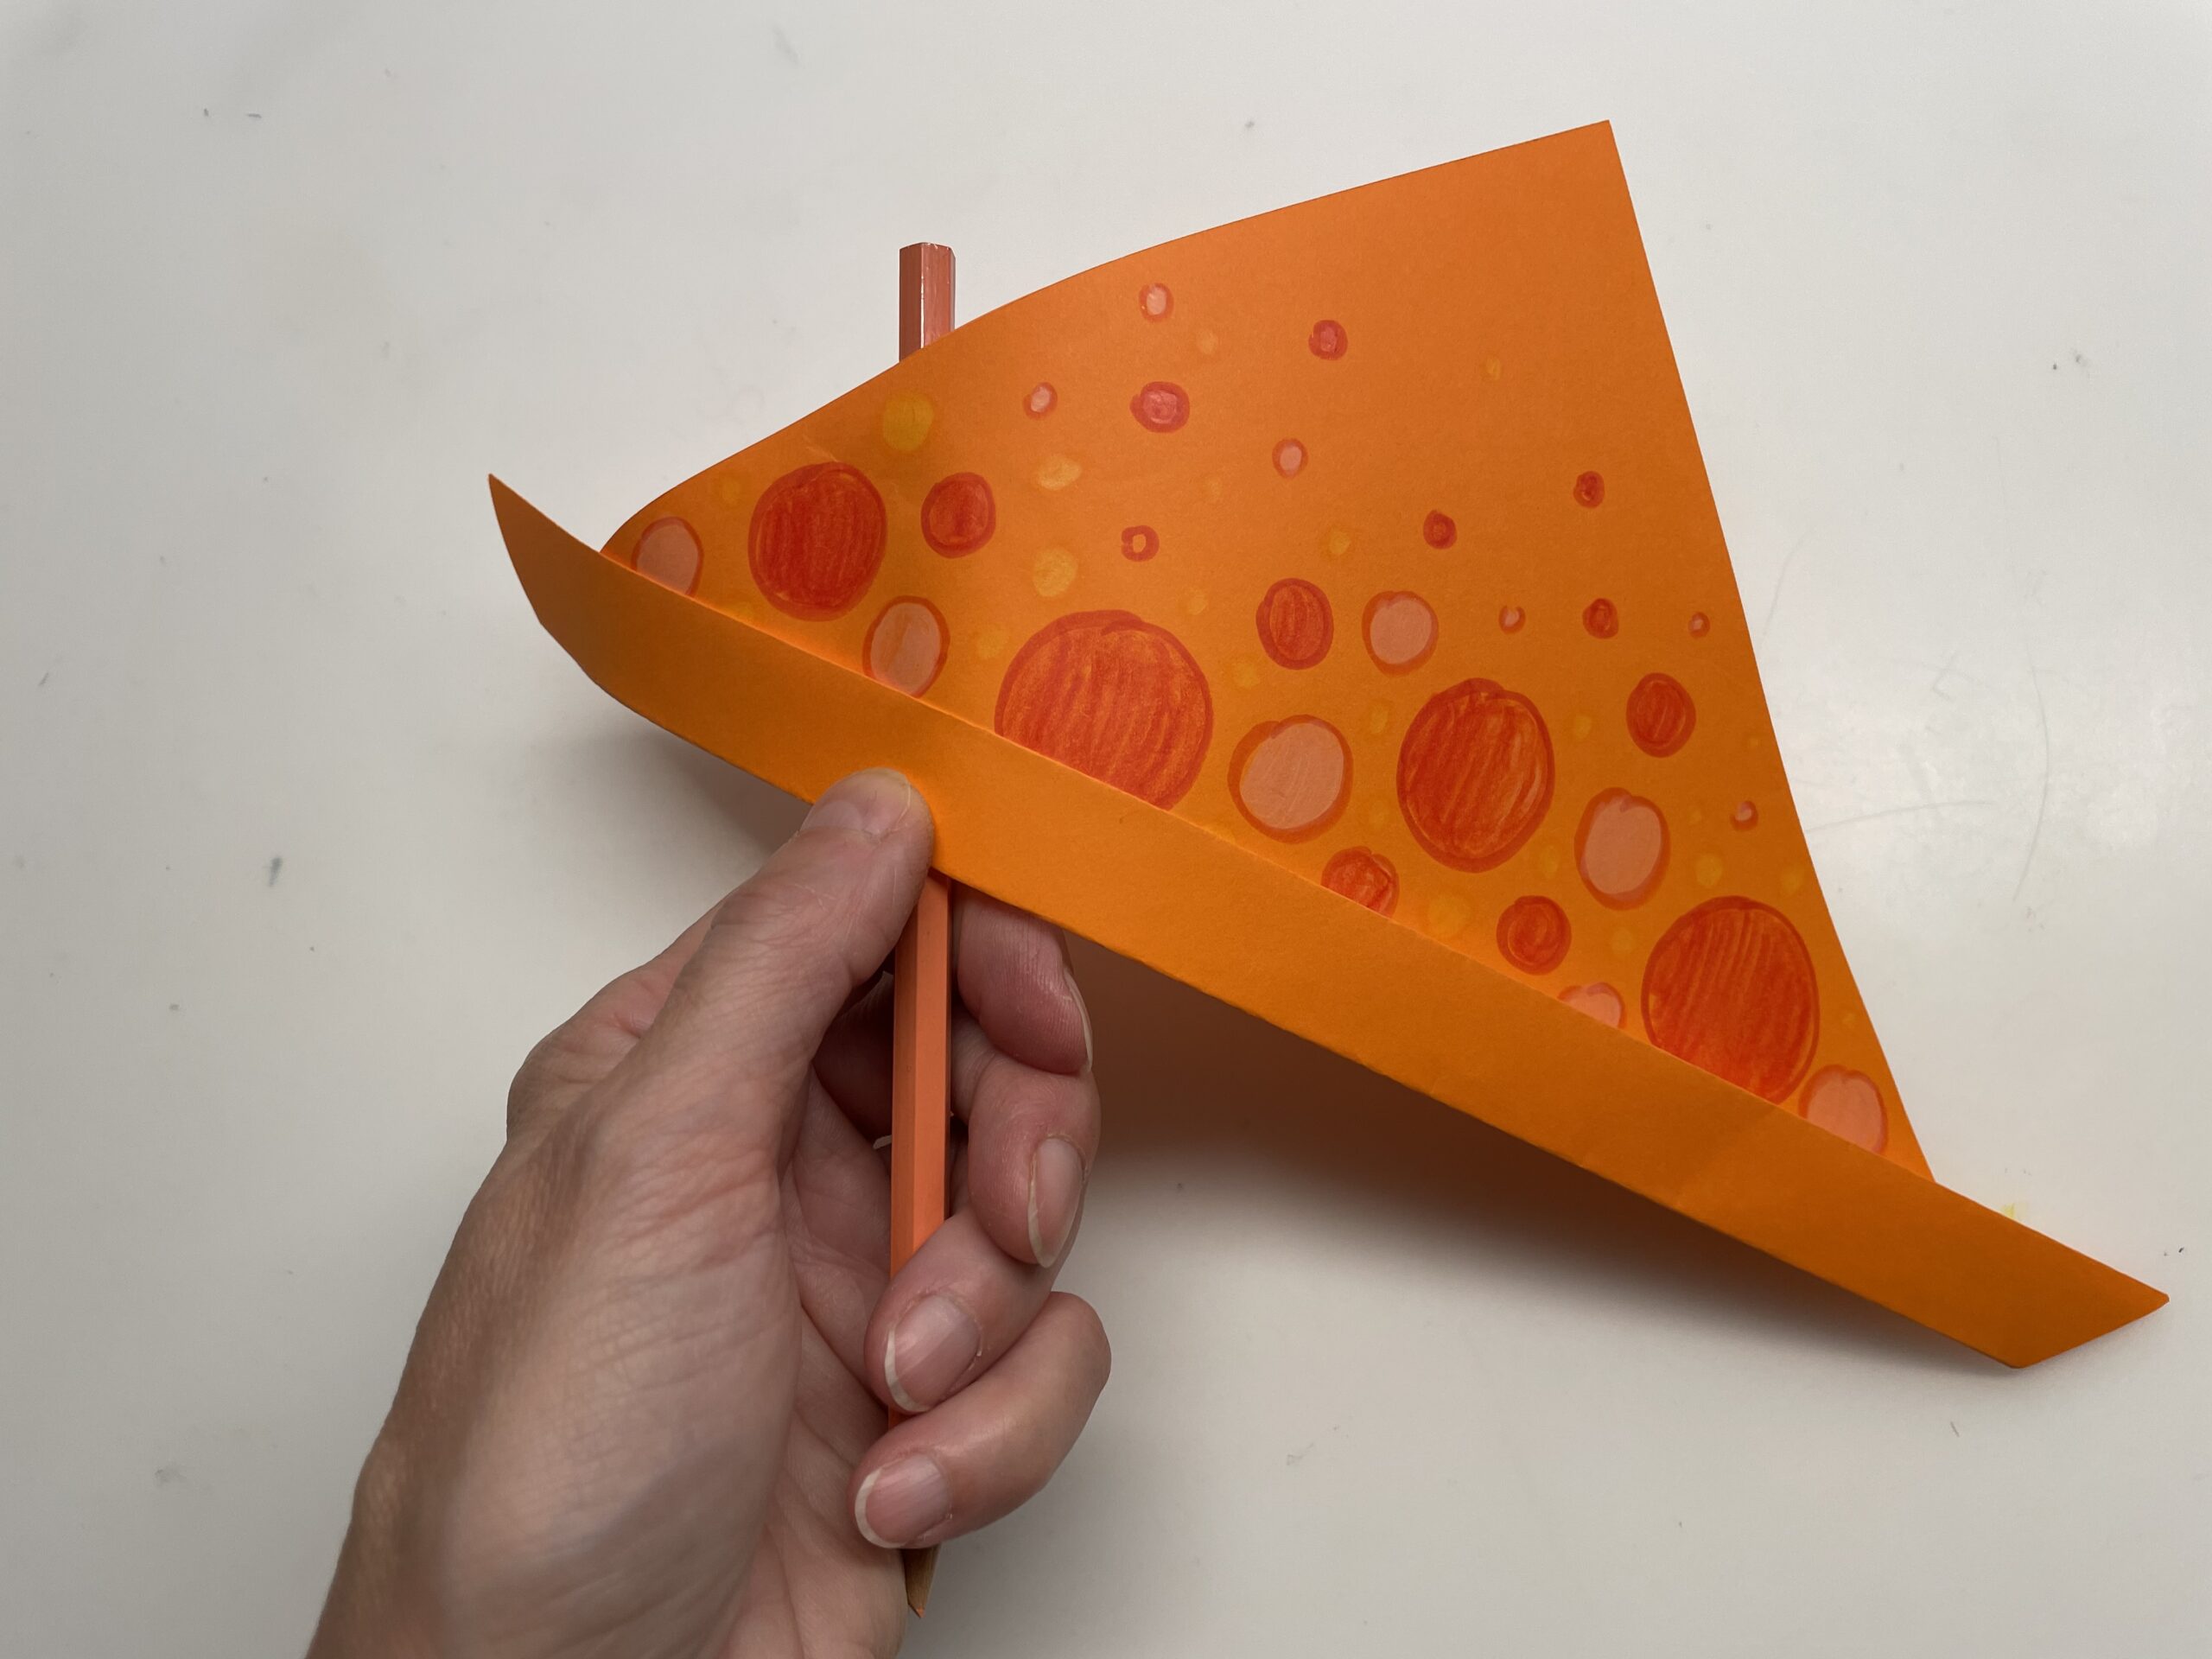
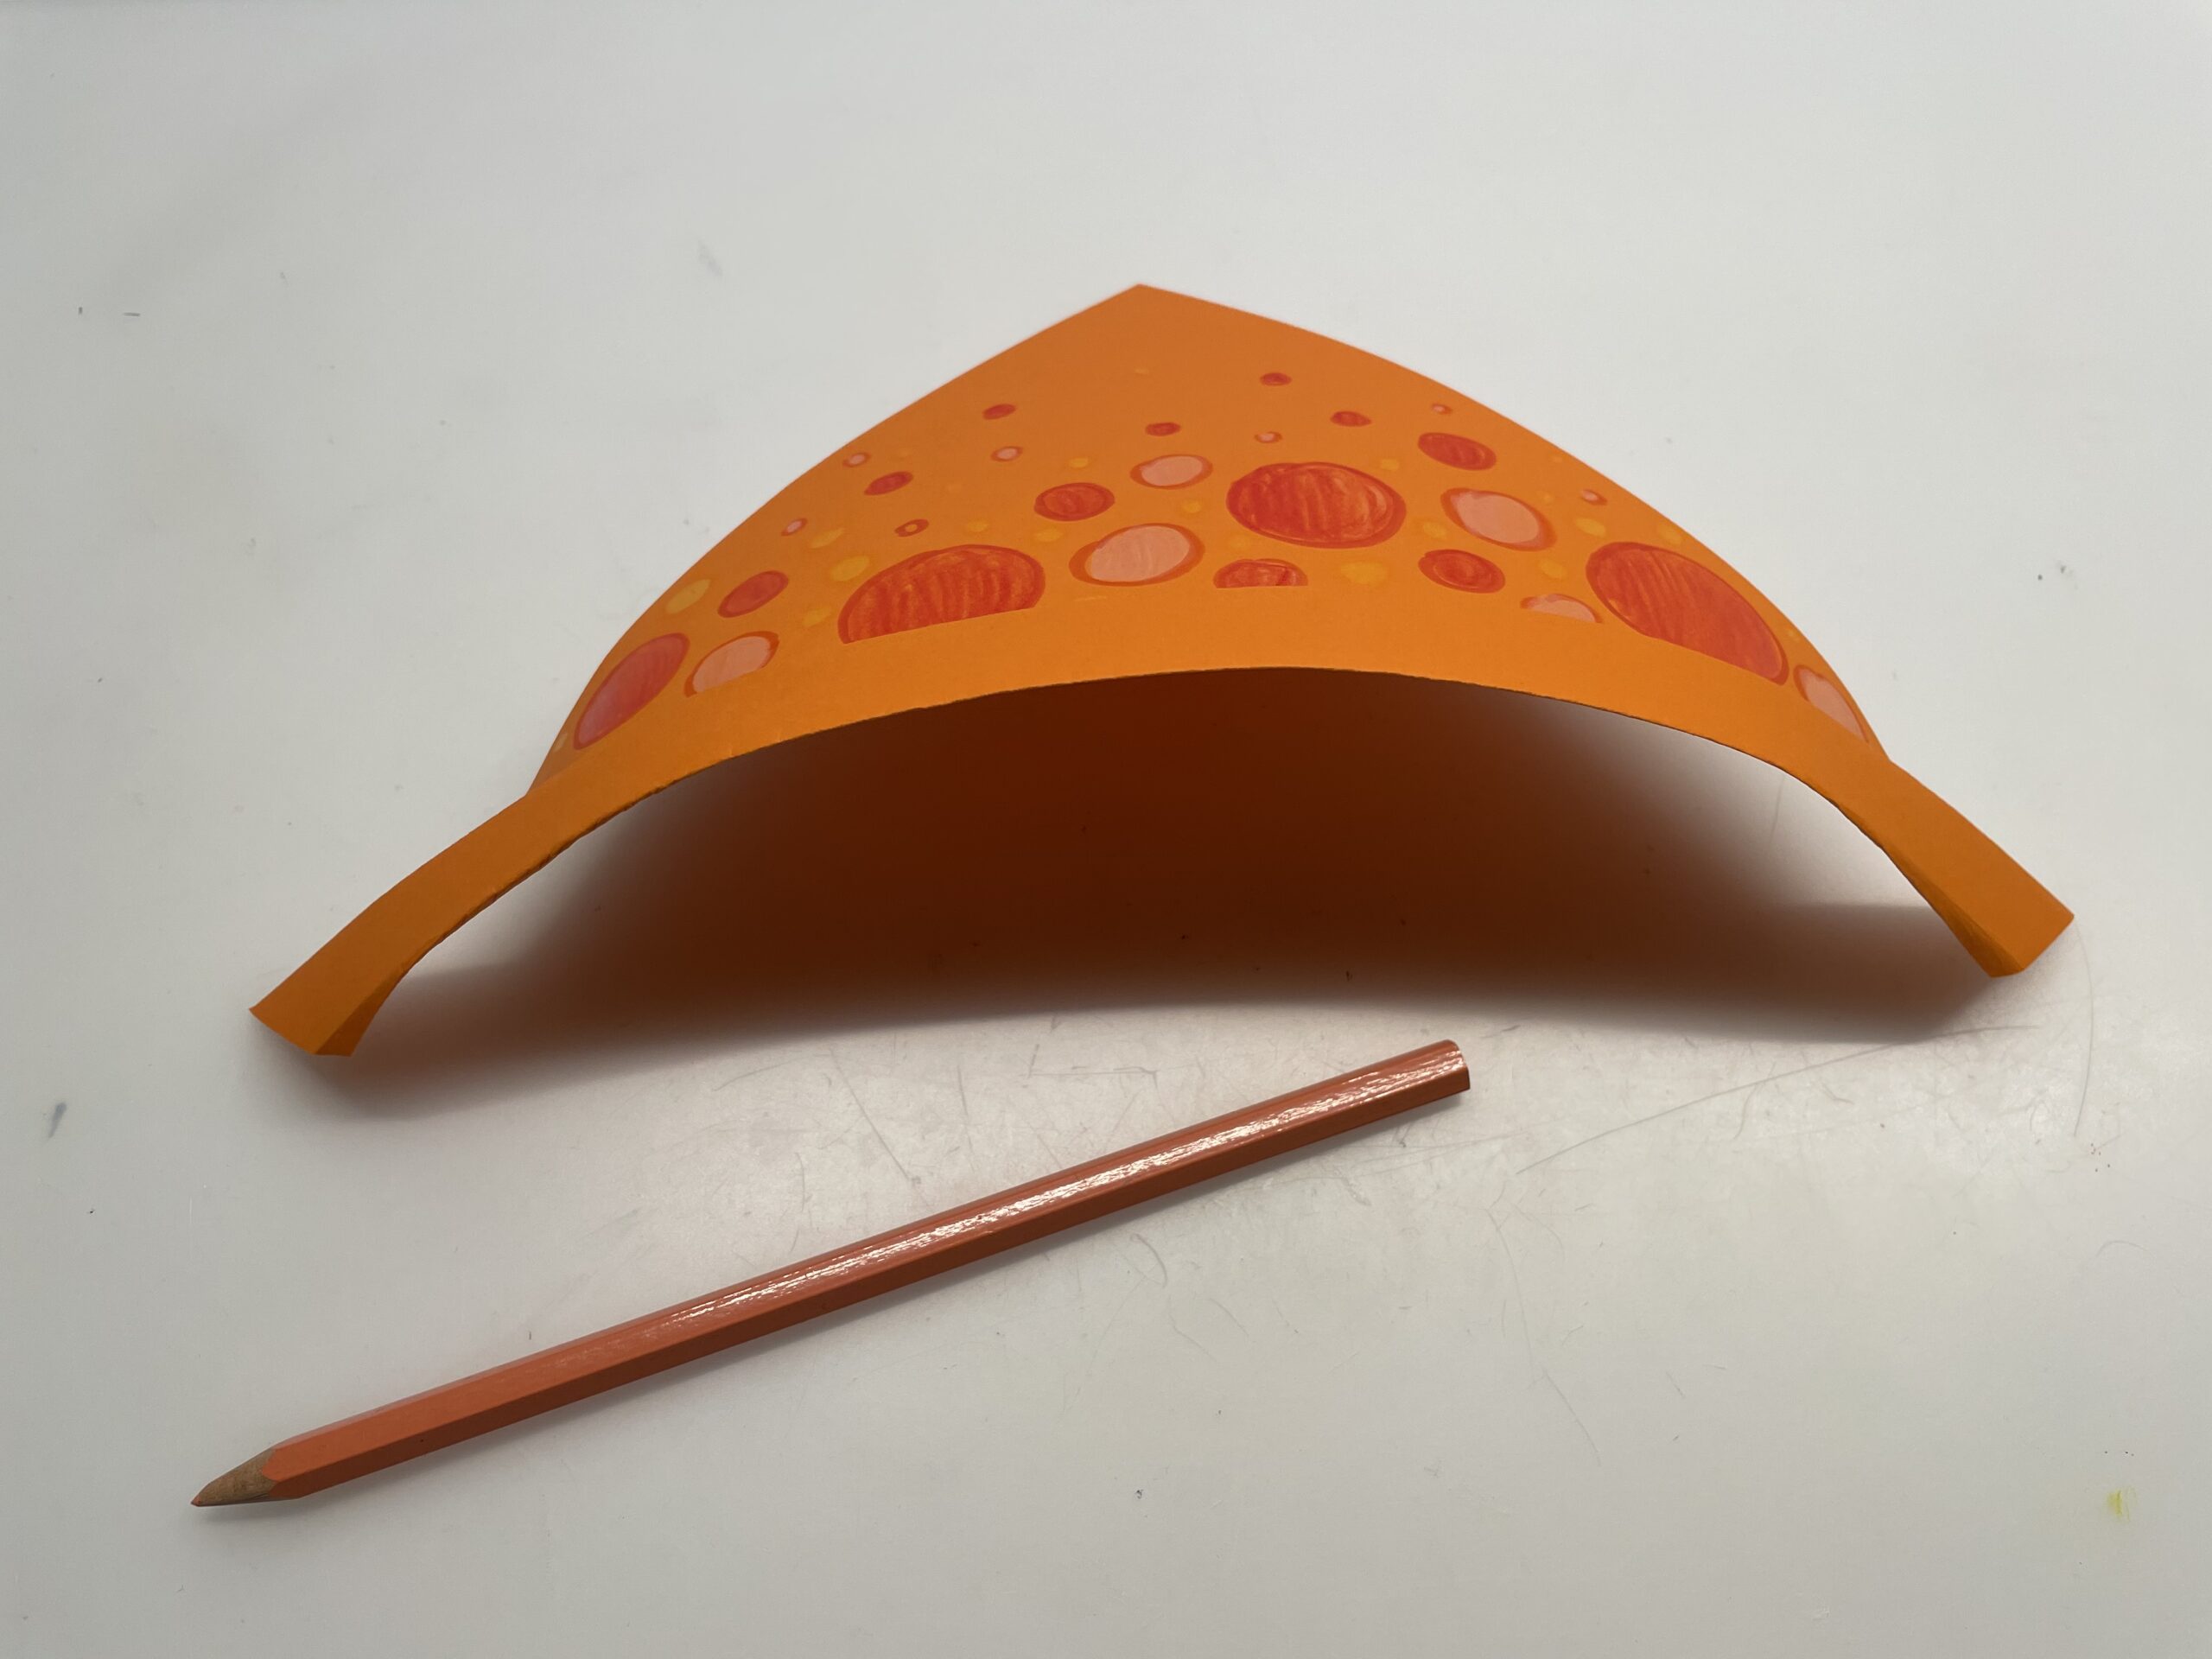
This is how the curved paper triangle looks now. The painted side is outside.
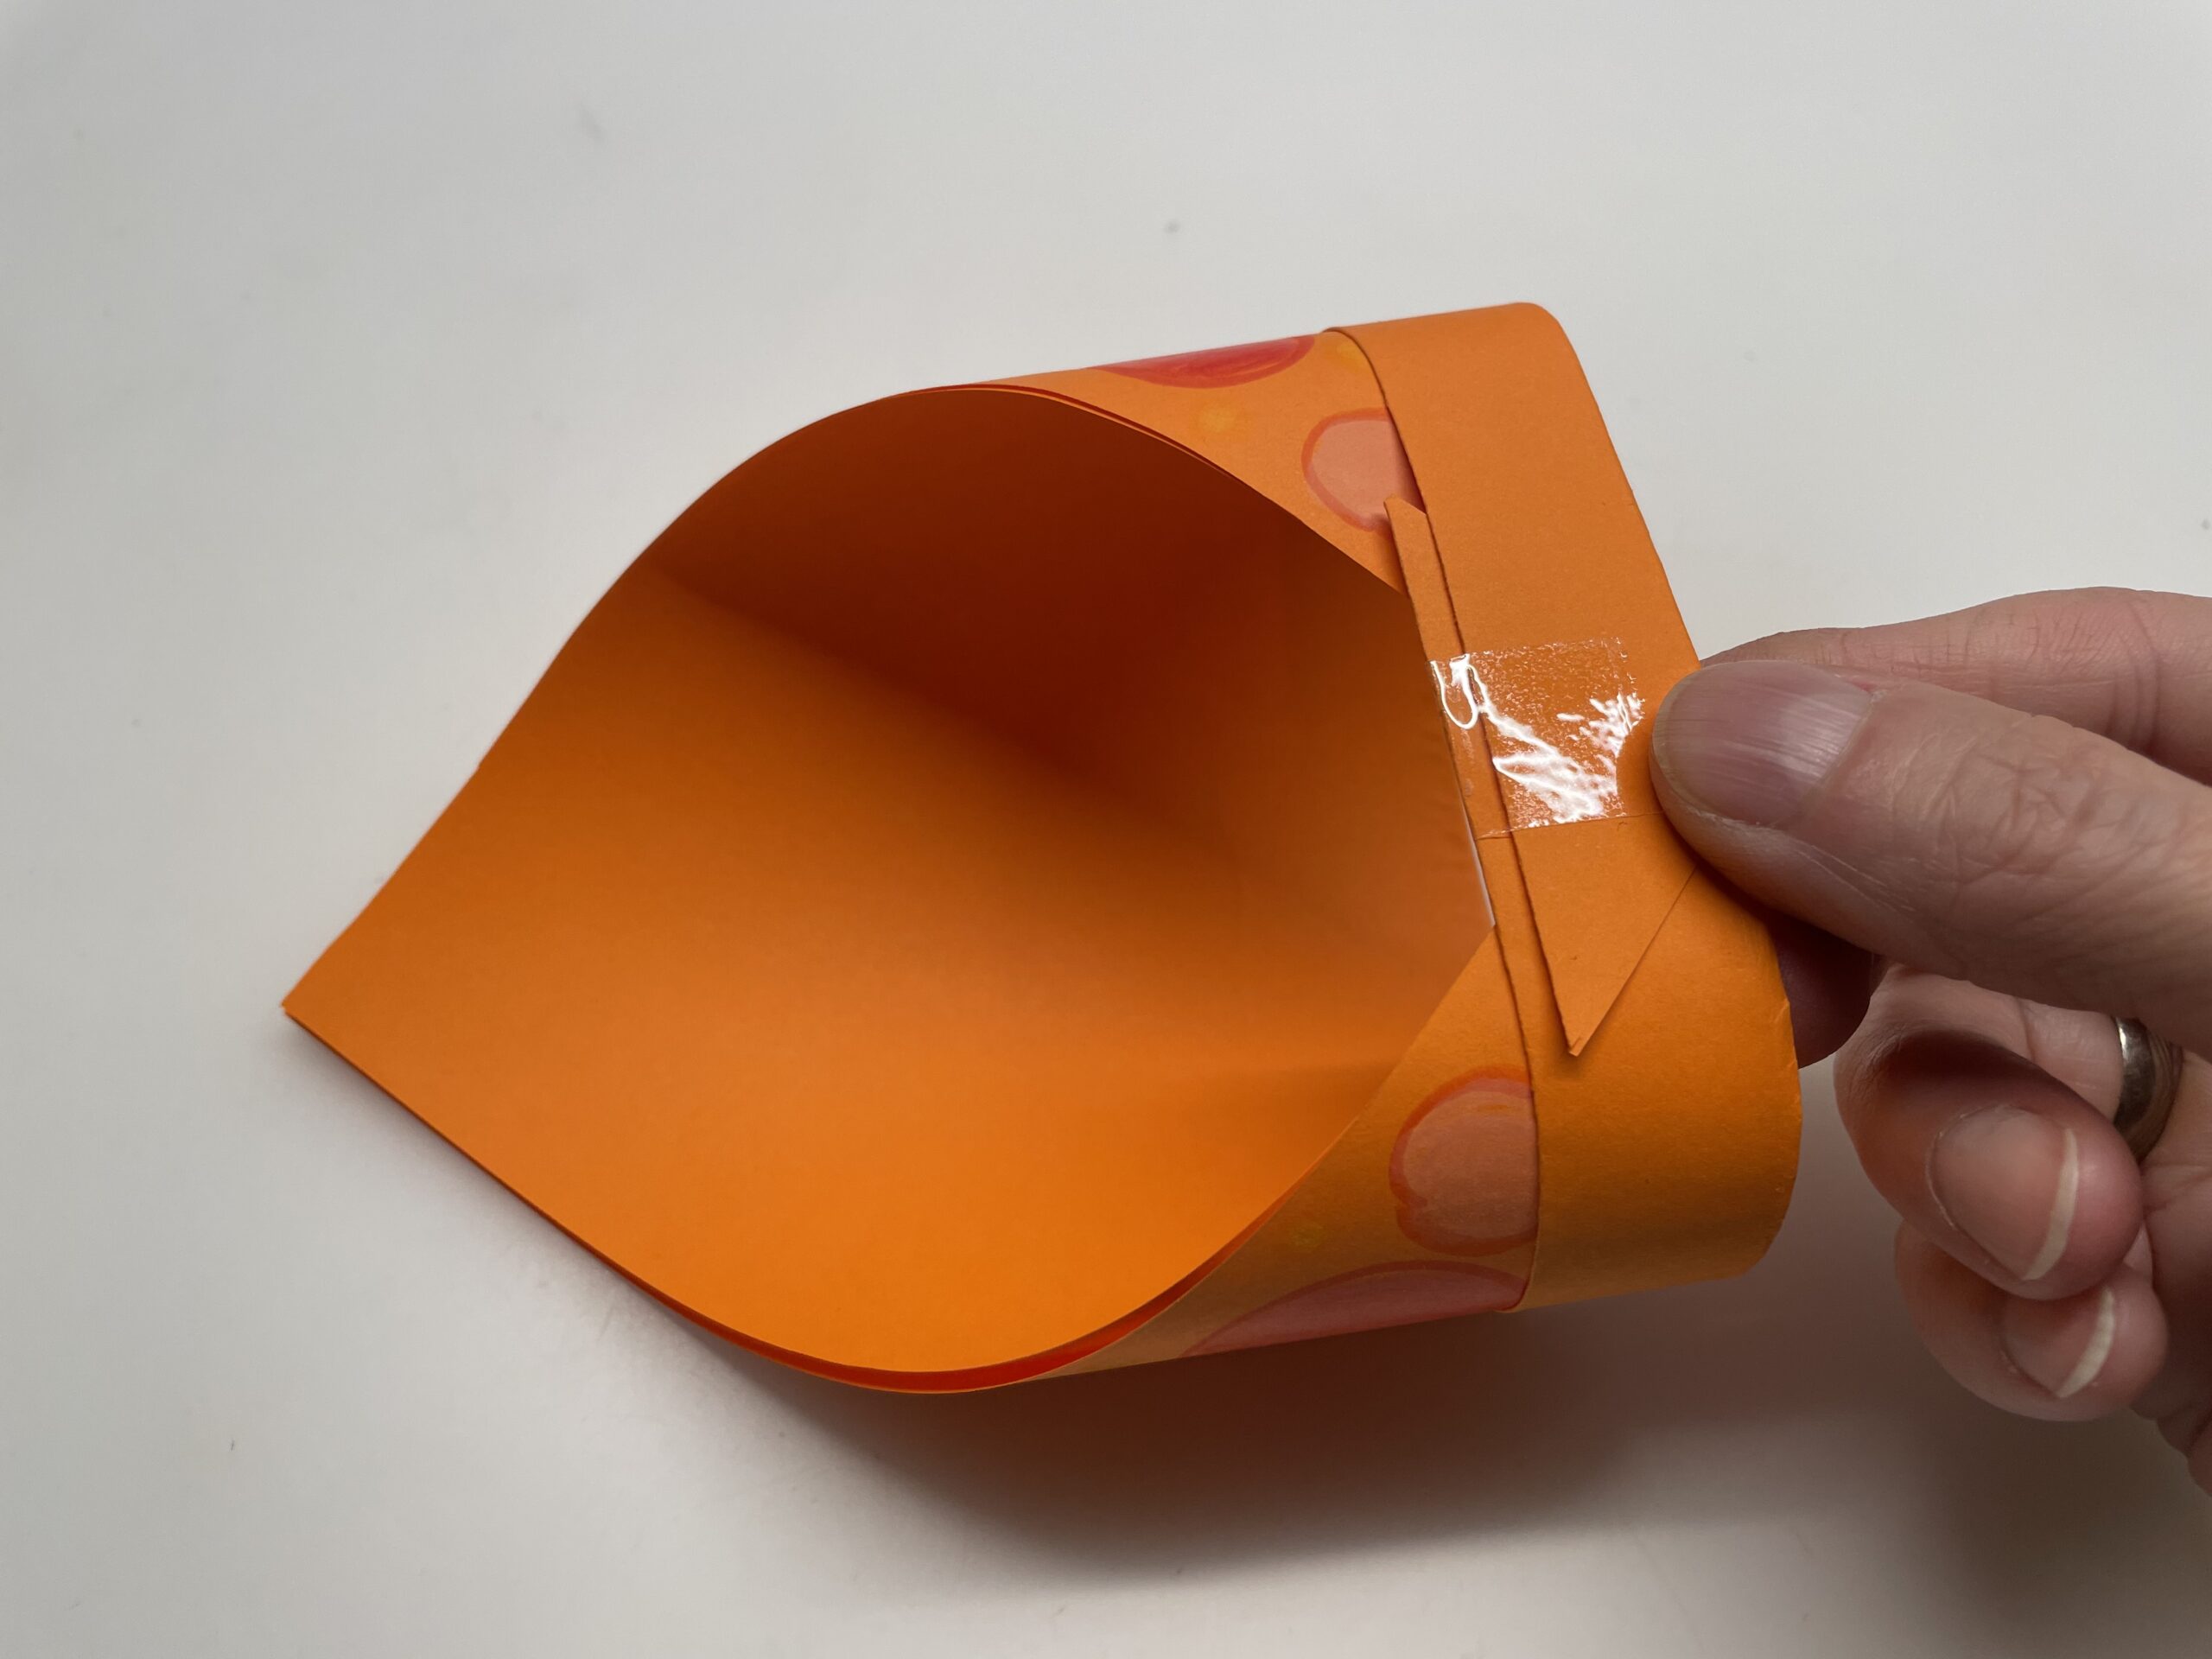
You're putting both Eden into each other now, creating a ring.
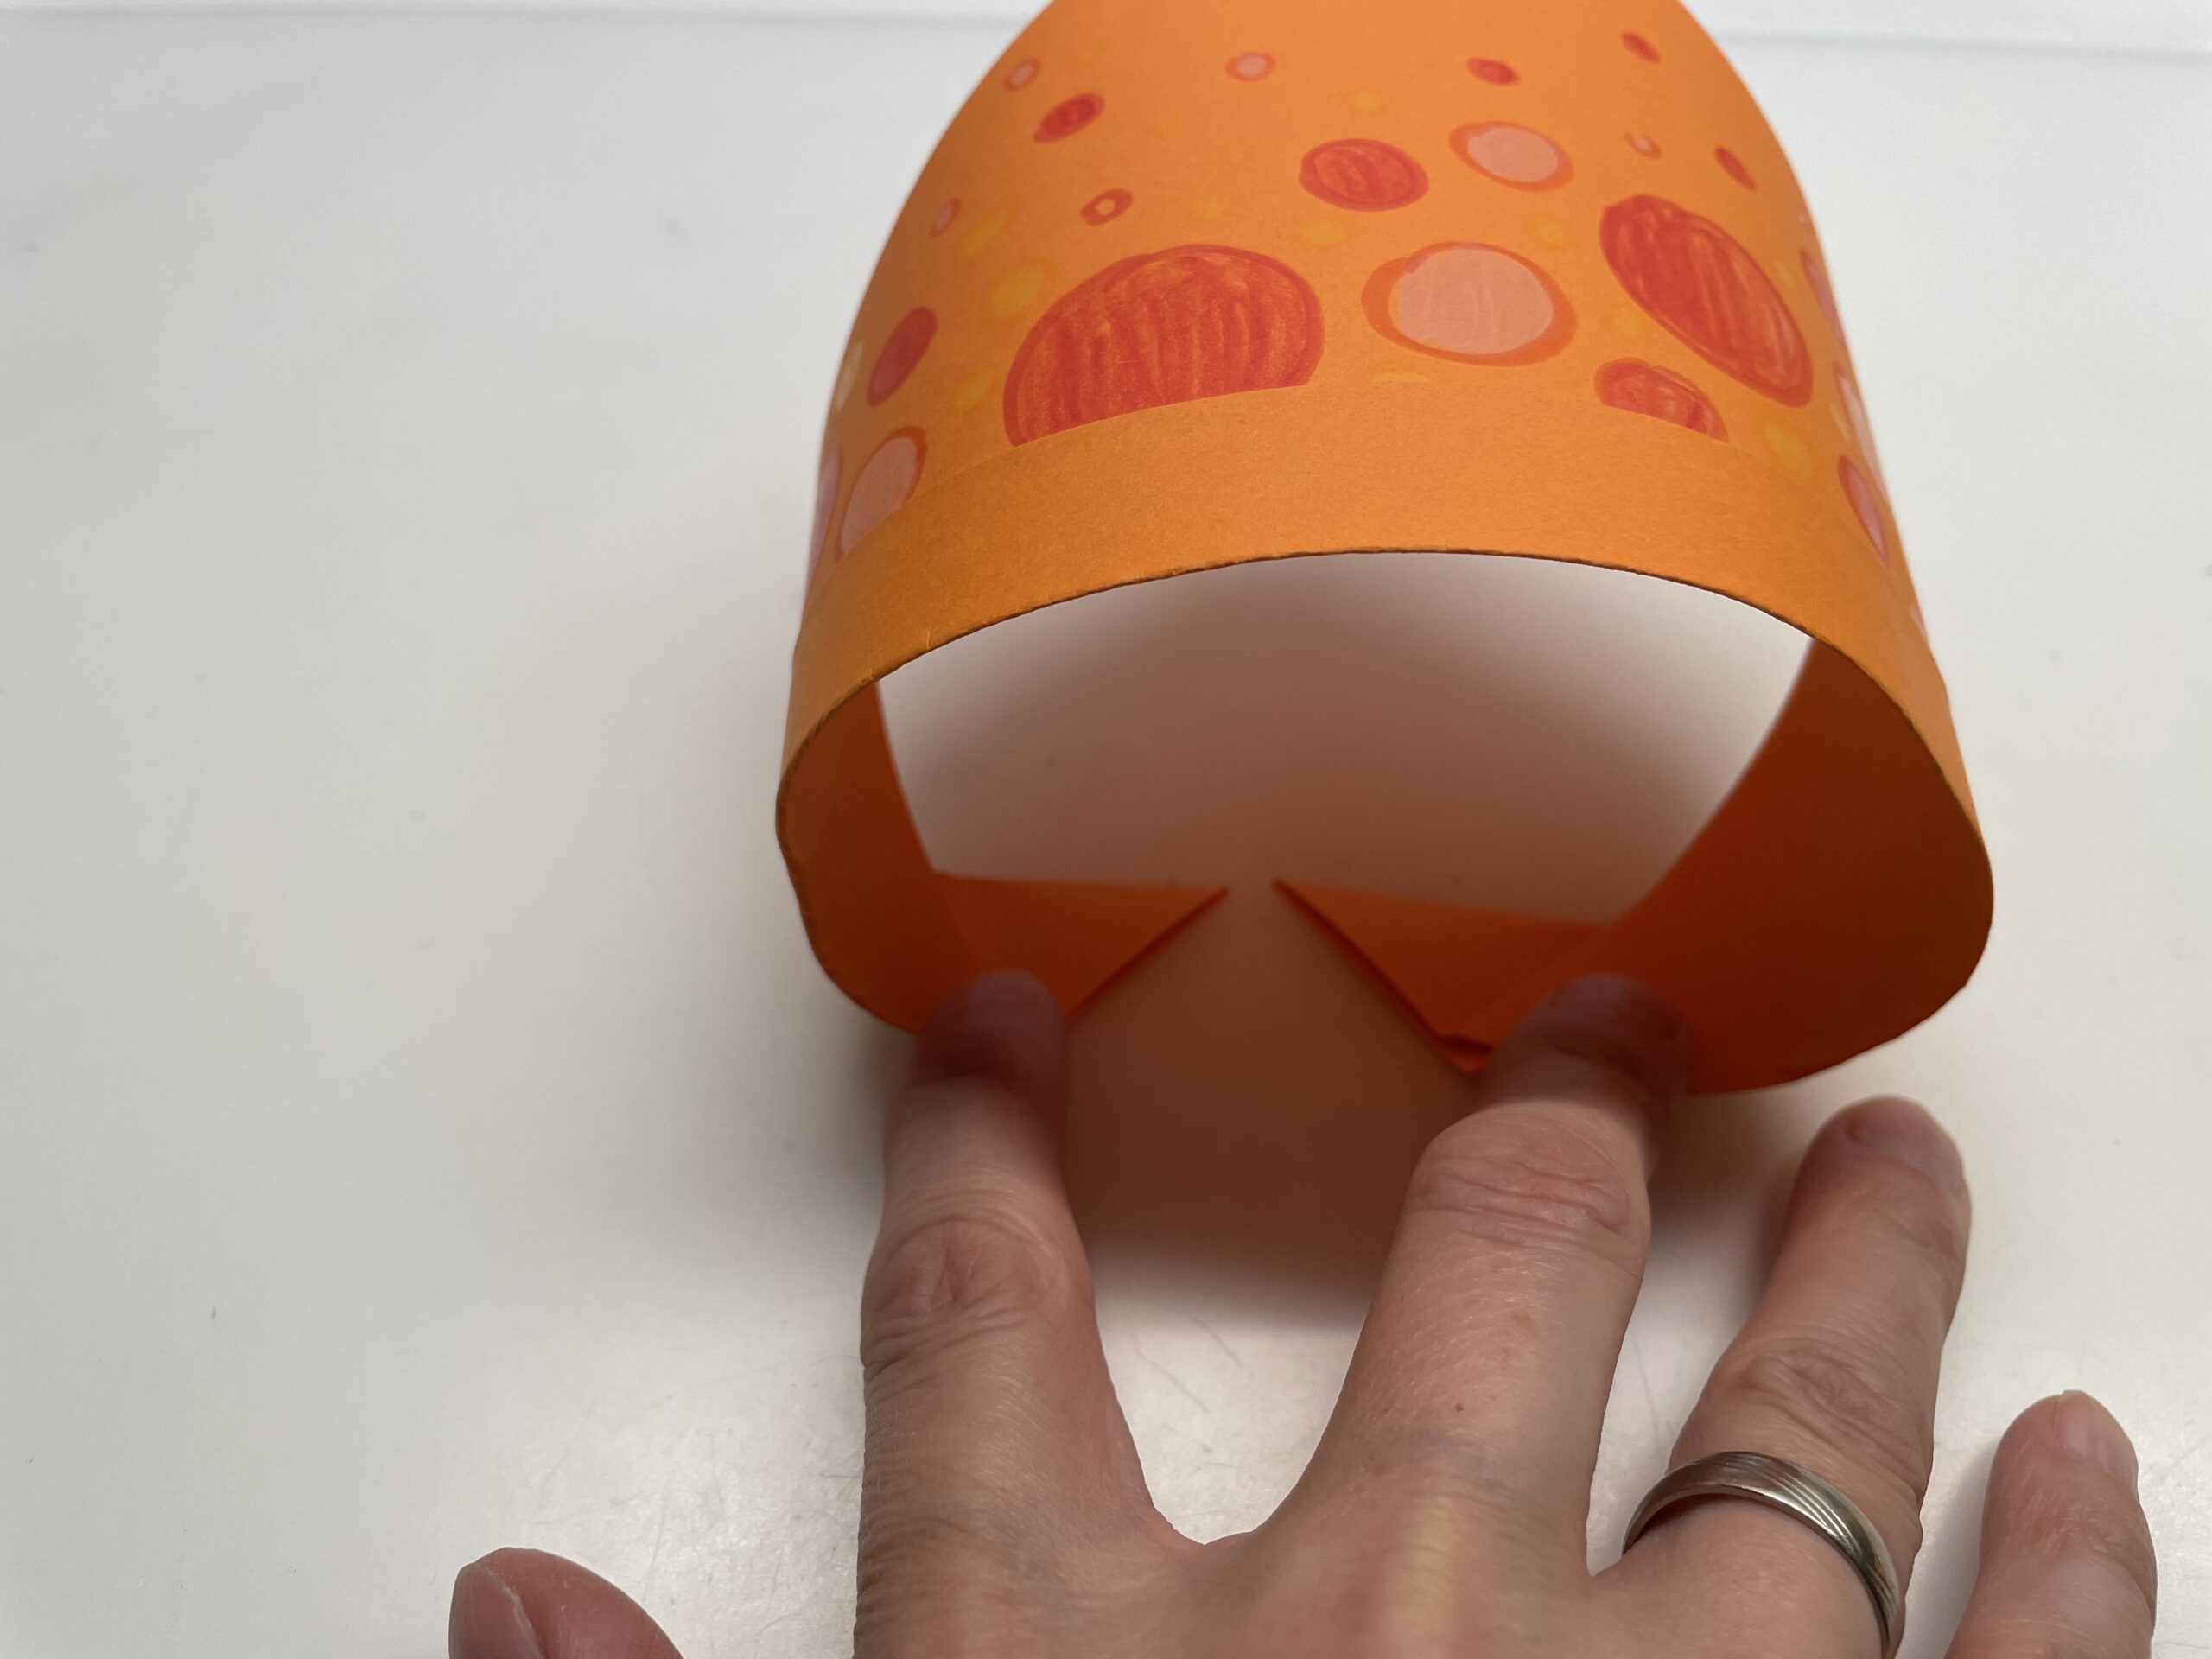
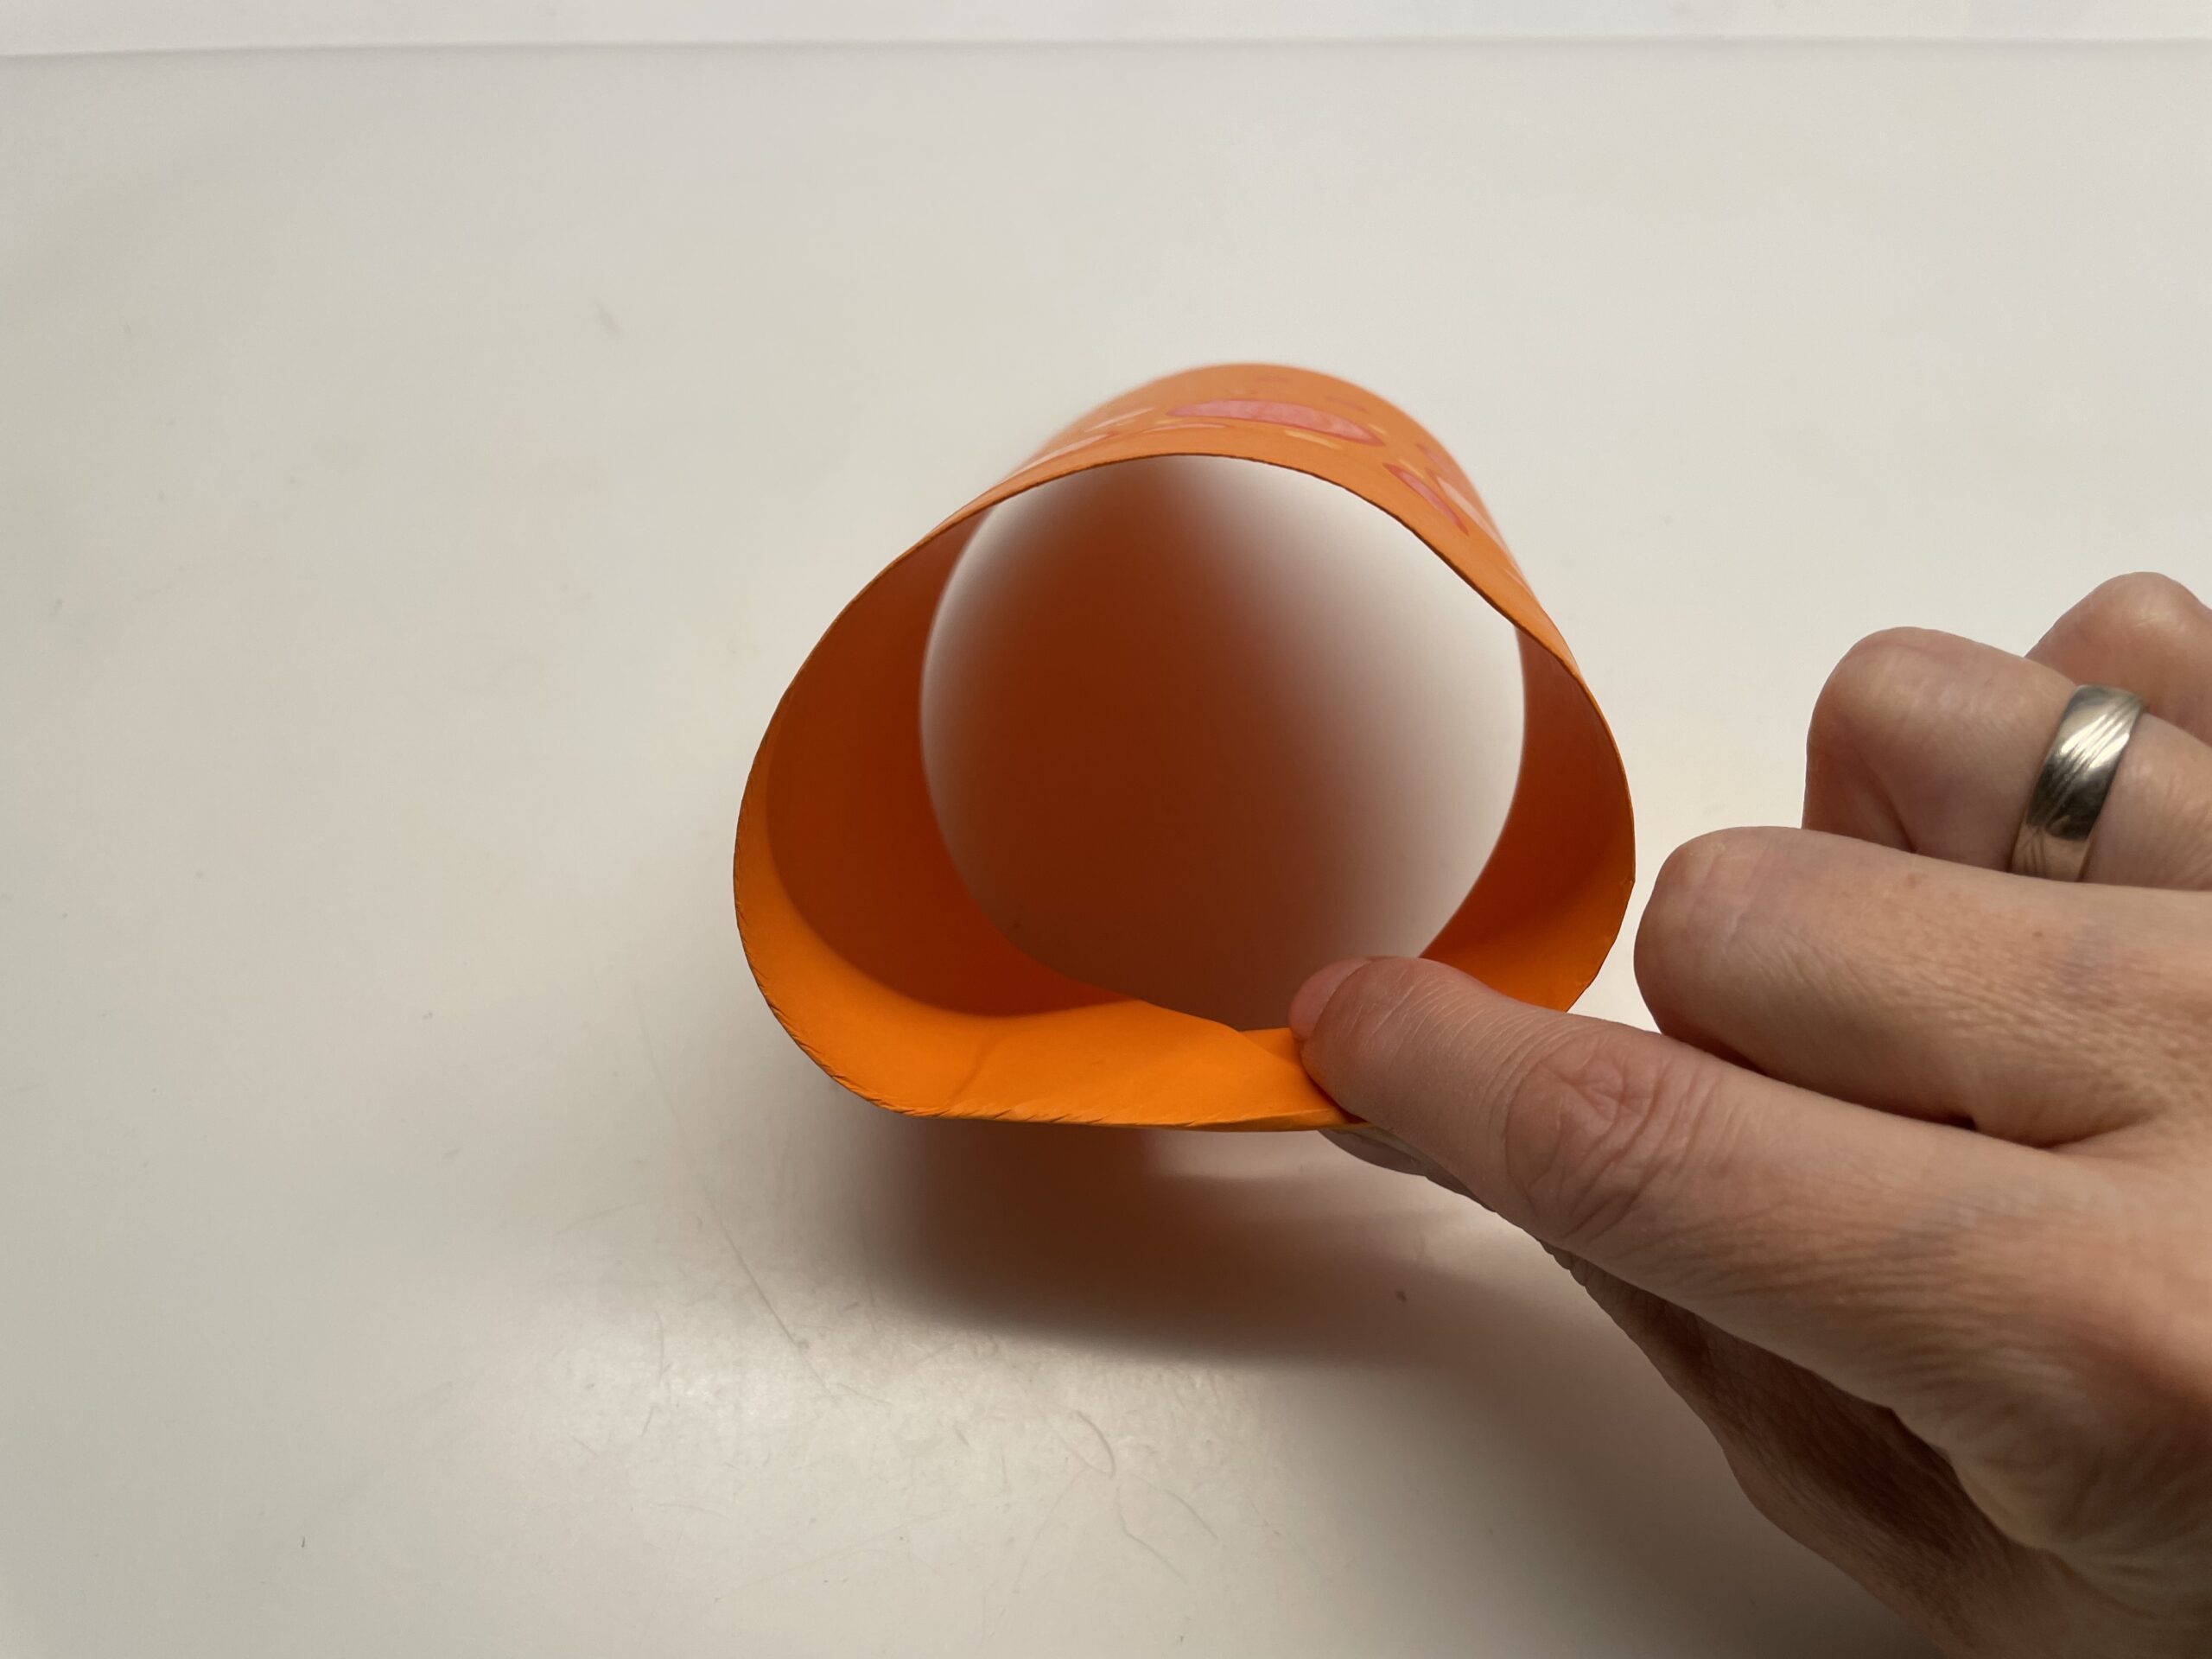
Tip: If you turn the paper, you better see how you have to put the two ends in each other.
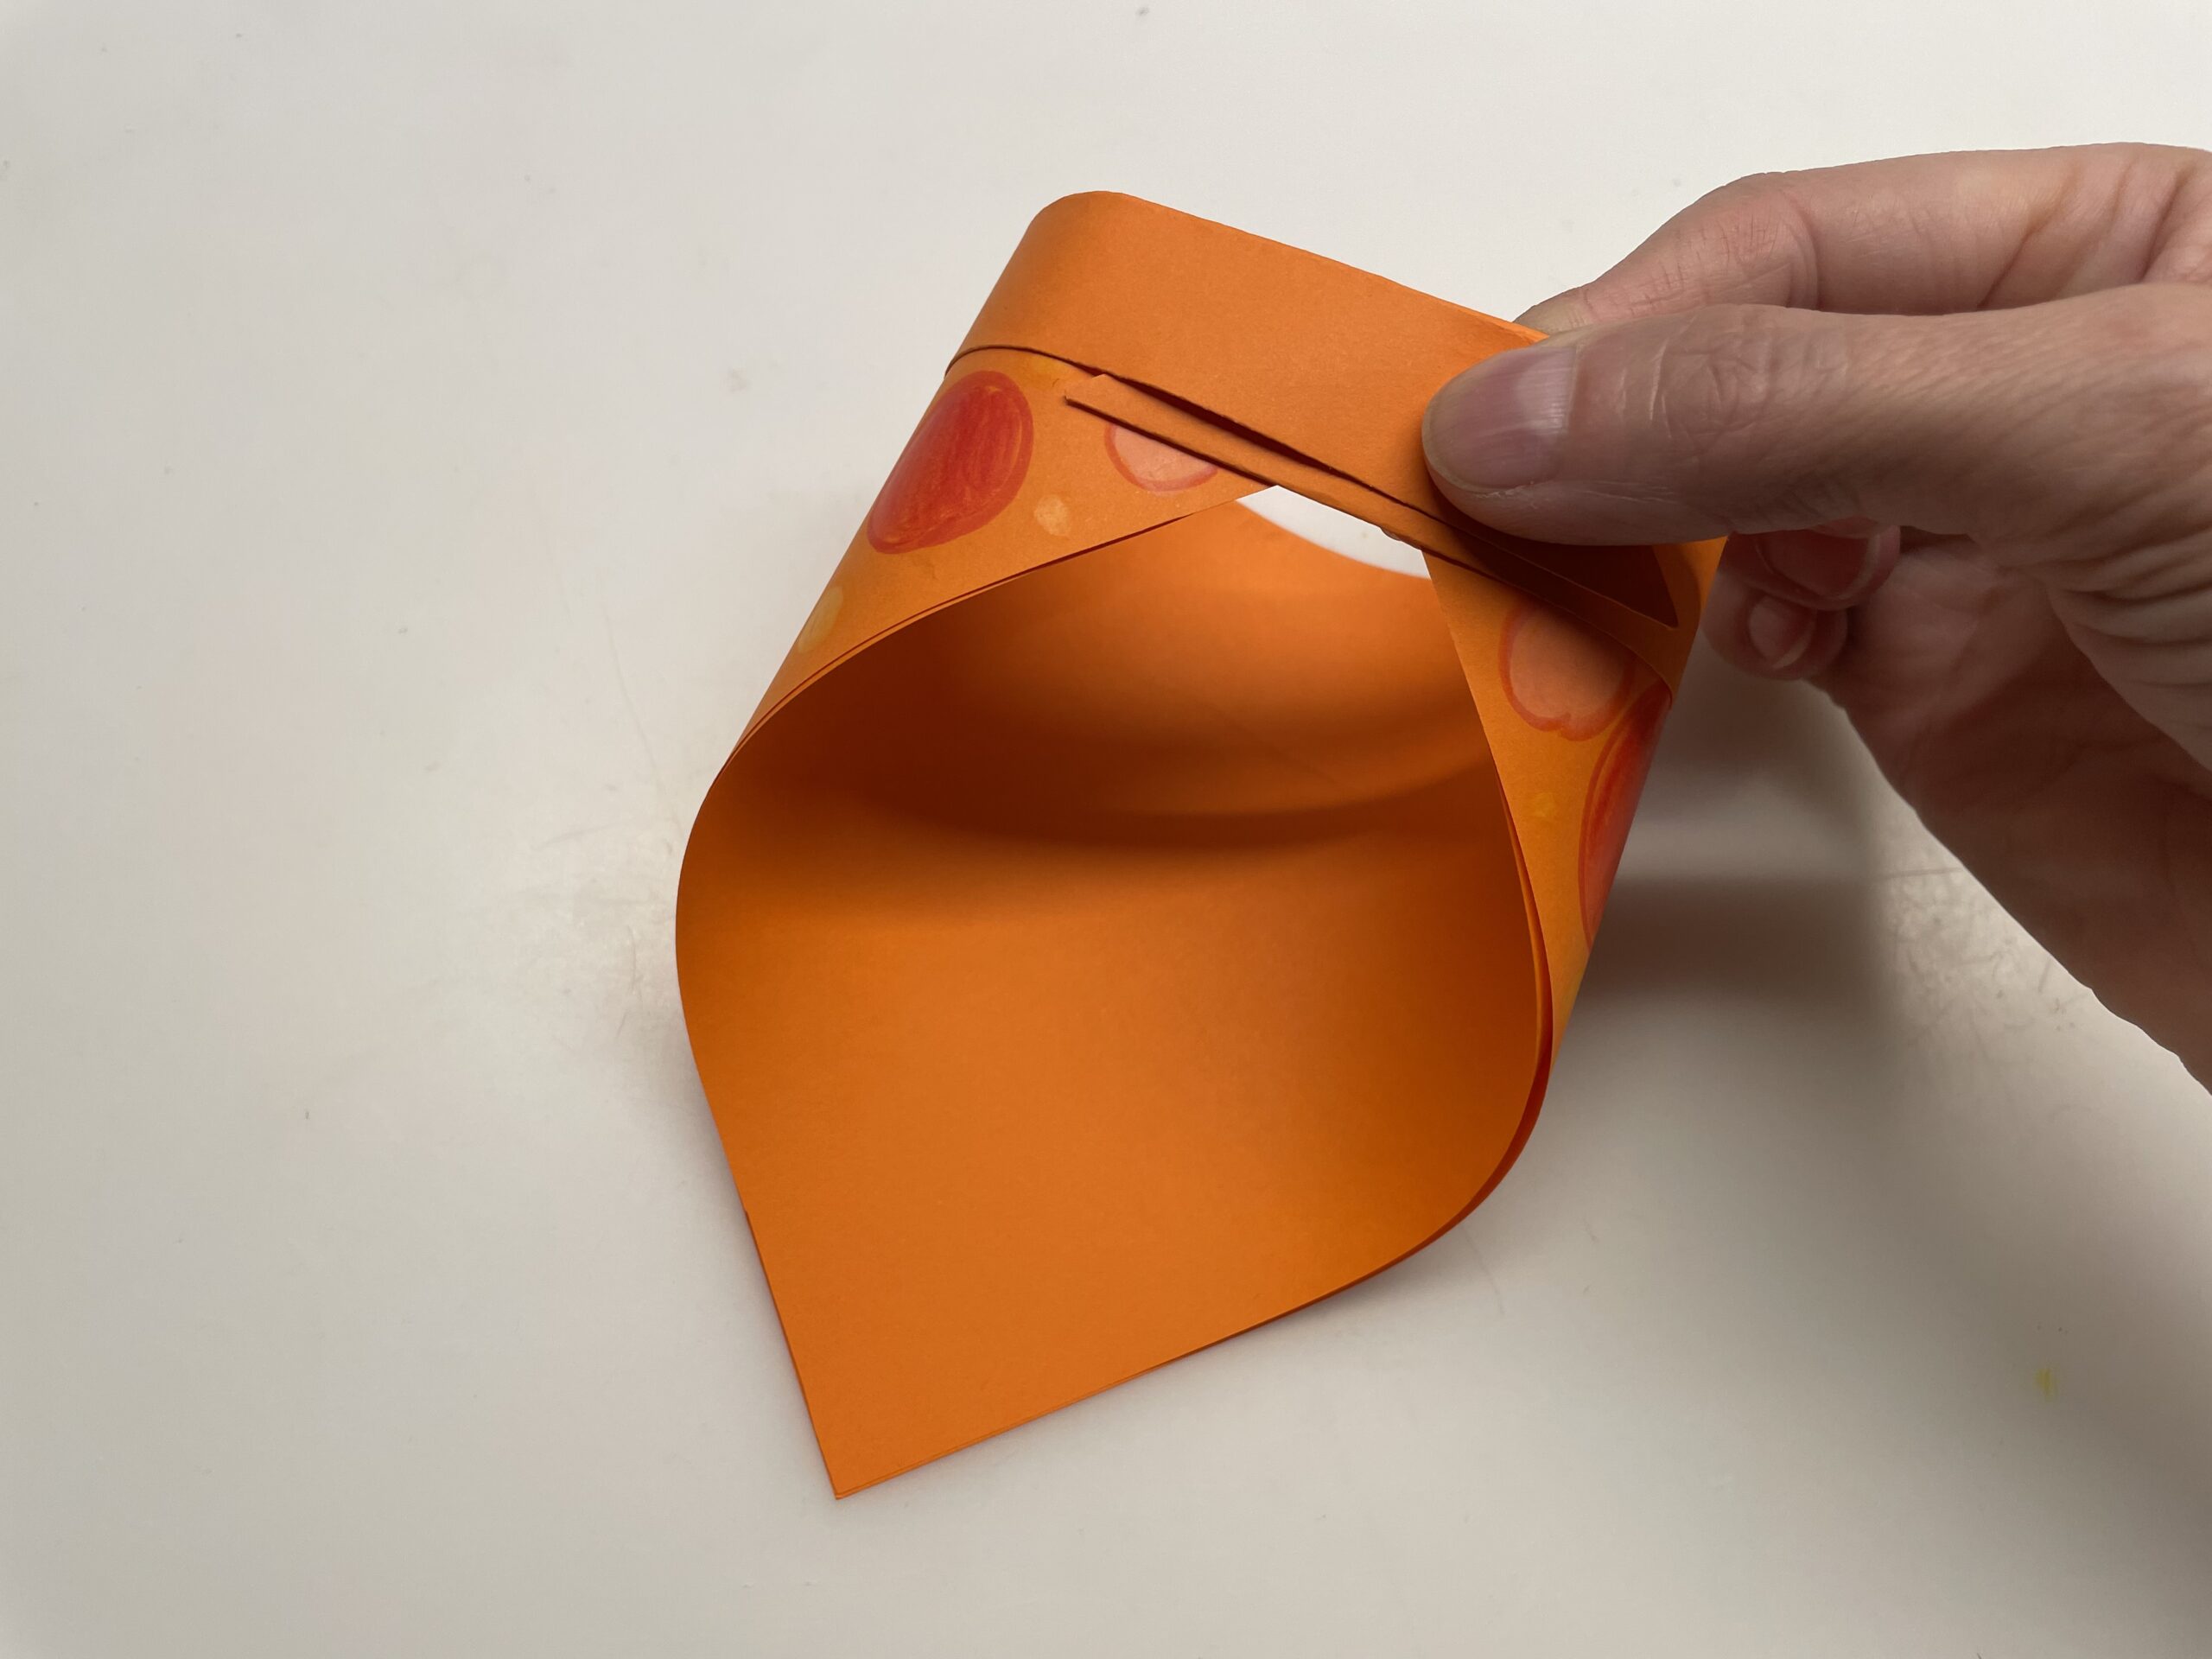
So that the ends stick together well, you fix them with an adhesive tape.
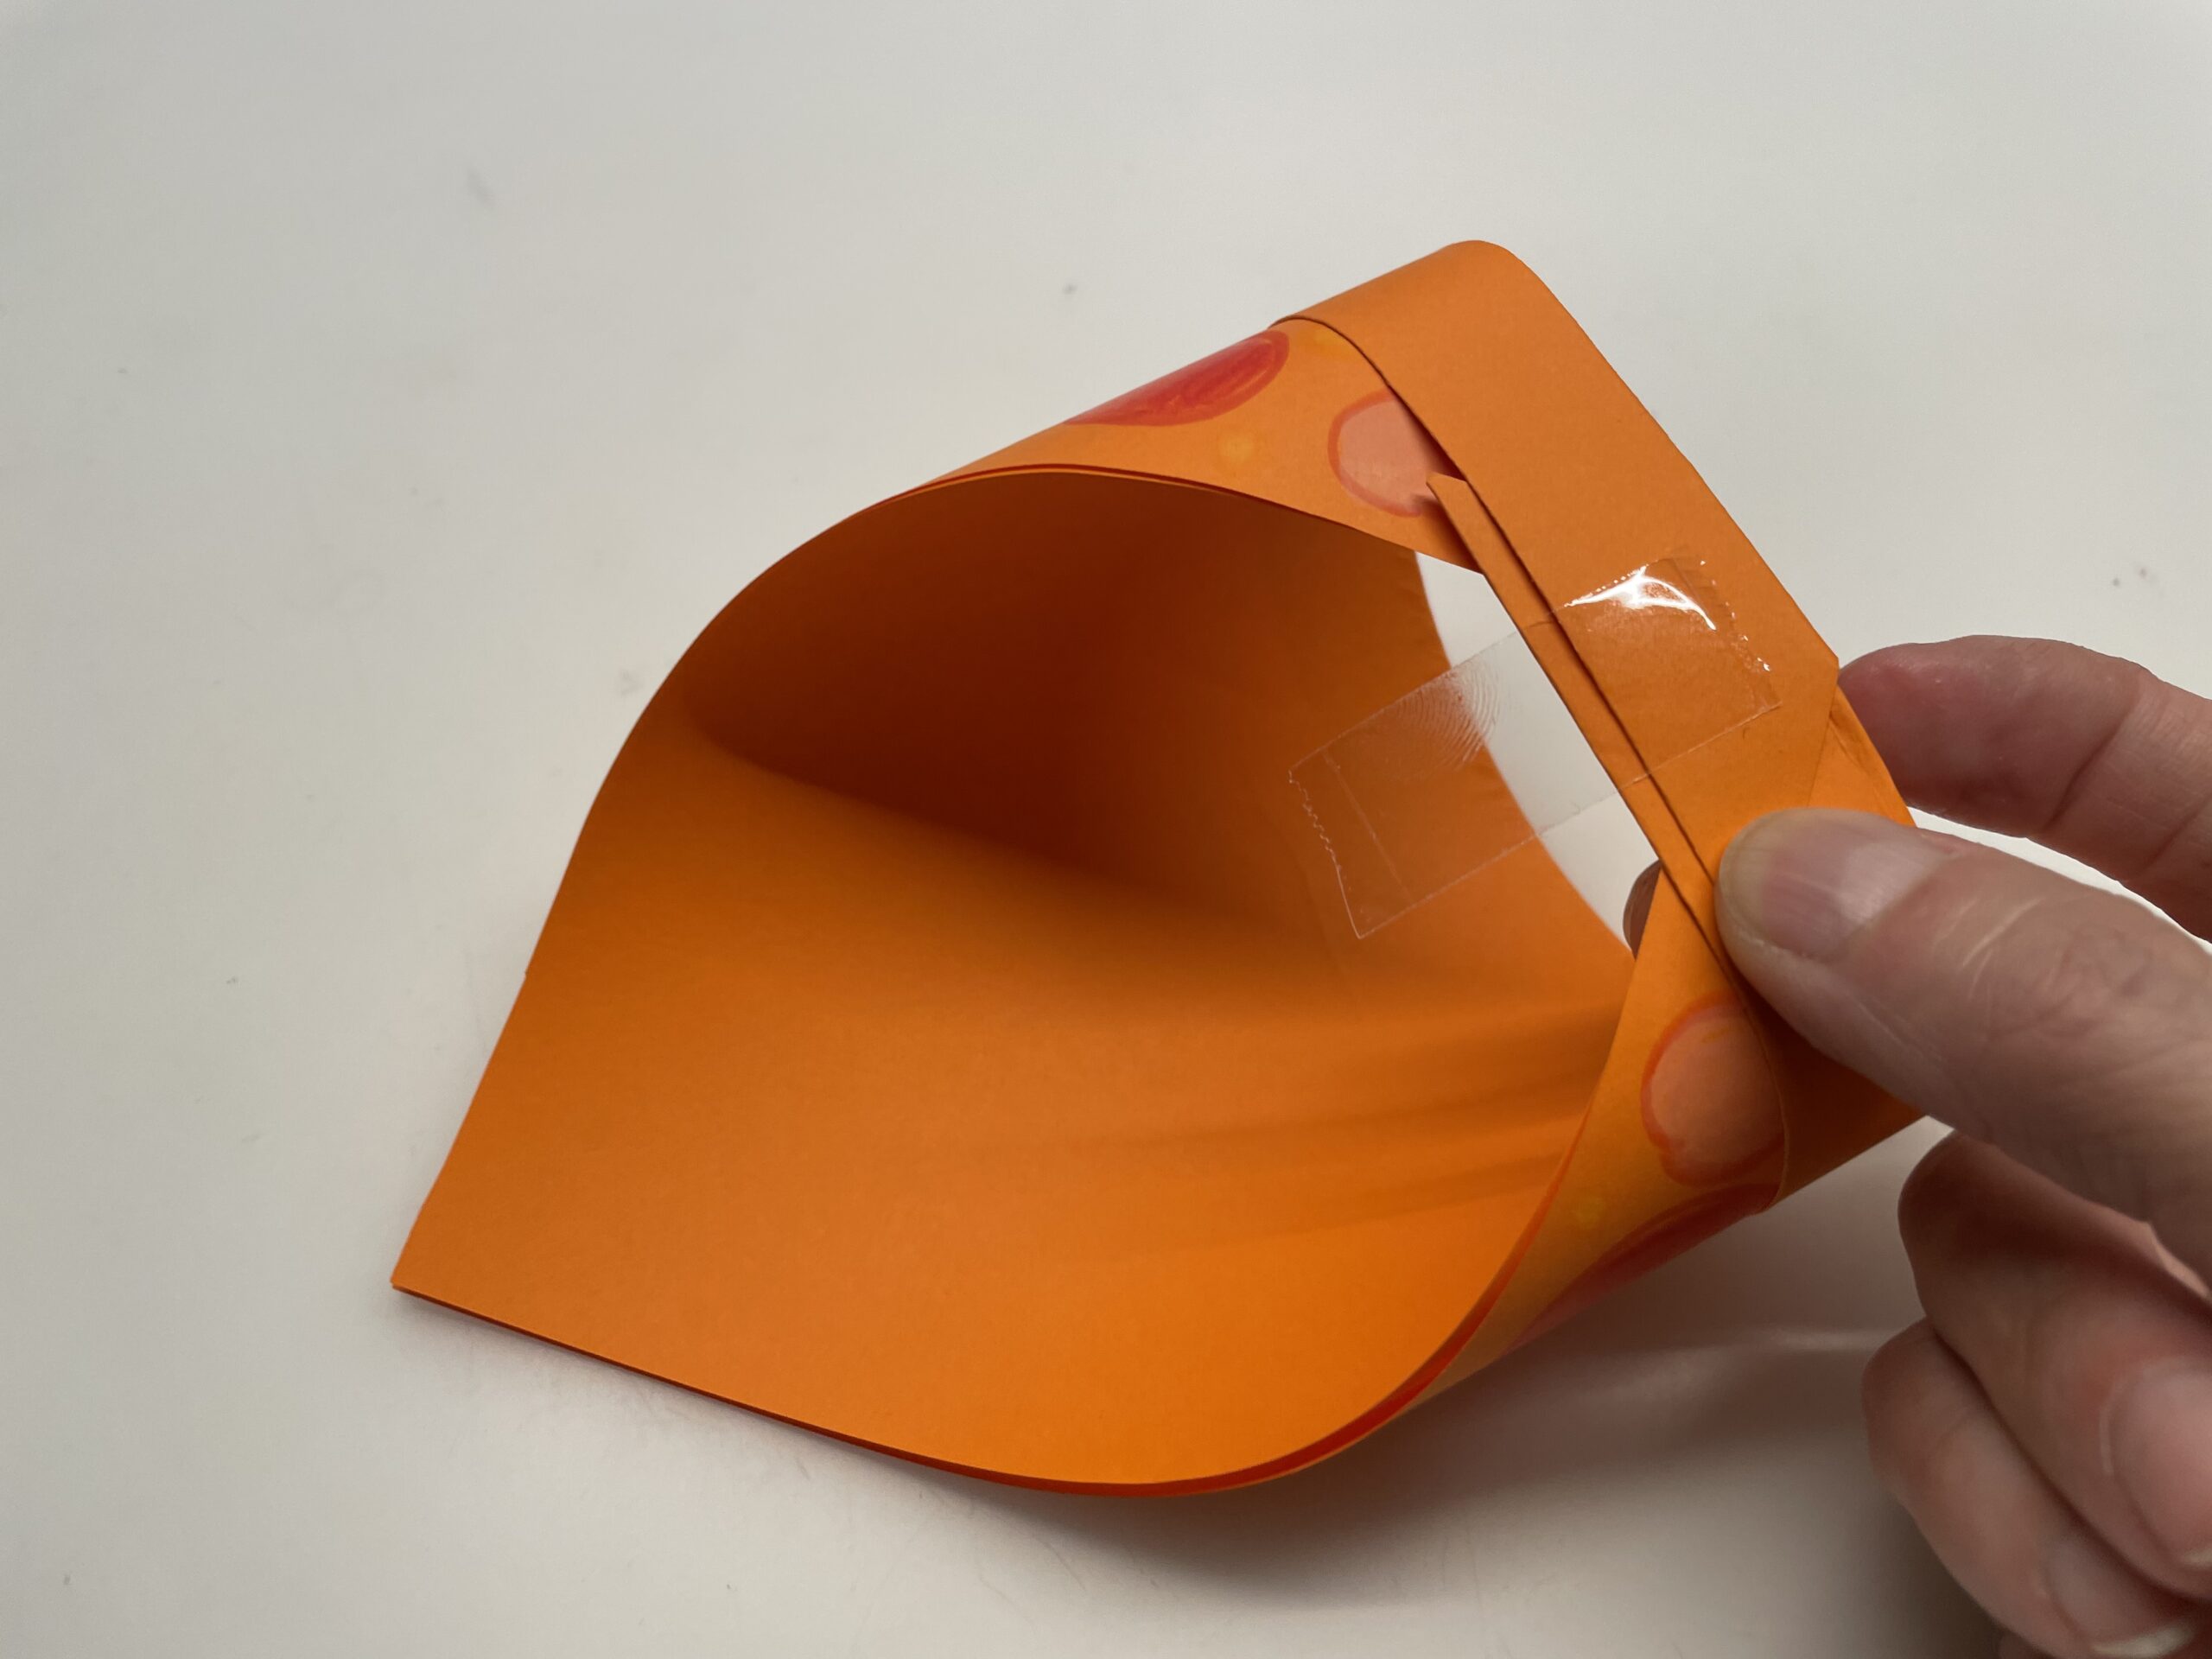
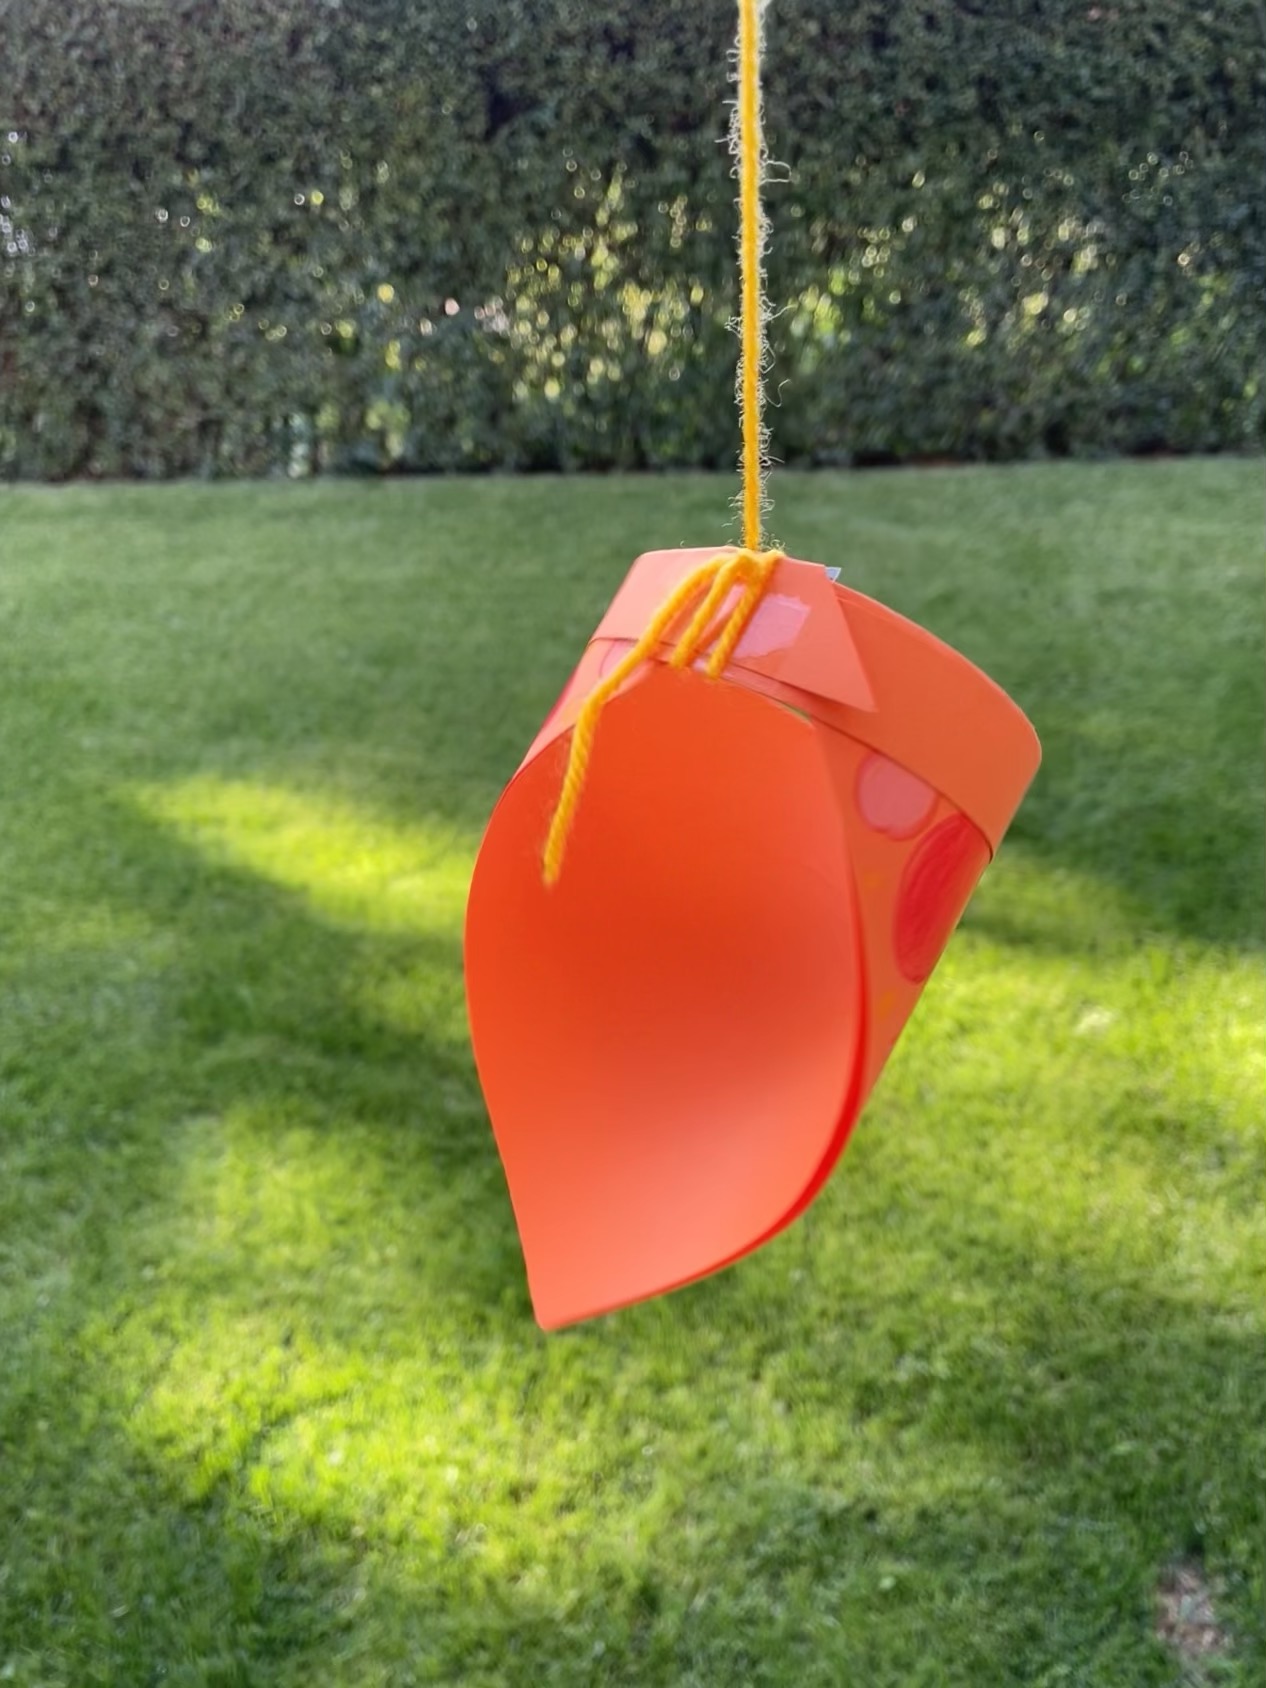
Your ring pilot's ready.
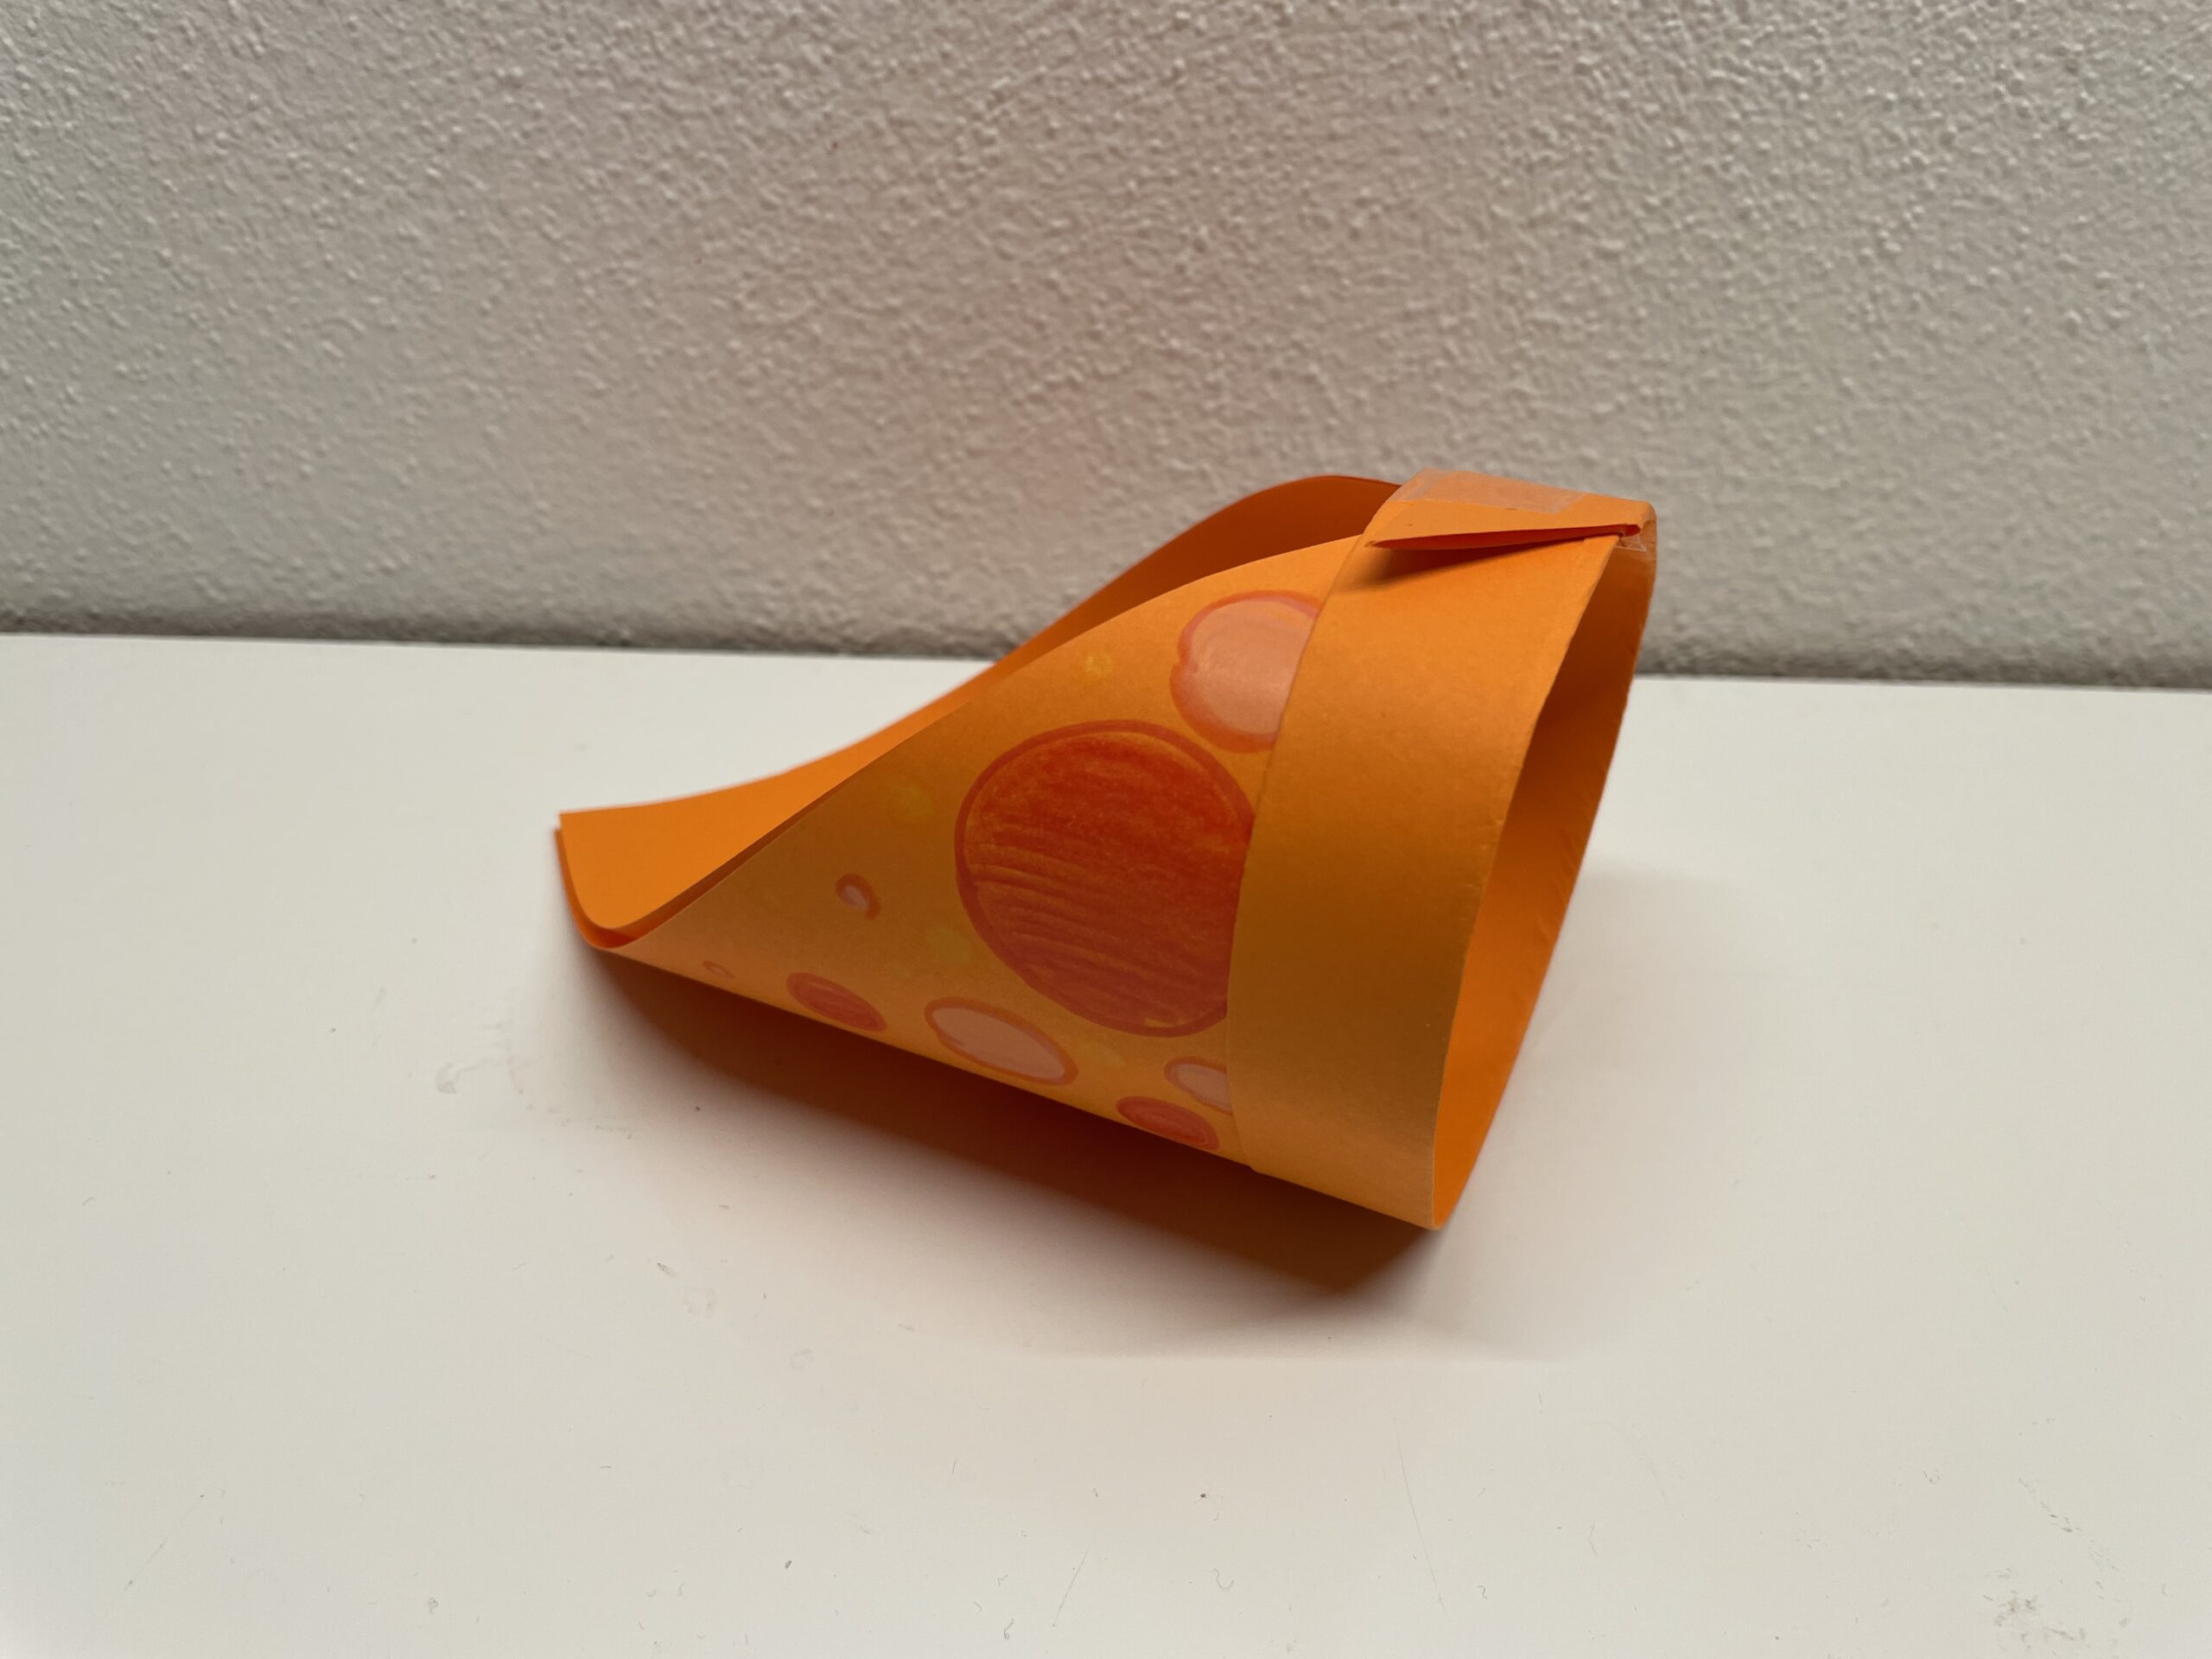
To fly, hold up the ringed fly with your thumb and index finger at the thin end and let it fly forward.
Try this flight technique. It is not quite easy and requires some experiments.
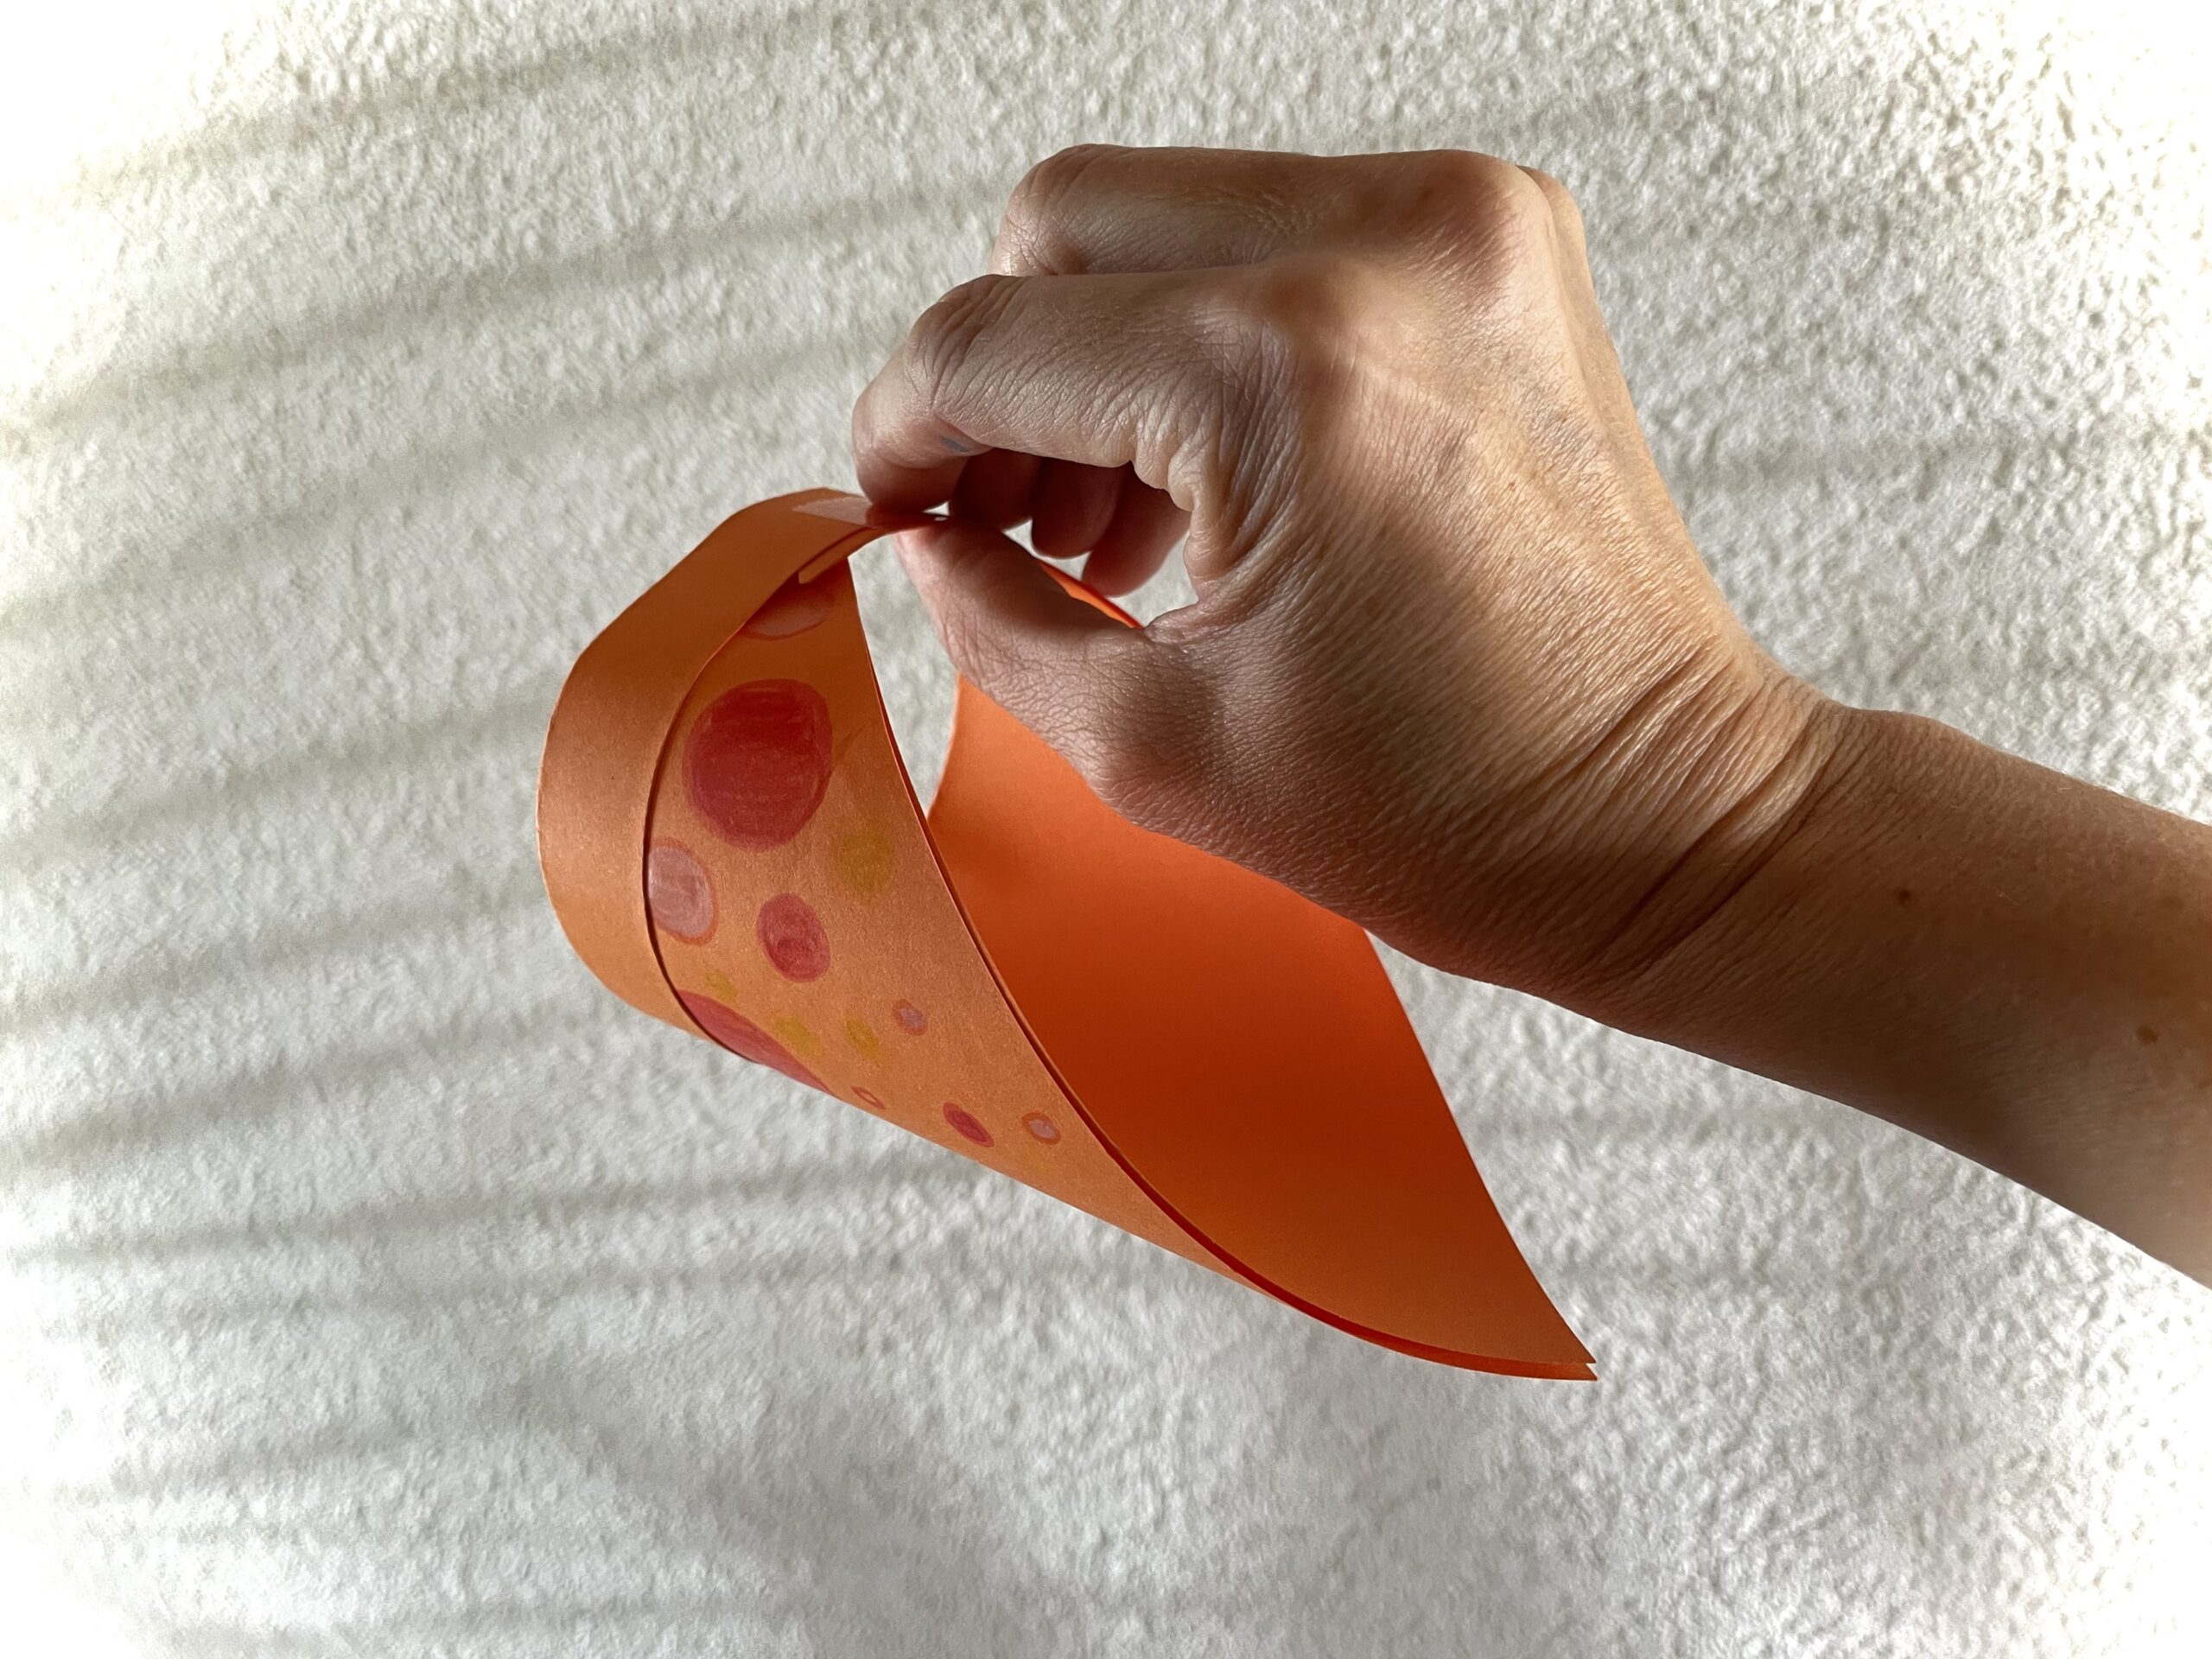
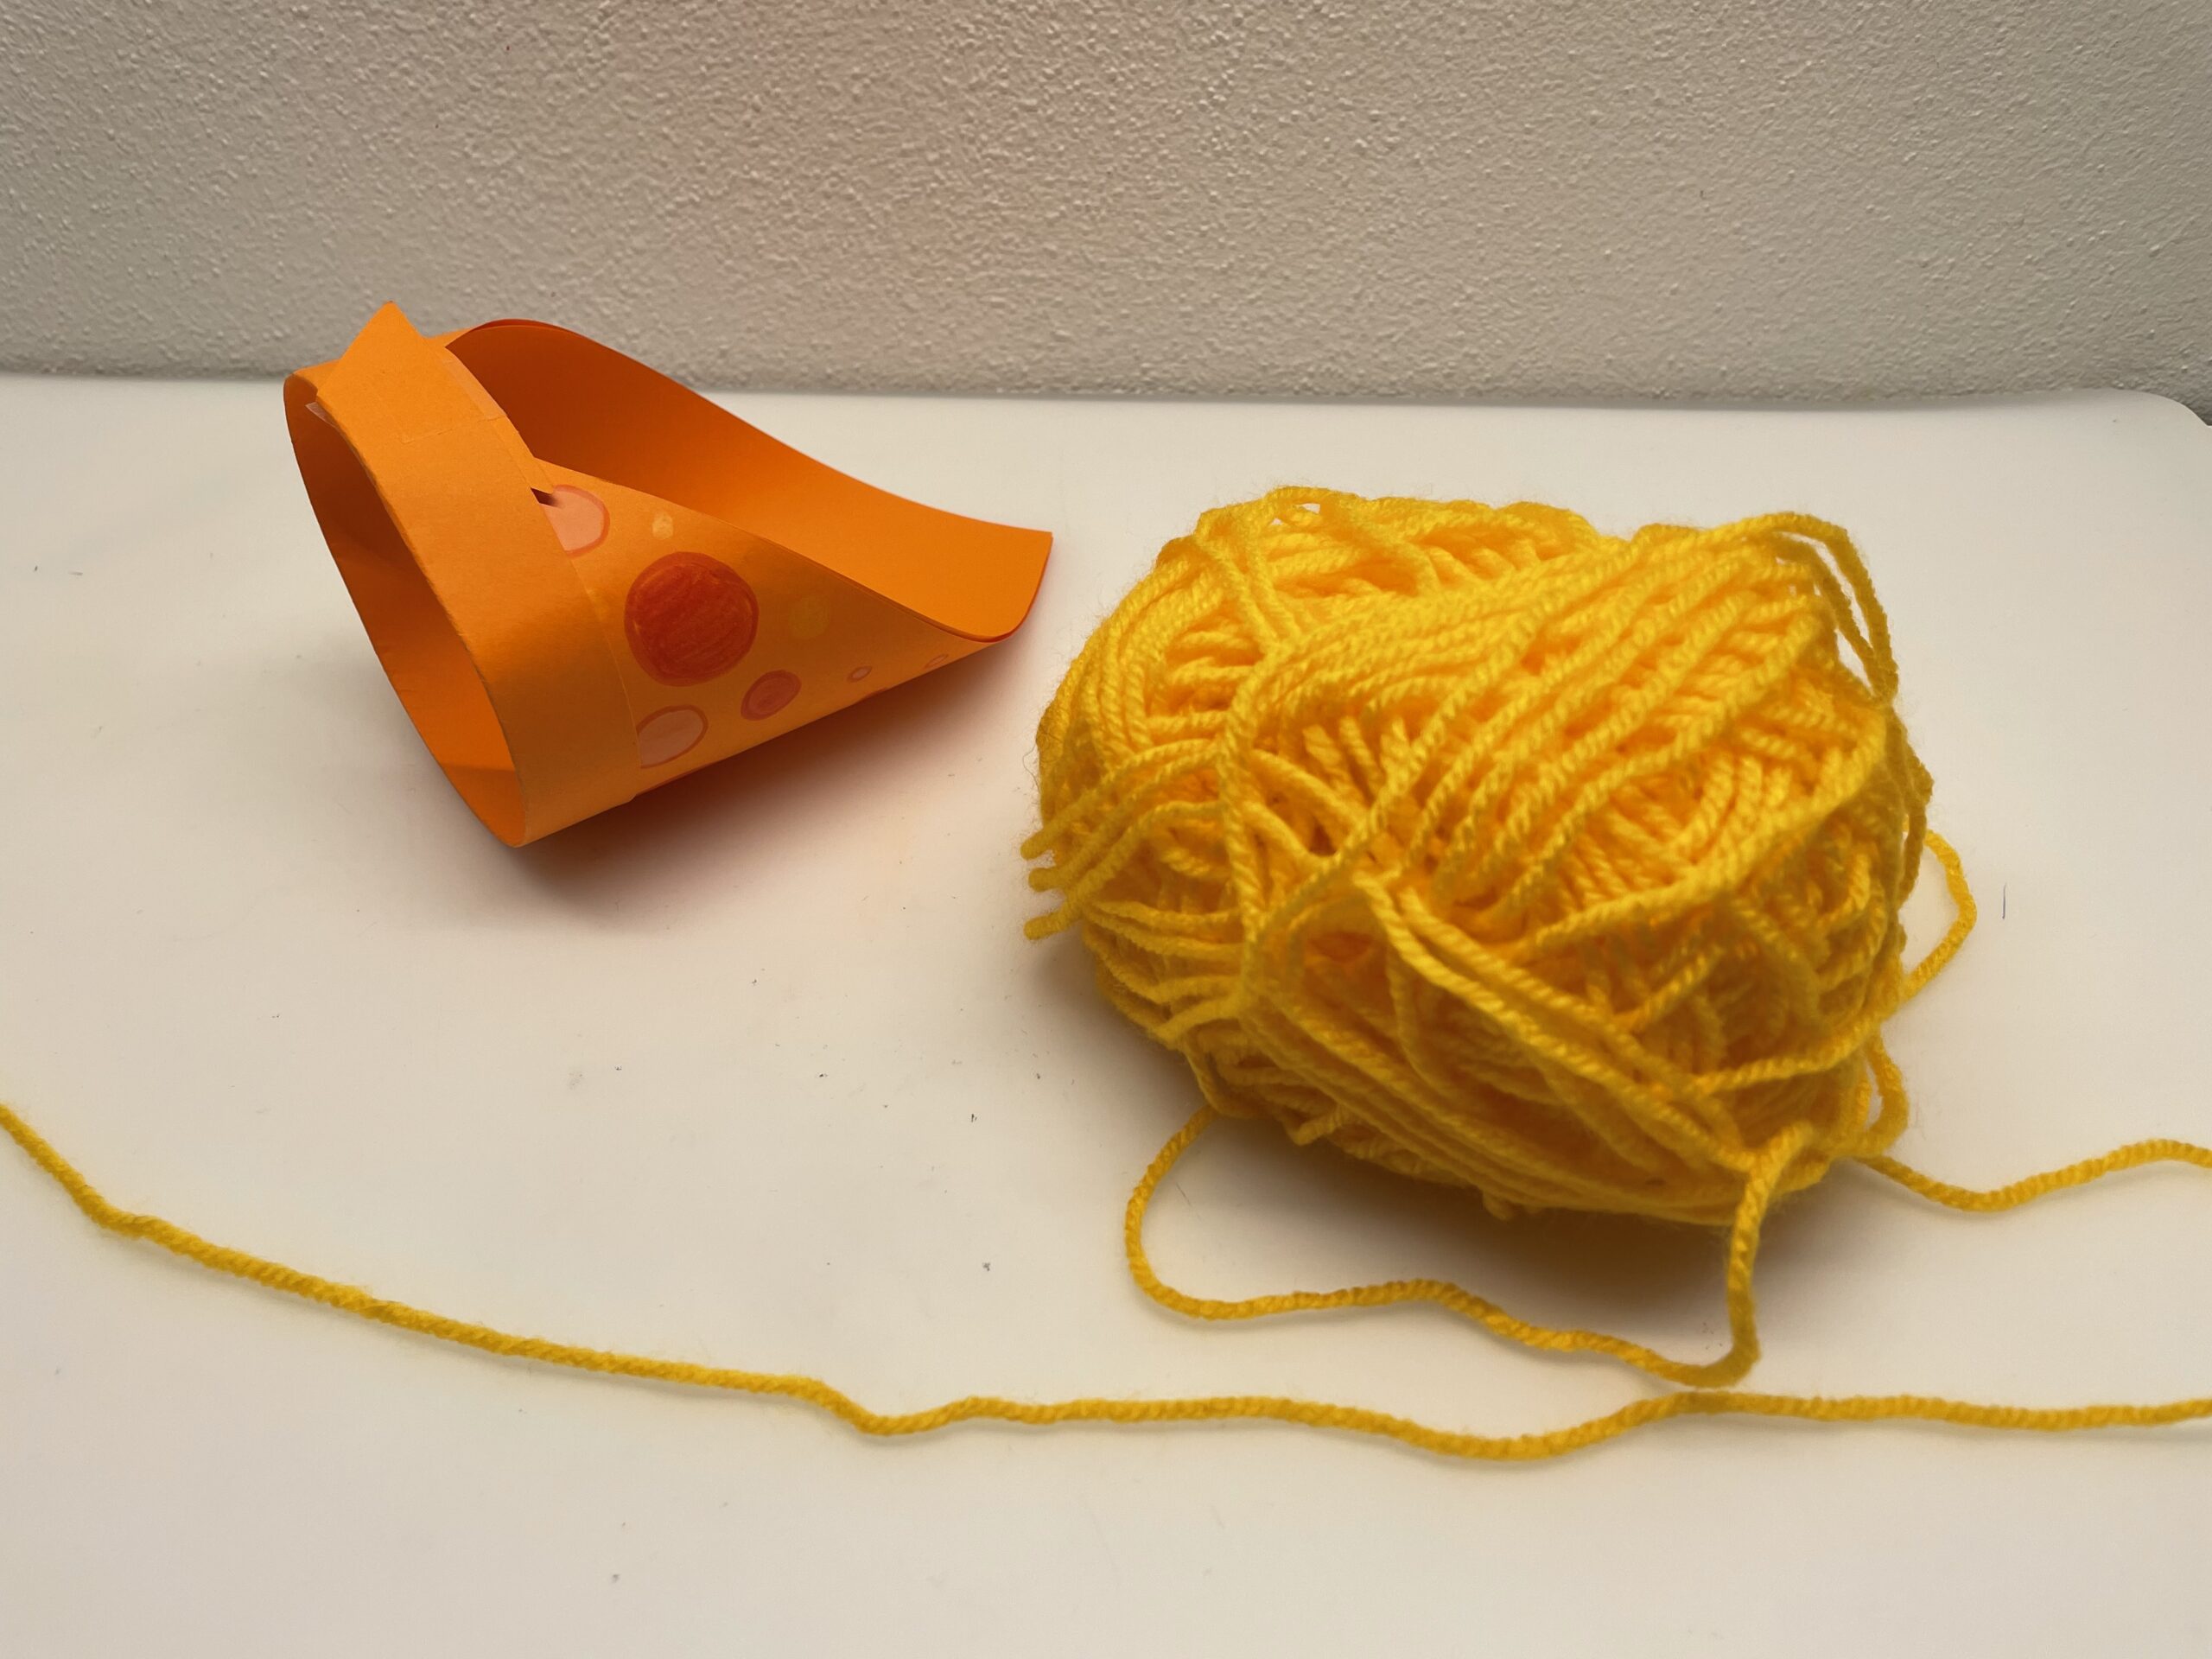
For this purpose, you tie the ringed fly to a wool thread.
Insert the end of the thread through the narrowest part and place the end of the wool thread like a cross over the long thread.
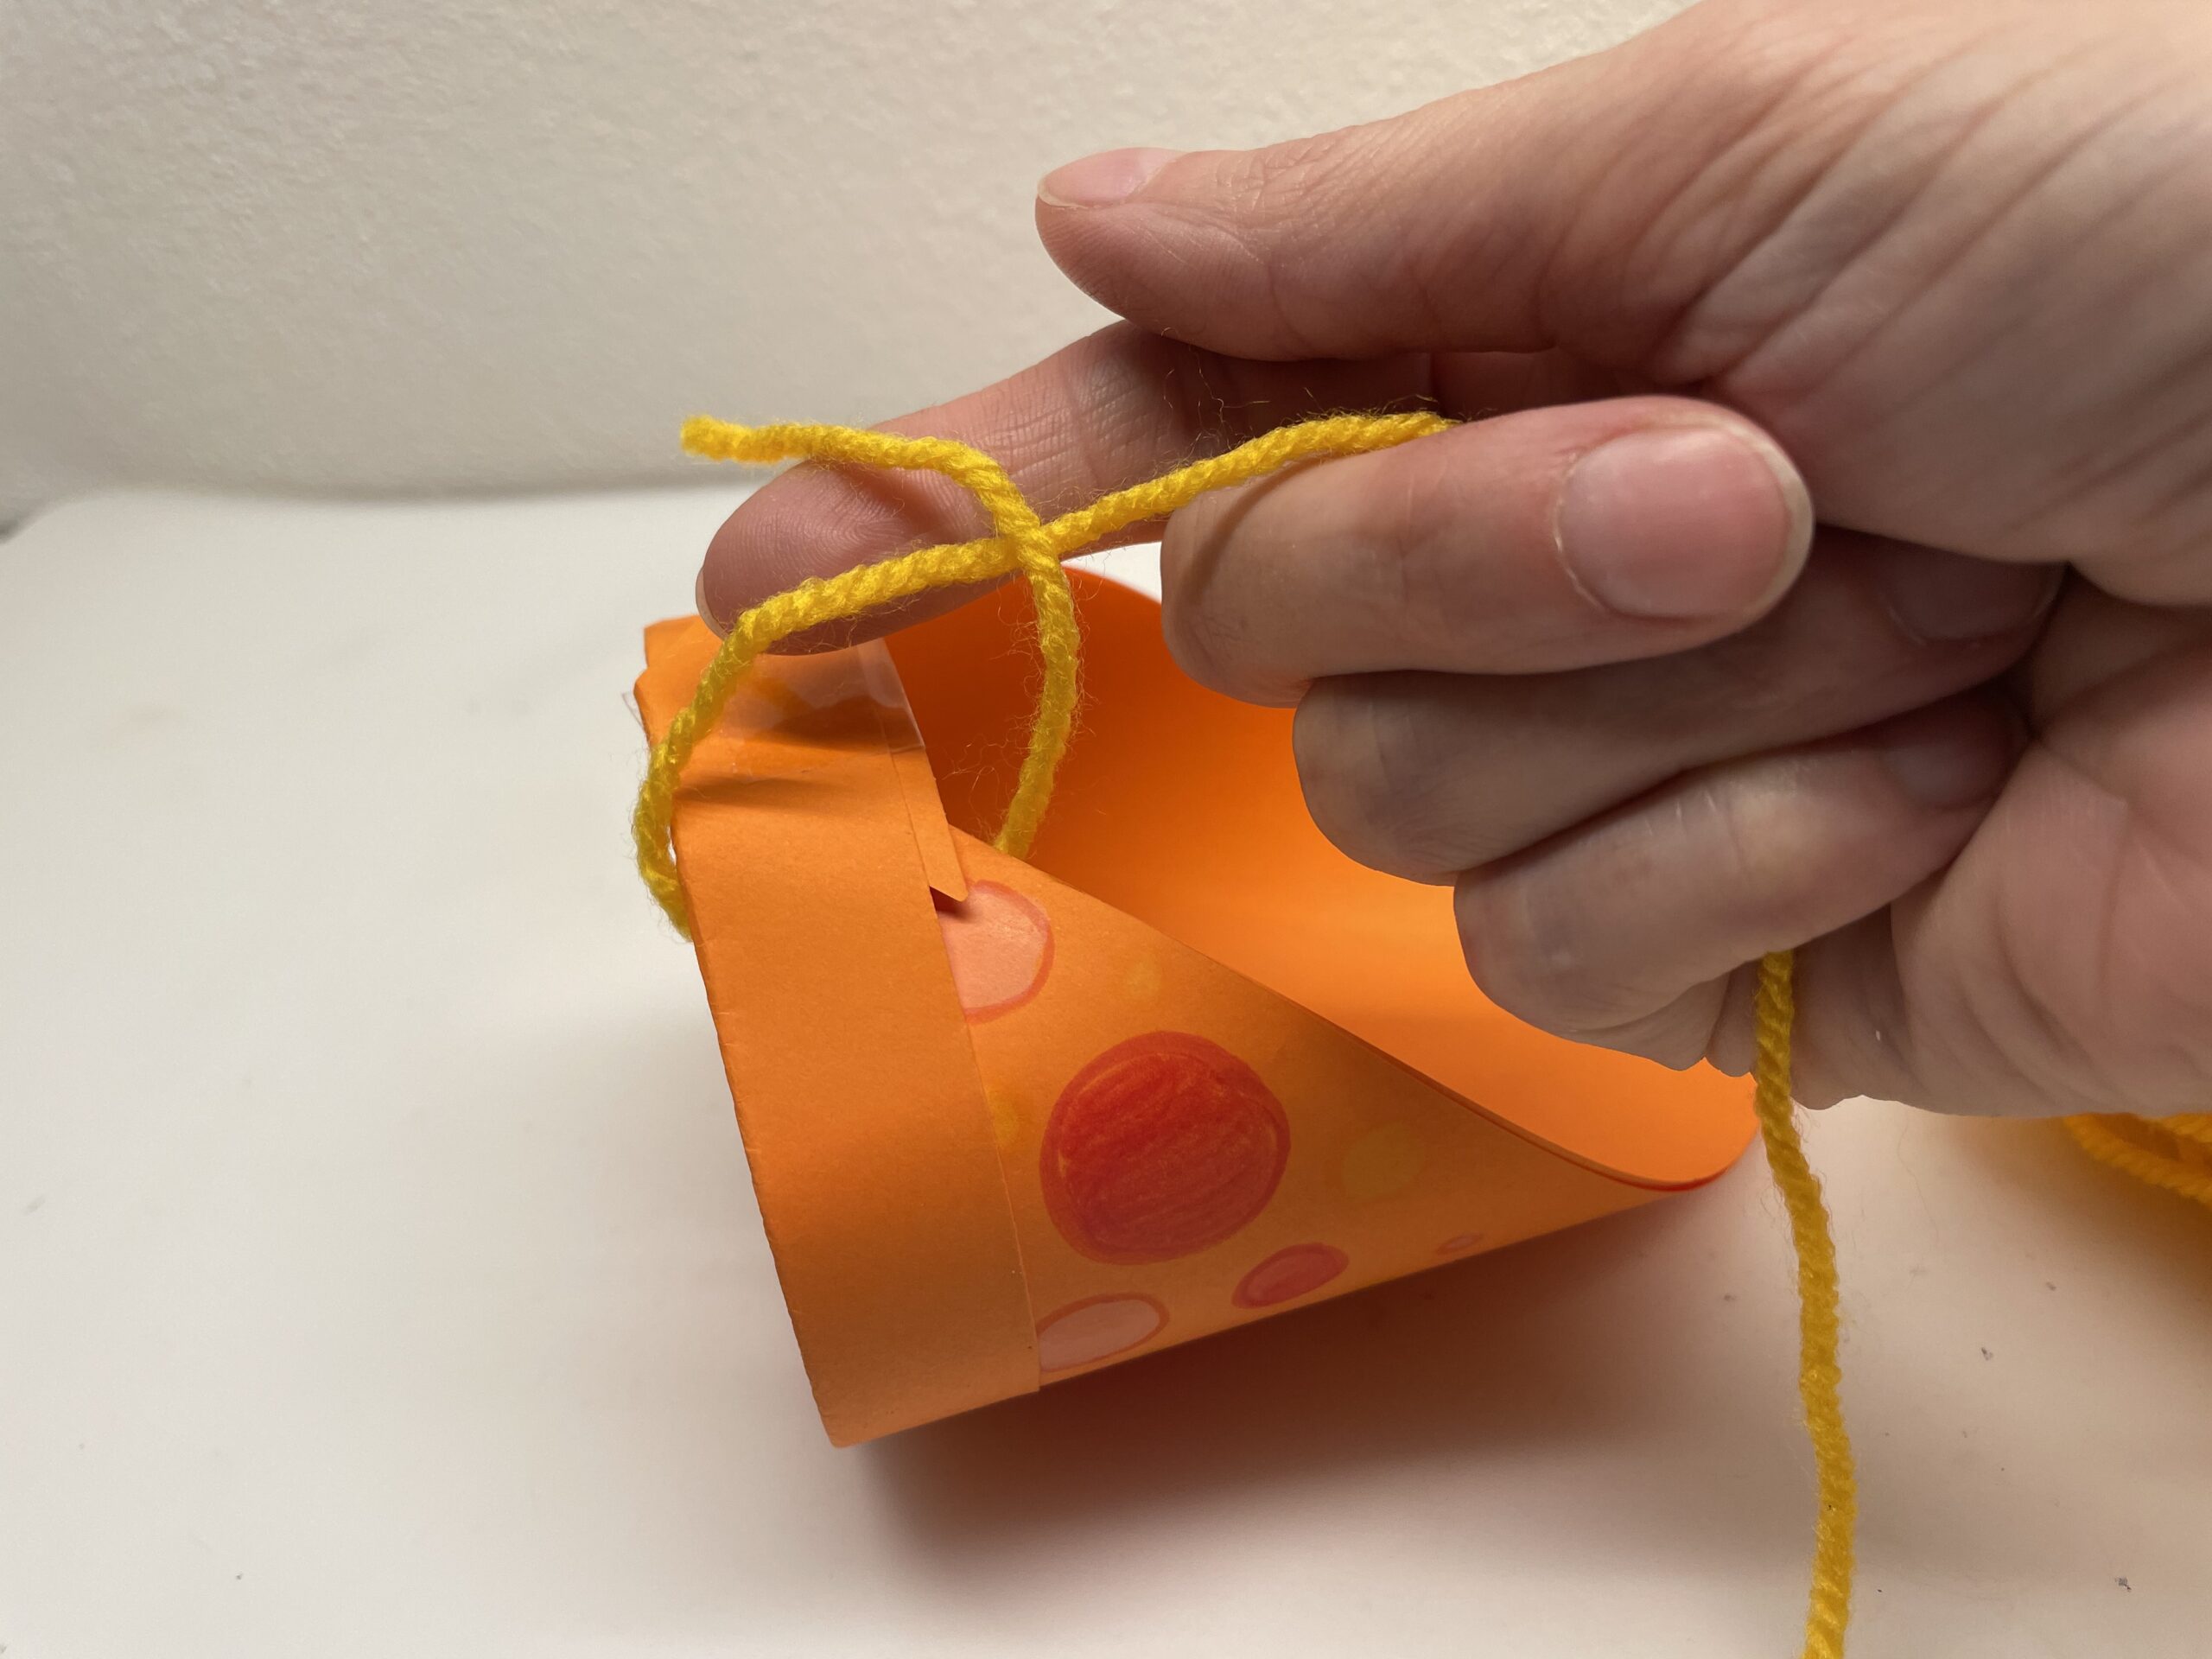
Then you put the end of the thread through the long thread.

Tighten the loop on both threads.
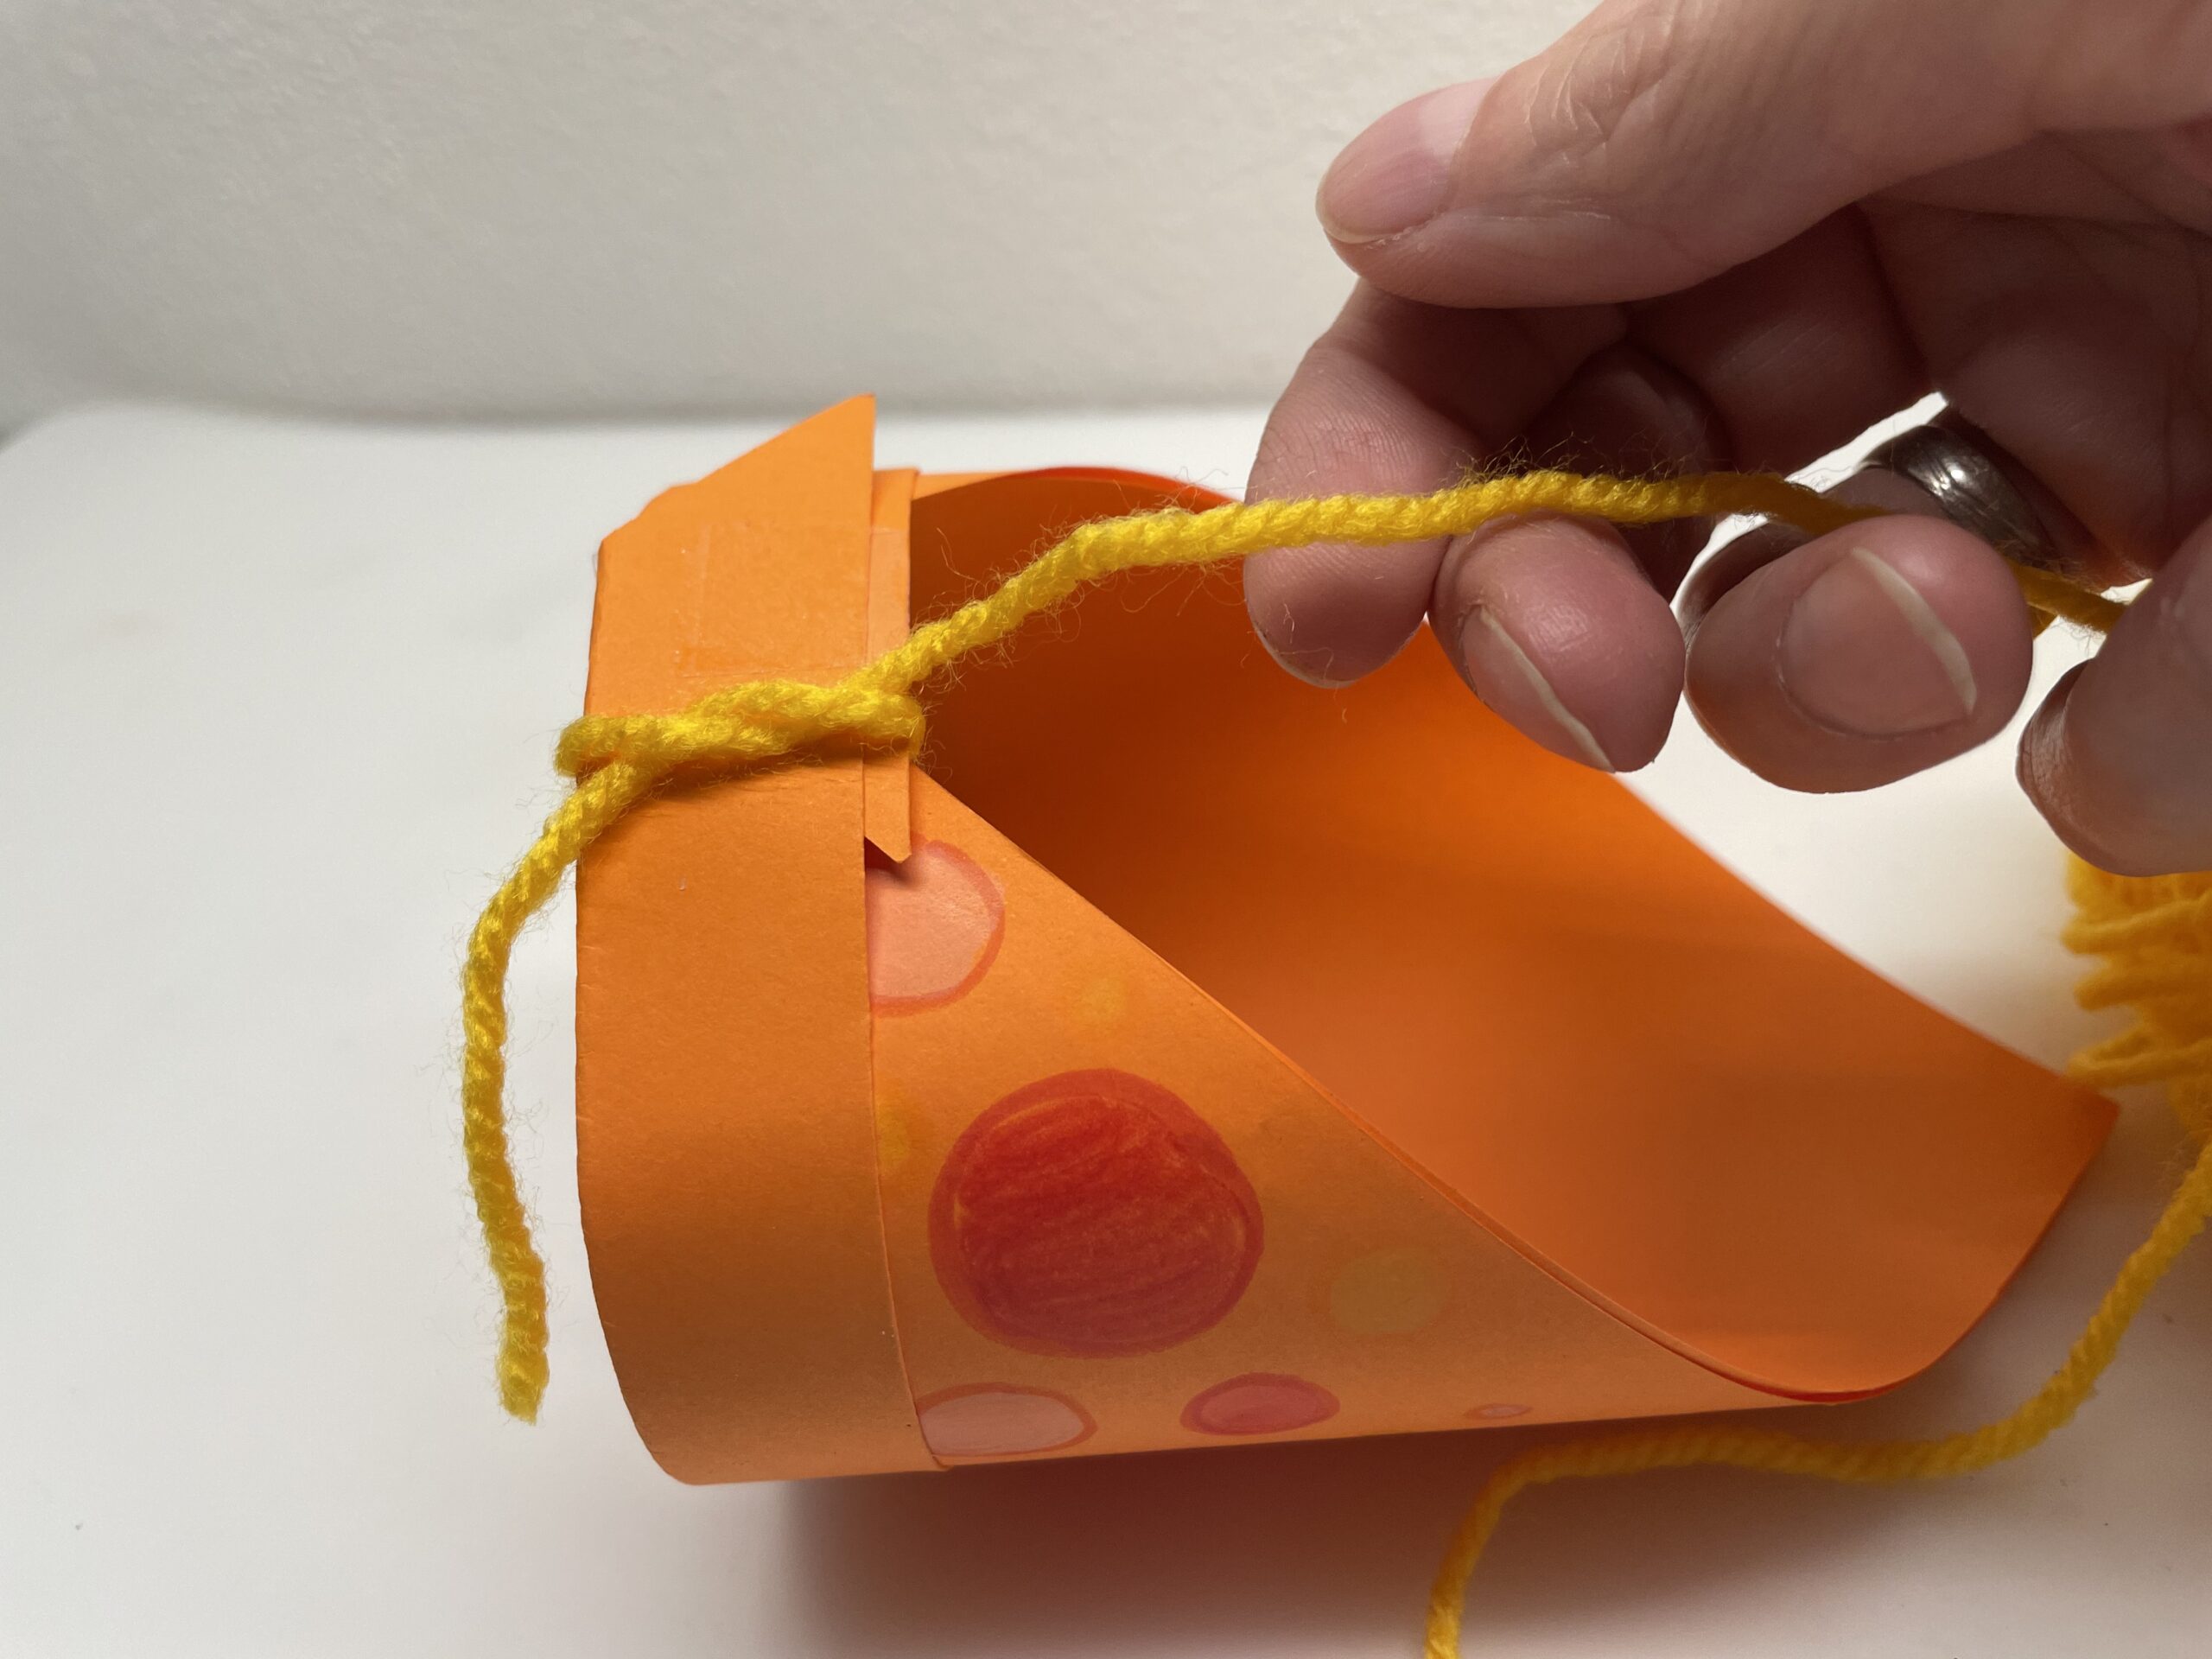
Now you lay another loop by placing both threads cross-shaped over each other again.
Insert the end of the thread through the thread loop and tighten.
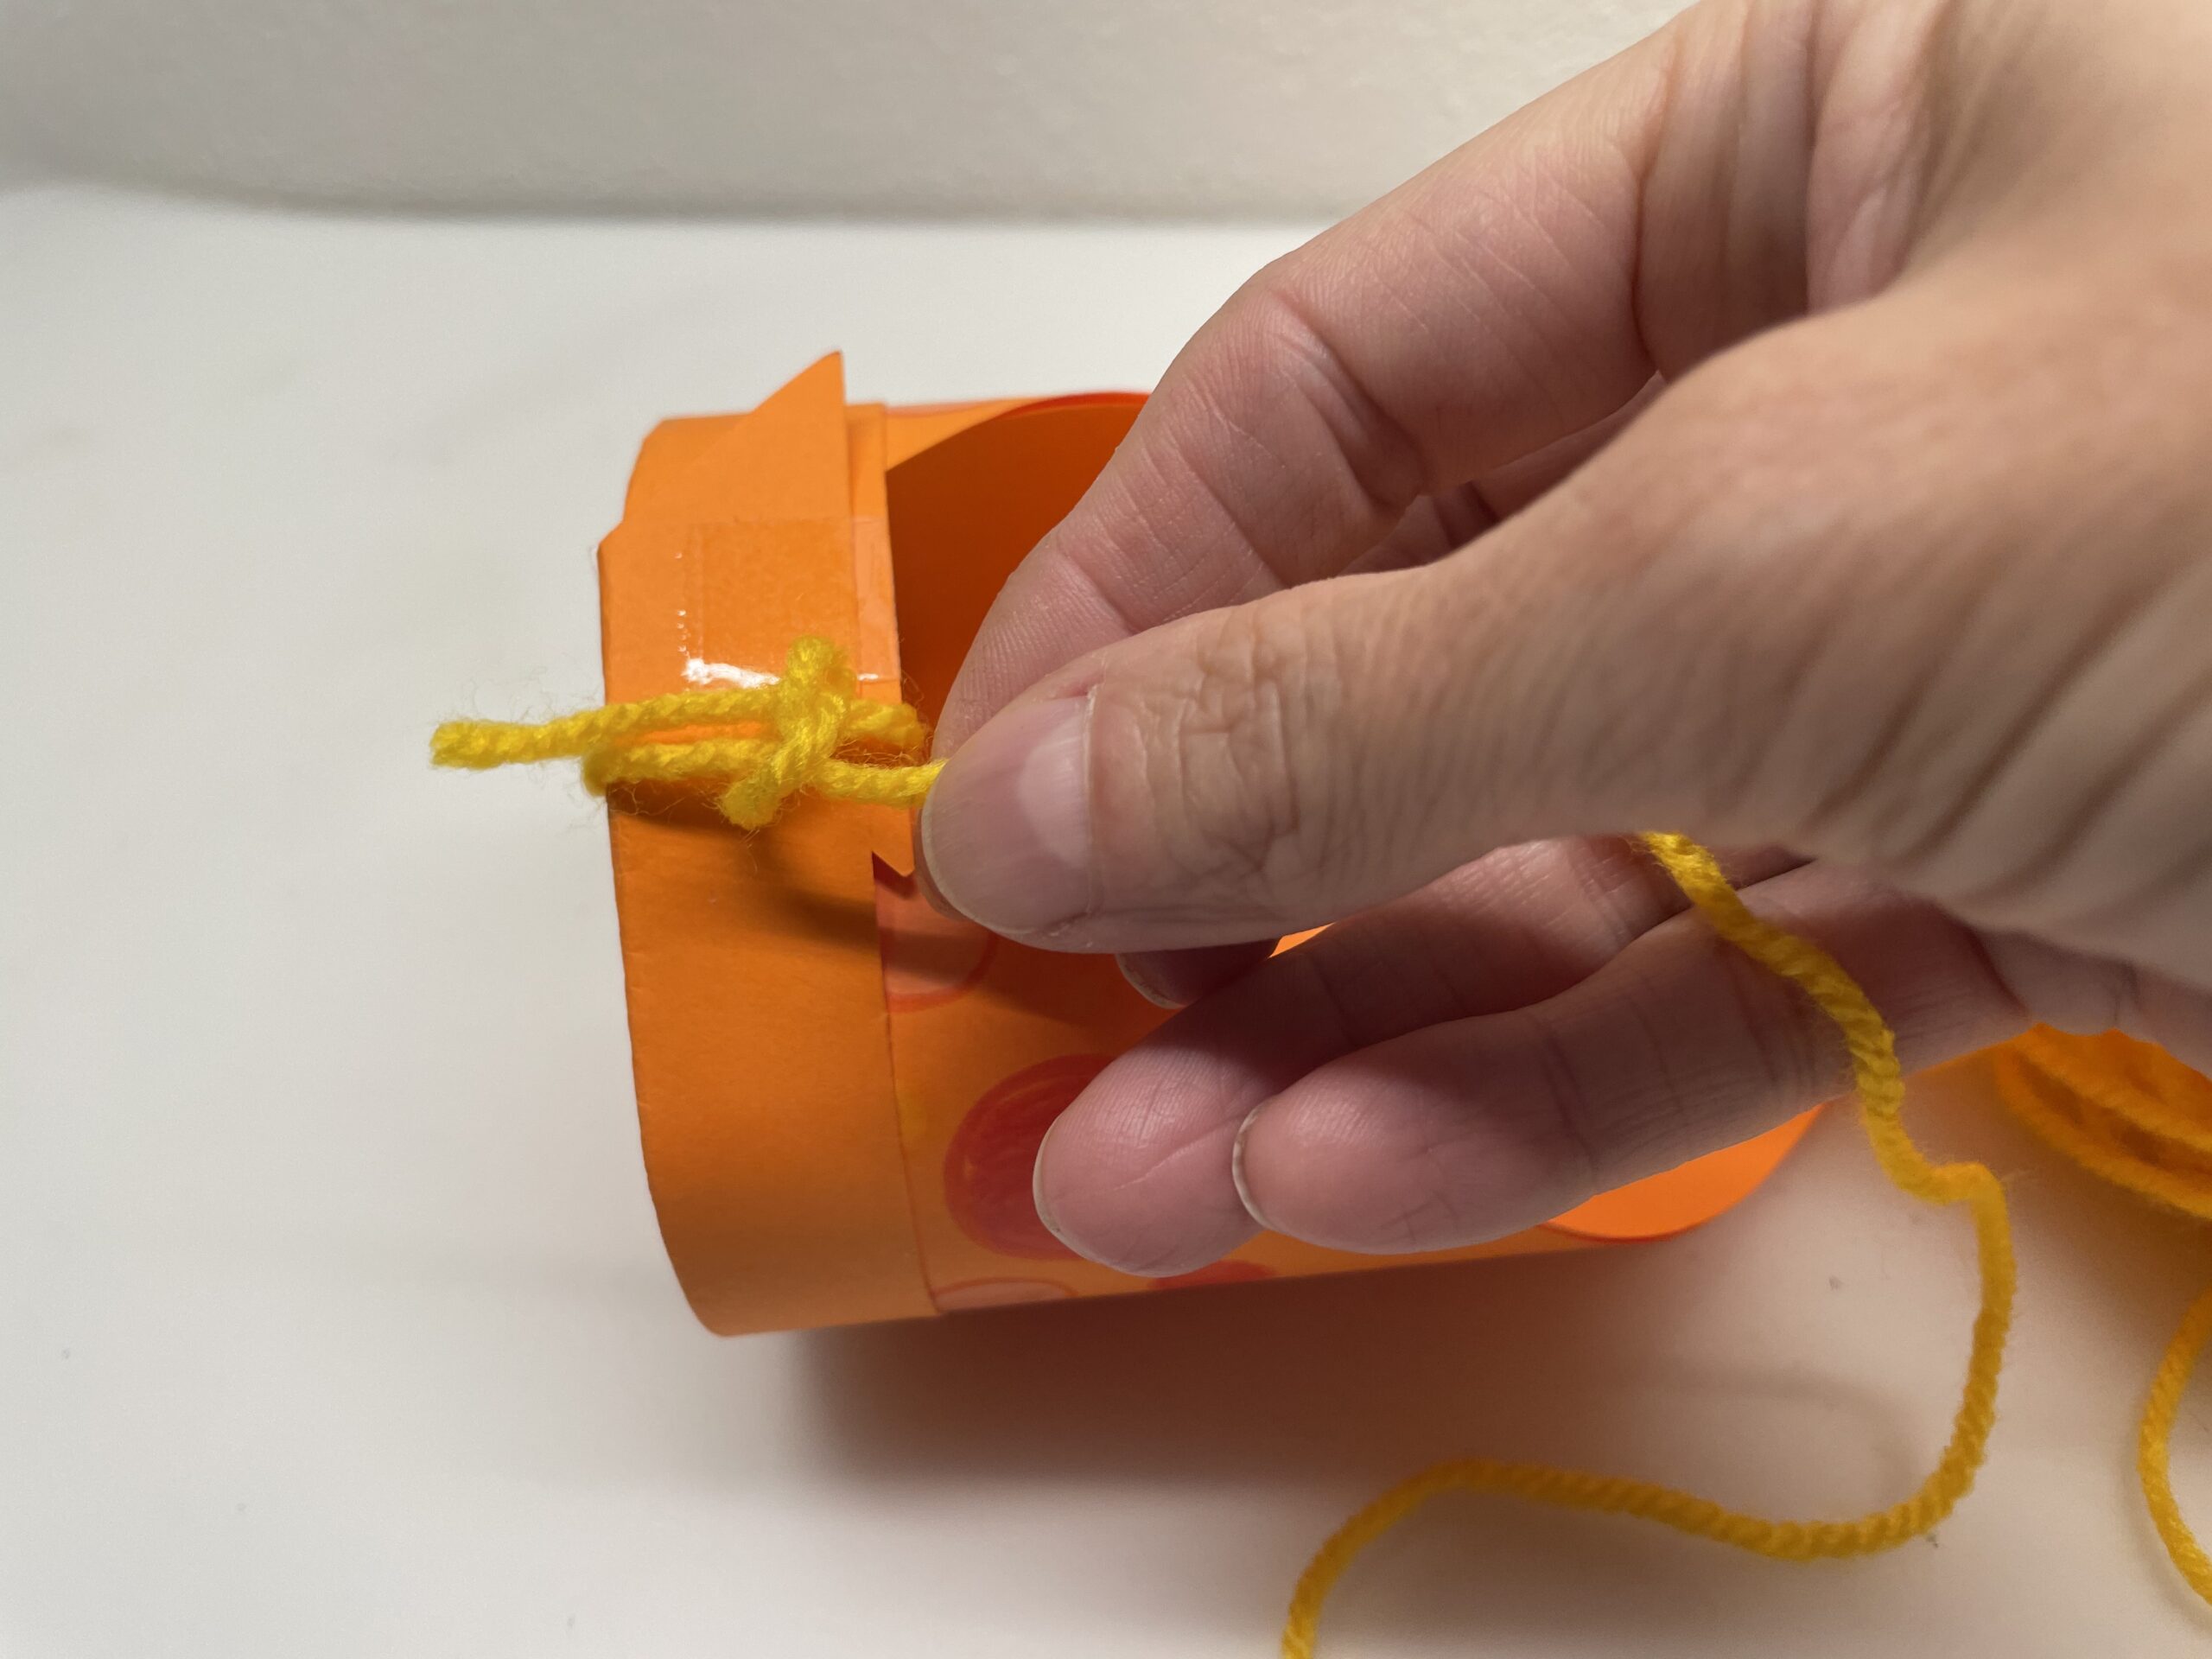
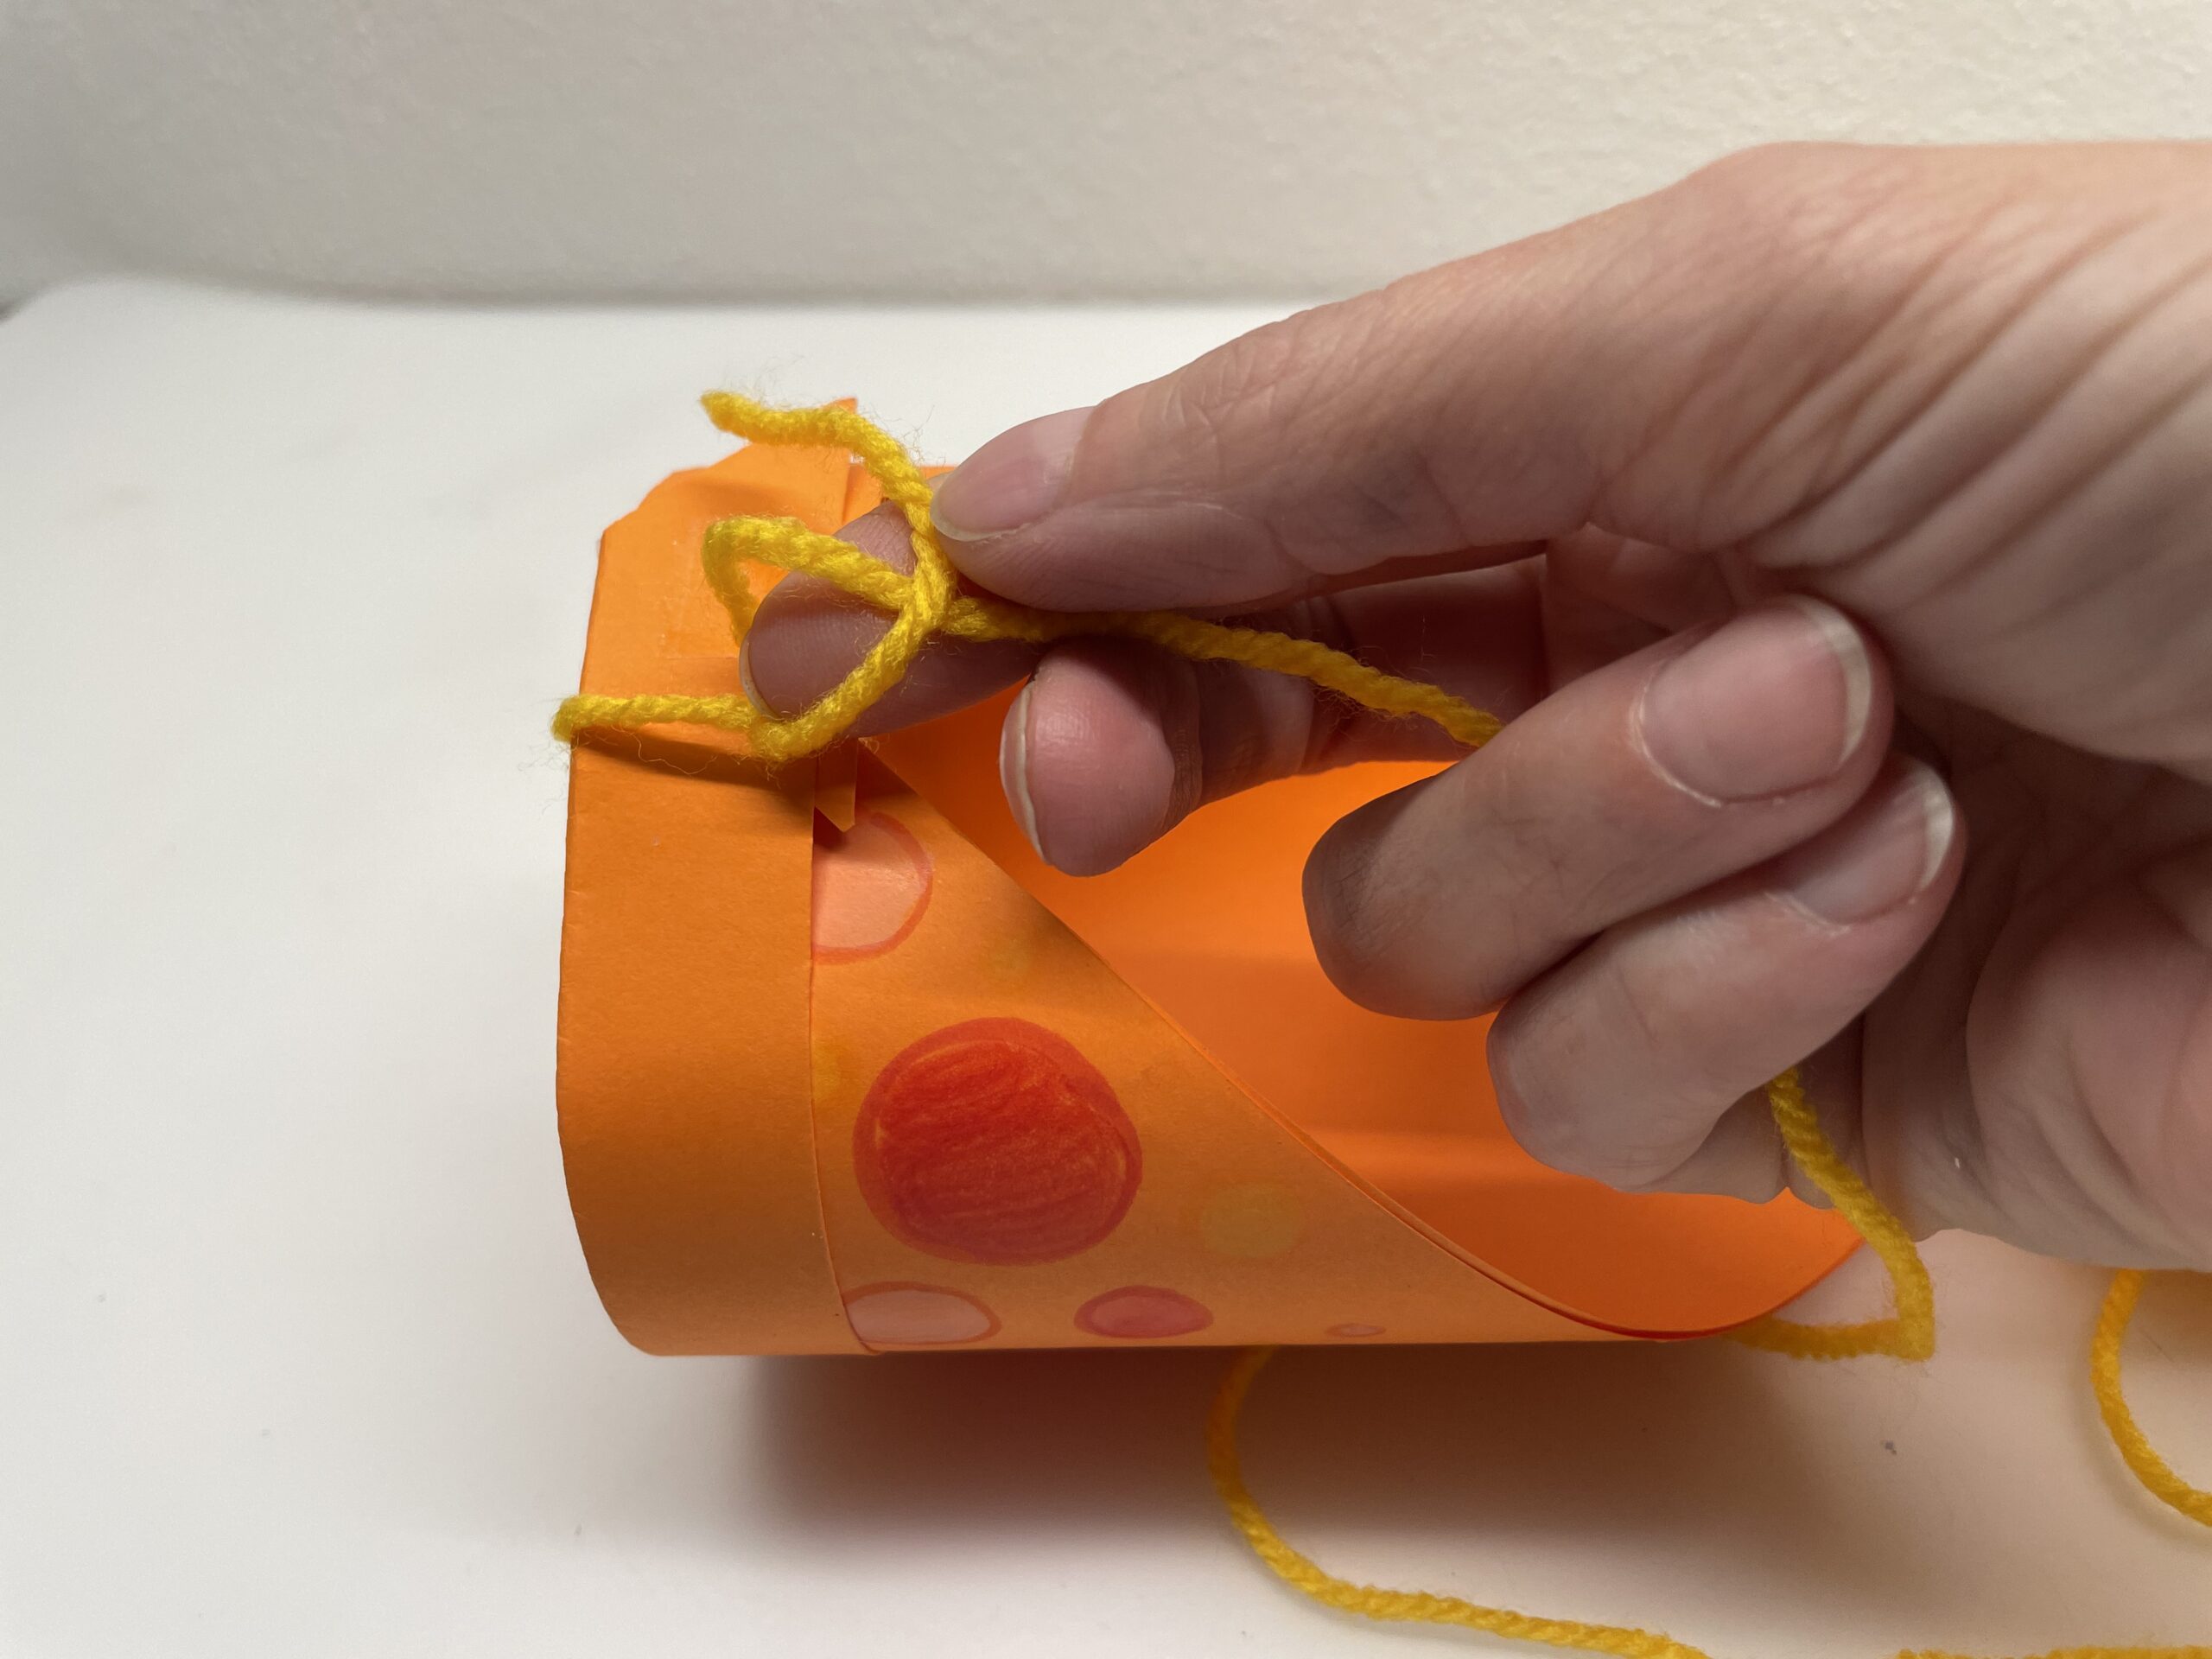
This is how you tighten the knot, creating a double knot.
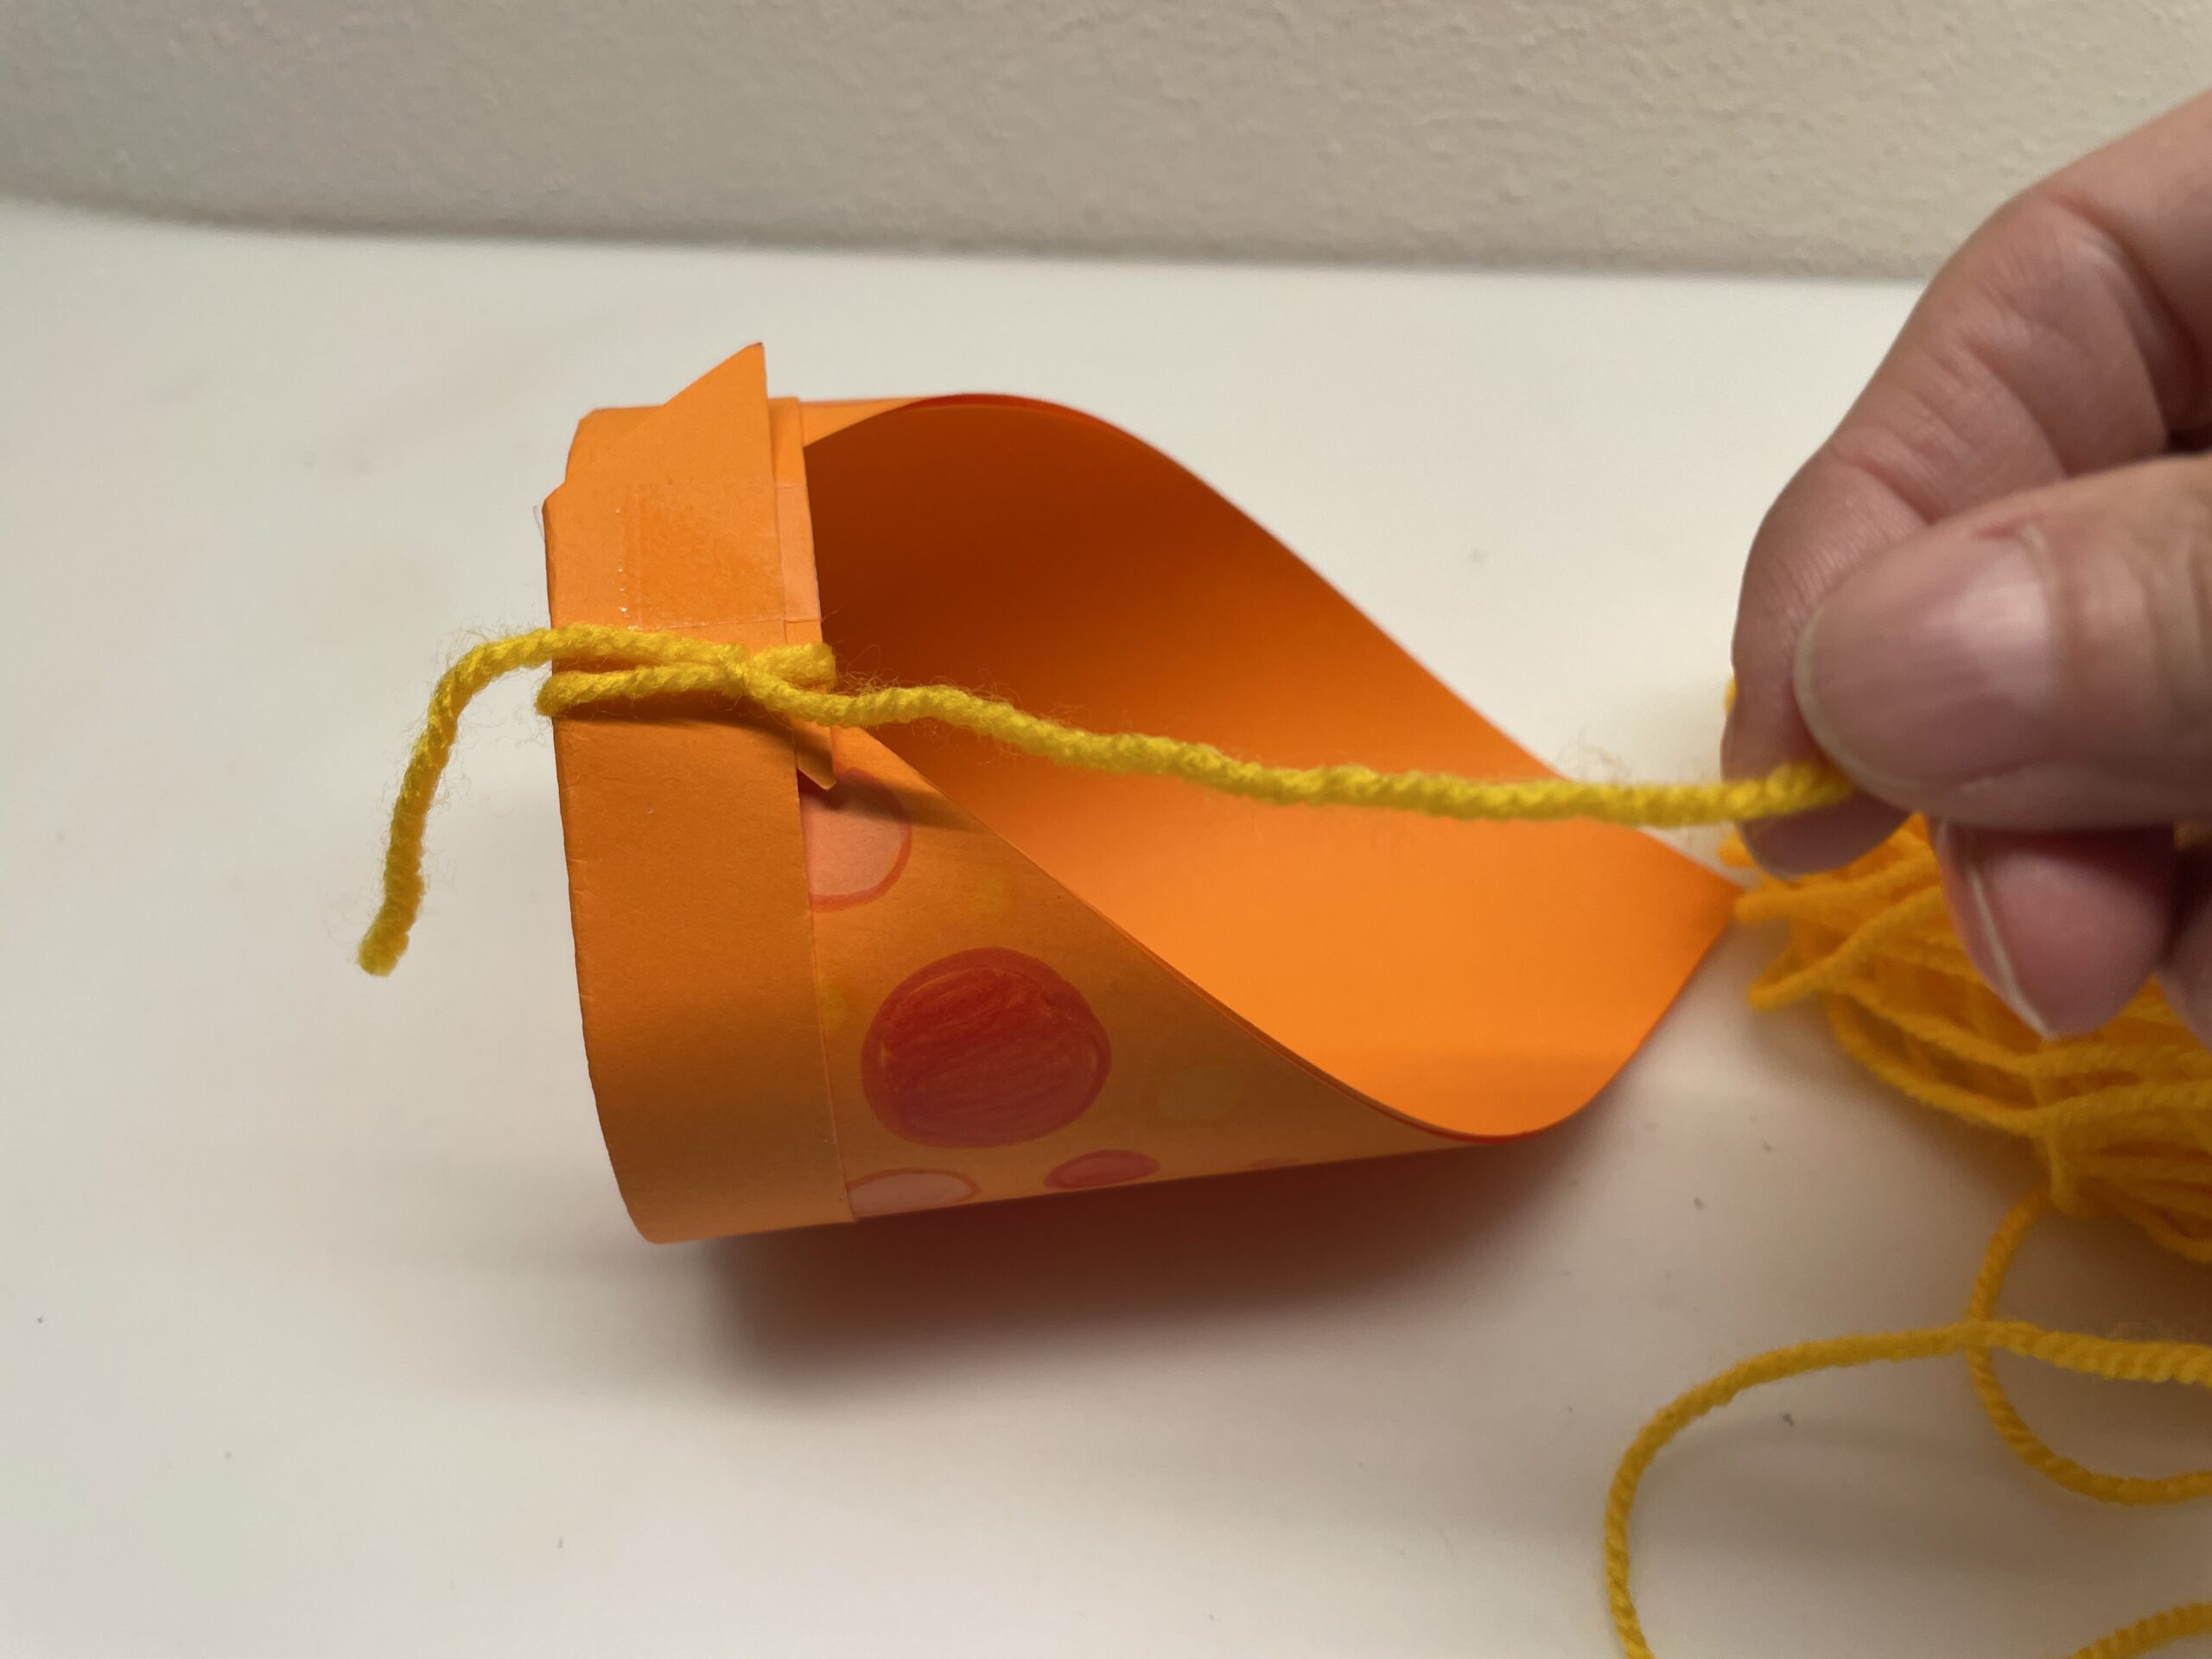
Then cut off the wool thread about 50cm long.
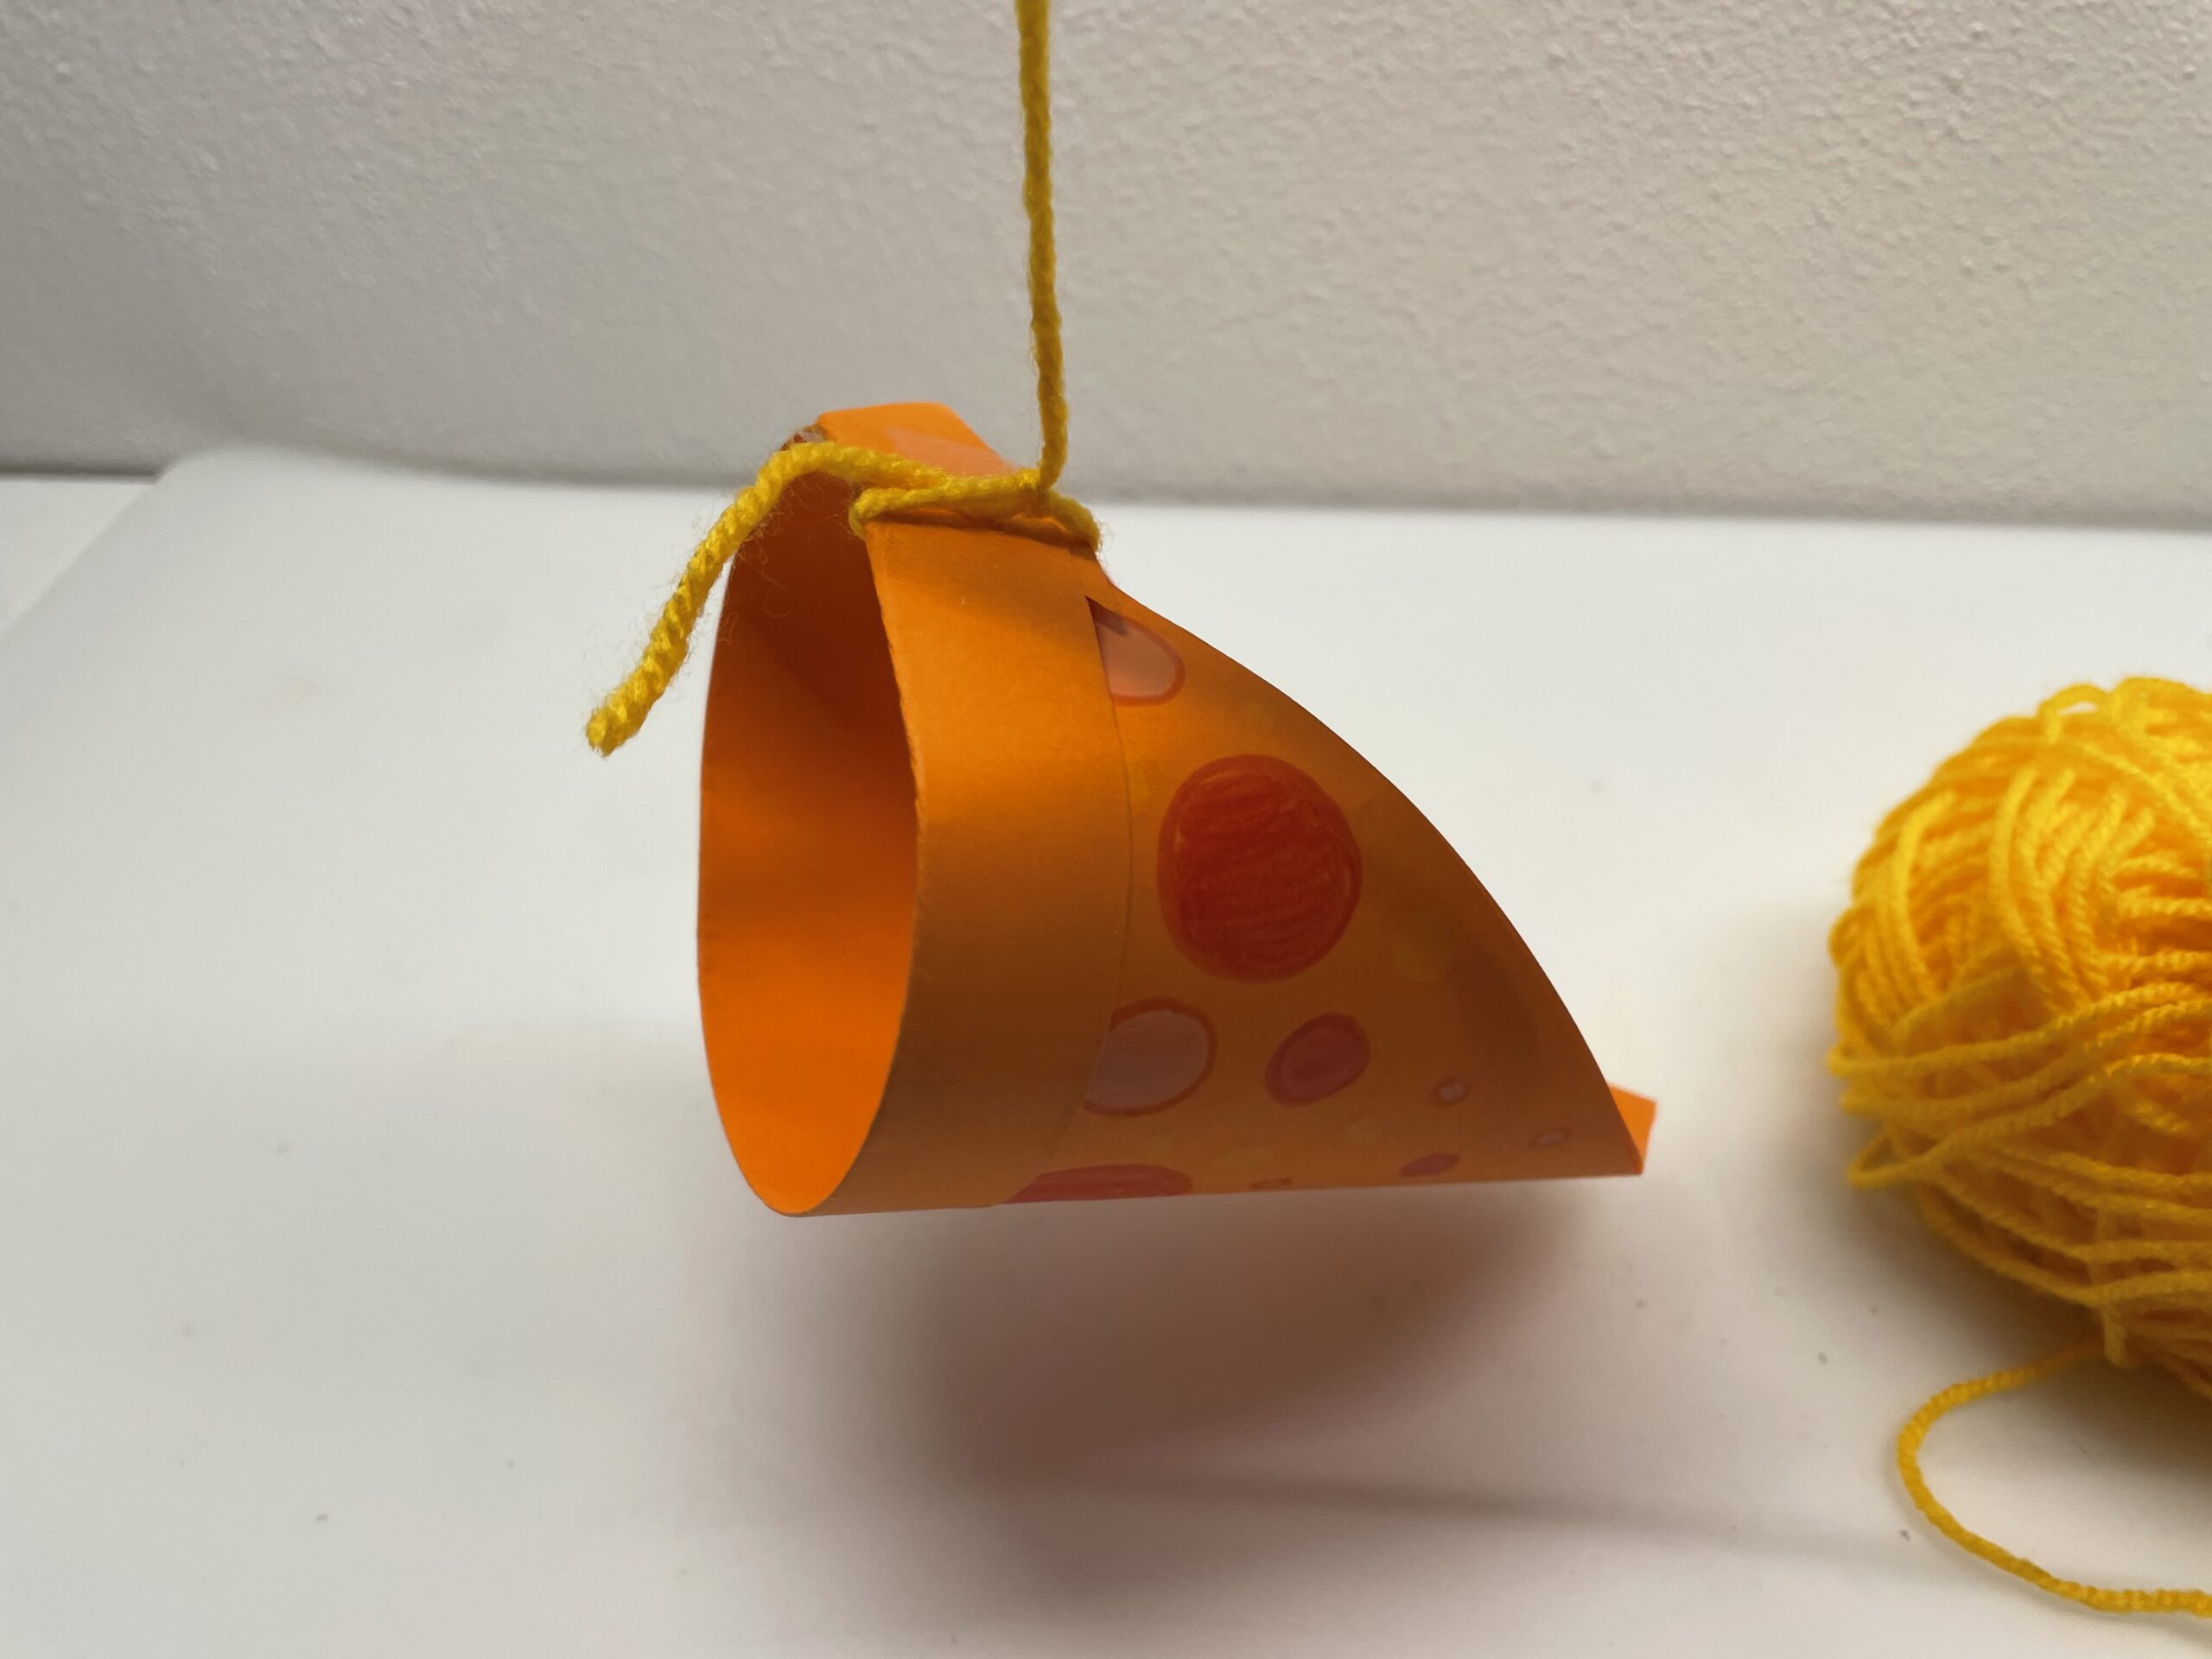
Now turn in circles. You lift a plane on the line above your head.
After a bit of exercise, the plane starts to rotate around itself and dances around your head.
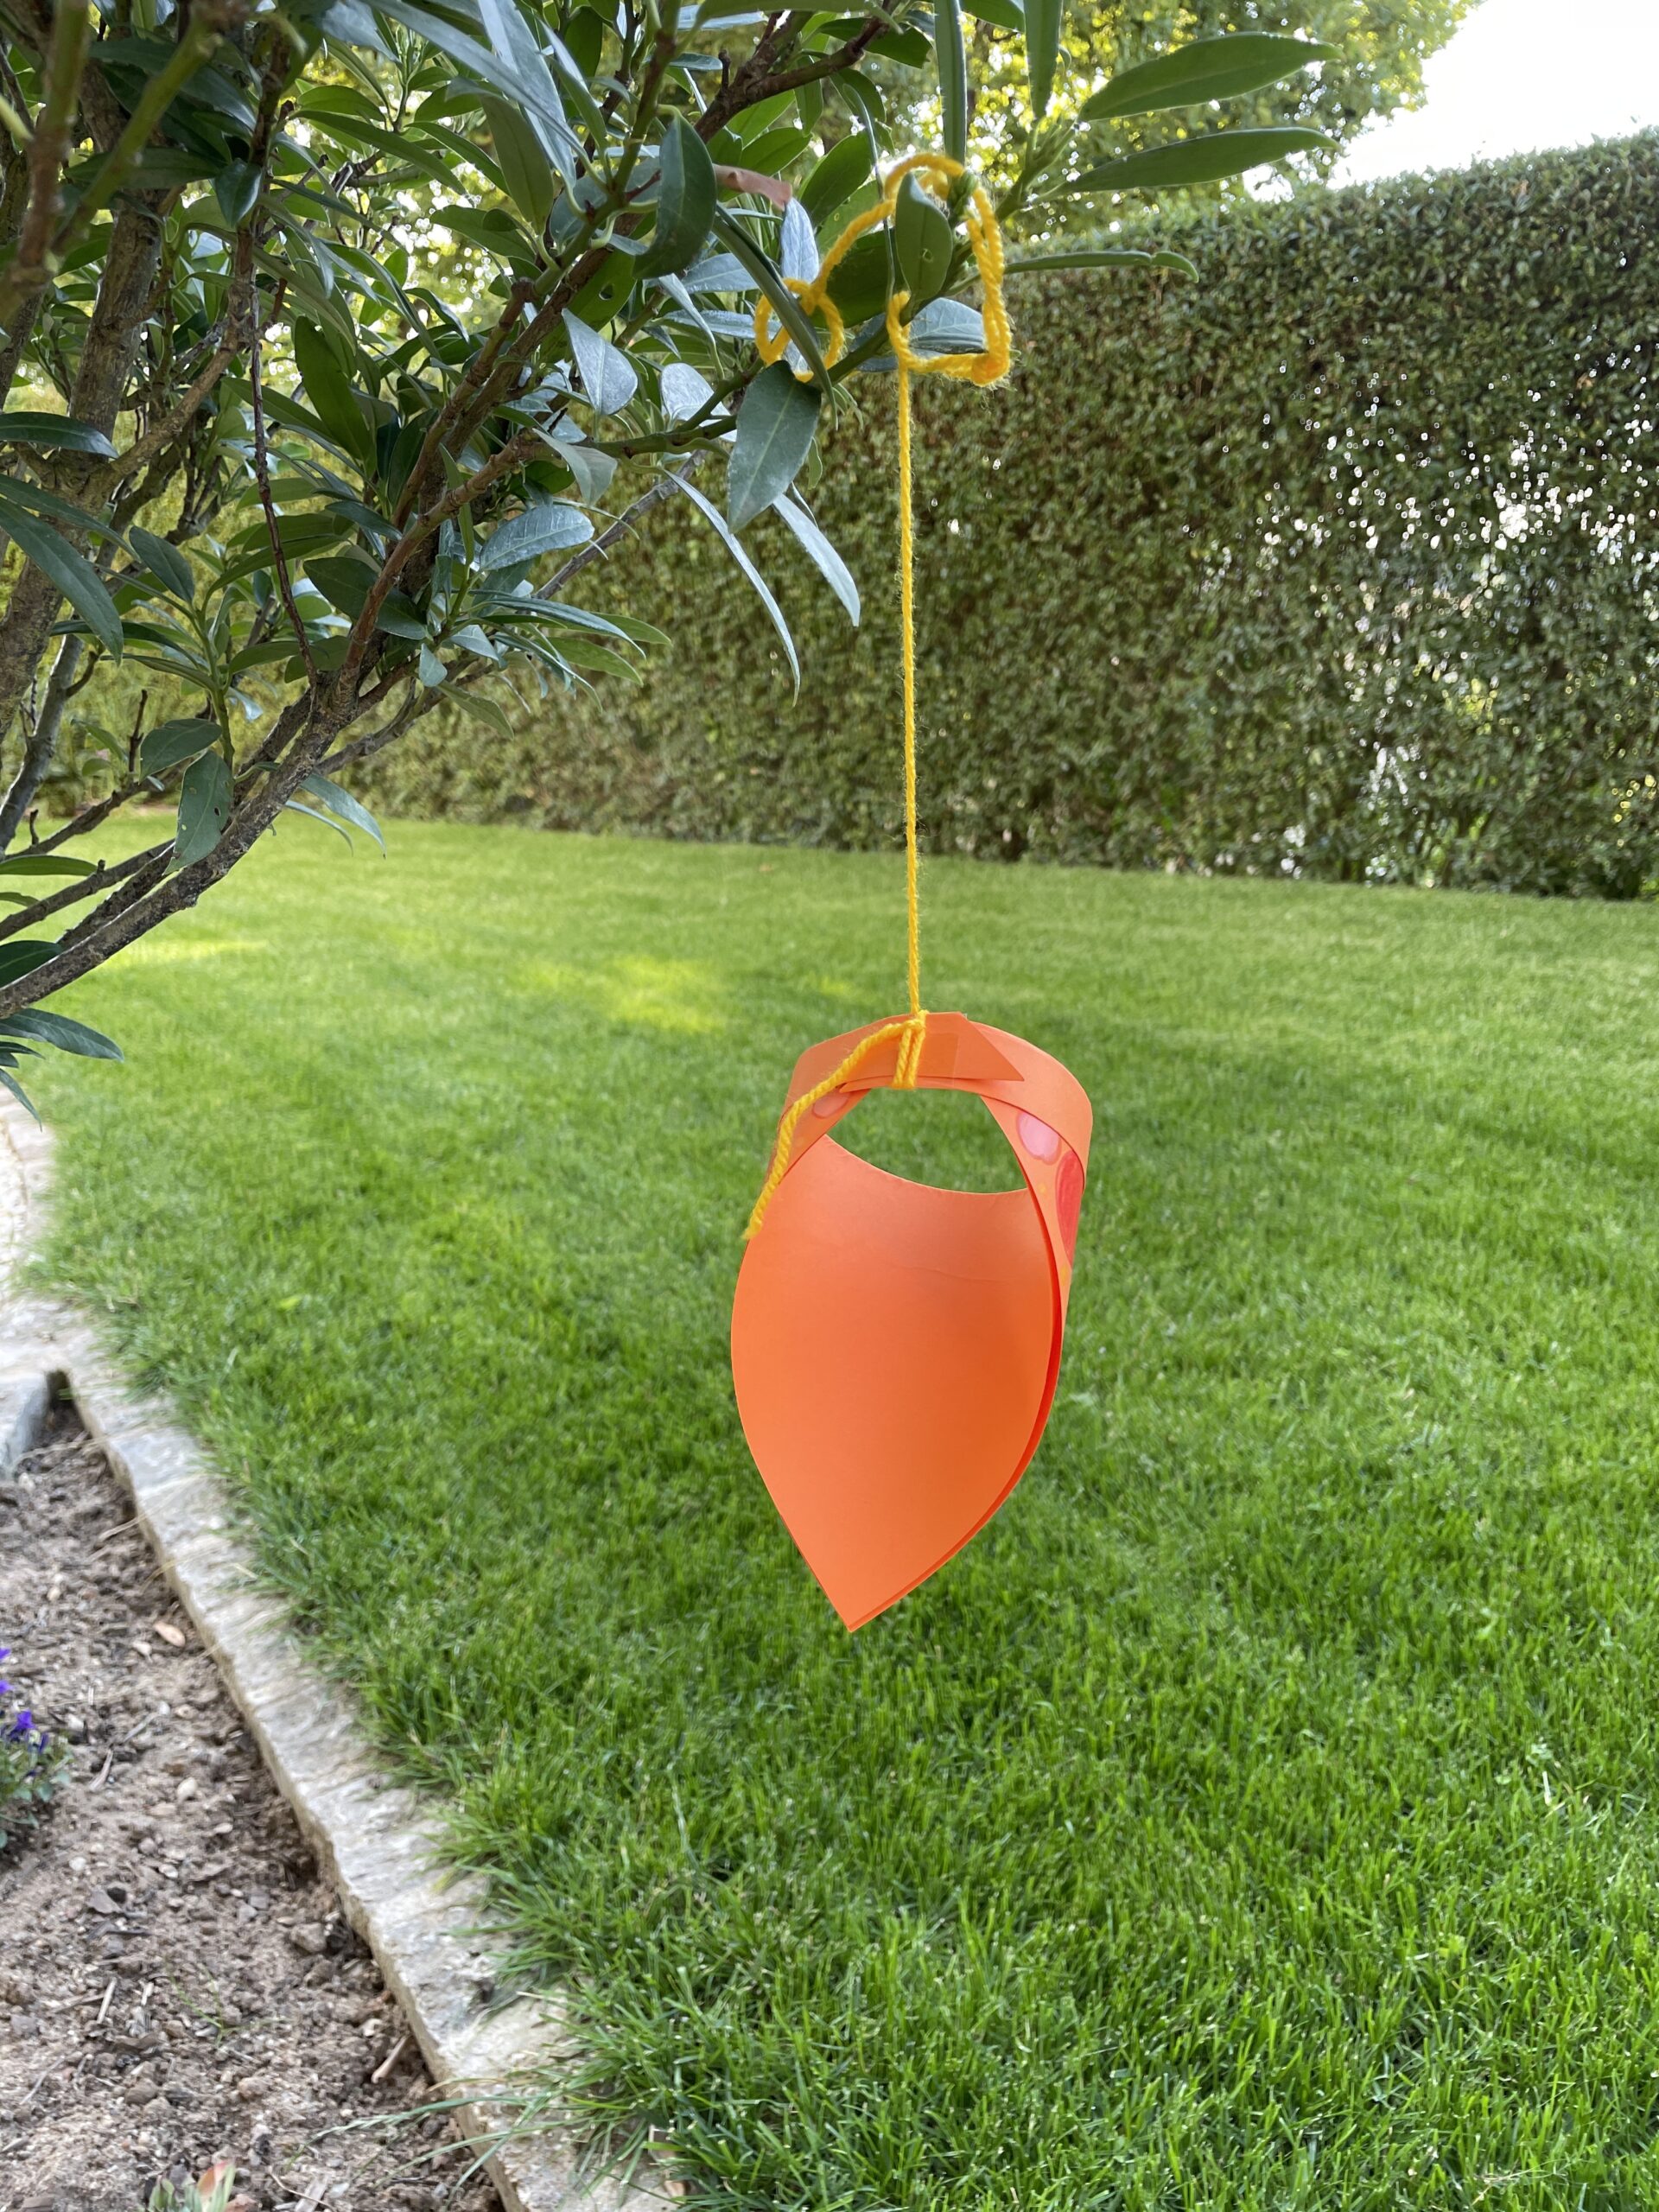
Even in the wind, the ring-flyer can dance. Hangs him on a long branch of a tree.
How many loops do you make?
Have fun!
Materials
Directions
For this plane you need a square sheet of paper.
You can simply cut it yourself. For this you put the DinA4 leaf up-edge in front of you. The short side of the leaf is right in front of your stomach.
Then take the lower left corner and place it directly on the right long side. At the bottom in the right corner a tip is created.
Make sure that both edges of the leaf lie exactly on each other.
The resulting diagonal strokes her with the fingers or the flat hand smoothly.
A triangle emerges.
Then cut off the paper strip above the triangle with scissors.
You don't need this strip anymore.
You use the folded triangle for the paper flyer.
Now she opens the triangle again. The result is a square paper.
Put the square in front of you so that there's a tip pointing at you.
Now fold the bottom tip upwards and place it exactly on the top tip. Strip the bottom side with your fingers smoothly.
That's how a triangle is created.
Attention: You already have the triangle when you have cut the paper yourself!
The lower closed edge now folds up about one centimeter wide.
To do this, first hold the strip firmly in the middle and strip with the other hand from the kink outwards. Make sure that a uniformly wide strip is formed.
Now you're done wrinkling.
Now you paint the paper flyer colorfully according to your ideas.
There are no limits to your imagination.
Then take the painted triangle in your hand at the bottom.
Then put a pen under the paper triangle and hold everything with your thumb. Now pull the paper edge over the pen several times. So bend the paper and the plane can be put together more easily later.
This is how the curved paper triangle looks now. The painted side is outside.
You're putting both Eden into each other now, creating a ring.
Tip: If you turn the paper, you better see how you have to put the two ends in each other.
So that the ends stick together well, you fix them with an adhesive tape.
Your ring pilot's ready.
To fly, hold up the ringed fly with your thumb and index finger at the thin end and let it fly forward.
Try this flight technique. It is not quite easy and requires some experiments.
For this purpose, you tie the ringed fly to a wool thread.
Insert the end of the thread through the narrowest part and place the end of the wool thread like a cross over the long thread.
Then you put the end of the thread through the long thread.
Tighten the loop on both threads.
Now you lay another loop by placing both threads cross-shaped over each other again.
Insert the end of the thread through the thread loop and tighten.
This is how you tighten the knot, creating a double knot.
Then cut off the wool thread about 50cm long.
Now turn in circles. You lift a plane on the line above your head.
After a bit of exercise, the plane starts to rotate around itself and dances around your head.
Even in the wind, the ring-flyer can dance. Hangs him on a long branch of a tree.
How many loops do you make?
Have fun!
Follow us on Facebook , Instagram and Pinterest
Don't miss any more adventures: Our bottle mail