Rabbit Bag – Easter Bag Rabbit

AdventurerKatzi
Rating5.04.4 thousand times & (1) DifficultyAdvanced

This small Easter bag consists of a tetrapack and a handkerchief. You are looking for a packaging for a small Easter gift? Then this Easter bag is suitable. It is fast made and probably you can start immediately as you have the materials at home.
Have fun upcycling!

Media Education for Kindergarten and Hort

Kind bastelt eine Rassel mit dem Navi
The Adventure Navi, the app for DIY projects, enables media education for the youngest.

Relief in everyday life, targeted promotion of individual children, independent learning and - without any pre-knowledge already usable by the youngest!
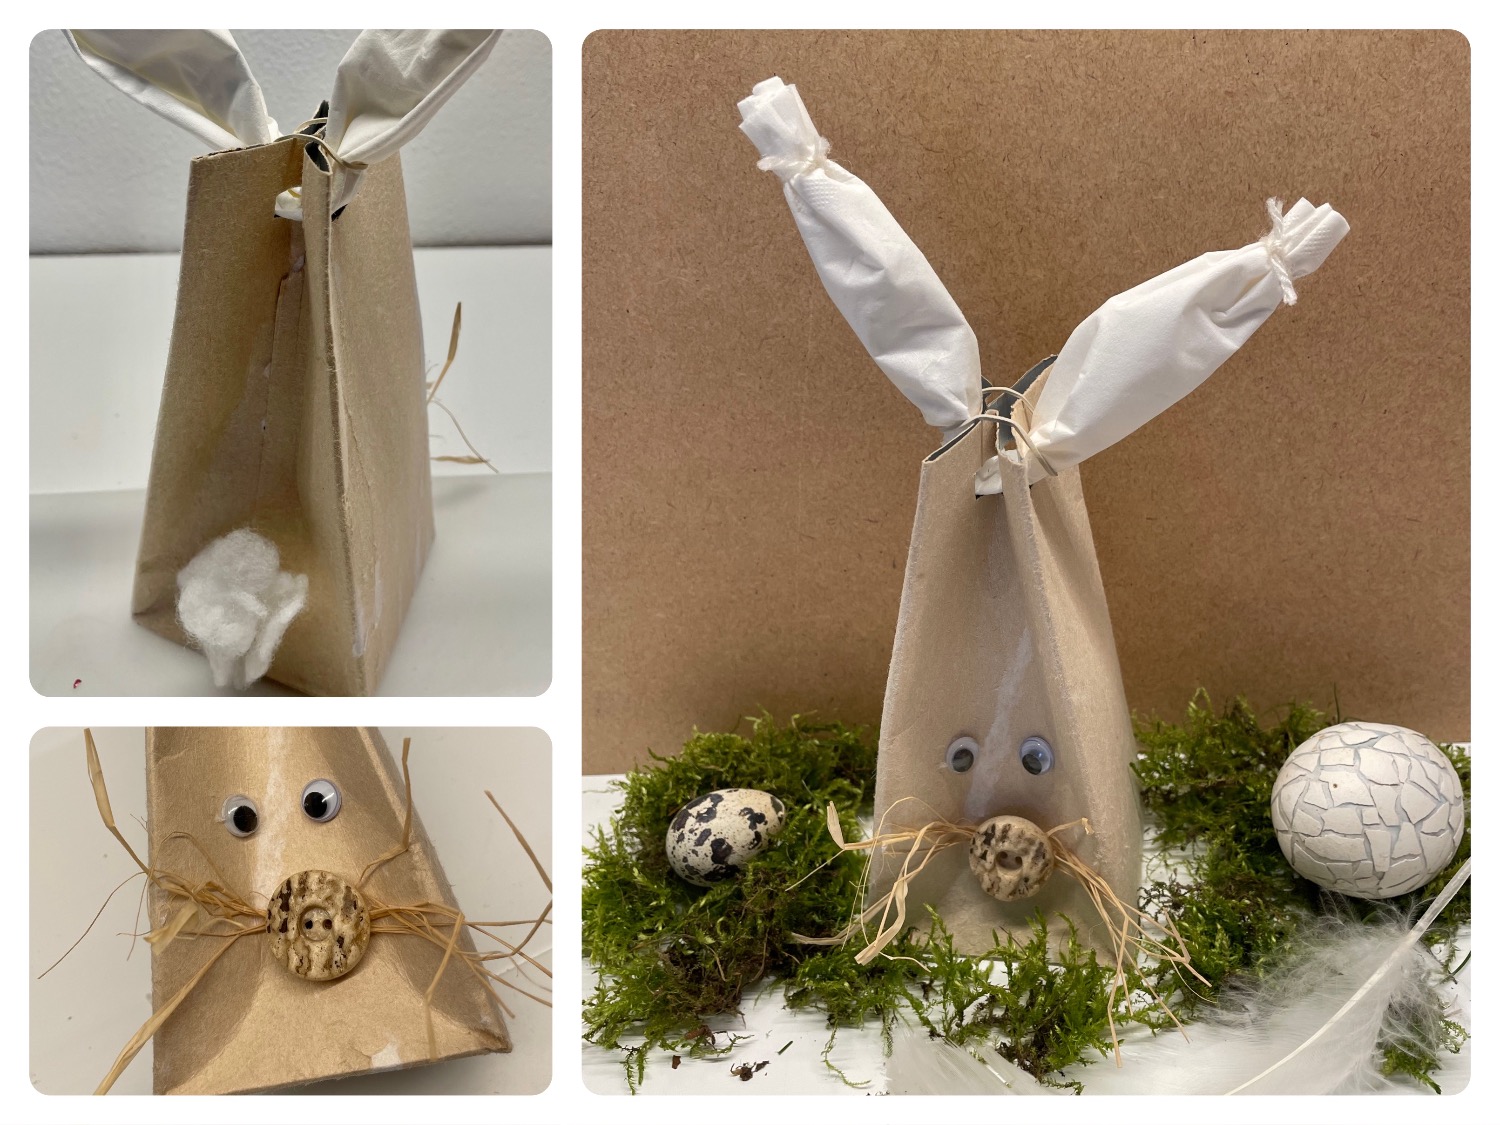


Titelbild zur Bastel- und DIY-Idee für Kinder '(699) Hasentüte – Ostertüte Hase'
Material for1 Child
Prep Time5 min.Adv. Time30 min.Total Time35 min.
 1 Tetrapack
 1 Hole pliers
 1 Pencil
 1 Hot glue gun
 1 Builder's pad
 2 Wool thread about 6 cm long
 1 Paper handkerchiefor piece of fabric in handkerchief size
 1 Household rubber whiteSmall rubber
 4 Woven fabrics of iron or non-alloy steelabout 5 cm long
 1 Button
All links marked with a shopping cart lead to Amazon - here we have selected products that we would order ourselves and in part also ordered. In a qualified purchase via the advertising link, we as Amazon partner receive a commission, for you there are no costs. You thus support our cost- and advertising banner-free, educational offer.
1

Prepare a craft pad and a washed out, dry tetrapack.
Carefully removes the top layer of the film from the packaging, so that the carton appears.
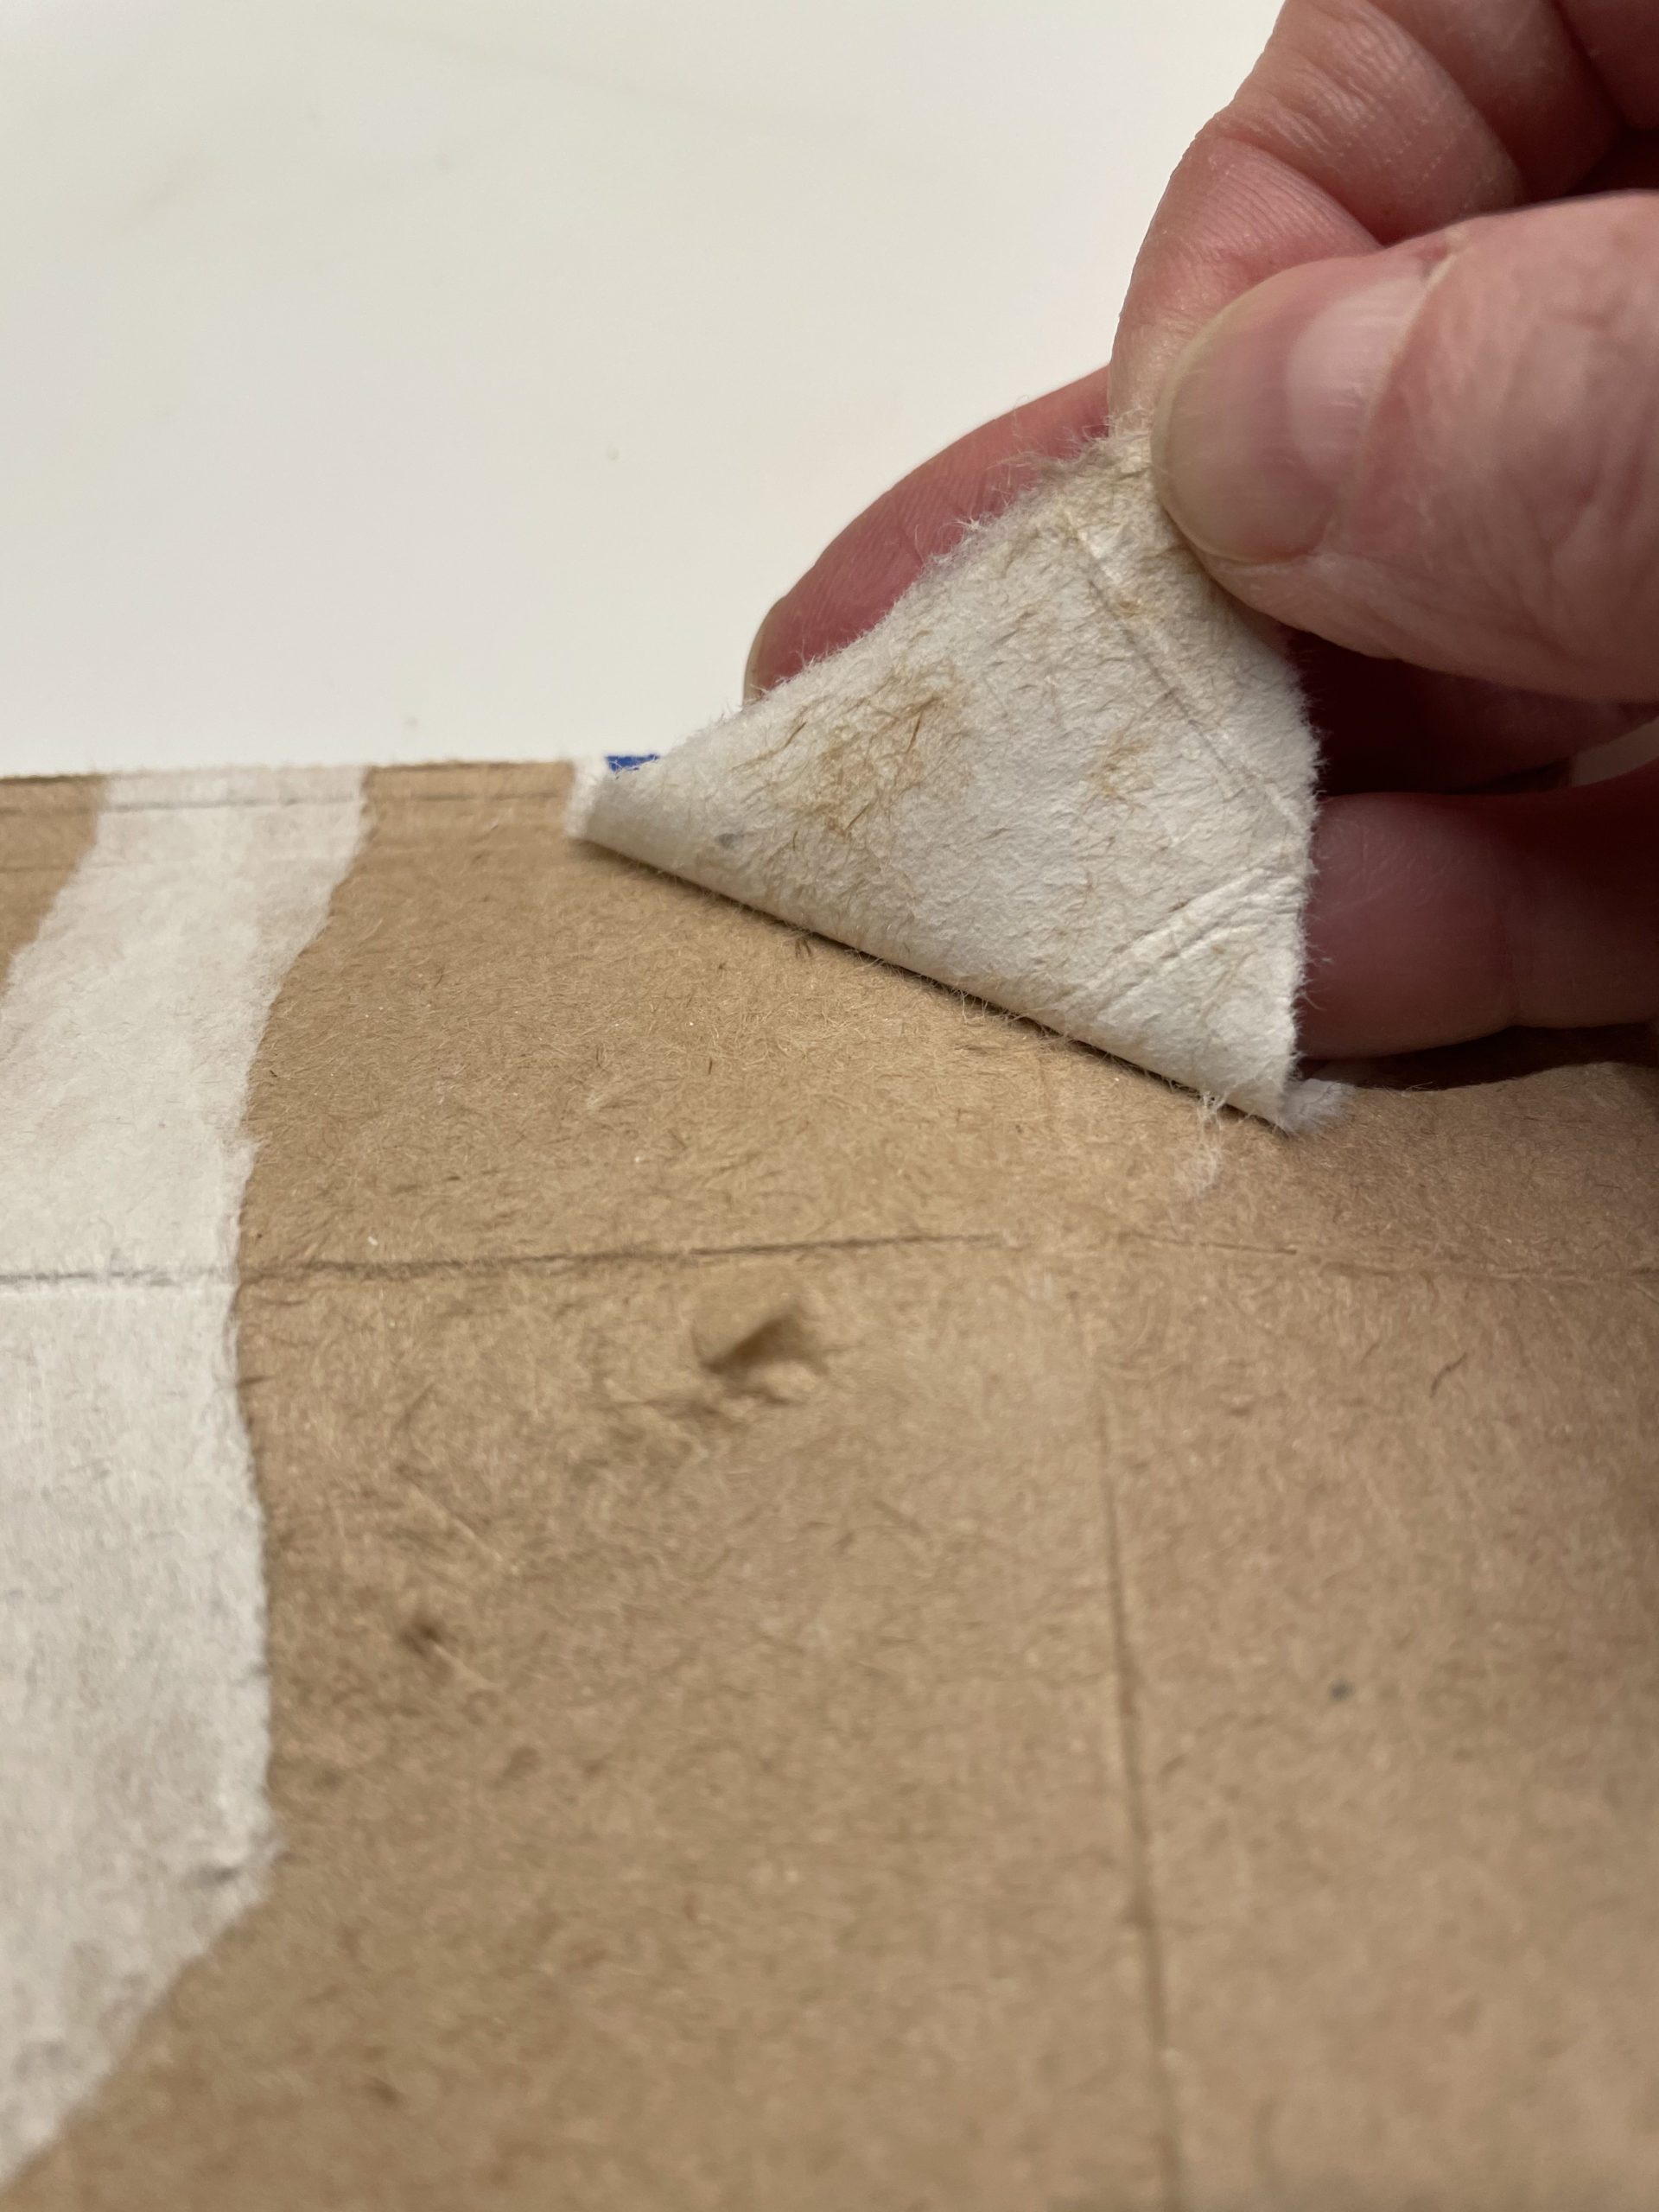
Bild zum Schritt 1 für das Bastel- und DIY-Abenteuer für Kinder: 'Legt eine Bastelunterlage bereit und einen ausgewaschenen, trockenen Tetrapack. ...'

2

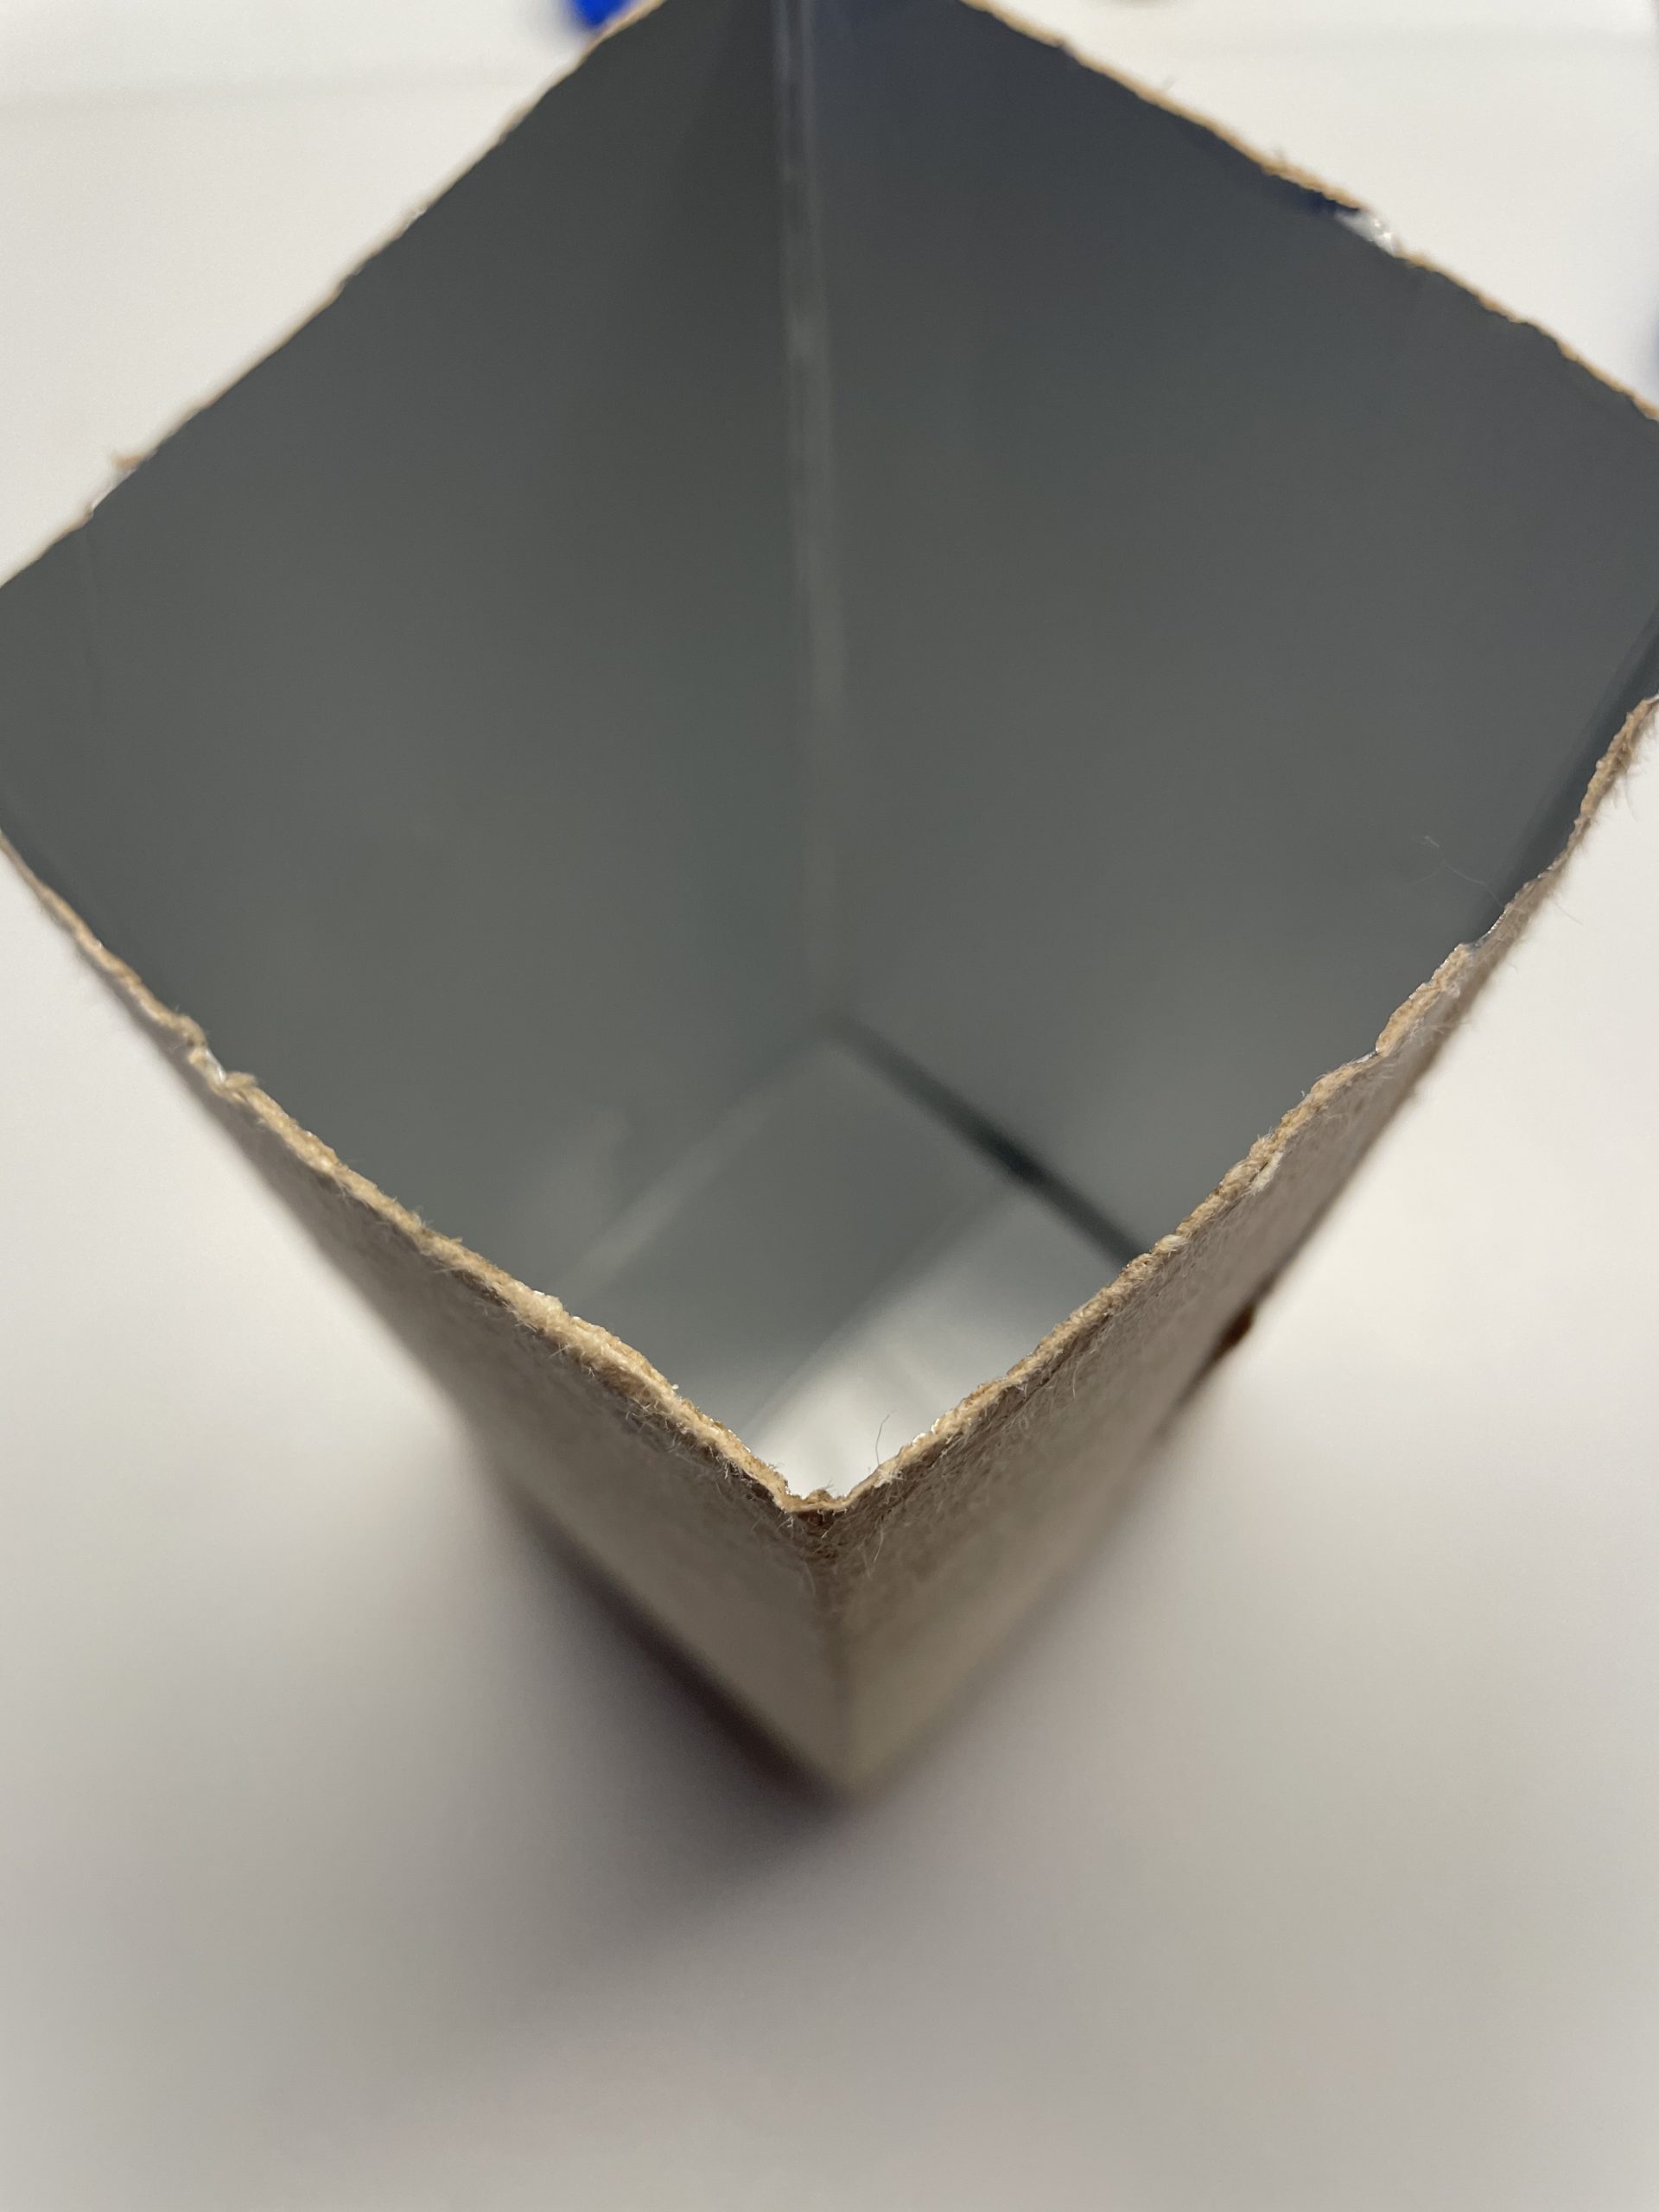
Cuts the carton straight off at the top.

Bild zum Schritt 2 für das Bastel- und DIY-Abenteuer für Kinder: 'Schneidet den Karton an der Oberseite gerade ab.'

3

2. Bild zum Schritt 2 für das Bastel- und DIY-Abenteuer für Kinder: 'Schneidet den Karton an der Oberseite gerade ab.'

4

Now gently press the sides of the packaging inwards. Now the two opposite sides touch each other.

Bild zum Schritt 4 für das Bastel- und DIY-Abenteuer für Kinder: 'Drückt nun die Seiten der Verpackung vorsichtig etwas nach innen....'

5

Just squeeze the top edge together.

Bild zum Schritt 5 für das Bastel- und DIY-Abenteuer für Kinder: 'Drückt nur den oberen Rand zusammen.'

6

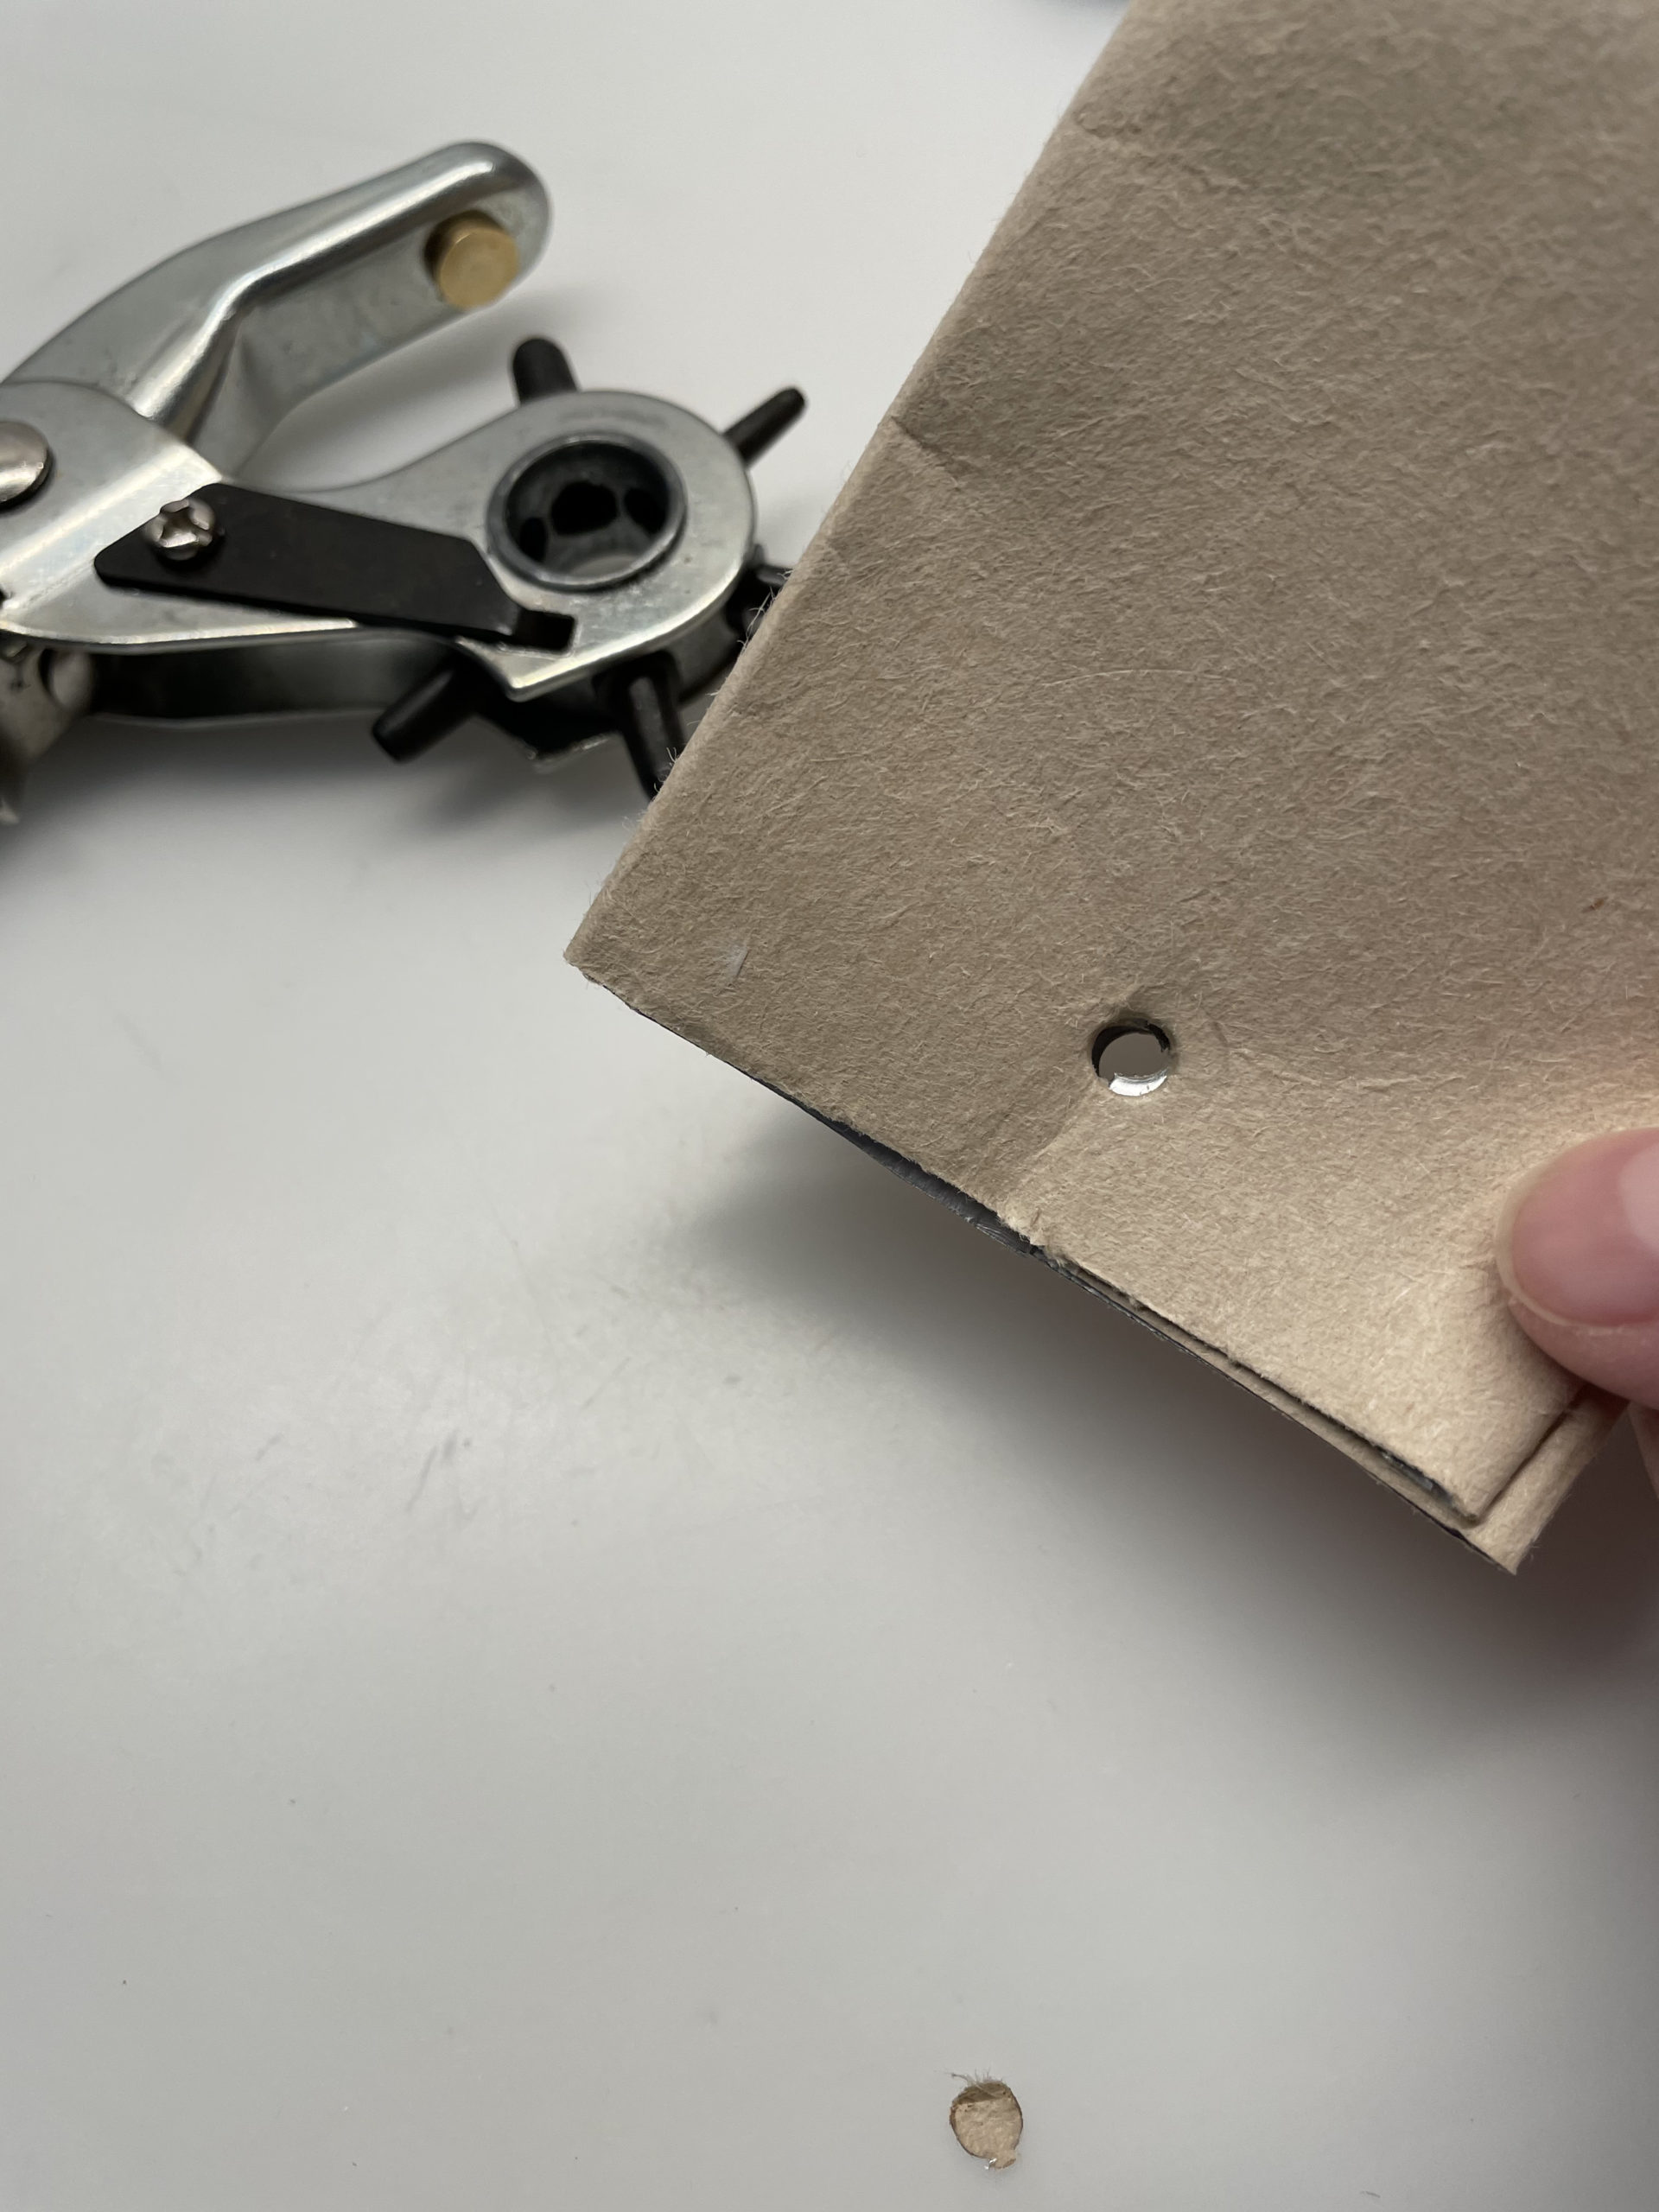
Hold the bag together at the top and light in the middle a hole with the punched pliers in the bag.
Holds a distance of 1cm from the bag edge.

Bild zum Schritt 6 für das Bastel- und DIY-Abenteuer für Kinder: 'Haltet die Tüte oben zusammen und Licht in der Mitte...'

7

2. Bild zum Schritt 6 für das Bastel- und DIY-Abenteuer für Kinder: 'Haltet die Tüte oben zusammen und Licht in der Mitte...'

8

Marks a narrow rectangle around the hole.

Bild zum Schritt 8 für das Bastel- und DIY-Abenteuer für Kinder: 'Markiert um das Loch herum ein schmales Rechteck.'

9

Cut it out with the scissors. The pre-cut holes facilitate cutting.

Bild zum Schritt 9 für das Bastel- und DIY-Abenteuer für Kinder: 'Schneidet dieses anschließend mit der Schere heraus. Die vorgestanzten Löcher...'

10

Now the blank of the bag is ready.

That's how a rabbit gets out of the bag:
11

Now you fold a paper handkerchief half-way.

Bild zum Schritt 12 für das Bastel- und DIY-Abenteuer für Kinder: 'Jetzt faltet ihr ein Papiertaschentuch zur Hälfte.'

12

Roll the handkerchief from the long side.

Bild zum Schritt 13 für das Bastel- und DIY-Abenteuer für Kinder: 'Rollt das Taschentuch von der langen Seite ausgehend zusammen.'

13

Then thread the rolled-up handkerchief through the cut-out rectangle.

Bild zum Schritt 14 für das Bastel- und DIY-Abenteuer für Kinder: 'Dann fädelt ihr das zusammengerollte Taschentuch durch das ausgeschnittene Rechteck.'

14

Then pull the handkerchief roll half through the opening.

Bild zum Schritt 15 für das Bastel- und DIY-Abenteuer für Kinder: 'Zieht dann die Taschentuchrolle zur Hälfte durch die Öffnung.'

15

Now you tie a woolen thread (with 5cm length) around the handkerchief ends.

Bild zum Schritt 16 für das Bastel- und DIY-Abenteuer für Kinder: 'Jetzt bindet ihr je einen Wollfaden (mit 5cm Länge) um...'

16

Repeat this on the other side and position the handkerchief in the middle.

Bild zum Schritt 17 für das Bastel- und DIY-Abenteuer für Kinder: 'Wiederholt das auf der anderen Seite und positioniert das Taschentuch...'

17

Now fold both ends of the handkerchief up as ears.

Bild zum Schritt 18 für das Bastel- und DIY-Abenteuer für Kinder: 'Klappt nun beide Enden des Taschentuches als Ohren nach oben.'

18

Now push a small rubber from above over both ears. Places the rubber on the bag edge.

Bild zum Schritt 19 für das Bastel- und DIY-Abenteuer für Kinder: 'Schiebt nun einen kleinen Gummi von oben über beide Ohren....'

19

Now bend the rabbit ears a little apart.

Bild zum Schritt 20 für das Bastel- und DIY-Abenteuer für Kinder: 'Biegt nun die Hasen-Ohren etwas auseinander.'

20

Cut off 3-4 bast threads on a length of 6cm. Lay them on each other and bundle them in the middle. These are the nose hairs of the rabbit.

Bild zum Schritt 21 für das Bastel- und DIY-Abenteuer für Kinder: 'Schneidet euch 3-4 Bastfäden auf eine Länge von 6cm ab....'

21

Stick a button in the middle of the nose hair and the rabbit snout is ready.

Bild zum Schritt 22 für das Bastel- und DIY-Abenteuer für Kinder: 'Klebt einen Knopf in die Mitte der Nasenhaare und fertig...'

22

Stick both to one side of the box.

Bild zum Schritt 23 für das Bastel- und DIY-Abenteuer für Kinder: 'Klebt beides an einer Seite des Kartons fest.'

23

Now you're gonna put two more eyes on your guard.

Bild zum Schritt 24 für das Bastel- und DIY-Abenteuer für Kinder: 'Jetzt befestigt ihr noch zwei Wachelaugen.'

24

Finally, on the back of the bag, there is still a small cotton wadding as a tail. The rabbit bag is ready.

Bild zum Schritt 25 für das Bastel- und DIY-Abenteuer für Kinder: 'Auf die Rückseite der Tüte klebt ihr abschließend noch kleinen...'

25

Decorate your bunny bag or give it away with a little Easter surprise!

Bild zum Schritt 26 für das Bastel- und DIY-Abenteuer für Kinder: 'Dekoriert eure Hasentüte oder verschenkt sie mit einer kleinen Osterüberraschung!'

26

Have fun trying out.
You can find more craft ideas for this bag here in the adventure market.

Materials

 1 Tetrapack
 1 Hole pliers
 1 Pencil
 1 Hot glue gun
 1 Builder's pad
 2 Wool thread about 6 cm long
 1 Paper handkerchiefor piece of fabric in handkerchief size
 1 Household rubber whiteSmall rubber
 4 Woven fabrics of iron or non-alloy steelabout 5 cm long
 1 Button
All links marked with a shopping cart lead to Amazon - here we have selected products that we would order ourselves and in part also ordered. In a qualified purchase via the advertising link, we as Amazon partner receive a commission, for you there are no costs. You thus support our cost- and advertising banner-free, educational offer.

Directions

1

Prepare a craft pad and a washed out, dry tetrapack.
Carefully removes the top layer of the film from the packaging, so that the carton appears.

Bild zum Schritt 1 für das Bastel- und DIY-Abenteuer für Kinder: 'Legt eine Bastelunterlage bereit und einen ausgewaschenen, trockenen Tetrapack. ...'

2

Cuts the carton straight off at the top.

Bild zum Schritt 2 für das Bastel- und DIY-Abenteuer für Kinder: 'Schneidet den Karton an der Oberseite gerade ab.'

3

2. Bild zum Schritt 2 für das Bastel- und DIY-Abenteuer für Kinder: 'Schneidet den Karton an der Oberseite gerade ab.'

4

Now gently press the sides of the packaging inwards. Now the two opposite sides touch each other.
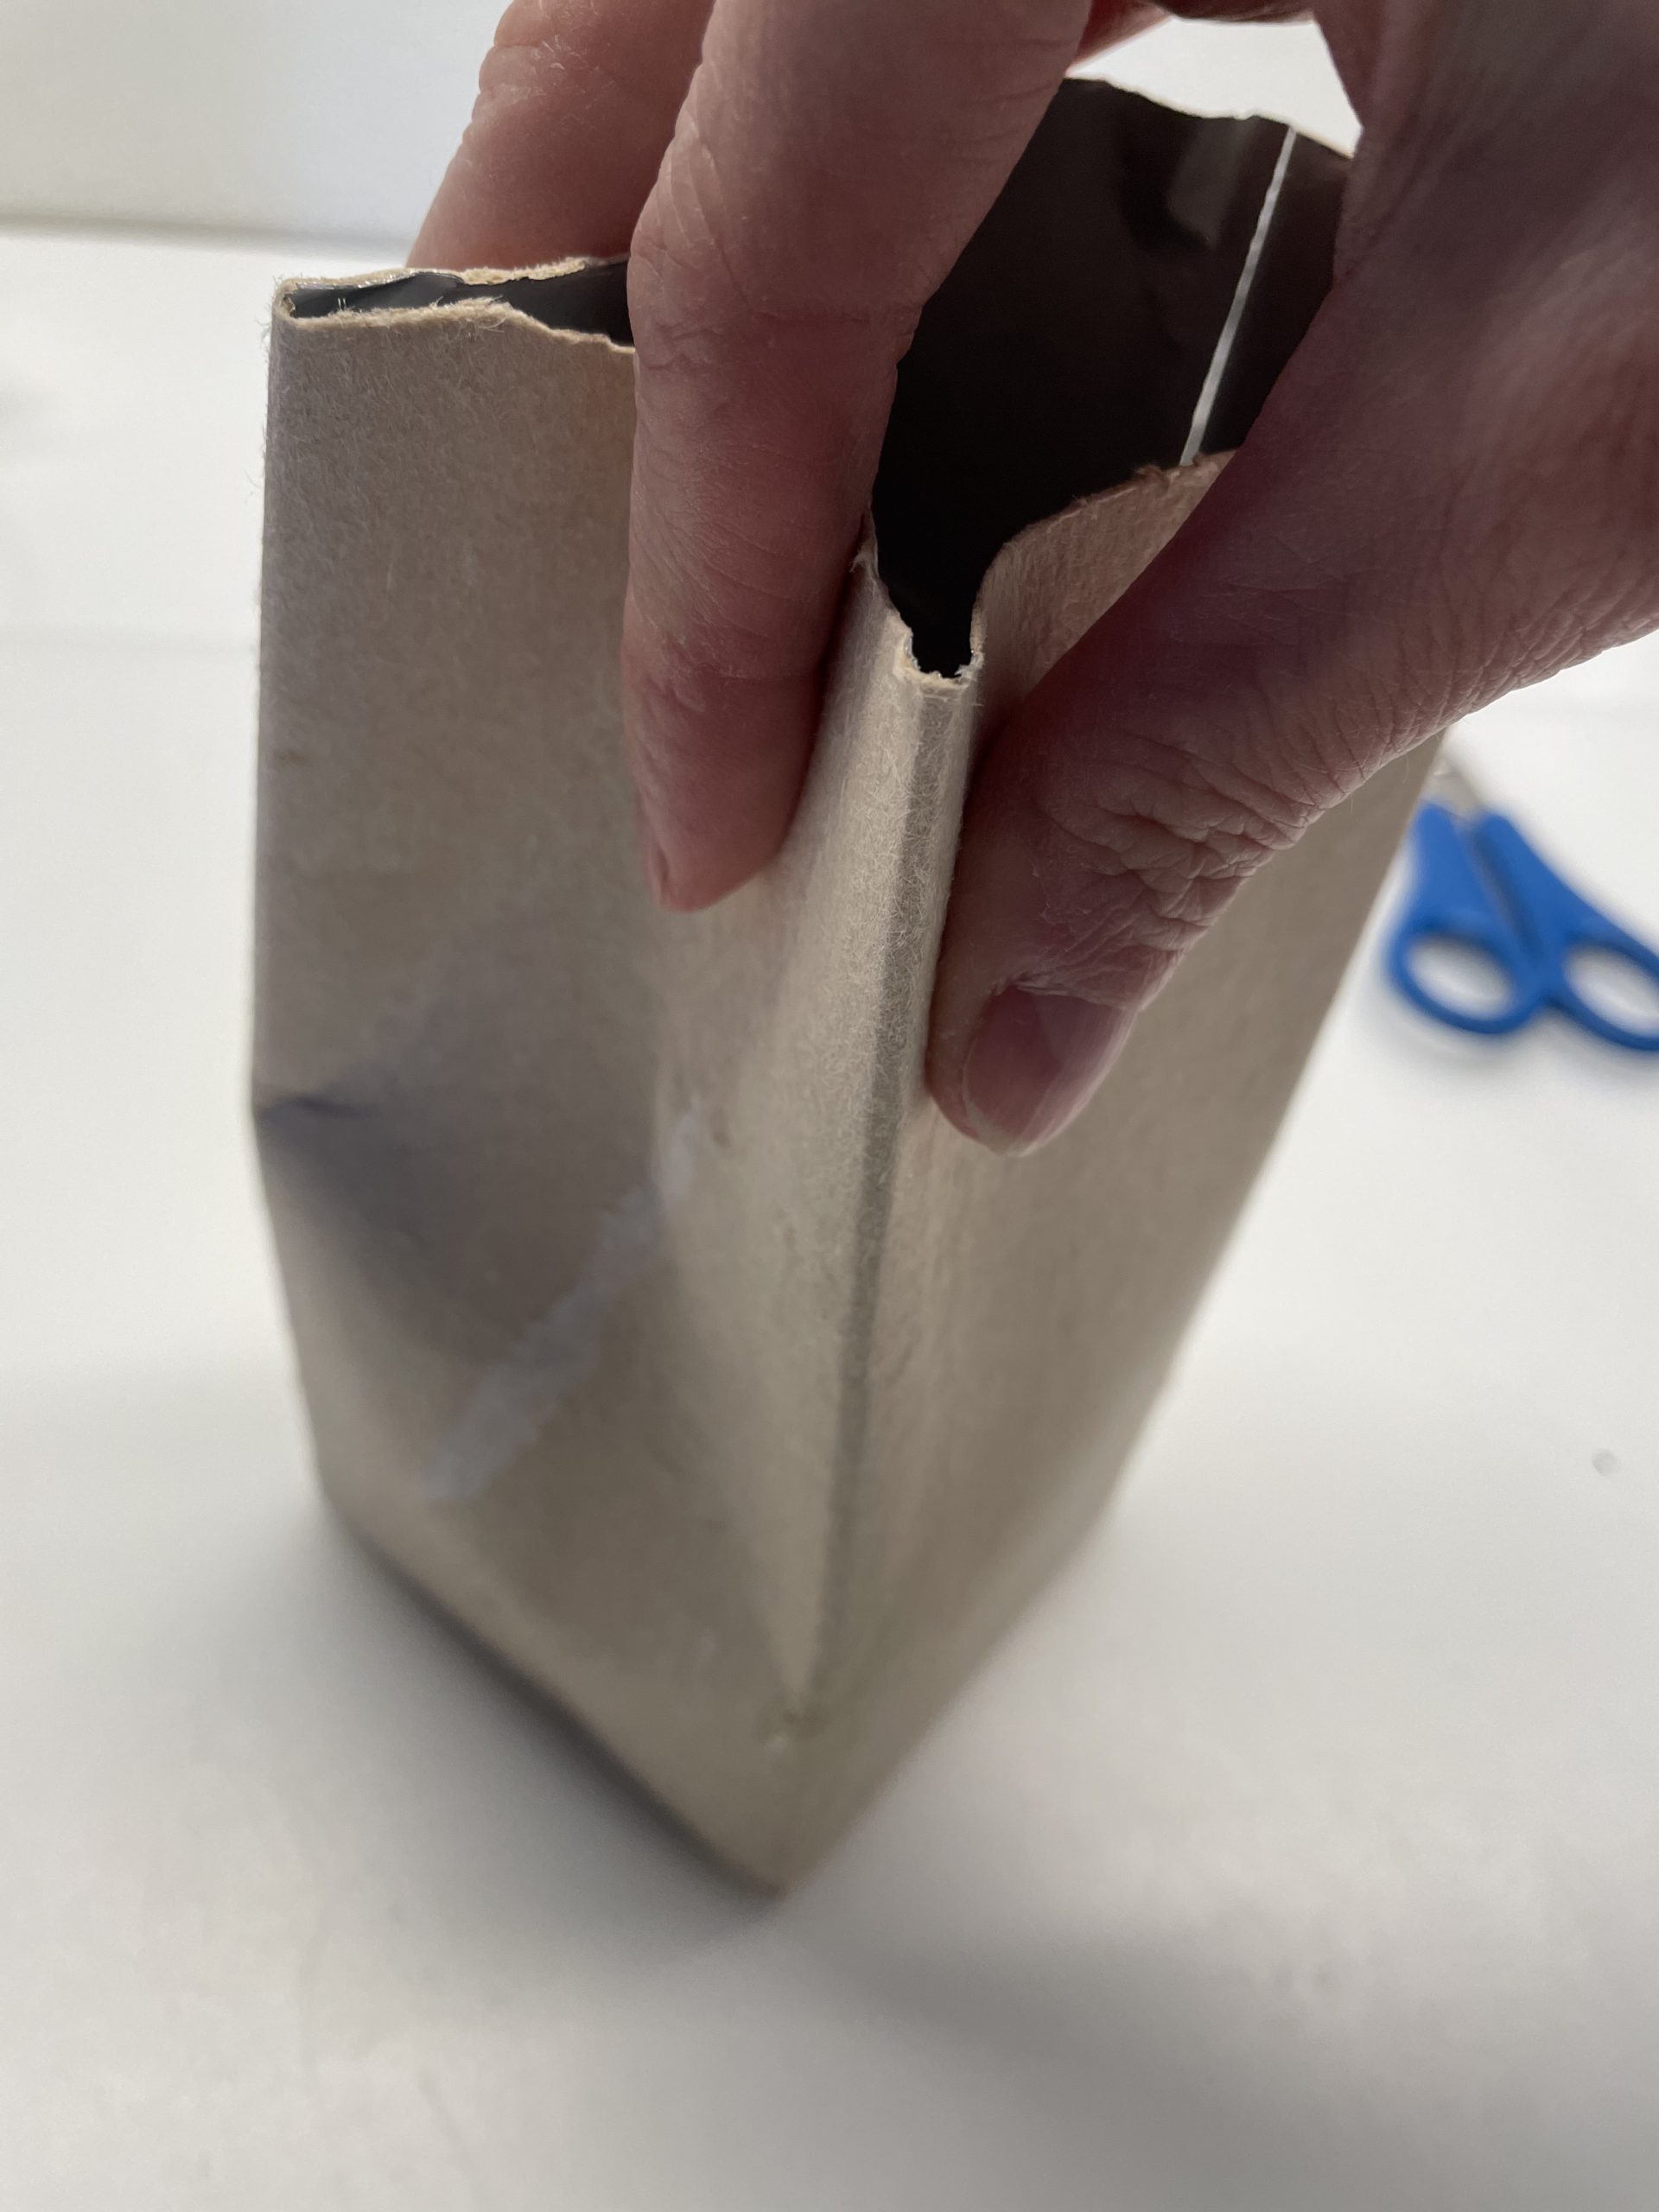
Bild zum Schritt 4 für das Bastel- und DIY-Abenteuer für Kinder: 'Drückt nun die Seiten der Verpackung vorsichtig etwas nach innen....'

5

Just squeeze the top edge together.
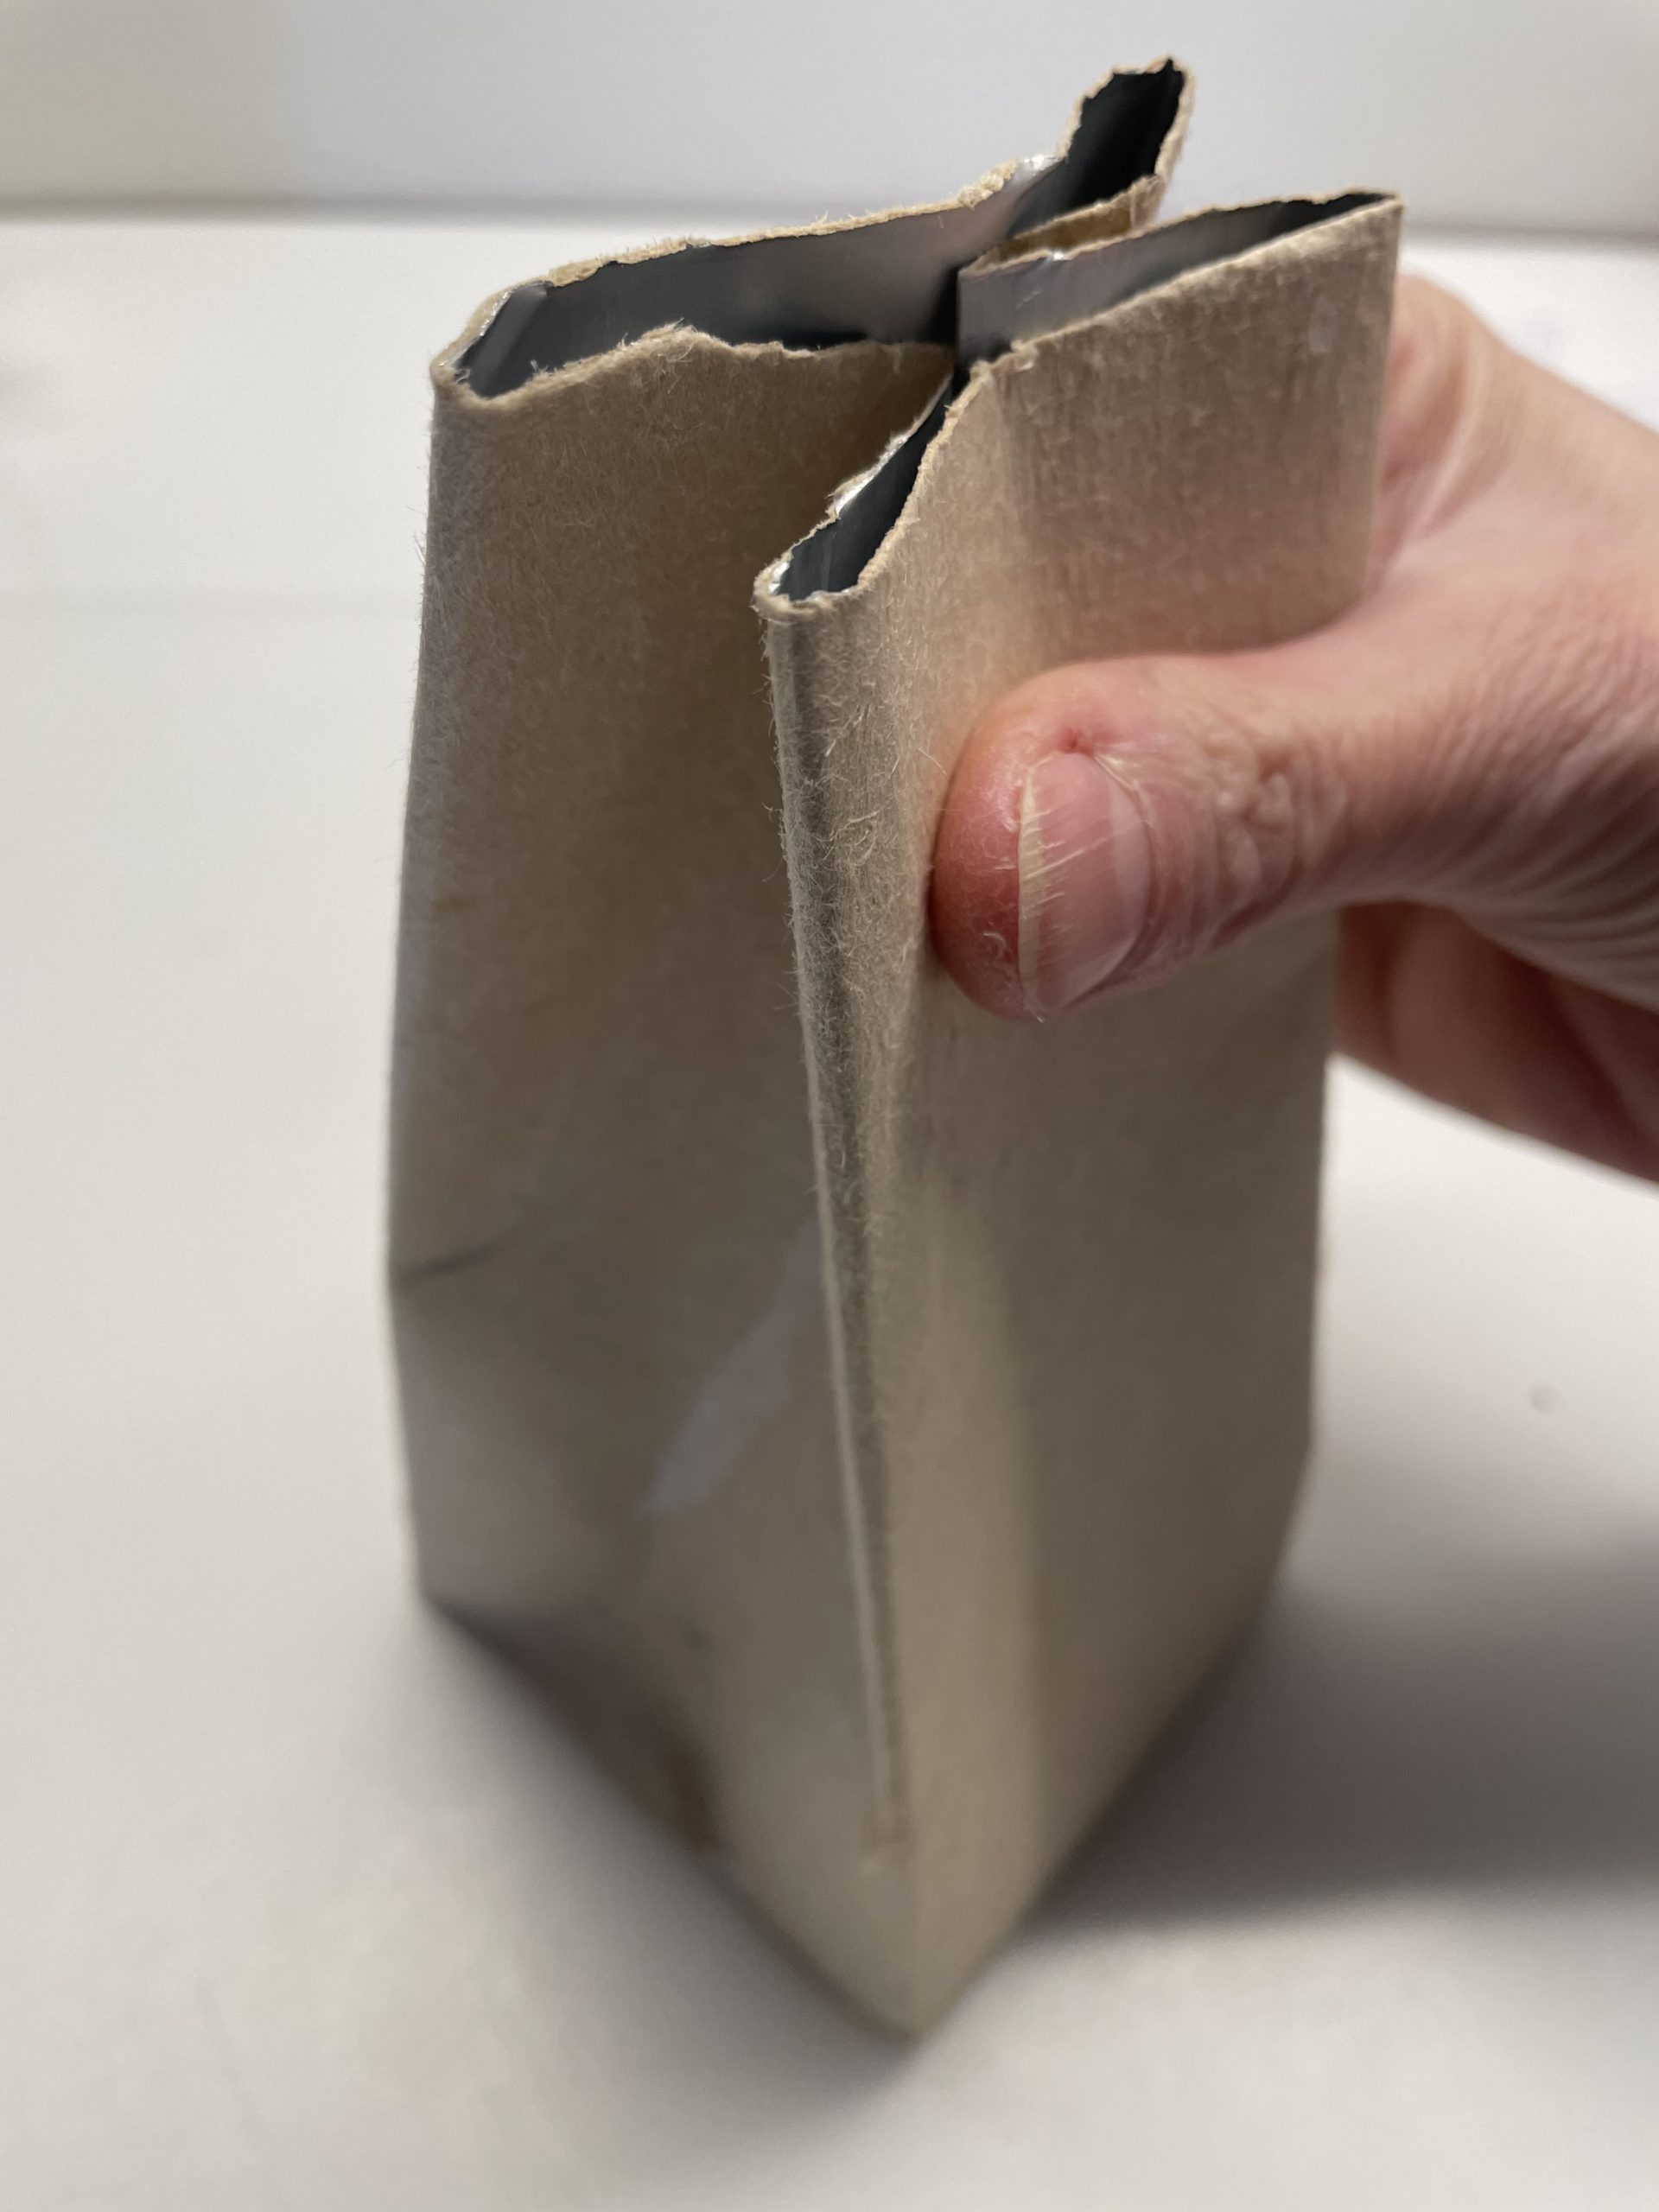
Bild zum Schritt 5 für das Bastel- und DIY-Abenteuer für Kinder: 'Drückt nur den oberen Rand zusammen.'

6

Hold the bag together at the top and light in the middle a hole with the punched pliers in the bag.
Holds a distance of 1cm from the bag edge.
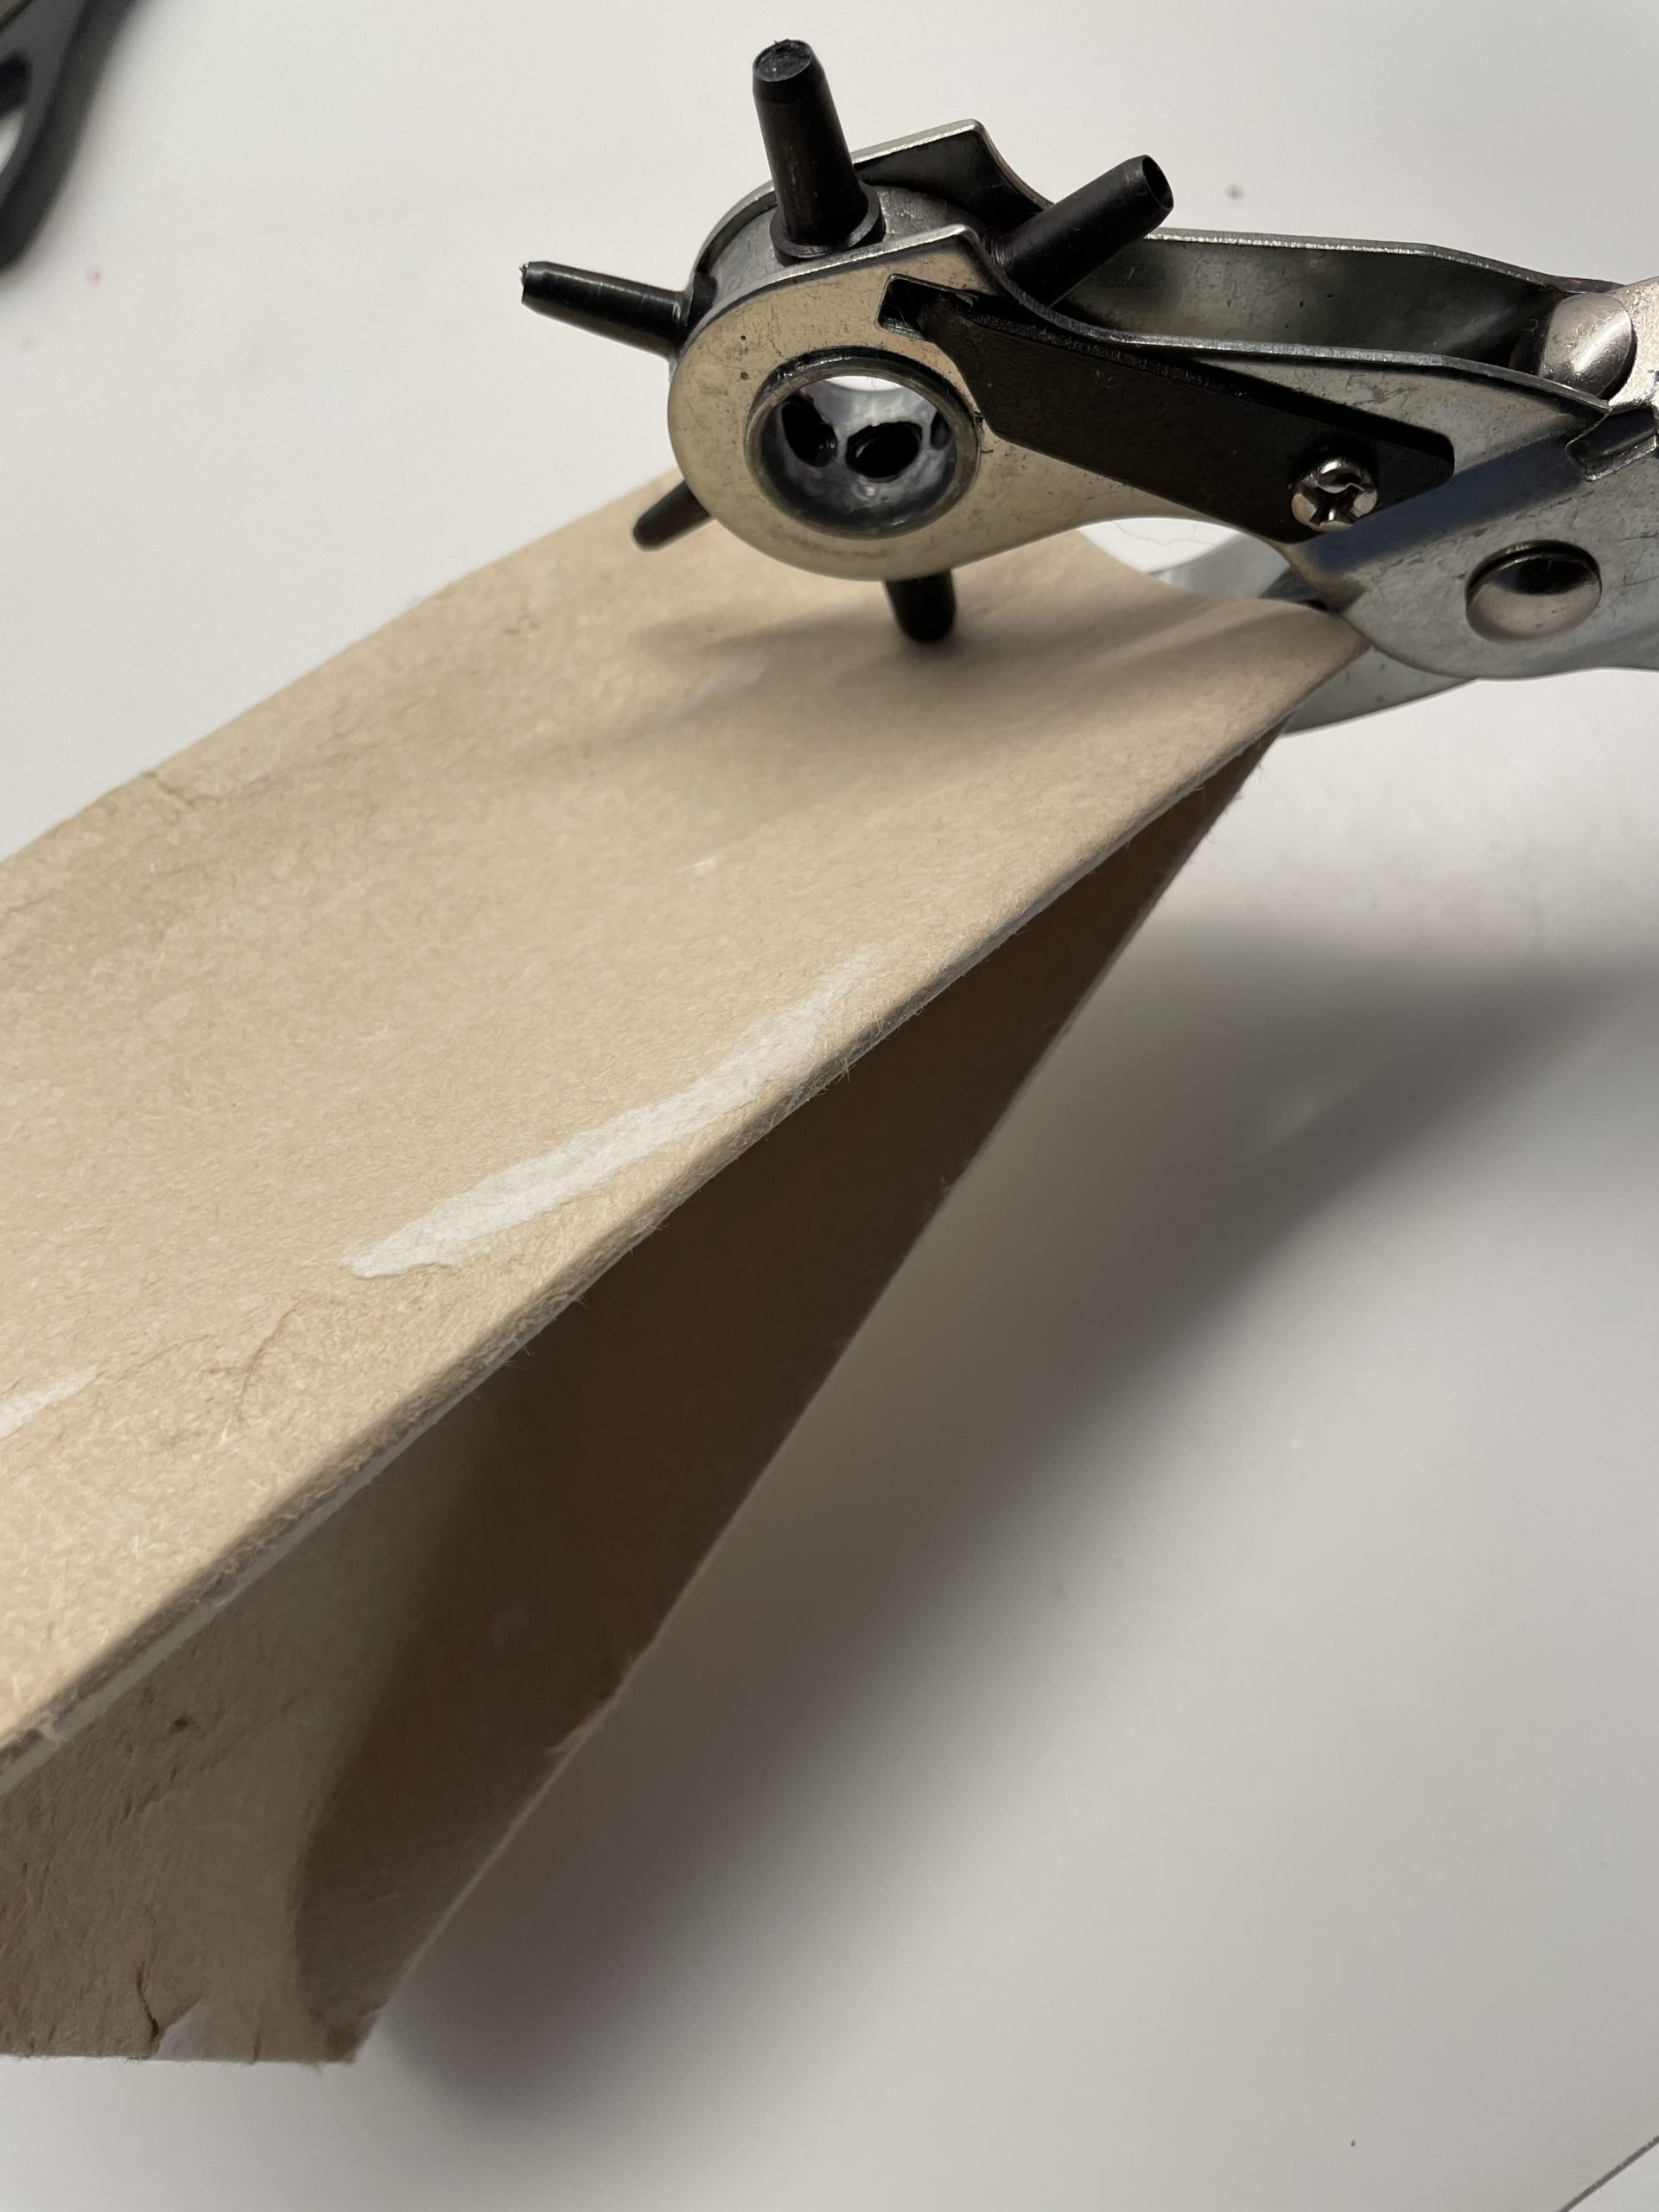
Bild zum Schritt 6 für das Bastel- und DIY-Abenteuer für Kinder: 'Haltet die Tüte oben zusammen und Licht in der Mitte...'

7

2. Bild zum Schritt 6 für das Bastel- und DIY-Abenteuer für Kinder: 'Haltet die Tüte oben zusammen und Licht in der Mitte...'

8

Marks a narrow rectangle around the hole.
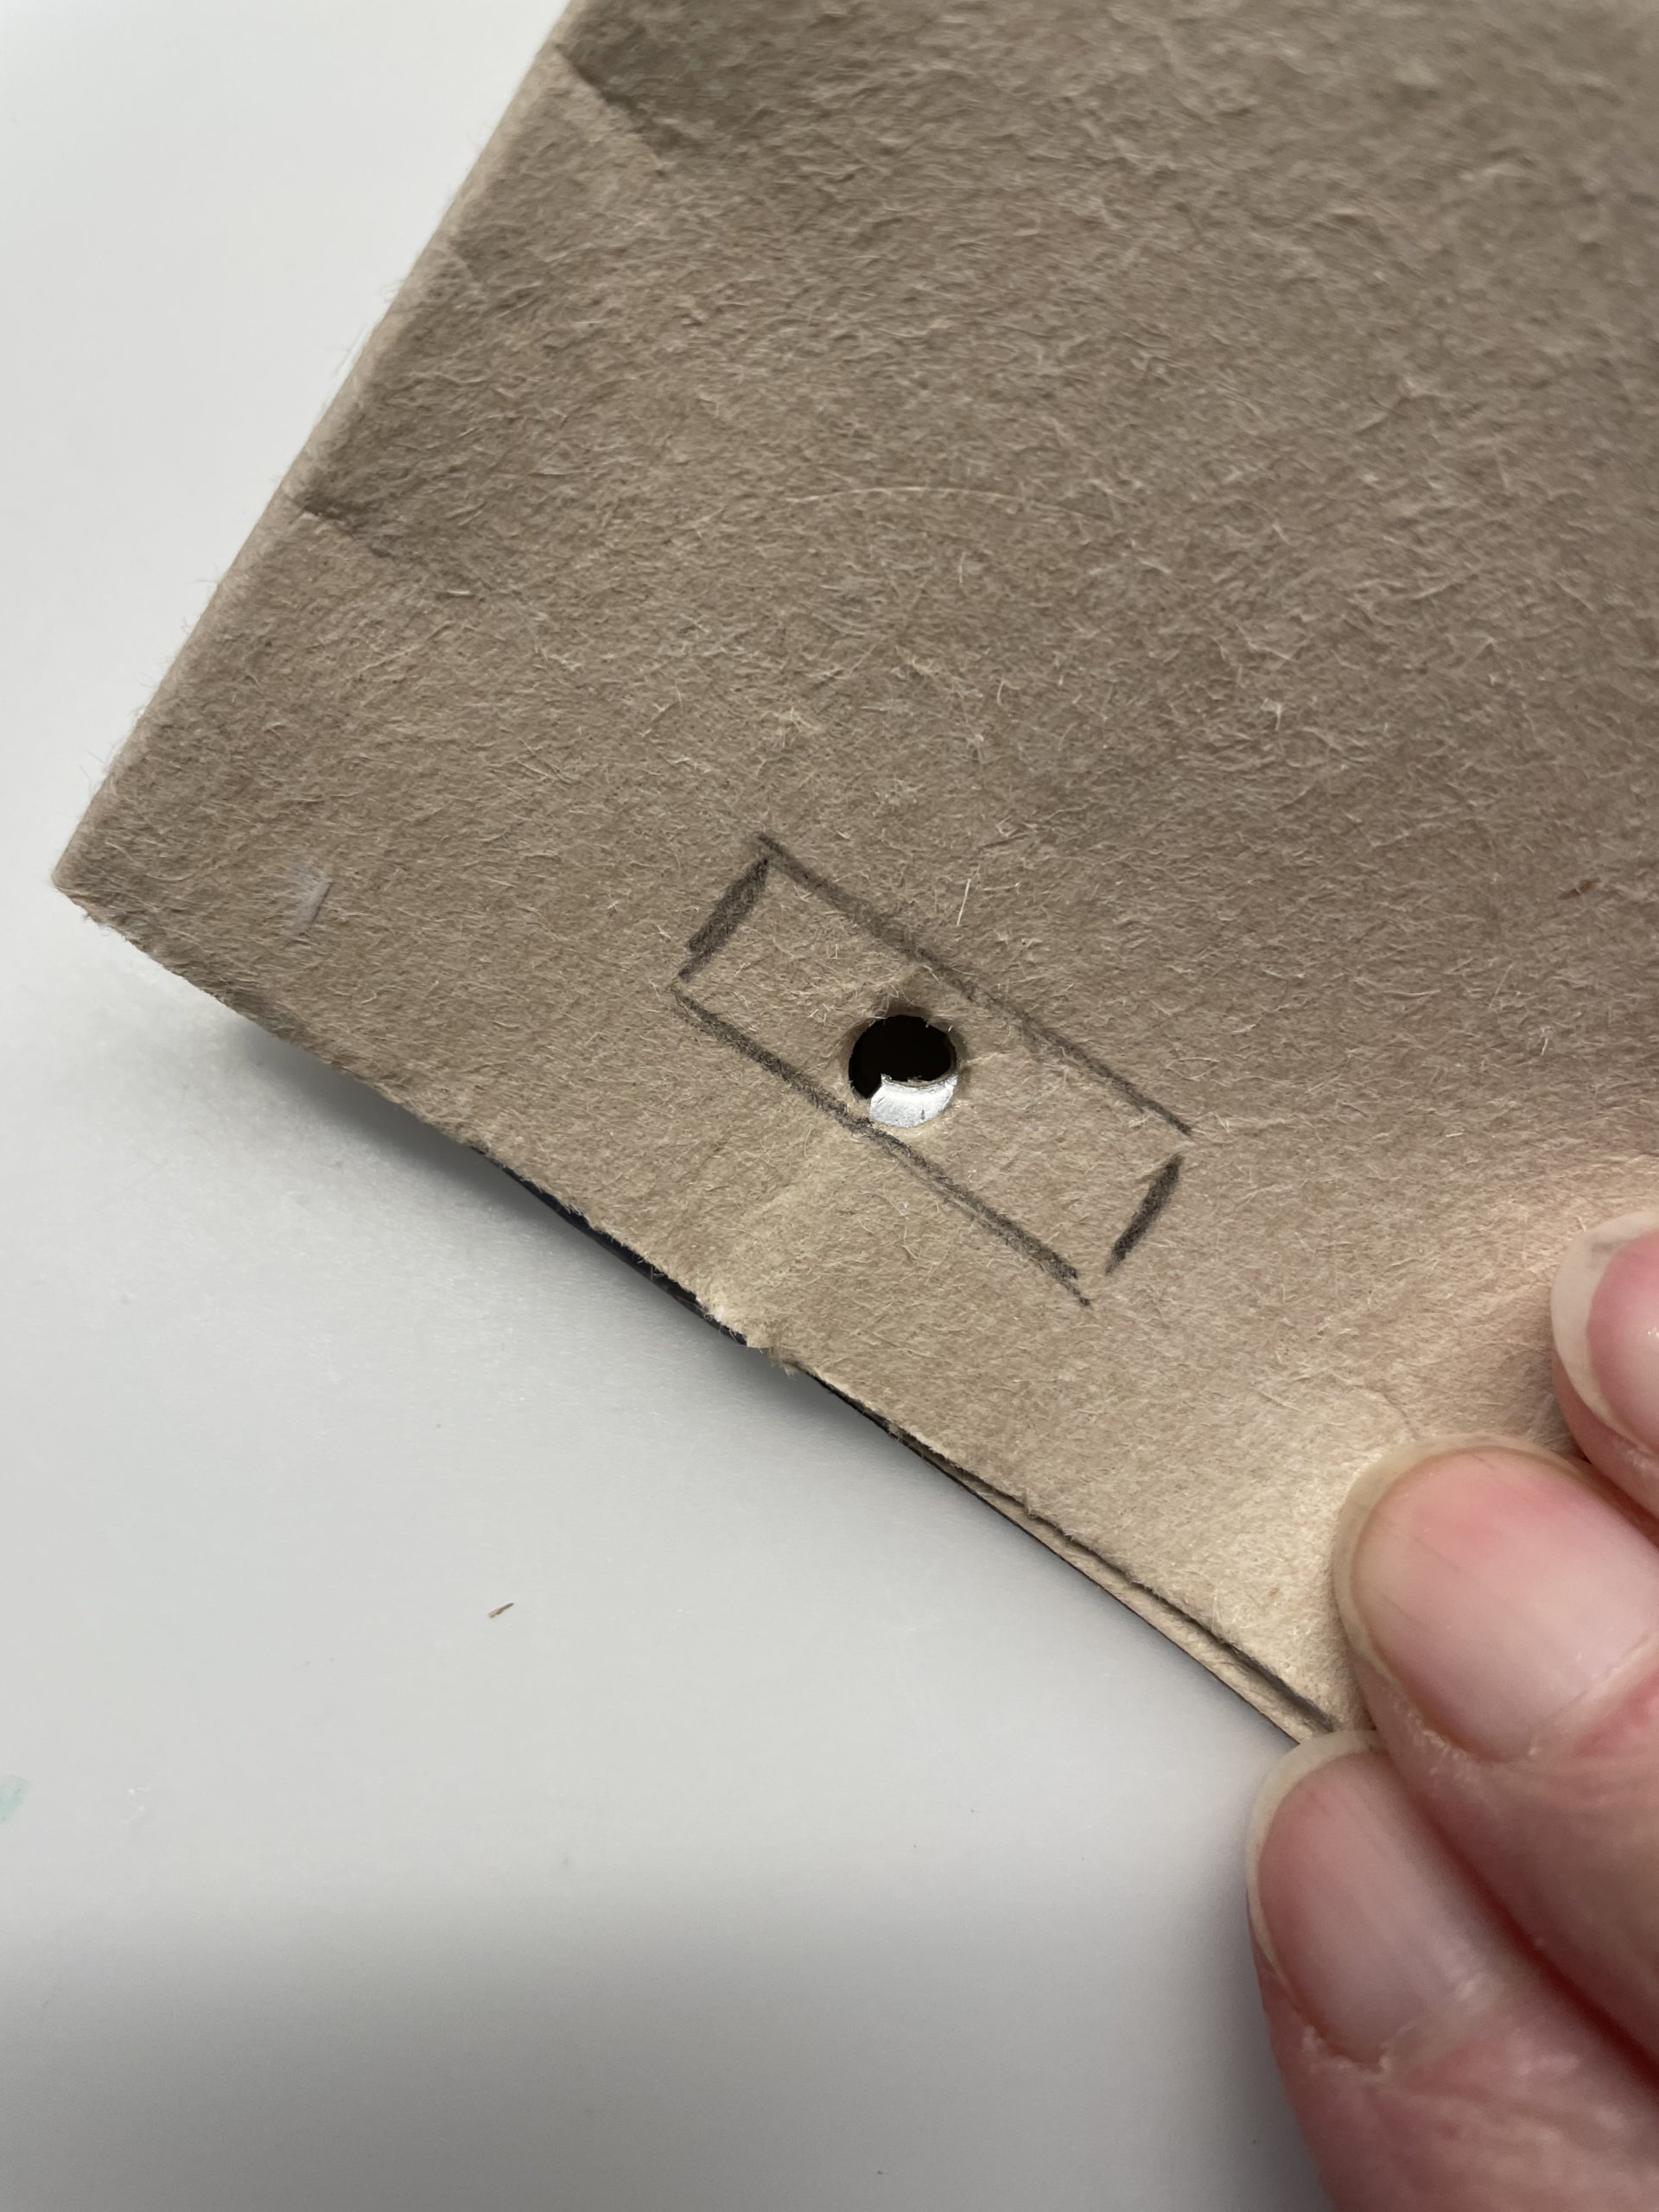
Bild zum Schritt 8 für das Bastel- und DIY-Abenteuer für Kinder: 'Markiert um das Loch herum ein schmales Rechteck.'

9

Cut it out with the scissors. The pre-cut holes facilitate cutting.
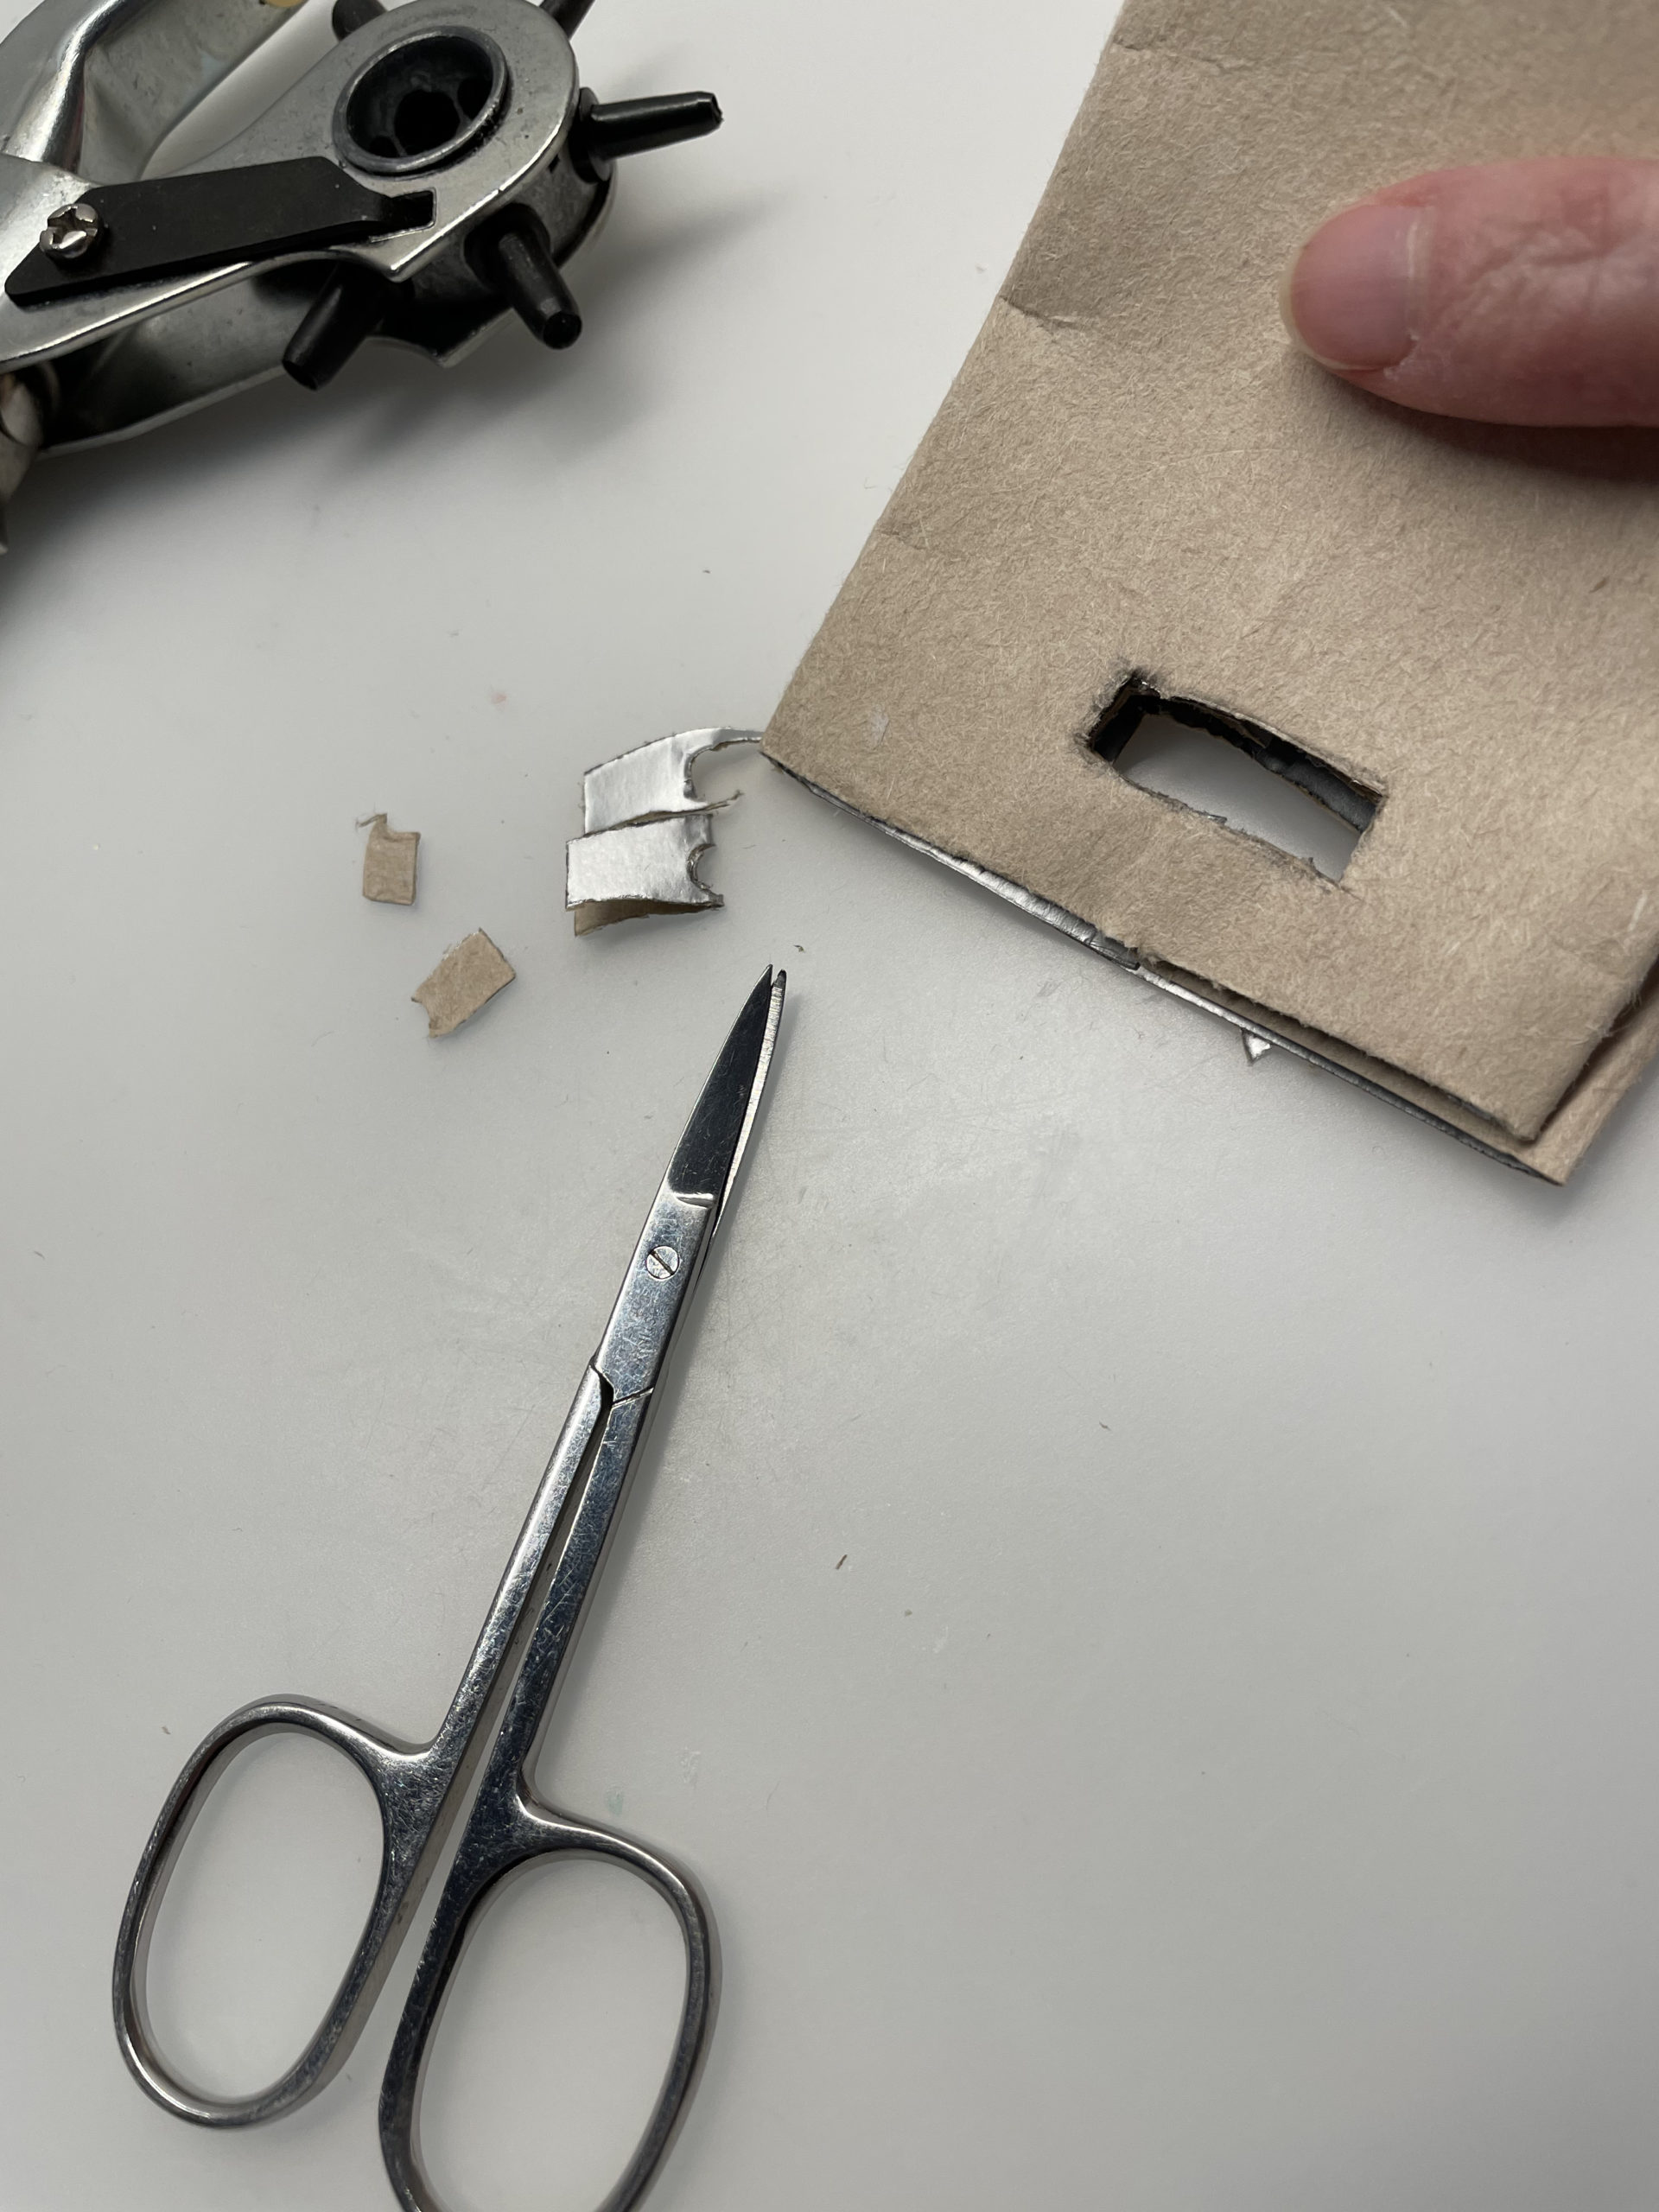
Bild zum Schritt 9 für das Bastel- und DIY-Abenteuer für Kinder: 'Schneidet dieses anschließend mit der Schere heraus. Die vorgestanzten Löcher...'

10

Now the blank of the bag is ready.

That's how a rabbit gets out of the bag:
11

Now you fold a paper handkerchief half-way.
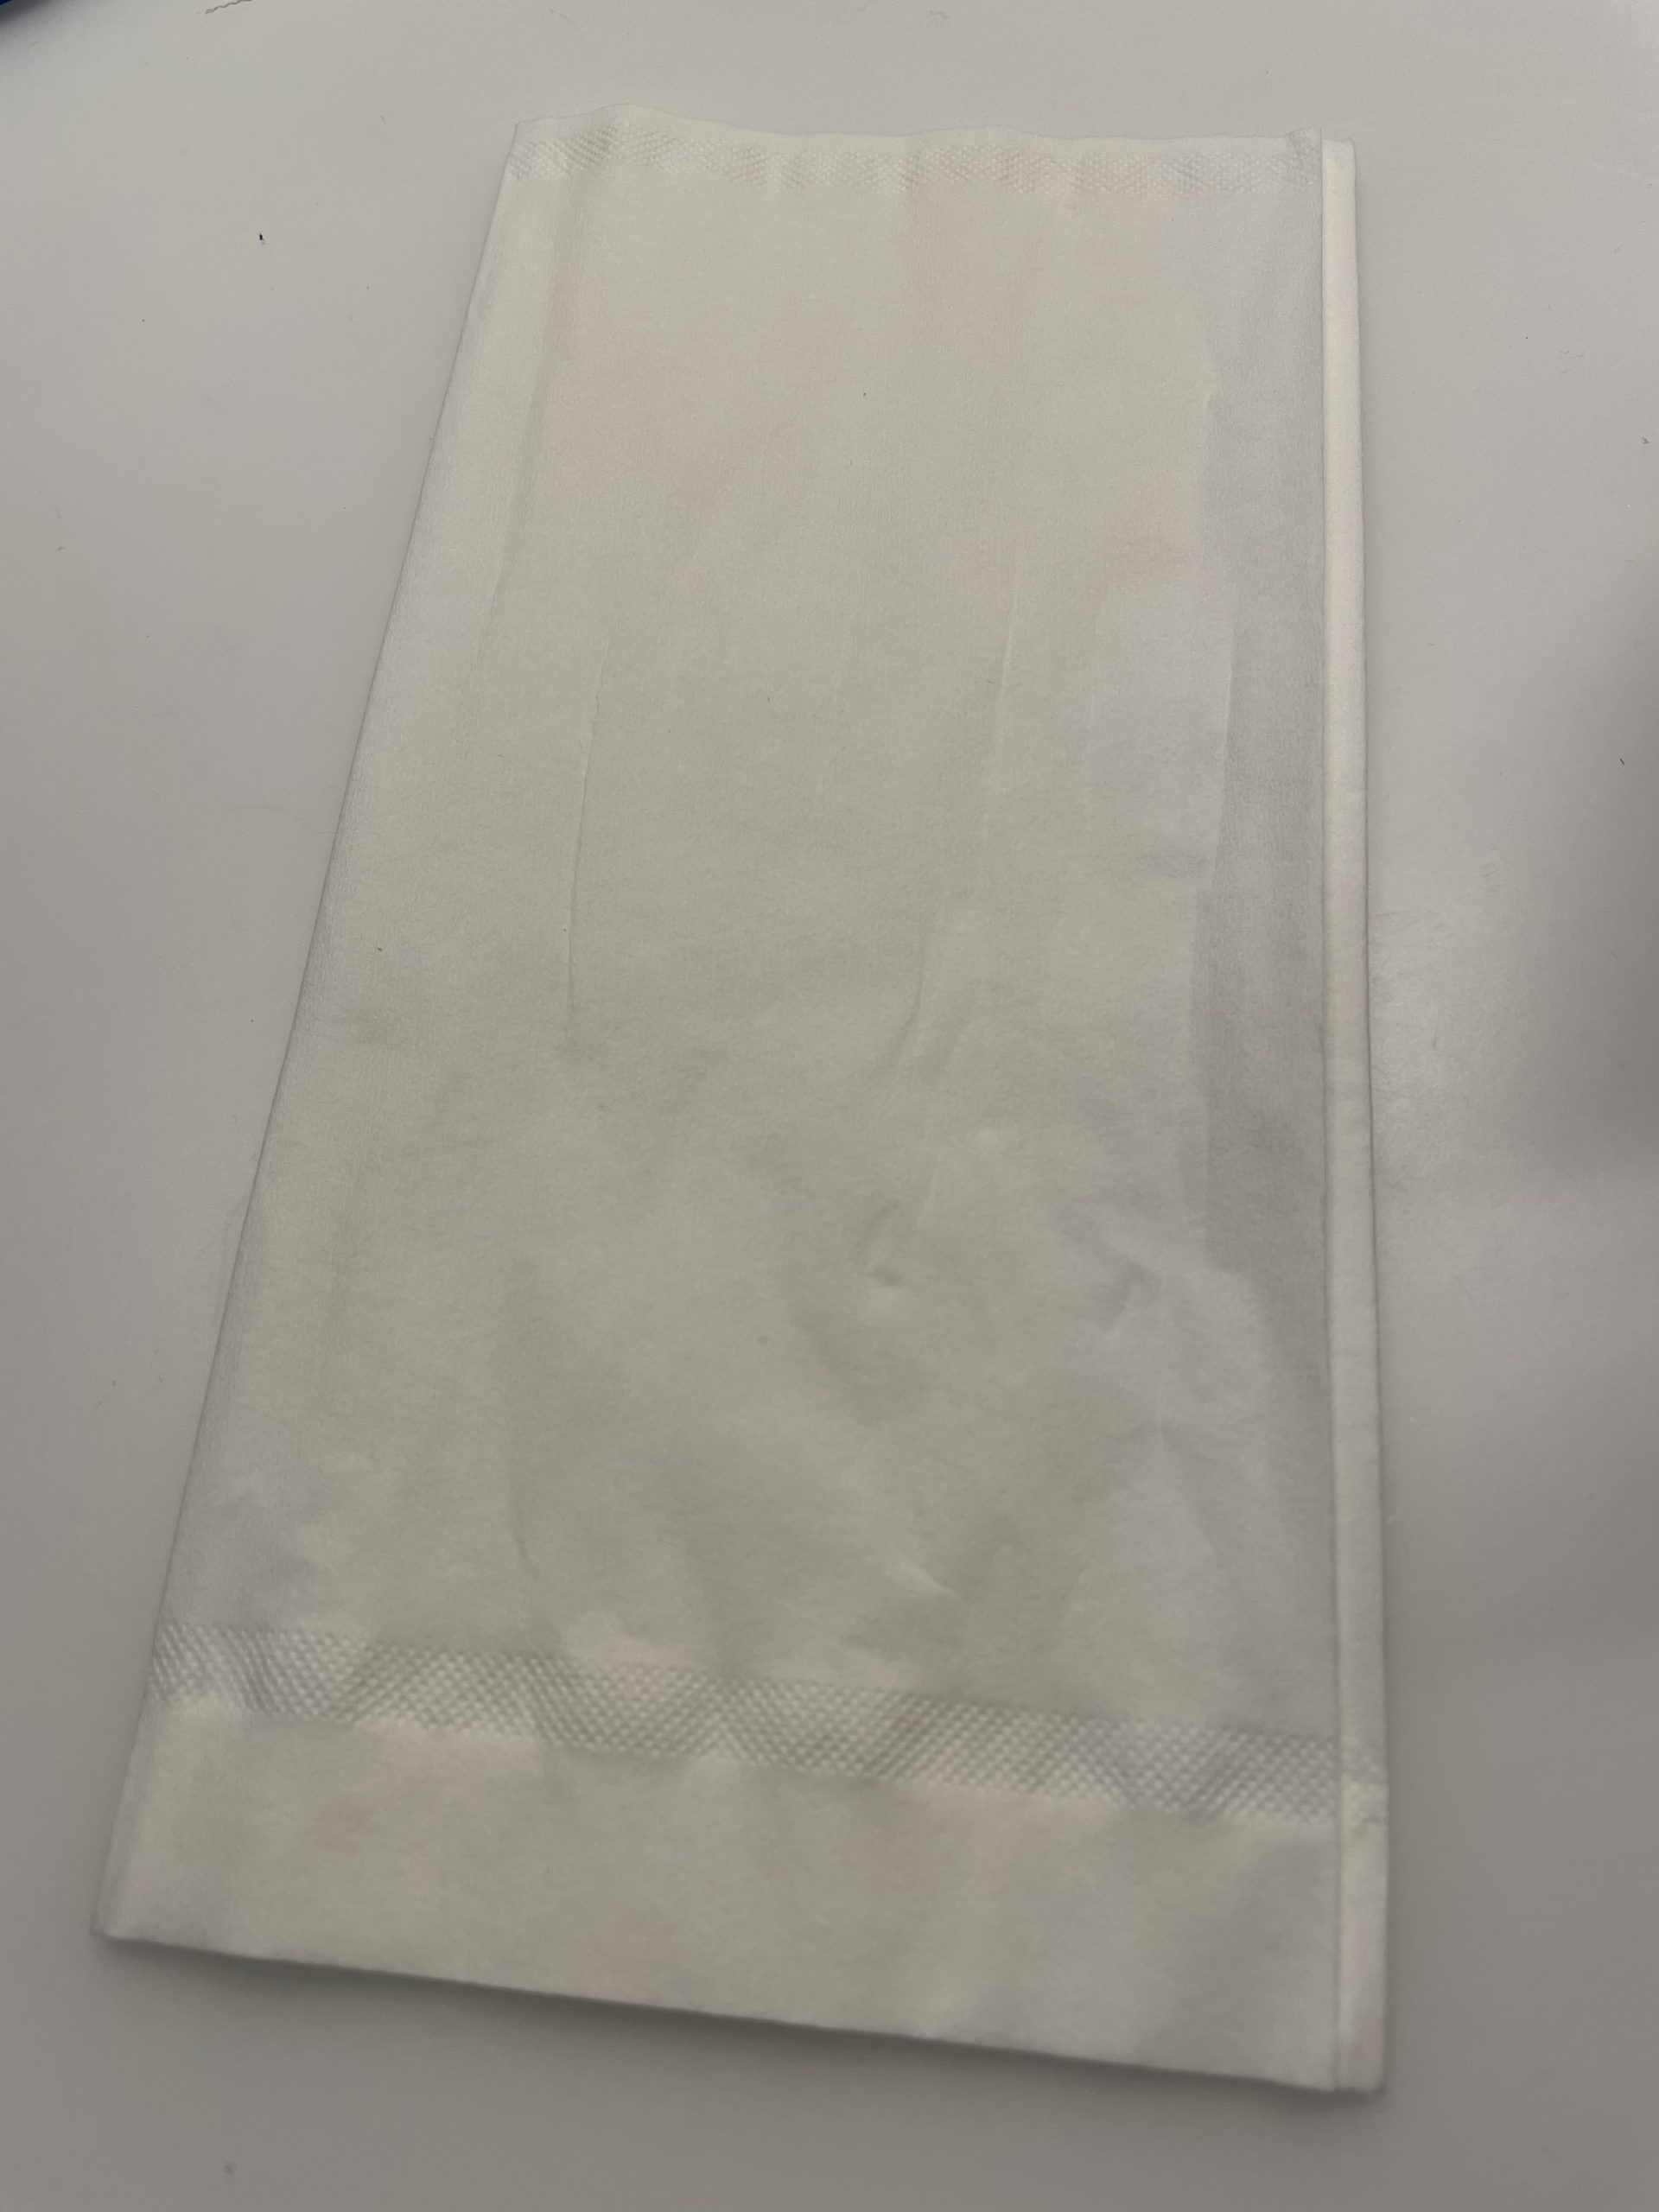
Bild zum Schritt 12 für das Bastel- und DIY-Abenteuer für Kinder: 'Jetzt faltet ihr ein Papiertaschentuch zur Hälfte.'

12

Roll the handkerchief from the long side.
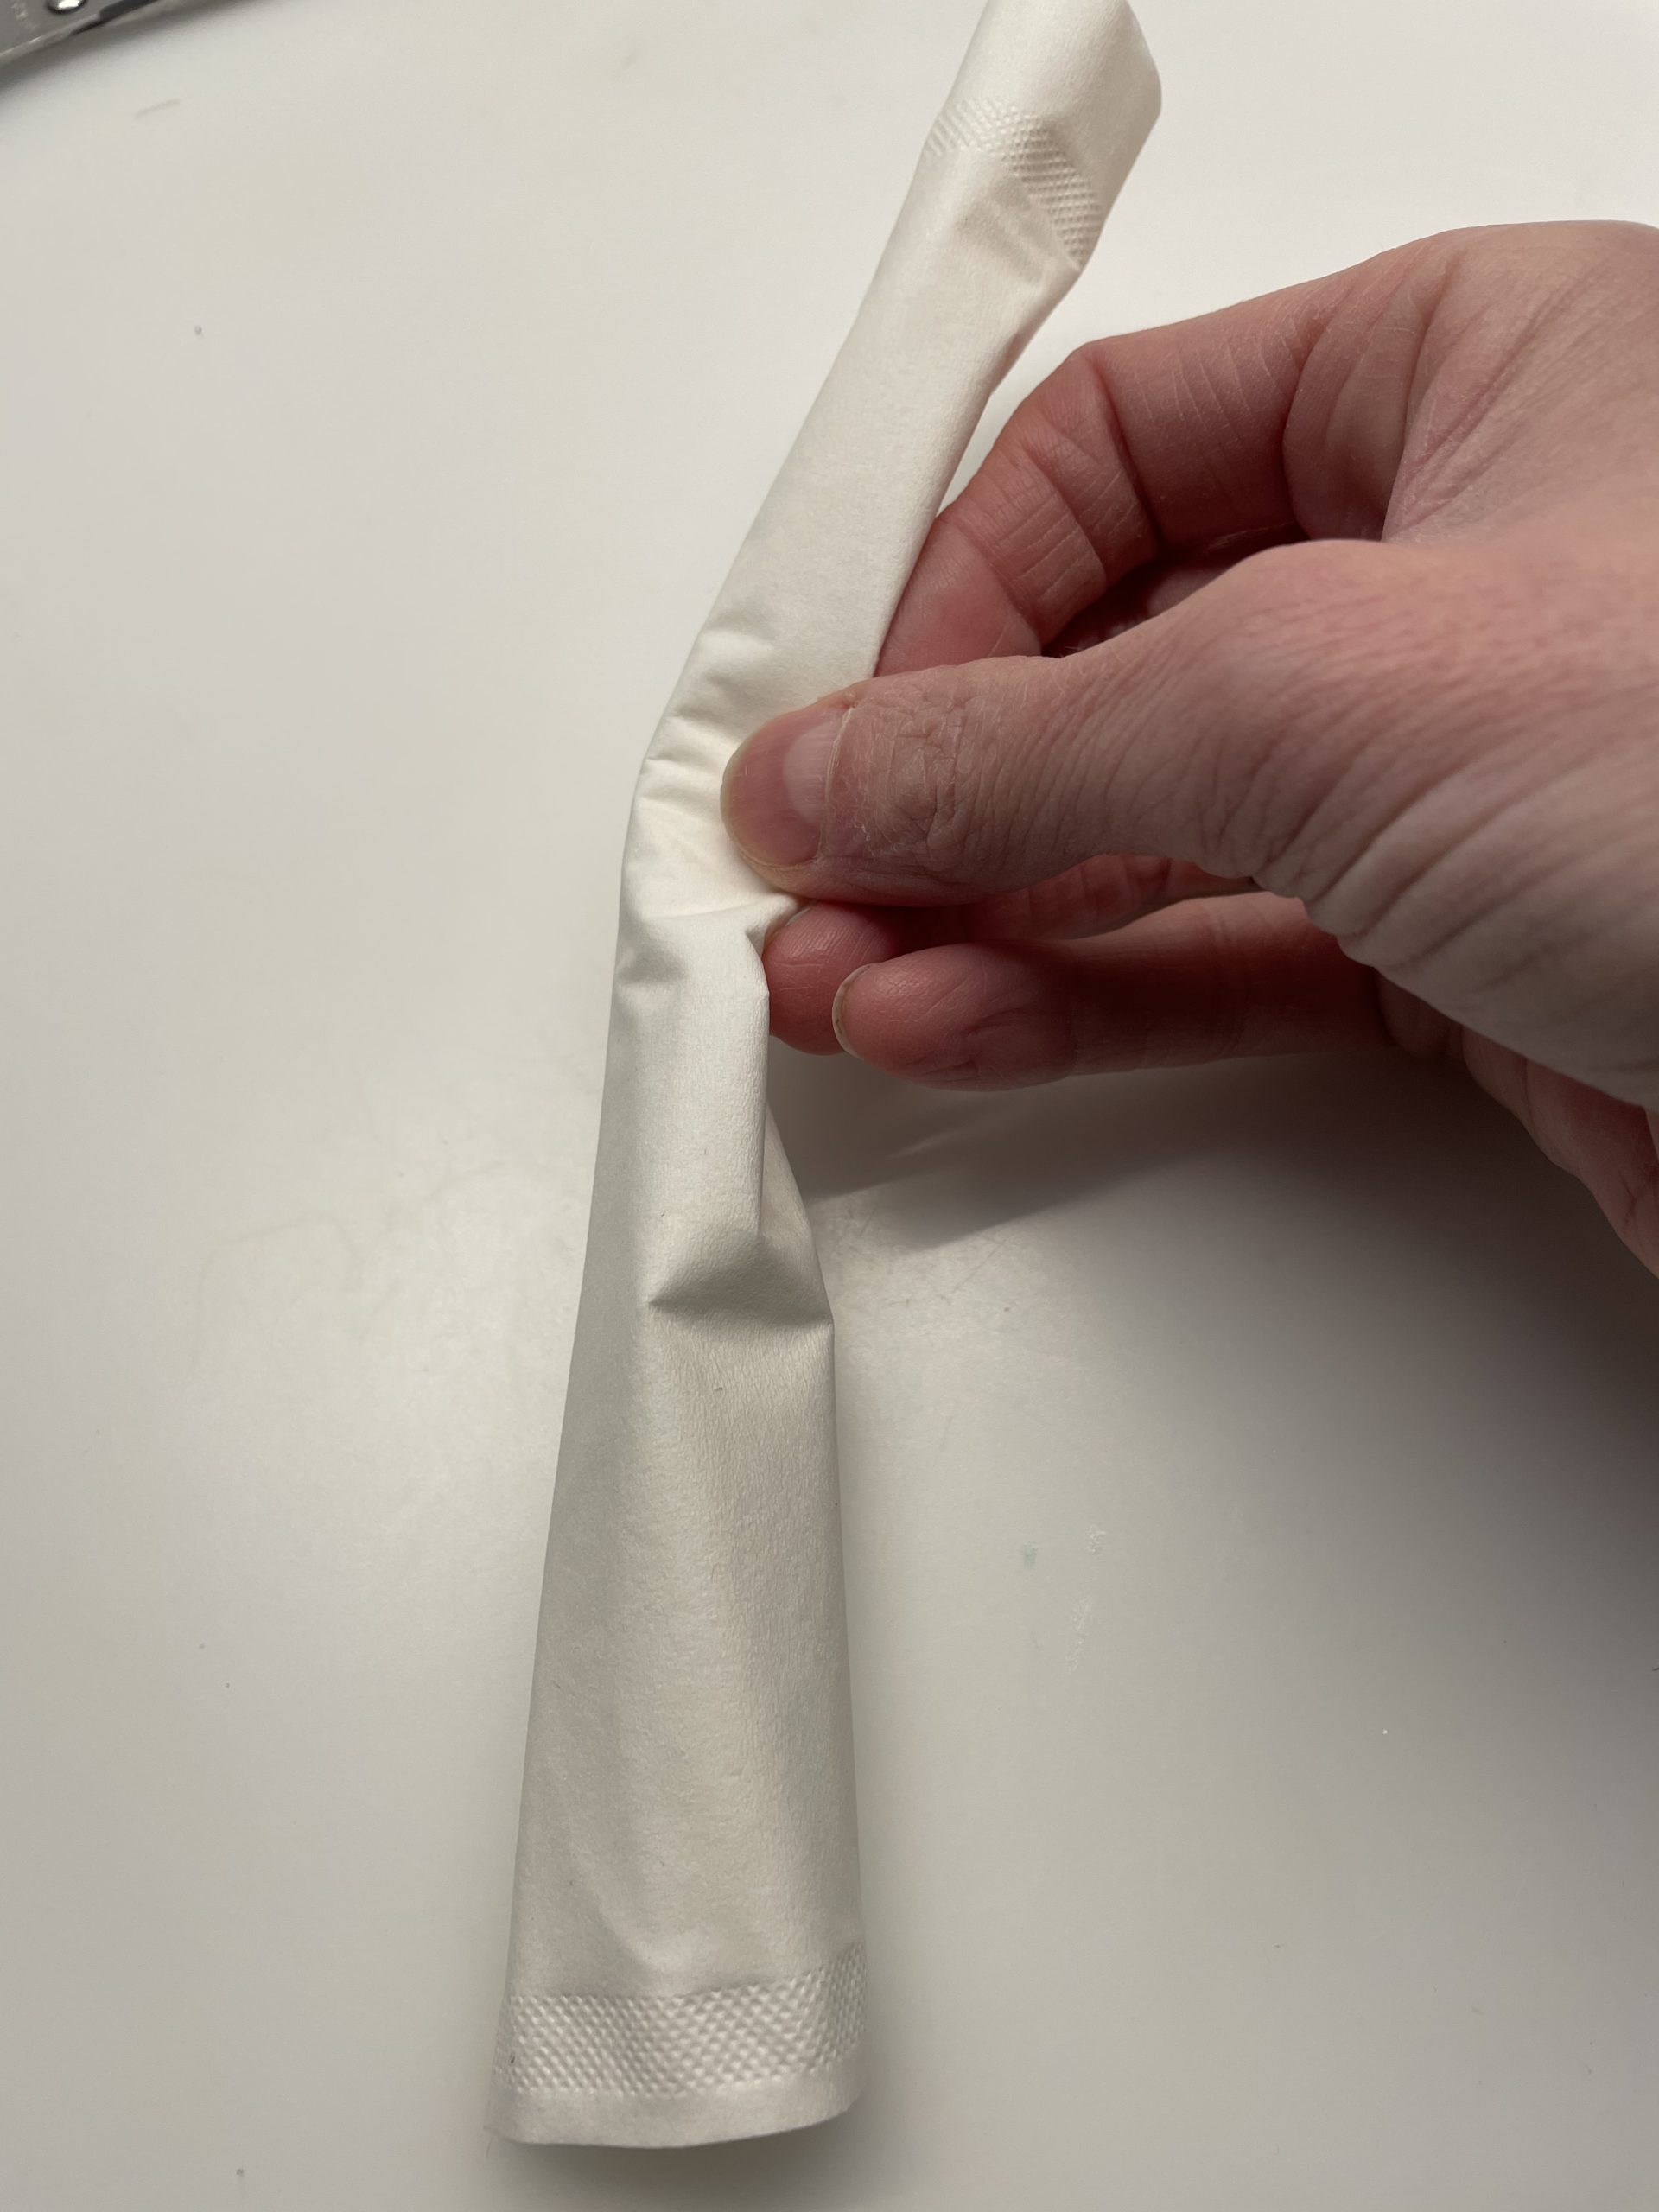
Bild zum Schritt 13 für das Bastel- und DIY-Abenteuer für Kinder: 'Rollt das Taschentuch von der langen Seite ausgehend zusammen.'

13

Then thread the rolled-up handkerchief through the cut-out rectangle.
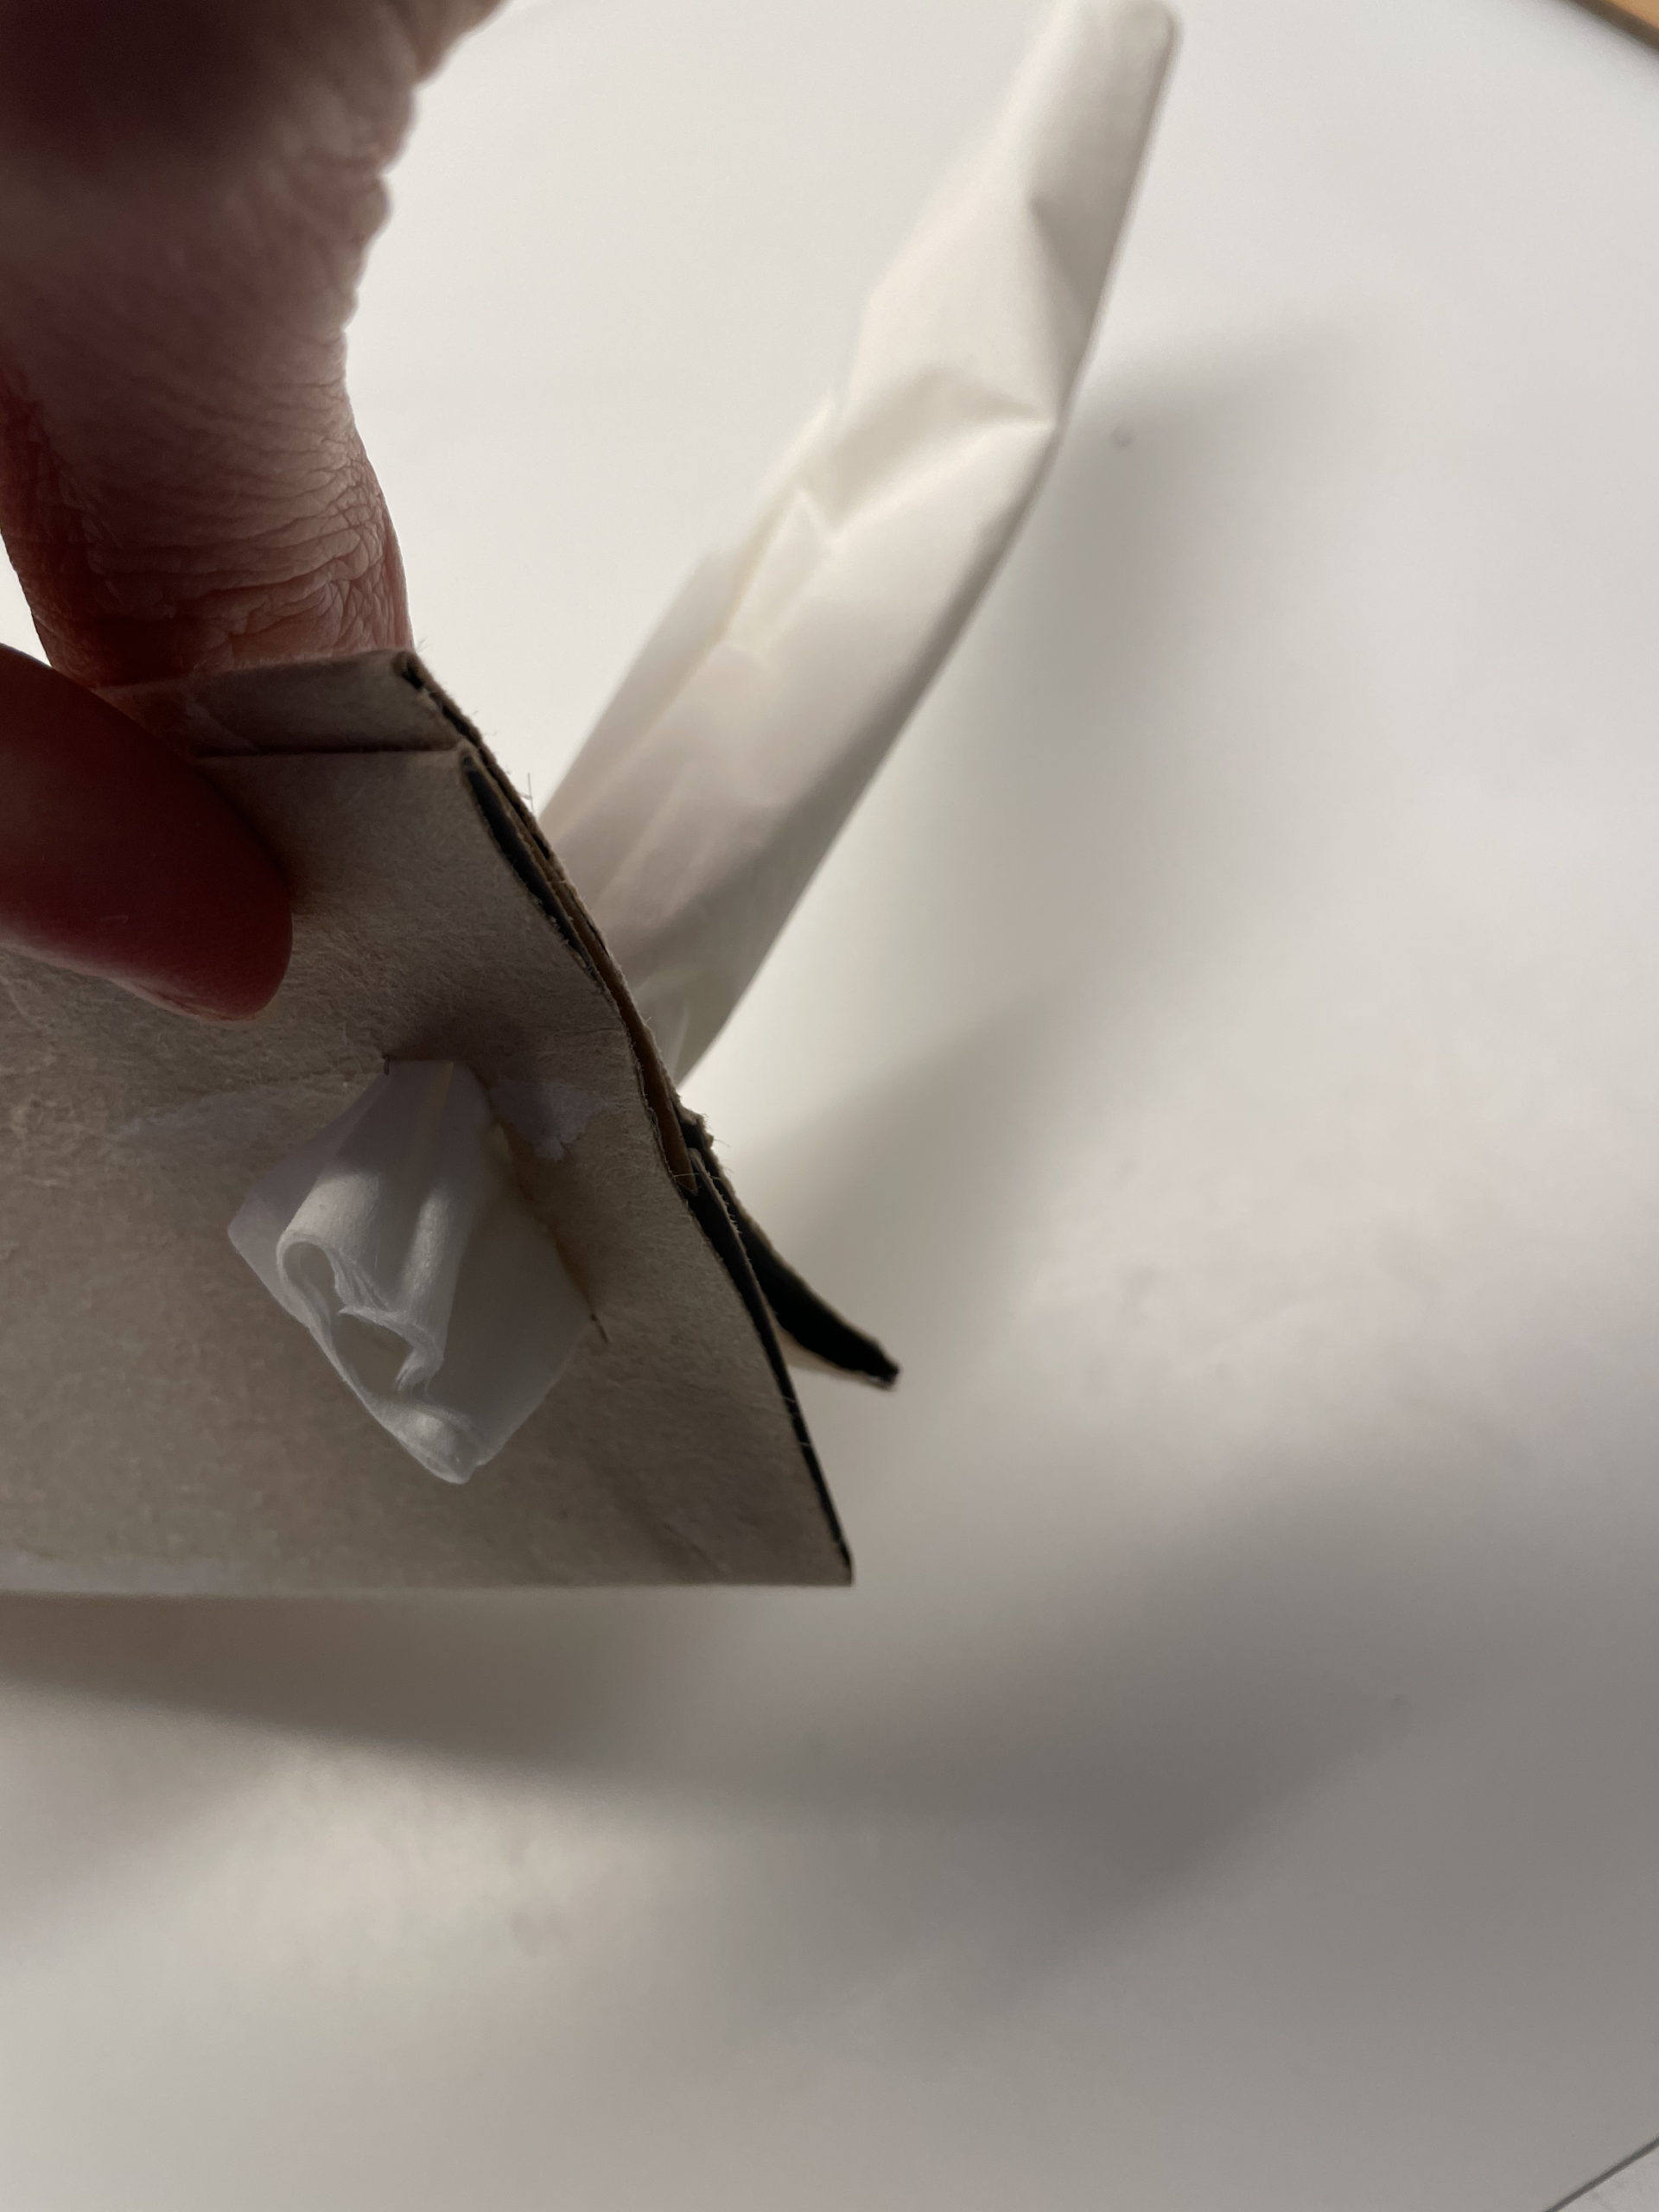
Bild zum Schritt 14 für das Bastel- und DIY-Abenteuer für Kinder: 'Dann fädelt ihr das zusammengerollte Taschentuch durch das ausgeschnittene Rechteck.'

14

Then pull the handkerchief roll half through the opening.
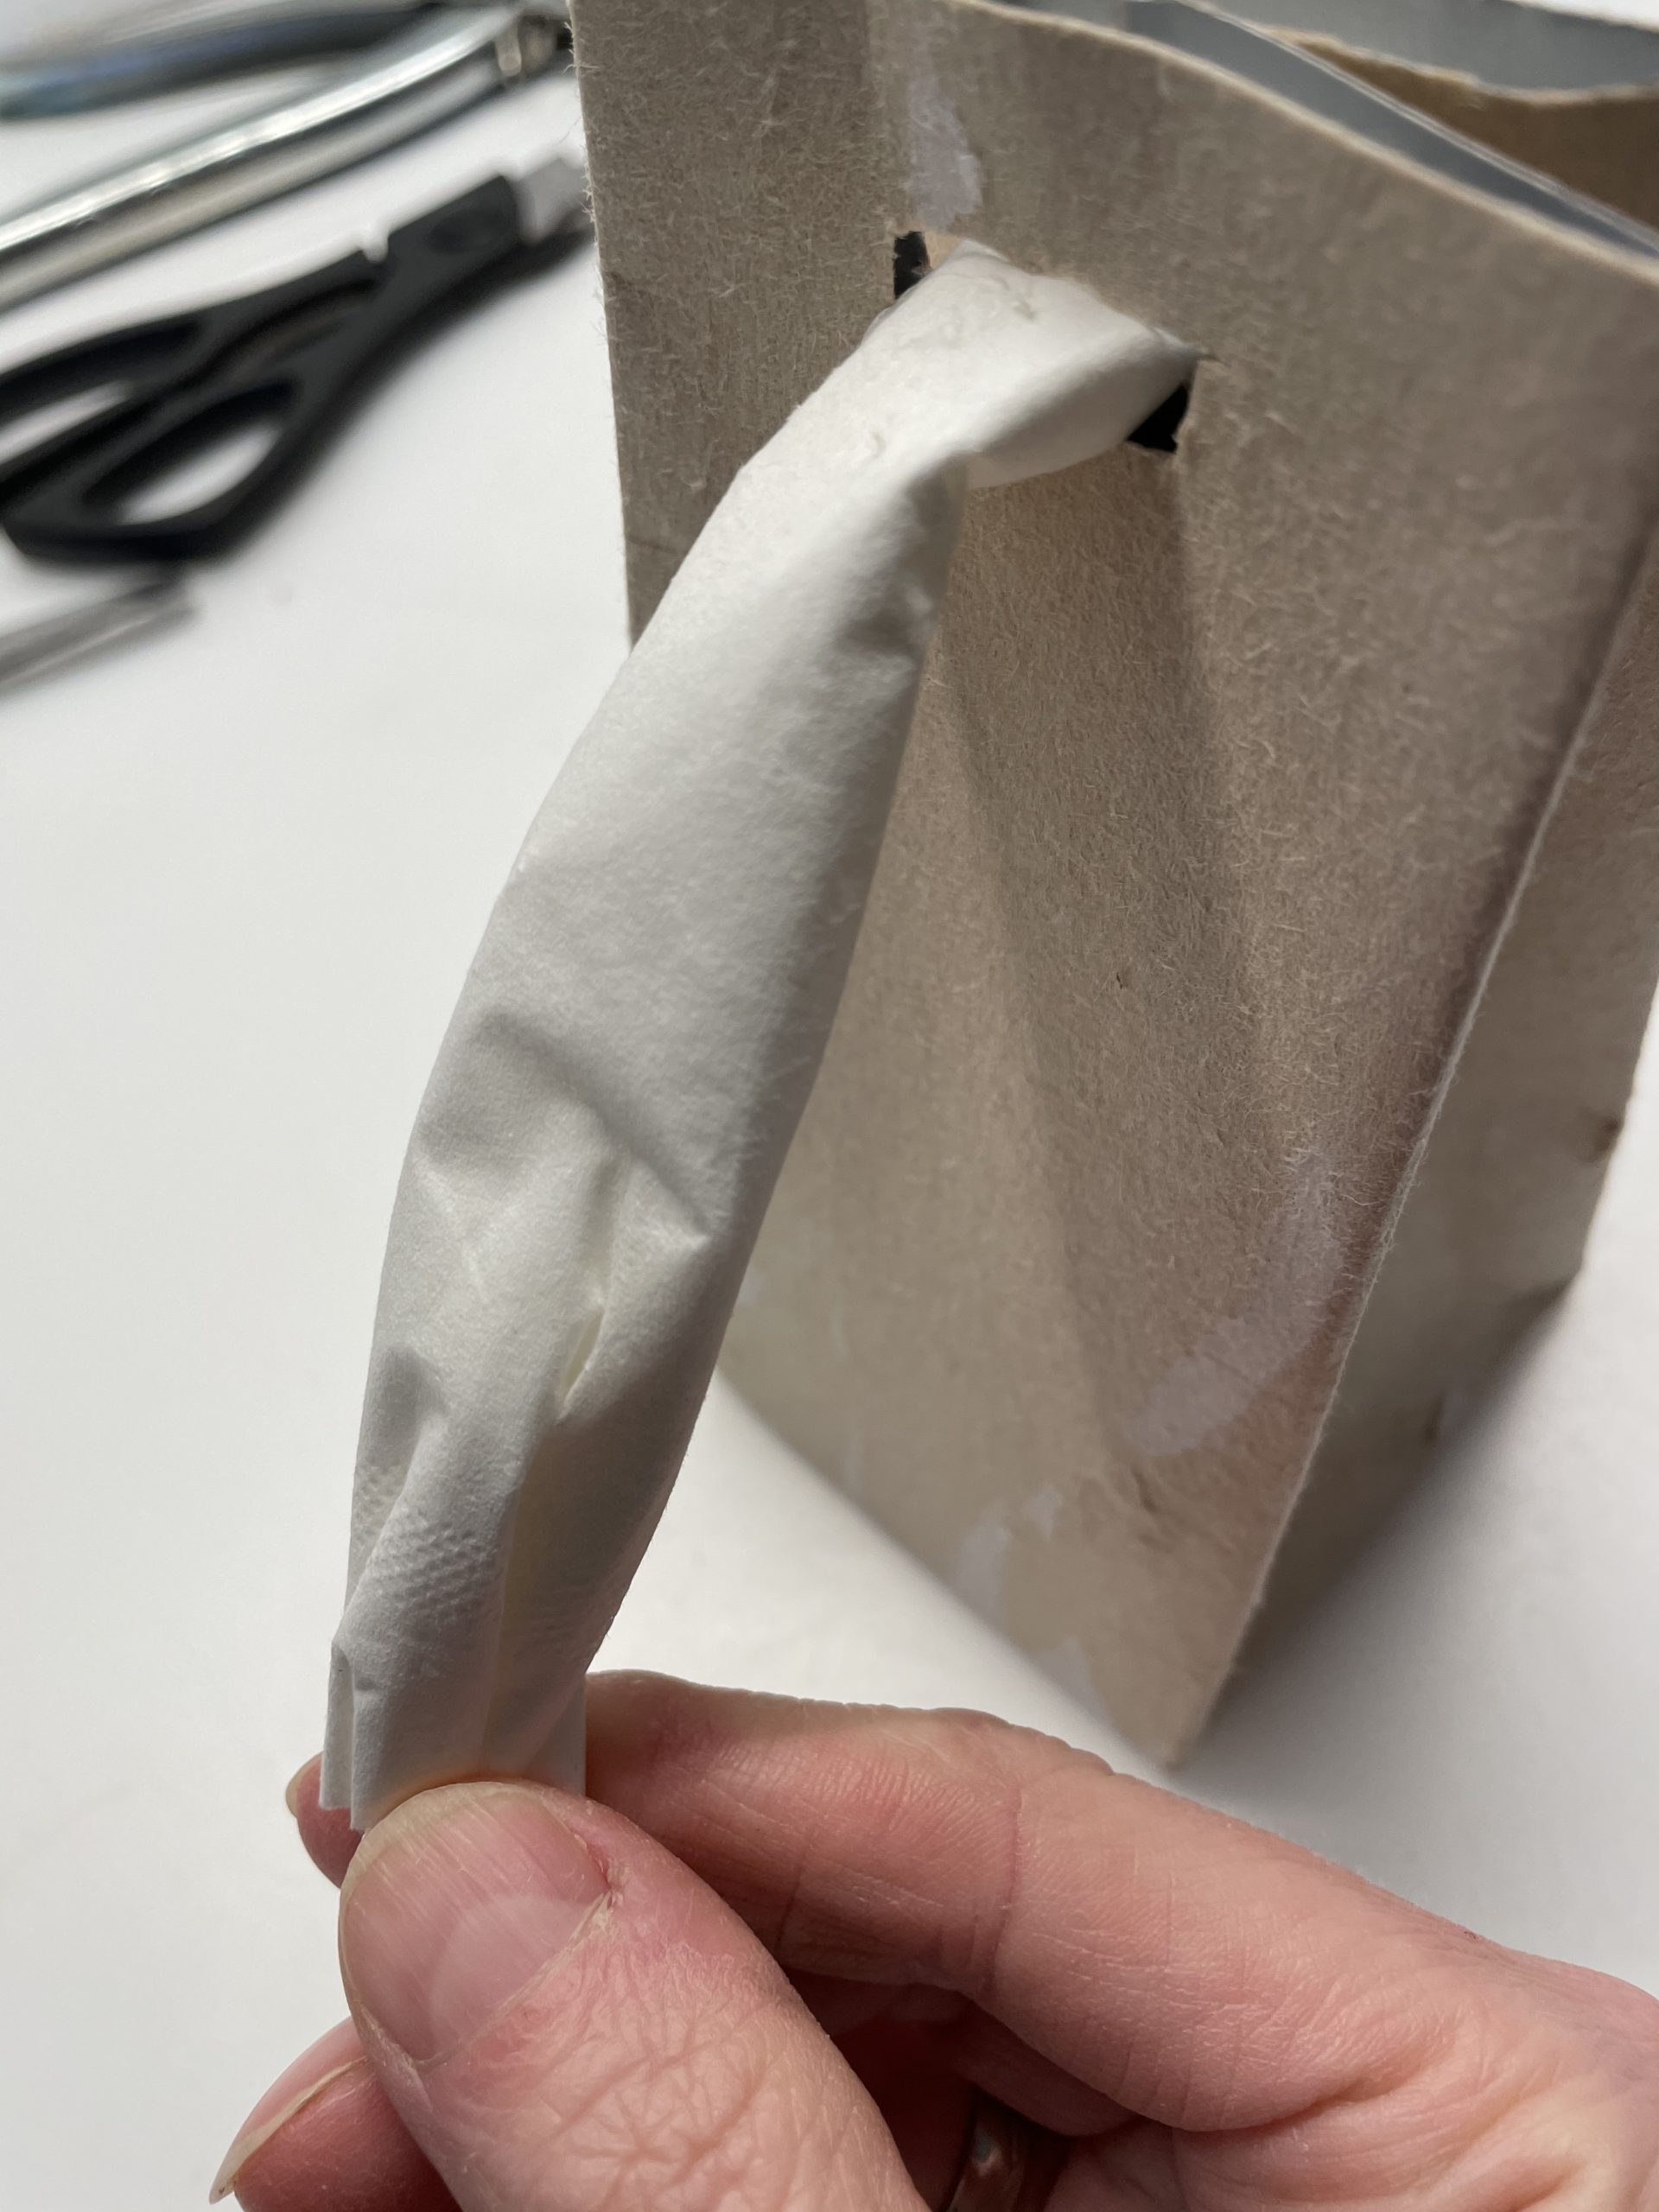
Bild zum Schritt 15 für das Bastel- und DIY-Abenteuer für Kinder: 'Zieht dann die Taschentuchrolle zur Hälfte durch die Öffnung.'

15

Now you tie a woolen thread (with 5cm length) around the handkerchief ends.
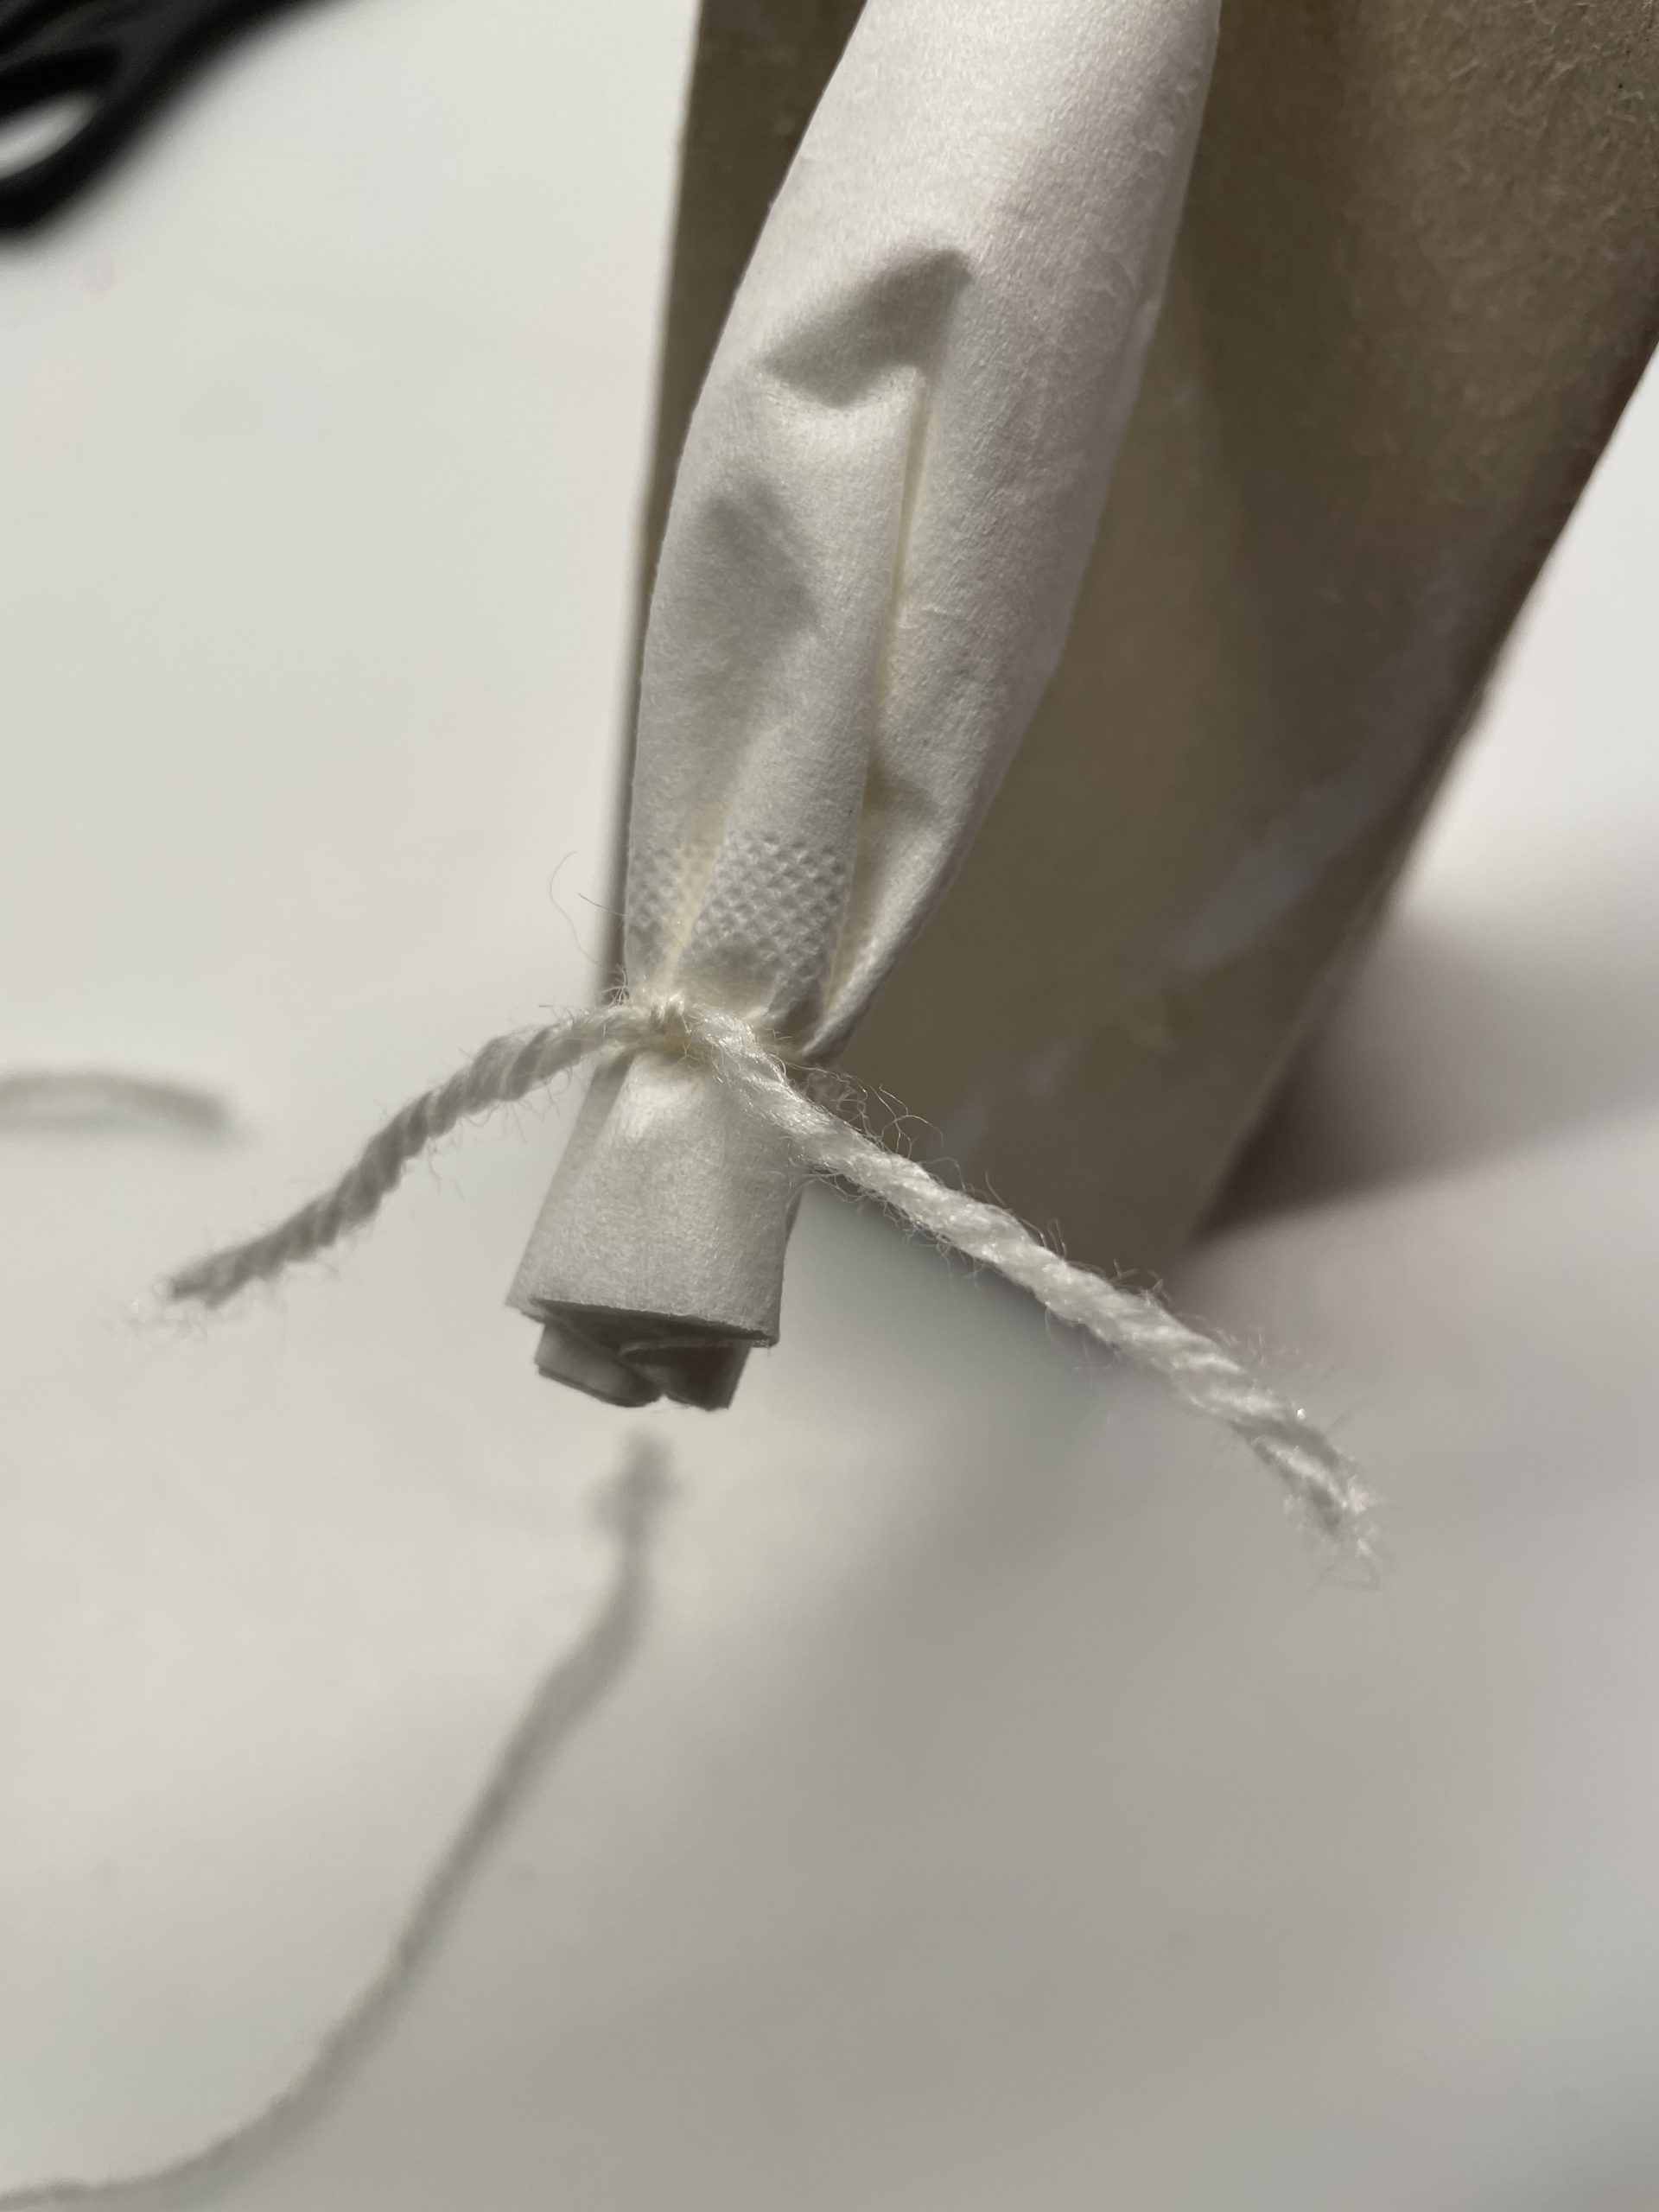
Bild zum Schritt 16 für das Bastel- und DIY-Abenteuer für Kinder: 'Jetzt bindet ihr je einen Wollfaden (mit 5cm Länge) um...'

16

Repeat this on the other side and position the handkerchief in the middle.

Bild zum Schritt 17 für das Bastel- und DIY-Abenteuer für Kinder: 'Wiederholt das auf der anderen Seite und positioniert das Taschentuch...'

17

Now fold both ends of the handkerchief up as ears.
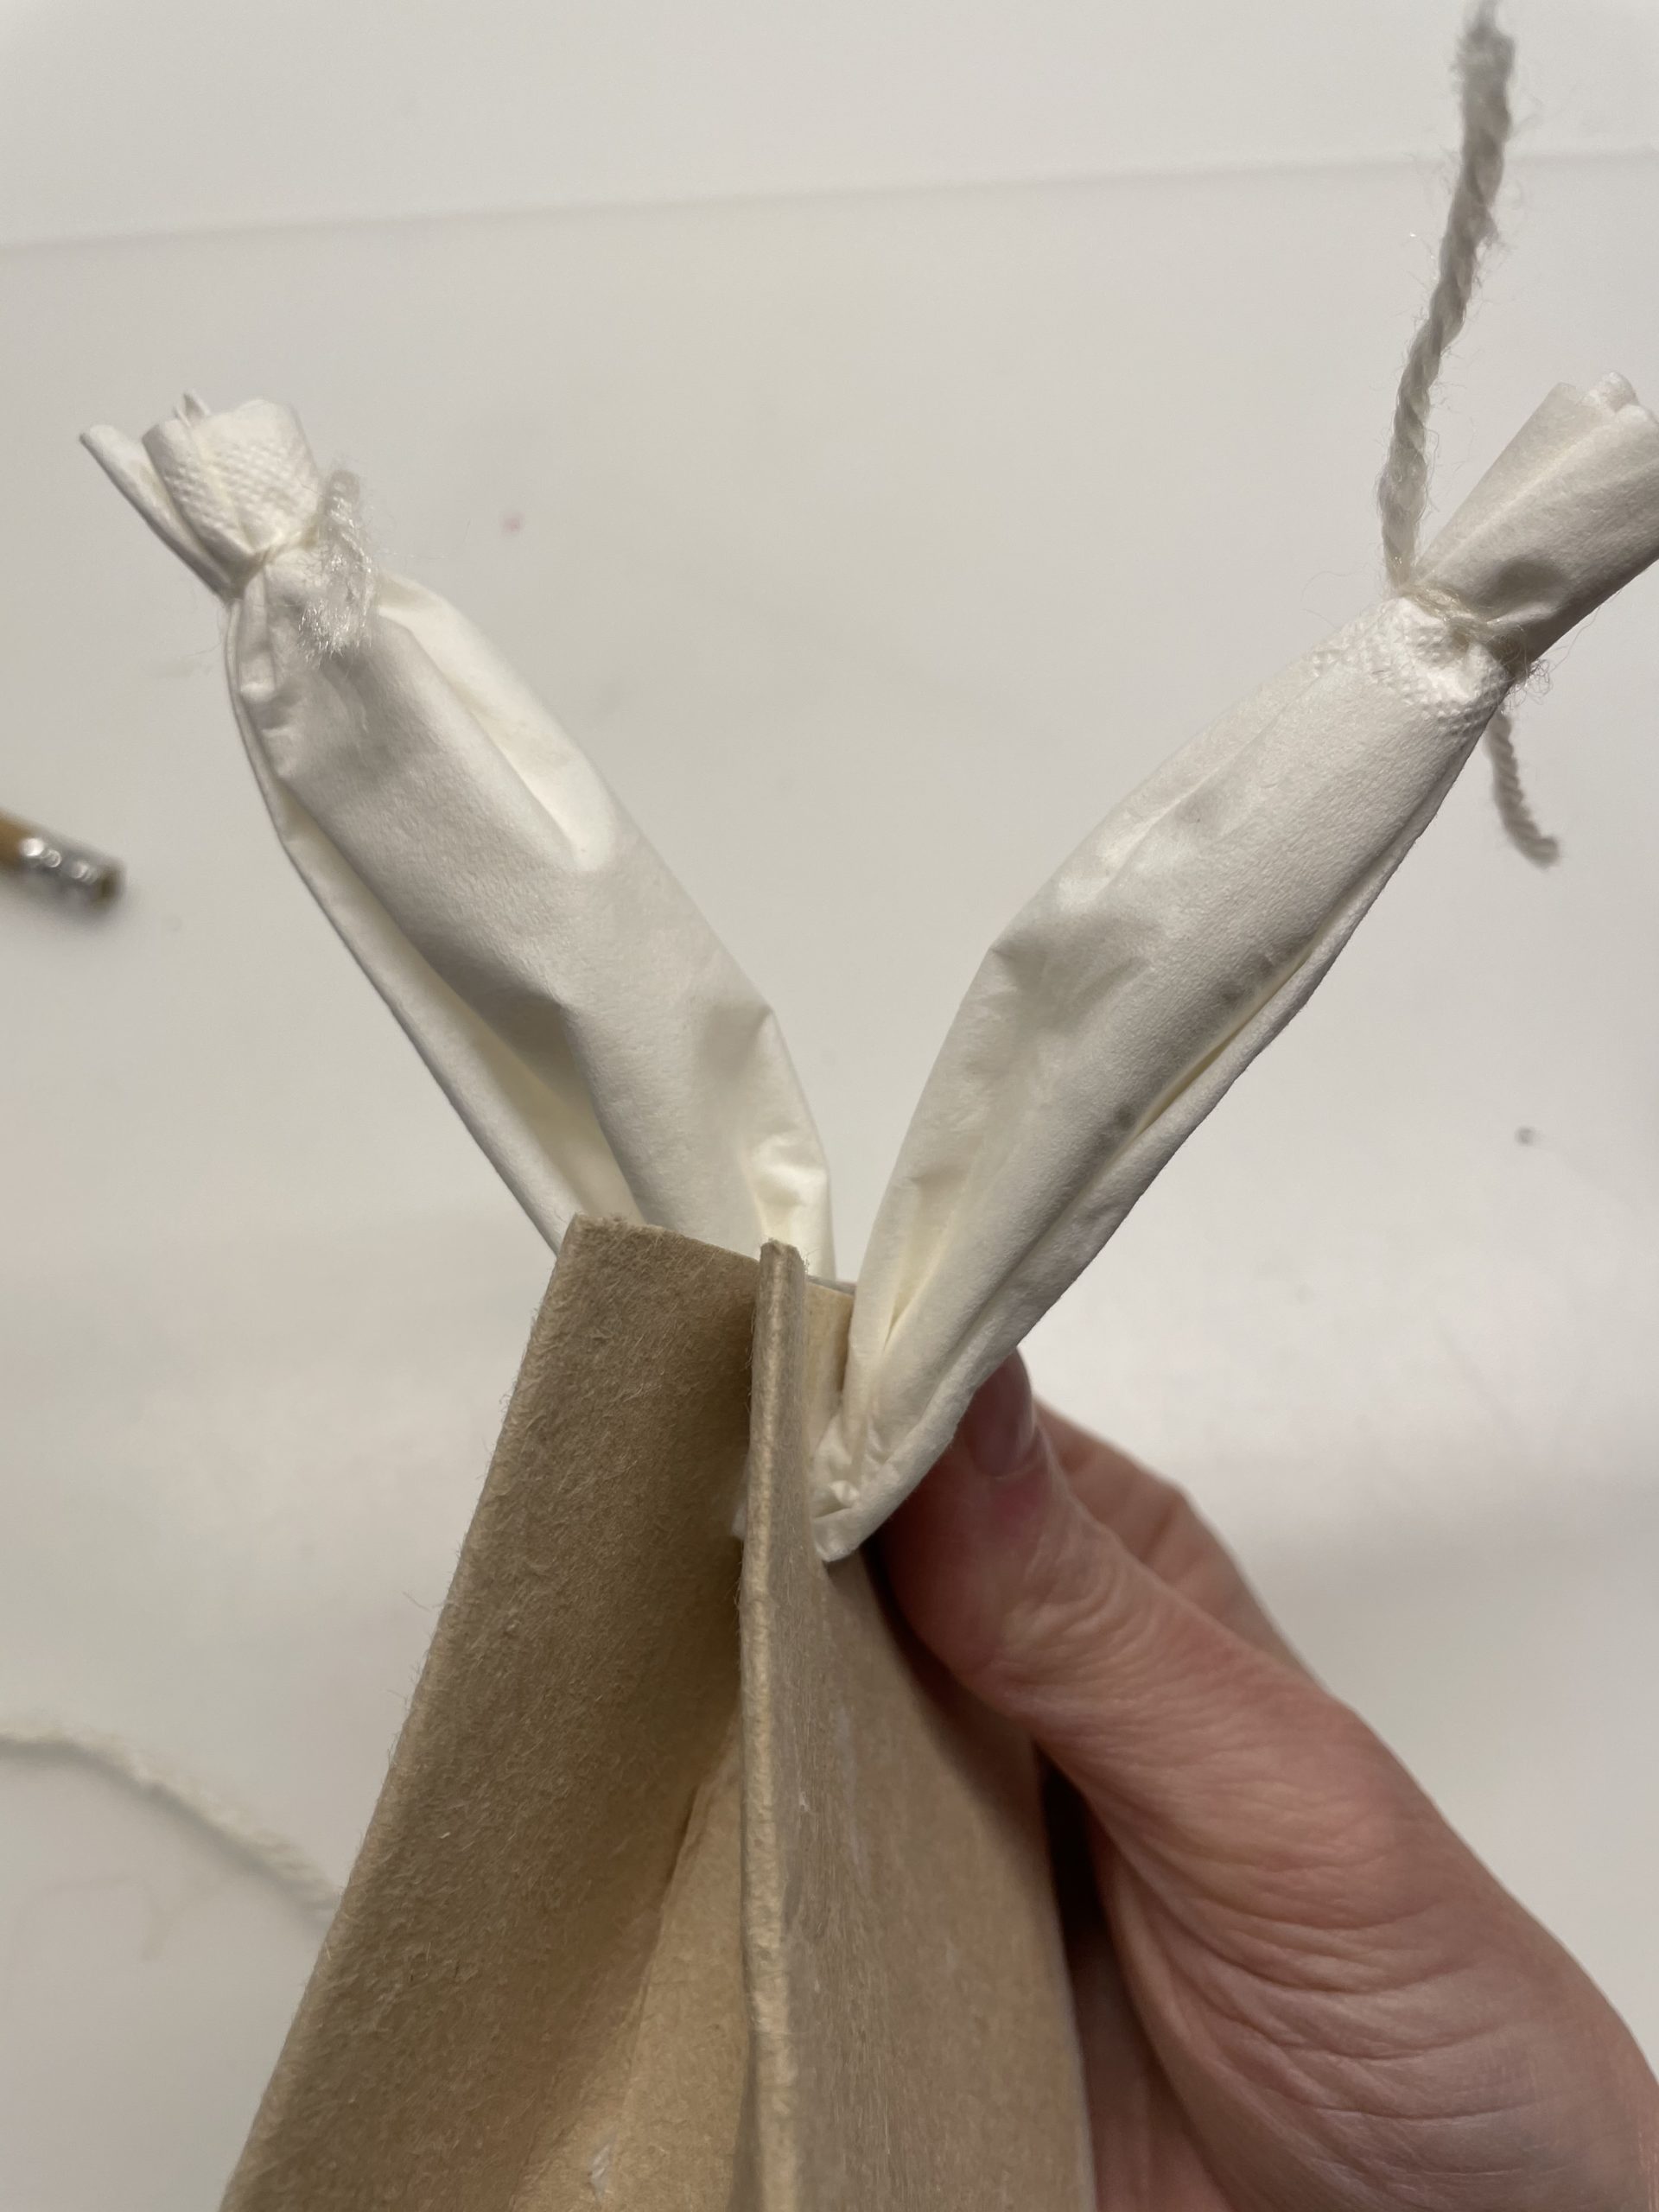
Bild zum Schritt 18 für das Bastel- und DIY-Abenteuer für Kinder: 'Klappt nun beide Enden des Taschentuches als Ohren nach oben.'

18

Now push a small rubber from above over both ears. Places the rubber on the bag edge.

Bild zum Schritt 19 für das Bastel- und DIY-Abenteuer für Kinder: 'Schiebt nun einen kleinen Gummi von oben über beide Ohren....'

19

Now bend the rabbit ears a little apart.
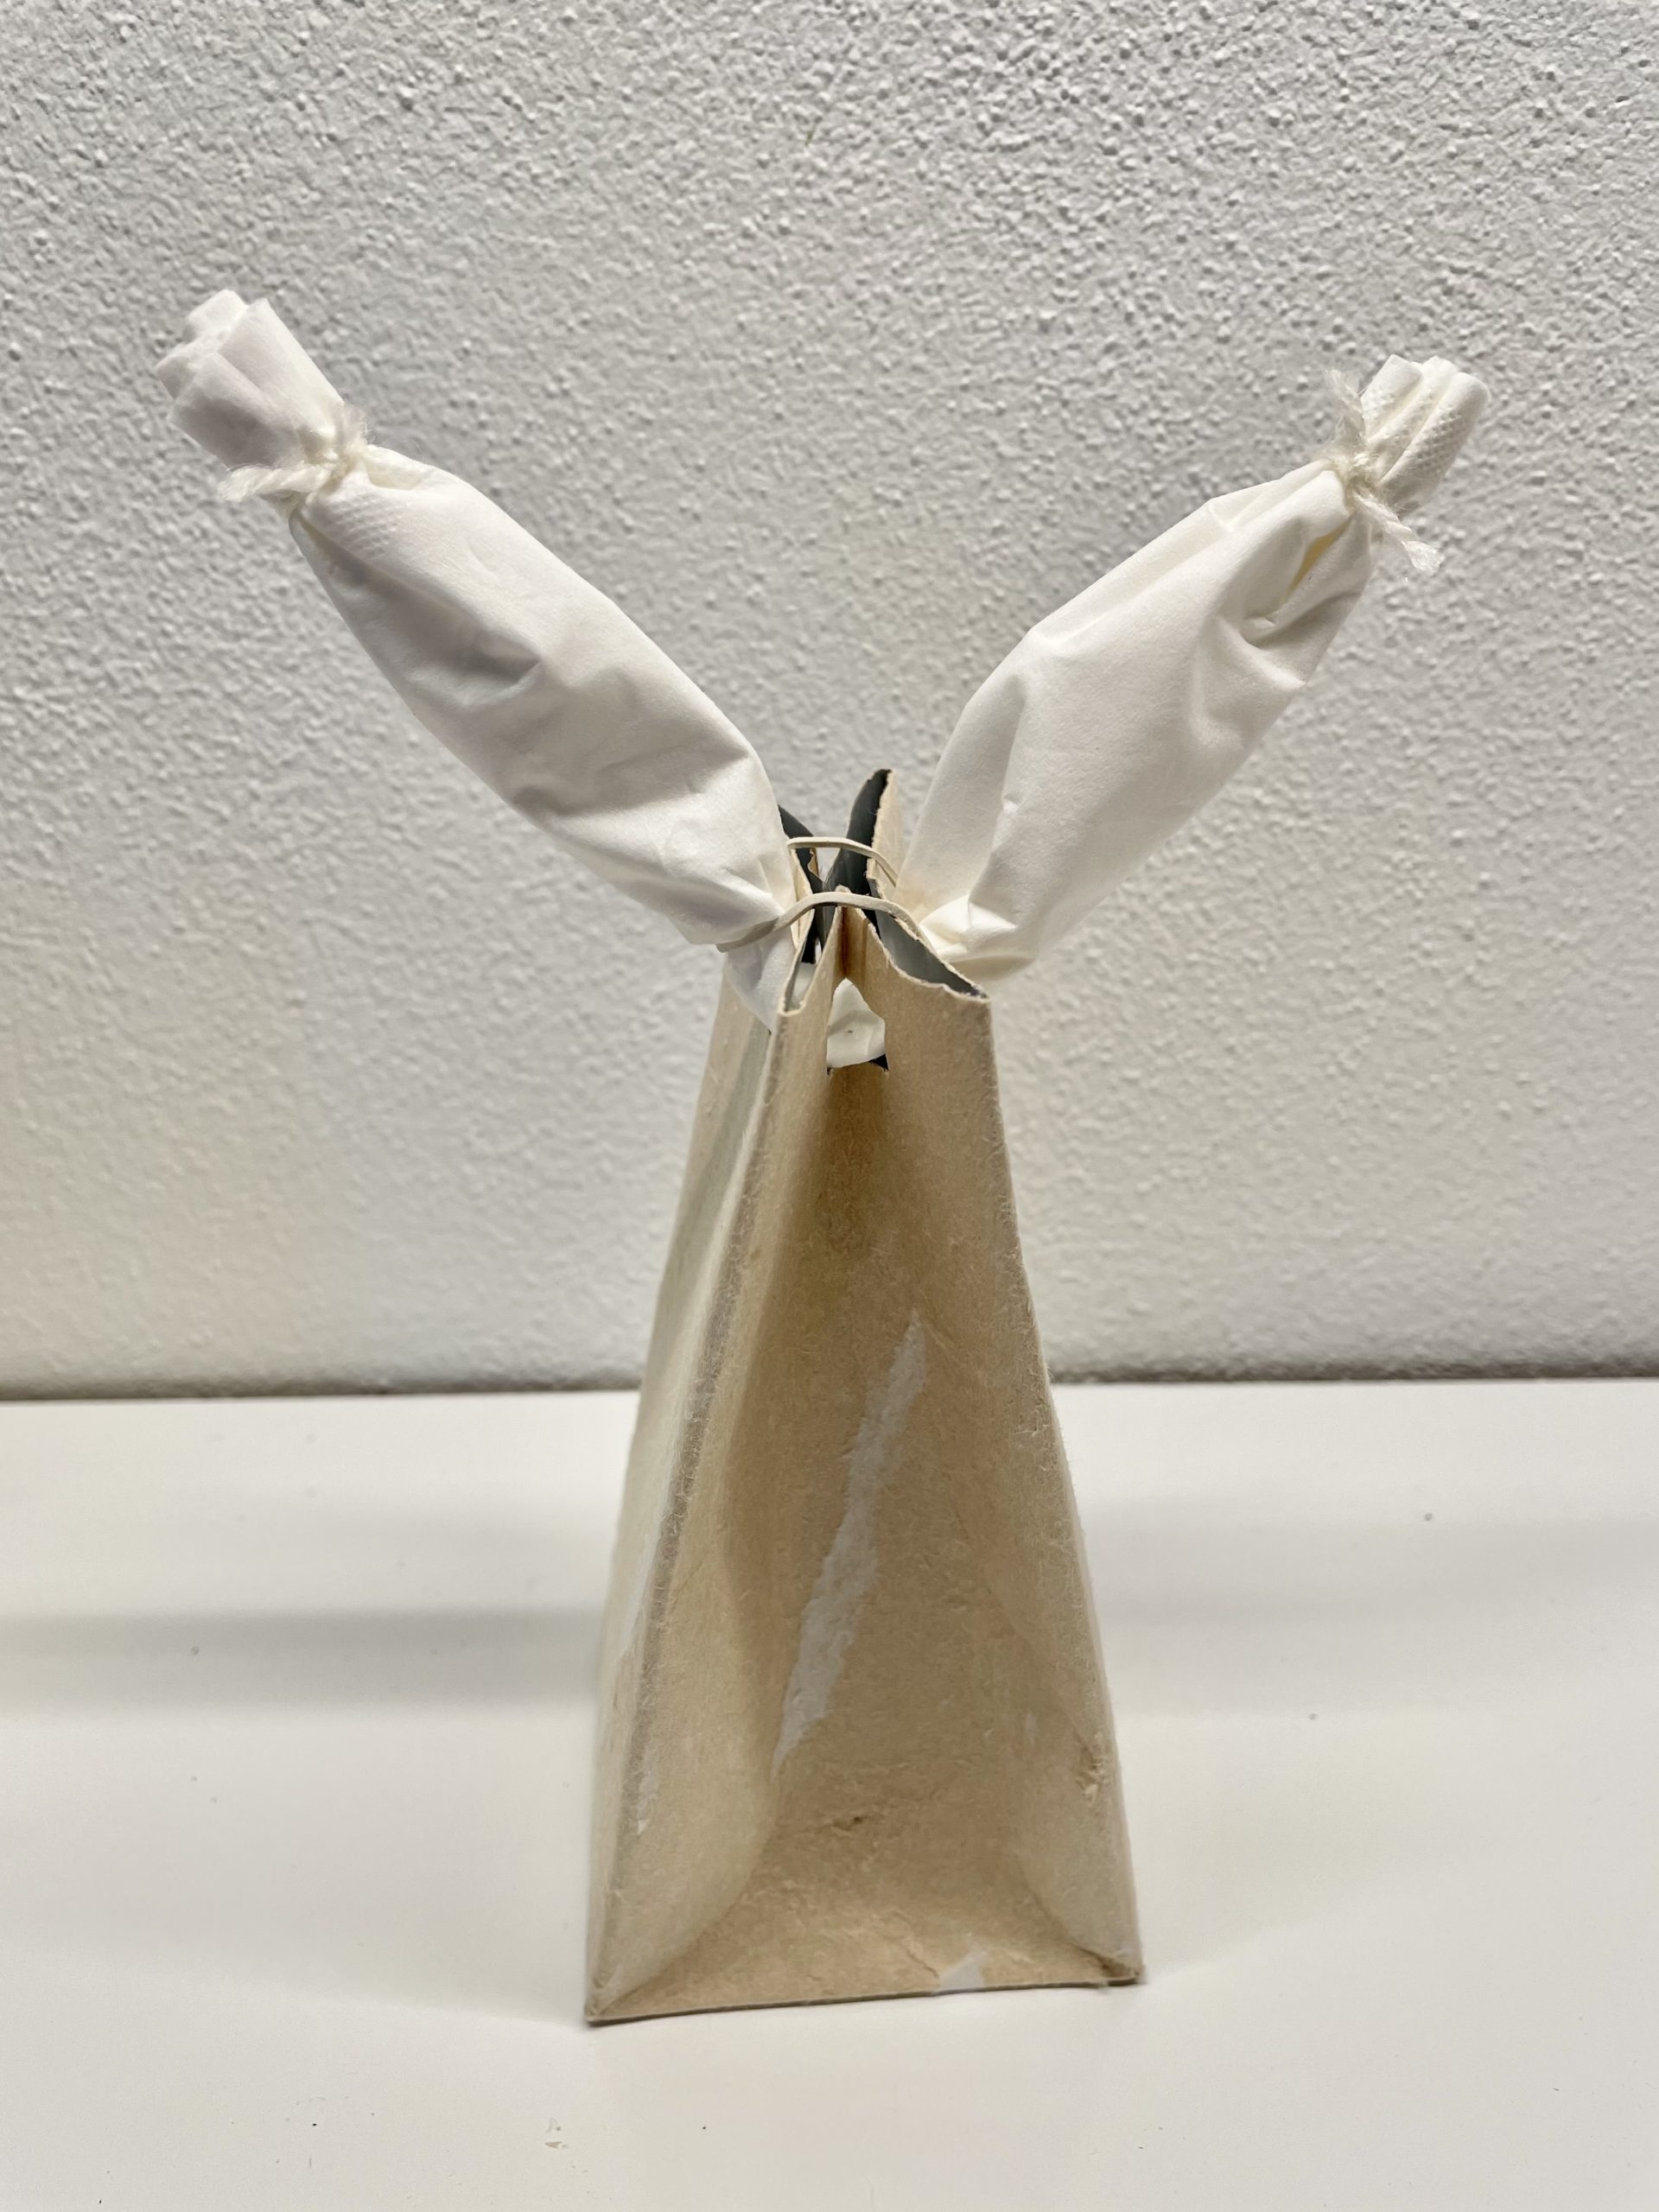
Bild zum Schritt 20 für das Bastel- und DIY-Abenteuer für Kinder: 'Biegt nun die Hasen-Ohren etwas auseinander.'

20

Cut off 3-4 bast threads on a length of 6cm. Lay them on each other and bundle them in the middle. These are the nose hairs of the rabbit.
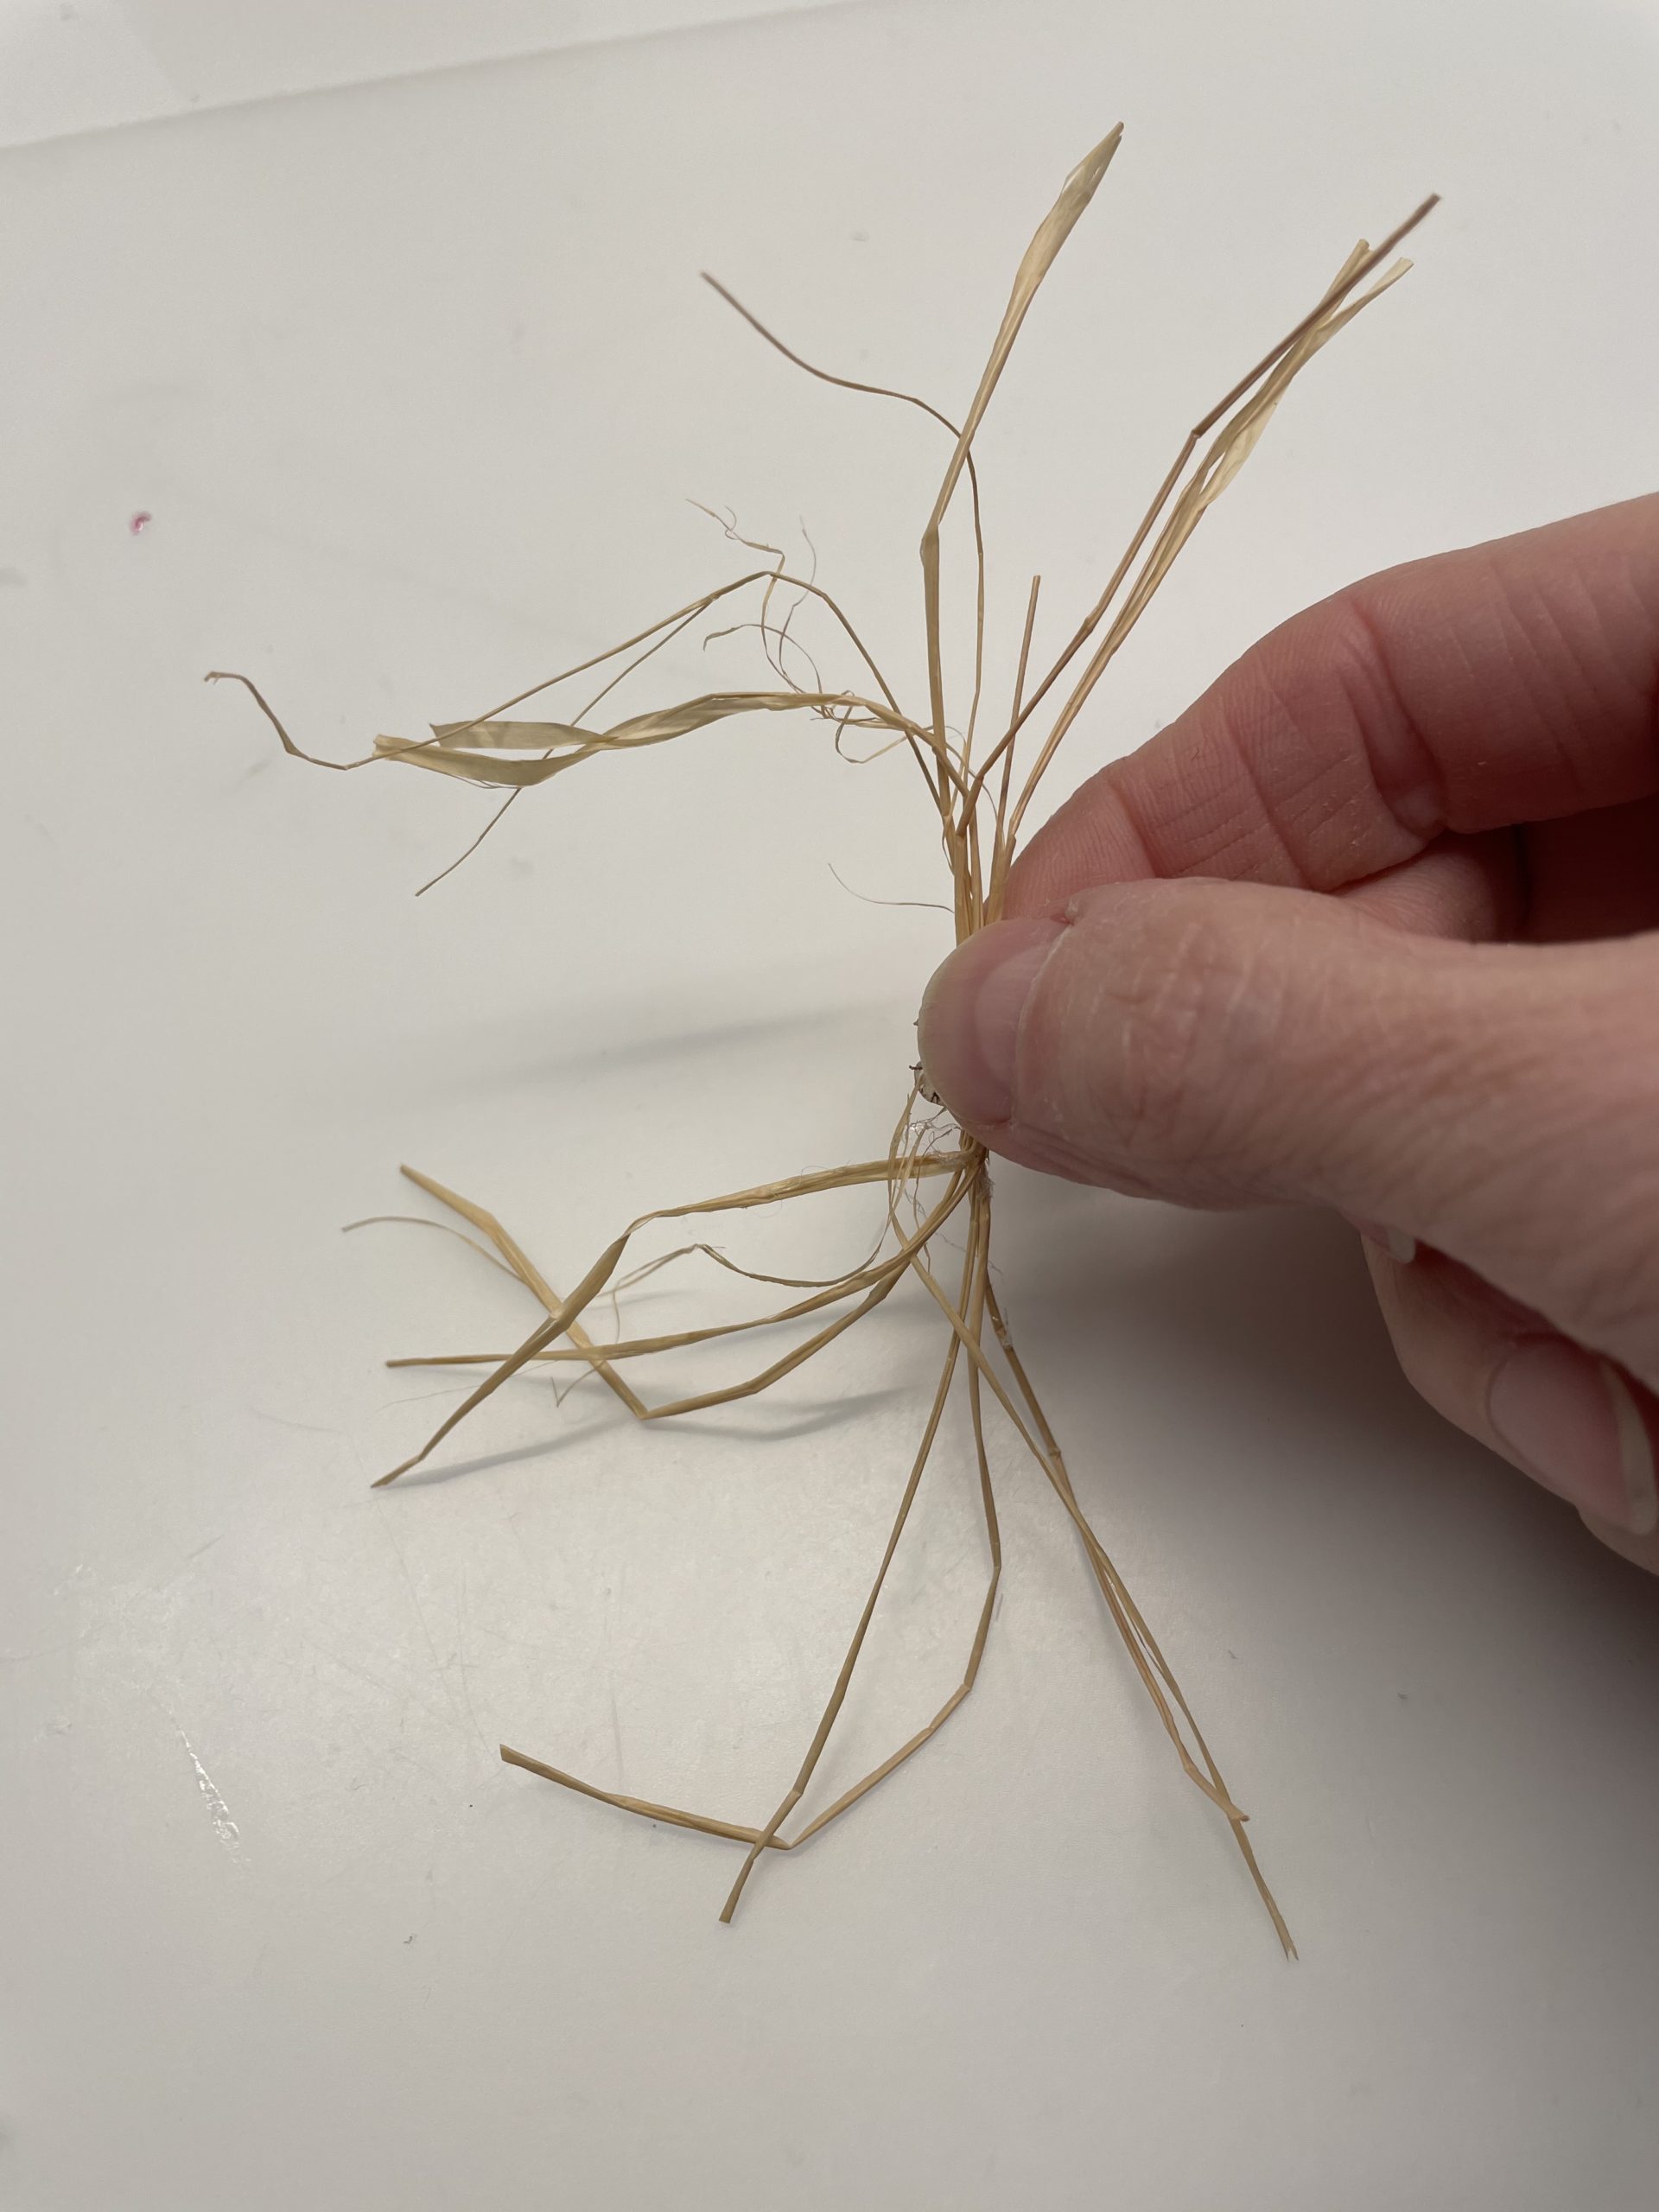
Bild zum Schritt 21 für das Bastel- und DIY-Abenteuer für Kinder: 'Schneidet euch 3-4 Bastfäden auf eine Länge von 6cm ab....'

21

Stick a button in the middle of the nose hair and the rabbit snout is ready.
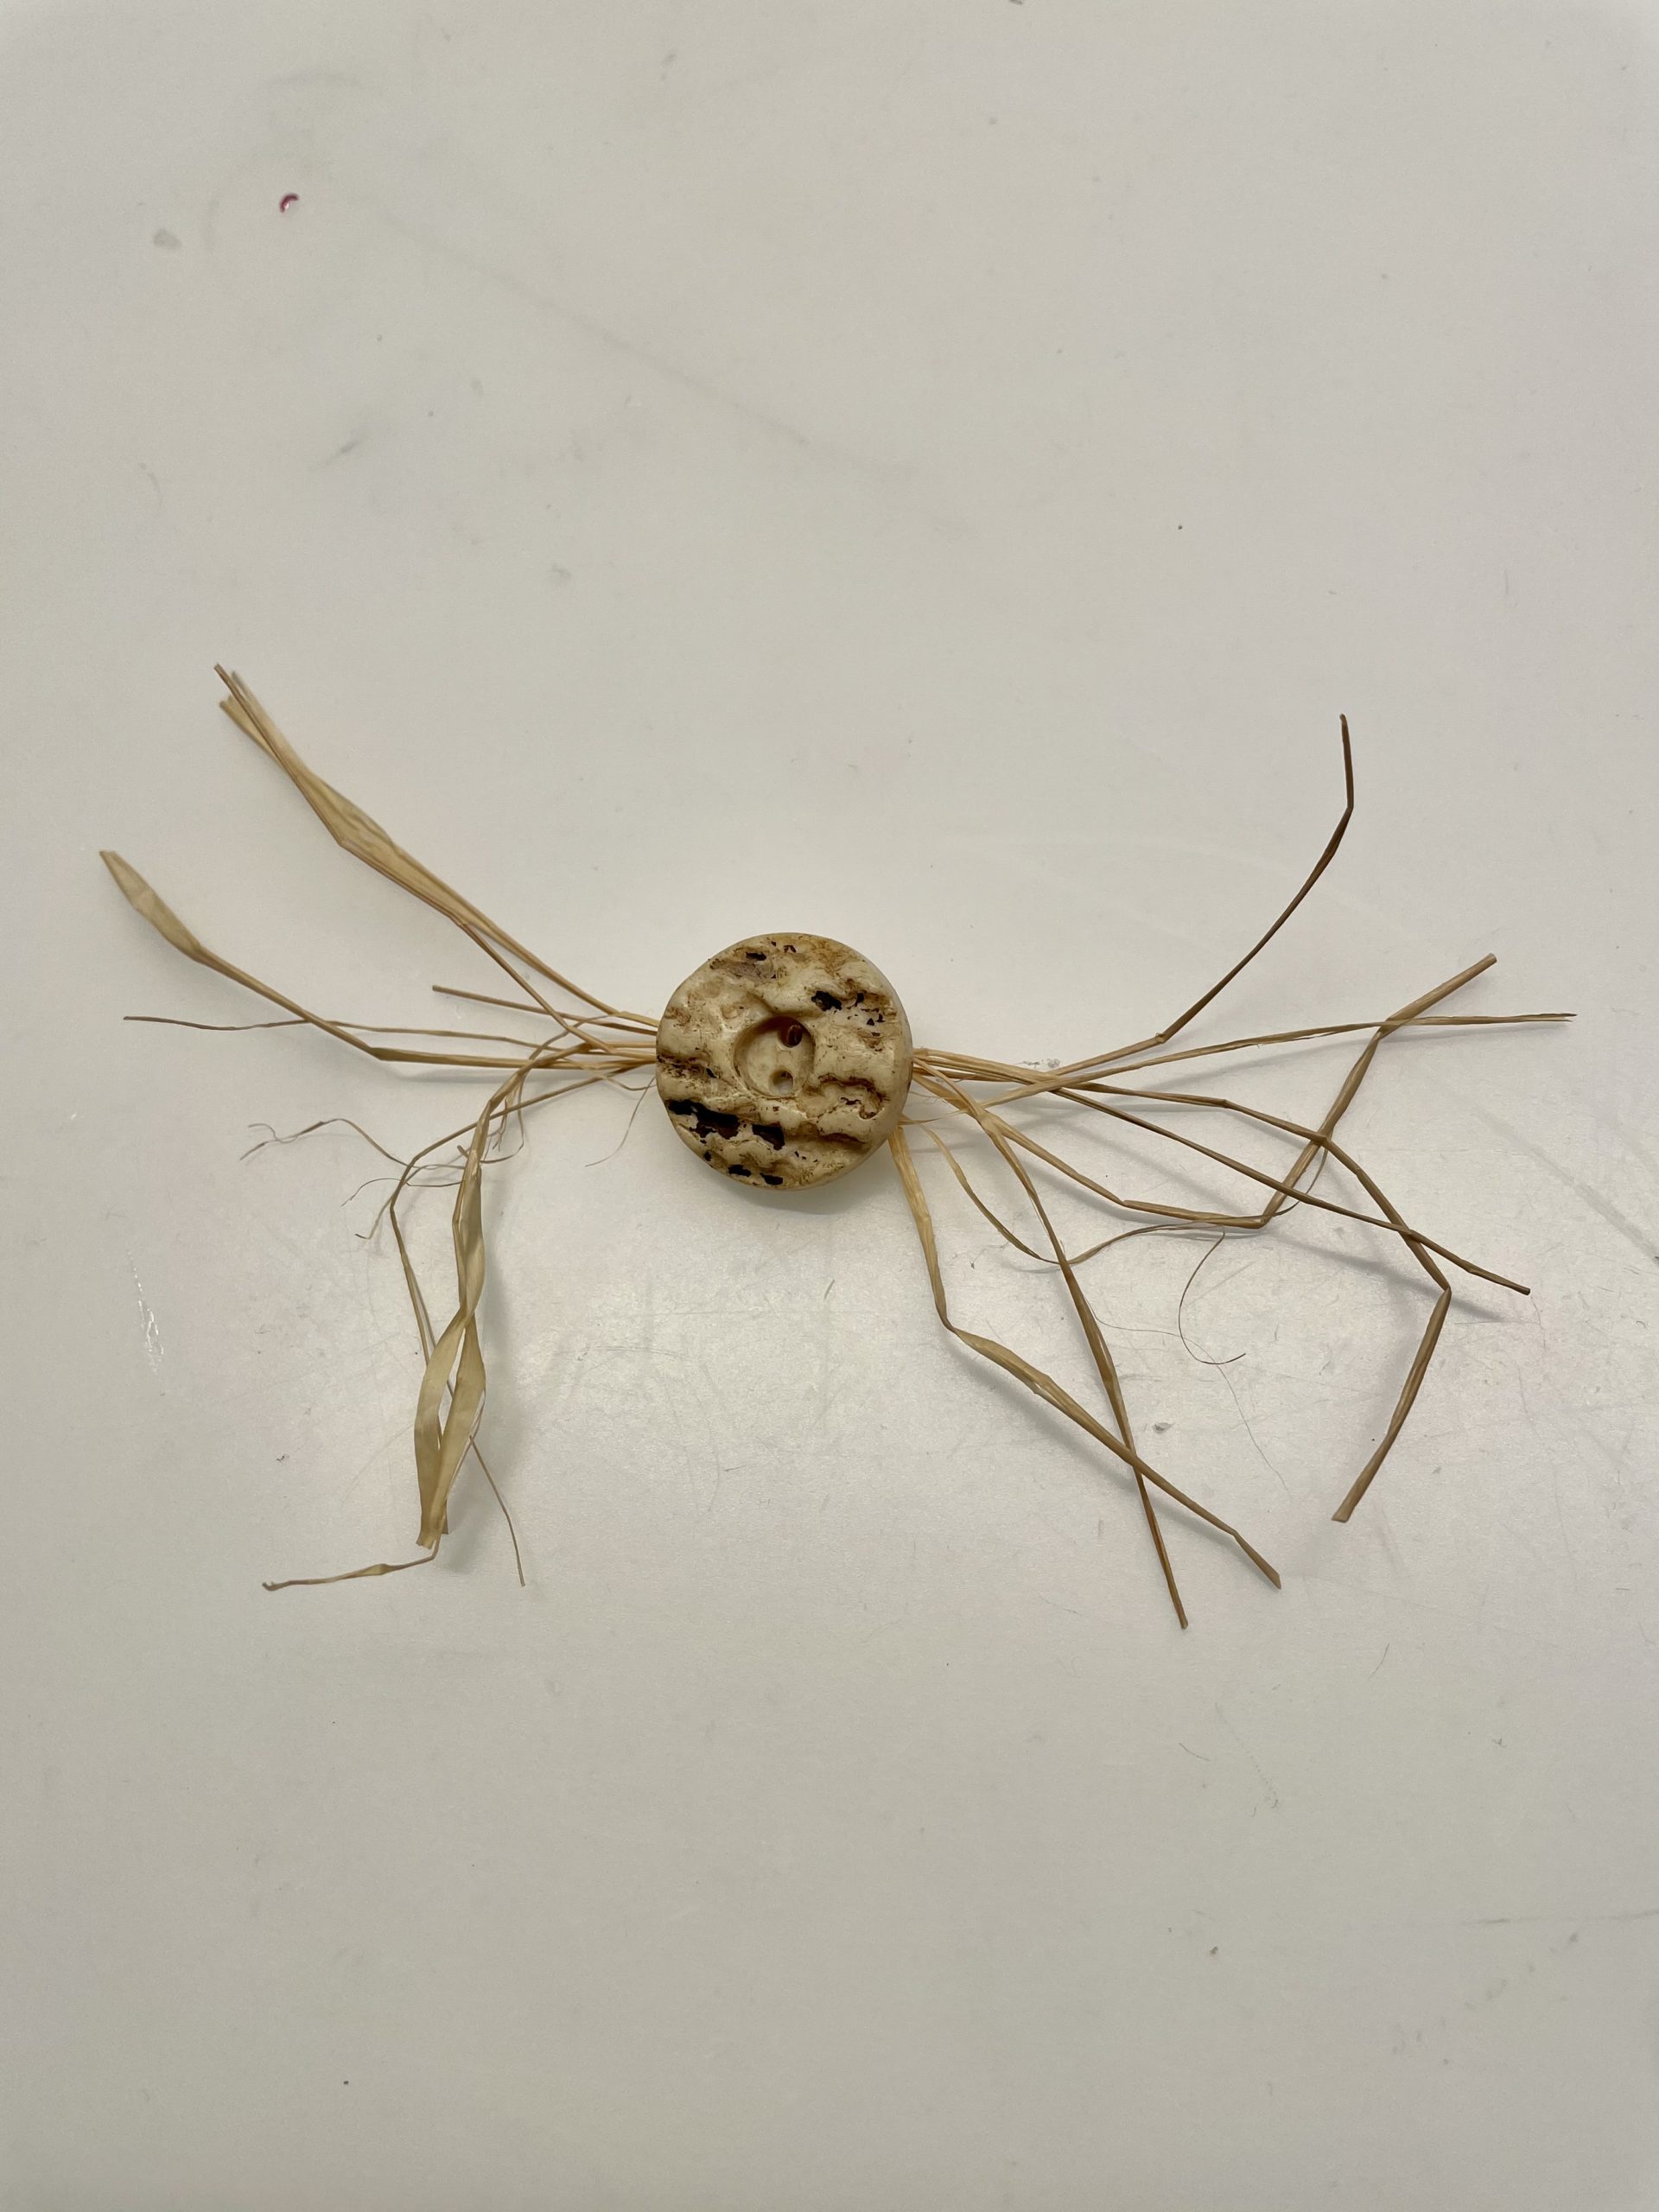
Bild zum Schritt 22 für das Bastel- und DIY-Abenteuer für Kinder: 'Klebt einen Knopf in die Mitte der Nasenhaare und fertig...'

22

Stick both to one side of the box.
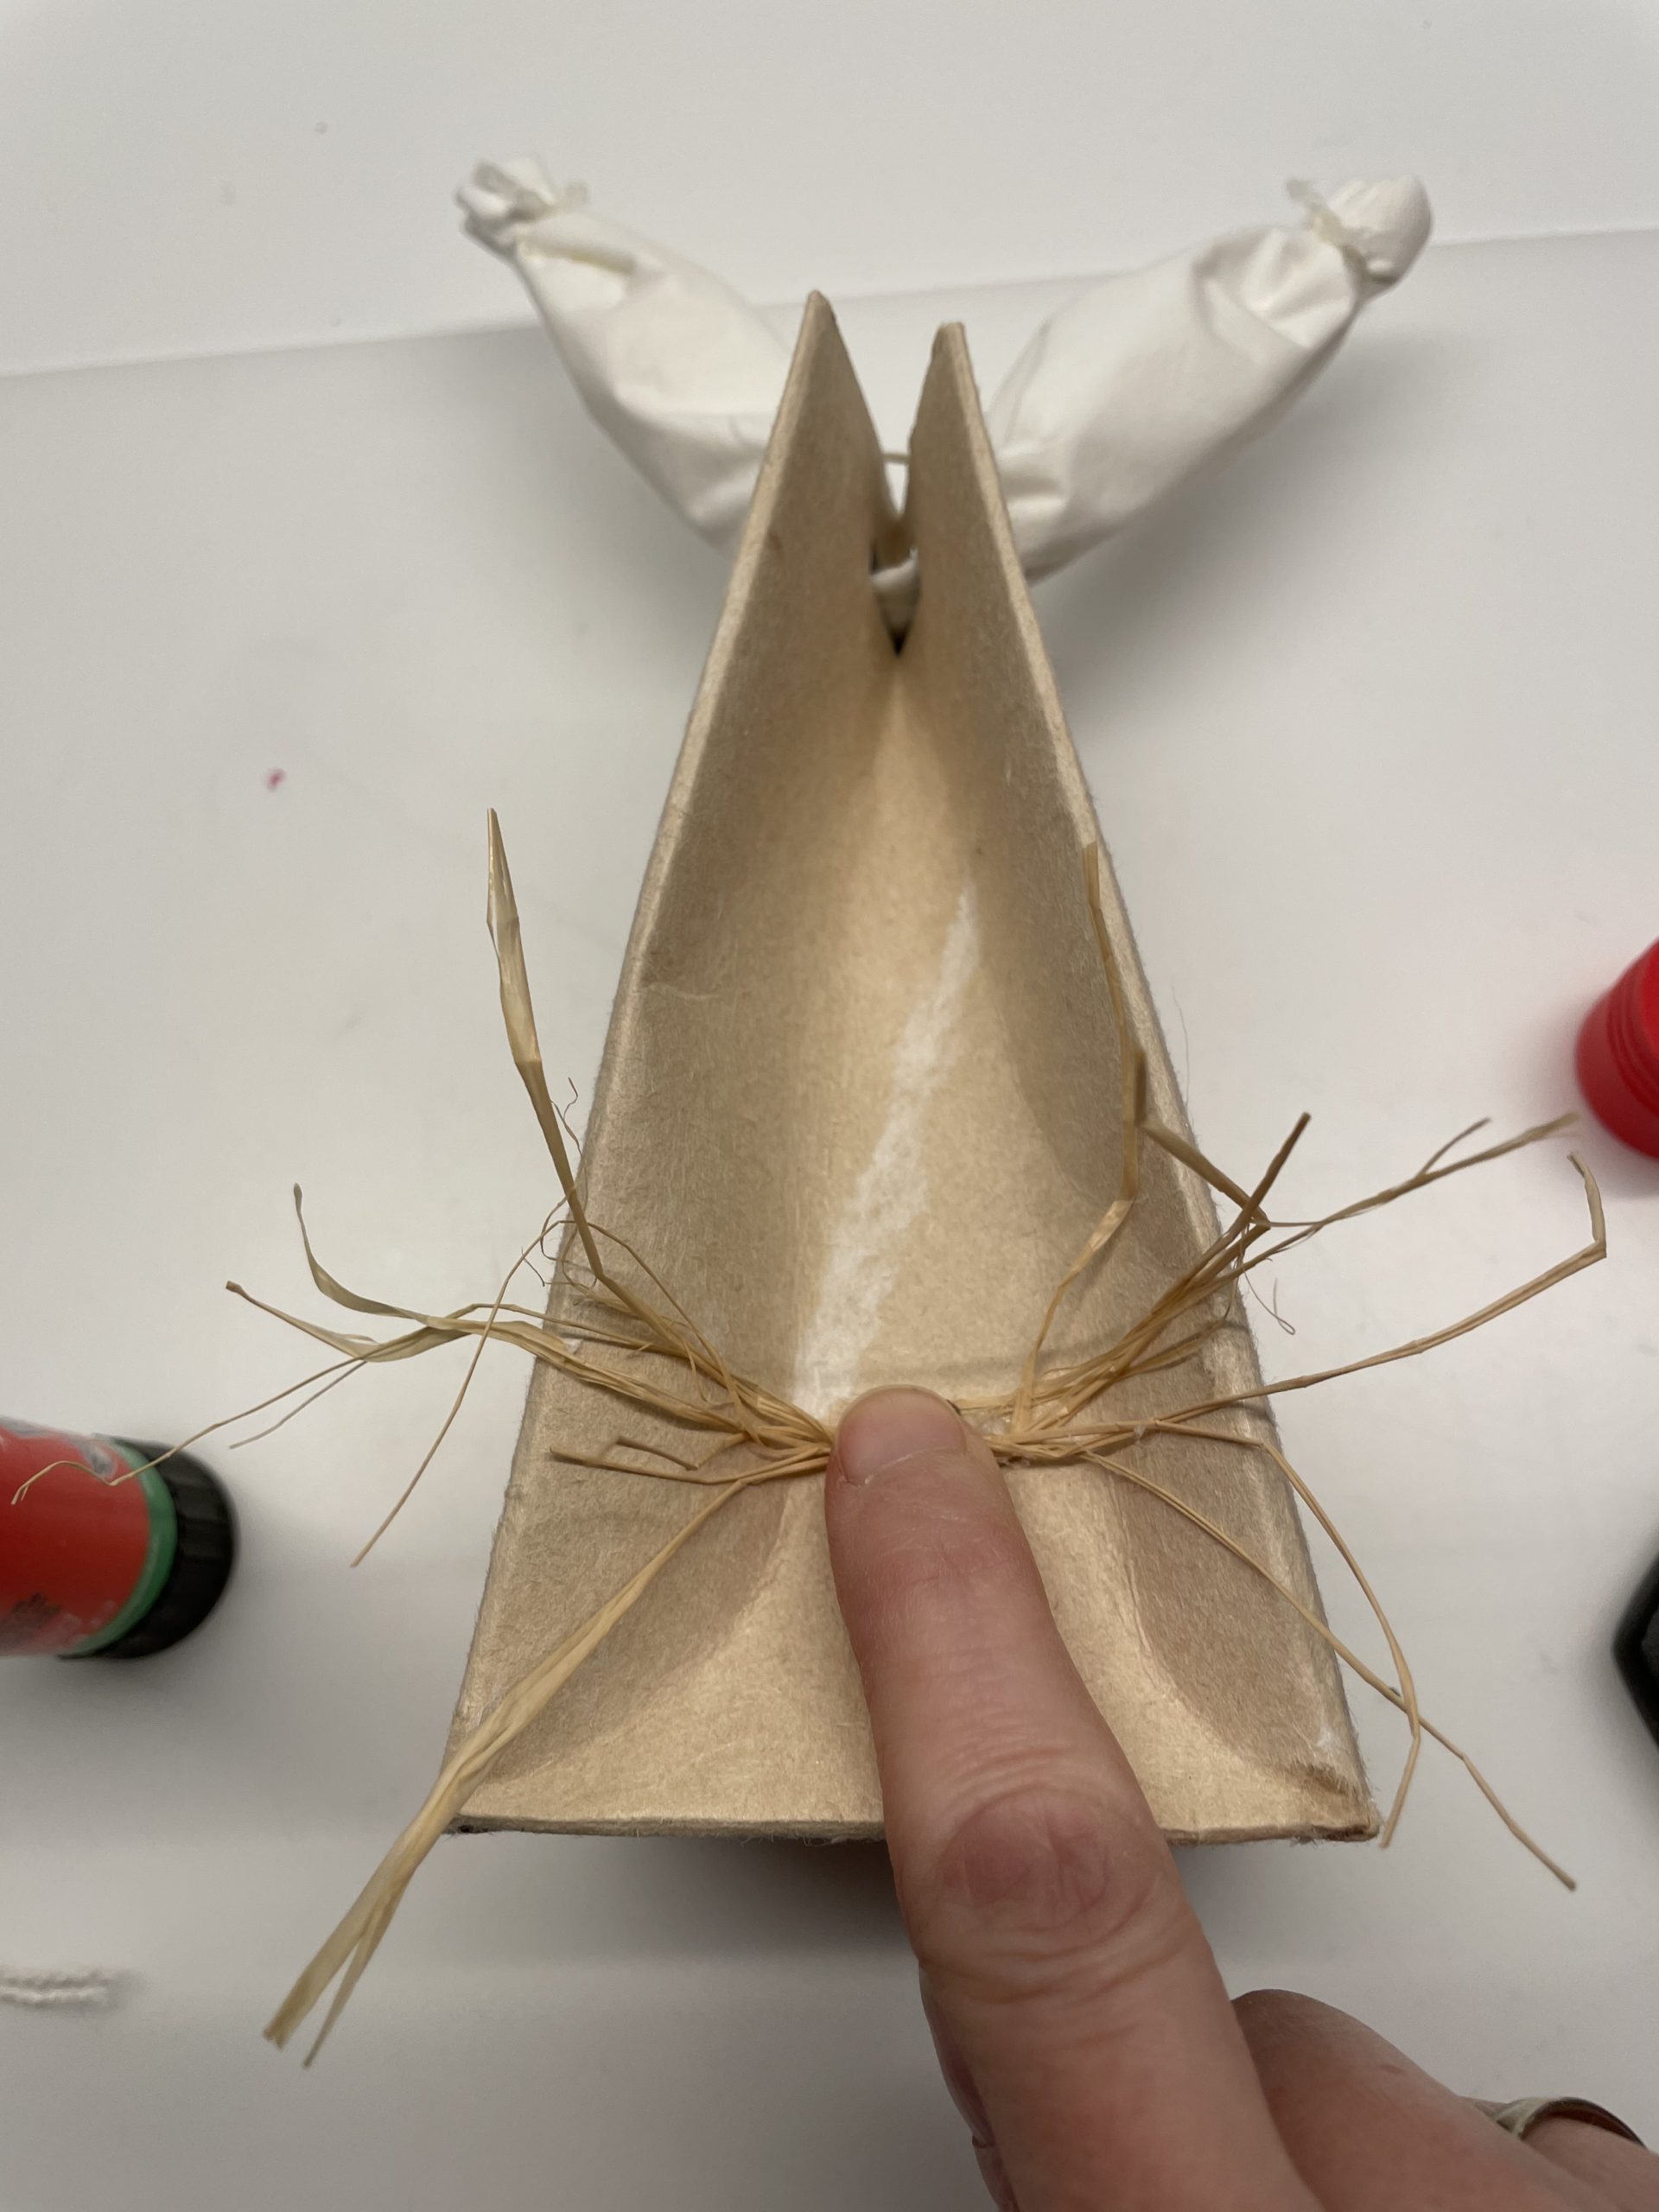
Bild zum Schritt 23 für das Bastel- und DIY-Abenteuer für Kinder: 'Klebt beides an einer Seite des Kartons fest.'

23

Now you're gonna put two more eyes on your guard.

Bild zum Schritt 24 für das Bastel- und DIY-Abenteuer für Kinder: 'Jetzt befestigt ihr noch zwei Wachelaugen.'

24

Finally, on the back of the bag, there is still a small cotton wadding as a tail. The rabbit bag is ready.
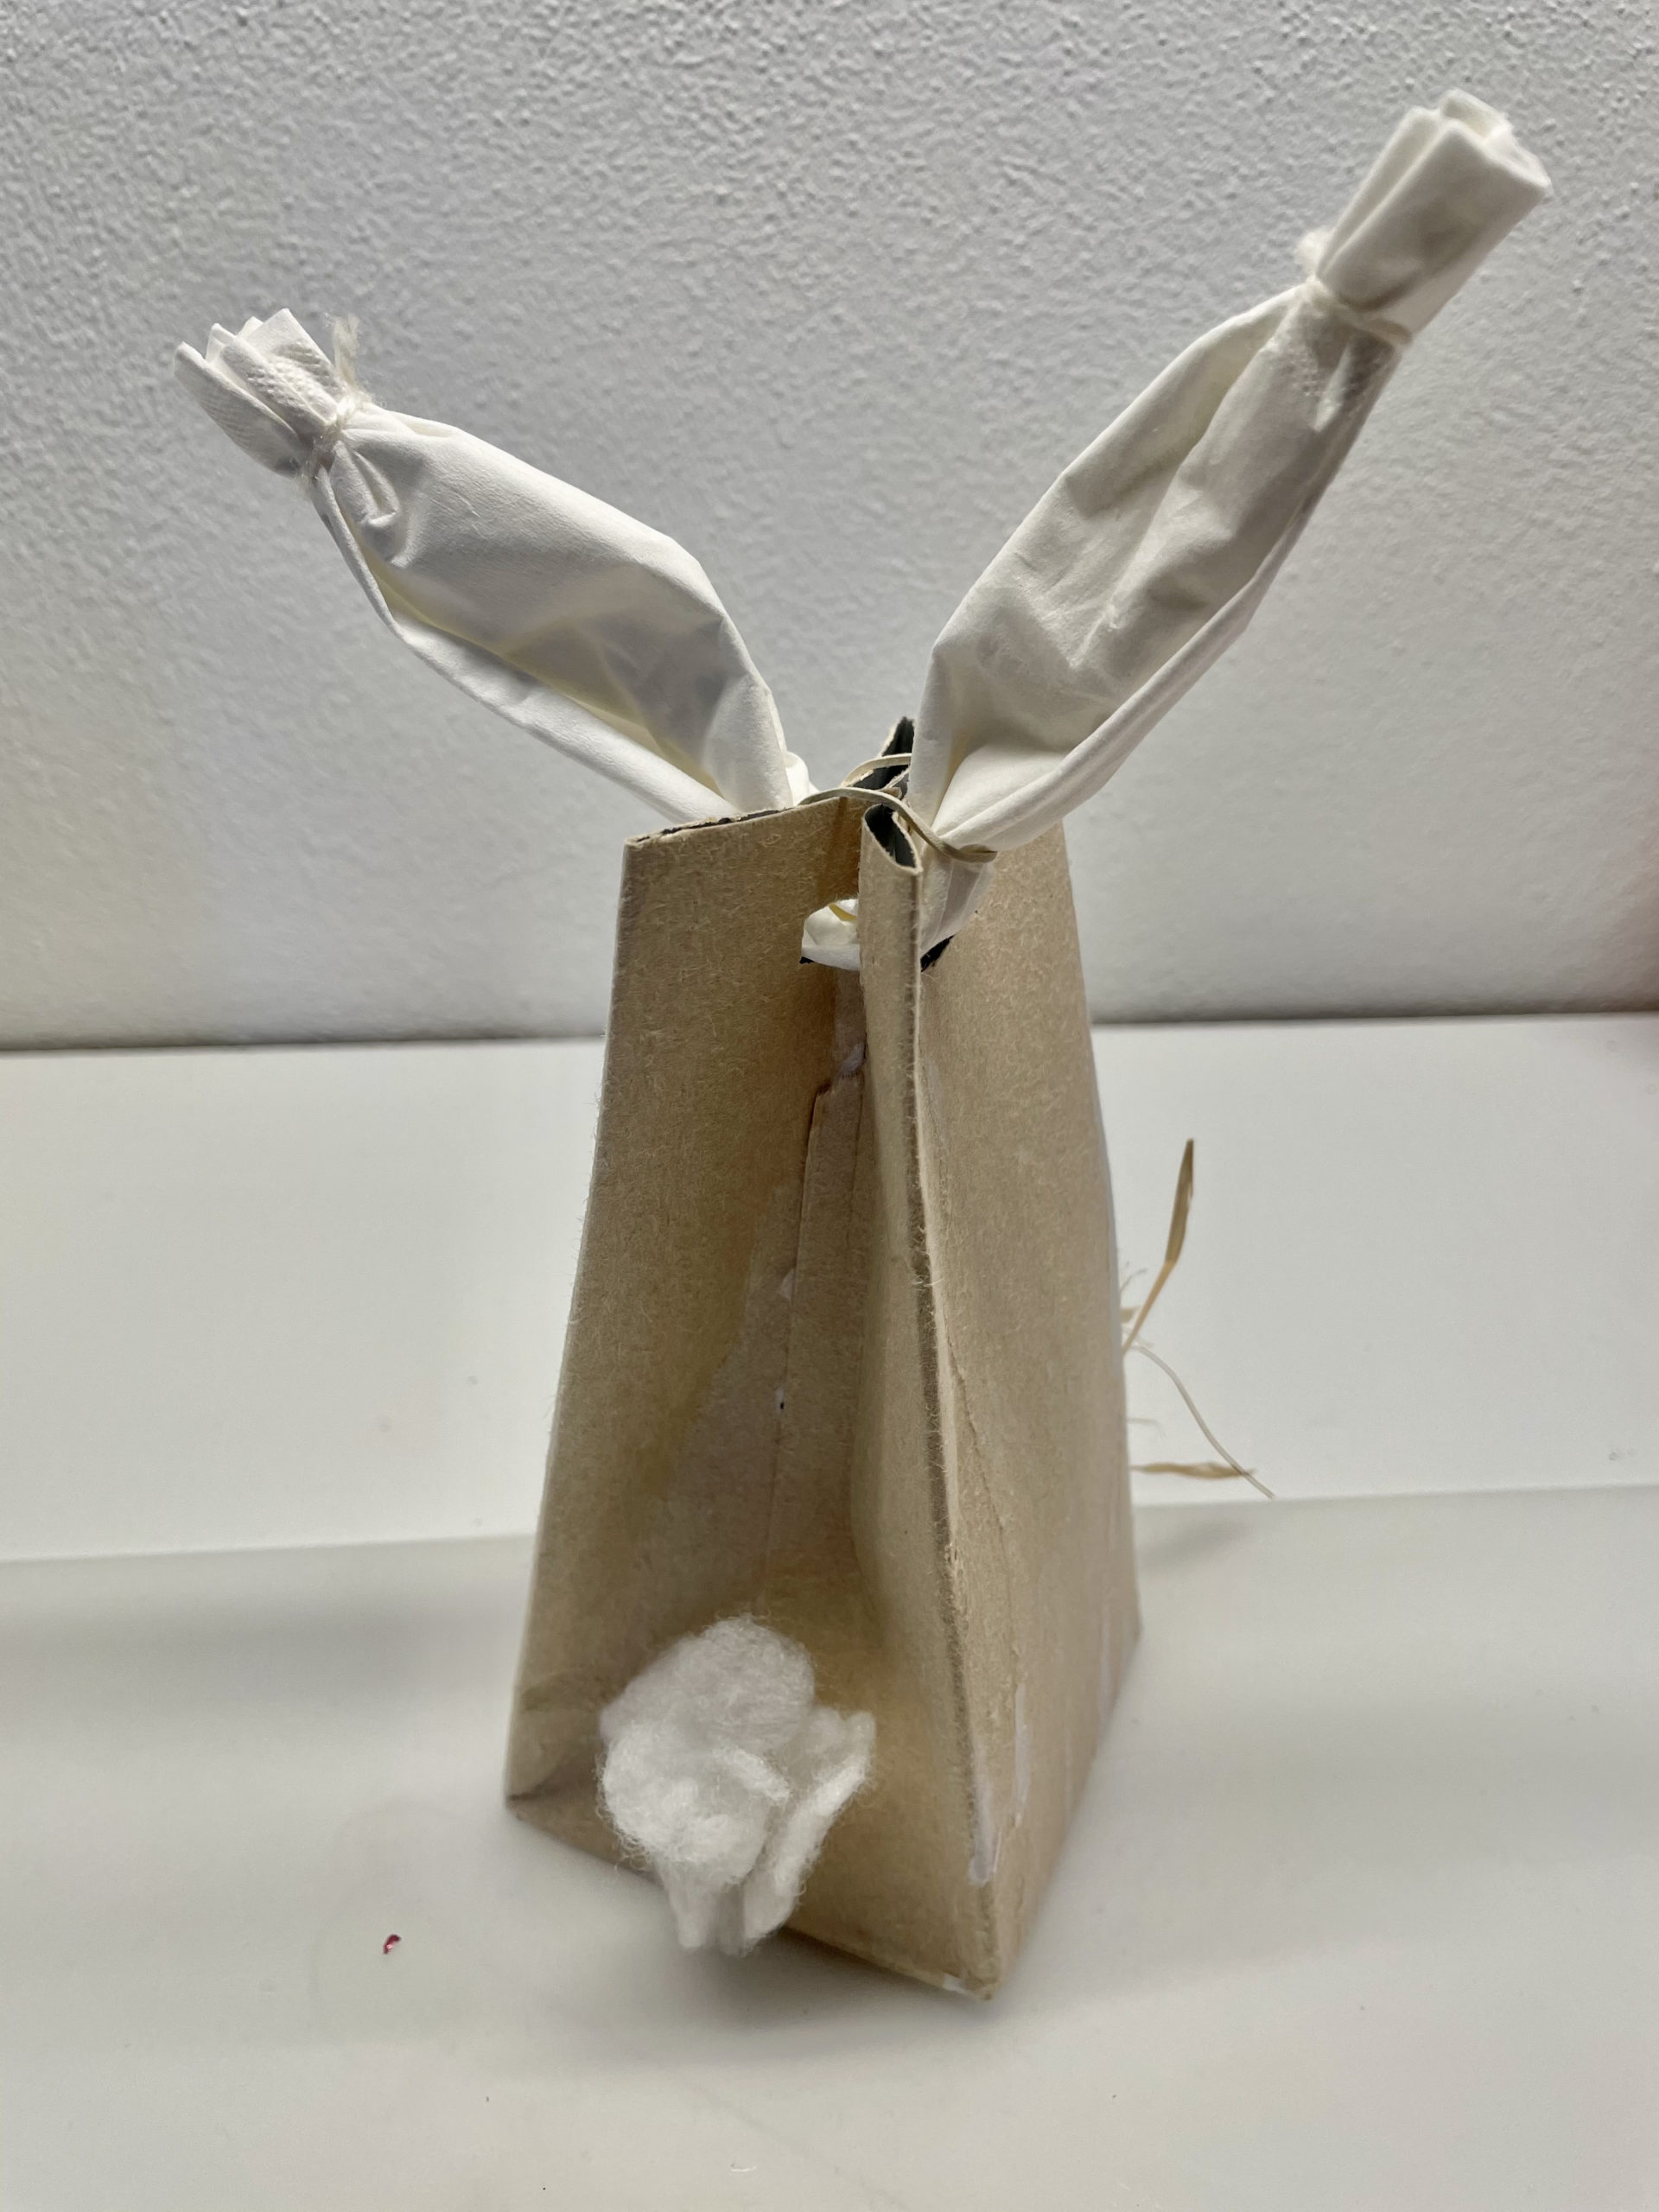
Bild zum Schritt 25 für das Bastel- und DIY-Abenteuer für Kinder: 'Auf die Rückseite der Tüte klebt ihr abschließend noch kleinen...'

25

Decorate your bunny bag or give it away with a little Easter surprise!
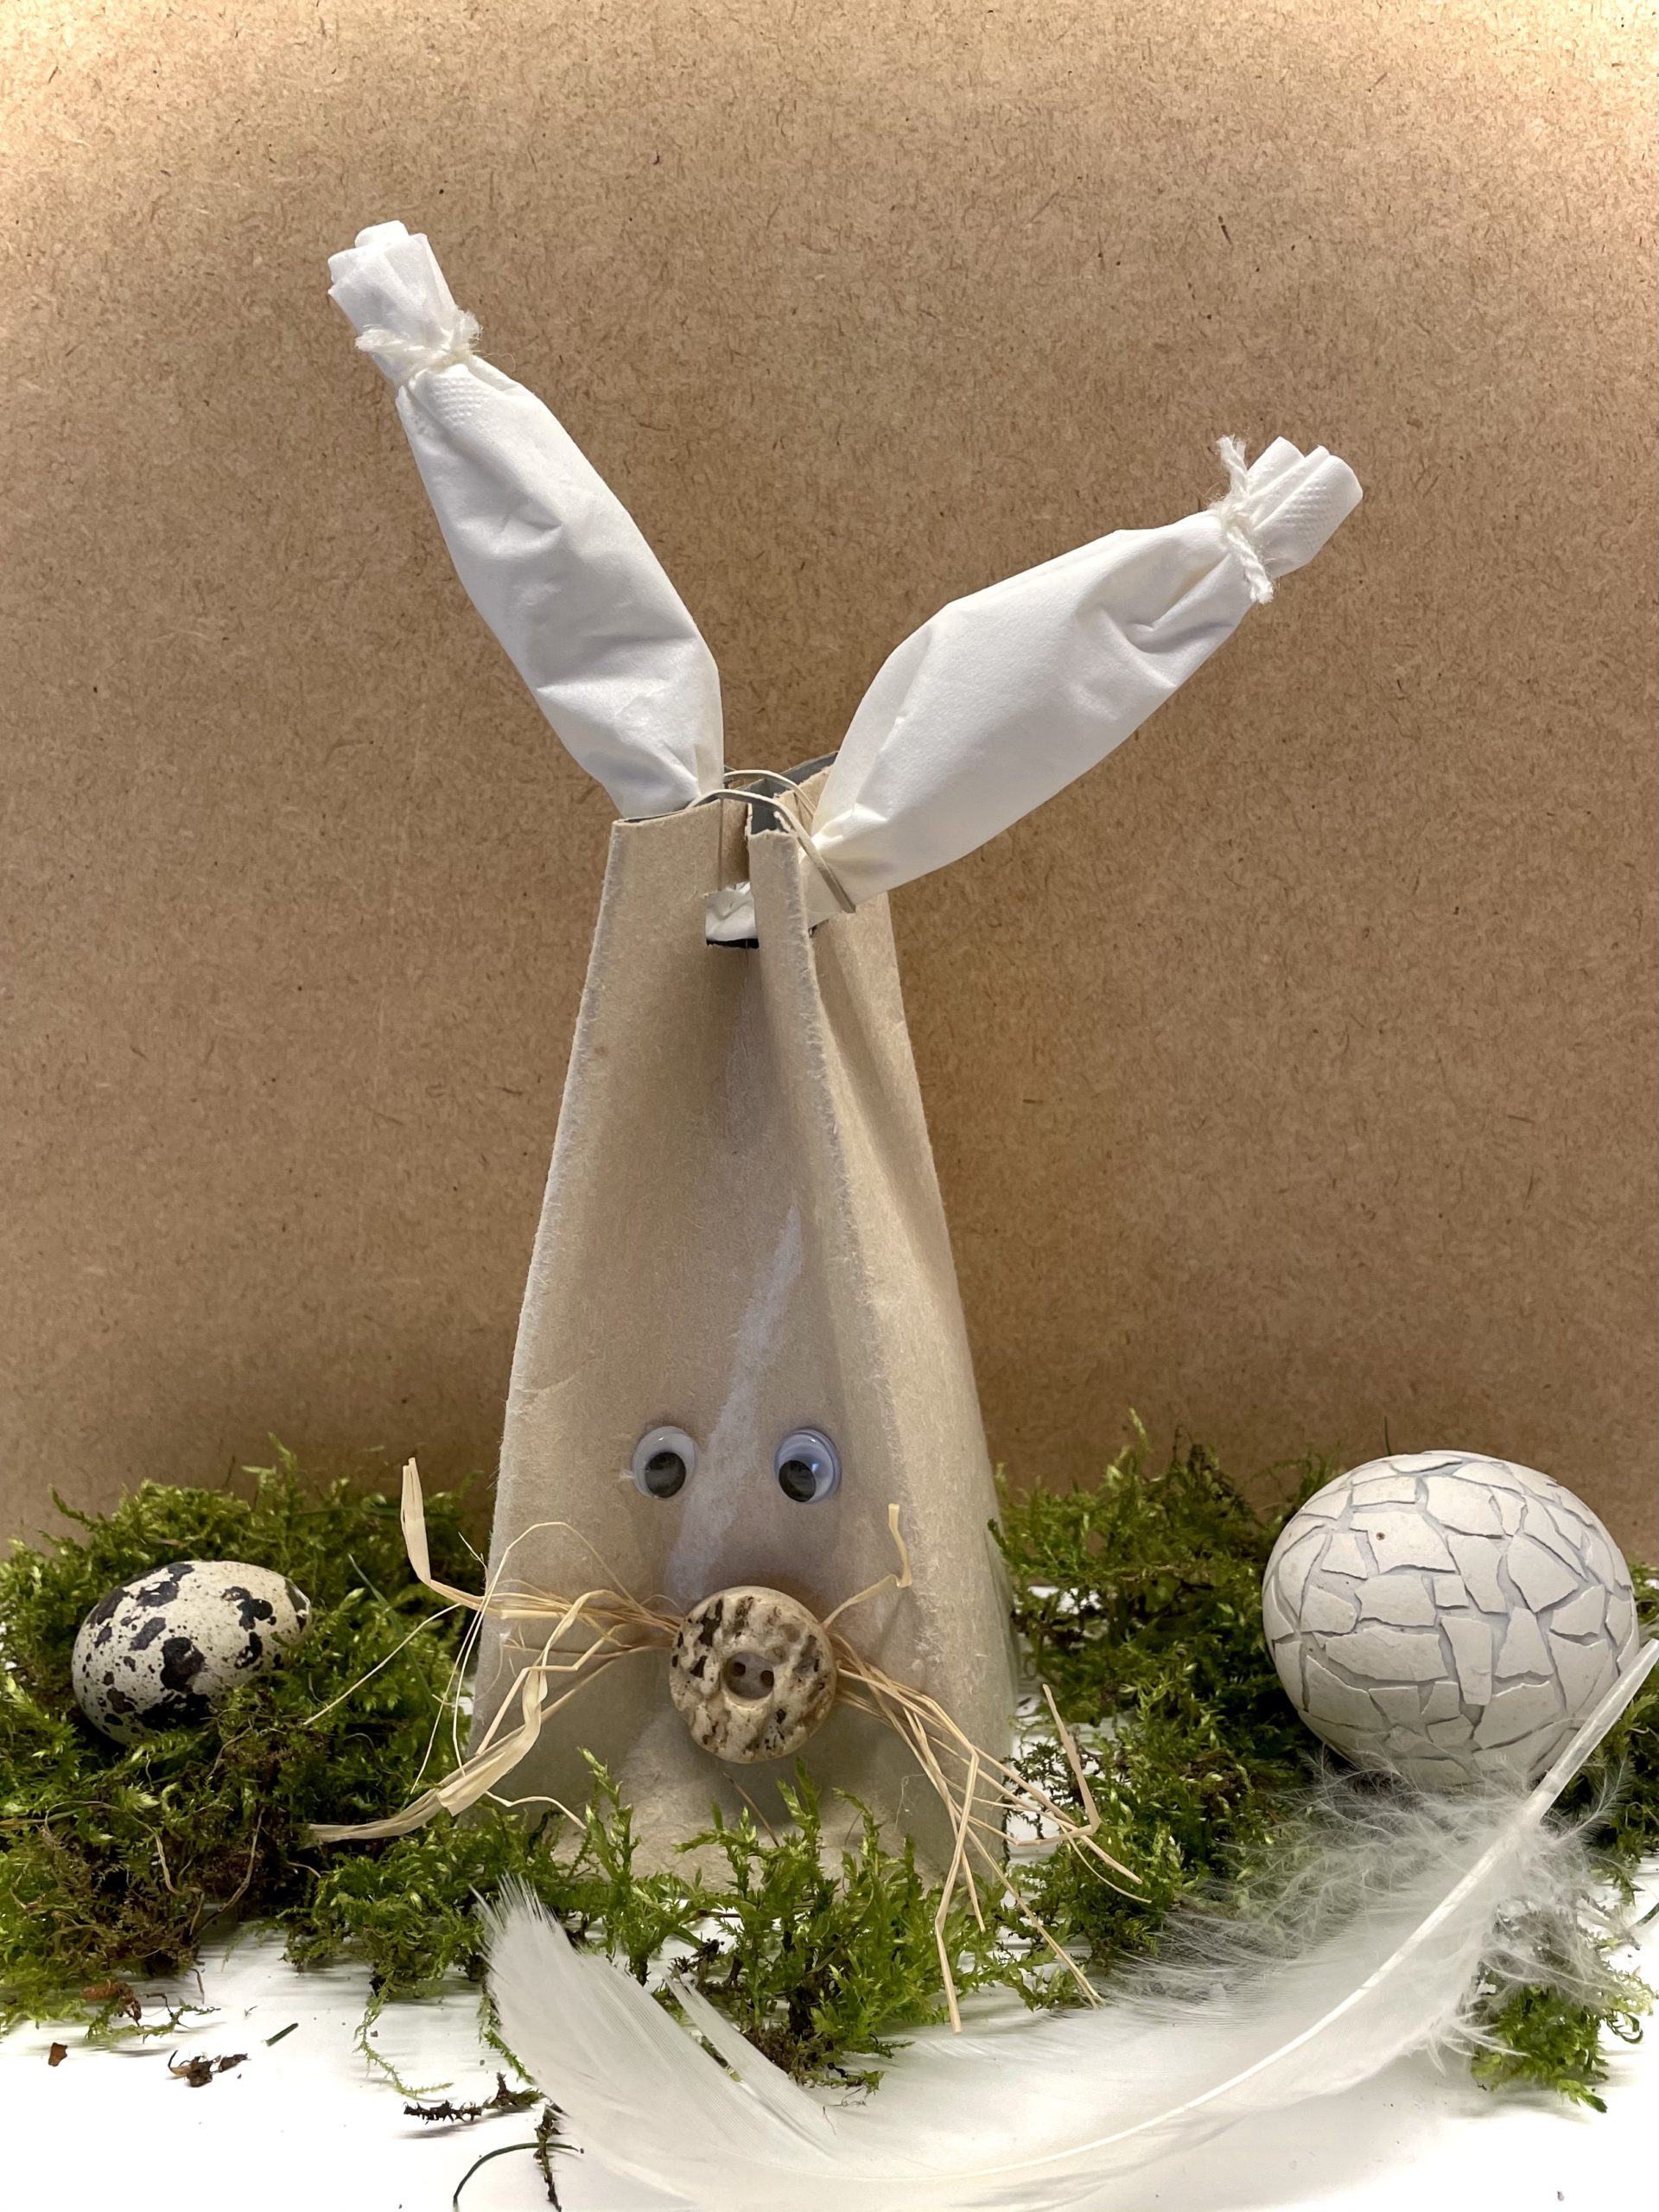
Bild zum Schritt 26 für das Bastel- und DIY-Abenteuer für Kinder: 'Dekoriert eure Hasentüte oder verschenkt sie mit einer kleinen Osterüberraschung!'

26

Have fun trying out.
You can find more craft ideas for this bag here in the adventure market.

Rabbit Bag – Easter Bag Rabbit

Follow us on Facebook , Instagram and Pinterest
Don't miss any more adventures: Our bottle mail

Leave a Reply

Your email address will not be published.

The maximum upload file size: 5 MB. You can upload: image, document. Drop file here