A little Santa Claus boot as a gift pendant is easy to make and also looks great. Also suitable as a name tag or table card for the Advent breakfast. With a few fresh fir branches or also rosemary branches the boot smells particularly pleasant and looks great.
Follow the instructions and you will be amazed how quickly this craft work is to be done. Have fun trying out.
Media Education for Kindergarten and Hort

Relief in everyday life, targeted promotion of individual children, independent learning and - without any pre-knowledge already usable by the youngest!

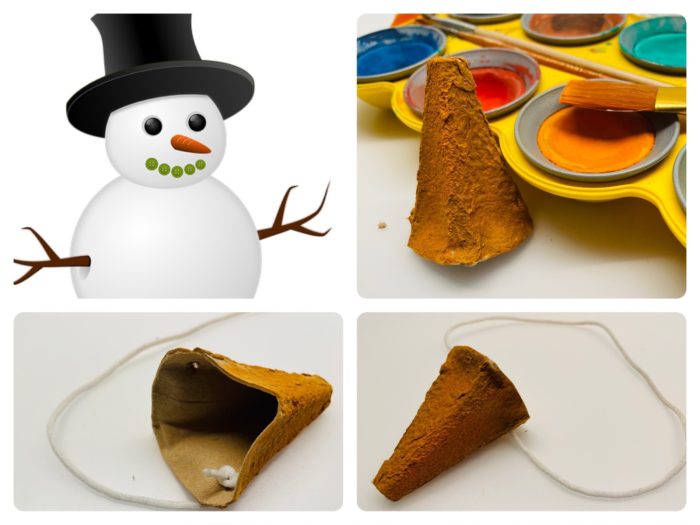
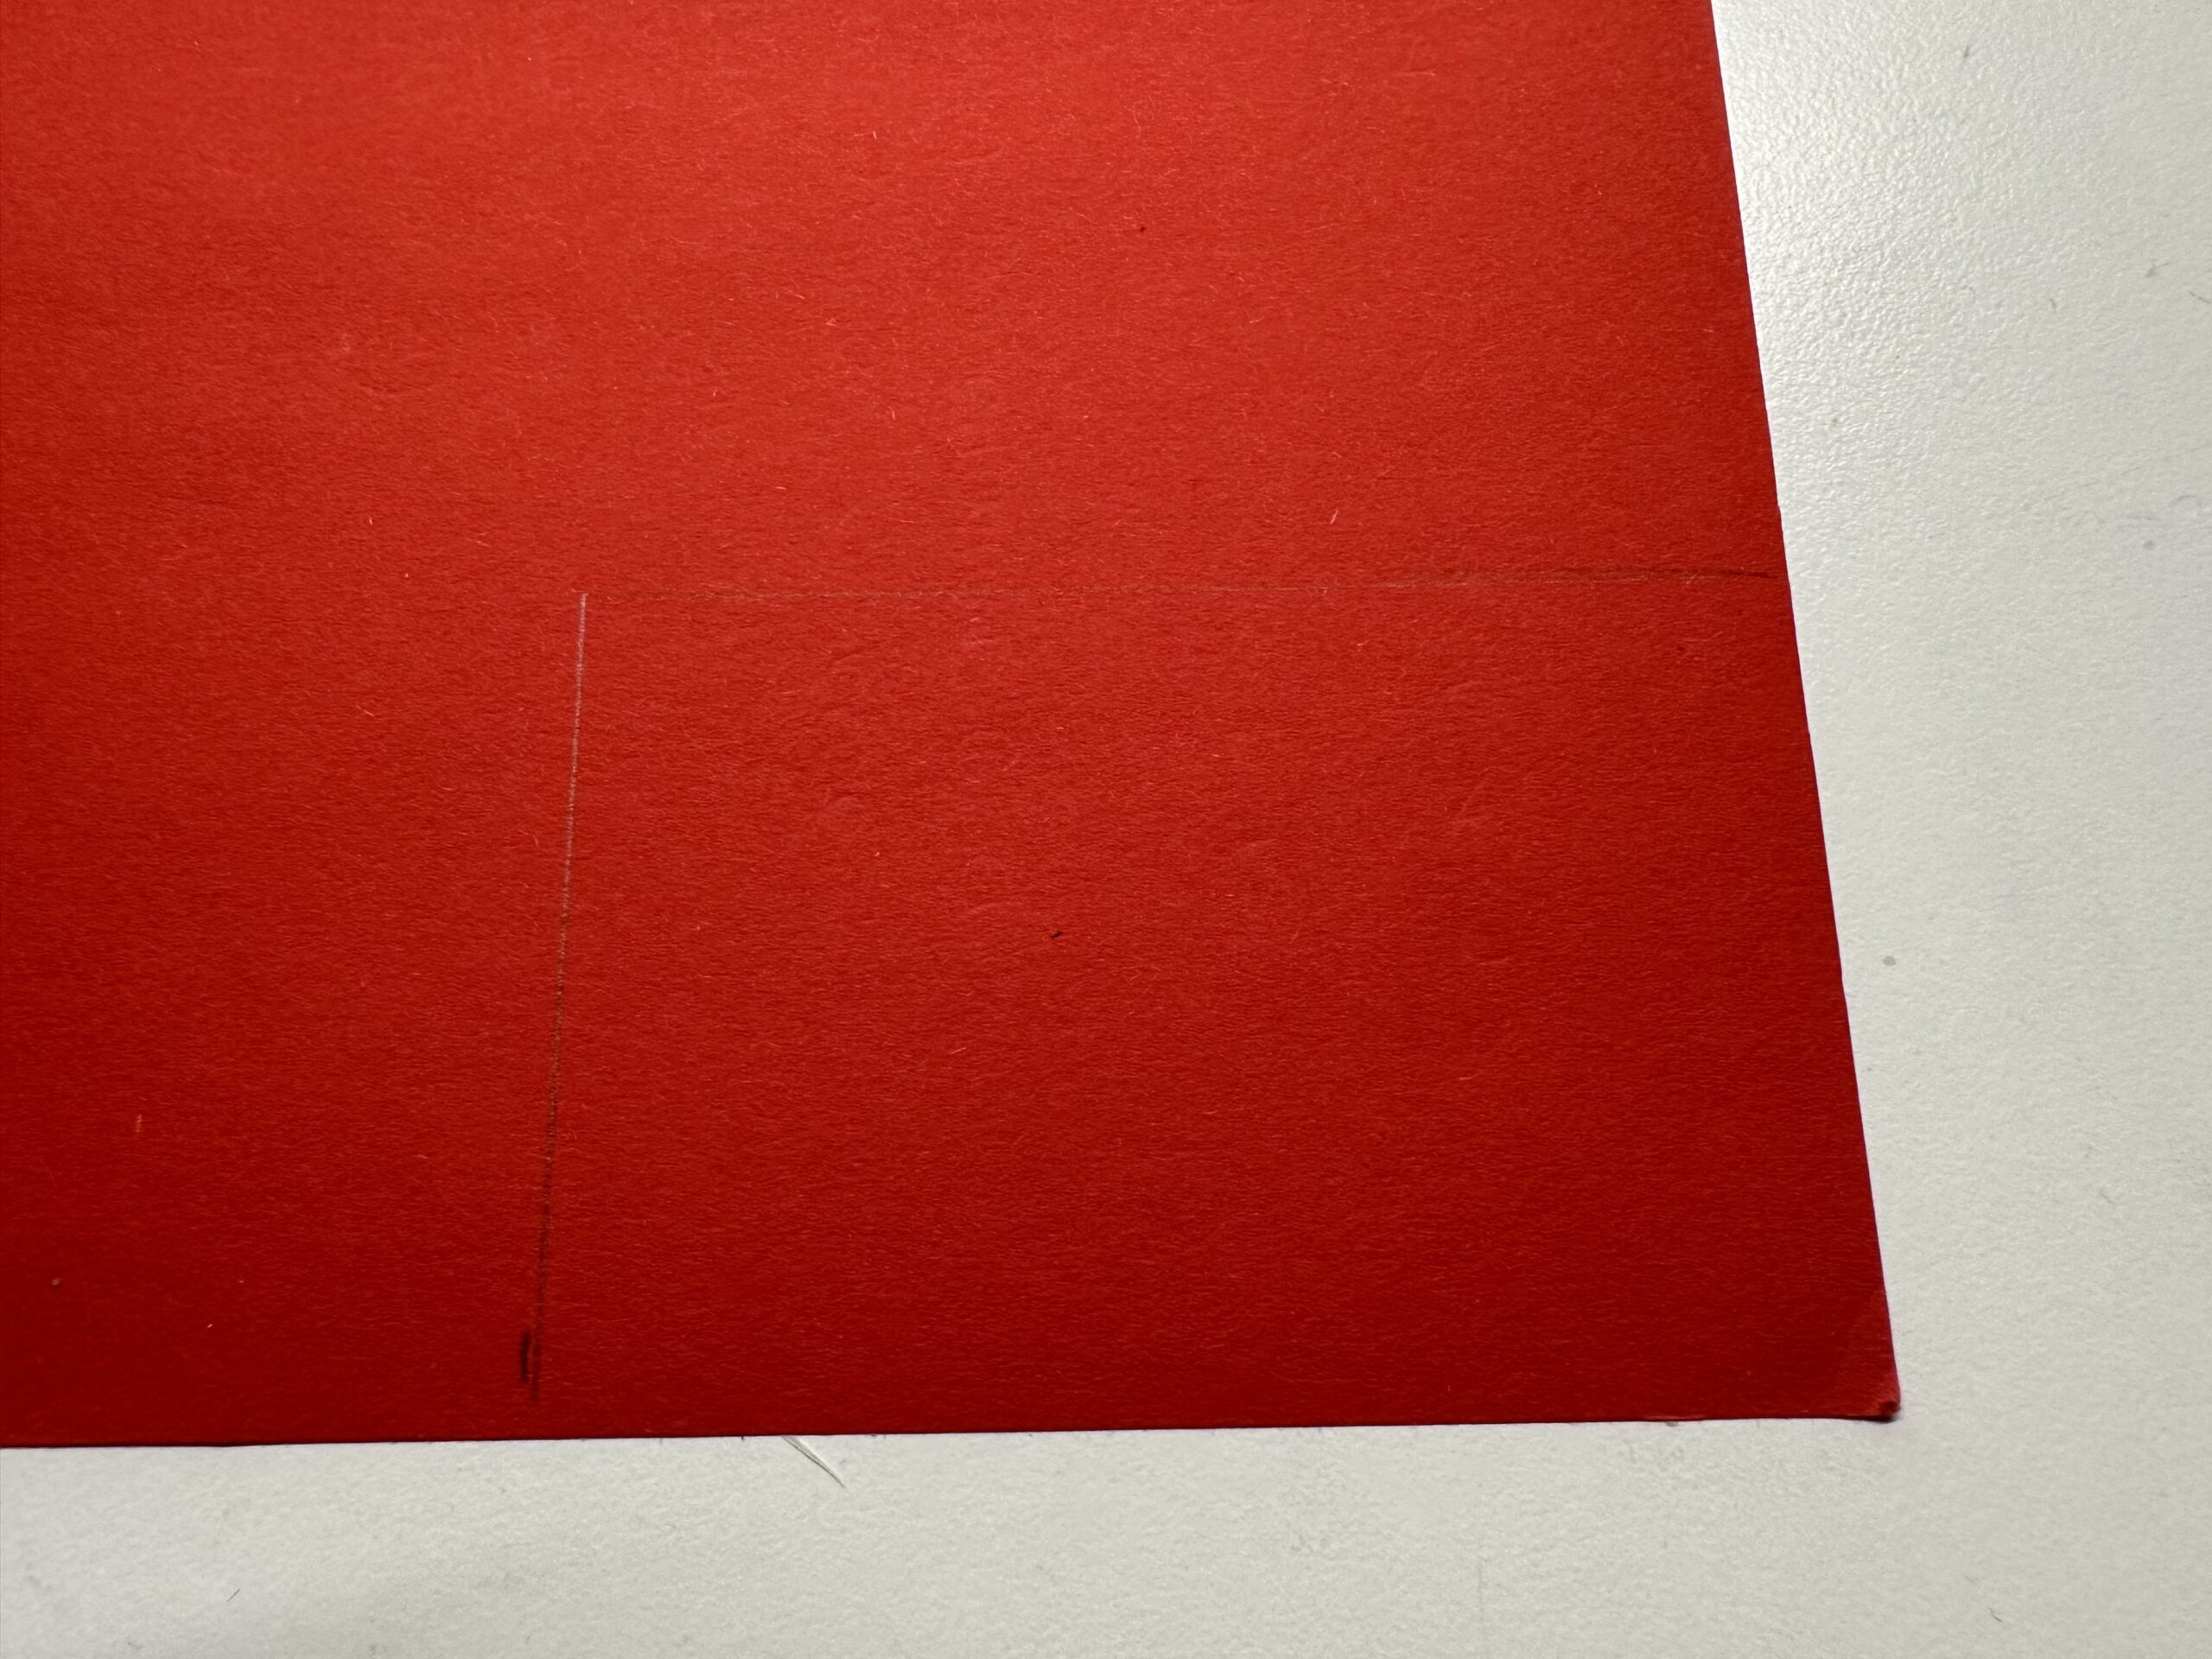
Take off your red clay paper and take off two identical rectangles. Use a ruler for this. Each rectangle should be 9cm by 6cm.
Cut out the rectangles with the scissors.
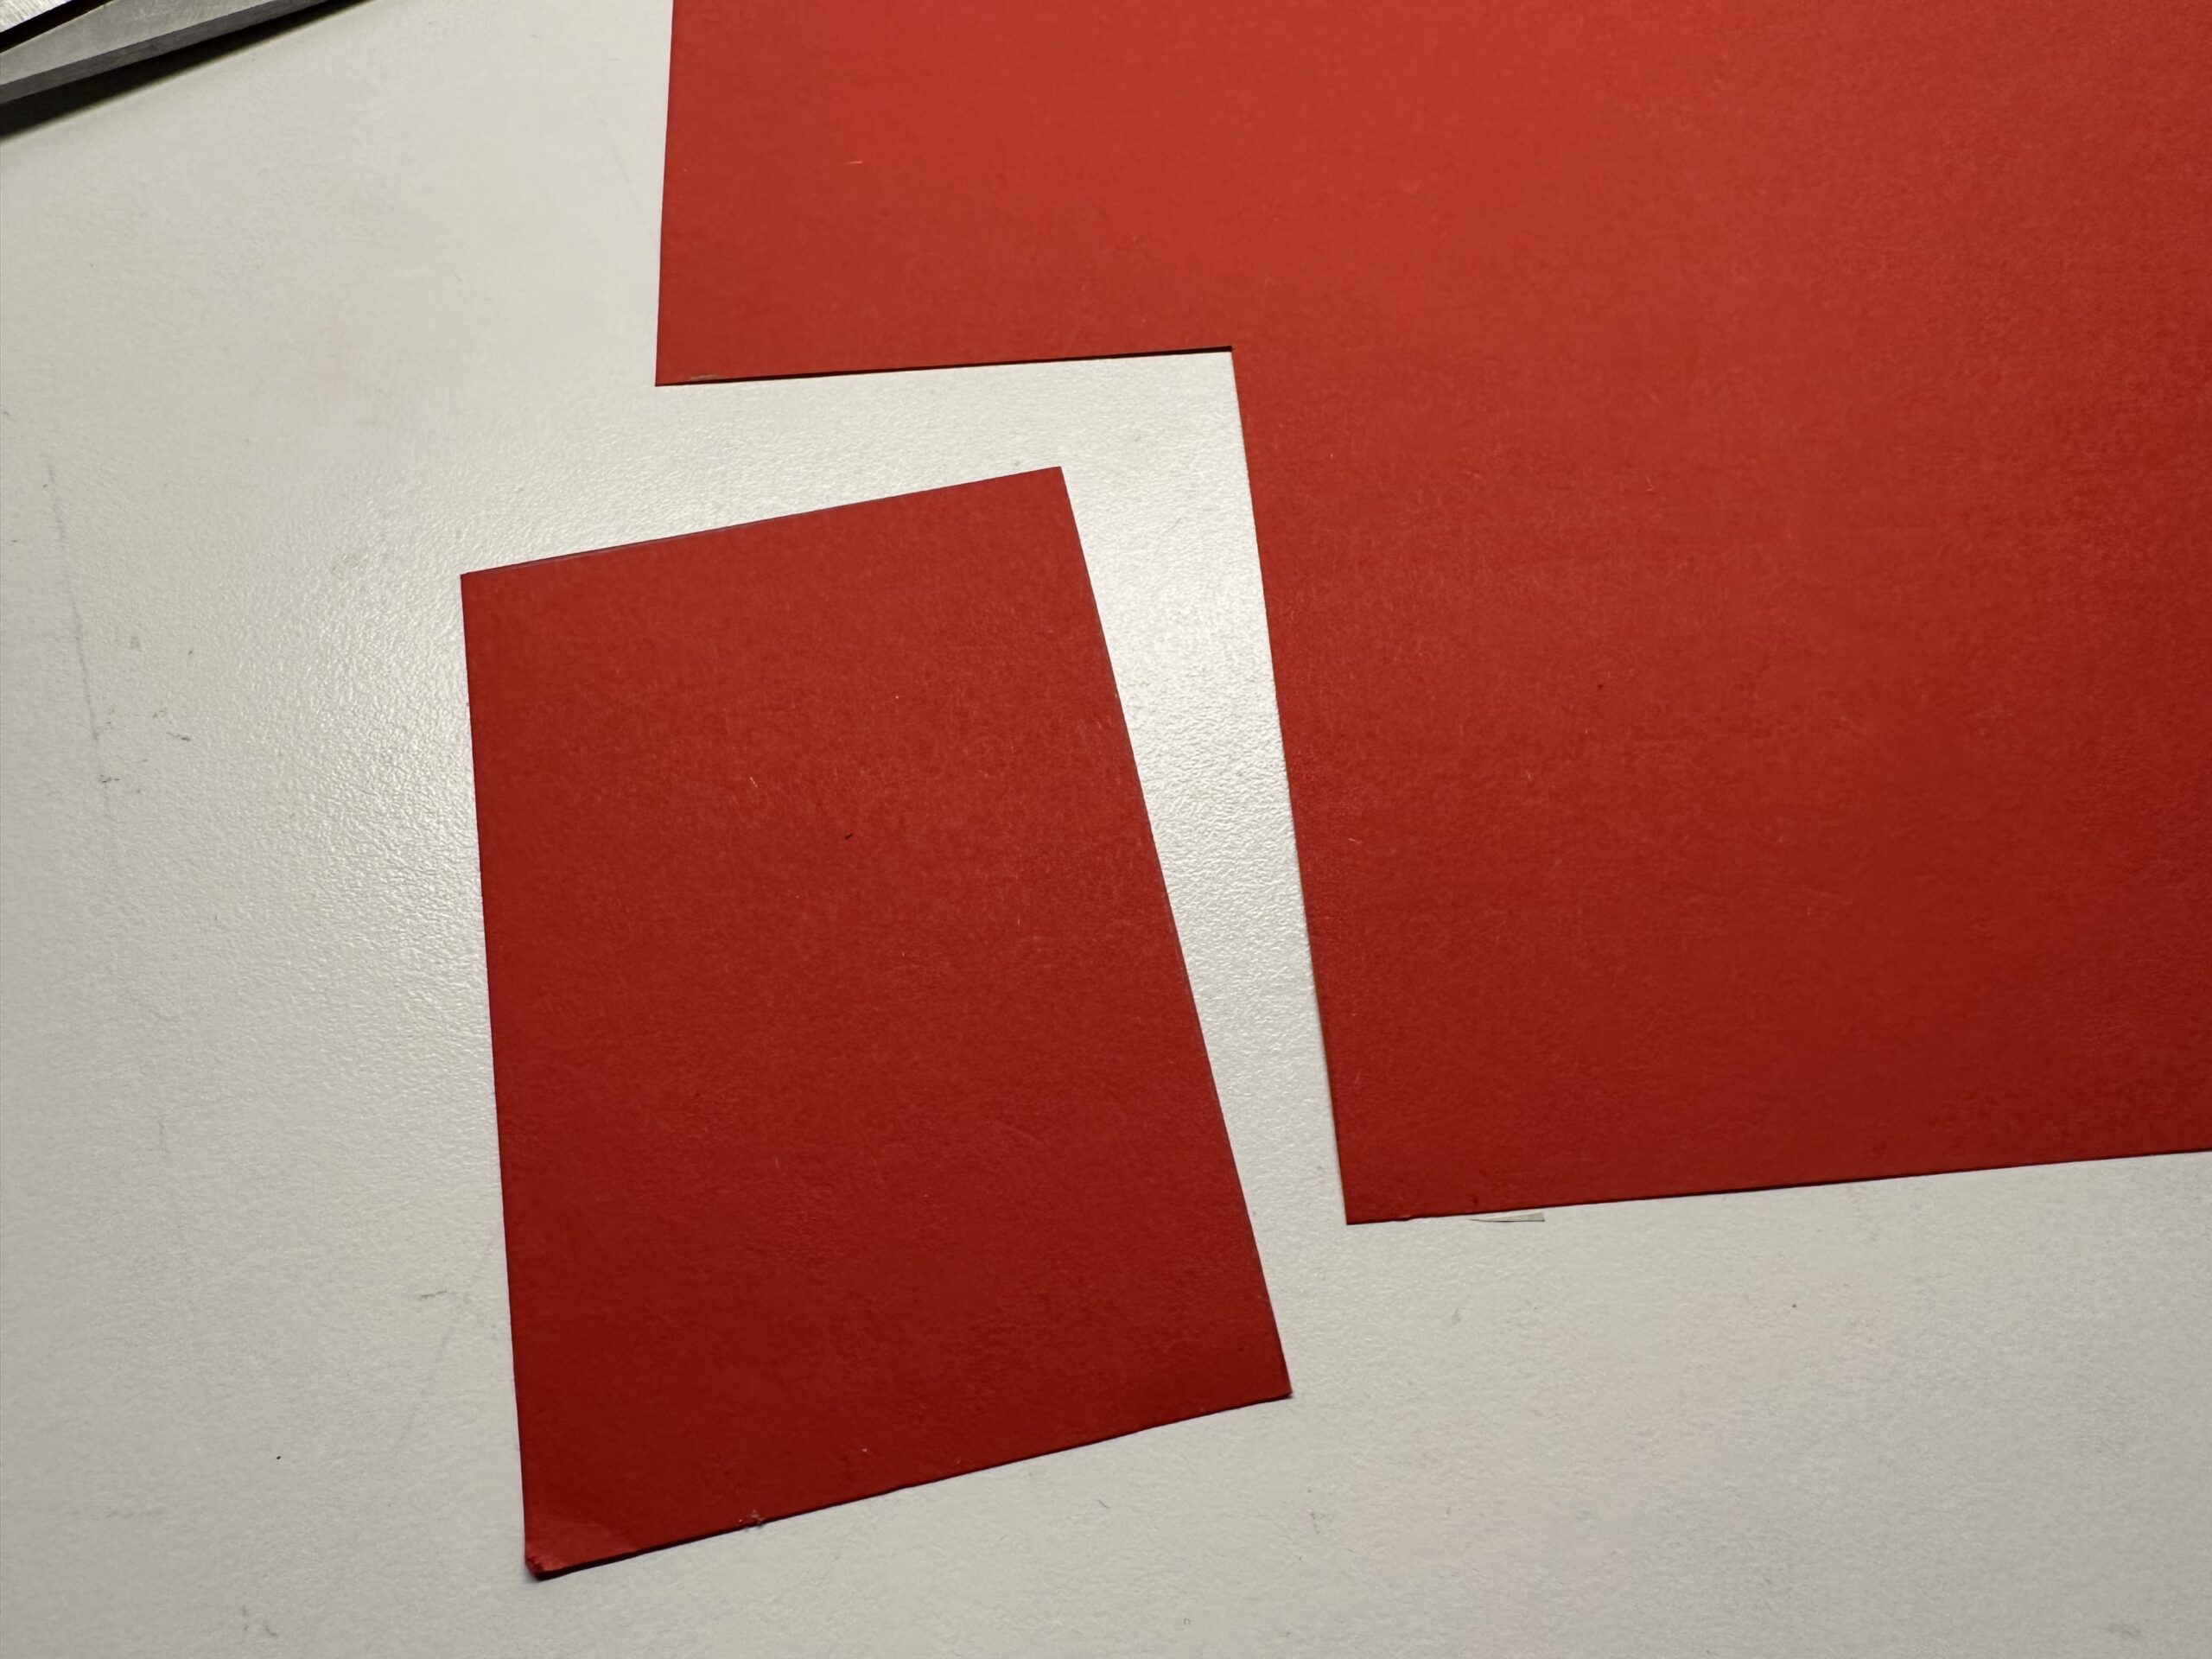
You now need both rectangles for crafting your boots.

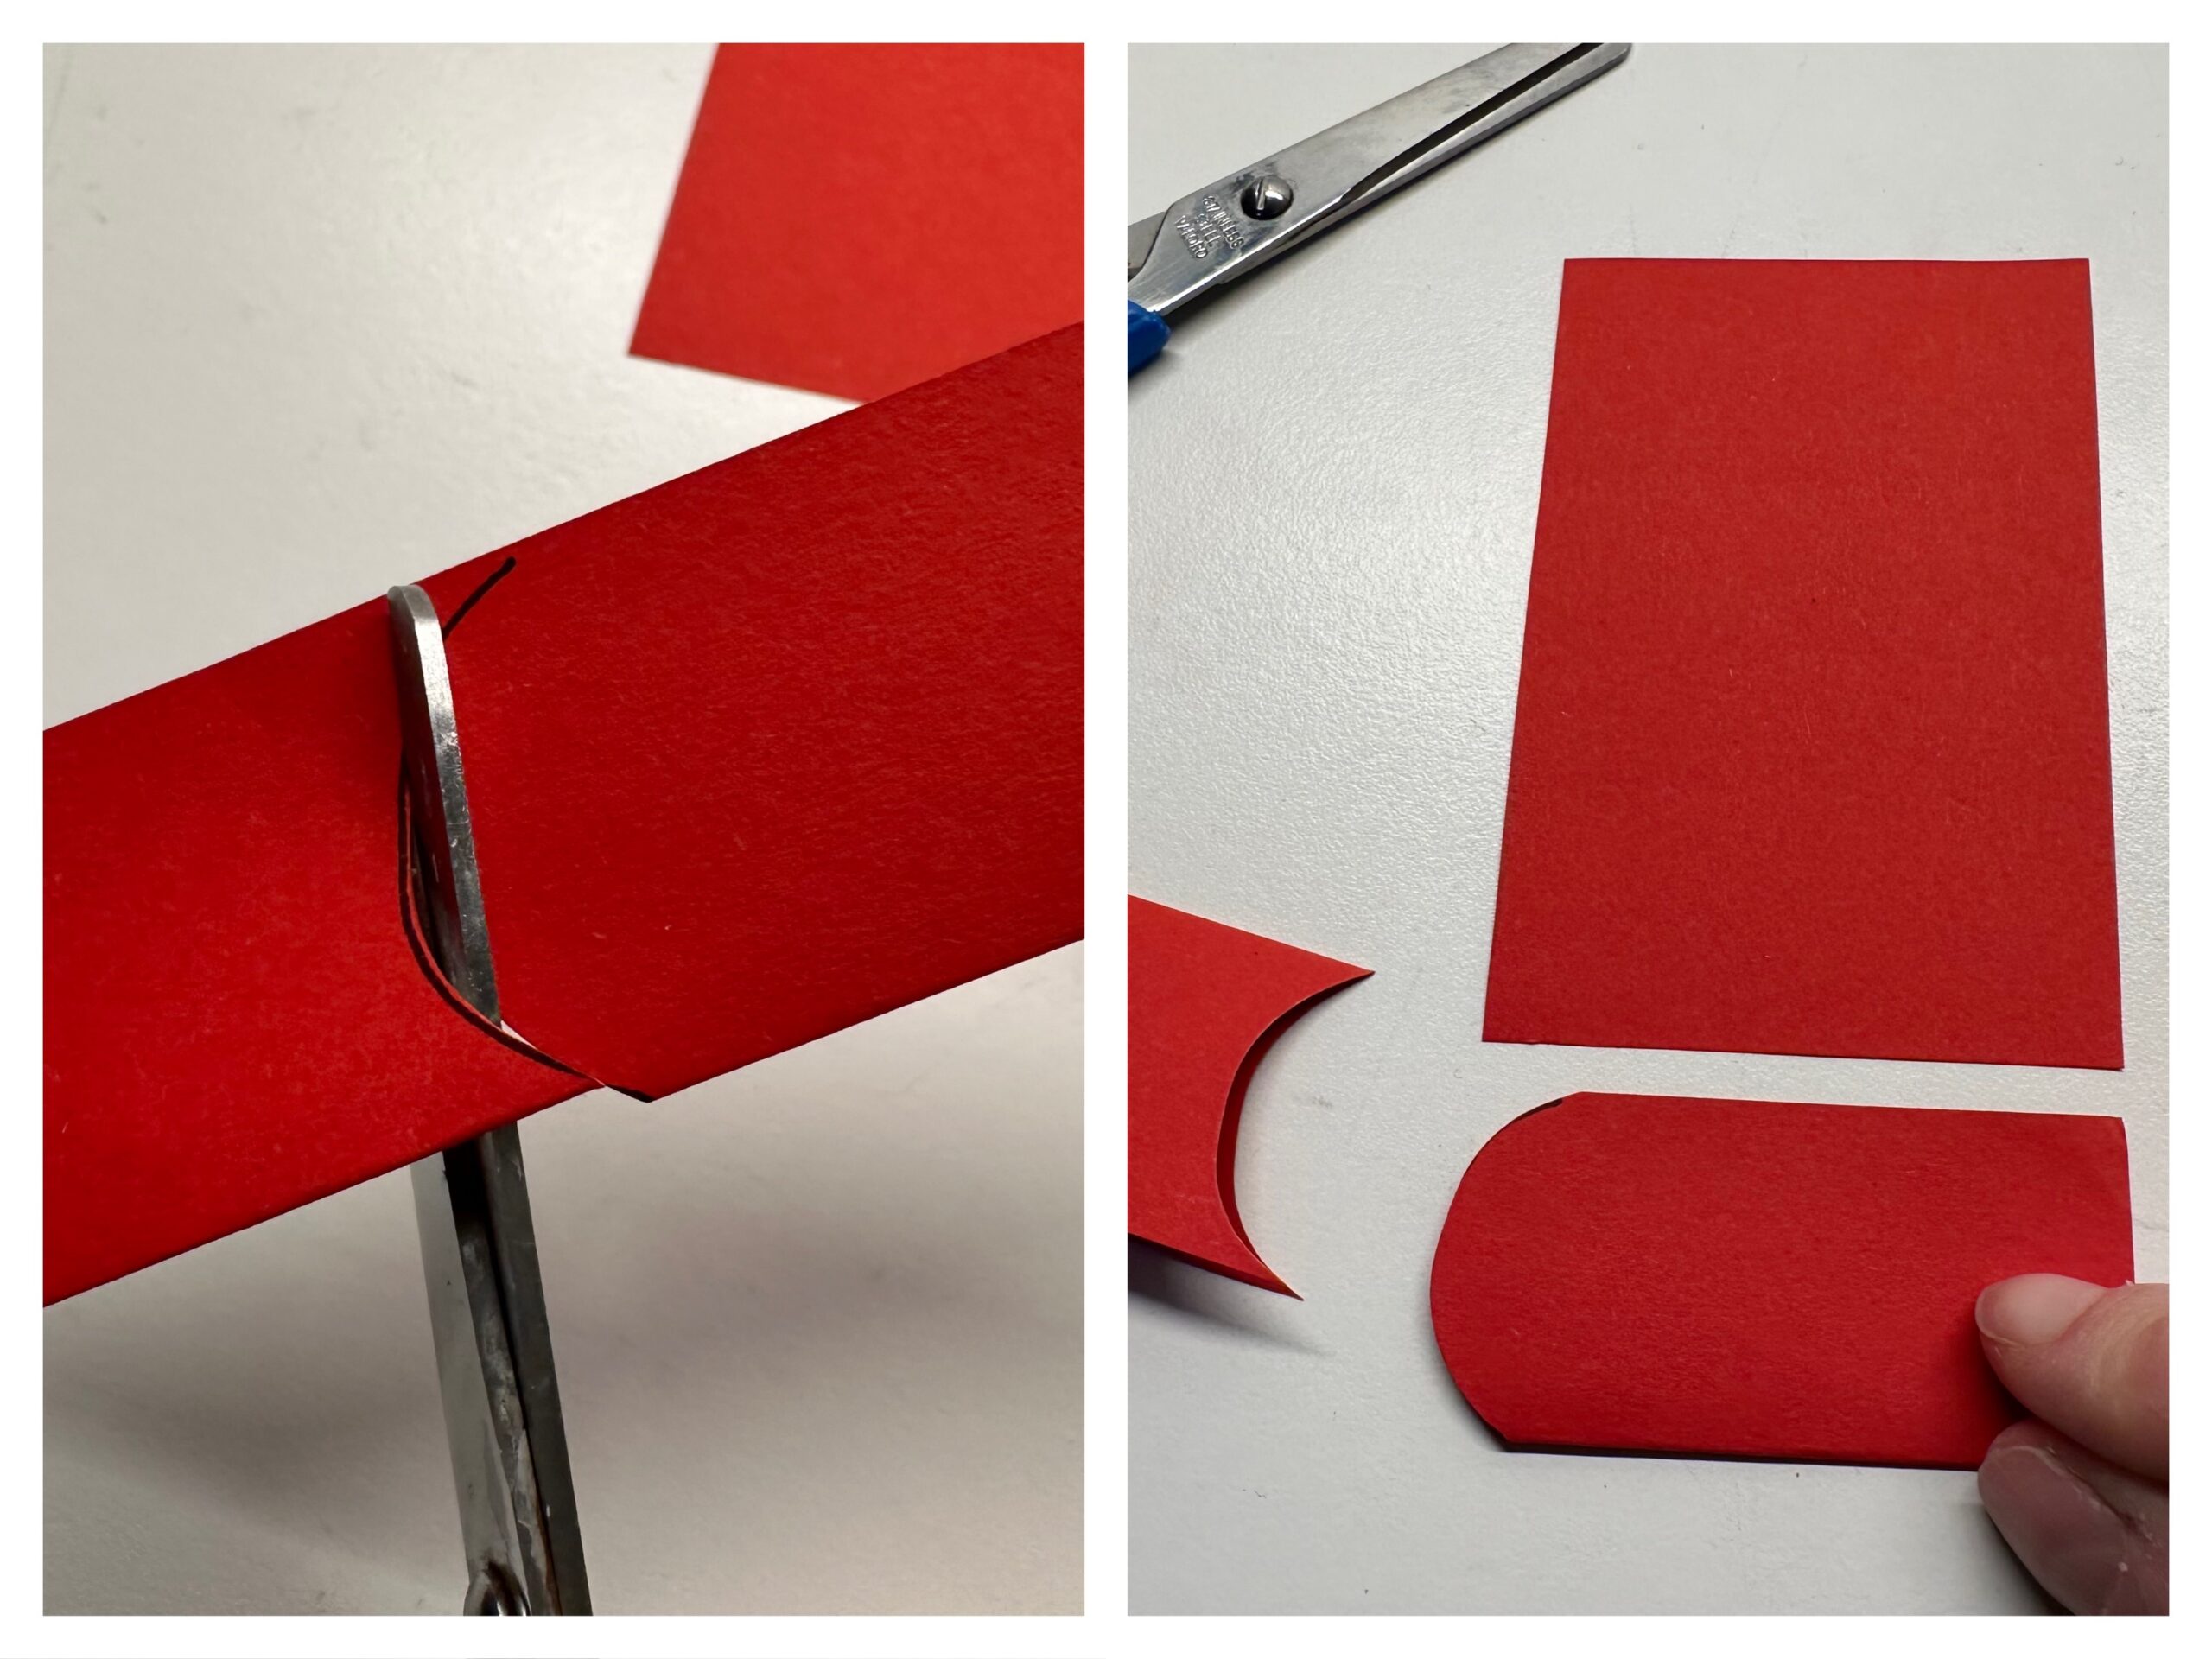
Place the two rectangles in front of you as in the first picture. One oblong up and the other cross below. Fold the lower rectangle half upwards. Gently strike the fracture. Then paint in the extension (The extension upwards, show you the pencil!) to the top rectangle a rounding on the folded rectangle.
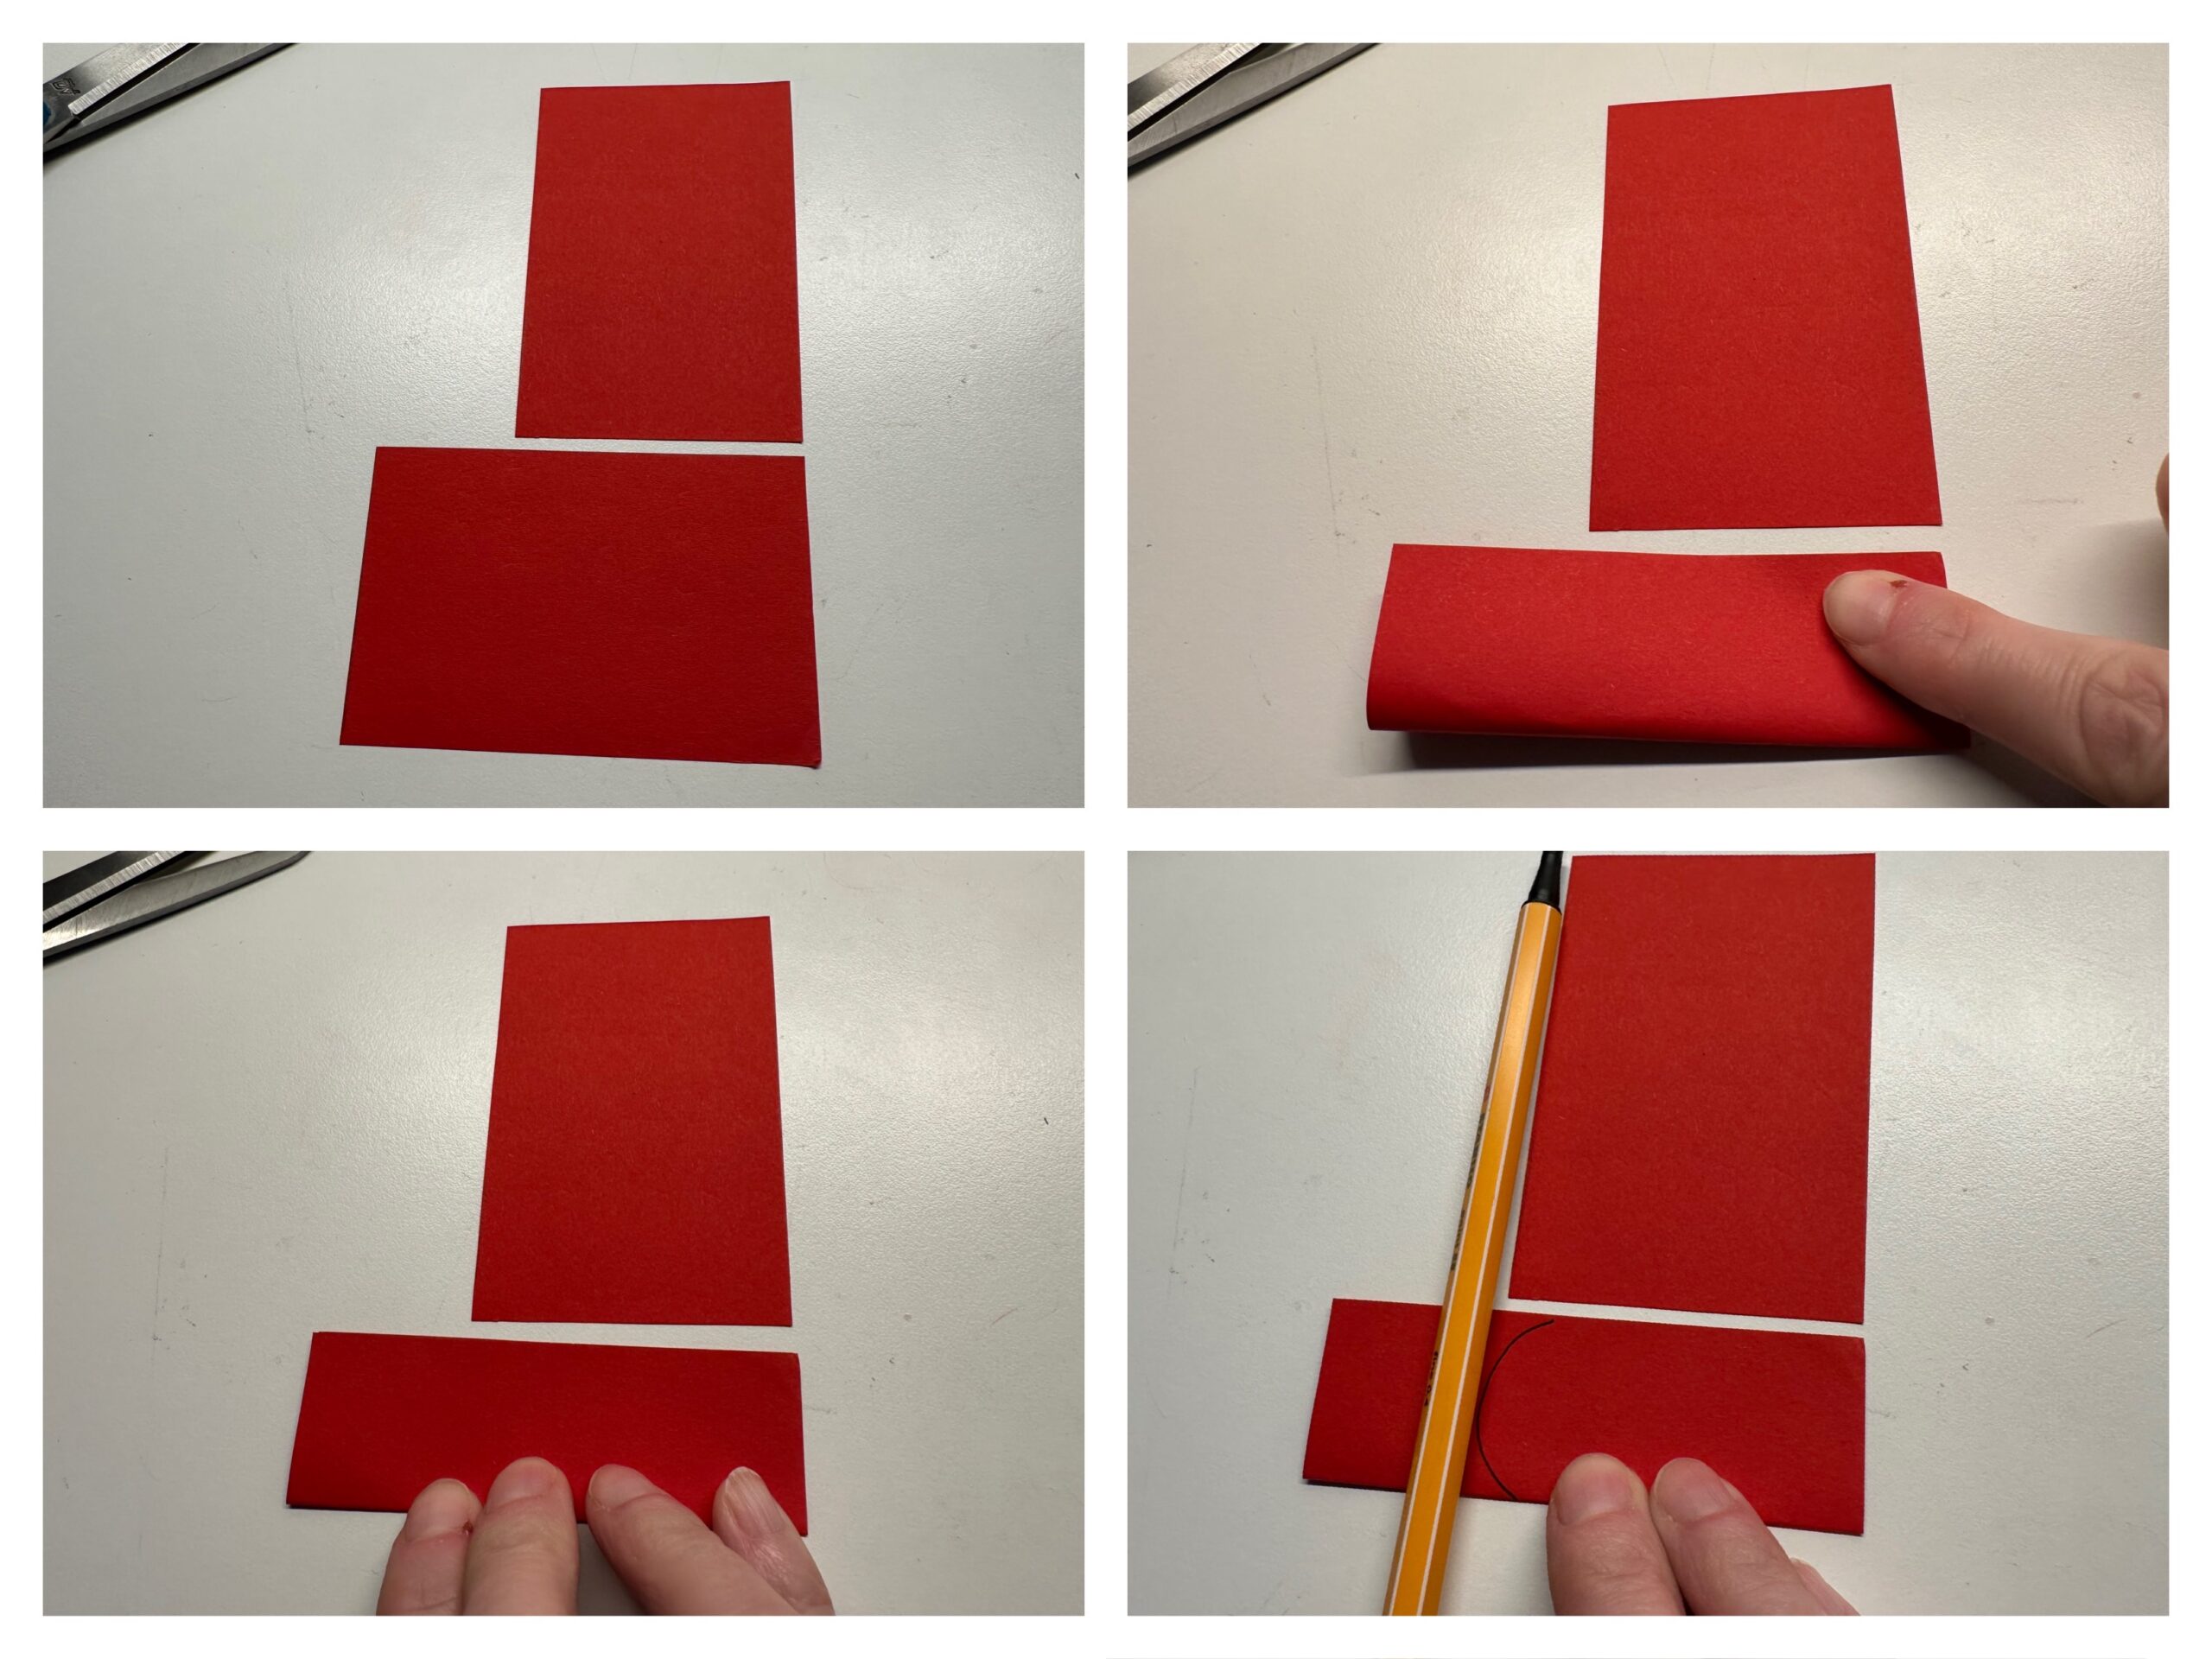
Cut the round with the scissors. You have to hold the folded paper together.
Now take the rectangle above. Stick the upper edge with glue. Then take the paper in your hand and bend the rectangle into a roll. On the adhesive strip, both ends of the paper are pressed tightly together. So you now have a paper roll.
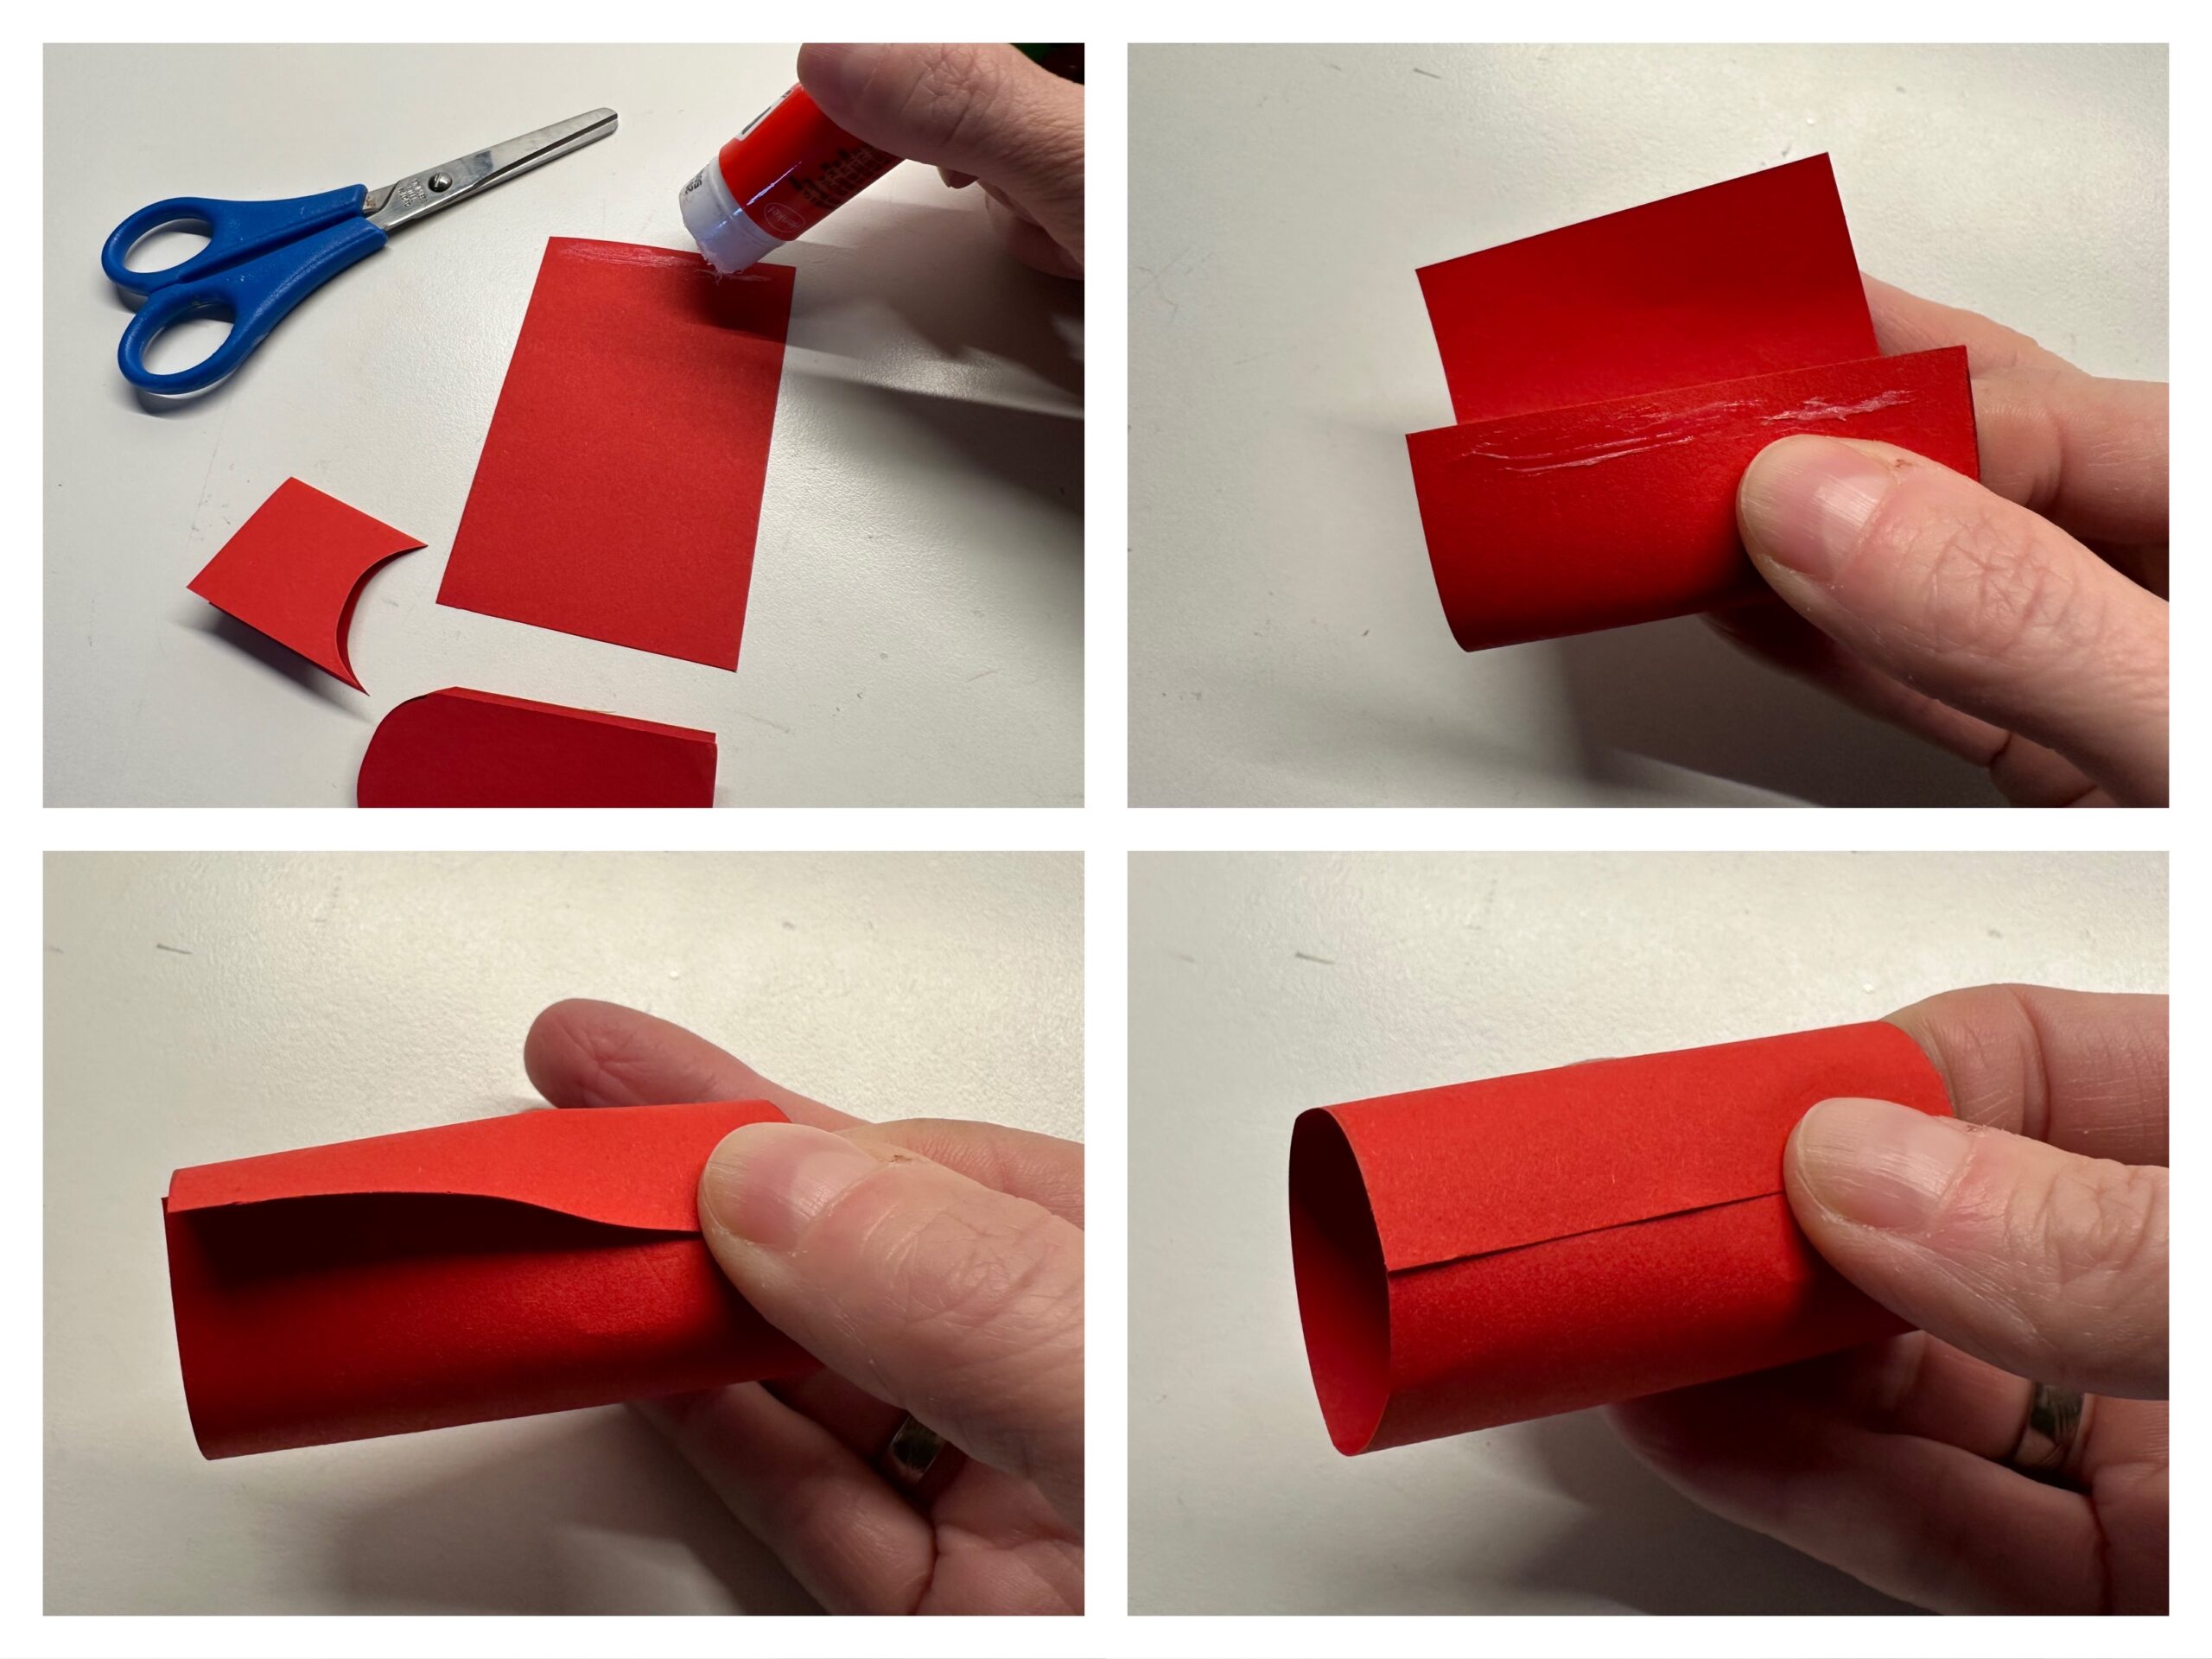
Put the roll on the table and gently press it with the flat hand a little flat. Do not completely flatten it!

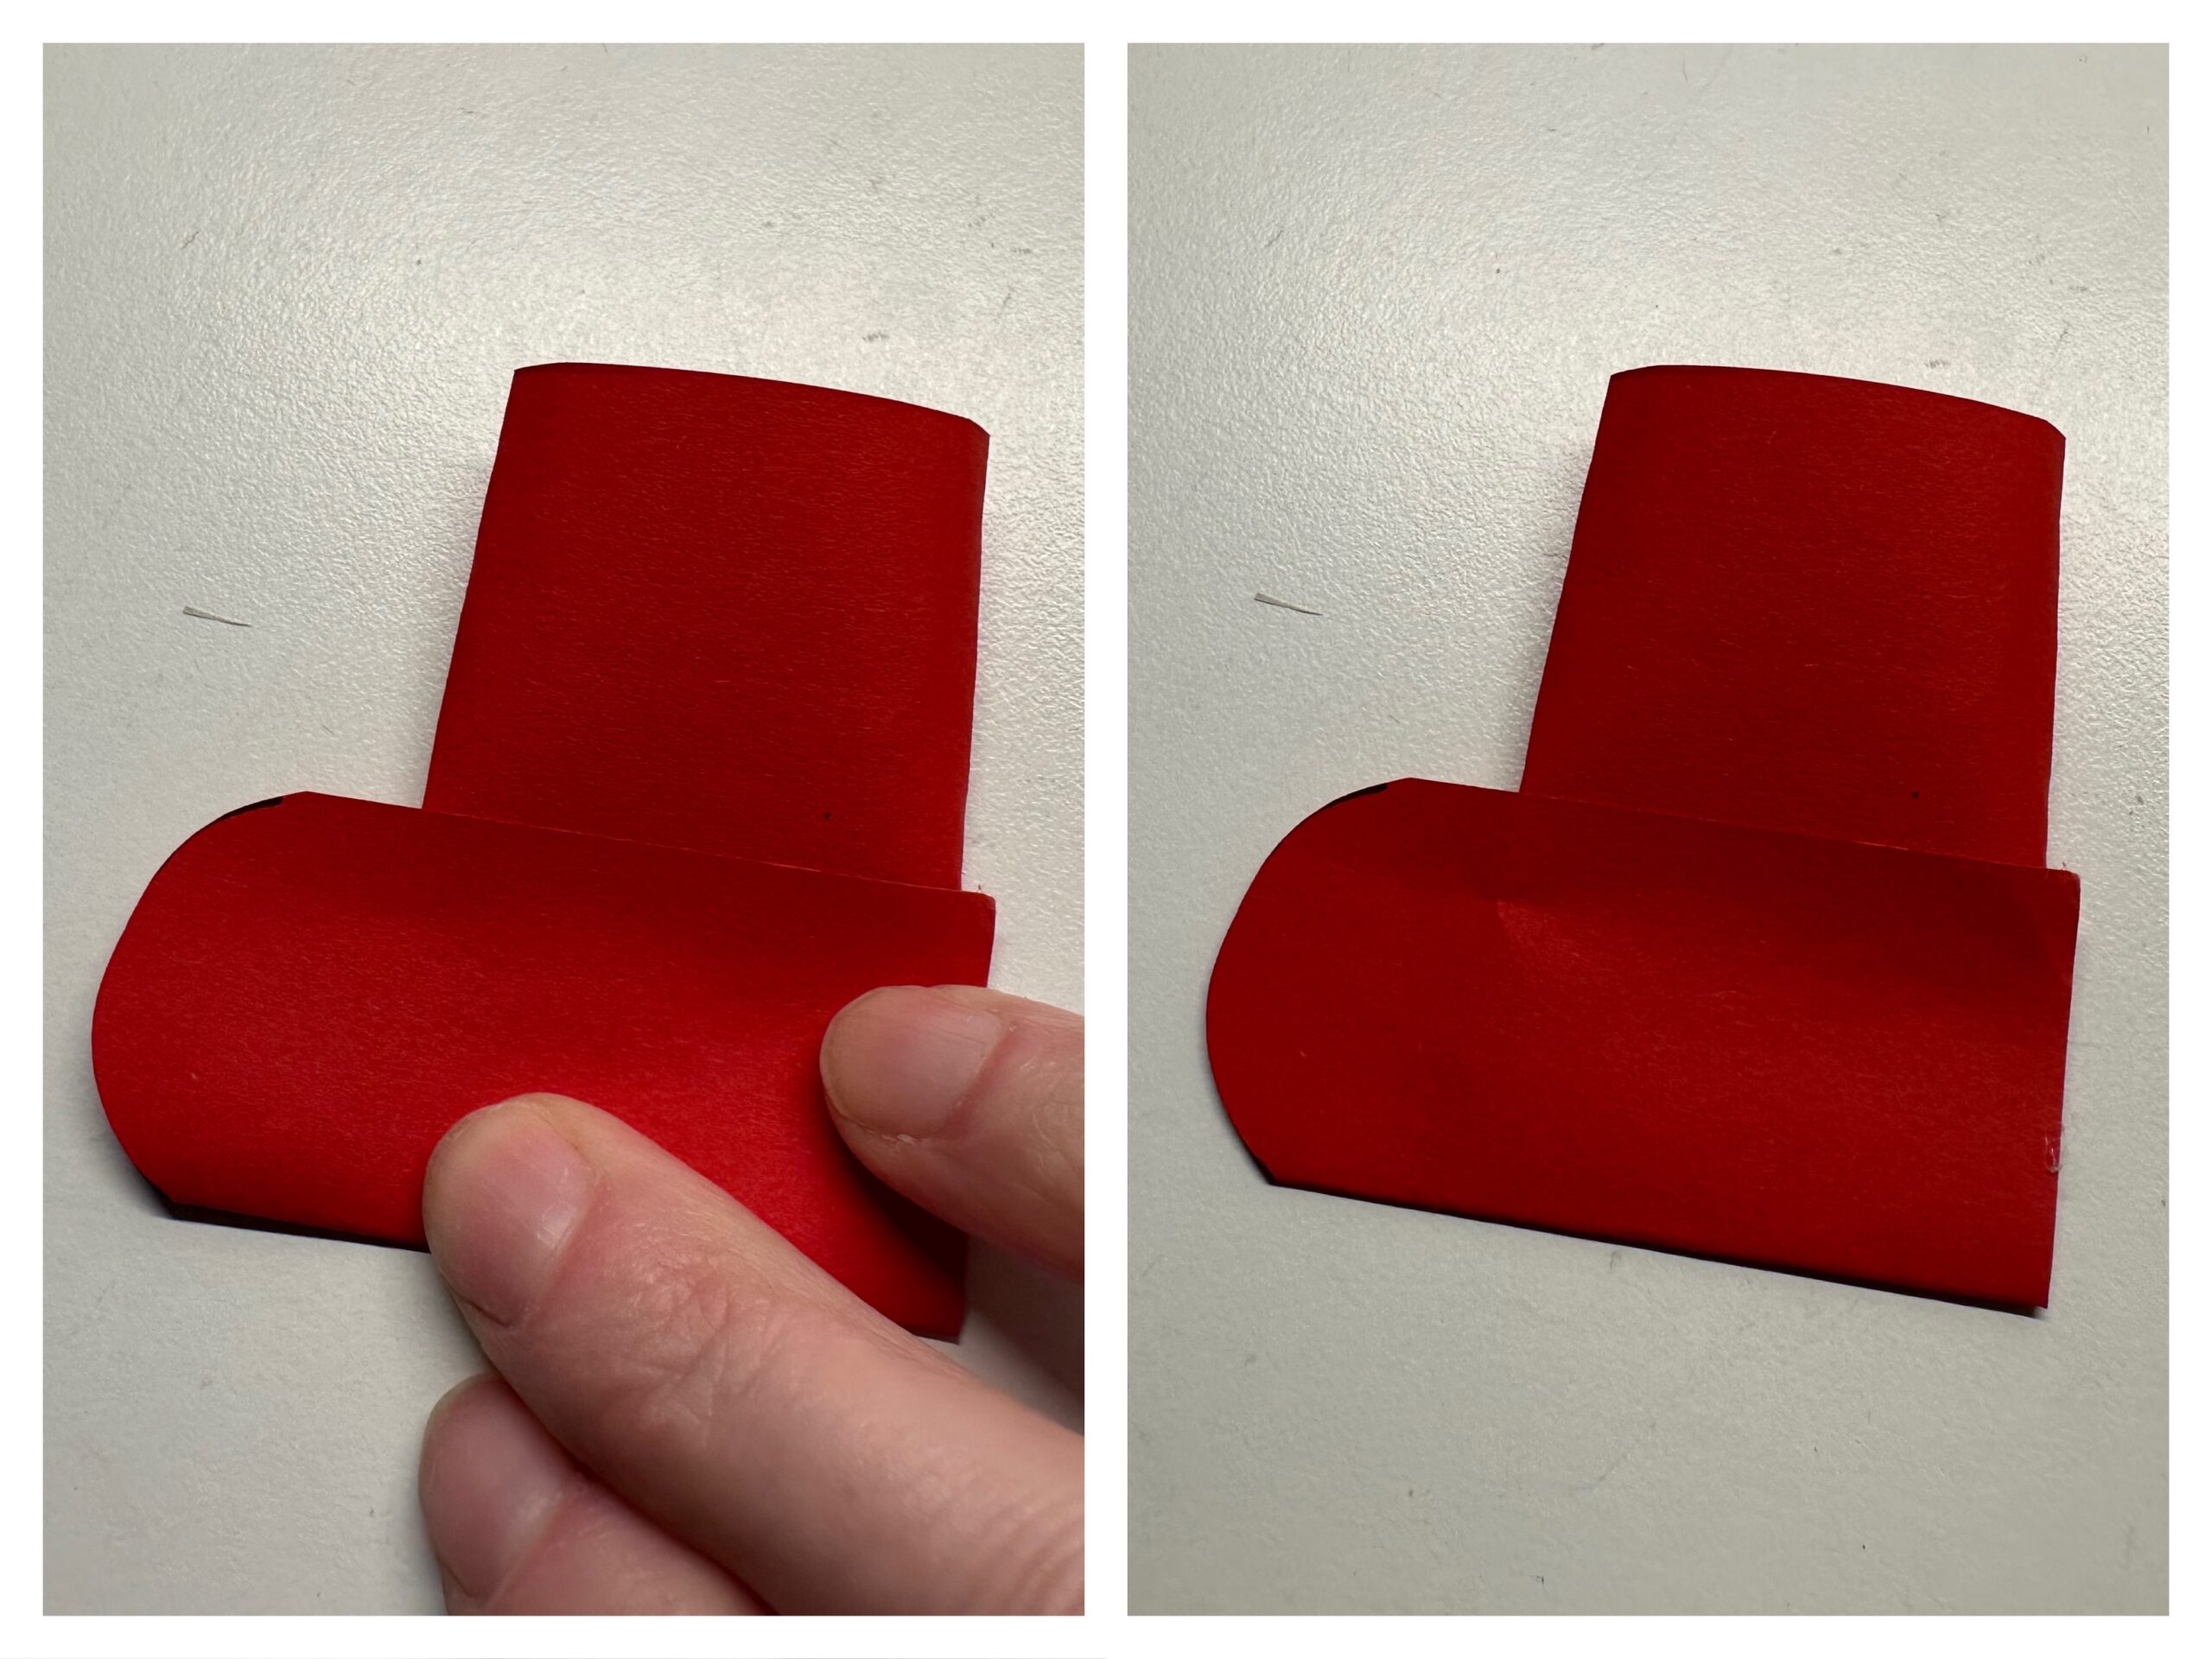
Folds the lower rectangle part again. It is still lying across the roll pointing upwards. Spreads the lower part flat with glue. Lays on the upper part of the folded, the plate roll.

Fold the lower part up and press it on the roll. Now you already recognize your little boot.
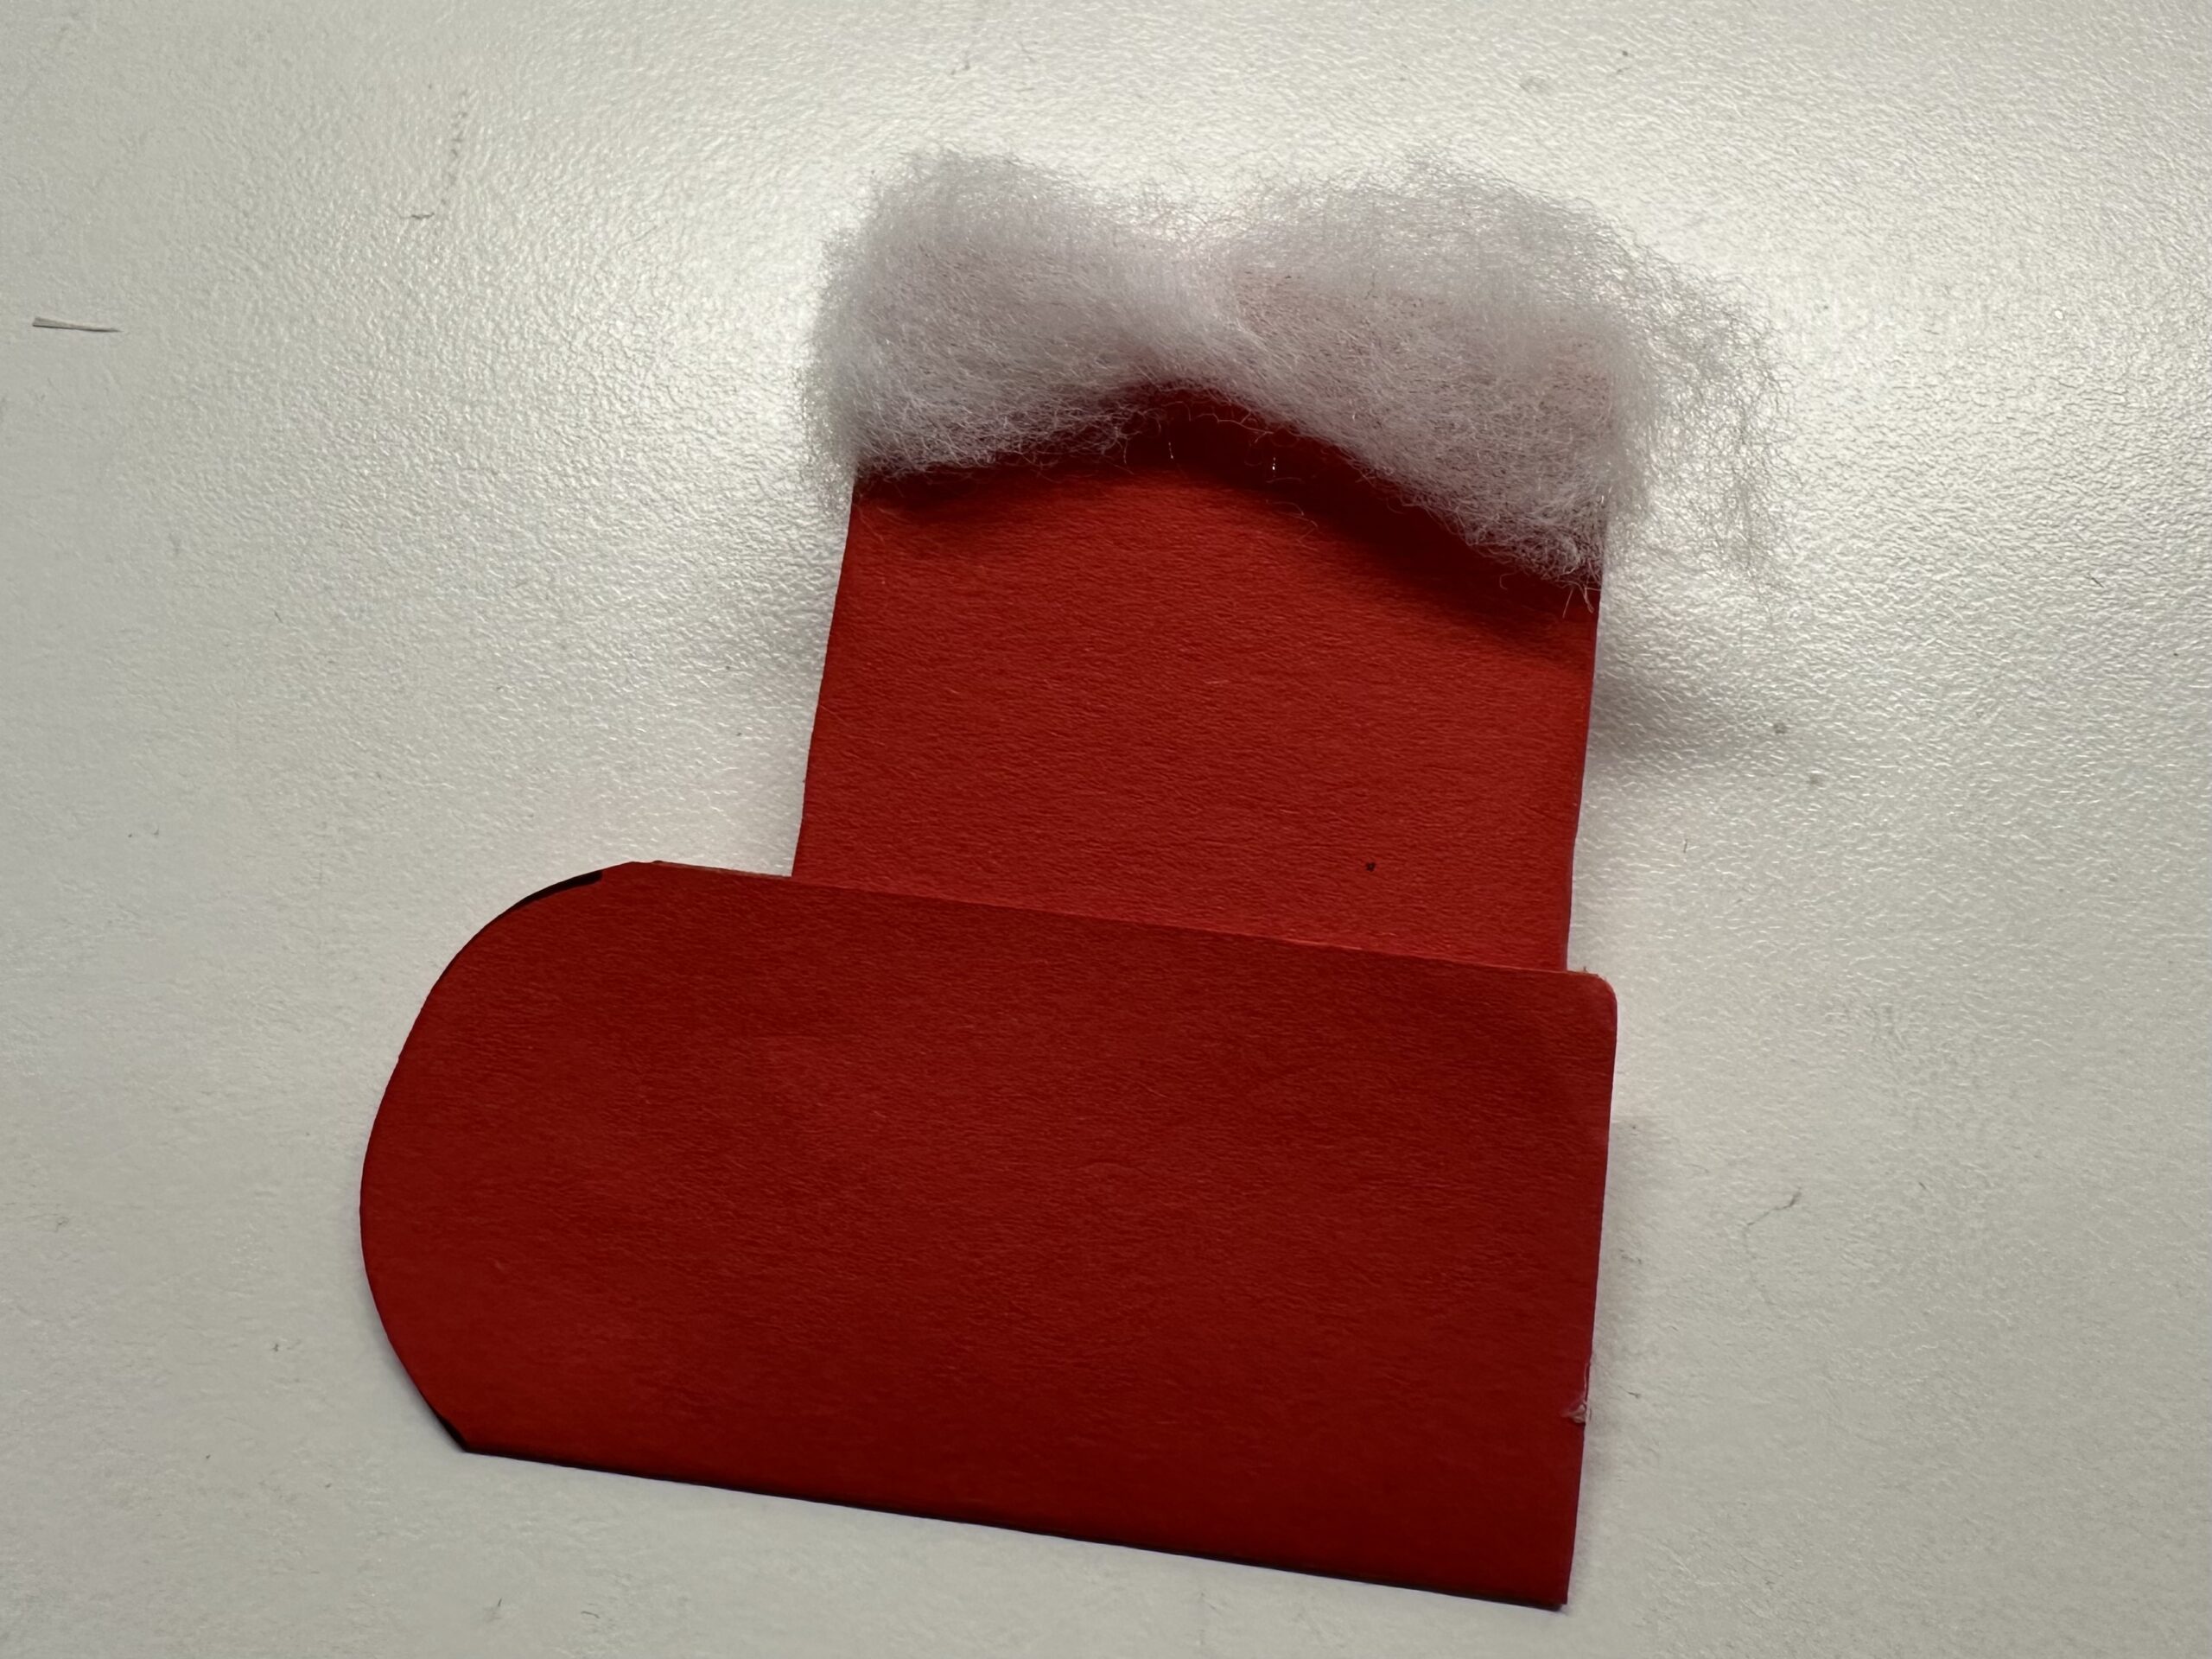
Take some cotton wool and twist it in your hand to form an elongated cotton wool strand, which should be as long as the upper part of the boot.
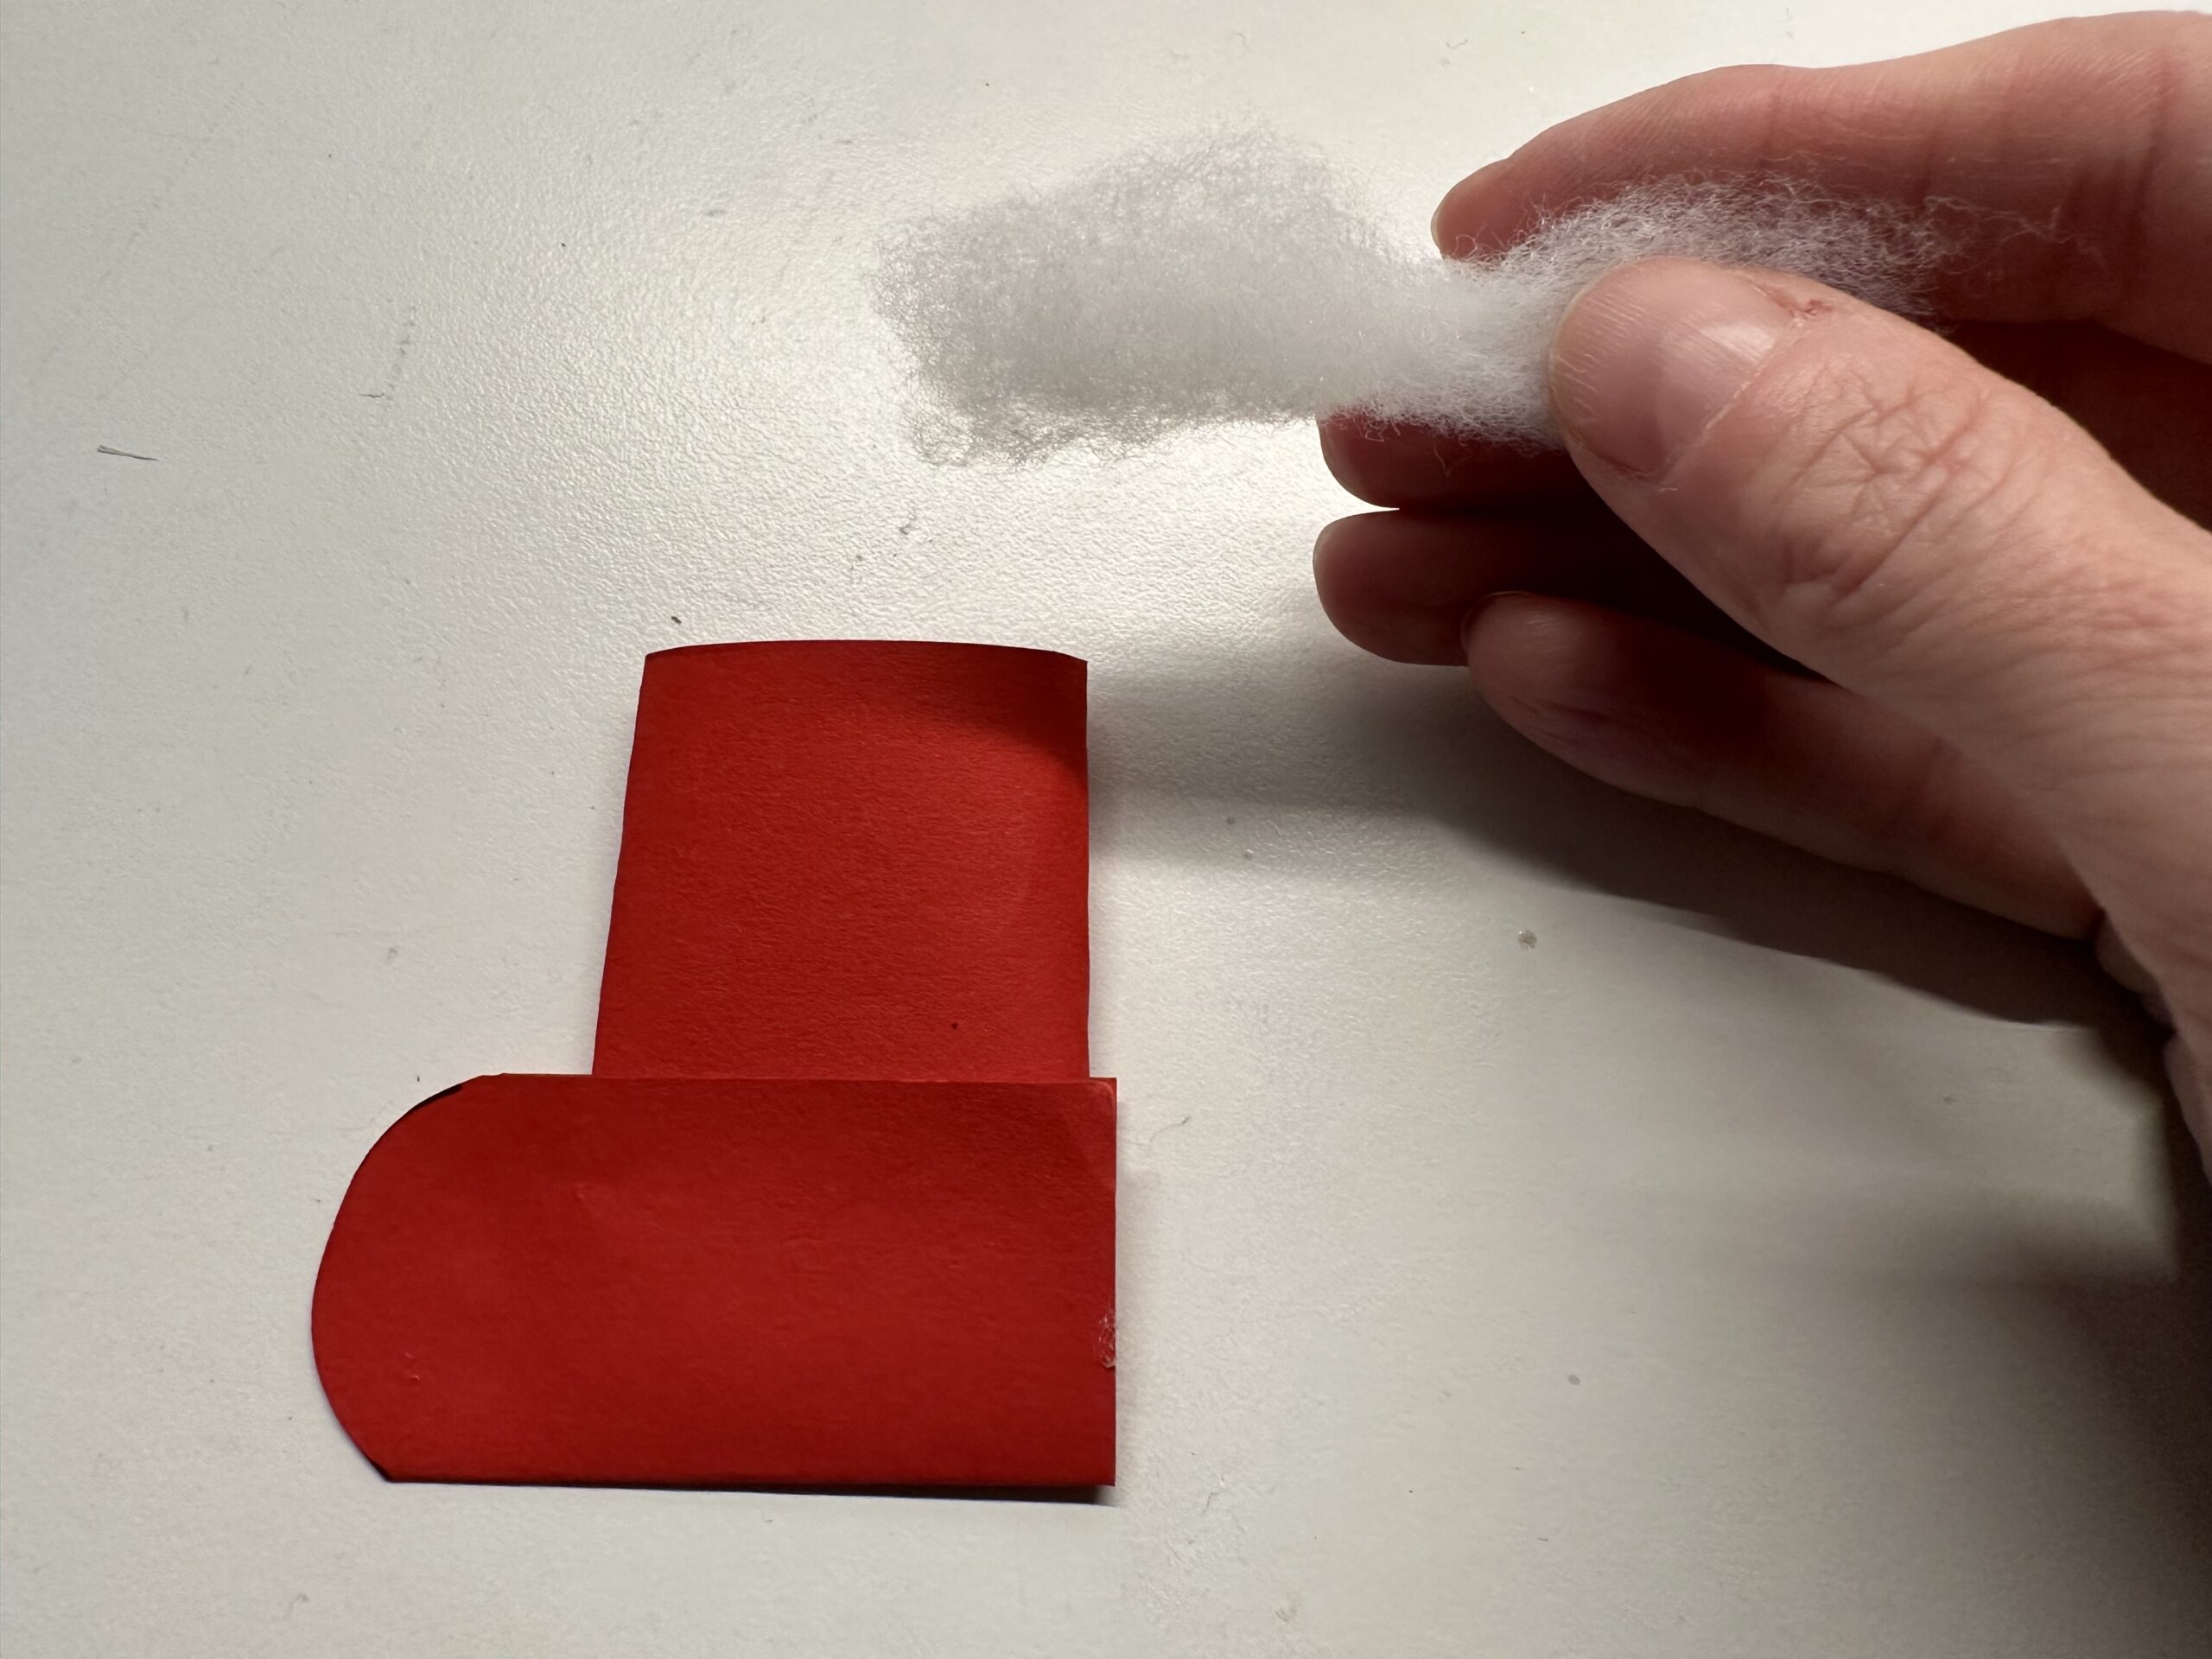
Sticks the cotton to the upper edge of the boot..
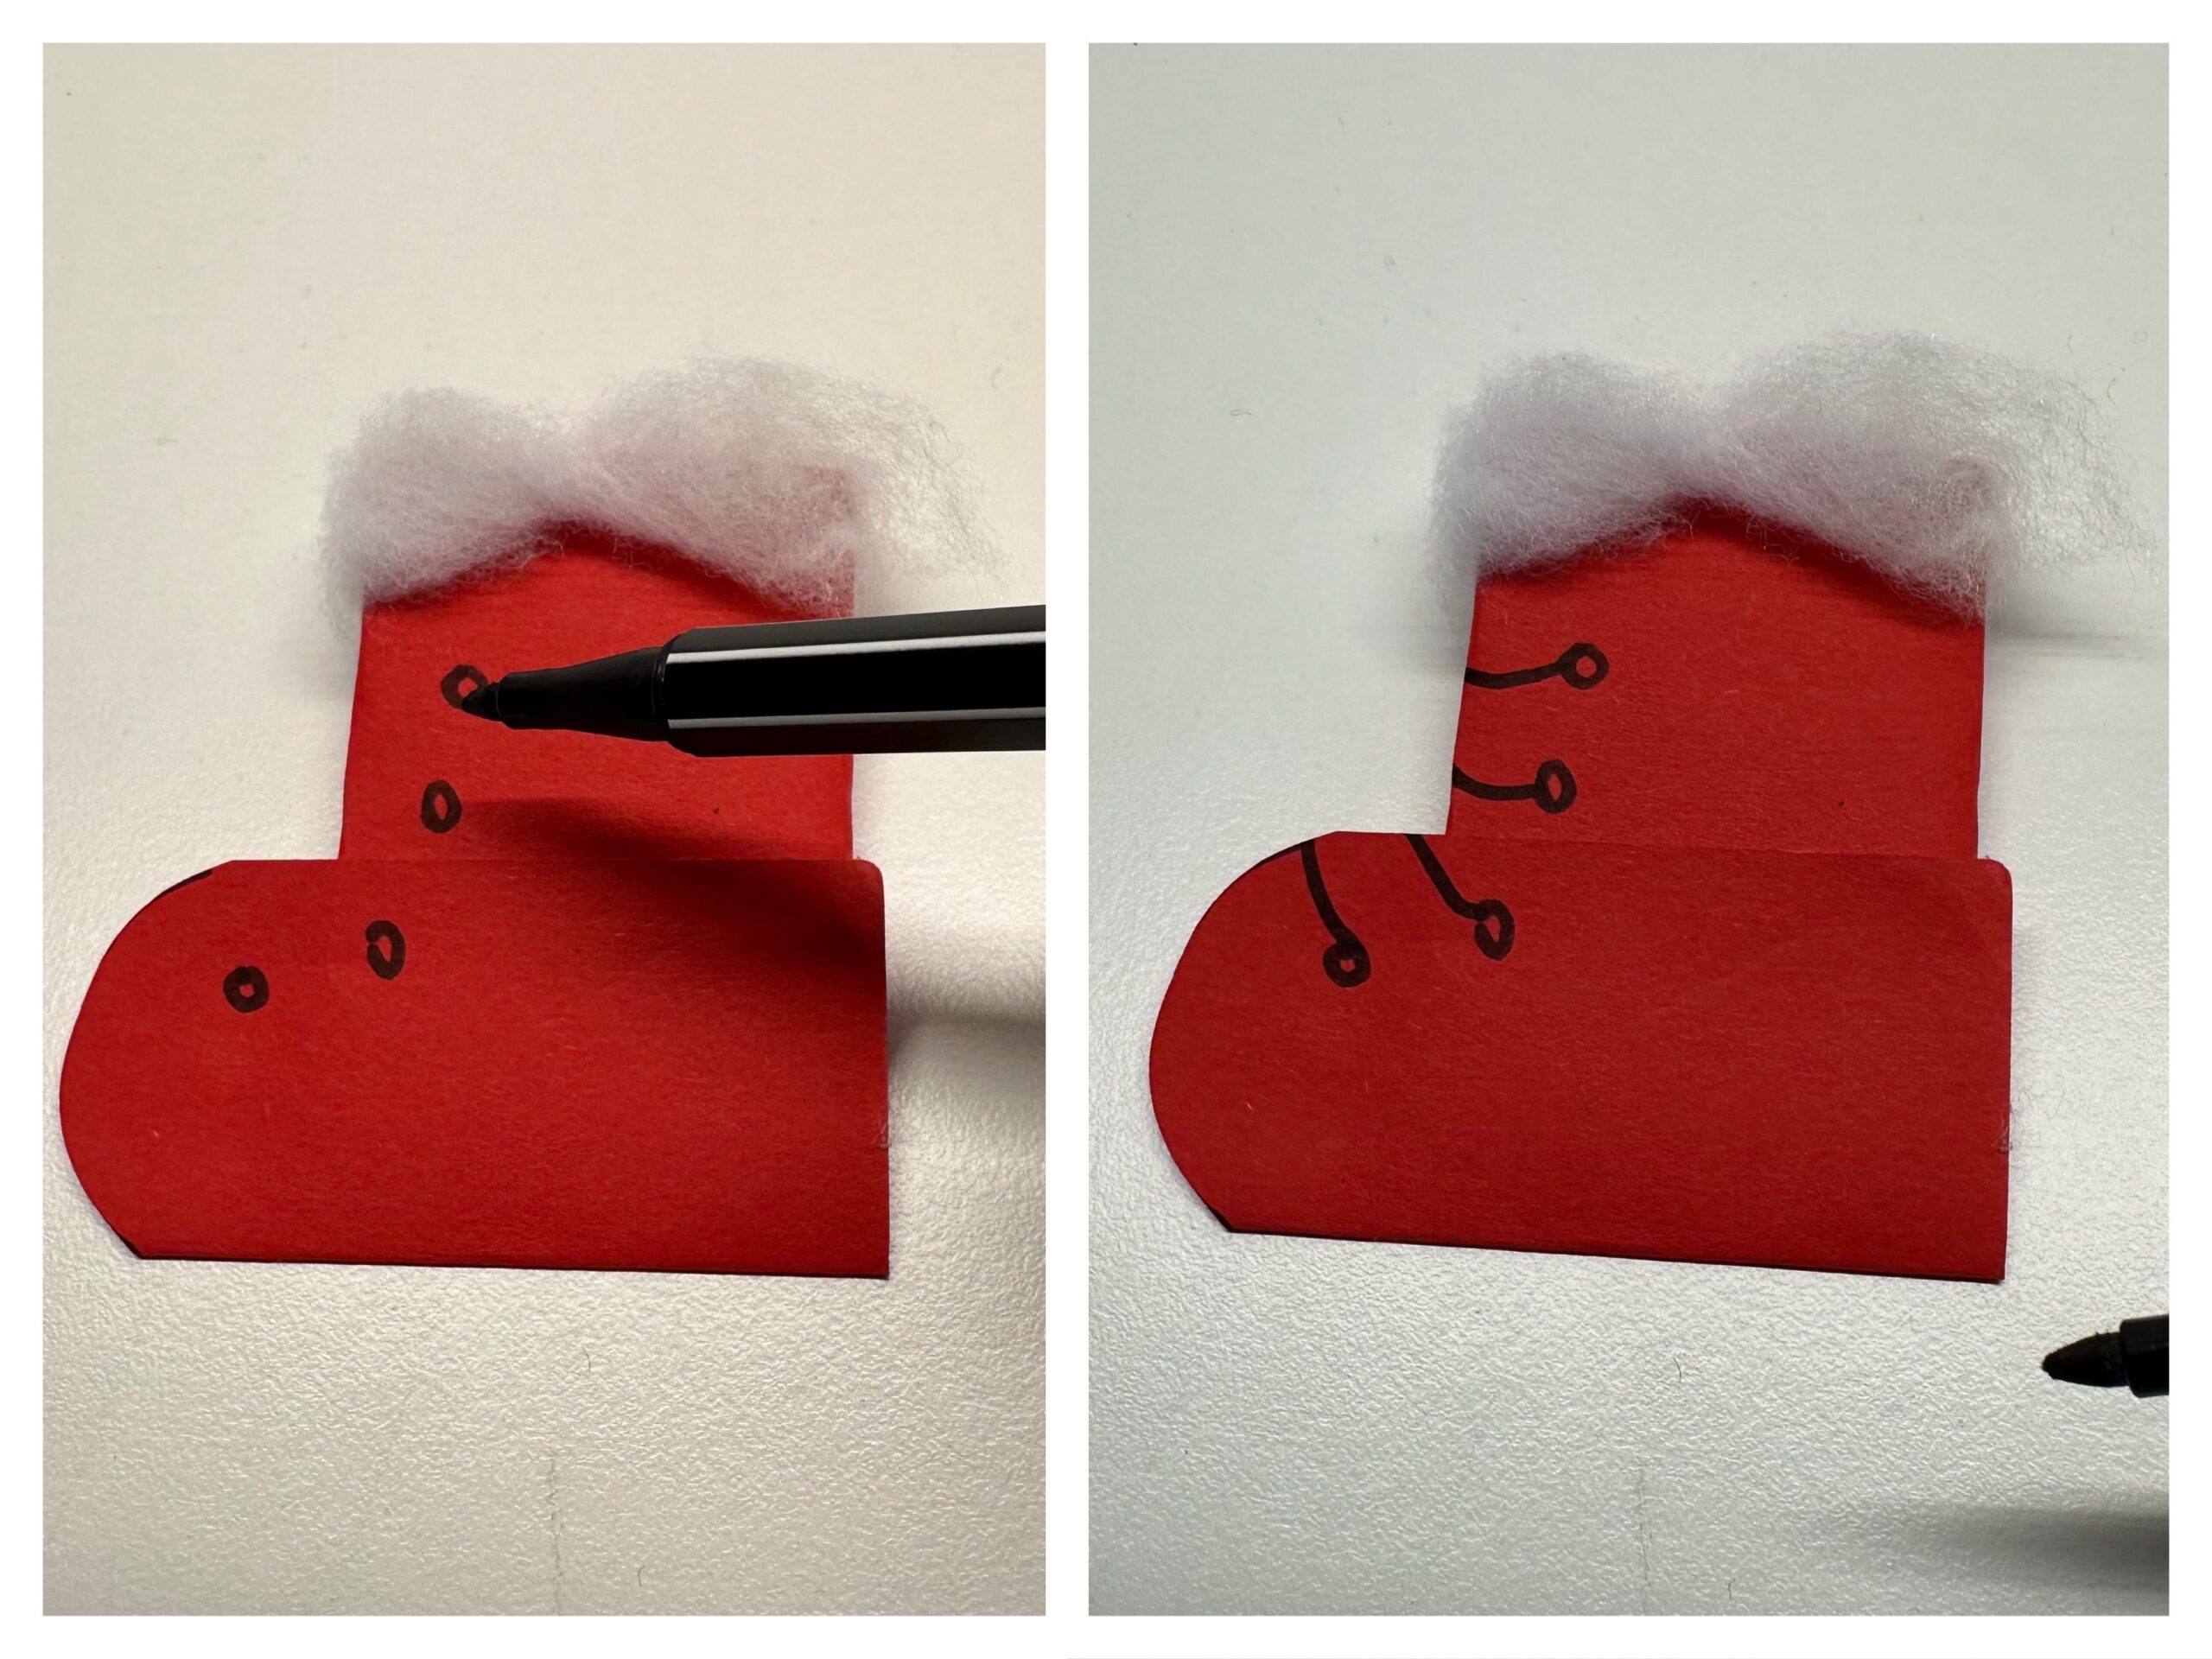
Now paints with a felt pen boot eyelets as small rings on the boot and paints strokes as shoelaces.
The Santa's boots are ready.
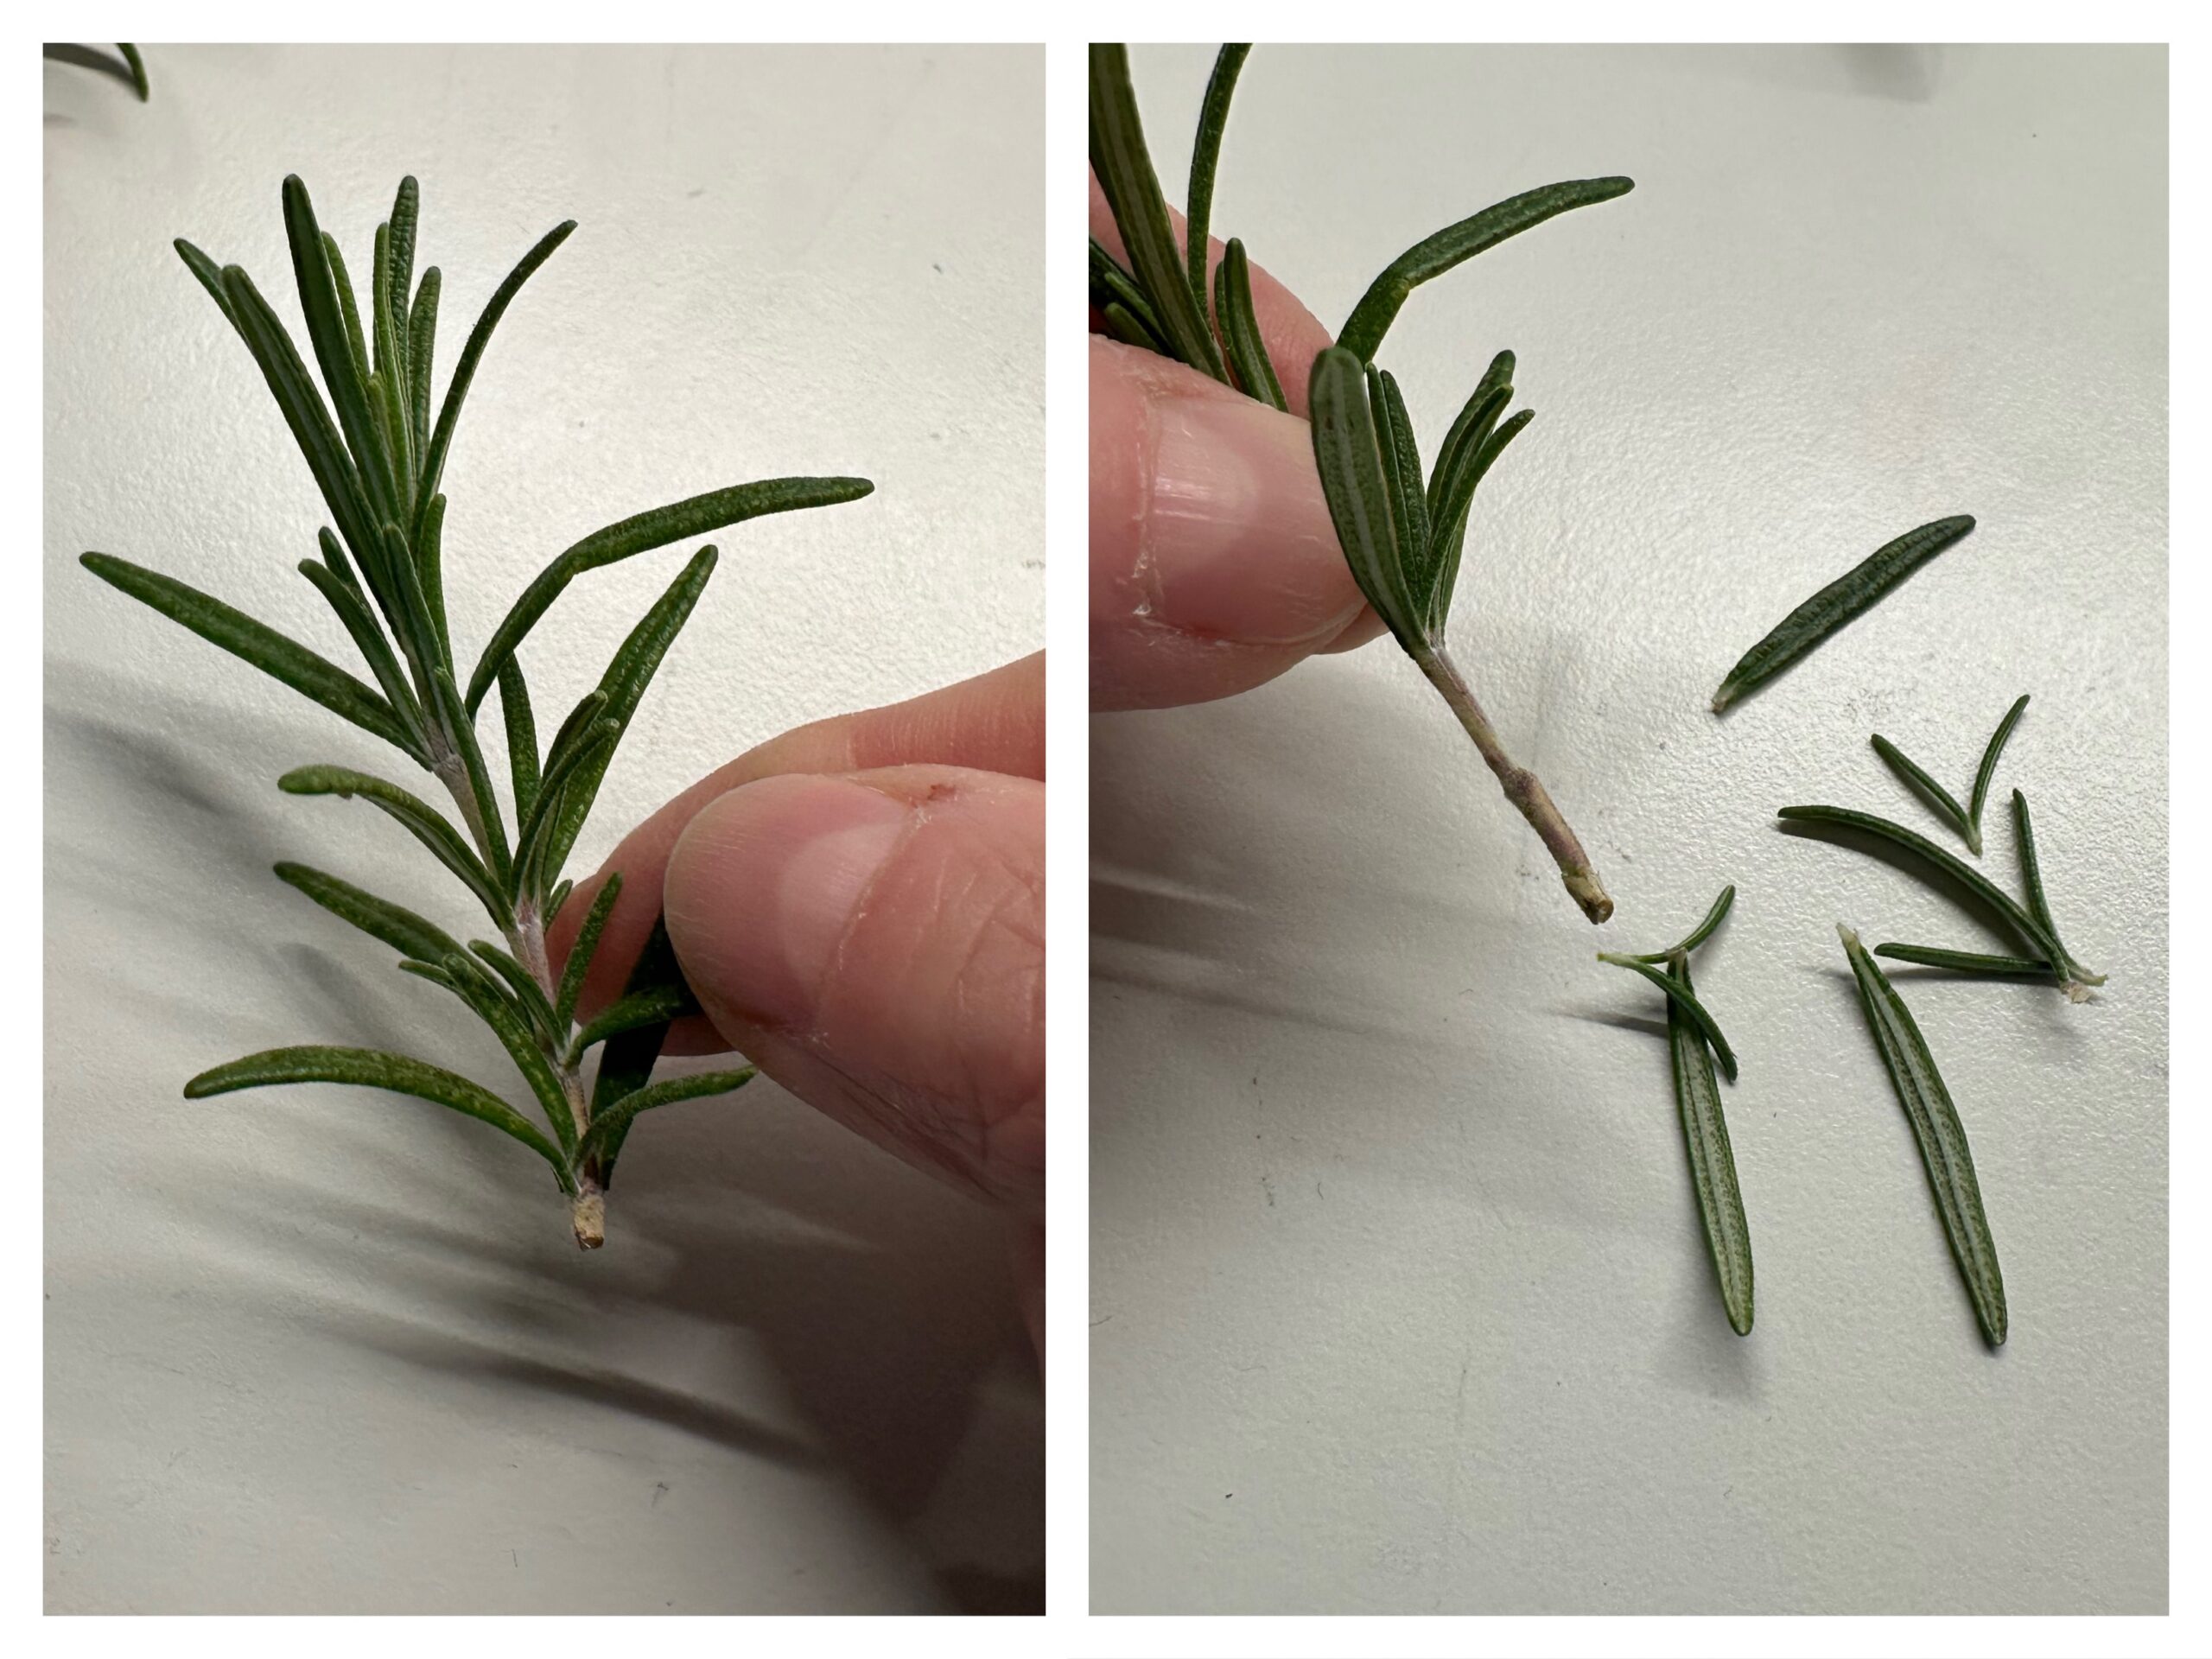
So that the boot smells well, you can put in two small branches of rosemary or fir branches. Removes the lower needles for this, that only the bare stalk remains. Thus the branches hold better in the boot.
Put both branches in the upper boot opening.
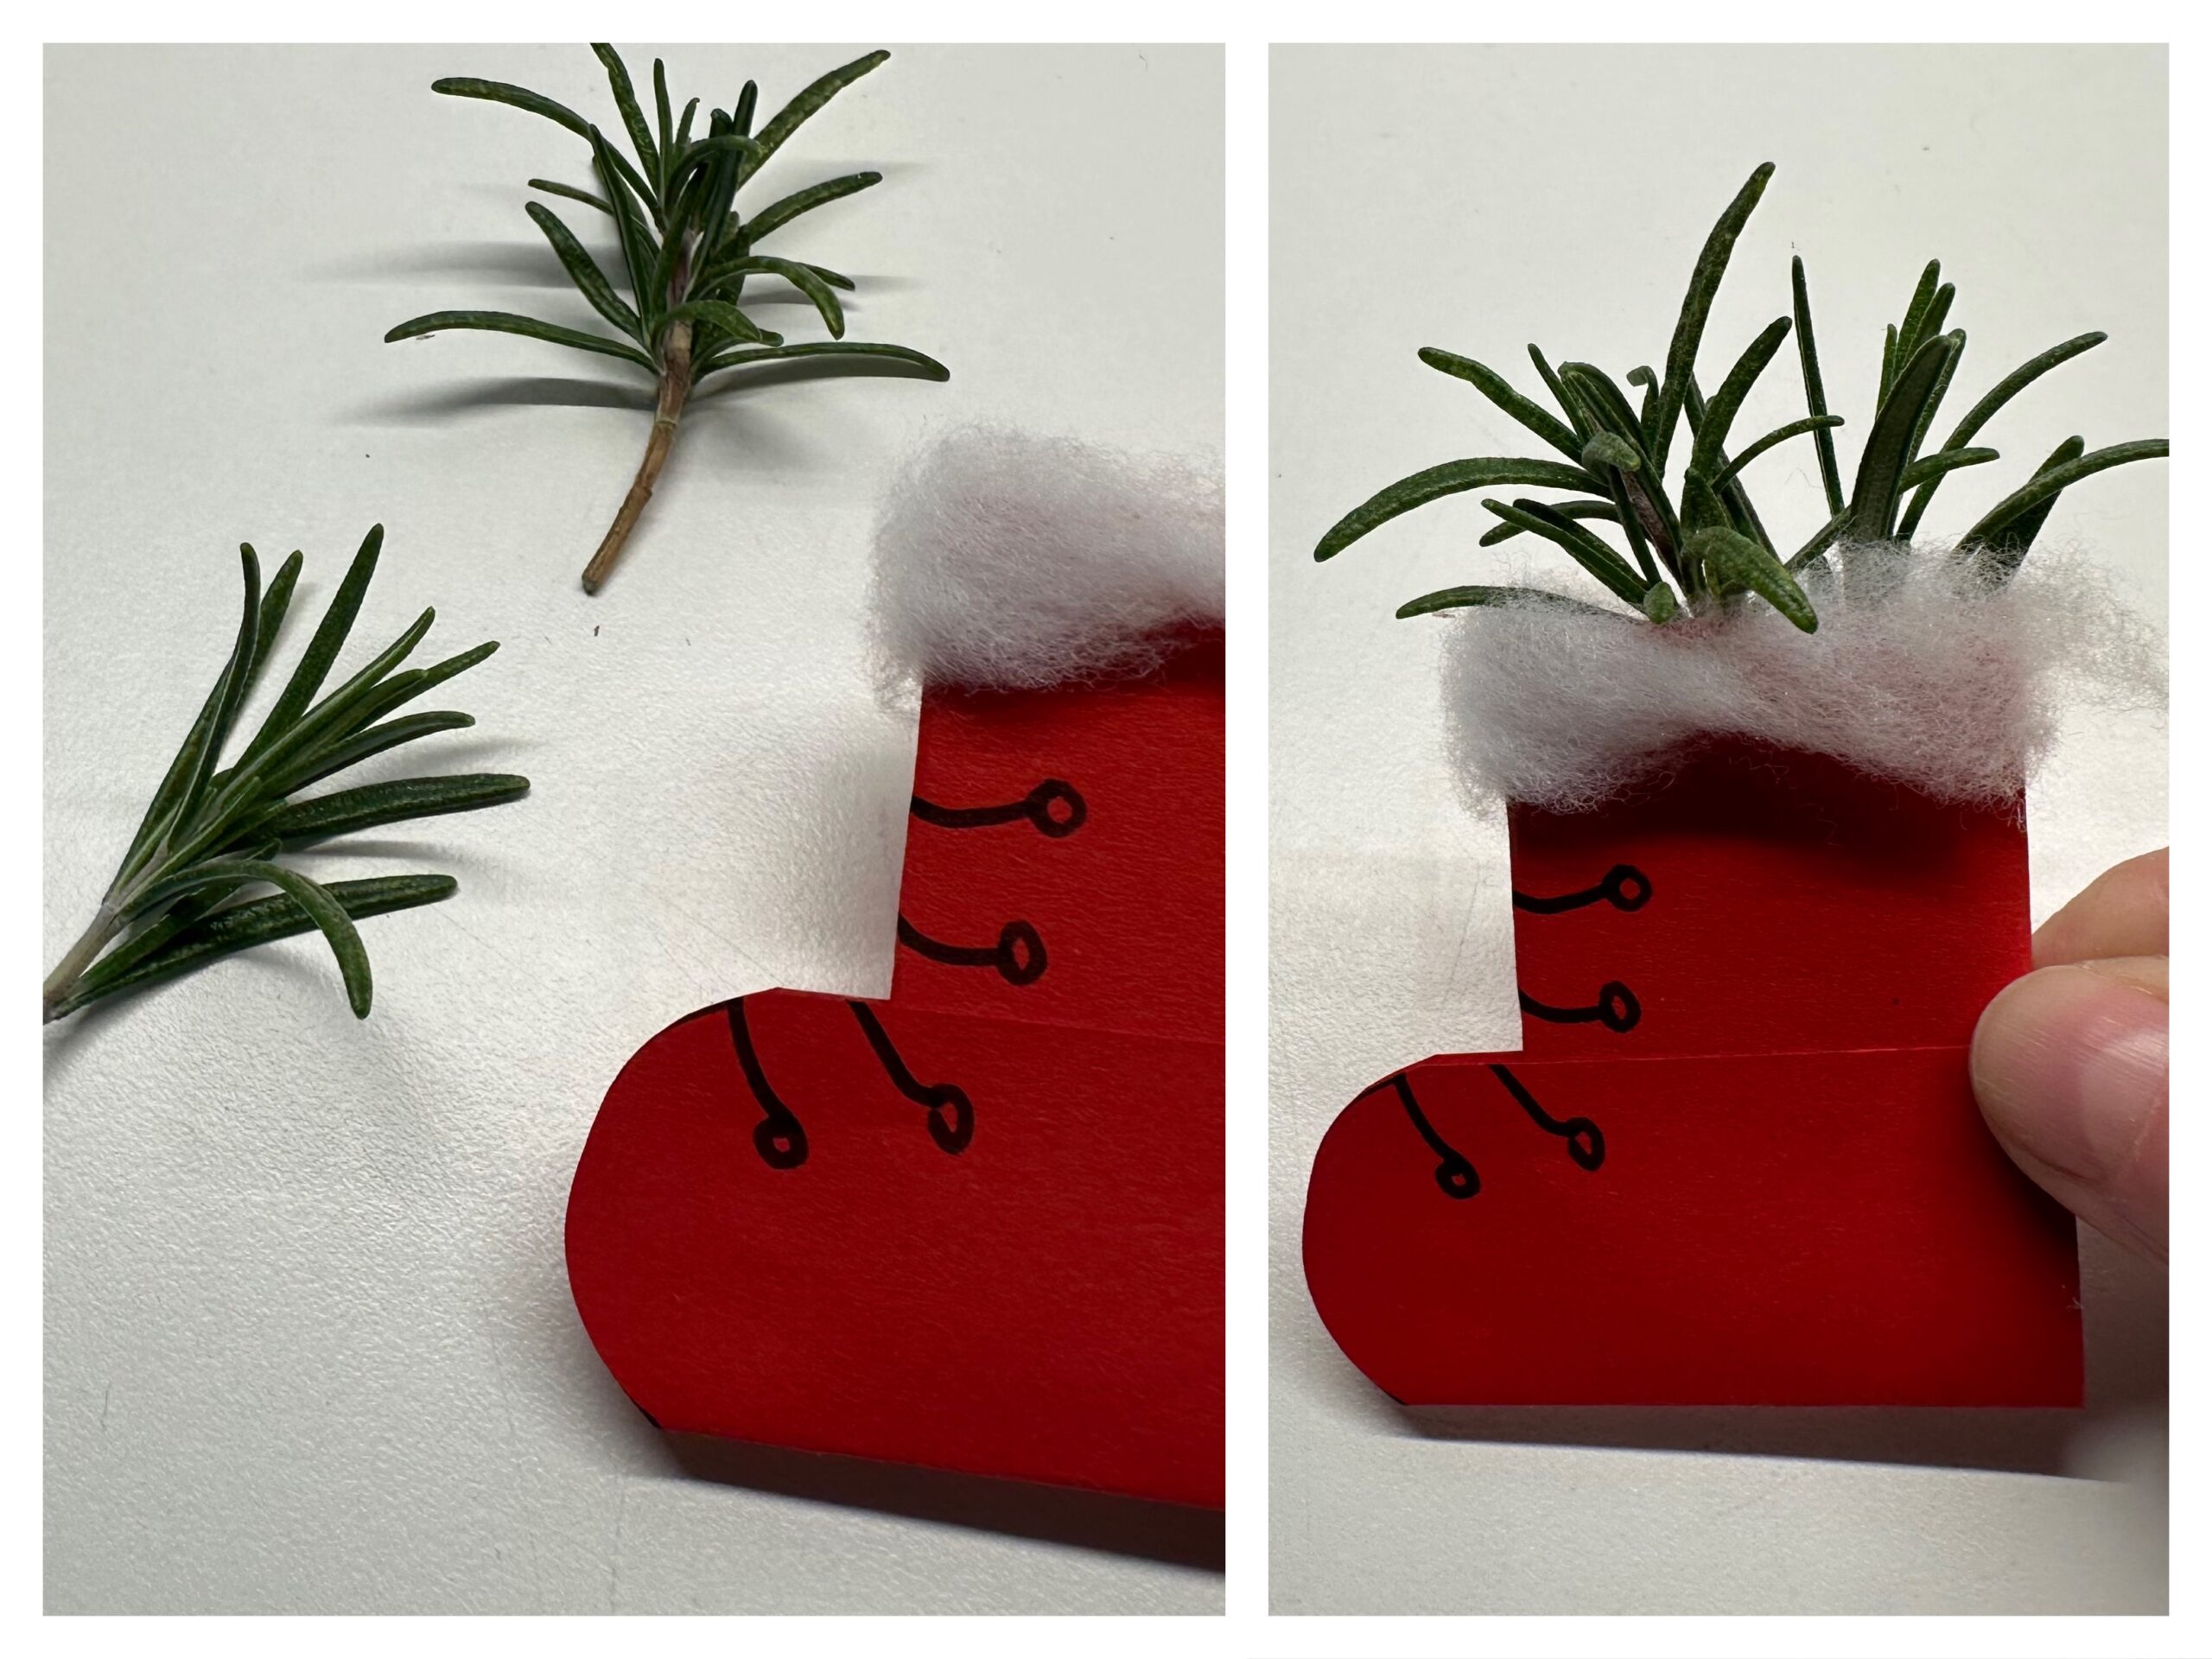
Now the Santa's boots can be used as a fragrant gift pendant.

Have fun trying out.
Materials
Directions
Take off your red clay paper and take off two identical rectangles. Use a ruler for this. Each rectangle should be 9cm by 6cm.
Cut out the rectangles with the scissors.
You now need both rectangles for crafting your boots.
Place the two rectangles in front of you as in the first picture. One oblong up and the other cross below. Fold the lower rectangle half upwards. Gently strike the fracture. Then paint in the extension (The extension upwards, show you the pencil!) to the top rectangle a rounding on the folded rectangle.
Cut the round with the scissors. You have to hold the folded paper together.
Now take the rectangle above. Stick the upper edge with glue. Then take the paper in your hand and bend the rectangle into a roll. On the adhesive strip, both ends of the paper are pressed tightly together. So you now have a paper roll.
Put the roll on the table and gently press it with the flat hand a little flat. Do not completely flatten it!
Folds the lower rectangle part again. It is still lying across the roll pointing upwards. Spreads the lower part flat with glue. Lays on the upper part of the folded, the plate roll.
Fold the lower part up and press it on the roll. Now you already recognize your little boot.
Take some cotton wool and twist it in your hand to form an elongated cotton wool strand, which should be as long as the upper part of the boot.
Sticks the cotton to the upper edge of the boot..
Now paints with a felt pen boot eyelets as small rings on the boot and paints strokes as shoelaces.
The Santa's boots are ready.
So that the boot smells well, you can put in two small branches of rosemary or fir branches. Removes the lower needles for this, that only the bare stalk remains. Thus the branches hold better in the boot.
Put both branches in the upper boot opening.
Now the Santa's boots can be used as a fragrant gift pendant.
Have fun trying out.
Follow us on Facebook , Instagram and Pinterest
Don't miss any more adventures: Our bottle mail