This chick is a small Easter bag or Easter box. It is made from a tetrapack. With a few feathers, a yellow pipe cleaner wire, a felt beak and wobble eyes, this small Easter bag is quickly made.
You will learn how to do this here in an illustrated step by step guide.
Media Education for Kindergarten and Hort

Relief in everyday life, targeted promotion of individual children, independent learning and - without any pre-knowledge already usable by the youngest!

Sets a craft pad and the materials ready.
Folds the washed out and dry Tetrapack flat.
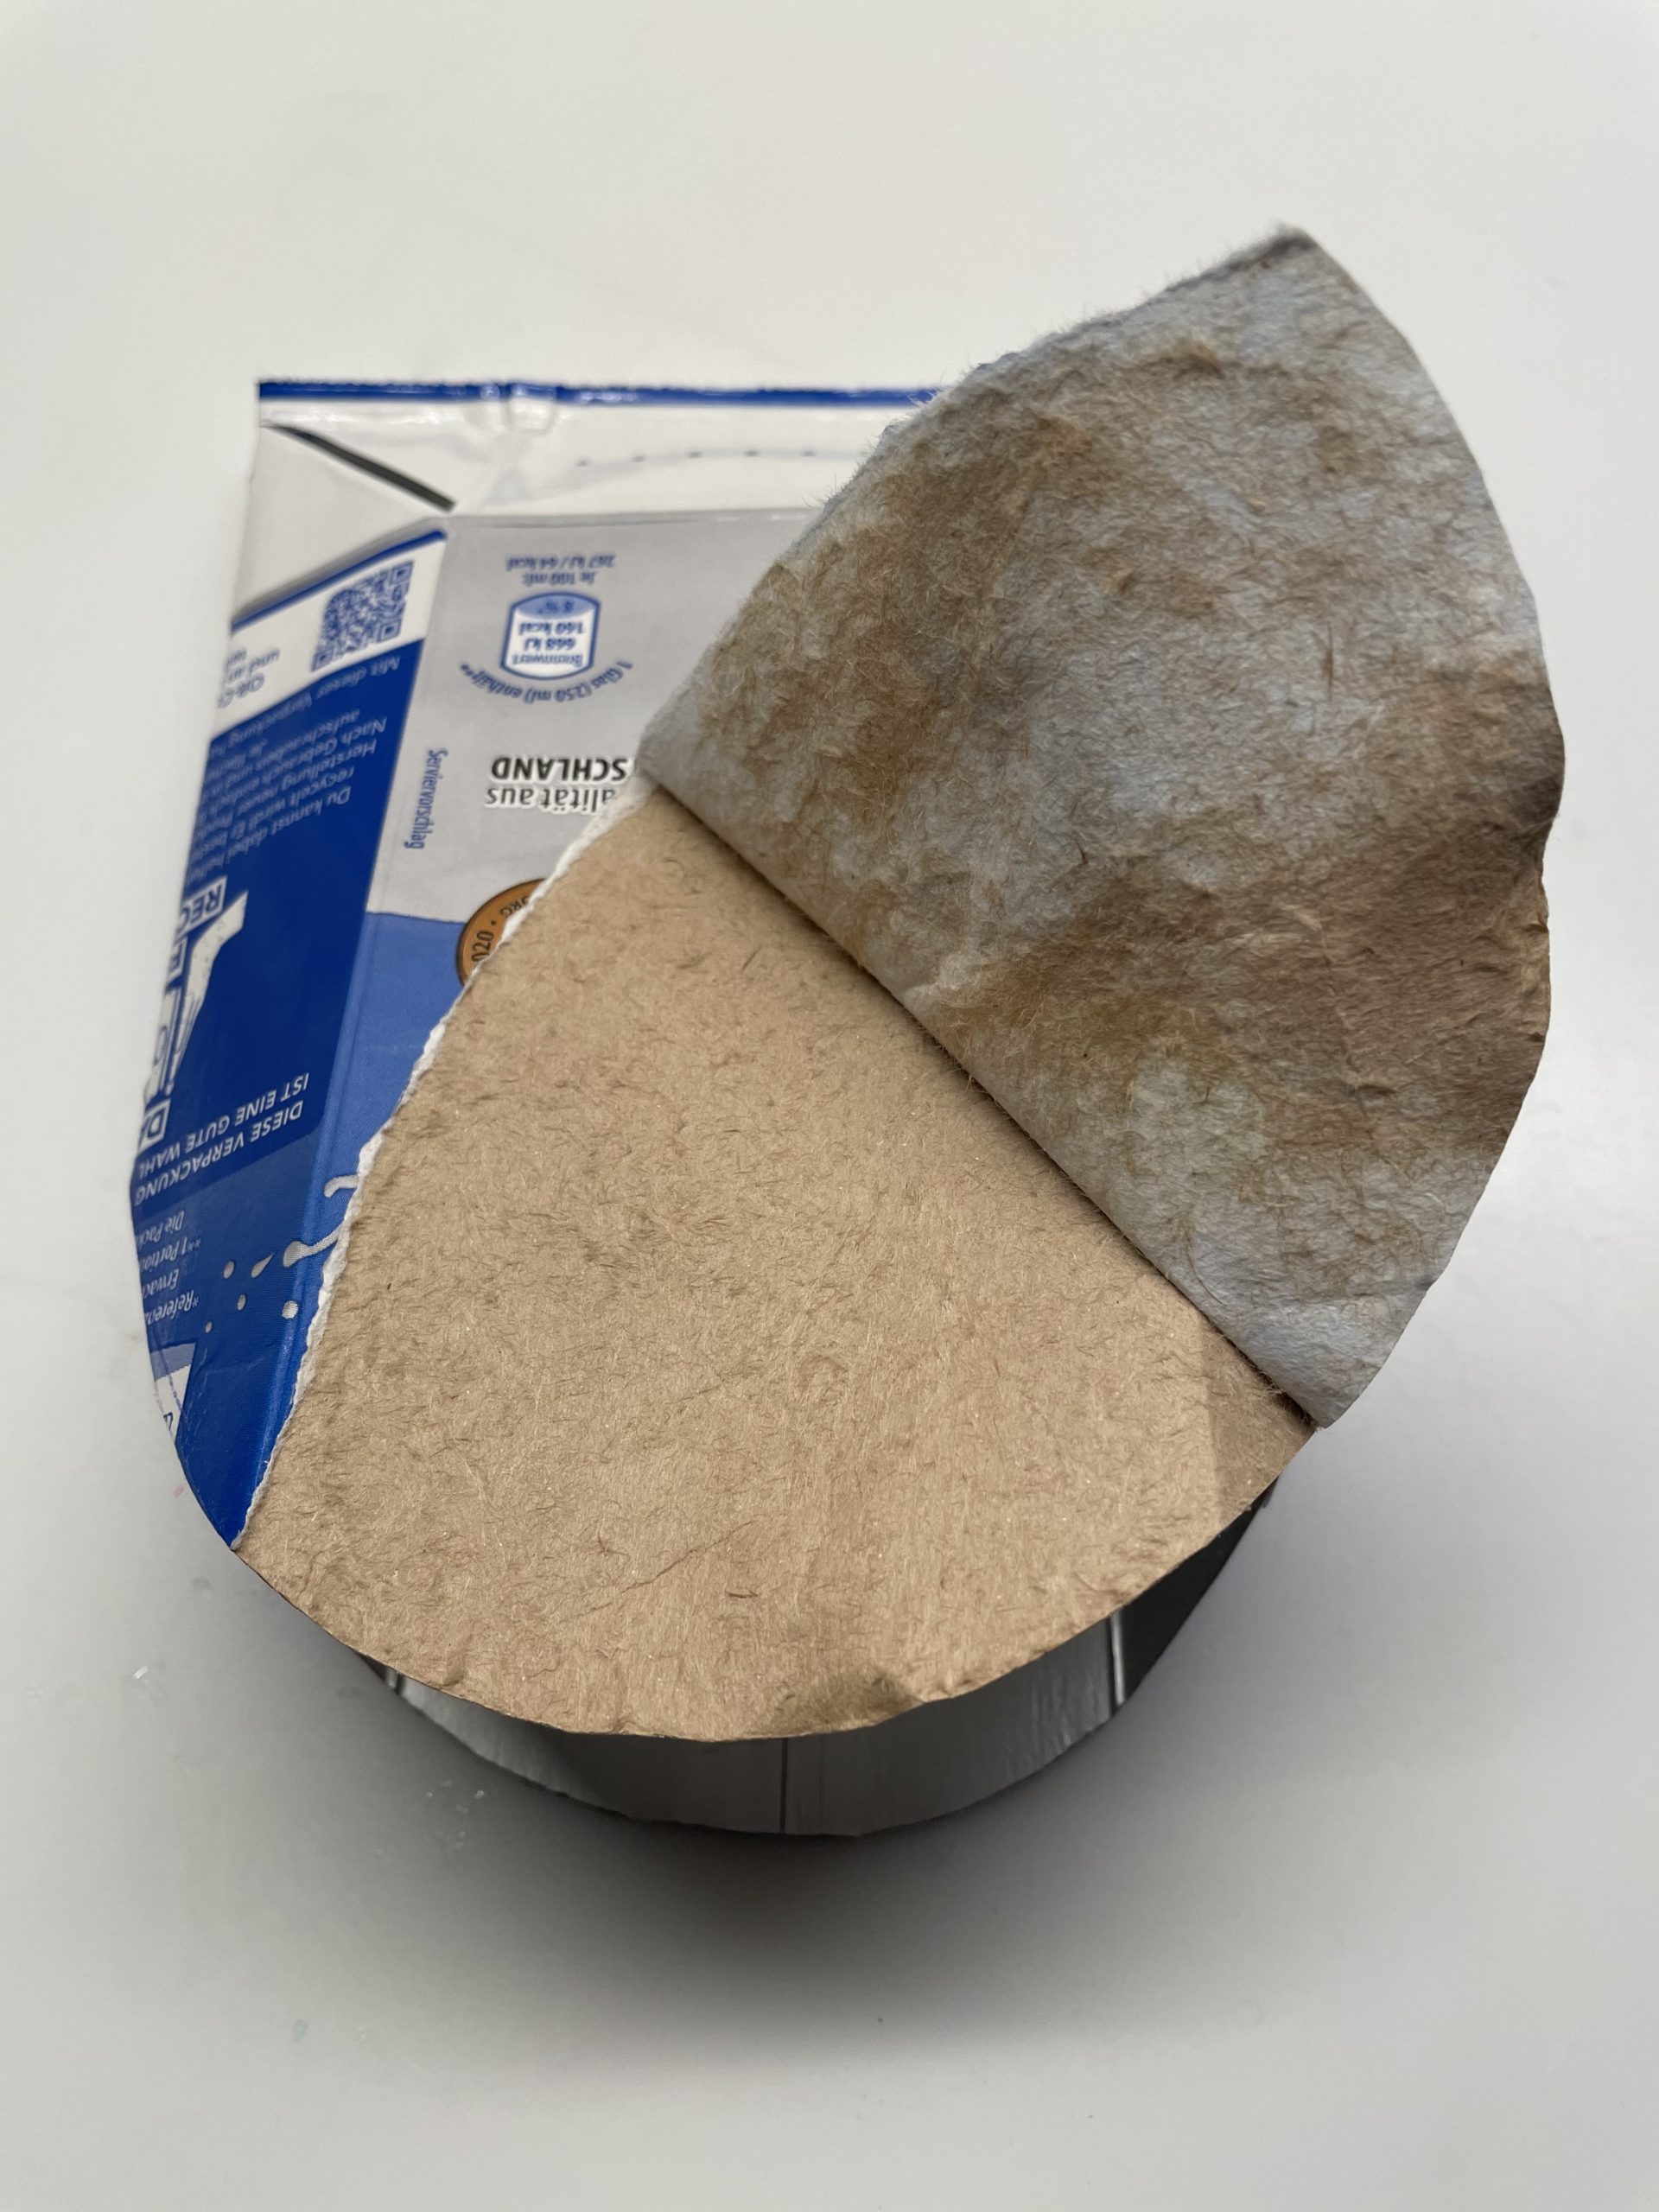
First cut off the upper piece. Cuts an arc.

At the cutting edge you pull the cardboard a bit apart and remove the top coating. Underneath it comes a cardboard box to the appearance.
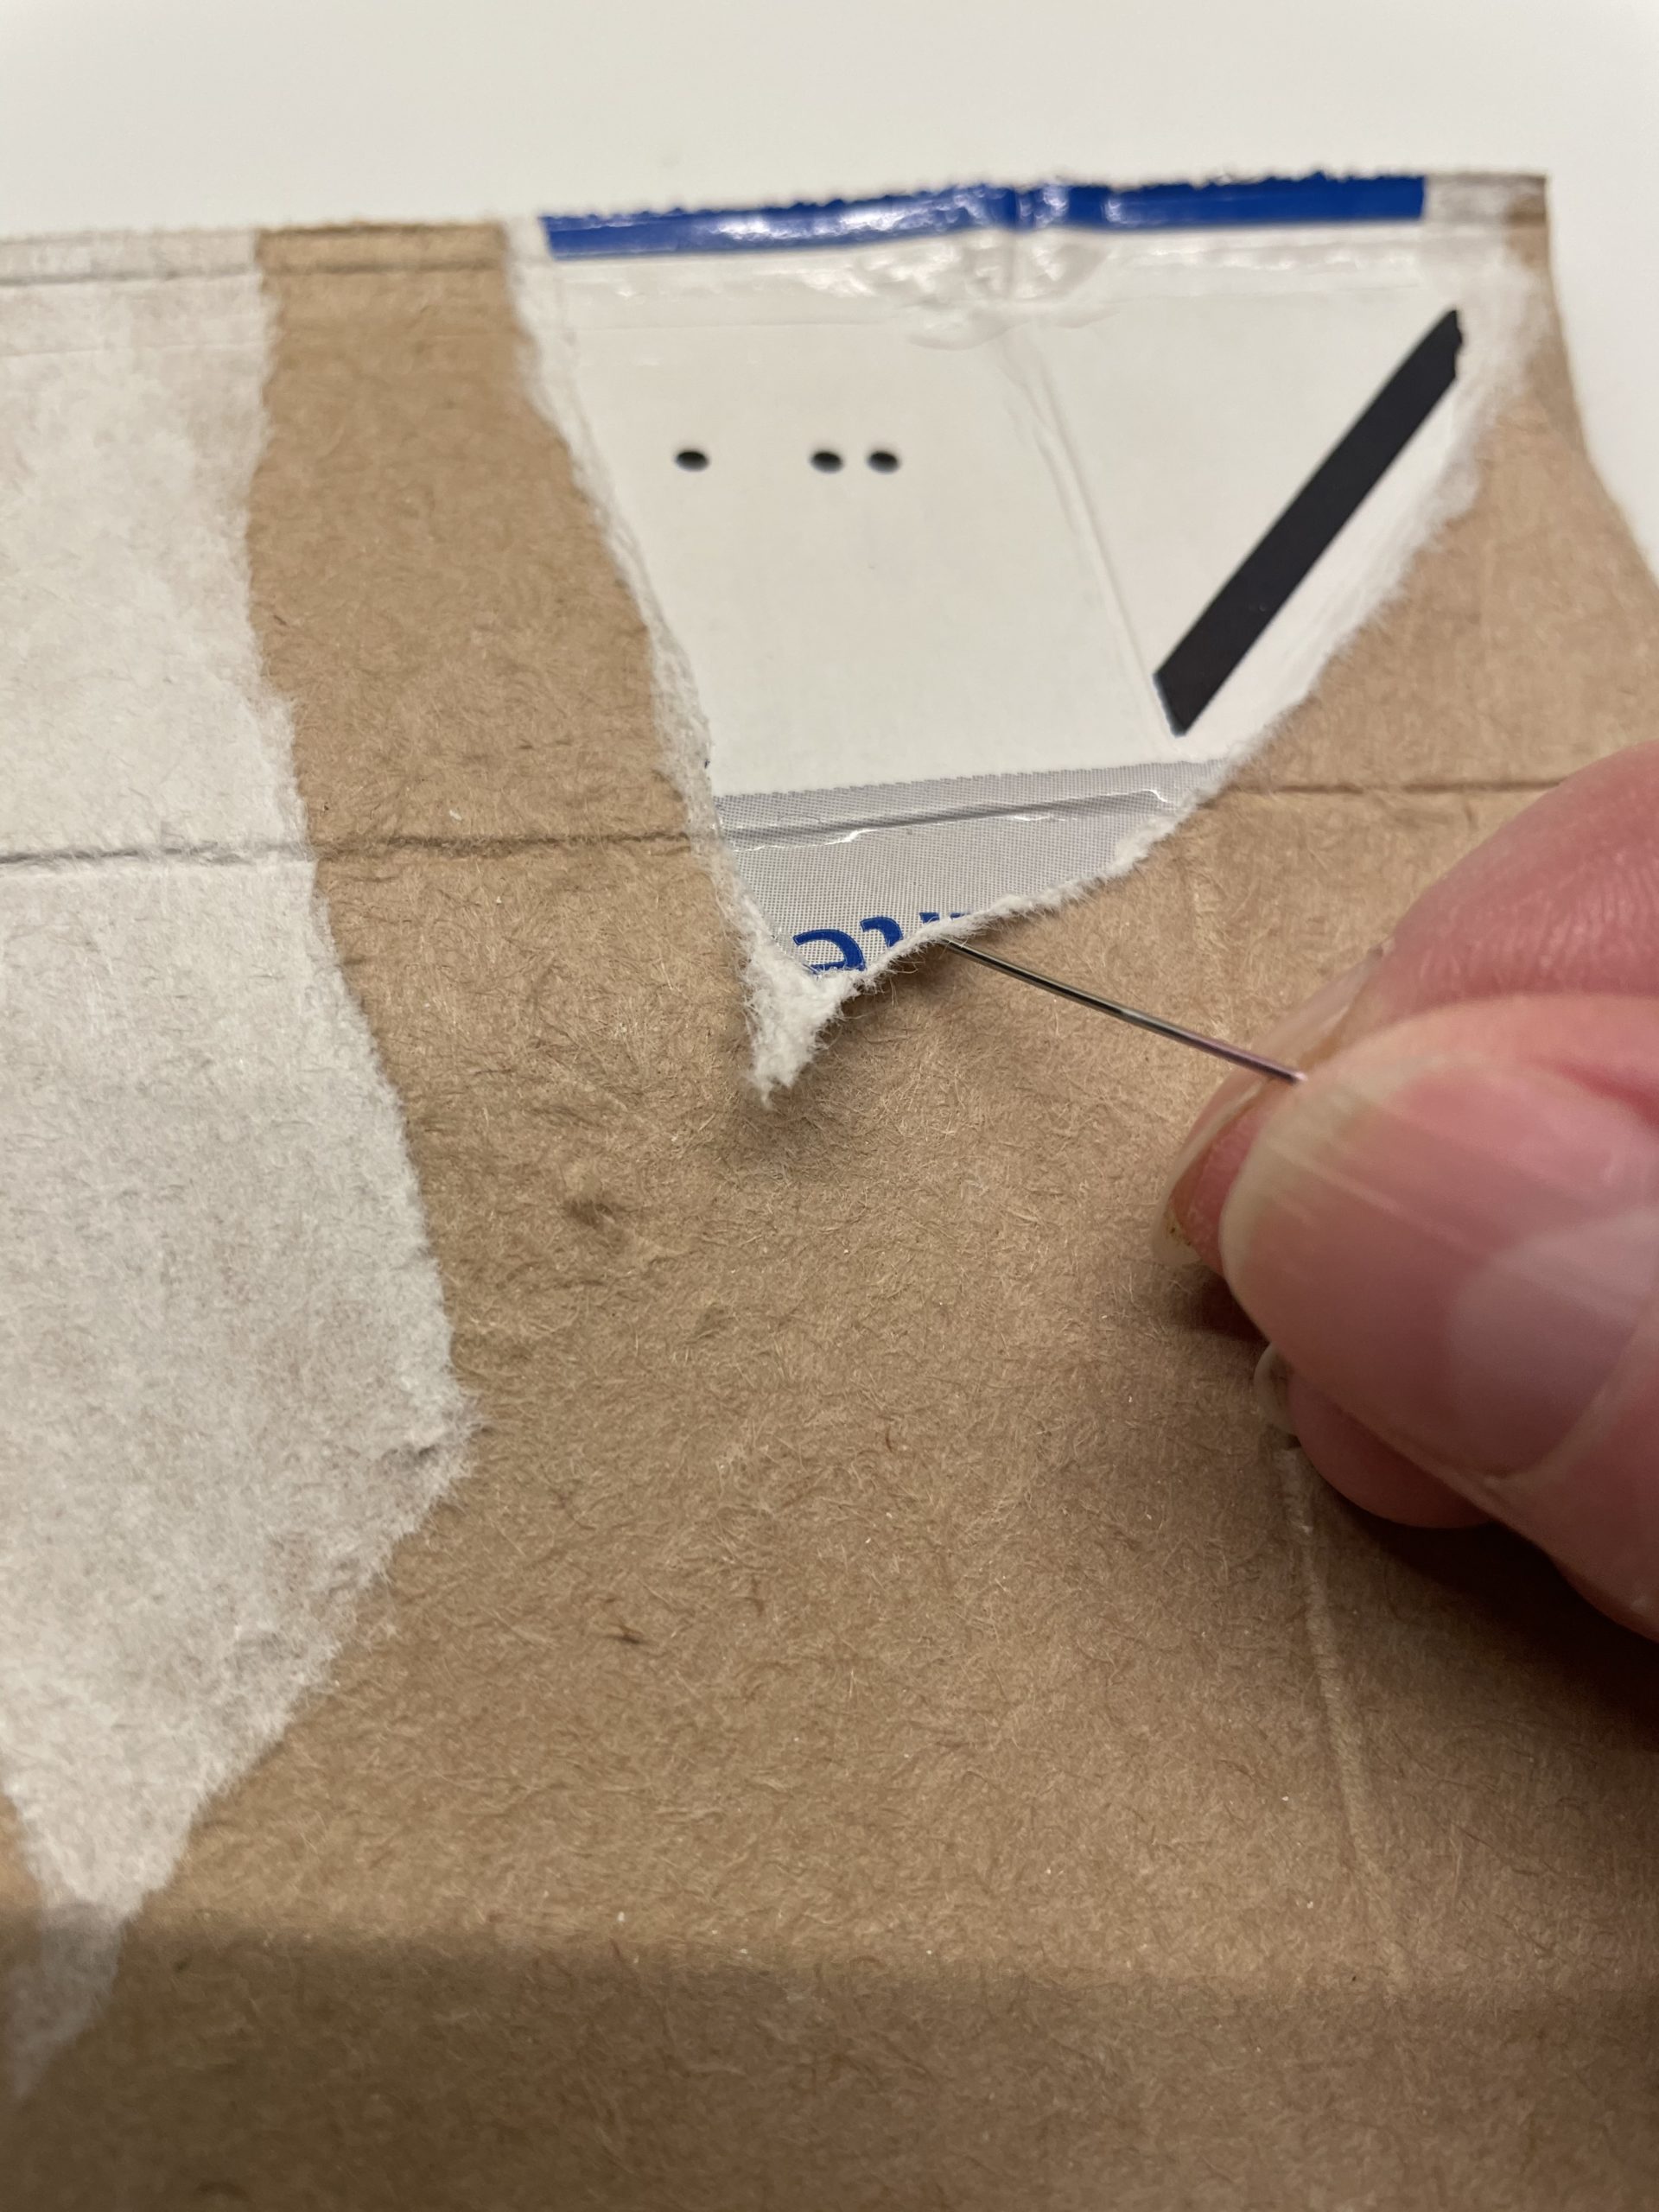
If individual areas can be solved badly, try to raise the coating with a pin. So you get a small piece again, that you can pull off then.

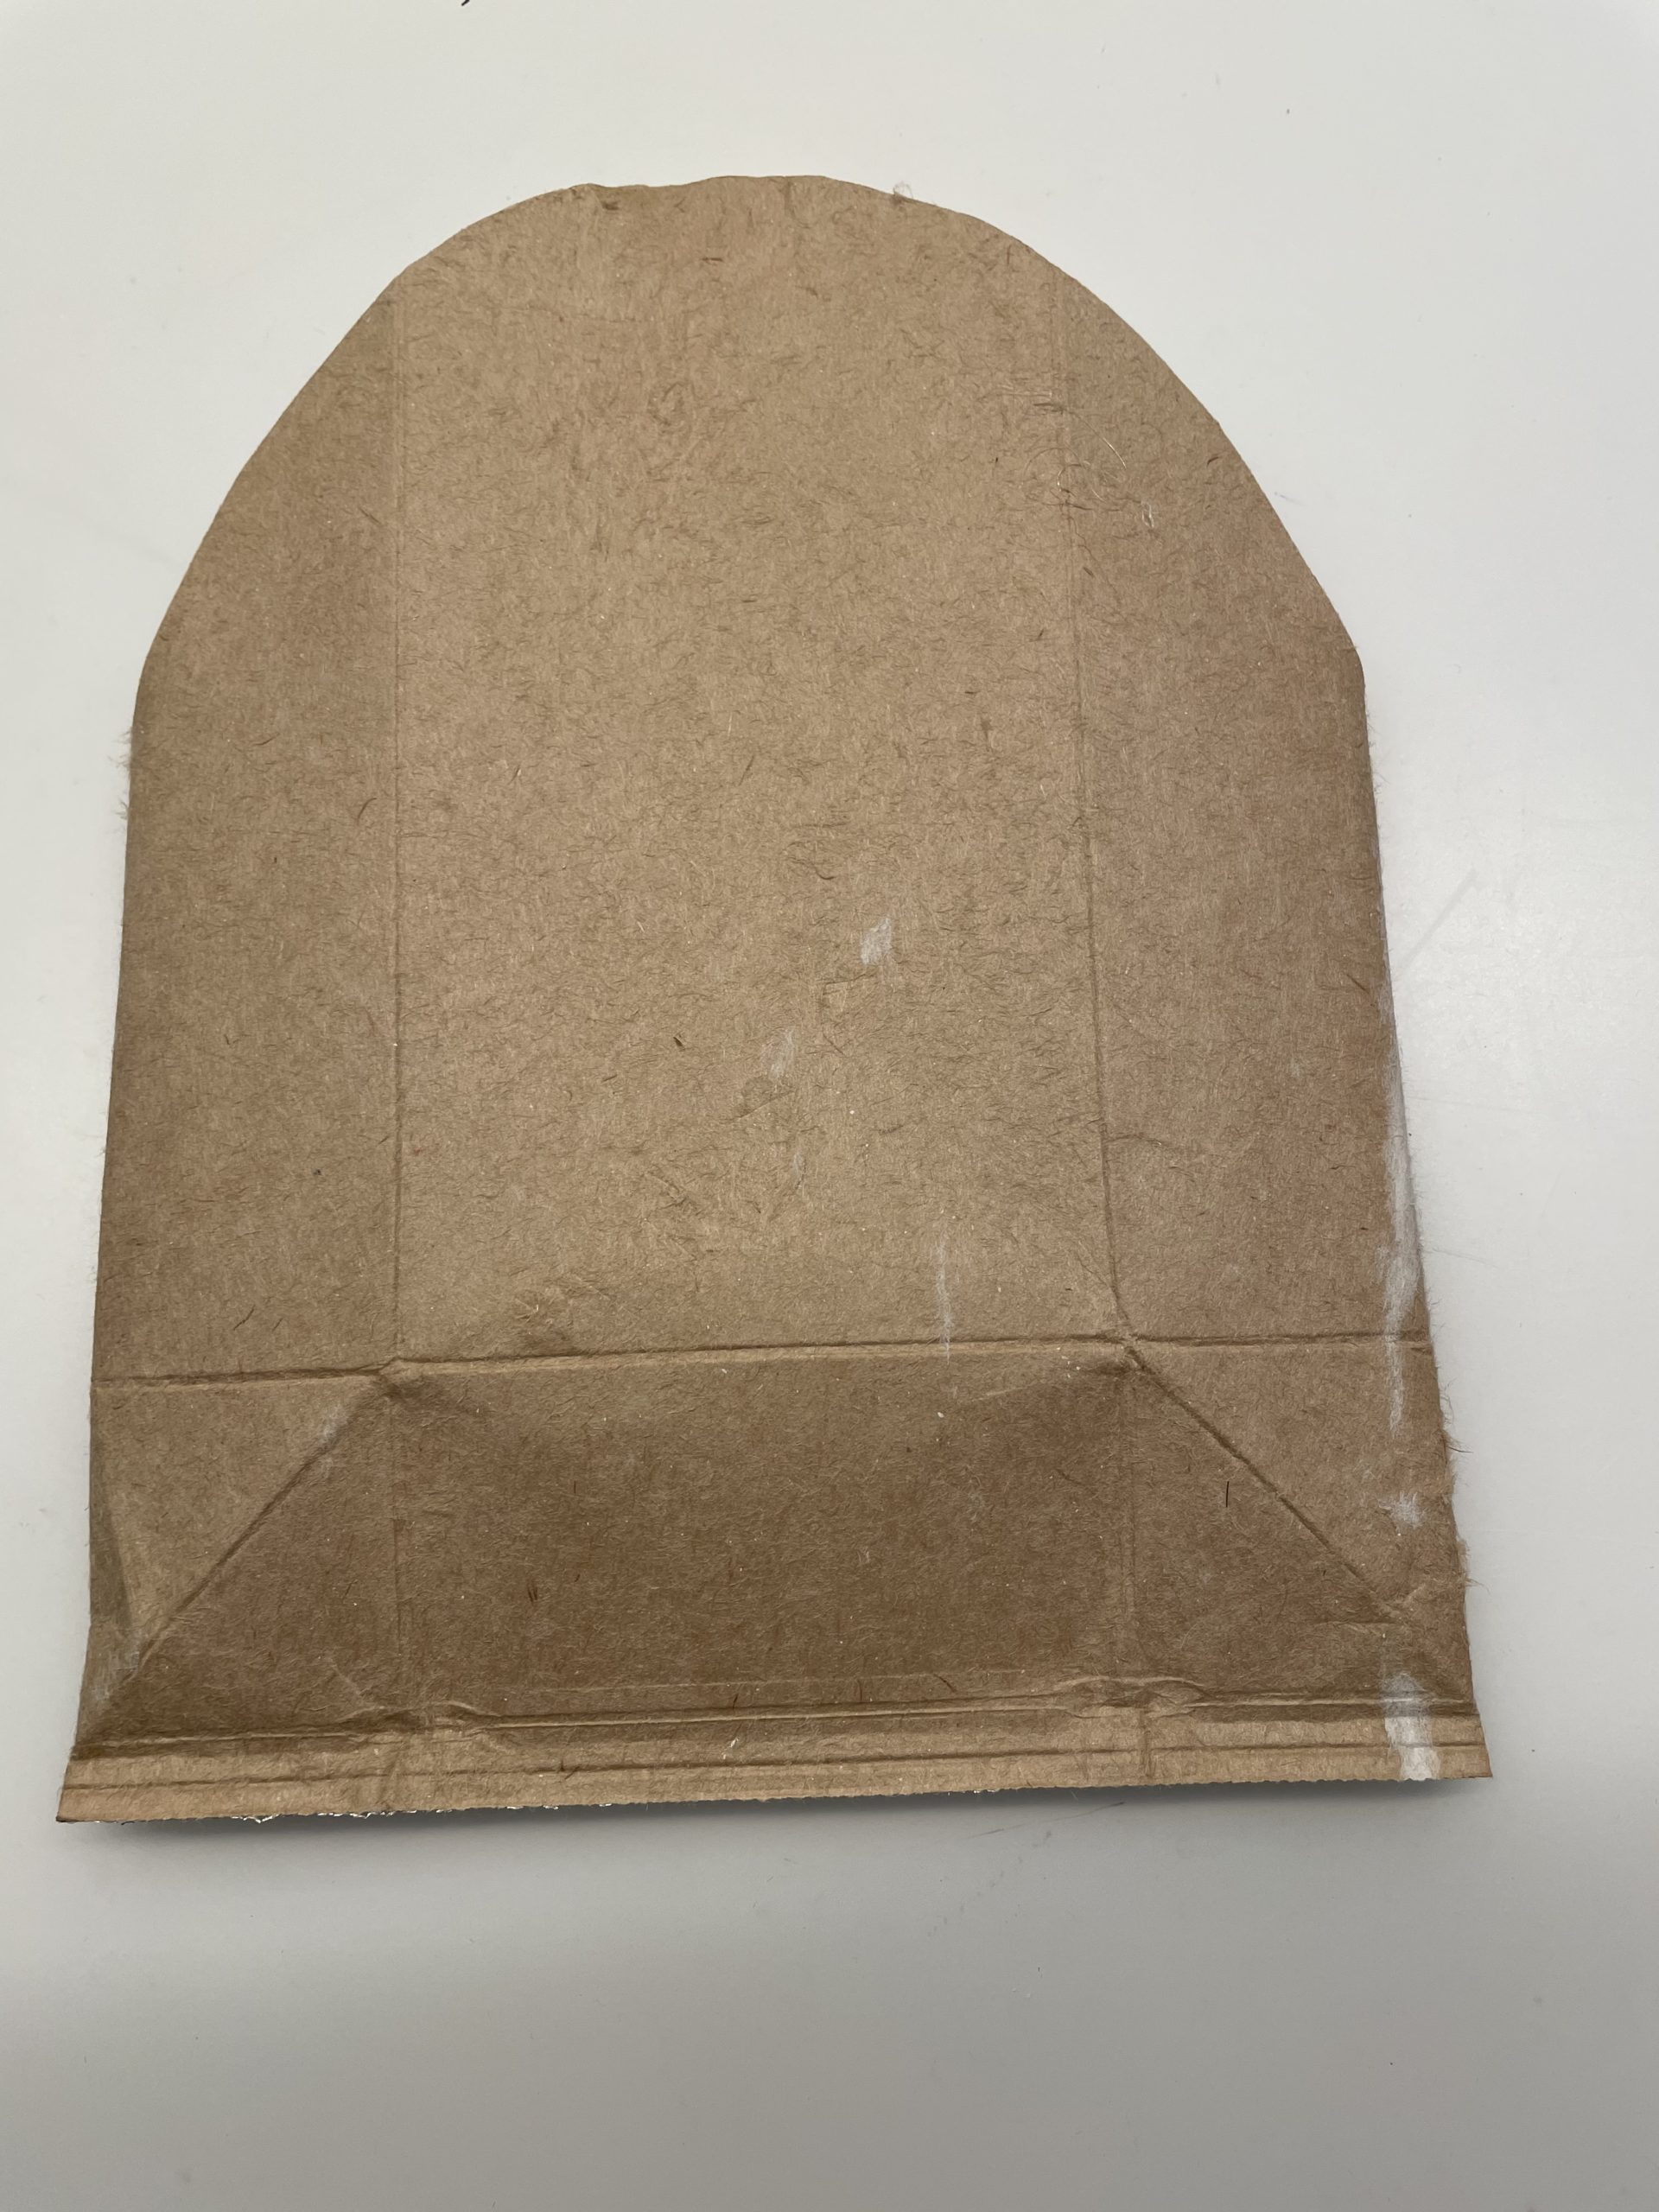
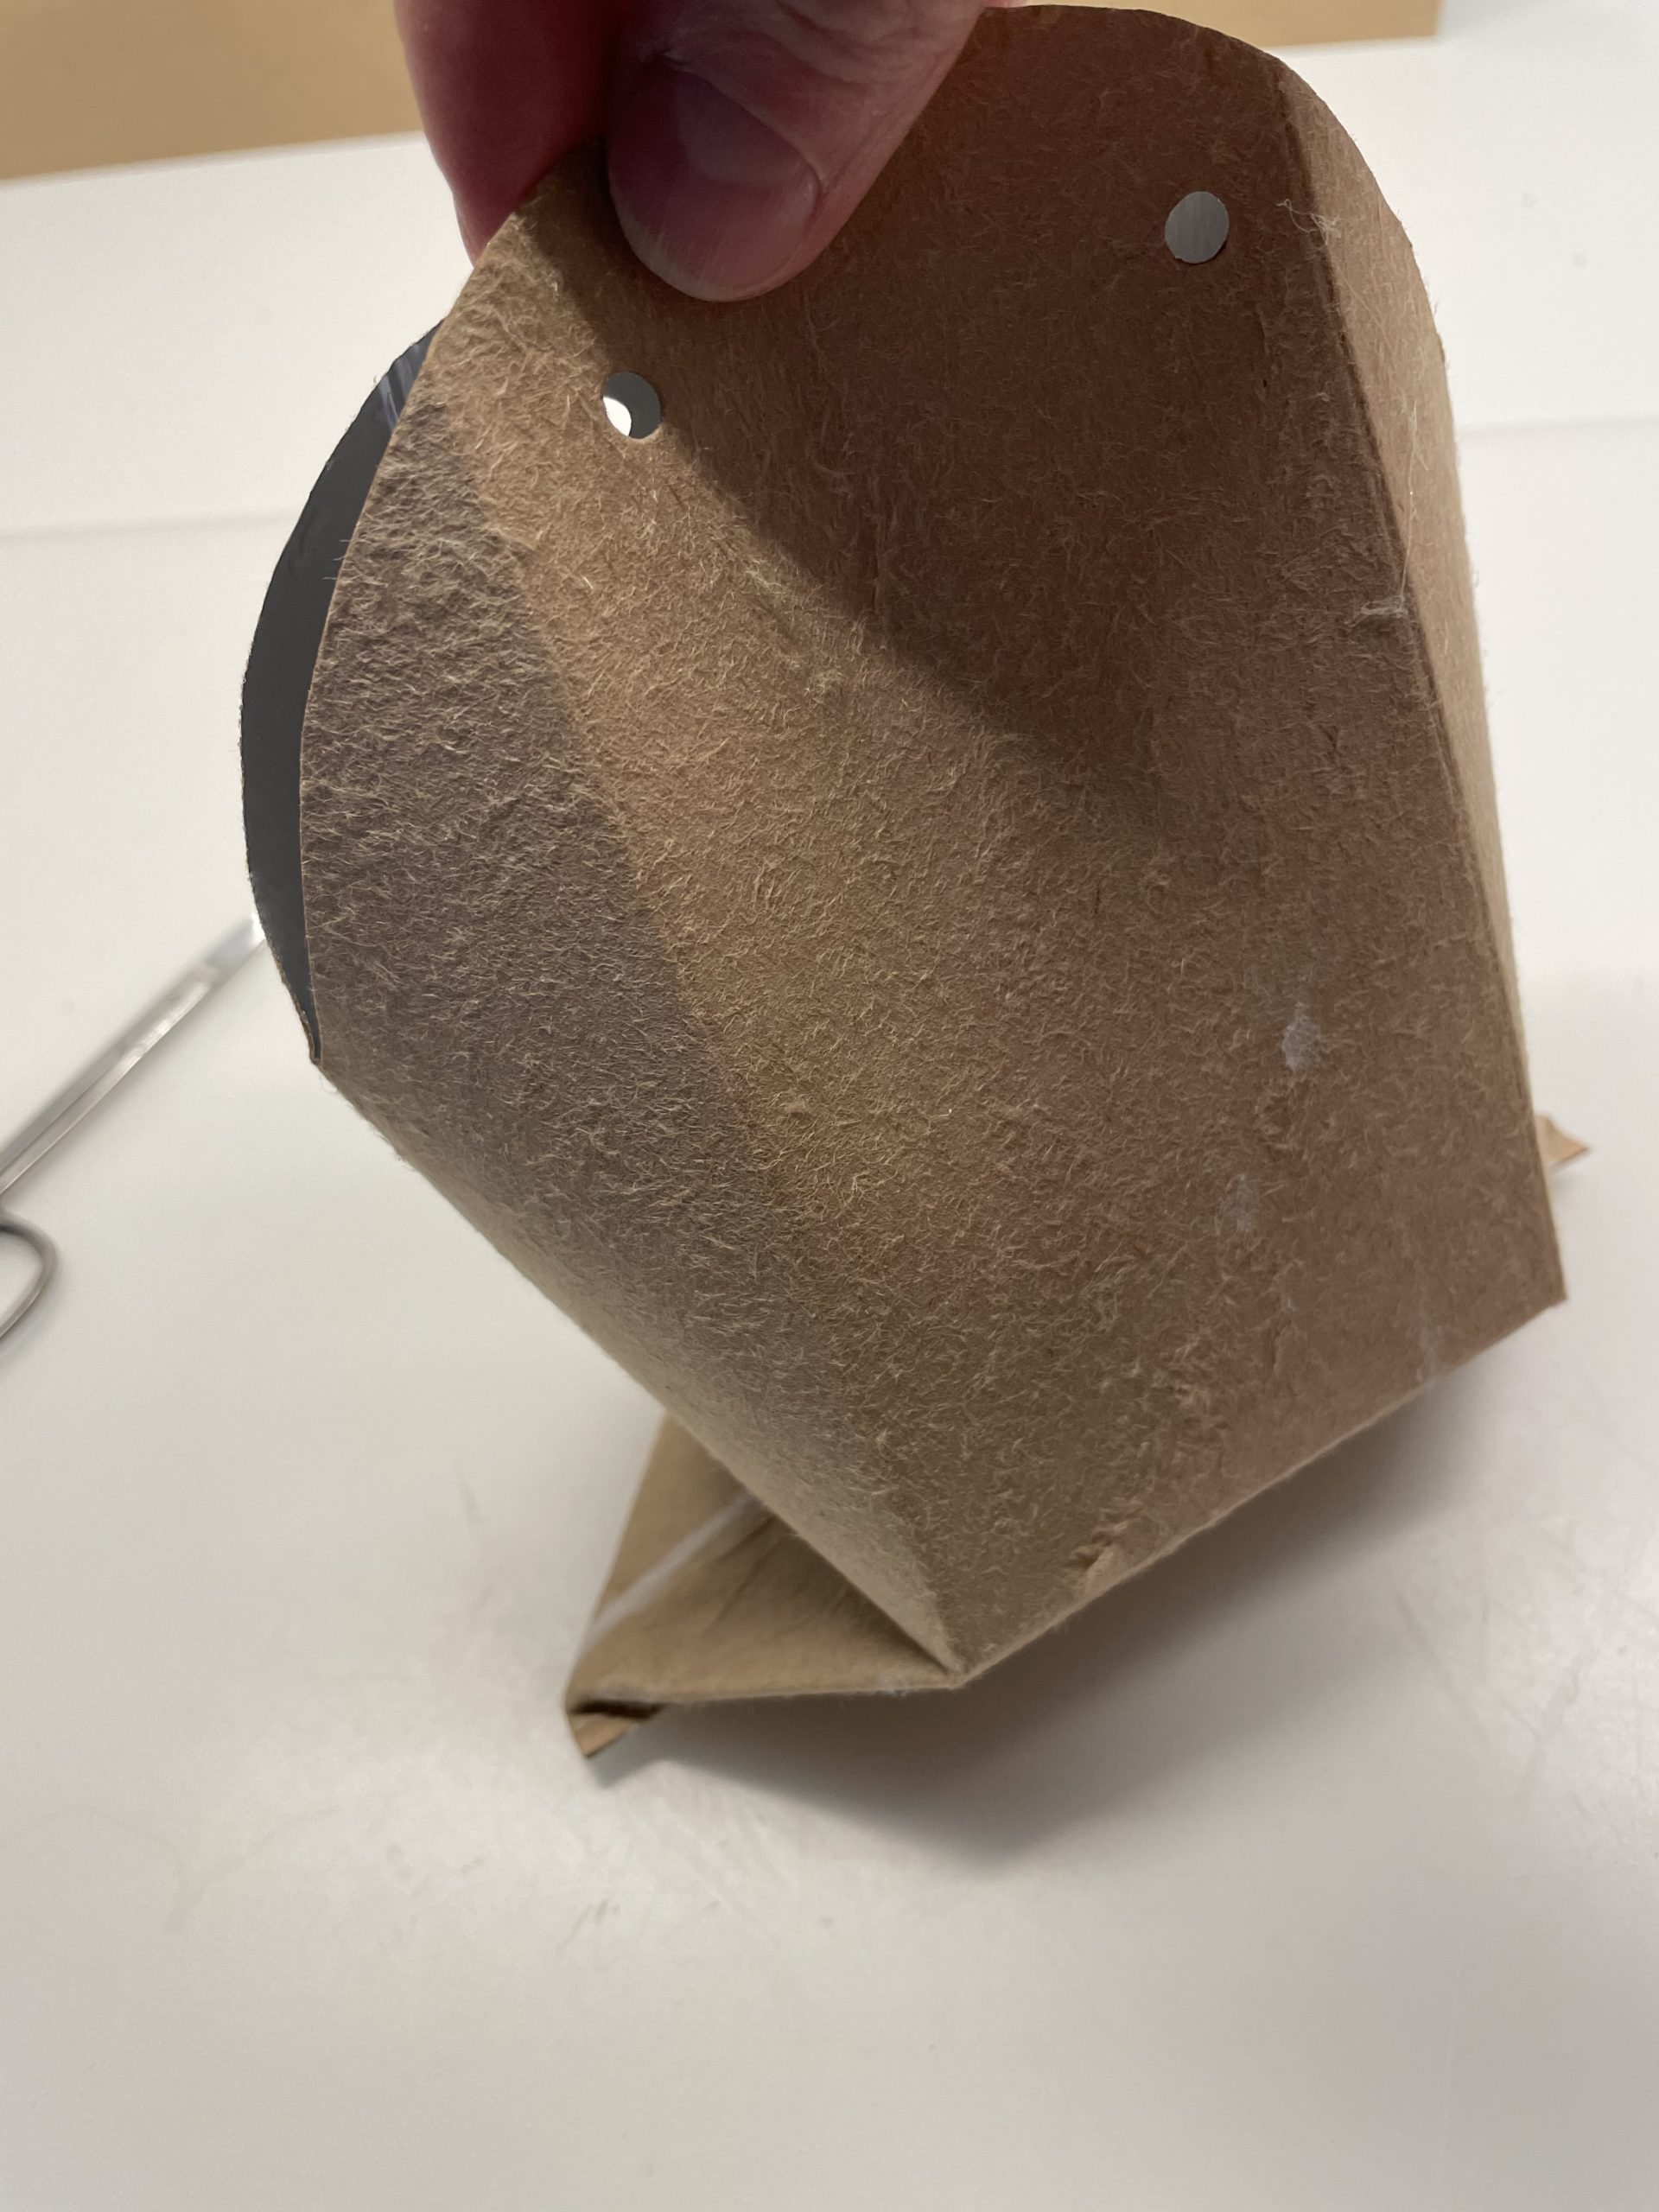
The whole package looks like this at the end.
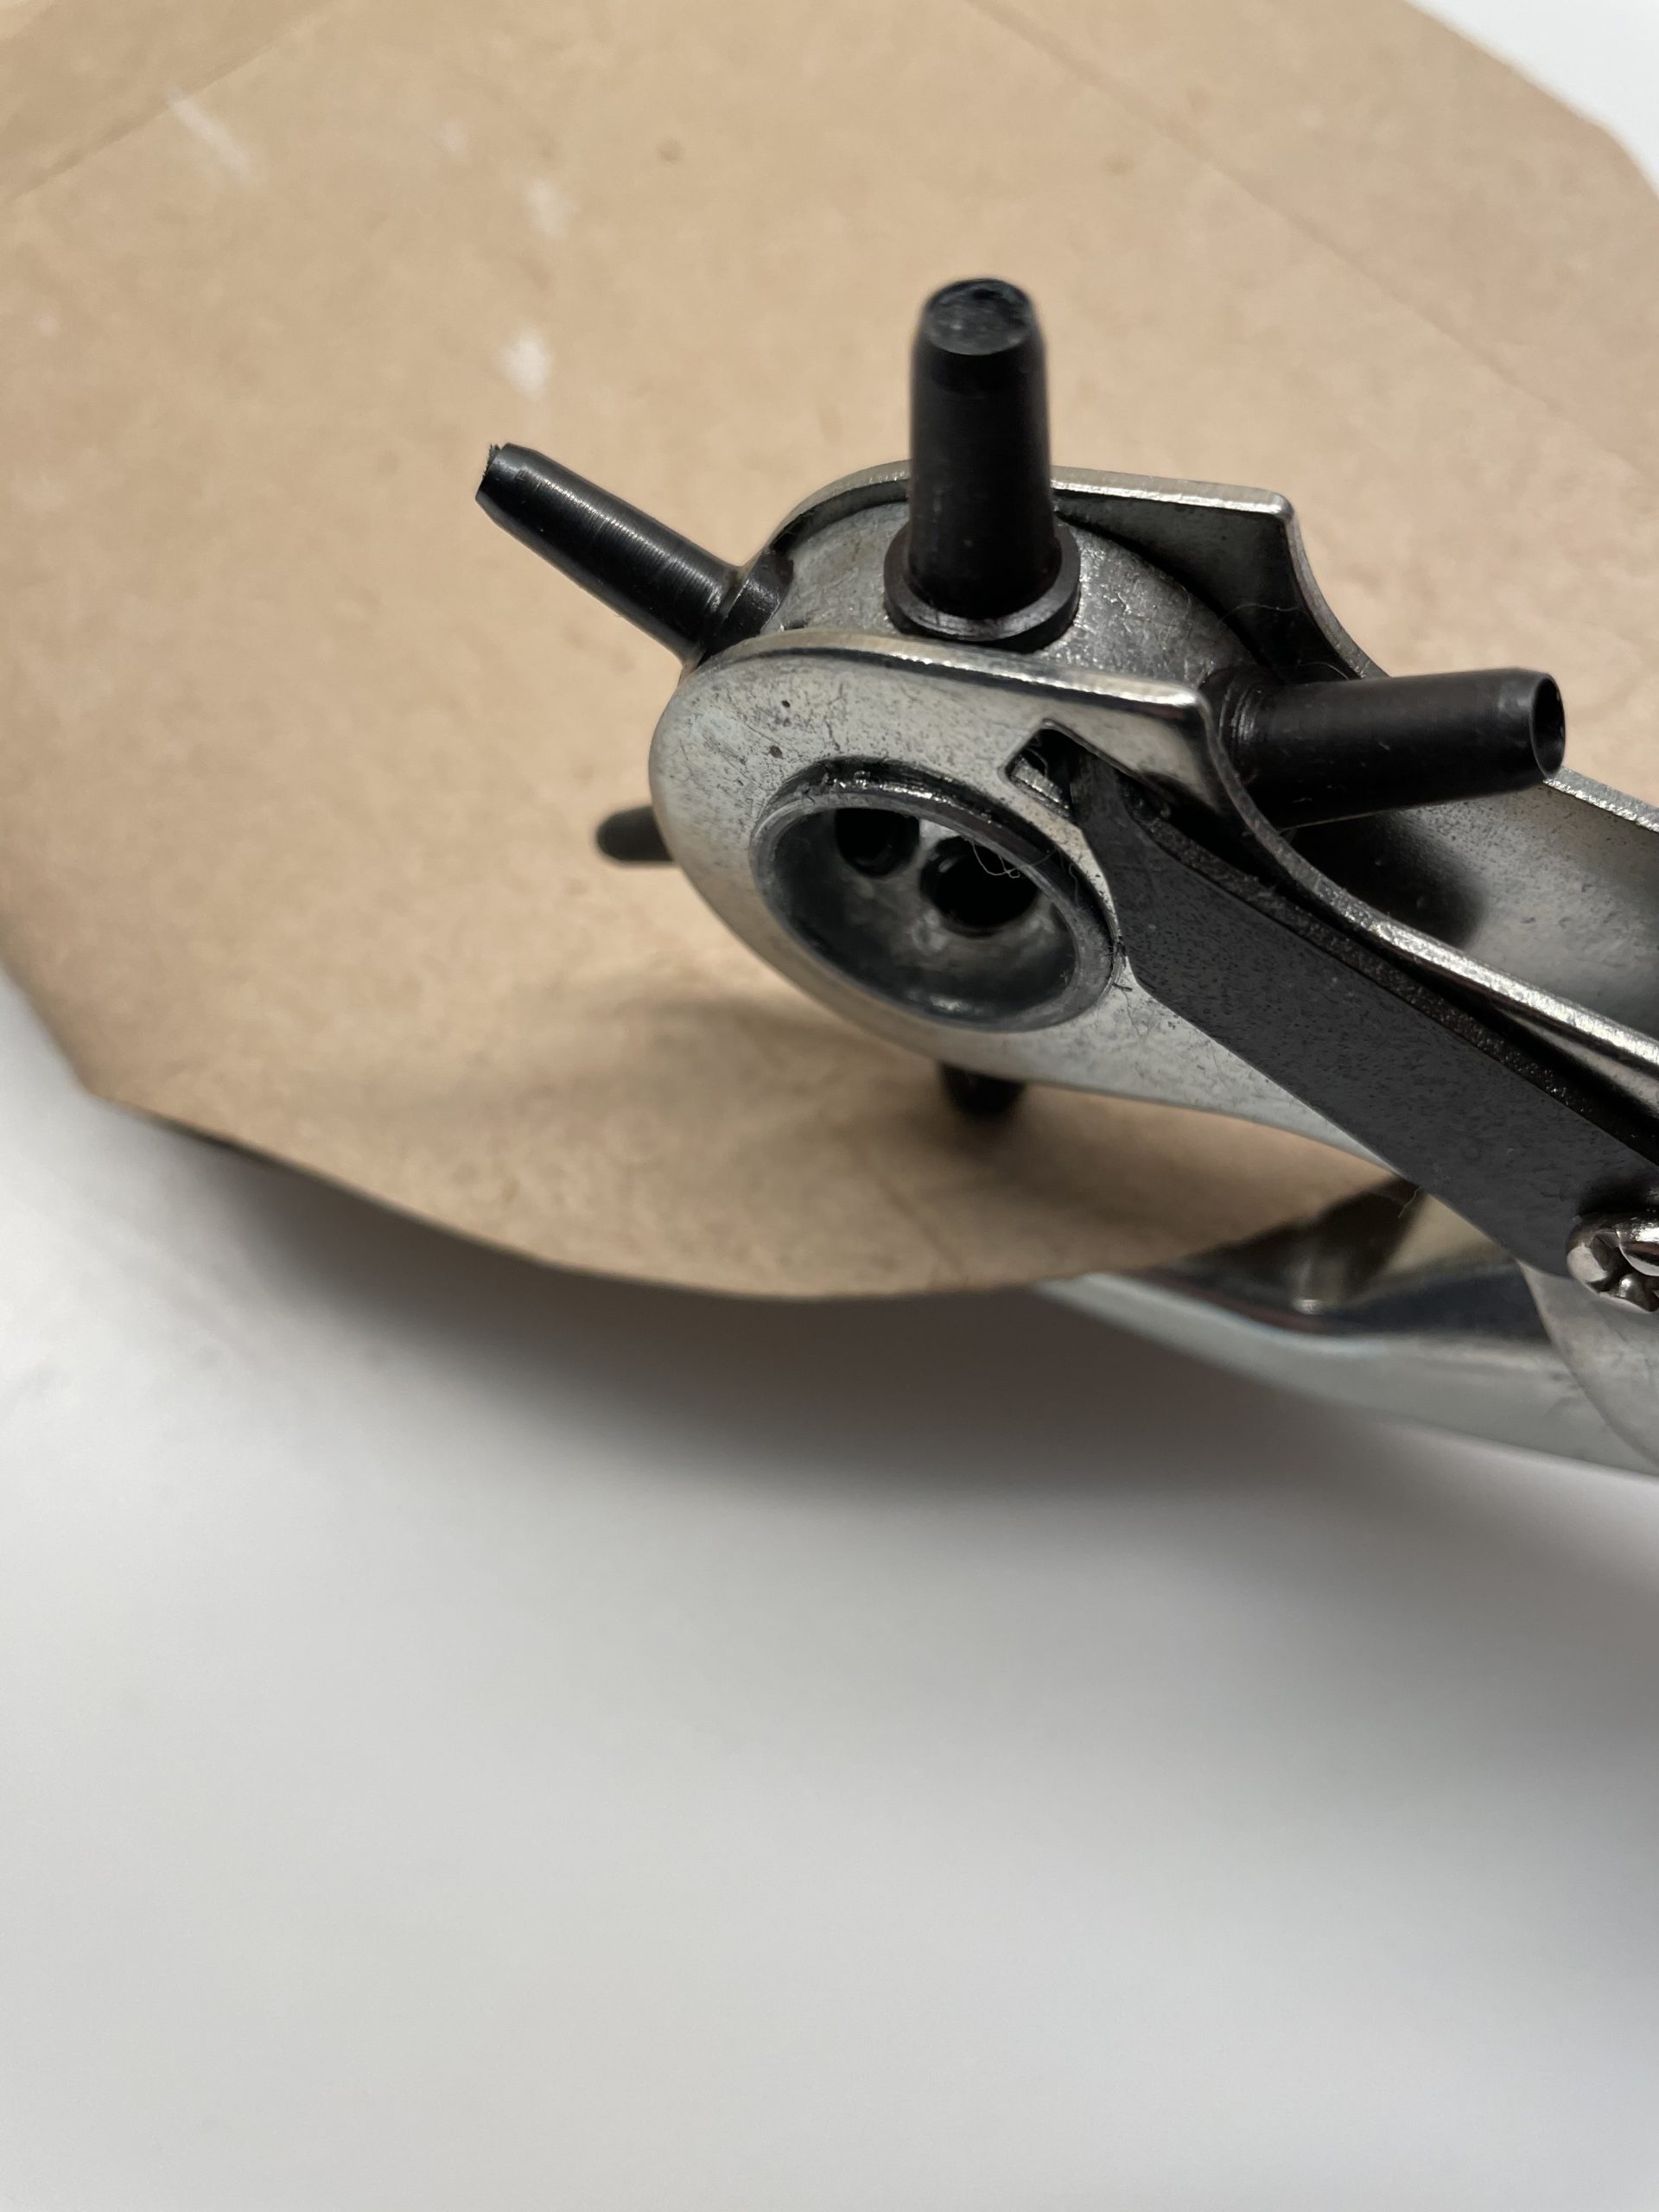
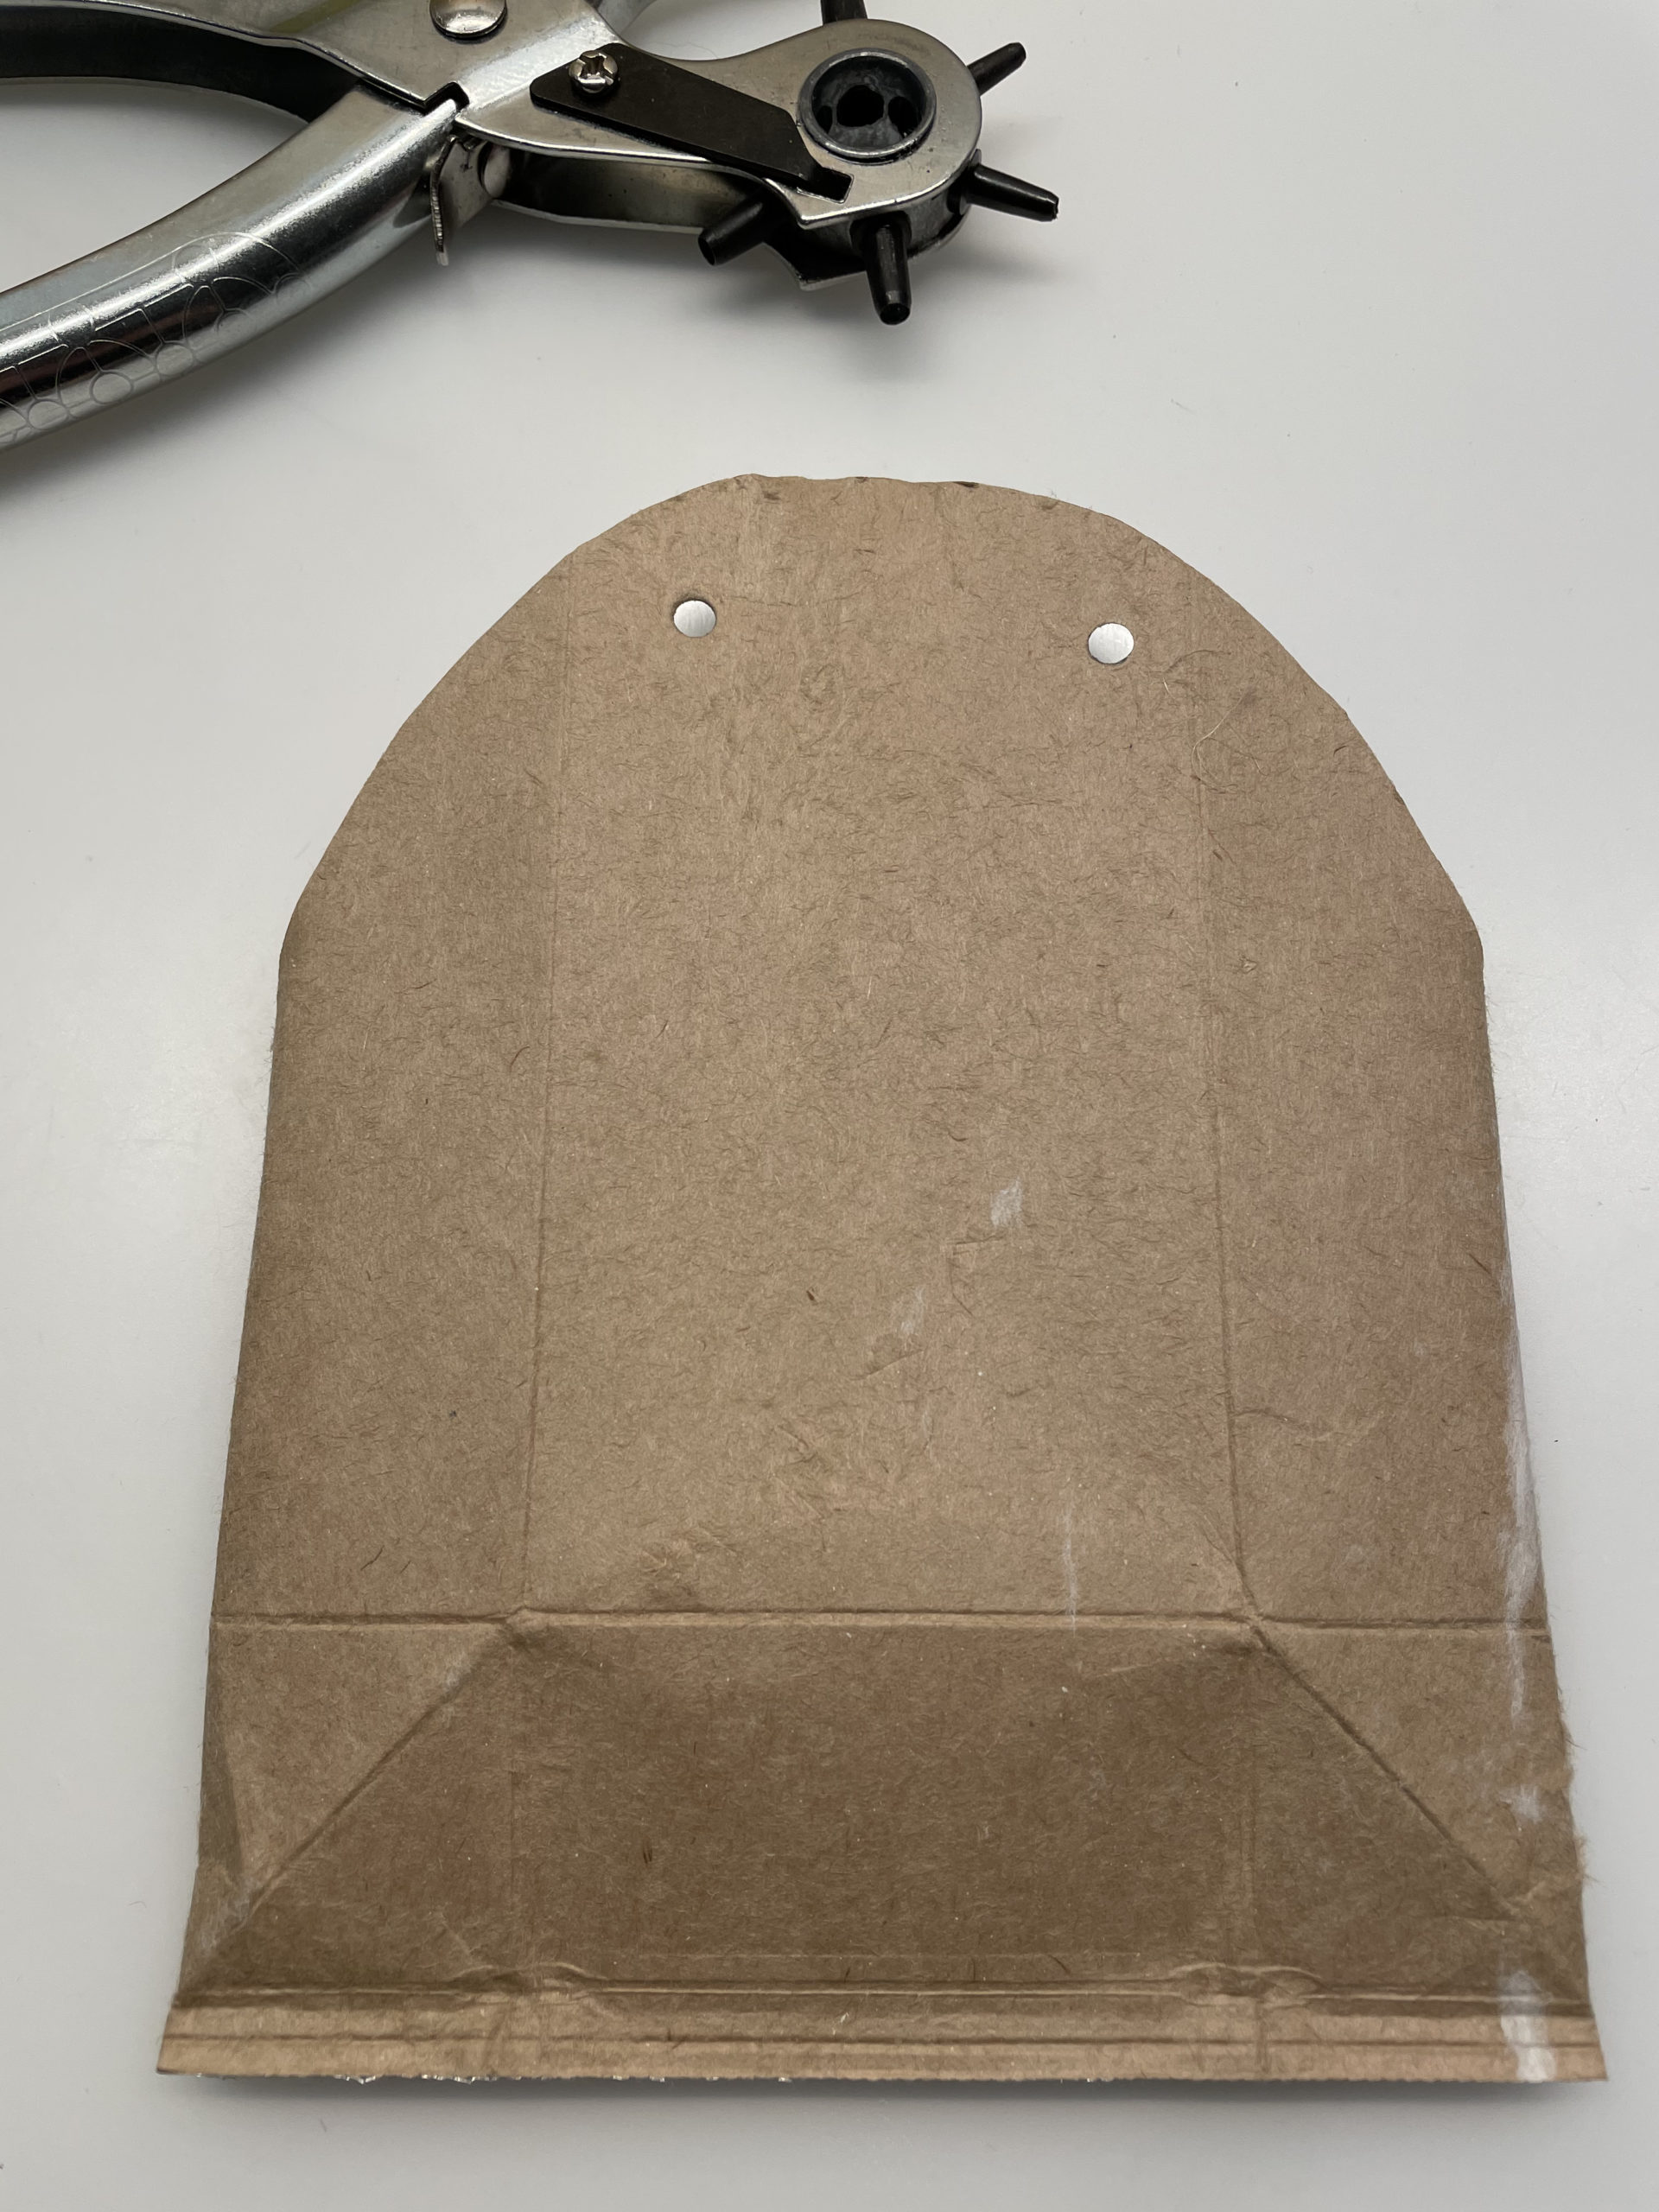
In the upper round you now punch two holes with the punched pliers. These should be on front and back at the same place.
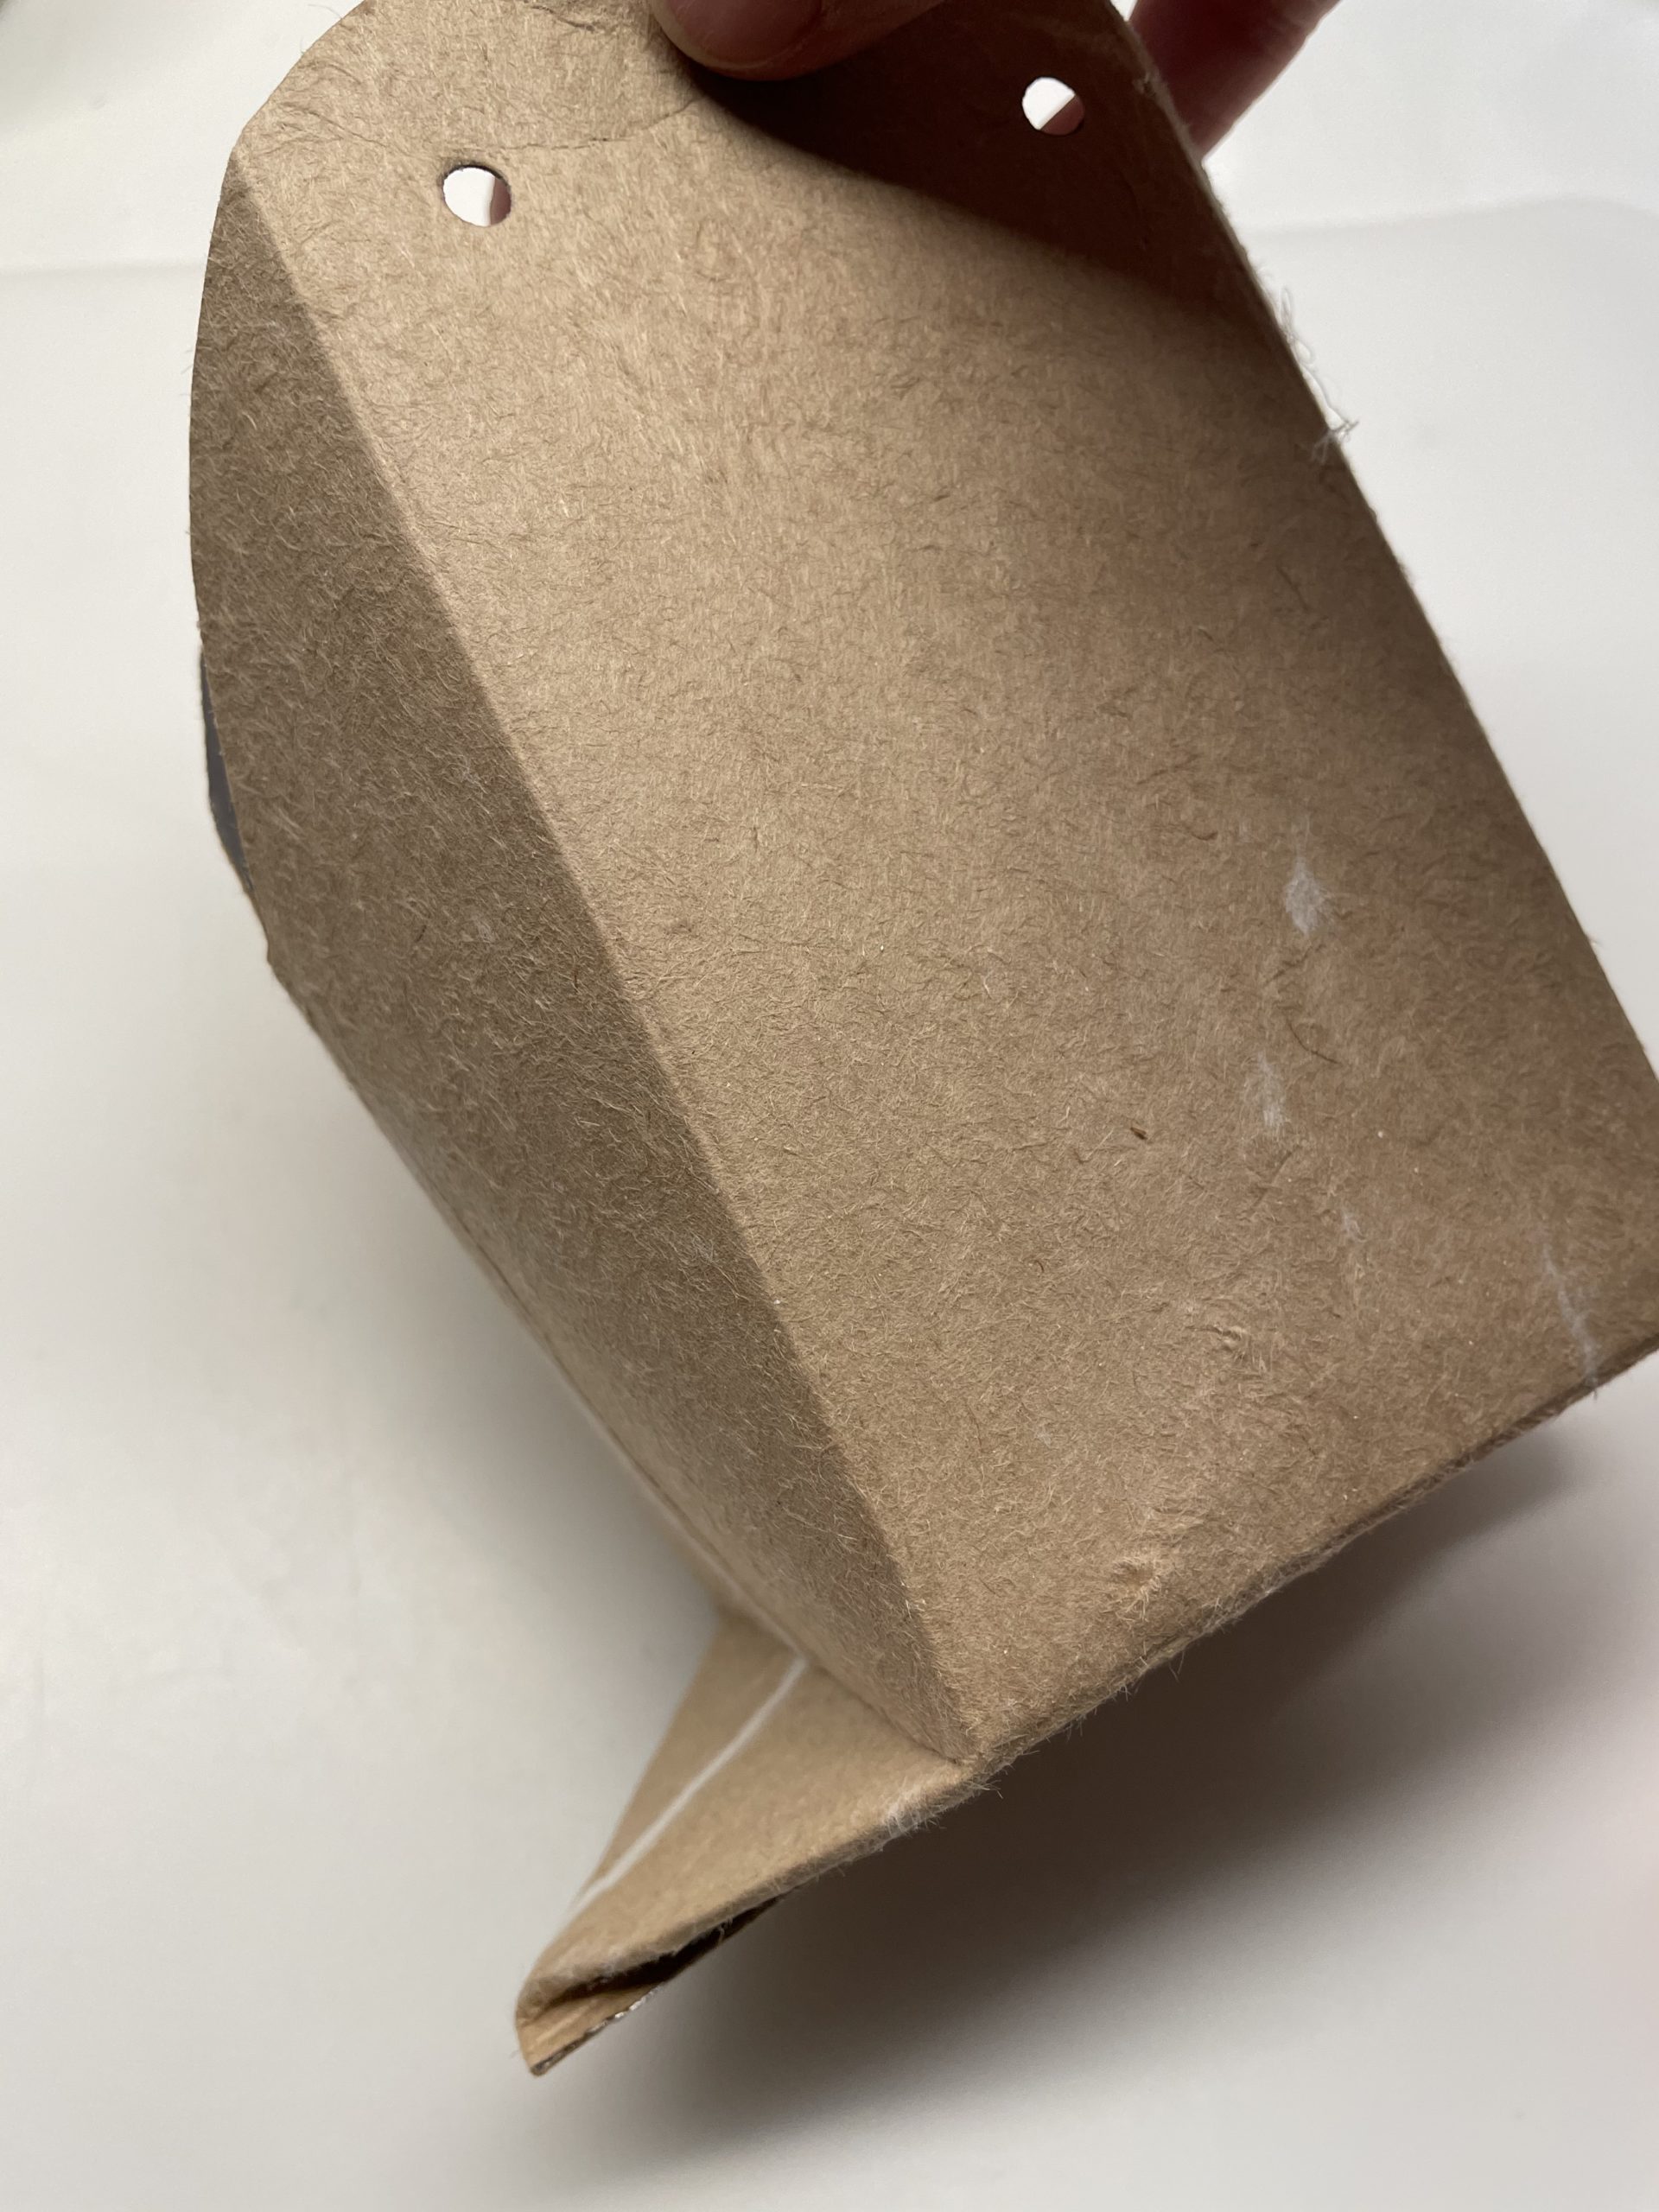
The bottom of the packaging is now folded as in the picture. To do this, push the bag a bit apart and the sides slightly inside. Through the pre-shaped packaging, the top of the floor automatically bends outwards. Then pushes the tip flat.
So the bag stands well on the ground. Above the bag is pressed flat.
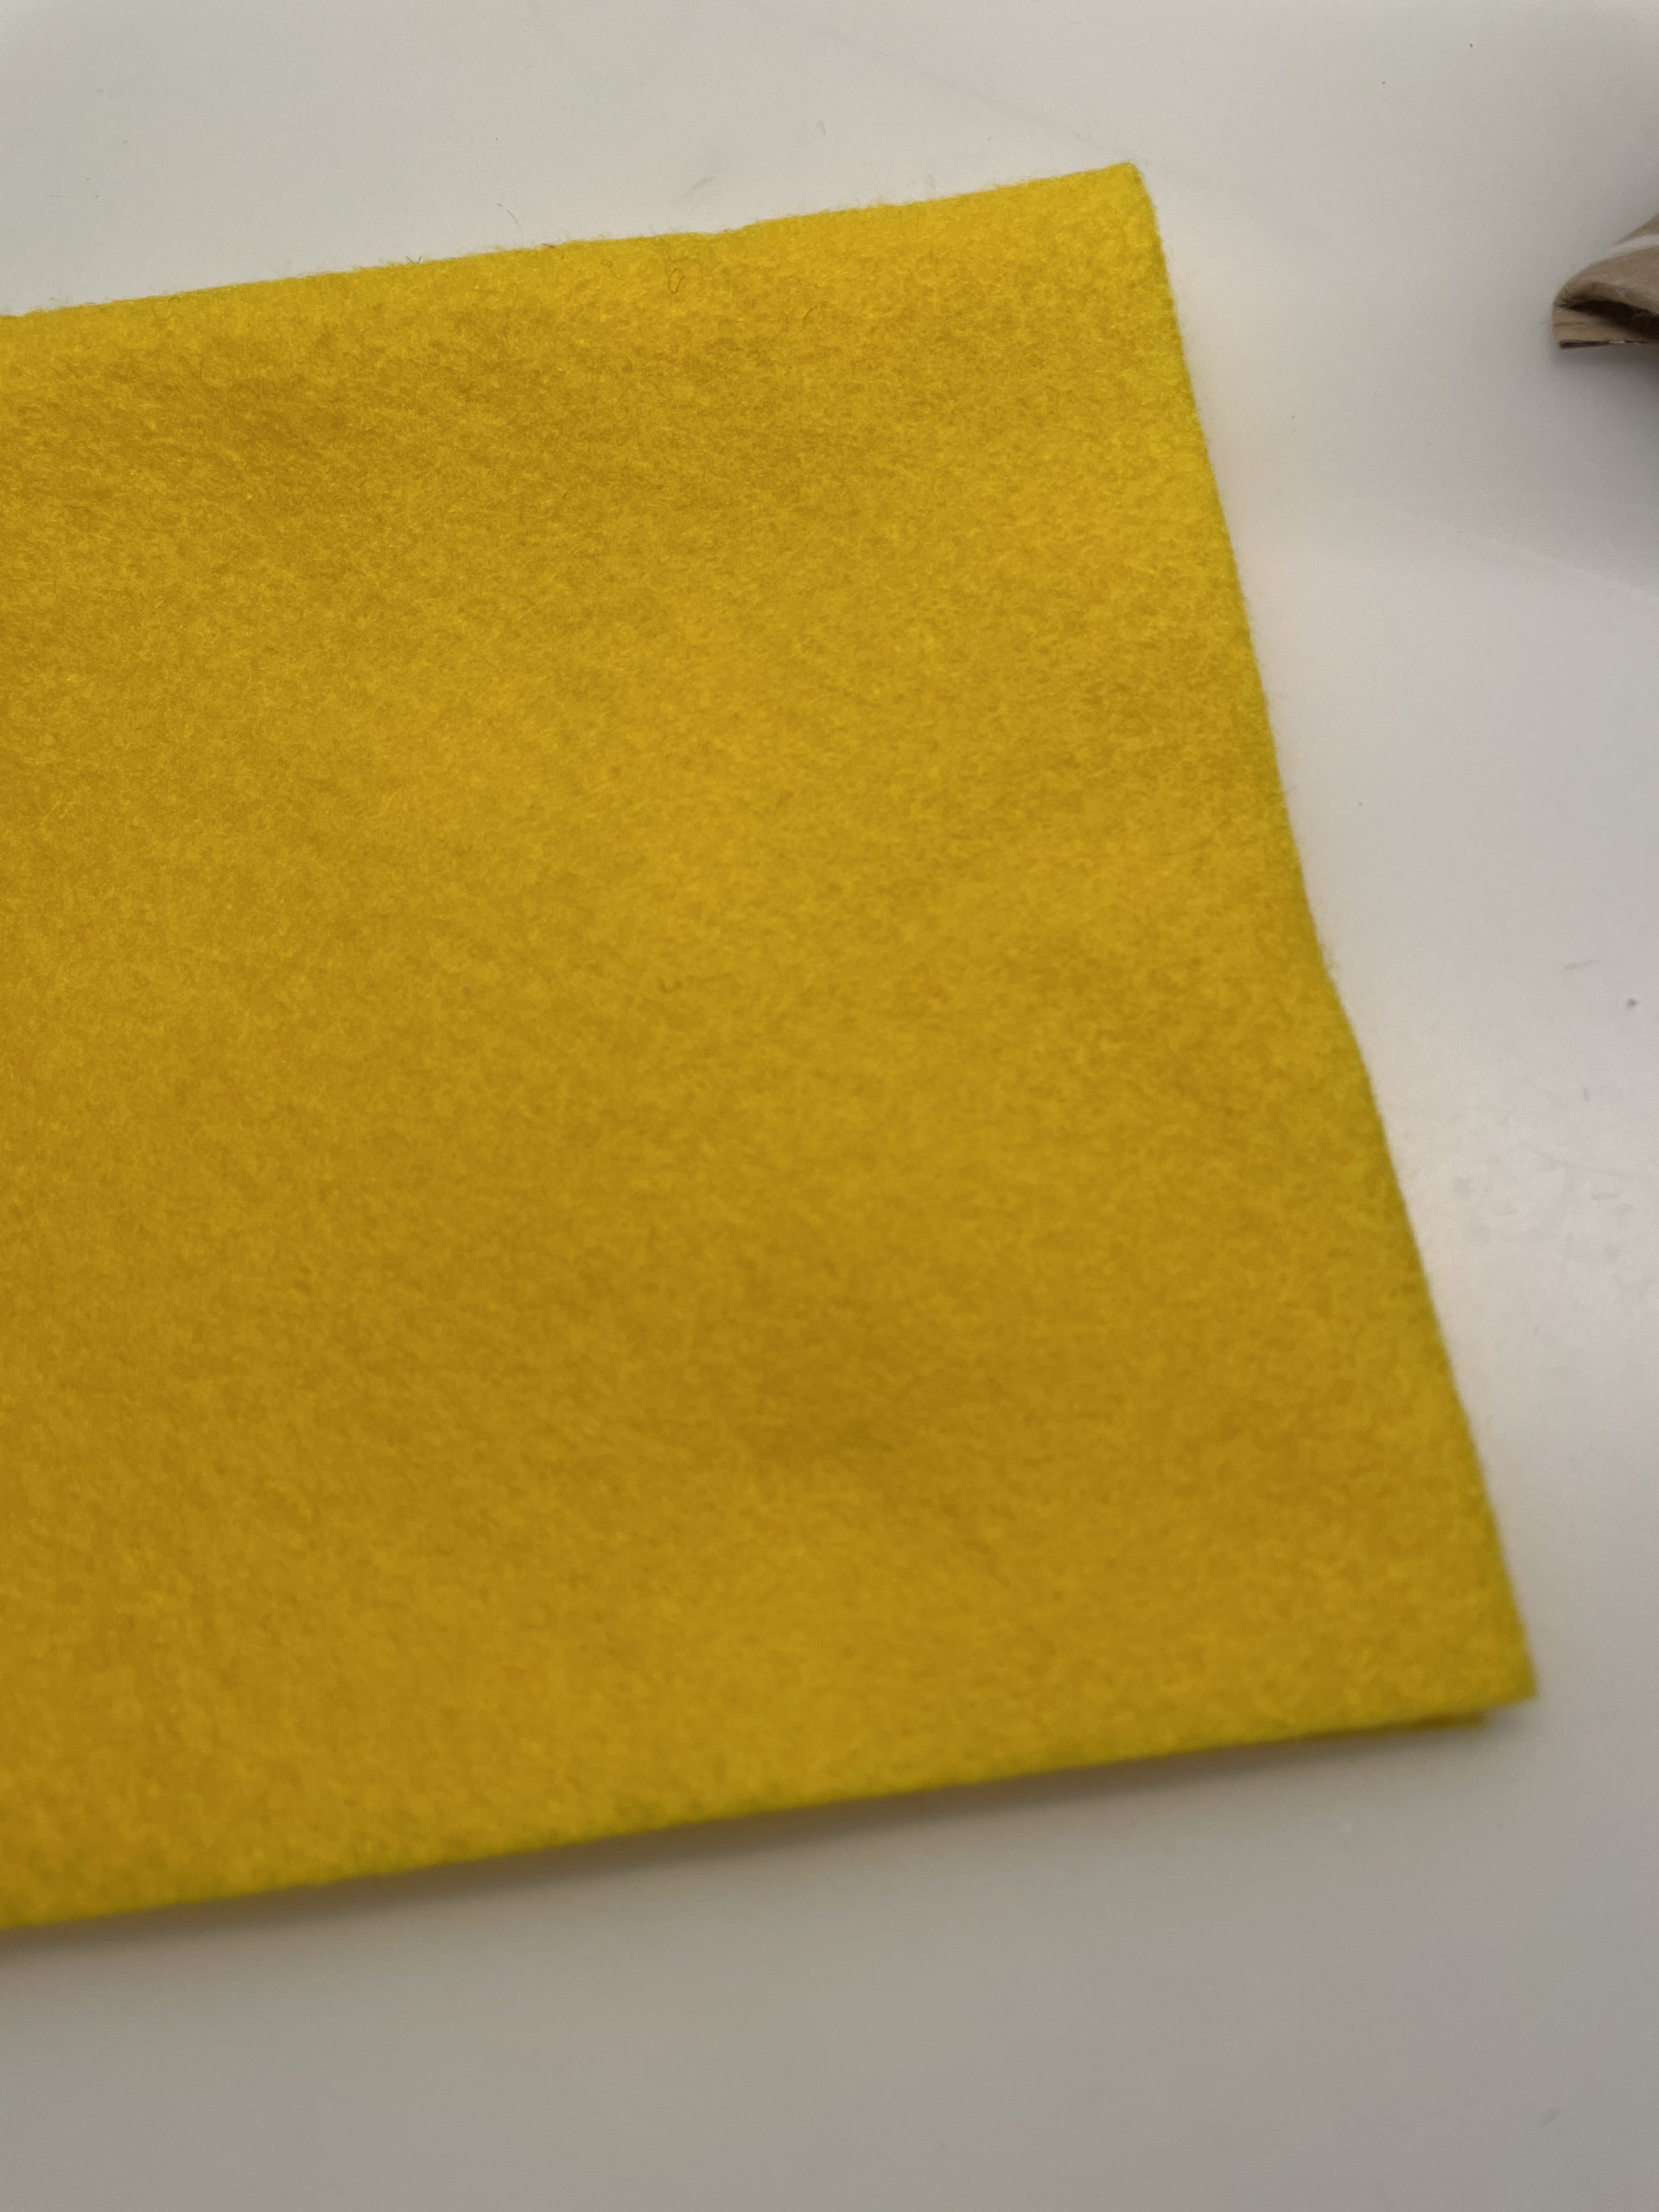
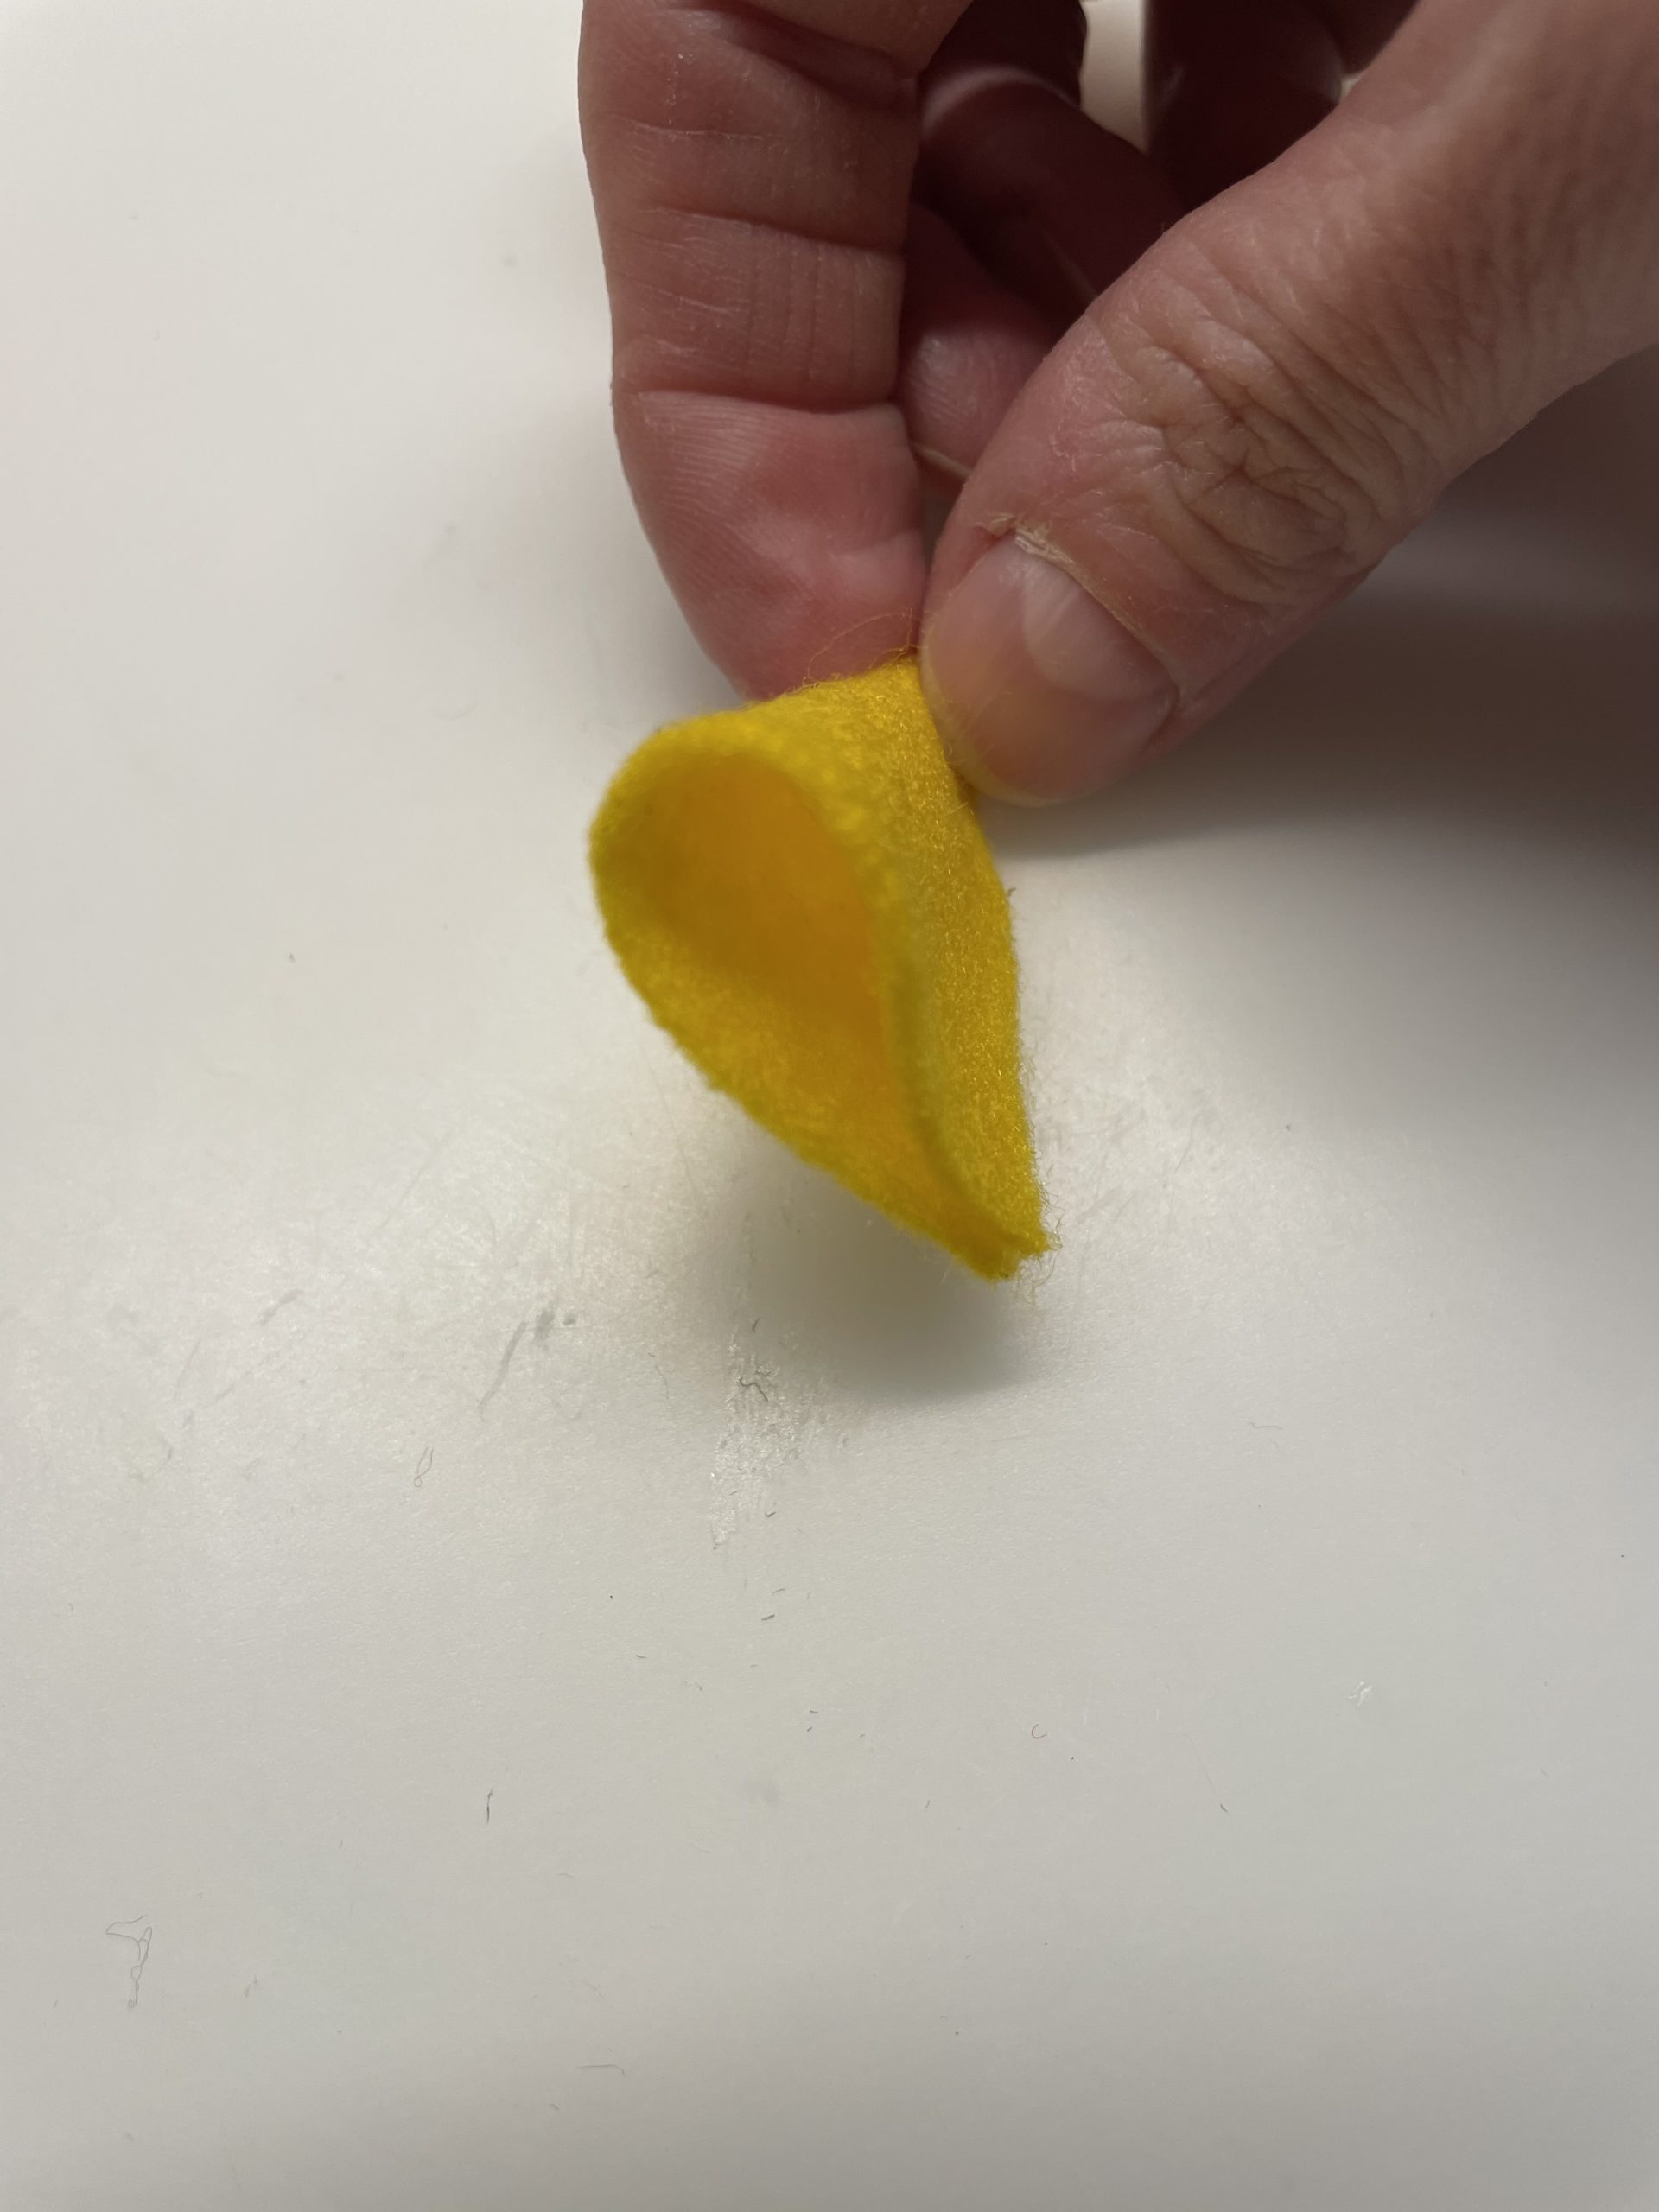
You need the yellow felt now.
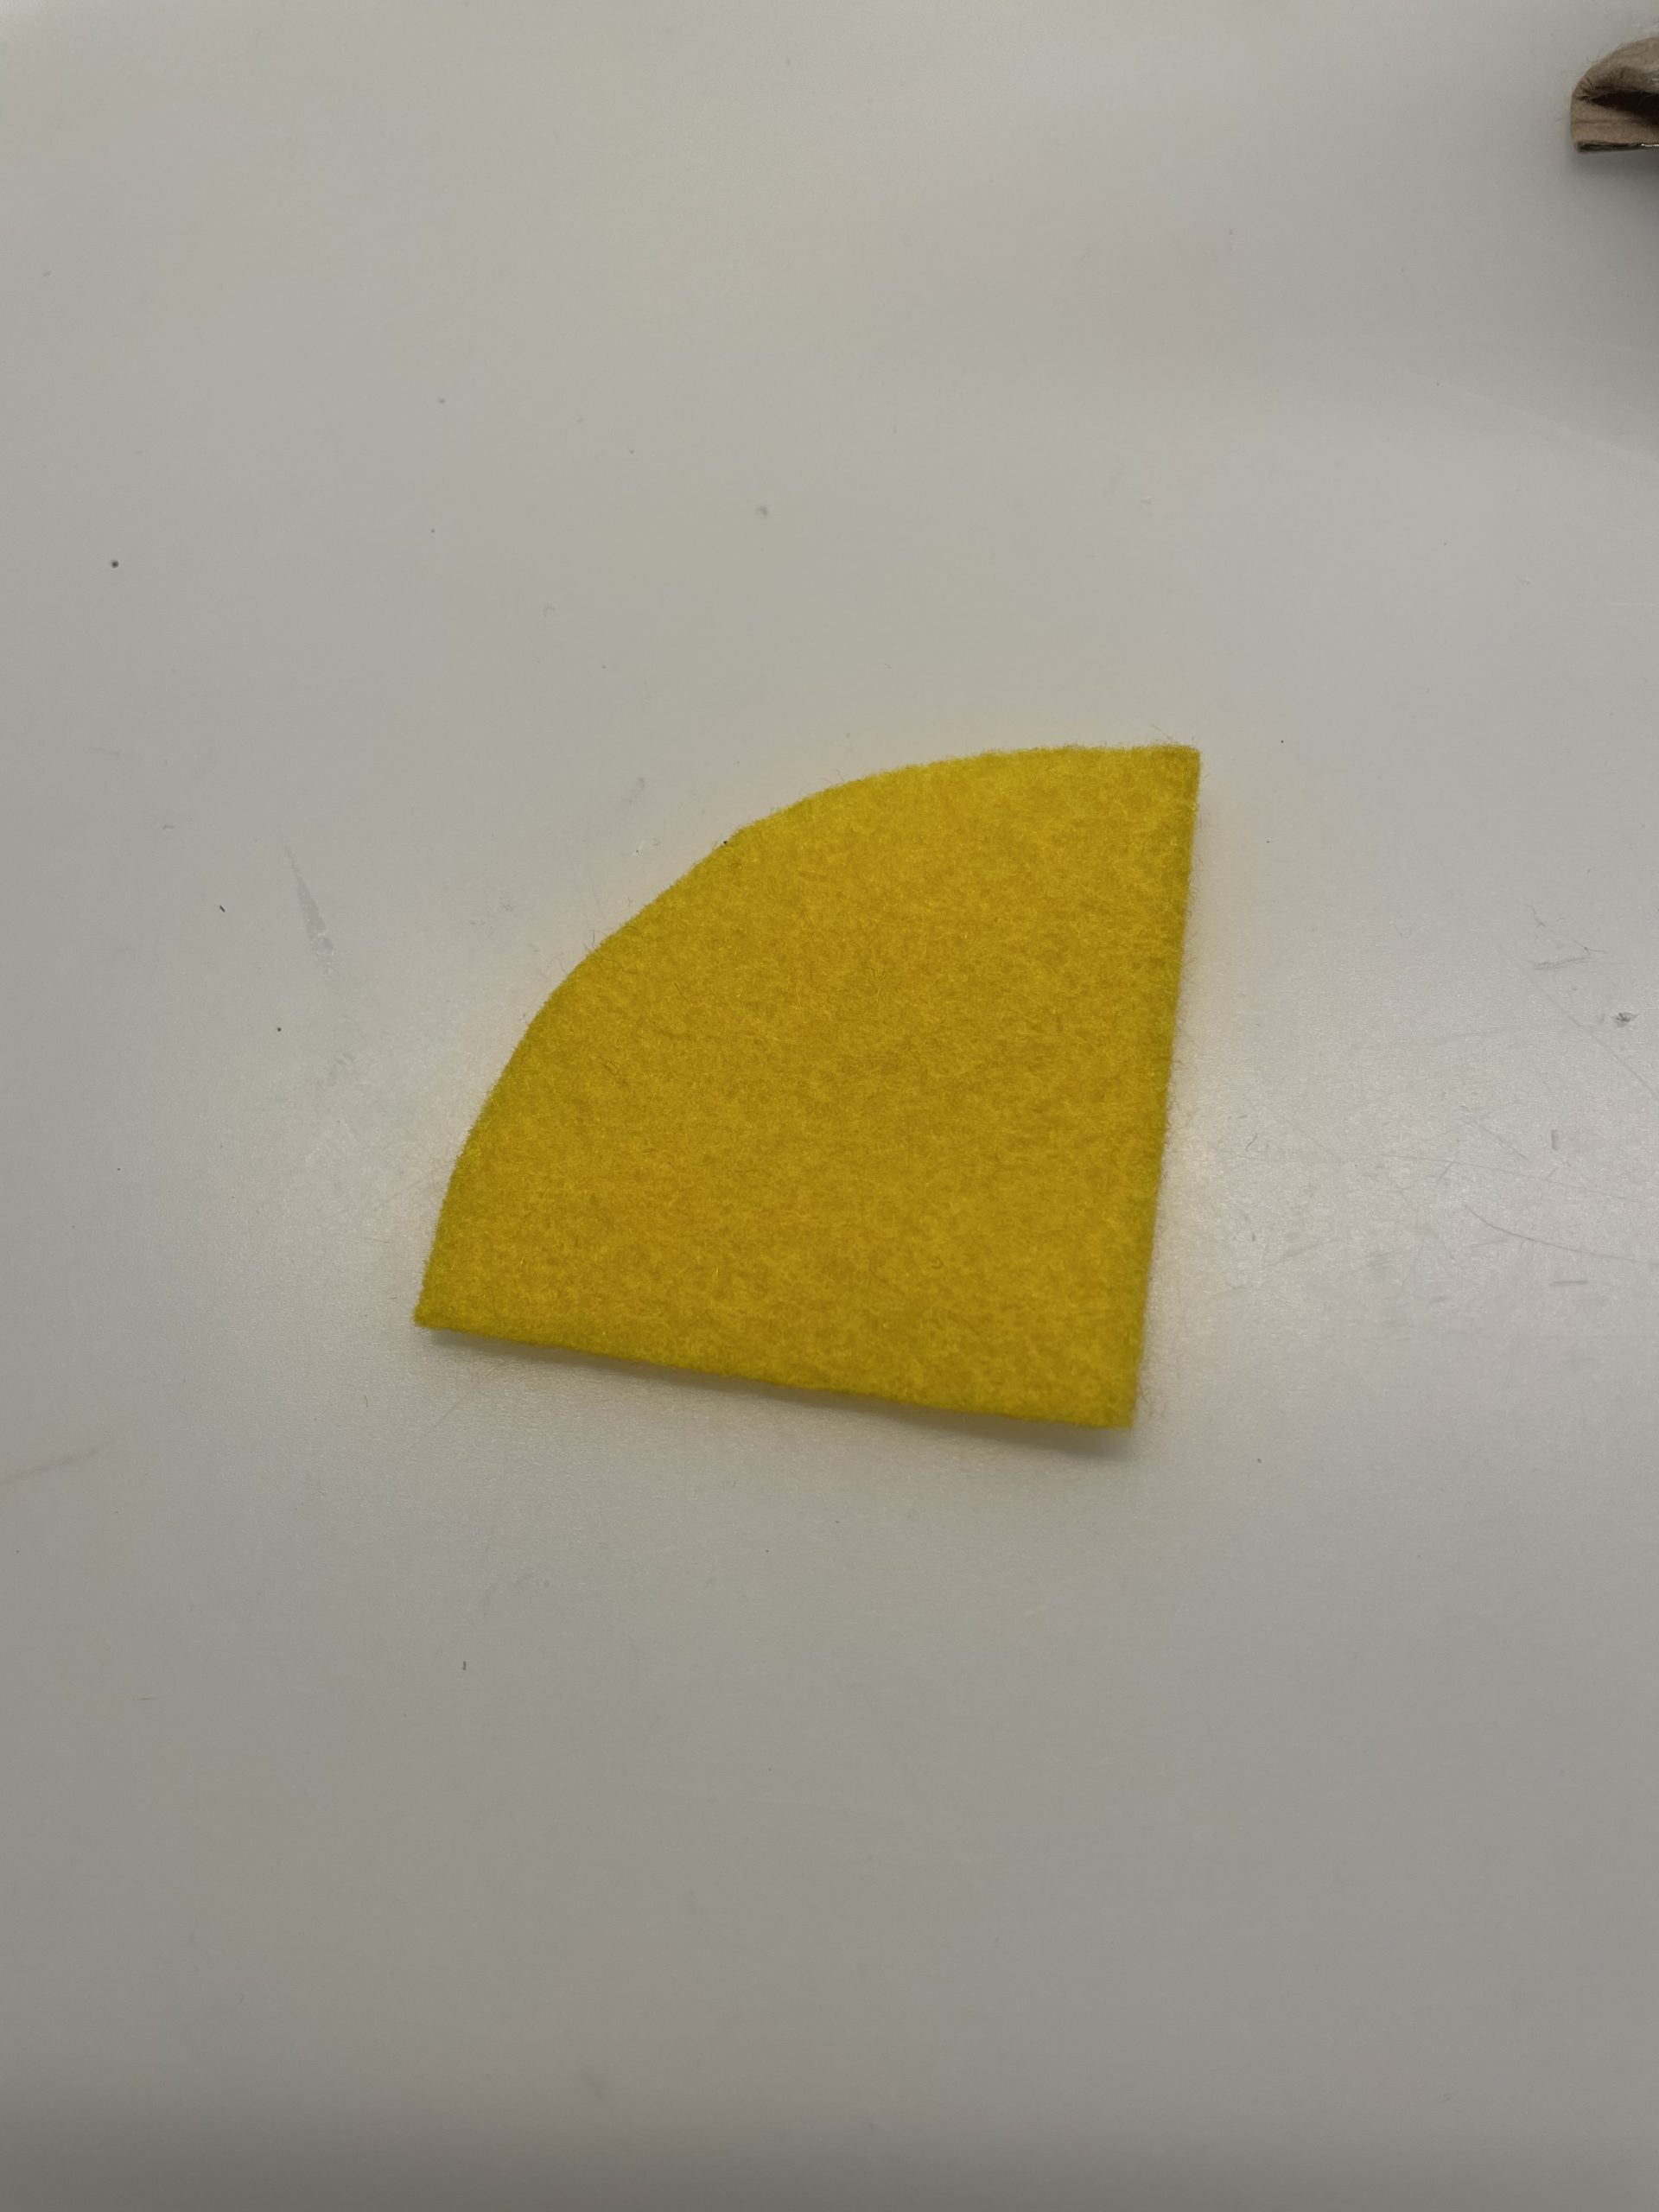
Cut a quarter circle.
Fold it together with the straight edges and glue it together. Apply the glue only on the edge.
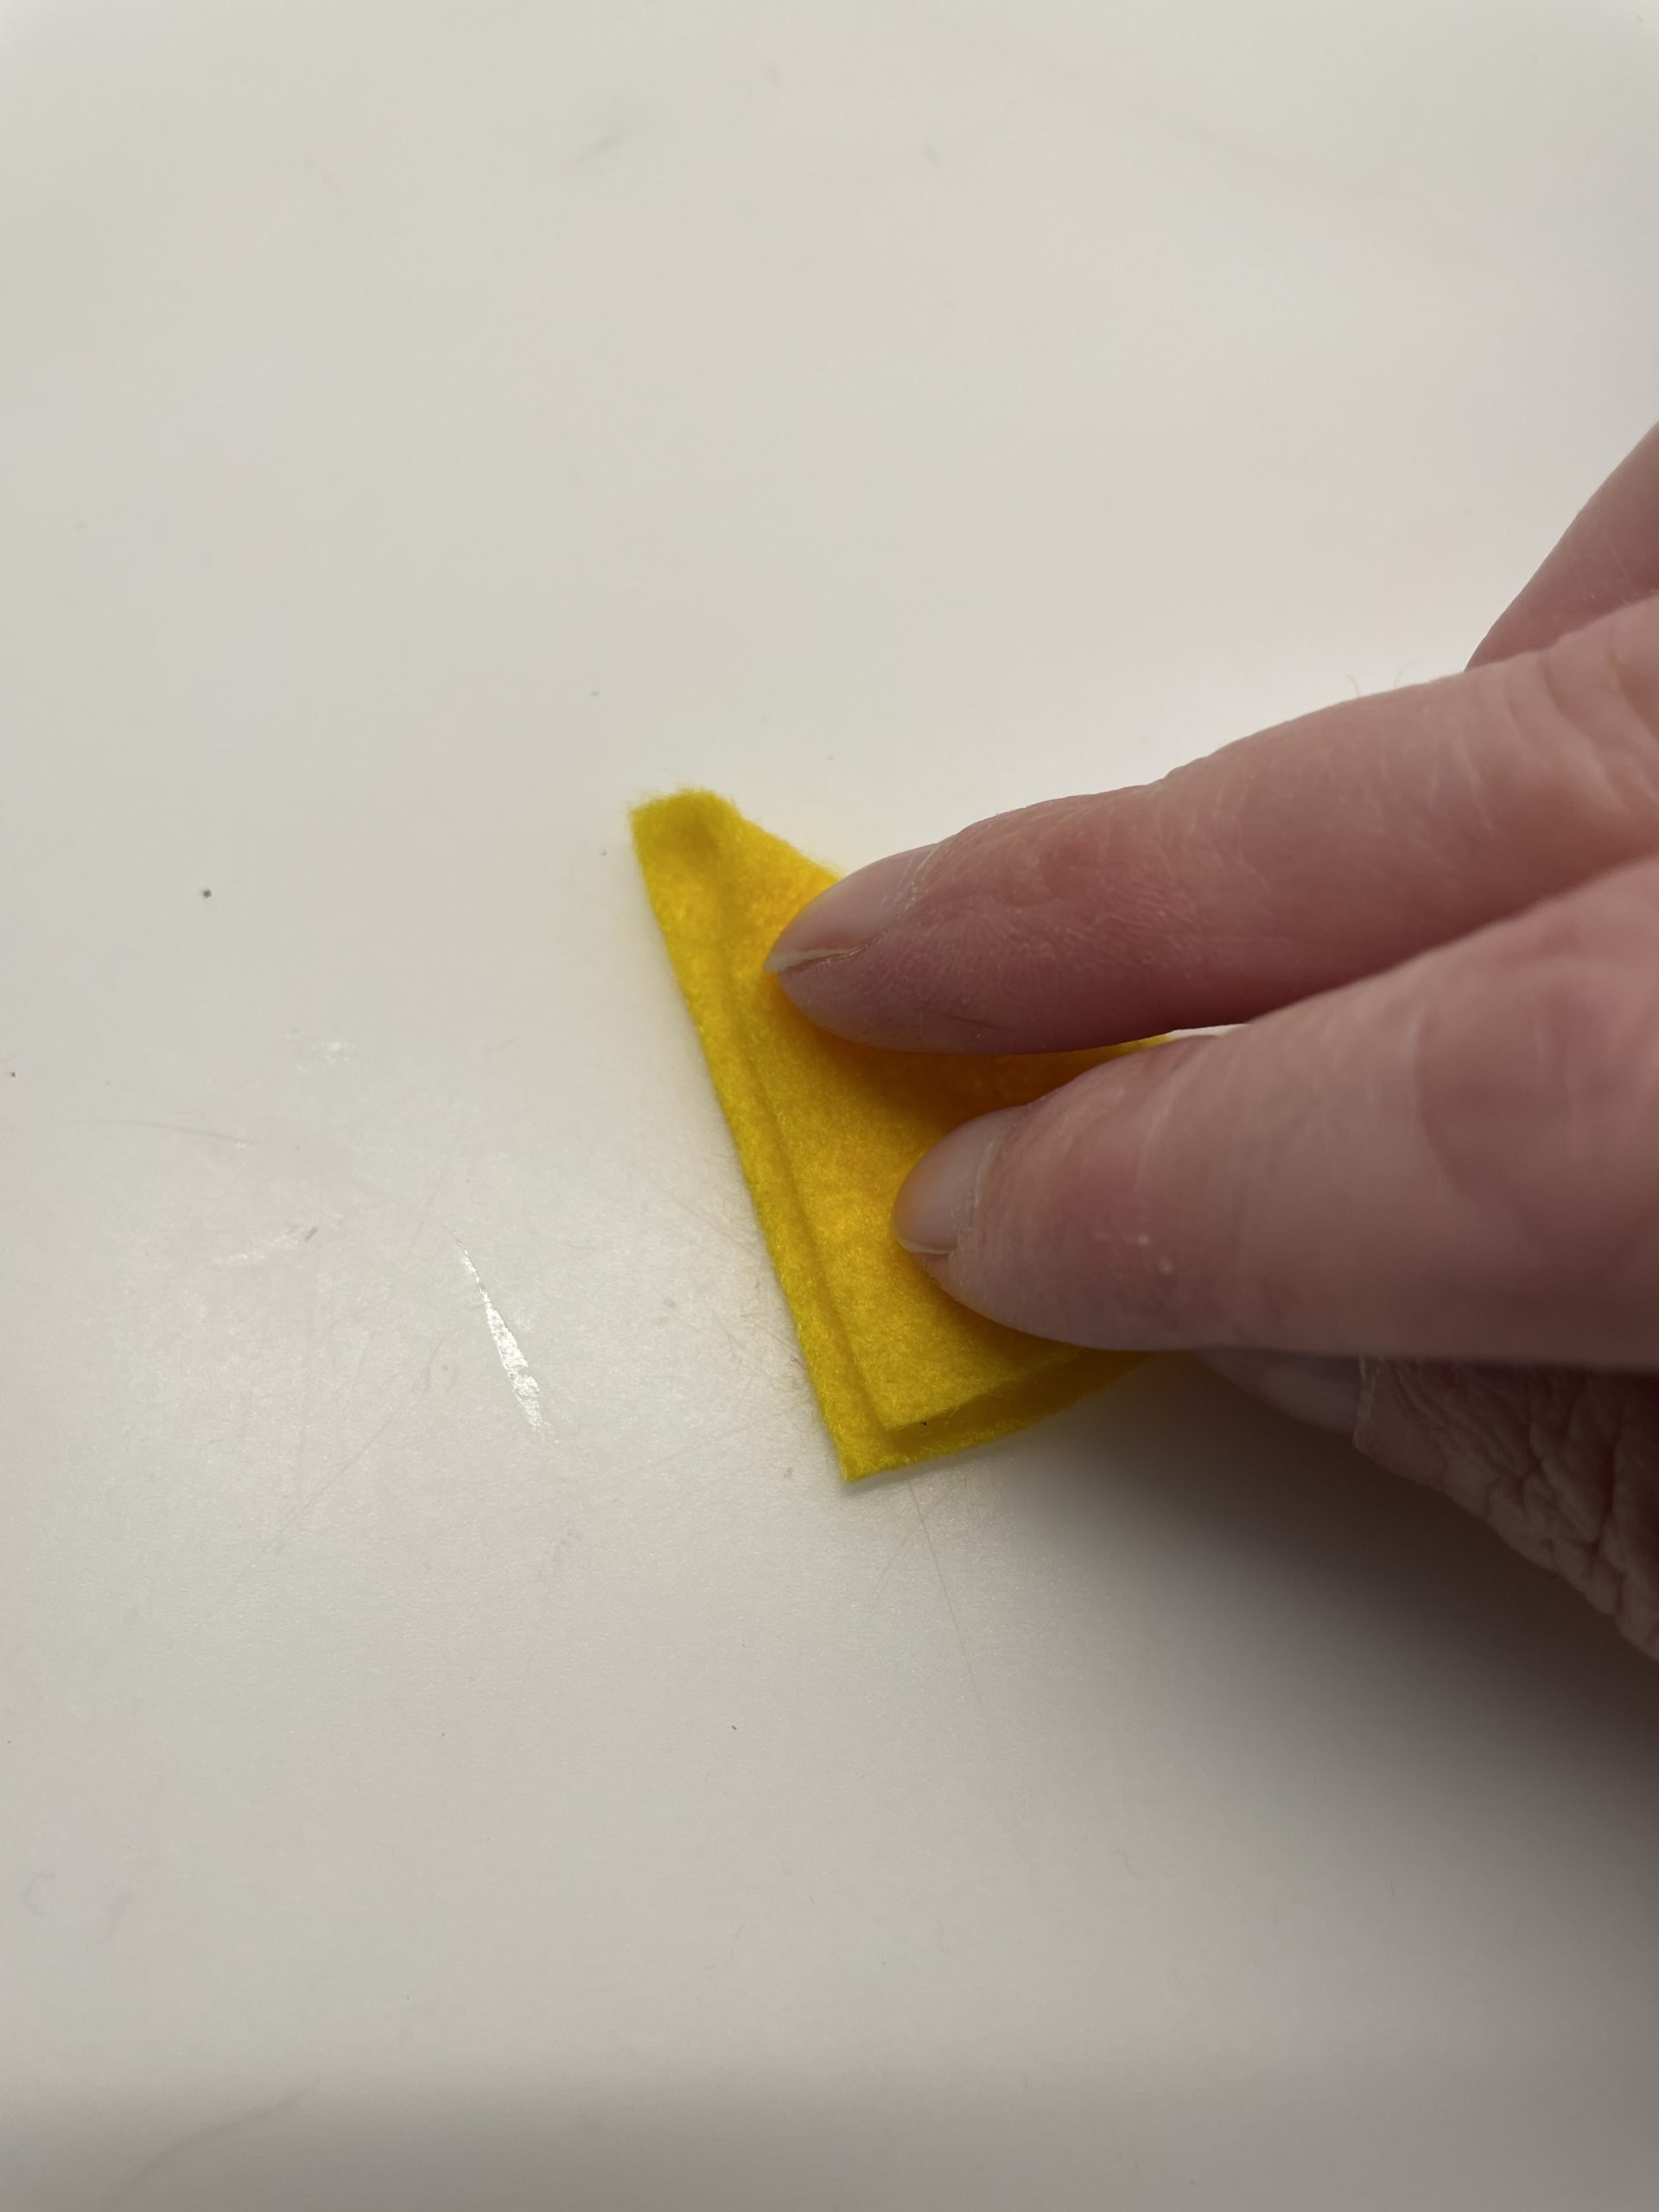
The chick's beak is ready.
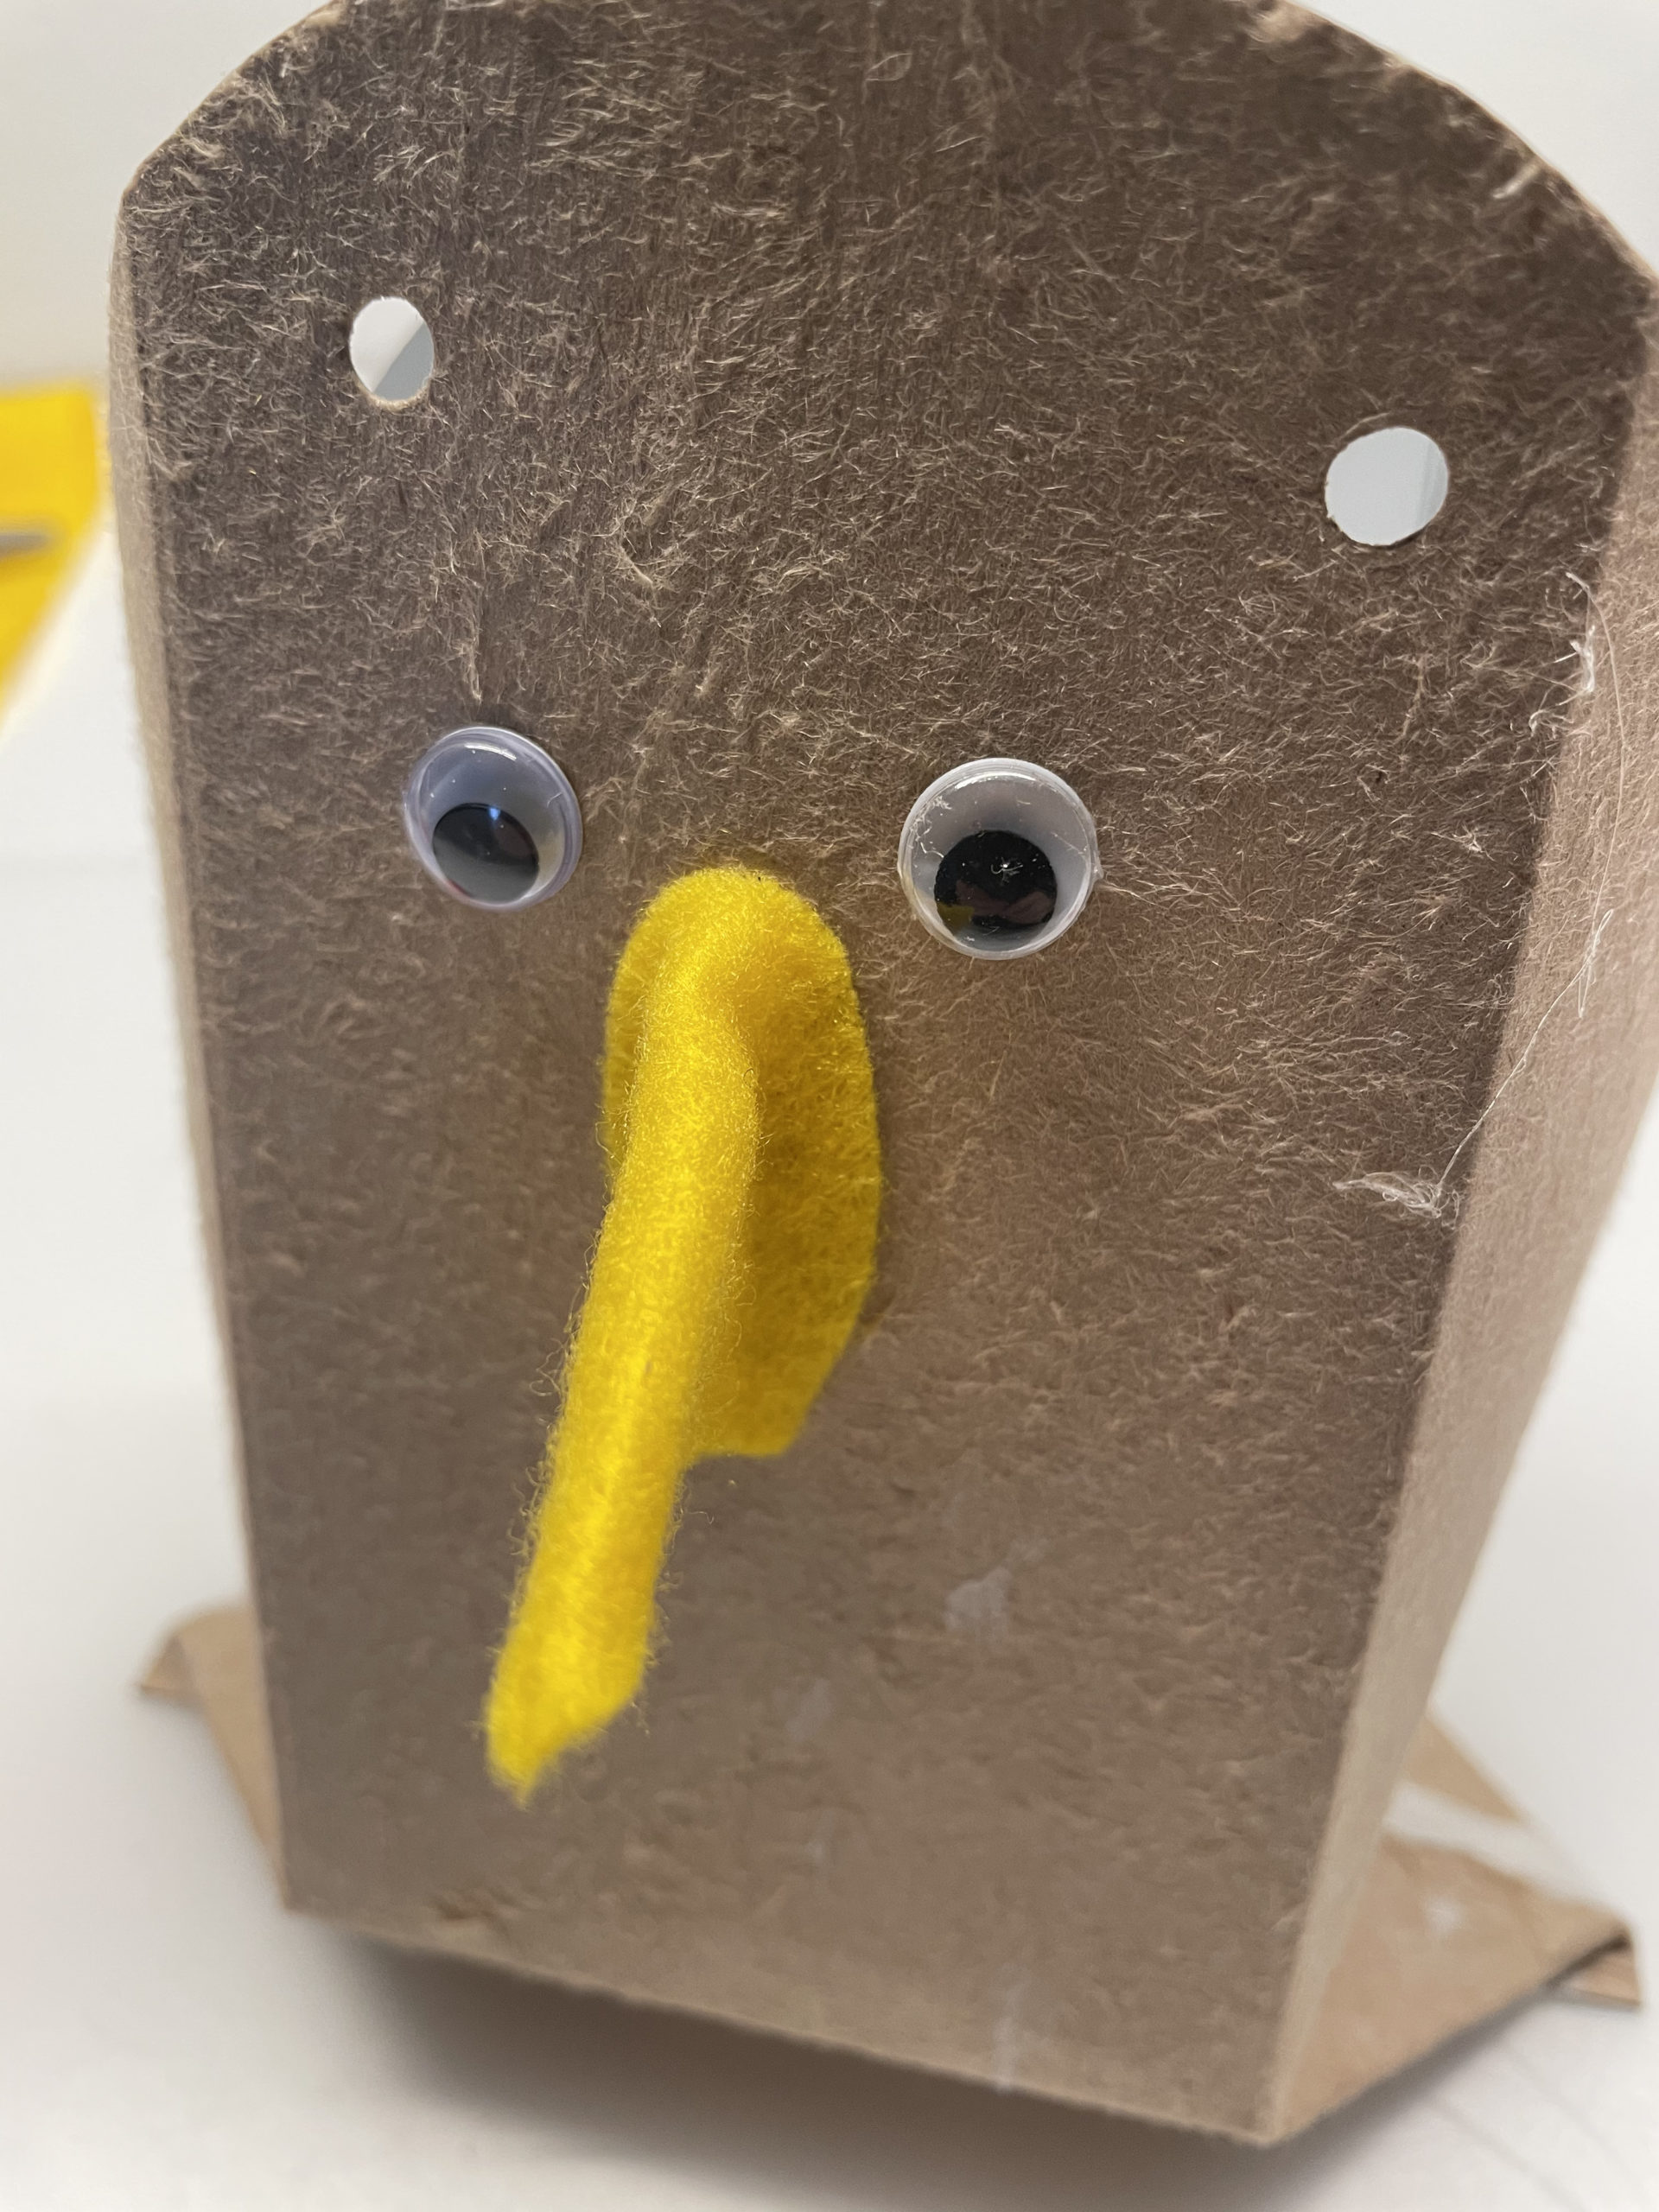
Now stick the beak, with the glued side down, to the front of the bag.
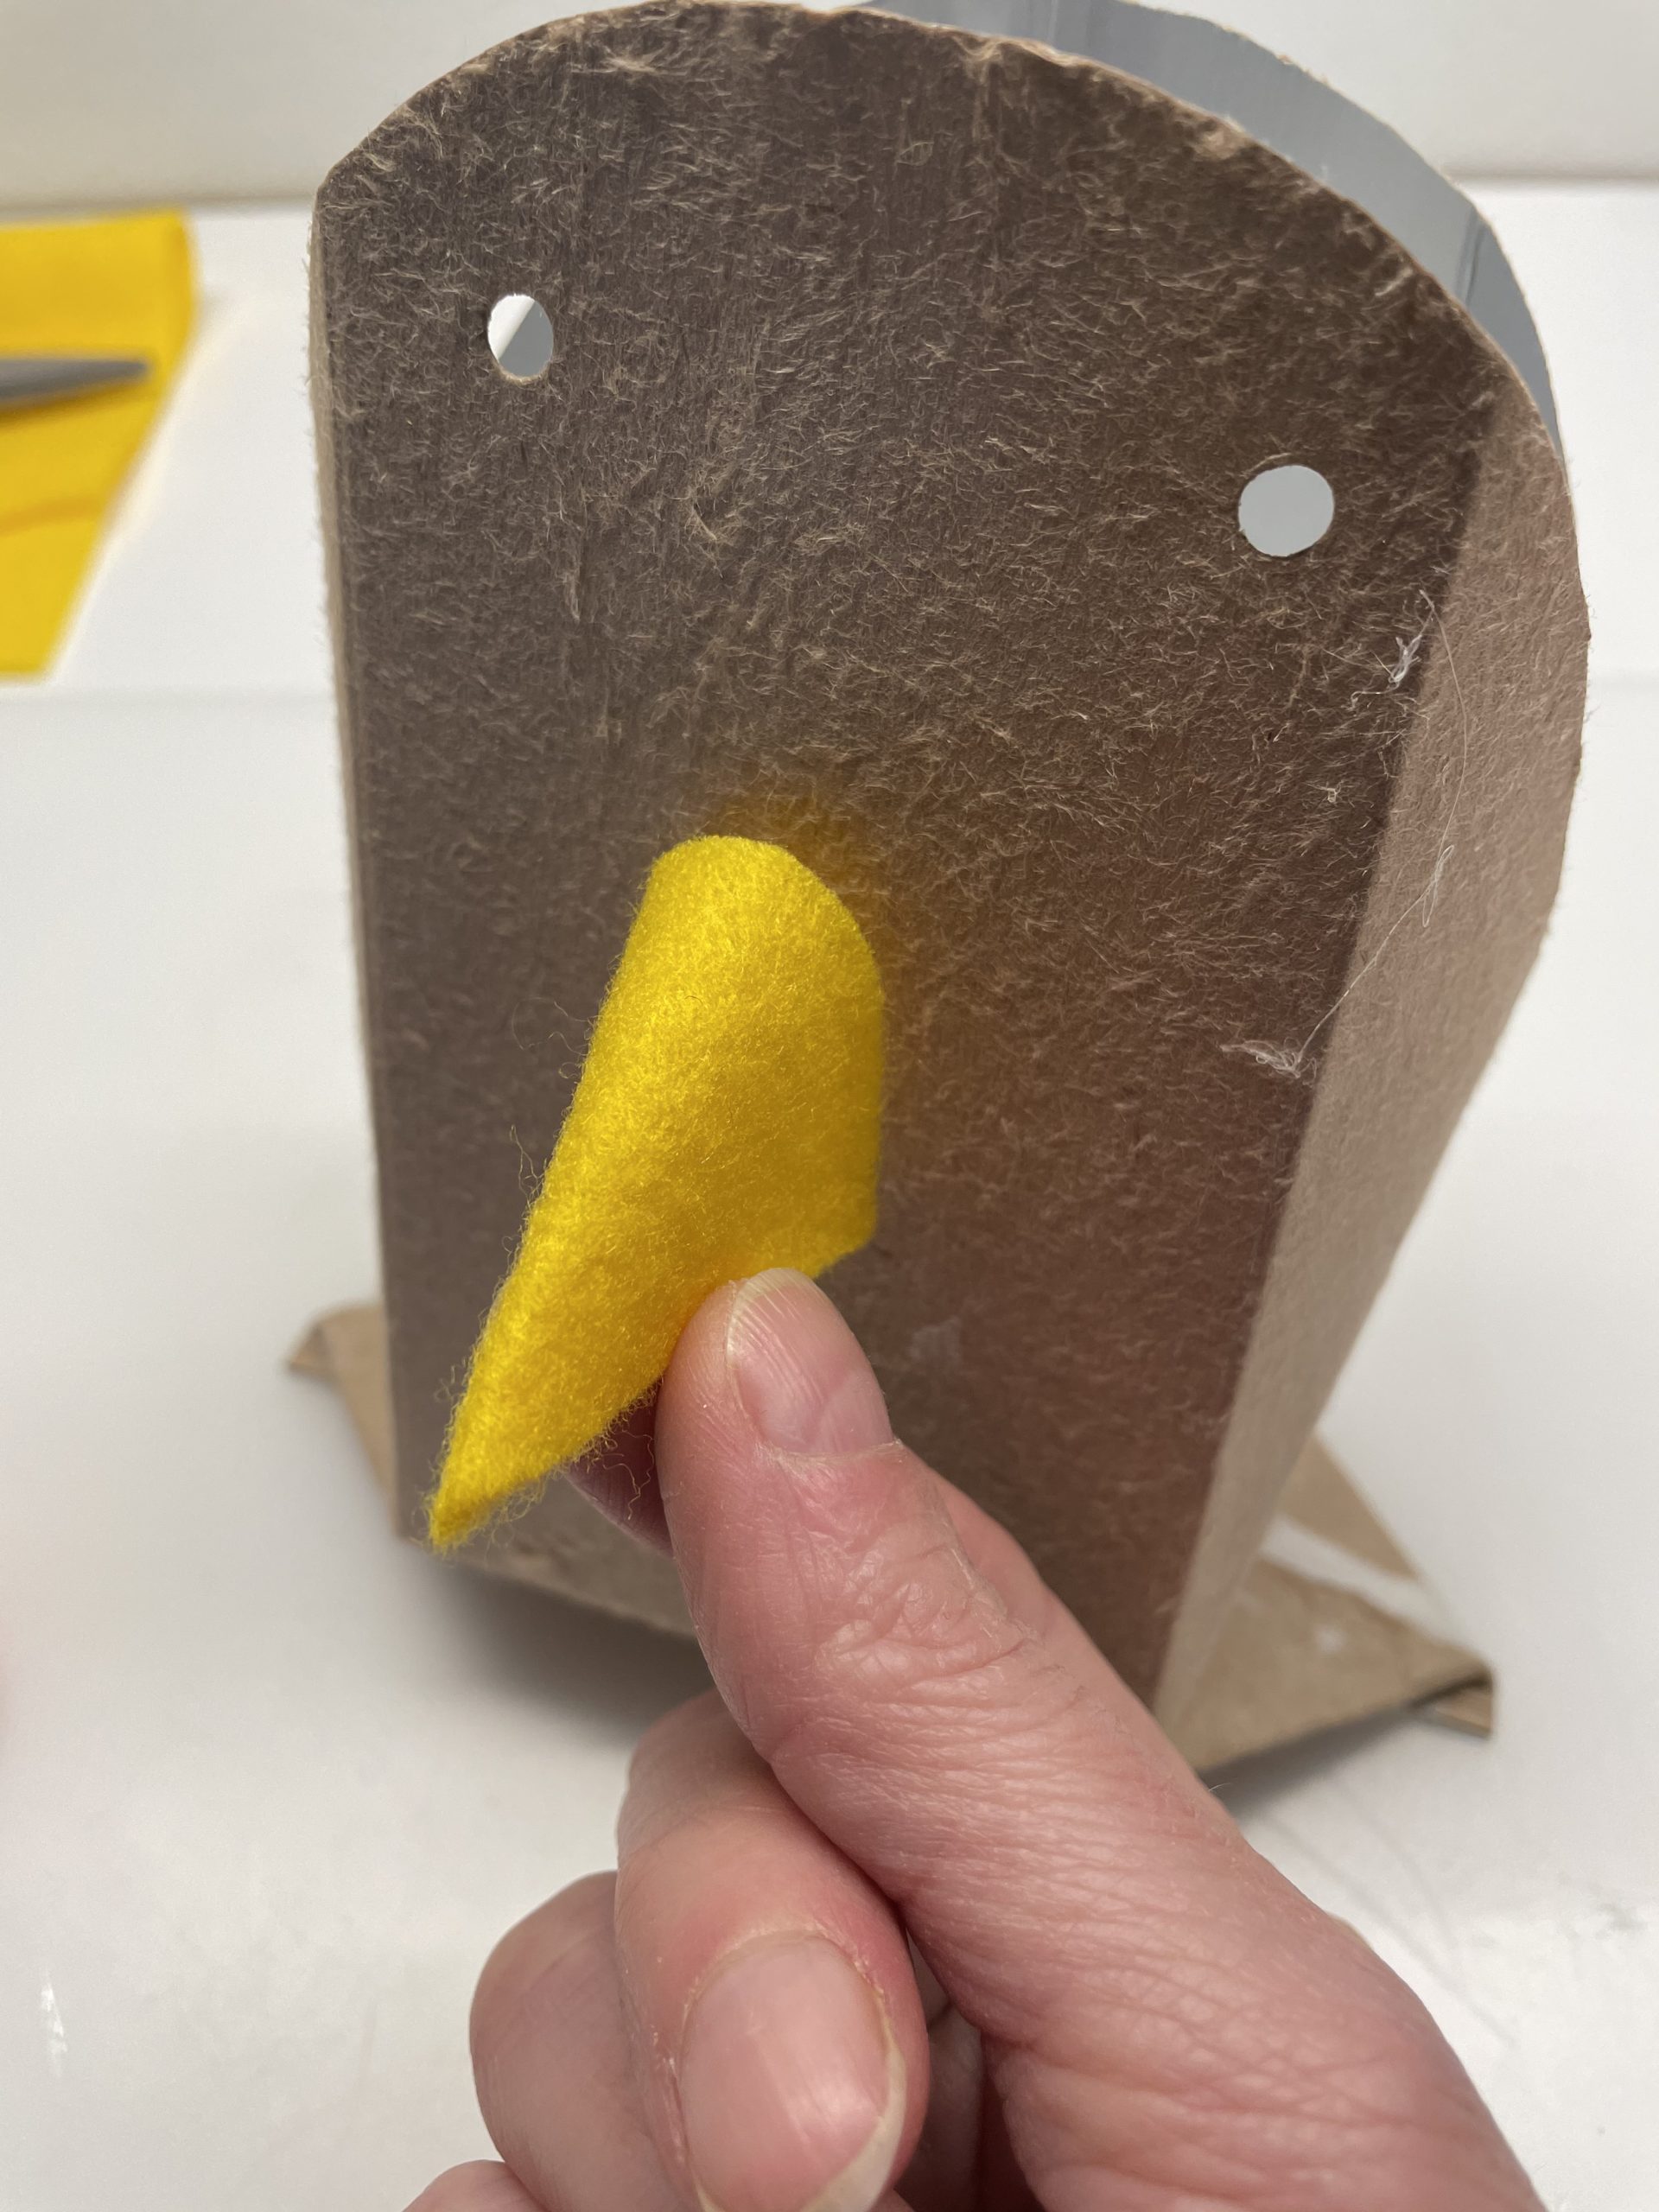
Above the beak there is room for two wobble eyes. Alternatively, you paint your eyes with a felt pen.
Now put your gift in the package.
Then you fold a yellow pipe cleaner half.
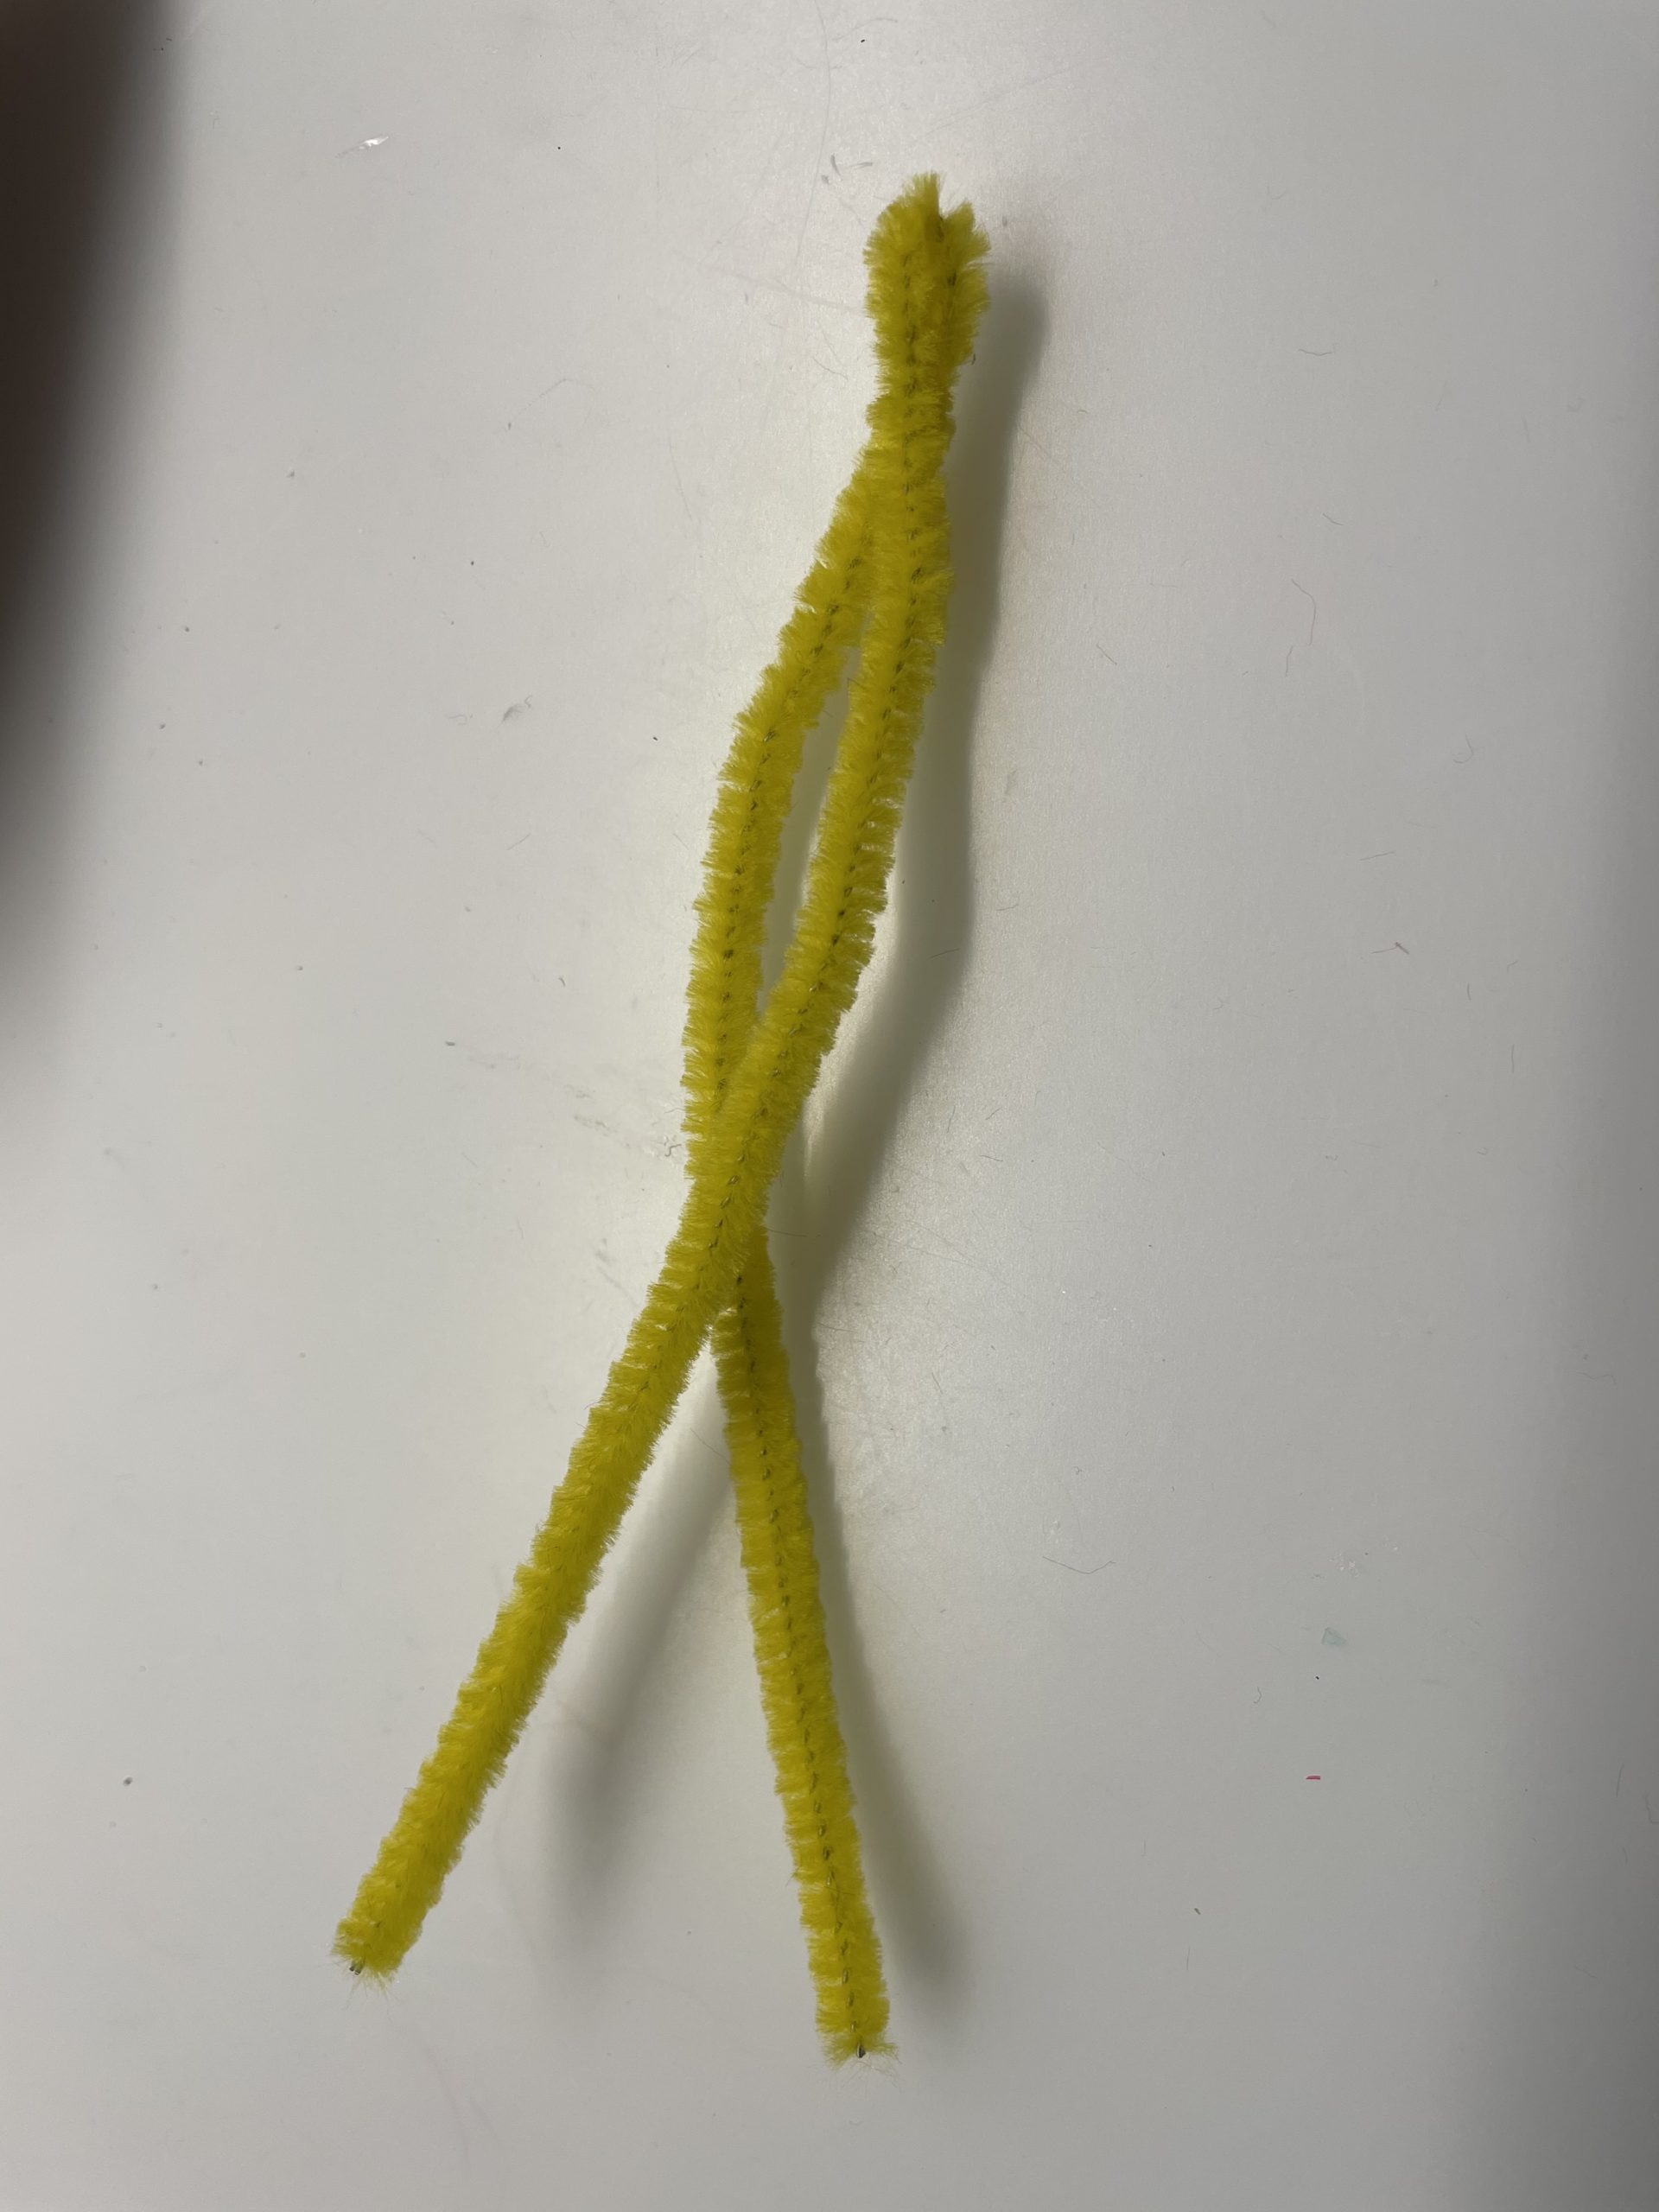
Thread the folded pipe cleaner through the first hole from front to back (through front and back). Pull the pipe cleaner wire as far as possible through the hole.

Then you put the wire around the back and thread it from the back to the front, through the second hole (again through the front and back). So both ends of the pipe cleaner look out at the front. At the back the pipe cleaner is attached to the packaging.
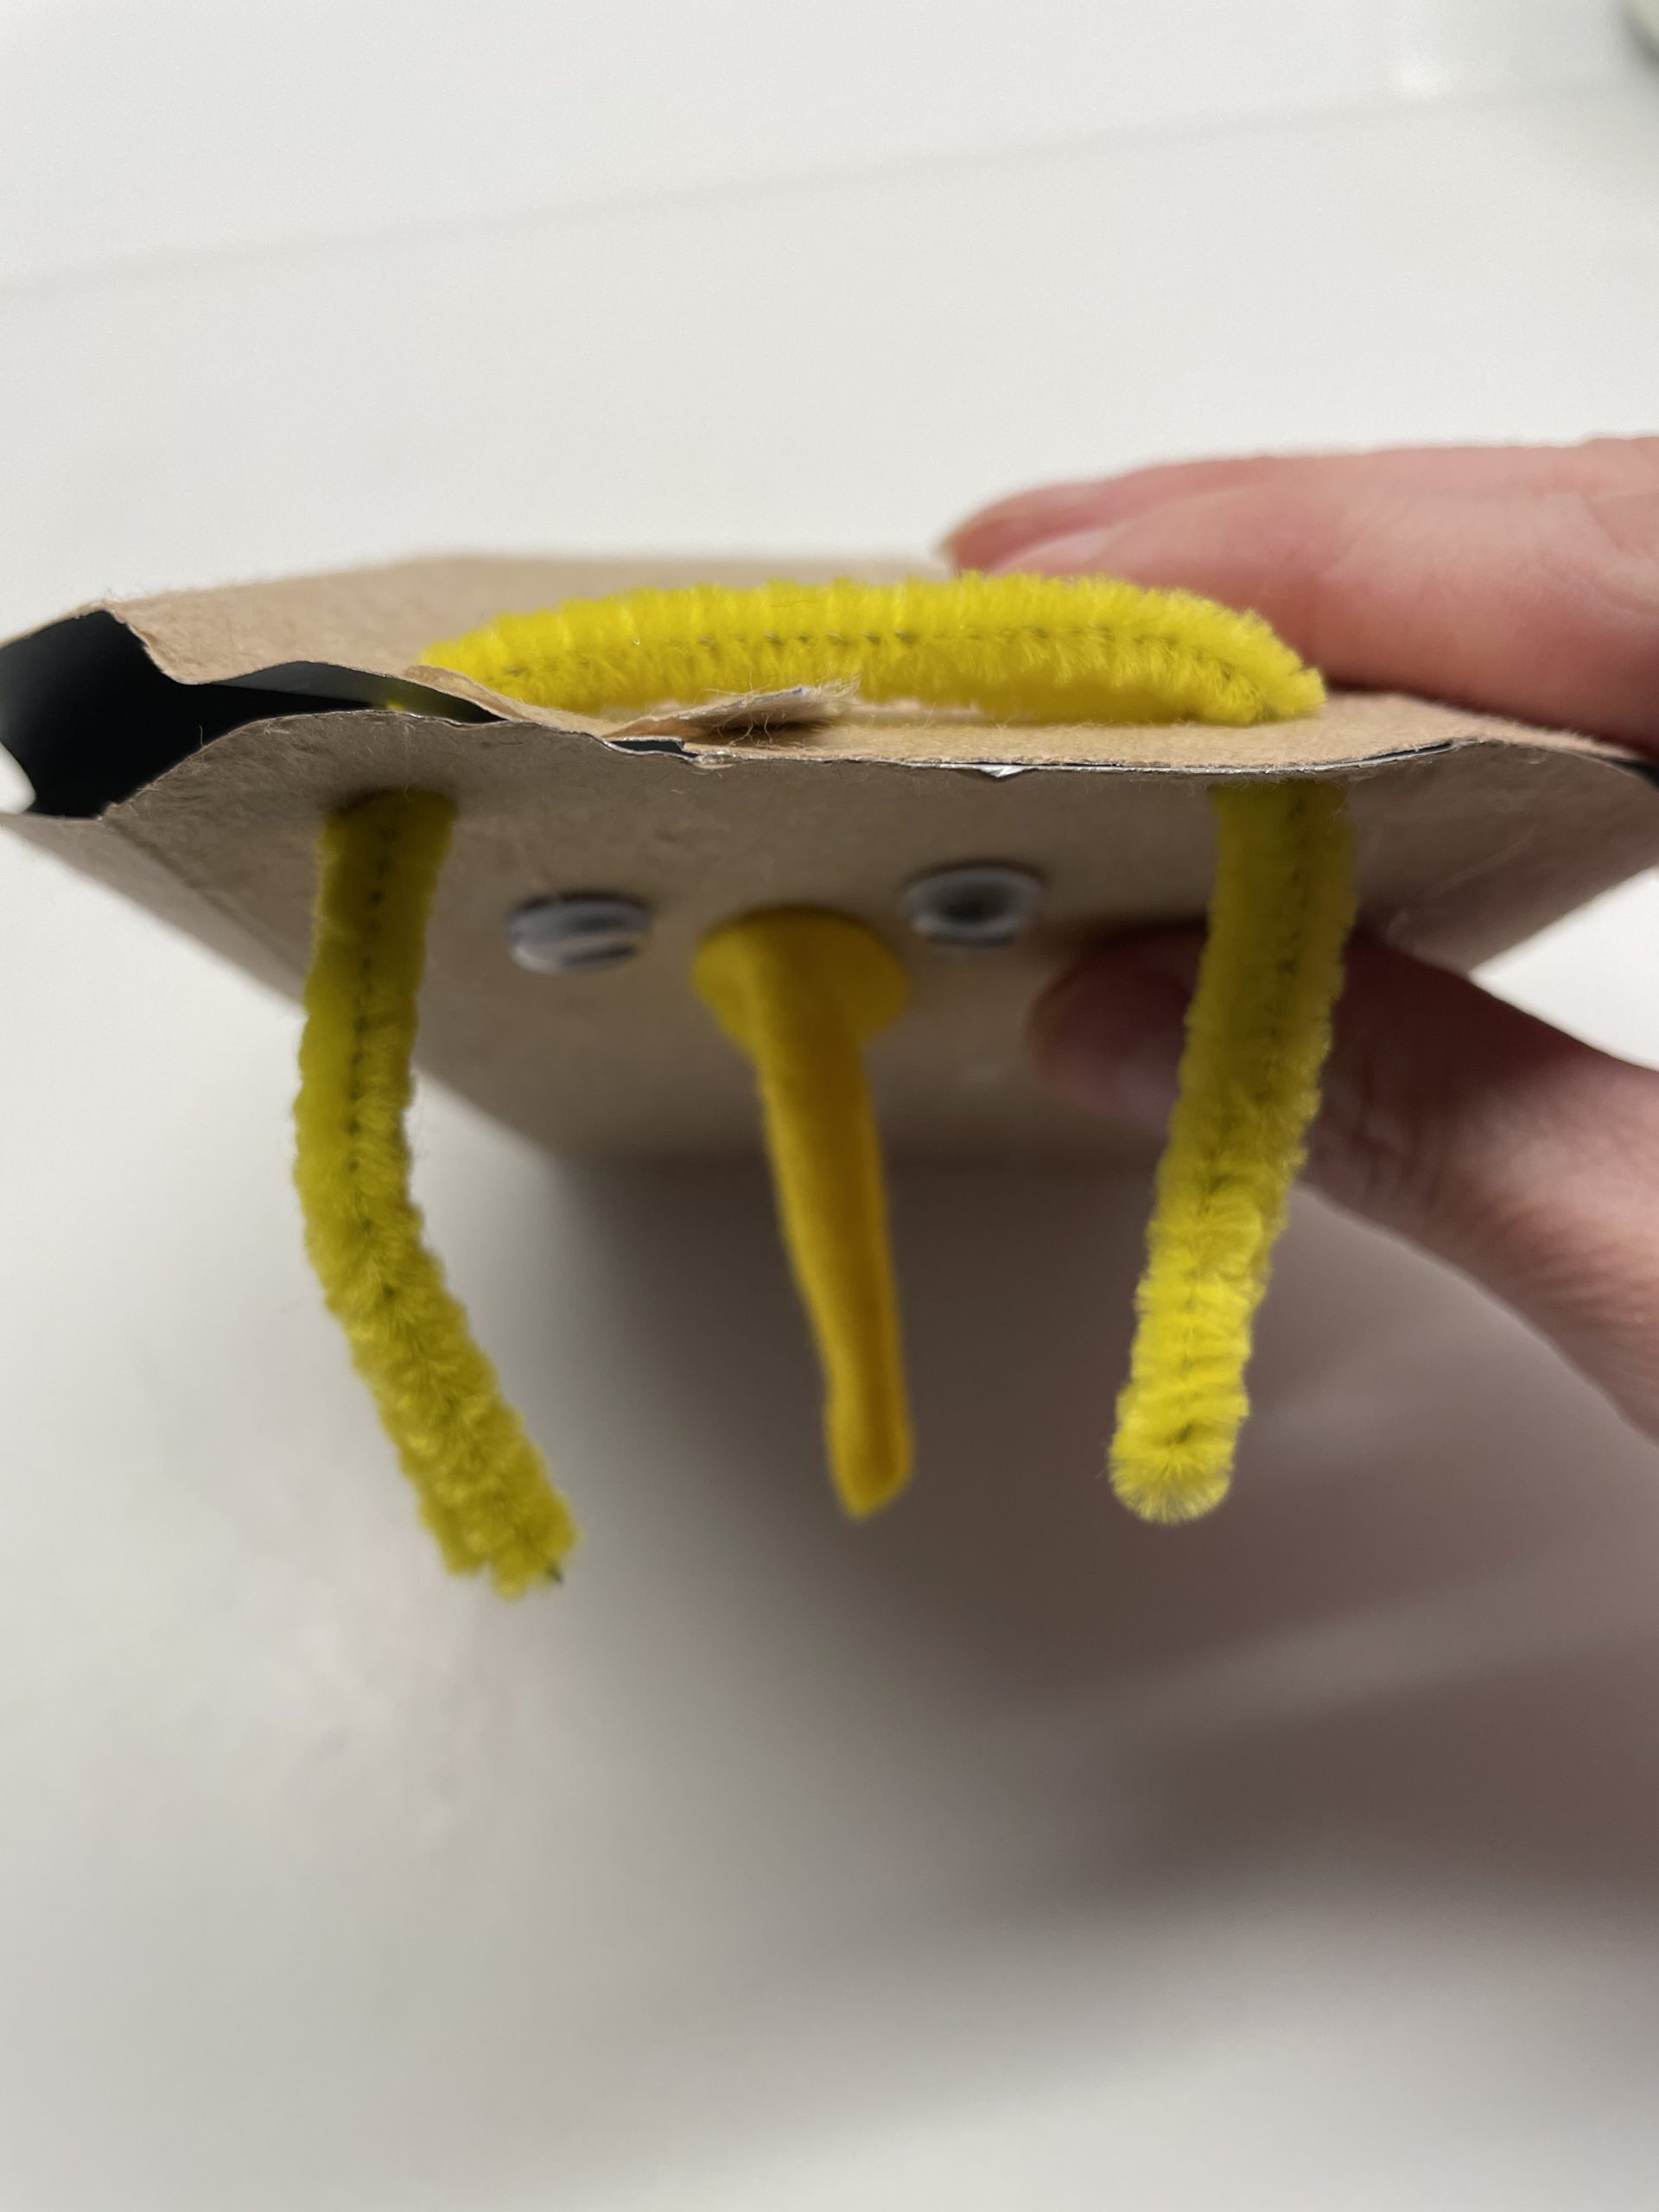
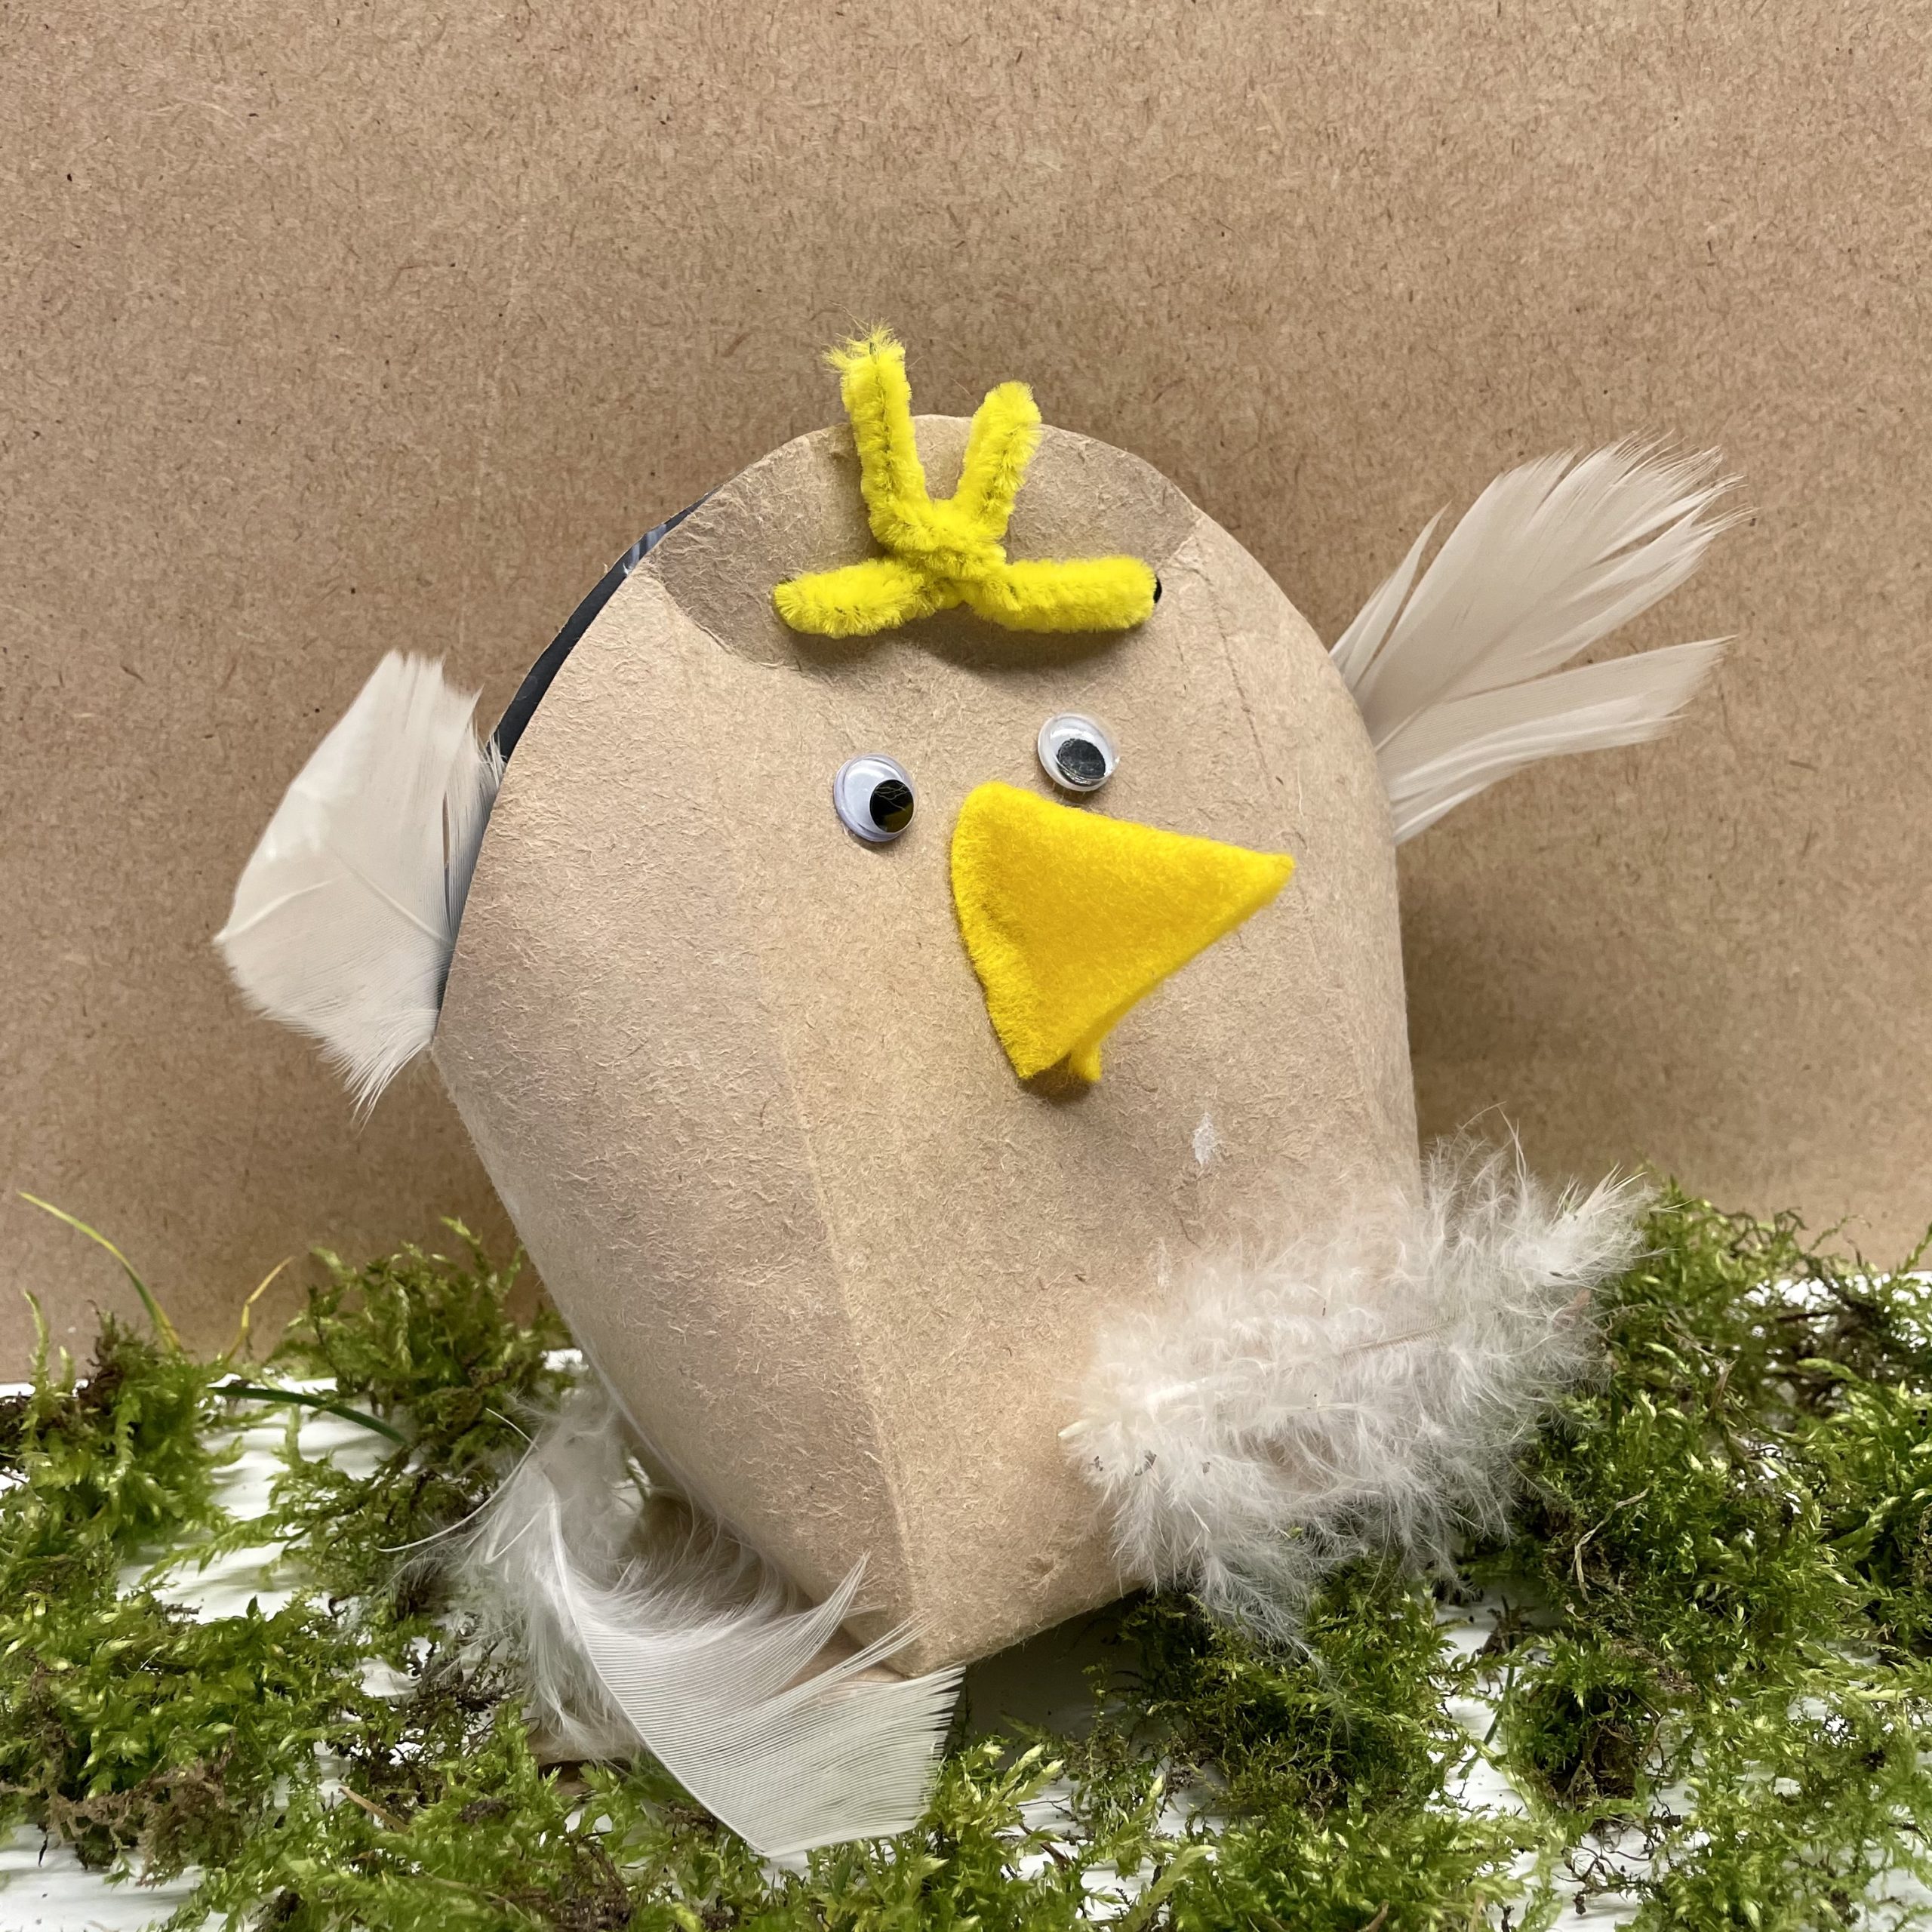
Now twist both ends at the front in the middle.

Now you place the springs sideways in the opening of the packaging.
Alternatively, you can also stick them on the back so that they survive sideways.

Sticks a few feathers on the front too.
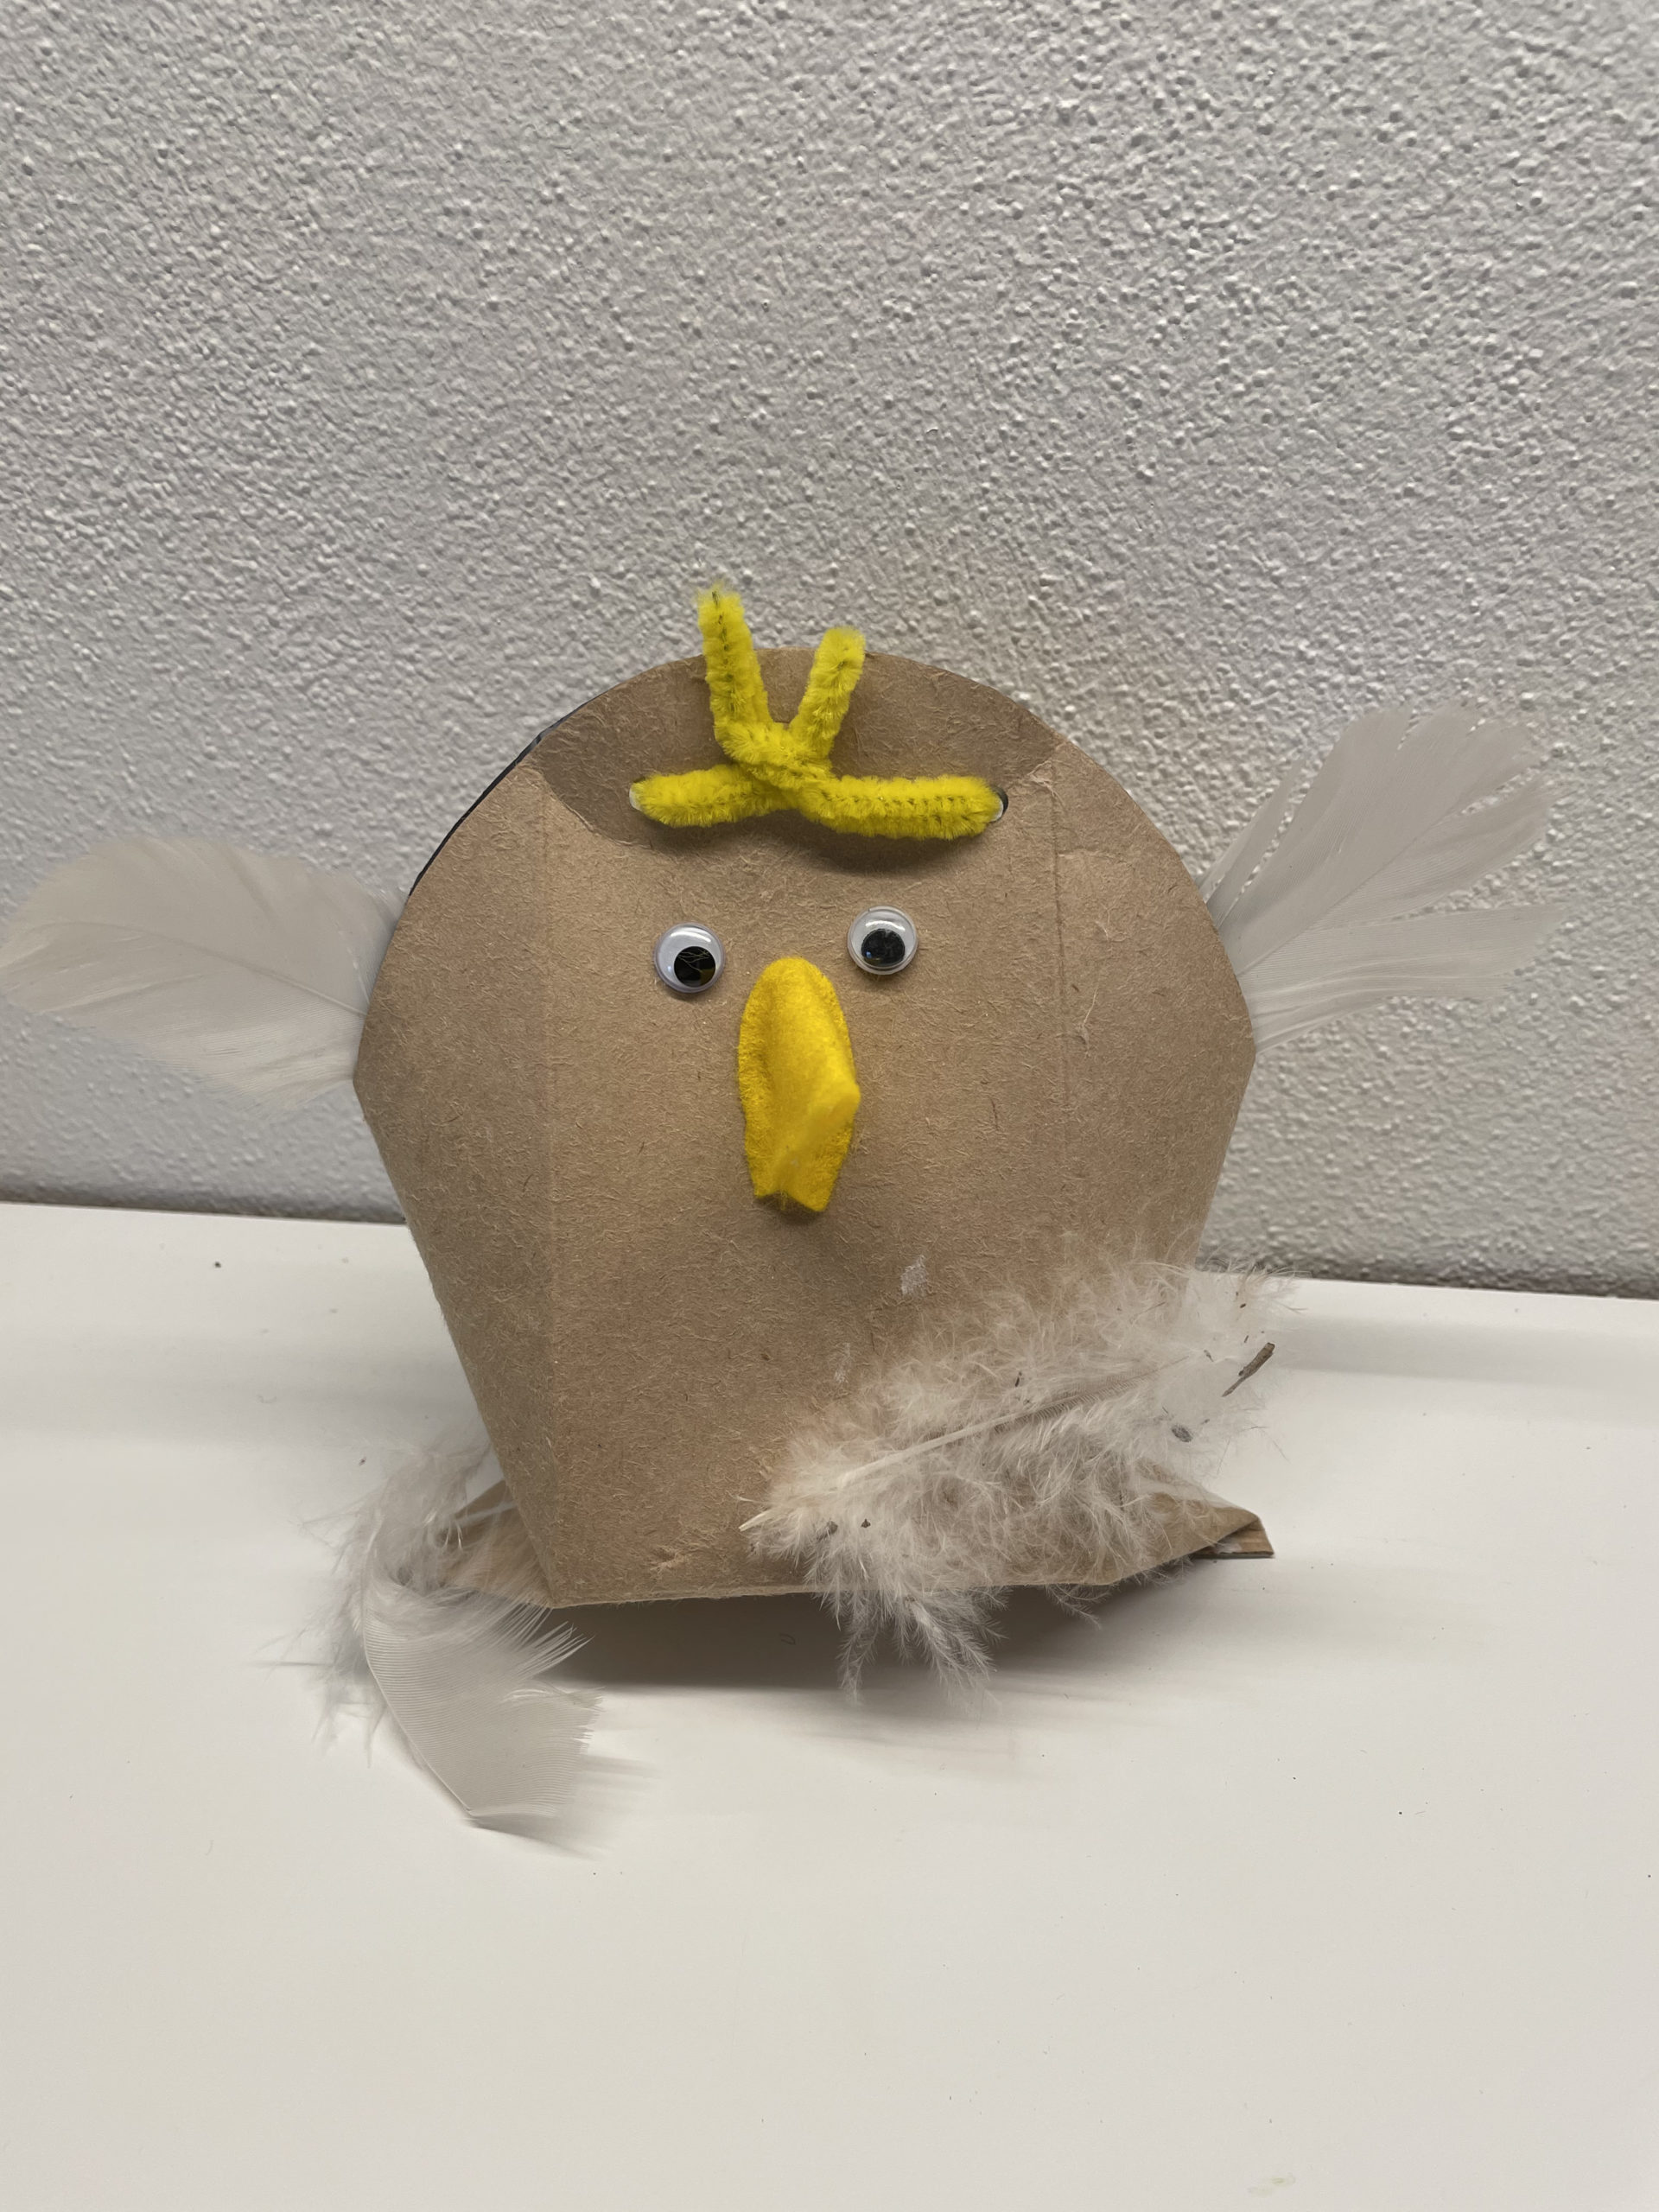
Your chick is ready.
You can use the chick as a decoration or pack a small Easter gift in this sweet Easter box.
Enjoy your crafting!
Materials
Directions
Sets a craft pad and the materials ready.
Folds the washed out and dry Tetrapack flat.
First cut off the upper piece. Cuts an arc.
At the cutting edge you pull the cardboard a bit apart and remove the top coating. Underneath it comes a cardboard box to the appearance.
If individual areas can be solved badly, try to raise the coating with a pin. So you get a small piece again, that you can pull off then.
The whole package looks like this at the end.
In the upper round you now punch two holes with the punched pliers. These should be on front and back at the same place.
The bottom of the packaging is now folded as in the picture. To do this, push the bag a bit apart and the sides slightly inside. Through the pre-shaped packaging, the top of the floor automatically bends outwards. Then pushes the tip flat.
So the bag stands well on the ground. Above the bag is pressed flat.
You need the yellow felt now.
Cut a quarter circle.
Fold it together with the straight edges and glue it together. Apply the glue only on the edge.
The chick's beak is ready.
Now stick the beak, with the glued side down, to the front of the bag.
Above the beak there is room for two wobble eyes. Alternatively, you paint your eyes with a felt pen.
Now put your gift in the package.
Then you fold a yellow pipe cleaner half.
Thread the folded pipe cleaner through the first hole from front to back (through front and back). Pull the pipe cleaner wire as far as possible through the hole.
Then you put the wire around the back and thread it from the back to the front, through the second hole (again through the front and back). So both ends of the pipe cleaner look out at the front. At the back the pipe cleaner is attached to the packaging.
Now twist both ends at the front in the middle.
Now you place the springs sideways in the opening of the packaging.
Alternatively, you can also stick them on the back so that they survive sideways.
Sticks a few feathers on the front too.
Your chick is ready.
You can use the chick as a decoration or pack a small Easter gift in this sweet Easter box.
Enjoy your crafting!
Follow us on Facebook , Instagram and Pinterest
Don't miss any more adventures: Our bottle mail