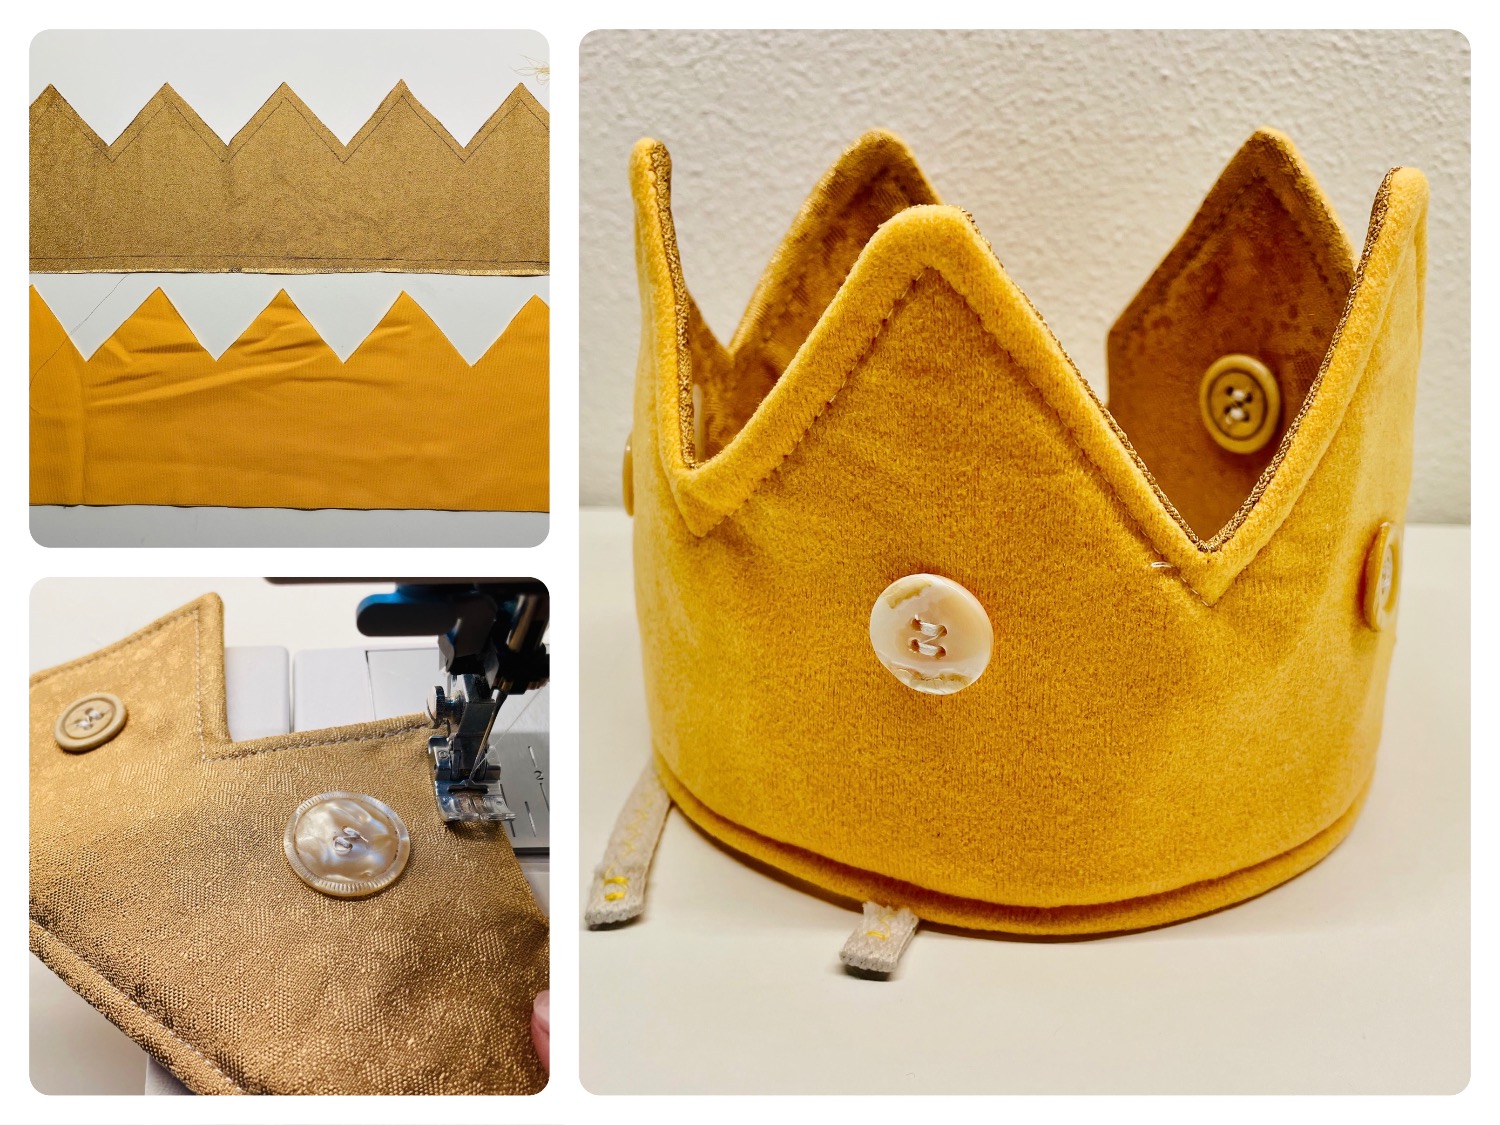
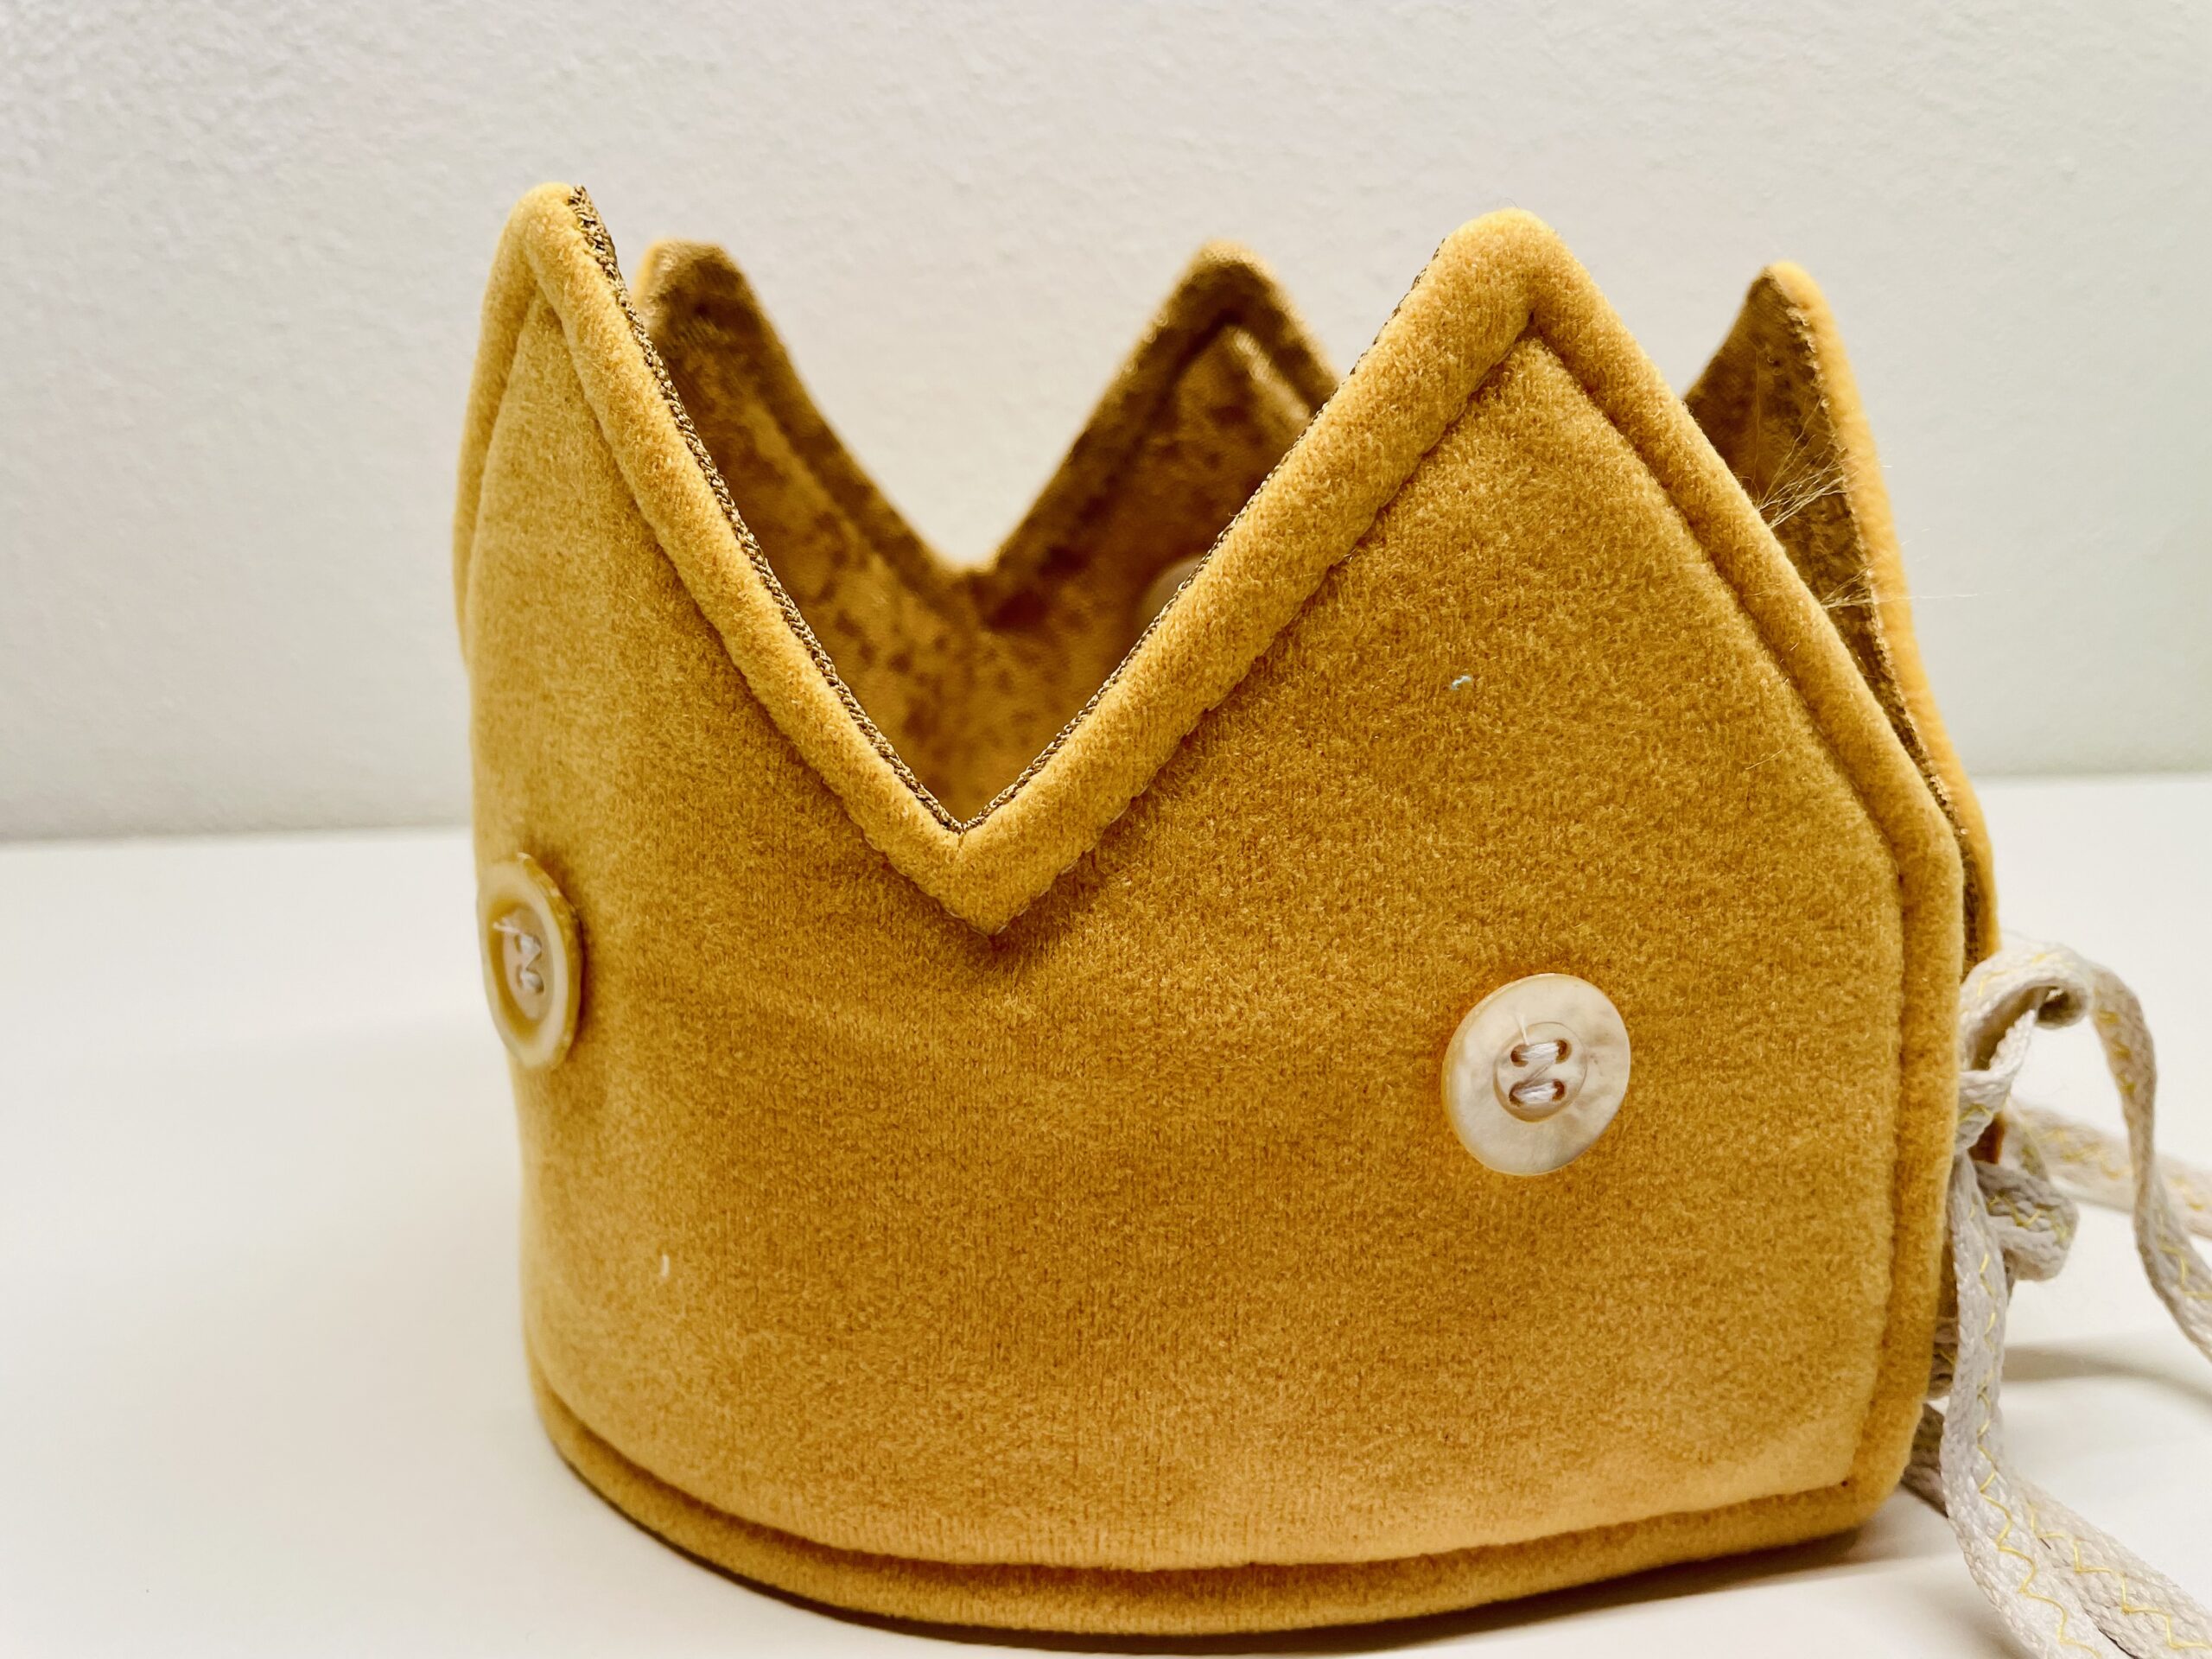
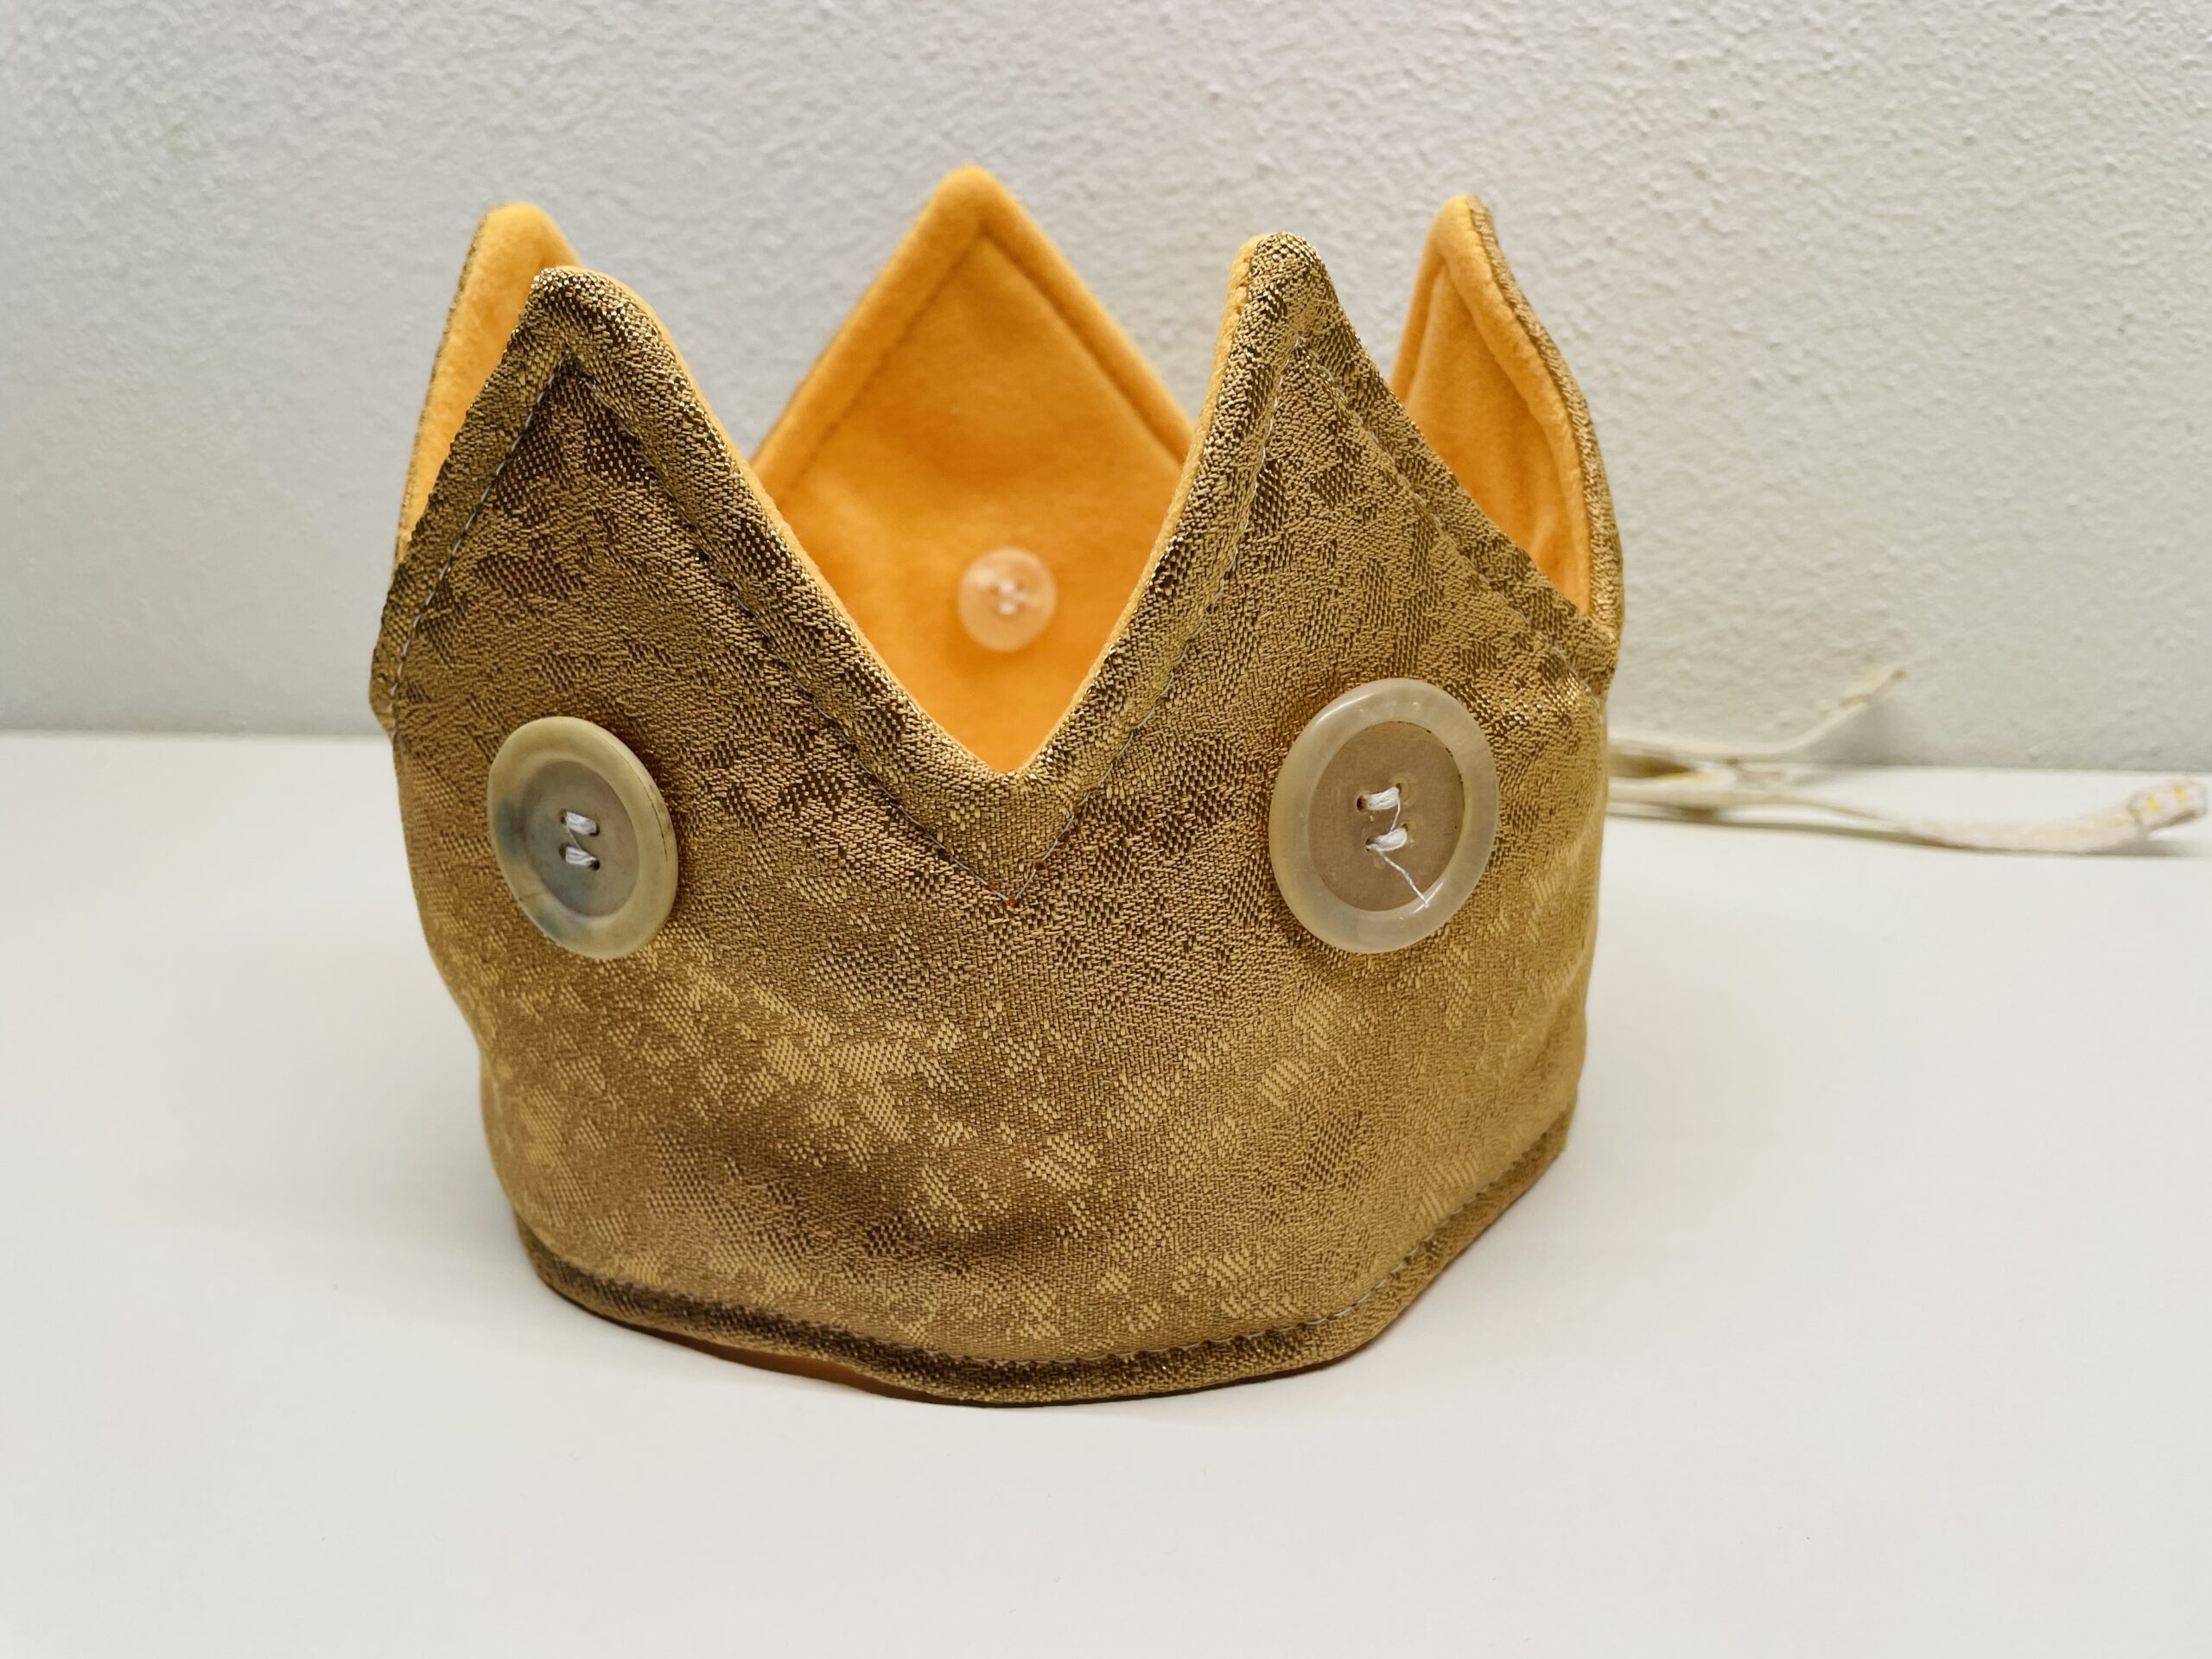
This crown is a great sewing project for small and large sewing enthusiasts.
You only need the crown as a fabric cut three times and you can start sewing. The buttons on the crown do not necessarily have to be attached, depending on the fabric pattern this is perhaps not necessary, but they look very nice on a monochrome fabric. By sewing the buttons, this can also be used for younger children, who like to pick things off or put them in the mouth (hazard of swallowing). If you use the crown exclusively for older children, the buttons or other things can also be glued on.
Here you can use ribbons from a shoelace, which can be upgraded with a coloured sewing thread. You can also find the detailed instructions here. Of course you can already use a nice binding tape.
The steps are described very detailed, if you don't need so much illustrated instructions just skip these pictures. Now you just need a pretty, non-stretchable fabric, this can be fluffy, shiny, monochrome or colorful and you can start. Have fun!
Media Education for Kindergarten and Hort

Relief in everyday life, targeted promotion of individual children, independent learning and - without any pre-knowledge already usable by the youngest!
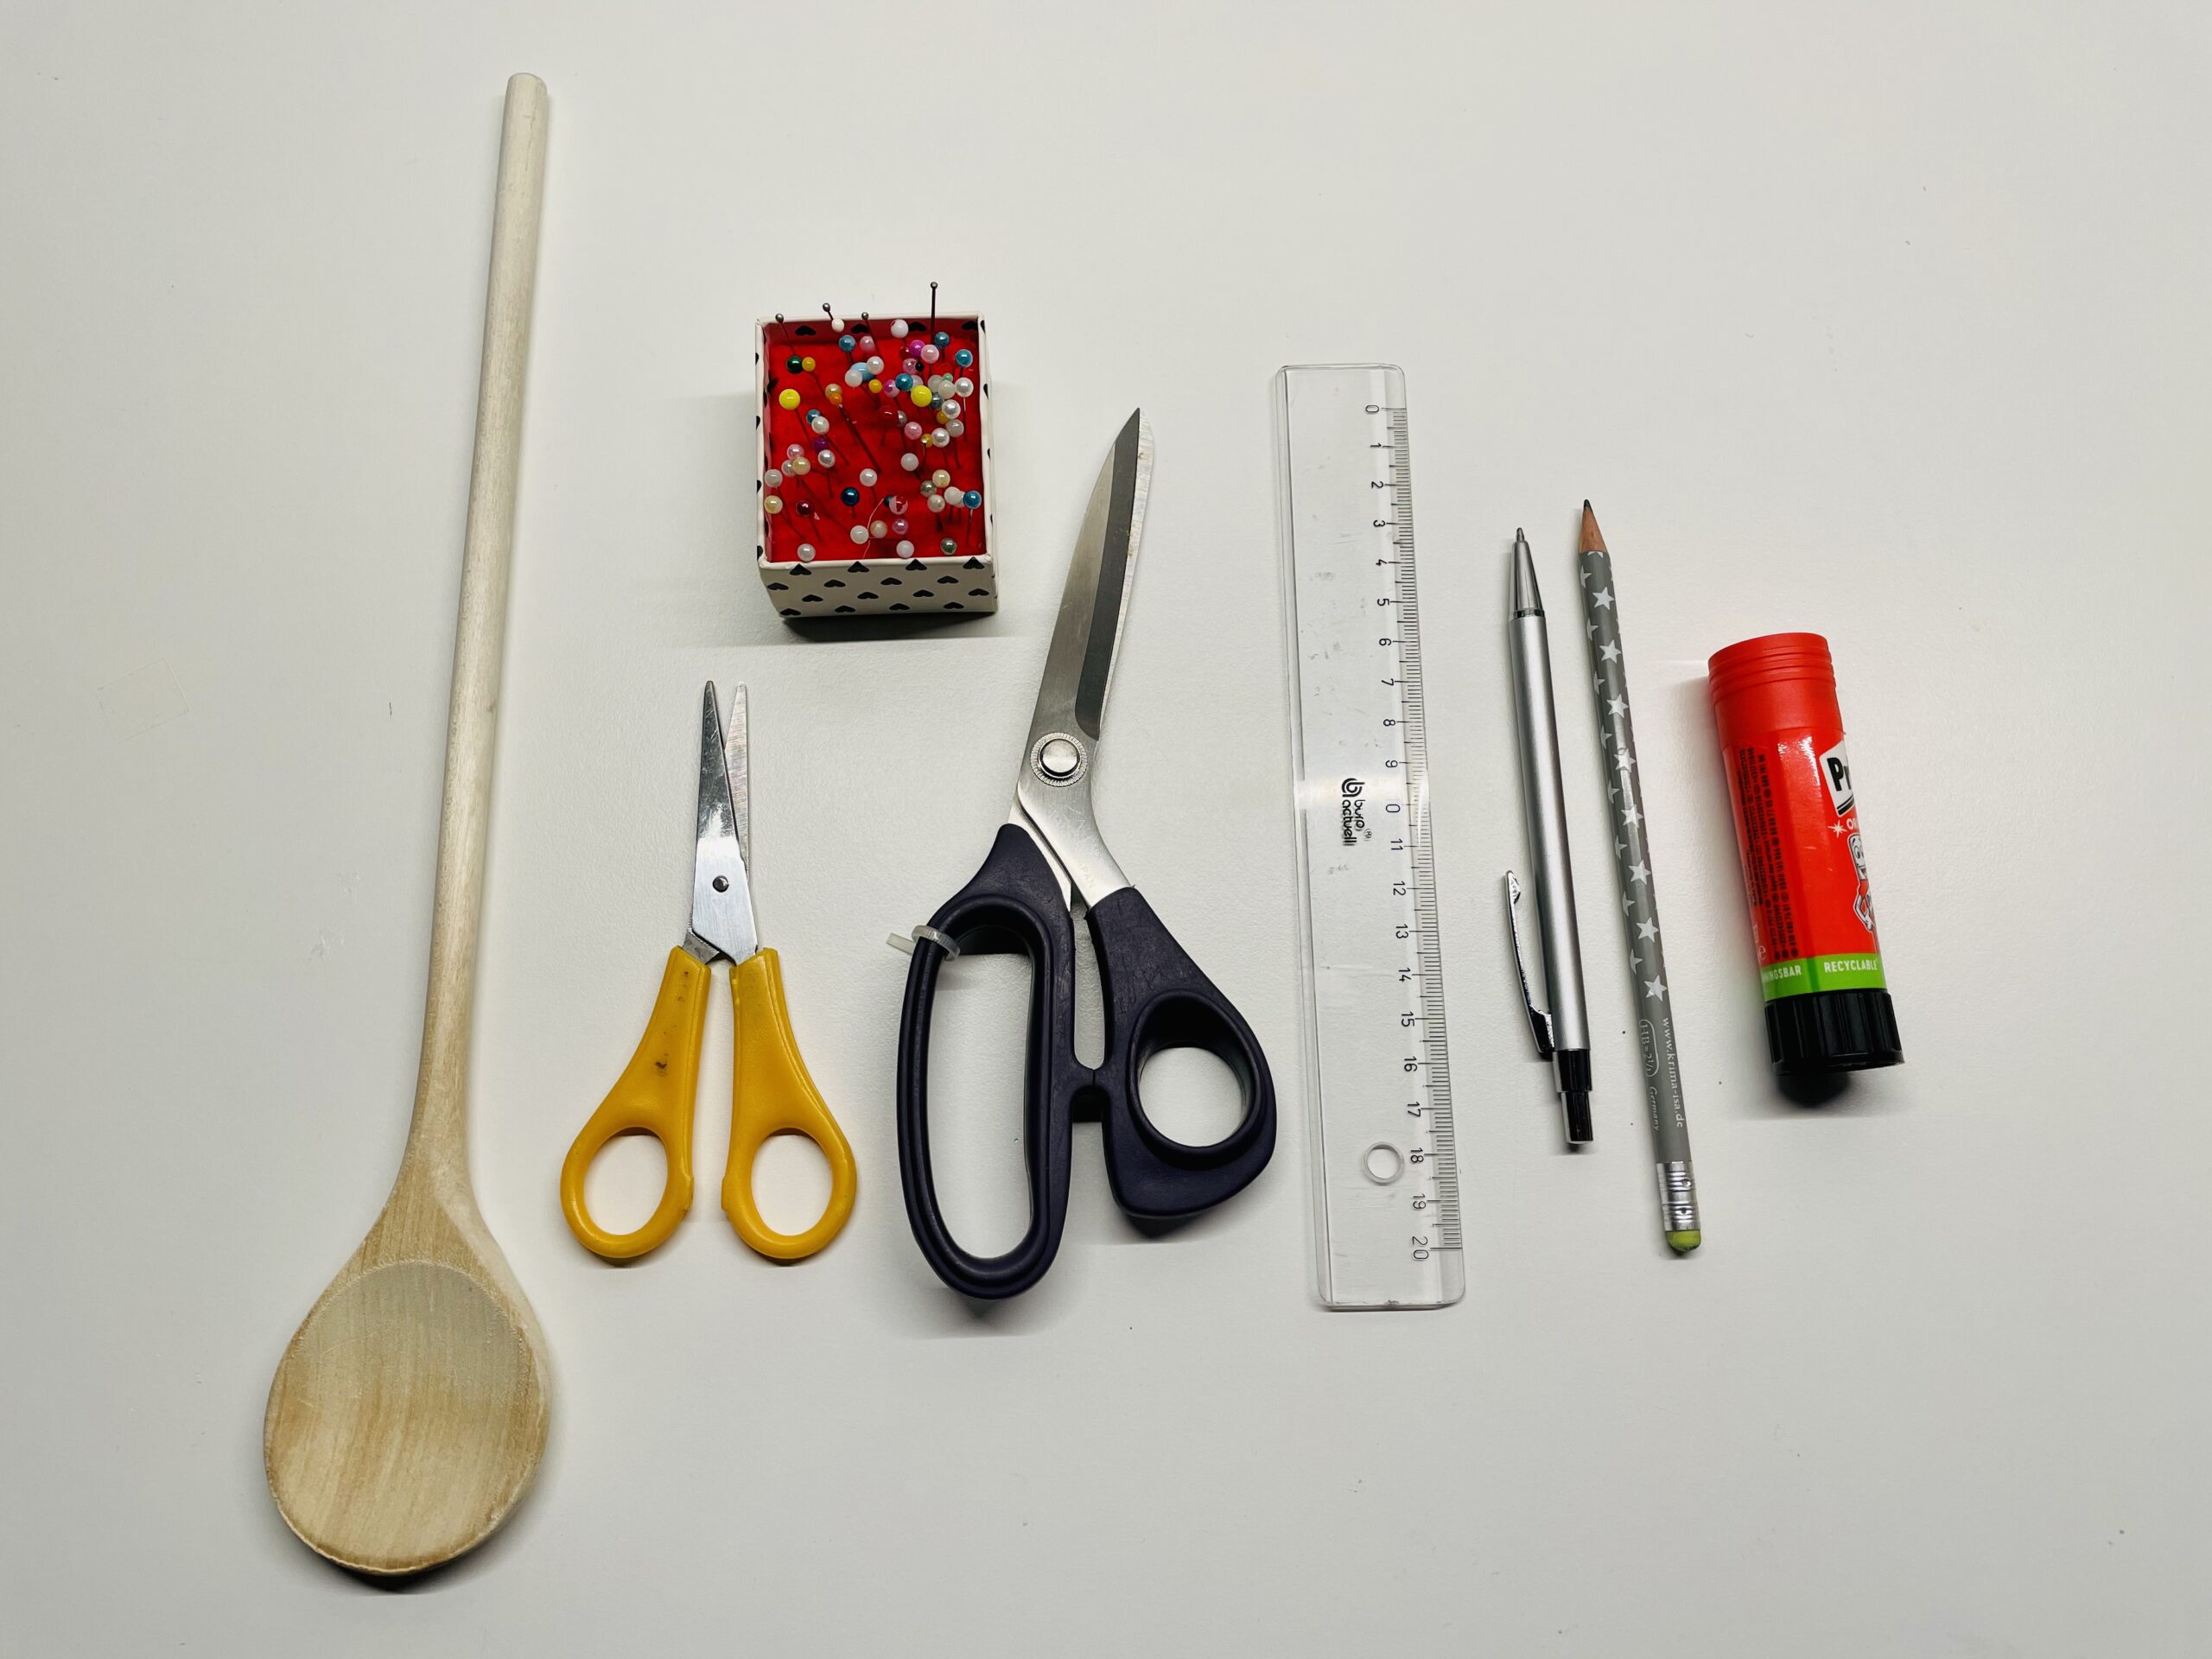
Get all the materials ready.
First print out the two templates once.
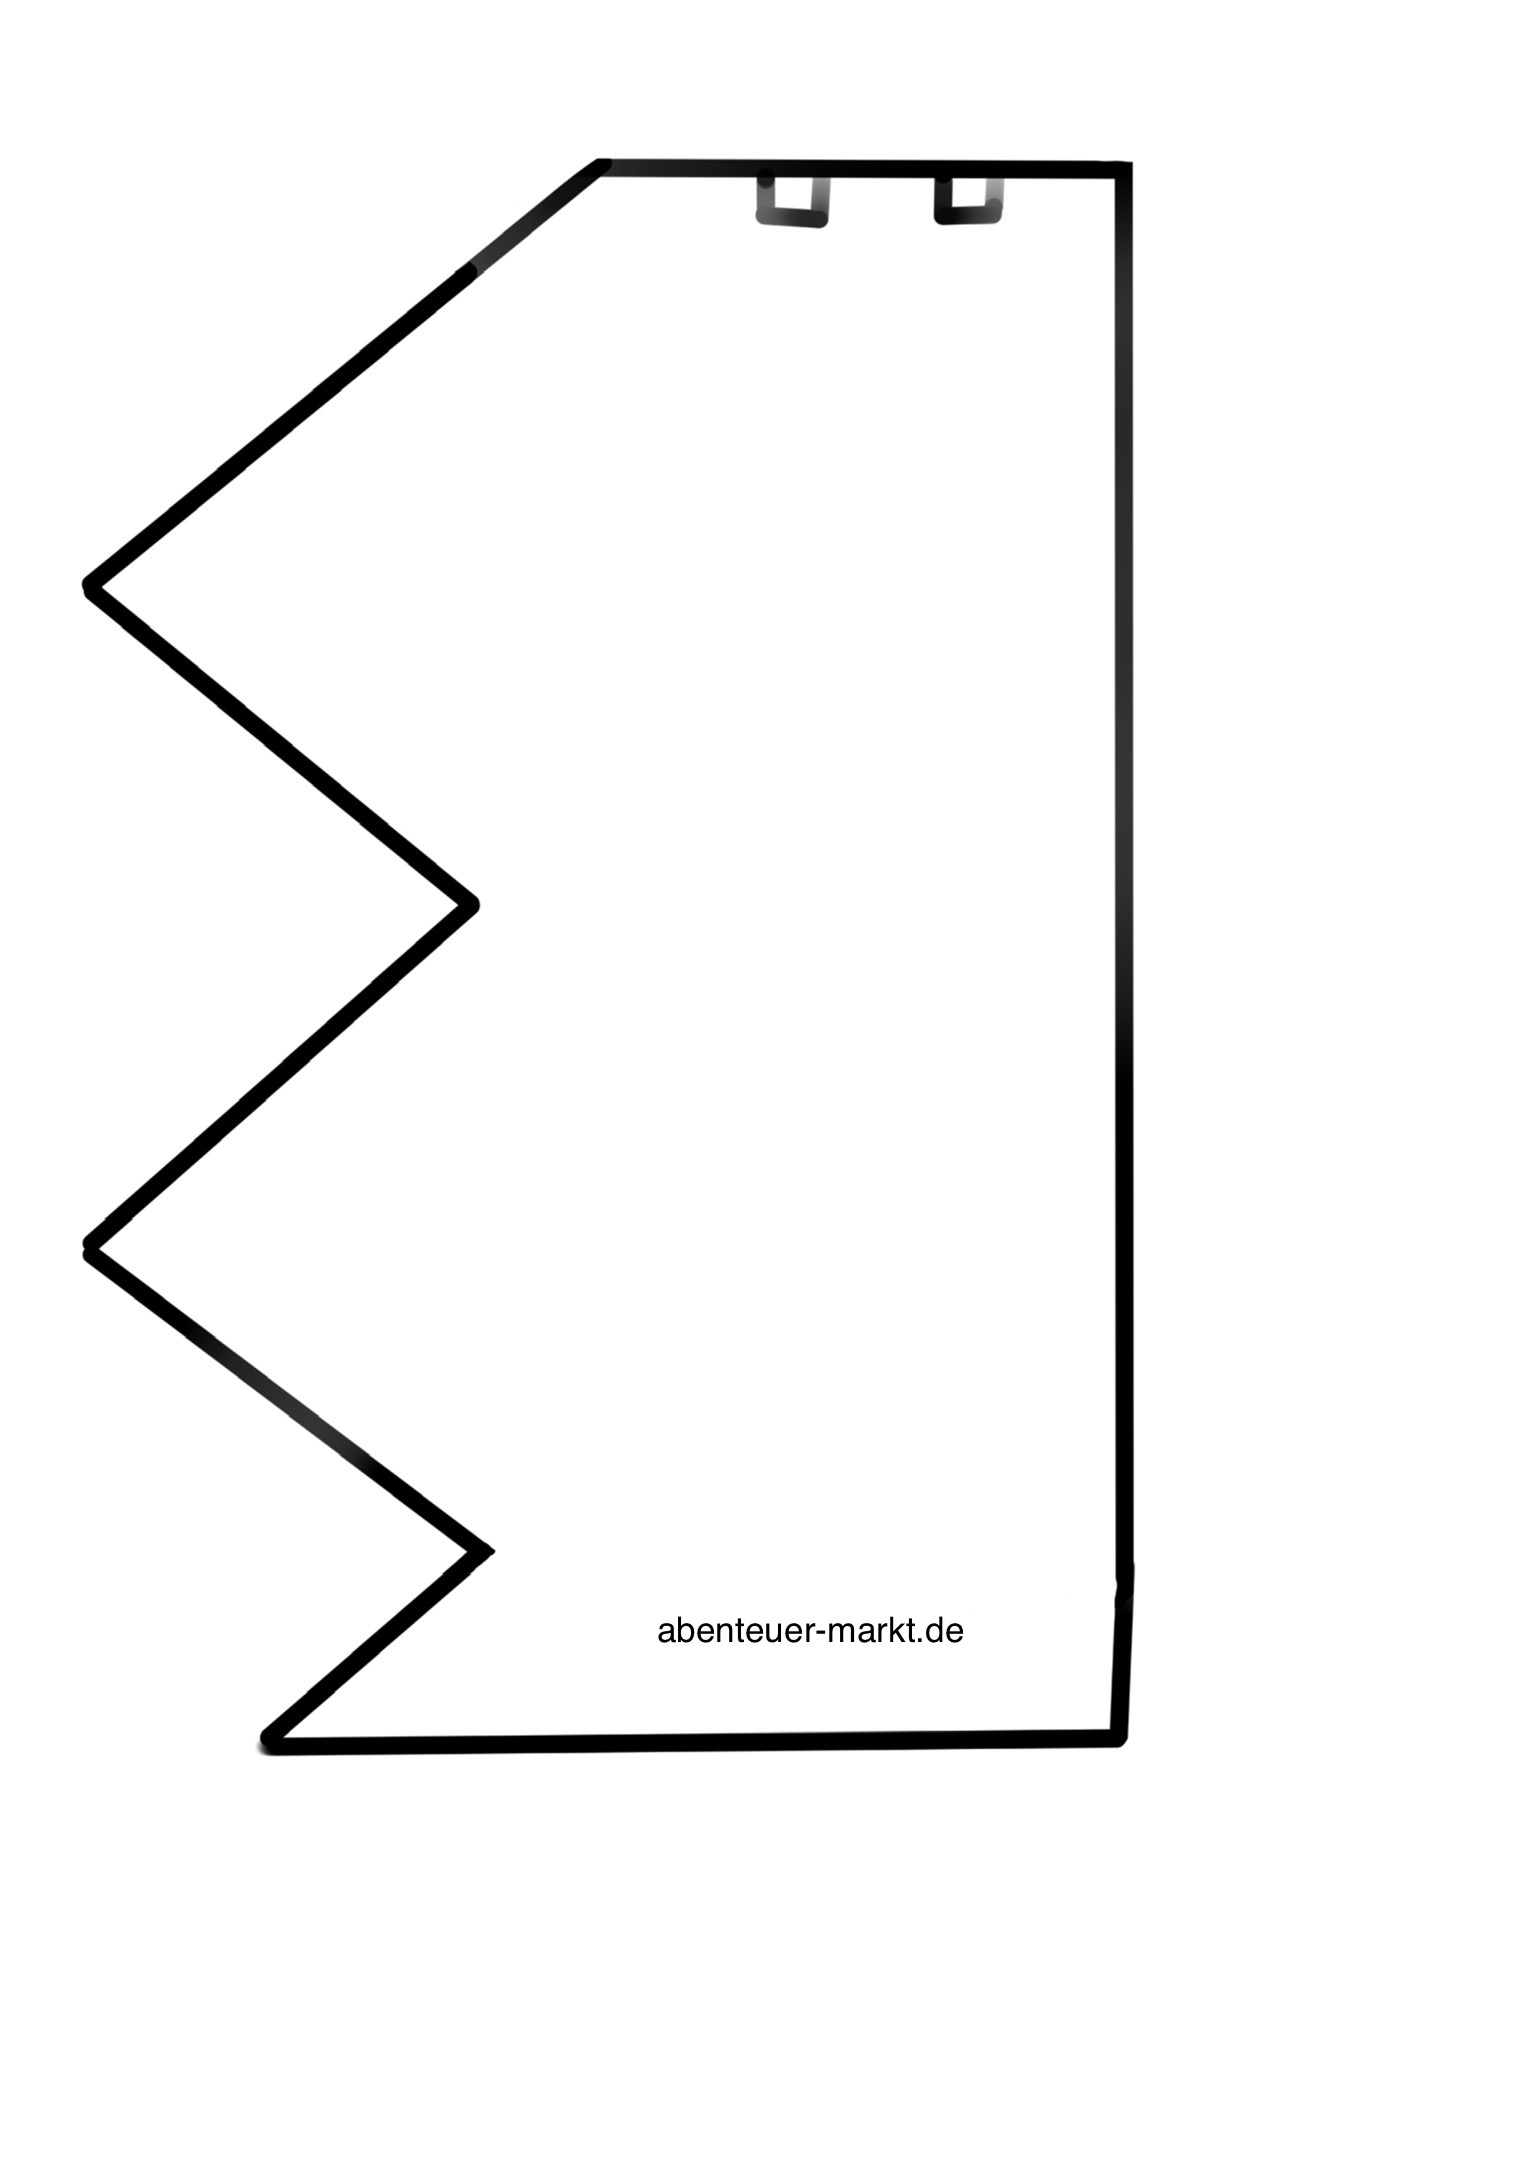


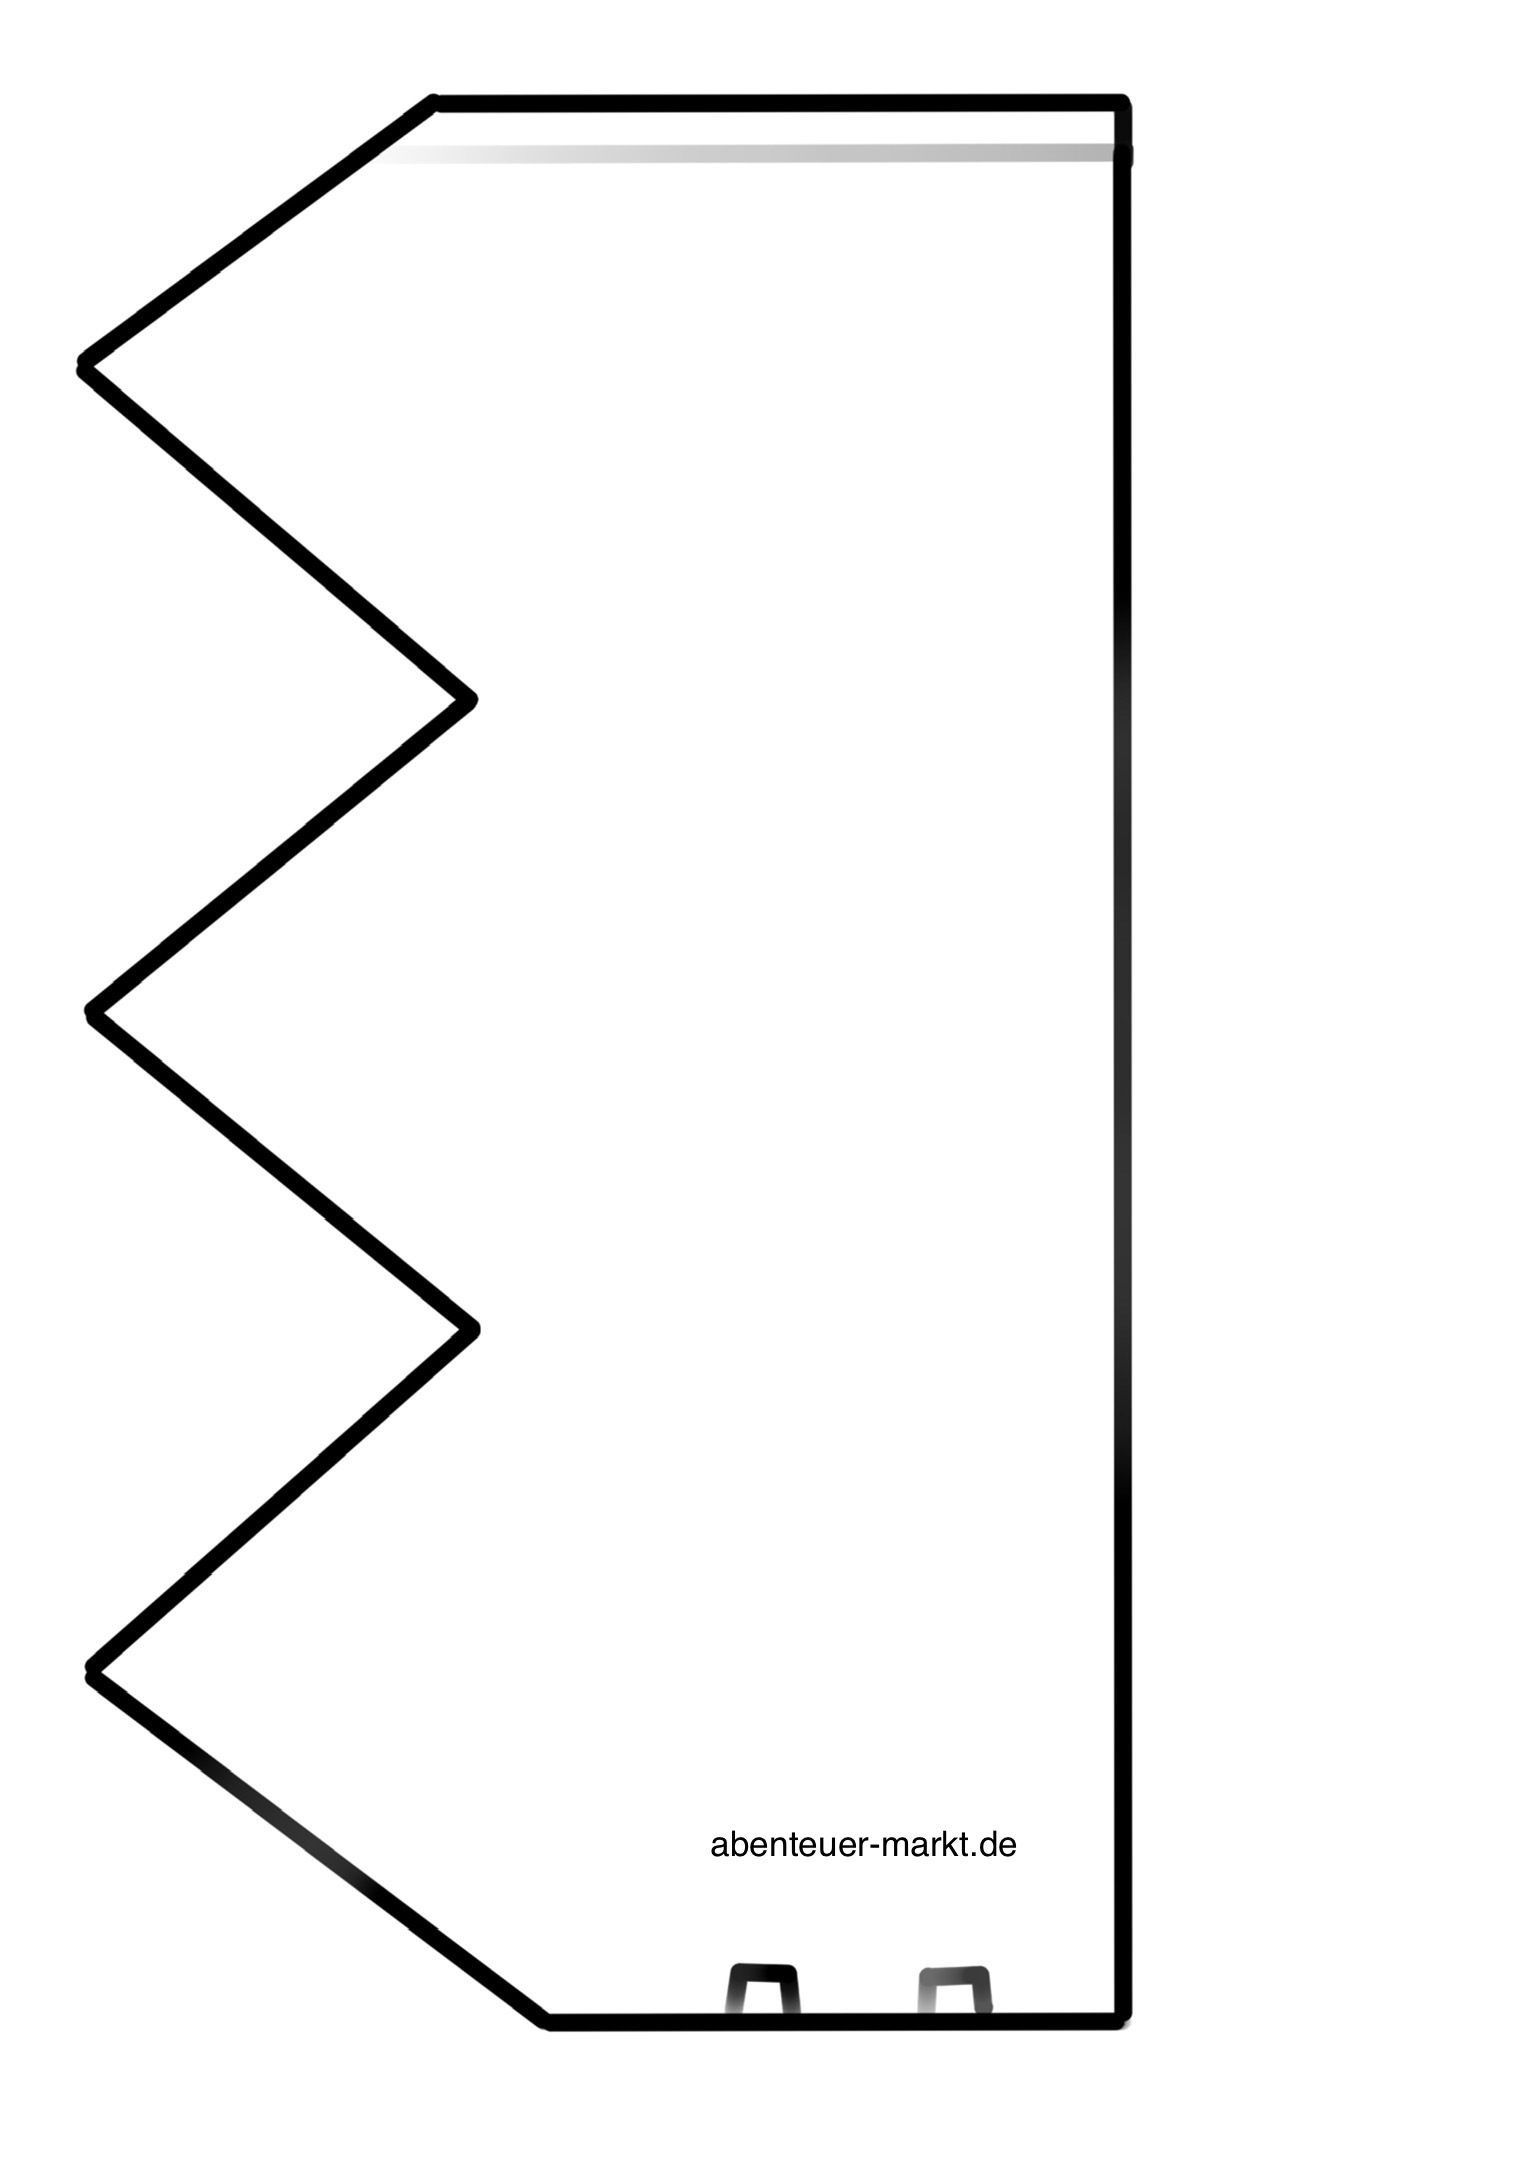


Cuts out the templates with the scissors.
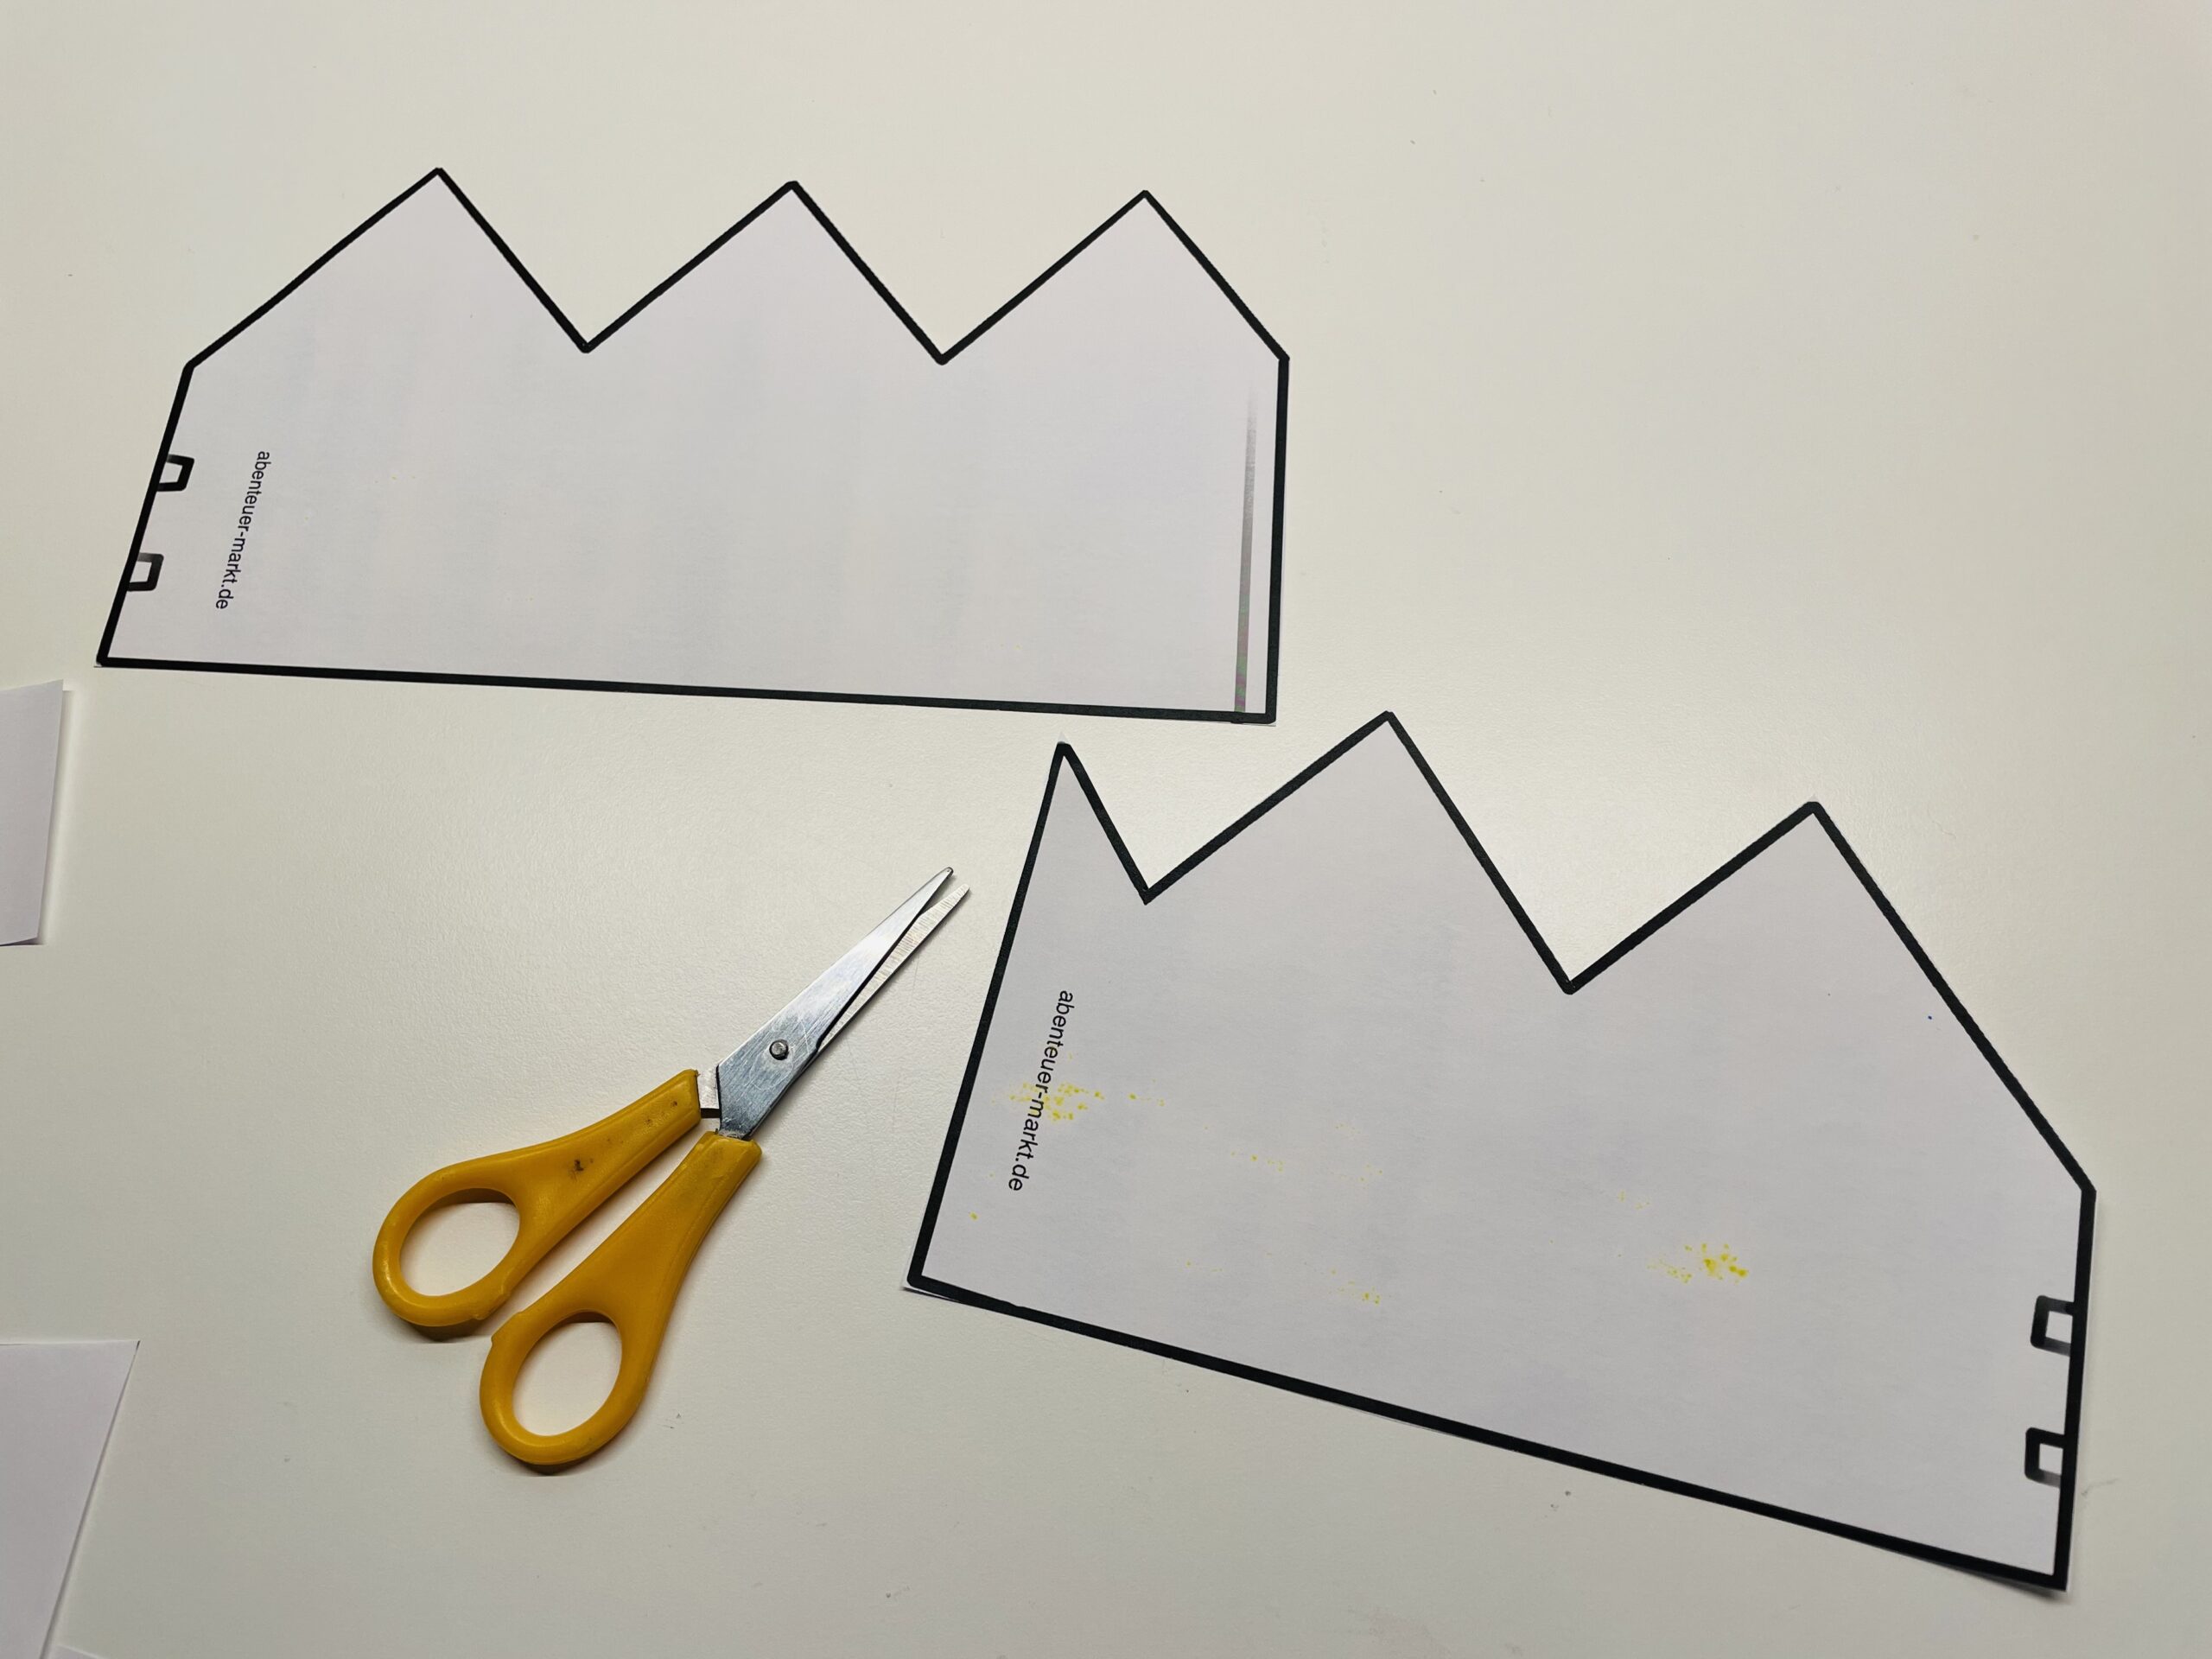


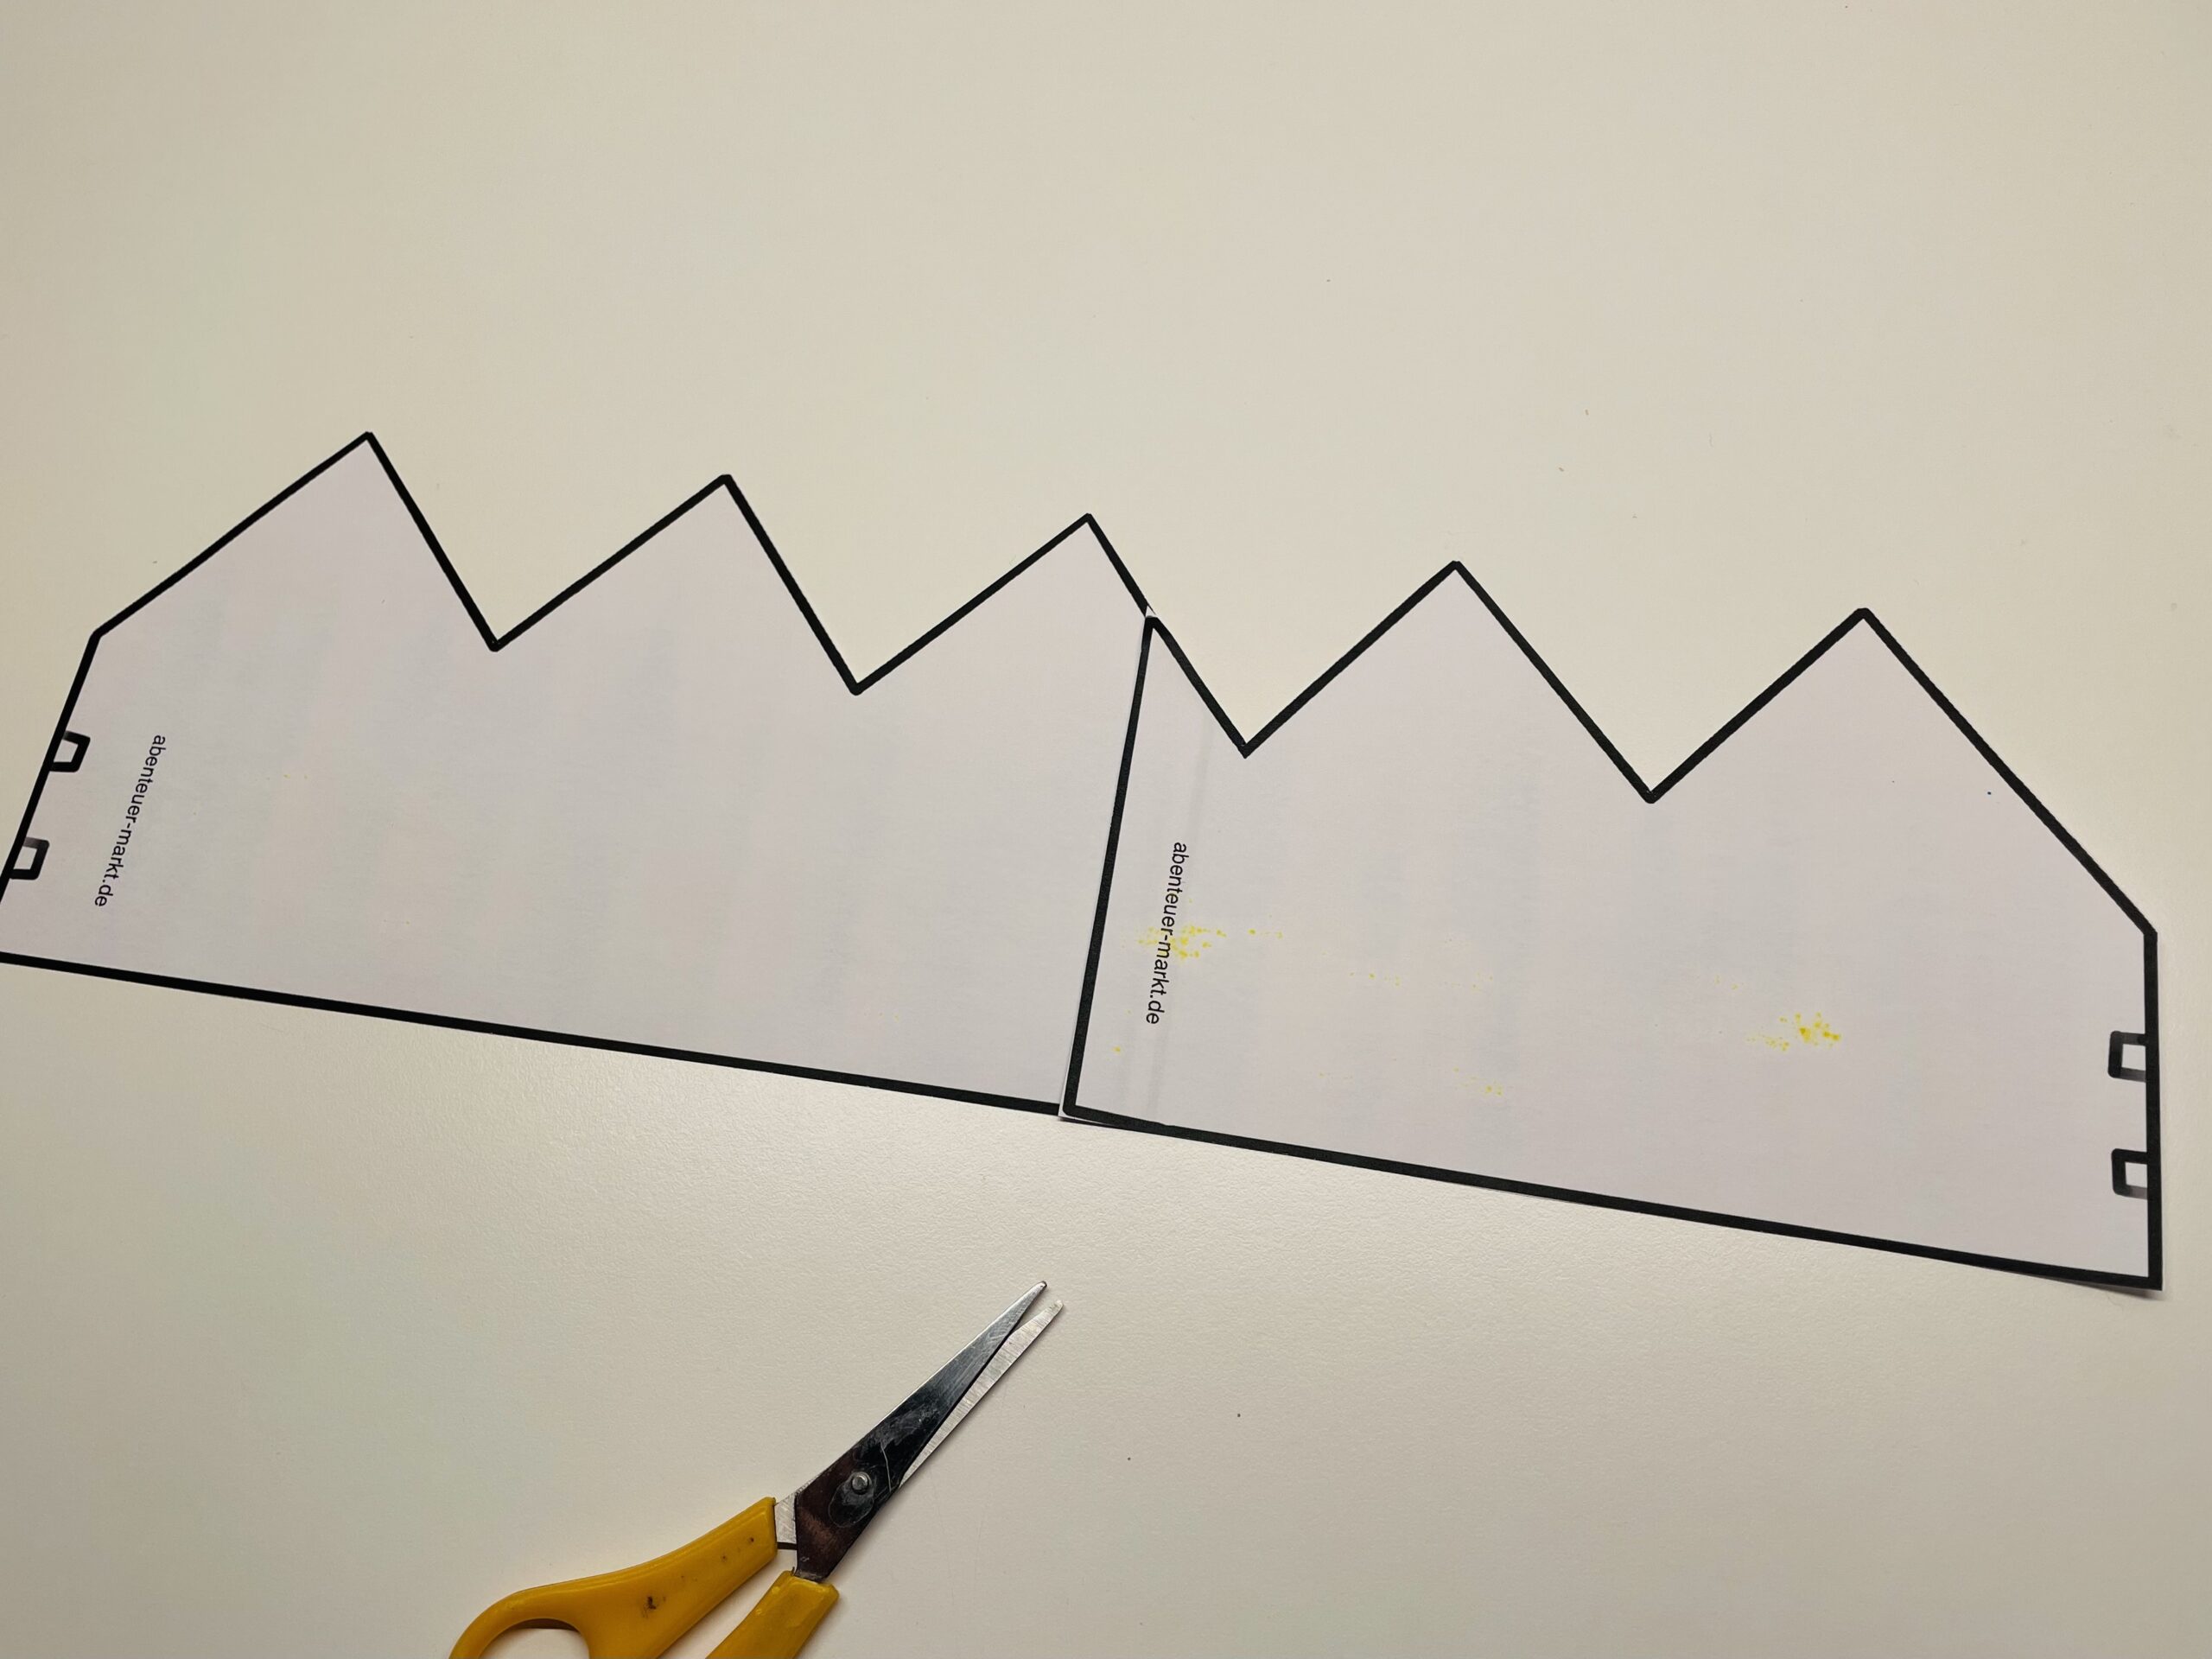
Sticks it to each other on the side with the "double" bridge. Aligns the border lines so that they lie exactly on each other.


Uses a cotton fabric or fleece fabric for the crown. It should not be stretchy.
Since both sides of the fabric can be used as a "front side", you can also use different fabrics, patterns or motifs. Place the fabric so that the beautiful side points downwards. Place the crown template on it and cover the complete outline. Tip: On many fabrics ballpoint pen (for recording) can be easily recognized.


If the outline is painted, you can paint your sewing line right away. To do this, the template moves about half a centimetre from the edge inwards and paints a second line on your fabric. This runs completely parallel to the outside line.


You have to adjust the template again and again when repainting, because it is a bit larger than the required sewing line.


This is what the painted on the fabric should look like.
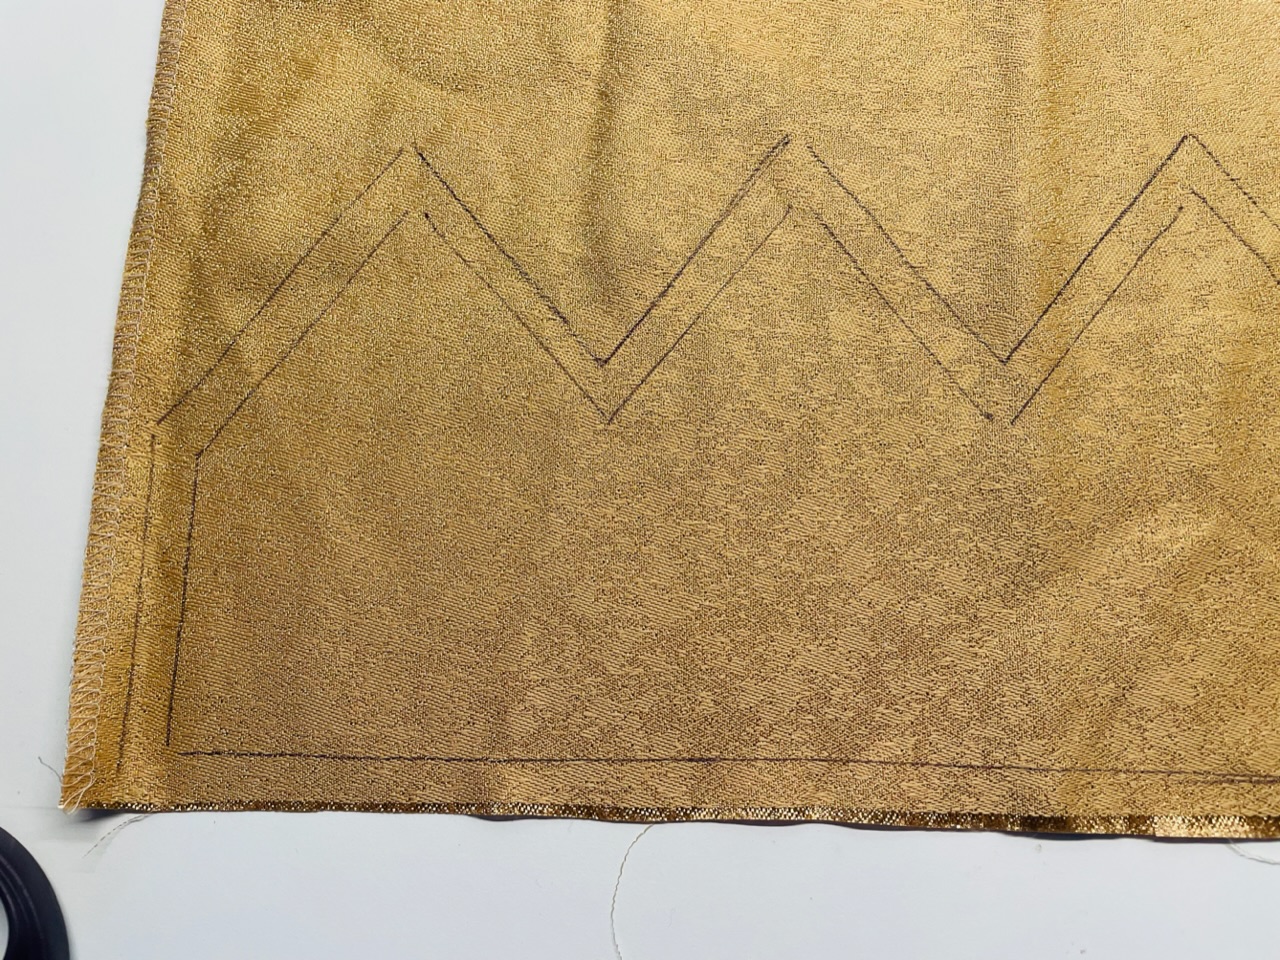


Cuts the "crown" out of the fabric properly with the fabric scissors. Then the first cut is already finished.
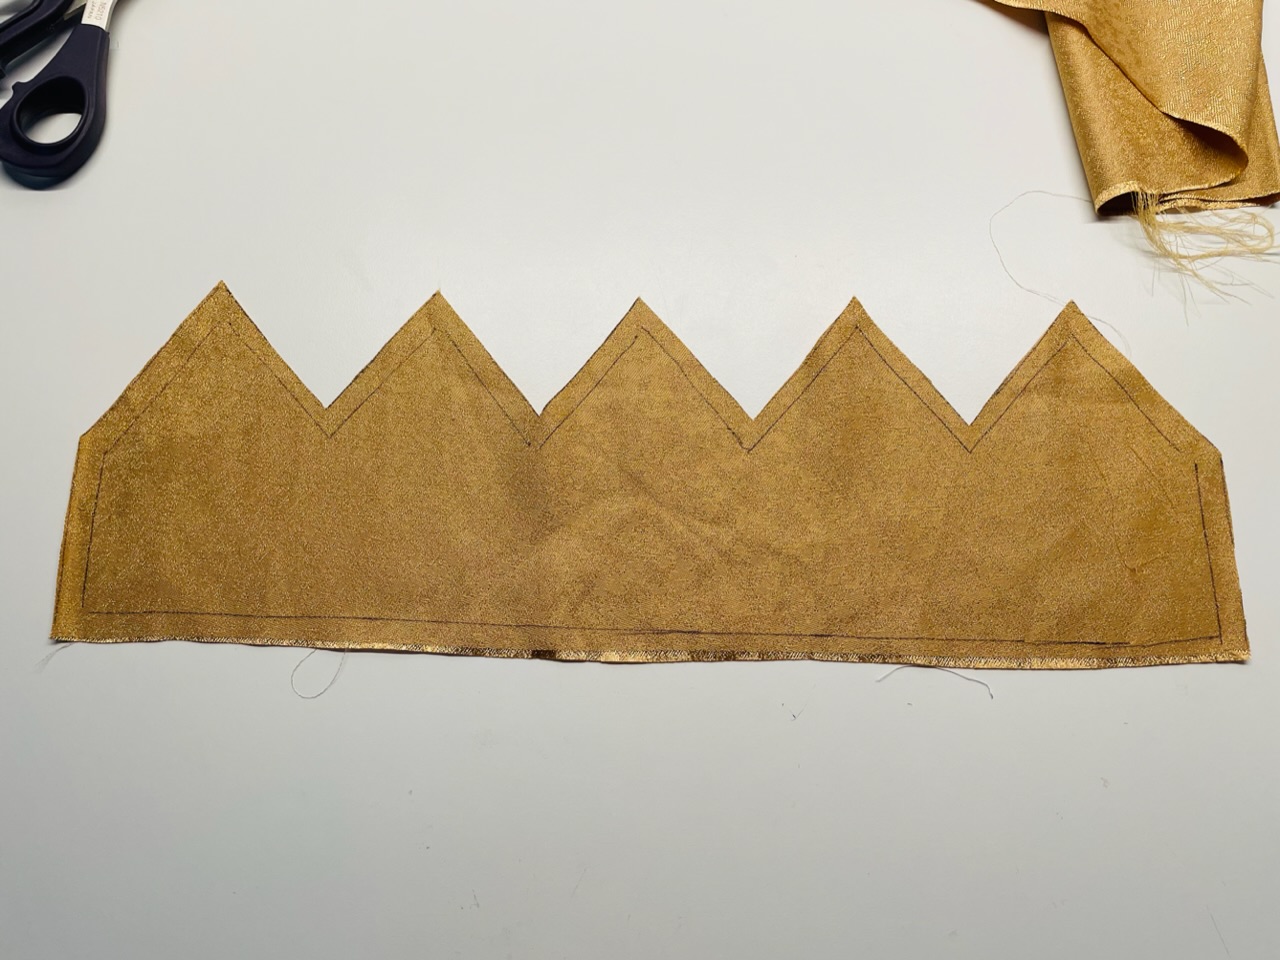


On the second outer fabric only the outline line is necessary. (On which fabric you mark the sewing line you can decide.) Cut also this fabric.
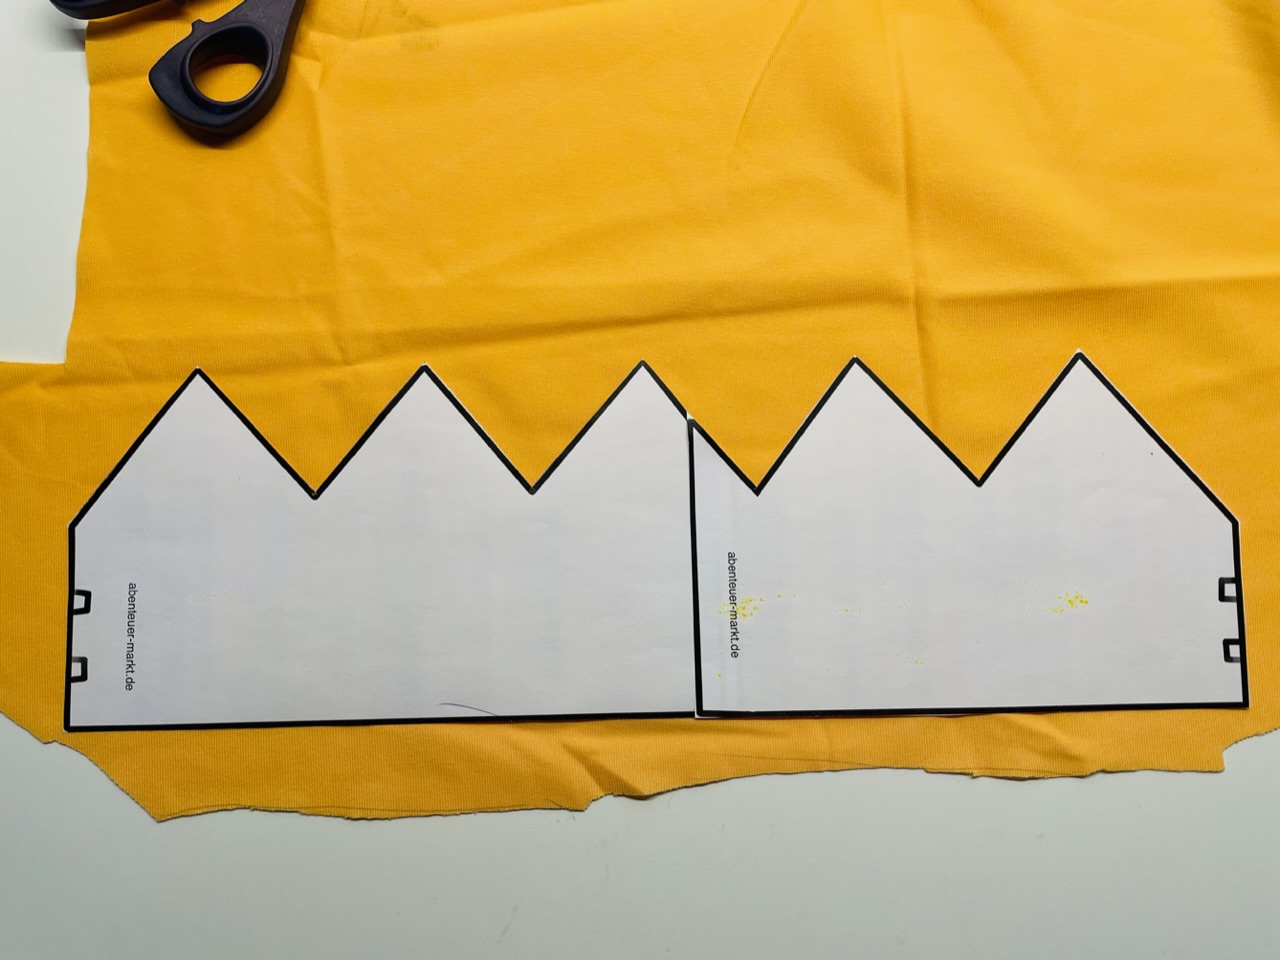


Both outer materials are now ready.
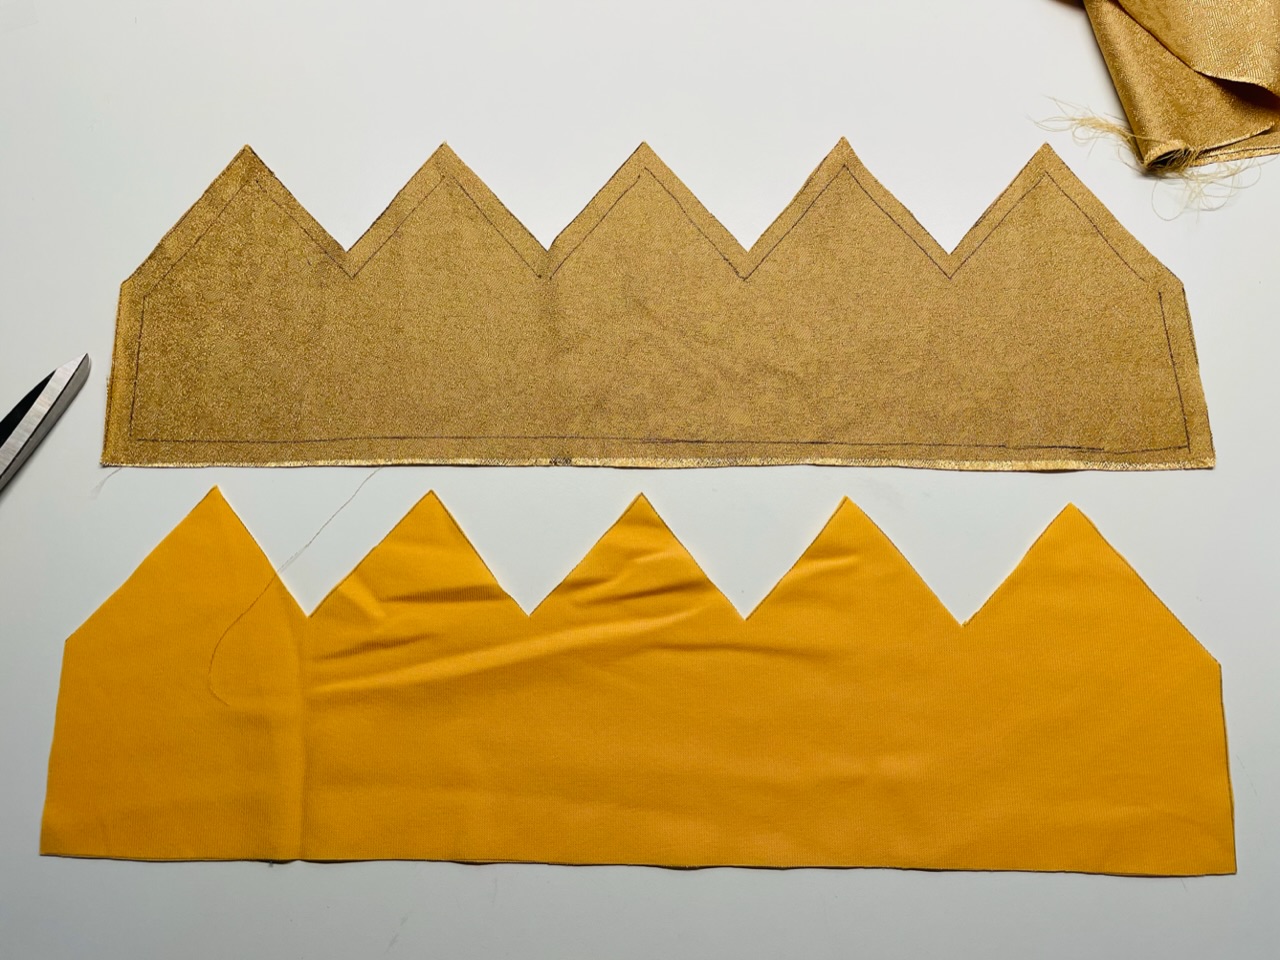


In addition, a stabilizing fleece is needed. For this you can also use a fleece cloth (new dishcloth or floor cloth).
Paint the border on the fleece fabric and cut it out.
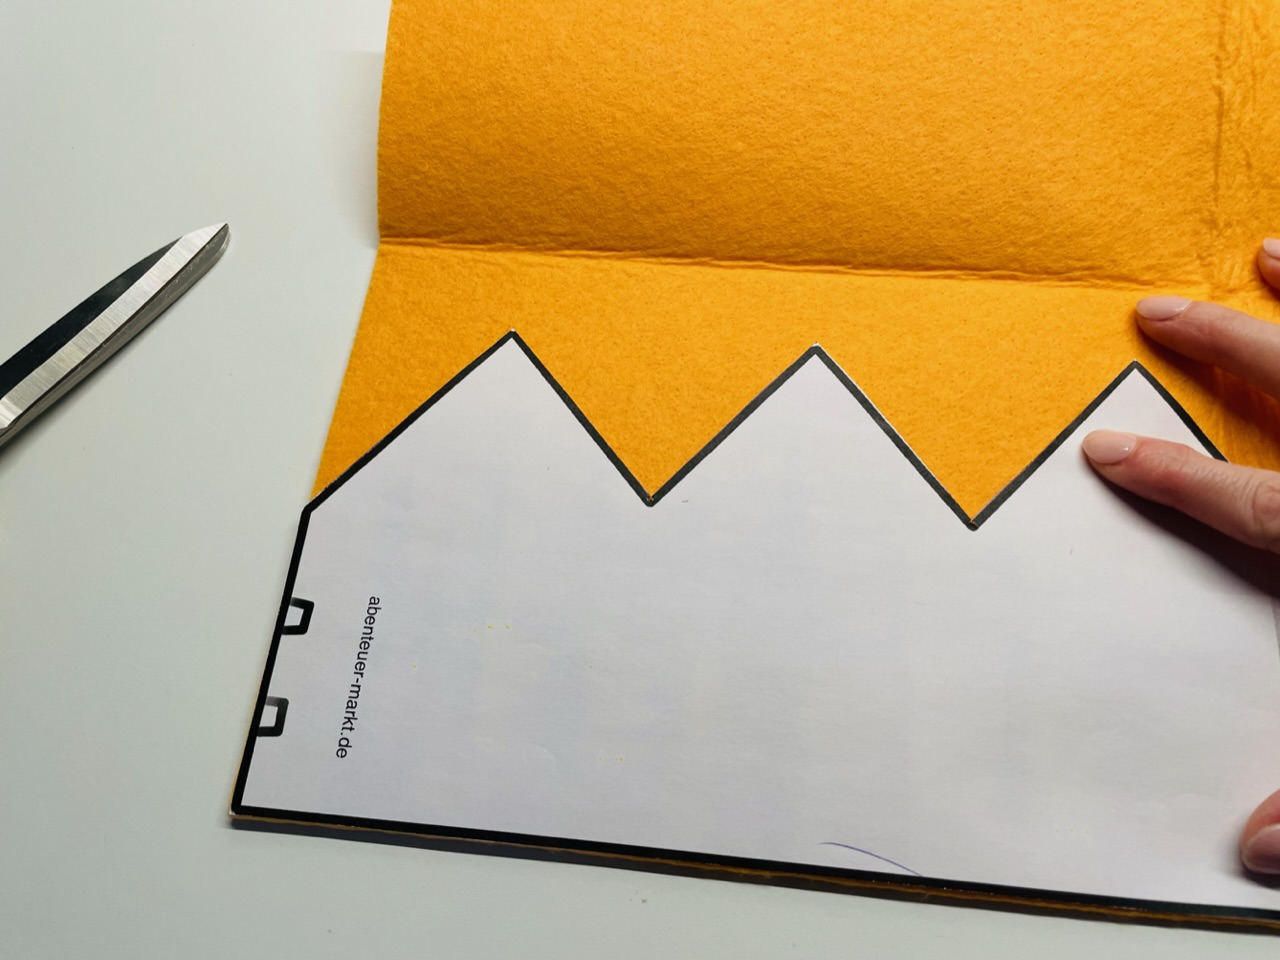


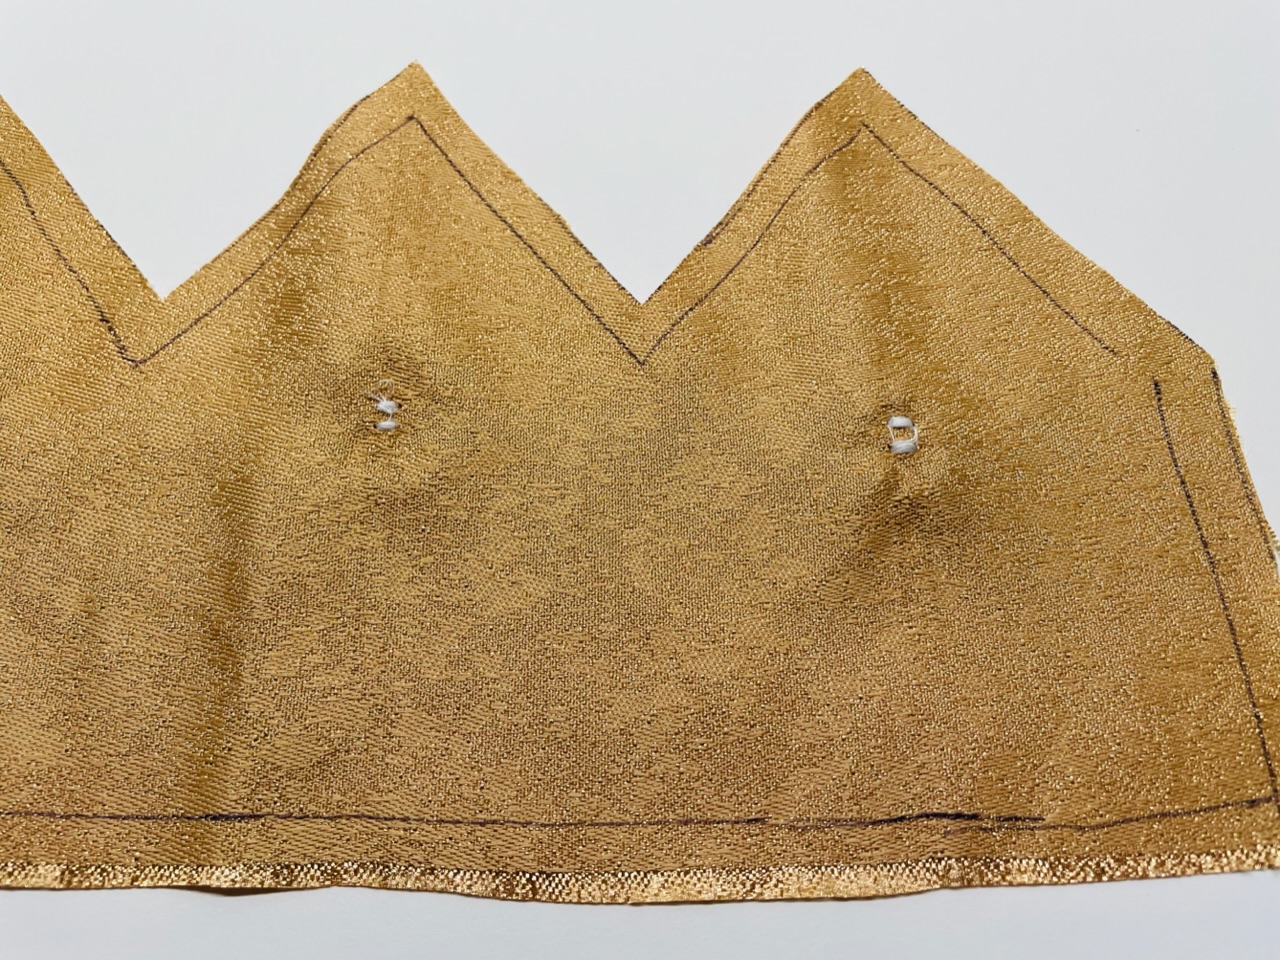
To beautify the crown, you can place a different or similar-looking button under each zacke.
You can also sew these in retrospect, but then you can see the threads on the back. To have buttons on both sides where no threads can be seen, it would be good to sew the buttons before sewing the crown together. Choose a button for each pitch that you like.
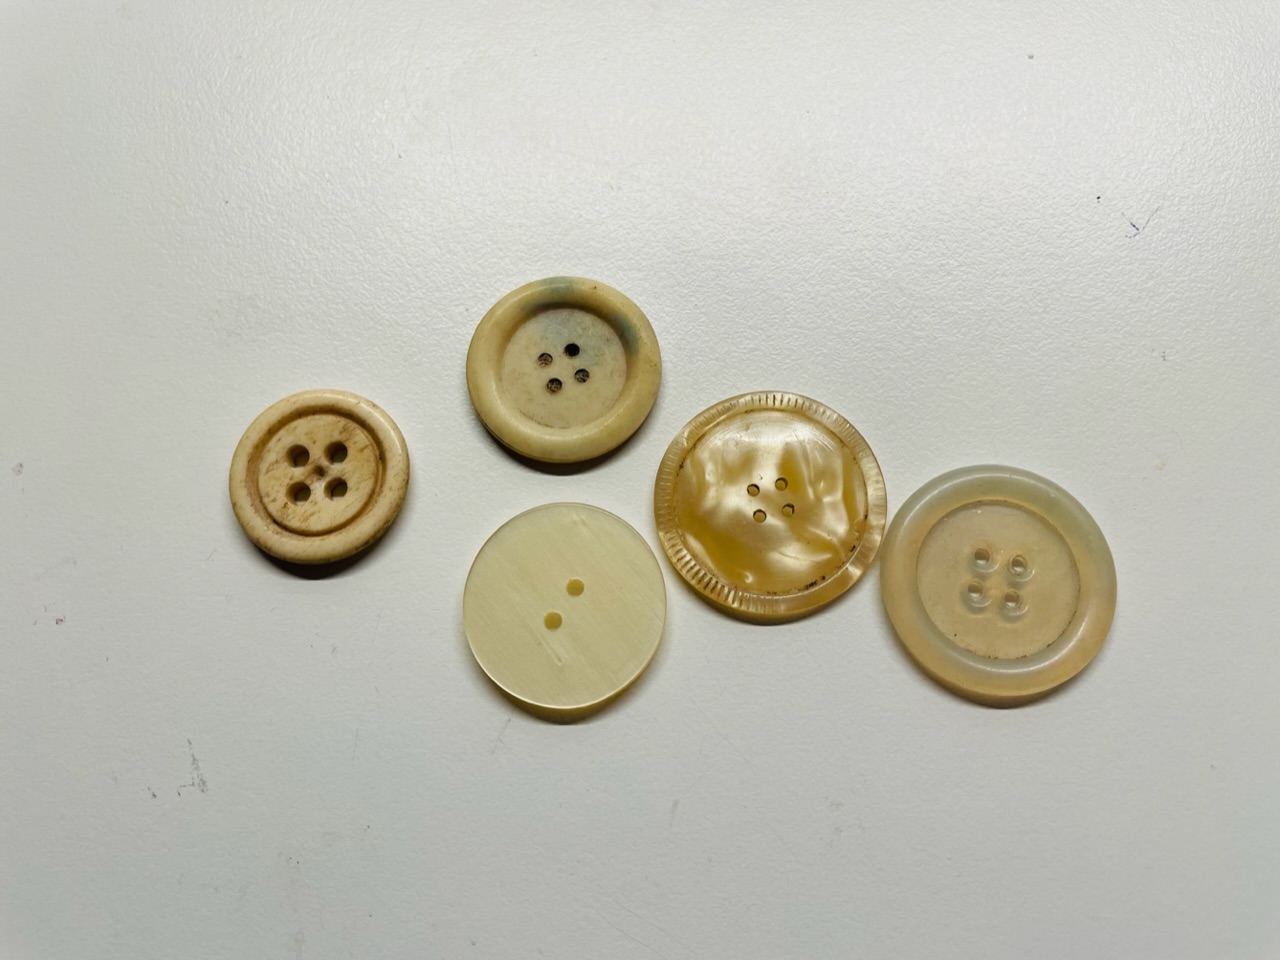


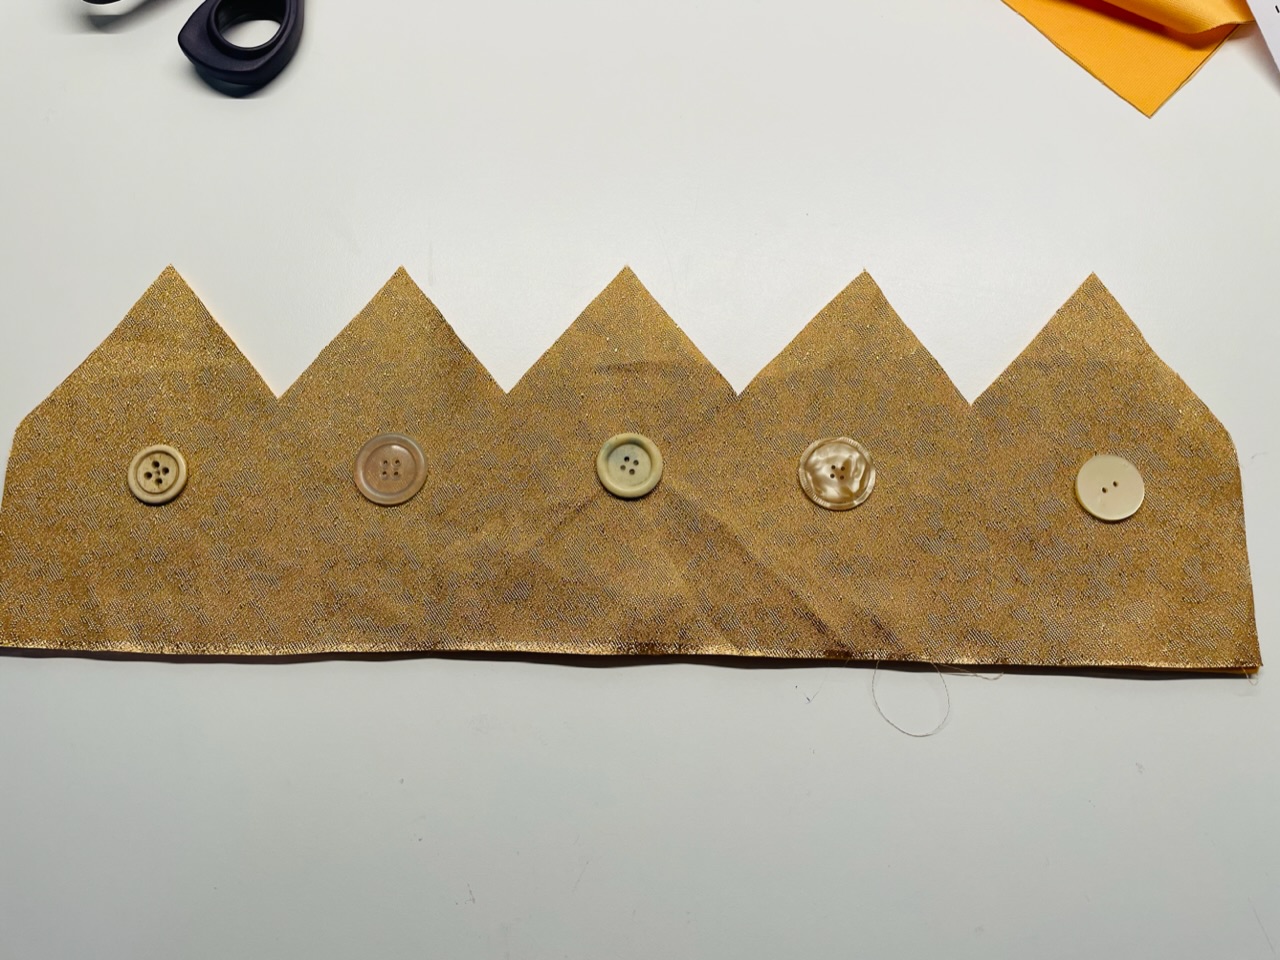
First place the buttons where you want them. Buttons that lie in the middle of the crown will later be visible "front" on the crown.


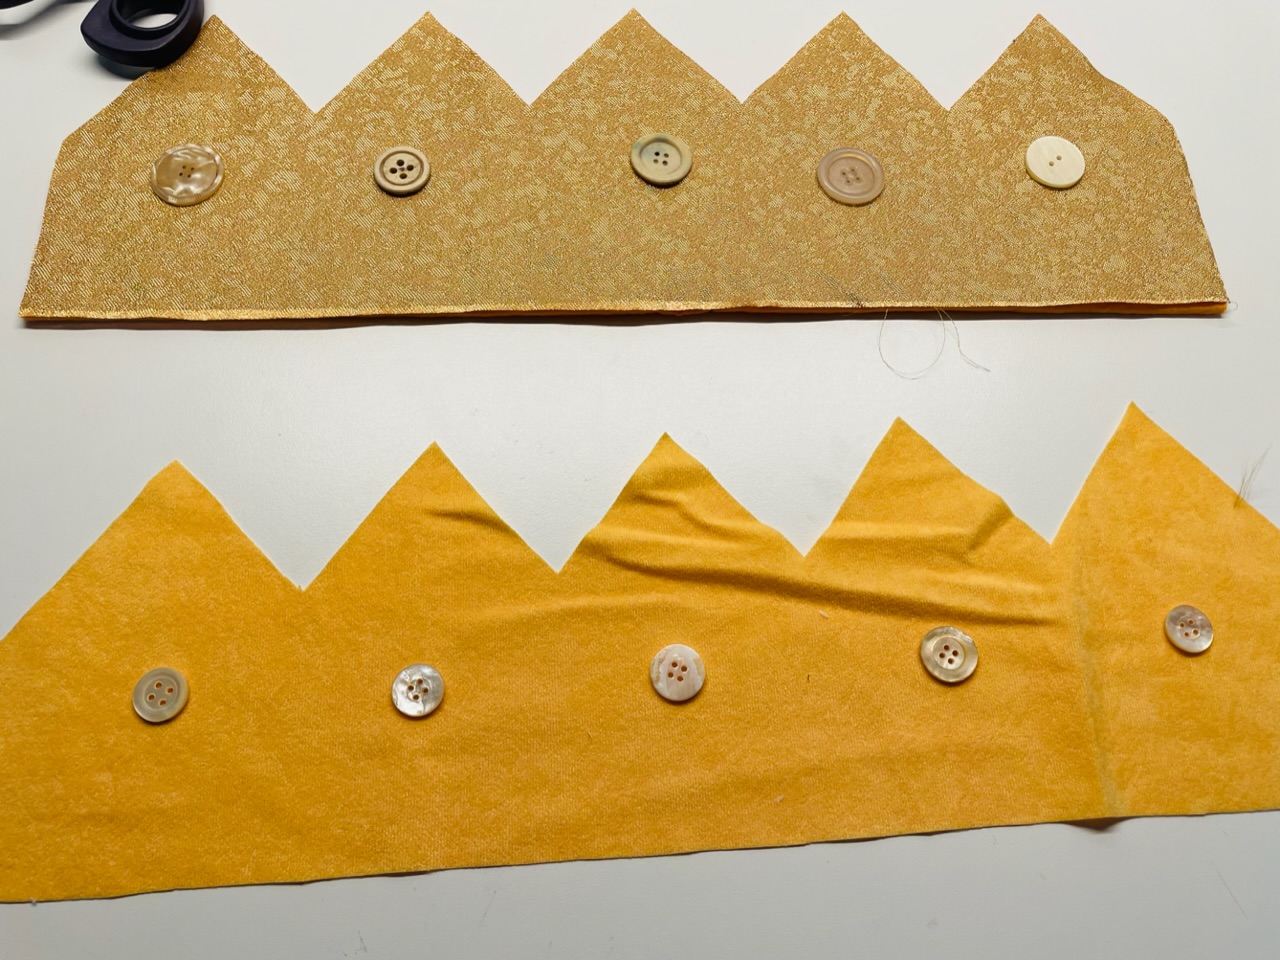
Both fabric parts can also get buttons.


With the sewing machine, each button can be sewn very quickly. However, some sewing experience is good for this.
This is how you go about it:
If the transport feet first lower on the sewing machine, the fabric remains lying when sewing.
Set the stitch to "Zick Zack".
Places the button directly under the sewing feet.
Move the needle with the hand-rotating wheel and let it pierce into a hole.
Turn the rotary wheel further and make the first stitch, which then punches into the second button hole. (The first stitch is sewn!)
Now you can continue "sew" with the hand-rotating wheel or you operate the foot pedal of the sewing machine carefully and very slowly. Both are possible.
Make several stitches until the button is well sewn.
Raise the little foot again and push the fabric forward so that you can cut the thread directly on the button. Leave the thread on it and first sew on the other buttons. This thread can be cut off at the end.
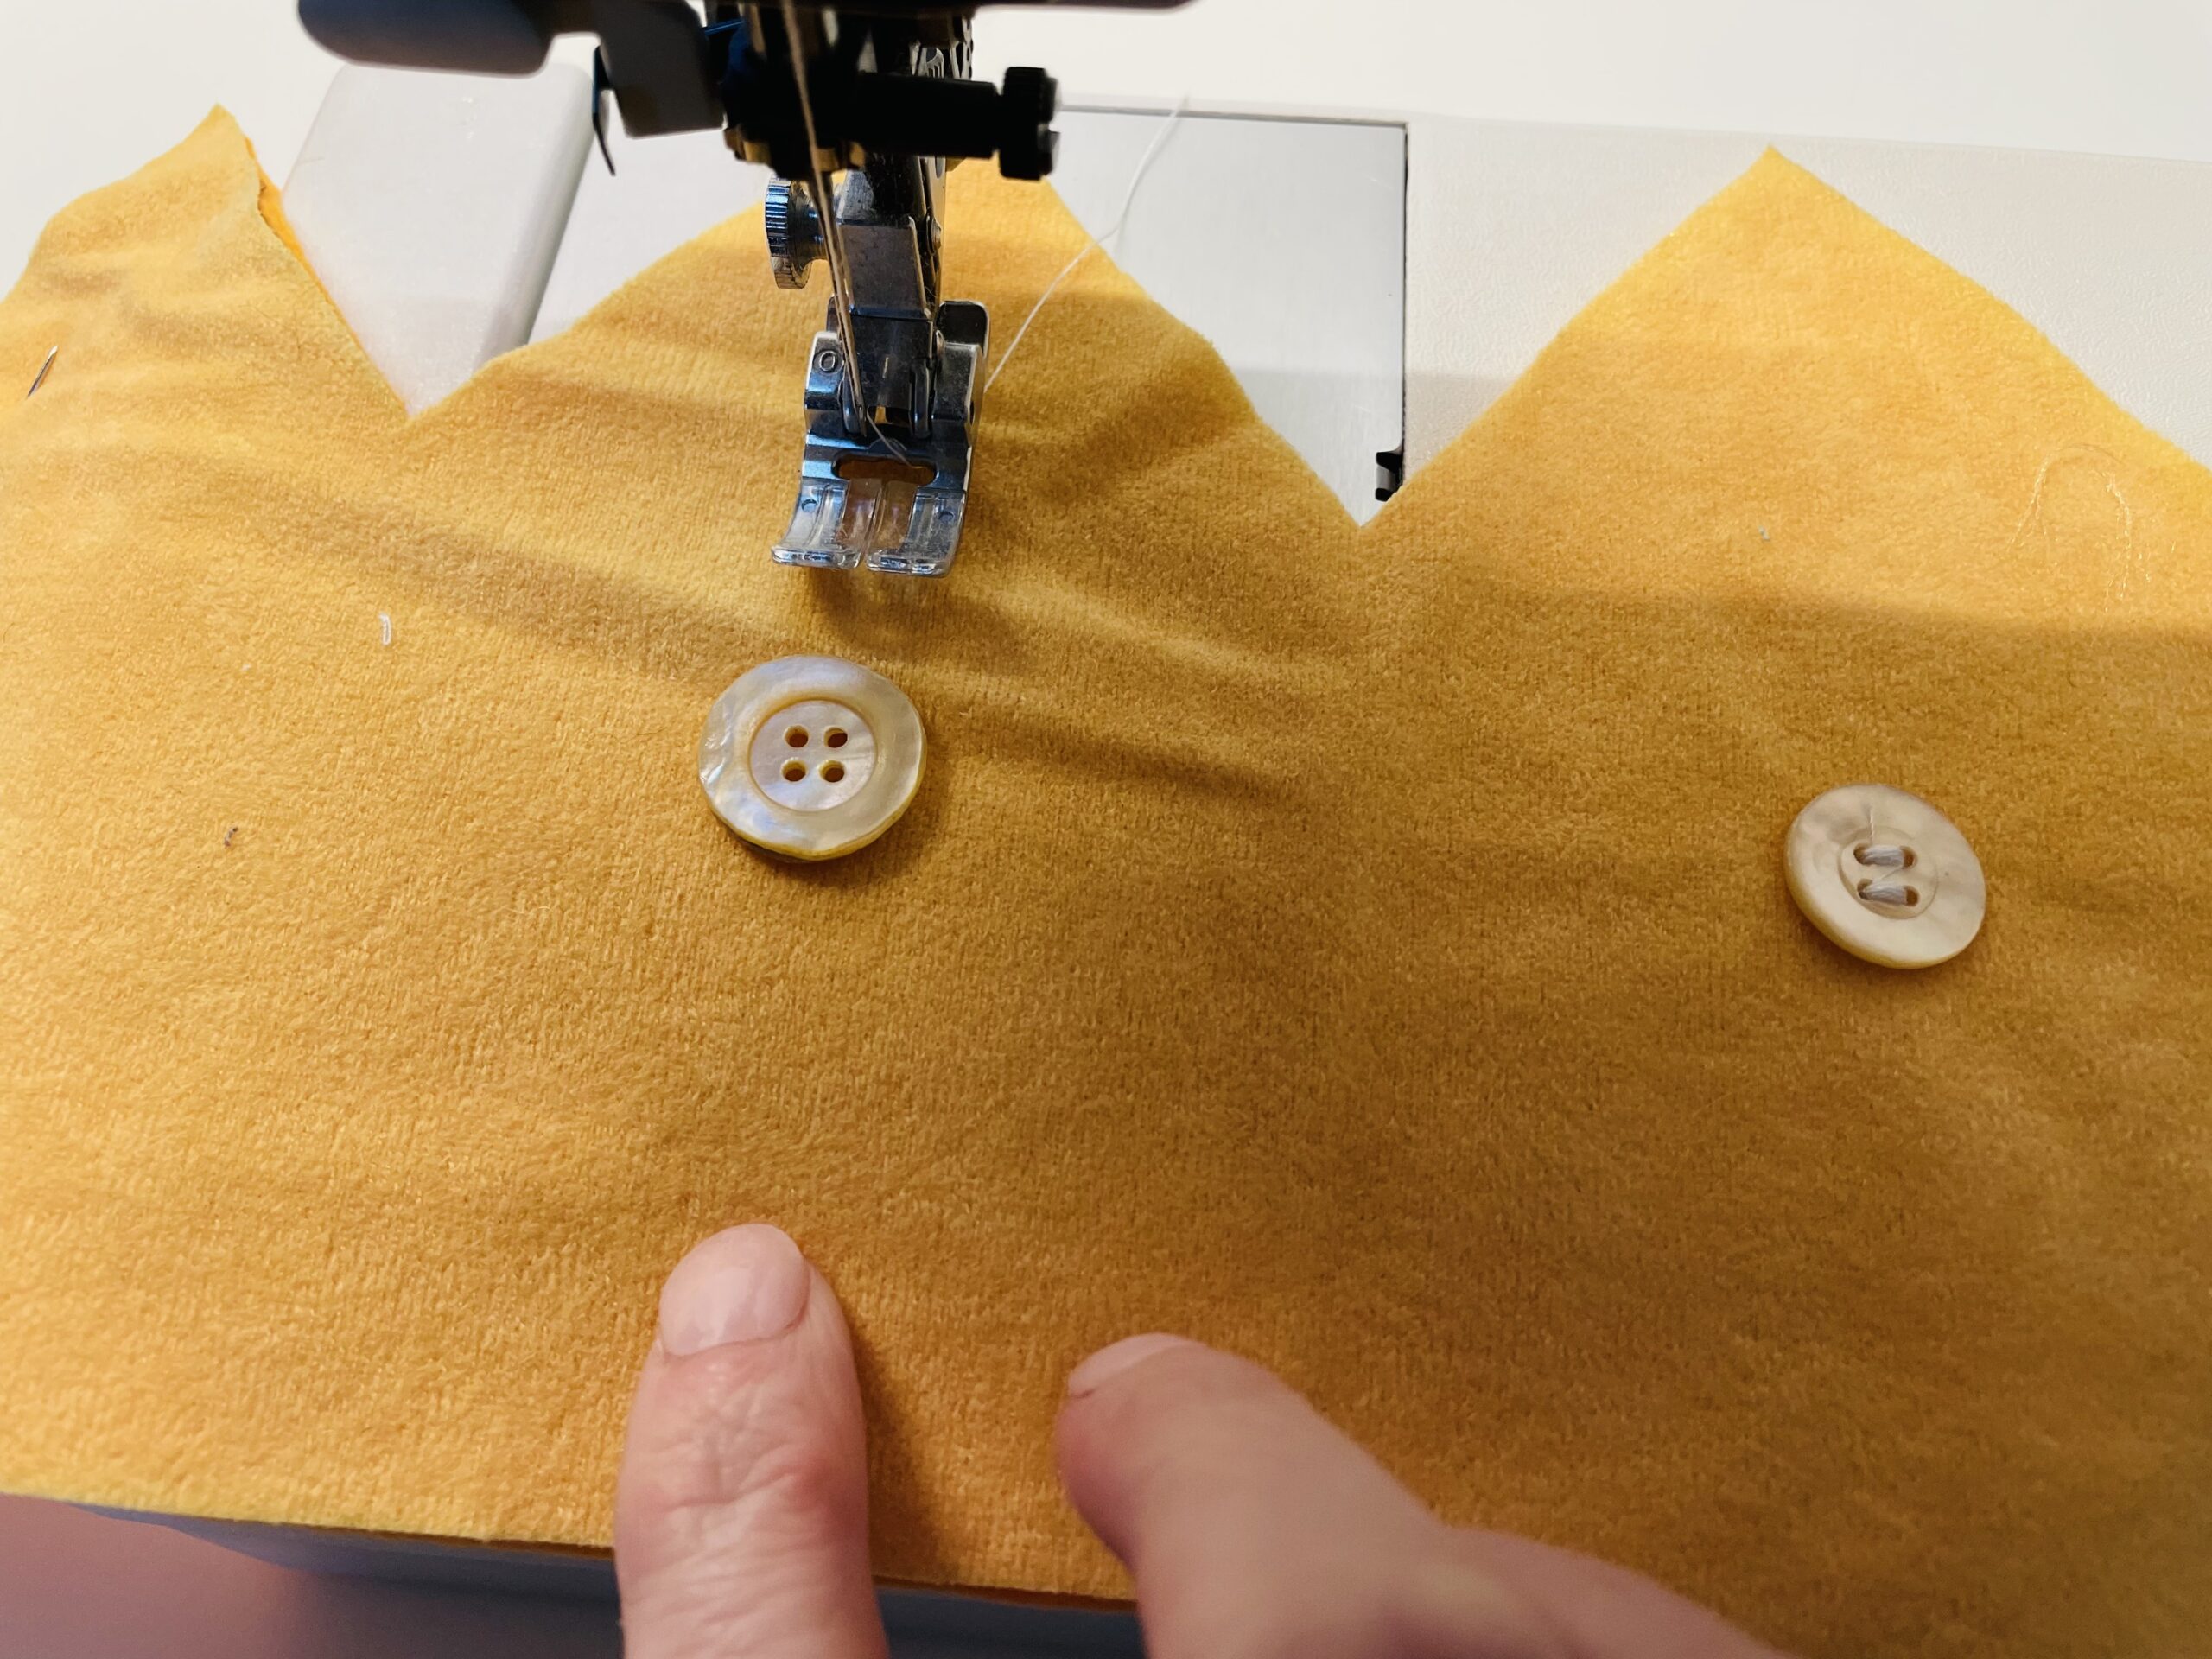


At the front of the crown, on which no sewing line was painted, the fleece can already lie under the fabric when sewing on the button. So this is also fixed.
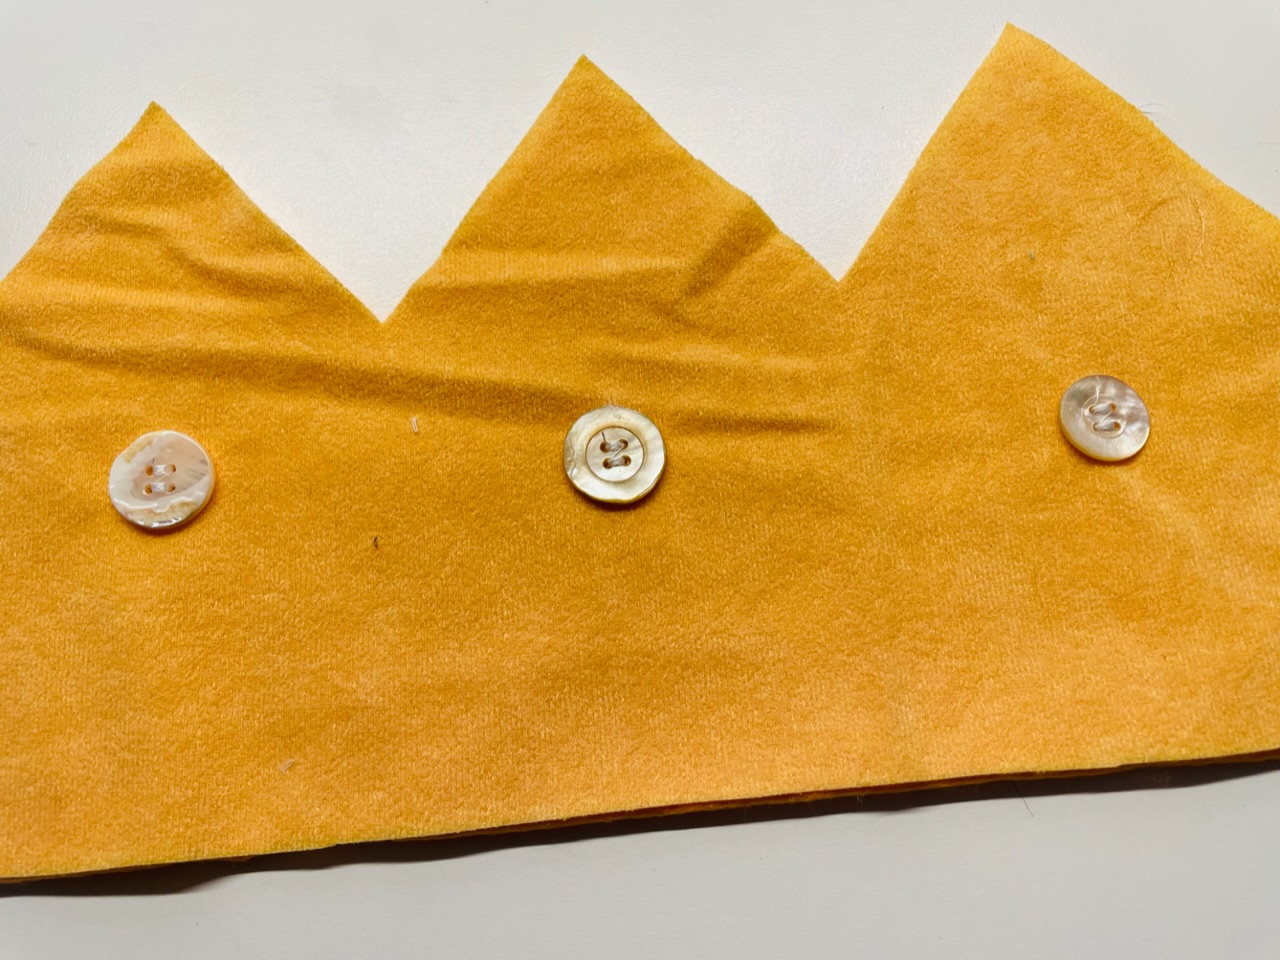


Sew all the buttons.
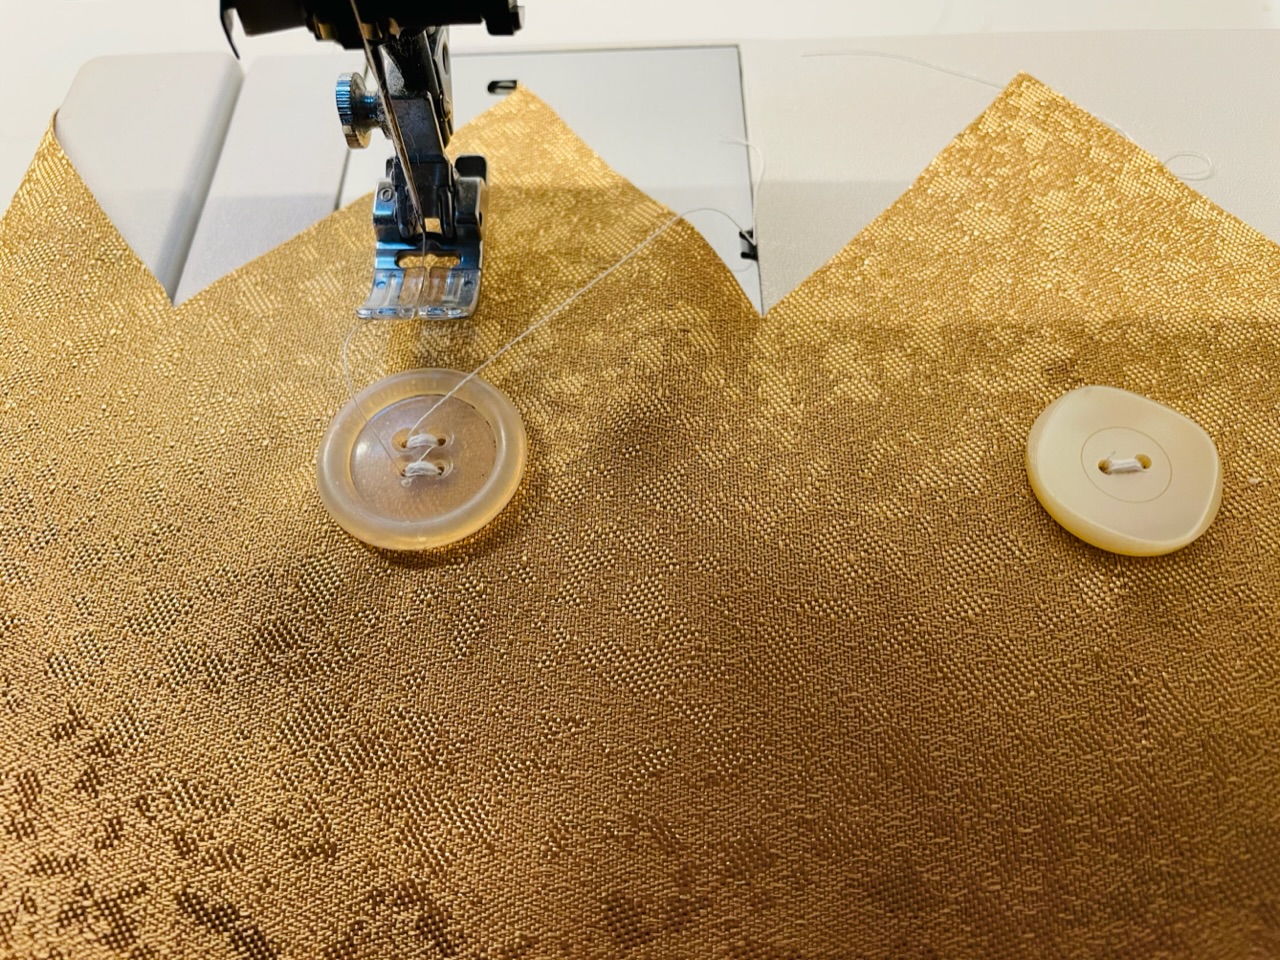


At the end of the last button turn off the fabric and cut off the lower threads with scissors. Additional sewing is not necessary.
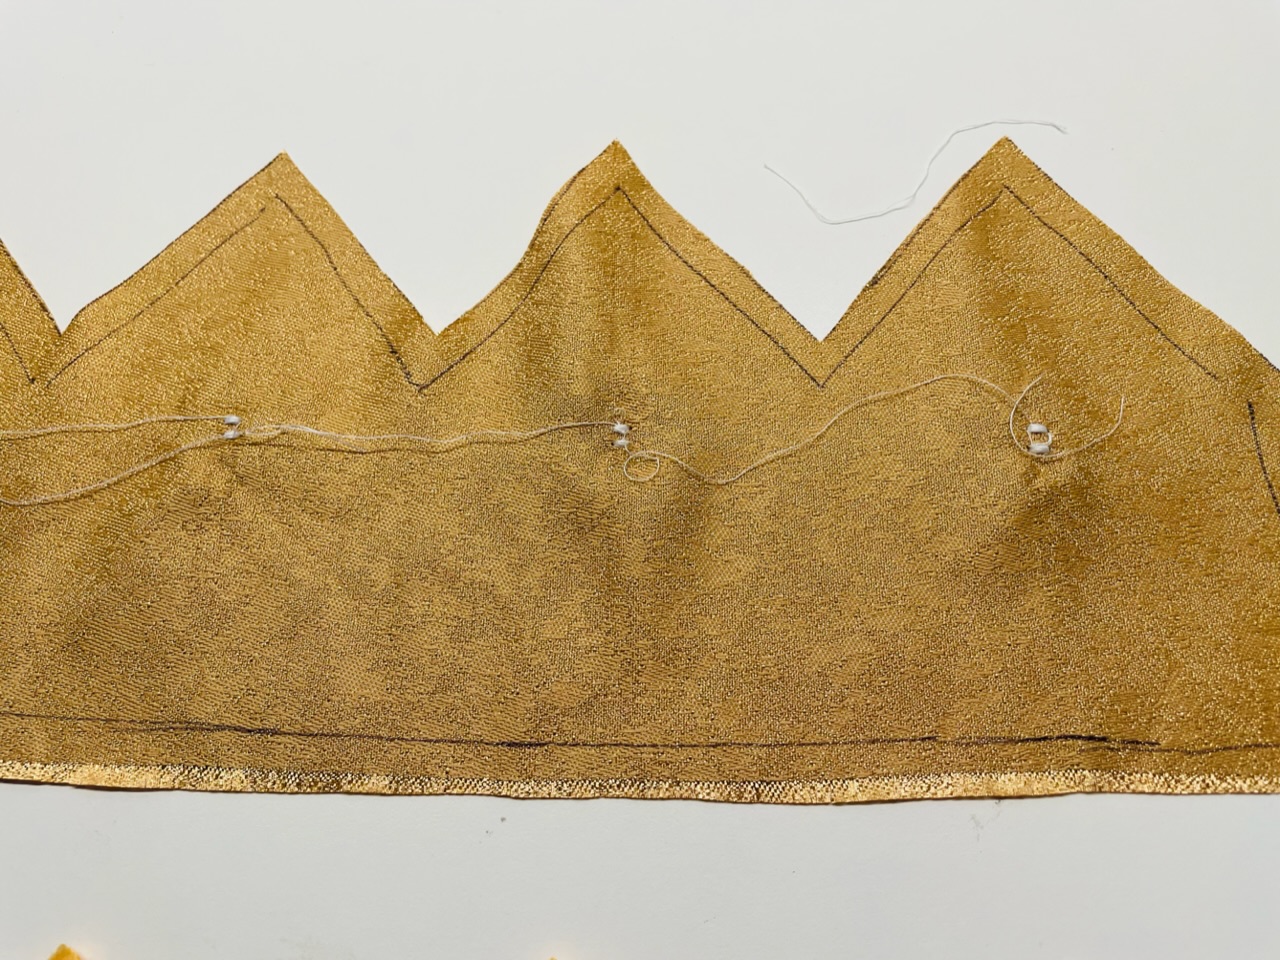


That's what the back could look like.
Now put the transport feet of the sewing machine back up!


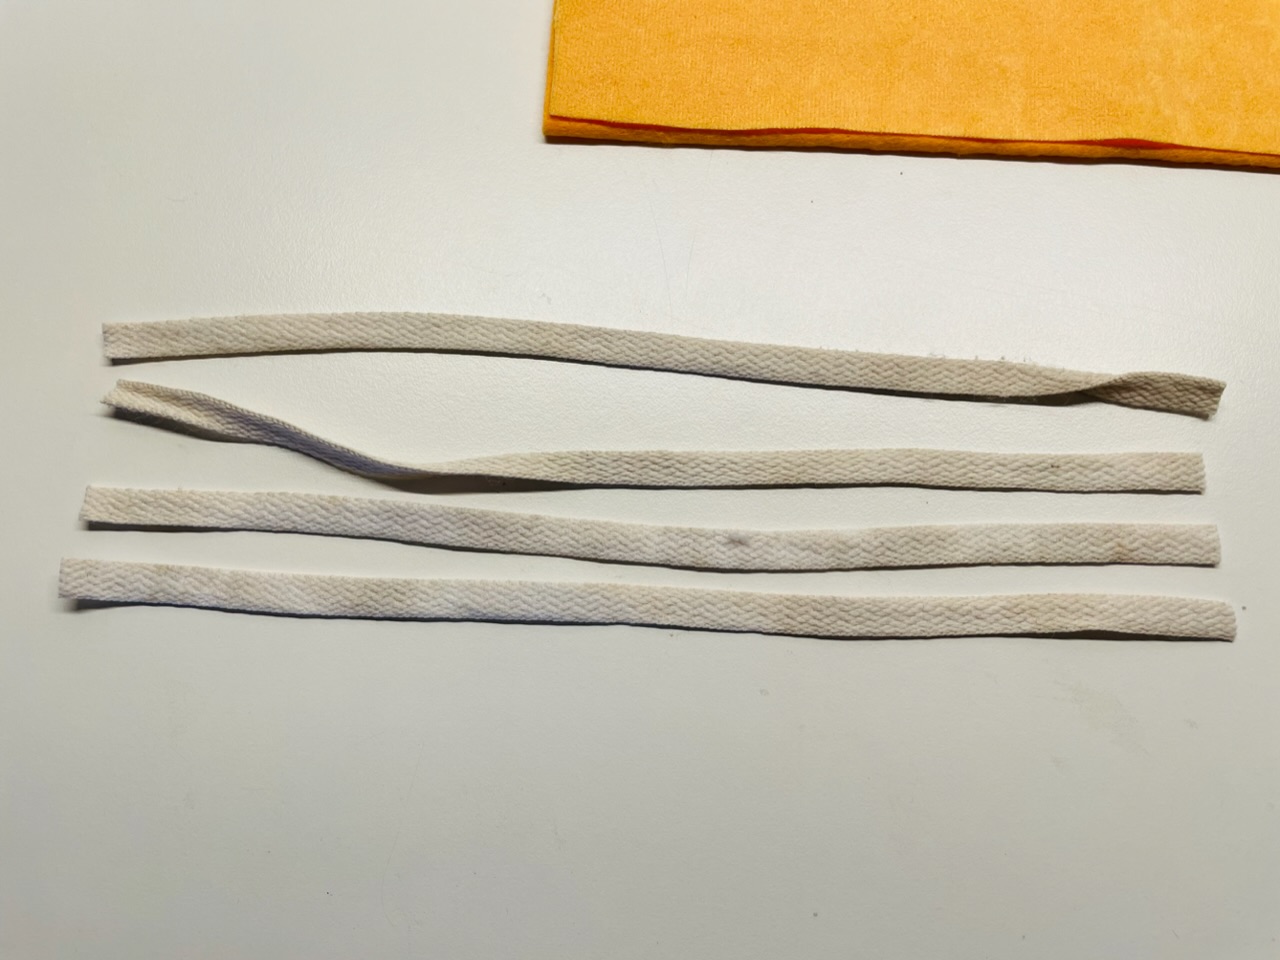
In order to adjust the crown to the child's head, ribbons are sewn on. Cuts them to a length of 24 cm. You need 4 ribbons.
You can also use shoelaces for this. You can see how these can be upgraded in the following steps. If you want to use them this way, simply skip the next steps.


So that the ribbons do not fray, knock it in half an inch and fix it with a pin. Stitch it across the tape.
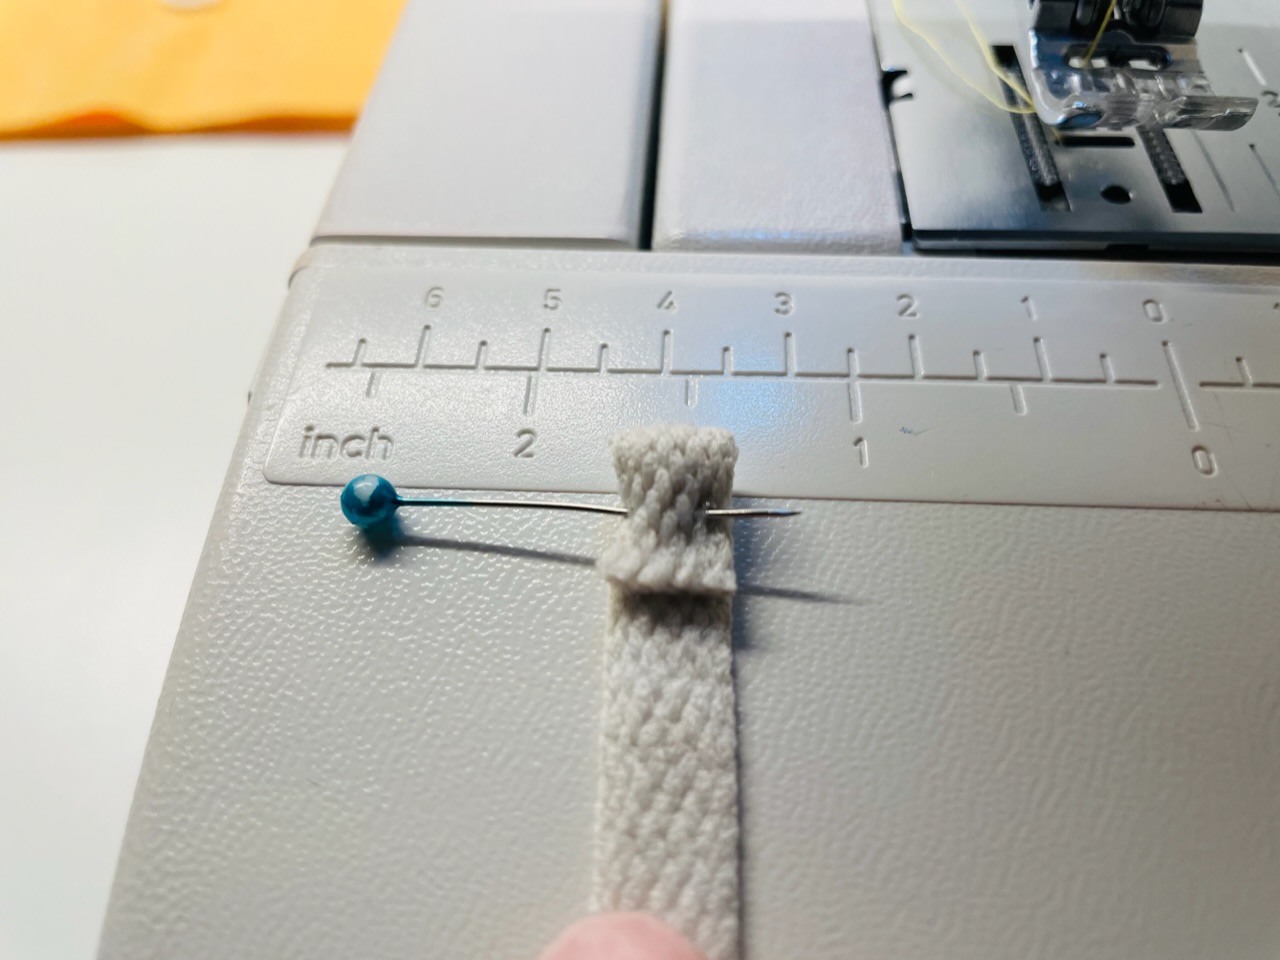


Put the tape under the sewing machine and hold the pin in your hand. So you can hold the tape under the sewing machine feet. Make a few stitches with the hand turning wheel and possibly raise the little foot again if the tape is not transported further. Stitch a little further in the front again into the tape. Then you can sew along the tape with a zig-zag stitch. It looks particularly nice if you use a different coloured thread for this.
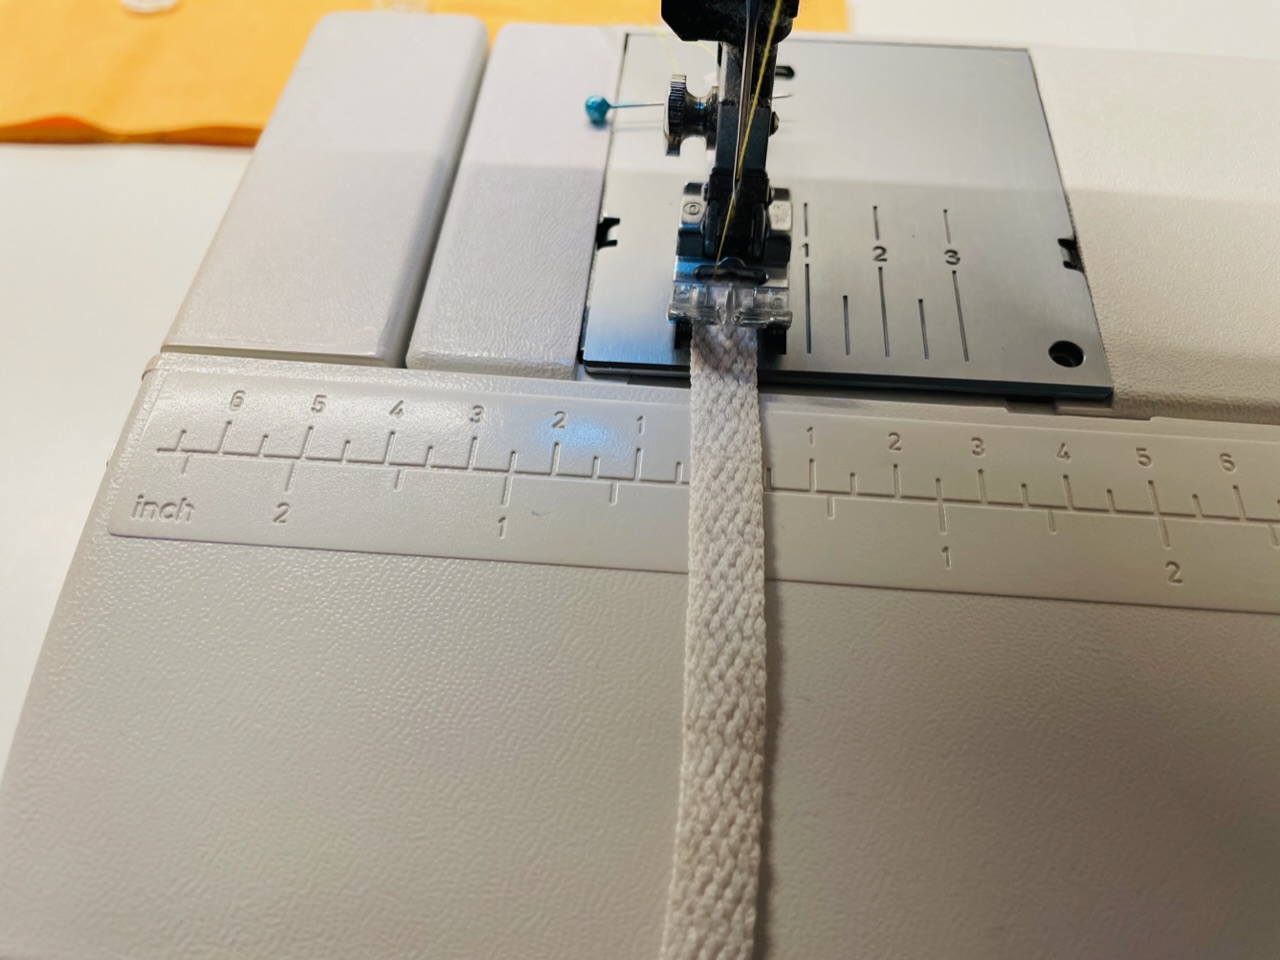


Here the tape is finished sewn.
It's enough if you flip one side of the band, because the other one "disappears" in the crown.
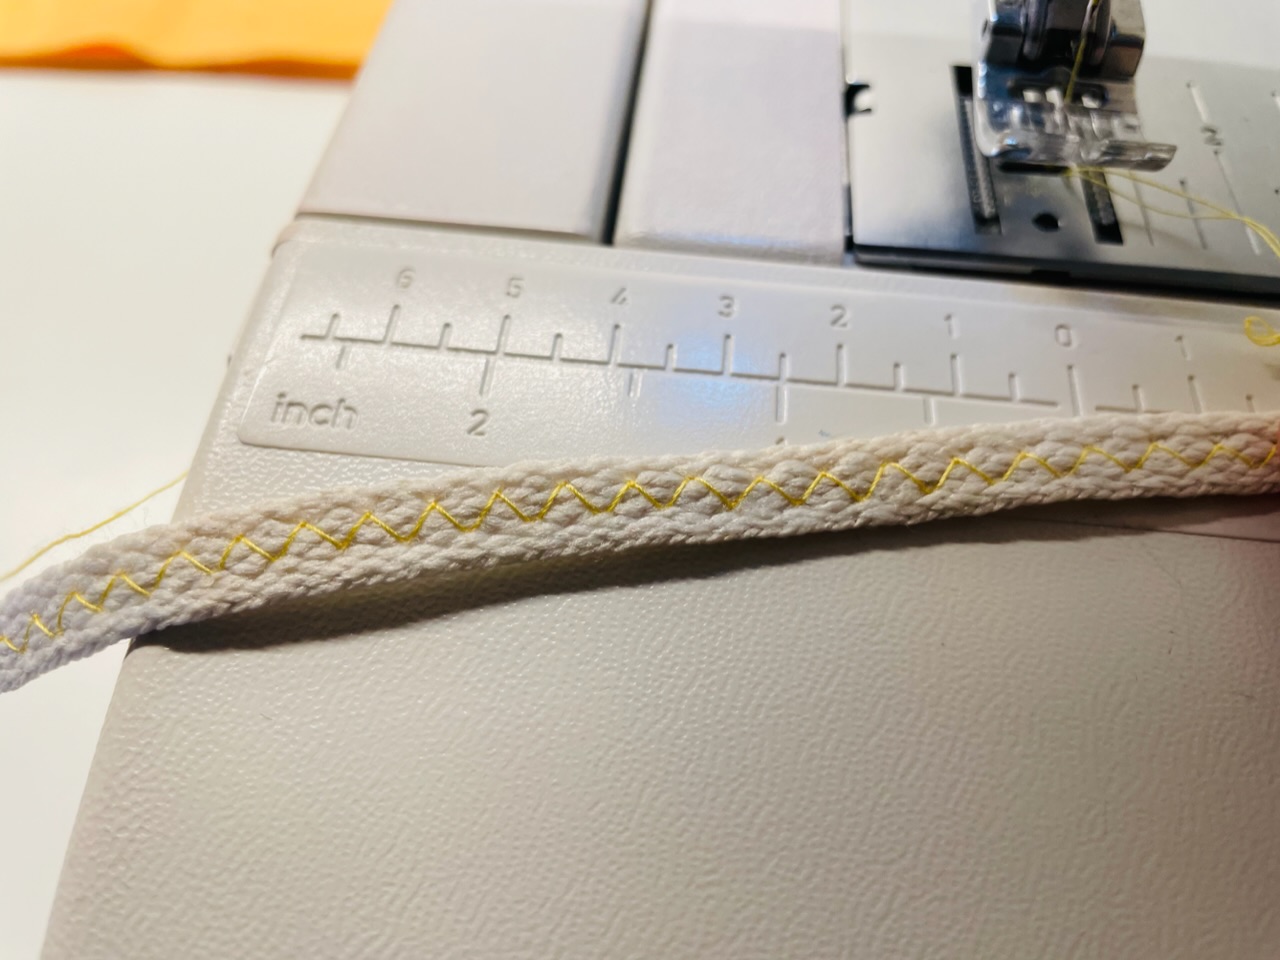


This way, embellish your shoelace band.
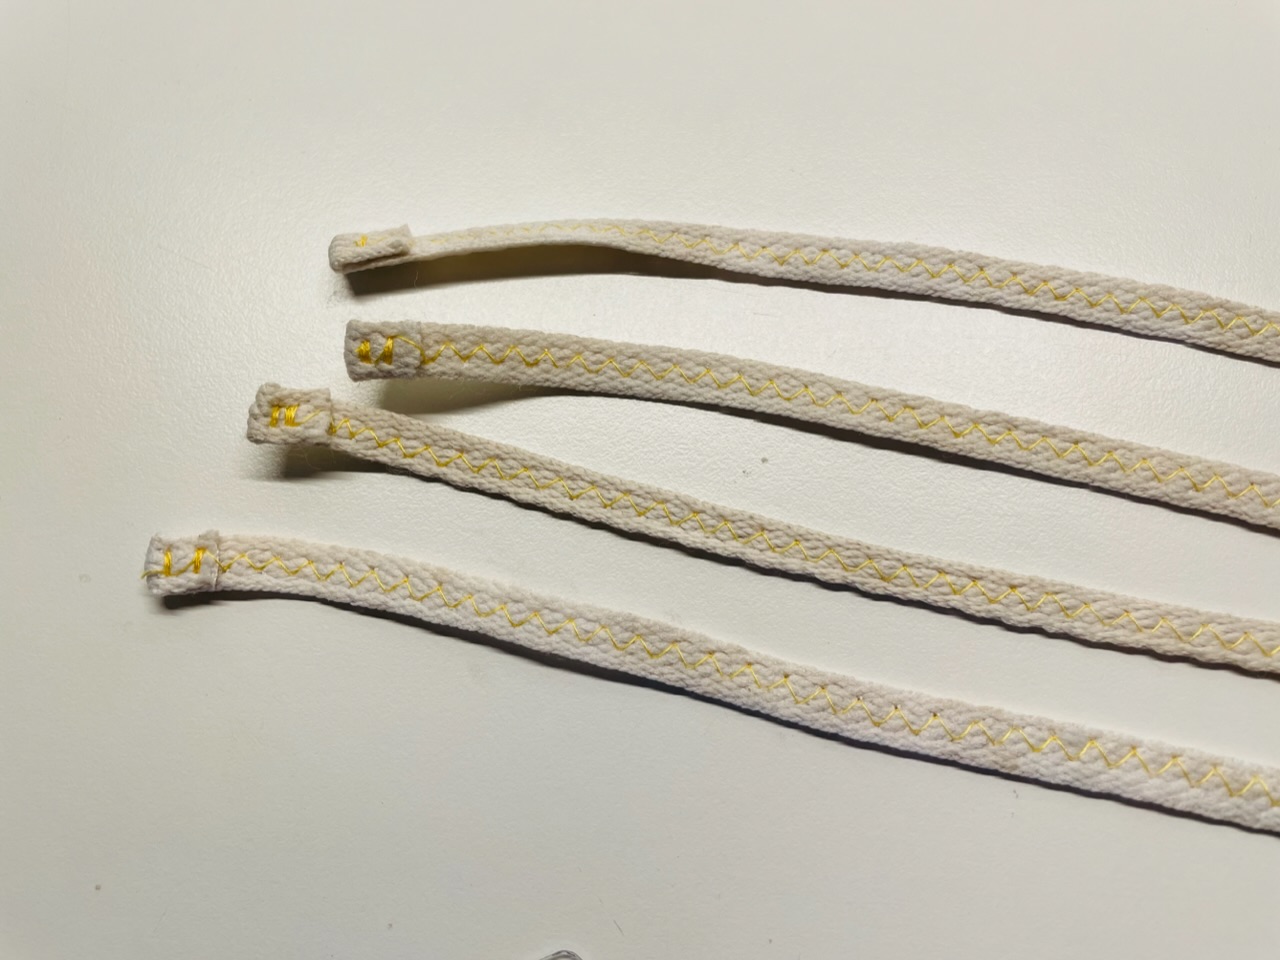


Now everything is ready.
Now place the crown parts on each other for sewing:
At the bottom is the fleece and on top is the crown cut without sewing line, with the beautiful side facing upwards! (You could have fixed these two parts together if you did this on the button!)
On it the outsides inwards the bands are put on. The uncleaned side of the tape shows outwards.
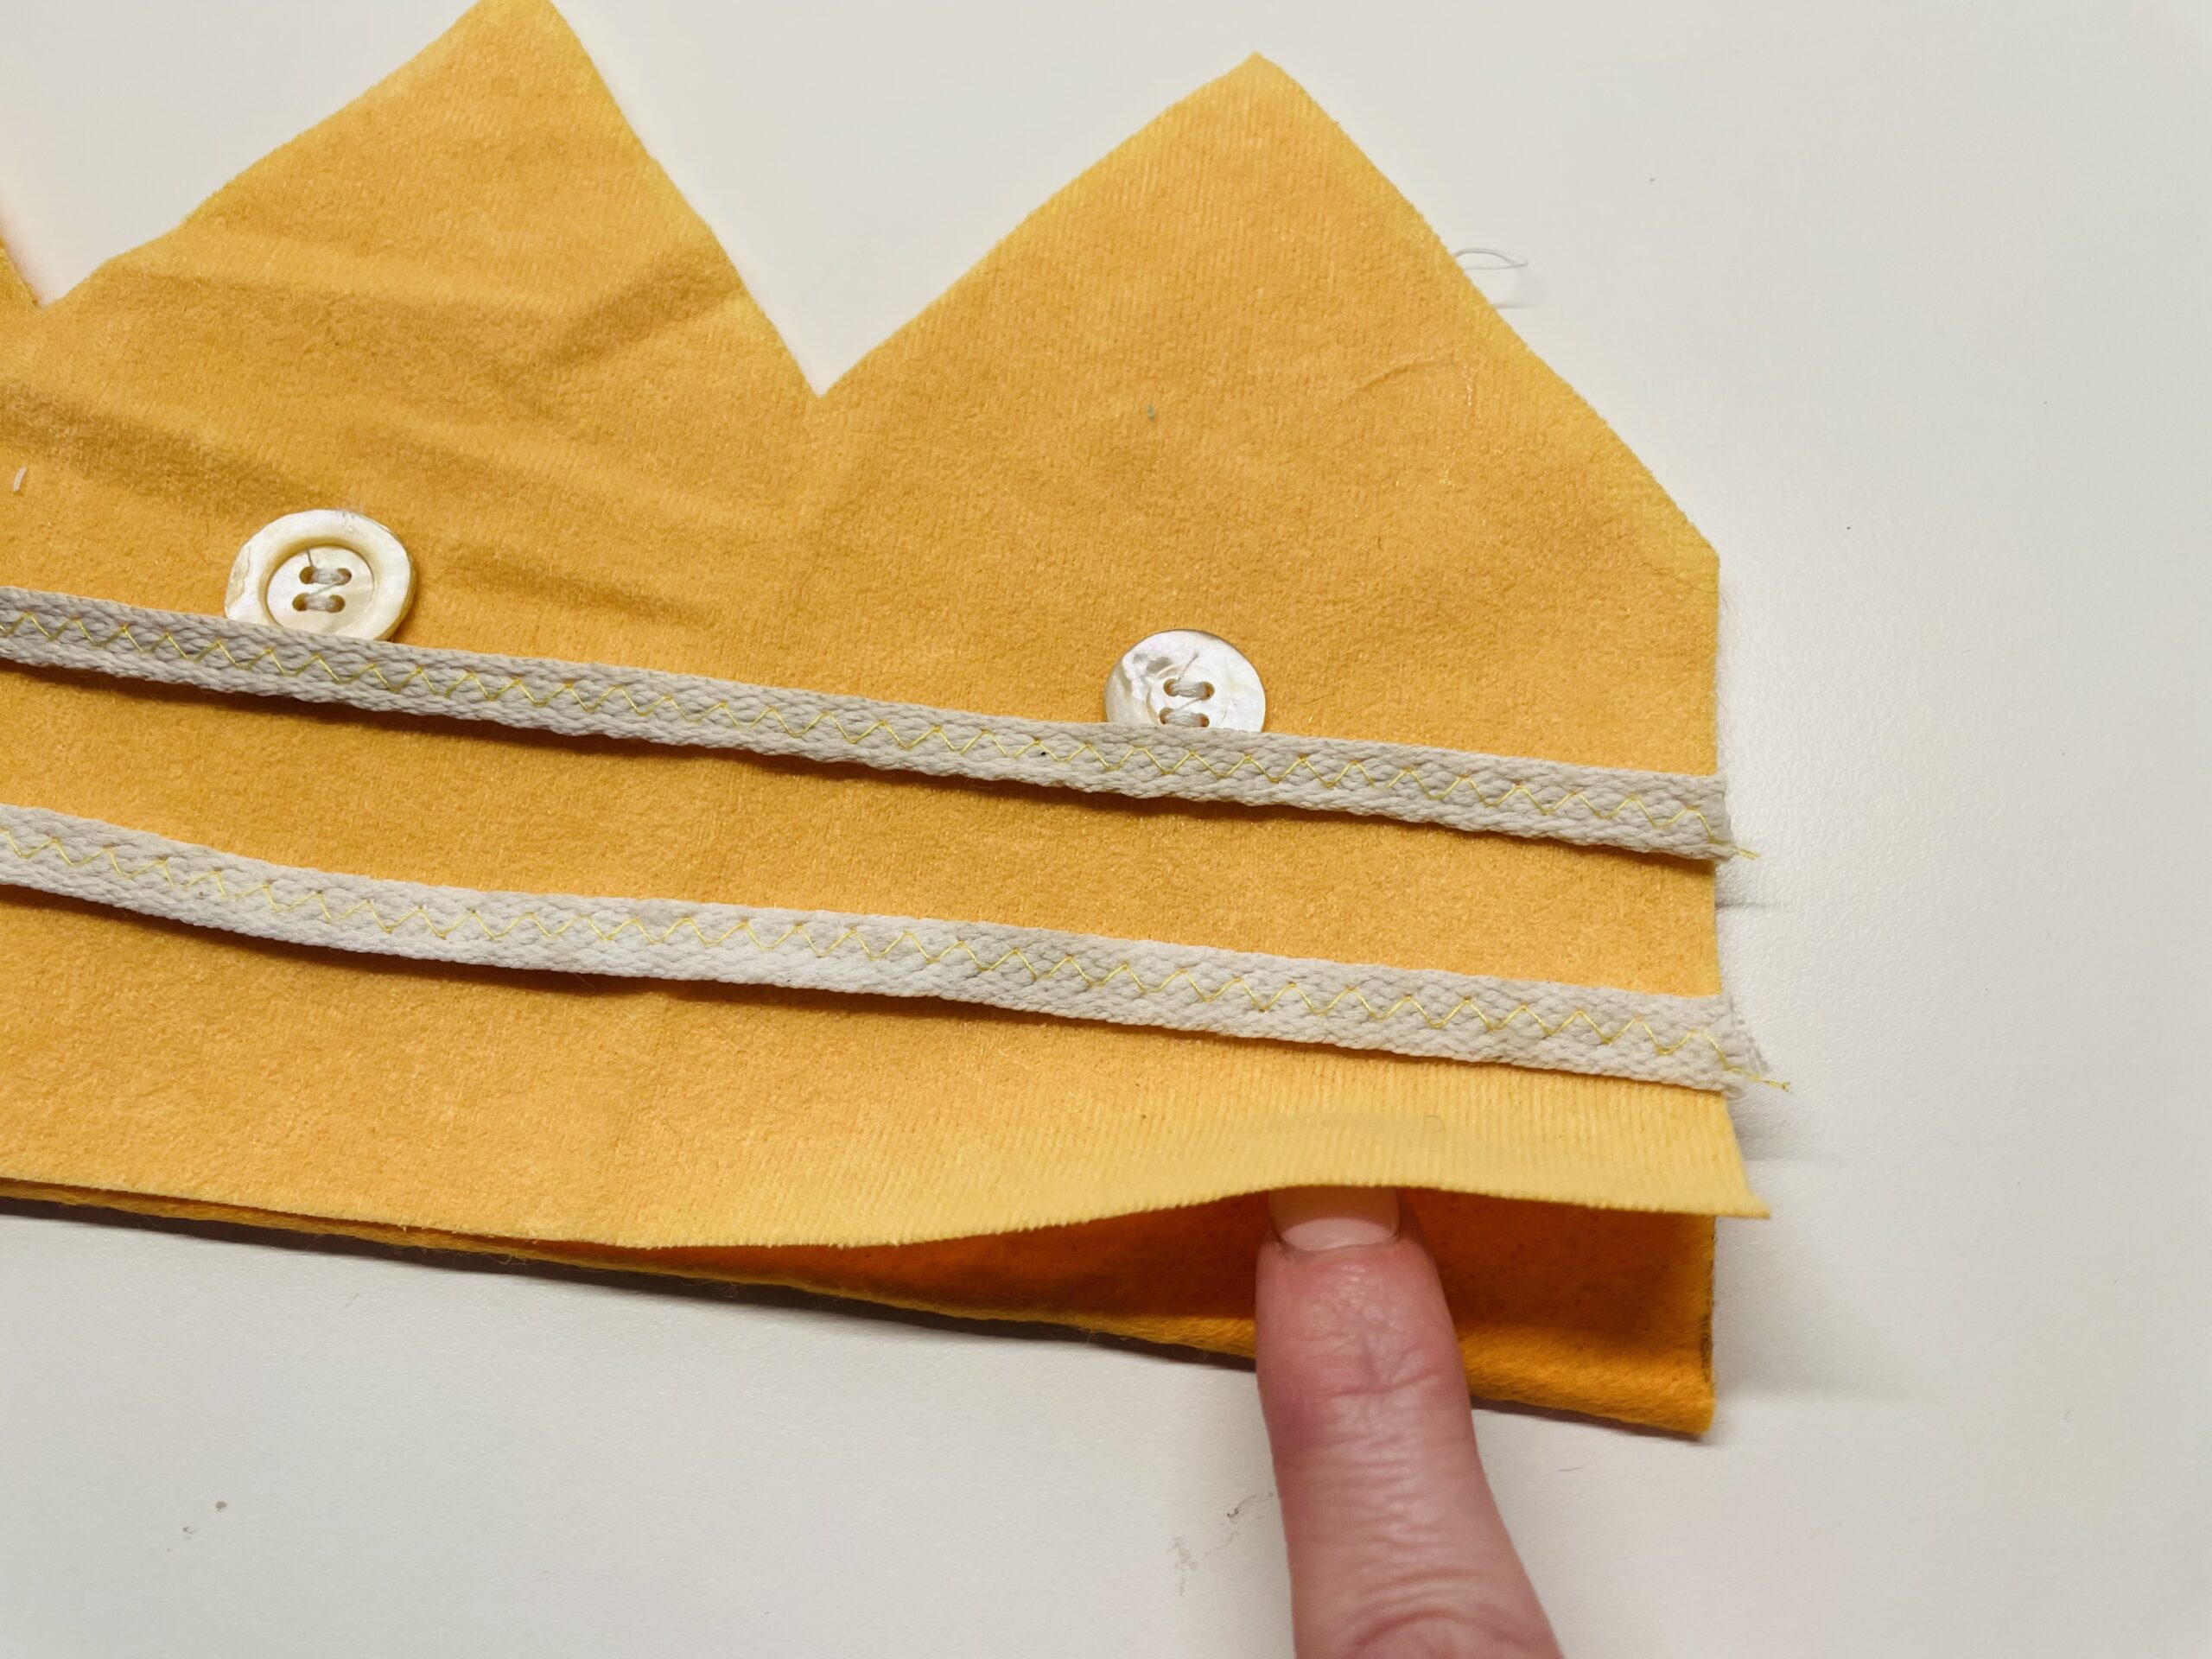


Fixes the two bands with two pins and sews on the edge with a straight stitch once over the bands, so they no longer slip.
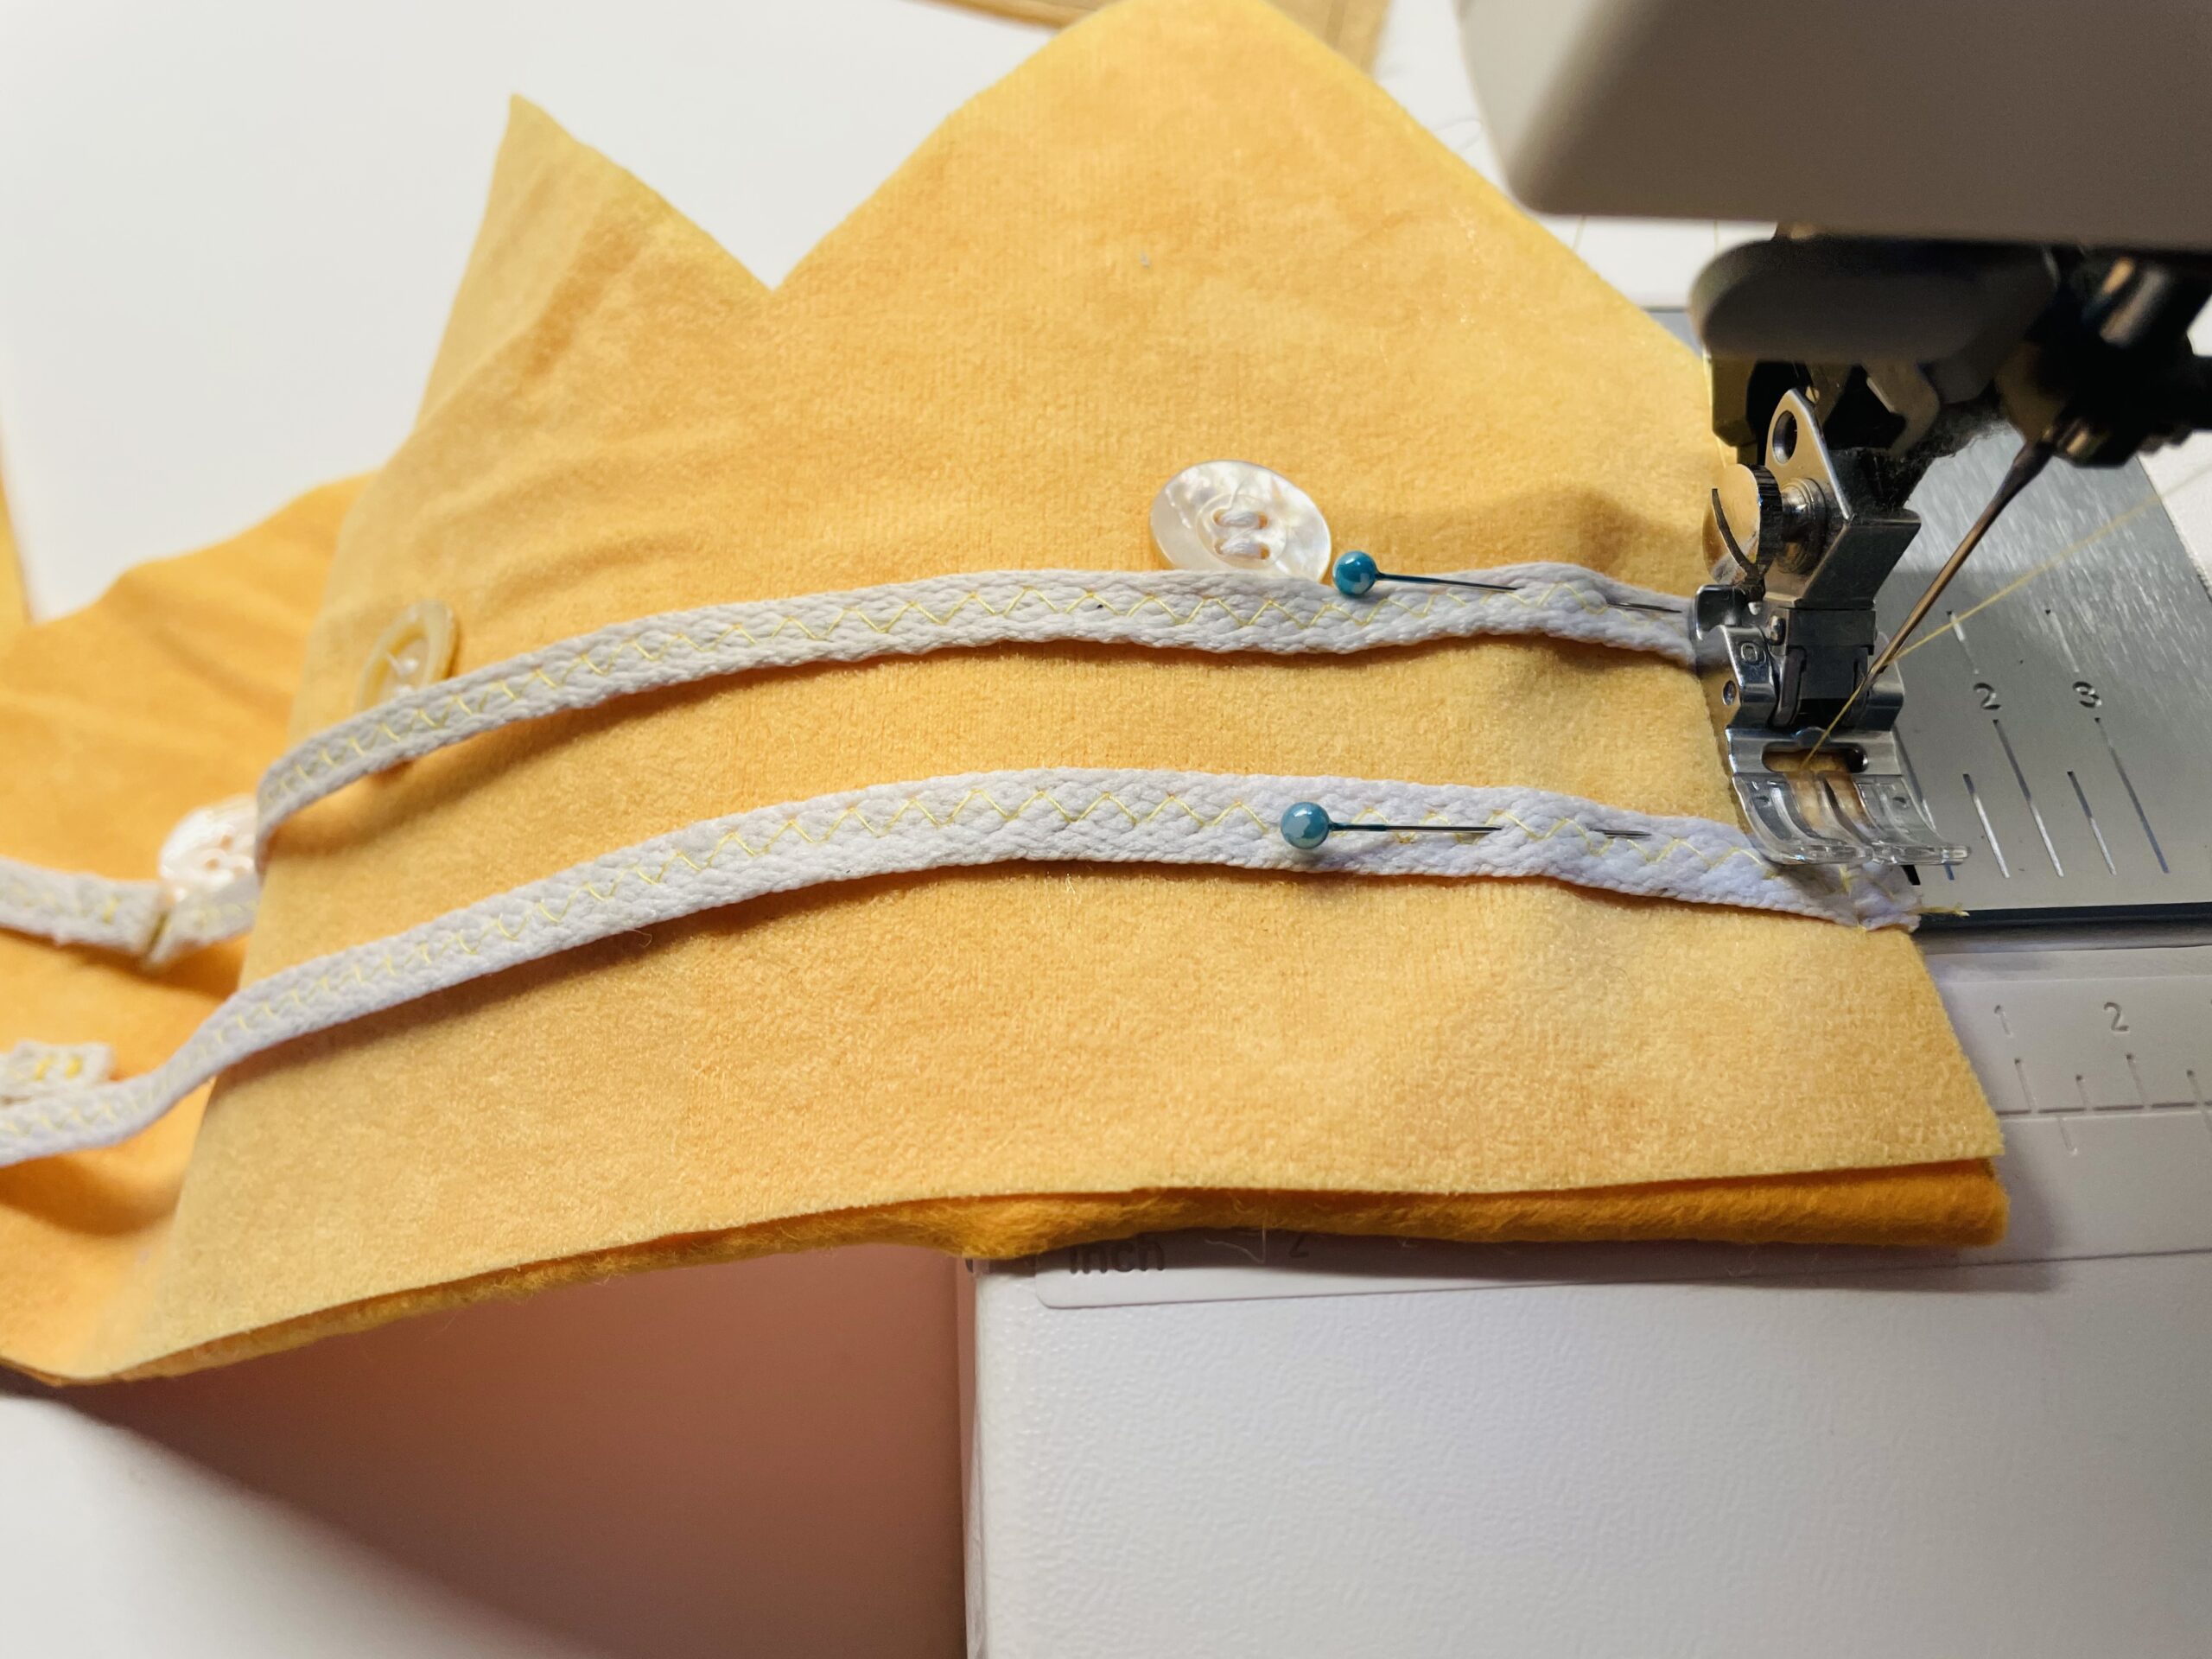


Repeat this on the opposite side of the crown.


Place the other crown cut with the beautiful side down exactly on the other parts. The seam line must now be visible above.
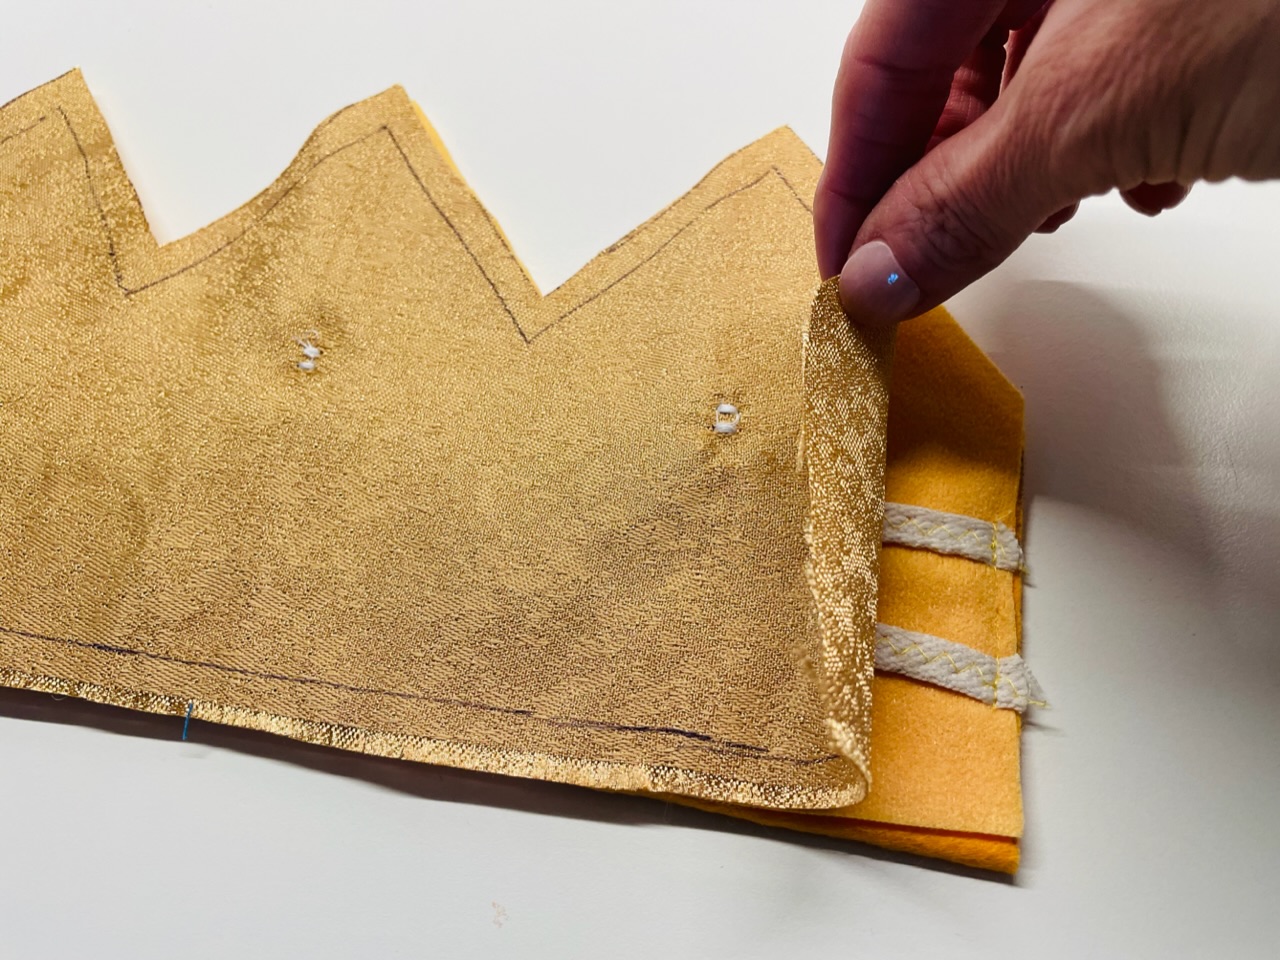


Sticks everything well so that the parts can no longer slip.
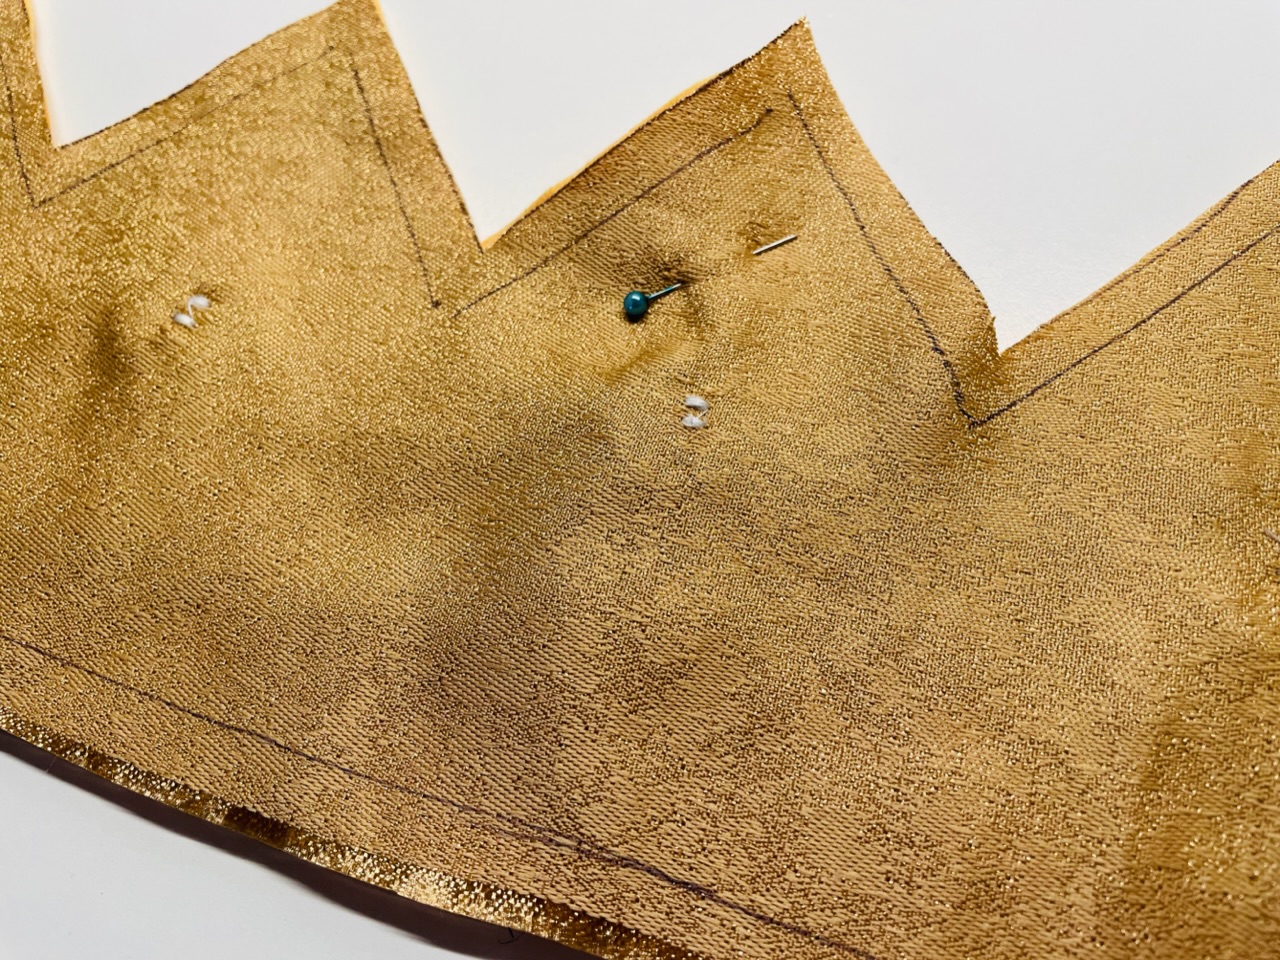


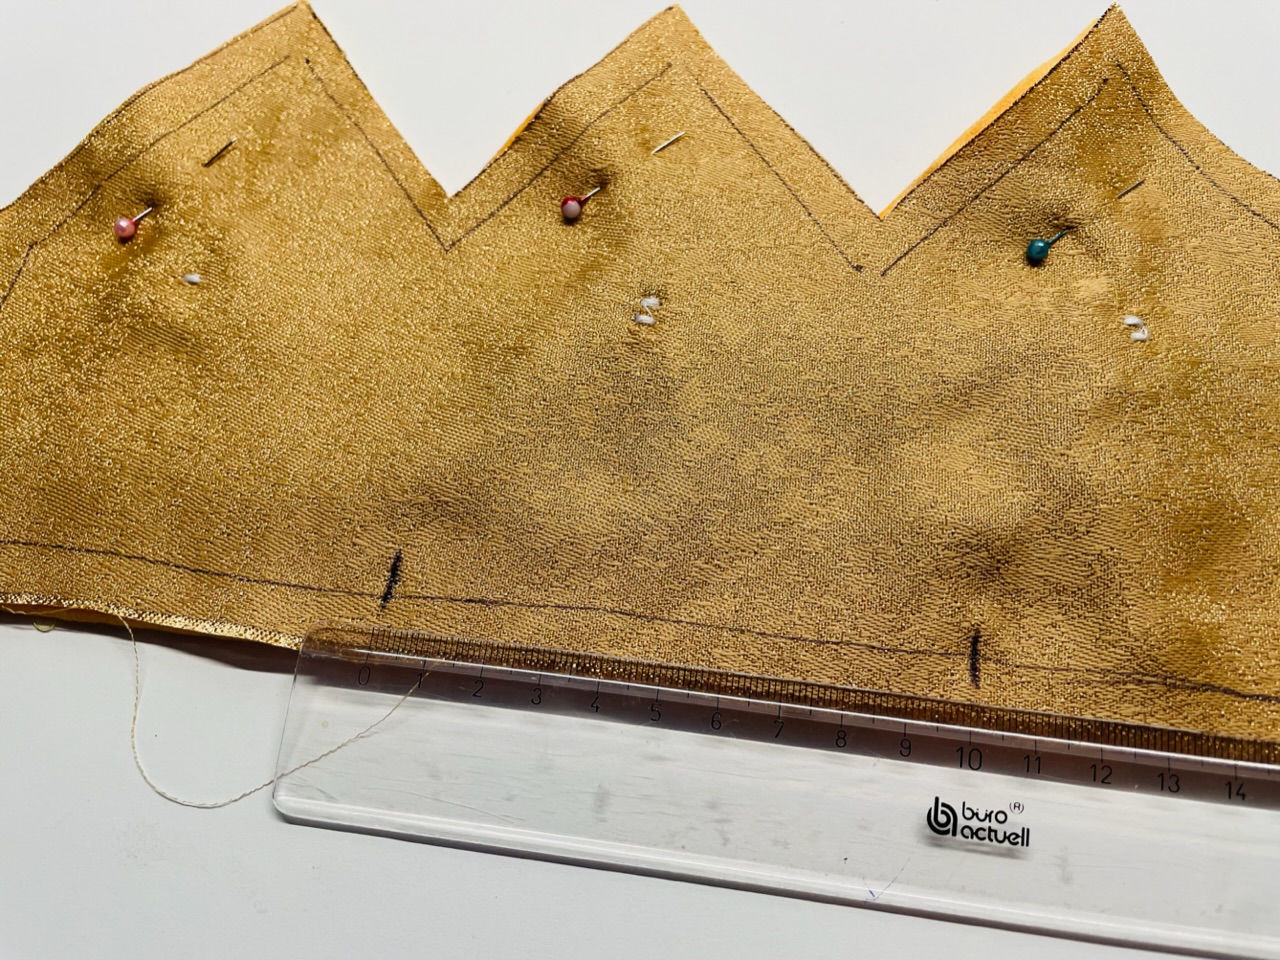
At the straight lower line, a piece about 10 centimetres wide is marked at the height of the second point, which cannot be sewn as a turning opening.


Starts at the marking of the turning opening with the sewing of the crown. On the sewing line the crown can now easily be sewn together.
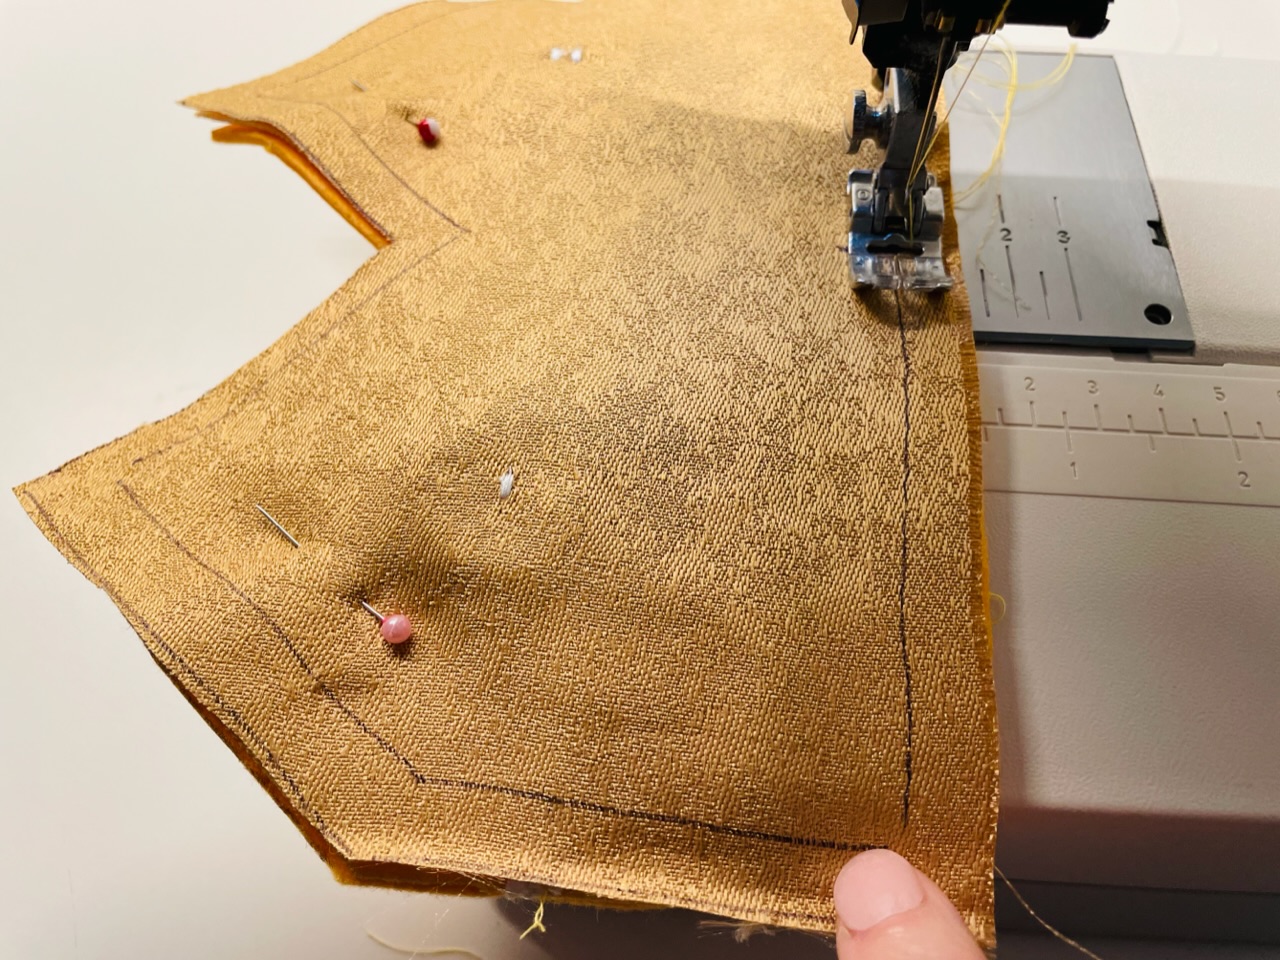


If you arrive at a corner while sewing, leave the needle in the fabric, lift the little foot briefly, turn the fabric so far, until you can continue sewing on the sewing line and lower the little foot again. Continue sewing to the next corner and drive the same way.
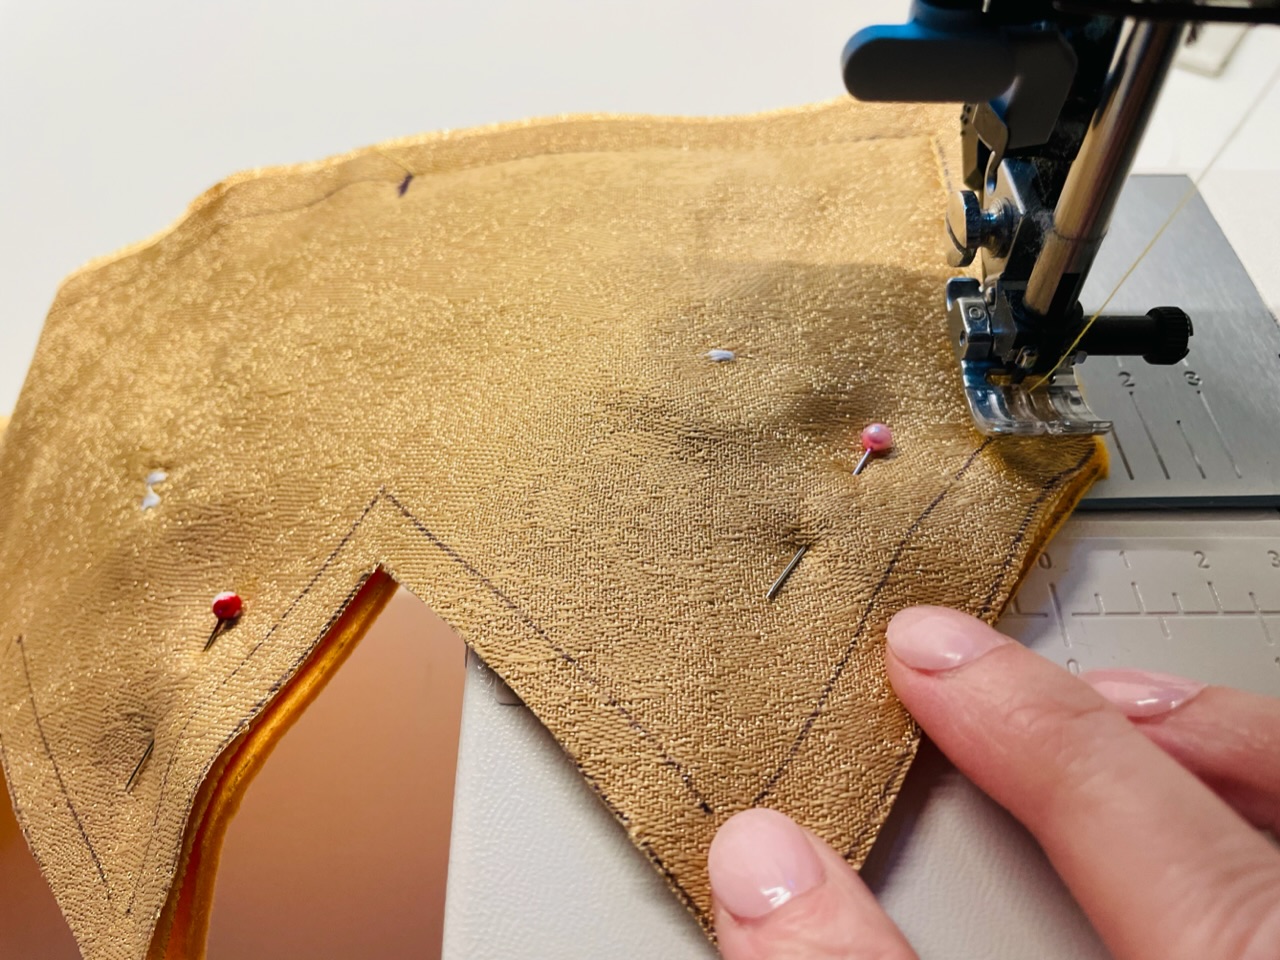


So you can sew the corners cleanly.
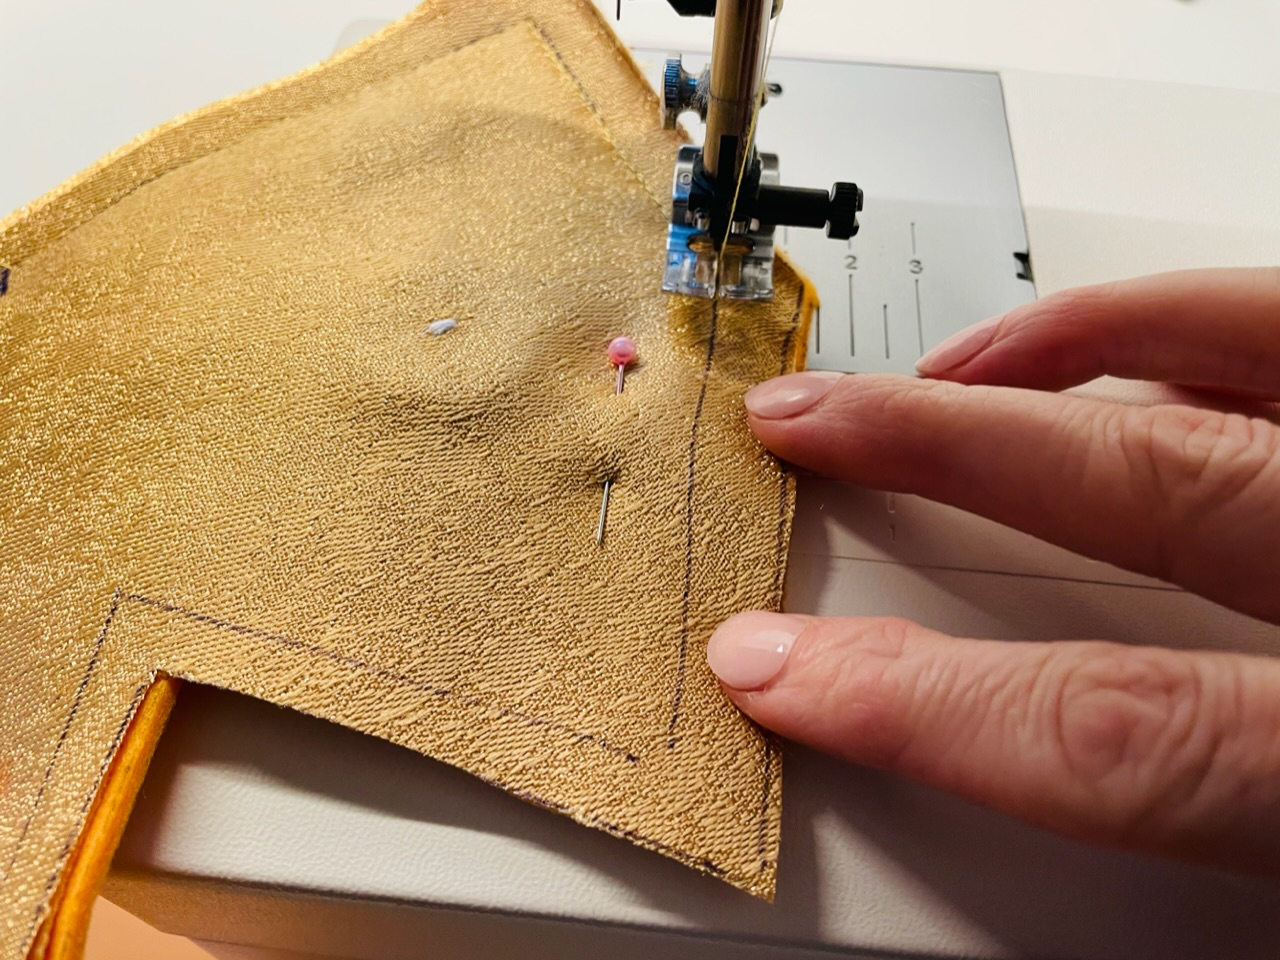


Sews all around until the second marker of the turning opening. Sews briefly the thread so that the seam does not open when turning.
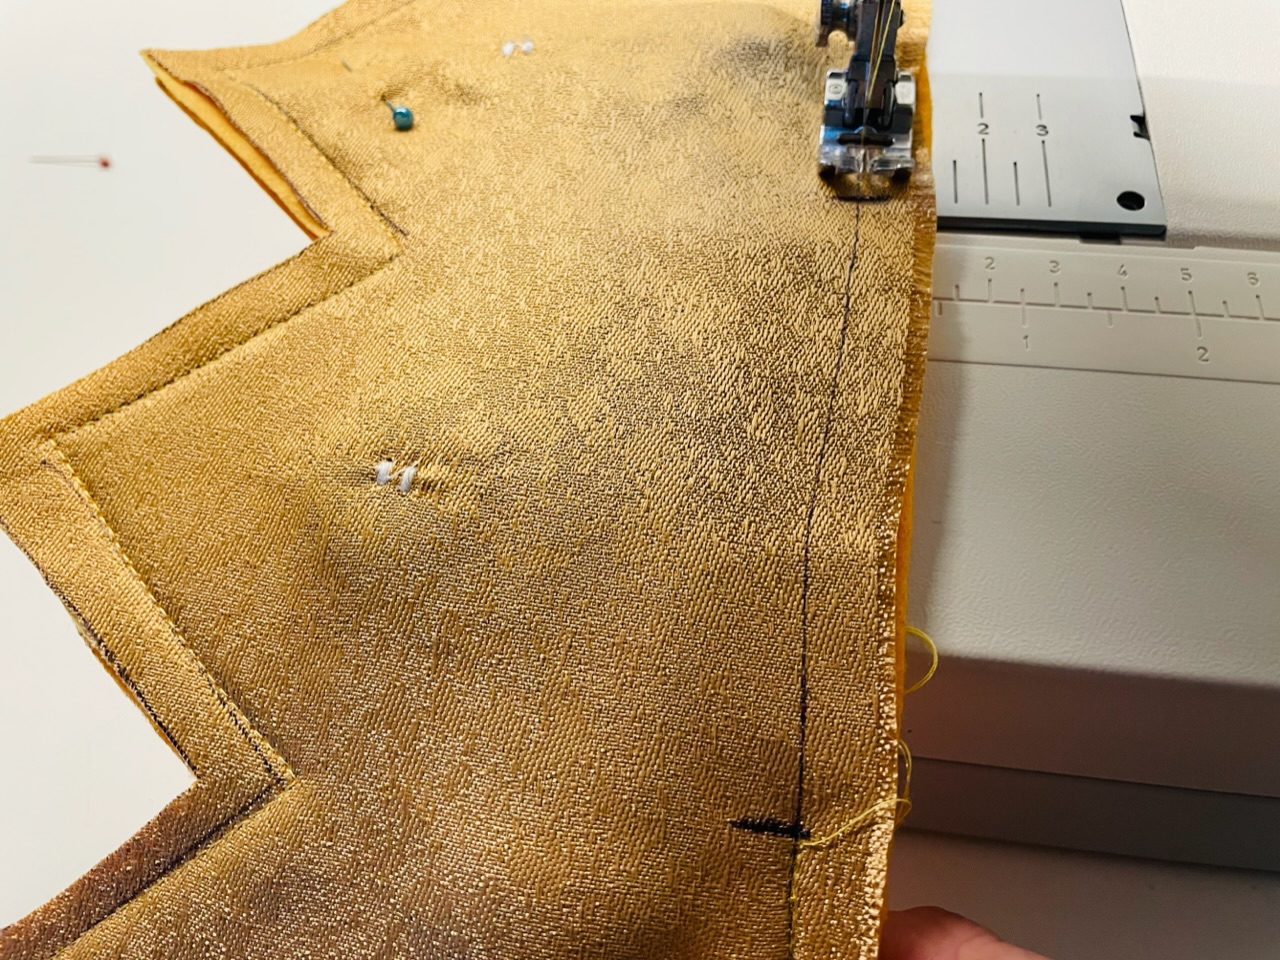


The turning opening.
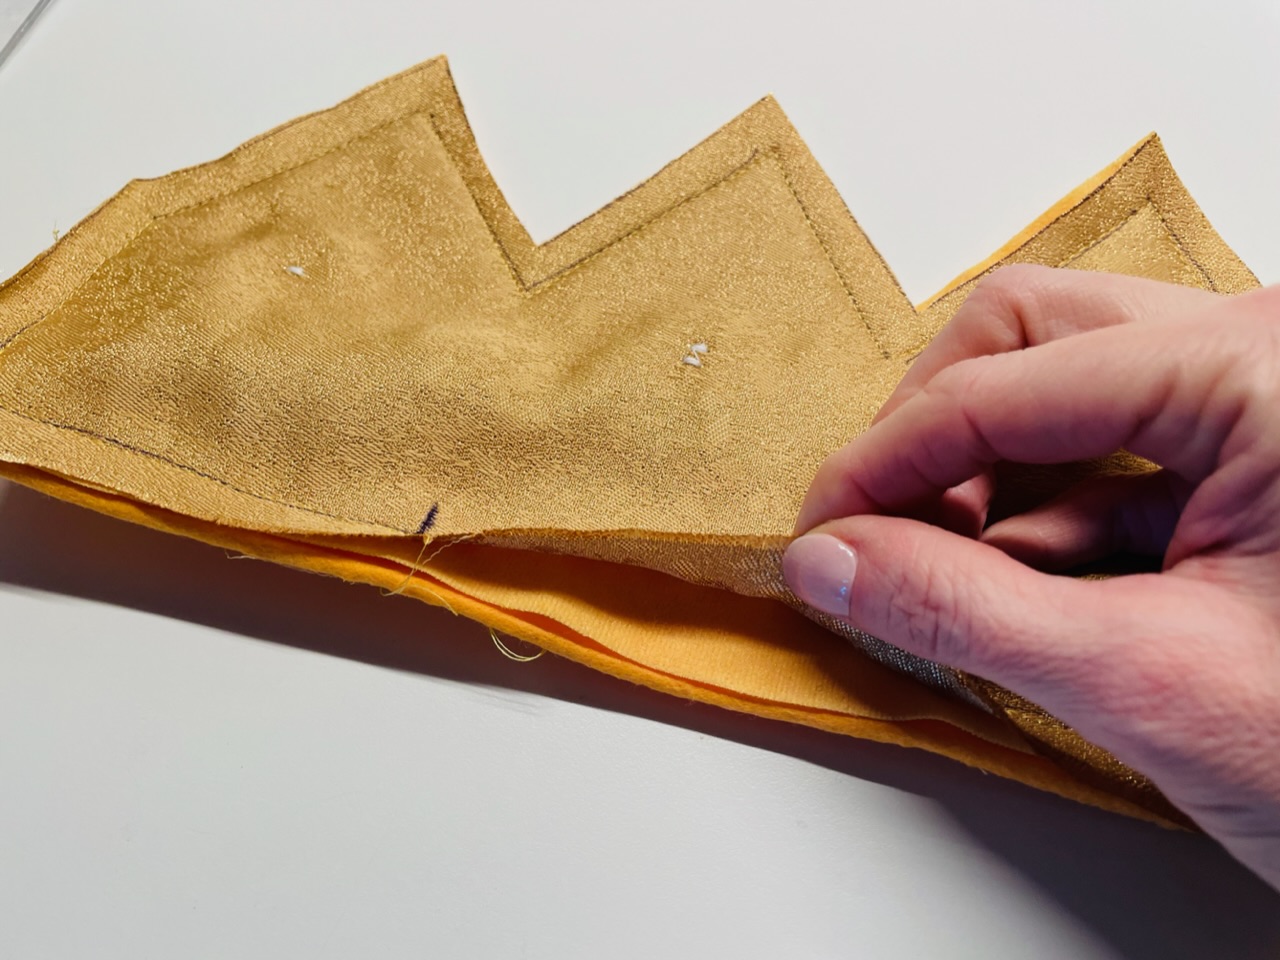


Before the crown is turned, you have to cut off the corners at the seams.
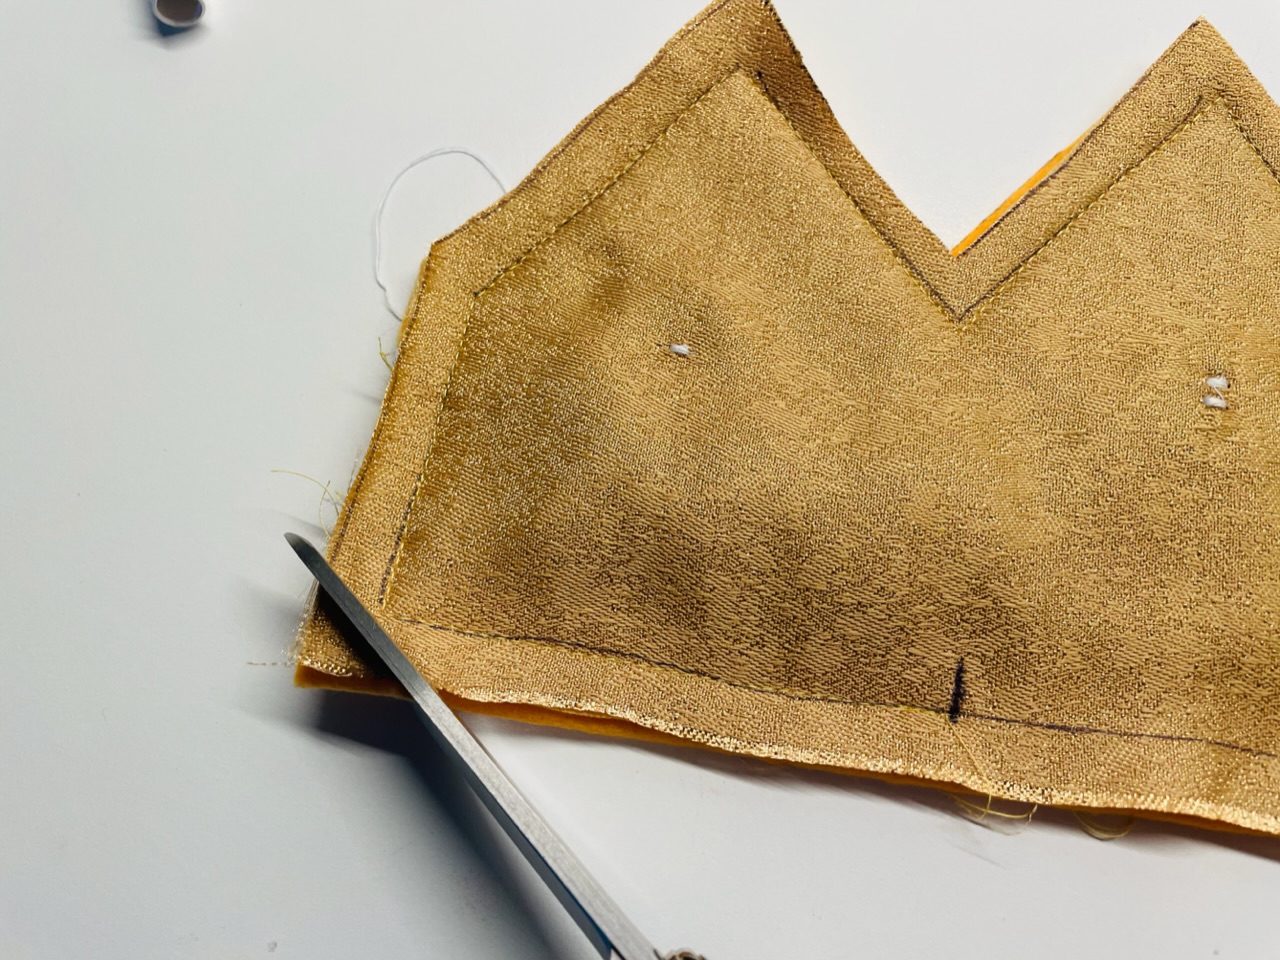


Even at the tips, the fabric is cut short. Later, the fabric can be shaped better than the lace.
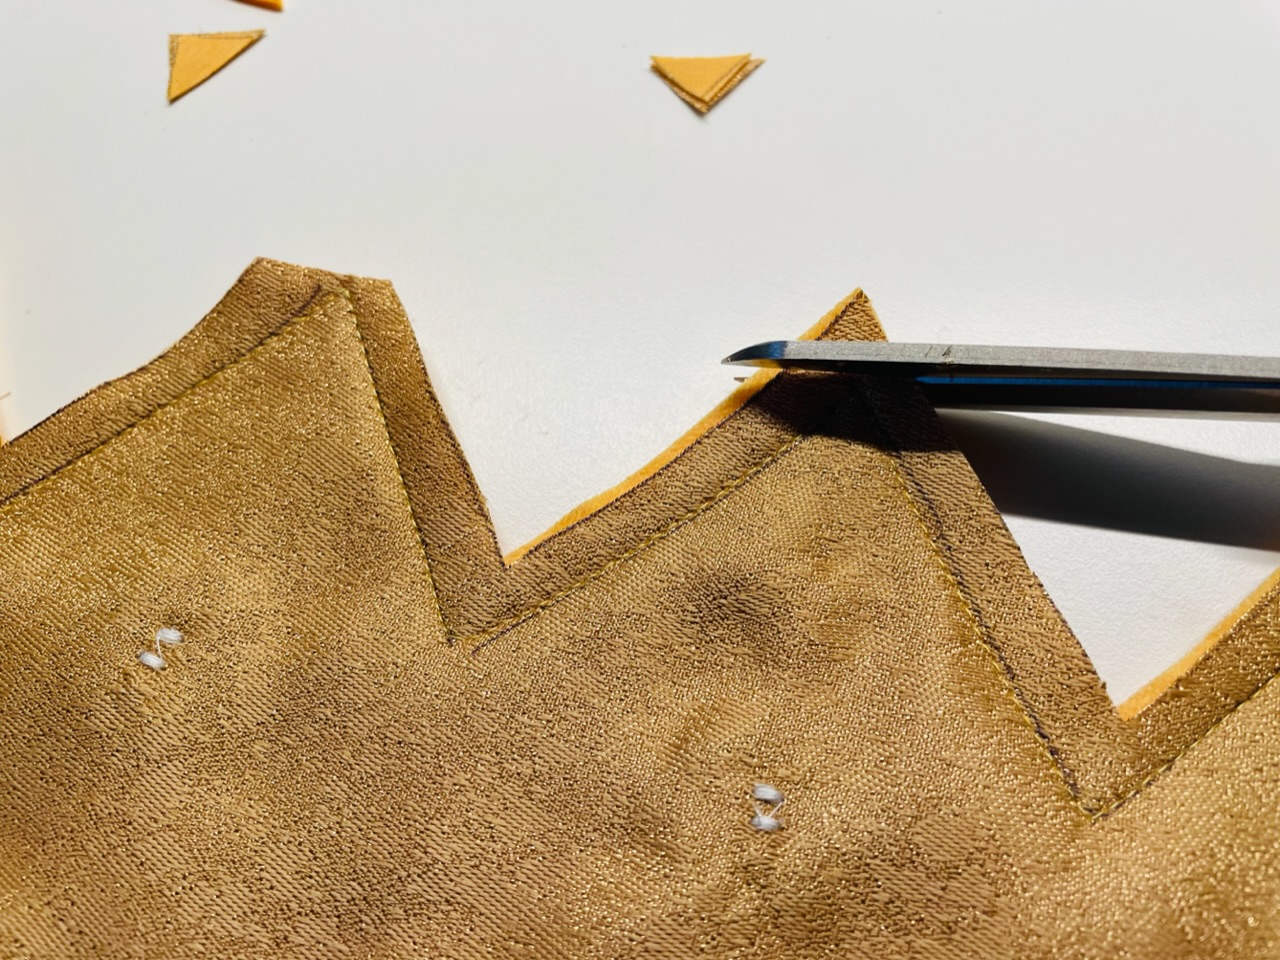


At the inner points the fabric is cut to the seam, otherwise it "throws" later when the fabric is turned over.
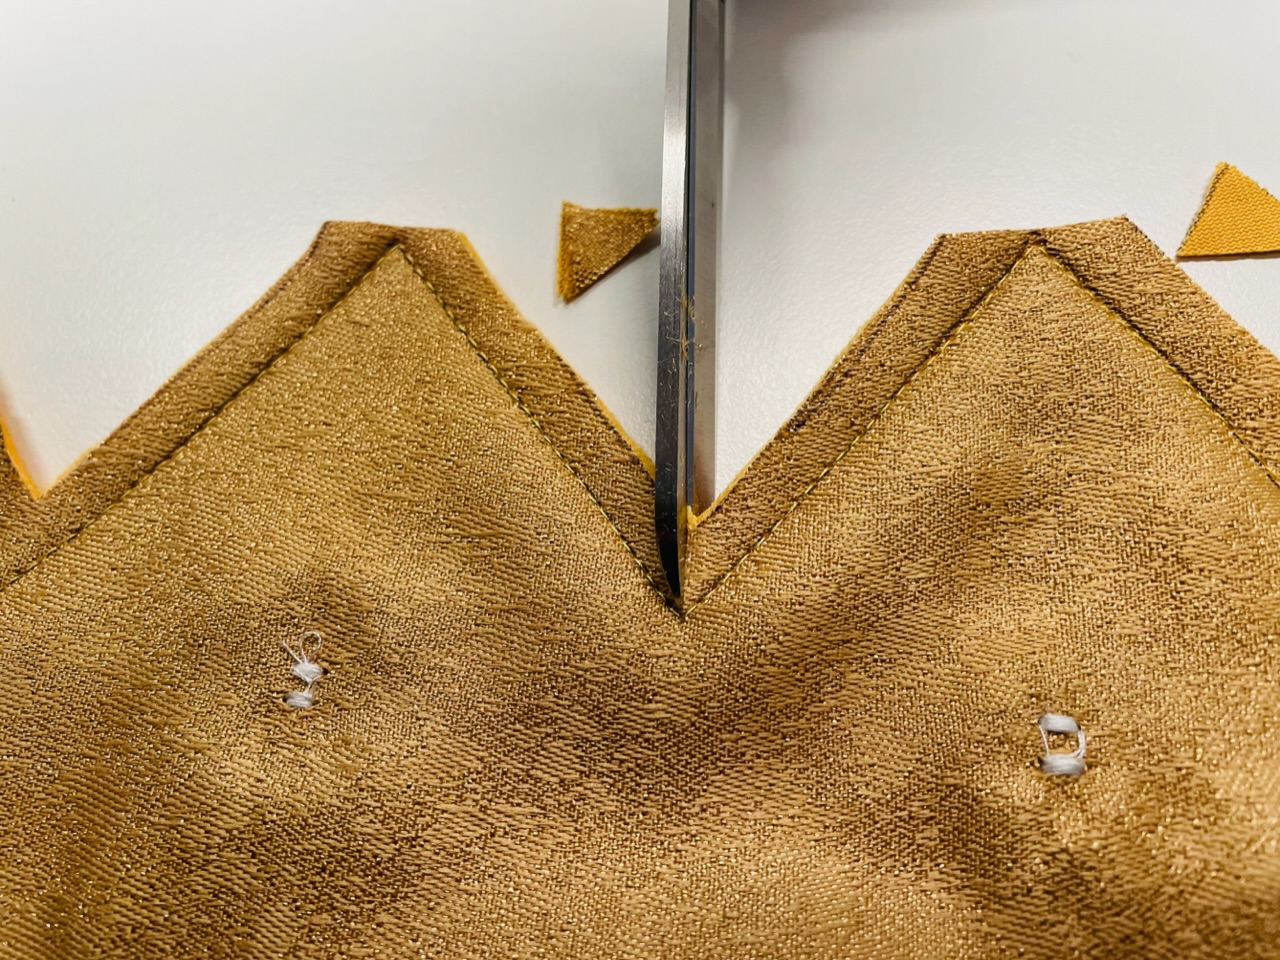


Here you can also make several small incisions. Just make sure not to cut the seam!
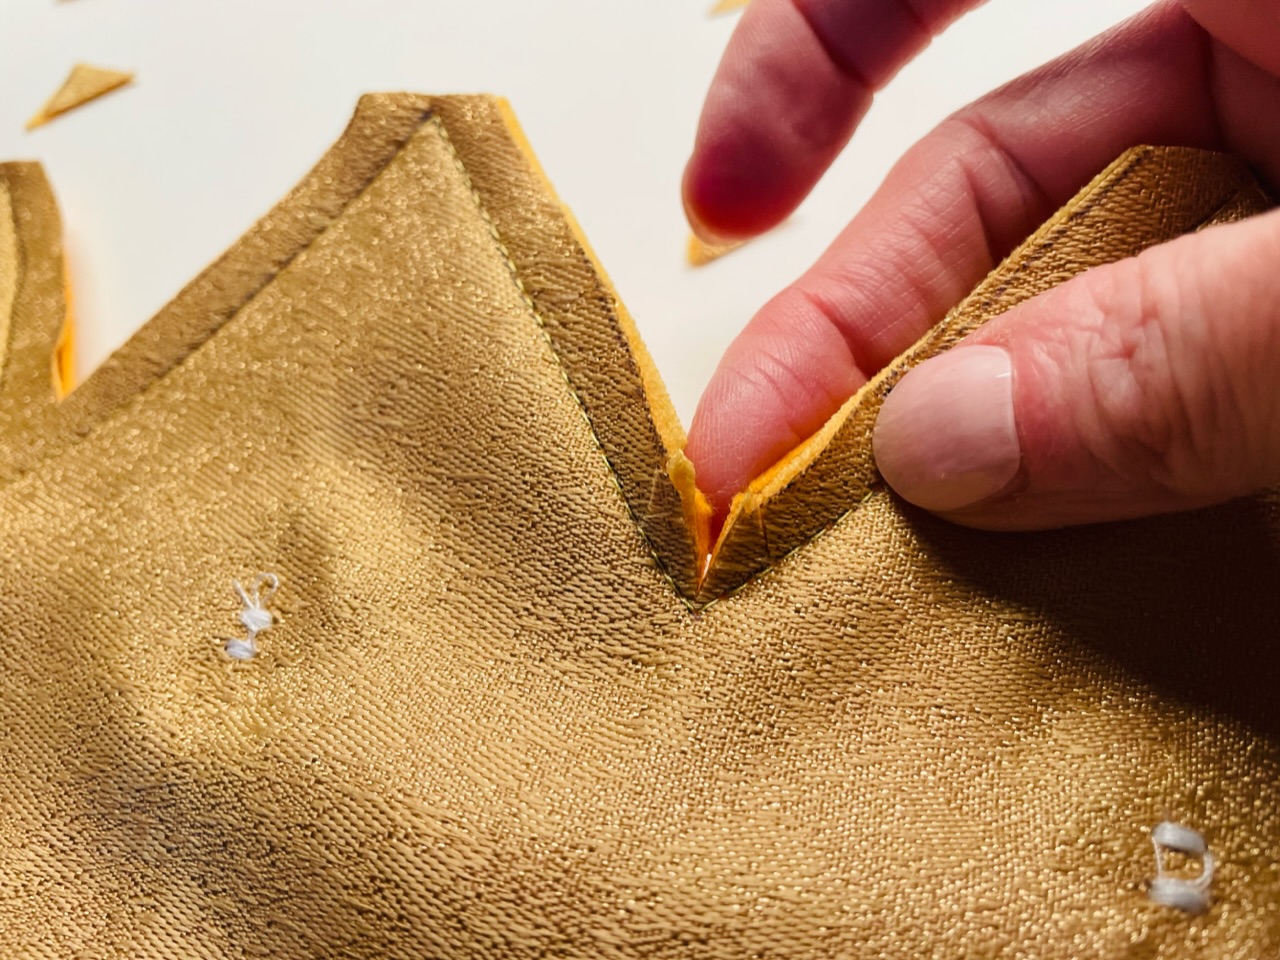


Through the turning opening between the two beautiful fabric sides and the crown is arched outwards.


This is a bit difficult, maybe you can also use the tapes to help...
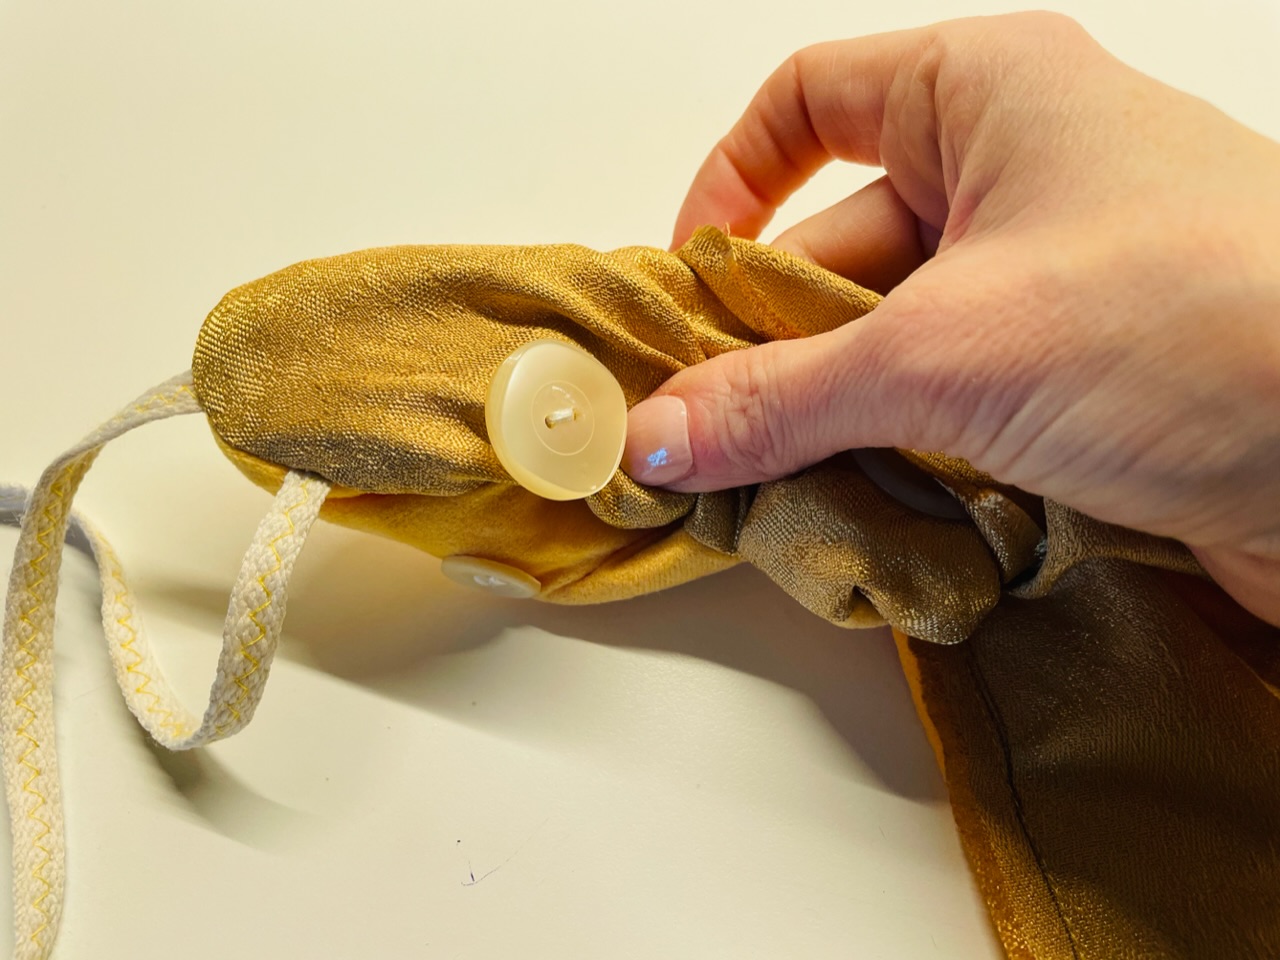


First turn the largest and then use a cooking spoon to bulge out the tacks.
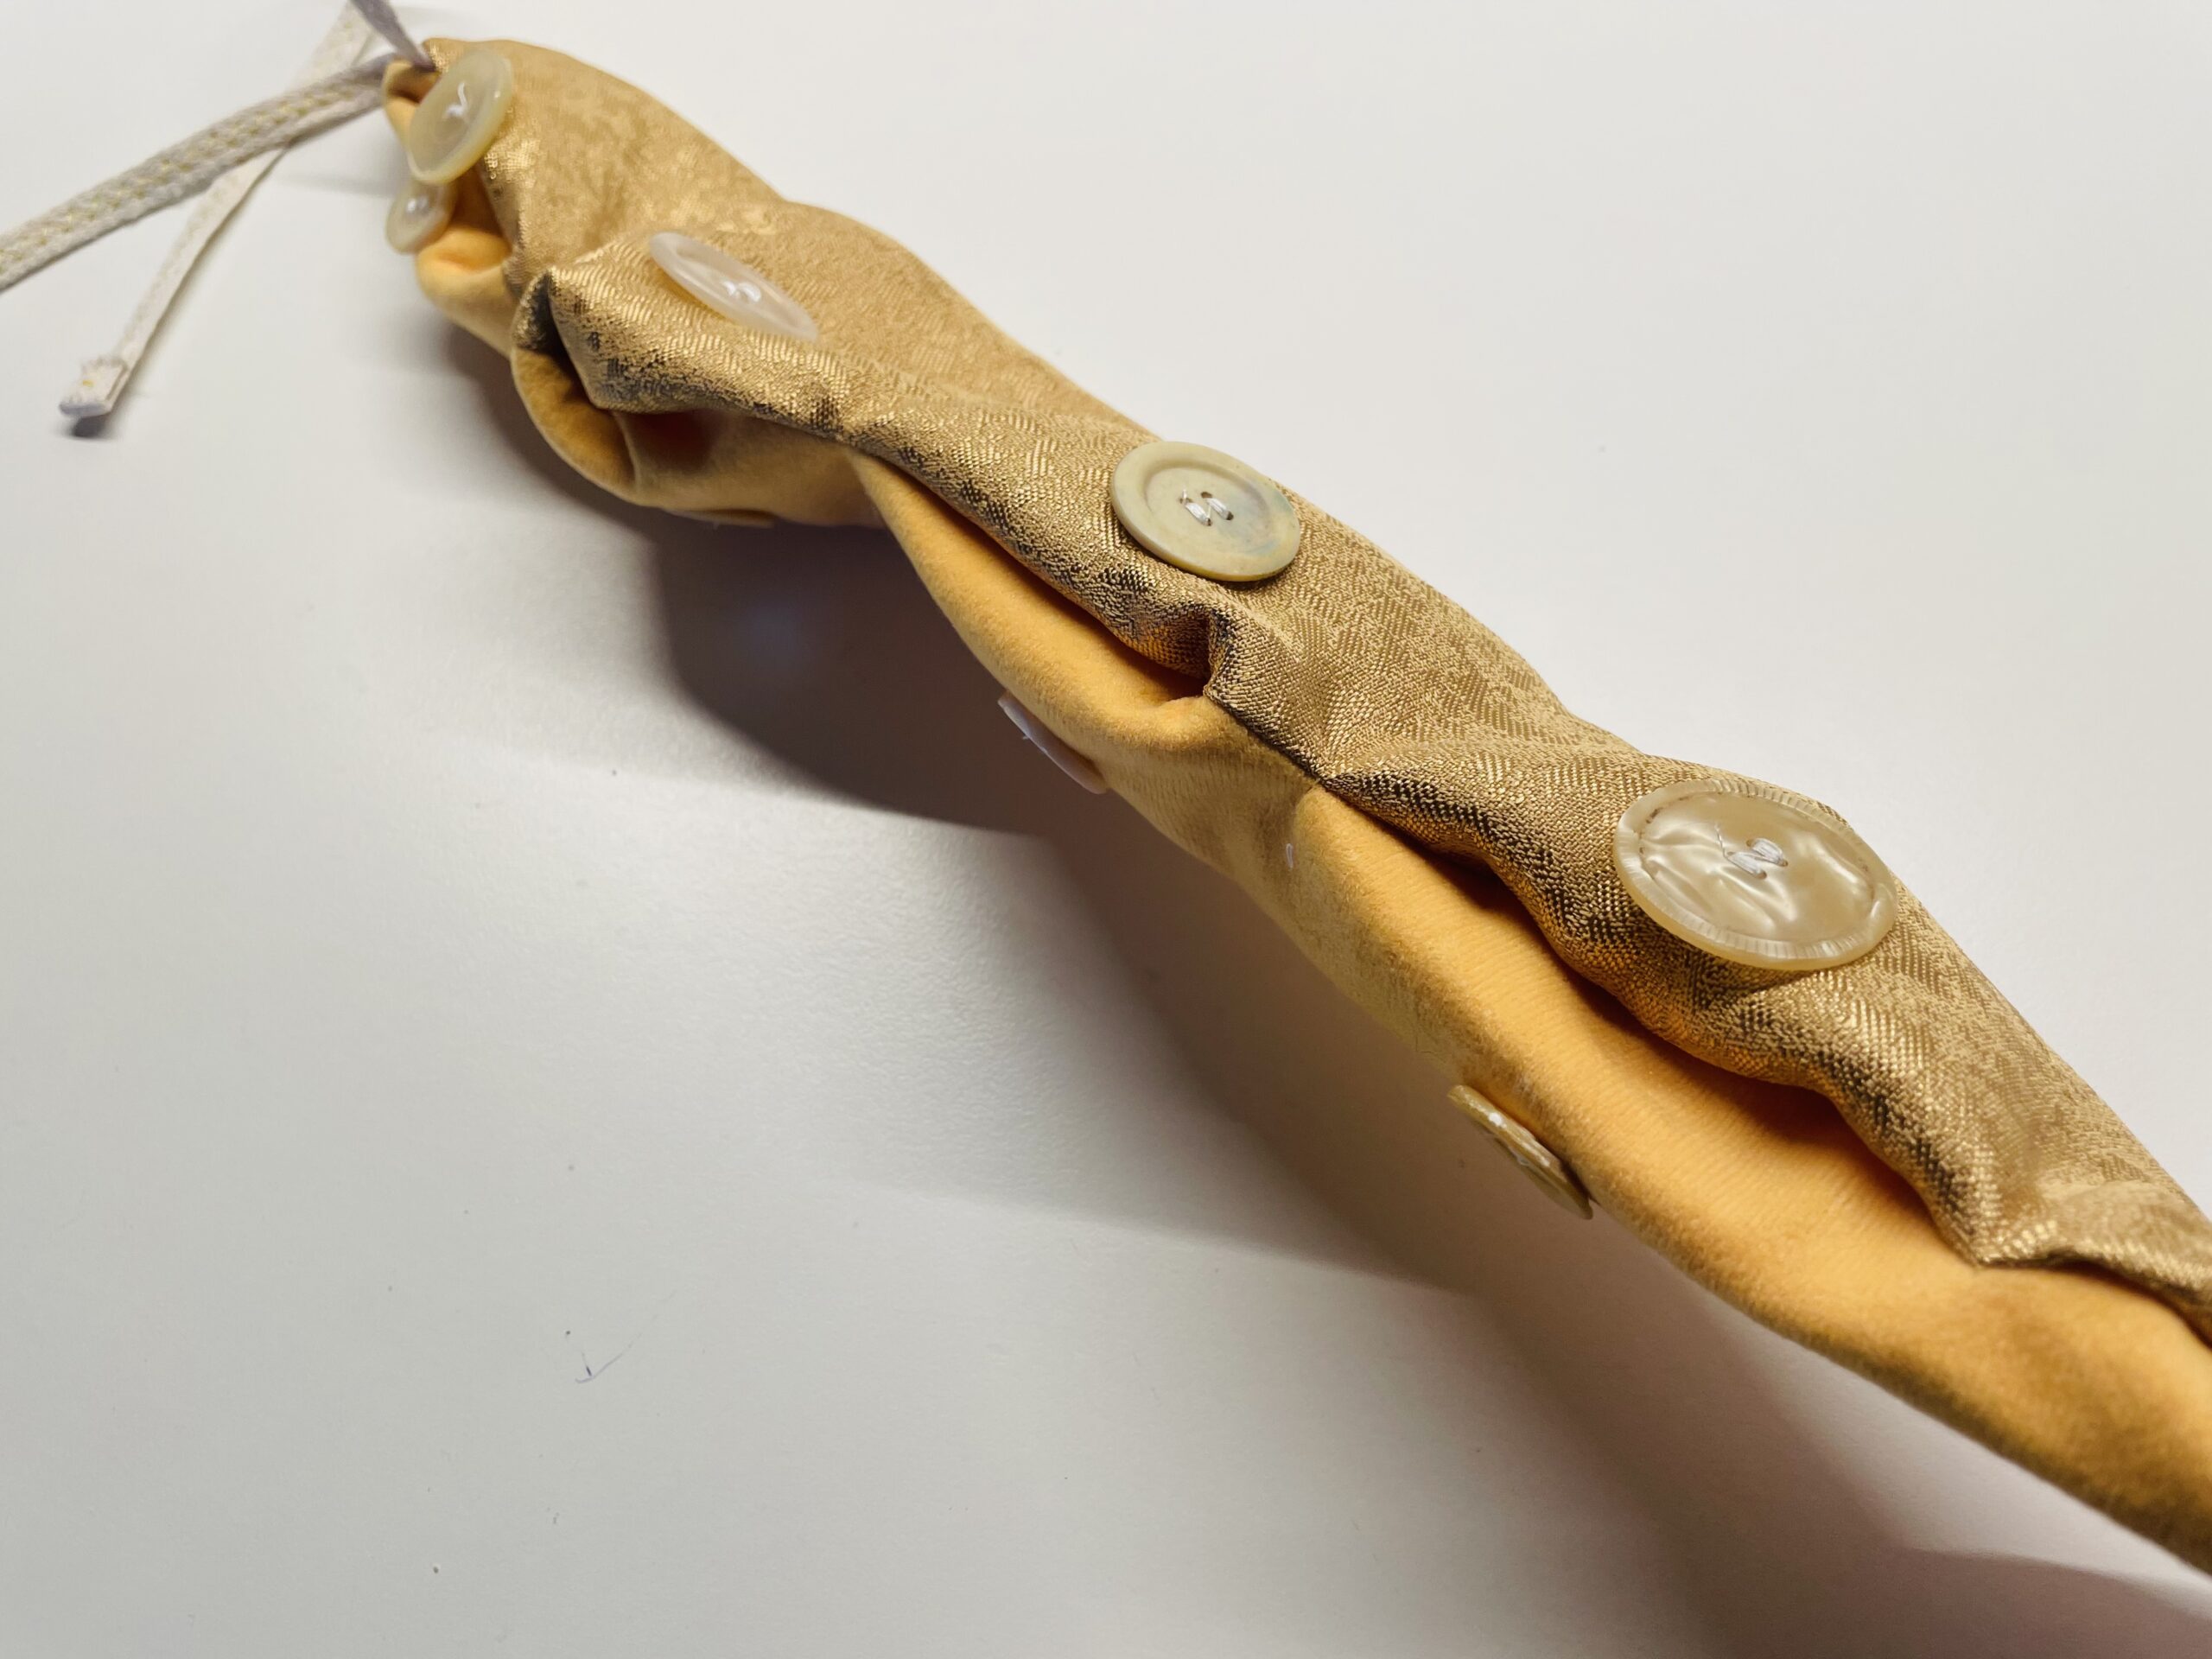


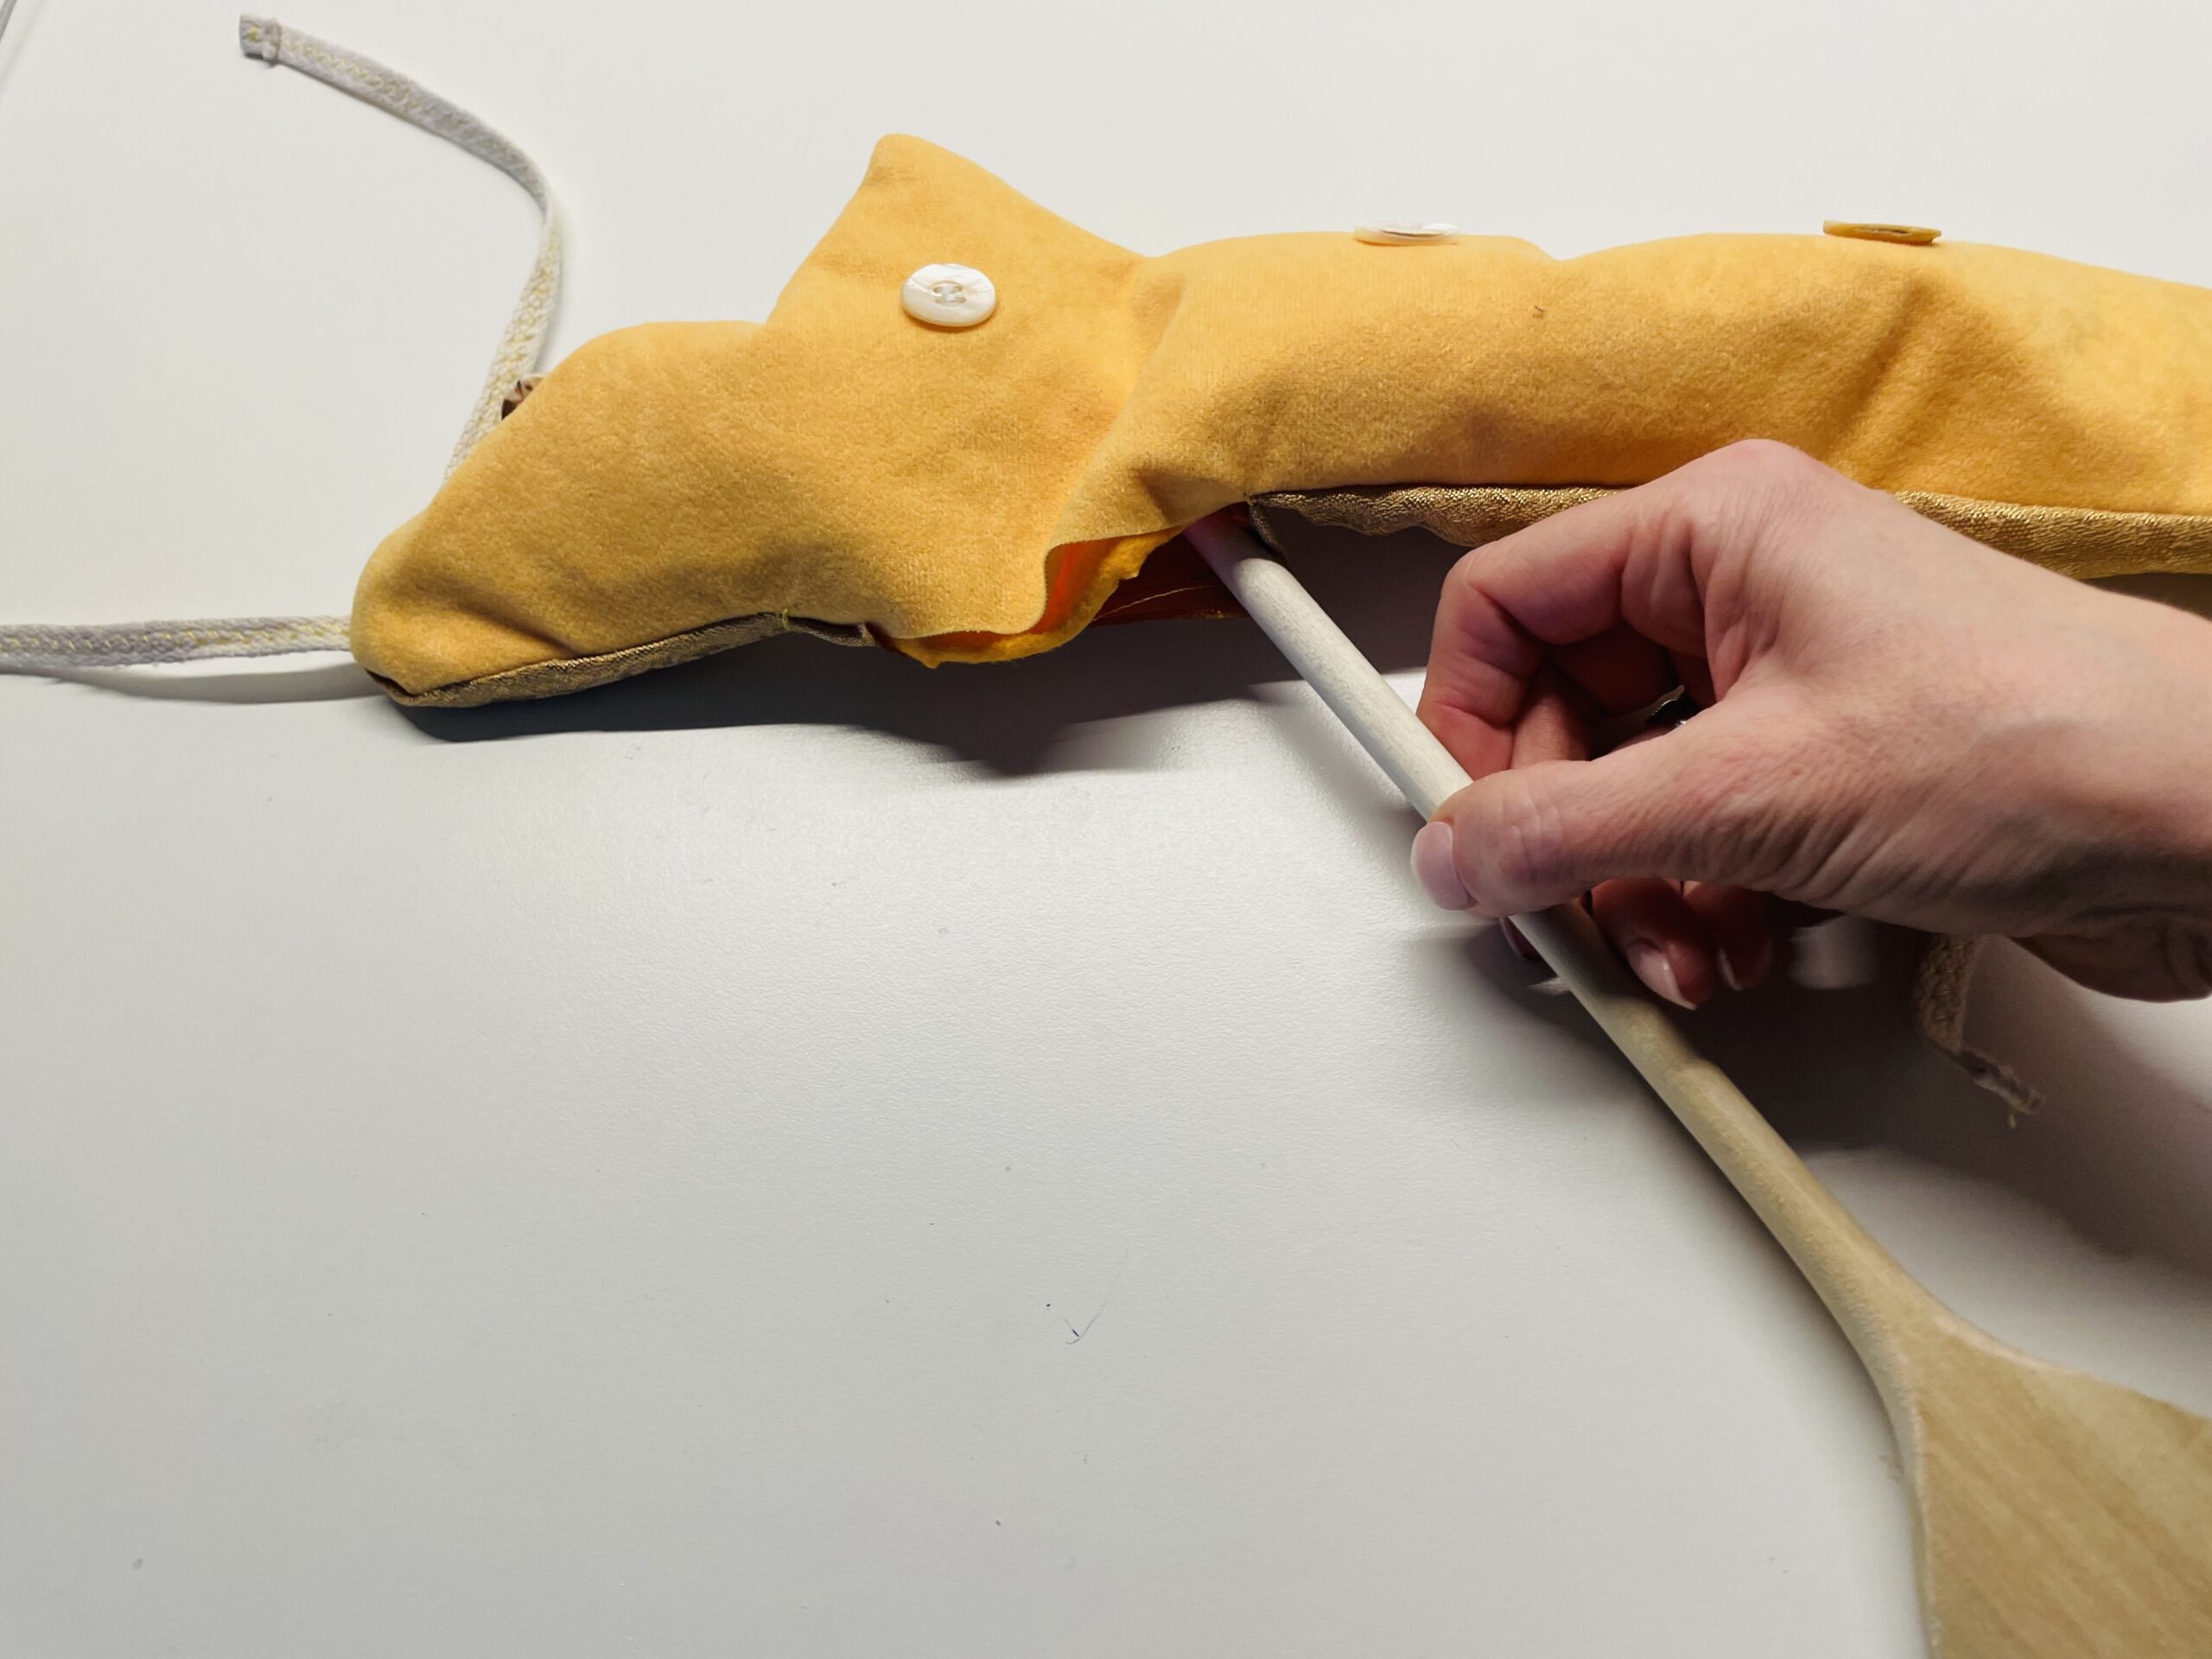
Drive with the style of the wooden spoon into each jig.


Forms as well as it goes out the jigs.
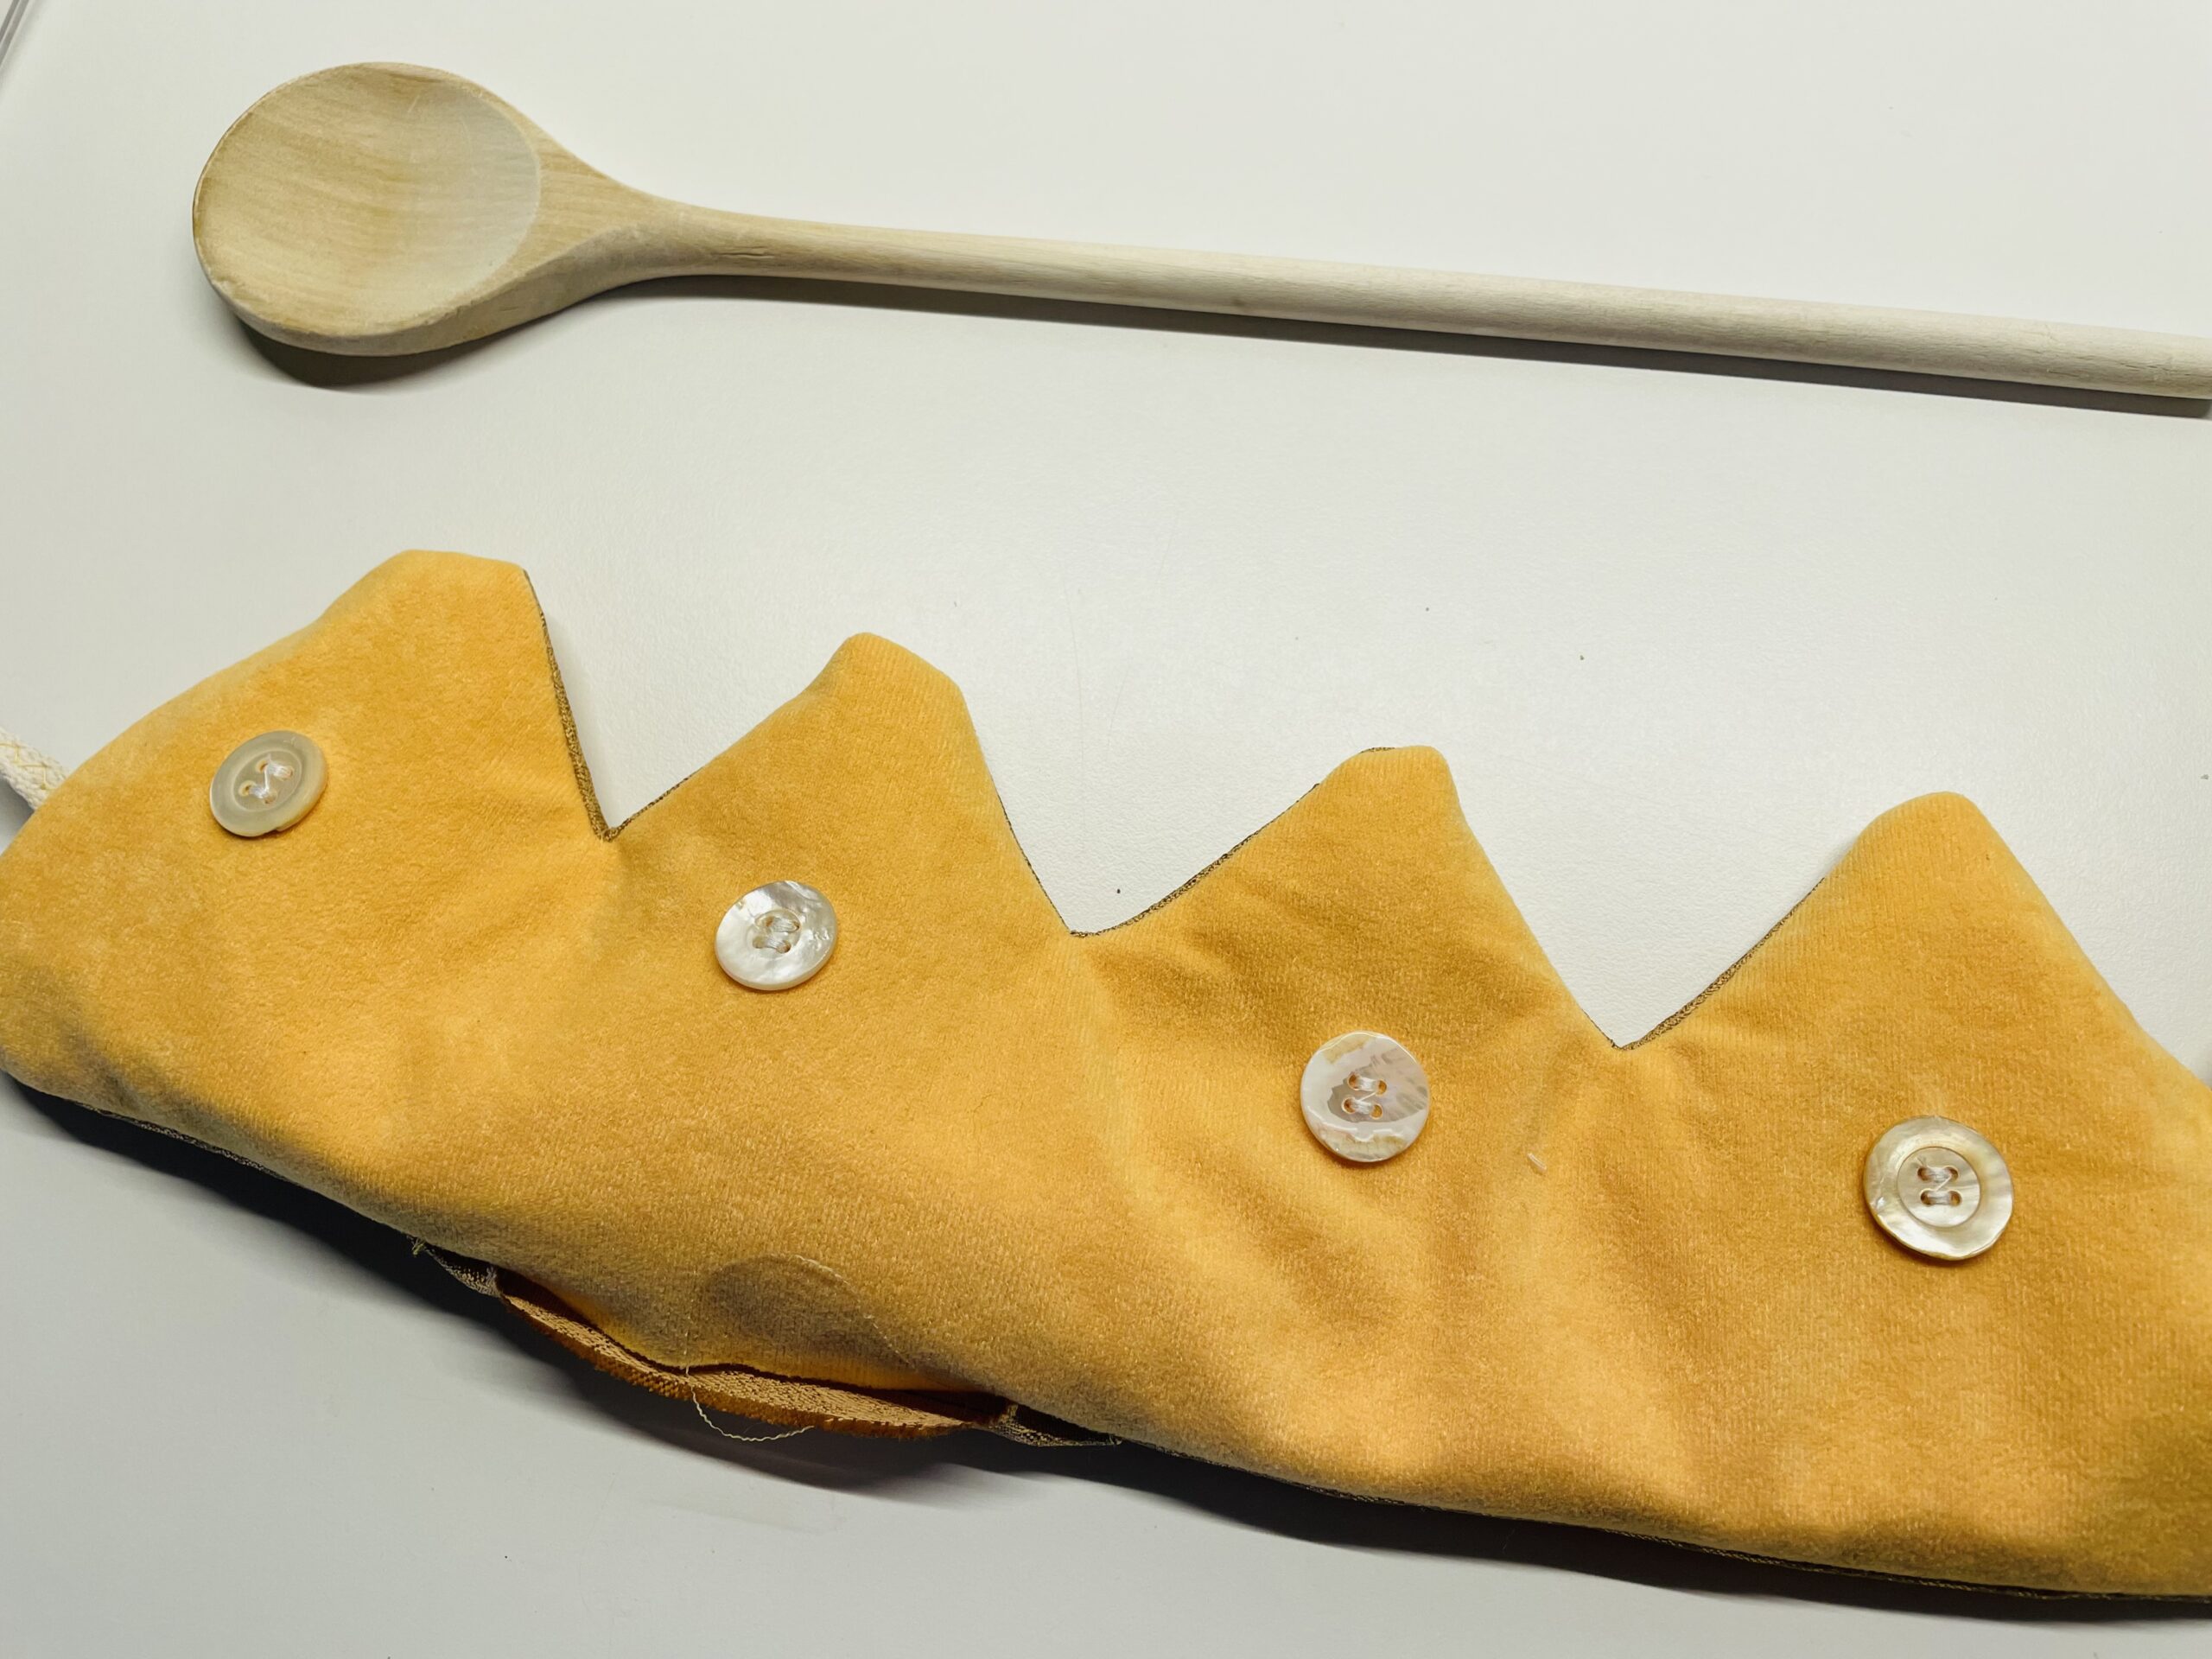


You can also use a blunt pen to refine the points, but be careful not to put holes in the fabric.
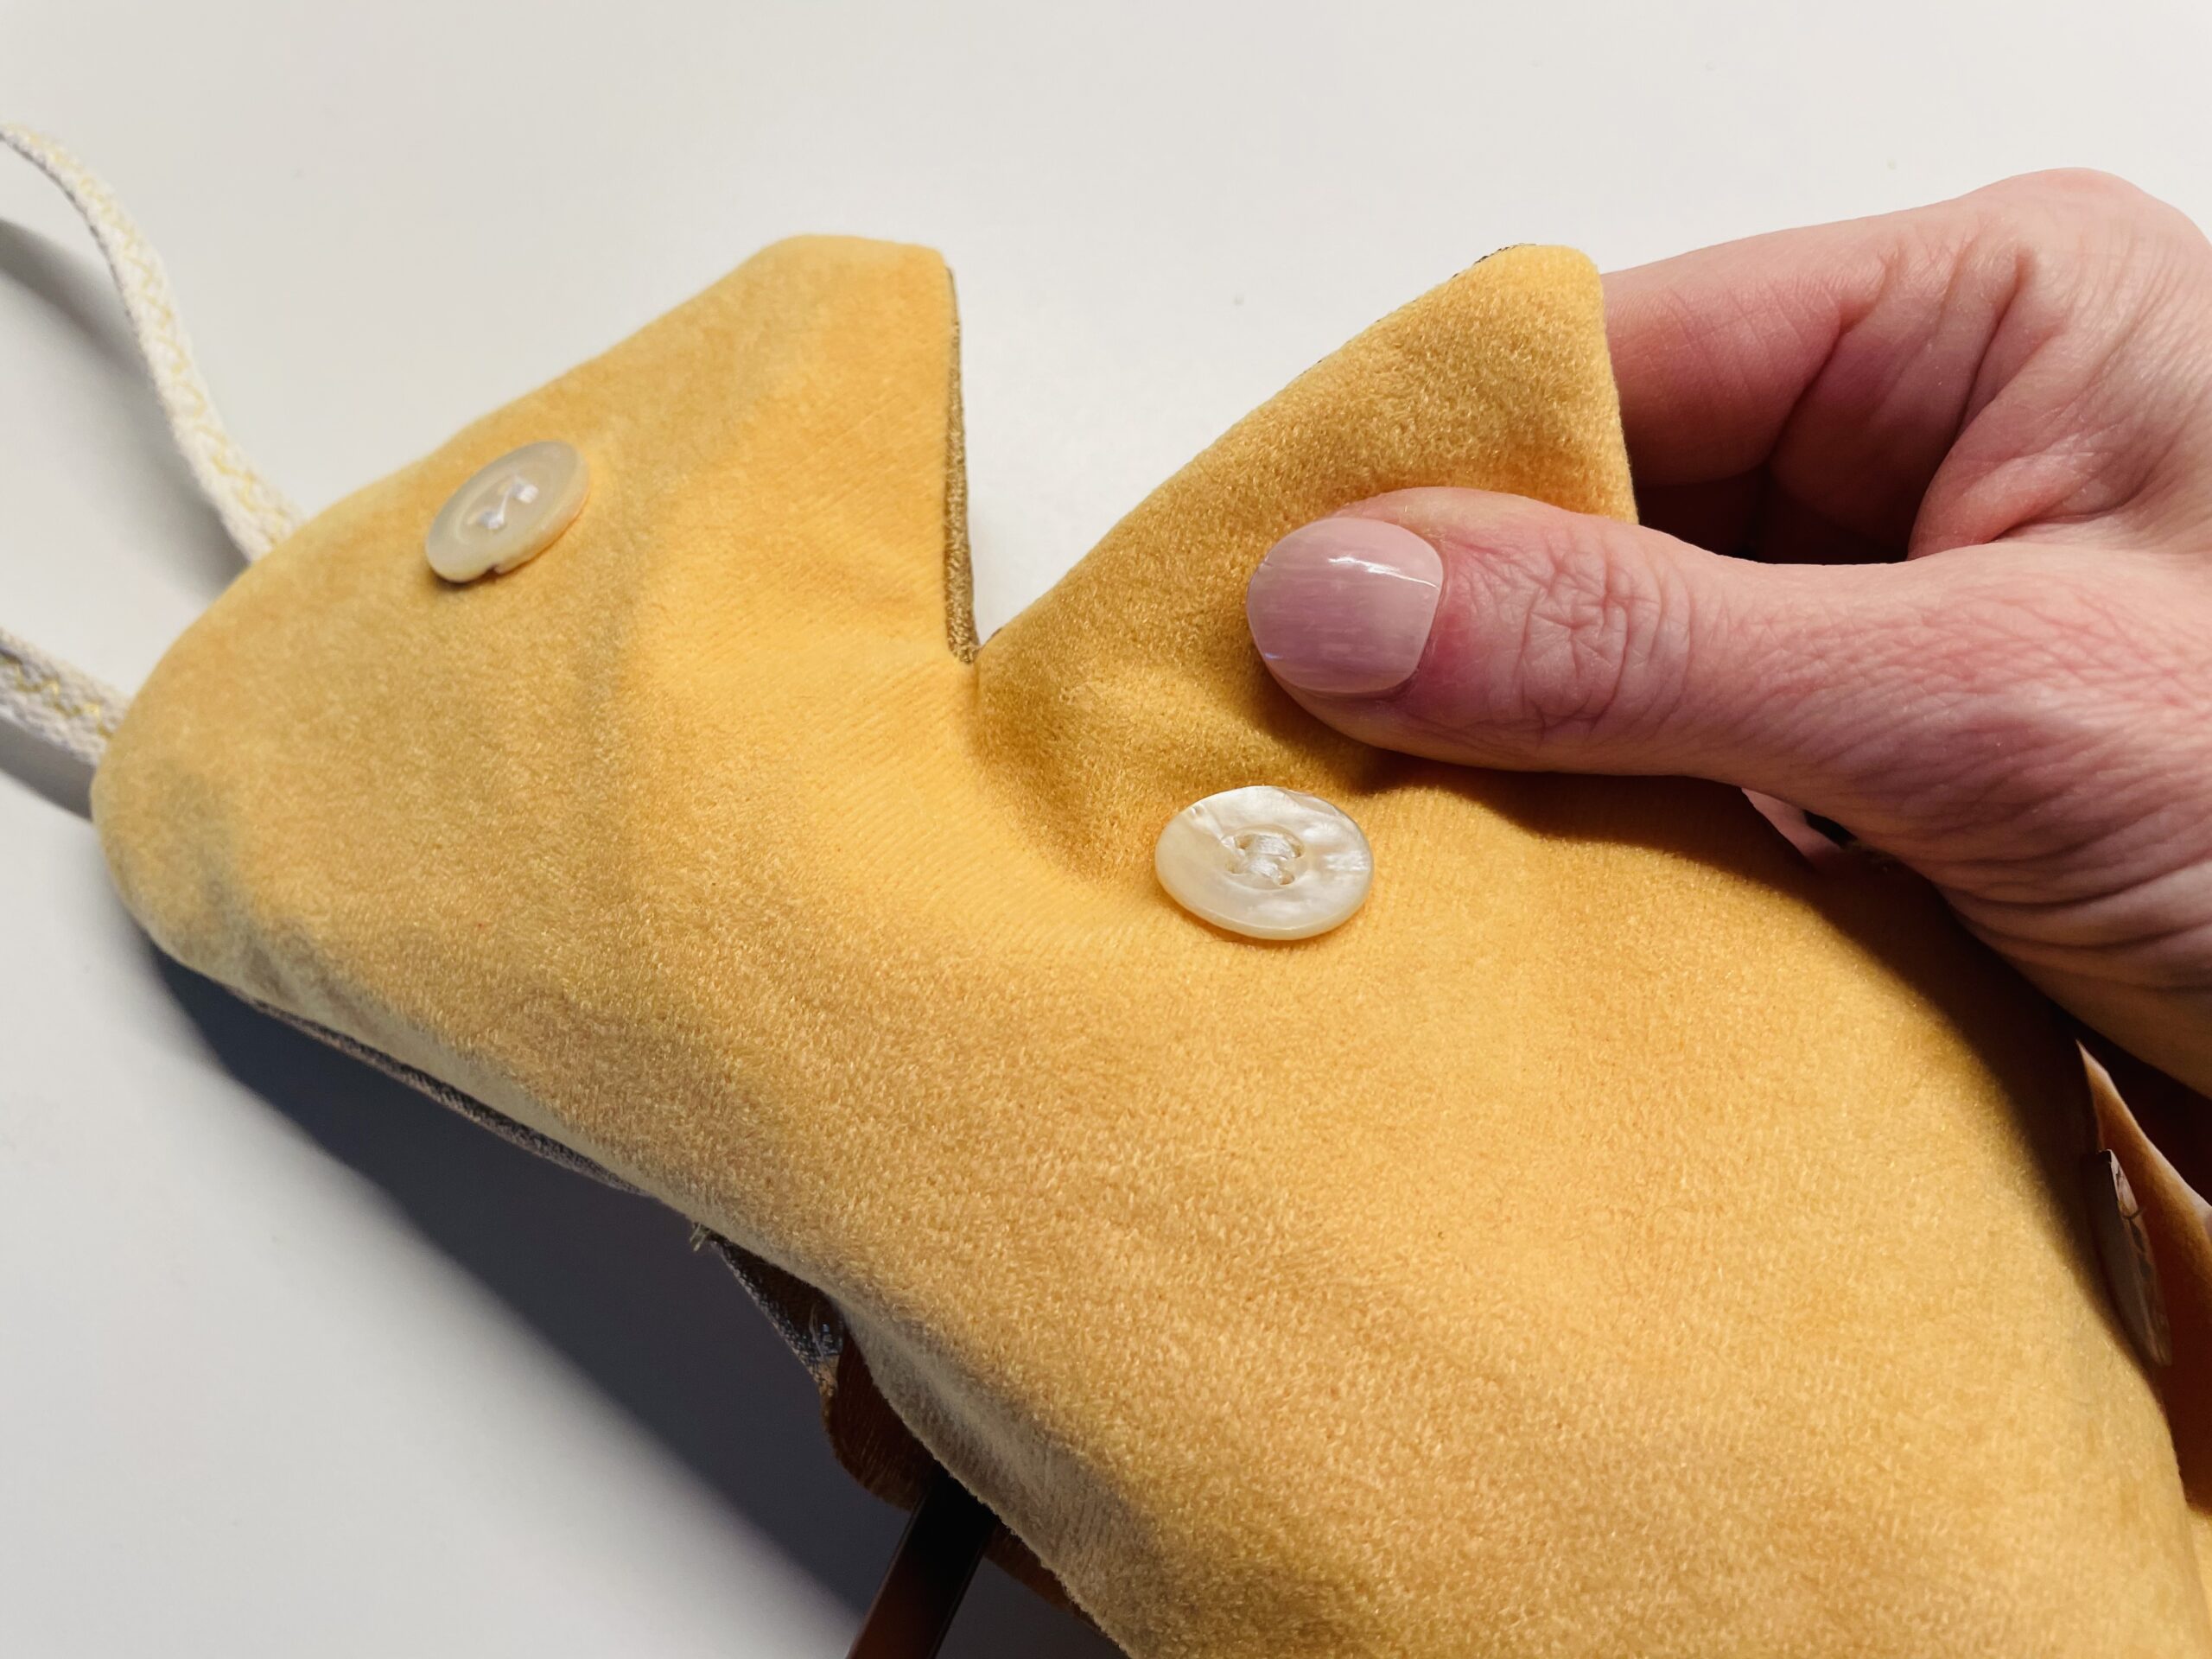


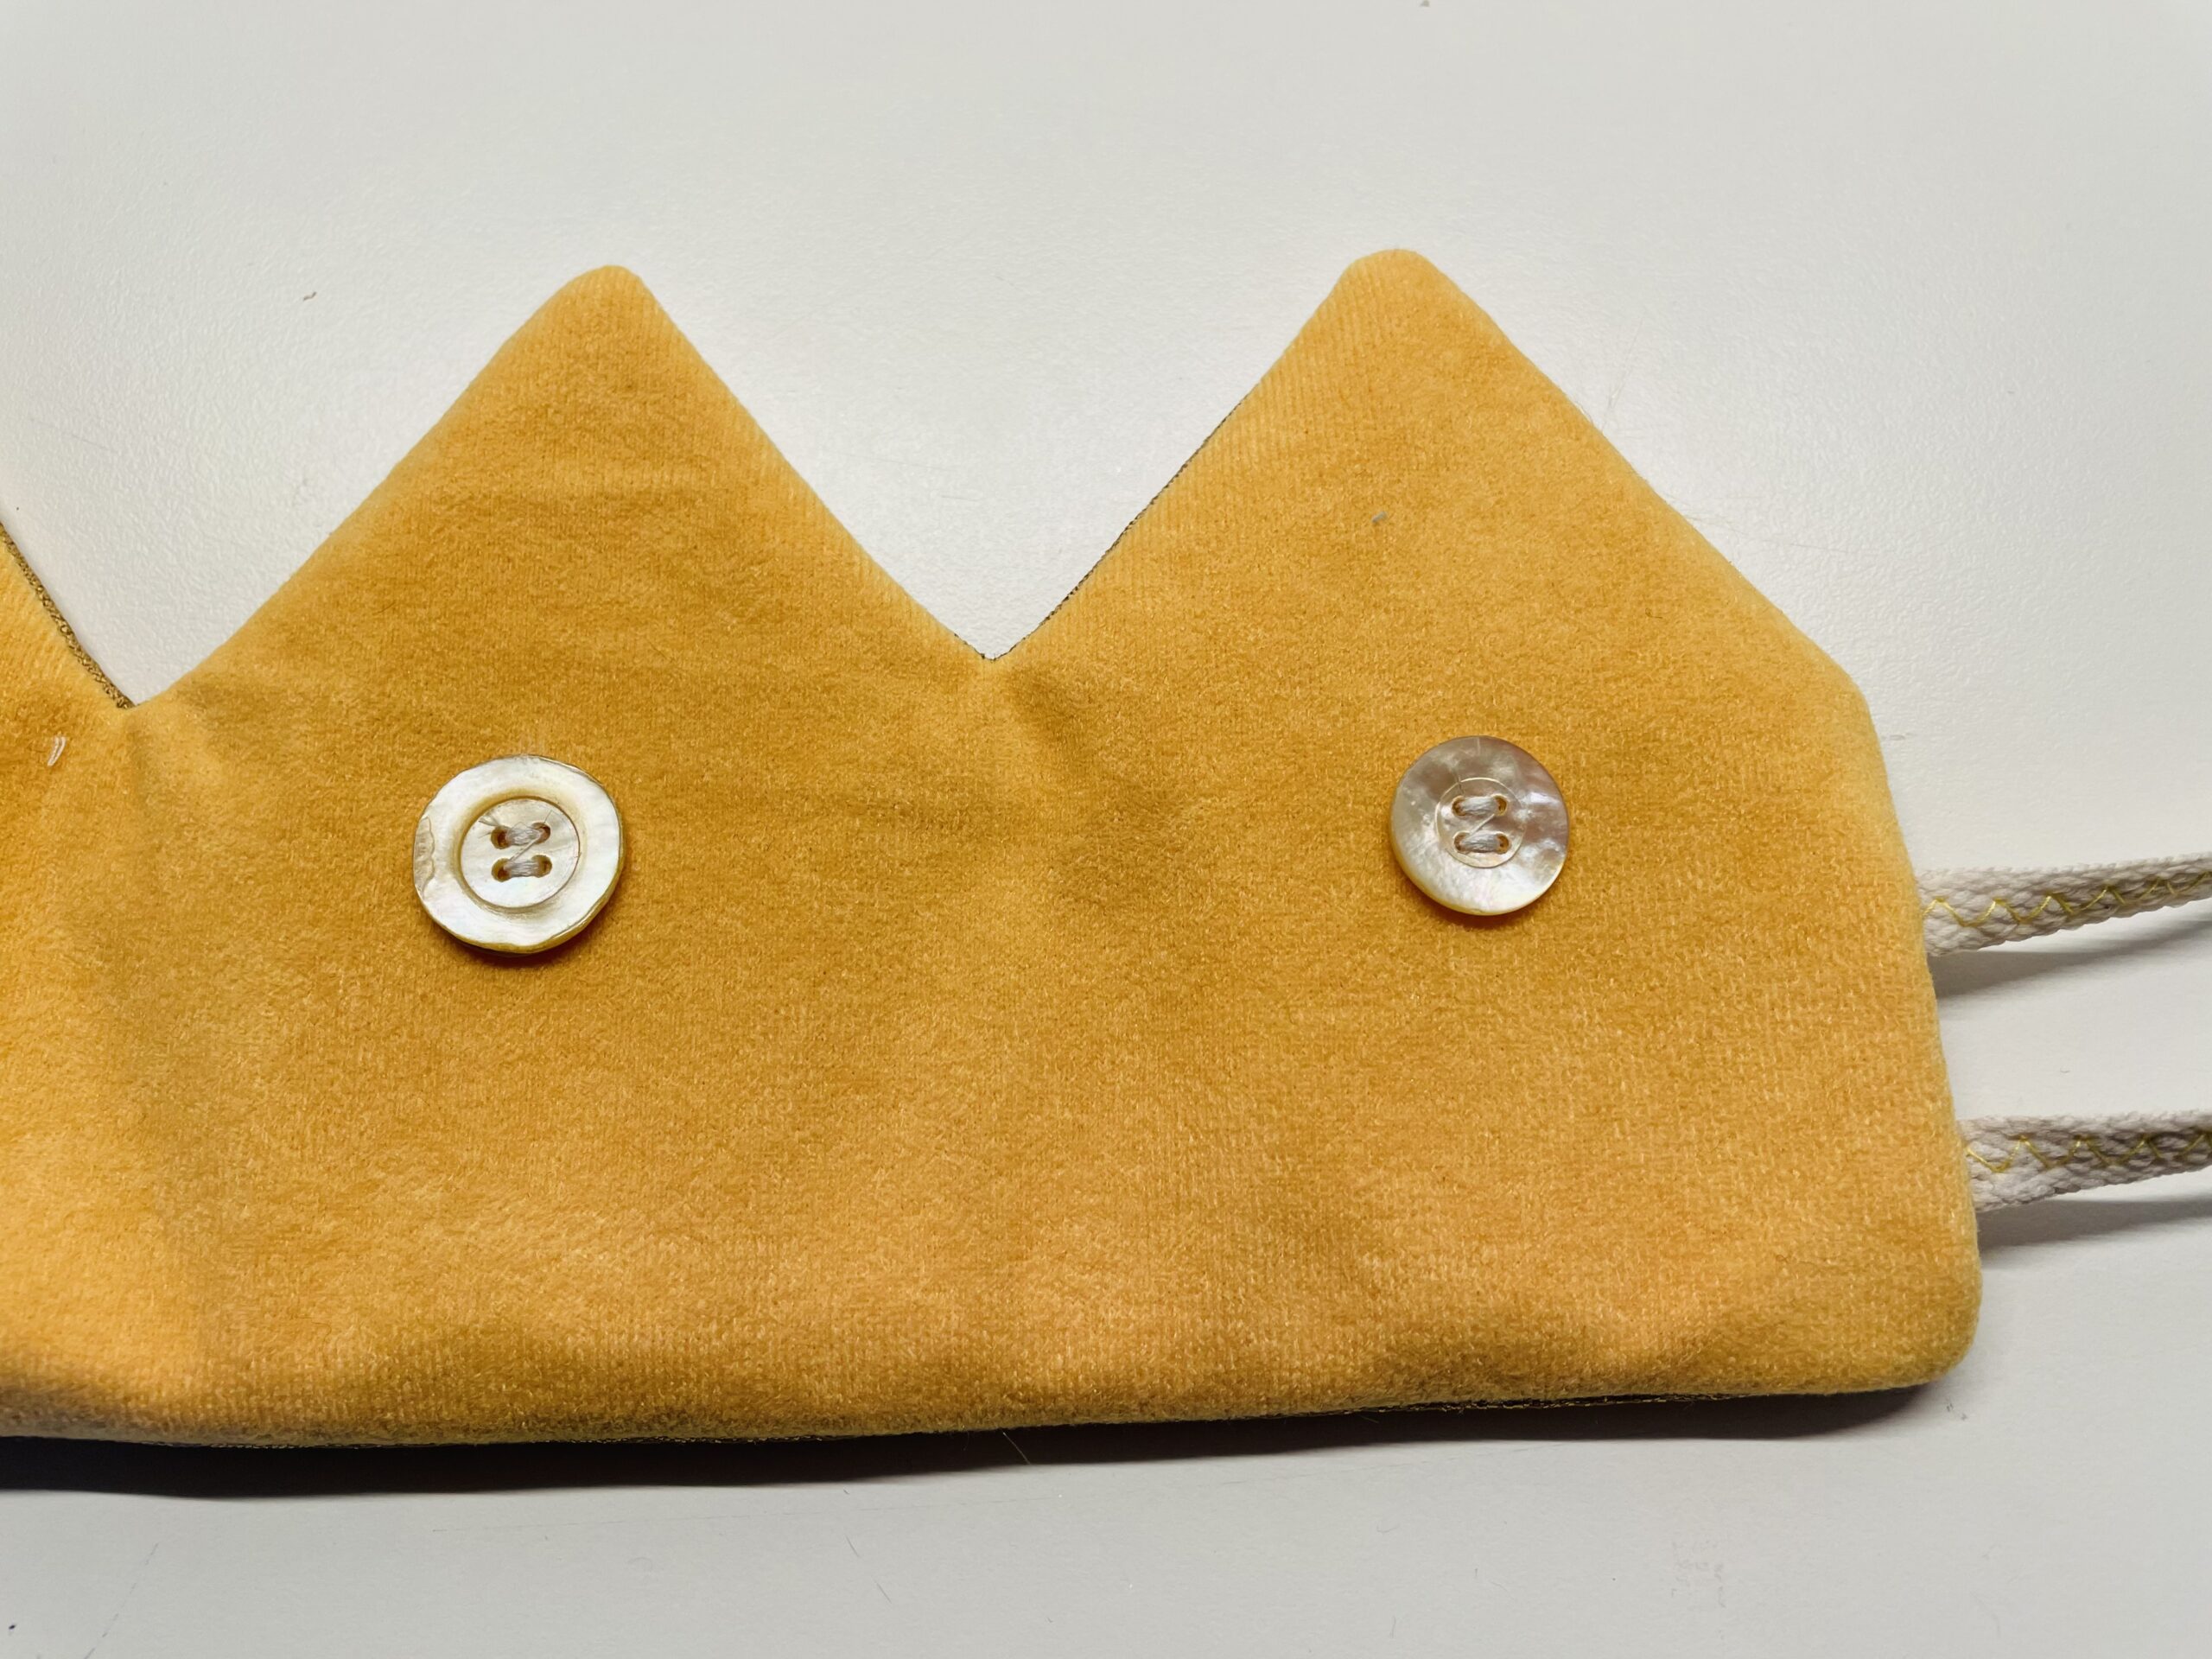
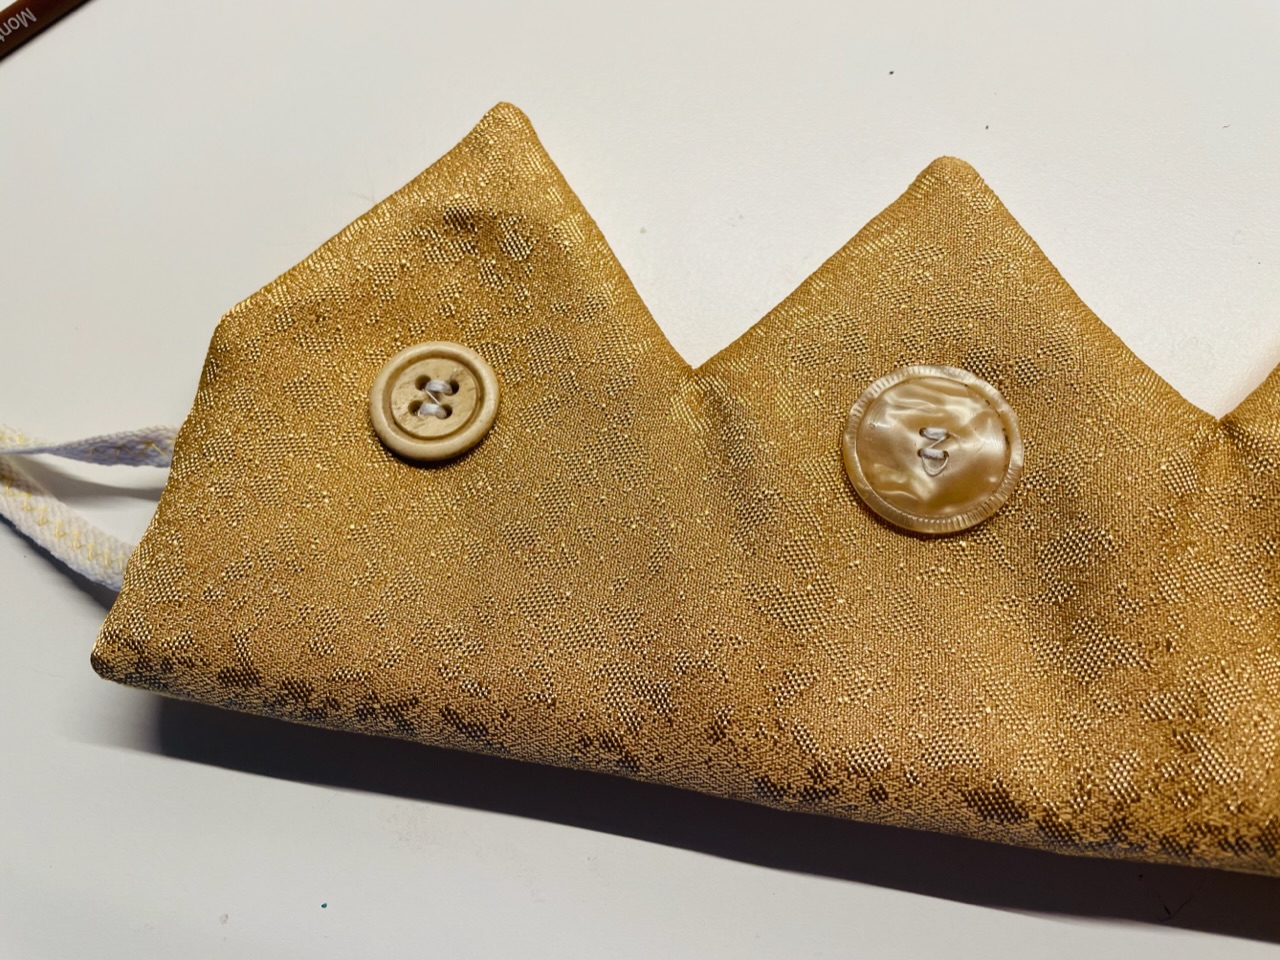
This is how both sides of the crown look like.




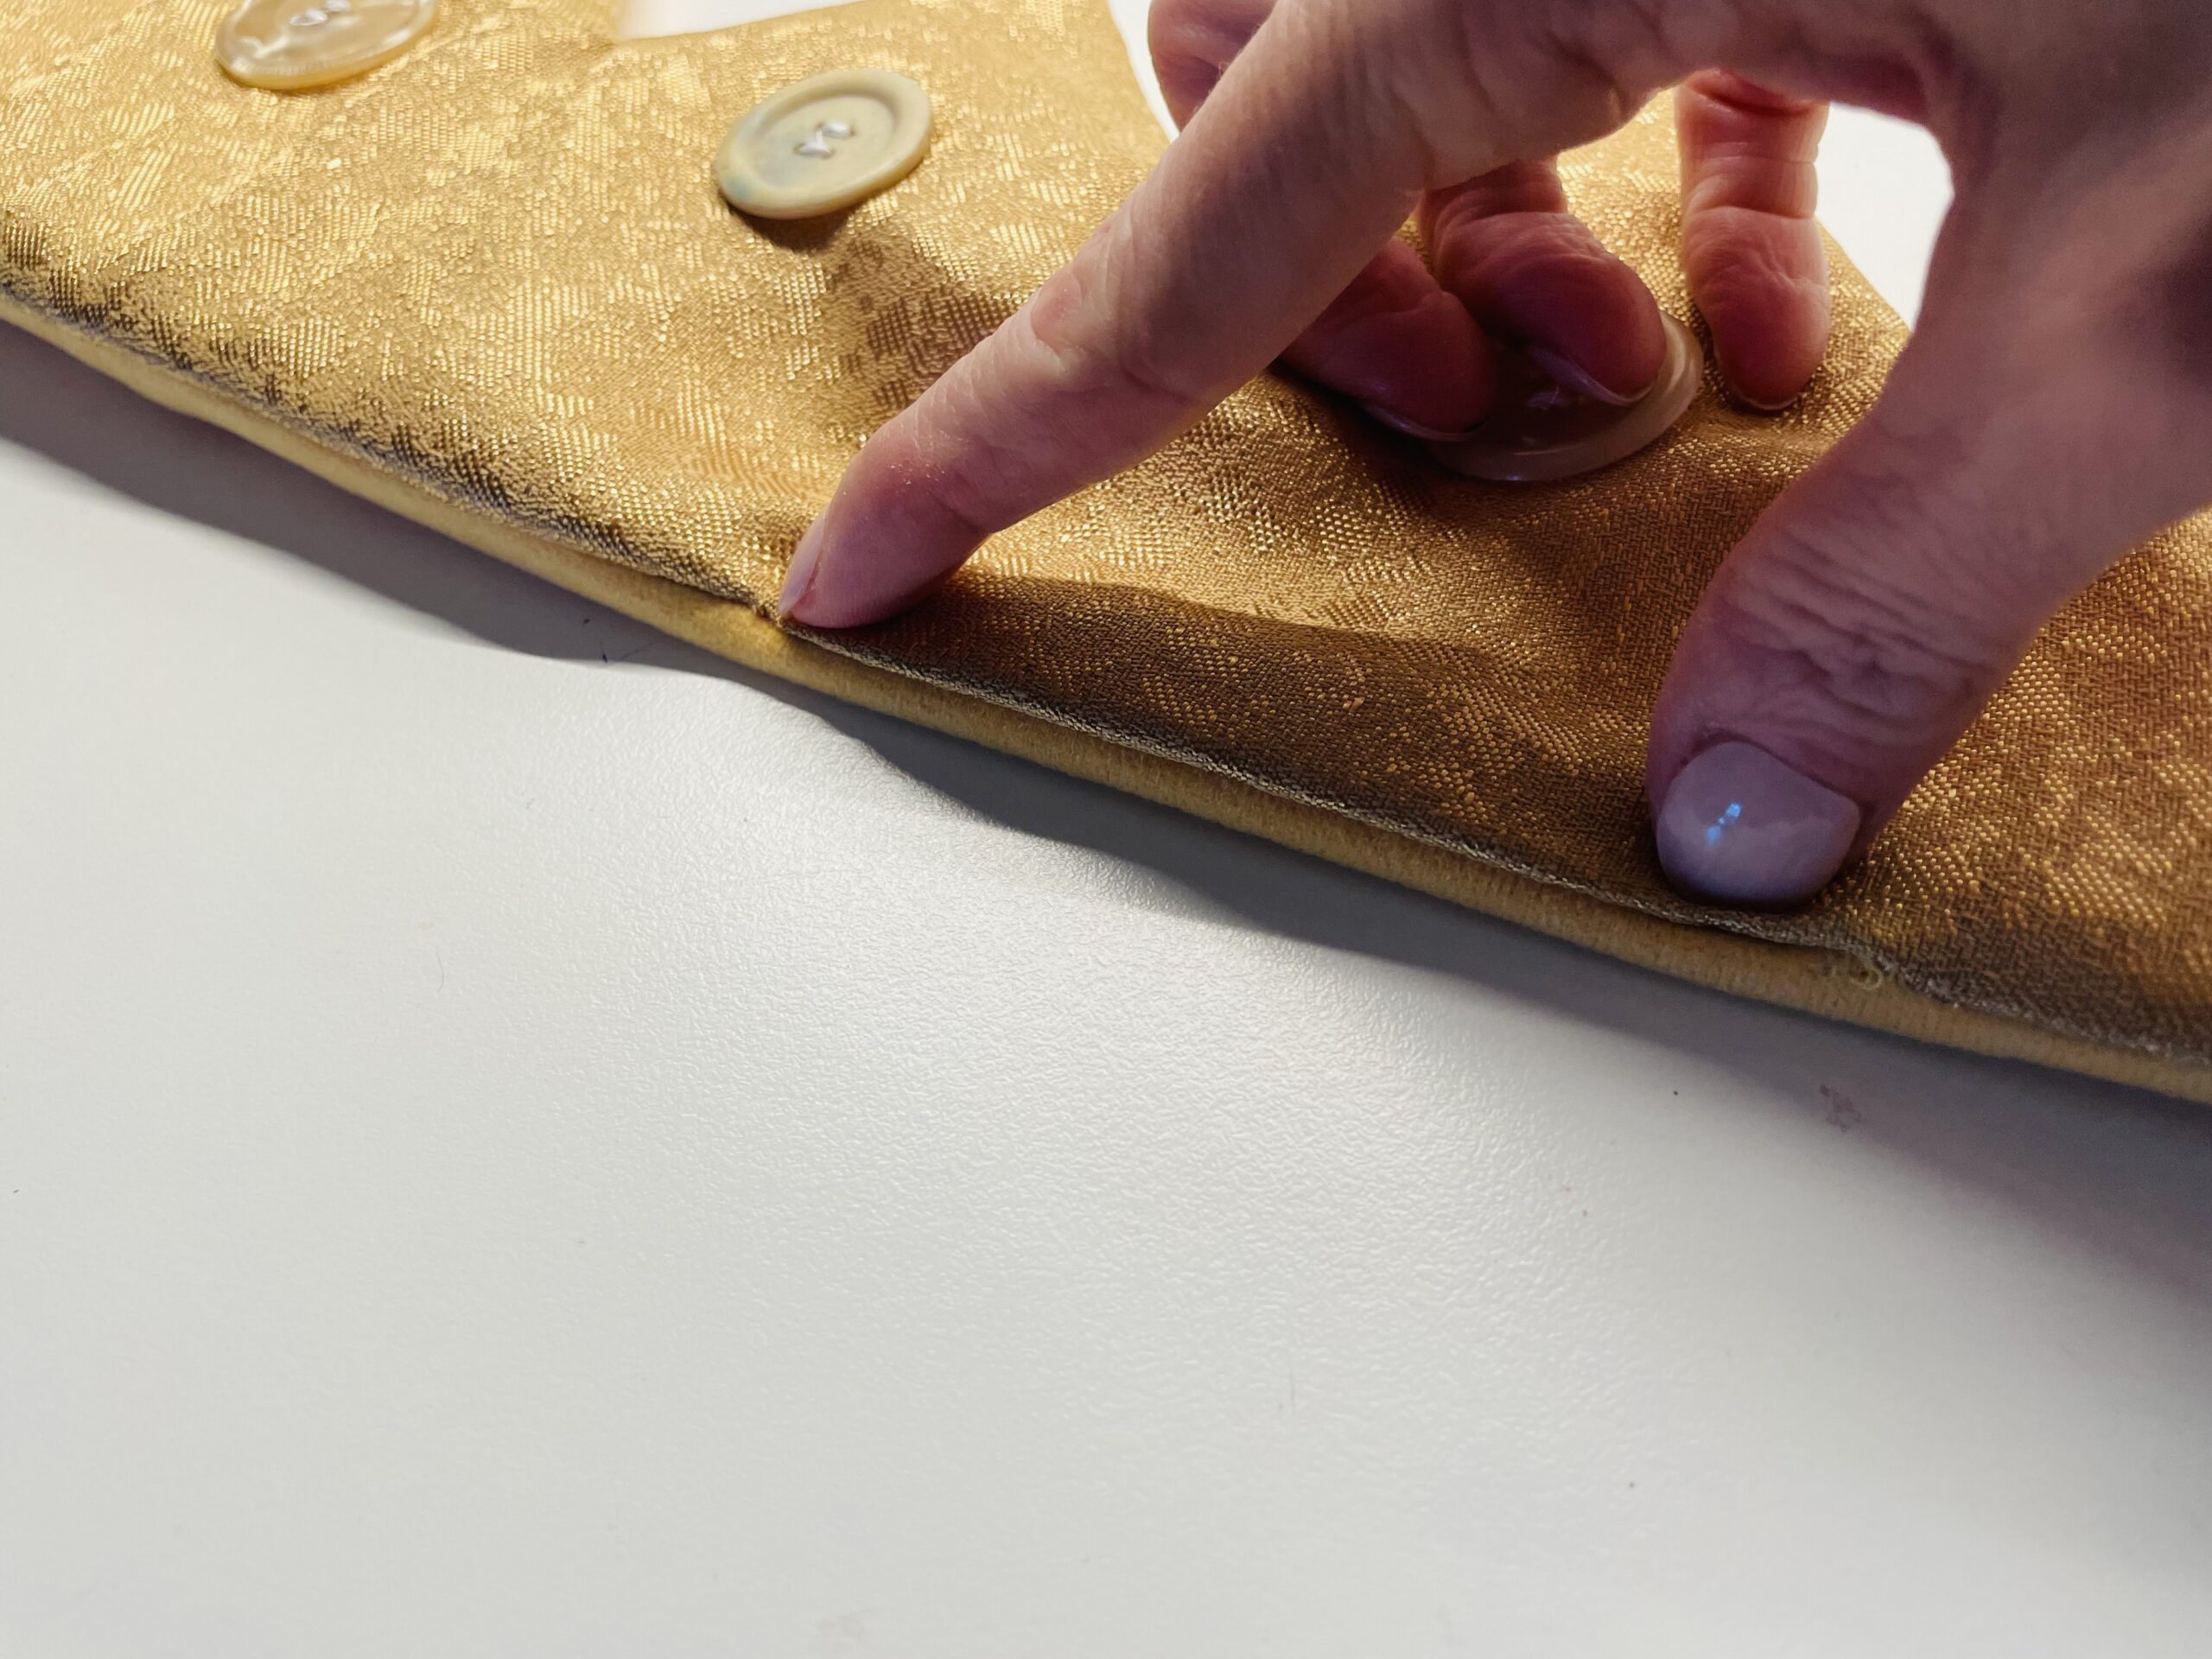
The turning opening still has to be closed. Put the fabrics neatly on top of each other.


First close the opening with a pin.
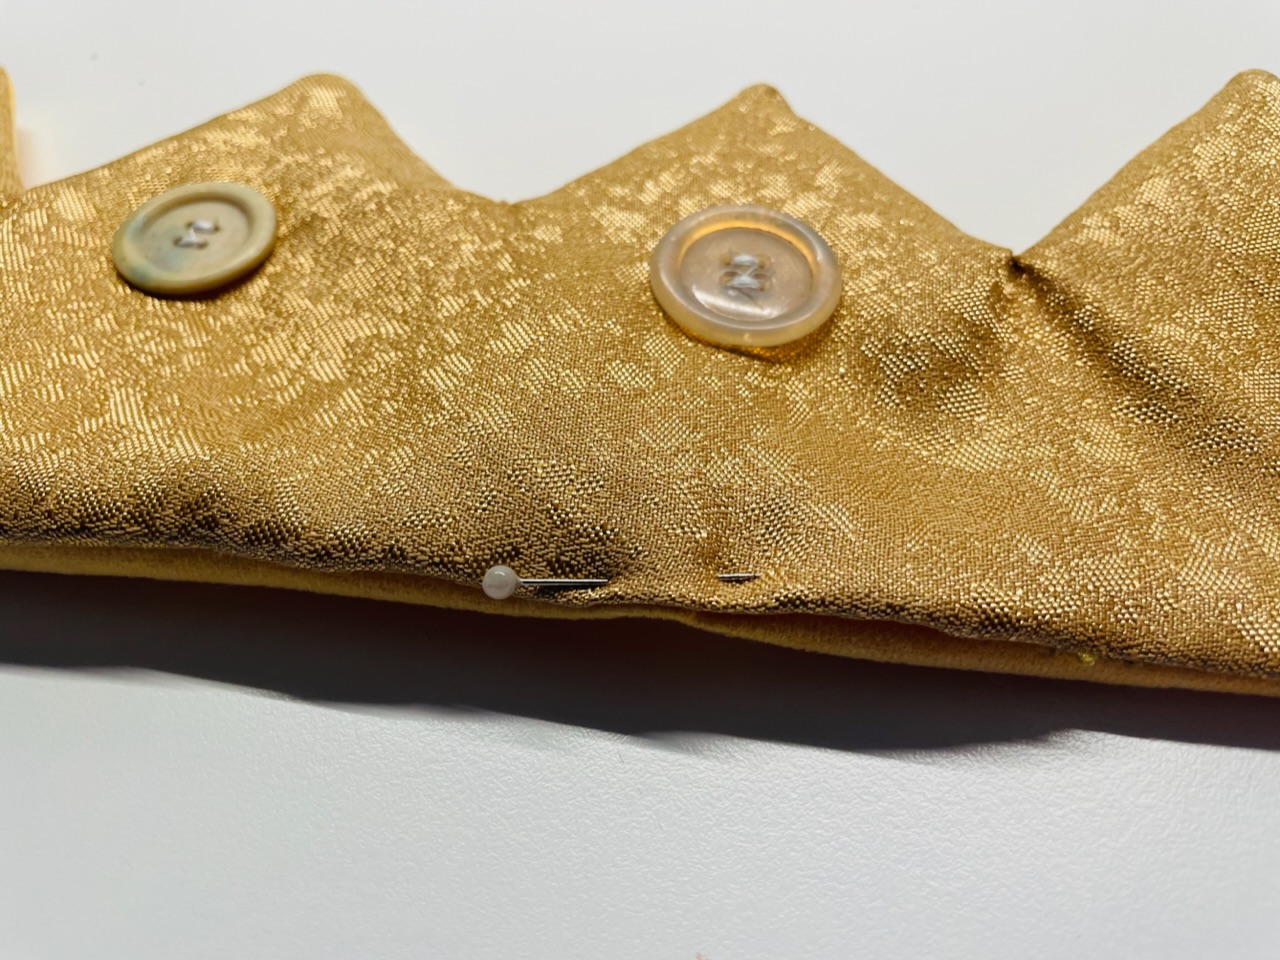


The crown is now completely sewn again, so it gets stability and the turning opening is closed "invisible". Start sewing the complete straight bottom first. Start sewing at a corner for this.
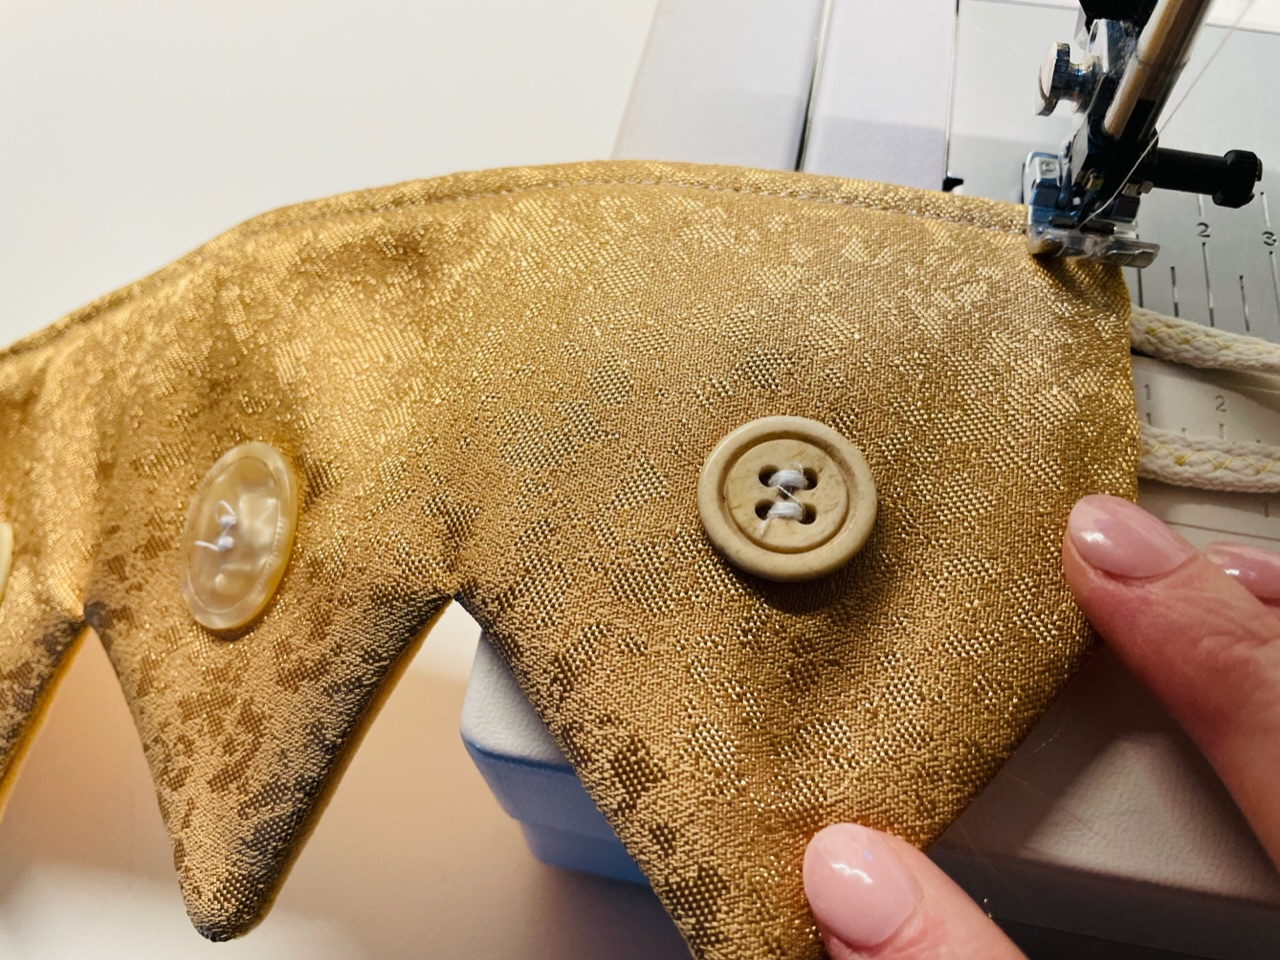


The seam line runs the same way as the previously sewn line, only on the "beautiful" side. Again, raise the foot of the sewing machine and let the needle stick in the fabric when you turn the crown.
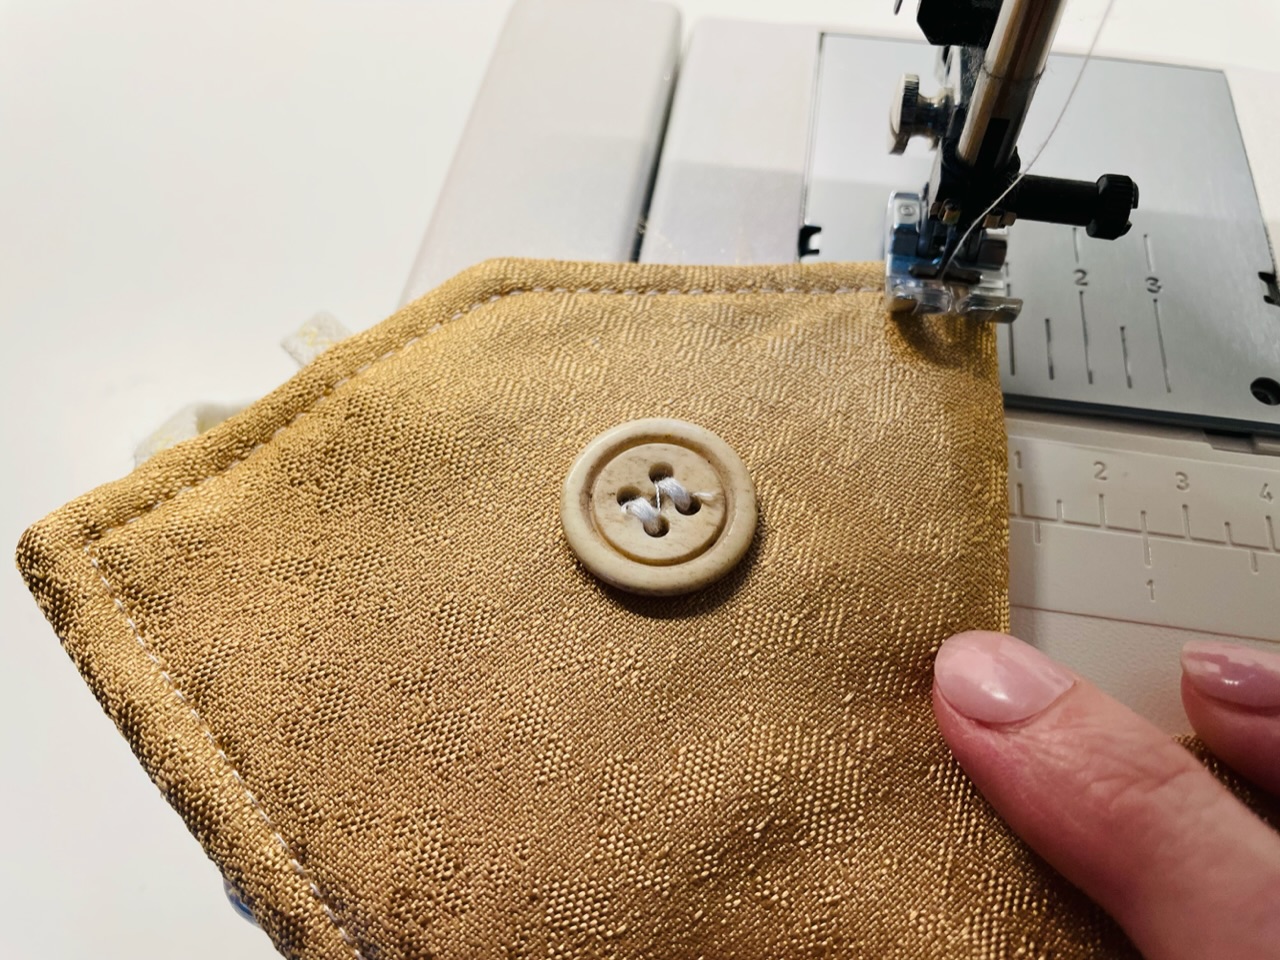


So you get a clean seam and the crown is very beautiful from both sides.
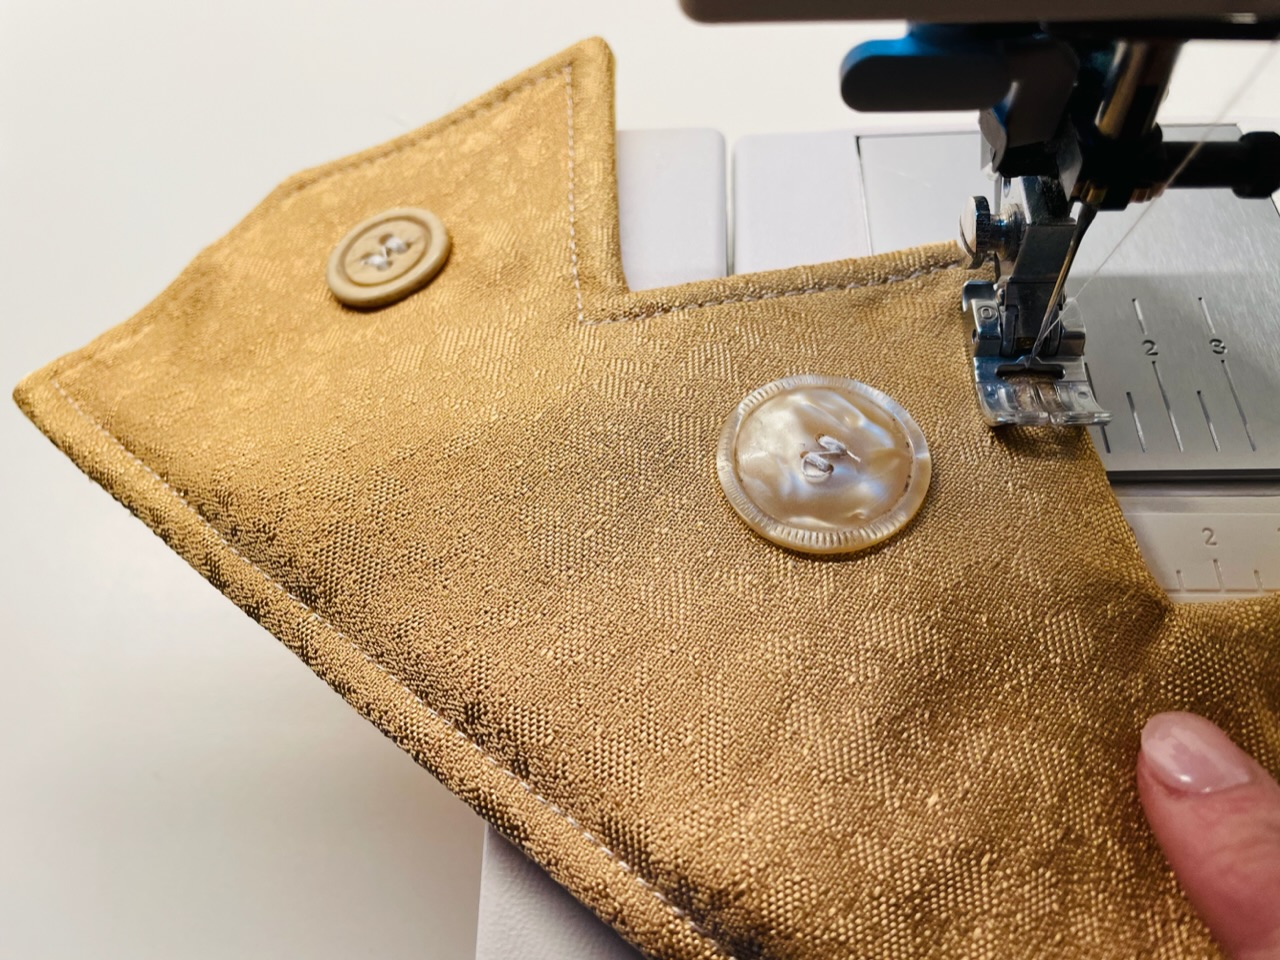


Both sides can now be seen for themselves. Decide on which "crowns" you want.
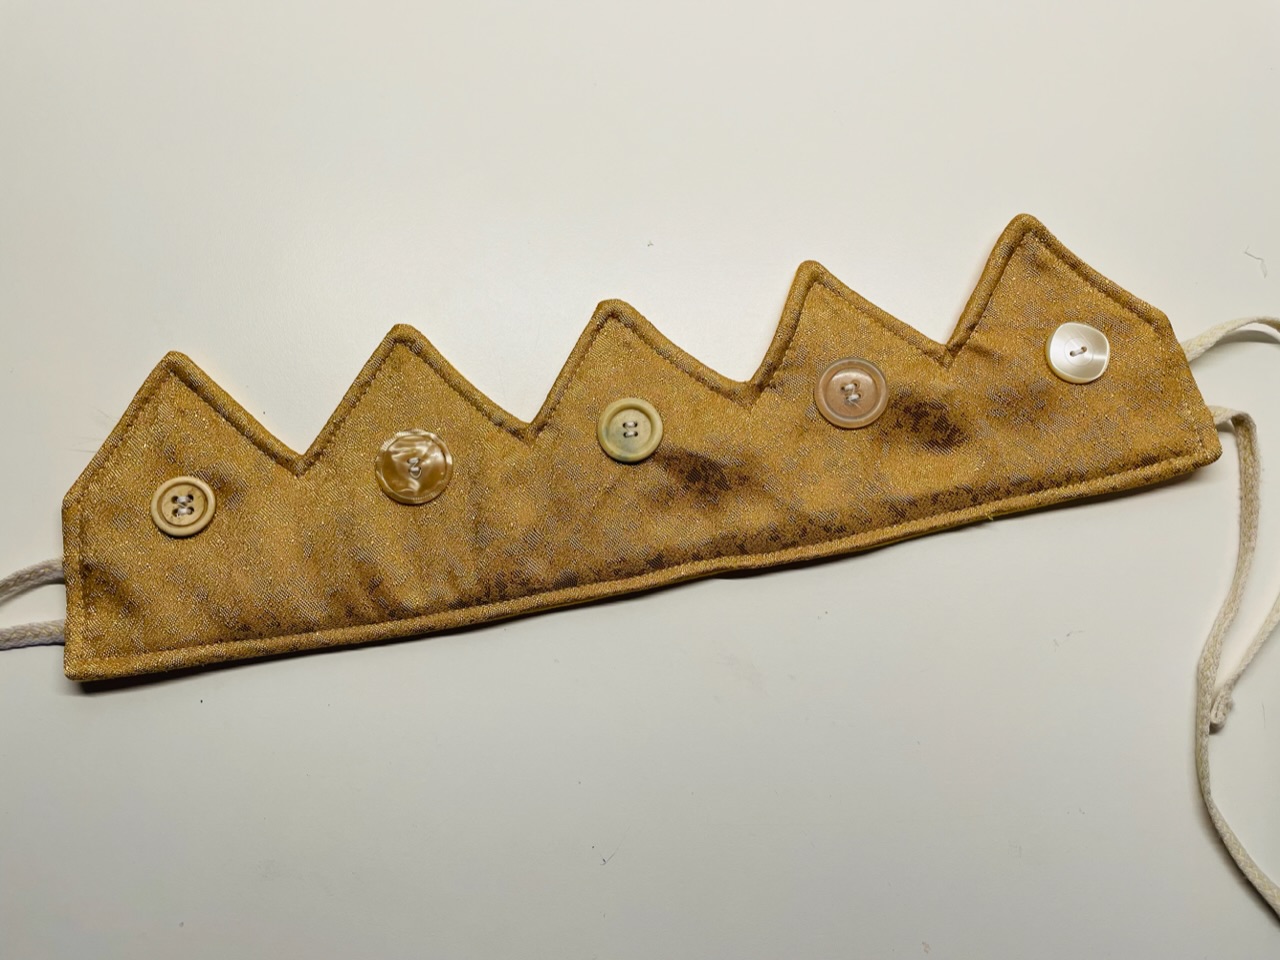


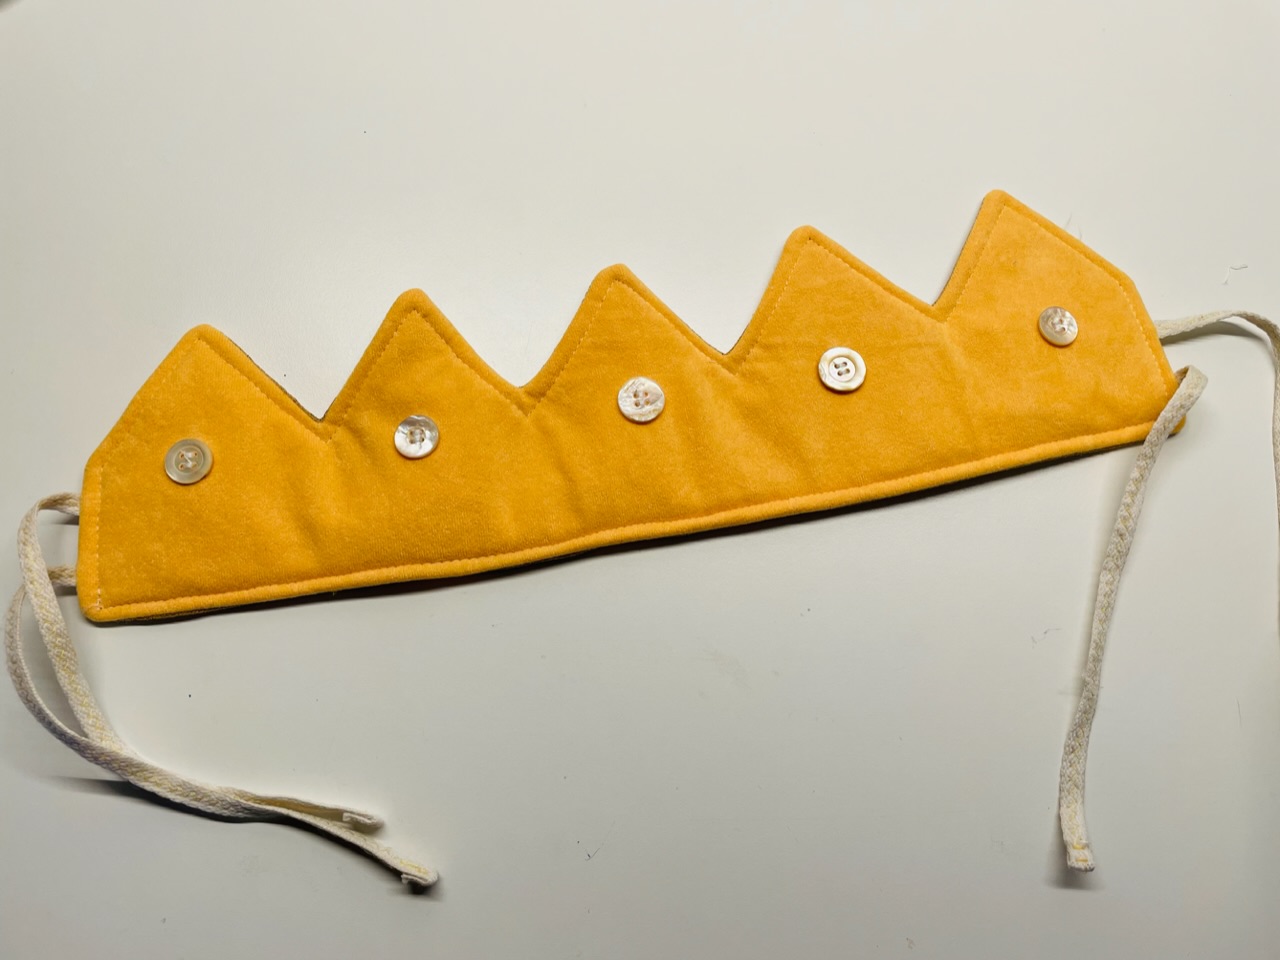


With the ribbons you can tie the crown together and put it on.
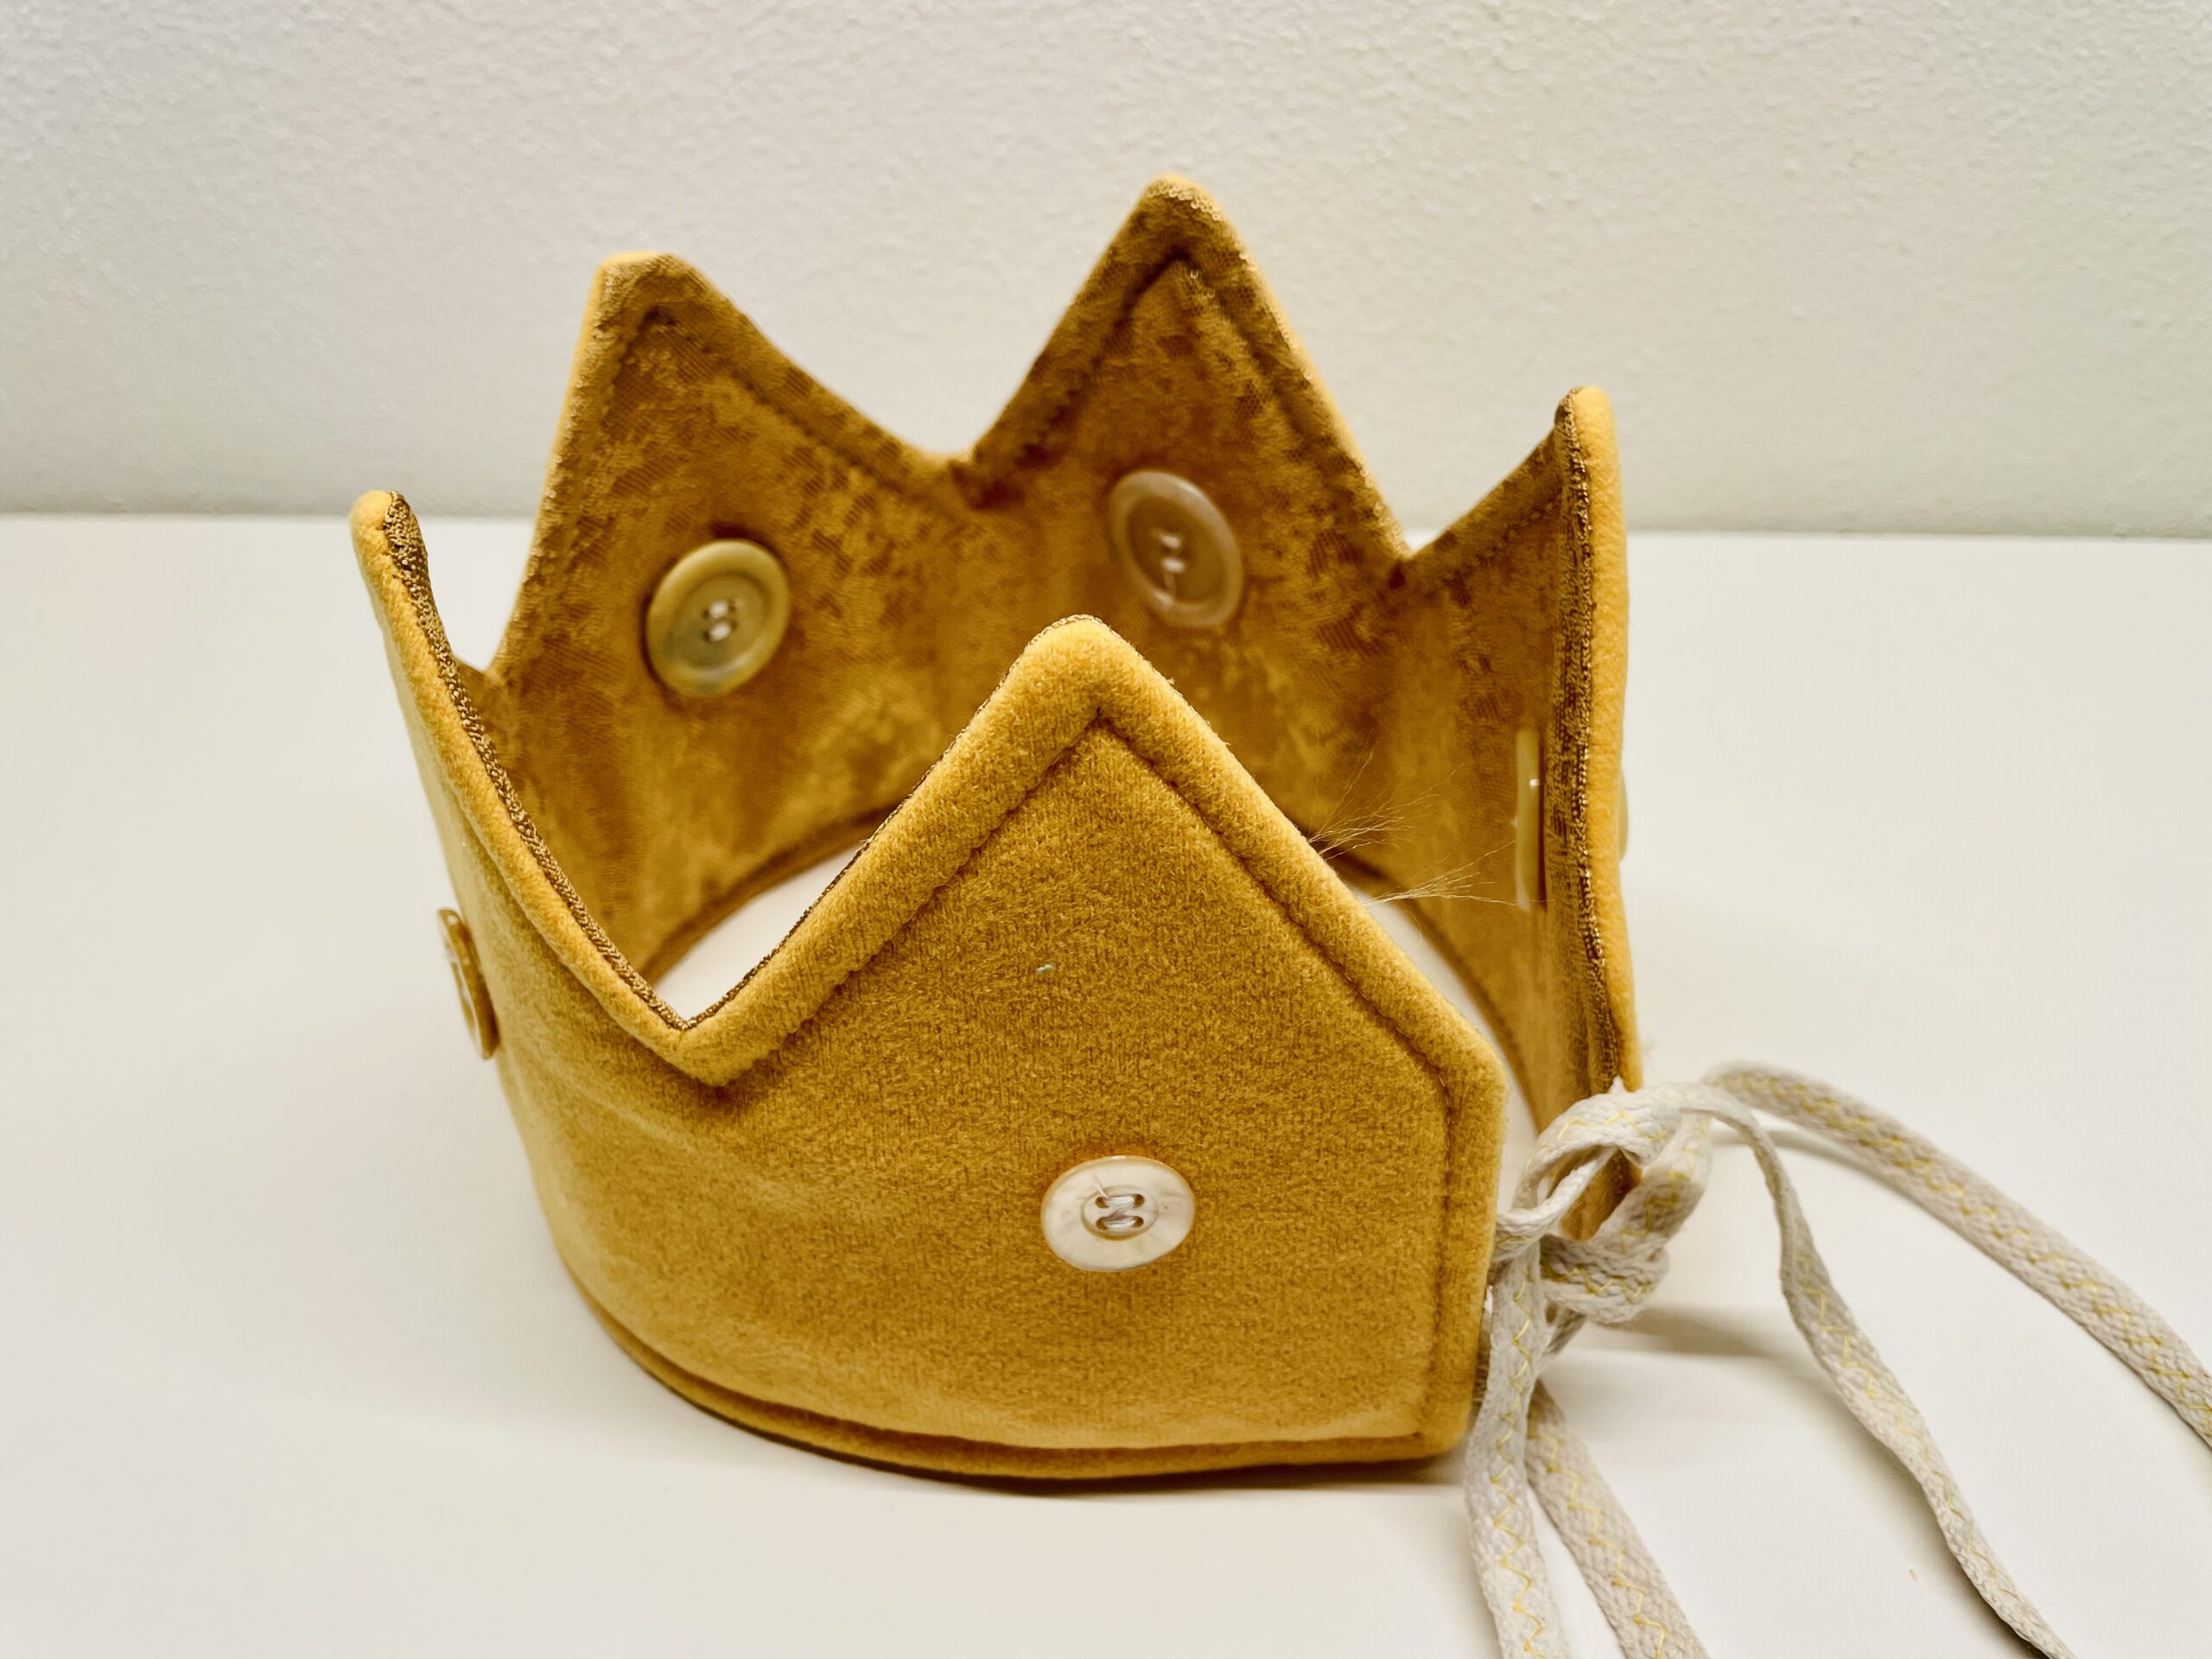


Have fun sewing.
The next birthday party can come! By the way, the crown is also a nice gift and can also be used to dress up for role playing or carnival.
Stay creative.




Materials
Directions
Get all the materials ready.


First print out the two templates once.


Cuts out the templates with the scissors.


Sticks it to each other on the side with the "double" bridge. Aligns the border lines so that they lie exactly on each other.


Uses a cotton fabric or fleece fabric for the crown. It should not be stretchy.
Since both sides of the fabric can be used as a "front side", you can also use different fabrics, patterns or motifs. Place the fabric so that the beautiful side points downwards. Place the crown template on it and cover the complete outline. Tip: On many fabrics ballpoint pen (for recording) can be easily recognized.


If the outline is painted, you can paint your sewing line right away. To do this, the template moves about half a centimetre from the edge inwards and paints a second line on your fabric. This runs completely parallel to the outside line.


You have to adjust the template again and again when repainting, because it is a bit larger than the required sewing line.


This is what the painted on the fabric should look like.


Cuts the "crown" out of the fabric properly with the fabric scissors. Then the first cut is already finished.


On the second outer fabric only the outline line is necessary. (On which fabric you mark the sewing line you can decide.) Cut also this fabric.


Both outer materials are now ready.


In addition, a stabilizing fleece is needed. For this you can also use a fleece cloth (new dishcloth or floor cloth).
Paint the border on the fleece fabric and cut it out.


To beautify the crown, you can place a different or similar-looking button under each zacke.
You can also sew these in retrospect, but then you can see the threads on the back. To have buttons on both sides where no threads can be seen, it would be good to sew the buttons before sewing the crown together. Choose a button for each pitch that you like.


First place the buttons where you want them. Buttons that lie in the middle of the crown will later be visible "front" on the crown.


Both fabric parts can also get buttons.


With the sewing machine, each button can be sewn very quickly. However, some sewing experience is good for this.
This is how you go about it:
If the transport feet first lower on the sewing machine, the fabric remains lying when sewing.
Set the stitch to "Zick Zack".
Places the button directly under the sewing feet.
Move the needle with the hand-rotating wheel and let it pierce into a hole.
Turn the rotary wheel further and make the first stitch, which then punches into the second button hole. (The first stitch is sewn!)
Now you can continue "sew" with the hand-rotating wheel or you operate the foot pedal of the sewing machine carefully and very slowly. Both are possible.
Make several stitches until the button is well sewn.
Raise the little foot again and push the fabric forward so that you can cut the thread directly on the button. Leave the thread on it and first sew on the other buttons. This thread can be cut off at the end.


At the front of the crown, on which no sewing line was painted, the fleece can already lie under the fabric when sewing on the button. So this is also fixed.


Sew all the buttons.


At the end of the last button turn off the fabric and cut off the lower threads with scissors. Additional sewing is not necessary.


That's what the back could look like.
Now put the transport feet of the sewing machine back up!


In order to adjust the crown to the child's head, ribbons are sewn on. Cuts them to a length of 24 cm. You need 4 ribbons.
You can also use shoelaces for this. You can see how these can be upgraded in the following steps. If you want to use them this way, simply skip the next steps.


So that the ribbons do not fray, knock it in half an inch and fix it with a pin. Stitch it across the tape.


Put the tape under the sewing machine and hold the pin in your hand. So you can hold the tape under the sewing machine feet. Make a few stitches with the hand turning wheel and possibly raise the little foot again if the tape is not transported further. Stitch a little further in the front again into the tape. Then you can sew along the tape with a zig-zag stitch. It looks particularly nice if you use a different coloured thread for this.


Here the tape is finished sewn.
It's enough if you flip one side of the band, because the other one "disappears" in the crown.


This way, embellish your shoelace band.


Now everything is ready.
Now place the crown parts on each other for sewing:
At the bottom is the fleece and on top is the crown cut without sewing line, with the beautiful side facing upwards! (You could have fixed these two parts together if you did this on the button!)
On it the outsides inwards the bands are put on. The uncleaned side of the tape shows outwards.


Fixes the two bands with two pins and sews on the edge with a straight stitch once over the bands, so they no longer slip.


Repeat this on the opposite side of the crown.


Place the other crown cut with the beautiful side down exactly on the other parts. The seam line must now be visible above.


Sticks everything well so that the parts can no longer slip.


At the straight lower line, a piece about 10 centimetres wide is marked at the height of the second point, which cannot be sewn as a turning opening.


Starts at the marking of the turning opening with the sewing of the crown. On the sewing line the crown can now easily be sewn together.


If you arrive at a corner while sewing, leave the needle in the fabric, lift the little foot briefly, turn the fabric so far, until you can continue sewing on the sewing line and lower the little foot again. Continue sewing to the next corner and drive the same way.


So you can sew the corners cleanly.


Sews all around until the second marker of the turning opening. Sews briefly the thread so that the seam does not open when turning.


The turning opening.


Before the crown is turned, you have to cut off the corners at the seams.


Even at the tips, the fabric is cut short. Later, the fabric can be shaped better than the lace.


At the inner points the fabric is cut to the seam, otherwise it "throws" later when the fabric is turned over.


Here you can also make several small incisions. Just make sure not to cut the seam!


Through the turning opening between the two beautiful fabric sides and the crown is arched outwards.


This is a bit difficult, maybe you can also use the tapes to help...


First turn the largest and then use a cooking spoon to bulge out the tacks.


Drive with the style of the wooden spoon into each jig.


Forms as well as it goes out the jigs.


You can also use a blunt pen to refine the points, but be careful not to put holes in the fabric.


This is how both sides of the crown look like.


The turning opening still has to be closed. Put the fabrics neatly on top of each other.


First close the opening with a pin.


The crown is now completely sewn again, so it gets stability and the turning opening is closed "invisible". Start sewing the complete straight bottom first. Start sewing at a corner for this.


The seam line runs the same way as the previously sewn line, only on the "beautiful" side. Again, raise the foot of the sewing machine and let the needle stick in the fabric when you turn the crown.


So you get a clean seam and the crown is very beautiful from both sides.


Both sides can now be seen for themselves. Decide on which "crowns" you want.


With the ribbons you can tie the crown together and put it on.


Have fun sewing.
The next birthday party can come! By the way, the crown is also a nice gift and can also be used to dress up for role playing or carnival.
Stay creative.


Follow us on Facebook , Instagram and Pinterest
Don't miss any more adventures: Our bottle mail


