Already from children's days one knows this craft technique. It is also known as "witch staircase" or "drawing harmonica".
It is folded here with two equally wide and equally long strips, which are always placed crosswise on each other and folded. With thin paper like newspaper, this is quite easy. However, it is necessary to do some practice, because the sequence of folding steps is always the same, but often not so obvious for children. Try it out, the individual steps are explained step by step here. The flame and the wick are not a big challenge for children who have folded the candle at first. Look at it and enjoy trying it out.
Media Education for Kindergarten and Hort

Relief in everyday life, targeted promotion of individual children, independent learning and - without any pre-knowledge already usable by the youngest!
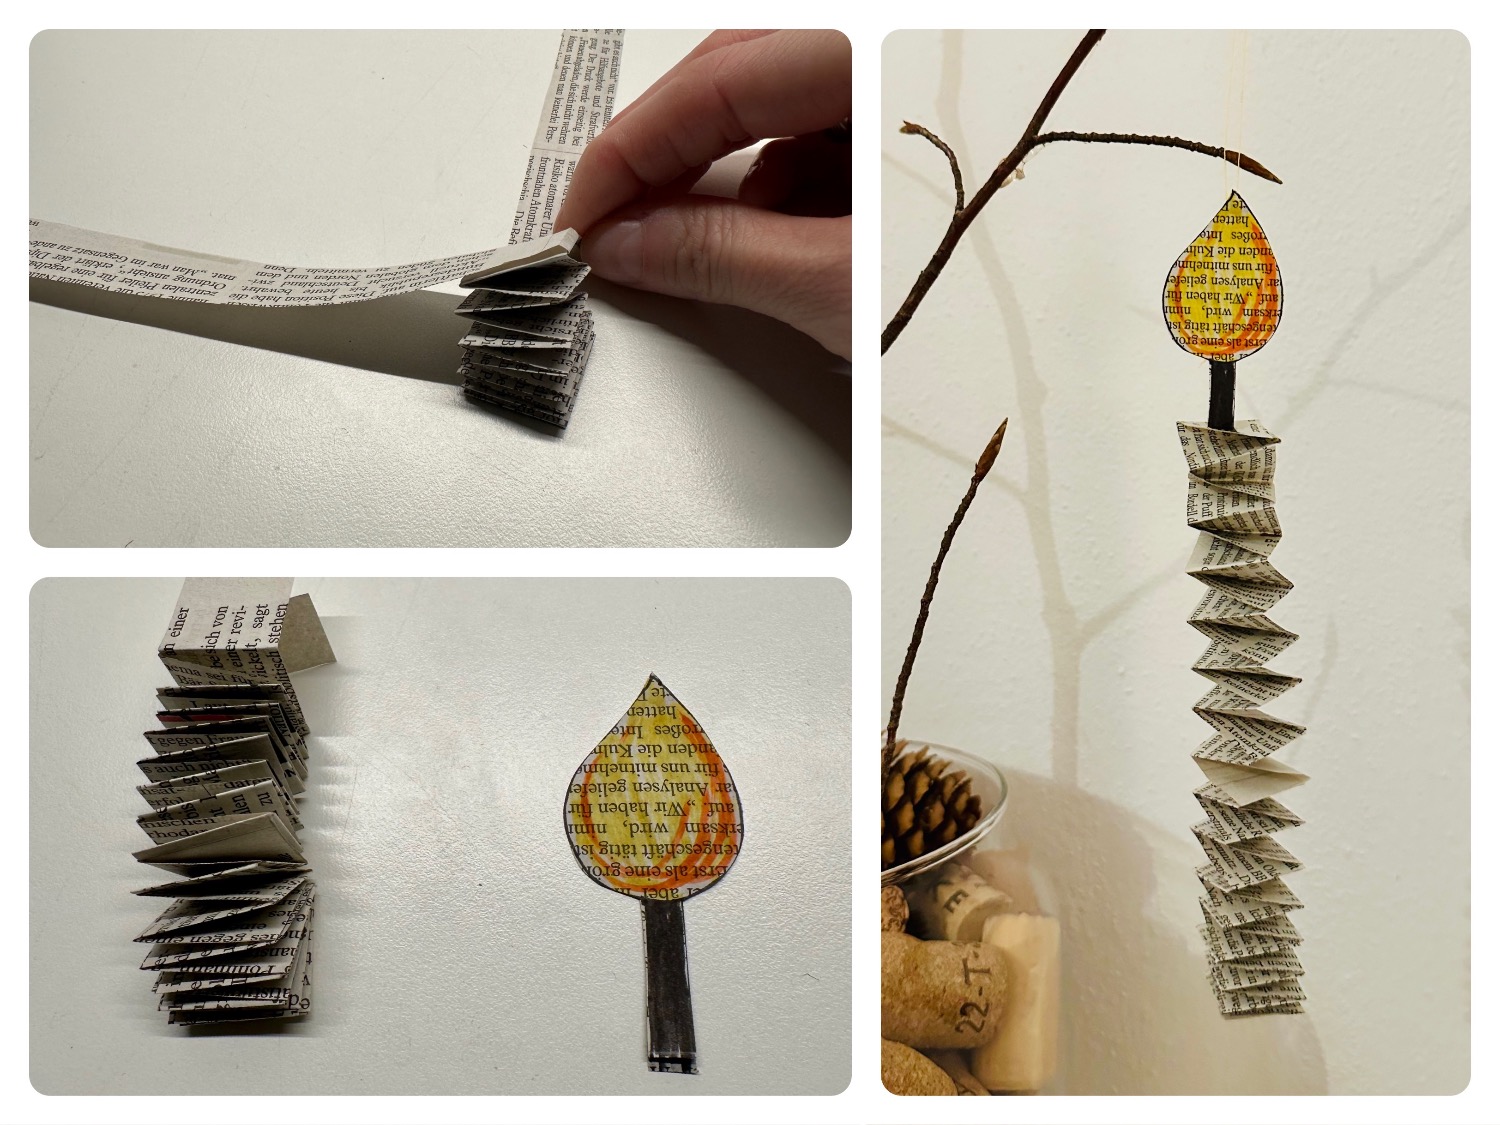
Get all the craft materials ready.
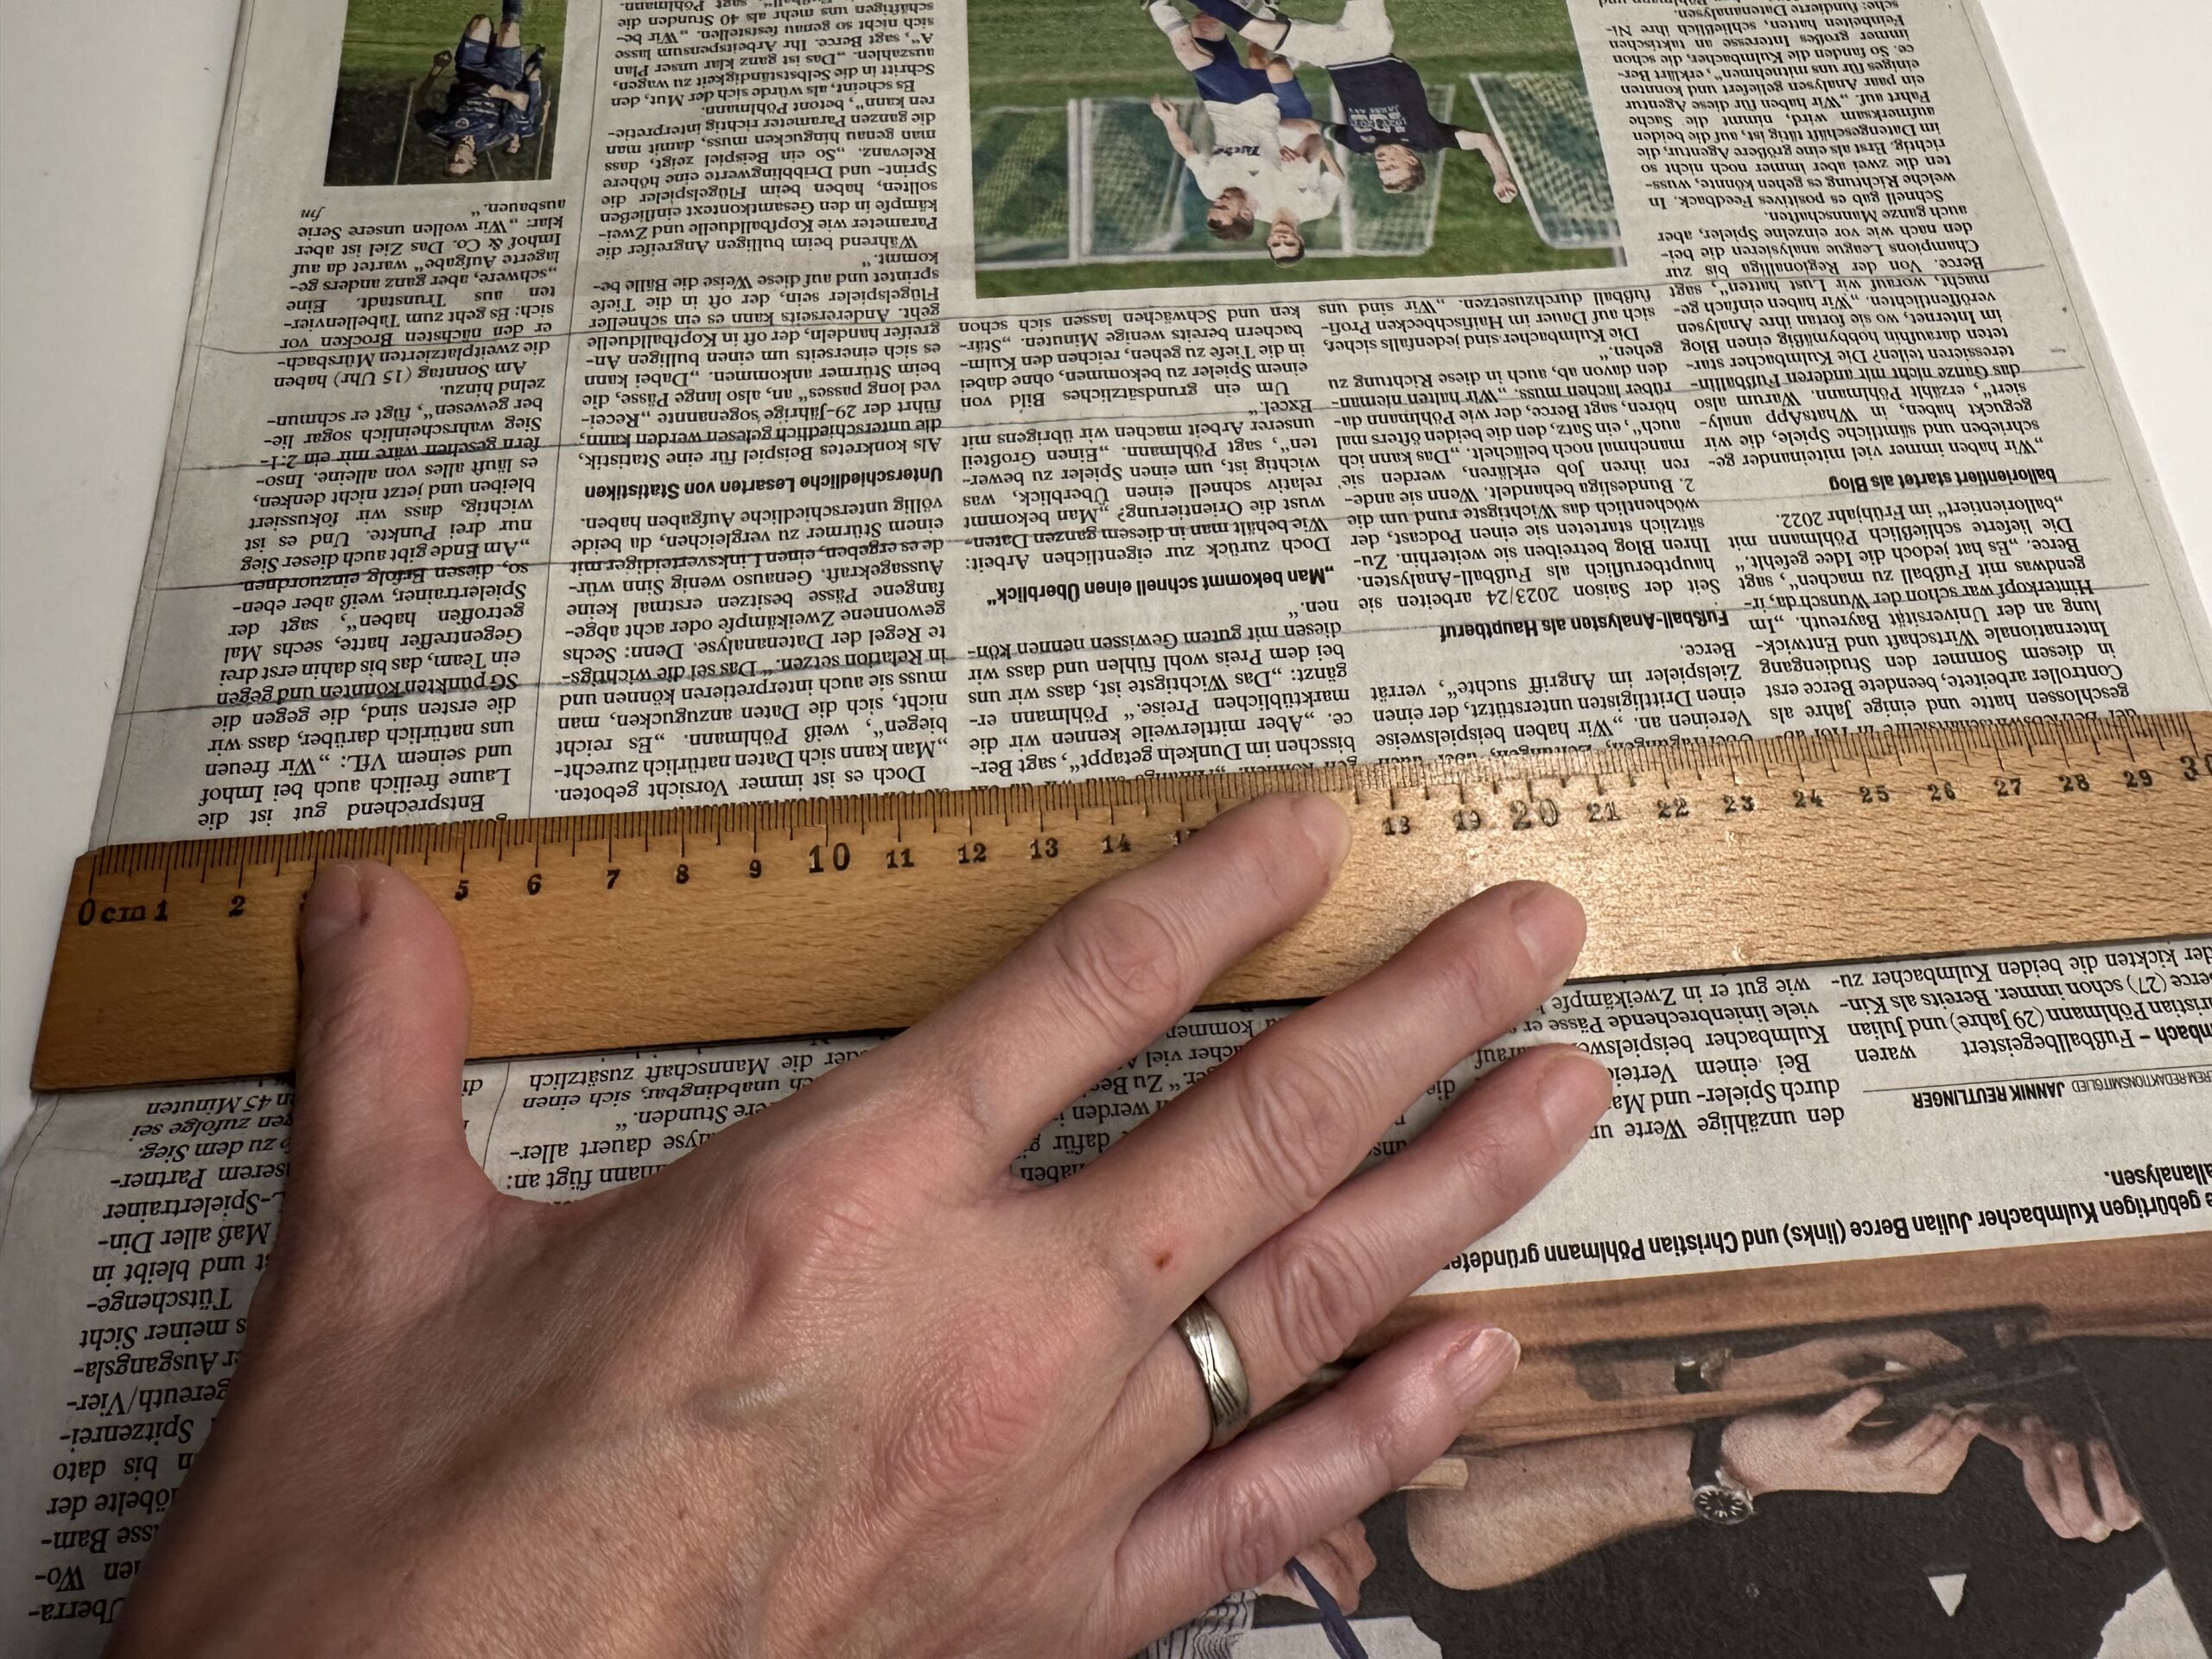
Take a newspaper and put it across you. One side is closed. The paper is double. Now take a long ruler. Measure two to three centimeters wide stripes (you can use the lines of the texts as lines. So you get straight strokes.) For a candle you need 2 stripes.
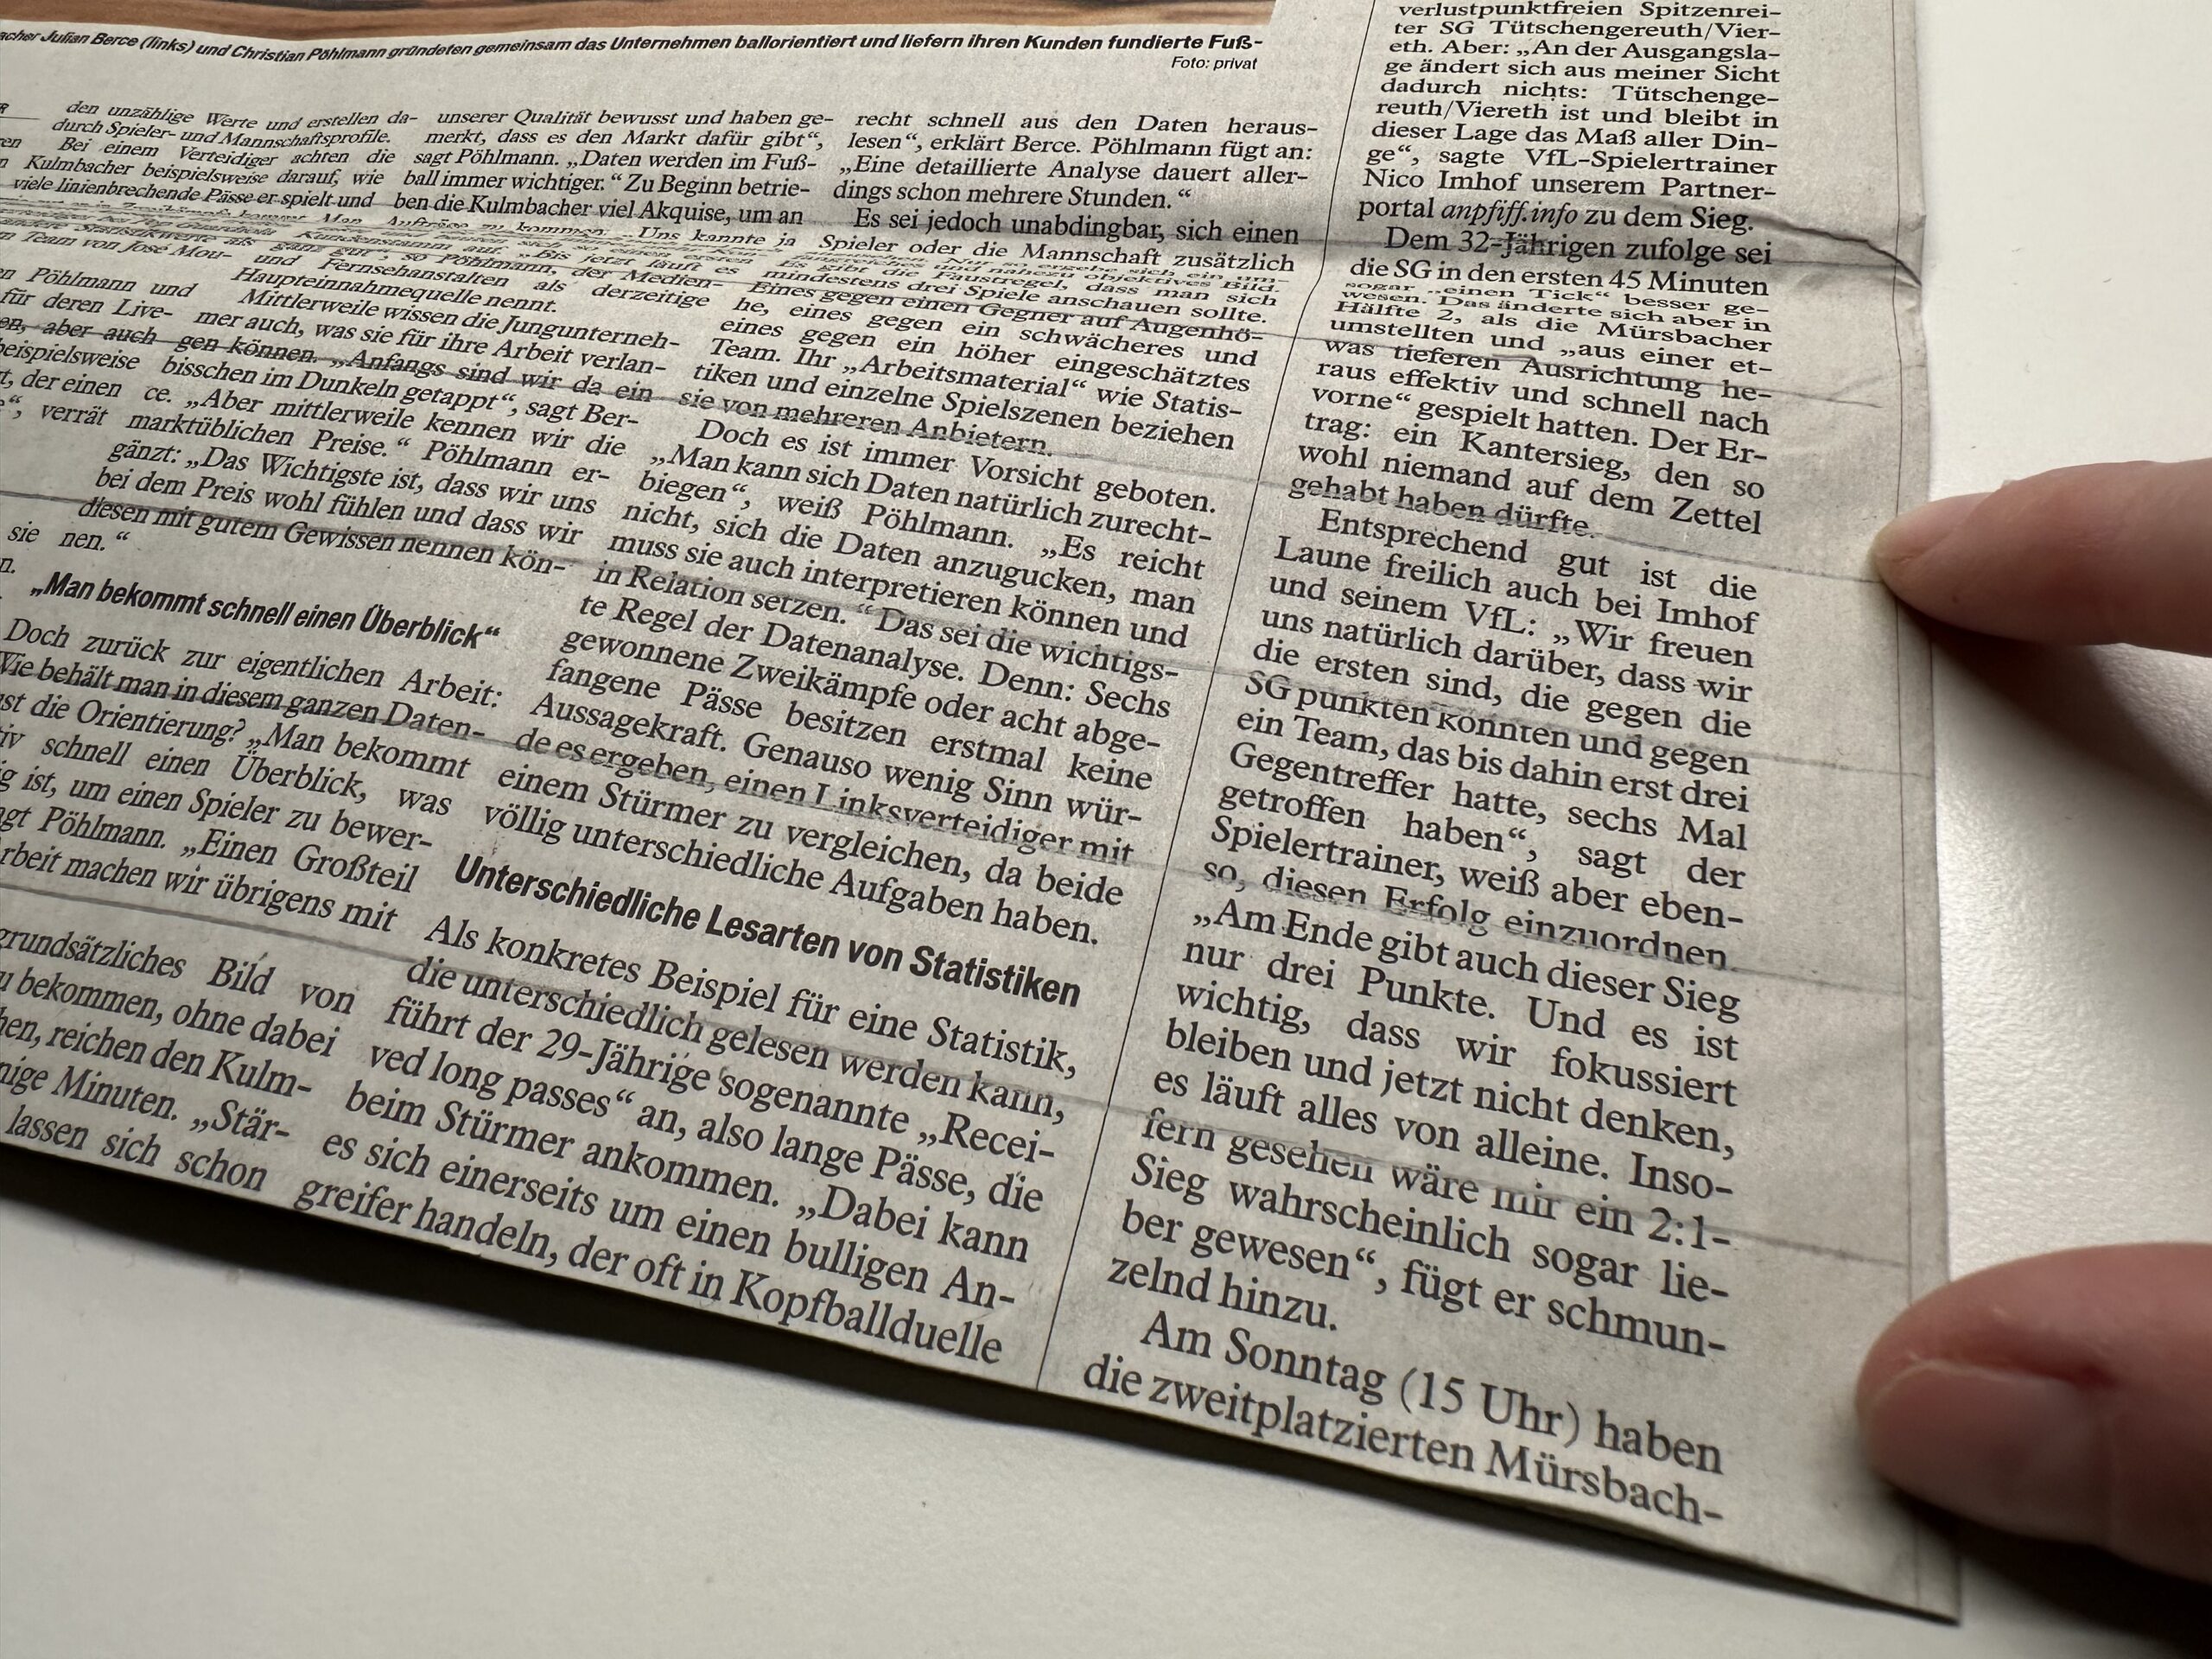
That's what your painted stripes look like.


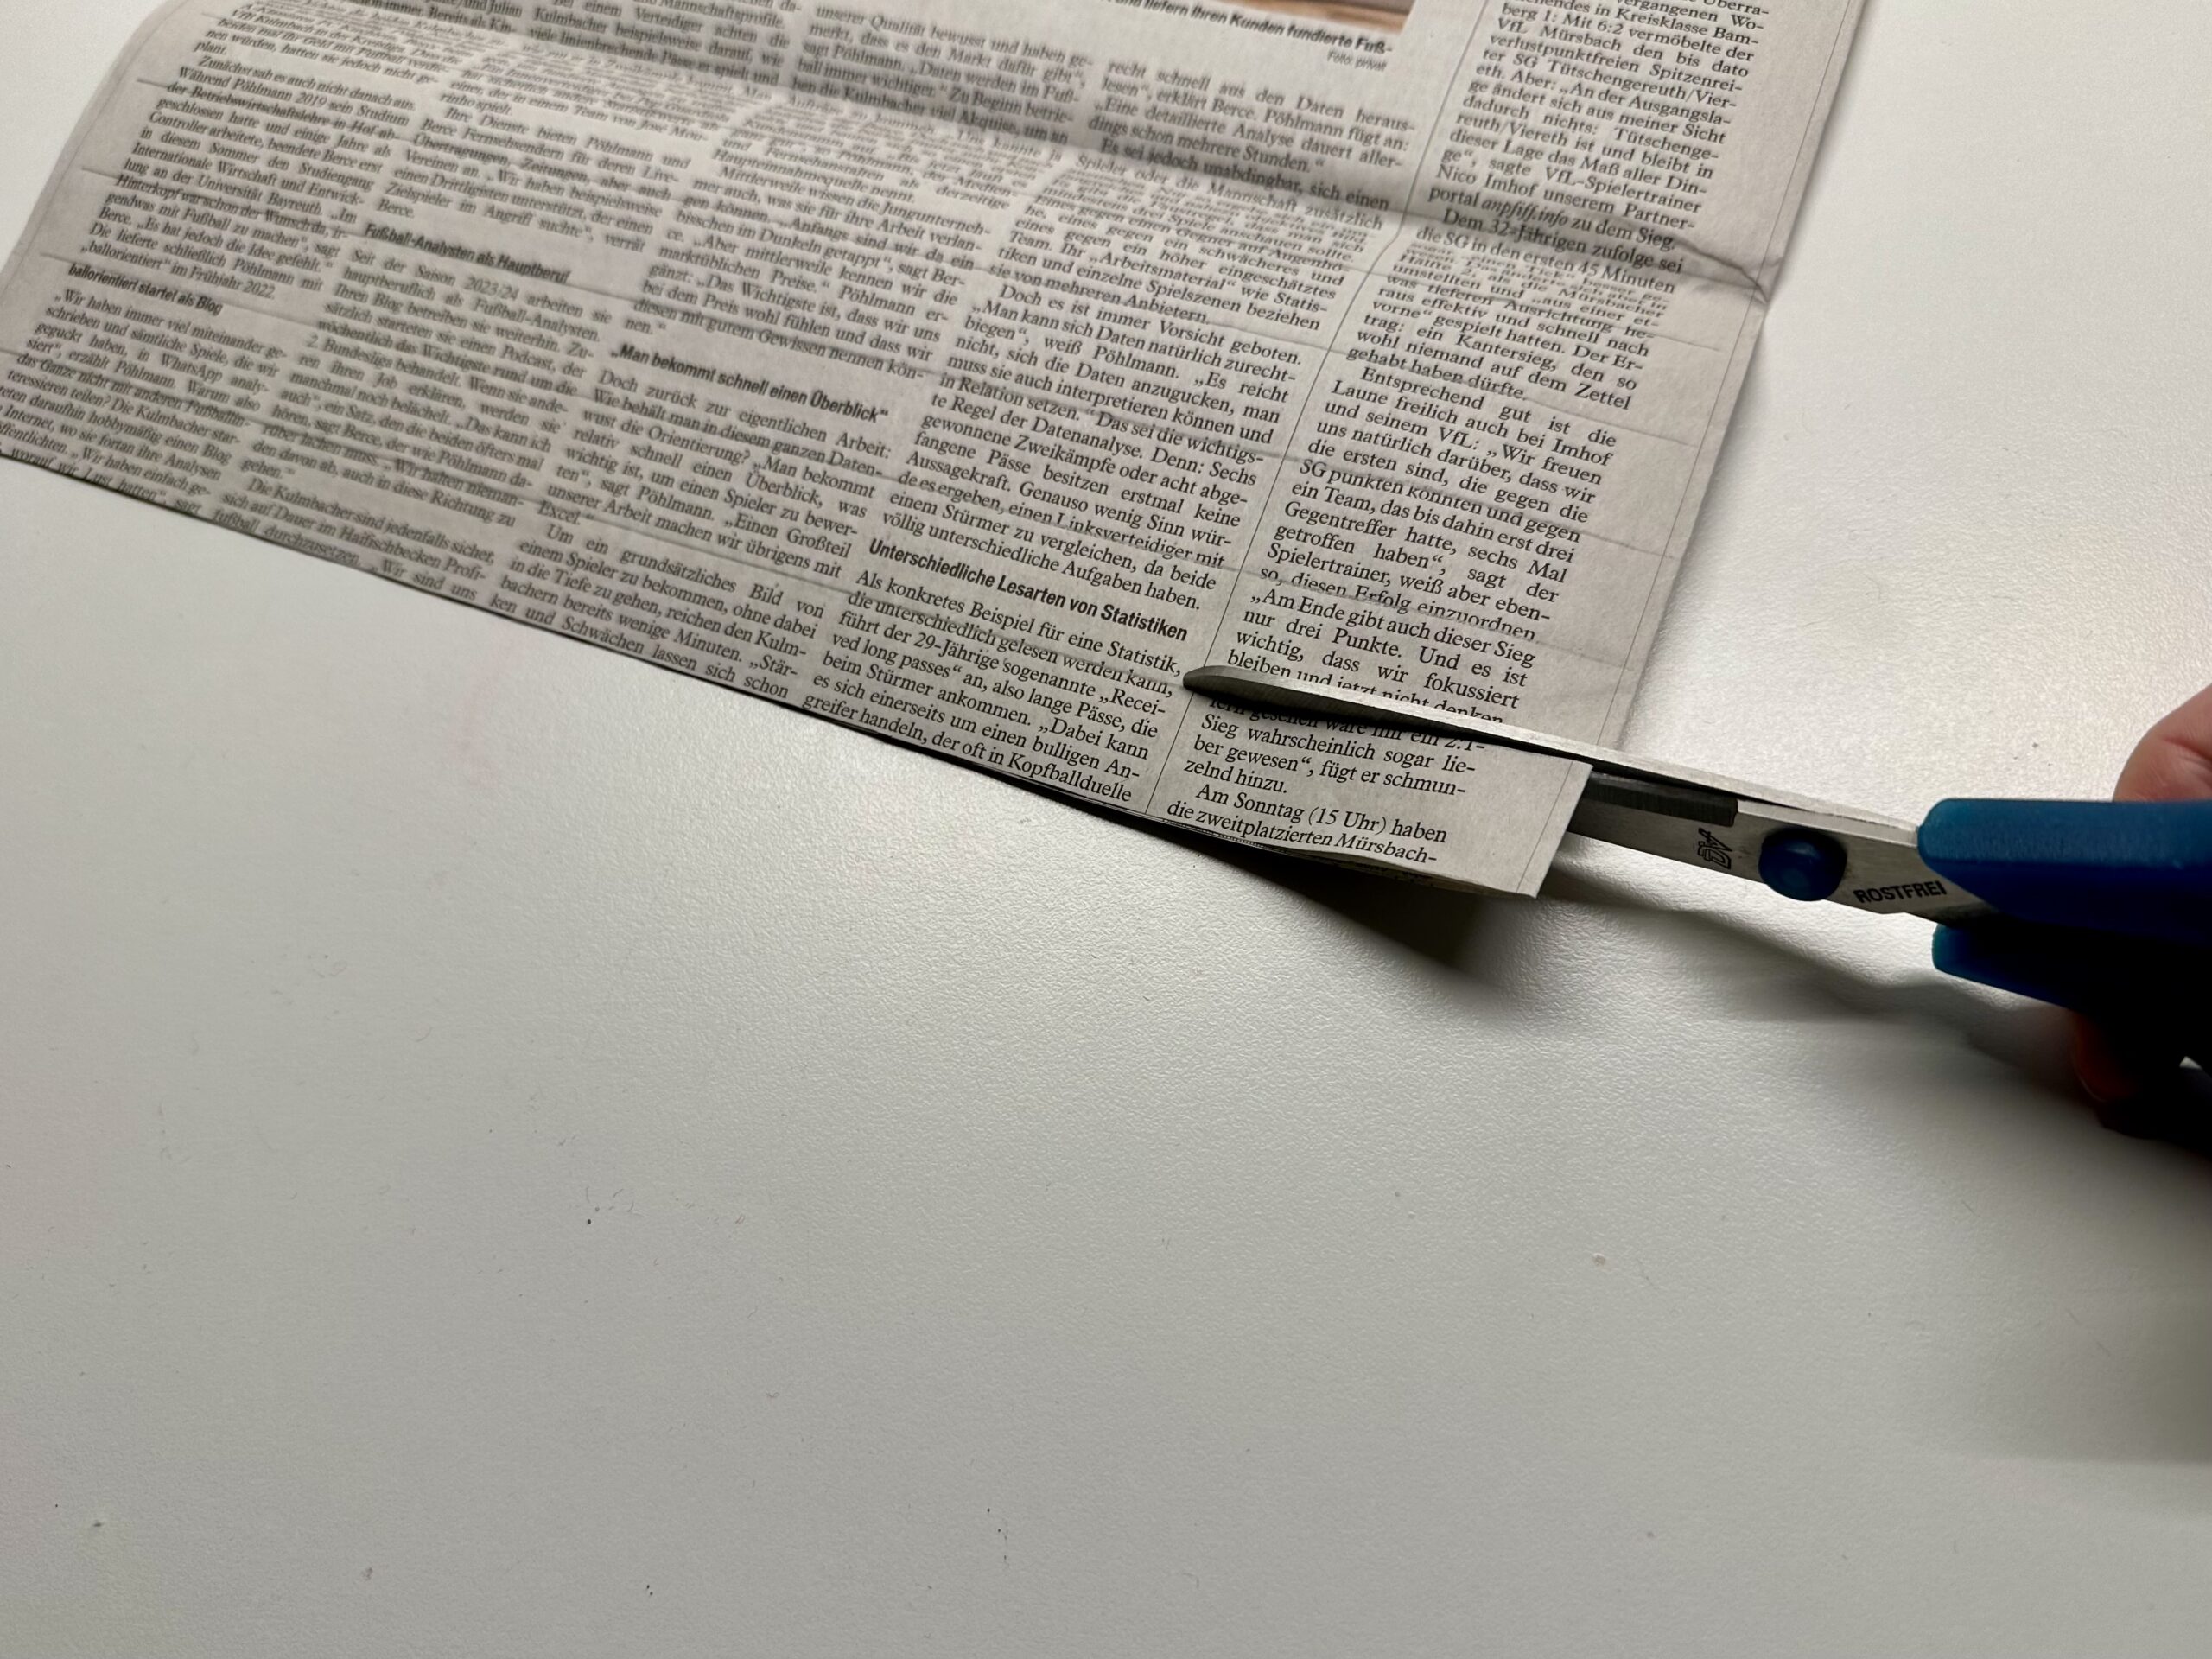
Cut the strips with a pair of scissors.


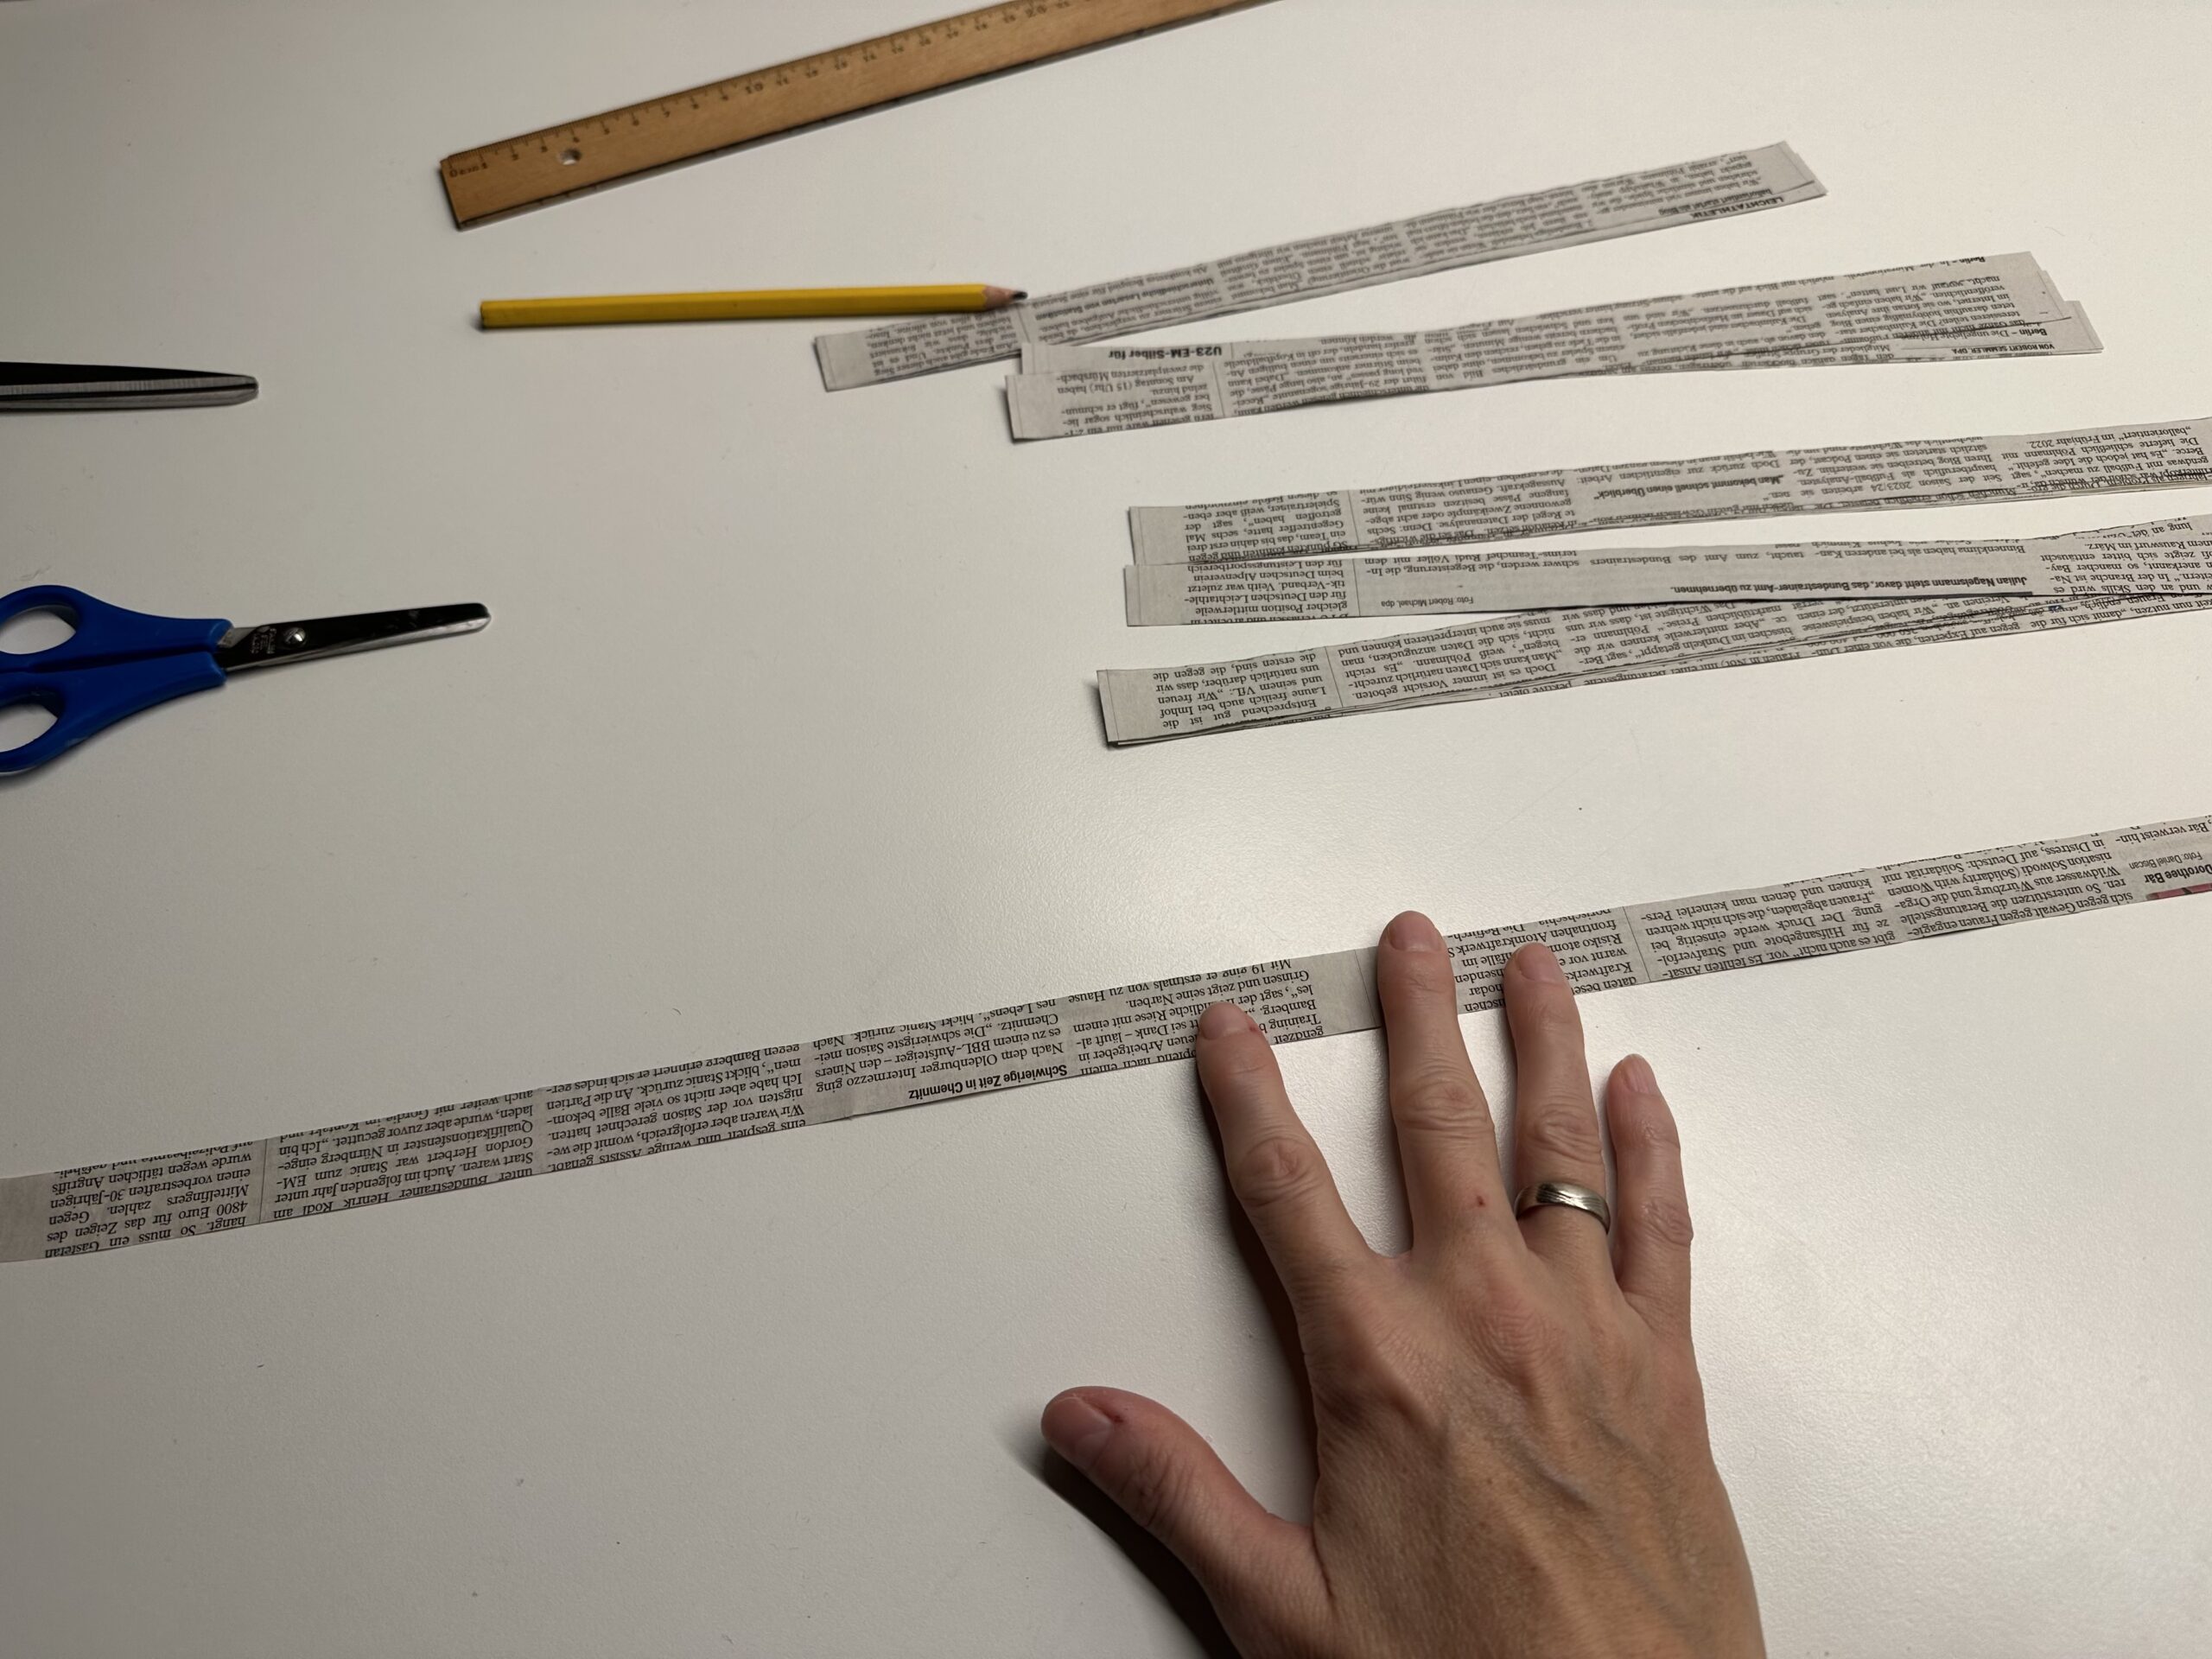
For a candle you need two equally long stripes.
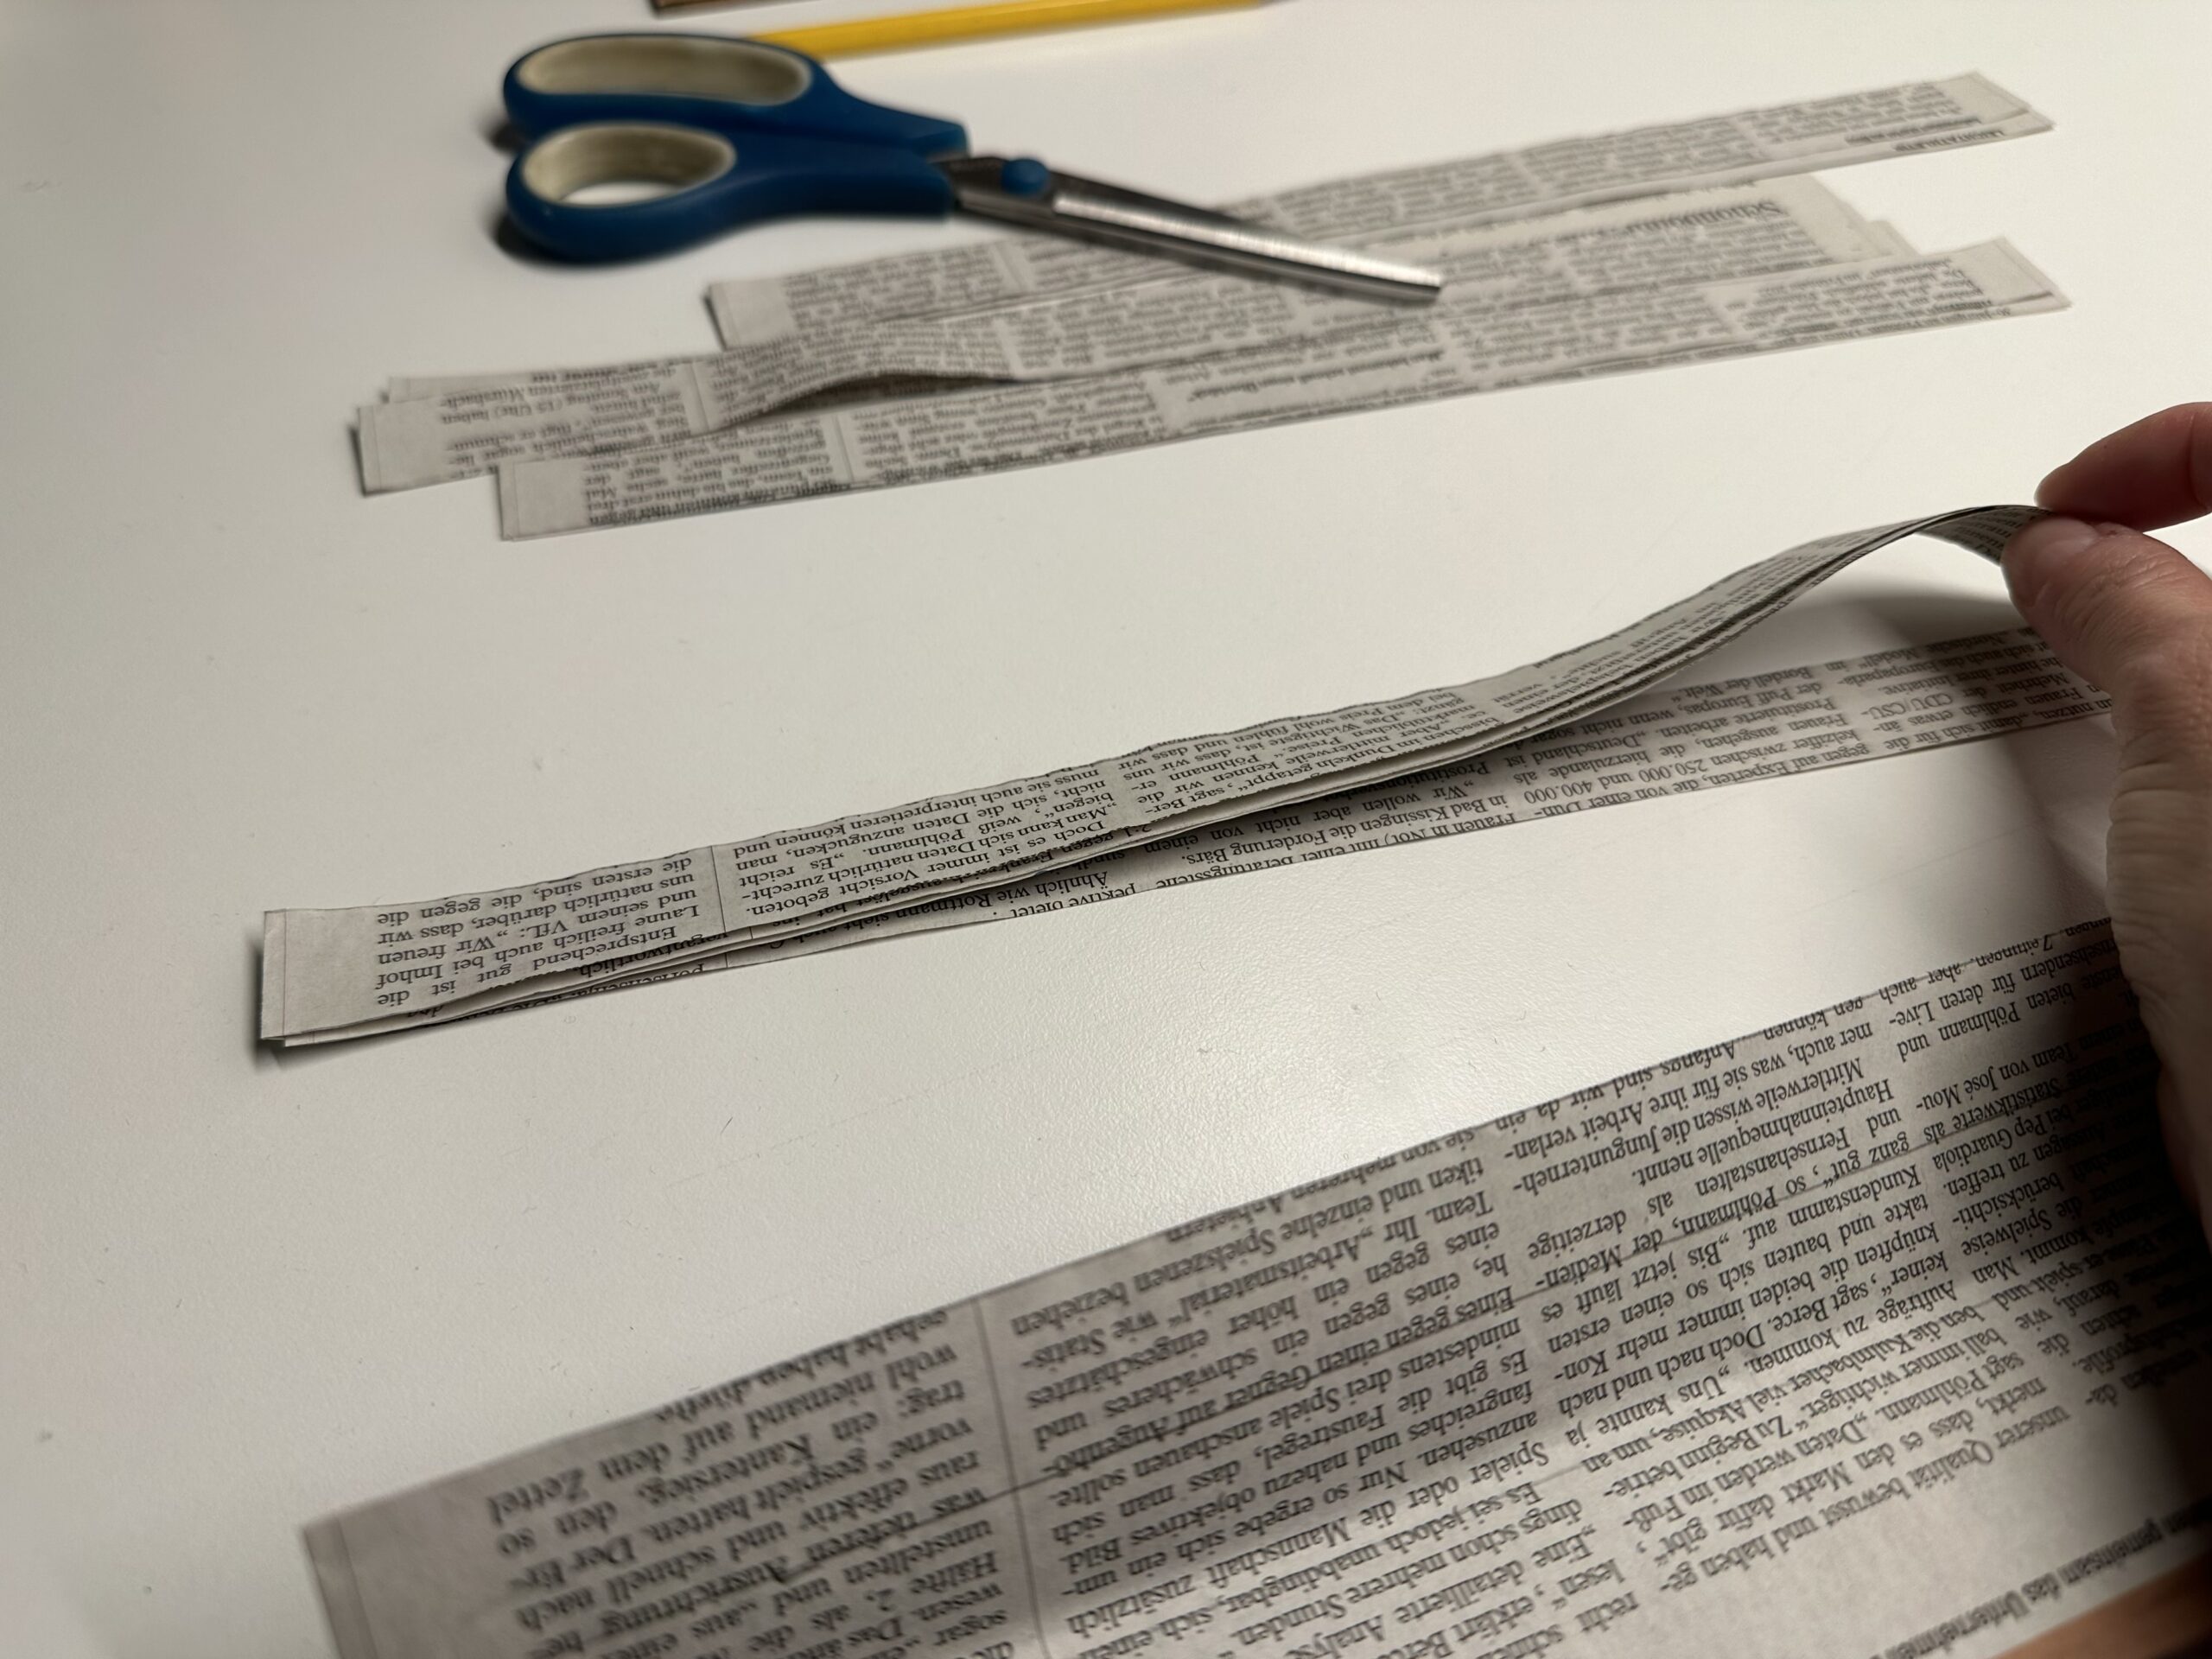


Now fold the double stripe apart.


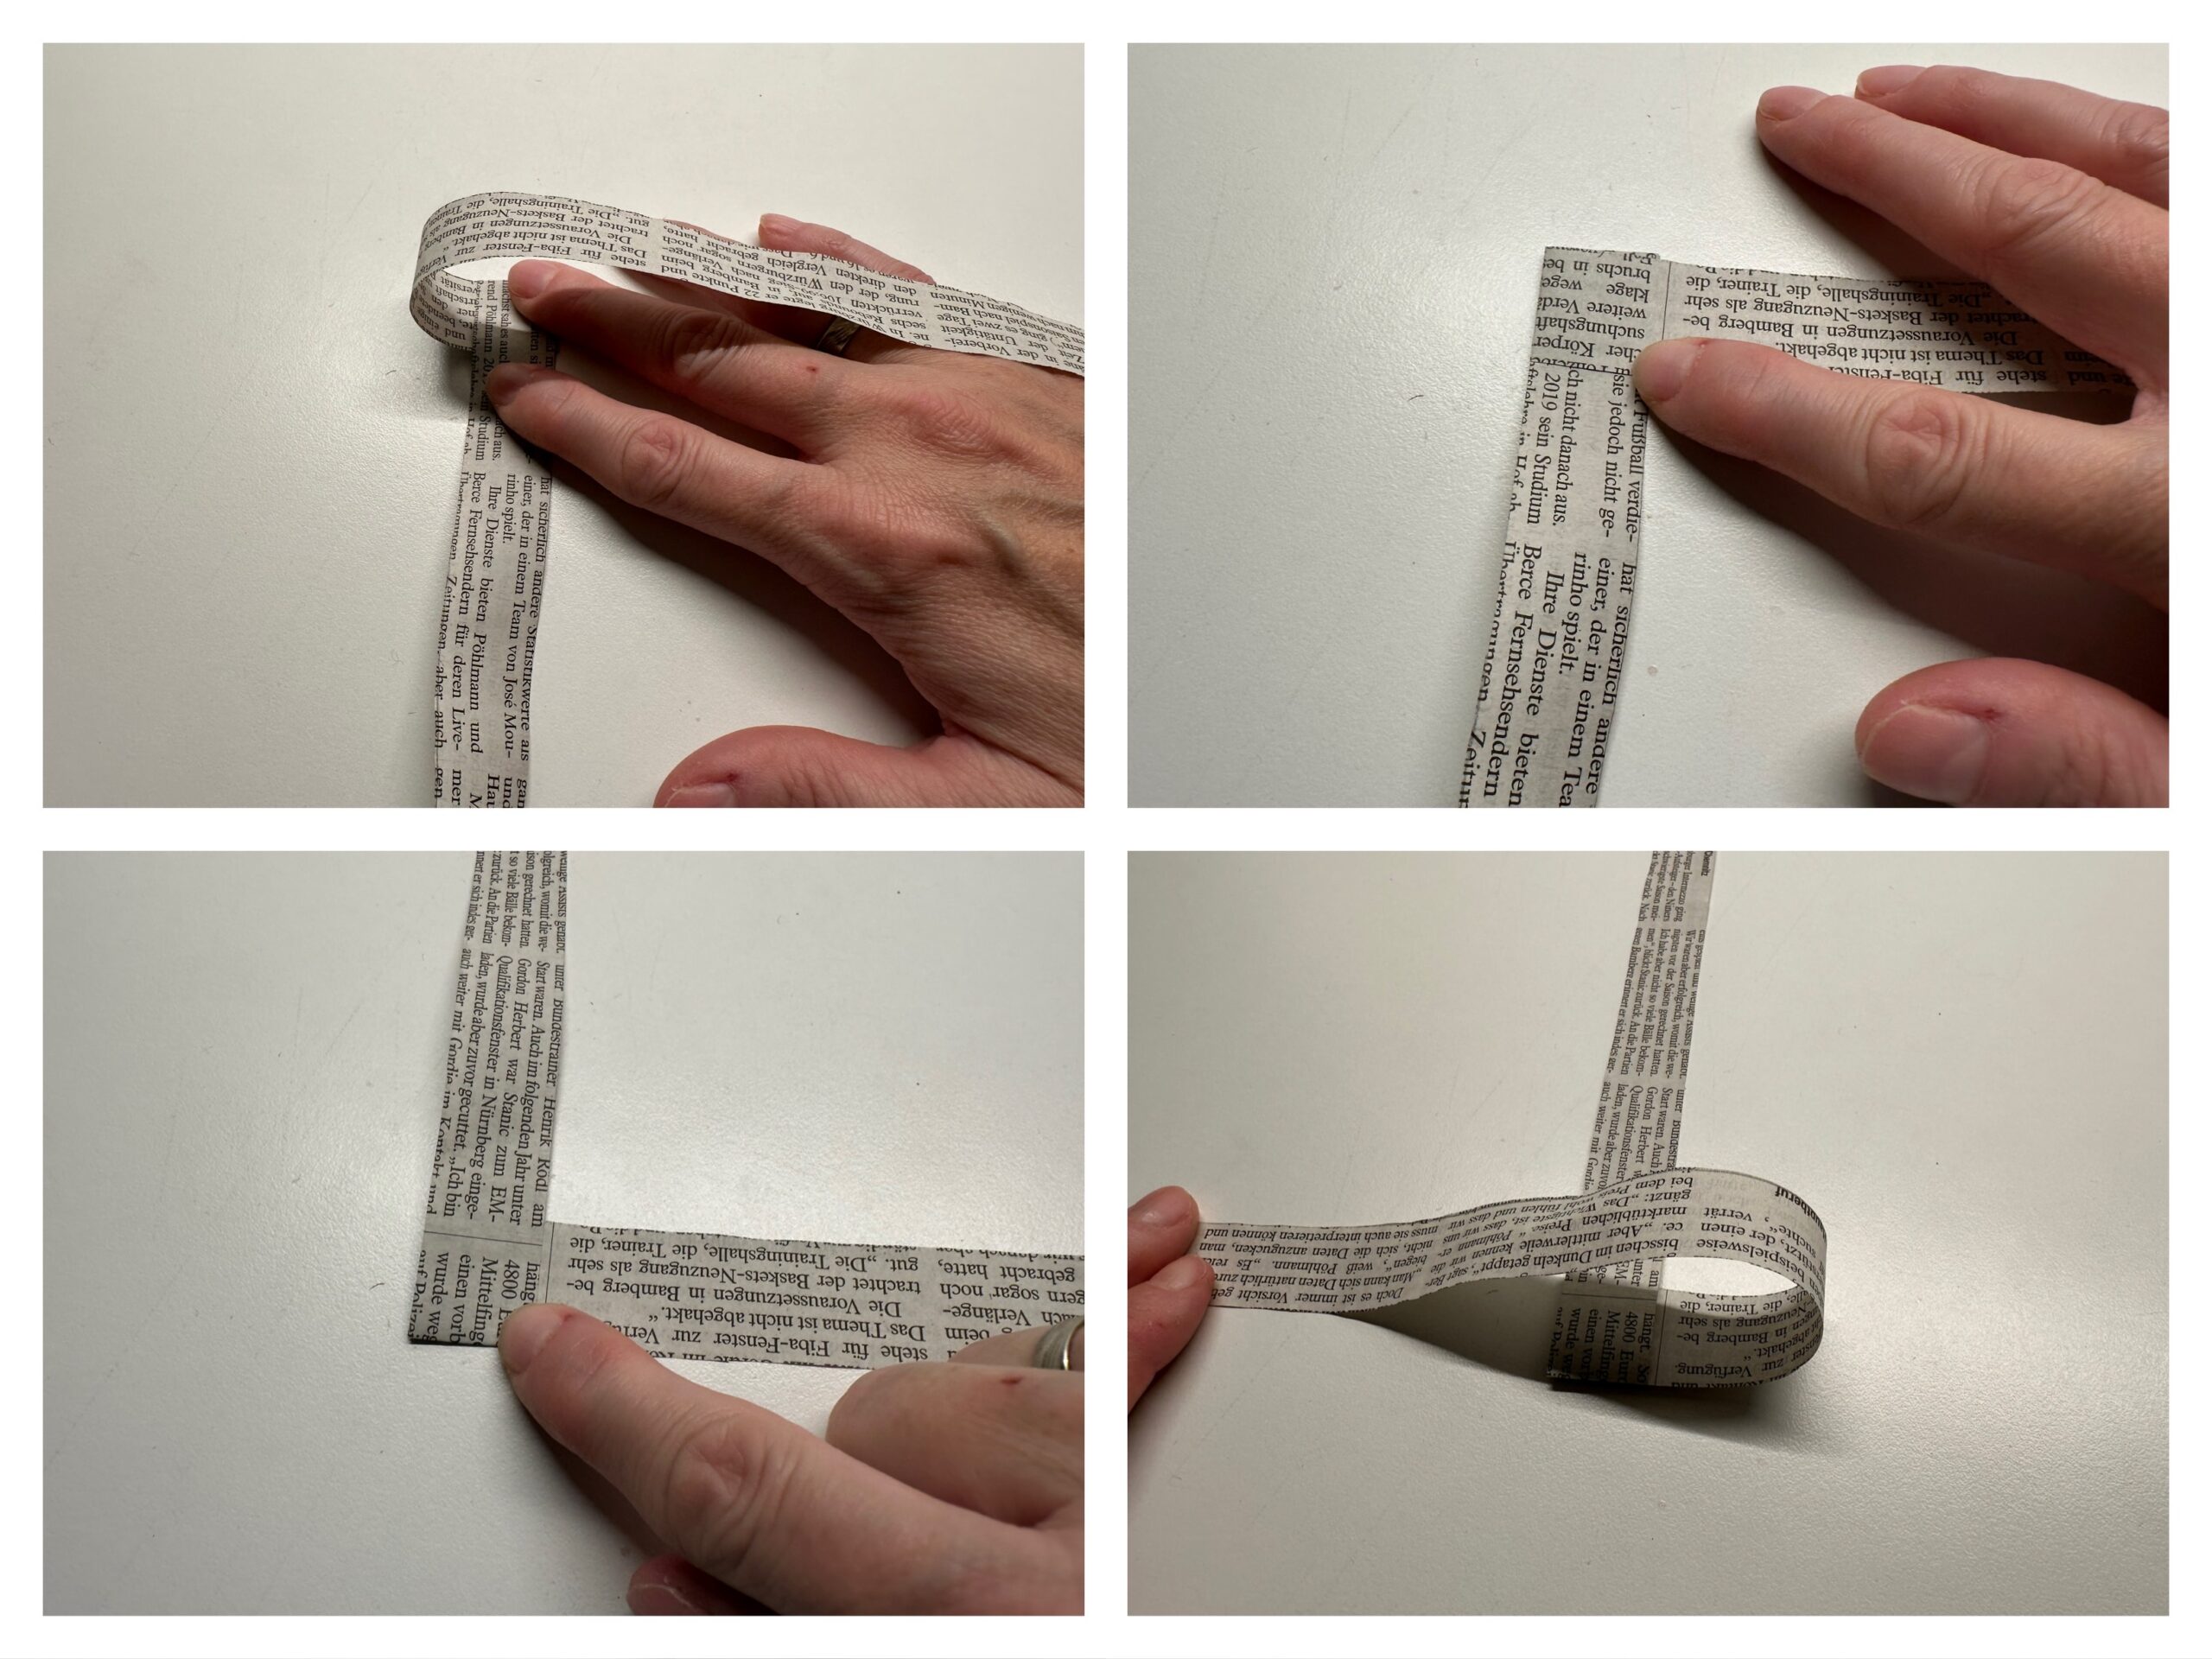
Set up two equally wide stripes, with which you fold your first candle. One strip points upwards and the other one lies across you. Both stripes are placed on one side and glued together. Then take the cross-sectional strip and fold it onto the opposite side.
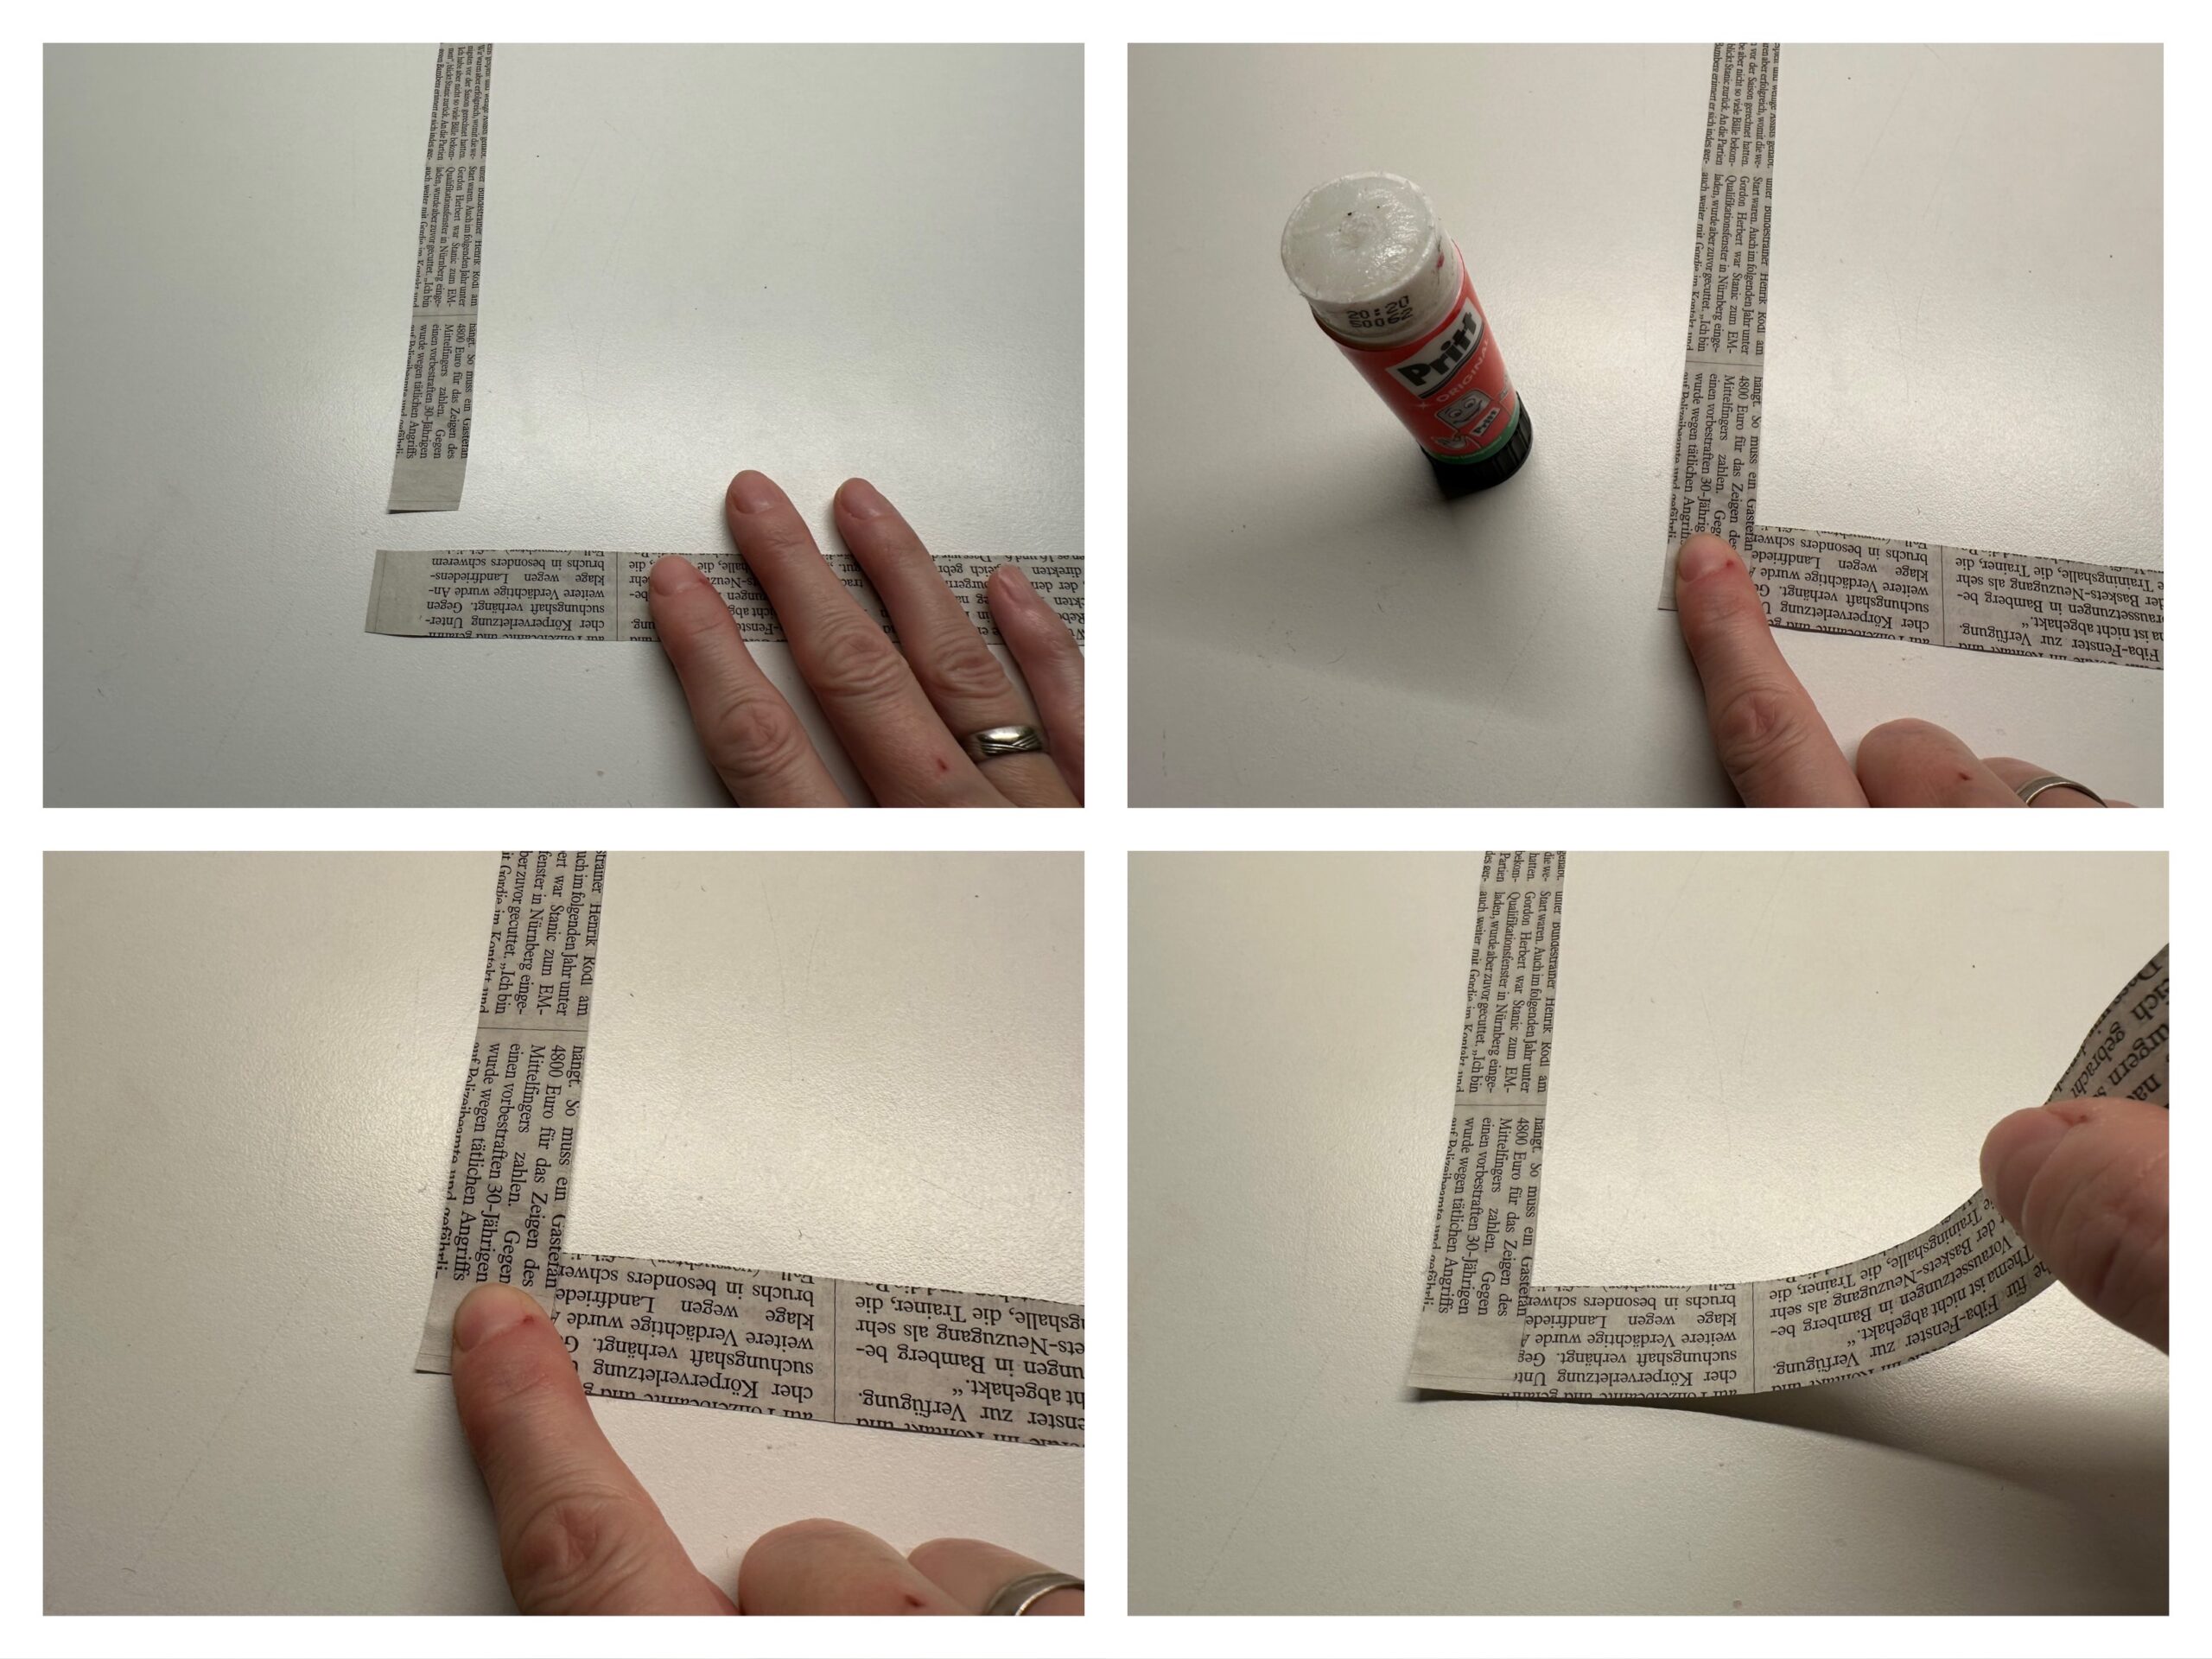


The strip is folded up to the stripe lying on top, on the other side. Removes the folded fracture.
Then take the strip lying up and fold it down. Strip this fracture smoothly as well.
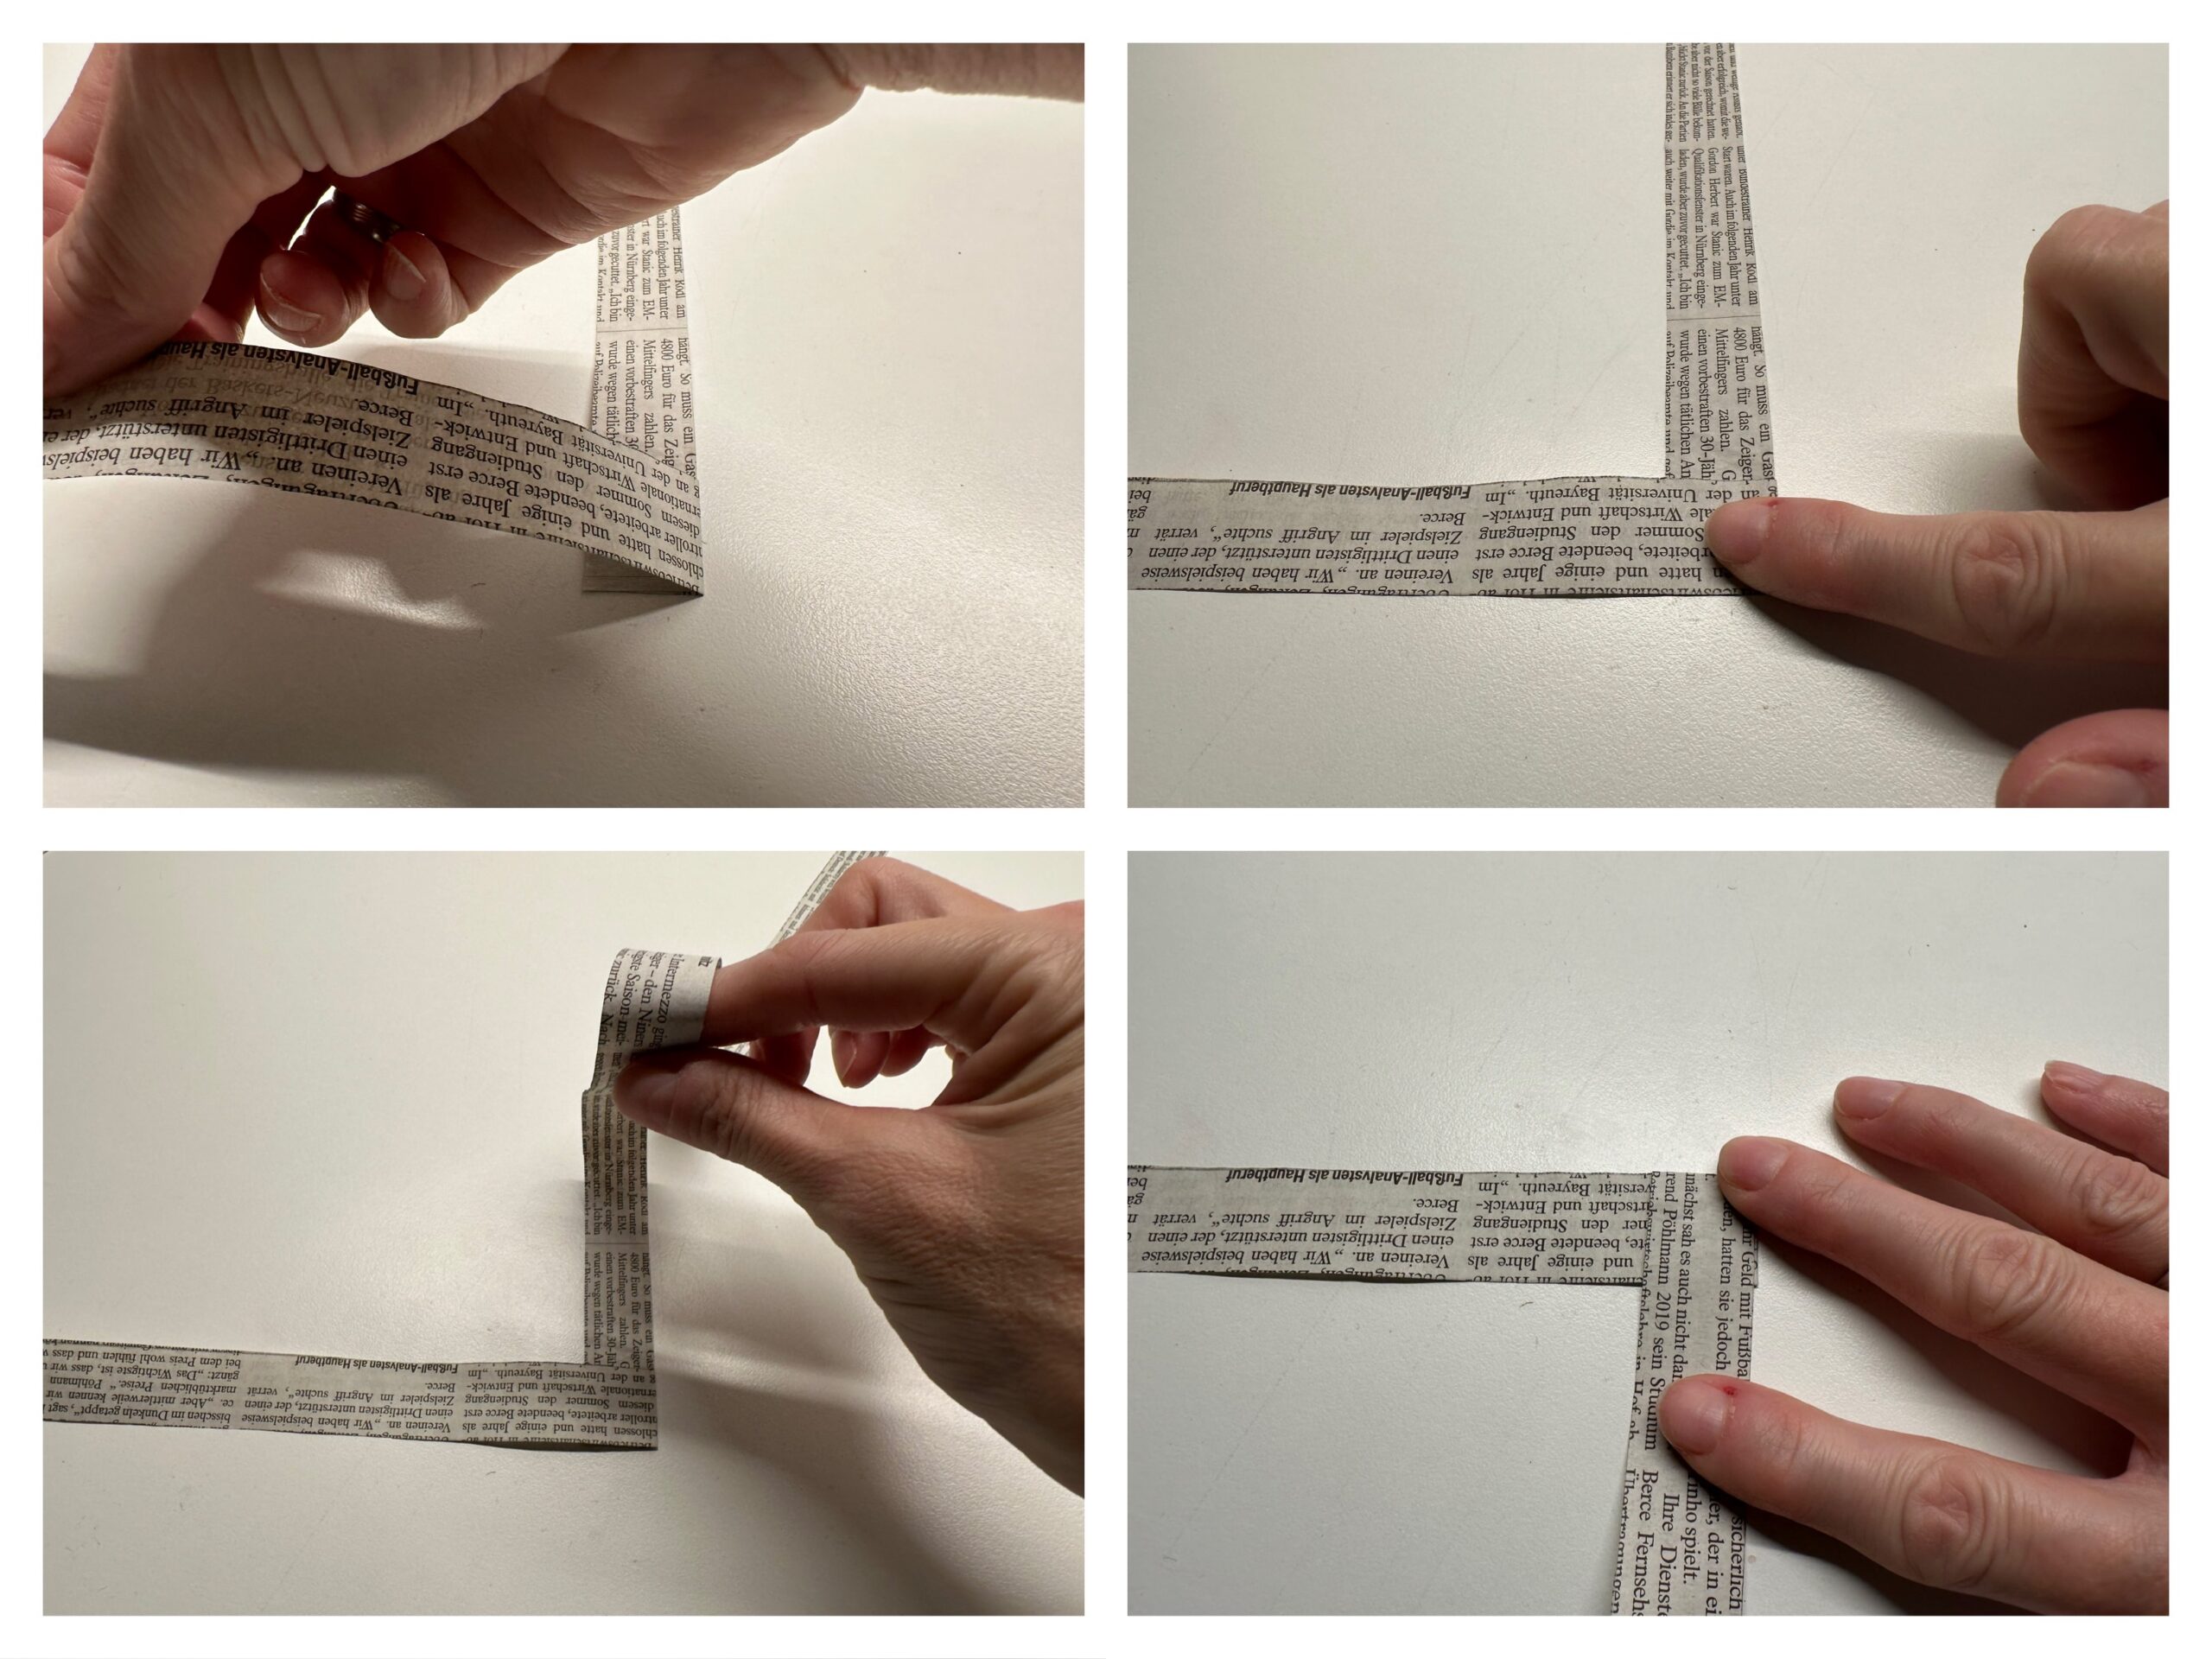


Fold the next strip from left to right and the next strip from bottom to top.
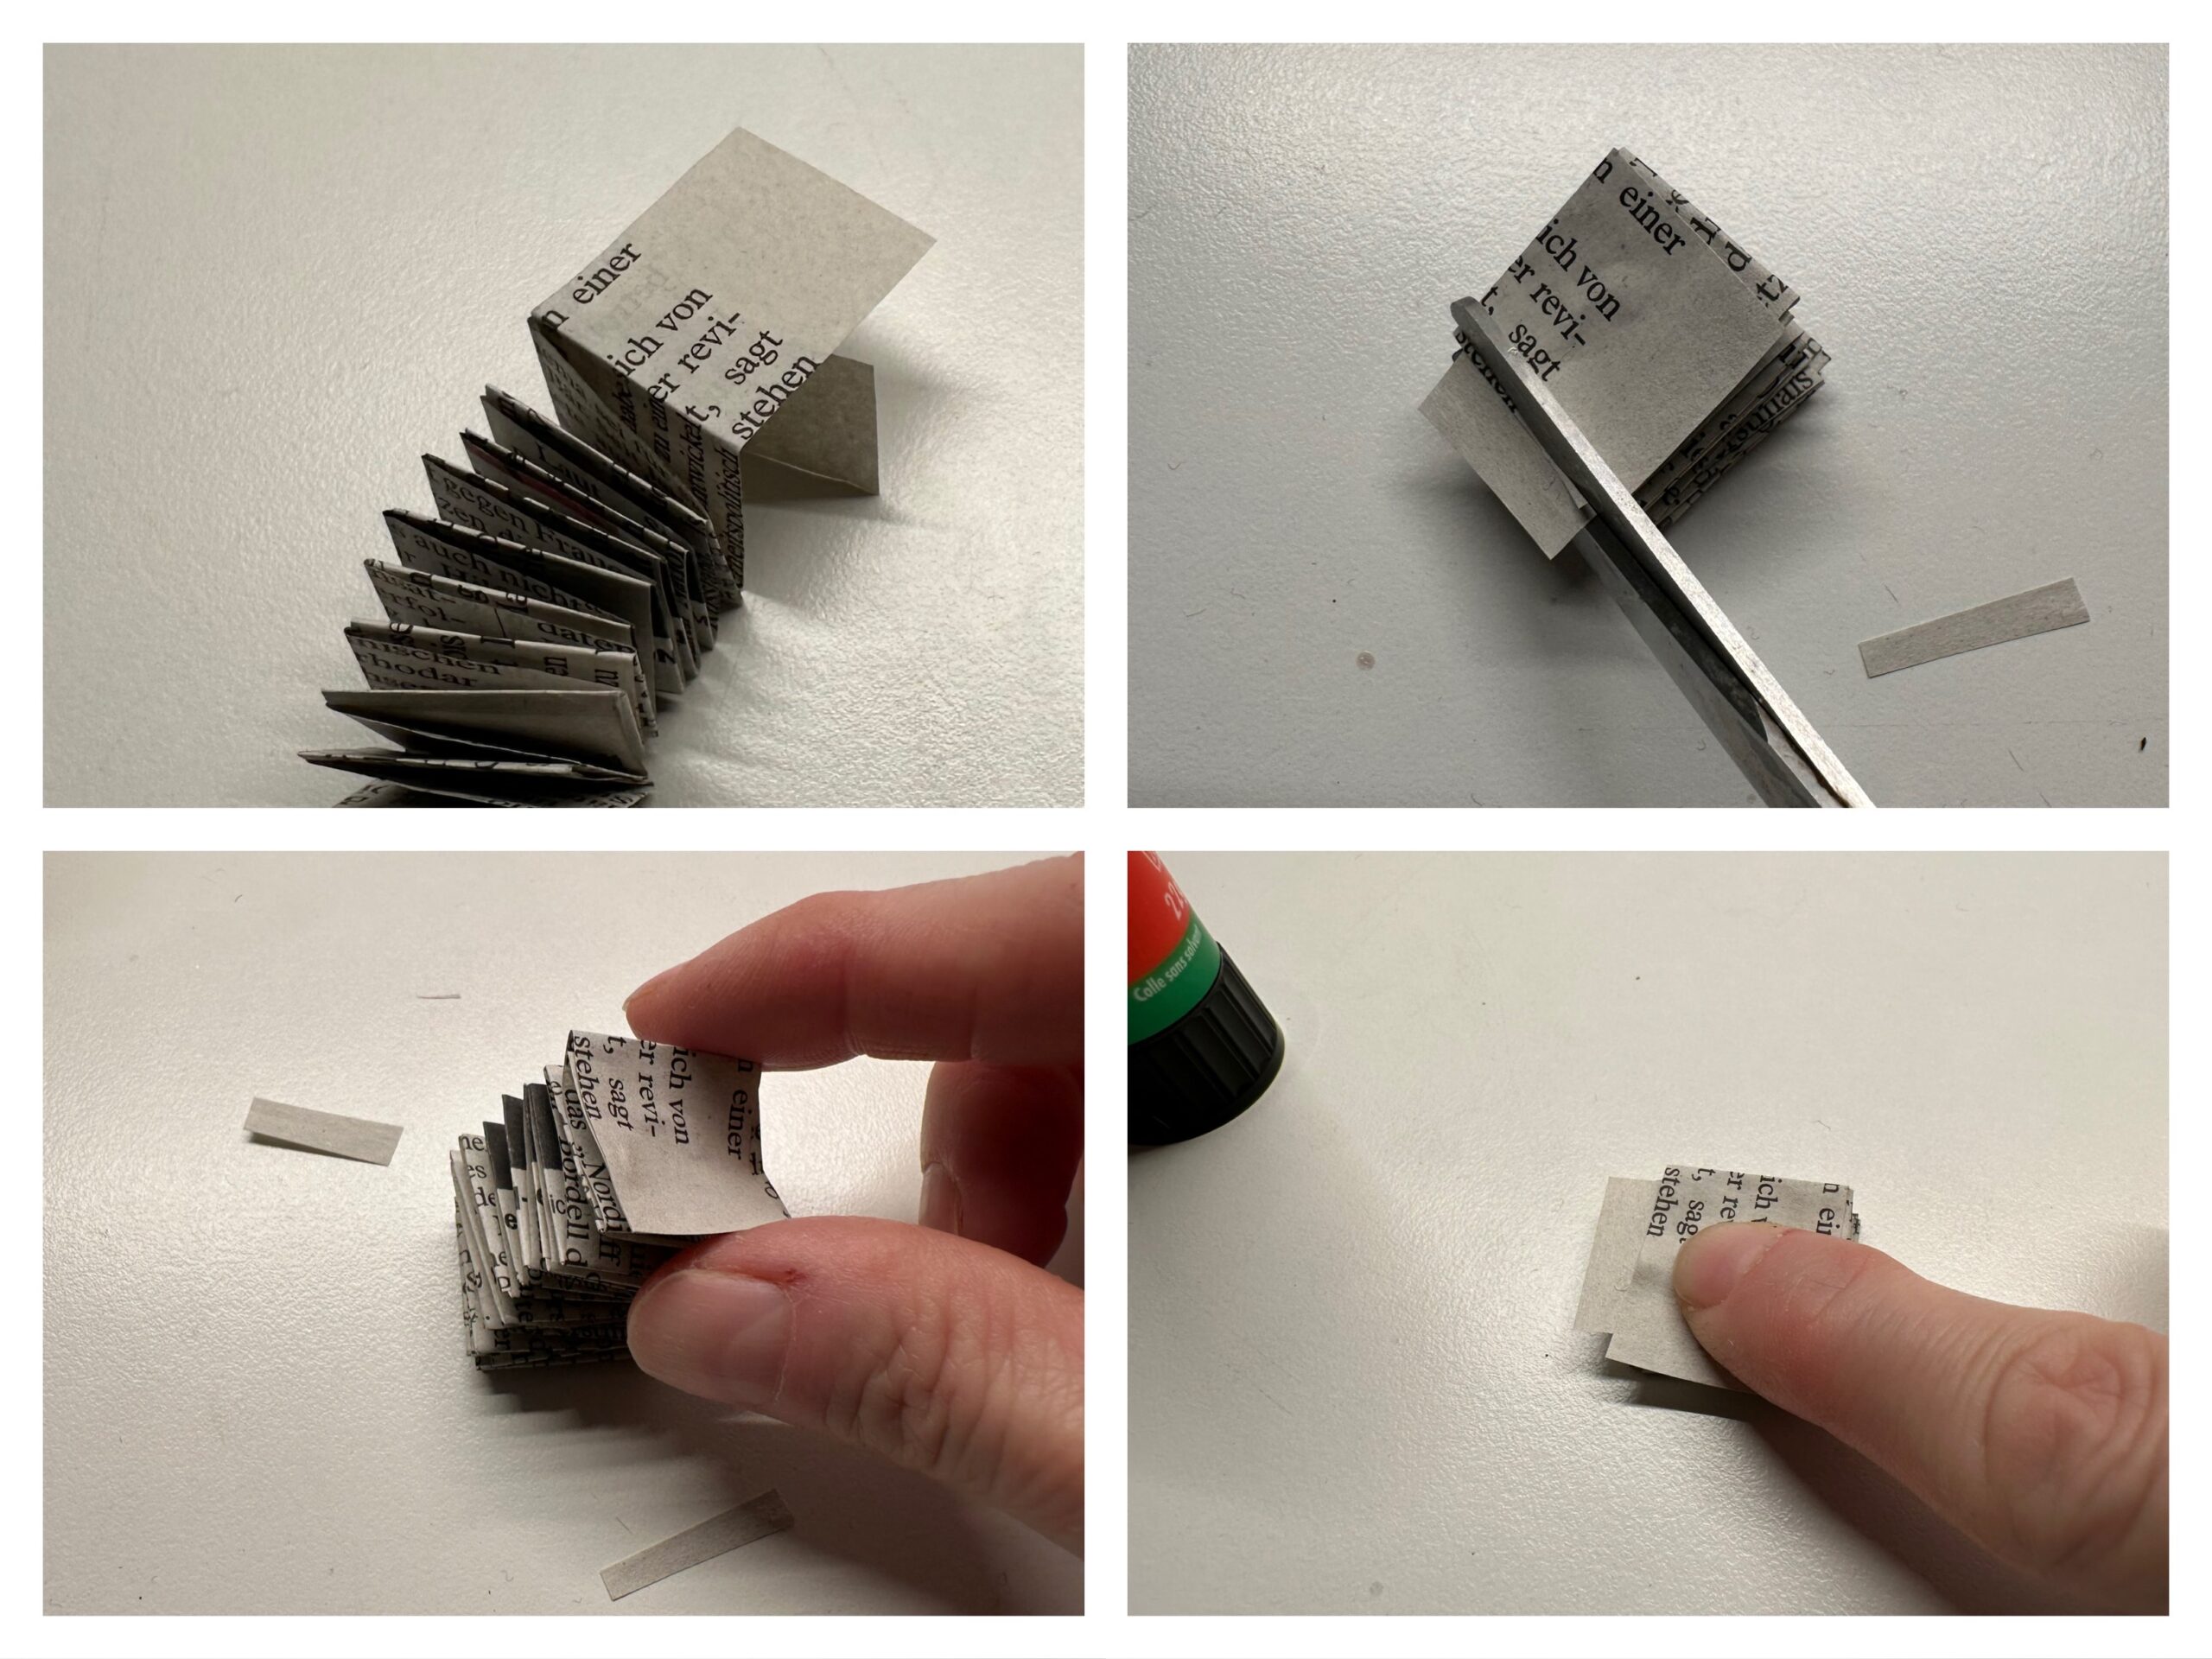
Repeat these steps until the paper strip ends.


The last two folded squares are glued together. Cuts off the remaining paper strips with scissors. The accordion candle is ready.


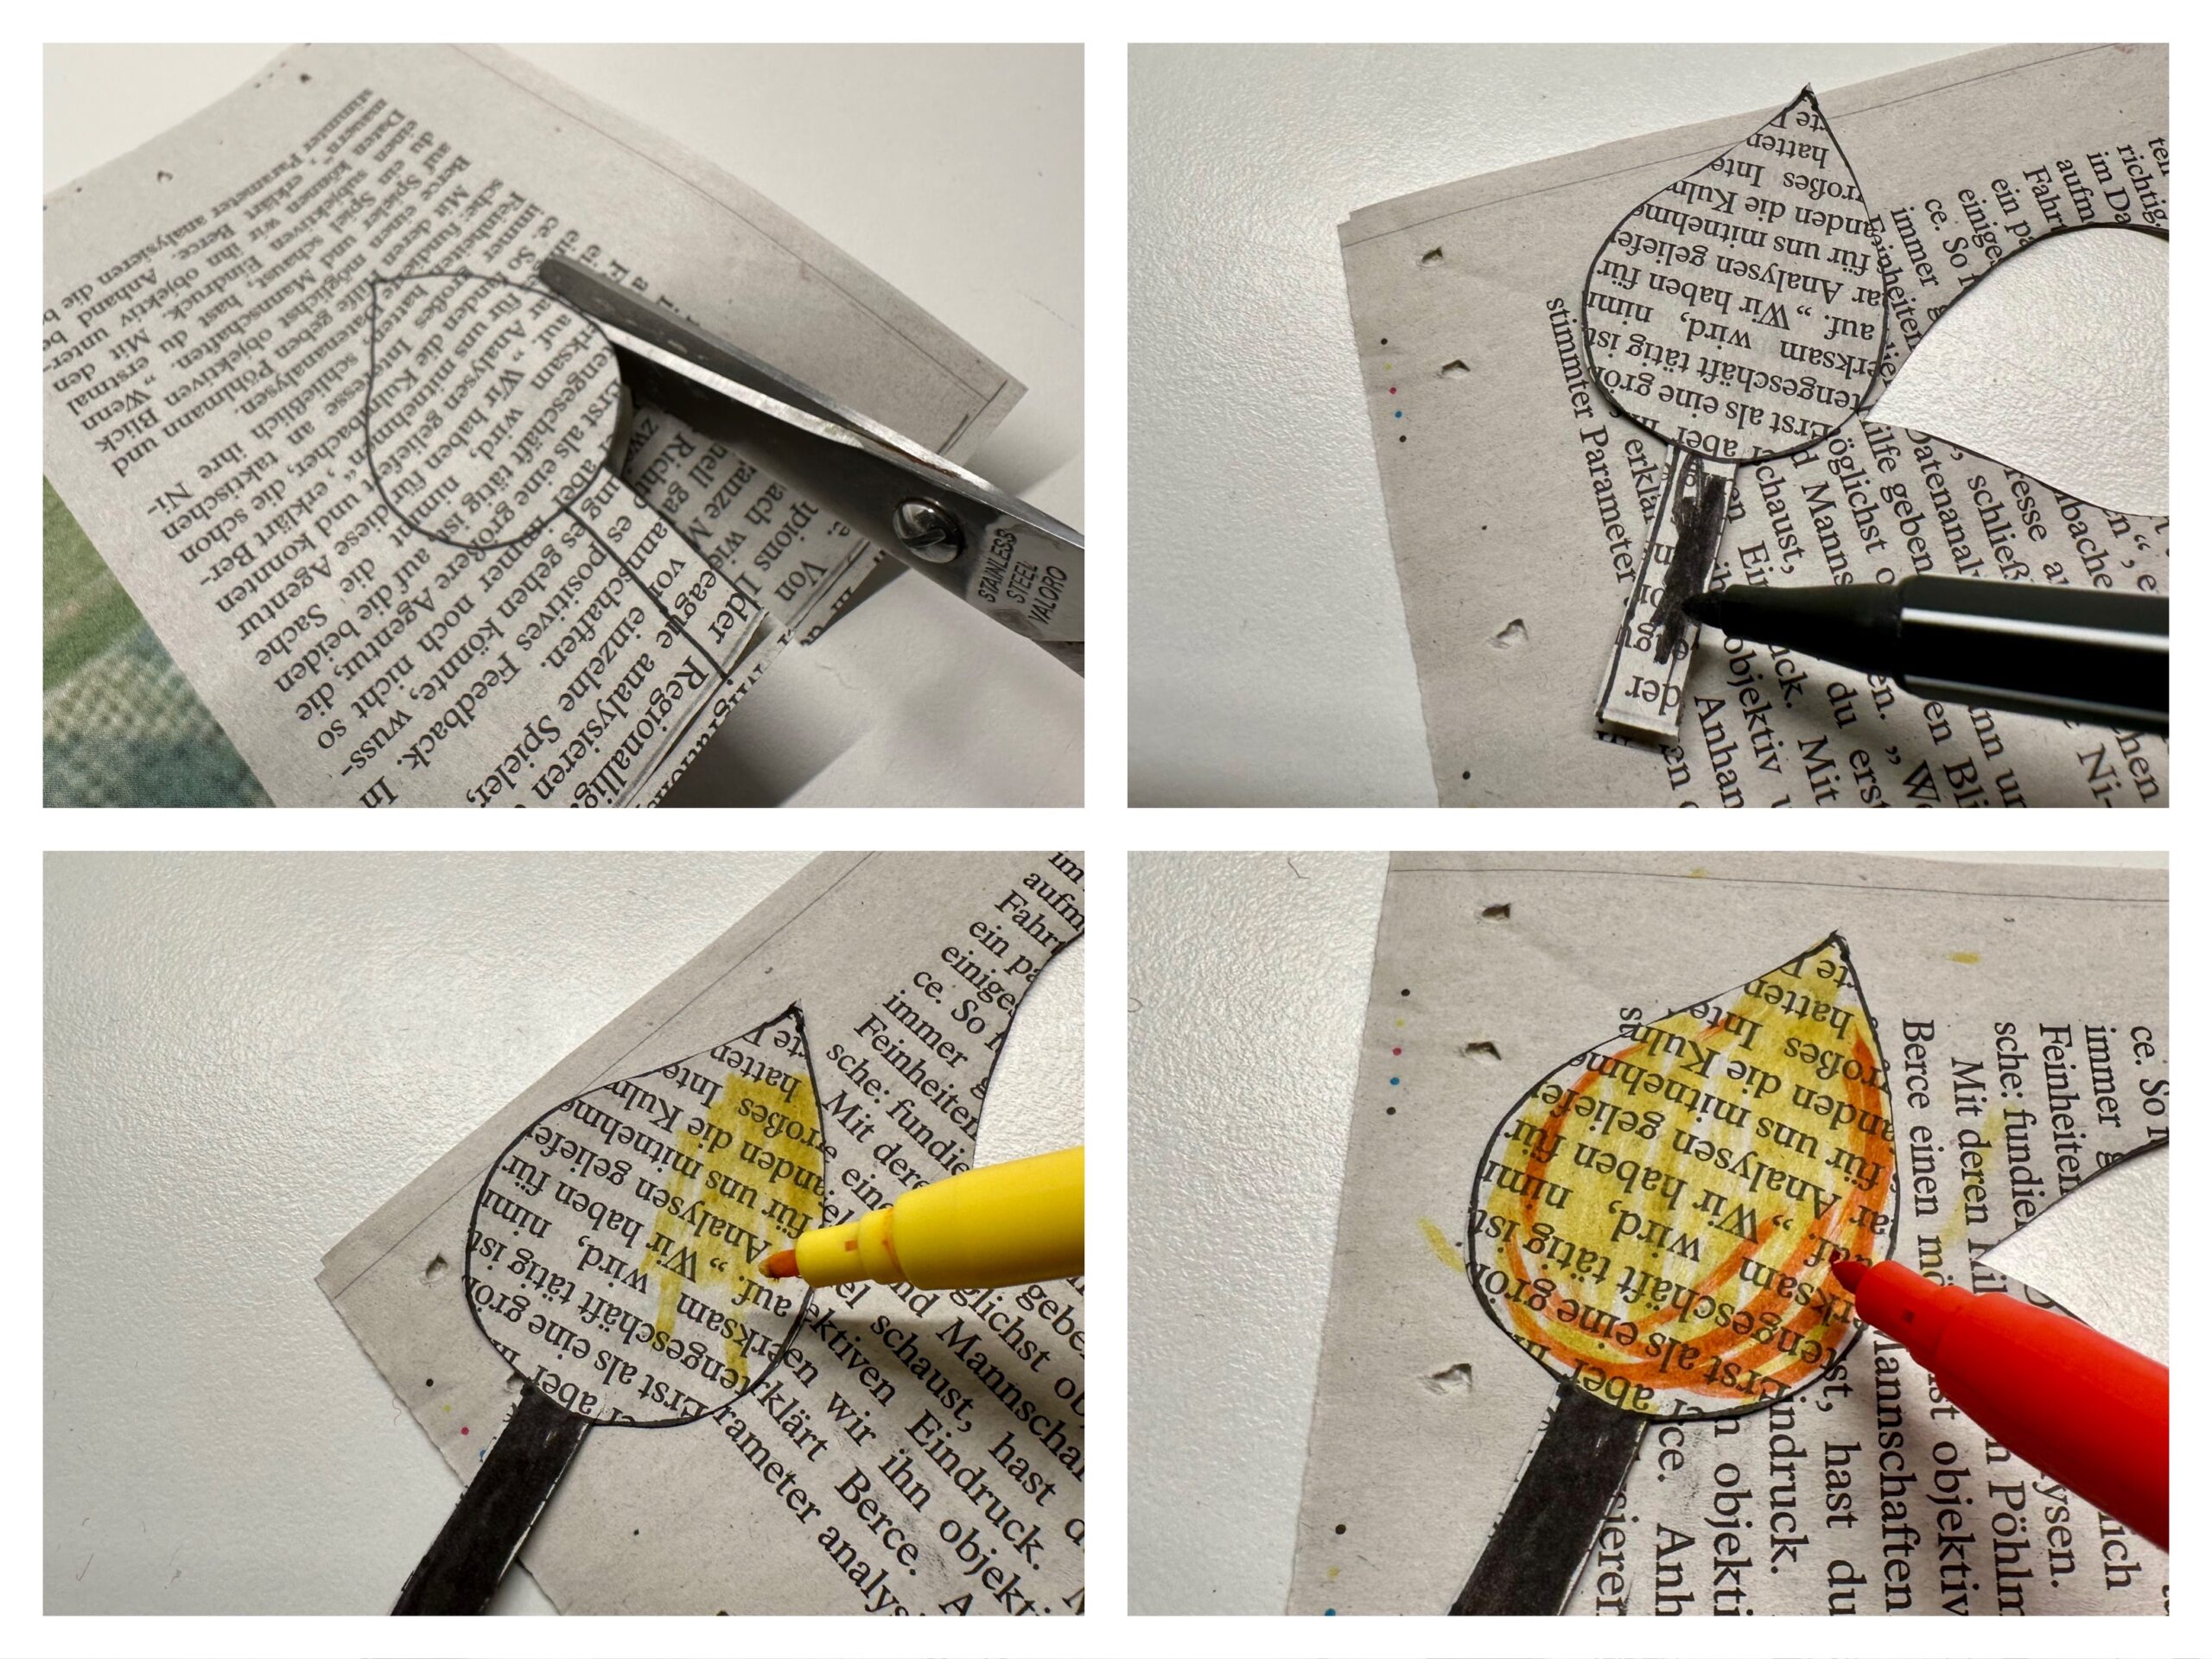
The flame and the wick are made from a double newspaper sheet. Glues two newspaper sheets together for this purpose. A hand-sized piece of paper extends for this purpose. Paints a flame (in drop form) on the paper piece. Paints the wick directly at the round bottom of the flame. This looks like a thin beam.
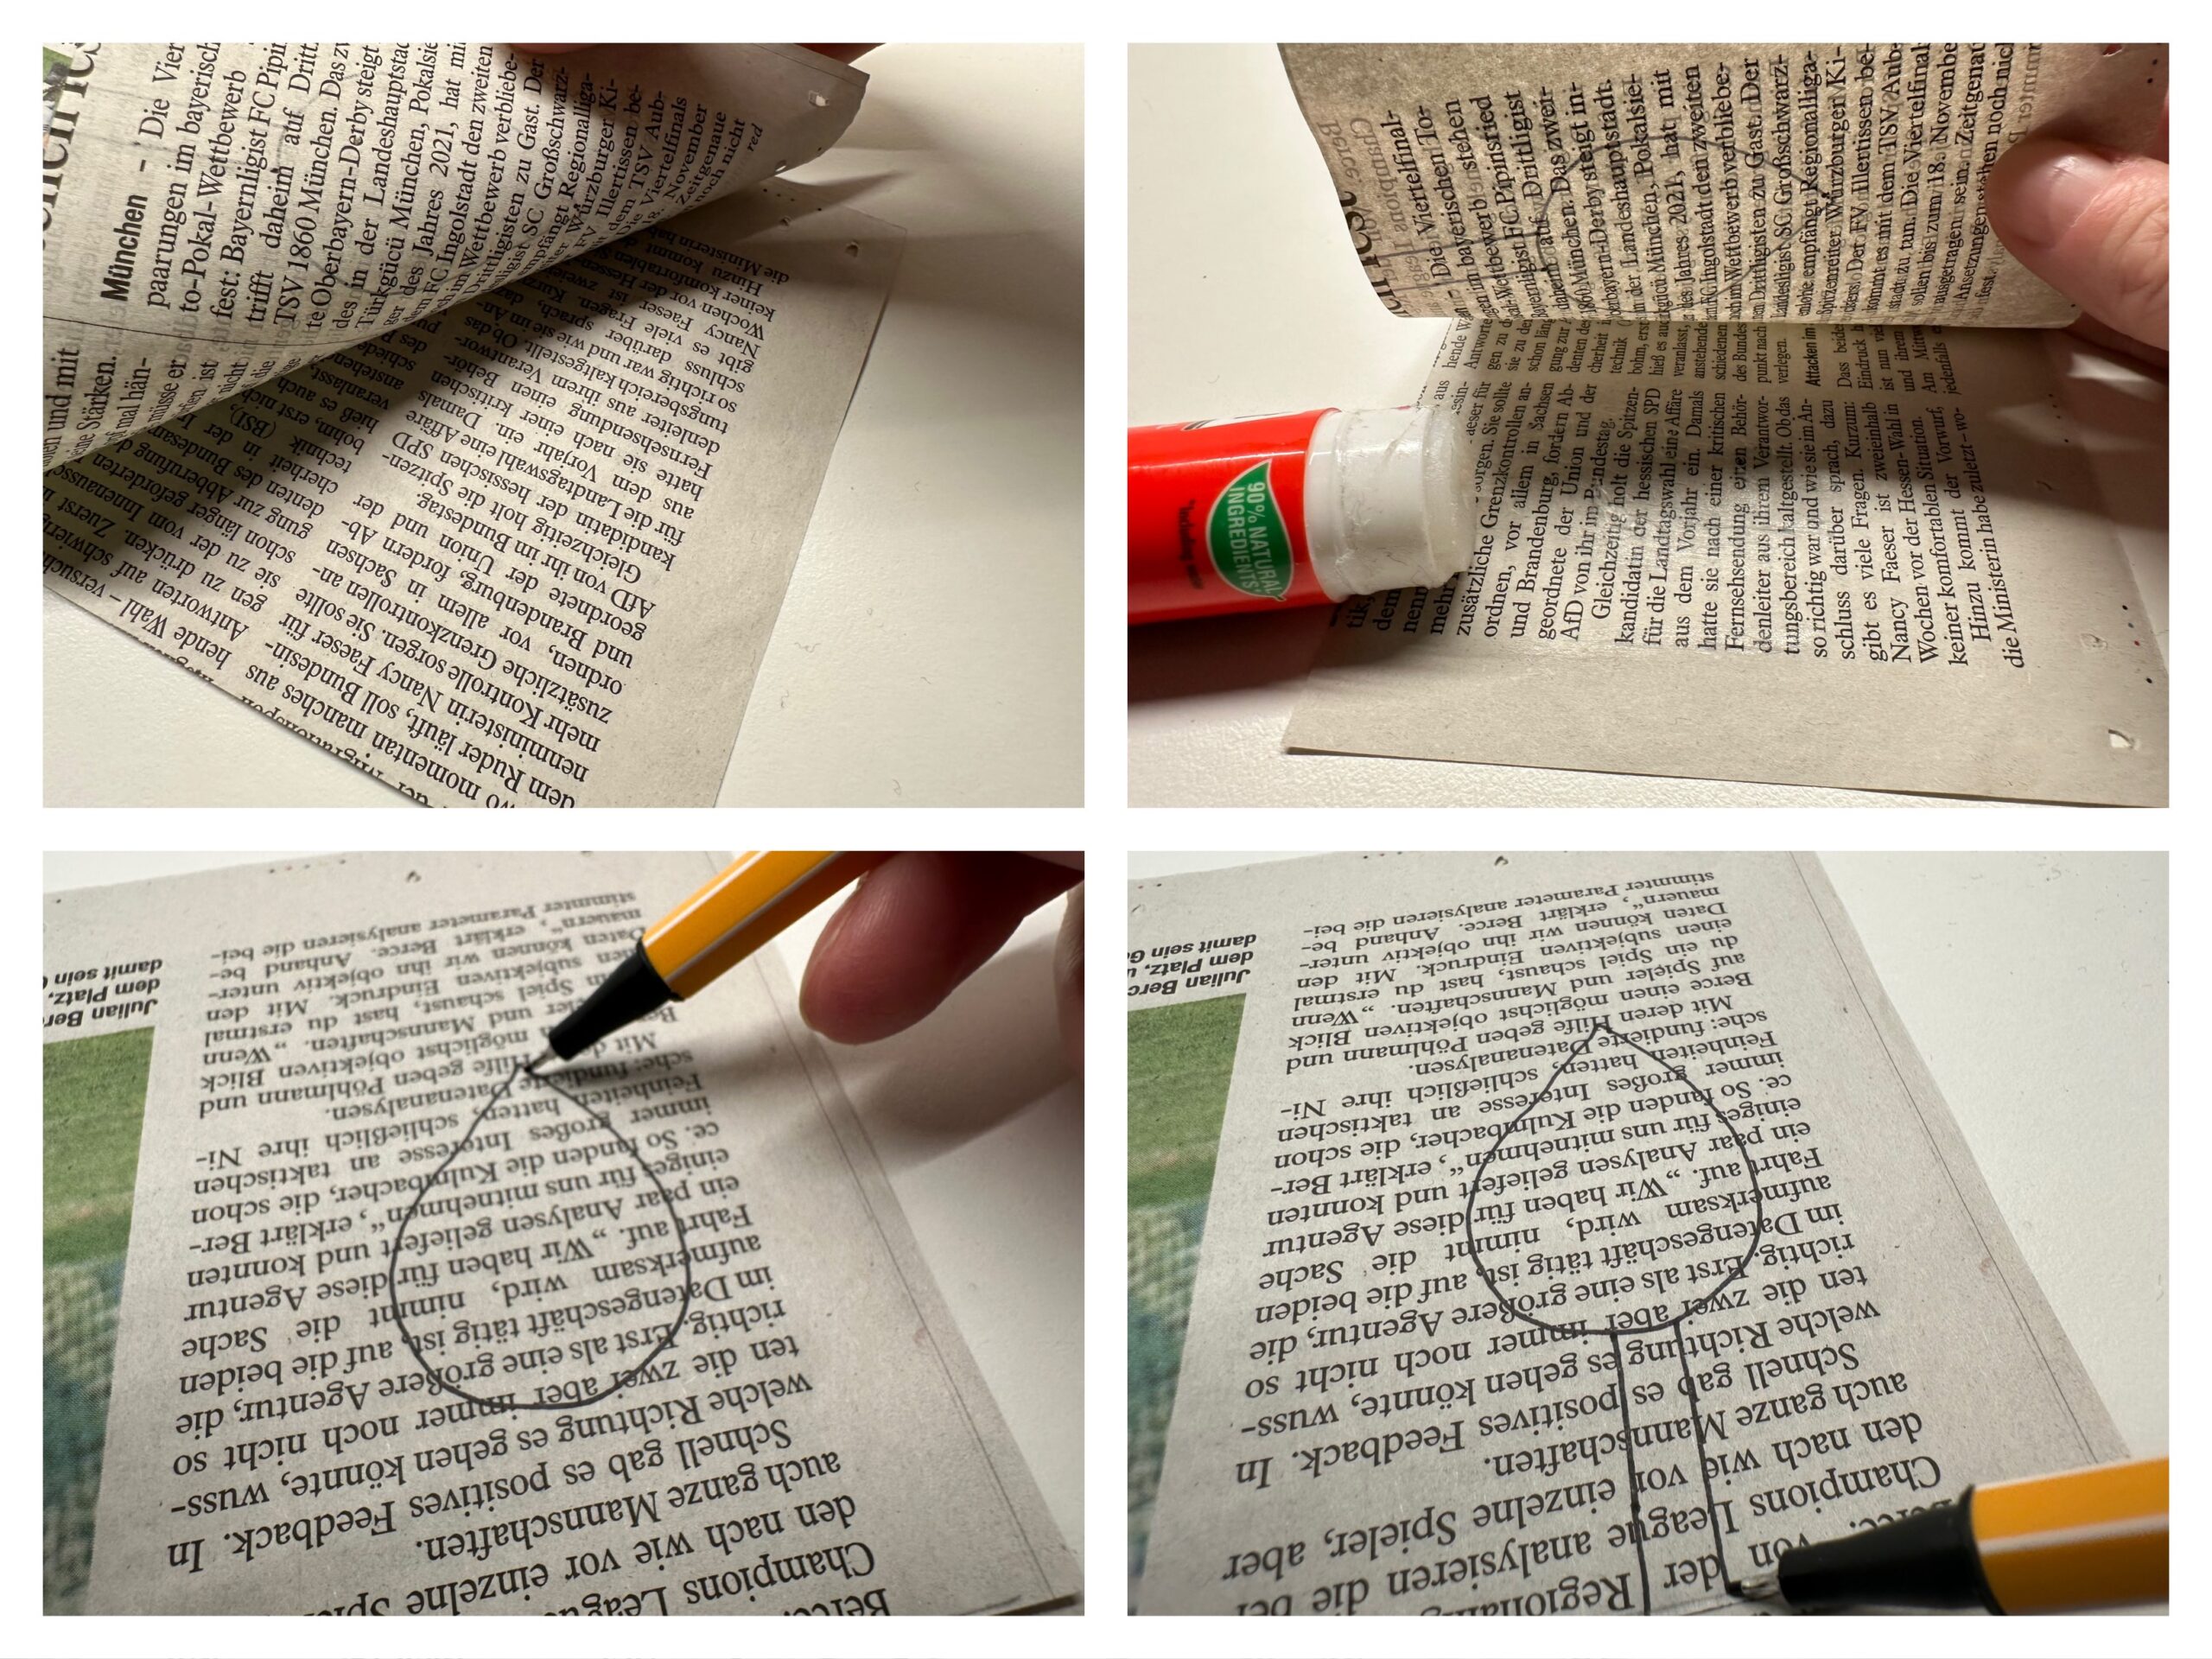


Cuts out everything in one piece together with the scissors. (Butt and candle).
Now you can paint the wick in black.
yellow and red felt pins are brought the flame to "light".


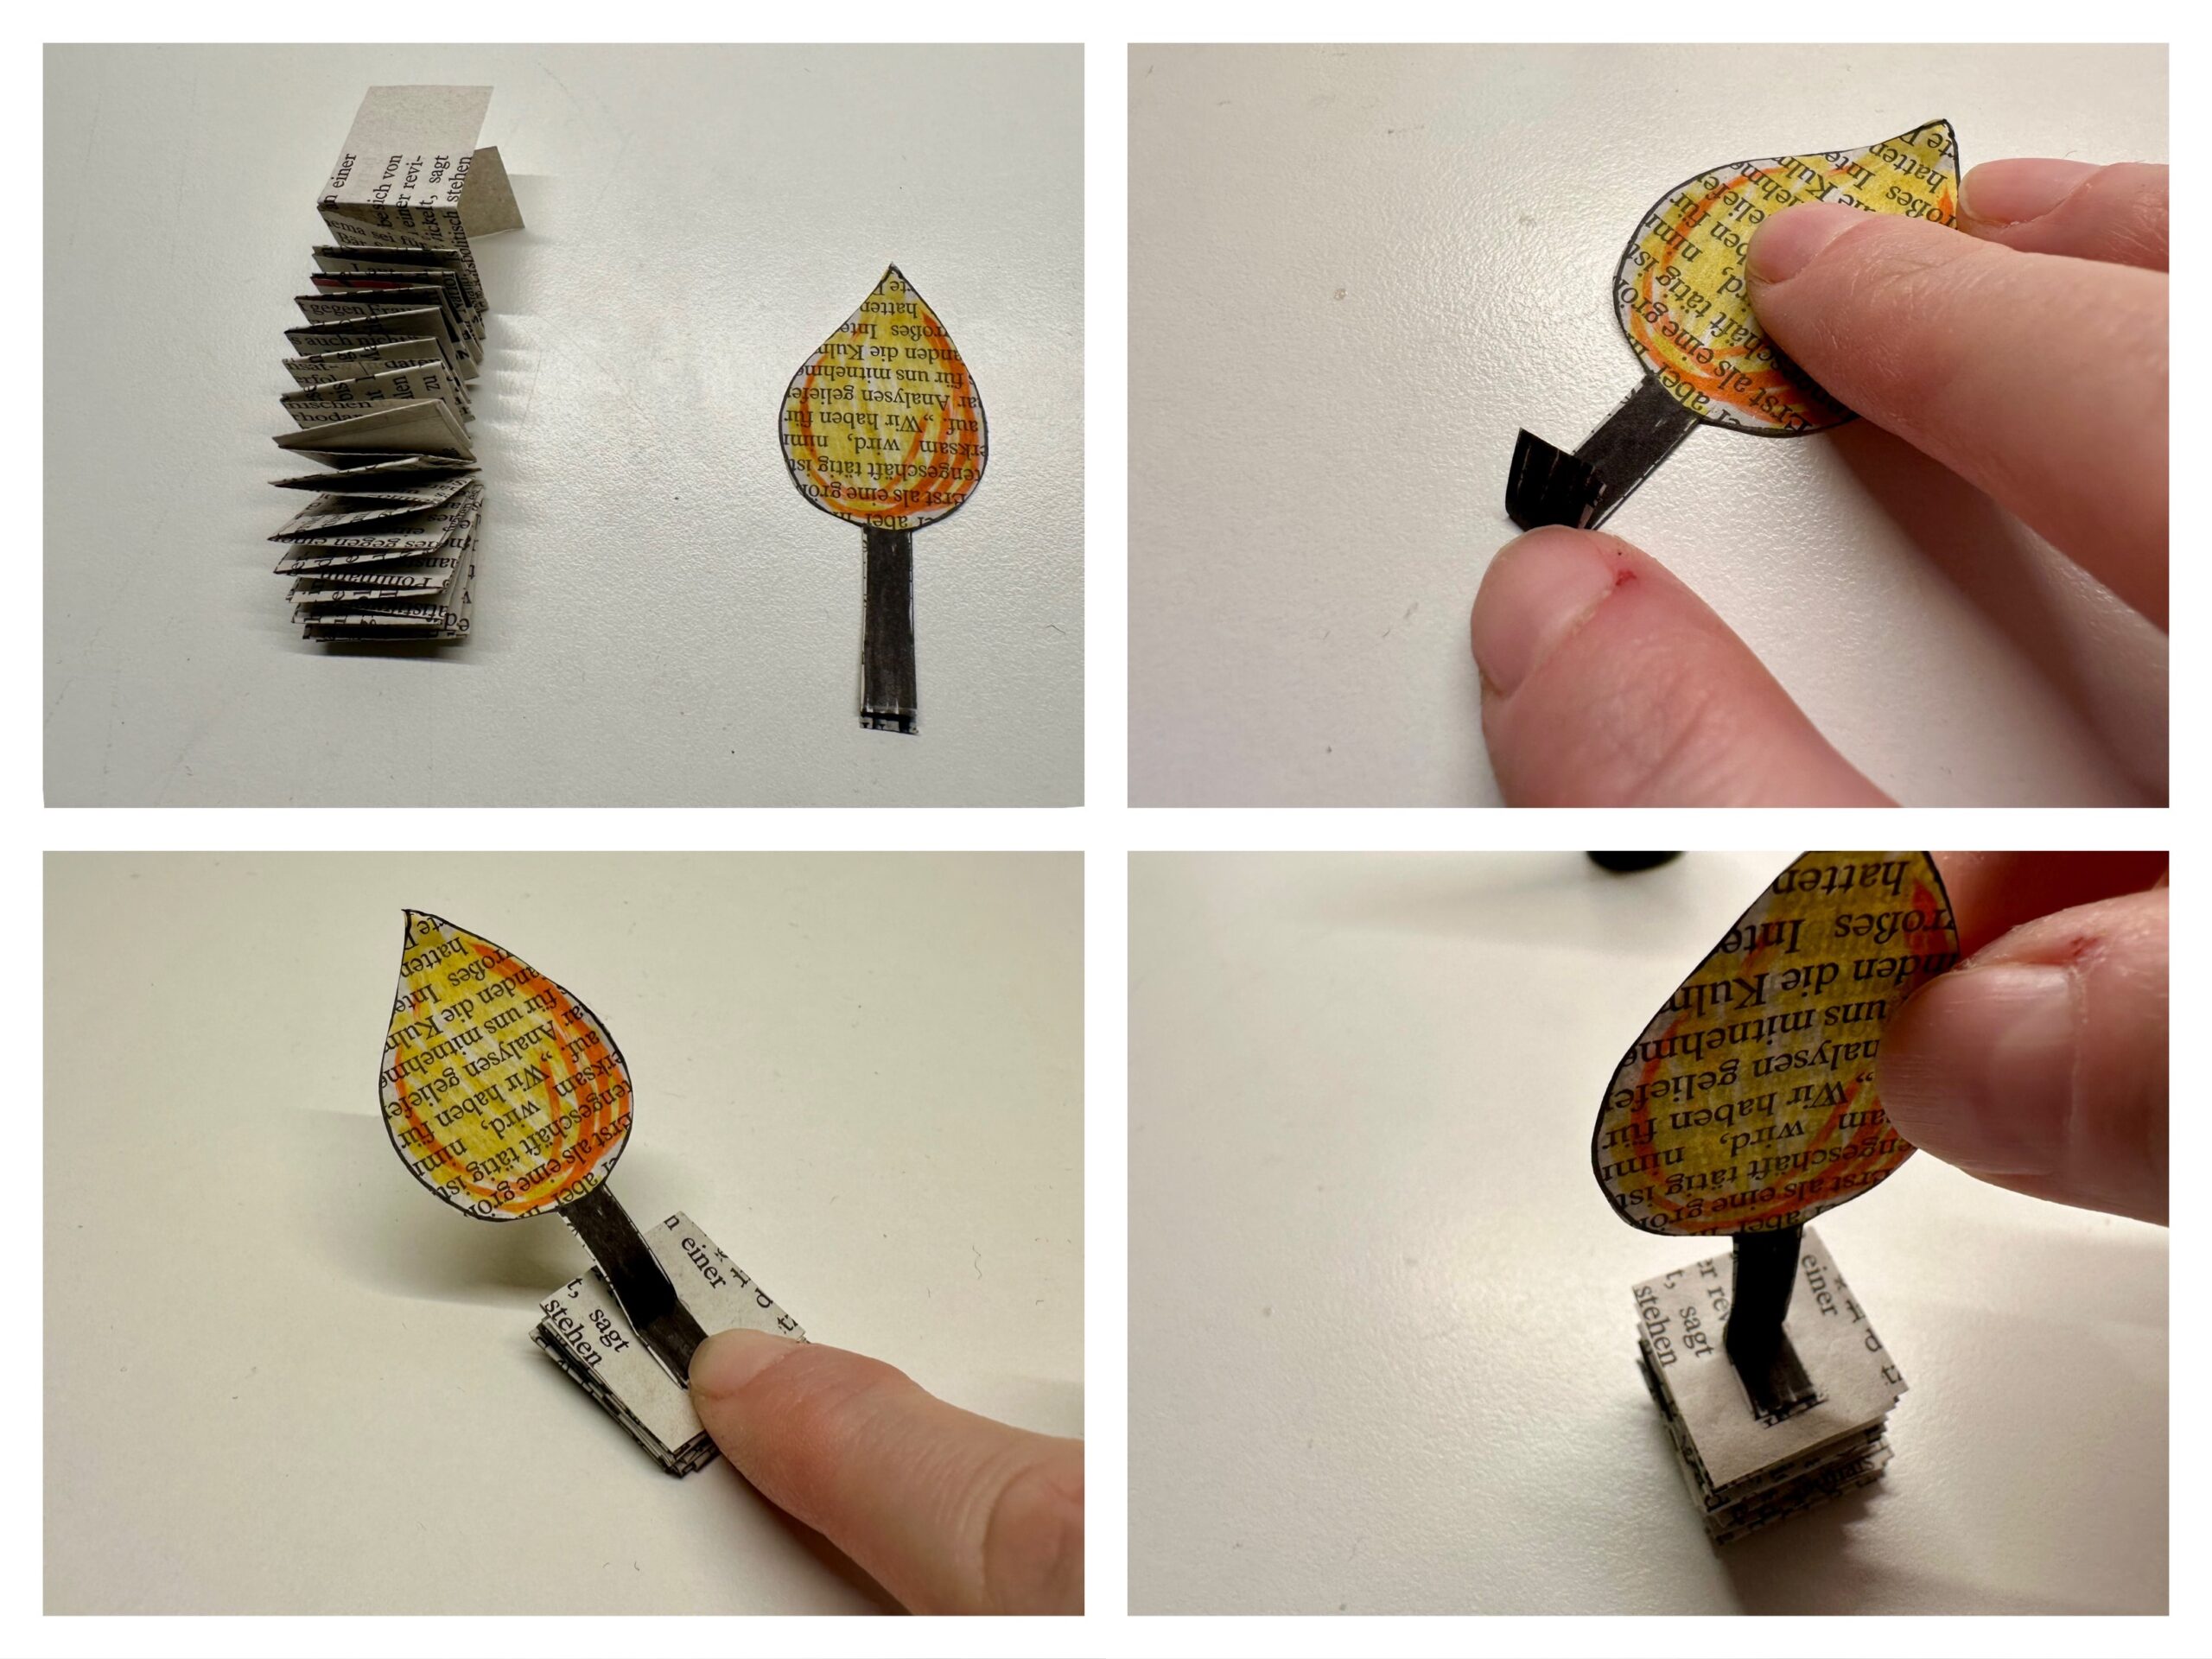
The candle and flame with wick are now glued to each other. Fold a small piece on the wick, this you need to stick to it. Then glue the folded piece of wick onto the top of the candle (on the top paper of the accordion candle).


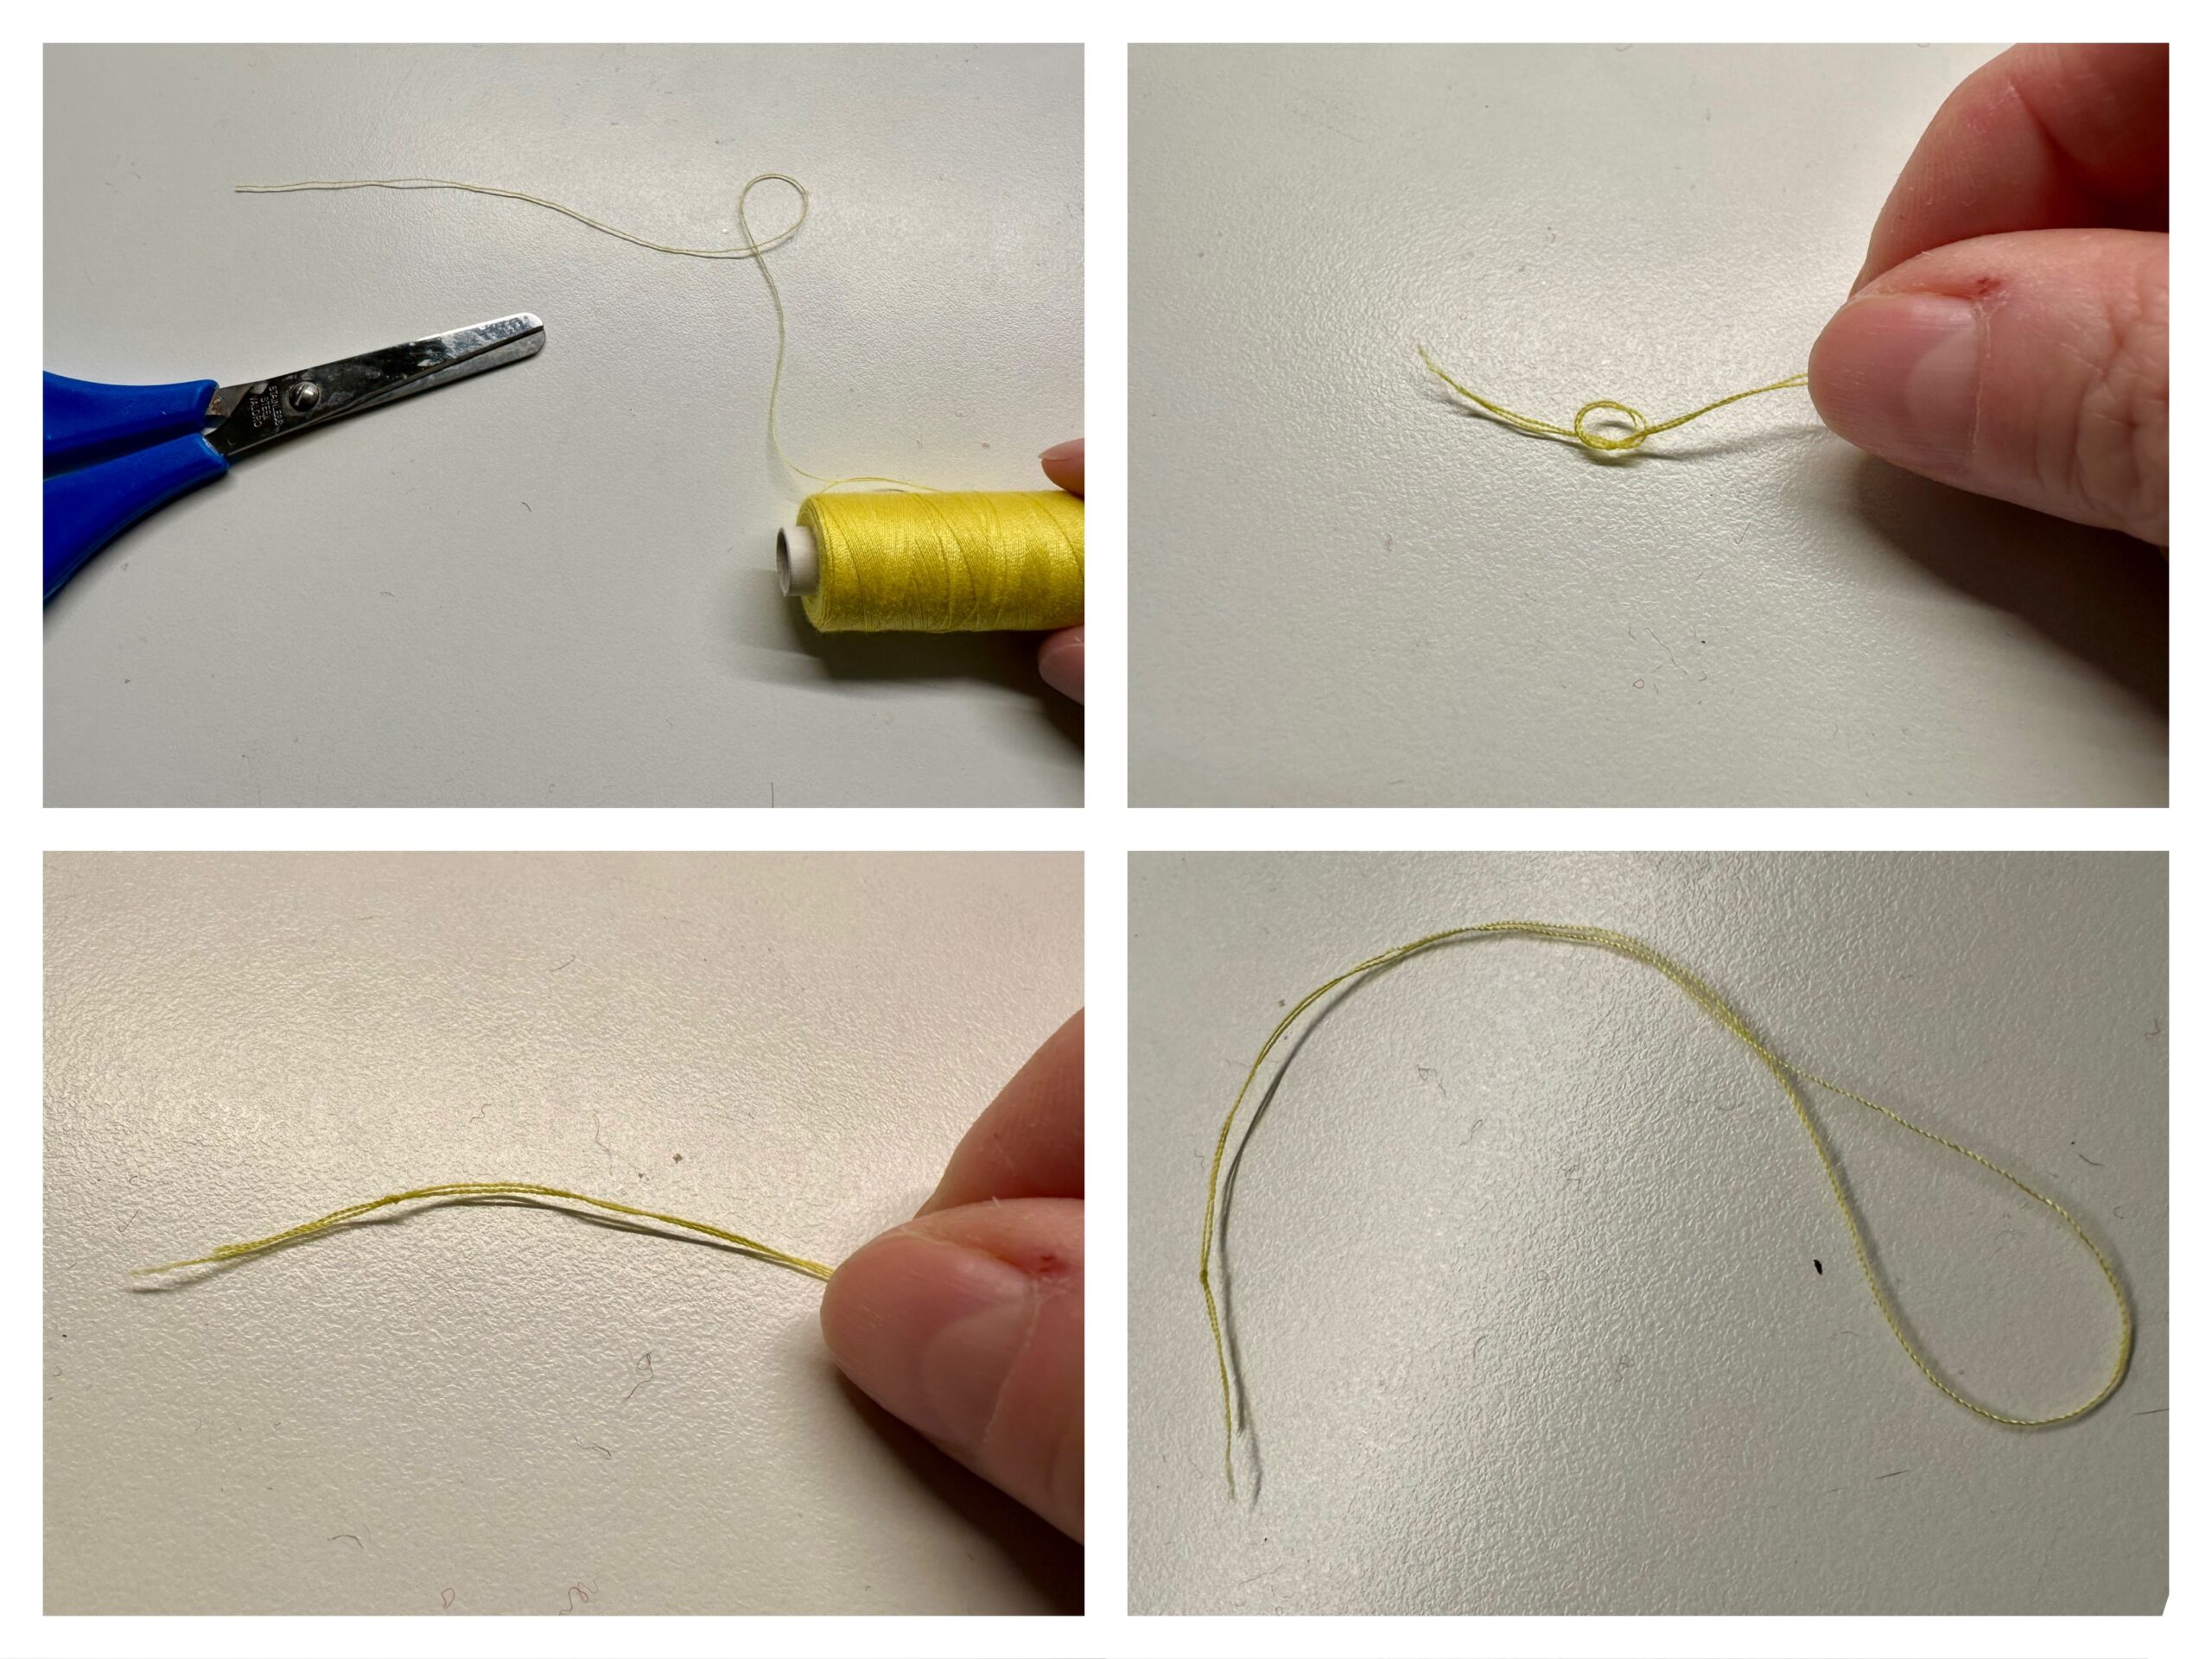
Cut a piece of thread. For this you can measure the length of your ruler. Double the thread so that both ends of the thread lie on each other. Make a knot in the thread.


Sticks the thread loop to the back of the flame (e.g. with a transparent adhesive tape = Tesafilm).
Now the candle is ready.
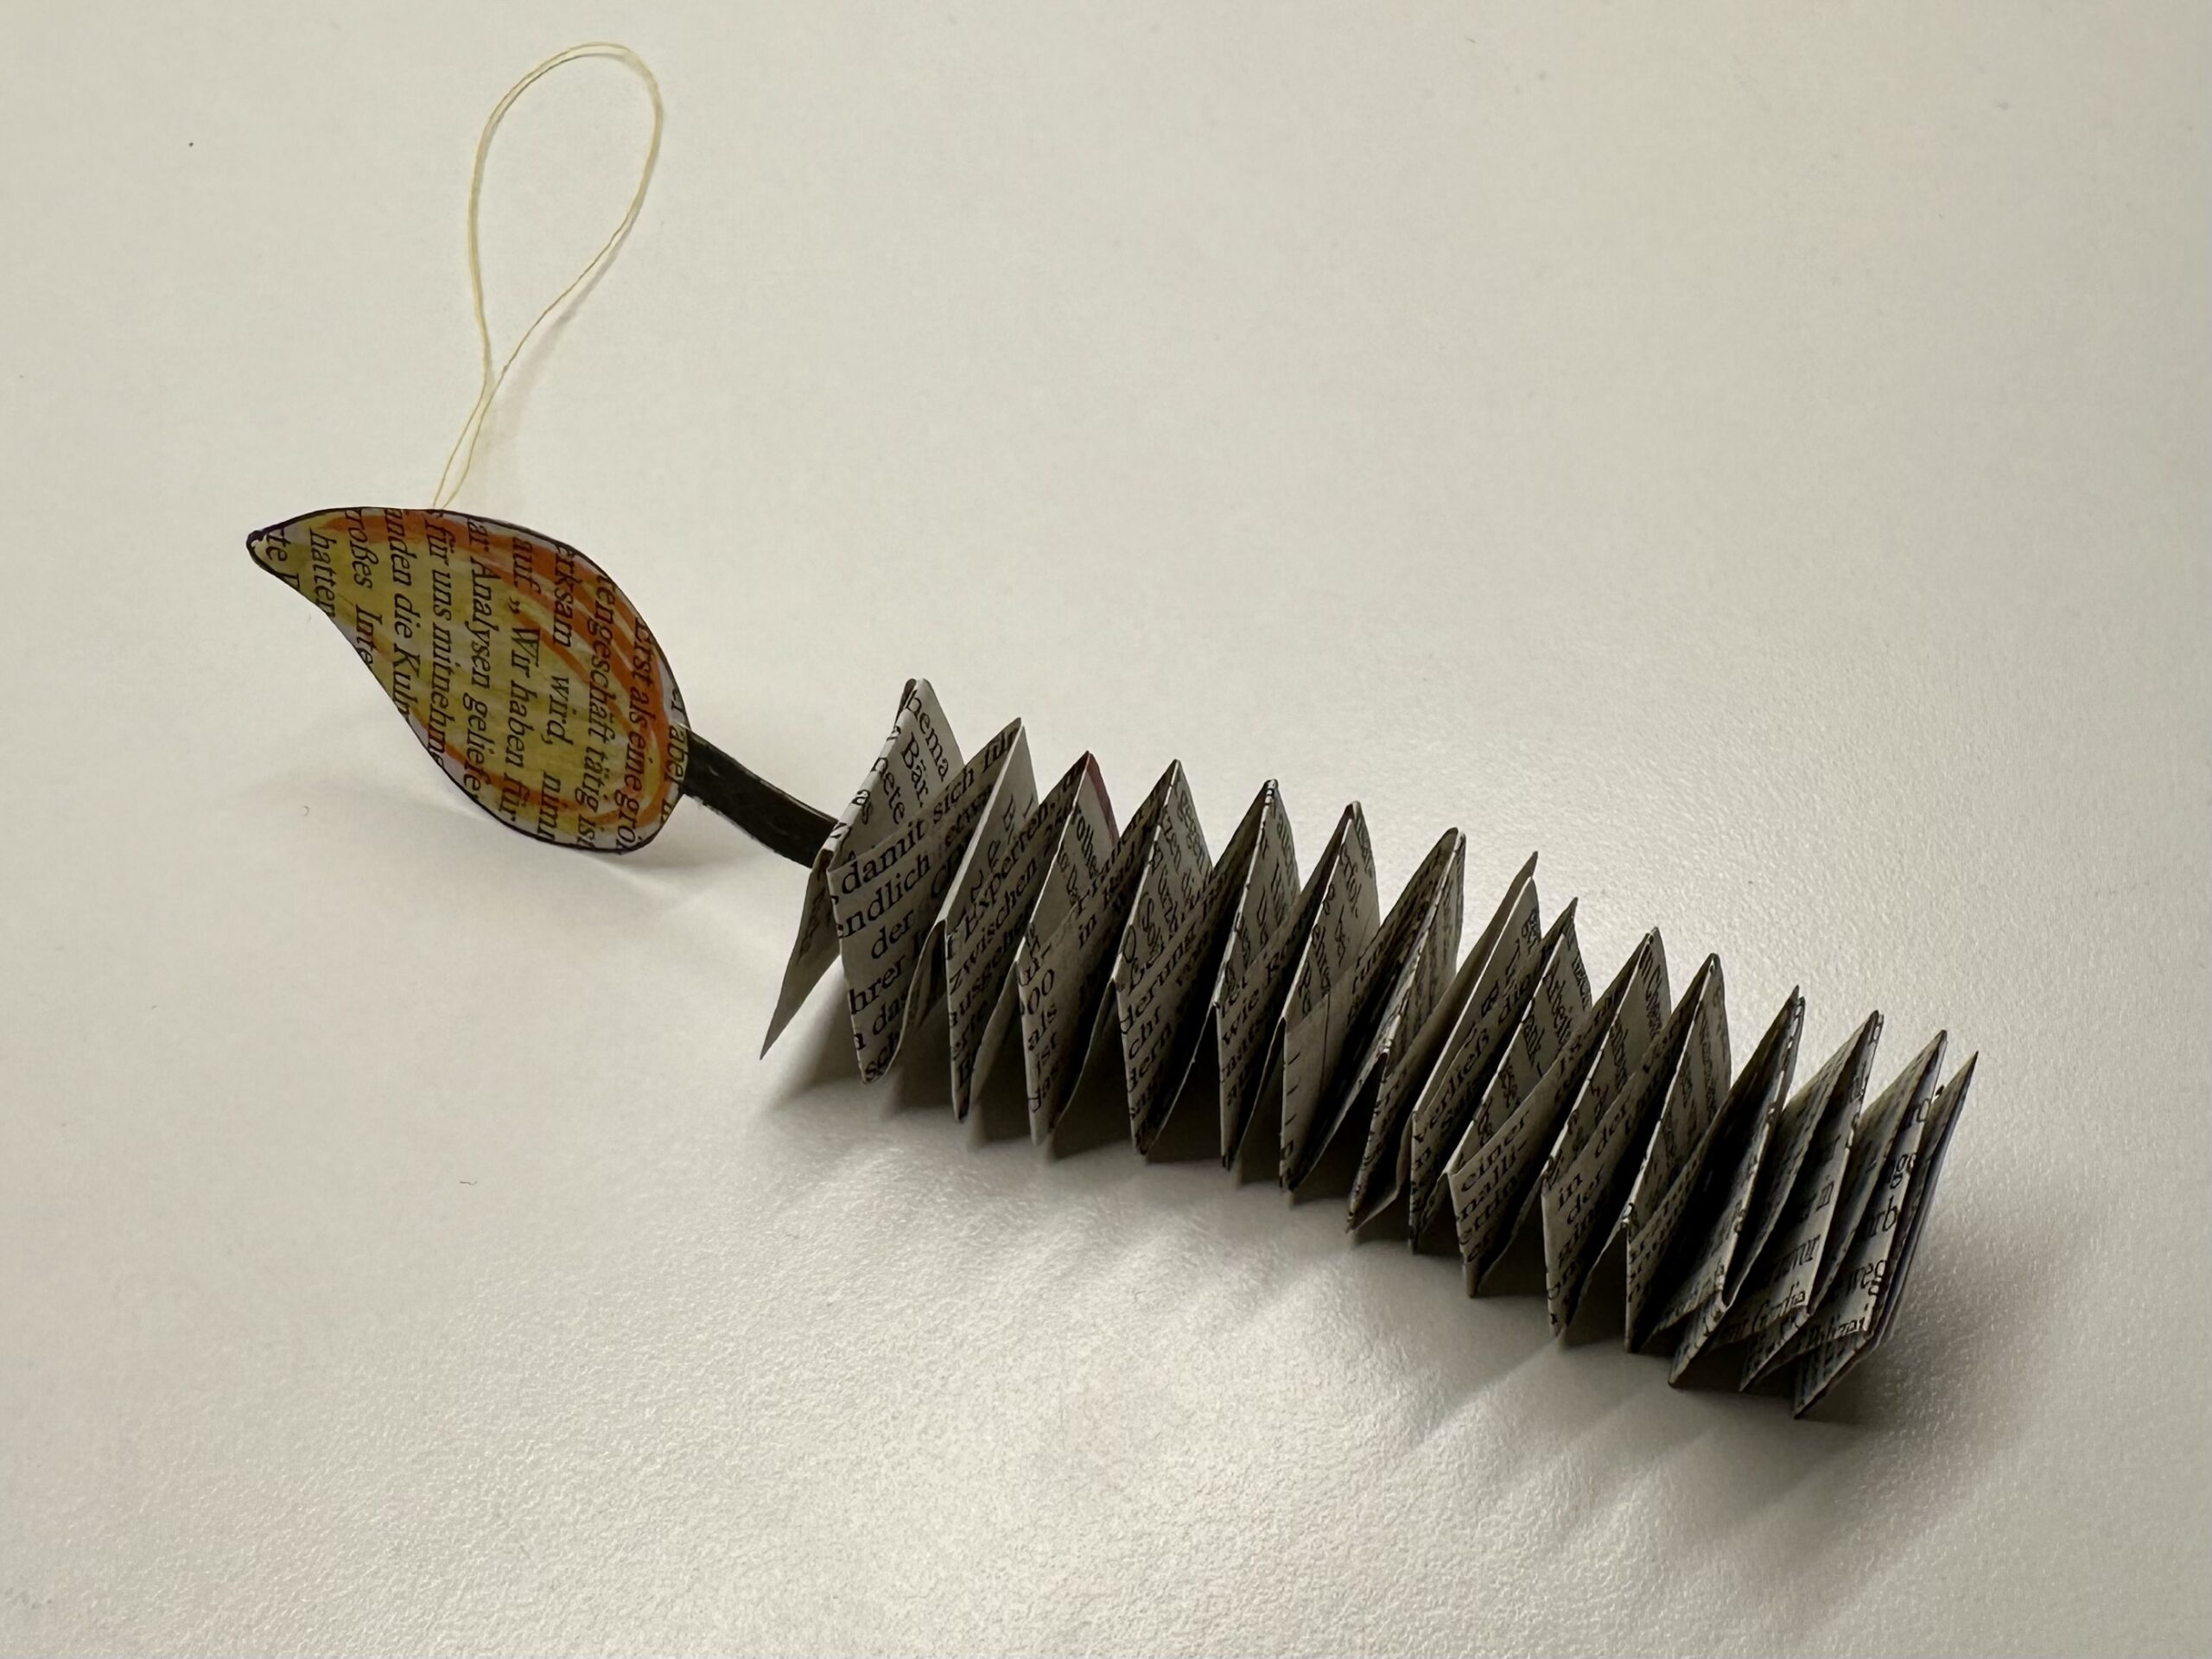


Find a nice place, e.g. at a branch or fir branch and hang up your candle.
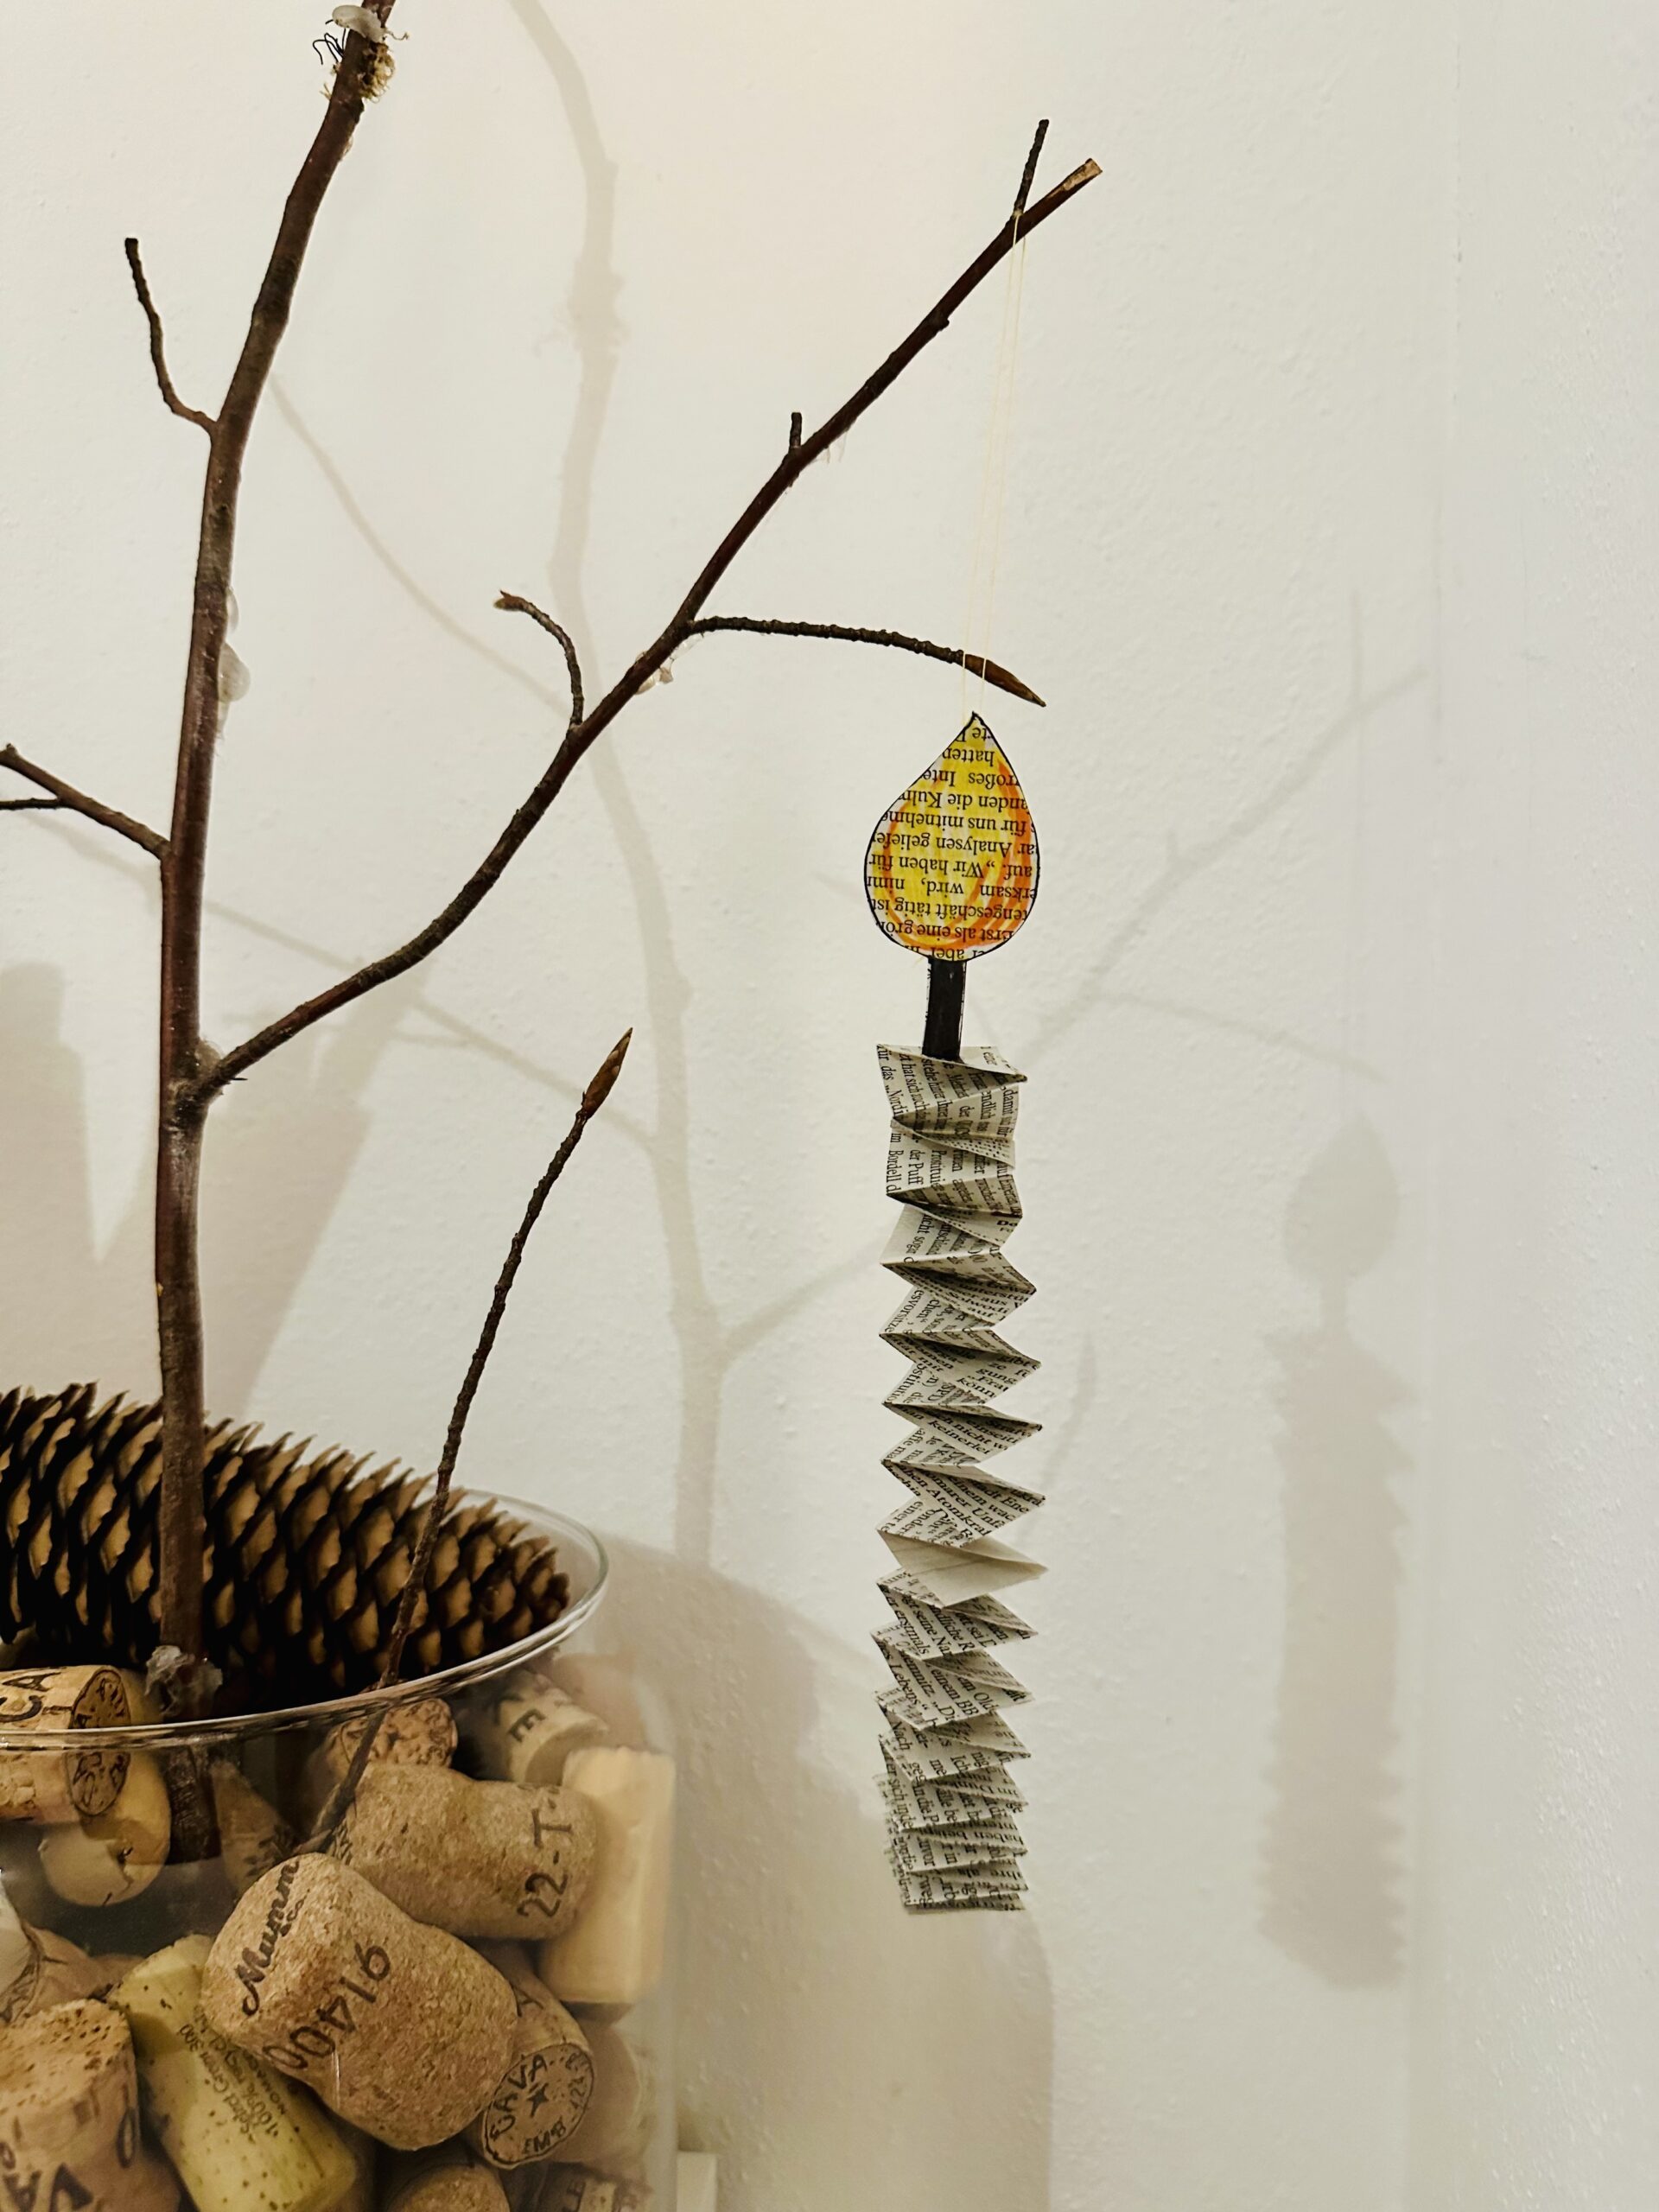


You may also make the candle as a gift or gift pendant.
You will get various thick candles if you cut the paper strips in different widths. However, for a candle you will always need two equally thick/wide strips of paper.
I'd love to try it out.
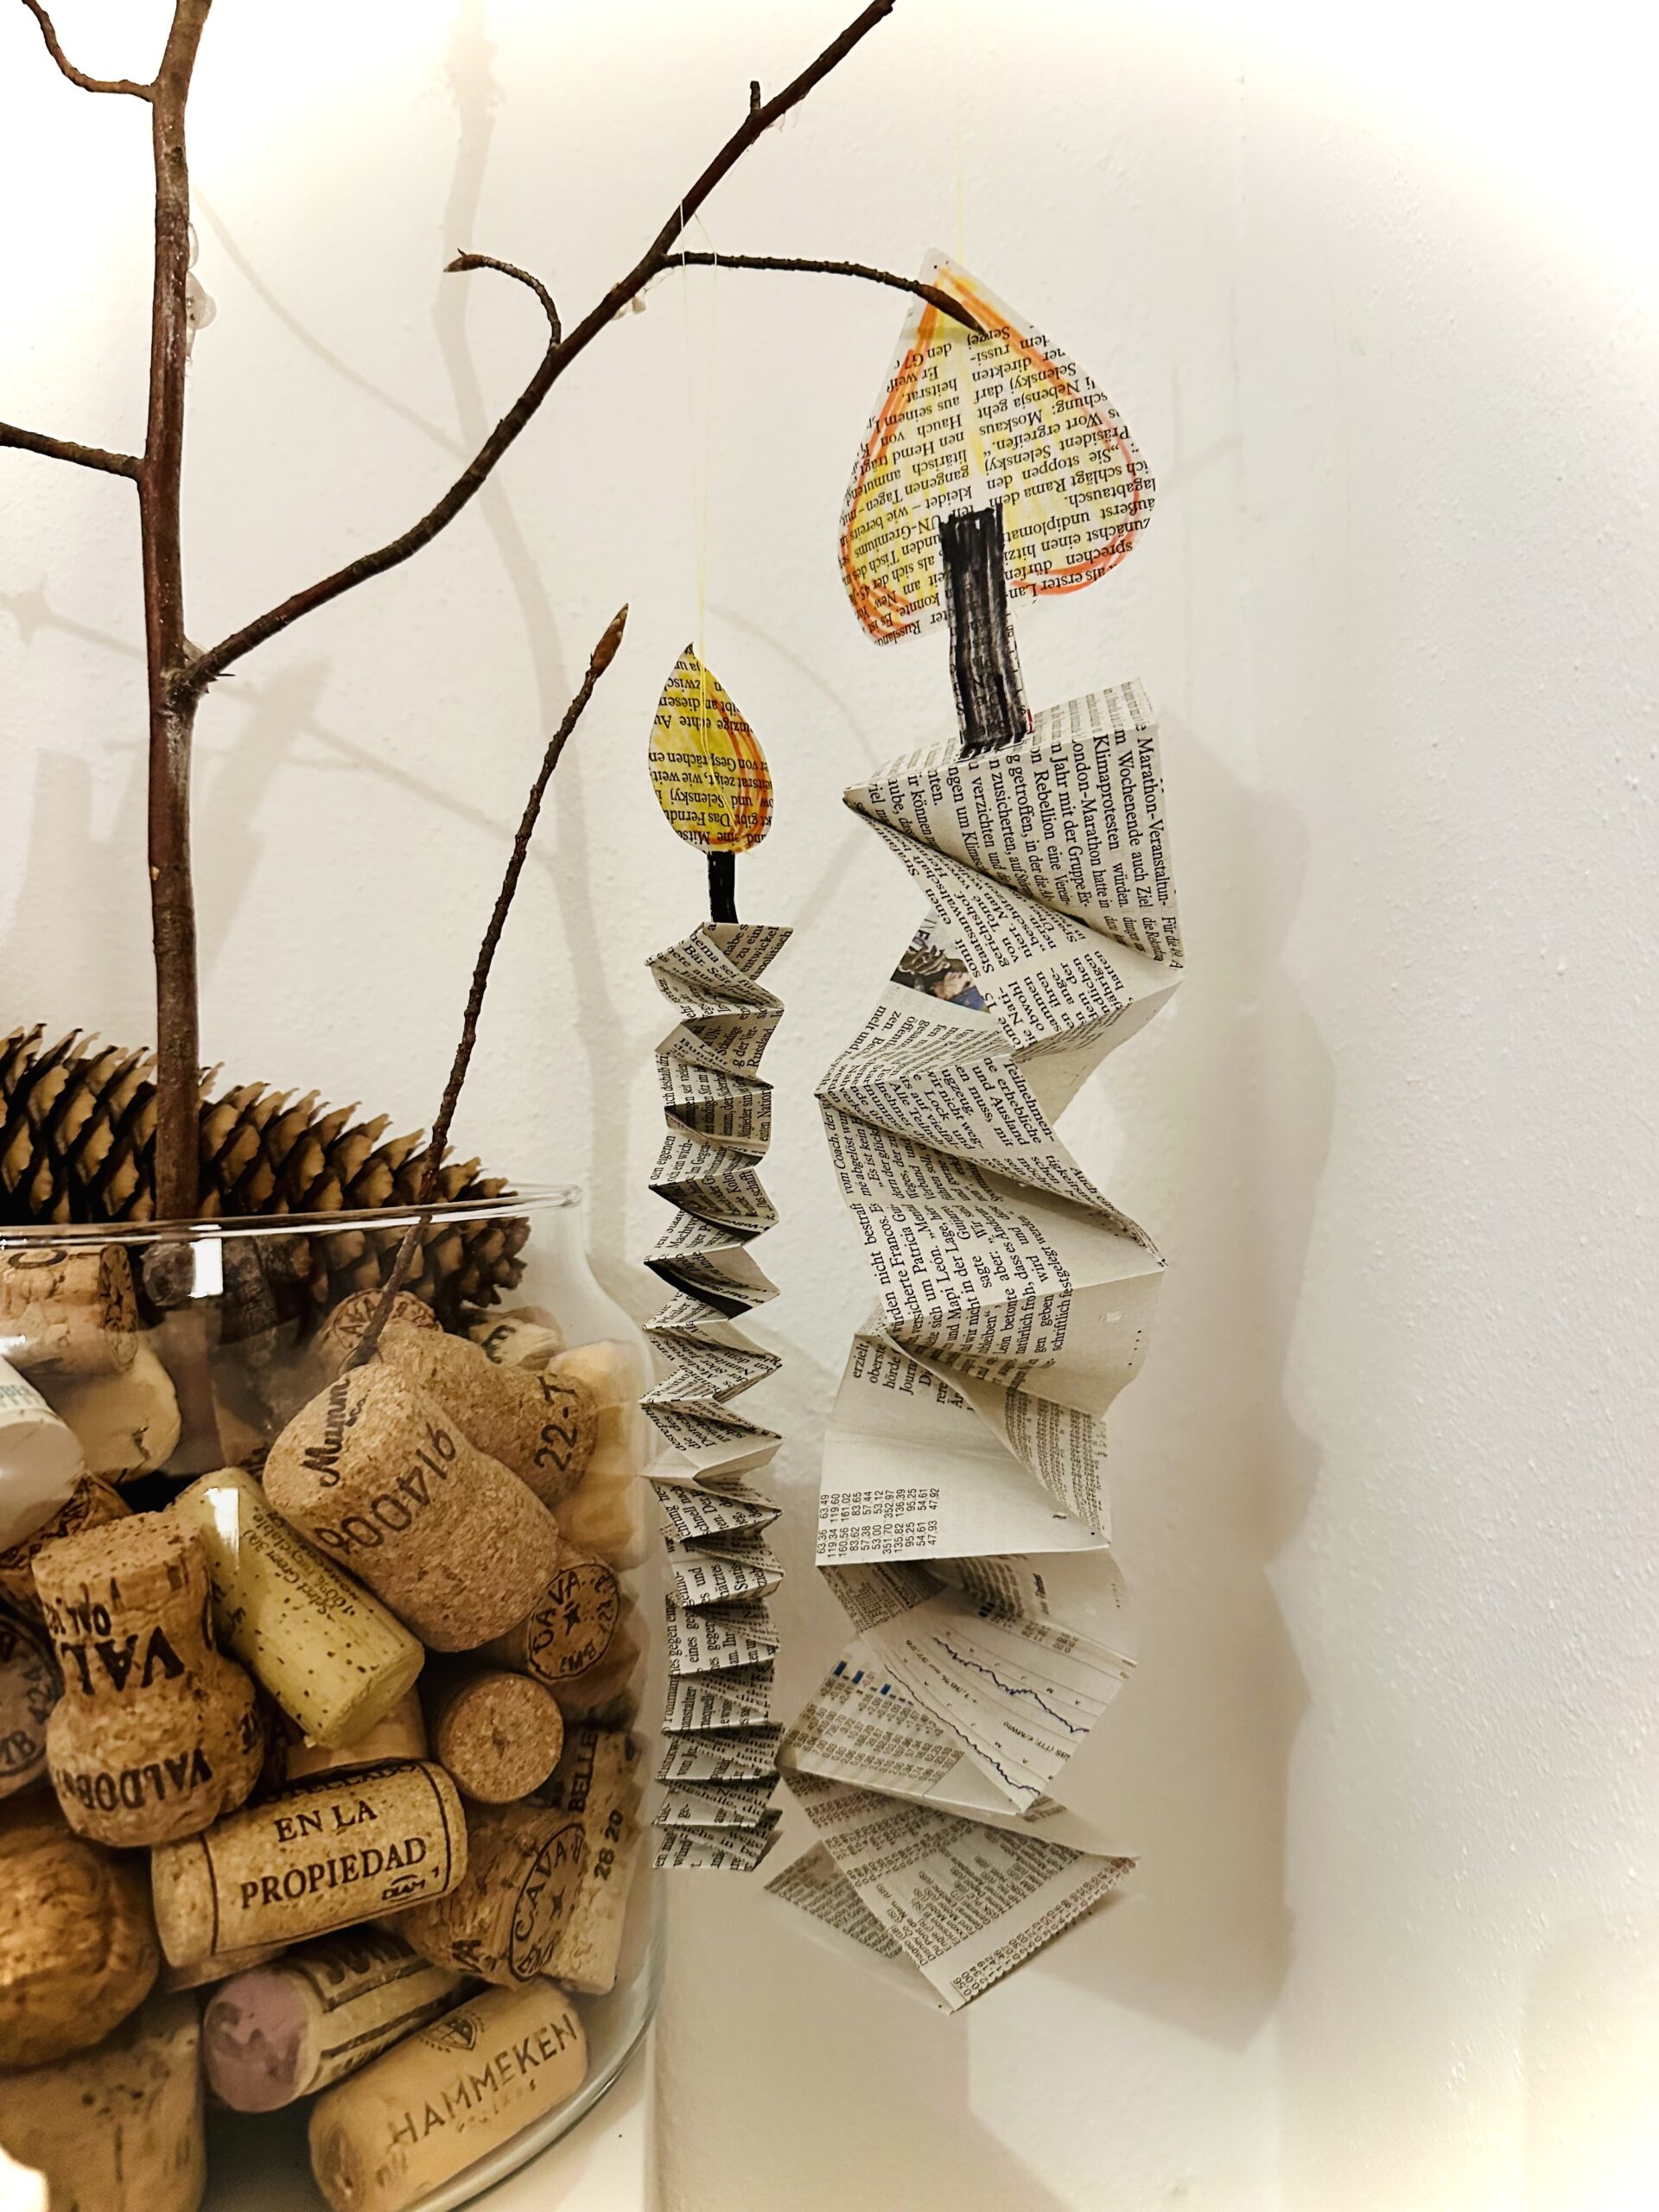


Stay creative.
Materials
Directions
Get all the craft materials ready.
Take a newspaper and put it across you. One side is closed. The paper is double. Now take a long ruler. Measure two to three centimeters wide stripes (you can use the lines of the texts as lines. So you get straight strokes.) For a candle you need 2 stripes.


That's what your painted stripes look like.


Cut the strips with a pair of scissors.


For a candle you need two equally long stripes.


Now fold the double stripe apart.


Set up two equally wide stripes, with which you fold your first candle. One strip points upwards and the other one lies across you. Both stripes are placed on one side and glued together. Then take the cross-sectional strip and fold it onto the opposite side.


The strip is folded up to the stripe lying on top, on the other side. Removes the folded fracture.
Then take the strip lying up and fold it down. Strip this fracture smoothly as well.


Fold the next strip from left to right and the next strip from bottom to top.
Repeat these steps until the paper strip ends.


The last two folded squares are glued together. Cuts off the remaining paper strips with scissors. The accordion candle is ready.


The flame and the wick are made from a double newspaper sheet. Glues two newspaper sheets together for this purpose. A hand-sized piece of paper extends for this purpose. Paints a flame (in drop form) on the paper piece. Paints the wick directly at the round bottom of the flame. This looks like a thin beam.


Cuts out everything in one piece together with the scissors. (Butt and candle).
Now you can paint the wick in black.
yellow and red felt pins are brought the flame to "light".


The candle and flame with wick are now glued to each other. Fold a small piece on the wick, this you need to stick to it. Then glue the folded piece of wick onto the top of the candle (on the top paper of the accordion candle).


Cut a piece of thread. For this you can measure the length of your ruler. Double the thread so that both ends of the thread lie on each other. Make a knot in the thread.


Sticks the thread loop to the back of the flame (e.g. with a transparent adhesive tape = Tesafilm).
Now the candle is ready.


Find a nice place, e.g. at a branch or fir branch and hang up your candle.


You may also make the candle as a gift or gift pendant.
You will get various thick candles if you cut the paper strips in different widths. However, for a candle you will always need two equally thick/wide strips of paper.
I'd love to try it out.


Stay creative.
Follow us on Facebook , Instagram and Pinterest
Don't miss any more adventures: Our bottle mail


