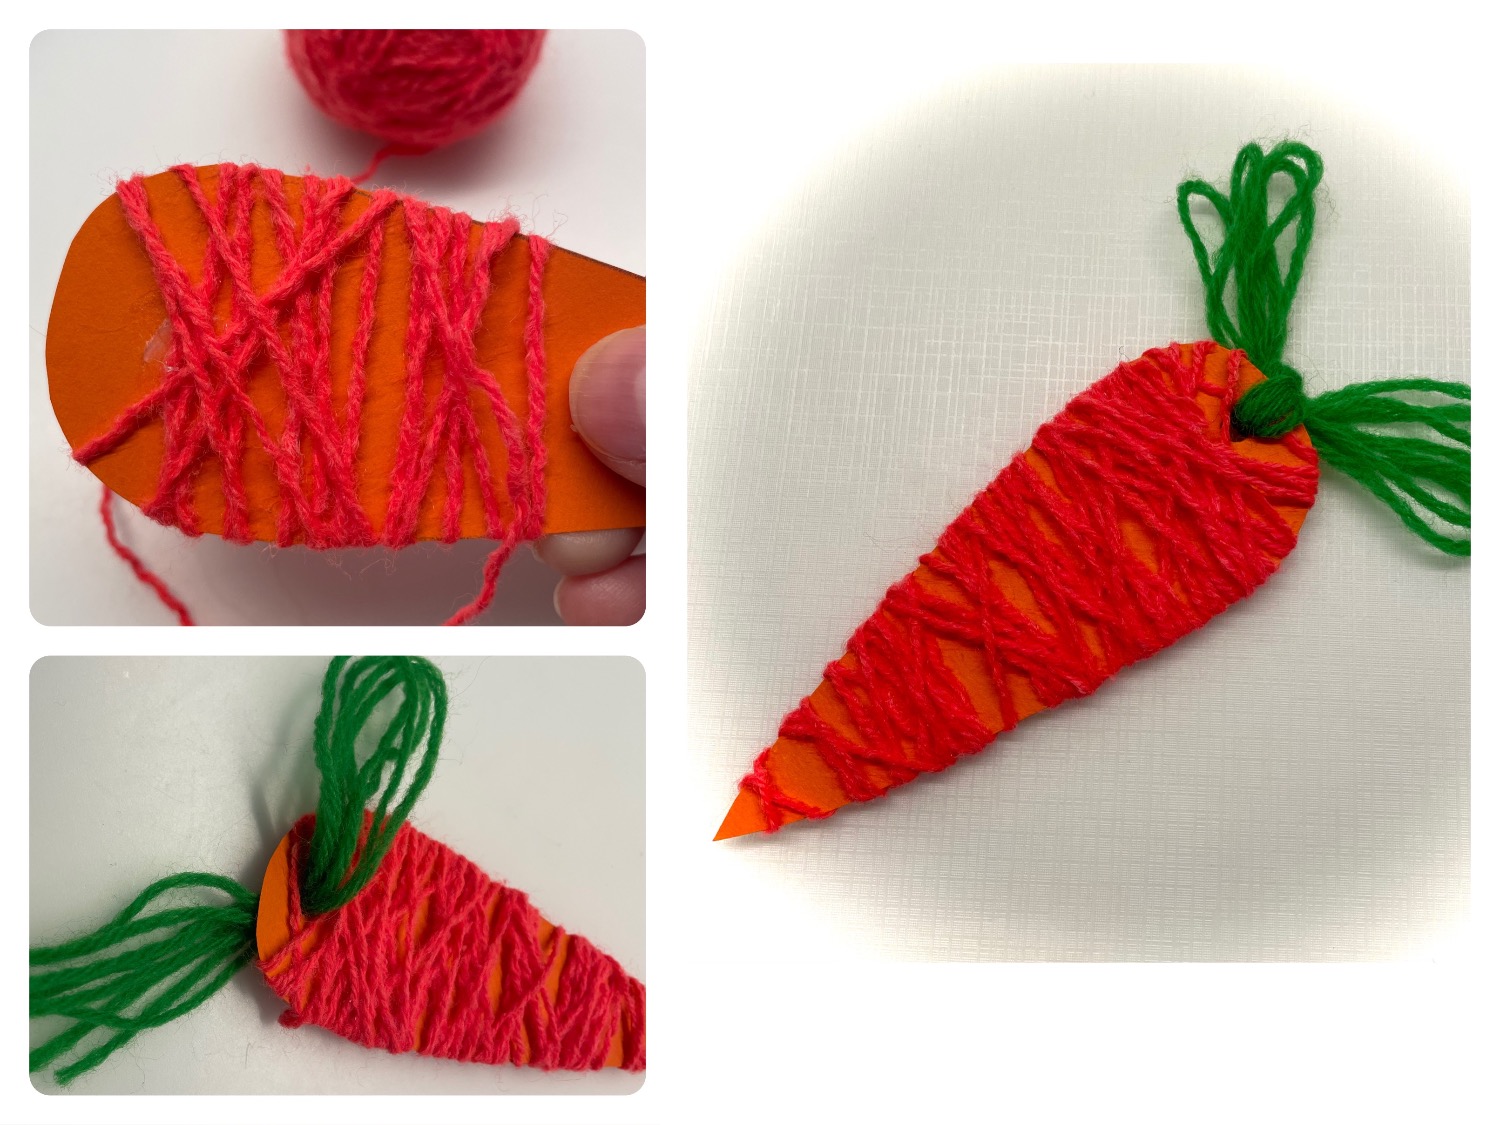
Make this carrot with photo box and orange and green wool. For this, wrap a photo box with orange wool cut as a carrot. For the carrot green you punch a hole in the cardboard at the thick end of the carrot, to which you knot green wool.
See for yourself how simple this craft is.
Media Education for Kindergarten and Hort

Relief in everyday life, targeted promotion of individual children, independent learning and - without any pre-knowledge already usable by the youngest!
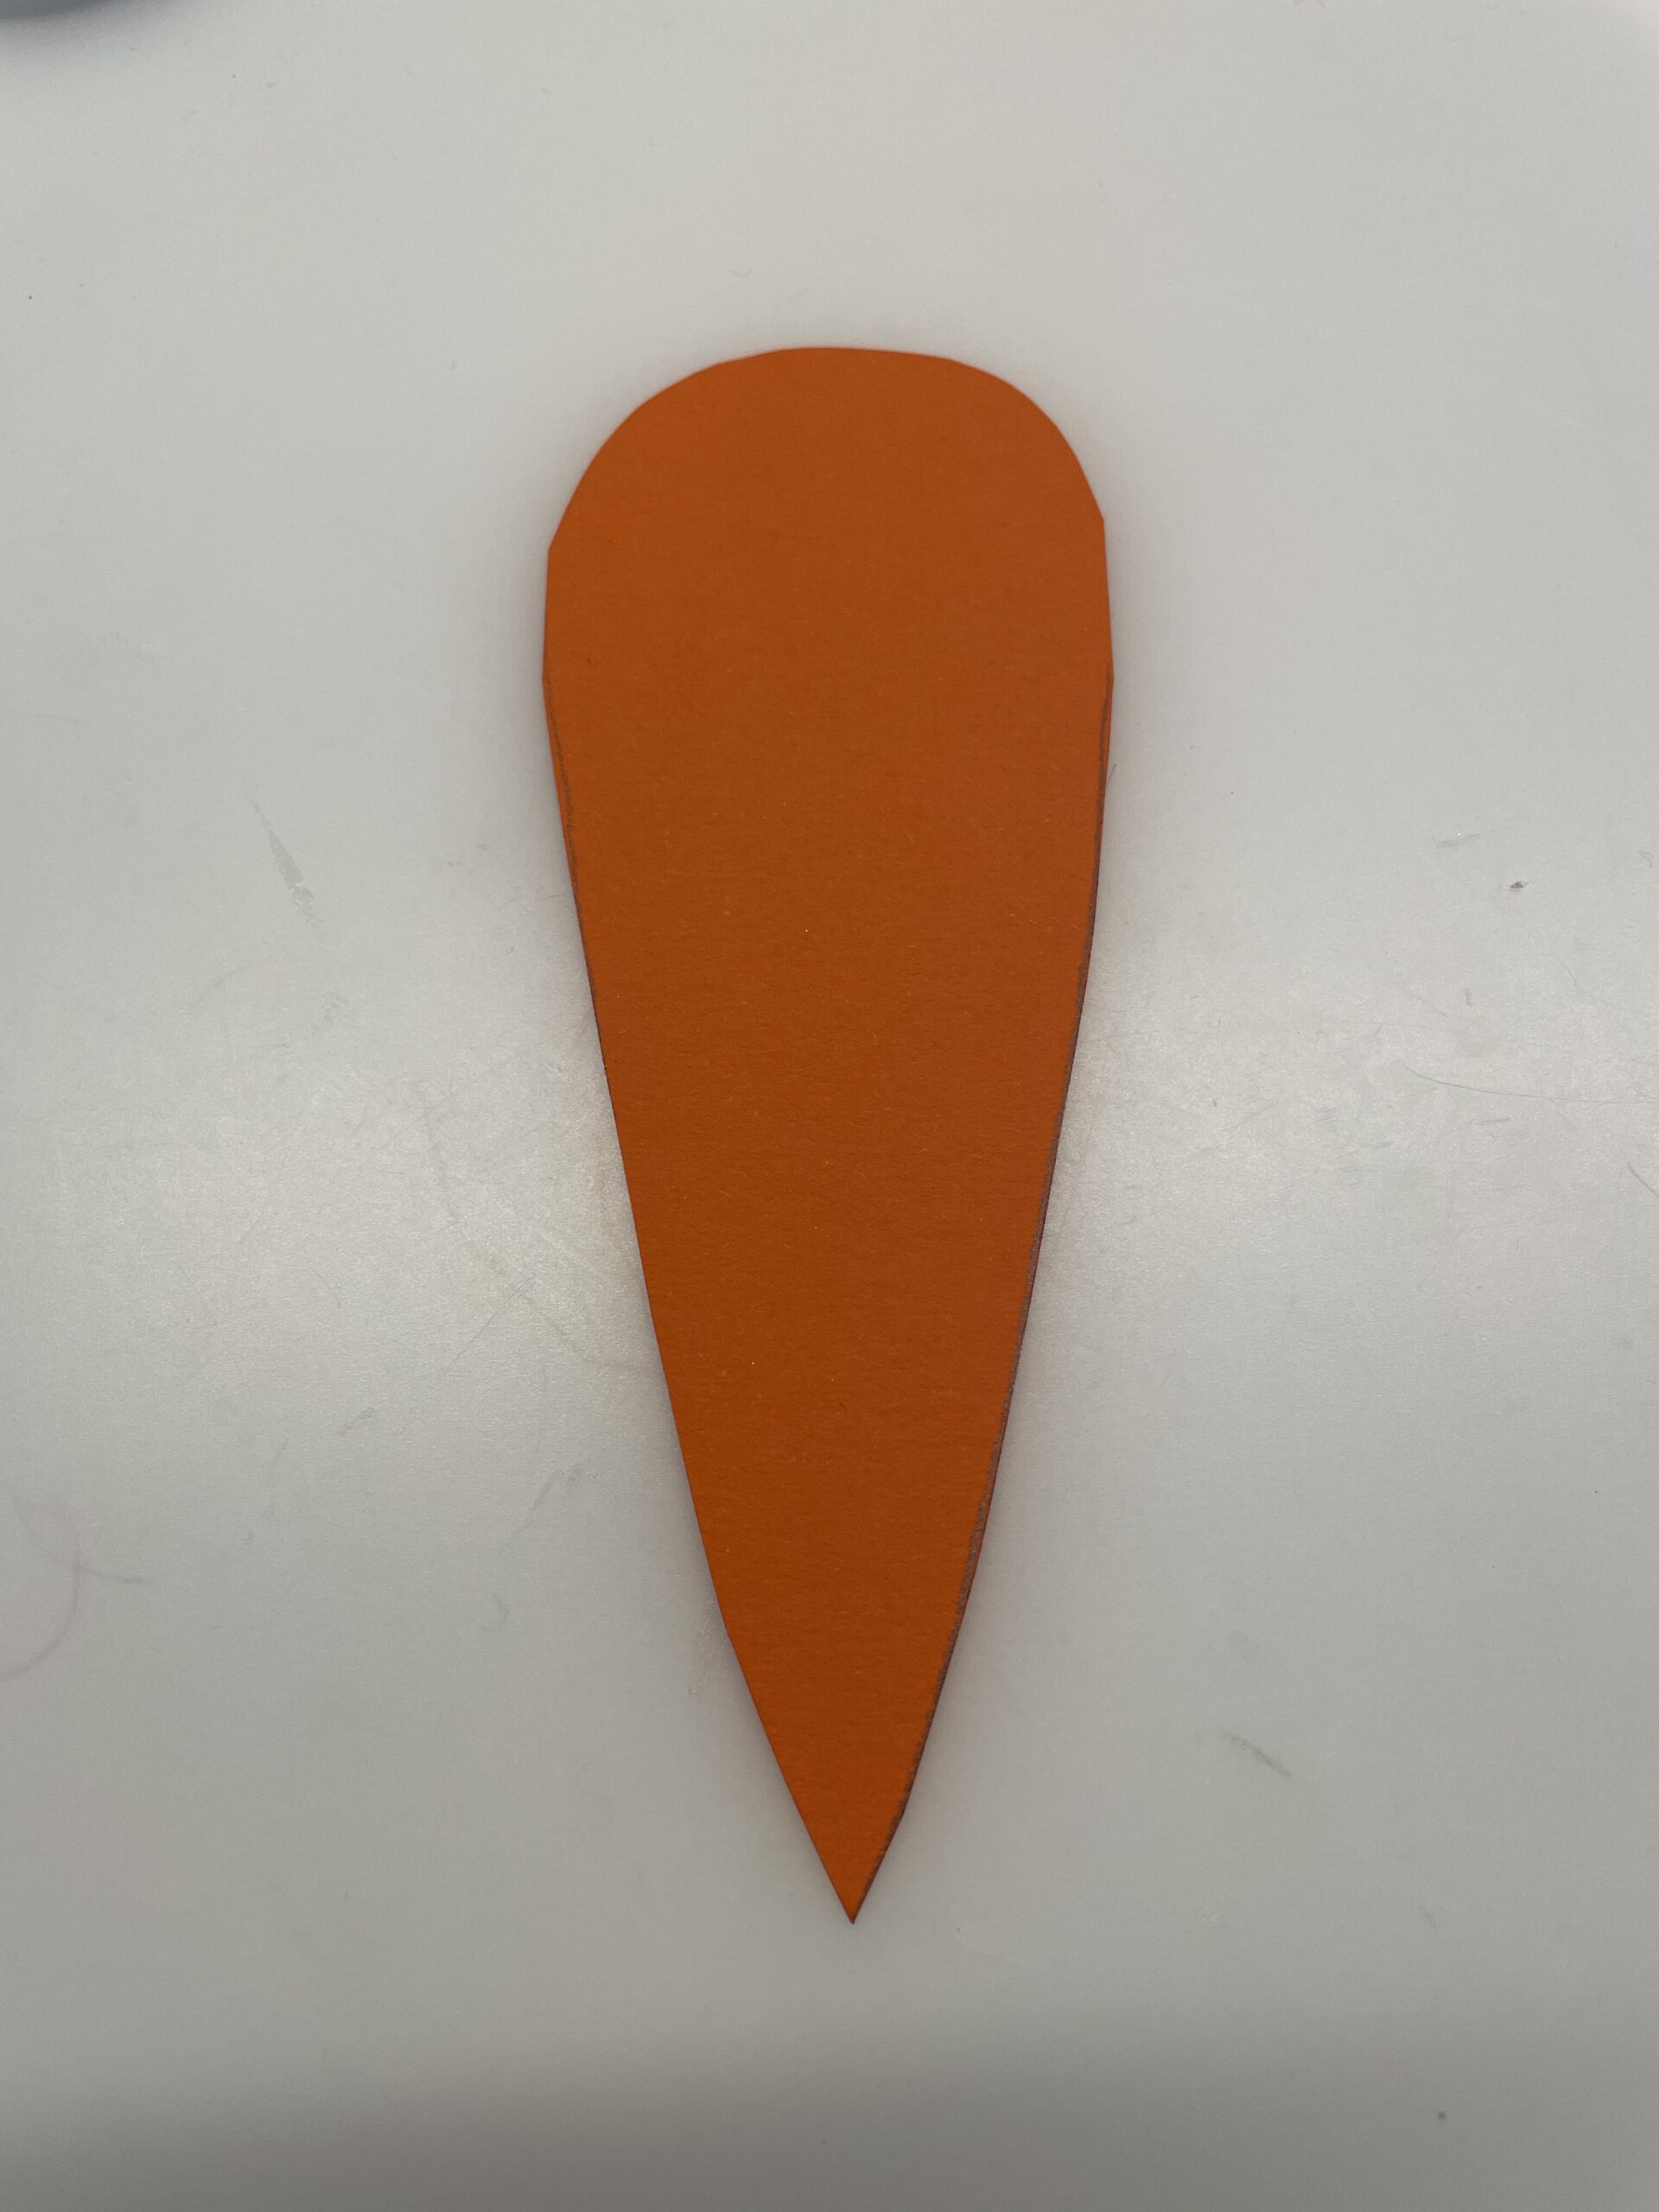
Consider how large your carrot shall be. The height of the carrot corresponds to the length of your paper. The width corresponds to the thickness of the carrot.
Round off the top end of this rectangle.

Then mark the lower center with a point. Then connect it to the upper outer edges. This creates the shape of a carrot.
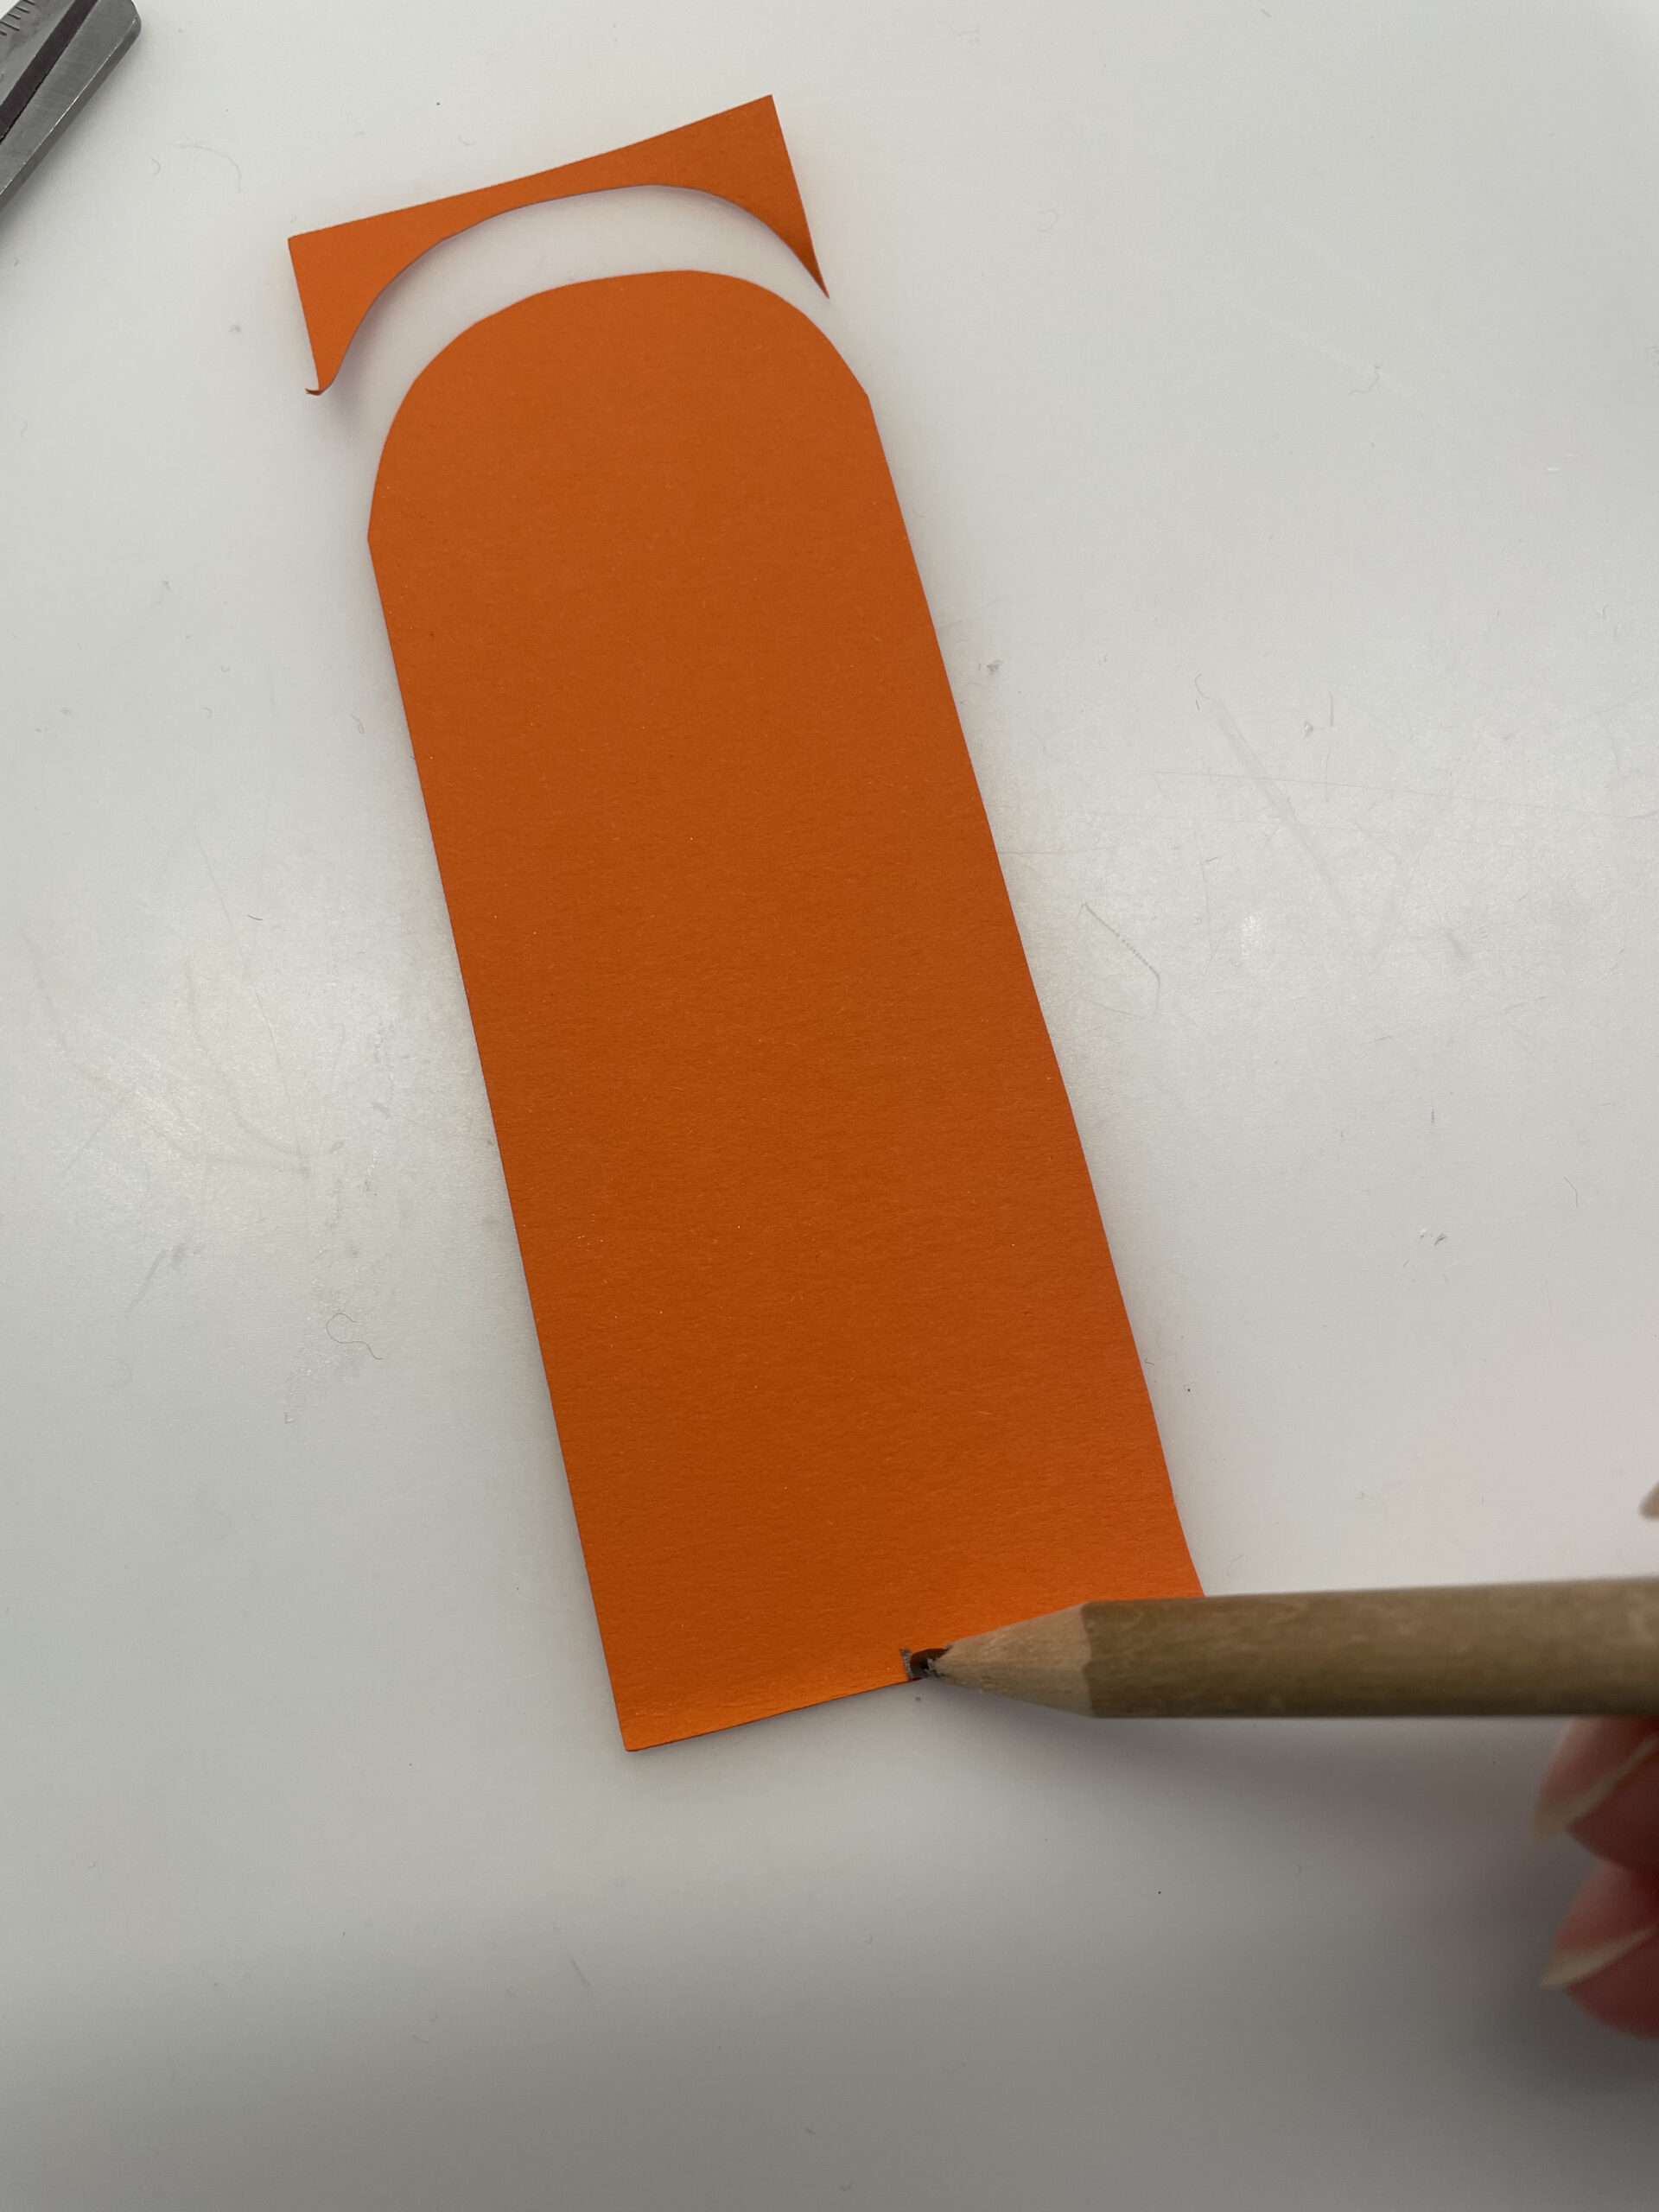
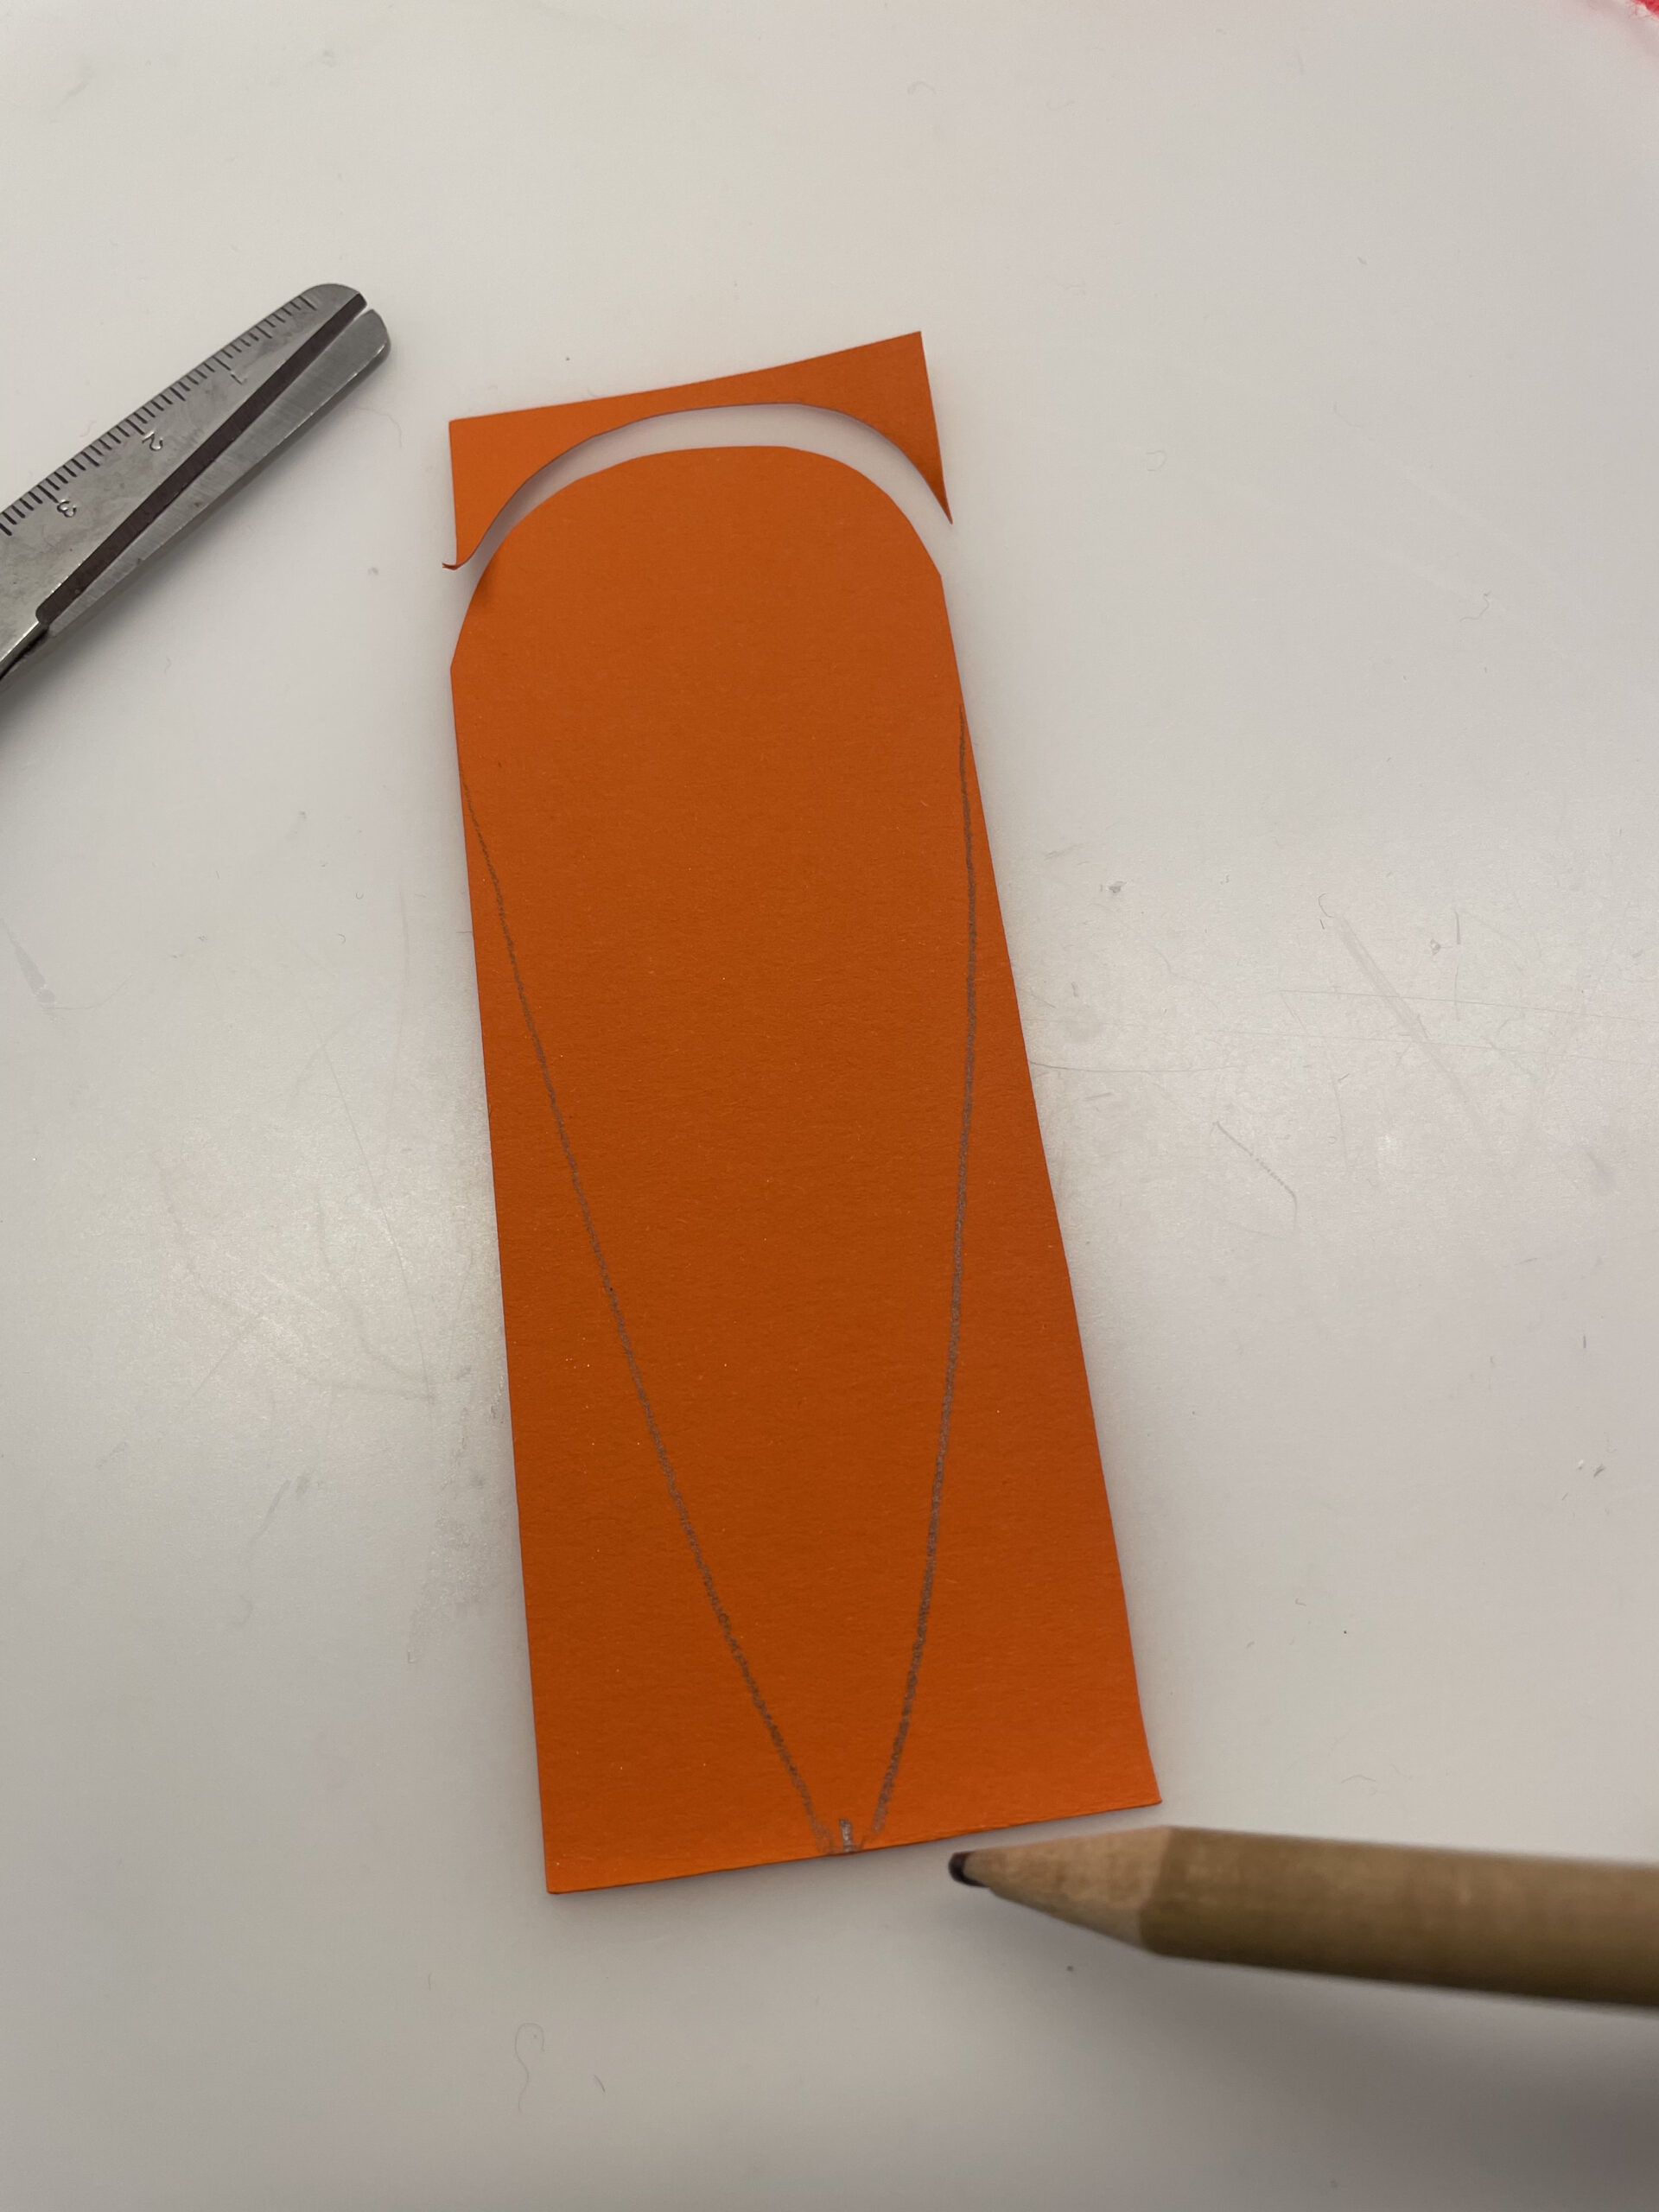
Cut out the carrot now.
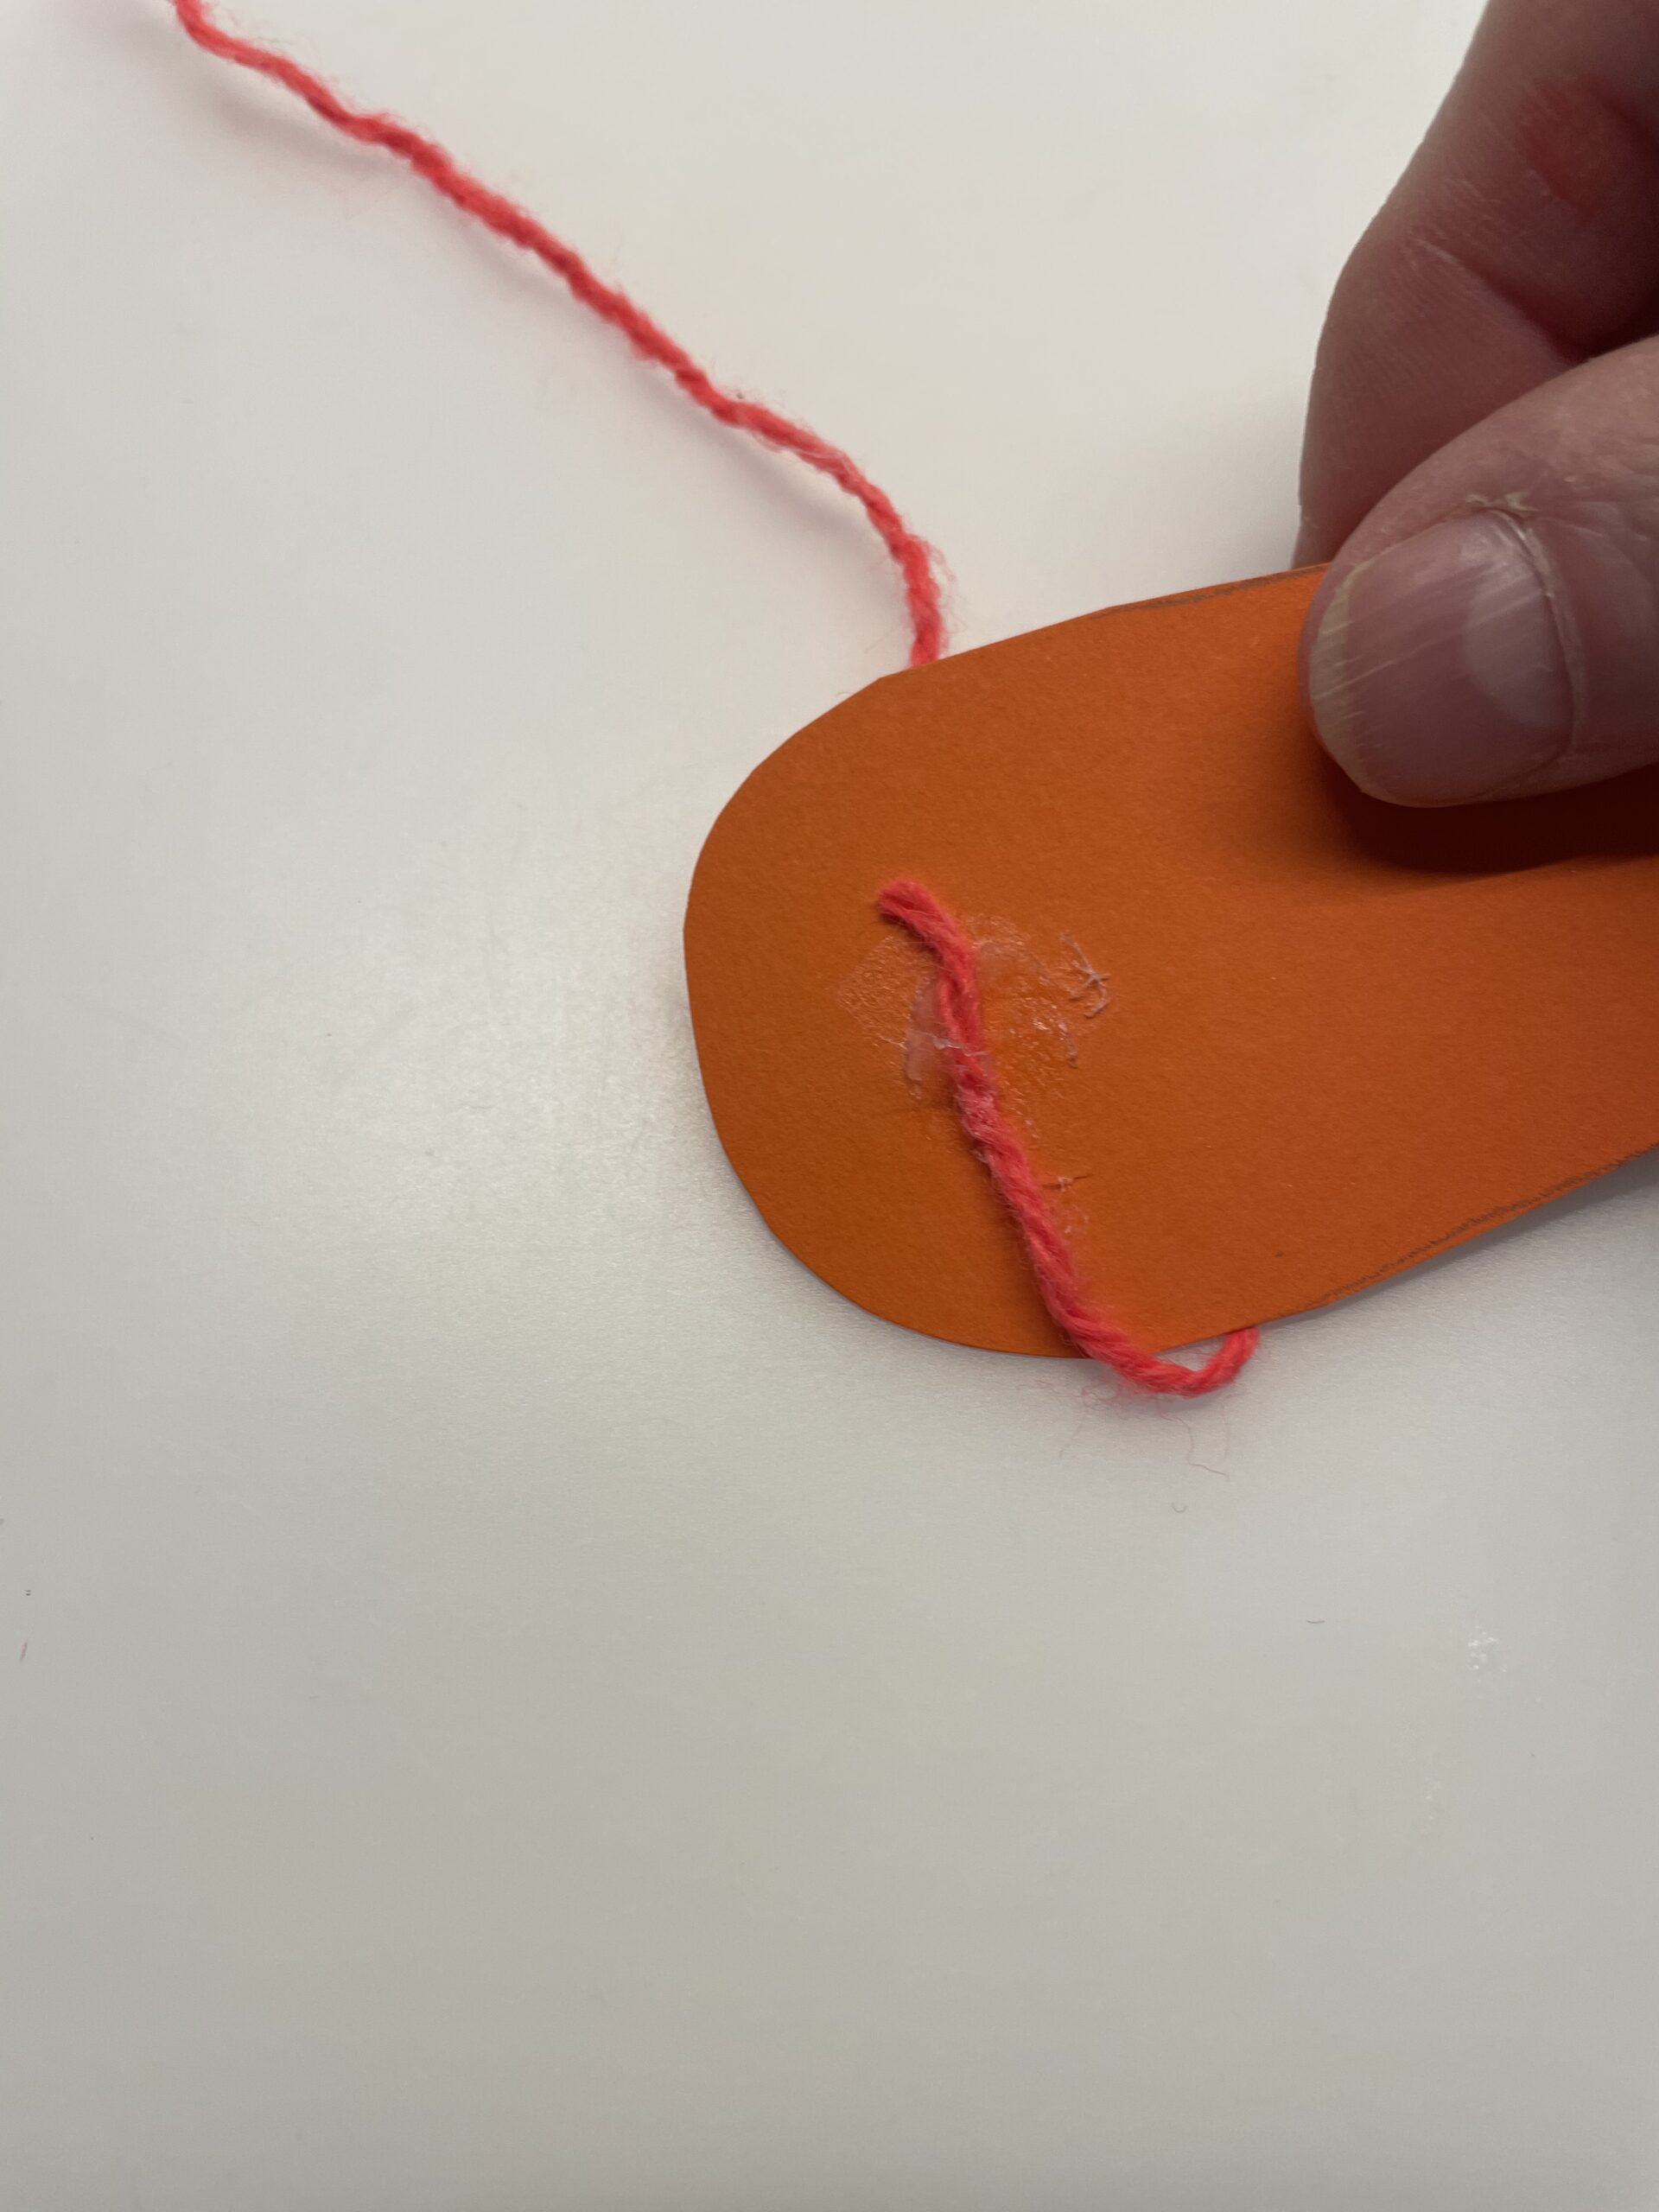
Now take the orange wool.

On the back of the carrot, stick to the beginning of the wool with an adhesive tape or a glue stick.
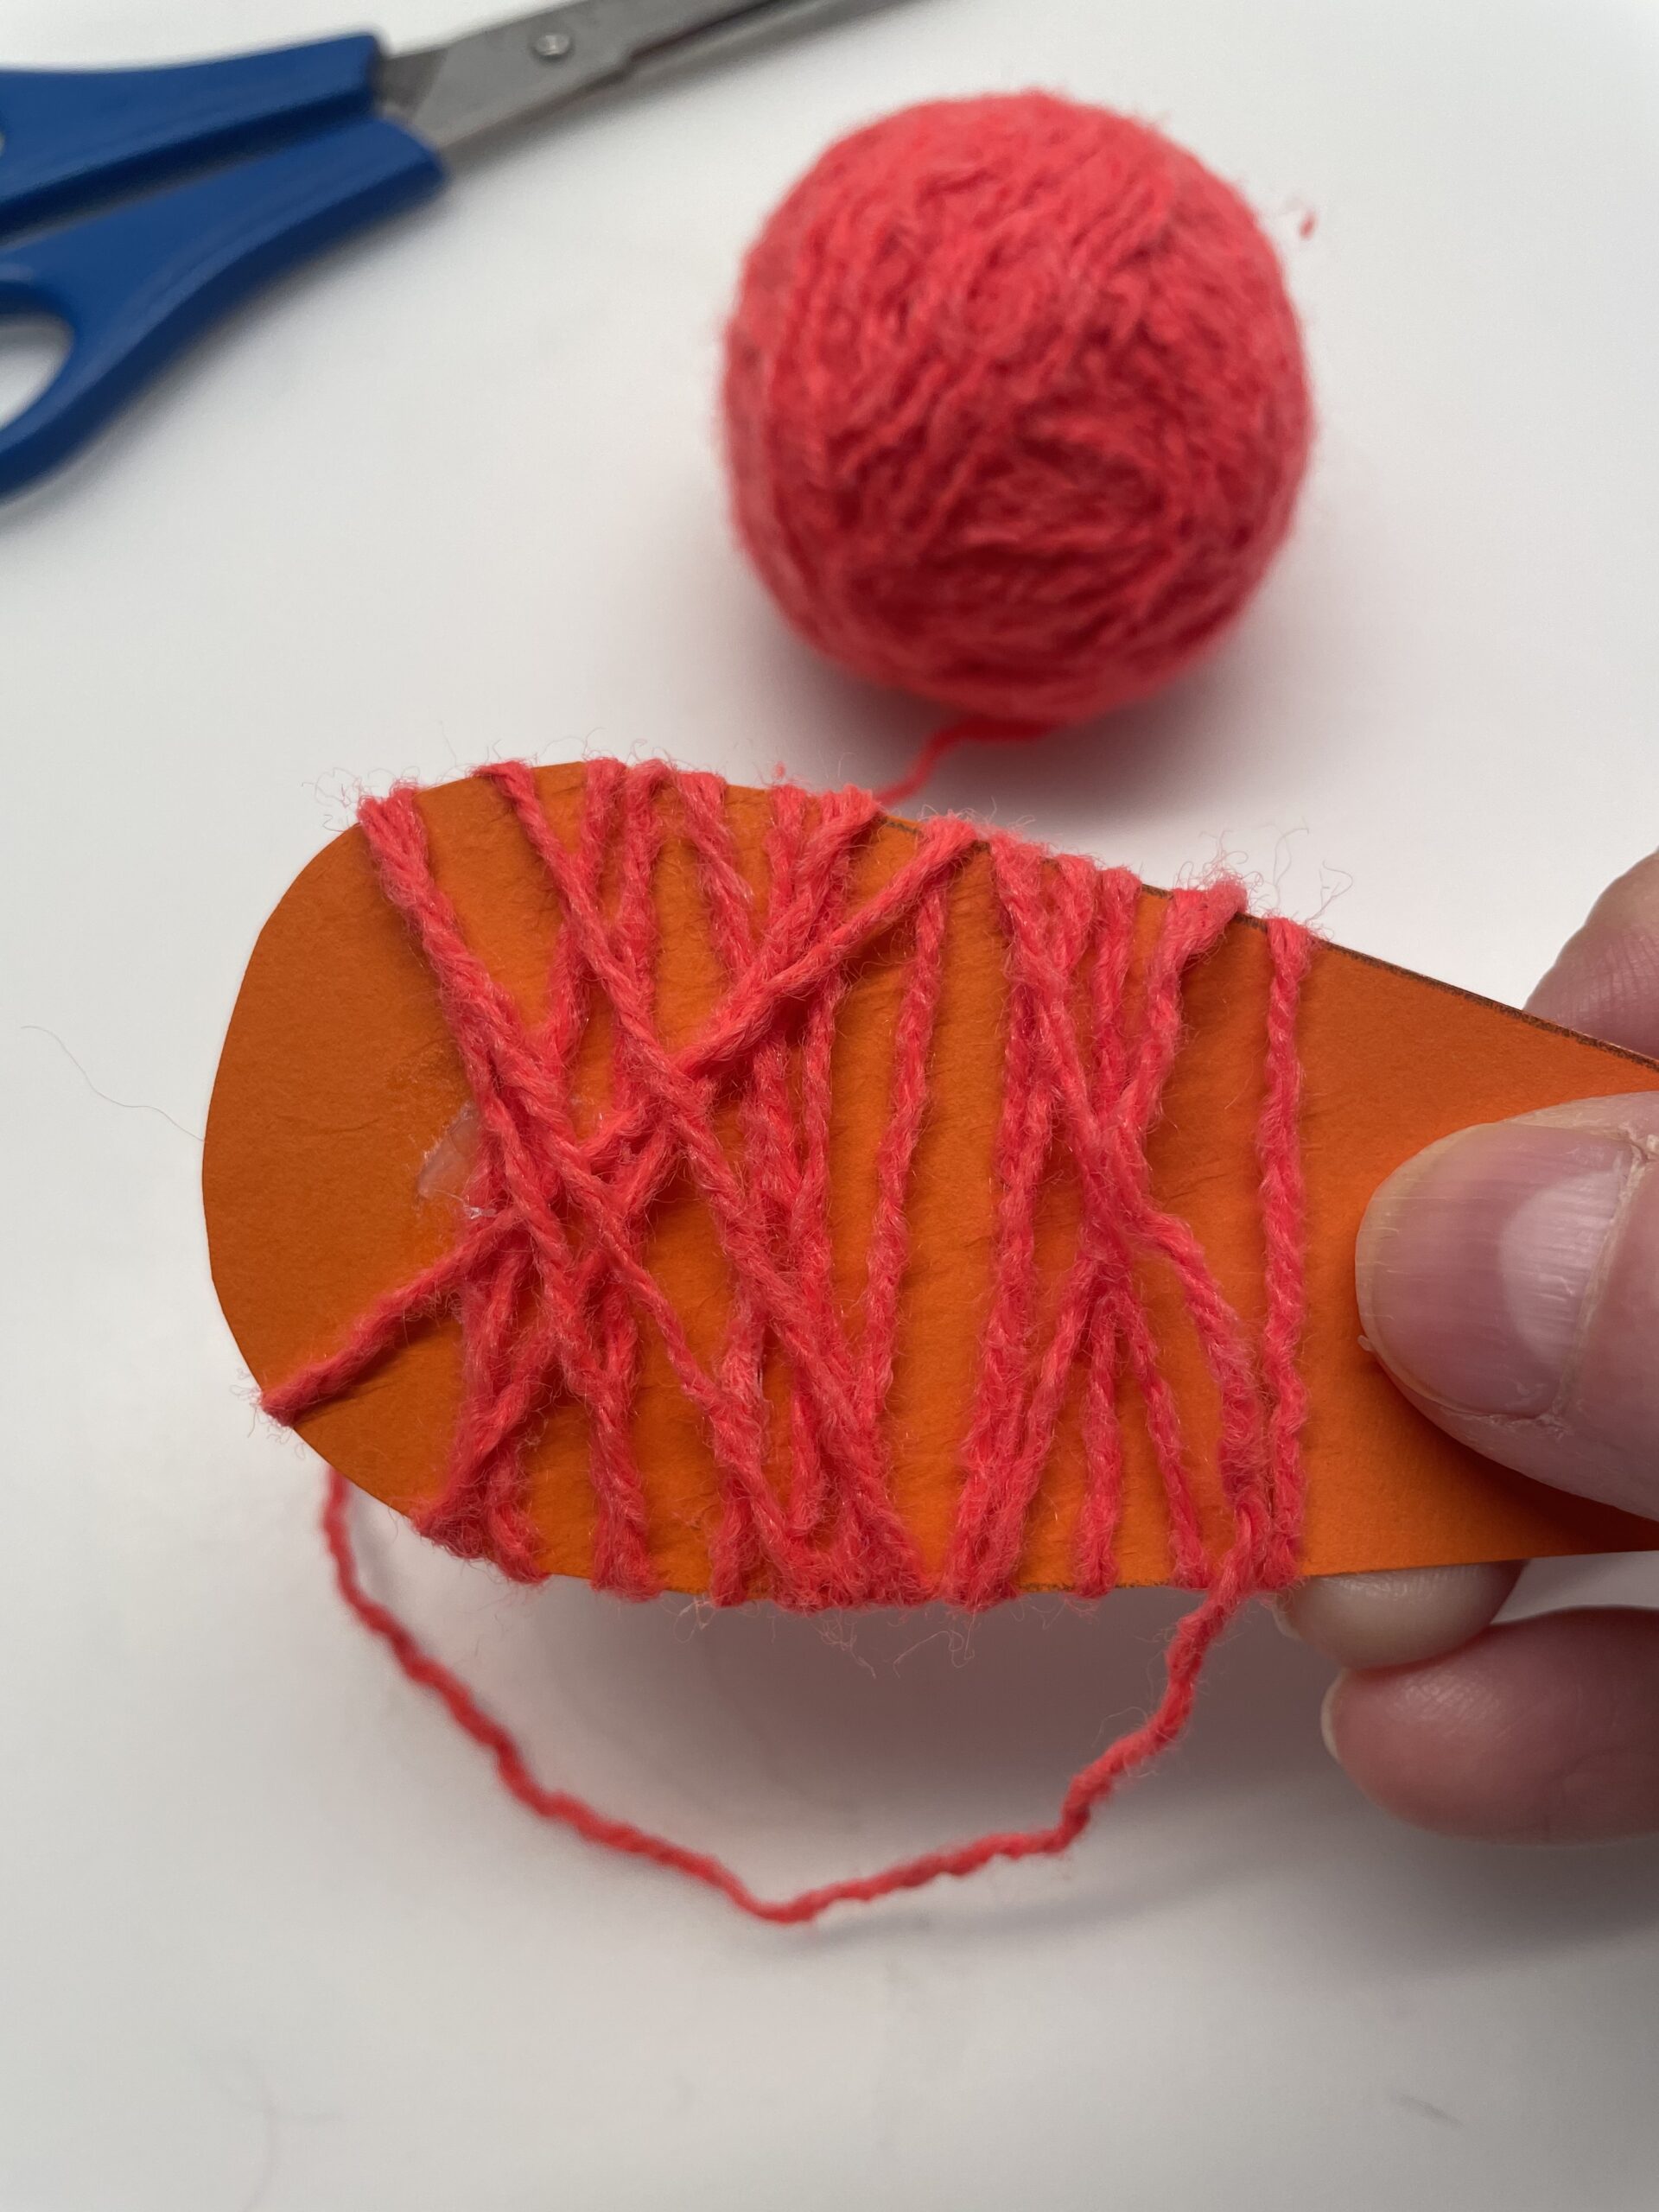
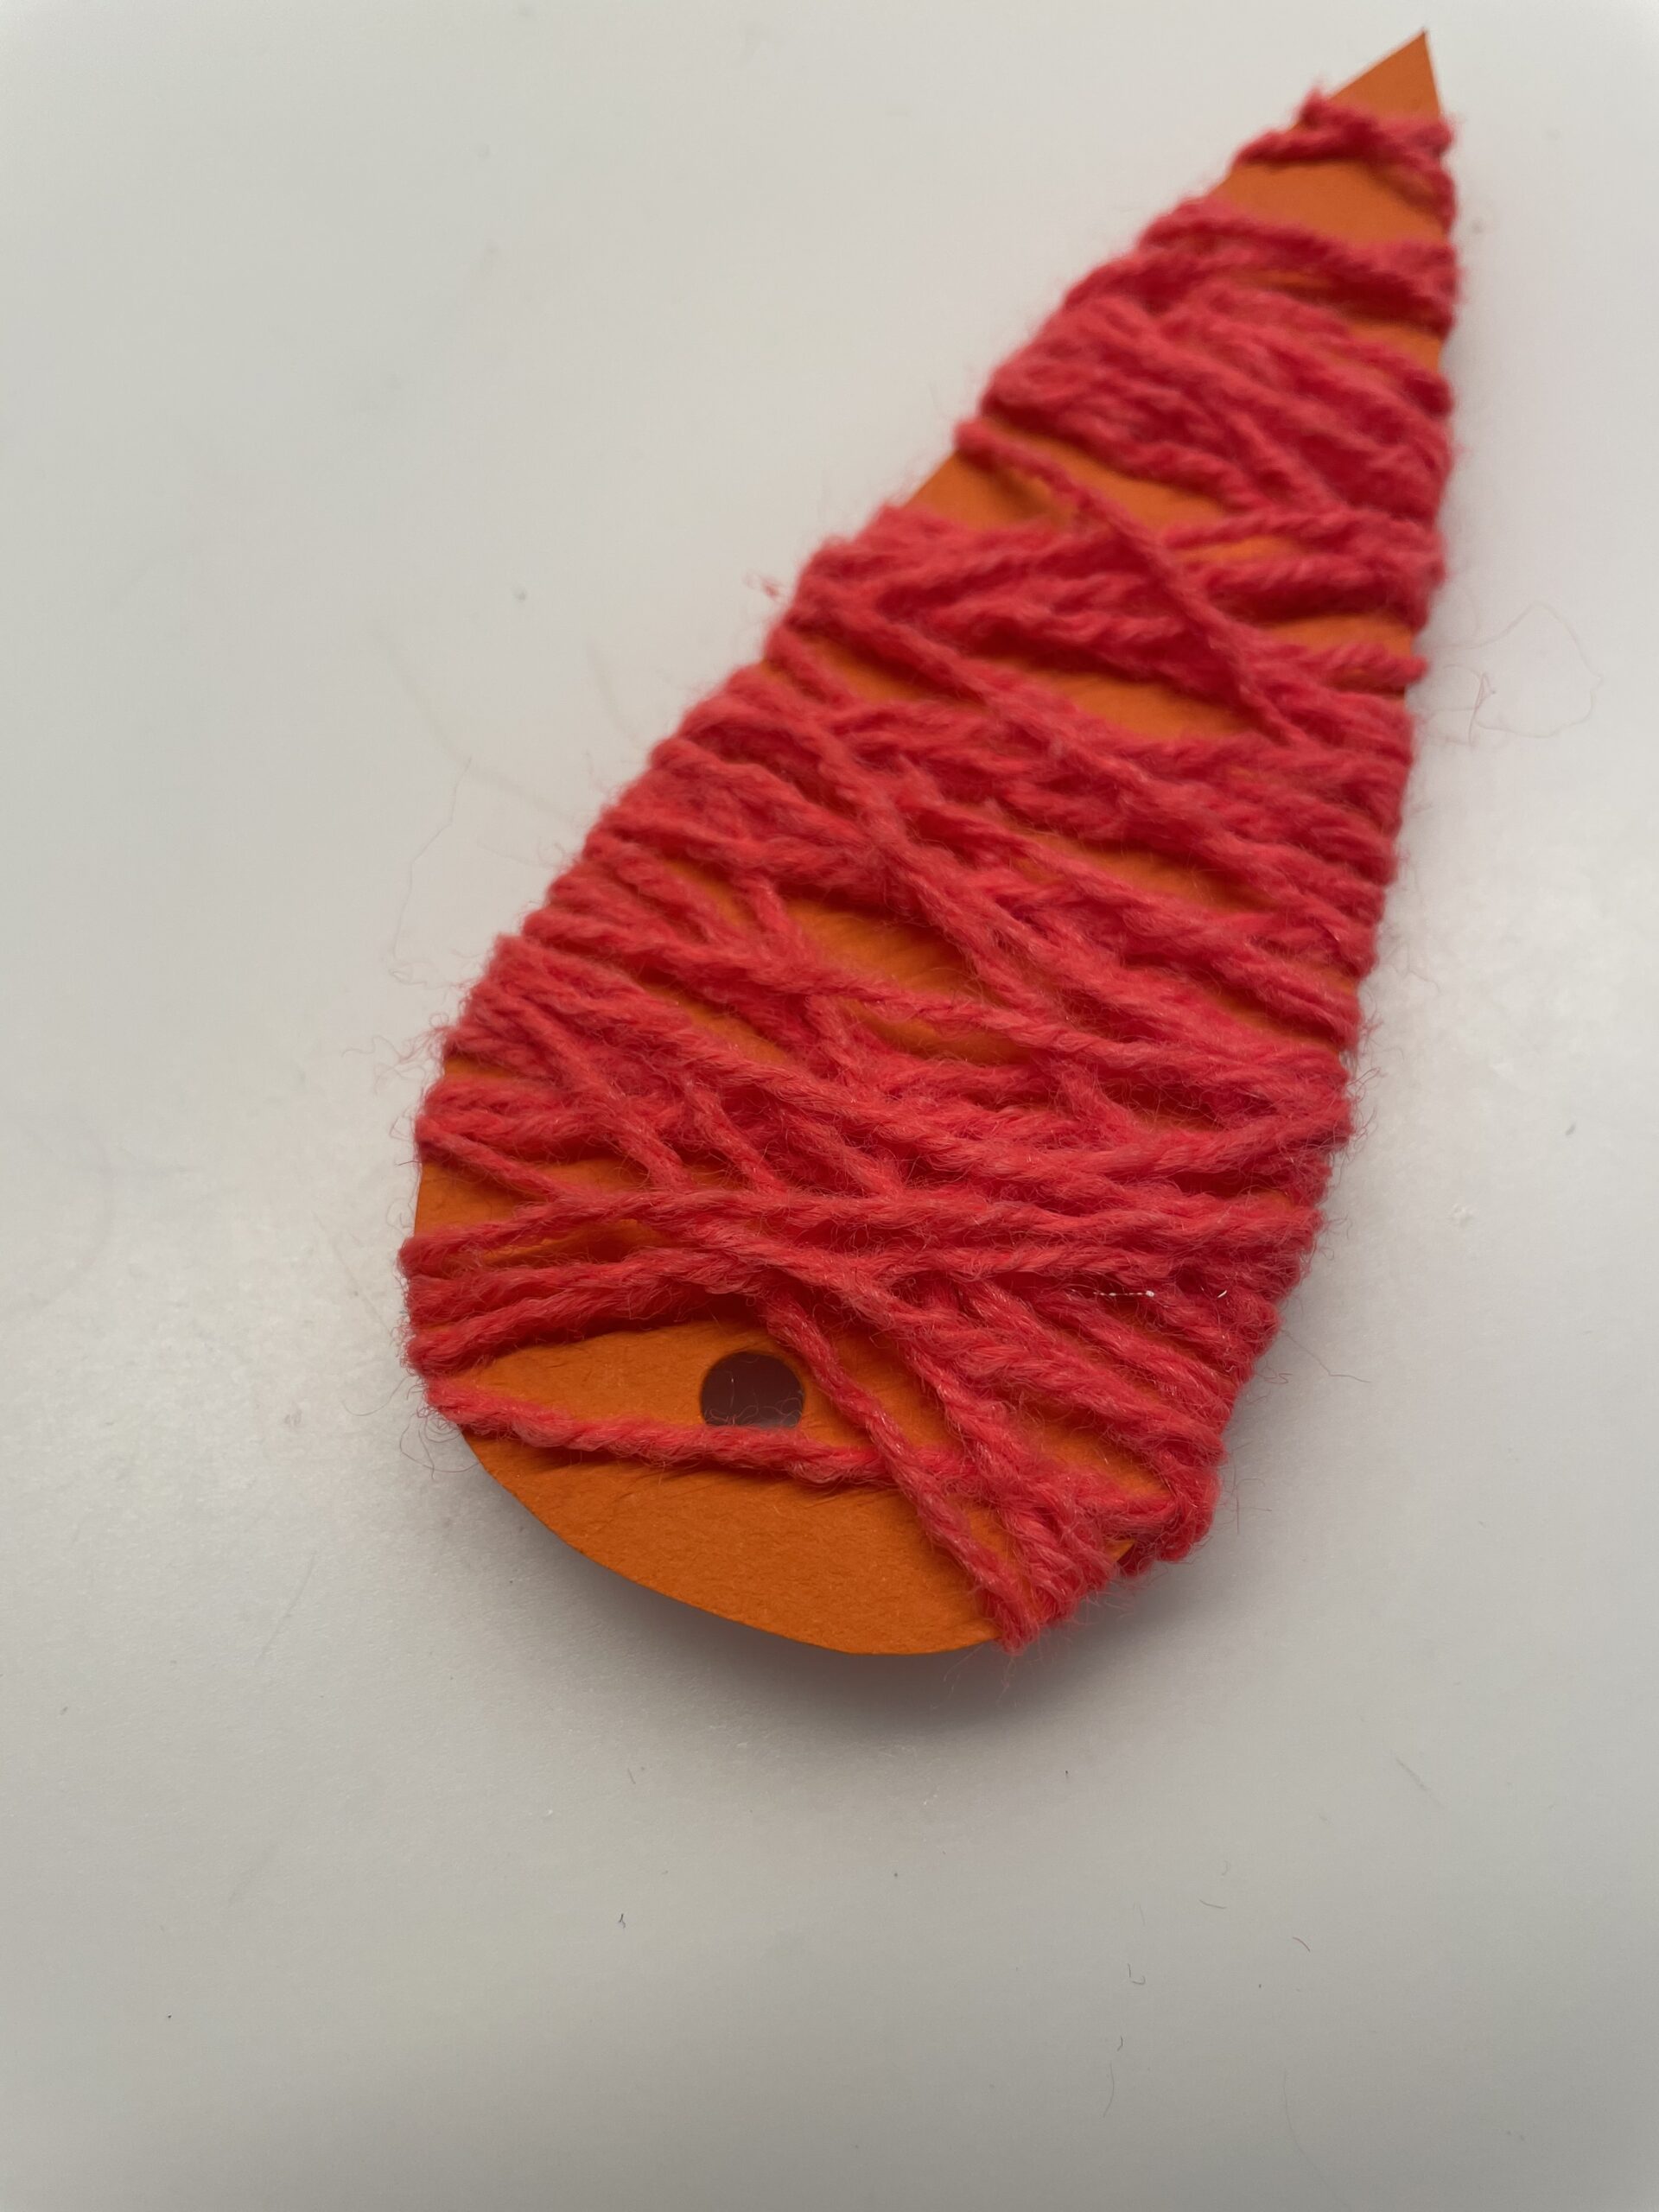
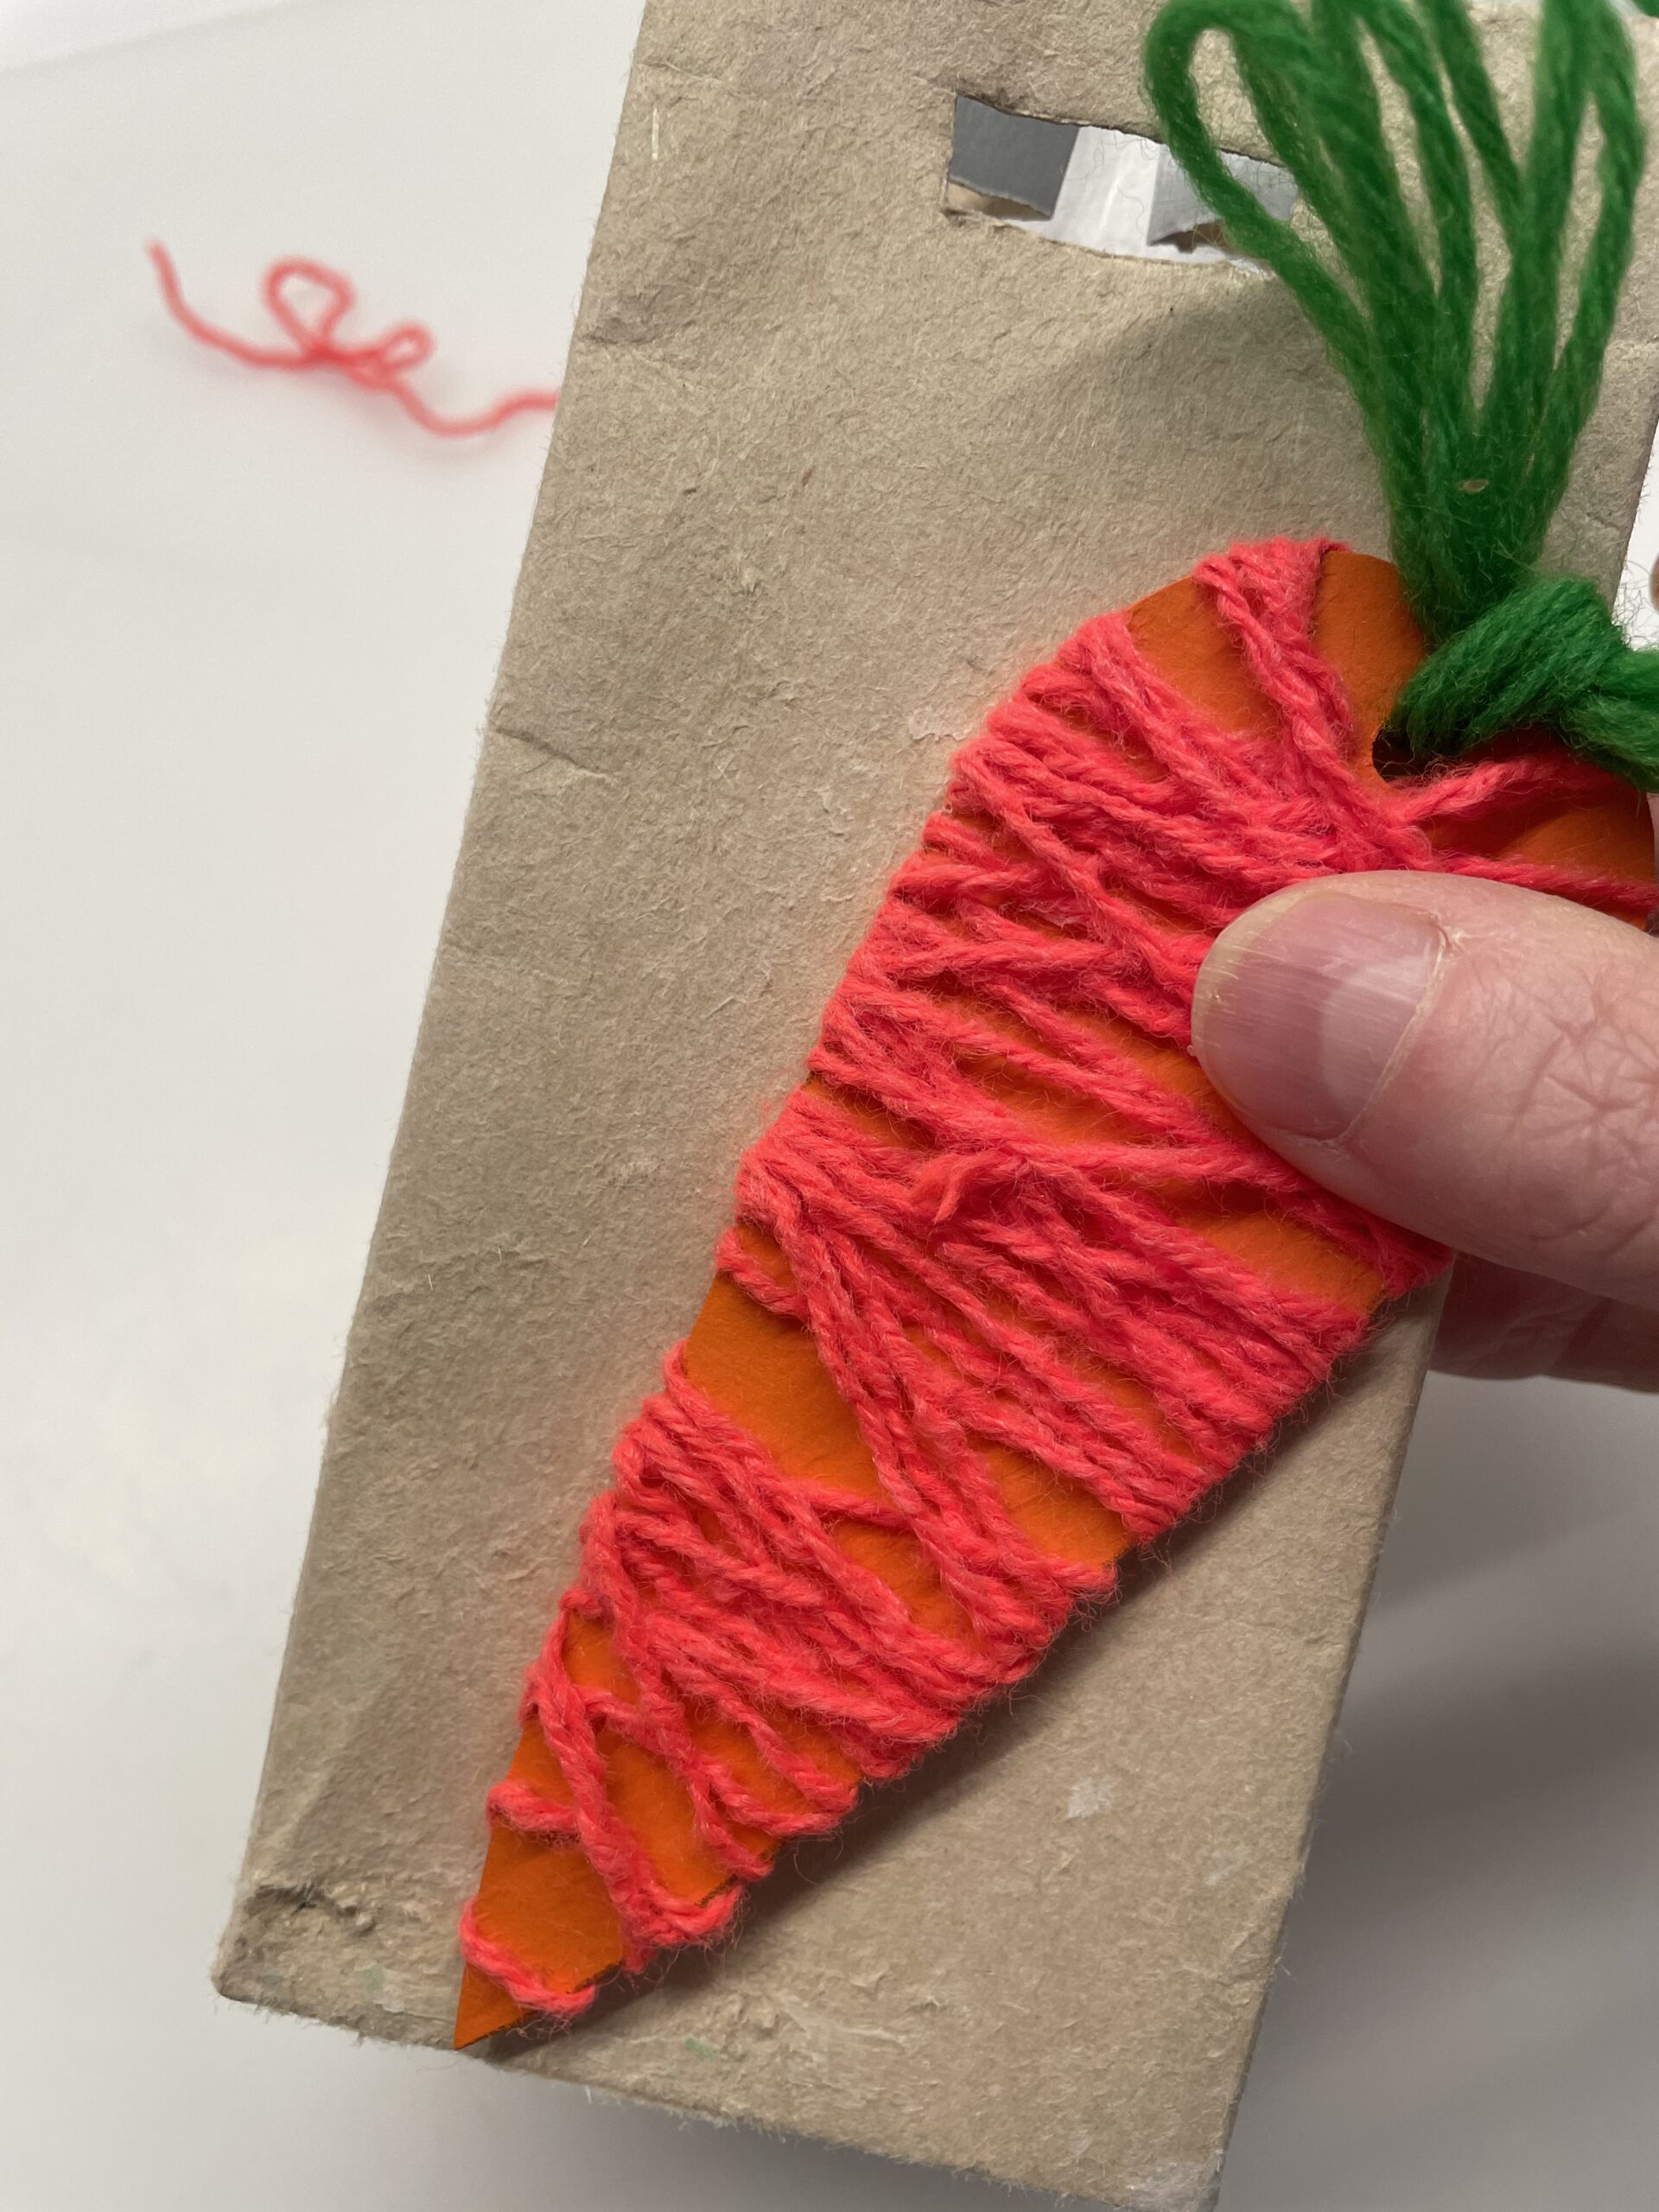
Then you wrap the carrot. Wrap crisscross and try to wrap the curves.

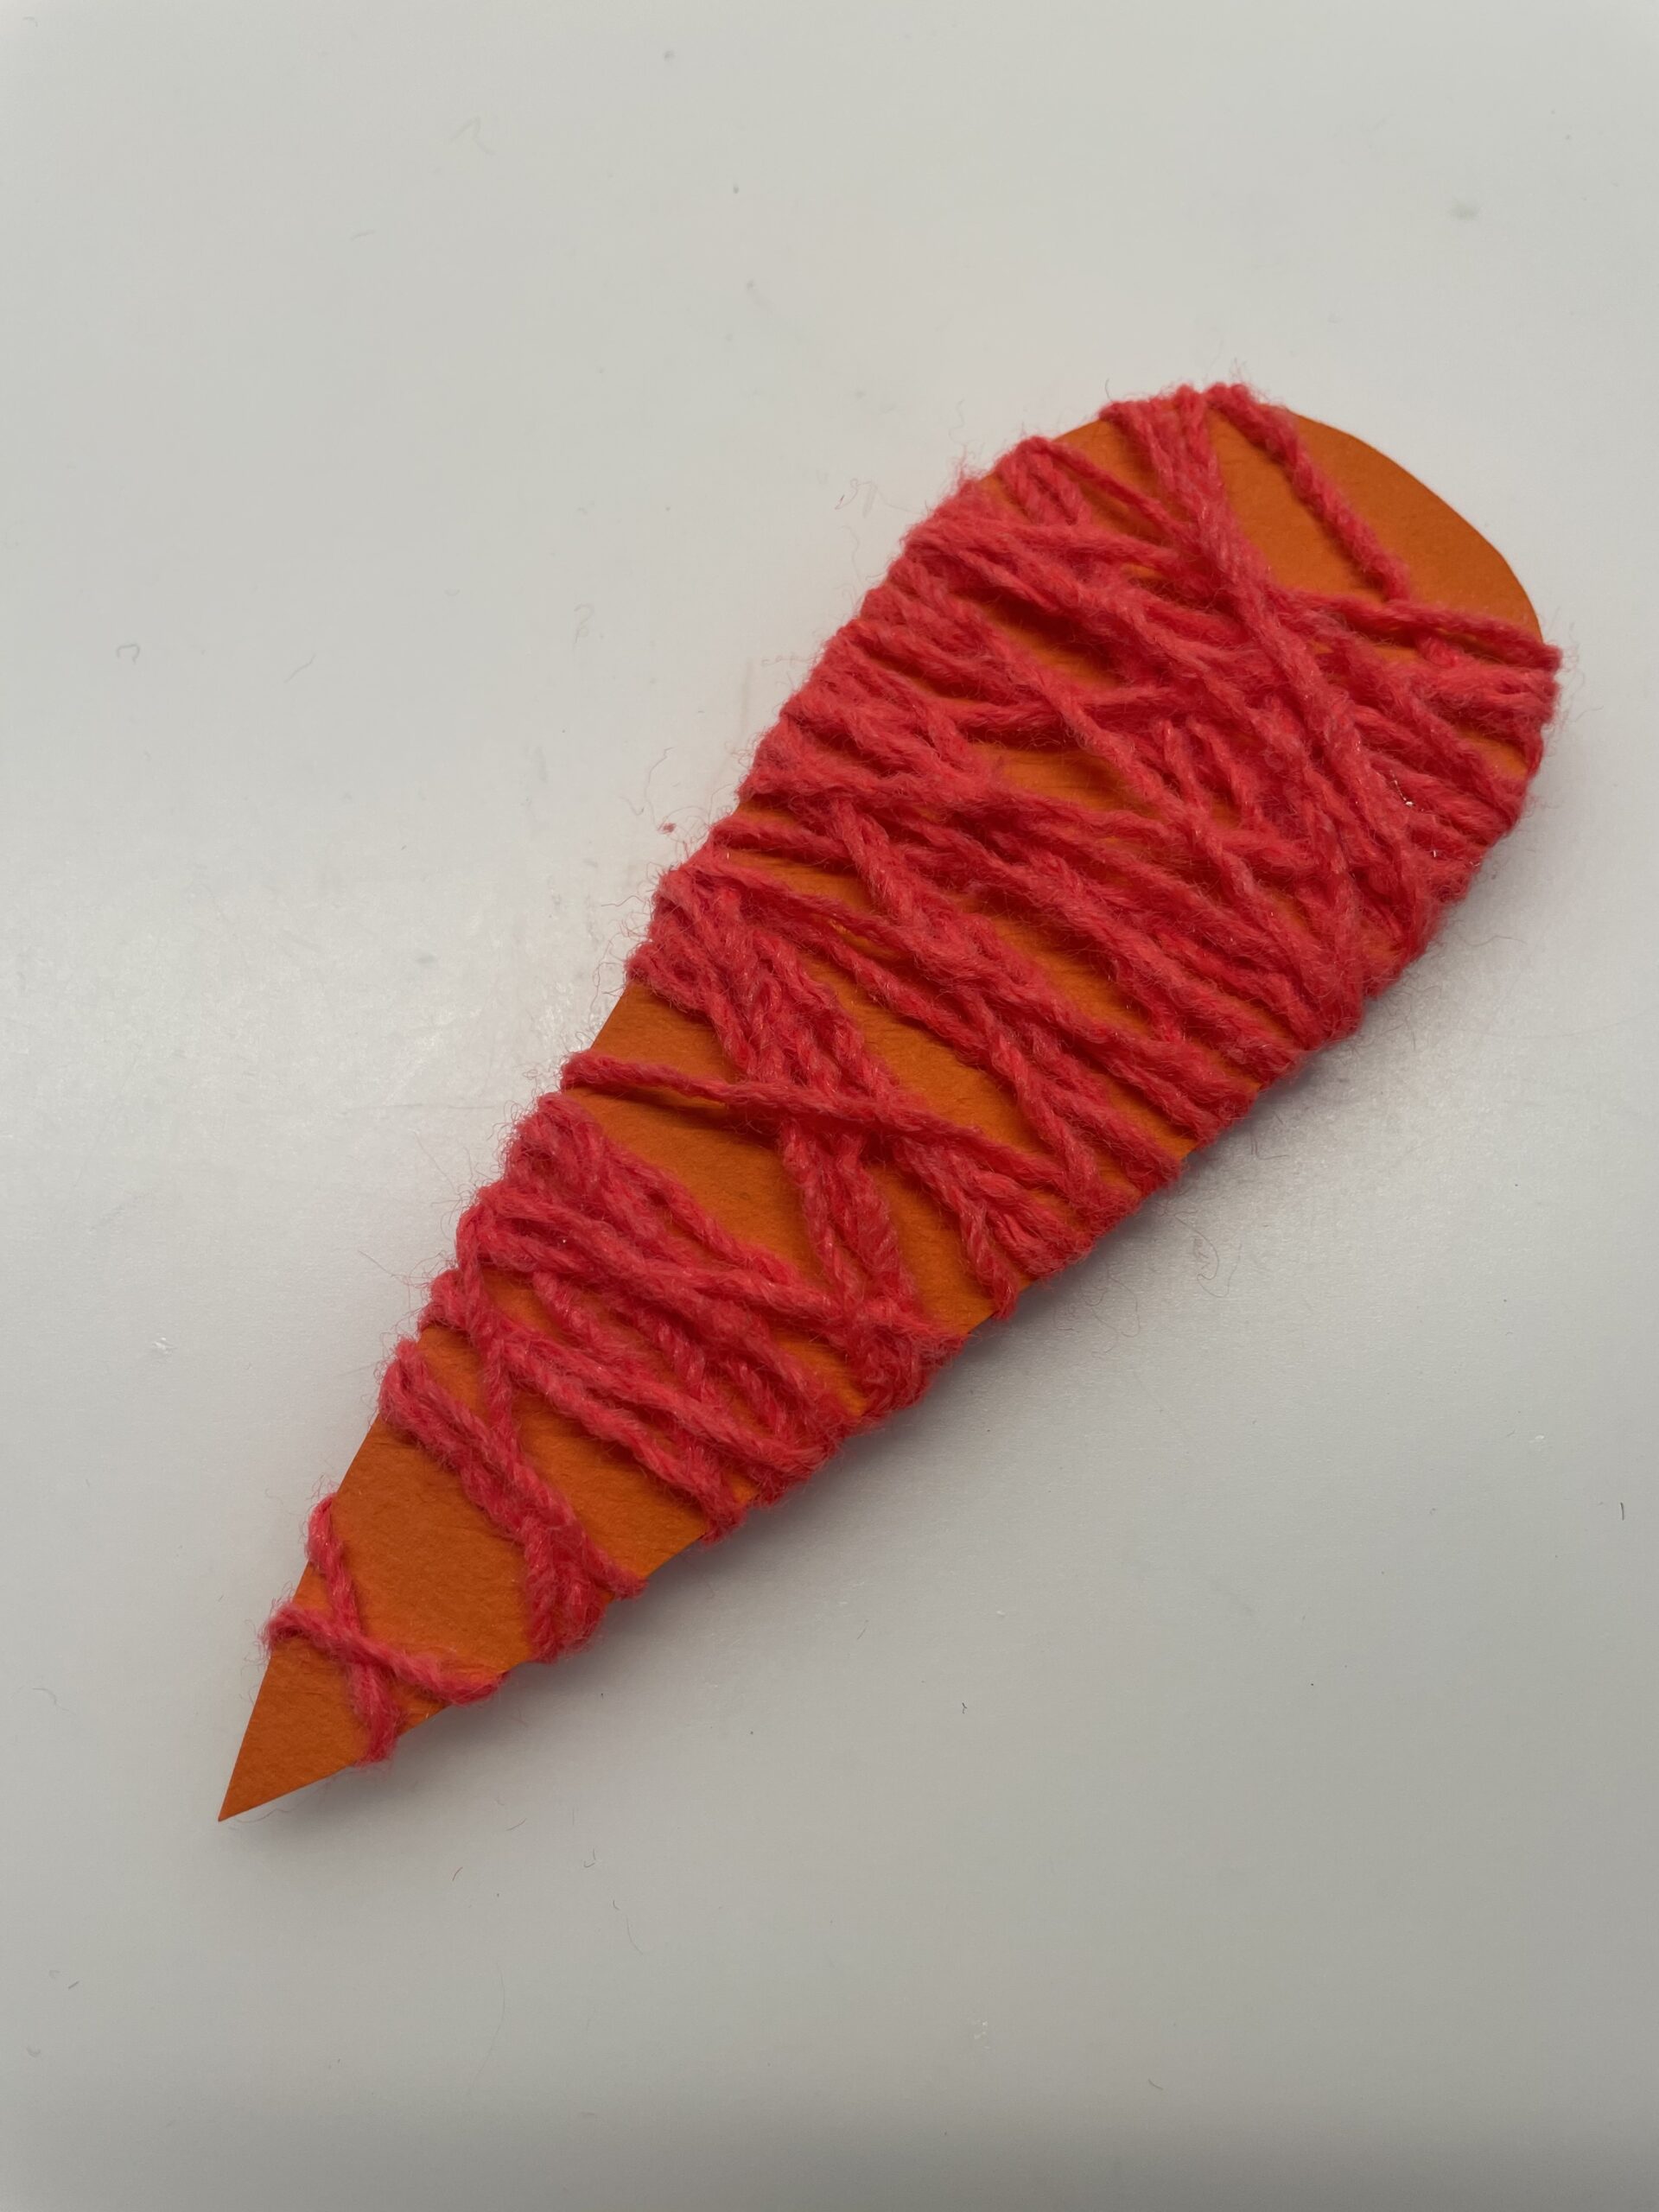
If you have wrapped the carrot with wool (it may still look out paper!) cut off the thread and put it on the back under the wool threads.

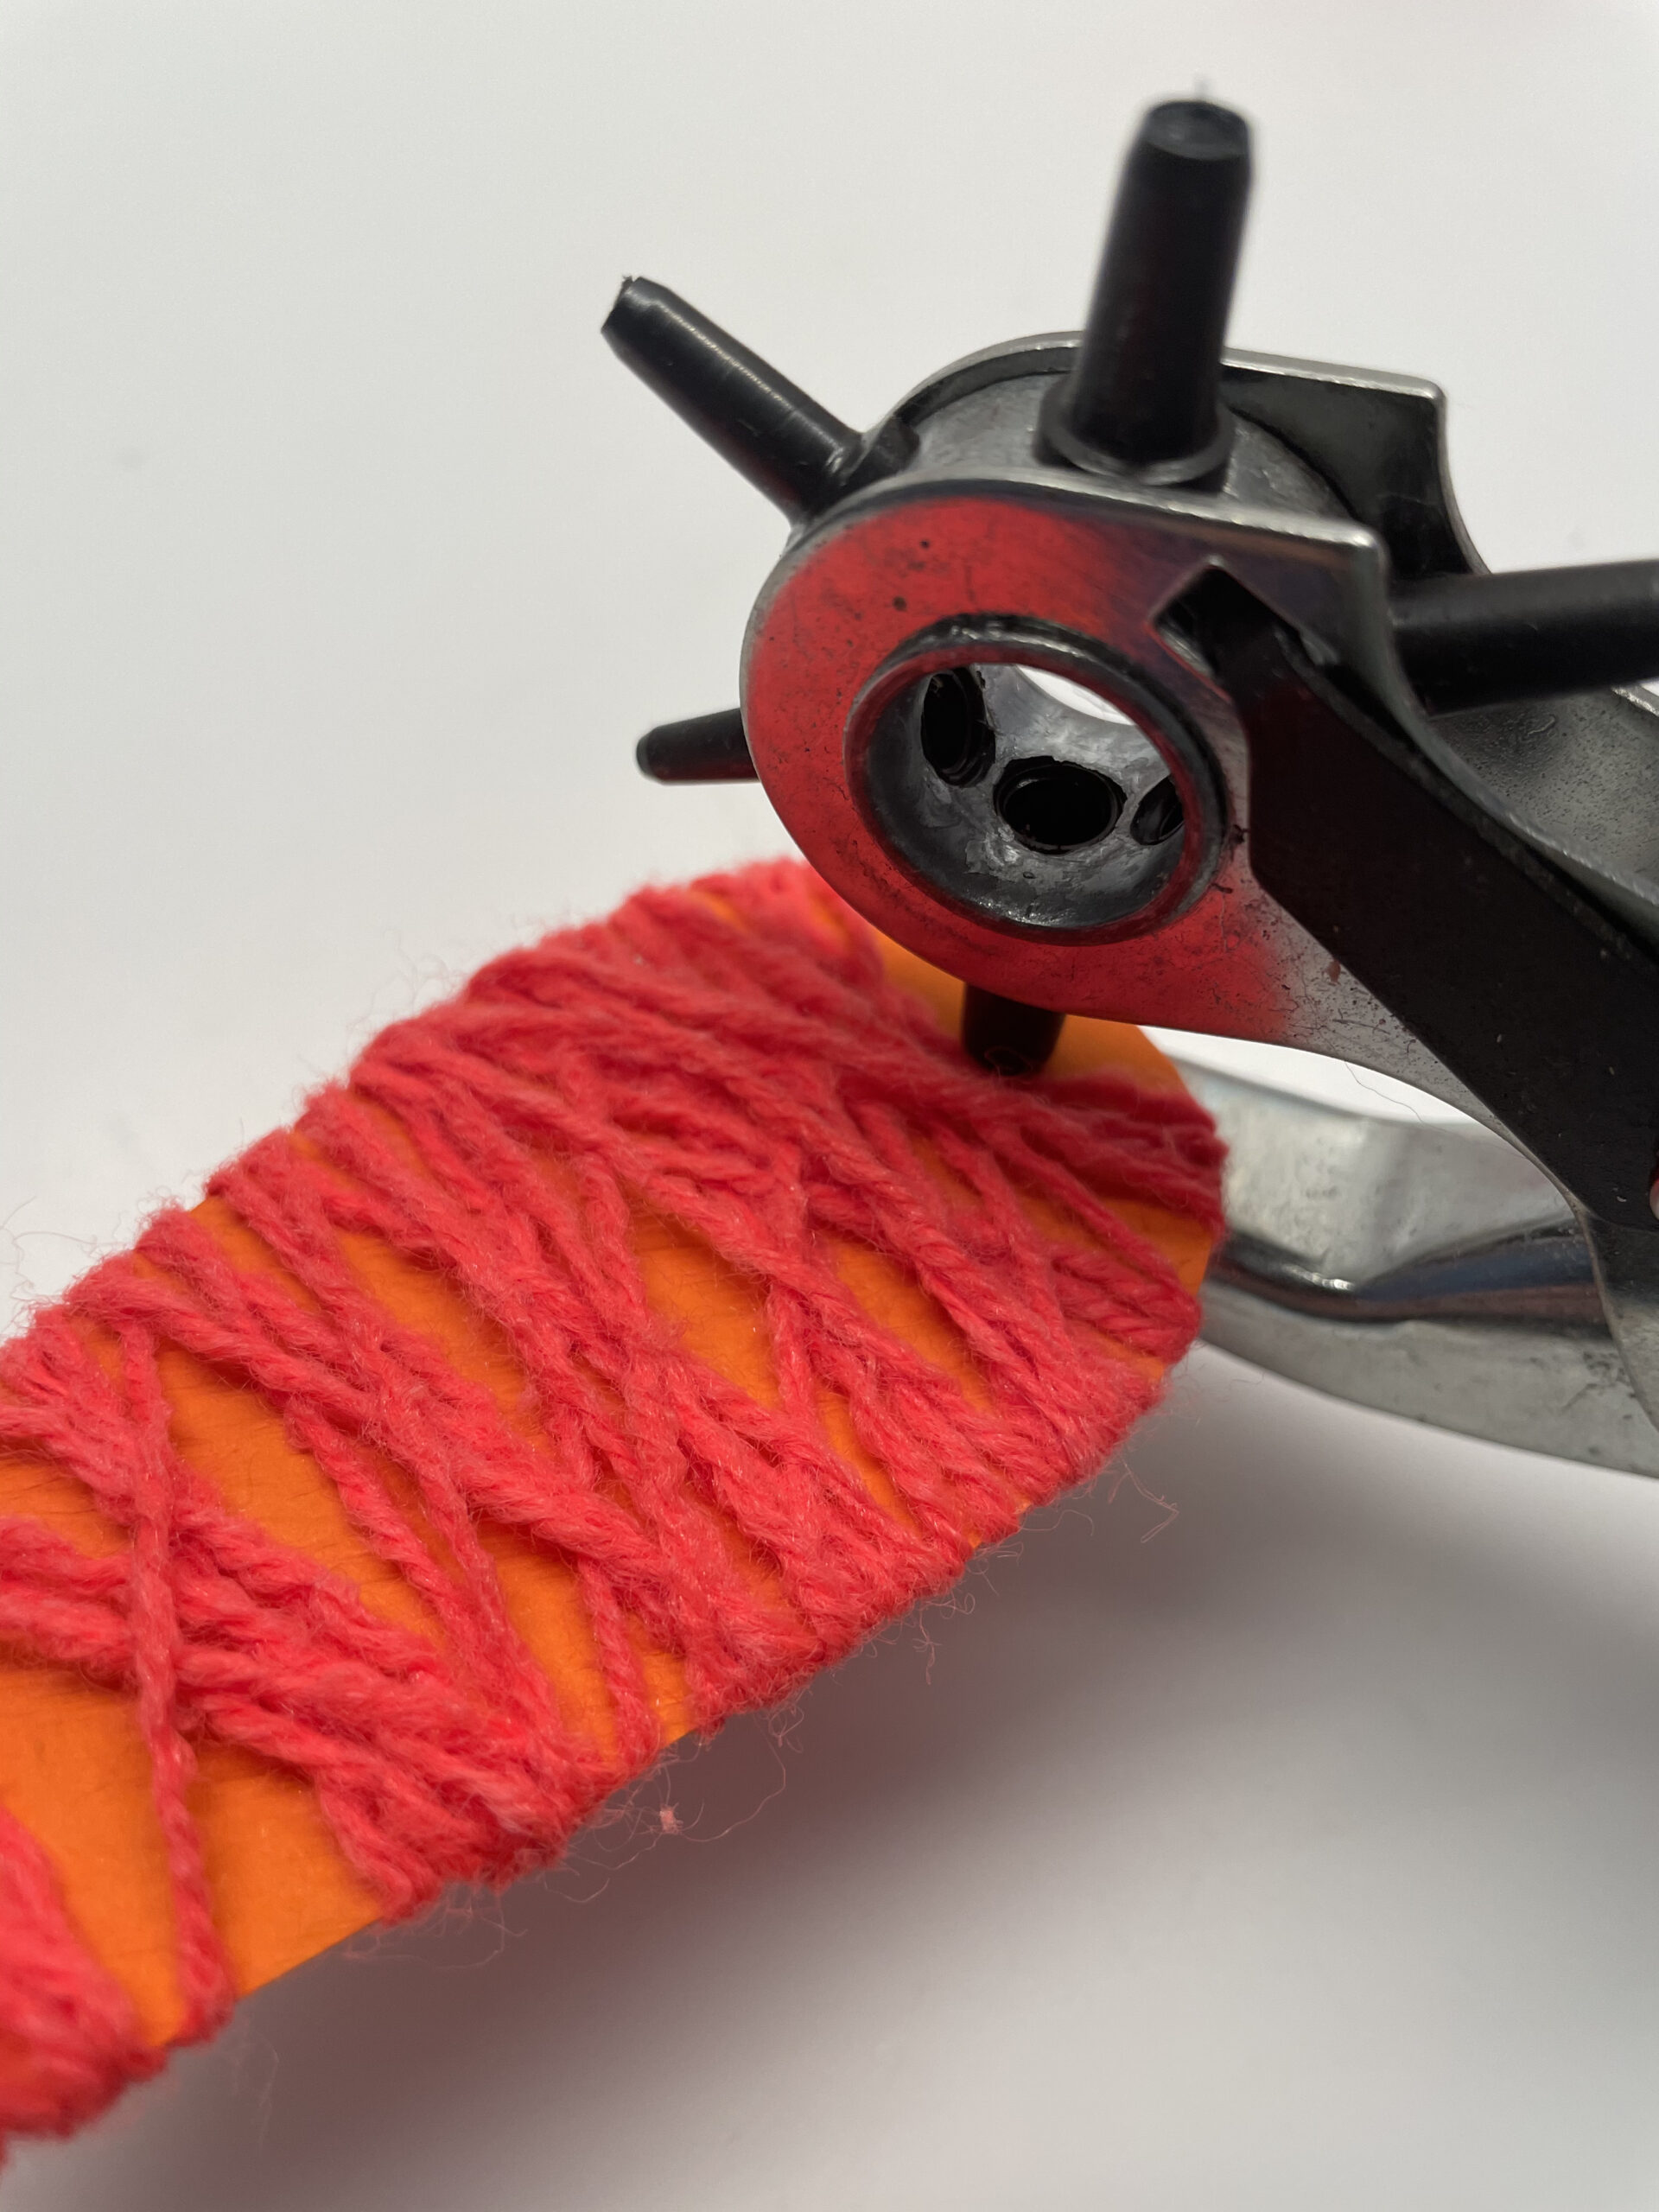
Punctures a hole in the photo box with the hole tong at the thick end of the carrot.
Tip: You can also use a puncher.
Make sure you don't punch any strings!
Now the carrot is finished except for the carrot green.
That's what you need the green wool for.
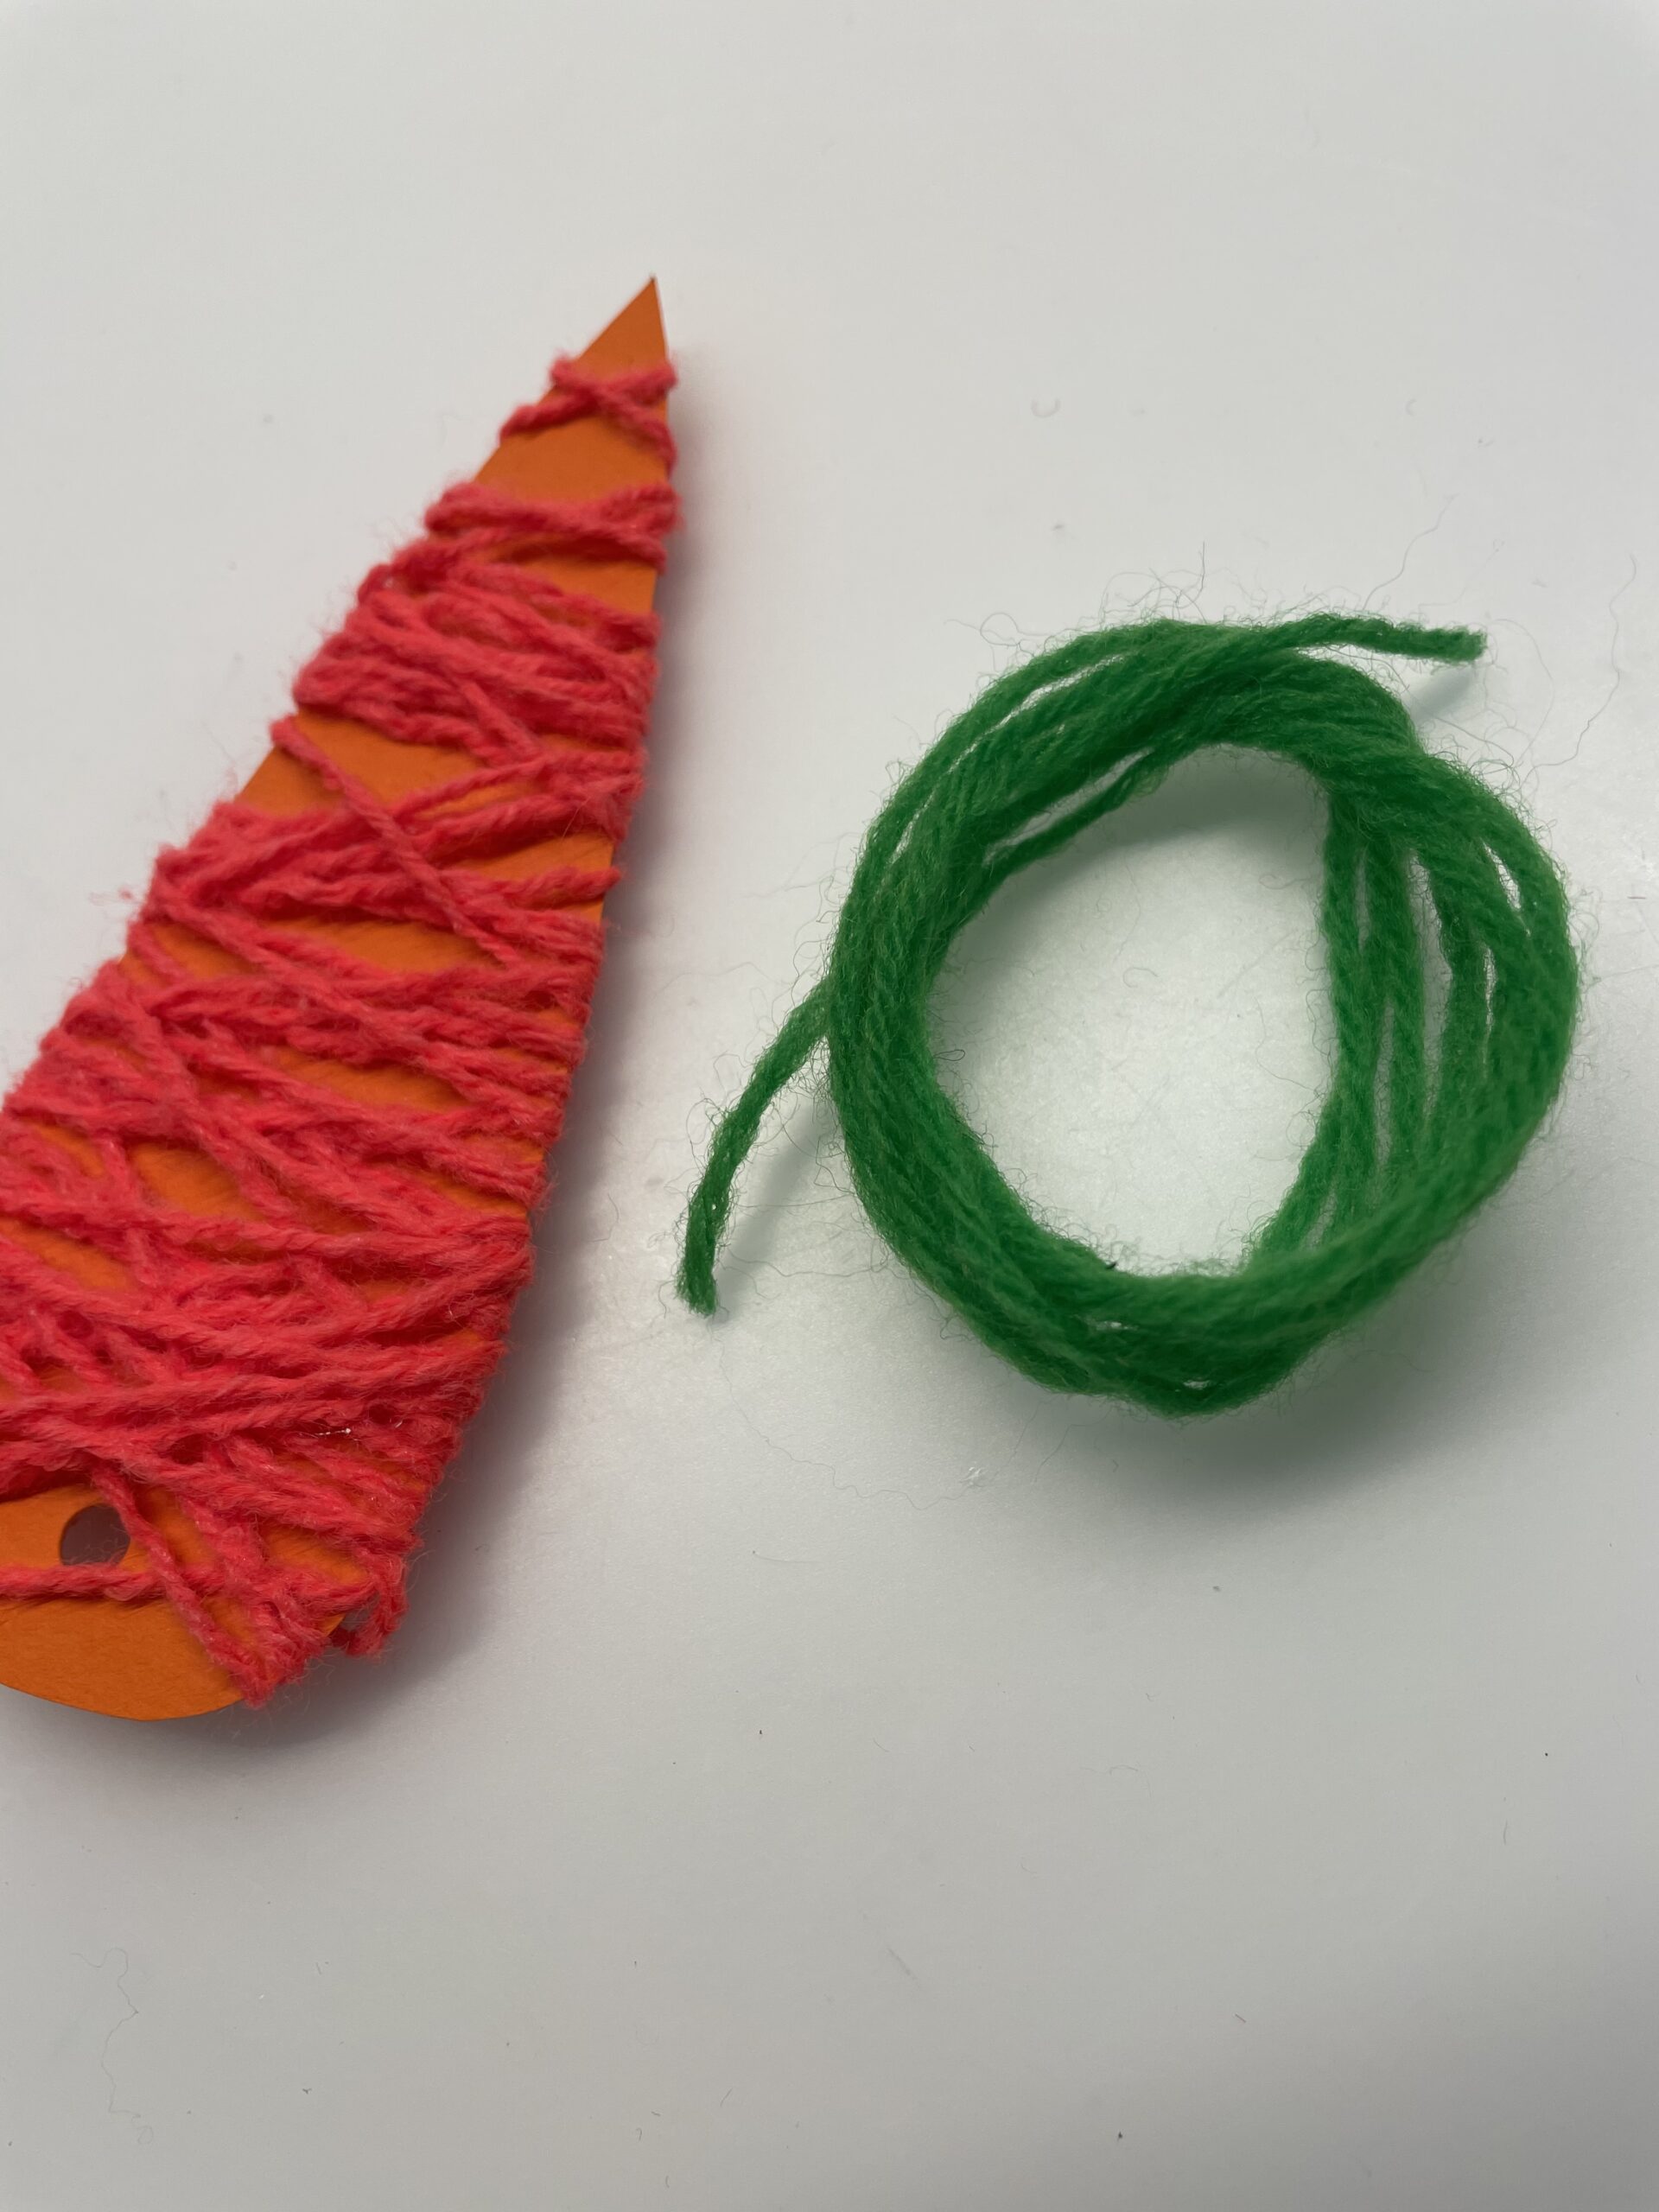
Put the wool in approx. 10cm long loops and leave it on one piece.
Alternatively, you can cut the threads into 10cm long pieces and pull them in separately!

Put the thread bundle through the hole (let it help you) and place it in such a way that the threads on both sides are the same length.
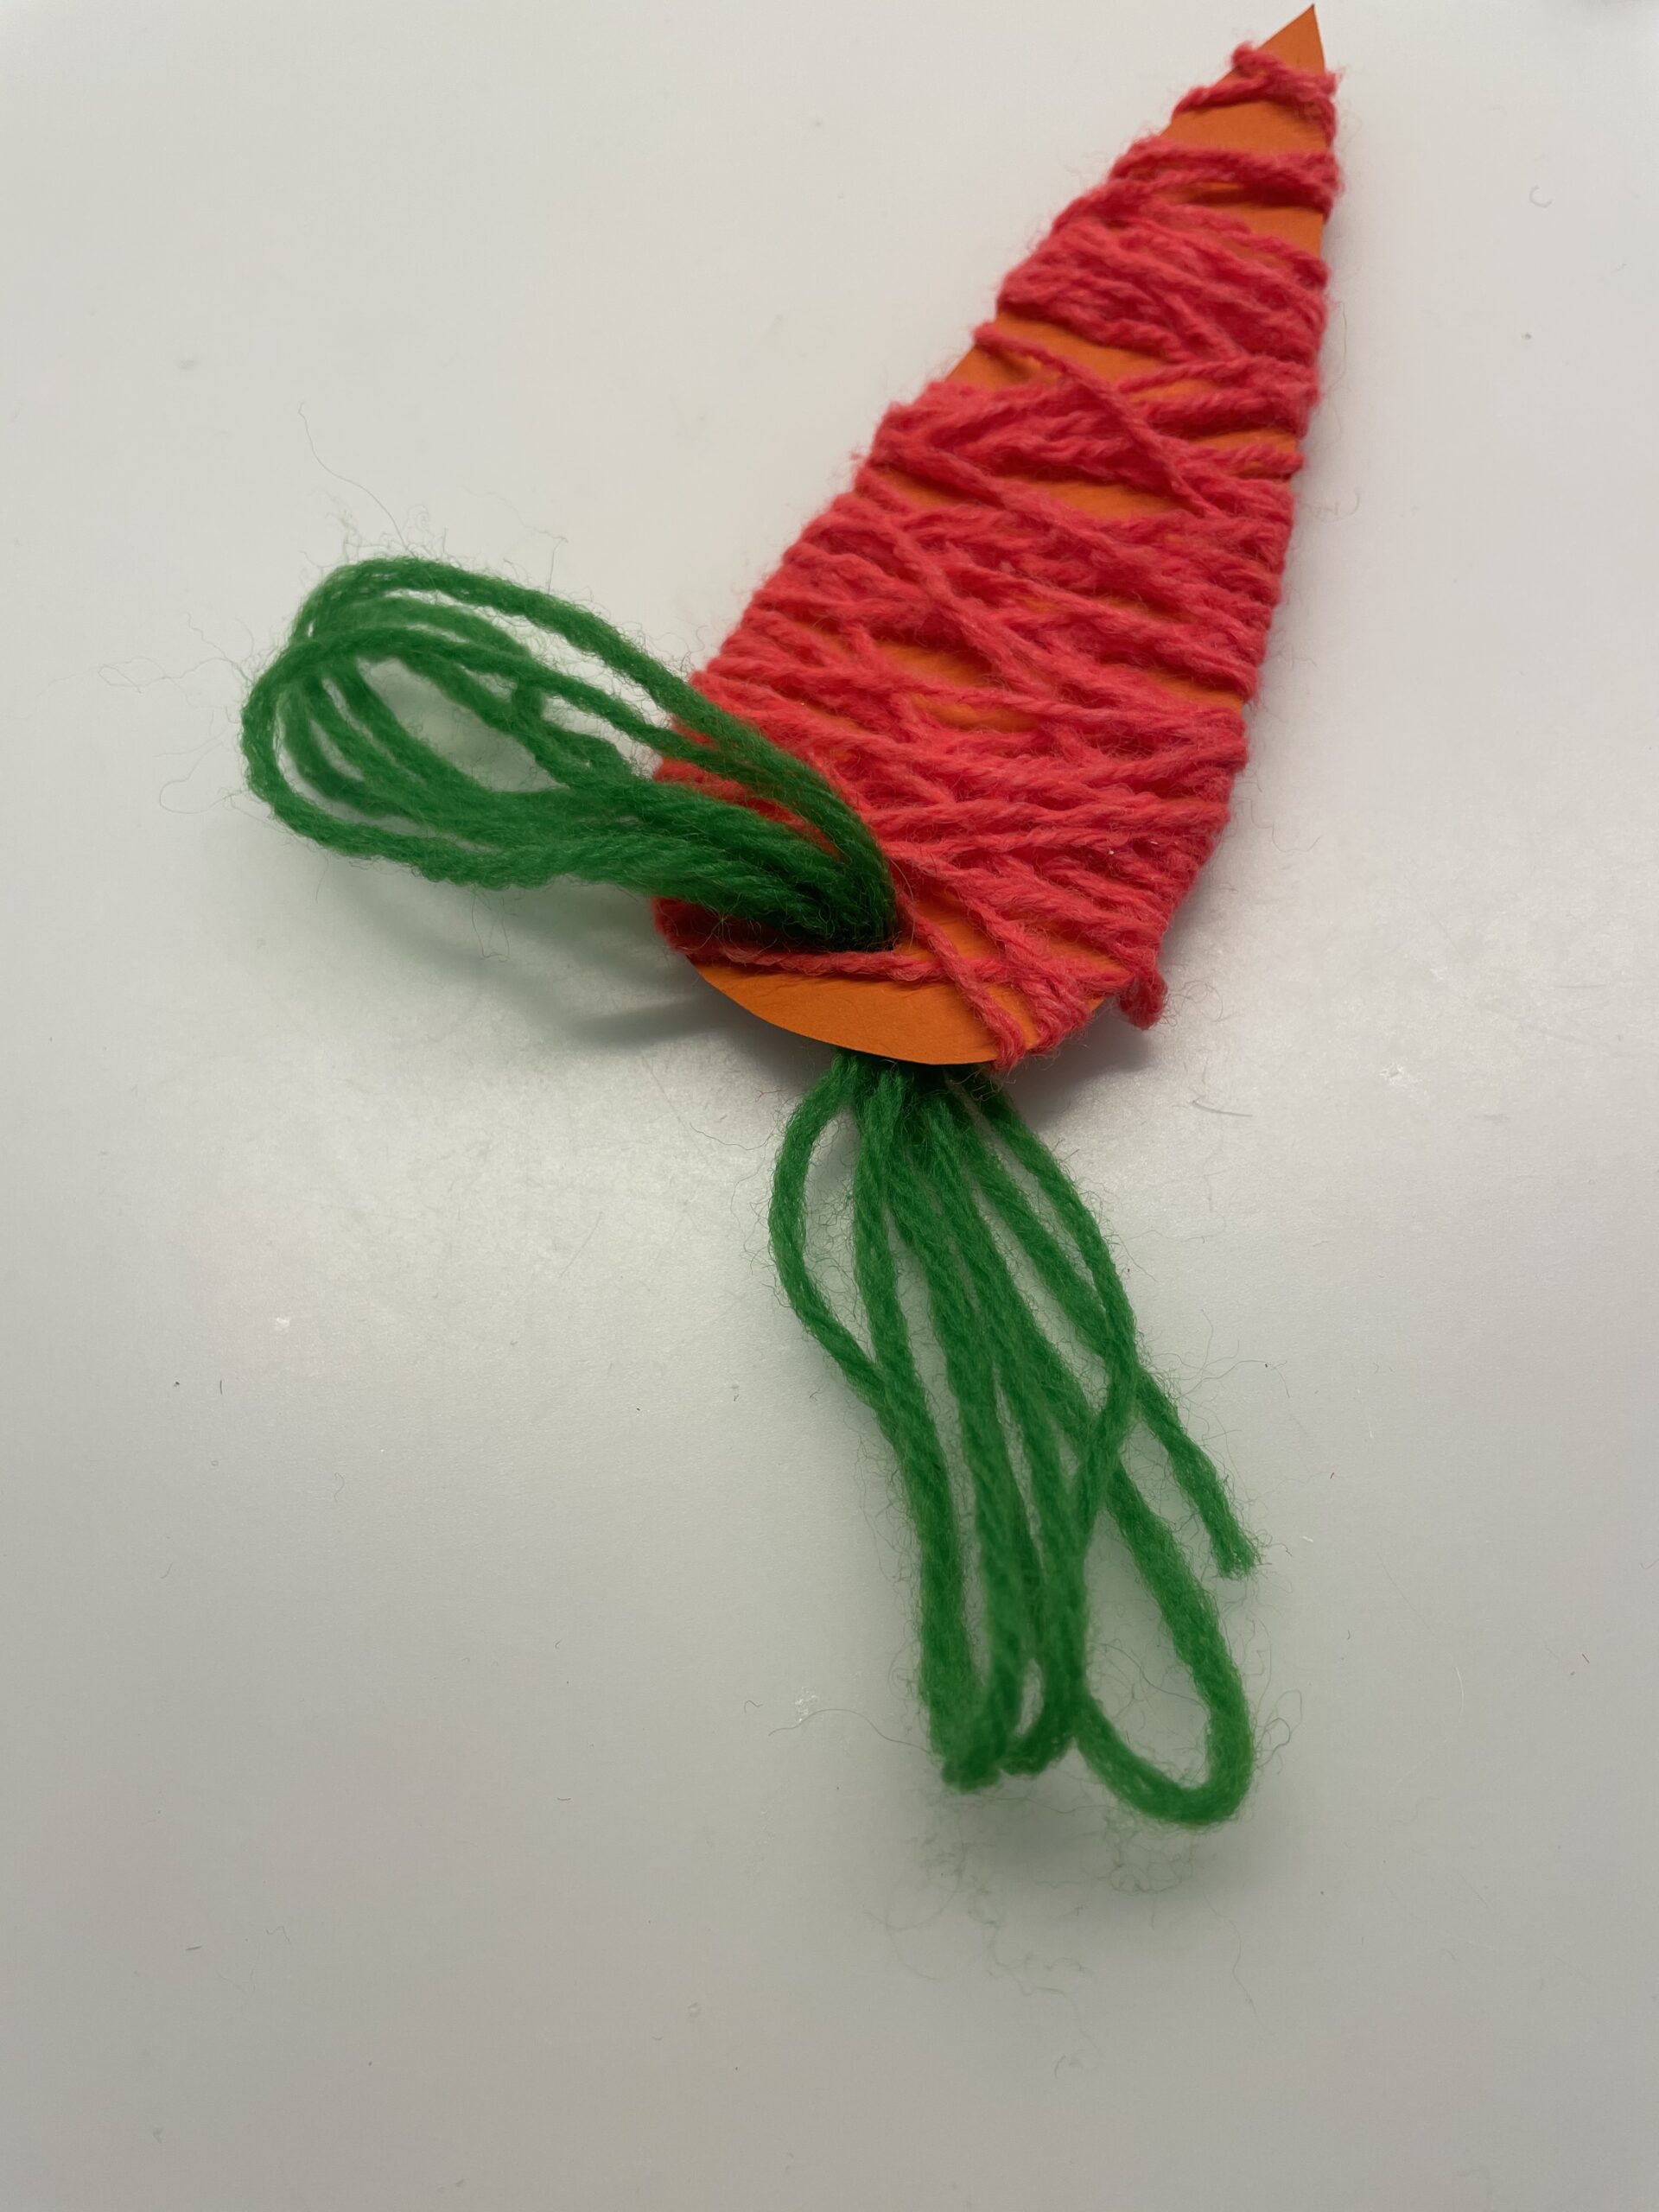
Then knot the thread bundle.

Put the wool threads up and place the knot in such a way that both ends stand up.

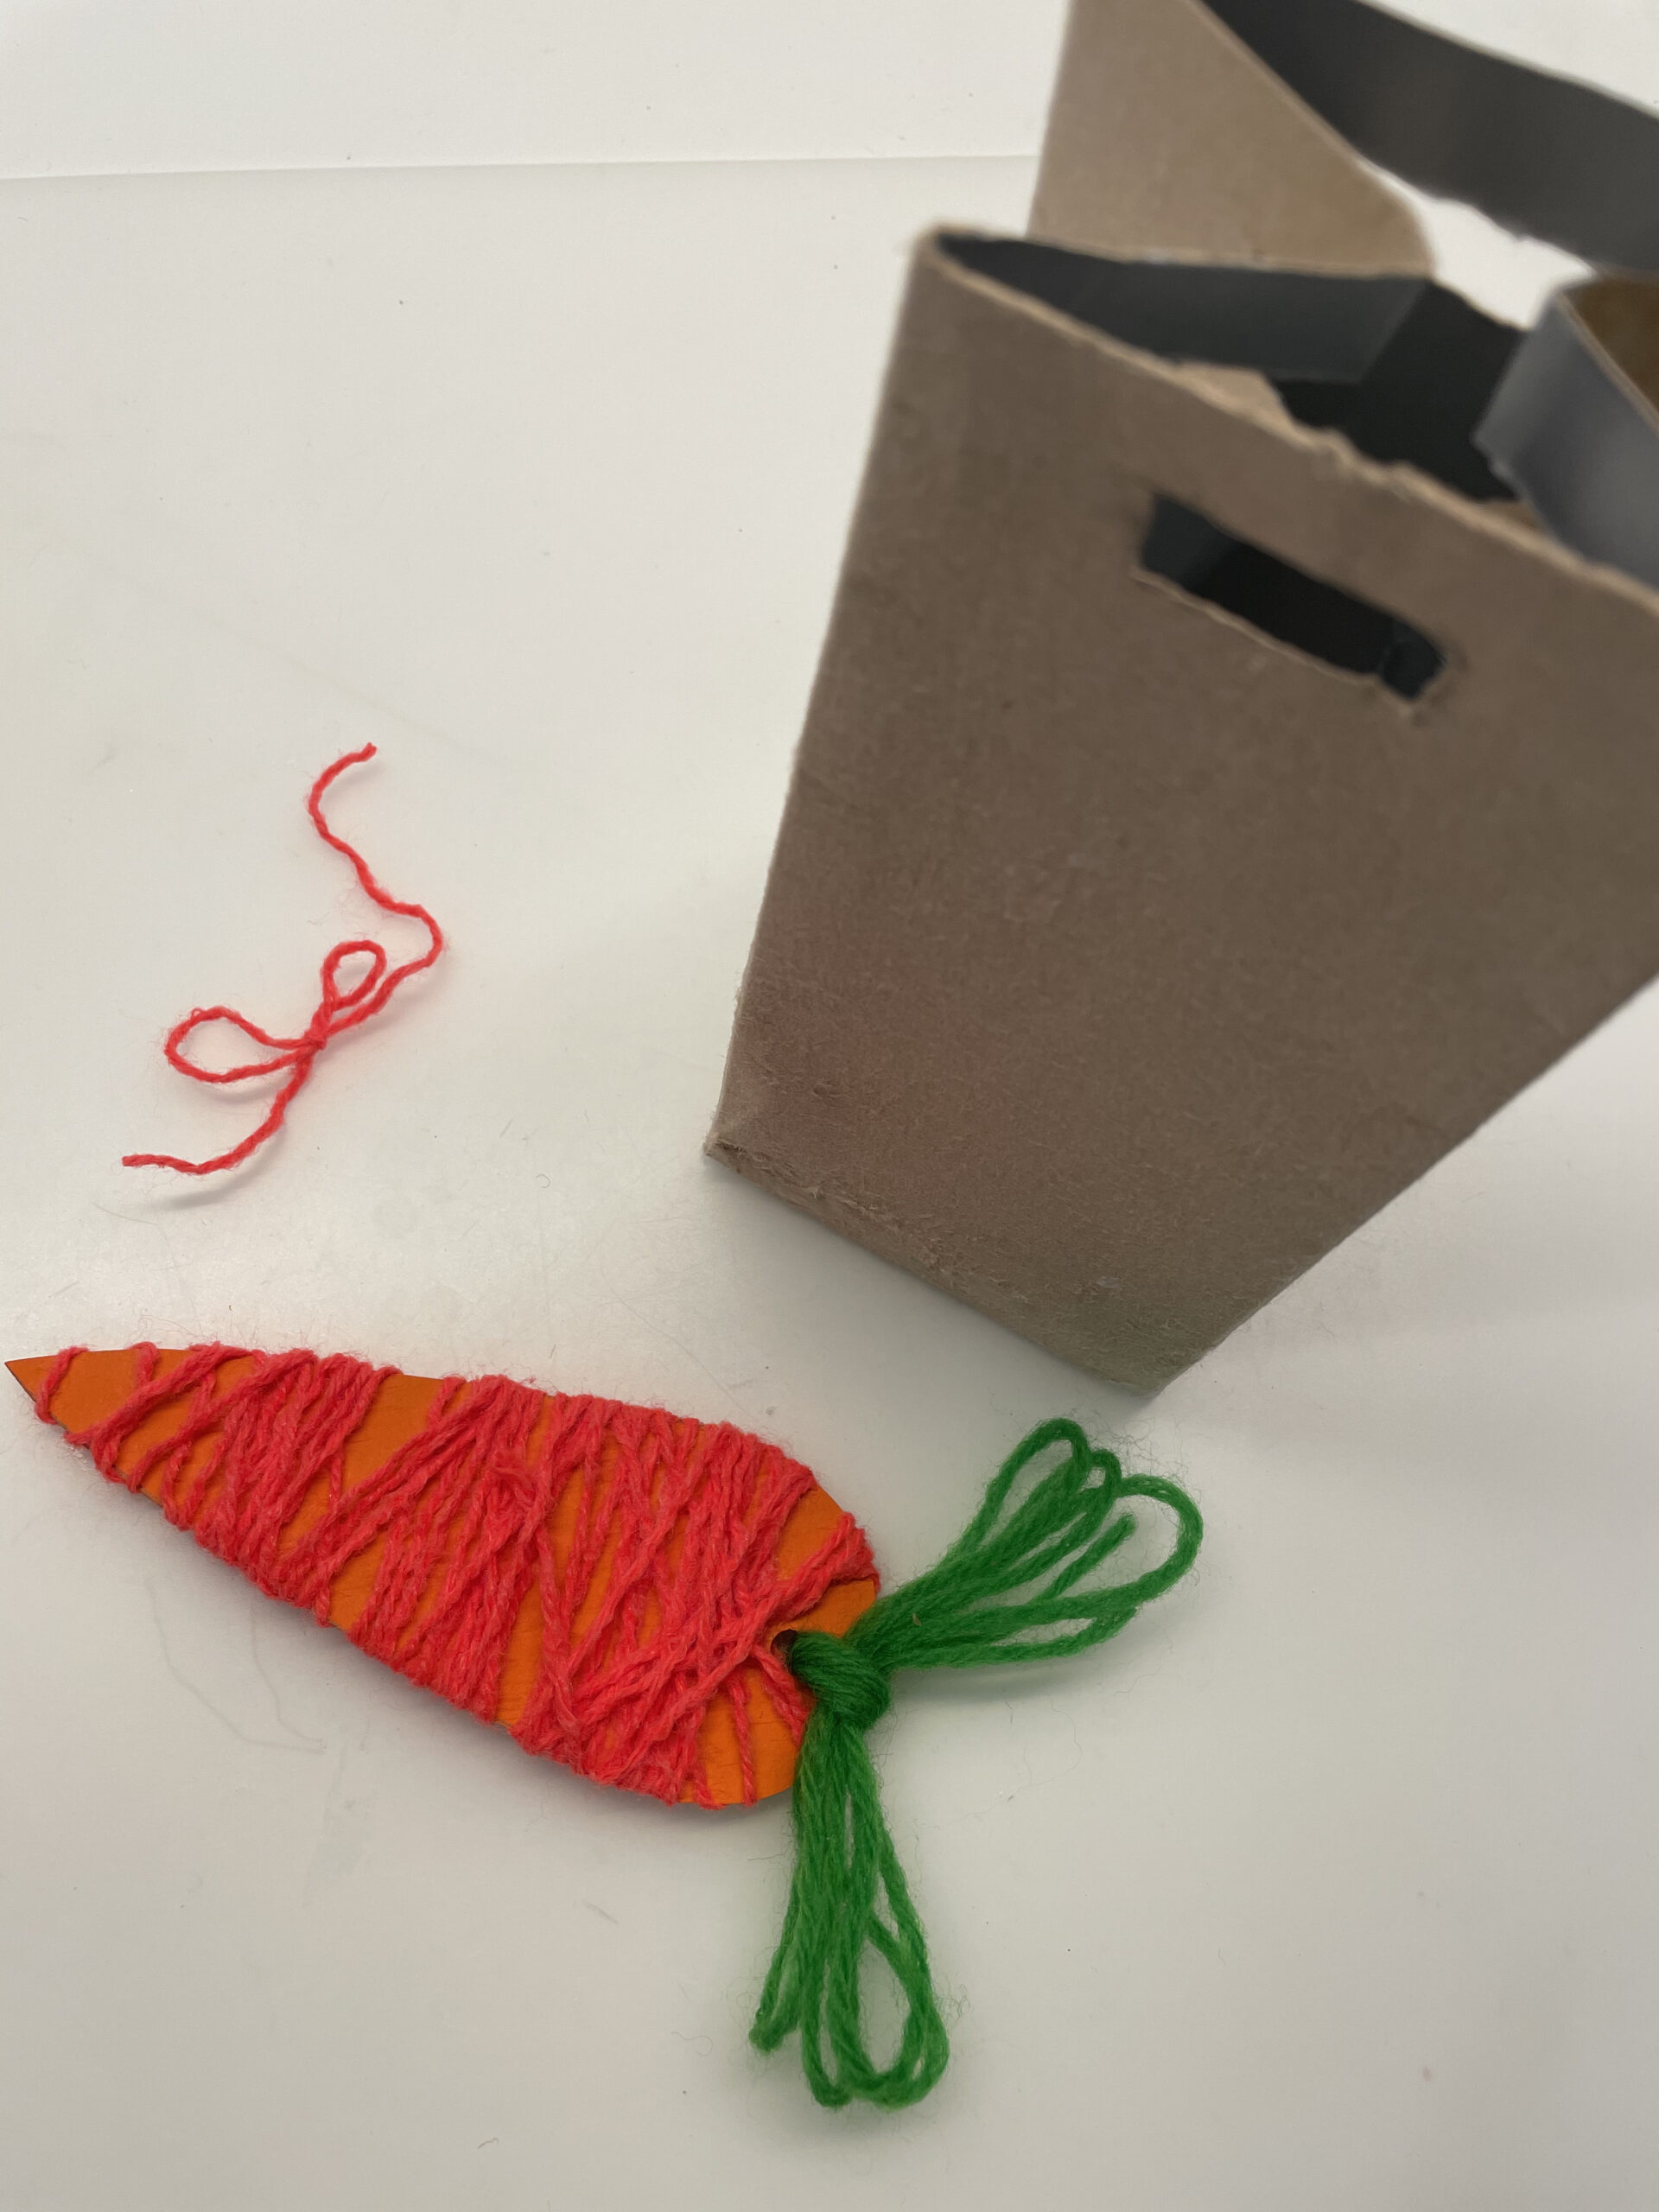
The carrot is ready.
For example, use it as a gift pendant, for an Easter shrub or on an Easter card.
Make this carrot and stick it on an Easter bag. (See separate offer.) Make a small bow out of the wool.
Glue the carrot with hot glue. Attention when handling hot glue - risk of injury! Then stick the loop on as well.
The Easter gift is ready.

Have fun doing crafts!
Materials
Directions
Consider how large your carrot shall be. The height of the carrot corresponds to the length of your paper. The width corresponds to the thickness of the carrot.
Round off the top end of this rectangle.
Then mark the lower center with a point. Then connect it to the upper outer edges. This creates the shape of a carrot.
Cut out the carrot now.
Now take the orange wool.
On the back of the carrot, stick to the beginning of the wool with an adhesive tape or a glue stick.
Then you wrap the carrot. Wrap crisscross and try to wrap the curves.
If you have wrapped the carrot with wool (it may still look out paper!) cut off the thread and put it on the back under the wool threads.
Punctures a hole in the photo box with the hole tong at the thick end of the carrot.
Tip: You can also use a puncher.
Make sure you don't punch any strings!
Now the carrot is finished except for the carrot green.
That's what you need the green wool for.
Put the wool in approx. 10cm long loops and leave it on one piece.
Alternatively, you can cut the threads into 10cm long pieces and pull them in separately!
Put the thread bundle through the hole (let it help you) and place it in such a way that the threads on both sides are the same length.
Then knot the thread bundle.
Put the wool threads up and place the knot in such a way that both ends stand up.
The carrot is ready.
For example, use it as a gift pendant, for an Easter shrub or on an Easter card.
Make this carrot and stick it on an Easter bag. (See separate offer.) Make a small bow out of the wool.
Glue the carrot with hot glue. Attention when handling hot glue - risk of injury! Then stick the loop on as well.
The Easter gift is ready.
Have fun doing crafts!
Follow us on Facebook , Instagram and Pinterest
Don't miss any more adventures: Our bottle mail