She embellishes a simple cheesecake with a few handles and conjures up a great school bag cake!
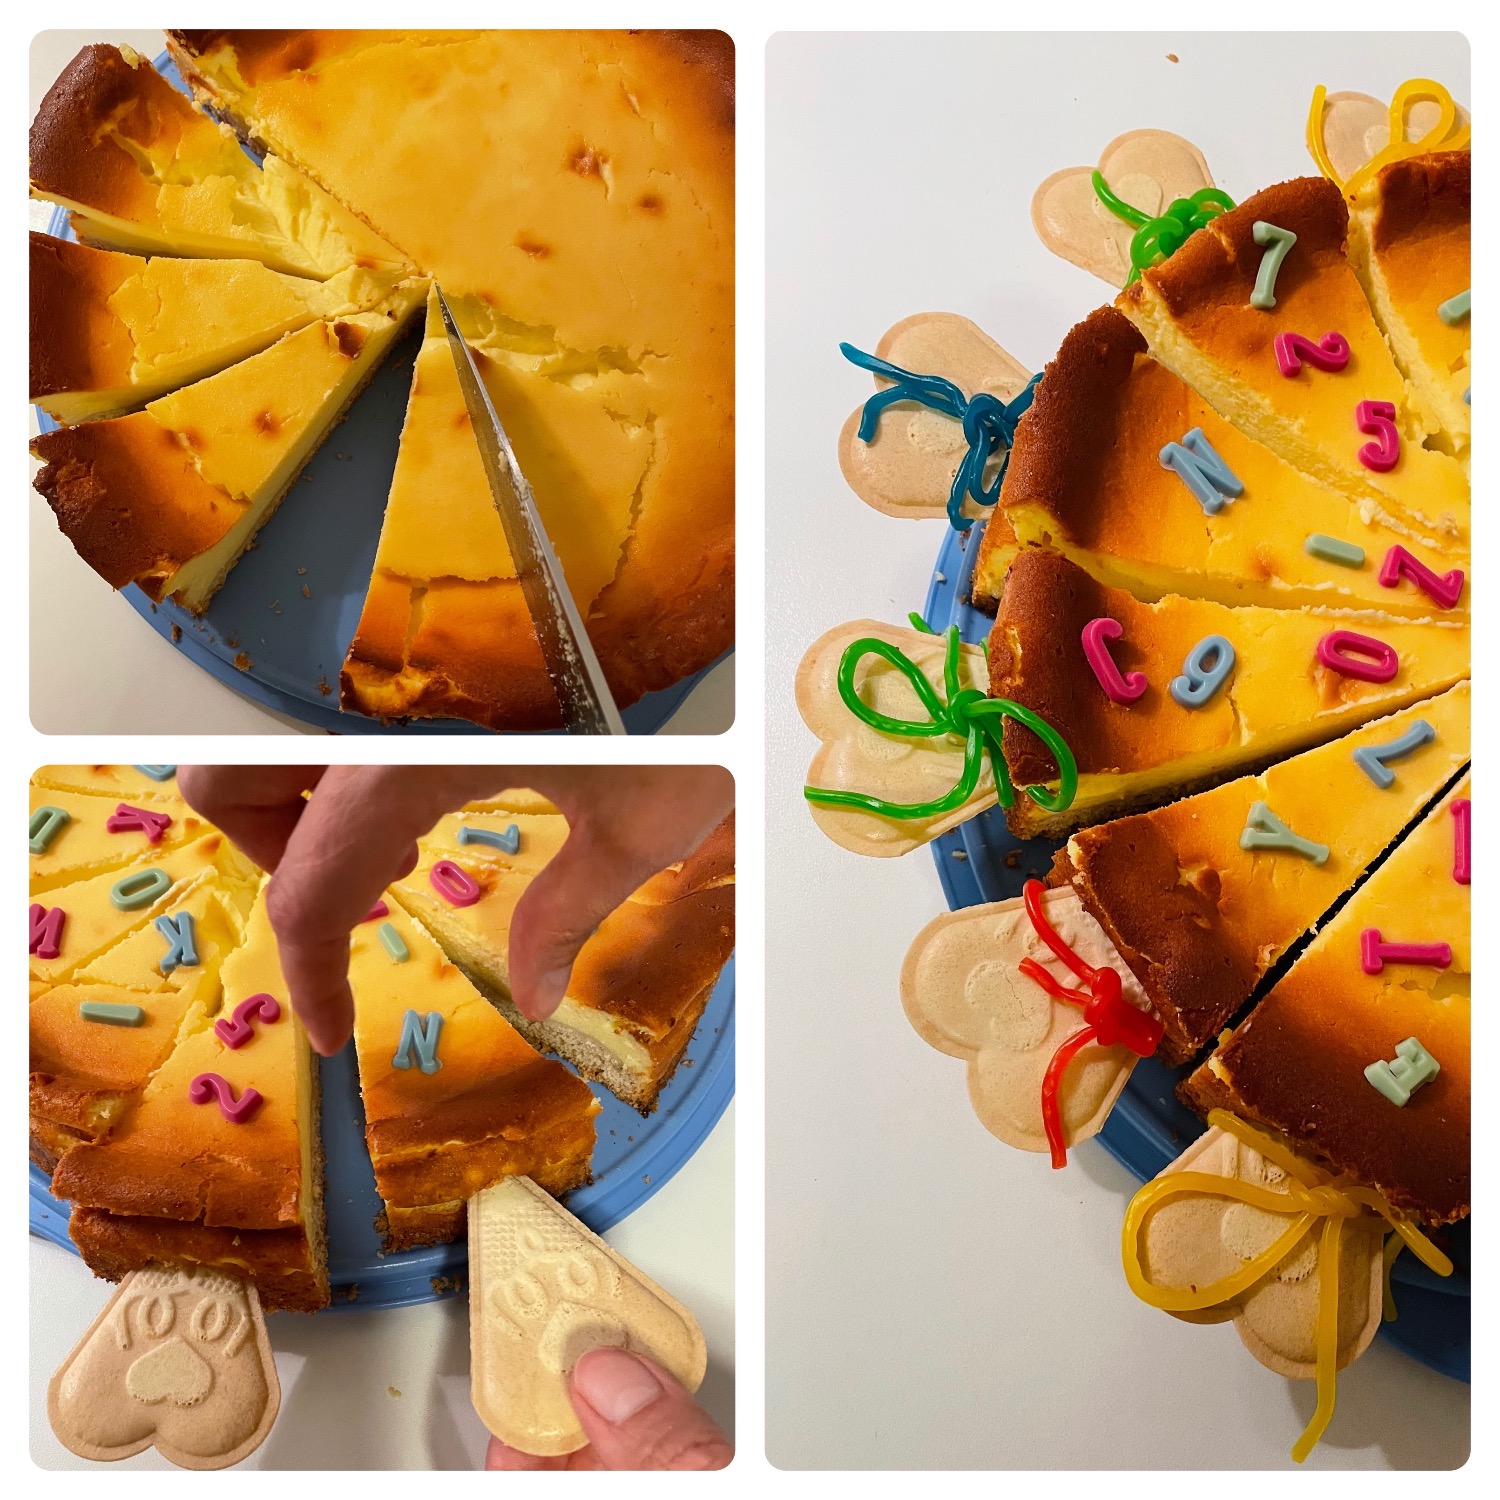
For this you bake a cheese cake in a round shape (without the dough edge). You cut the cooled cake into individual pieces of cake. Then you take out two pieces of cake and push the other pieces a bit apart. Now you can decorate the pieces with frosted letters.
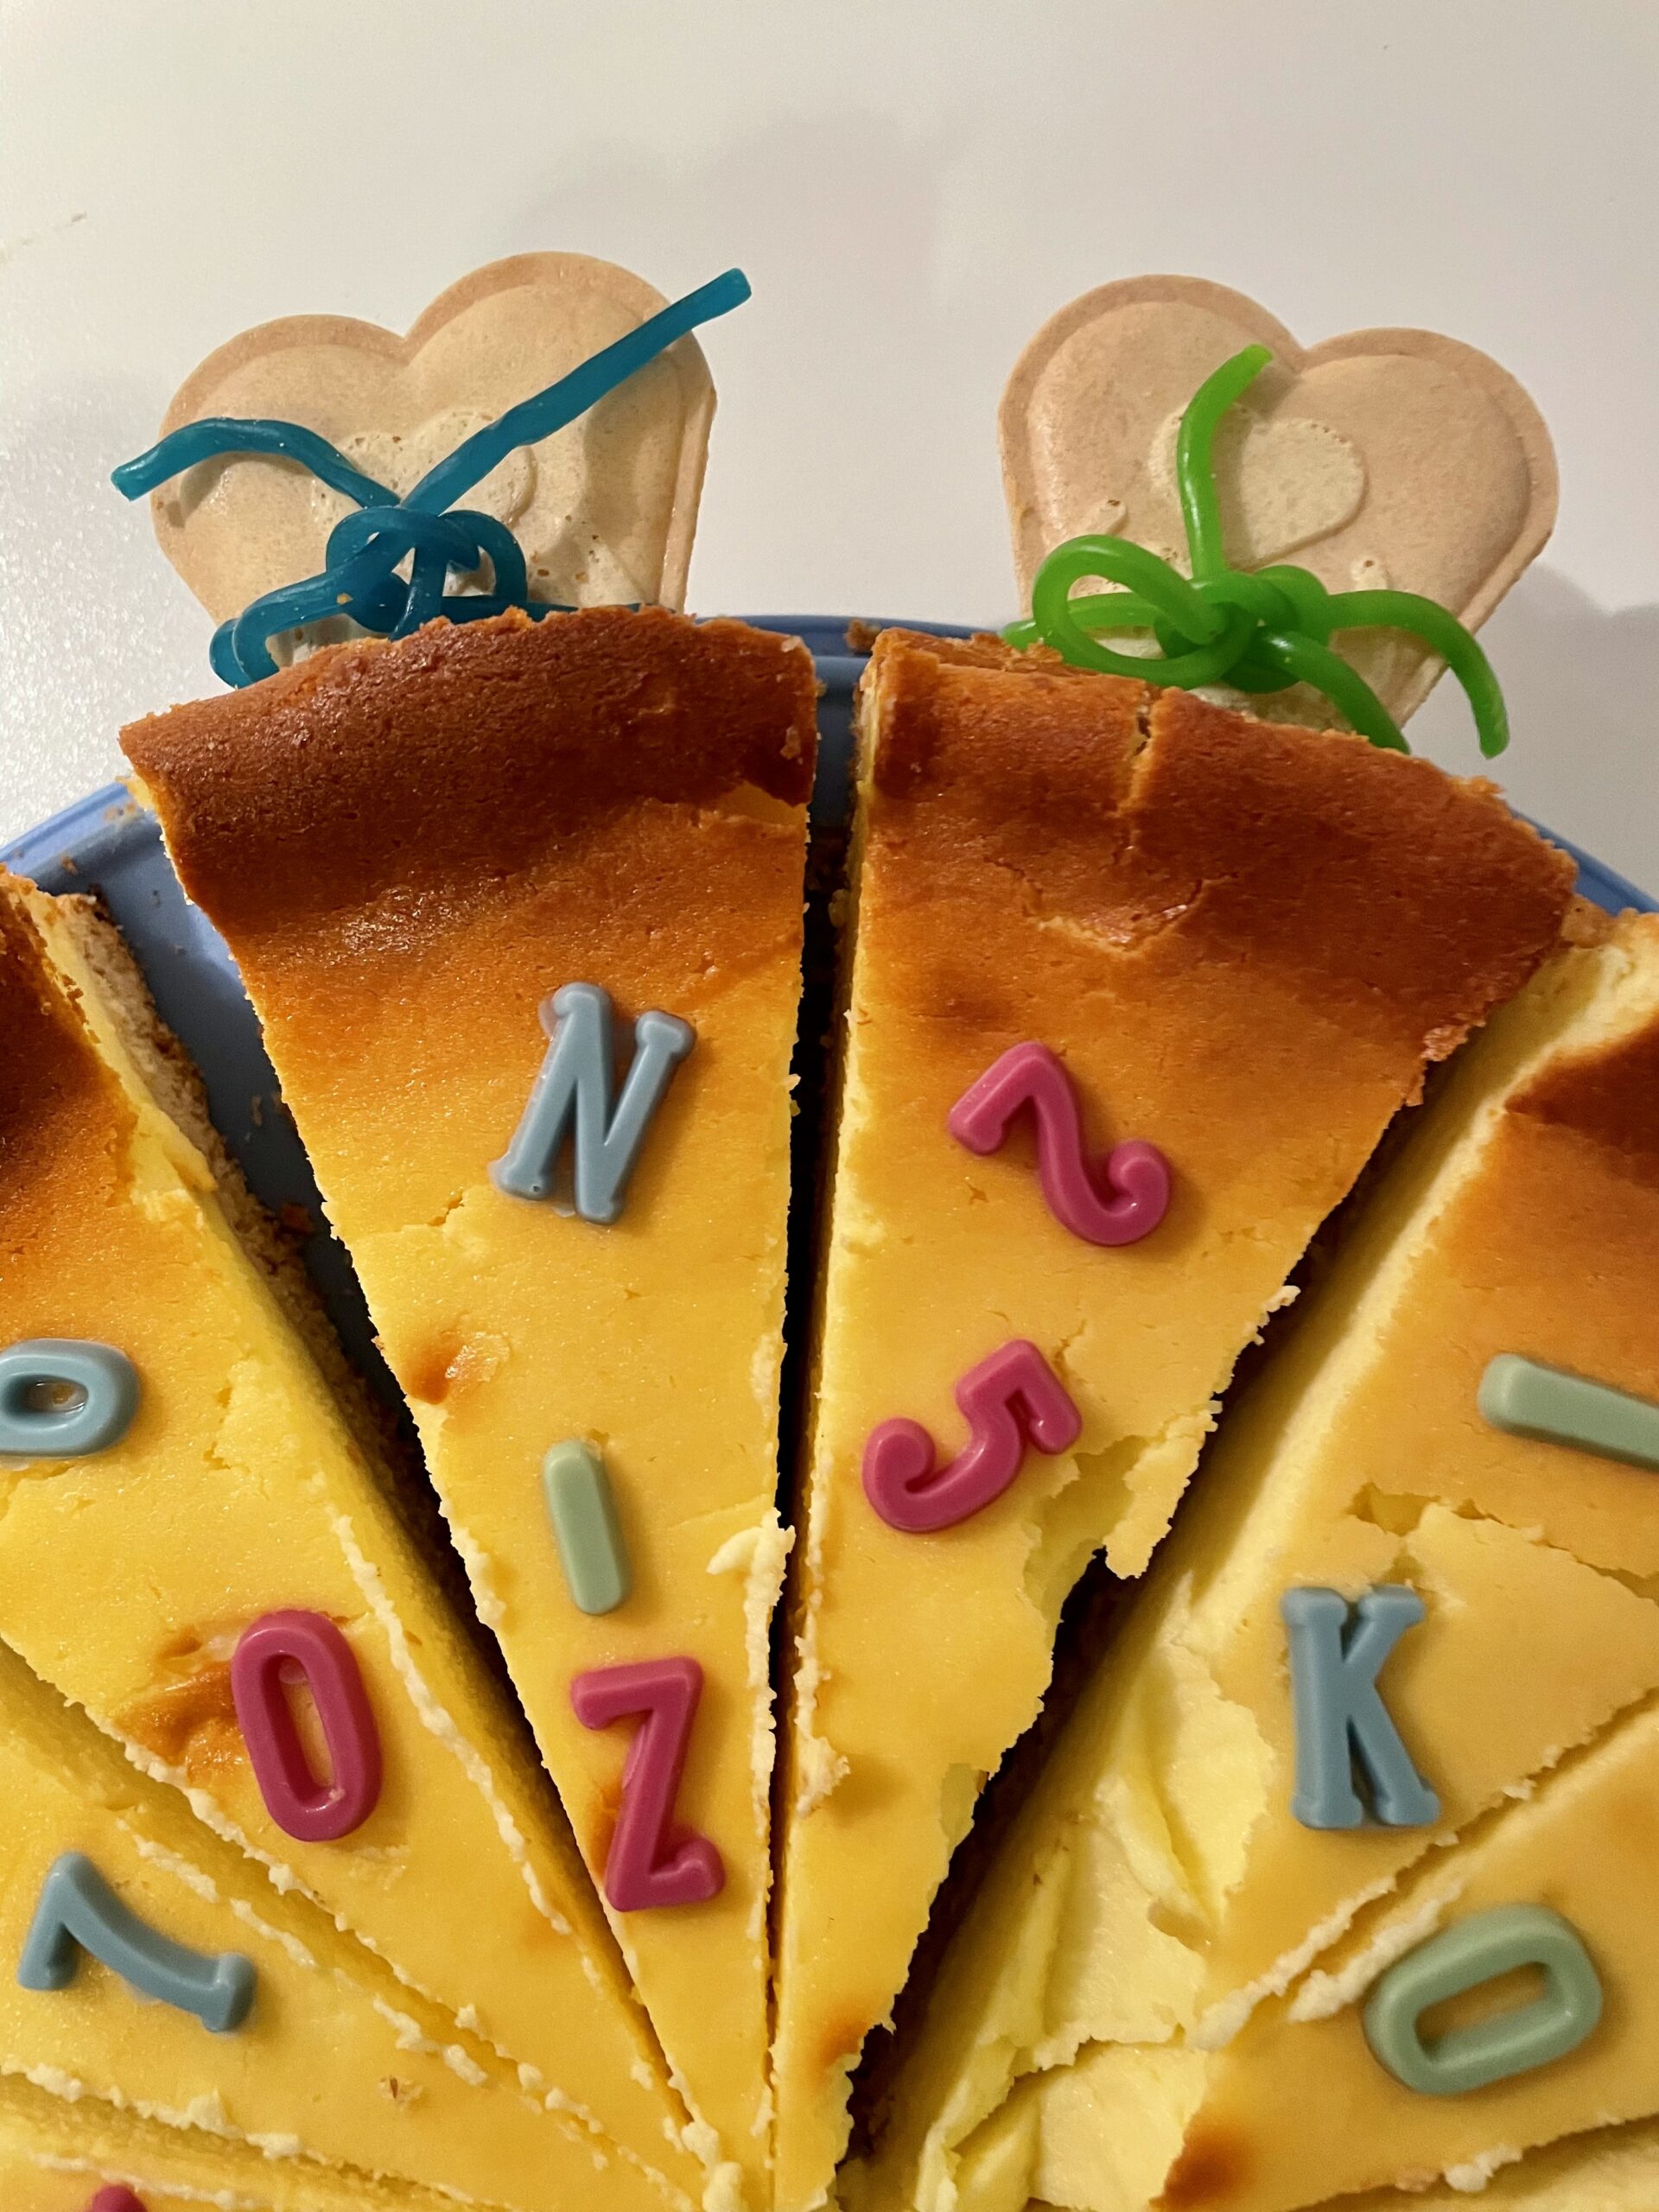
Before serving, put heart-shaped ice cream waffles with the tip in front of the cake edge from the outside. Put them in the piece of cake so that the individual pieces look like a school bag. Now take a fruit gum snurry, place it around the waffle and tie a loose loop. Repeat this with all the pieces of cake and change the colours of the fruit gum cords.
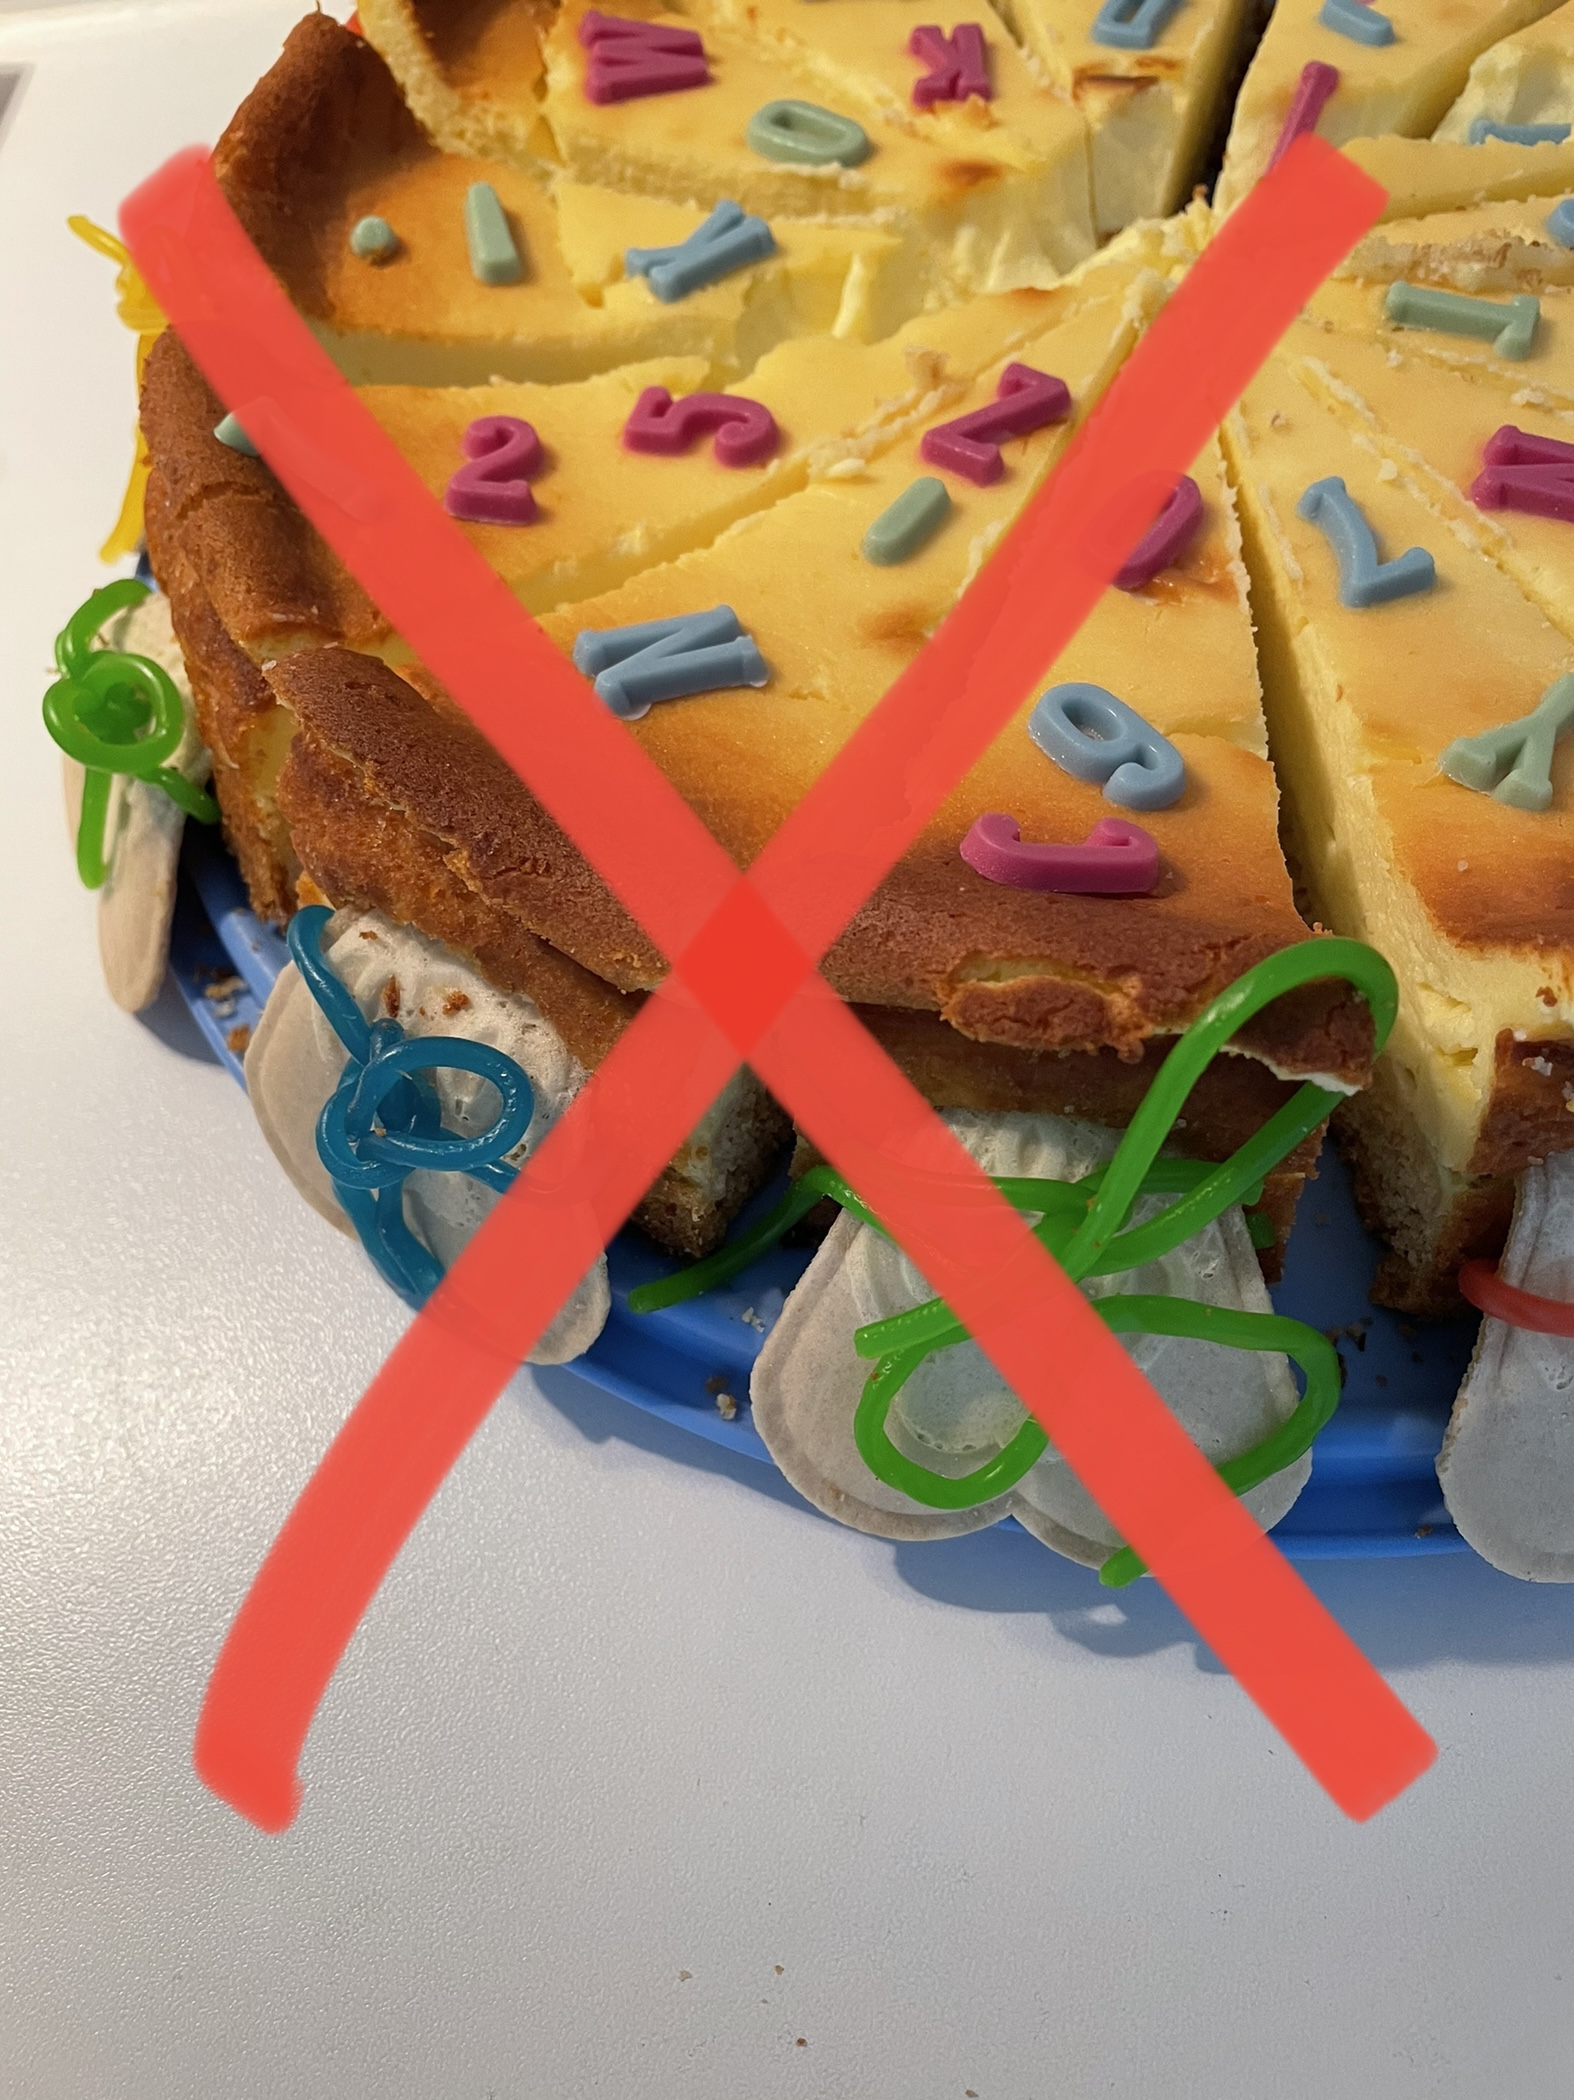
You can prepare the school bag cake the day before. However, only insert the waffles 1-2 hours before consumption, as they otherwise become soft and bend down due to the moisture of the cake!
Media Education for Kindergarten and Hort

Relief in everyday life, targeted promotion of individual children, independent learning and - without any pre-knowledge already usable by the youngest!
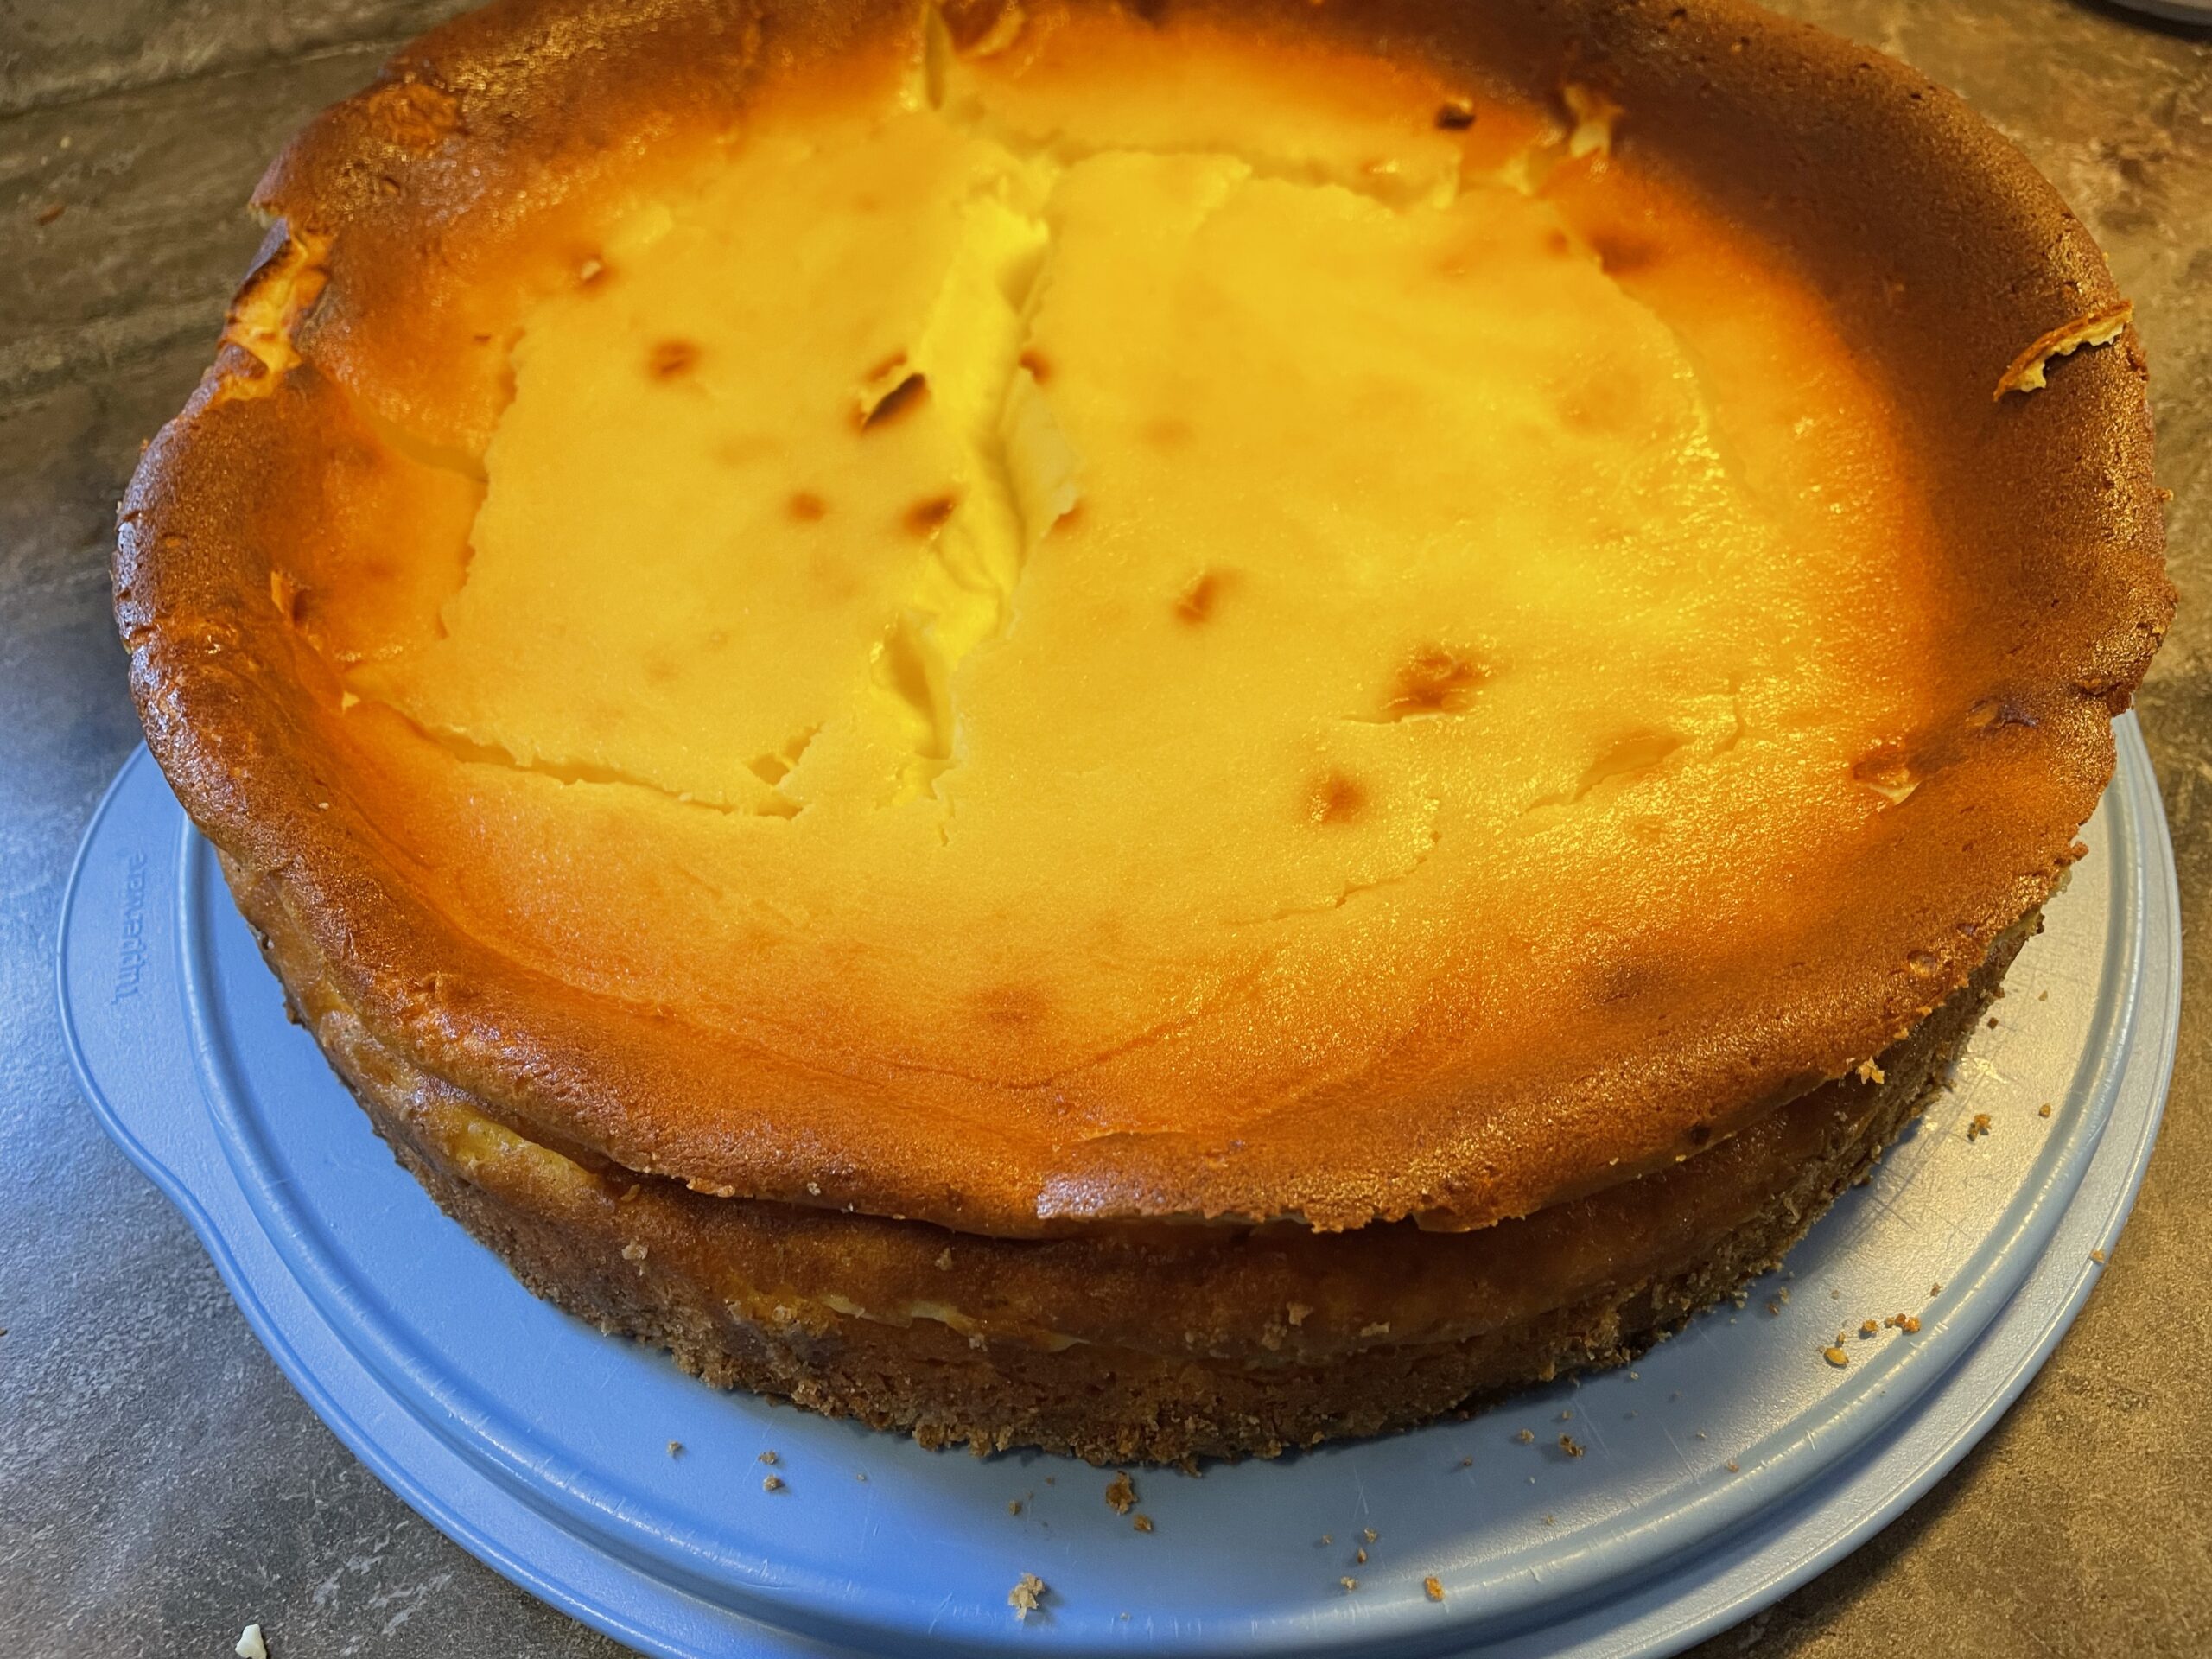
Bake a cheese cake in a round spring shape. Attention: the cake must not have a dough edge! After baking, the cake cools down in the form. Only after cooling you remove the spring edge. (Otherwise, the quark mass slides apart!)
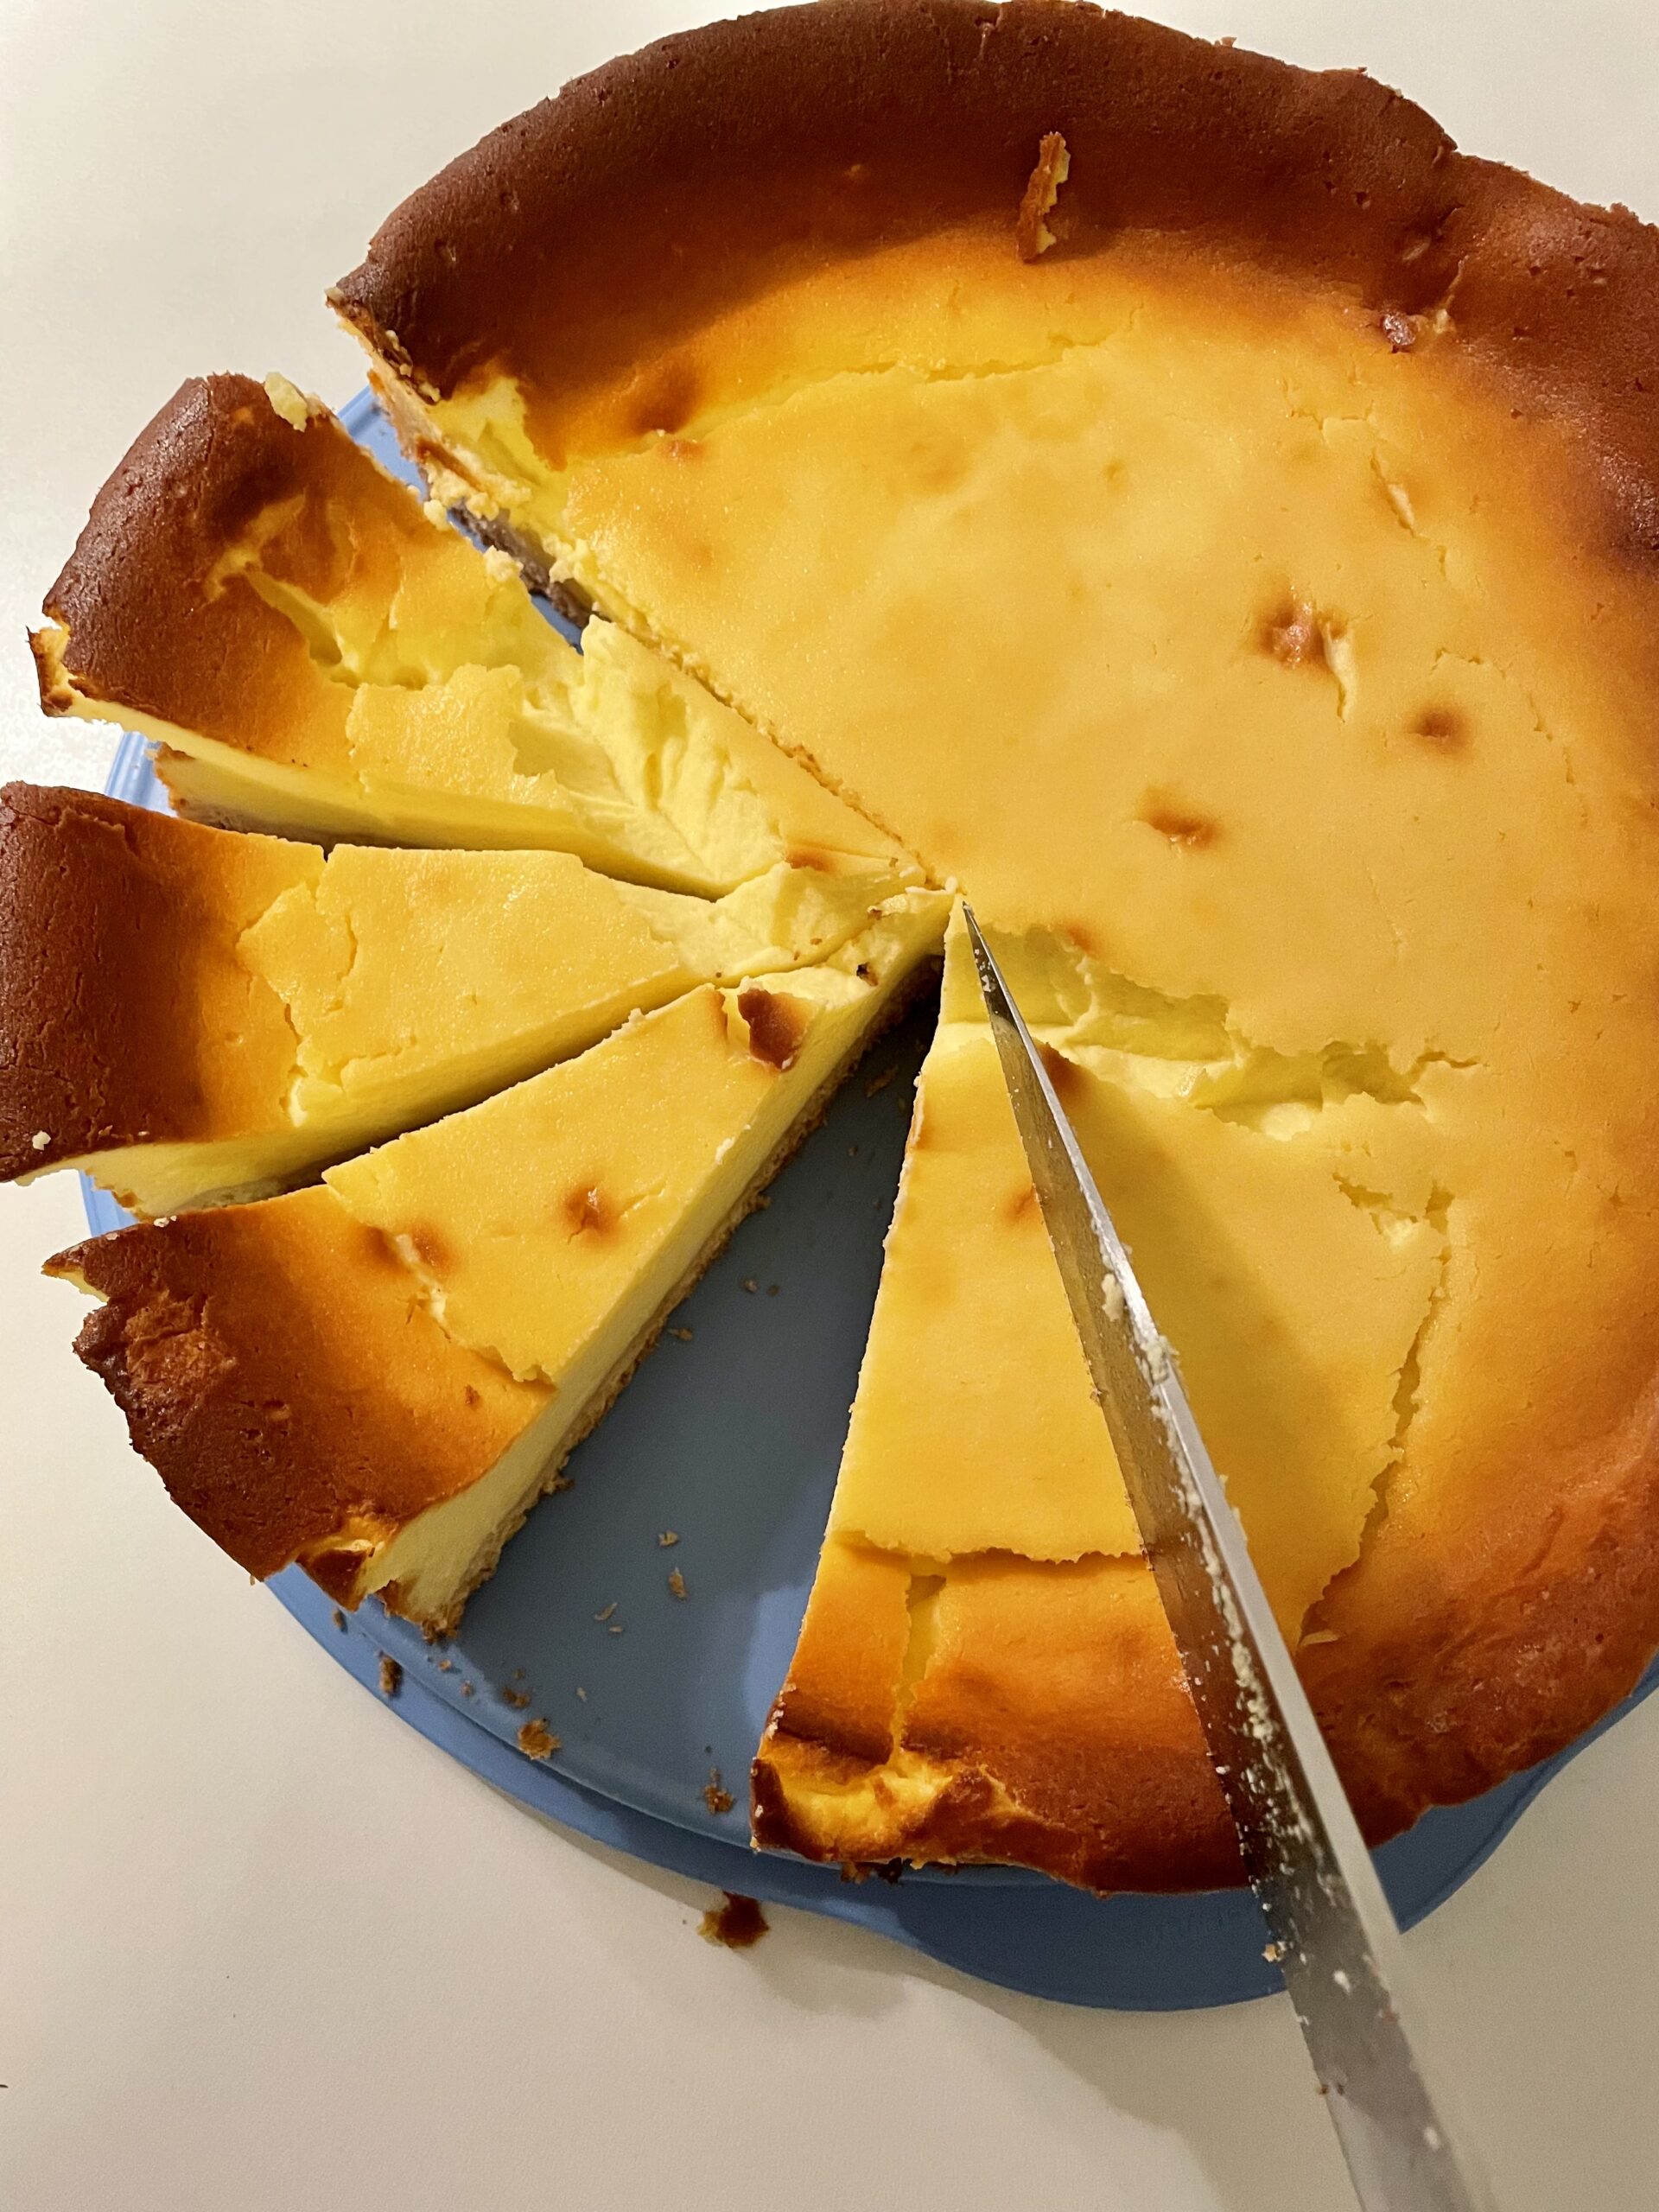
Then cut out two pieces of cake and place them on a separate plate.

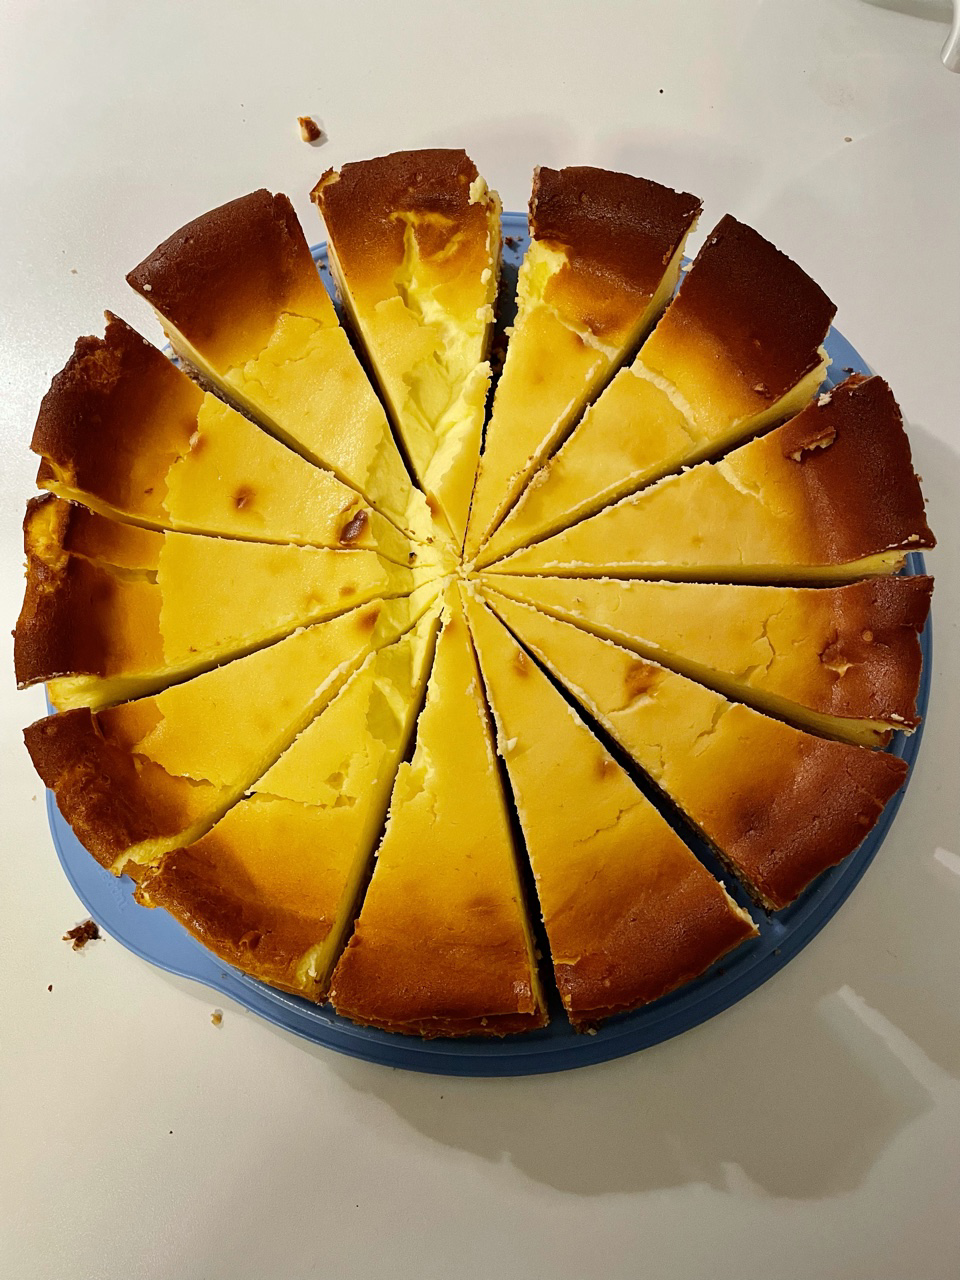
Now you cut the whole cheesecake into pie pieces.
Slides the individual pieces of cake a bit apart.
Now you decorate the pieces of cake. For example, place on the individual pieces of cake icing letters.
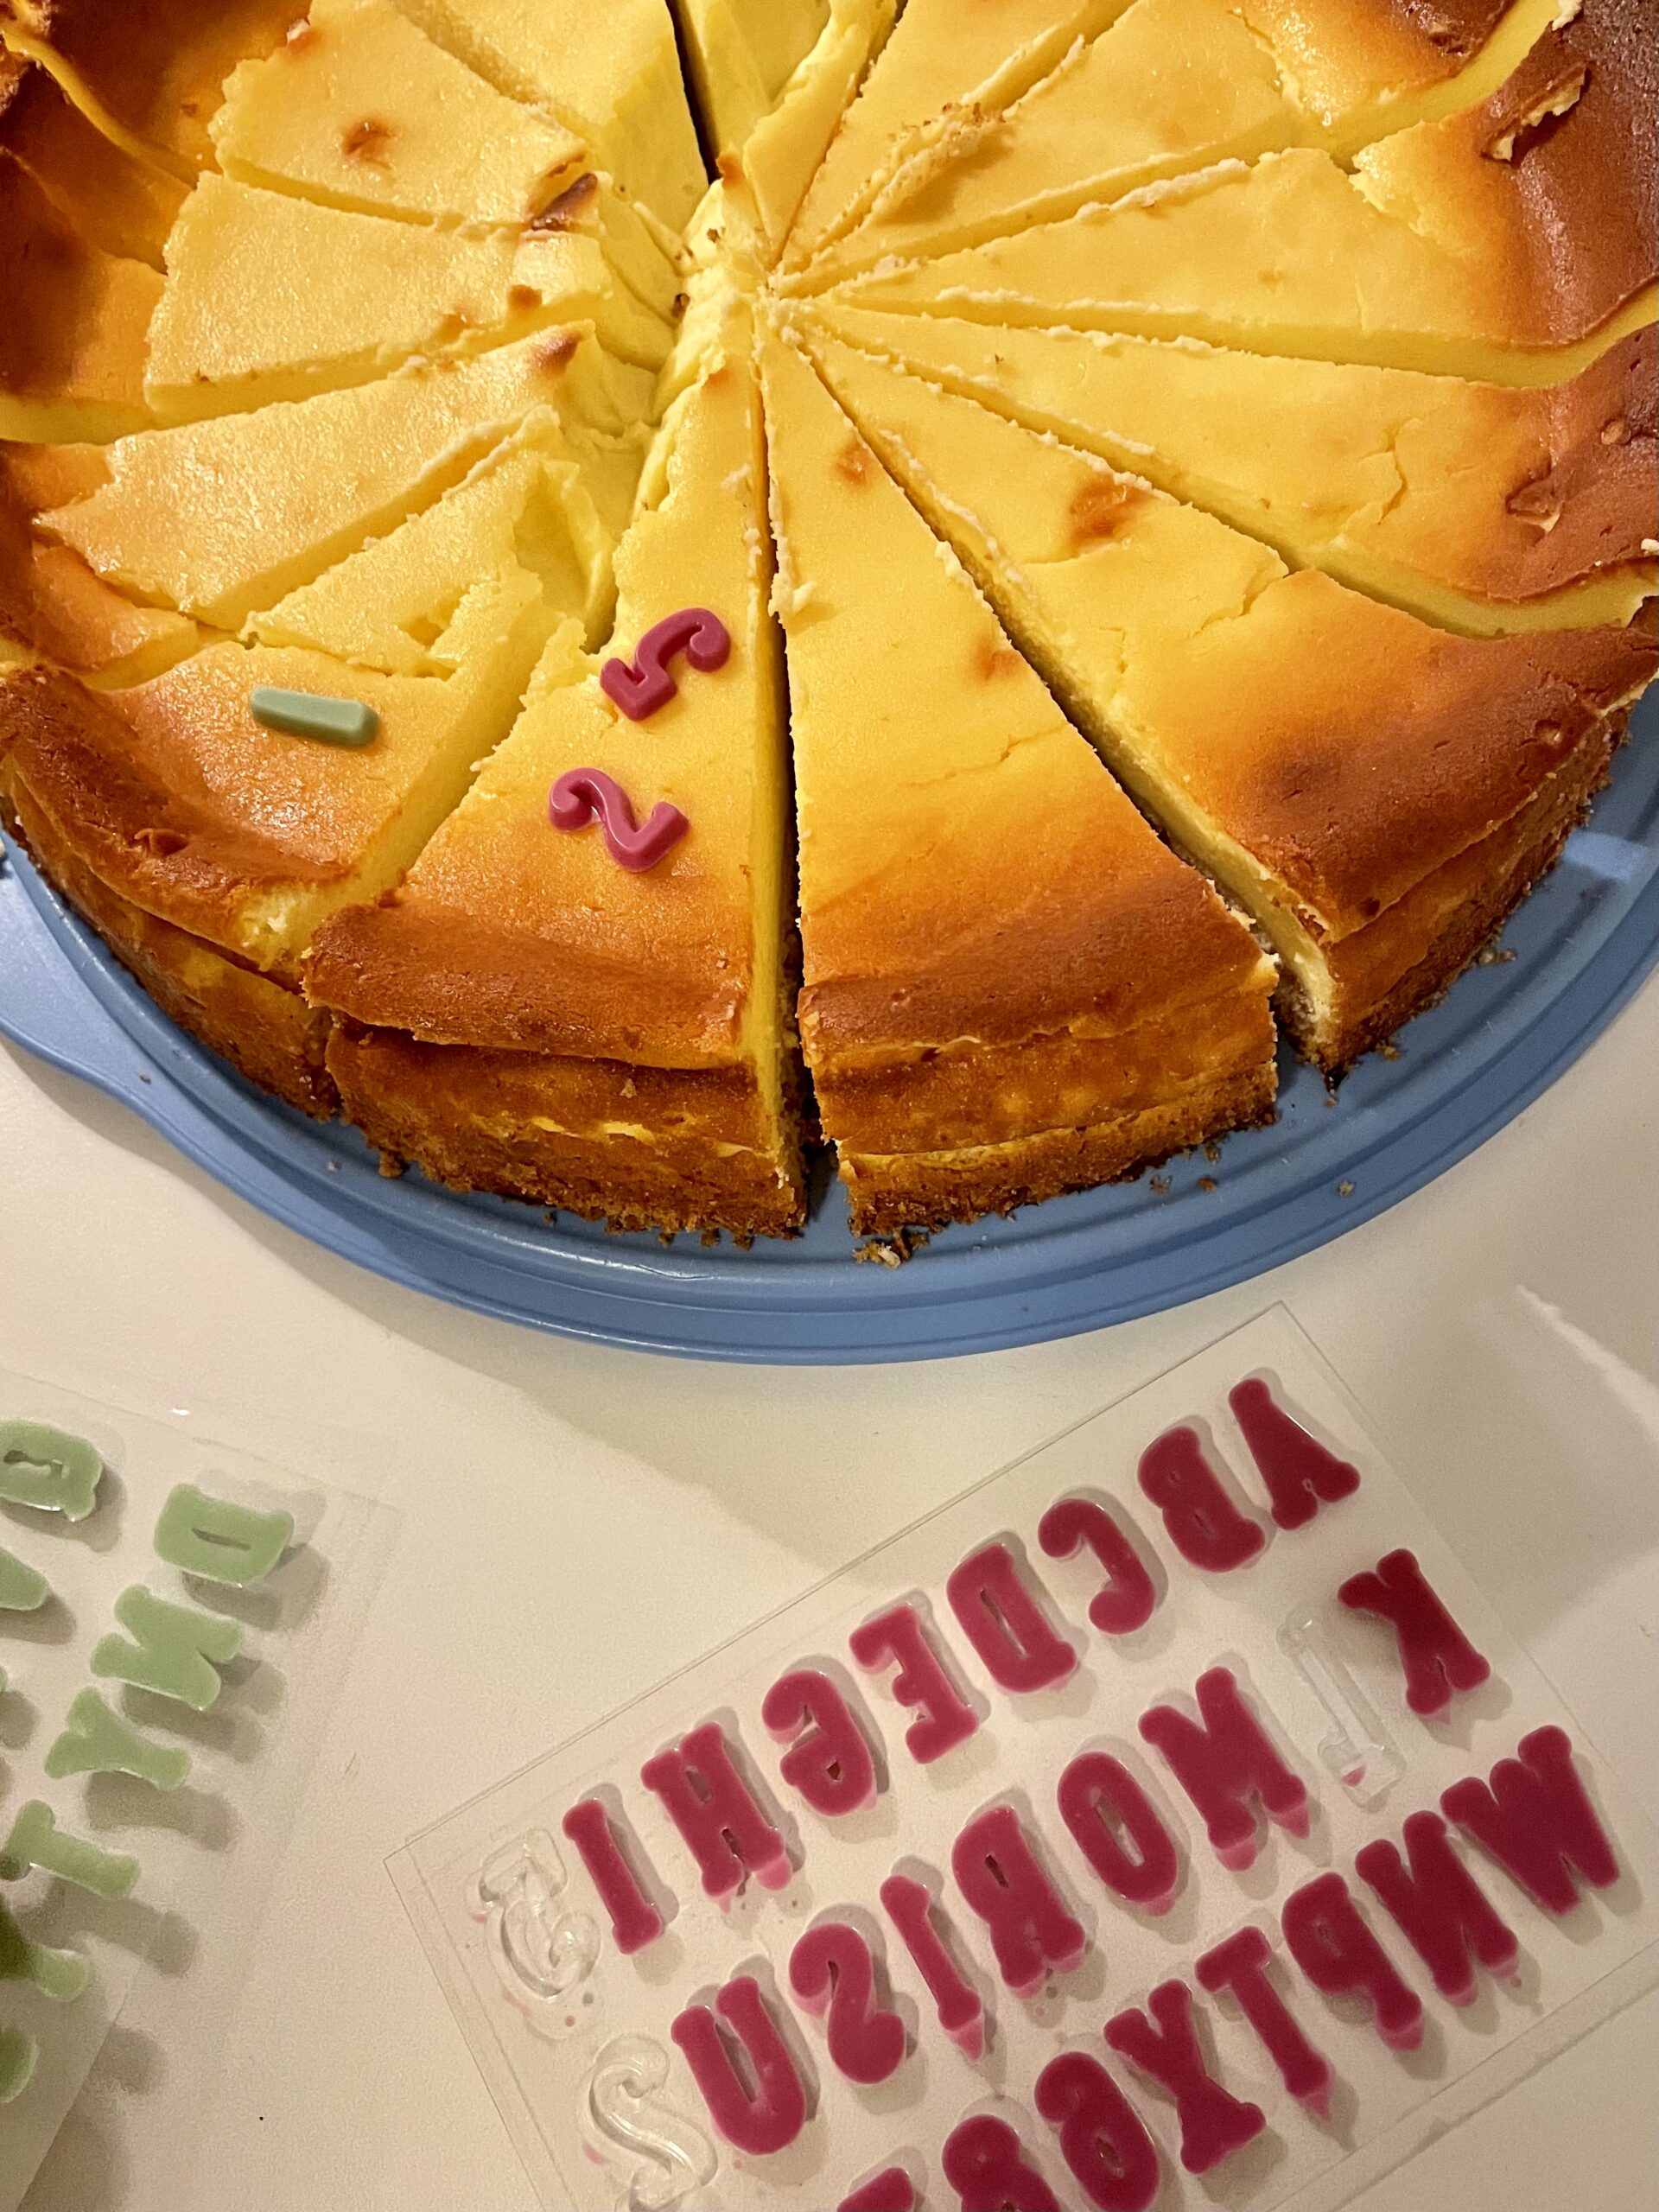
You can decorate the cake the day before.

A few hours (max. 2-3 hours) before serving you put the heart-shaped ice cream waffles from the outside into the cake pieces.
If you put these already in the cheesecake at the lecture, then the waffles soften and bend down.
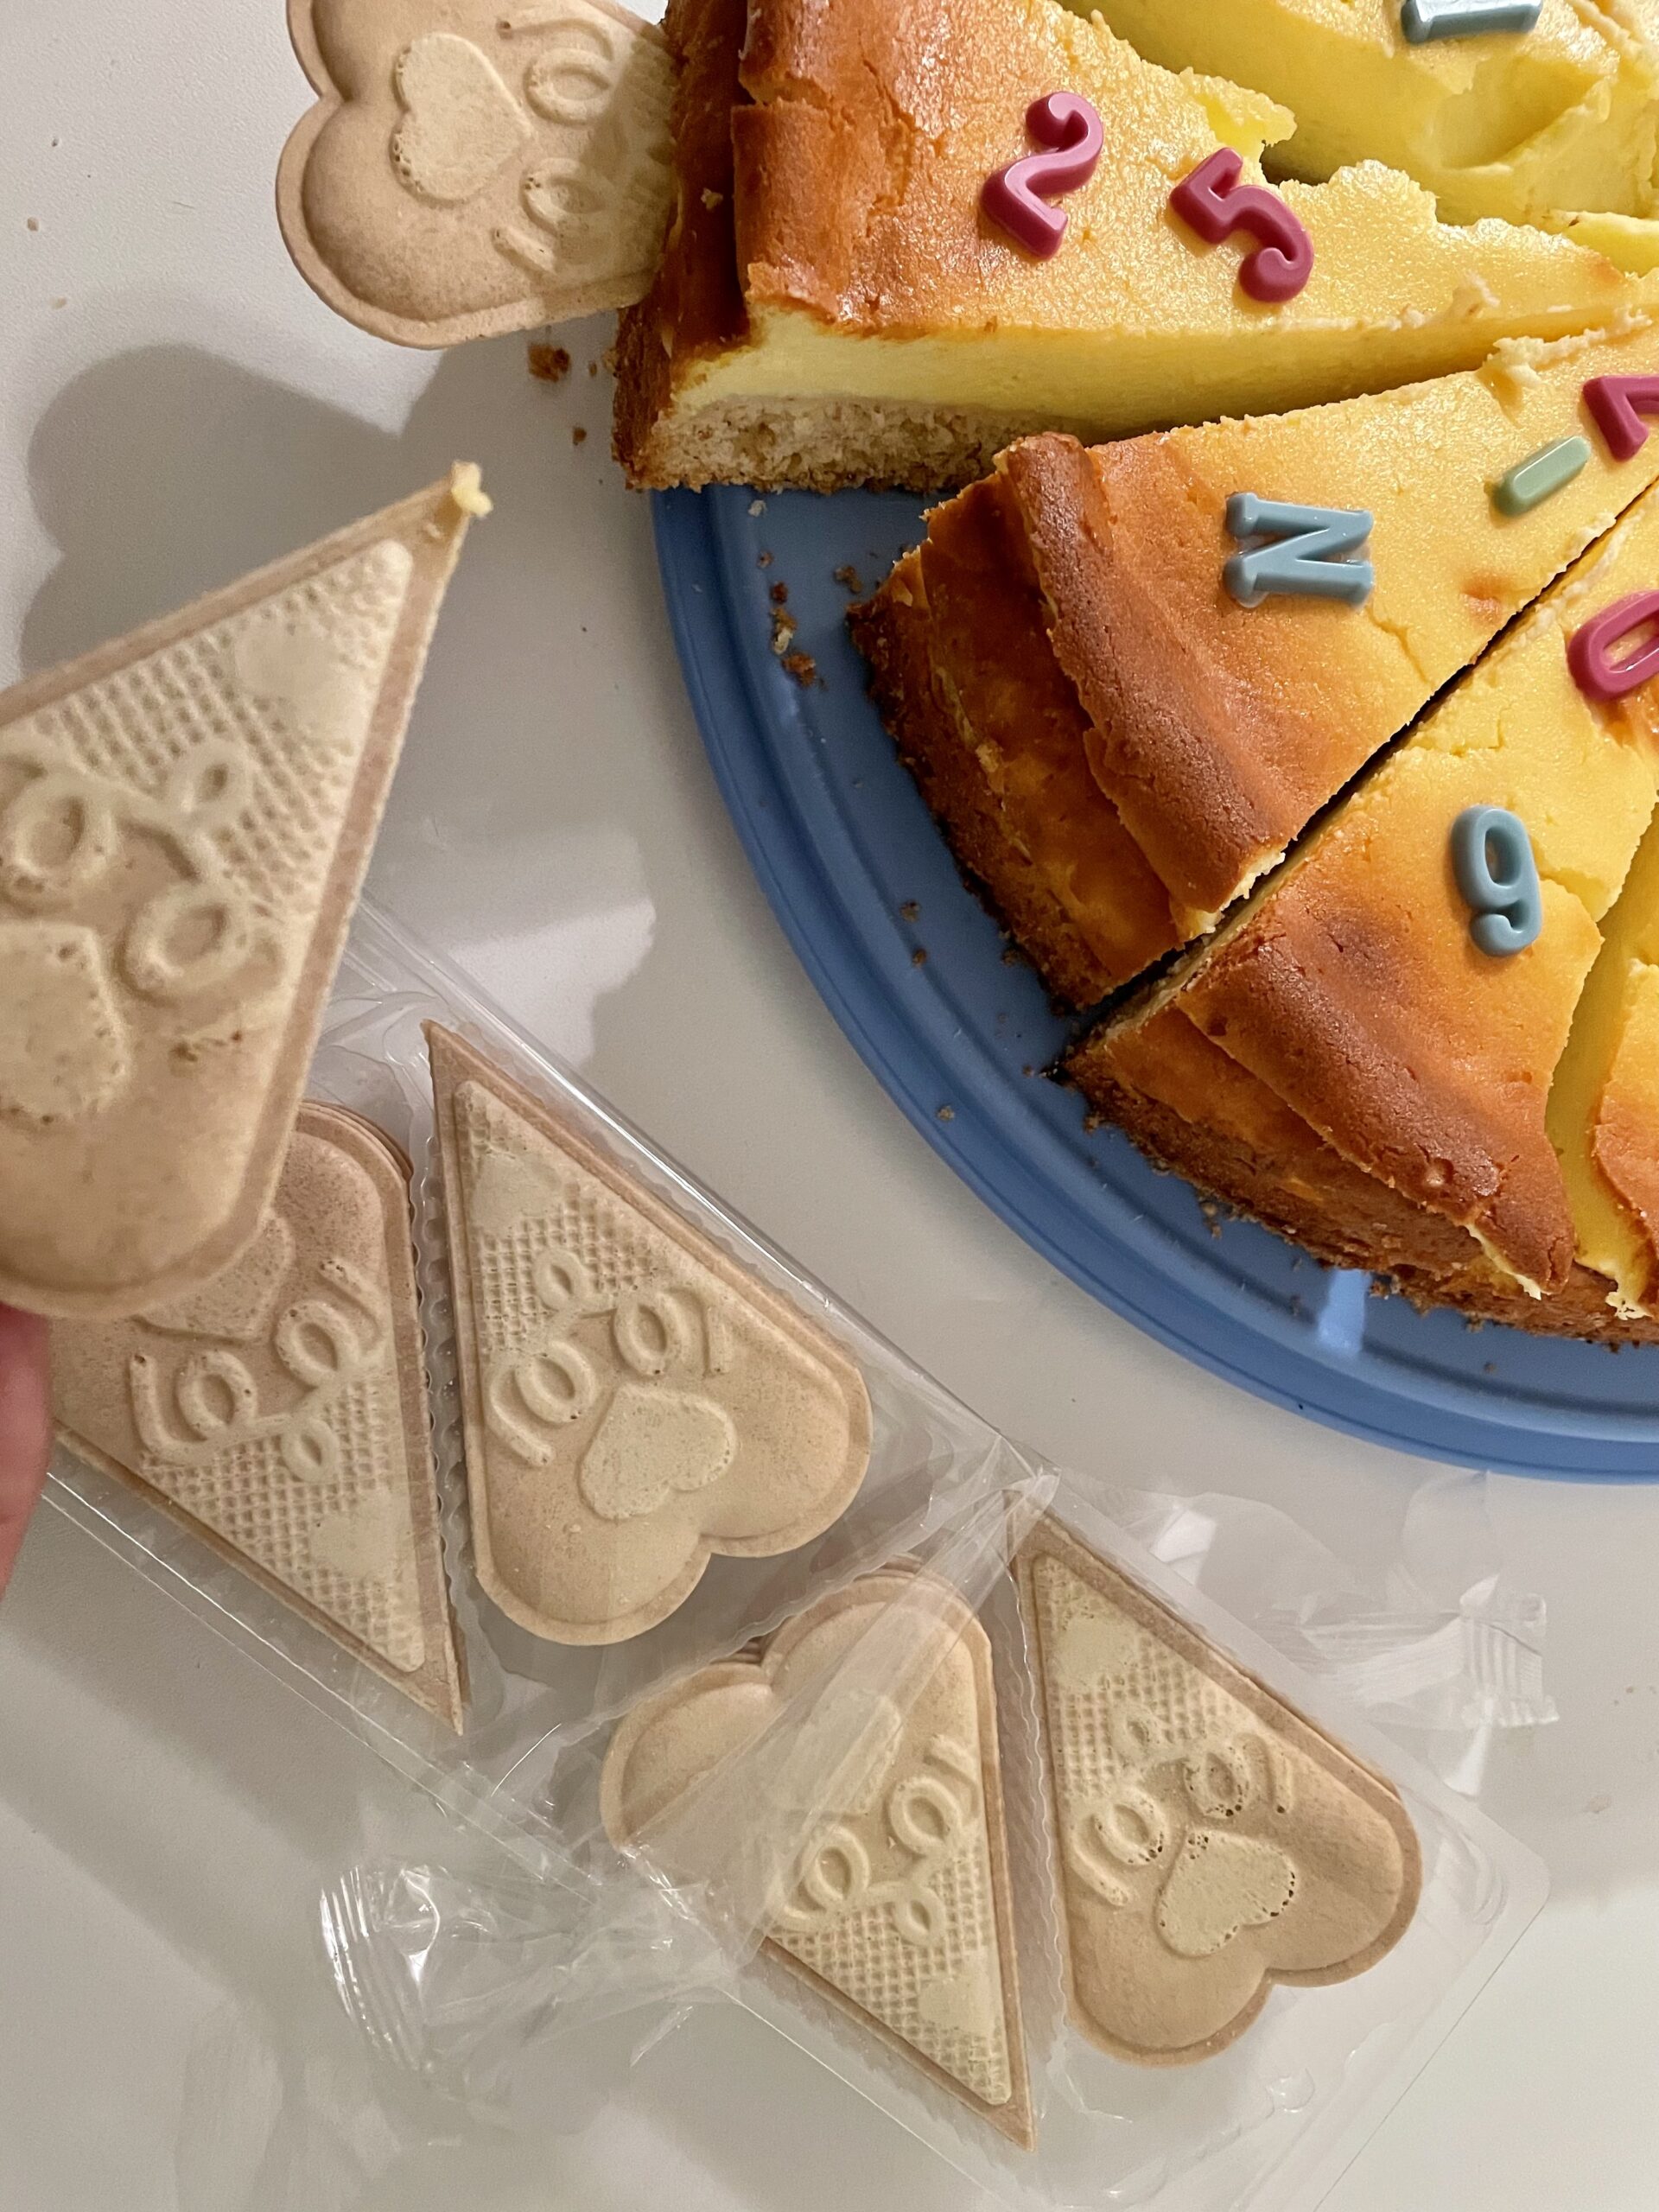
When inserted, start with the tip and then gently push the waffle into the quark layer.
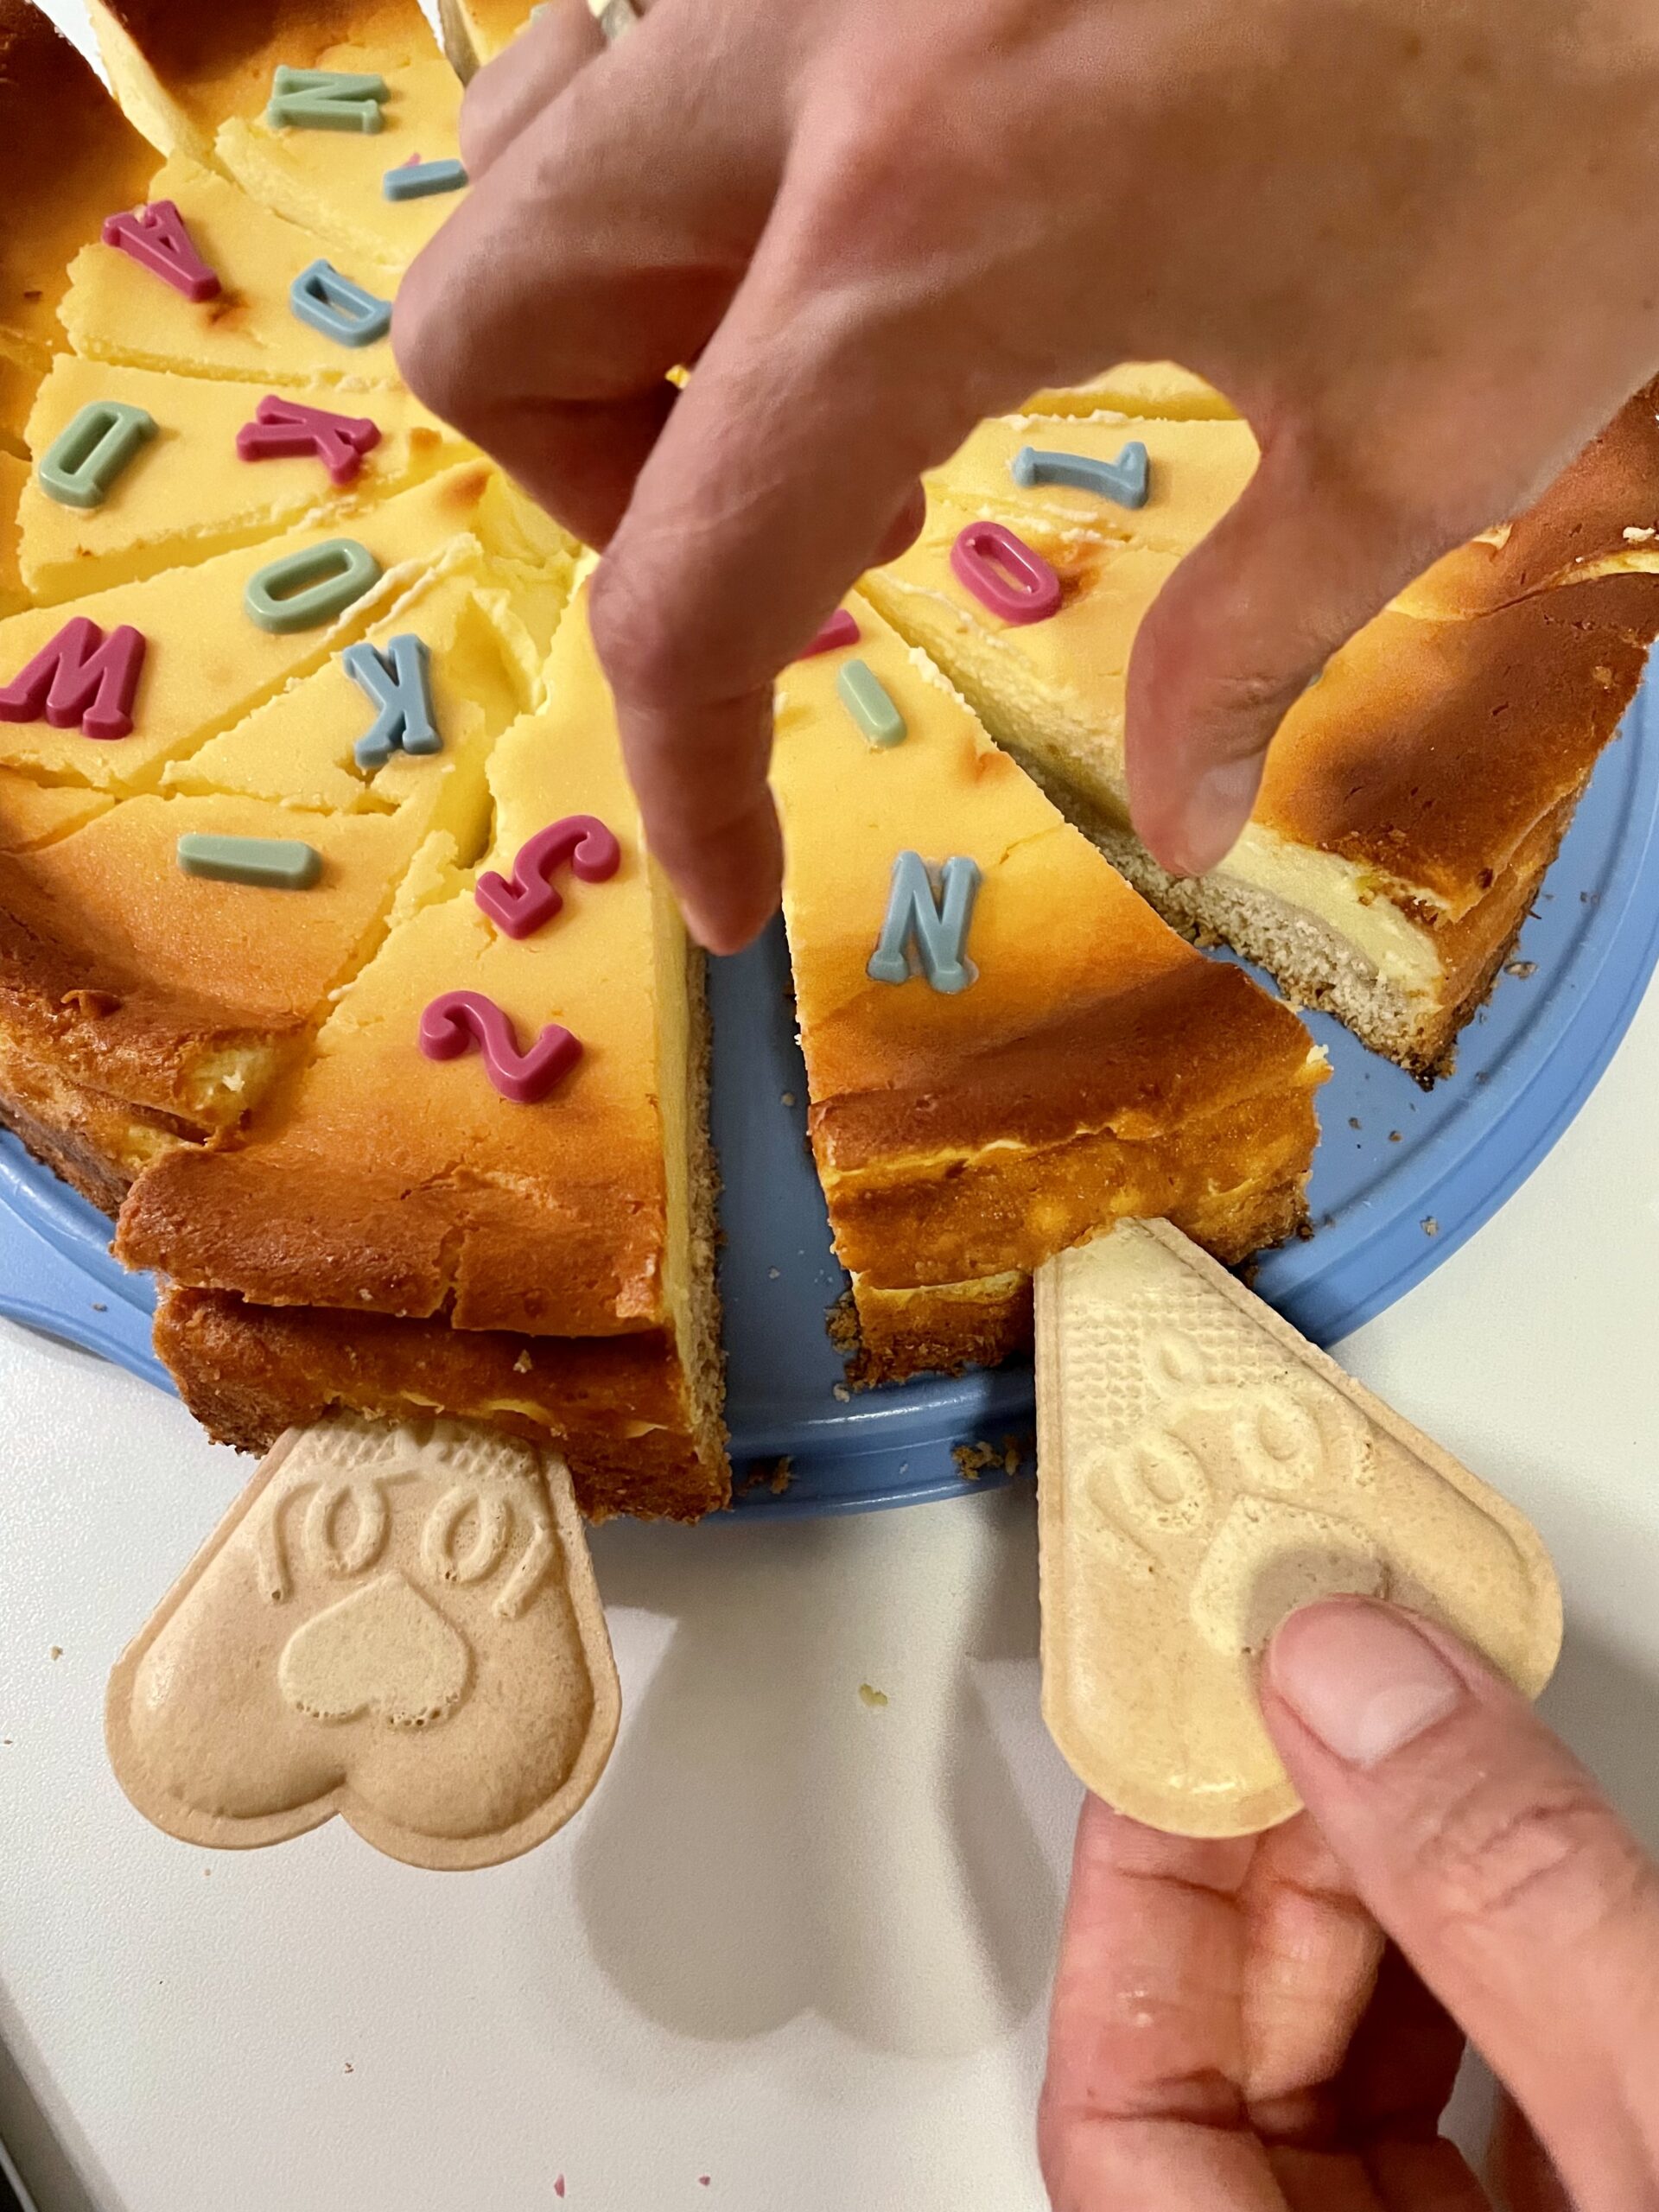
Hold the cake piece with one hand.

Then tie a fruit gum purifier as a loop around the ice waffles.
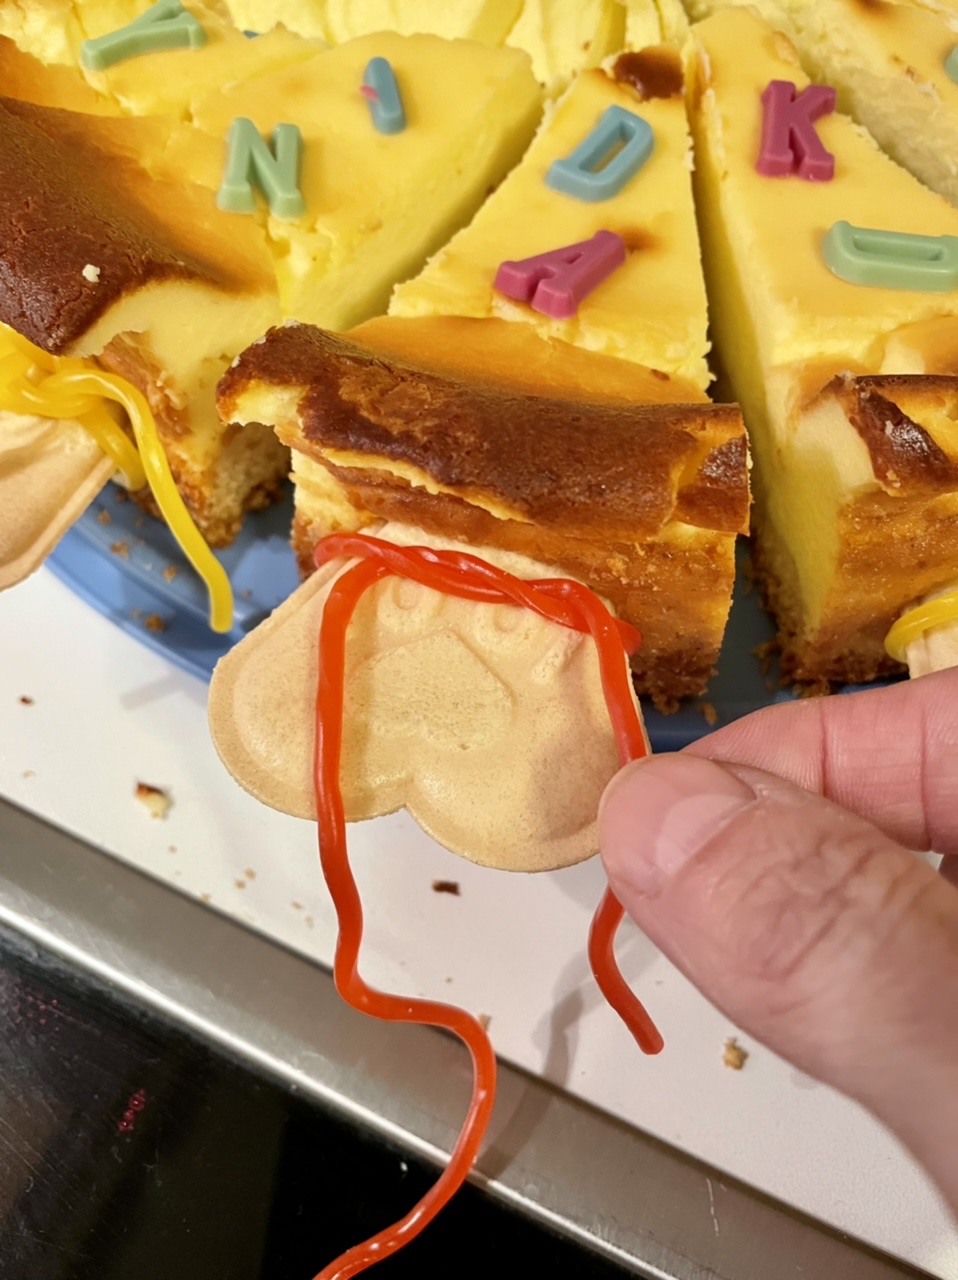
Ties a small bow around each waffle and with it to each piece of cake.

Many small school bags are ready.
Have fun trying it out!

That's what the cake looks like!

And so you certainly don't want him!!!
Good luck!
Materials
Directions
Bake a cheese cake in a round spring shape. Attention: the cake must not have a dough edge! After baking, the cake cools down in the form. Only after cooling you remove the spring edge. (Otherwise, the quark mass slides apart!)
Then cut out two pieces of cake and place them on a separate plate.
Now you cut the whole cheesecake into pie pieces.
Slides the individual pieces of cake a bit apart.
Now you decorate the pieces of cake. For example, place on the individual pieces of cake icing letters.
You can decorate the cake the day before.
A few hours (max. 2-3 hours) before serving you put the heart-shaped ice cream waffles from the outside into the cake pieces.
If you put these already in the cheesecake at the lecture, then the waffles soften and bend down.
When inserted, start with the tip and then gently push the waffle into the quark layer.
Hold the cake piece with one hand.
Then tie a fruit gum purifier as a loop around the ice waffles.
Ties a small bow around each waffle and with it to each piece of cake.
Many small school bags are ready.
Have fun trying it out!
That's what the cake looks like!
And so you certainly don't want him!!!
Good luck!
Follow us on Facebook , Instagram and Pinterest
Don't miss any more adventures: Our bottle mail


