Sew juggling balls

AdventurerKatzi
Rating4.929.4 thousand times & (8) DifficultyAdvanced

These small handy balls are ideal for juggling, especially for children's hands! Have fun doing crafts.

Media Education for Kindergarten and Hort

Kind bastelt eine Rassel mit dem Navi
The Adventure Navi, the app for DIY projects, enables media education for the youngest.

Relief in everyday life, targeted promotion of individual children, independent learning and - without any pre-knowledge already usable by the youngest!
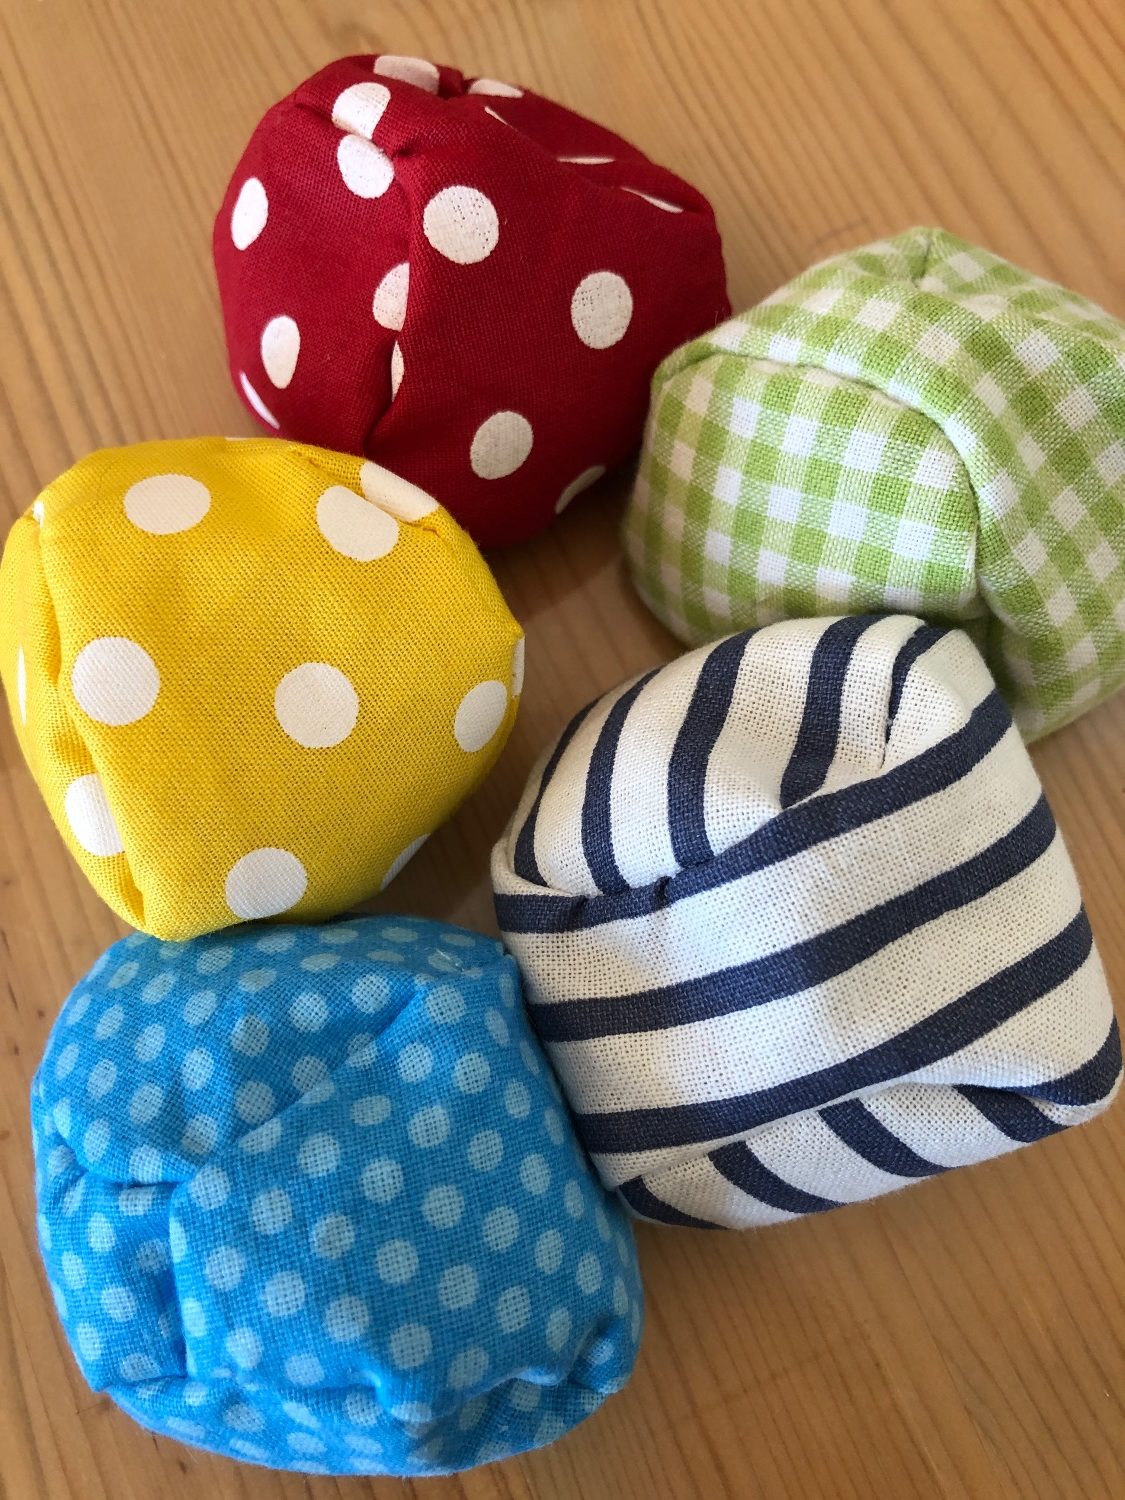


Titelbild zur Bastel- und DIY-Idee für Kinder '(138) Jonglierbälle nähen'
Material for1 Child
Prep Time10 min.Adv. Time20 min.Total Time30 min.
 1 Colorful fabric residue (approx. 12 cm x 15 cm)
 Sewing machine
 1 Pen
 1 Cut template (in the first instruction step)
 1 Needle
 1 Thread matching the fabric
 1 Substance shears
 1 Paper shears
 1 Funnels for filling
 50 g Rice or spelt
1

Print and cut cutting template (also as PDF in the comment area at the bottom)
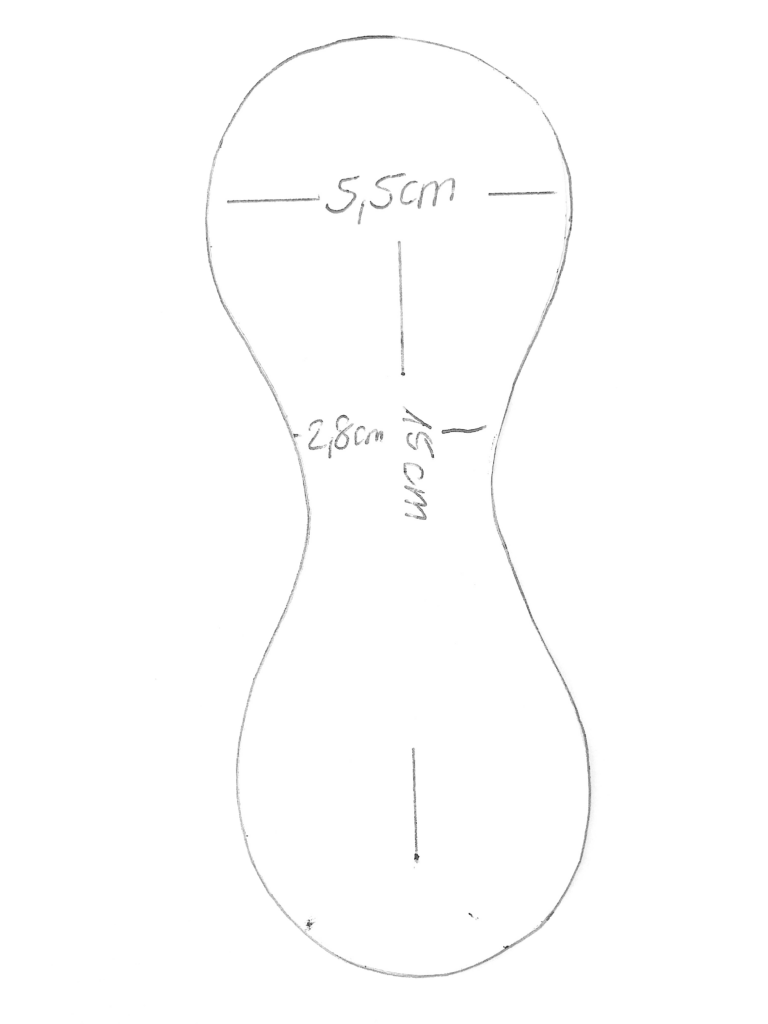
Bild zum Schritt 1 für das Bastel- und DIY-Abenteuer für Kinder: 'Schnittvorlage ausdrucken und ausschneiden (auch als PDF im Kommentar-Bereich ganz...'

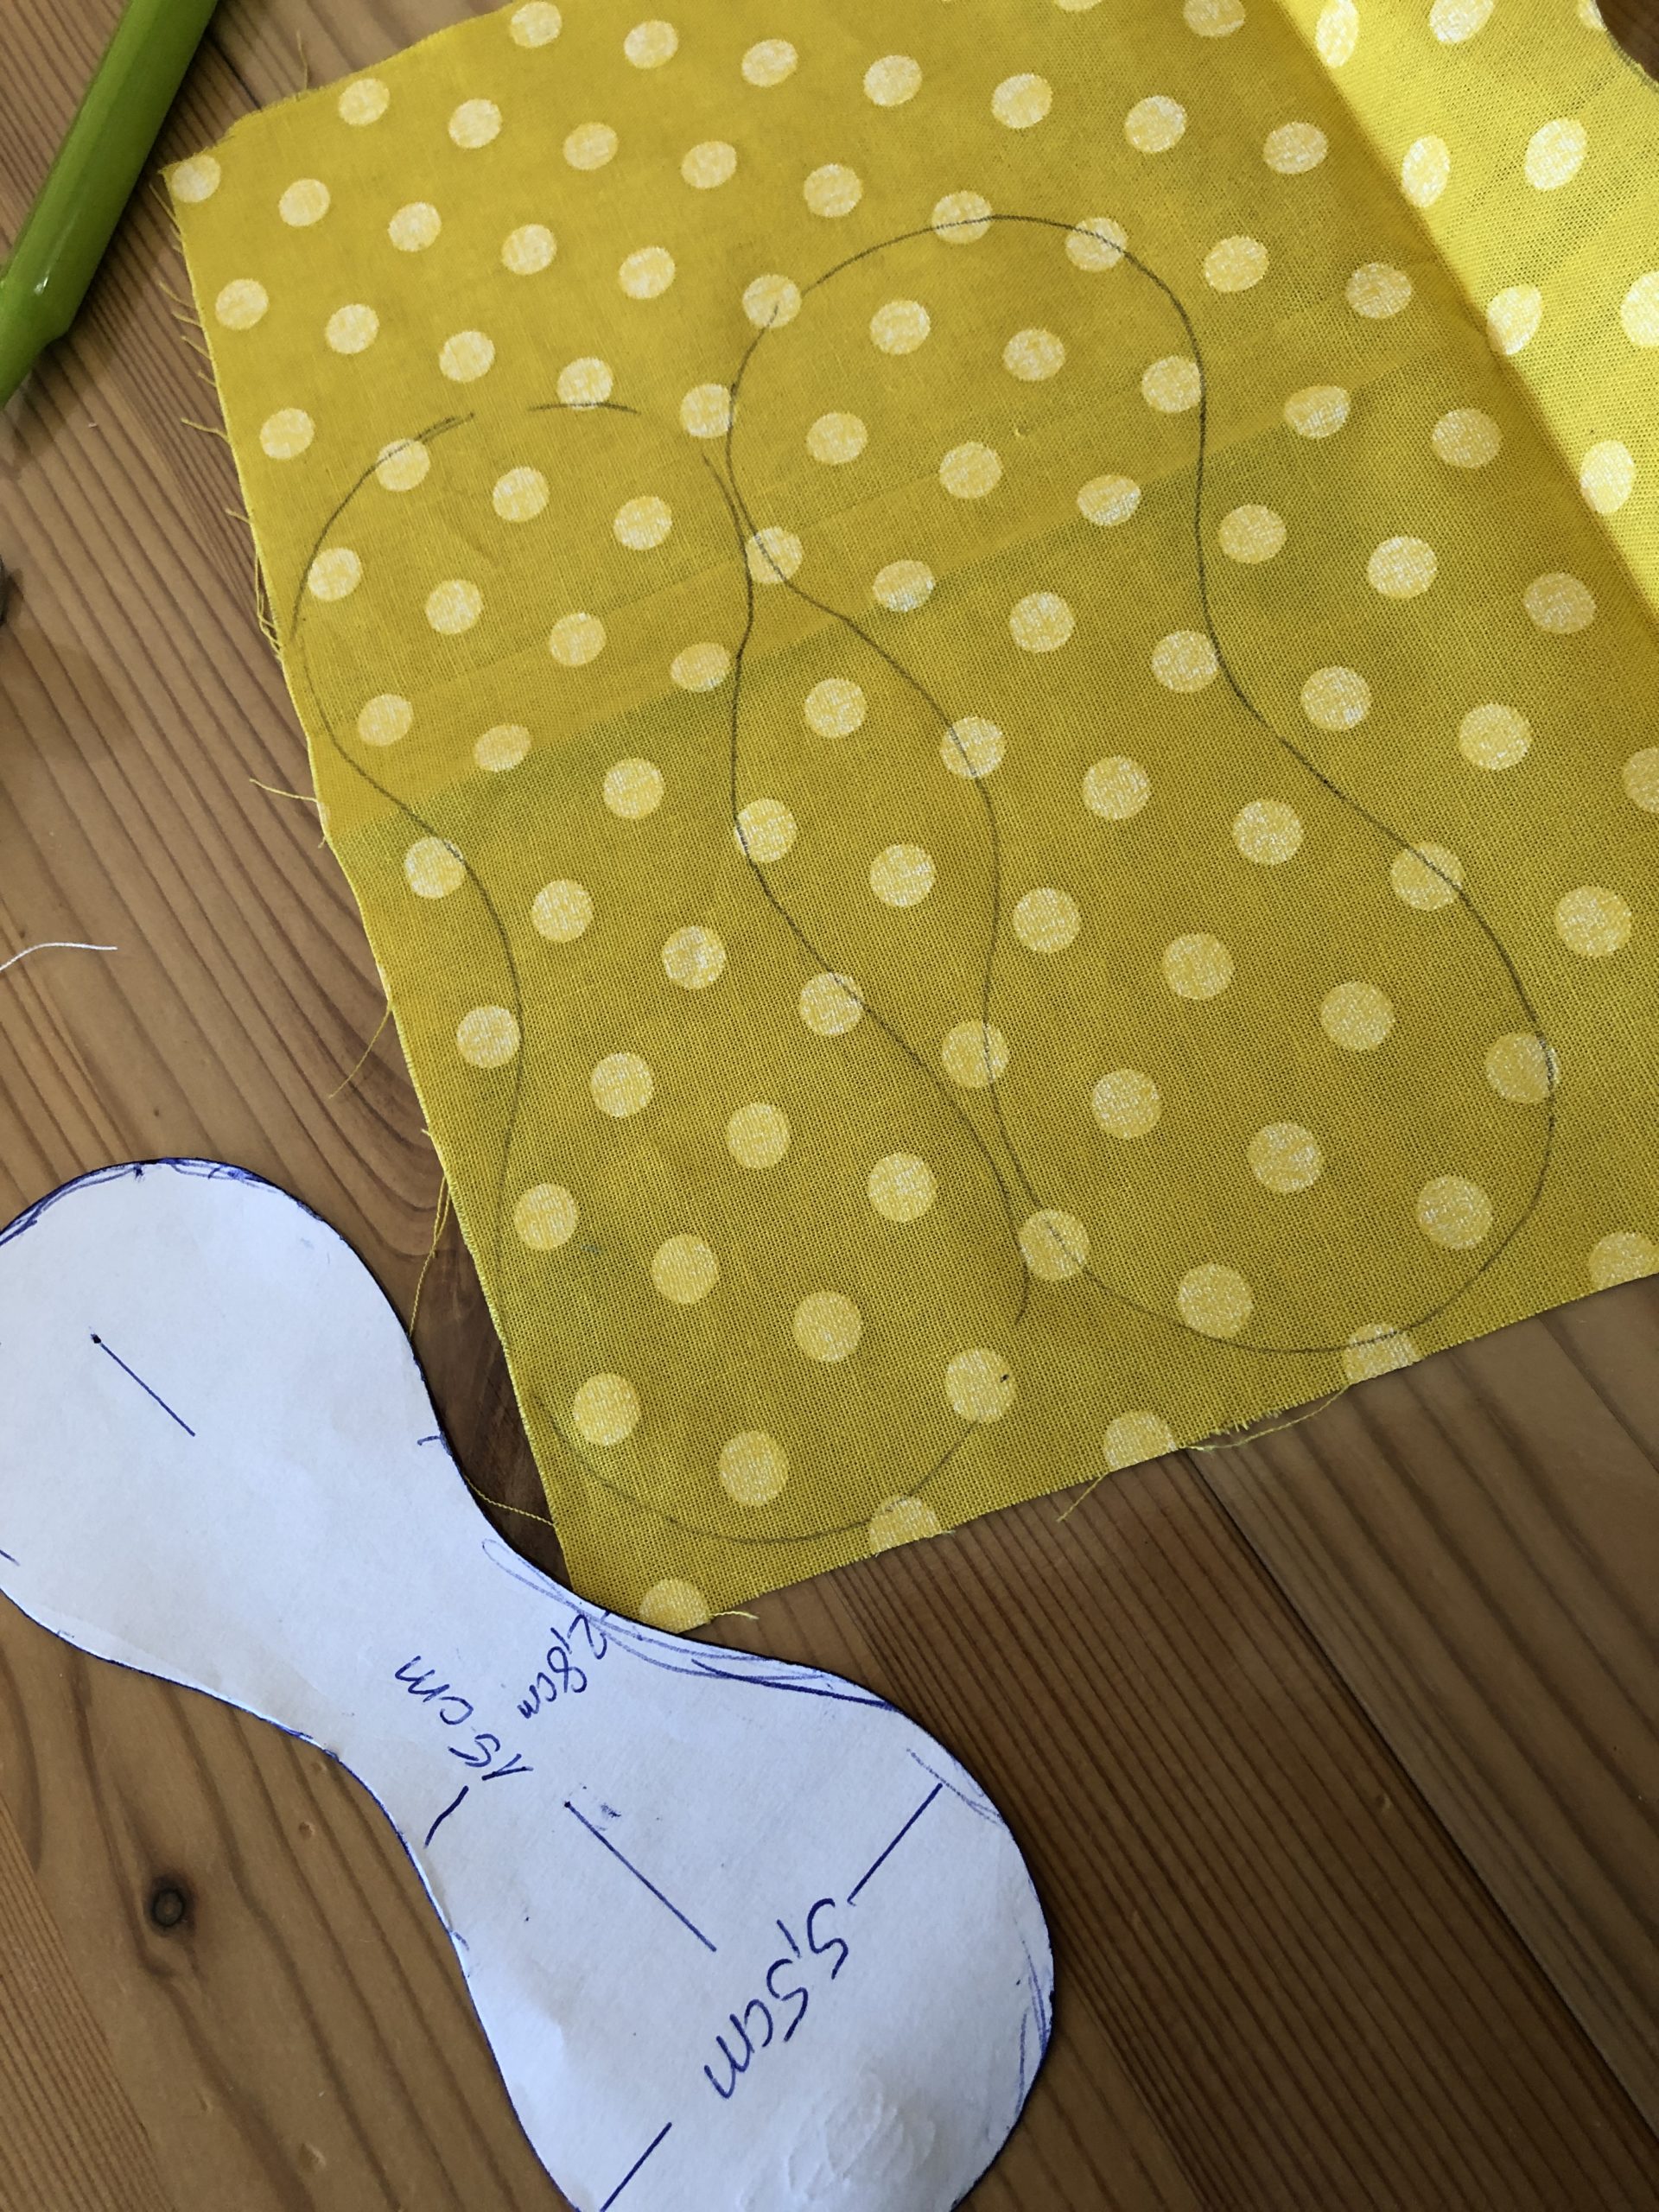
2

Transfer pattern 2 x to the fabric

Bild zum Schritt 2 für das Bastel- und DIY-Abenteuer für Kinder: 'Schnittmuster 2 x auf den Stoff übertragen'

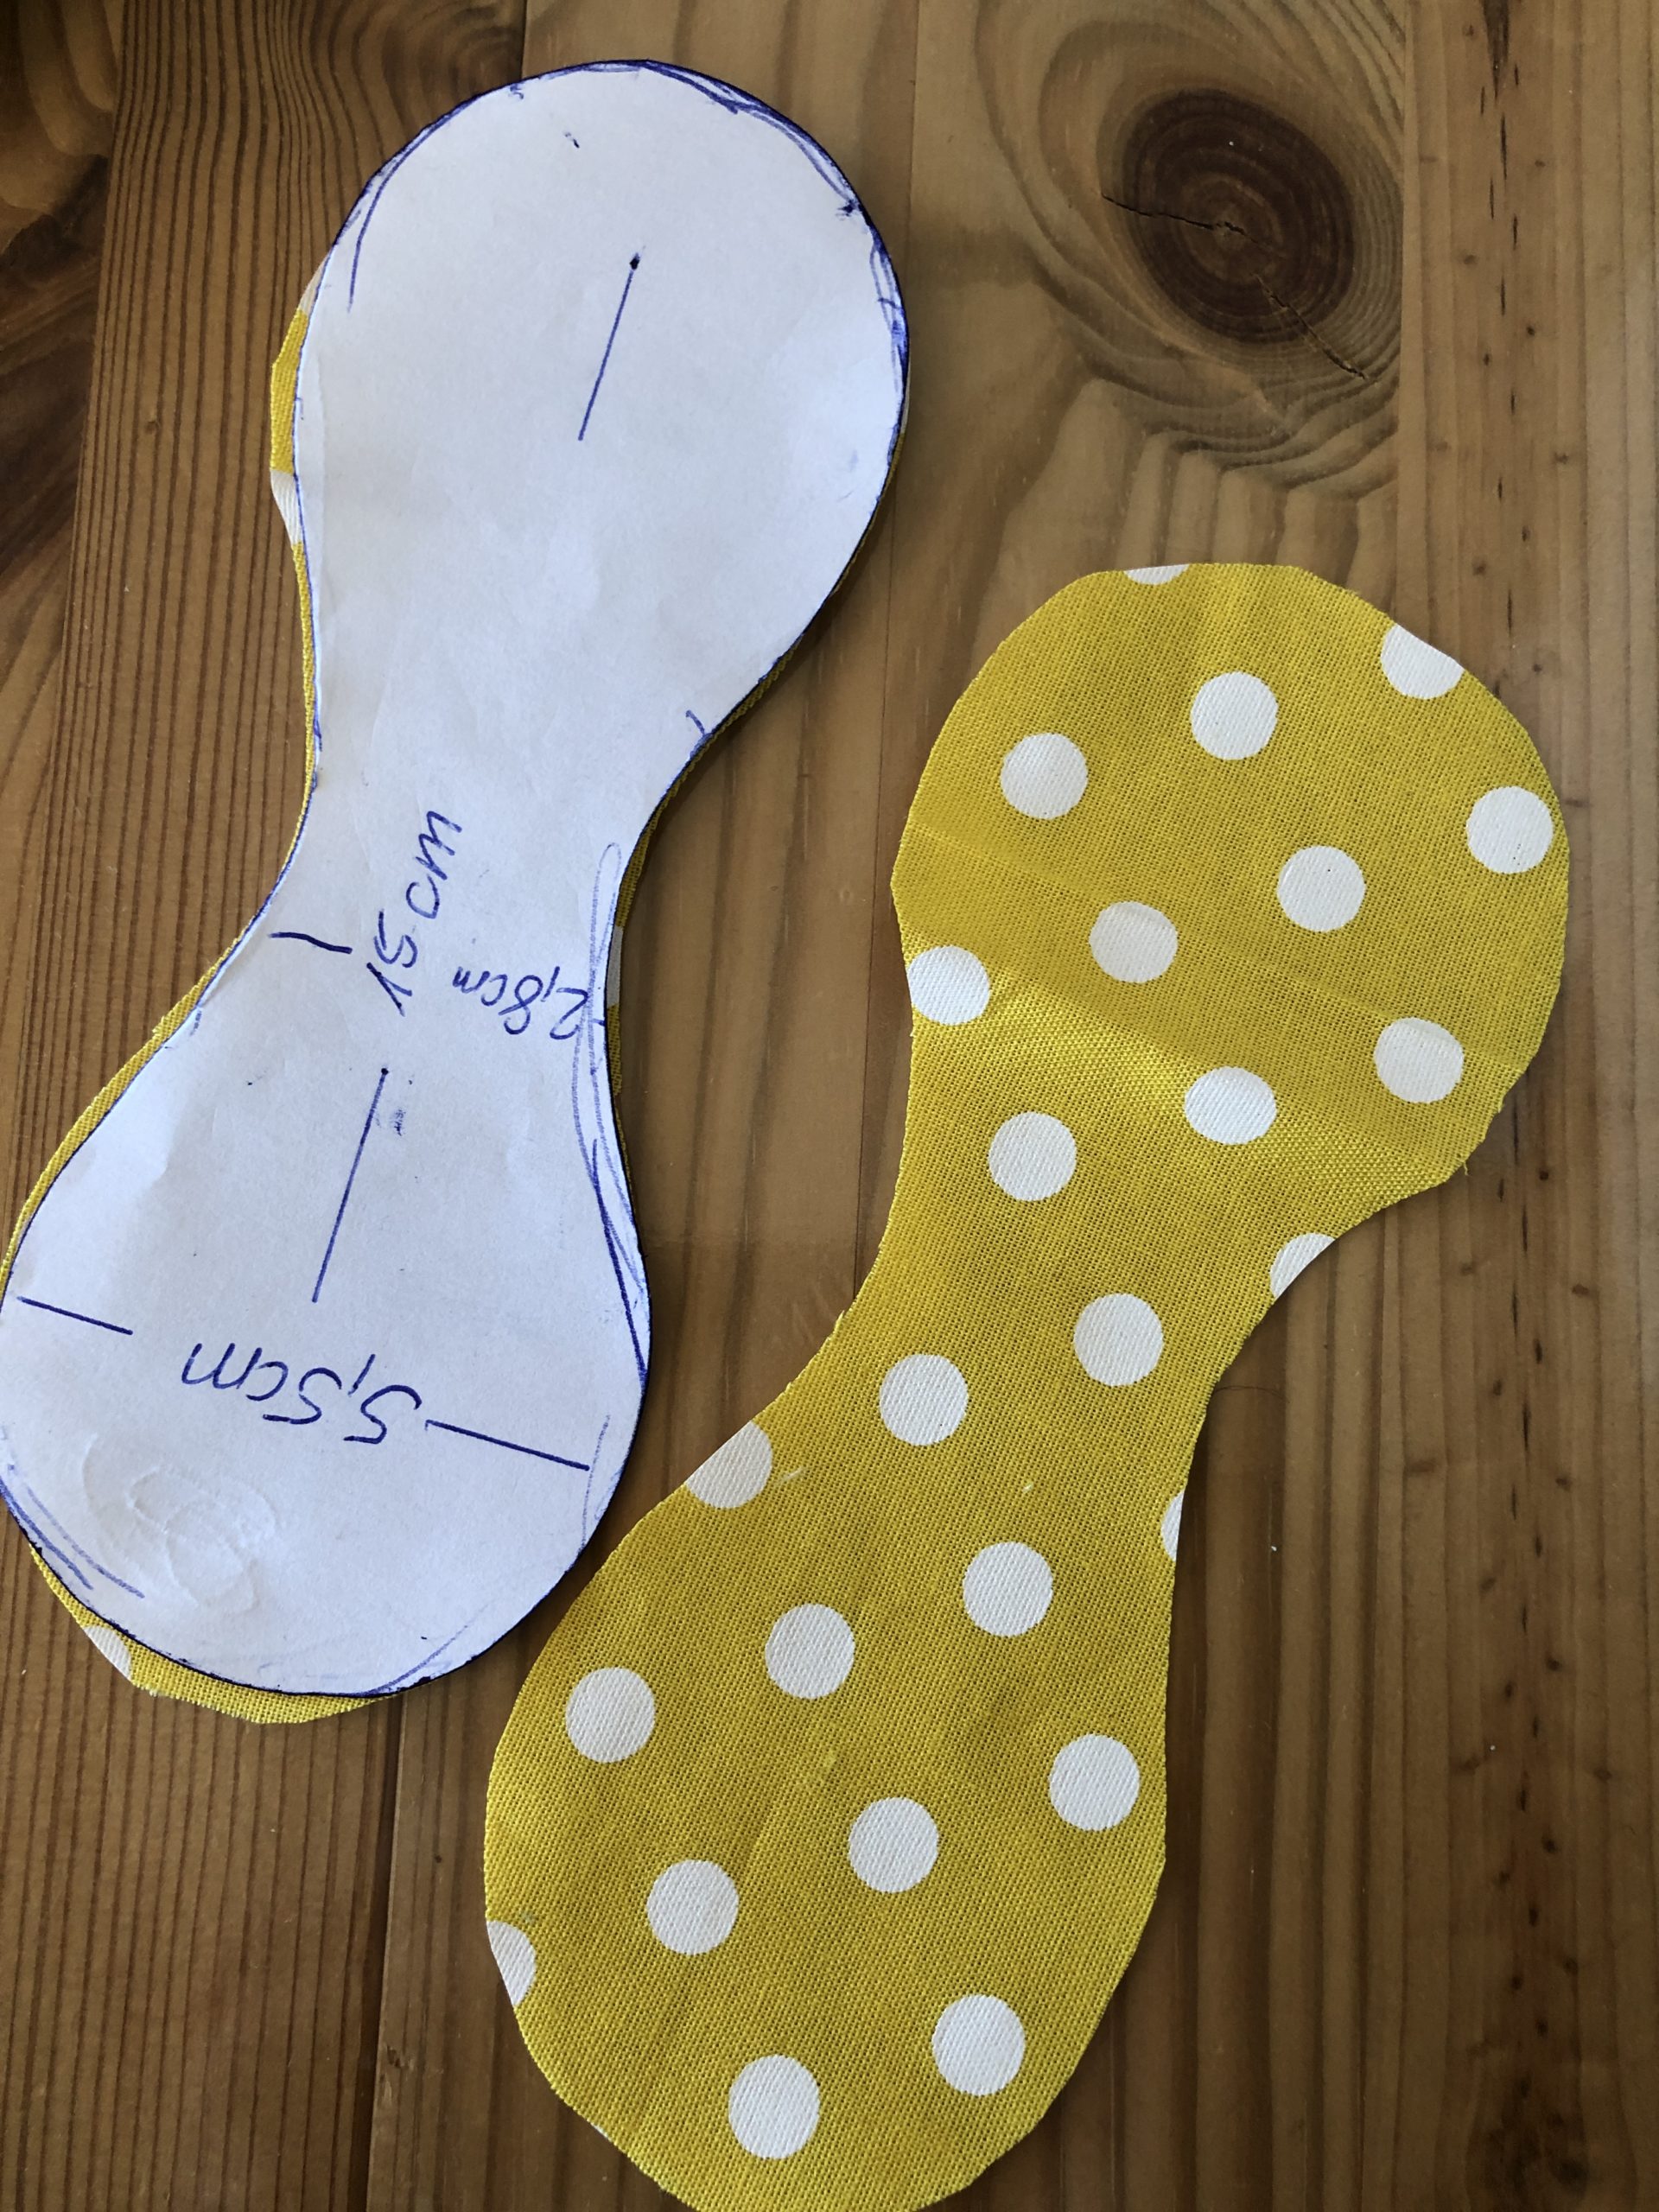
3

Cut fabric

Bild zum Schritt 3 für das Bastel- und DIY-Abenteuer für Kinder: 'Stoff zuschneiden'

4

Place fabric on each other as in the picture, the two beautiful sides lie on each other.
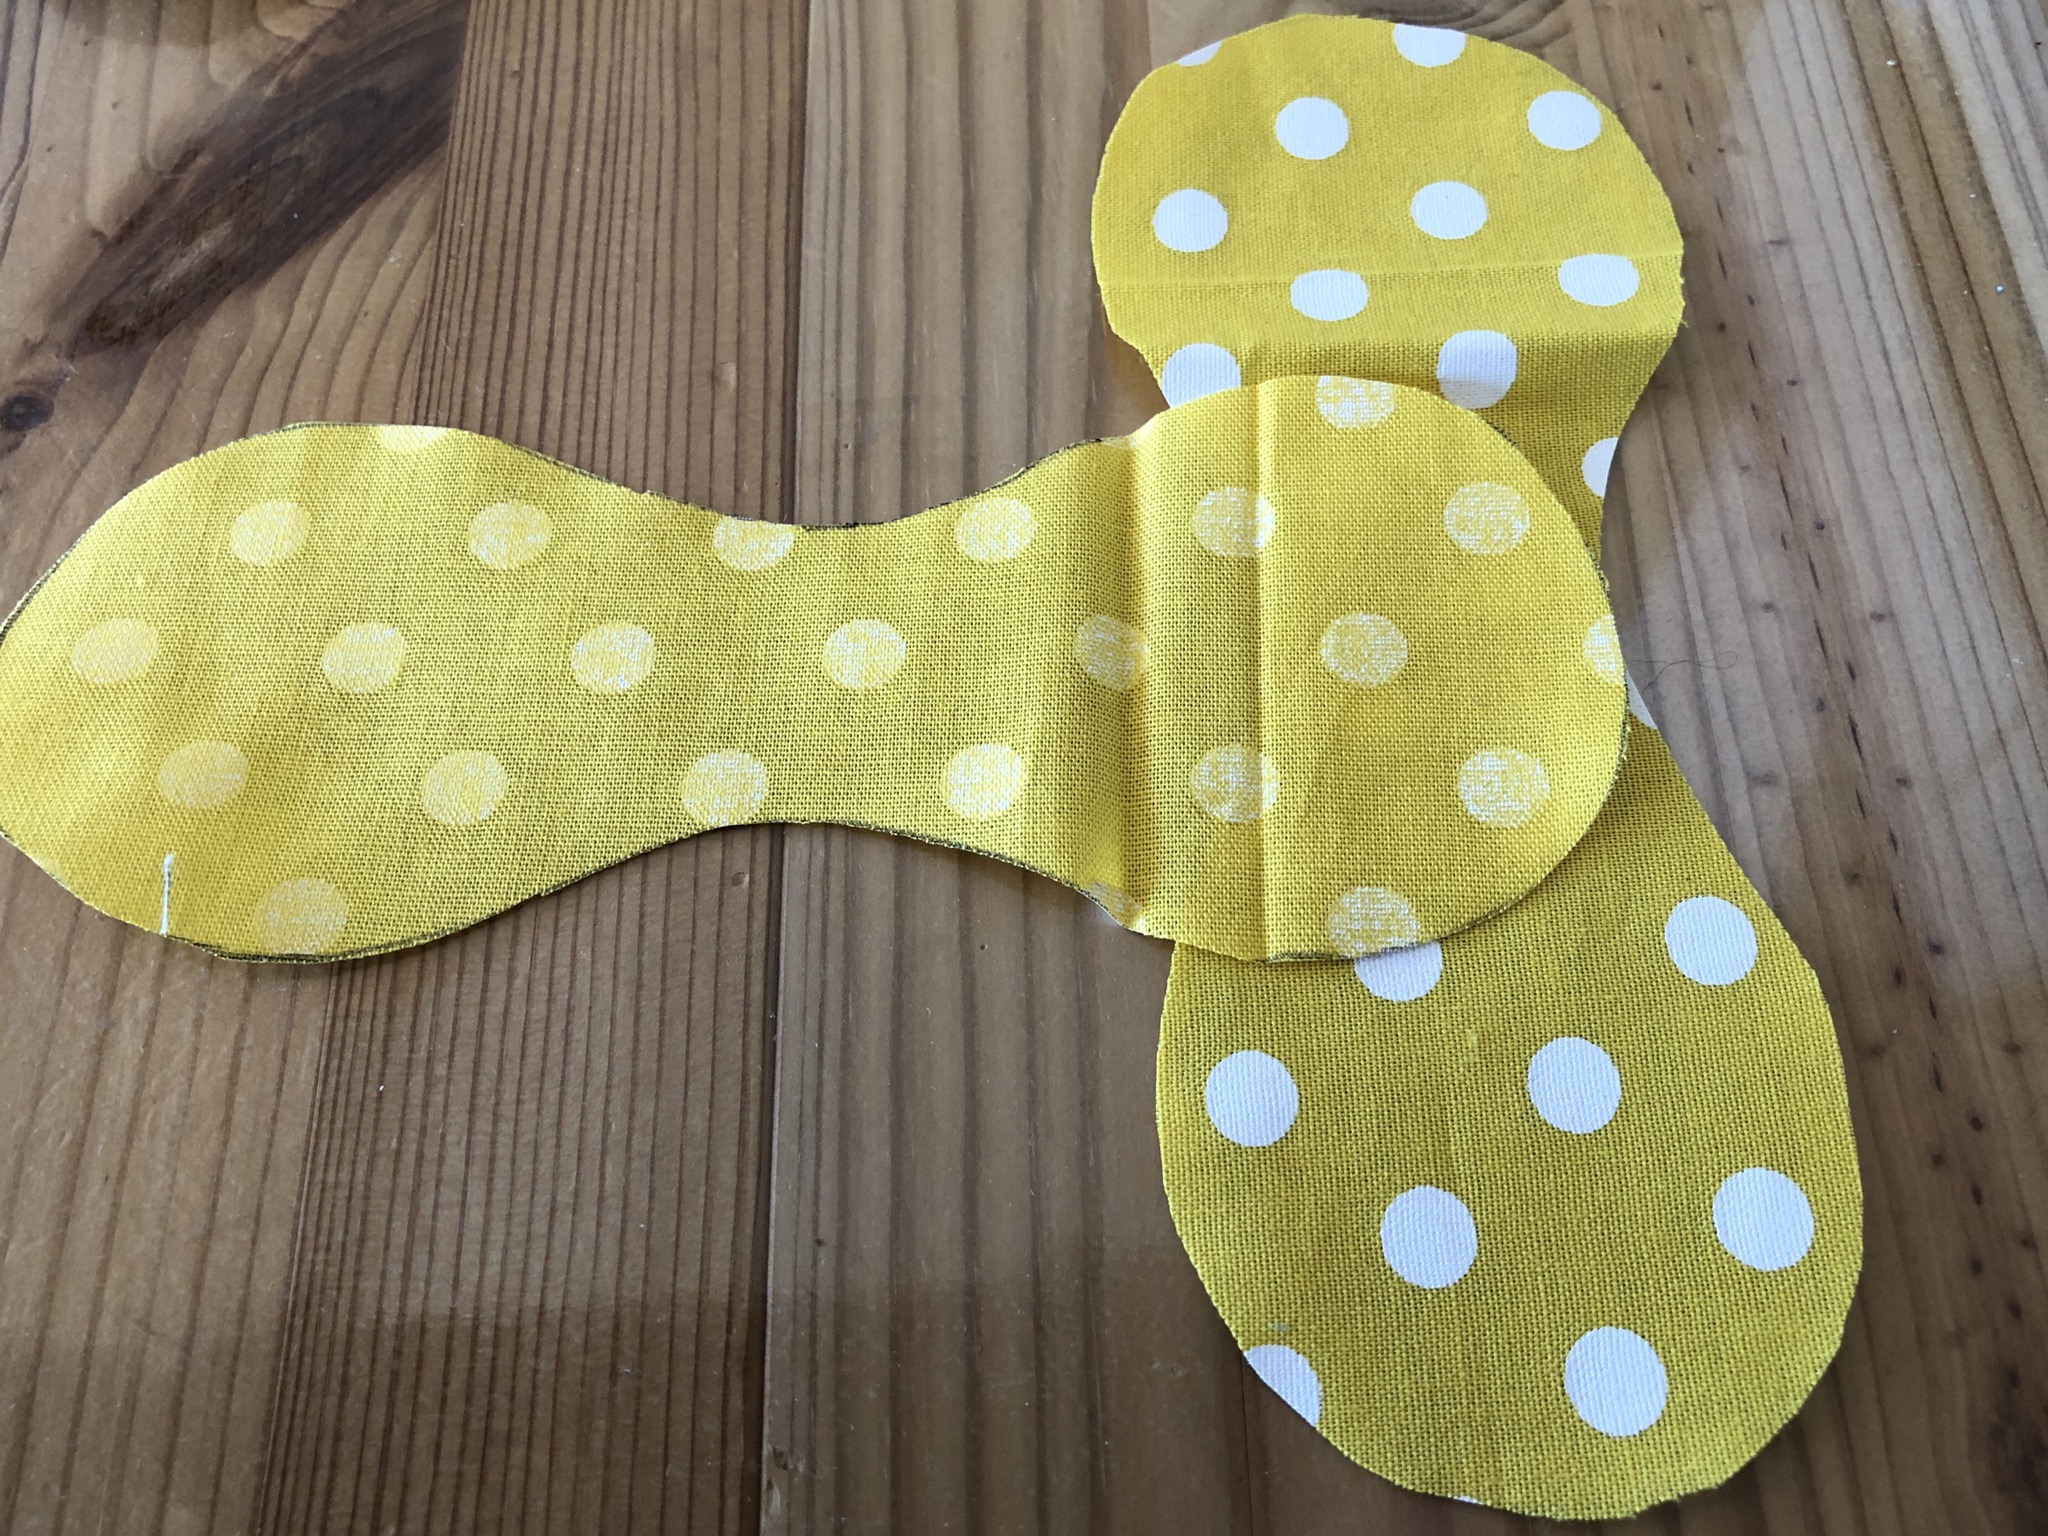
Bild zum Schritt 4 für das Bastel- und DIY-Abenteuer für Kinder: 'Stoff wie im Bild aufeinander legen, die beiden schönen Seiten...'

5

Nothing stuck, start sewing with the sewing machine in the middle. (See picture)

Bild zum Schritt 5 für das Bastel- und DIY-Abenteuer für Kinder: 'Nichts feststecken,  mit der Nähmaschine mittig mit dem Nähen...'

6

Always pull the fabric edge of the upper part on sewing piece by piece to the edge of the lower part. So that both edges always lie on each other.

Bild zum Schritt 6 für das Bastel- und DIY-Abenteuer für Kinder: 'Den Stoffrand des oberen Teils beim Nähen immer Stückchenweise auf...'

7

As long as you continue to sew until only a 2 cm wide piece remains open (turn opening).

Bild zum Schritt 7 für das Bastel- und DIY-Abenteuer für Kinder: 'Solange weiternähen bis nur noch ein 2 cm breites Stück...'

8

Turn the finished sewn part through the turning opening and fill as follows:

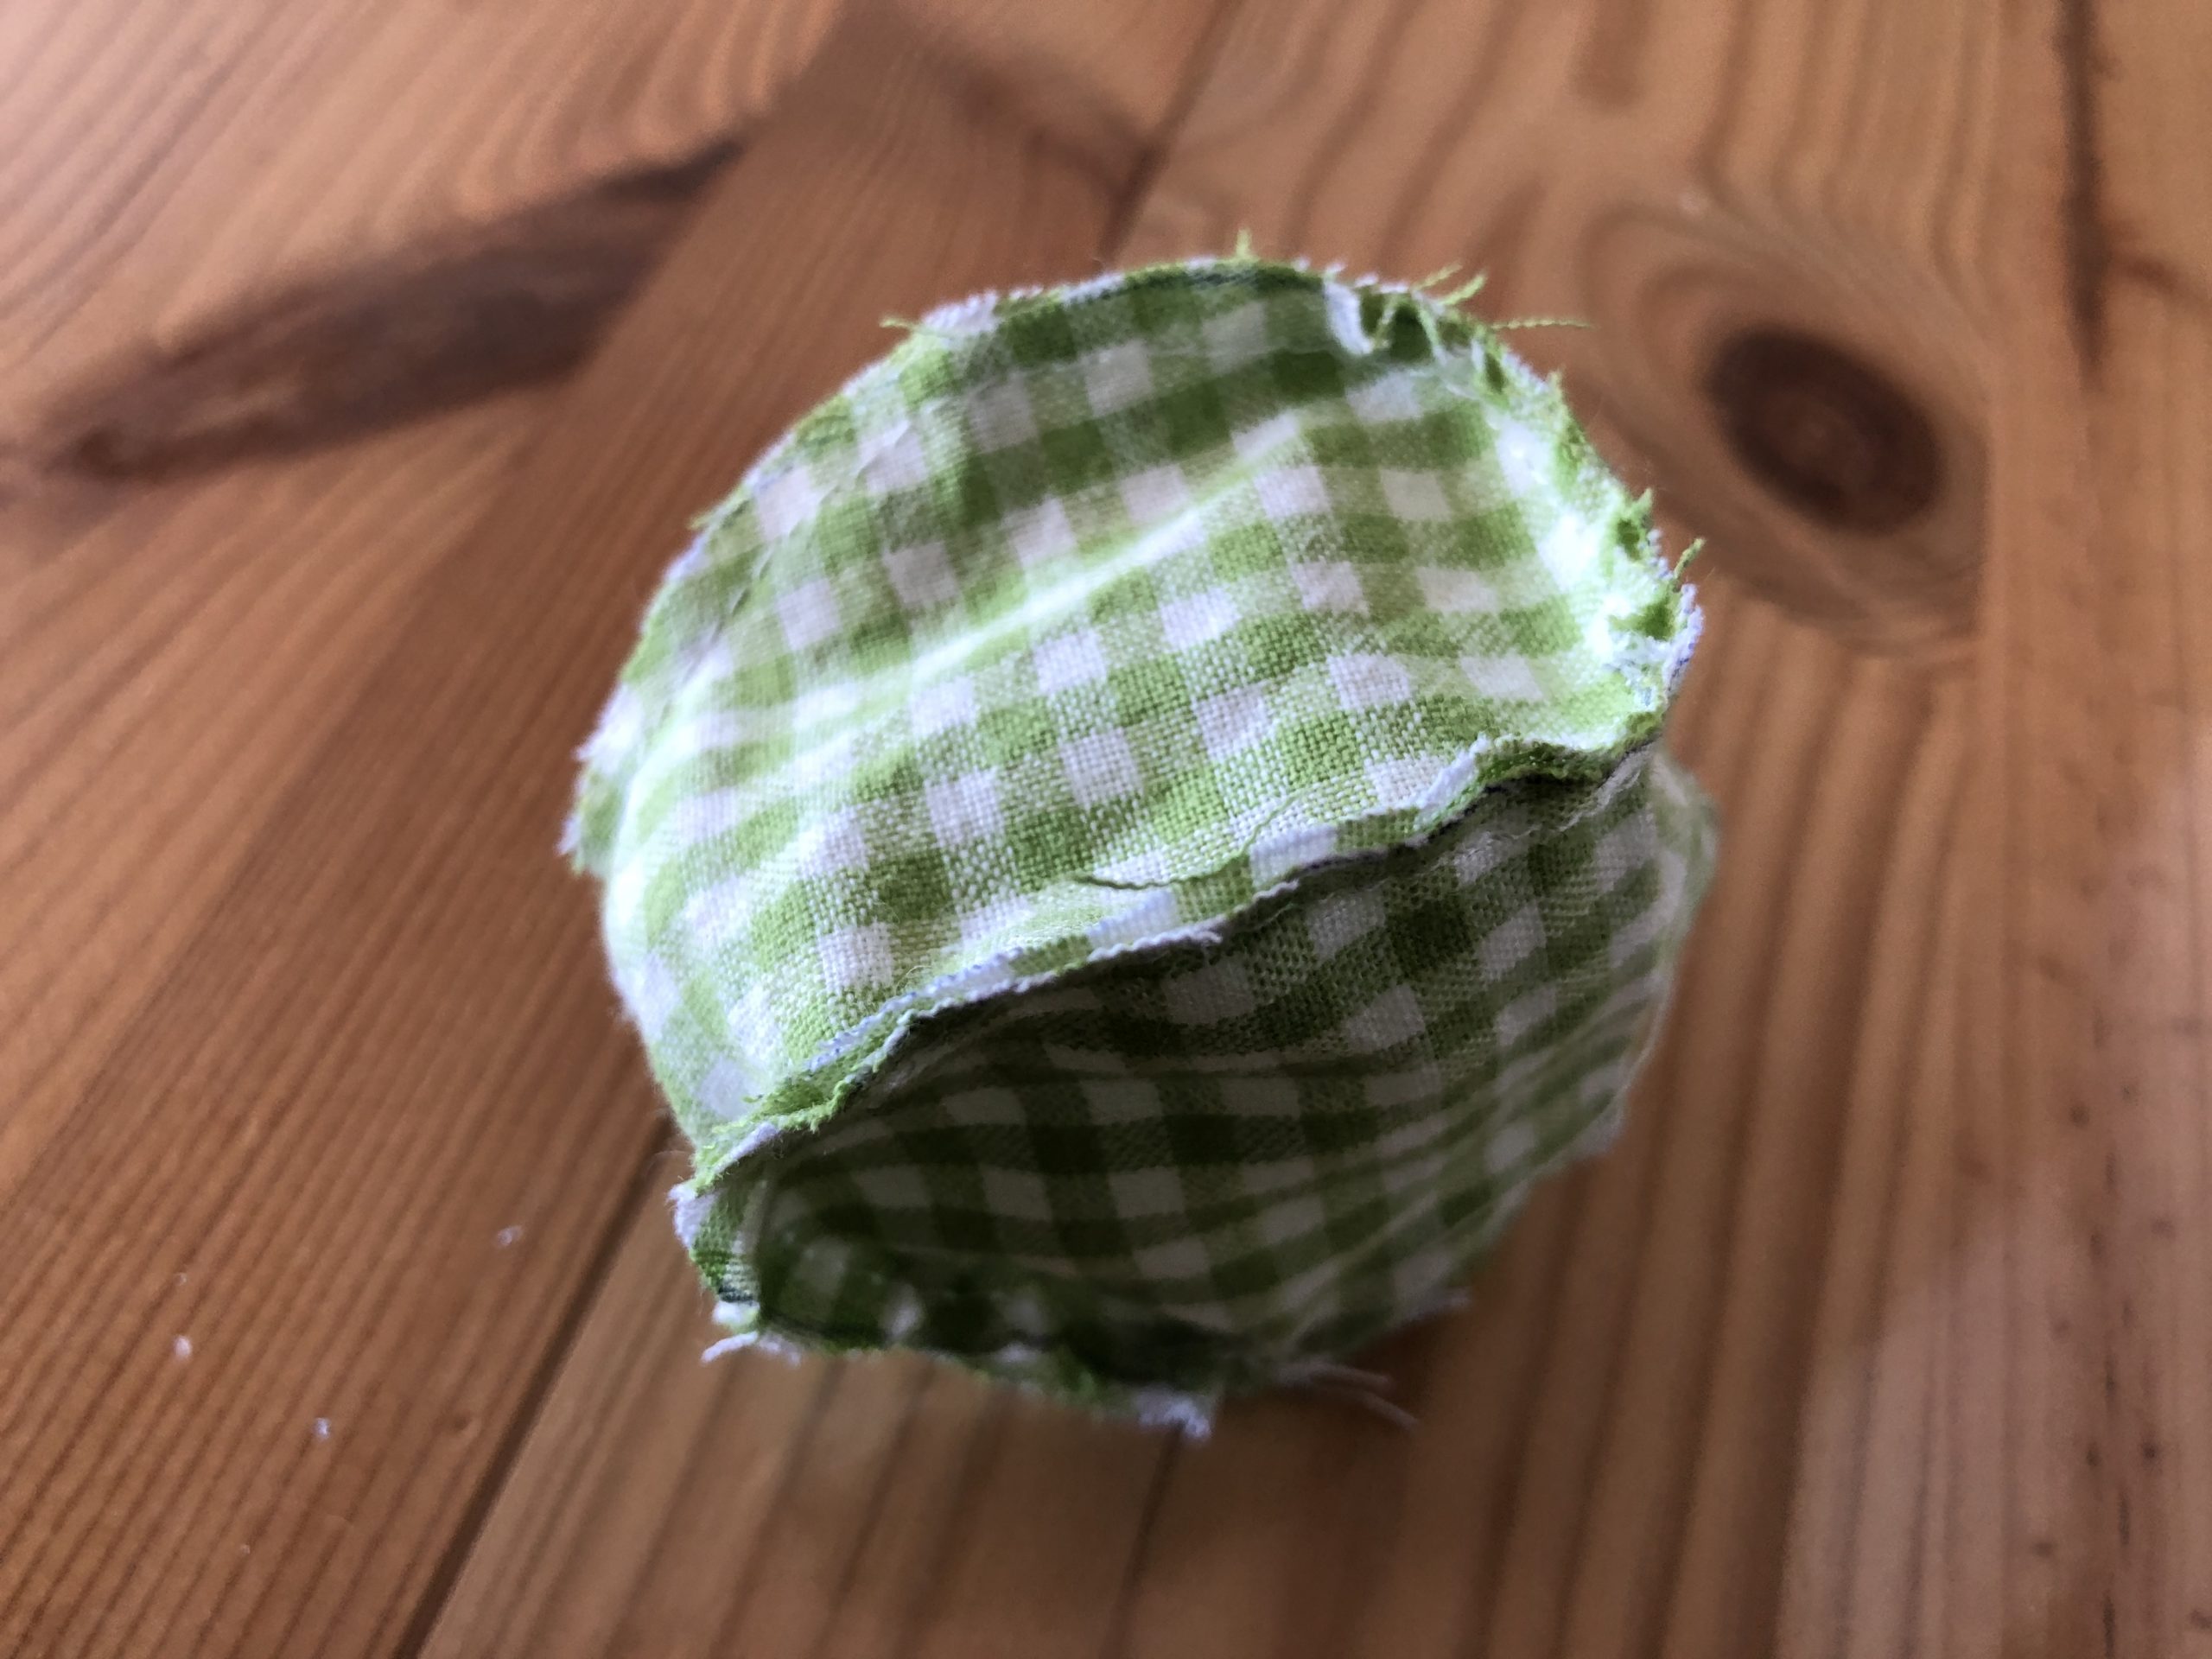
9

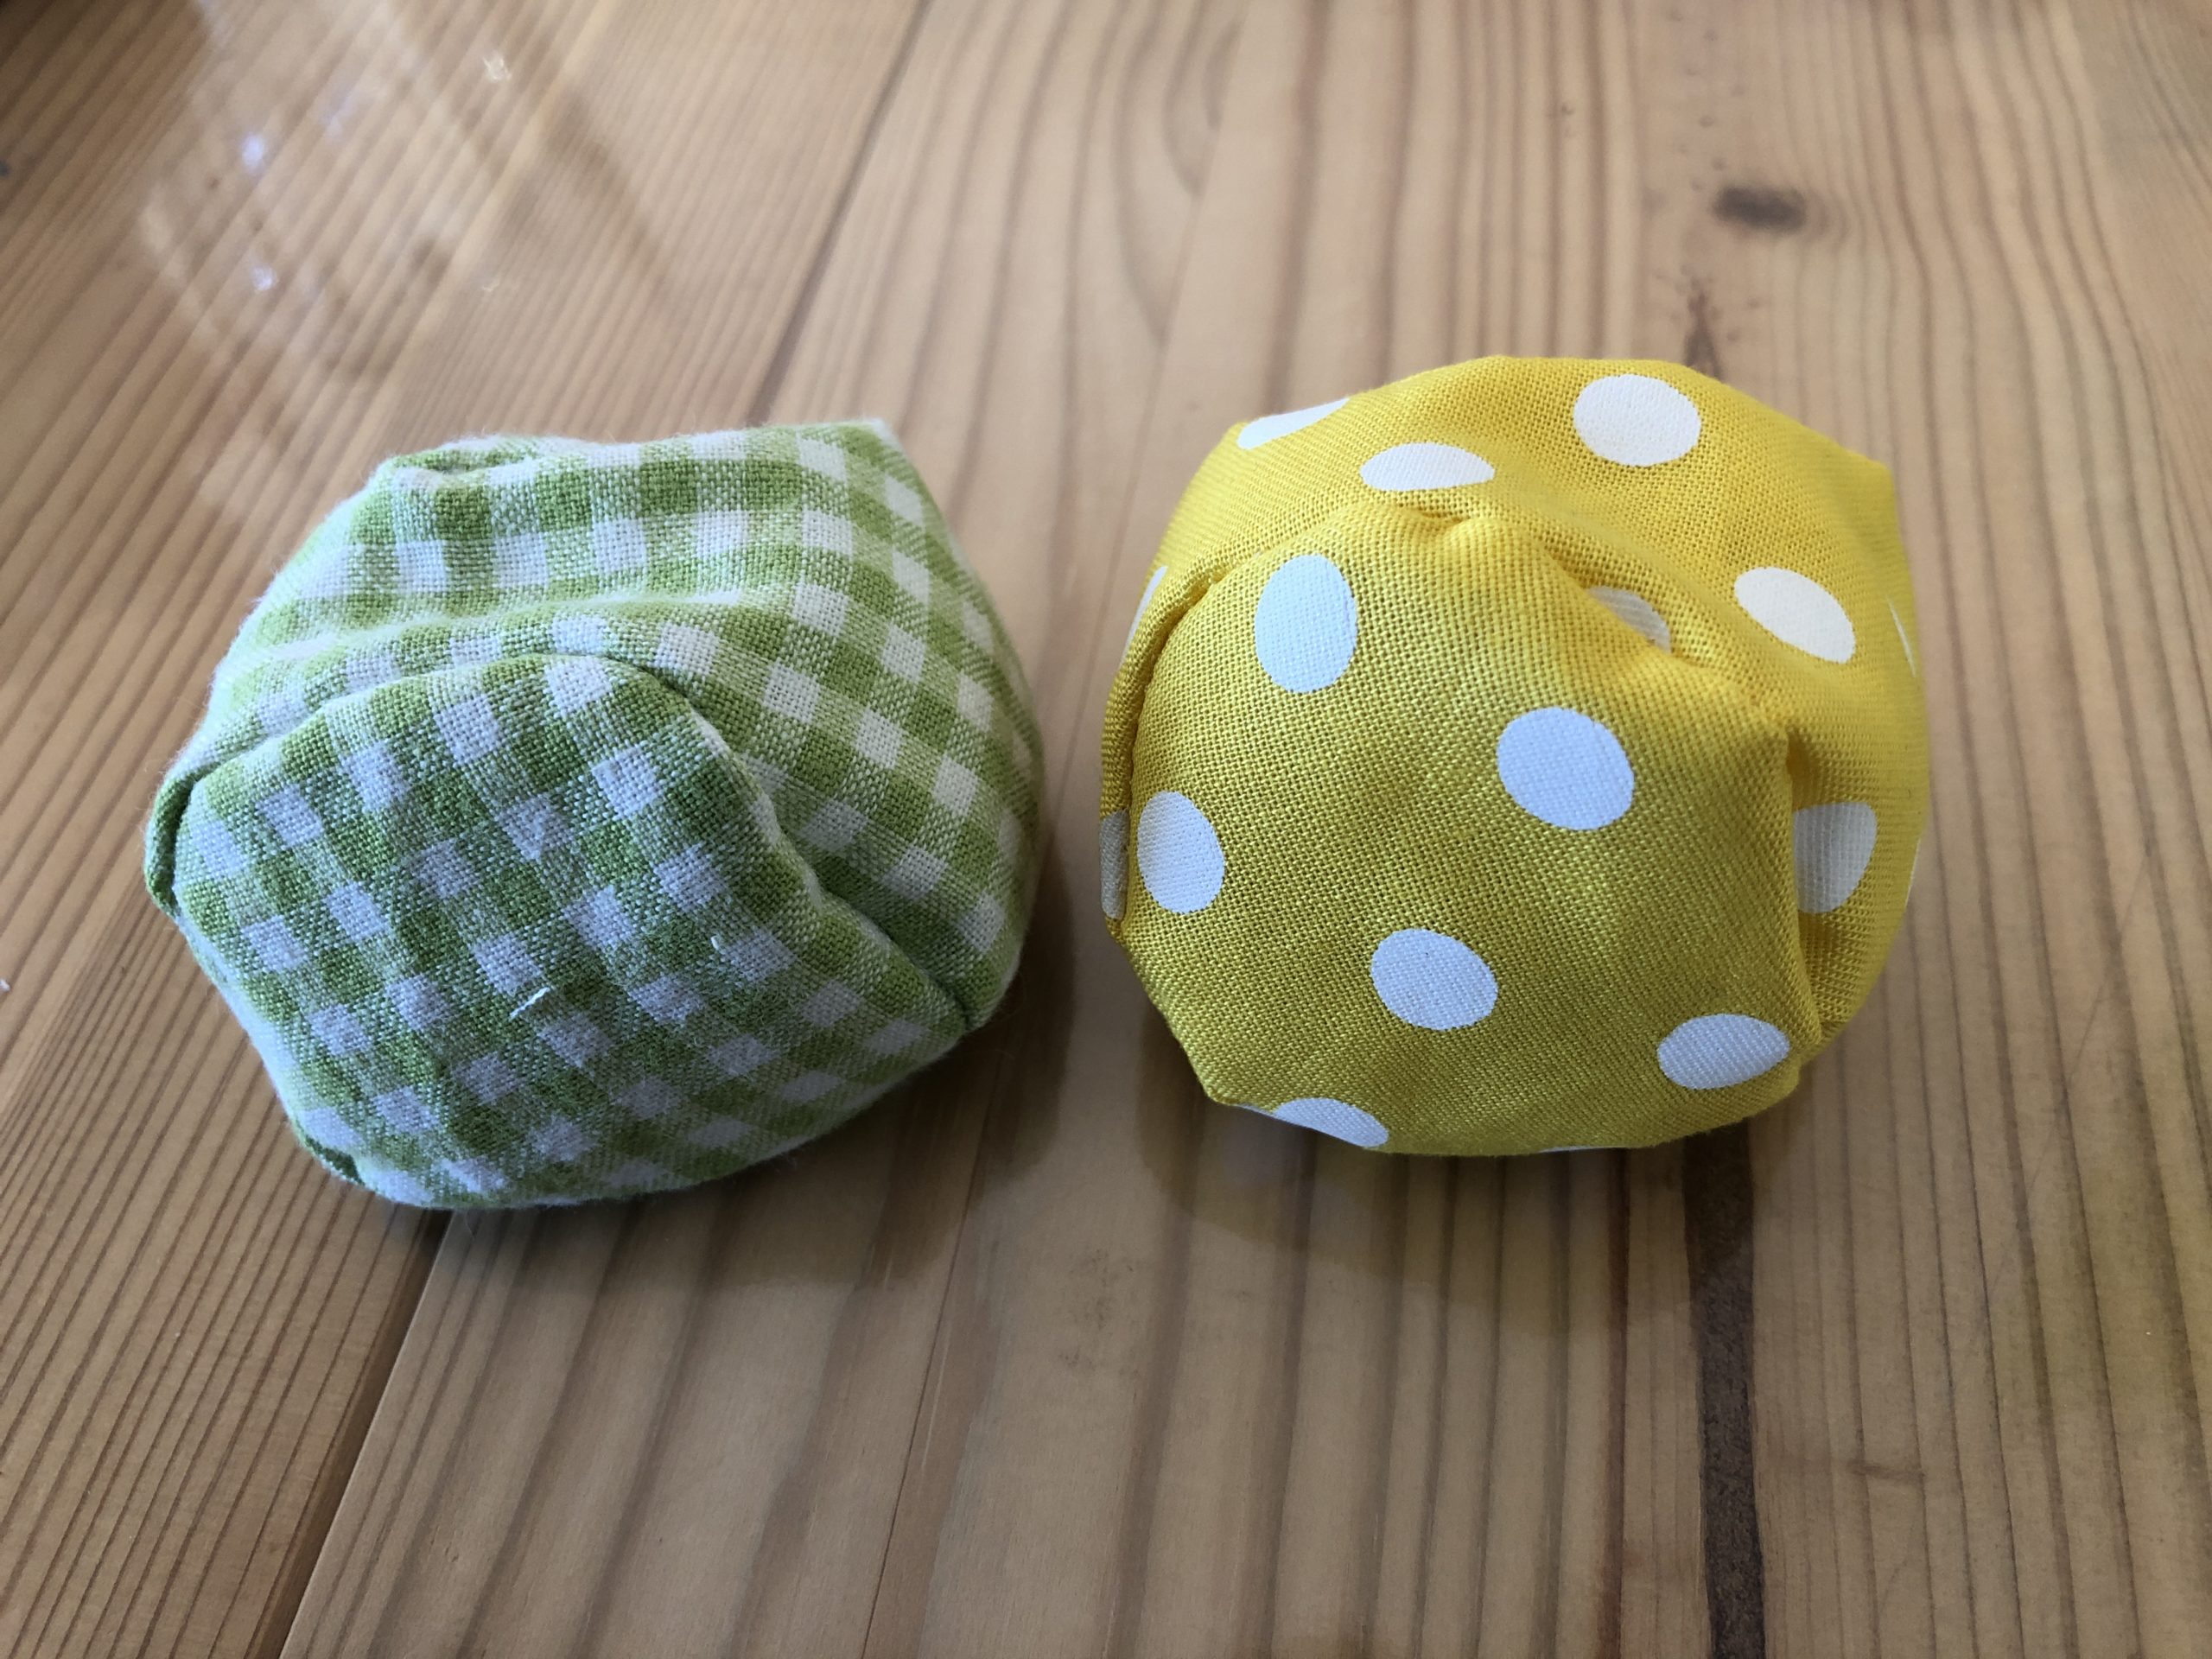
That's how the balls look like...

Bild zum Schritt 9 für das Bastel- und DIY-Abenteuer für Kinder: 'So sehen die Bällchen dann aus...'

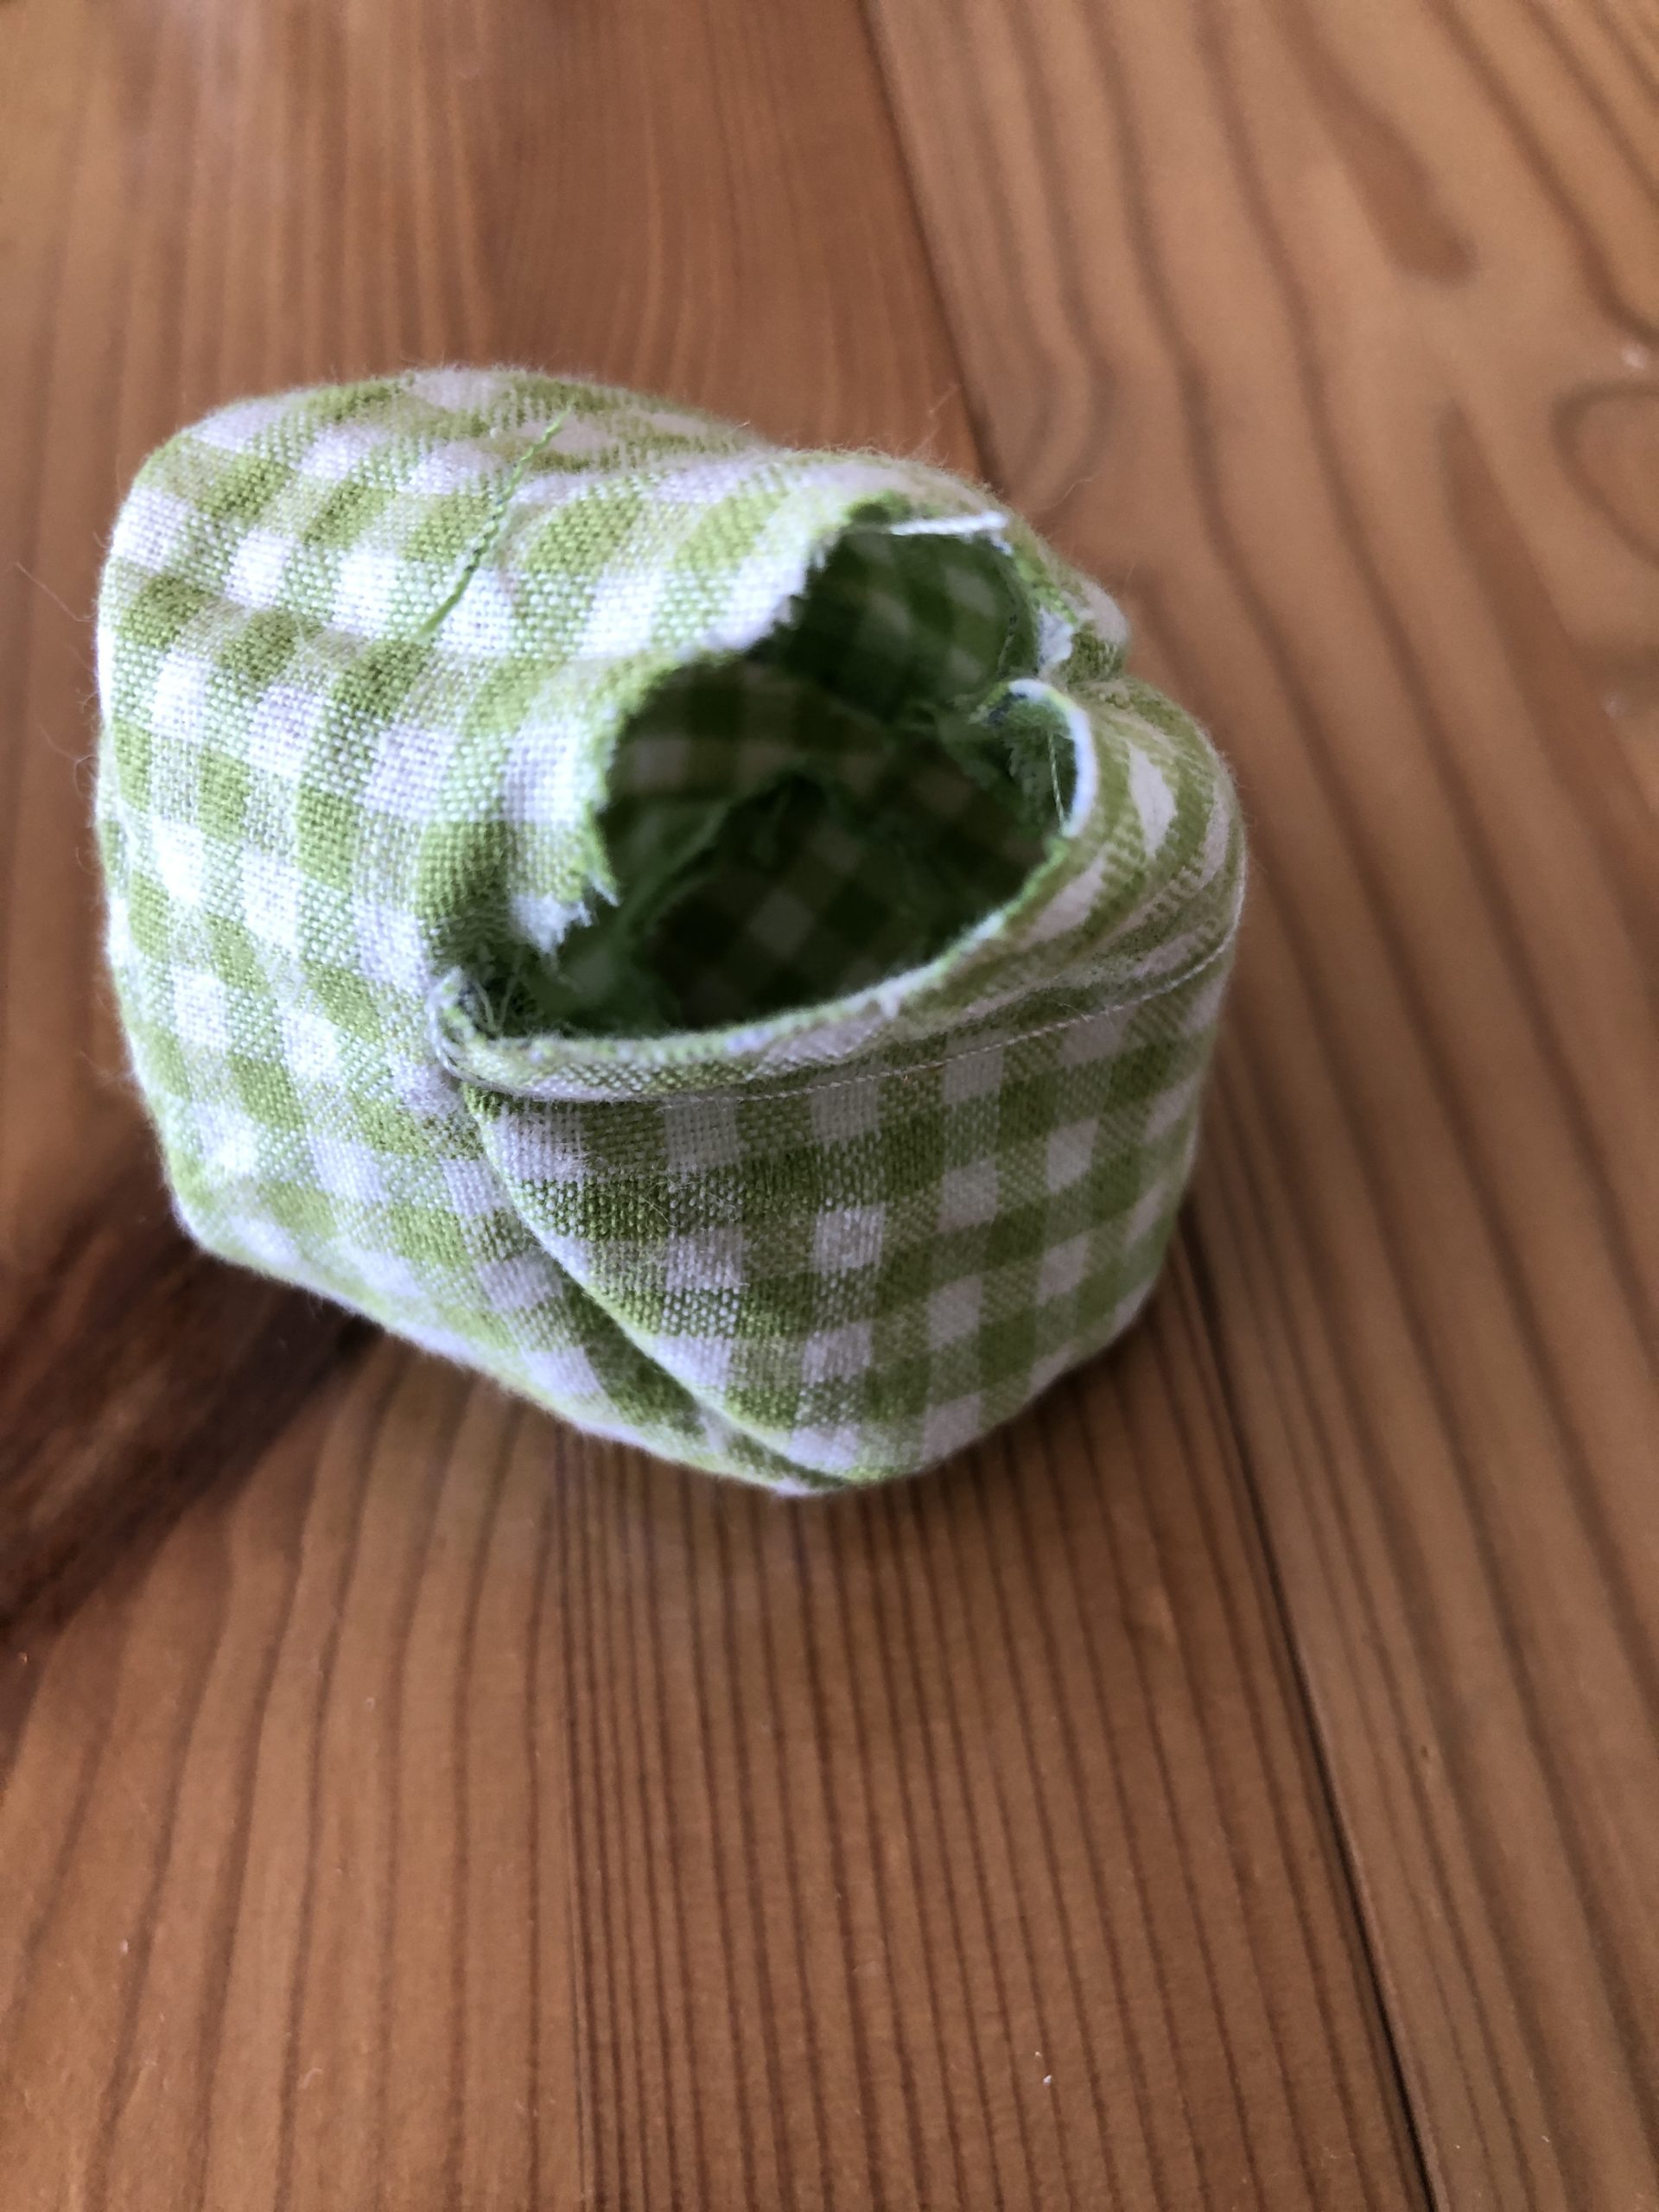
10

Turn the part around through the turning opening

Bild zum Schritt 10 für das Bastel- und DIY-Abenteuer für Kinder: 'Das Teil durch die Wendeöffnung umdrehen'

11

2. Bild zum Schritt 10 für das Bastel- und DIY-Abenteuer für Kinder: 'Das Teil durch die Wendeöffnung umdrehen'

12

Now they are filled with about 1 Esbresso cup full of rice or spelt (depending on how bulging you want it!)

Bild zum Schritt 12 für das Bastel- und DIY-Abenteuer für Kinder: 'Nun werden sie mit ca. 1 Esbresso-Tasse voll Reis oder...'

13

The best way to fill is to use a funnel.

Bild zum Schritt 13 für das Bastel- und DIY-Abenteuer für Kinder: 'Zum Befüllen am besten einen Trichter nehmen.'

14

Insert the fabric at the opening a little bit inwards and stick it together with a pin. Sew the opening with needle and thread. Cut the thread.

Bild zum Schritt 14 für das Bastel- und DIY-Abenteuer für Kinder: 'Den Stoff an der Öffnung etwas nach innen einschlagen und...'

15

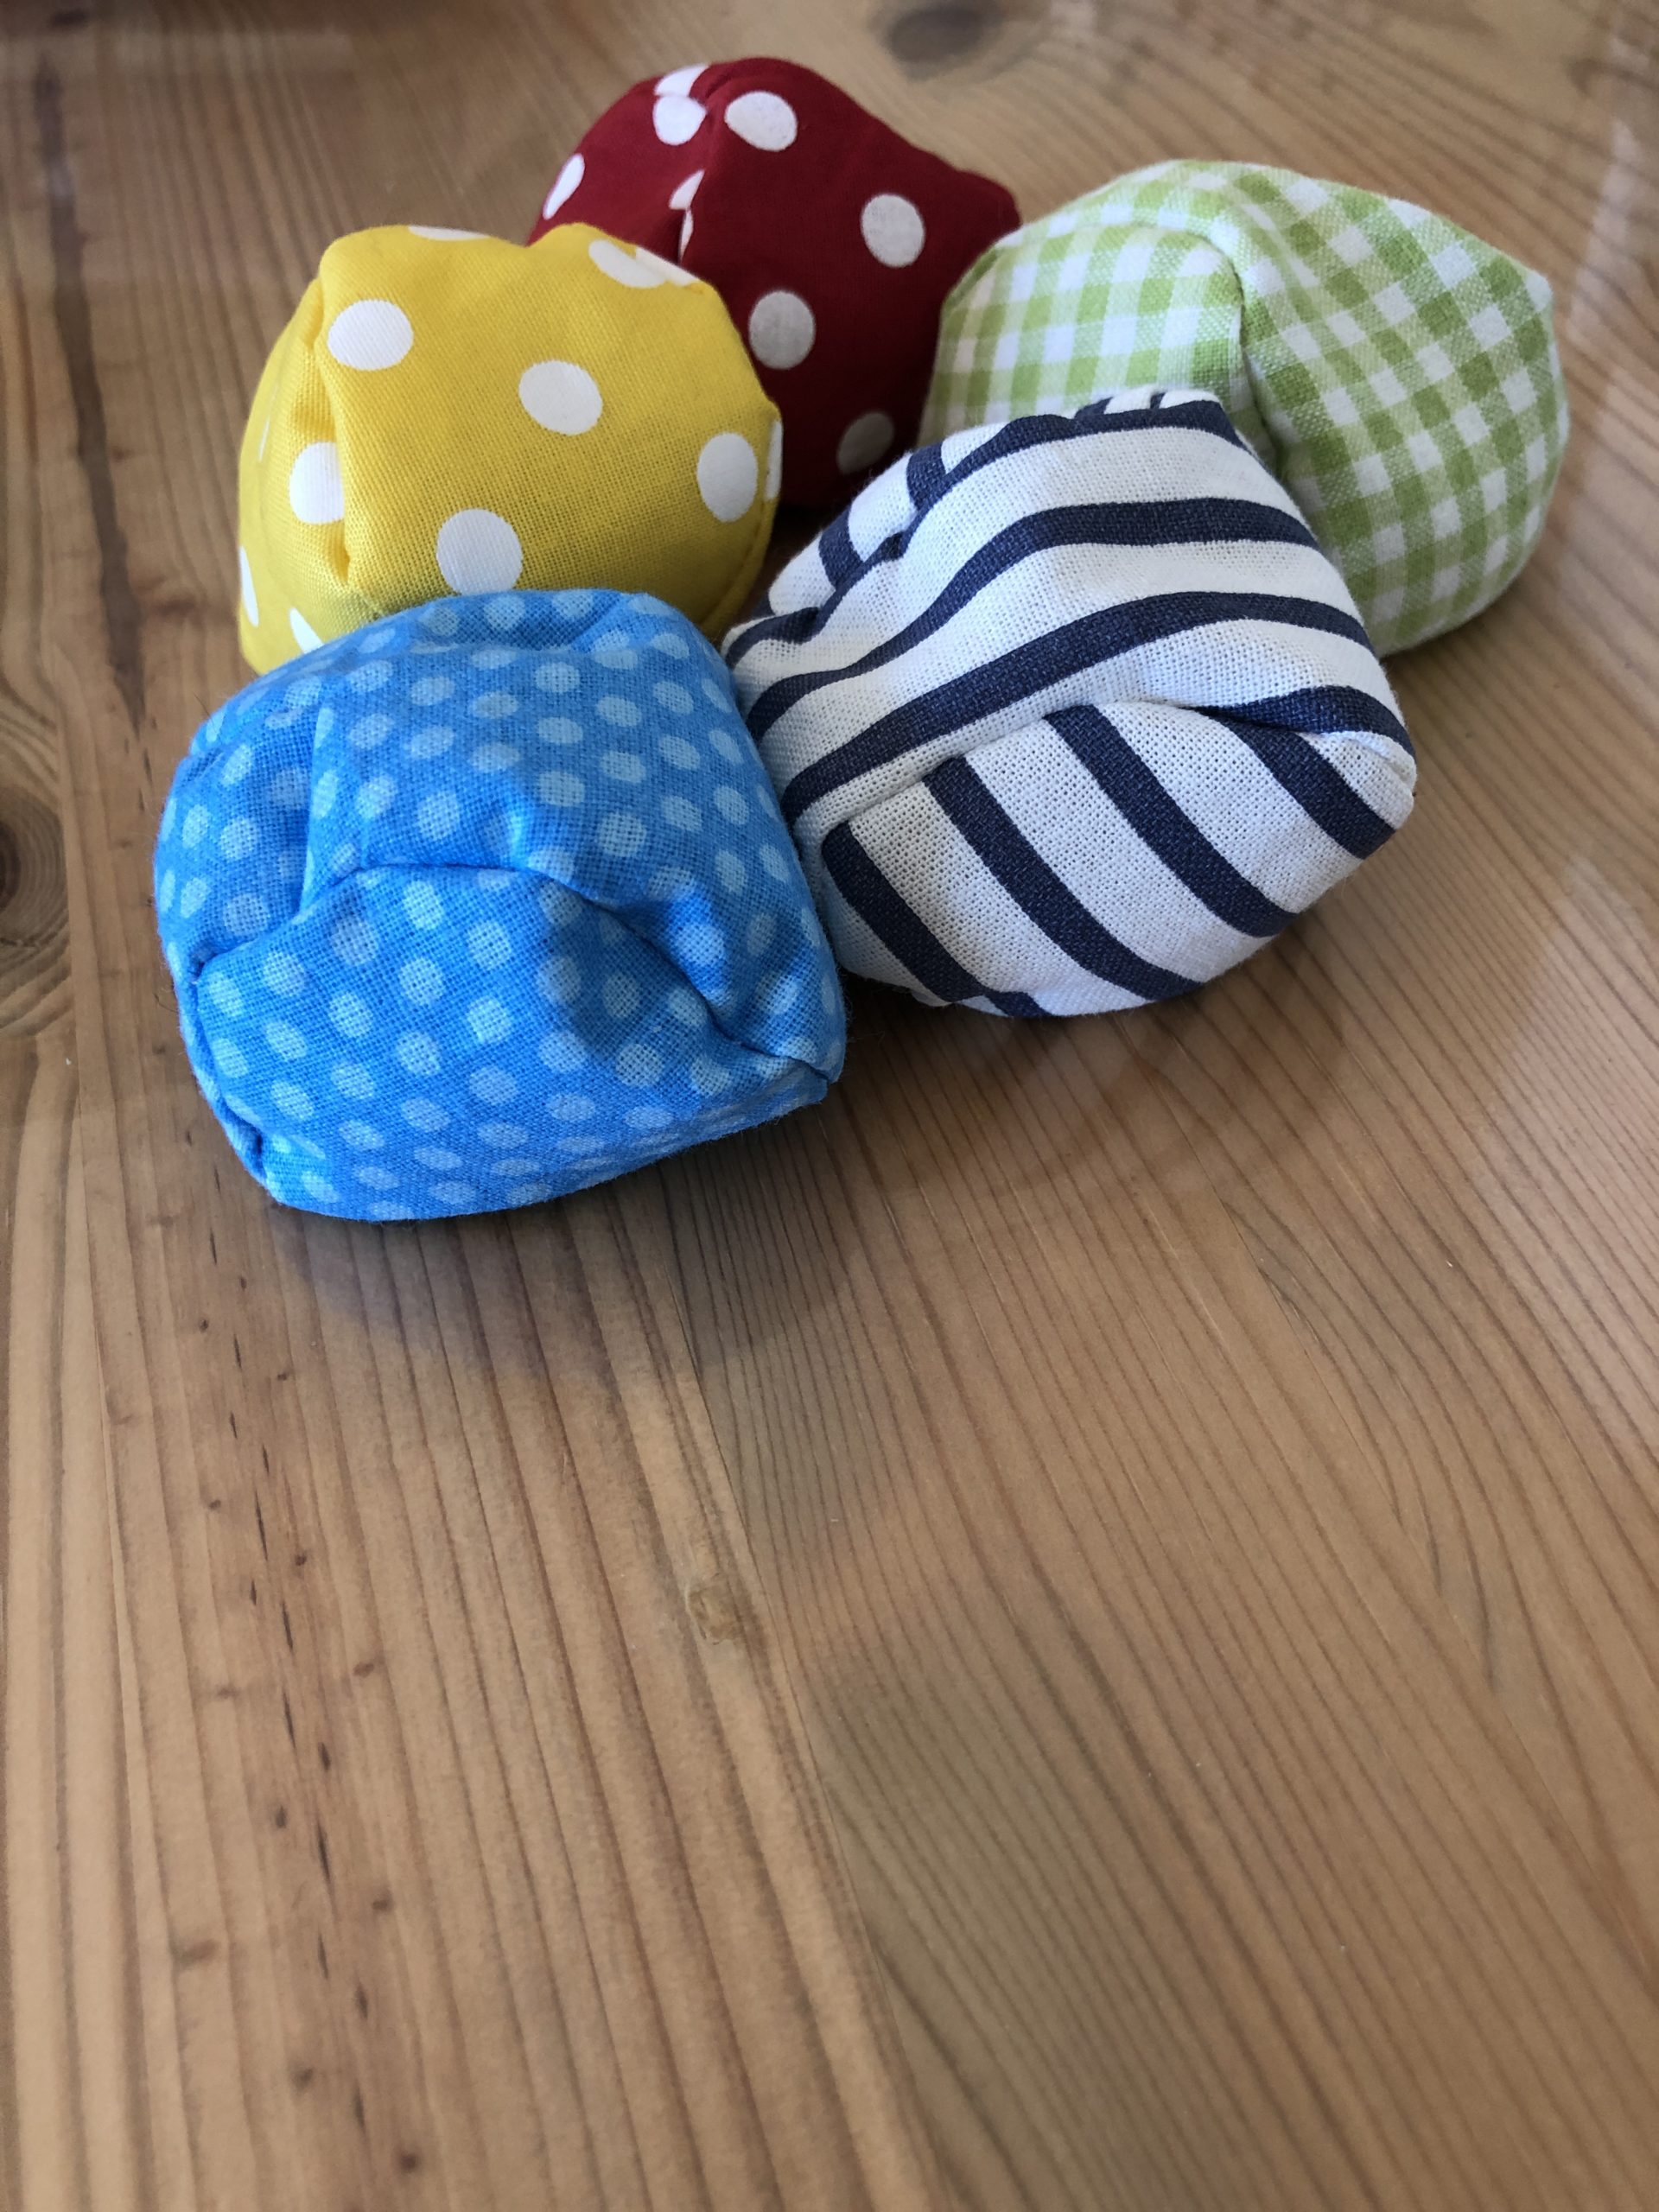
Ready!

Bild zum Schritt 15 für das Bastel- und DIY-Abenteuer für Kinder: 'Fertig!'

16

This way you can make many different balls that you can use to juggle or play.

Here is an introduction to the Learning to juggle for children.

Have fun with it!

Bild zum Schritt 16 für das Bastel- und DIY-Abenteuer für Kinder: 'Auf diese Art könnt ihr viele verschiedene Bälle herstellen, die...'

Materials

 1 Colorful fabric residue (approx. 12 cm x 15 cm)
 Sewing machine
 1 Pen
 1 Cut template (in the first instruction step)
 1 Needle
 1 Thread matching the fabric
 1 Substance shears
 1 Paper shears
 1 Funnels for filling
 50 g Rice or spelt

Directions

1

Print and cut cutting template (also as PDF in the comment area at the bottom)

Bild zum Schritt 1 für das Bastel- und DIY-Abenteuer für Kinder: 'Schnittvorlage ausdrucken und ausschneiden (auch als PDF im Kommentar-Bereich ganz...'

2

Transfer pattern 2 x to the fabric

Bild zum Schritt 2 für das Bastel- und DIY-Abenteuer für Kinder: 'Schnittmuster 2 x auf den Stoff übertragen'

3

Cut fabric

Bild zum Schritt 3 für das Bastel- und DIY-Abenteuer für Kinder: 'Stoff zuschneiden'

4

Place fabric on each other as in the picture, the two beautiful sides lie on each other.

Bild zum Schritt 4 für das Bastel- und DIY-Abenteuer für Kinder: 'Stoff wie im Bild aufeinander legen, die beiden schönen Seiten...'

5

Nothing stuck, start sewing with the sewing machine in the middle. (See picture)
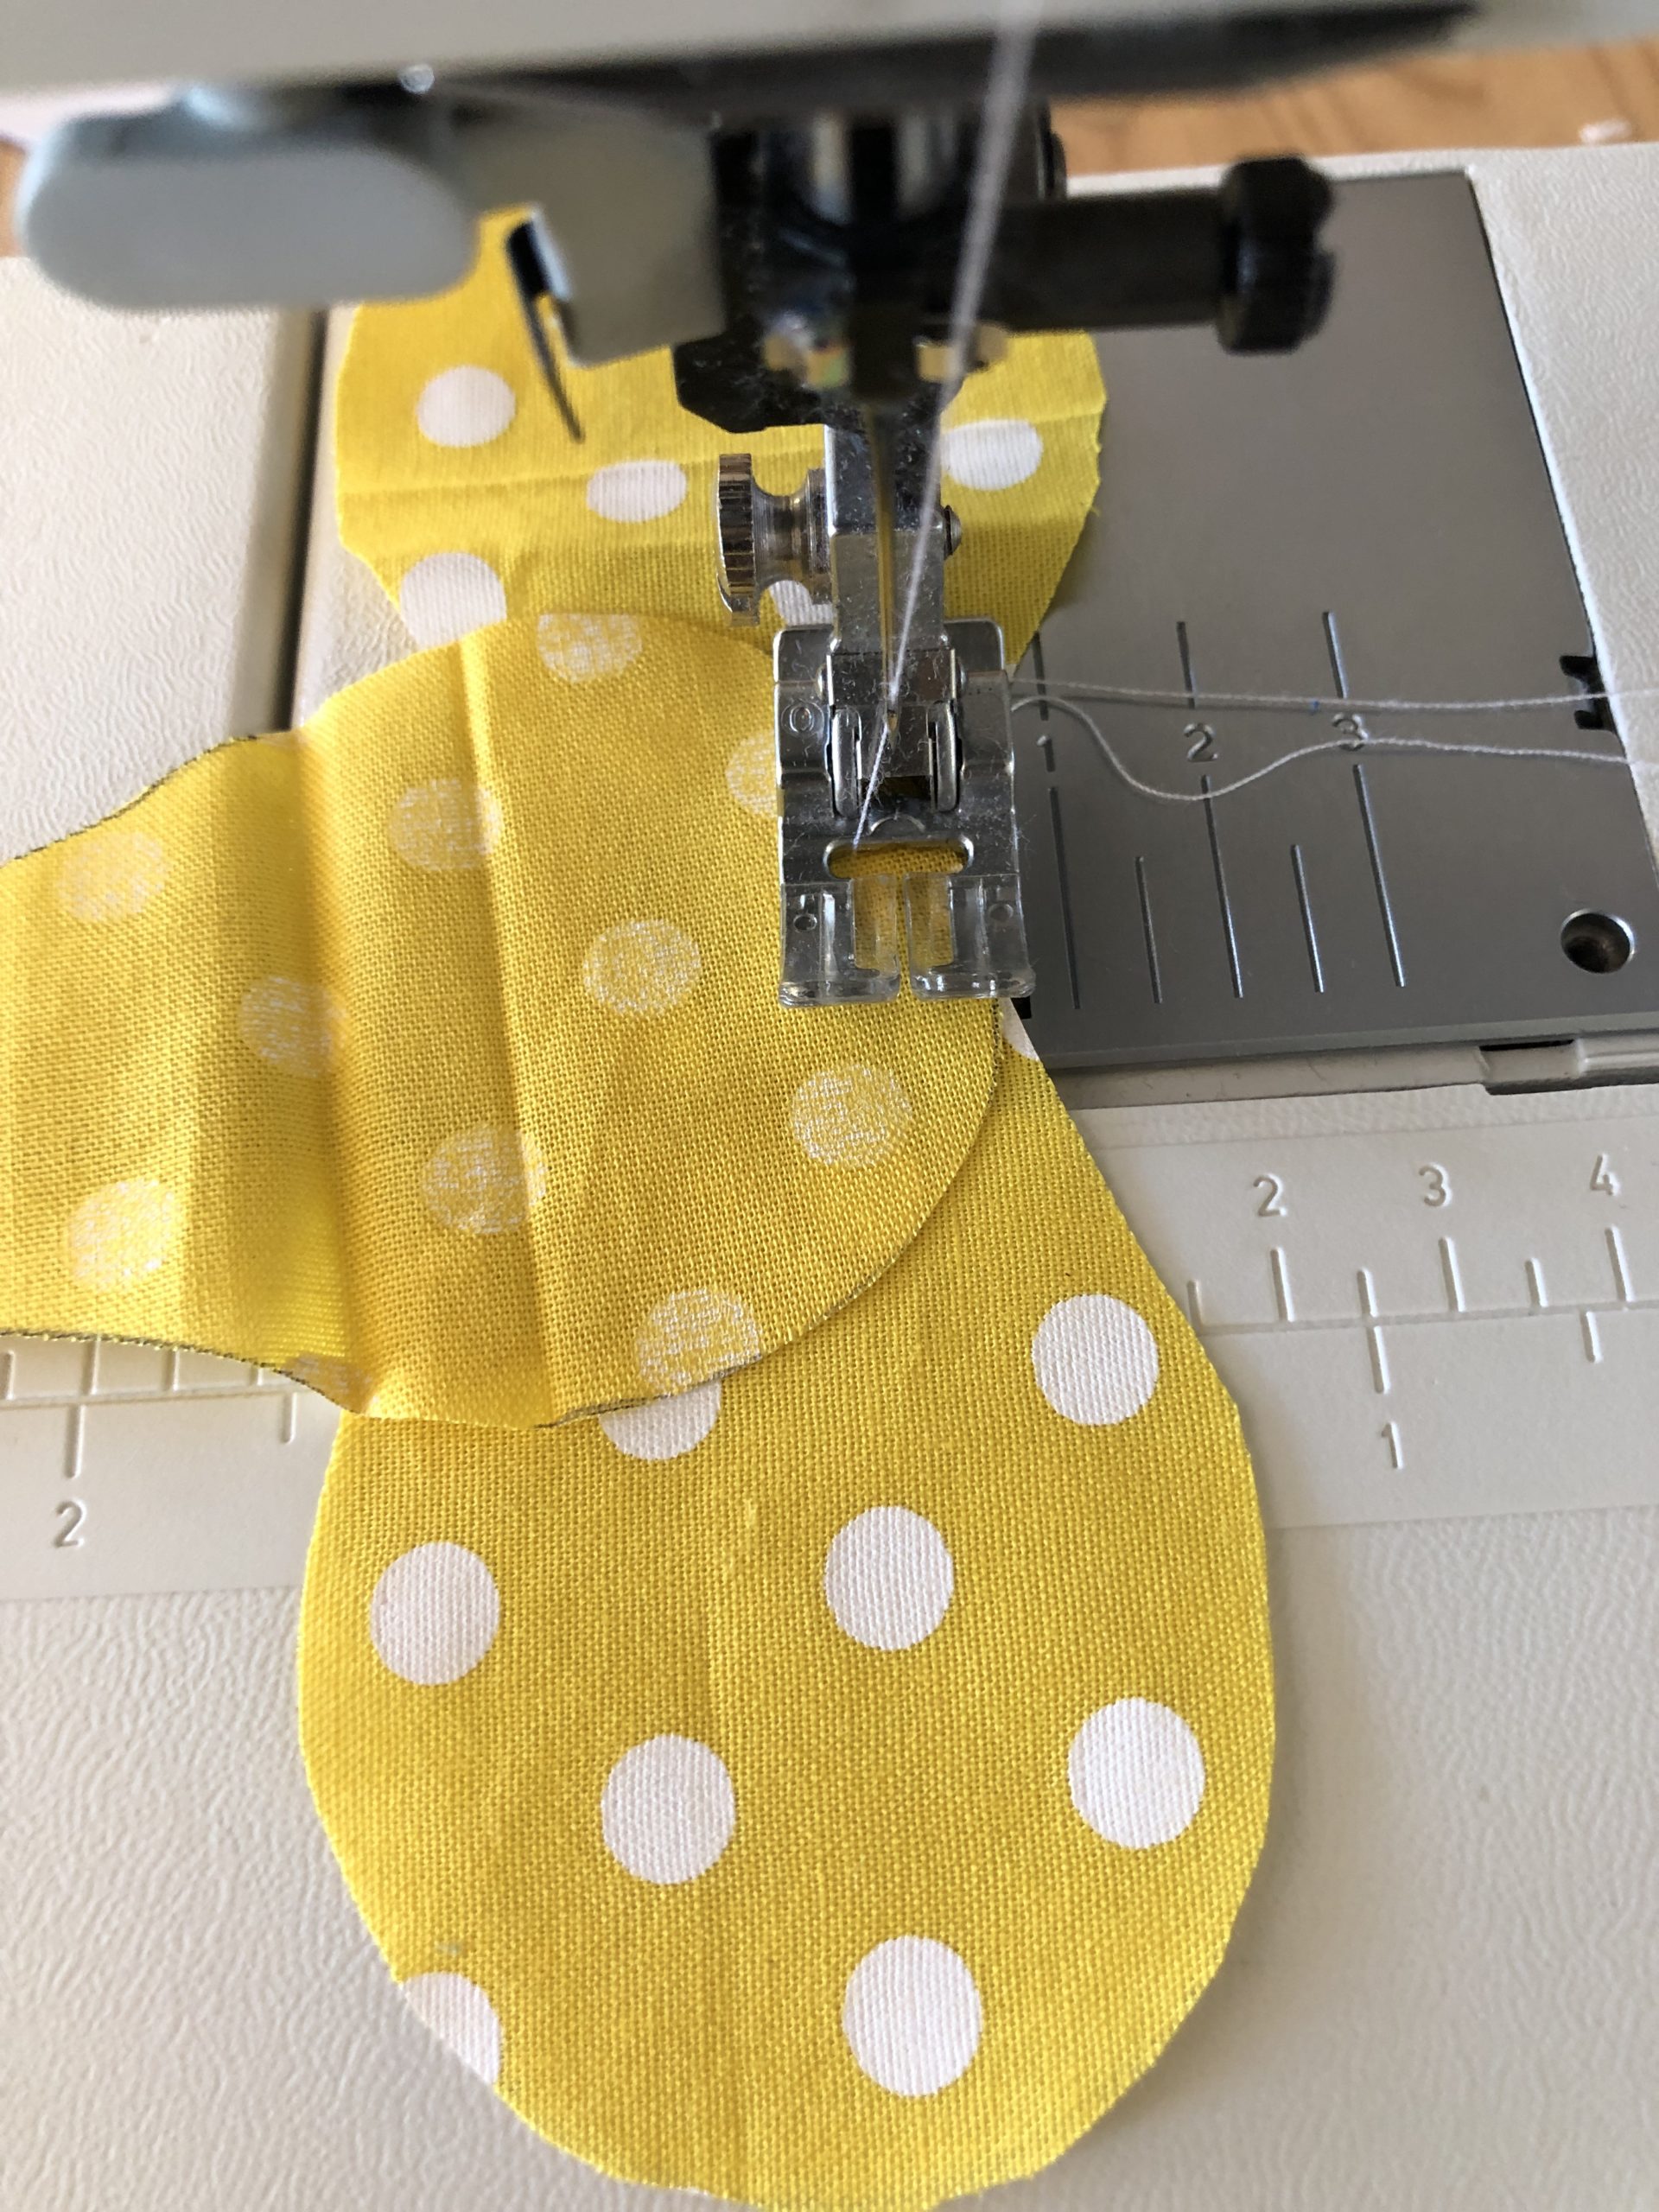
Bild zum Schritt 5 für das Bastel- und DIY-Abenteuer für Kinder: 'Nichts feststecken,  mit der Nähmaschine mittig mit dem Nähen...'

6

Always pull the fabric edge of the upper part on sewing piece by piece to the edge of the lower part. So that both edges always lie on each other.
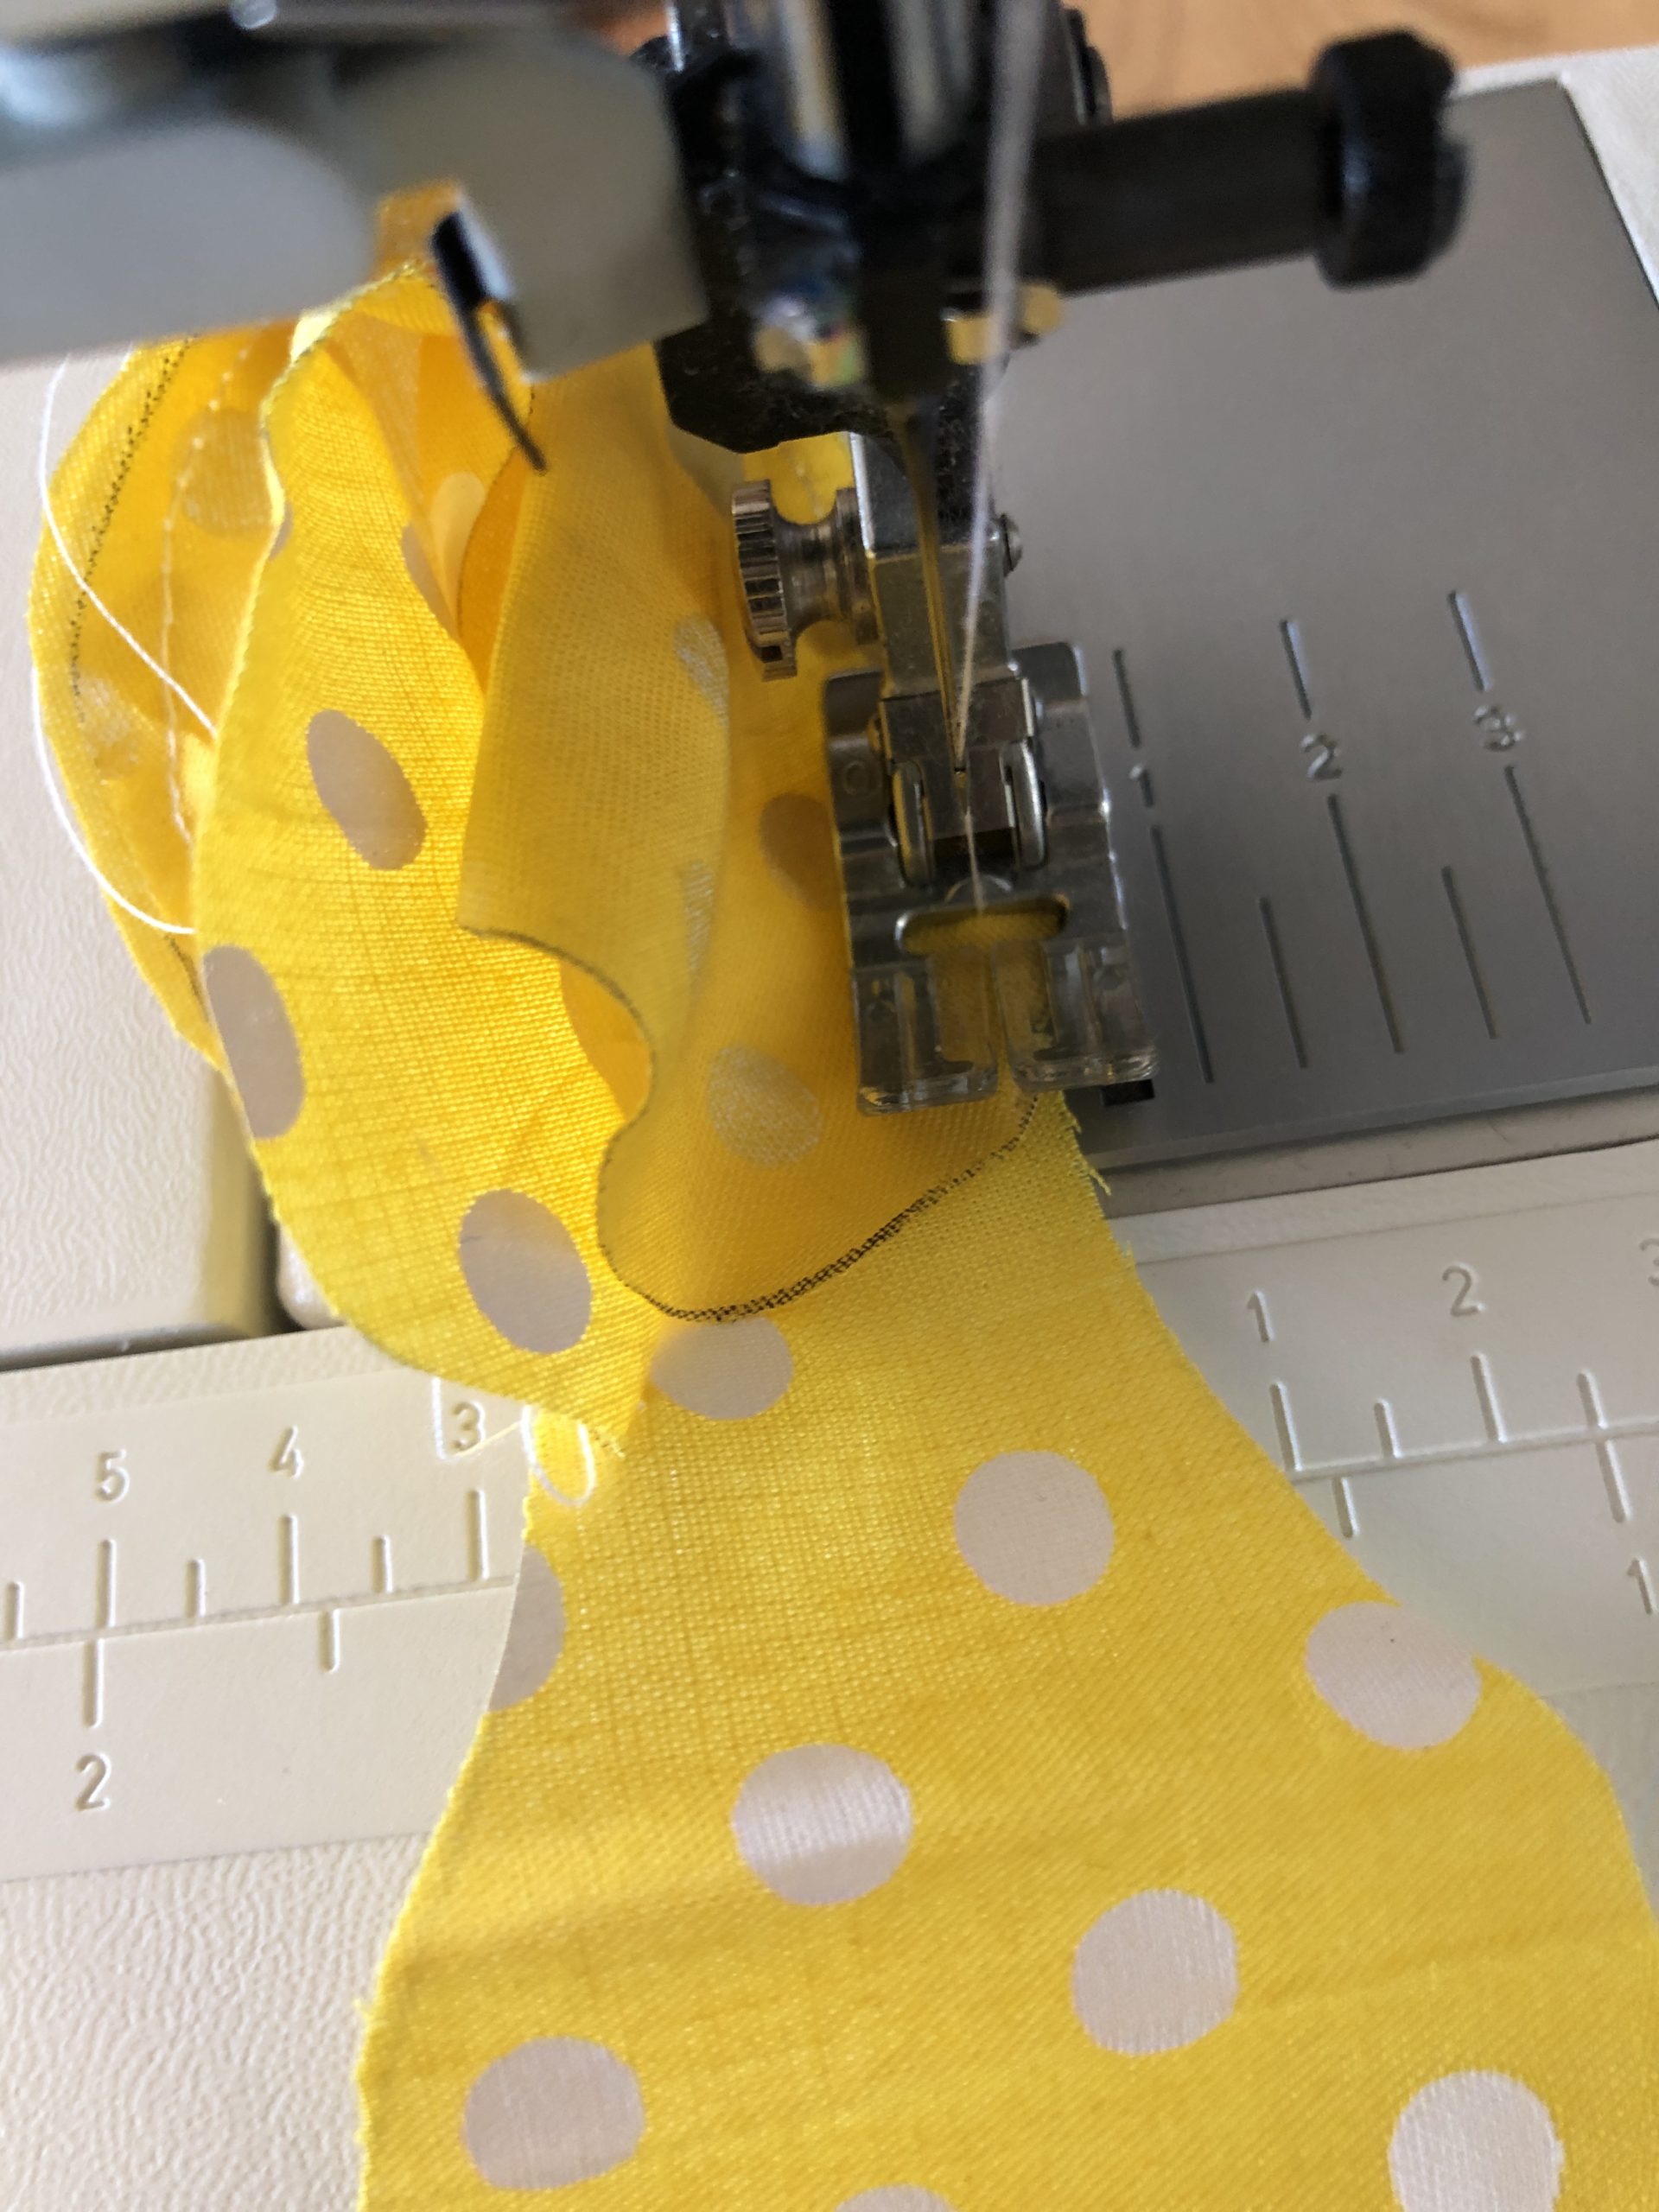
Bild zum Schritt 6 für das Bastel- und DIY-Abenteuer für Kinder: 'Den Stoffrand des oberen Teils beim Nähen immer Stückchenweise auf...'

7

As long as you continue to sew until only a 2 cm wide piece remains open (turn opening).
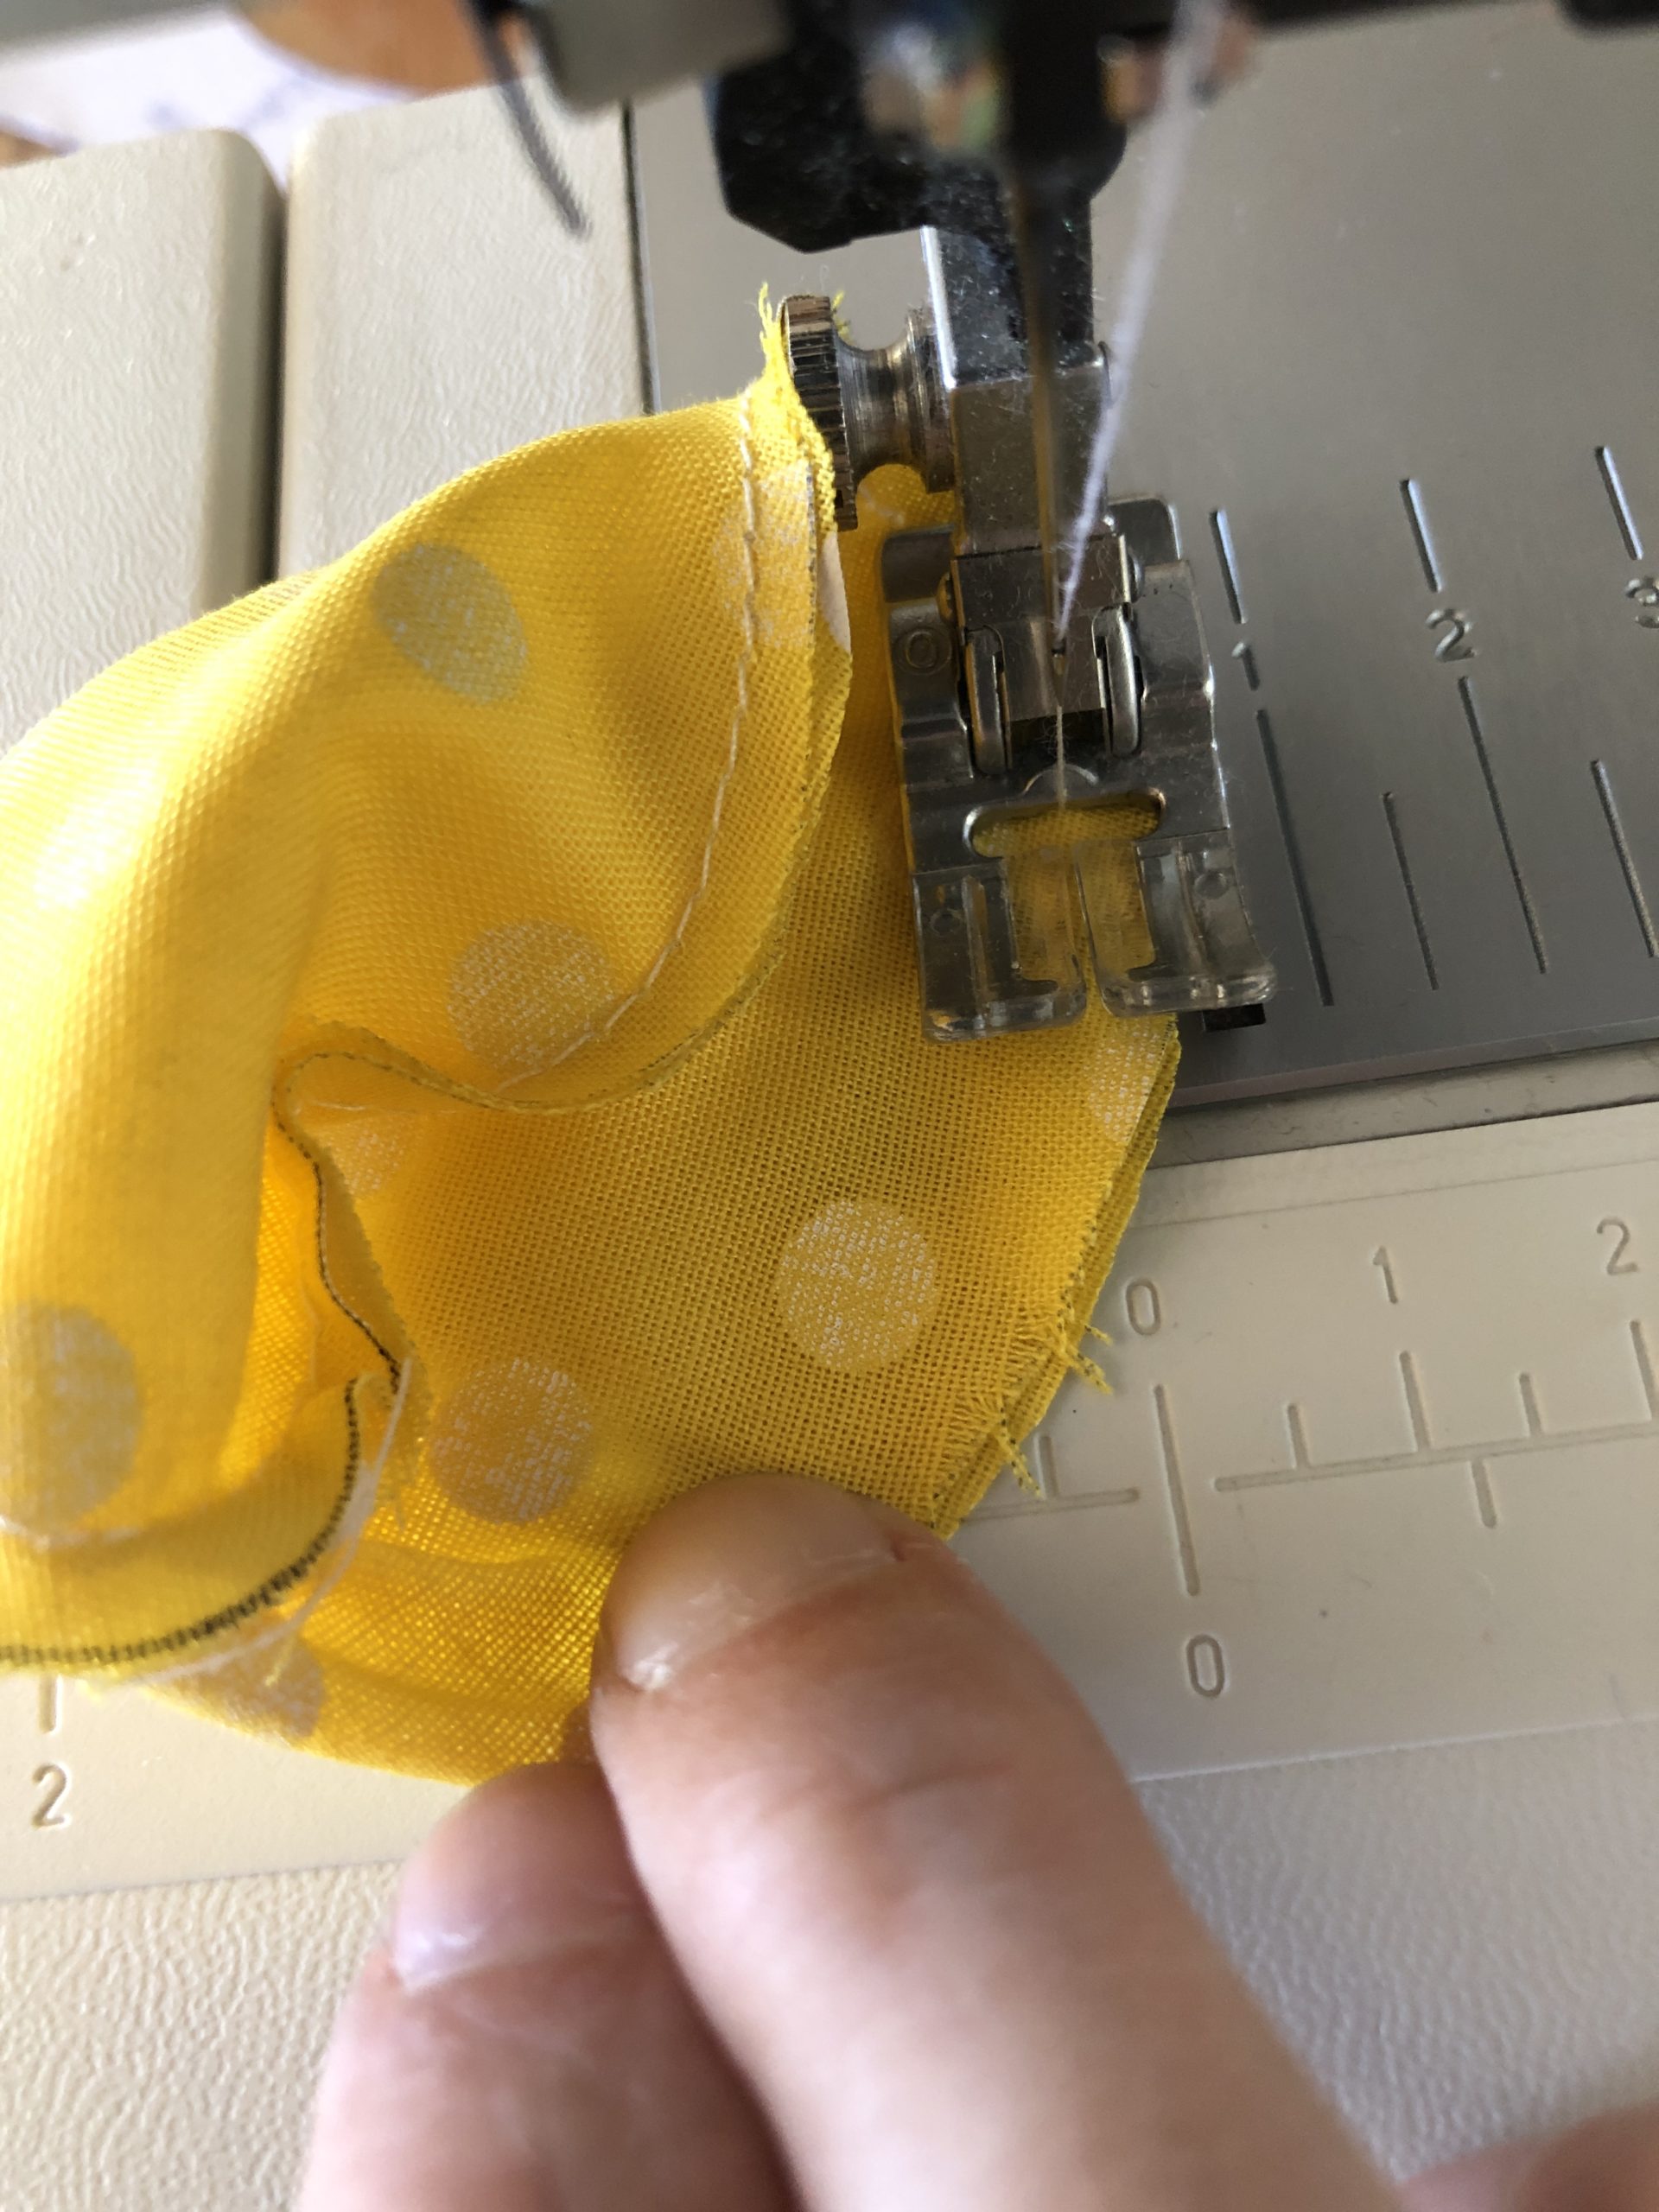
Bild zum Schritt 7 für das Bastel- und DIY-Abenteuer für Kinder: 'Solange weiternähen bis nur noch ein 2 cm breites Stück...'

8

Turn the finished sewn part through the turning opening and fill as follows:

9

That's how the balls look like...

Bild zum Schritt 9 für das Bastel- und DIY-Abenteuer für Kinder: 'So sehen die Bällchen dann aus...'

10

Turn the part around through the turning opening

Bild zum Schritt 10 für das Bastel- und DIY-Abenteuer für Kinder: 'Das Teil durch die Wendeöffnung umdrehen'

11

2. Bild zum Schritt 10 für das Bastel- und DIY-Abenteuer für Kinder: 'Das Teil durch die Wendeöffnung umdrehen'

12

Now they are filled with about 1 Esbresso cup full of rice or spelt (depending on how bulging you want it!)
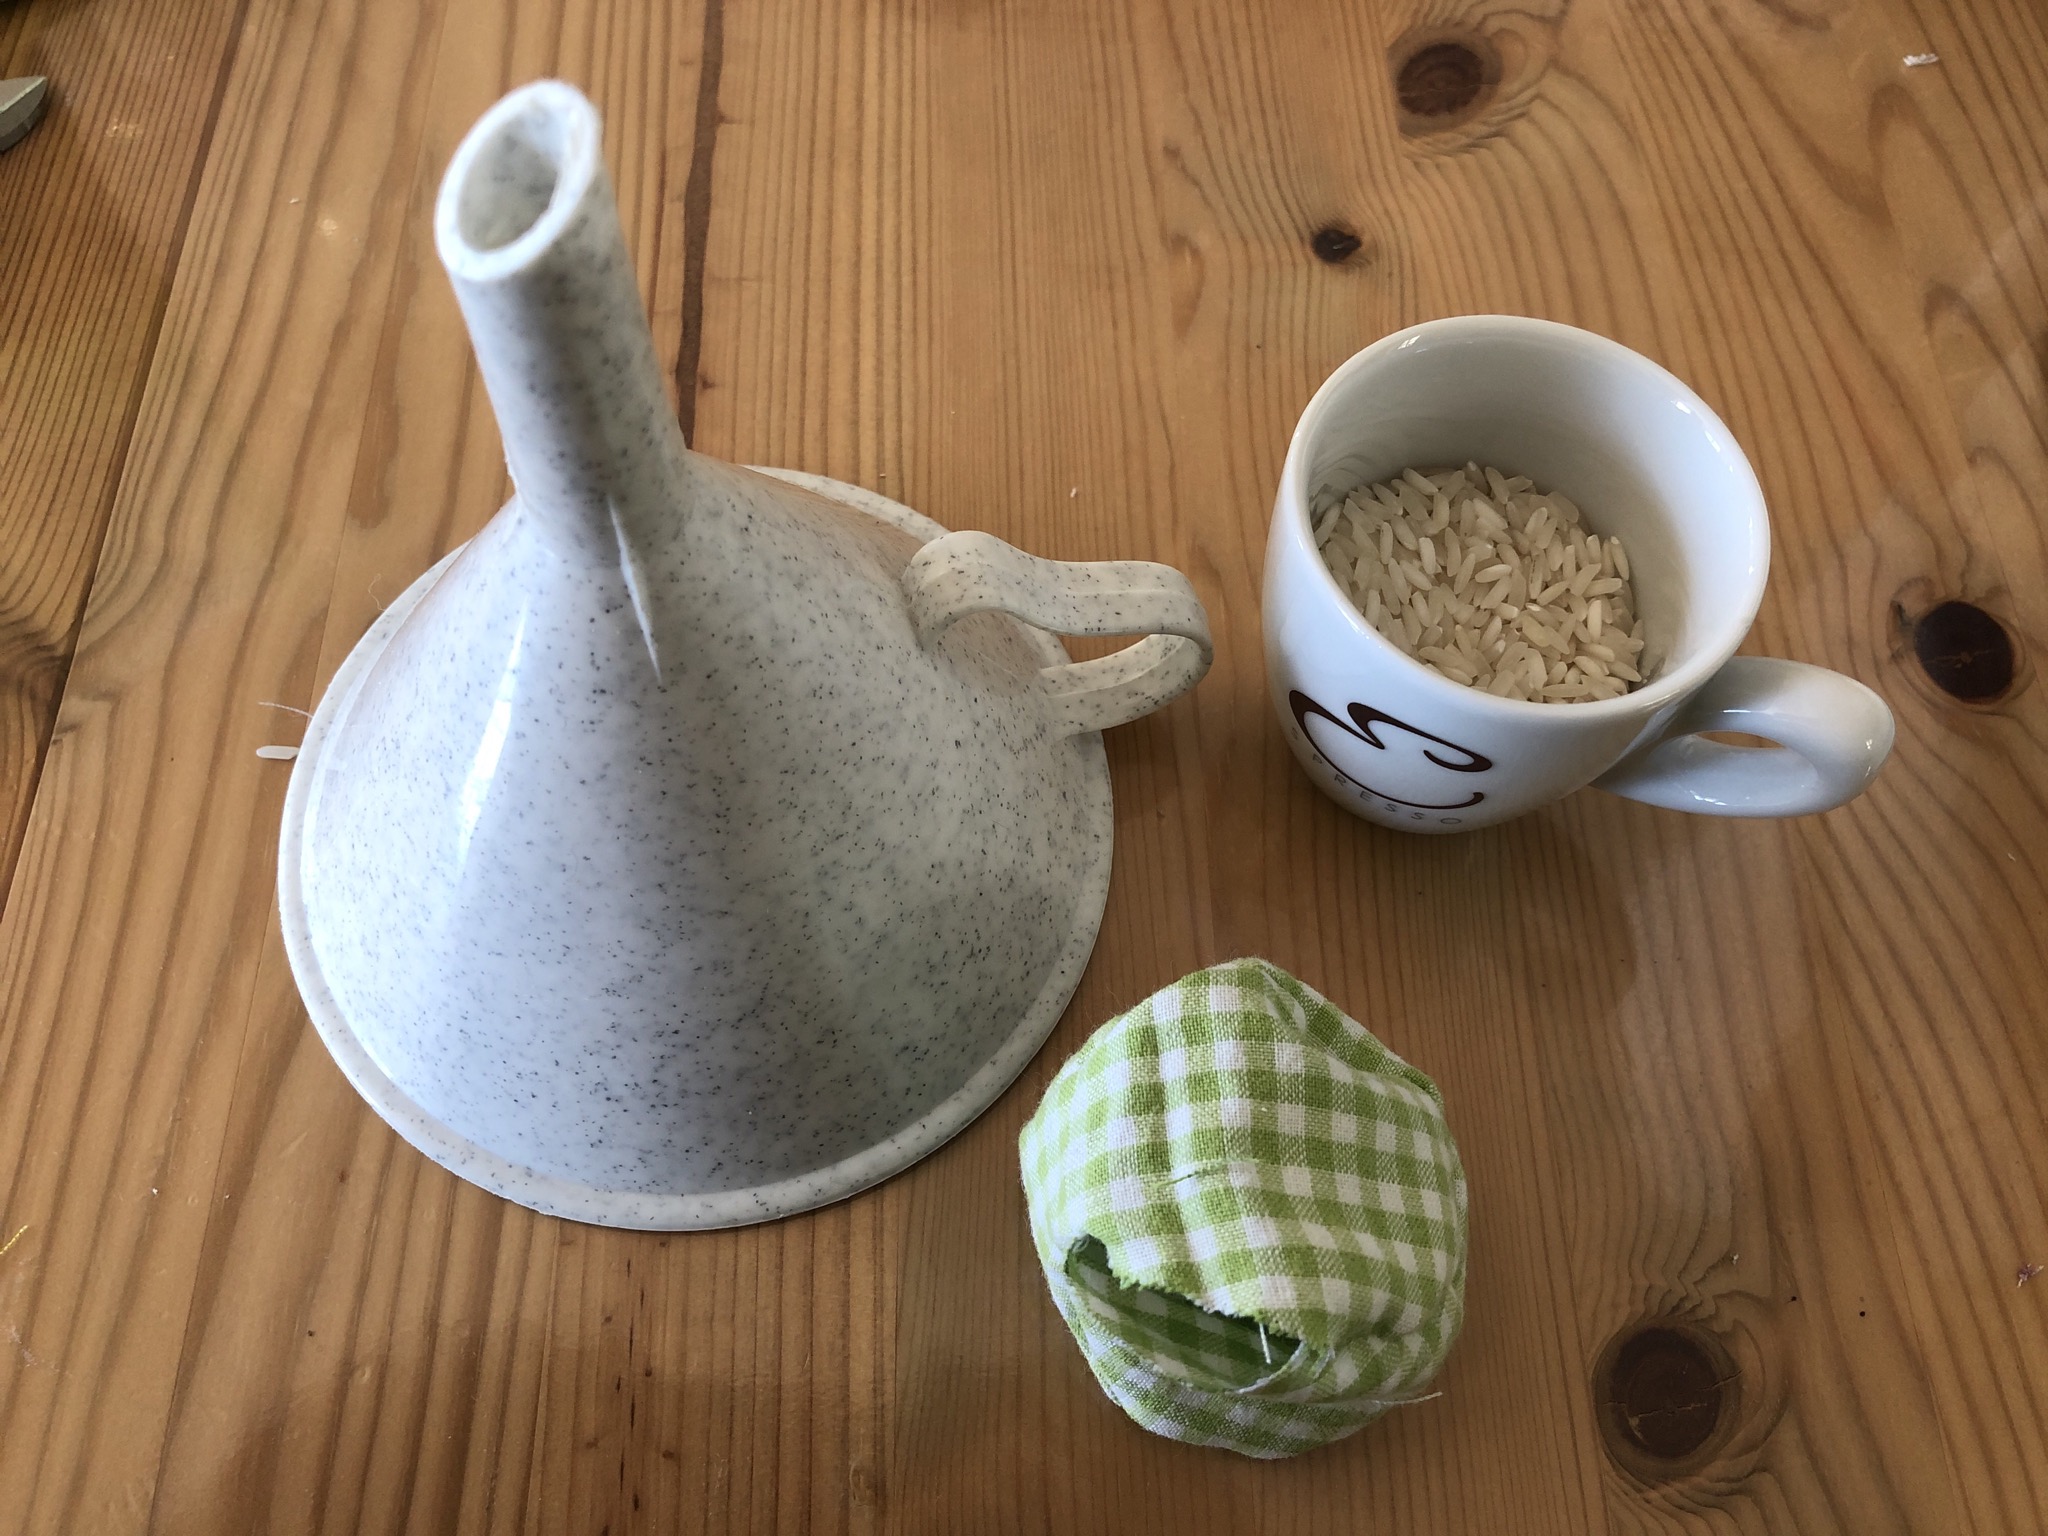
Bild zum Schritt 12 für das Bastel- und DIY-Abenteuer für Kinder: 'Nun werden sie mit ca. 1 Esbresso-Tasse voll Reis oder...'

13

The best way to fill is to use a funnel.
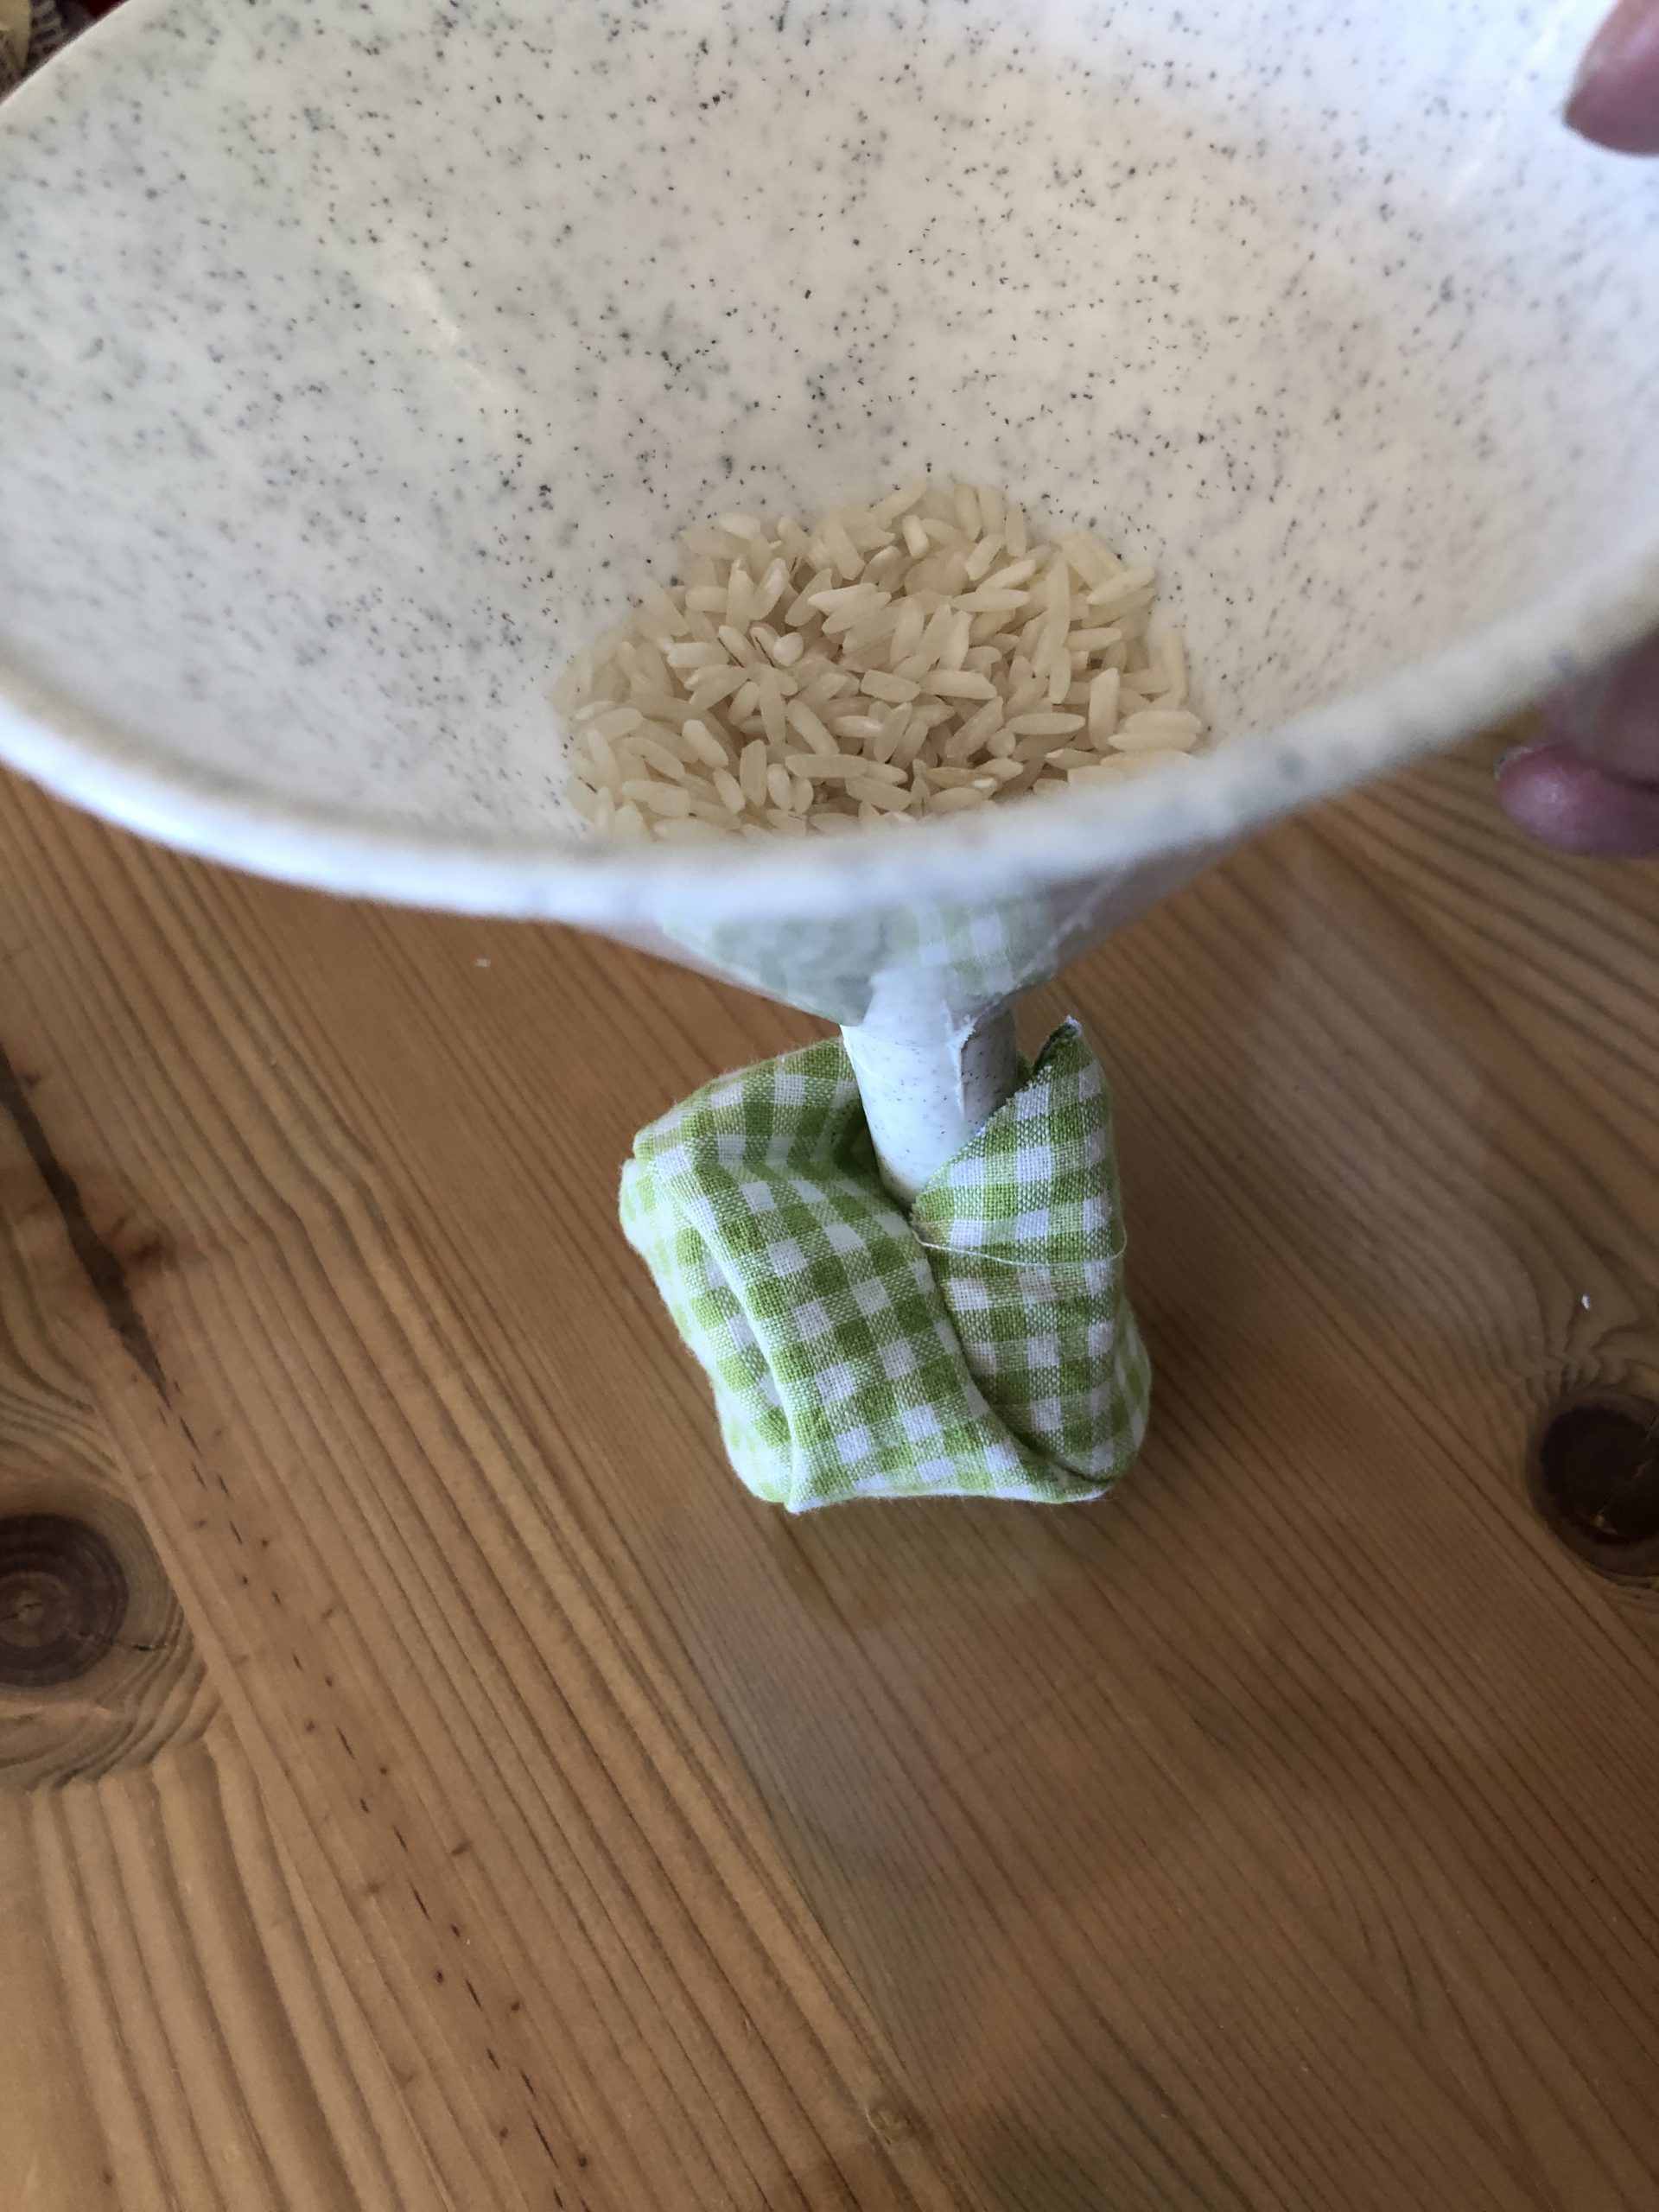
Bild zum Schritt 13 für das Bastel- und DIY-Abenteuer für Kinder: 'Zum Befüllen am besten einen Trichter nehmen.'

14

Insert the fabric at the opening a little bit inwards and stick it together with a pin. Sew the opening with needle and thread. Cut the thread.
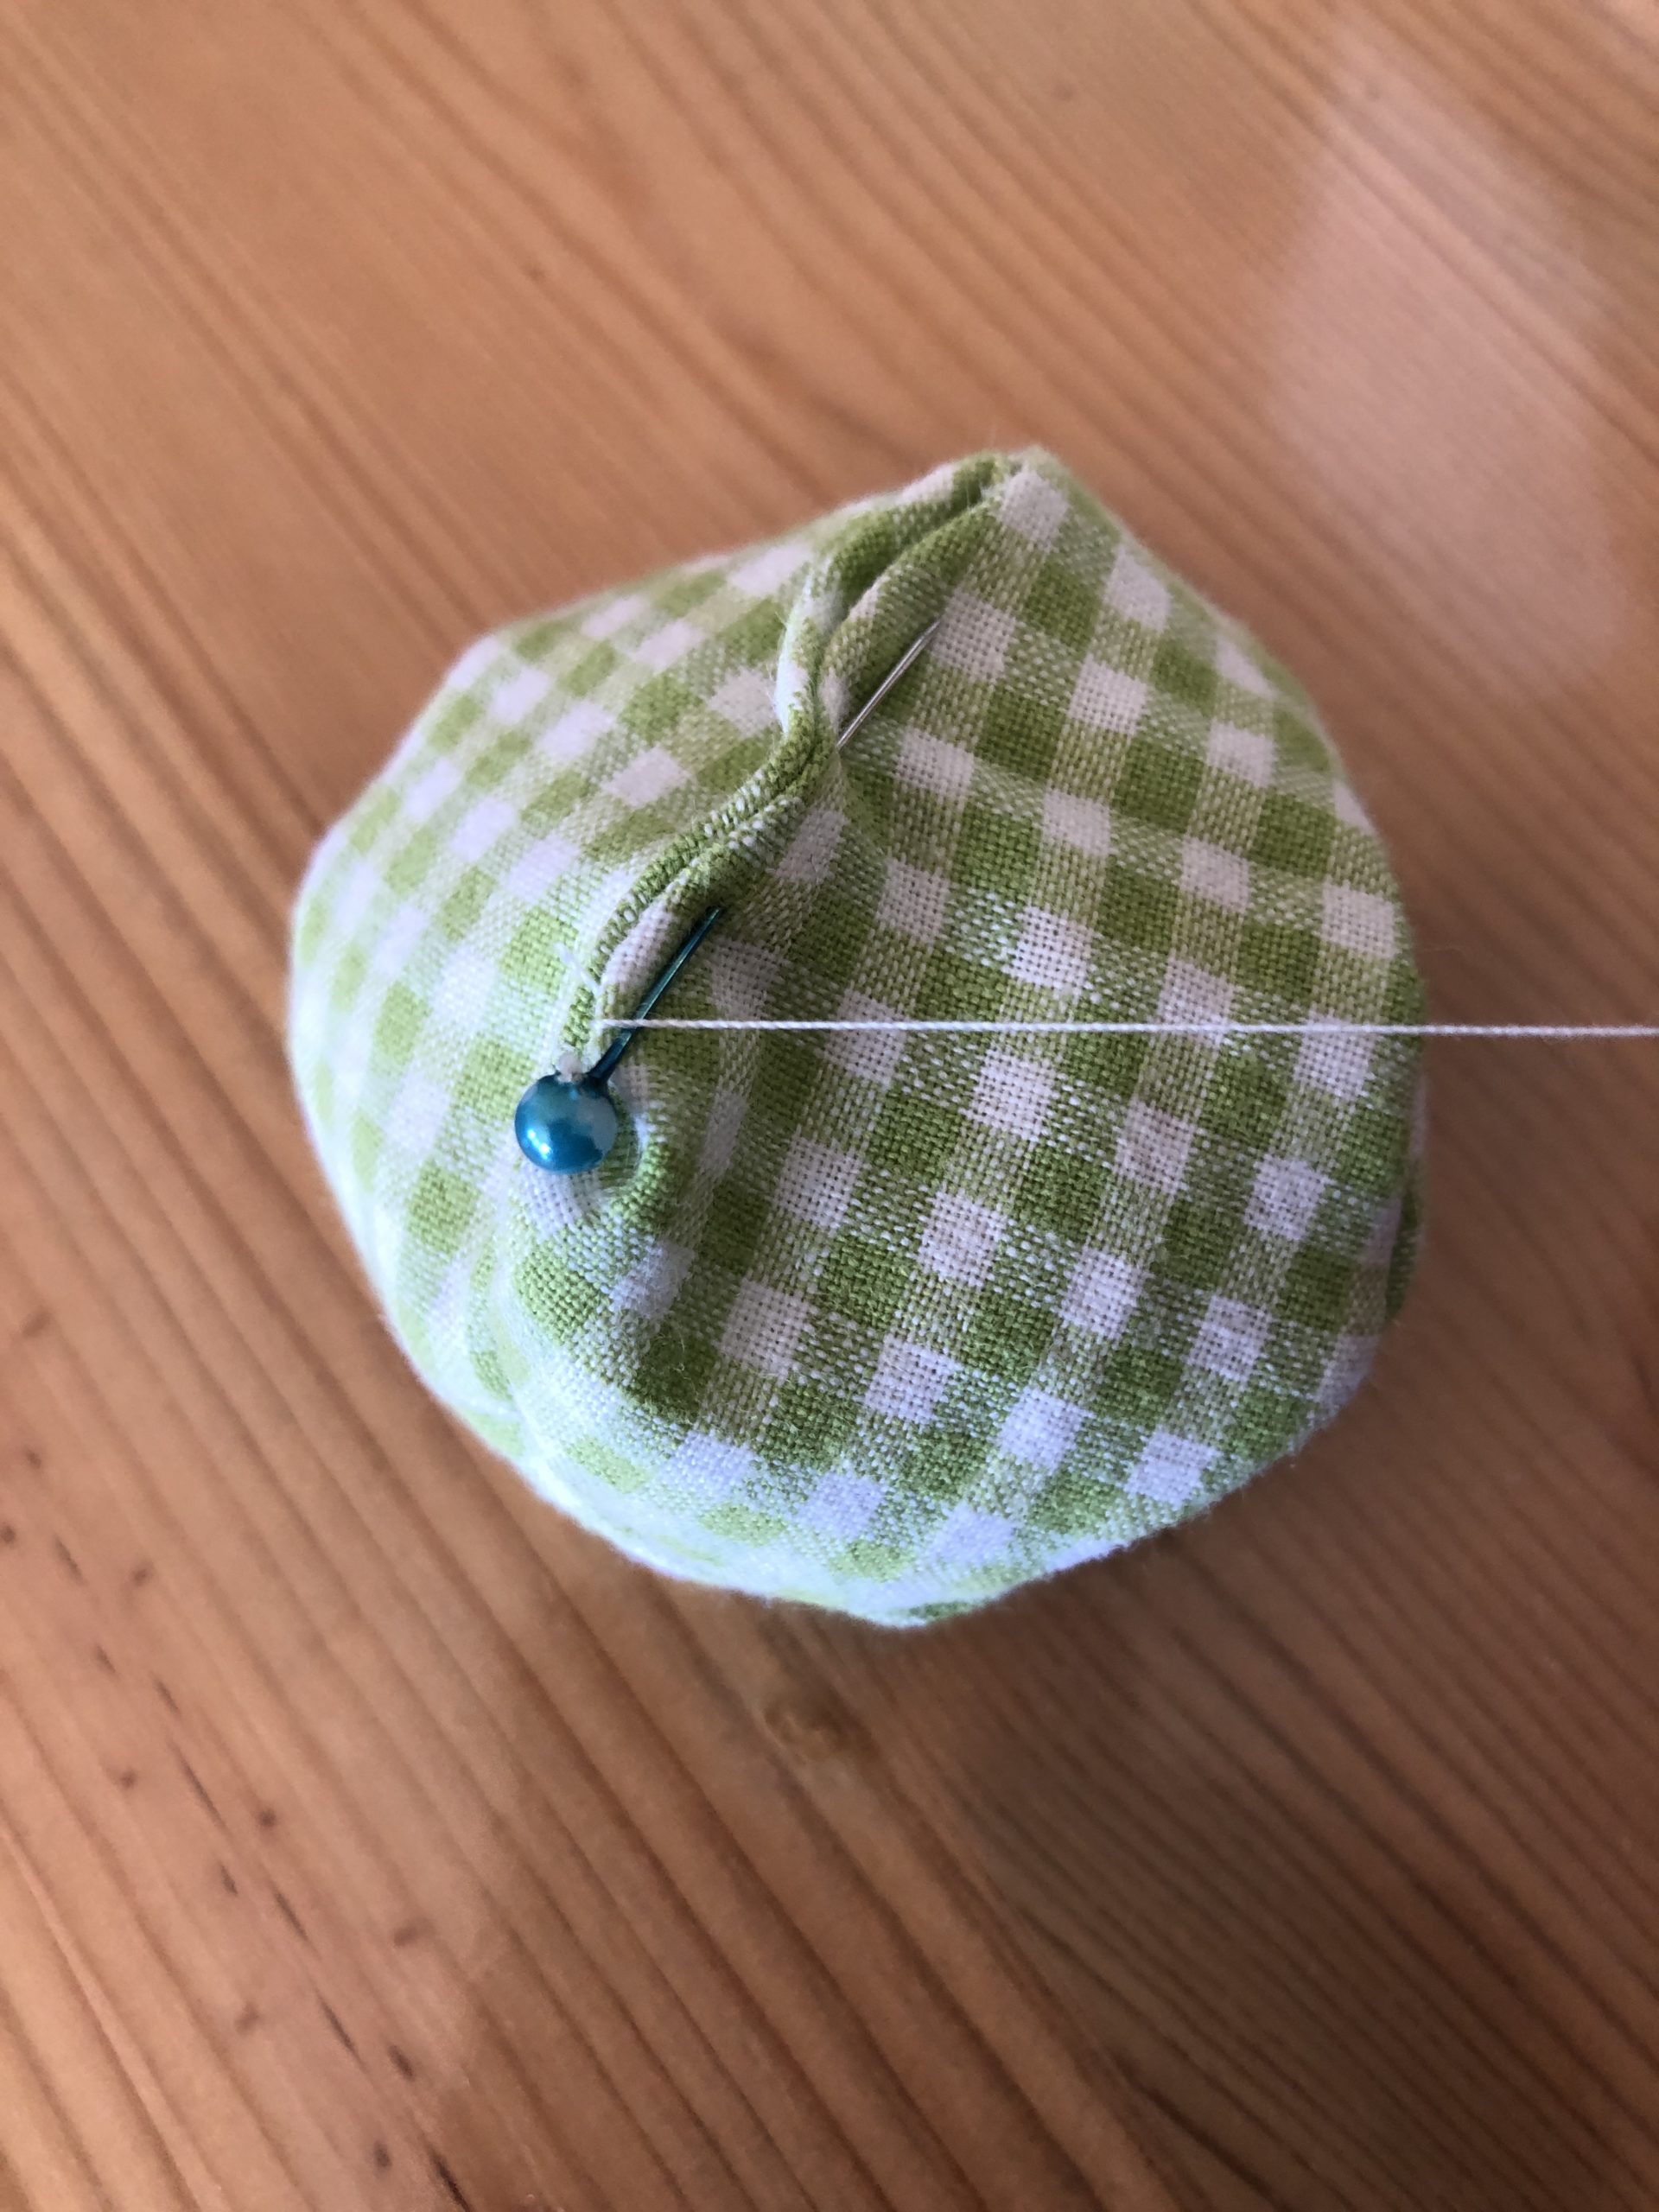
Bild zum Schritt 14 für das Bastel- und DIY-Abenteuer für Kinder: 'Den Stoff an der Öffnung etwas nach innen einschlagen und...'

15

Ready!

Bild zum Schritt 15 für das Bastel- und DIY-Abenteuer für Kinder: 'Fertig!'

16

This way you can make many different balls that you can use to juggle or play.

Here is an introduction to the Learning to juggle for children.

Have fun with it!

Bild zum Schritt 16 für das Bastel- und DIY-Abenteuer für Kinder: 'Auf diese Art könnt ihr viele verschiedene Bälle herstellen, die...'

Sew juggling balls

Follow us on Facebook , Instagram and Pinterest
Don't miss any more adventures: Our bottle mail

2 Comments

  1. Great instruction, very nicely illustrated and very understandable. in the instruction is "Cut in the appendix" unfortunately I could not find it…

    1. Dear Tamara, thank you for the feedback. The editing is not in the appendix, but in the first tutorial step – we have now adapted this in the text. In addition, we have attached the editing to this comment as PDF. Have fun trying it out!

      Cut Template_Juggling Ball

Leave a Reply

Your email address will not be published.

The maximum upload file size: 5 MB. You can upload: image, document. Drop file here