Hand Dragon "to fly yourself"

AdventurerKatzi
Rating0.099 times & (0) DifficultyAdvanced

A dragon that doesn't hang on a string! For small children it is not yet possible to let the dragon rise with a kite line. You must be able to take the dragon into your hand. This hand dragon is ideal for this. Through the corresponding folding it has a kind of "pocket" in which the child can push the whole hand and thus take the dragon as with a hand puppet. With large arm movements the dragon moves and dances. Frings on the sides of the dragon and a dragon tail make the dragon "live" look.
Try it out, the kids will love it.

Media Education for Kindergarten and Hort

Kind bastelt eine Rassel mit dem Navi
The Adventure Navi, the app for DIY projects, enables media education for the youngest.

Relief in everyday life, targeted promotion of individual children, independent learning and - without any pre-knowledge already usable by the youngest!
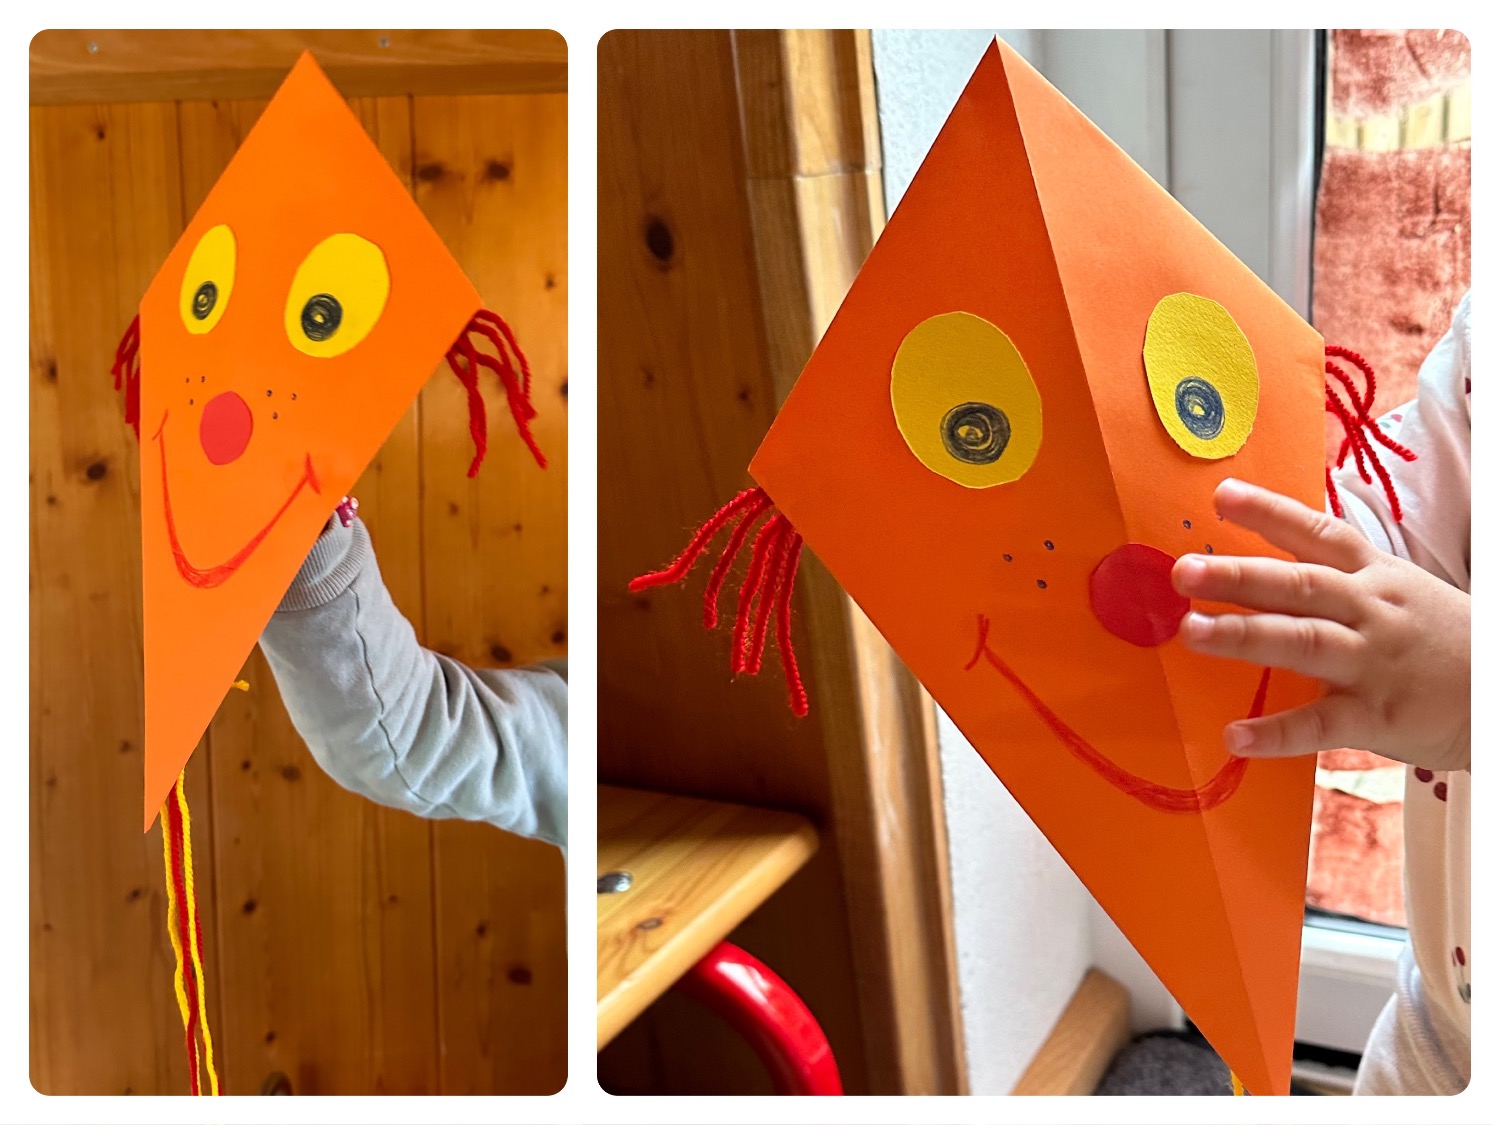


Titelbild zur Bastel- und DIY-Idee für Kinder '(1126) Hand-Drache „zum selber fliegen lassen“'
Material for1 Child
Prep Time5 min.Adv. Time30 min.Total Time35 min.
 1 Colourful paper DIN A4
 WoolColoured
 Felt pinsColoured
 Transparent adhesive strips For example, Tesafilm
 Paper remnants colorfulFor example, folding paper residue
 2 Woven fabrics containing predominantly, but < 85 % cotton by weight, mixed principally or solely with cotton
 1 Builder's pad
All links marked with a shopping cart lead to Amazon - here we have selected products that we would order ourselves and in part also ordered. In a qualified purchase via the advertising link, we as Amazon partner receive a commission, for you there are no costs. You thus support our cost- and advertising banner-free, educational offer.
1

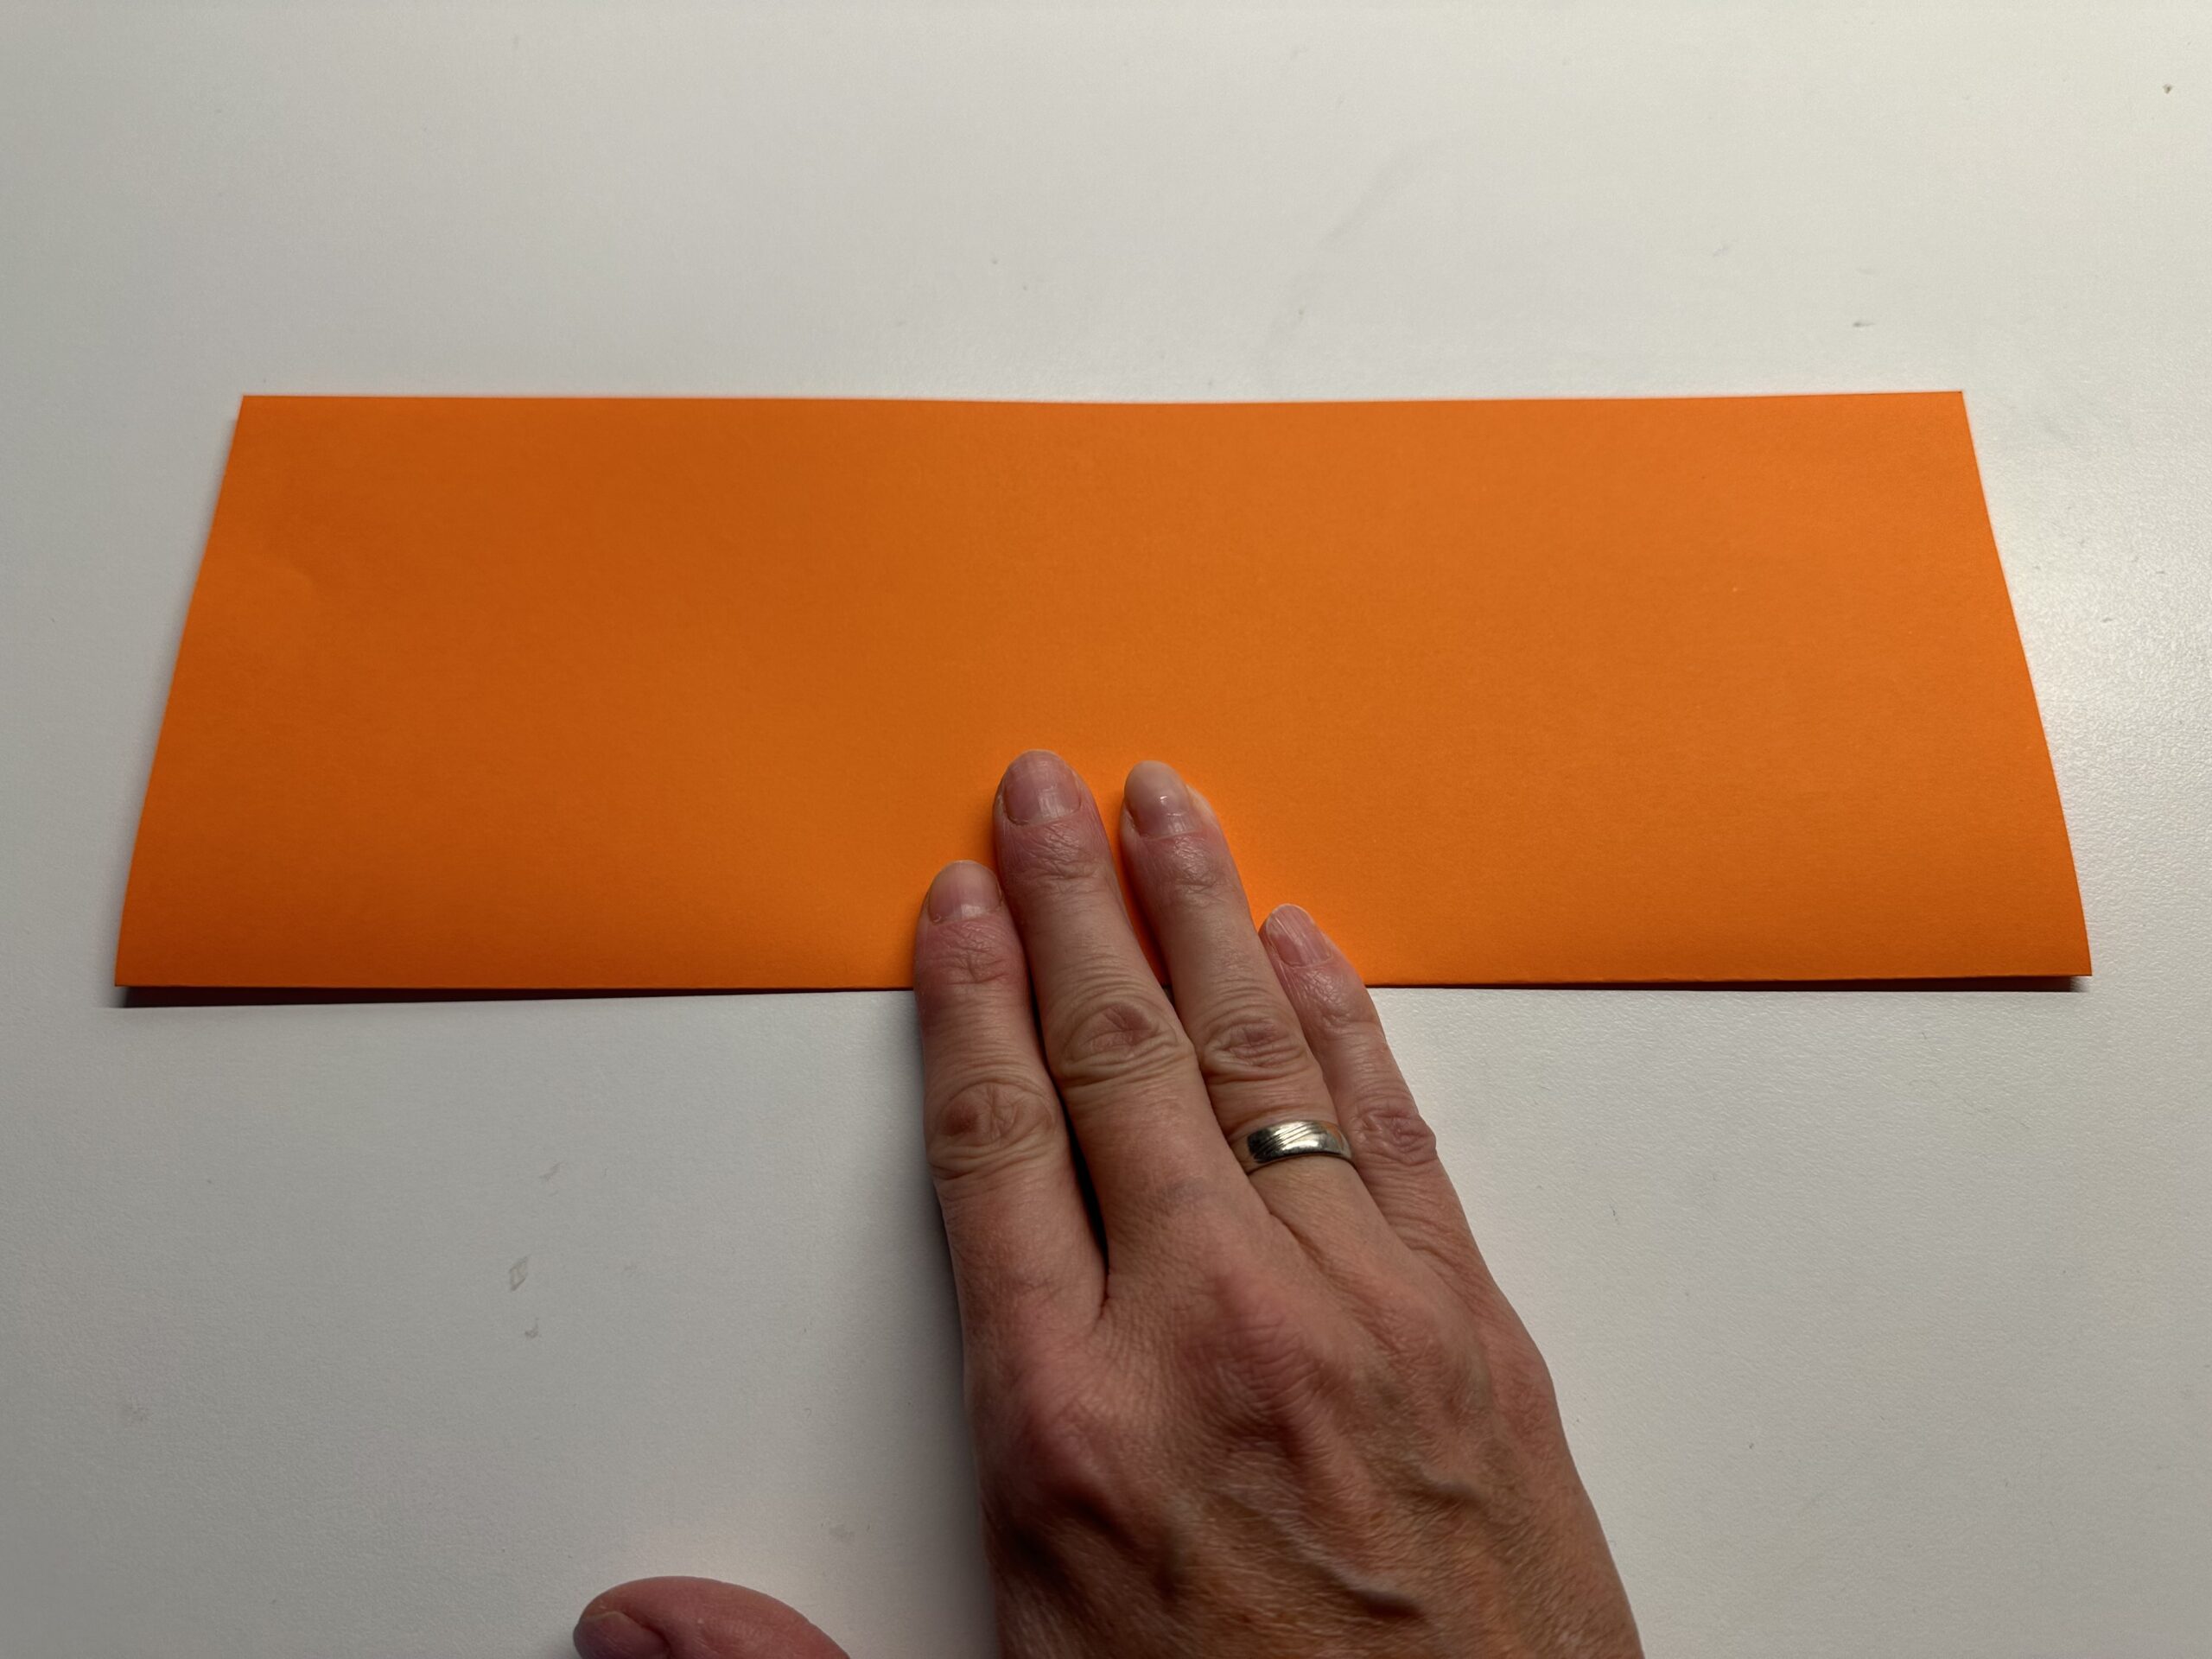
Take a colorful copy paper and put it across the street.
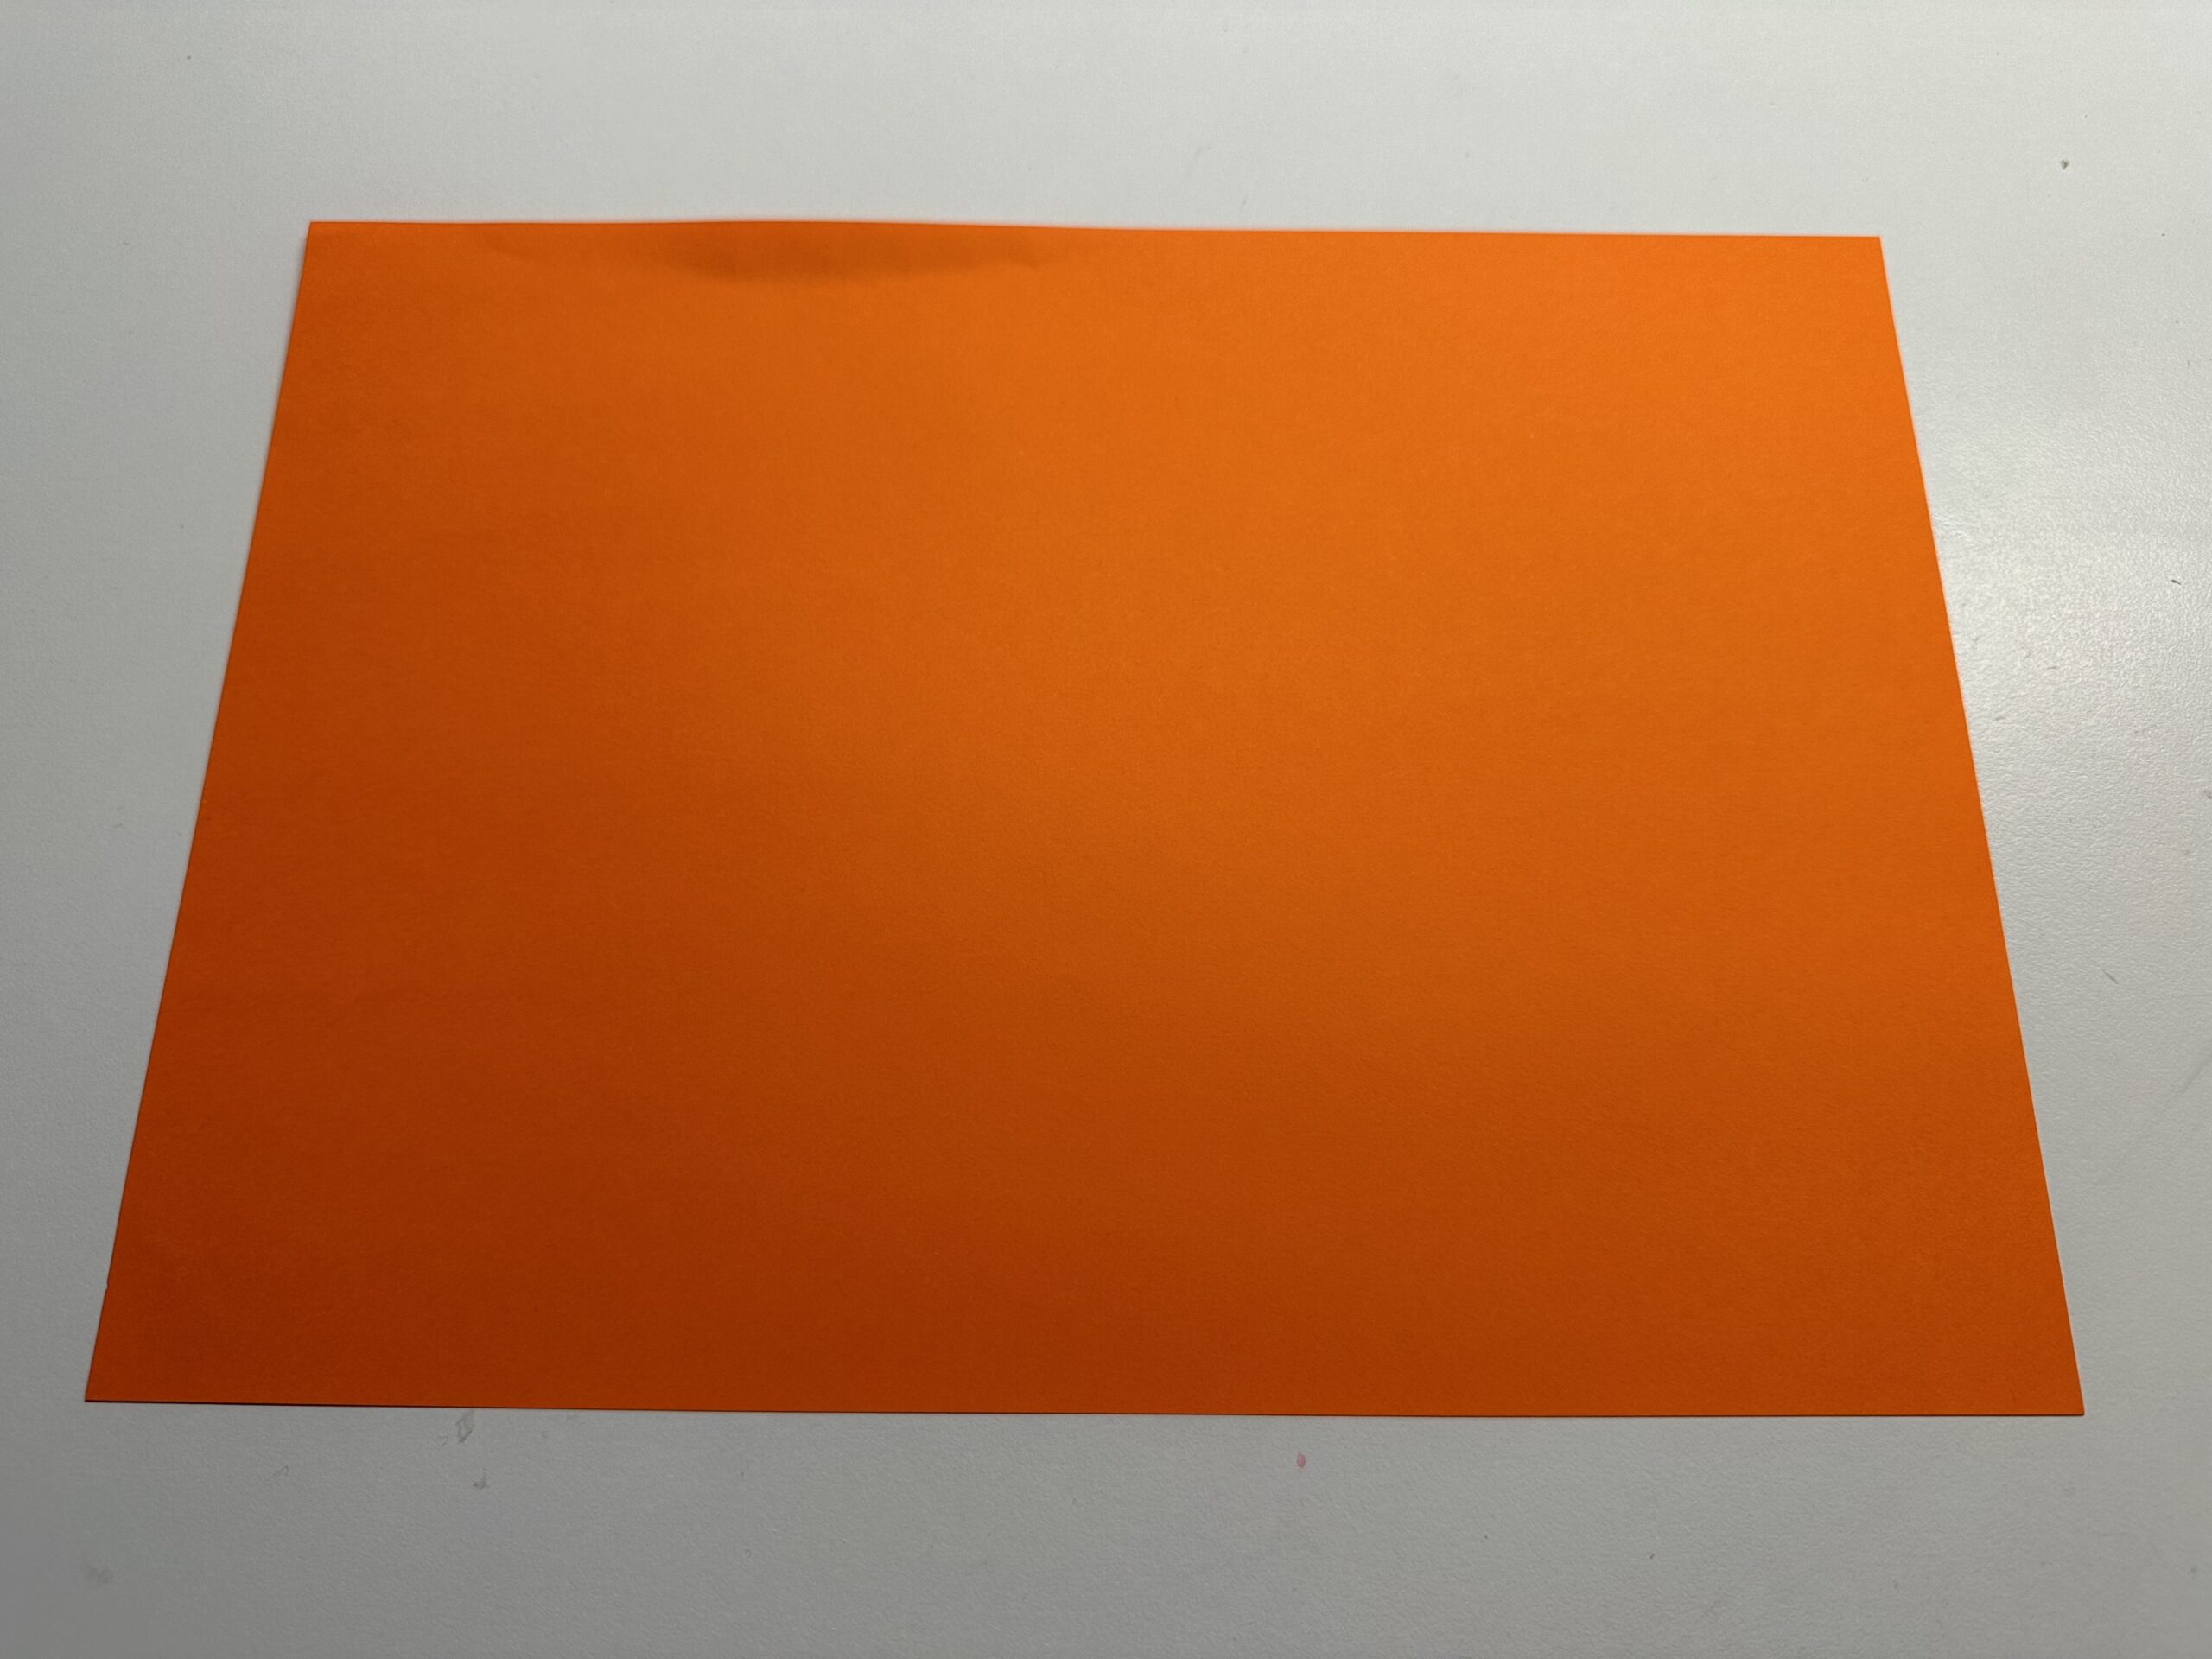
Bild zum Schritt 1 für das Bastel- und DIY-Abenteuer für Kinder: 'Nimm ein buntes Kopierpapier und lege es quer vor dich...'

2

Fold the lower side up. Corner to corner.
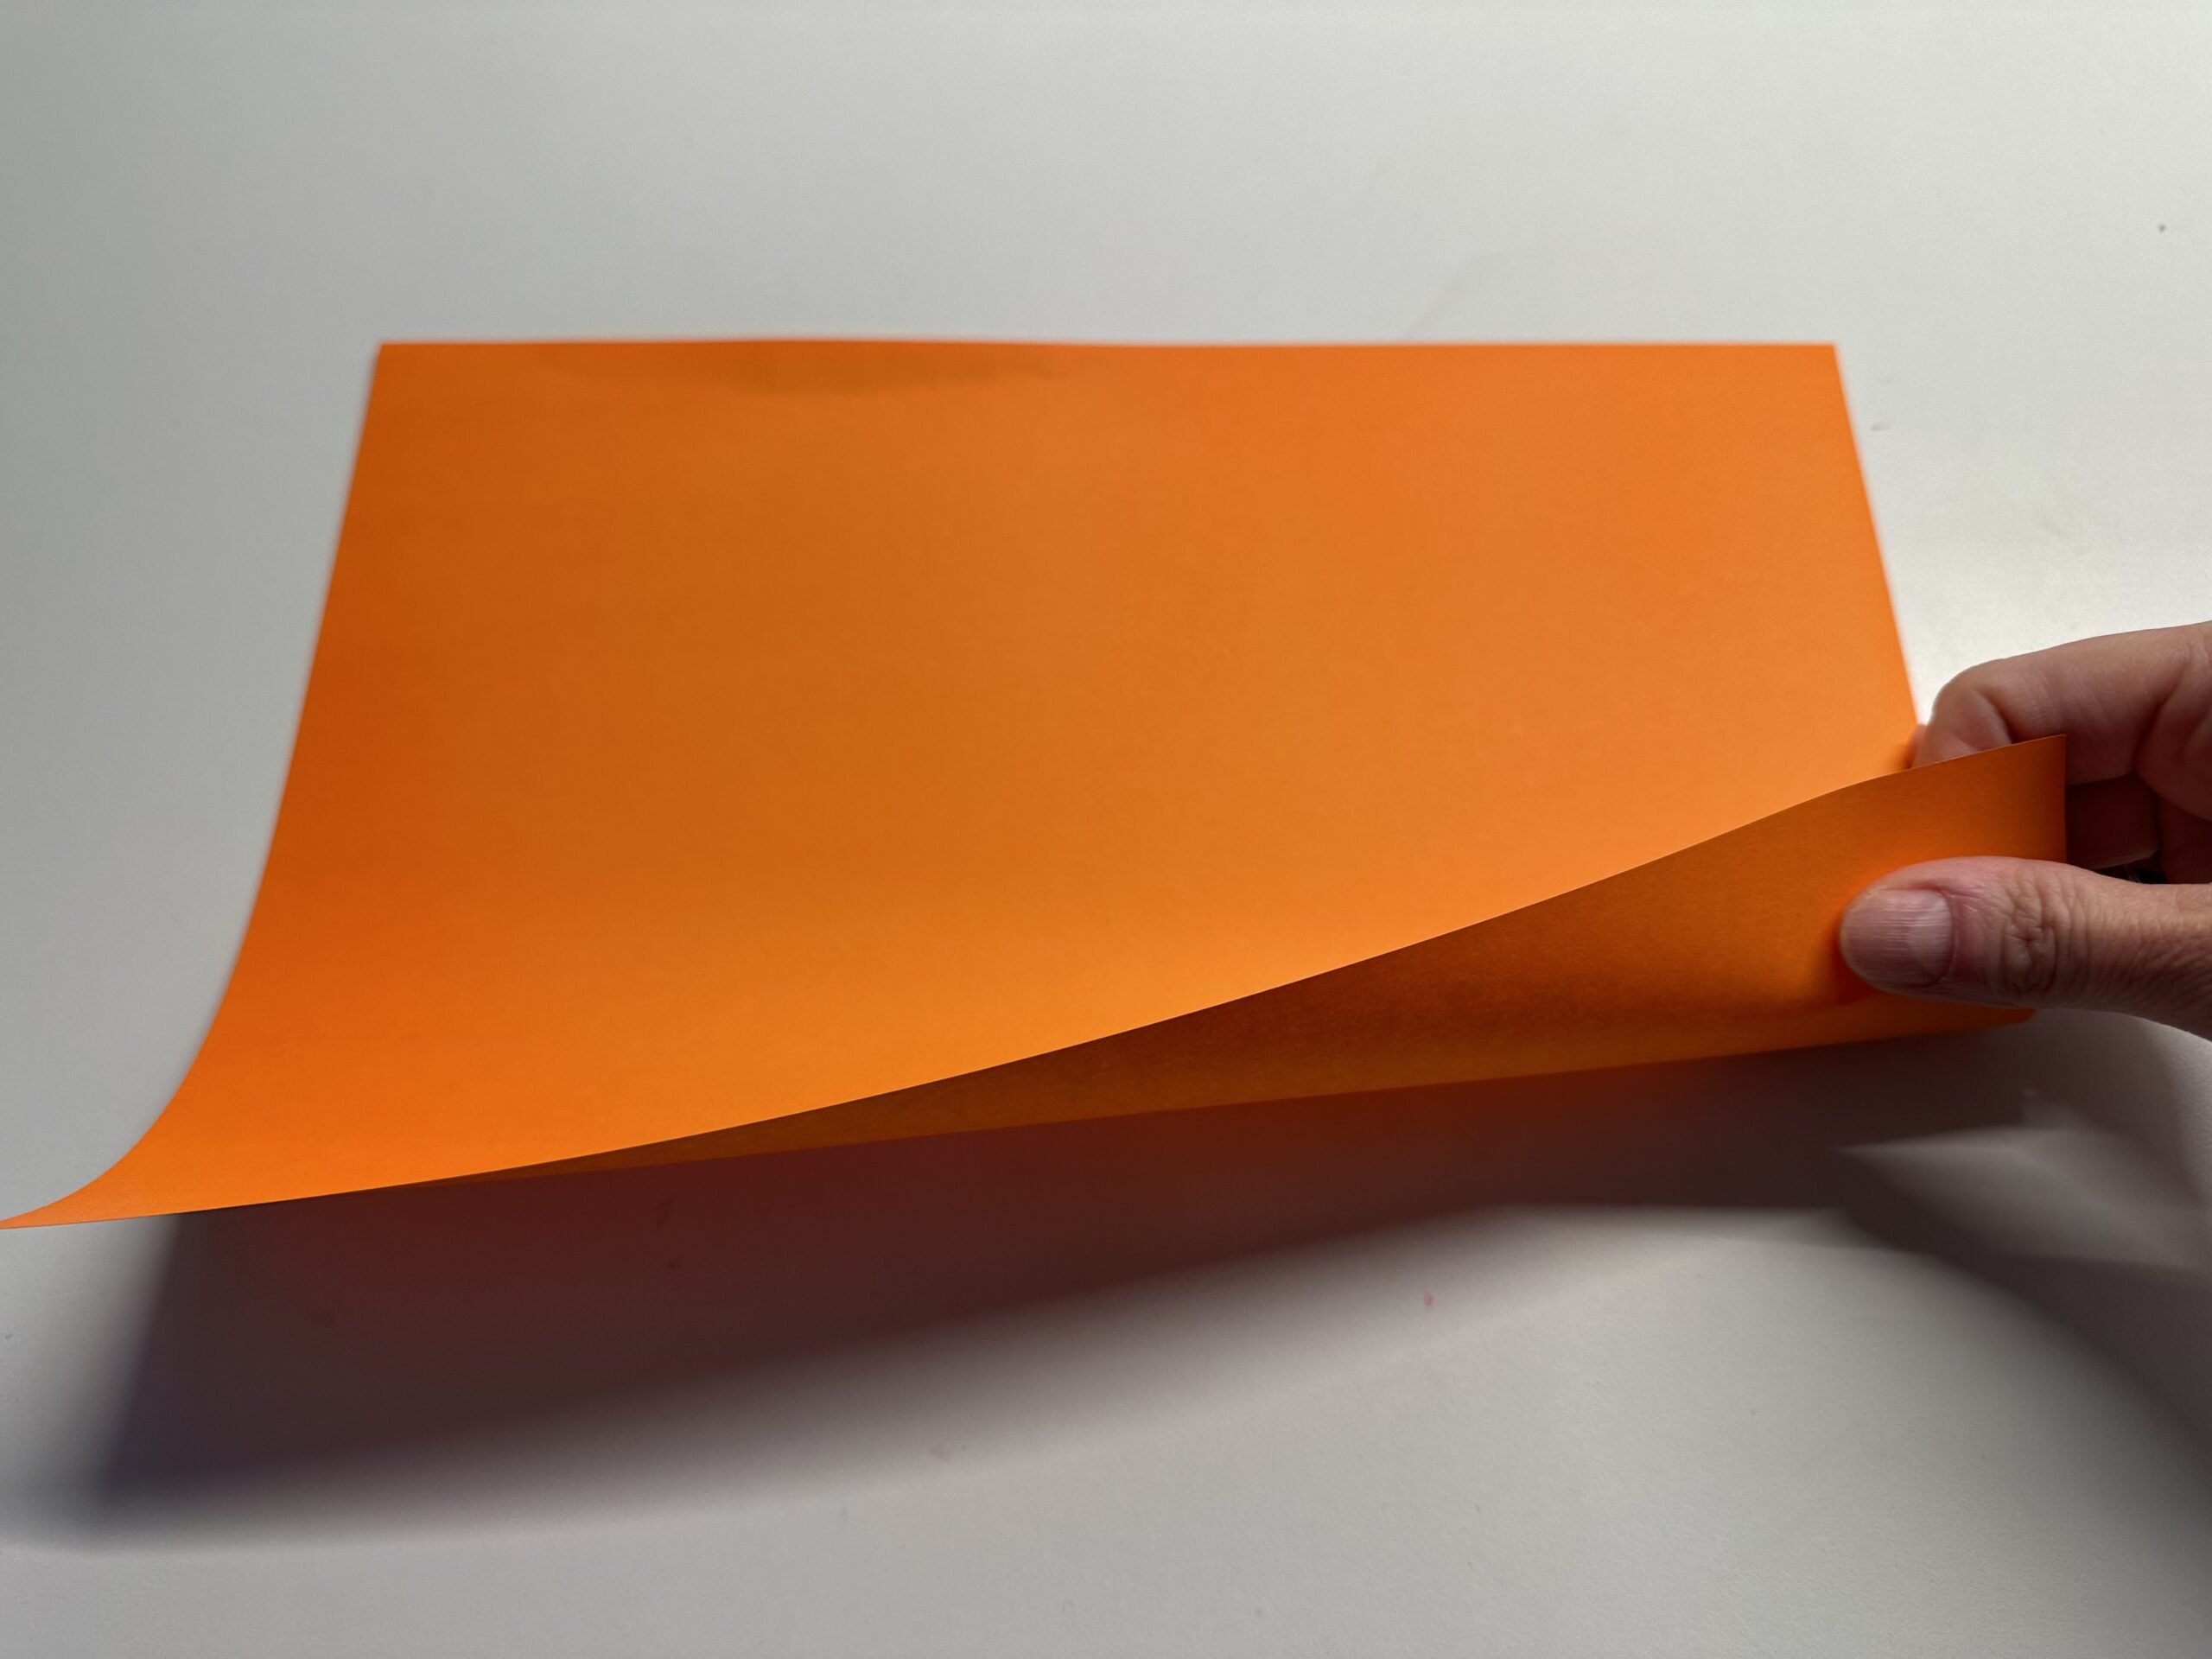
Bild zum Schritt 2 für das Bastel- und DIY-Abenteuer für Kinder: 'Falte die untere Seite nach oben. Ecke auf Ecke.'

3

Strip the break with the flat hand smoothly.

Bild zum Schritt 3 für das Bastel- und DIY-Abenteuer für Kinder: 'Streife den Bruch mit der flachen Hand glatt.'

4

That's what it looks like.

Bild zum Schritt 4 für das Bastel- und DIY-Abenteuer für Kinder: 'So sieht das dann aus.'

5

Open the folded paper again and put it up in front of you. The folded fracture now points to you.

Bild zum Schritt 5 für das Bastel- und DIY-Abenteuer für Kinder: 'Klappe das gefaltete Papier wieder auf und lege es hochkant...'

6

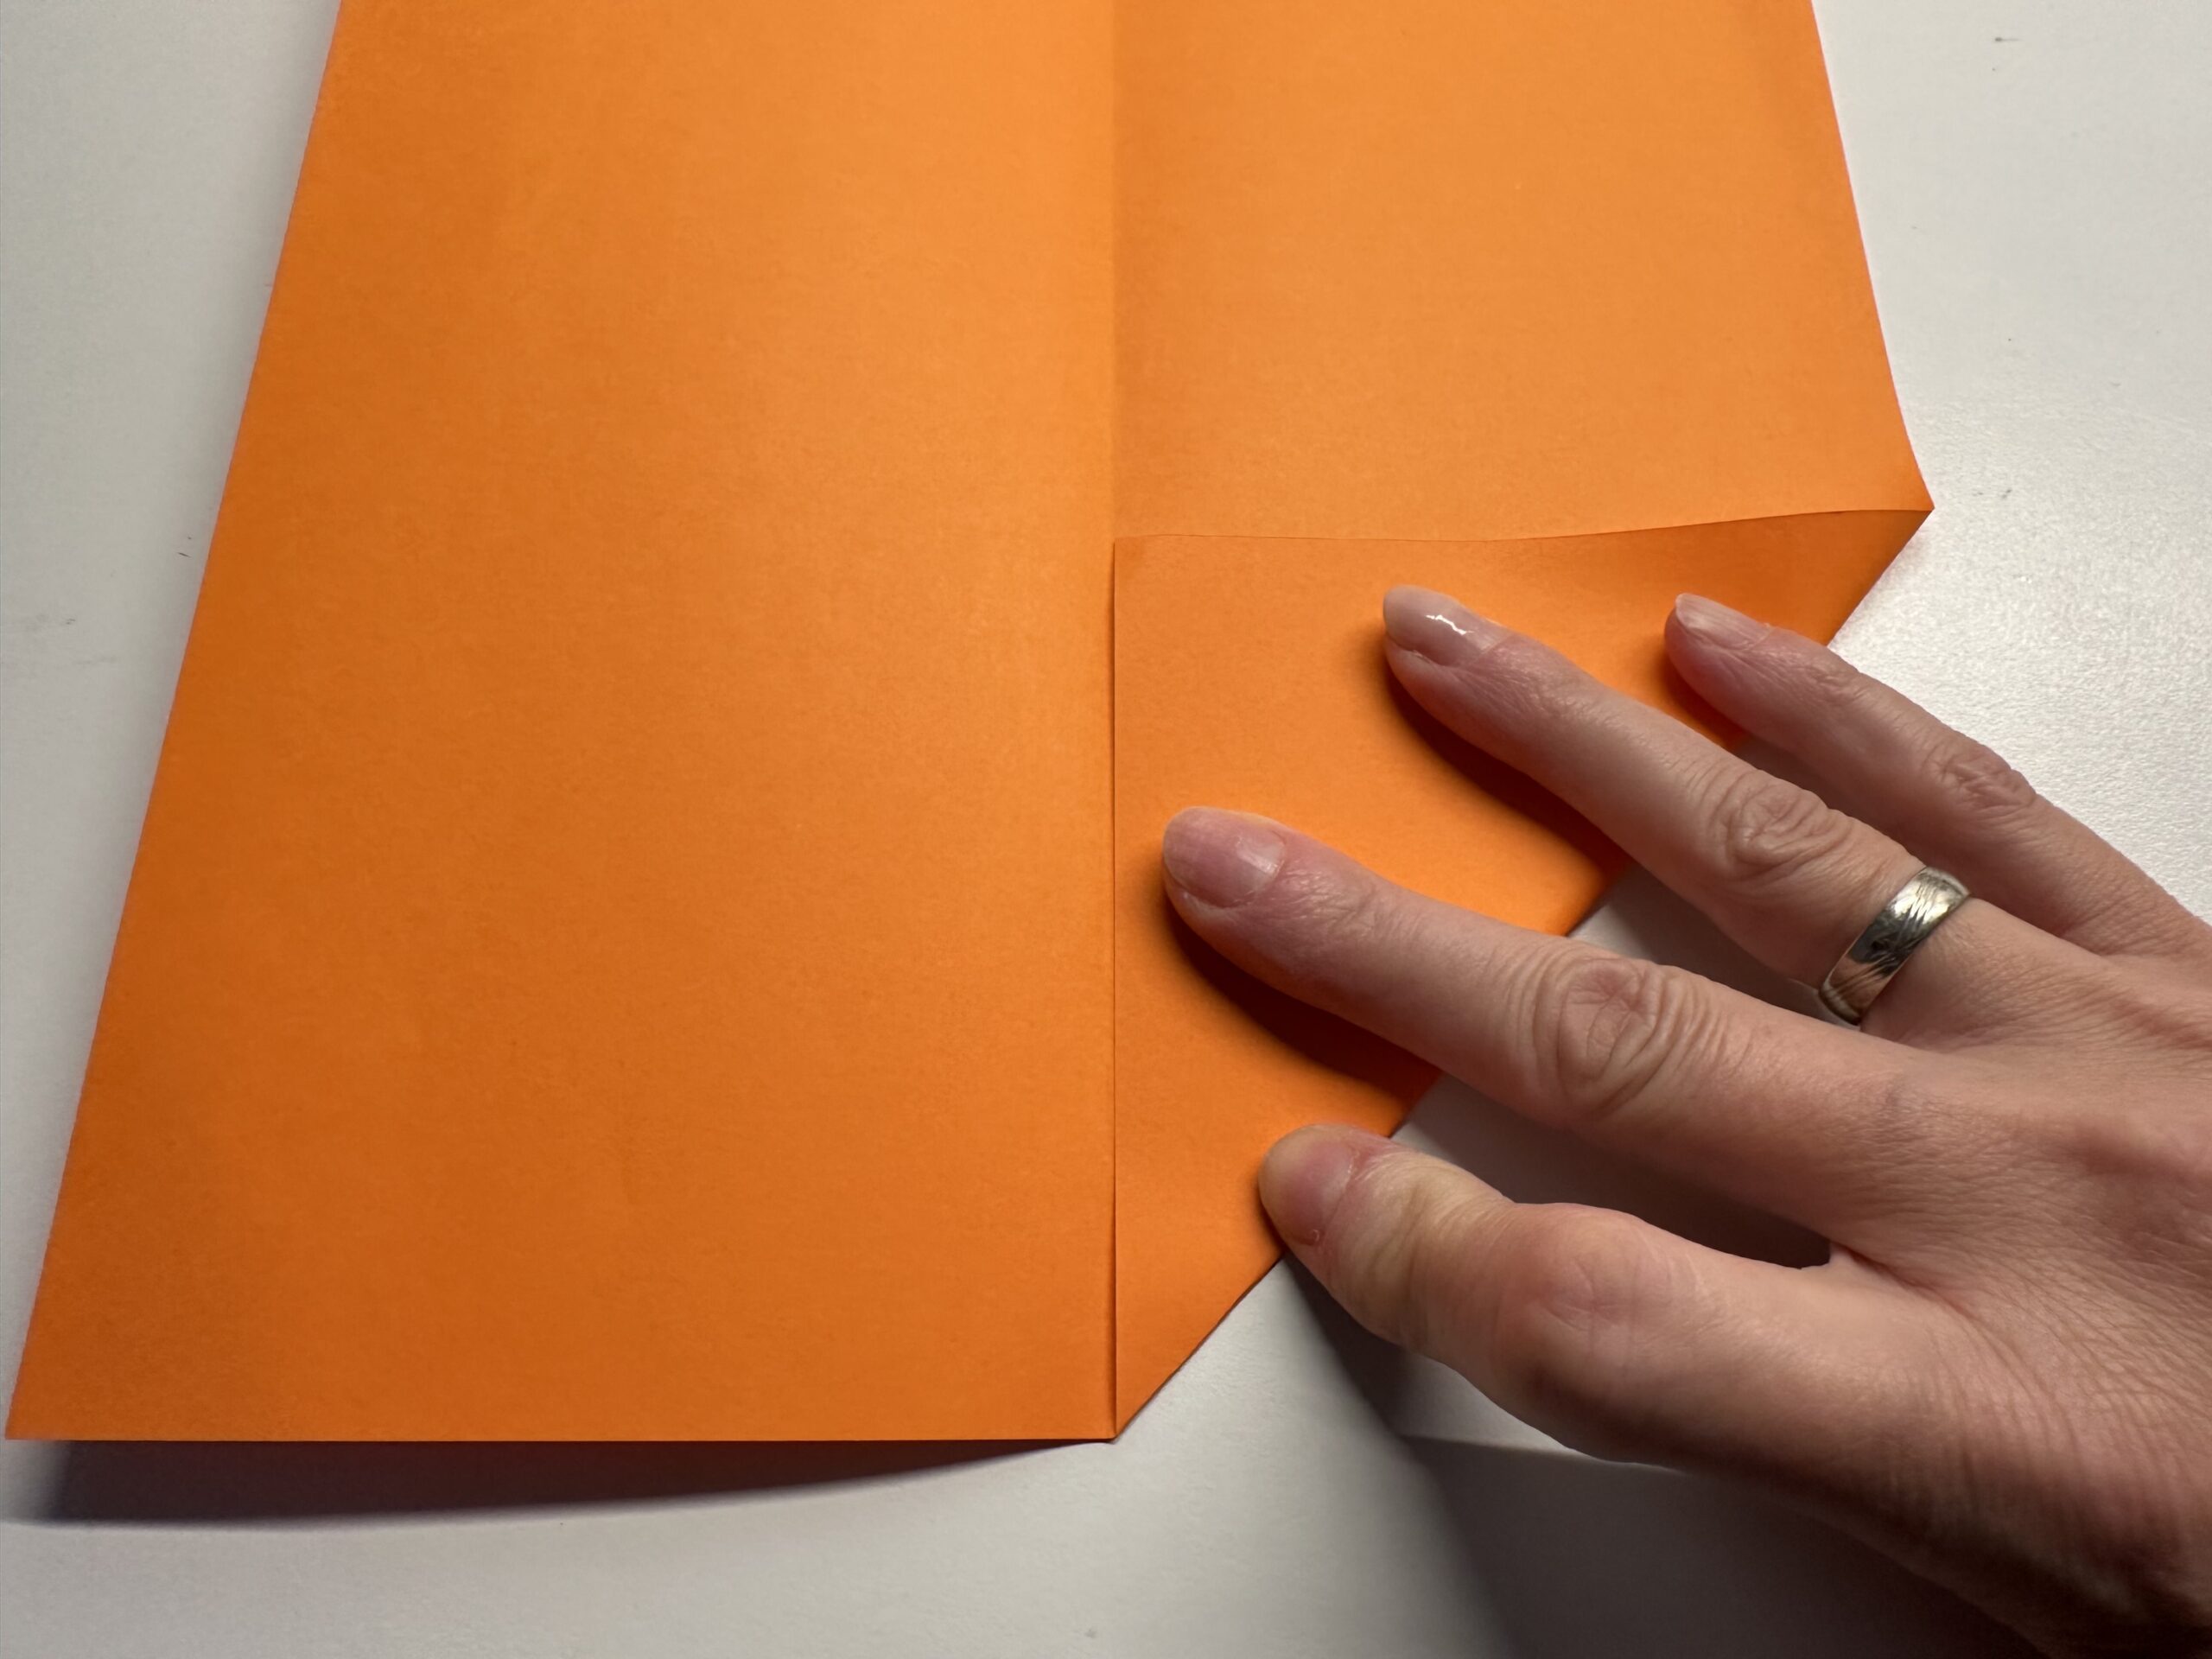
Take a lower corner and fold it to the center line.

Bild zum Schritt 6 für das Bastel- und DIY-Abenteuer für Kinder: 'Nimm eine untere Ecke und falte sie zur Mittellinie.'

7

A triangle emerges.

Bild zum Schritt 7 für das Bastel- und DIY-Abenteuer für Kinder: 'Es entsteht ein Dreieck.'

8

Repeat the whole with the other corner. That's how a lace is created.

Bild zum Schritt 8 für das Bastel- und DIY-Abenteuer für Kinder: 'Wiederhole das ganze mit der anderen Ecke. So entsteht eine...'

9

Turn the paper around and repeat the whole thing on the other side.

Bild zum Schritt 9 für das Bastel- und DIY-Abenteuer für Kinder: 'Drehe das Papier einmal herum und wiederhole das Ganze auf...'

10

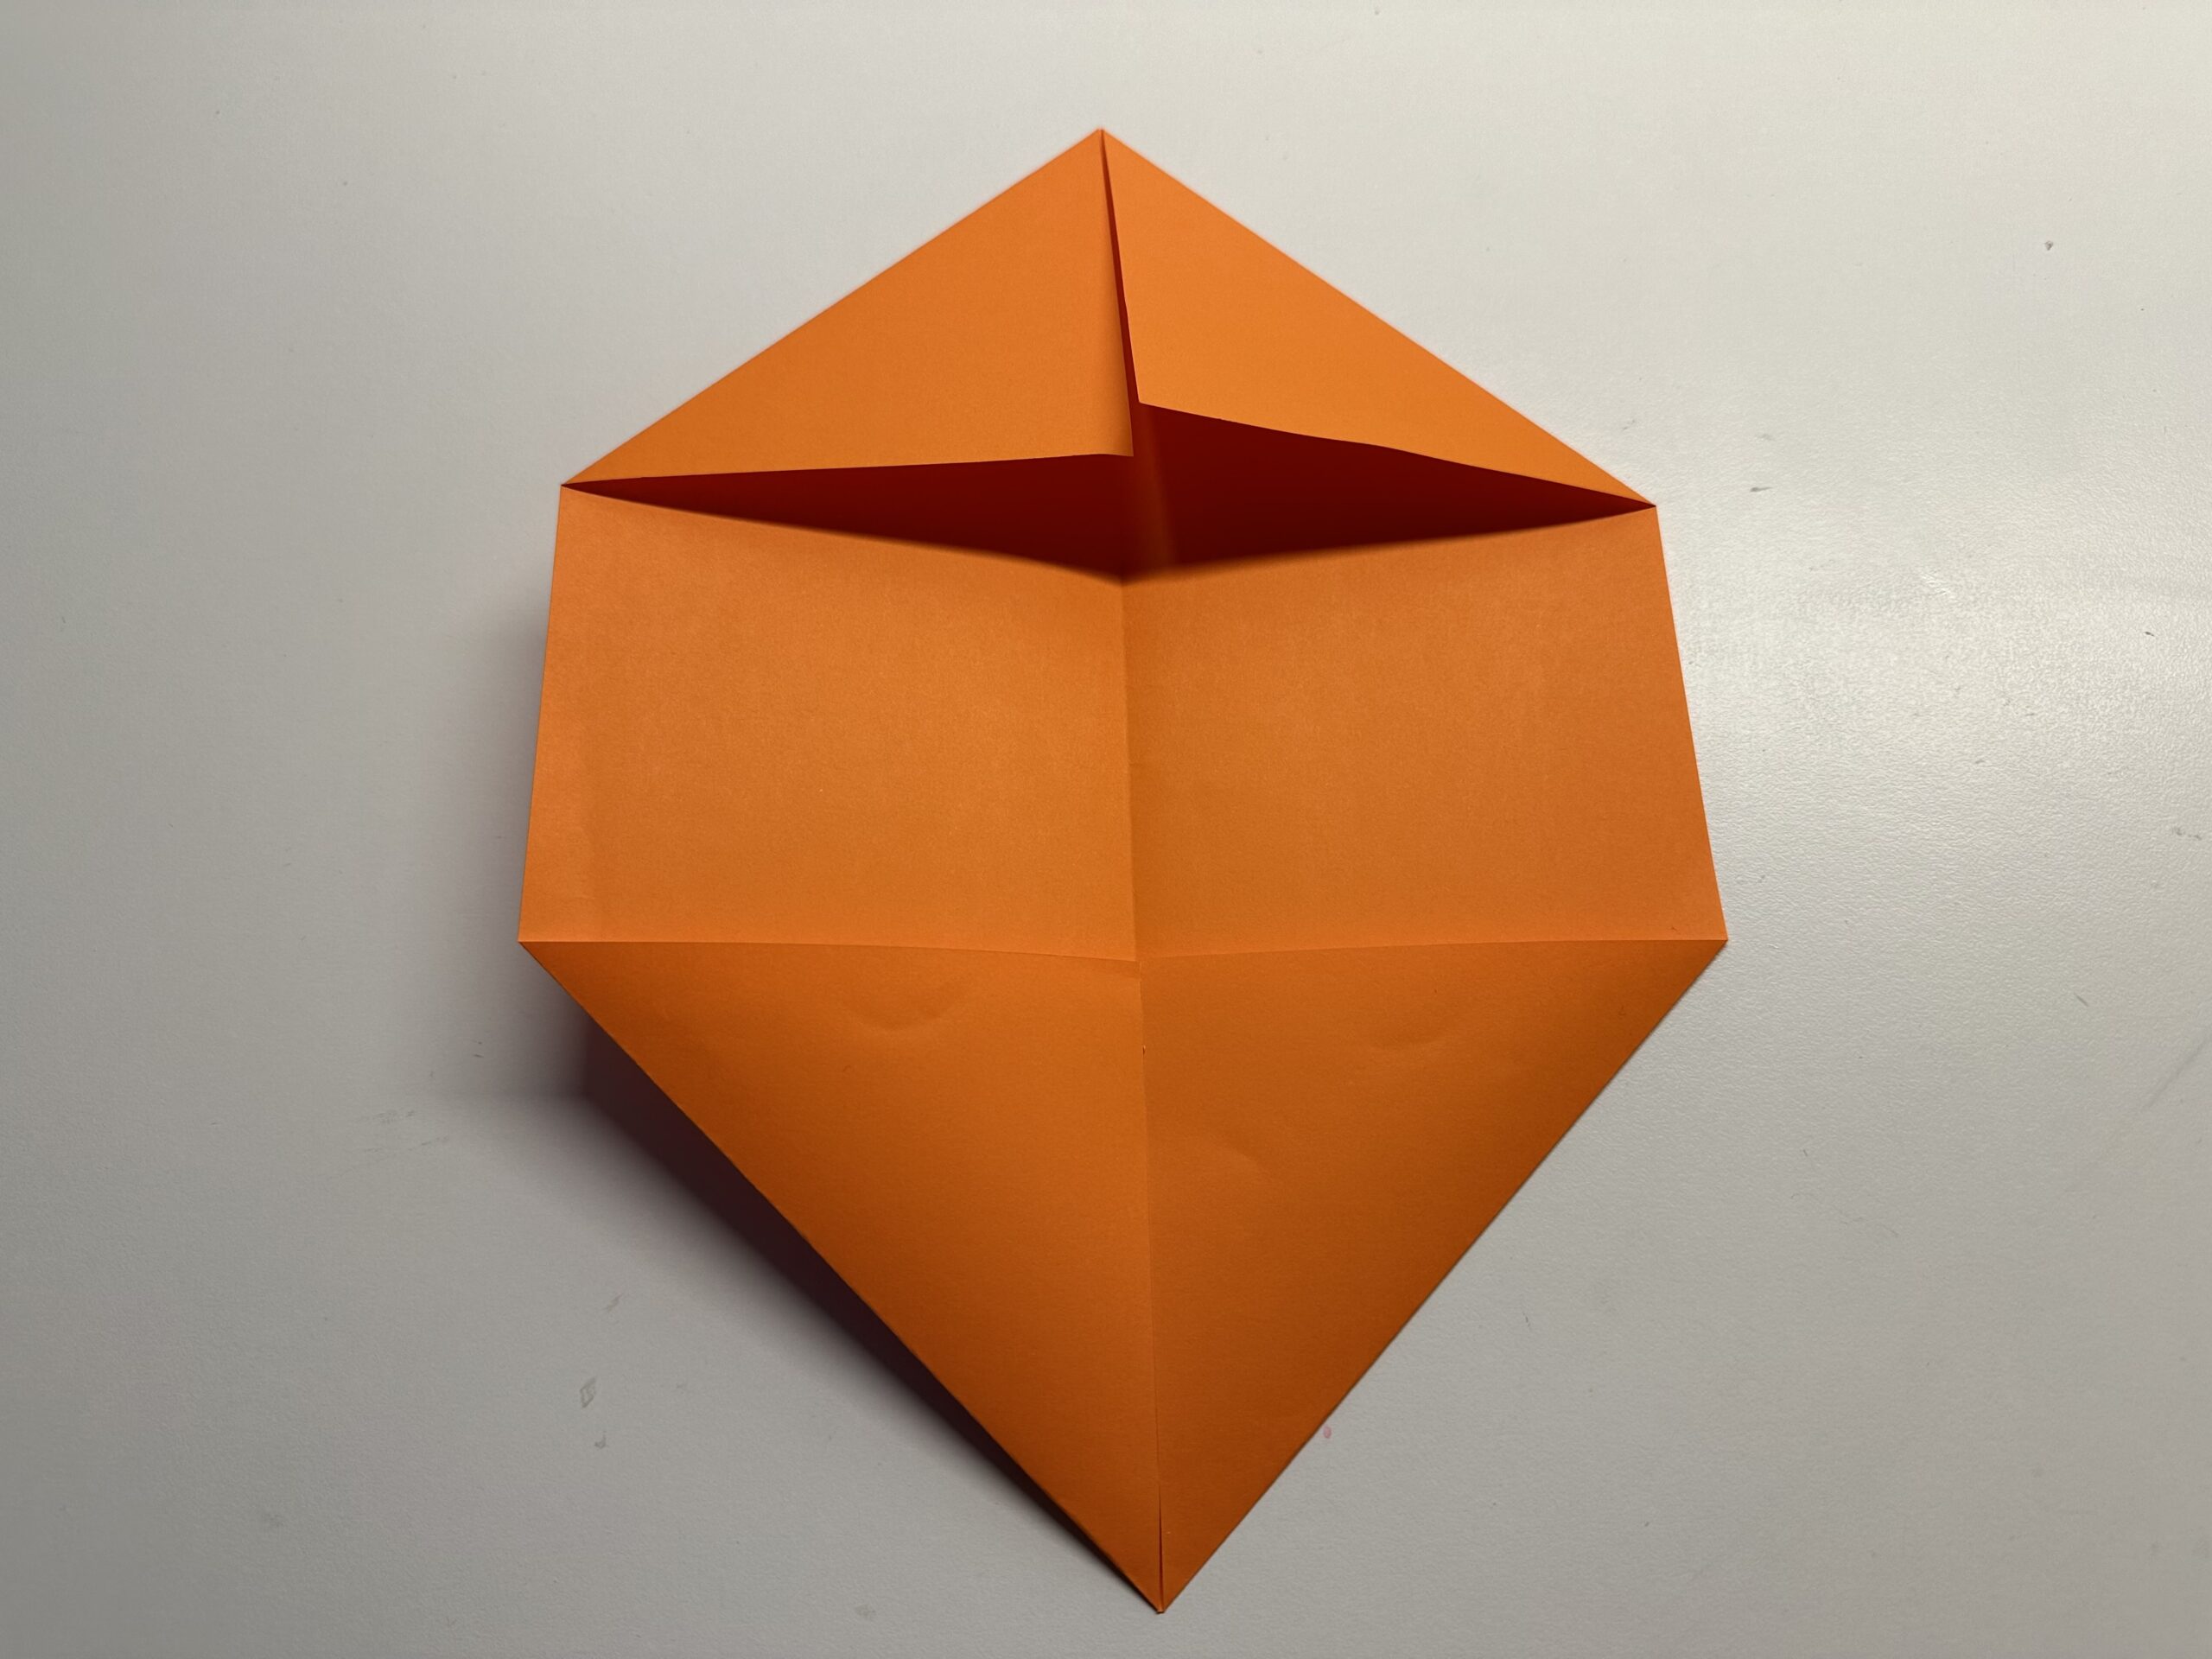
All four corners are now folded to the centre line. A tip has been created at the top and bottom.

Bild zum Schritt 10 für das Bastel- und DIY-Abenteuer für Kinder: 'Alle vier Ecken sind nun zur Mittellinie gefaltet. Es ist...'

11

The lower tip is folded again. Take the outer lower corner and fold it back to the centre line. The lower edge of the leaf is now located along the centre line.

Bild zum Schritt 11 für das Bastel- und DIY-Abenteuer für Kinder: 'Die untere Spitze wird noch einmal gefaltet. Nimm hierzu die...'

12

Strip the fracture smoothly.

Bild zum Schritt 12 für das Bastel- und DIY-Abenteuer für Kinder: 'Streife den Bruch glatt.'

13

Repeat the whole thing on the other side.

Bild zum Schritt 13 für das Bastel- und DIY-Abenteuer für Kinder: 'Wiederhole das ganze auf der anderen Seite.'

14

Make sure you get a decent tip.
Now the kite shape is already ready.

Bild zum Schritt 14 für das Bastel- und DIY-Abenteuer für Kinder: 'Achte darauf, dass du eine ordentliche Spitze erhältst.  ...'

15

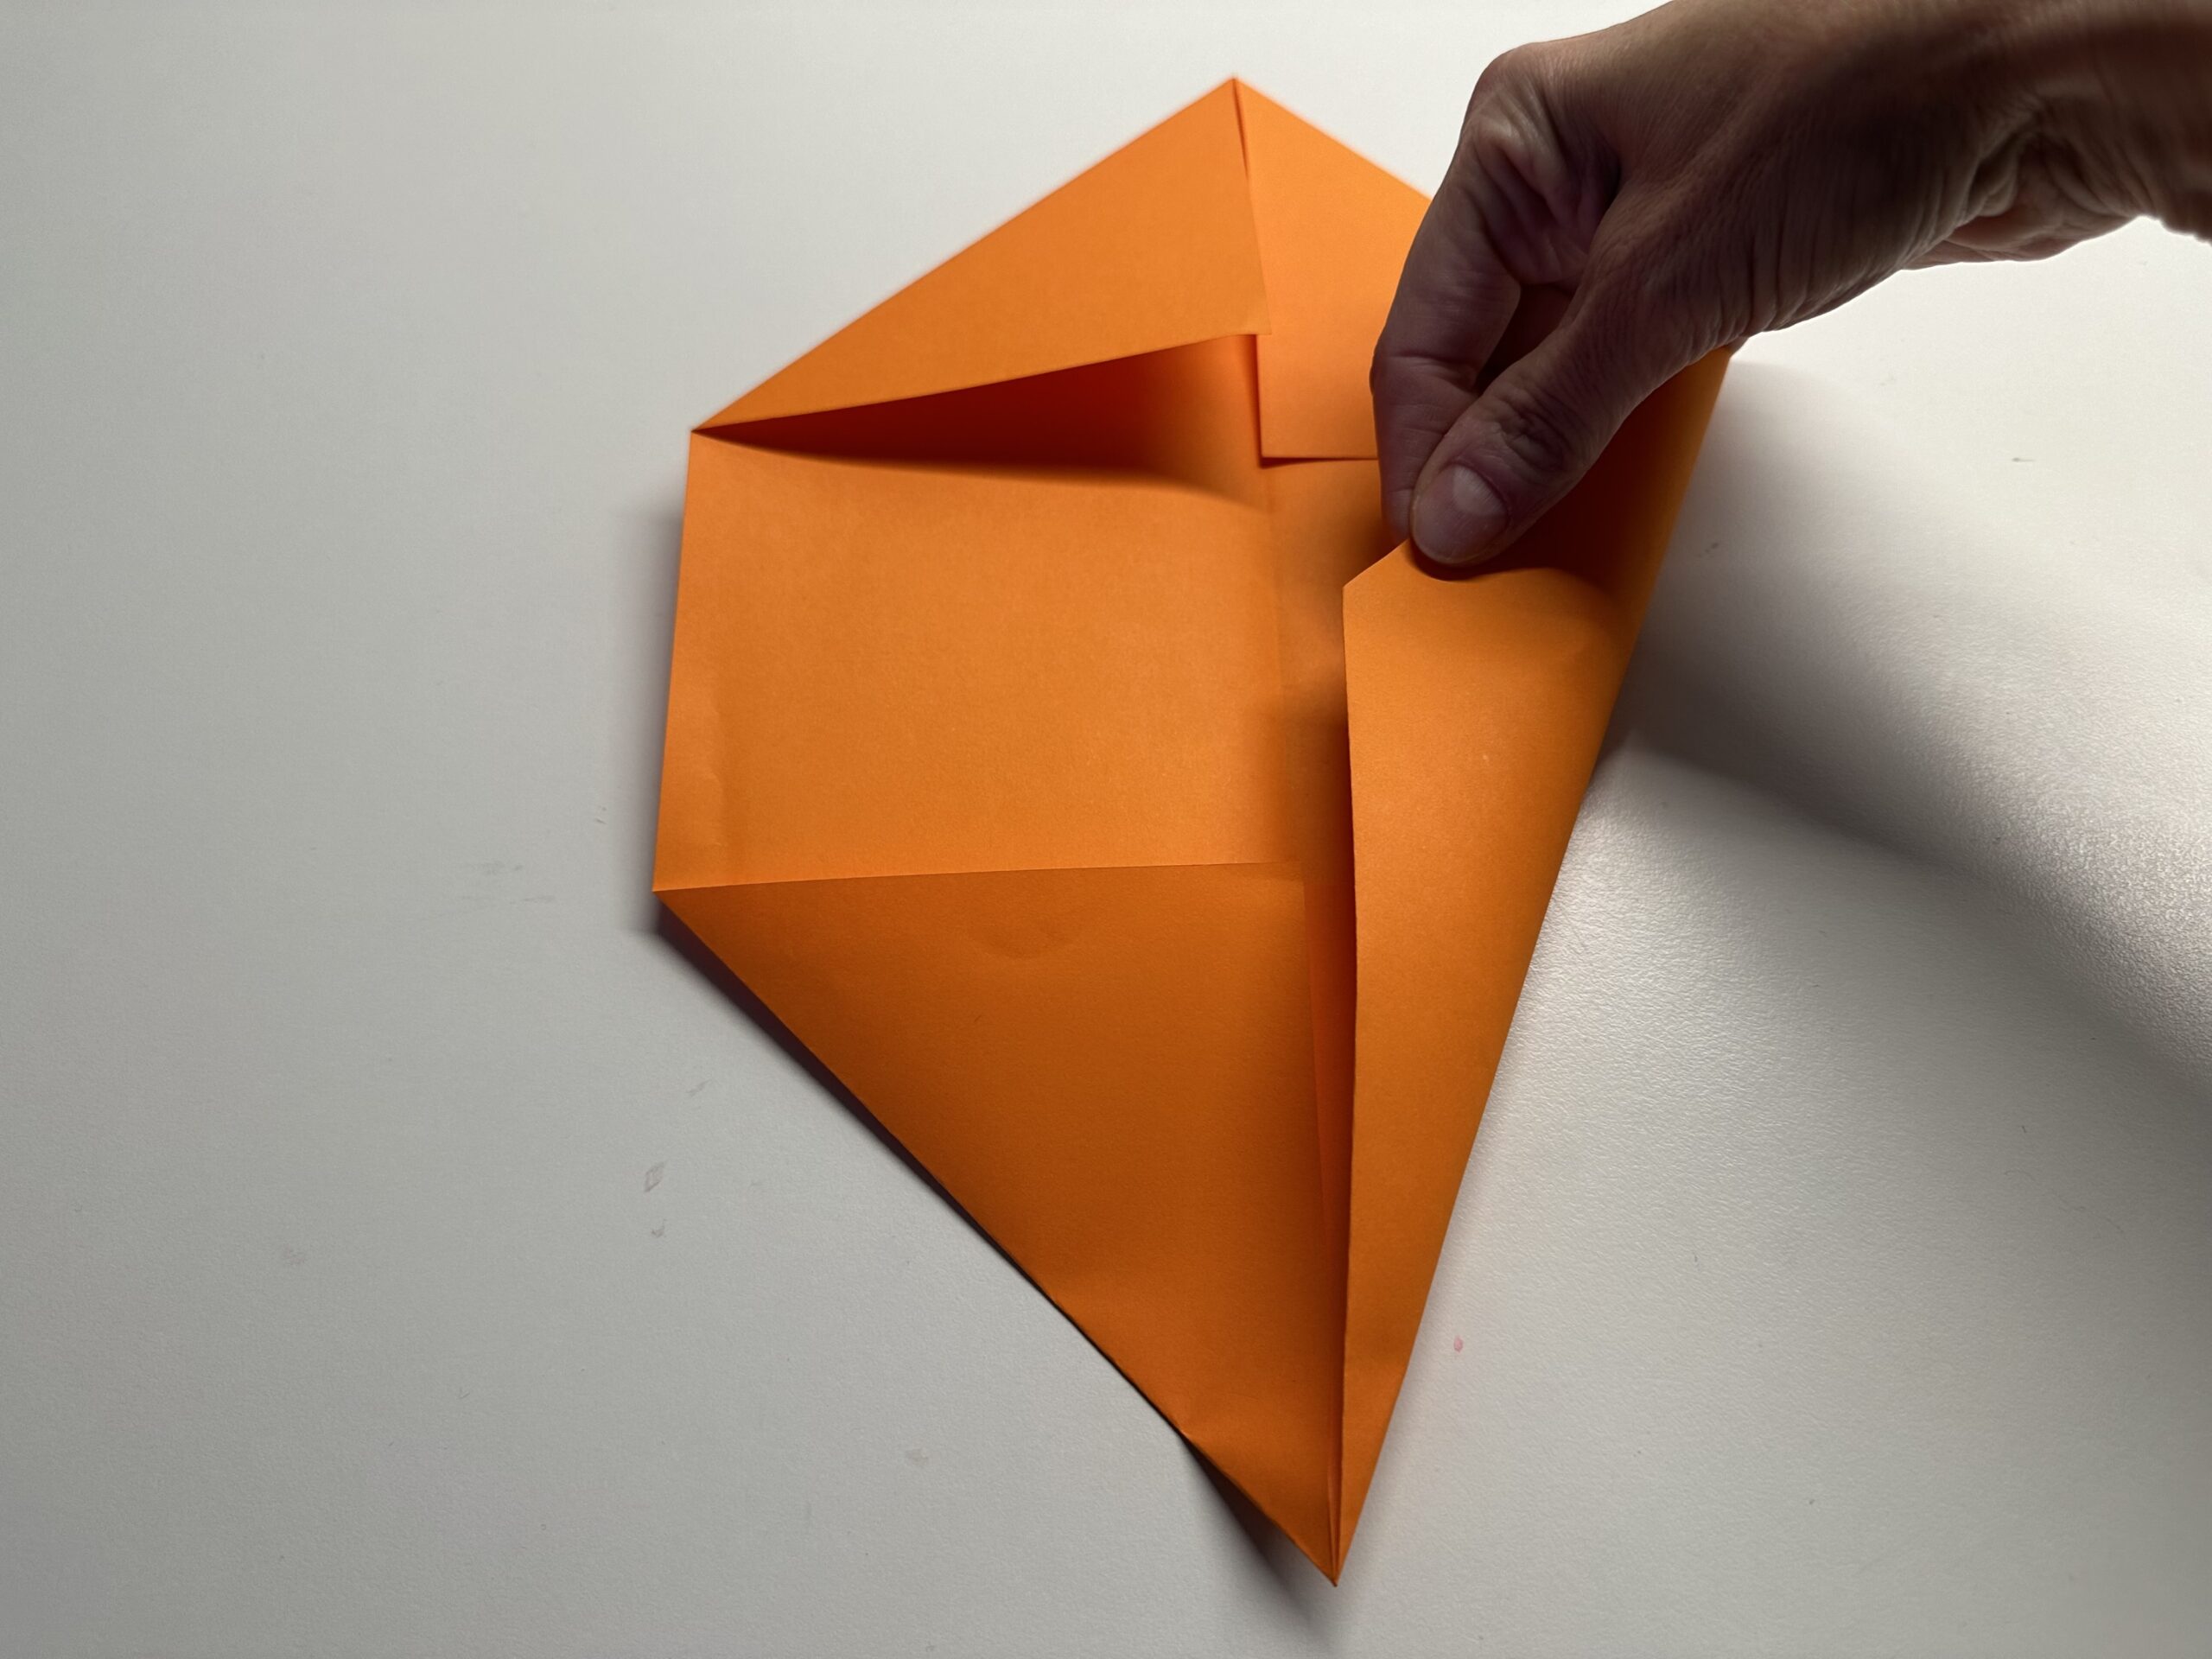
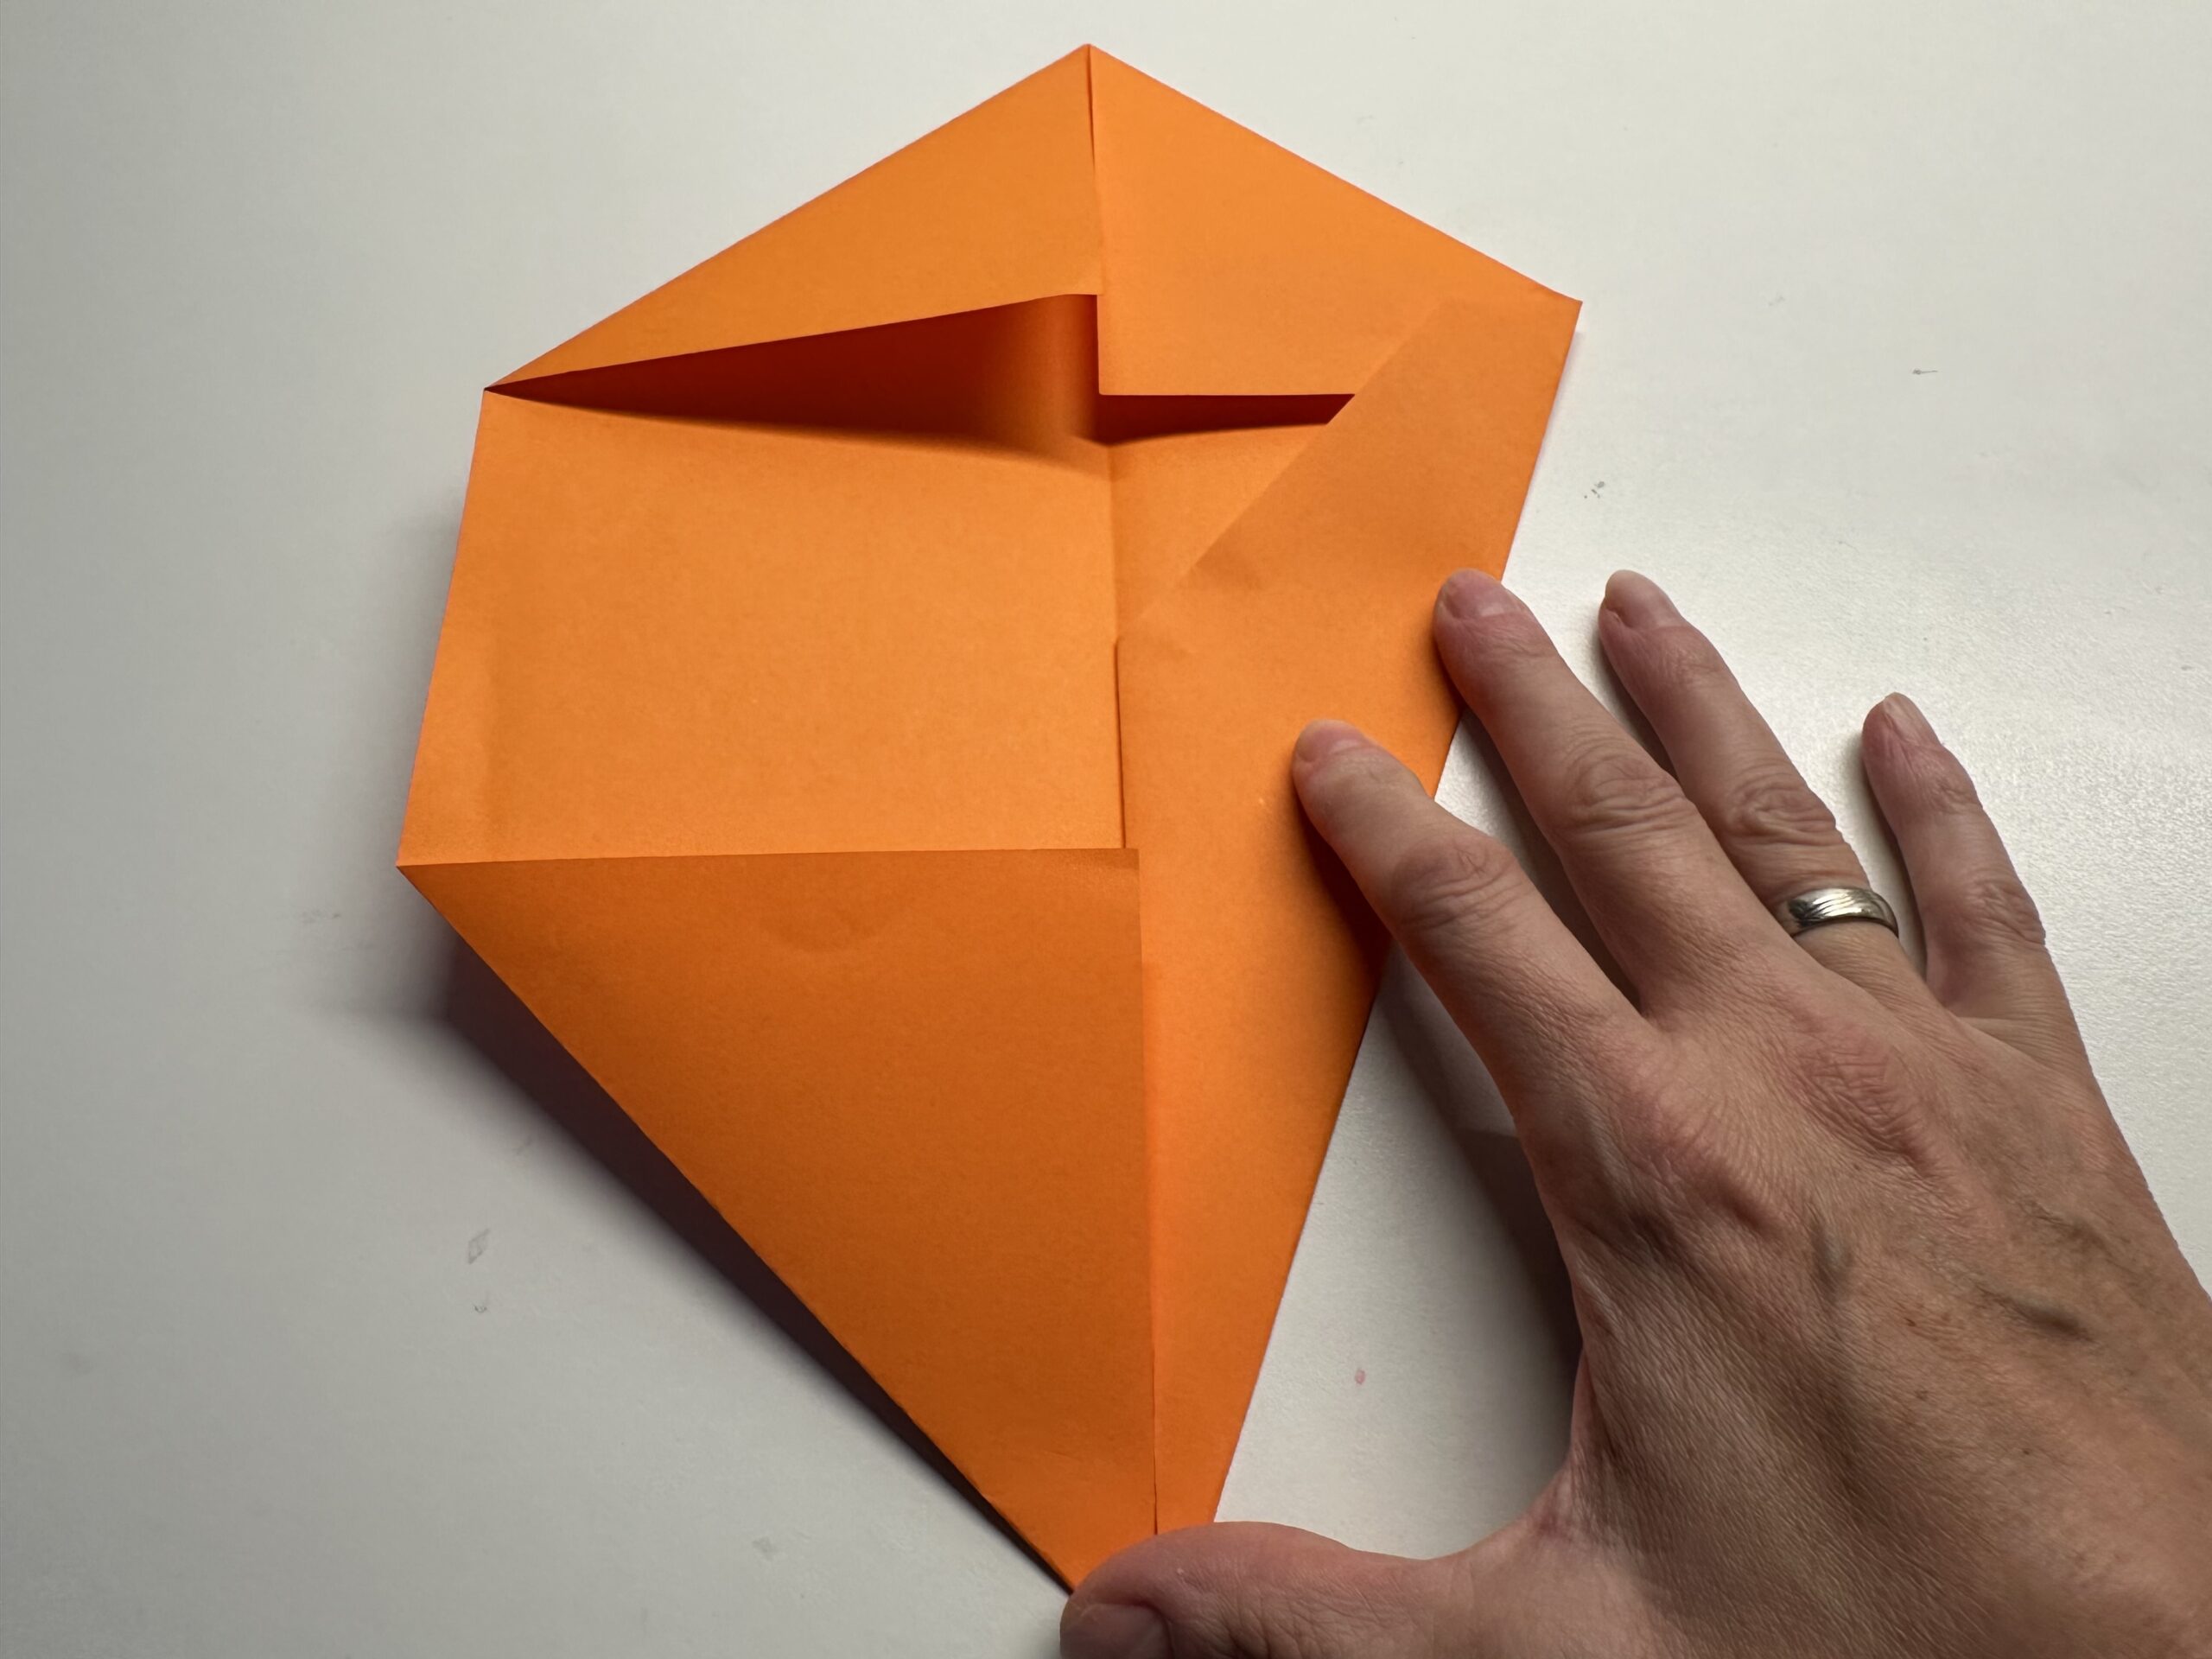
The upper part of the kite is shorter. The lower side is still at the top. Lift both folds a little high.

Bild zum Schritt 15 für das Bastel- und DIY-Abenteuer für Kinder: 'Das obere Teil des Drachens ist kürzer. Noch liegt die...'

16

Bending the folded parts a bit apart.

Bild zum Schritt 16 für das Bastel- und DIY-Abenteuer für Kinder: 'Biege die gefalteten Teile etwas auseinander.'

17

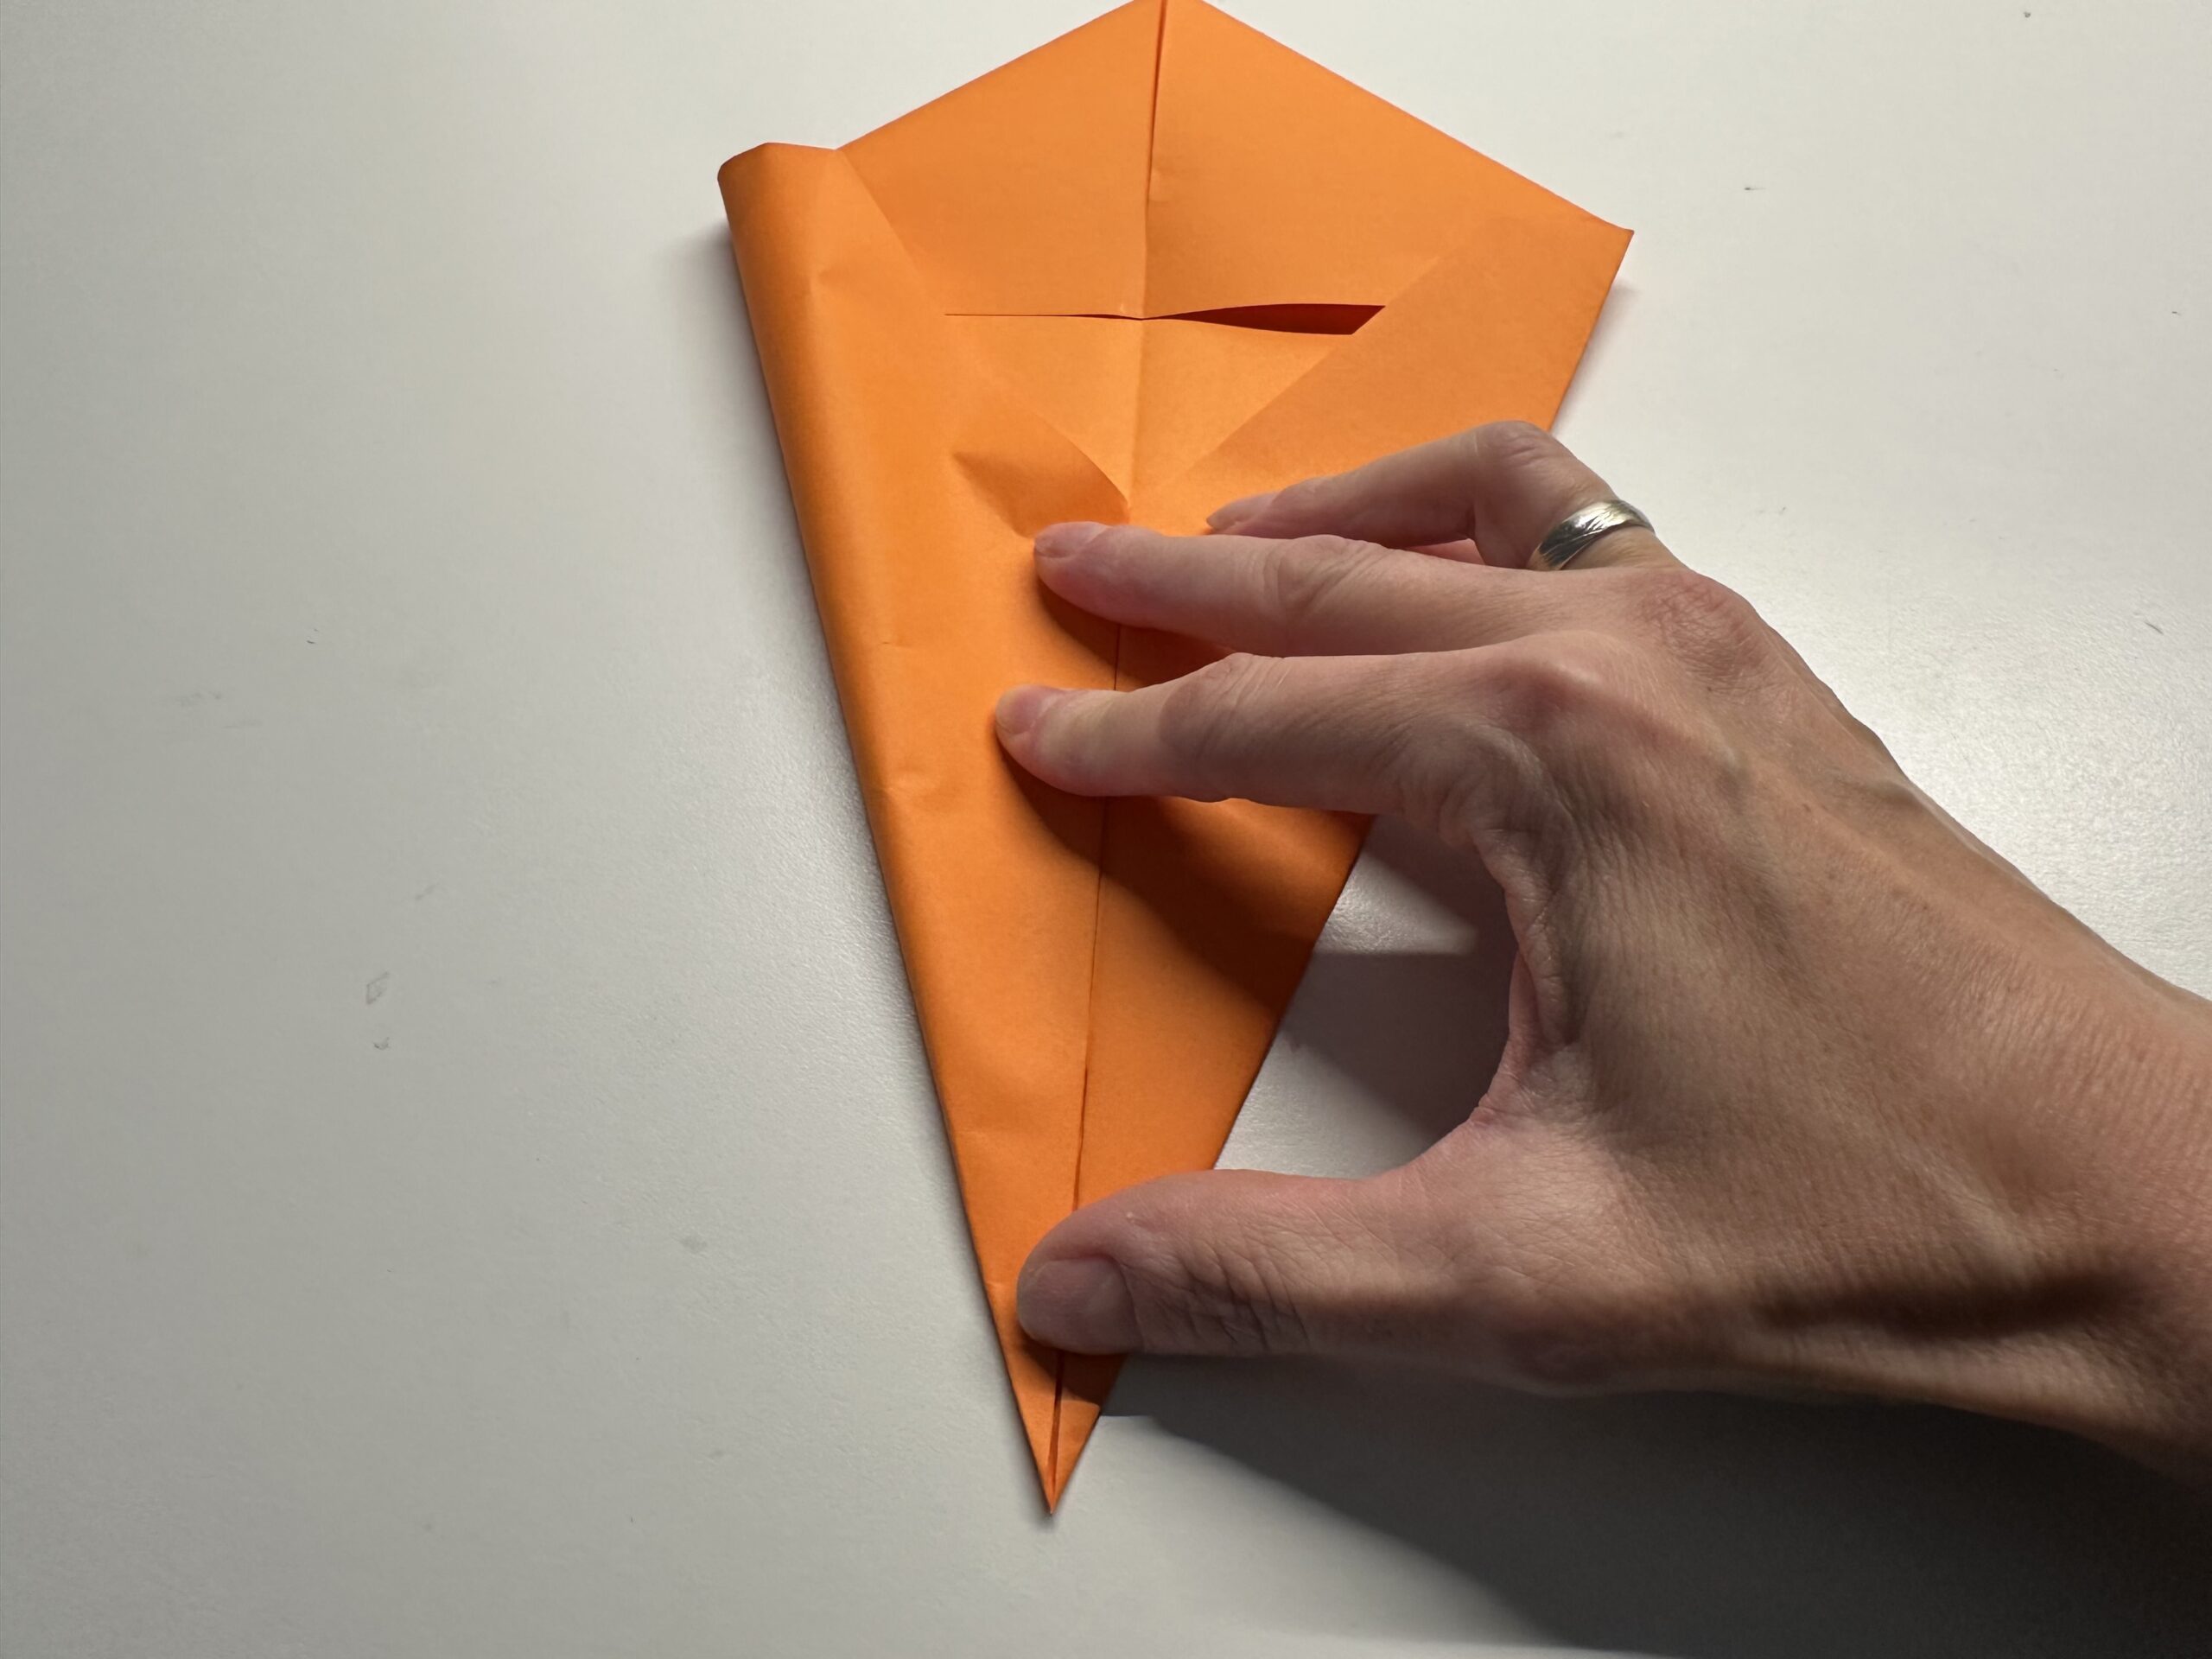
Put the paper below up and fold the fold back.

Bild zum Schritt 17 für das Bastel- und DIY-Abenteuer für Kinder: 'Lege das unten liegende Papier nach oben und klappe die...'

18

That's what it looks like.

Bild zum Schritt 18 für das Bastel- und DIY-Abenteuer für Kinder: 'So sieht das nun aus.'

19

Place the short triangles upwards on the other side as well.

Bild zum Schritt 19 für das Bastel- und DIY-Abenteuer für Kinder: 'Lege auch auf der anderen Seite die kurzen Dreiecke nach...'

20

The upper sides are now also on top.

Bild zum Schritt 20 für das Bastel- und DIY-Abenteuer für Kinder: 'Die oberen Seiten liegen nun auch obendrauf.'

21

Take a tape and glue both triangles together.

Bild zum Schritt 21 für das Bastel- und DIY-Abenteuer für Kinder: 'Nimm einen Klebestreifen und klebe beide Dreiecke zusammen.'

22

Glue another adhesive tape to the middle of the lower triangles so that they don't open.

Bild zum Schritt 22 für das Bastel- und DIY-Abenteuer für Kinder: 'Klebe einen weiteren Klebestreifen auf die Mitte der unteren Dreiecke....'

23

Now you can reach into the upper tip with your hand.
The dragon can now be taken like a hand puppet.

Bild zum Schritt 23 für das Bastel- und DIY-Abenteuer für Kinder: 'Nun kannst du mit der Hand in die obere Spitze...'

24

Turn your hand and you can see the front of the dragon.

Bild zum Schritt 24 für das Bastel- und DIY-Abenteuer für Kinder: 'Drehe die Hand und du kannst dir die Vorderseite des...'

25

The front of the dragon is now still decorated.

Bild zum Schritt 25 für das Bastel- und DIY-Abenteuer für Kinder: 'Die Vorderseite des Drachens wird nun noch verziert.'

26

Take a piece of paper and fold half of it.

Bild zum Schritt 26 für das Bastel- und DIY-Abenteuer für Kinder: 'Nimm einen Papierrest und falte ihn zur Hälfte.'

27

Put a circle on the paper.
It's gonna be the dragon's eyes.

Bild zum Schritt 27 für das Bastel- und DIY-Abenteuer für Kinder: 'Male einen Kreis auf das Papier.   Das werden...'

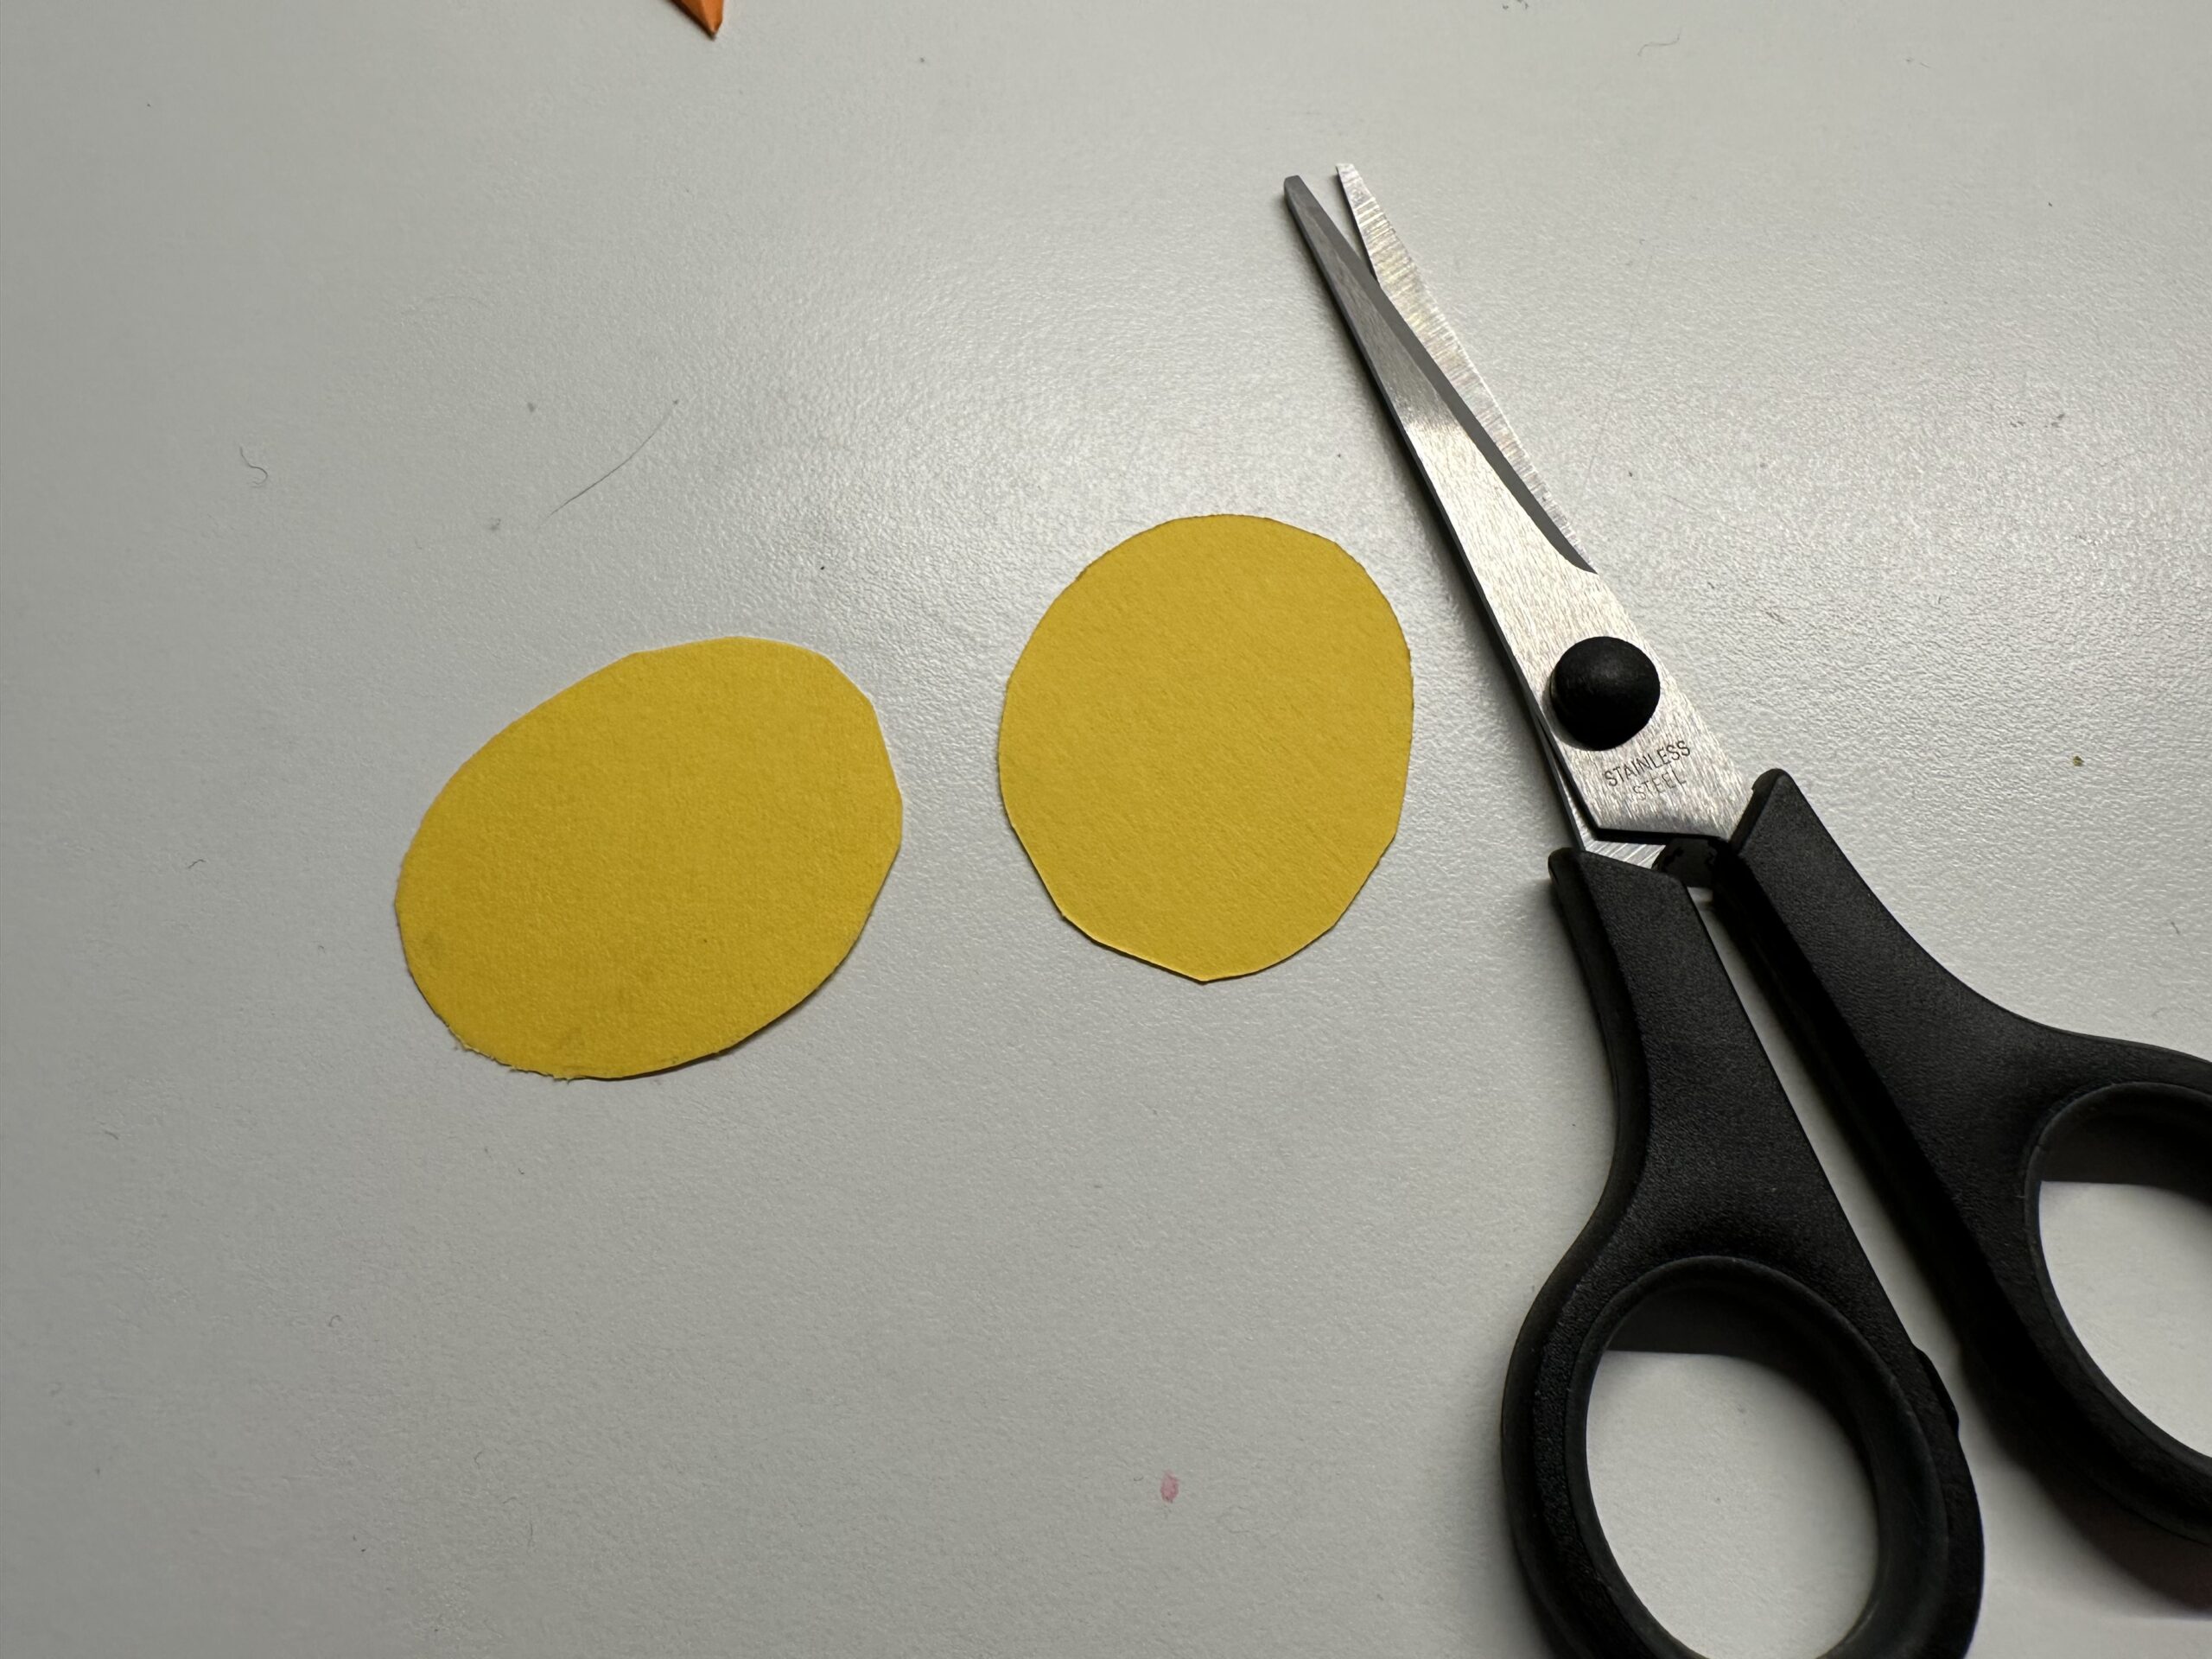
28

Cut out the circles twice.

Bild zum Schritt 28 für das Bastel- und DIY-Abenteuer für Kinder: 'Schneide die Kreise doppelt aus.'

29

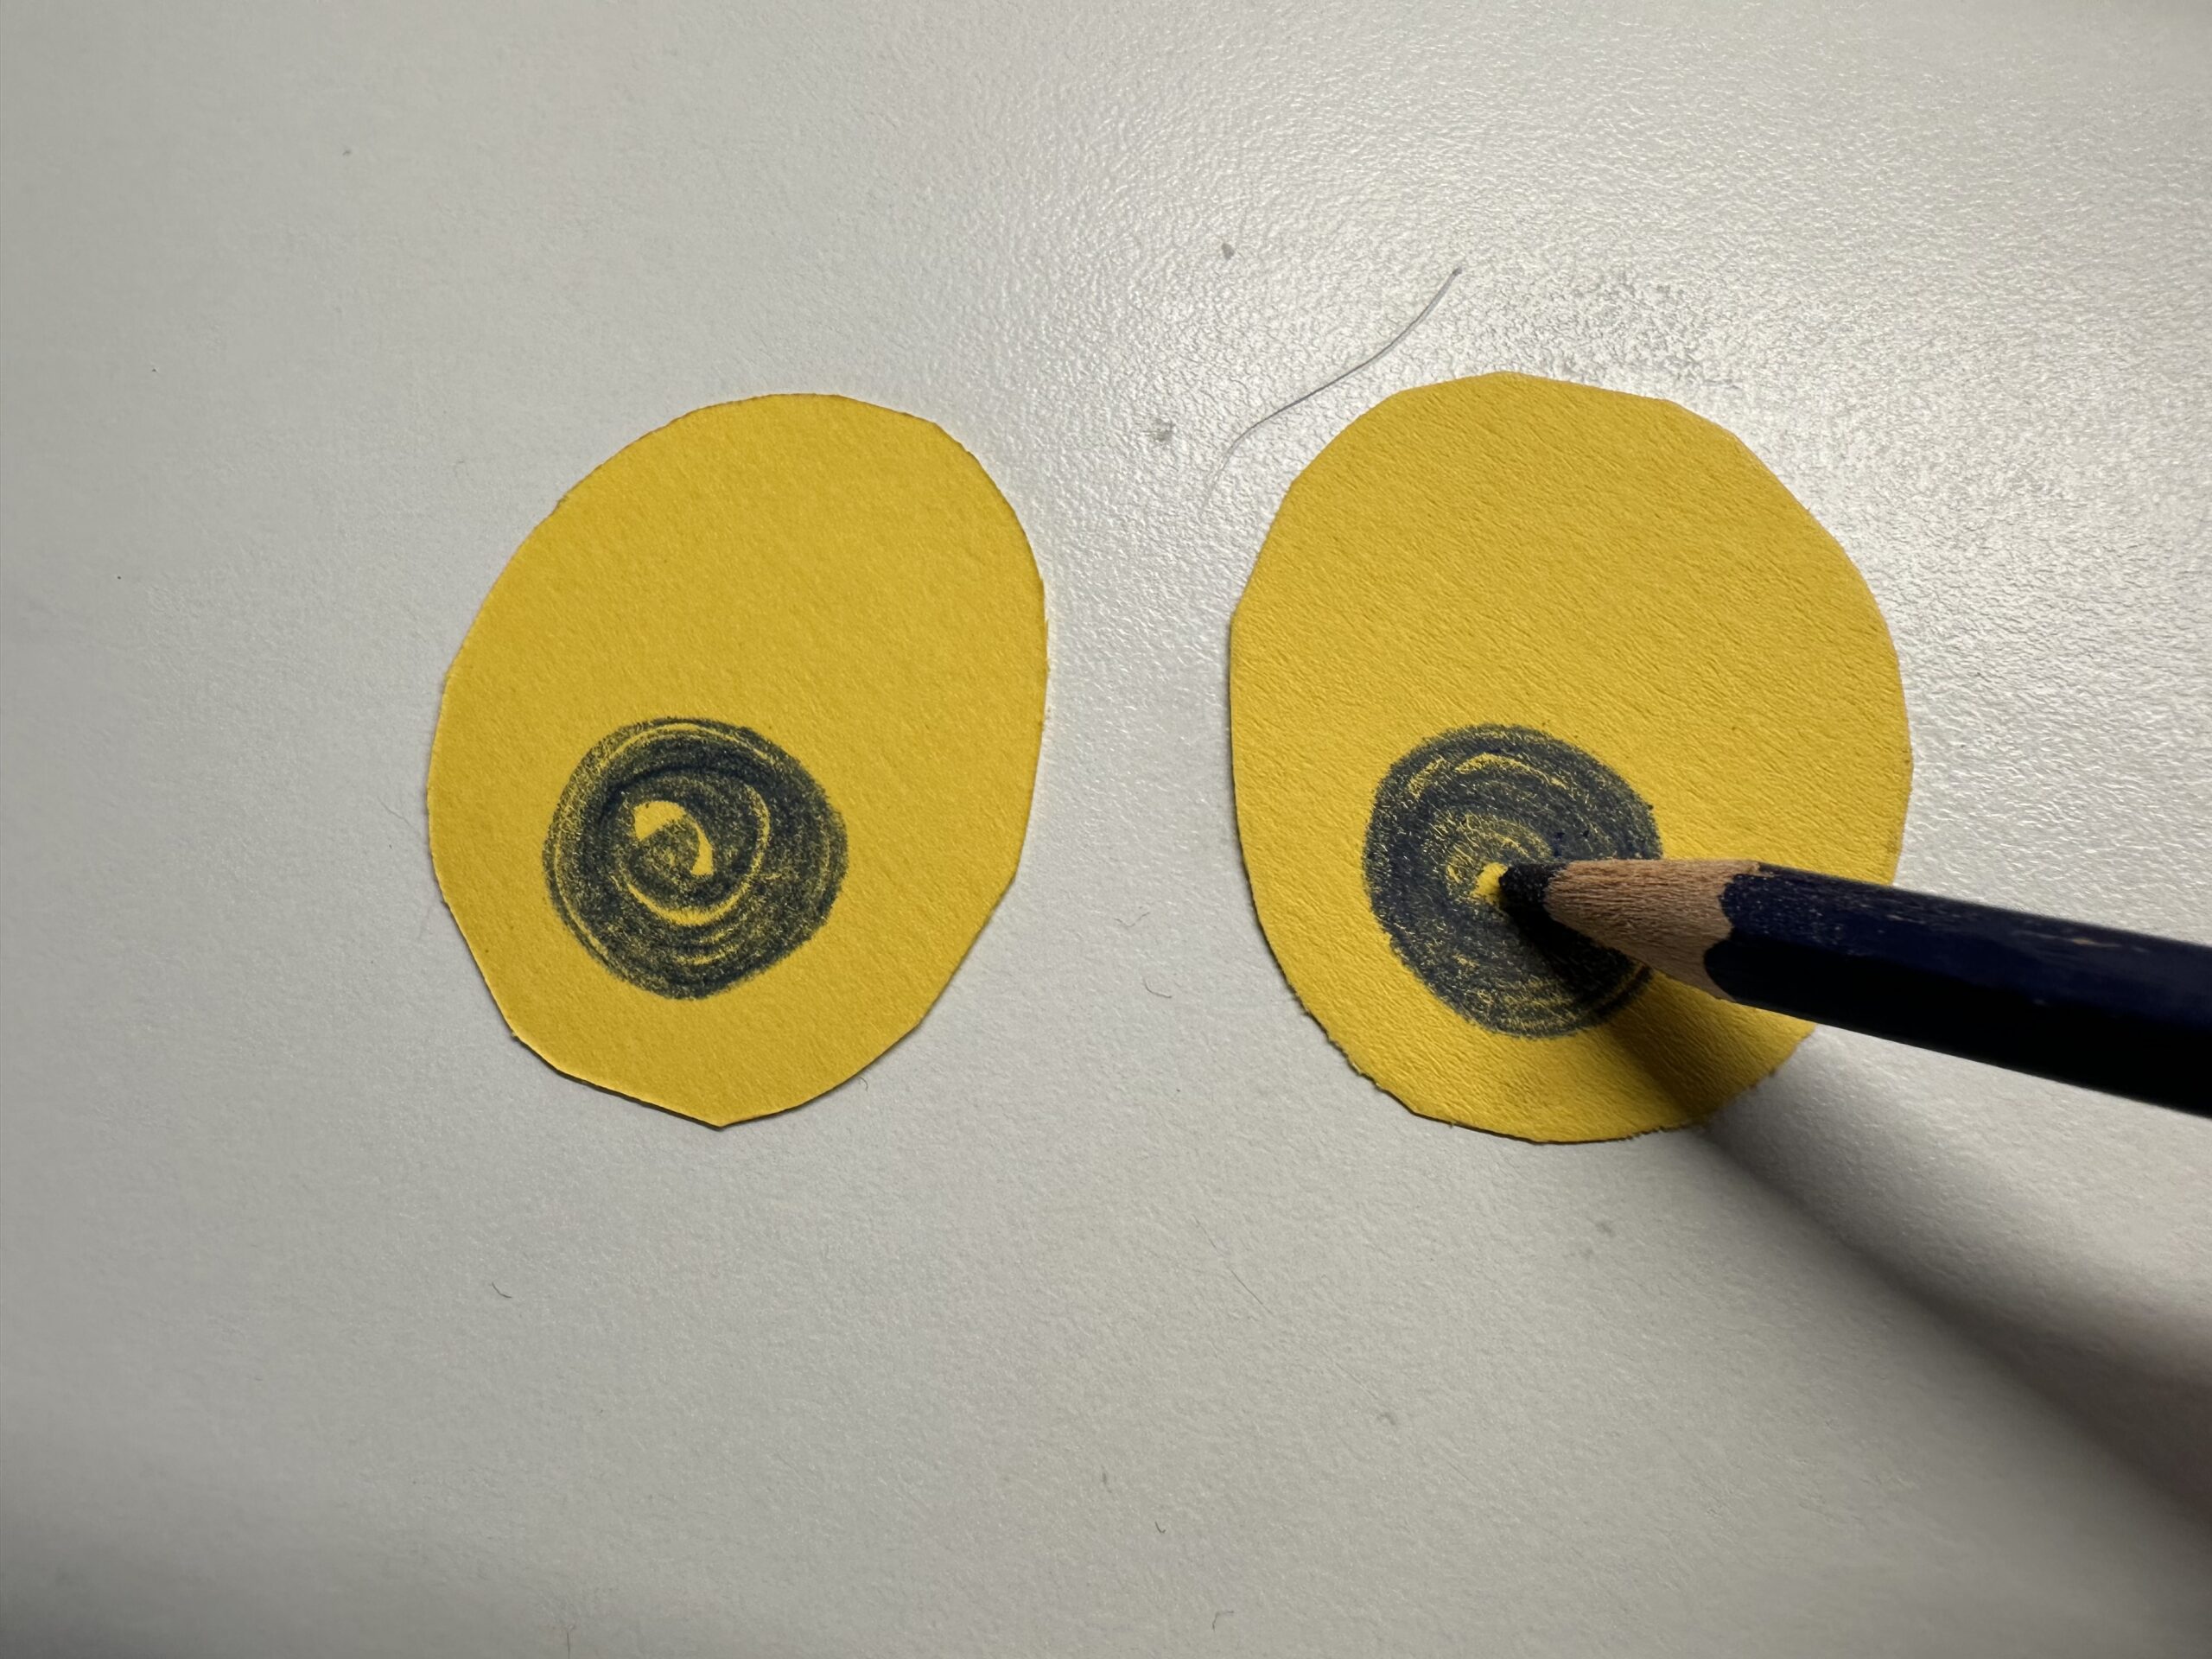
Put the pupils on your eyes.

Bild zum Schritt 29 für das Bastel- und DIY-Abenteuer für Kinder: 'Male die Pupillen auf die Augen.'

30

The nose is crafted from a small paper residue.

Bild zum Schritt 30 für das Bastel- und DIY-Abenteuer für Kinder: 'Aus einem kleinen Papierrest wird die Nase gebastelt. Male einen...'

31

Cut out the circle, that's the nose.

Bild zum Schritt 31 für das Bastel- und DIY-Abenteuer für Kinder: 'Schneide den Kreis aus. Das ist die Nase.'

32

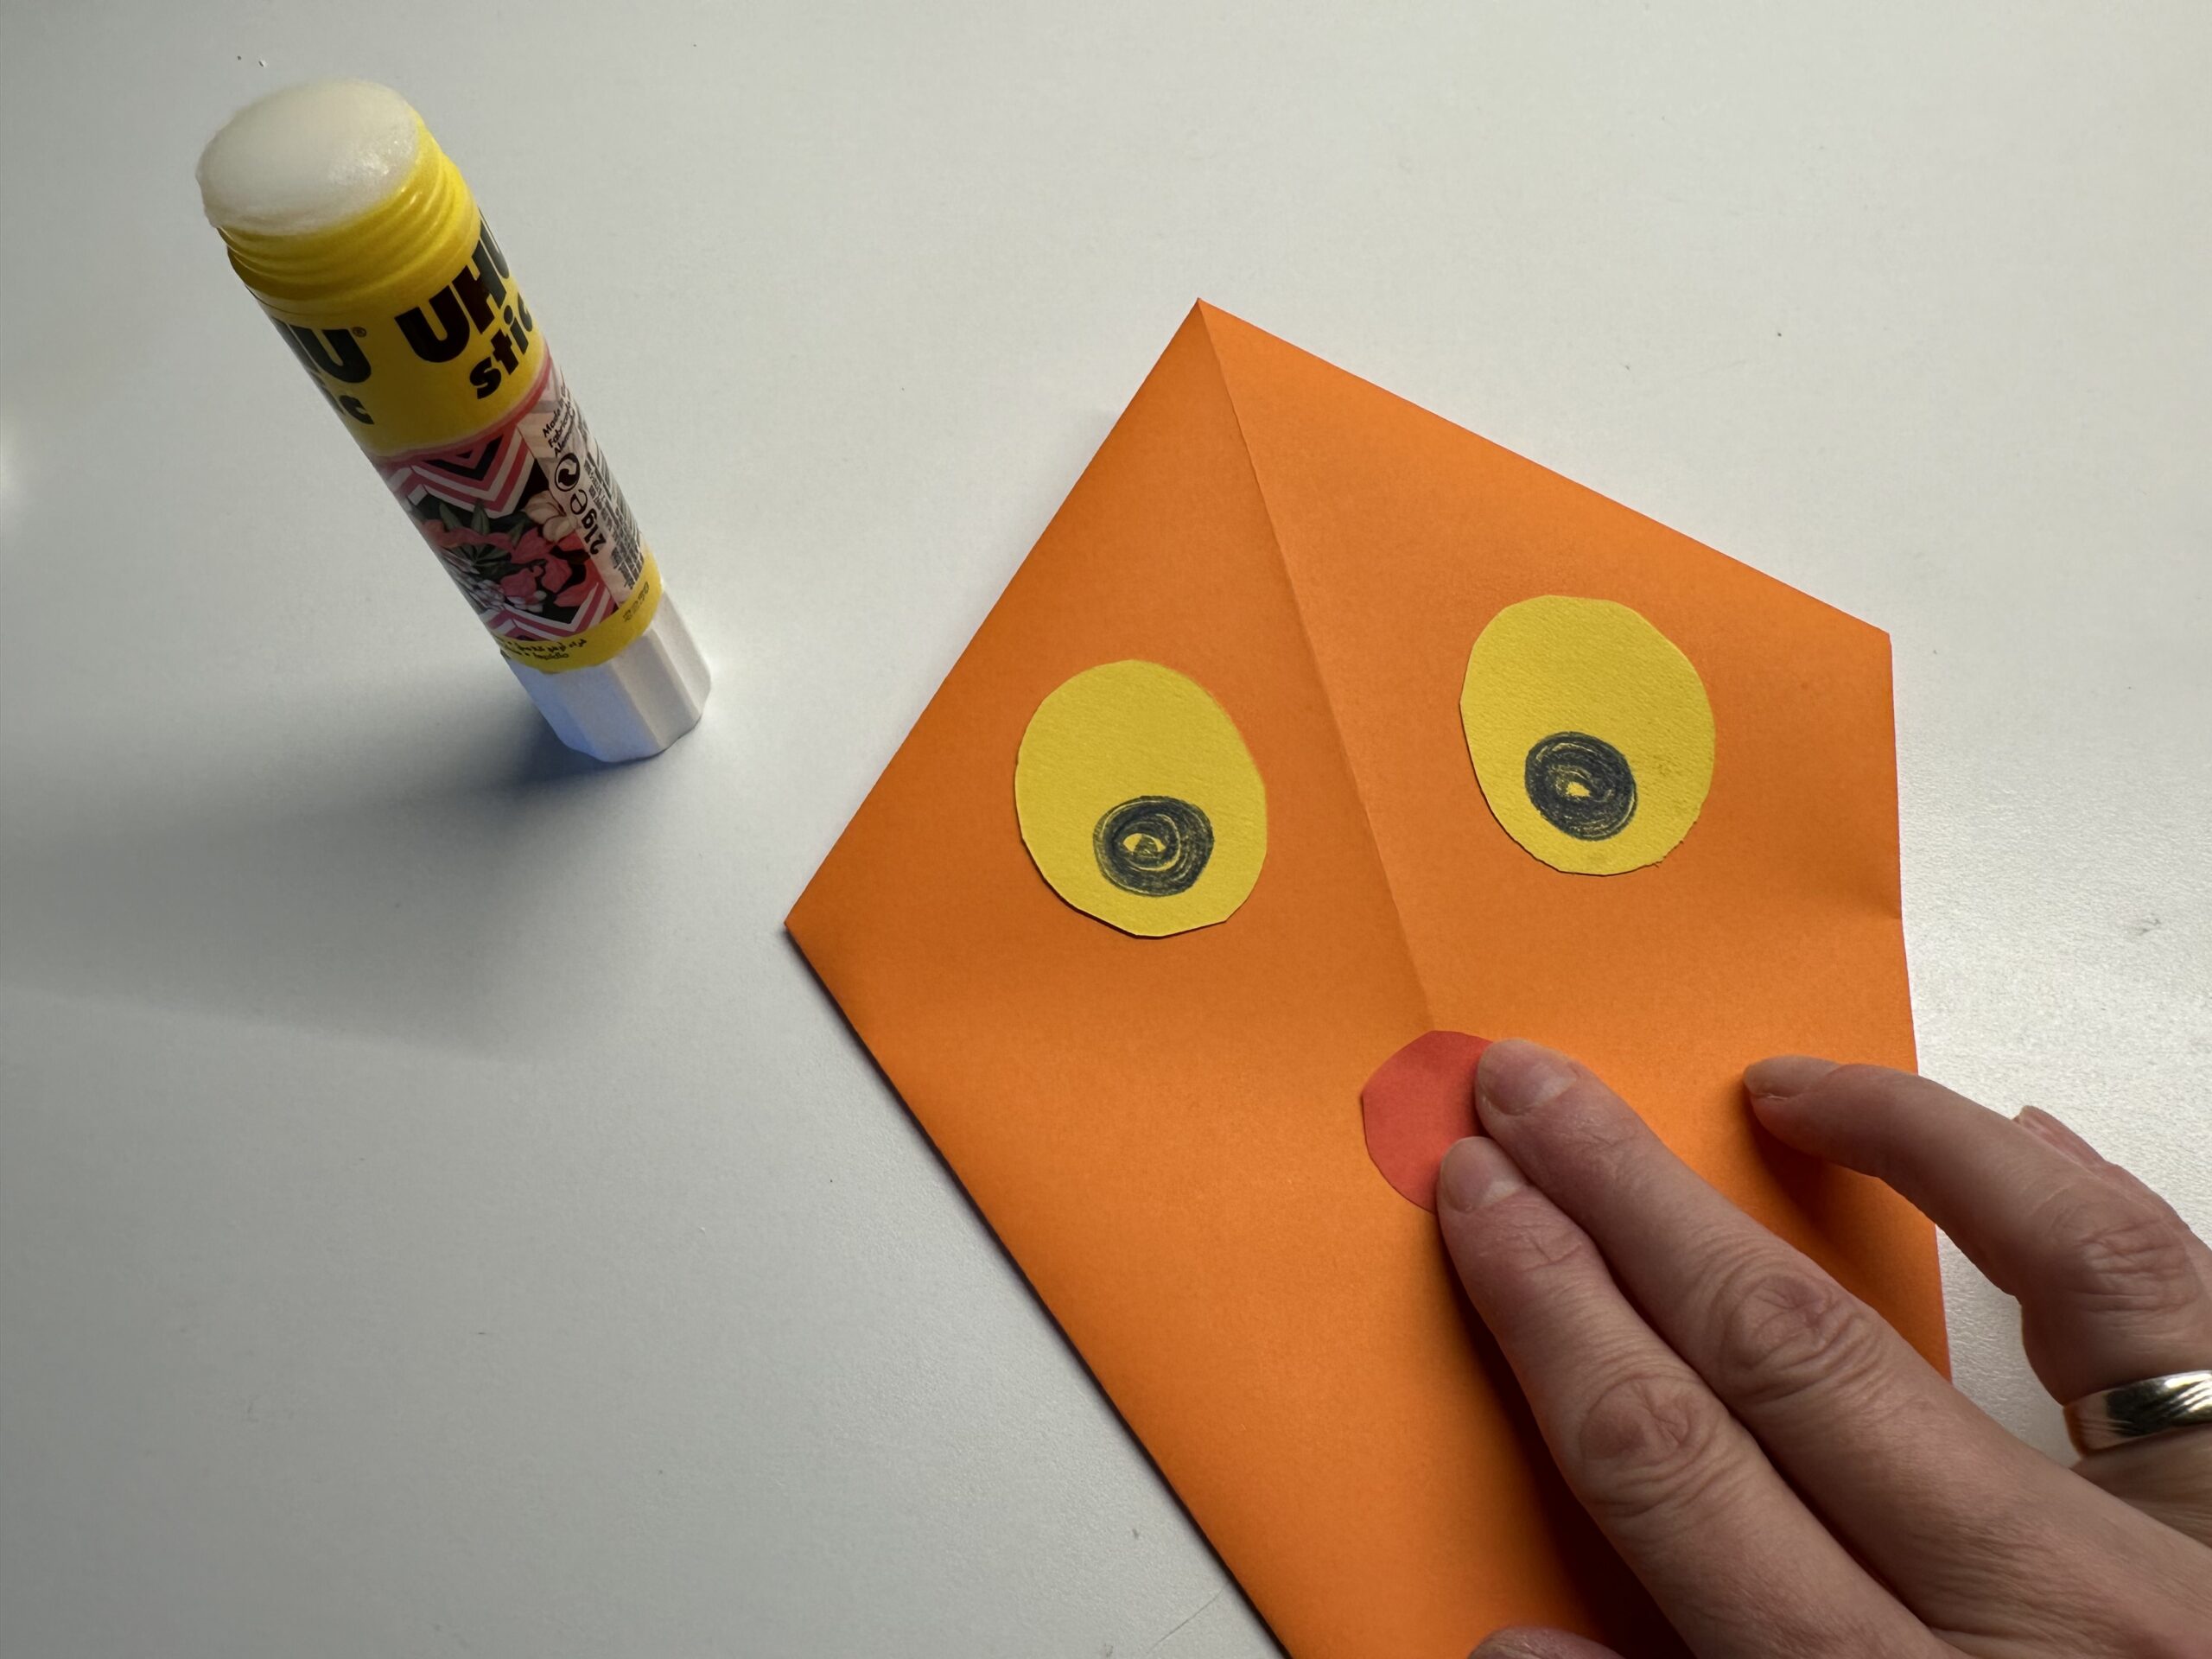
Stick eyes and nose on the dragon.

Bild zum Schritt 32 für das Bastel- und DIY-Abenteuer für Kinder: 'Klebe Augen und Nase auf den Drachen.'

33

Hold it tight.

Bild zum Schritt 33 für das Bastel- und DIY-Abenteuer für Kinder: 'Drücke alles gut fest.'

34

Finally the mouth is missing. This one is painted.

Bild zum Schritt 34 für das Bastel- und DIY-Abenteuer für Kinder: 'Zuletzt fehlt noch der Mund. Dieser wird aufgemalt.'

35

Now you need the wool. Cut off all the short threads.

Bild zum Schritt 35 für das Bastel- und DIY-Abenteuer für Kinder: 'Nun brauchst du die Wolle. Schneide dir lauter kurze Fäden...'

36

To the left and right, the wool threads are glued on as fringes. Fold the doubly lying tip on the side a little.

Bild zum Schritt 36 für das Bastel- und DIY-Abenteuer für Kinder: 'Links und rechts werden die Wollfäden als Fransen angeklebt. Klappe...'

37

Glue some wool threads to the side.

Bild zum Schritt 37 für das Bastel- und DIY-Abenteuer für Kinder: 'Klebe einige Wollfäden an die Seite.'

38

Place another adhesive point on the top of the paper and press the paper on the threads.

Bild zum Schritt 38 für das Bastel- und DIY-Abenteuer für Kinder: 'Gib einen weiteren Klebepunkt an die Oberseite des Papiers und...'

39

So the thread ends disappear in the inner of the fold.

Bild zum Schritt 39 für das Bastel- und DIY-Abenteuer für Kinder: 'So verschwinden die Fadenenden im inneren der Faltung.'

40

To keep everything going well, attach a clothes clip to it. Thus, the papers are pressed together.

Bild zum Schritt 40 für das Bastel- und DIY-Abenteuer für Kinder: 'Damit alles gut hält, befestige eine Wäscheklammer darüber. So werden...'

41

Repeat the same on the other side.
Leave the clothespins on the sides until you are completely finished with the crafting.

Bild zum Schritt 41 für das Bastel- und DIY-Abenteuer für Kinder: 'Wiederhole das gleiche auf der anderen Seite.   Lass...'

42

Cut off some long wool threads. These can have different colors and lengths. (approximately 30cm long)

Bild zum Schritt 42 für das Bastel- und DIY-Abenteuer für Kinder: 'Schneide dir ein paar lange Wollfäden ab. Diese können unterschiedlich...'

43

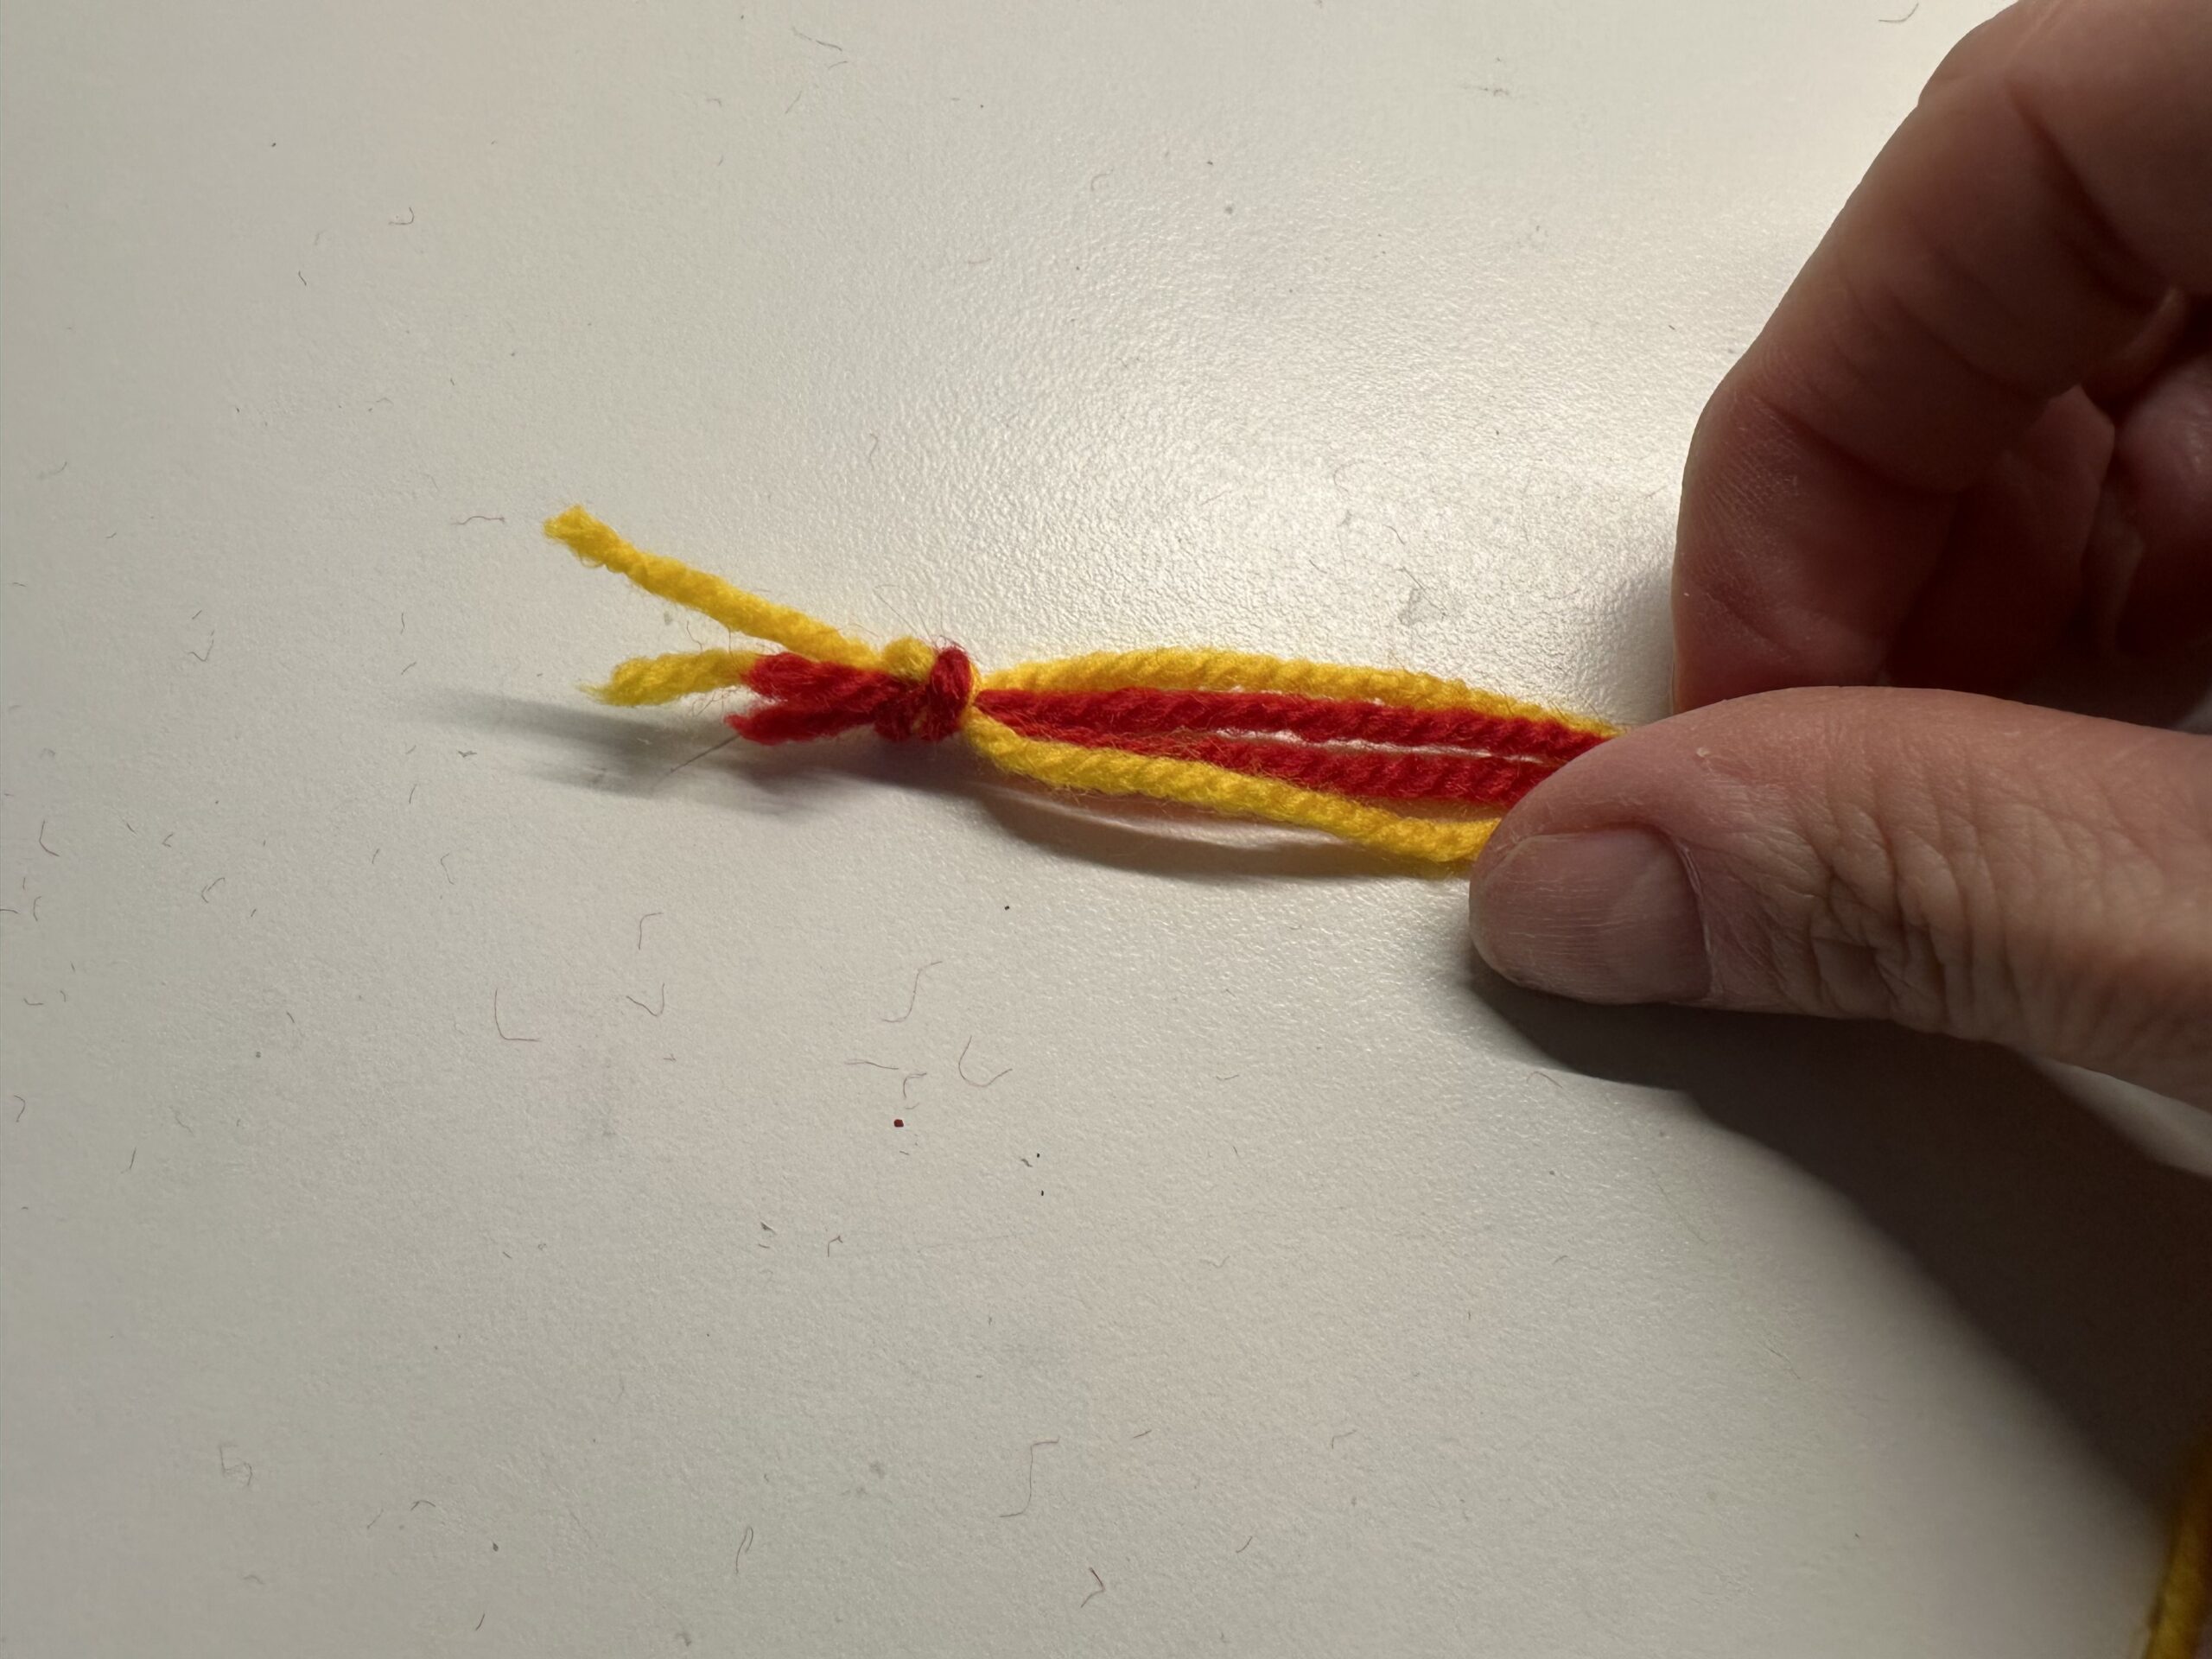
Place the threads so that all thread beginnings lie together on one side.

Bild zum Schritt 43 für das Bastel- und DIY-Abenteuer für Kinder: 'Lege die Fäden so hin, dass alle Fadenanfänge an einer...'

44

Make a knot here.

Bild zum Schritt 44 für das Bastel- und DIY-Abenteuer für Kinder: 'Mache hier einen Knoten.'

45

Attach the threads at the bottom of the kite with an adhesive strip. The adhesive strip should lie below the knot that the wool does not slip out.

Bild zum Schritt 45 für das Bastel- und DIY-Abenteuer für Kinder: 'Befestige mit einem Klebestreifen die Fäden am unteren Ende des...'

46

Now remove the brackets from the sides.

Bild zum Schritt 46 für das Bastel- und DIY-Abenteuer für Kinder: 'Löse nun die Klammern von den Seiten.'

47

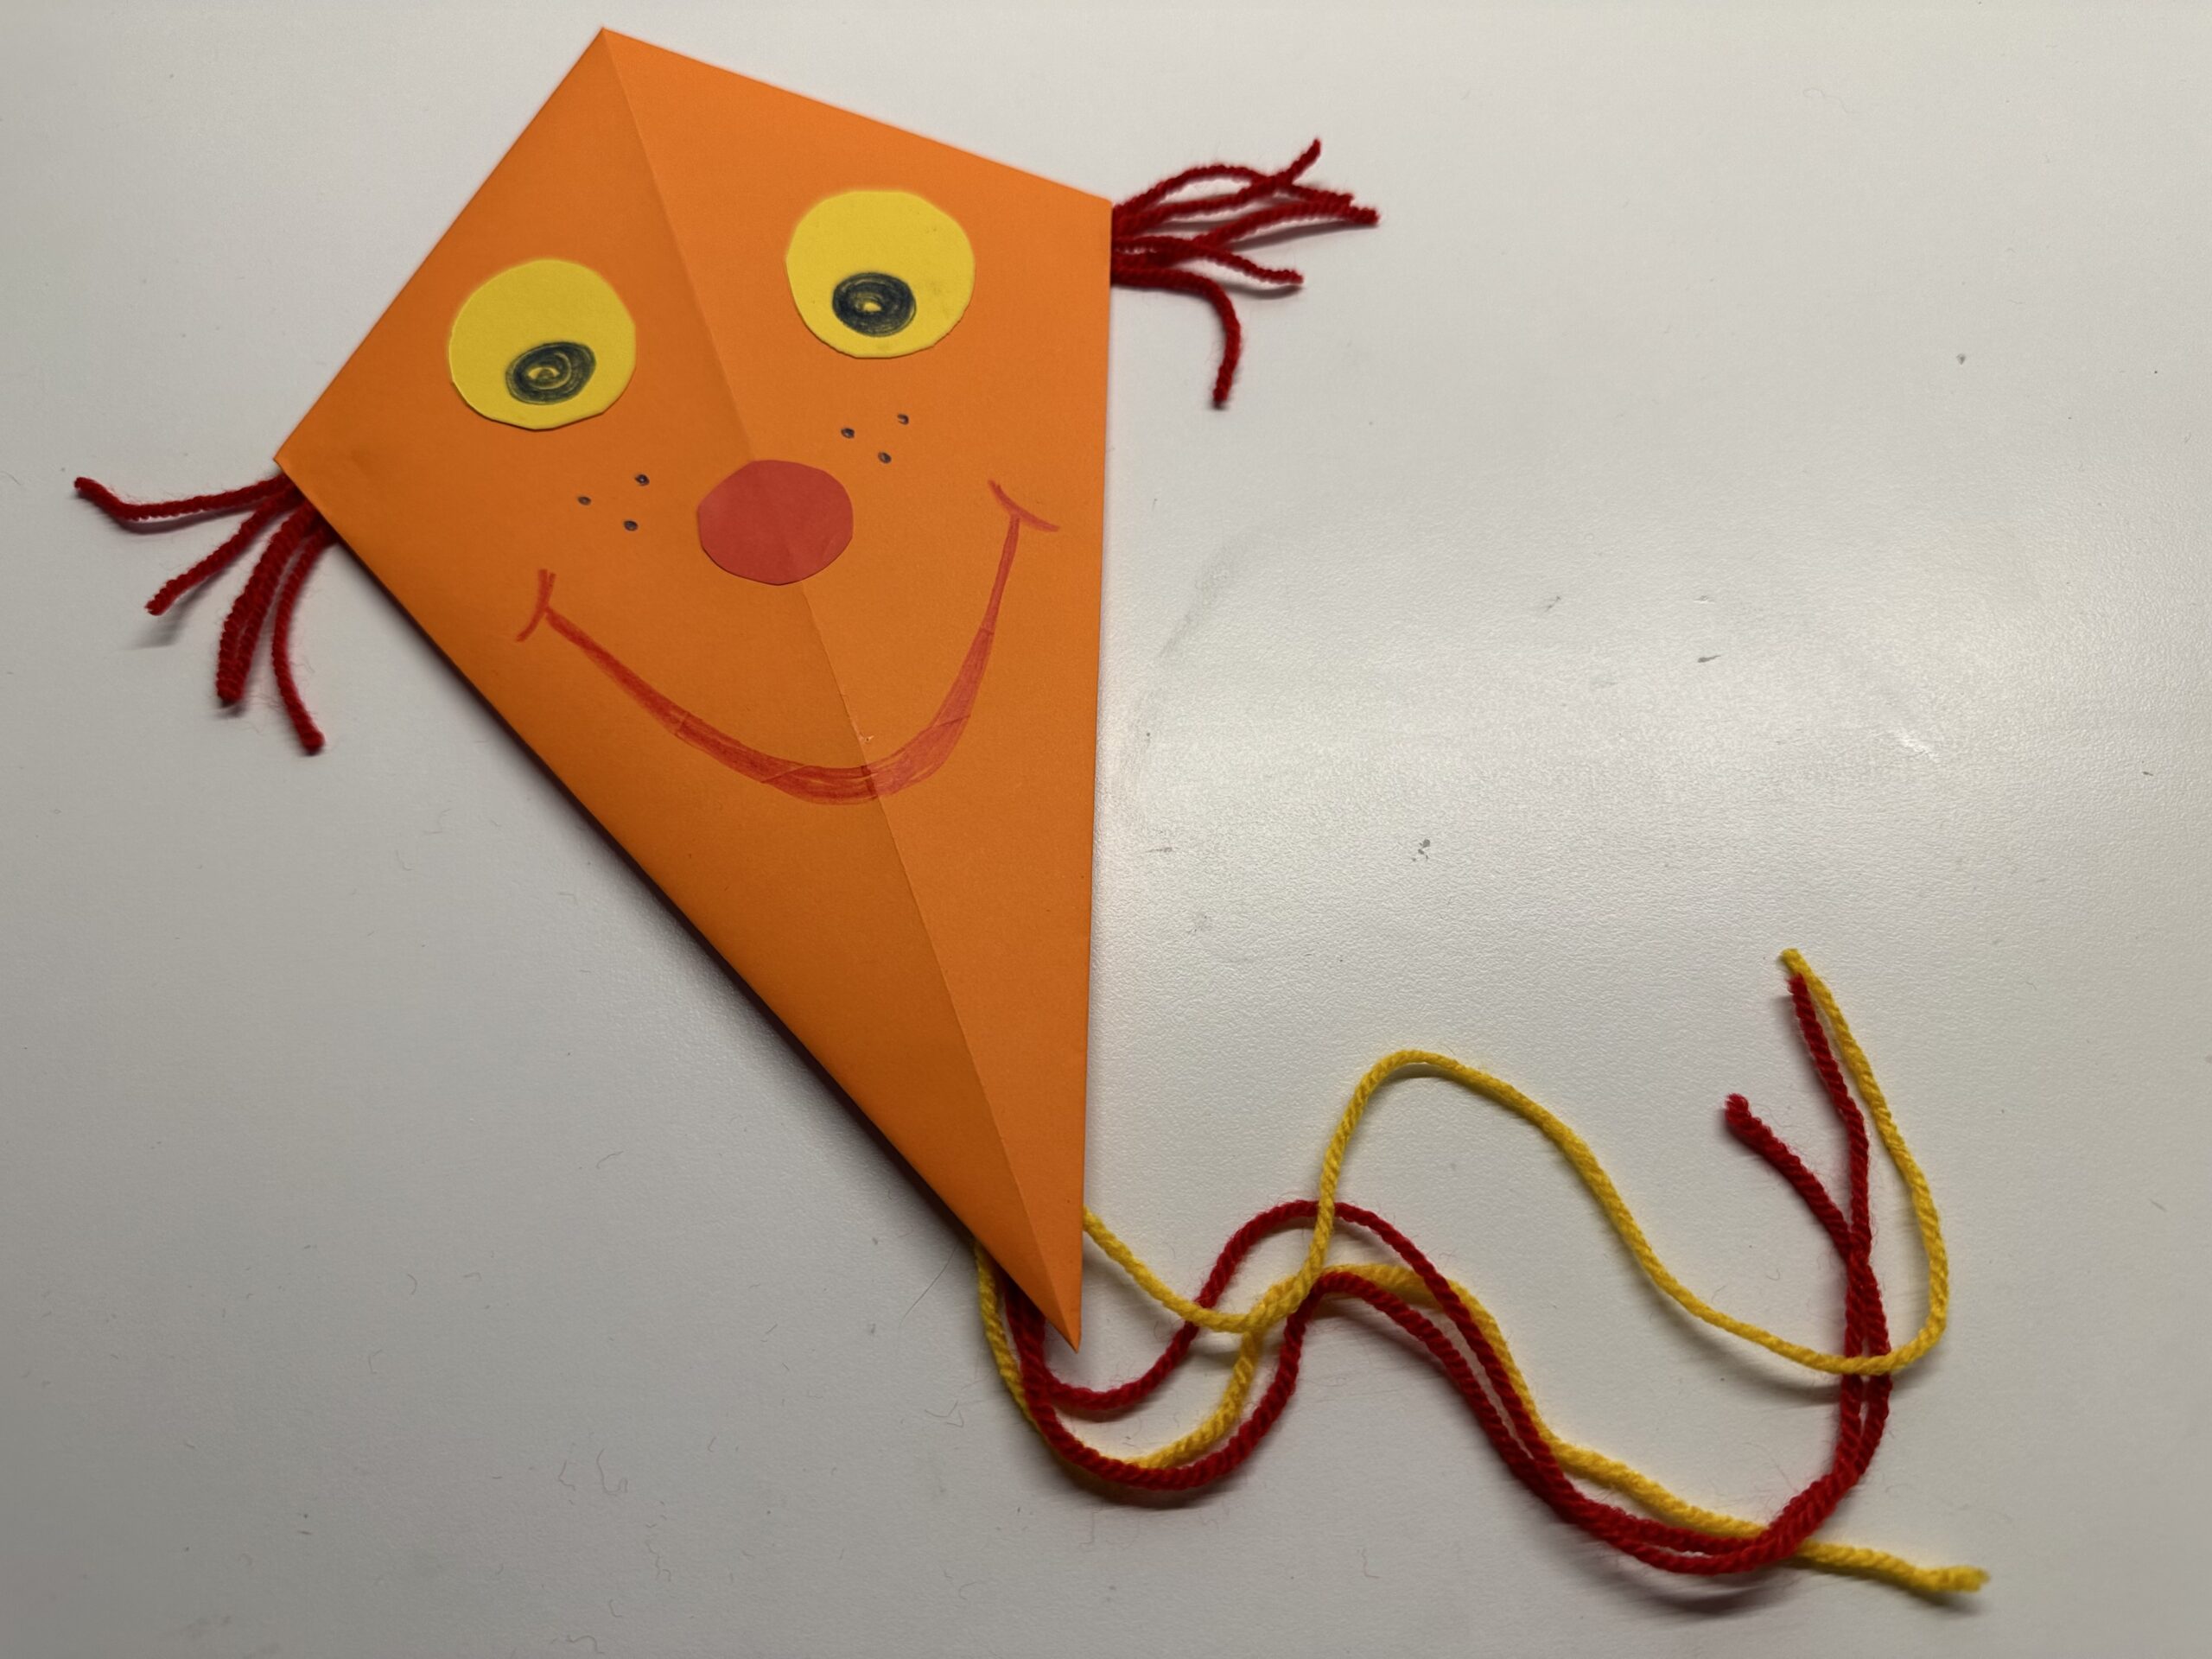
The dragon is ready.

Bild zum Schritt 47 für das Bastel- und DIY-Abenteuer für Kinder: 'Der Drache ist fertig.'

48

Grab the upper triangle (on the back) of the dragon with your hand. Now you can let it dance. The wool threads of the dragon tail can fly in the air.

Bild zum Schritt 48 für das Bastel- und DIY-Abenteuer für Kinder: 'Greife mit der Hand in das obere Dreieck (auf der...'

49

Have fun trying out.

Materials

 1 Colourful paper DIN A4
 WoolColoured
 Felt pinsColoured
 Transparent adhesive strips For example, Tesafilm
 Paper remnants colorfulFor example, folding paper residue
 2 Woven fabrics containing predominantly, but < 85 % cotton by weight, mixed principally or solely with cotton
 1 Builder's pad
All links marked with a shopping cart lead to Amazon - here we have selected products that we would order ourselves and in part also ordered. In a qualified purchase via the advertising link, we as Amazon partner receive a commission, for you there are no costs. You thus support our cost- and advertising banner-free, educational offer.

Directions

1

Take a colorful copy paper and put it across the street.

Bild zum Schritt 1 für das Bastel- und DIY-Abenteuer für Kinder: 'Nimm ein buntes Kopierpapier und lege es quer vor dich...'

2

Fold the lower side up. Corner to corner.

Bild zum Schritt 2 für das Bastel- und DIY-Abenteuer für Kinder: 'Falte die untere Seite nach oben. Ecke auf Ecke.'

3

Strip the break with the flat hand smoothly.
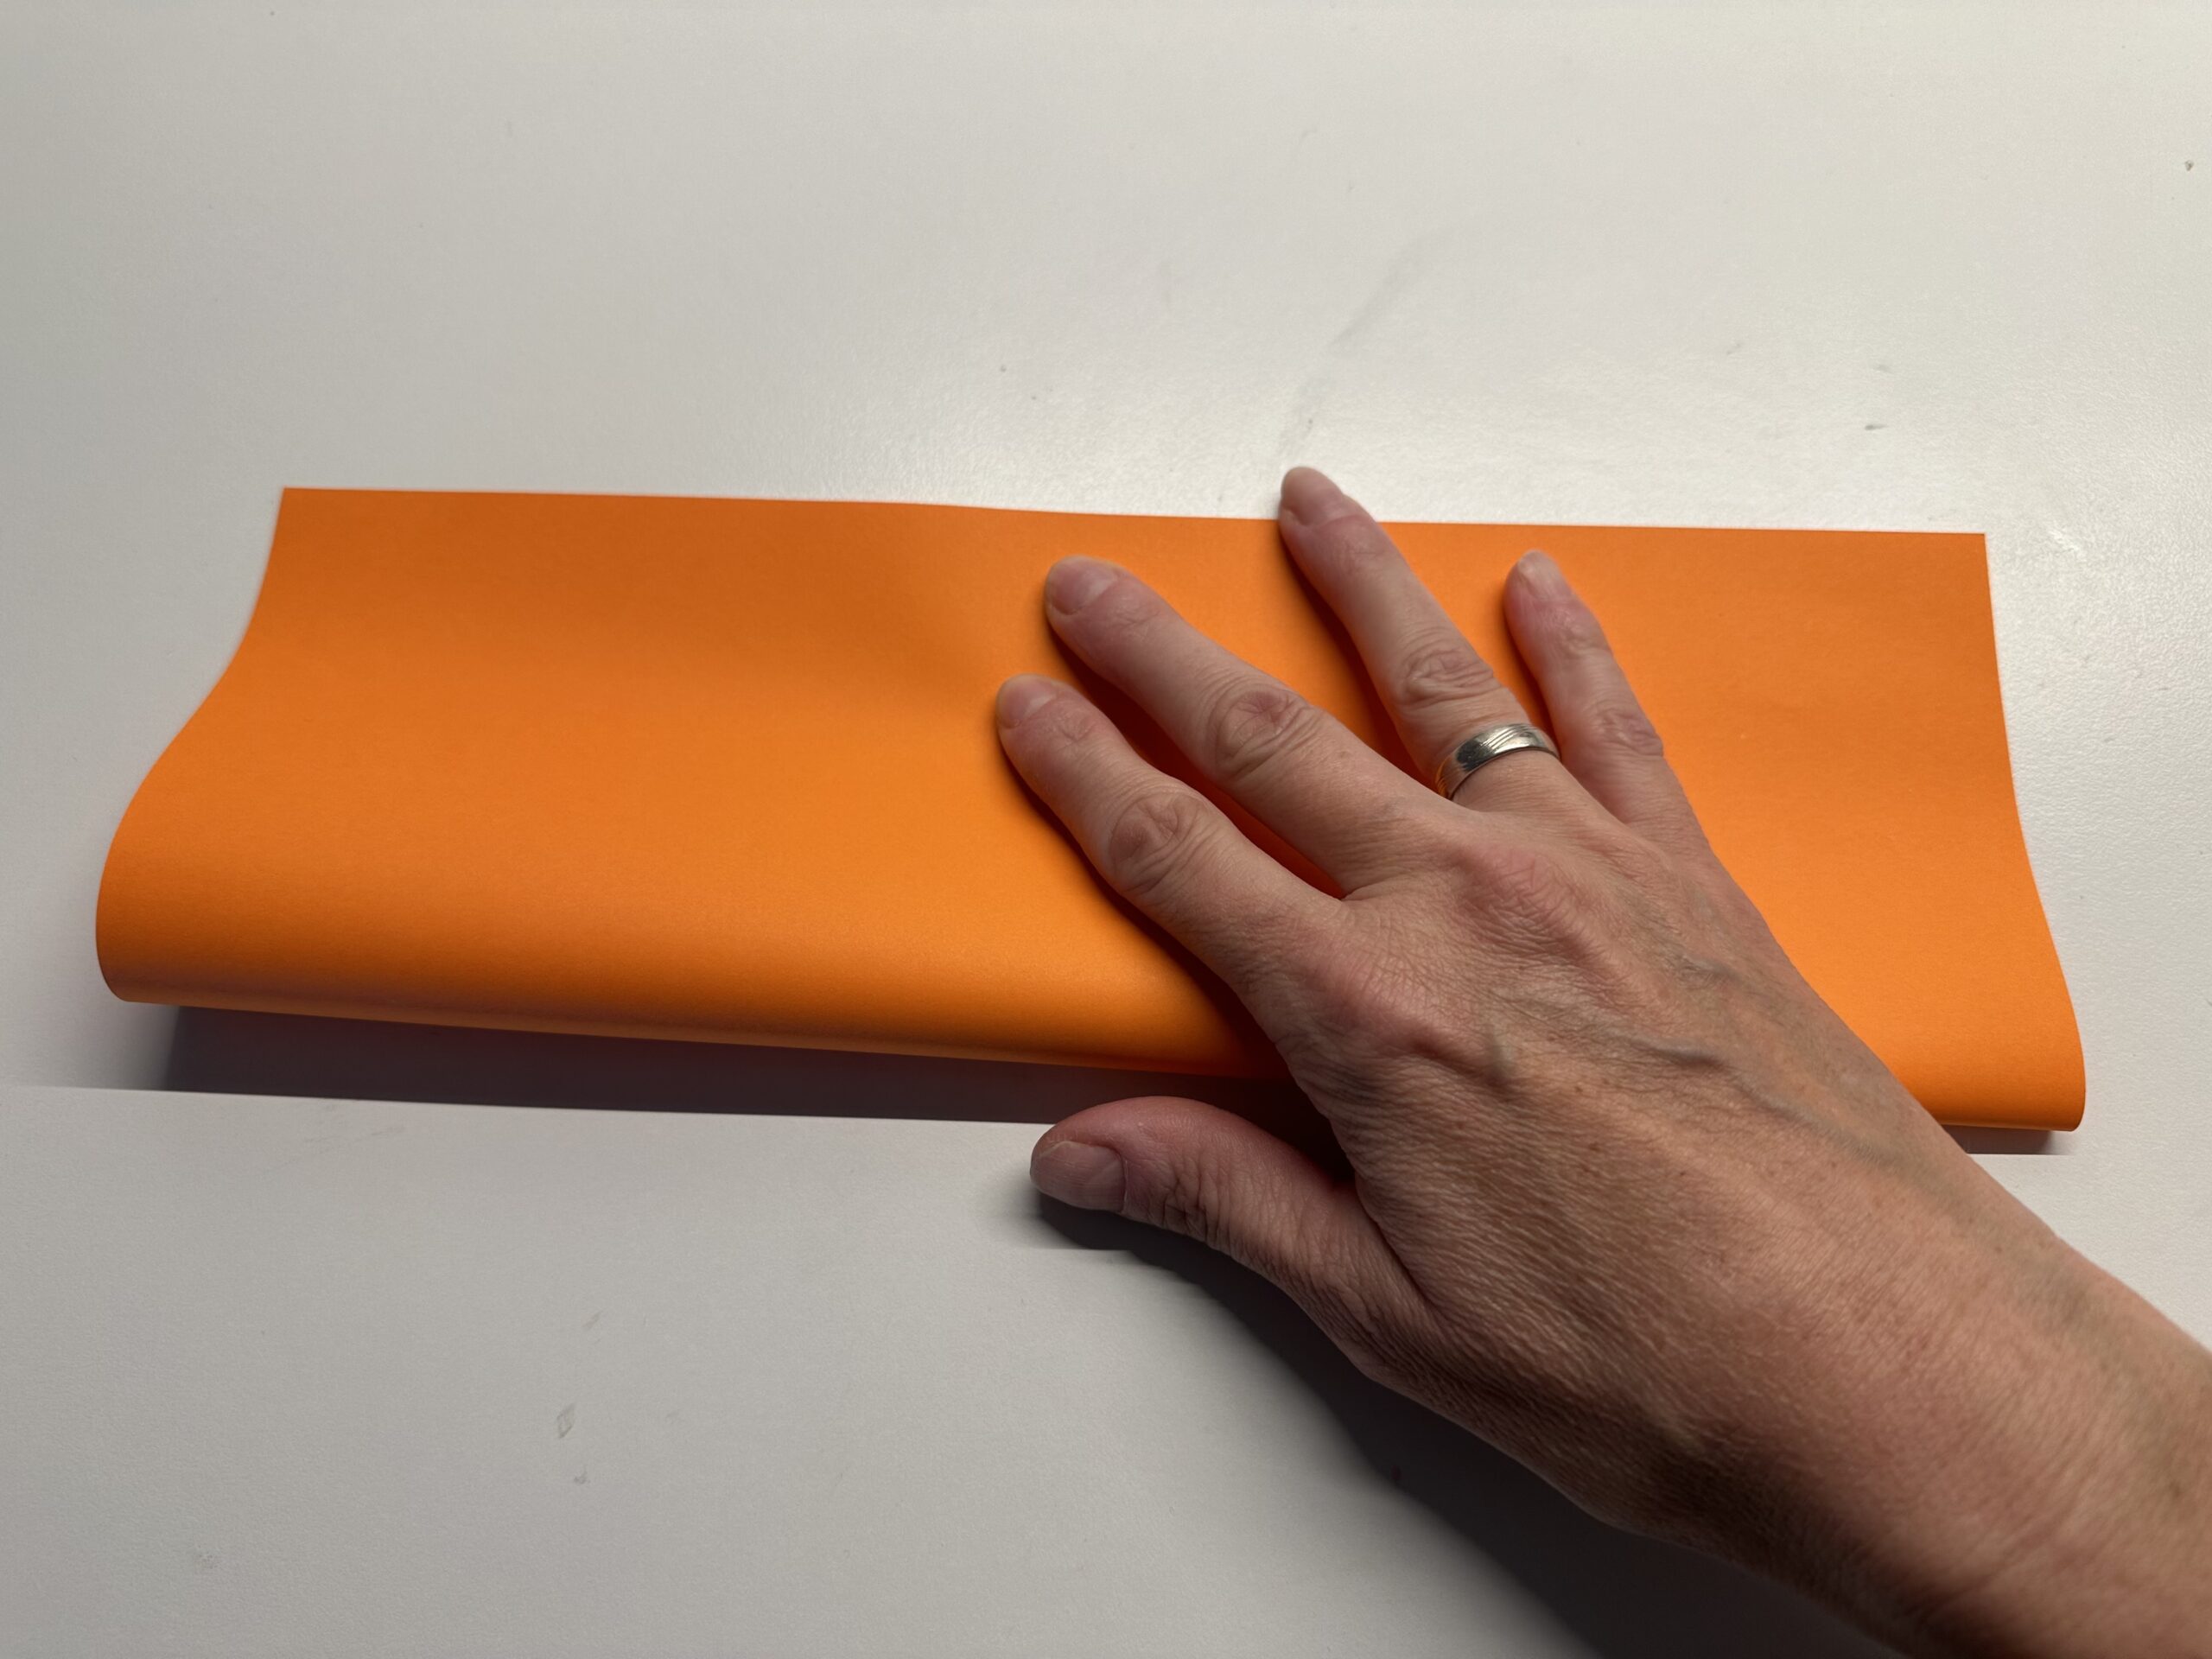
Bild zum Schritt 3 für das Bastel- und DIY-Abenteuer für Kinder: 'Streife den Bruch mit der flachen Hand glatt.'

4

That's what it looks like.

Bild zum Schritt 4 für das Bastel- und DIY-Abenteuer für Kinder: 'So sieht das dann aus.'

5

Open the folded paper again and put it up in front of you. The folded fracture now points to you.
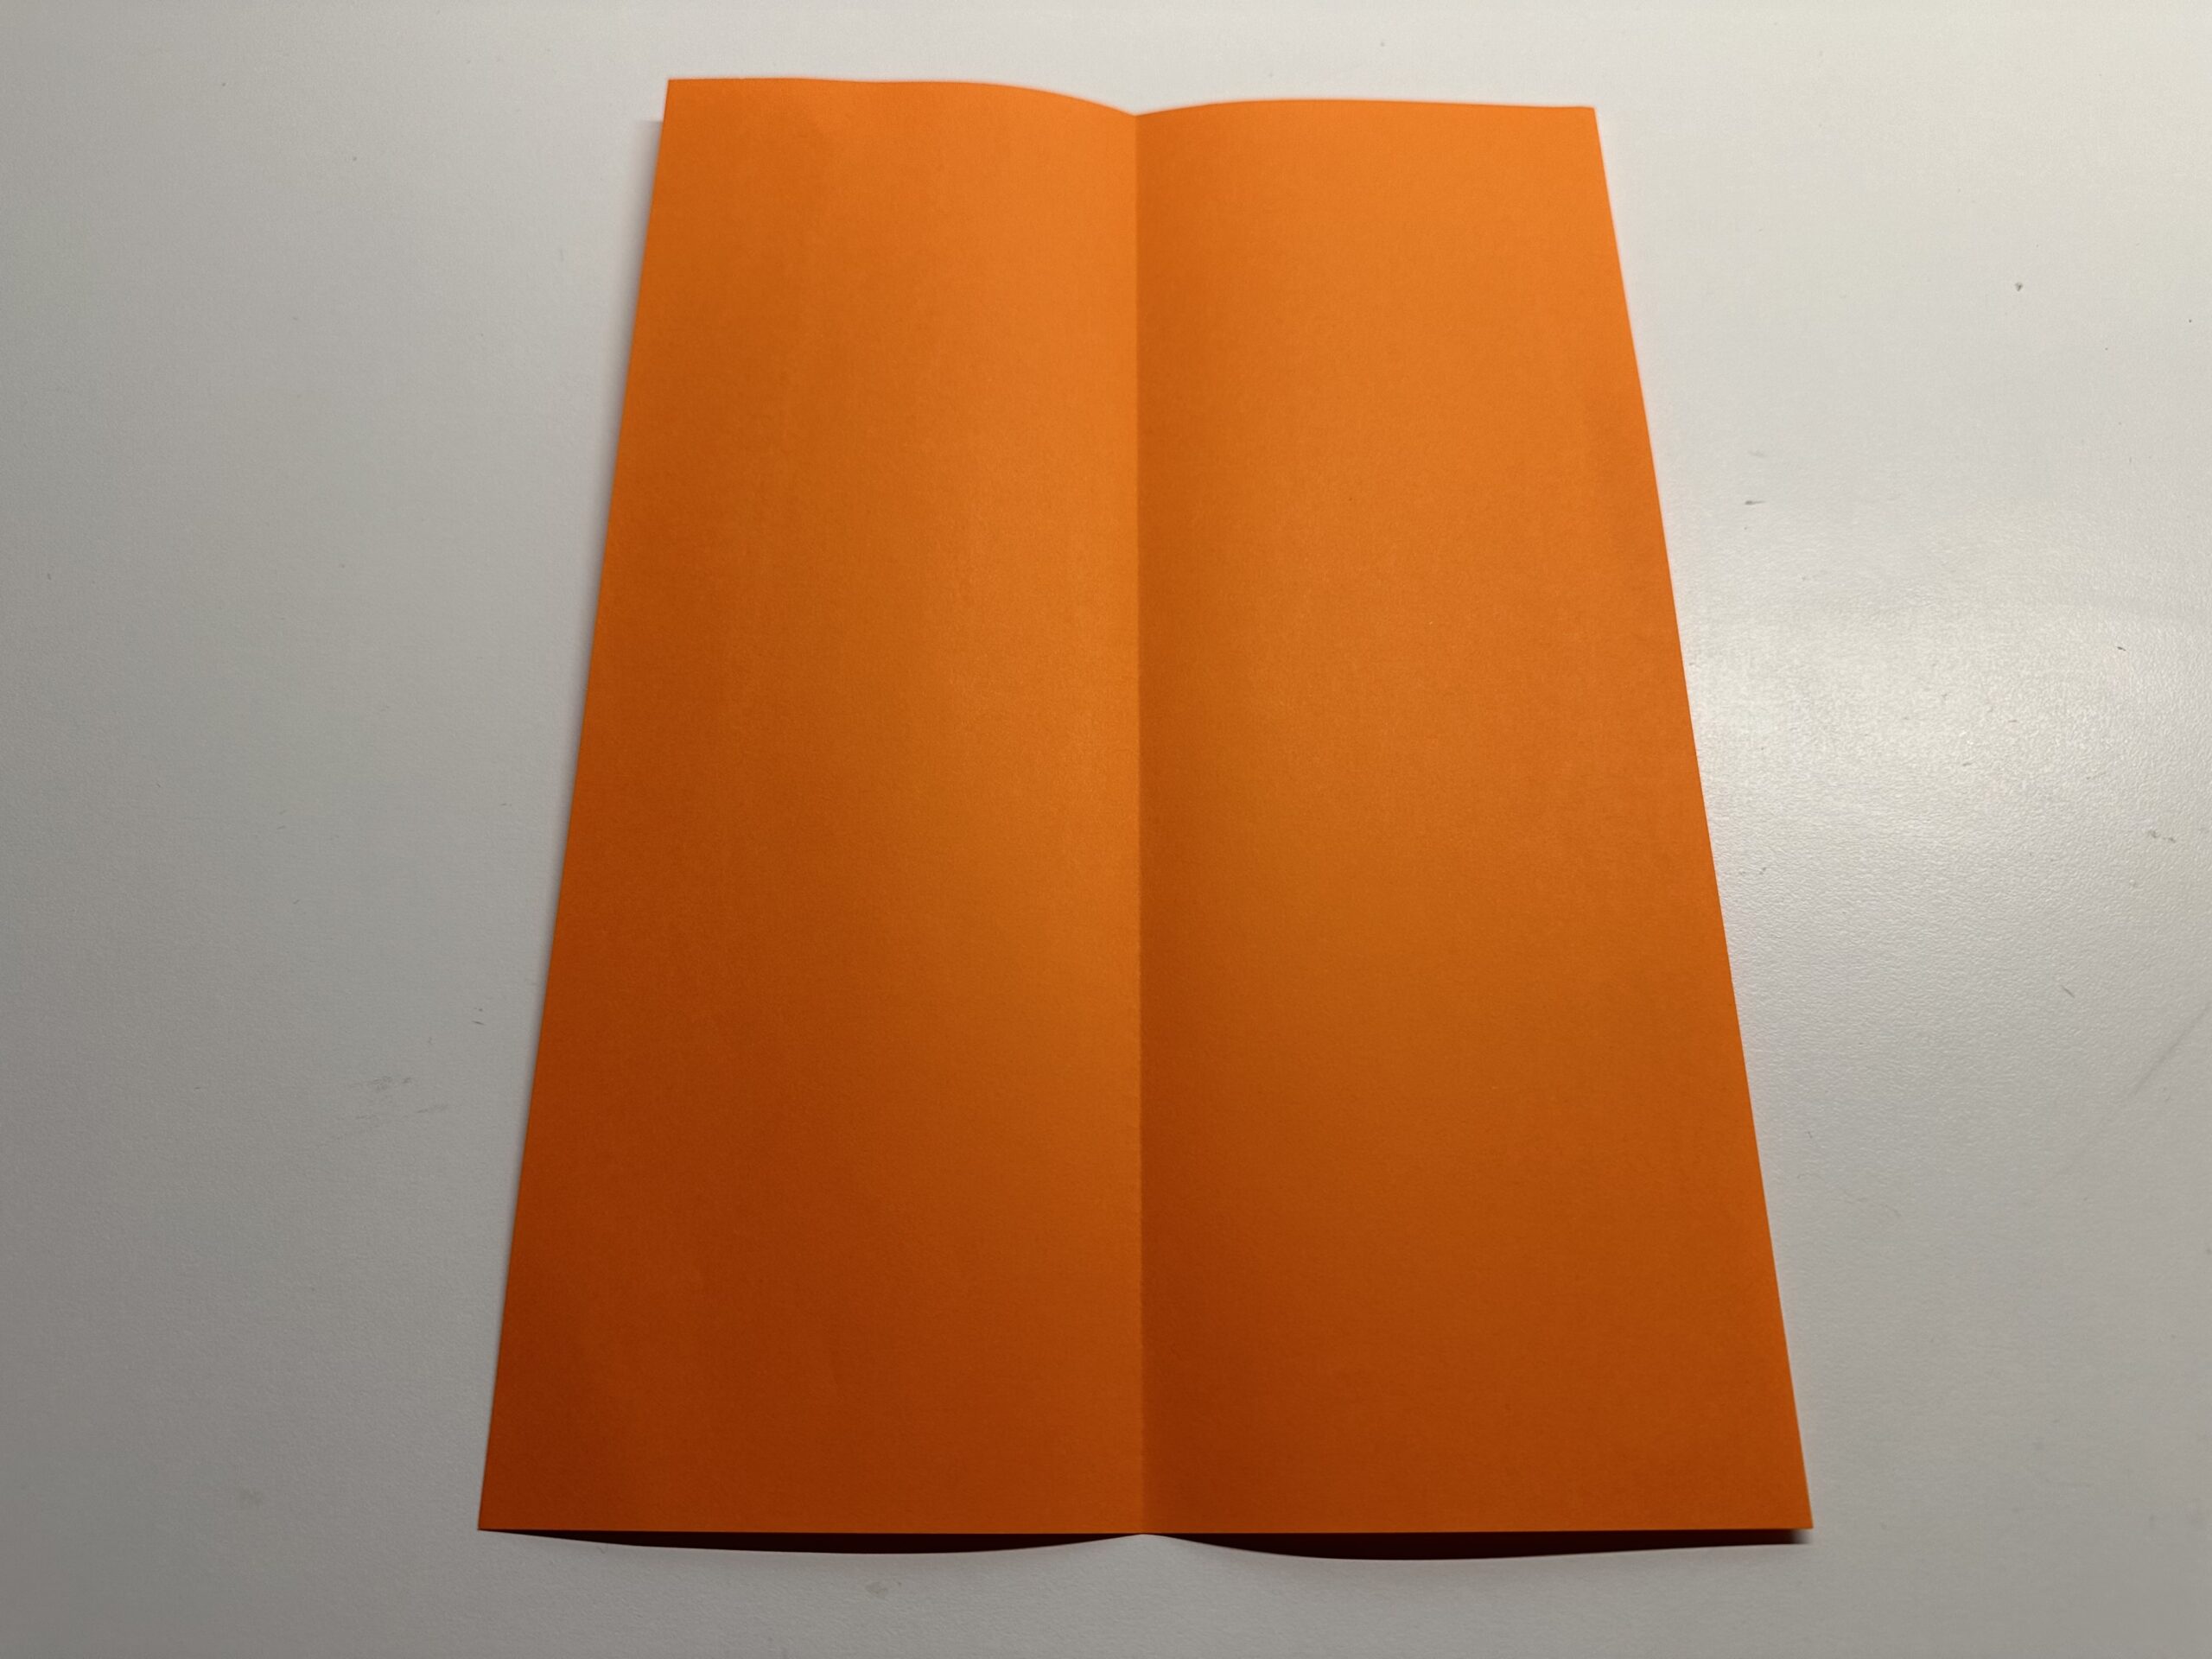
Bild zum Schritt 5 für das Bastel- und DIY-Abenteuer für Kinder: 'Klappe das gefaltete Papier wieder auf und lege es hochkant...'

6

Take a lower corner and fold it to the center line.
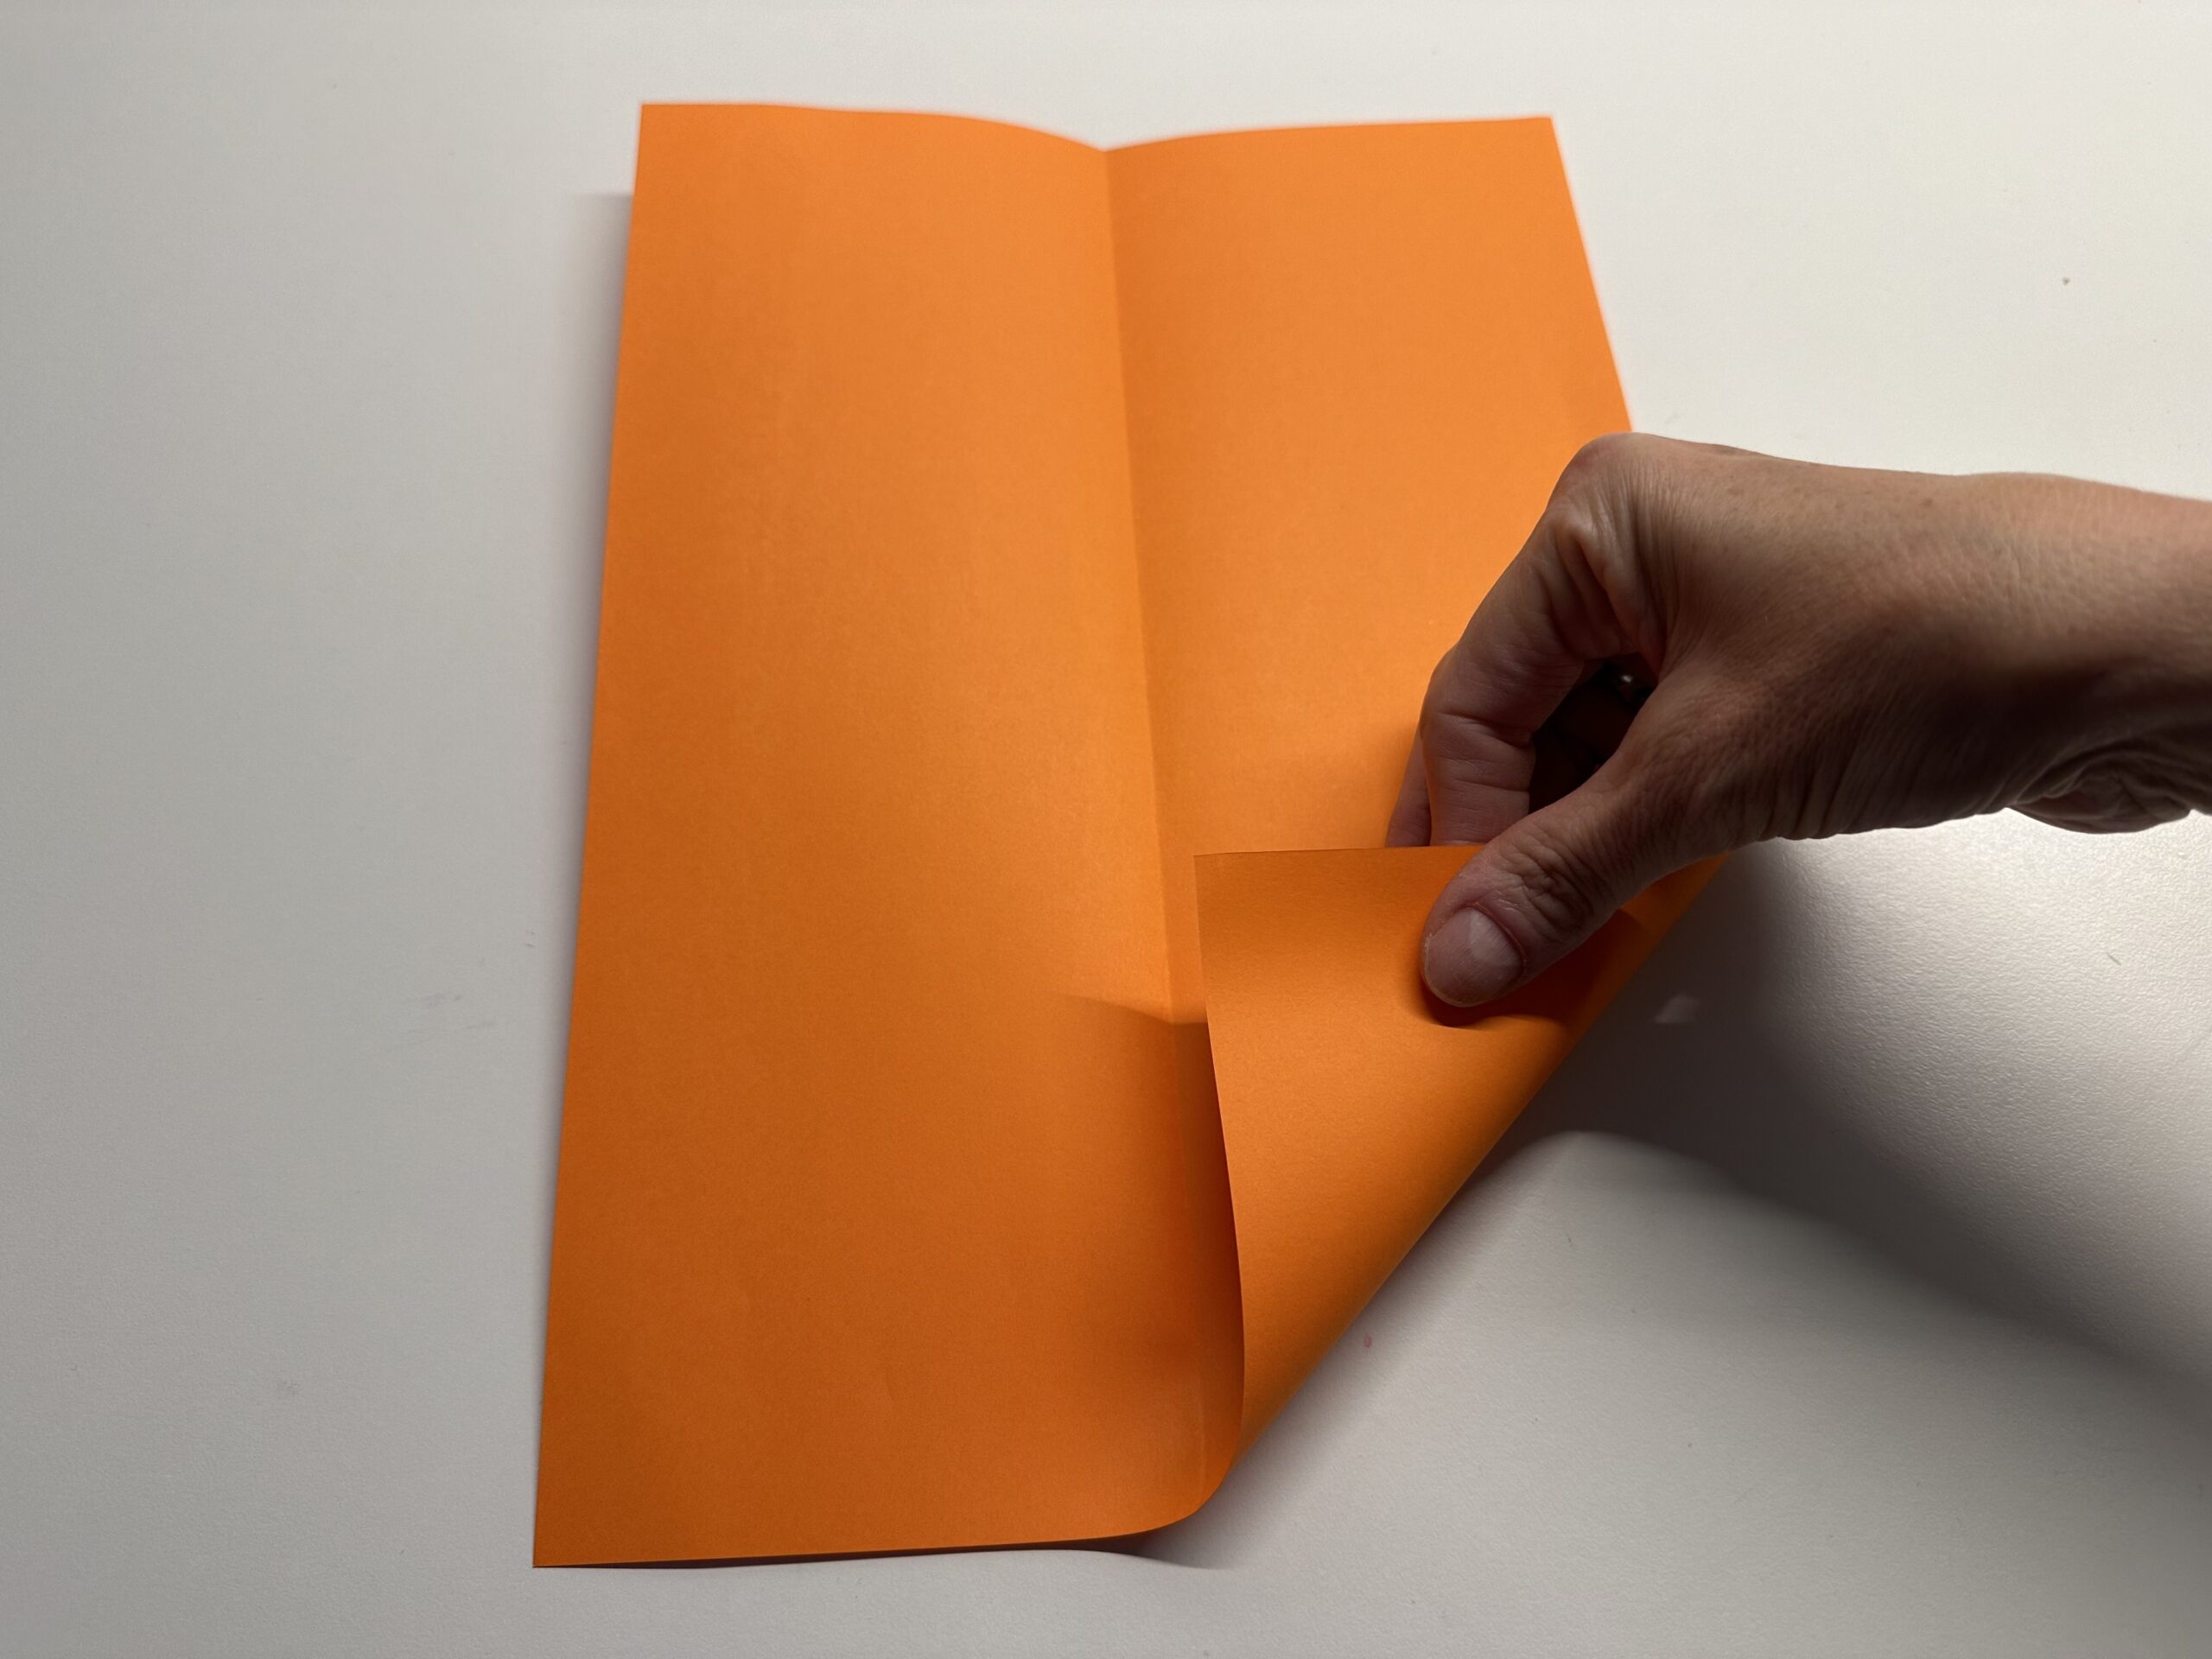
Bild zum Schritt 6 für das Bastel- und DIY-Abenteuer für Kinder: 'Nimm eine untere Ecke und falte sie zur Mittellinie.'

7

A triangle emerges.

Bild zum Schritt 7 für das Bastel- und DIY-Abenteuer für Kinder: 'Es entsteht ein Dreieck.'

8

Repeat the whole with the other corner. That's how a lace is created.
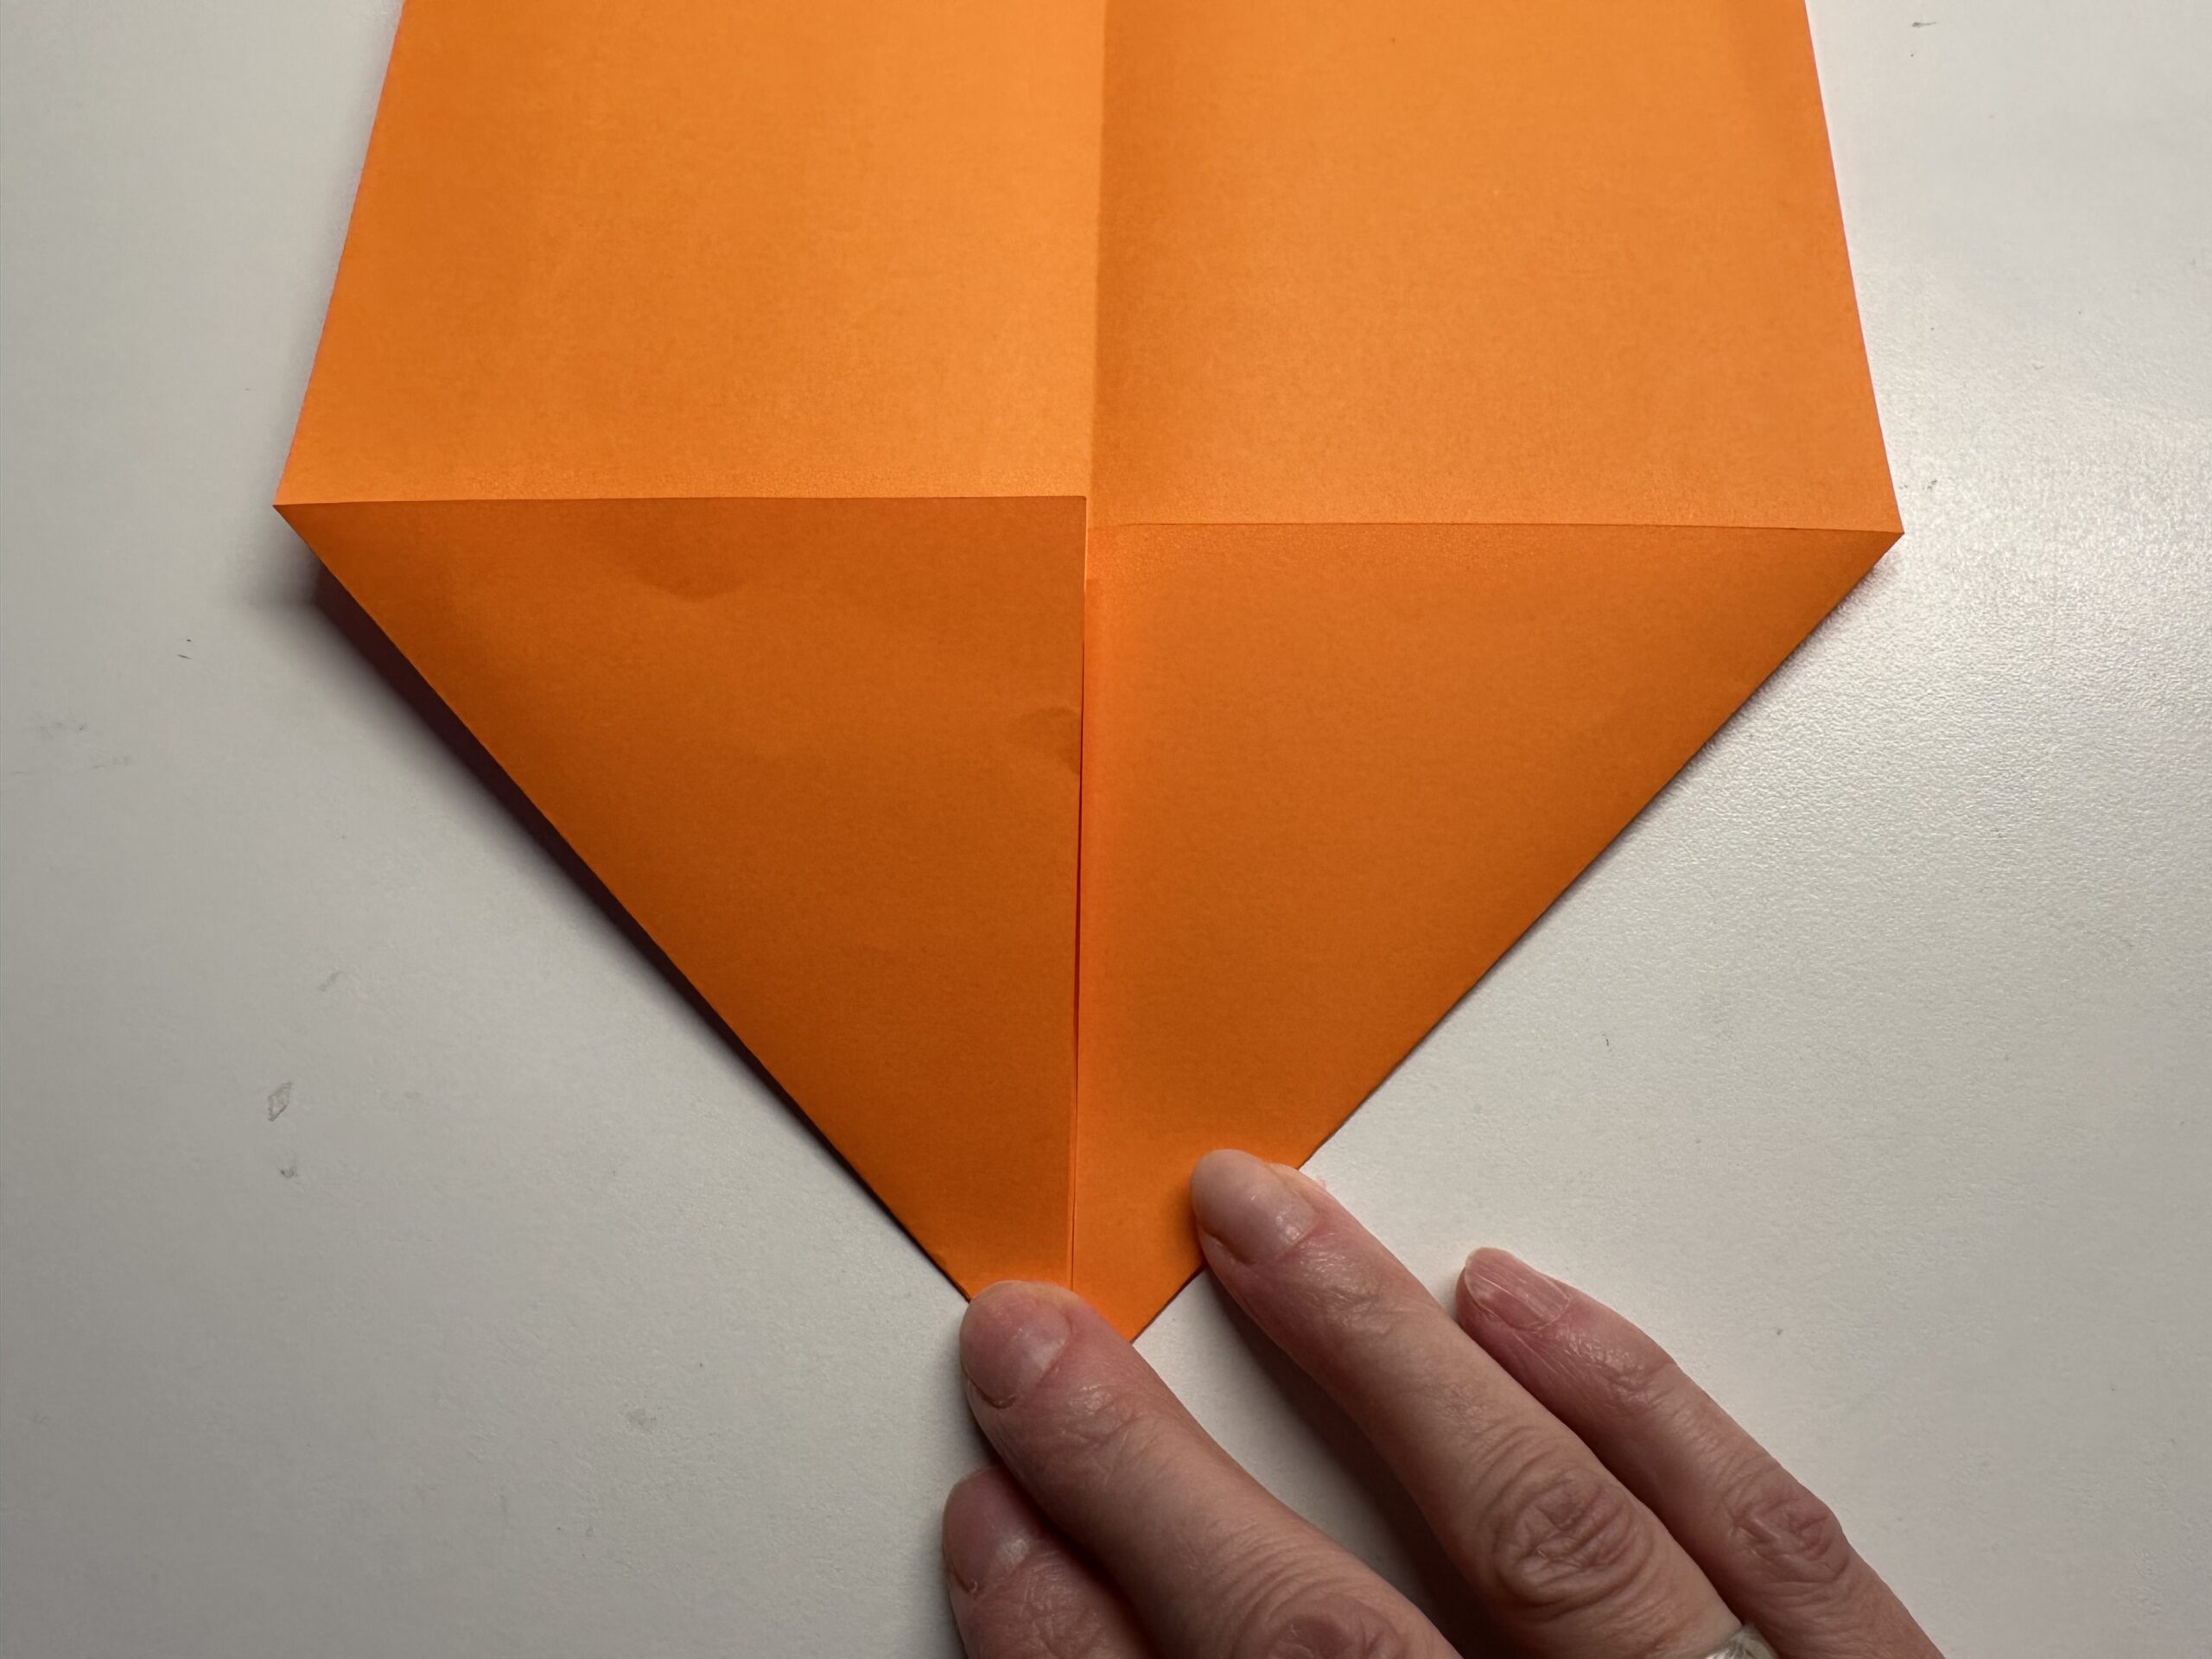
Bild zum Schritt 8 für das Bastel- und DIY-Abenteuer für Kinder: 'Wiederhole das ganze mit der anderen Ecke. So entsteht eine...'

9

Turn the paper around and repeat the whole thing on the other side.
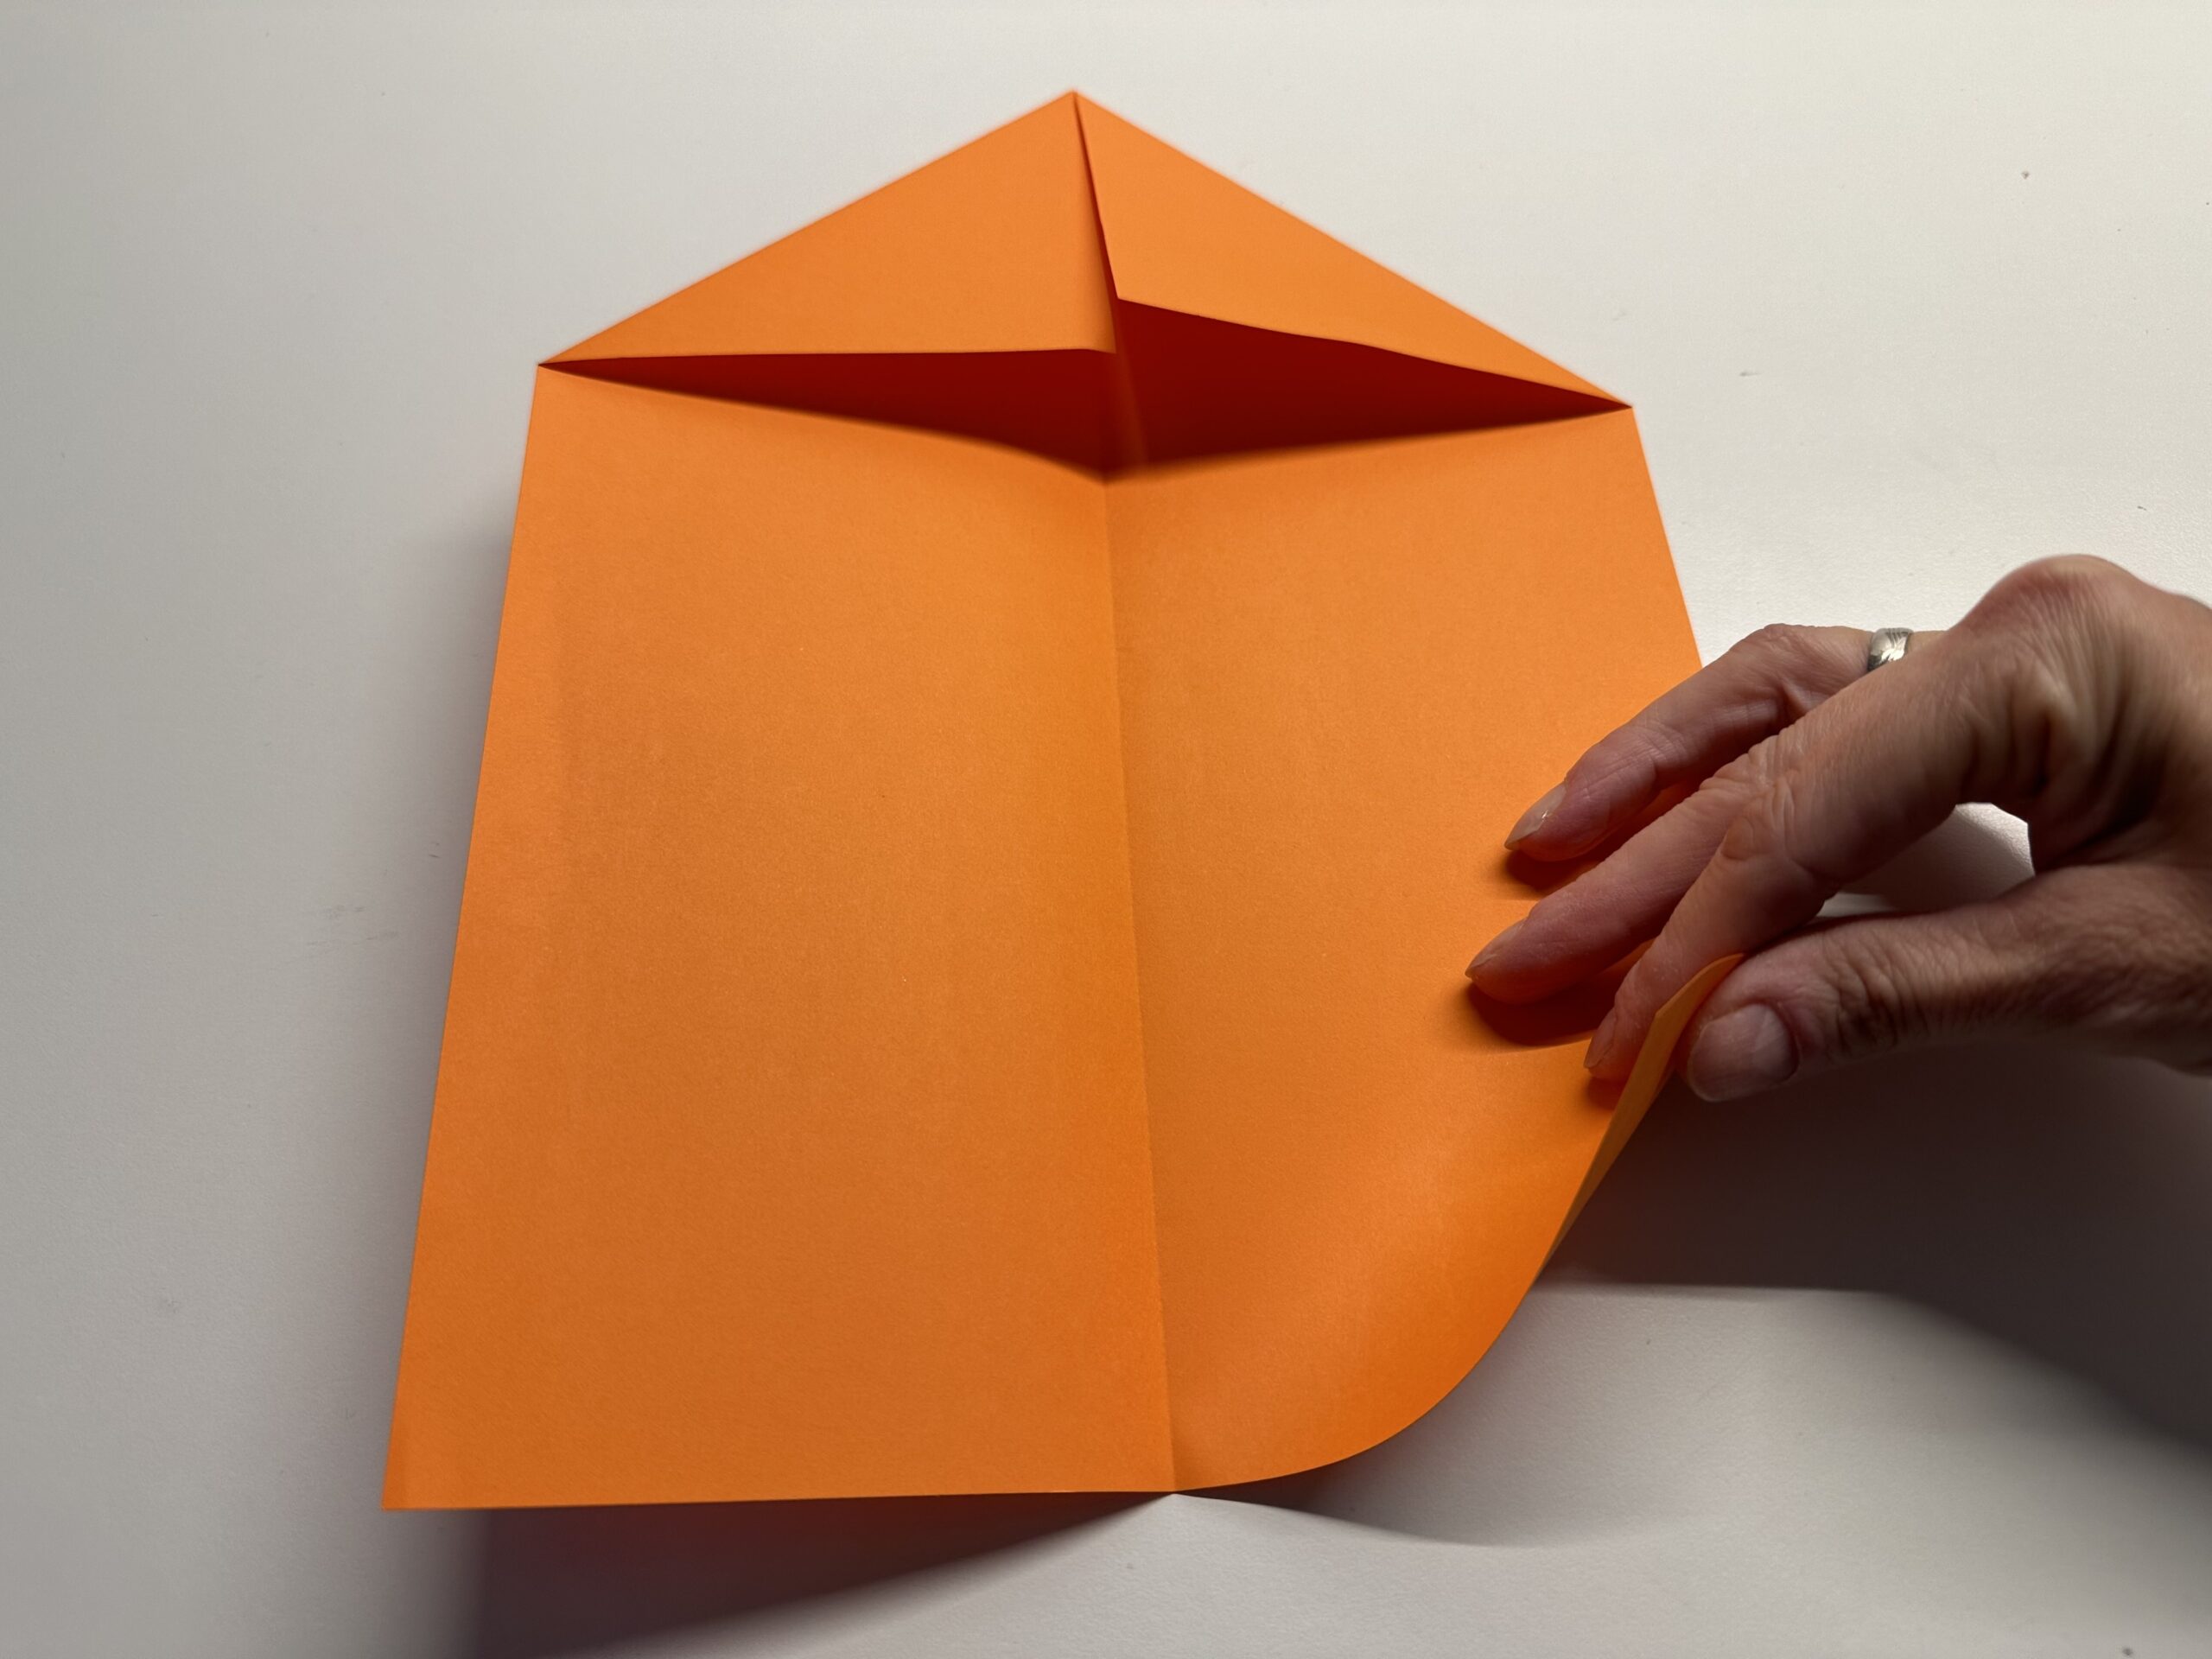
Bild zum Schritt 9 für das Bastel- und DIY-Abenteuer für Kinder: 'Drehe das Papier einmal herum und wiederhole das Ganze auf...'

10

All four corners are now folded to the centre line. A tip has been created at the top and bottom.

Bild zum Schritt 10 für das Bastel- und DIY-Abenteuer für Kinder: 'Alle vier Ecken sind nun zur Mittellinie gefaltet. Es ist...'

11

The lower tip is folded again. Take the outer lower corner and fold it back to the centre line. The lower edge of the leaf is now located along the centre line.

Bild zum Schritt 11 für das Bastel- und DIY-Abenteuer für Kinder: 'Die untere Spitze wird noch einmal gefaltet. Nimm hierzu die...'

12

Strip the fracture smoothly.

Bild zum Schritt 12 für das Bastel- und DIY-Abenteuer für Kinder: 'Streife den Bruch glatt.'

13

Repeat the whole thing on the other side.

Bild zum Schritt 13 für das Bastel- und DIY-Abenteuer für Kinder: 'Wiederhole das ganze auf der anderen Seite.'

14

Make sure you get a decent tip.
Now the kite shape is already ready.
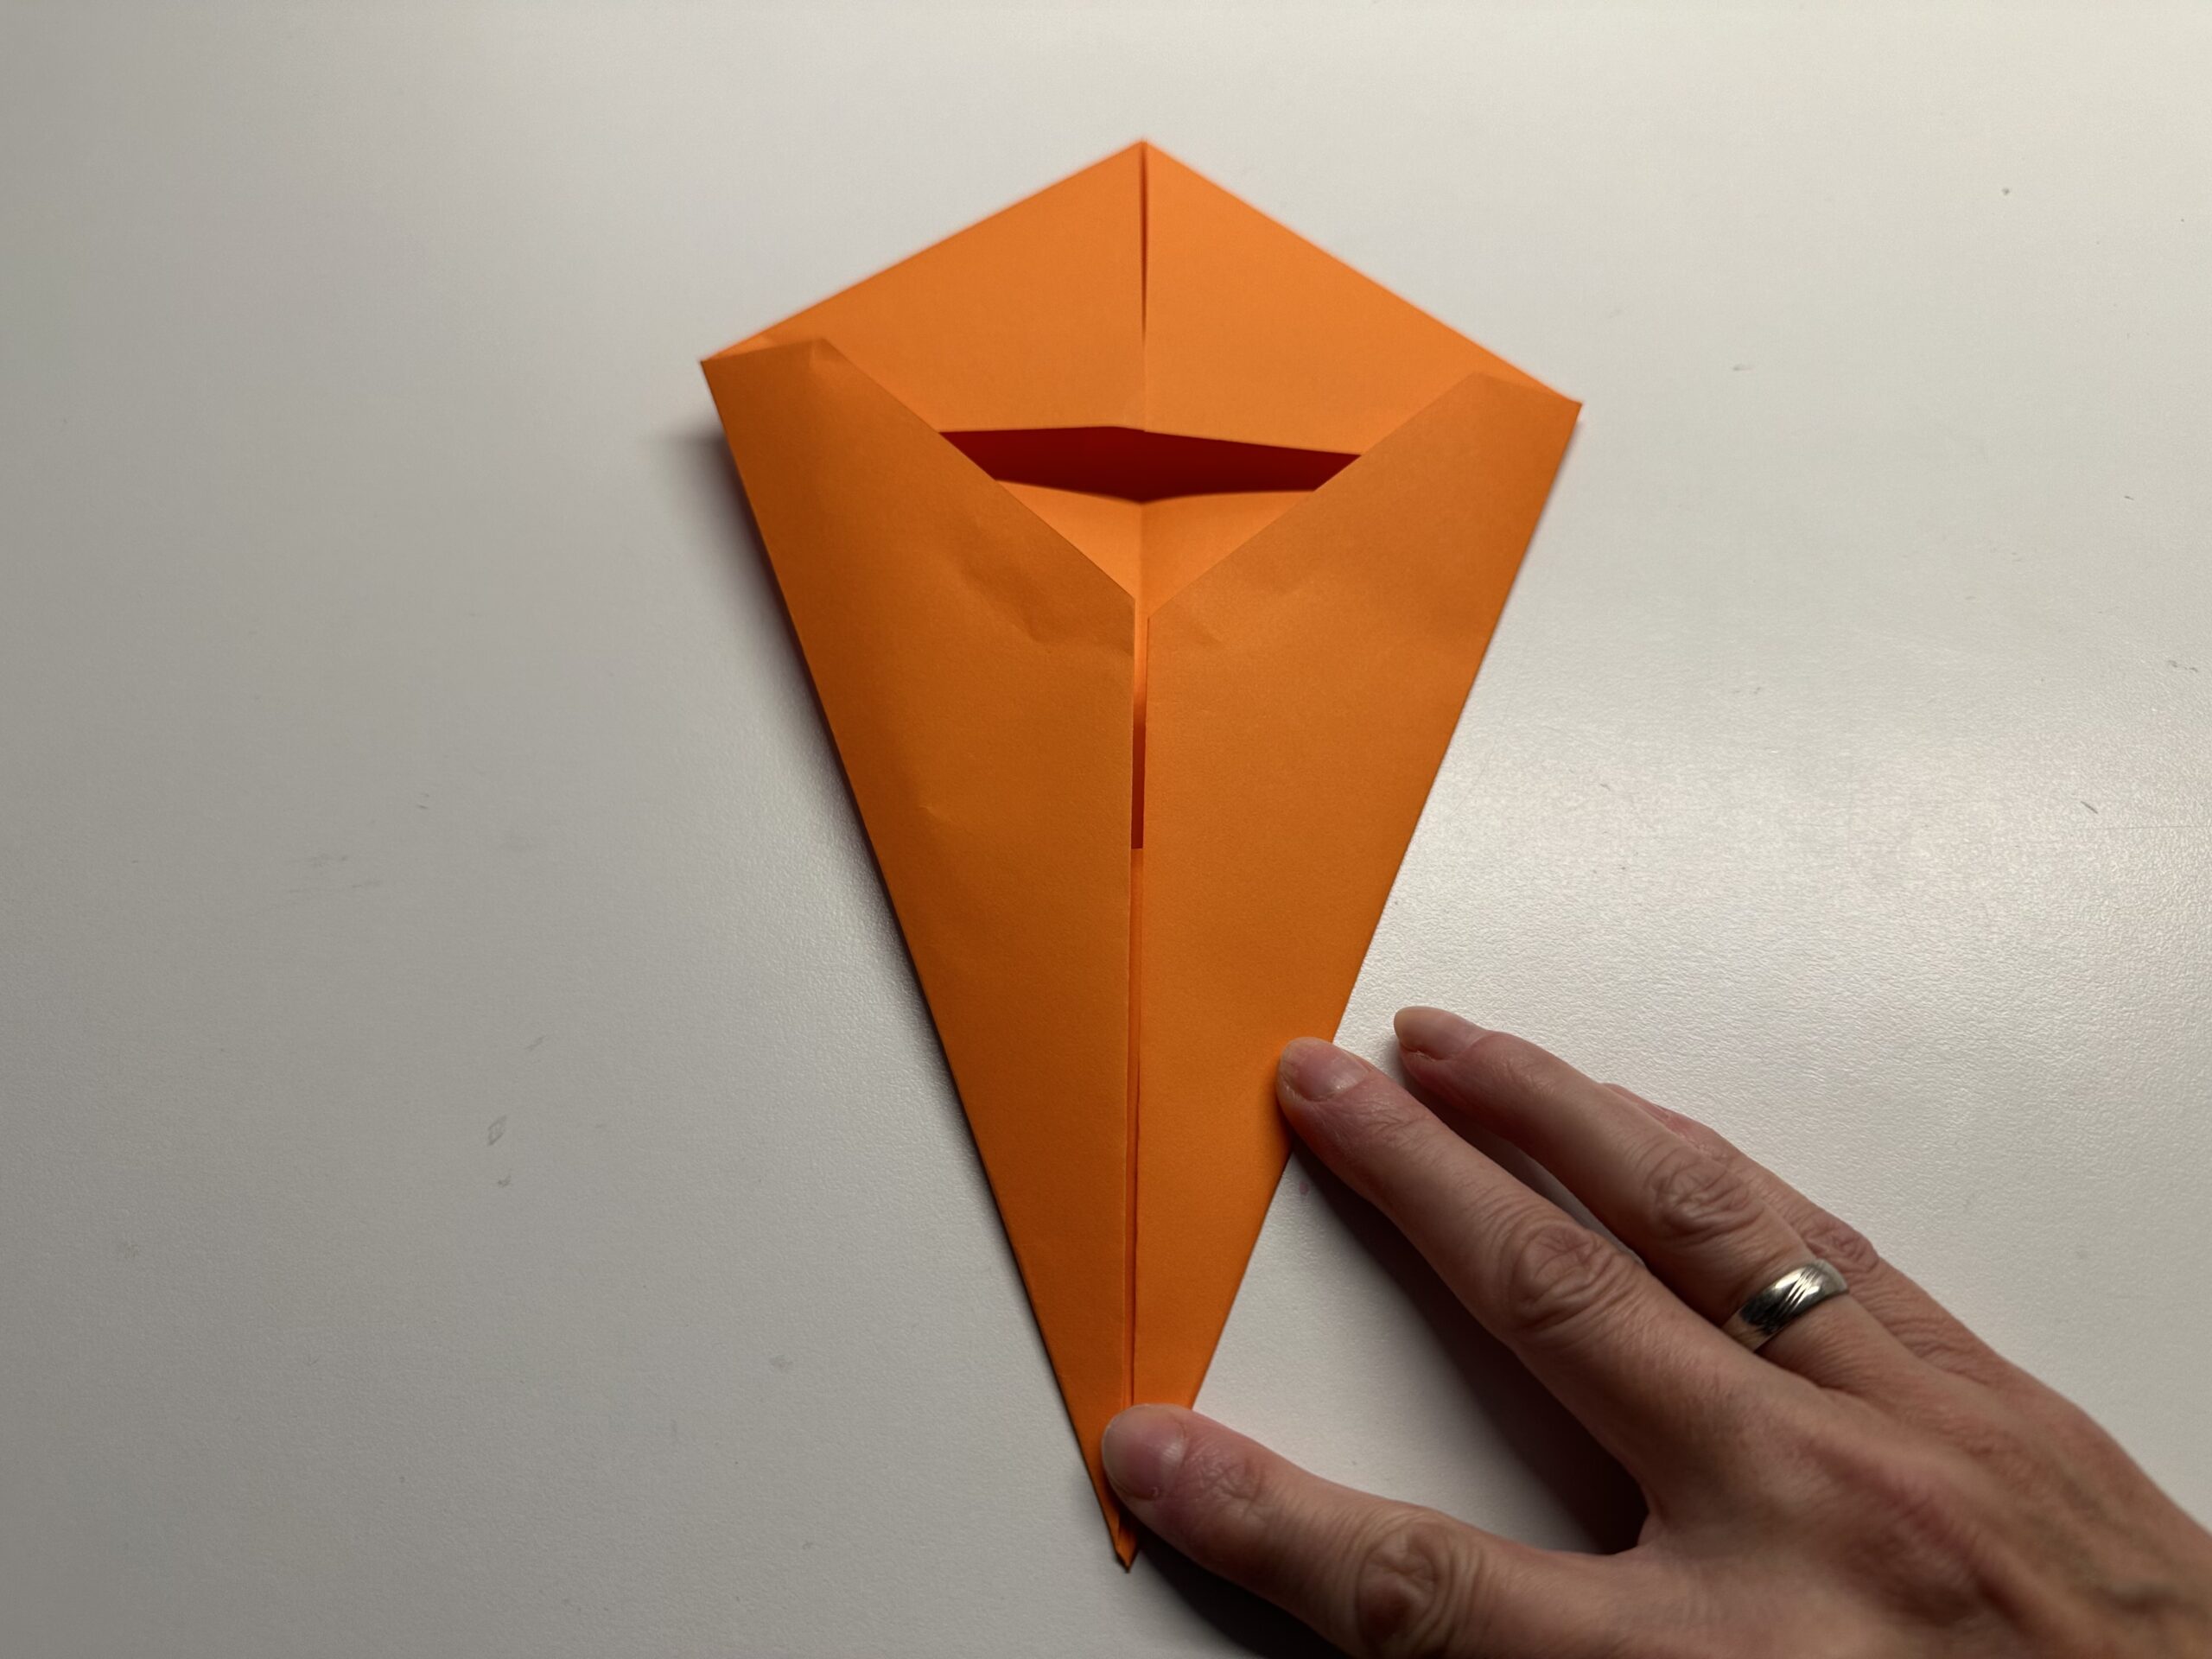
Bild zum Schritt 14 für das Bastel- und DIY-Abenteuer für Kinder: 'Achte darauf, dass du eine ordentliche Spitze erhältst.  ...'

15

The upper part of the kite is shorter. The lower side is still at the top. Lift both folds a little high.
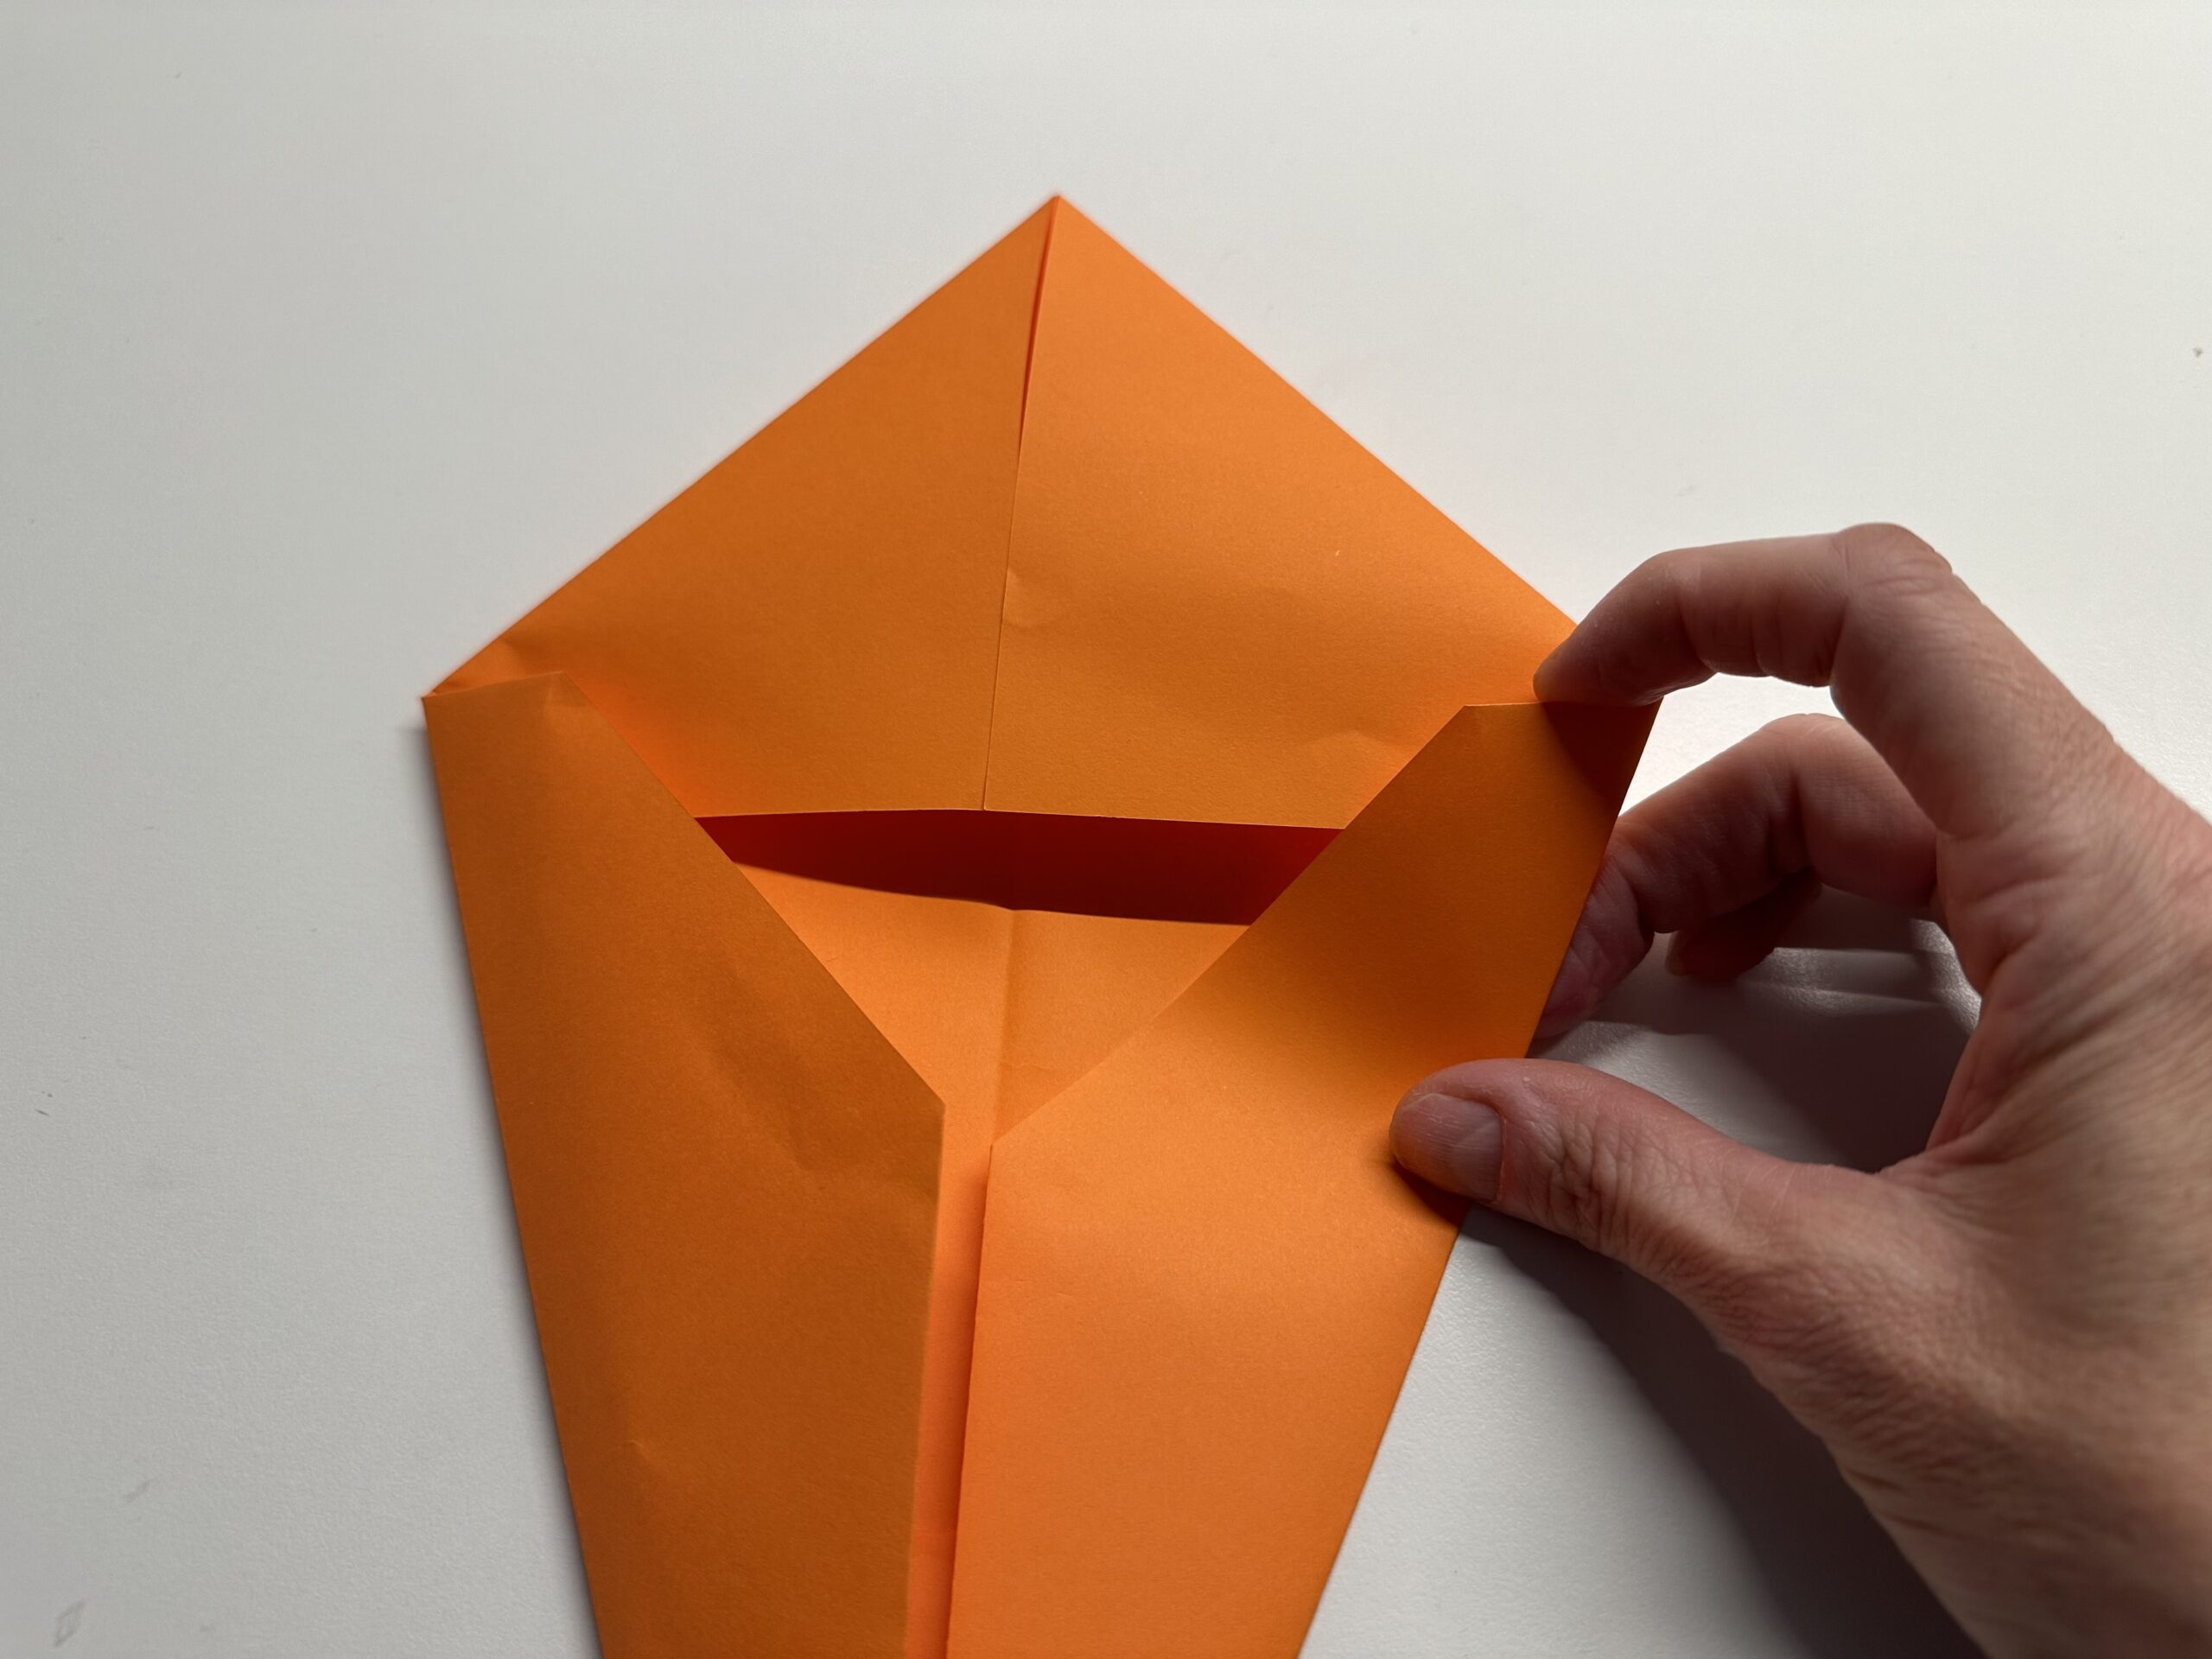
Bild zum Schritt 15 für das Bastel- und DIY-Abenteuer für Kinder: 'Das obere Teil des Drachens ist kürzer. Noch liegt die...'

16

Bending the folded parts a bit apart.
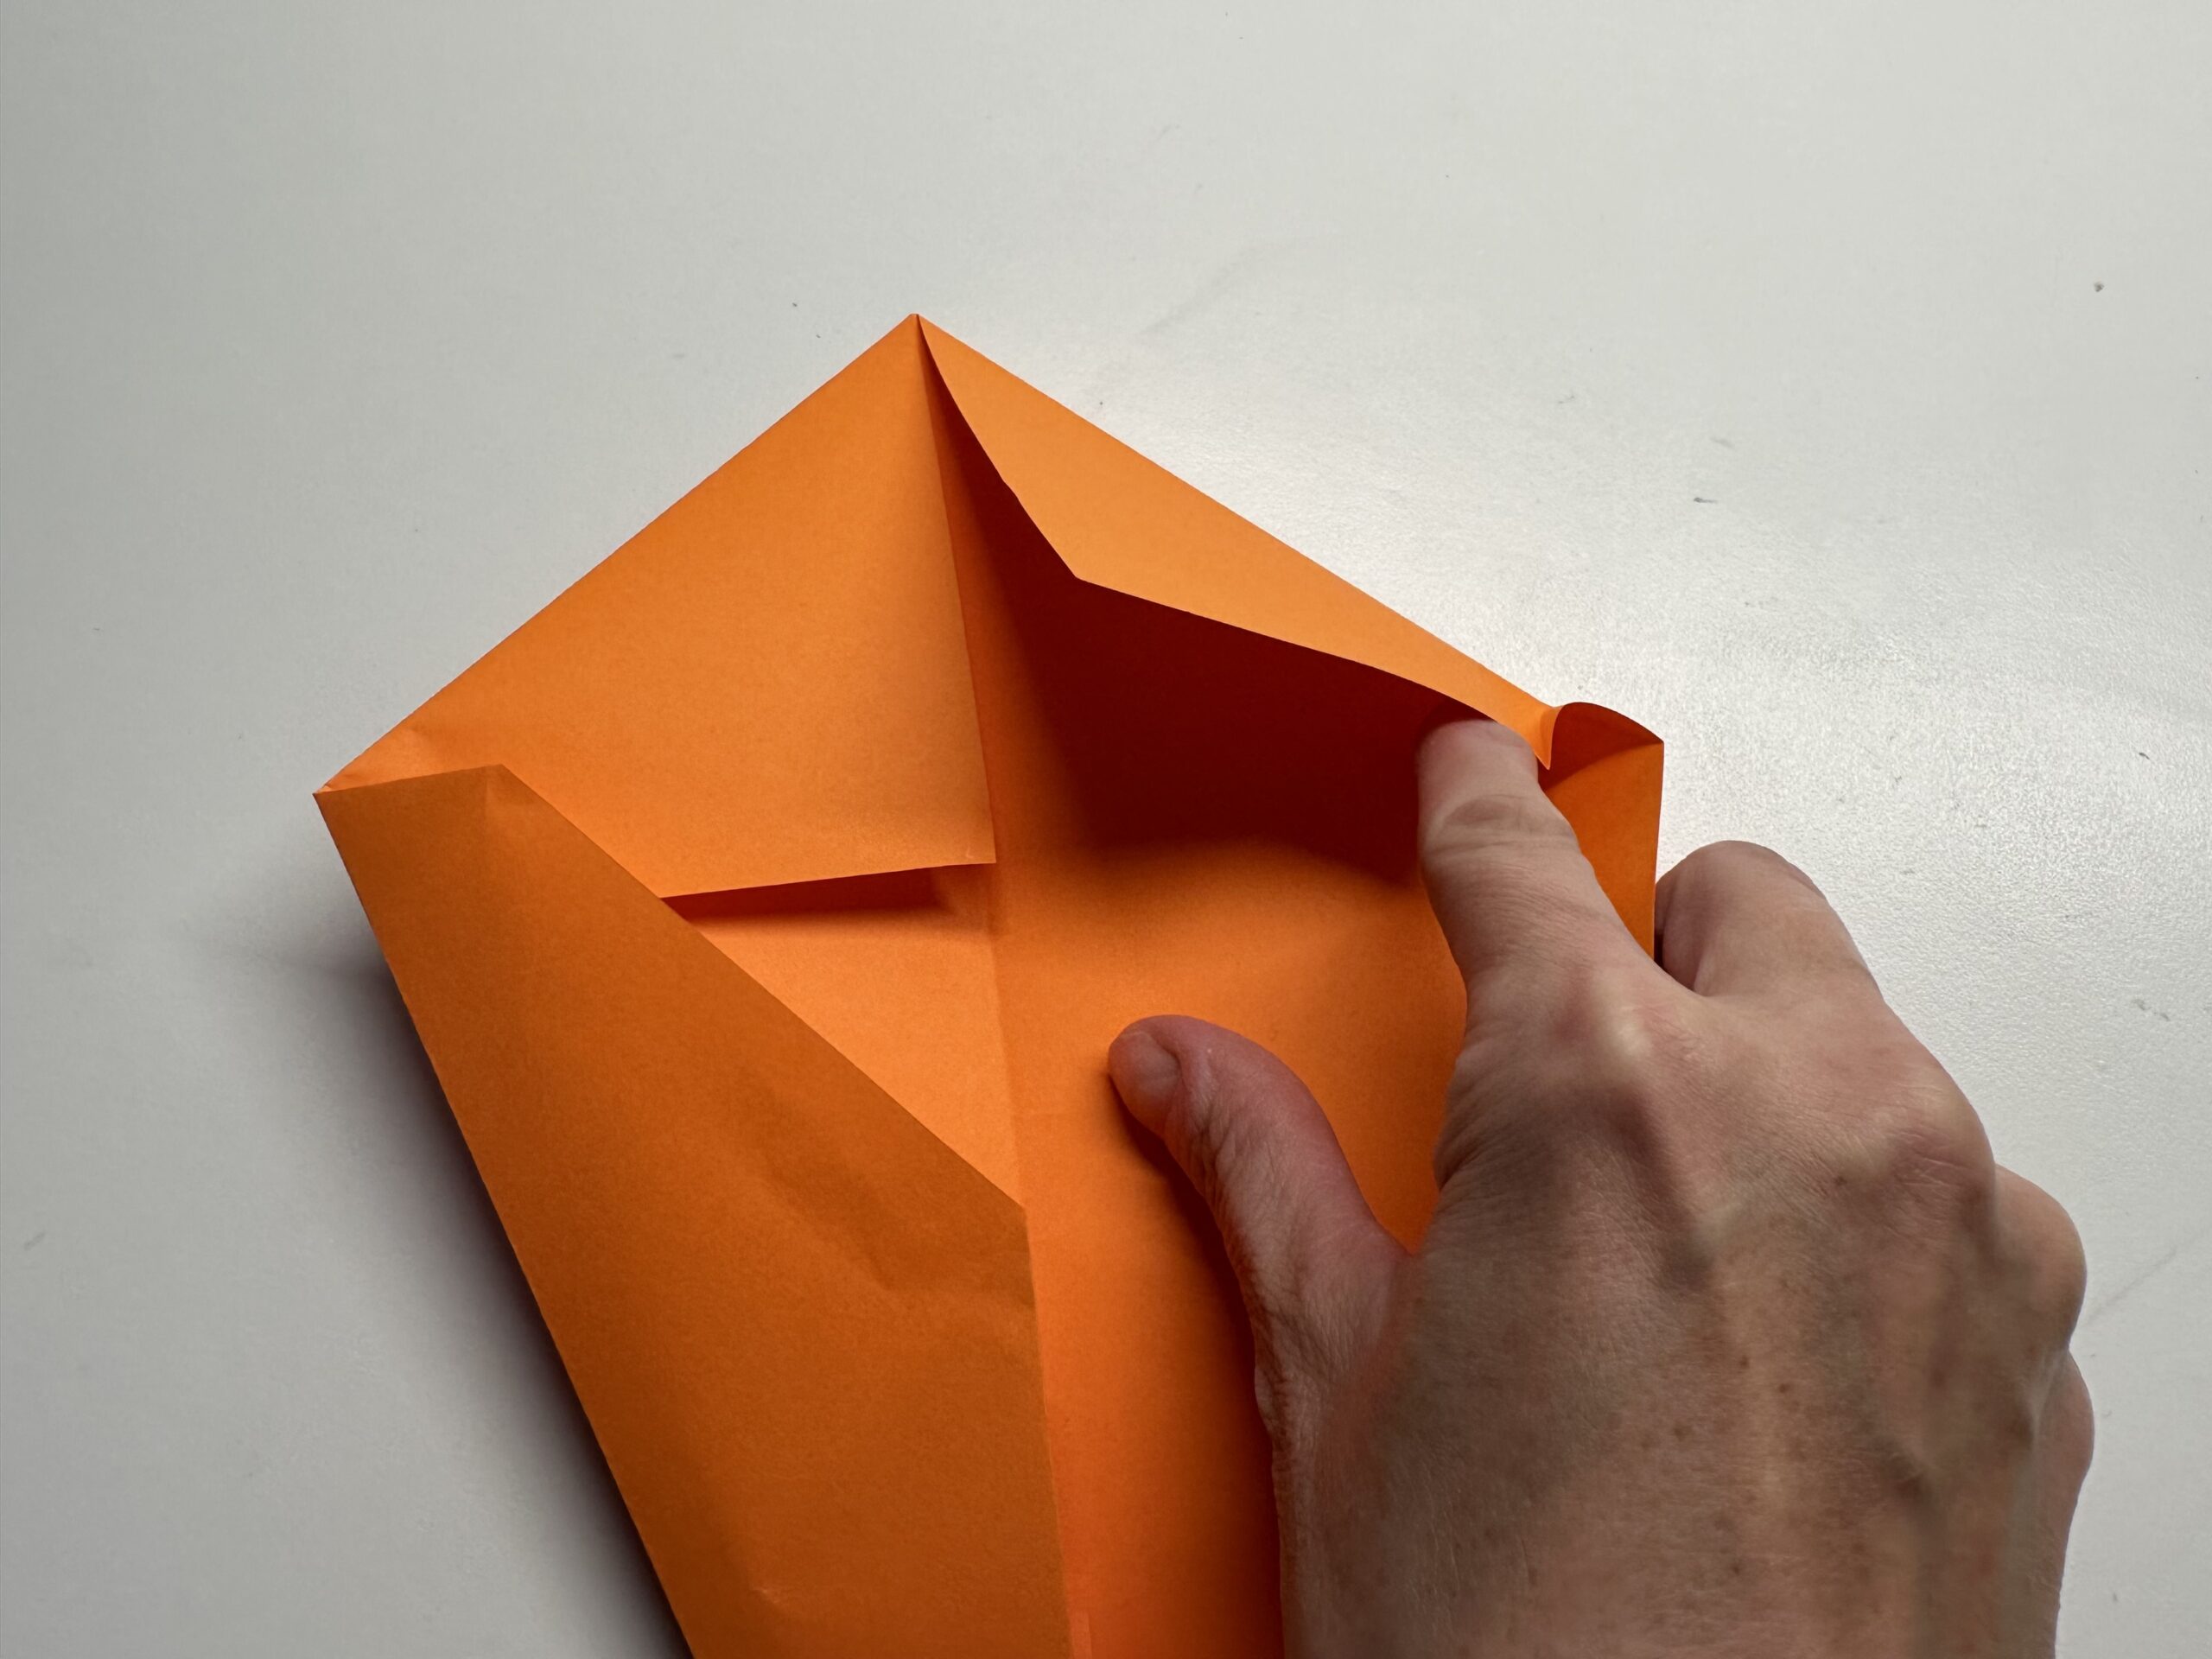
Bild zum Schritt 16 für das Bastel- und DIY-Abenteuer für Kinder: 'Biege die gefalteten Teile etwas auseinander.'

17

Put the paper below up and fold the fold back.
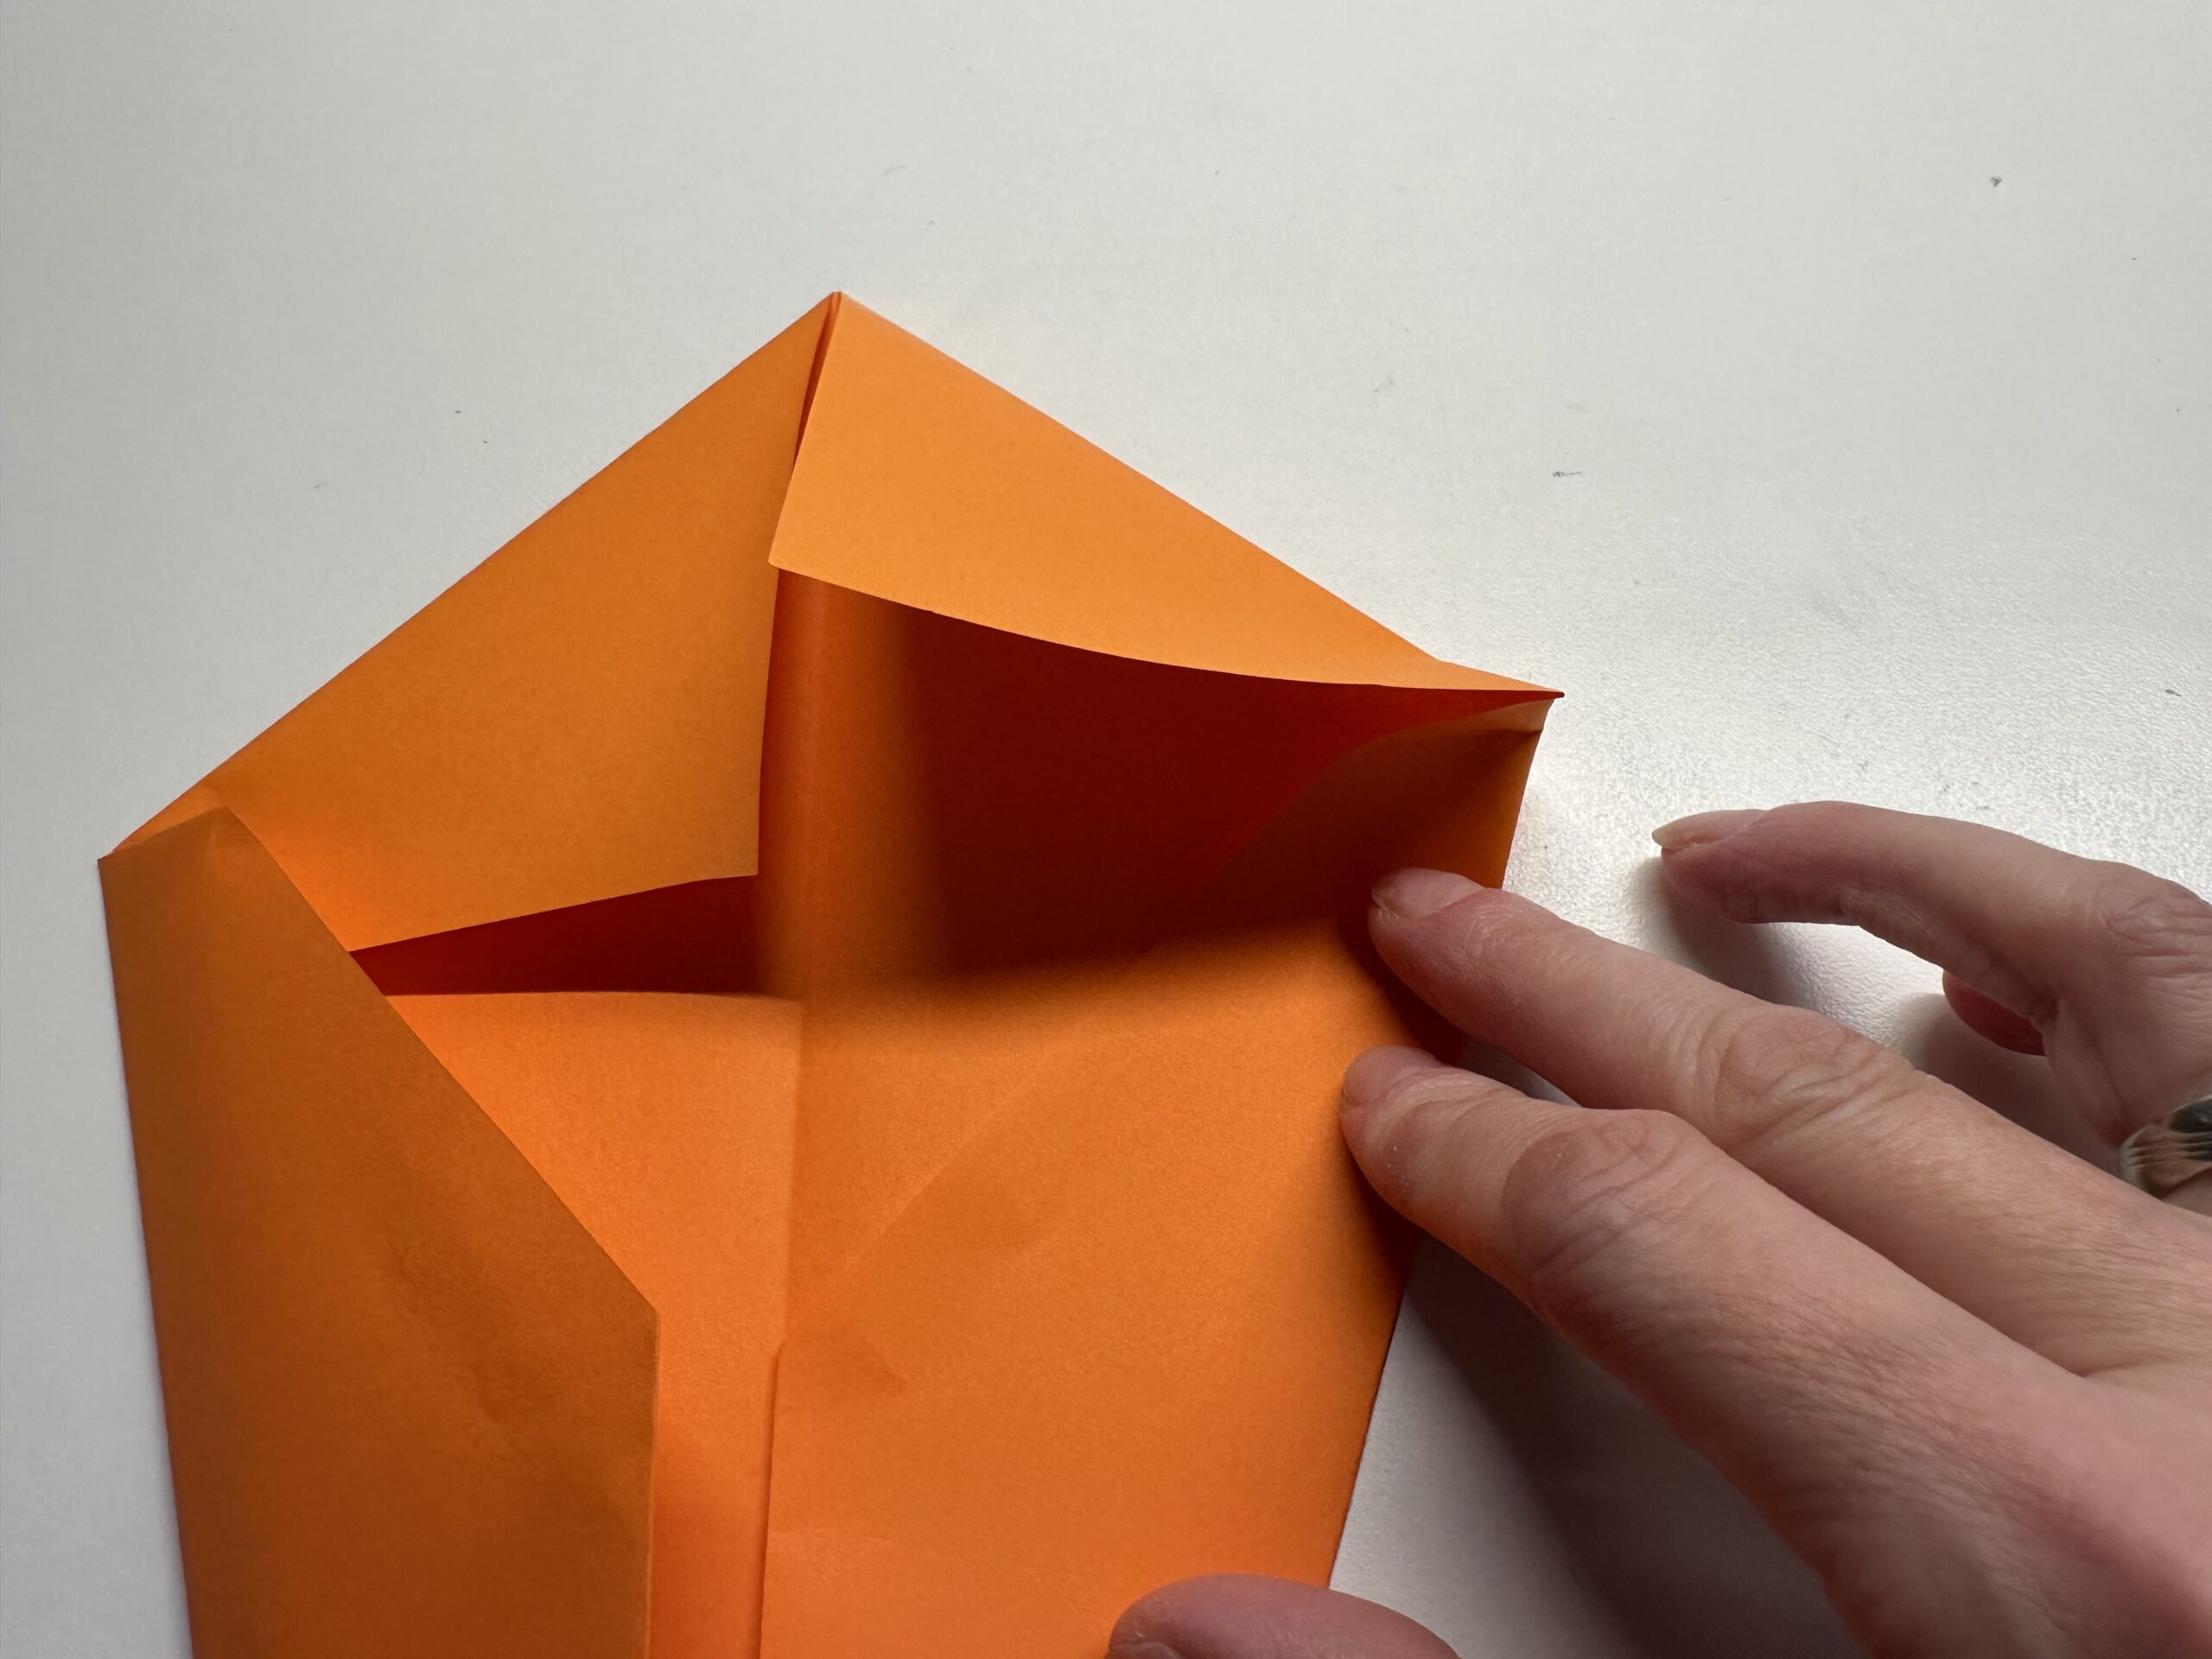
Bild zum Schritt 17 für das Bastel- und DIY-Abenteuer für Kinder: 'Lege das unten liegende Papier nach oben und klappe die...'

18

That's what it looks like.

Bild zum Schritt 18 für das Bastel- und DIY-Abenteuer für Kinder: 'So sieht das nun aus.'

19

Place the short triangles upwards on the other side as well.
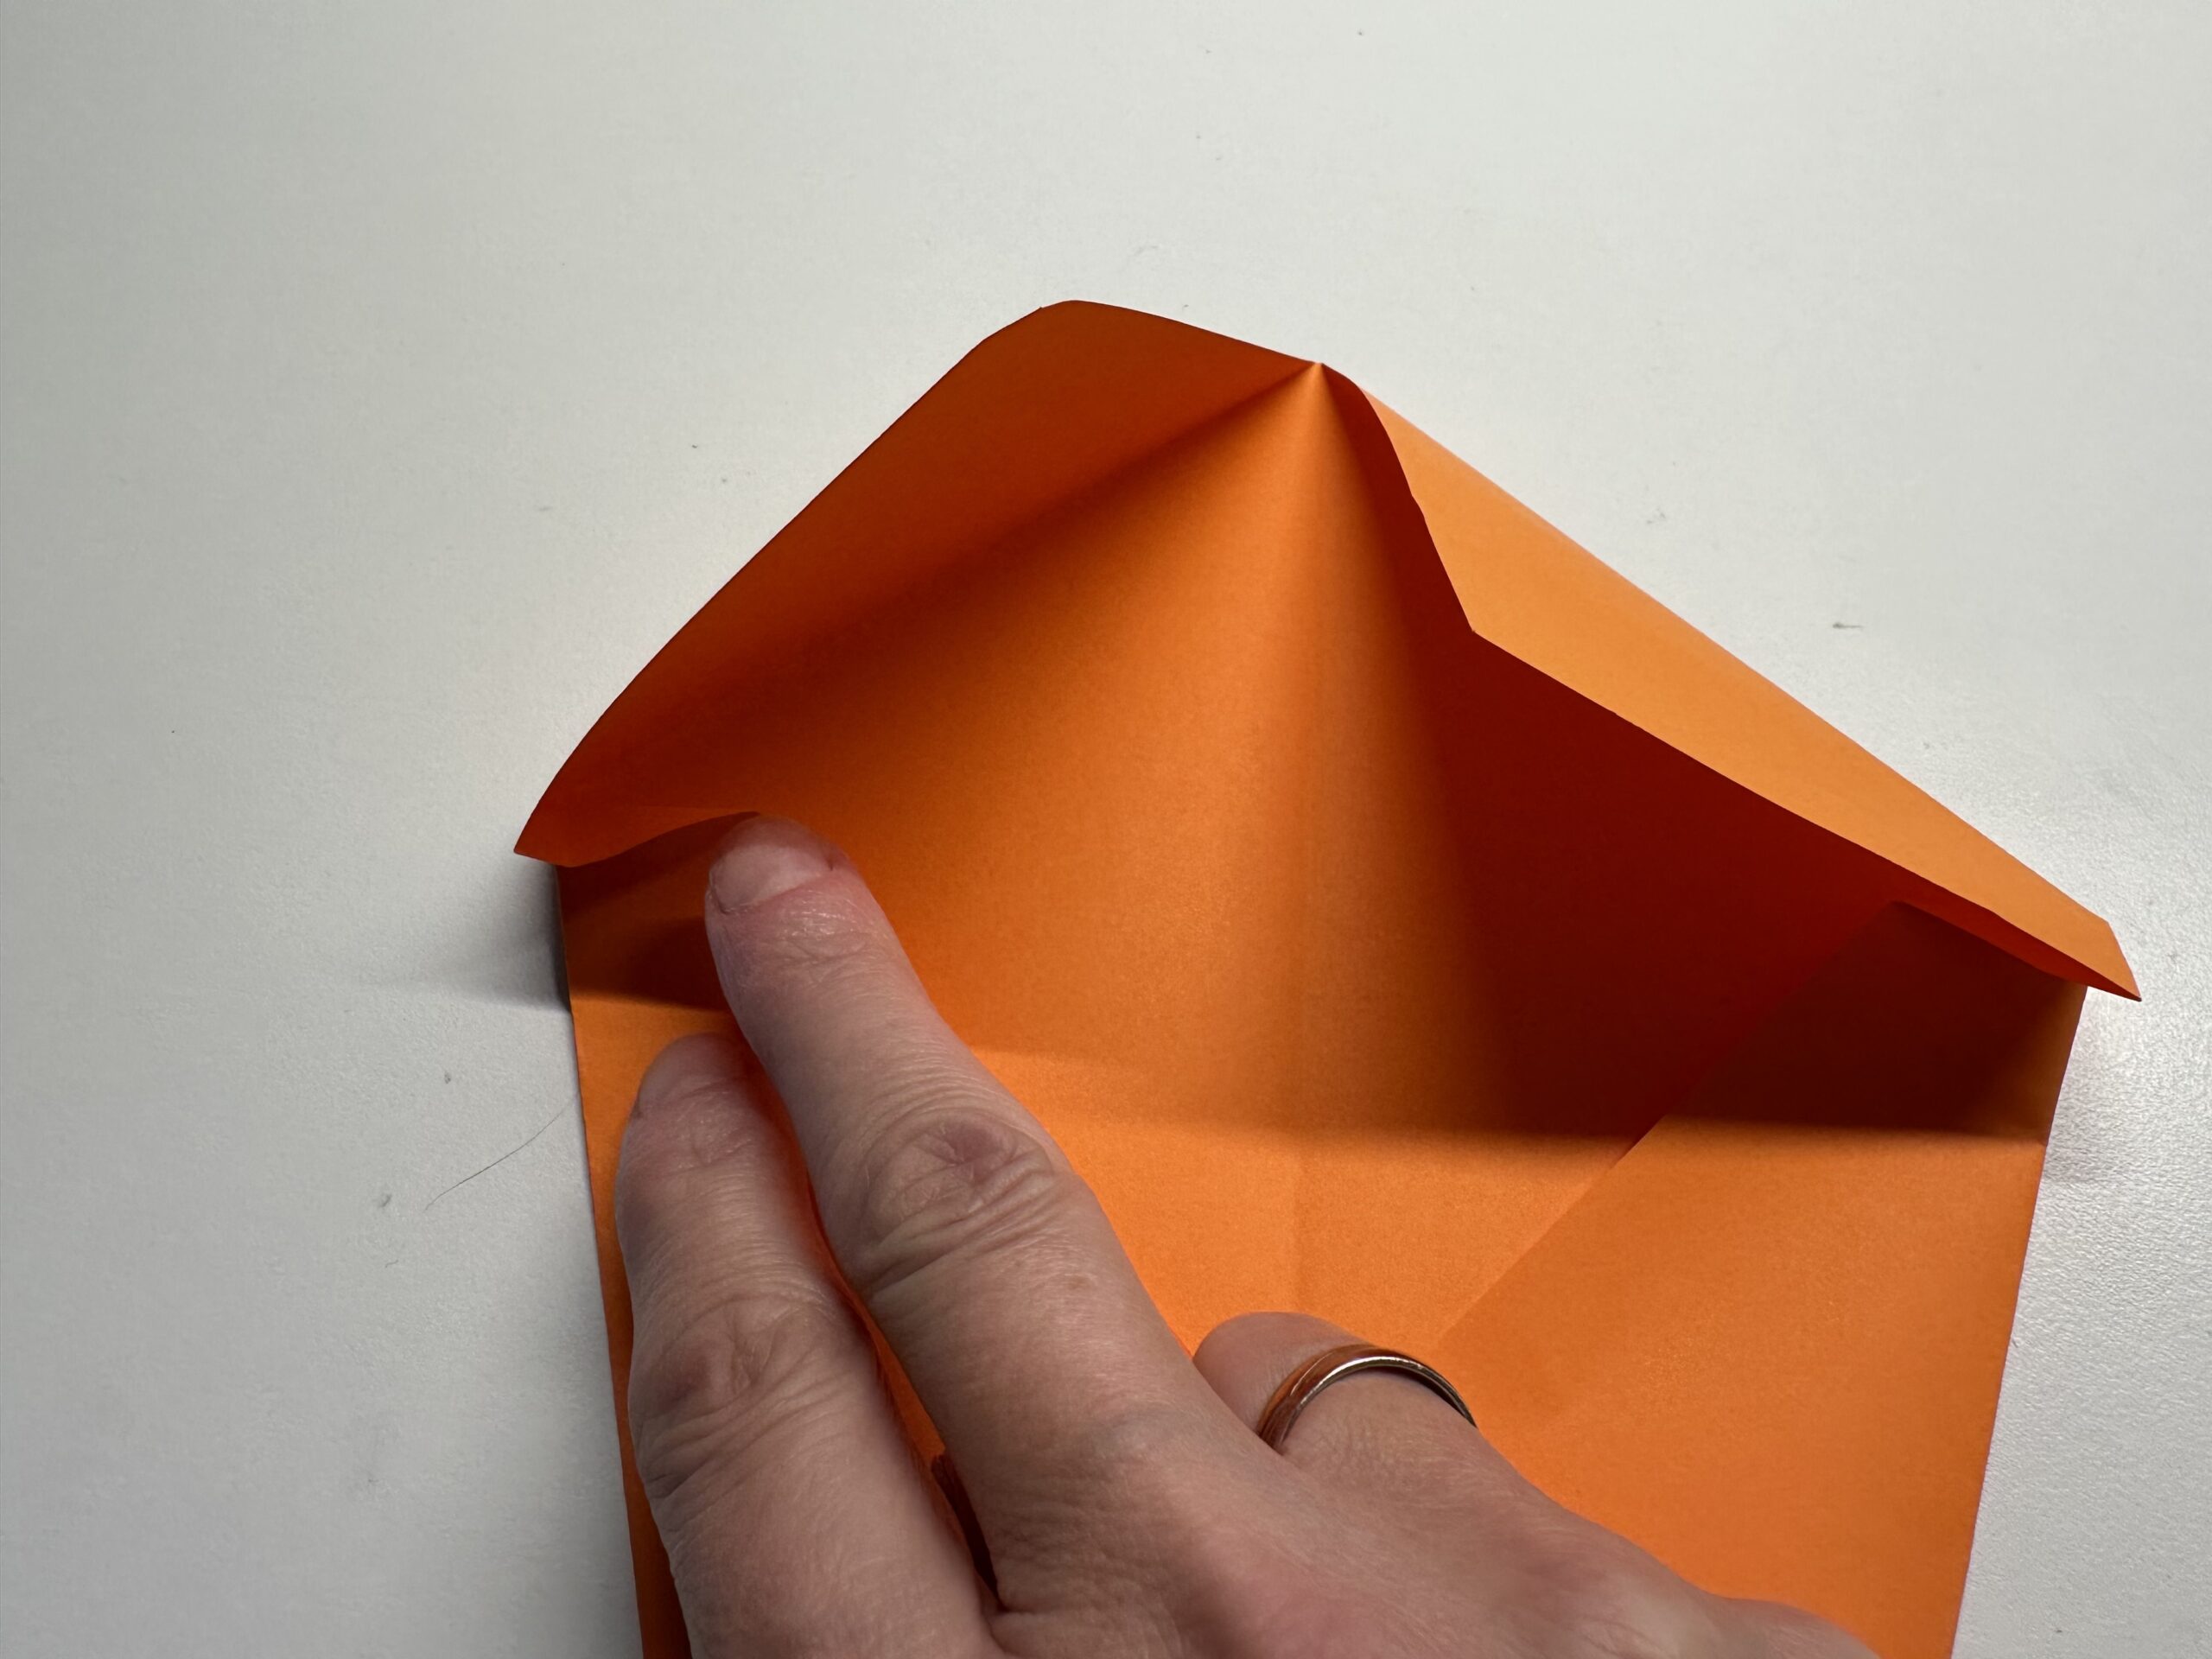
Bild zum Schritt 19 für das Bastel- und DIY-Abenteuer für Kinder: 'Lege auch auf der anderen Seite die kurzen Dreiecke nach...'

20

The upper sides are now also on top.
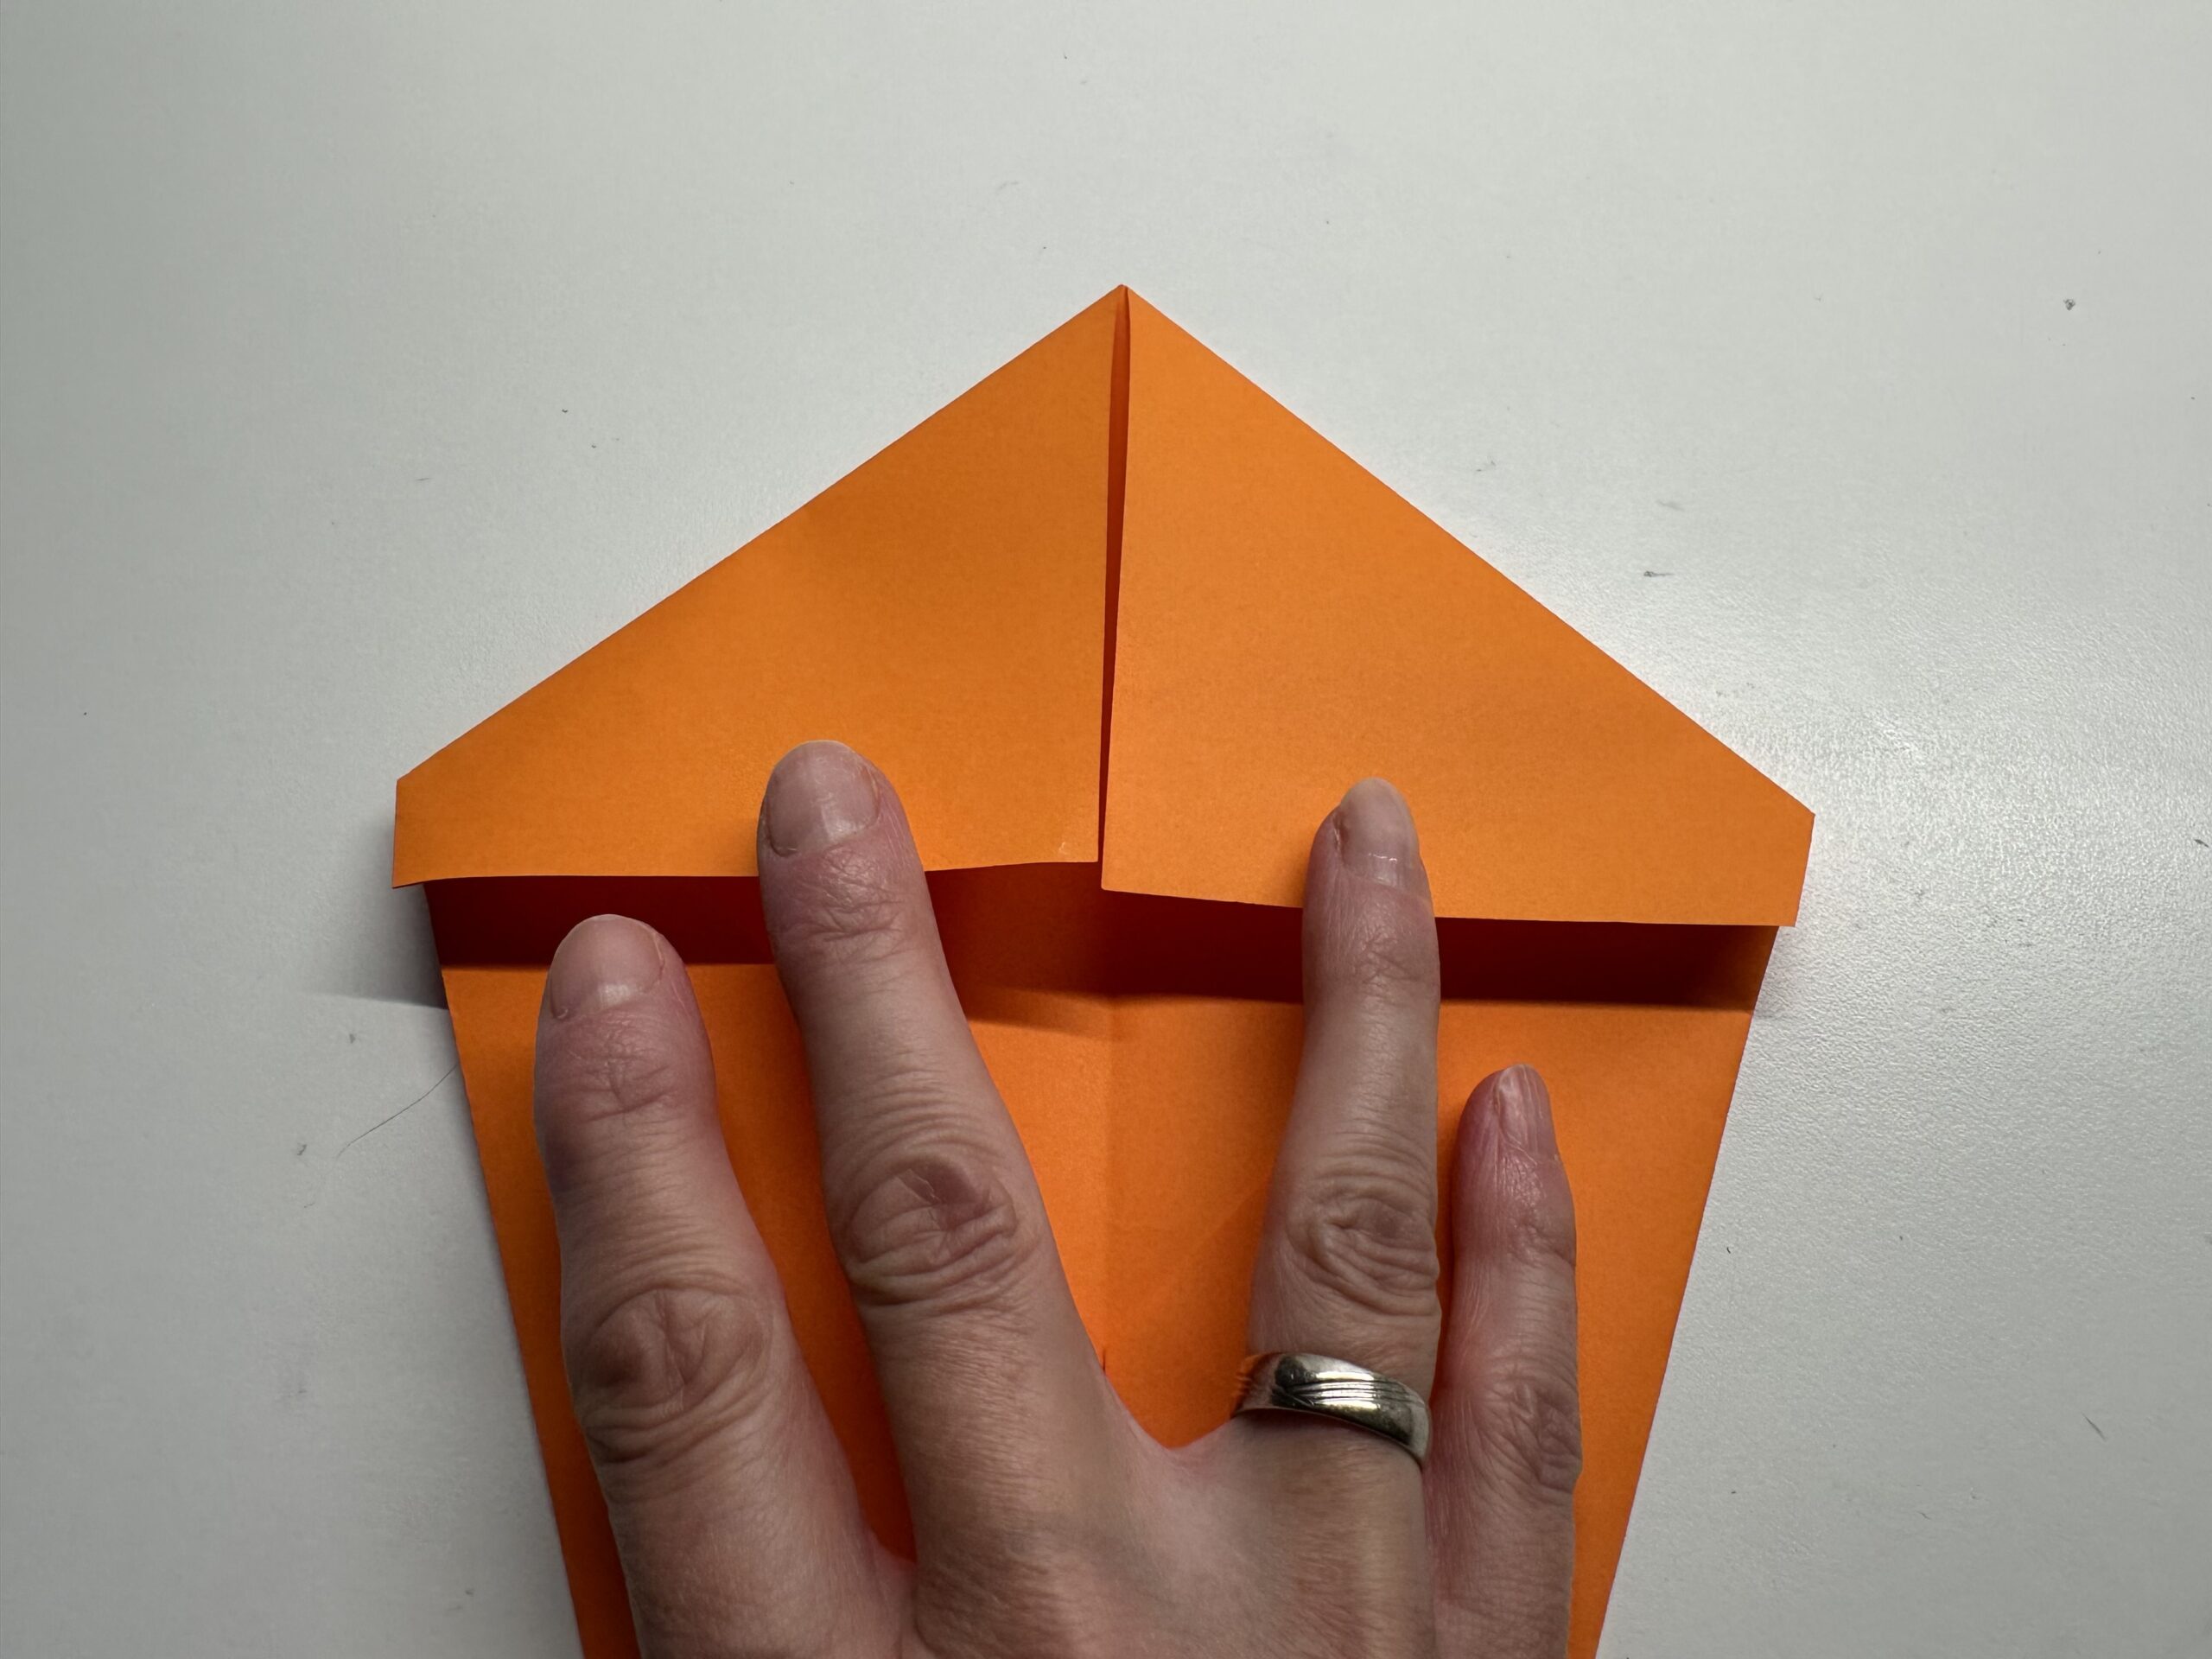
Bild zum Schritt 20 für das Bastel- und DIY-Abenteuer für Kinder: 'Die oberen Seiten liegen nun auch obendrauf.'

21

Take a tape and glue both triangles together.
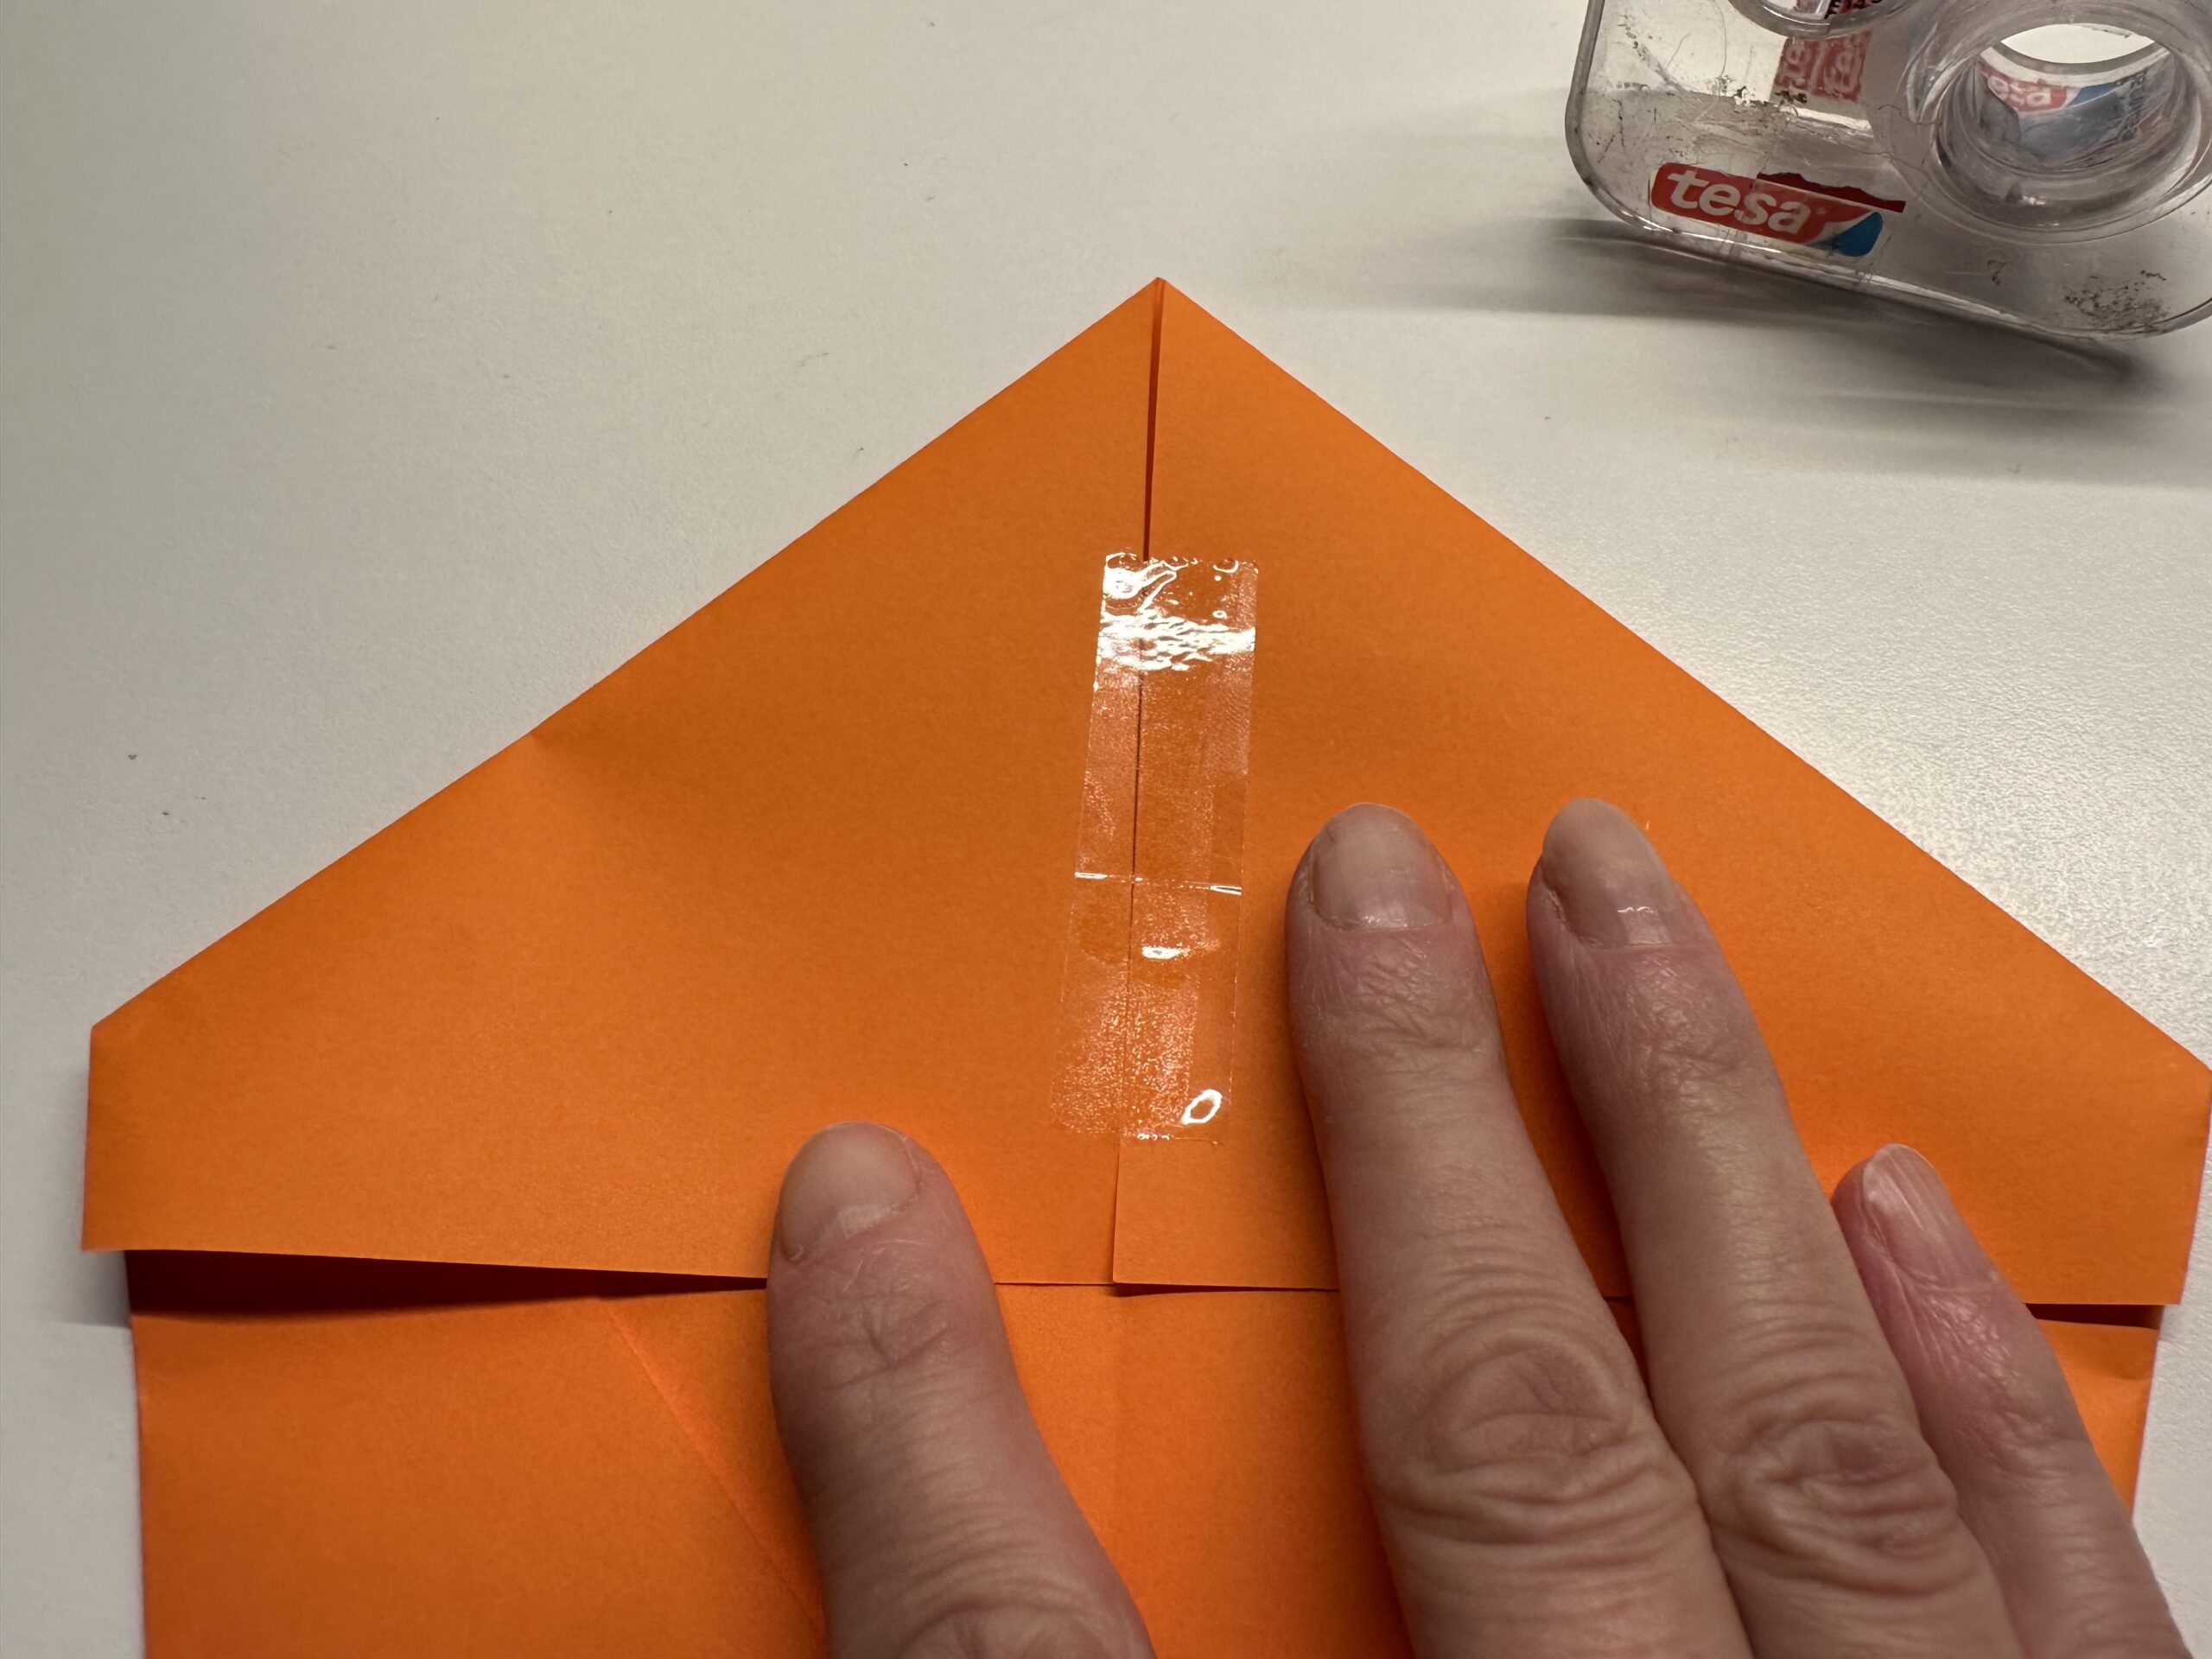
Bild zum Schritt 21 für das Bastel- und DIY-Abenteuer für Kinder: 'Nimm einen Klebestreifen und klebe beide Dreiecke zusammen.'

22

Glue another adhesive tape to the middle of the lower triangles so that they don't open.
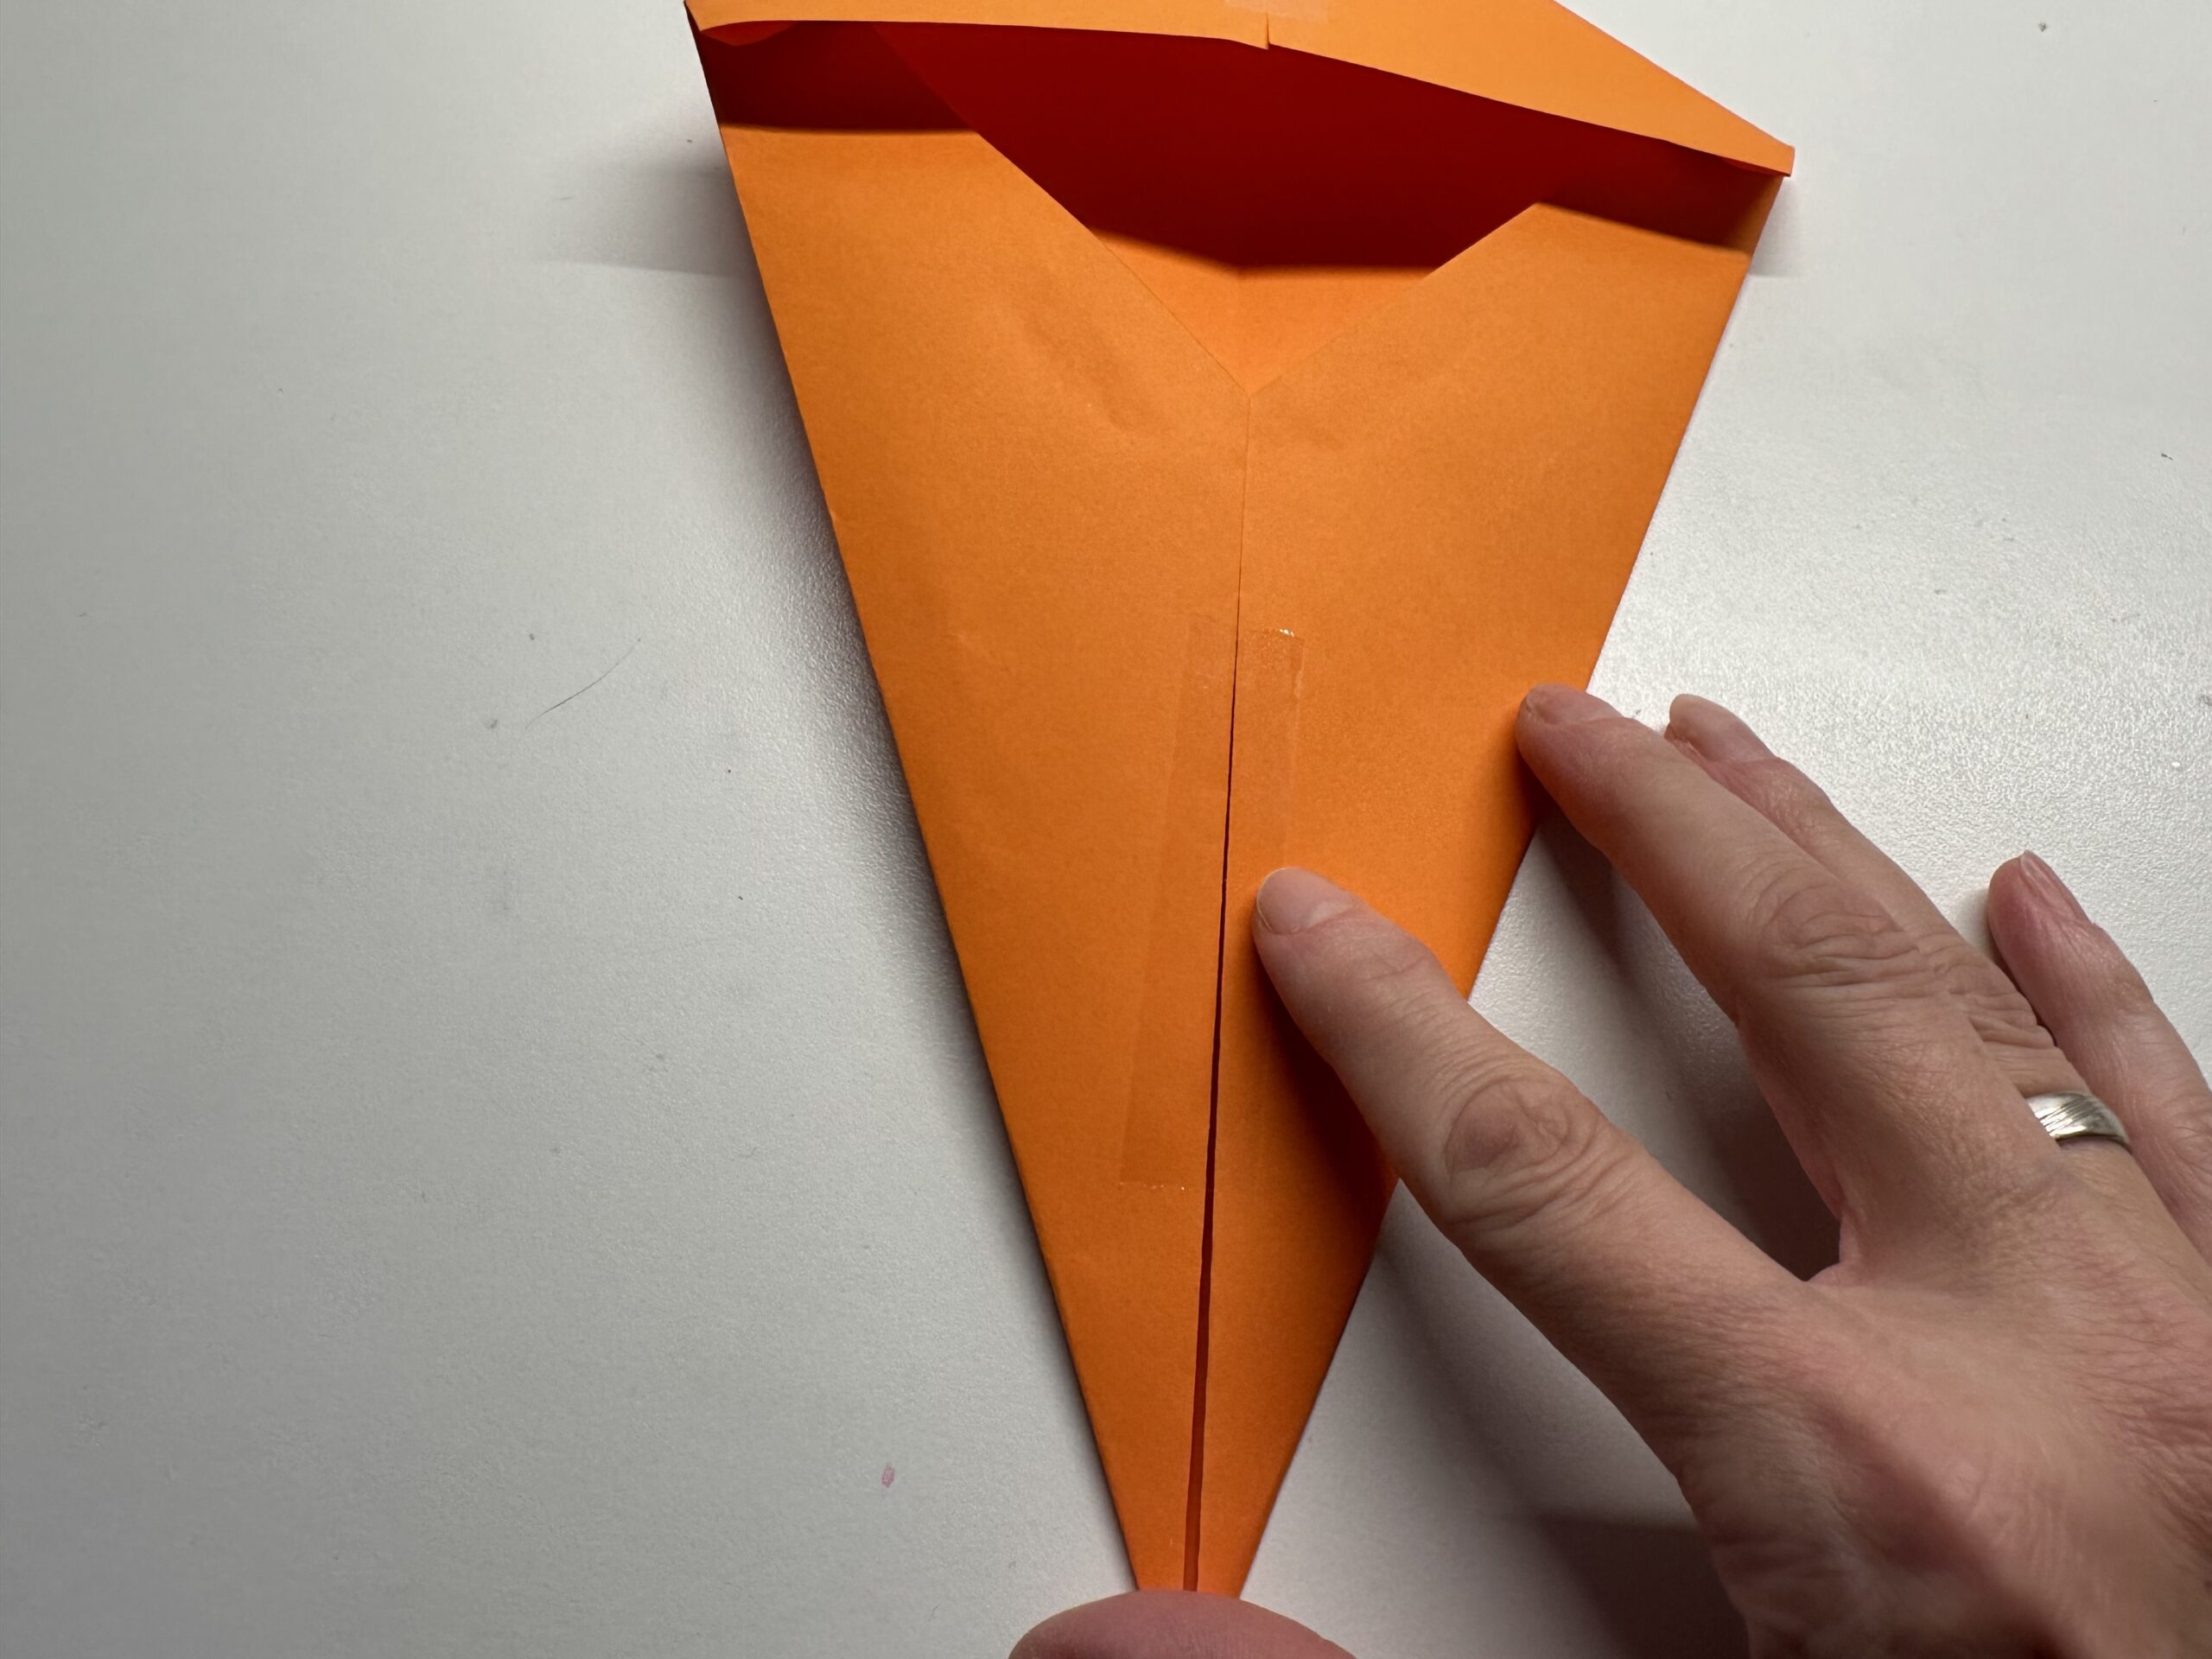
Bild zum Schritt 22 für das Bastel- und DIY-Abenteuer für Kinder: 'Klebe einen weiteren Klebestreifen auf die Mitte der unteren Dreiecke....'

23

Now you can reach into the upper tip with your hand.
The dragon can now be taken like a hand puppet.
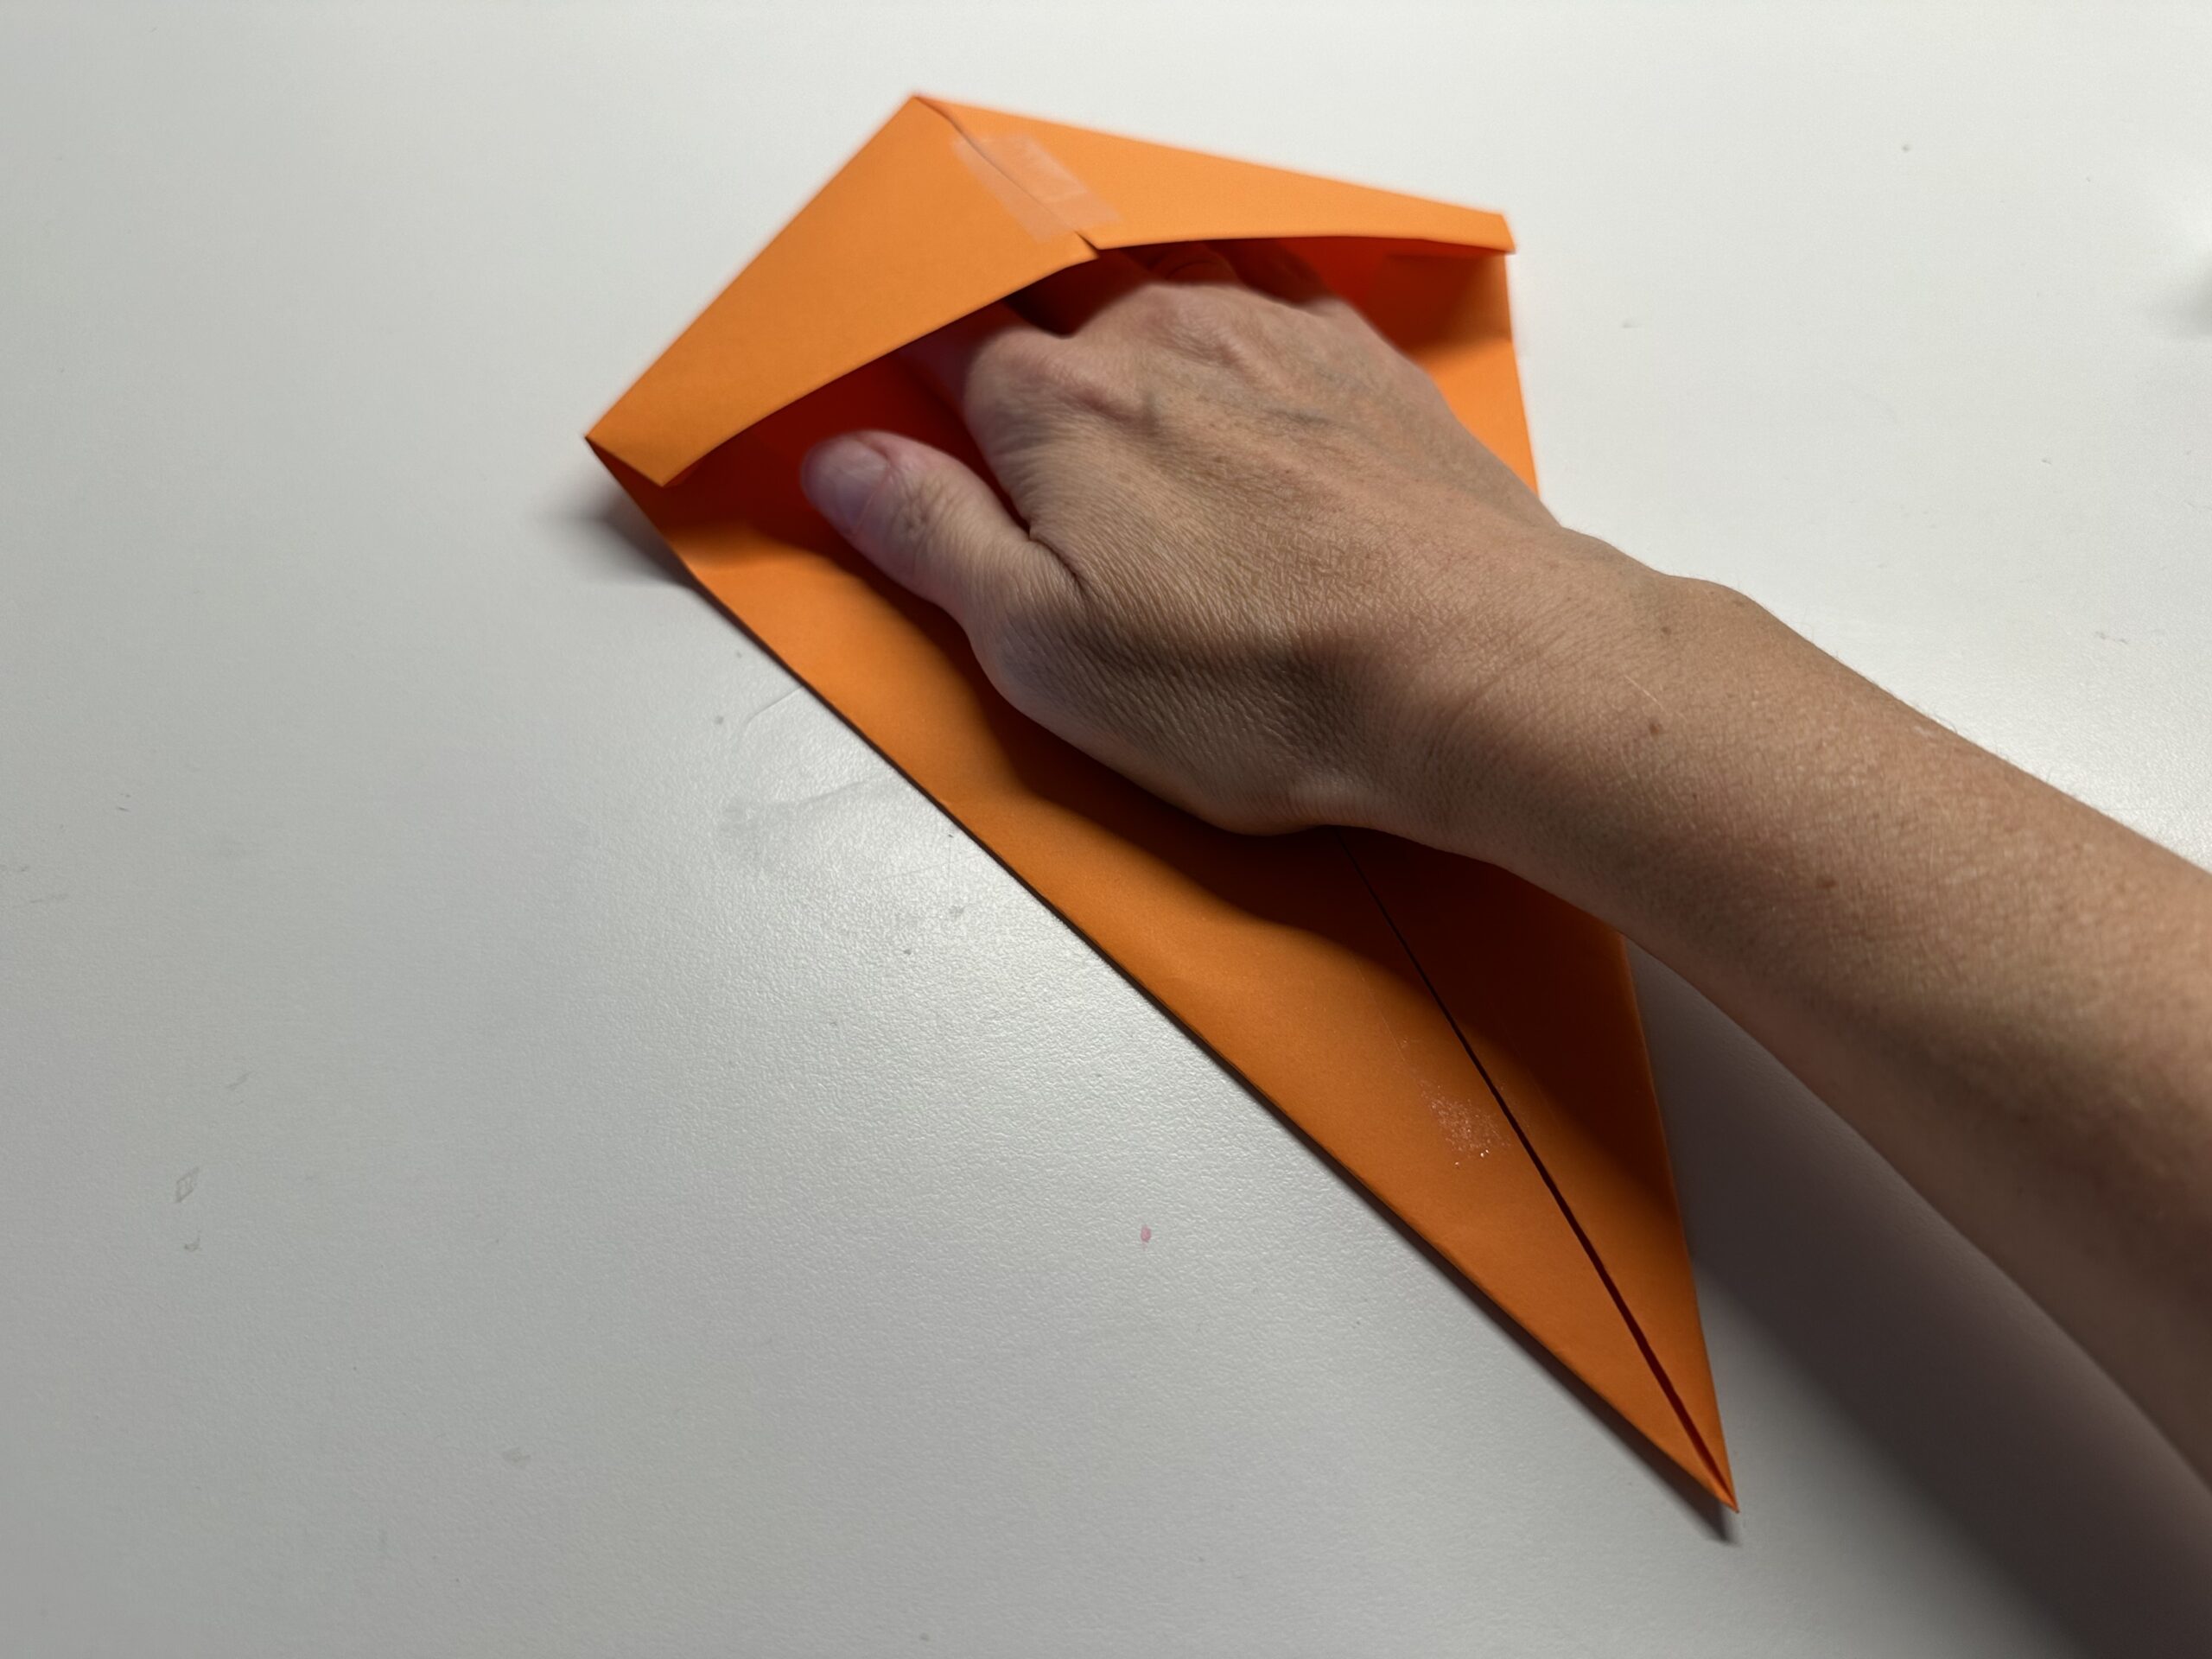
Bild zum Schritt 23 für das Bastel- und DIY-Abenteuer für Kinder: 'Nun kannst du mit der Hand in die obere Spitze...'

24

Turn your hand and you can see the front of the dragon.
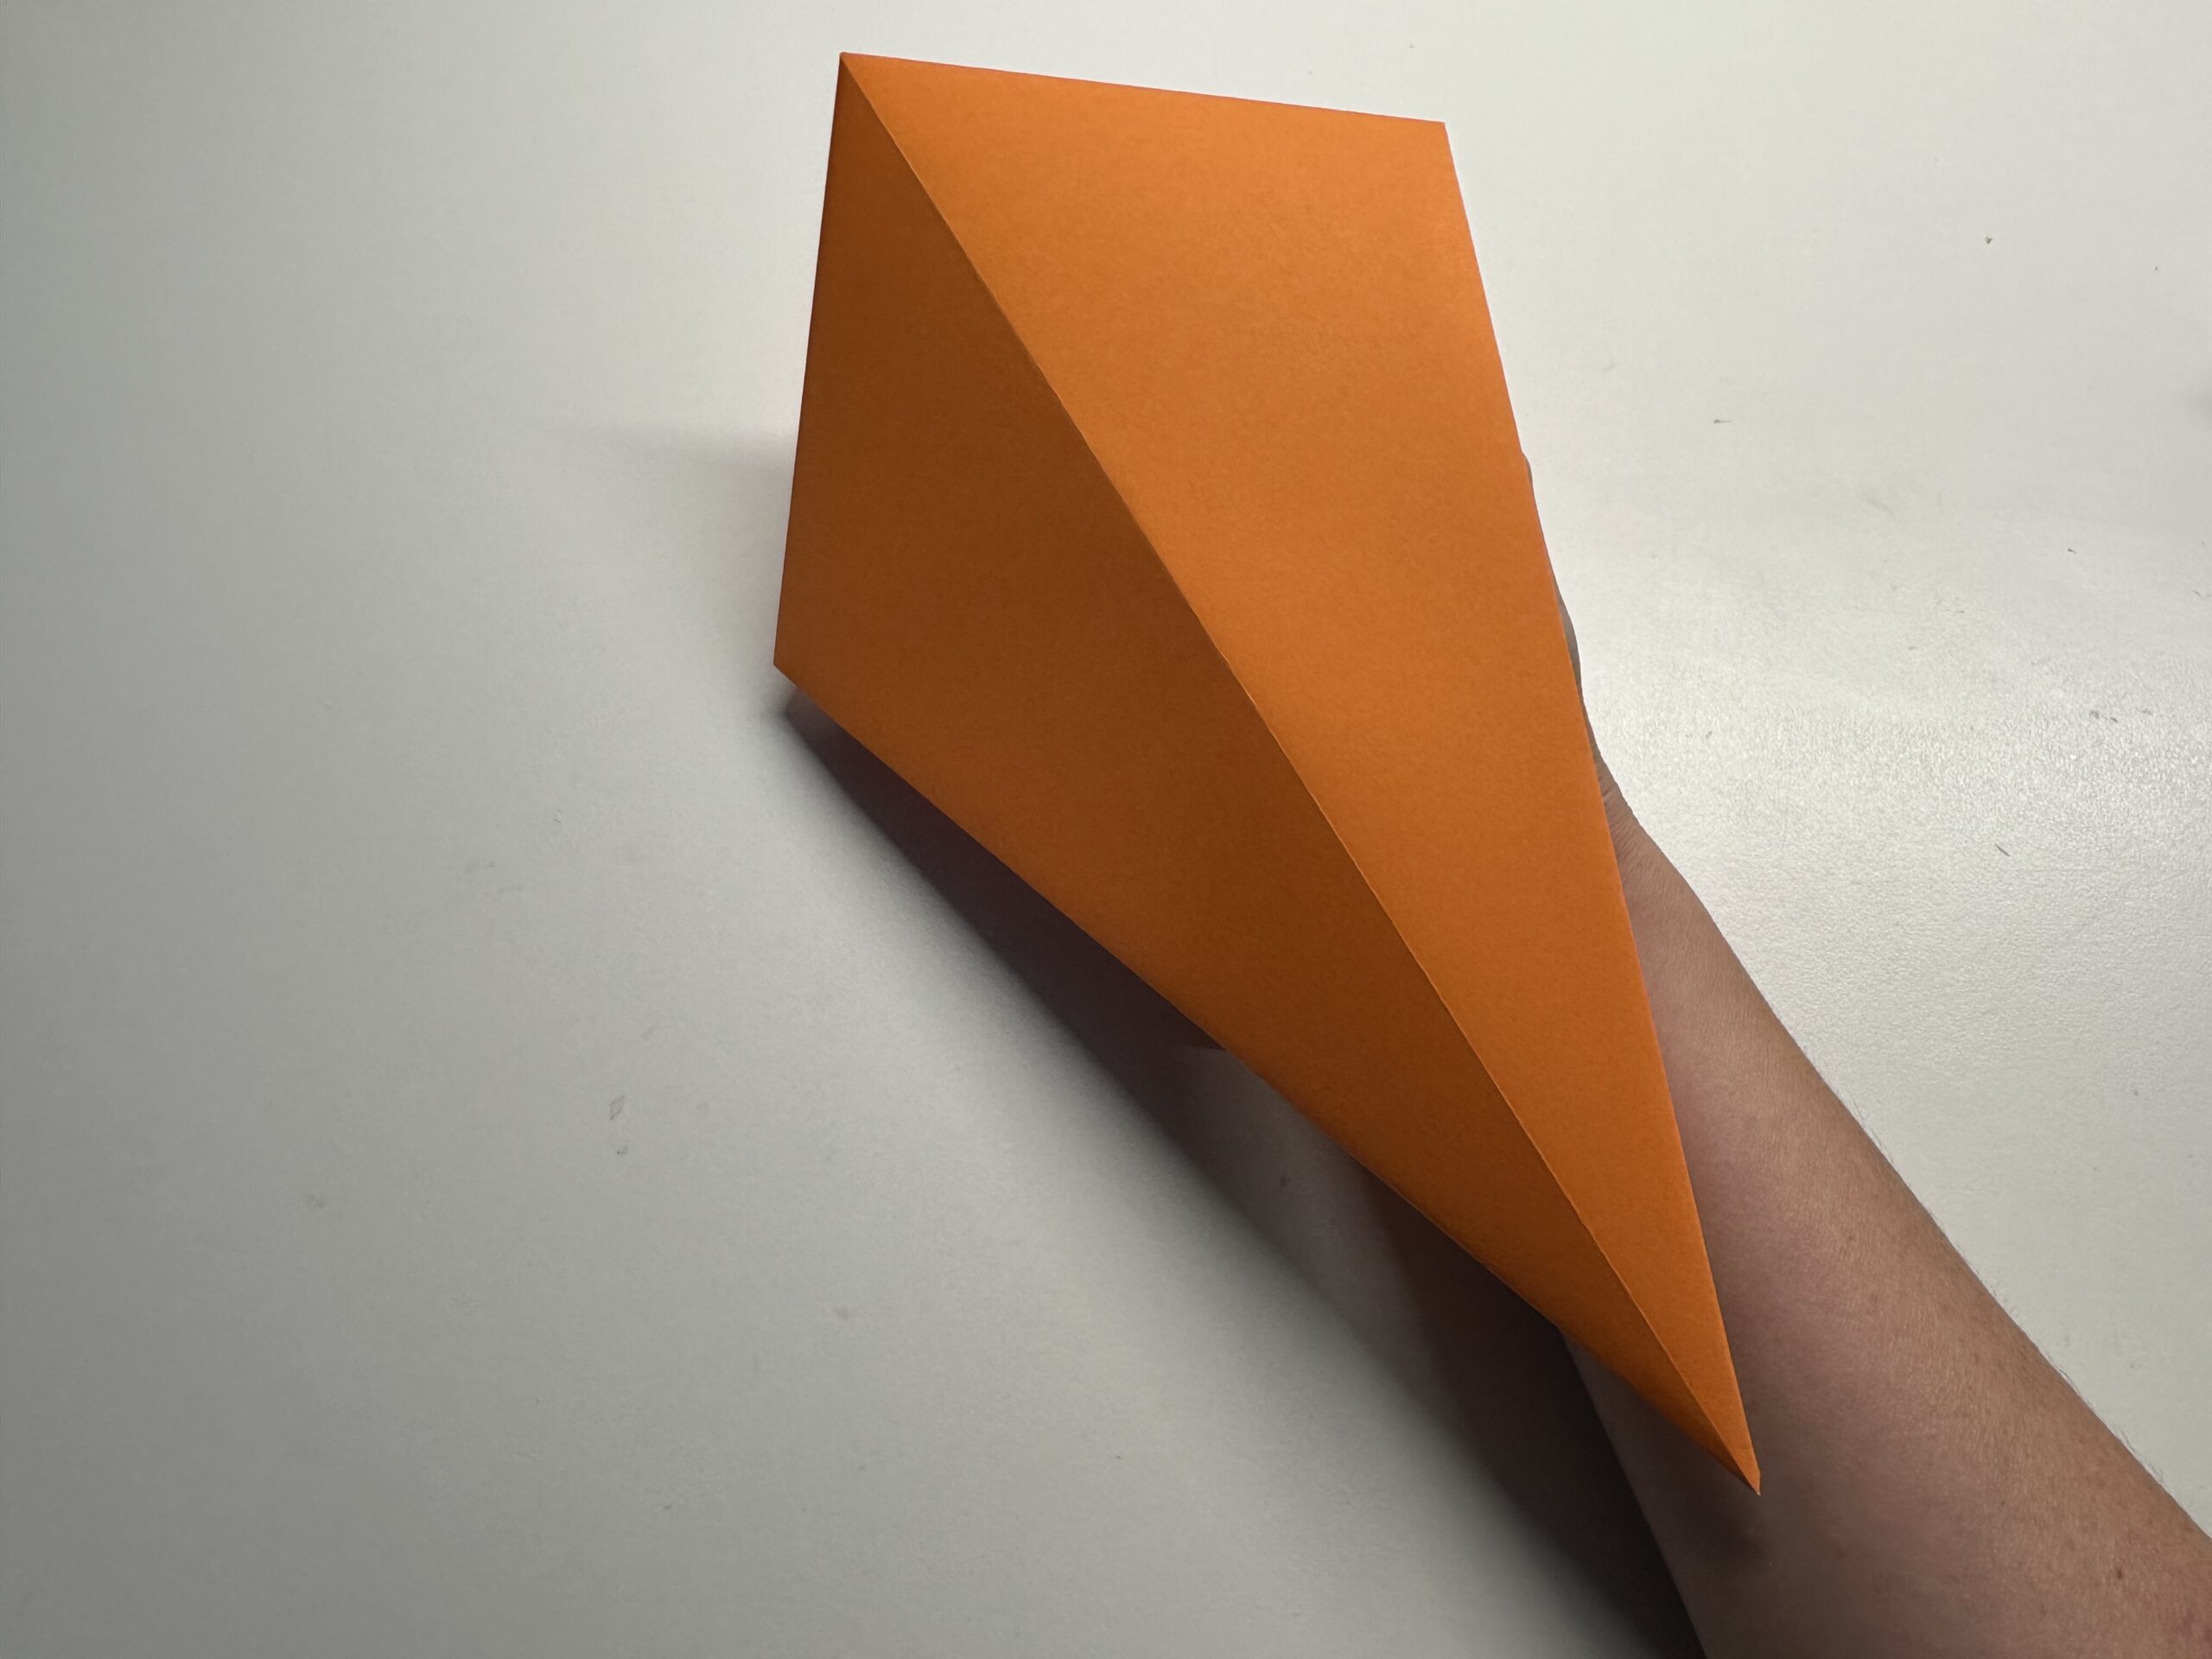
Bild zum Schritt 24 für das Bastel- und DIY-Abenteuer für Kinder: 'Drehe die Hand und du kannst dir die Vorderseite des...'

25

The front of the dragon is now still decorated.
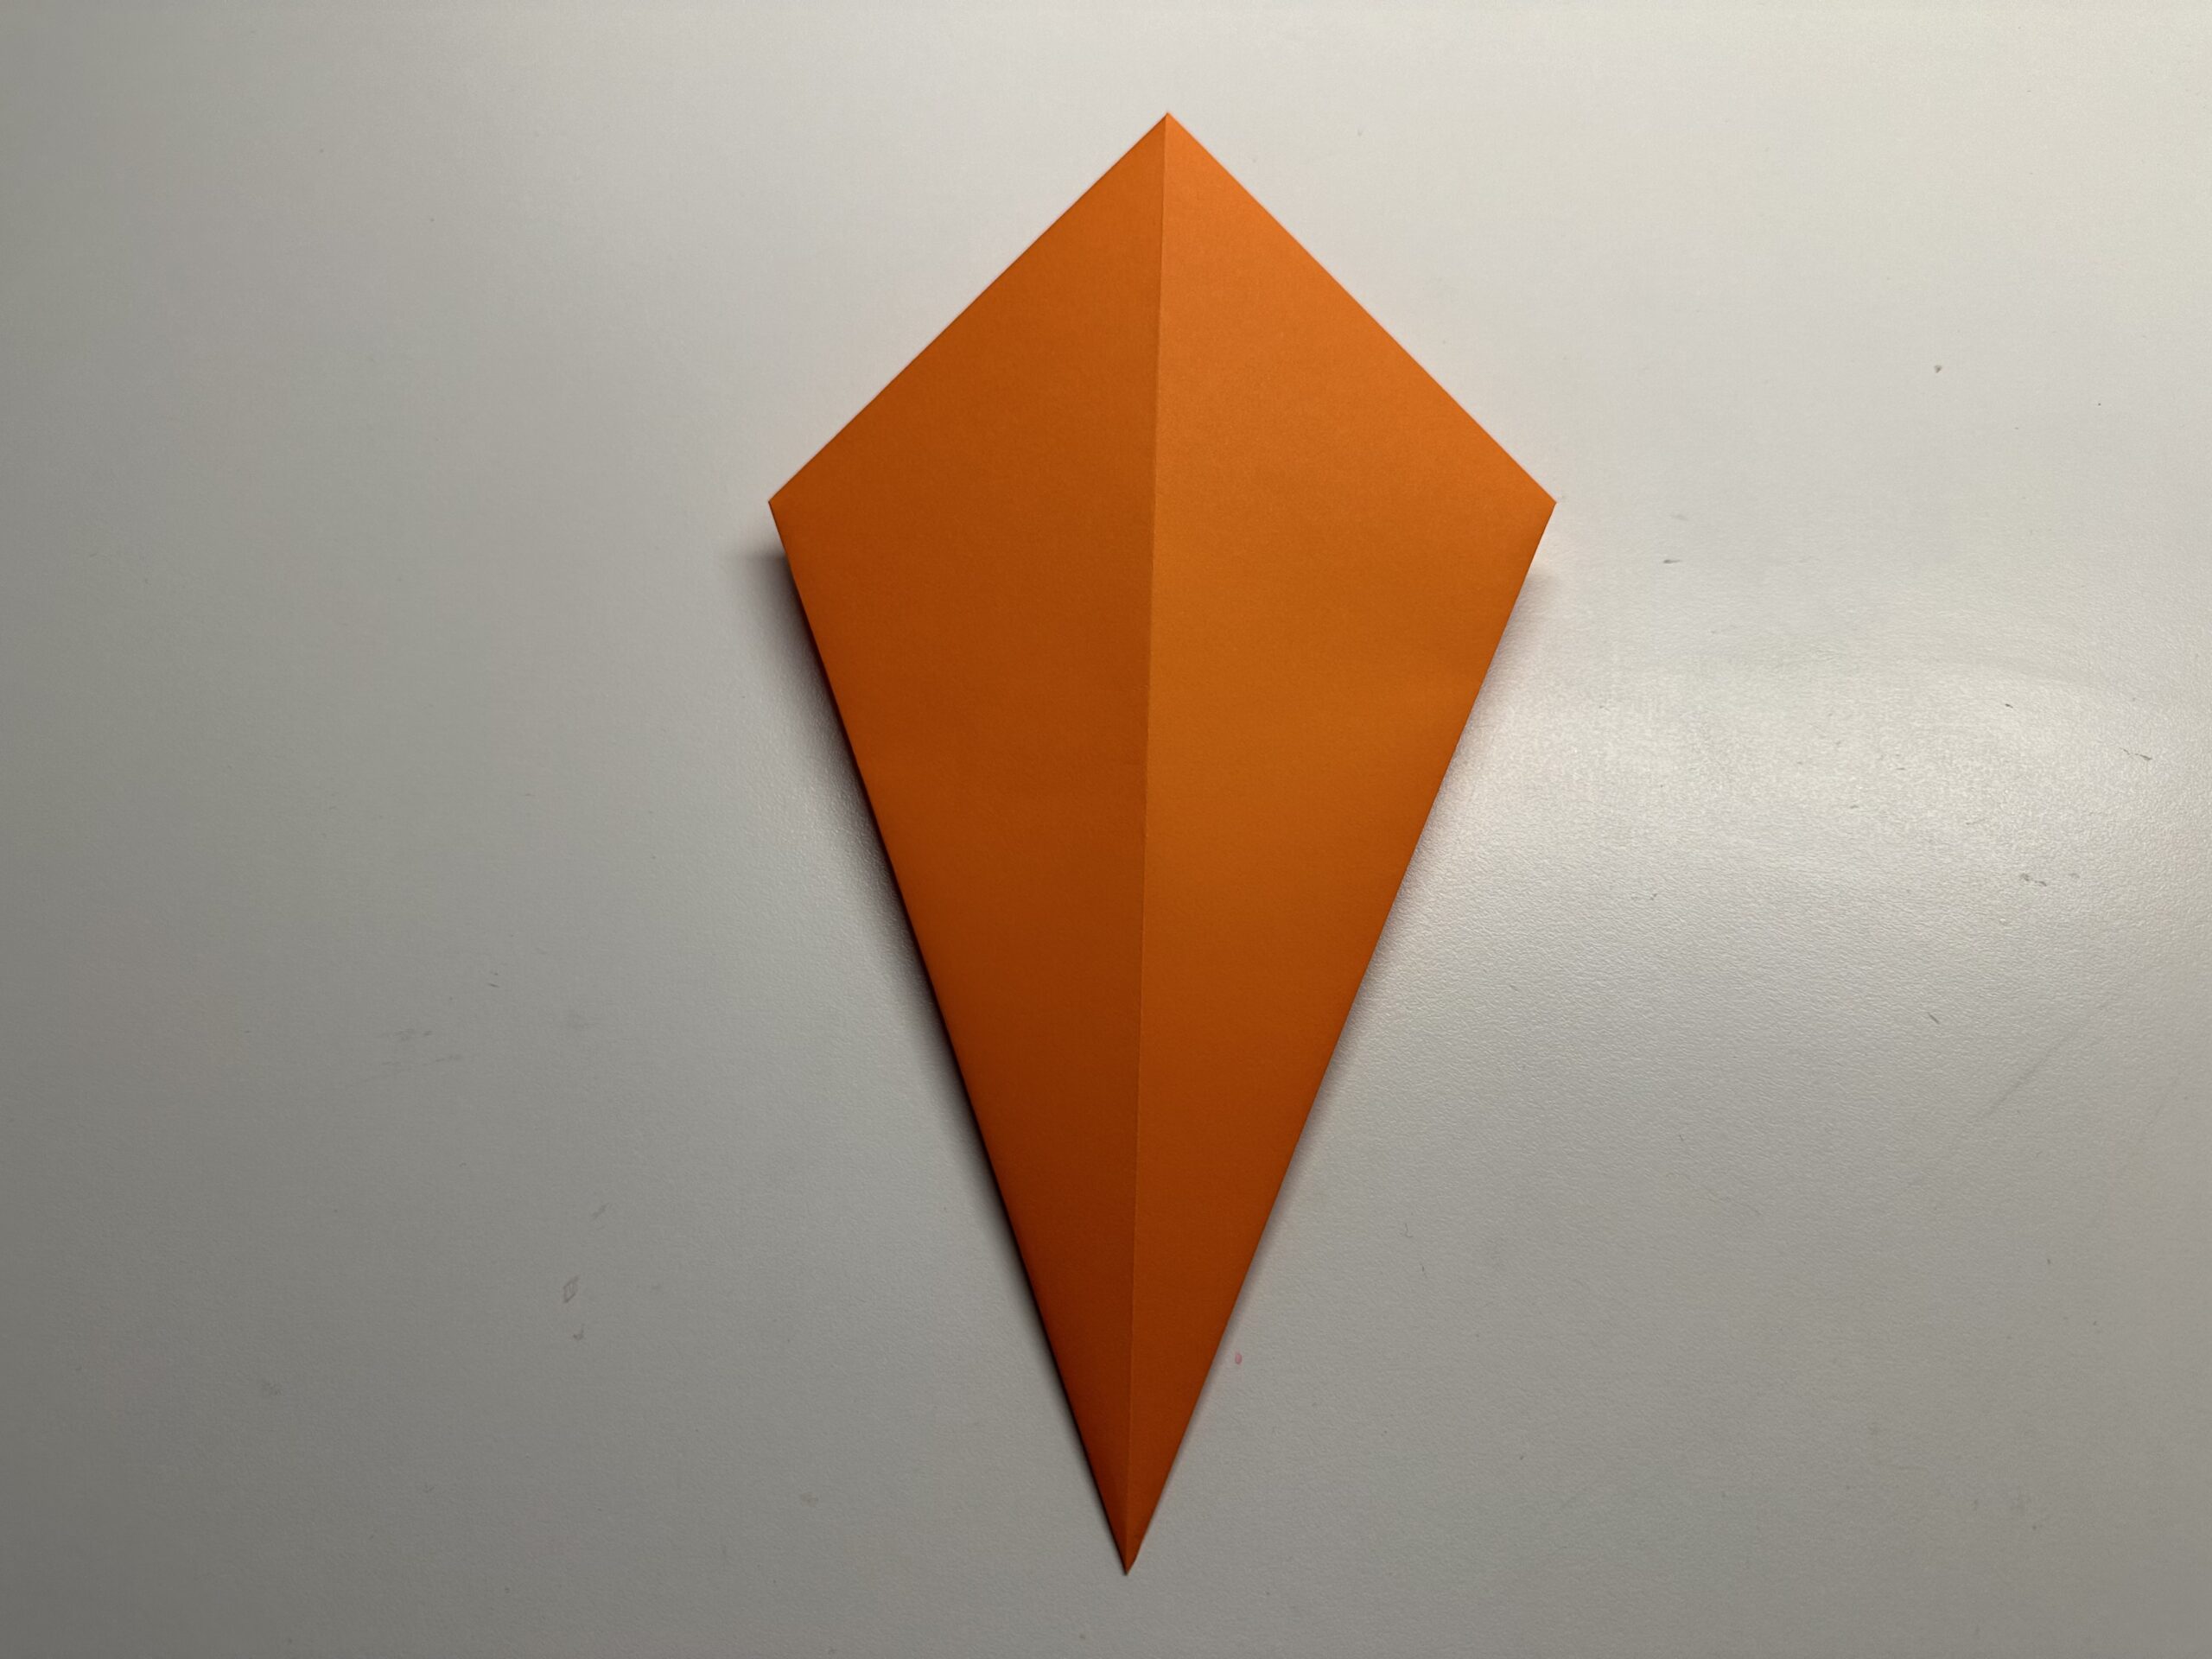
Bild zum Schritt 25 für das Bastel- und DIY-Abenteuer für Kinder: 'Die Vorderseite des Drachens wird nun noch verziert.'

26

Take a piece of paper and fold half of it.
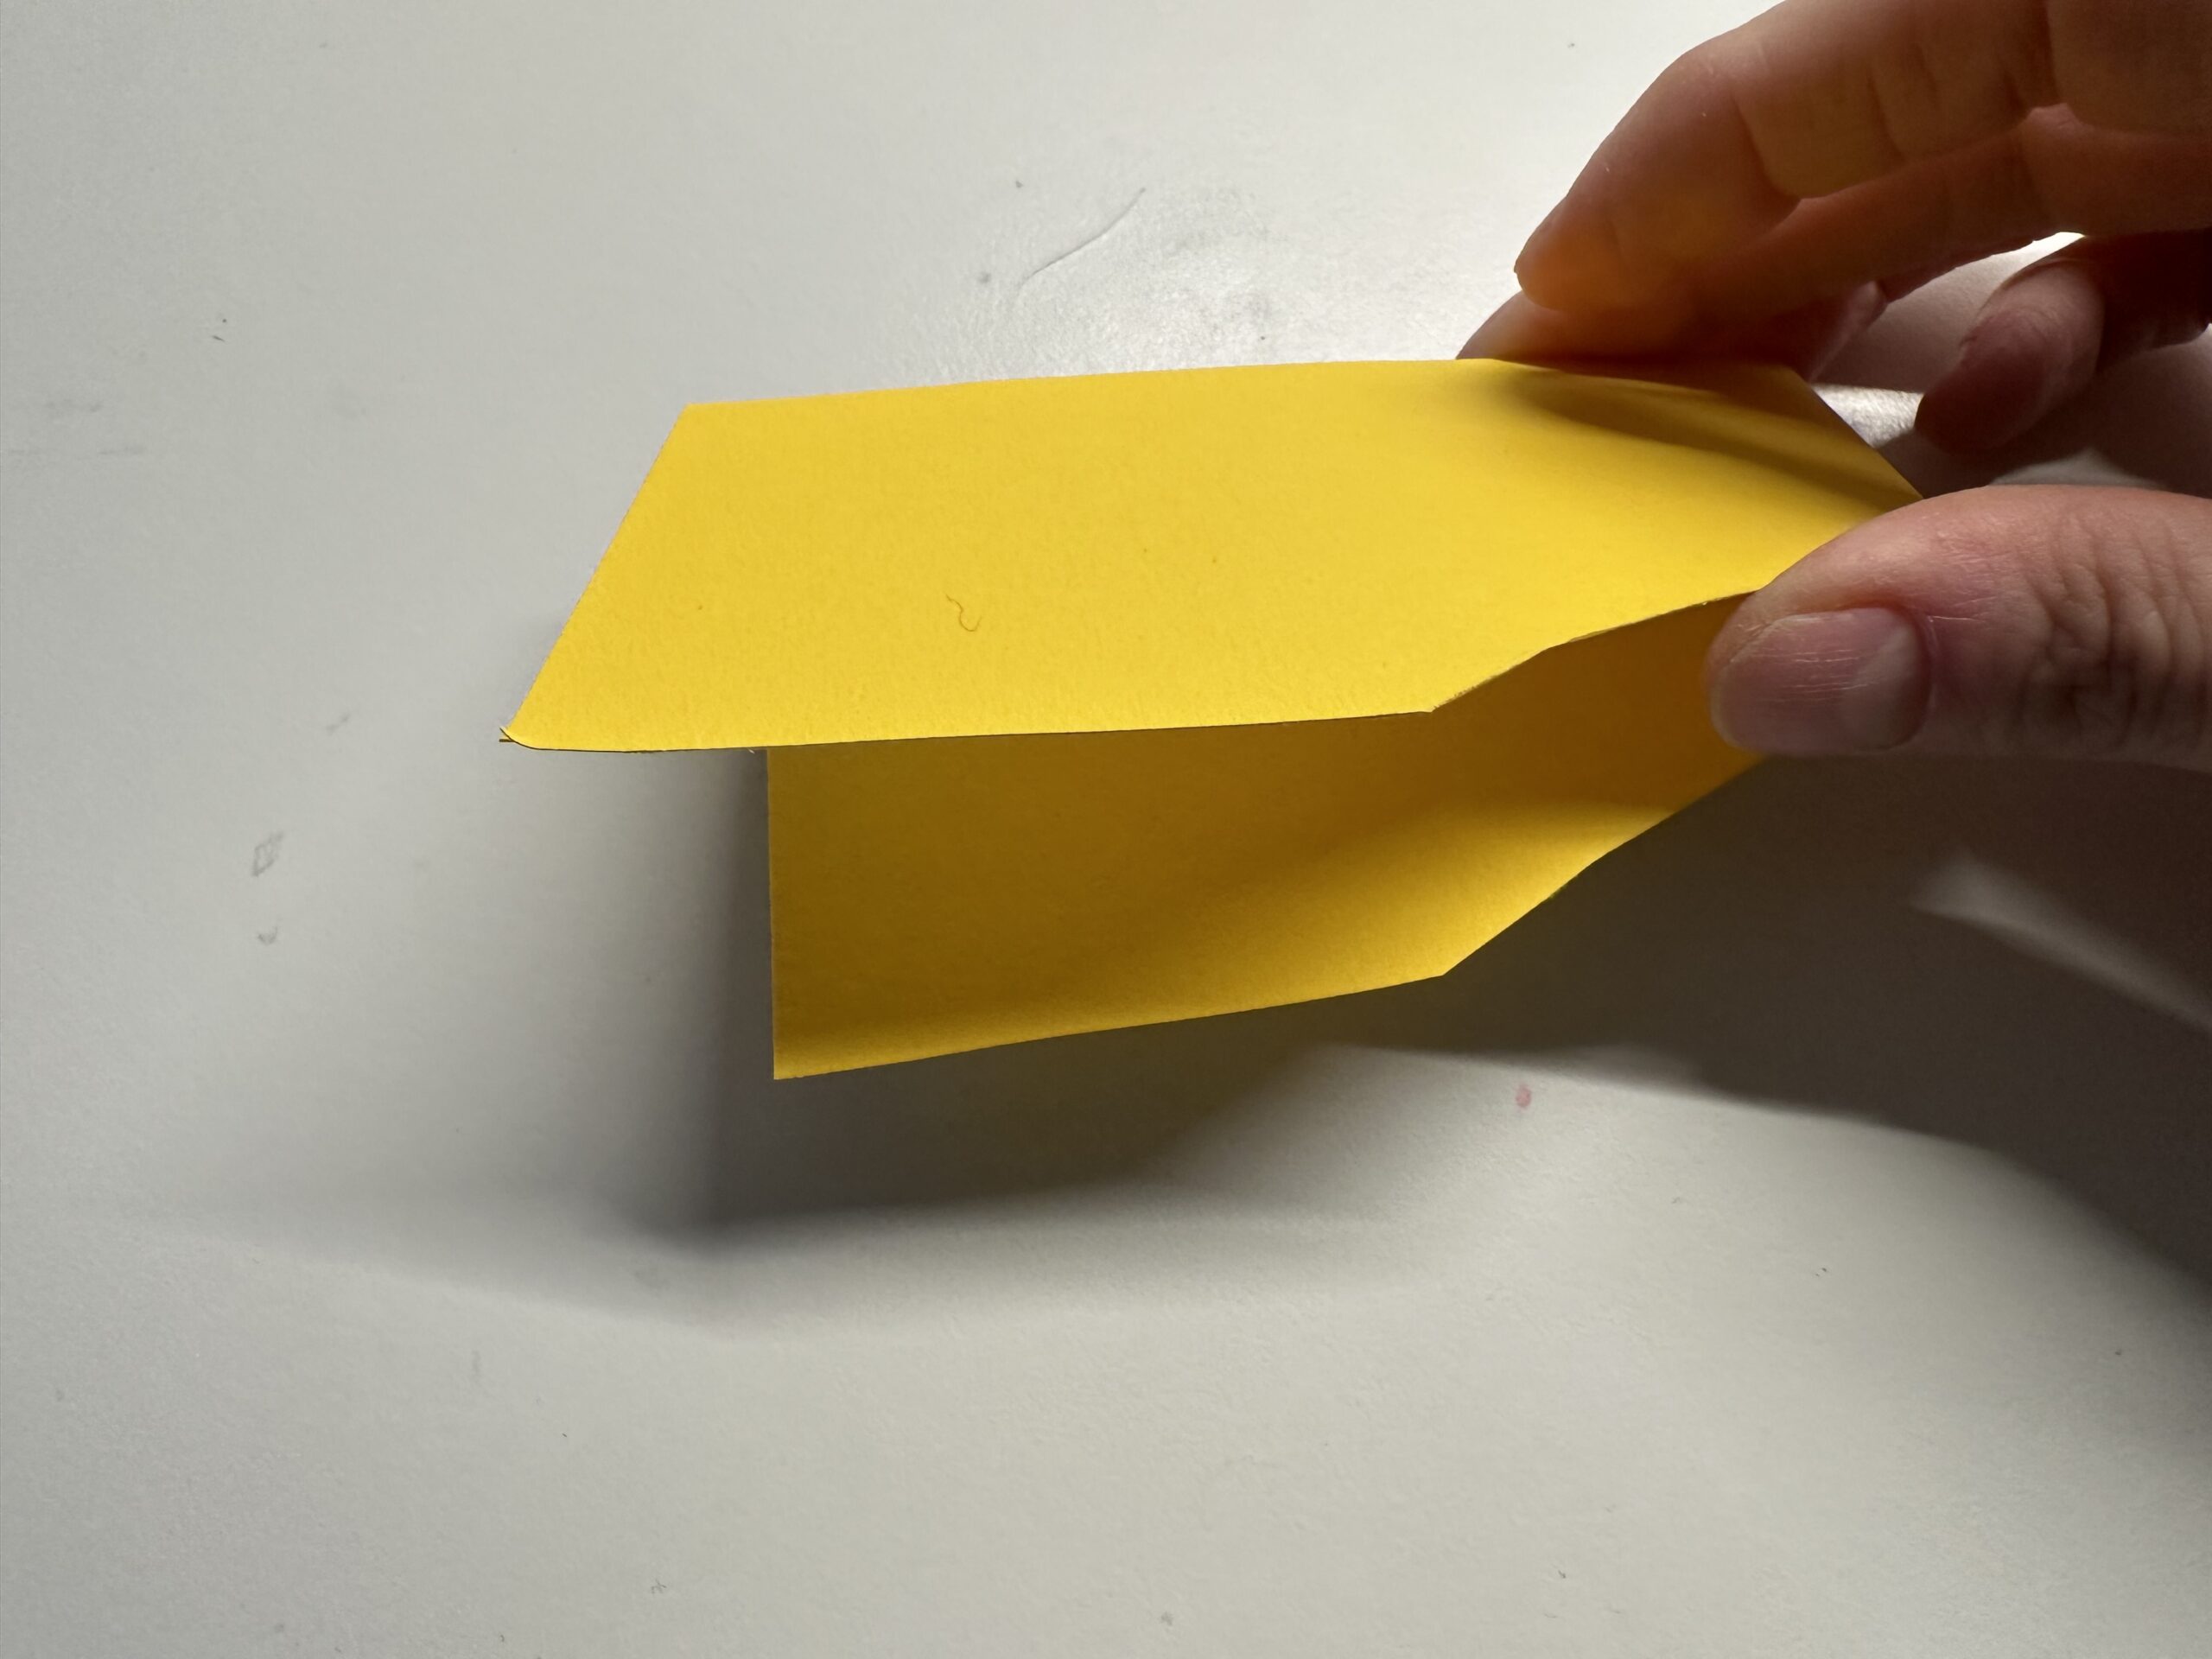
Bild zum Schritt 26 für das Bastel- und DIY-Abenteuer für Kinder: 'Nimm einen Papierrest und falte ihn zur Hälfte.'

27

Put a circle on the paper.
It's gonna be the dragon's eyes.
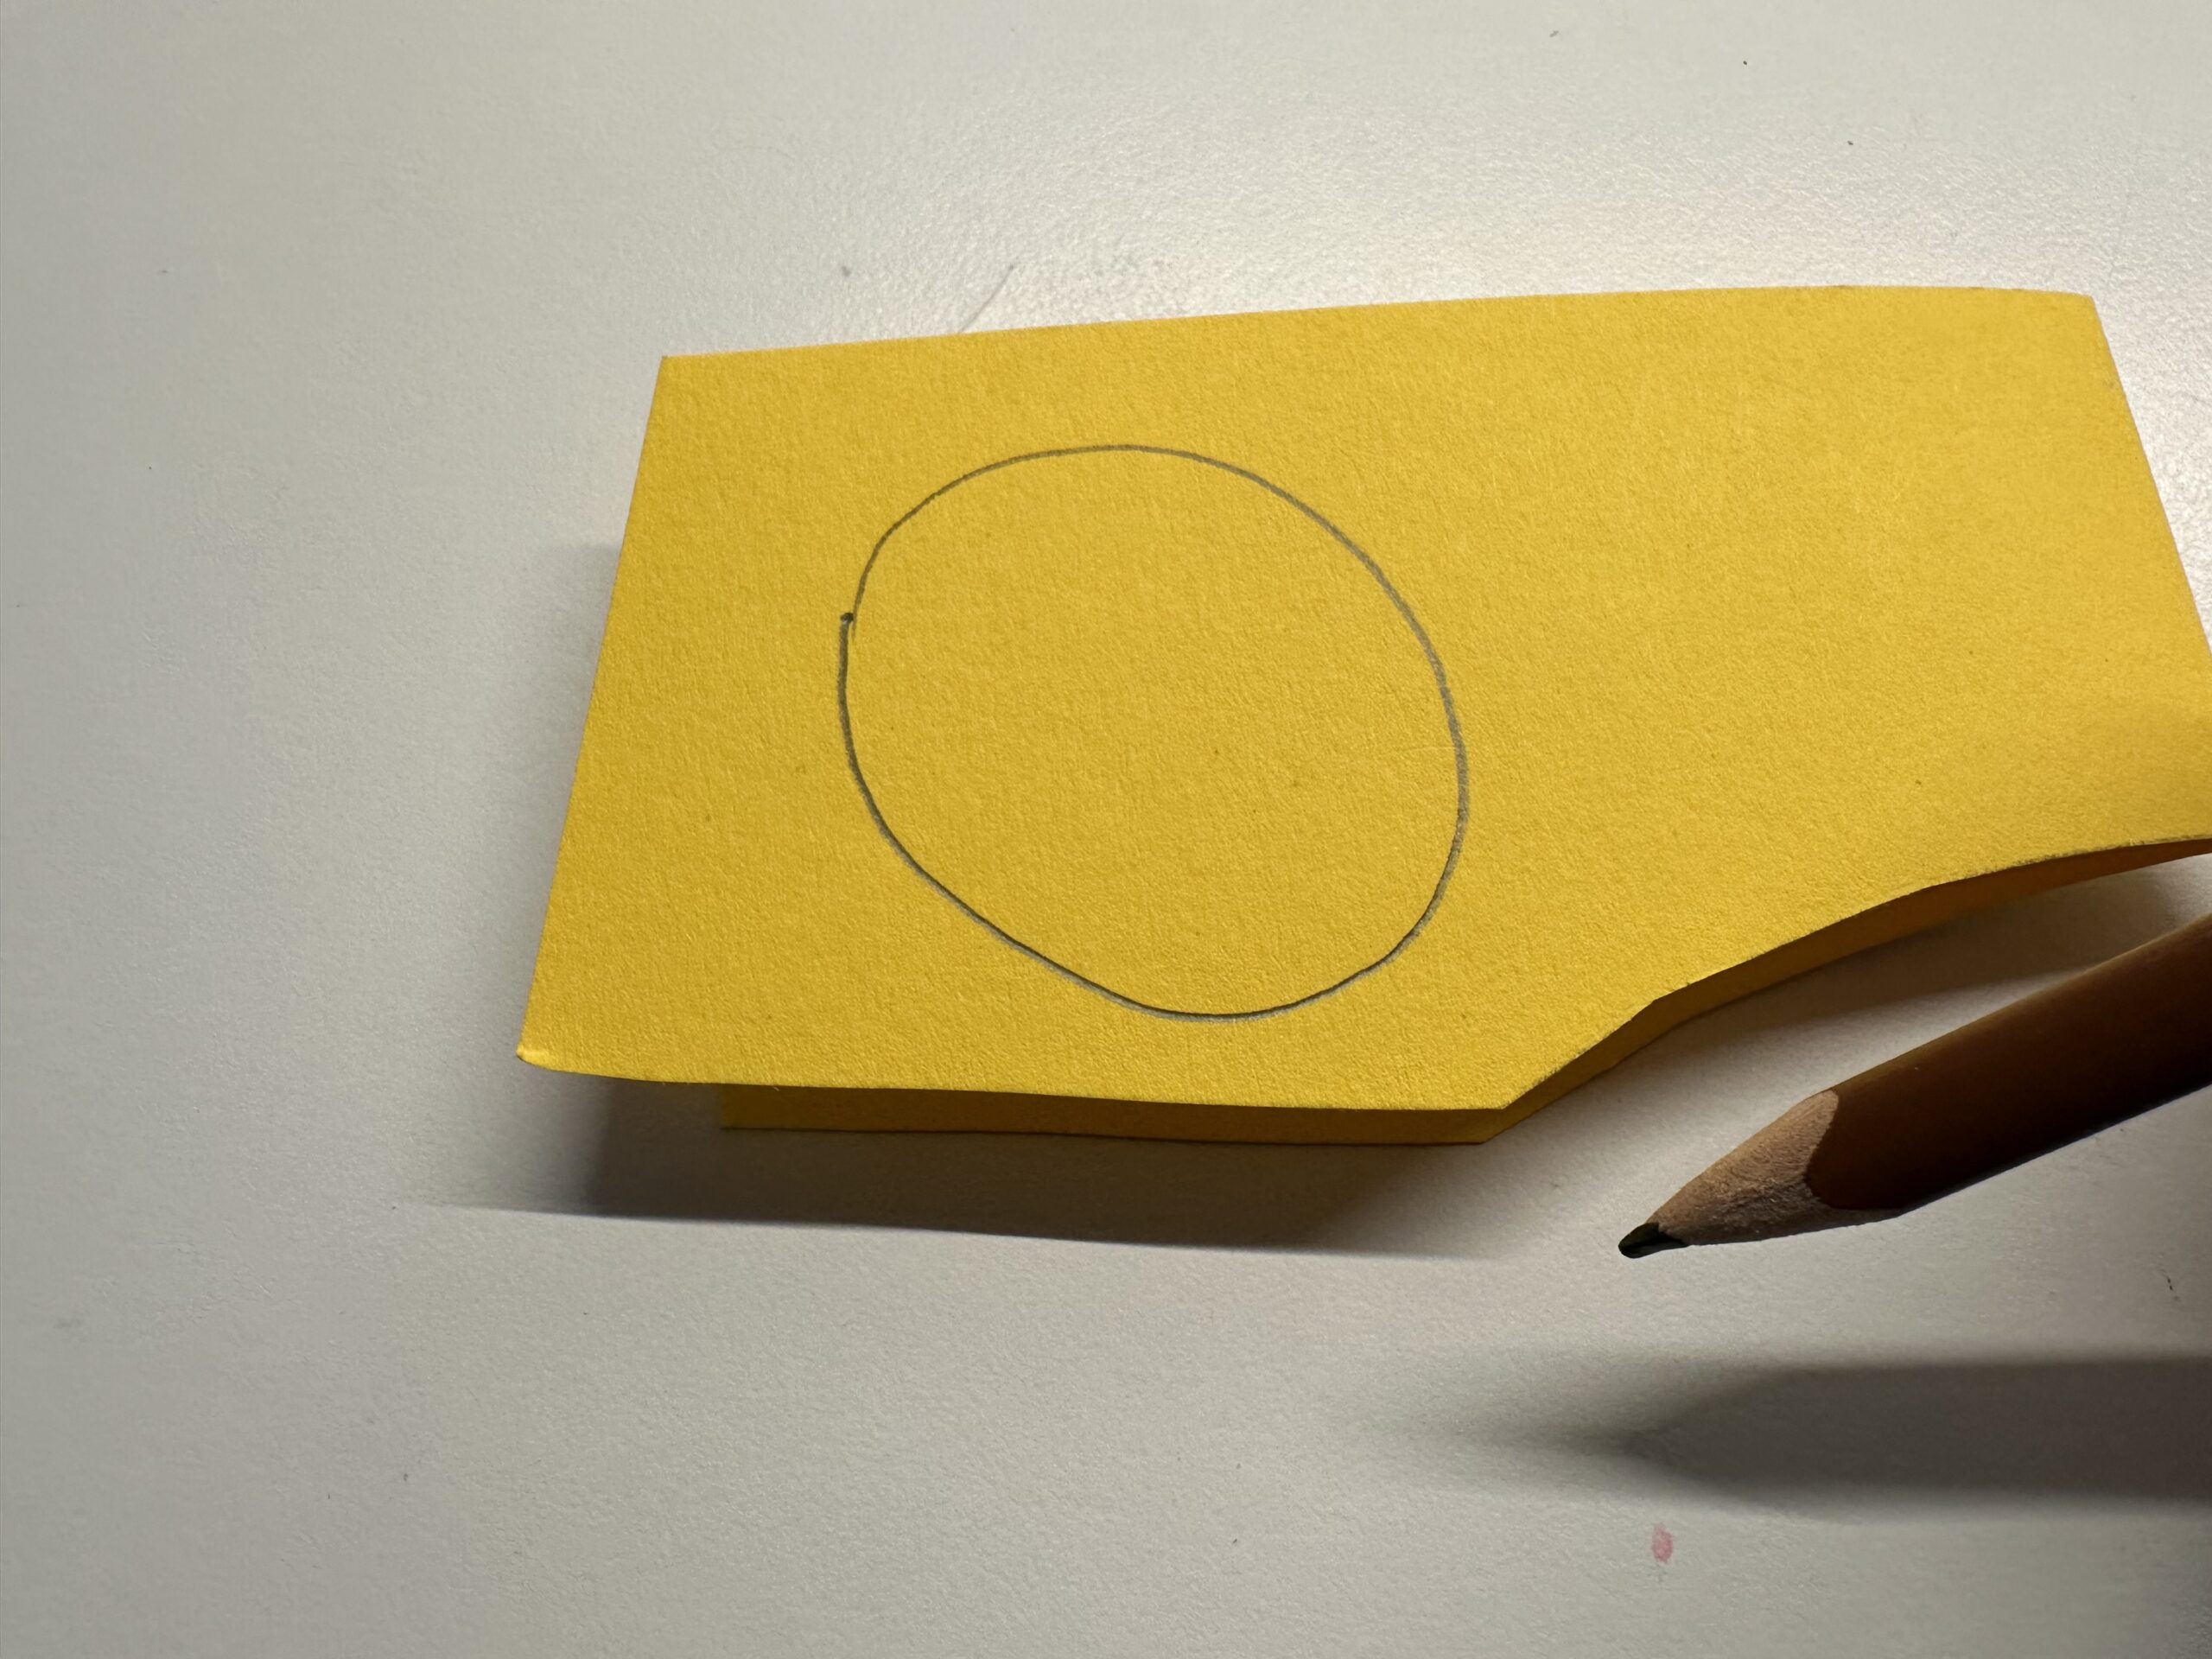
Bild zum Schritt 27 für das Bastel- und DIY-Abenteuer für Kinder: 'Male einen Kreis auf das Papier.   Das werden...'

28

Cut out the circles twice.

Bild zum Schritt 28 für das Bastel- und DIY-Abenteuer für Kinder: 'Schneide die Kreise doppelt aus.'

29

Put the pupils on your eyes.

Bild zum Schritt 29 für das Bastel- und DIY-Abenteuer für Kinder: 'Male die Pupillen auf die Augen.'

30

The nose is crafted from a small paper residue.
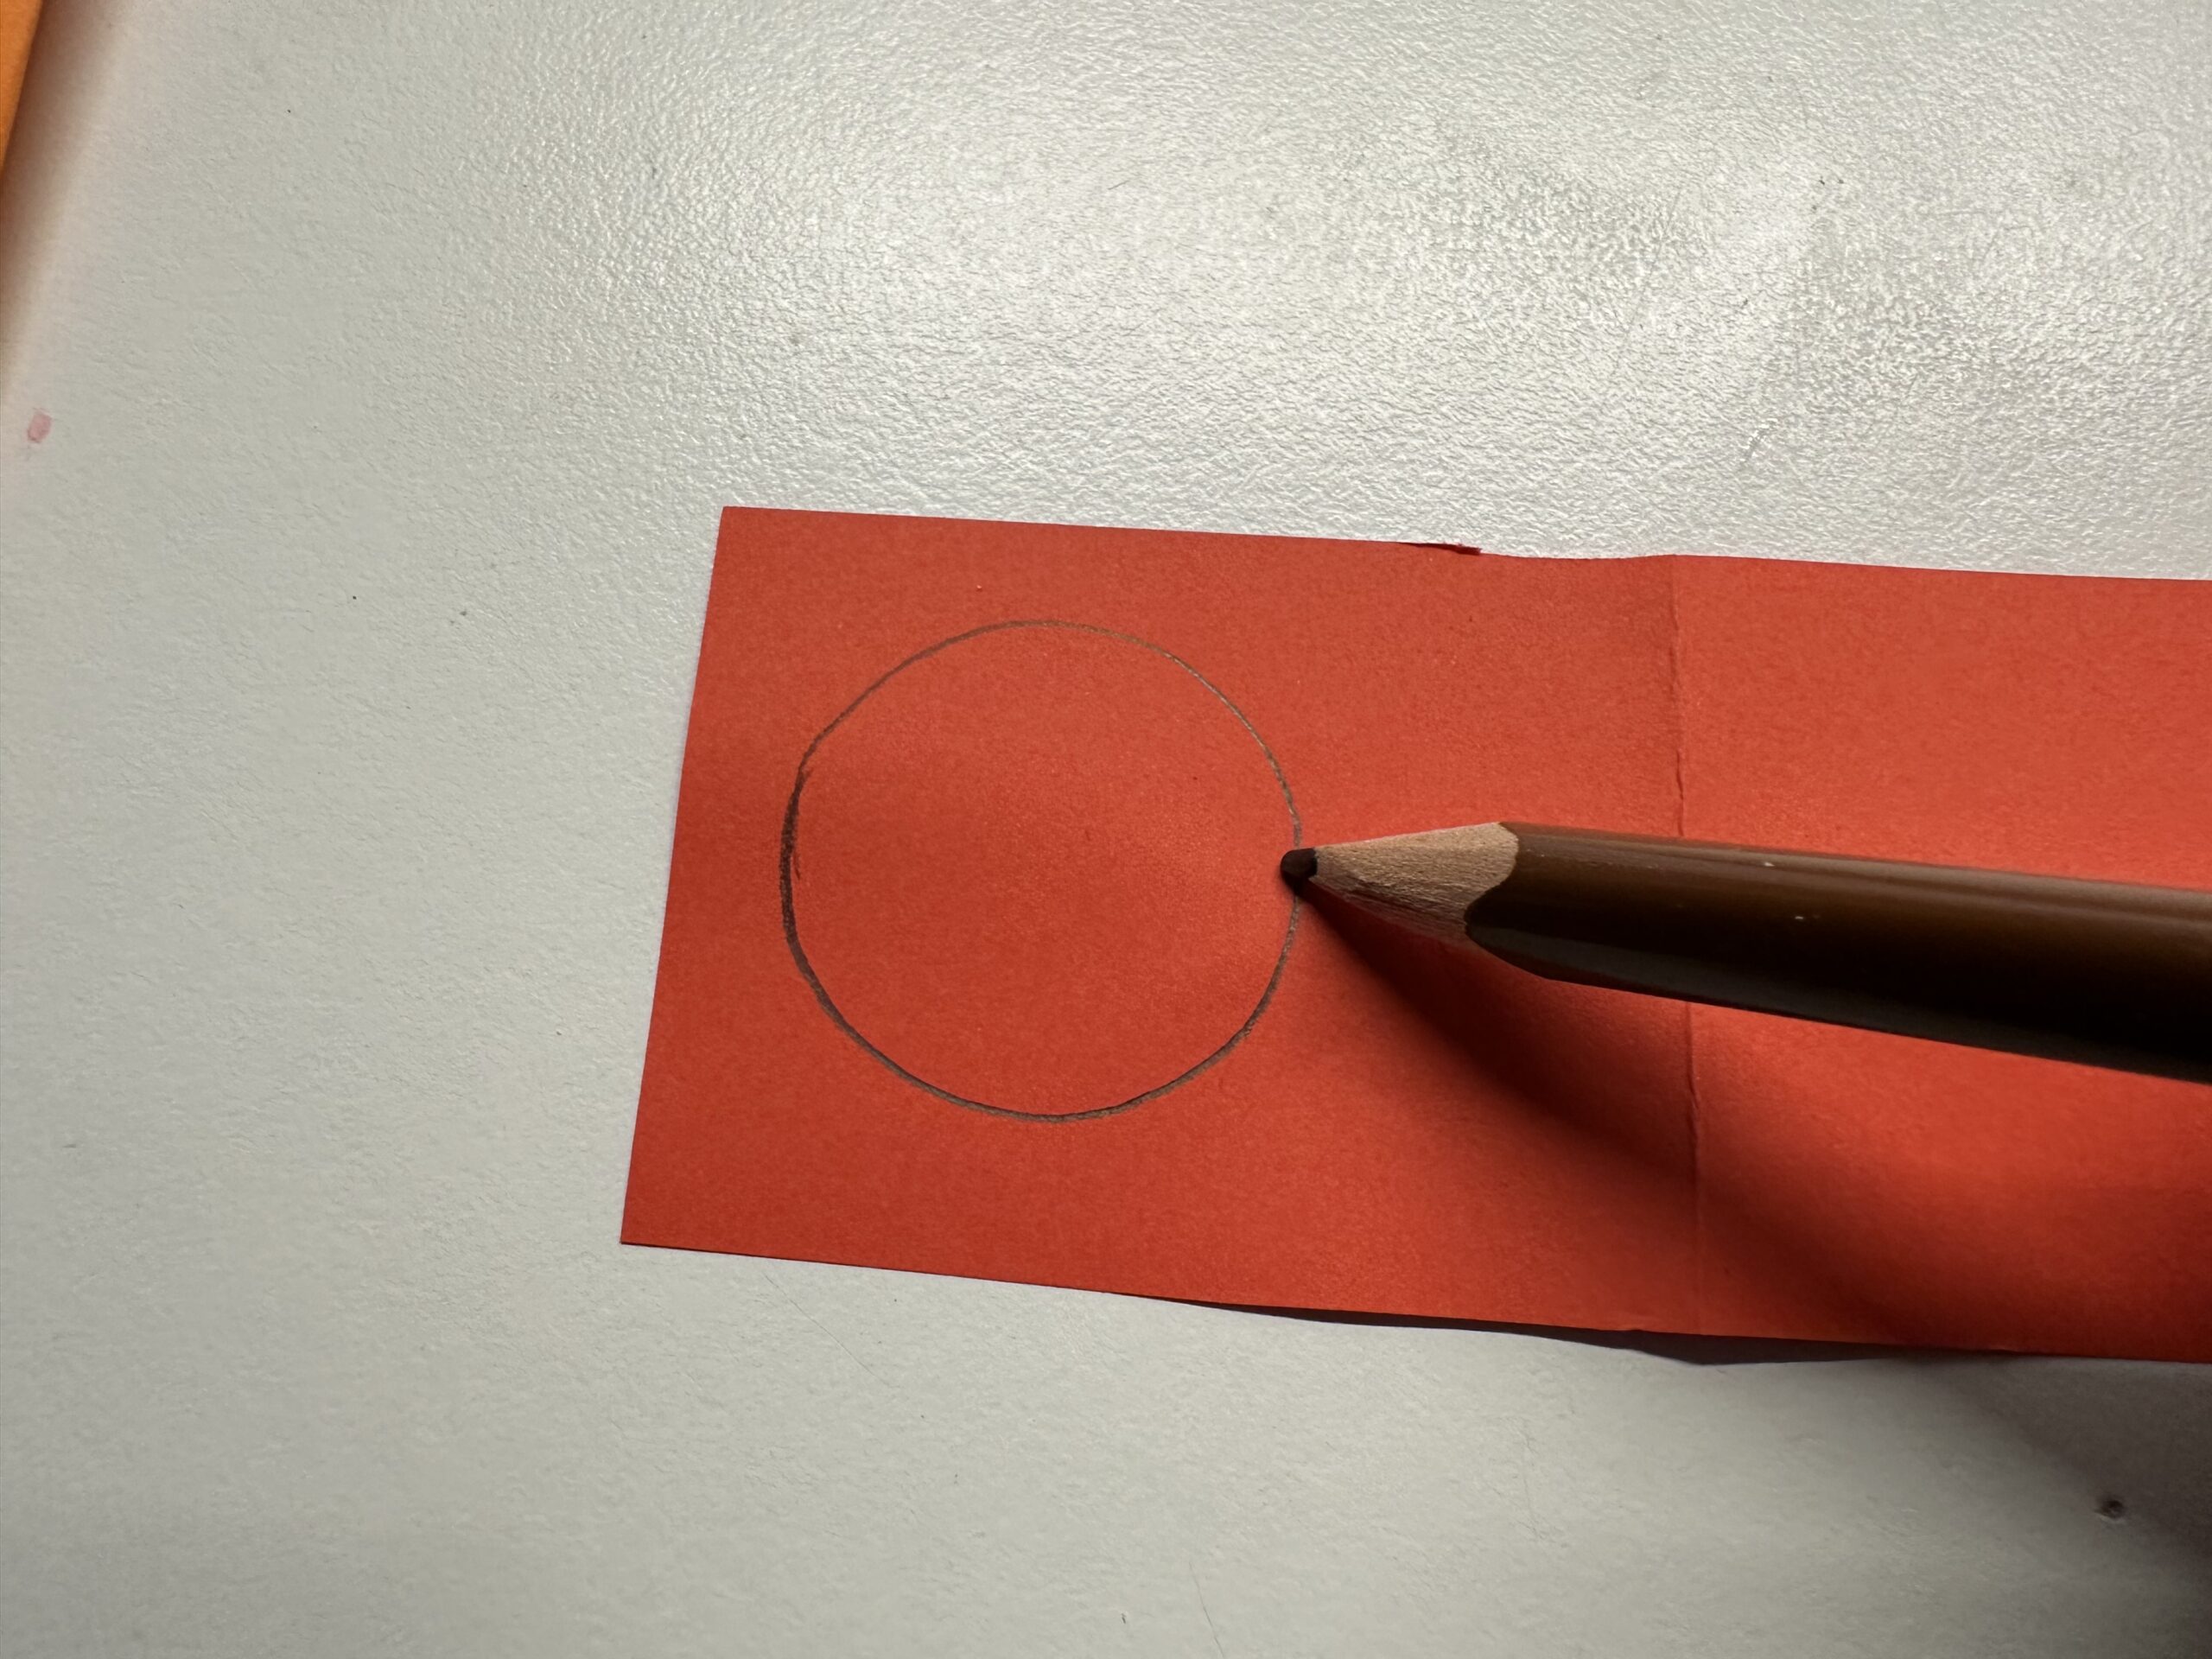
Bild zum Schritt 30 für das Bastel- und DIY-Abenteuer für Kinder: 'Aus einem kleinen Papierrest wird die Nase gebastelt. Male einen...'

31

Cut out the circle, that's the nose.
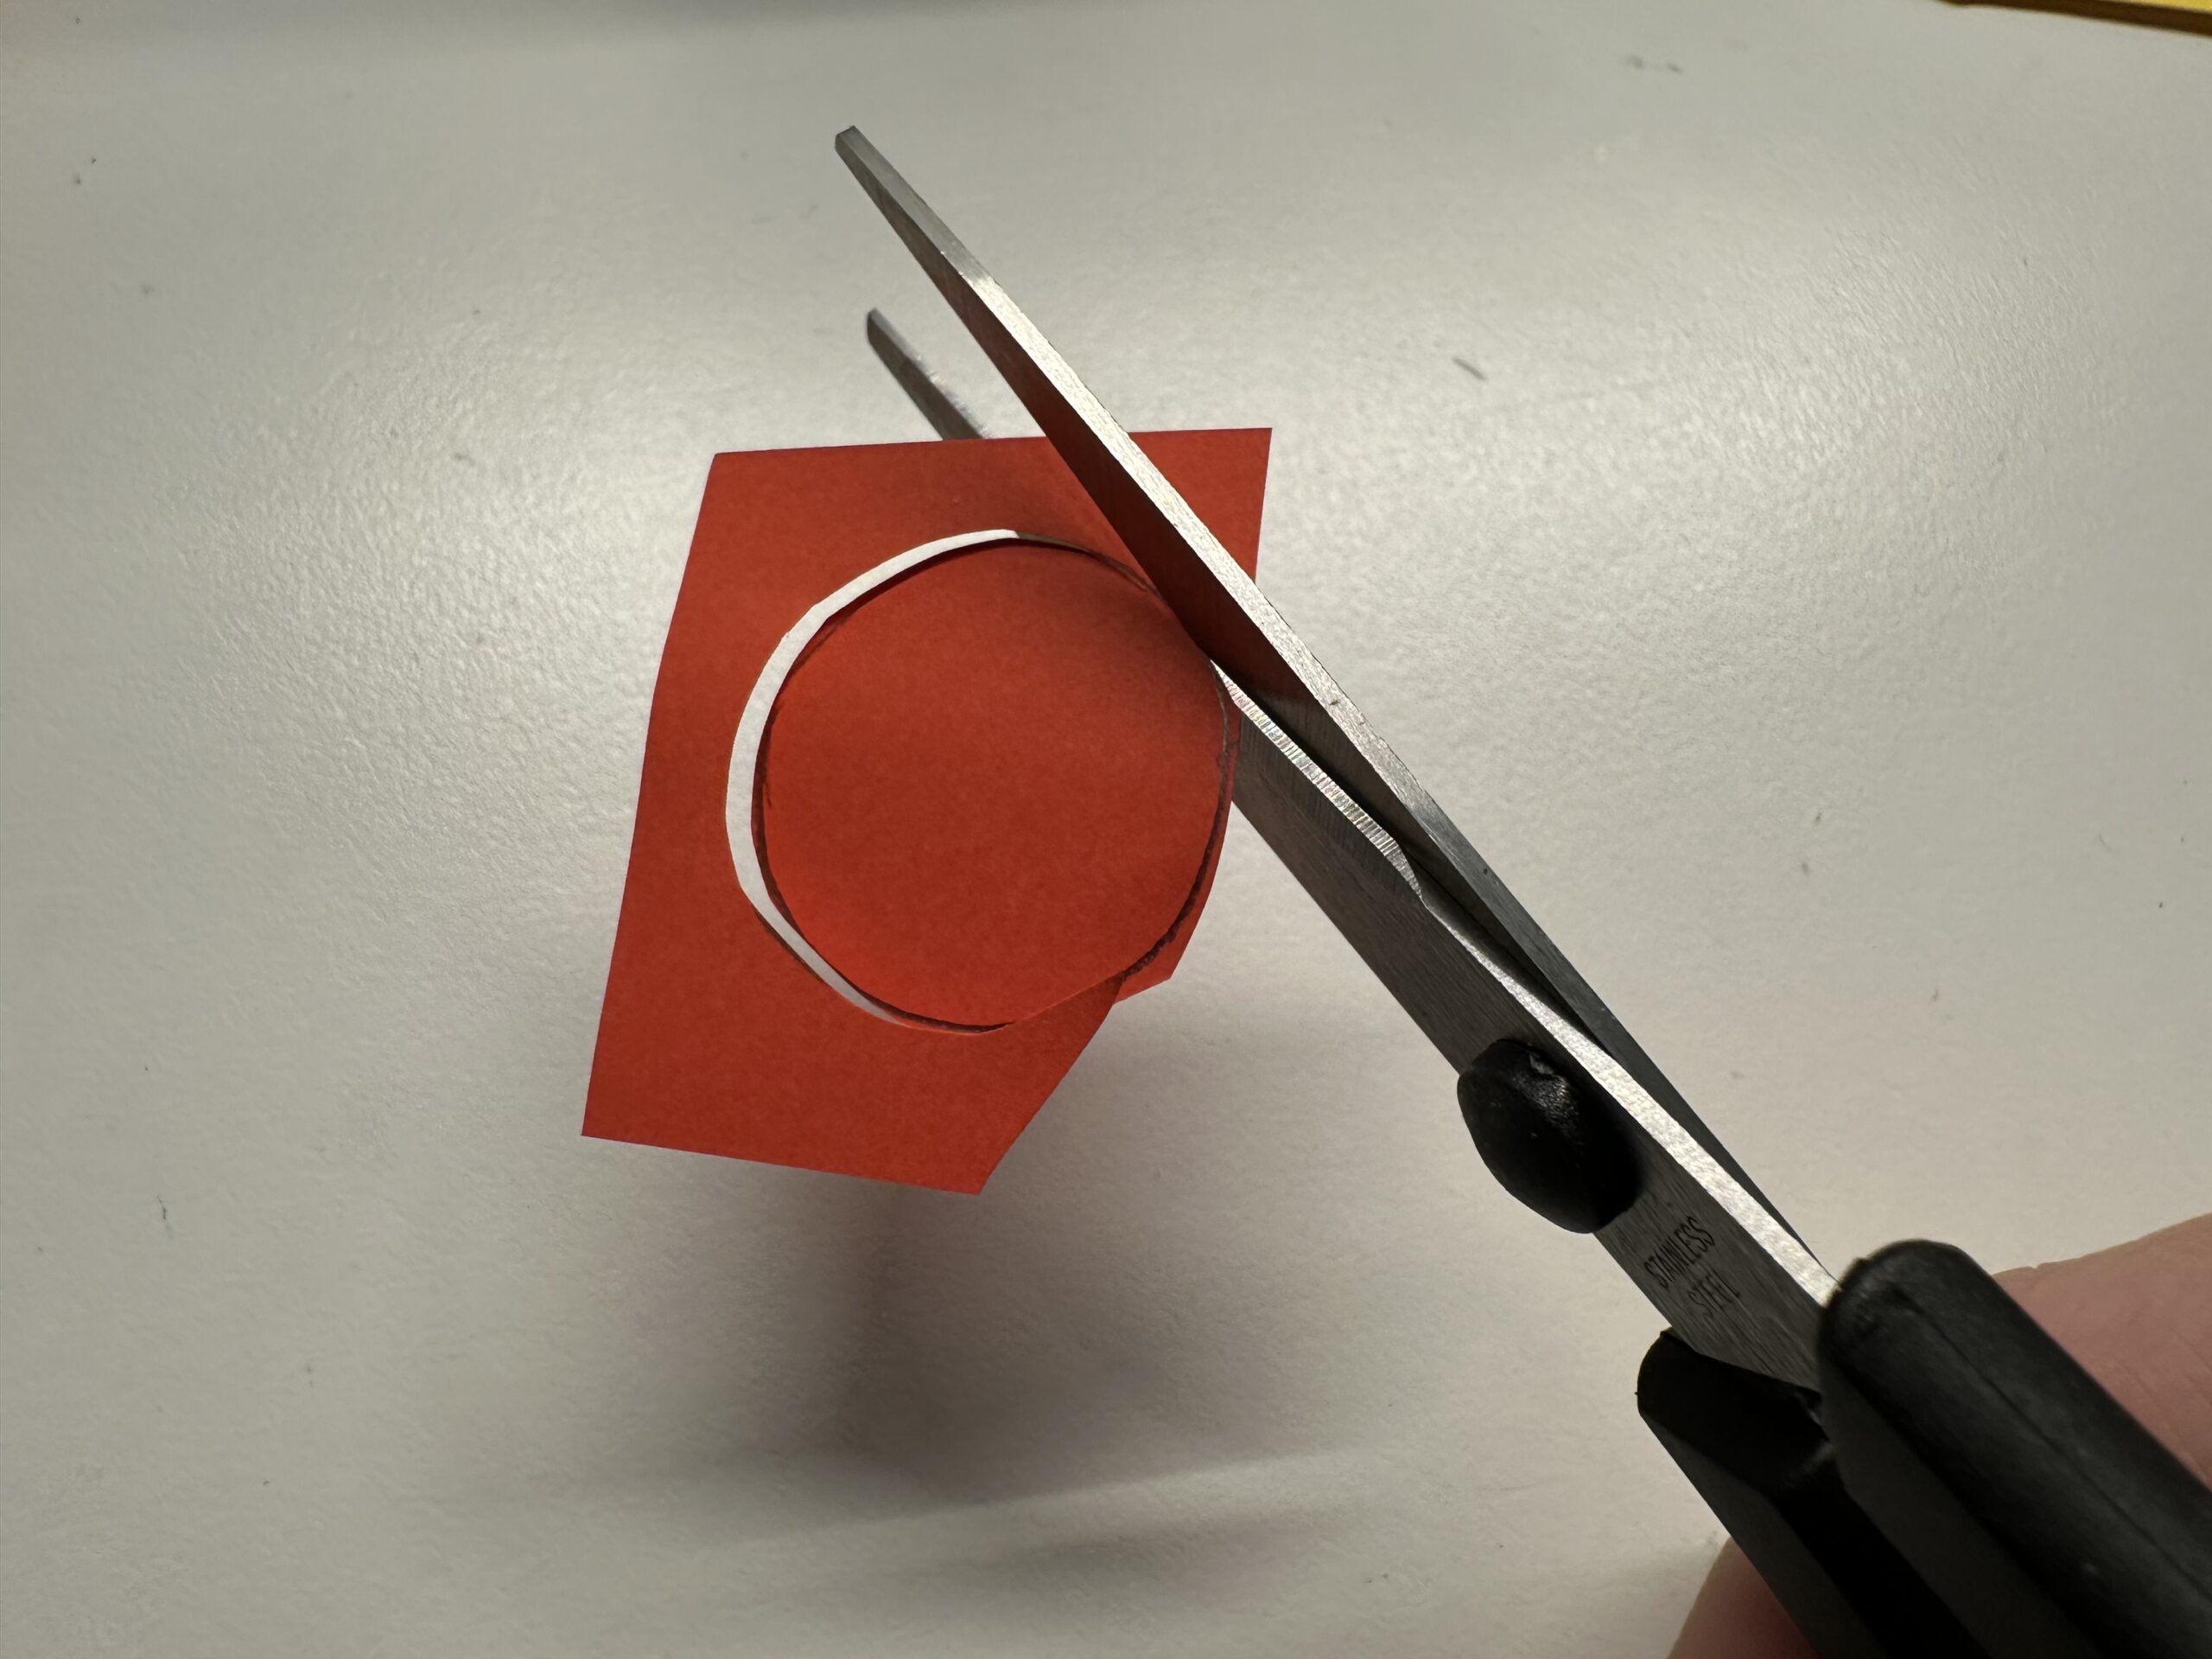
Bild zum Schritt 31 für das Bastel- und DIY-Abenteuer für Kinder: 'Schneide den Kreis aus. Das ist die Nase.'

32

Stick eyes and nose on the dragon.
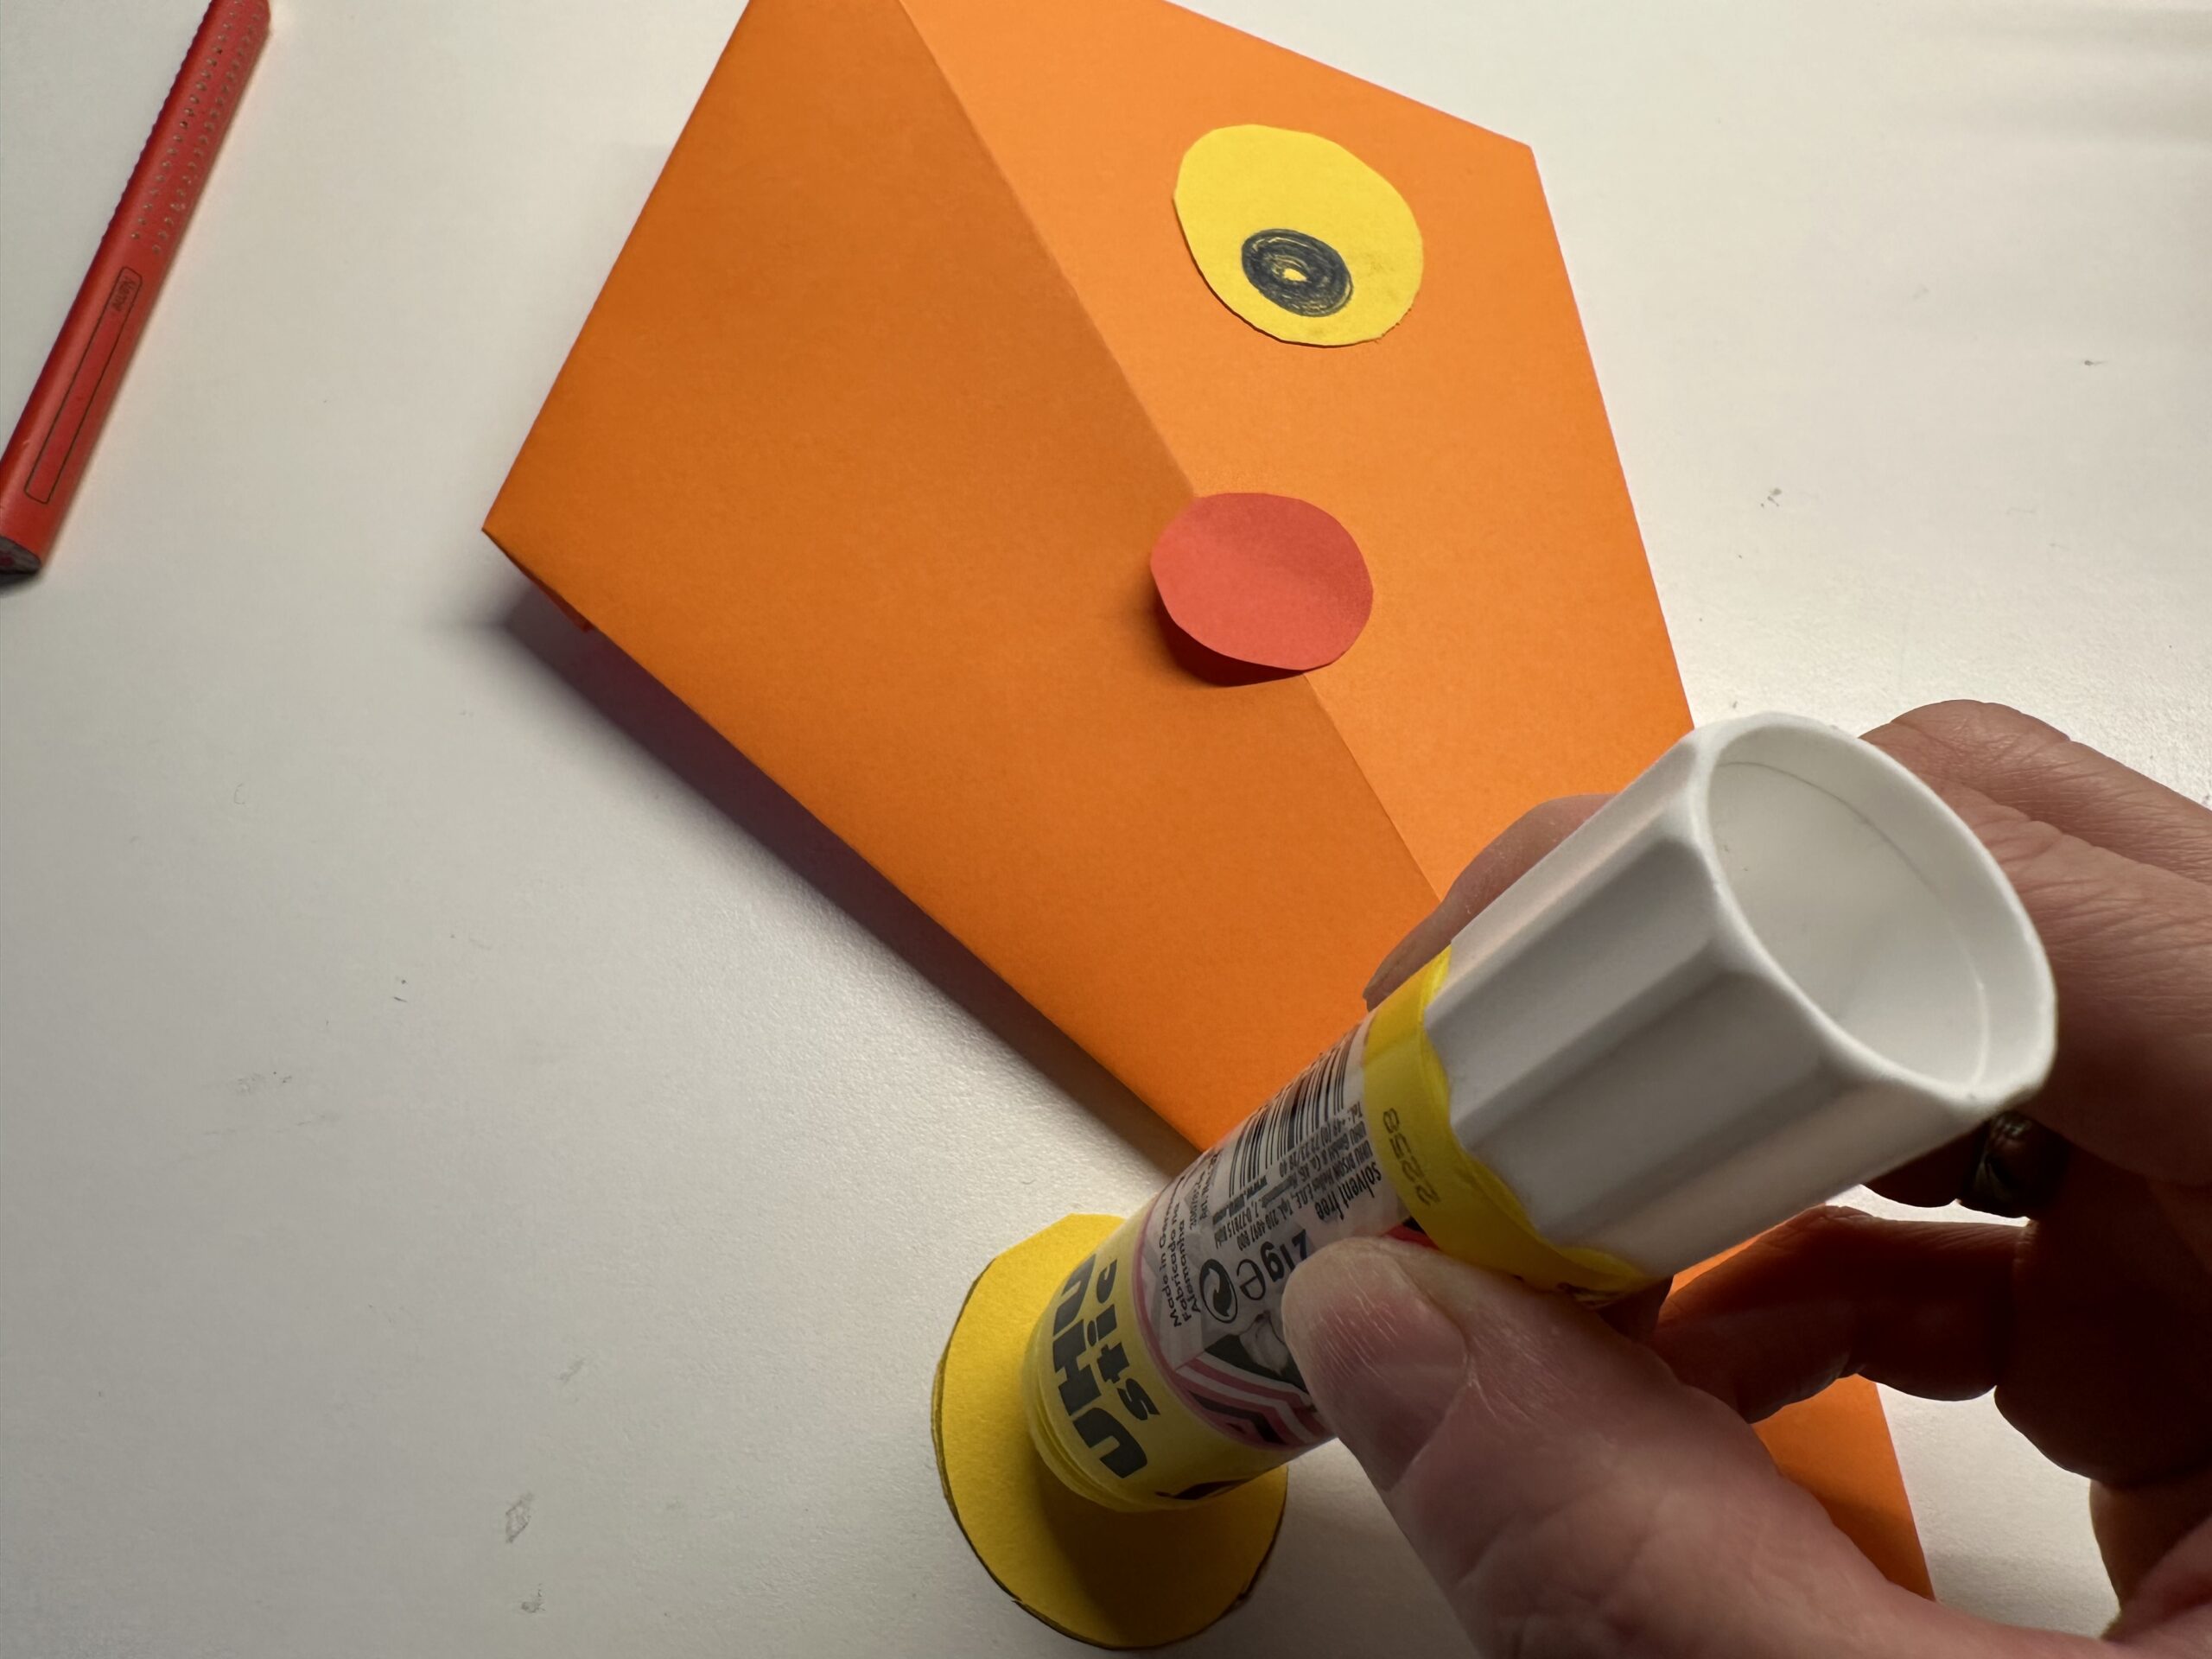
Bild zum Schritt 32 für das Bastel- und DIY-Abenteuer für Kinder: 'Klebe Augen und Nase auf den Drachen.'

33

Hold it tight.

Bild zum Schritt 33 für das Bastel- und DIY-Abenteuer für Kinder: 'Drücke alles gut fest.'

34

Finally the mouth is missing. This one is painted.
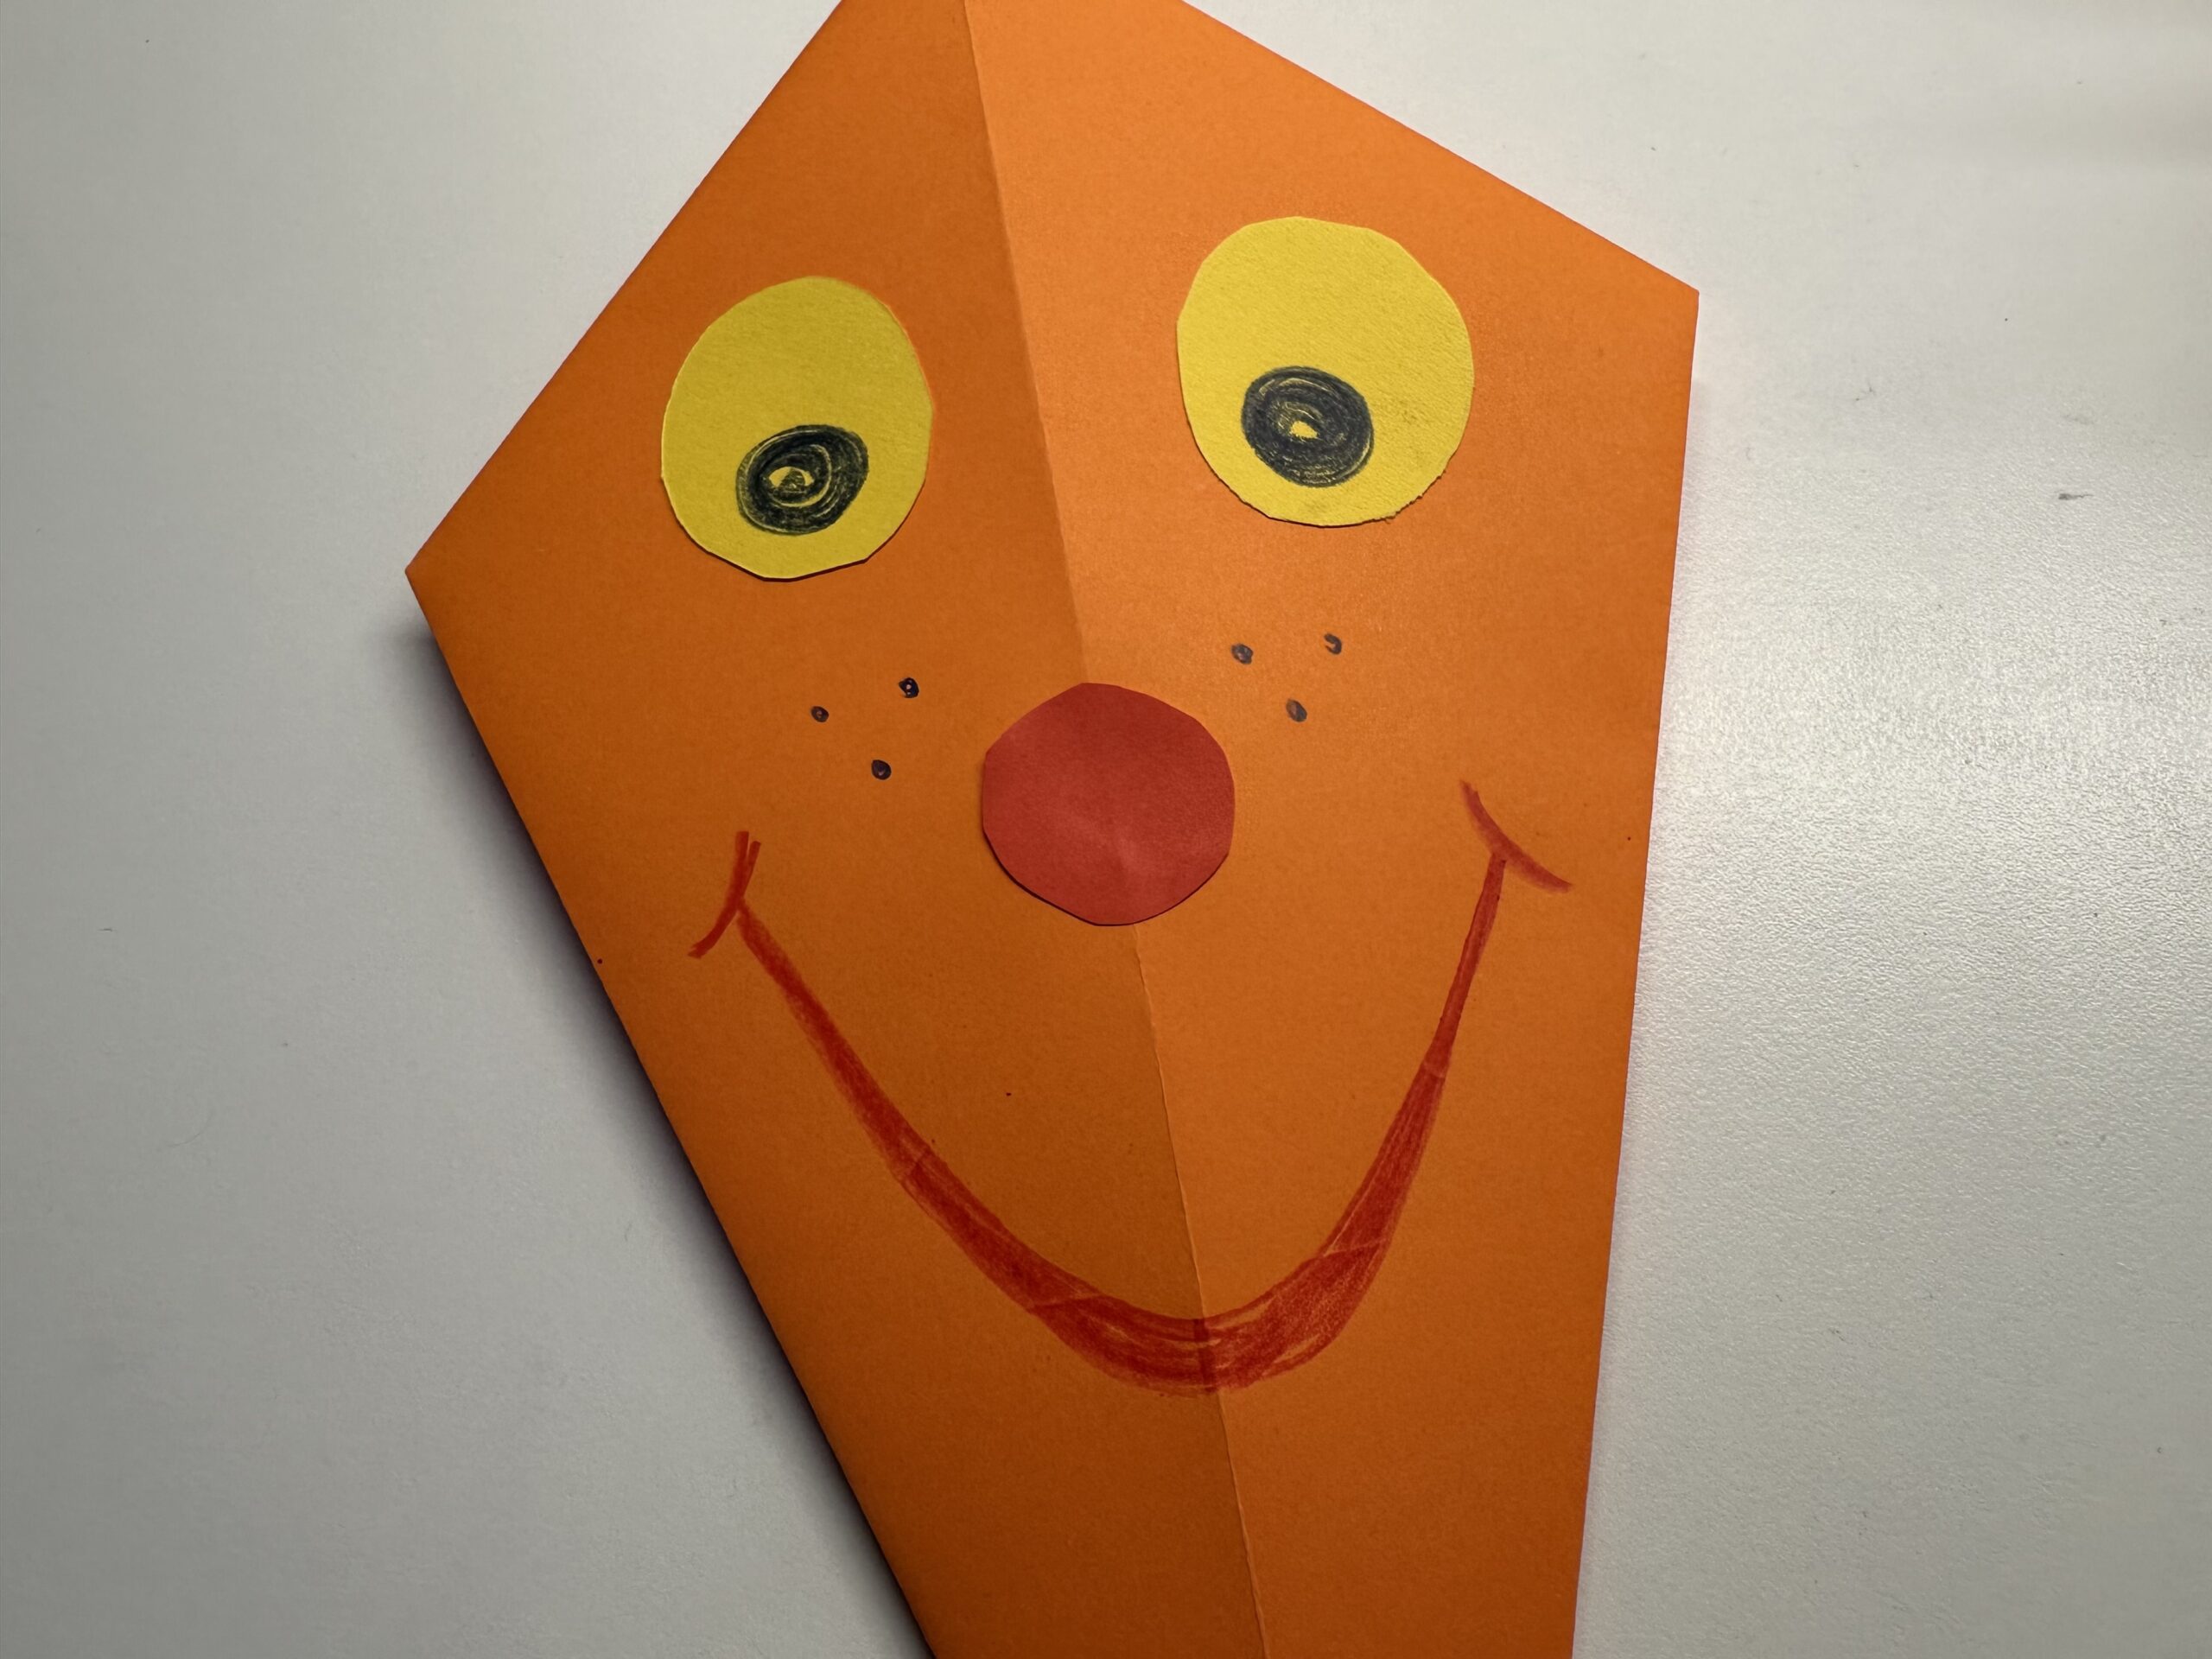
Bild zum Schritt 34 für das Bastel- und DIY-Abenteuer für Kinder: 'Zuletzt fehlt noch der Mund. Dieser wird aufgemalt.'

35

Now you need the wool. Cut off all the short threads.
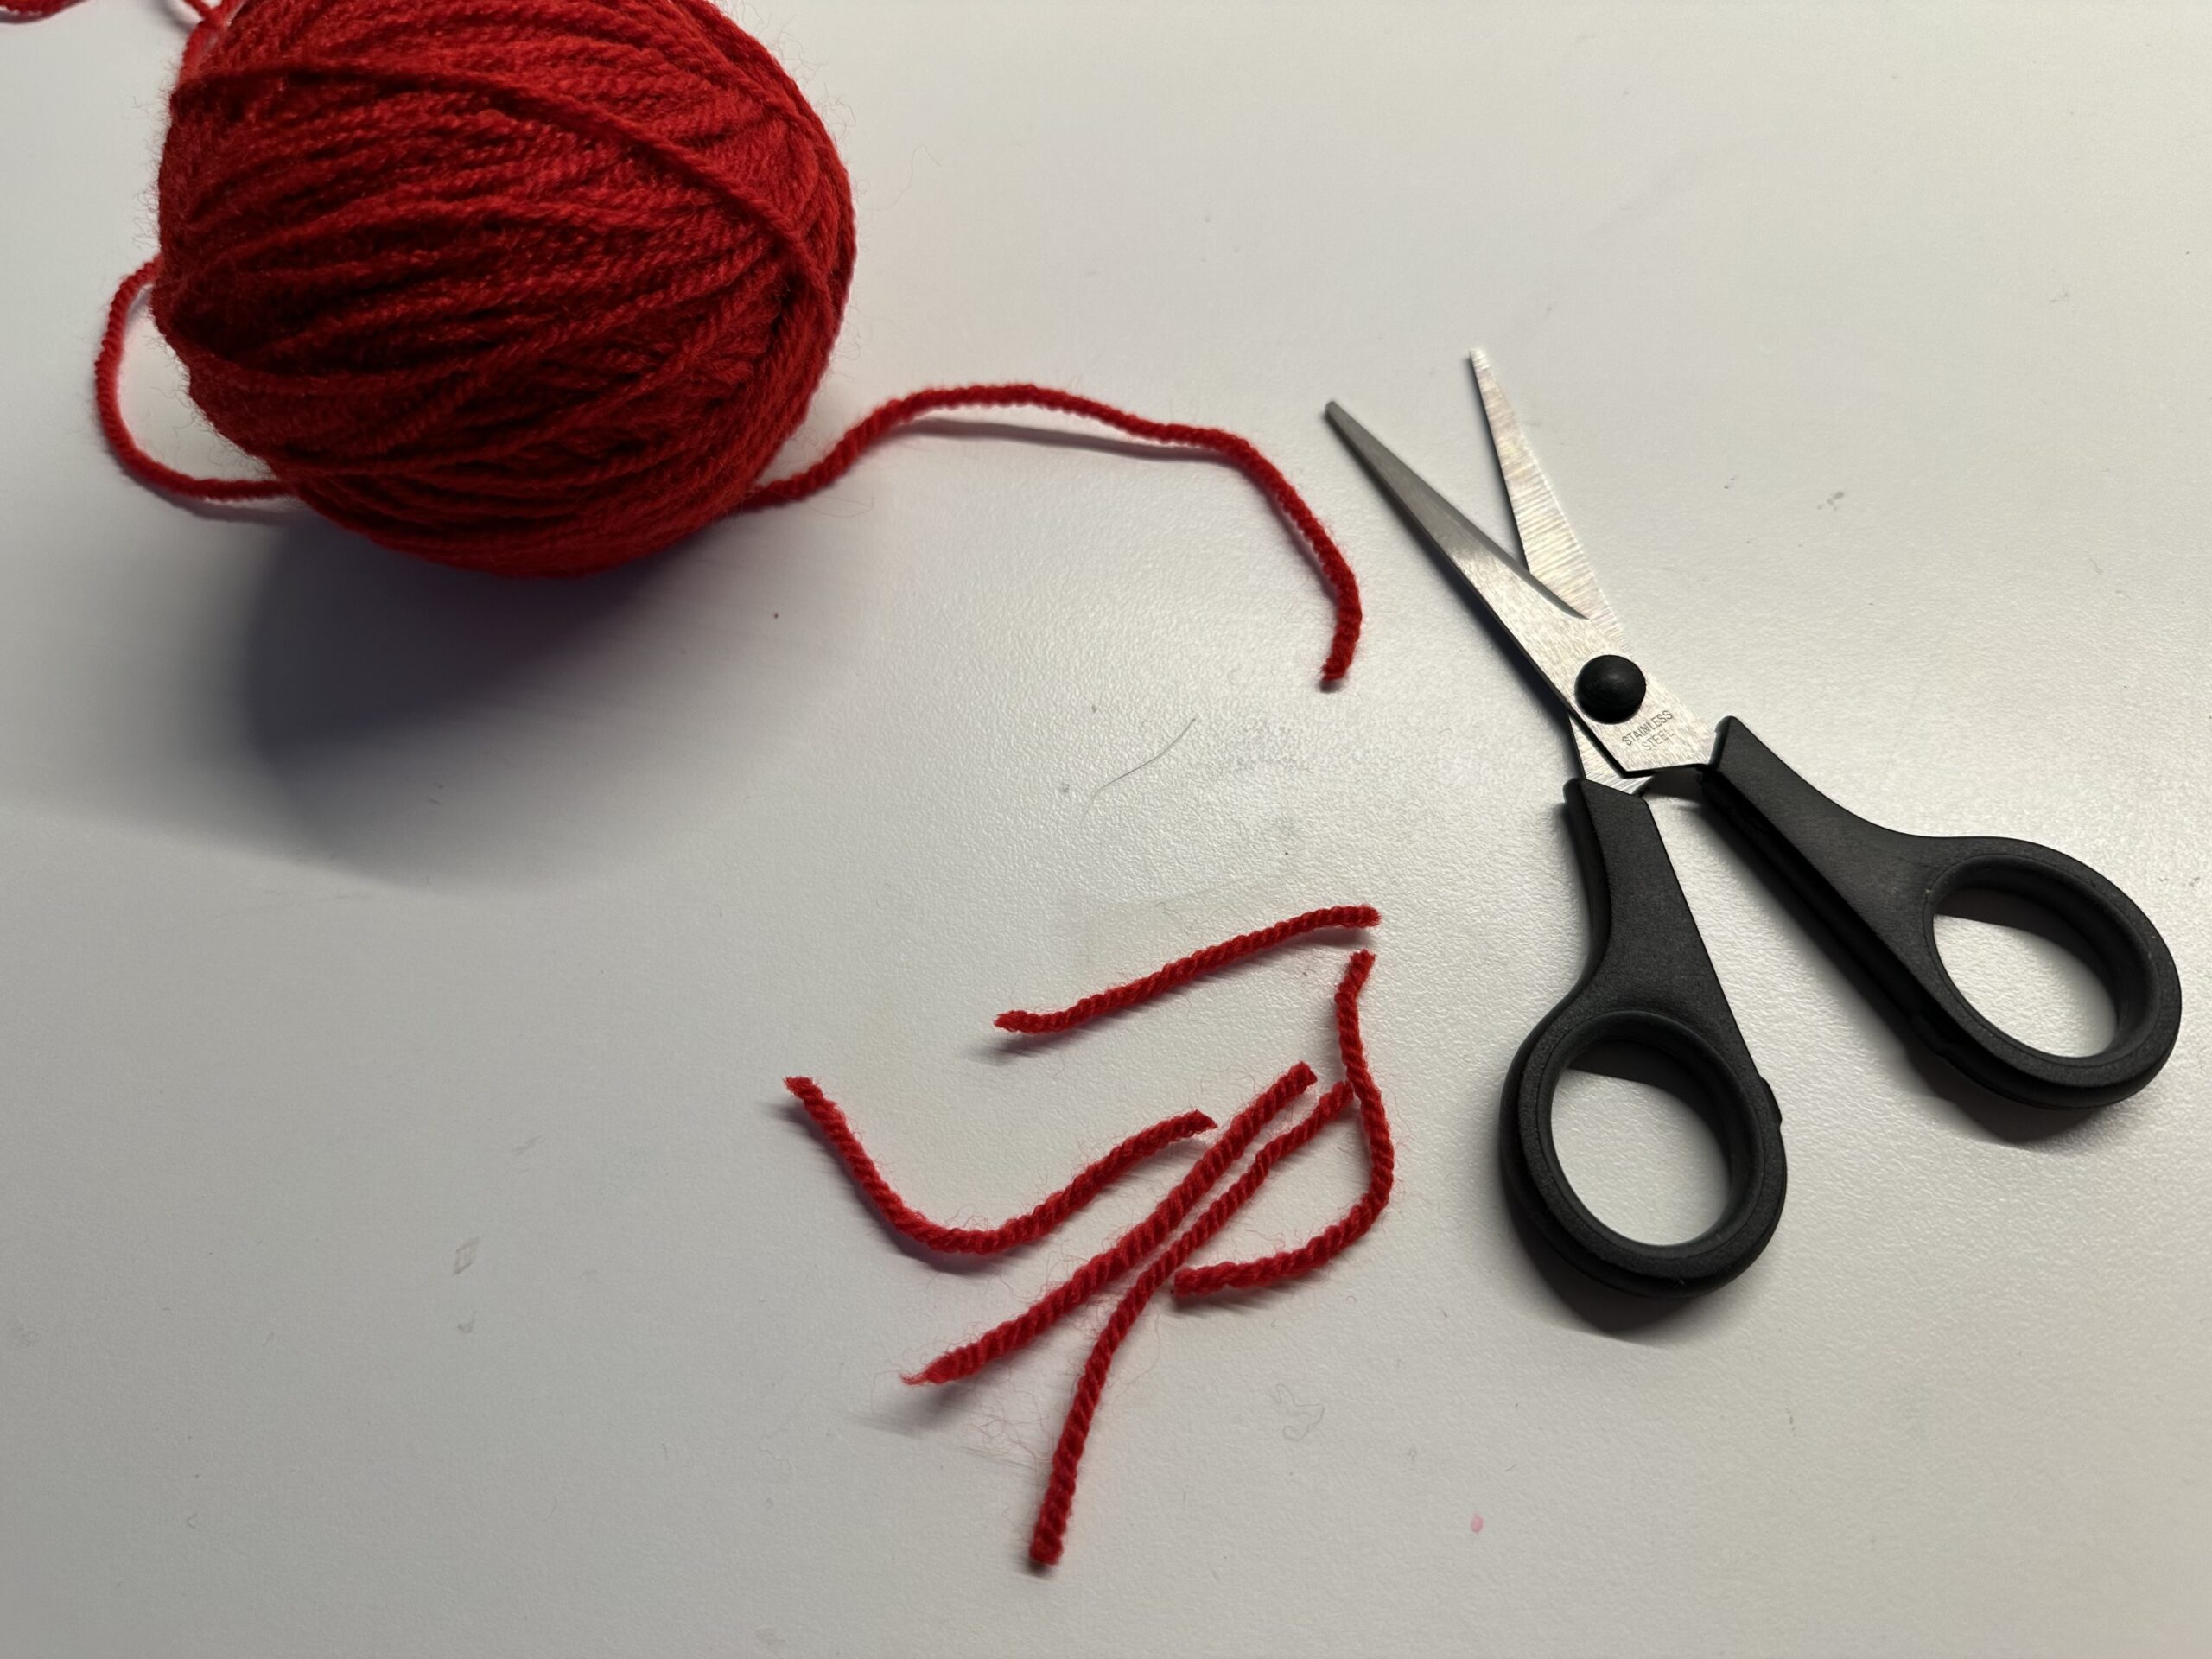
Bild zum Schritt 35 für das Bastel- und DIY-Abenteuer für Kinder: 'Nun brauchst du die Wolle. Schneide dir lauter kurze Fäden...'

36

To the left and right, the wool threads are glued on as fringes. Fold the doubly lying tip on the side a little.
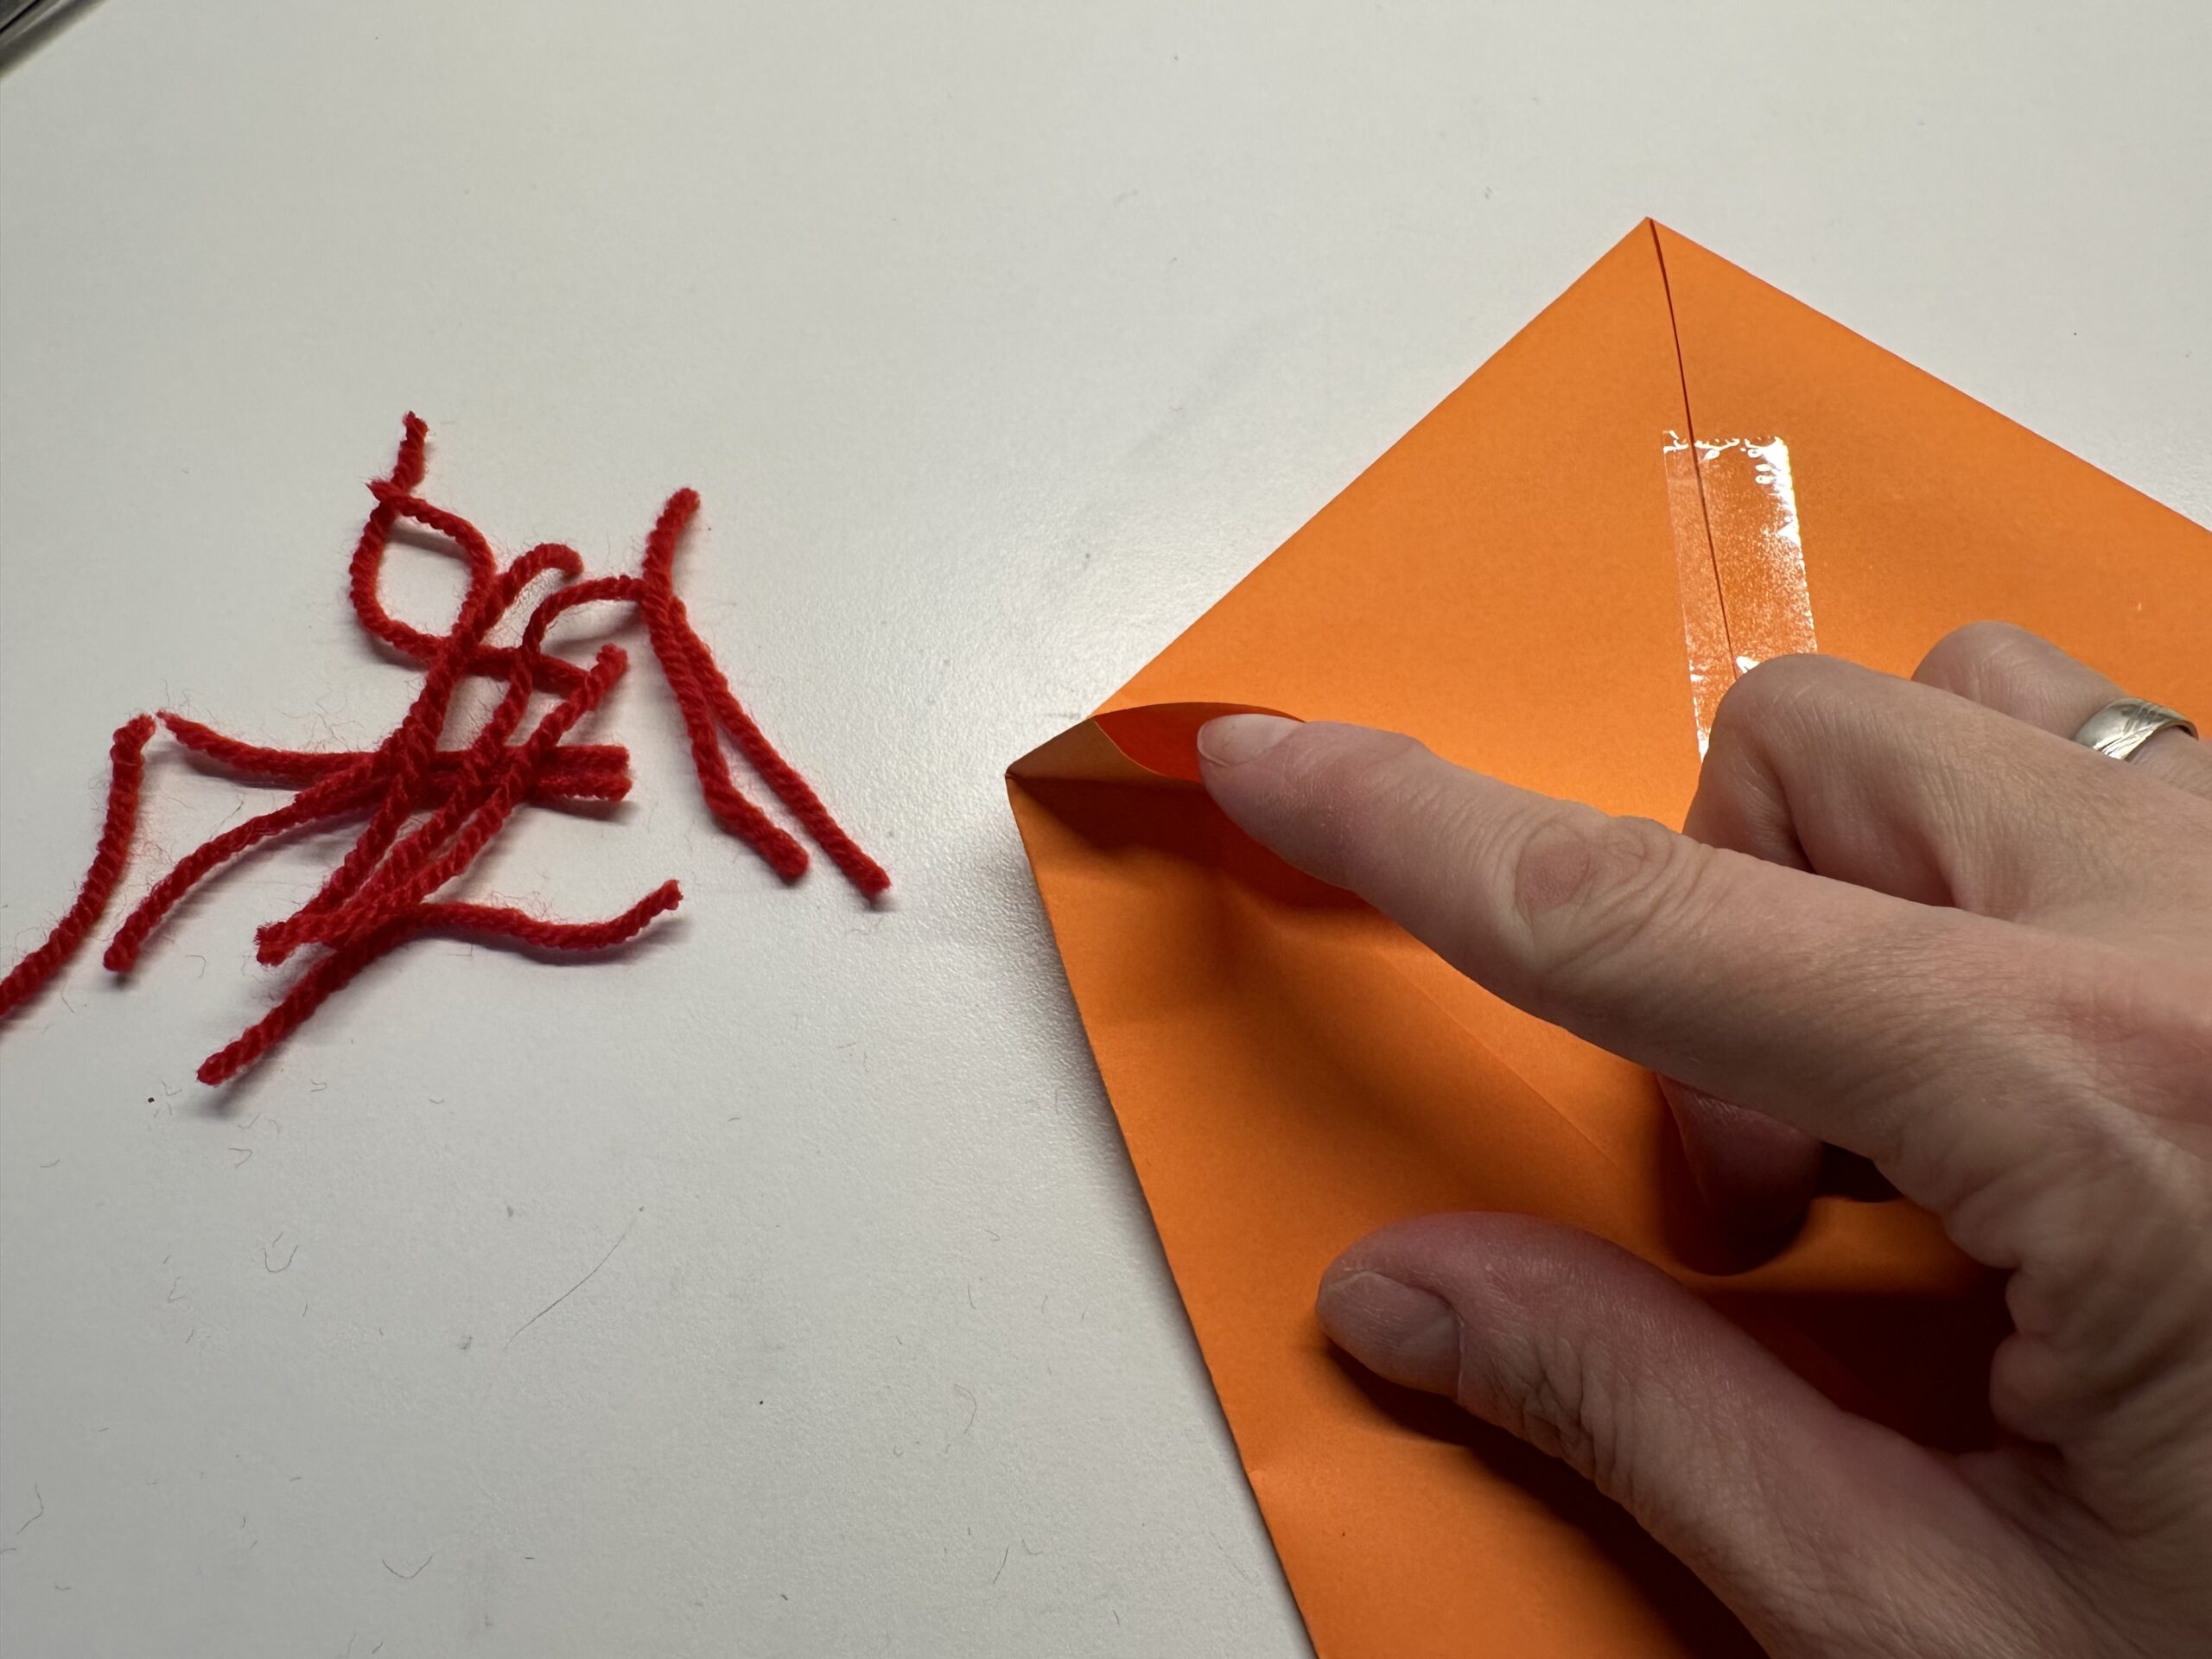
Bild zum Schritt 36 für das Bastel- und DIY-Abenteuer für Kinder: 'Links und rechts werden die Wollfäden als Fransen angeklebt. Klappe...'

37

Glue some wool threads to the side.
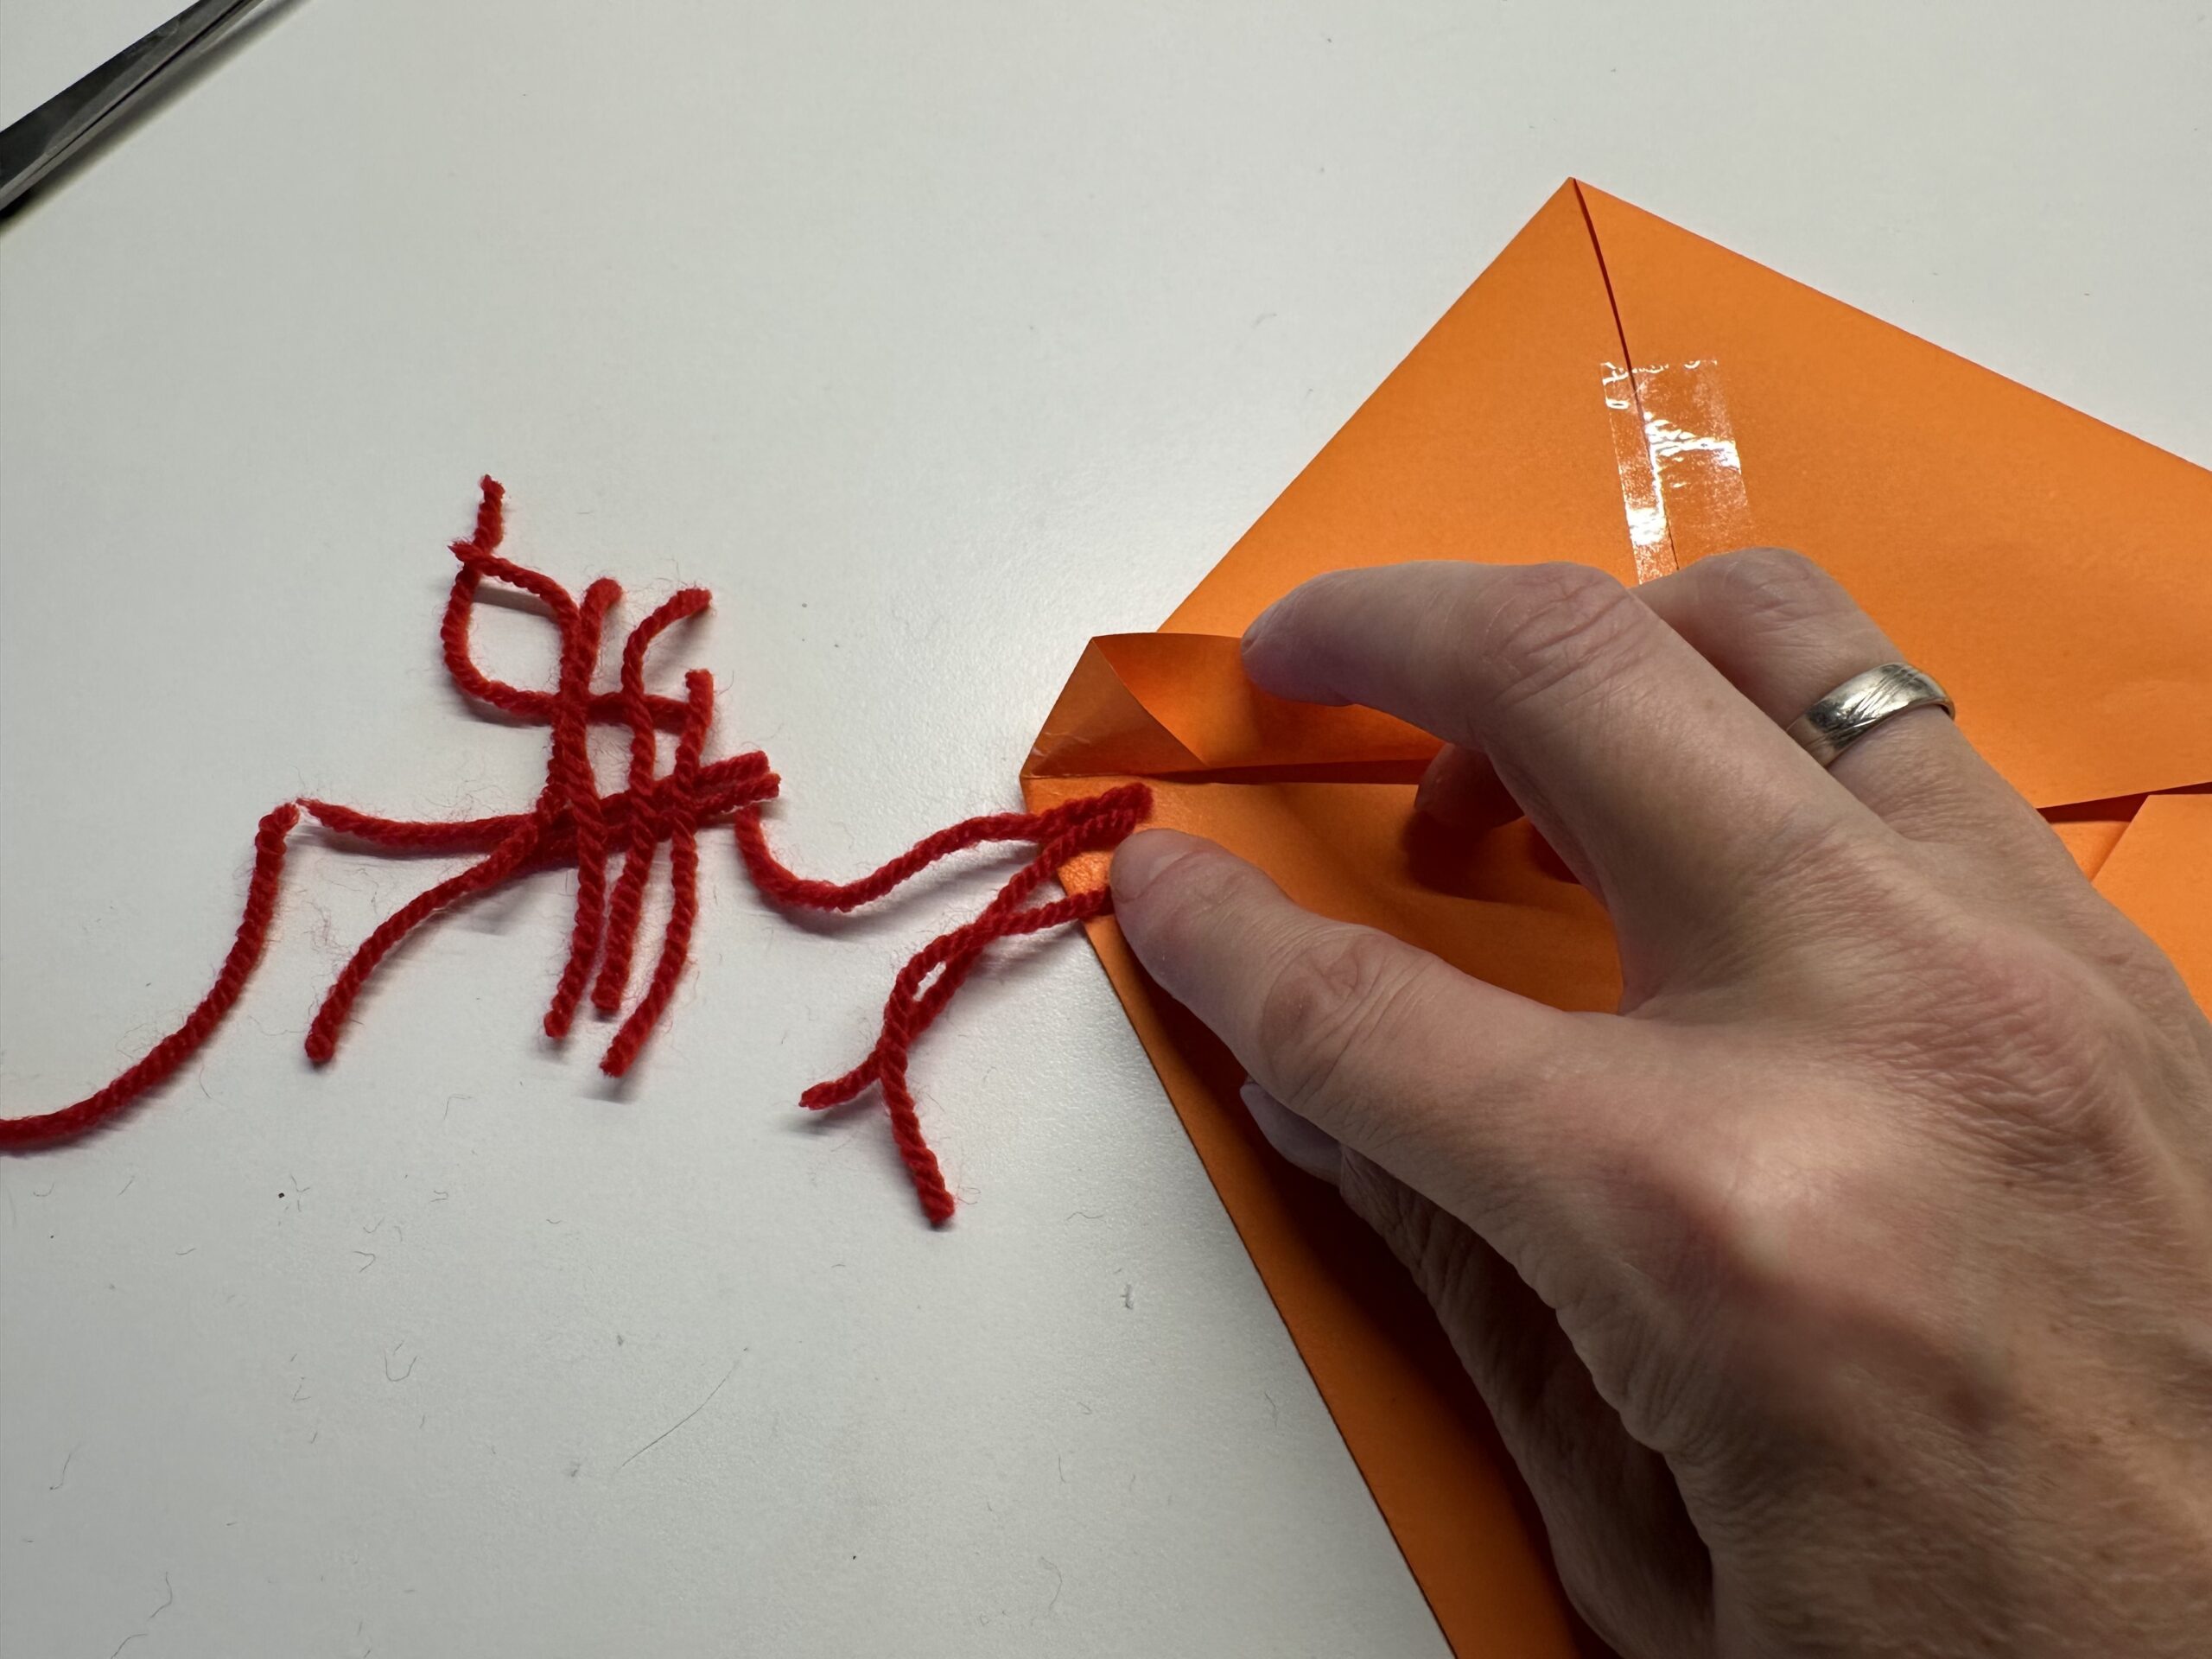
Bild zum Schritt 37 für das Bastel- und DIY-Abenteuer für Kinder: 'Klebe einige Wollfäden an die Seite.'

38

Place another adhesive point on the top of the paper and press the paper on the threads.
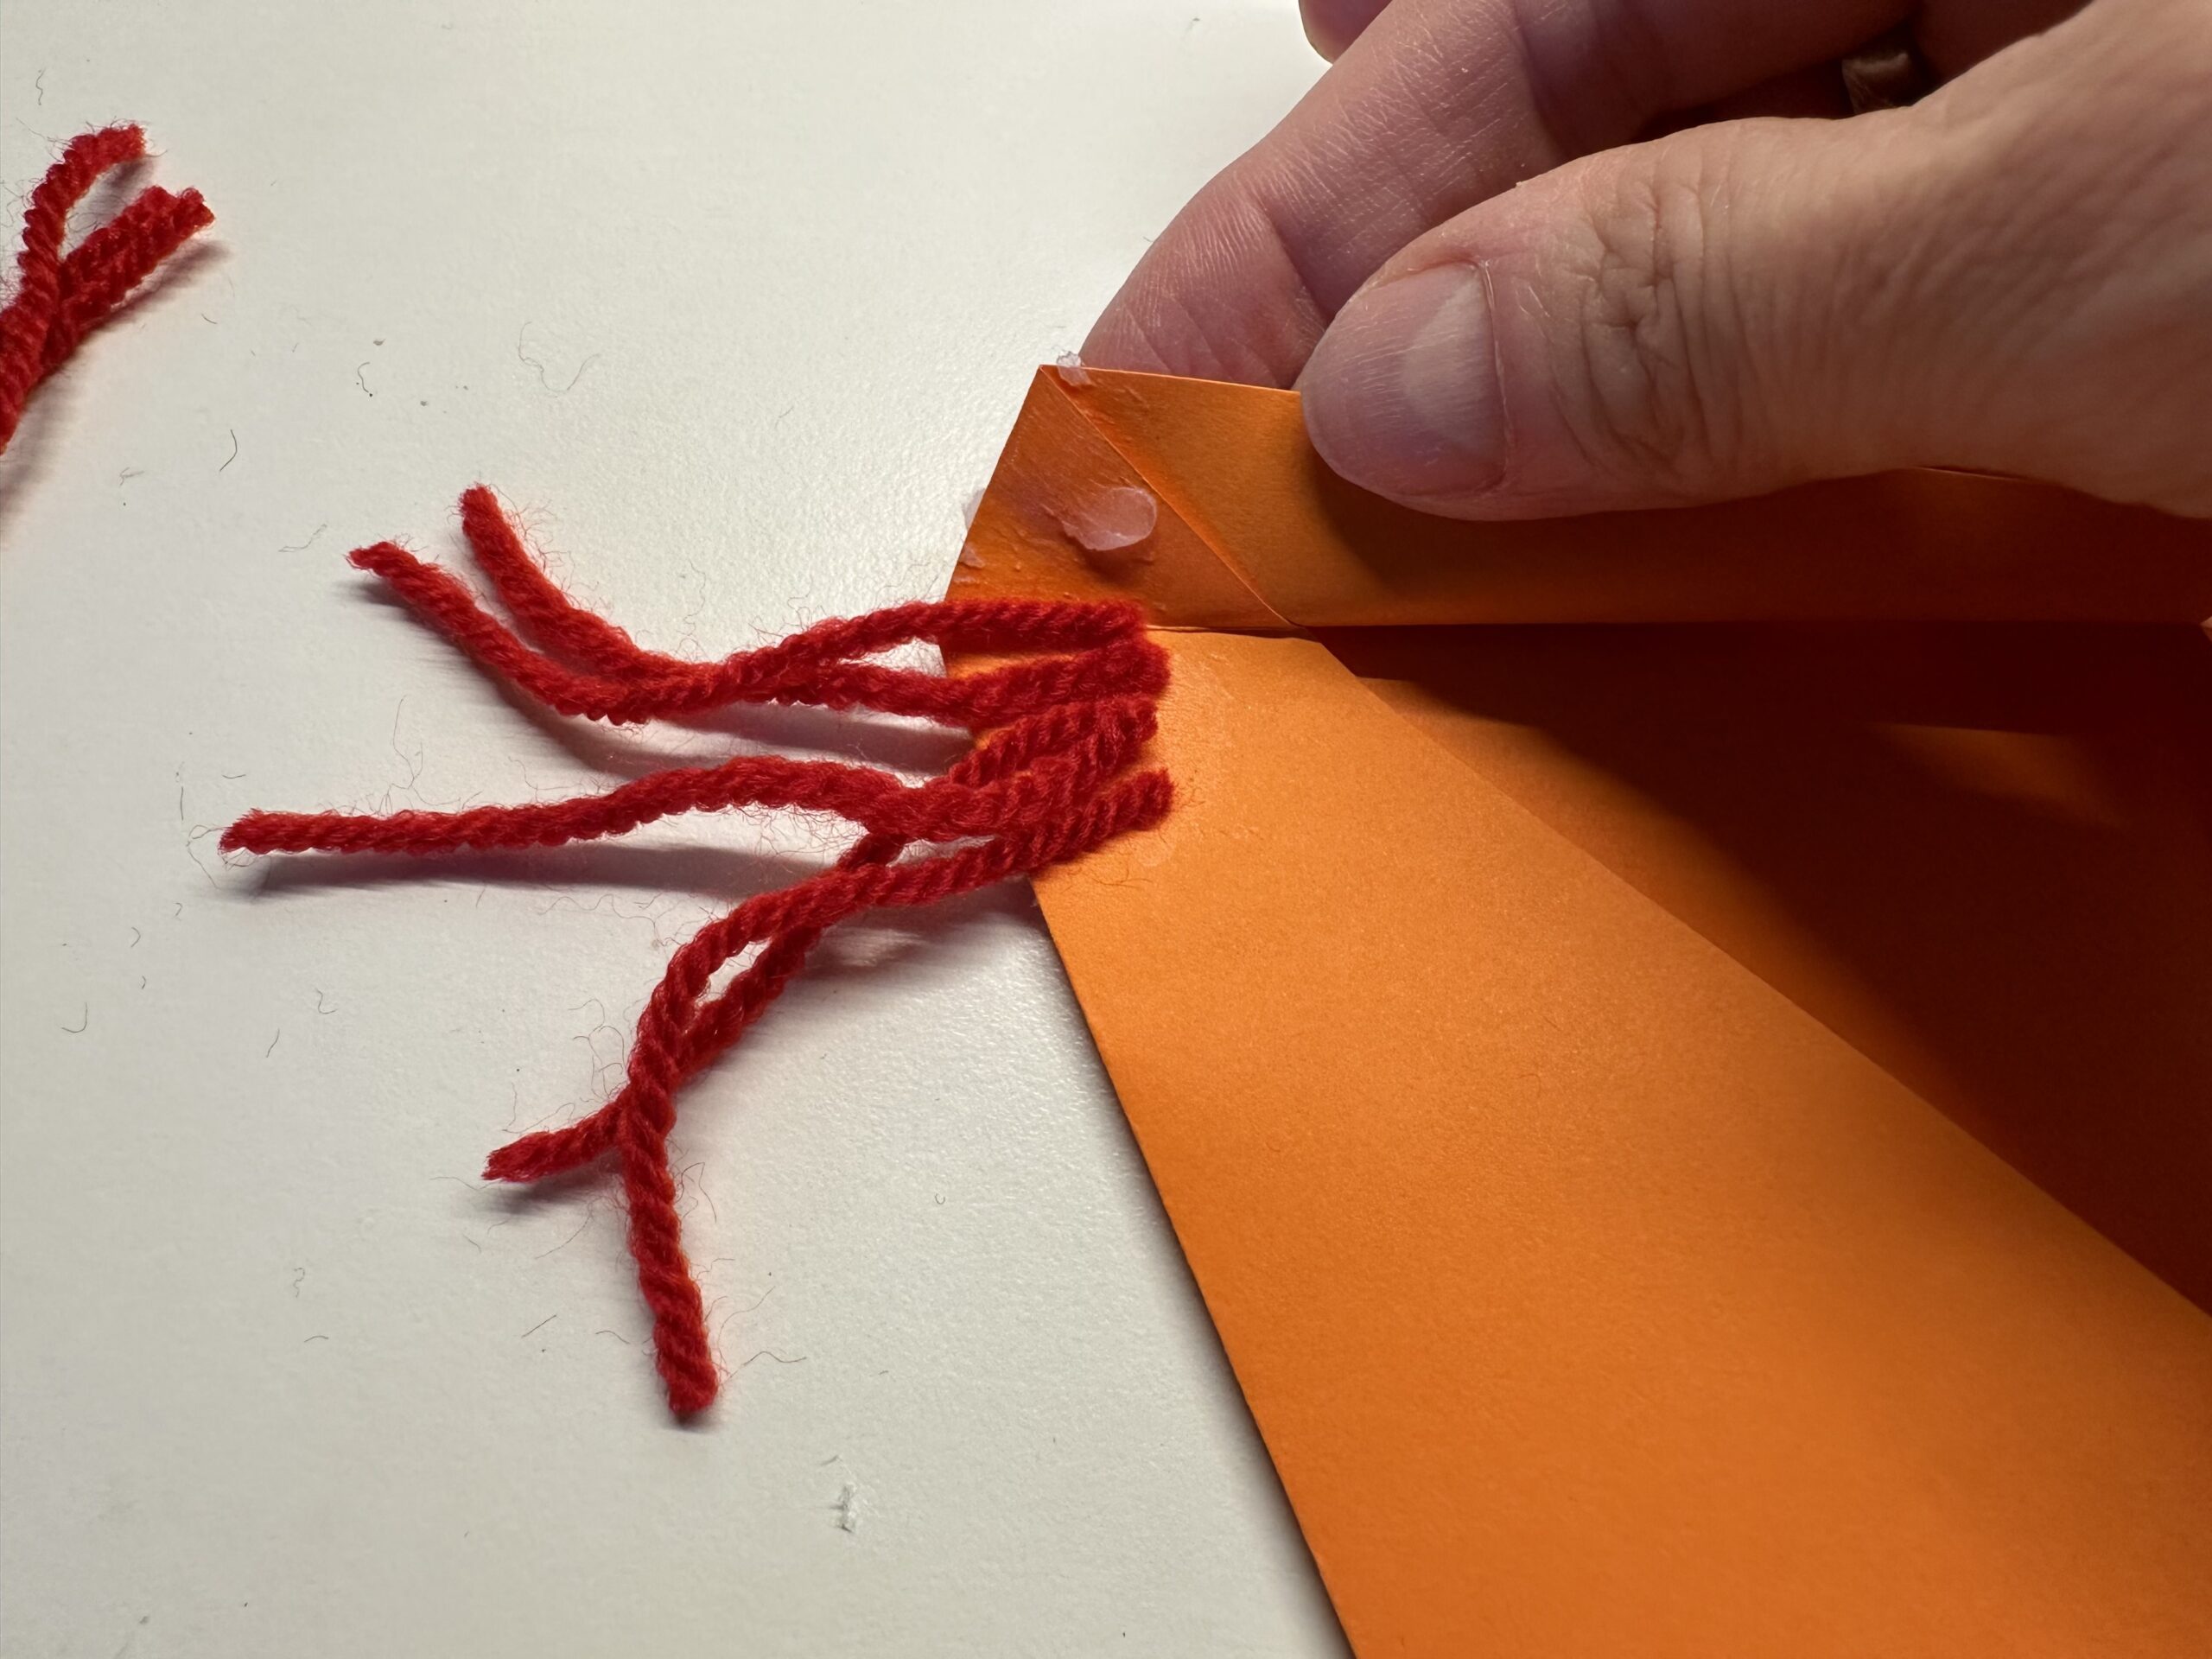
Bild zum Schritt 38 für das Bastel- und DIY-Abenteuer für Kinder: 'Gib einen weiteren Klebepunkt an die Oberseite des Papiers und...'

39

So the thread ends disappear in the inner of the fold.
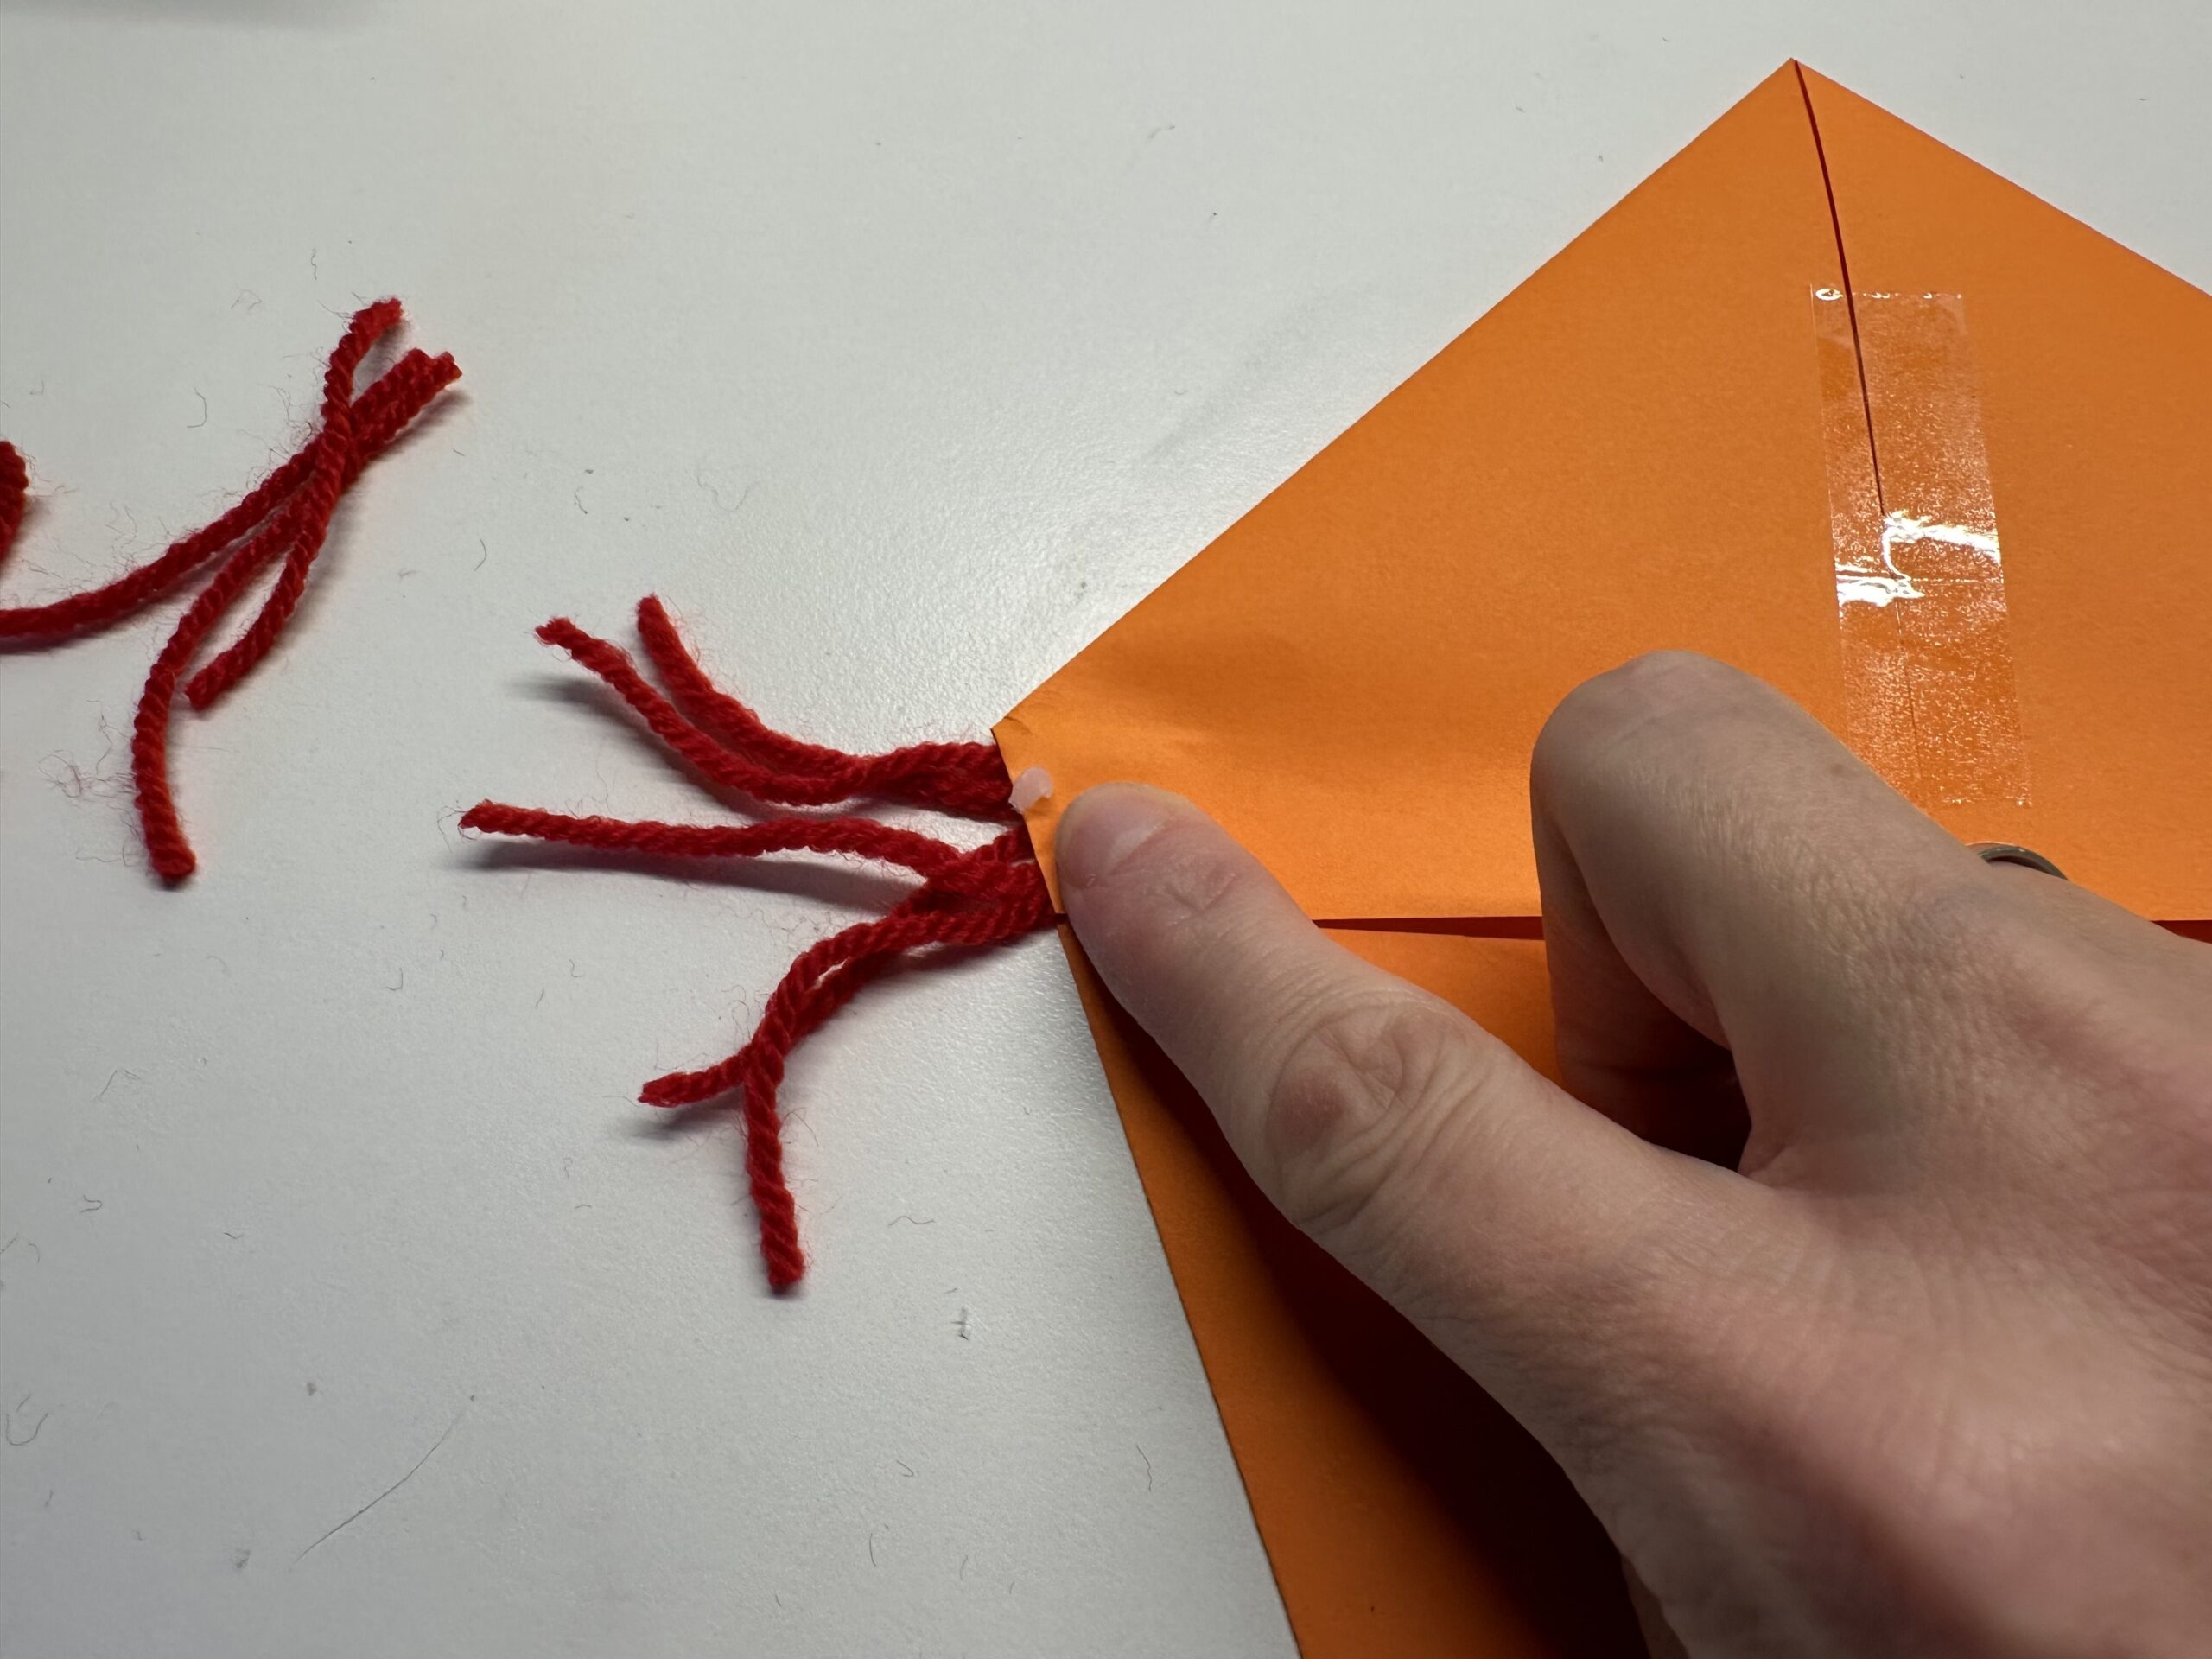
Bild zum Schritt 39 für das Bastel- und DIY-Abenteuer für Kinder: 'So verschwinden die Fadenenden im inneren der Faltung.'

40

To keep everything going well, attach a clothes clip to it. Thus, the papers are pressed together.
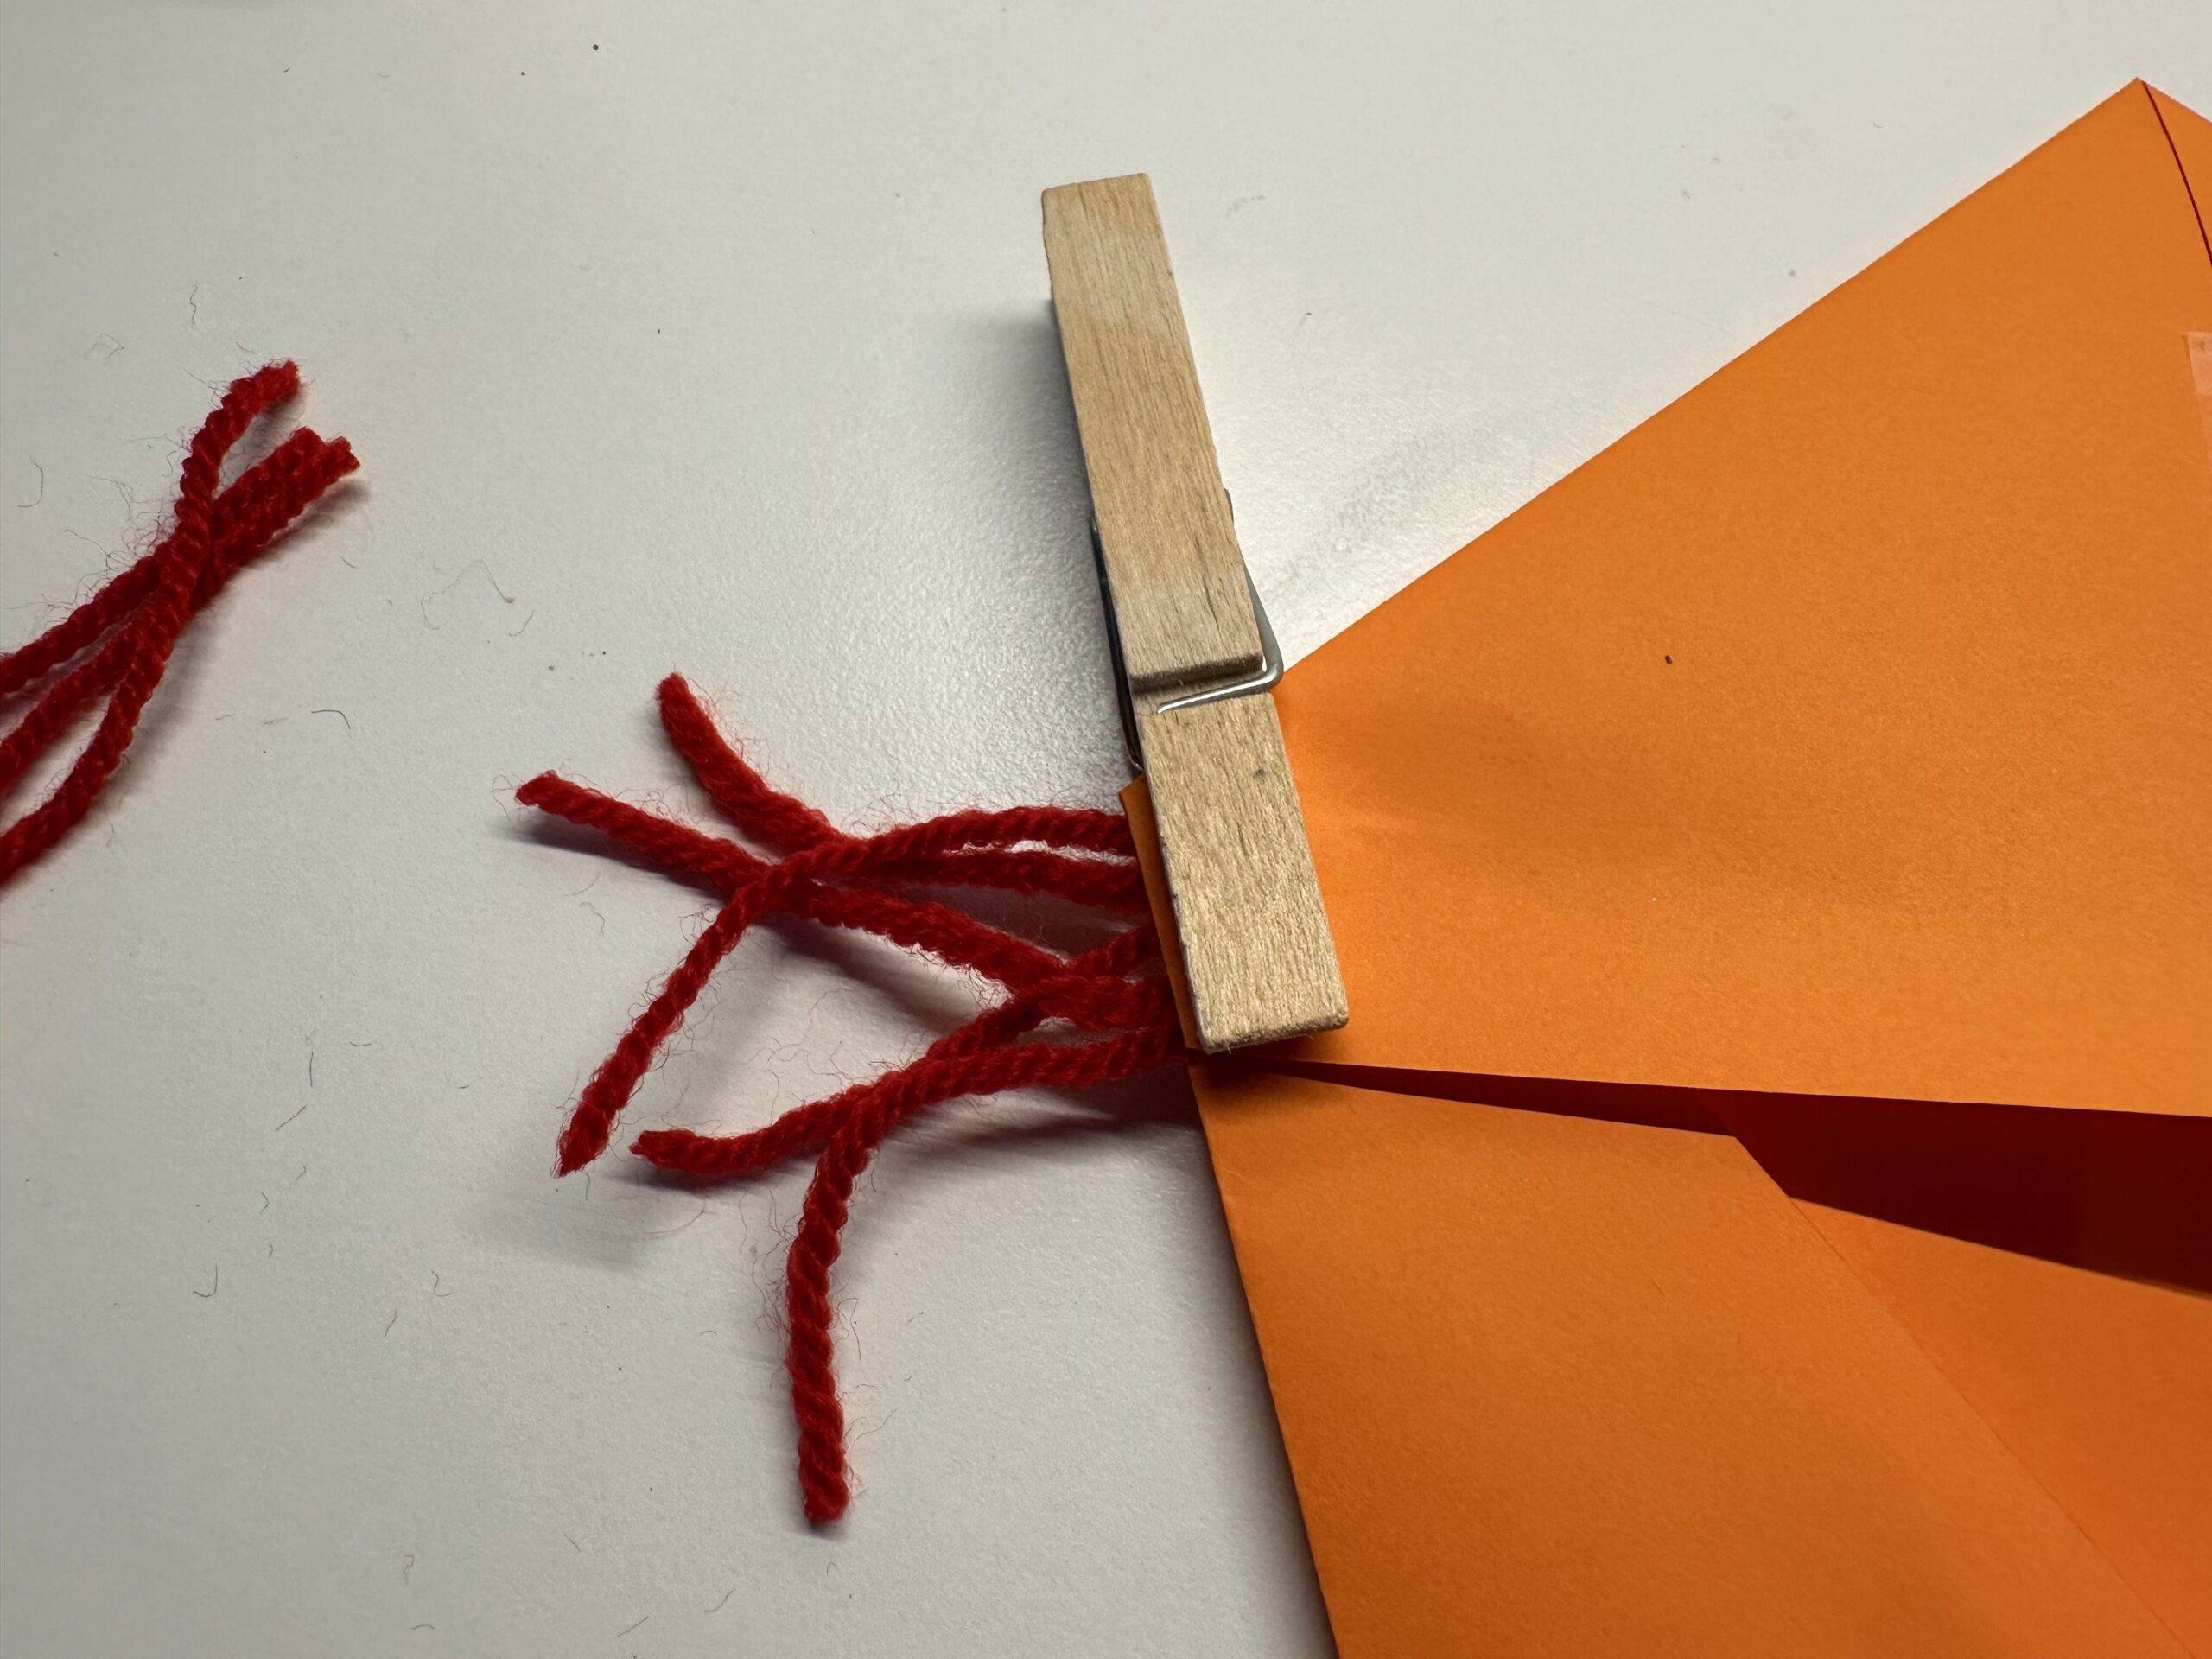
Bild zum Schritt 40 für das Bastel- und DIY-Abenteuer für Kinder: 'Damit alles gut hält, befestige eine Wäscheklammer darüber. So werden...'

41

Repeat the same on the other side.
Leave the clothespins on the sides until you are completely finished with the crafting.
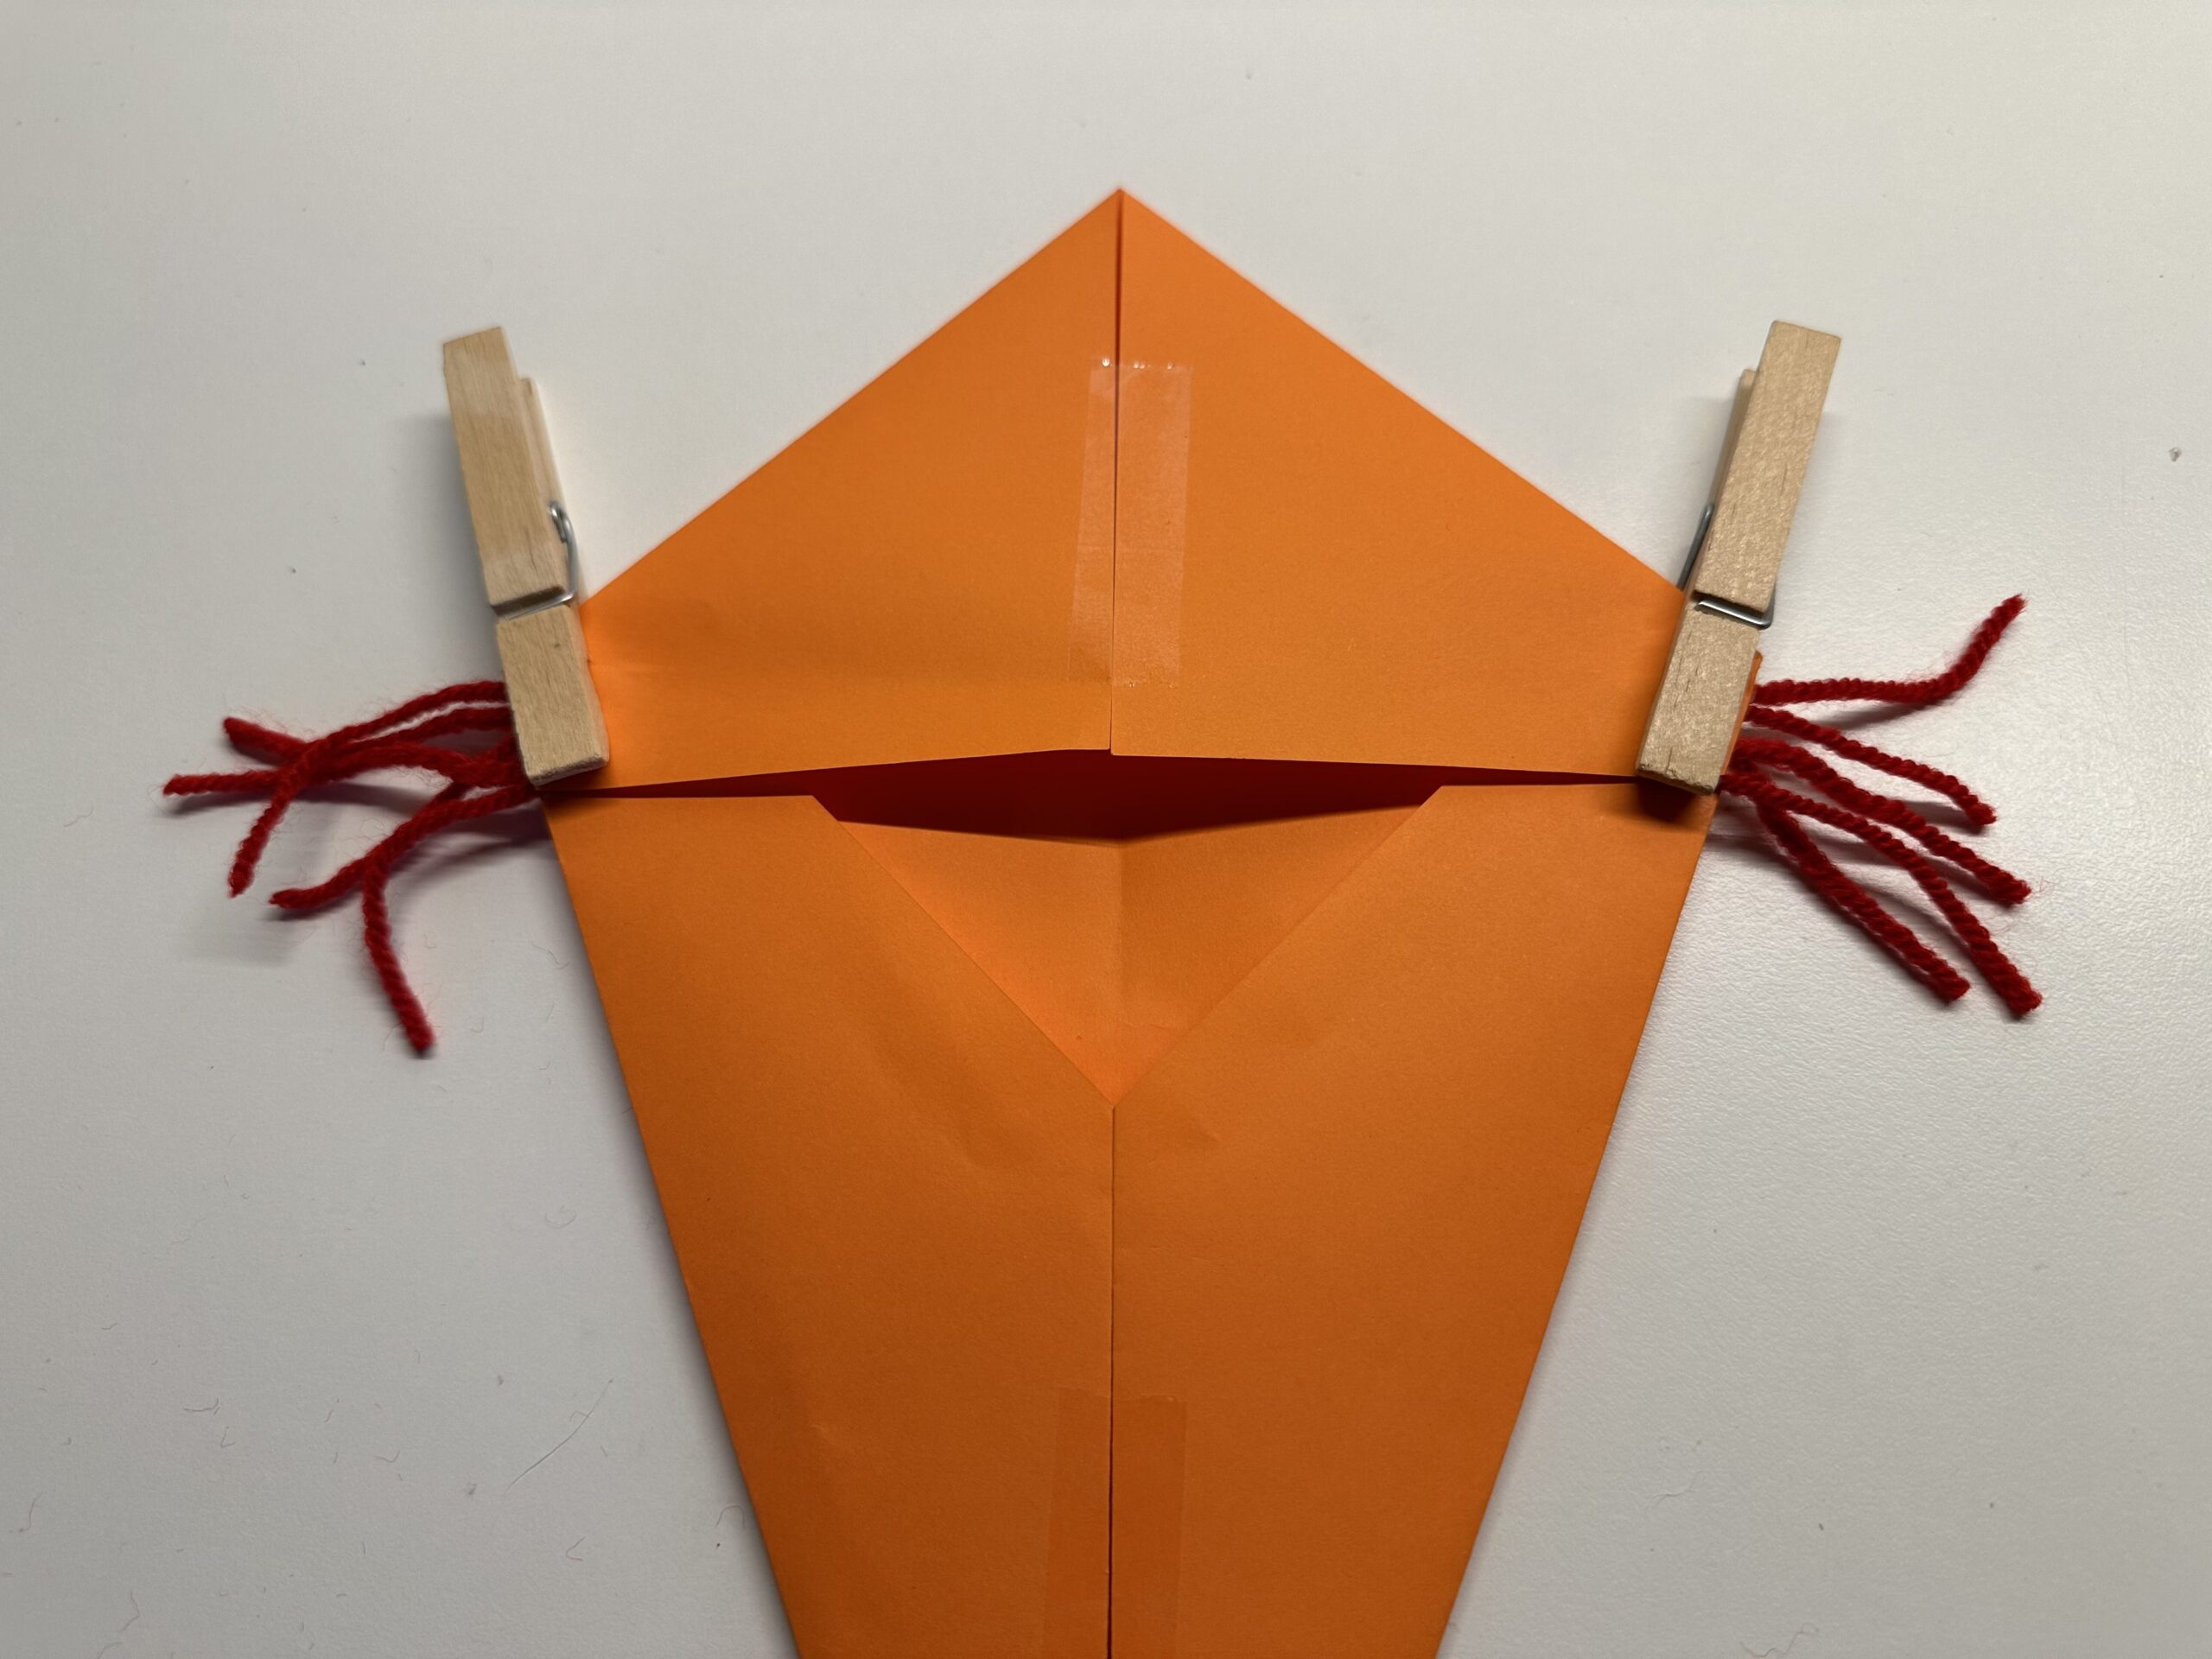
Bild zum Schritt 41 für das Bastel- und DIY-Abenteuer für Kinder: 'Wiederhole das gleiche auf der anderen Seite.   Lass...'

42

Cut off some long wool threads. These can have different colors and lengths. (approximately 30cm long)
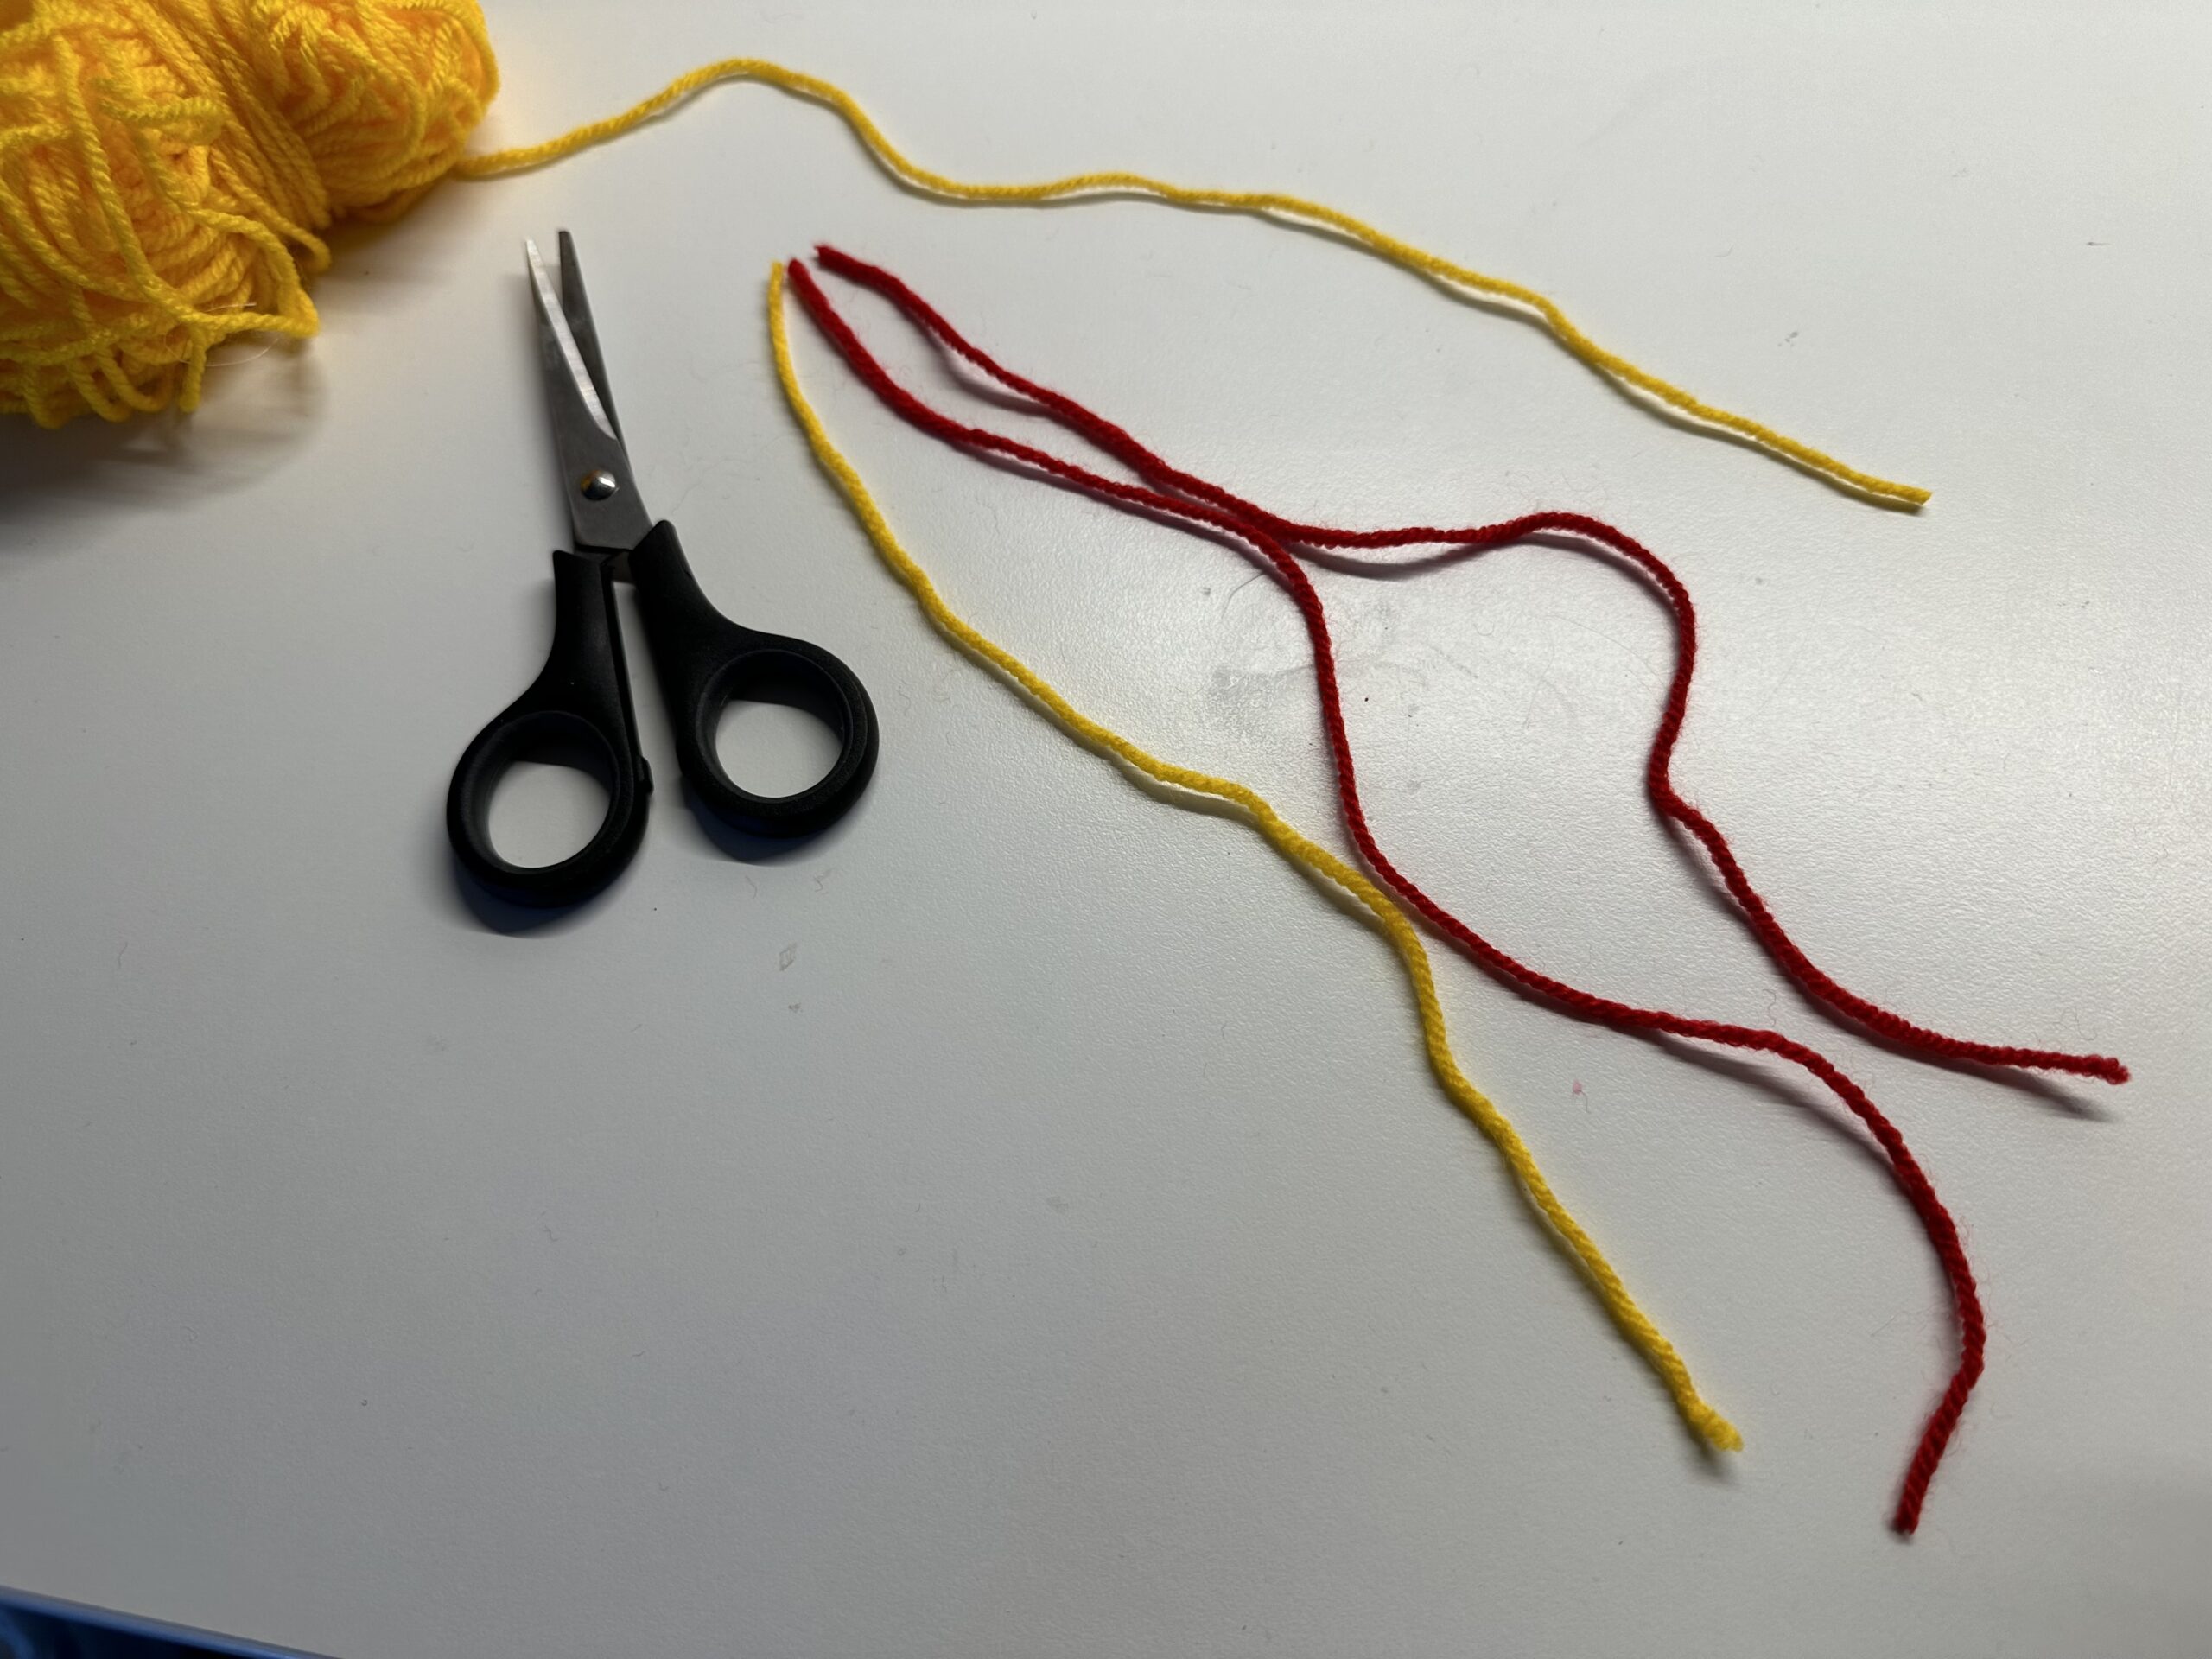
Bild zum Schritt 42 für das Bastel- und DIY-Abenteuer für Kinder: 'Schneide dir ein paar lange Wollfäden ab. Diese können unterschiedlich...'

43

Place the threads so that all thread beginnings lie together on one side.
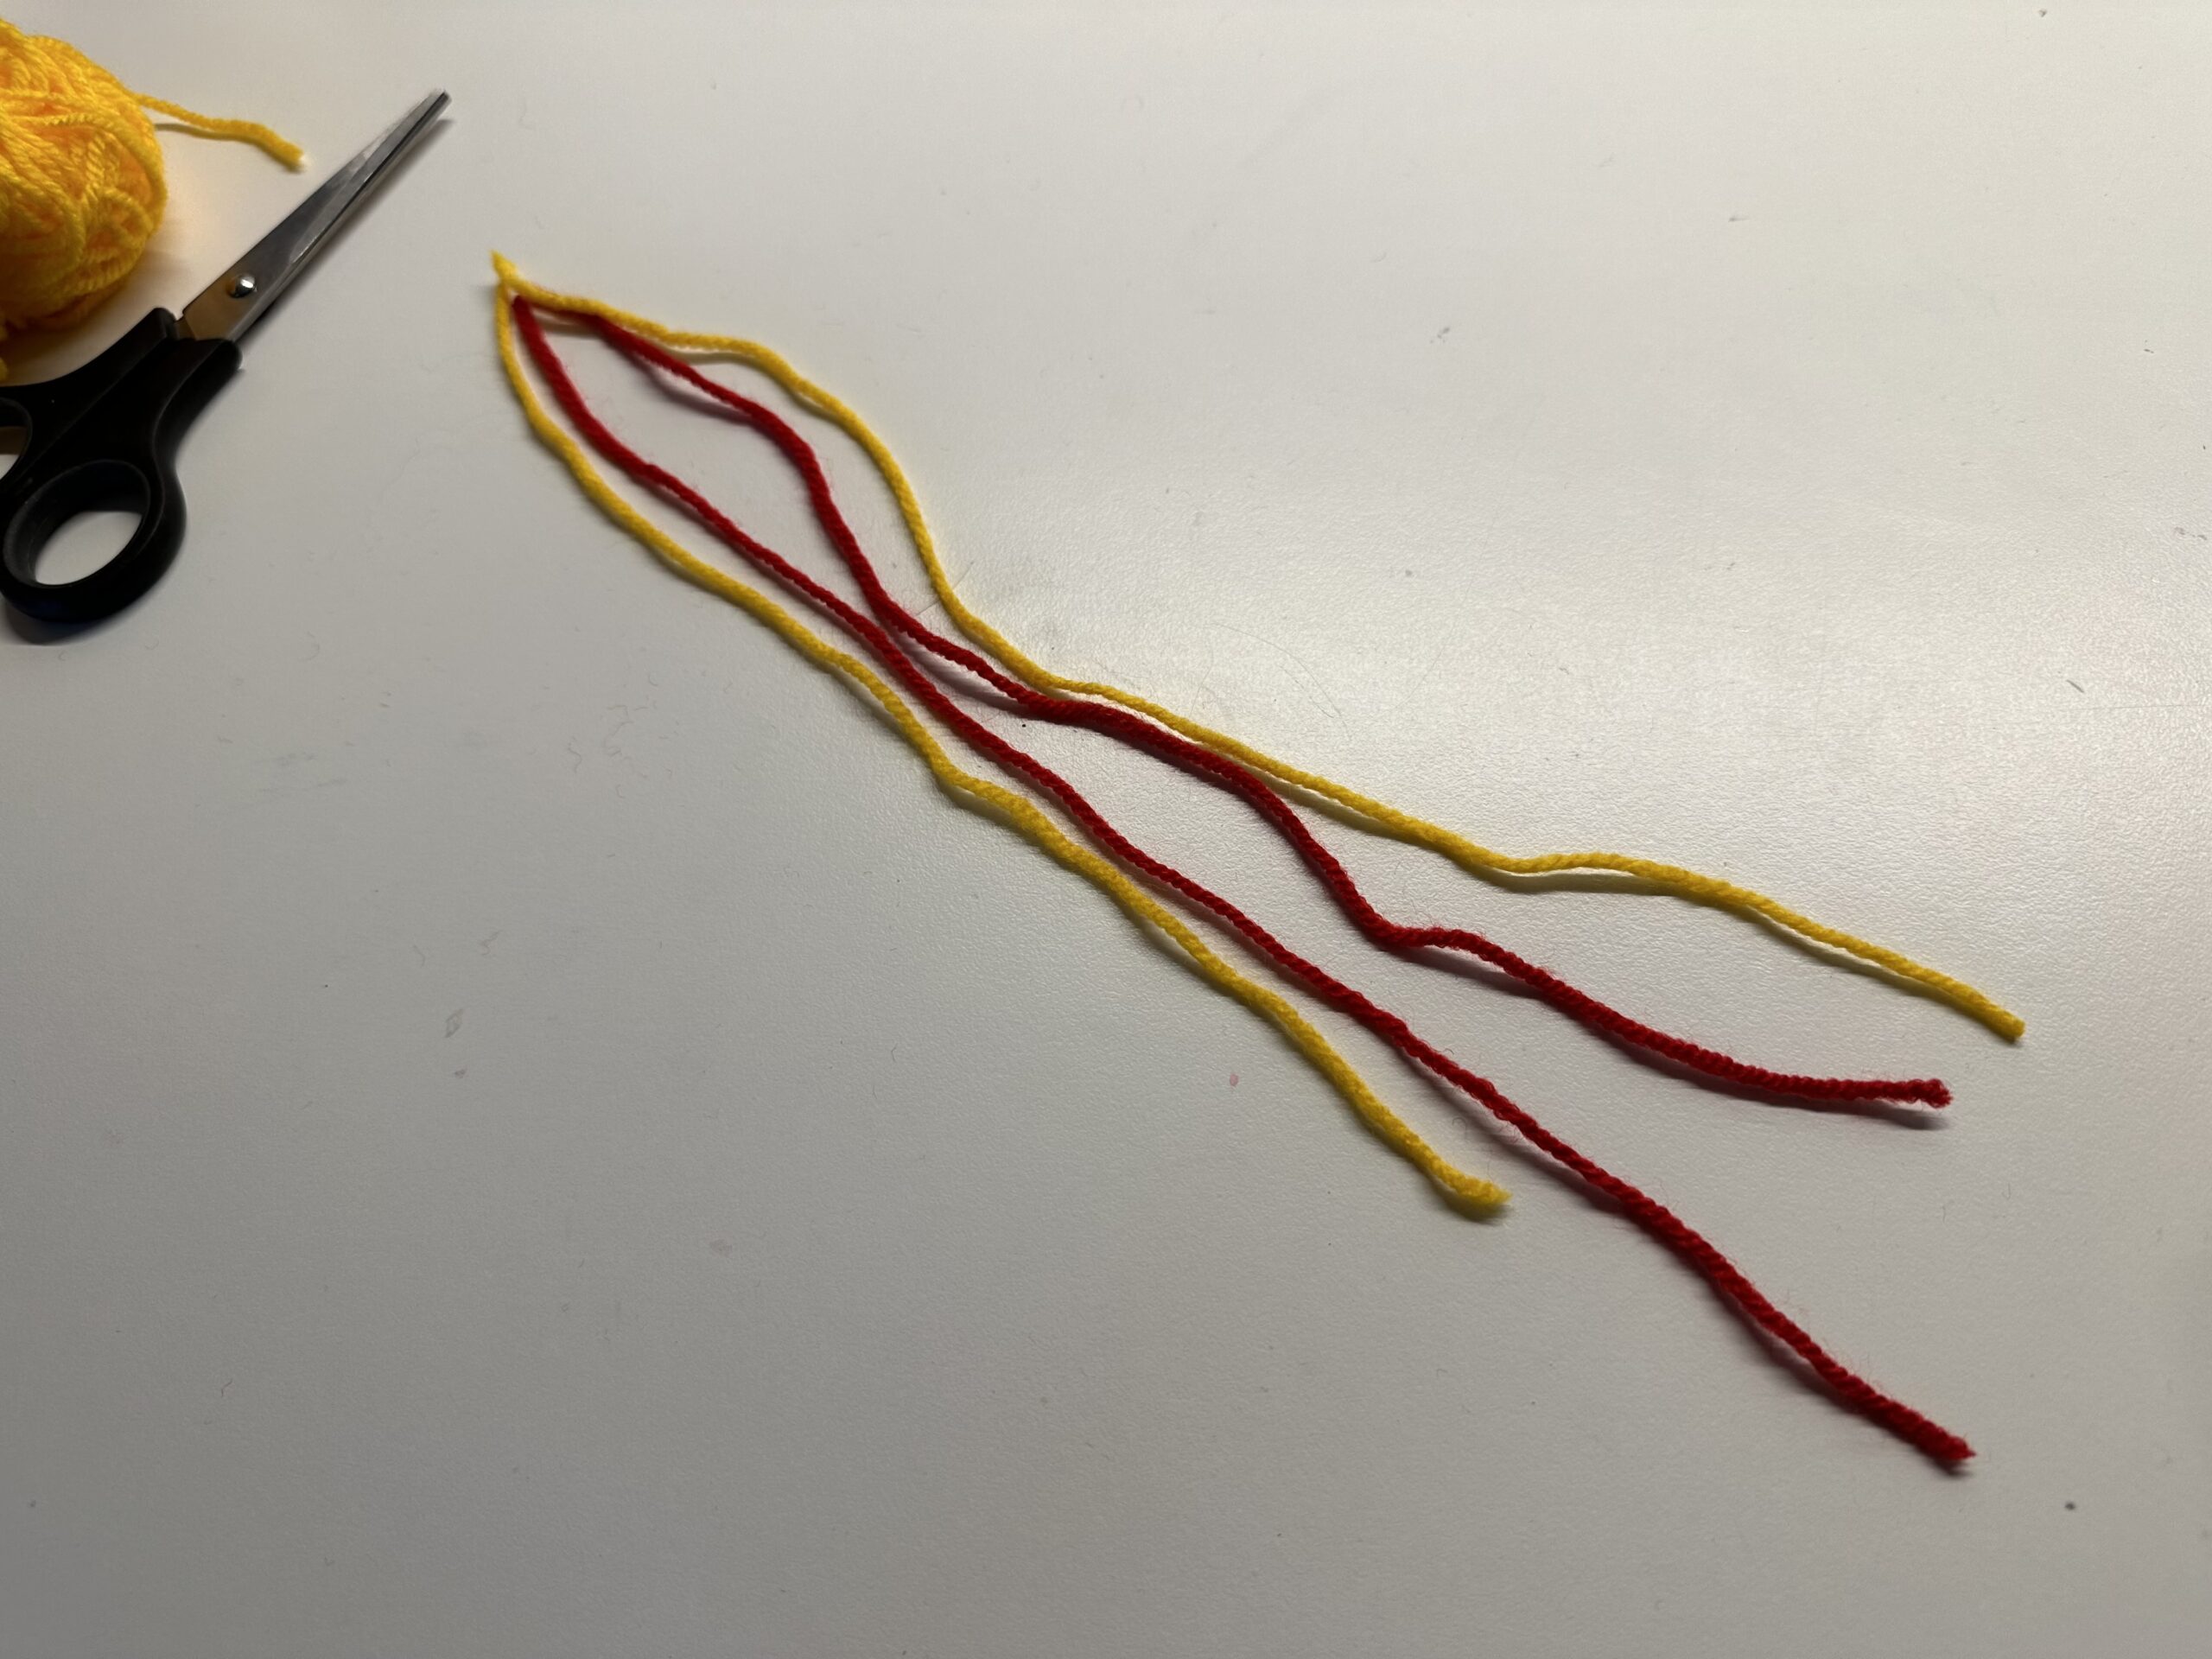
Bild zum Schritt 43 für das Bastel- und DIY-Abenteuer für Kinder: 'Lege die Fäden so hin, dass alle Fadenanfänge an einer...'

44

Make a knot here.

Bild zum Schritt 44 für das Bastel- und DIY-Abenteuer für Kinder: 'Mache hier einen Knoten.'

45

Attach the threads at the bottom of the kite with an adhesive strip. The adhesive strip should lie below the knot that the wool does not slip out.
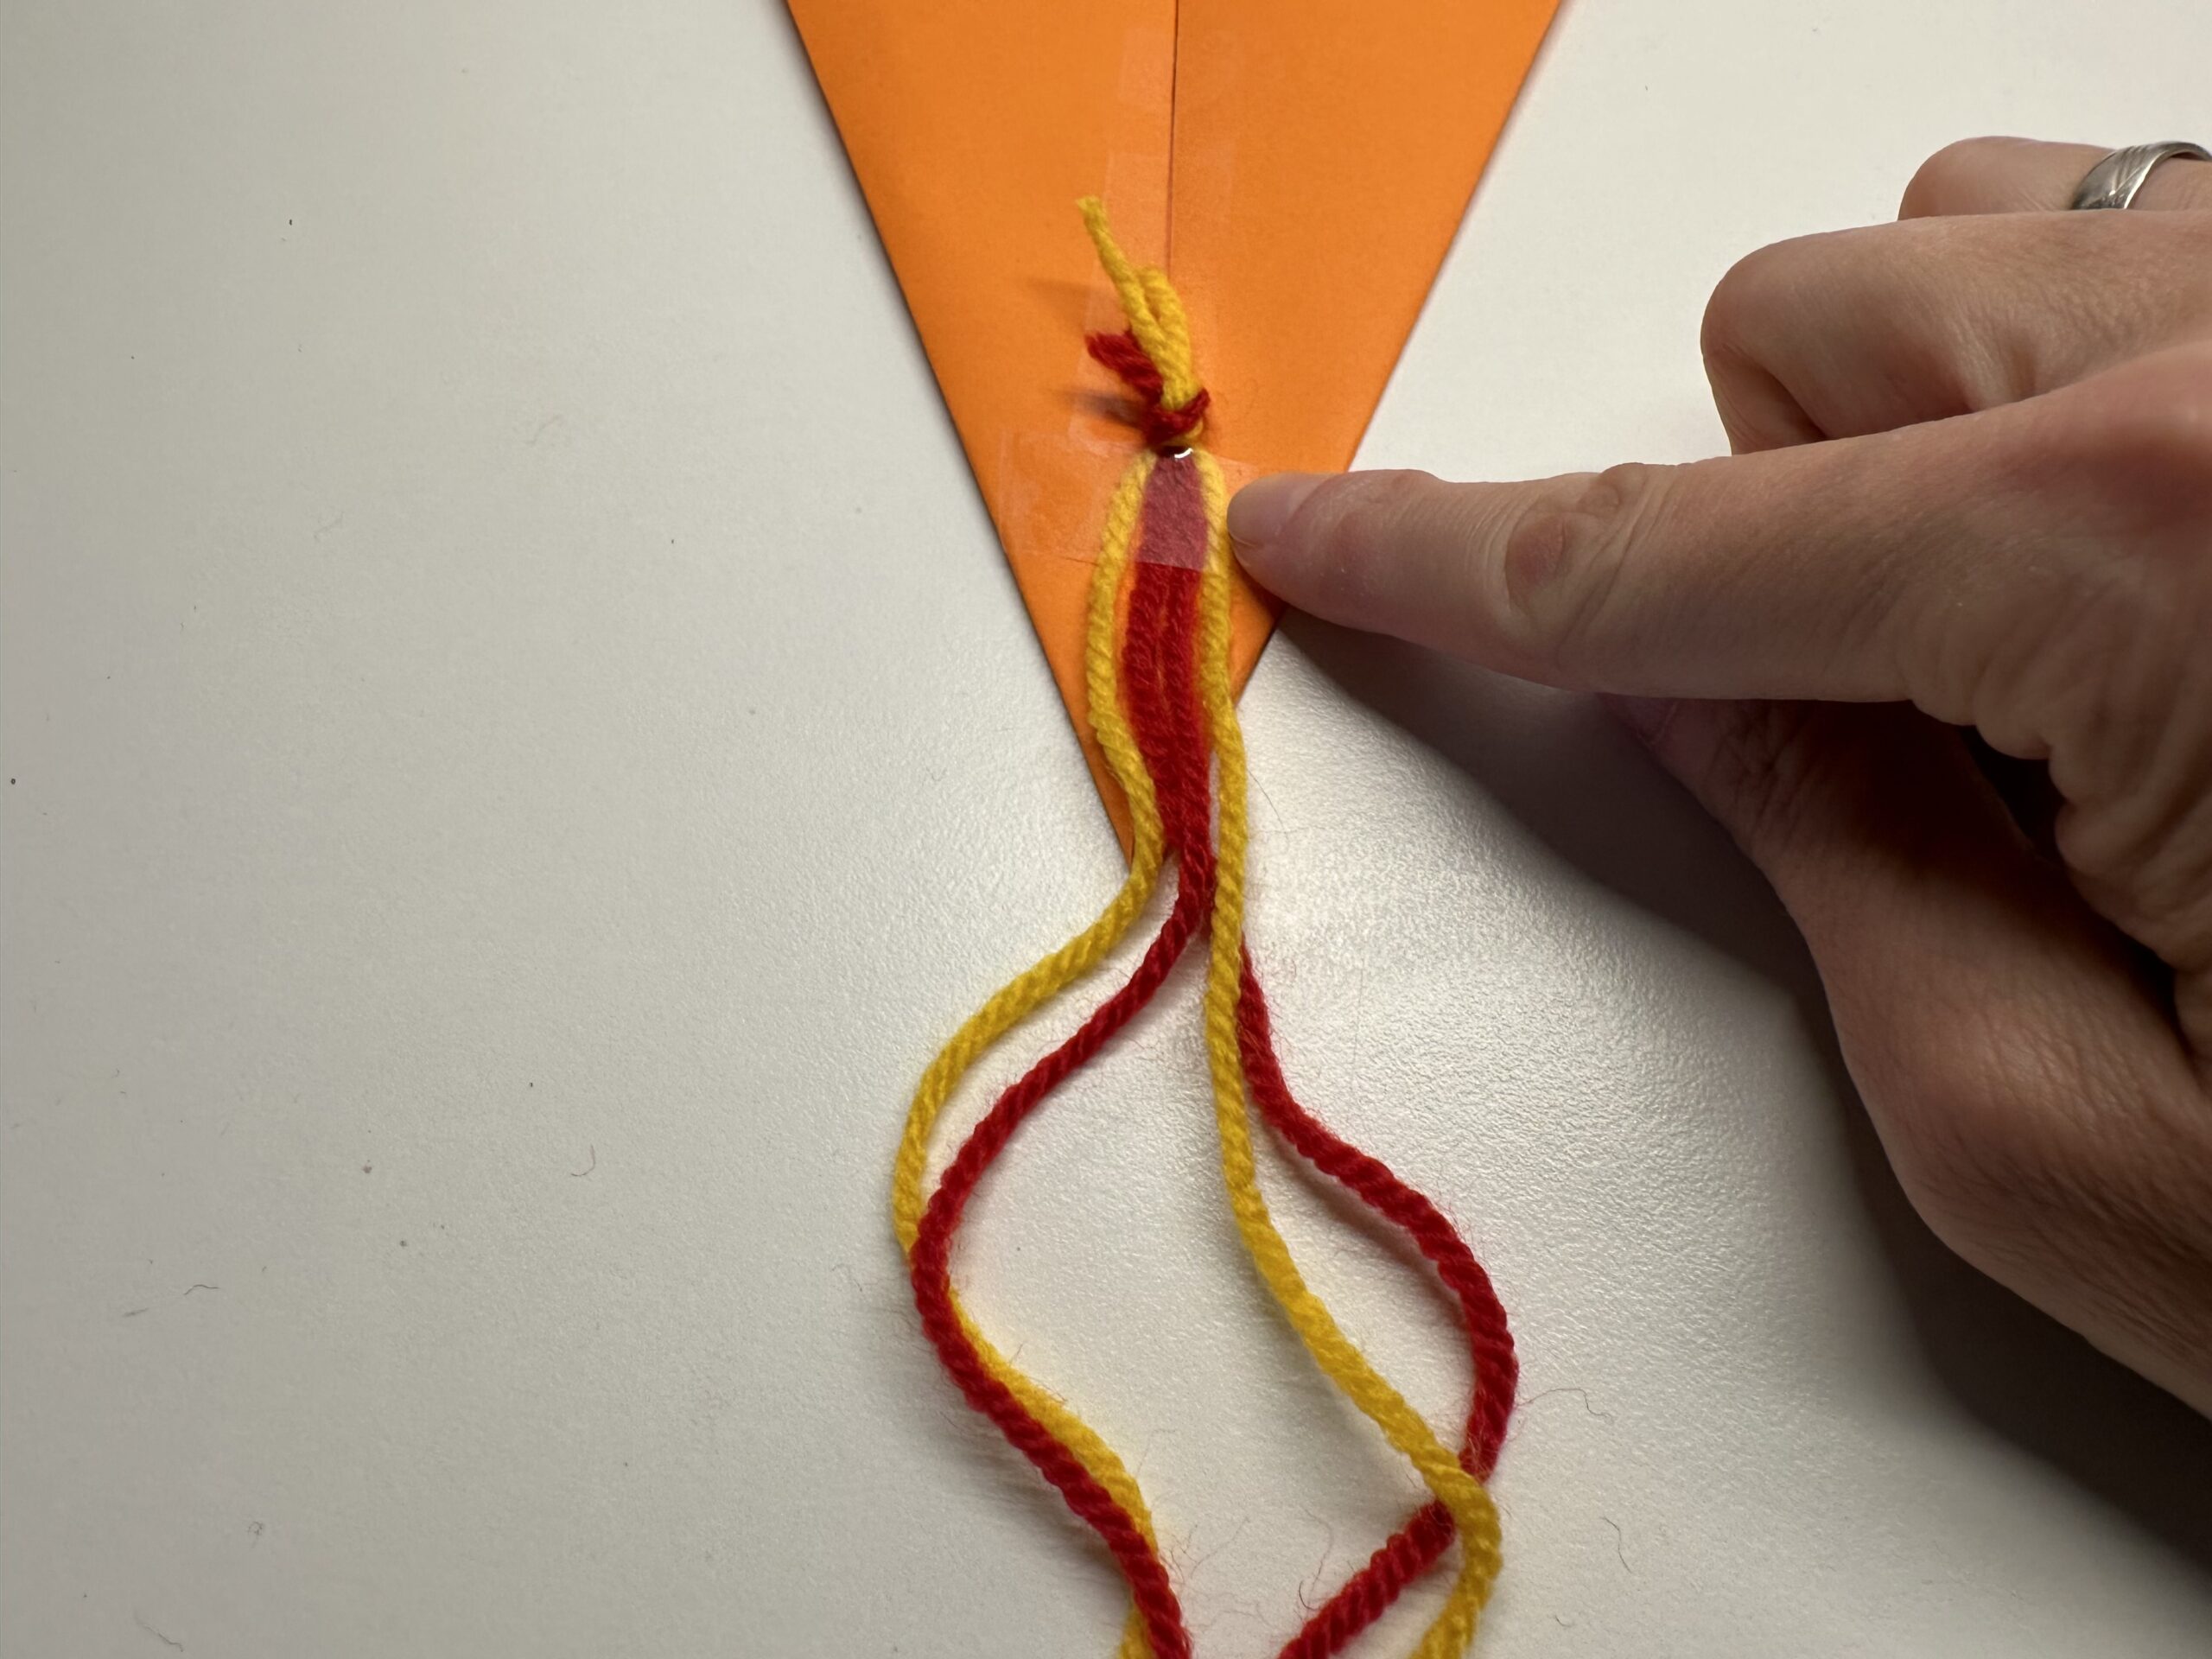
Bild zum Schritt 45 für das Bastel- und DIY-Abenteuer für Kinder: 'Befestige mit einem Klebestreifen die Fäden am unteren Ende des...'

46

Now remove the brackets from the sides.
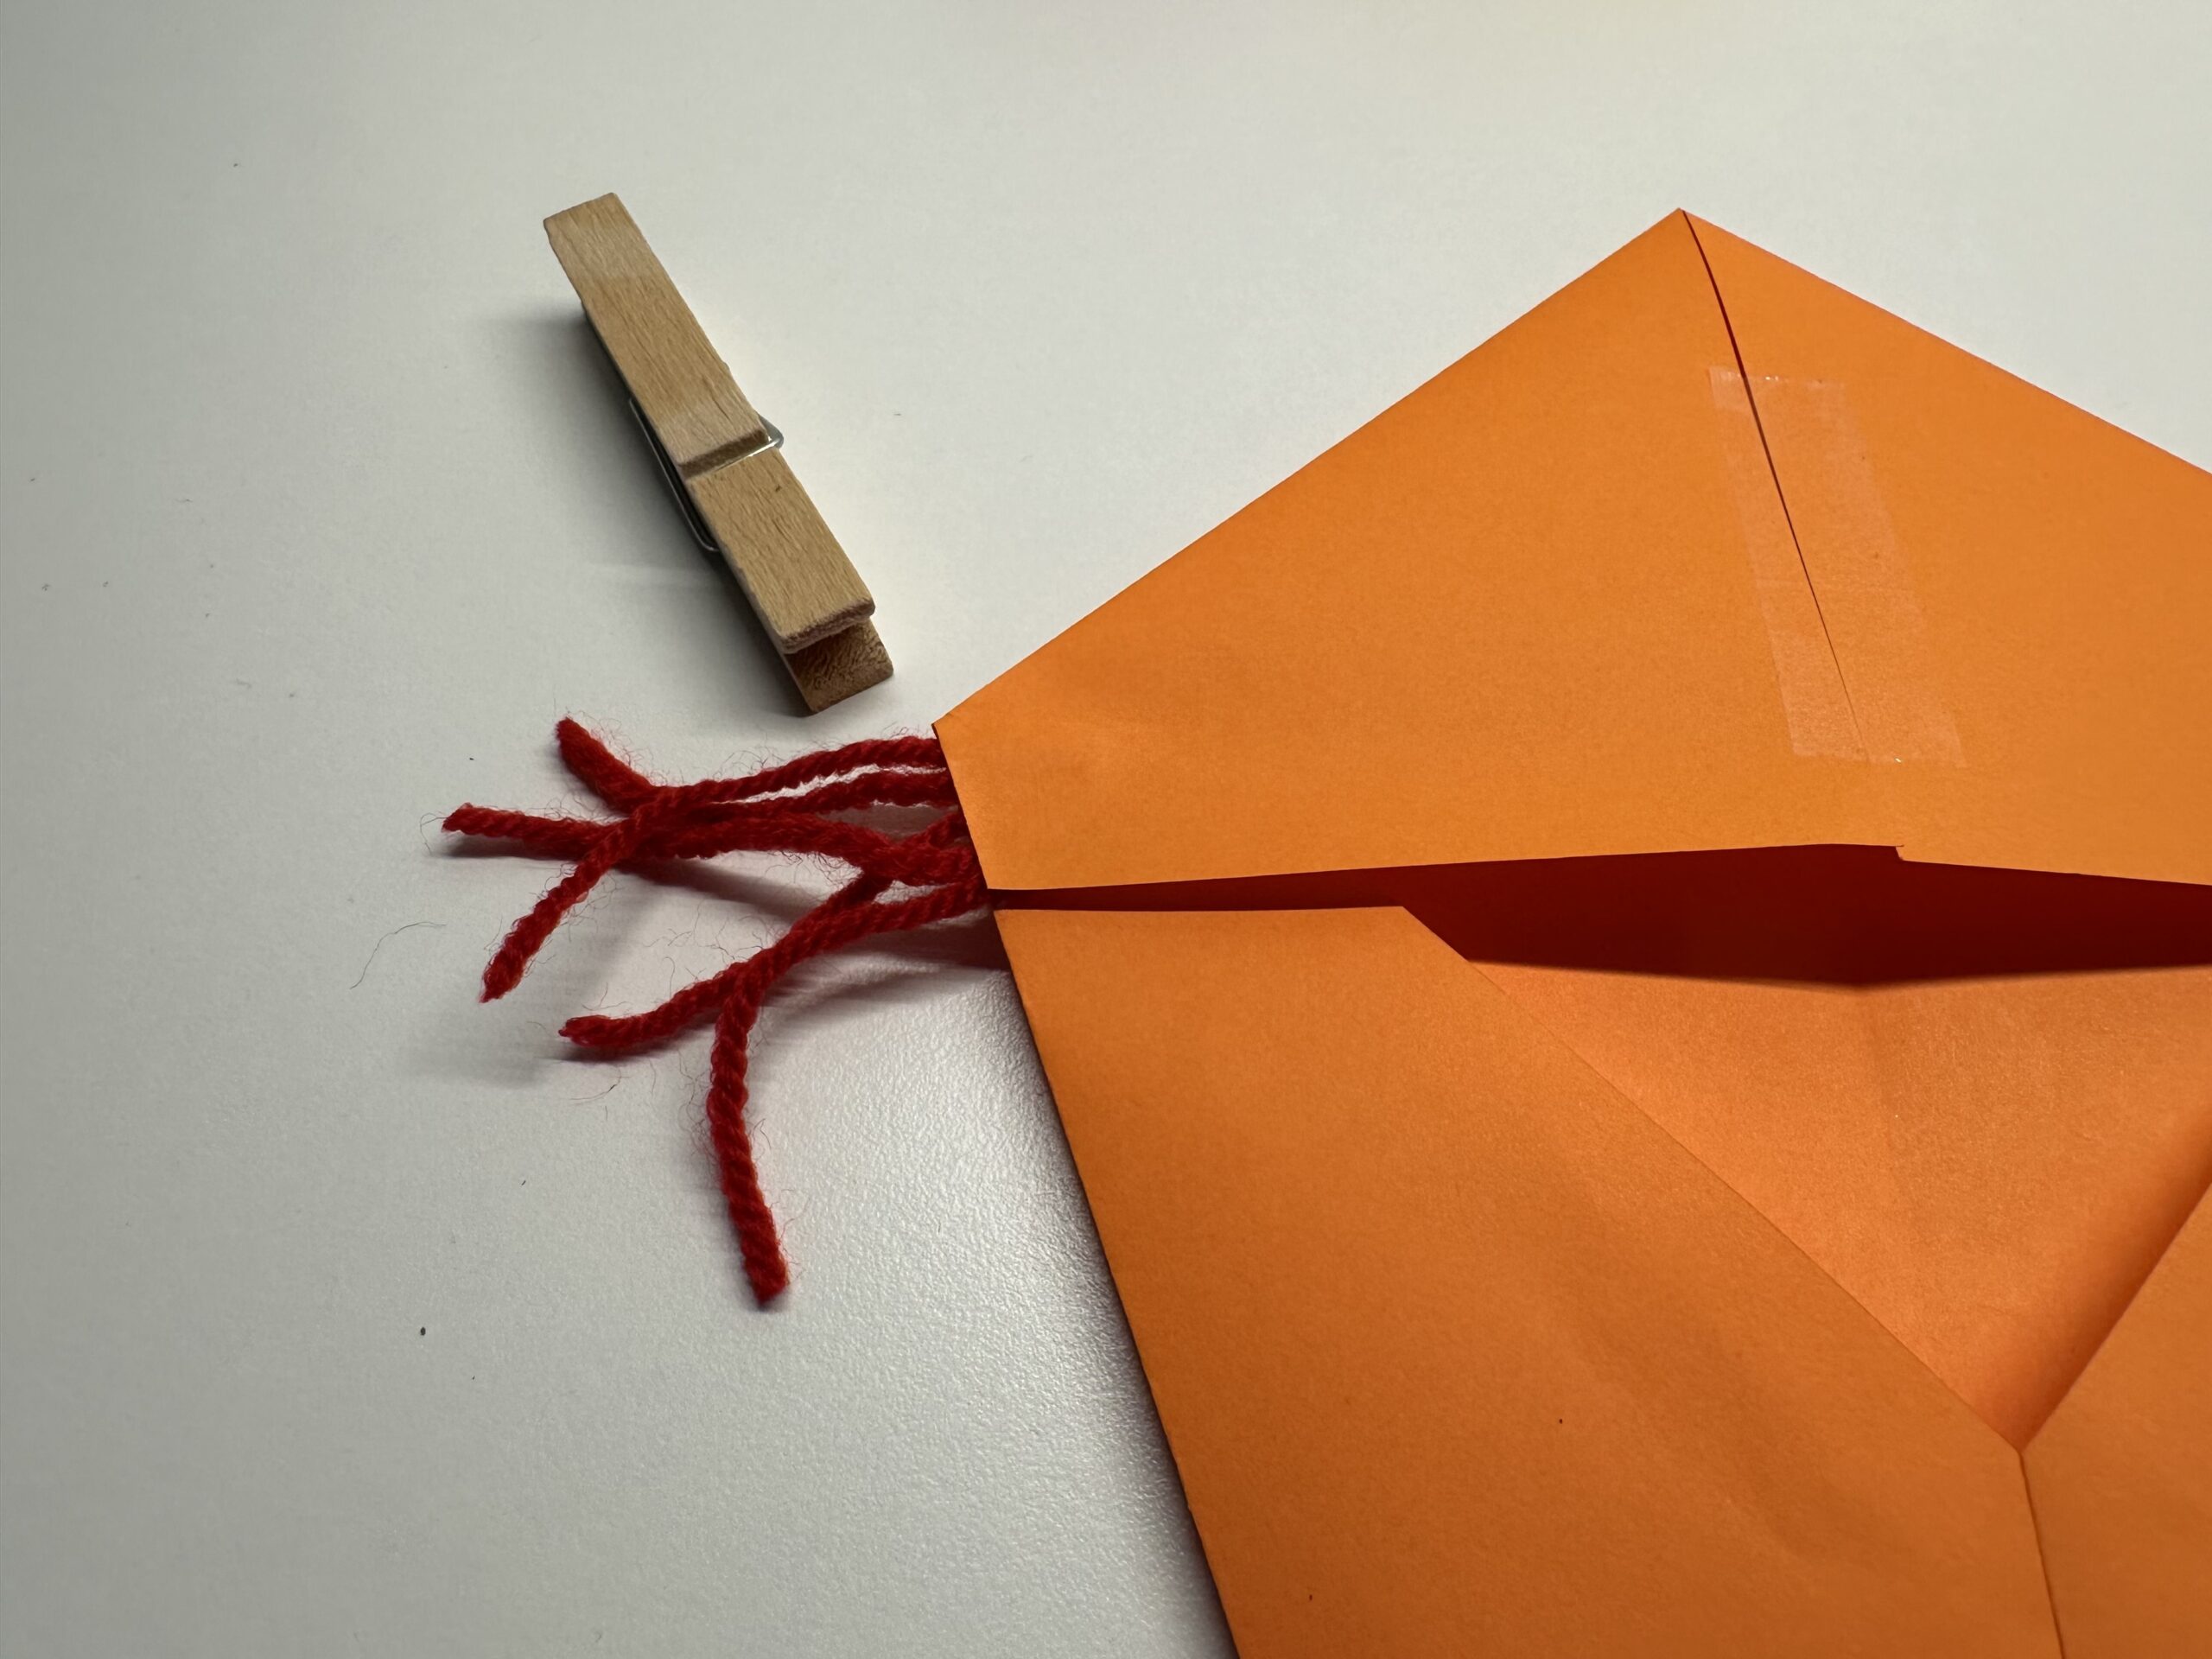
Bild zum Schritt 46 für das Bastel- und DIY-Abenteuer für Kinder: 'Löse nun die Klammern von den Seiten.'

47

The dragon is ready.

Bild zum Schritt 47 für das Bastel- und DIY-Abenteuer für Kinder: 'Der Drache ist fertig.'

48

Grab the upper triangle (on the back) of the dragon with your hand. Now you can let it dance. The wool threads of the dragon tail can fly in the air.
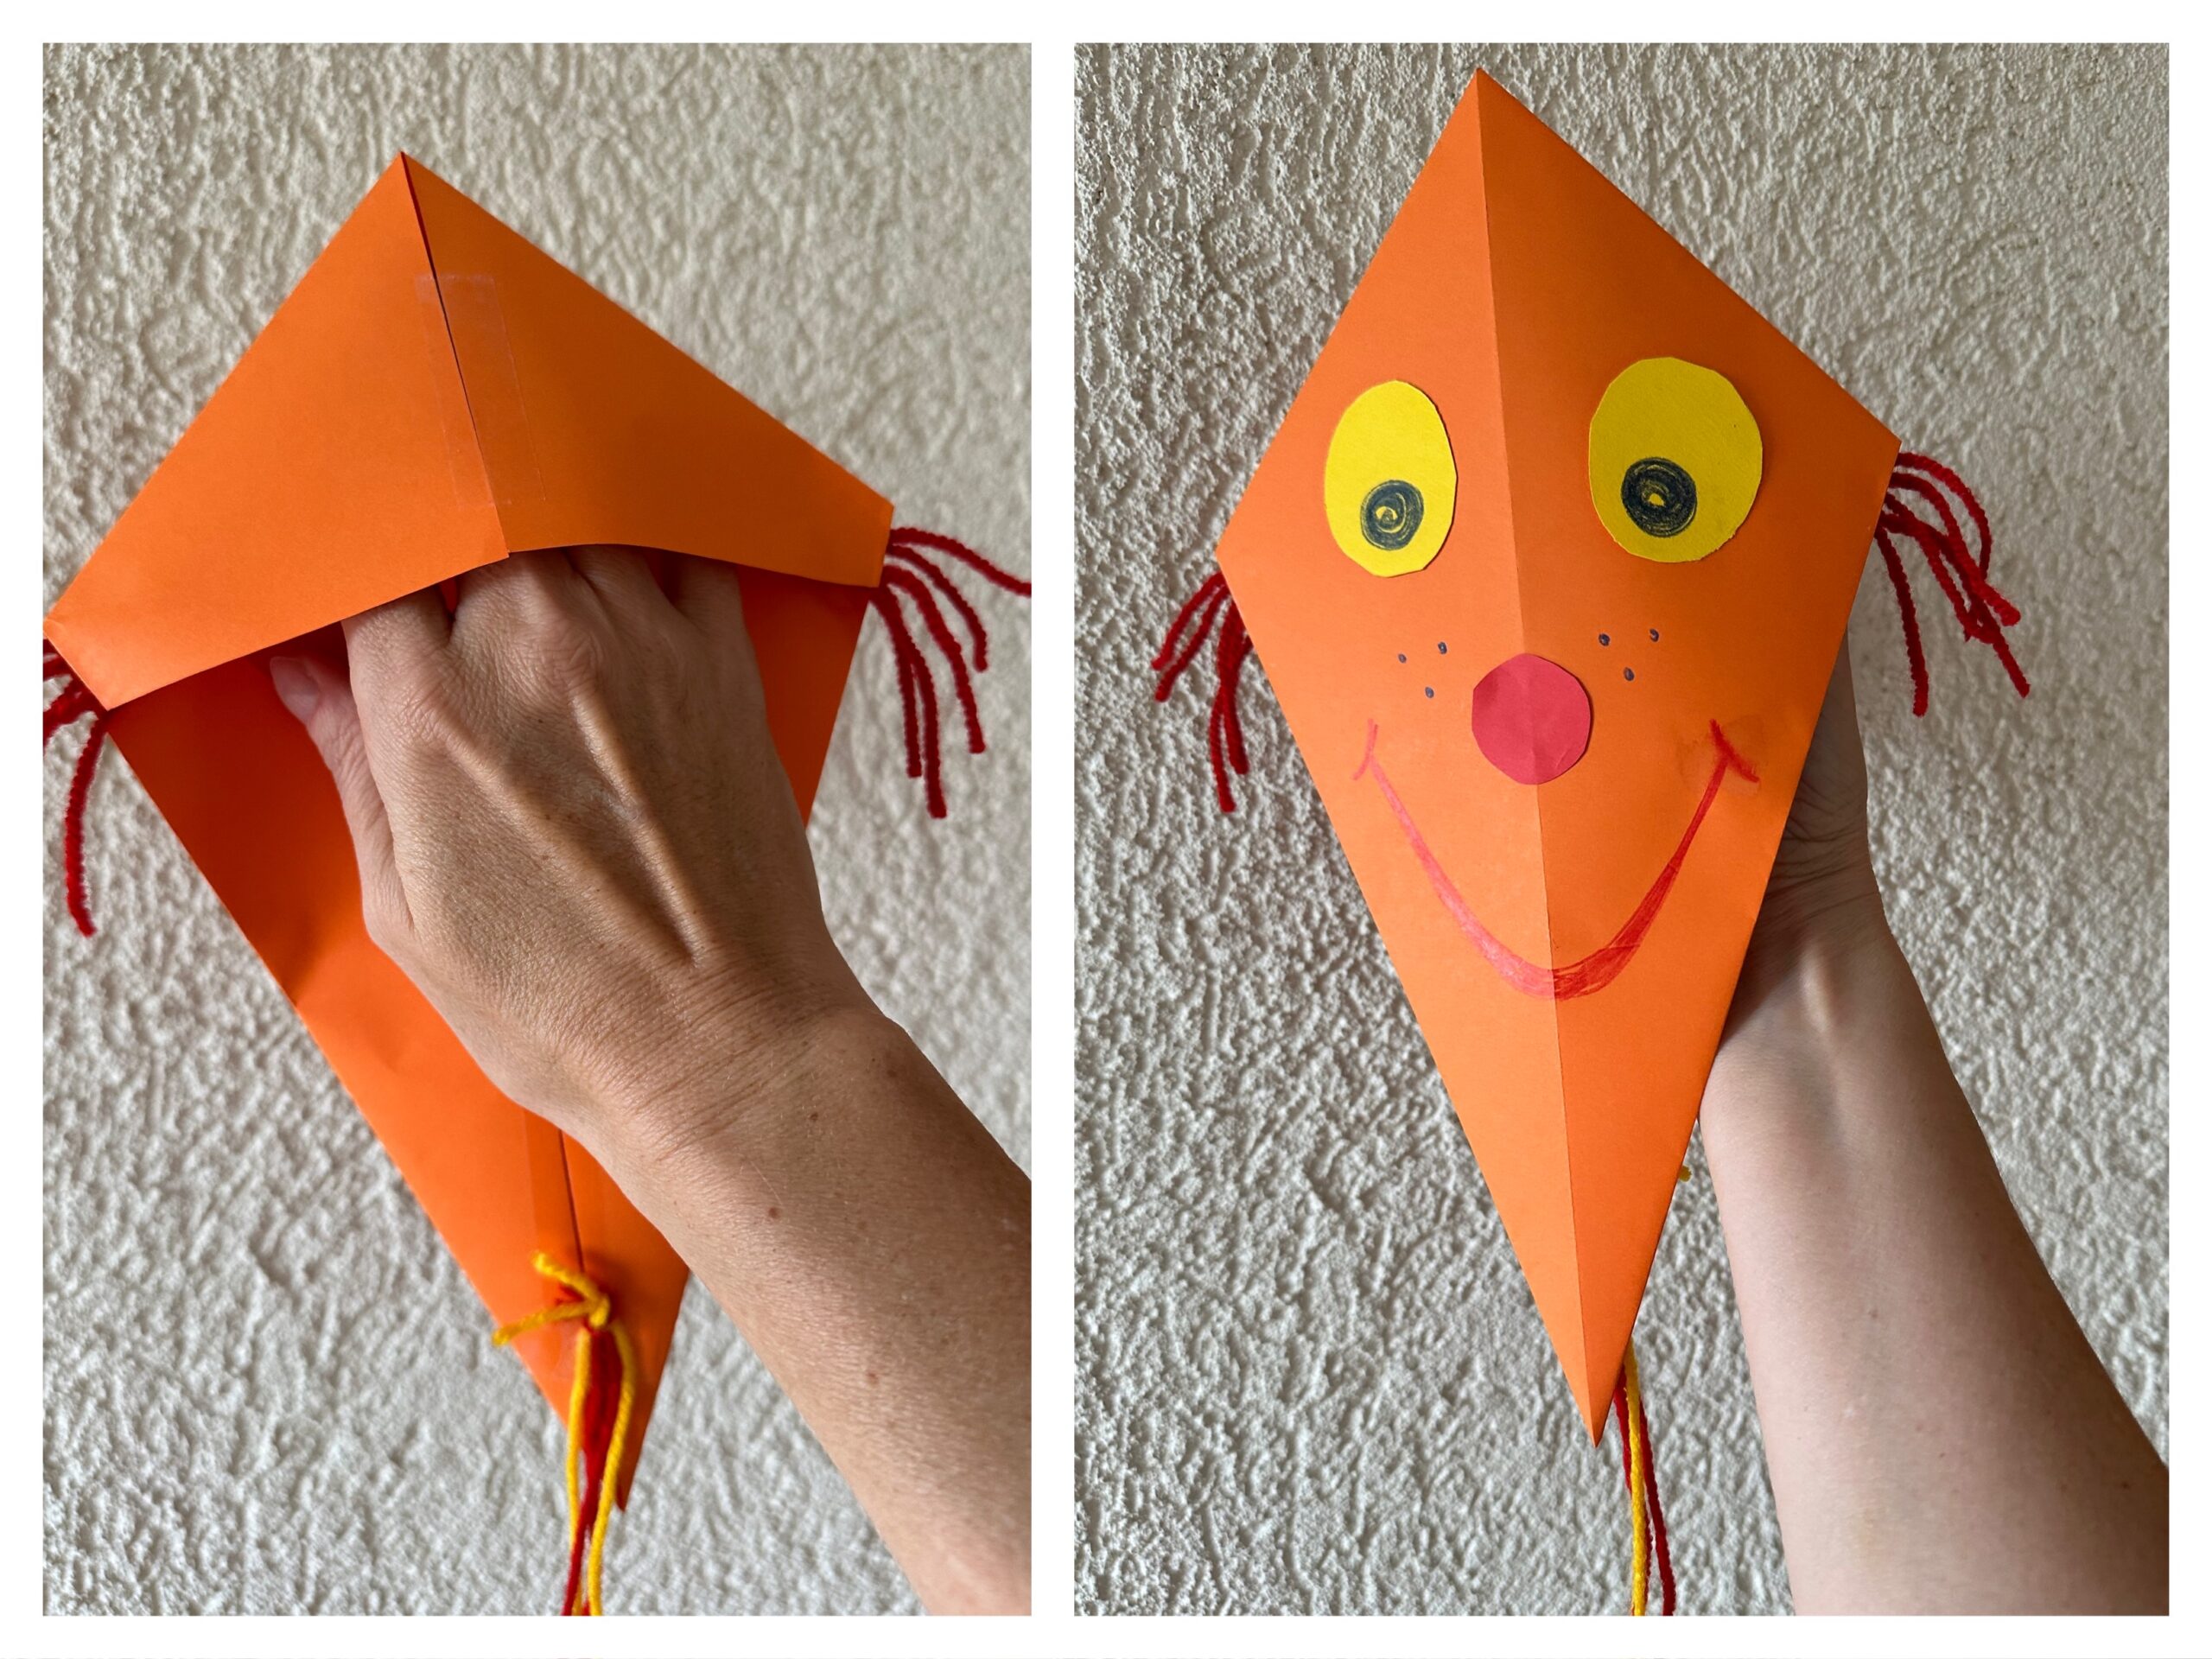
Bild zum Schritt 48 für das Bastel- und DIY-Abenteuer für Kinder: 'Greife mit der Hand in das obere Dreieck (auf der...'

49

Have fun trying out.

Hand Dragon "to fly yourself"

Follow us on Facebook , Instagram and Pinterest
Don't miss any more adventures: Our bottle mail

Leave a Reply

Your email address will not be published.

The maximum upload file size: 5 MB. You can upload: image, document. Drop file here