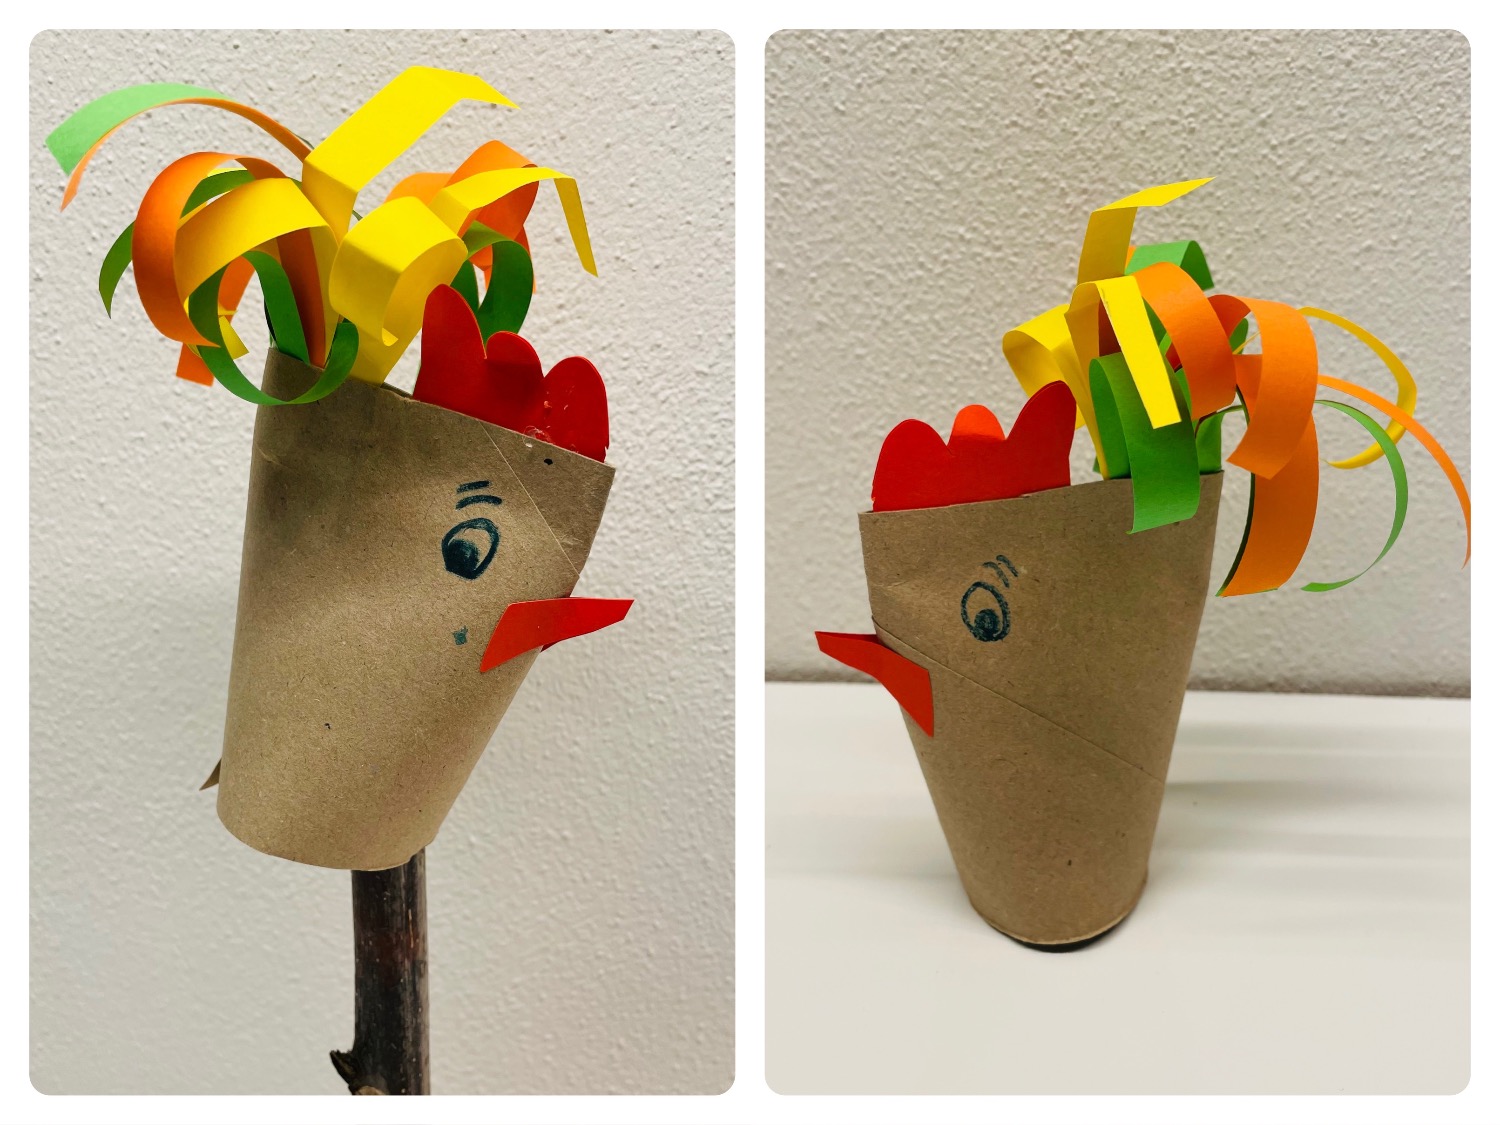
This colorful rooster is made of a cardboard roll. It decorates the table or the window sill at Easter or in spring and on a staff it can also be used as a figure for a puppet play, puppet theatre or Kasperltheater. Children it motivates to play. Try it out.
Media Education for Kindergarten and Hort

Relief in everyday life, targeted promotion of individual children, independent learning and - without any pre-knowledge already usable by the youngest!
Put out your craft pad and all the materials ready.
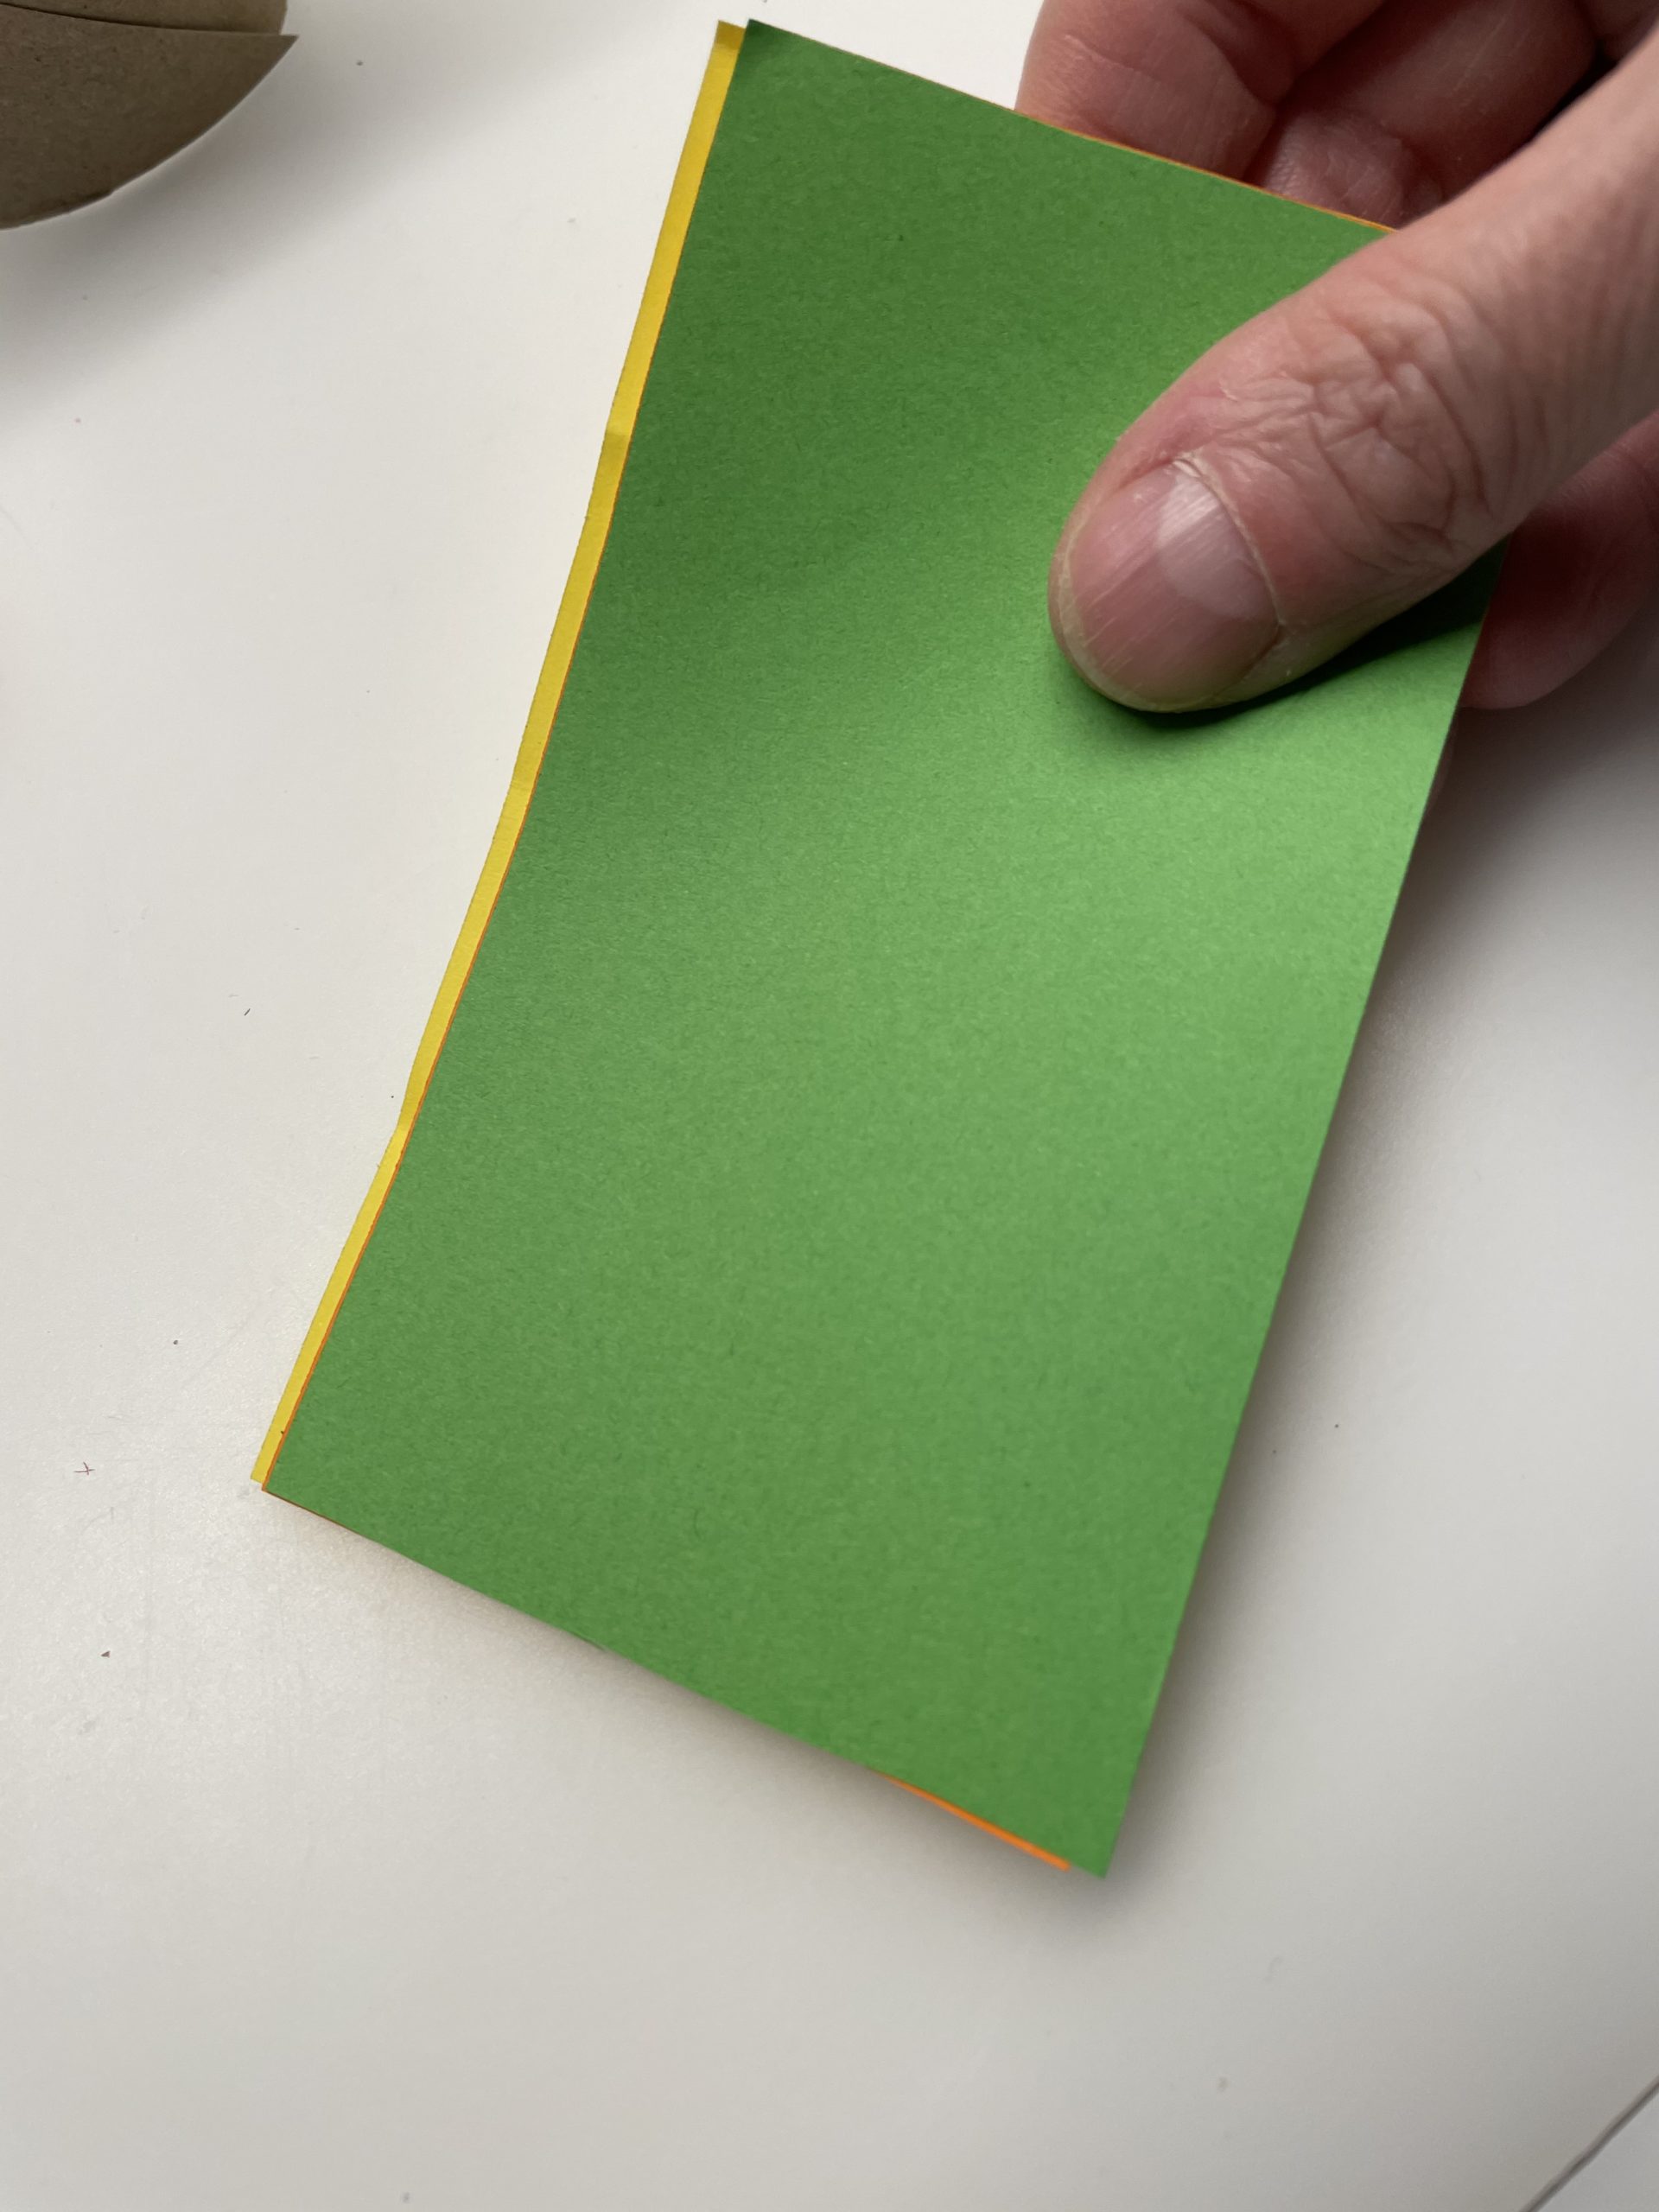
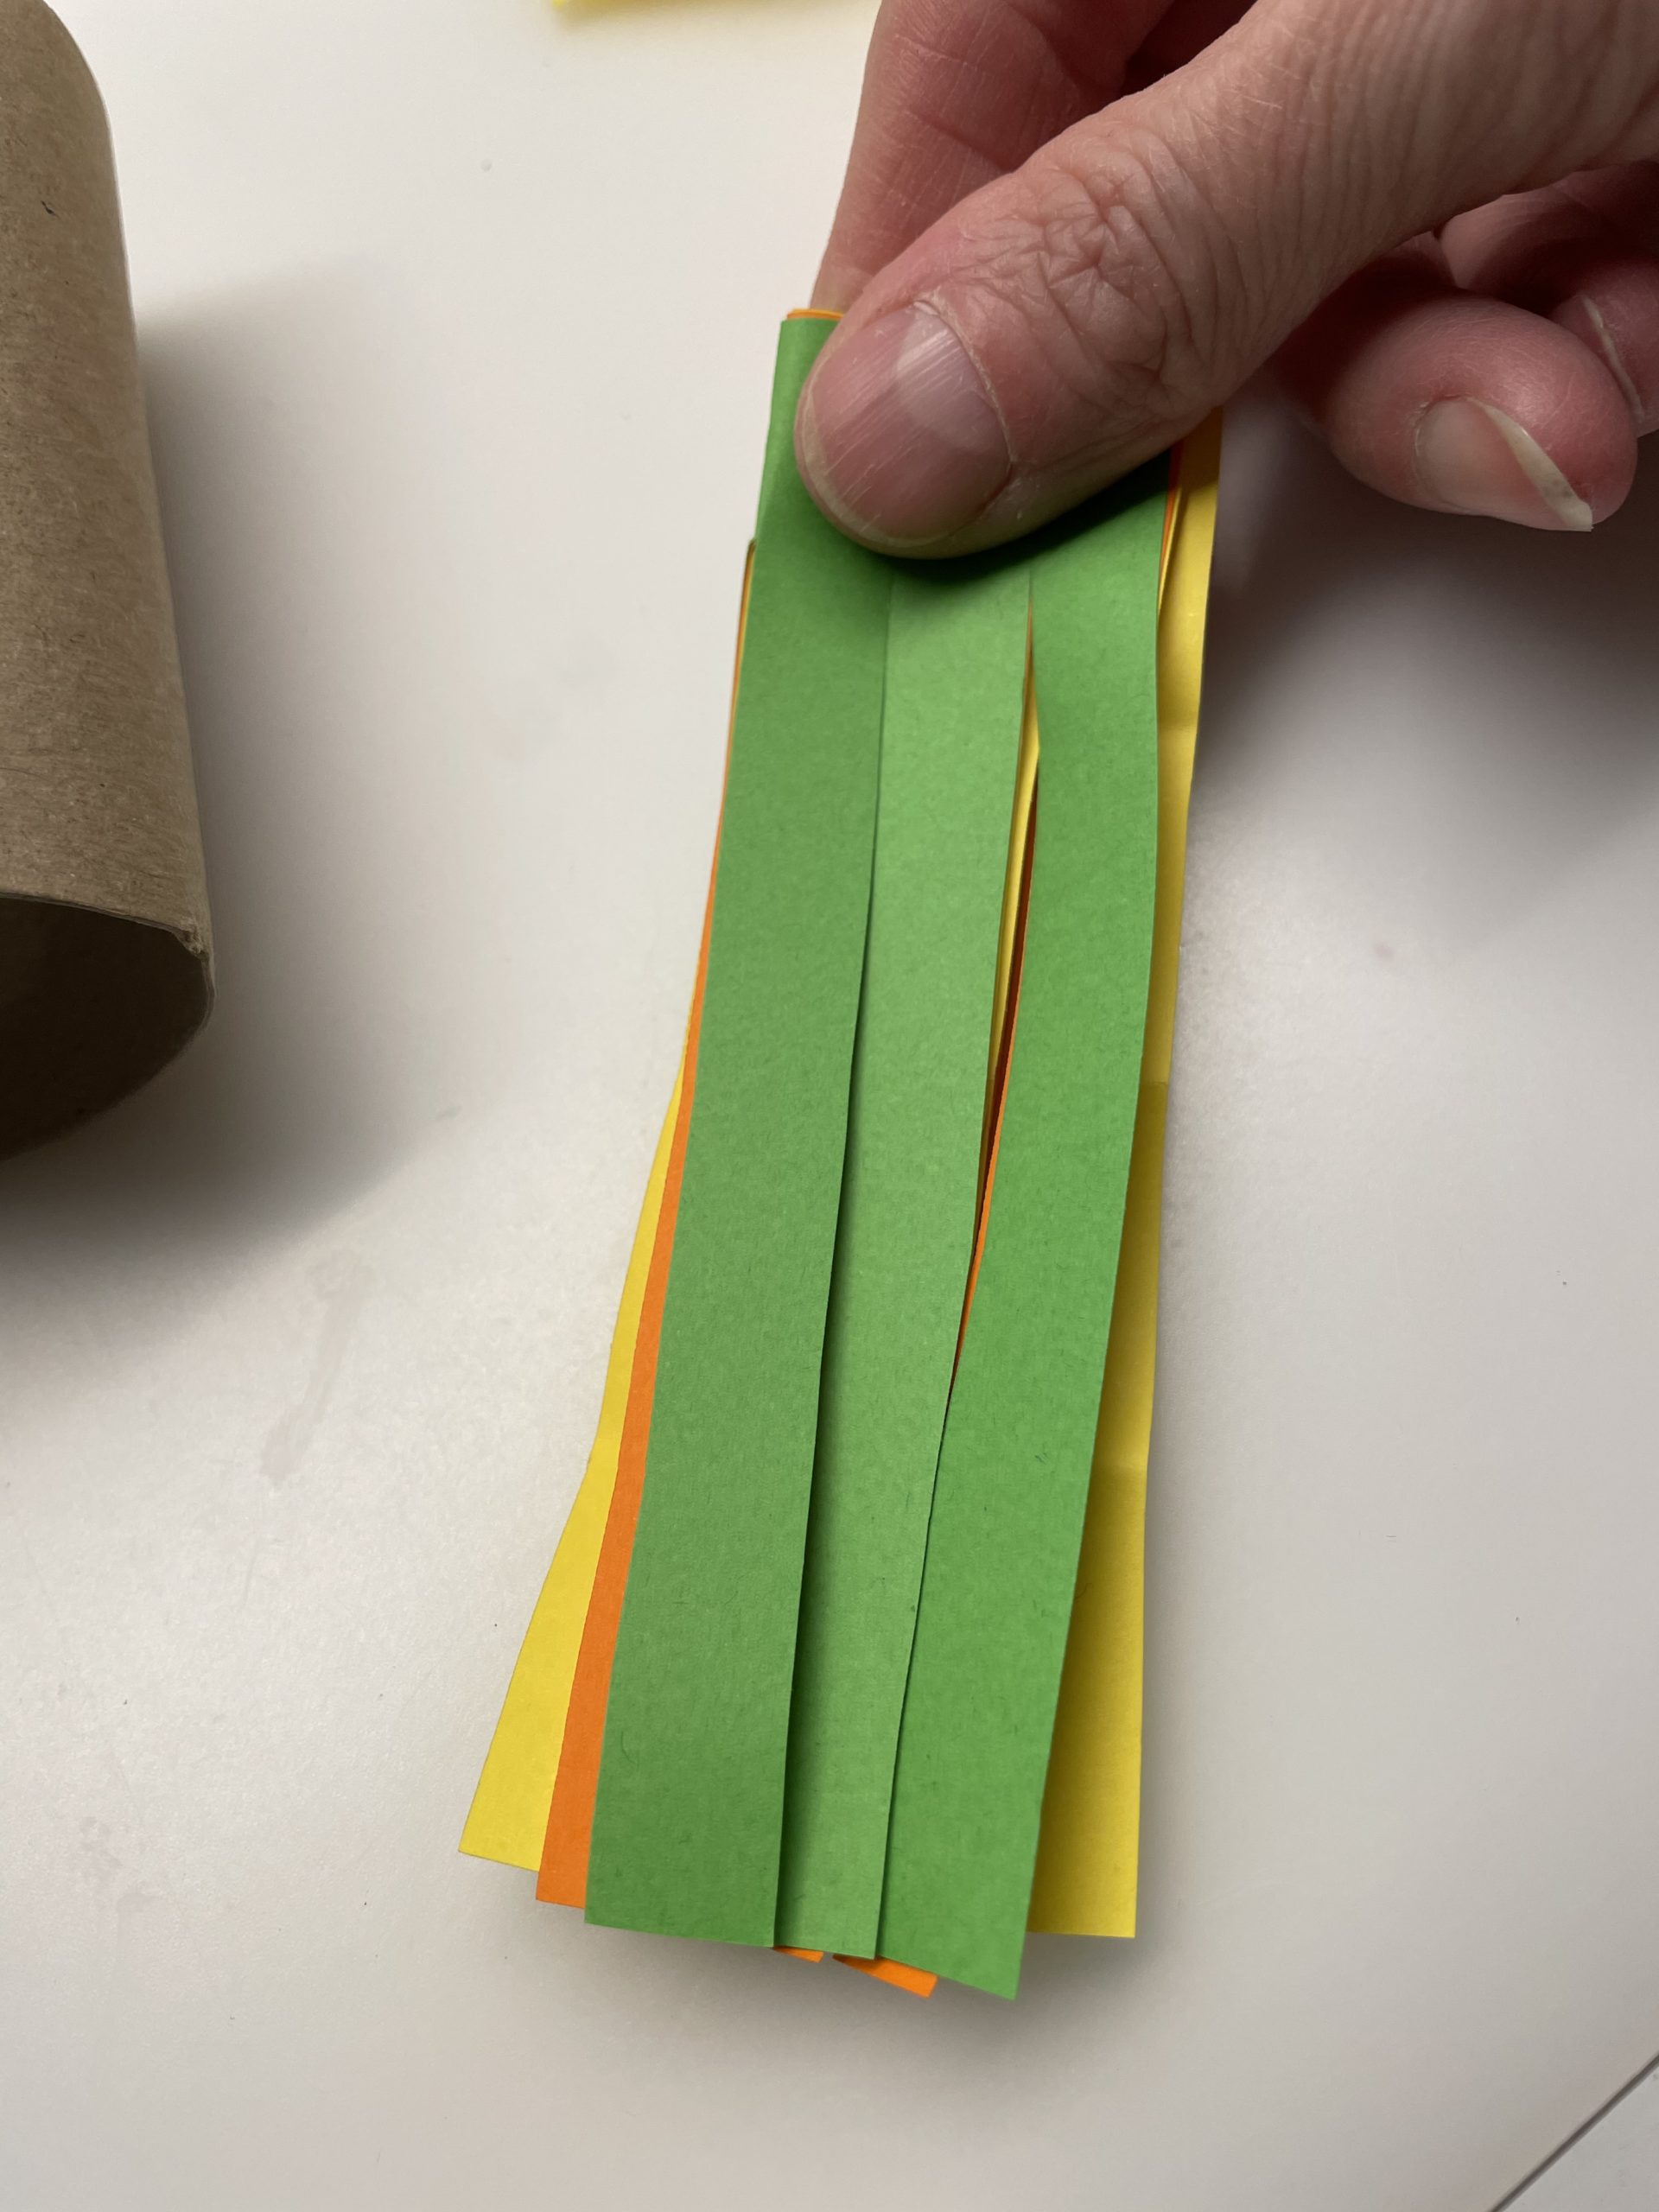
First, cut the thin papers to a size of 5cm x 10cm each.

Then put the yellow, orange and green paper on top of each other.
Tip: Stick the papers together on one of the narrow sides with a glue stick, so they do not slip when cutting!
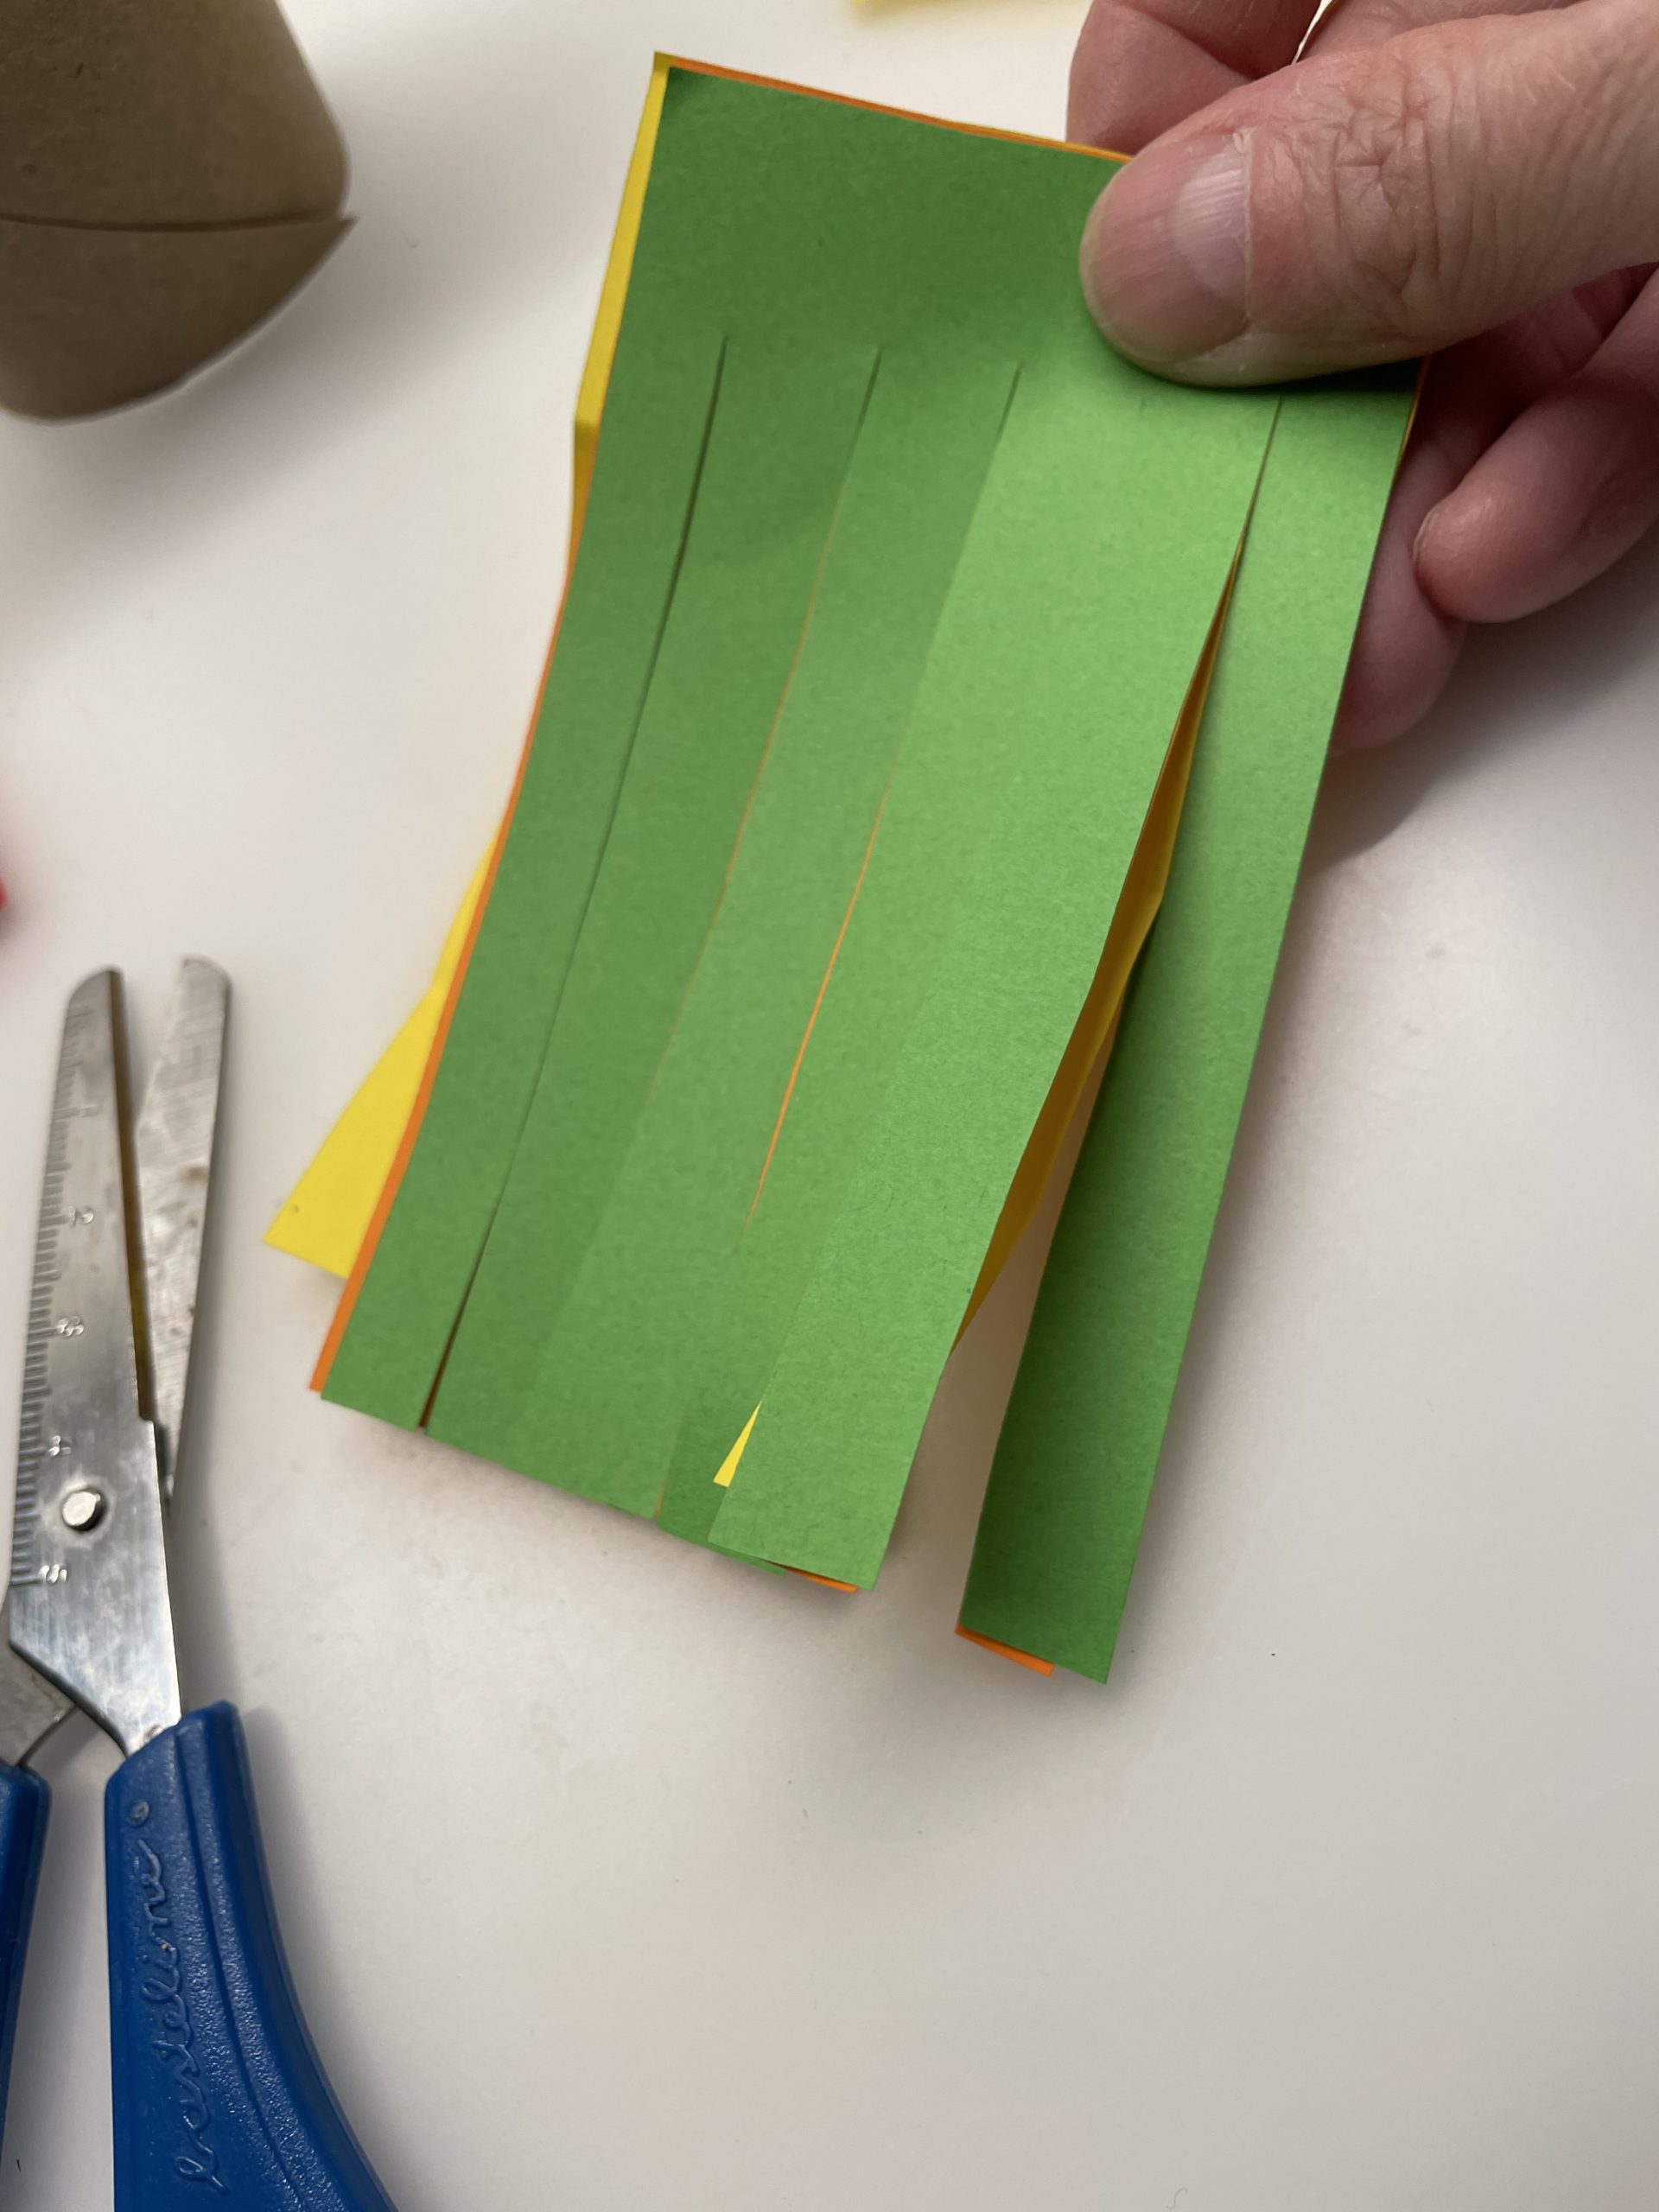
Now cut into all three papers narrow stripes. Leave a 1cm wide strip (the glued edge) standing!
Now fold the cut paper in length.
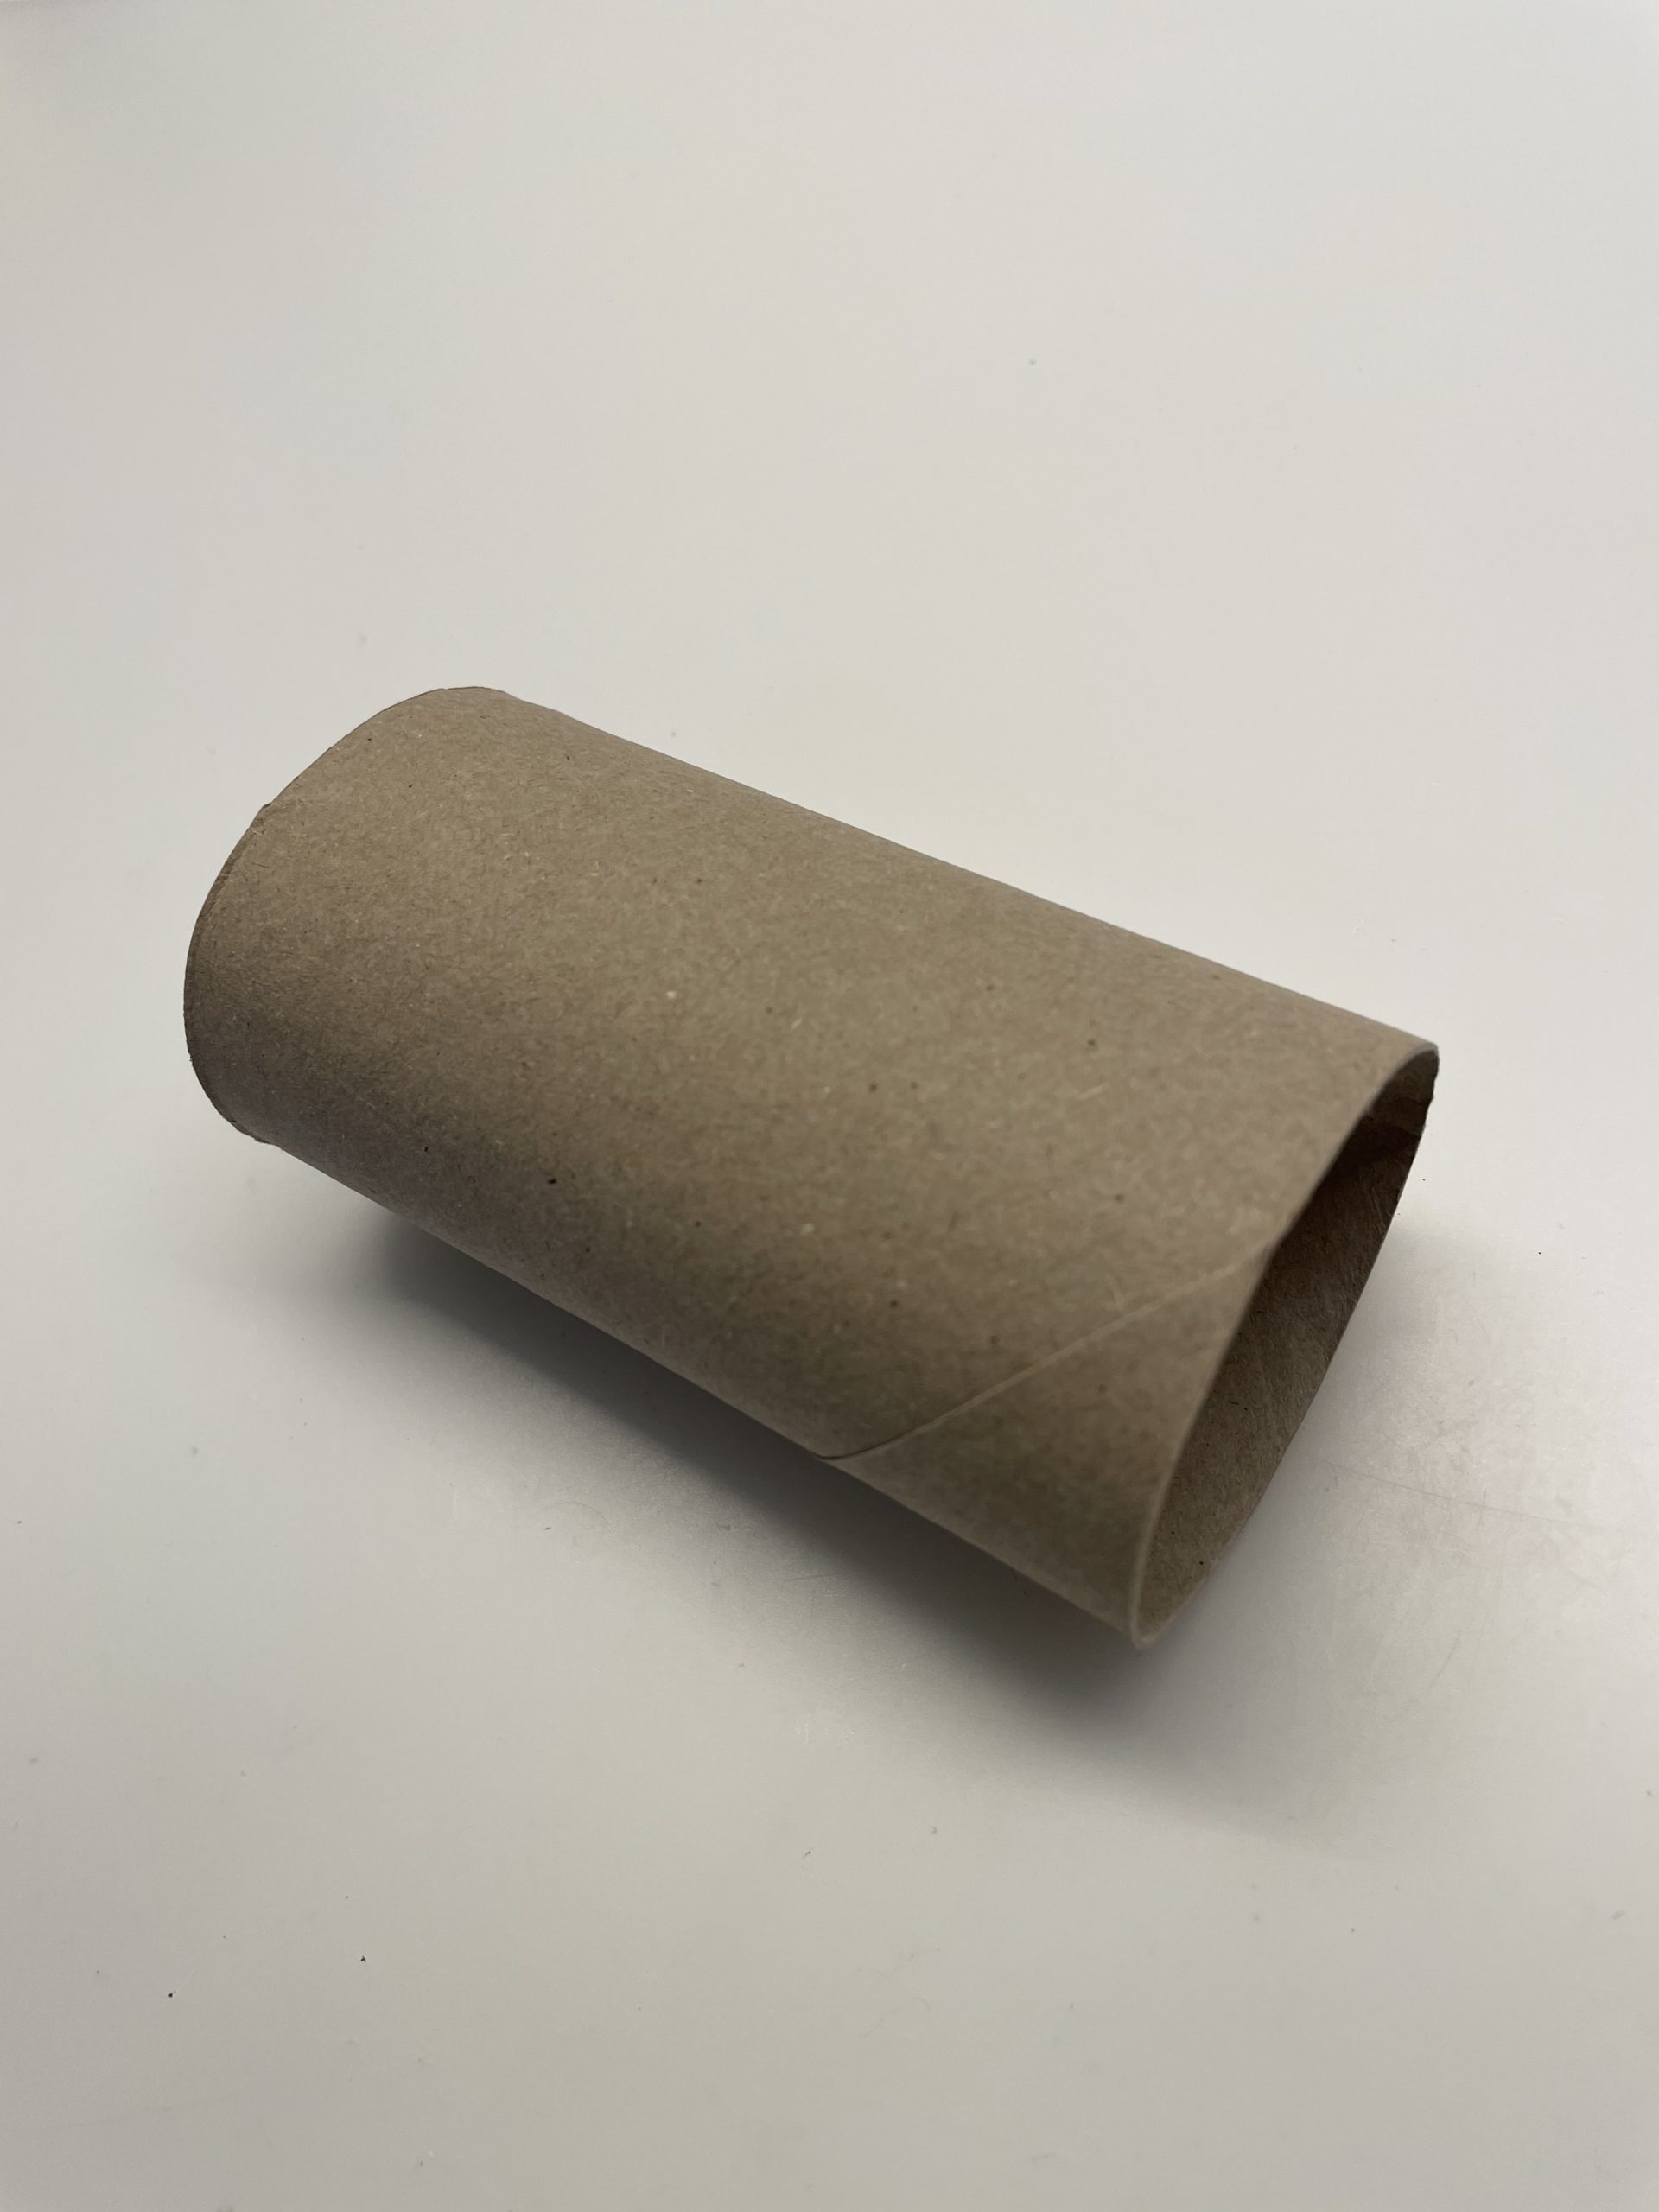
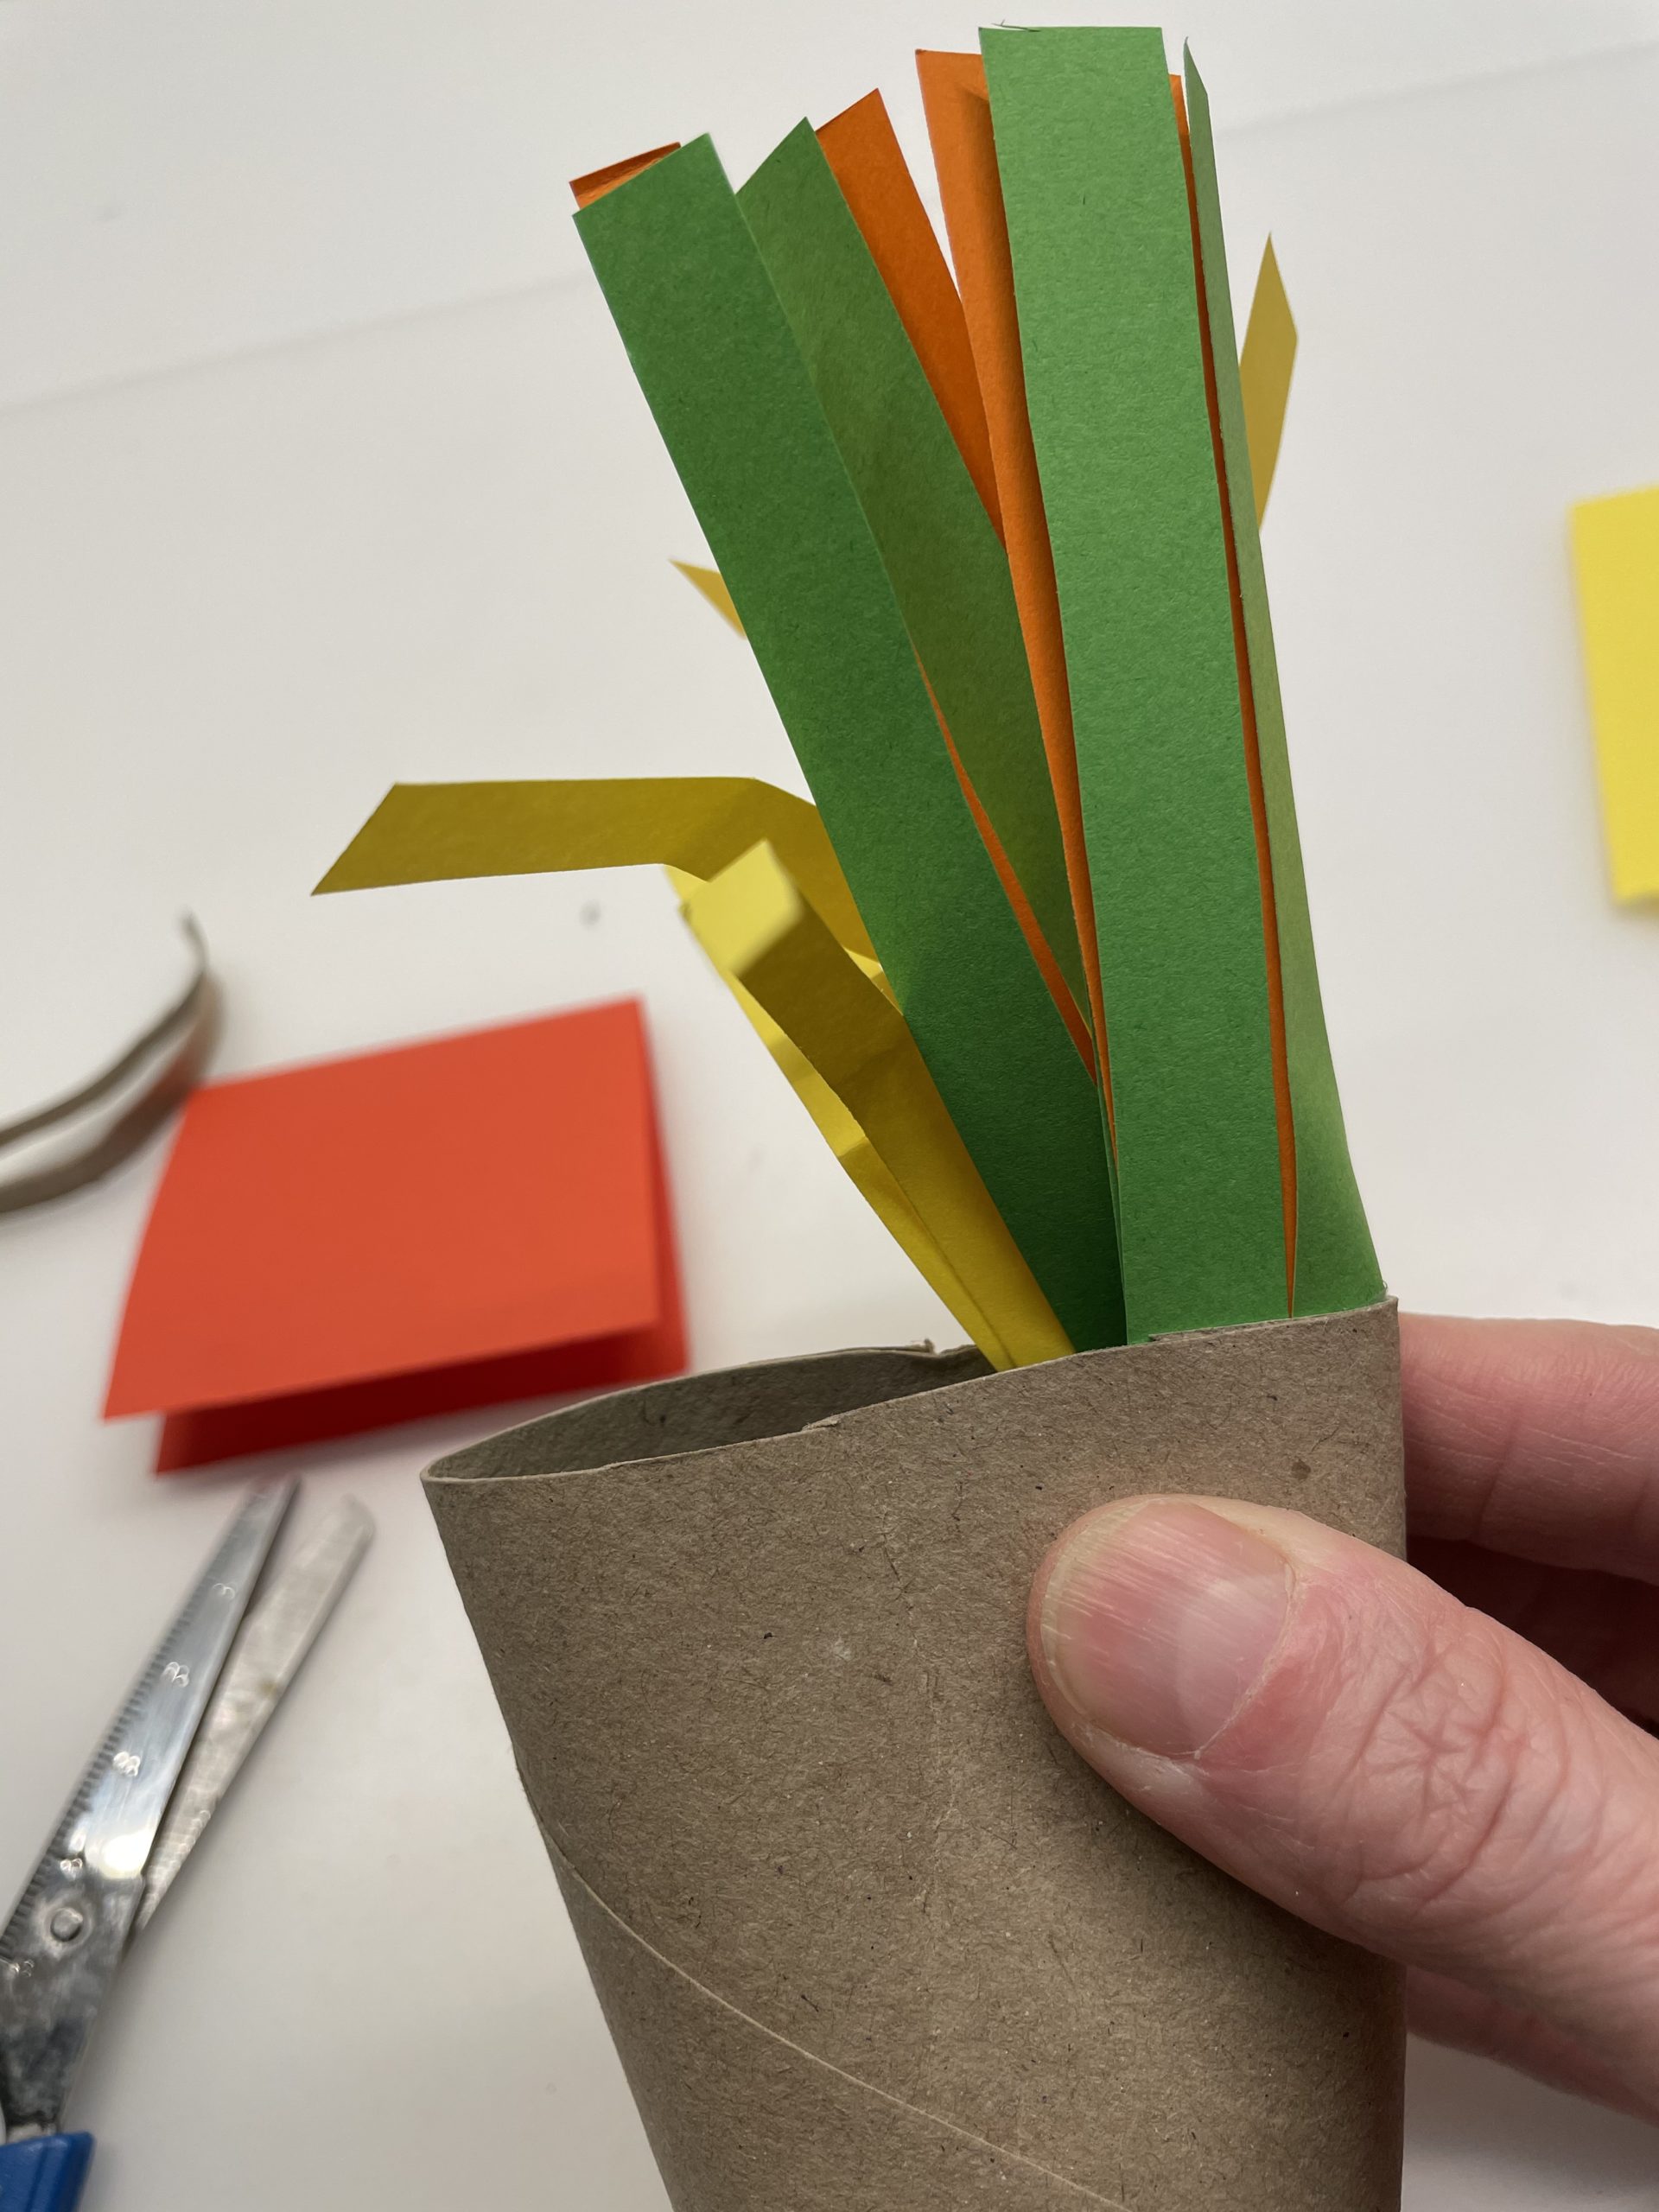
Now glue the paper strip with the closed side to the inner wall of the cardboard roll.

Then you squeeze the paper roll so that the paper strip is folded again in the middle. Attention, only the spot pinches with the tail at the top where the paper strips are together.
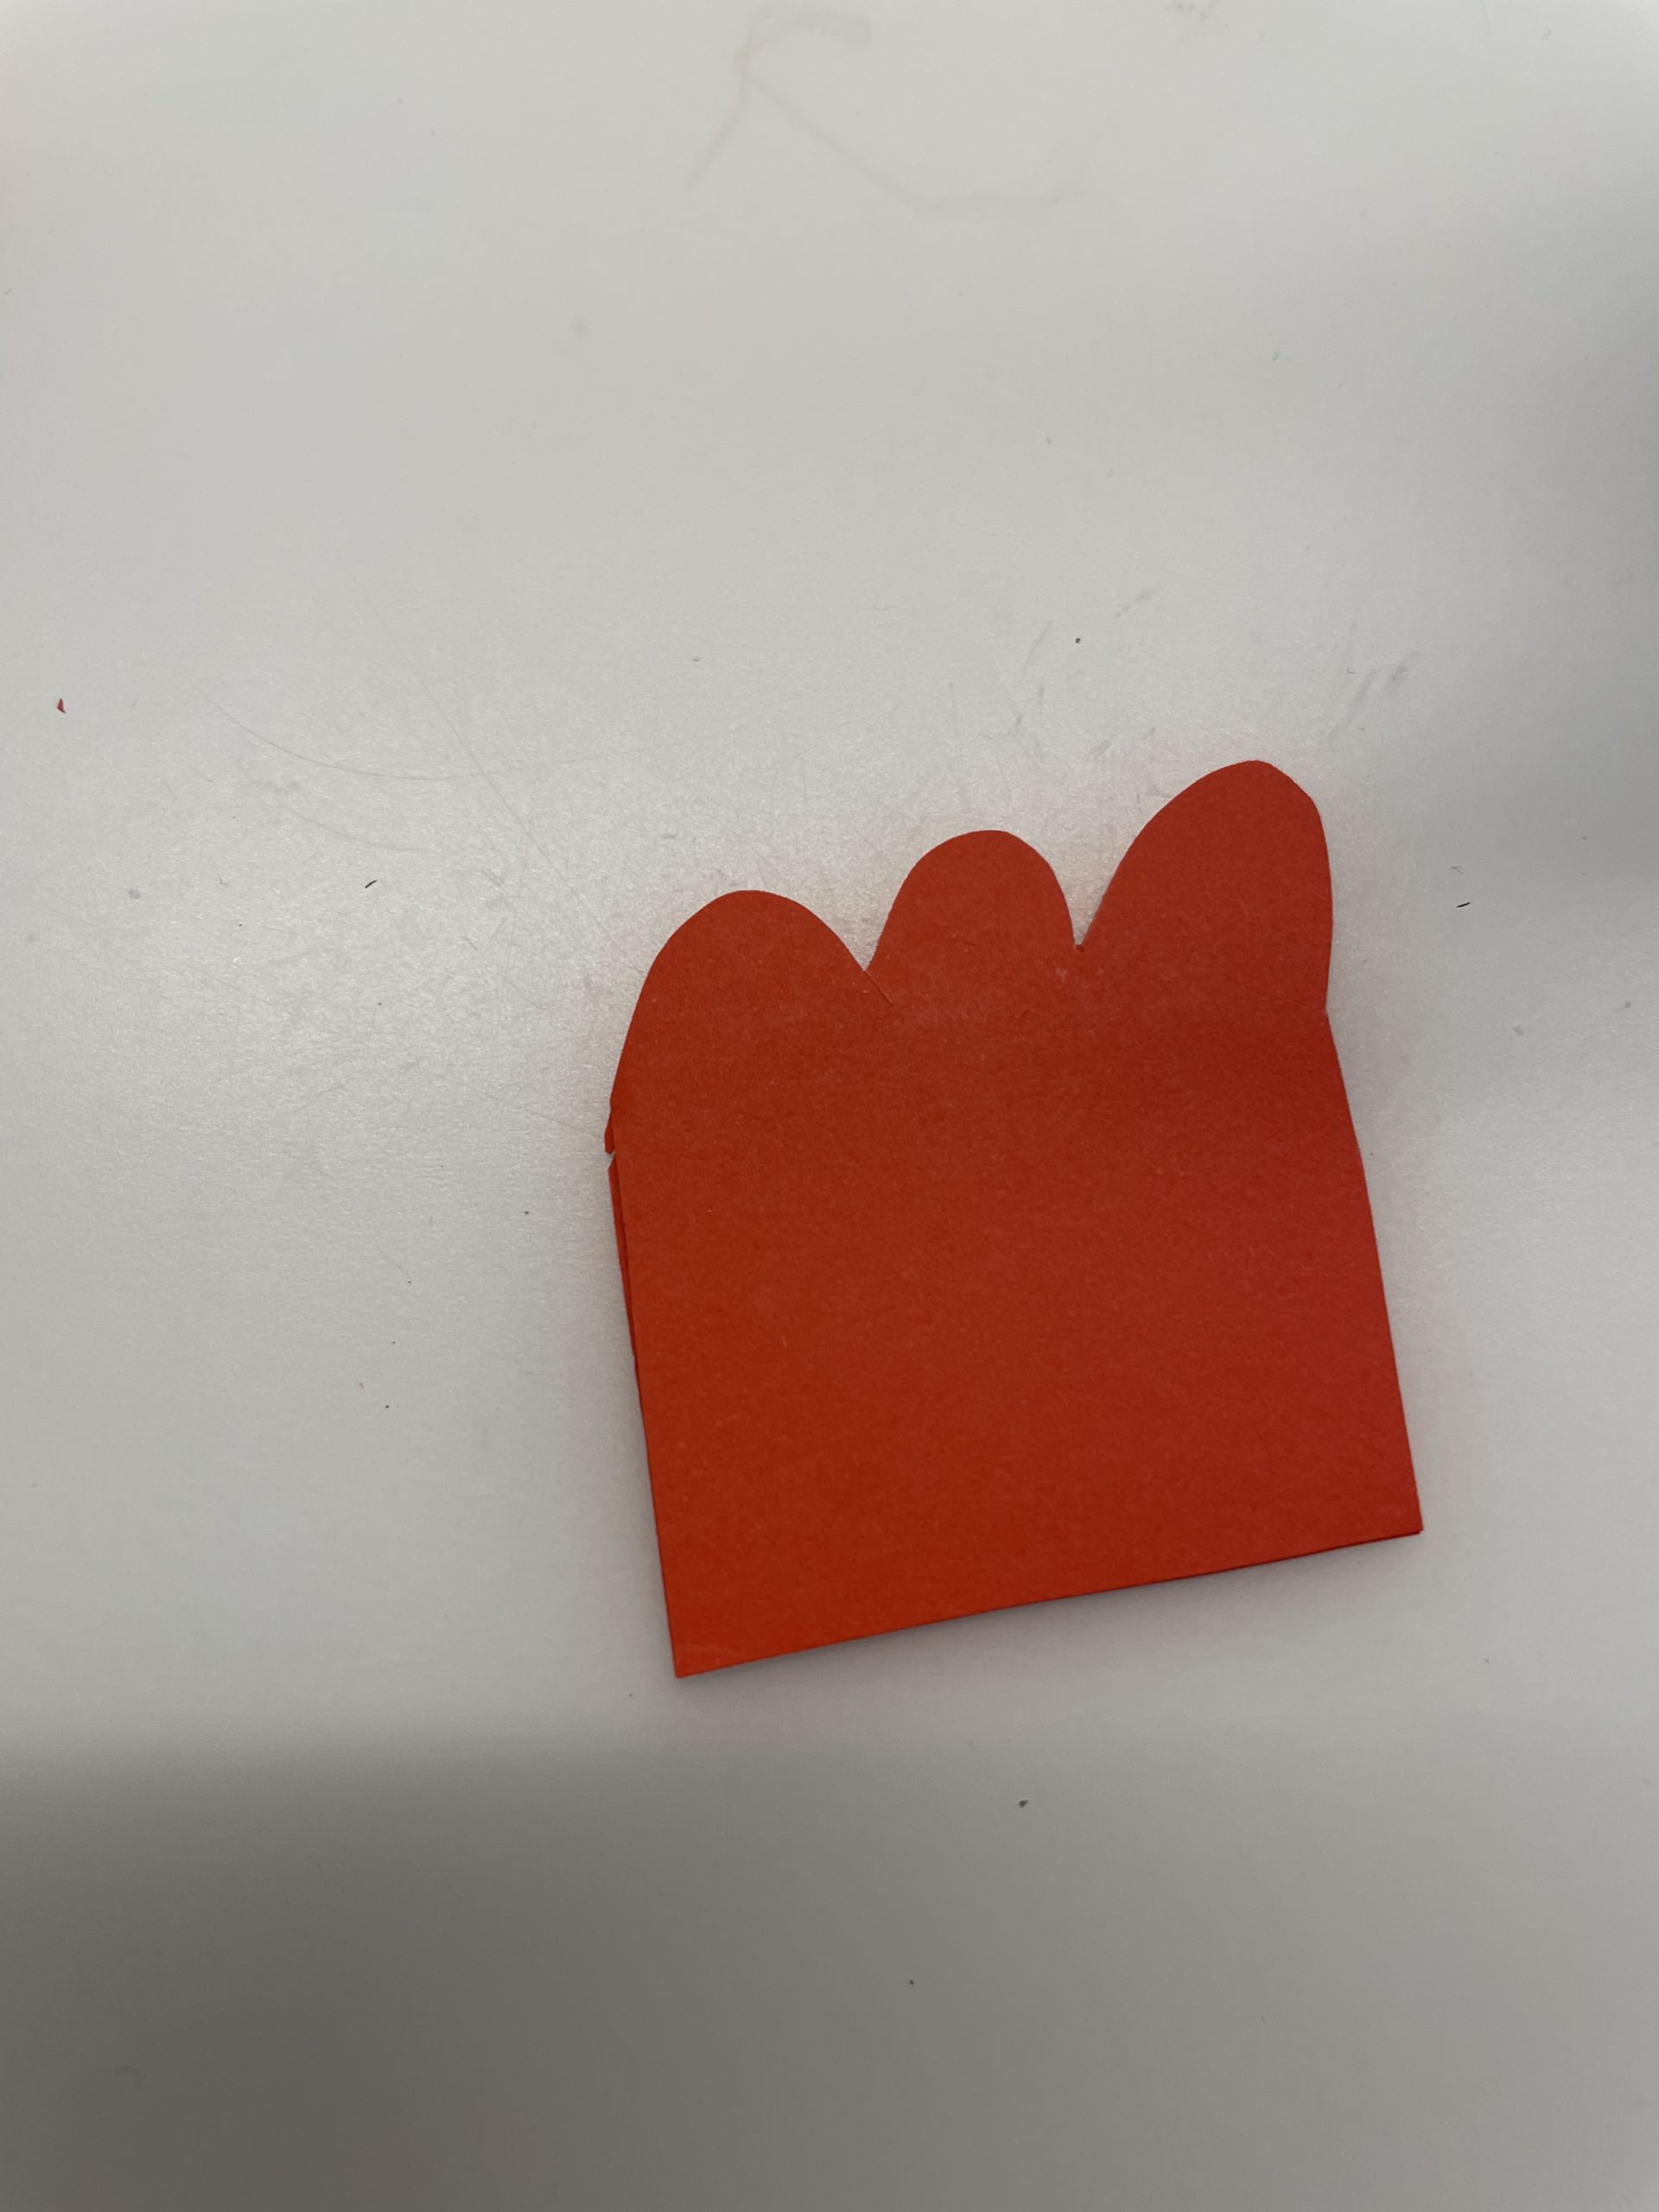
Now you cut a cock comb.
You shorten the red paper to 3.5cm x 3.5cm.
Then you cut three small arches on one side. The cock comb is ready.
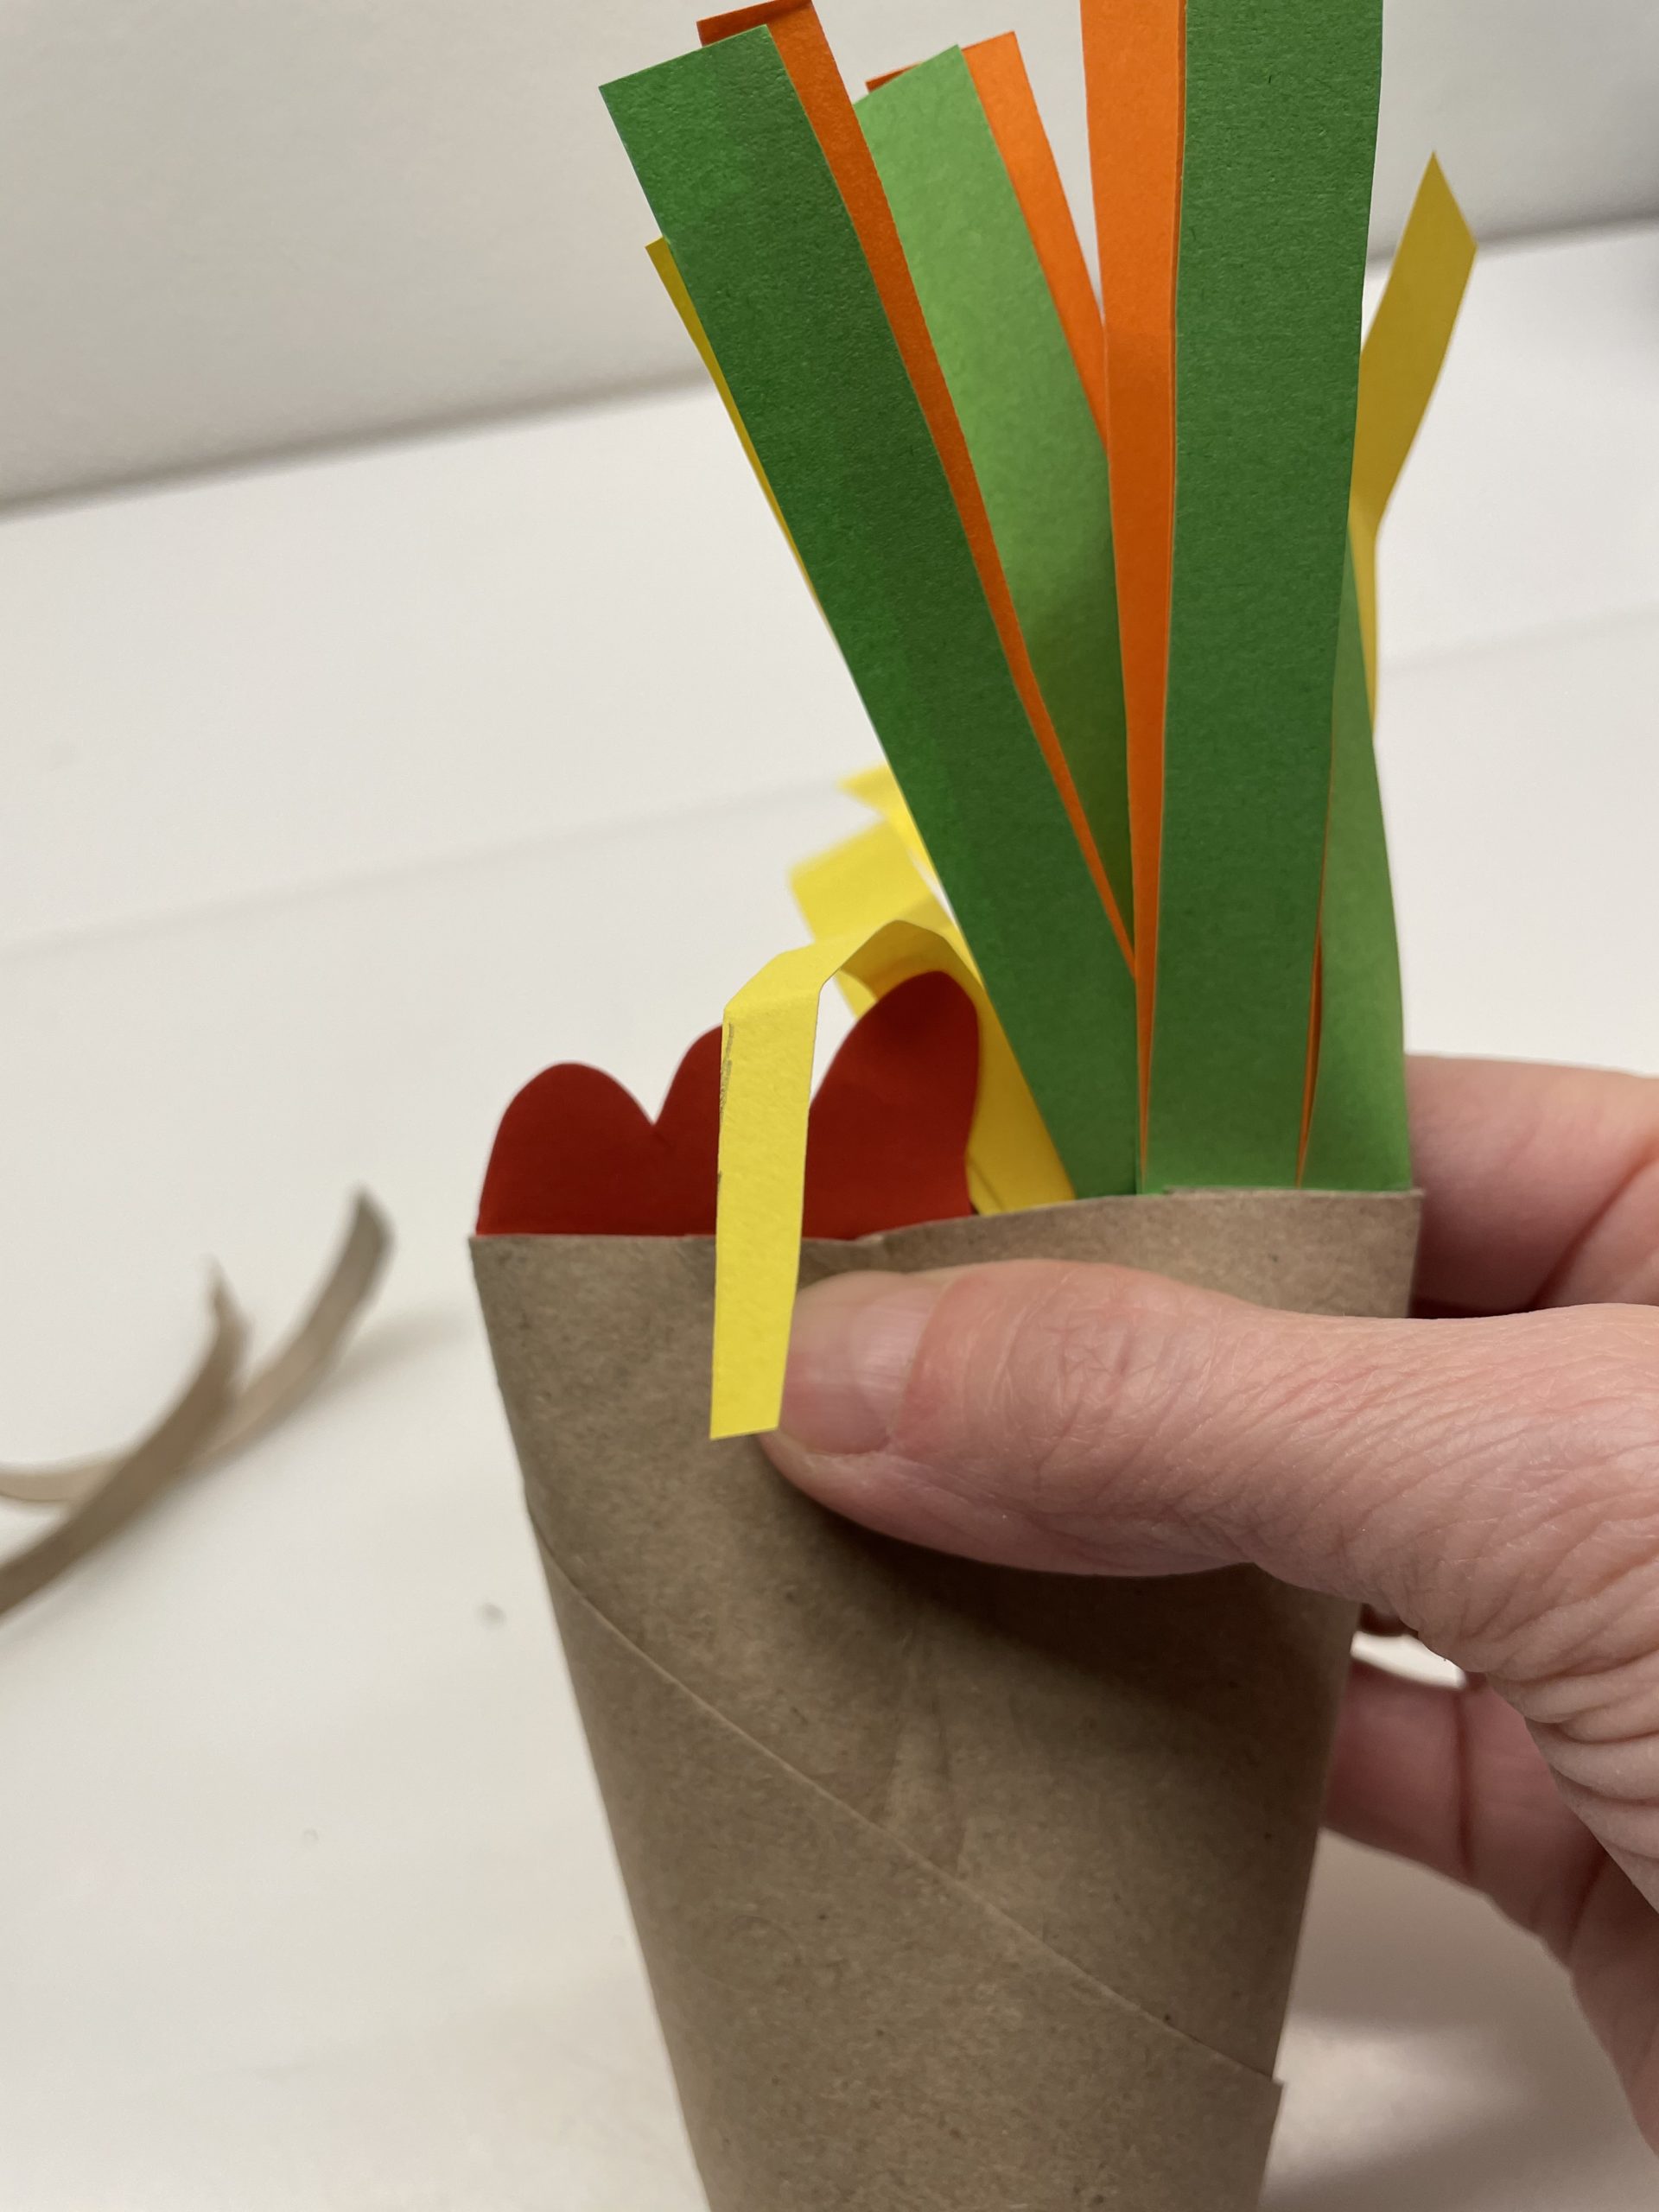
Now glue the cock comb in front of the colorful paper strips into the top of the cardboard roll. Press the cardboard roll together at the top.
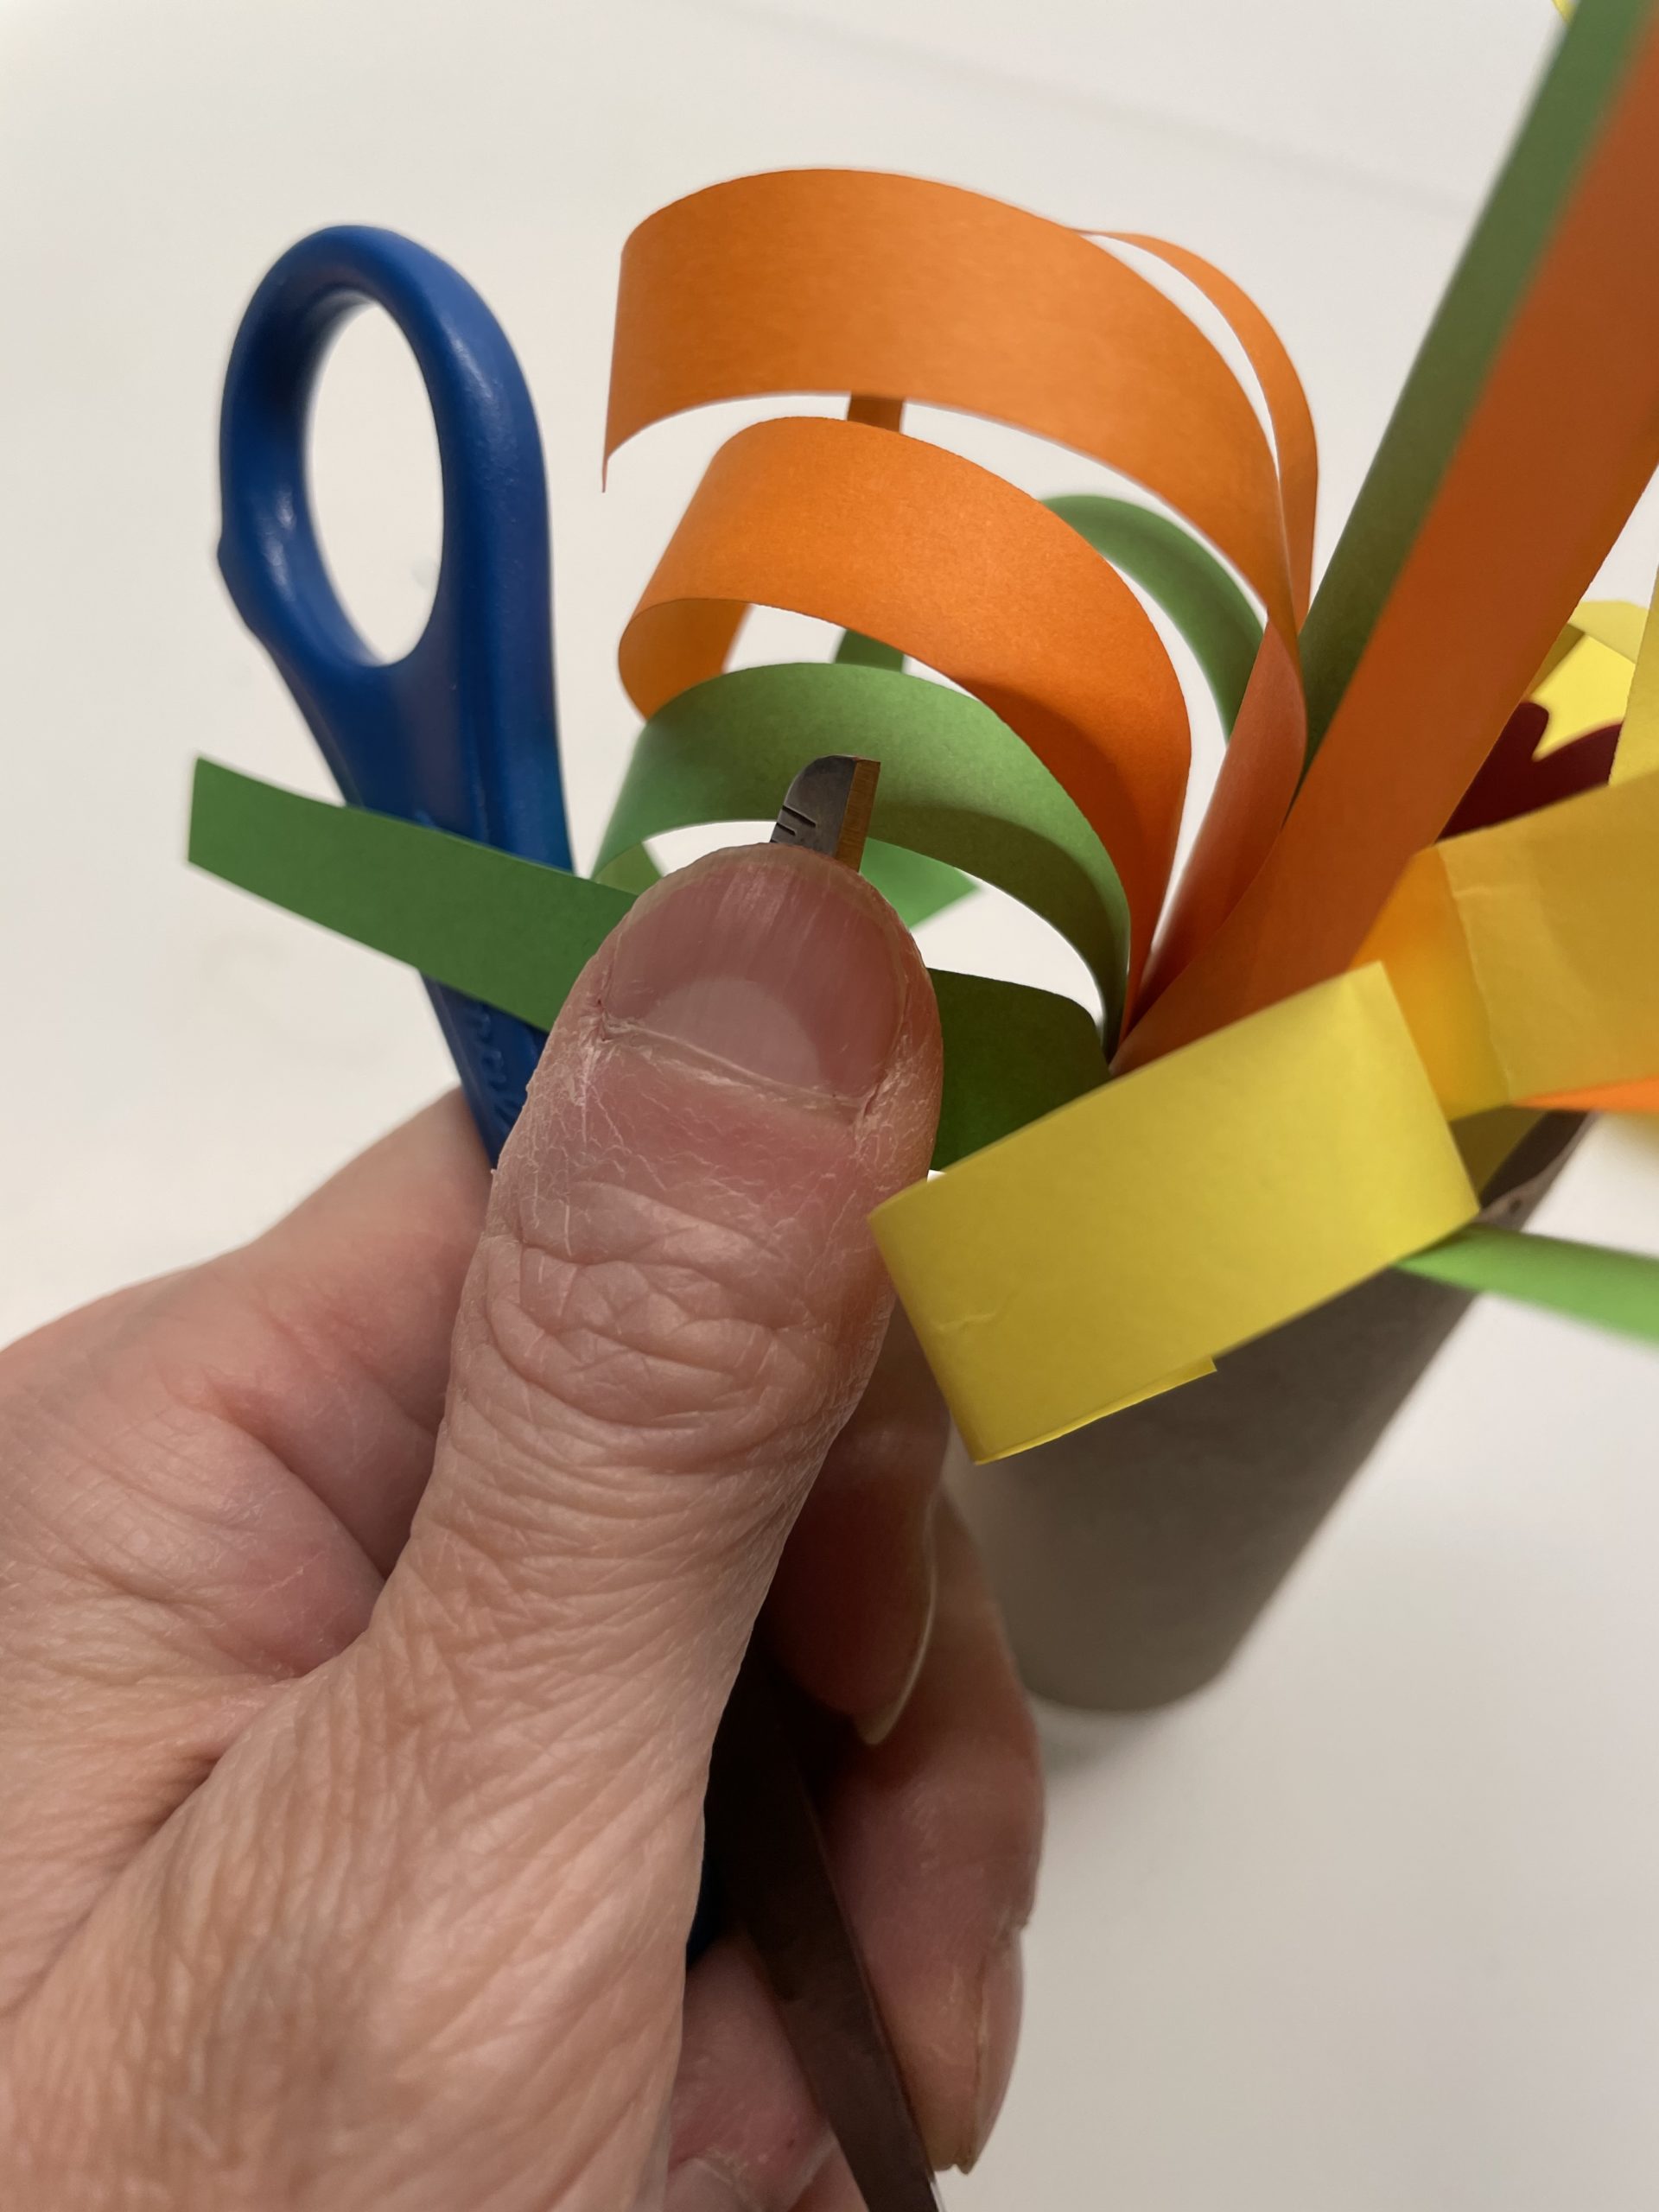
With the scissors you now ring the colorful stripes. Put the scissors under a strip with a cutting surface and gently pull it over the edge.
Tip: This can also be done with a ruler or a pen! You only need an edge over which you can wave the paper.
Always pull the paper in the direction over the edge, in which the paper should also curl. Afterwards, the paper strips are plucked into shape.
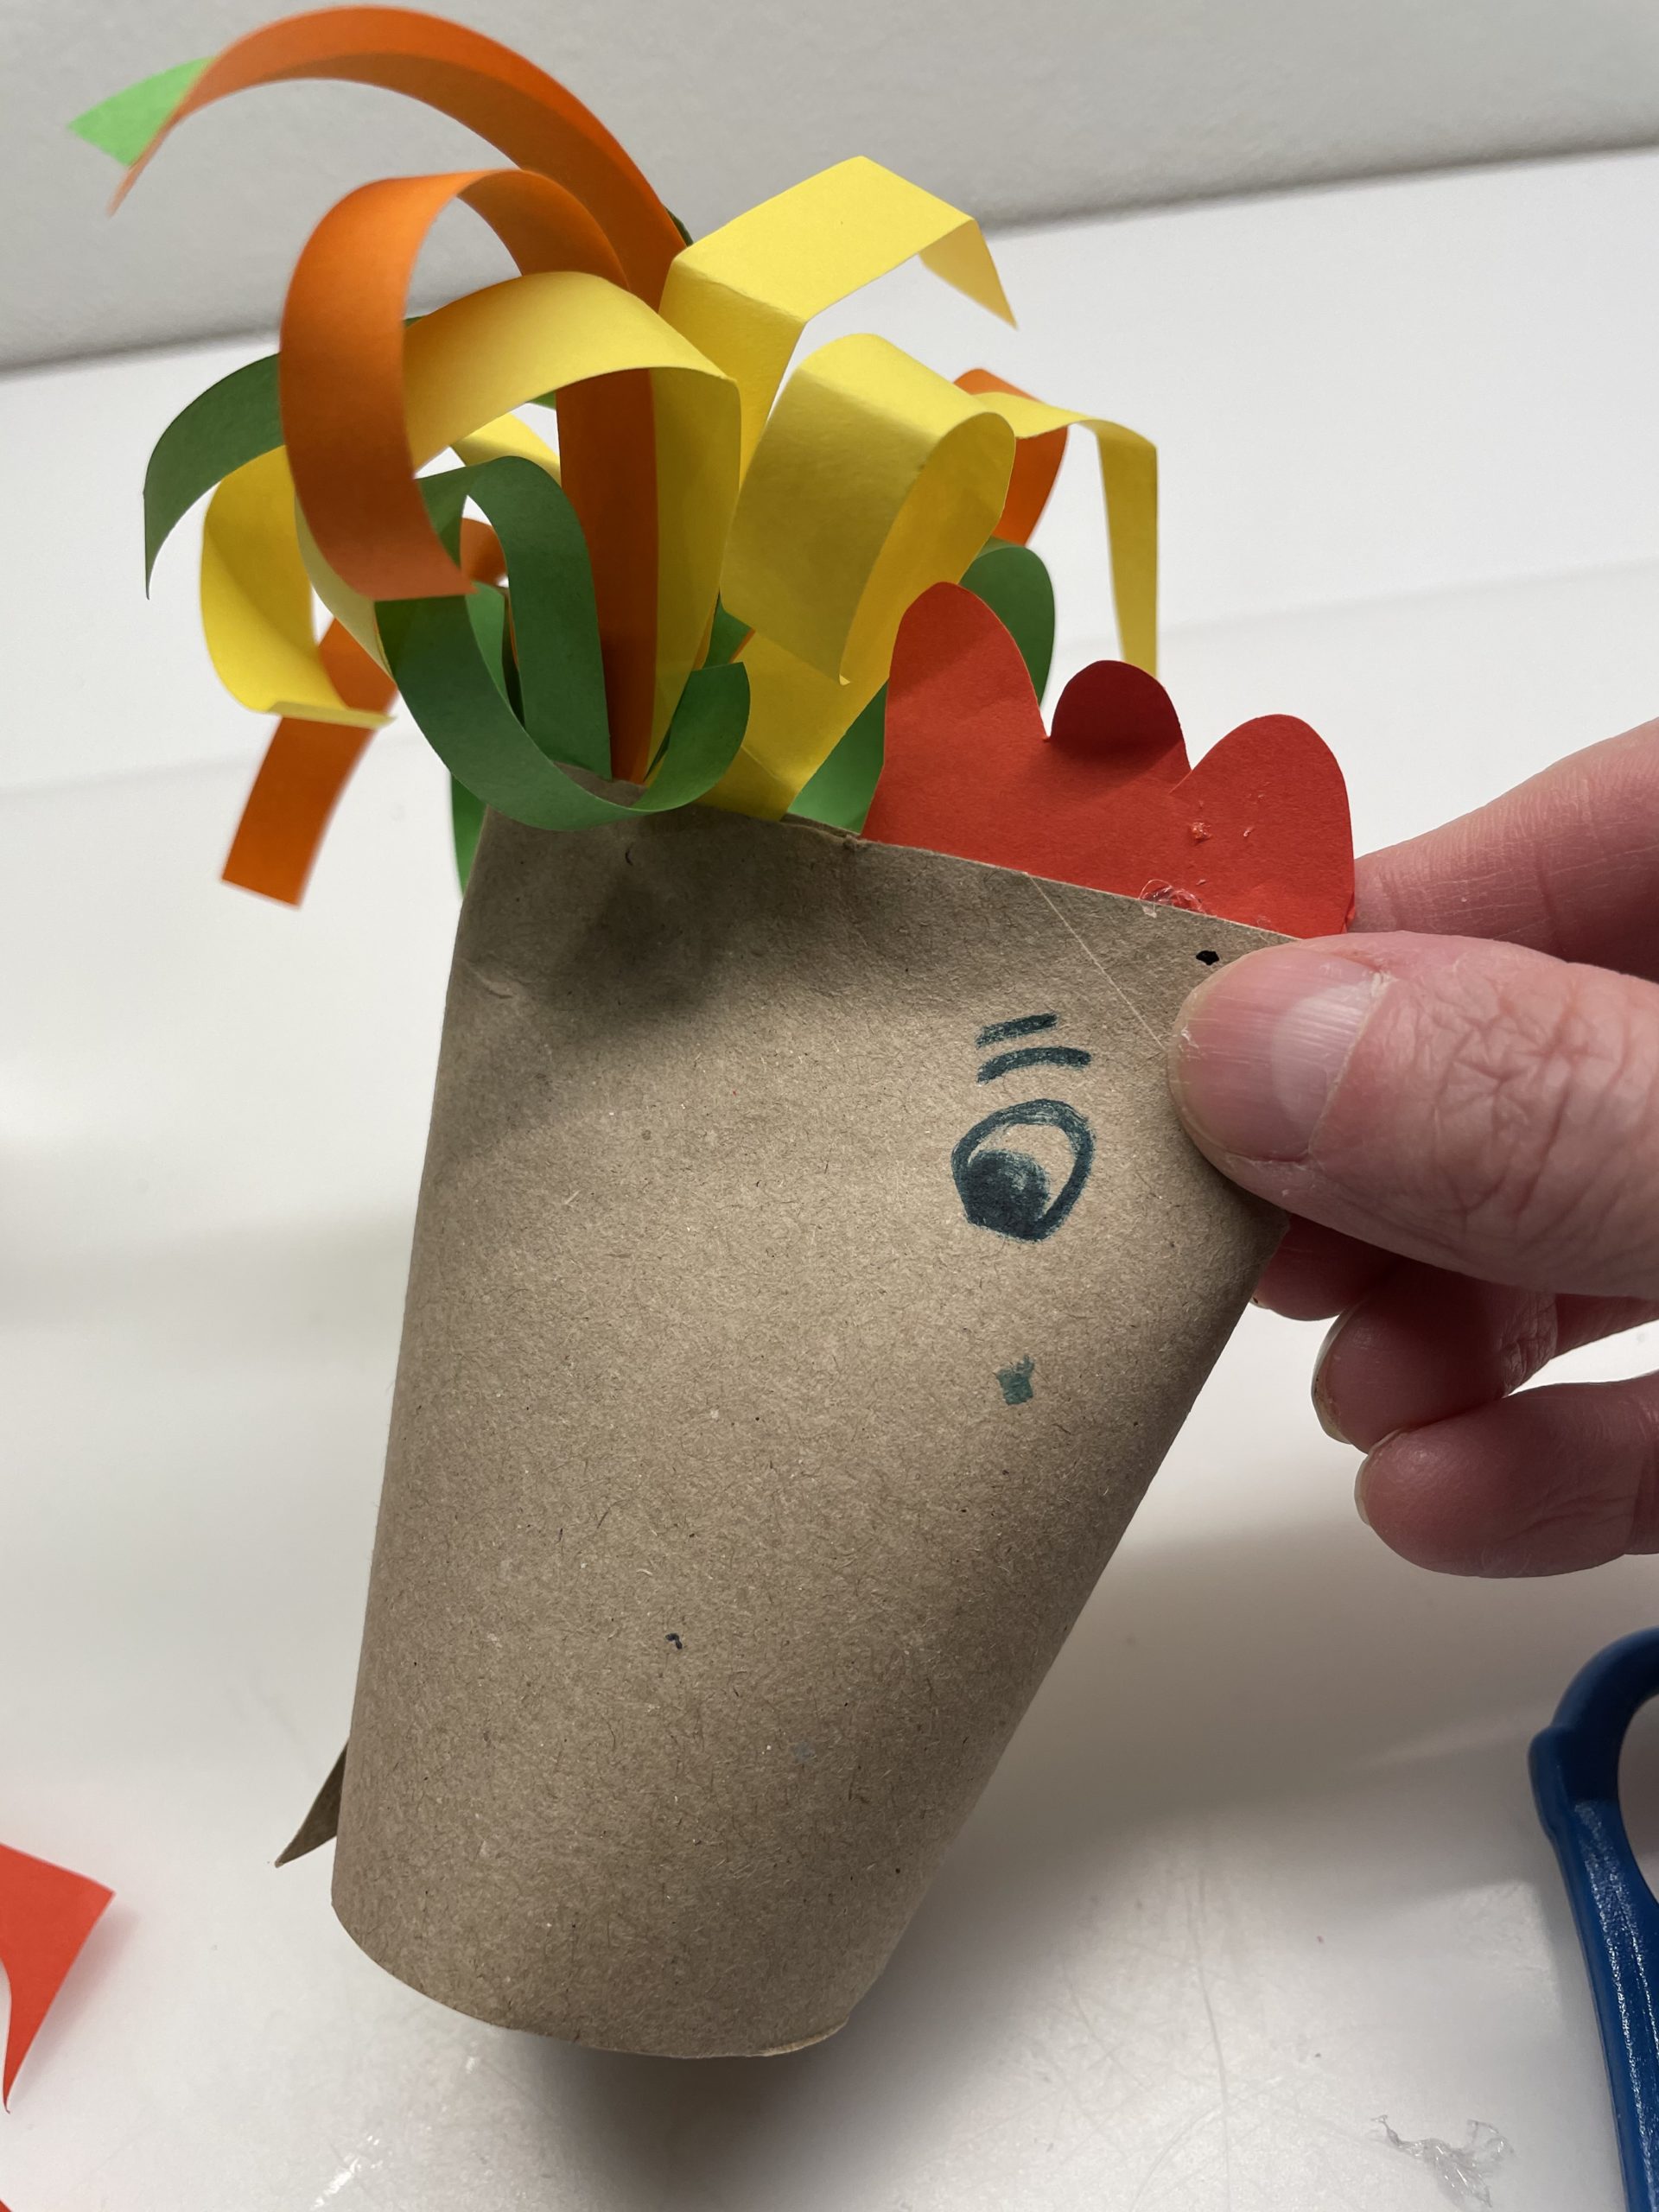
Paints an eye on the cardboard roll with a felt pen on the left and right.
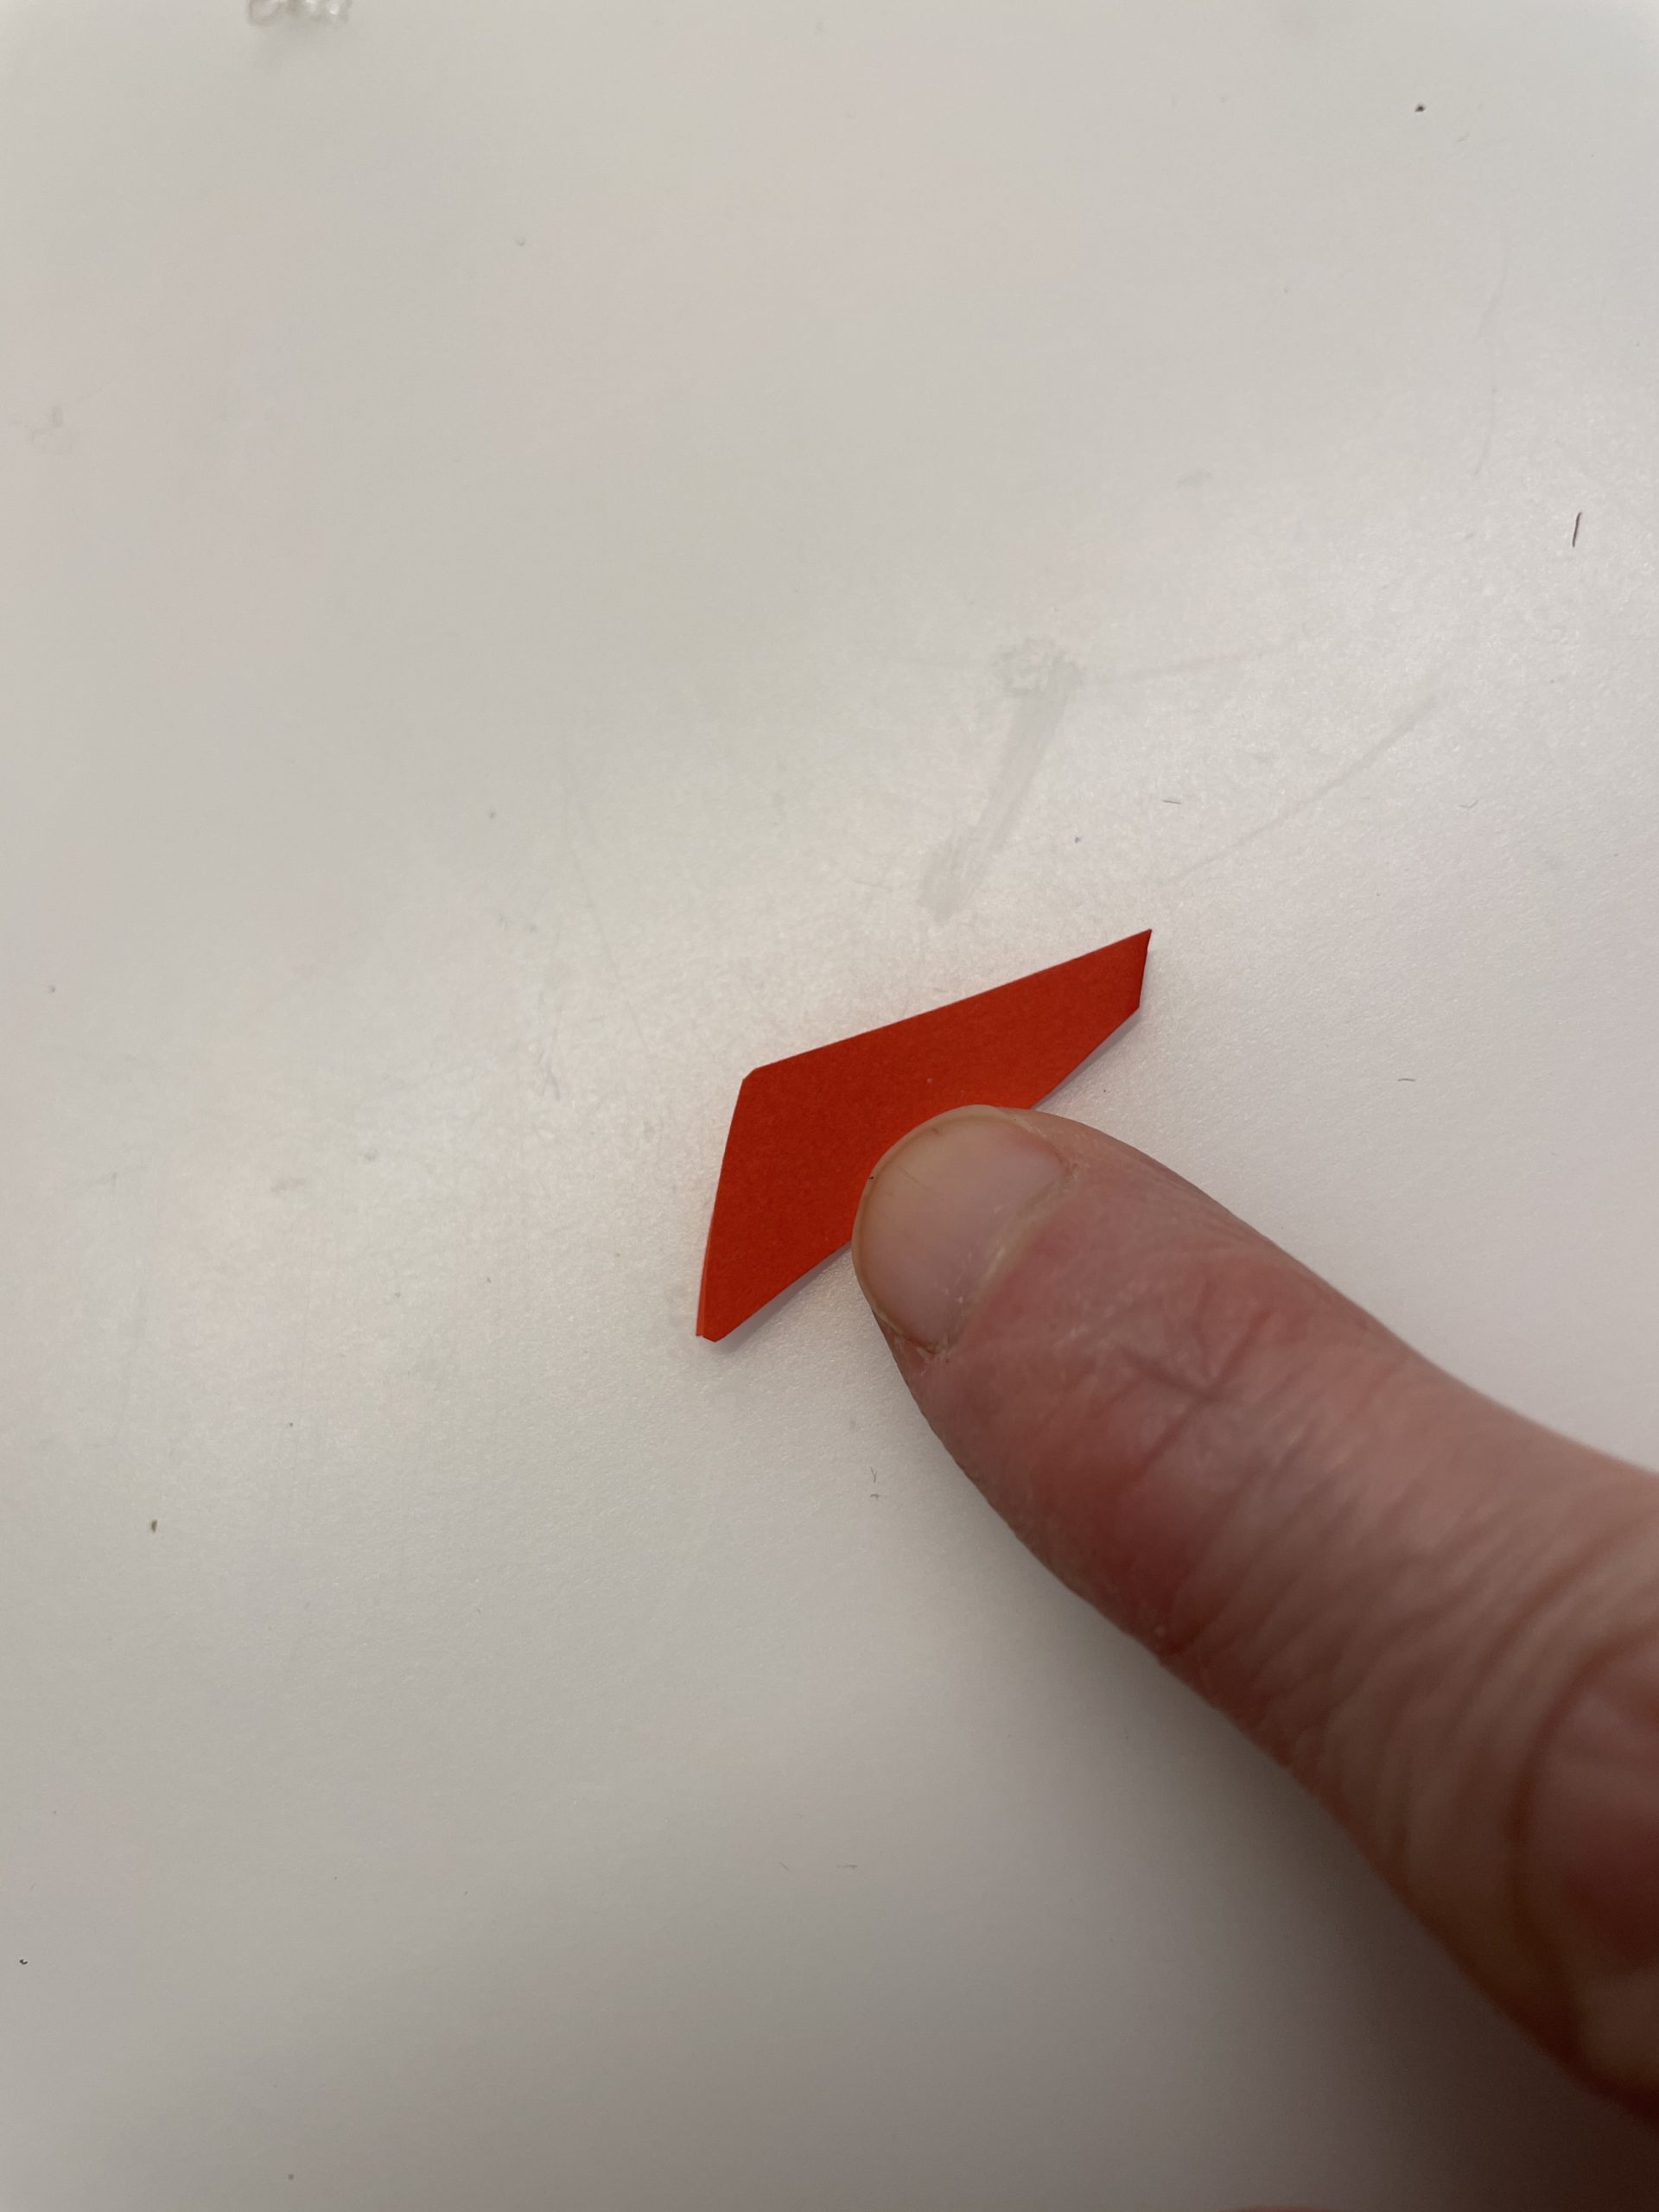
Then you fold a small red paper twice and cut a triangle out of it. So you get two beaks!
Glue the beaks from both sides to the cardboard roll and let a tip survive. Then stick the beak tip together.
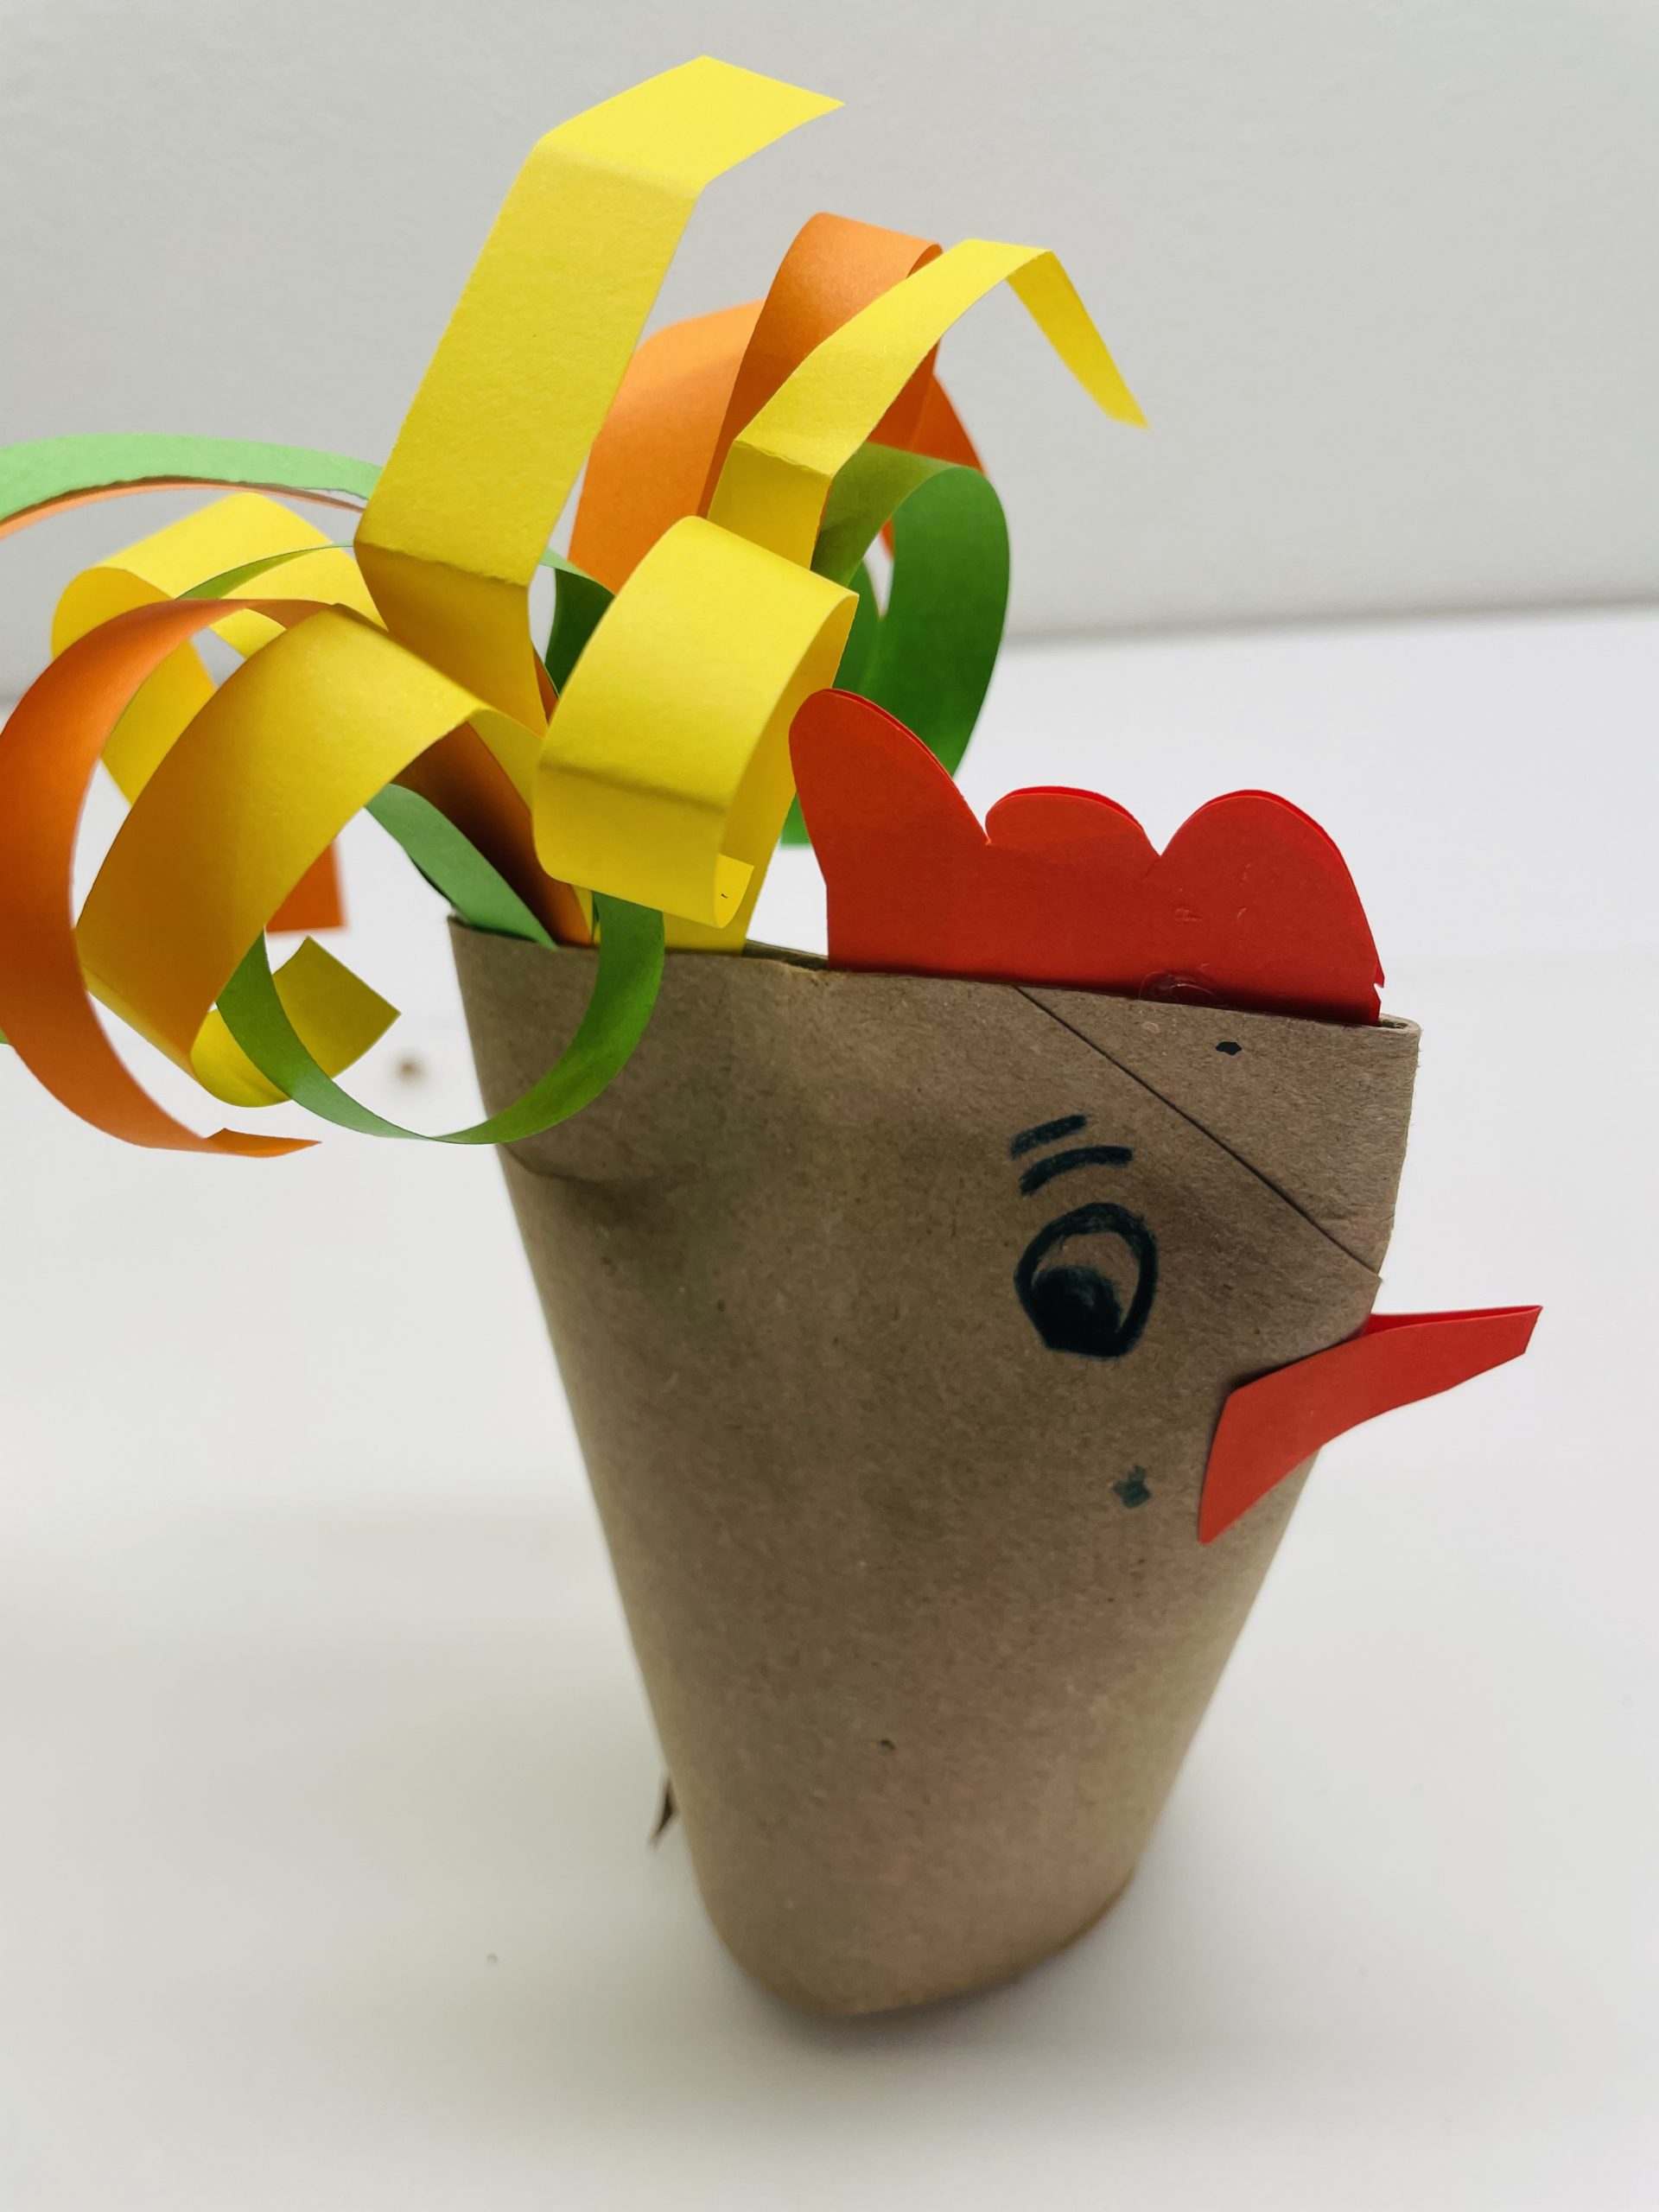
Your rooster is ready.
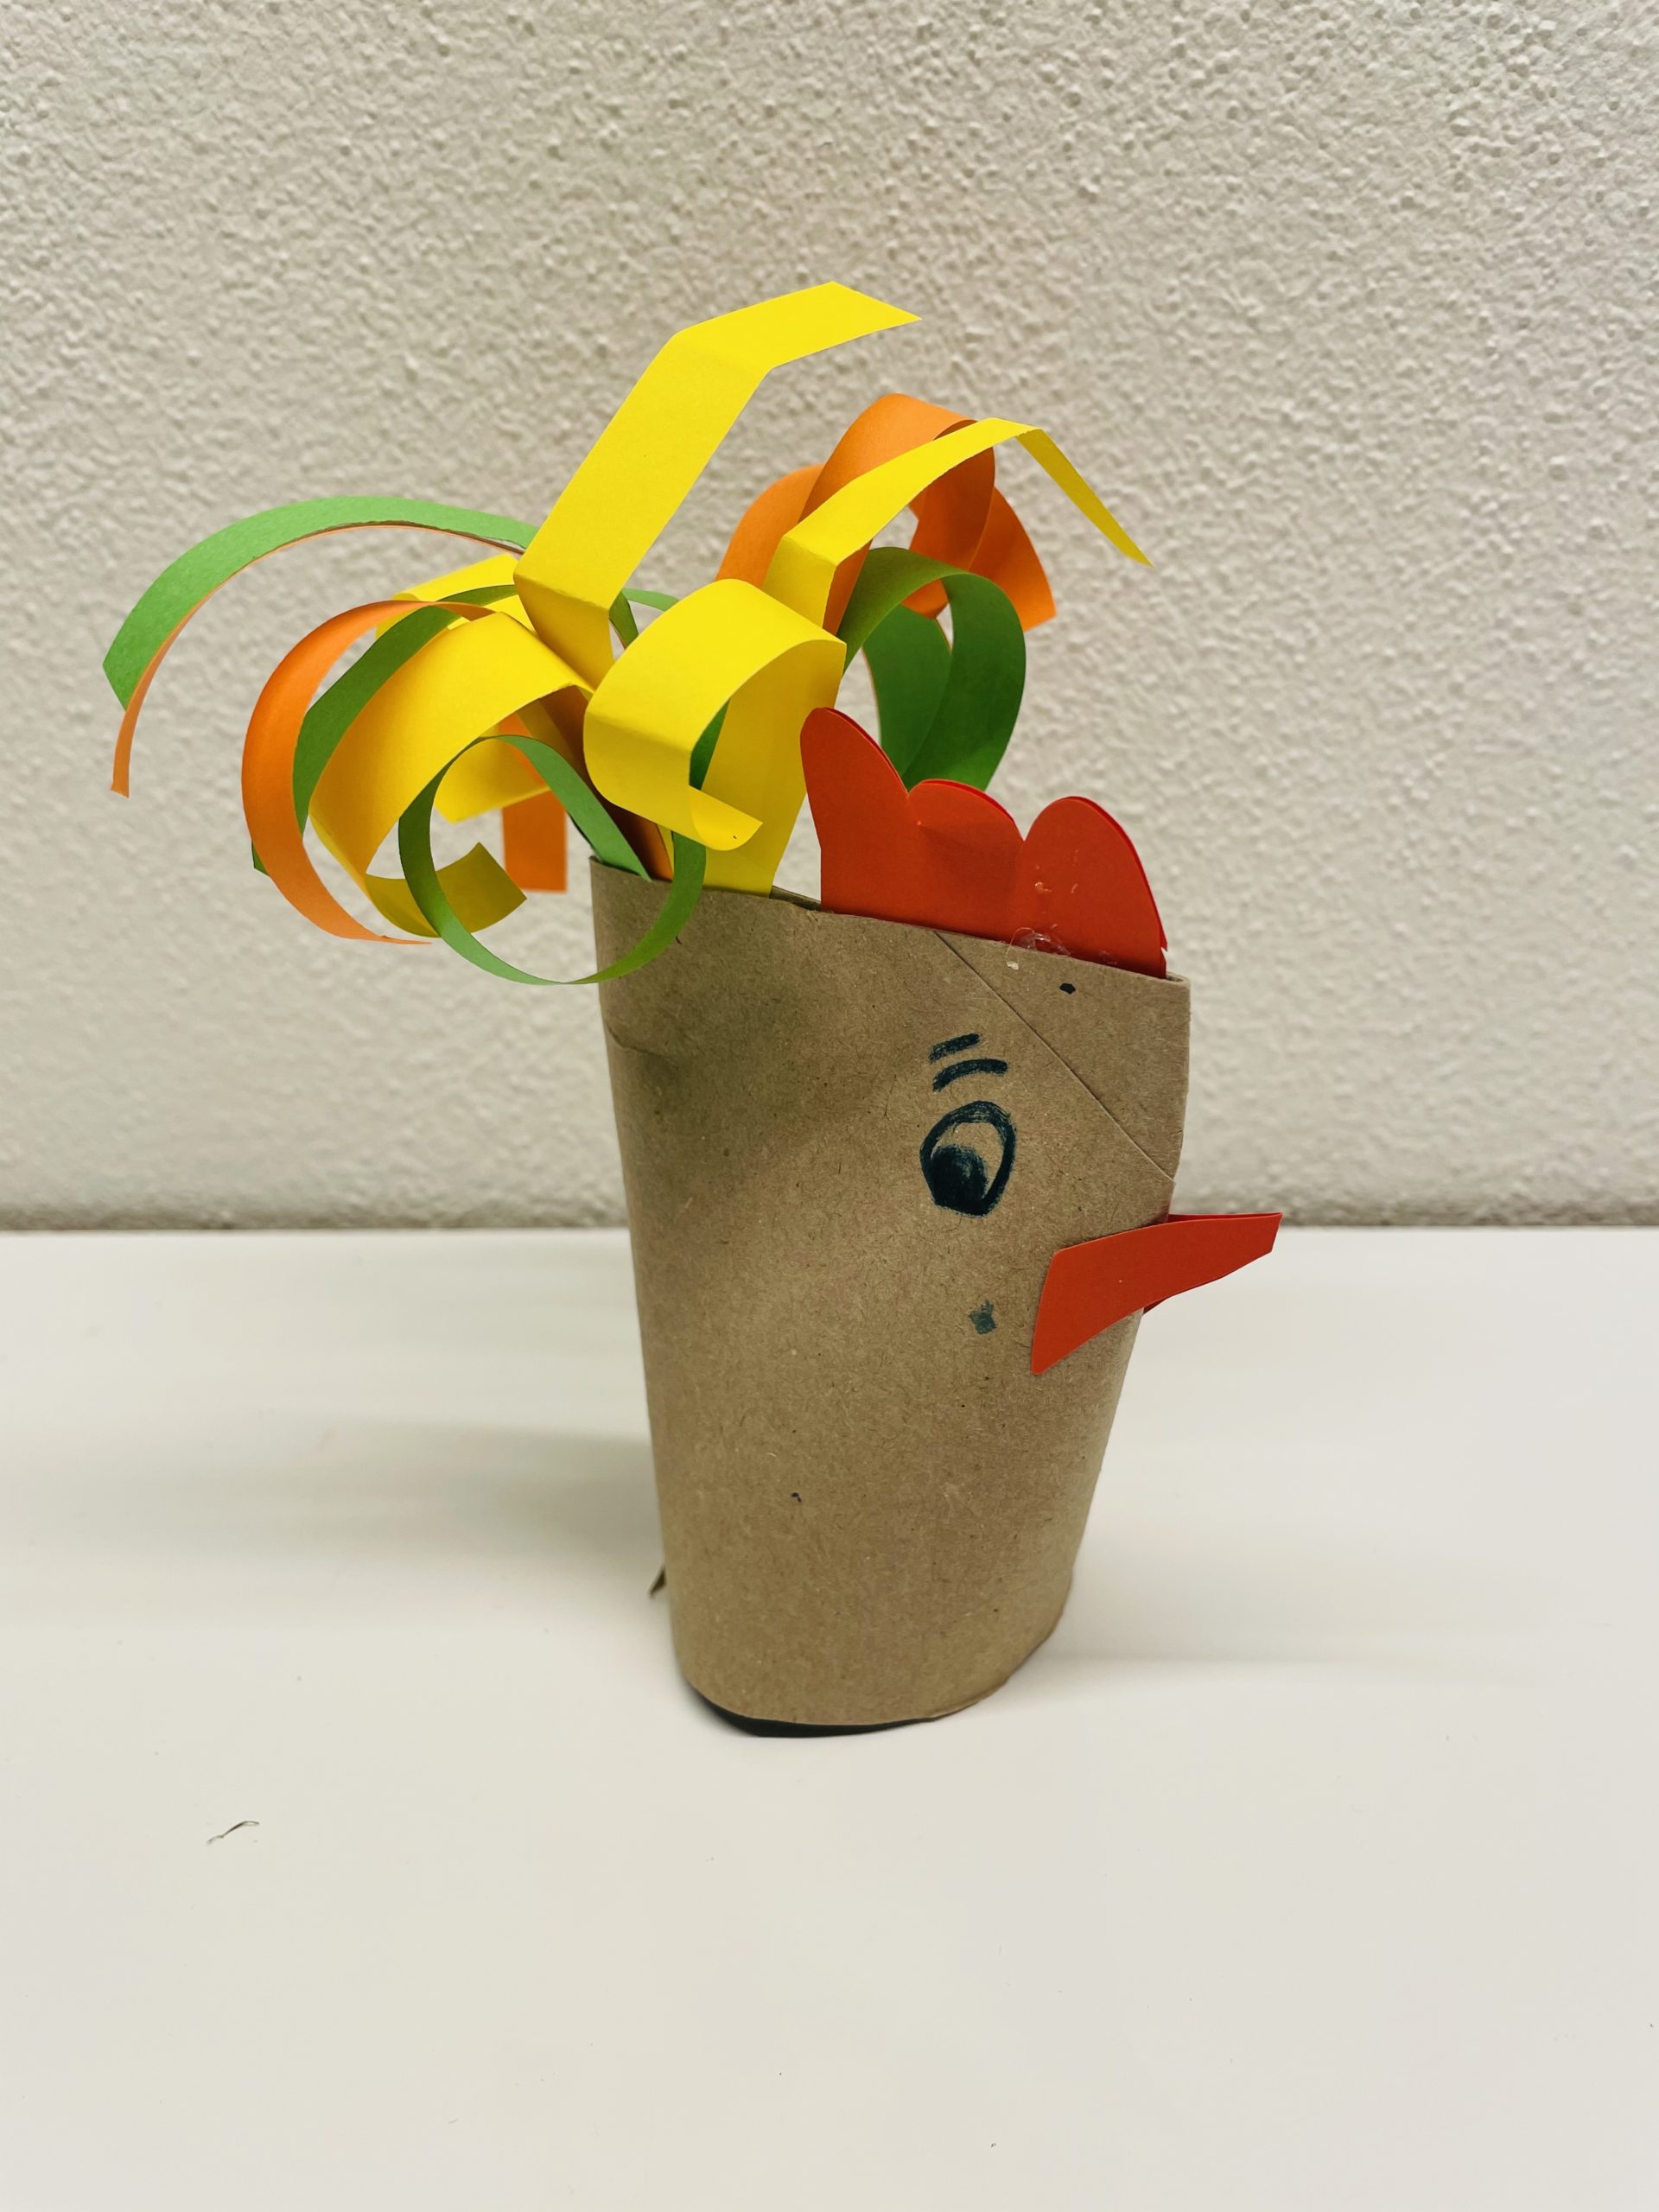
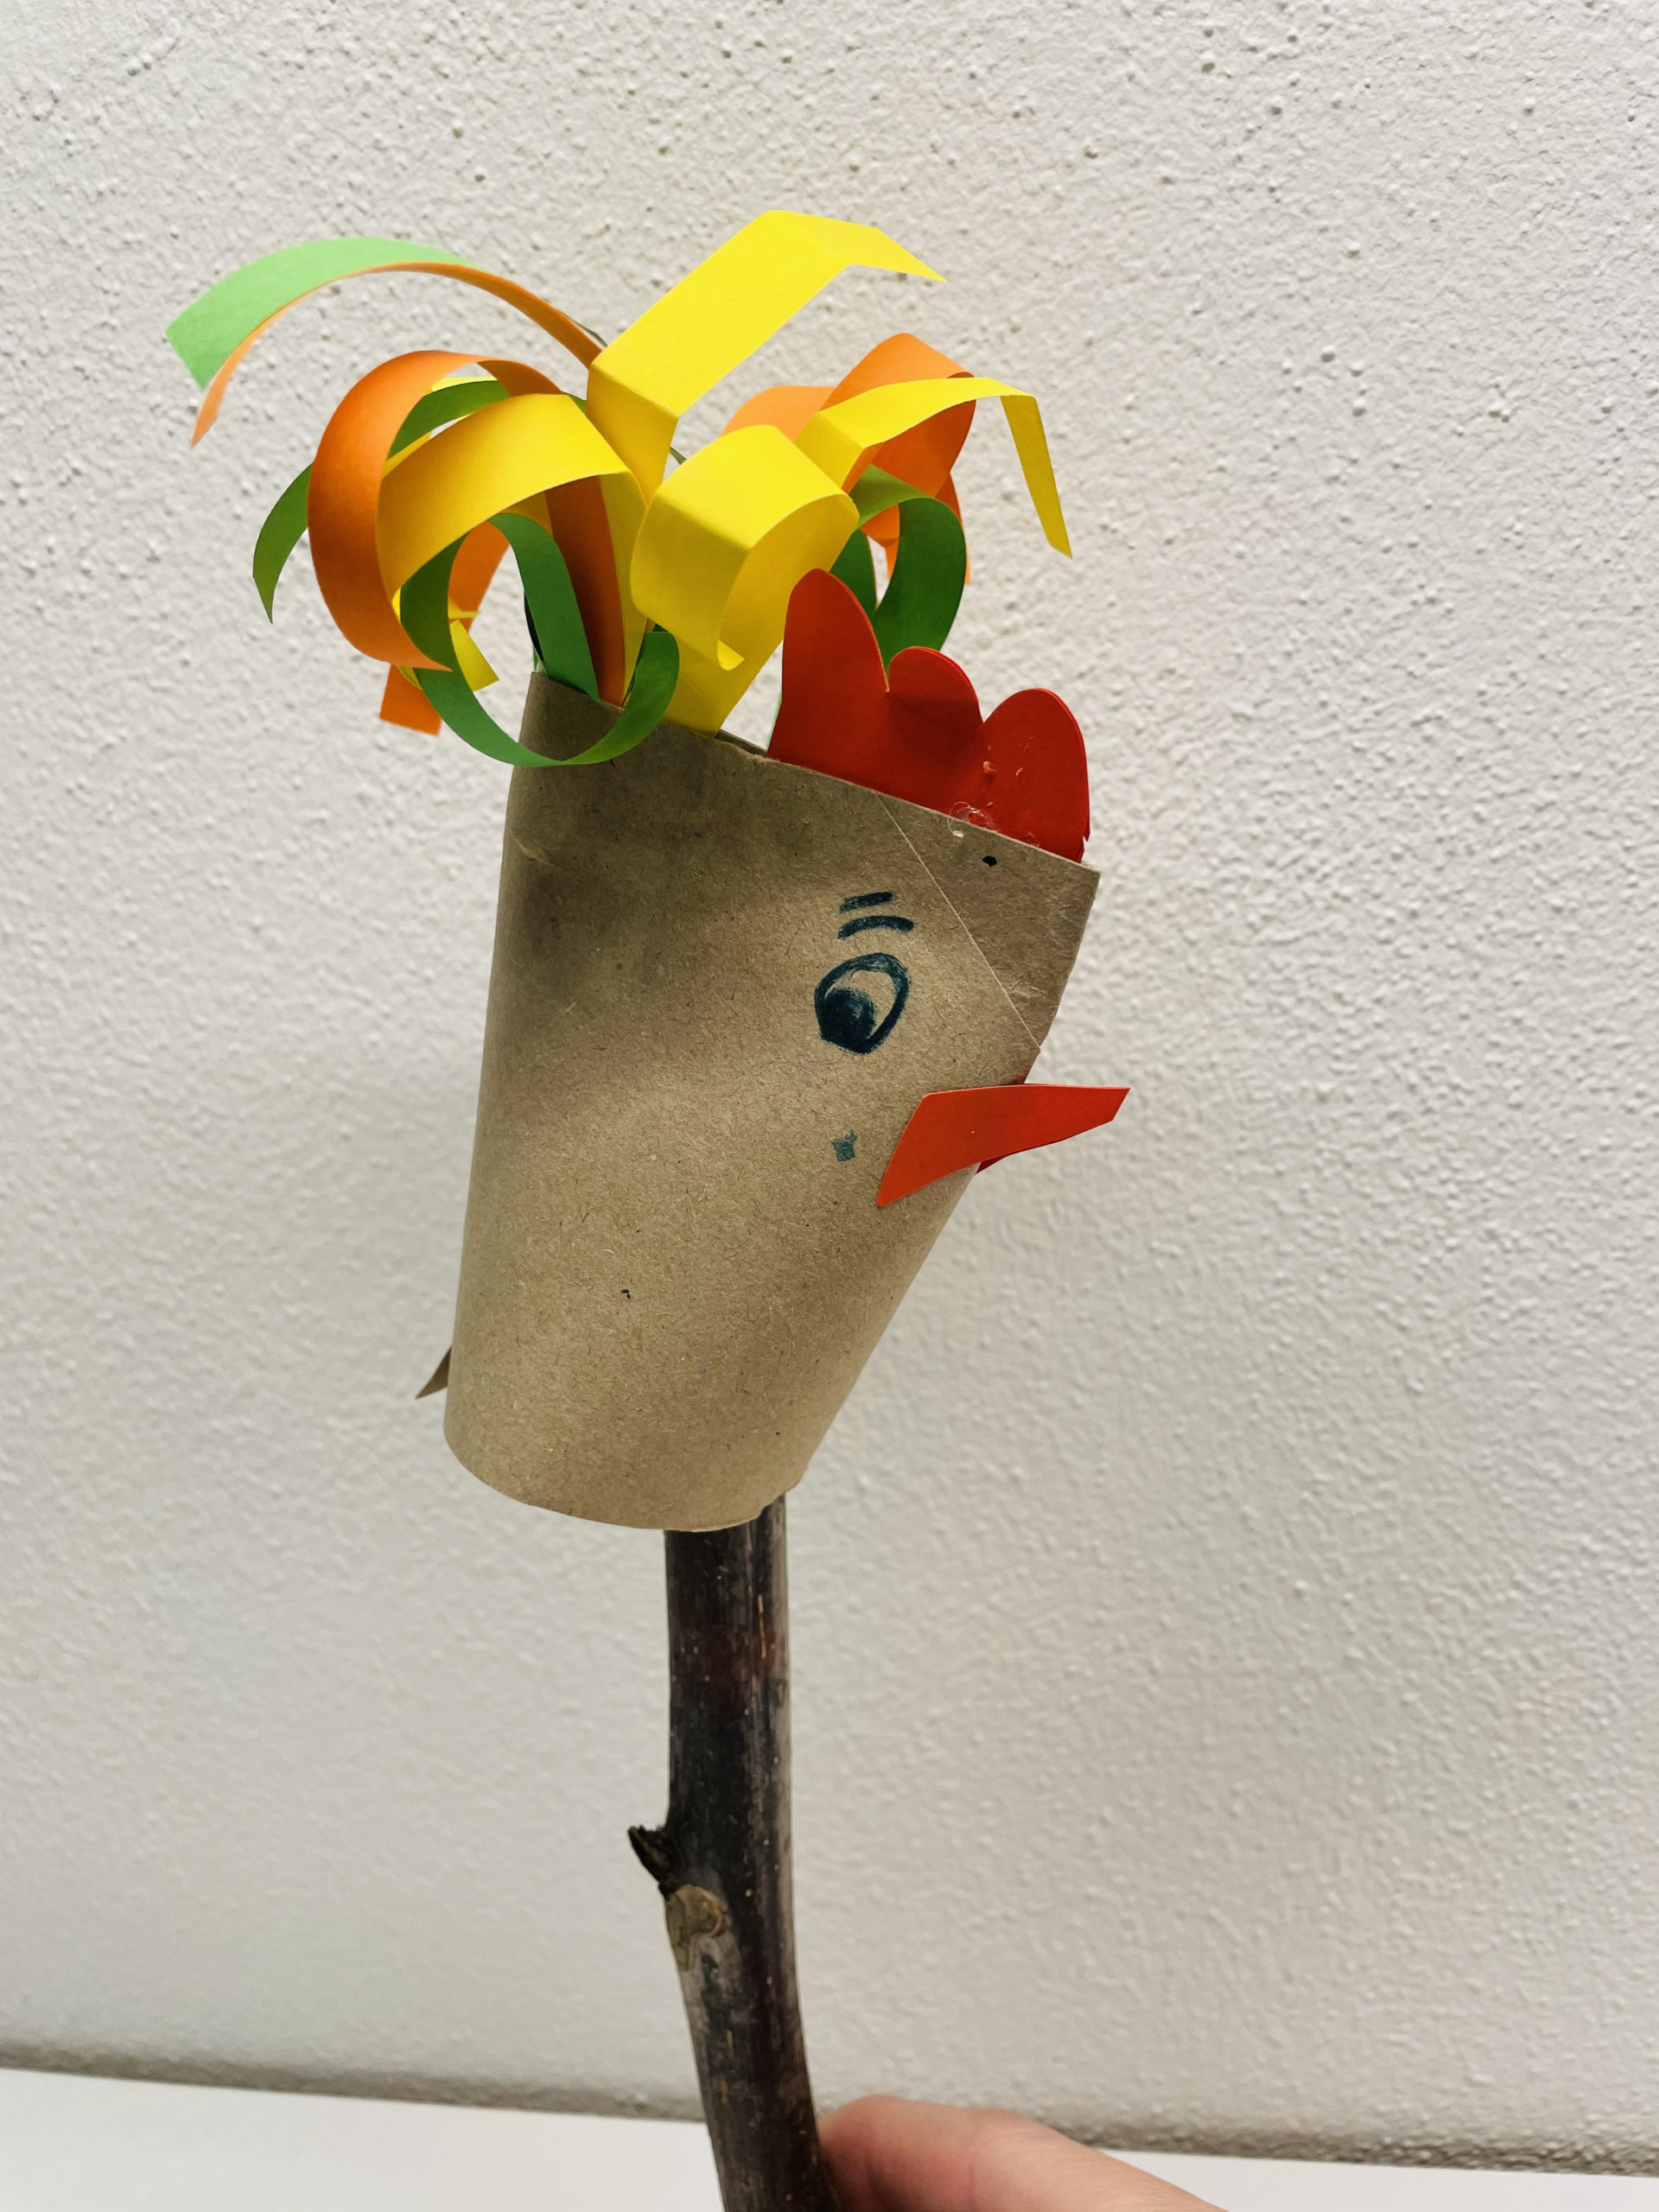
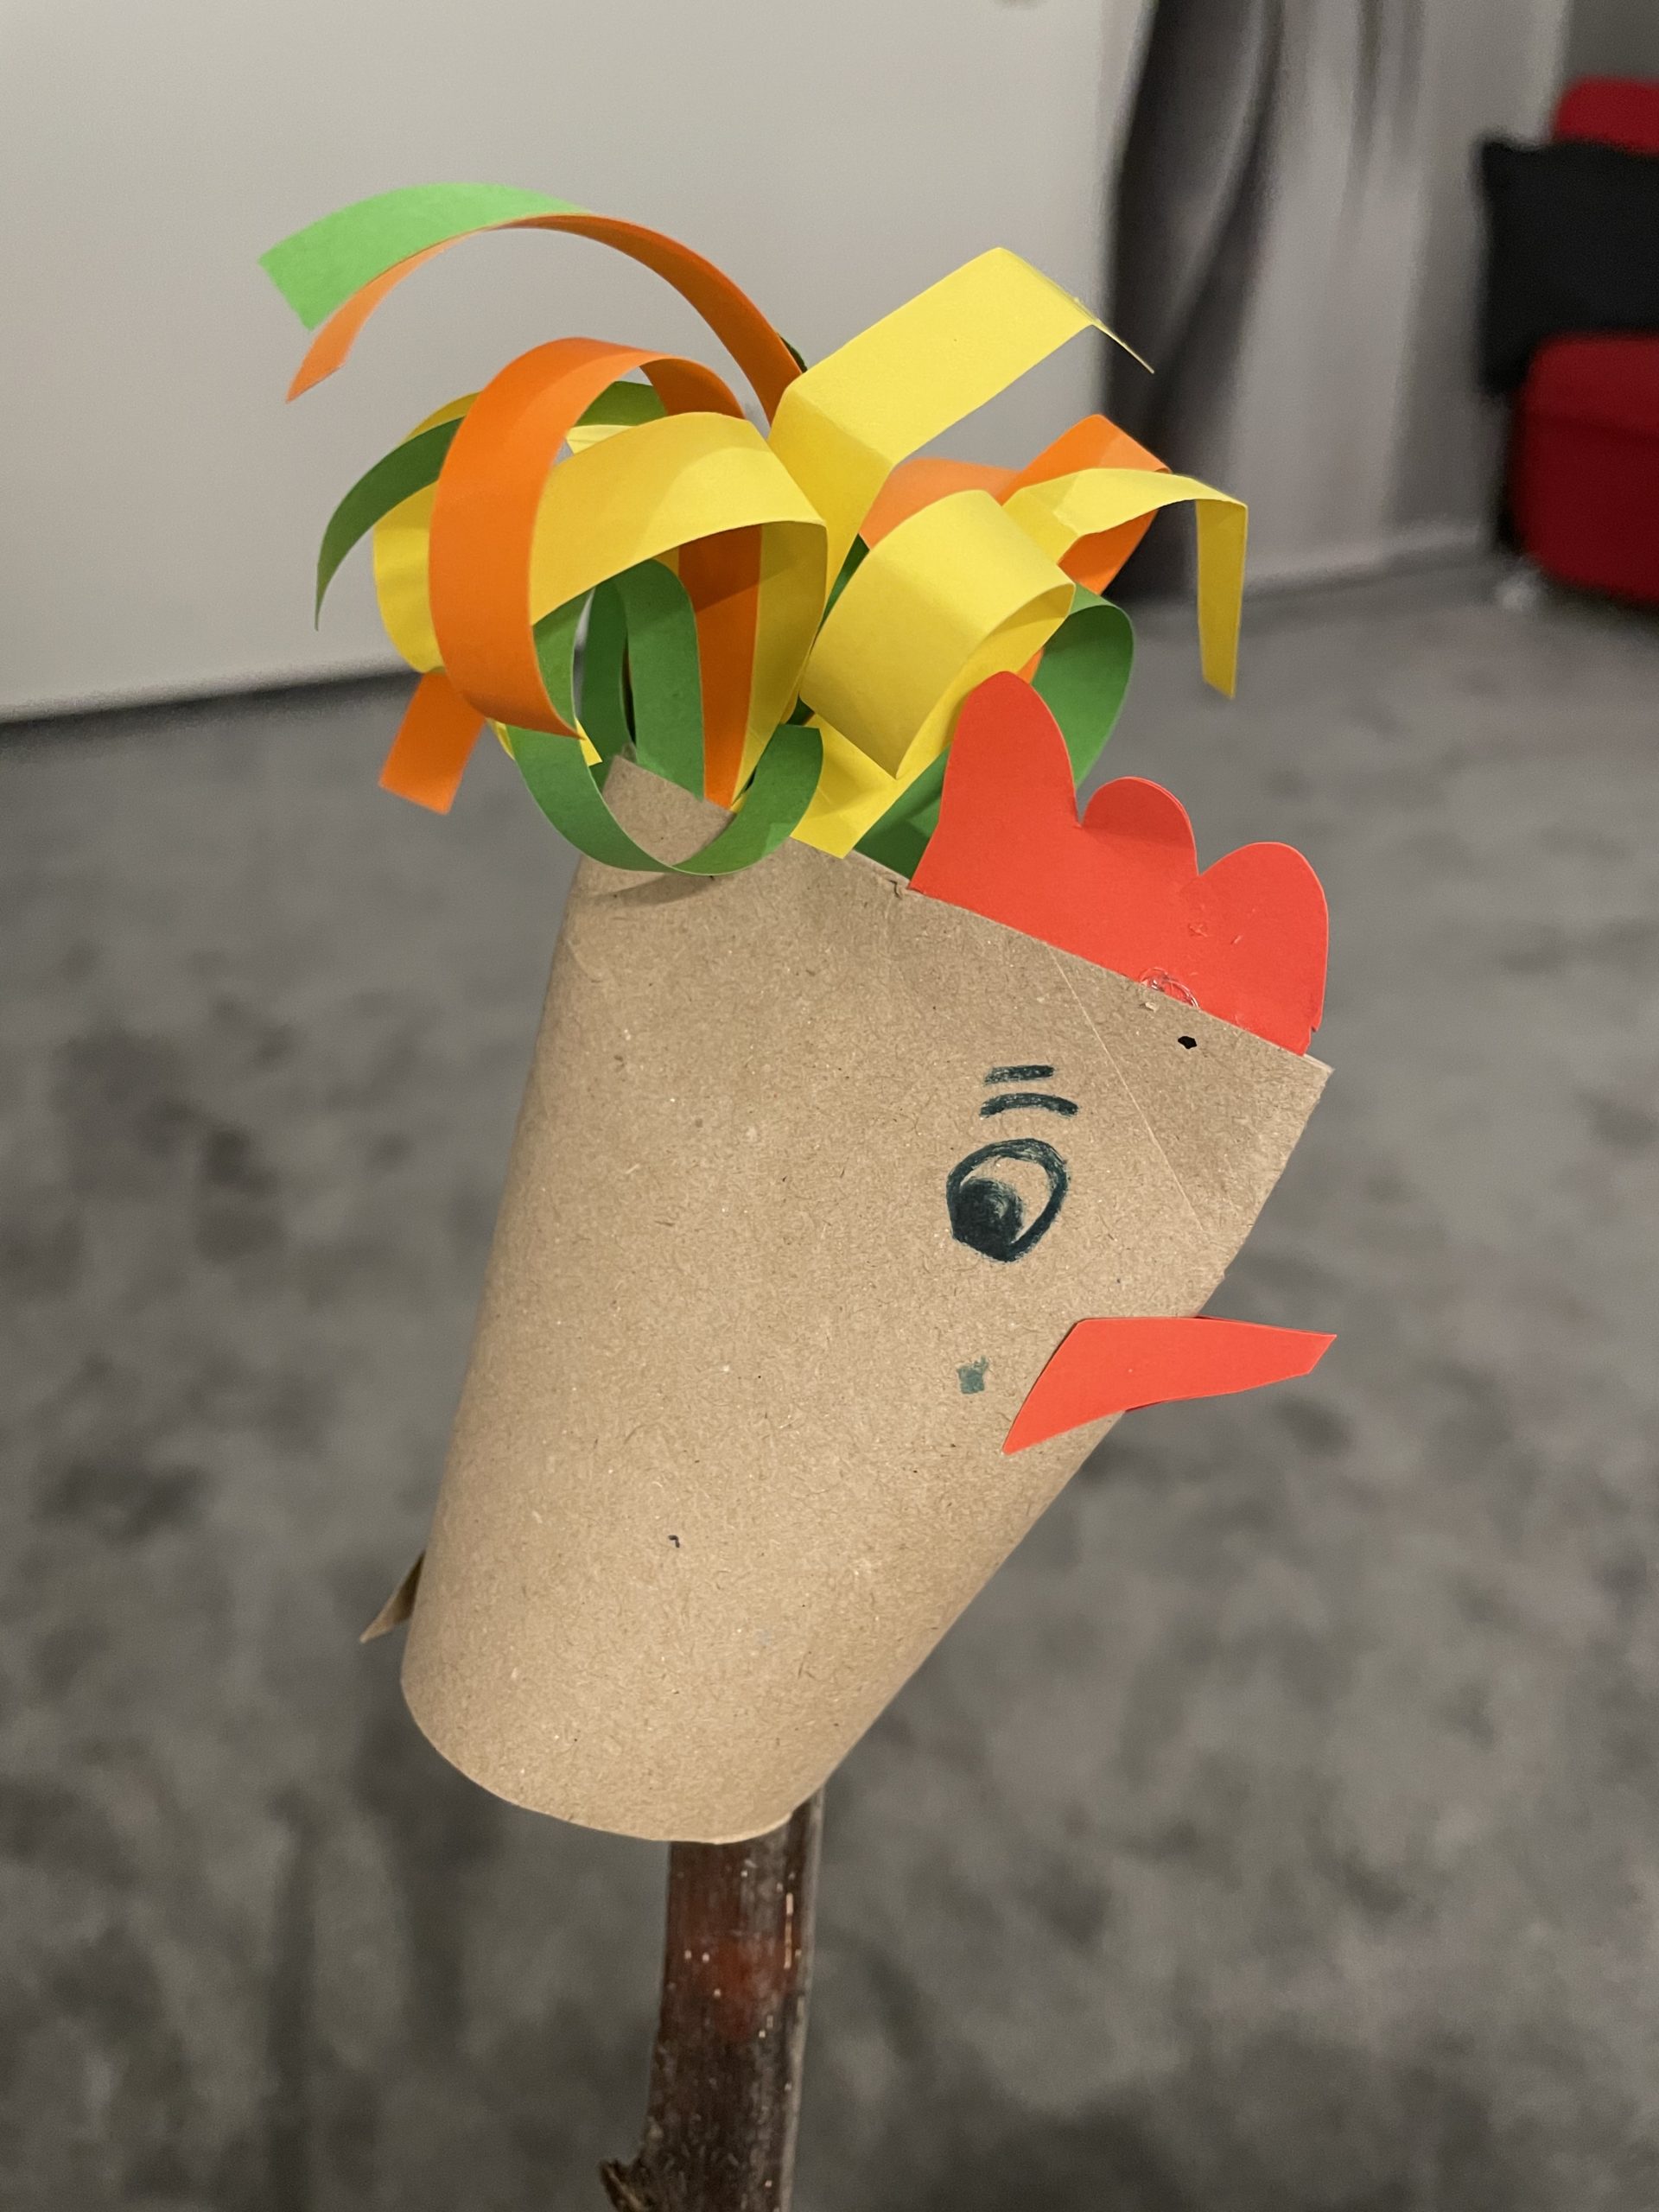
For this you put the cock on a stick. So you can use it as a figure for an Easter theatre or a puppet play. As decoration he also looks great in a flower pot.

Let your imagination run wild and remain creative.
Materials
Directions
Put out your craft pad and all the materials ready.
First, cut the thin papers to a size of 5cm x 10cm each.
Then put the yellow, orange and green paper on top of each other.
Tip: Stick the papers together on one of the narrow sides with a glue stick, so they do not slip when cutting!
Now cut into all three papers narrow stripes. Leave a 1cm wide strip (the glued edge) standing!
Now fold the cut paper in length.
Now glue the paper strip with the closed side to the inner wall of the cardboard roll.
Then you squeeze the paper roll so that the paper strip is folded again in the middle. Attention, only the spot pinches with the tail at the top where the paper strips are together.
Now you cut a cock comb.
You shorten the red paper to 3.5cm x 3.5cm.
Then you cut three small arches on one side. The cock comb is ready.
Now glue the cock comb in front of the colorful paper strips into the top of the cardboard roll. Press the cardboard roll together at the top.
With the scissors you now ring the colorful stripes. Put the scissors under a strip with a cutting surface and gently pull it over the edge.
Tip: This can also be done with a ruler or a pen! You only need an edge over which you can wave the paper.
Always pull the paper in the direction over the edge, in which the paper should also curl. Afterwards, the paper strips are plucked into shape.
Paints an eye on the cardboard roll with a felt pen on the left and right.
Then you fold a small red paper twice and cut a triangle out of it. So you get two beaks!
Glue the beaks from both sides to the cardboard roll and let a tip survive. Then stick the beak tip together.
Your rooster is ready.
For this you put the cock on a stick. So you can use it as a figure for an Easter theatre or a puppet play. As decoration he also looks great in a flower pot.
Let your imagination run wild and remain creative.
Follow us on Facebook , Instagram and Pinterest
Don't miss any more adventures: Our bottle mail


