AdventurerKitaForst
This table lamp can also be used for a garden party.
Media Education for Kindergarten and Hort

Relief in everyday life, targeted promotion of individual children, independent learning and - without any pre-knowledge already usable by the youngest!

Get all the craft materials ready.
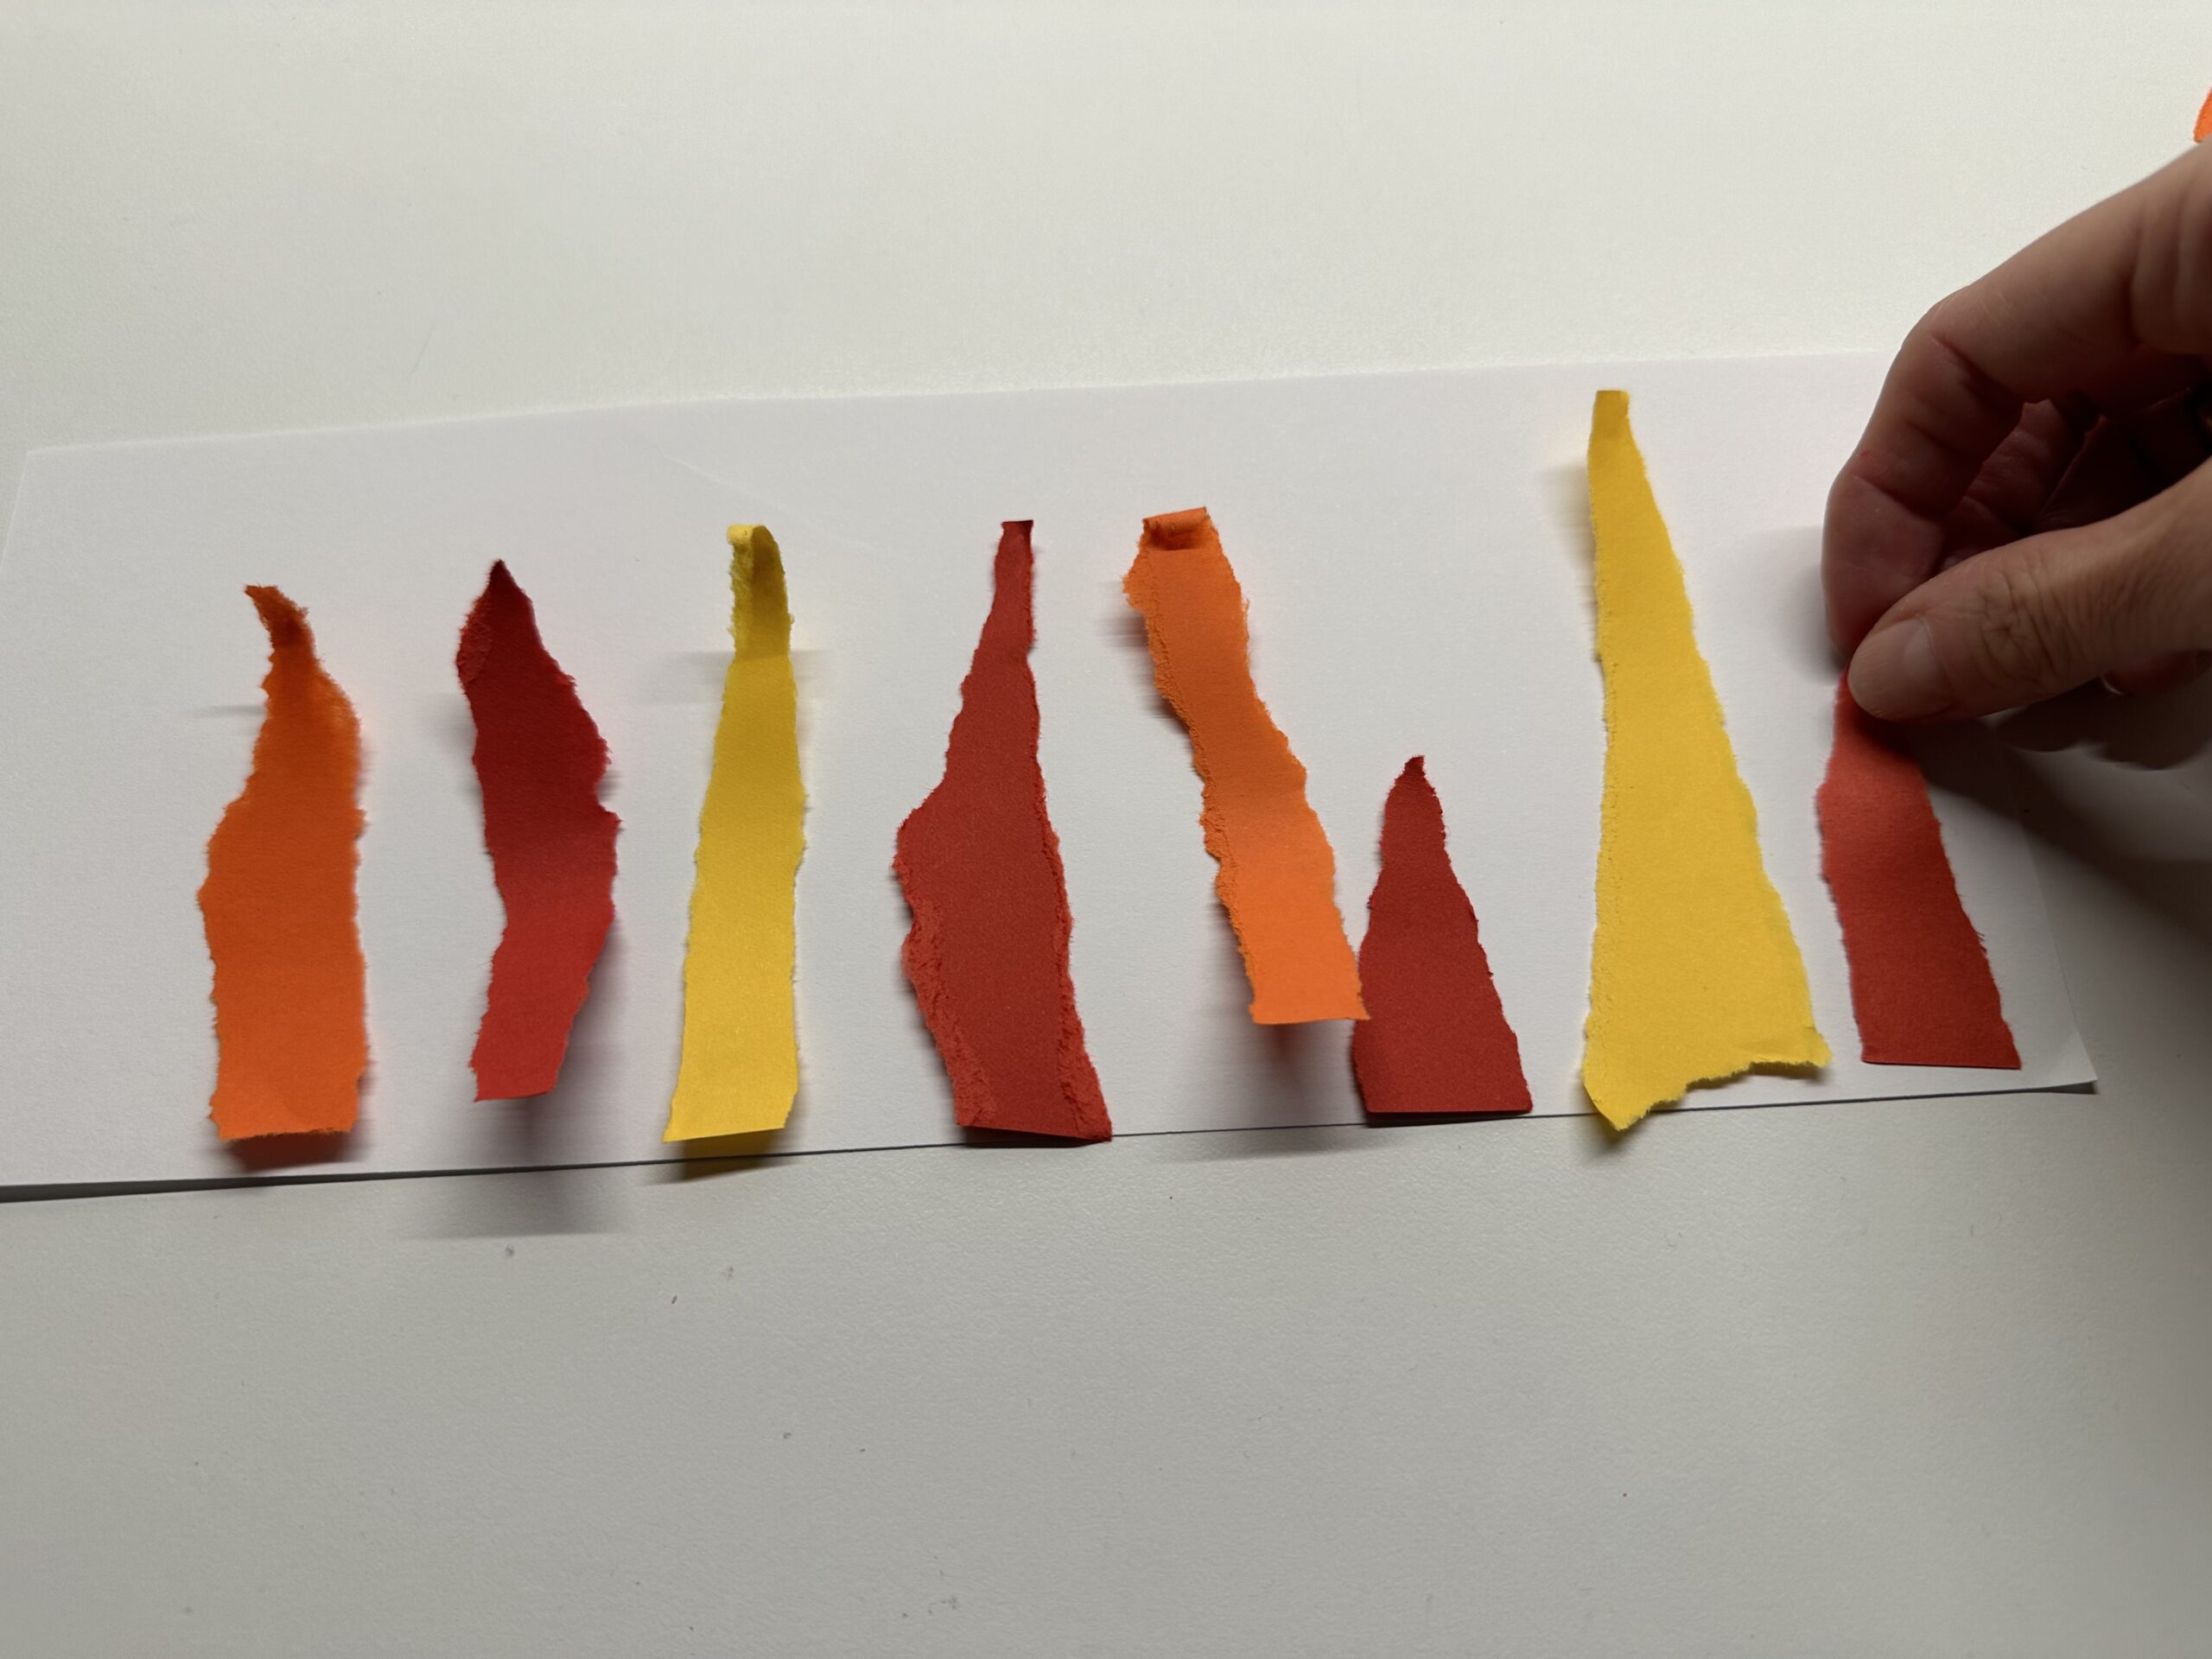
First take the clay paper at hand. You can also use clay paper residues for this.
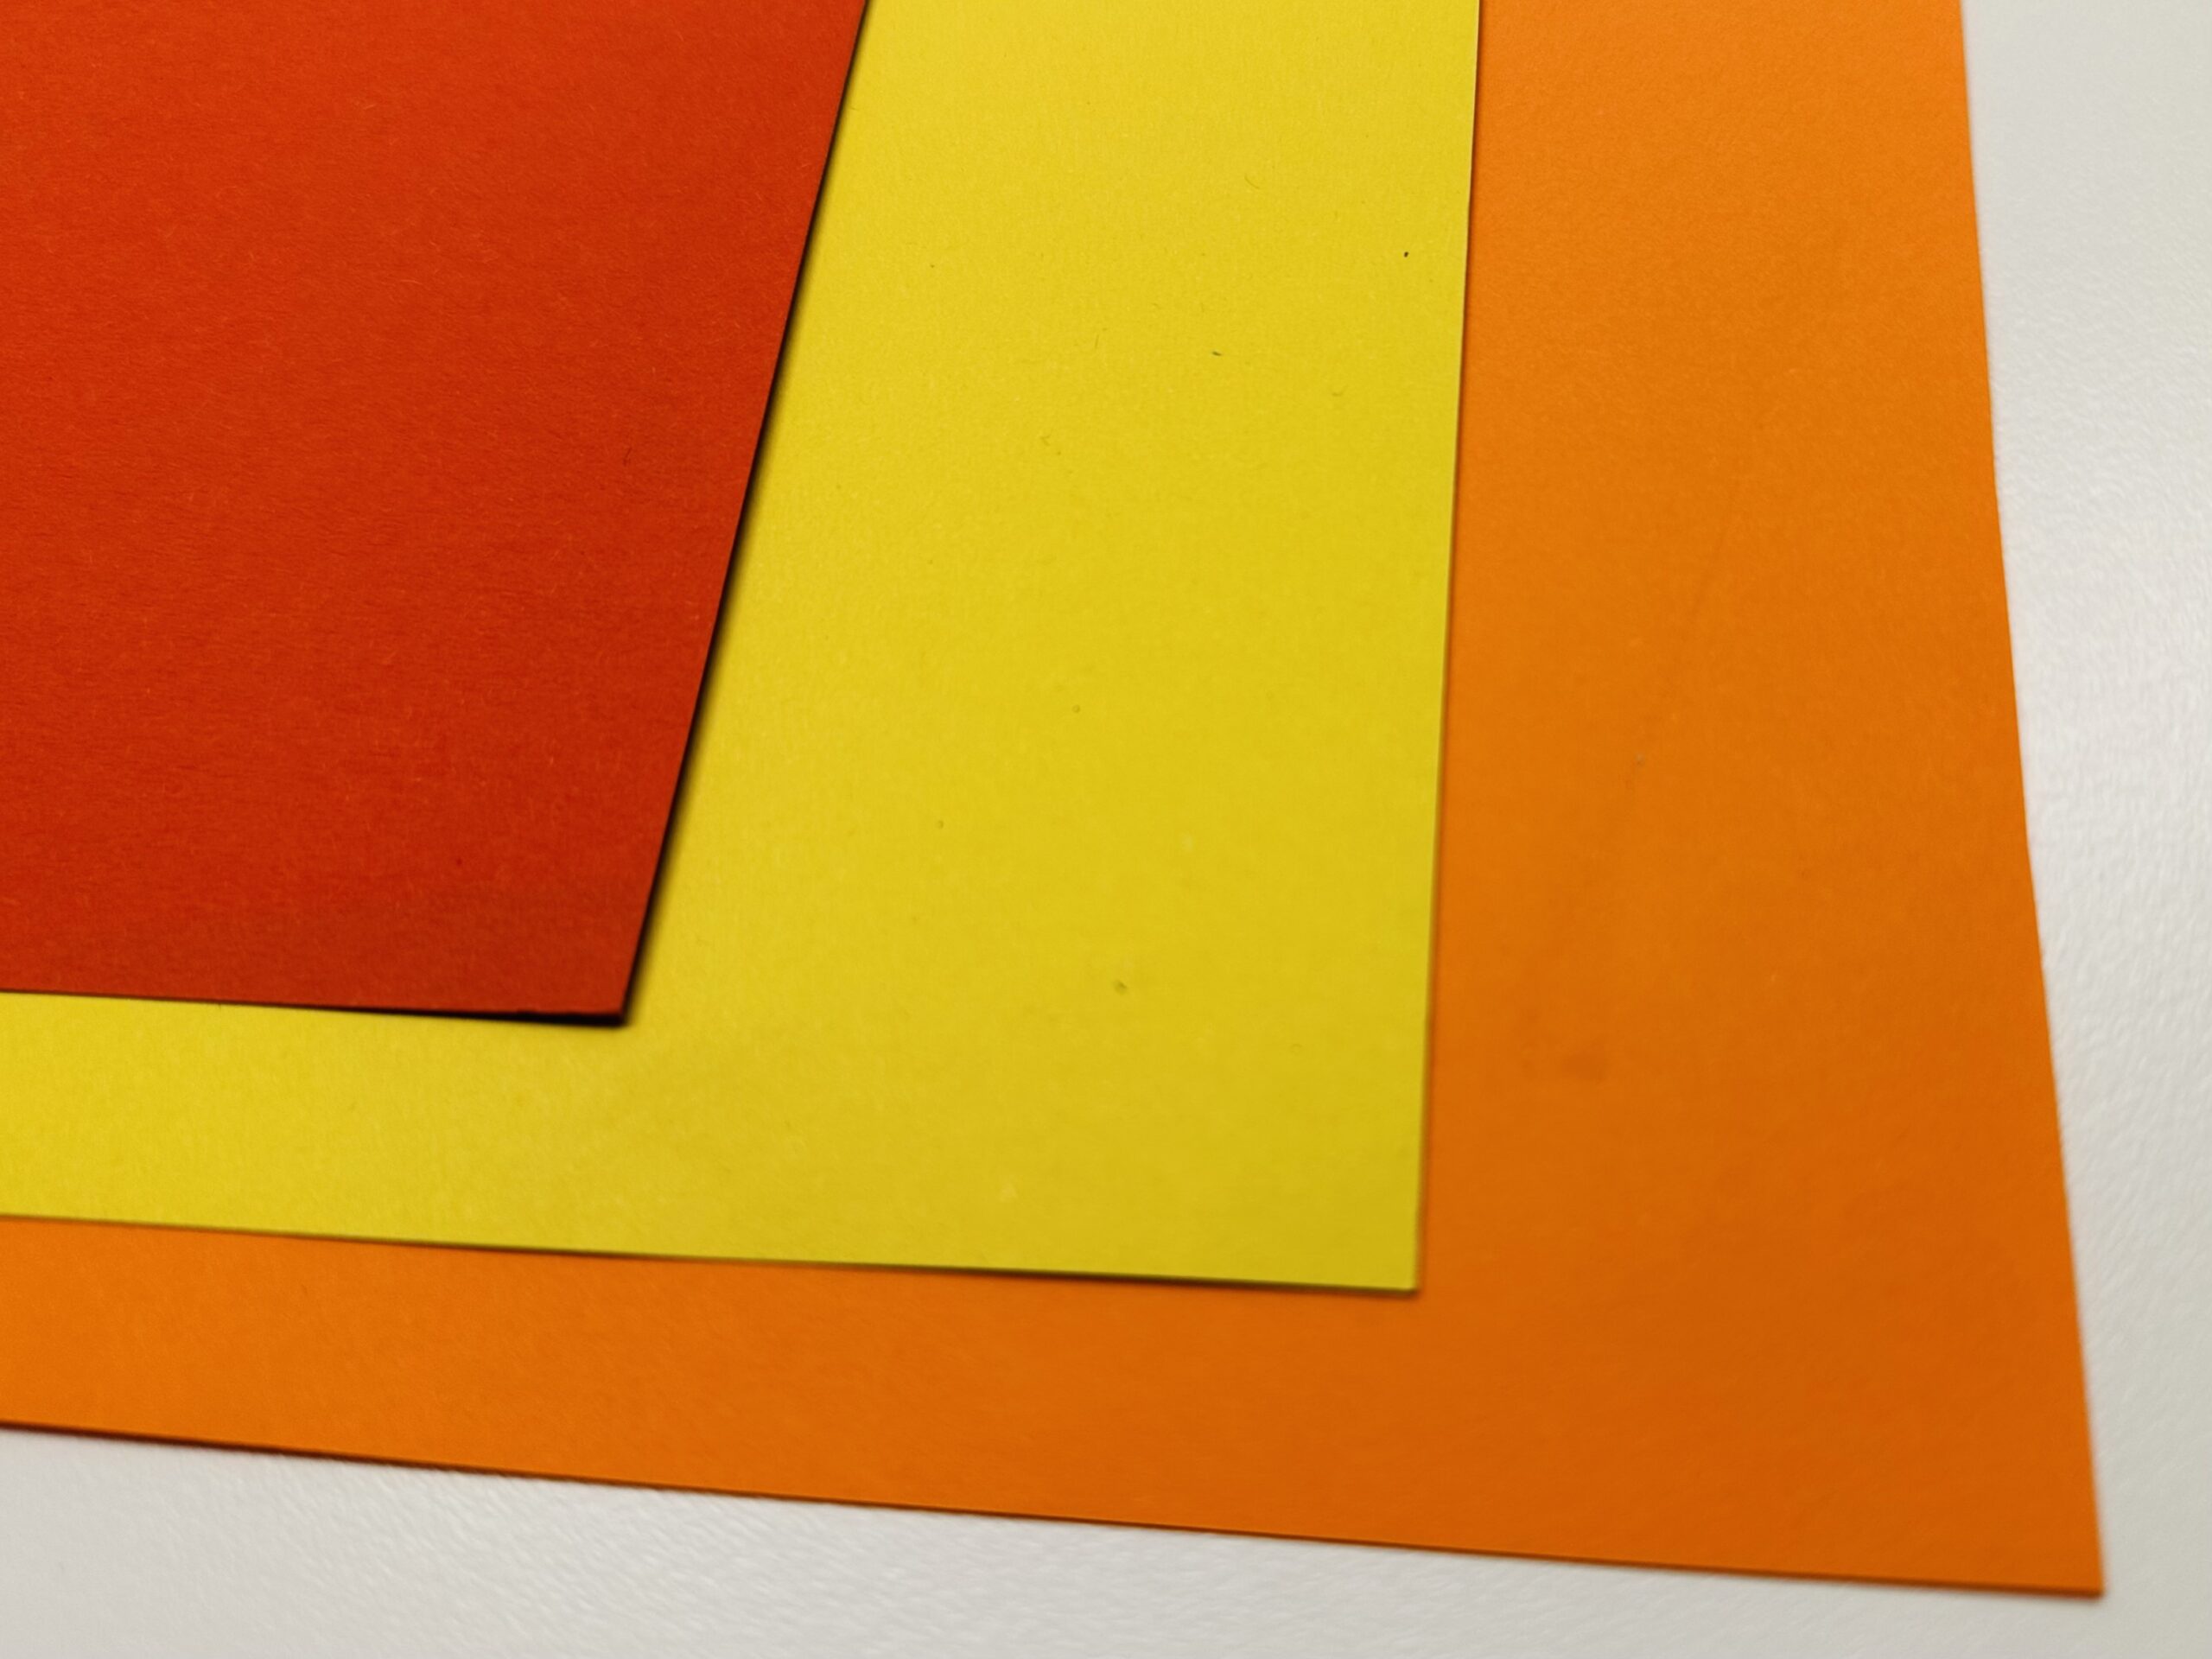
Tear the clay paper into pointed strips. It'll be the individual flames.

The torn stripes can look very different.
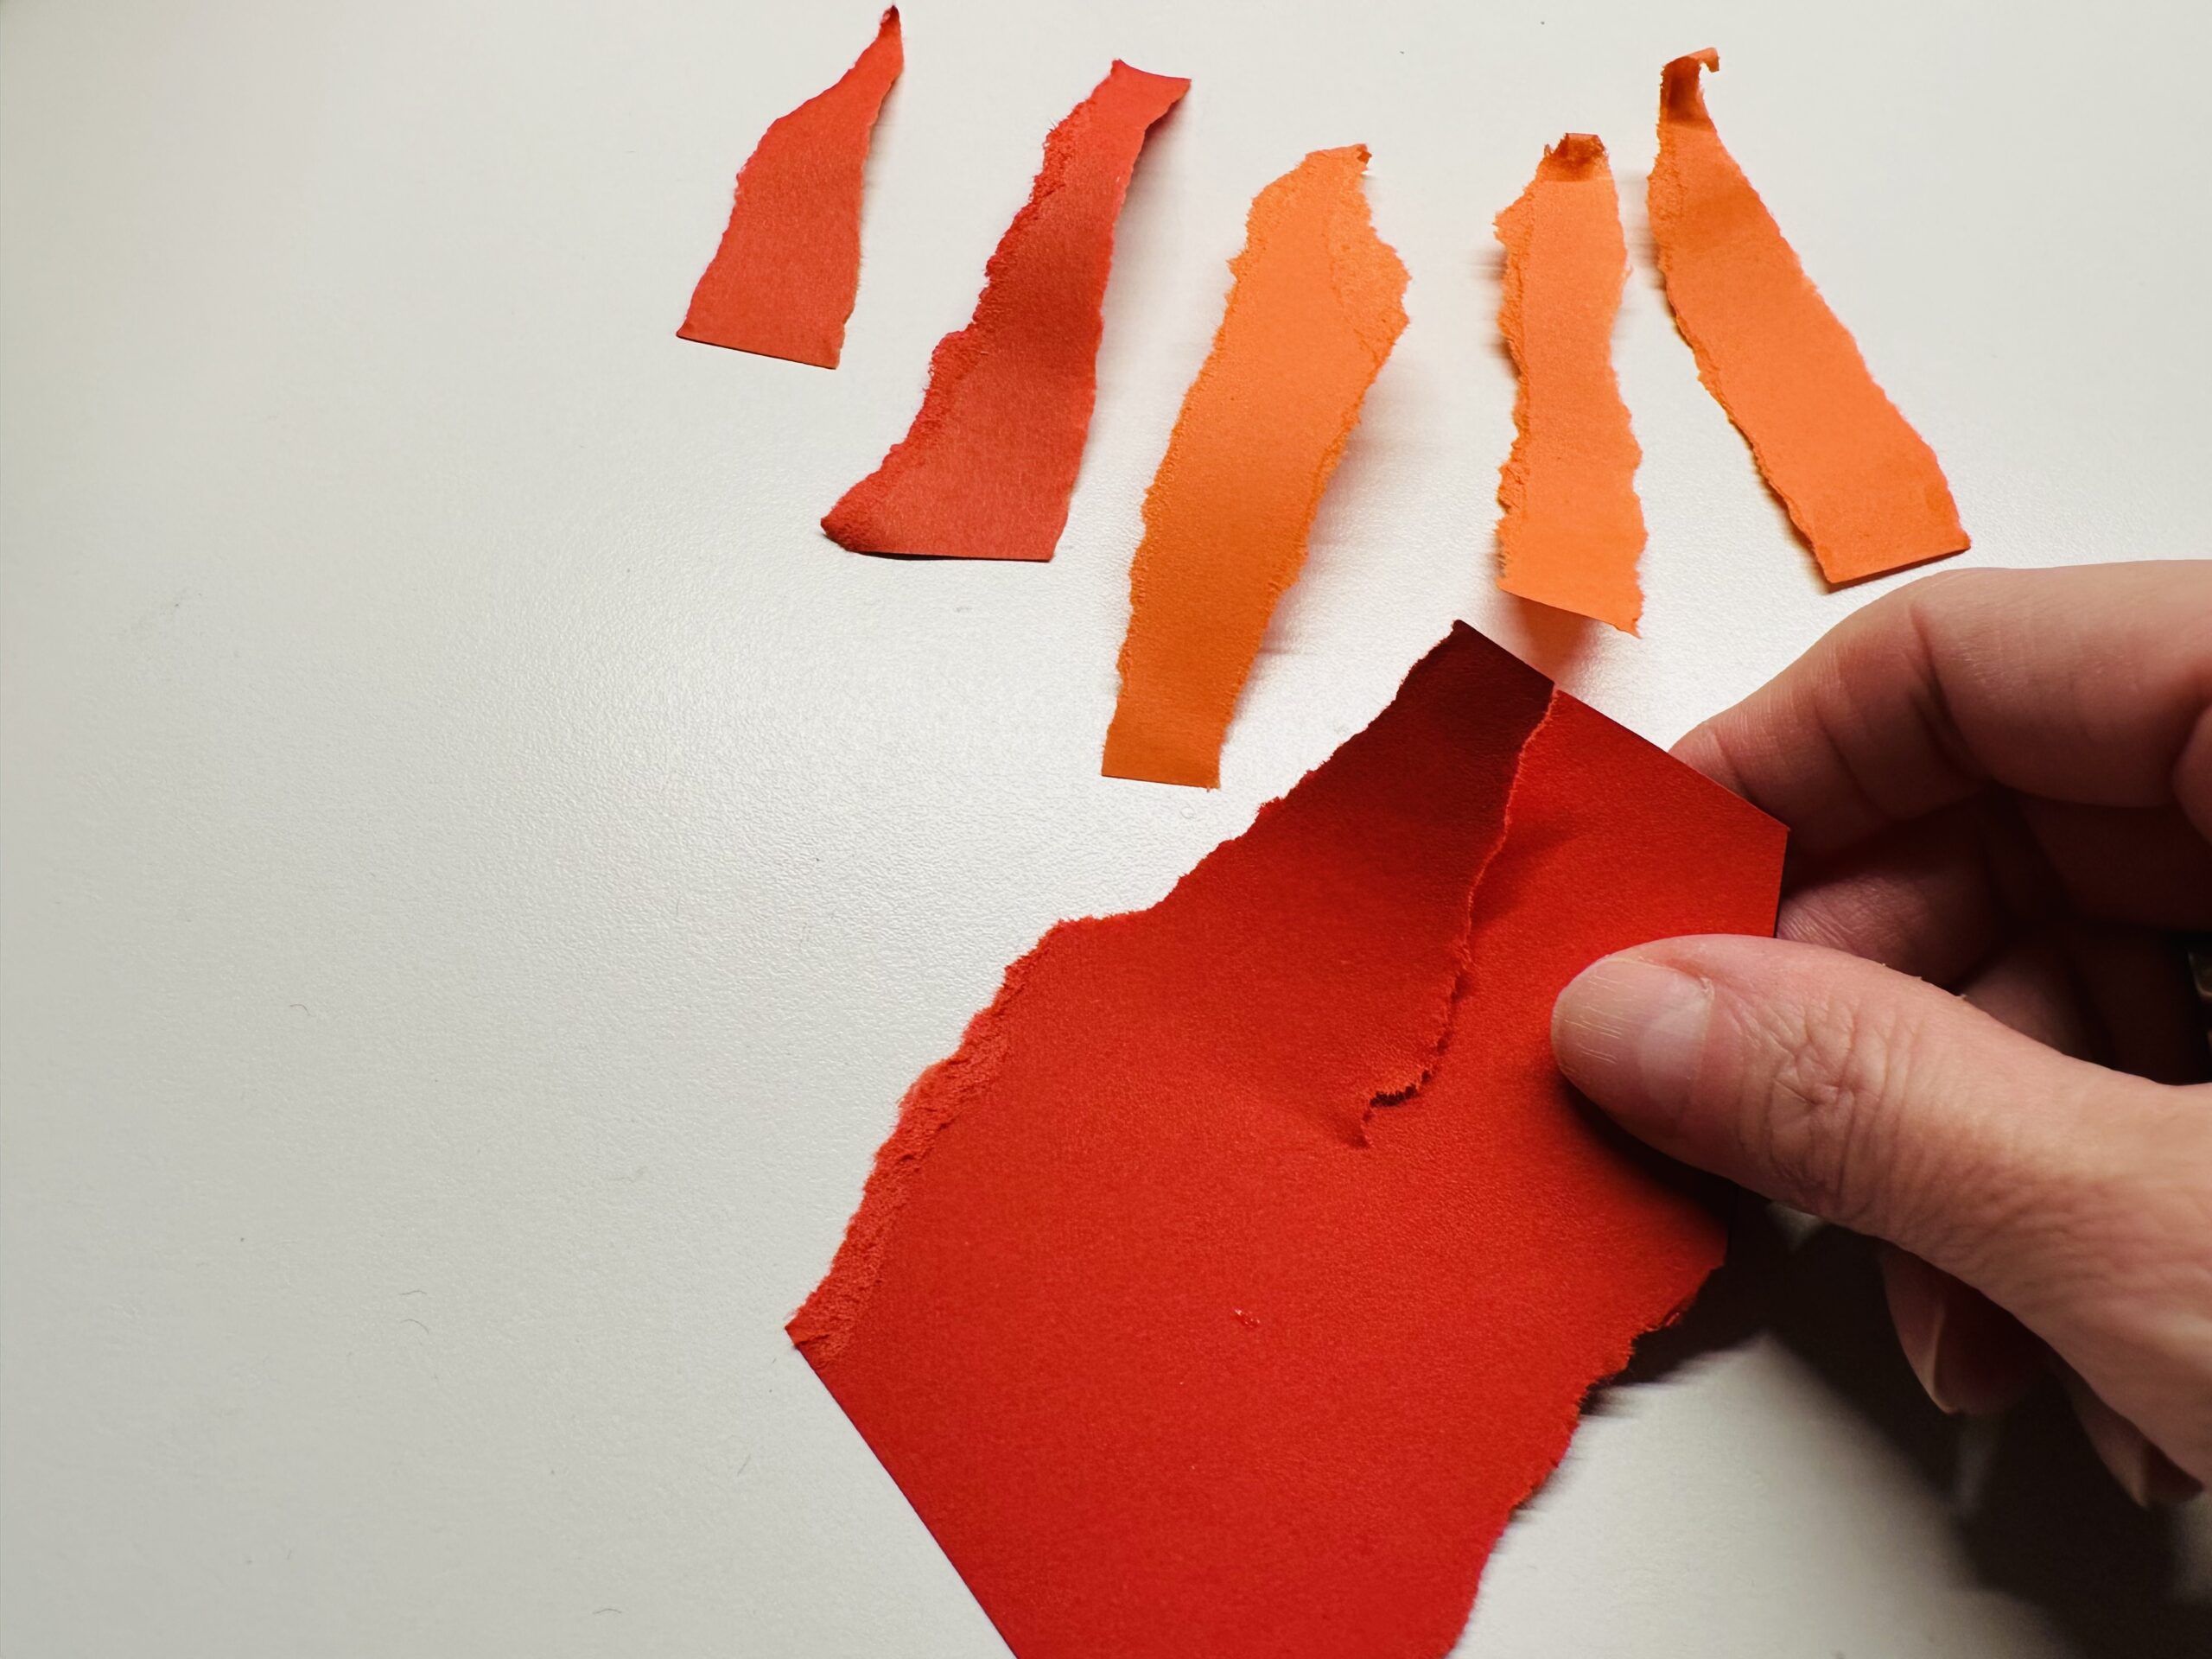
Put the torn stripes aside.
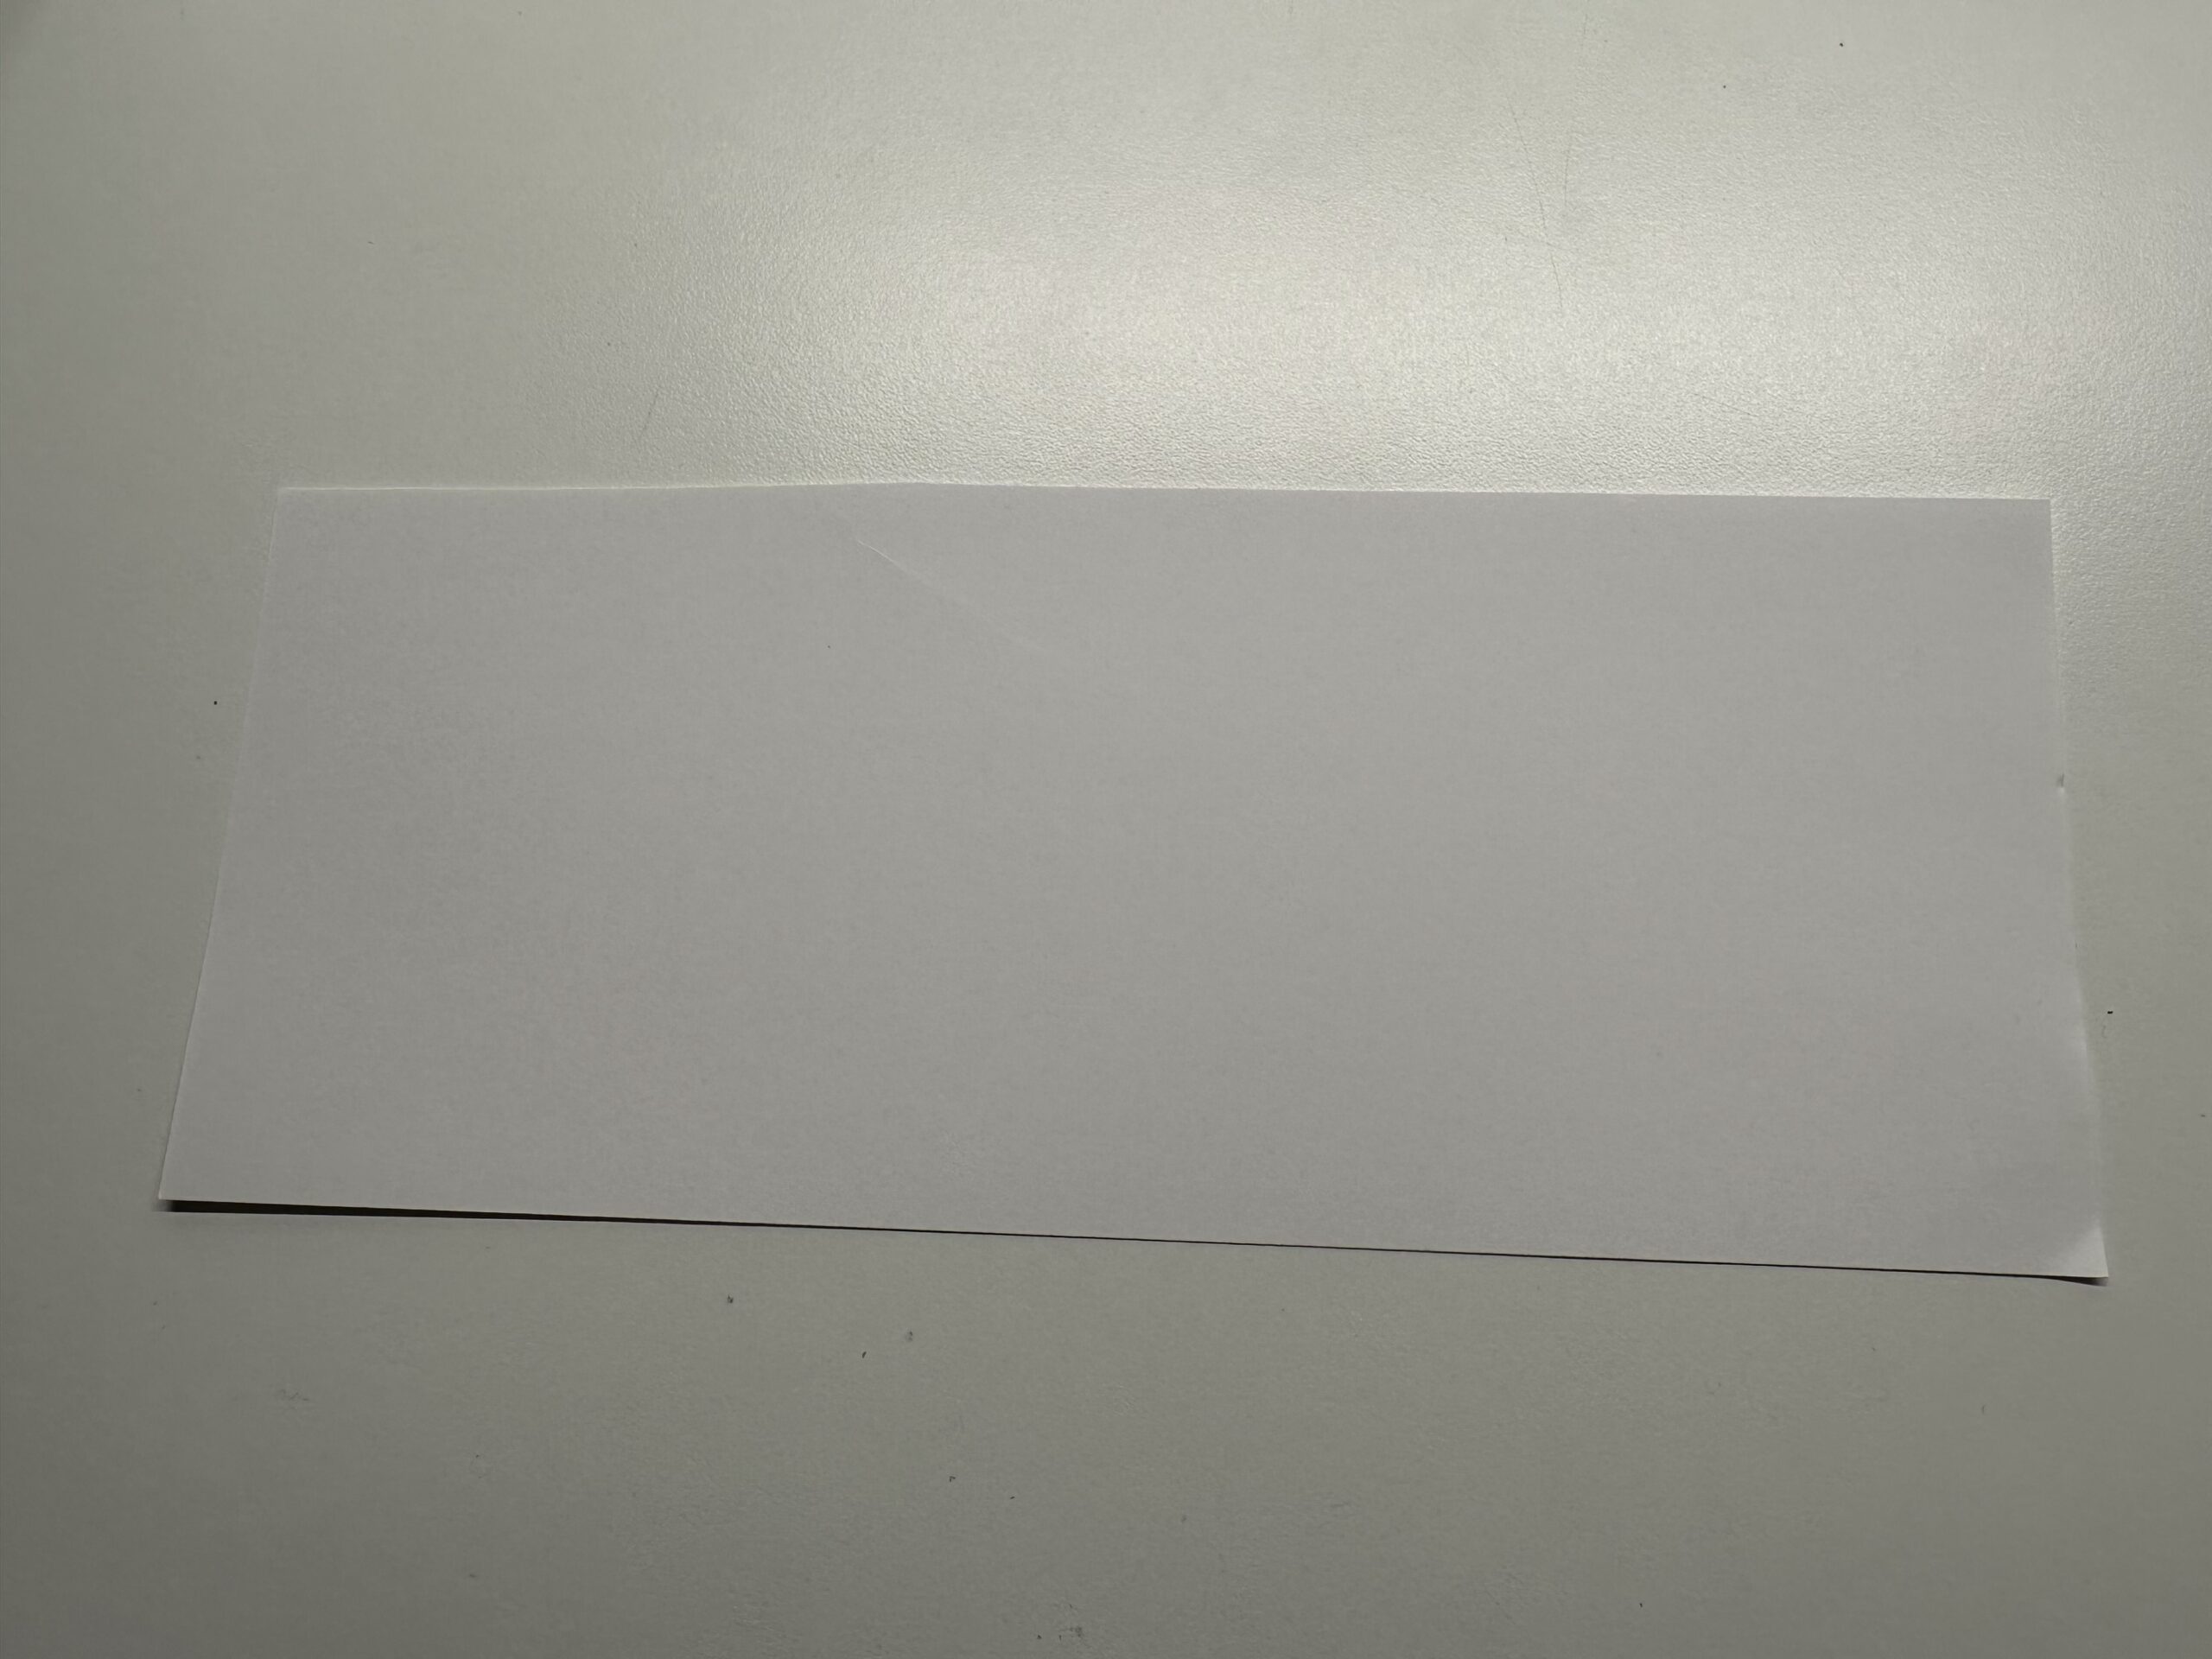
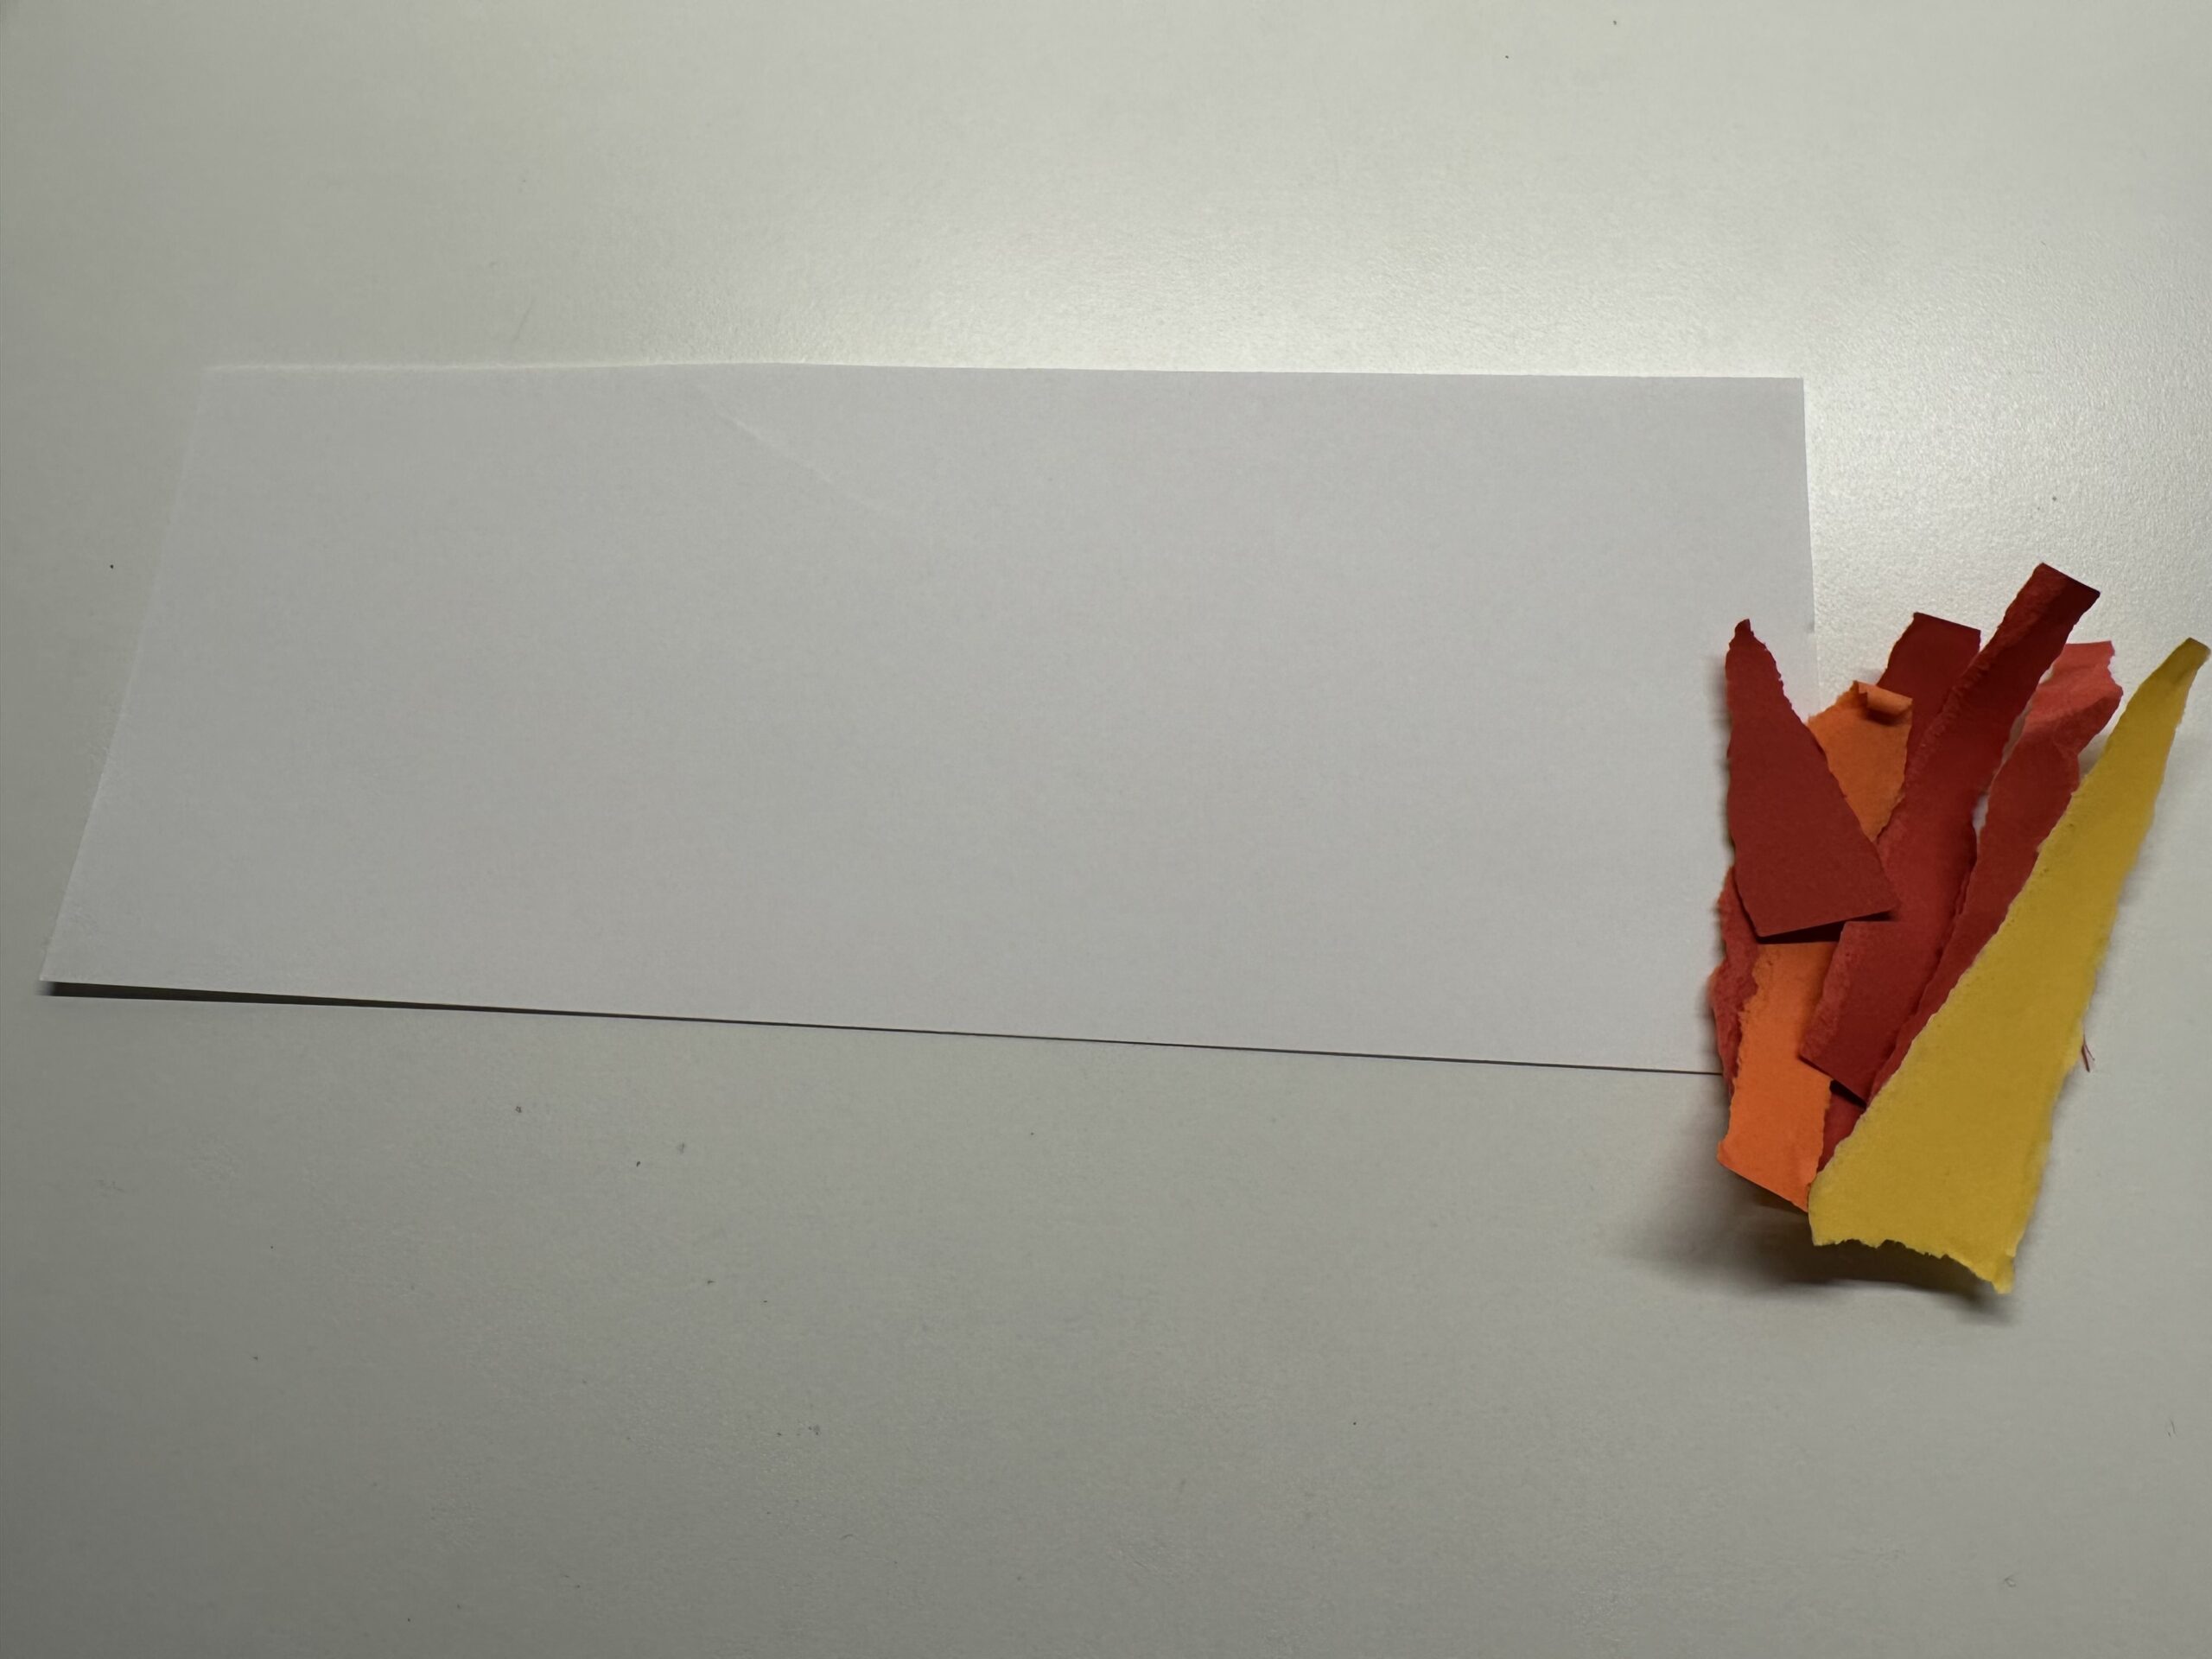
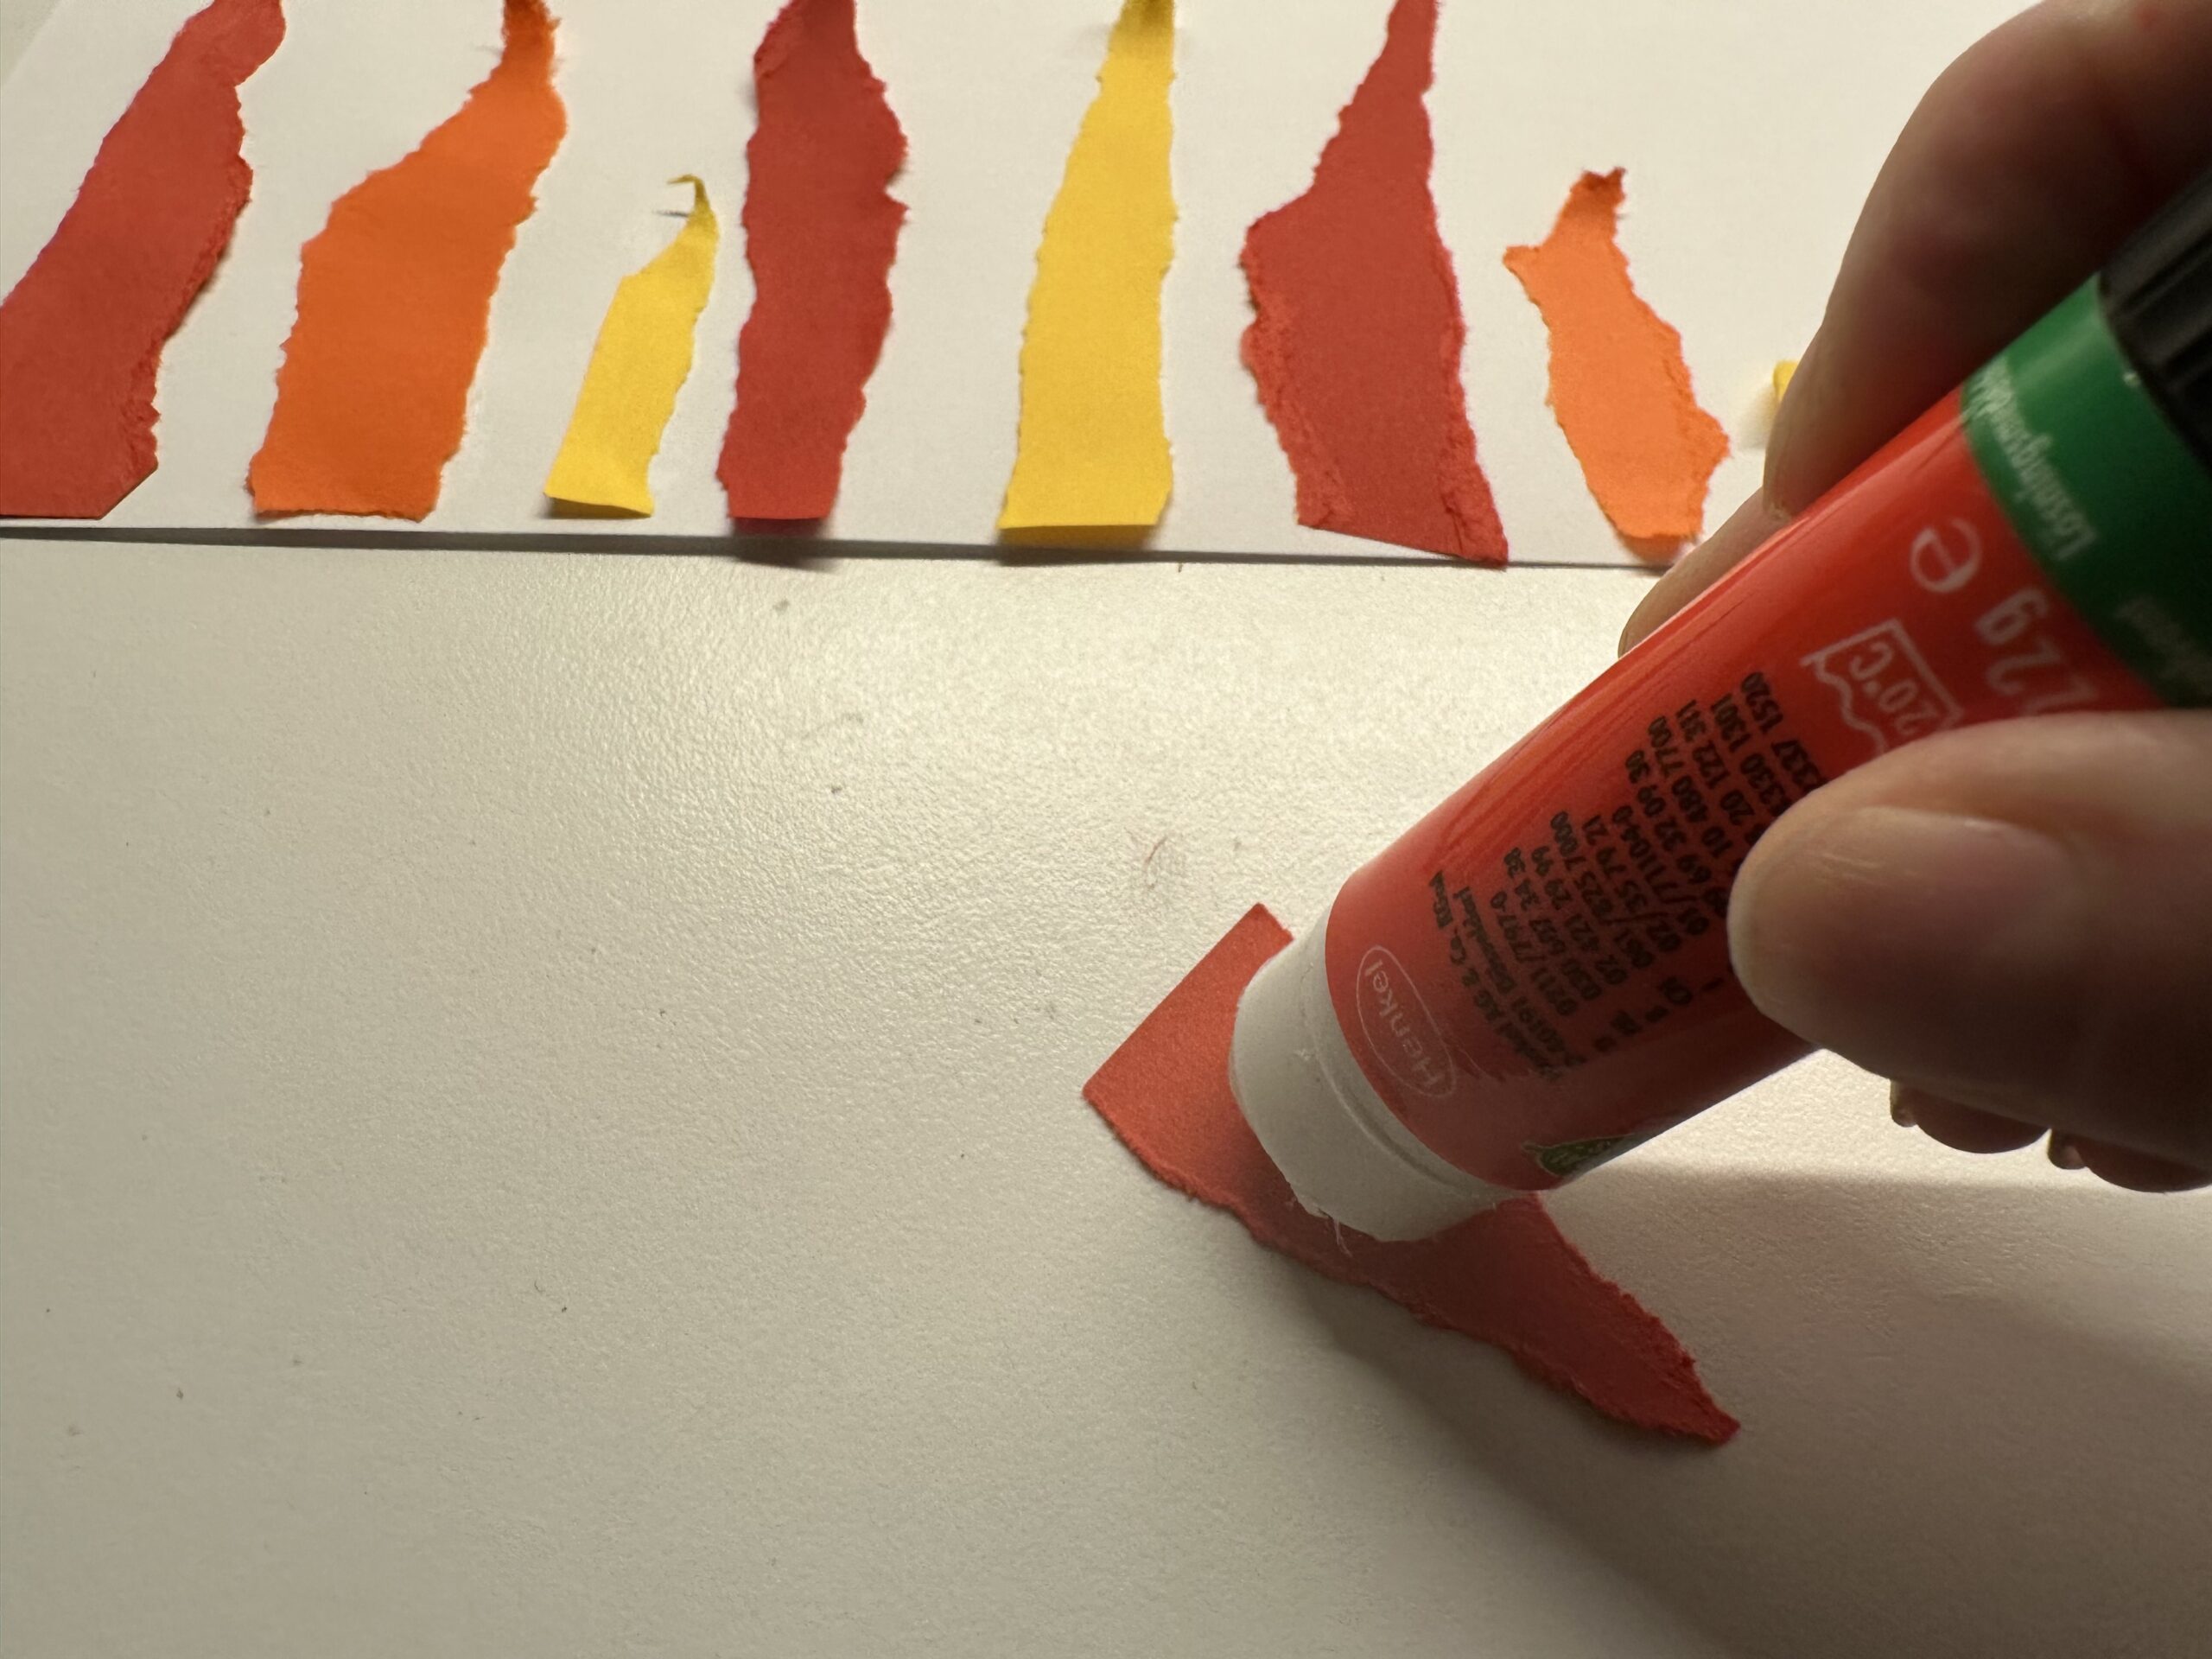
Now take a white sheet of paper and cut off a broad strip. The width of the strip is the height of your table lamp afterwards.
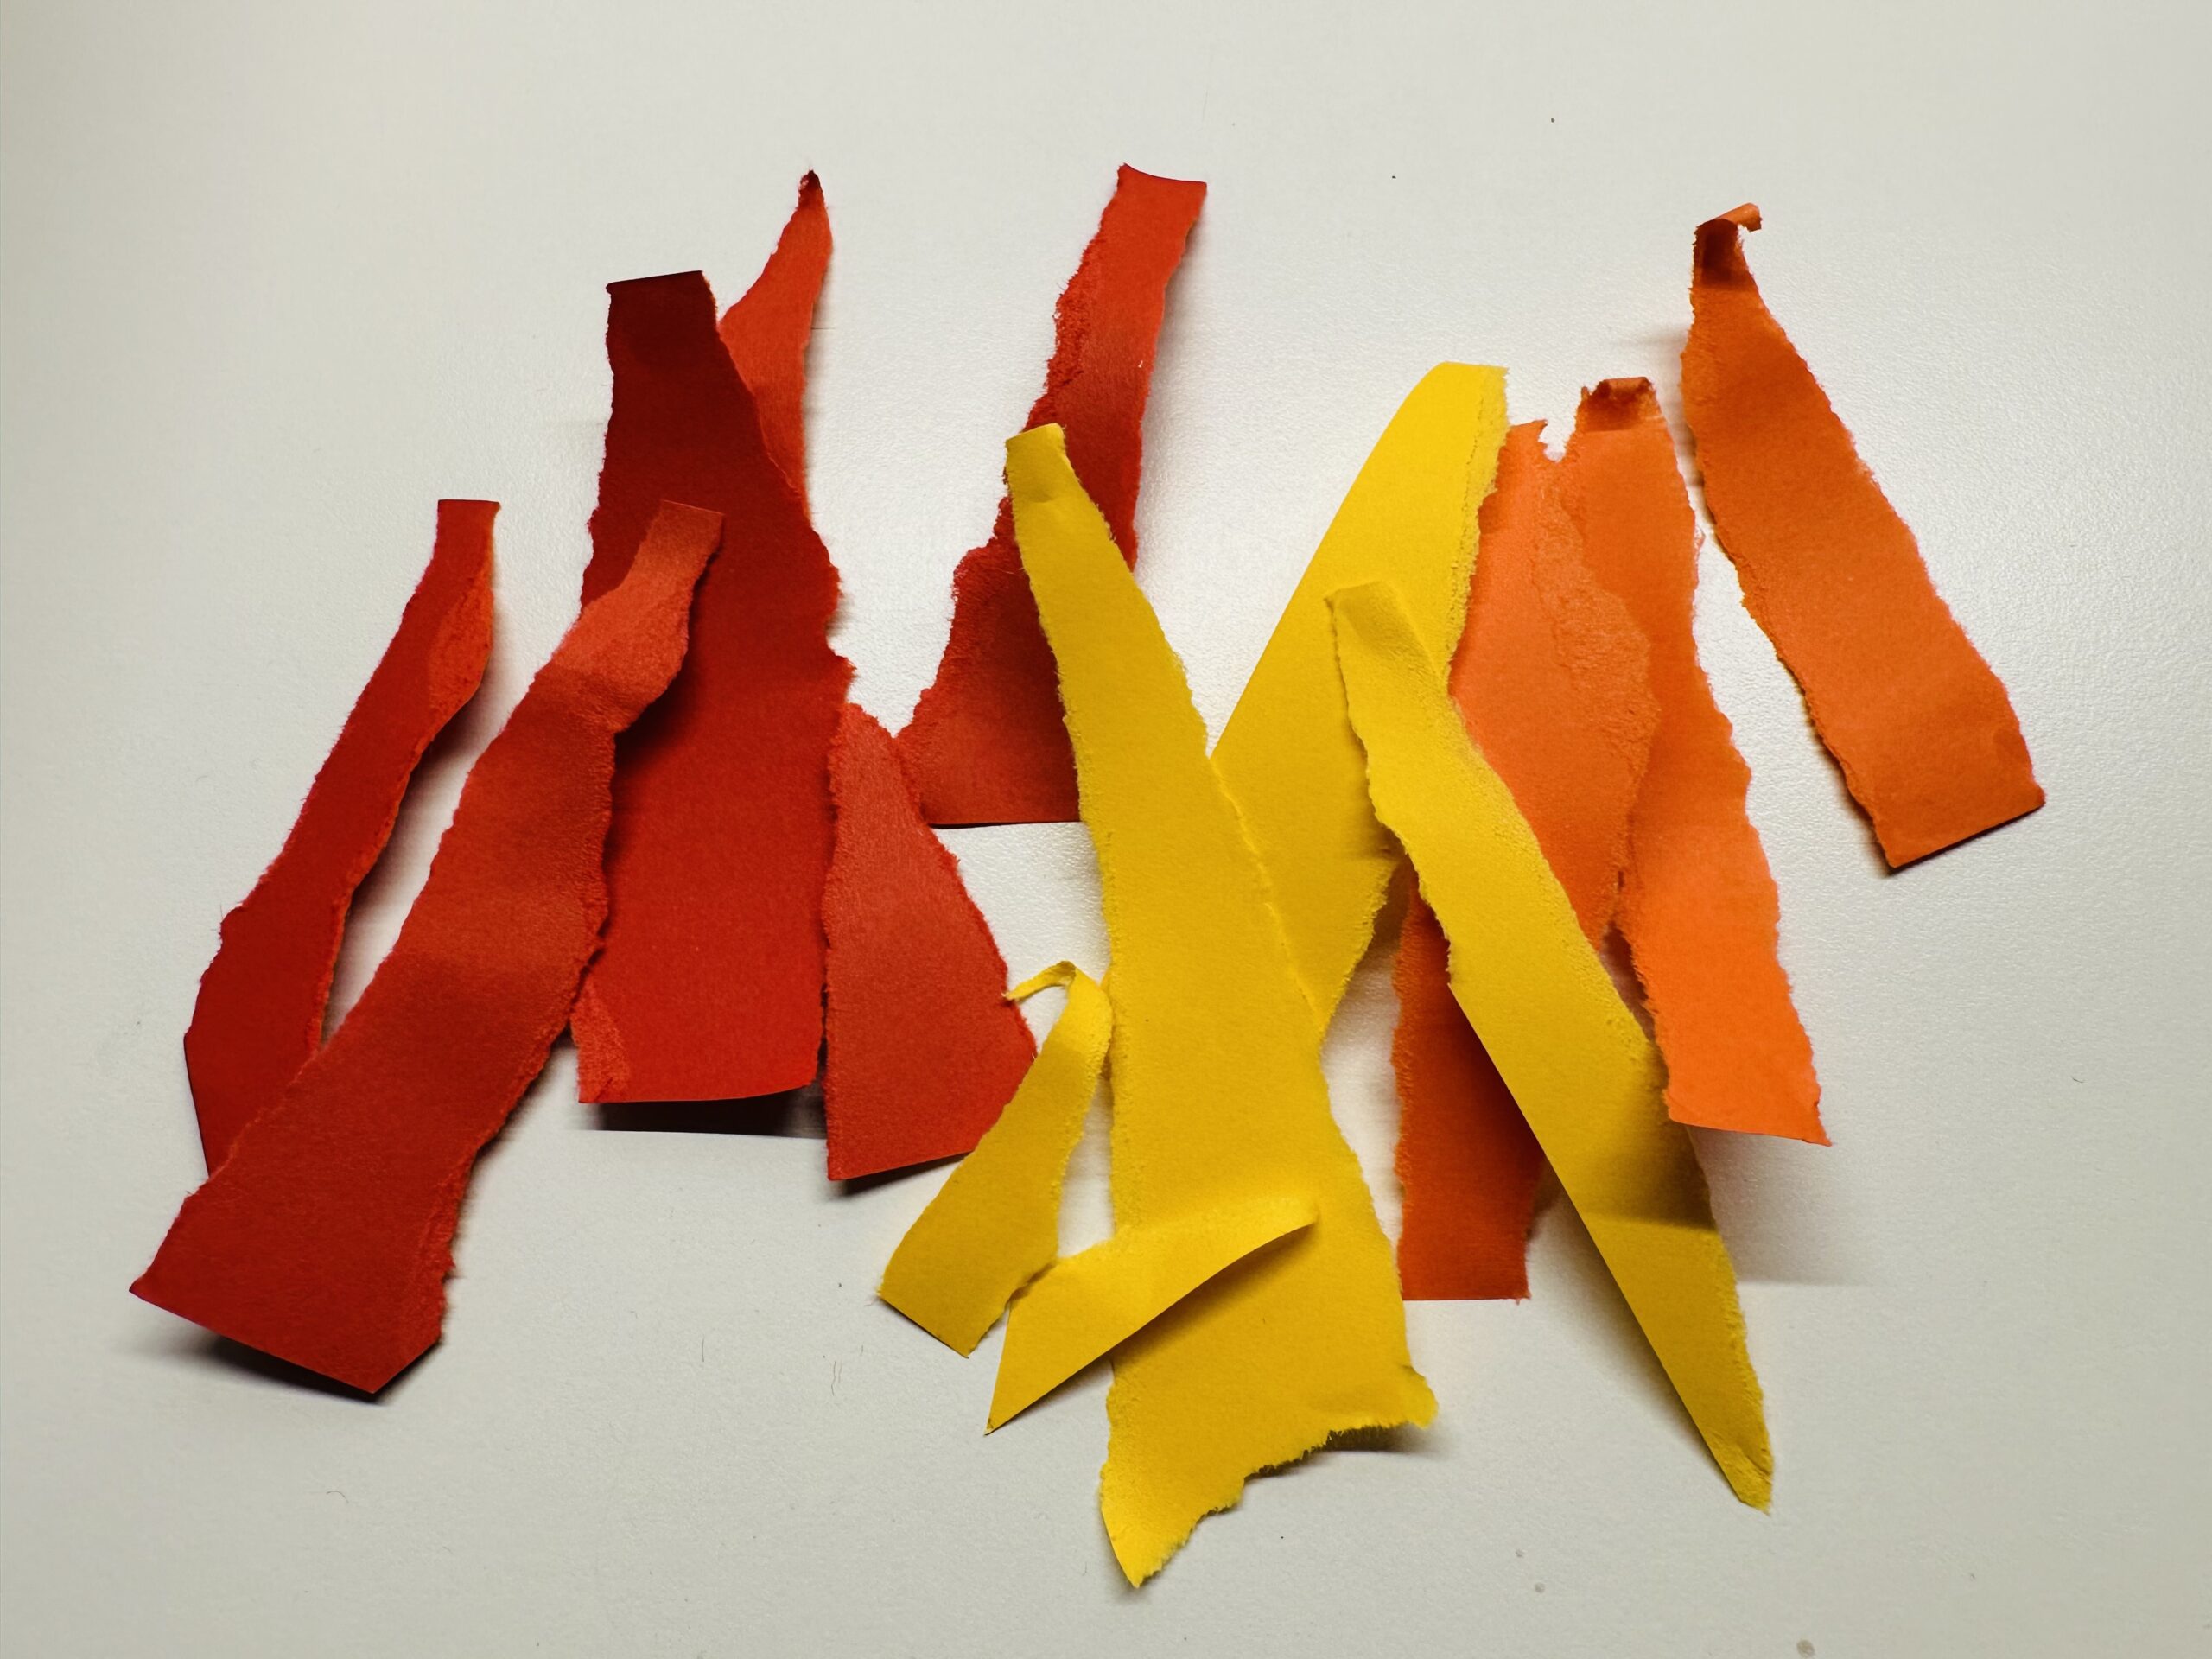
The torn flames are now laid on the stripes.
Interchanges with the colors and sizes. This creates a tingling flame image.
Stick all the flames on the paper.
Now the table lamp is almost ready.

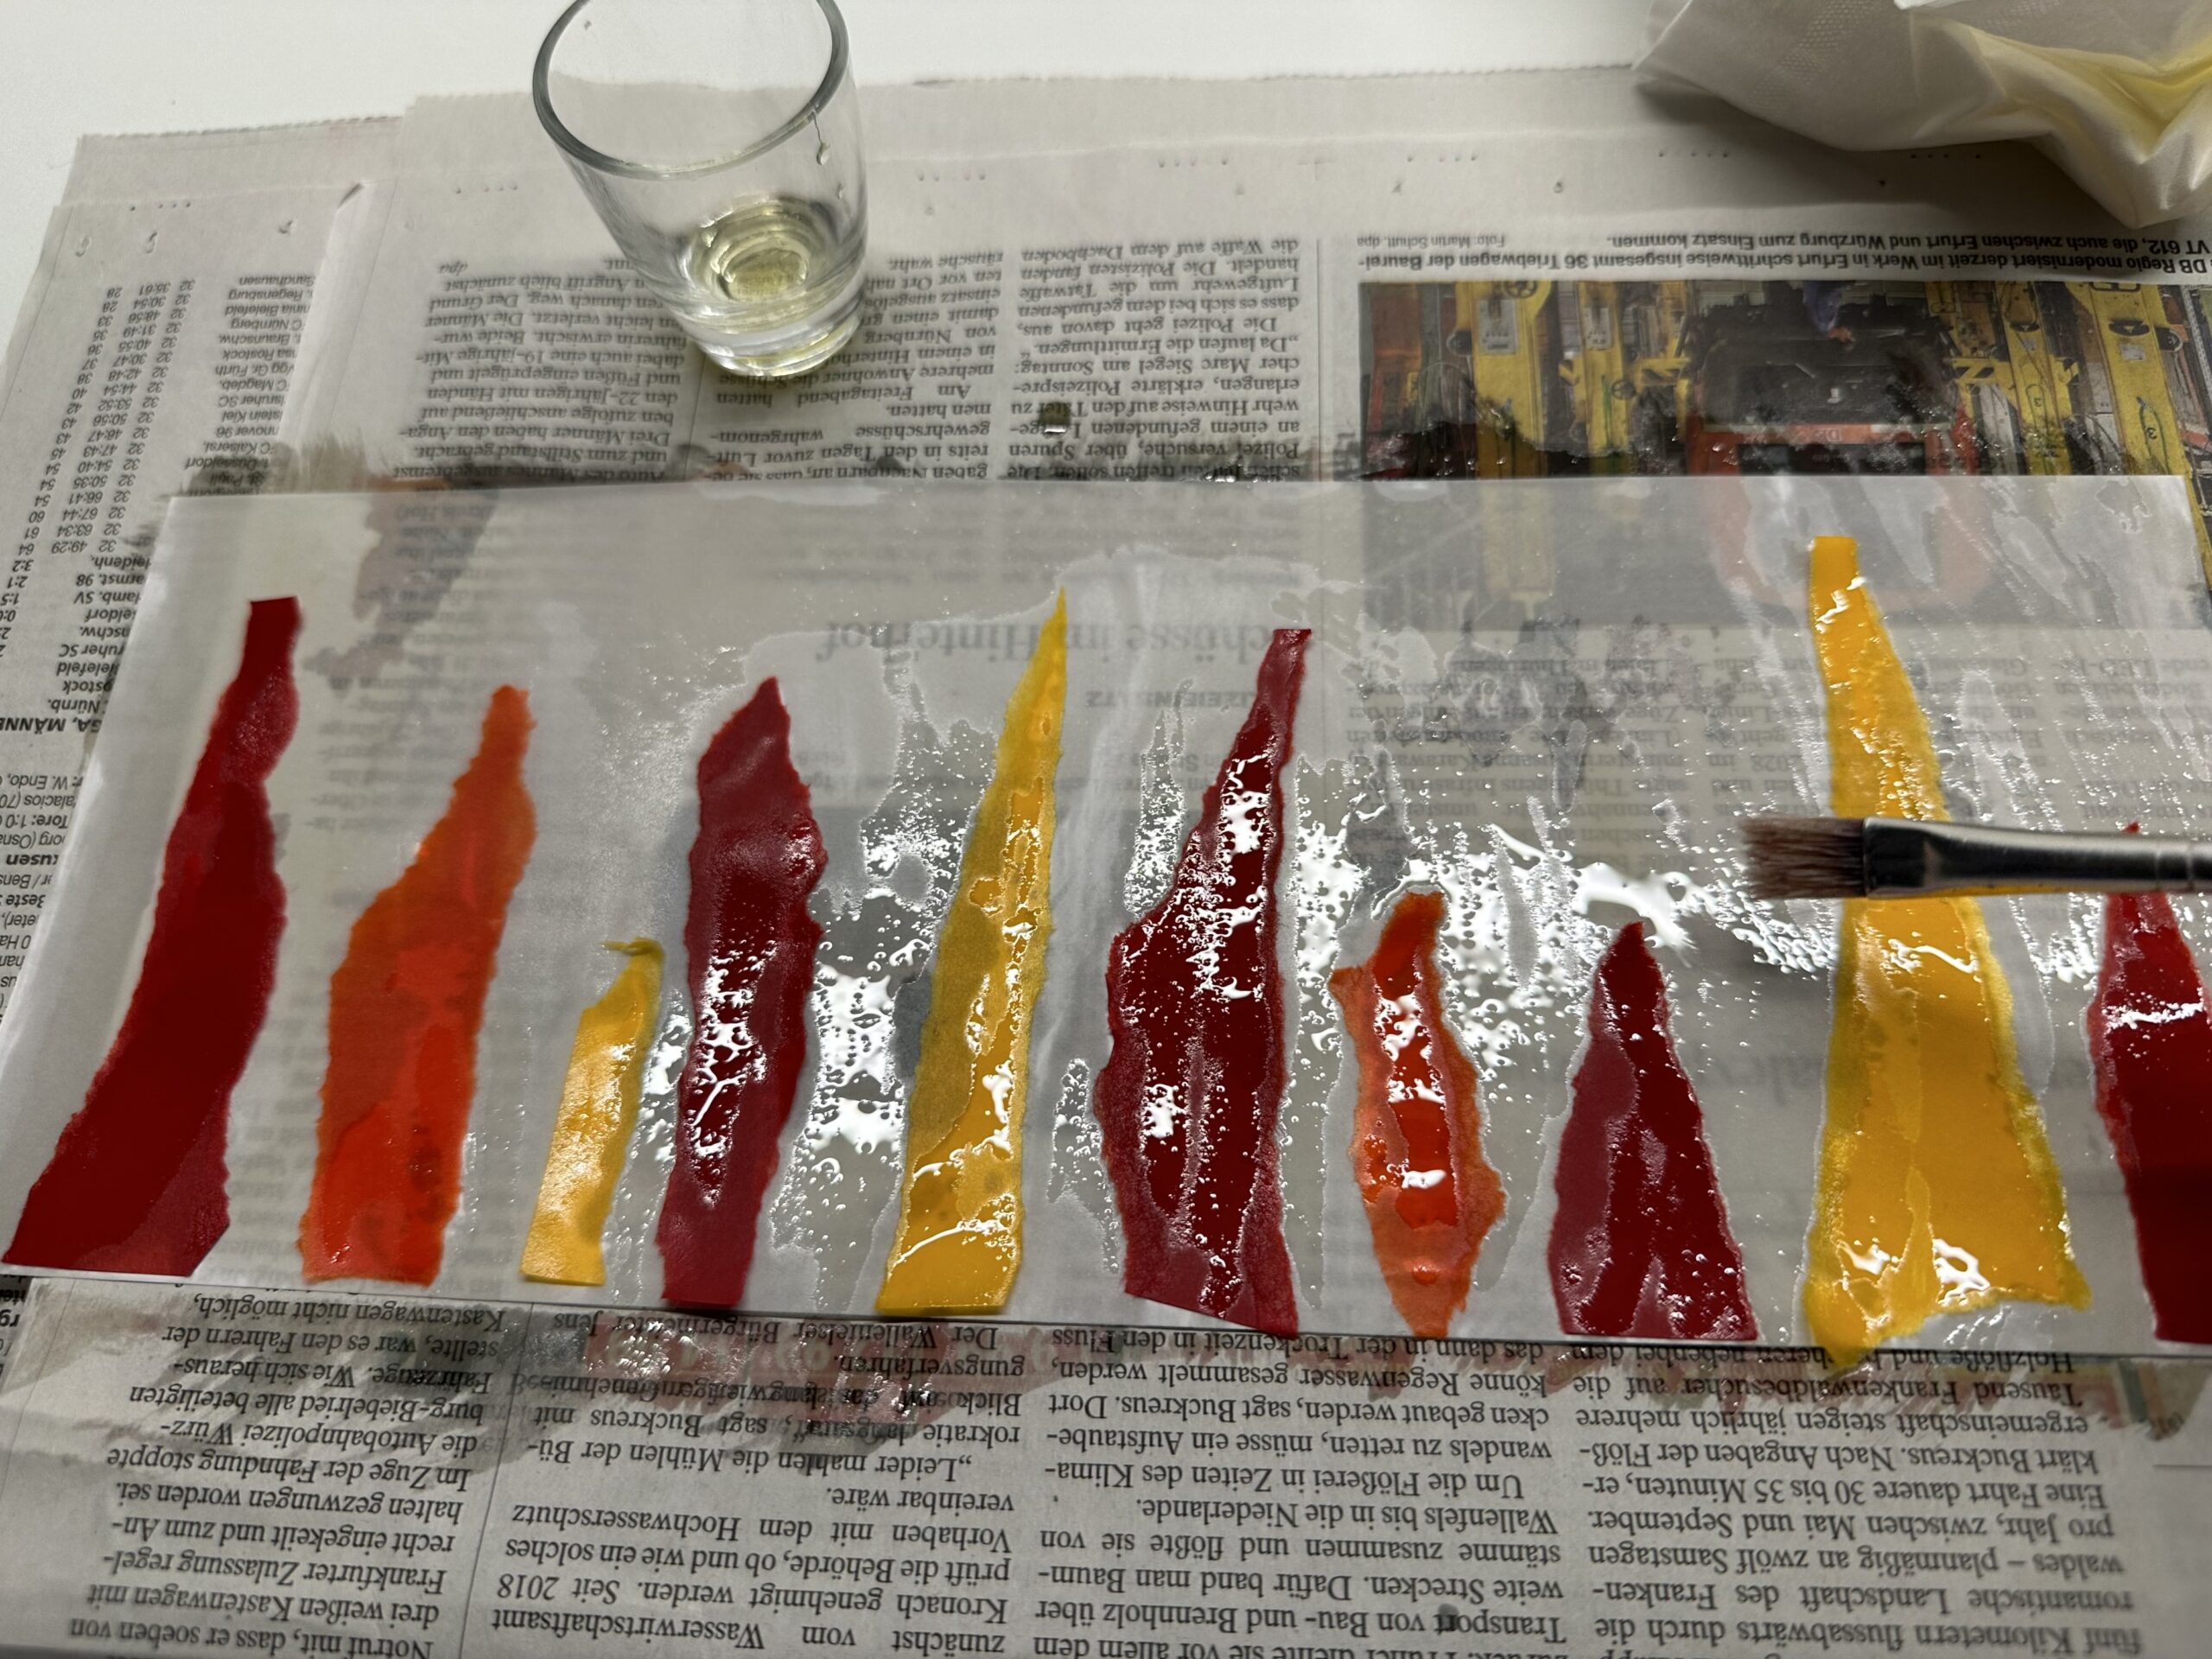
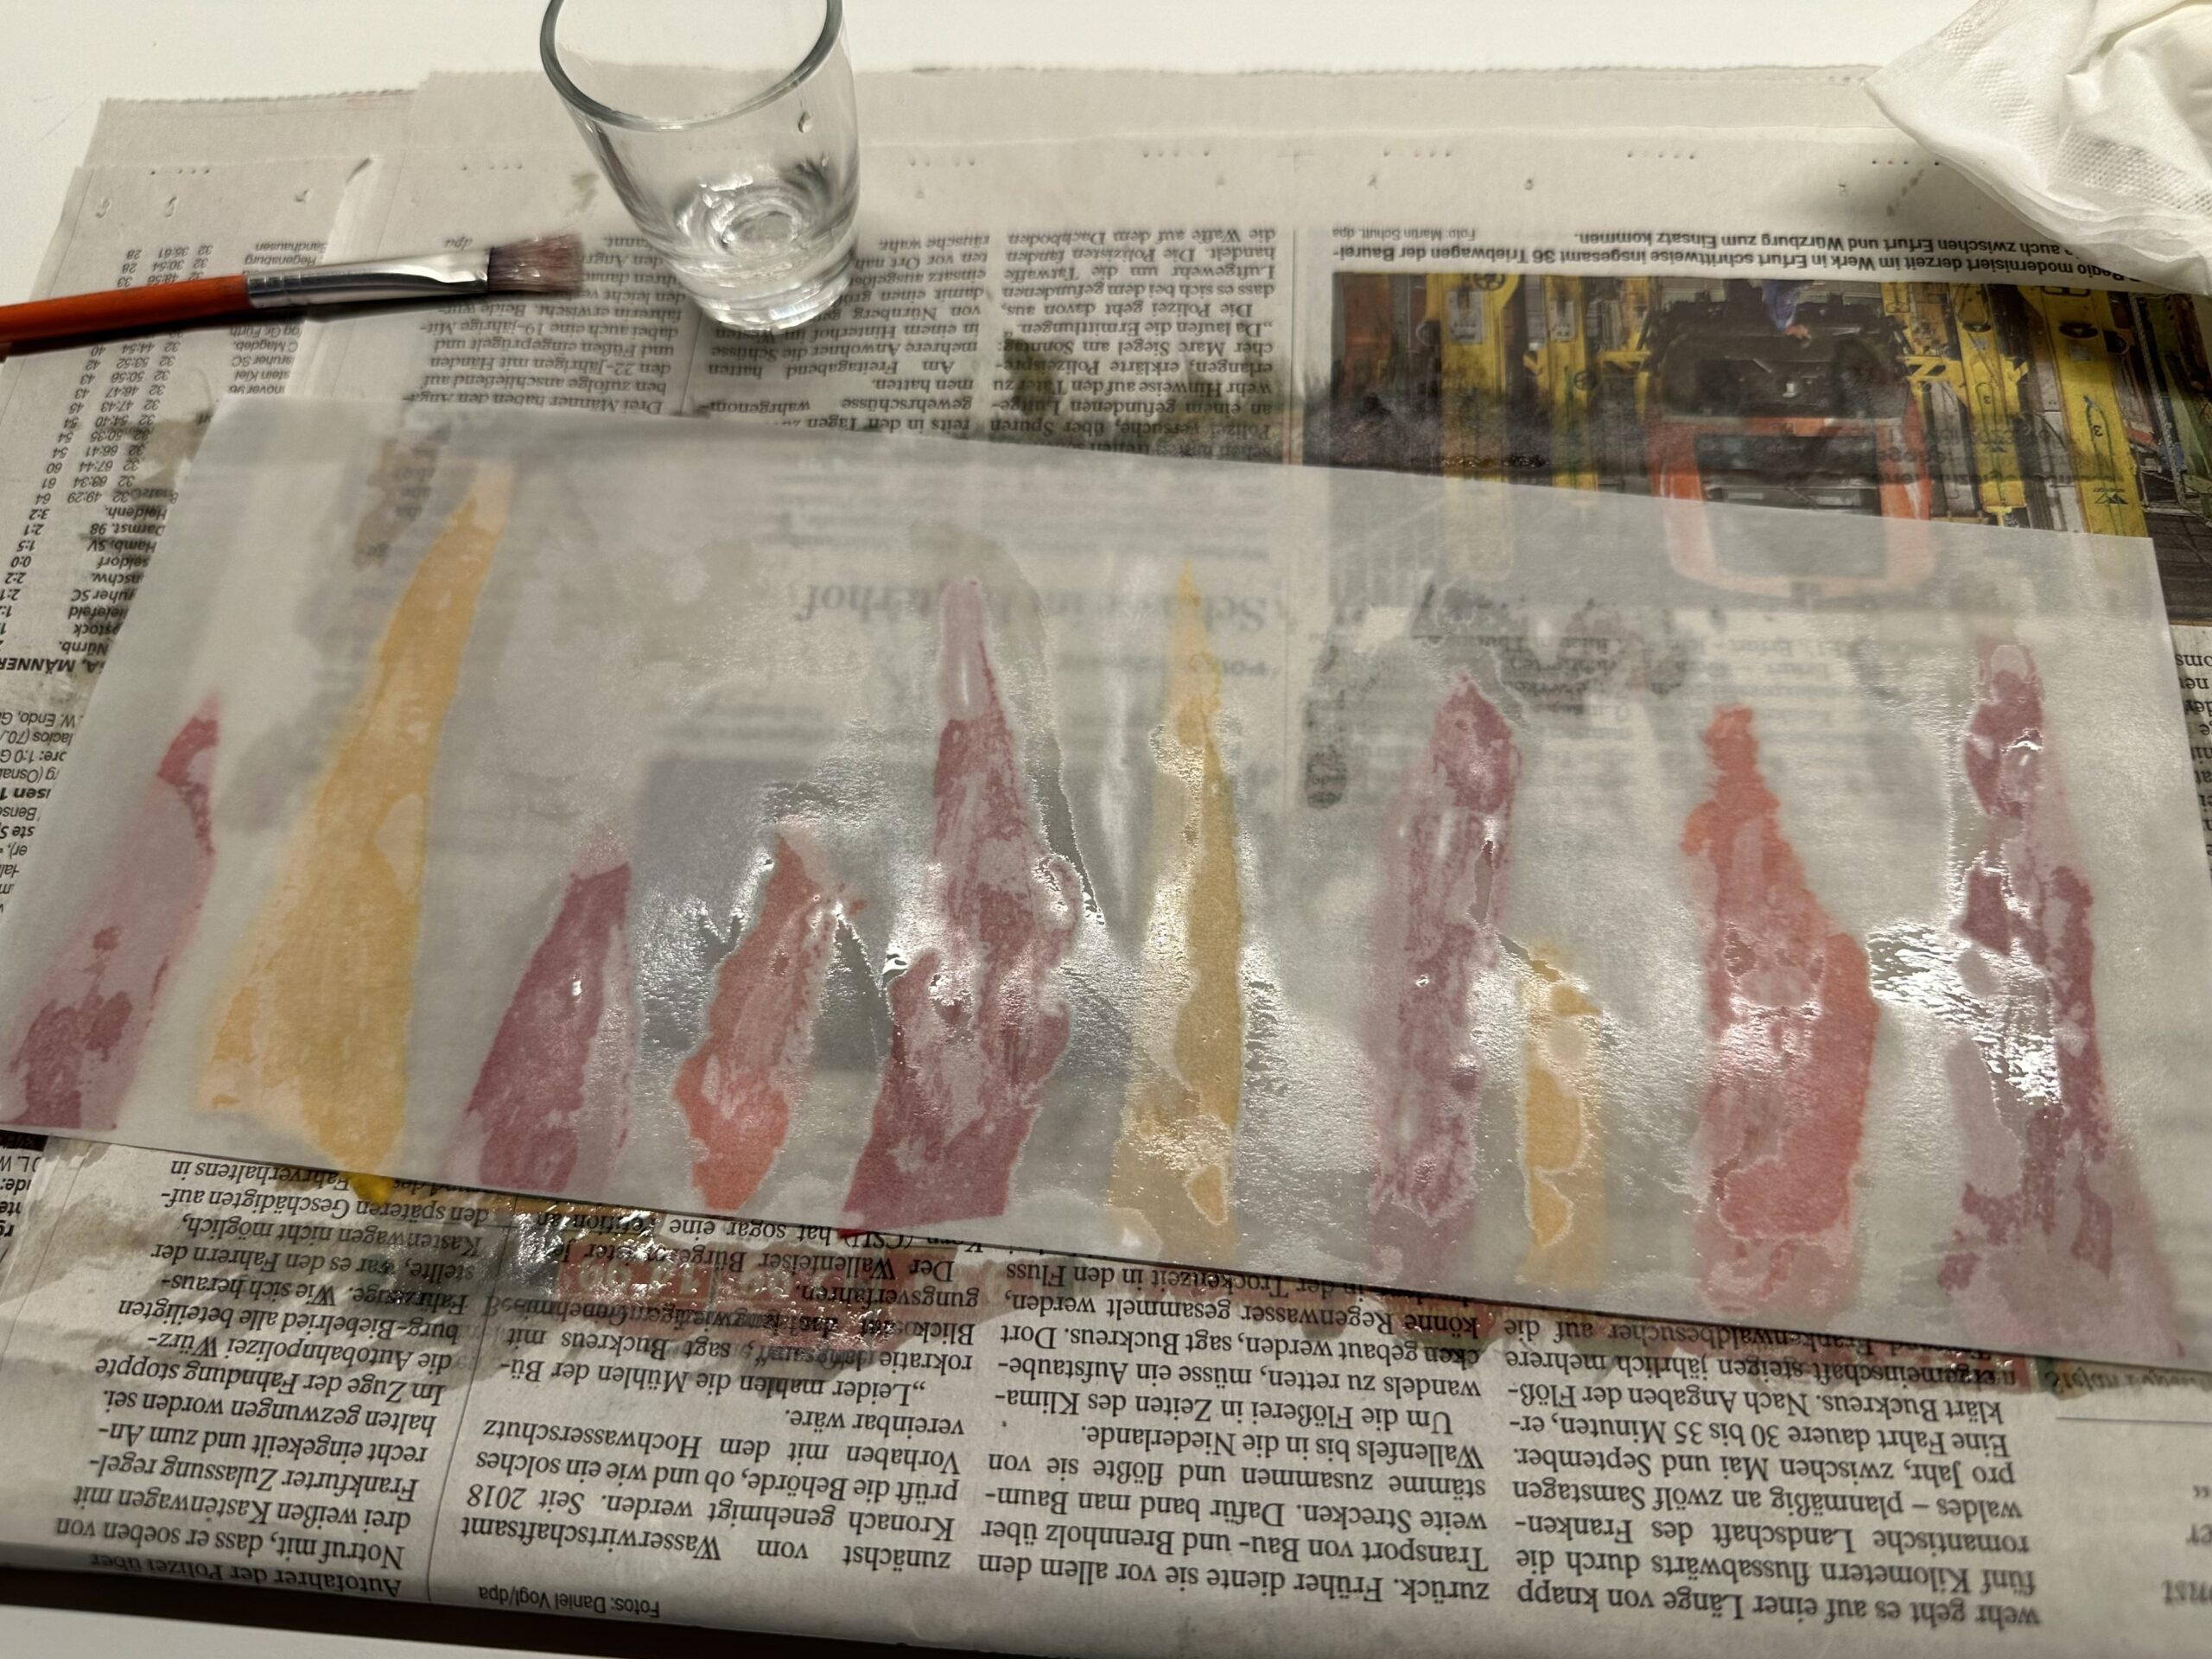
Place the flame image on a double-layed newspaper. Prepare a glass with salad oil and a brush.
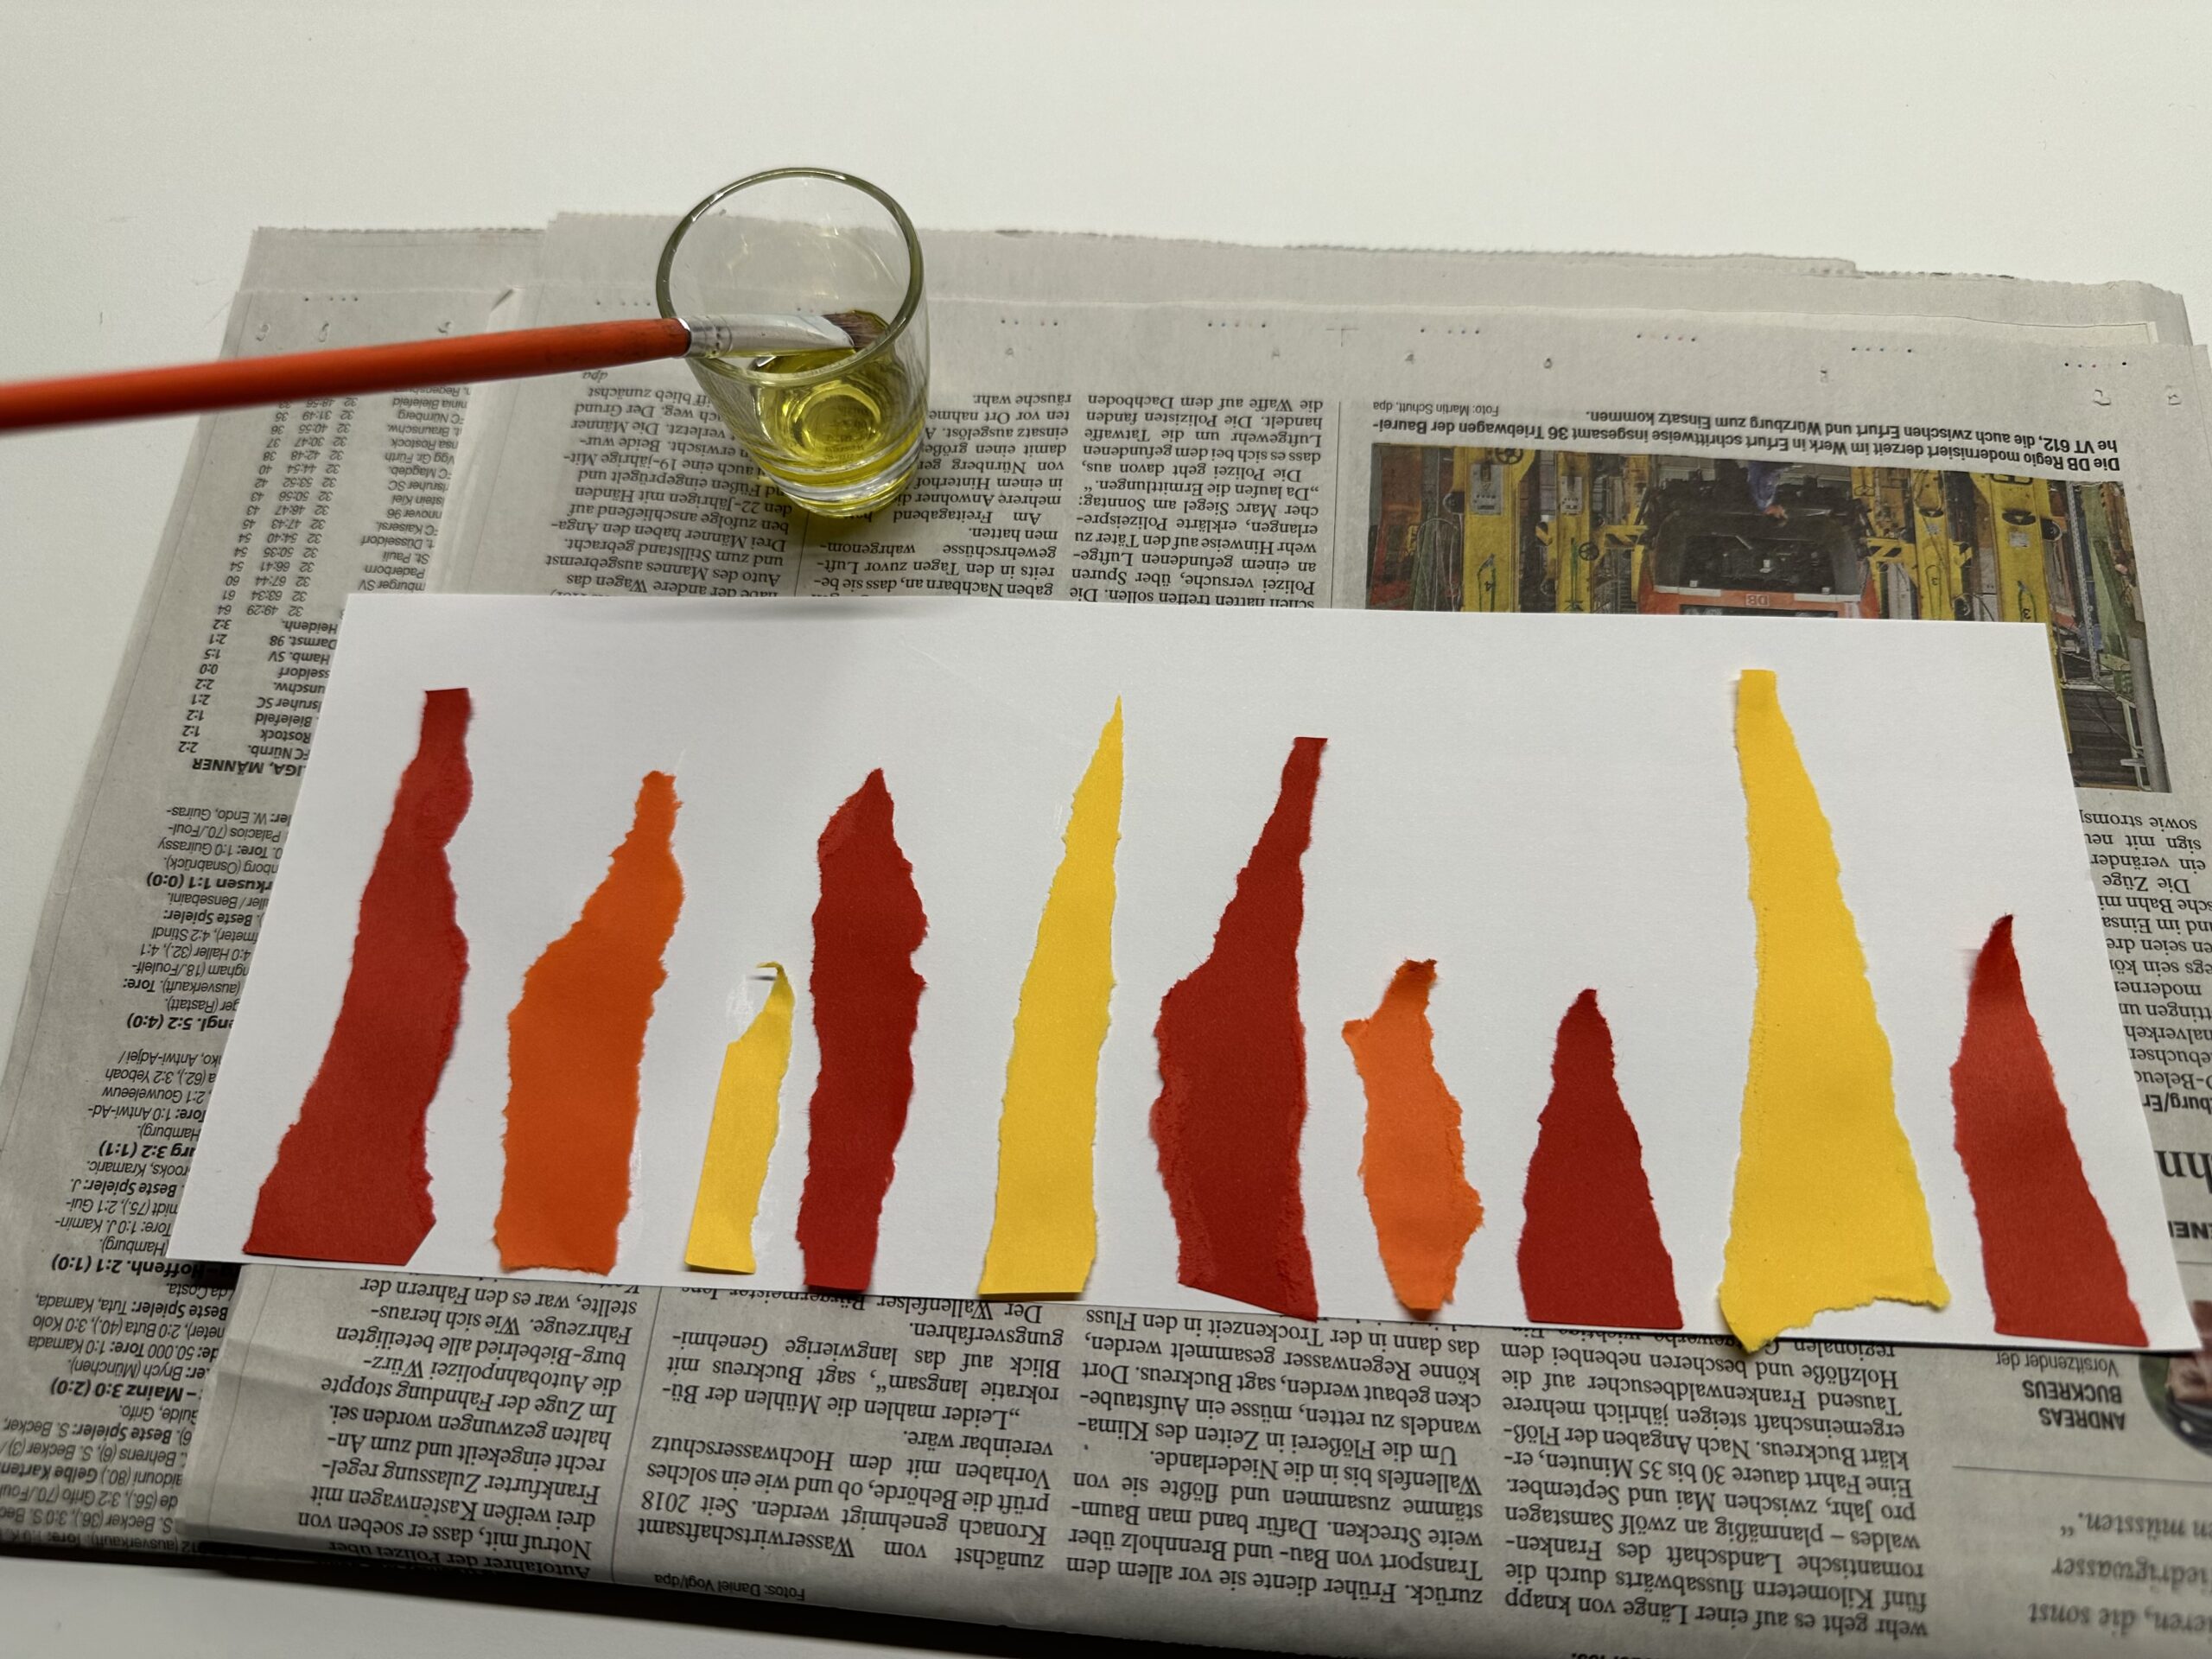
Covers the complete flame pattern with oil.
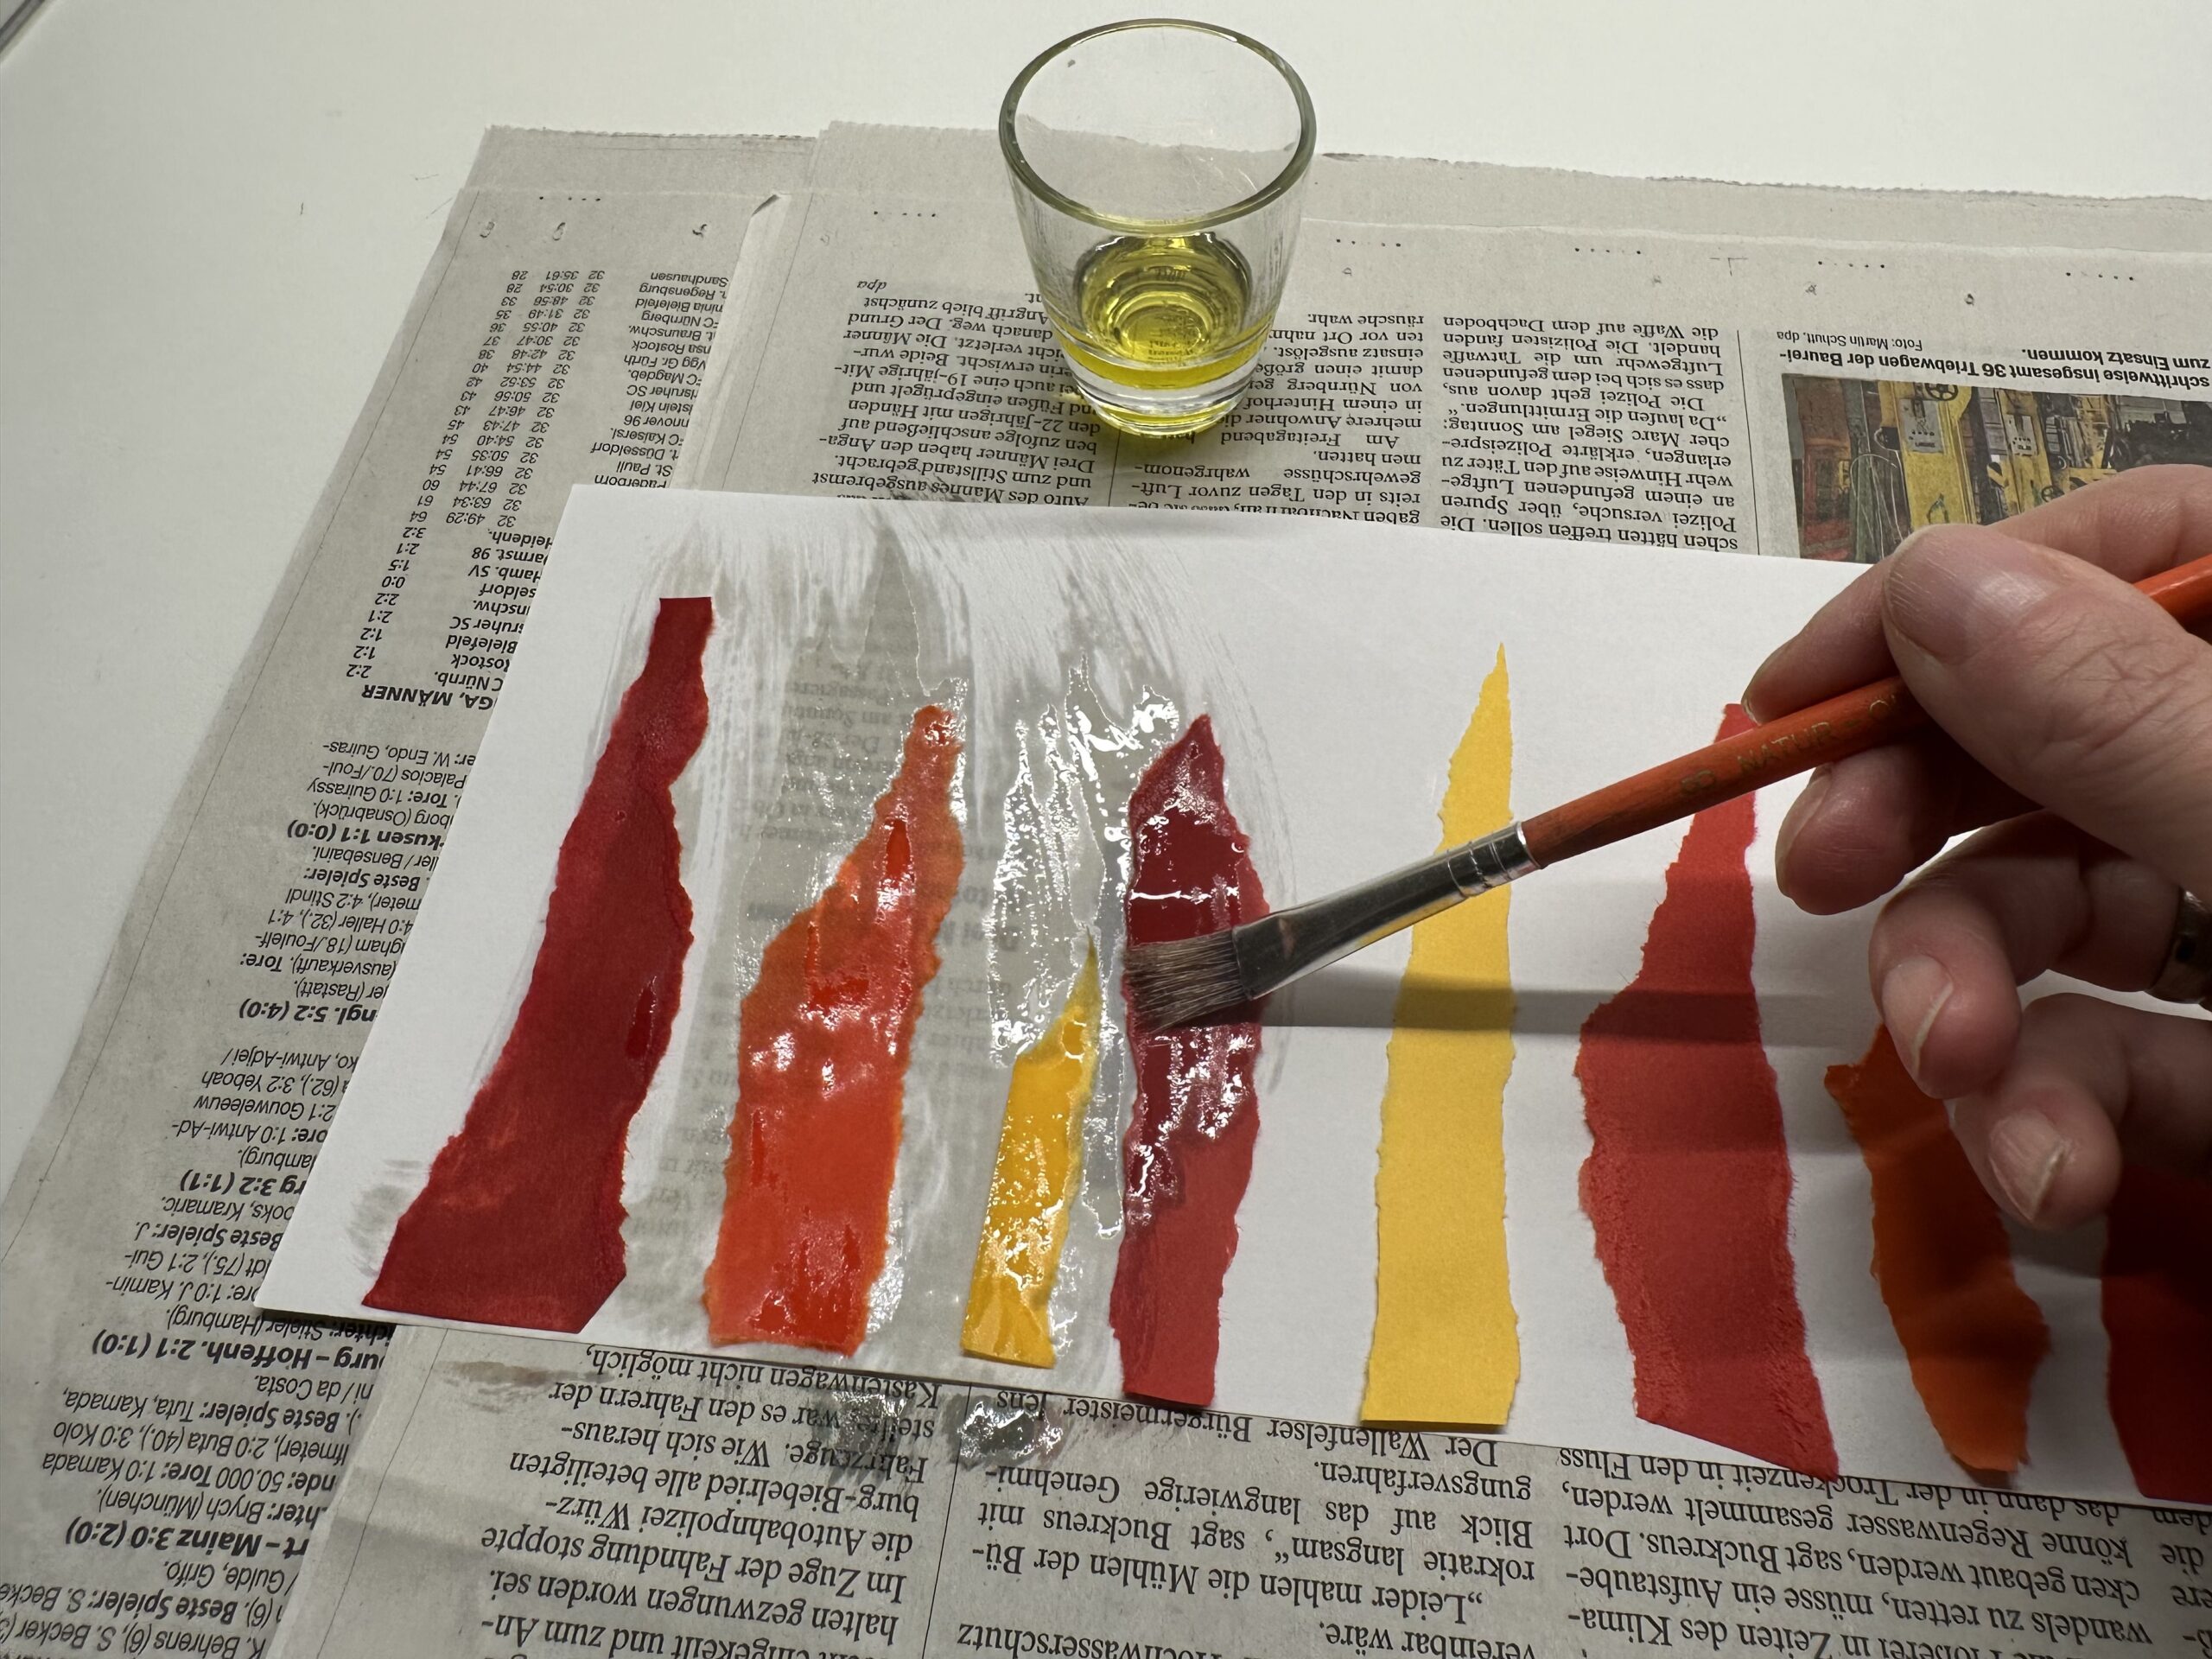
The paper becomes slightly transparent, if this is not the case in some places, you can brush some oil over it here again.
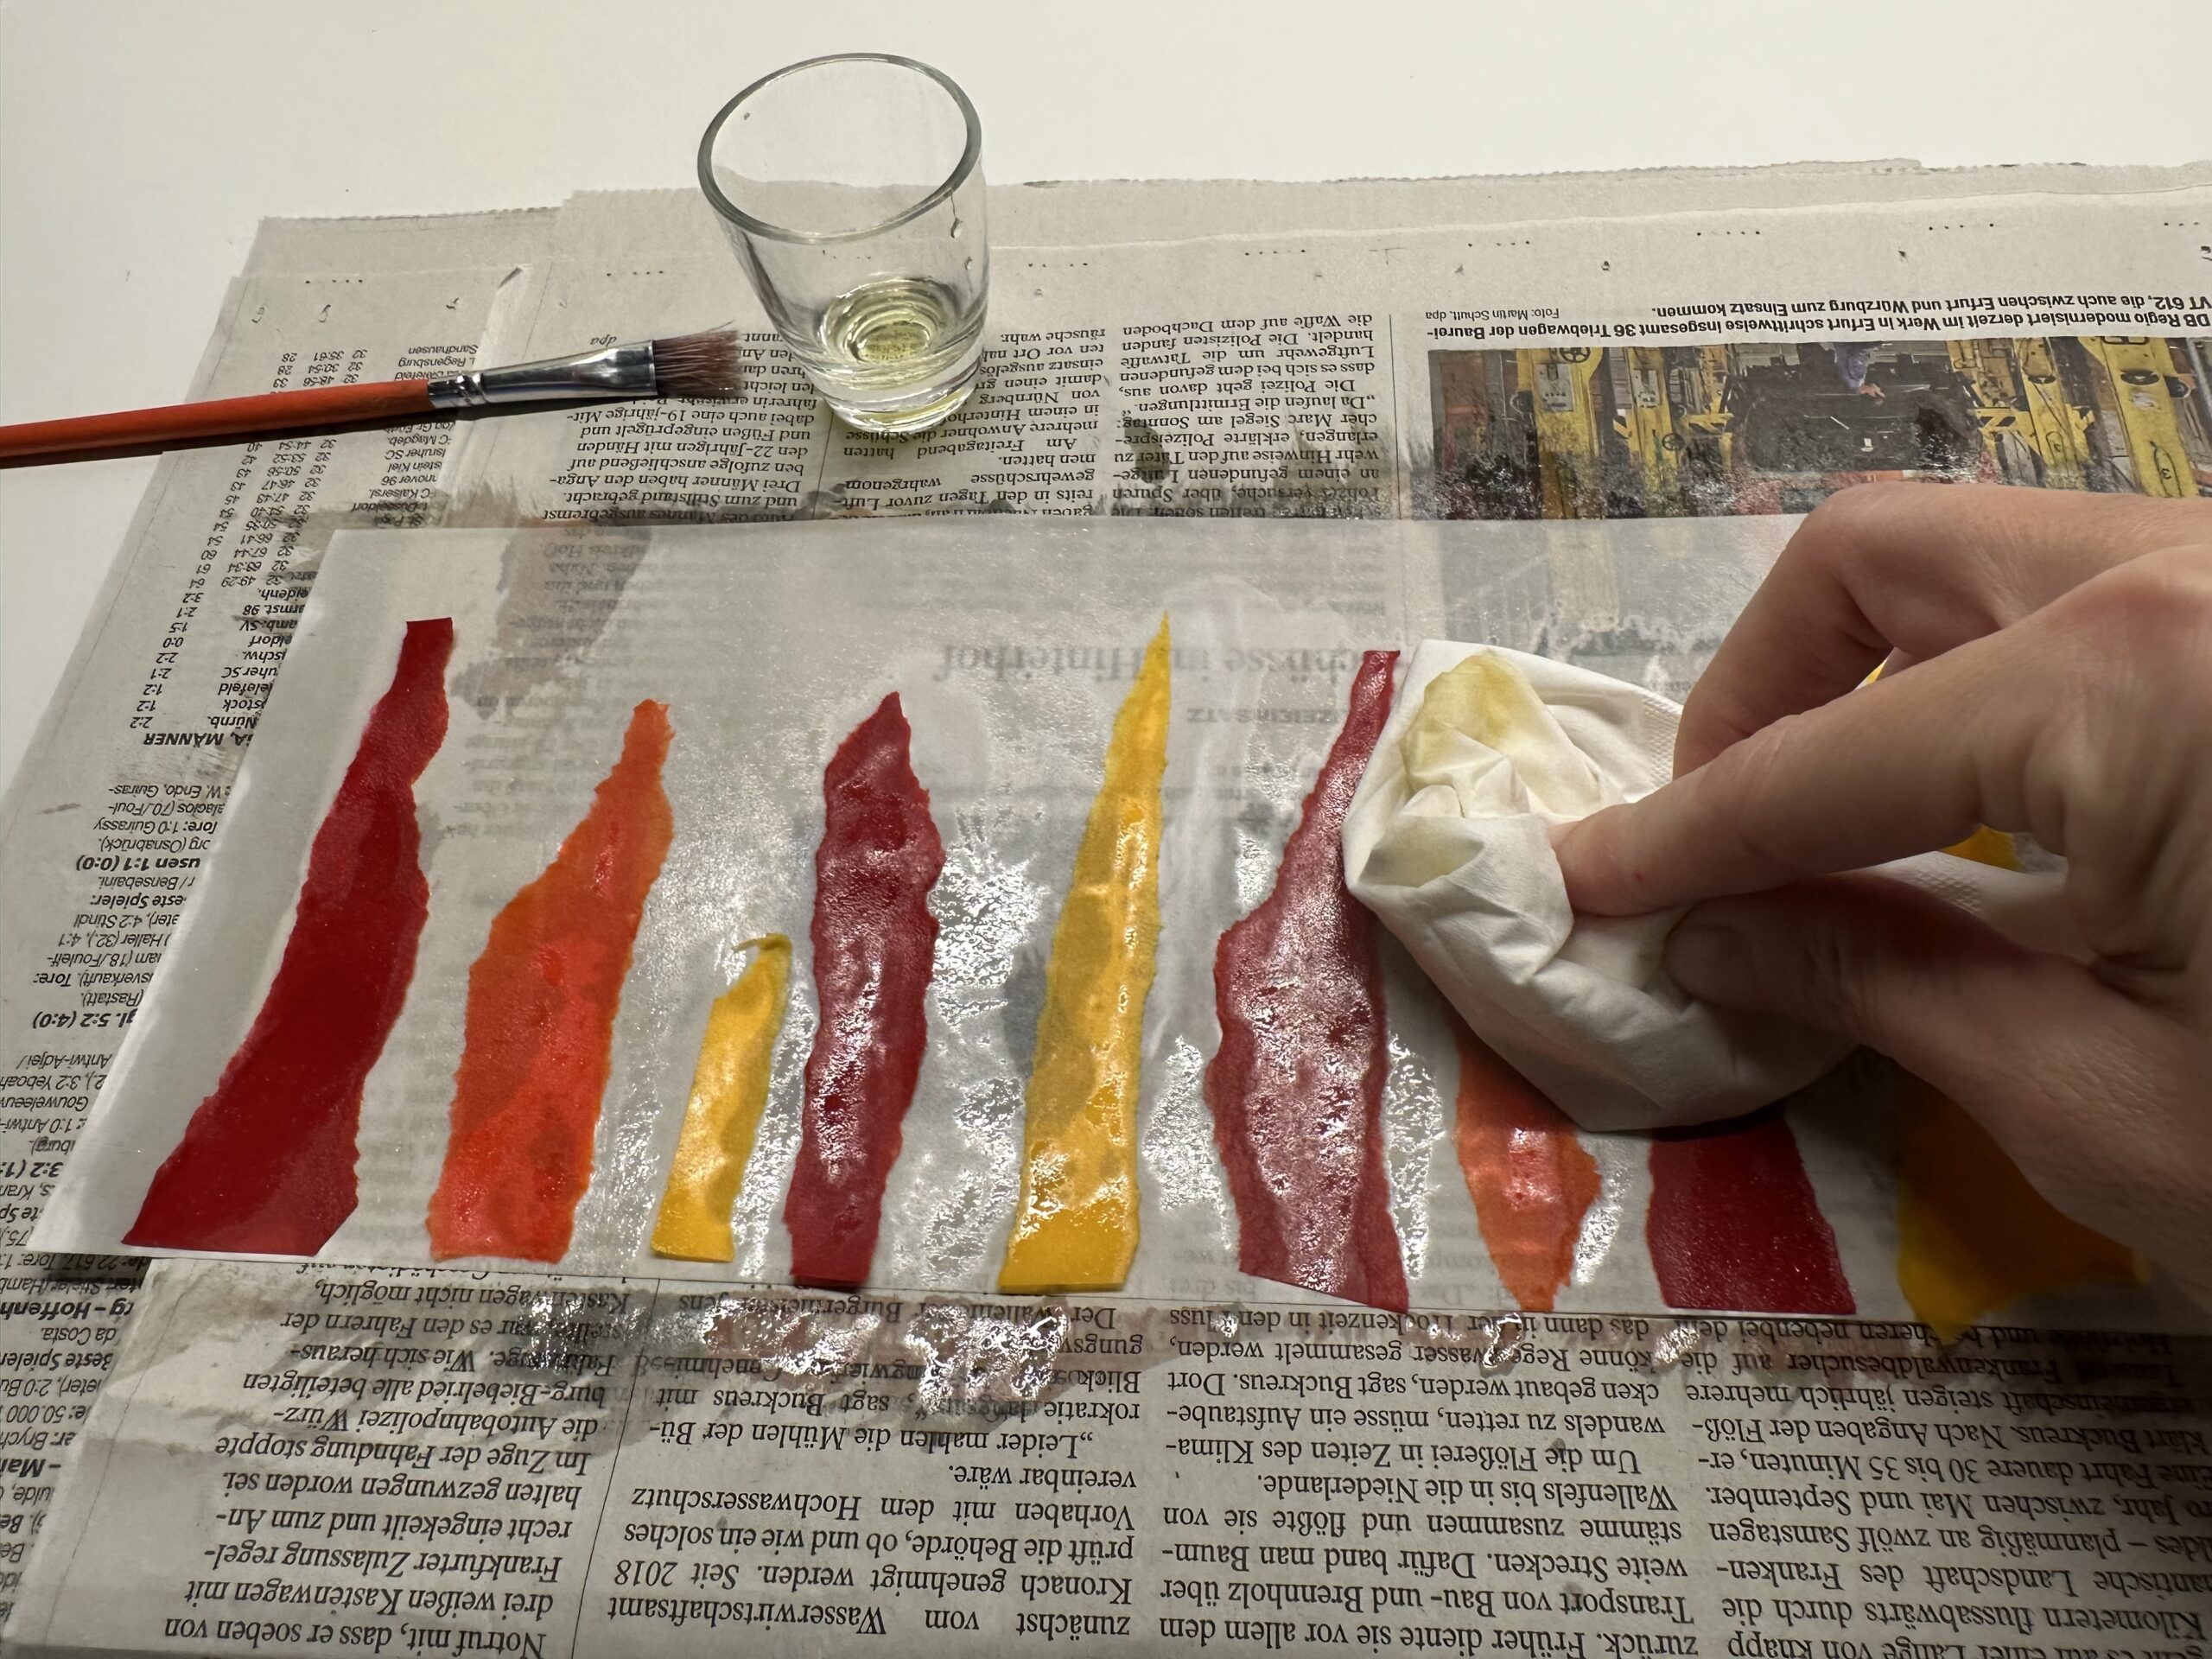
Dump the excess oil with a kitchen crepe or a handkerchief.
Turn the flame image so that the back is on top. Here you can still see white spots. At these places the paper has not yet come into contact with oil.
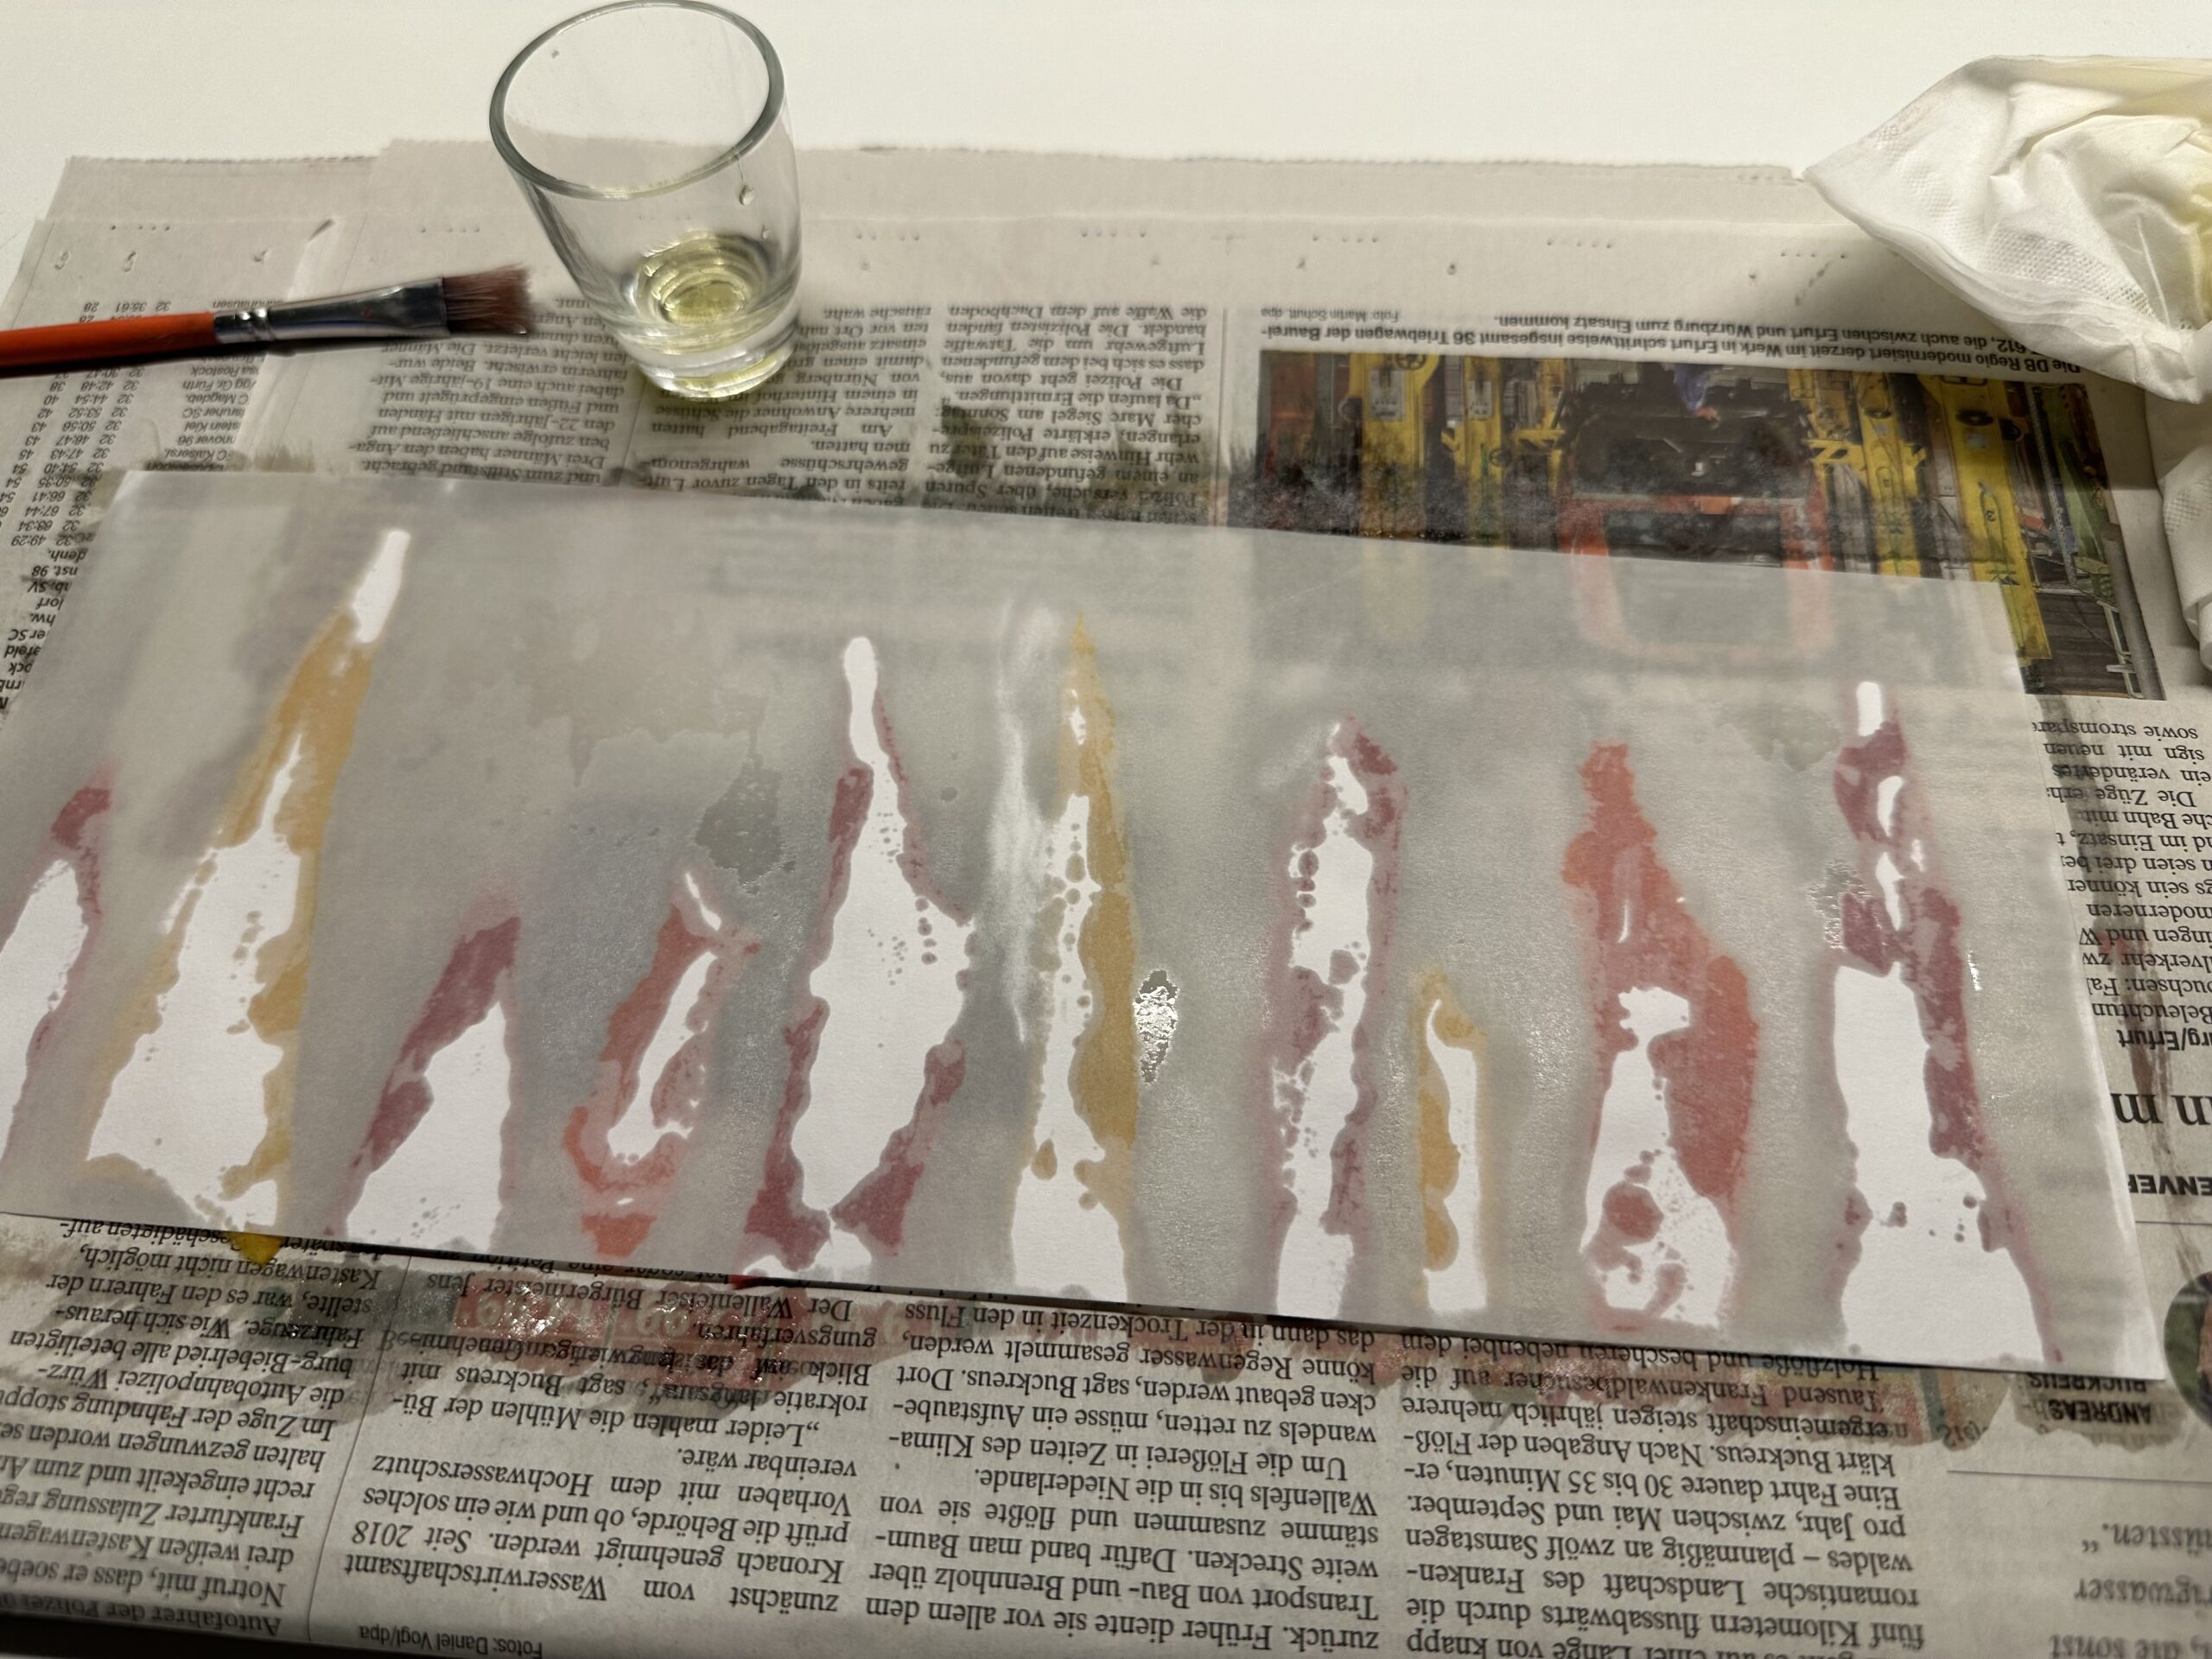
Pinches these places from the back again with oil. The paper is too thick here to be sufficiently soaked with oil from the front.
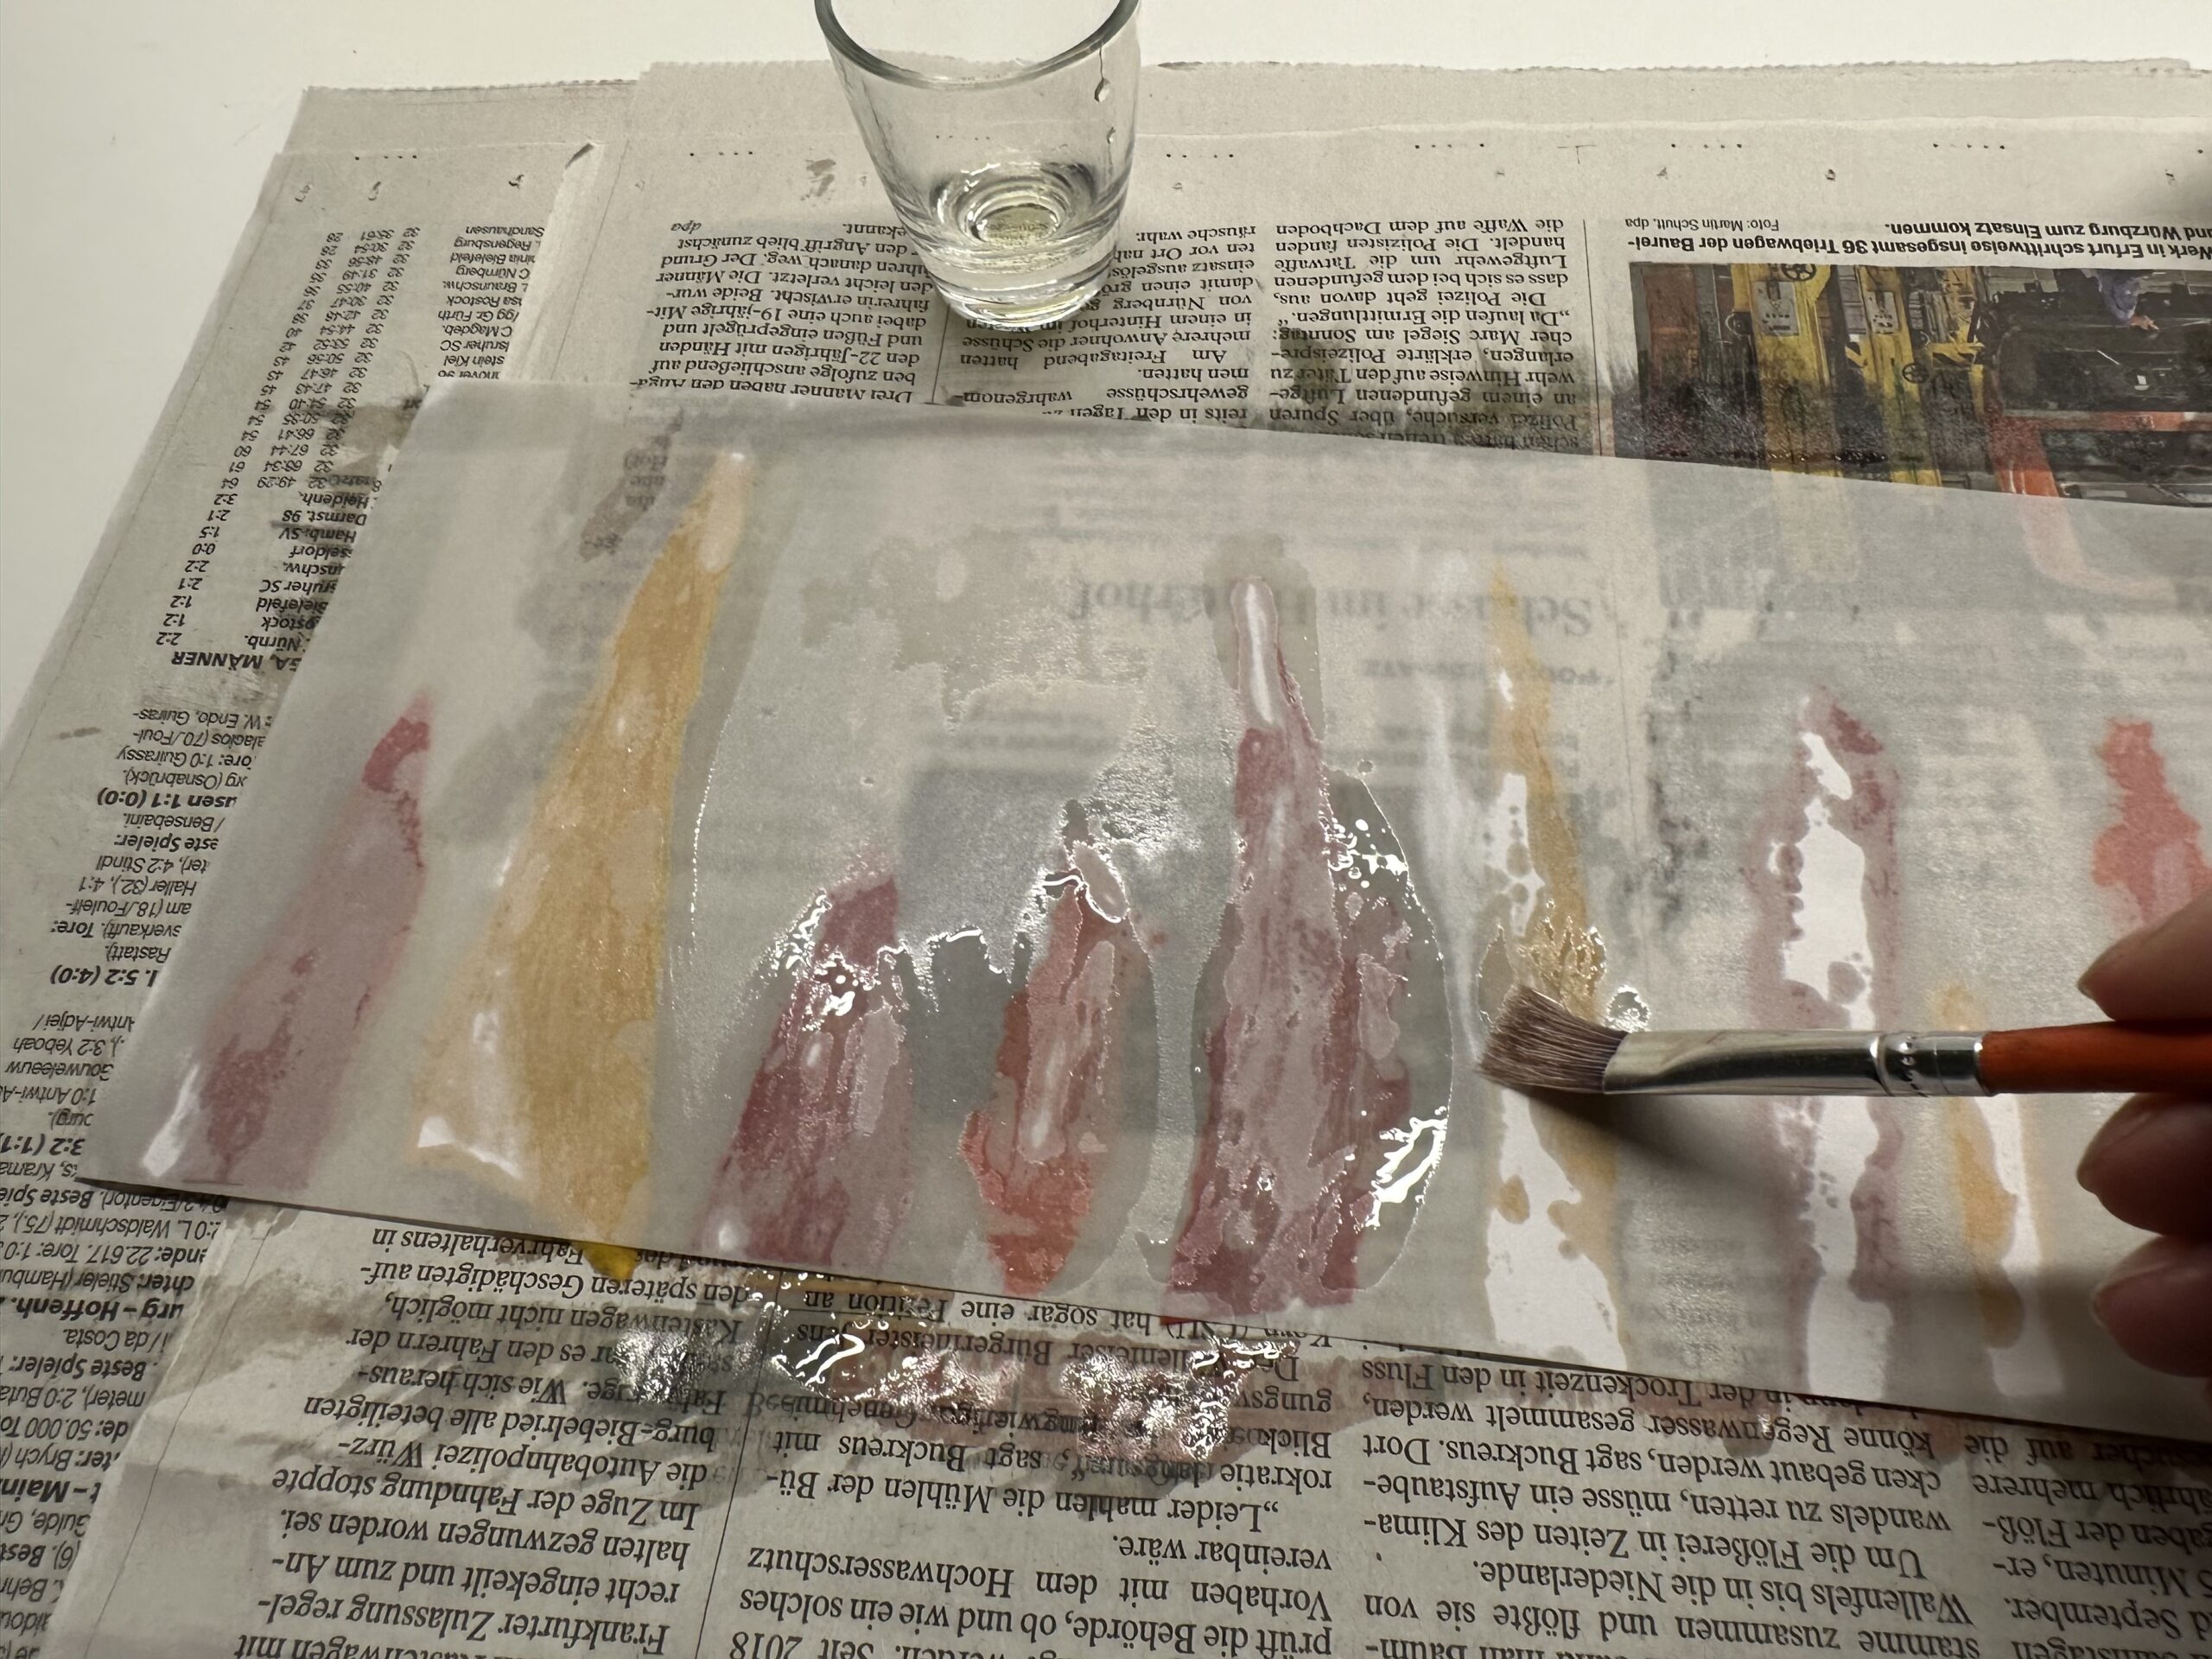
The complete flame image is now slightly transparent. Dumps necessarily excess oil again with a kitchen crepe.
Put the flame pattern to dry.
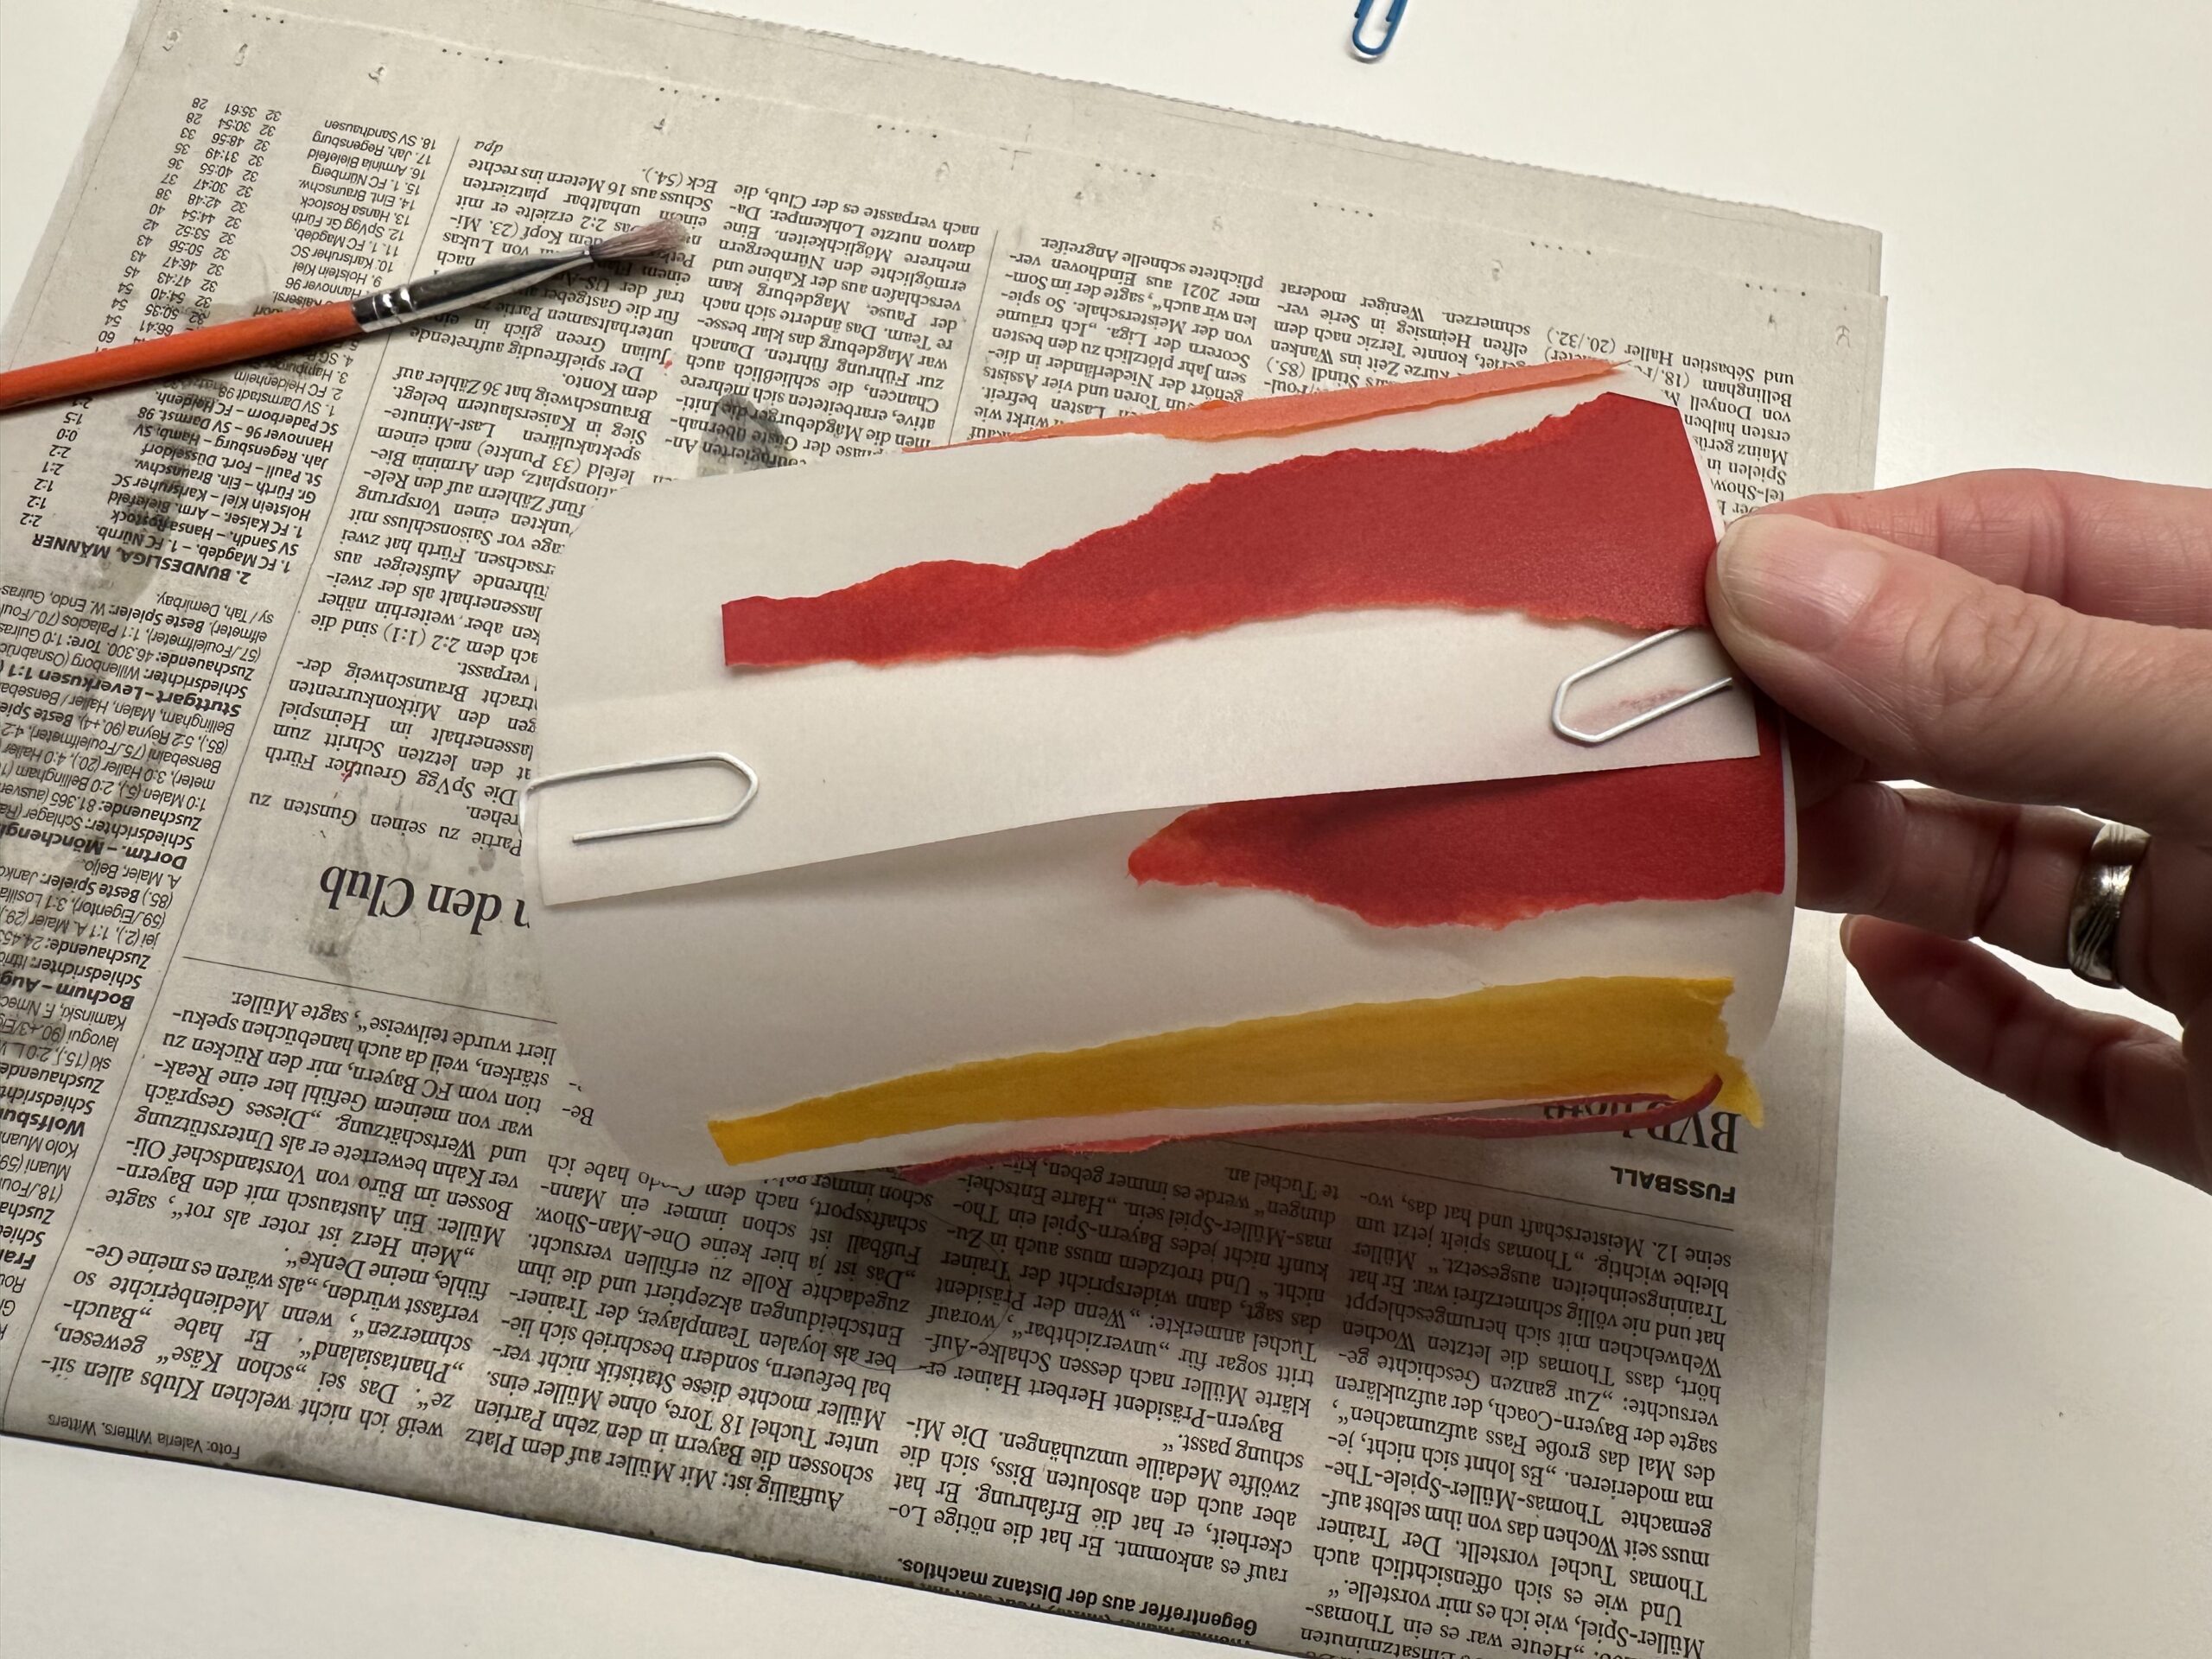
After drying, you can finish your table lamp.

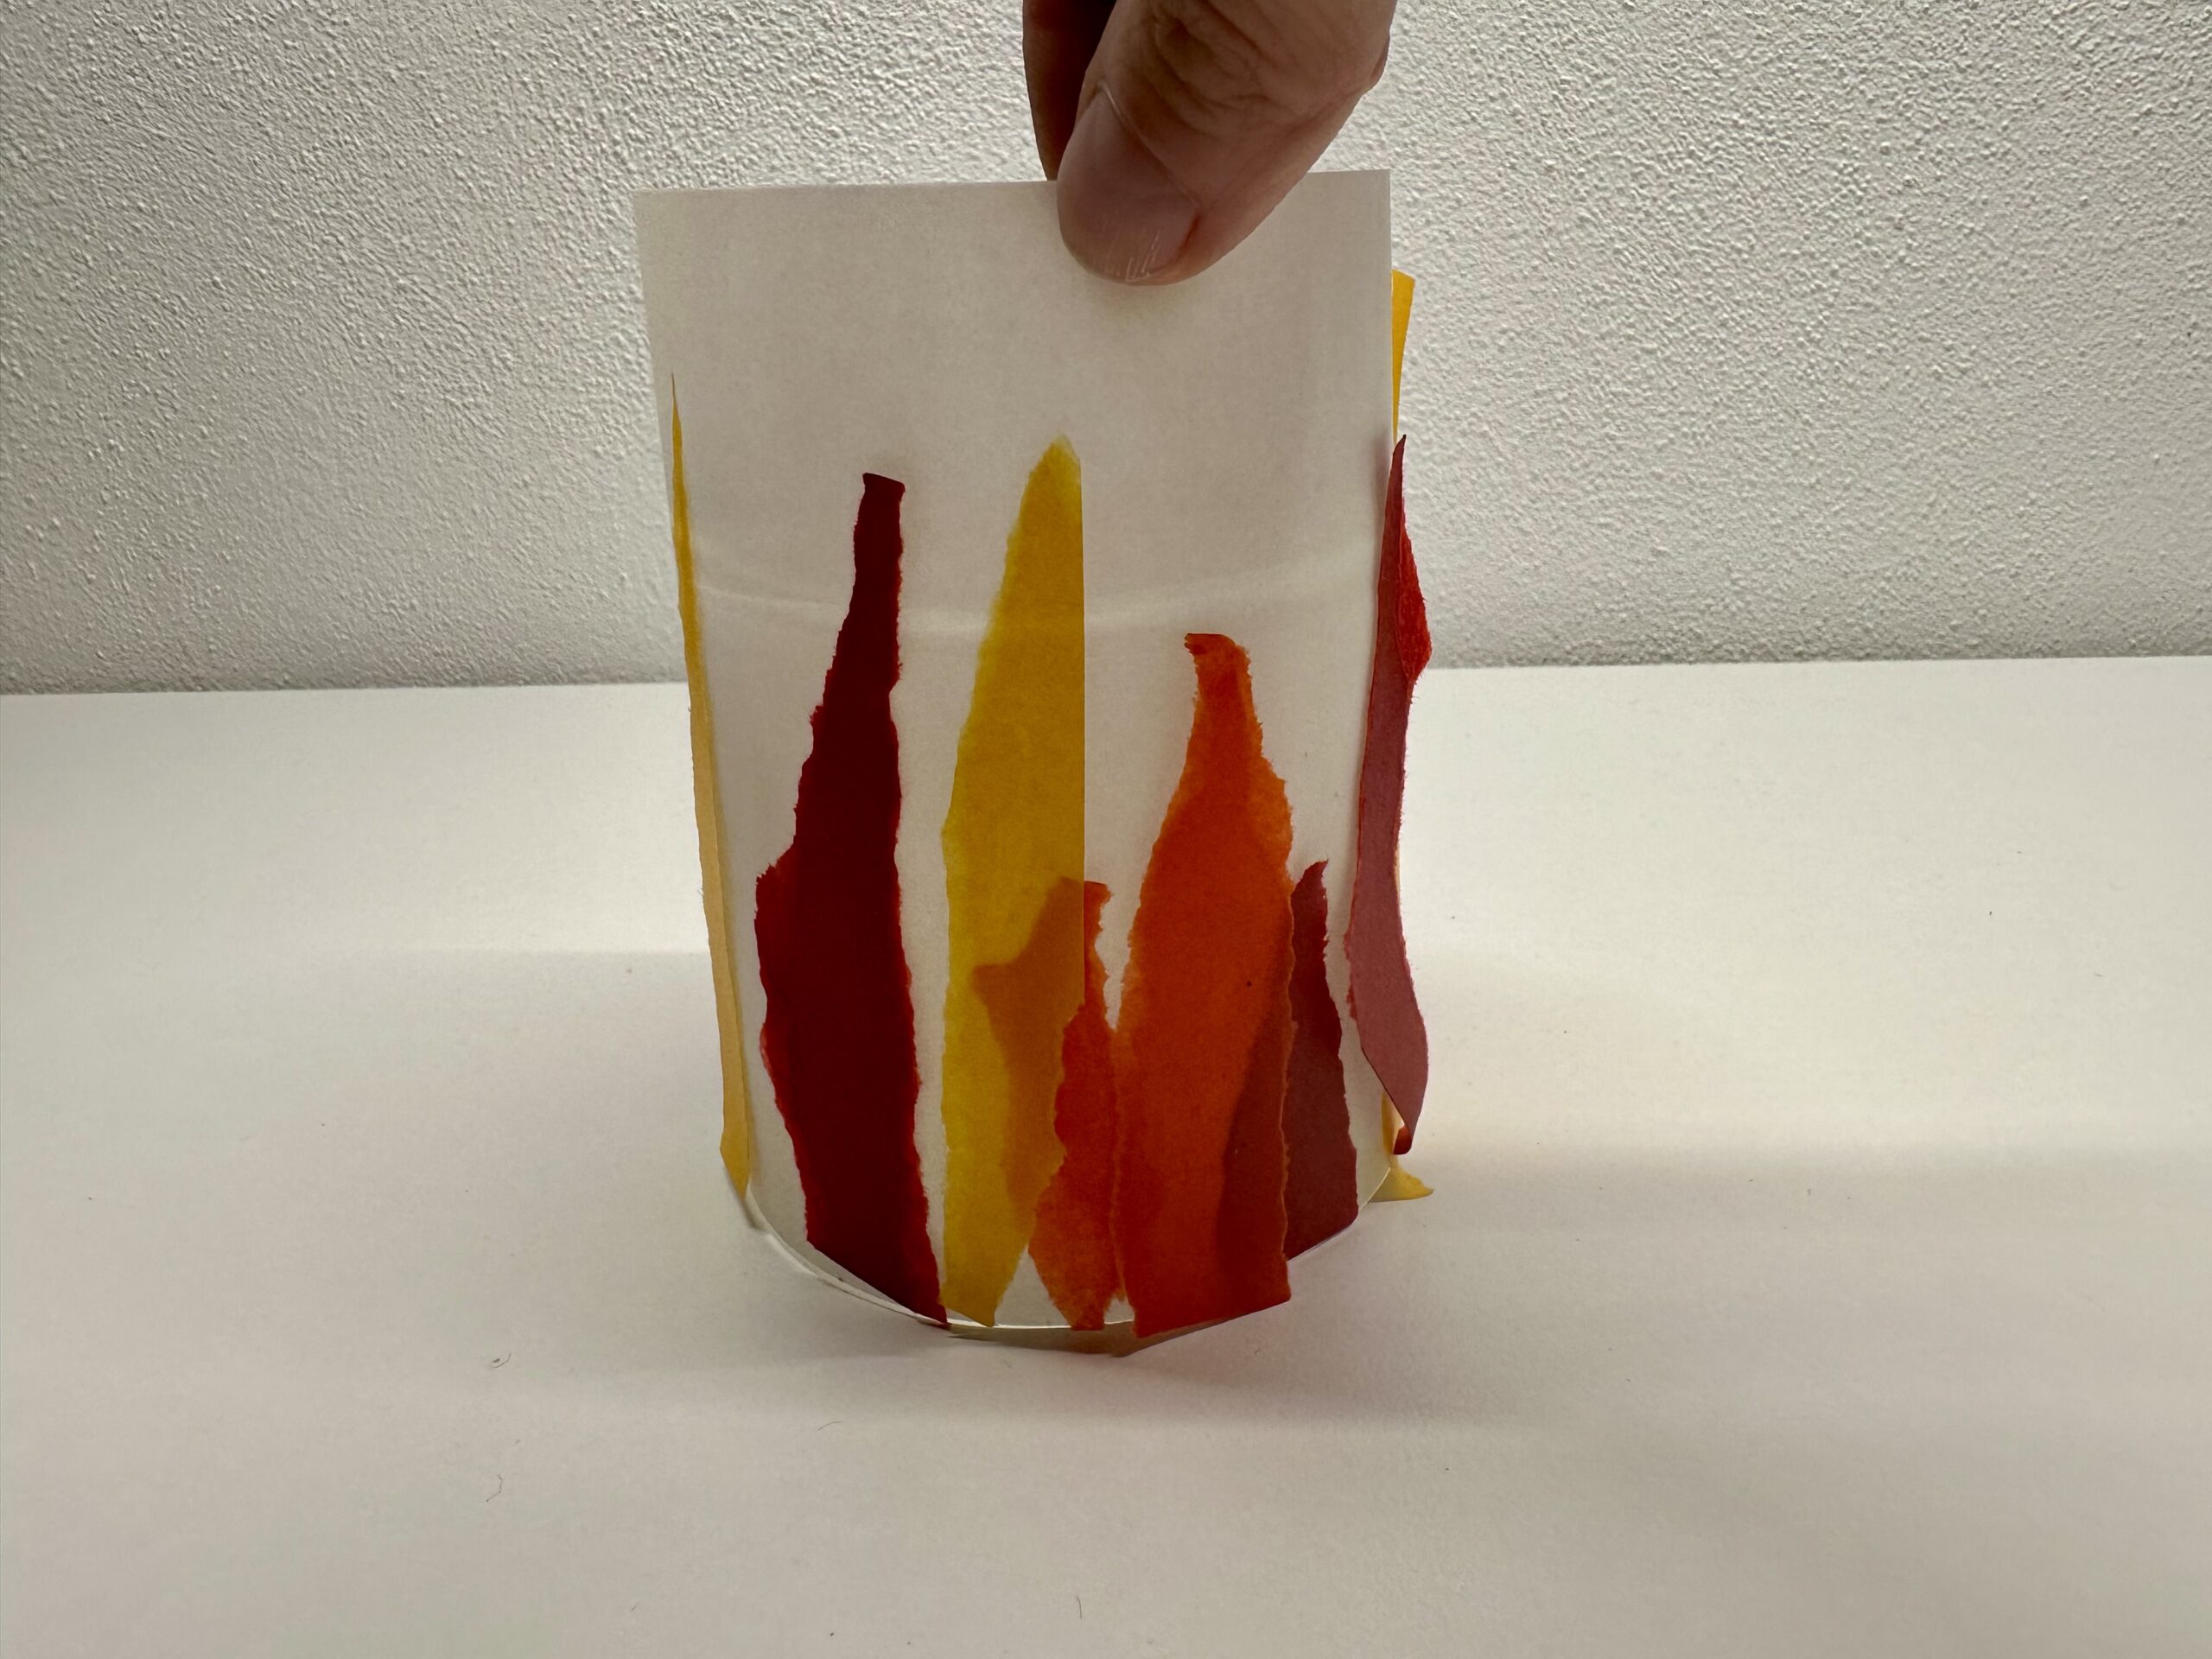
Bends the flame image so that the two short sides overlap finger width. The glued flames are outside. Stick the paper here with paper clips. Alternatively, you can stack it together. Your table lamp is ready.
Take a glass and put in a candle (e.g. electric tealight).
Put the finished banderoles over it.
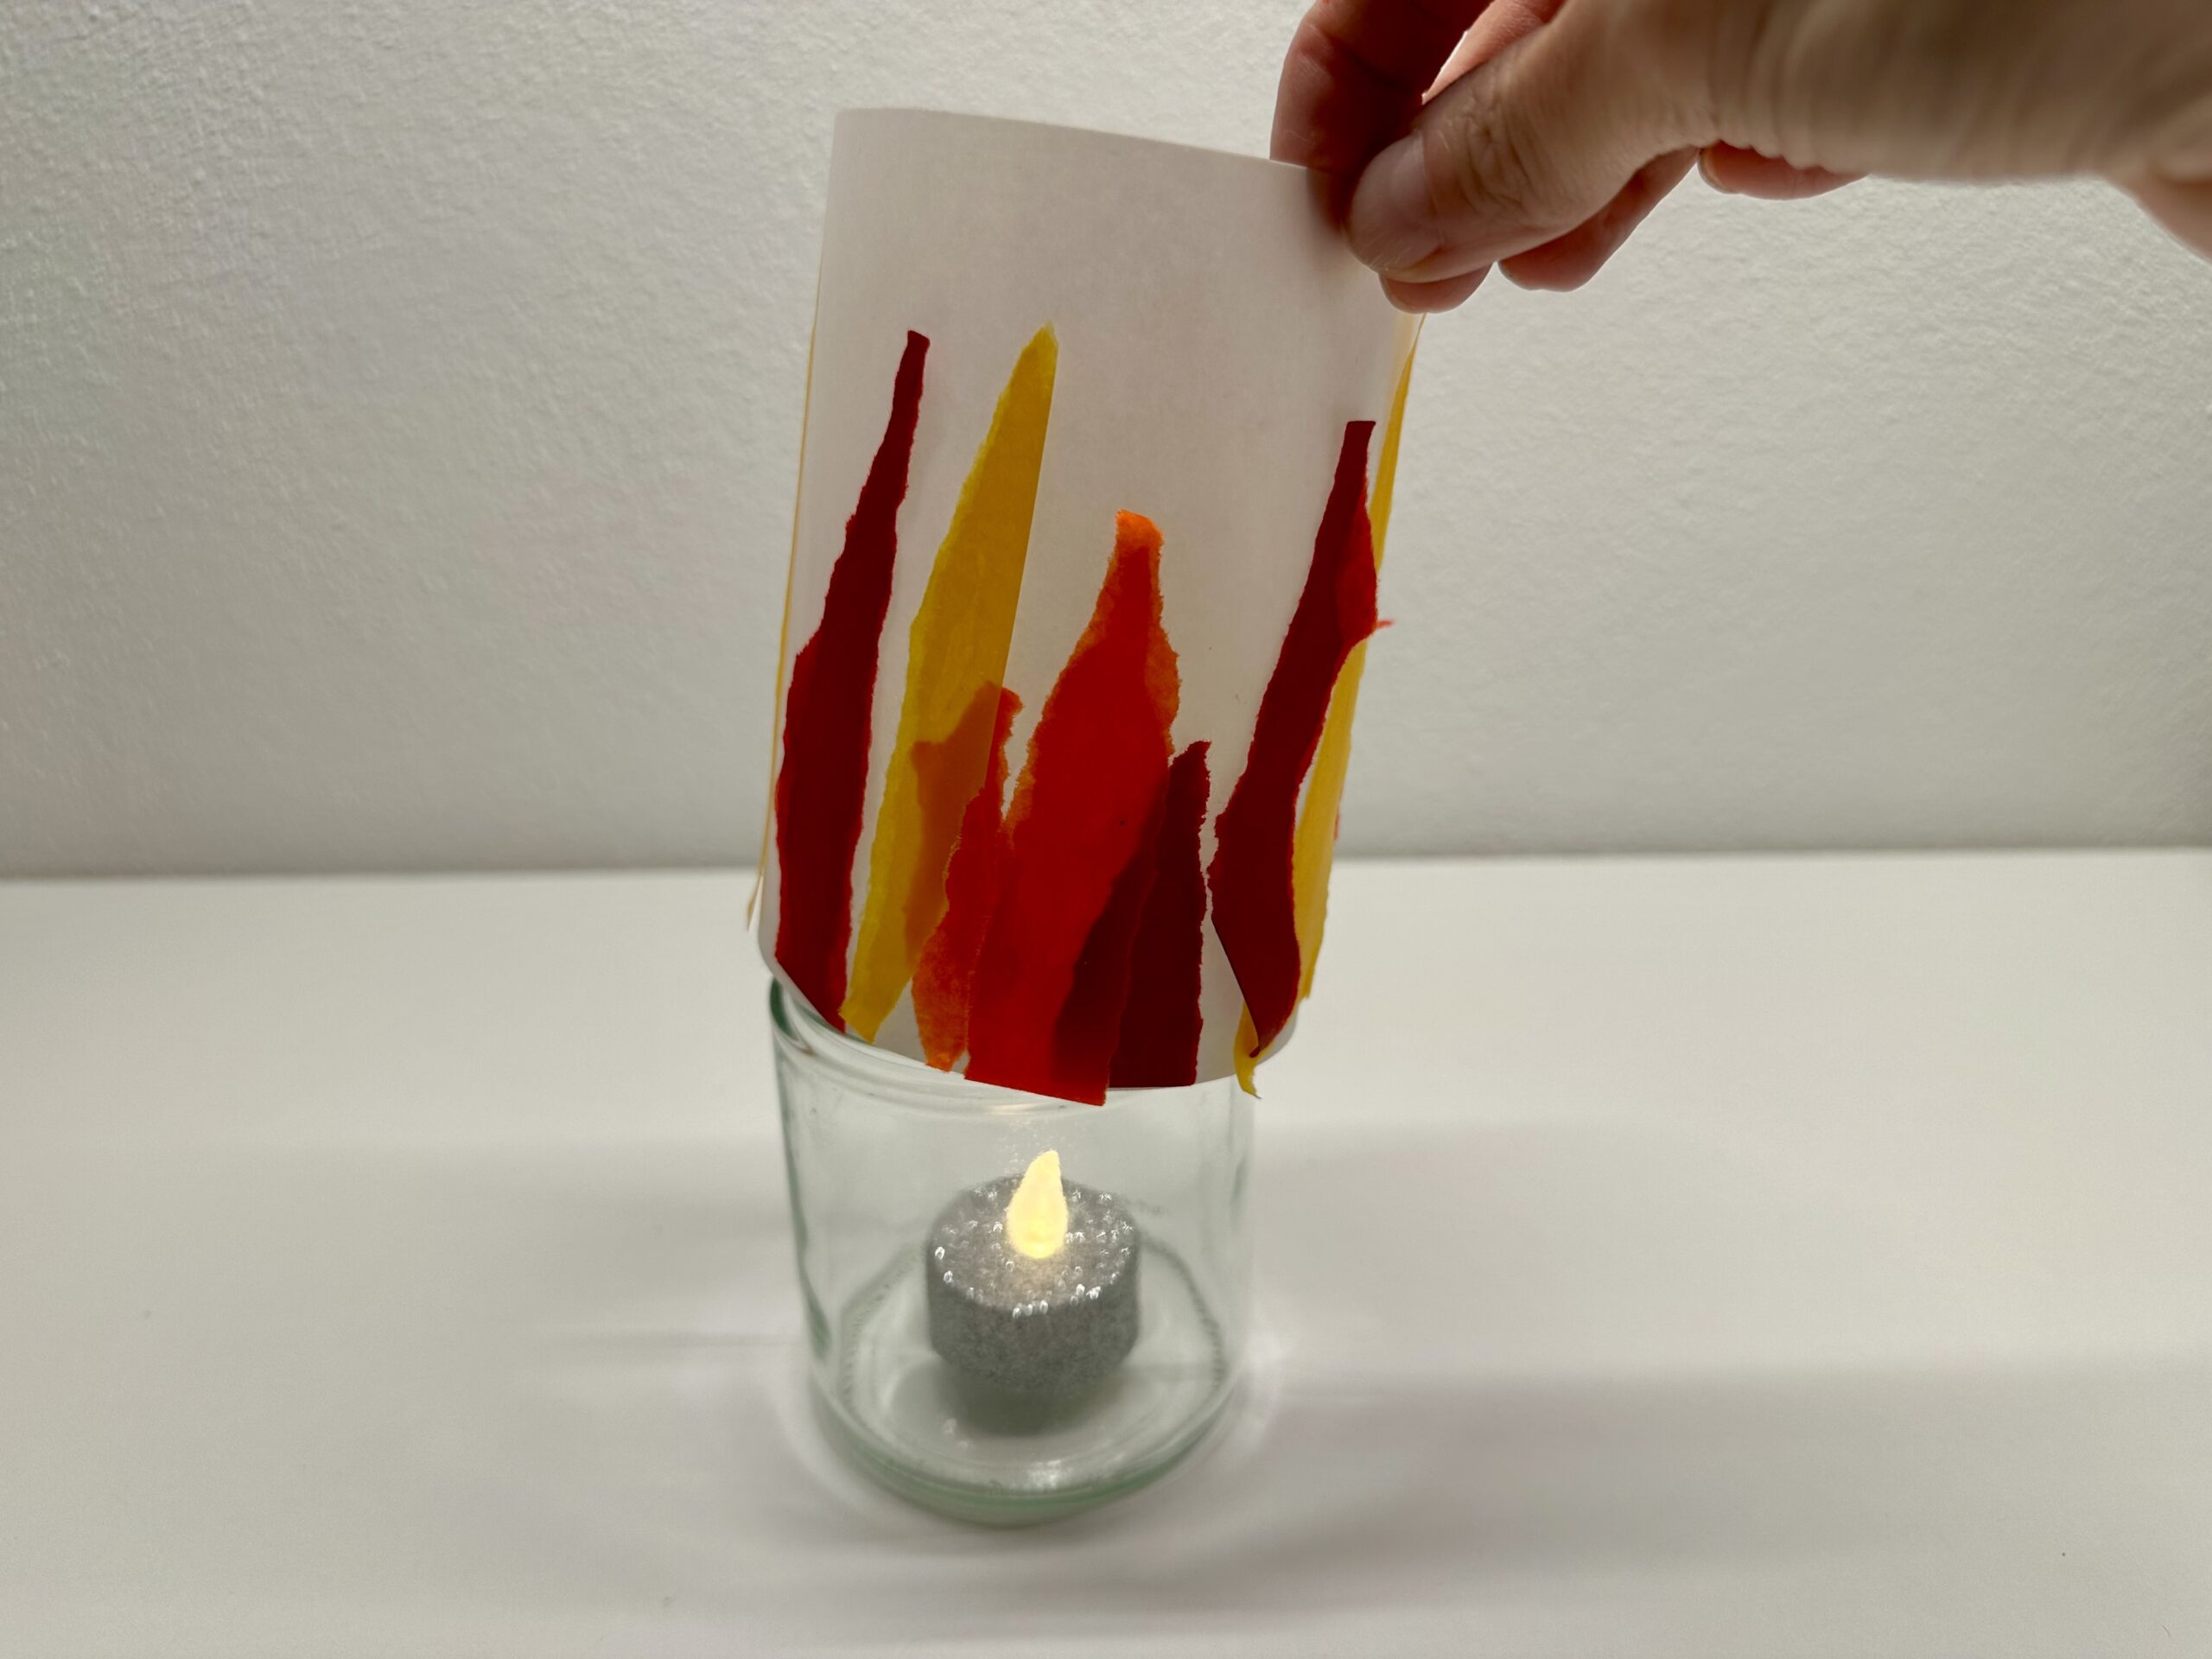
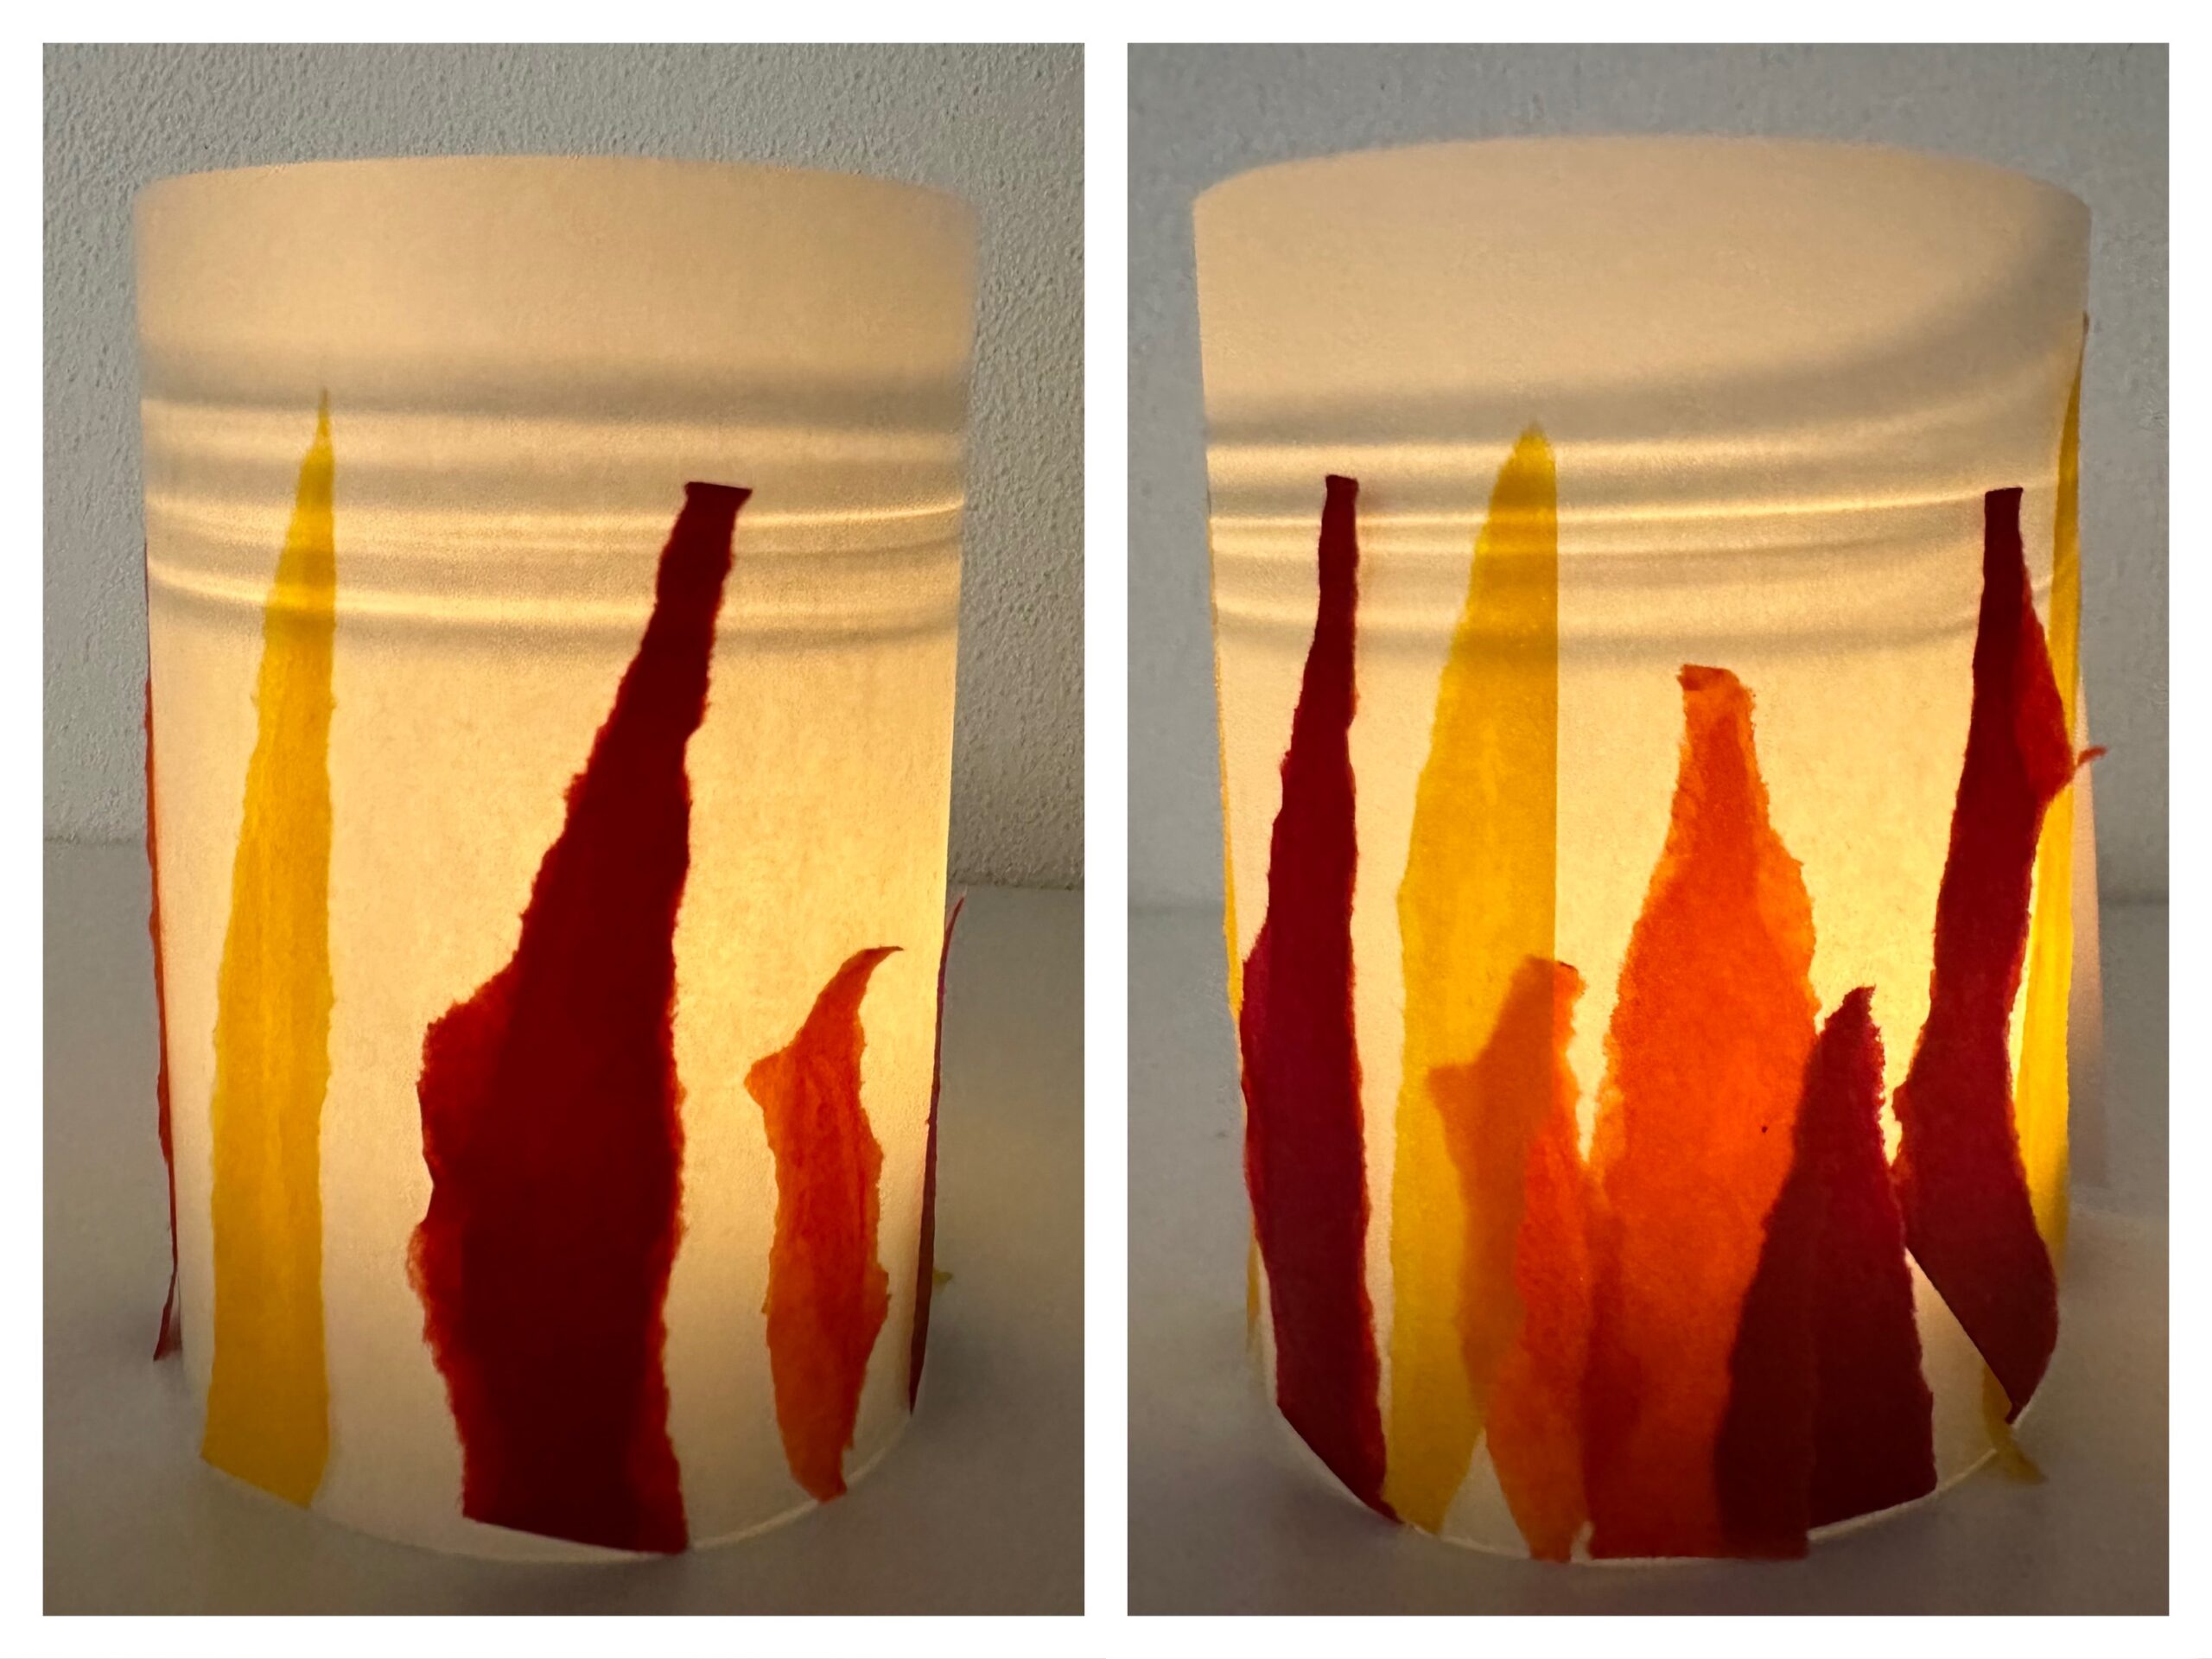
The table lamp is ready.
With a flickering electric tealight, the fire motif looks very realistic.
Have fun trying out.
Materials
Directions
Get all the craft materials ready.
First take the clay paper at hand. You can also use clay paper residues for this.
Tear the clay paper into pointed strips. It'll be the individual flames.
The torn stripes can look very different.
Put the torn stripes aside.
Now take a white sheet of paper and cut off a broad strip. The width of the strip is the height of your table lamp afterwards.
The torn flames are now laid on the stripes.
Interchanges with the colors and sizes. This creates a tingling flame image.
Stick all the flames on the paper.
Now the table lamp is almost ready.
Place the flame image on a double-layed newspaper. Prepare a glass with salad oil and a brush.
Covers the complete flame pattern with oil.
The paper becomes slightly transparent, if this is not the case in some places, you can brush some oil over it here again.
Dump the excess oil with a kitchen crepe or a handkerchief.
Turn the flame image so that the back is on top. Here you can still see white spots. At these places the paper has not yet come into contact with oil.
Pinches these places from the back again with oil. The paper is too thick here to be sufficiently soaked with oil from the front.
The complete flame image is now slightly transparent. Dumps necessarily excess oil again with a kitchen crepe.
Put the flame pattern to dry.
After drying, you can finish your table lamp.
Bends the flame image so that the two short sides overlap finger width. The glued flames are outside. Stick the paper here with paper clips. Alternatively, you can stack it together. Your table lamp is ready.
Take a glass and put in a candle (e.g. electric tealight).
Put the finished banderoles over it.
The table lamp is ready.
With a flickering electric tealight, the fire motif looks very realistic.
Have fun trying out.
Follow us on Facebook , Instagram and Pinterest
Don't miss any more adventures: Our bottle mail