Egg with egg yolk to hang up

AdventurerKatzi
Rating5.03.2 thousand times & (5) DifficultyBeginner

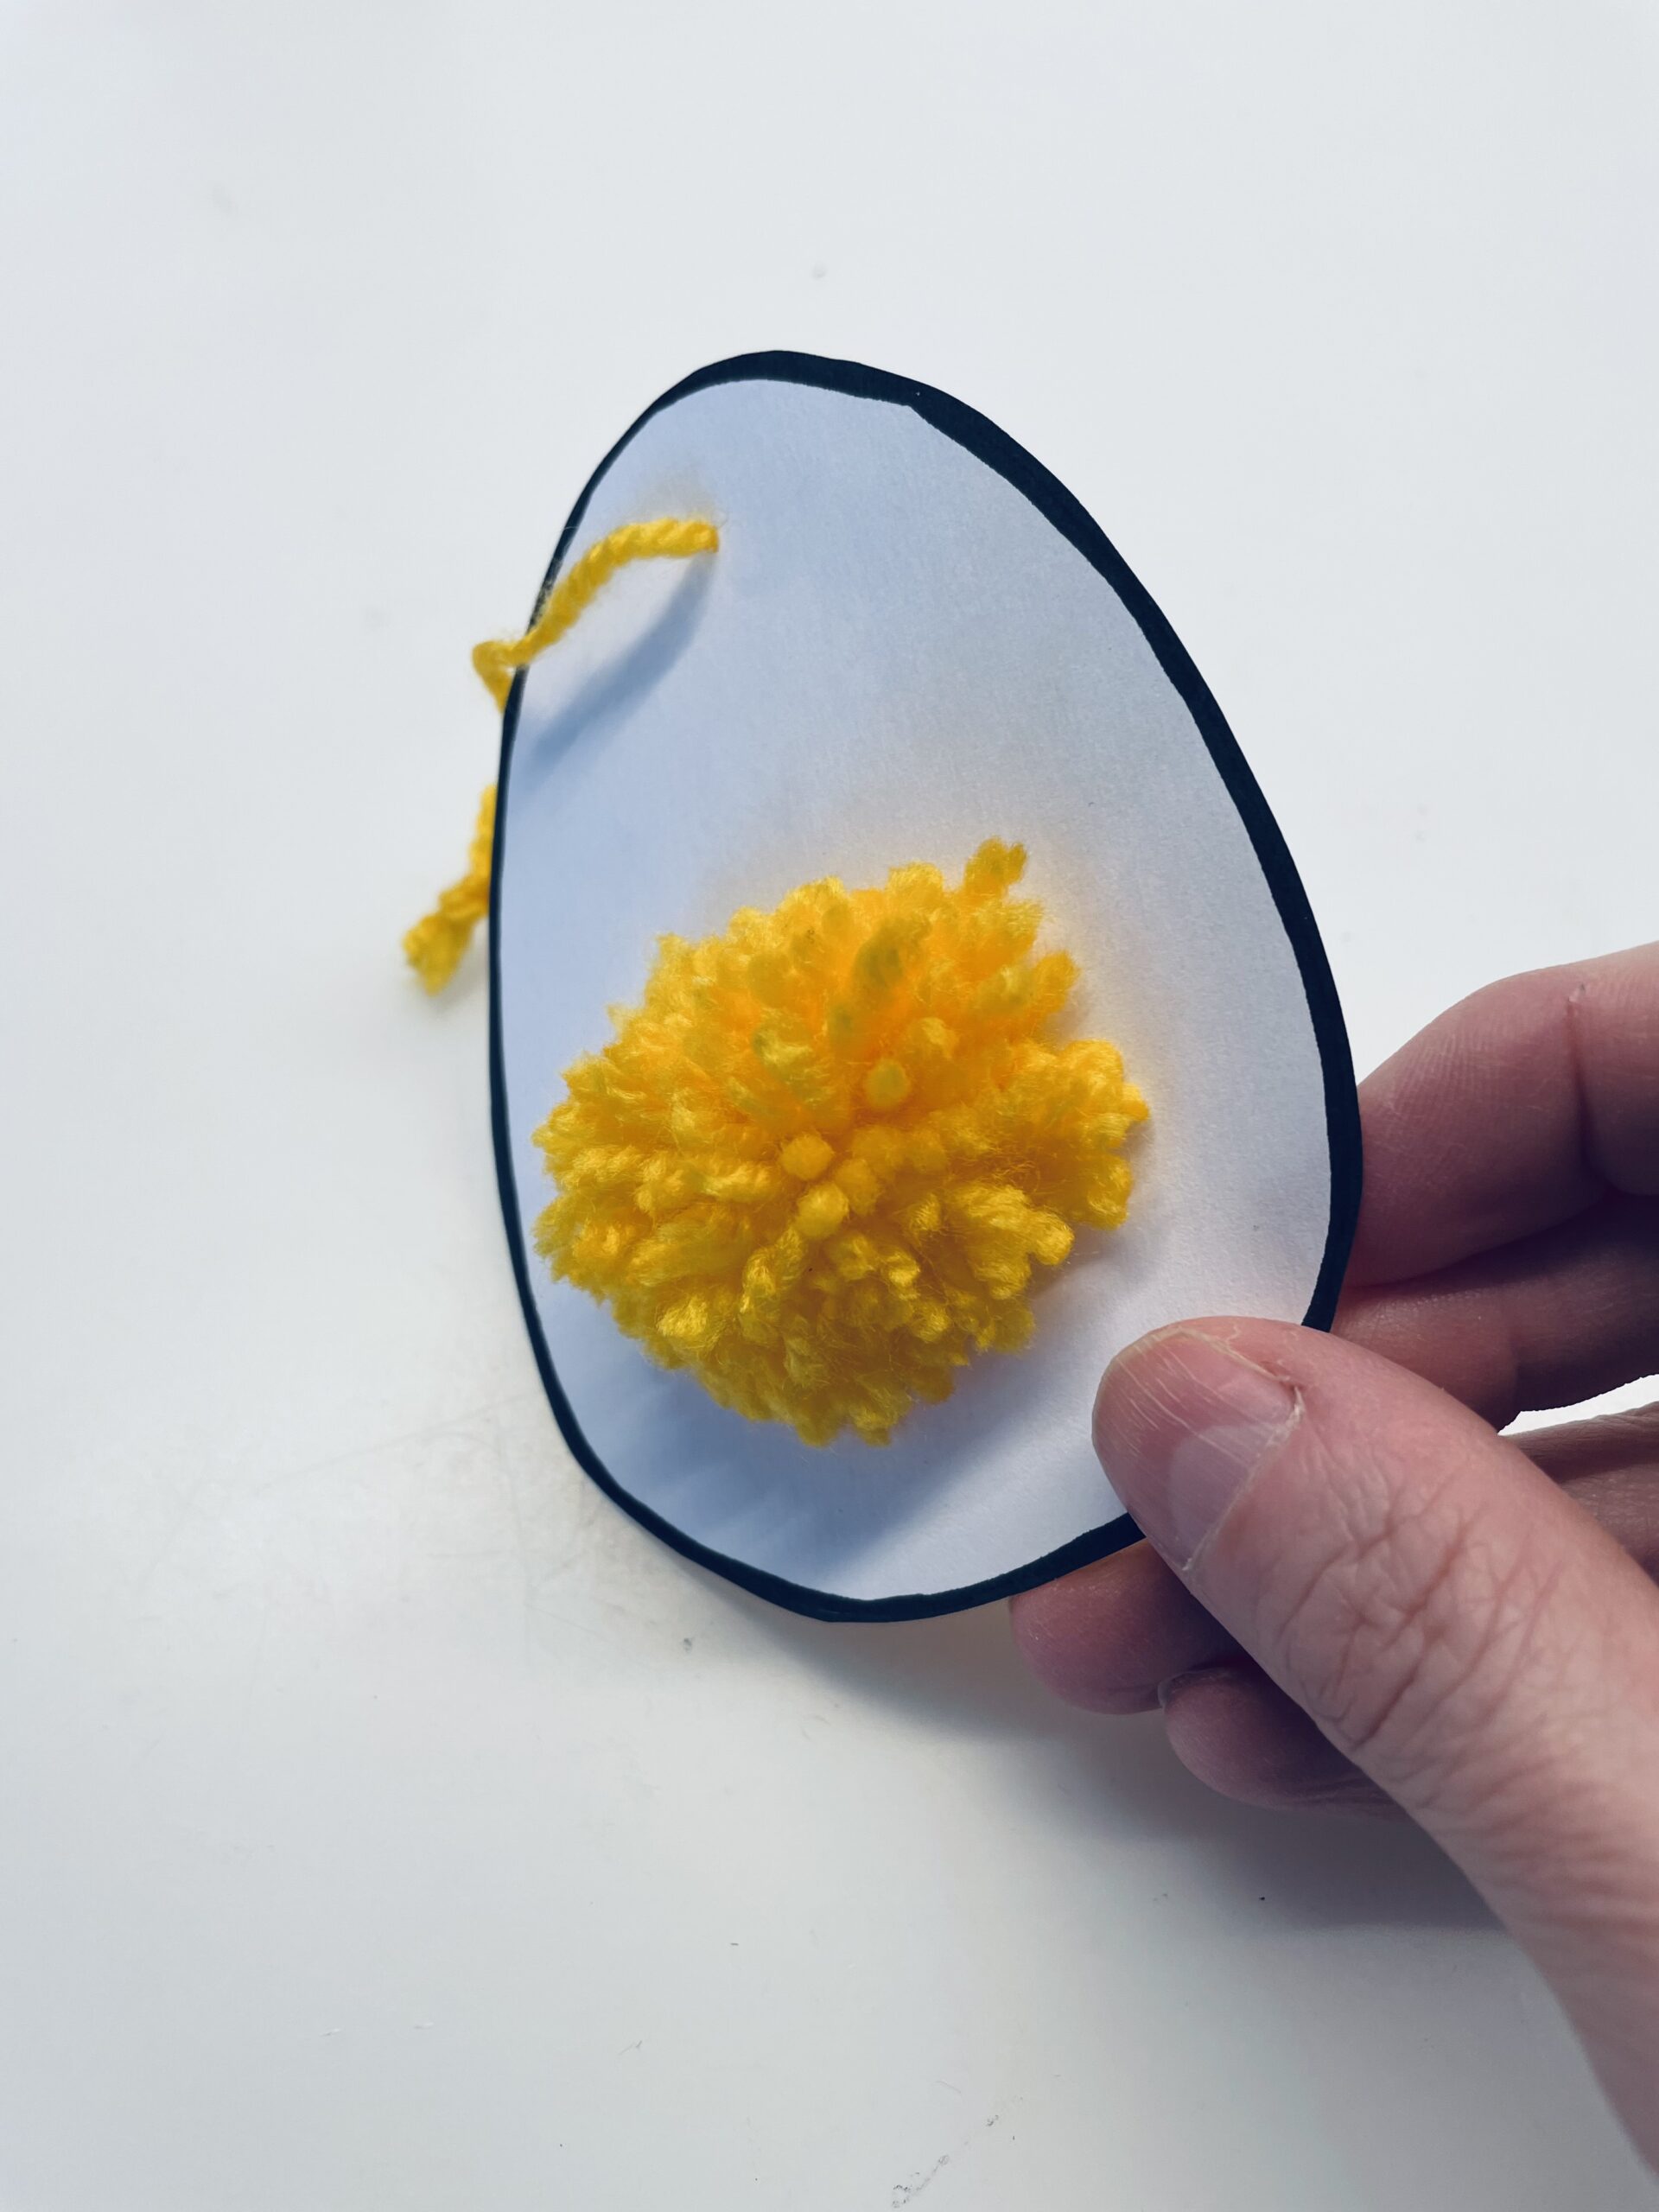
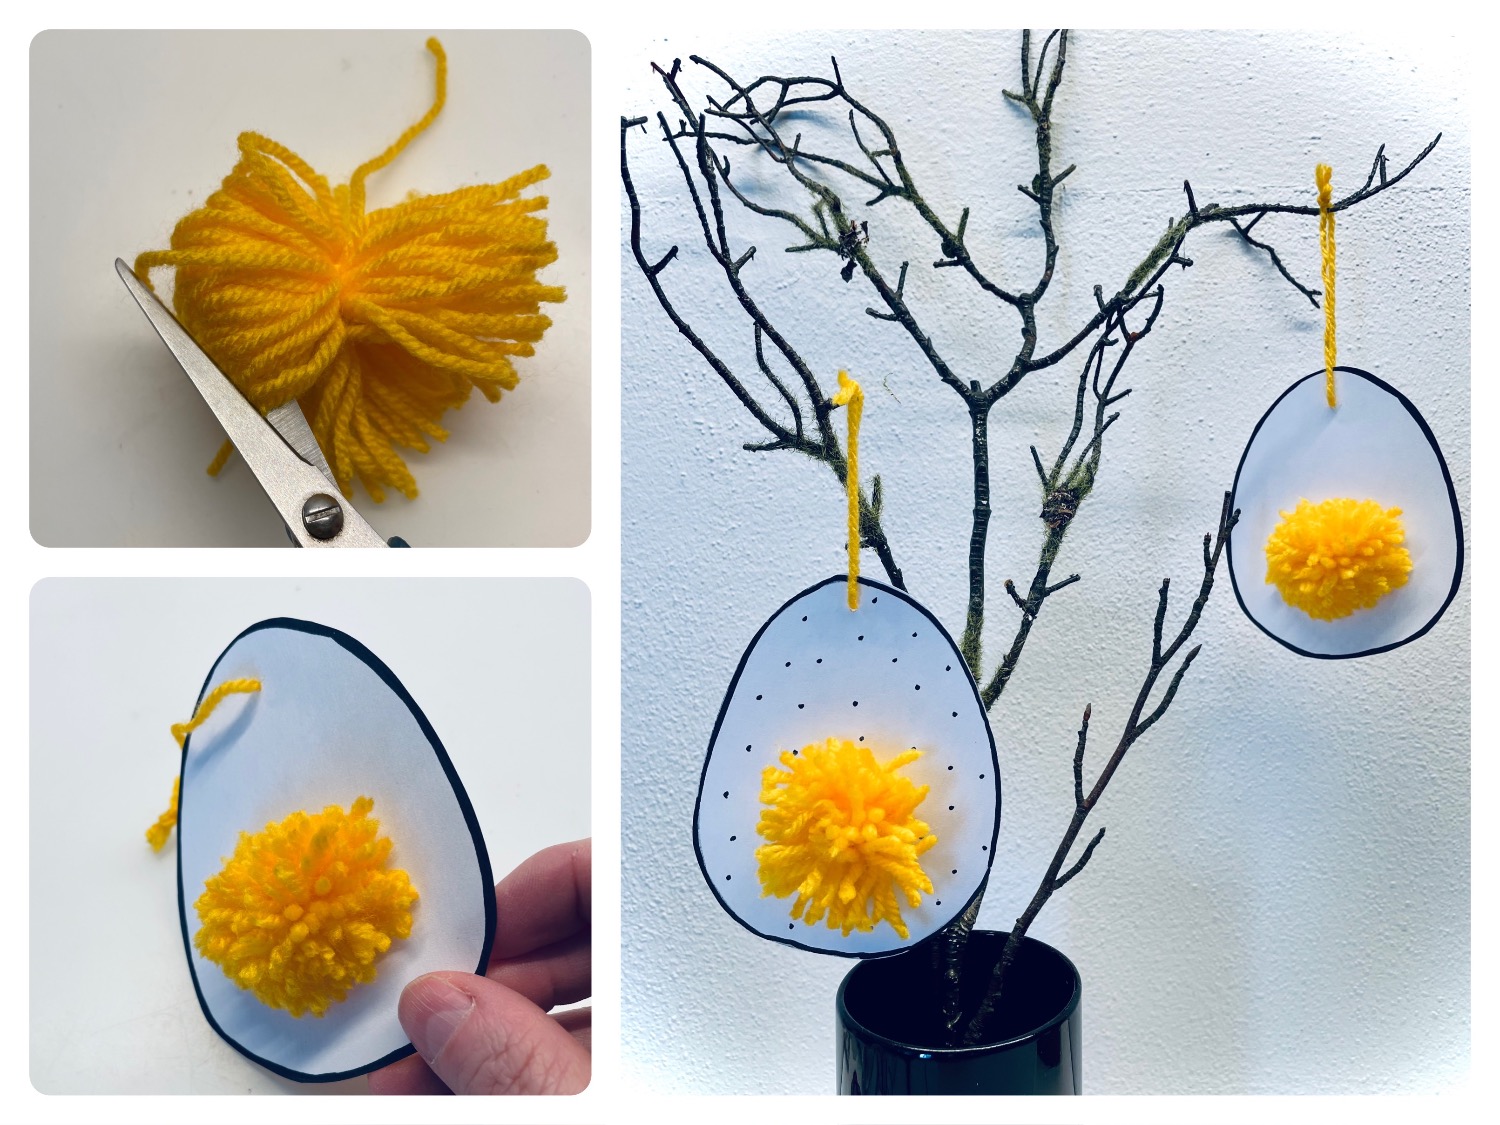
This egg looks like a mirror egg. The egg yolk shines in a strong yellow and stands out because it stands out as a plastic ball from the flat shape of the egg. The white of the ice is from a solid photo box, which is bordered after cutting with a black pen. A pommel, a pompon or a wuschel are inserted as an egg yolk. To hang up you can thread a thread through the egg and hang it on a branch or Easter shrub. Have fun crafting.

Media Education for Kindergarten and Hort

Kind bastelt eine Rassel mit dem Navi
The Adventure Navi, the app for DIY projects, enables media education for the youngest.

Relief in everyday life, targeted promotion of individual children, independent learning and - without any pre-knowledge already usable by the youngest!


Titelbild zur Bastel- und DIY-Idee für Kinder '(1060) Ei mit Eidotter zum Aufhängen'
Material for1 Child
Prep Time5 min.Adv. Time15 min.Total Time20 min.
 1 White photo box
 1 Wool yellow
 1 Rolled paper (not necessarily necessary!)
 1 Pencil
 1 Felt pen
 1 Fingernail shears
 1 Needle pointed
 Builder's pad
All links marked with a shopping cart lead to Amazon - here we have selected products that we would order ourselves and in part also ordered. In a qualified purchase via the advertising link, we as Amazon partner receive a commission, for you there are no costs. You thus support our cost- and advertising banner-free, educational offer.
1

First you make a pommel/wuschel out of yellow wool. As an aid you can use a cardboard roll. Wrap it in one place thick with yellow wool.

Tip: Alternatively, you can wrap the wool around the fingers of a hand.
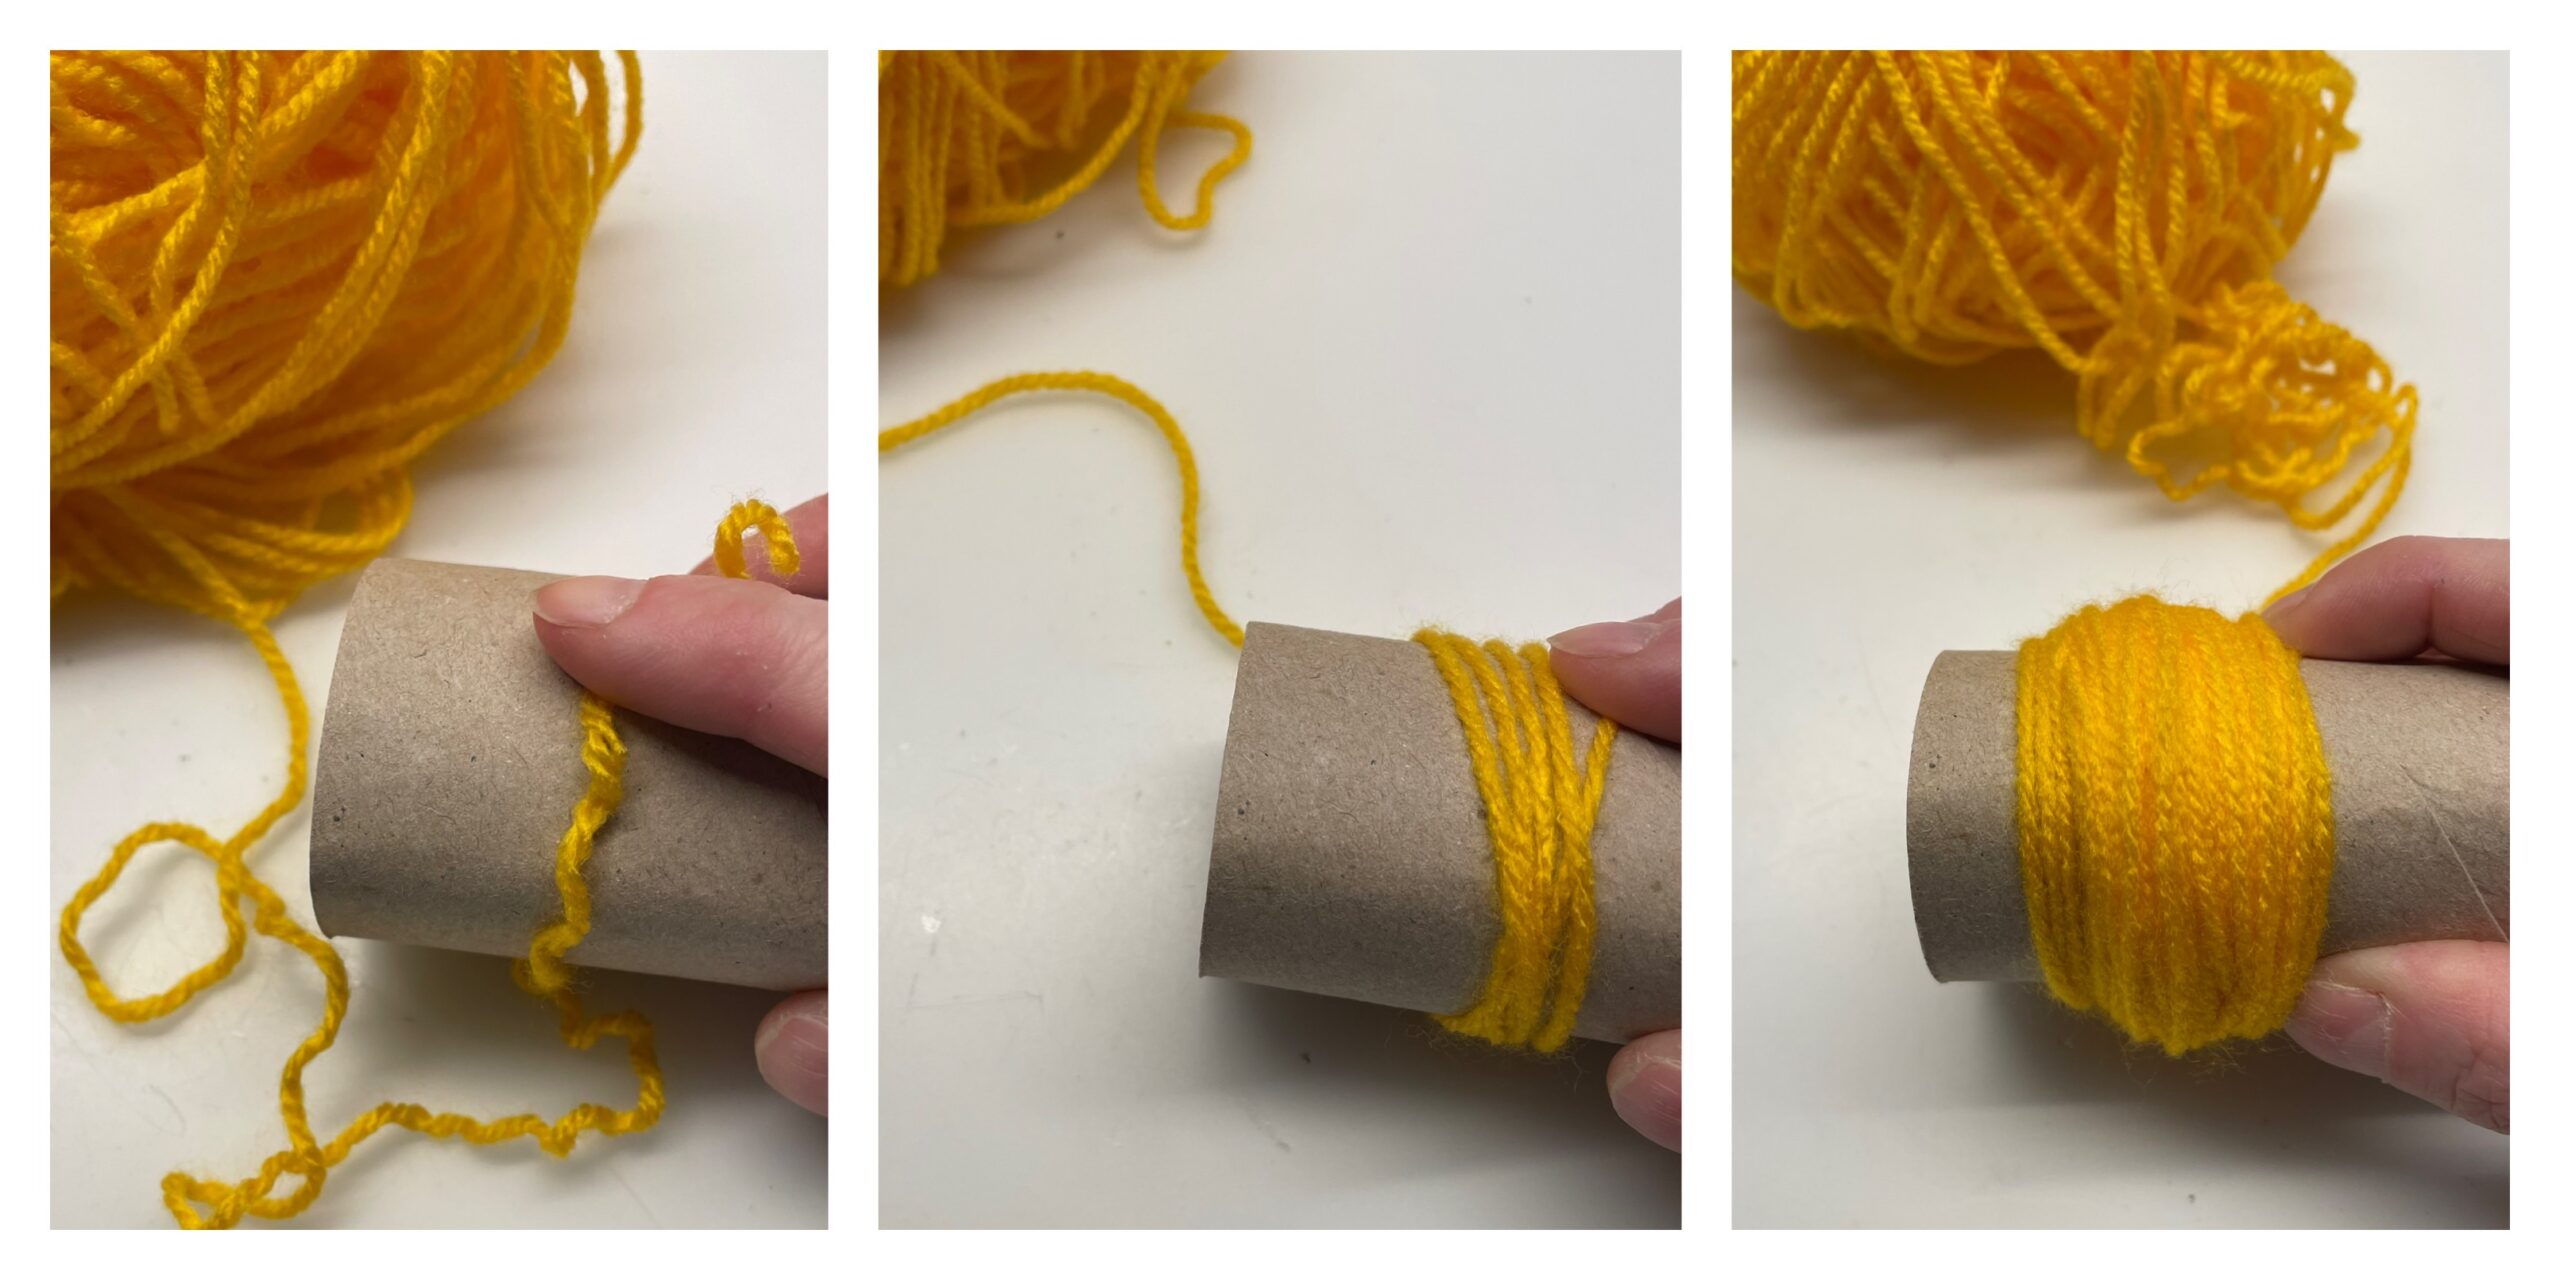
Bild zum Schritt 1 für das Bastel- und DIY-Abenteuer für Kinder: 'Zuerst bastelt ihr aus gelber Wolle einen Pommel/ Wuschel. Als...'

2

Then you carefully push the thick wool band off the roll. If you press it a bit together, it will be easier.
Now try to keep the wool ring tight together.
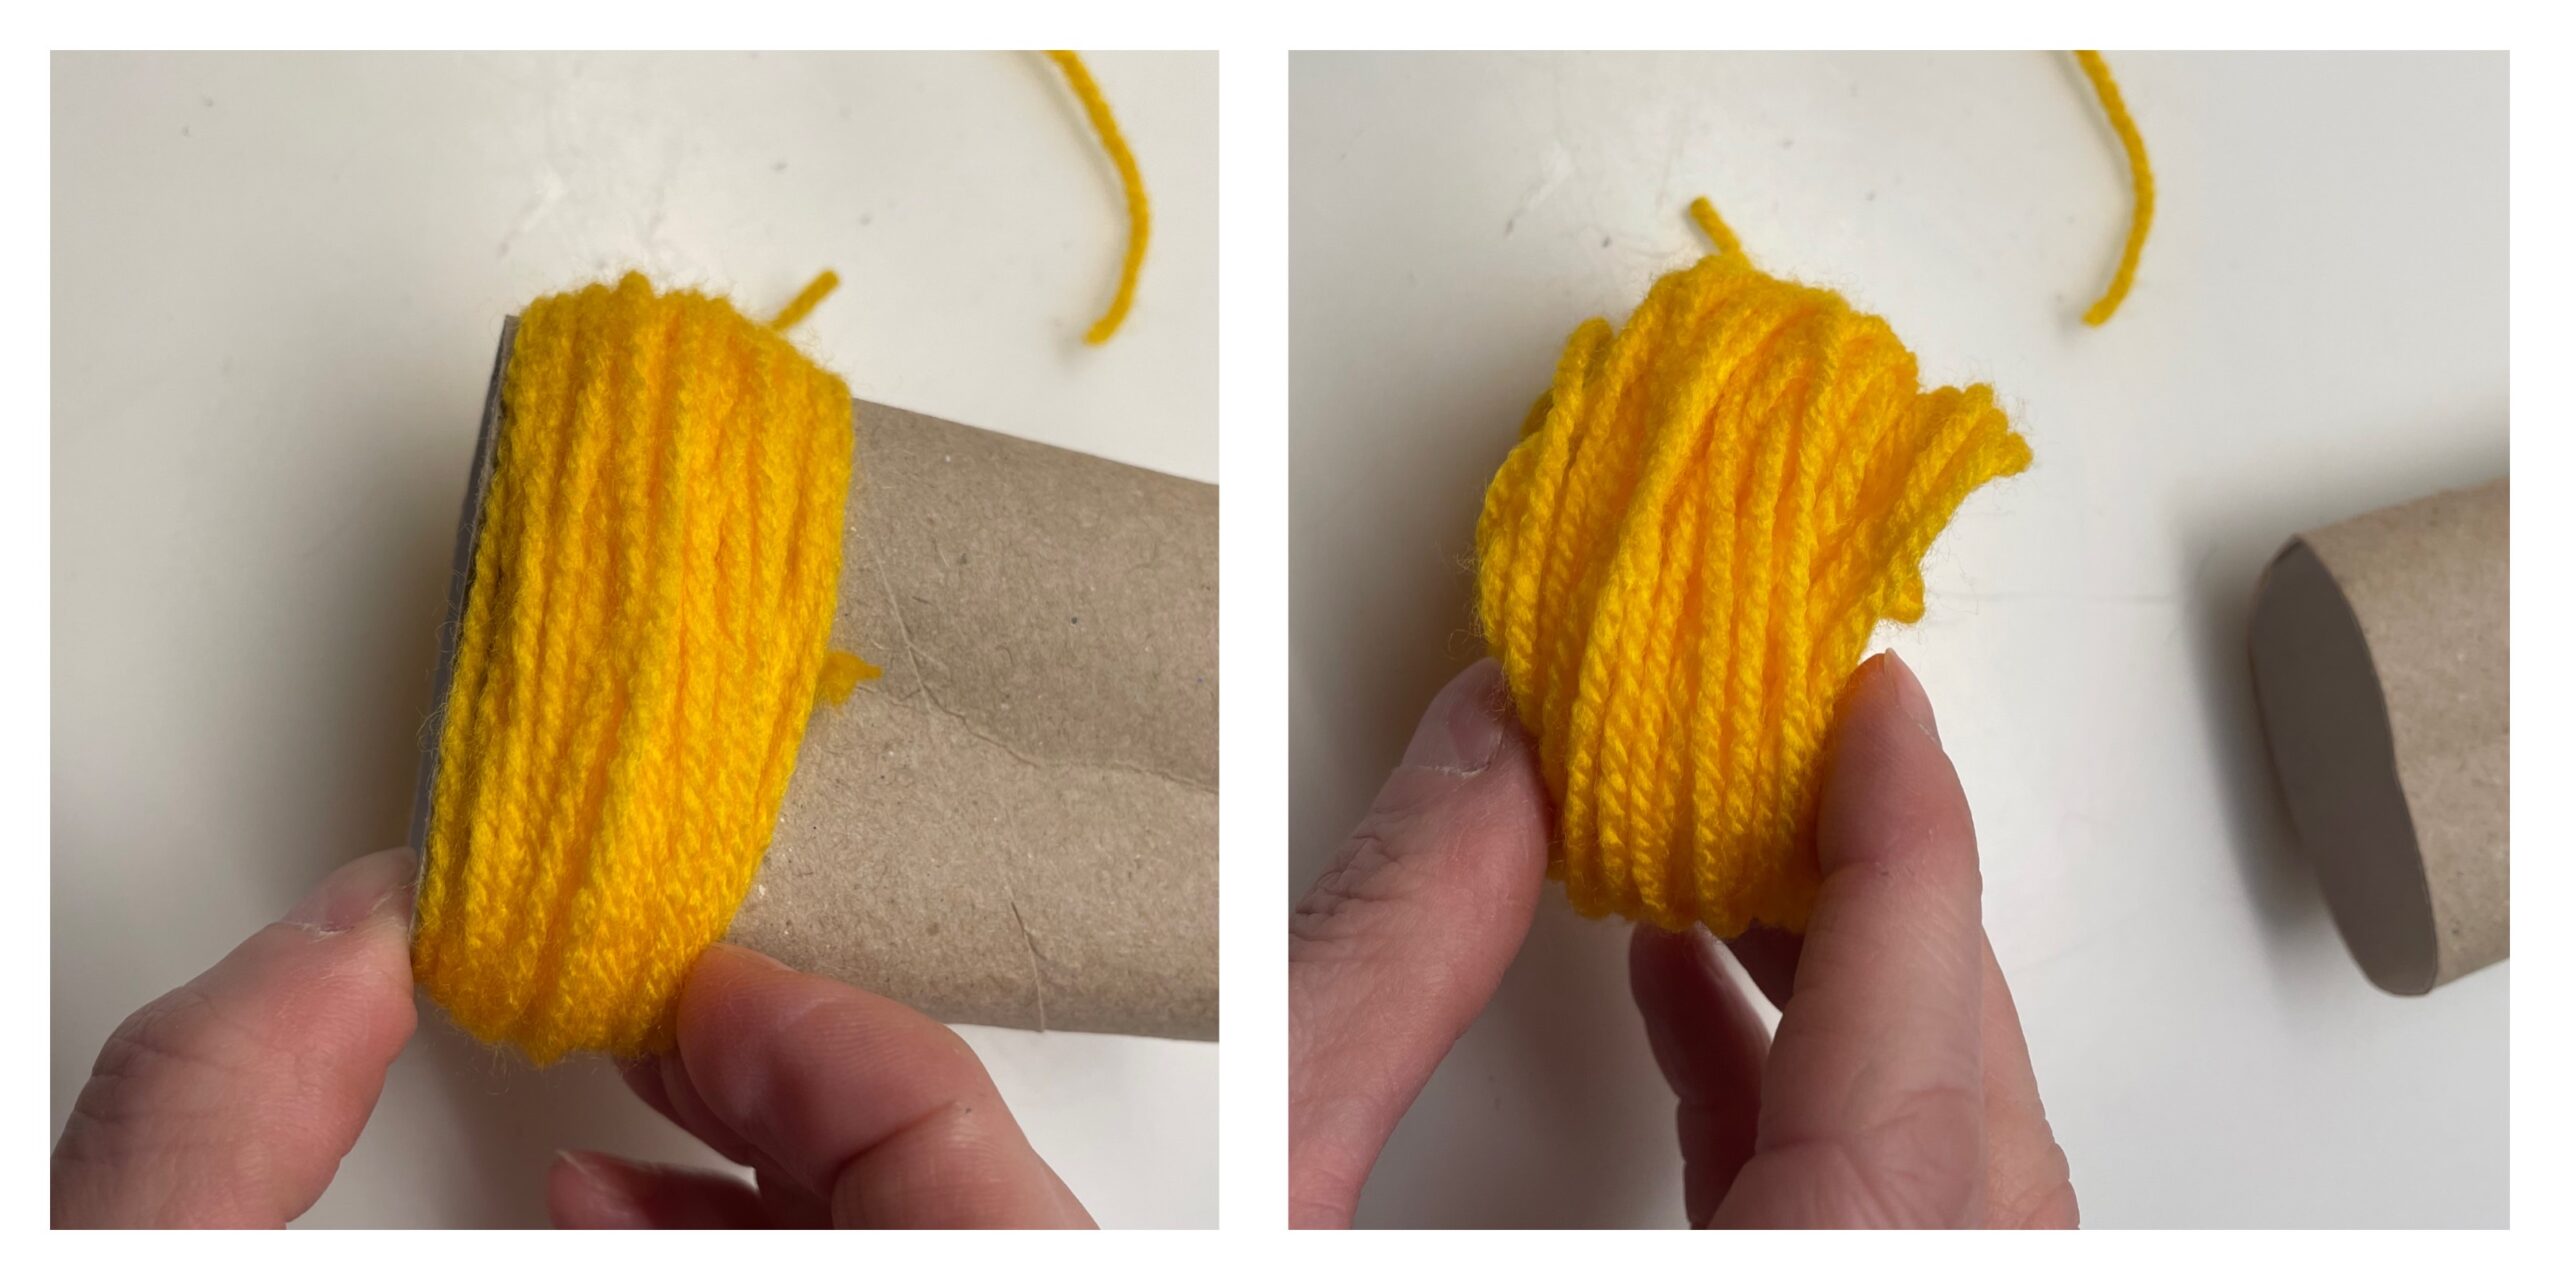
Bild zum Schritt 2 für das Bastel- und DIY-Abenteuer für Kinder: 'Dann schiebt ihr den dicken Wollbund vorsichtig von der Rolle....'

3

Now cut off a 10cm long woolen thread and put it on the table. Then put the woolen waistband in the middle. The closed sides of the woolen waistband lie above and below. Now put both ends of the thread over the woolen waistband and knot them together.

Bild zum Schritt 3 für das Bastel- und DIY-Abenteuer für Kinder: 'Schneidet jetzt einen 10cm langen Wollfaden ab und legt ihn...'

4

Then insert a pair of scissors into a woolen loop and cut the woolen threads apart.

Bild zum Schritt 4 für das Bastel- und DIY-Abenteuer für Kinder: 'Danach führt ihr eine Schere in eine Wollschlaufe ein und...'

5

Now repeat the process on the opposite side. Now you form the pommel/wuschel with your fingers apart.

Bild zum Schritt 5 für das Bastel- und DIY-Abenteuer für Kinder: 'Wiederholt nun den Vorgang auf der gegenüberliegenden  Seite. Jetzt...'

6

Then cut off unshaped and overhanging threads, creating a ball.

Bild zum Schritt 6 für das Bastel- und DIY-Abenteuer für Kinder: 'Unförmige und überstehende Fäden schneidet ihr anschließend ab. So entsteht...'

7

Then you paint an egg on a white photo box. The egg should be about 10cm tall. Then cut out the egg with the scissors.

Bild zum Schritt 7 für das Bastel- und DIY-Abenteuer für Kinder: 'Anschließend malt ihr auf einen weißen Fotokarton ein Ei auf....'

8

Now you cut out a small circle in the lower thicker area of the egg. By this you stick the pommel afterwards.

Tip: For painting you can use a 2€ coin.

Stitches a hole in the painted circle with a fingernail and cuts out from there star-shaped to the outside and then the circle.

Bild zum Schritt 8 für das Bastel- und DIY-Abenteuer für Kinder: 'Nun schneidet ihr im unteren dickeren Bereich des Eies einen...'

9

Now surrounds the circle with a black felt pen on the front and back.
If you want, you can still paint points on the egg.

Bild zum Schritt 9 für das Bastel- und DIY-Abenteuer für Kinder: 'Umrandet nun den Kreis mit einem schwarzen Filzstift auf Vorder-...'

10

Now she puts the pommel through the egg and plucks it in shape.

Bild zum Schritt 10 für das Bastel- und DIY-Abenteuer für Kinder: 'Jetzt steckt ihr die Pommel durch das Ei und zupft...'

11

Finally, thread a piece of wool into a needle and stash it through the upper edge of the egg. Then tie both ends of the thread together with a knot.

Bild zum Schritt 11 für das Bastel- und DIY-Abenteuer für Kinder: 'Abschließend fädelt ihr ein Stück Wolle in eine Nadel und...'

12

Now the egg is ready to hang.

Bild zum Schritt 12 für das Bastel- und DIY-Abenteuer für Kinder: 'Jetzt ist das Ei bereit zum Aufhängen.'

13

Make several eggs with egg yolks and hang them on a shrub or branch.

Bild zum Schritt 13 für das Bastel- und DIY-Abenteuer für Kinder: 'Bastelt doch gleich mehrere Eier mit Eidotter und hängt sie...'

14

Have fun!

Materials

 1 White photo box
 1 Wool yellow
 1 Rolled paper (not necessarily necessary!)
 1 Pencil
 1 Felt pen
 1 Fingernail shears
 1 Needle pointed
 Builder's pad
All links marked with a shopping cart lead to Amazon - here we have selected products that we would order ourselves and in part also ordered. In a qualified purchase via the advertising link, we as Amazon partner receive a commission, for you there are no costs. You thus support our cost- and advertising banner-free, educational offer.

Directions

1

First you make a pommel/wuschel out of yellow wool. As an aid you can use a cardboard roll. Wrap it in one place thick with yellow wool.

Tip: Alternatively, you can wrap the wool around the fingers of a hand.

Bild zum Schritt 1 für das Bastel- und DIY-Abenteuer für Kinder: 'Zuerst bastelt ihr aus gelber Wolle einen Pommel/ Wuschel. Als...'

2

Then you carefully push the thick wool band off the roll. If you press it a bit together, it will be easier.
Now try to keep the wool ring tight together.

Bild zum Schritt 2 für das Bastel- und DIY-Abenteuer für Kinder: 'Dann schiebt ihr den dicken Wollbund vorsichtig von der Rolle....'

3

Now cut off a 10cm long woolen thread and put it on the table. Then put the woolen waistband in the middle. The closed sides of the woolen waistband lie above and below. Now put both ends of the thread over the woolen waistband and knot them together.

Bild zum Schritt 3 für das Bastel- und DIY-Abenteuer für Kinder: 'Schneidet jetzt einen 10cm langen Wollfaden ab und legt ihn...'

4

Then insert a pair of scissors into a woolen loop and cut the woolen threads apart.

Bild zum Schritt 4 für das Bastel- und DIY-Abenteuer für Kinder: 'Danach führt ihr eine Schere in eine Wollschlaufe ein und...'

5

Now repeat the process on the opposite side. Now you form the pommel/wuschel with your fingers apart.
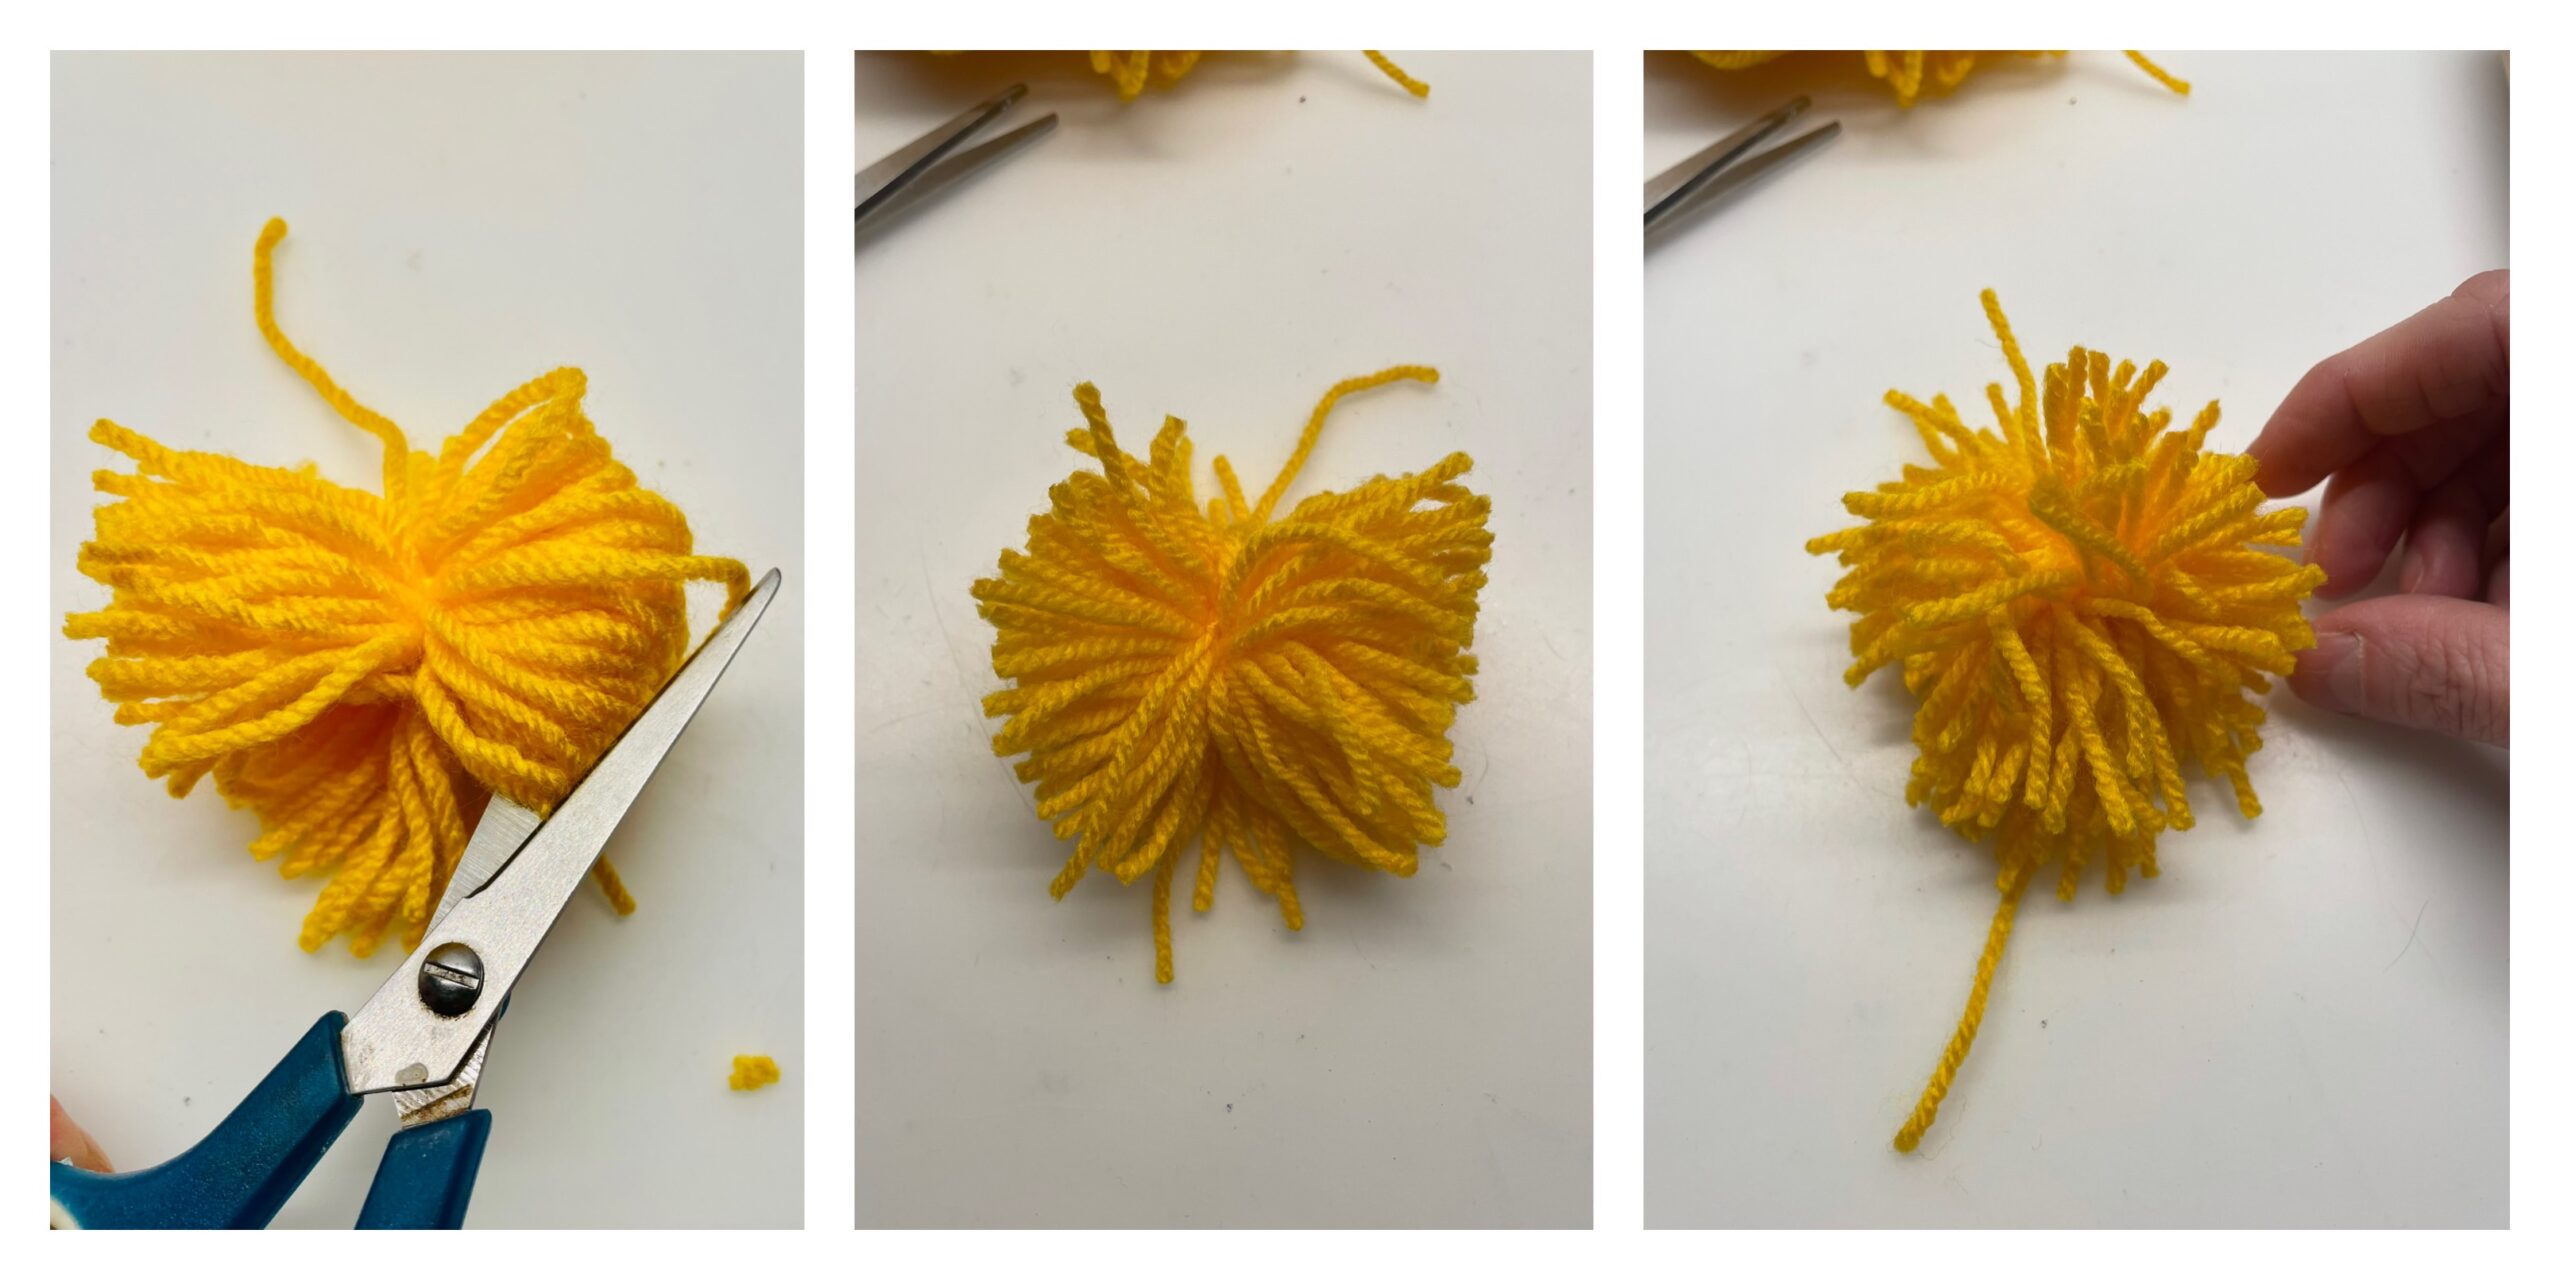
Bild zum Schritt 5 für das Bastel- und DIY-Abenteuer für Kinder: 'Wiederholt nun den Vorgang auf der gegenüberliegenden  Seite. Jetzt...'

6

Then cut off unshaped and overhanging threads, creating a ball.
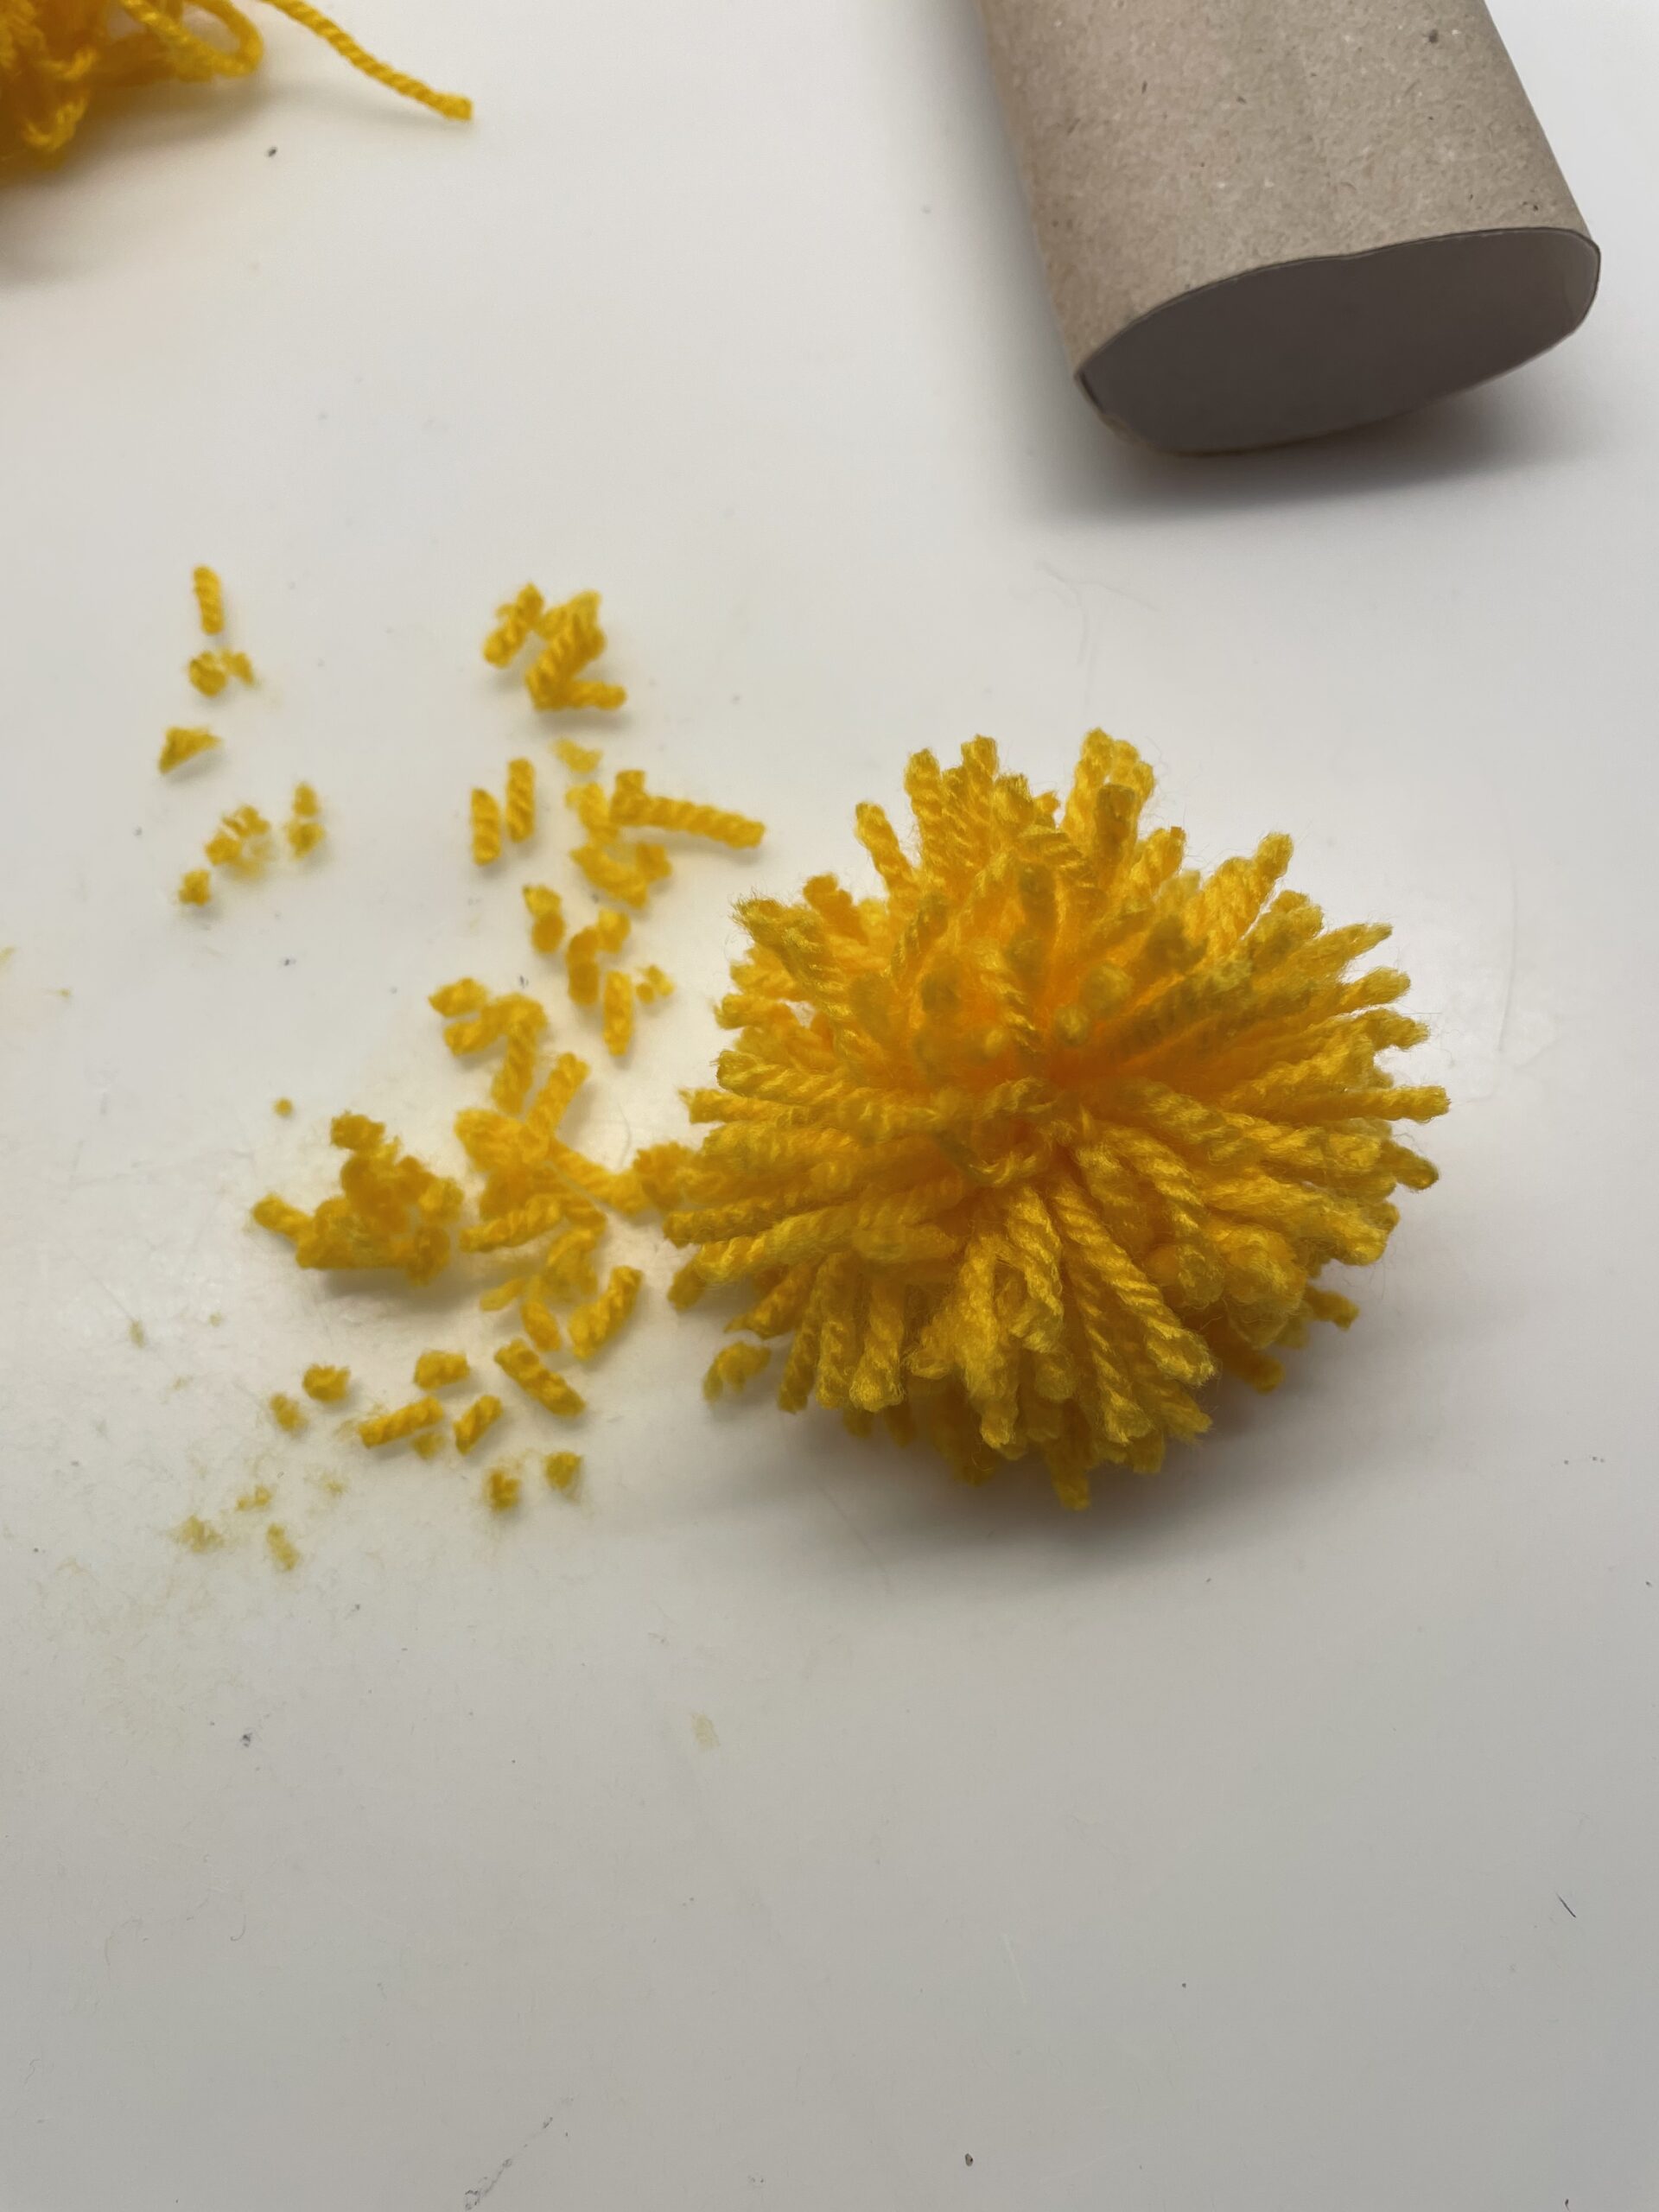
Bild zum Schritt 6 für das Bastel- und DIY-Abenteuer für Kinder: 'Unförmige und überstehende Fäden schneidet ihr anschließend ab. So entsteht...'

7

Then you paint an egg on a white photo box. The egg should be about 10cm tall. Then cut out the egg with the scissors.
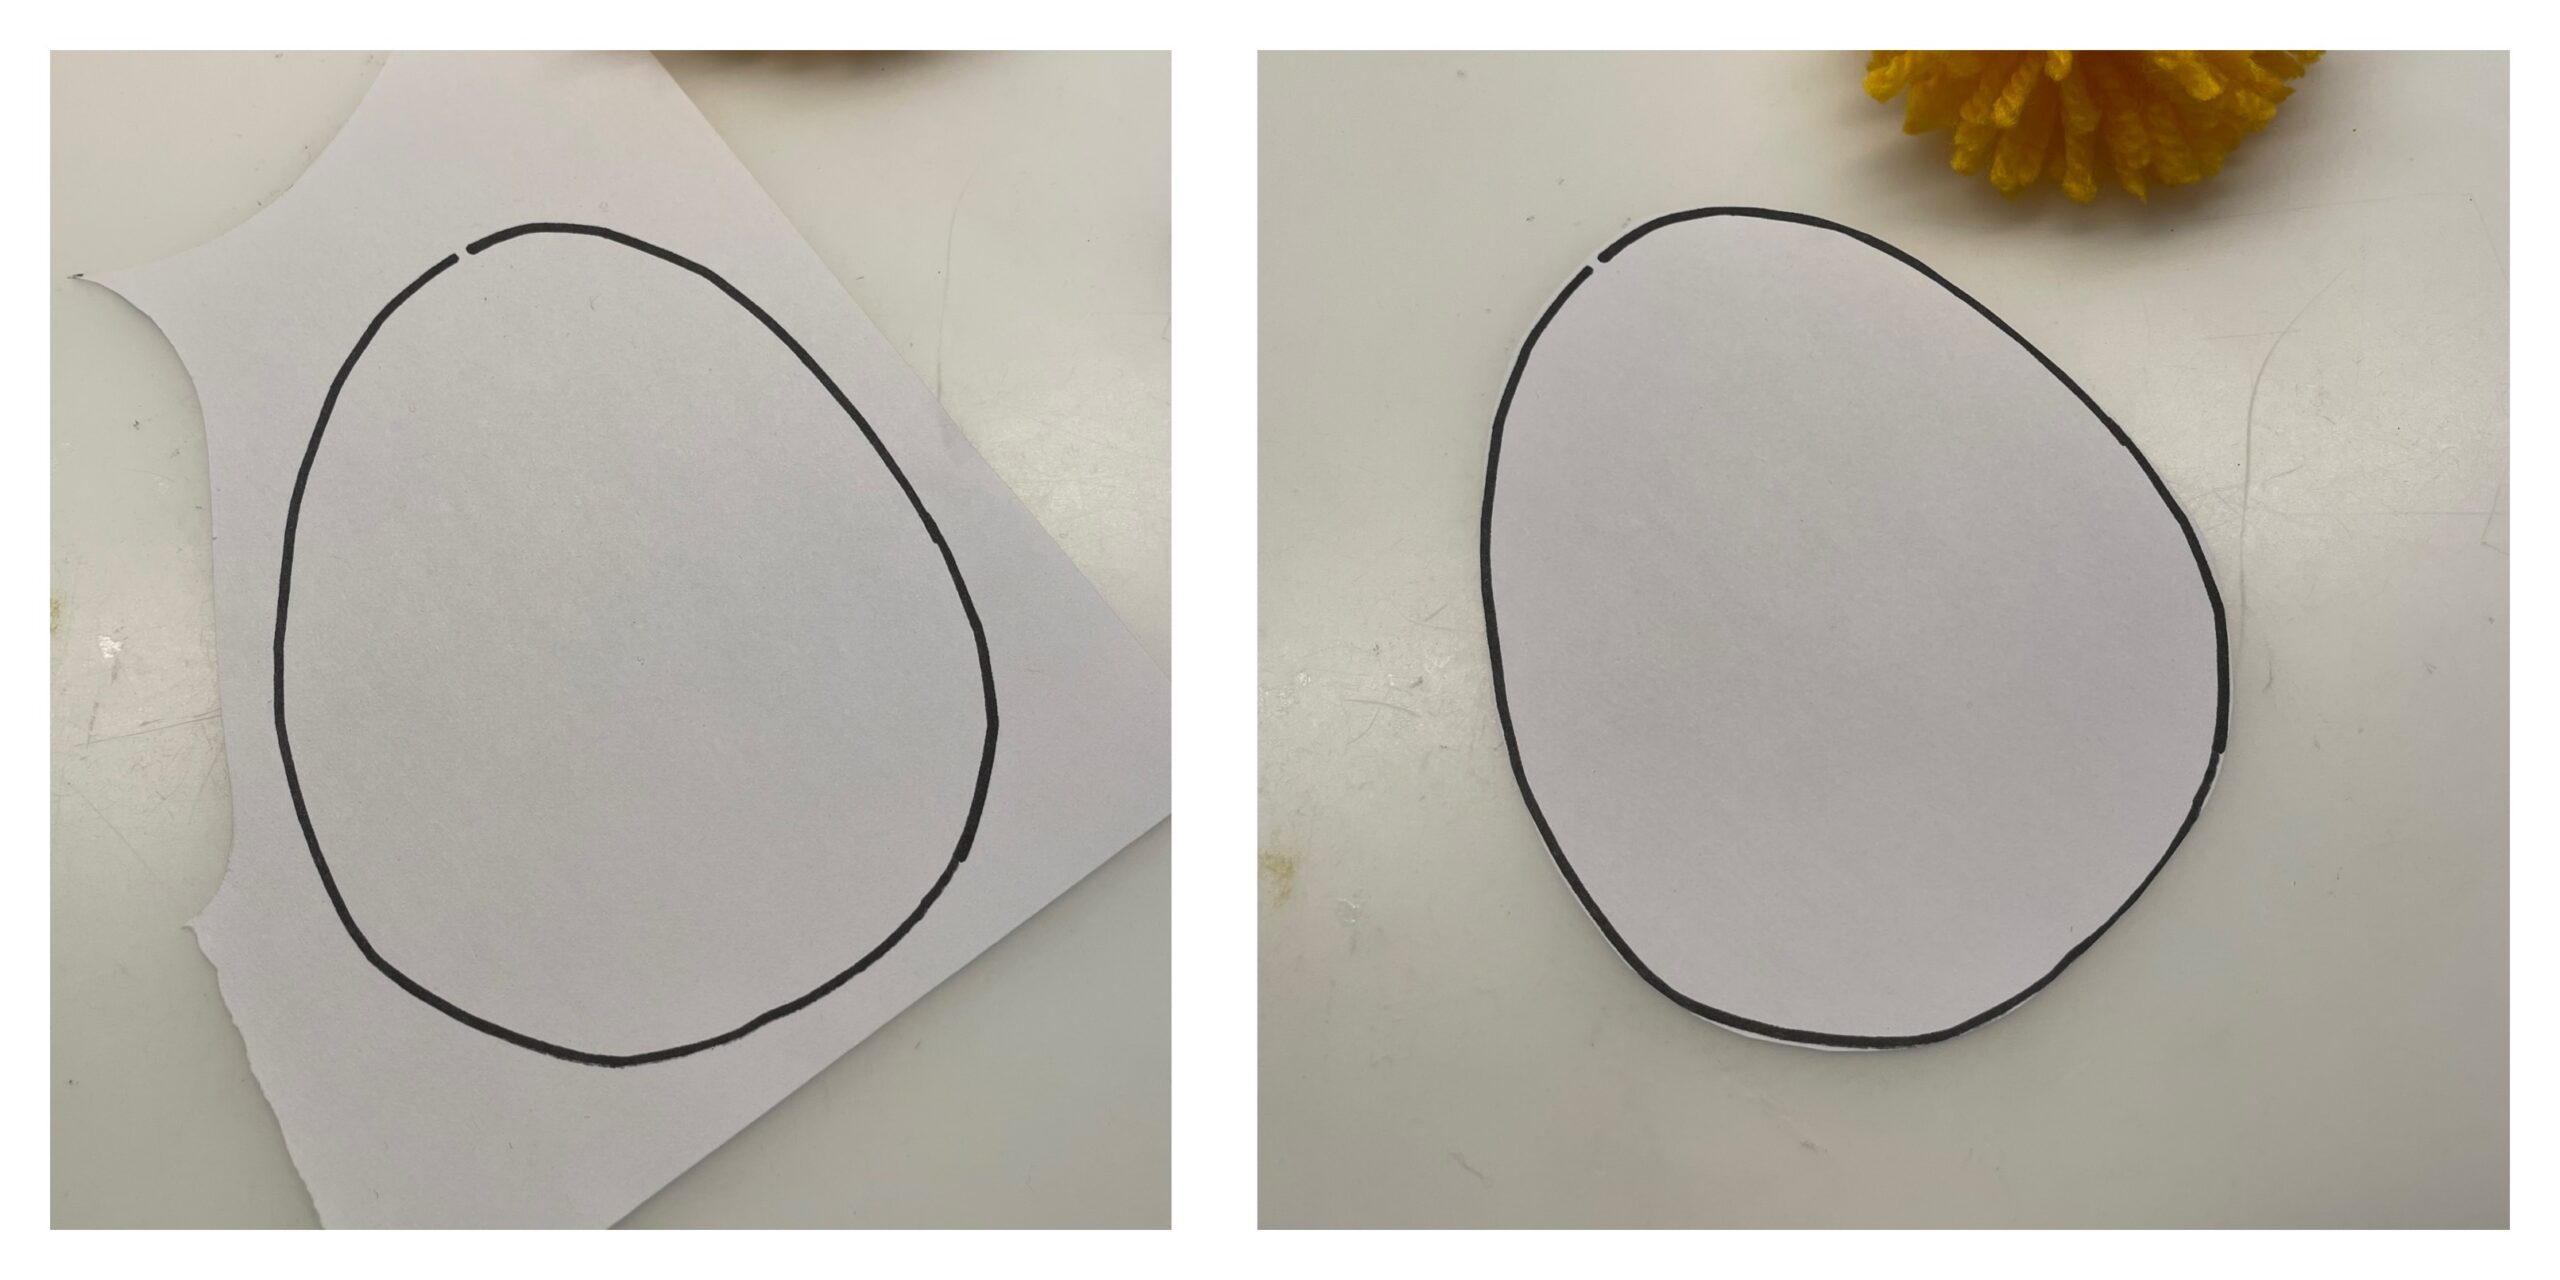
Bild zum Schritt 7 für das Bastel- und DIY-Abenteuer für Kinder: 'Anschließend malt ihr auf einen weißen Fotokarton ein Ei auf....'

8

Now you cut out a small circle in the lower thicker area of the egg. By this you stick the pommel afterwards.

Tip: For painting you can use a 2€ coin.

Stitches a hole in the painted circle with a fingernail and cuts out from there star-shaped to the outside and then the circle.
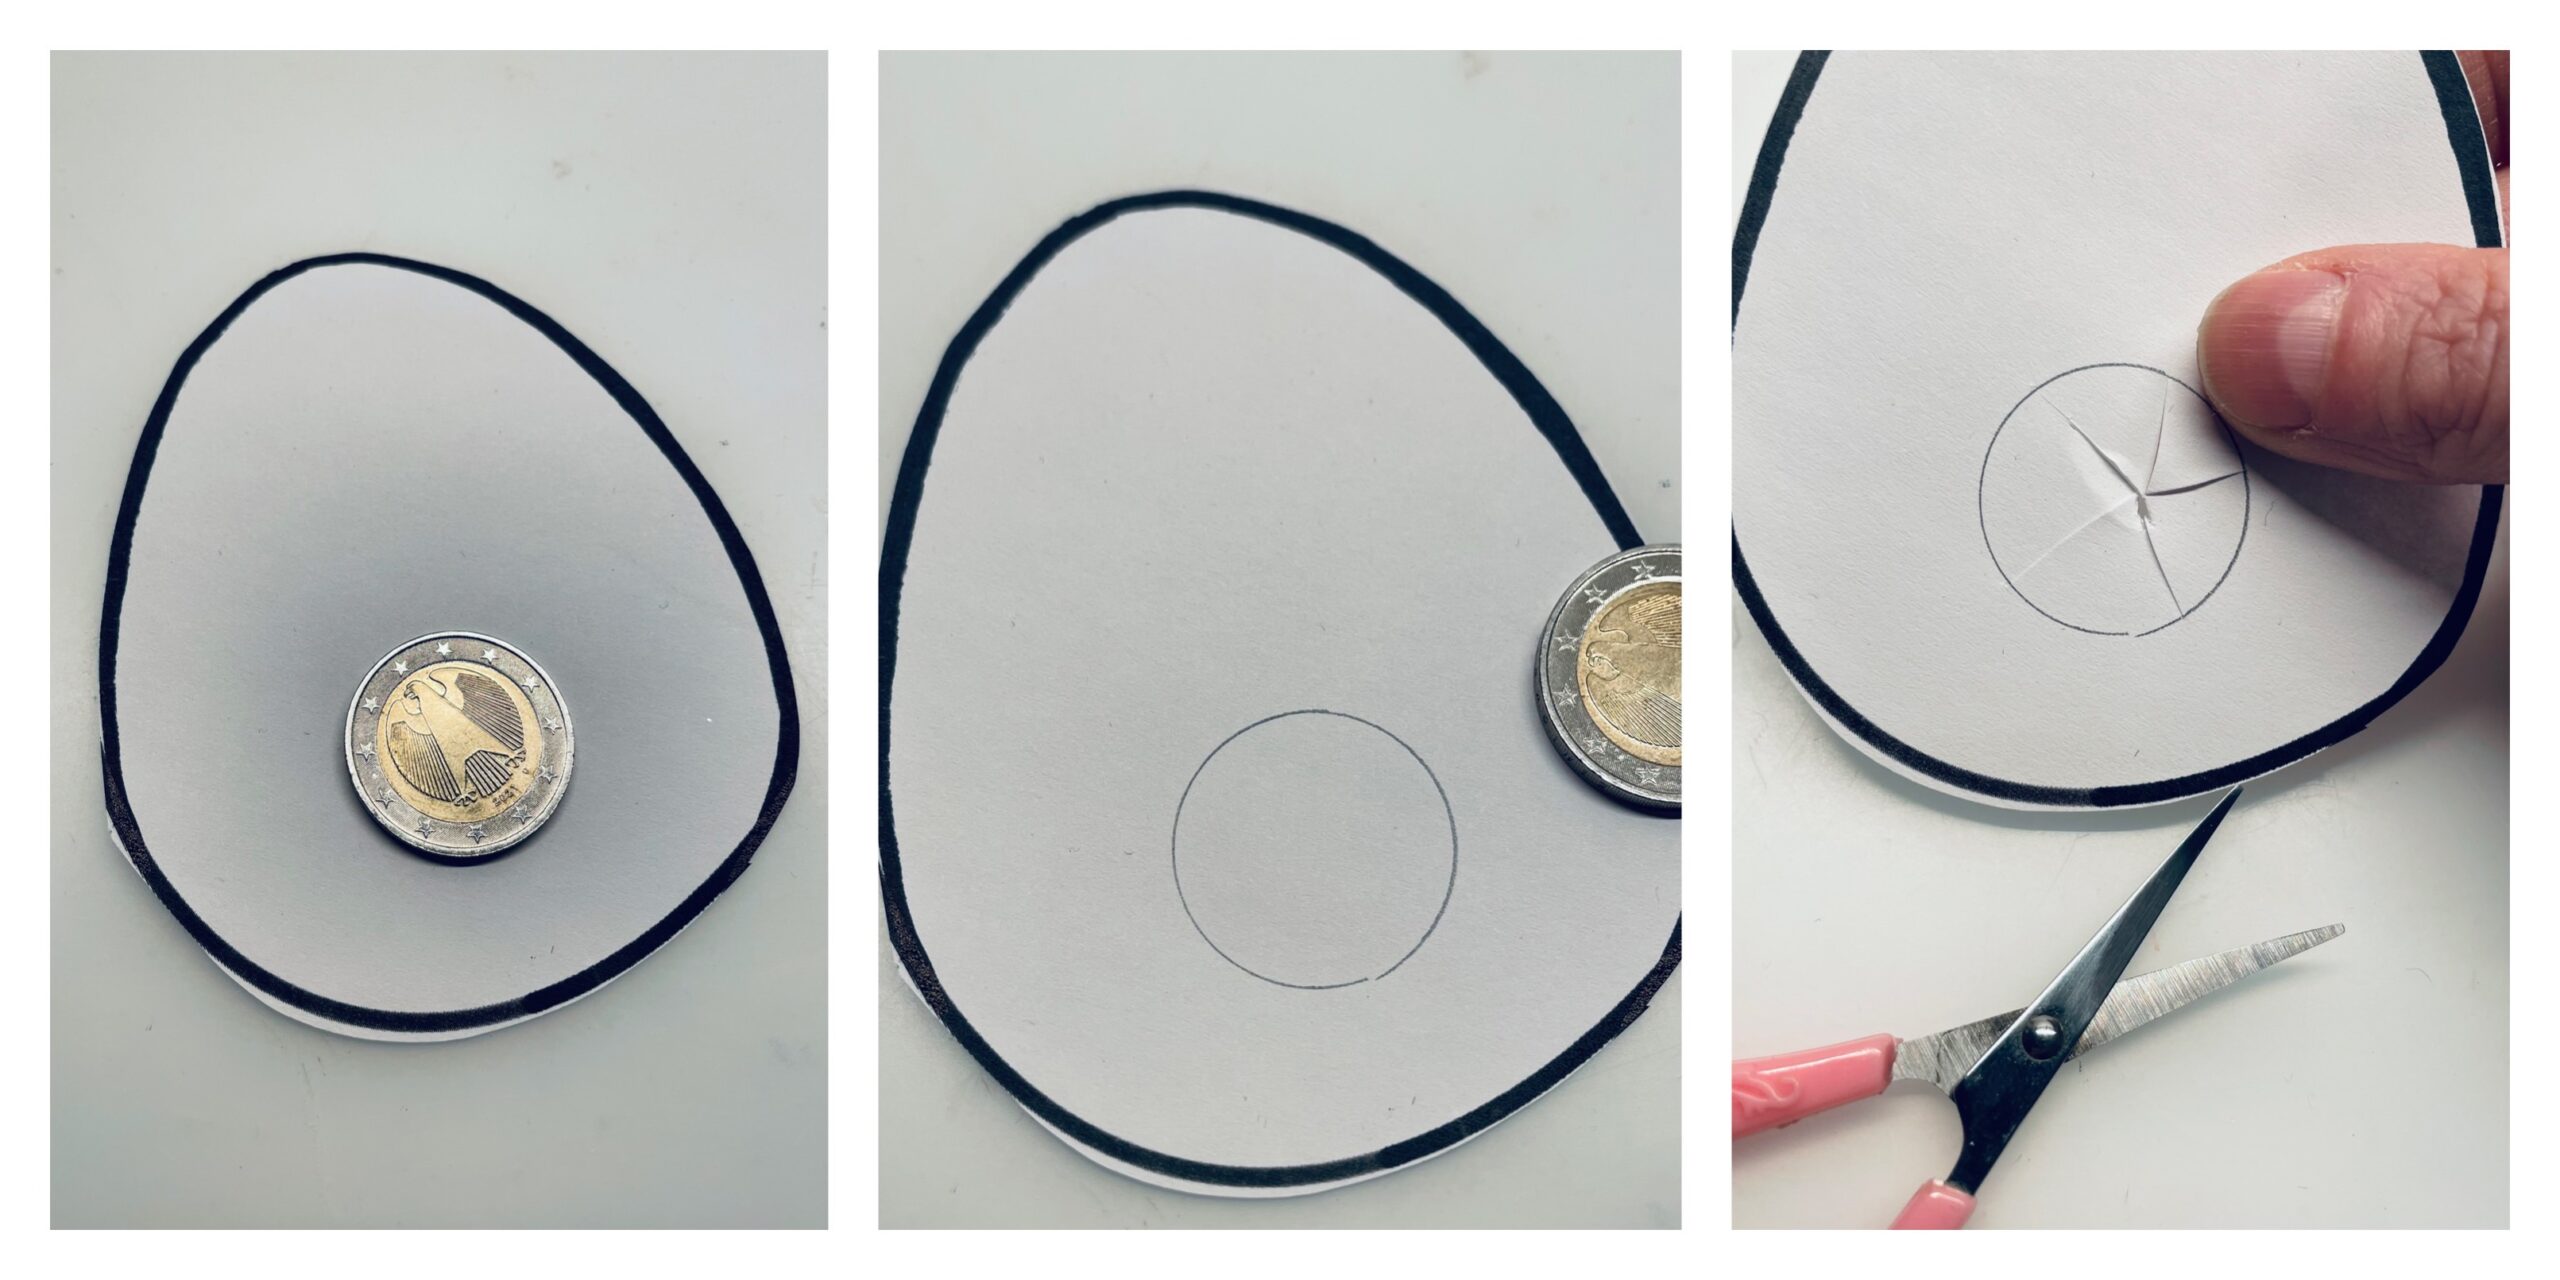
Bild zum Schritt 8 für das Bastel- und DIY-Abenteuer für Kinder: 'Nun schneidet ihr im unteren dickeren Bereich des Eies einen...'

9

Now surrounds the circle with a black felt pen on the front and back.
If you want, you can still paint points on the egg.

Bild zum Schritt 9 für das Bastel- und DIY-Abenteuer für Kinder: 'Umrandet nun den Kreis mit einem schwarzen Filzstift auf Vorder-...'

10

Now she puts the pommel through the egg and plucks it in shape.
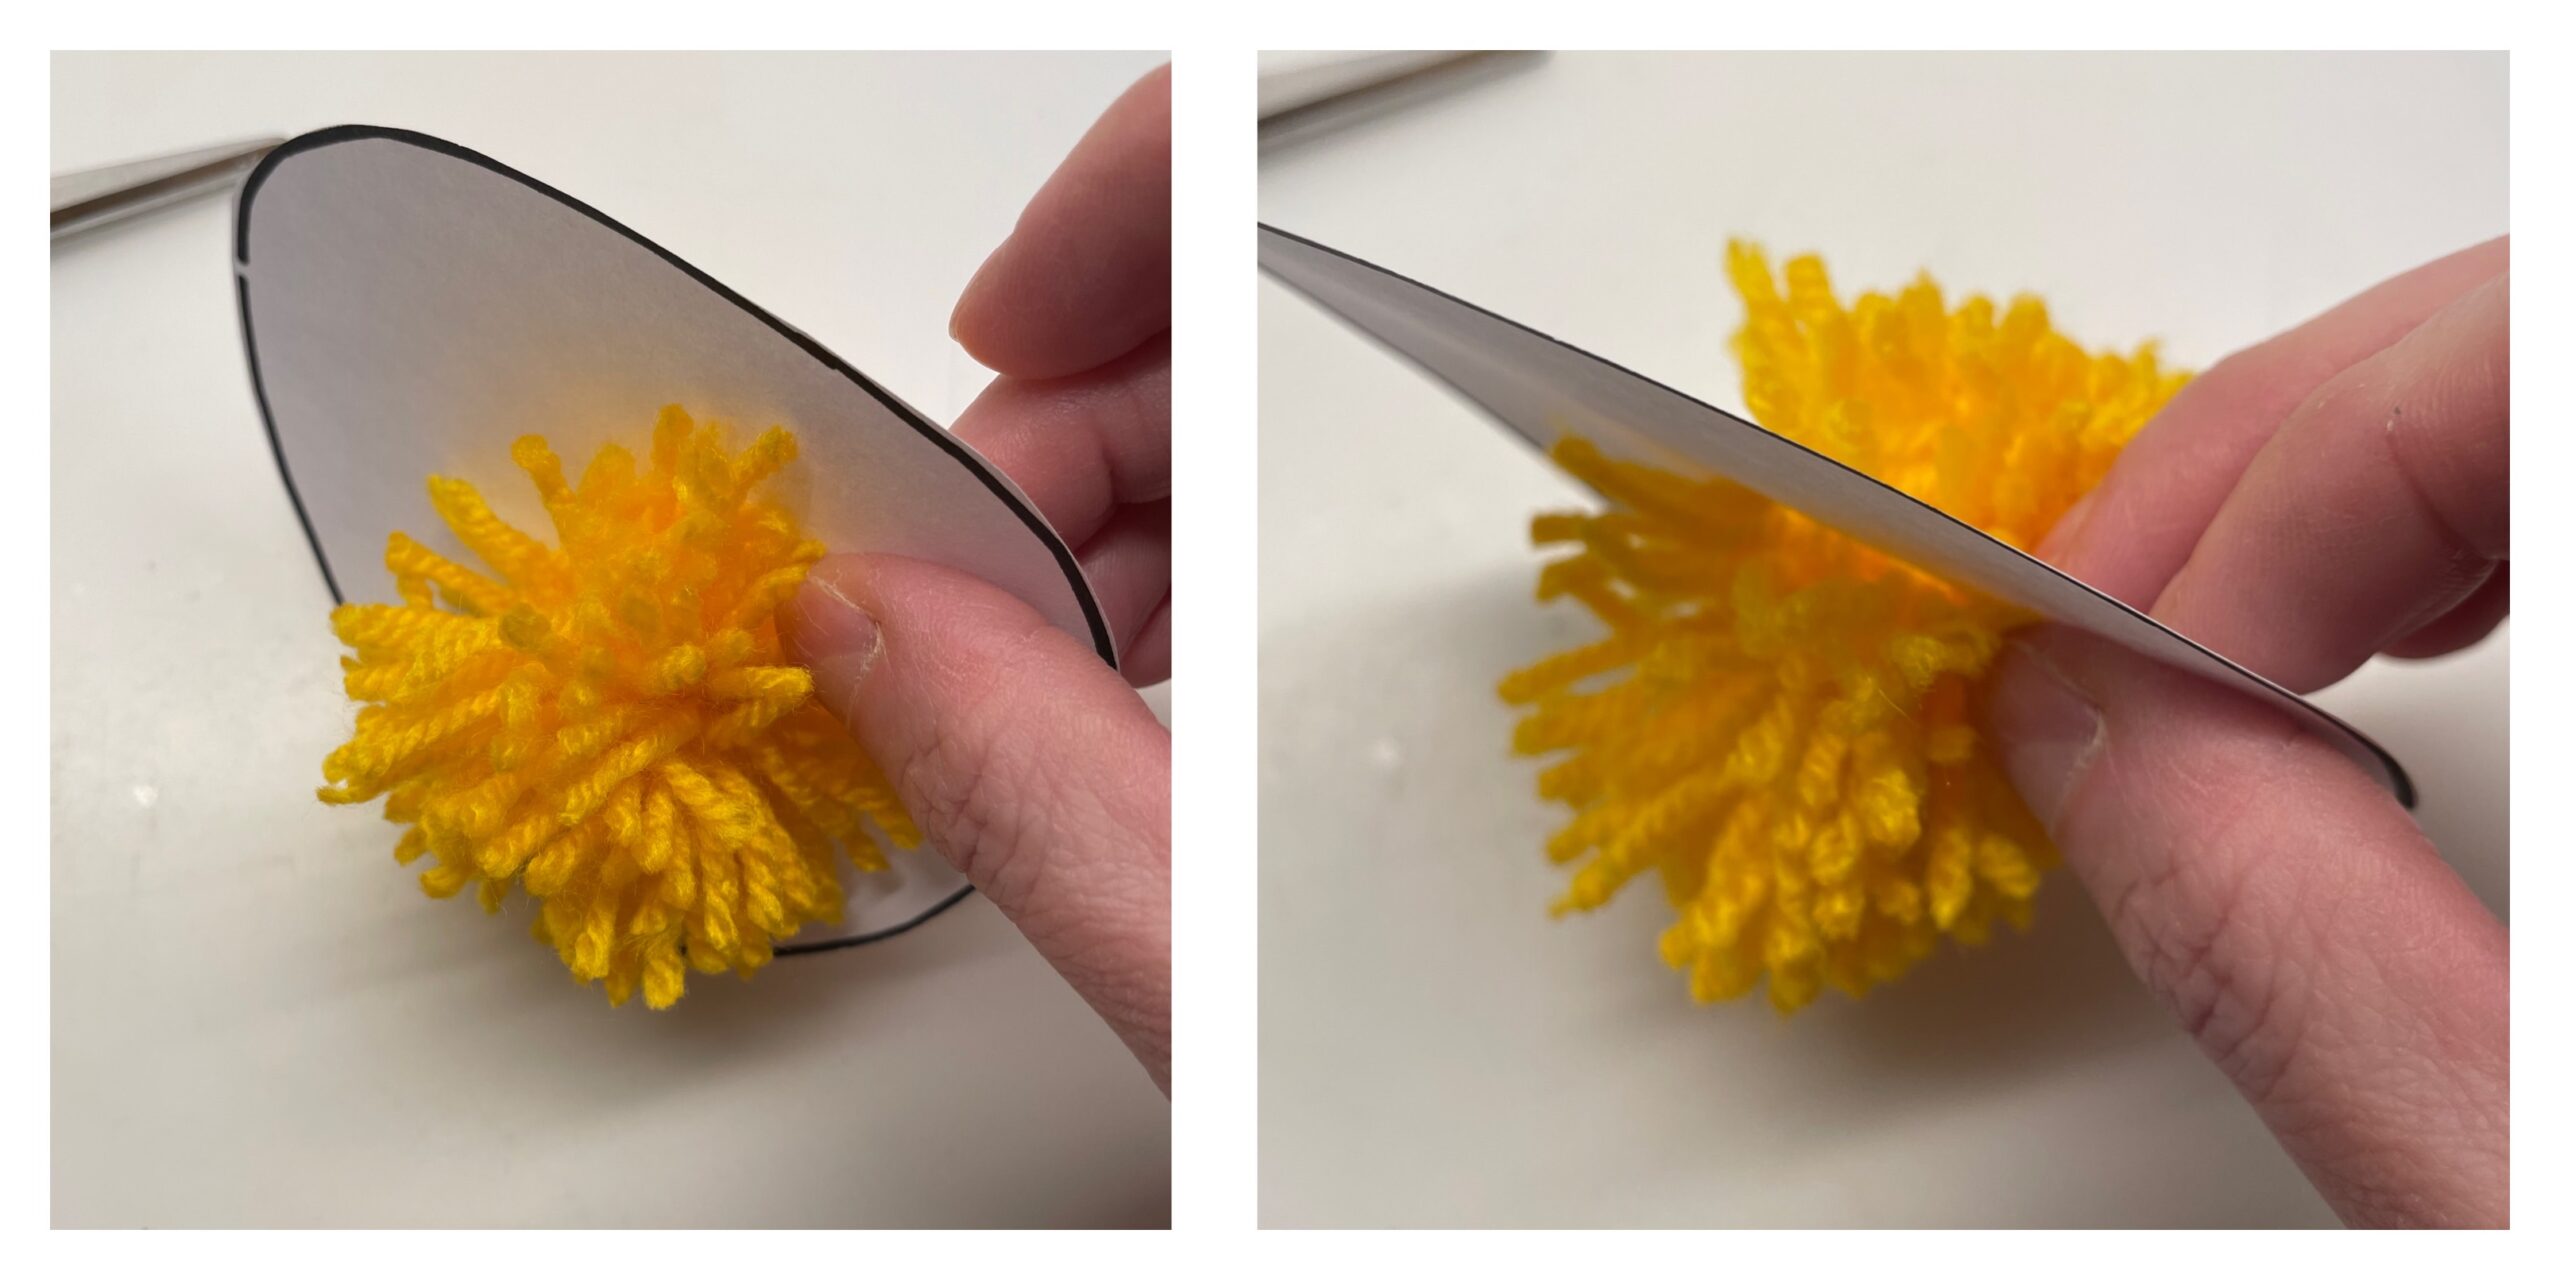
Bild zum Schritt 10 für das Bastel- und DIY-Abenteuer für Kinder: 'Jetzt steckt ihr die Pommel durch das Ei und zupft...'

11

Finally, thread a piece of wool into a needle and stash it through the upper edge of the egg. Then tie both ends of the thread together with a knot.
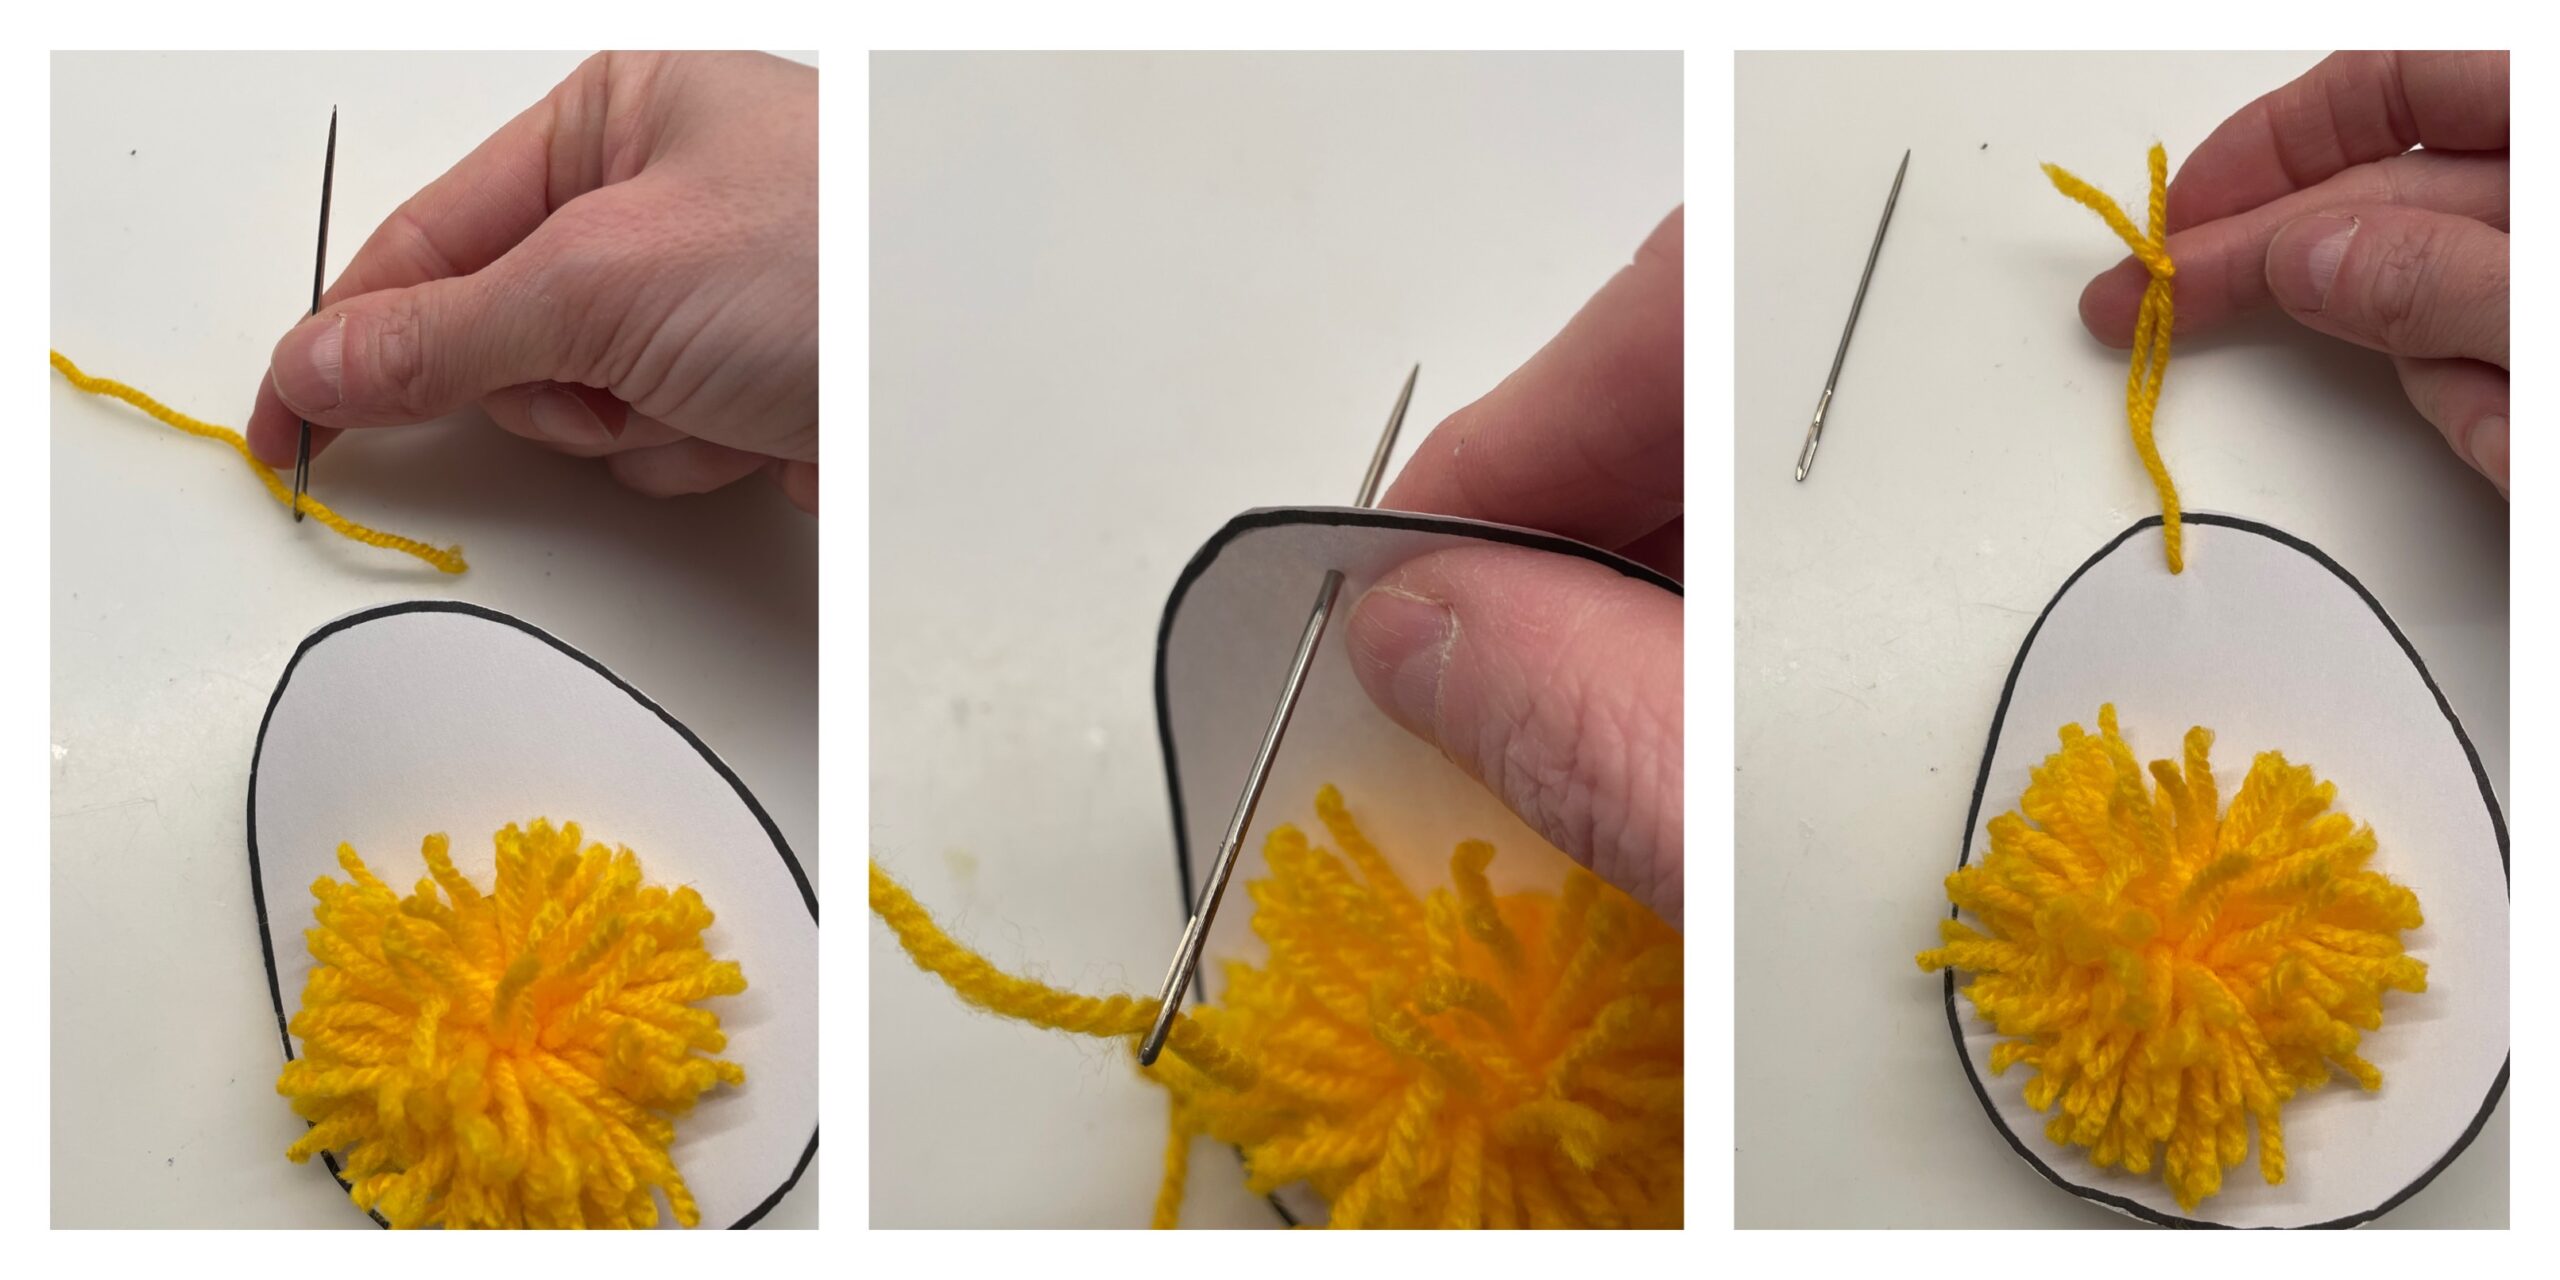
Bild zum Schritt 11 für das Bastel- und DIY-Abenteuer für Kinder: 'Abschließend fädelt ihr ein Stück Wolle in eine Nadel und...'

12

Now the egg is ready to hang.

Bild zum Schritt 12 für das Bastel- und DIY-Abenteuer für Kinder: 'Jetzt ist das Ei bereit zum Aufhängen.'

13

Make several eggs with egg yolks and hang them on a shrub or branch.
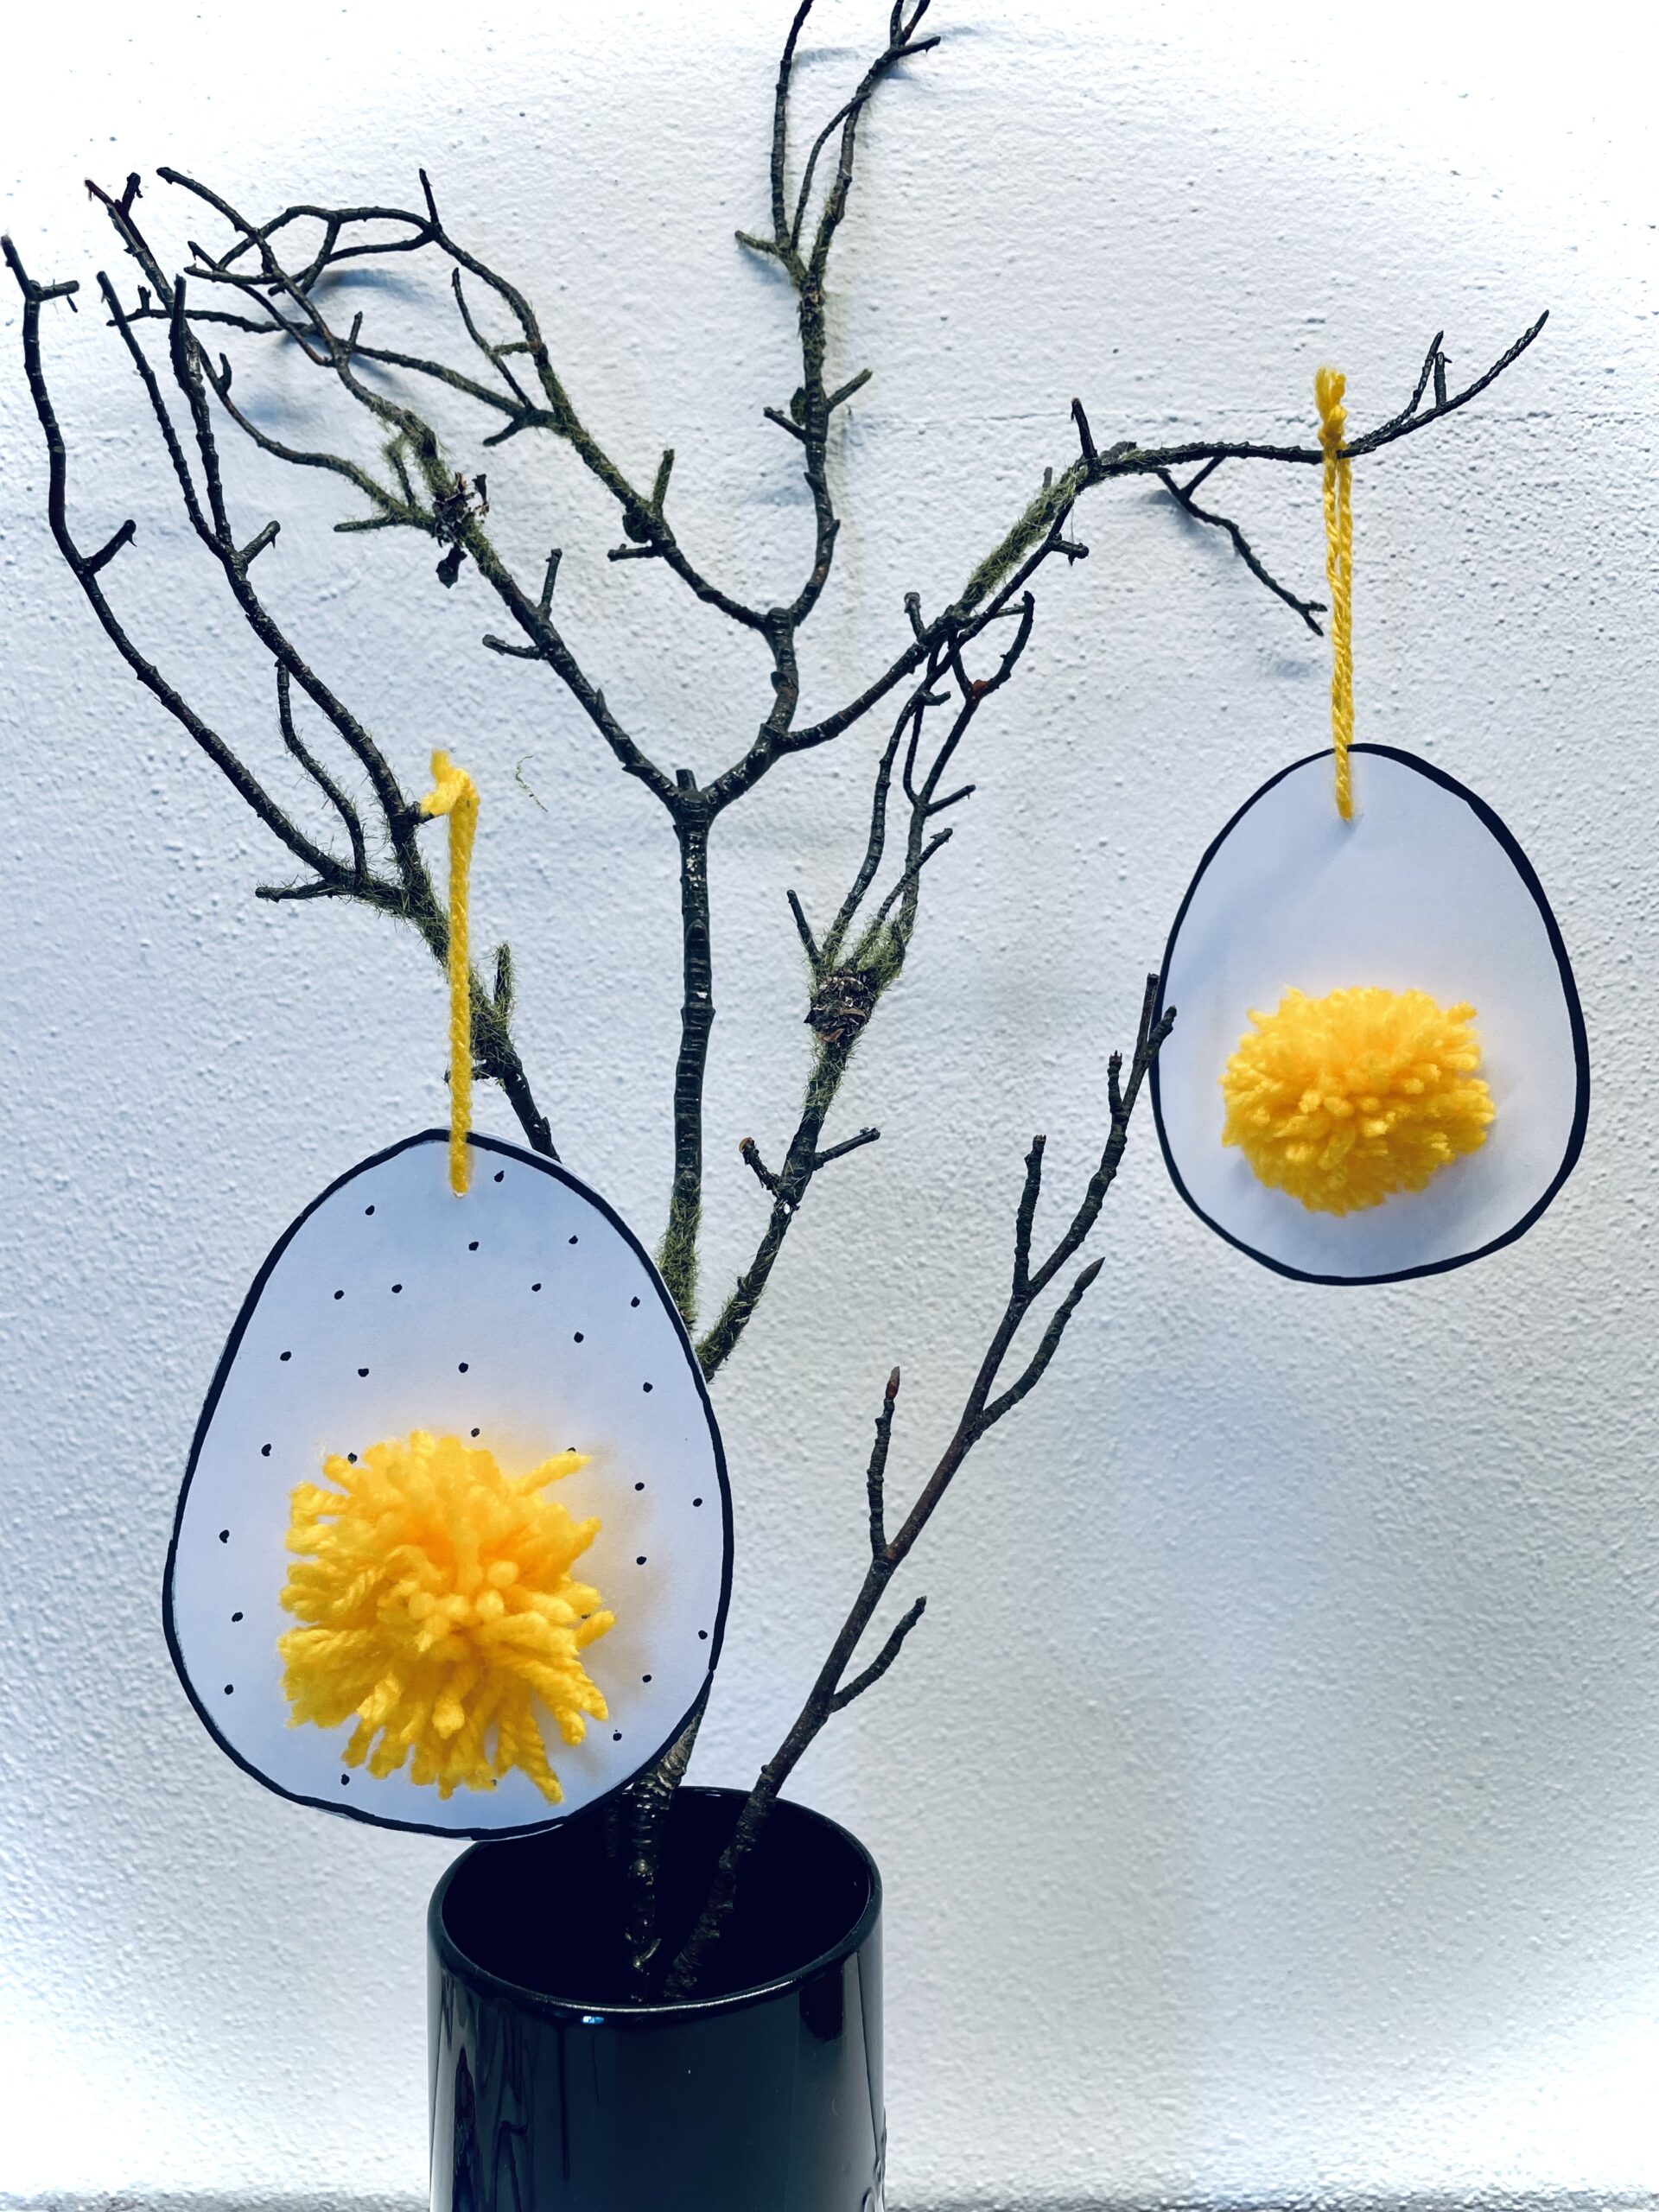
Bild zum Schritt 13 für das Bastel- und DIY-Abenteuer für Kinder: 'Bastelt doch gleich mehrere Eier mit Eidotter und hängt sie...'

14

Have fun!

Egg with egg yolk to hang up

Follow us on Facebook , Instagram and Pinterest
Don't miss any more adventures: Our bottle mail

Leave a Reply

Your email address will not be published.

The maximum upload file size: 5 MB. You can upload: image, document. Drop file here