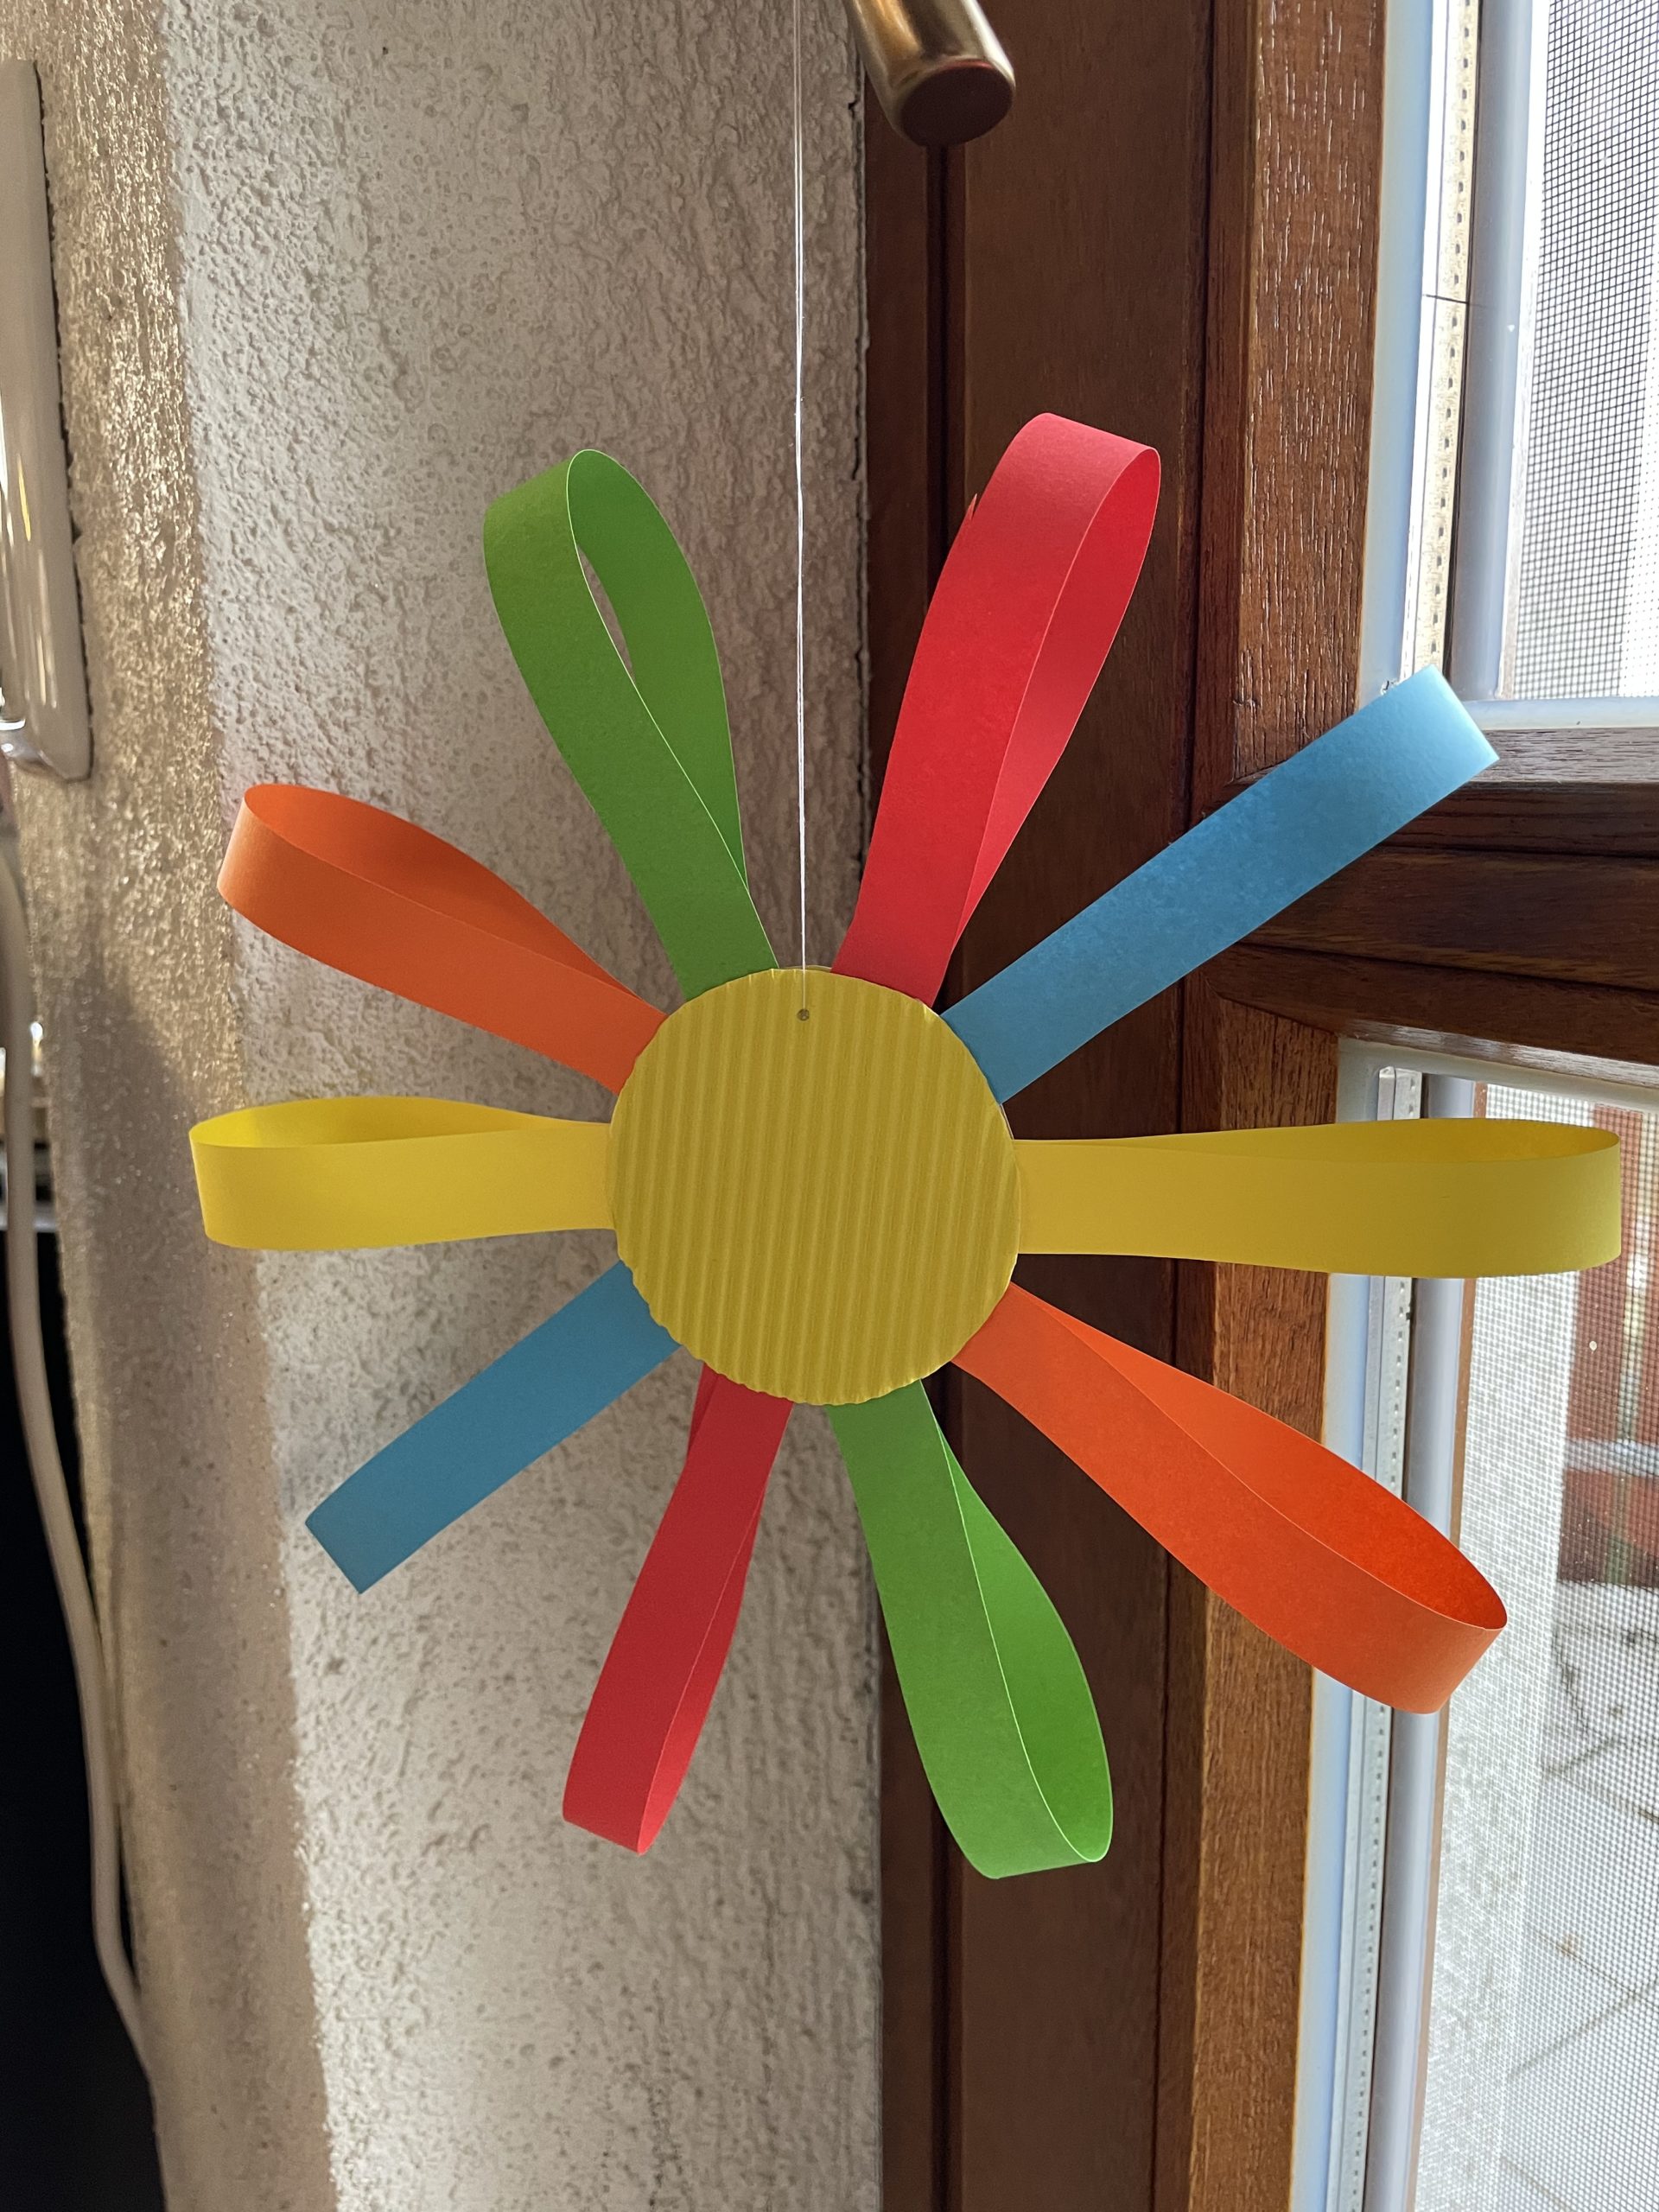
These wonderful colorful flowers made of coloured paper strips are perfectly suited to allow spring to move into the house! Hang them on a window or on a branch and already these colorful paper flowers conjure up a colorful paint stick in your rooms! How this flower is made, that I show you here!
Media Education for Kindergarten and Hort

Relief in everyday life, targeted promotion of individual children, independent learning and - without any pre-knowledge already usable by the youngest!
First put out your craft file and the materials ready.
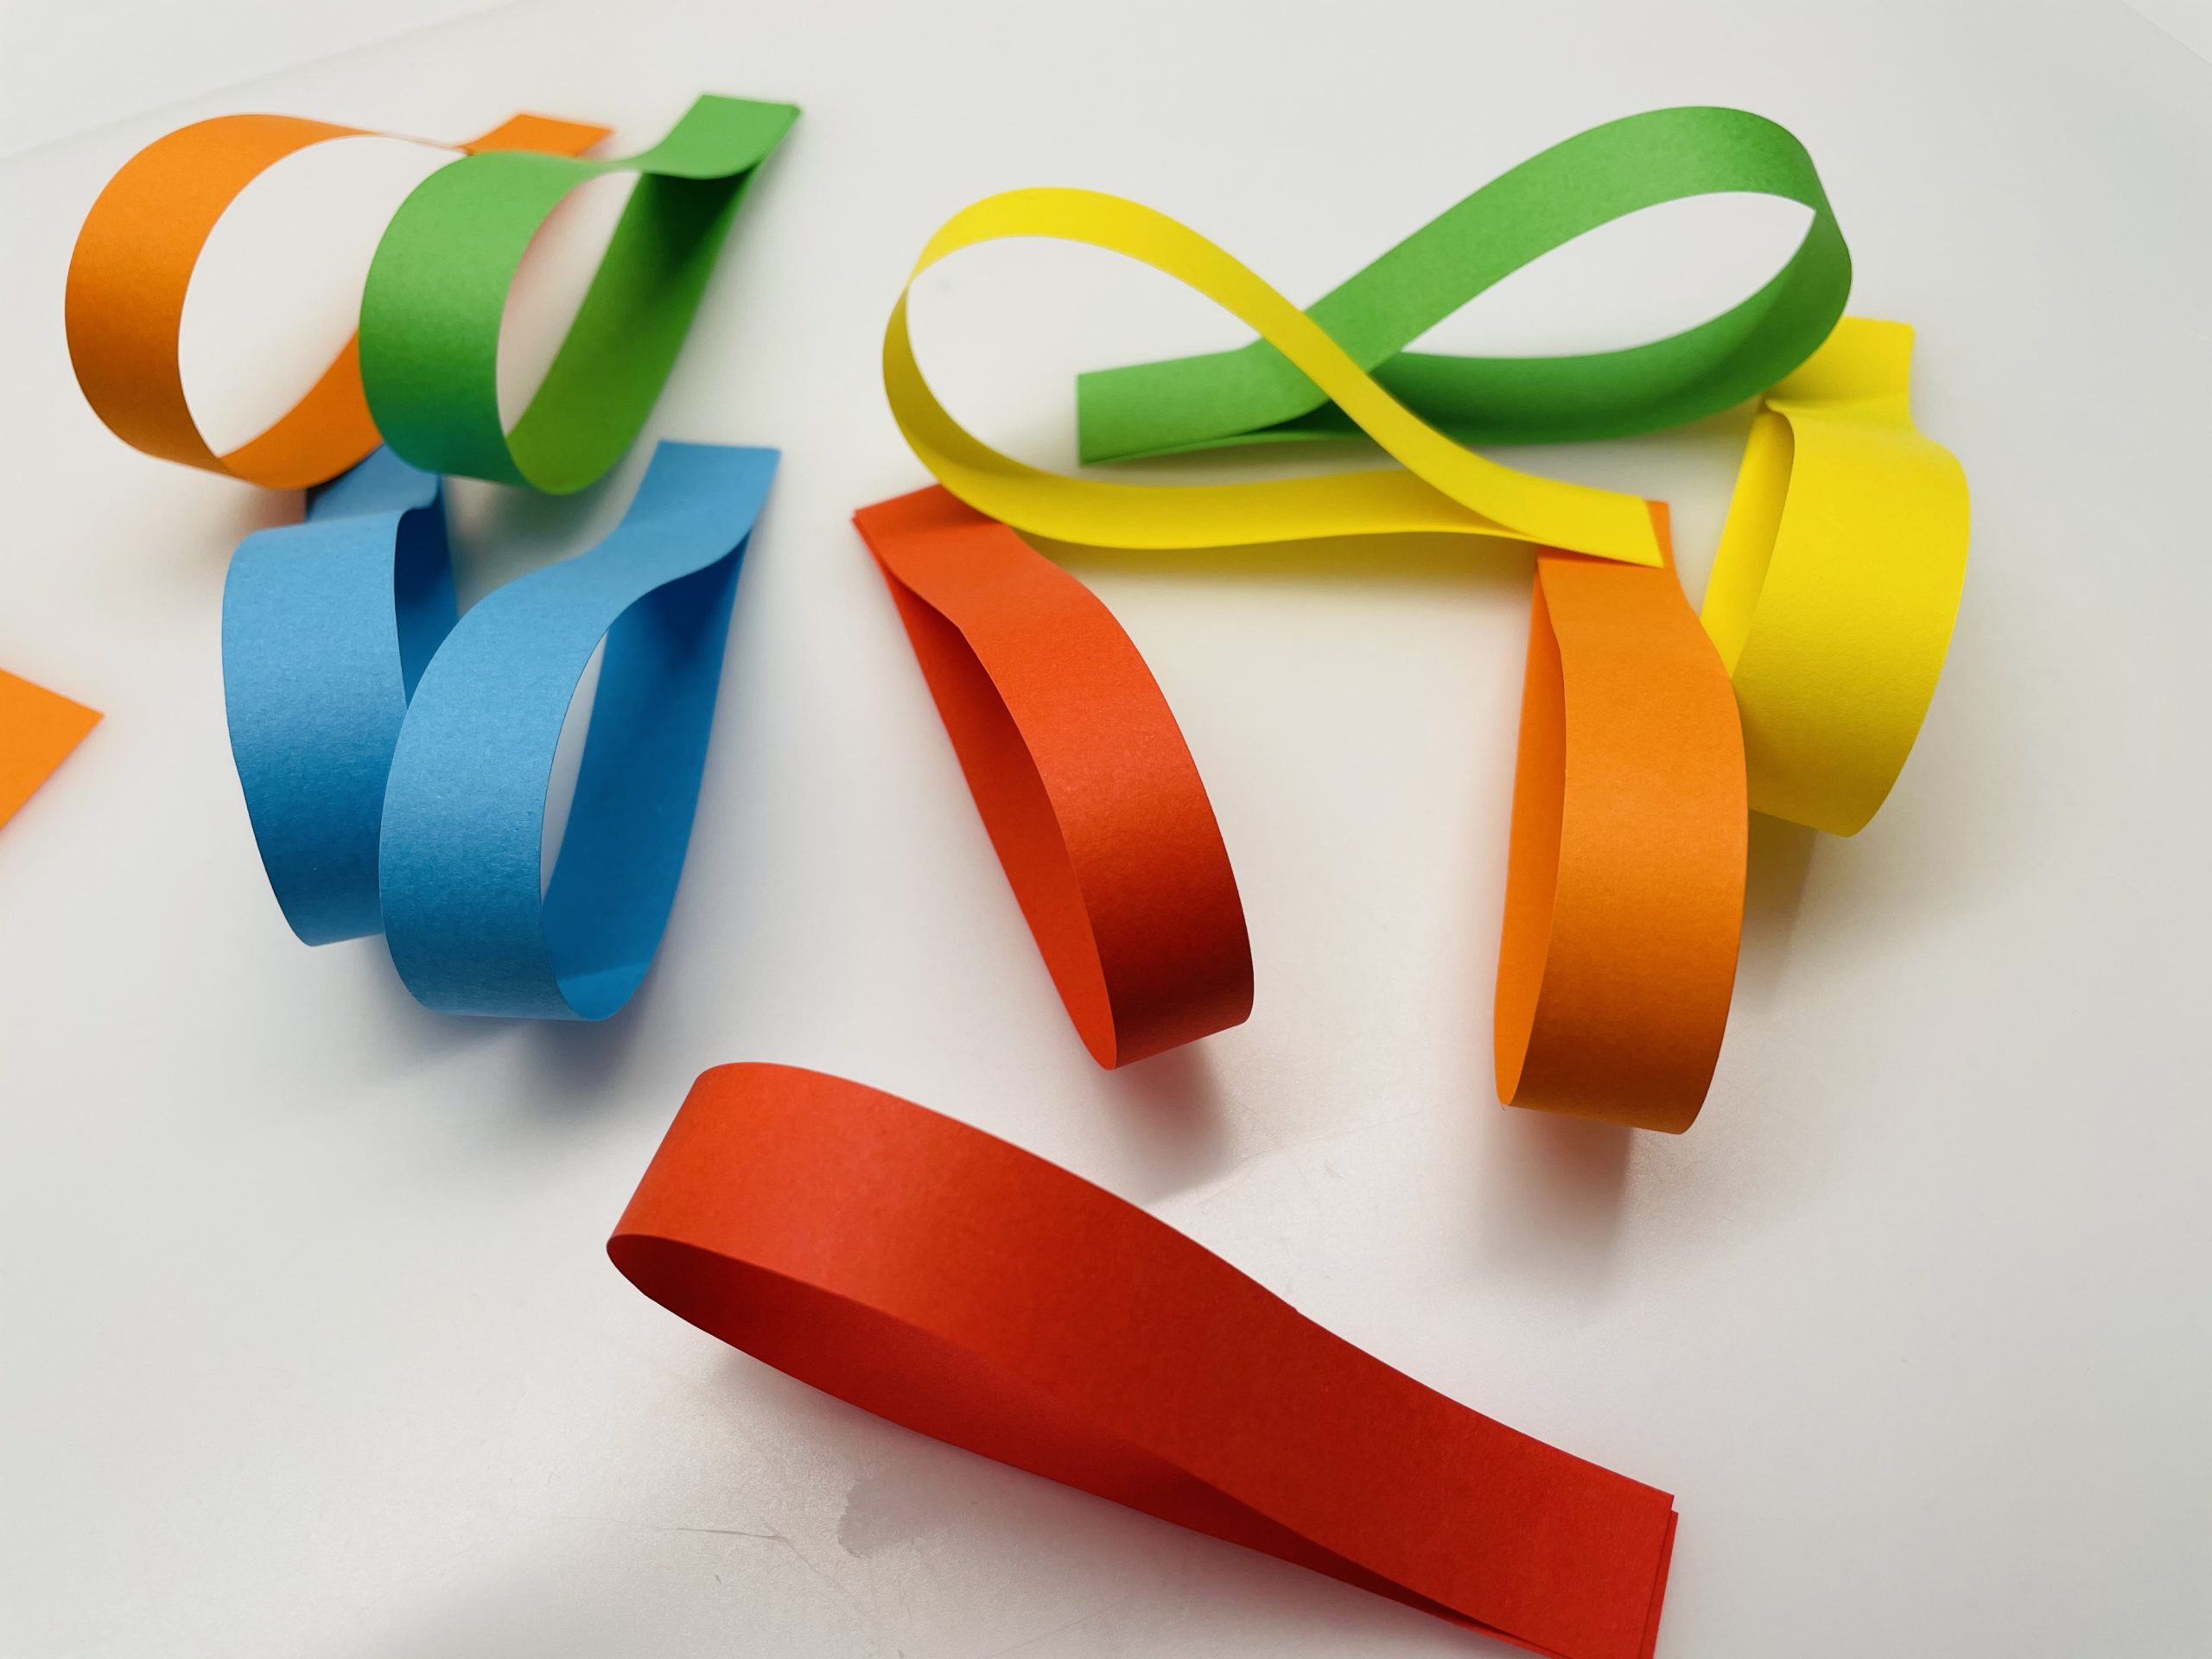
Then cut off 2 strips of each color.
The strips should be about 1cm wide and 20 cm long. You can measure them with the ruler or cut them freely.
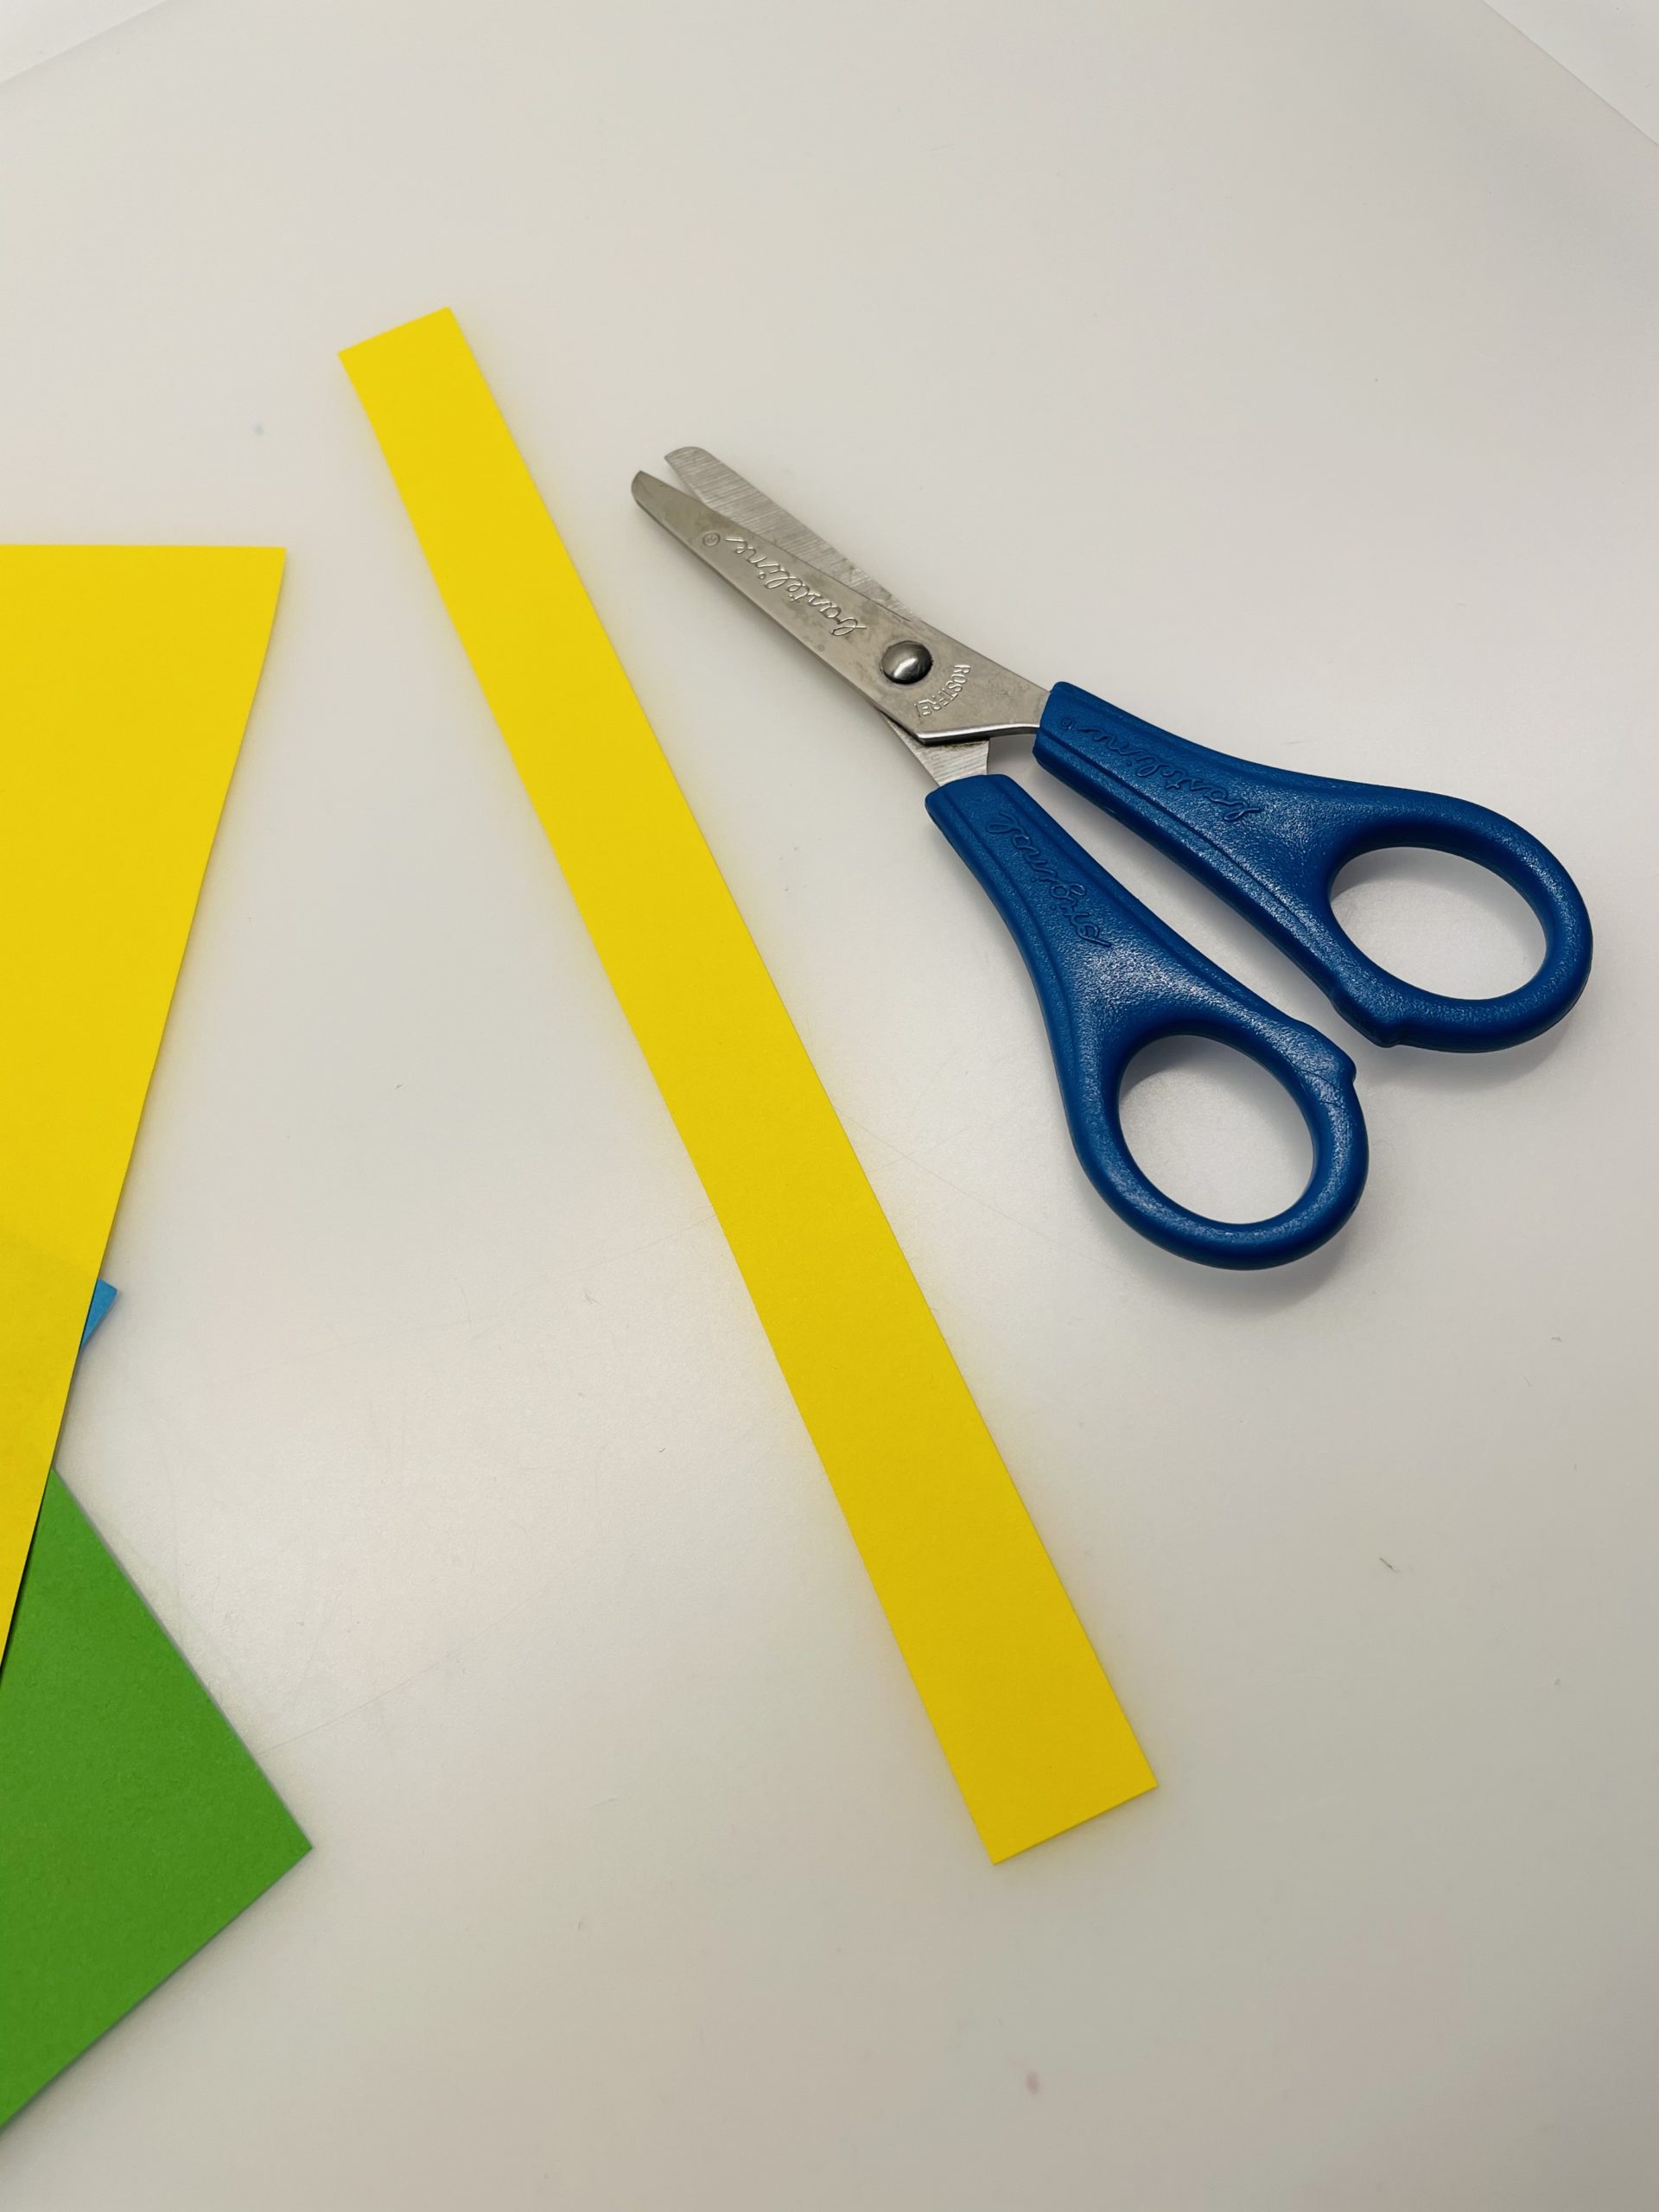
In total you need about 10 stripes.
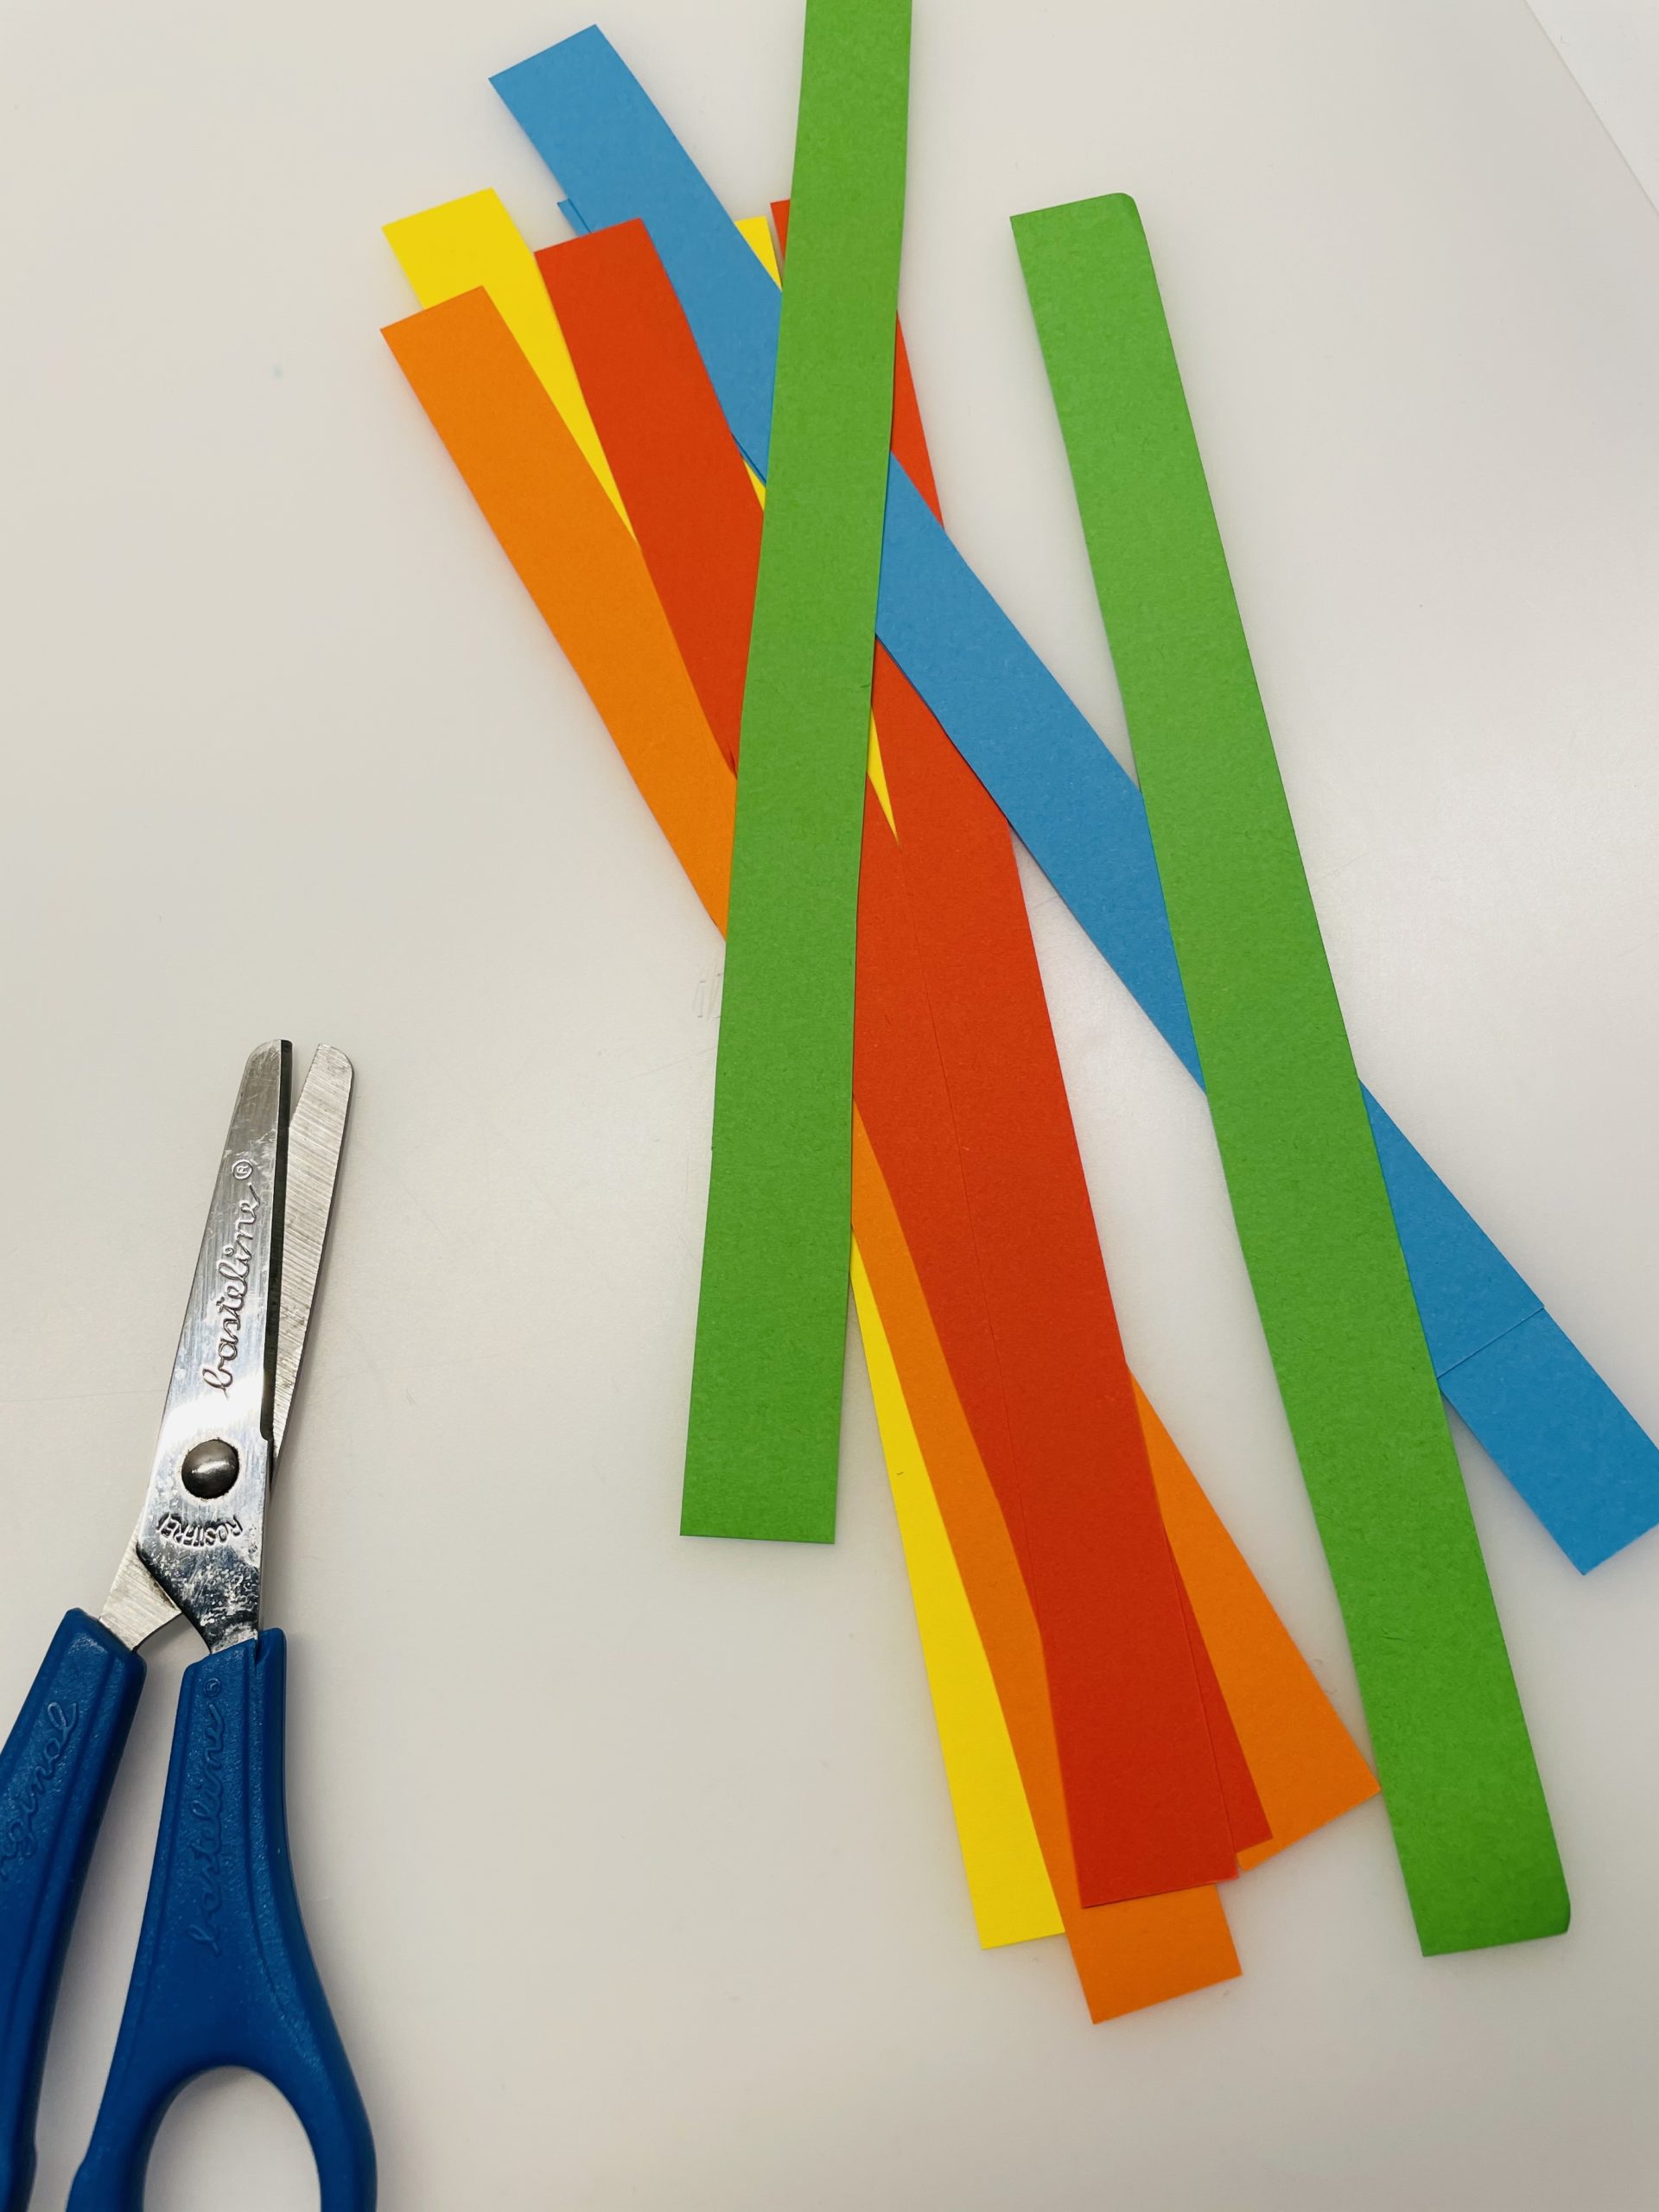
Now you stick each single strip together with its ends. To do this, put a glue point at one end of the strip.
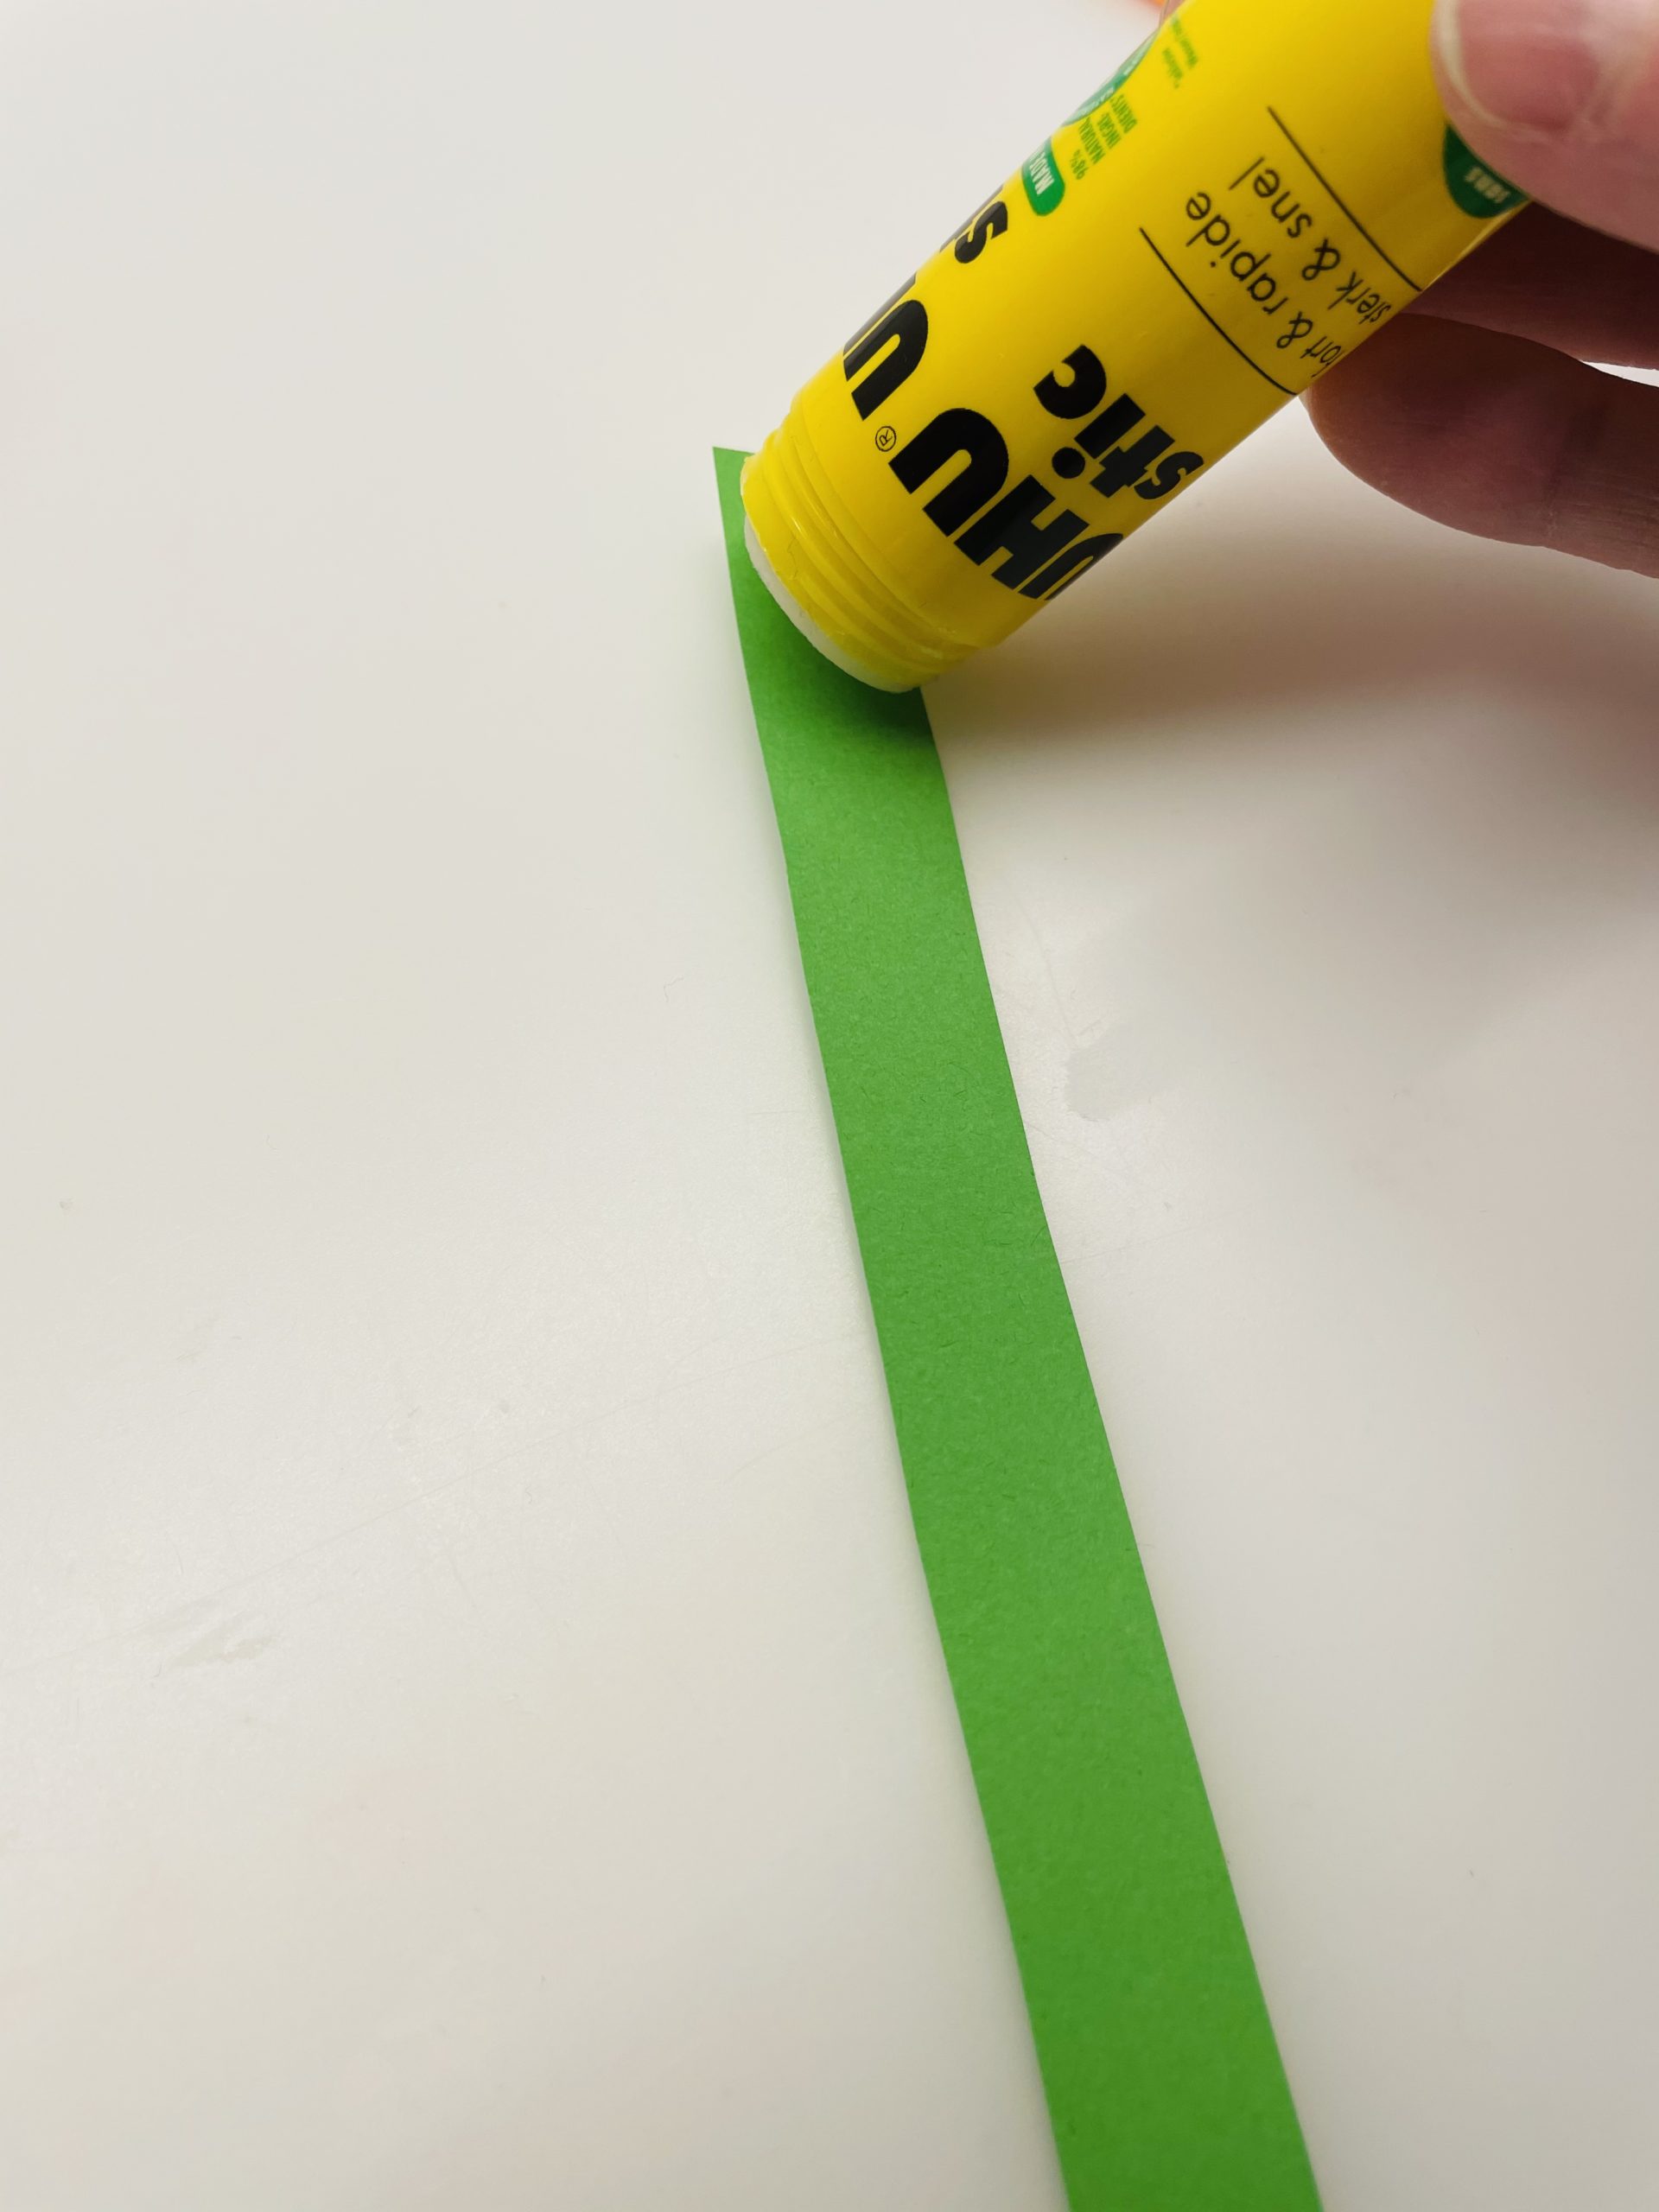
Then you stick the other end of the strip on it. Press the ends briefly, but don't squeeze the paper!

Now stick all the stripes together like this.
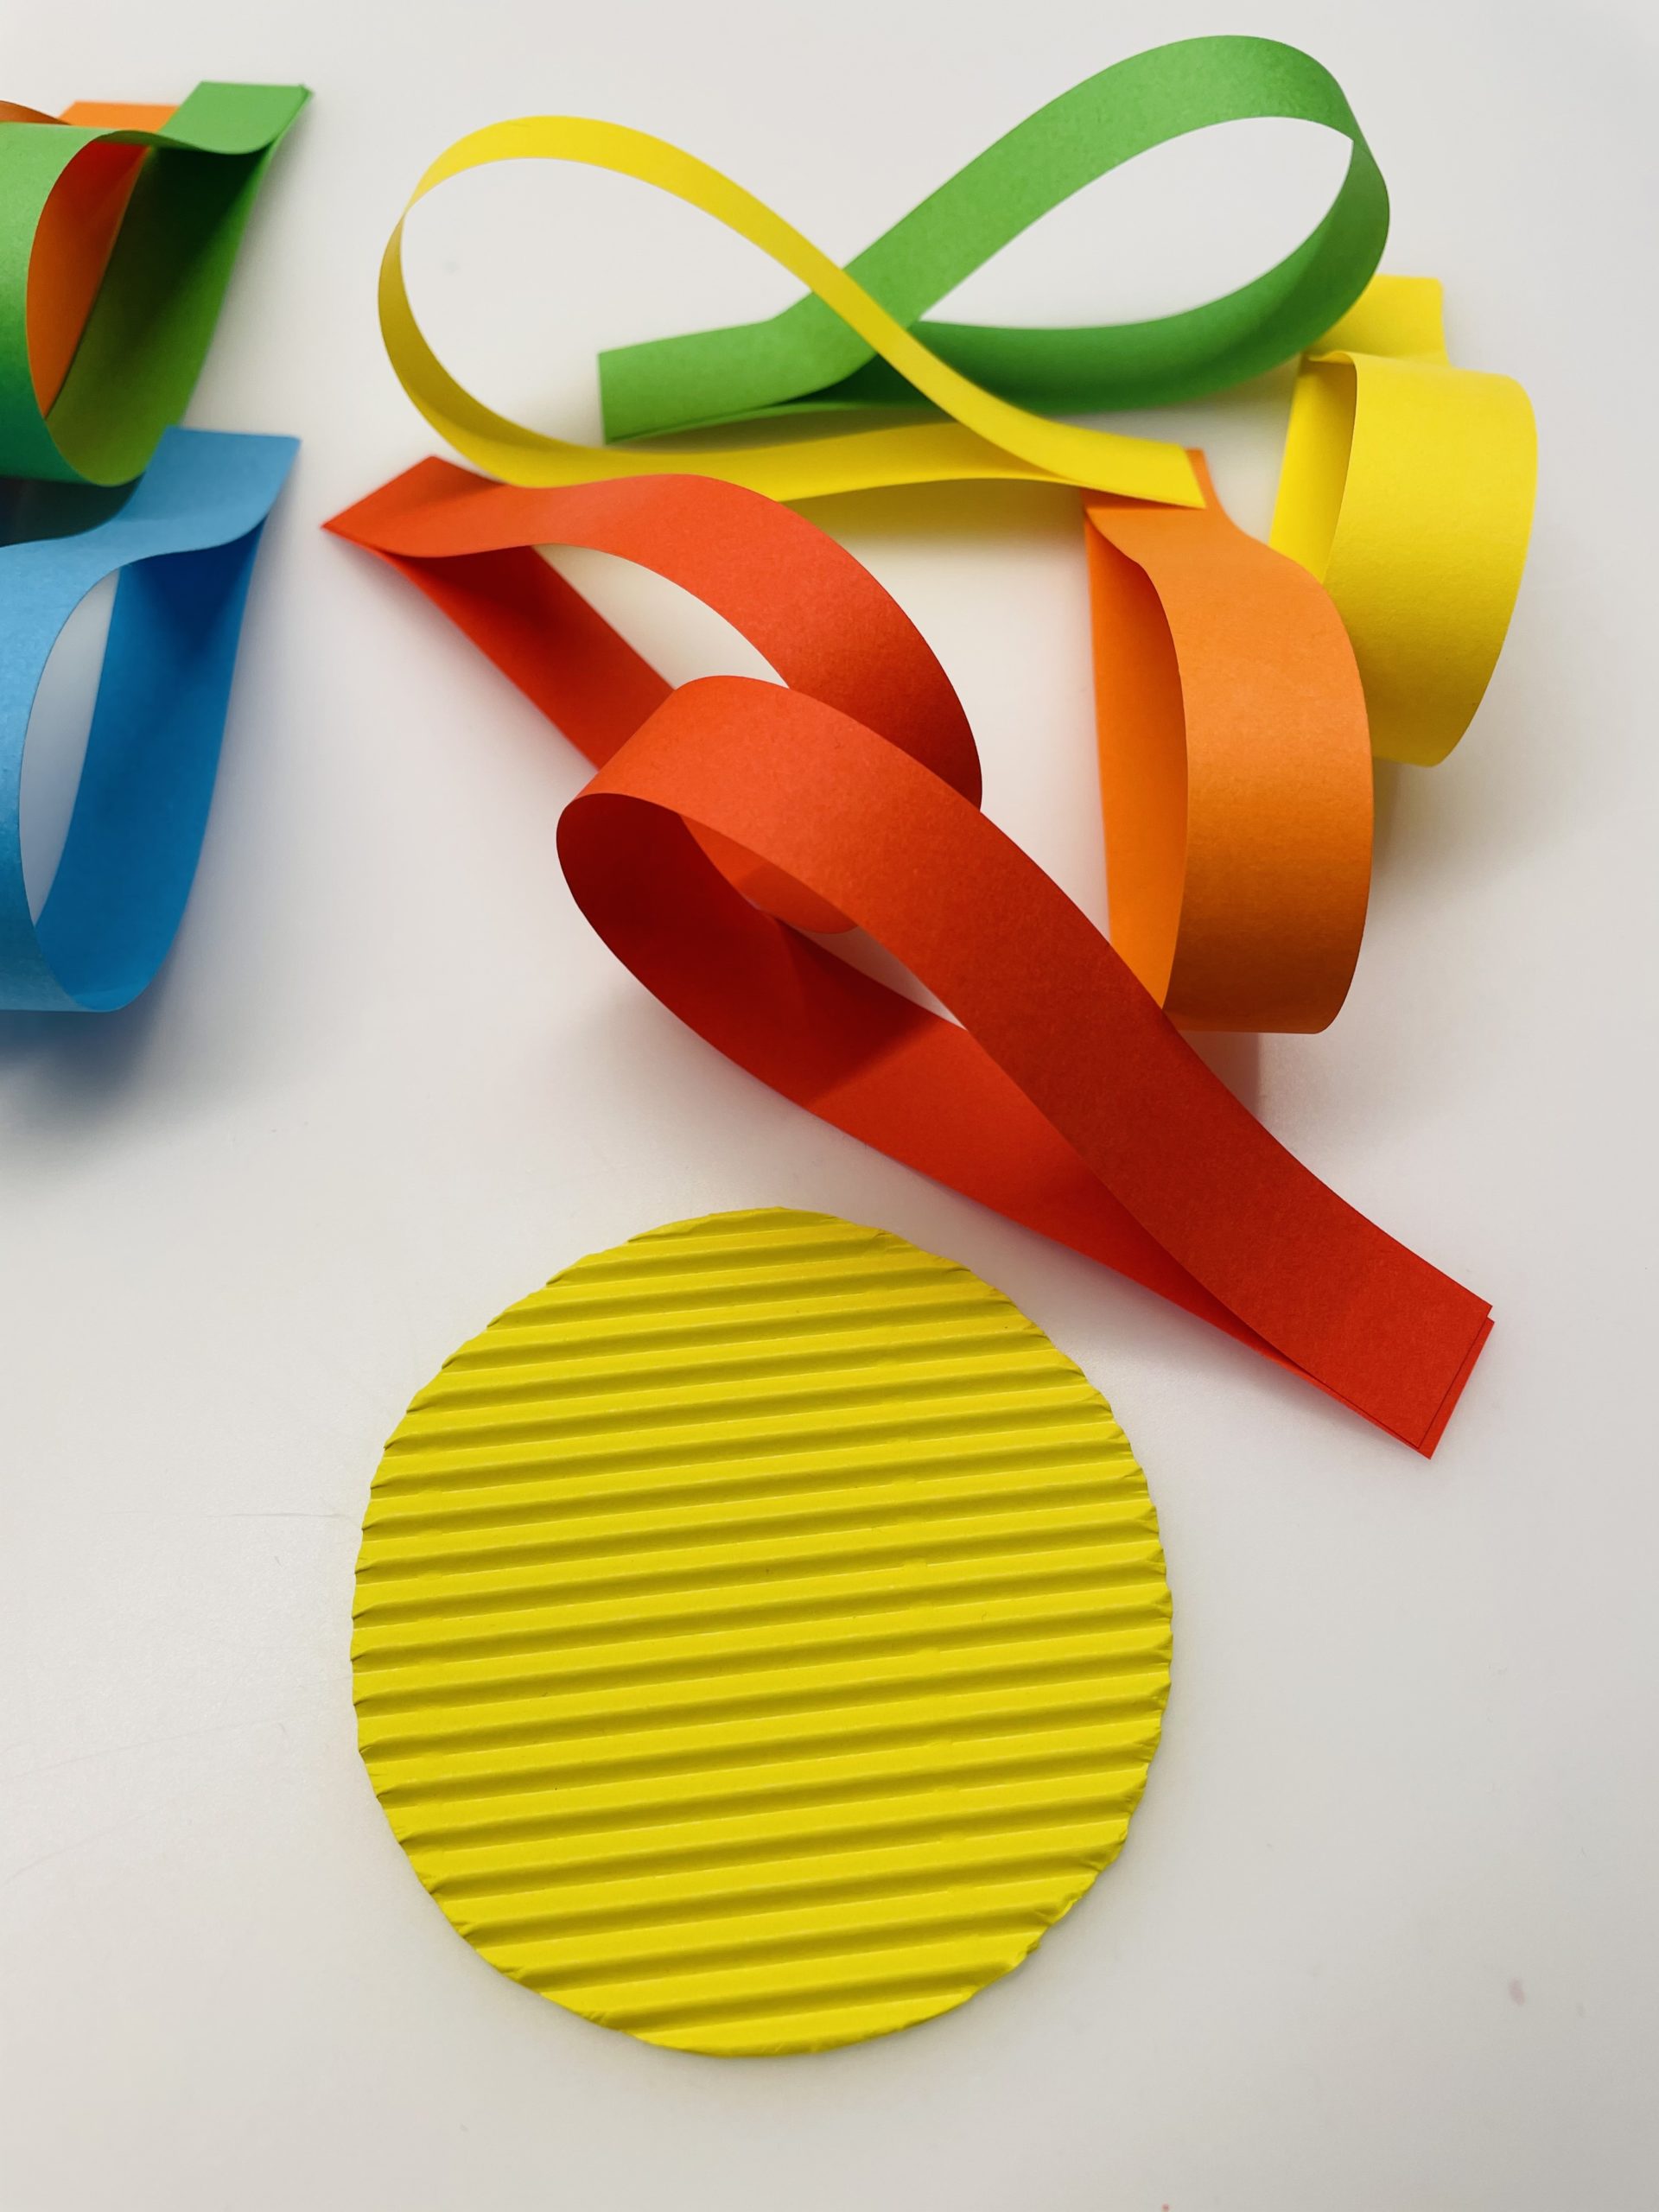
Now choose a piece of corrugated board and draw a circle on it.
Used to mark a round object: e.g. screw glass lid, bowl or drinking glass.
Tip: You can select any stable paper.

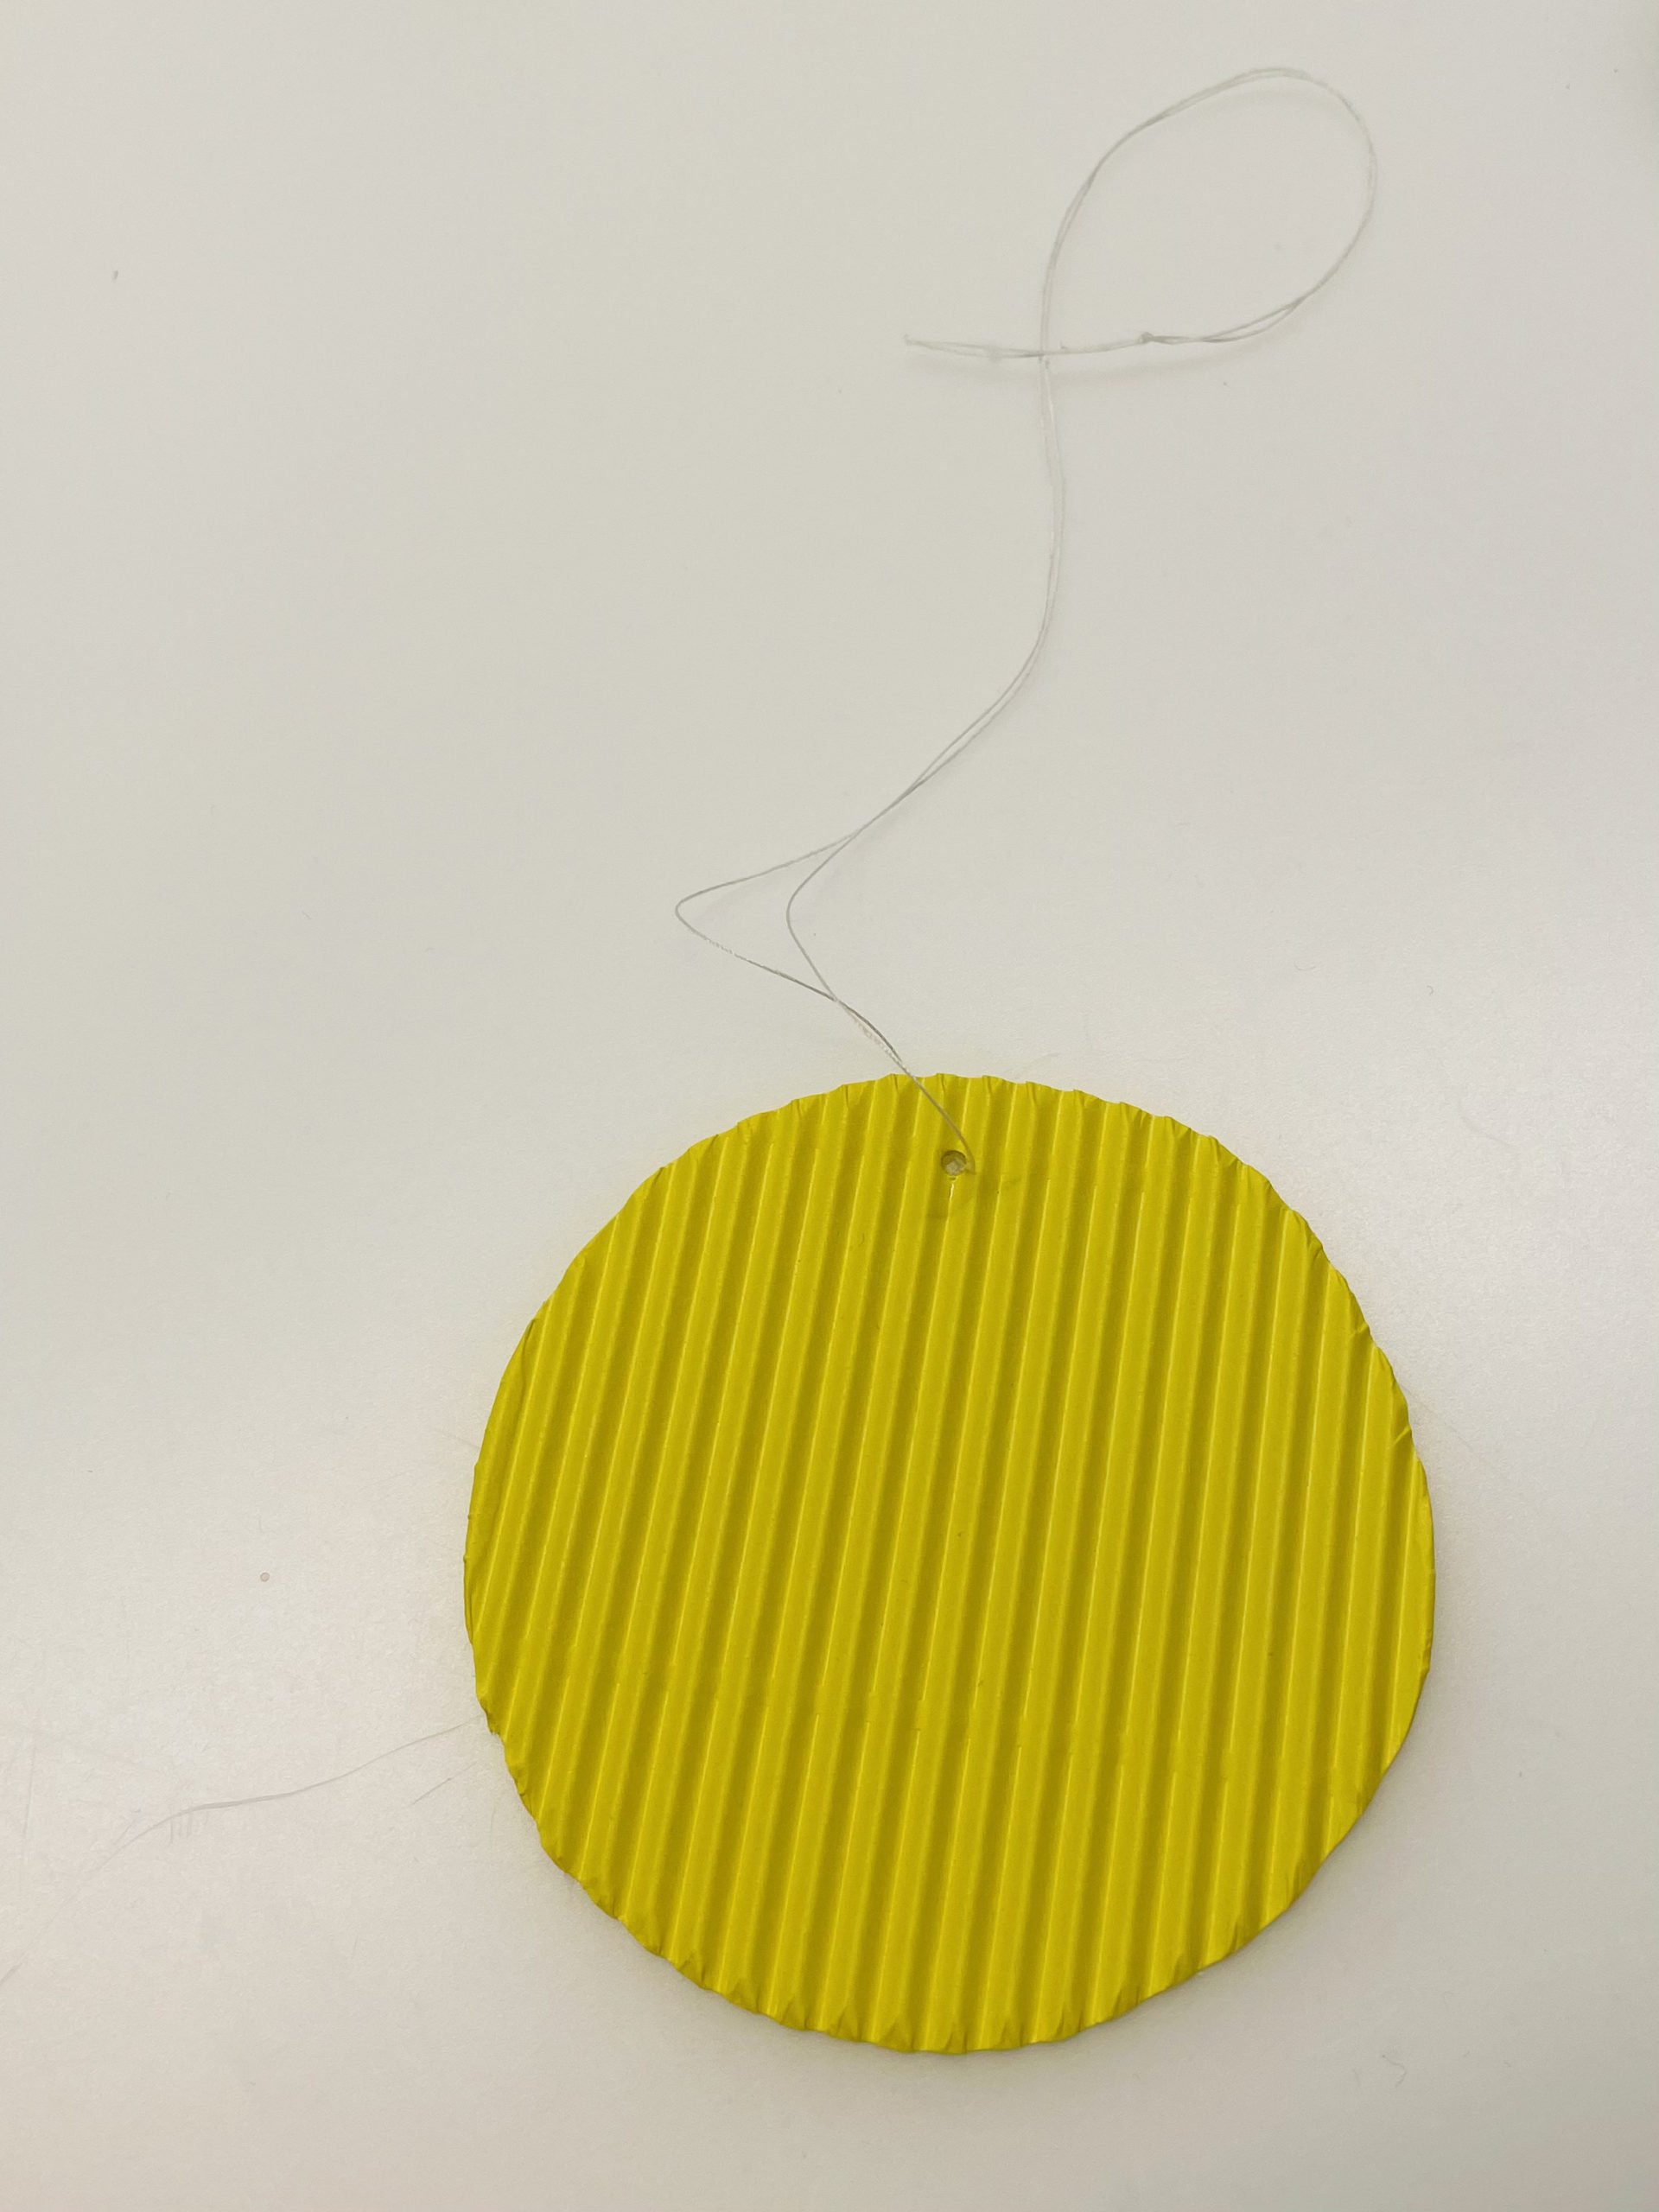
Then cut out the circle.
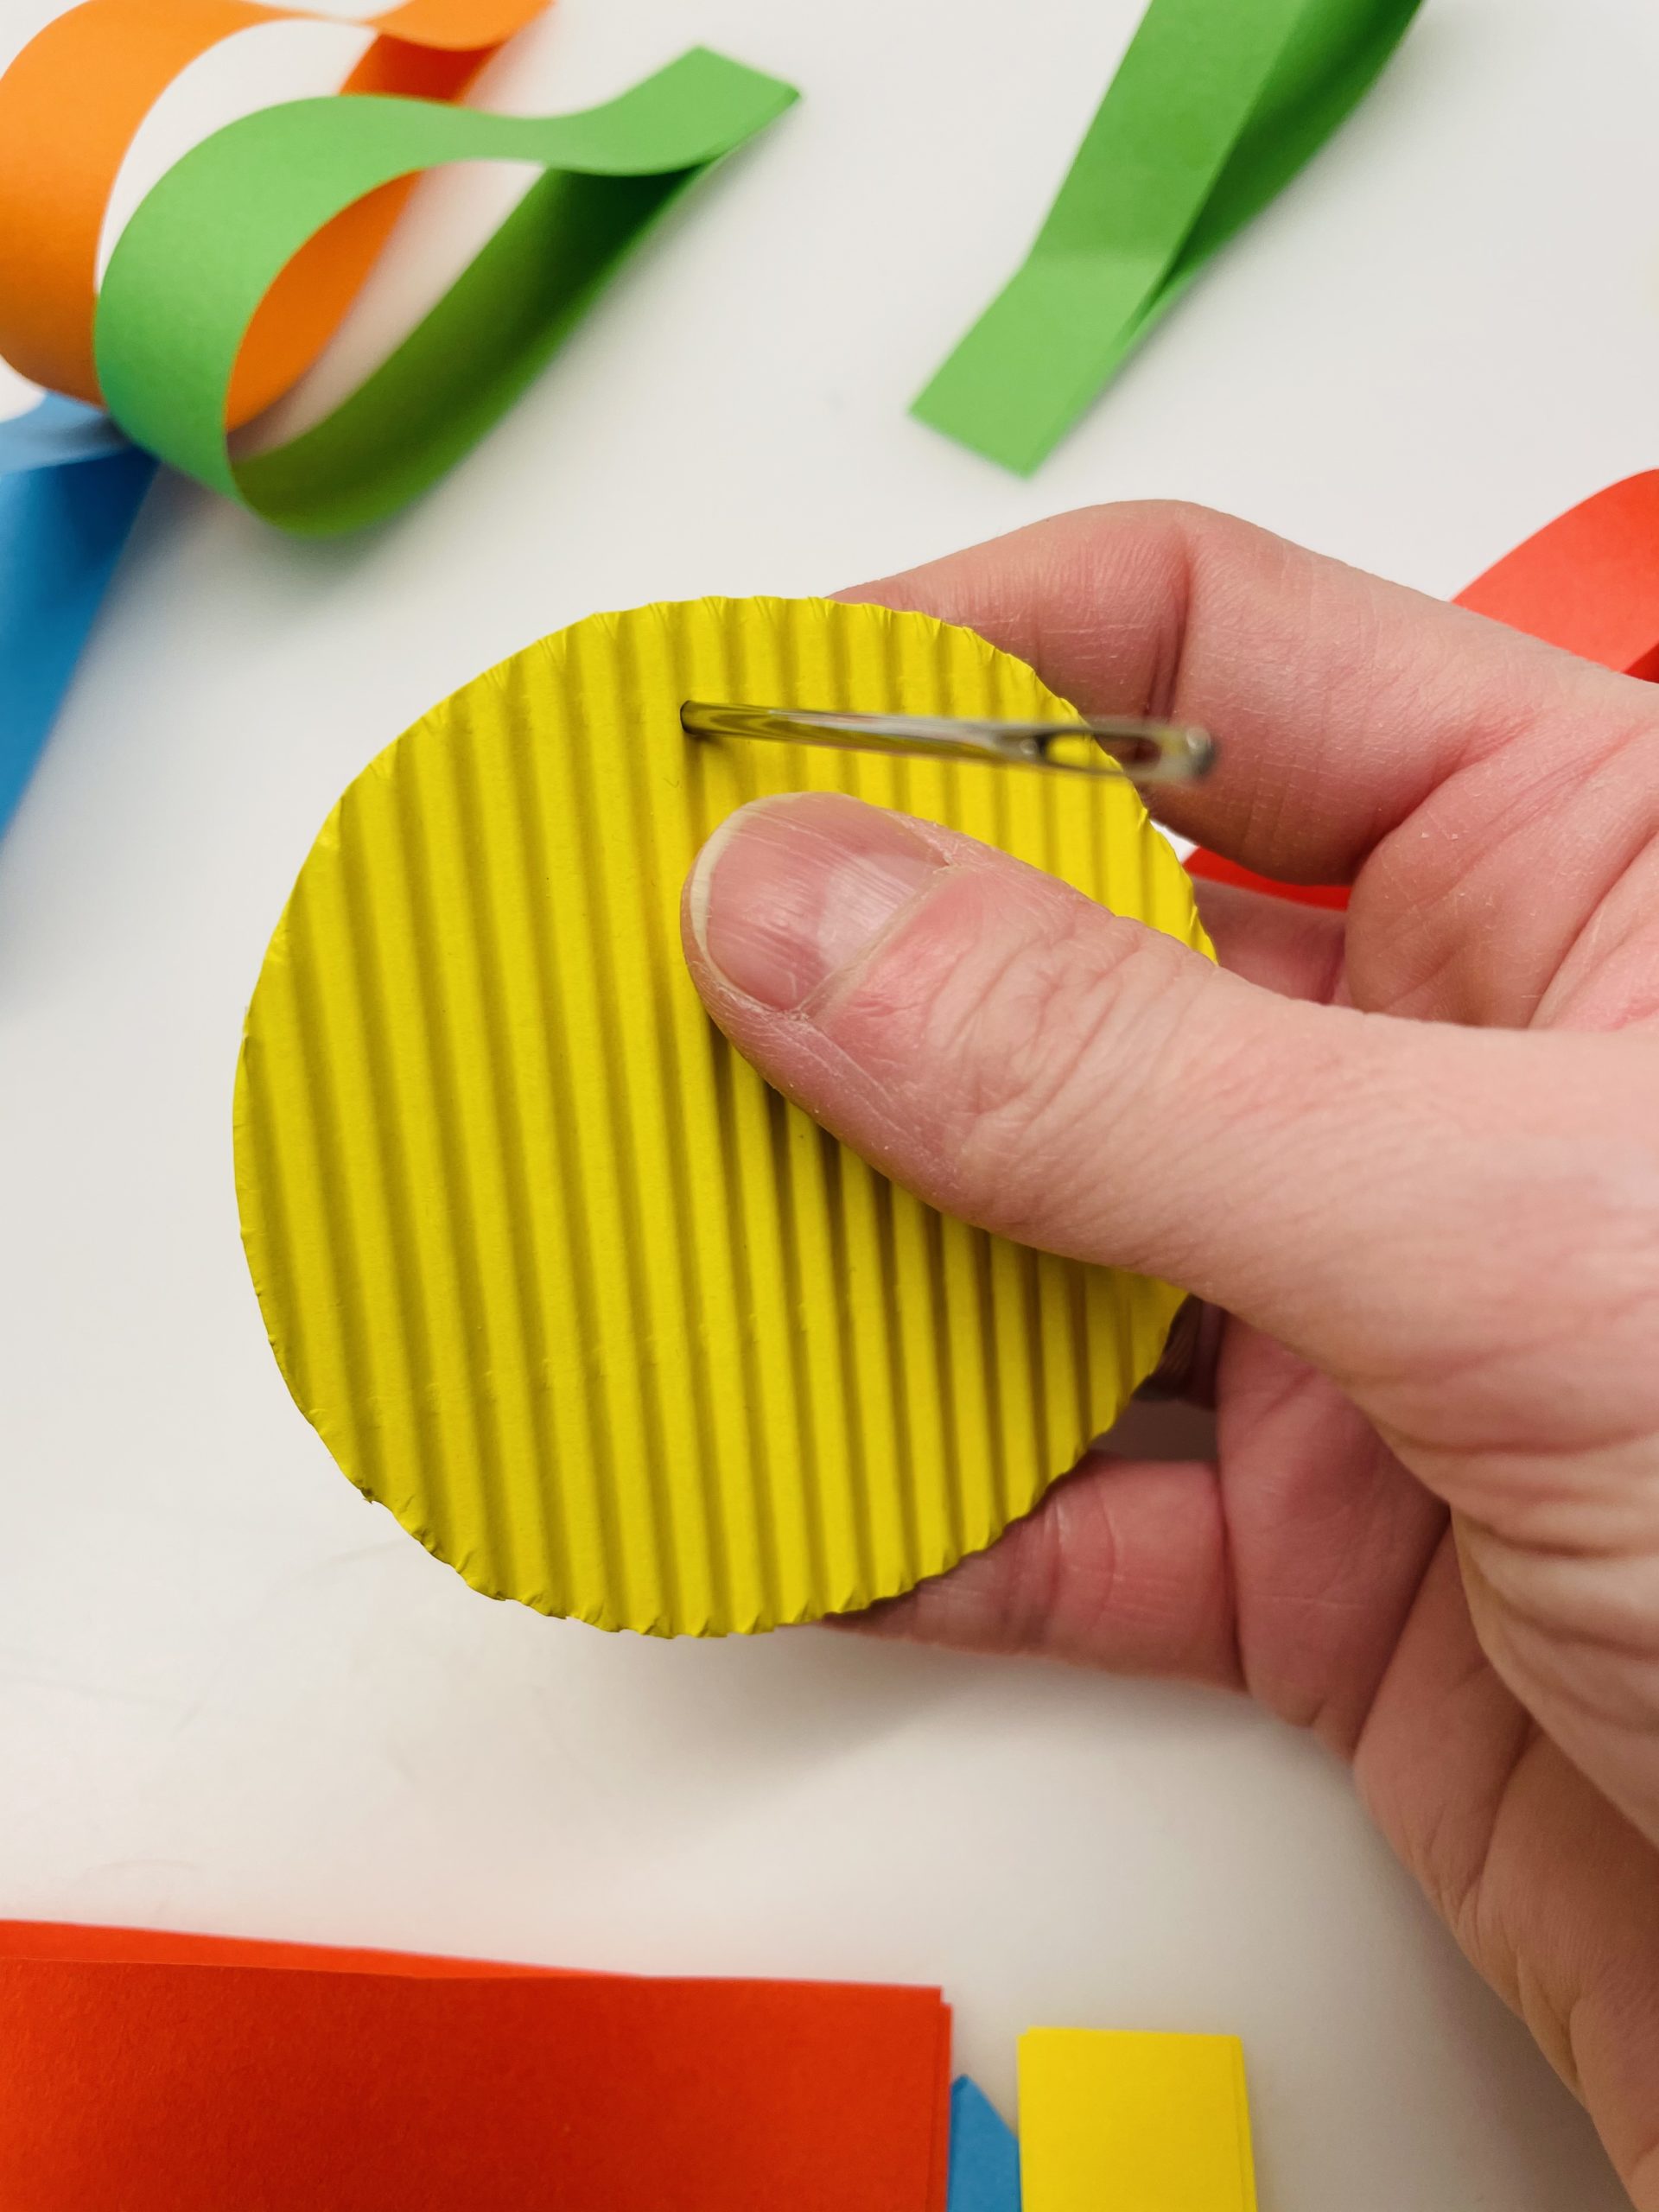
After that, you pierce a hole through the circle with a thick needle at the edge.
Now thread through a thread and knot it. Then tie another loop with the thread. Then you can hang up the flower.
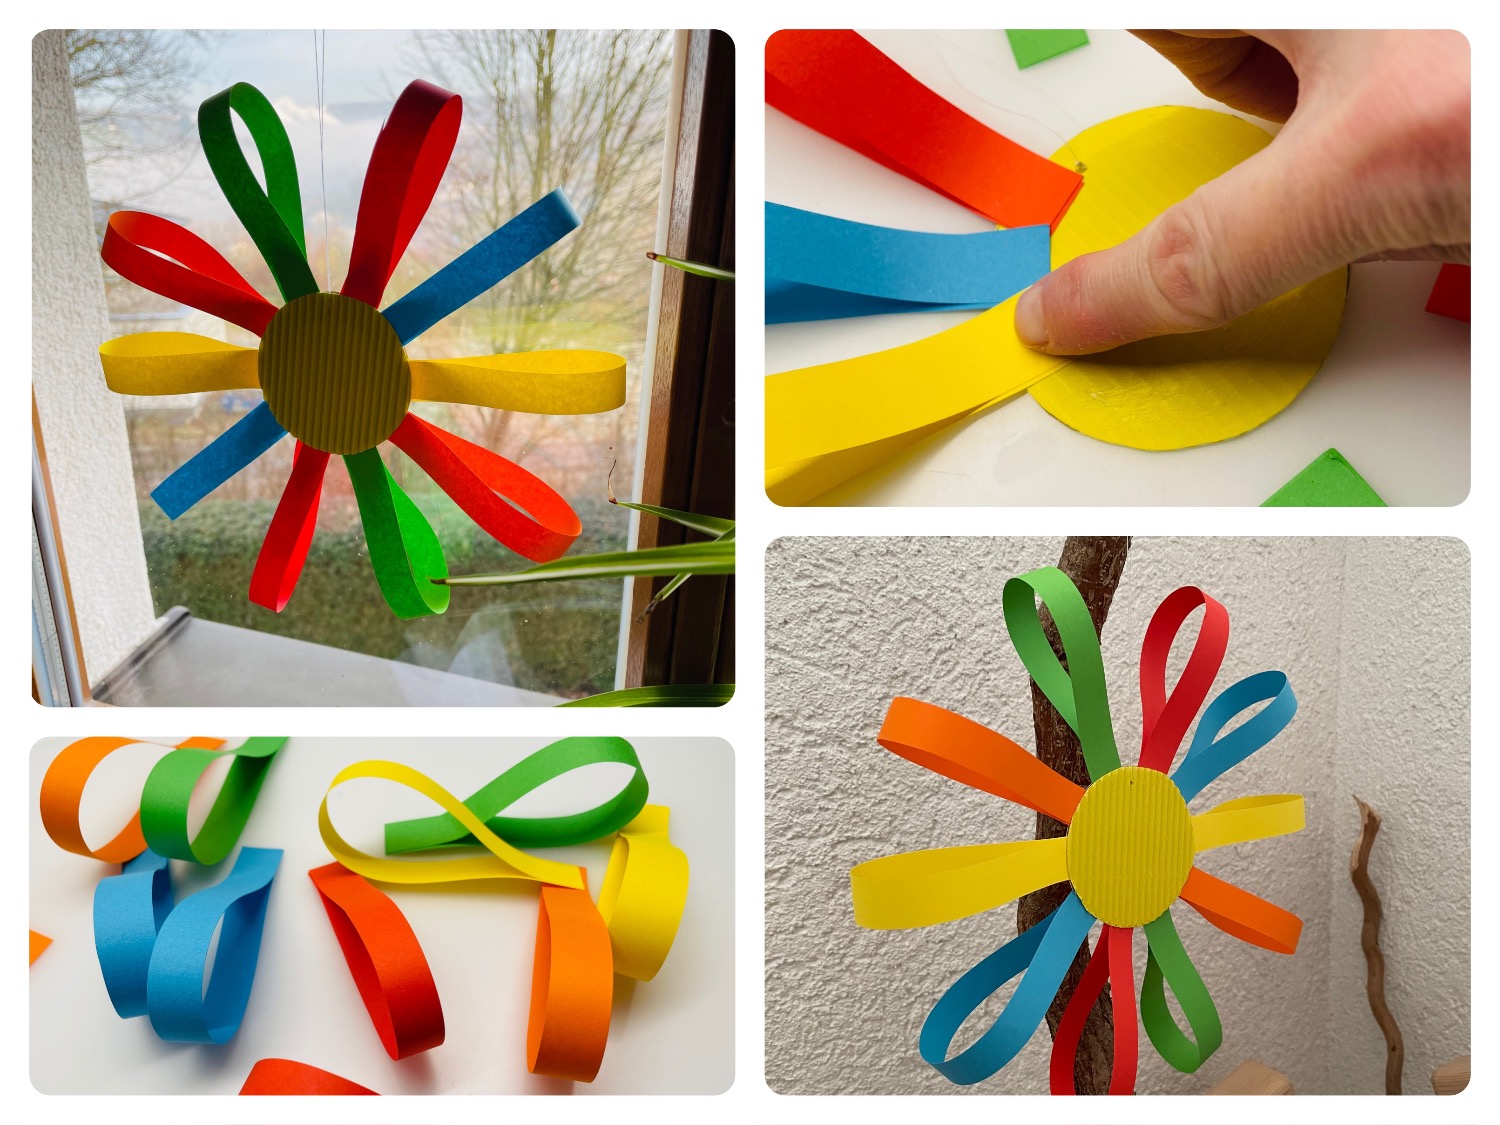
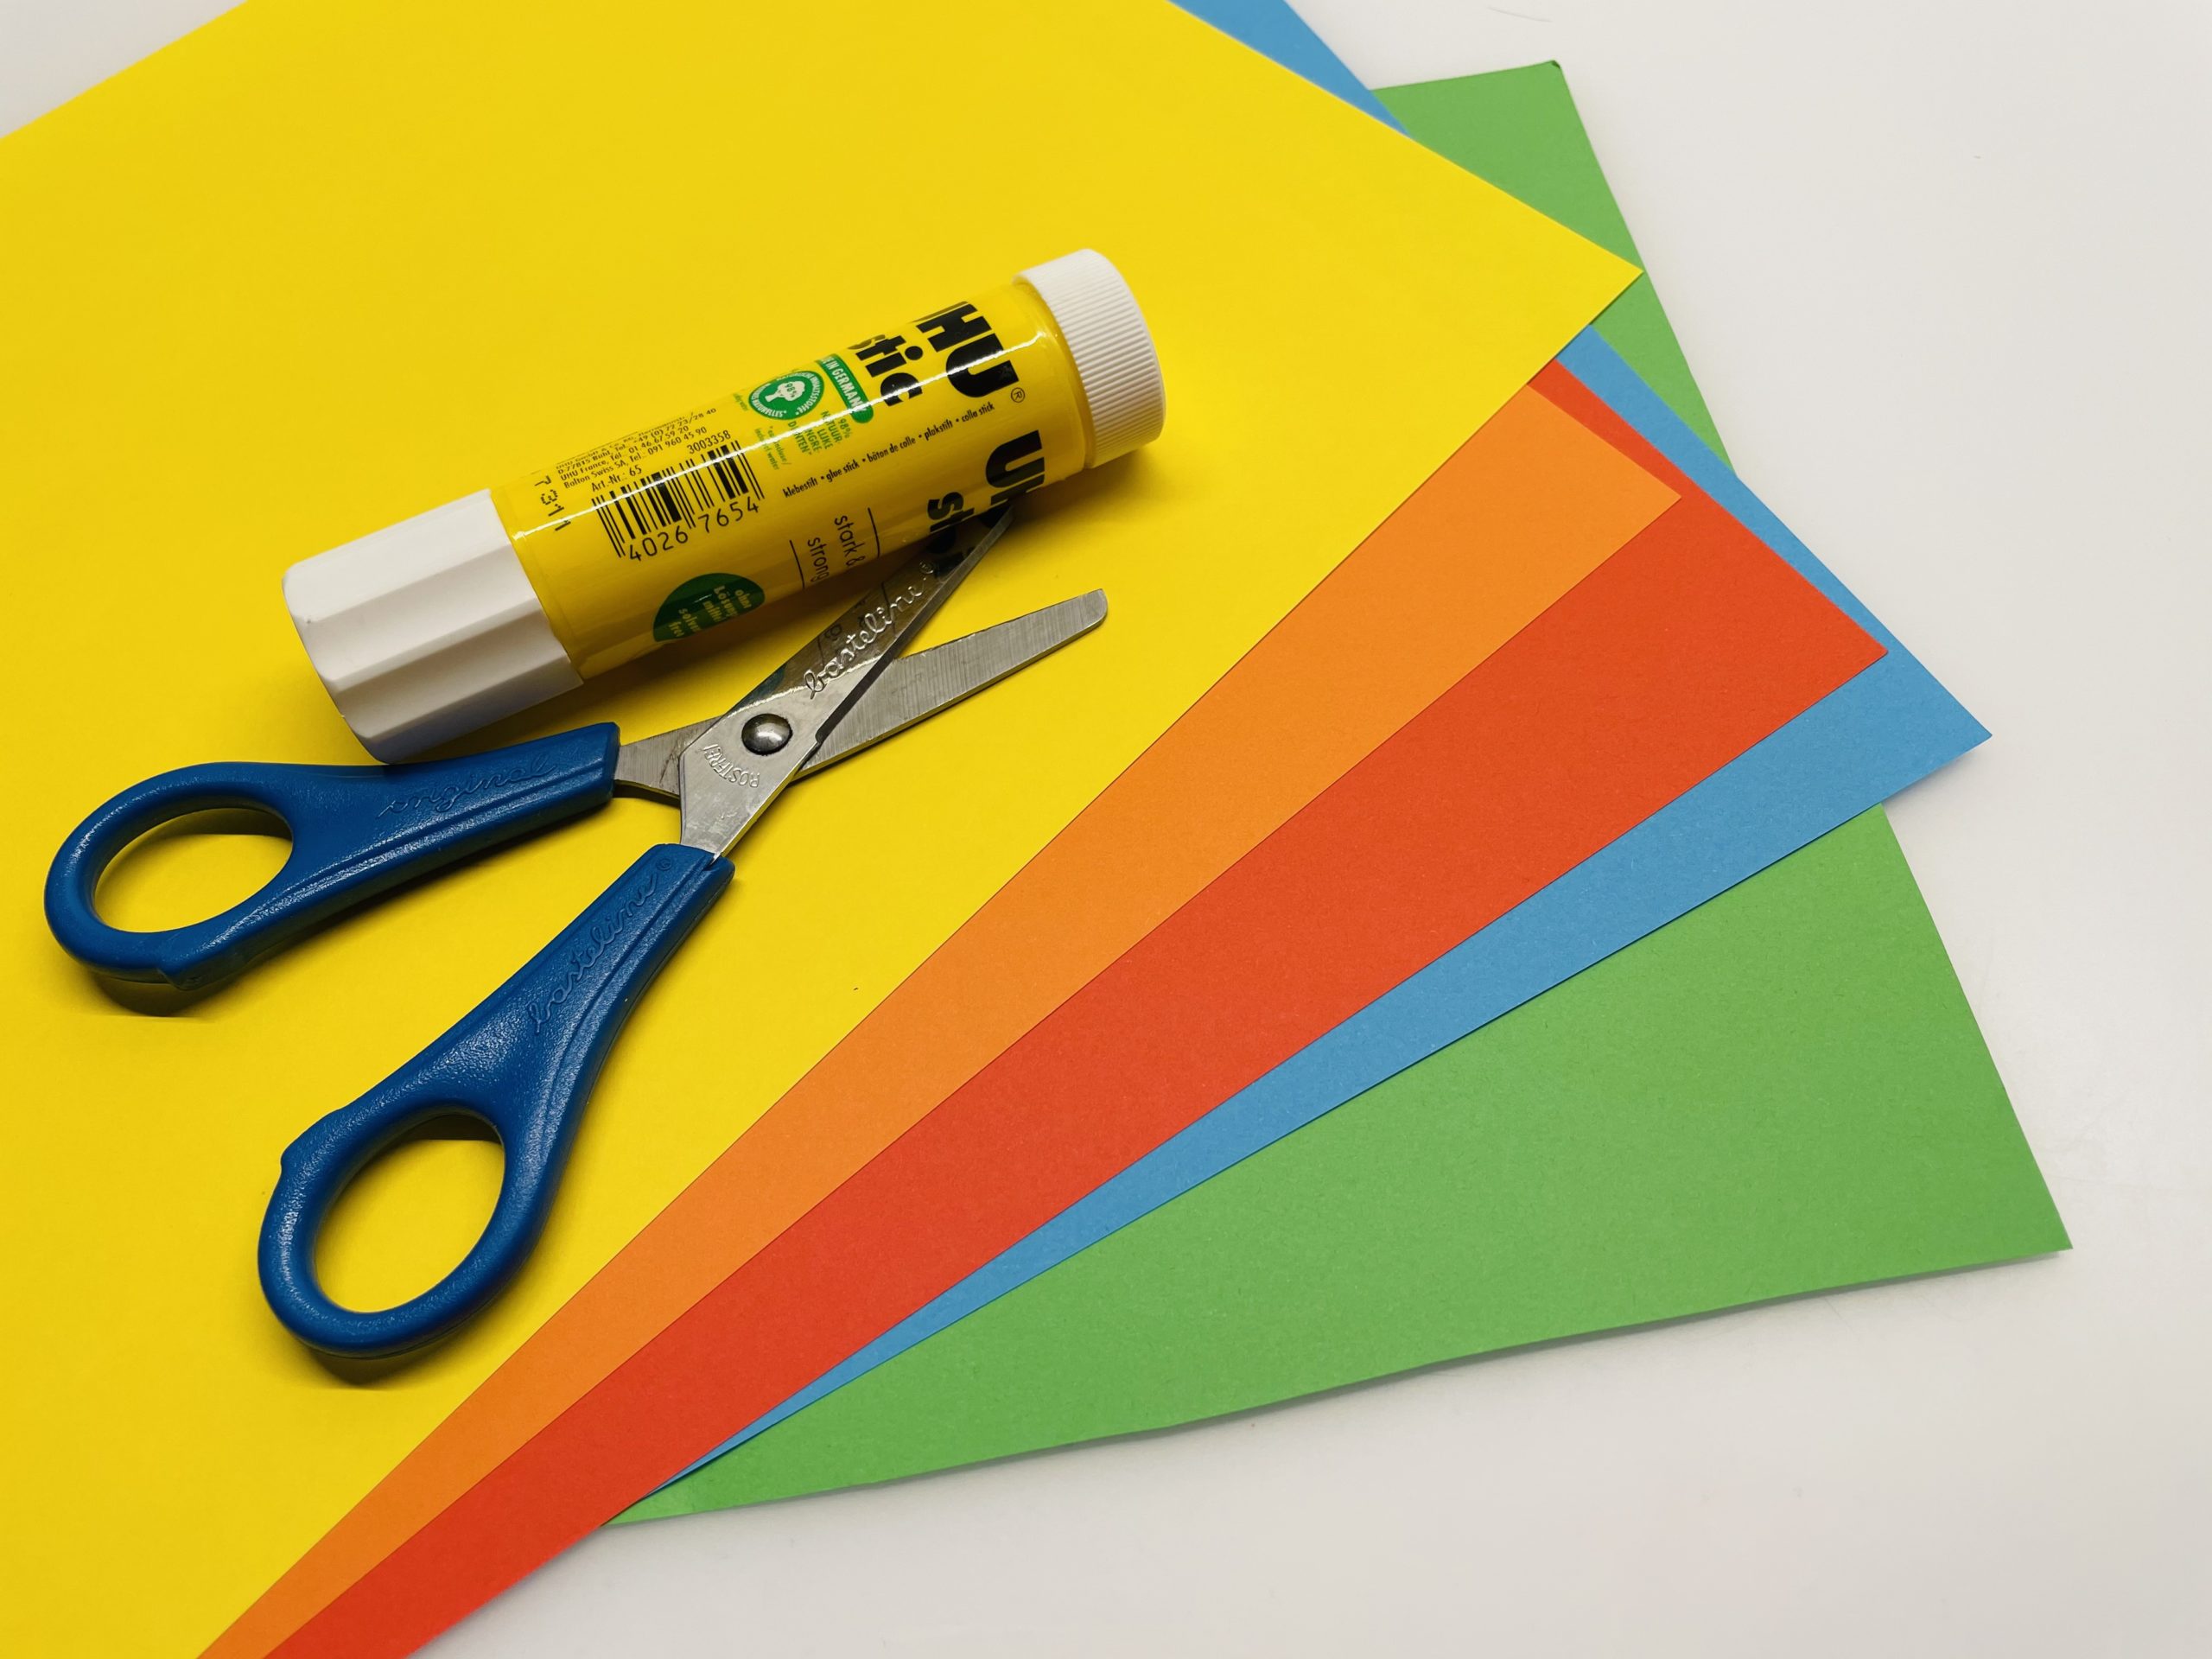
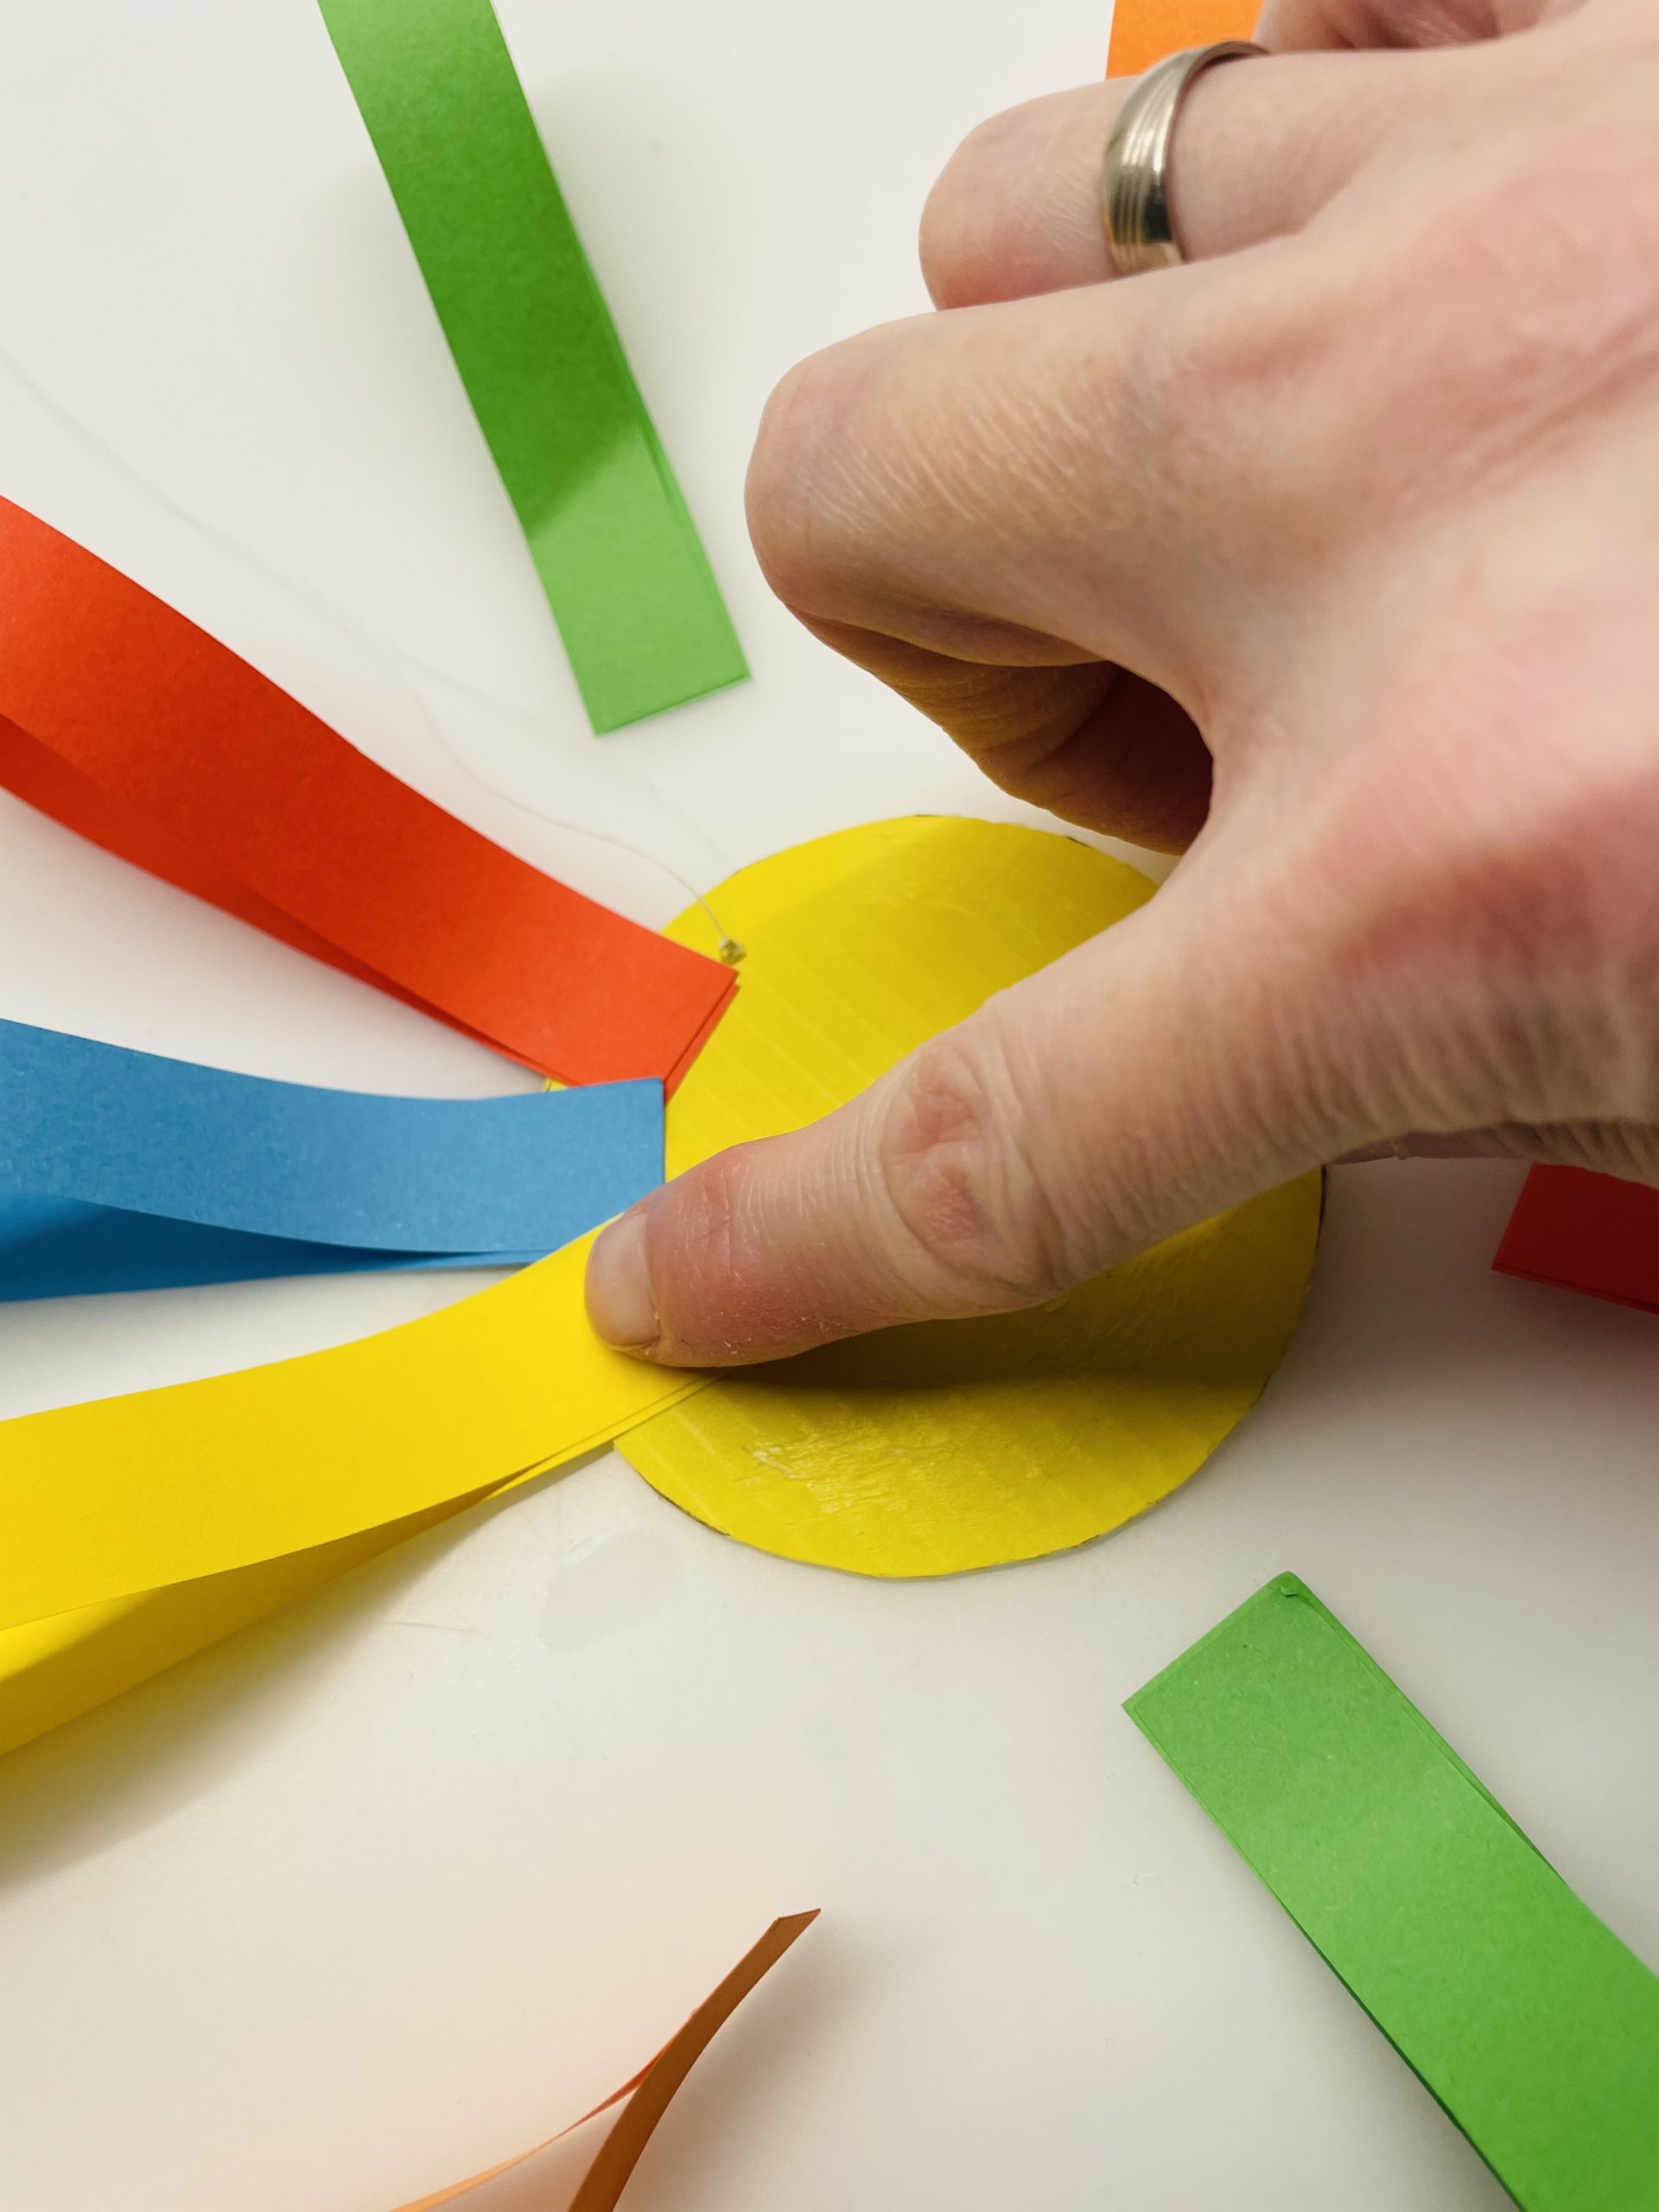
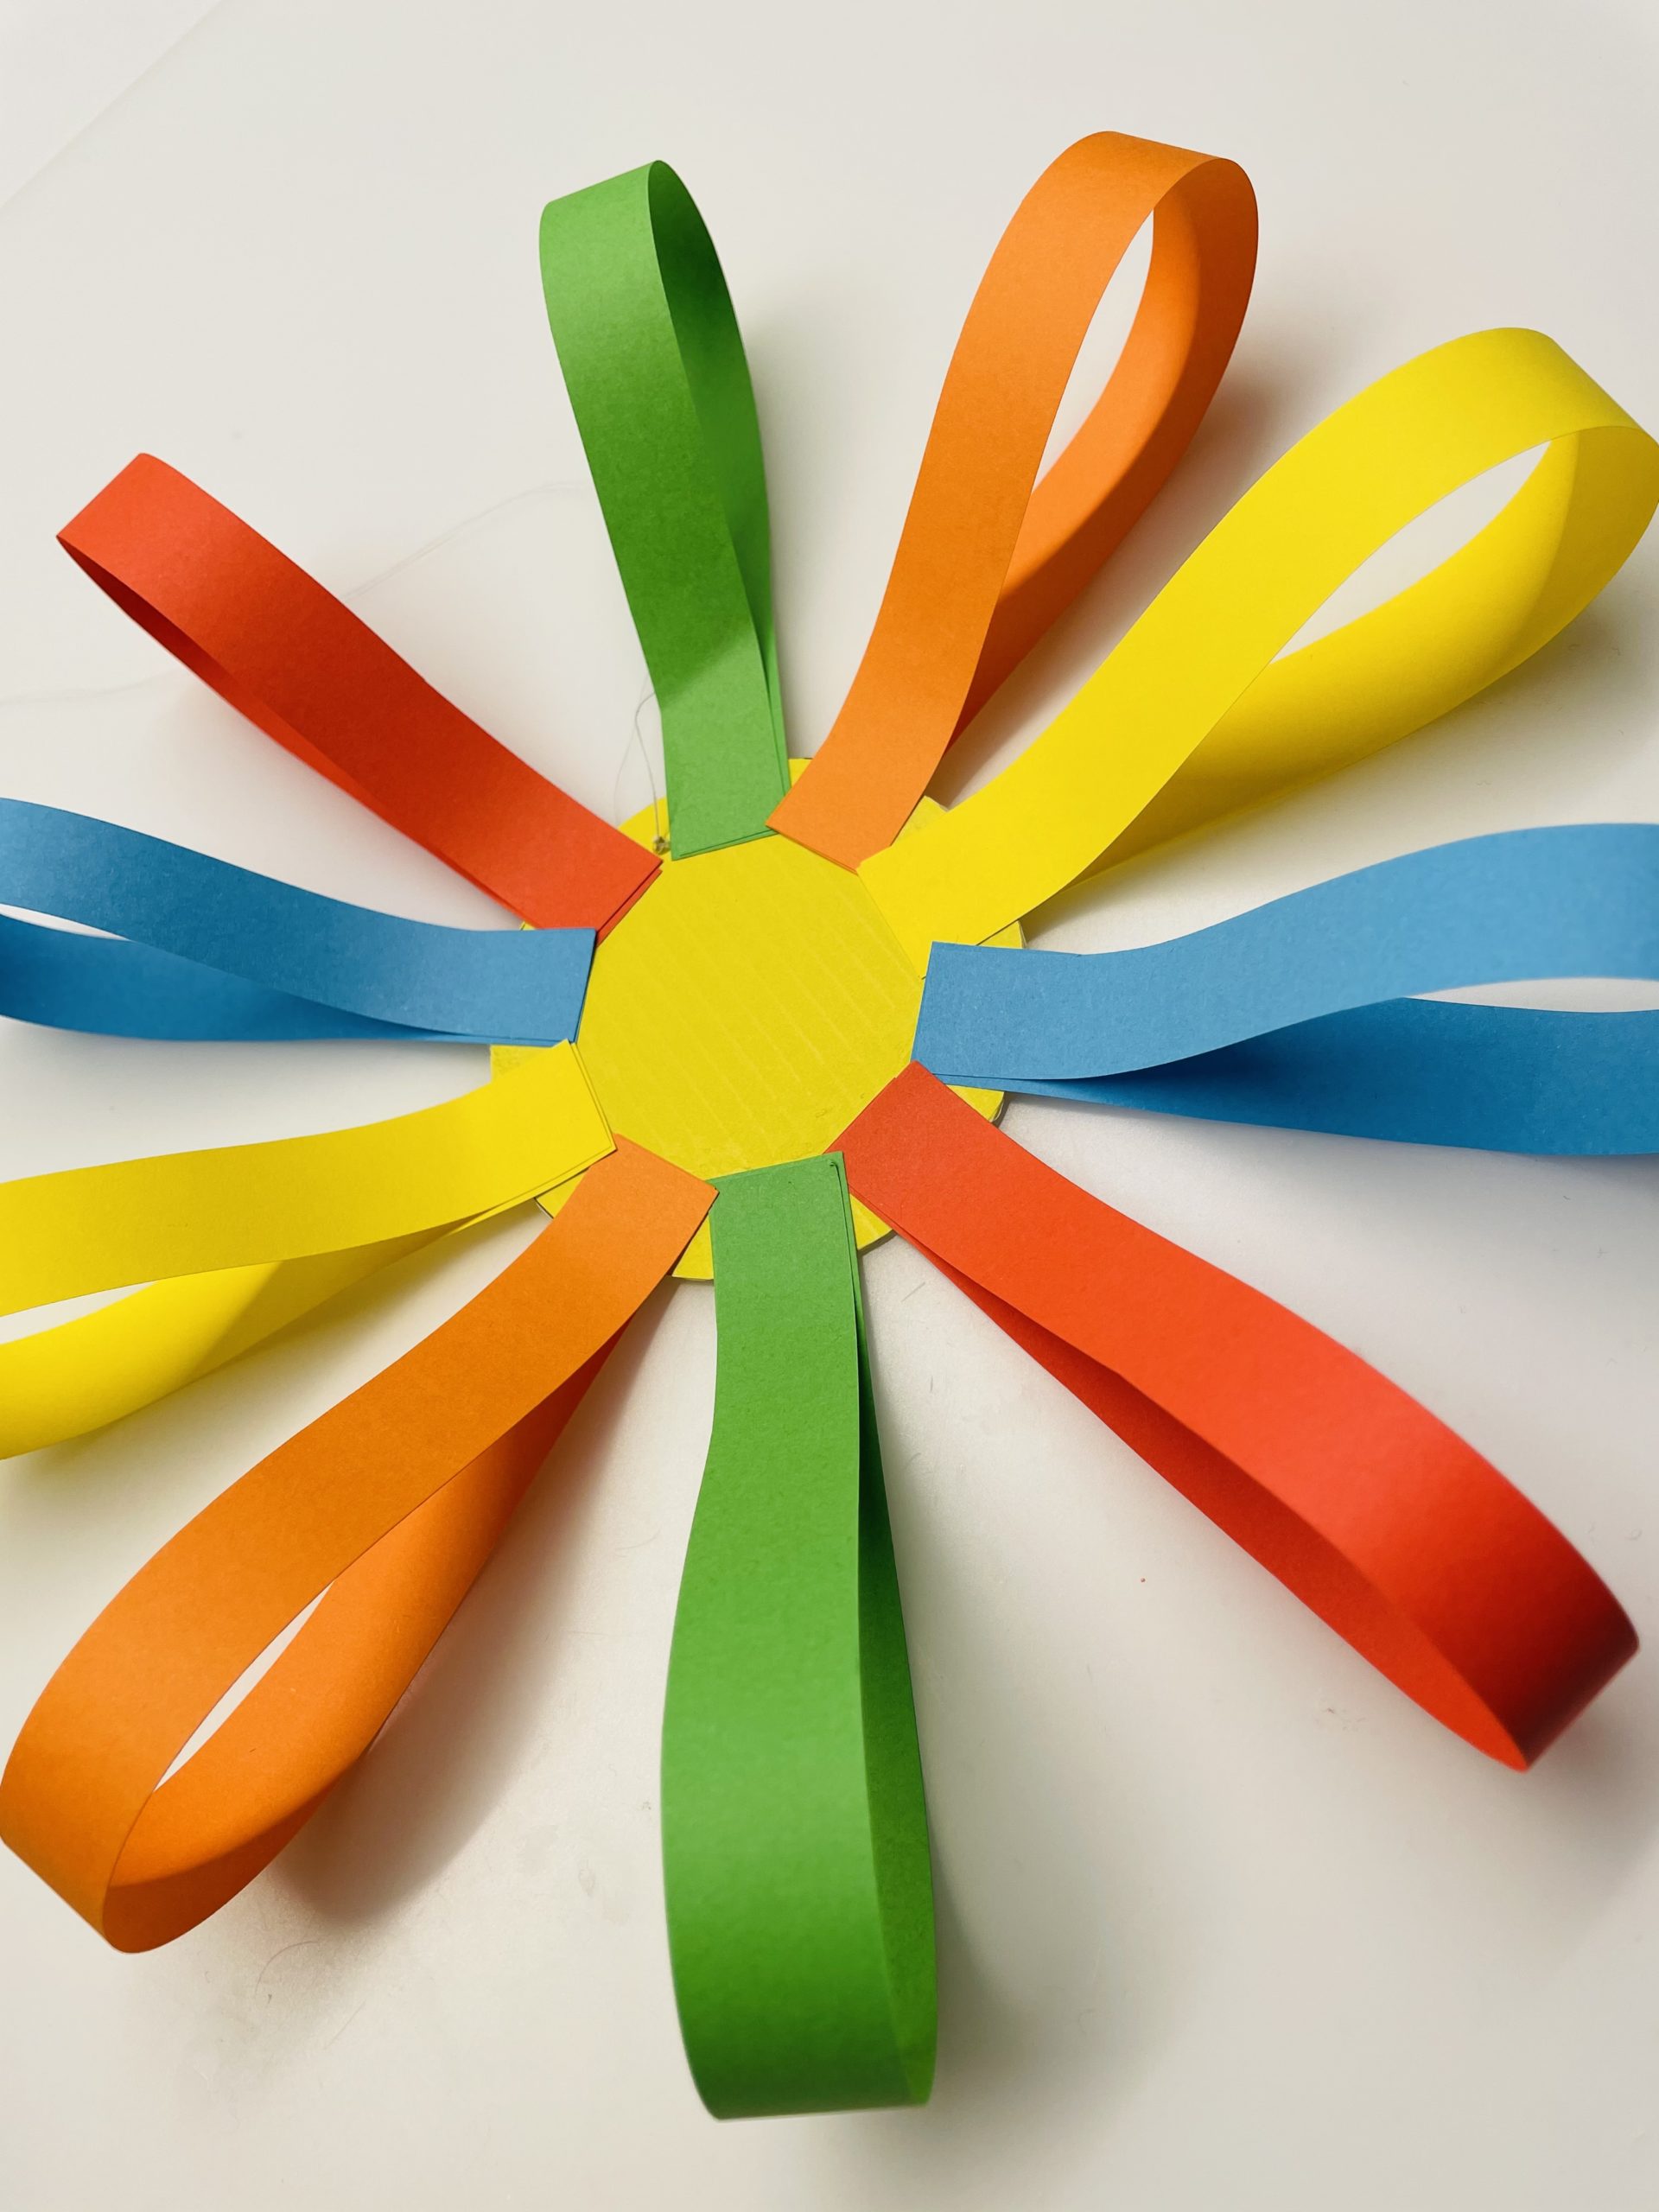
Now place the circle with the beautiful side down on the table. Now you place the prepared paper strips all around. As soon as the arrangement of the colors and distances fall, then you push the strips outward - away from the circle.
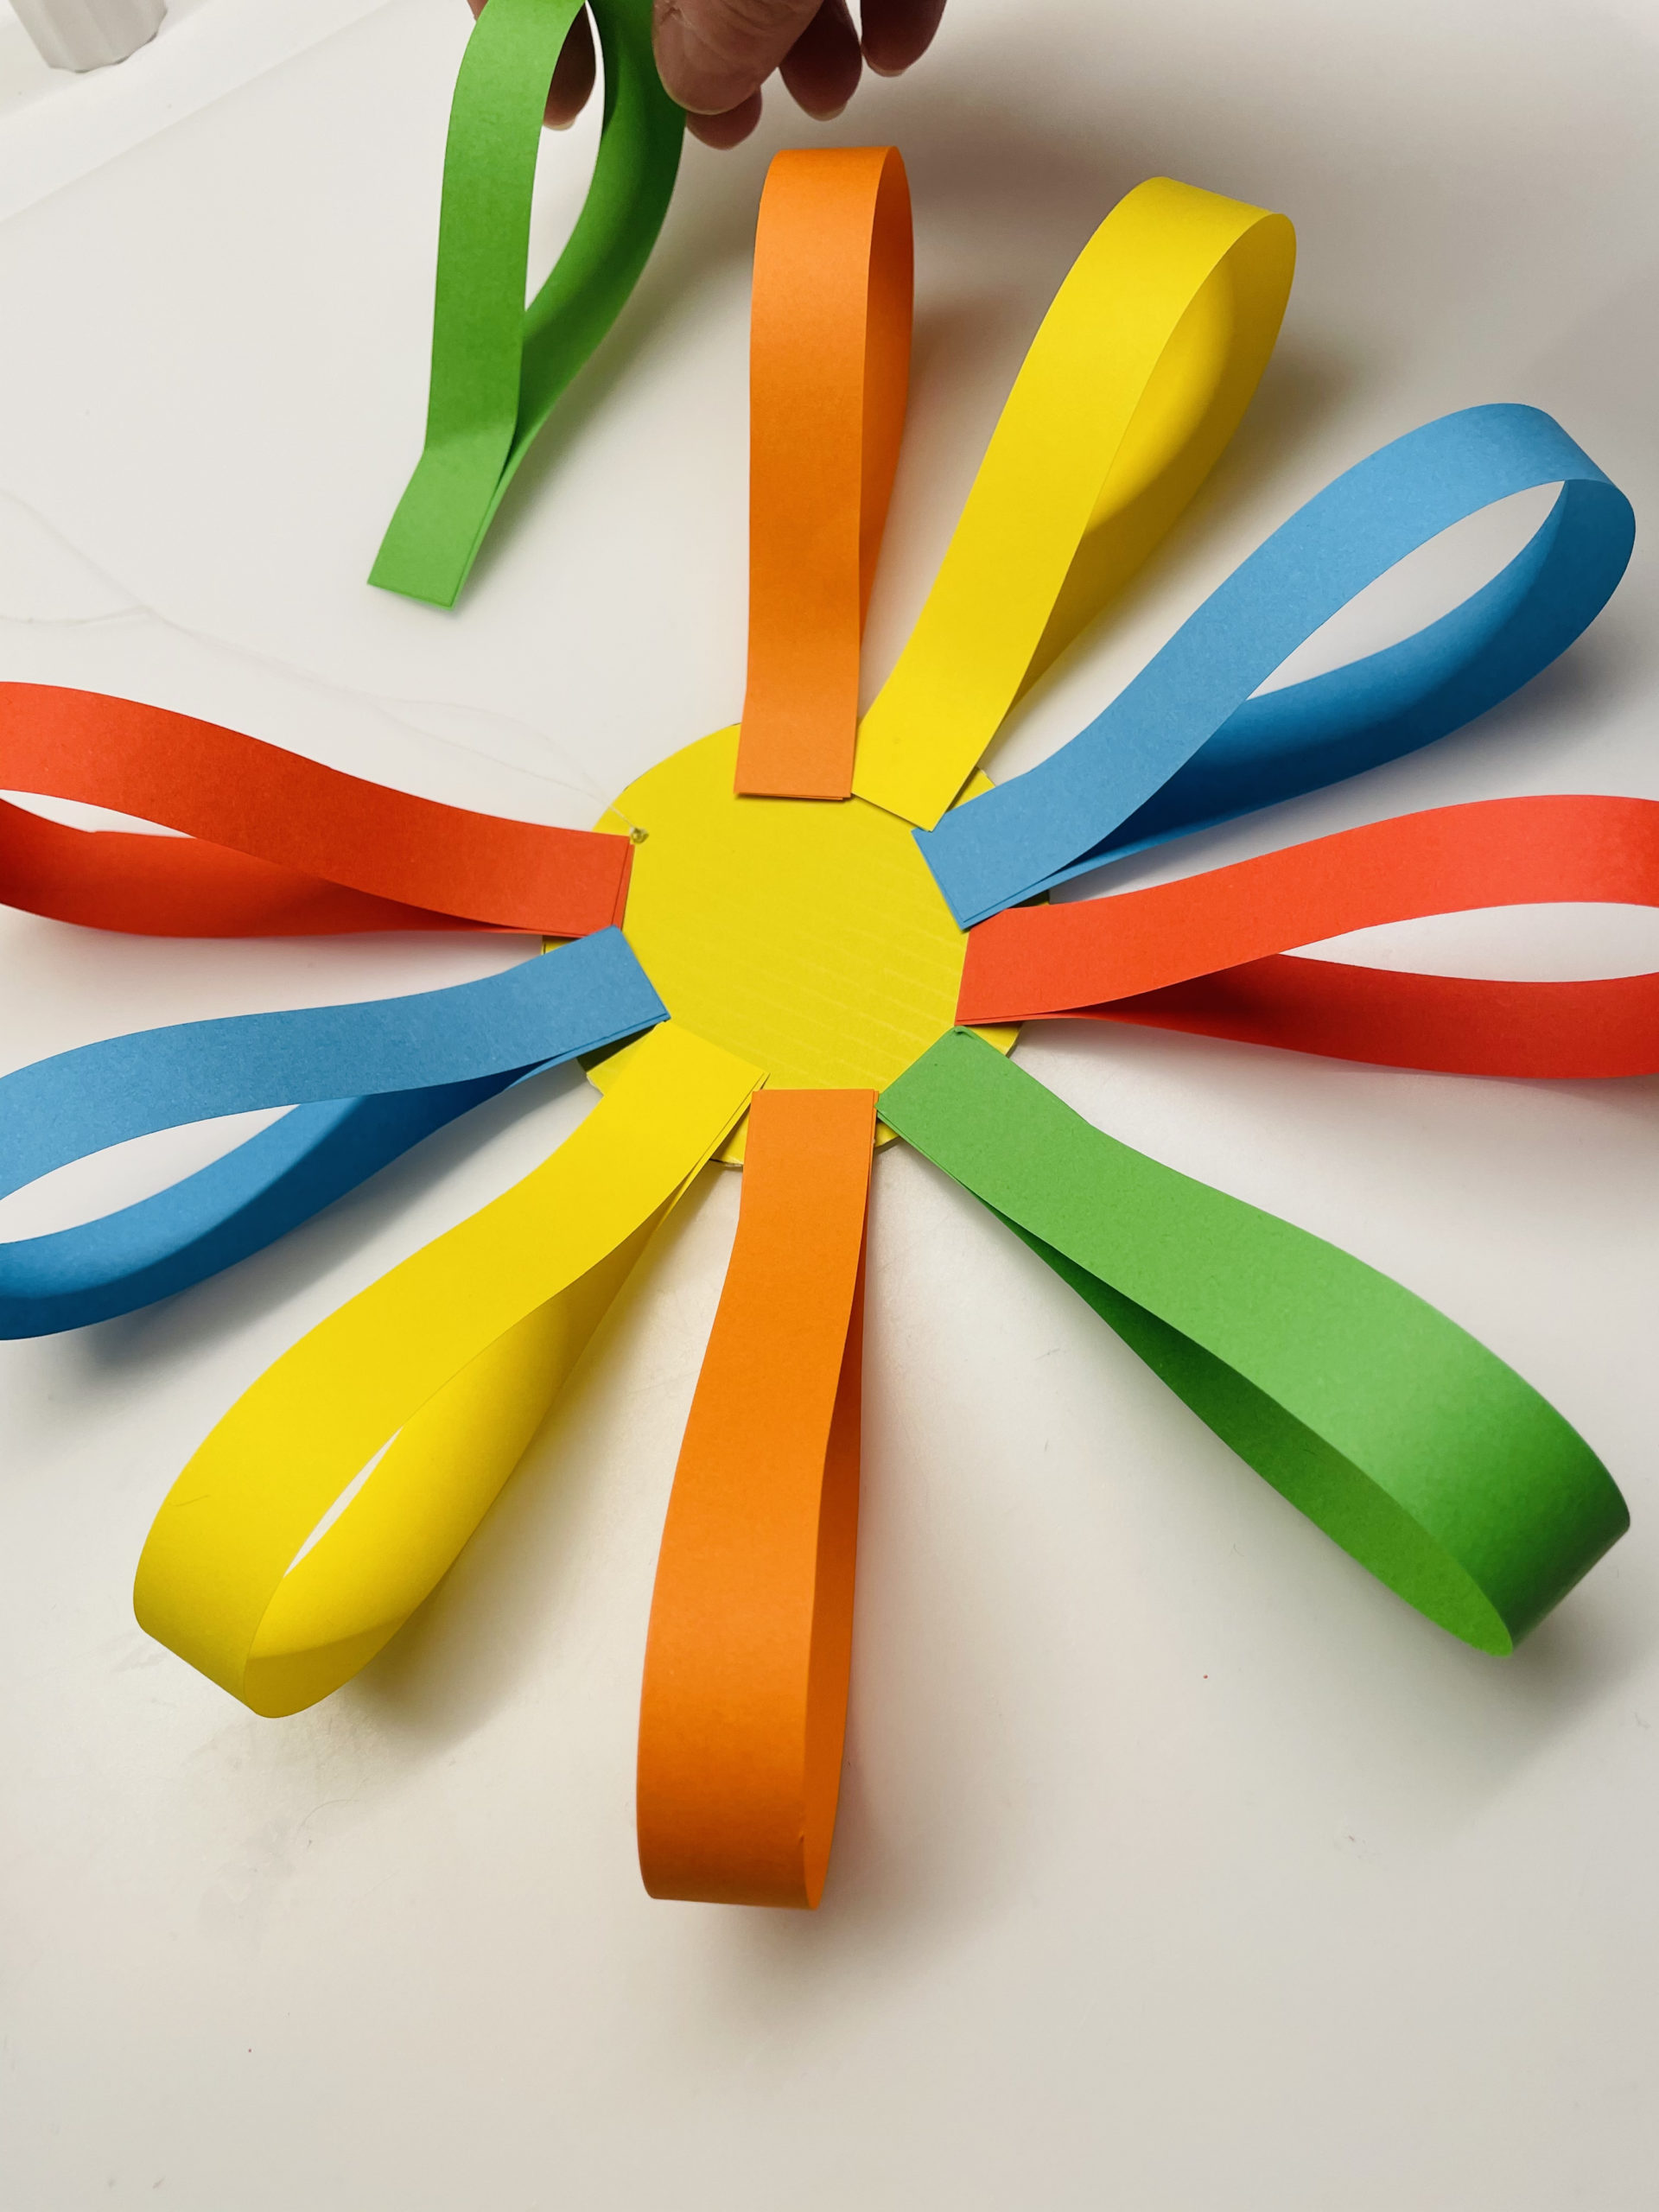
Now you brush the outer edge of the circle with glue.
Then you begin to apply the petals. Sticks on one strip after the other, just as you put the strips in order.
Tighten the individual strips well.
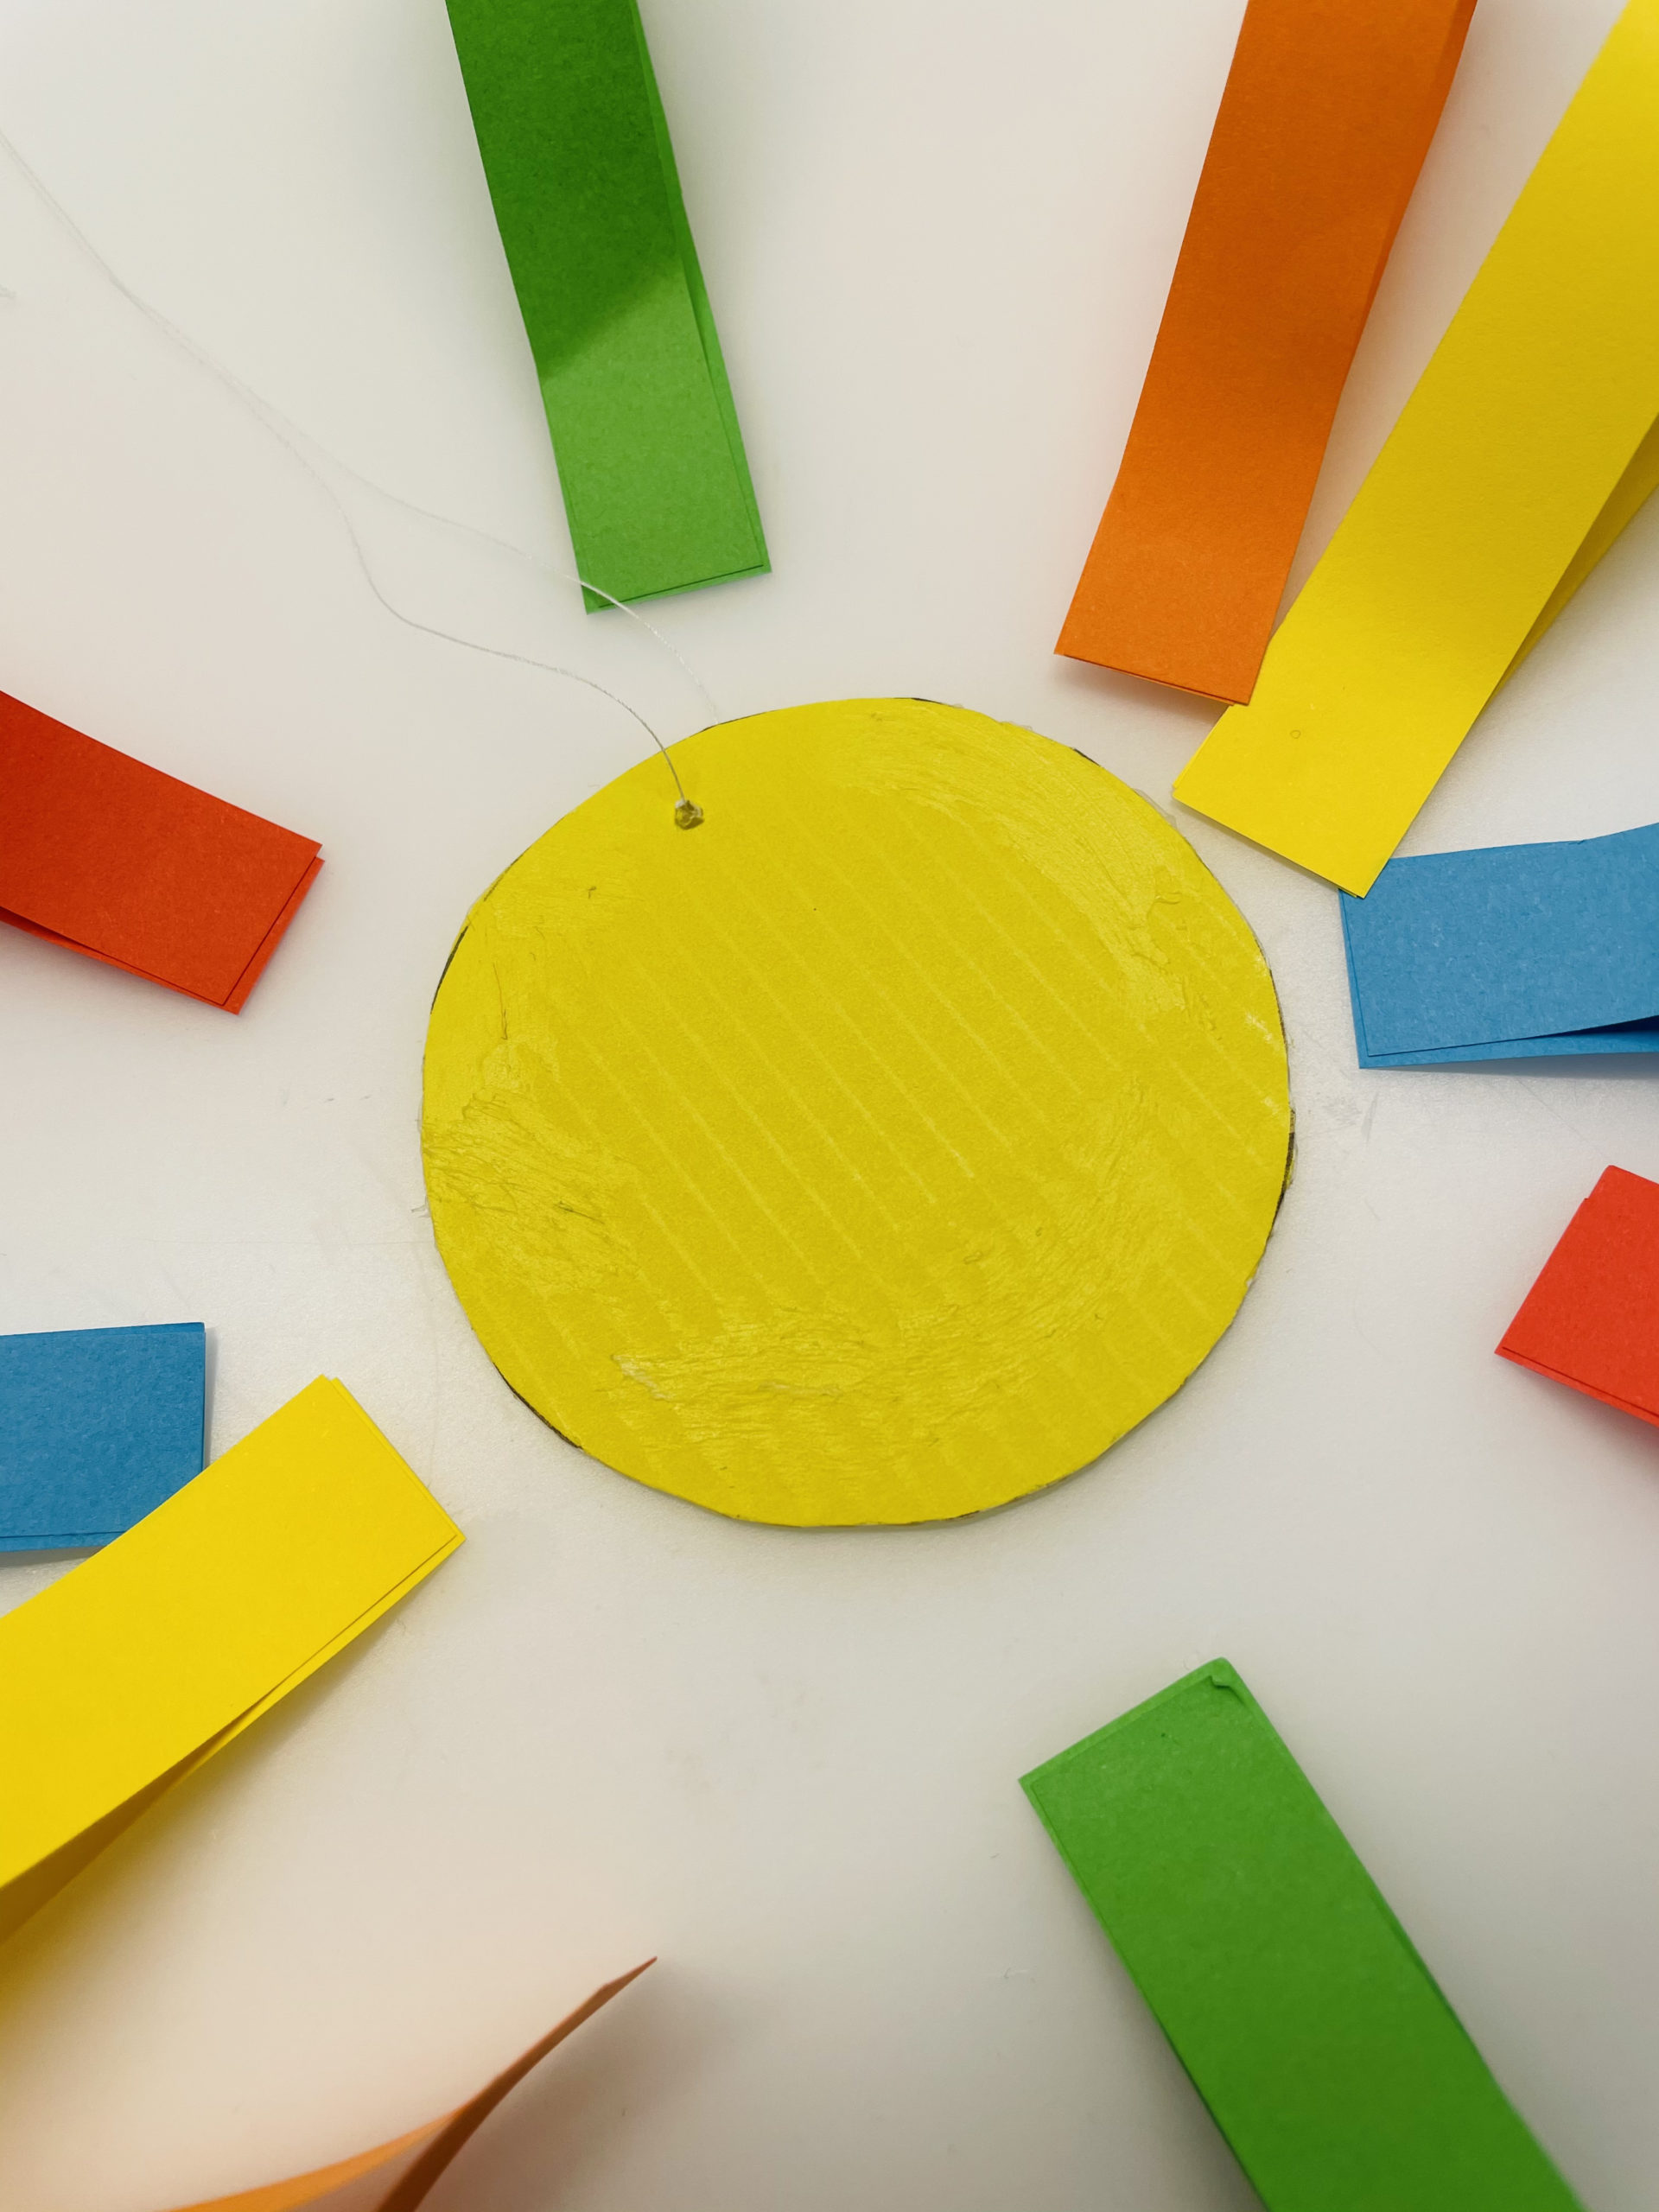
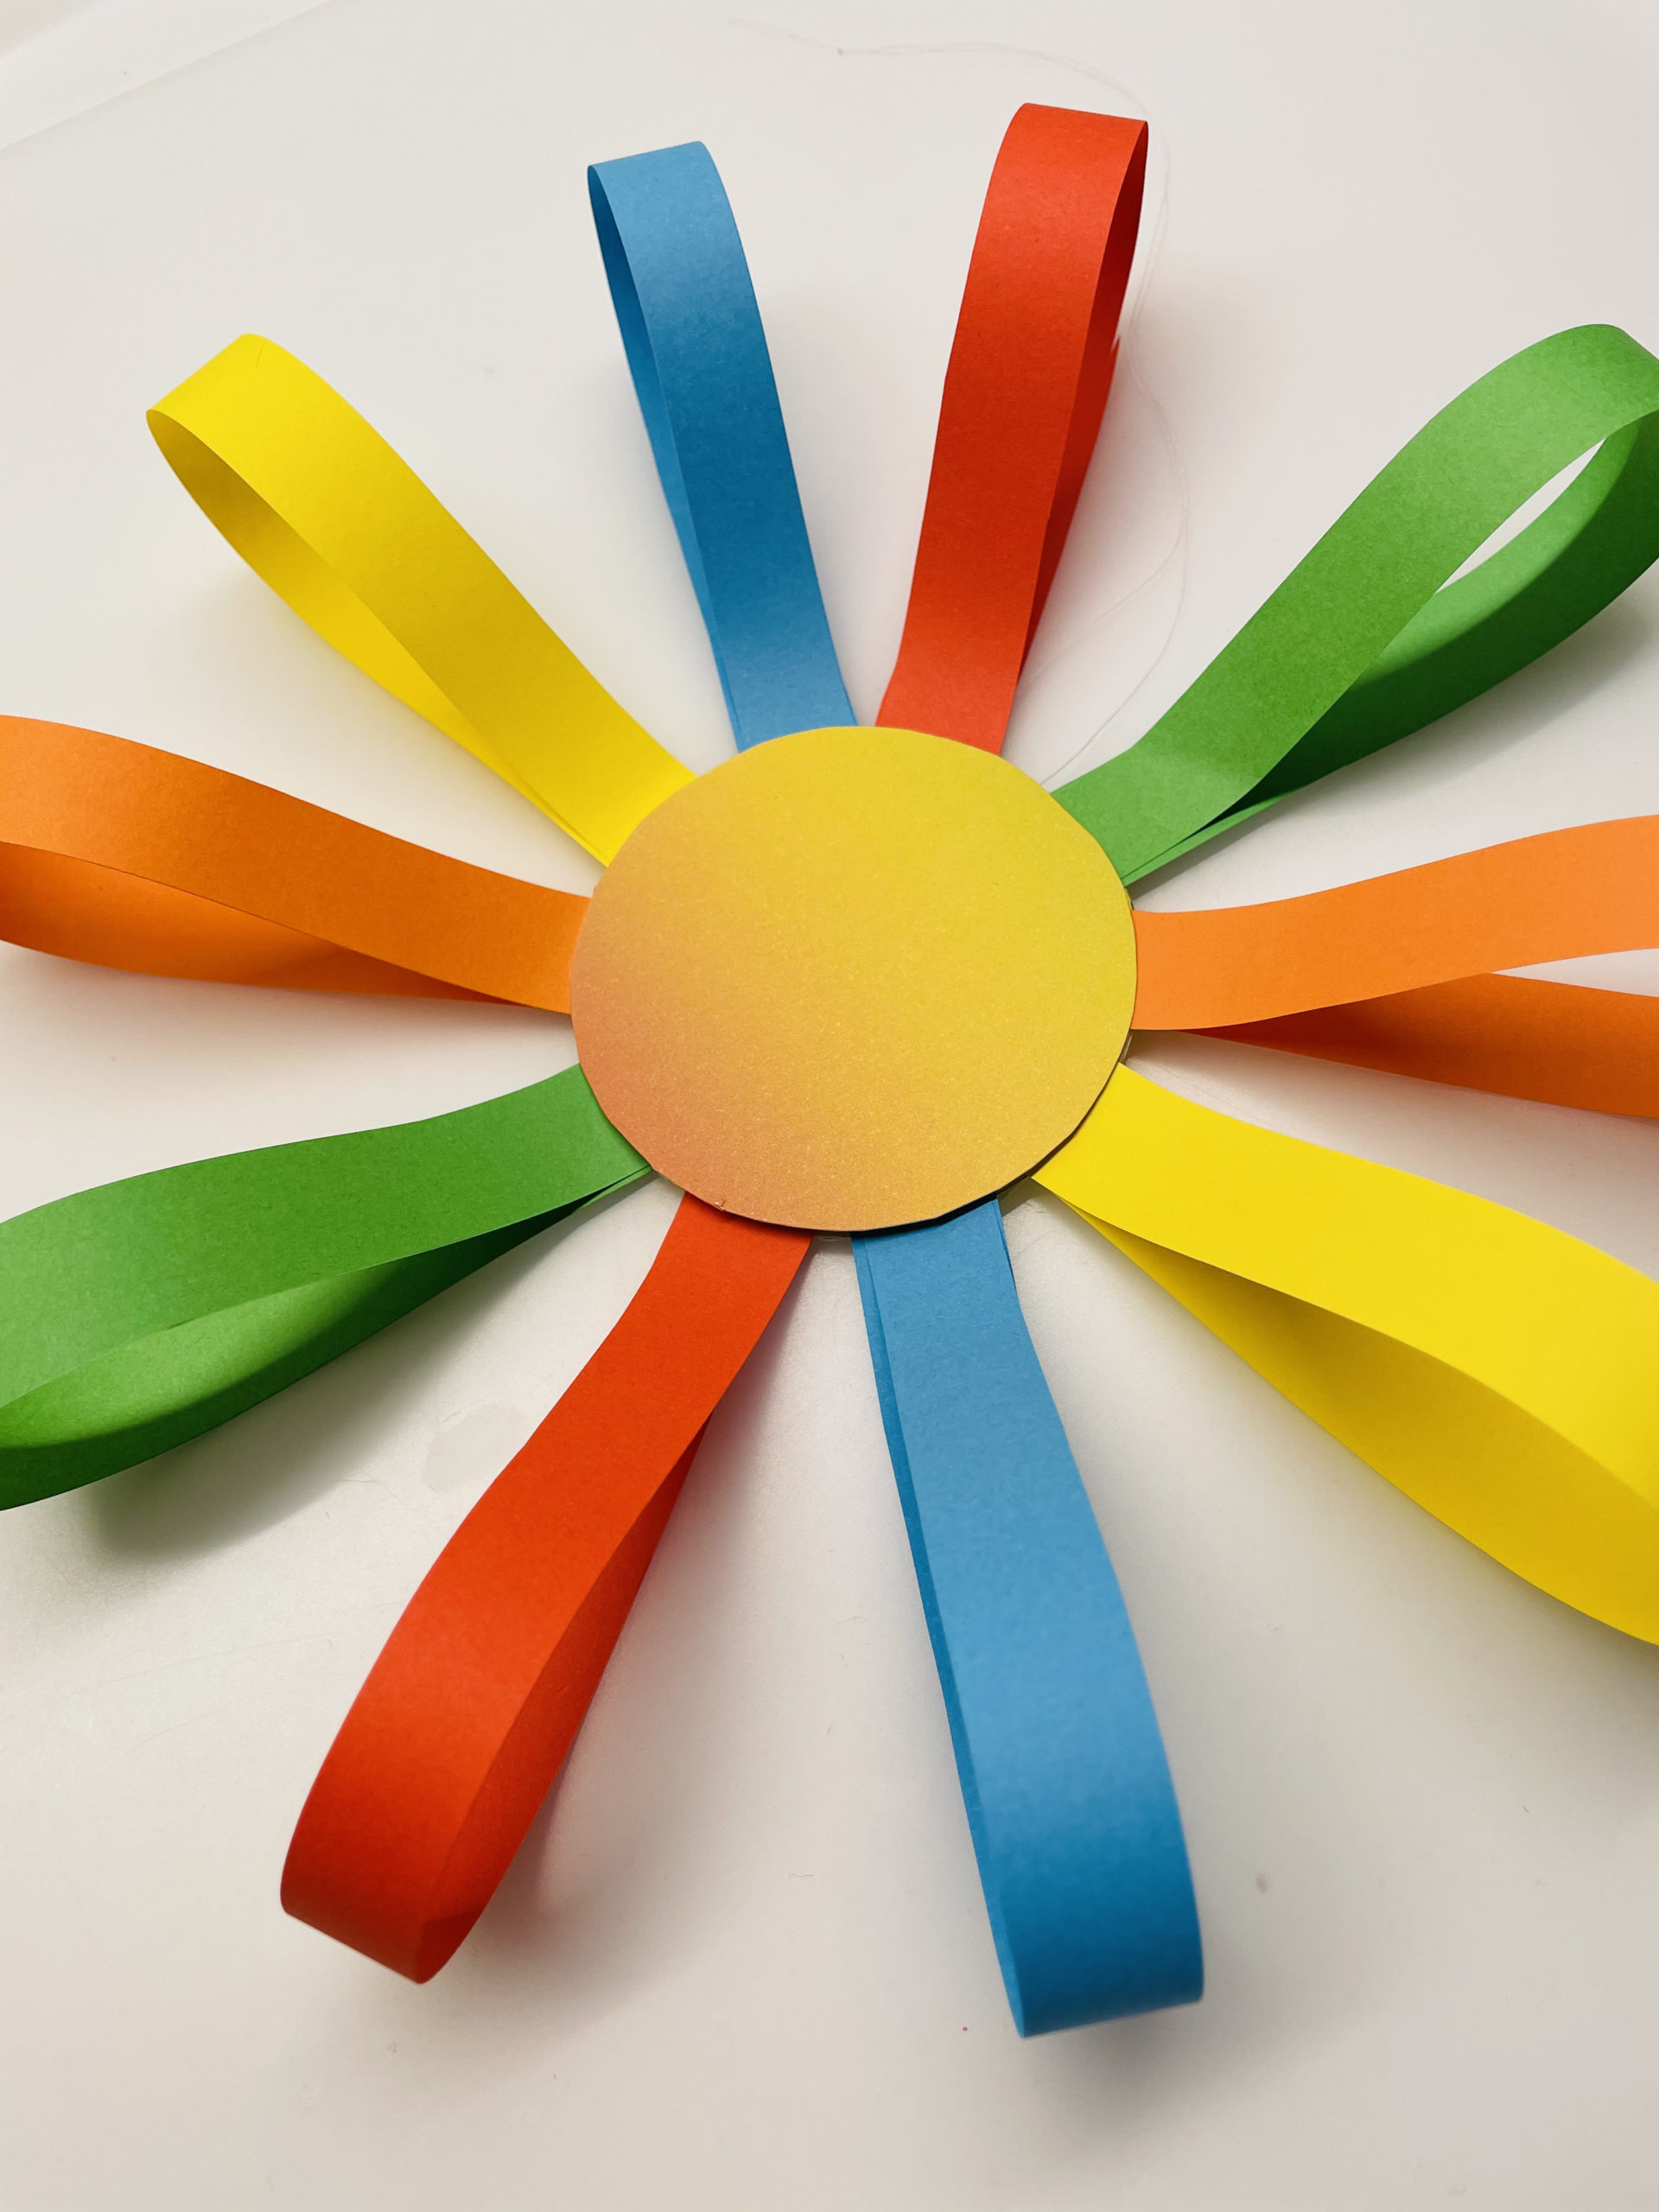
Now you cut out a second circle for the back of your flower. Stick it up as in the picture.
Tip: This can also be from a motif paper.
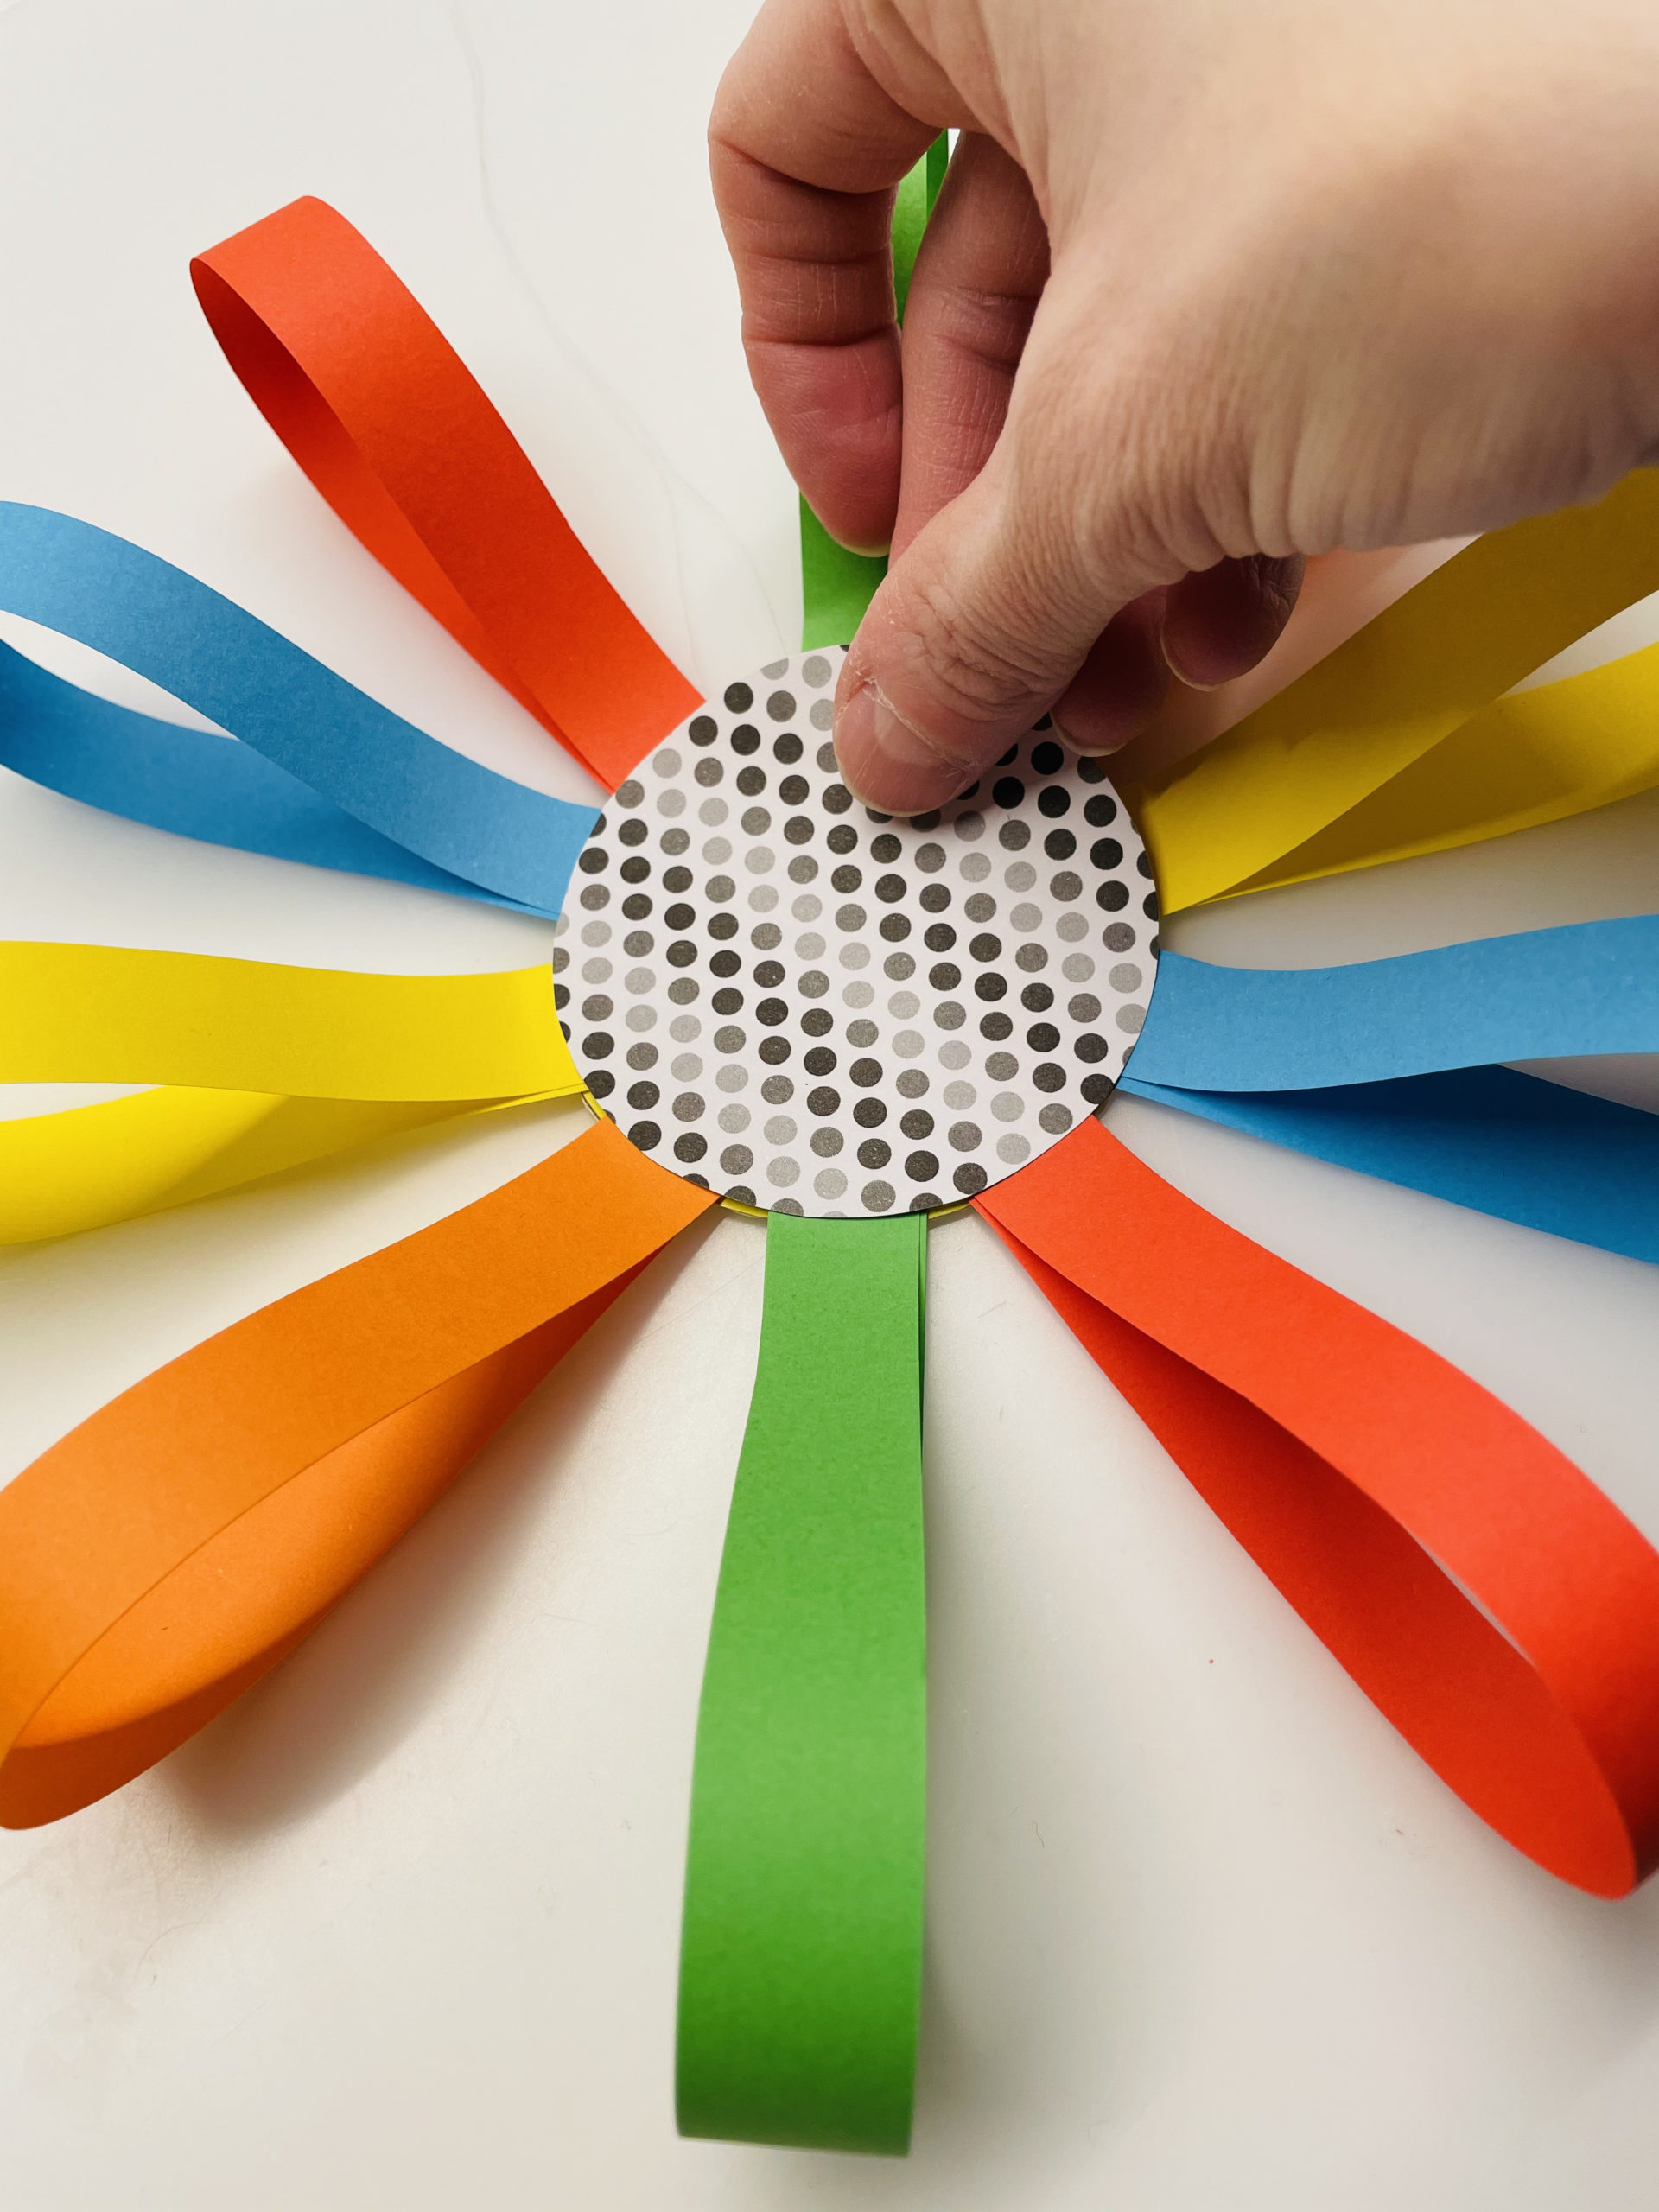
Or rainbow paper.
Now you can hang the flower.
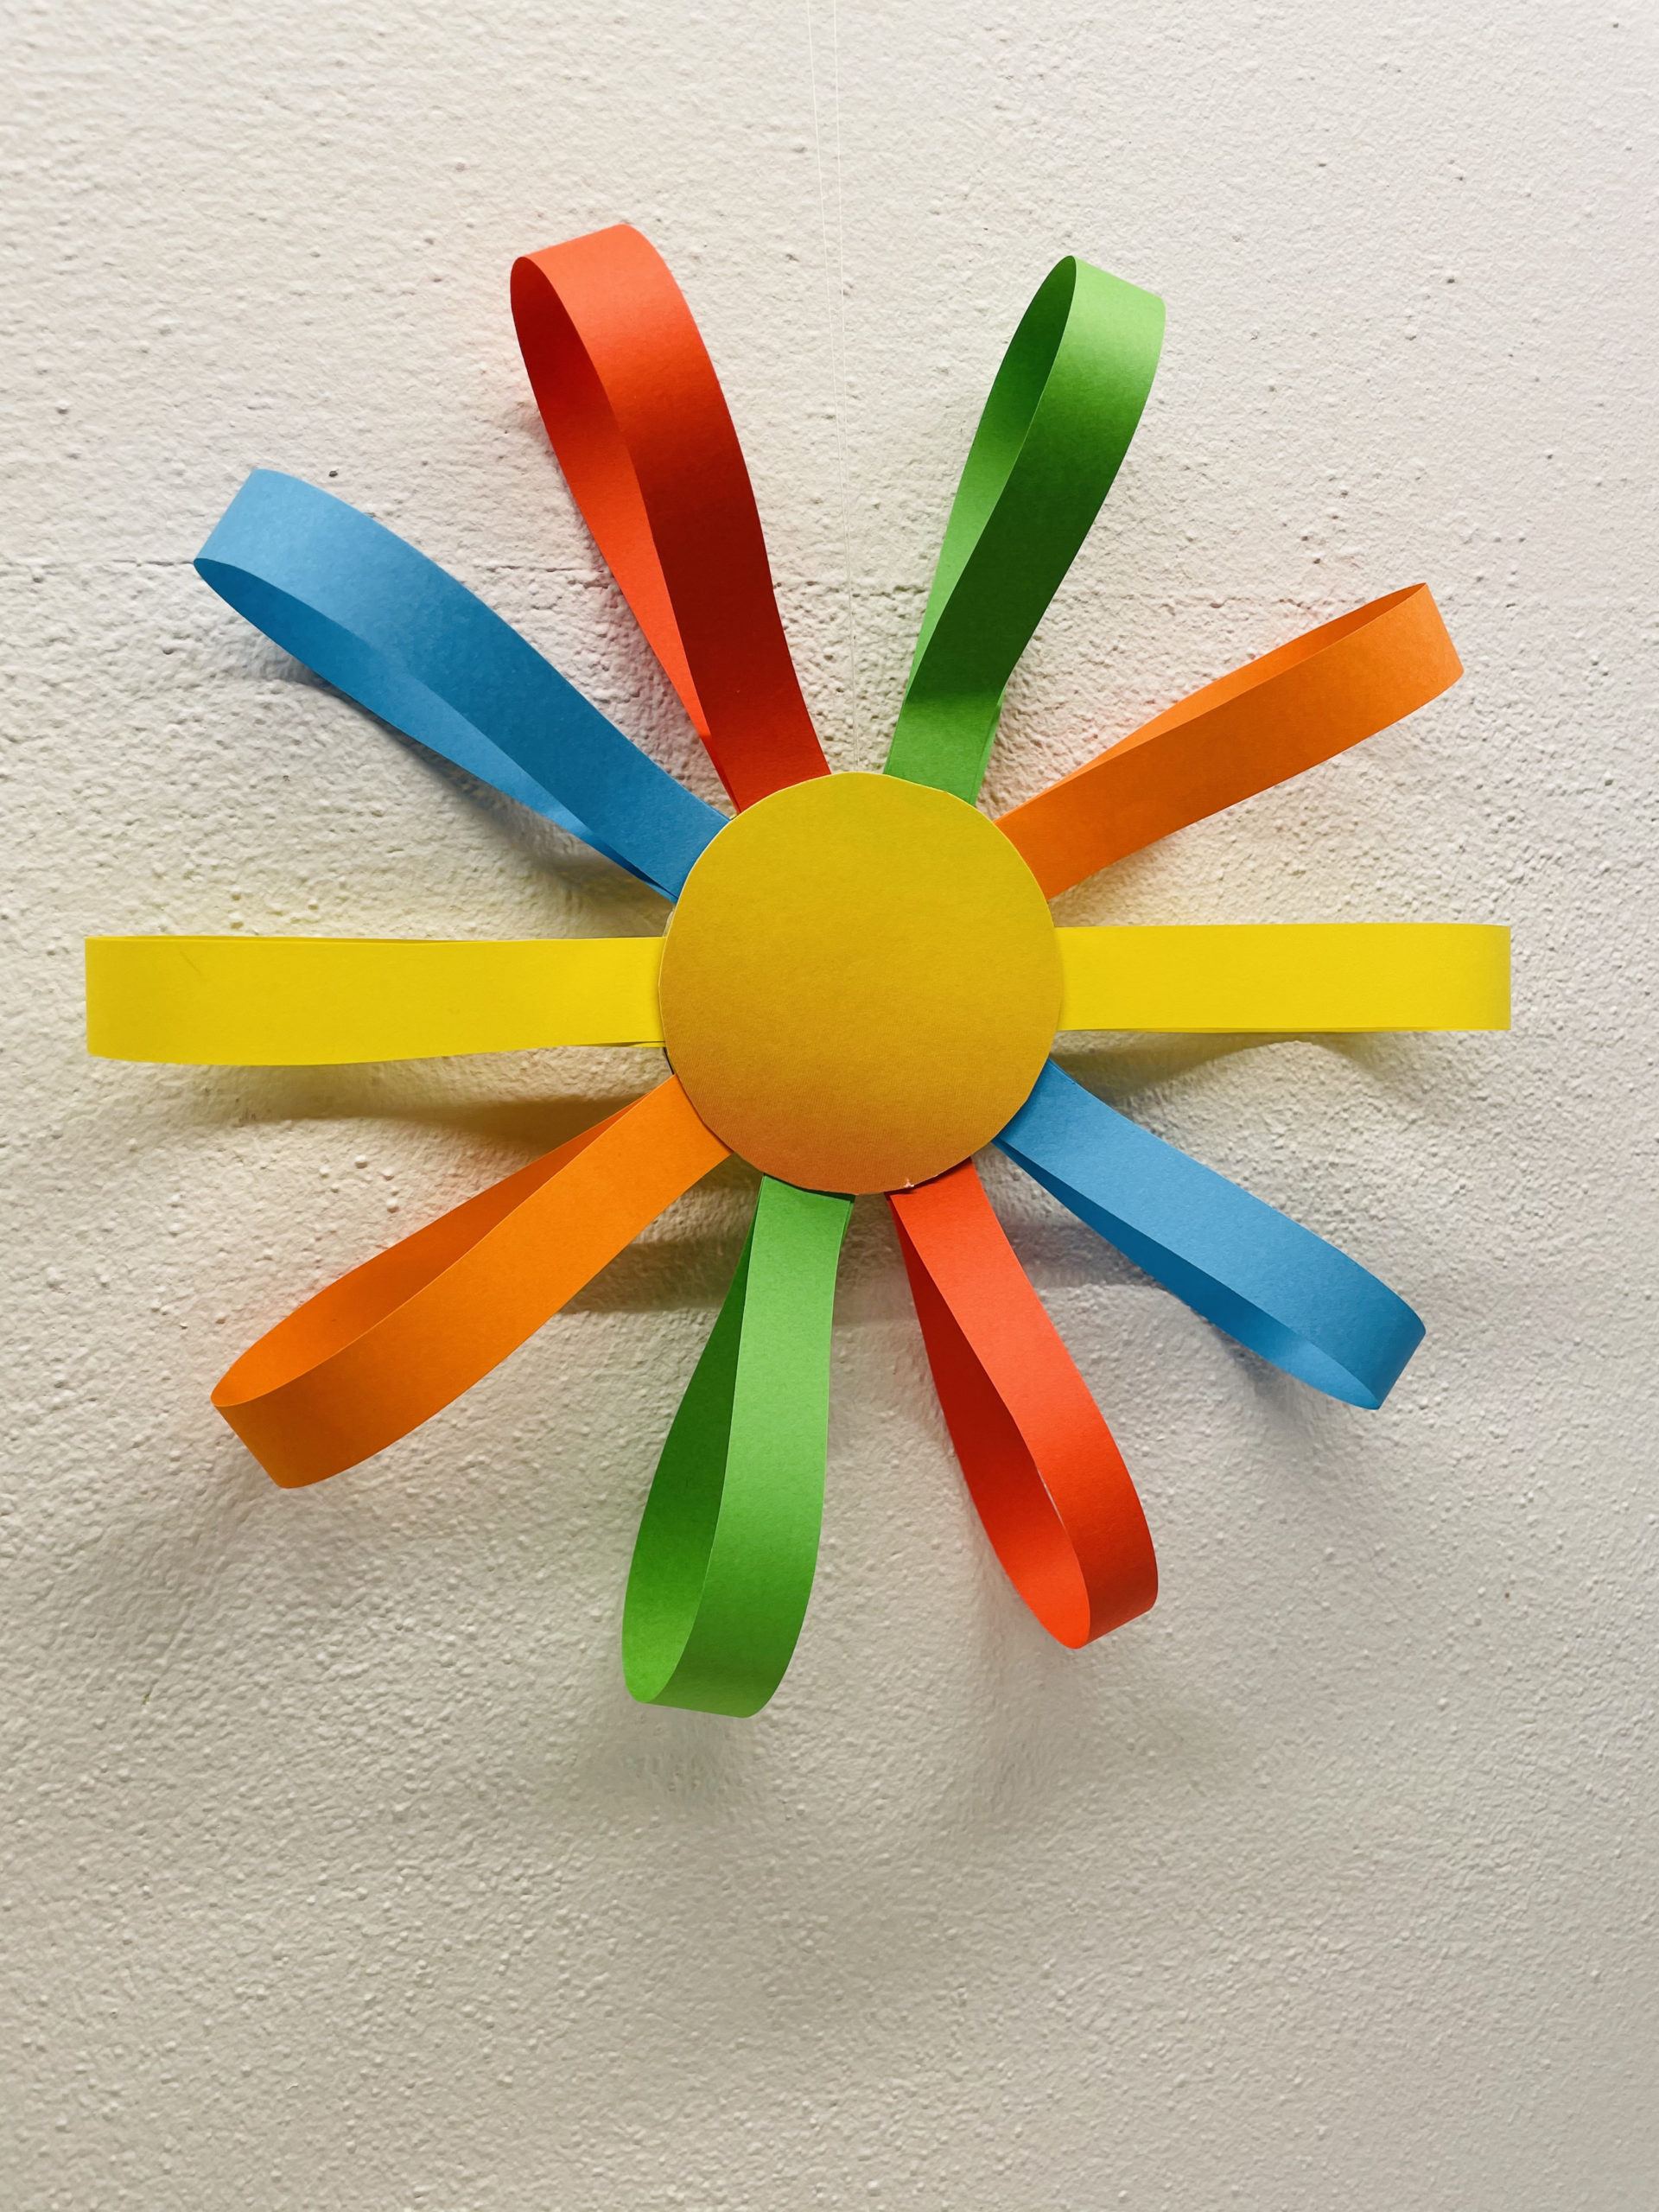
Either you hang her by a window.
Or she hangs it directly on a window window.
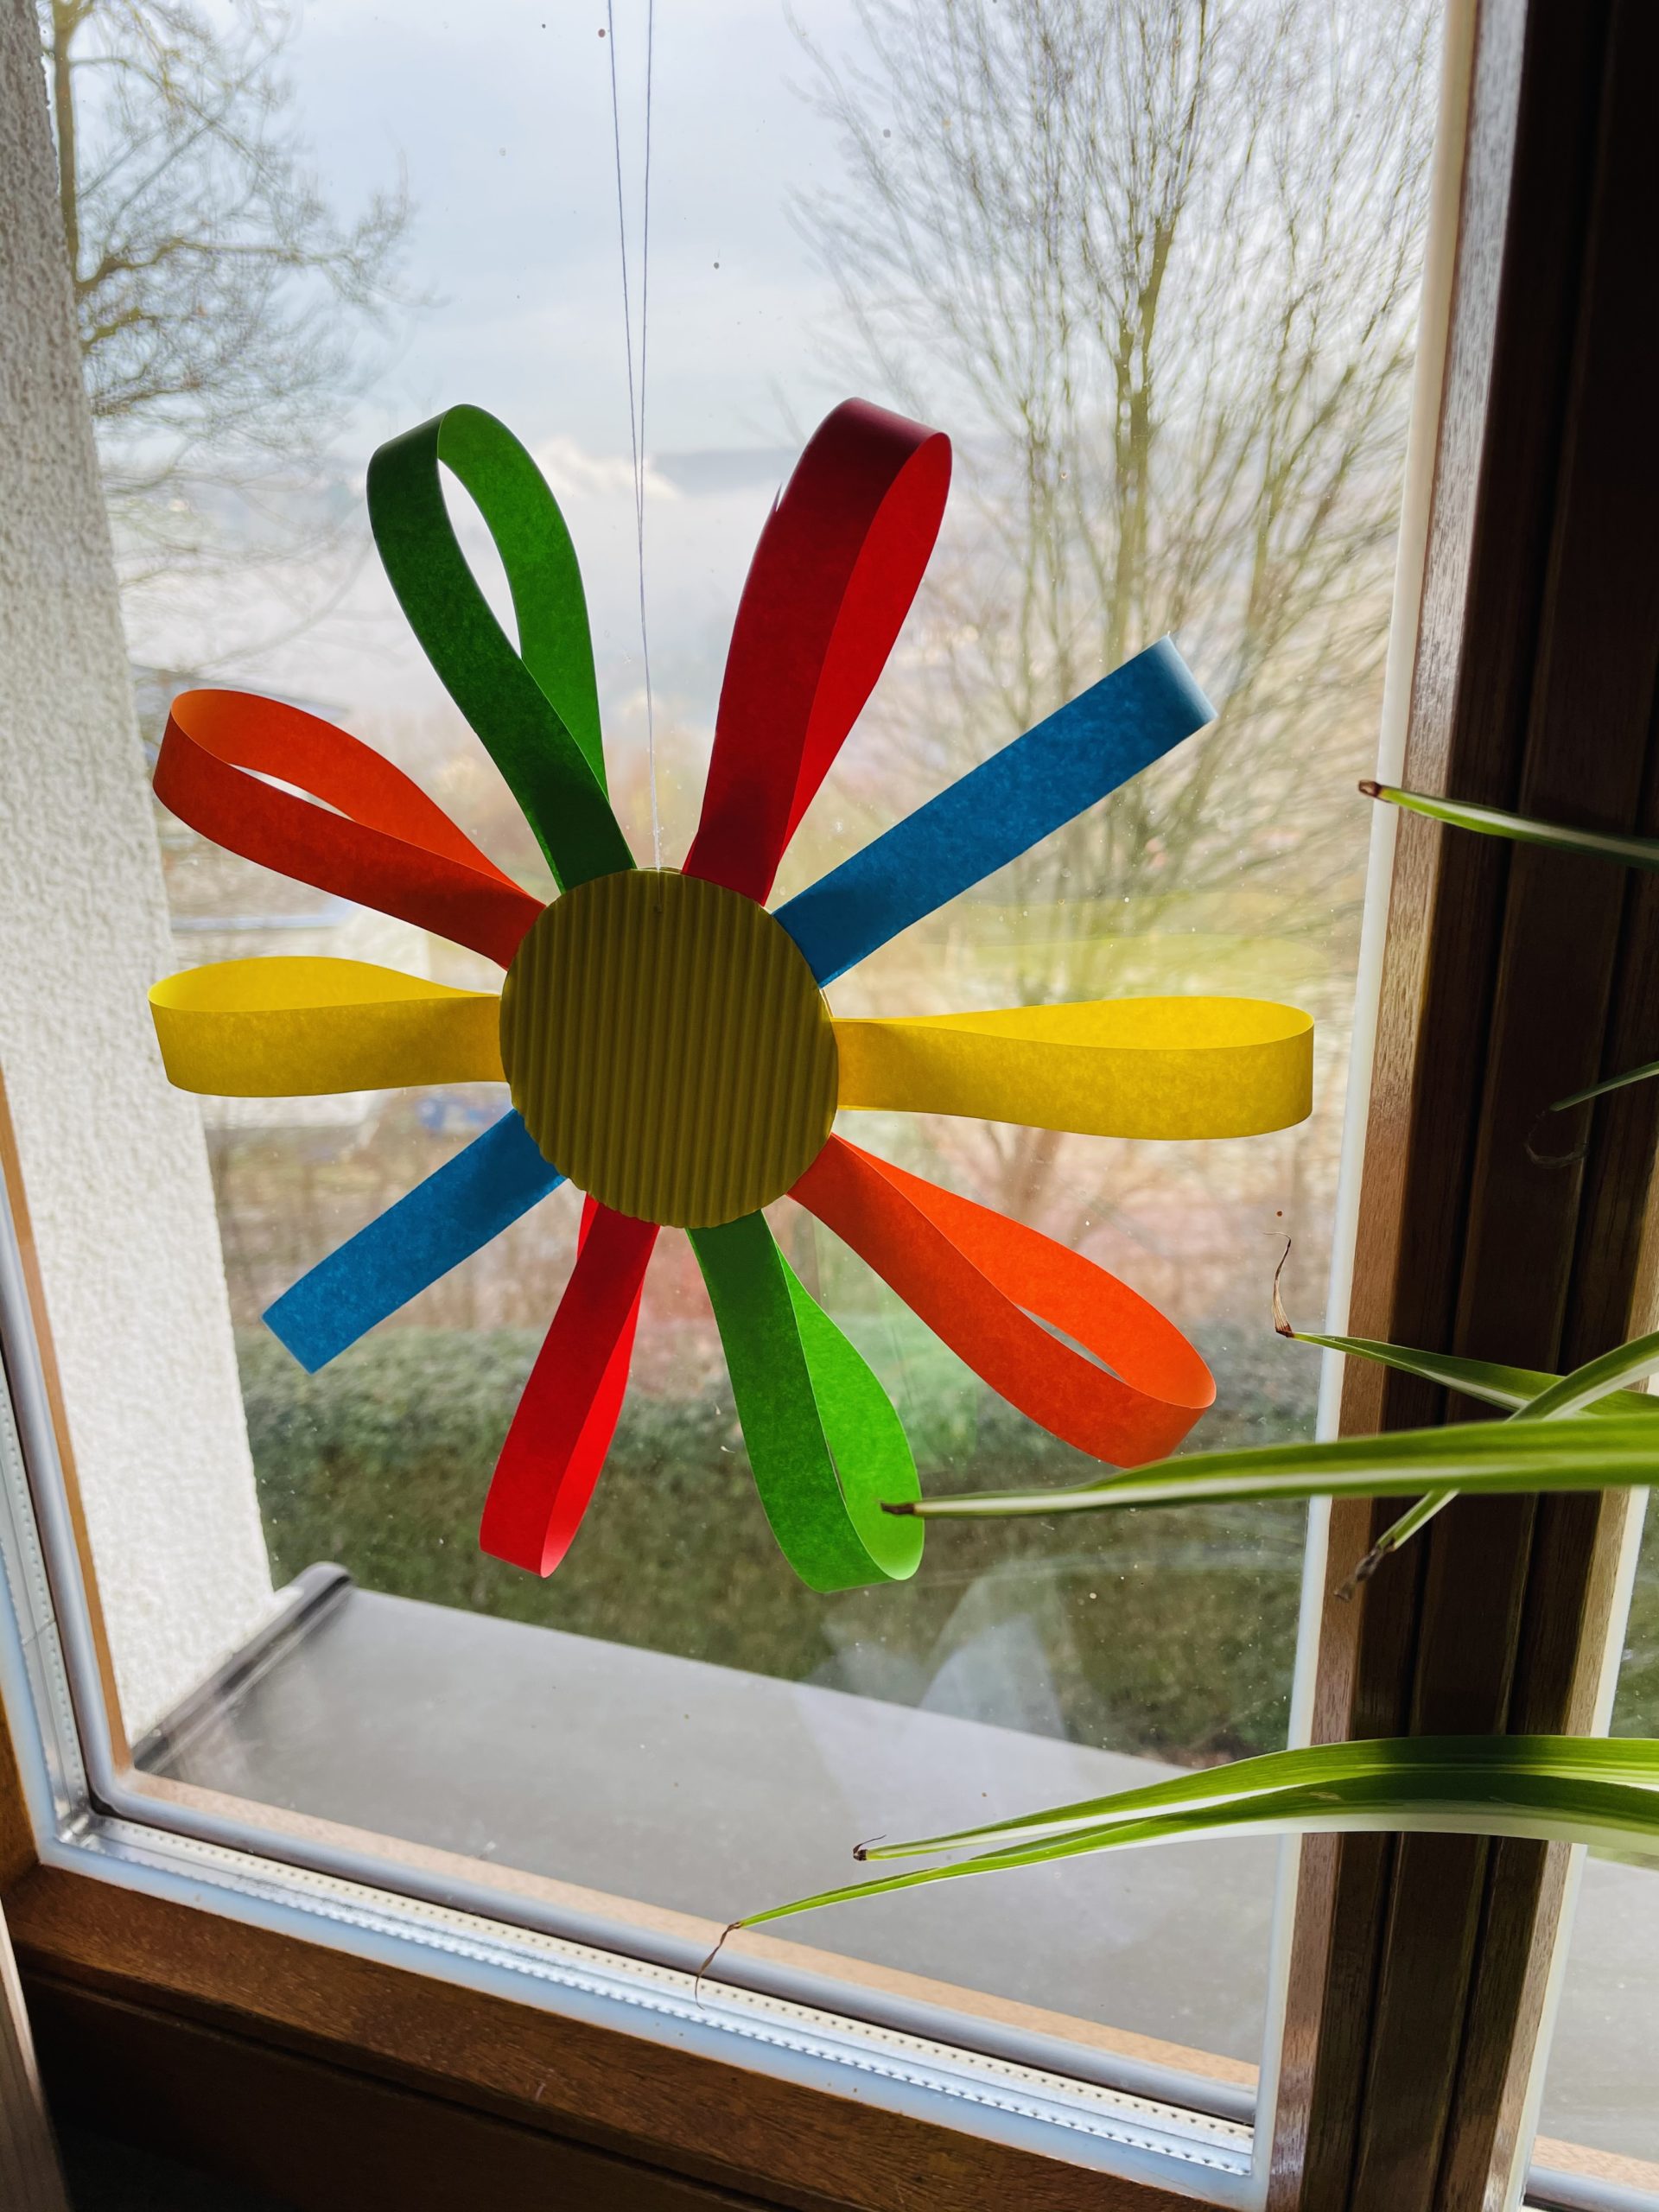
Or you hang her on a branch in the stairwell or put her in the living room..
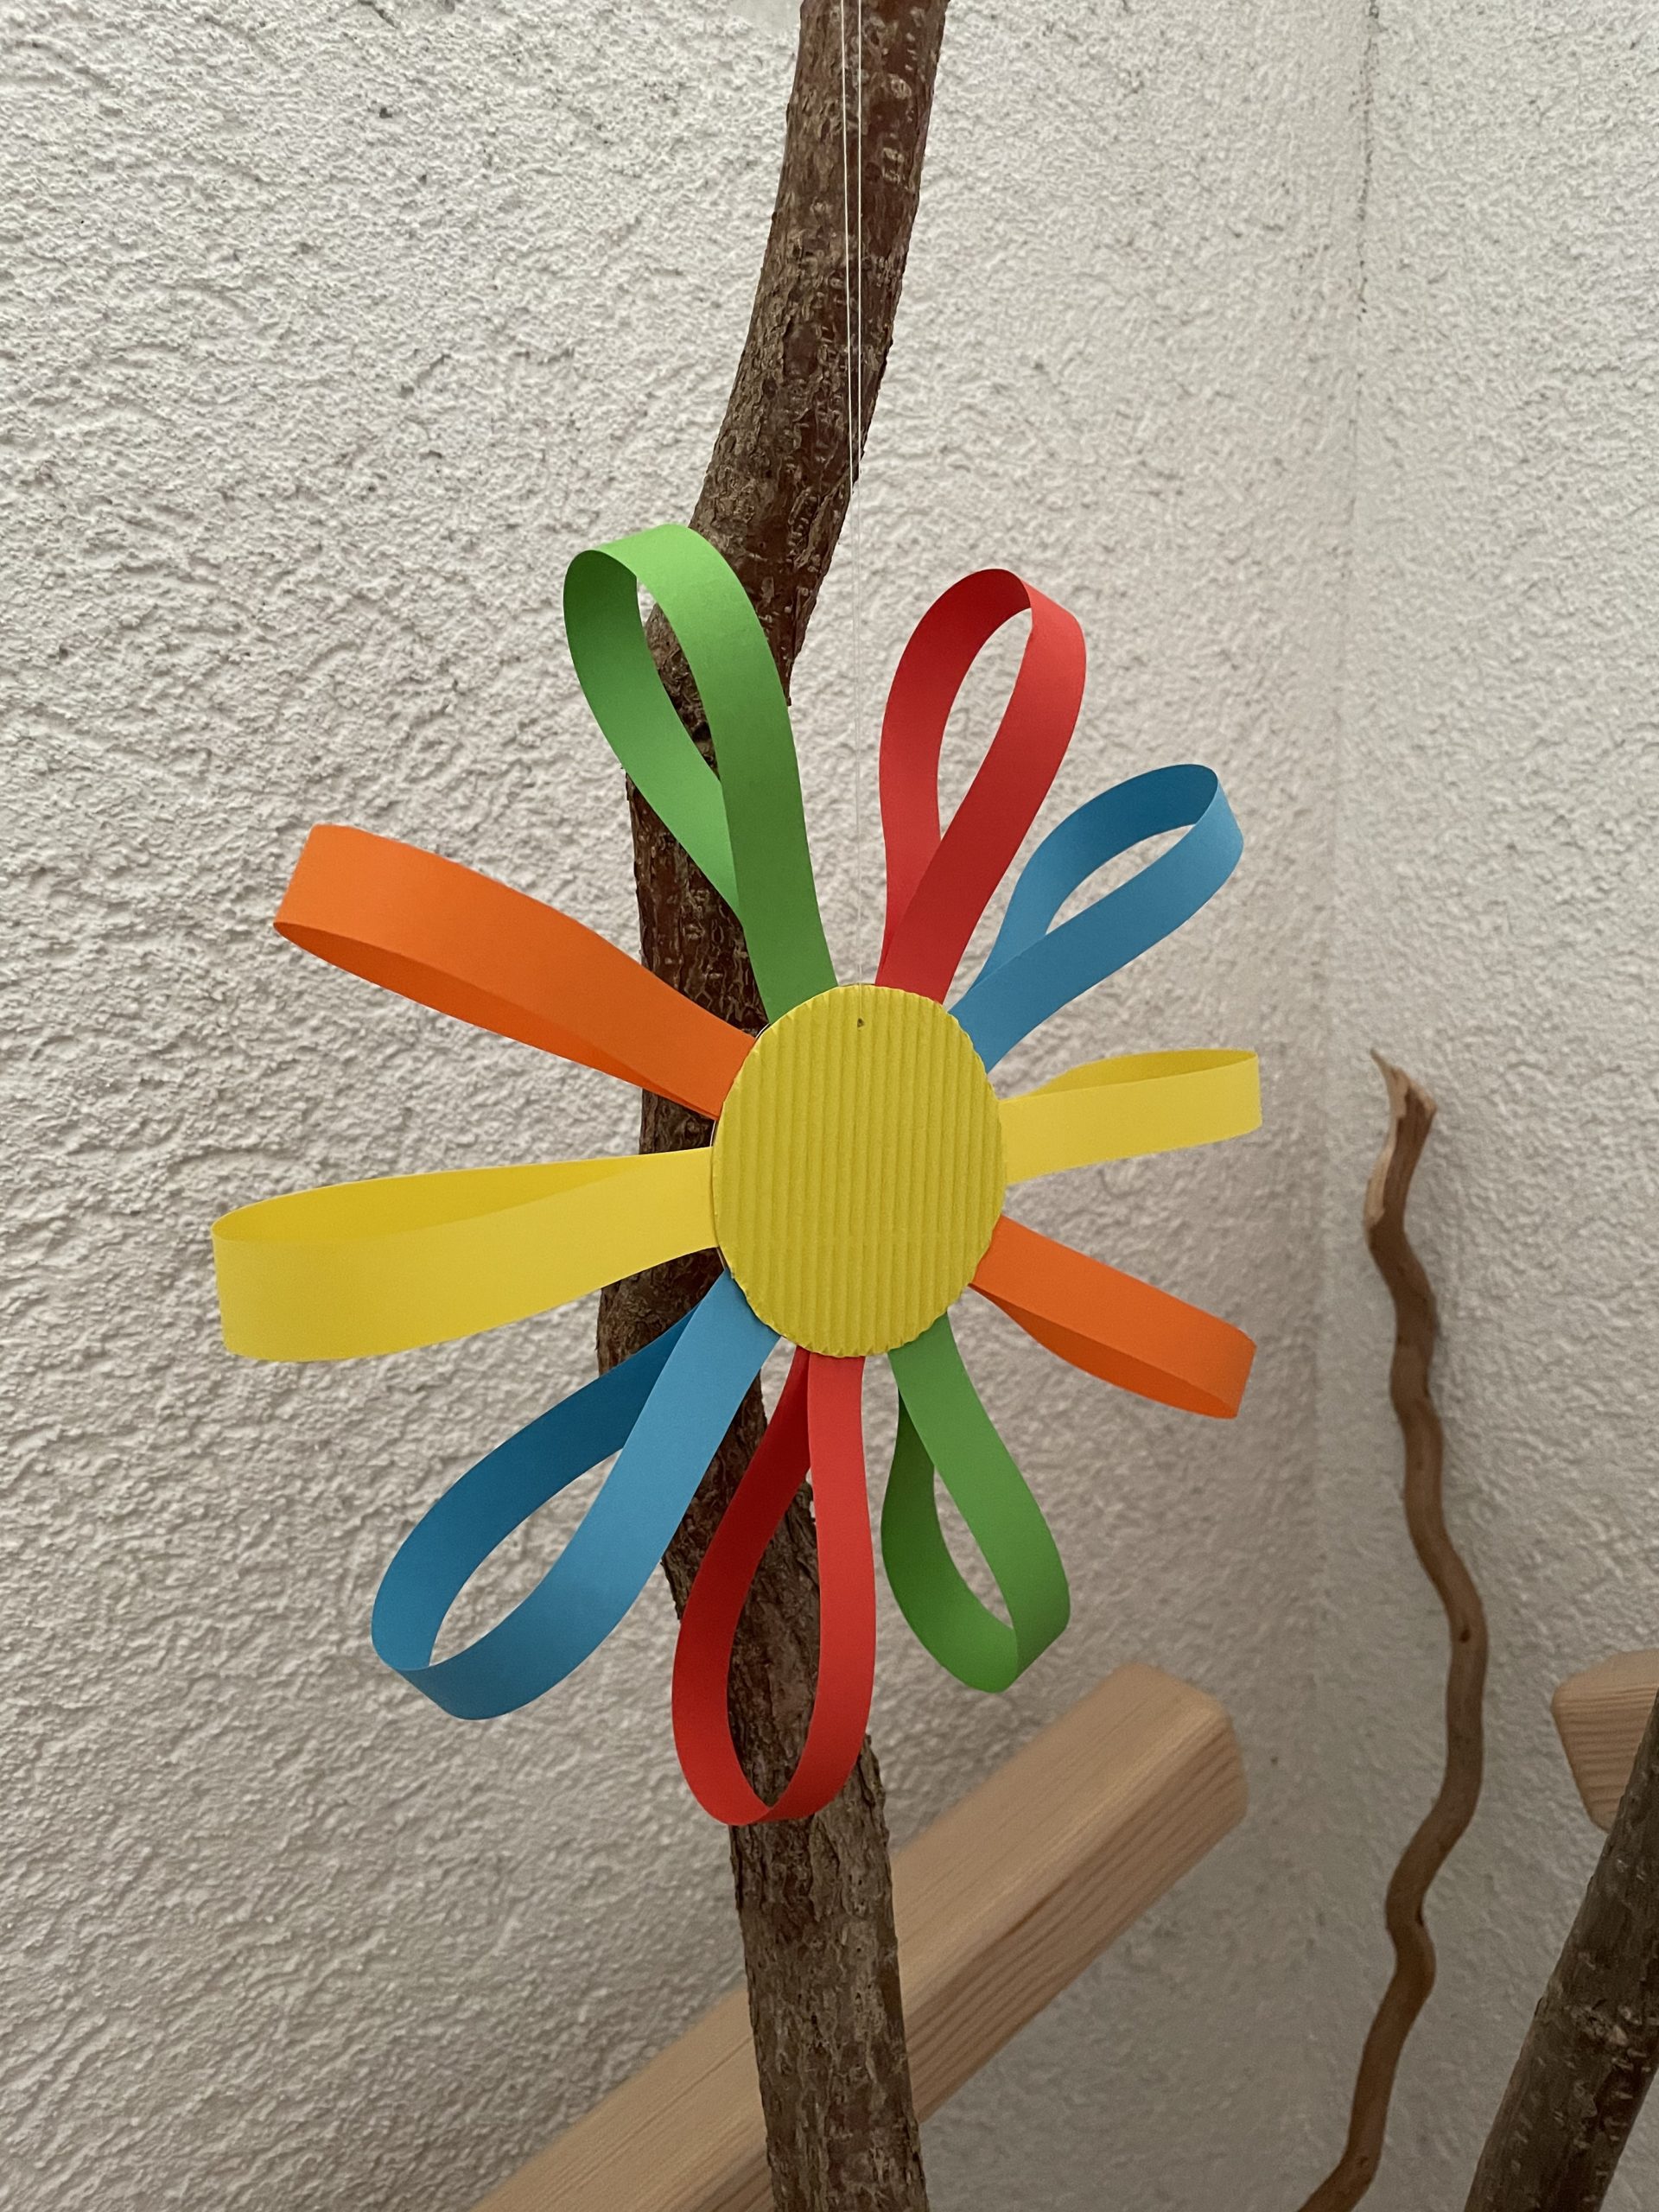
Find a nice place for your colorful flower.
Or give it to someone!

Have fun!
Materials
Directions
First put out your craft file and the materials ready.
Then cut off 2 strips of each color.
The strips should be about 1cm wide and 20 cm long. You can measure them with the ruler or cut them freely.
In total you need about 10 stripes.
Now you stick each single strip together with its ends. To do this, put a glue point at one end of the strip.
Then you stick the other end of the strip on it. Press the ends briefly, but don't squeeze the paper!
Now stick all the stripes together like this.
Now choose a piece of corrugated board and draw a circle on it.
Used to mark a round object: e.g. screw glass lid, bowl or drinking glass.
Tip: You can select any stable paper.
Then cut out the circle.
After that, you pierce a hole through the circle with a thick needle at the edge.
Now thread through a thread and knot it. Then tie another loop with the thread. Then you can hang up the flower.
Now place the circle with the beautiful side down on the table. Now you place the prepared paper strips all around. As soon as the arrangement of the colors and distances fall, then you push the strips outward - away from the circle.
Now you brush the outer edge of the circle with glue.
Then you begin to apply the petals. Sticks on one strip after the other, just as you put the strips in order.
Tighten the individual strips well.
Now you cut out a second circle for the back of your flower. Stick it up as in the picture.
Tip: This can also be from a motif paper.
Or rainbow paper.
Now you can hang the flower.
Either you hang her by a window.
Or she hangs it directly on a window window.
Or you hang her on a branch in the stairwell or put her in the living room..
Find a nice place for your colorful flower.
Or give it to someone!
Have fun!
Follow us on Facebook , Instagram and Pinterest
Don't miss any more adventures: Our bottle mail


That was really super easy. I'm a dad and I don't really make a lot of – but that worked really well. Almost like with the thermomix all steps are explained exactly. Top!
Thank you for the nice idea. The little mouse was totally excited. Here is her artwork.