Minced flower of egg box

AdventurerKatzi
Rating5.05.7 Thousand times & (1) DifficultyAdvanced

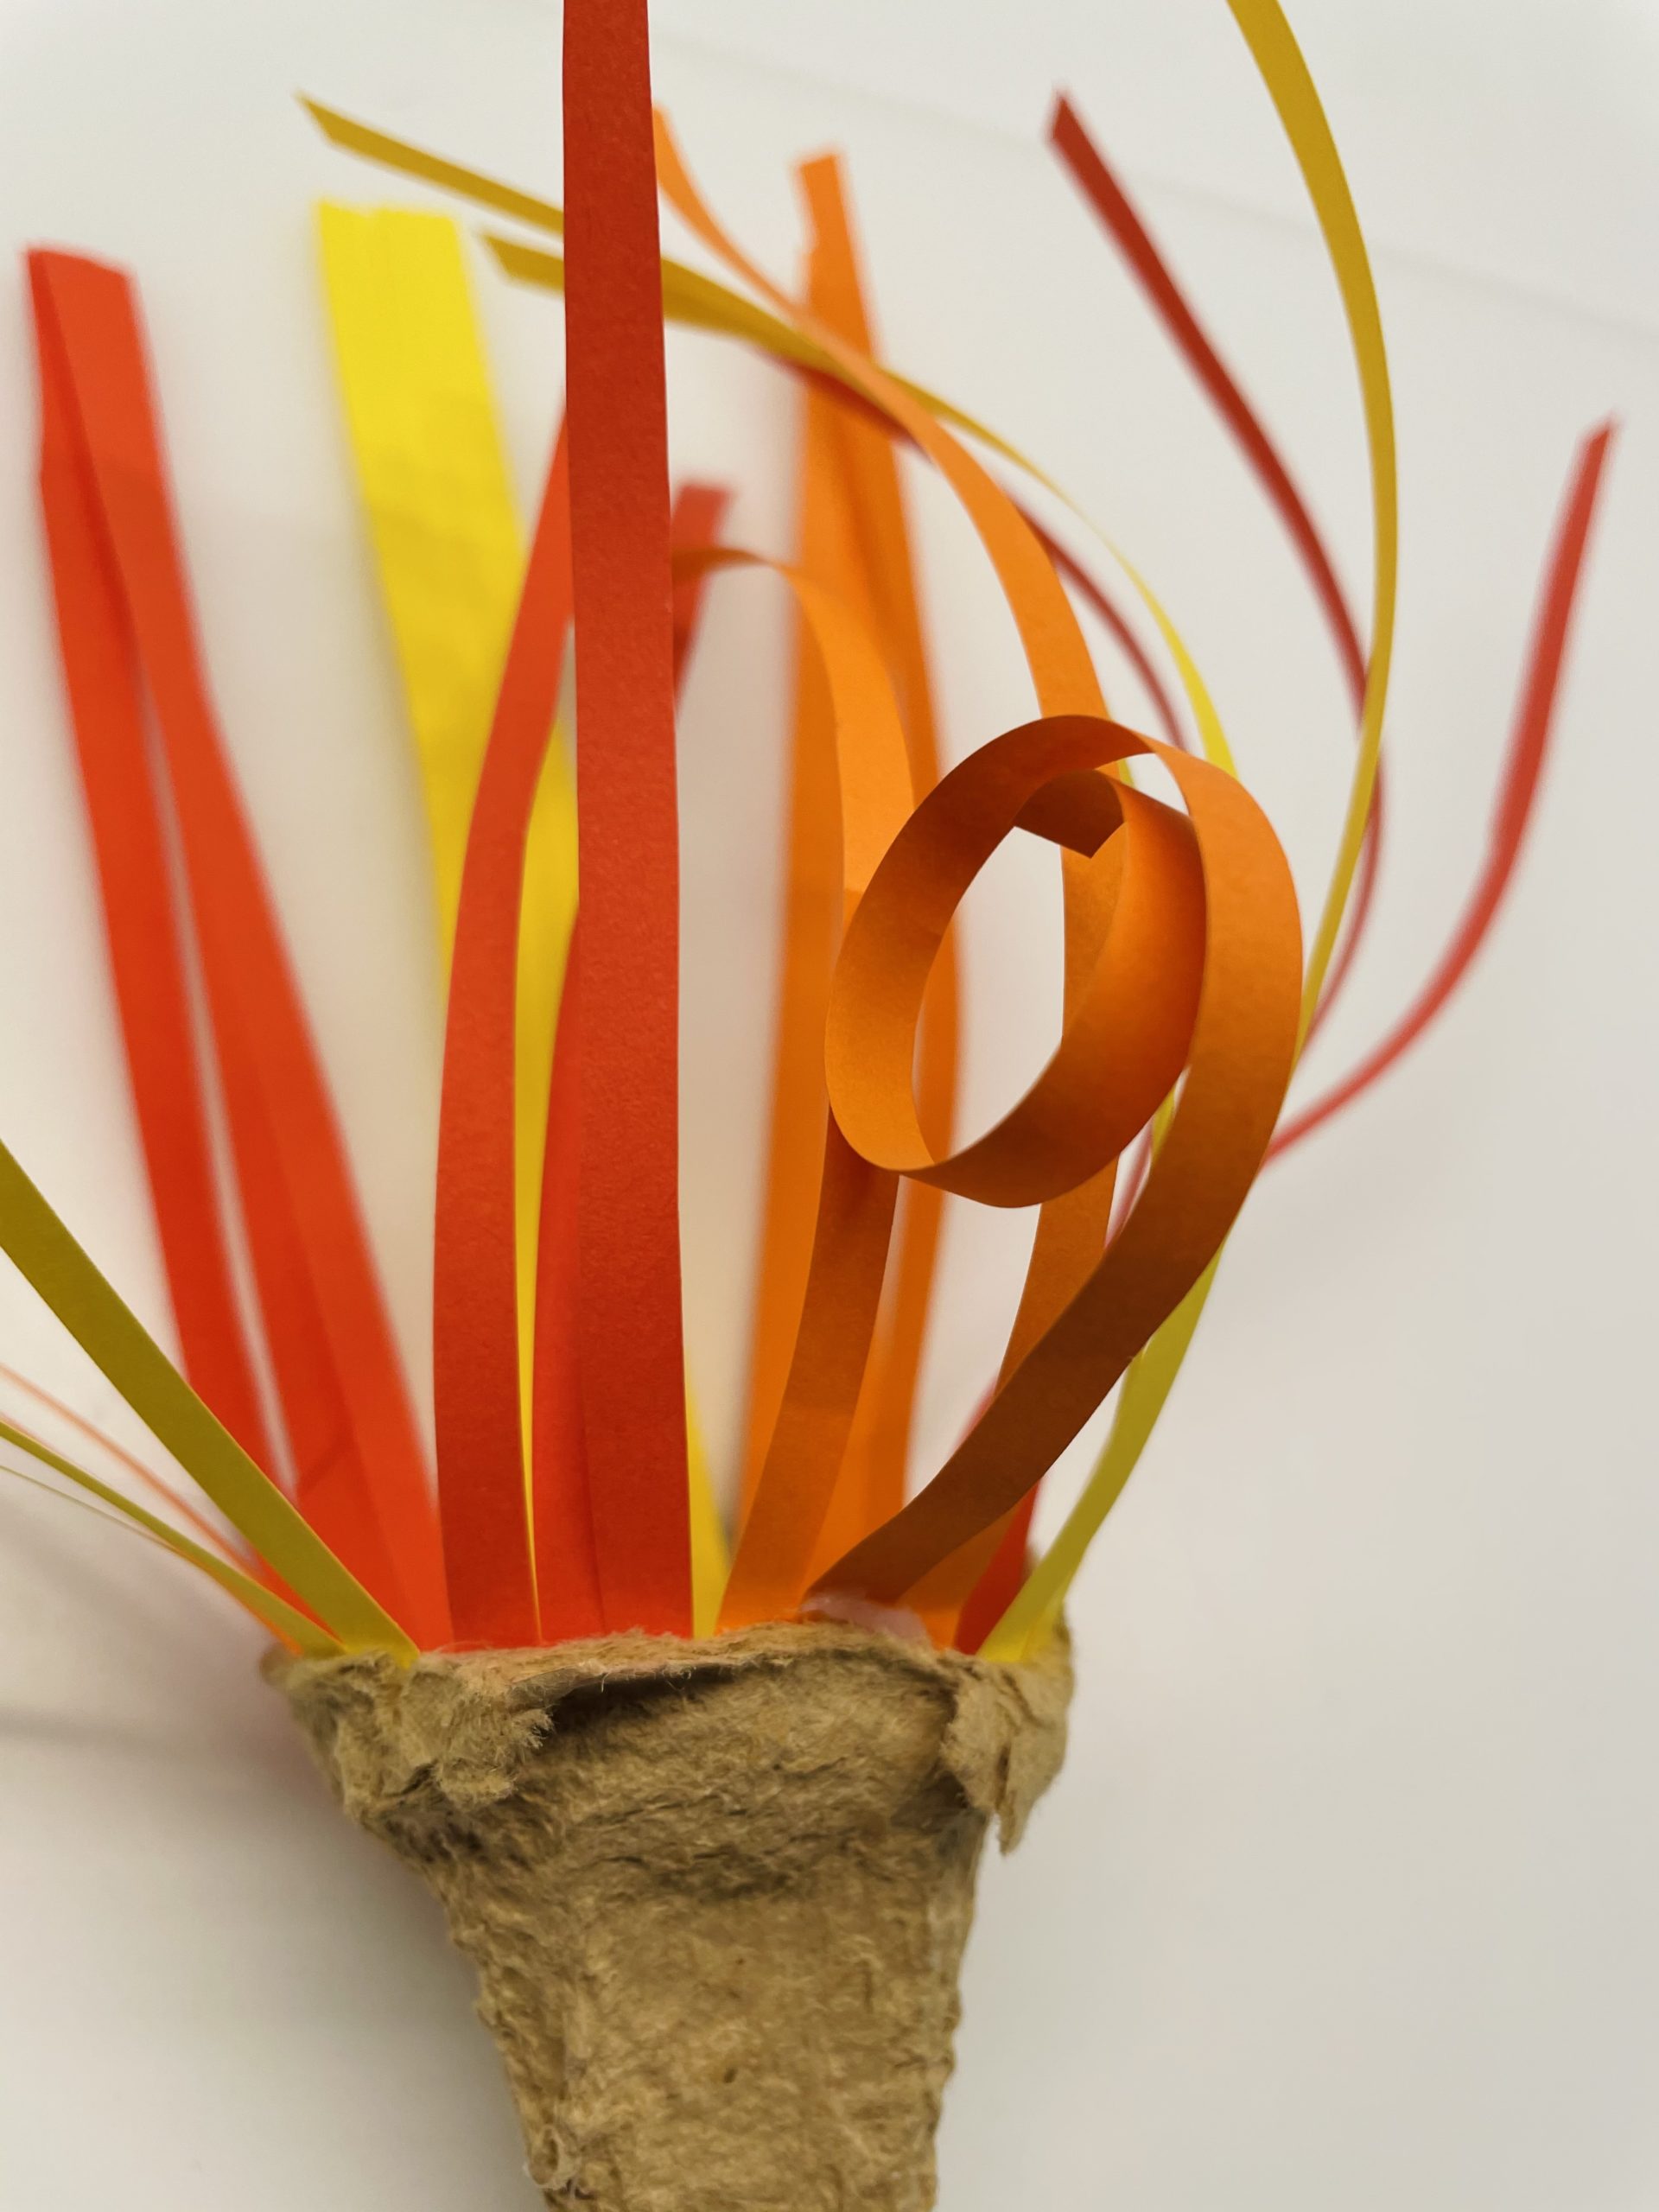
This colorful flower is made from colorful thin paper strips and an egg box. With scissors, the paper strips are reduced. See for yourself how this works and make this colorful spring flower according to this instruction.

Media Education for Kindergarten and Hort

Kind bastelt eine Rassel mit dem Navi
The Adventure Navi, the app for DIY projects, enables media education for the youngest.

Relief in everyday life, targeted promotion of individual children, independent learning and - without any pre-knowledge already usable by the youngest!
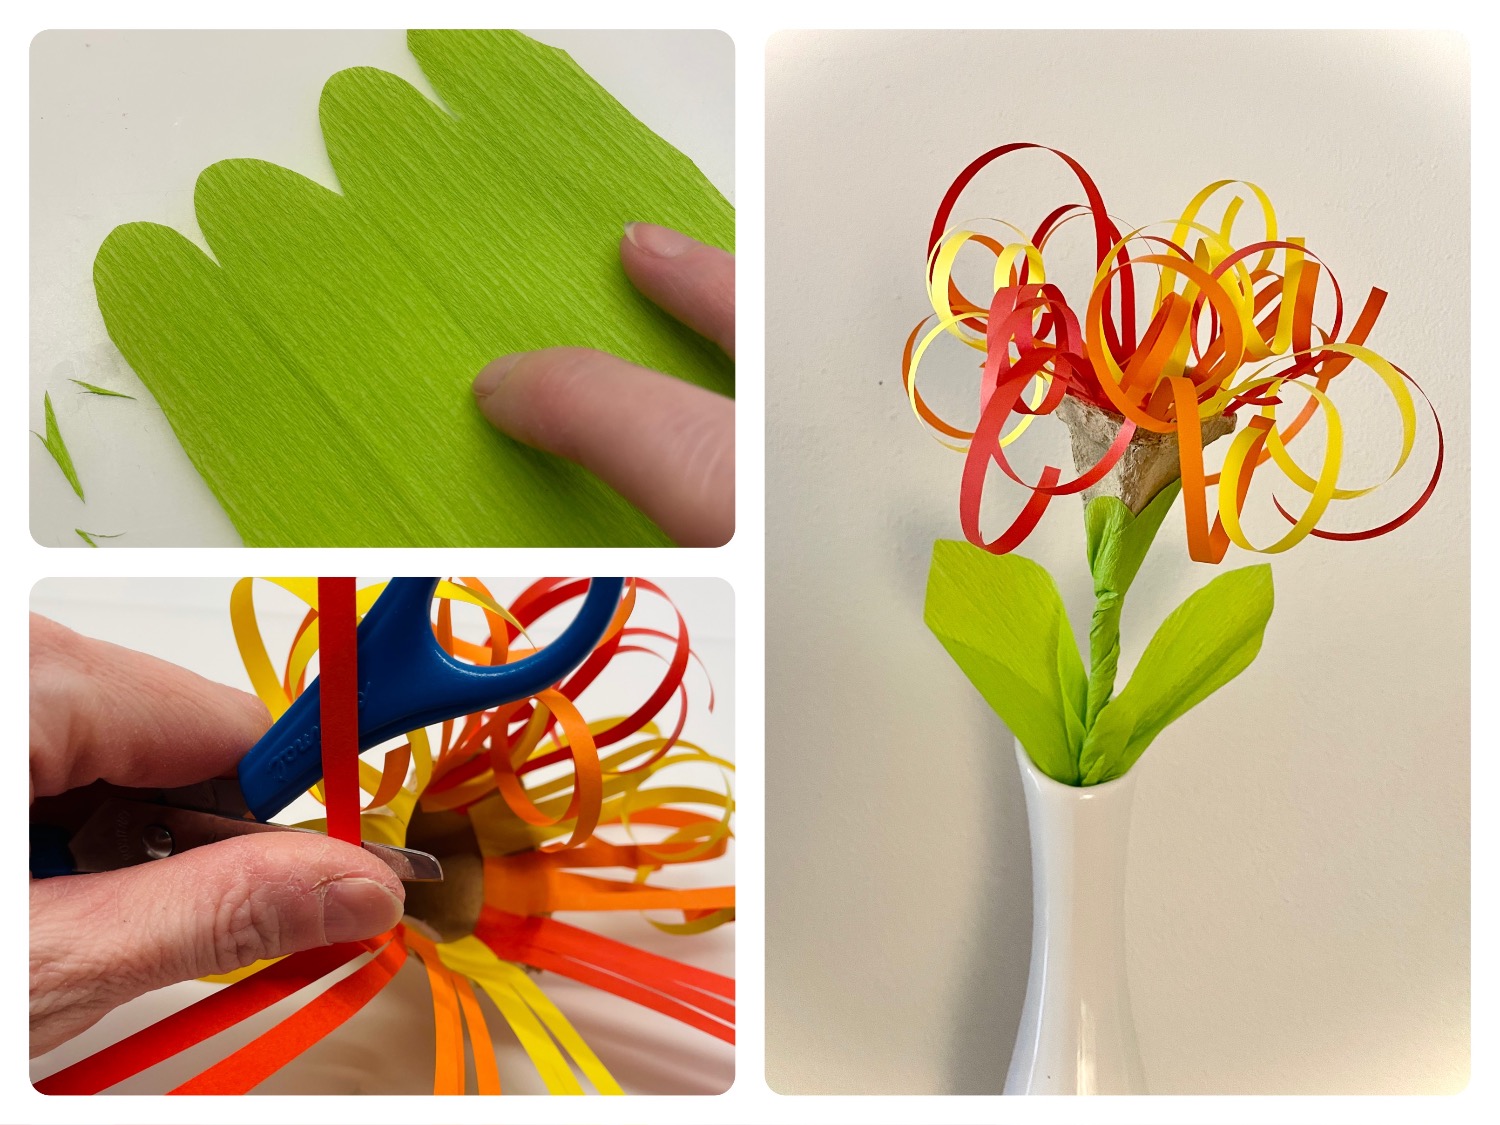


Titelbild zur Bastel- und DIY-Idee für Kinder '(636) Geringelte Blume aus Eierkarton'
Material for1 Child
Prep Time5 min.Adv. Time20 min.Total Time25 min.
 1 Egg carton
 Copy paper in red, orange and yellow
 Crepe paper green
 1 Wooden rod
That's what you need in addition:
 1 Pen
 1 Glue
 possibly knives
 Builder's pad
All links marked with a shopping cart lead to Amazon - here we have selected products that we would order ourselves and in part also ordered. In a qualified purchase via the advertising link, we as Amazon partner receive a commission, for you there are no costs. You thus support our cost- and advertising banner-free, educational offer.
1

Put out your craft pad and the materials ready.
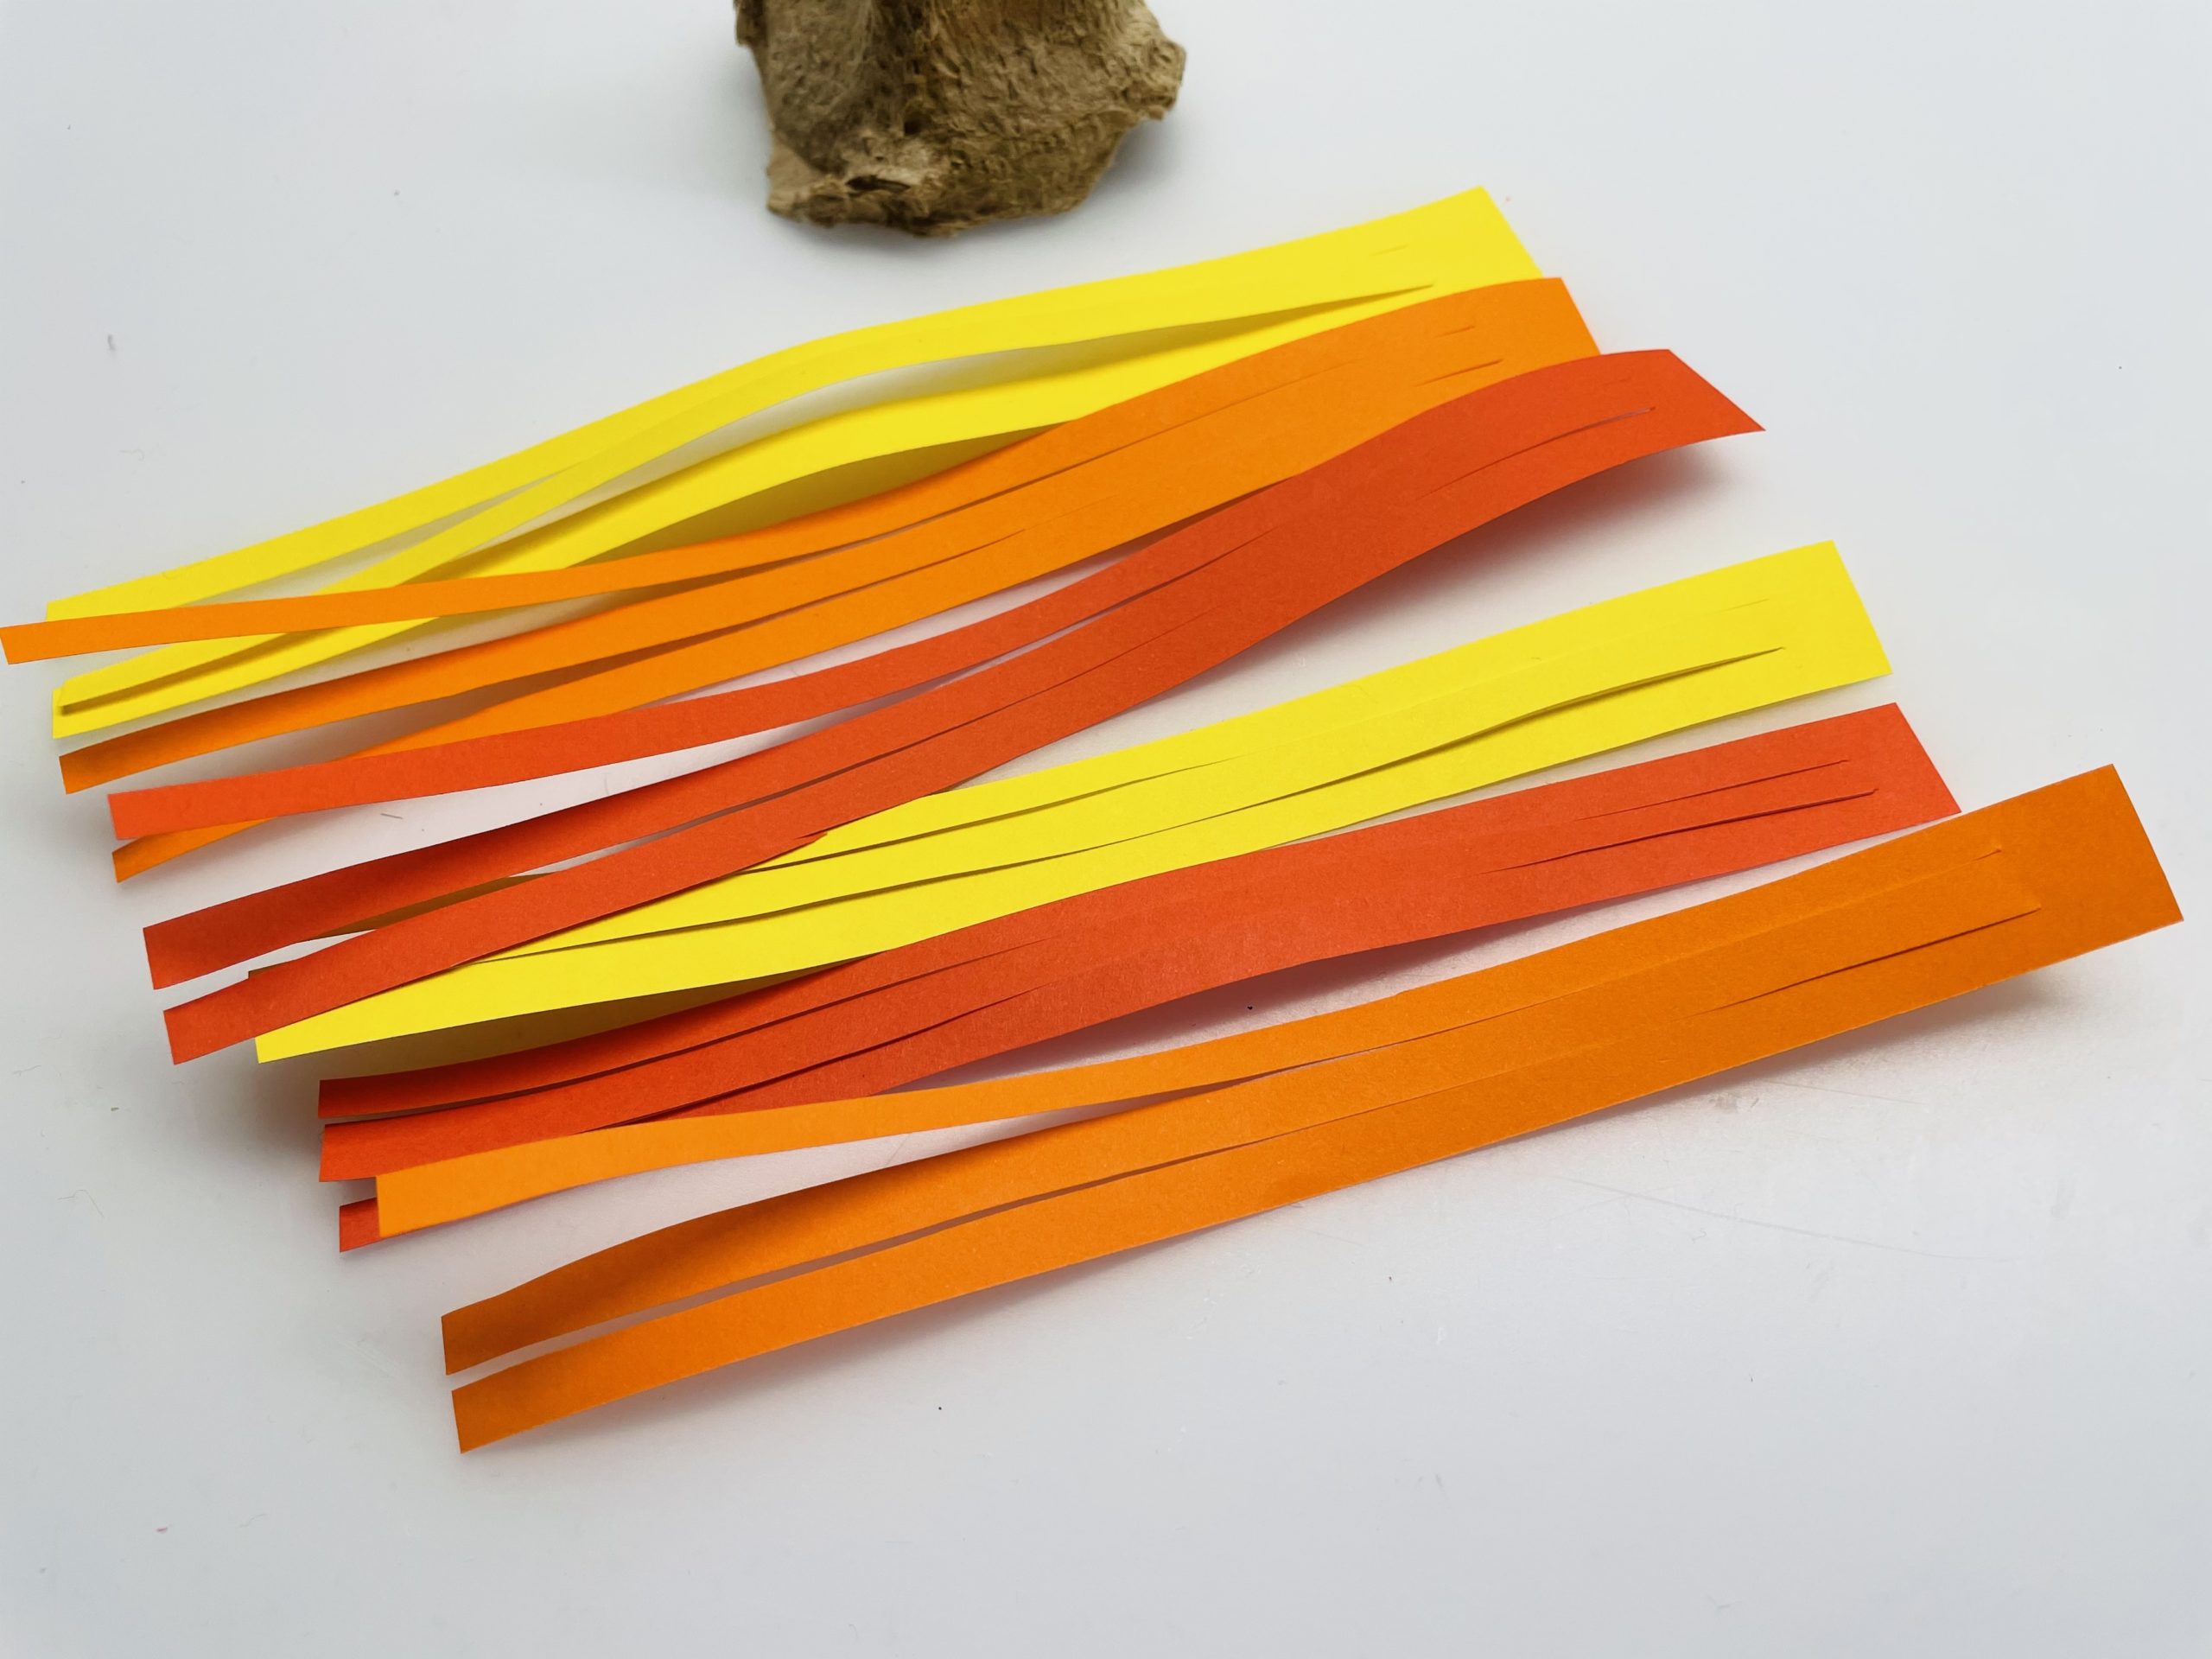
Then cut strips with 1cm width from colored copy paper. Choose your favorite colors! I used three colors with three stripes each.
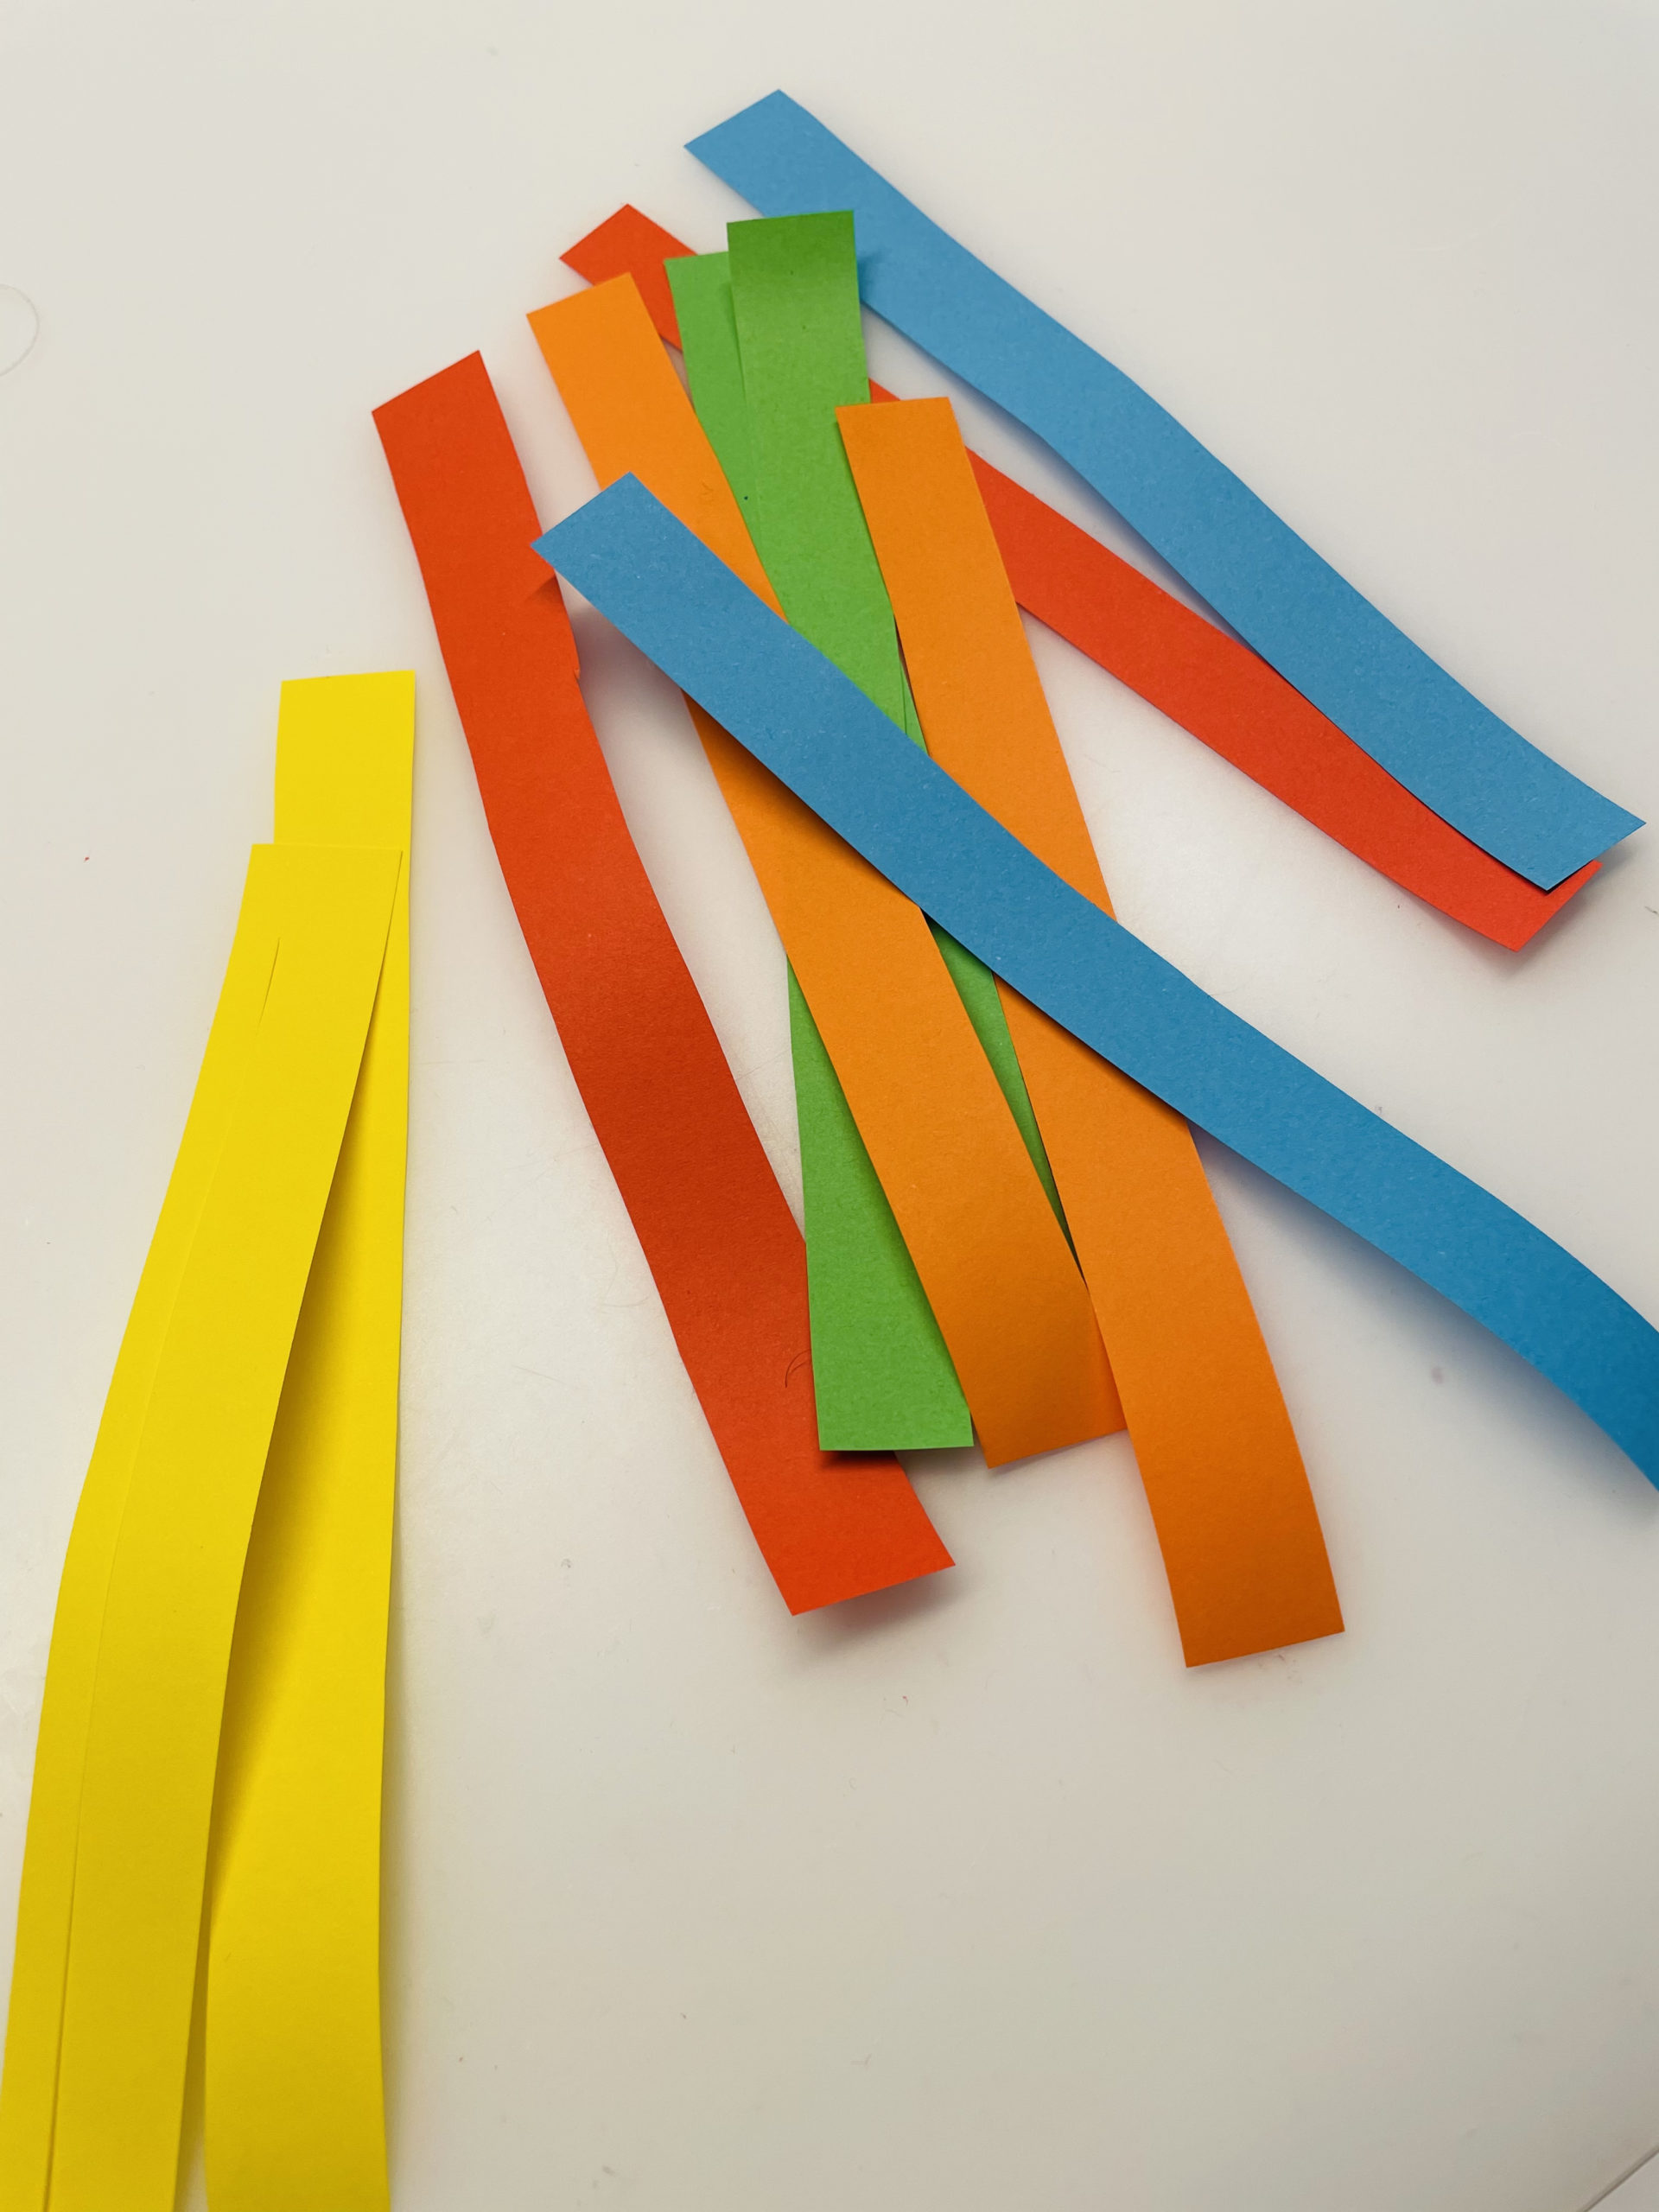
Bild zum Schritt 1 für das Bastel- und DIY-Abenteuer für Kinder: 'Legt eure Bastelunterlage aus und die Materialien bereit.  Dann...'

2

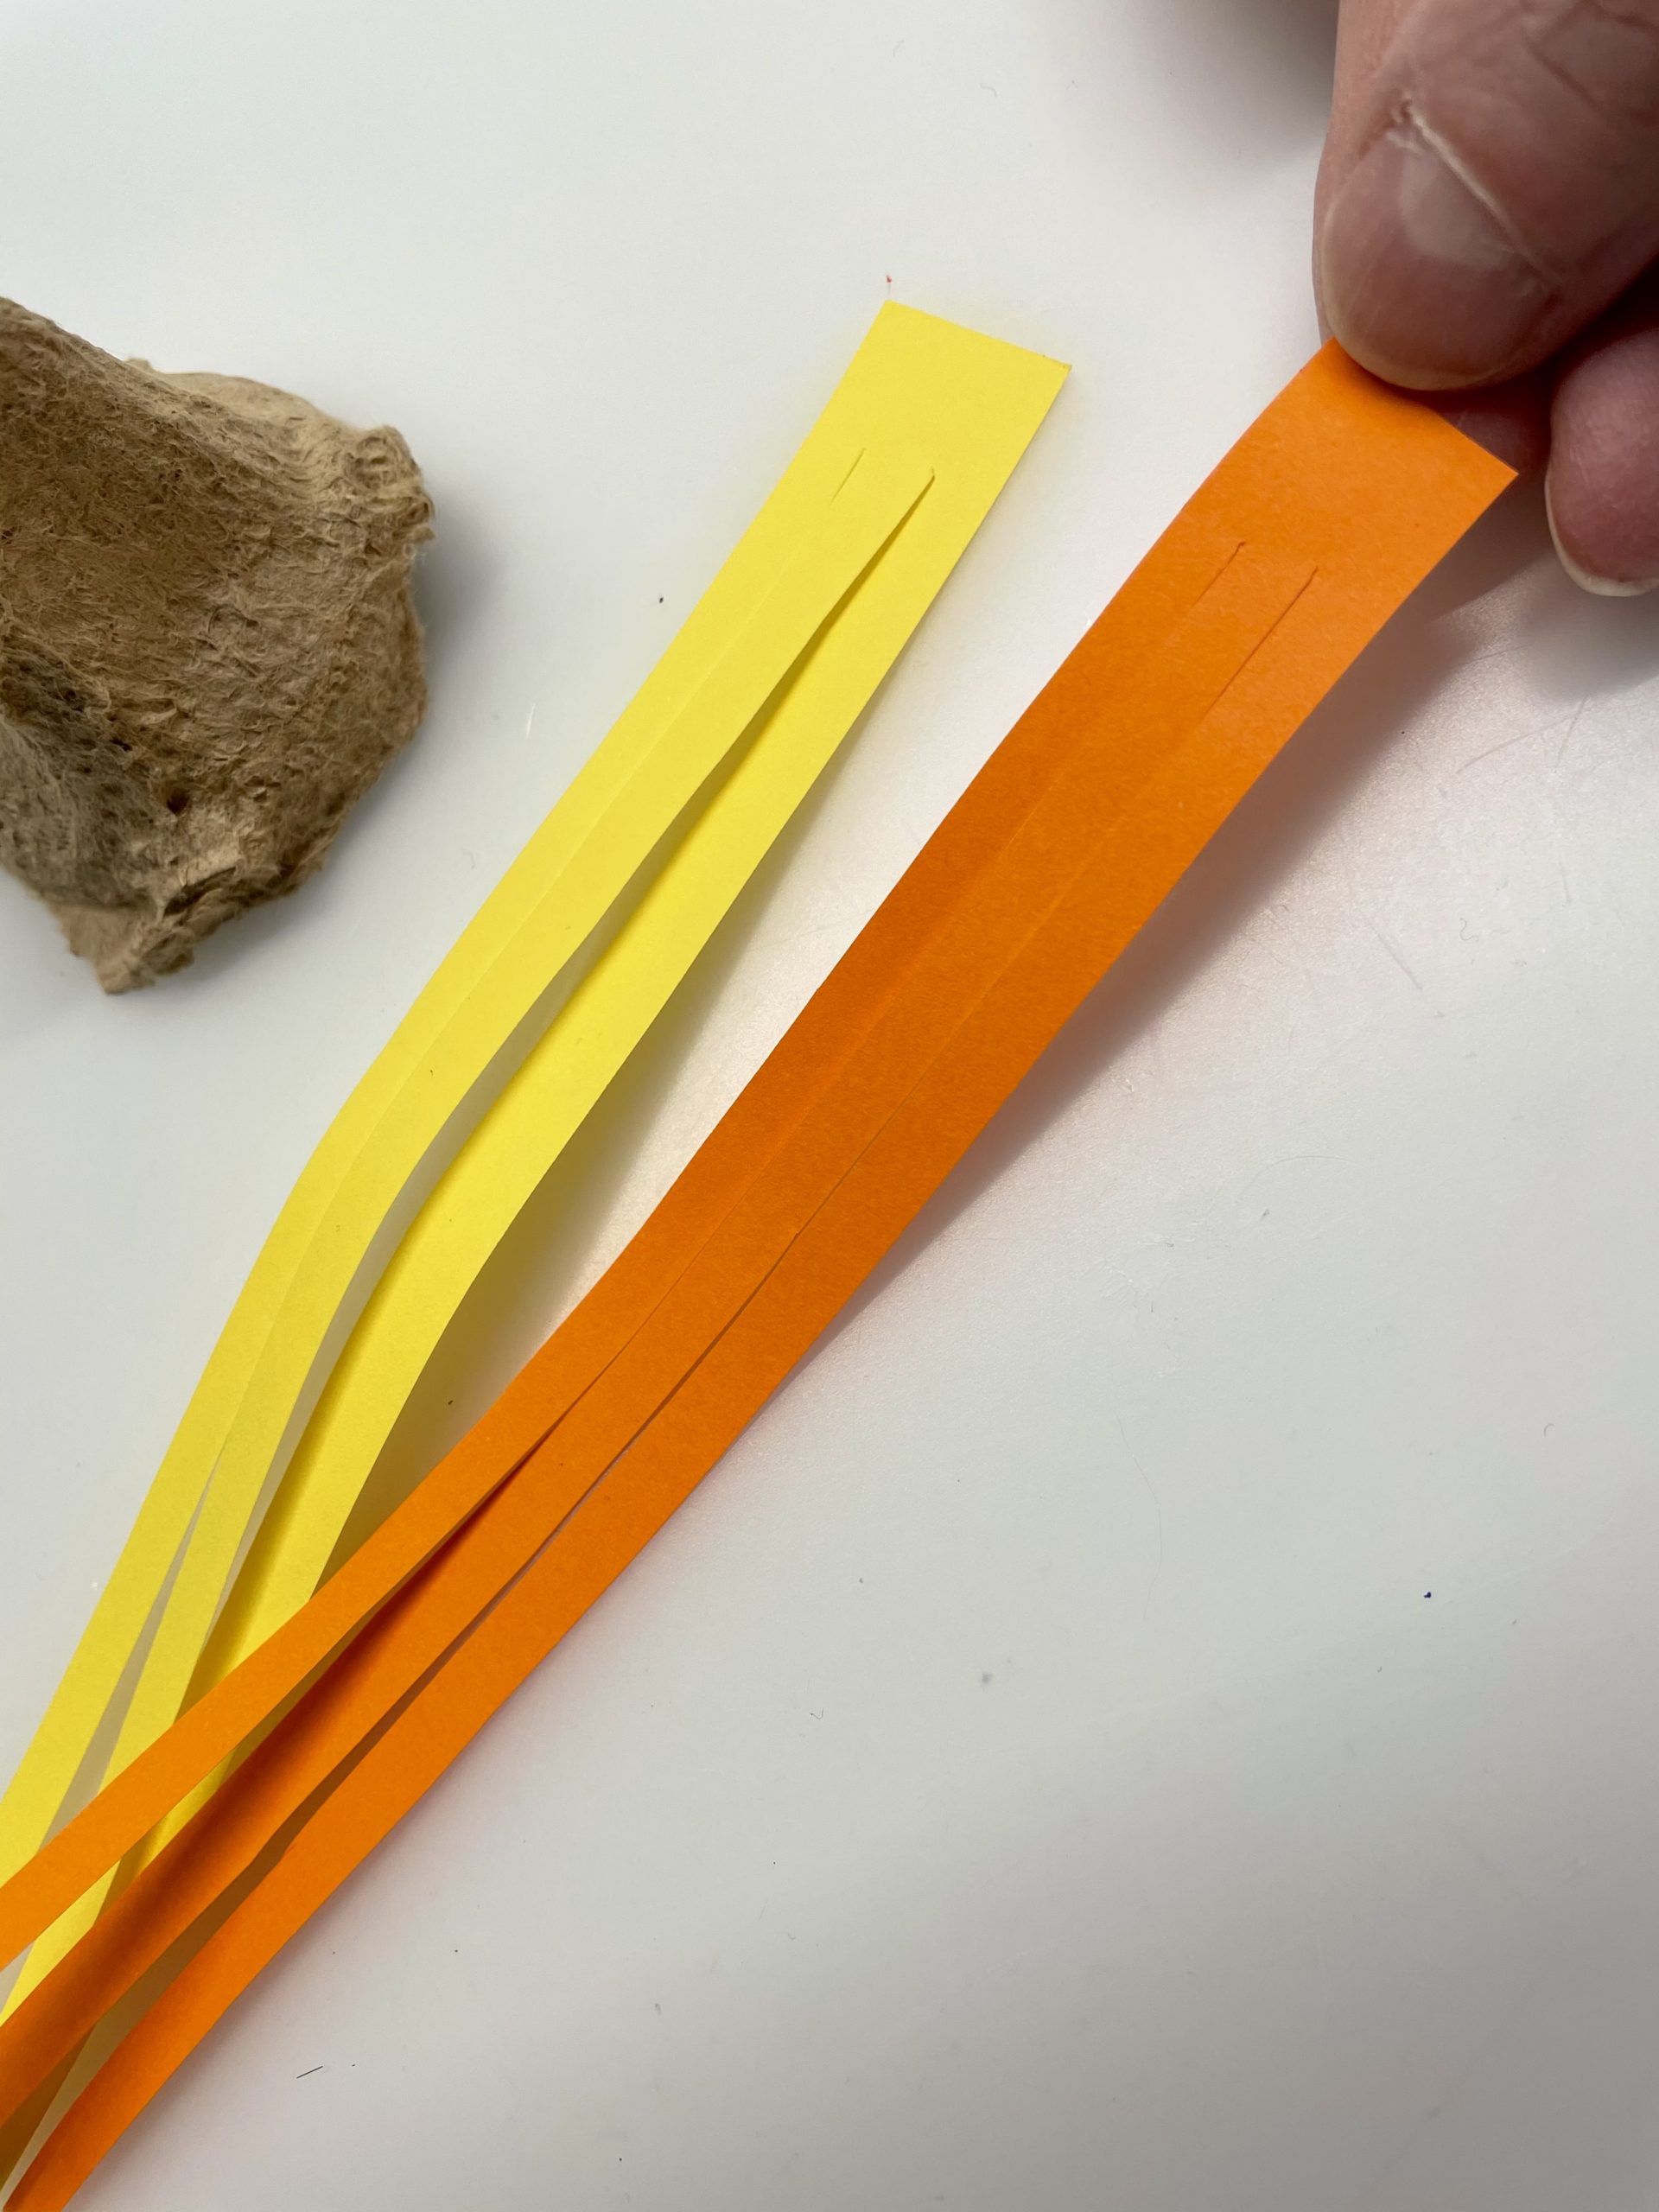
Each strip is cut in 2 times the length.
Attention: the stripes are not cut.
At the end of the strip, 1cm stops and is not cut.
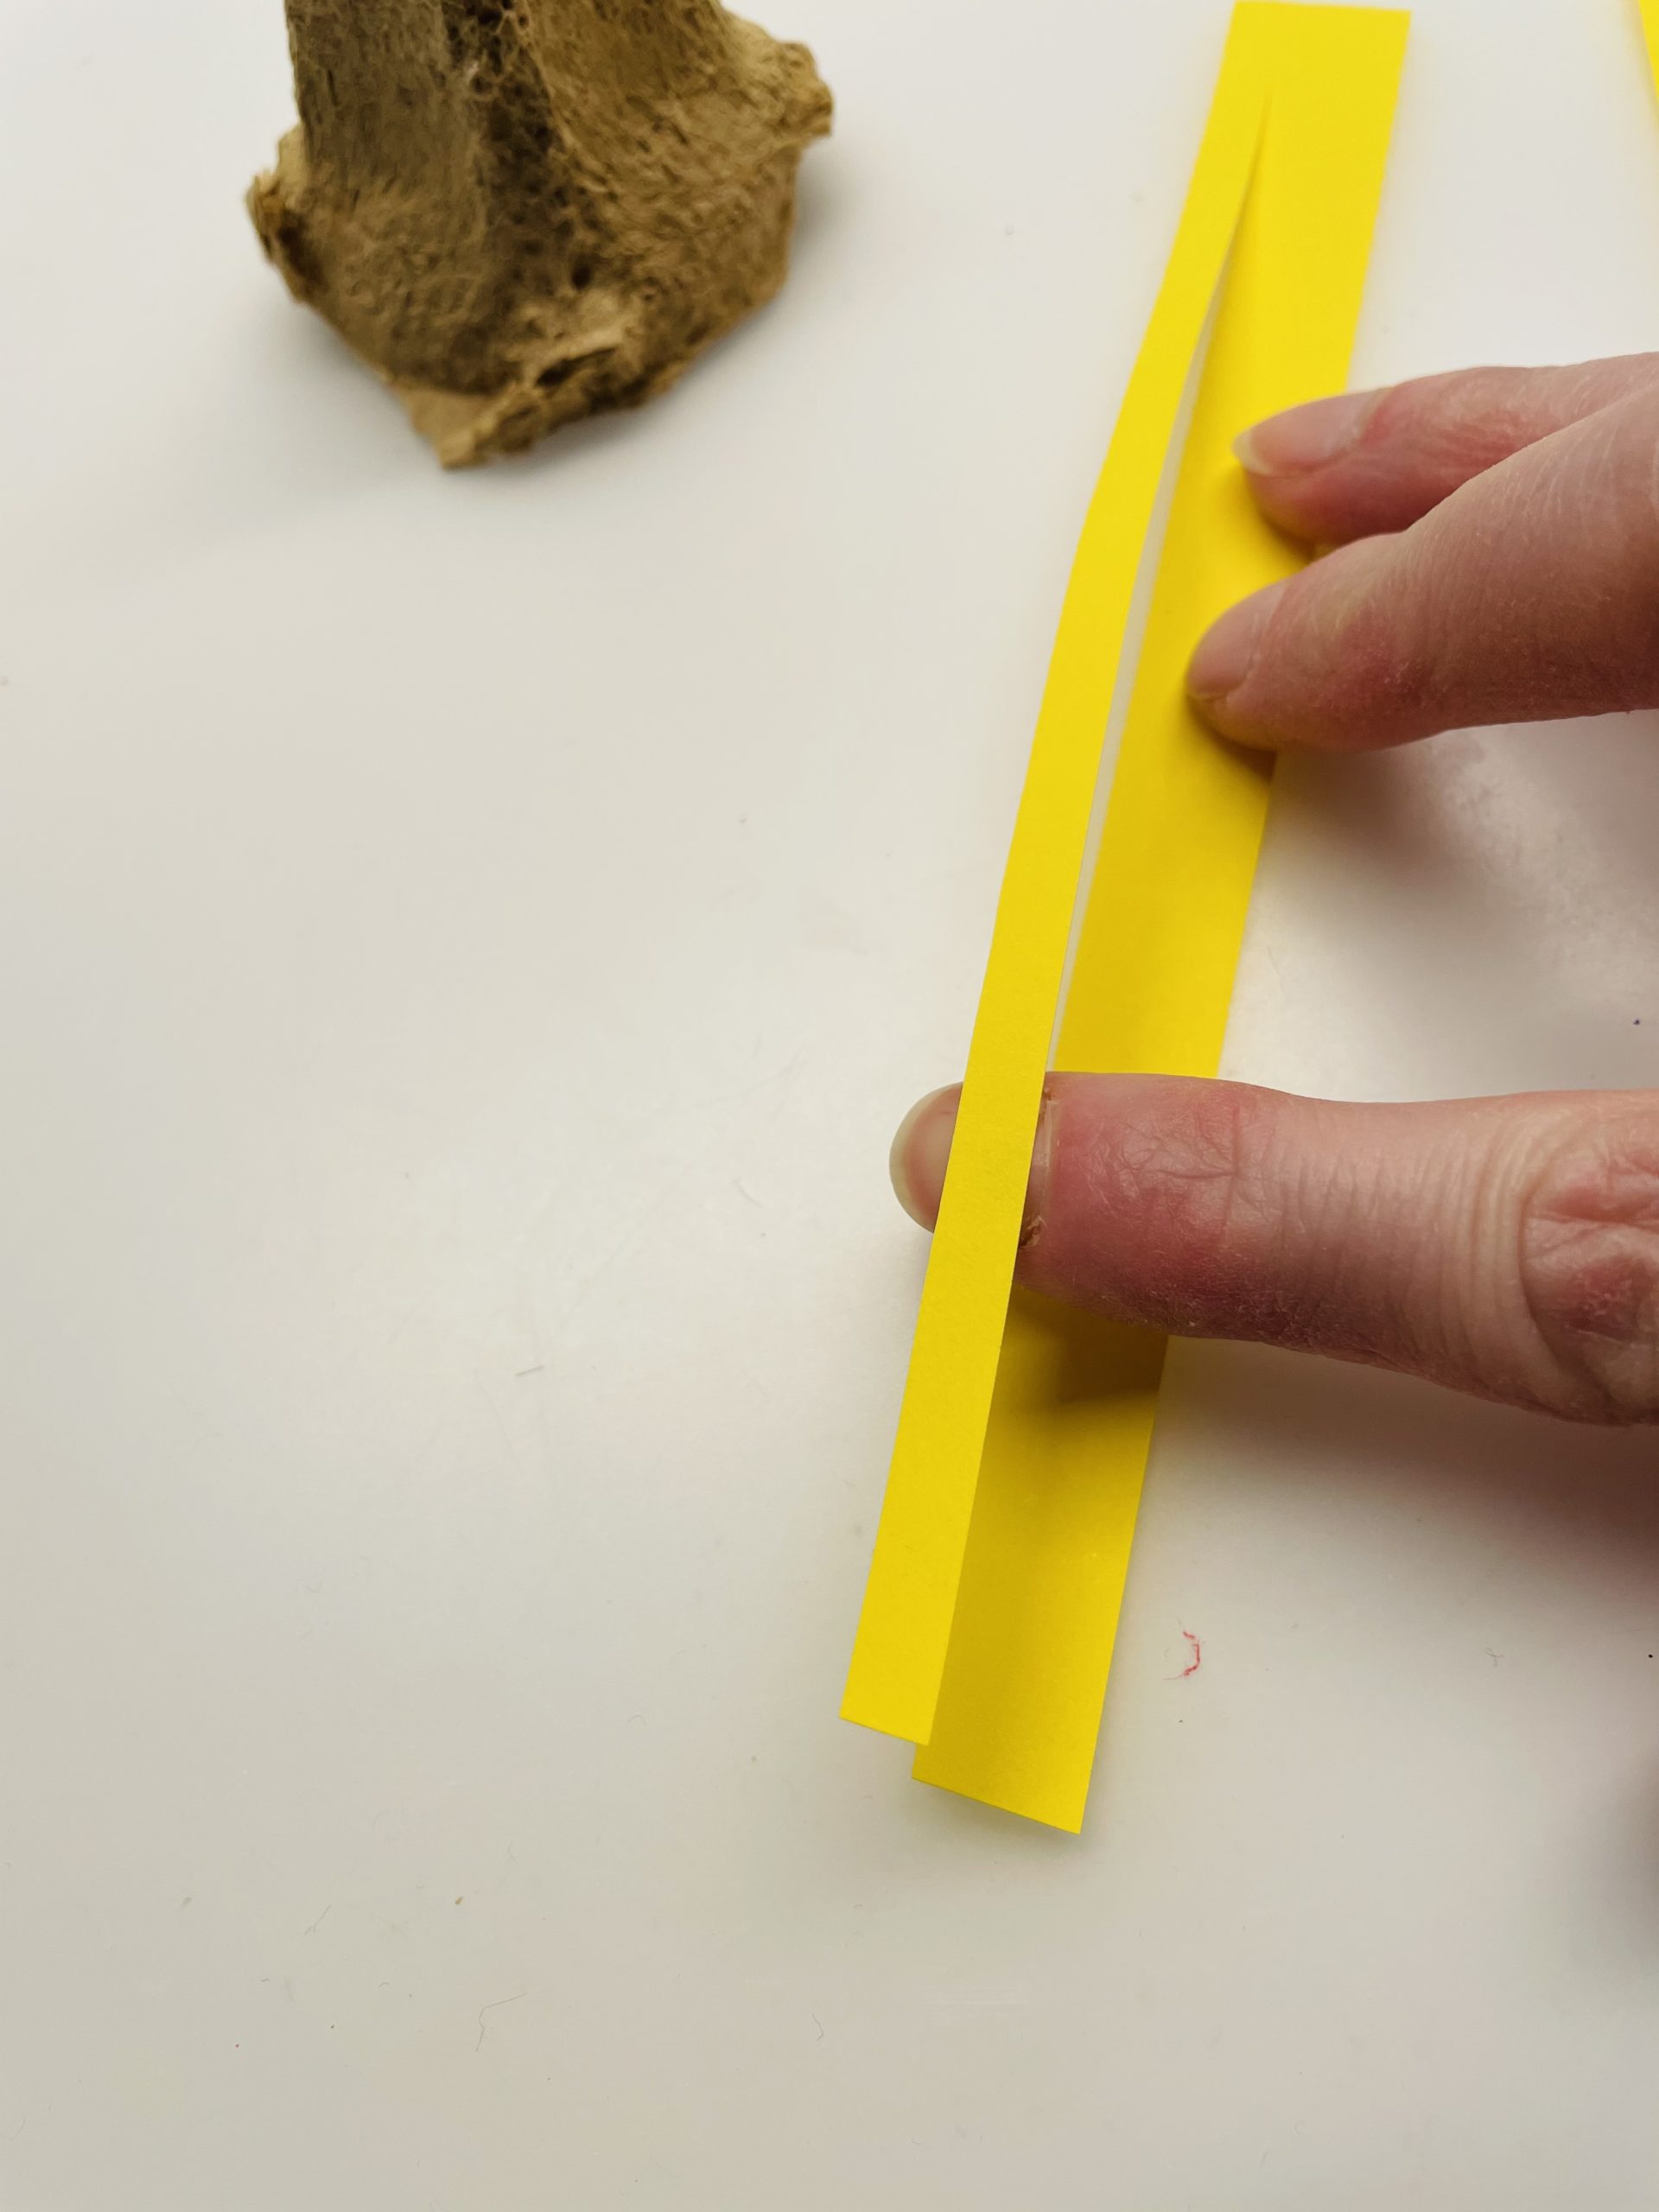
Bild zum Schritt 2 für das Bastel- und DIY-Abenteuer für Kinder: 'Jeder Streifen wird 2x der Länge nach eingeschnitten.  ...'

3

Cuts every strip in this way.

Bild zum Schritt 3 für das Bastel- und DIY-Abenteuer für Kinder: 'Schneidet jeden Streifen auf diese Weise.'

4

2. Bild zum Schritt 3 für das Bastel- und DIY-Abenteuer für Kinder: 'Schneidet jeden Streifen auf diese Weise.'

5

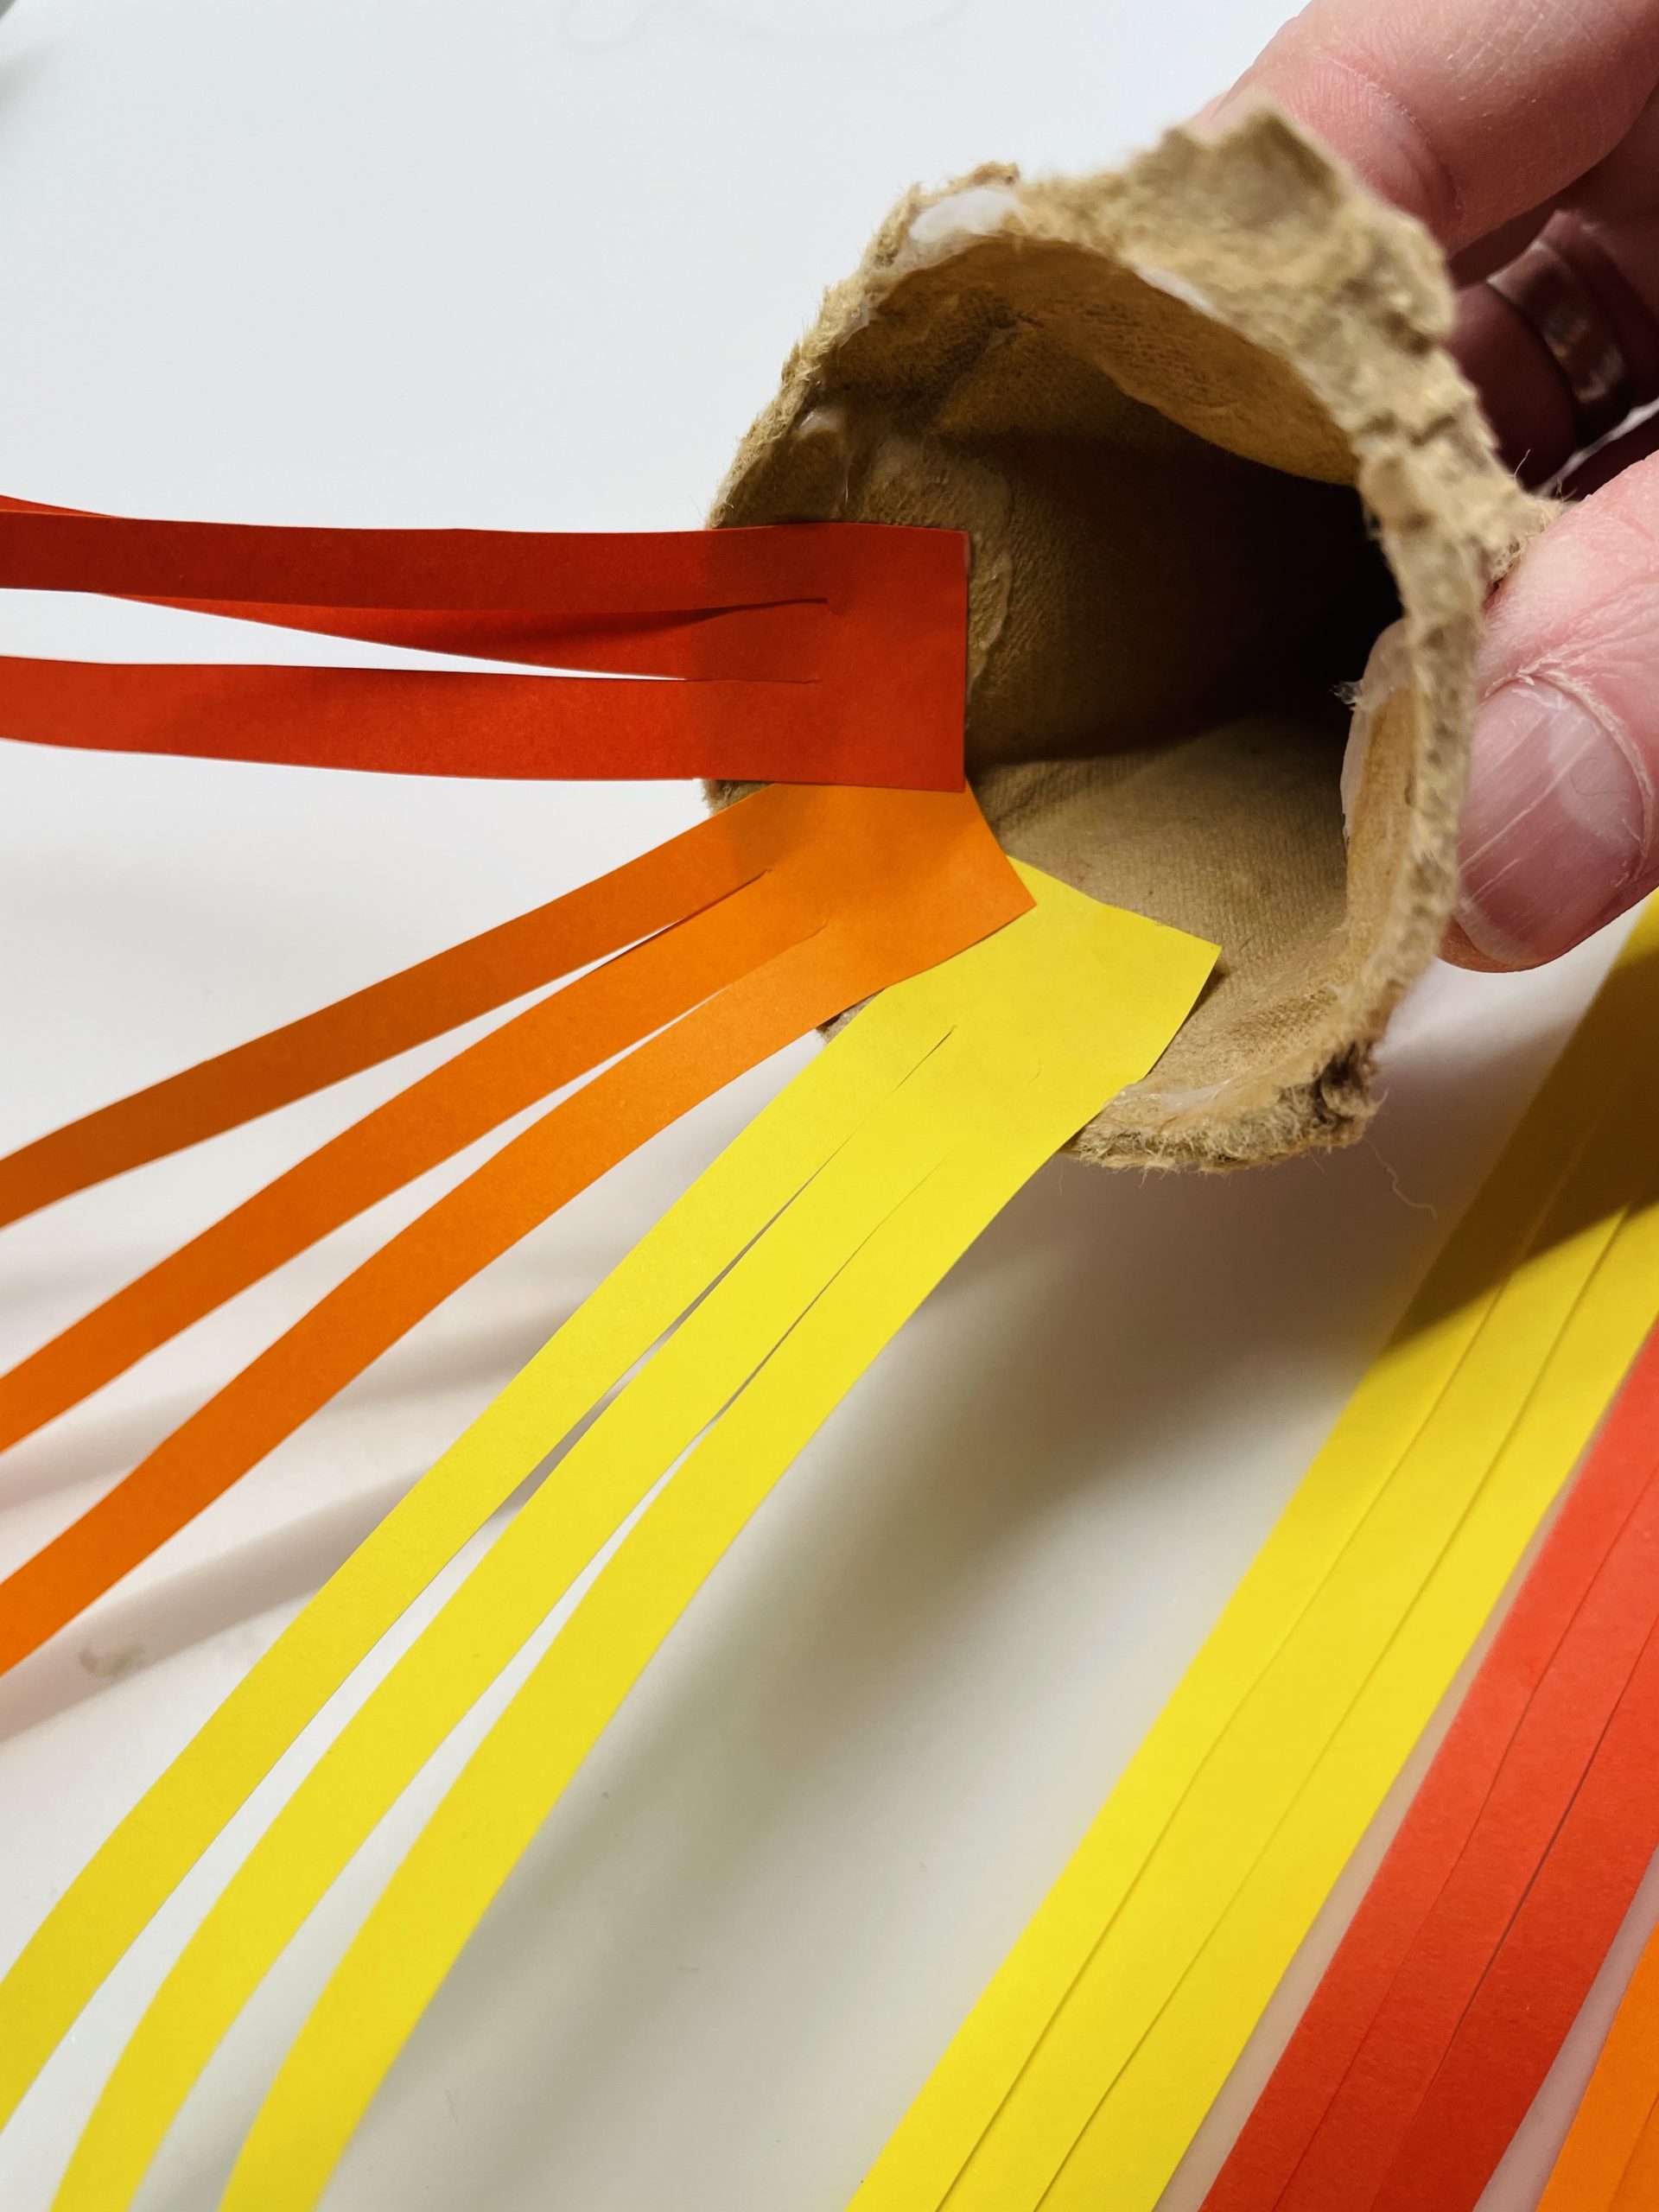
Separates a tip from an egg carton.
Then brush the edge of the inside with glue.

Bild zum Schritt 5 für das Bastel- und DIY-Abenteuer für Kinder: 'Trennt aus einem Eierkarton eine Spitze heraus.  Anschließend bestreicht...'

6

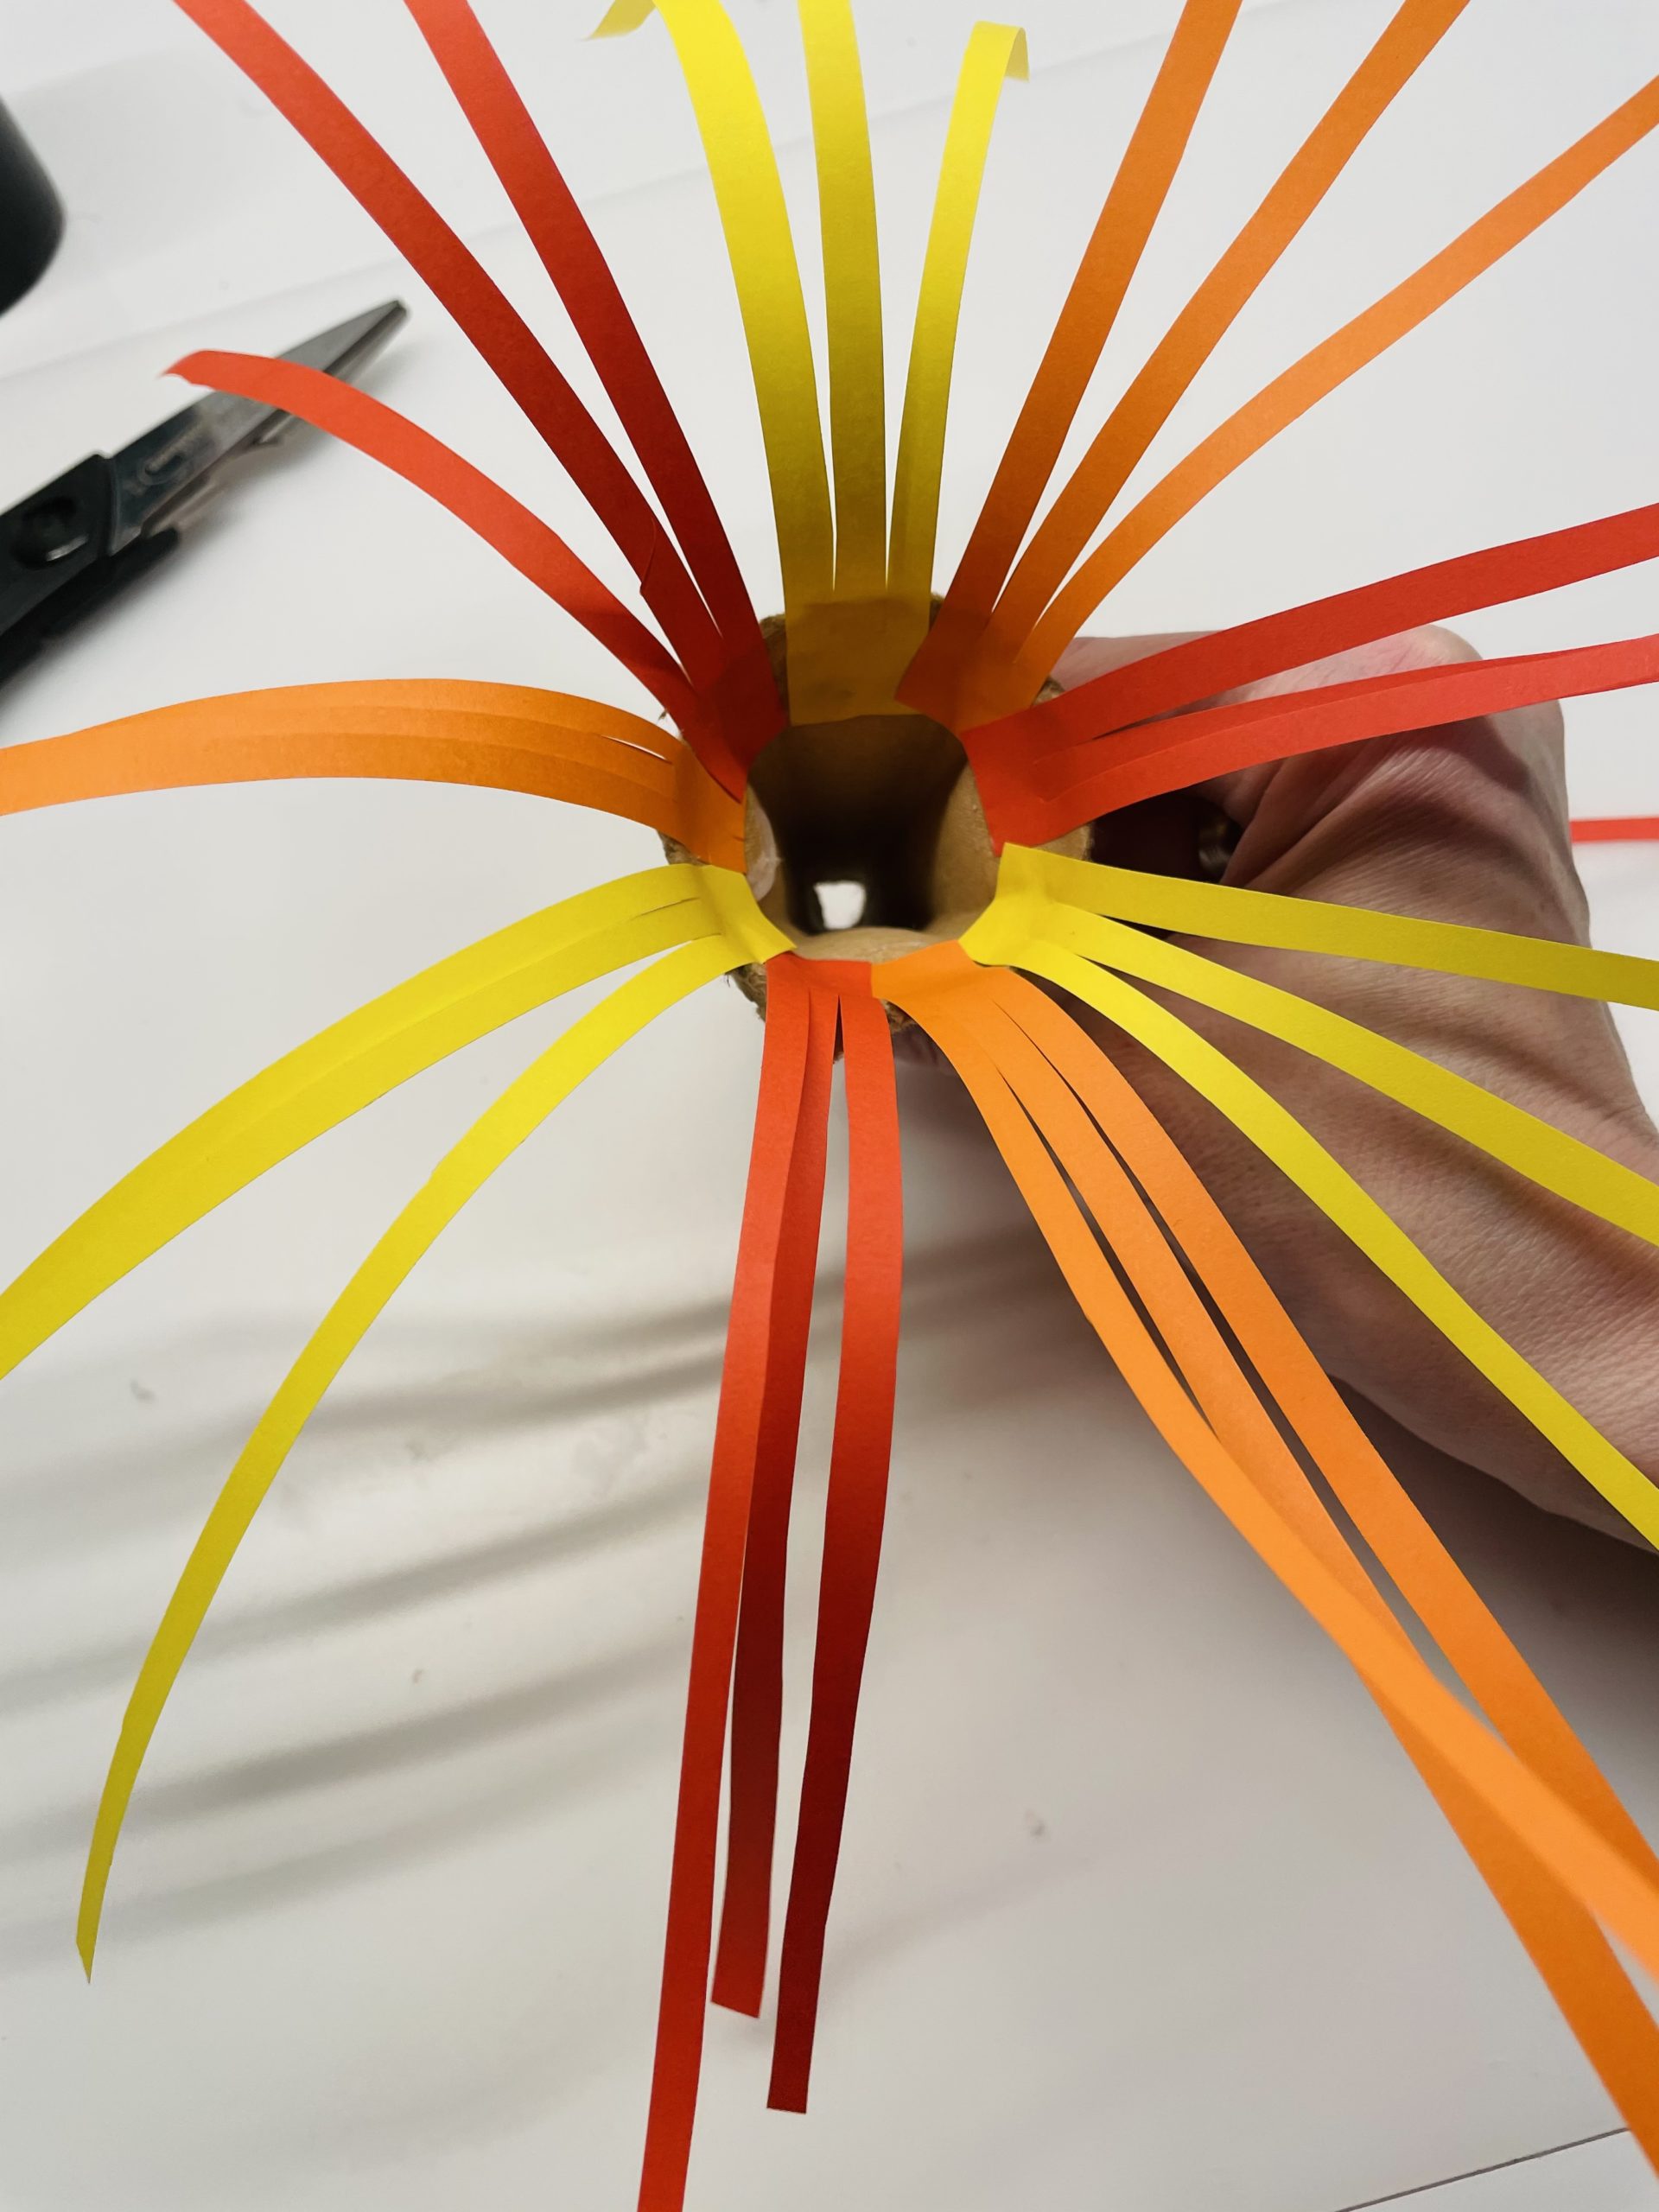
Now stick the stripes to the inner edge with the closed side.

Bild zum Schritt 6 für das Bastel- und DIY-Abenteuer für Kinder: 'Klebt nun die Streifen mit der geschlossenen Seite am inneren...'

7

Change the colors.

Bild zum Schritt 7 für das Bastel- und DIY-Abenteuer für Kinder: 'Wechselt die Farben ab.'

8

2. Bild zum Schritt 7 für das Bastel- und DIY-Abenteuer für Kinder: 'Wechselt die Farben ab.'

9

3. Bild zum Schritt 8 für das Bastel- und DIY-Abenteuer für Kinder: 'Wechselt die Farben ab.'

10

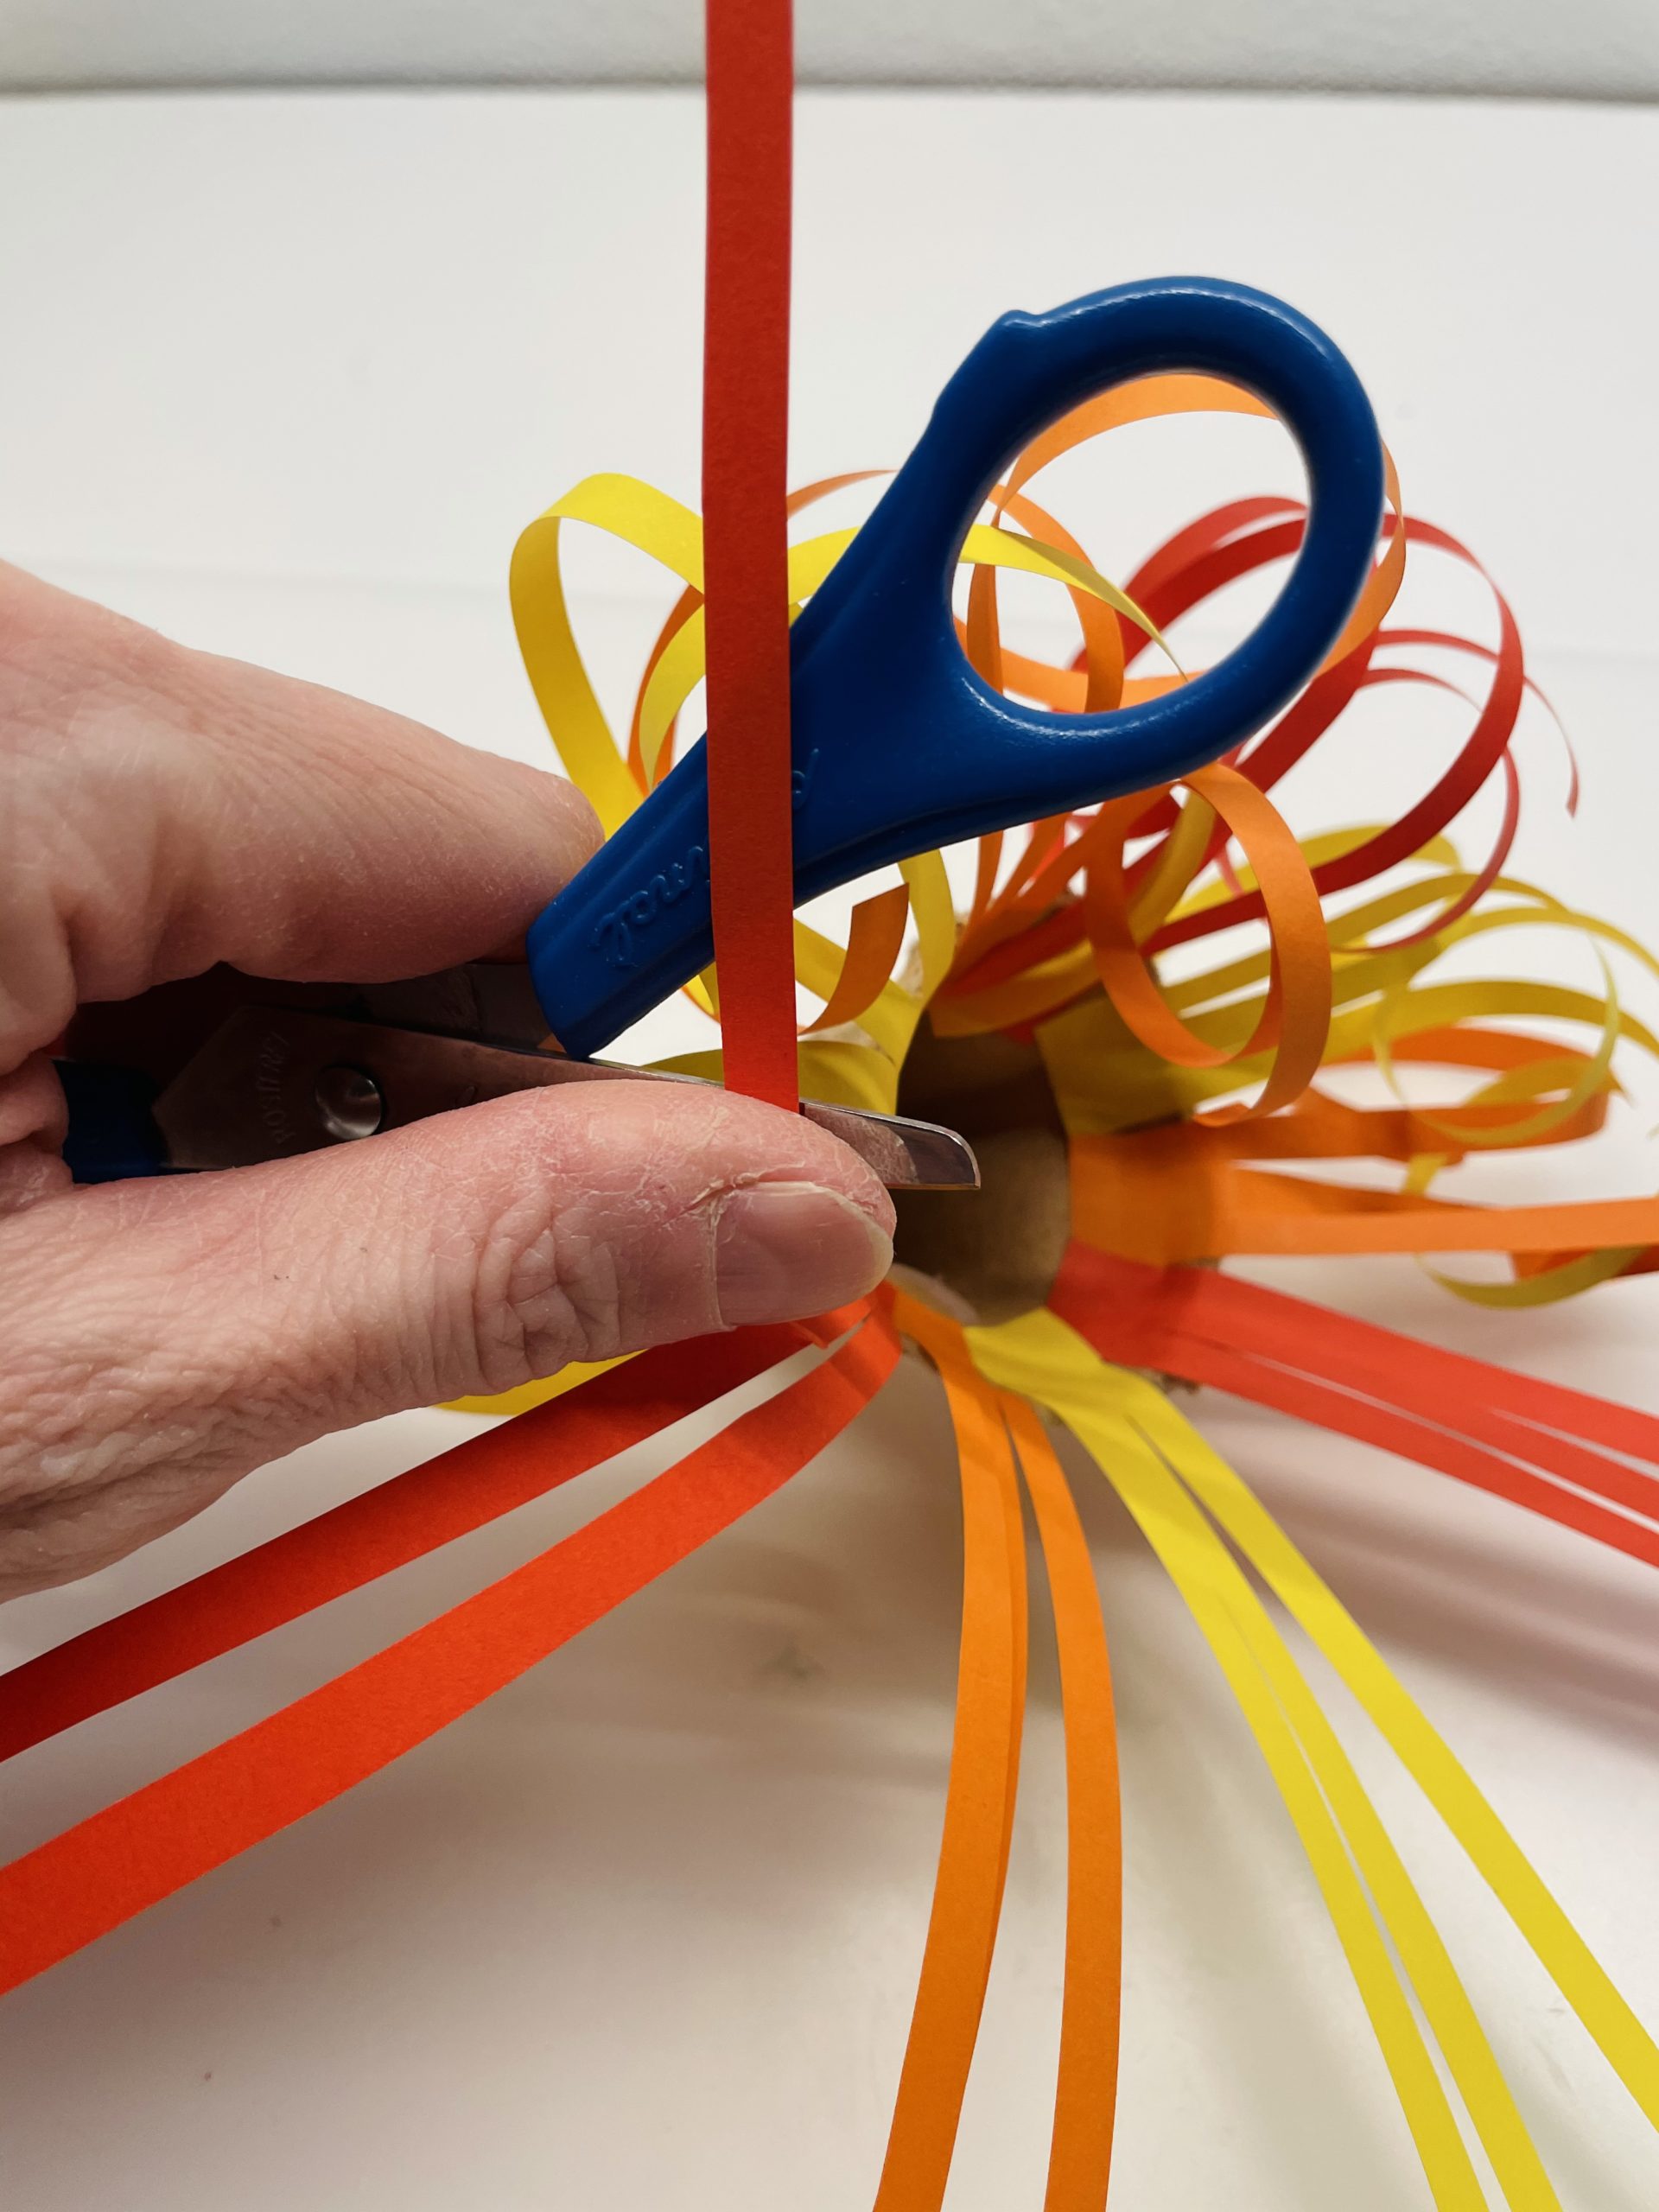
If all the strips are glued, then you wrestle the individual strips.

Bild zum Schritt 10 für das Bastel- und DIY-Abenteuer für Kinder: 'Sind alle Streifen festgeklebt, dann ringelt ihr die einzelnen Streifen.'

11

To do this, put a strip on the edge of a scissors. Then carefully pull the paper over it. Attention: Let an adult help you, or do it with an adult = risk of injury!
Tip: You can also wrestle the paper with a knife! But be careful, because there is also a risk of injury here!

Bild zum Schritt 11 für das Bastel- und DIY-Abenteuer für Kinder: 'Dafür legt ihr einen Streifen auf die Schneide einer Schere....'

12

2. Bild zum Schritt 11 für das Bastel- und DIY-Abenteuer für Kinder: 'Dafür legt ihr einen Streifen auf die Schneide einer Schere....'

13

Now wrestle one strip at a time.

Bild zum Schritt 13 für das Bastel- und DIY-Abenteuer für Kinder: 'Ringelt nun einen Streifen nach dem anderen.'

14

Tip: If the handle is slightly slanted, the stripes will roll a bit more beautifully!

Bild zum Schritt 14 für das Bastel- und DIY-Abenteuer für Kinder: 'Tipp: Setzt die Klinke leicht schräg an, dann rollen sich...'

15

2. Bild zum Schritt 14 für das Bastel- und DIY-Abenteuer für Kinder: 'Tipp: Setzt die Klinke leicht schräg an, dann rollen sich...'

16

That's what your bloom could look like!

Bild zum Schritt 16 für das Bastel- und DIY-Abenteuer für Kinder: 'So könnte eure Blüte dann aussehen!'

Leaves:
17

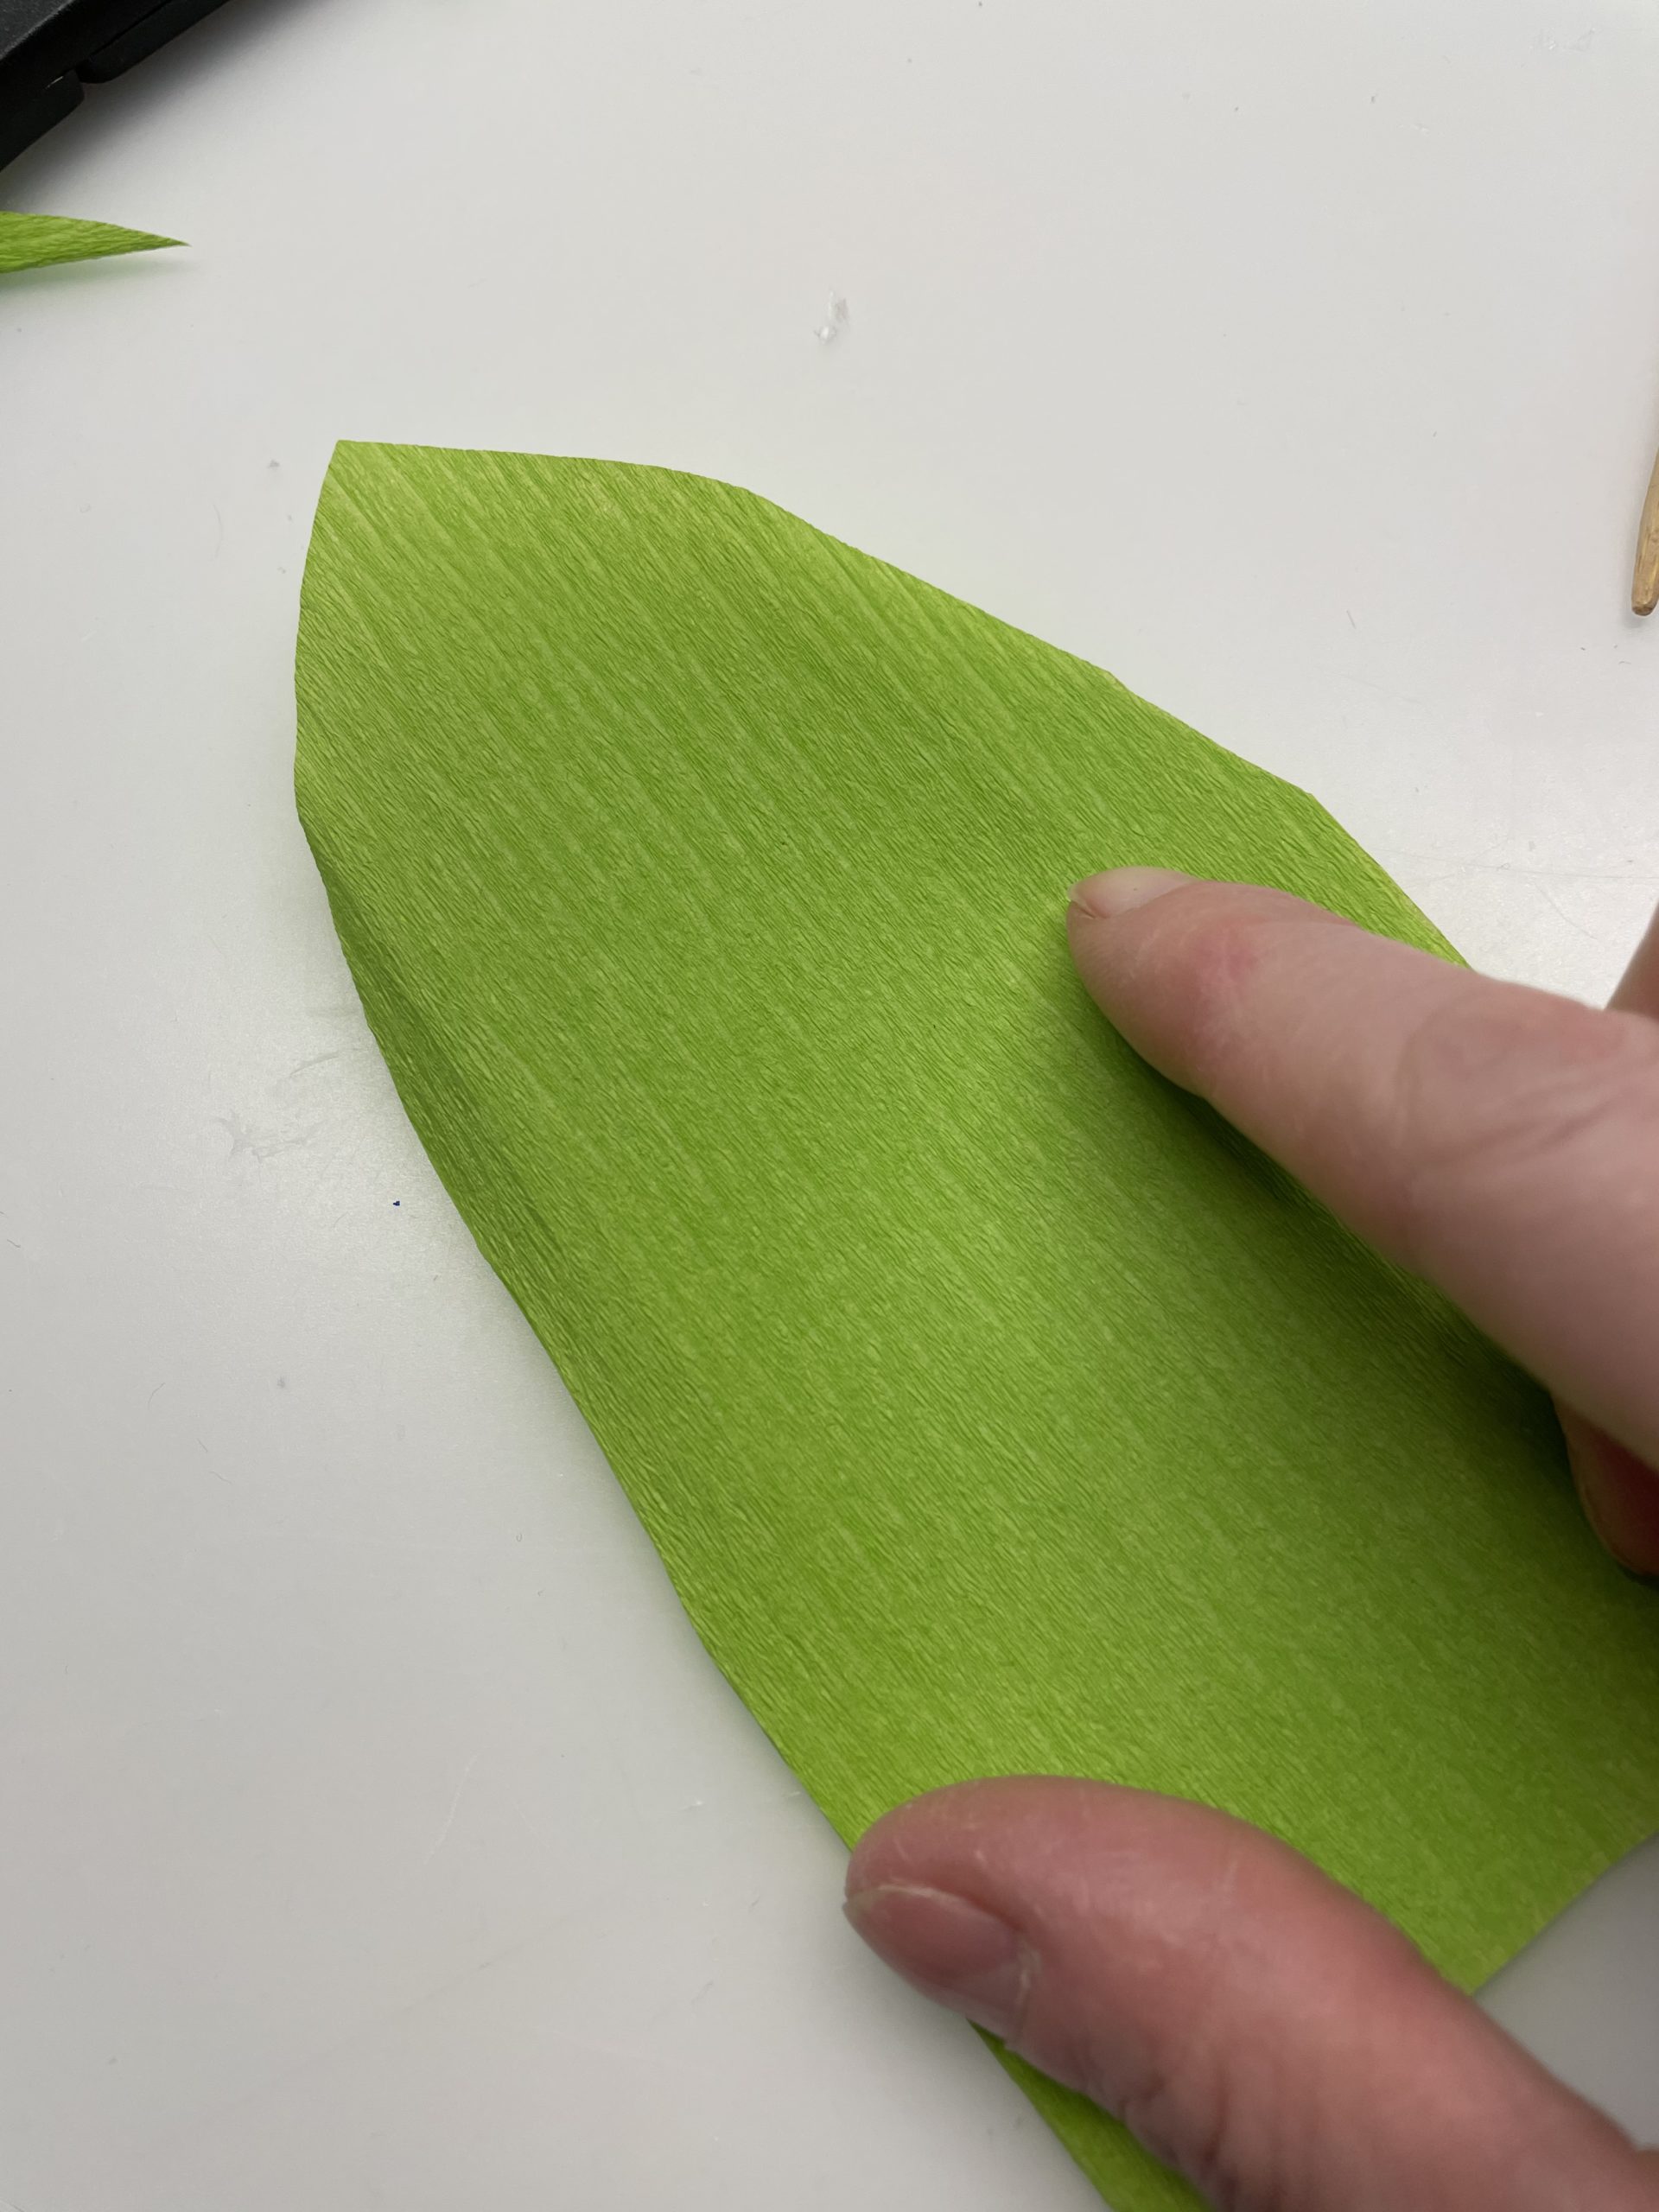
Get ready green crepe paper with the dimensions 7cm x 10cm.

Bild zum Schritt 18 für das Bastel- und DIY-Abenteuer für Kinder: 'Legt euch dafür grünes Krepppapier mit den Maßen 7cm x...'

18

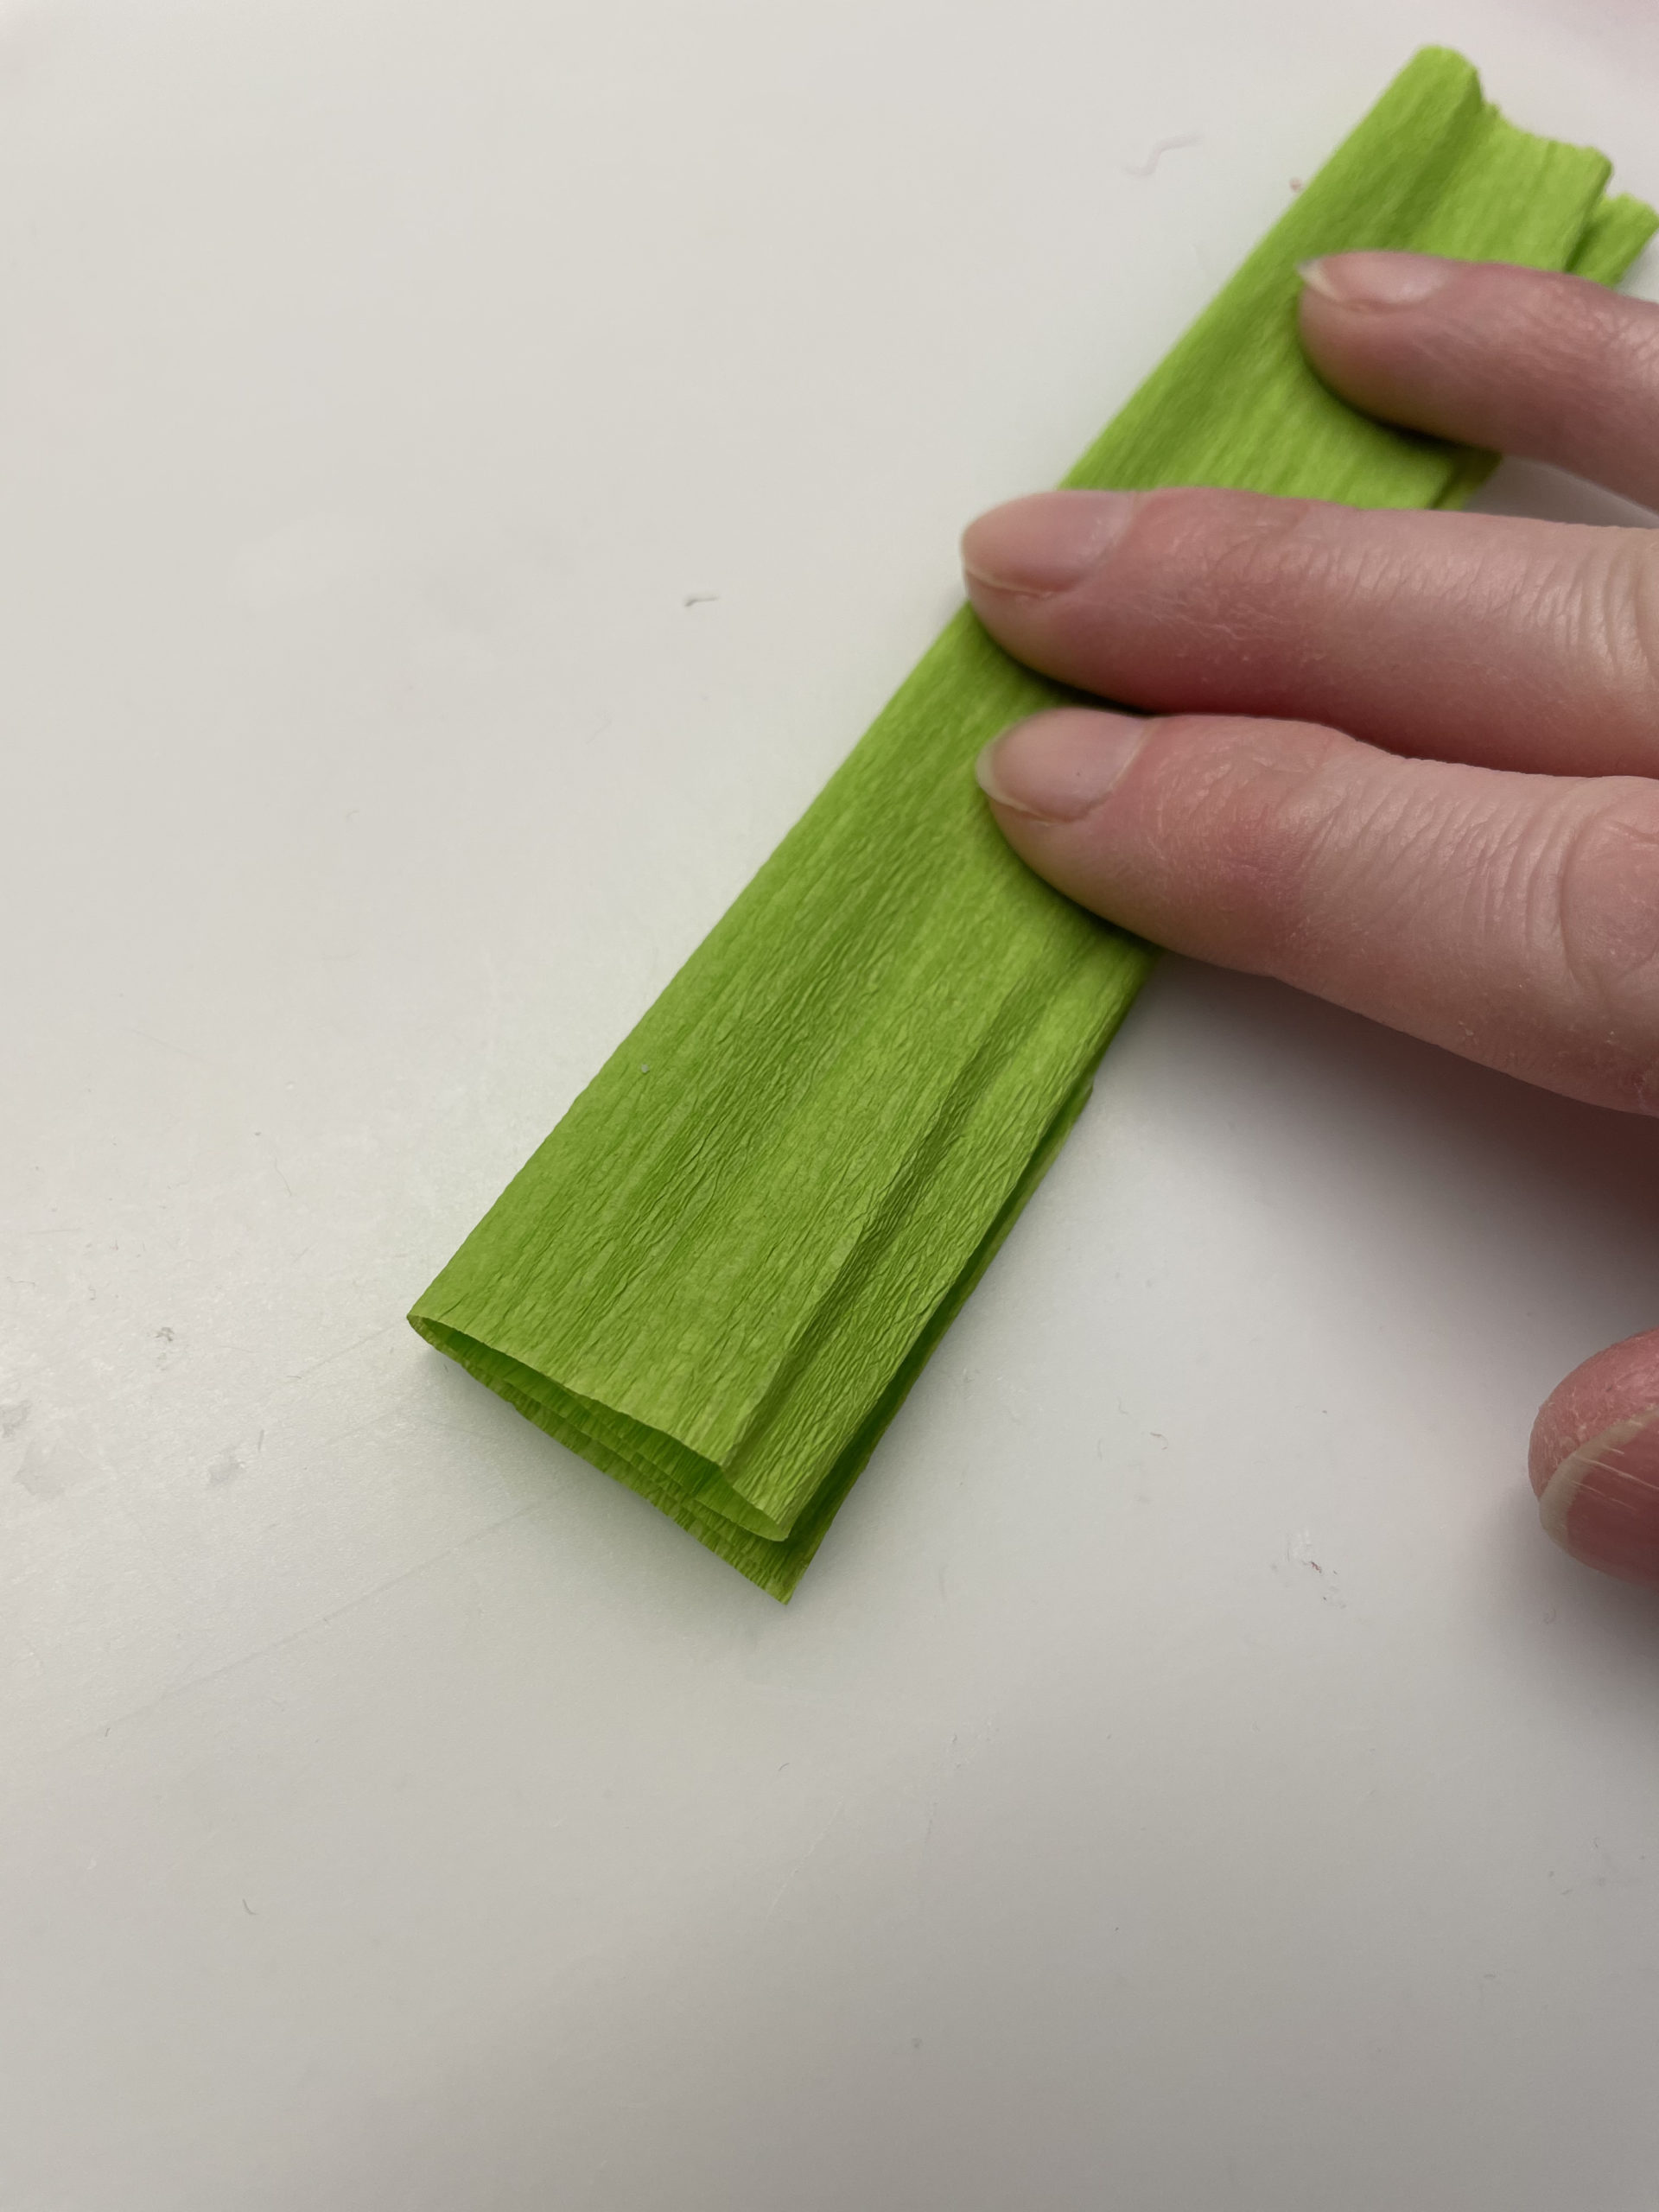
Fold the paper 2 times.
So you get a narrow strip.

Bild zum Schritt 19 für das Bastel- und DIY-Abenteuer für Kinder: 'Faltet das Papier 2x zusammen.   So erhaltet ihr...'

19

2. Bild zum Schritt 19 für das Bastel- und DIY-Abenteuer für Kinder: 'Faltet das Papier 2x zusammen.   So erhaltet ihr...'

20

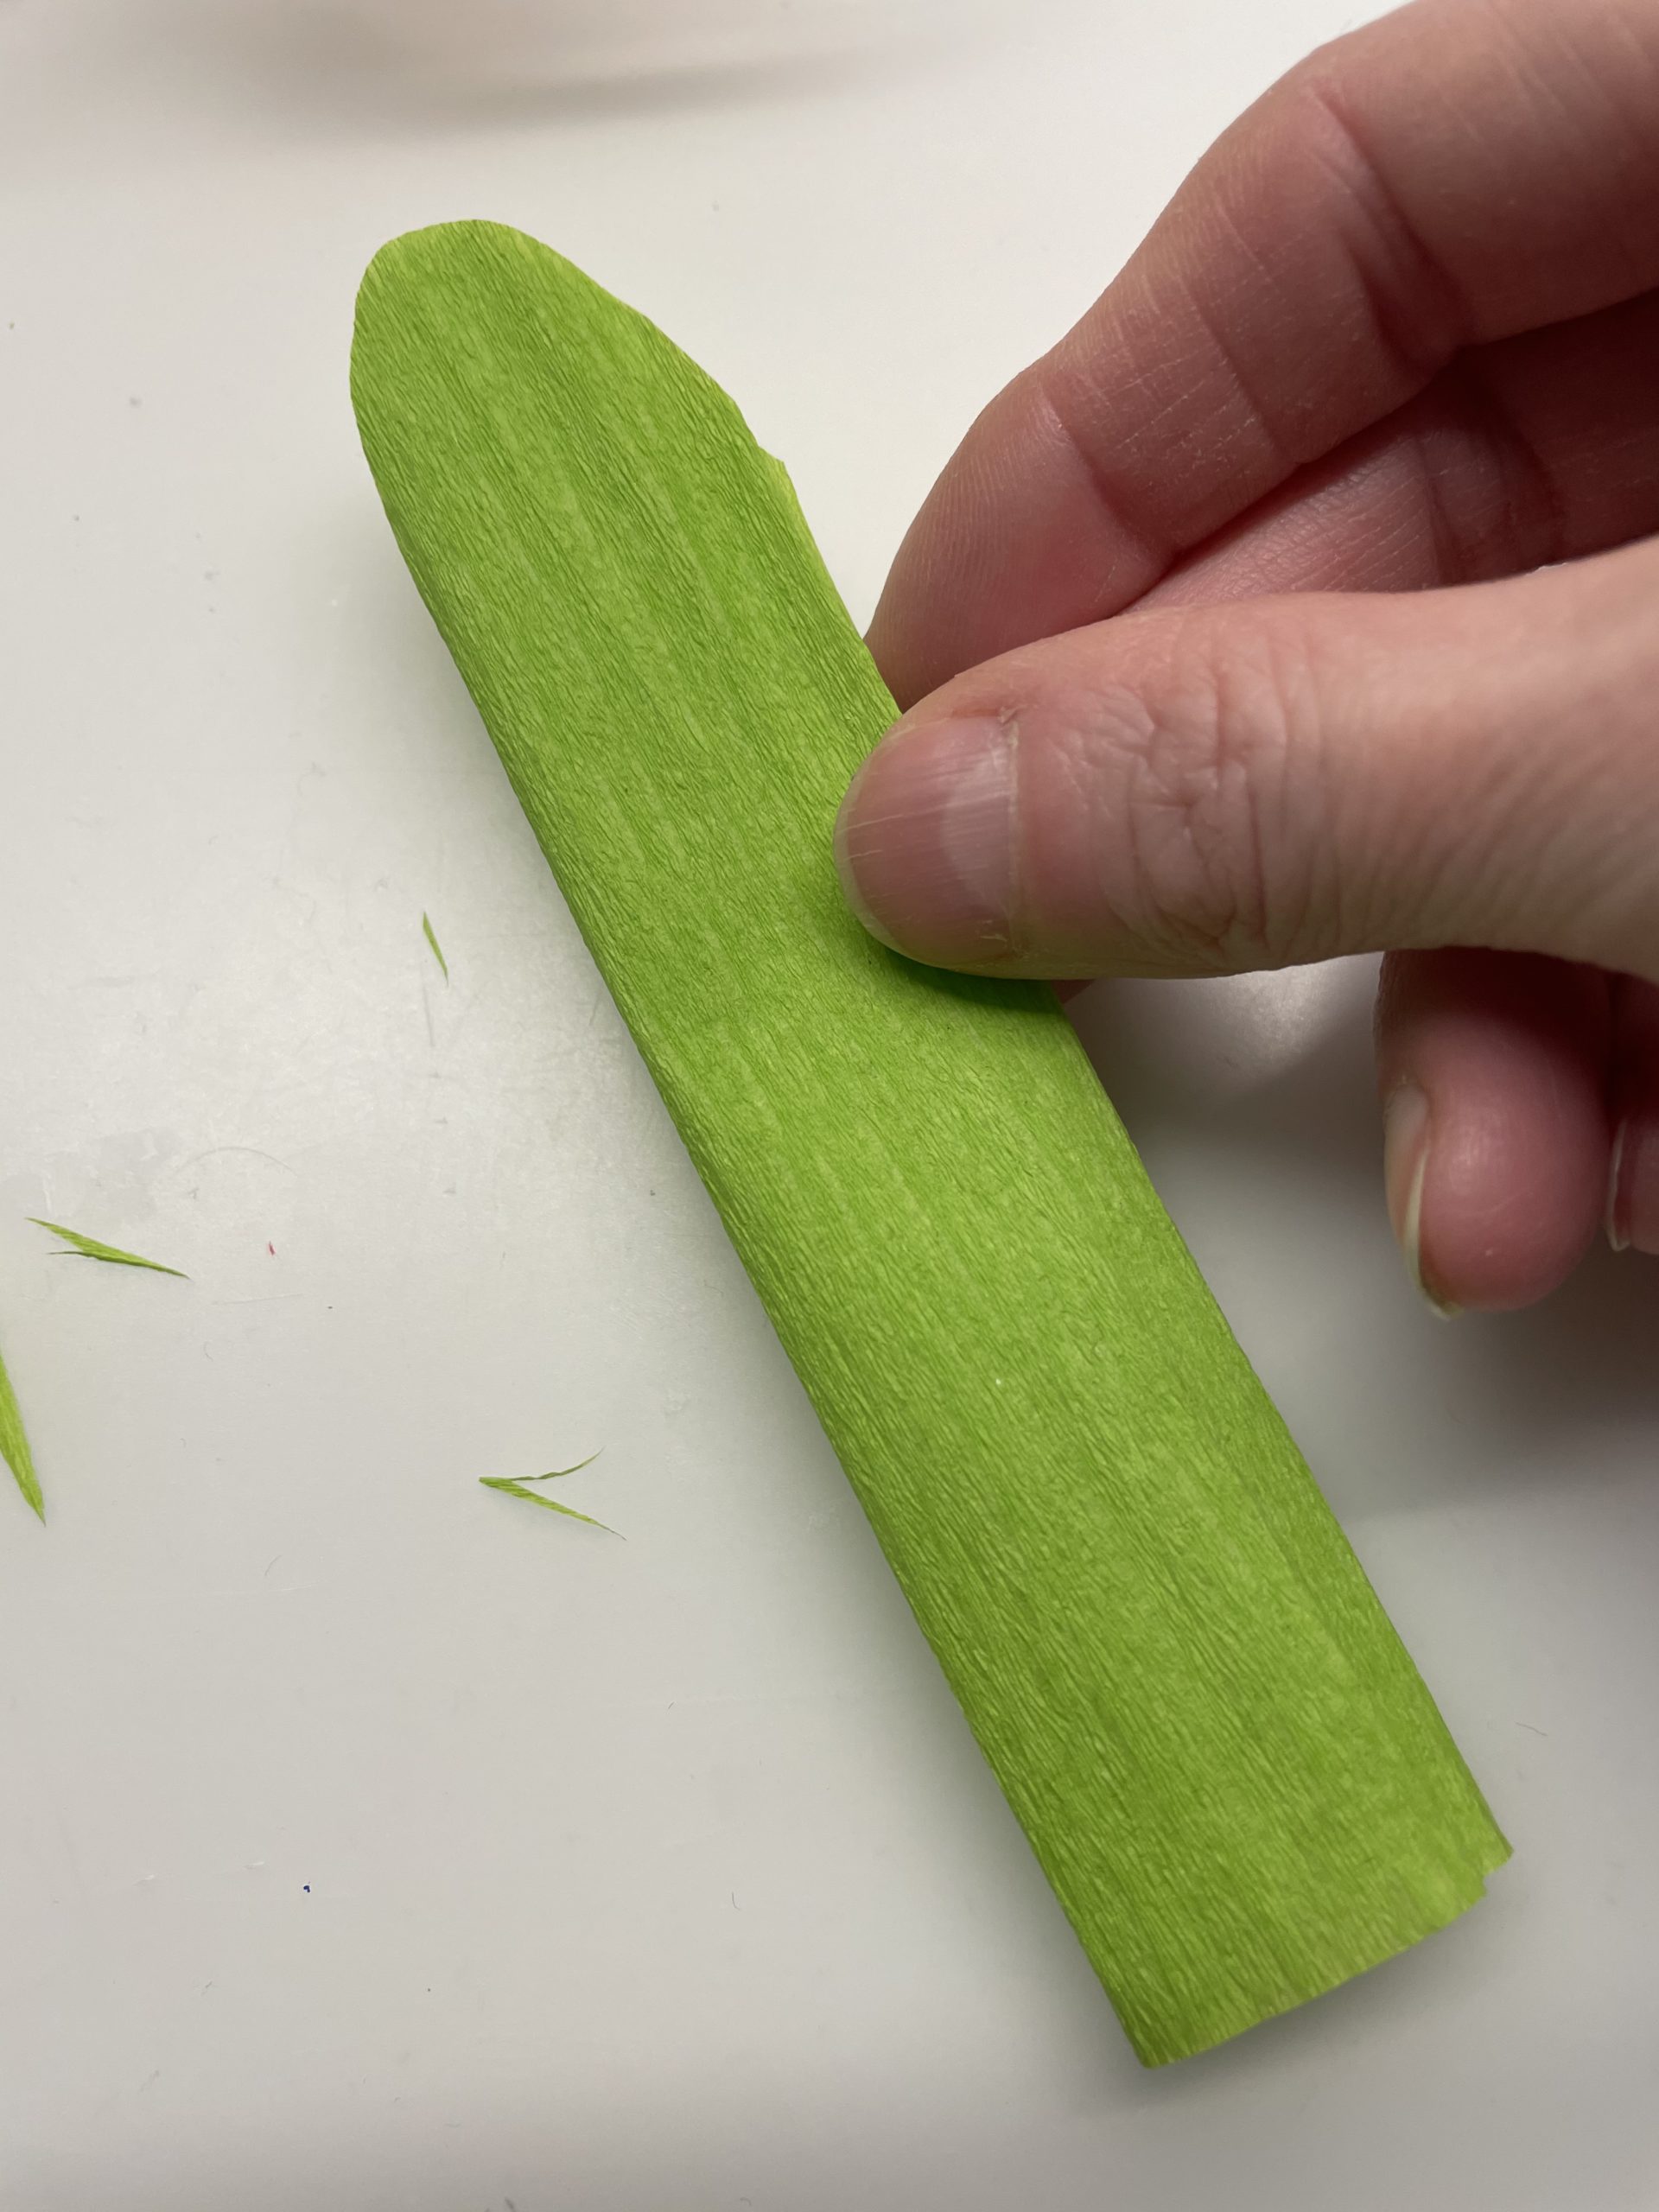
Then round off the strip by cutting a bow on one side with the scissors.

Bild zum Schritt 21 für das Bastel- und DIY-Abenteuer für Kinder: 'Rundet dann den Streifen ab, indem ihr auf einer Seite...'

21

2. Bild zum Schritt 21 für das Bastel- und DIY-Abenteuer für Kinder: 'Rundet dann den Streifen ab, indem ihr auf einer Seite...'

22

Then fold the crepe paper apart.

Bild zum Schritt 23 für das Bastel- und DIY-Abenteuer für Kinder: 'Faltet danach das Krepppapier auseinander.'

23

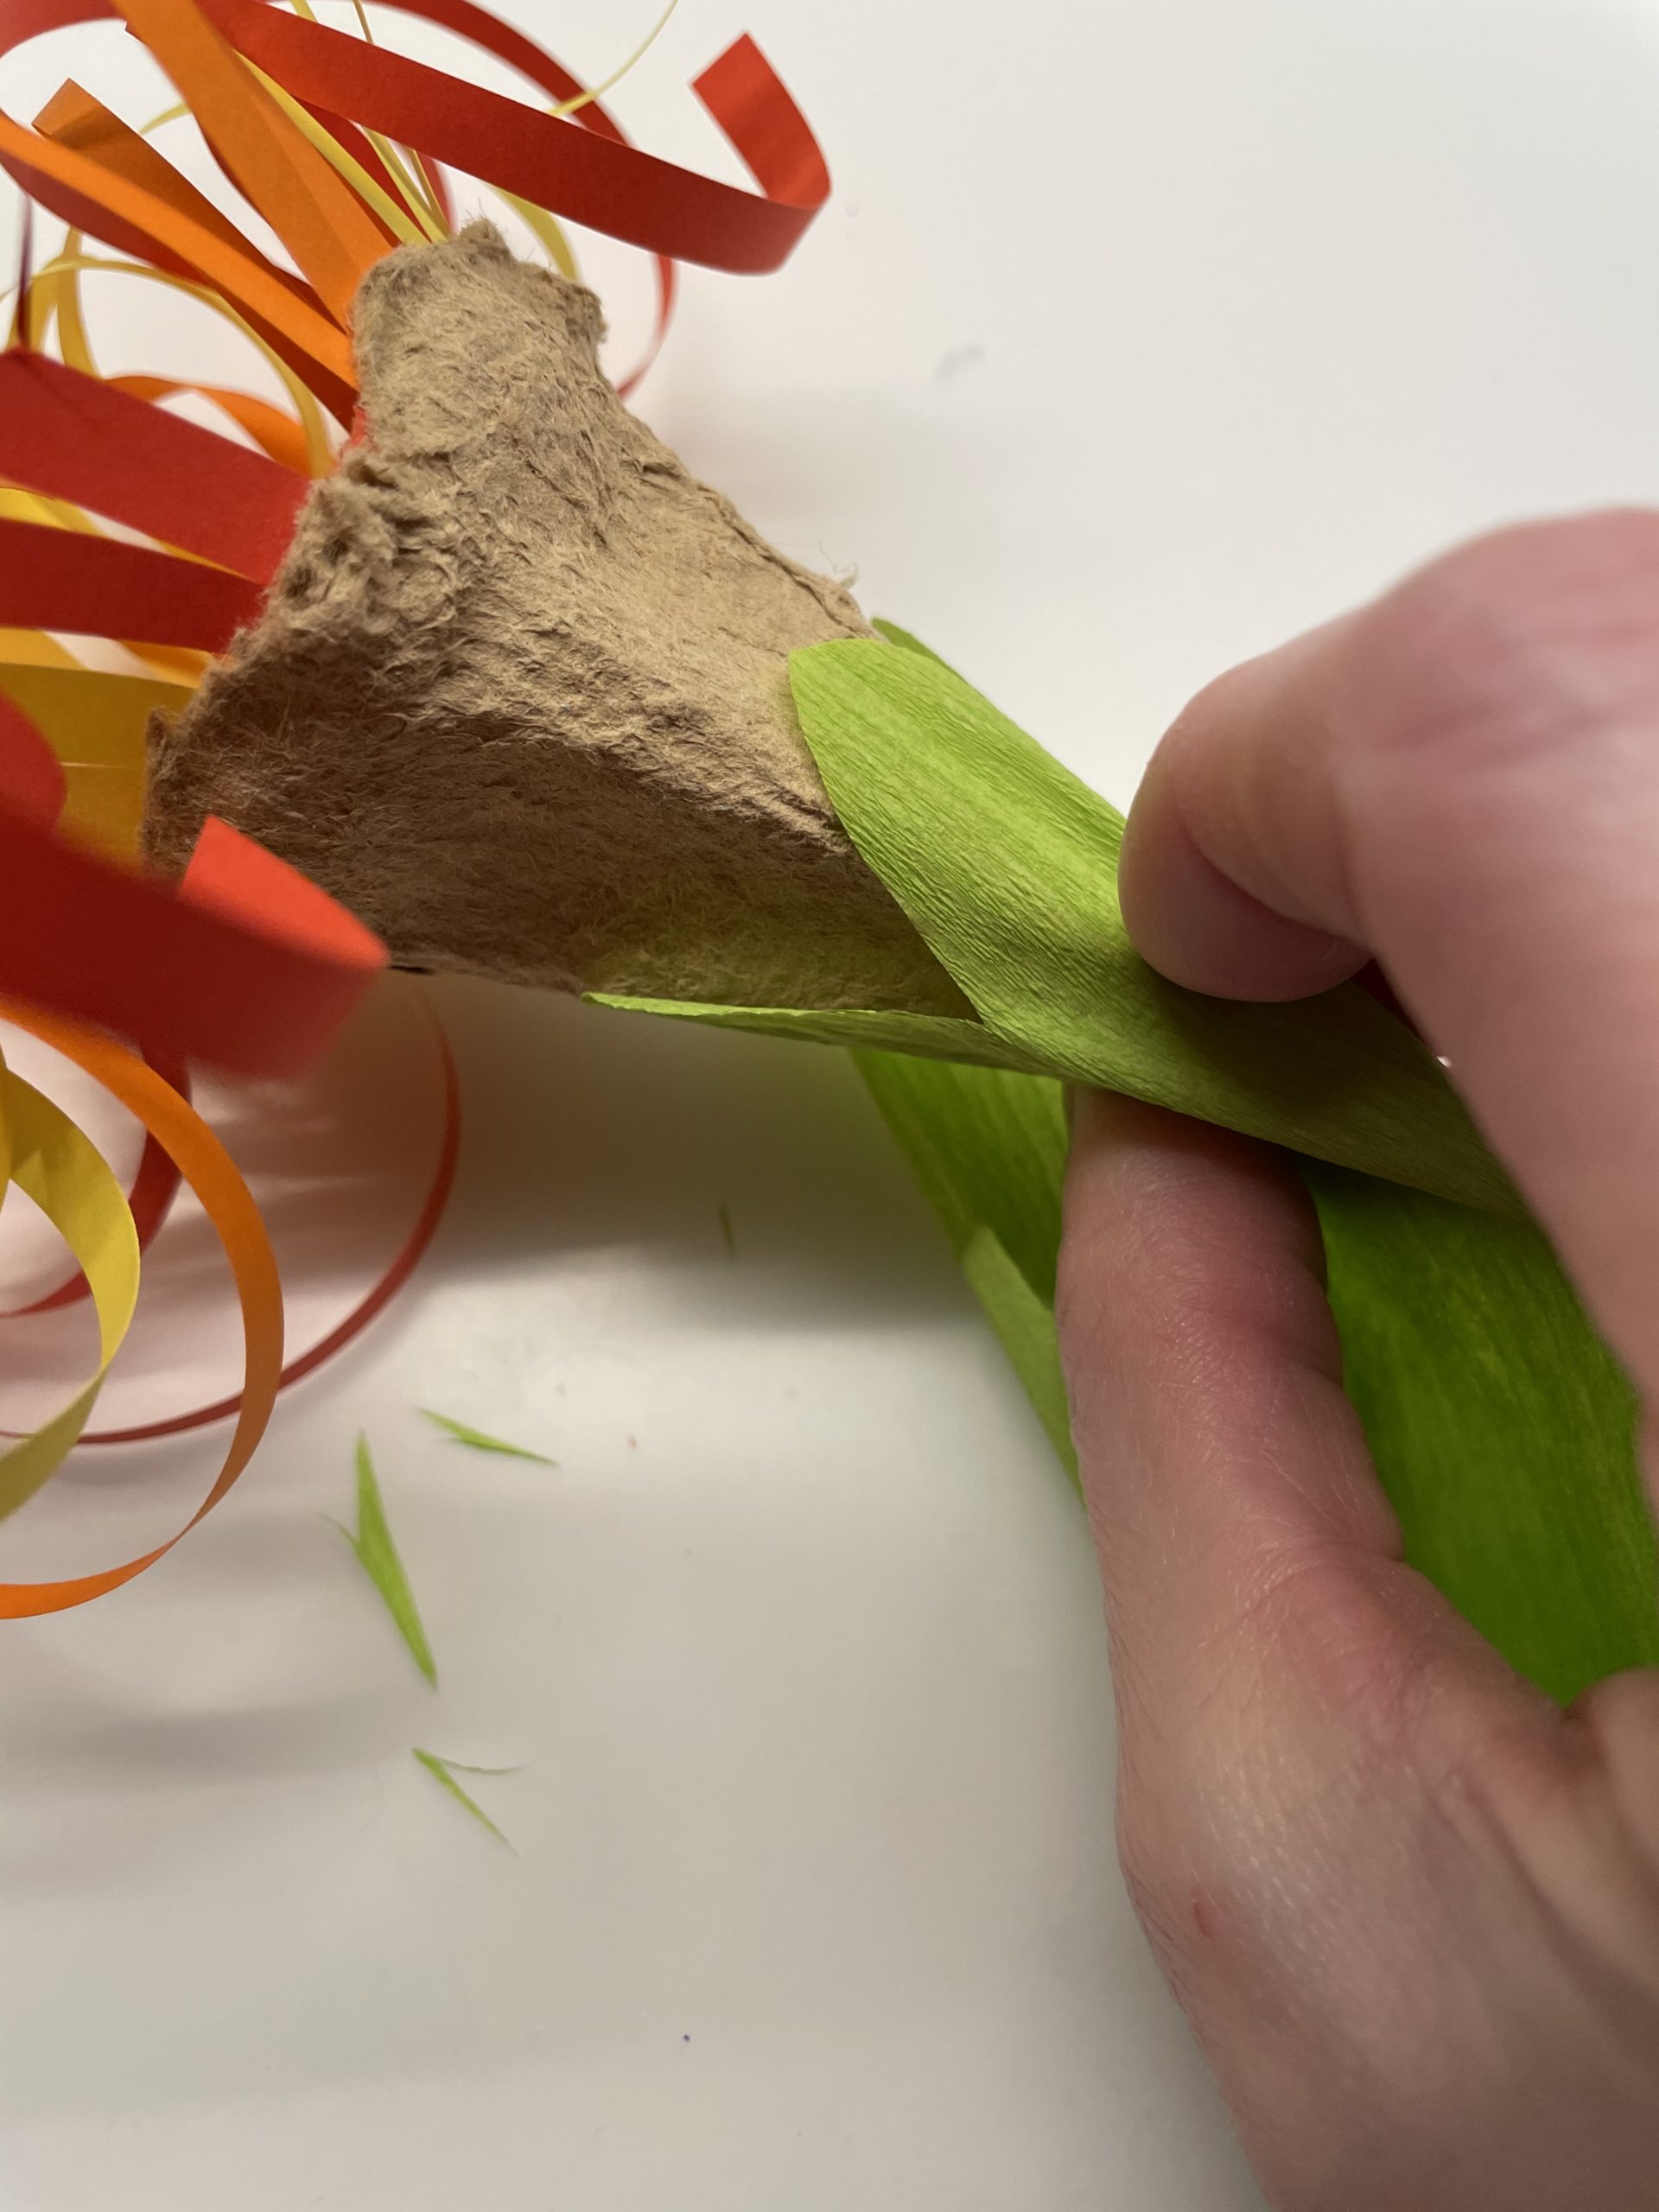
Place the stripe with the roundings upwards around the cup of flowers.

Bild zum Schritt 24 für das Bastel- und DIY-Abenteuer für Kinder: 'Legt den Streifen mit den Rundungen nach oben um den...'

24

2. Bild zum Schritt 24 für das Bastel- und DIY-Abenteuer für Kinder: 'Legt den Streifen mit den Rundungen nach oben um den...'

25

Then put a wooden stick in the flower cup from below.
Now she's stuck with the crepe paper.

Bild zum Schritt 26 für das Bastel- und DIY-Abenteuer für Kinder: 'Drückt das Krepppapier zurecht. Dann steckt einen Holzstab von unten...'

26

Cuts two leaves from another piece of crepe paper (15 cm x 10 cm).
Fold half the paper and cut a bow on one side.

Bild zum Schritt 27 für das Bastel- und DIY-Abenteuer für Kinder: 'Schneidet aus einem weiteren Stück Krepppapier (15 cm x 10...'

27

2. Bild zum Schritt 27 für das Bastel- und DIY-Abenteuer für Kinder: 'Schneidet aus einem weiteren Stück Krepppapier (15 cm x 10...'

28

Then folds the crepe paper apart.
That's how you get a double leaf.

Bild zum Schritt 29 für das Bastel- und DIY-Abenteuer für Kinder: 'Klappt das Krepppapier anschließend auseinander.   So erhaltet ihr...'

29

Gather the crepe paper at the bottom - on the straight side - and attach it to the stem (wood stick) of your flower.

Bild zum Schritt 30 für das Bastel- und DIY-Abenteuer für Kinder: 'Rafft das Krepppapier unten - an der geraden Seite -...'

30

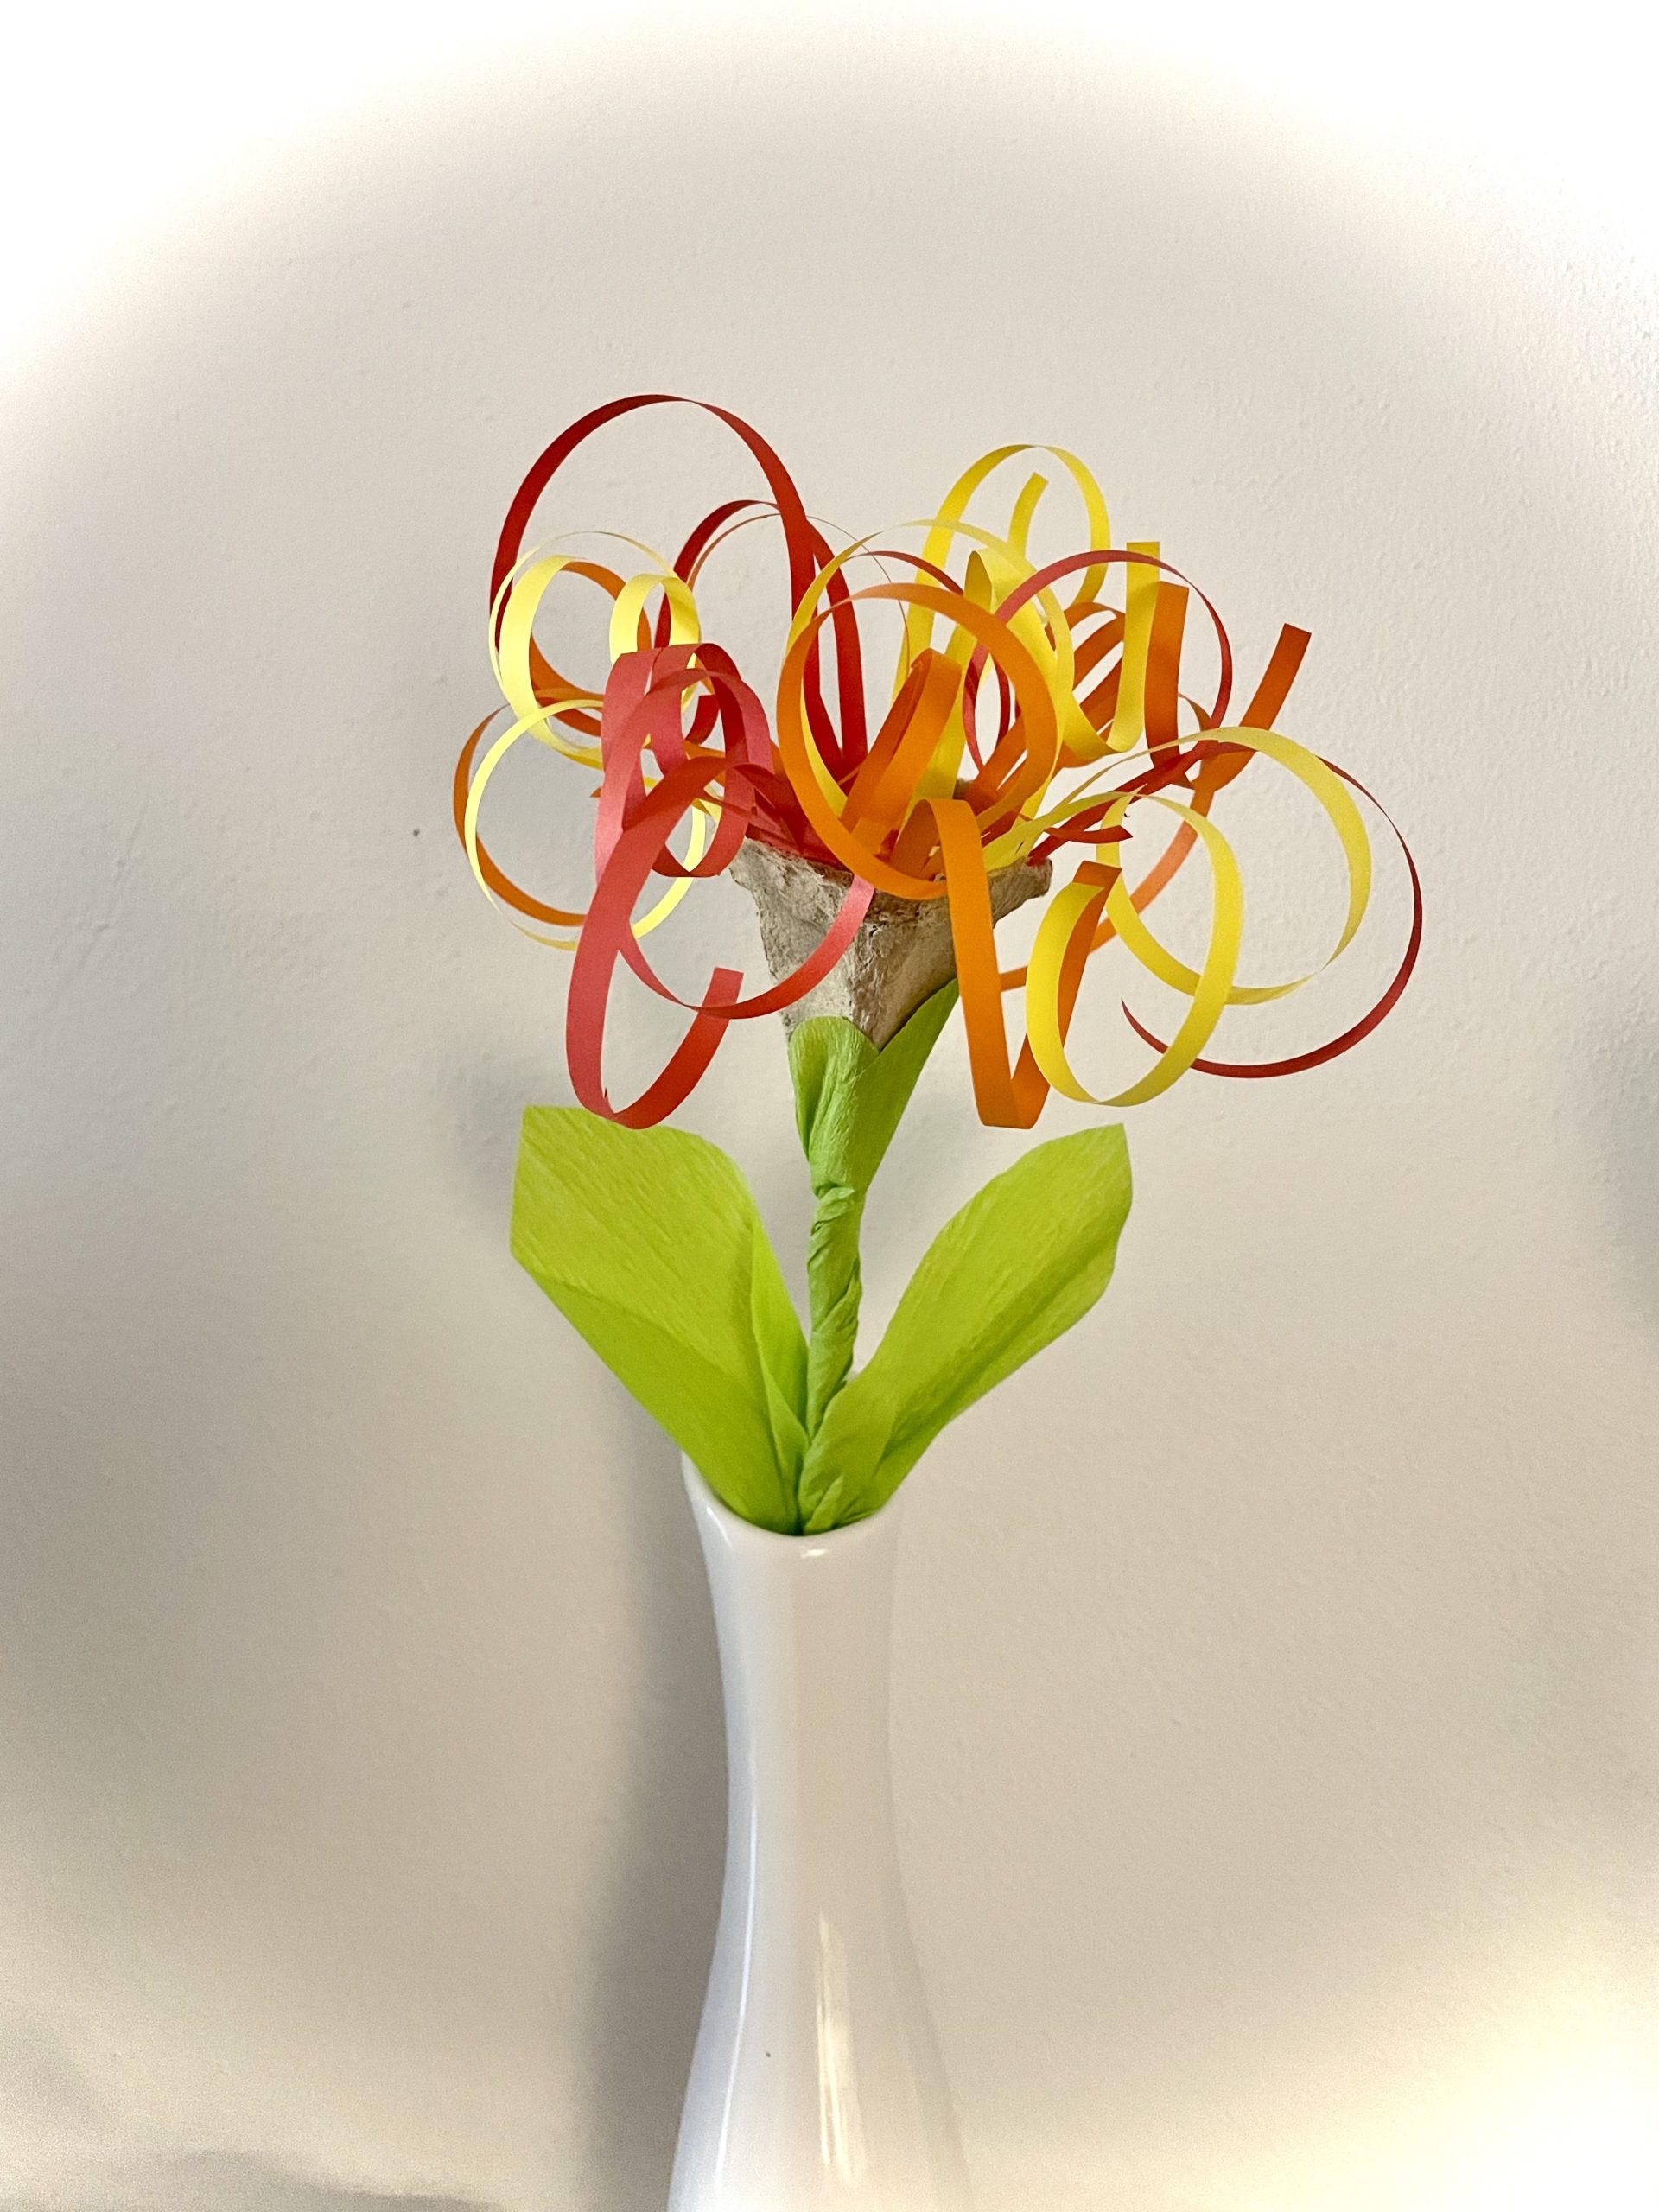
Your flower is ready.

Bild zum Schritt 31 für das Bastel- und DIY-Abenteuer für Kinder: 'Fertig ist eure Blume.'

31

Put it in a vase and your table decoration is ready.
This colourful variant is also great for a children's birthday party!

Bild zum Schritt 32 für das Bastel- und DIY-Abenteuer für Kinder: 'Stellt sie in eine Vase und fertig ist eure Tischdekoration....'

32

2. Bild zum Schritt 32 für das Bastel- und DIY-Abenteuer für Kinder: 'Stellt sie in eine Vase und fertig ist eure Tischdekoration....'

33

Have fun trying it out!

Materials

 1 Egg carton
 Copy paper in red, orange and yellow
 Crepe paper green
 1 Wooden rod
That's what you need in addition:
 1 Pen
 1 Glue
 possibly knives
 Builder's pad
All links marked with a shopping cart lead to Amazon - here we have selected products that we would order ourselves and in part also ordered. In a qualified purchase via the advertising link, we as Amazon partner receive a commission, for you there are no costs. You thus support our cost- and advertising banner-free, educational offer.

Directions

1

Put out your craft pad and the materials ready.
Then cut strips with 1cm width from colored copy paper. Choose your favorite colors! I used three colors with three stripes each.

Bild zum Schritt 1 für das Bastel- und DIY-Abenteuer für Kinder: 'Legt eure Bastelunterlage aus und die Materialien bereit.  Dann...'

2

Each strip is cut in 2 times the length.
Attention: the stripes are not cut.
At the end of the strip, 1cm stops and is not cut.

Bild zum Schritt 2 für das Bastel- und DIY-Abenteuer für Kinder: 'Jeder Streifen wird 2x der Länge nach eingeschnitten.  ...'

3

Cuts every strip in this way.

Bild zum Schritt 3 für das Bastel- und DIY-Abenteuer für Kinder: 'Schneidet jeden Streifen auf diese Weise.'

4

2. Bild zum Schritt 3 für das Bastel- und DIY-Abenteuer für Kinder: 'Schneidet jeden Streifen auf diese Weise.'

5

Separates a tip from an egg carton.
Then brush the edge of the inside with glue.
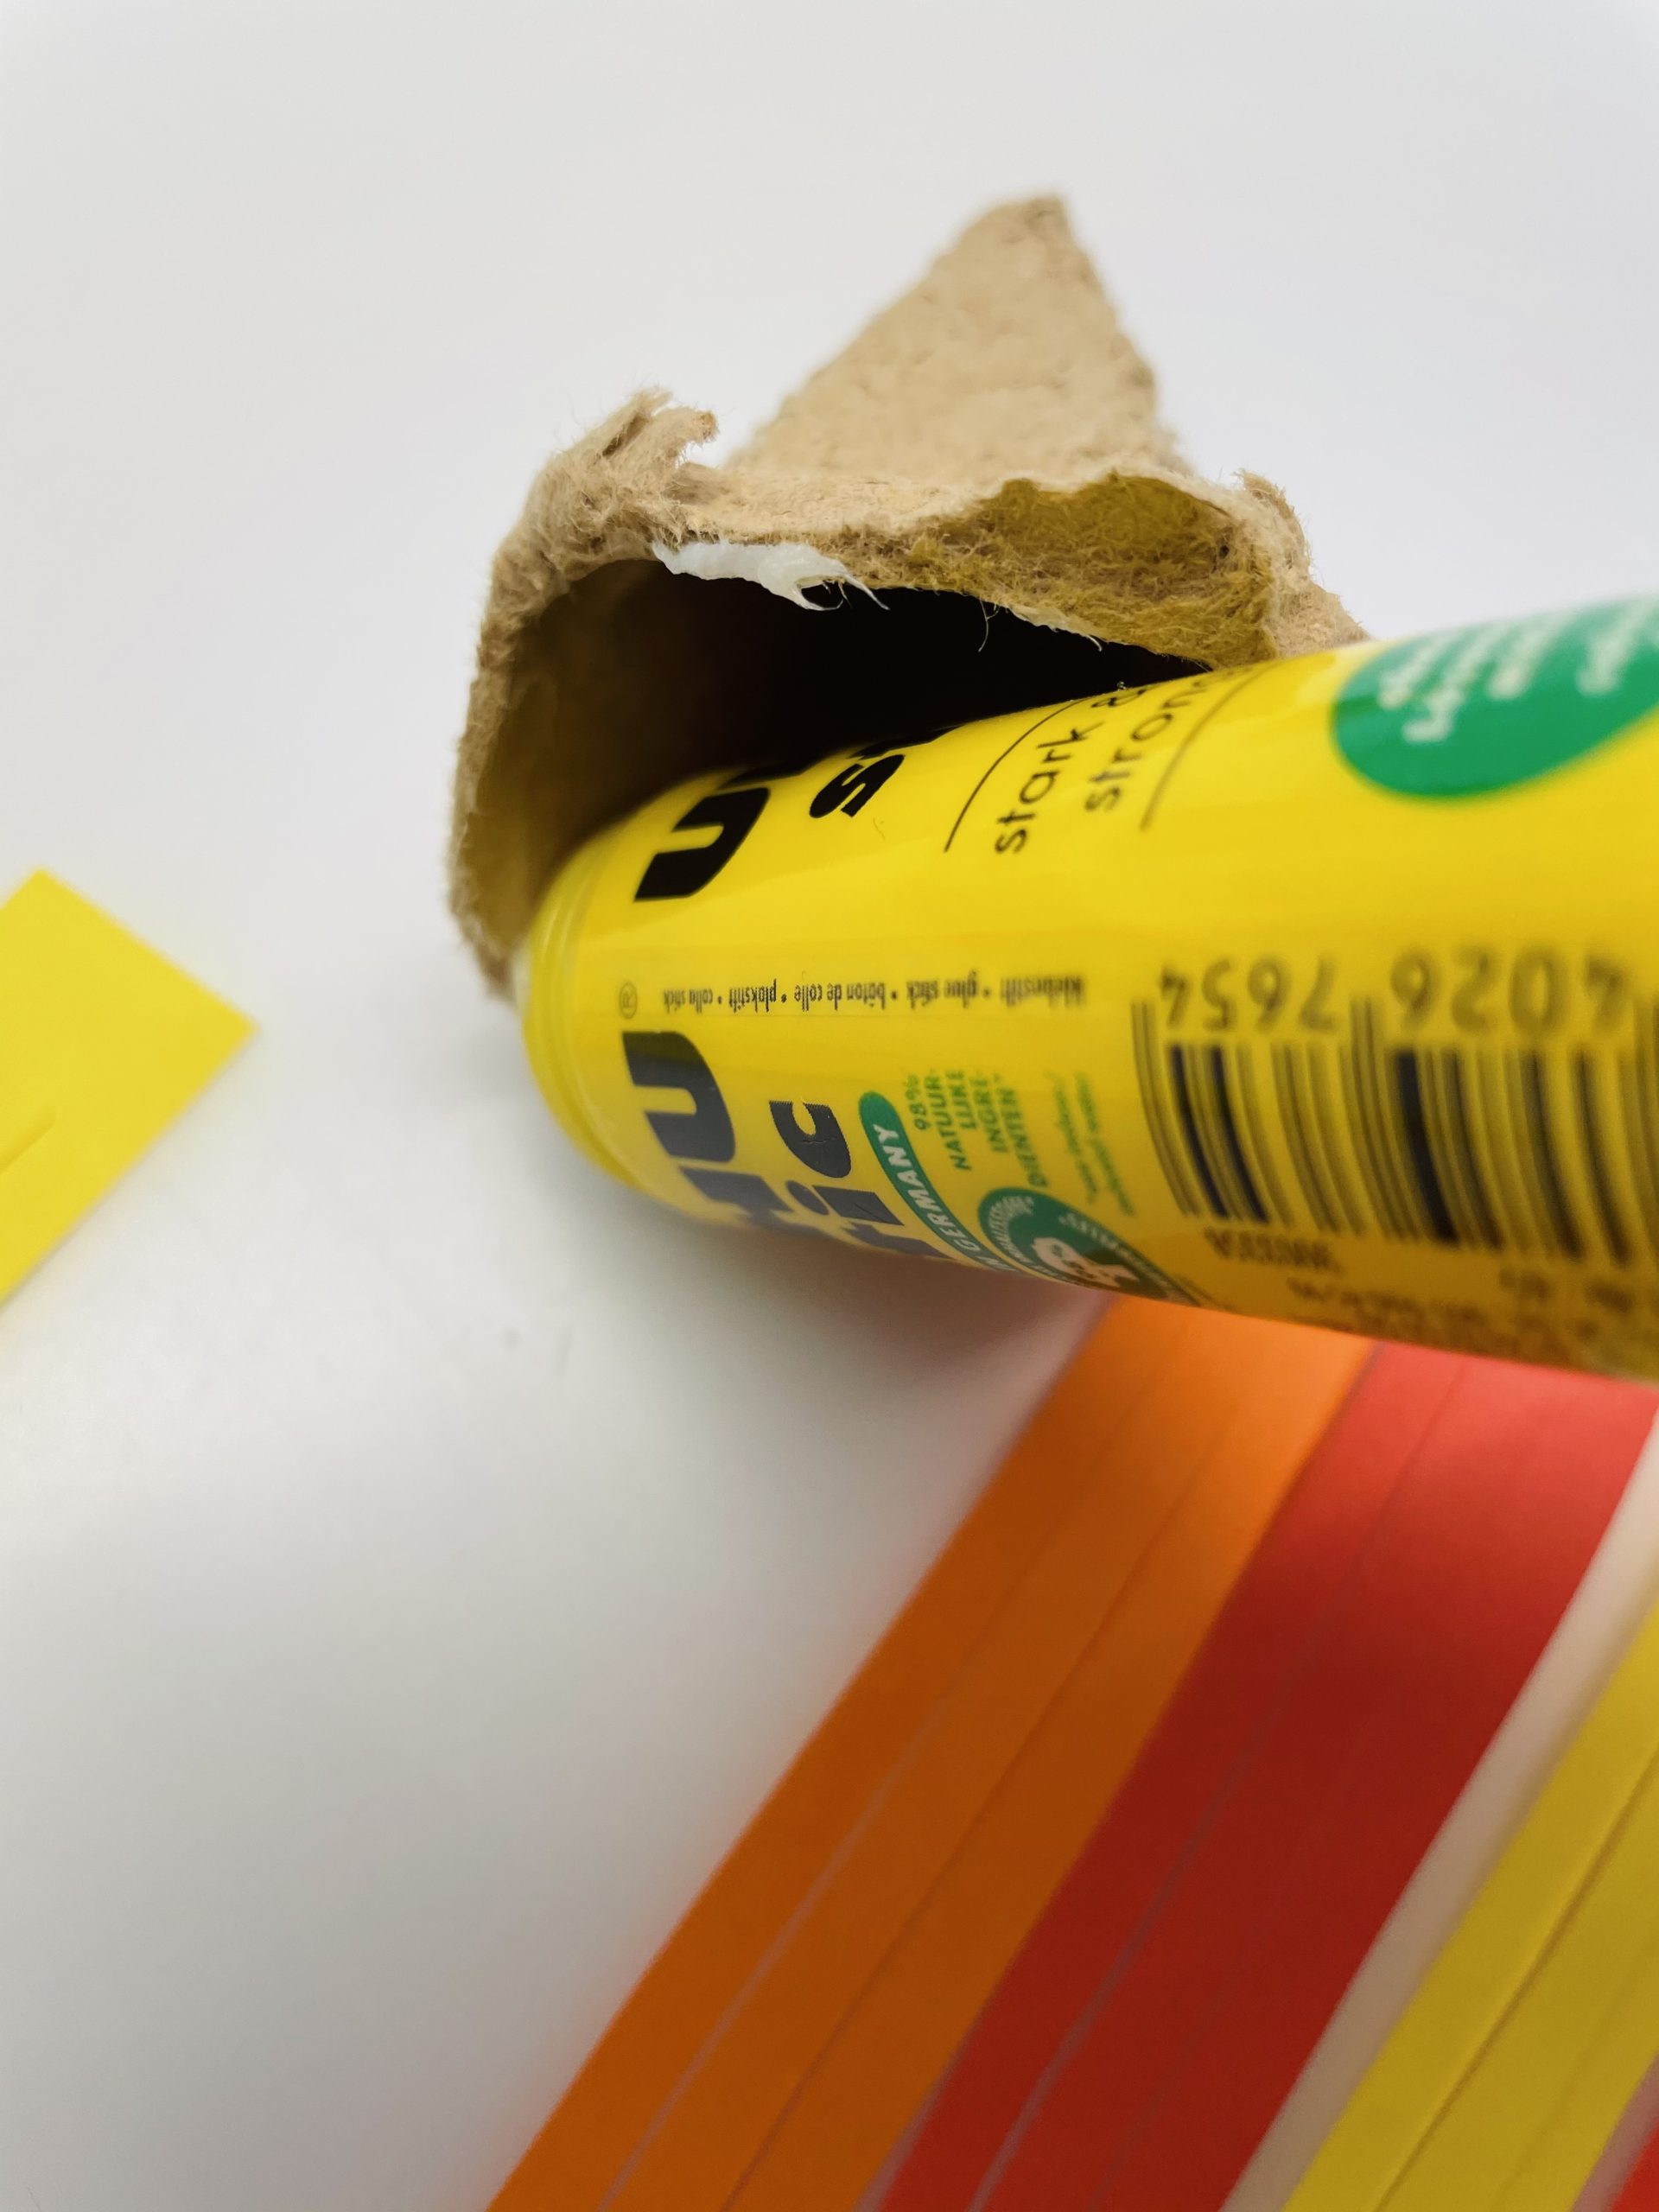
Bild zum Schritt 5 für das Bastel- und DIY-Abenteuer für Kinder: 'Trennt aus einem Eierkarton eine Spitze heraus.  Anschließend bestreicht...'

6

Now stick the stripes to the inner edge with the closed side.
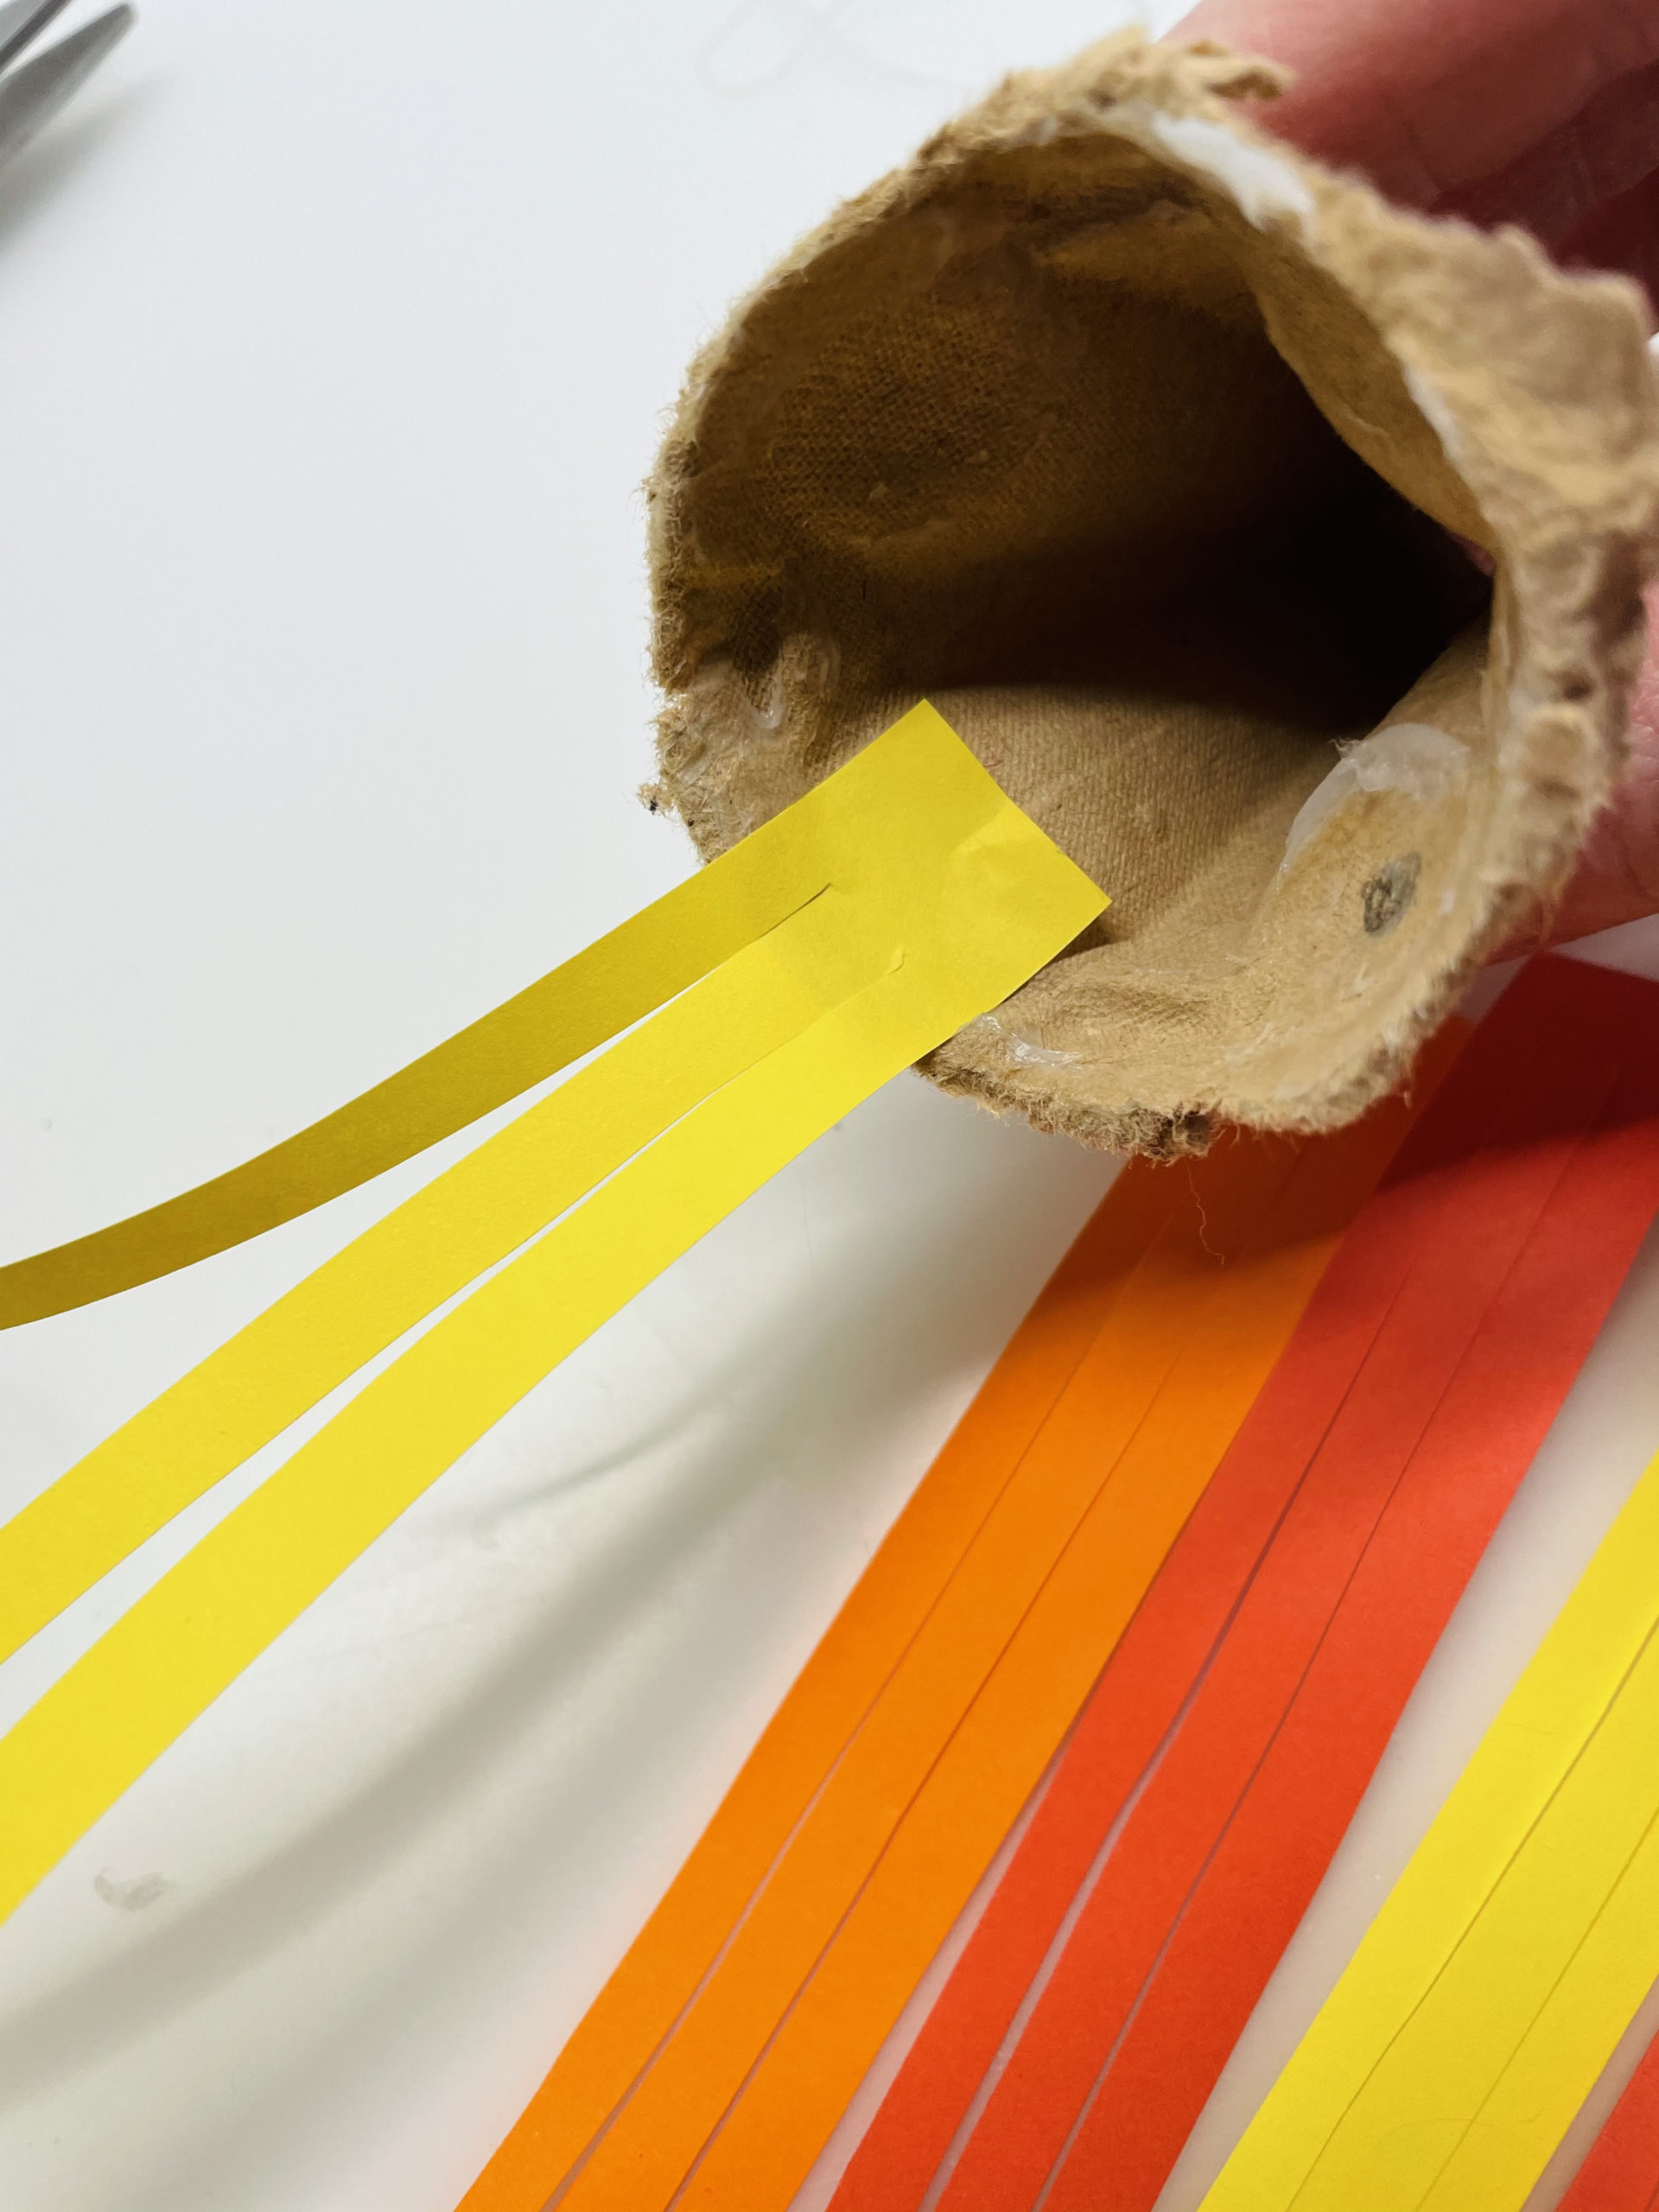
Bild zum Schritt 6 für das Bastel- und DIY-Abenteuer für Kinder: 'Klebt nun die Streifen mit der geschlossenen Seite am inneren...'

7

Change the colors.

Bild zum Schritt 7 für das Bastel- und DIY-Abenteuer für Kinder: 'Wechselt die Farben ab.'

8

2. Bild zum Schritt 7 für das Bastel- und DIY-Abenteuer für Kinder: 'Wechselt die Farben ab.'

9

3. Bild zum Schritt 8 für das Bastel- und DIY-Abenteuer für Kinder: 'Wechselt die Farben ab.'

10

If all the strips are glued, then you wrestle the individual strips.
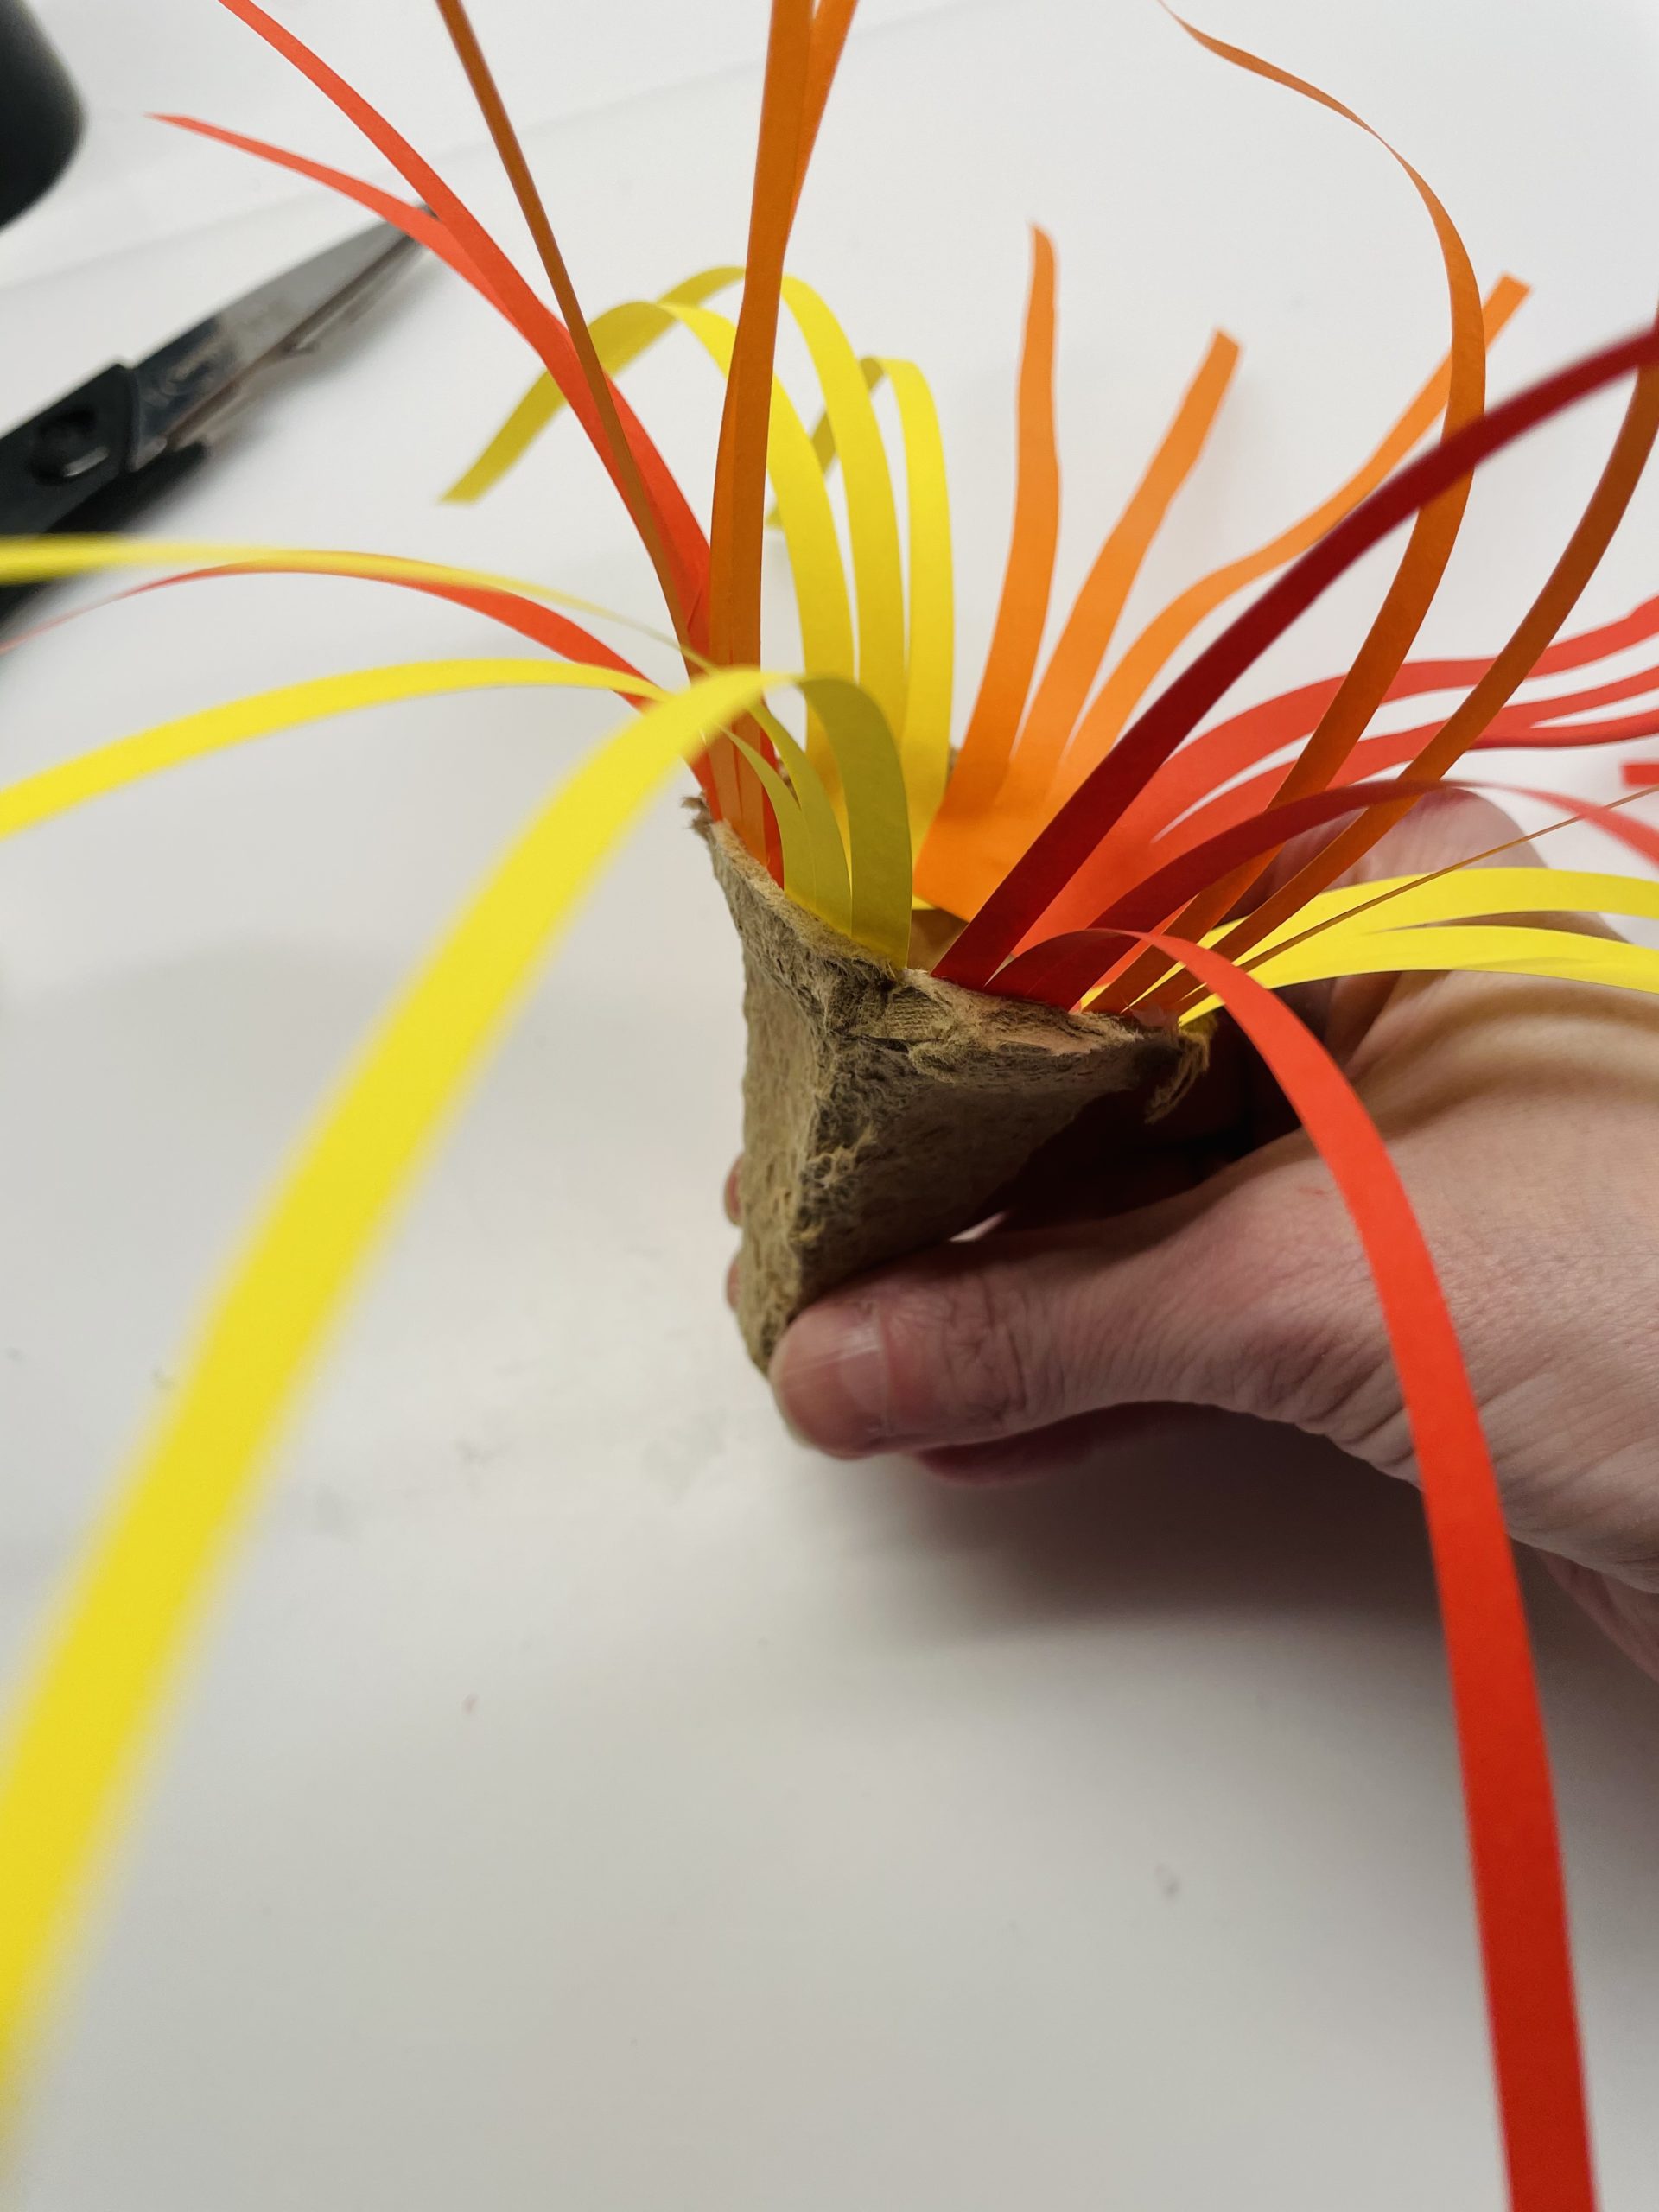
Bild zum Schritt 10 für das Bastel- und DIY-Abenteuer für Kinder: 'Sind alle Streifen festgeklebt, dann ringelt ihr die einzelnen Streifen.'

11

To do this, put a strip on the edge of a scissors. Then carefully pull the paper over it. Attention: Let an adult help you, or do it with an adult = risk of injury!
Tip: You can also wrestle the paper with a knife! But be careful, because there is also a risk of injury here!
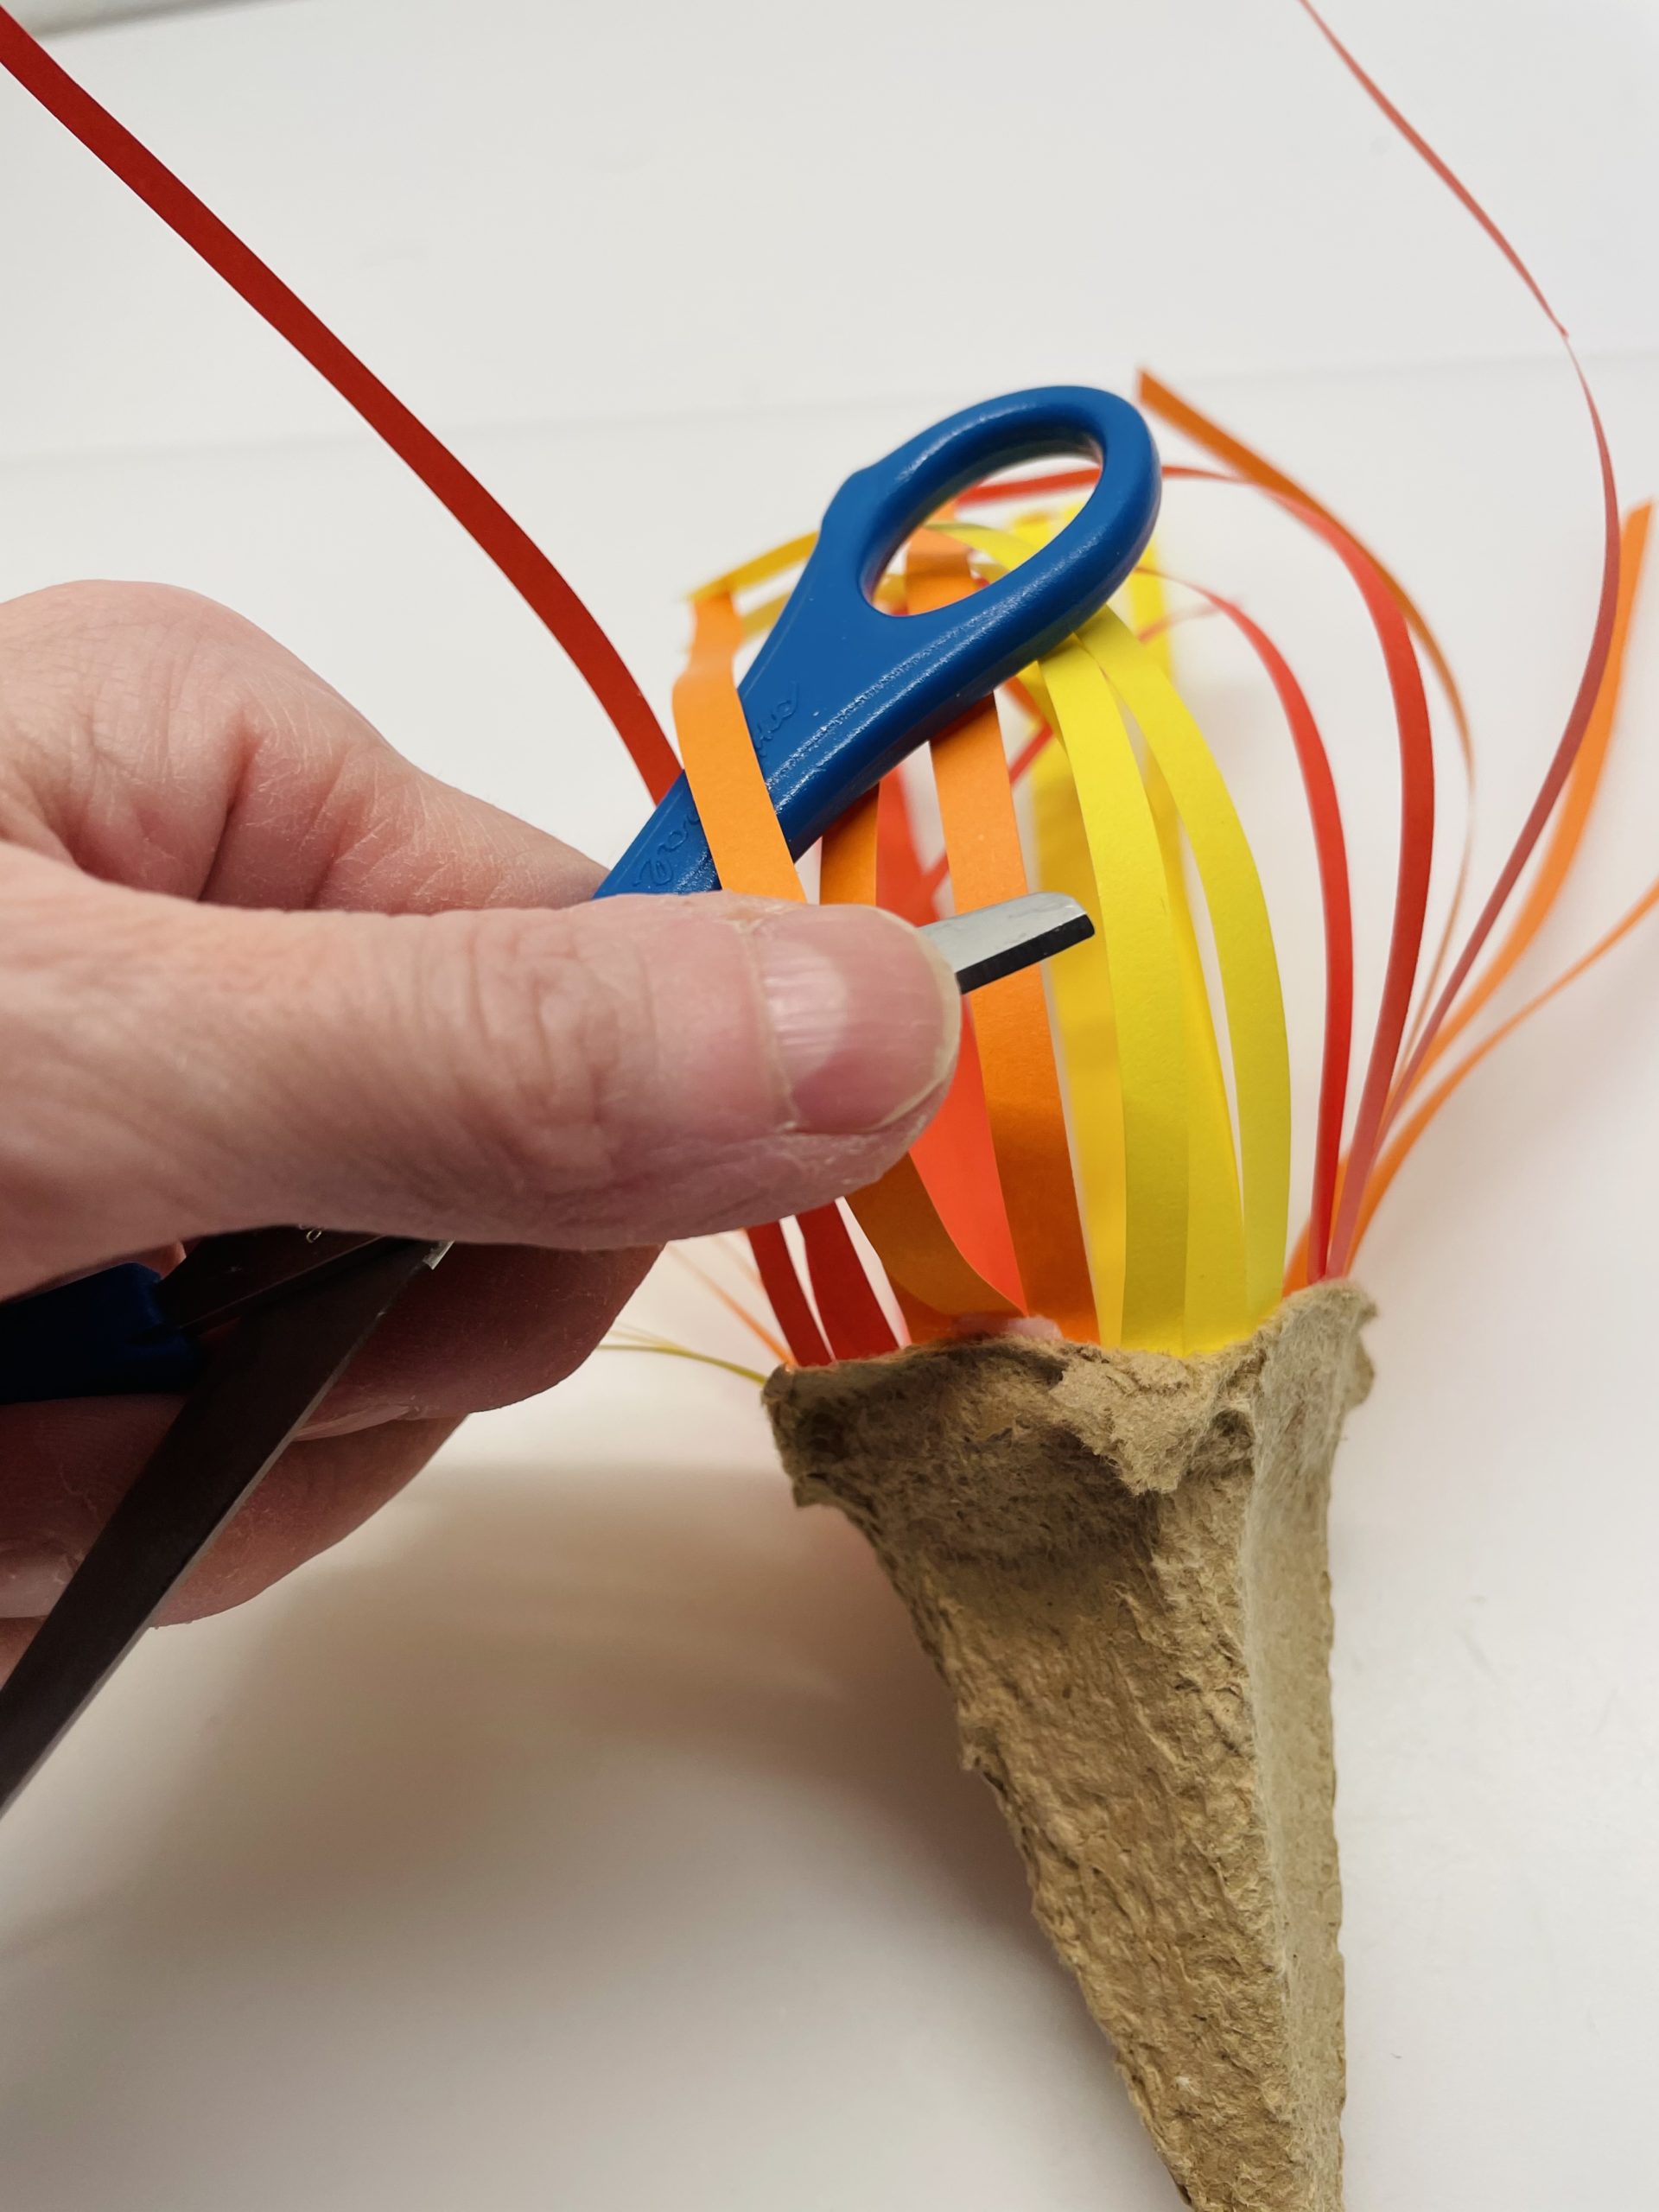
Bild zum Schritt 11 für das Bastel- und DIY-Abenteuer für Kinder: 'Dafür legt ihr einen Streifen auf die Schneide einer Schere....'

12

2. Bild zum Schritt 11 für das Bastel- und DIY-Abenteuer für Kinder: 'Dafür legt ihr einen Streifen auf die Schneide einer Schere....'

13

Now wrestle one strip at a time.
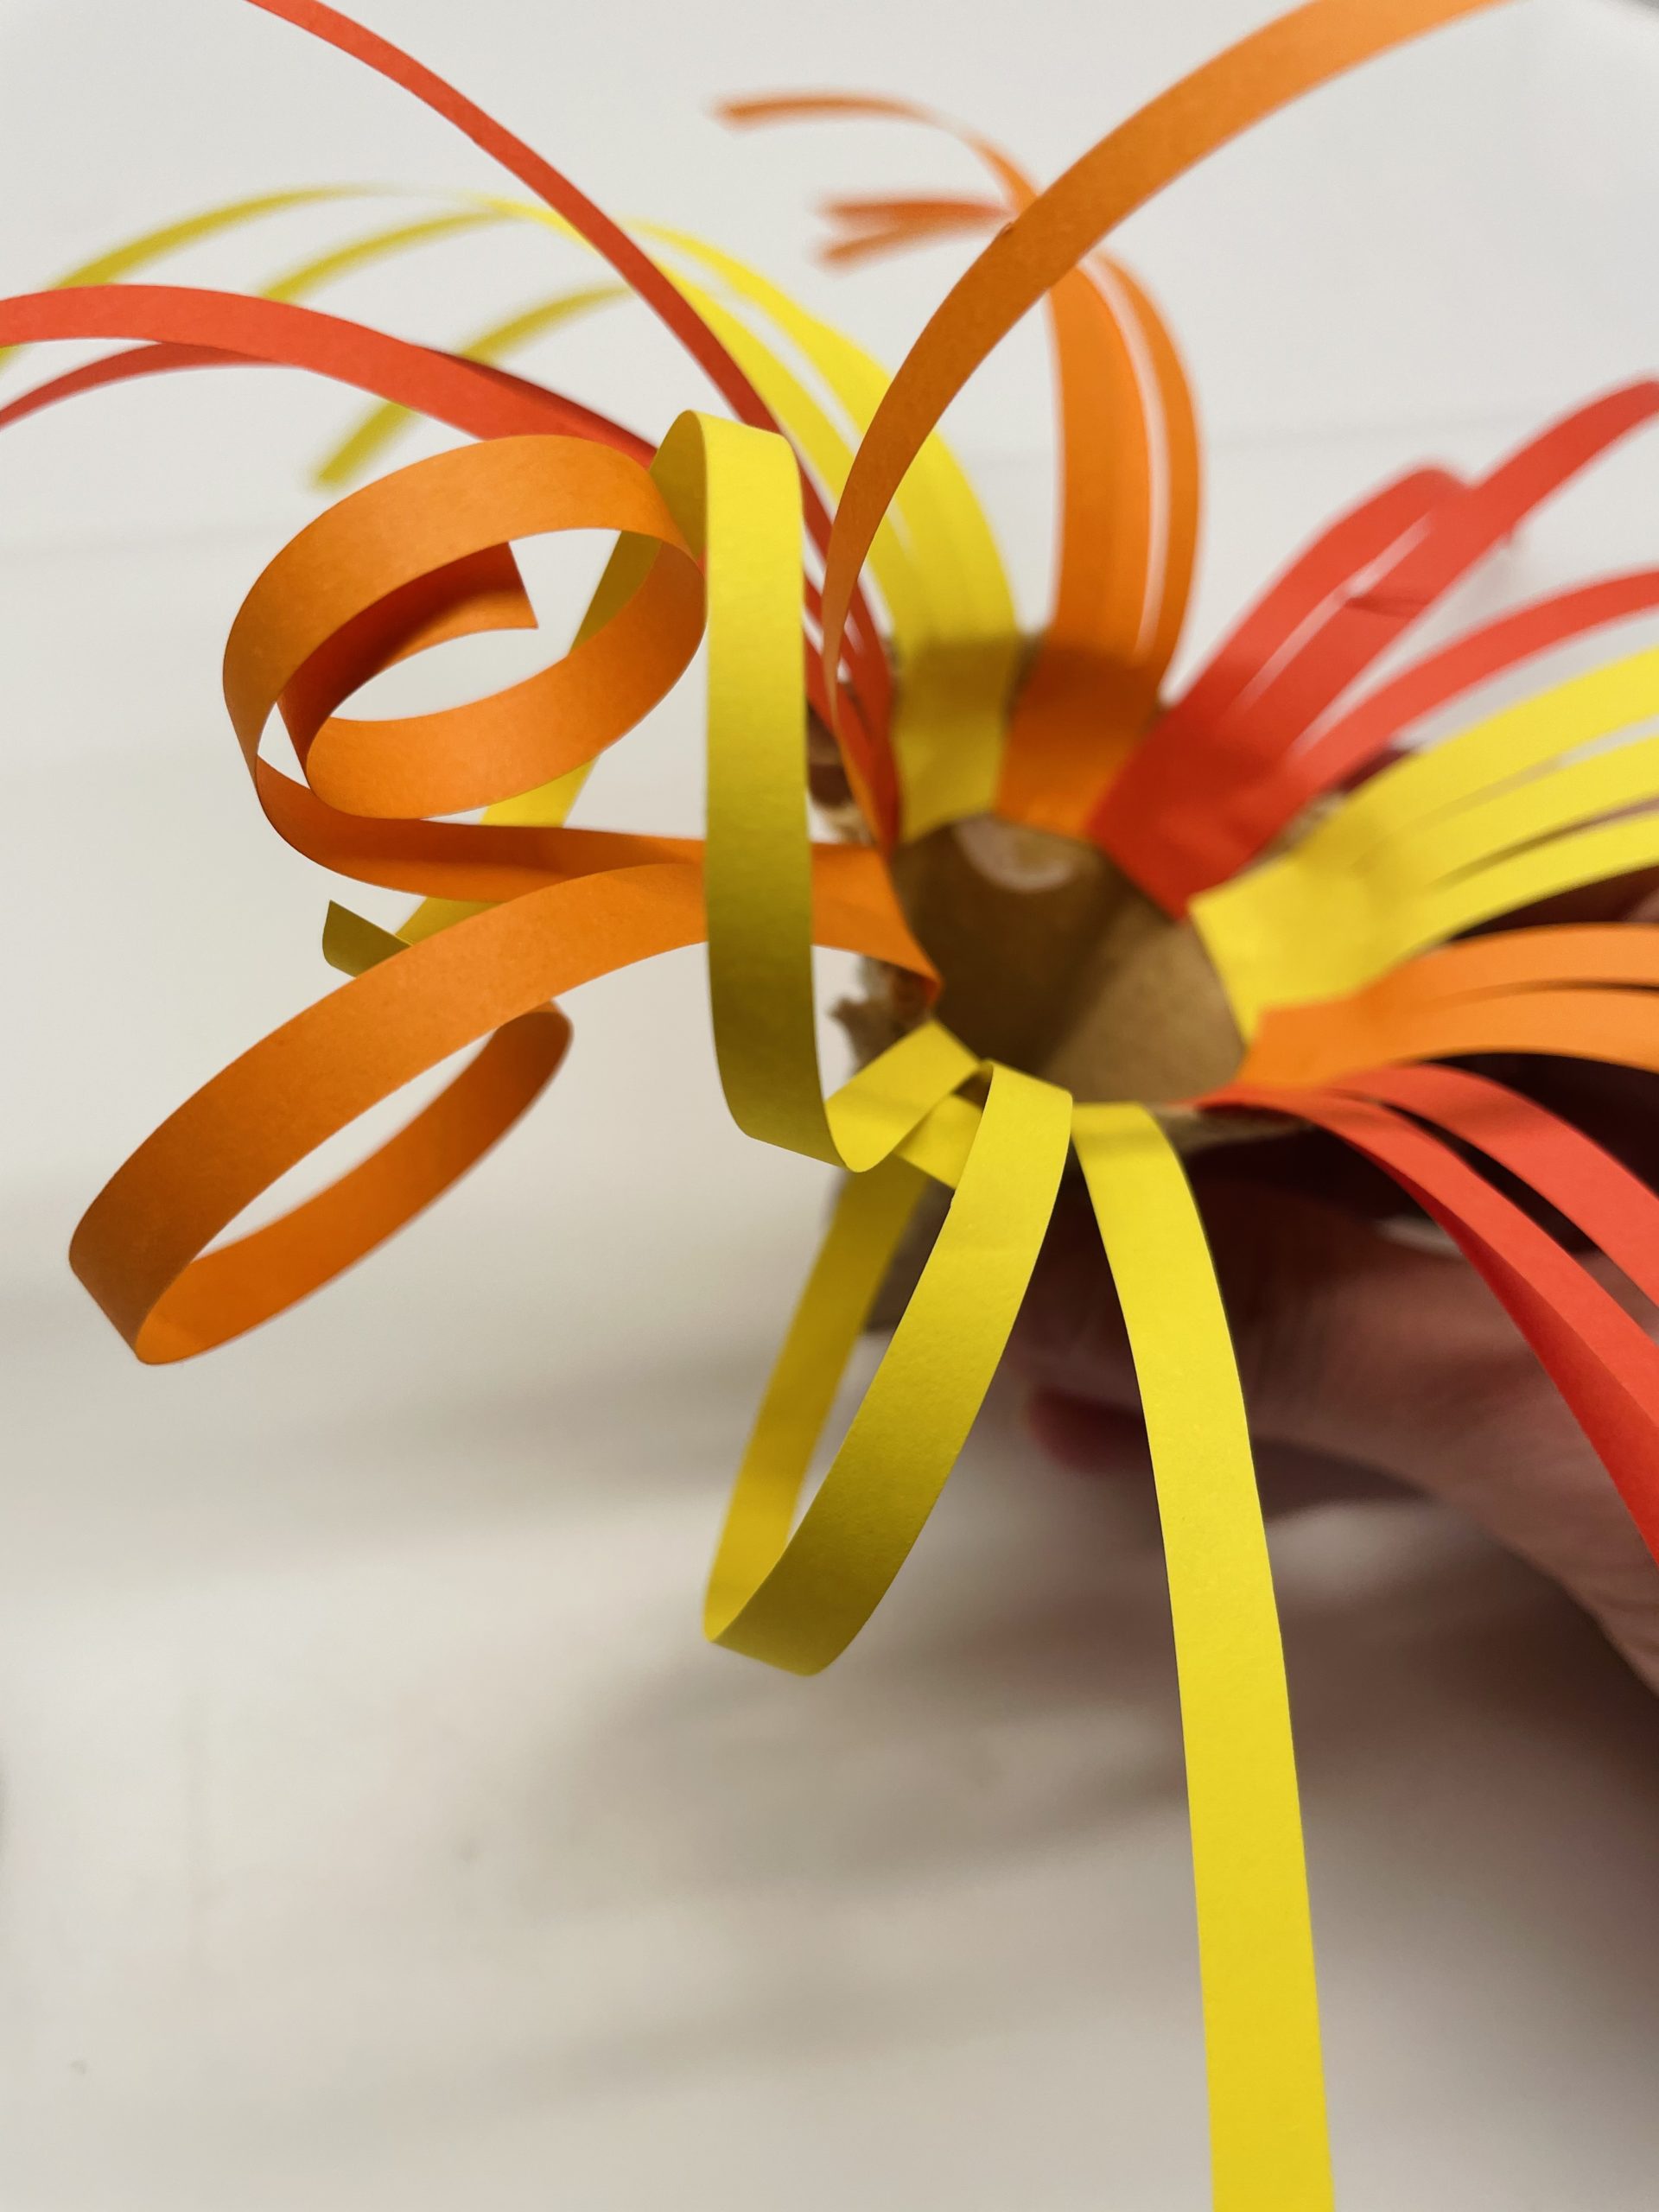
Bild zum Schritt 13 für das Bastel- und DIY-Abenteuer für Kinder: 'Ringelt nun einen Streifen nach dem anderen.'

14

Tip: If the handle is slightly slanted, the stripes will roll a bit more beautifully!
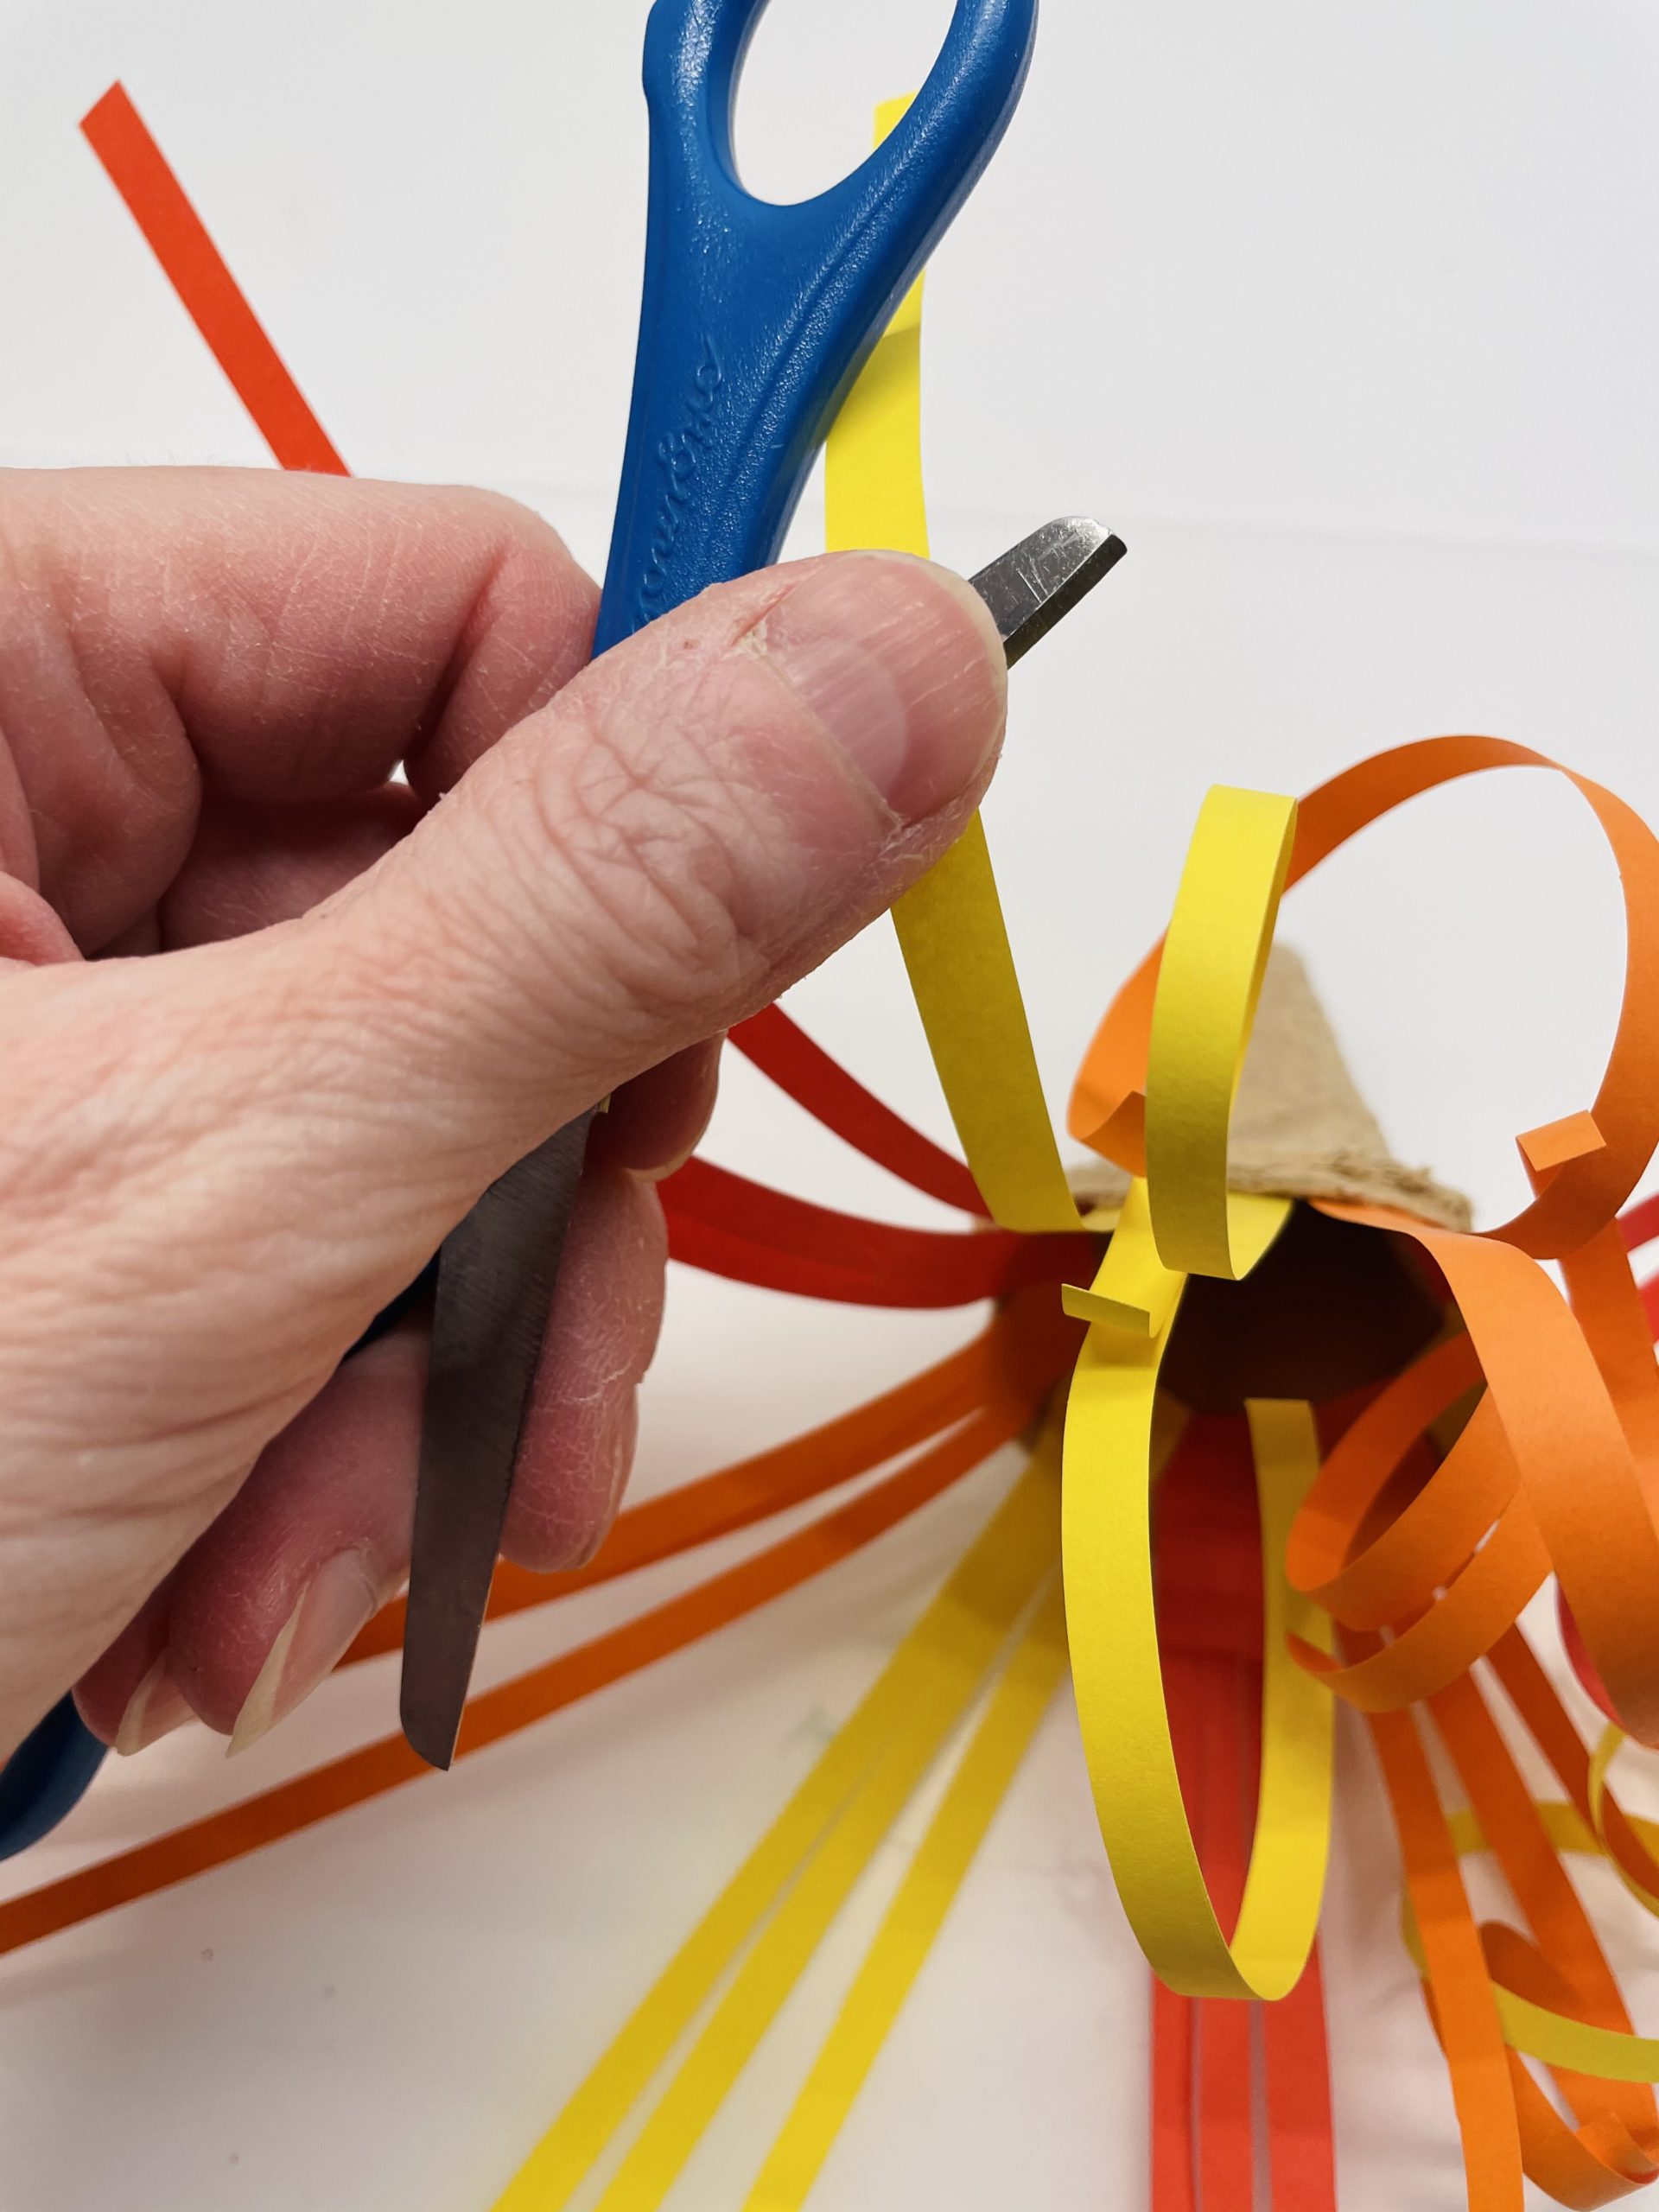
Bild zum Schritt 14 für das Bastel- und DIY-Abenteuer für Kinder: 'Tipp: Setzt die Klinke leicht schräg an, dann rollen sich...'

15

2. Bild zum Schritt 14 für das Bastel- und DIY-Abenteuer für Kinder: 'Tipp: Setzt die Klinke leicht schräg an, dann rollen sich...'

16

That's what your bloom could look like!
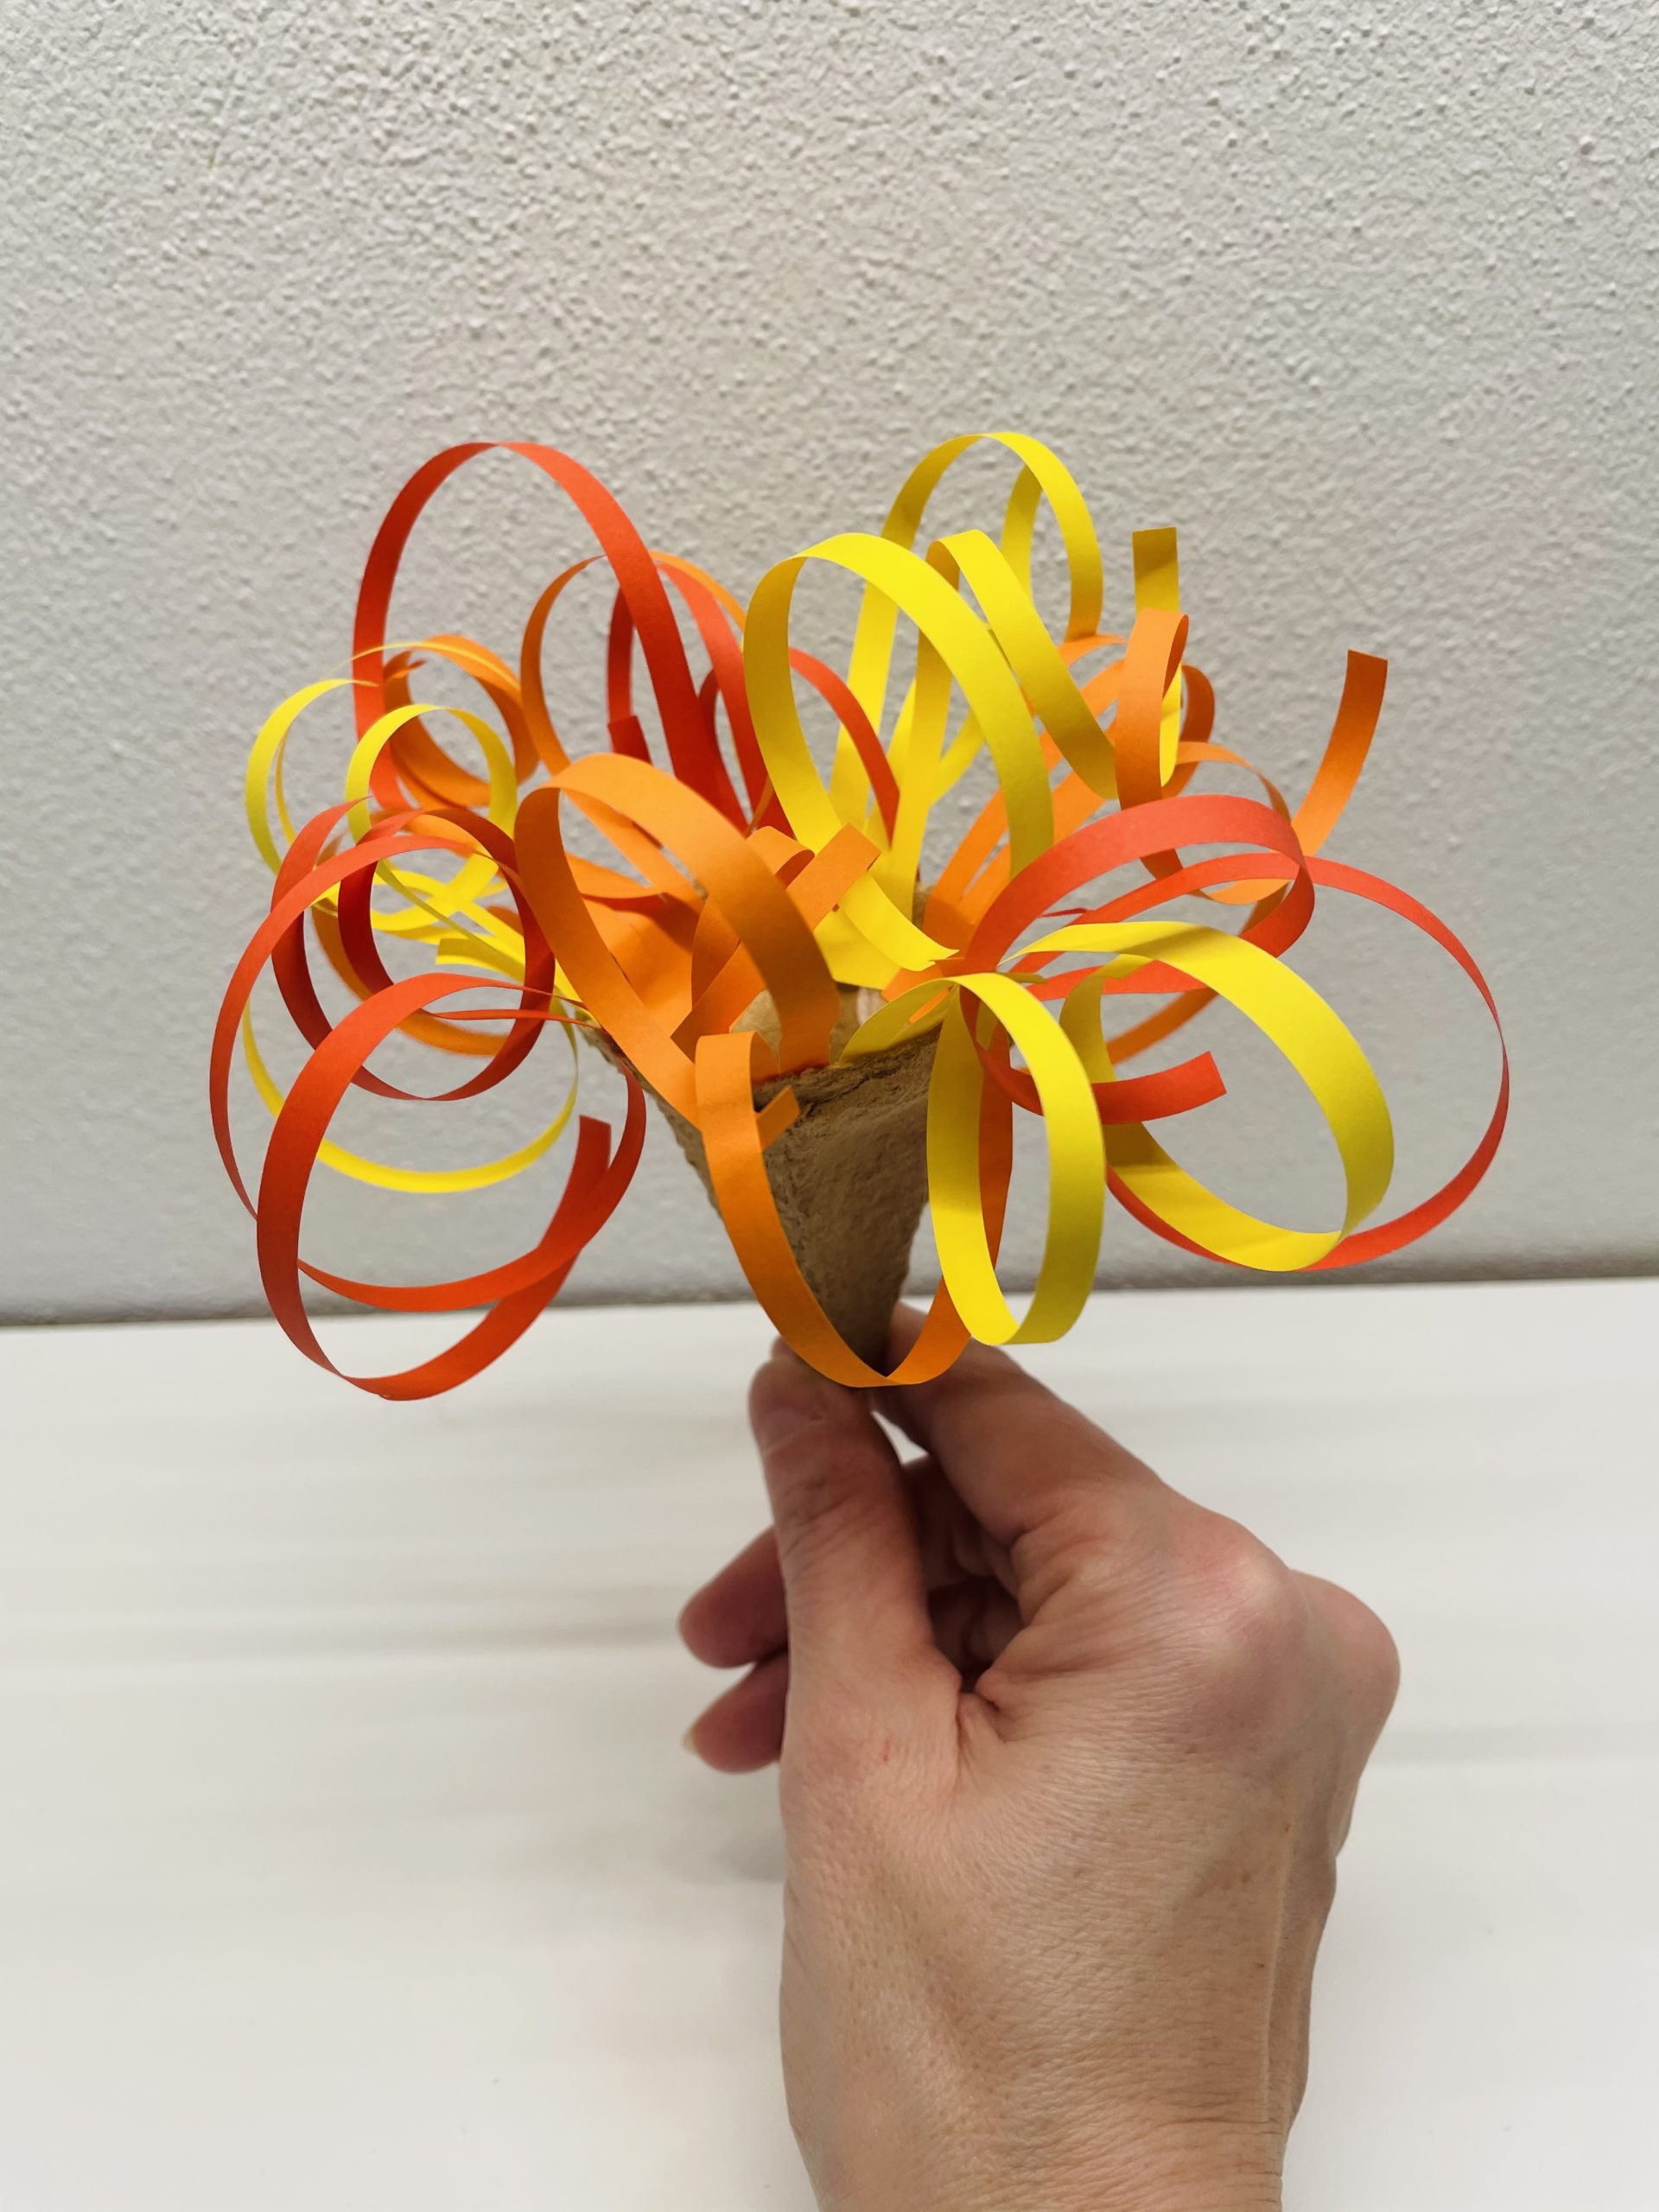
Bild zum Schritt 16 für das Bastel- und DIY-Abenteuer für Kinder: 'So könnte eure Blüte dann aussehen!'

Leaves:
17

Get ready green crepe paper with the dimensions 7cm x 10cm.
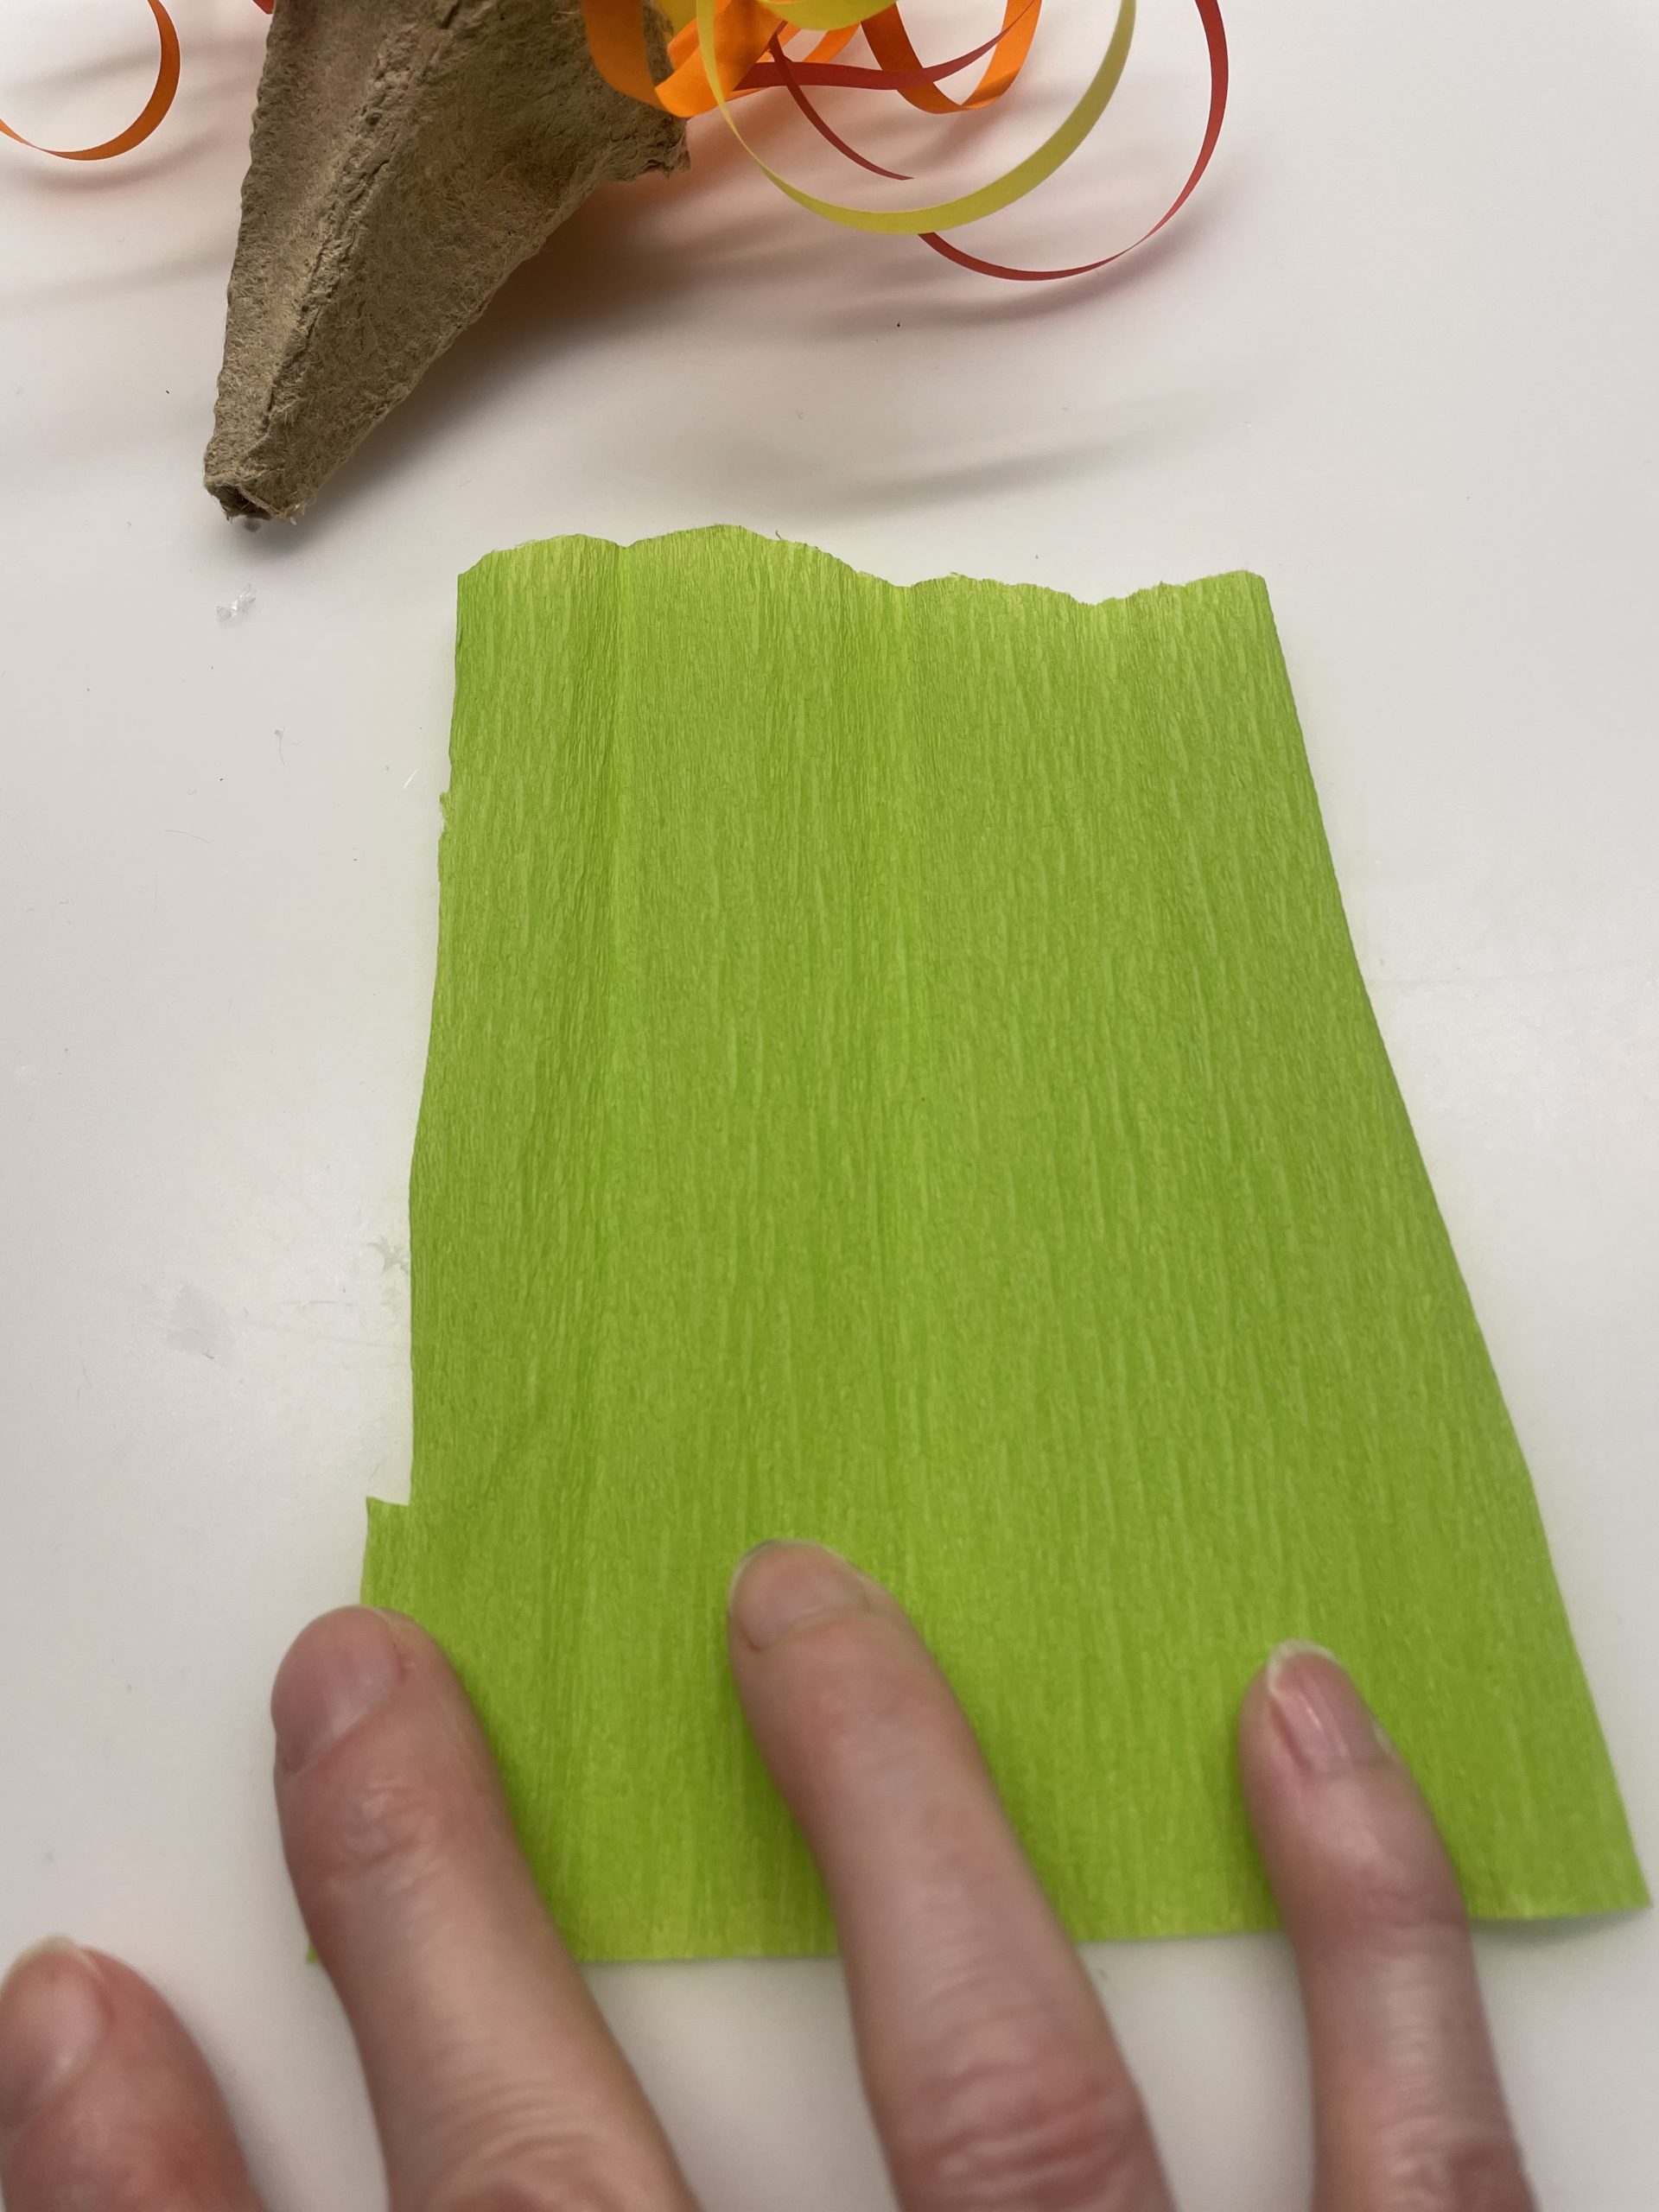
Bild zum Schritt 18 für das Bastel- und DIY-Abenteuer für Kinder: 'Legt euch dafür grünes Krepppapier mit den Maßen 7cm x...'

18

Fold the paper 2 times.
So you get a narrow strip.
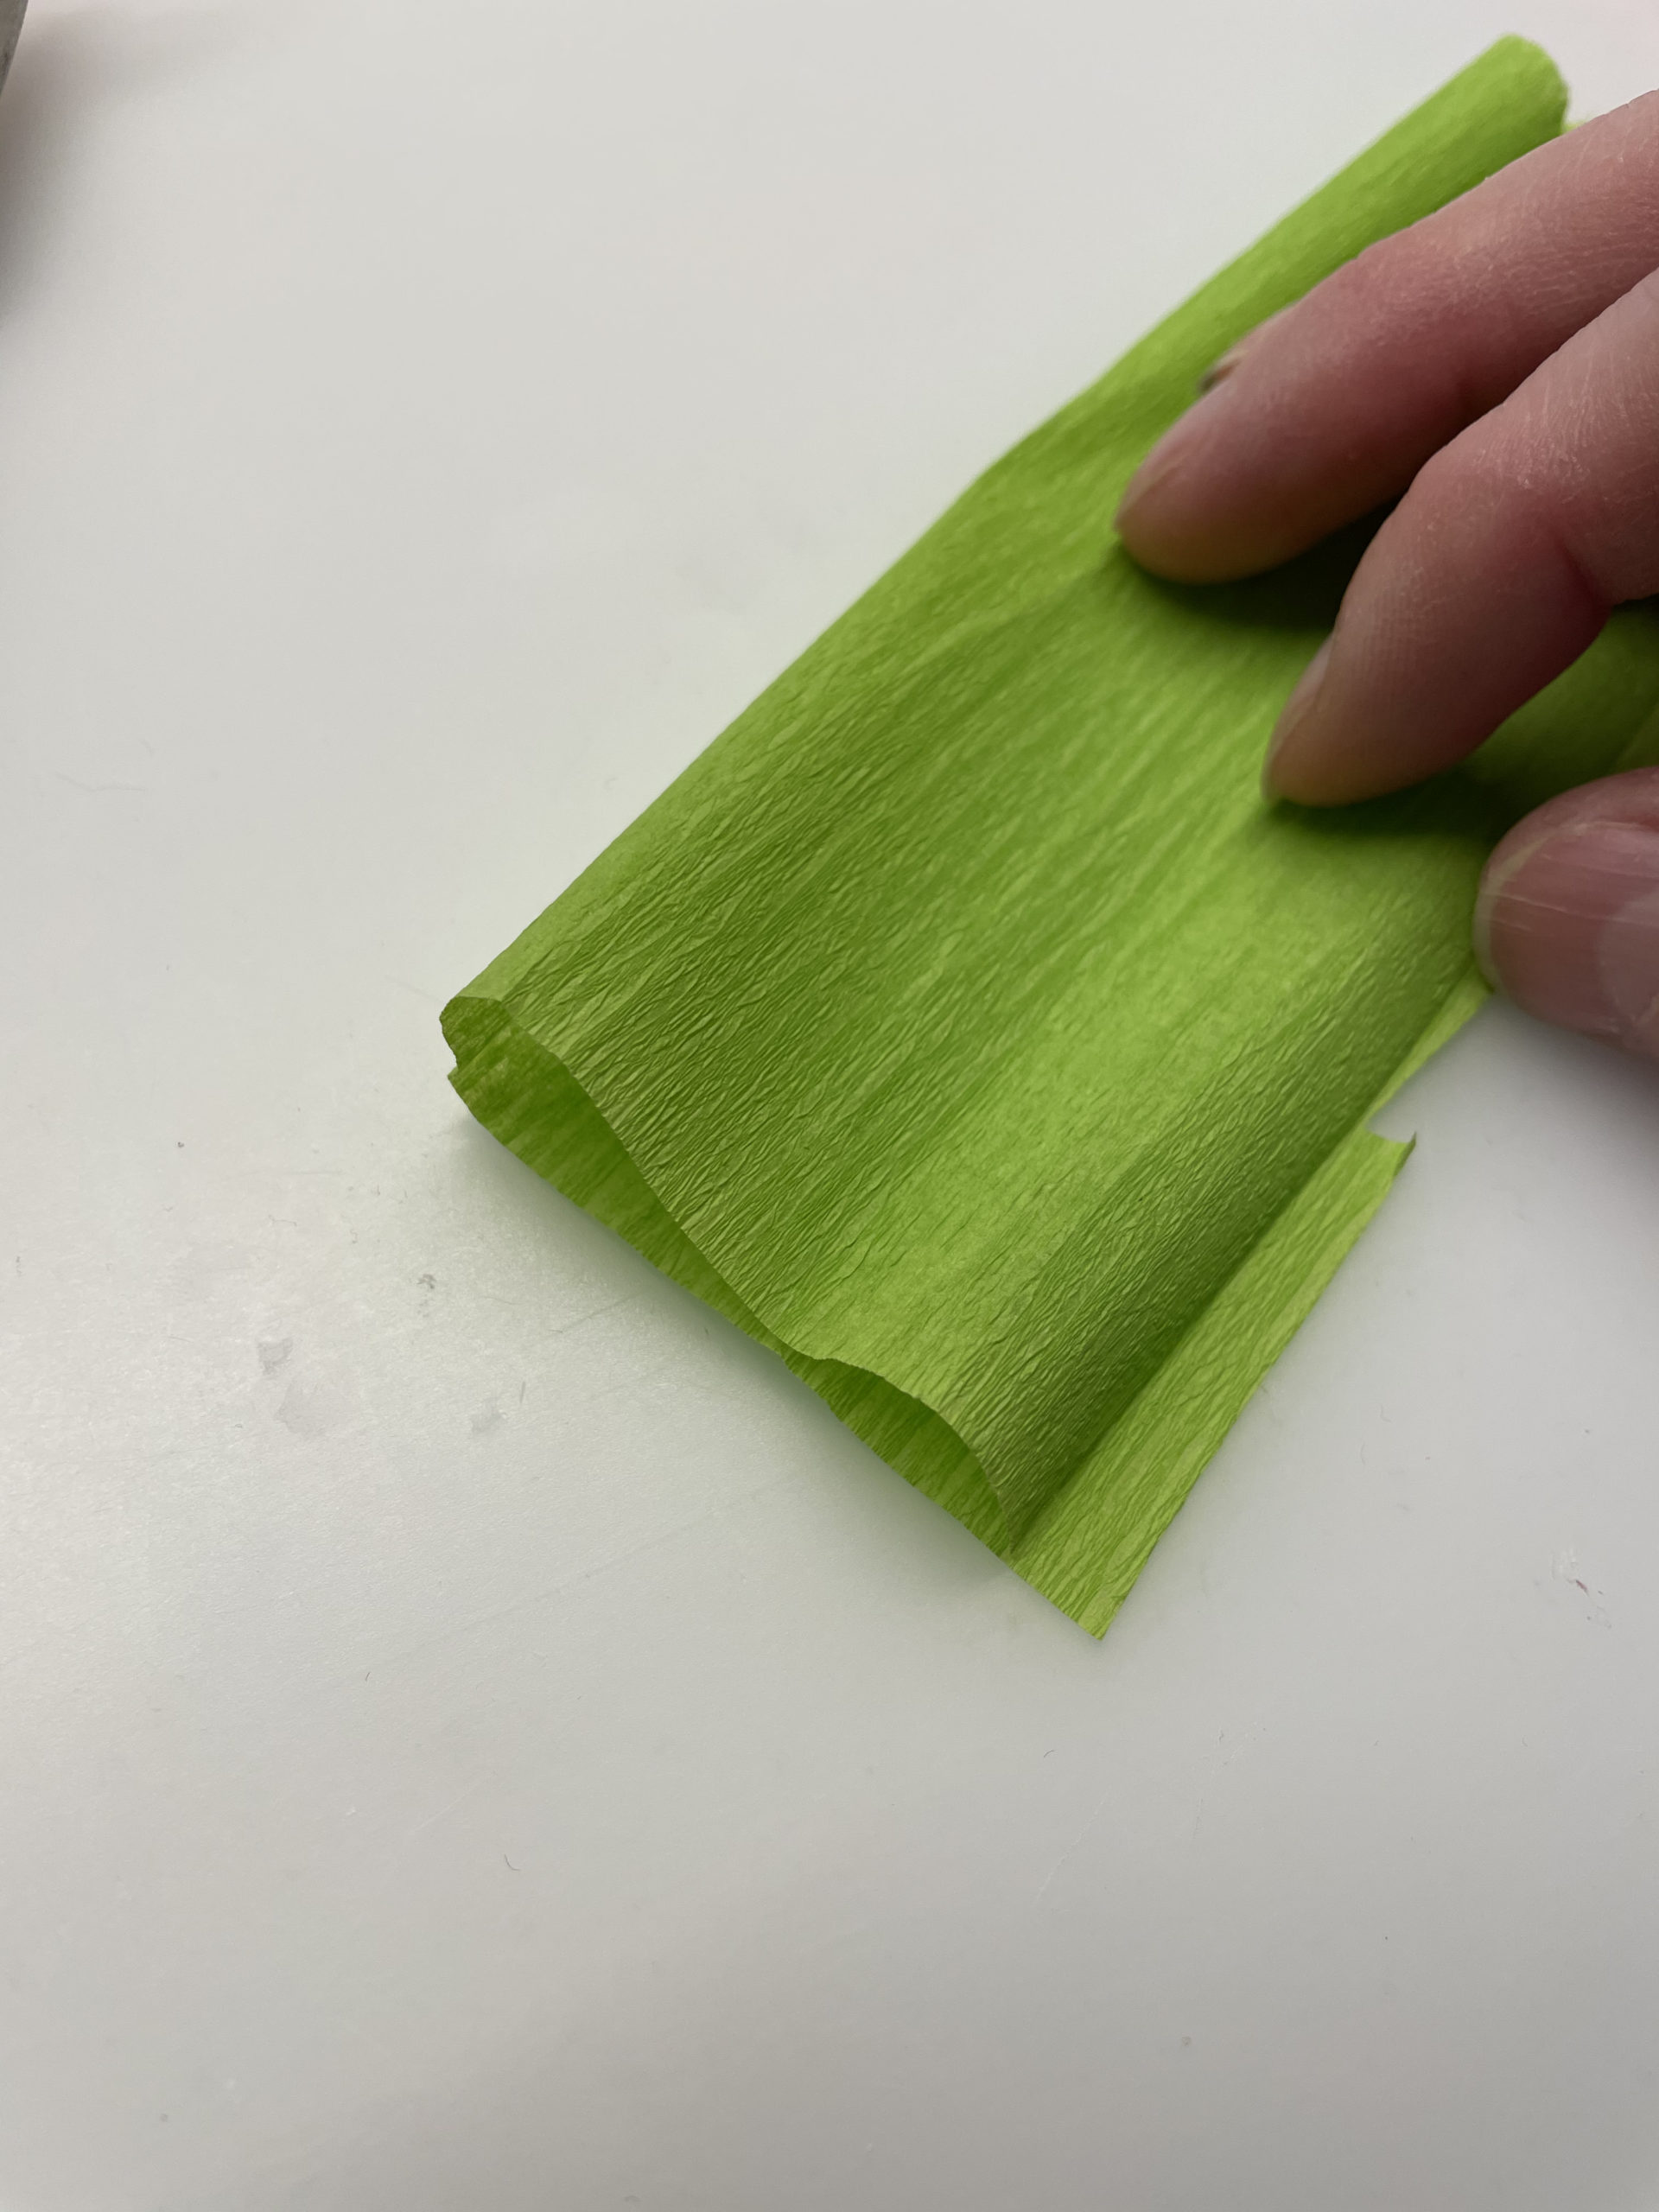
Bild zum Schritt 19 für das Bastel- und DIY-Abenteuer für Kinder: 'Faltet das Papier 2x zusammen.   So erhaltet ihr...'

19

2. Bild zum Schritt 19 für das Bastel- und DIY-Abenteuer für Kinder: 'Faltet das Papier 2x zusammen.   So erhaltet ihr...'

20

Then round off the strip by cutting a bow on one side with the scissors.
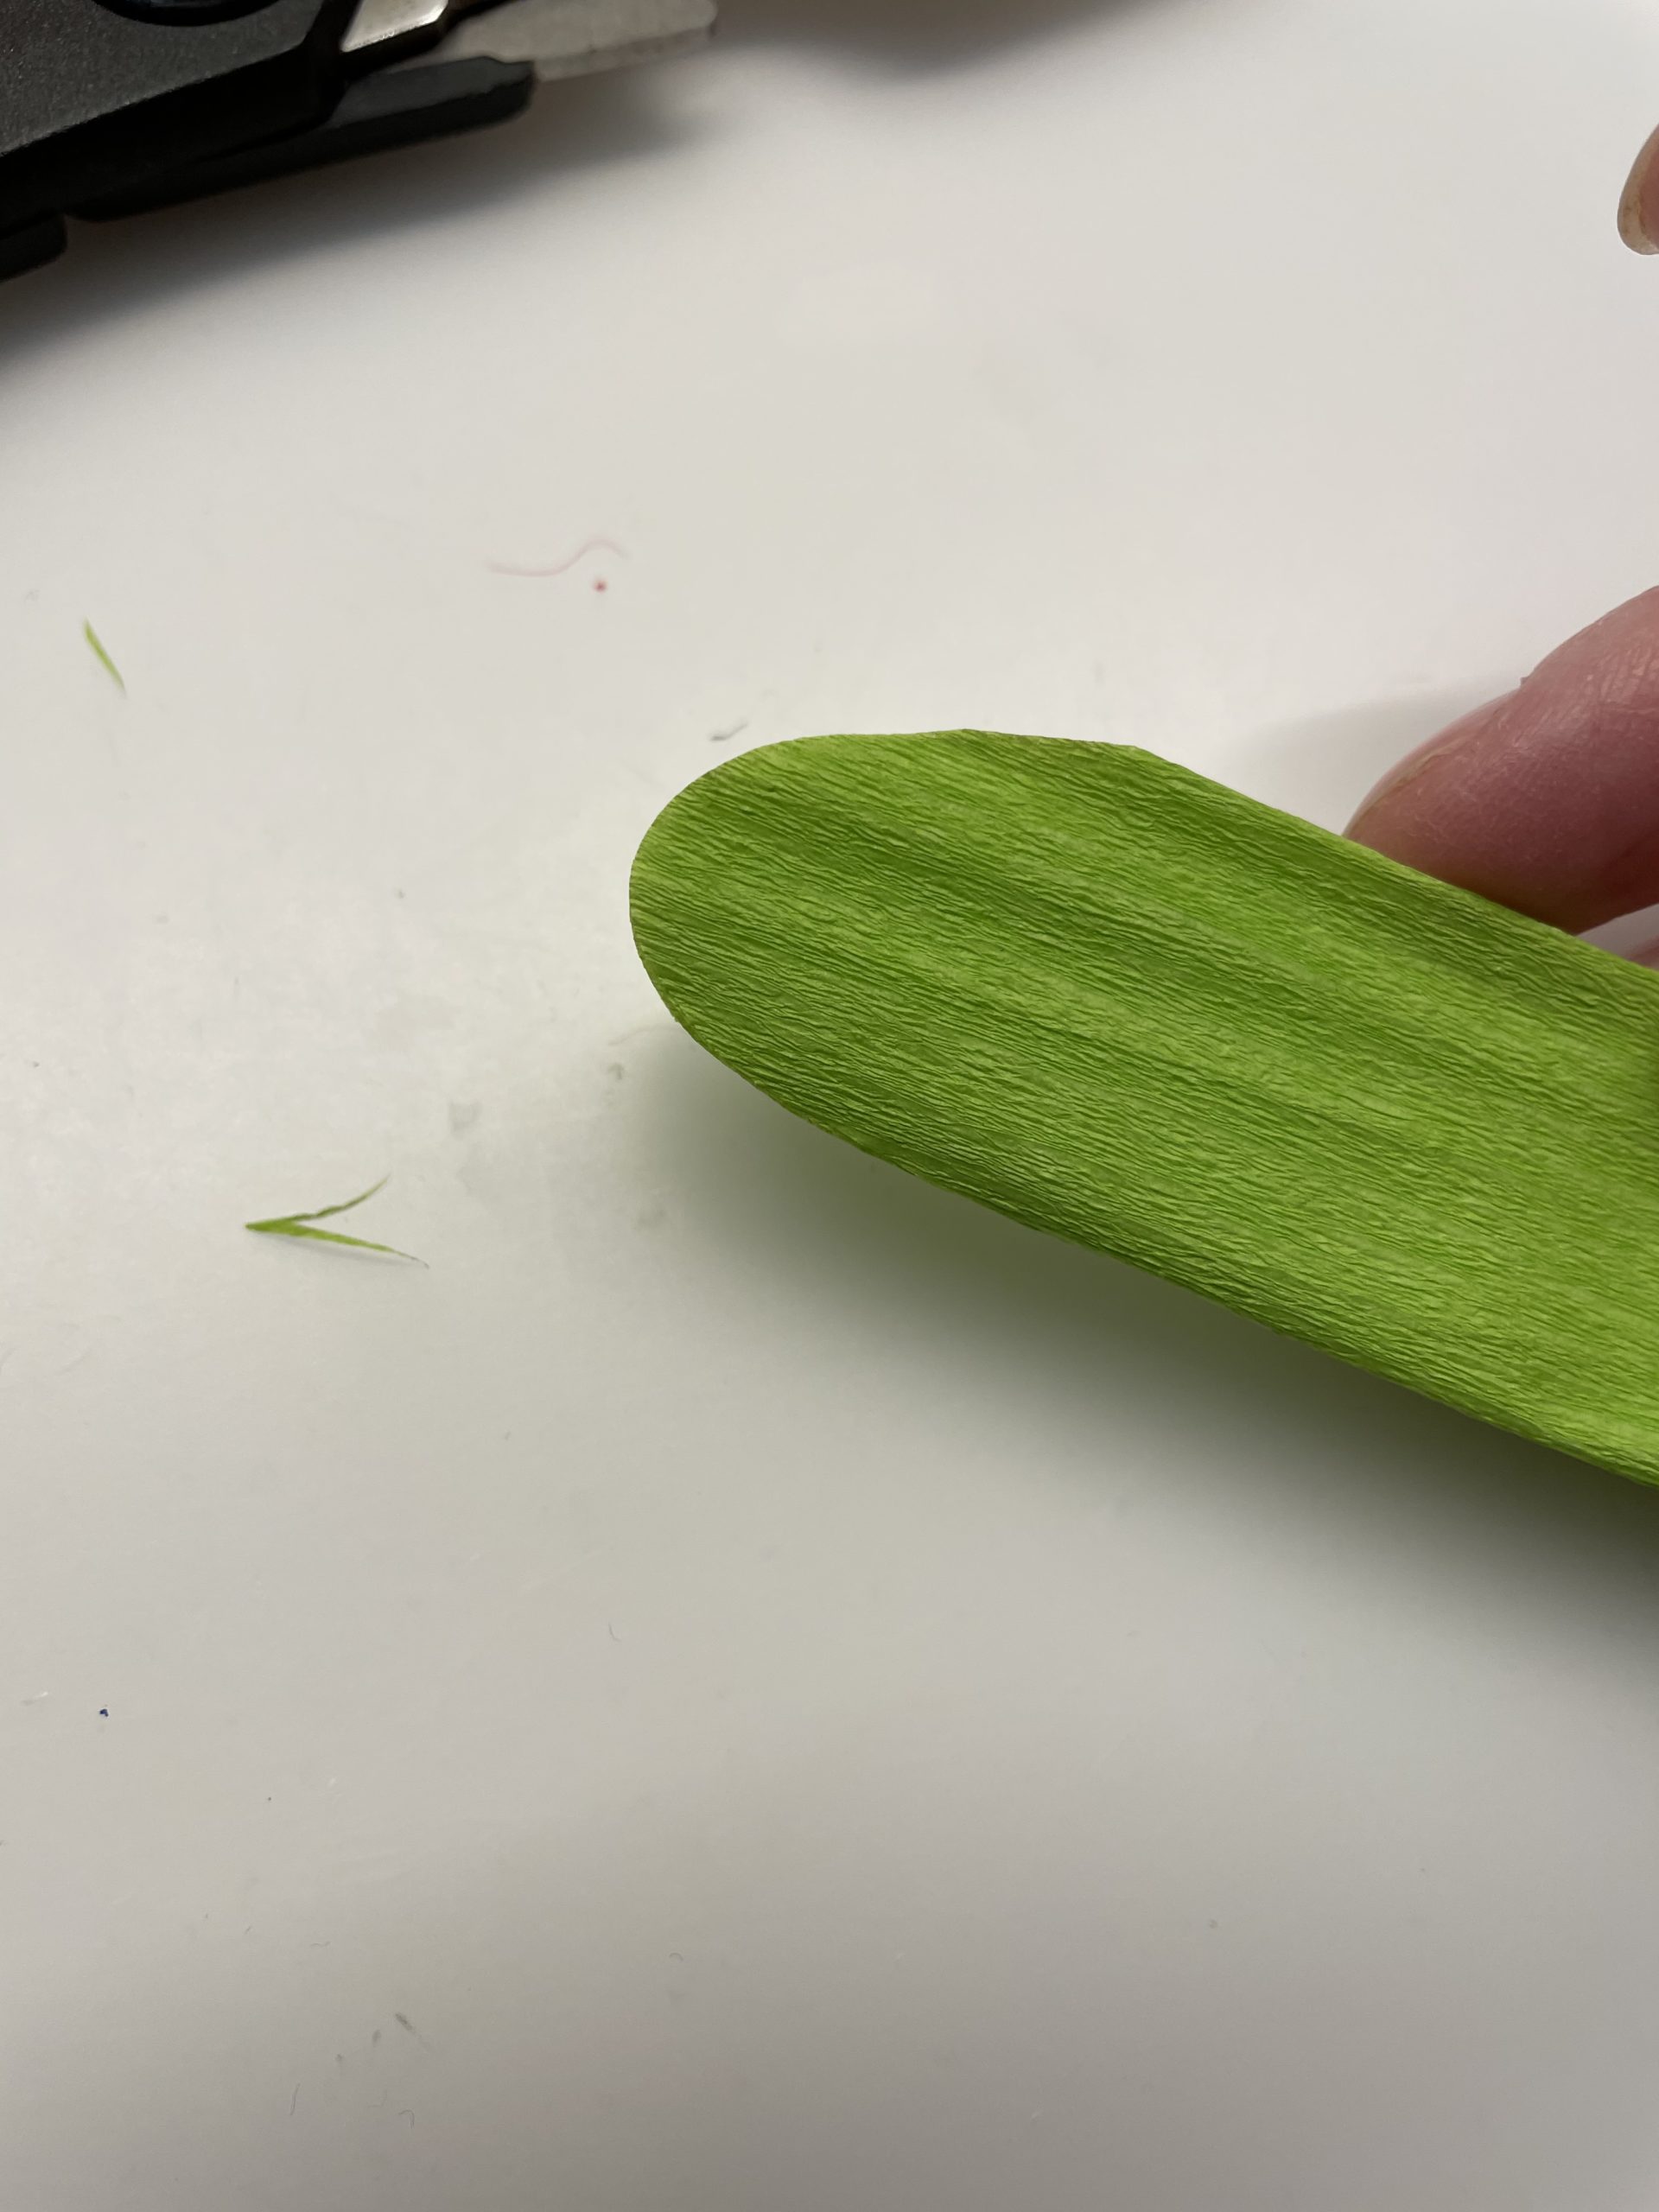
Bild zum Schritt 21 für das Bastel- und DIY-Abenteuer für Kinder: 'Rundet dann den Streifen ab, indem ihr auf einer Seite...'

21

2. Bild zum Schritt 21 für das Bastel- und DIY-Abenteuer für Kinder: 'Rundet dann den Streifen ab, indem ihr auf einer Seite...'

22

Then fold the crepe paper apart.
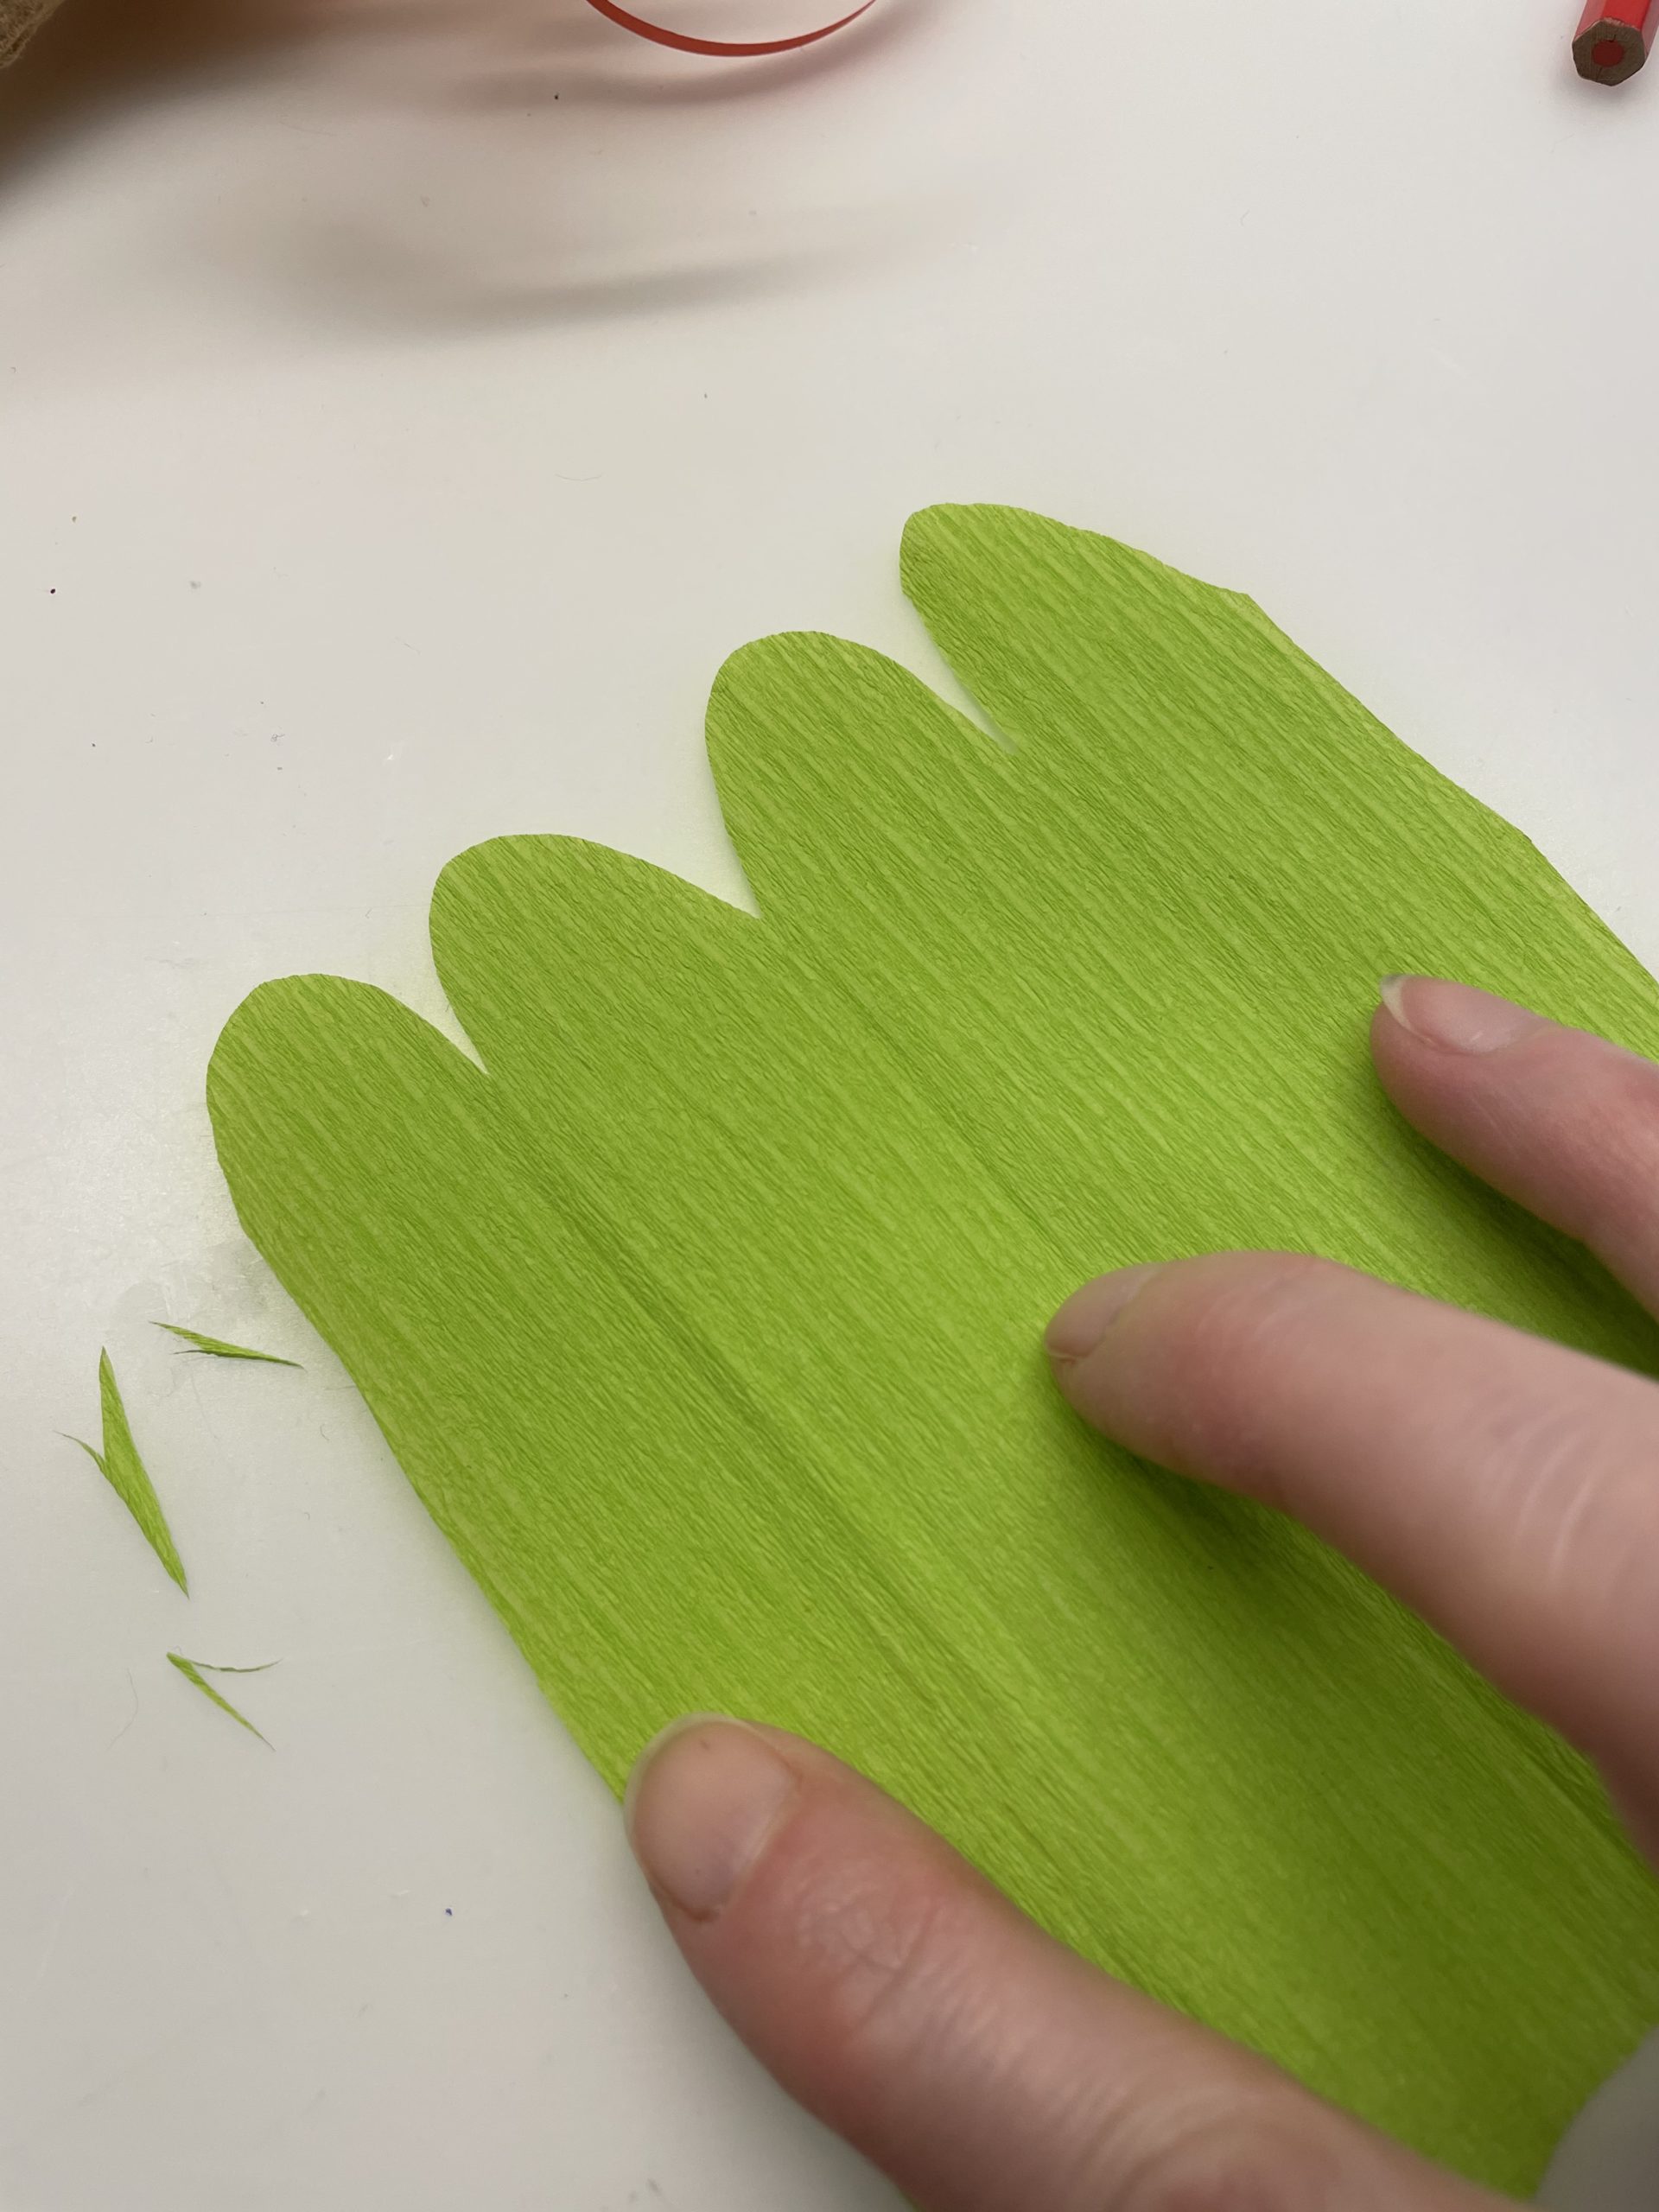
Bild zum Schritt 23 für das Bastel- und DIY-Abenteuer für Kinder: 'Faltet danach das Krepppapier auseinander.'

23

Place the stripe with the roundings upwards around the cup of flowers.
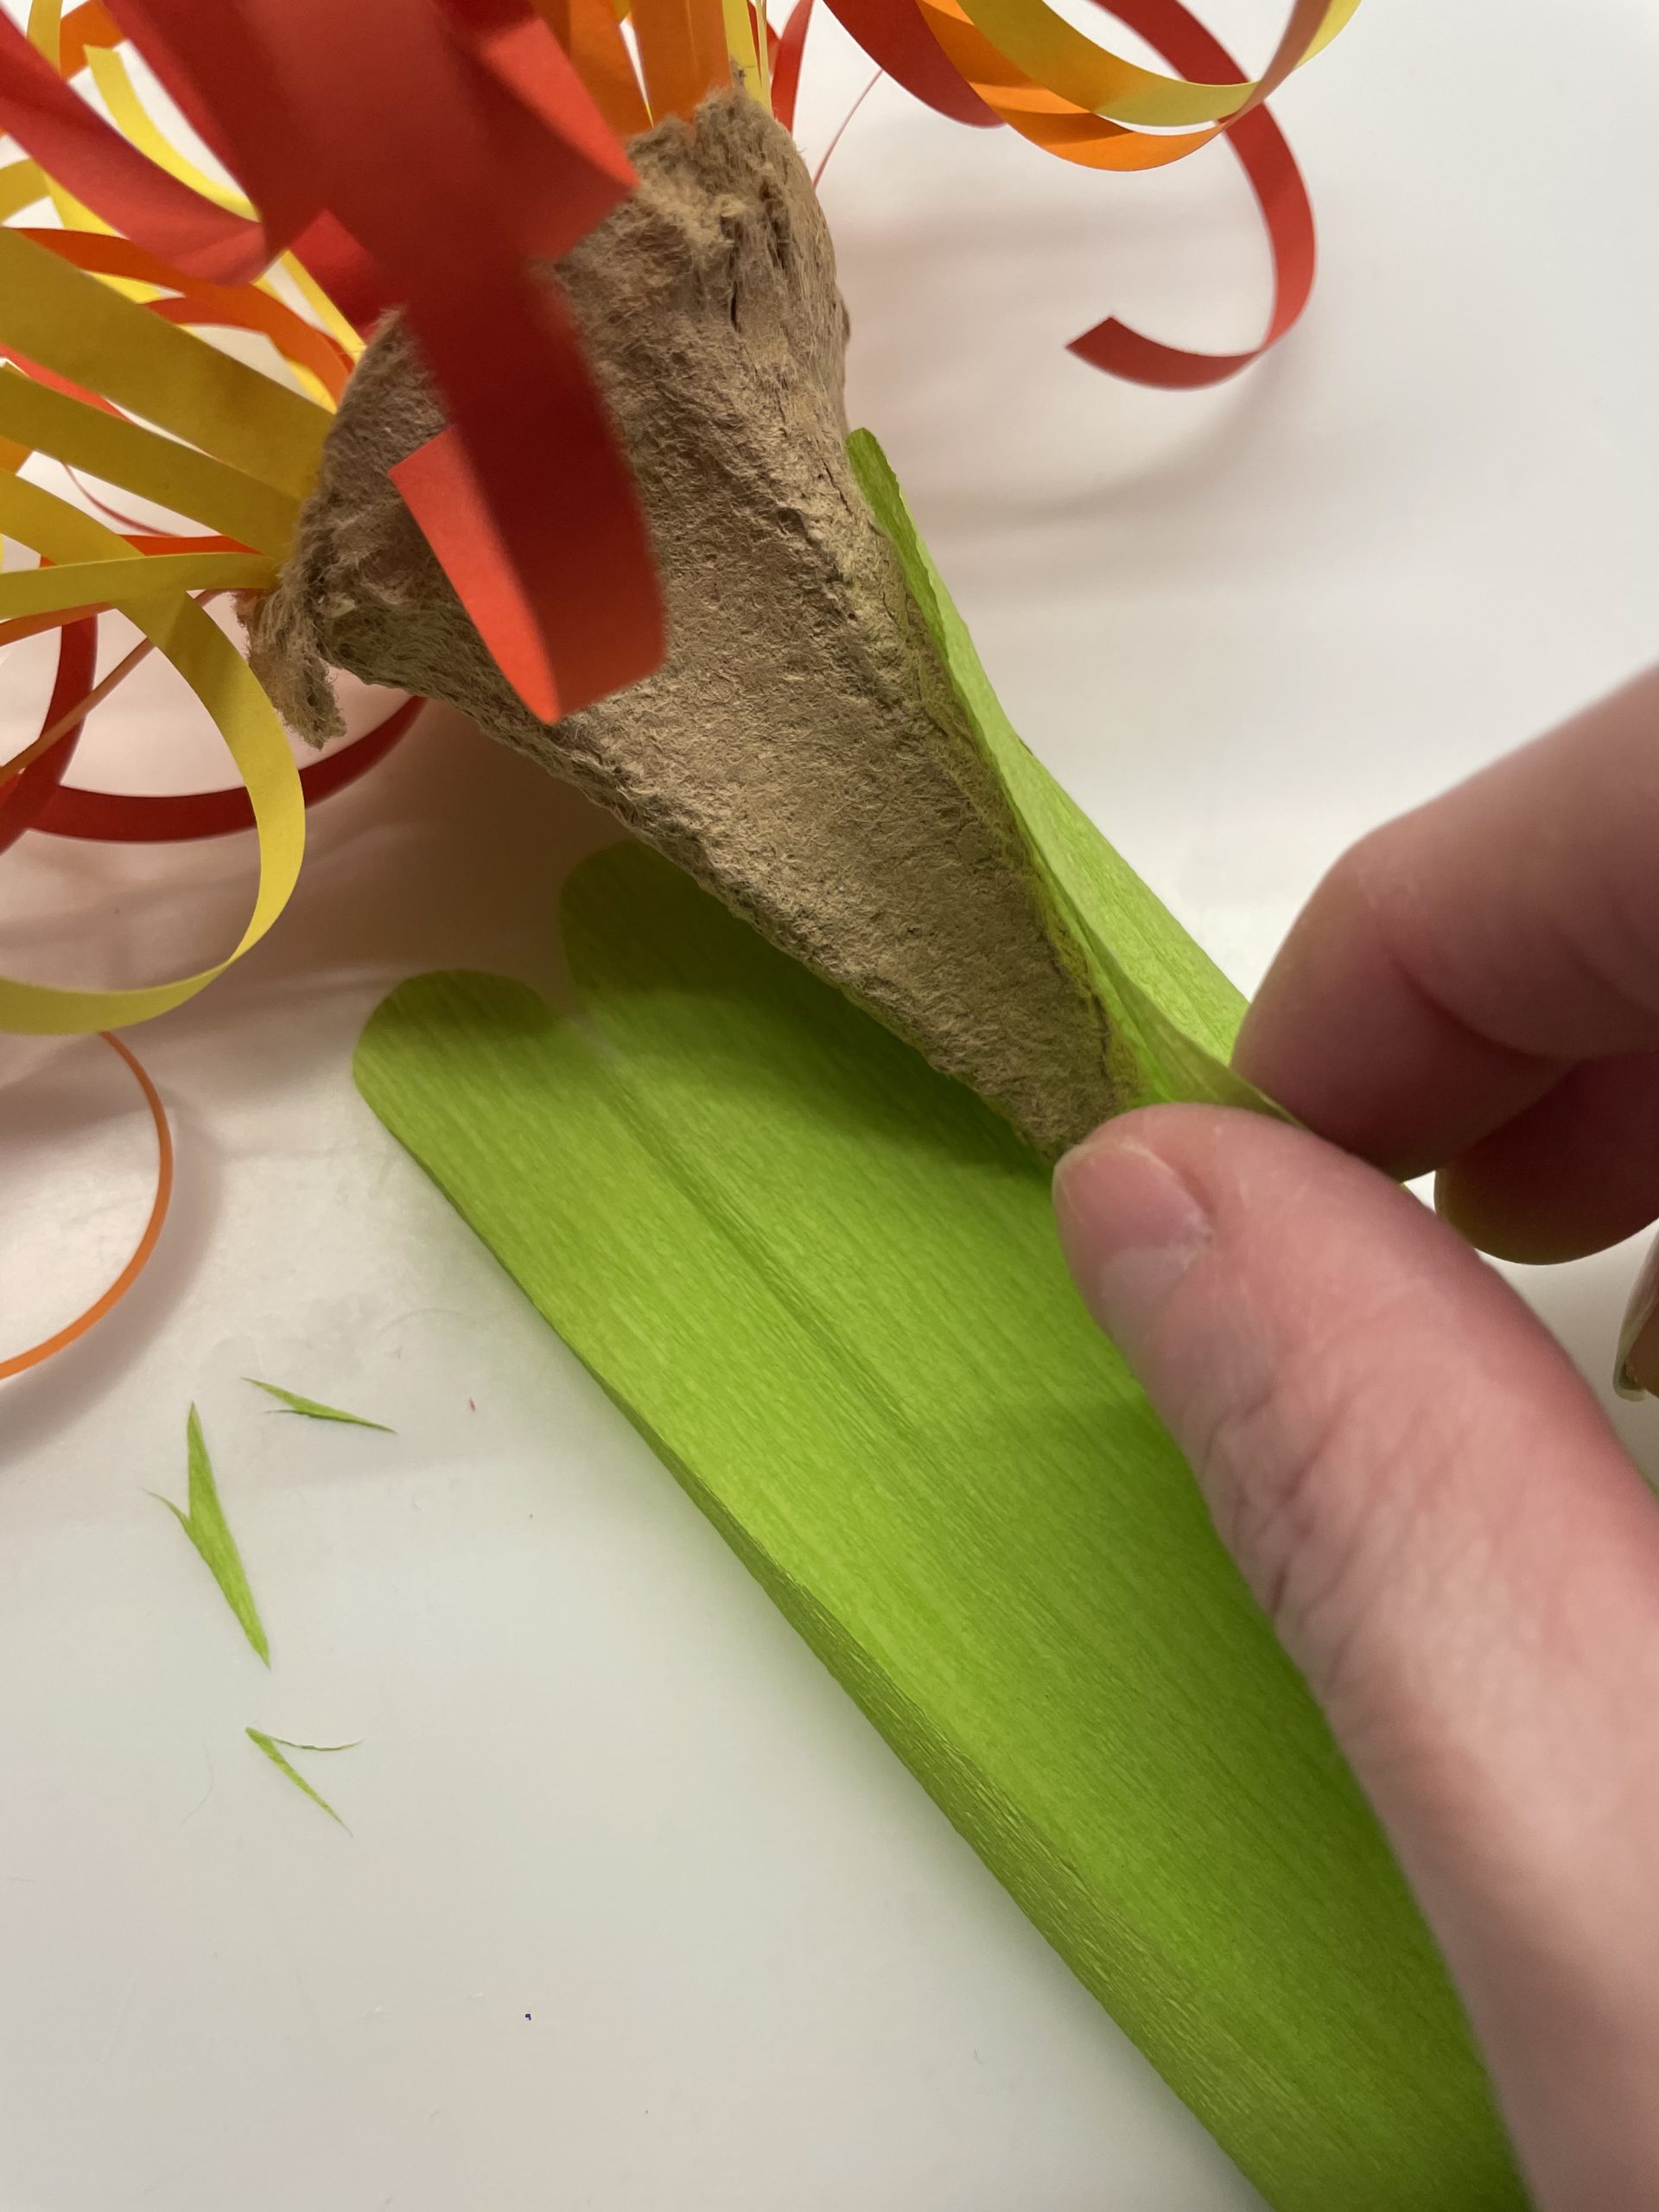
Bild zum Schritt 24 für das Bastel- und DIY-Abenteuer für Kinder: 'Legt den Streifen mit den Rundungen nach oben um den...'

24

2. Bild zum Schritt 24 für das Bastel- und DIY-Abenteuer für Kinder: 'Legt den Streifen mit den Rundungen nach oben um den...'

25

Then put a wooden stick in the flower cup from below.
Now she's stuck with the crepe paper.
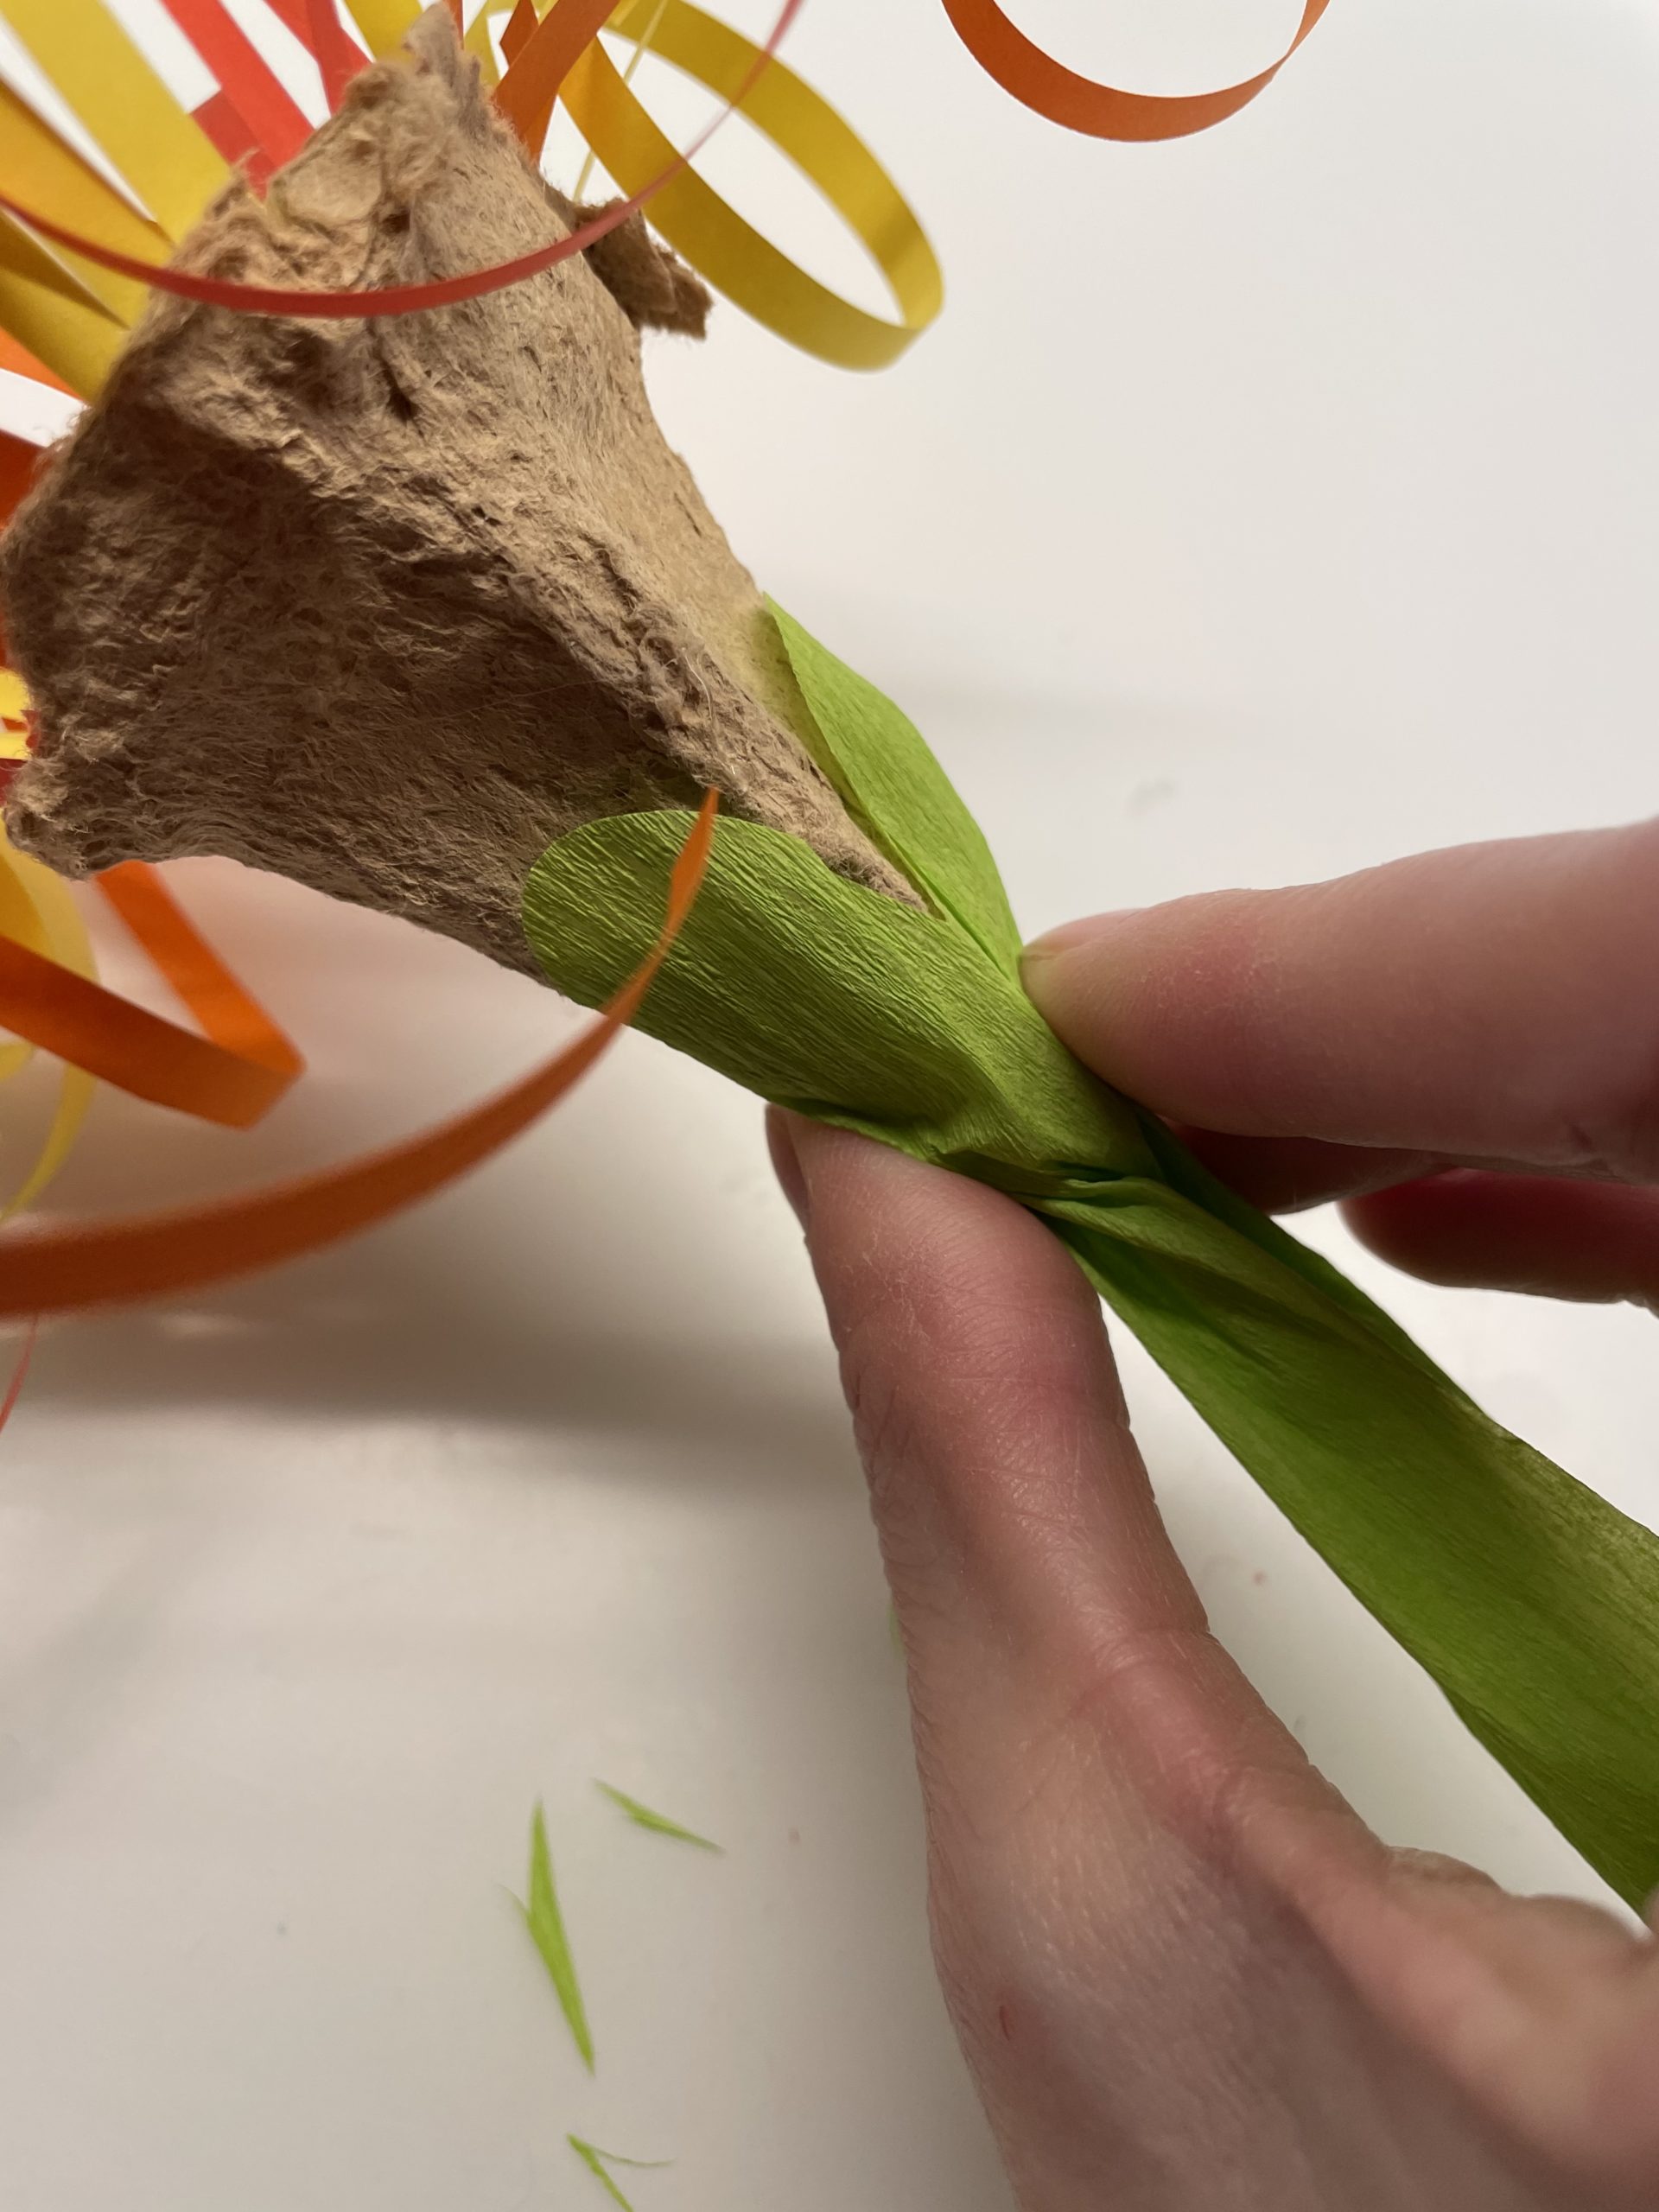
Bild zum Schritt 26 für das Bastel- und DIY-Abenteuer für Kinder: 'Drückt das Krepppapier zurecht. Dann steckt einen Holzstab von unten...'

26

Cuts two leaves from another piece of crepe paper (15 cm x 10 cm).
Fold half the paper and cut a bow on one side.
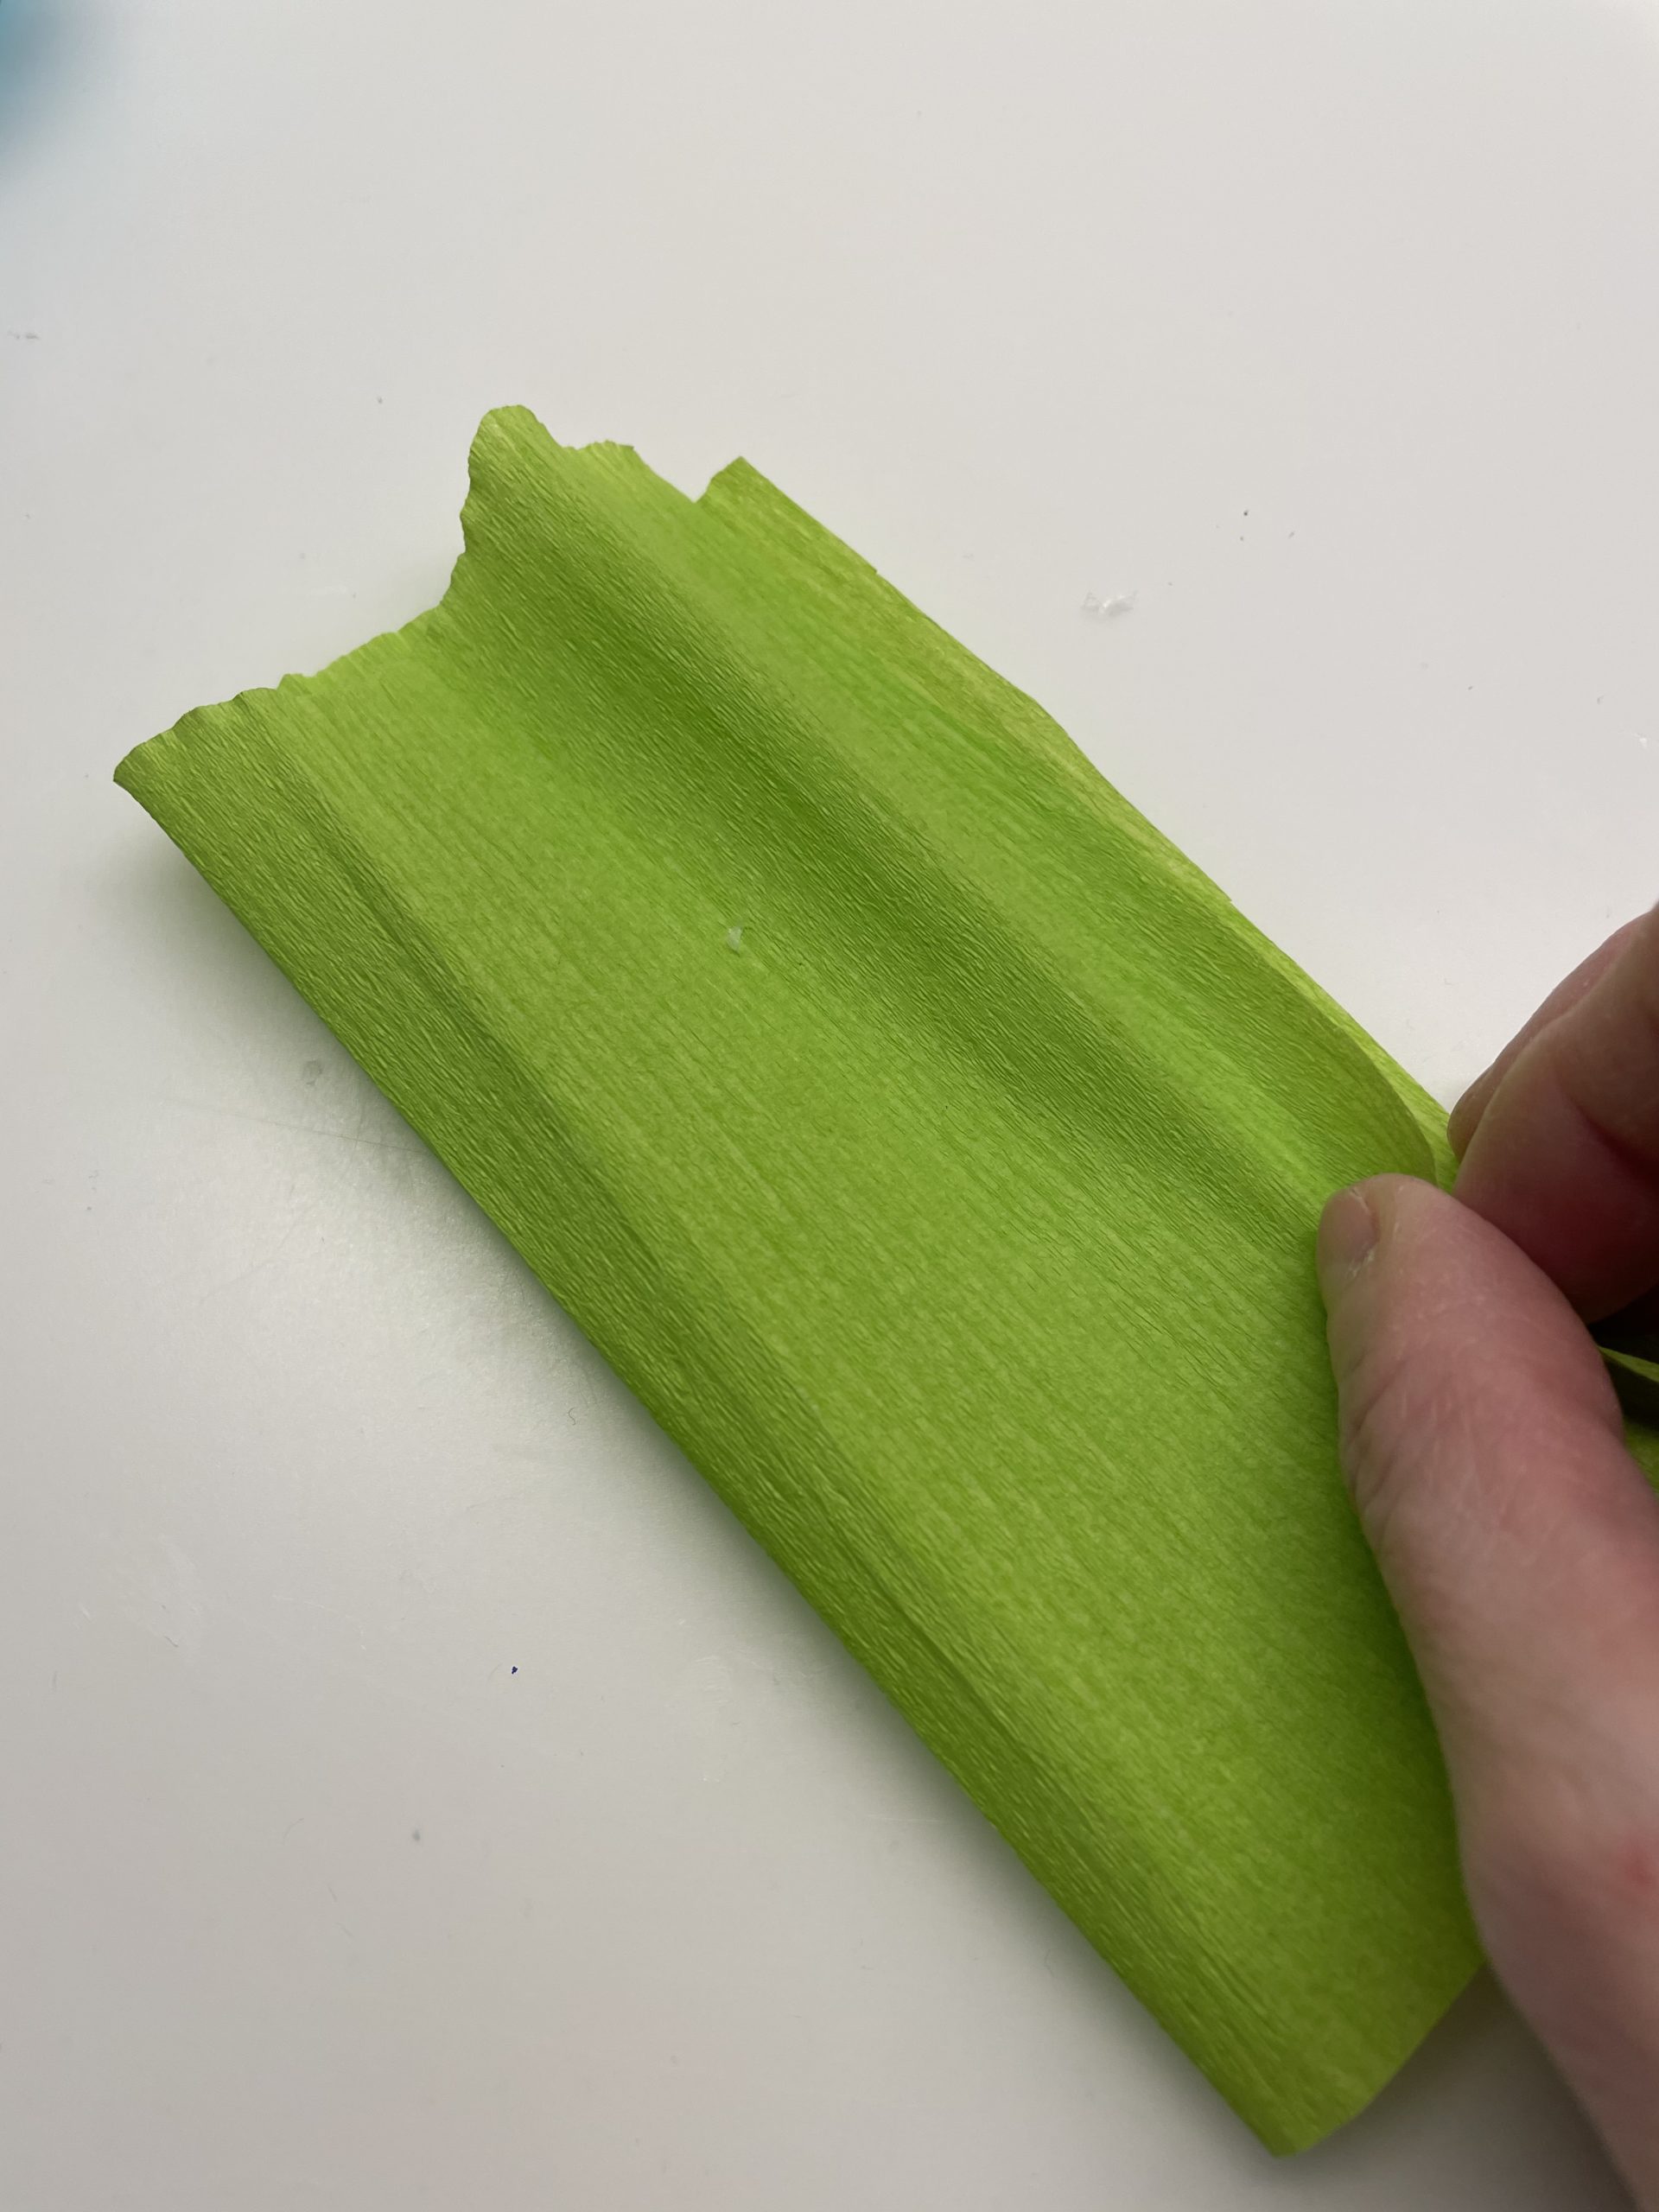
Bild zum Schritt 27 für das Bastel- und DIY-Abenteuer für Kinder: 'Schneidet aus einem weiteren Stück Krepppapier (15 cm x 10...'

27

2. Bild zum Schritt 27 für das Bastel- und DIY-Abenteuer für Kinder: 'Schneidet aus einem weiteren Stück Krepppapier (15 cm x 10...'

28

Then folds the crepe paper apart.
That's how you get a double leaf.
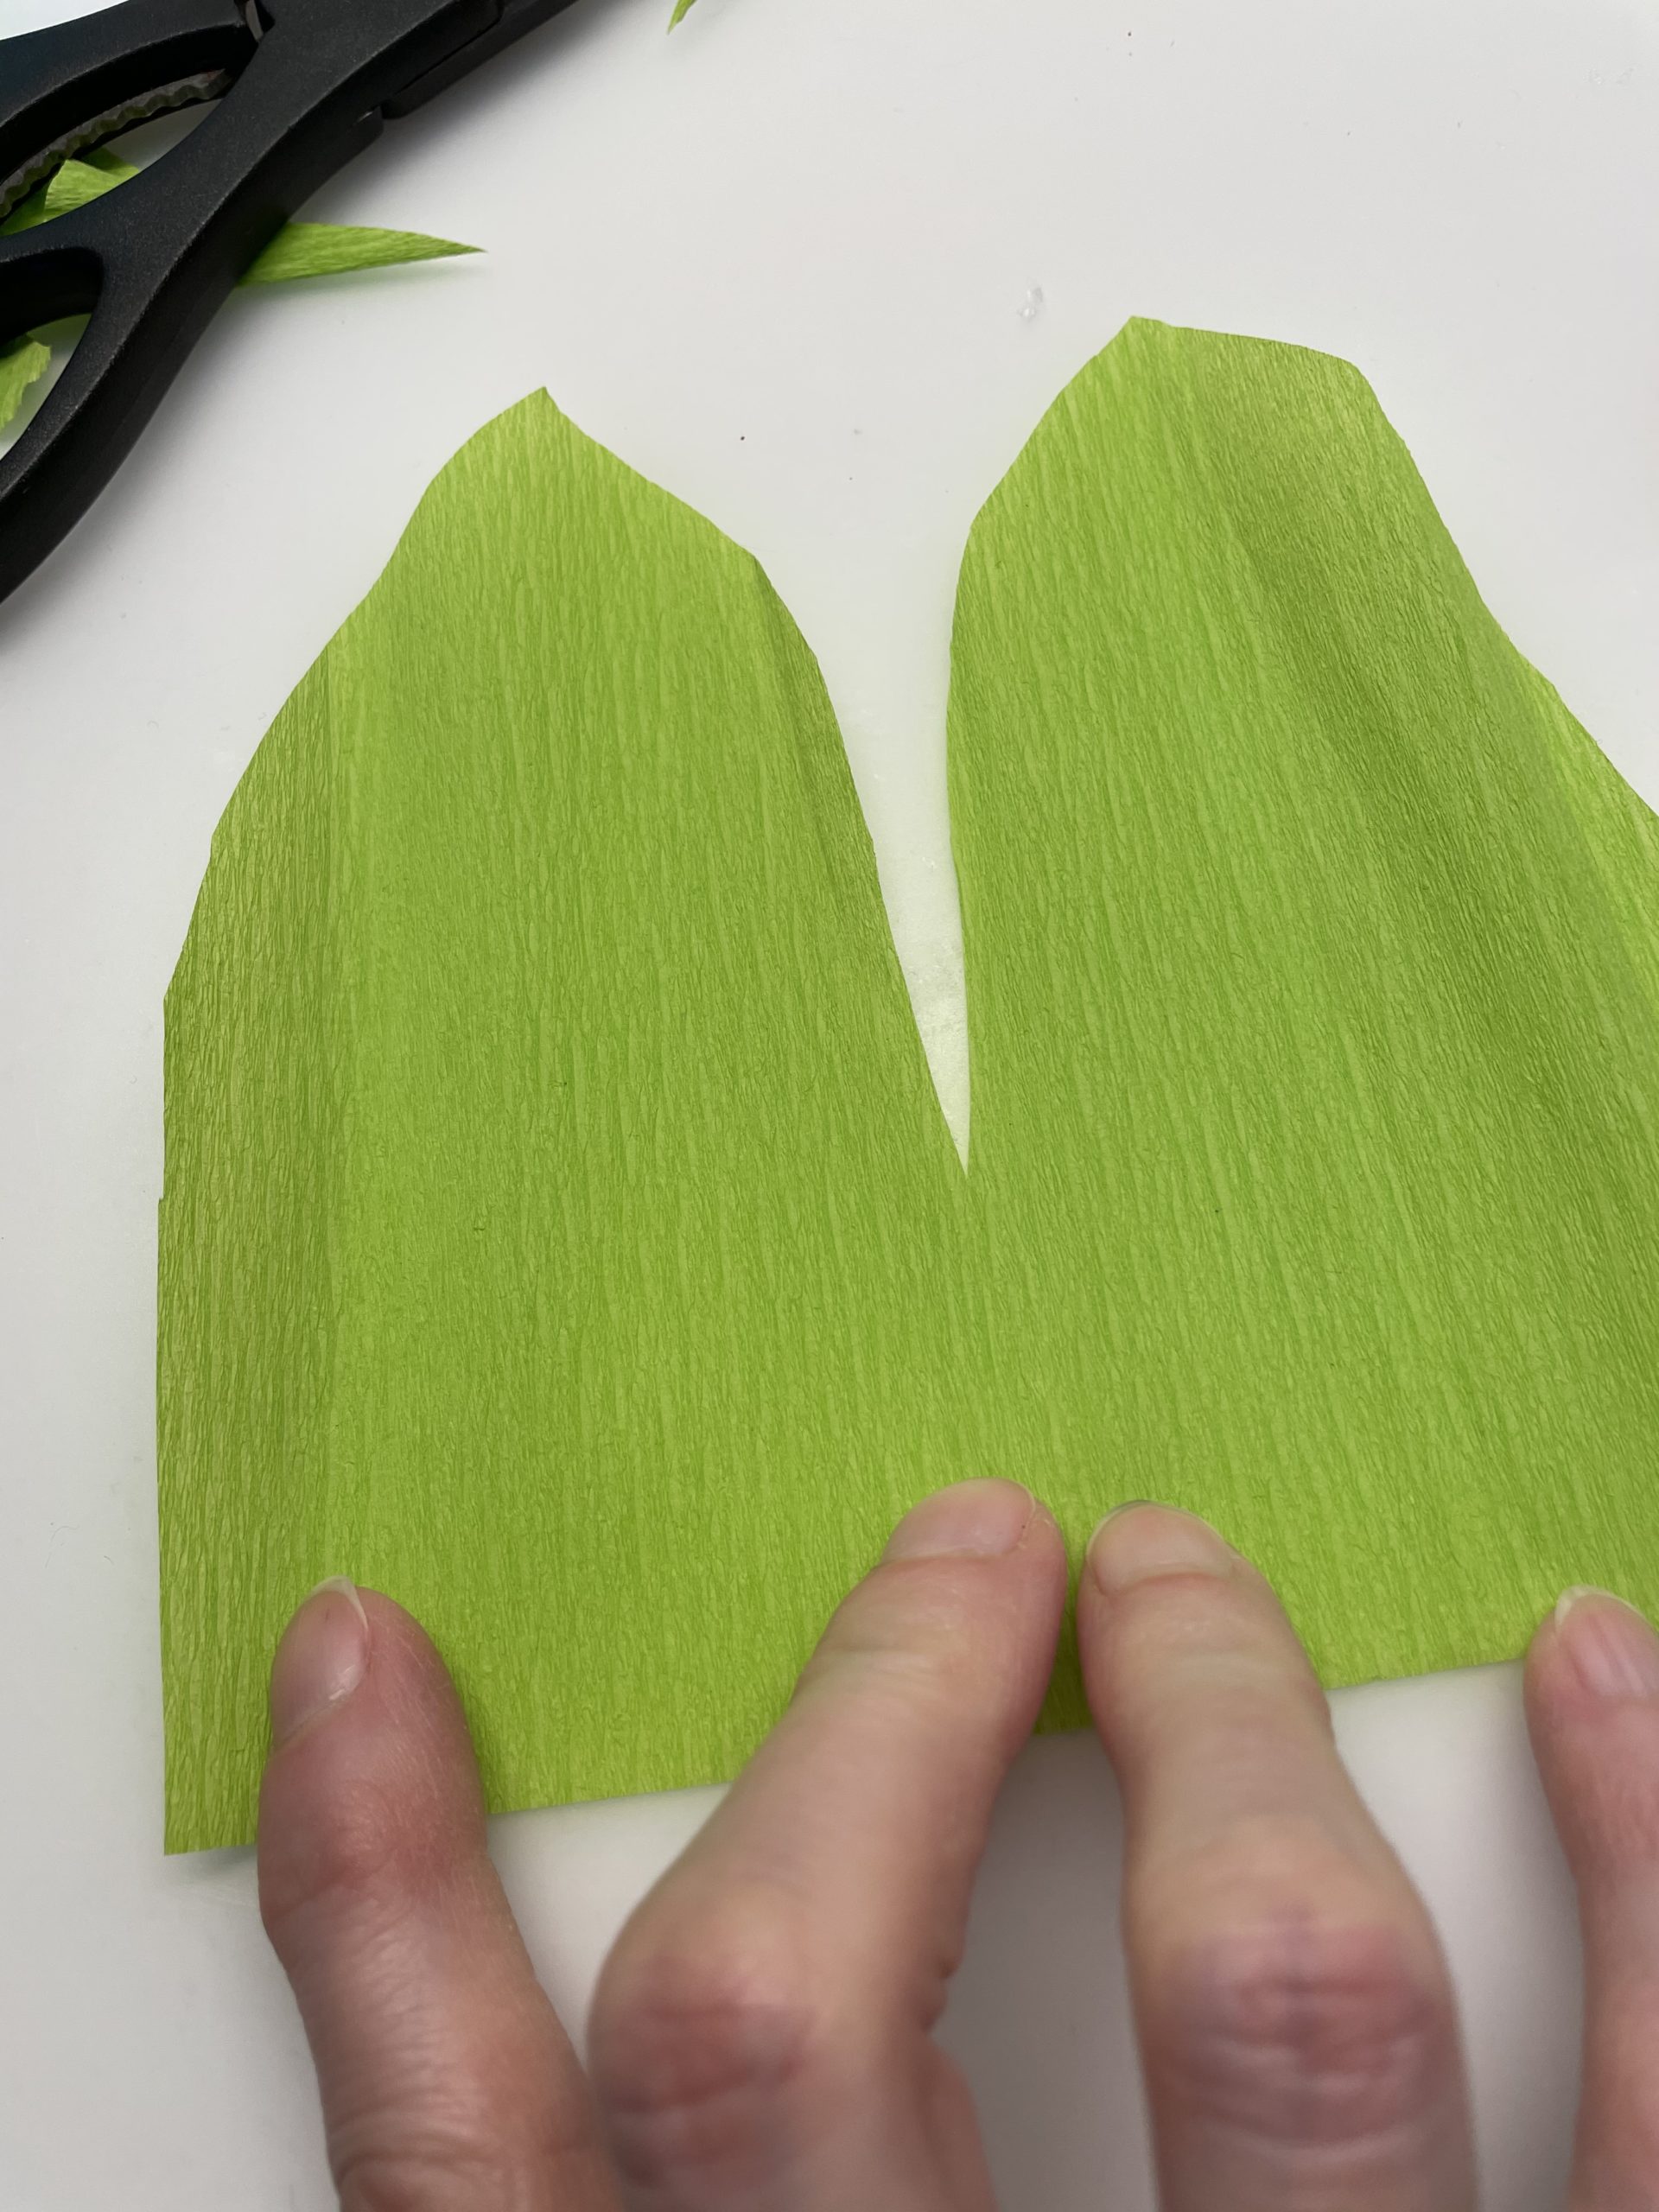
Bild zum Schritt 29 für das Bastel- und DIY-Abenteuer für Kinder: 'Klappt das Krepppapier anschließend auseinander.   So erhaltet ihr...'

29

Gather the crepe paper at the bottom - on the straight side - and attach it to the stem (wood stick) of your flower.
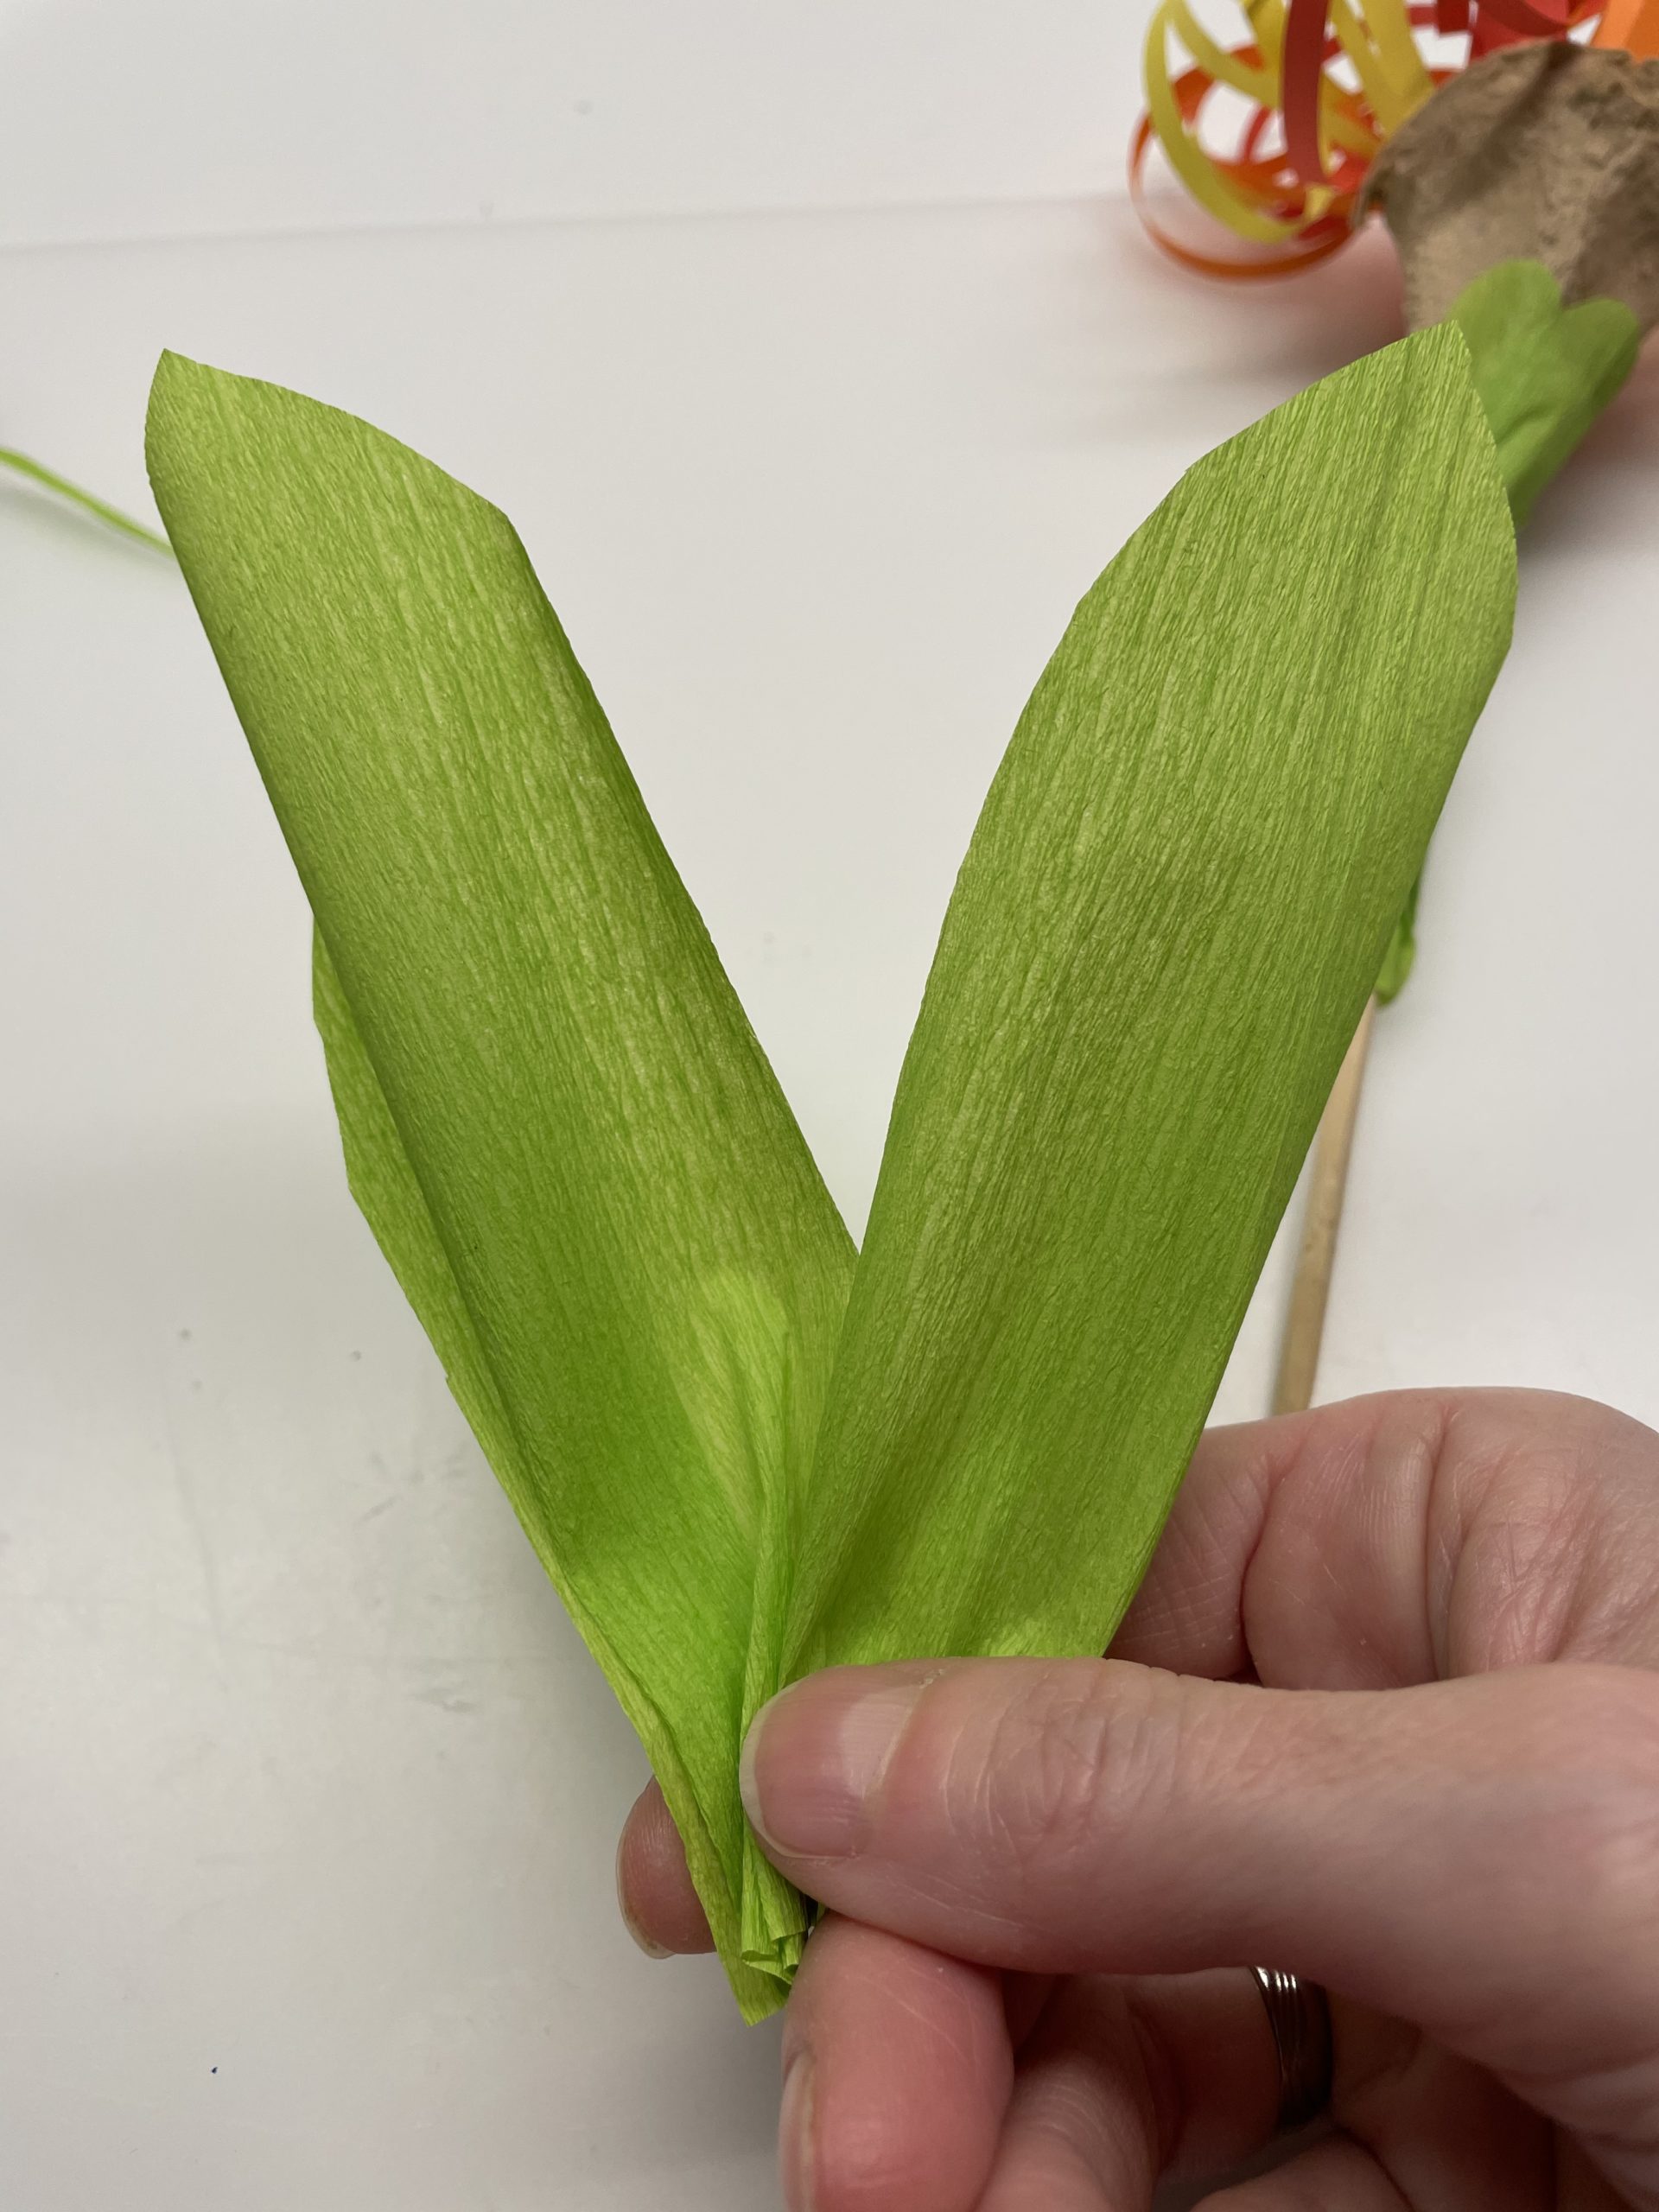
Bild zum Schritt 30 für das Bastel- und DIY-Abenteuer für Kinder: 'Rafft das Krepppapier unten - an der geraden Seite -...'

30

Your flower is ready.

Bild zum Schritt 31 für das Bastel- und DIY-Abenteuer für Kinder: 'Fertig ist eure Blume.'

31

Put it in a vase and your table decoration is ready.
This colourful variant is also great for a children's birthday party!
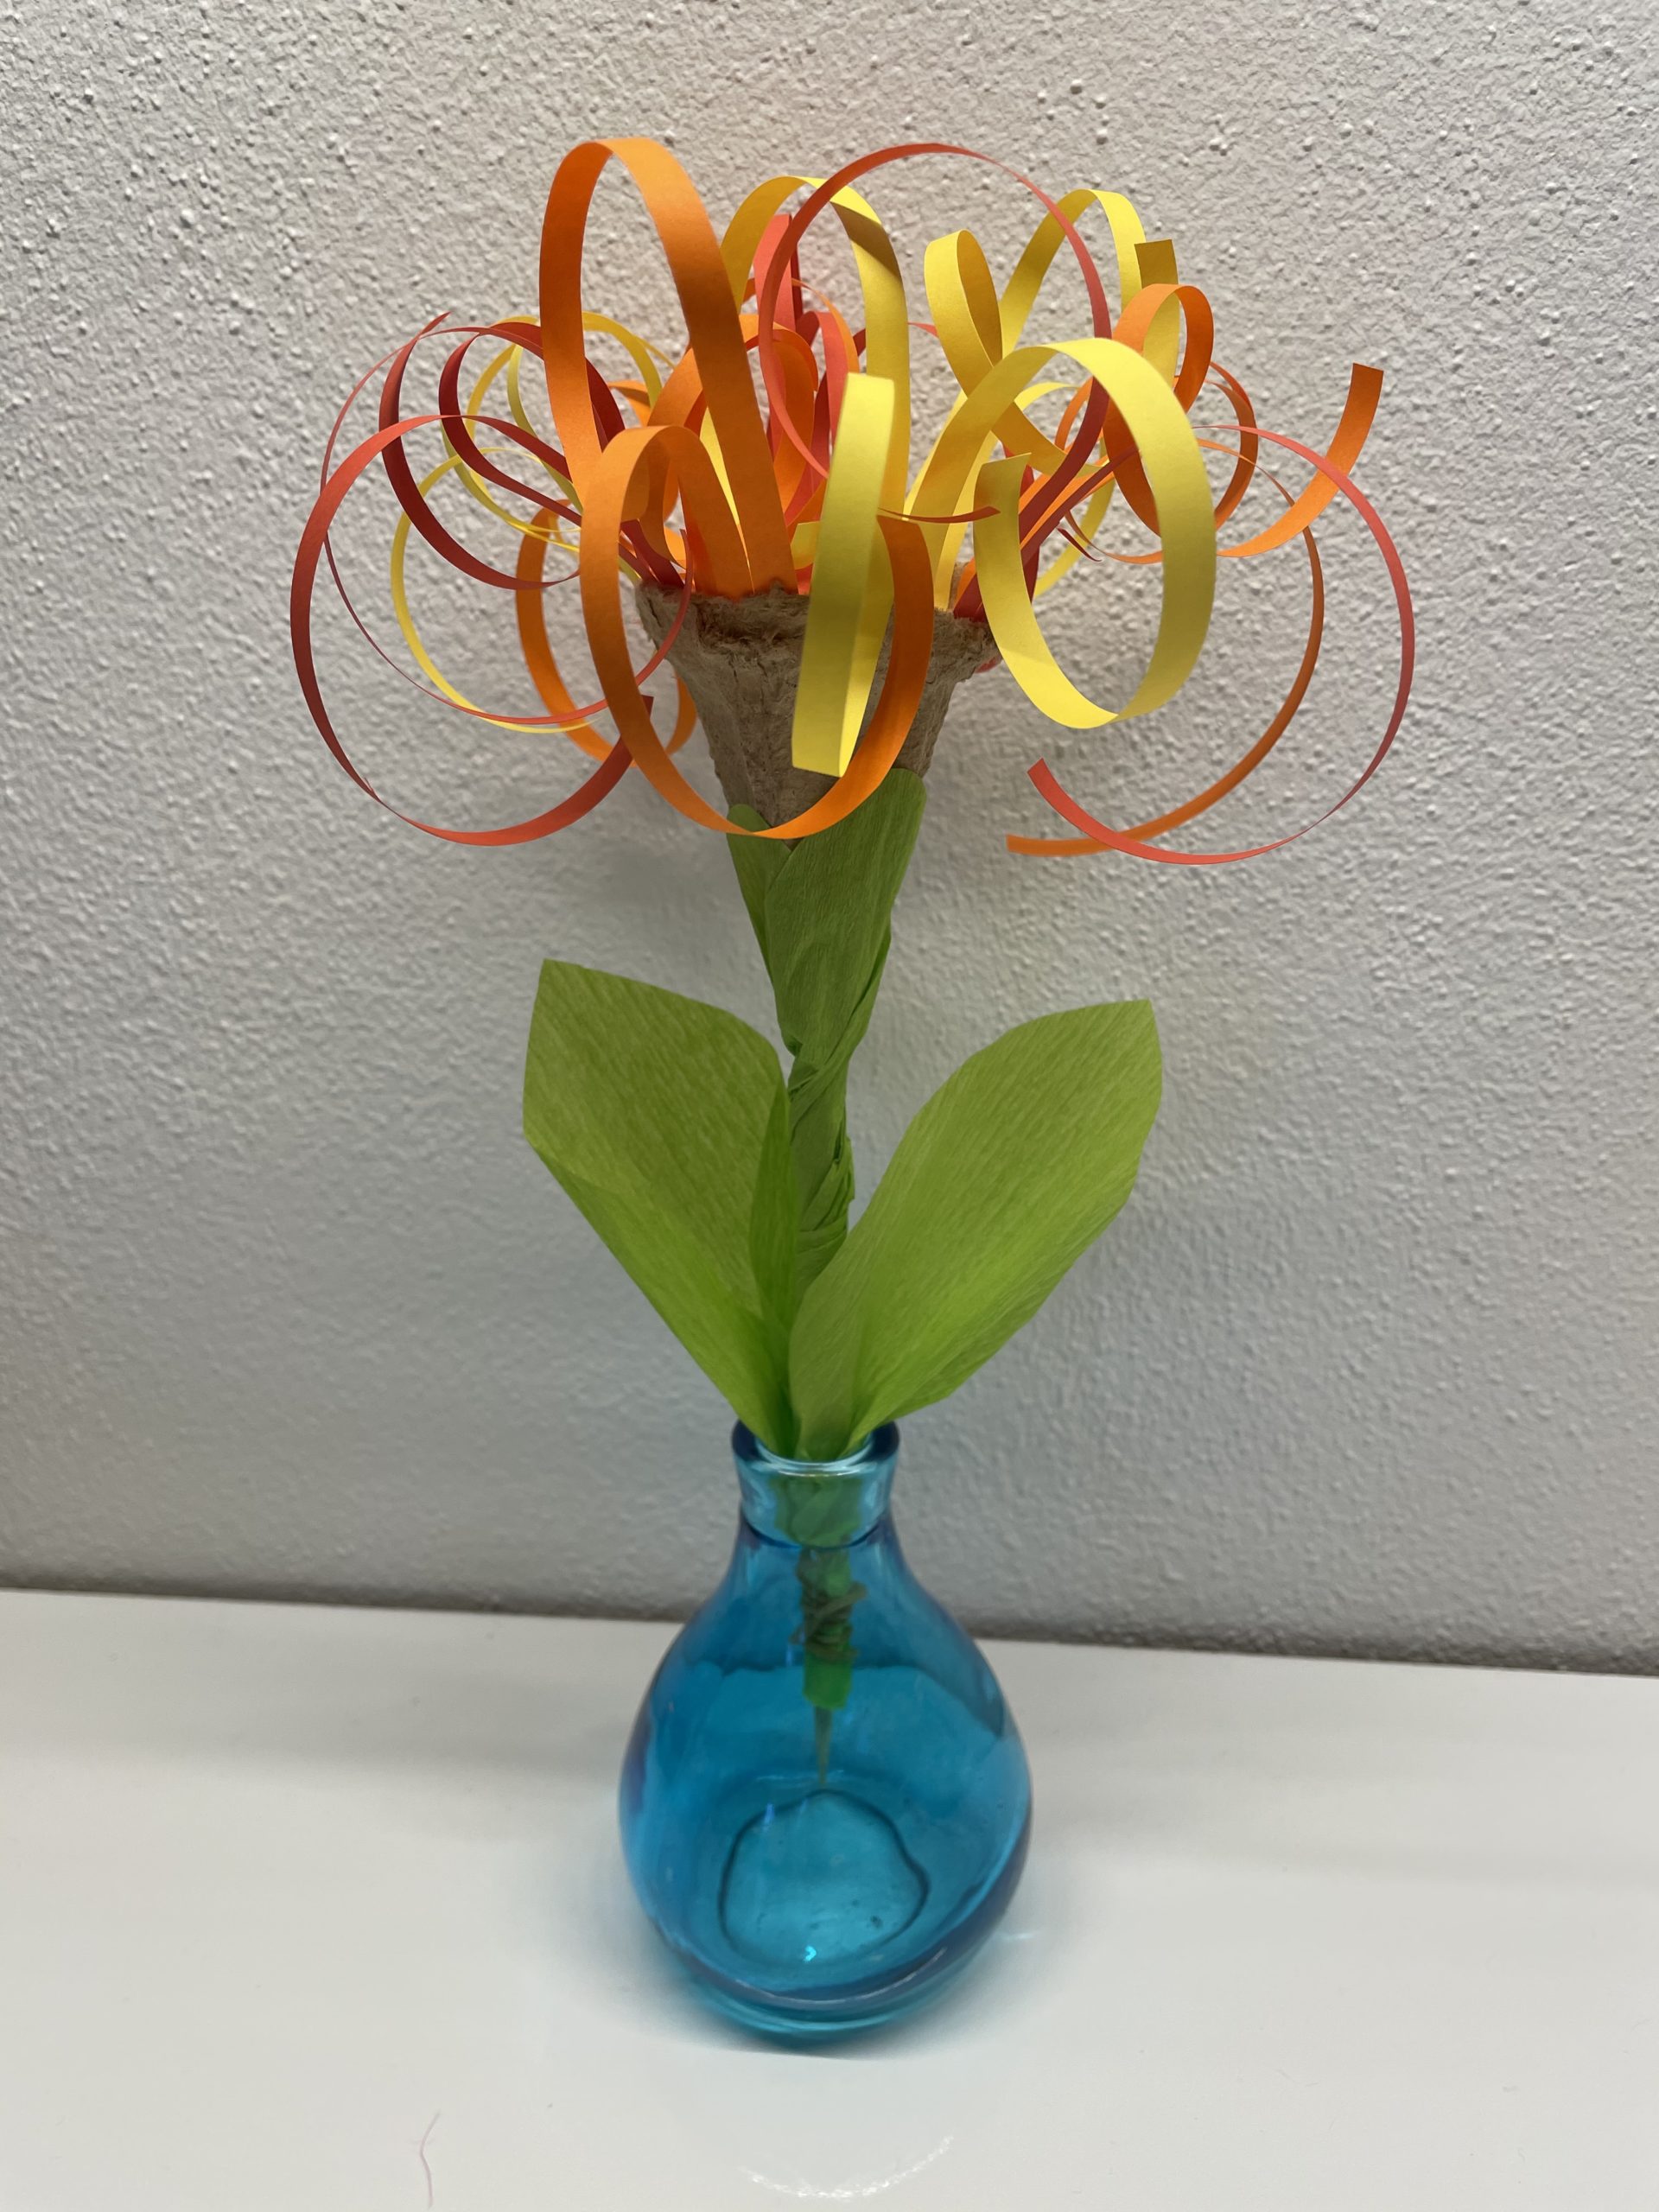
Bild zum Schritt 32 für das Bastel- und DIY-Abenteuer für Kinder: 'Stellt sie in eine Vase und fertig ist eure Tischdekoration....'

32

2. Bild zum Schritt 32 für das Bastel- und DIY-Abenteuer für Kinder: 'Stellt sie in eine Vase und fertig ist eure Tischdekoration....'

33

Have fun trying it out!

Minced flower of egg box

Follow us on Facebook , Instagram and Pinterest
Don't miss any more adventures: Our bottle mail

Leave a Reply

Your email address will not be published.

The maximum upload file size: 5 MB. You can upload: image, document. Drop file here