Print Options:

Crafting Wizards

Material for1 ChildPrep Time5 min.Adv. Time40 min.Total Time45 min.

You are looking for an idea for a magic party, needs a crafting excitement for carnival or Halloween? Then this magician would be a challenging craft action.
You can master different techniques and challenges and find here the illustrated instructions. The template offers only one suggestion for further ideas. See for yourself and marvel what everything can come about once you have started.

Titelbild zur Bastel- und DIY-Idee für Kinder '(999) Zauberer basteln'

 1 Printable template
 Sound paper DIN A5 for the hat e.g. in blue
 White woolor black
 Coloured pencils
 1 Scissors
 1 Hole pliers
 1 Adhesive pen
 1 Felt pen black
 Builder's pad
All links marked with a shopping cart lead to Amazon - here we have selected products that we would order ourselves and in part also ordered. In a qualified purchase via the advertising link, we as Amazon partner receive a commission, for you there are no costs. You thus support our cost- and advertising banner-free, educational offer.
1

Print the template first.
Then you put all the materials on your craft pad.

Bild zum Schritt 1 für das Bastel- und DIY-Abenteuer für Kinder: 'Druckt euch zuerst die Vorlage aus.  Anschließend legt ihr...'

2

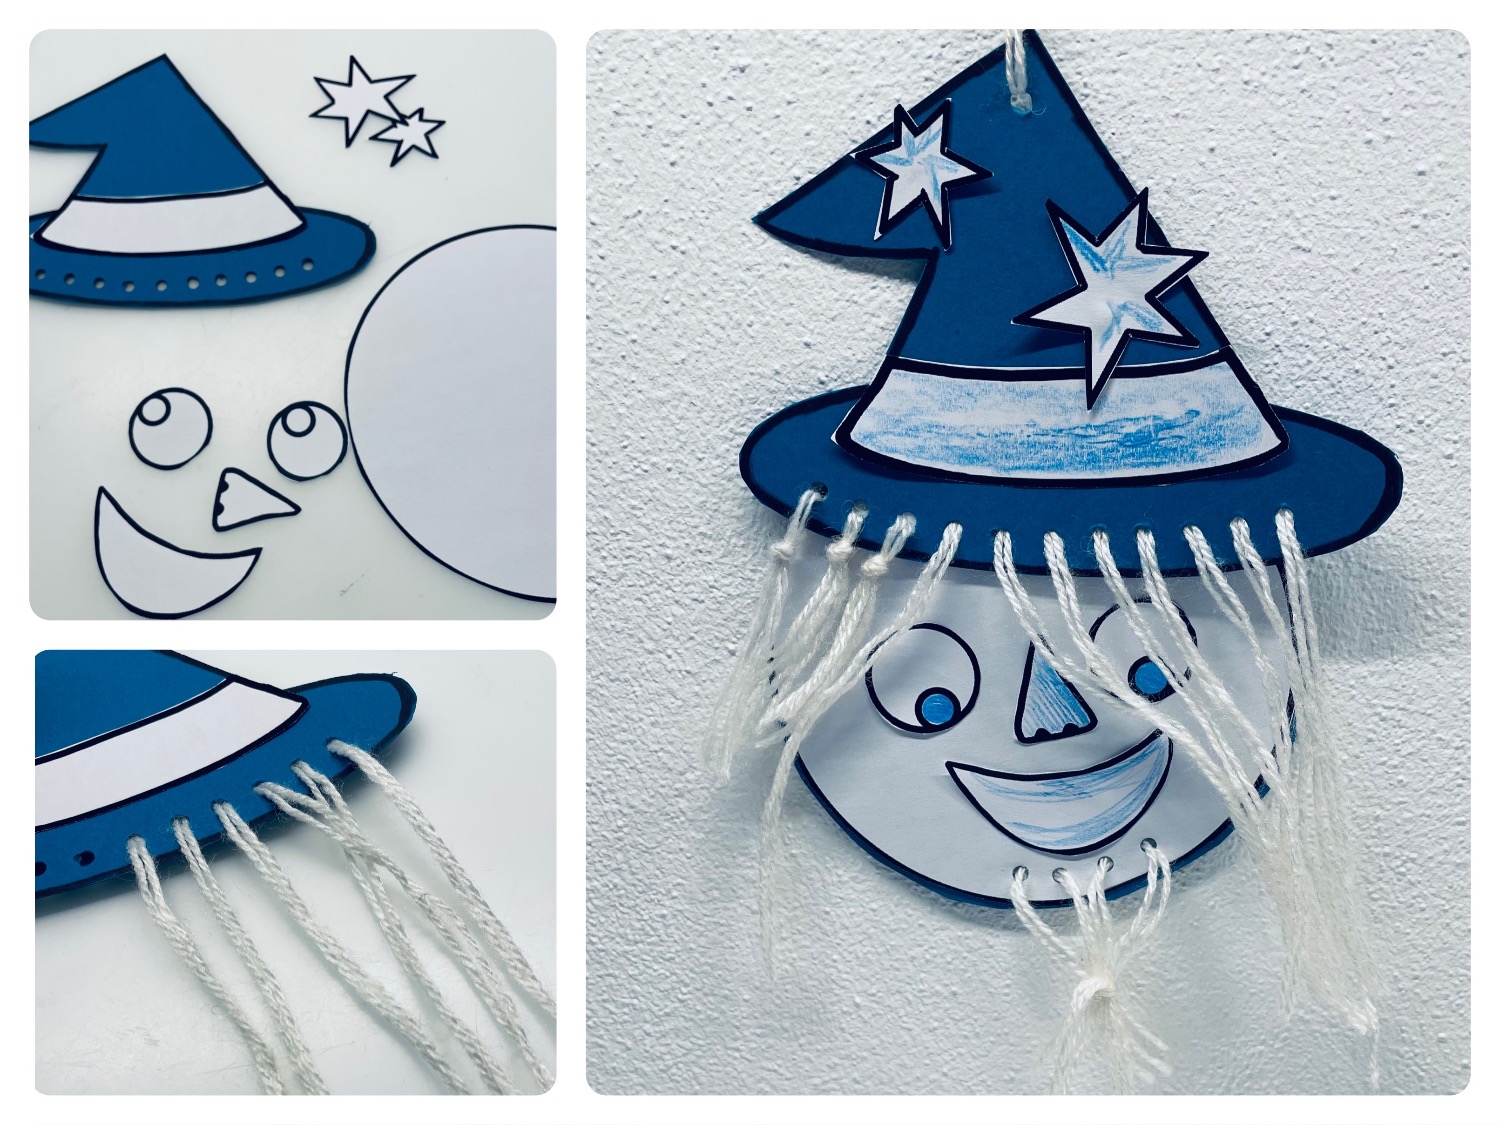
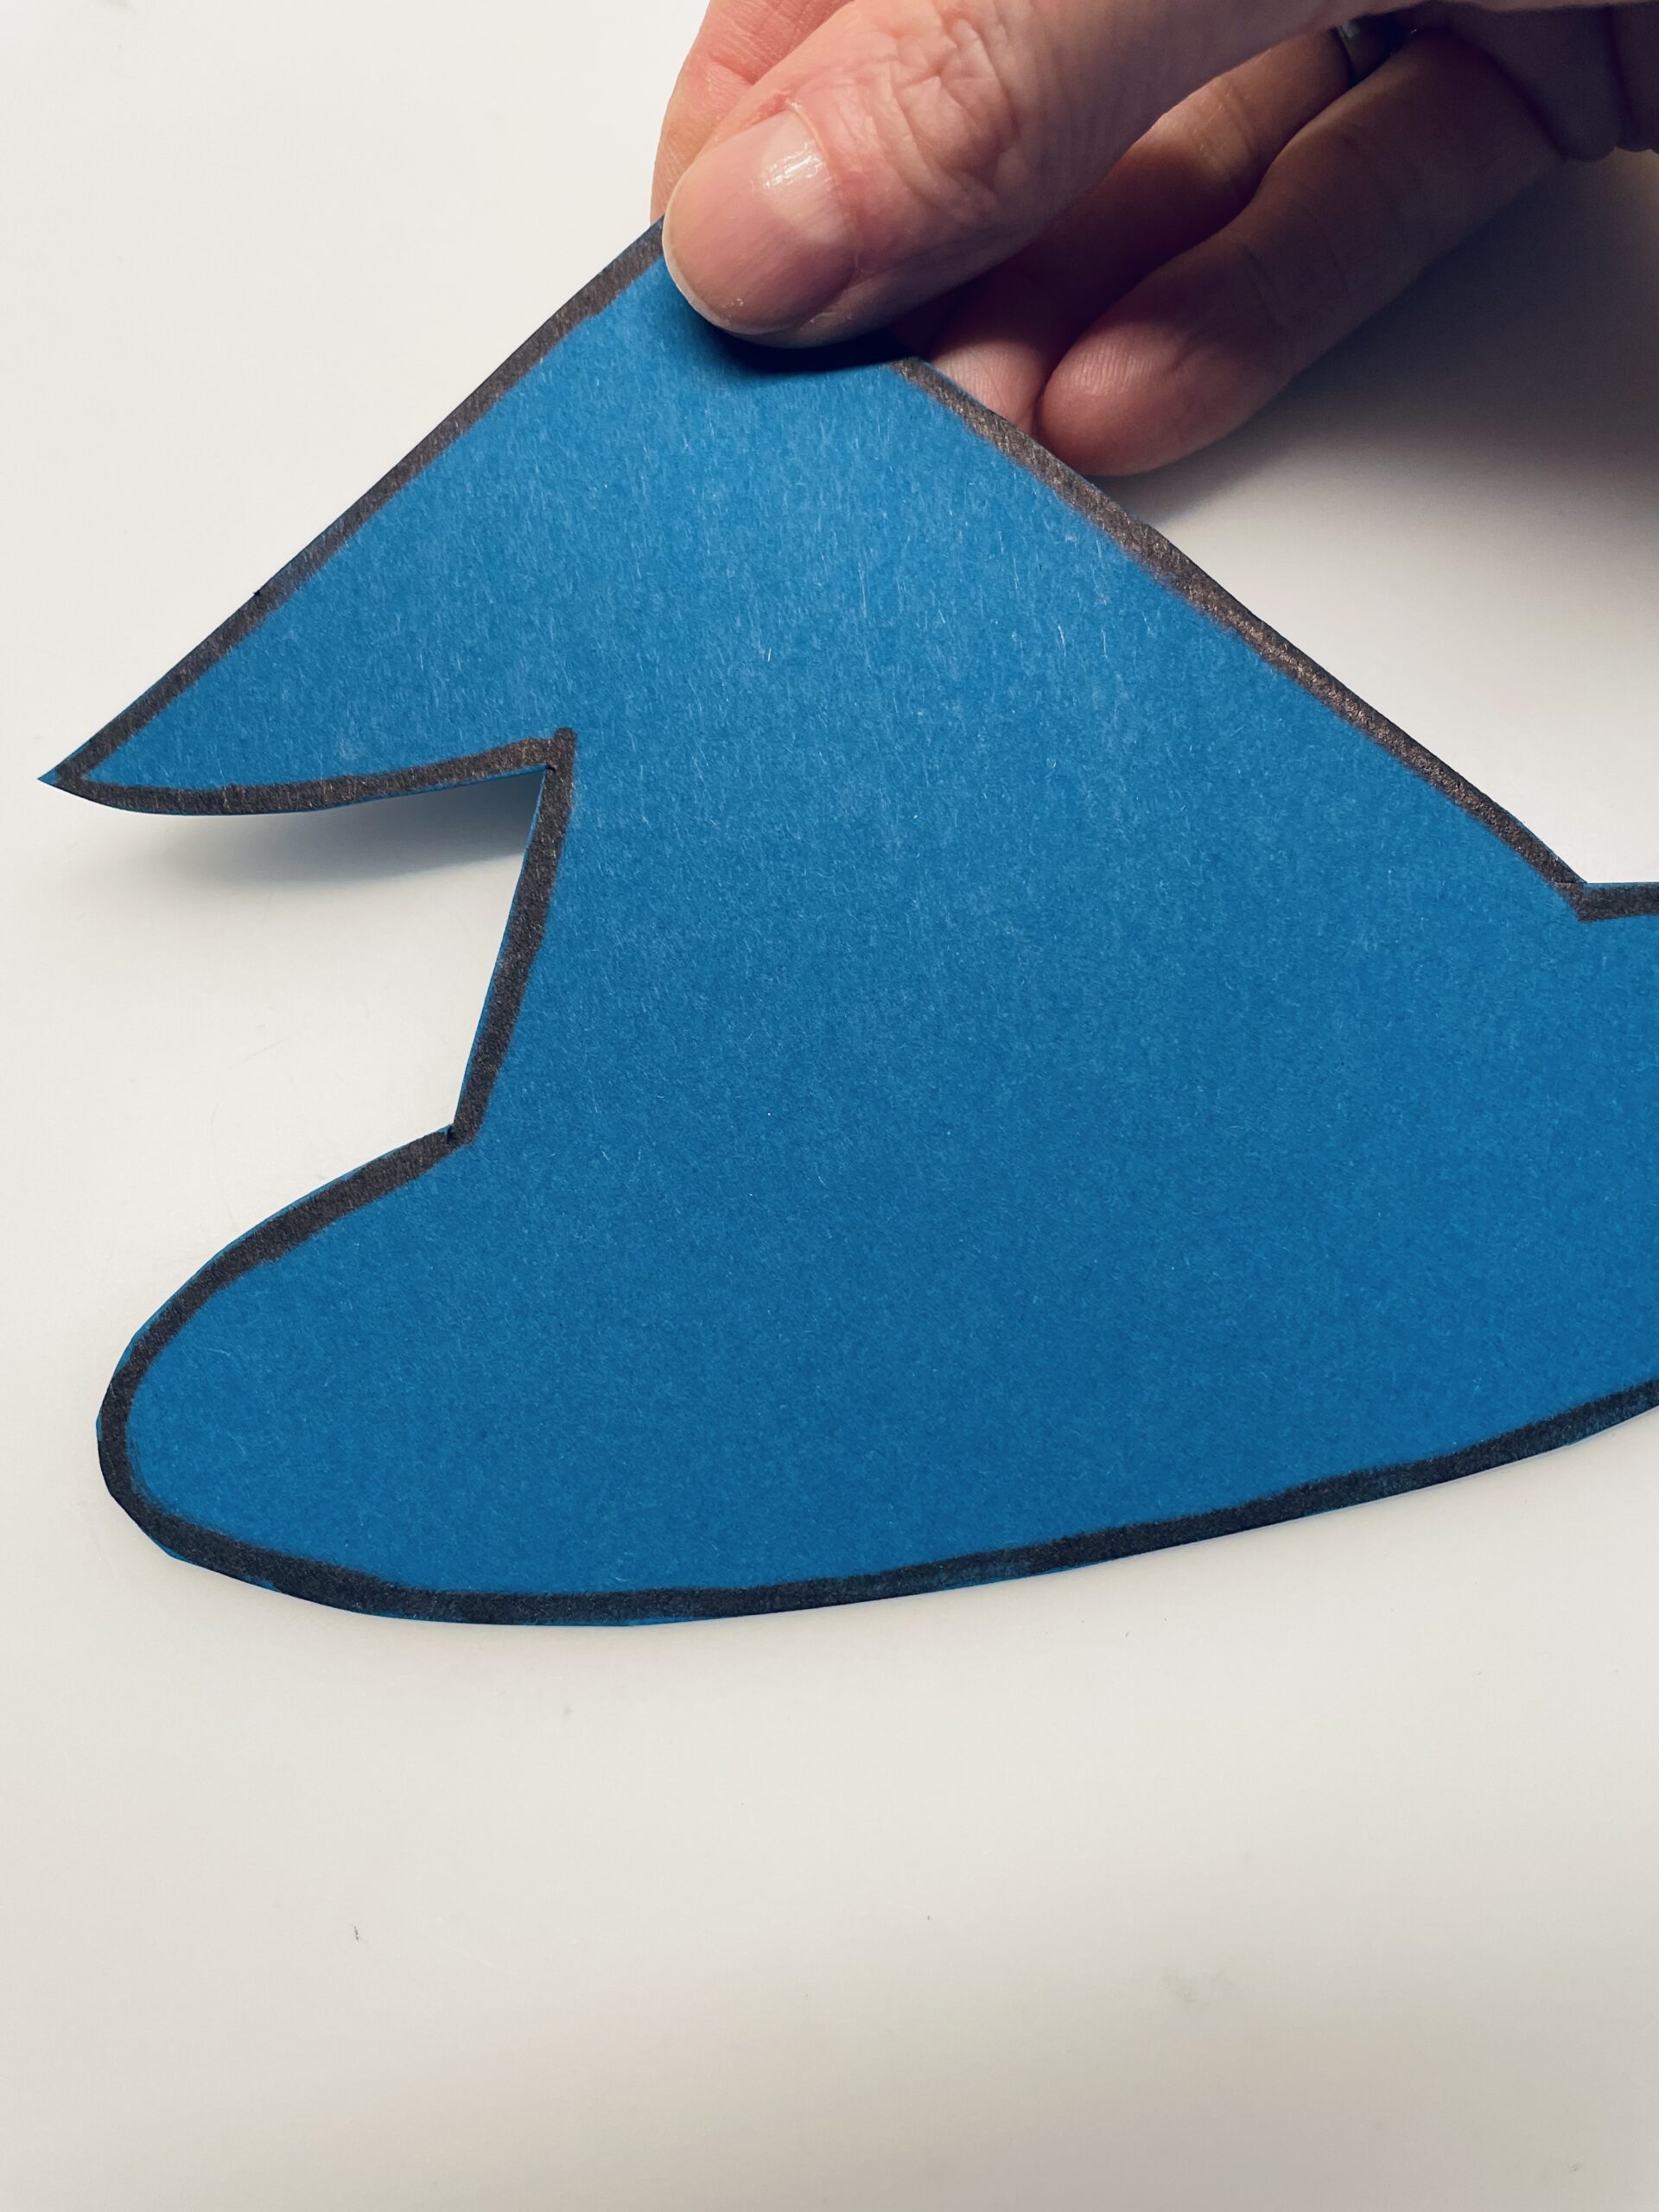
Then cut out the hat and transfer the outline to a colored clay paper.

Bild zum Schritt 2 für das Bastel- und DIY-Abenteuer für Kinder: 'Dann schneidet ihr den Hut aus und übertragt den Umriss...'

3

Now you cut out the hat of clay paper.

Bild zum Schritt 3 für das Bastel- und DIY-Abenteuer für Kinder: 'Jetzt schneidet ihr den Hut aus Tonpapier aus.'

4

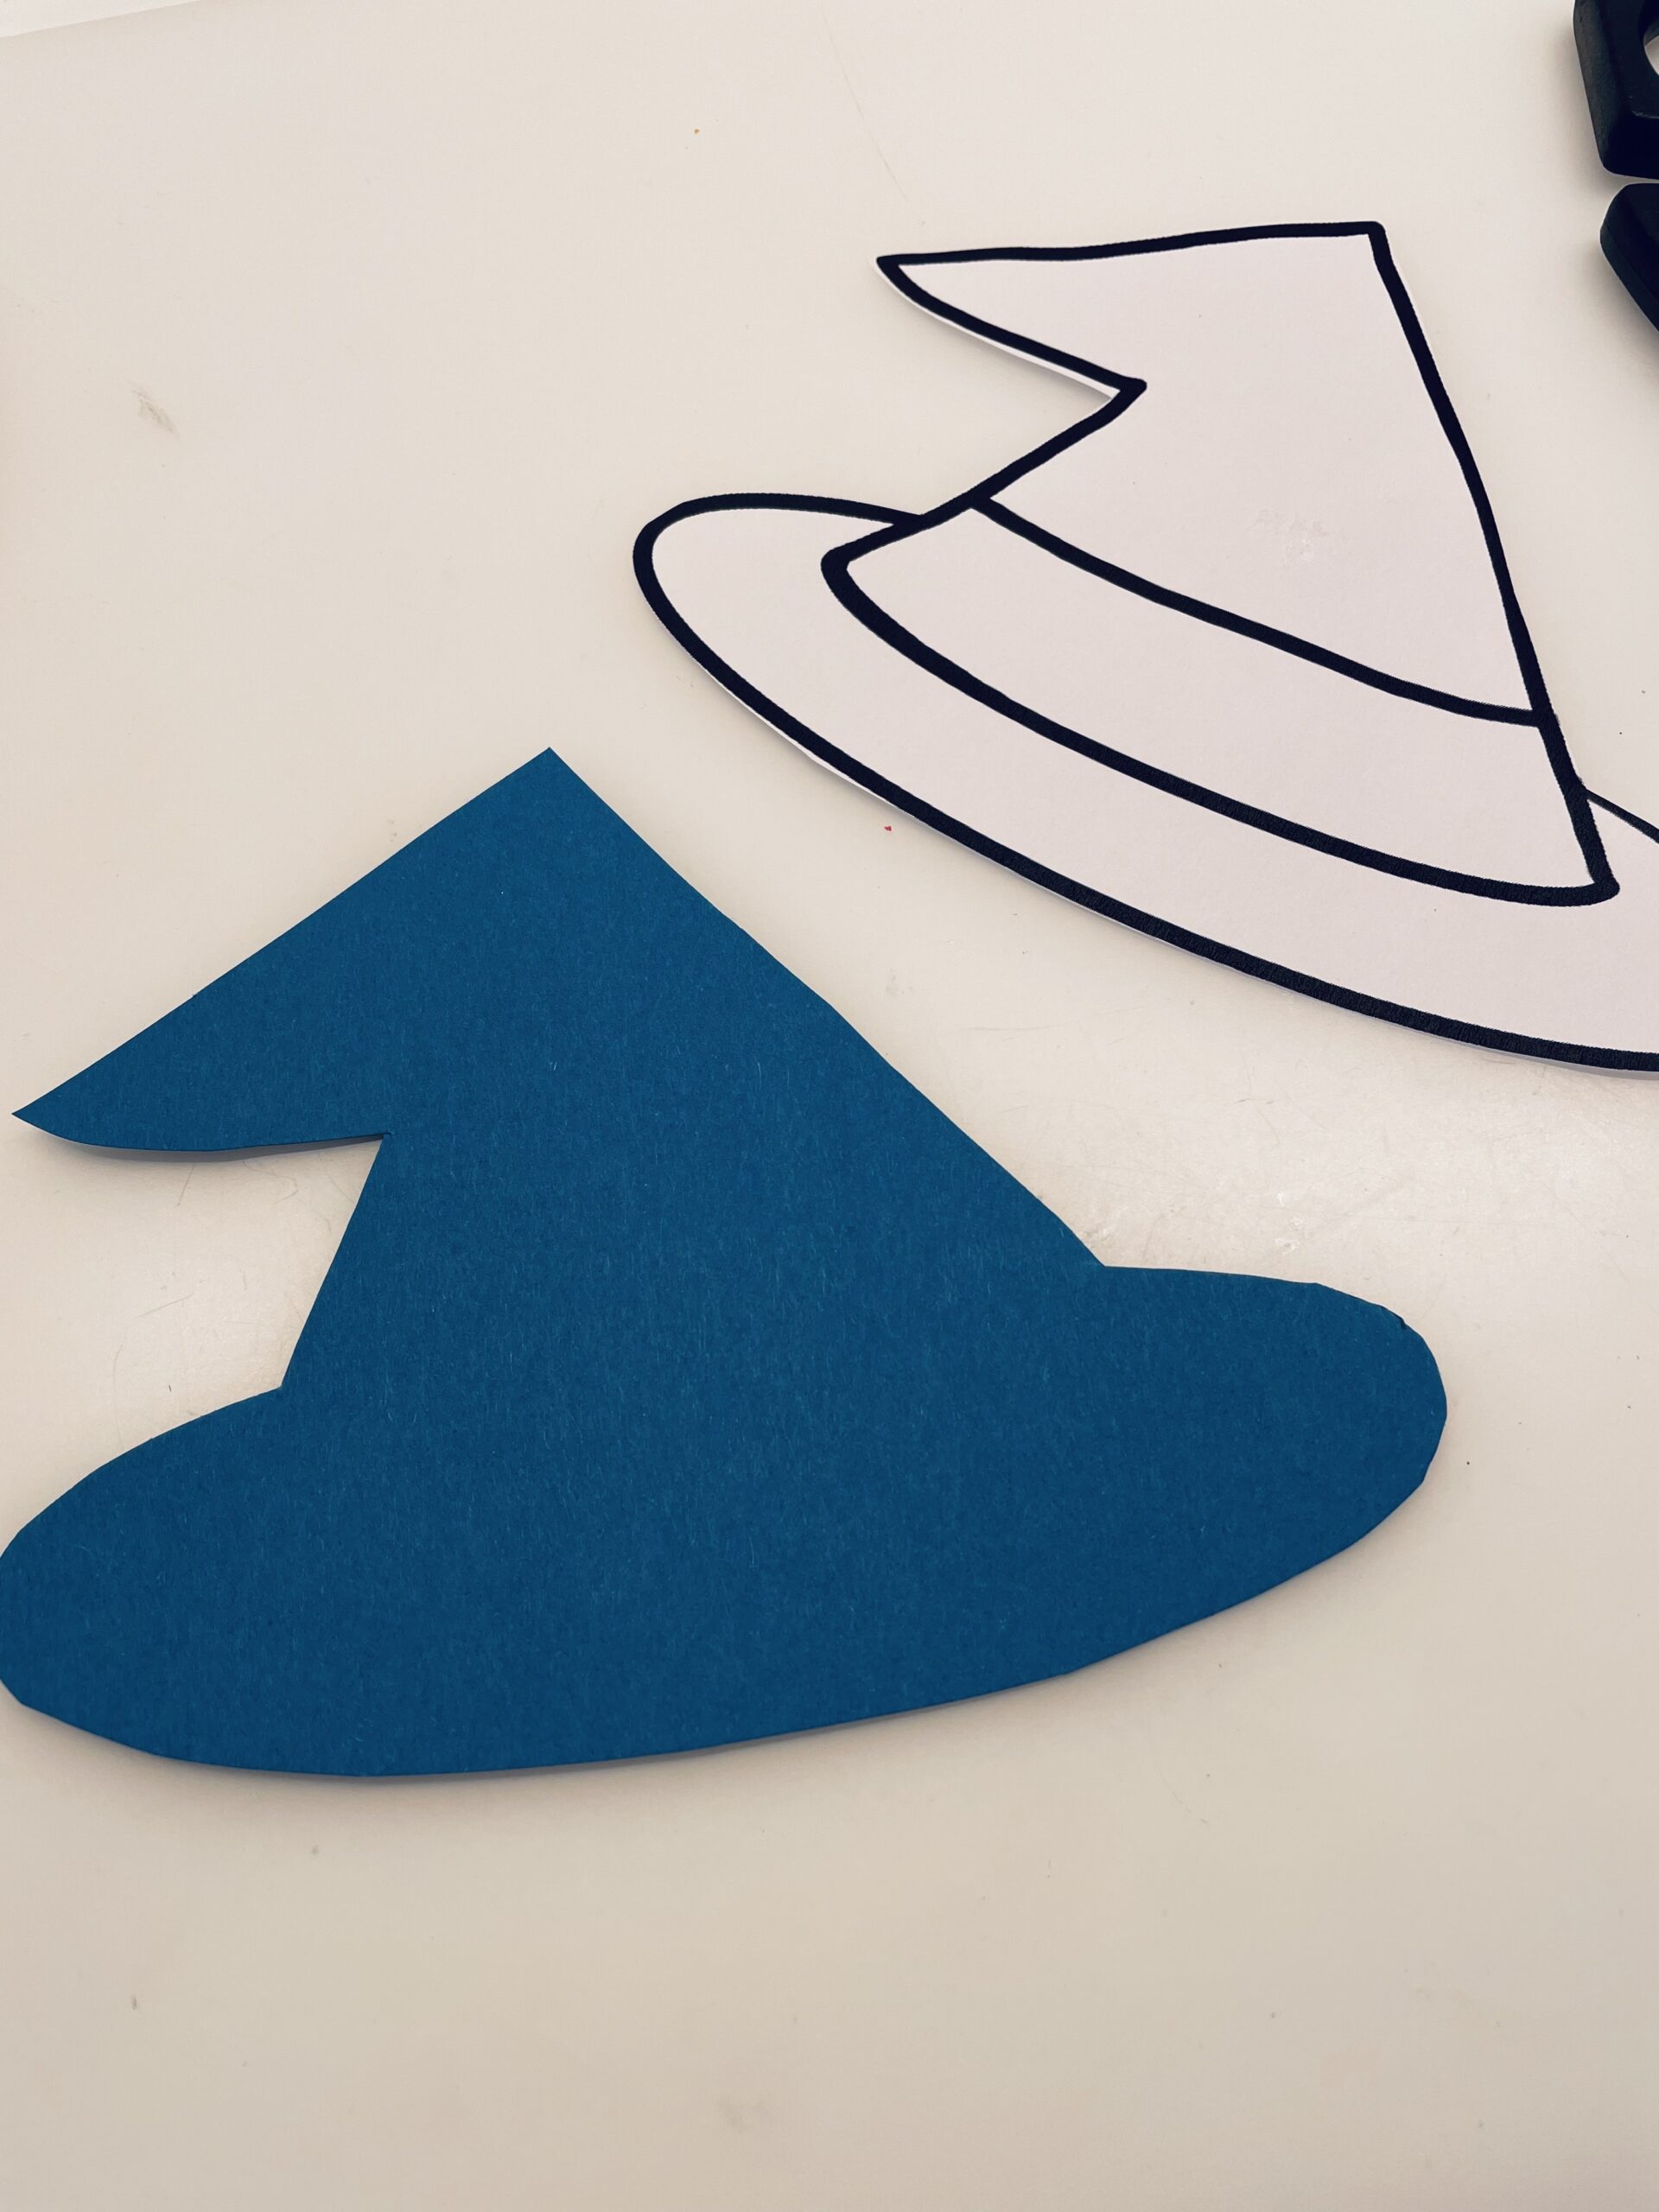
Then you cut the template apart on all lines.

Bild zum Schritt 4 für das Bastel- und DIY-Abenteuer für Kinder: 'Anschließend schneidet ihr die Schablone an allen Linien auseinander.'

5

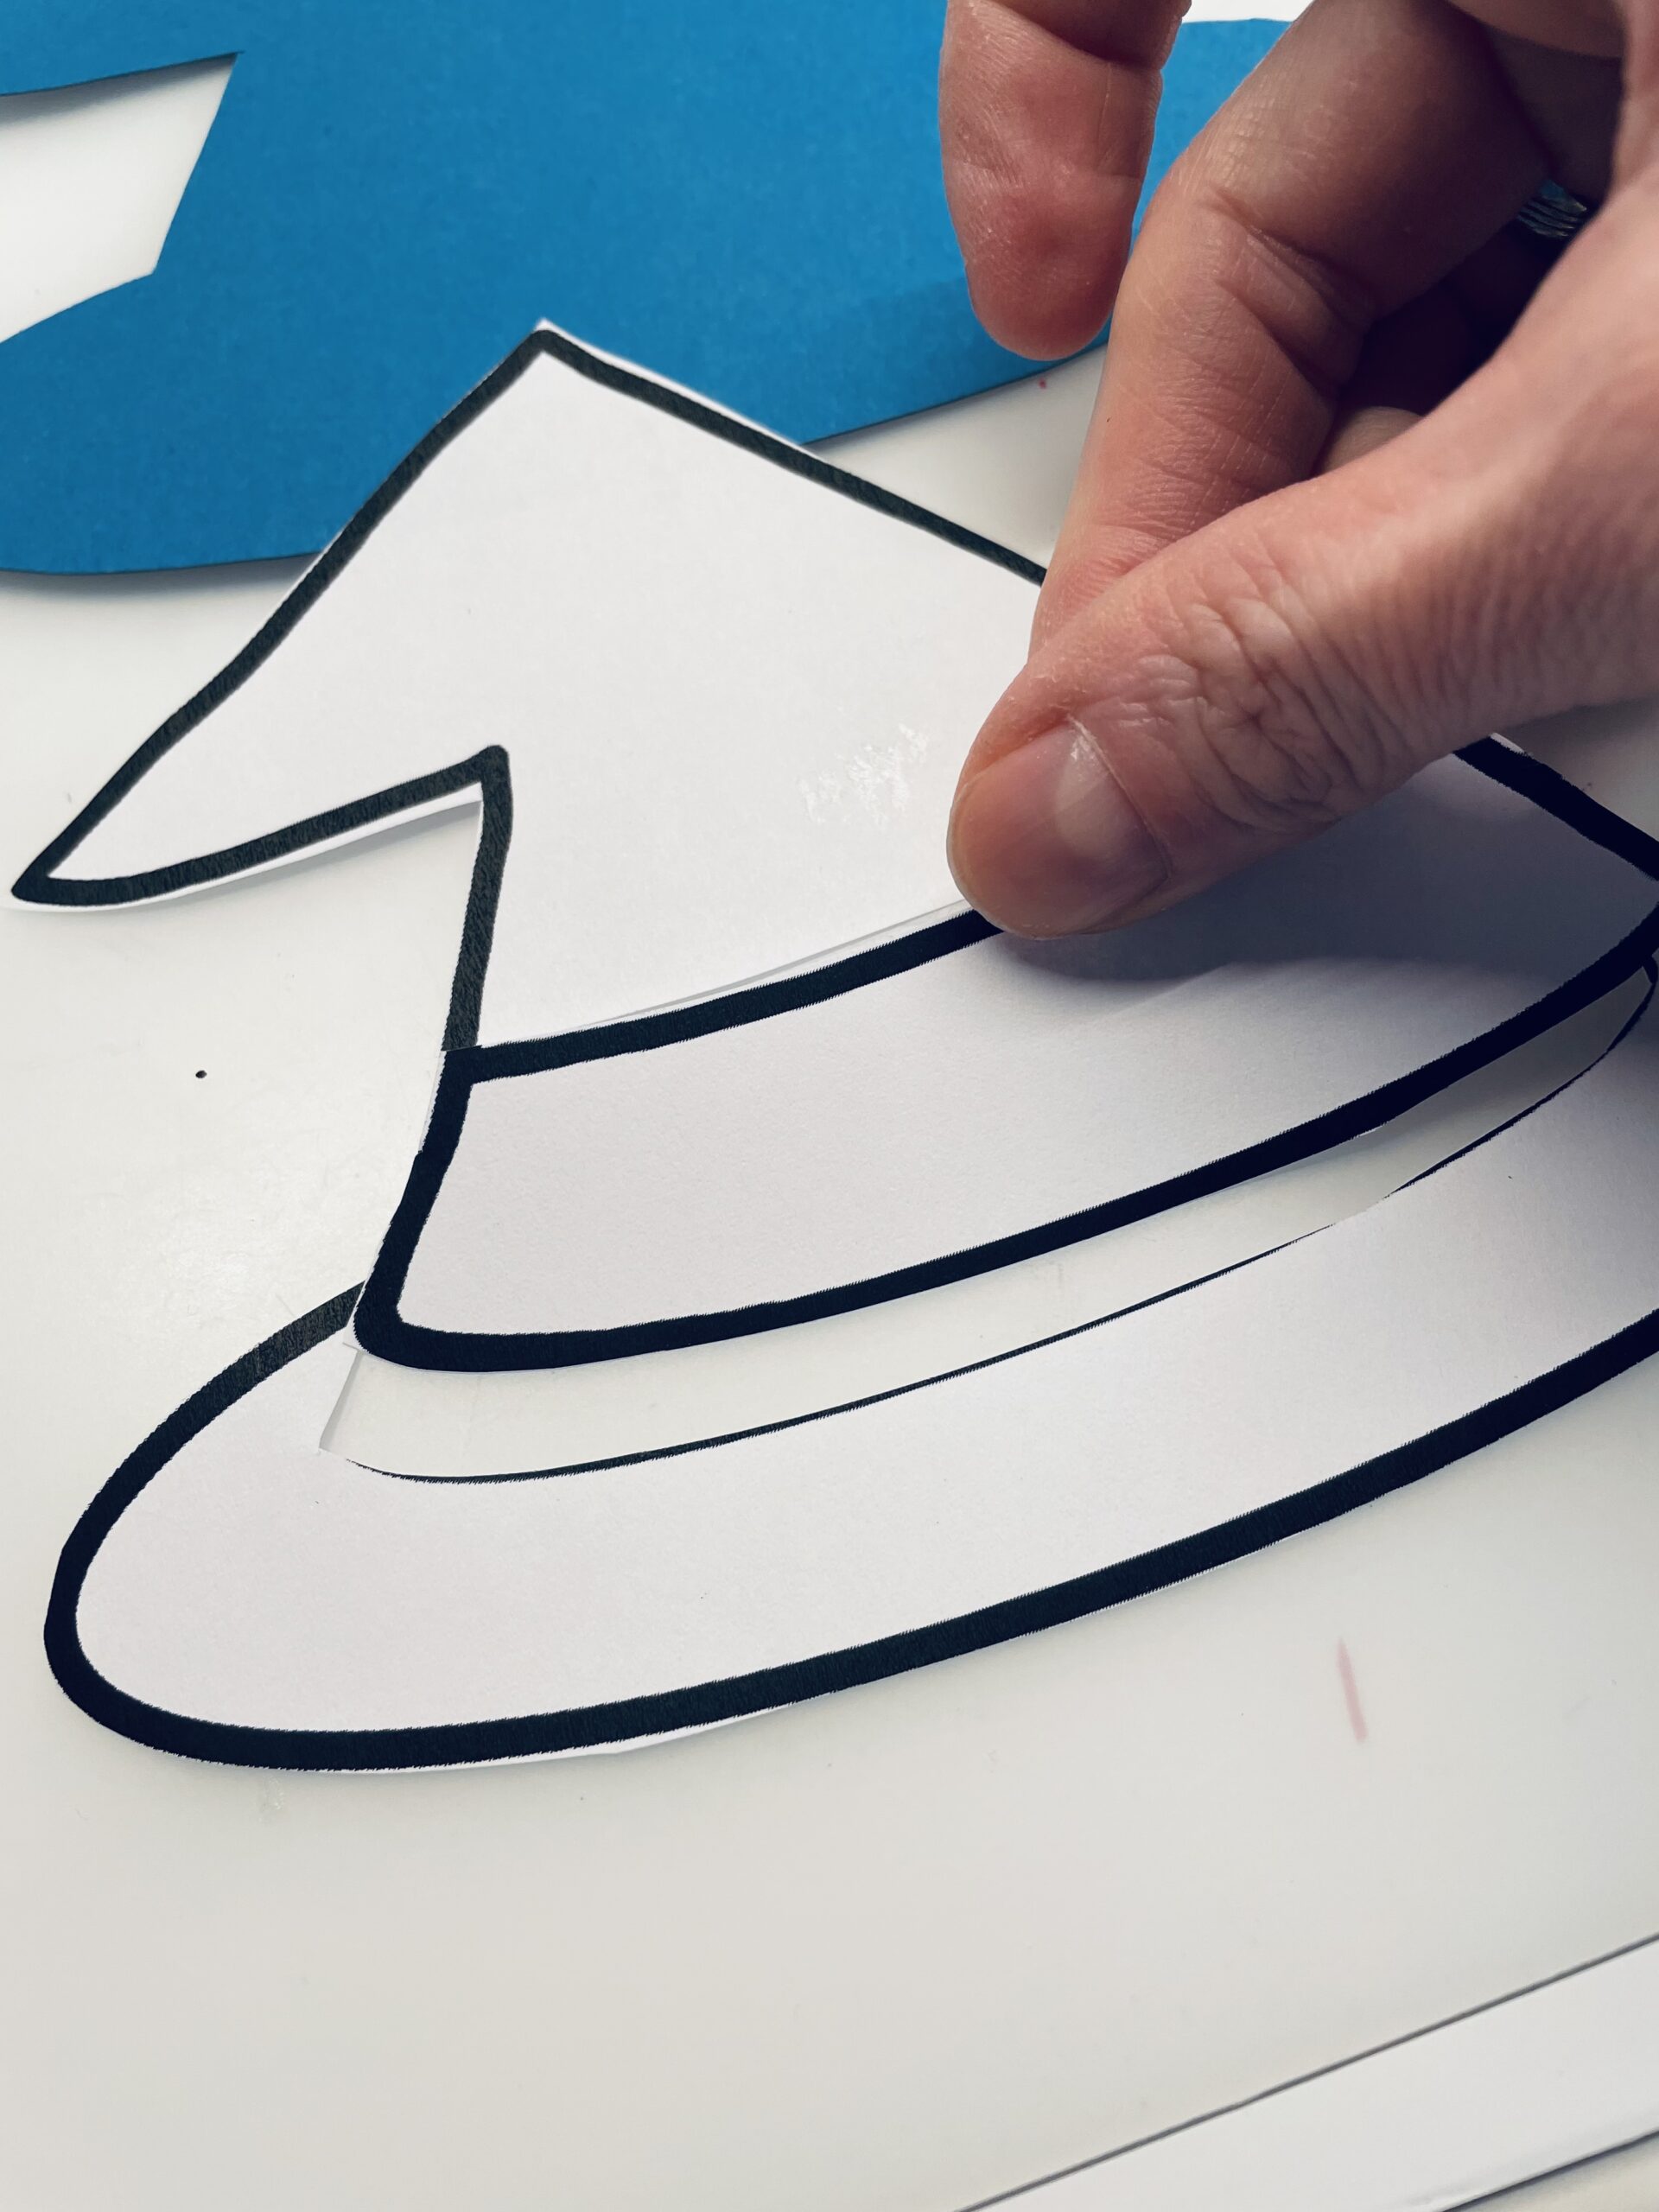
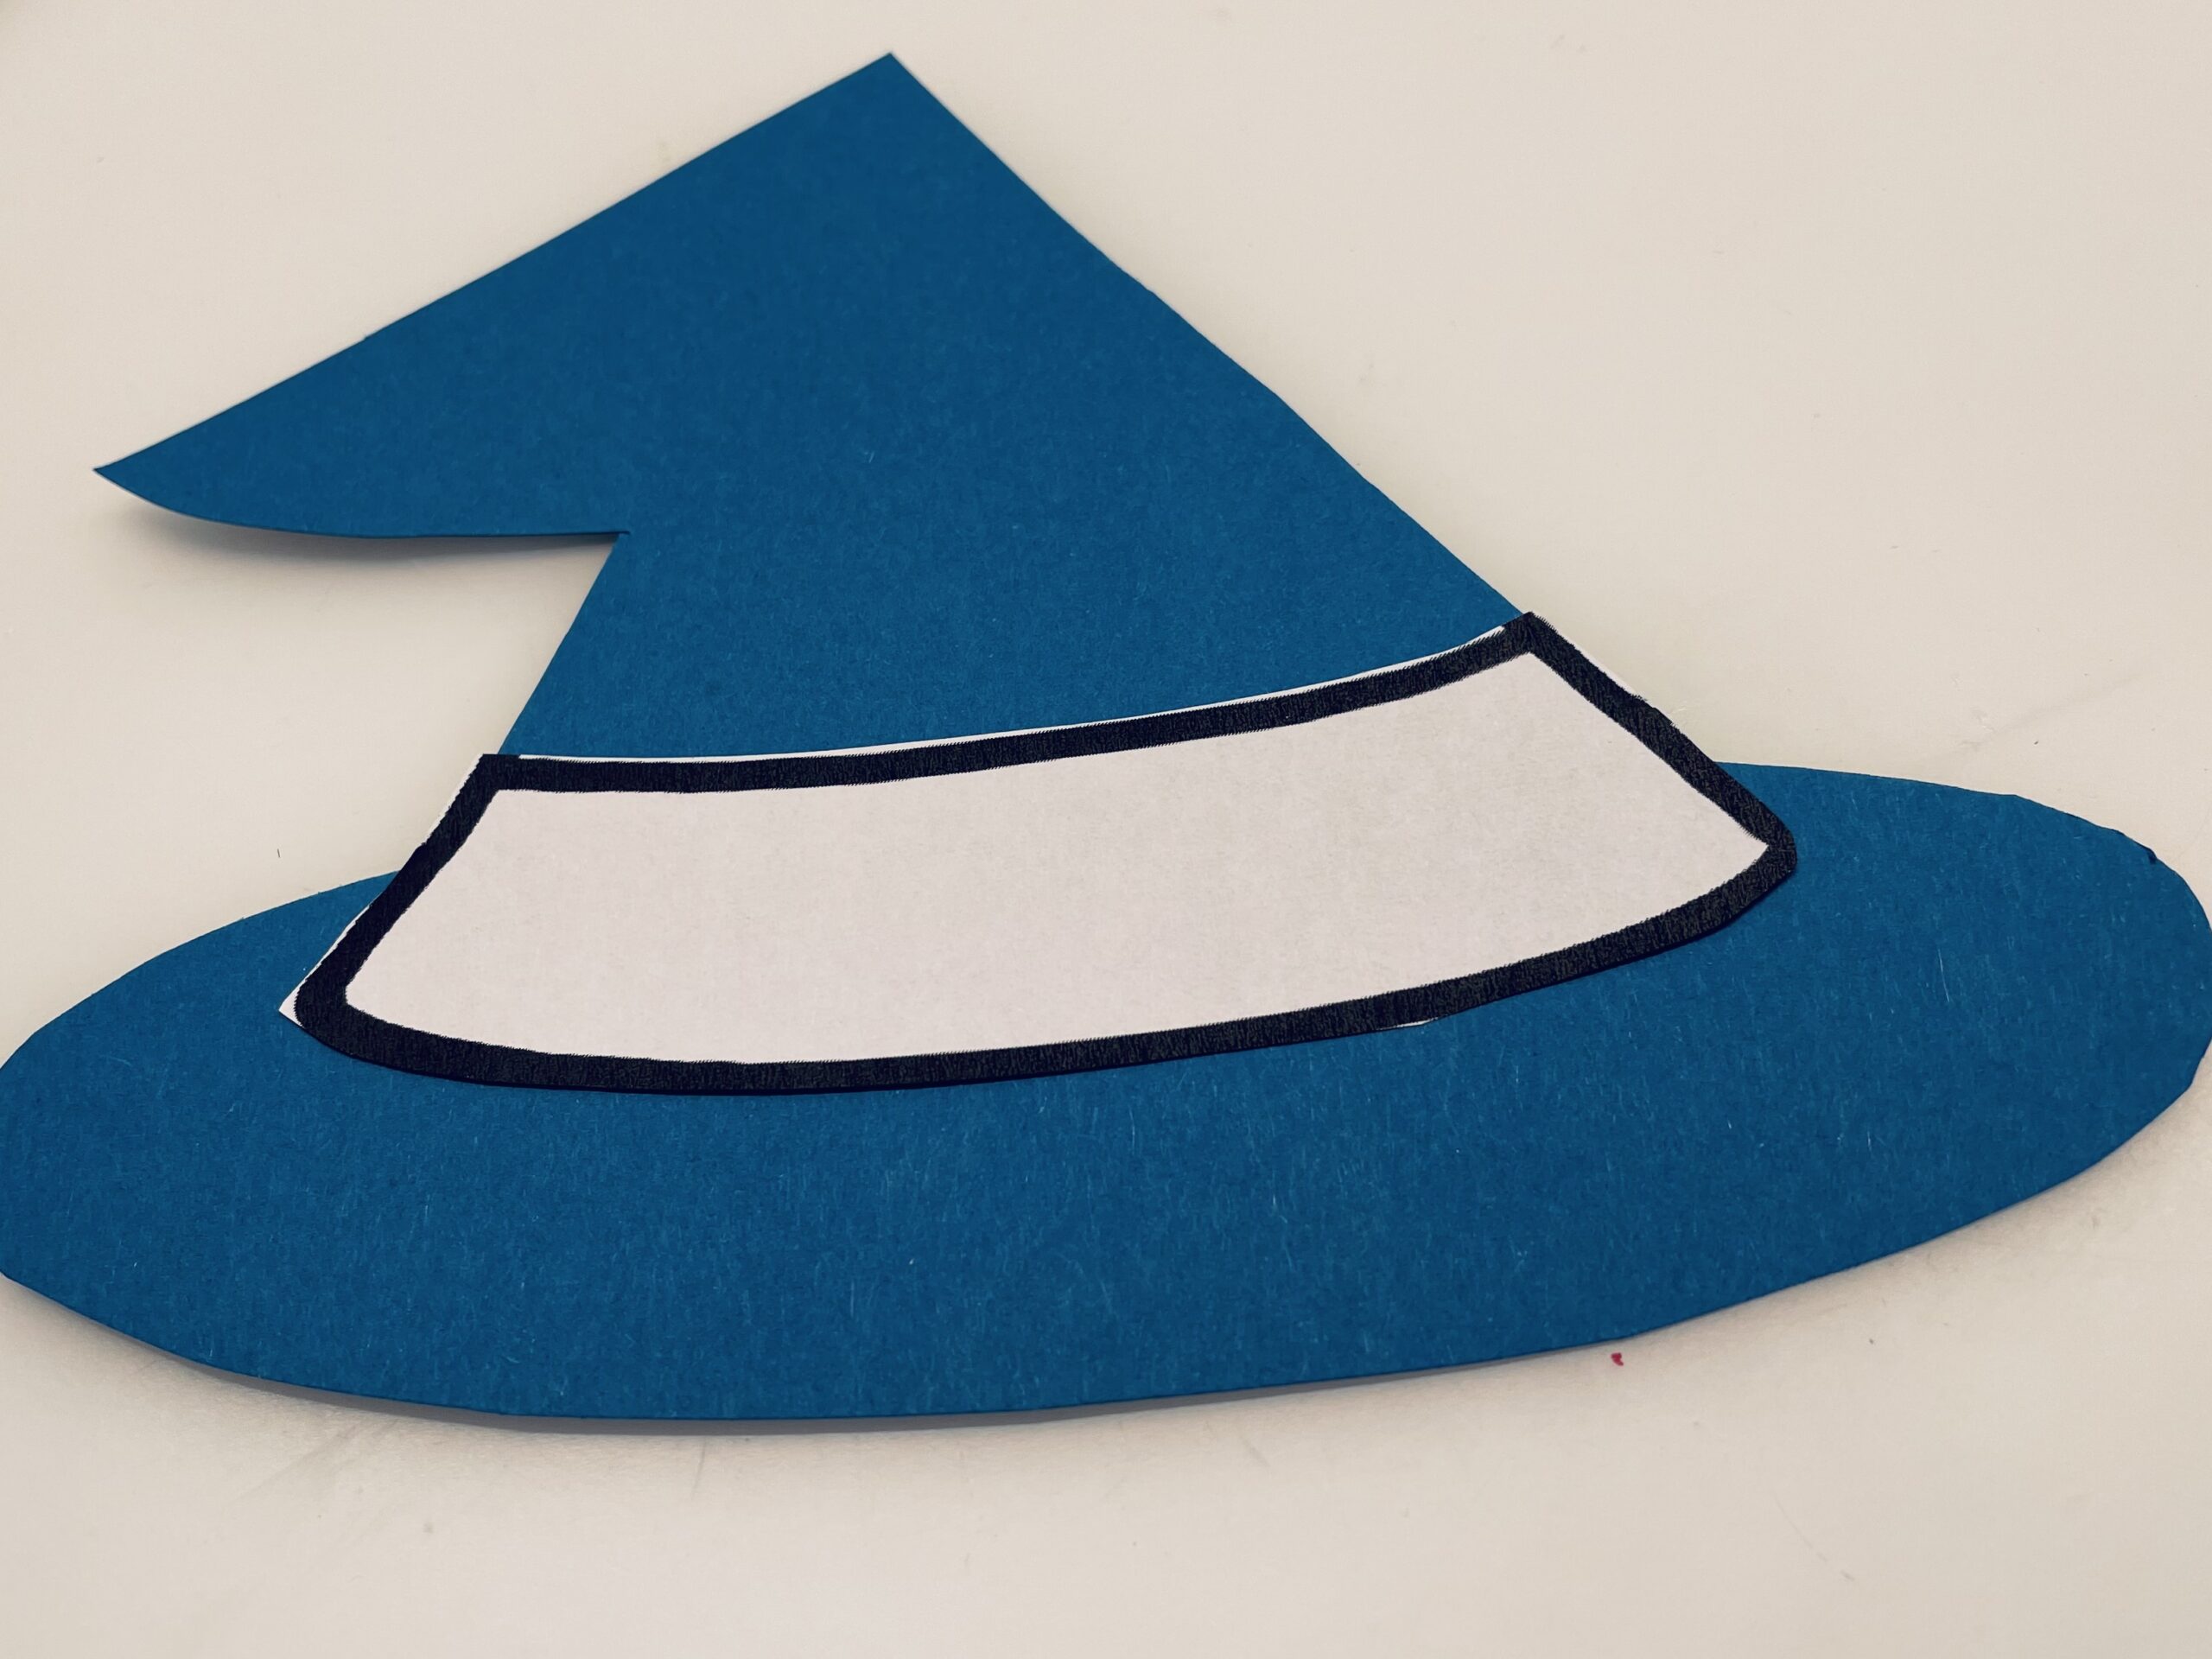
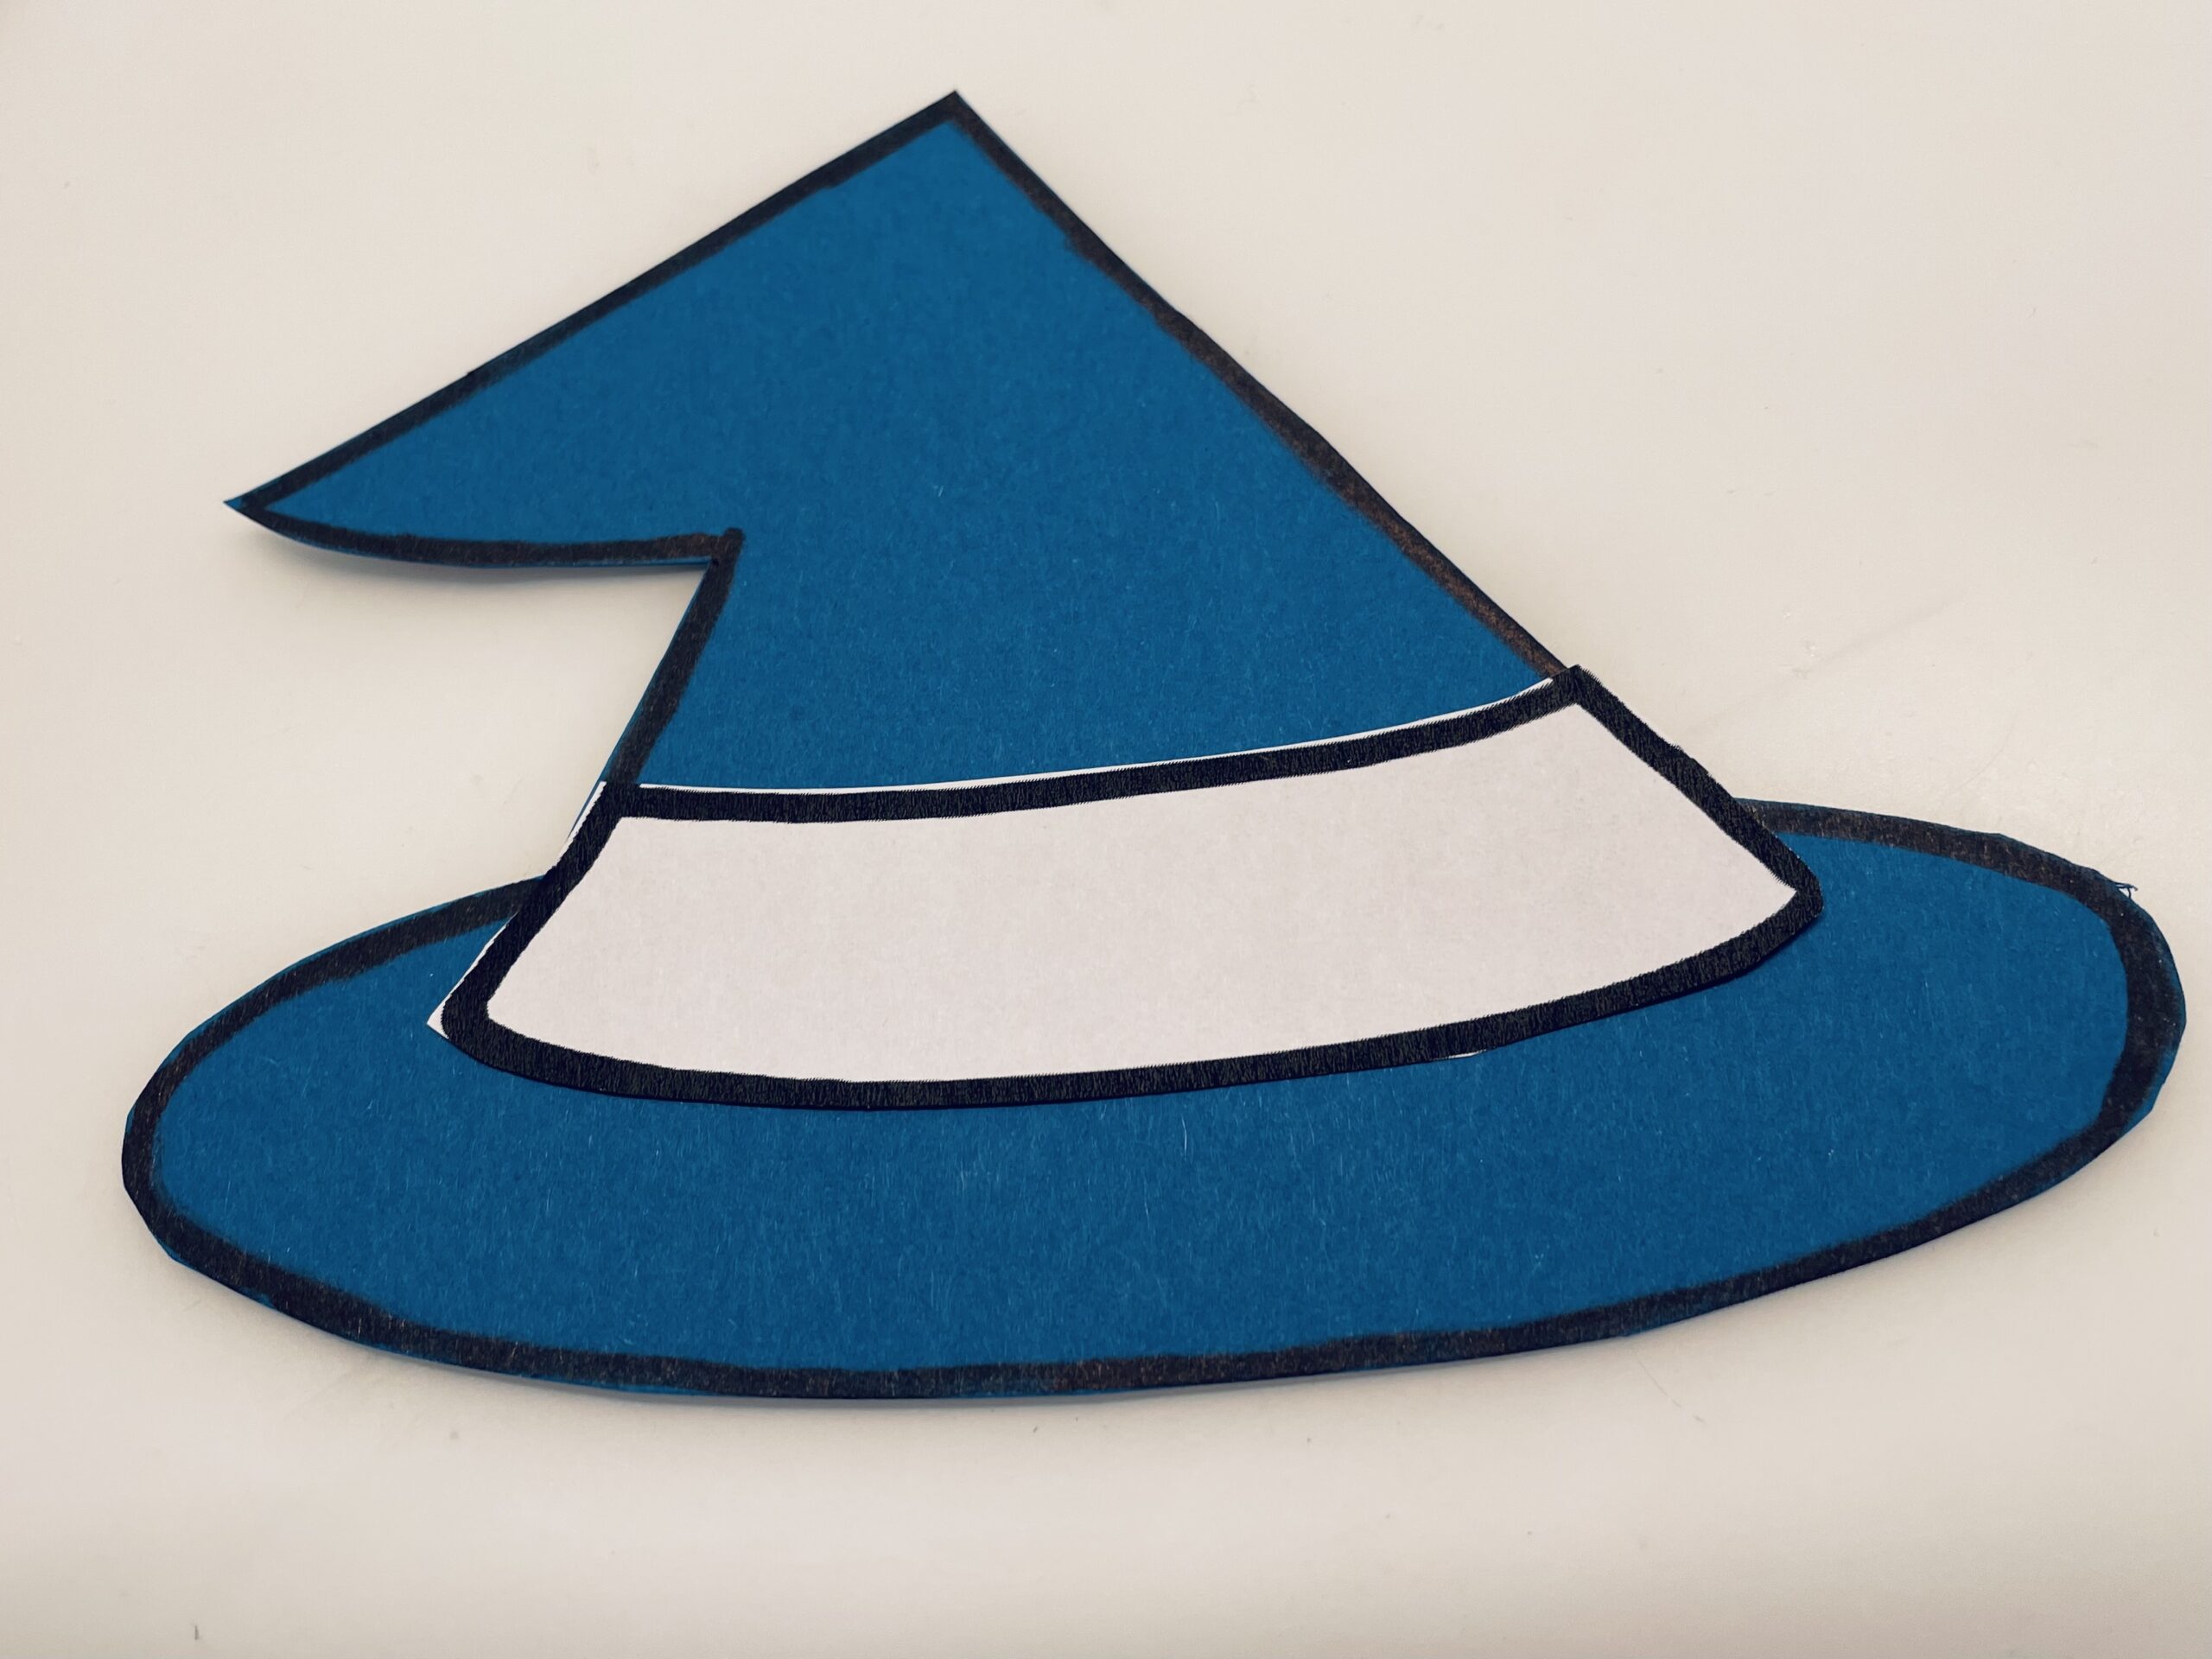
The center piece of the template comes later on the hat of clay paper.

Bild zum Schritt 5 für das Bastel- und DIY-Abenteuer für Kinder: 'Das Mittelstück der Schablone kommt später auf den Hut aus...'

6

Now you surround the hat of clay paper with a black felt pen.

Bild zum Schritt 6 für das Bastel- und DIY-Abenteuer für Kinder: 'Jetzt umrandet ihr den Hut aus Tonpapier mit einem schwarzem...'

7

Then stick the center piece of the template on her hat.

Bild zum Schritt 7 für das Bastel- und DIY-Abenteuer für Kinder: 'Anschließend klebt ihr das Mittelstück der Schablone auf den Hut.'

8

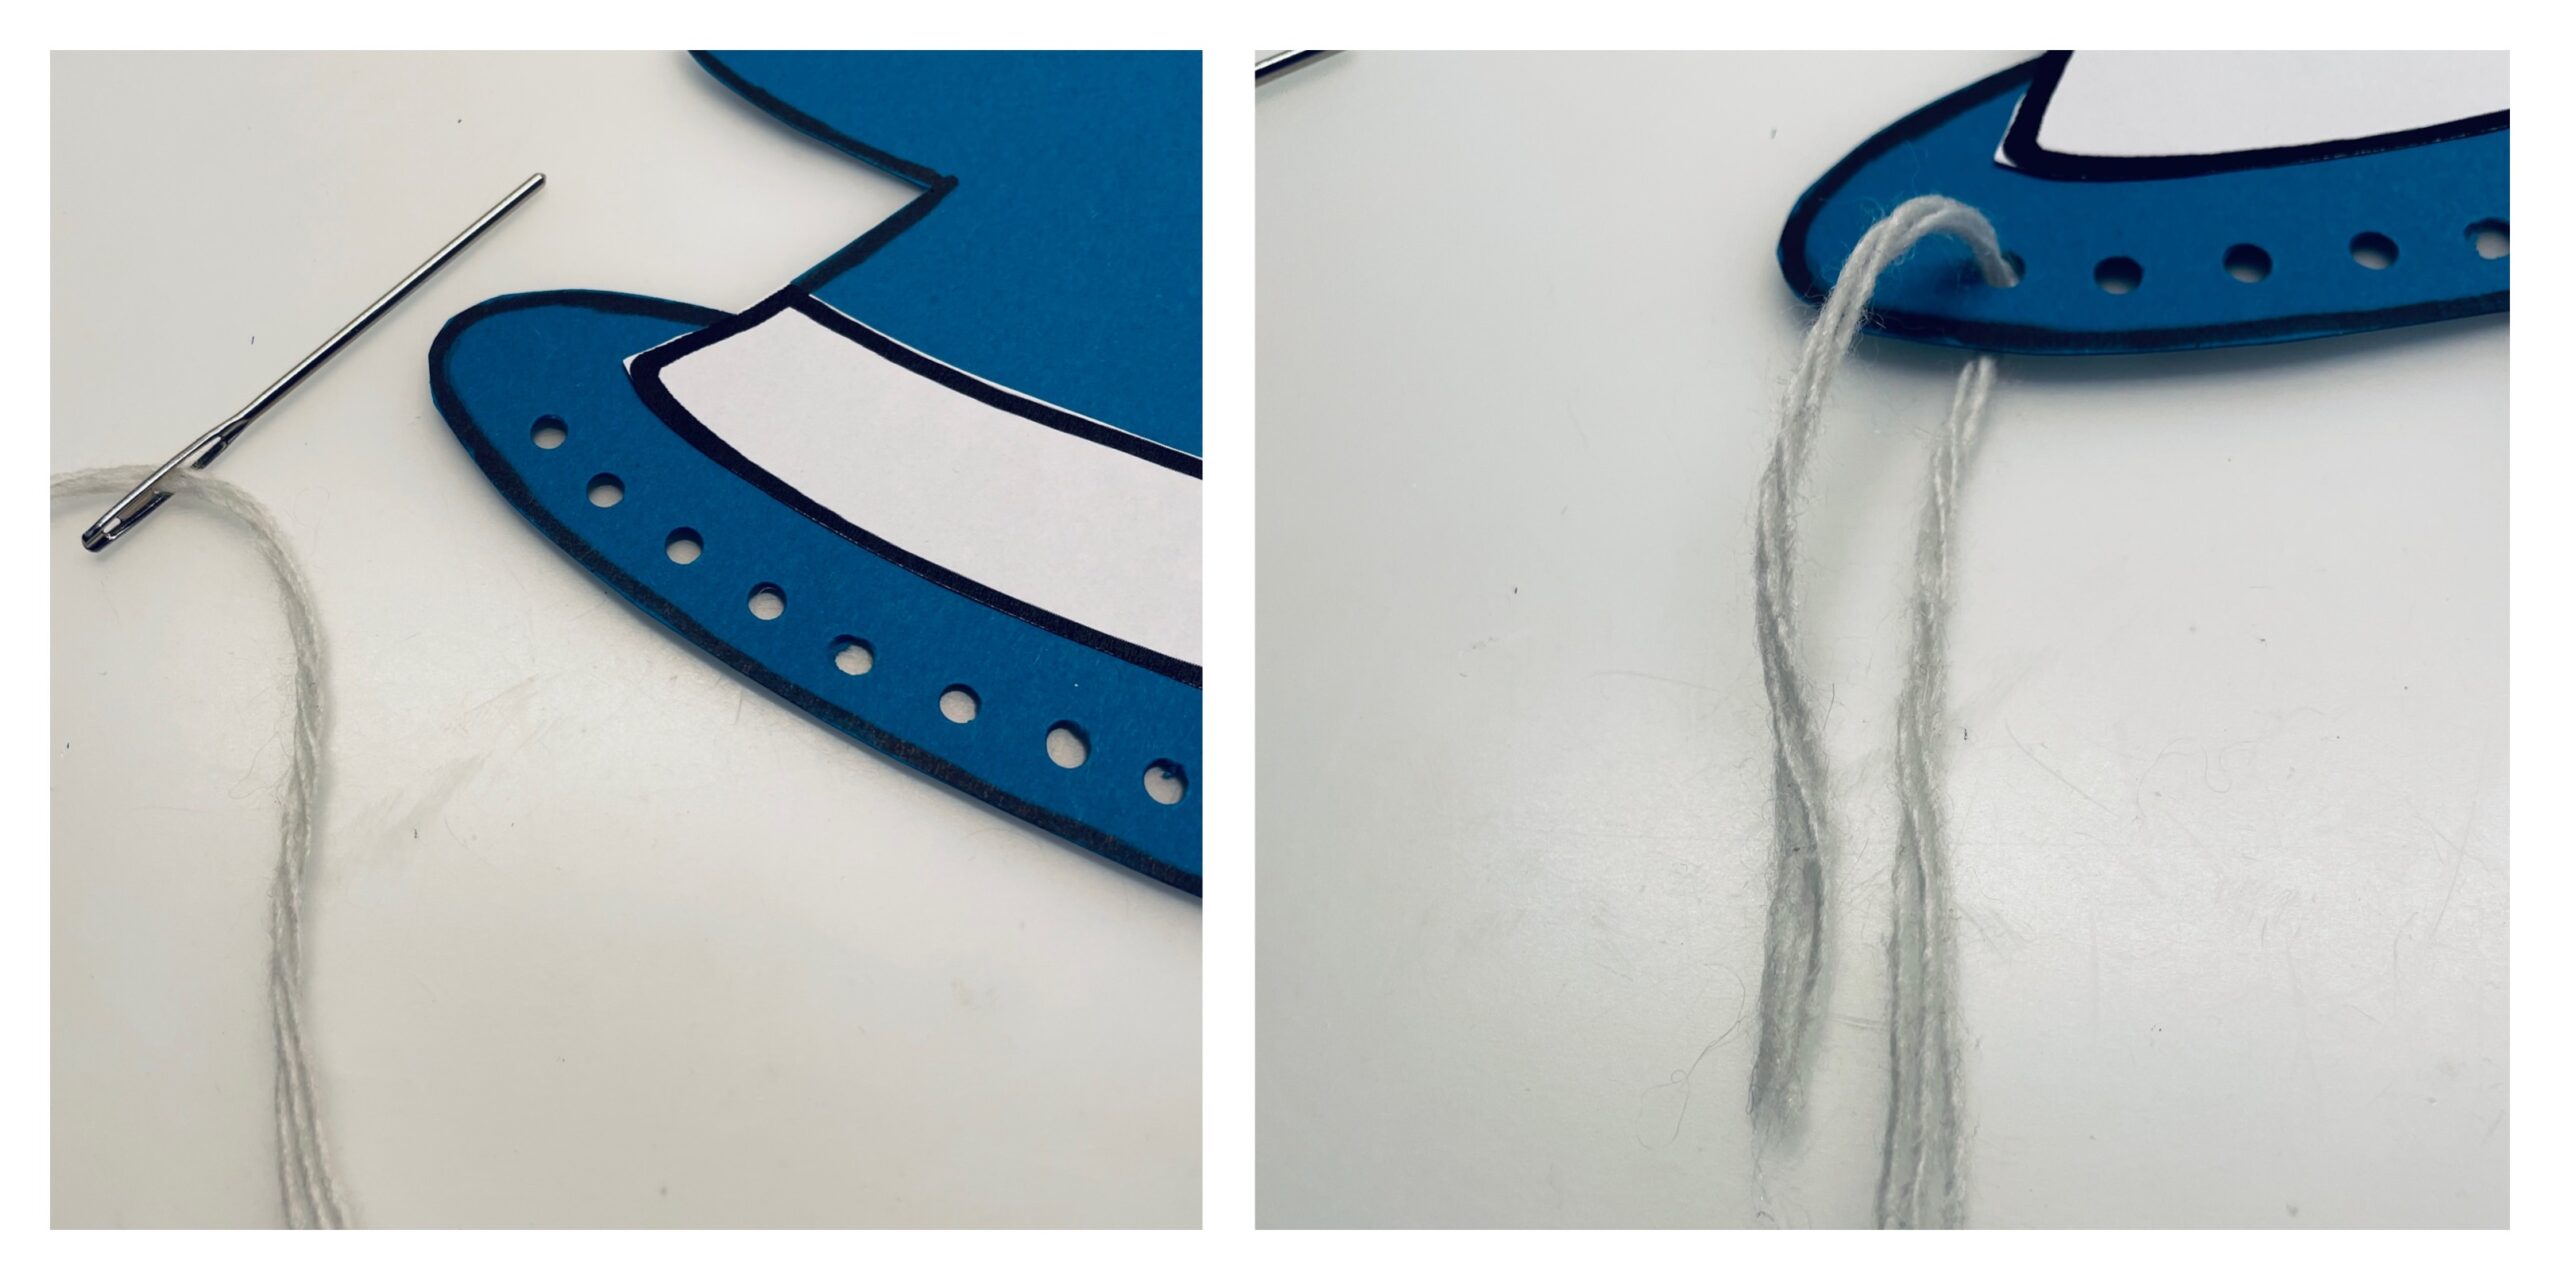
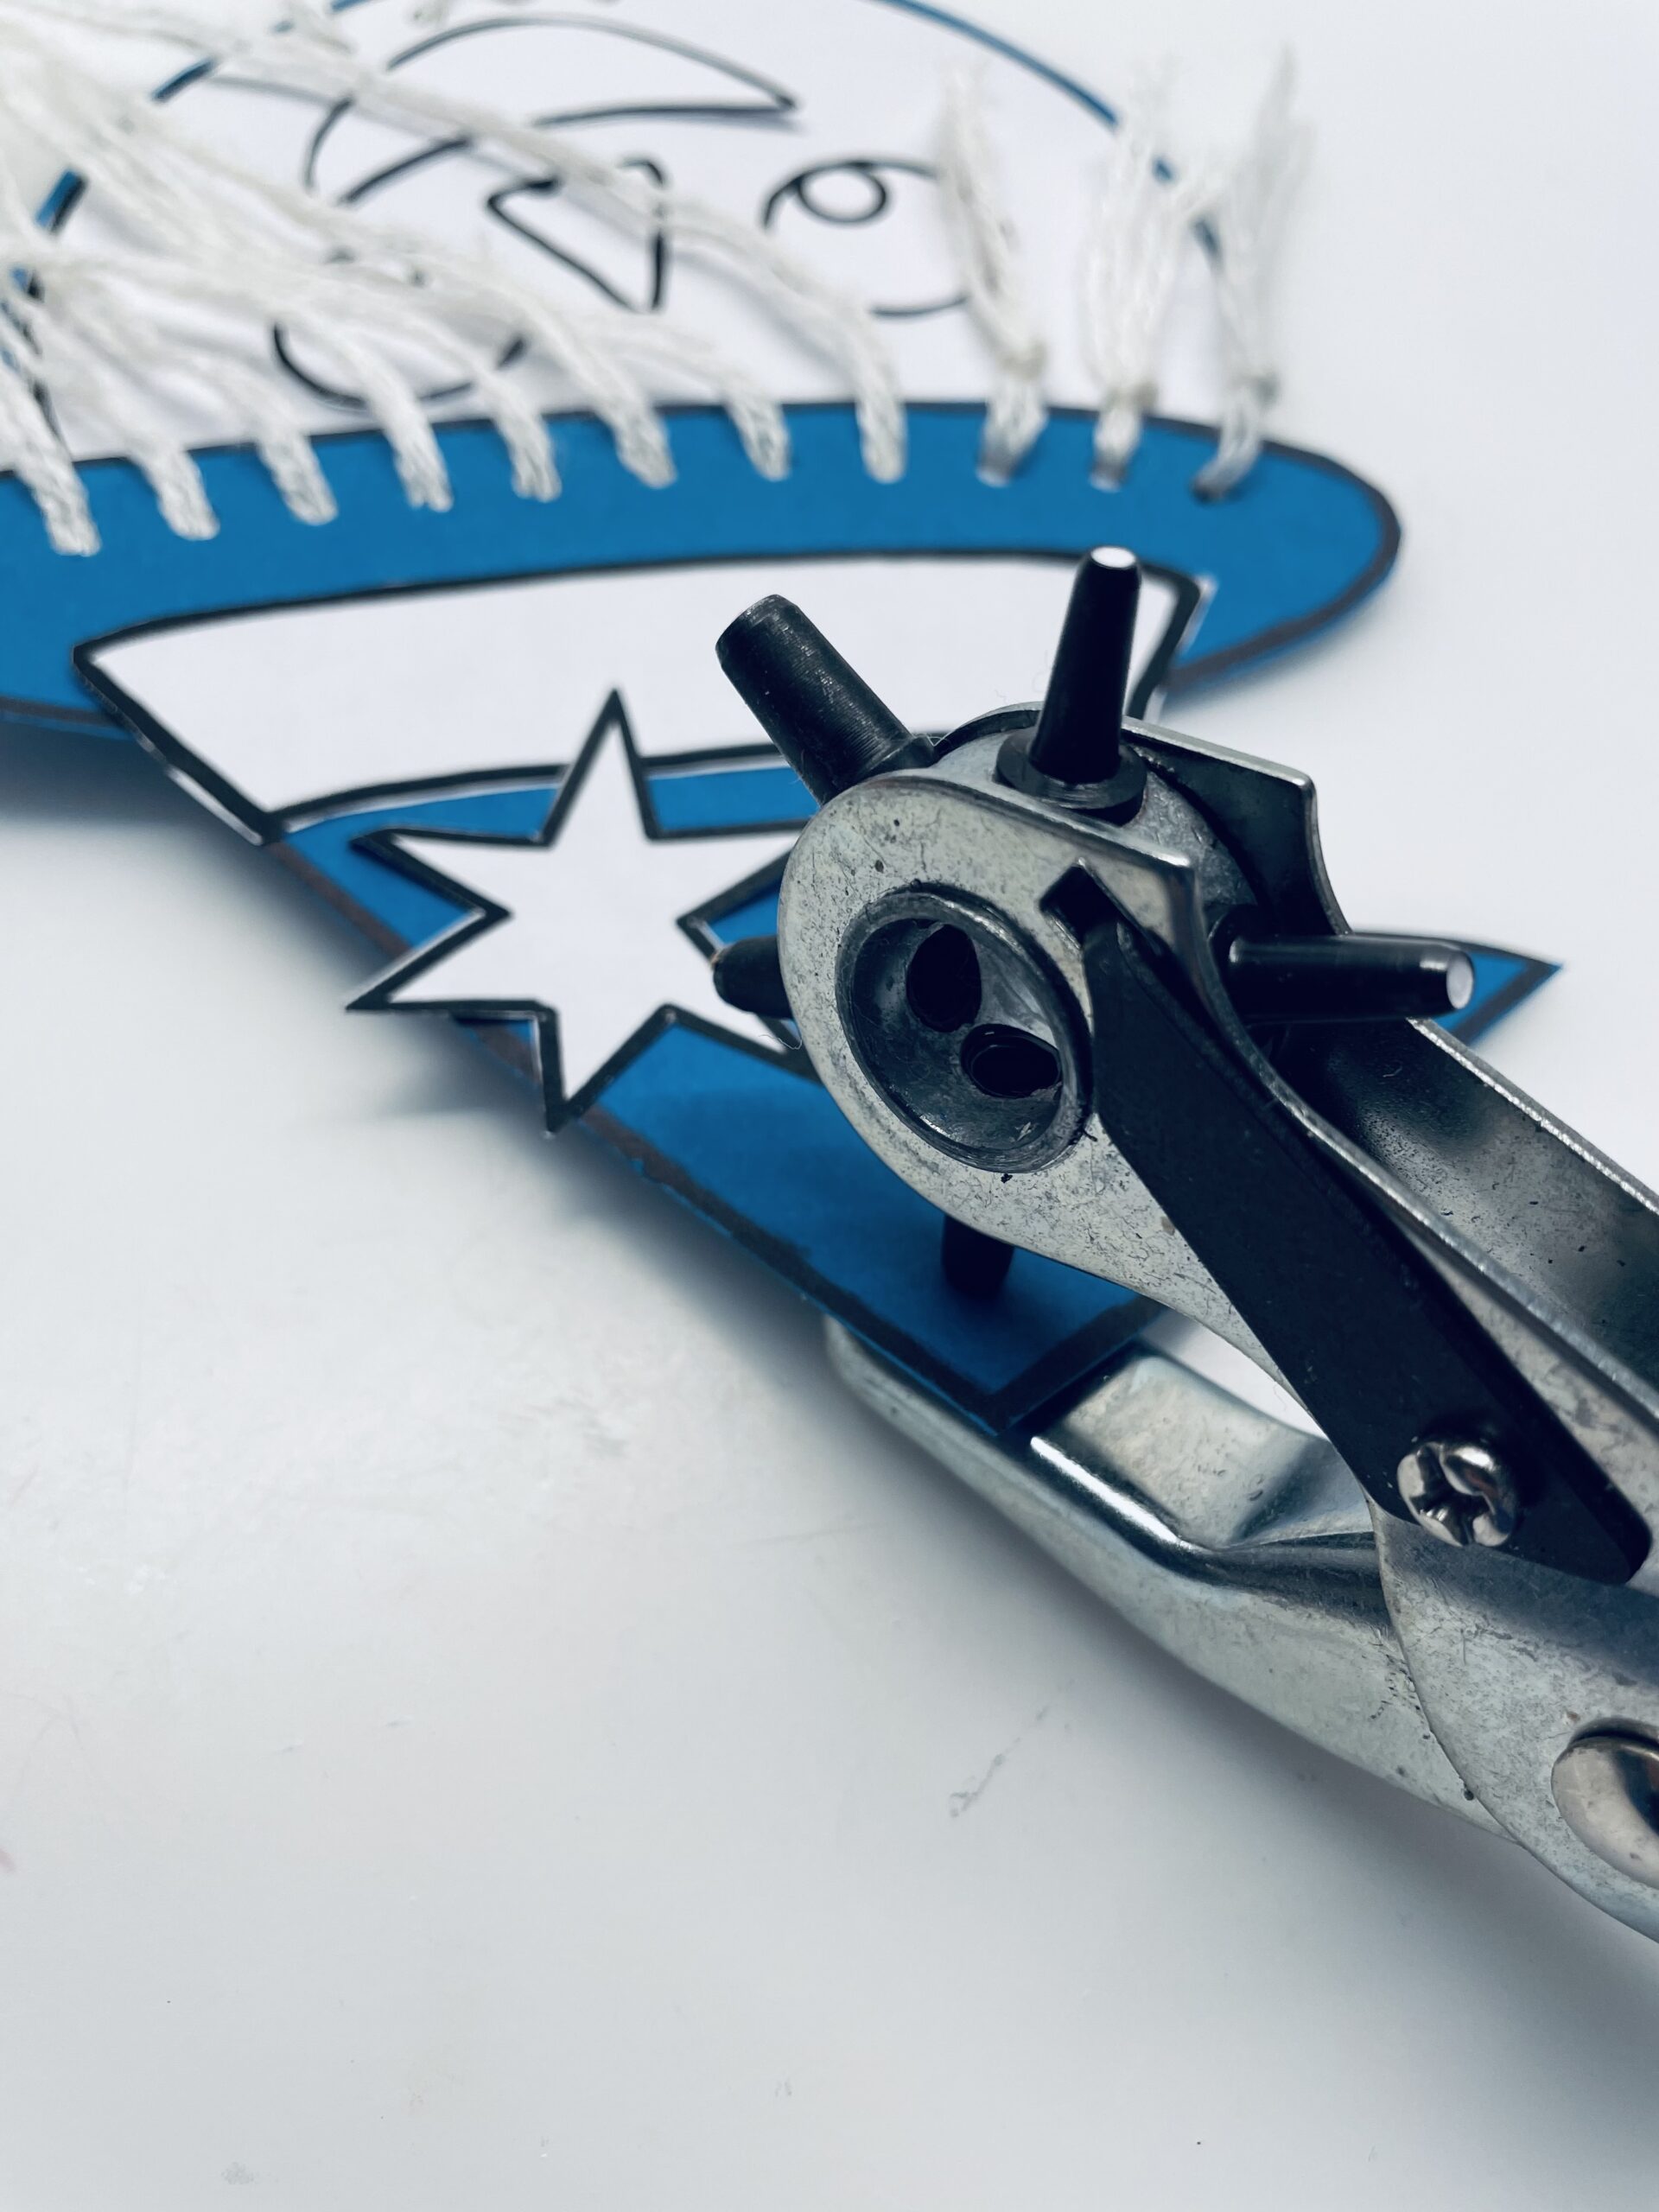
Then you punch holes in the bottom of the hat with the punched pliers or a punched hole.

Bild zum Schritt 8 für das Bastel- und DIY-Abenteuer für Kinder: 'Danach locht ihr mit der Lochzange oder einem Locher Löcher...'

9

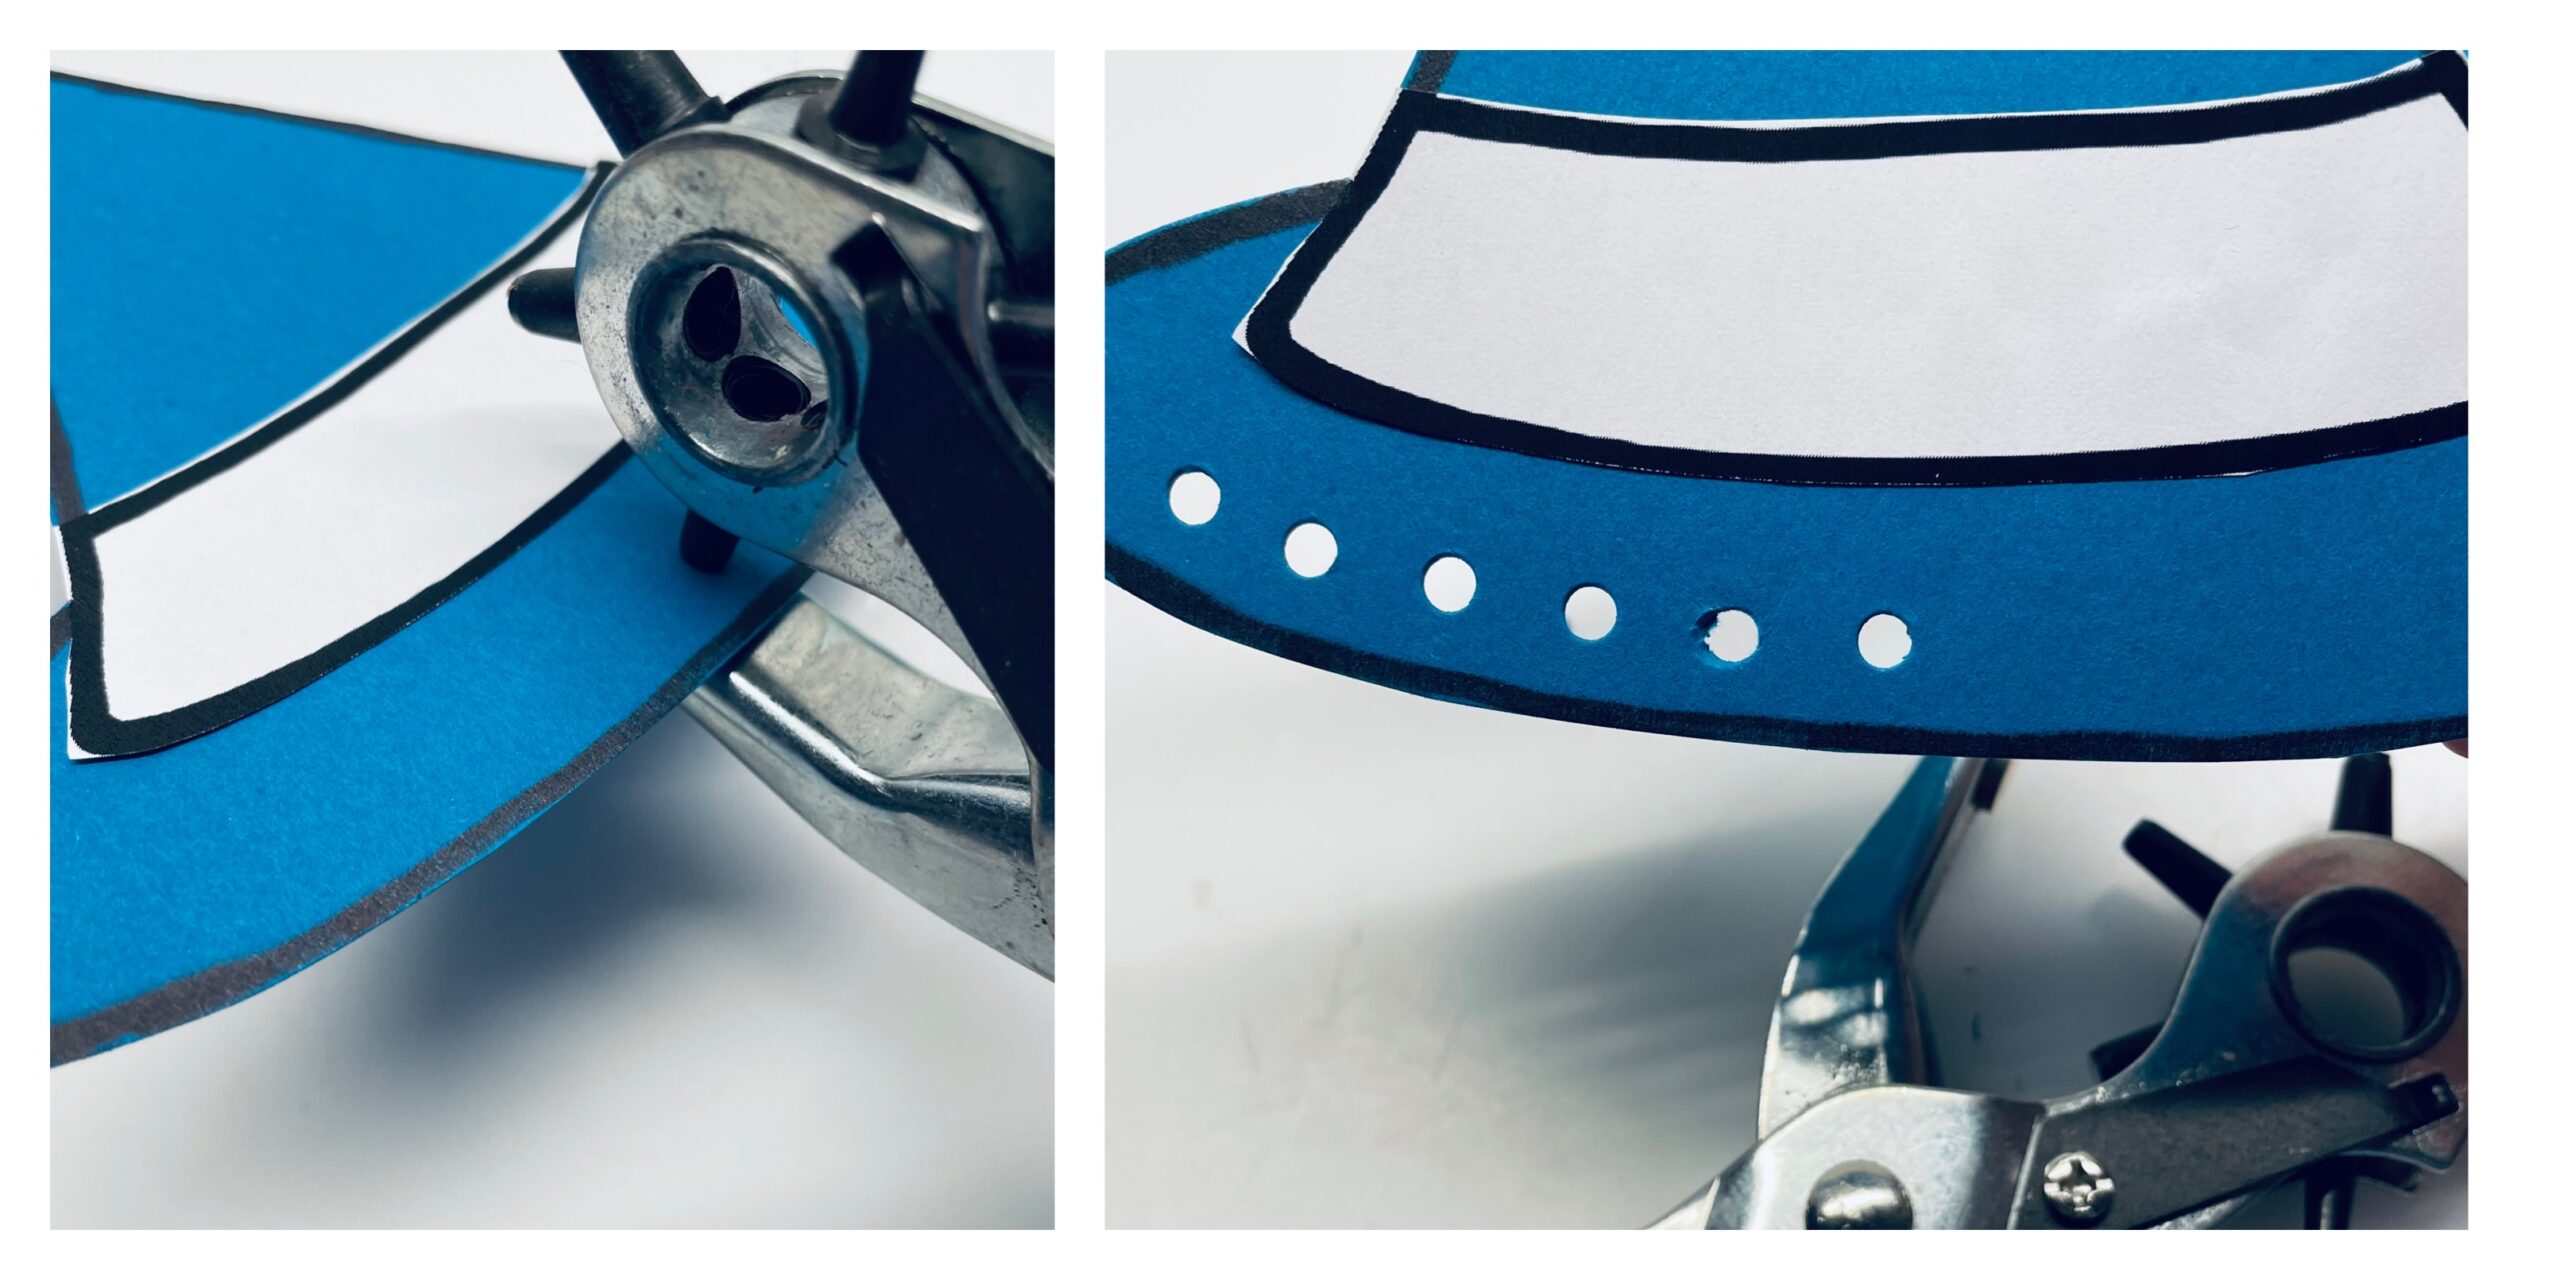
That's what it looks like now.

Bild zum Schritt 9 für das Bastel- und DIY-Abenteuer für Kinder: 'So sieht es jetzt aus.'

10

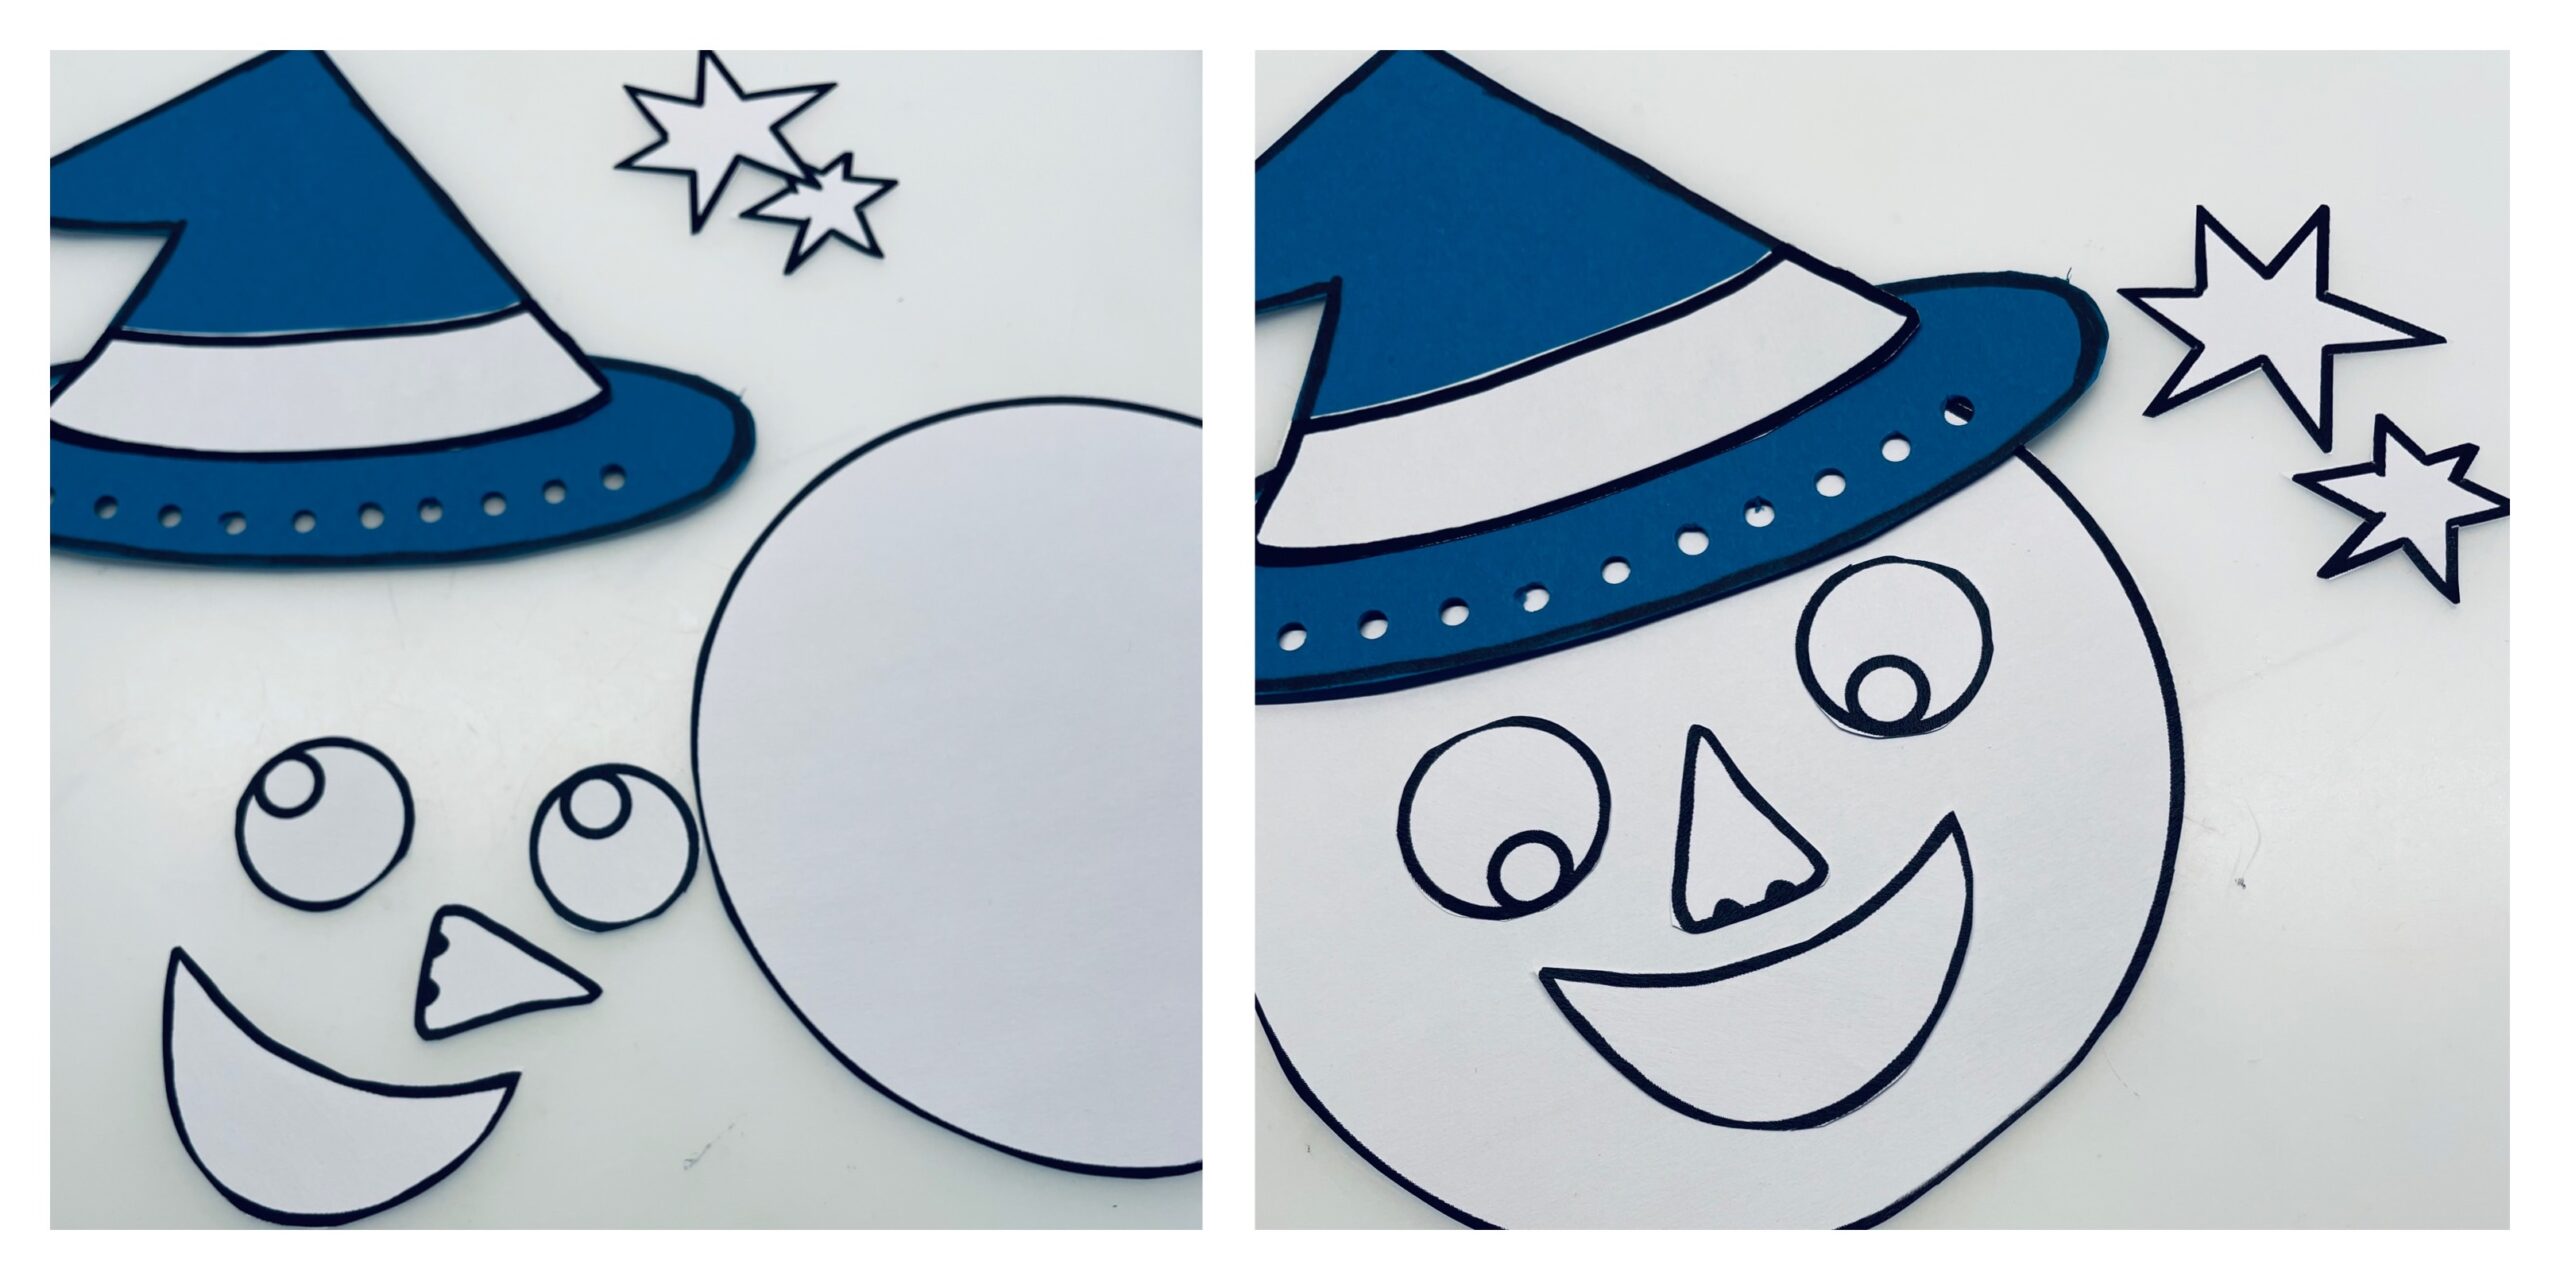
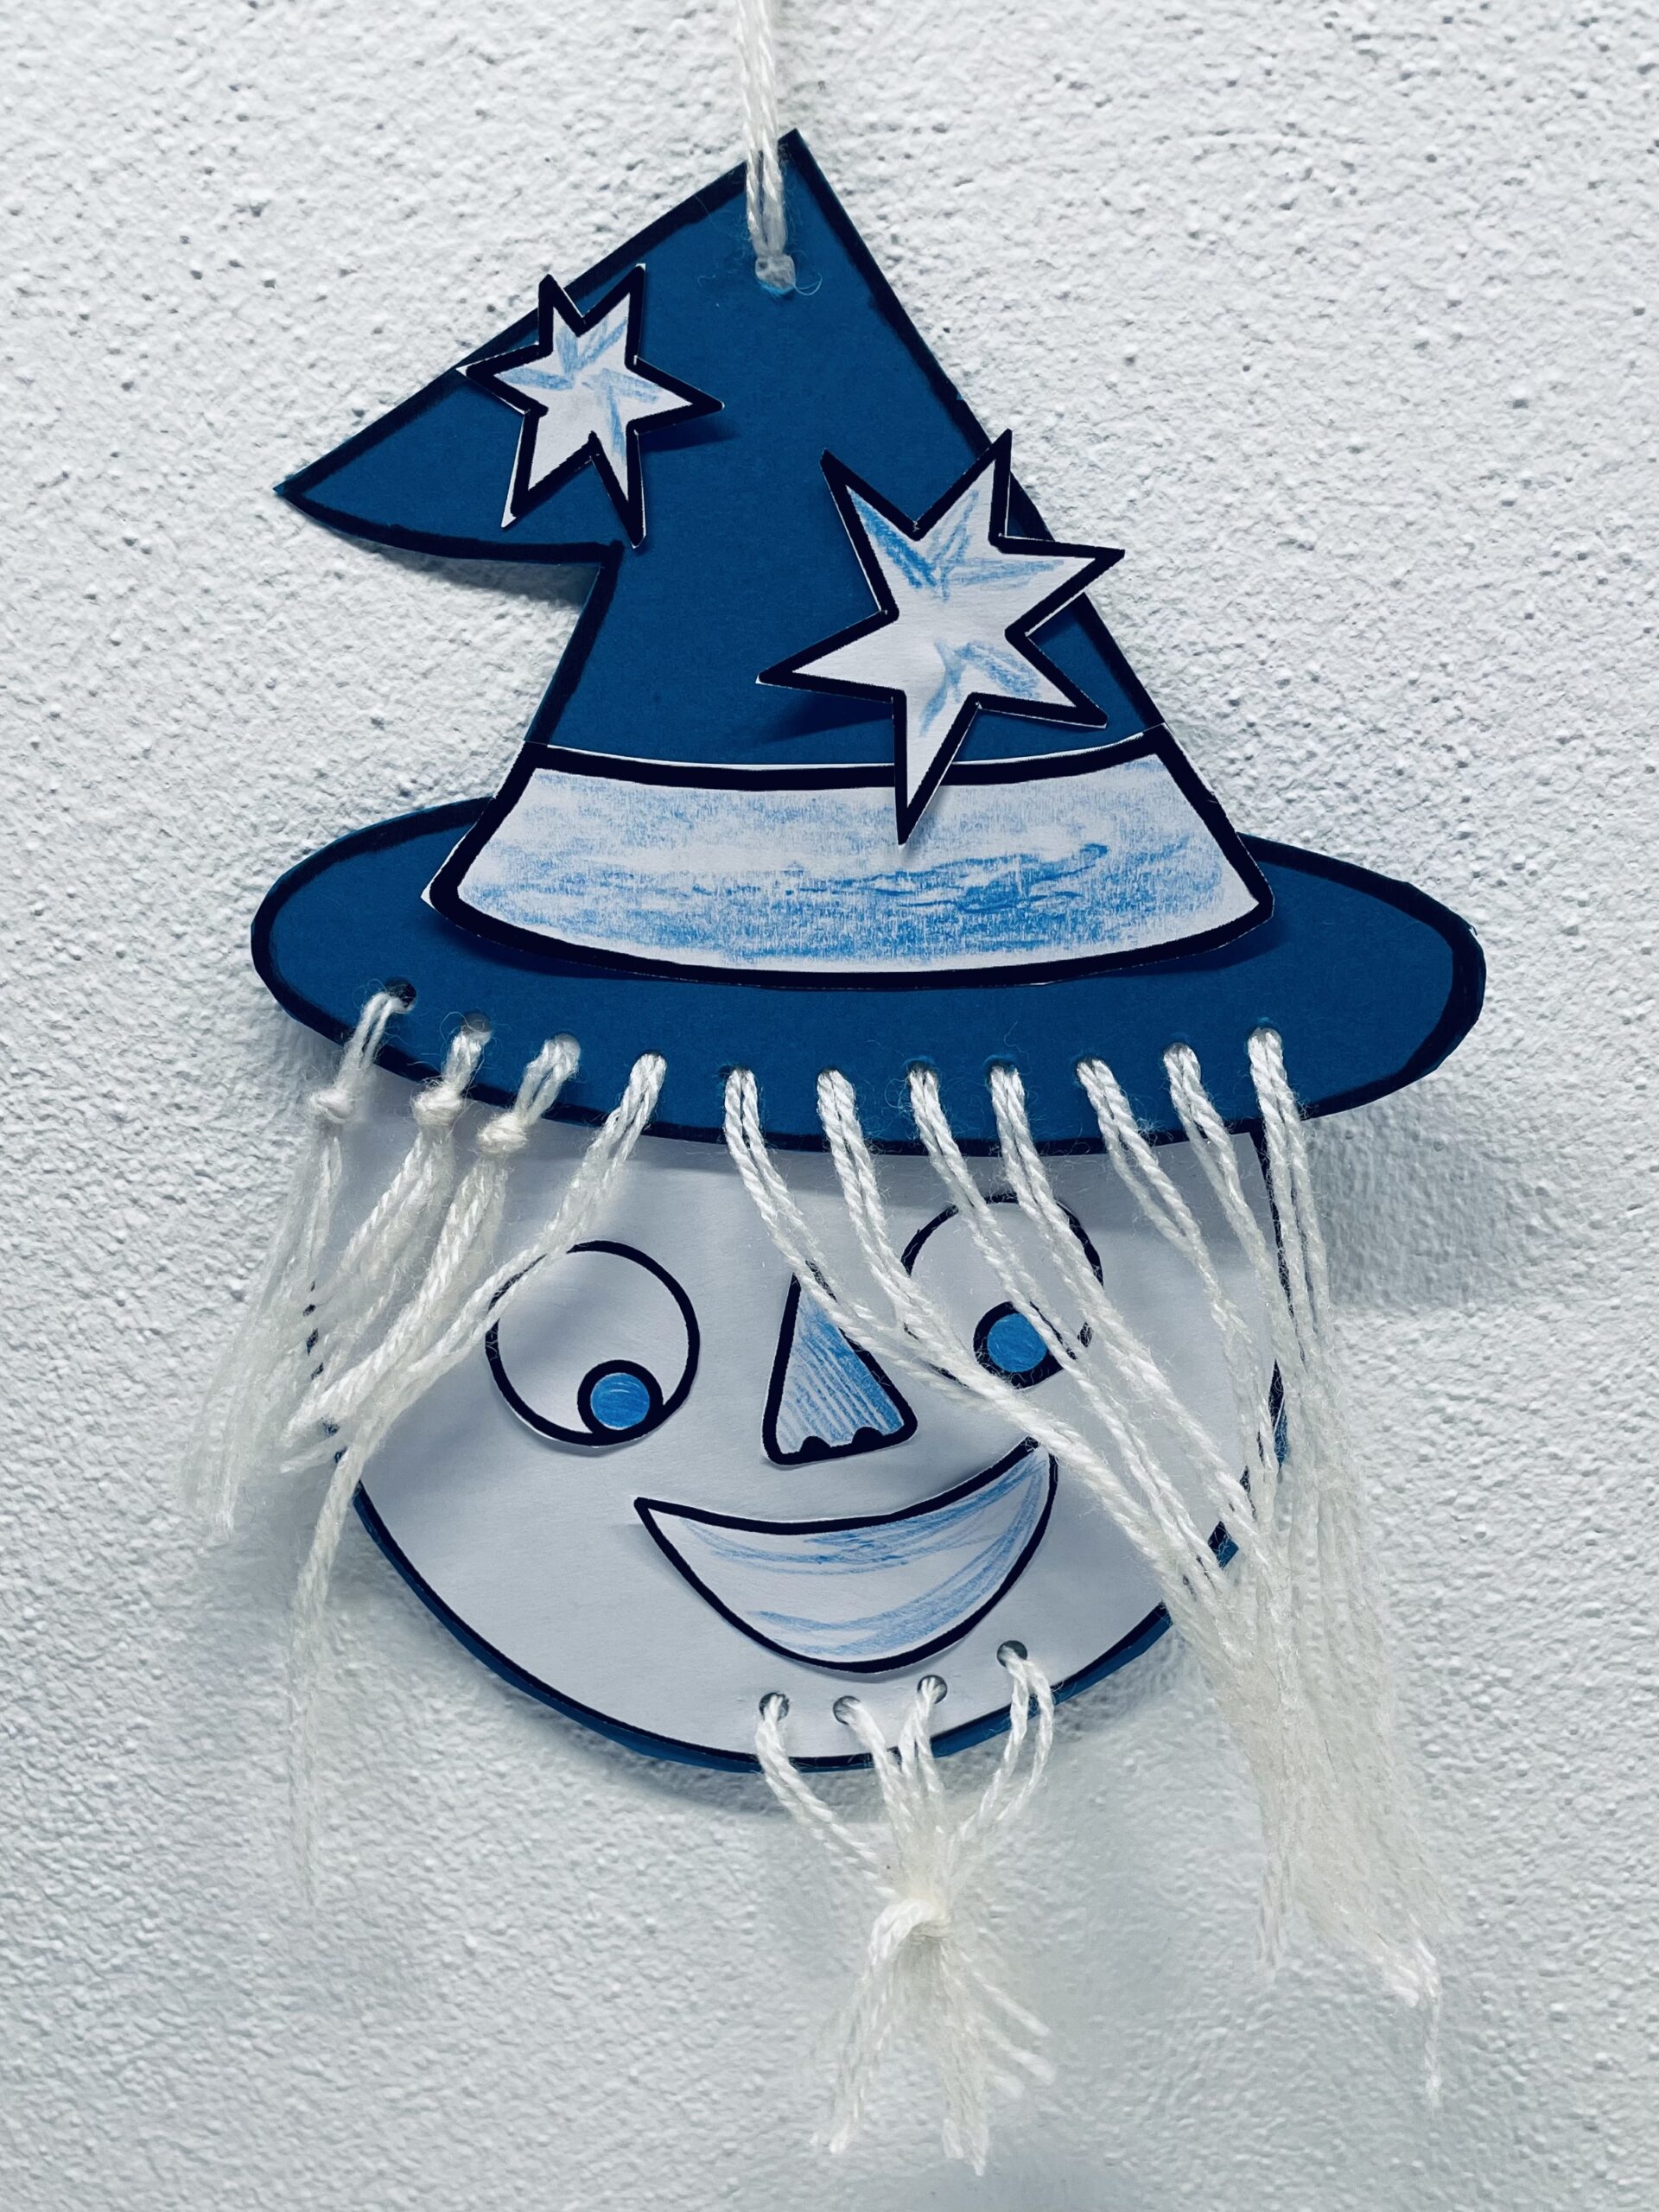
Now cut out all other items and place them on the round large circle; the face of the wizard. Then stick the items on.

Bild zum Schritt 10 für das Bastel- und DIY-Abenteuer für Kinder: 'Schneidet jetzt alle weiteren Einzelteile aus und legt sie auf...'

11

Then you cut wool to the length of about 12 cm.

Bild zum Schritt 11 für das Bastel- und DIY-Abenteuer für Kinder: 'Danach schneidet ihr euch Wolle auf die Länge von circa...'

Option 1: thread and knot
12

Thread the wool threads through the holes. Pull the thread so that both ends lie on each other.

Bild zum Schritt 13 für das Bastel- und DIY-Abenteuer für Kinder: 'Fädelt die Wollfäden durch die Löcher. Zieht den Faden soweit...'

13

Put a knot in the thread and fix it on the magic hat.

Bild zum Schritt 14 für das Bastel- und DIY-Abenteuer für Kinder: 'Macht einen Knoten in den Faden und fixiert ihn so...'

14

Repeat this on all holes.

Bild zum Schritt 15 für das Bastel- und DIY-Abenteuer für Kinder: 'Wiederholt das bei allen Löchern.'

Possibility 2: thread and glue
15

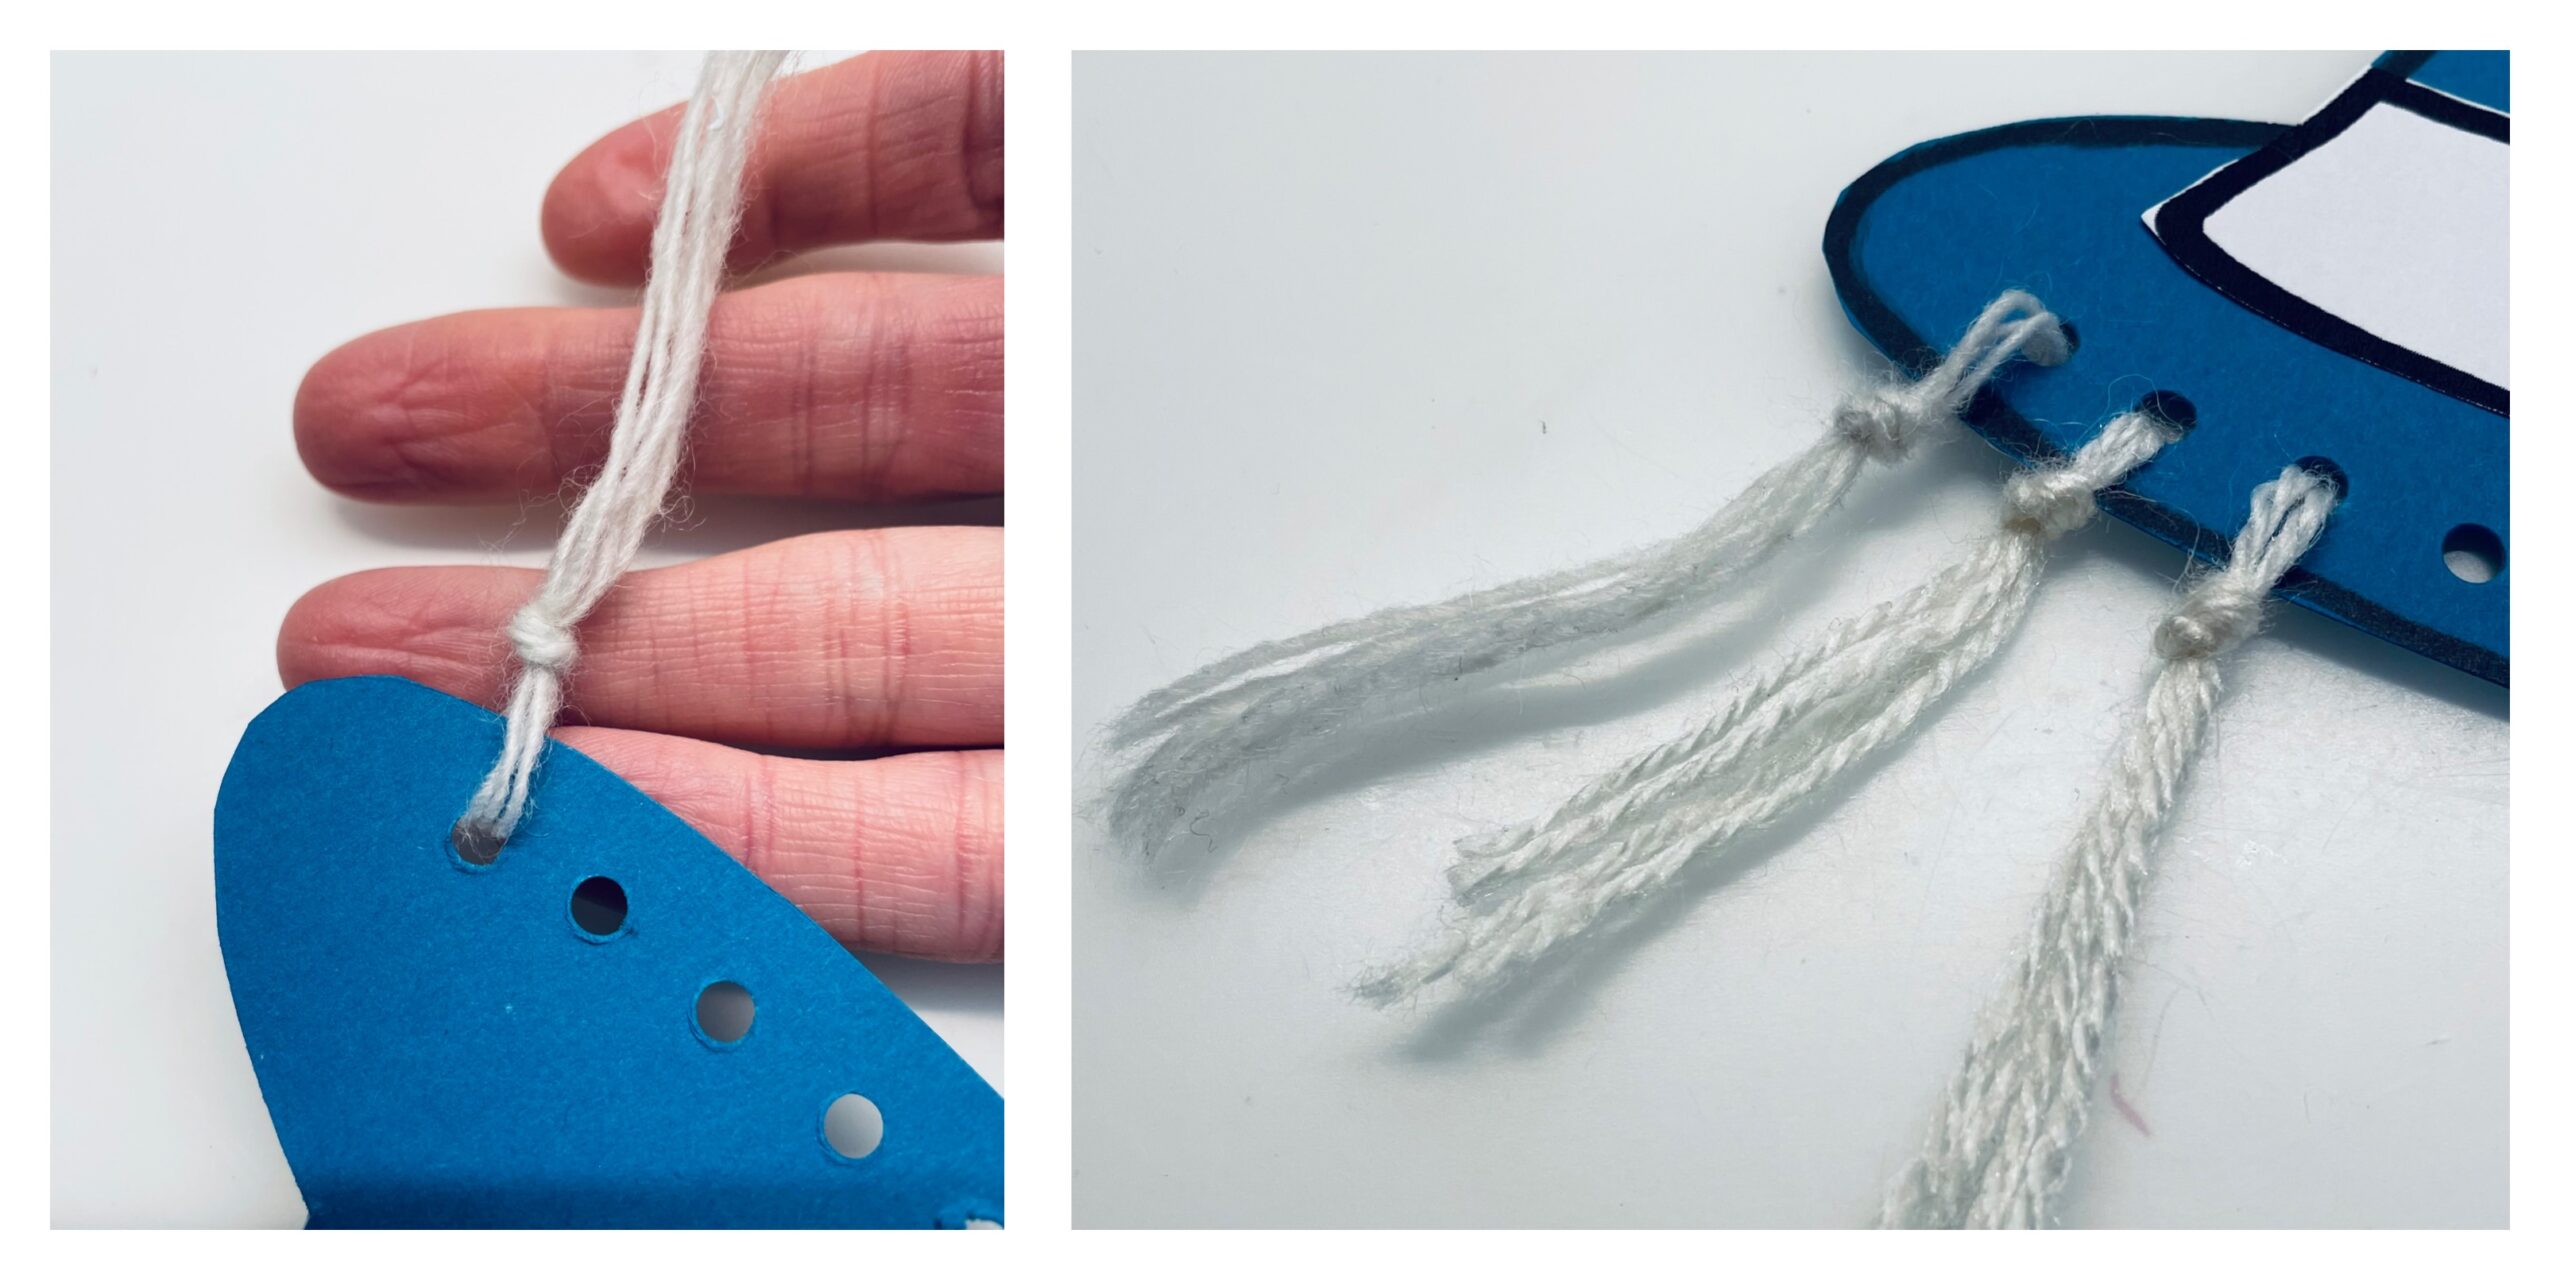
If you can't tie a knot yet, leave the thread on the back about 1.5 cm above and stick it up. Take a glue stick or tesa film.

Bild zum Schritt 17 für das Bastel- und DIY-Abenteuer für Kinder: 'Wenn ihr noch keinen Knoten binden könnt, lasst den Faden...'

16

Repeat that with every hole.

Bild zum Schritt 18 für das Bastel- und DIY-Abenteuer für Kinder: 'Wiederholt das bei jedem Loch.'

The beard of the sorcerer
17

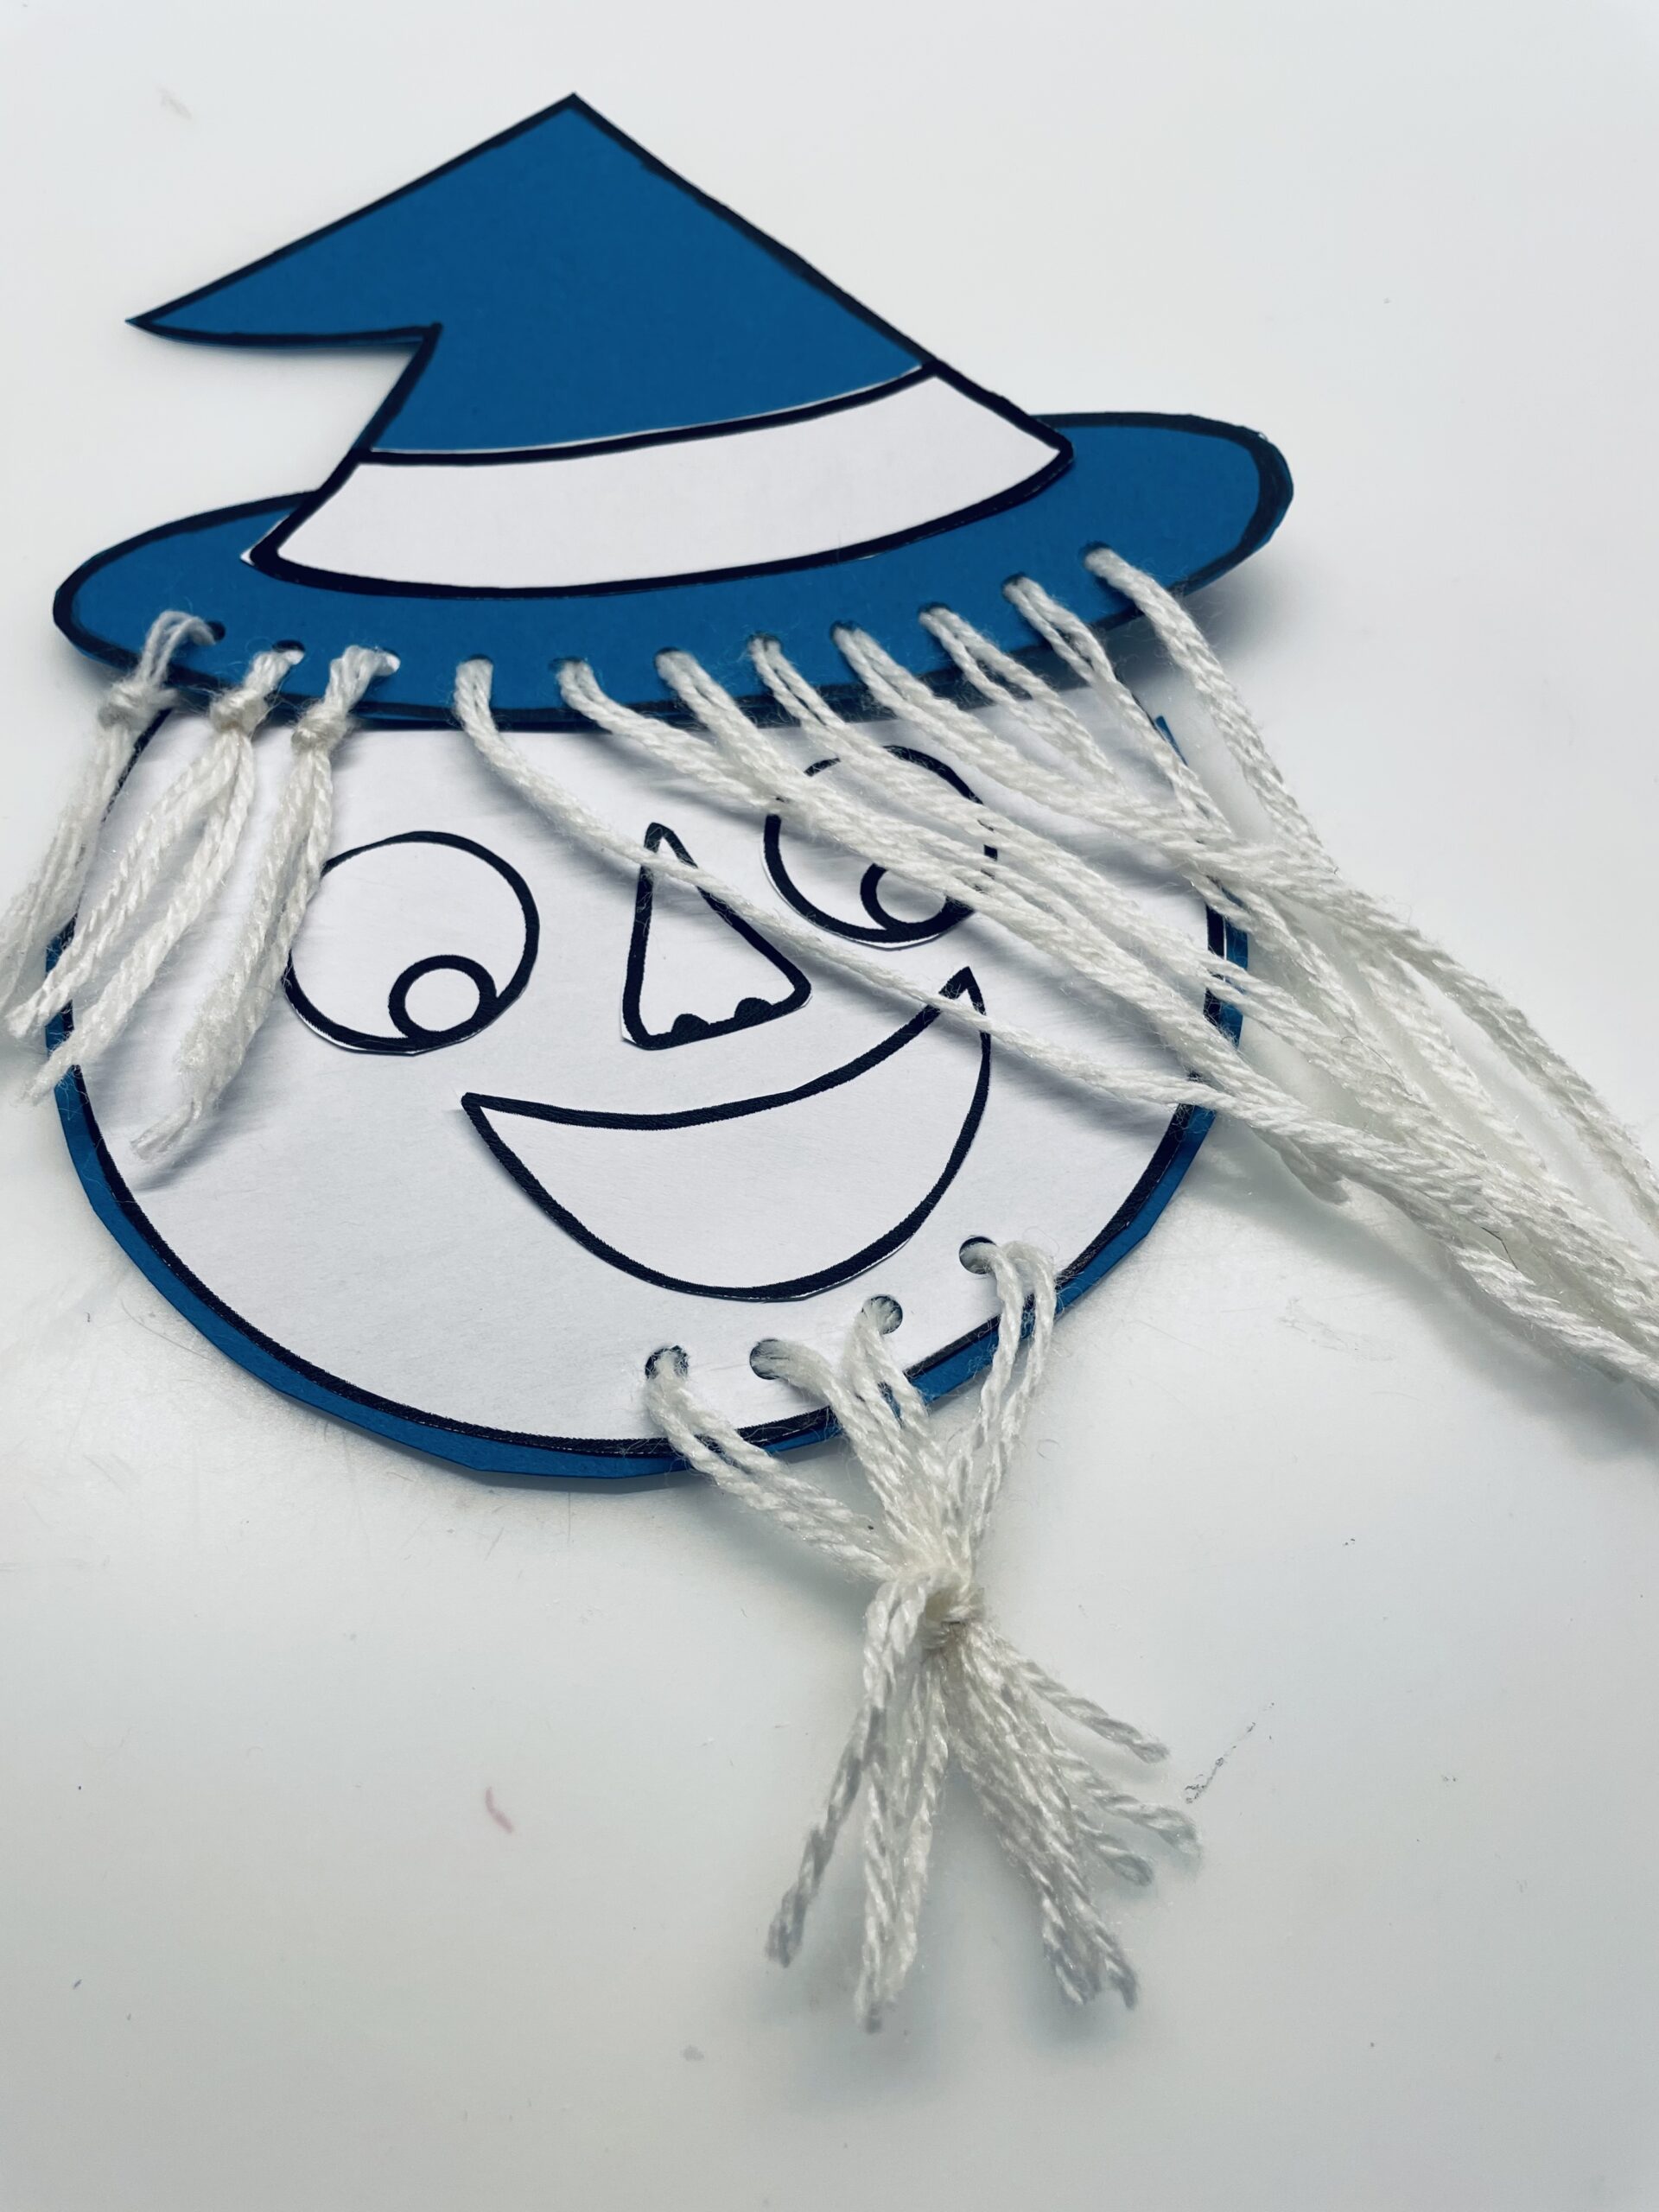
In addition, you can make the wizard another beard. For this, make 4 holes under the mouth into the circle.

Bild zum Schritt 20 für das Bastel- und DIY-Abenteuer für Kinder: 'Zusätzlich könnt ihr den Zauberer noch einen Bart basteln. Hierfür...'

18

Here thread from front to back through the first hole and through the second thread from back to front. Pull through the thread so that the ends are at the same height. Repeat this with the other two holes. Four threads are the same length as beard.

Bild zum Schritt 21 für das Bastel- und DIY-Abenteuer für Kinder: 'Fädelt hier einen Faden von vorne nach hinten durch das...'

19

With another thread, the 4 threads are tied together. Place the thread across the beard threads and make a knot over it.

Bild zum Schritt 22 für das Bastel- und DIY-Abenteuer für Kinder: 'Mit einem weiteren Faden werden die 4 Fäden zusammen gebunden....'

20

The beard is ready.

Bild zum Schritt 23 für das Bastel- und DIY-Abenteuer für Kinder: 'Fertig ist der Bart.'

Put together:
21

Stick the magic hat on the head.

Bild zum Schritt 25 für das Bastel- und DIY-Abenteuer für Kinder: 'Klebt den Zauberhut auf den Kopf.'

22

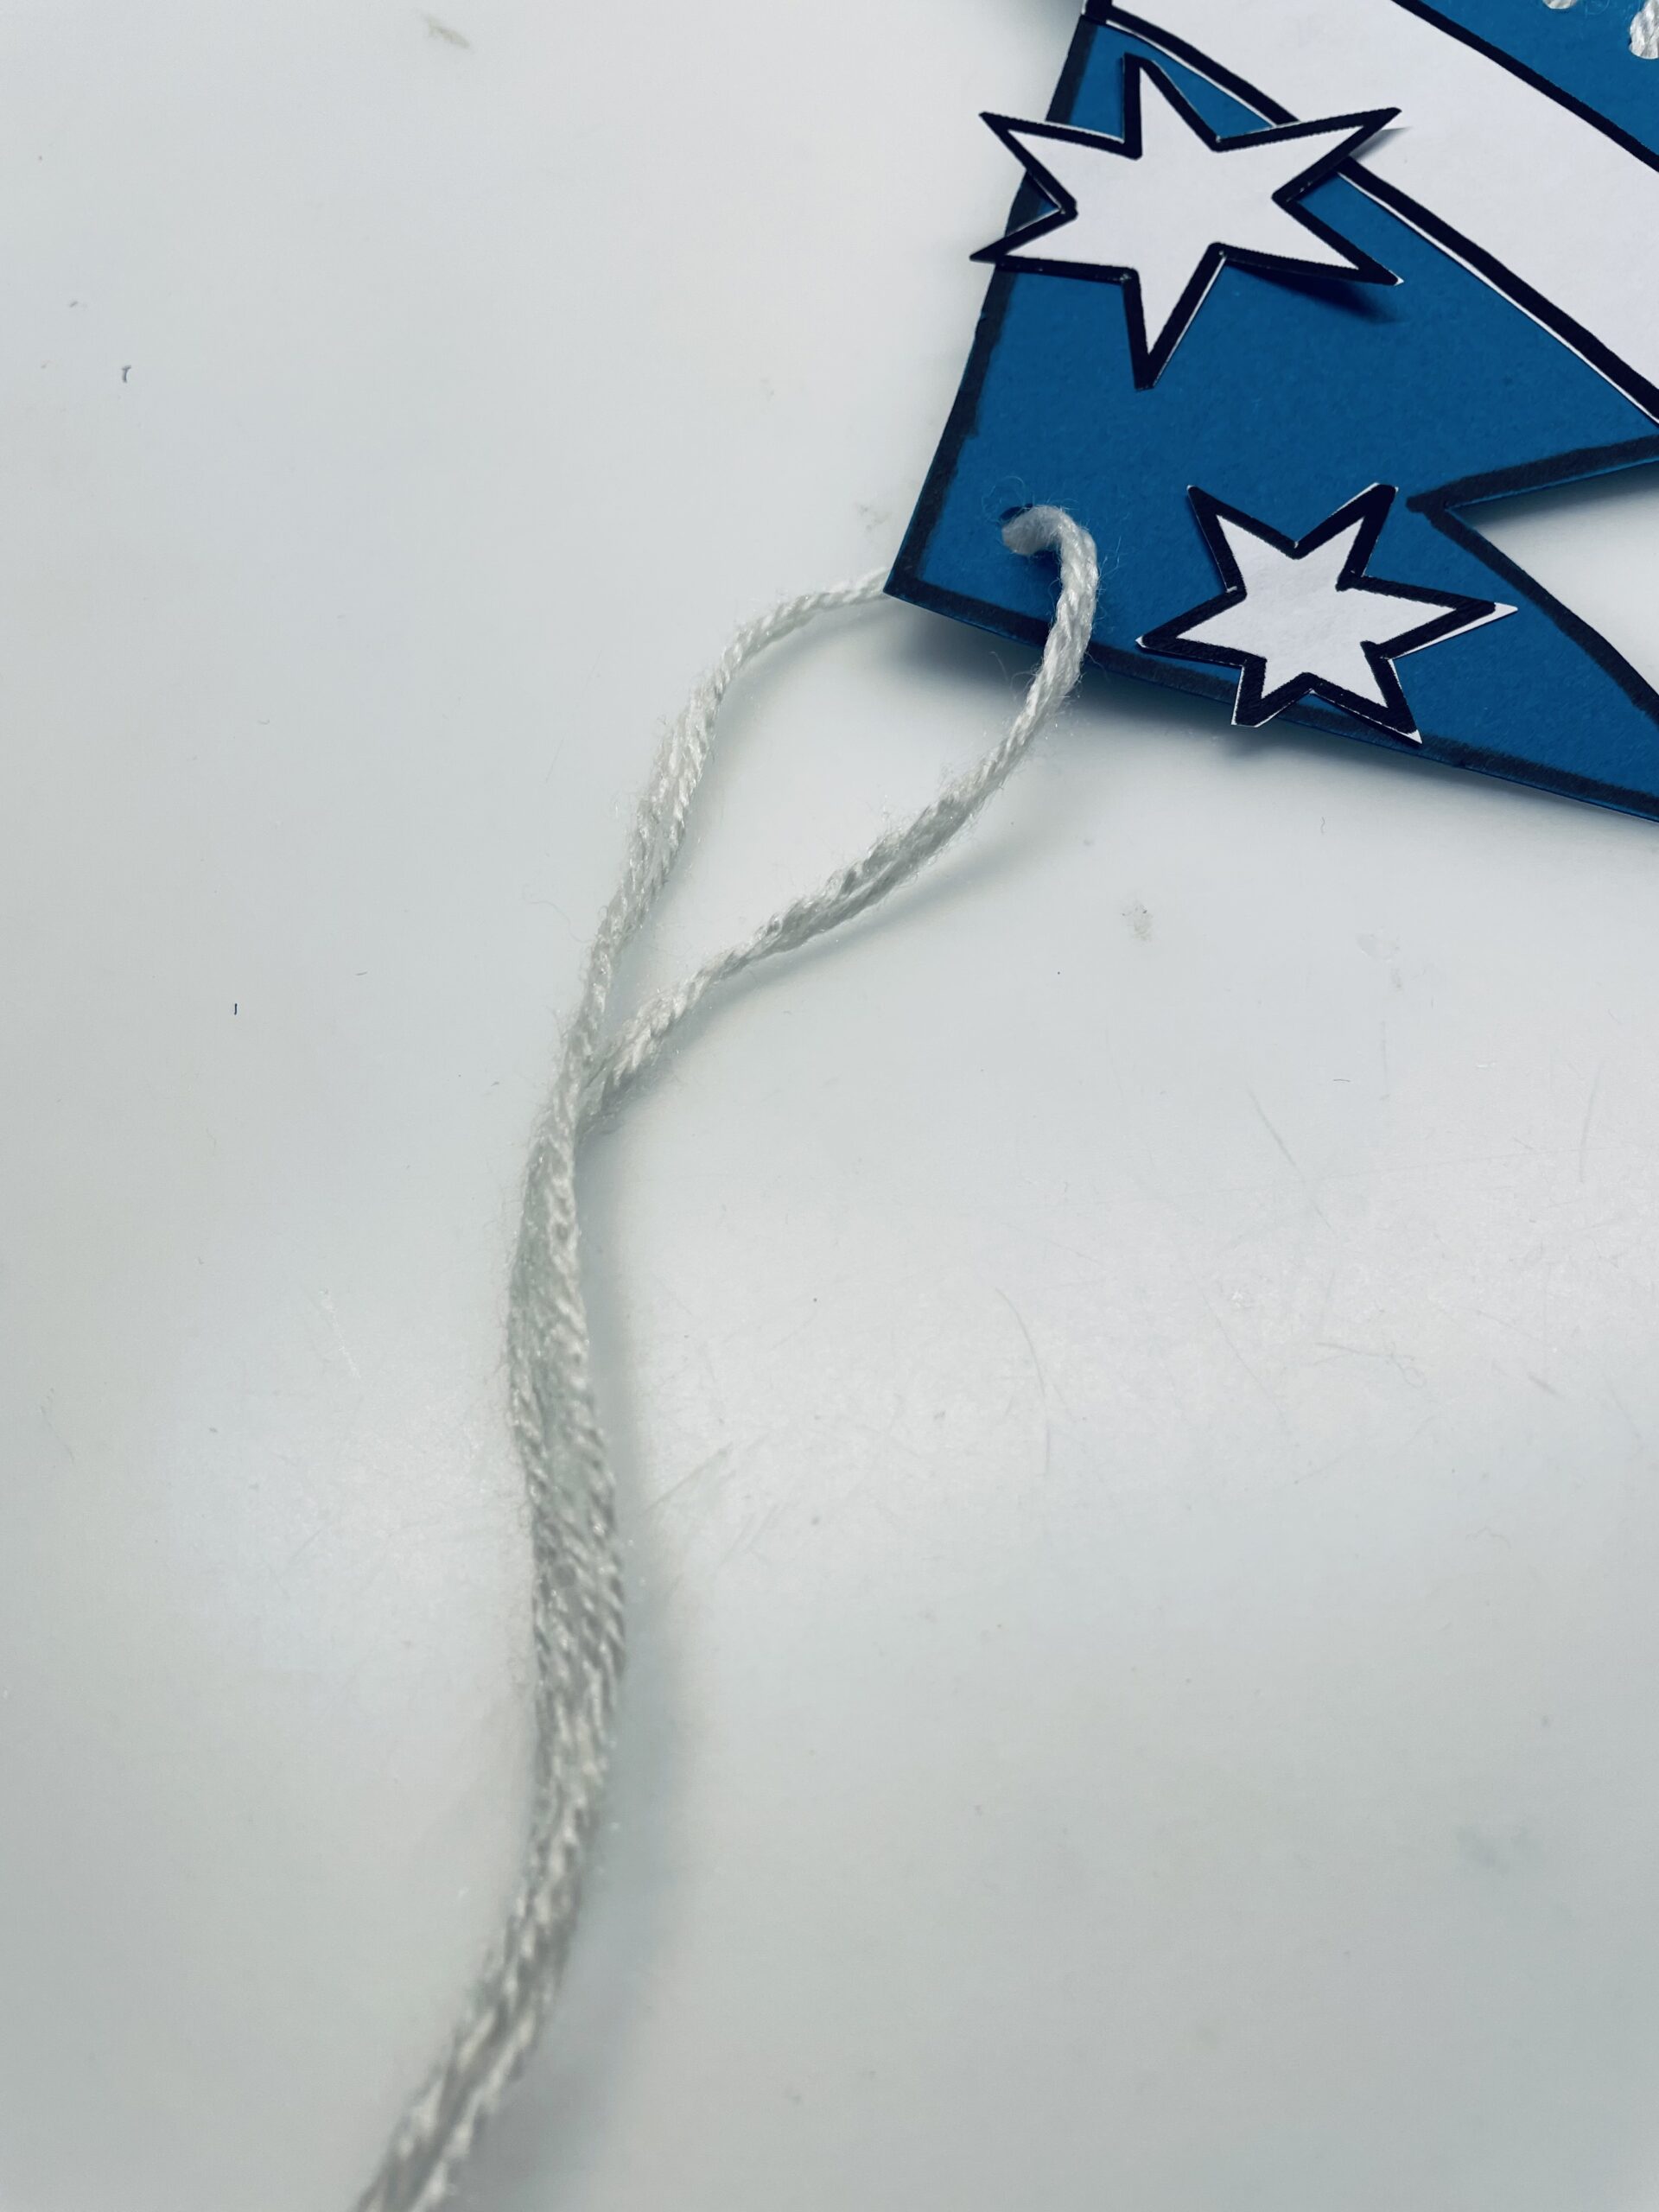
Makes a hole at the top of the hat.

Bild zum Schritt 26 für das Bastel- und DIY-Abenteuer für Kinder: 'Macht an der Spitze des Hutes ein Loch.'

23

Put a thread through it, knot both ends together, so you can hang the wizard.

Bild zum Schritt 27 für das Bastel- und DIY-Abenteuer für Kinder: 'Fädelt einen Faden hindurch. Verknotet beide Enden miteinander. So könnt...'

24

Use the wizard as room decoration to carnival or make it on a magic birthday.

Bild zum Schritt 28 für das Bastel- und DIY-Abenteuer für Kinder: 'Verwendet den Zauberer als Raumschmuck zu Fasching oder bastelt ihn...'

25

Let this template inspire you and choose your own colors and ideas to design. Gift ribbons, bast or stretch cords are also suitable for threading the hair. For the design of the hat you can also use sequins and glitter or create your own patterns.
Stay creative!

Bild zum Schritt 29 für das Bastel- und DIY-Abenteuer für Kinder: 'Lasst euch mit dieser Vorlage anregen und wählt eure eigenen...'

26

Have fun!