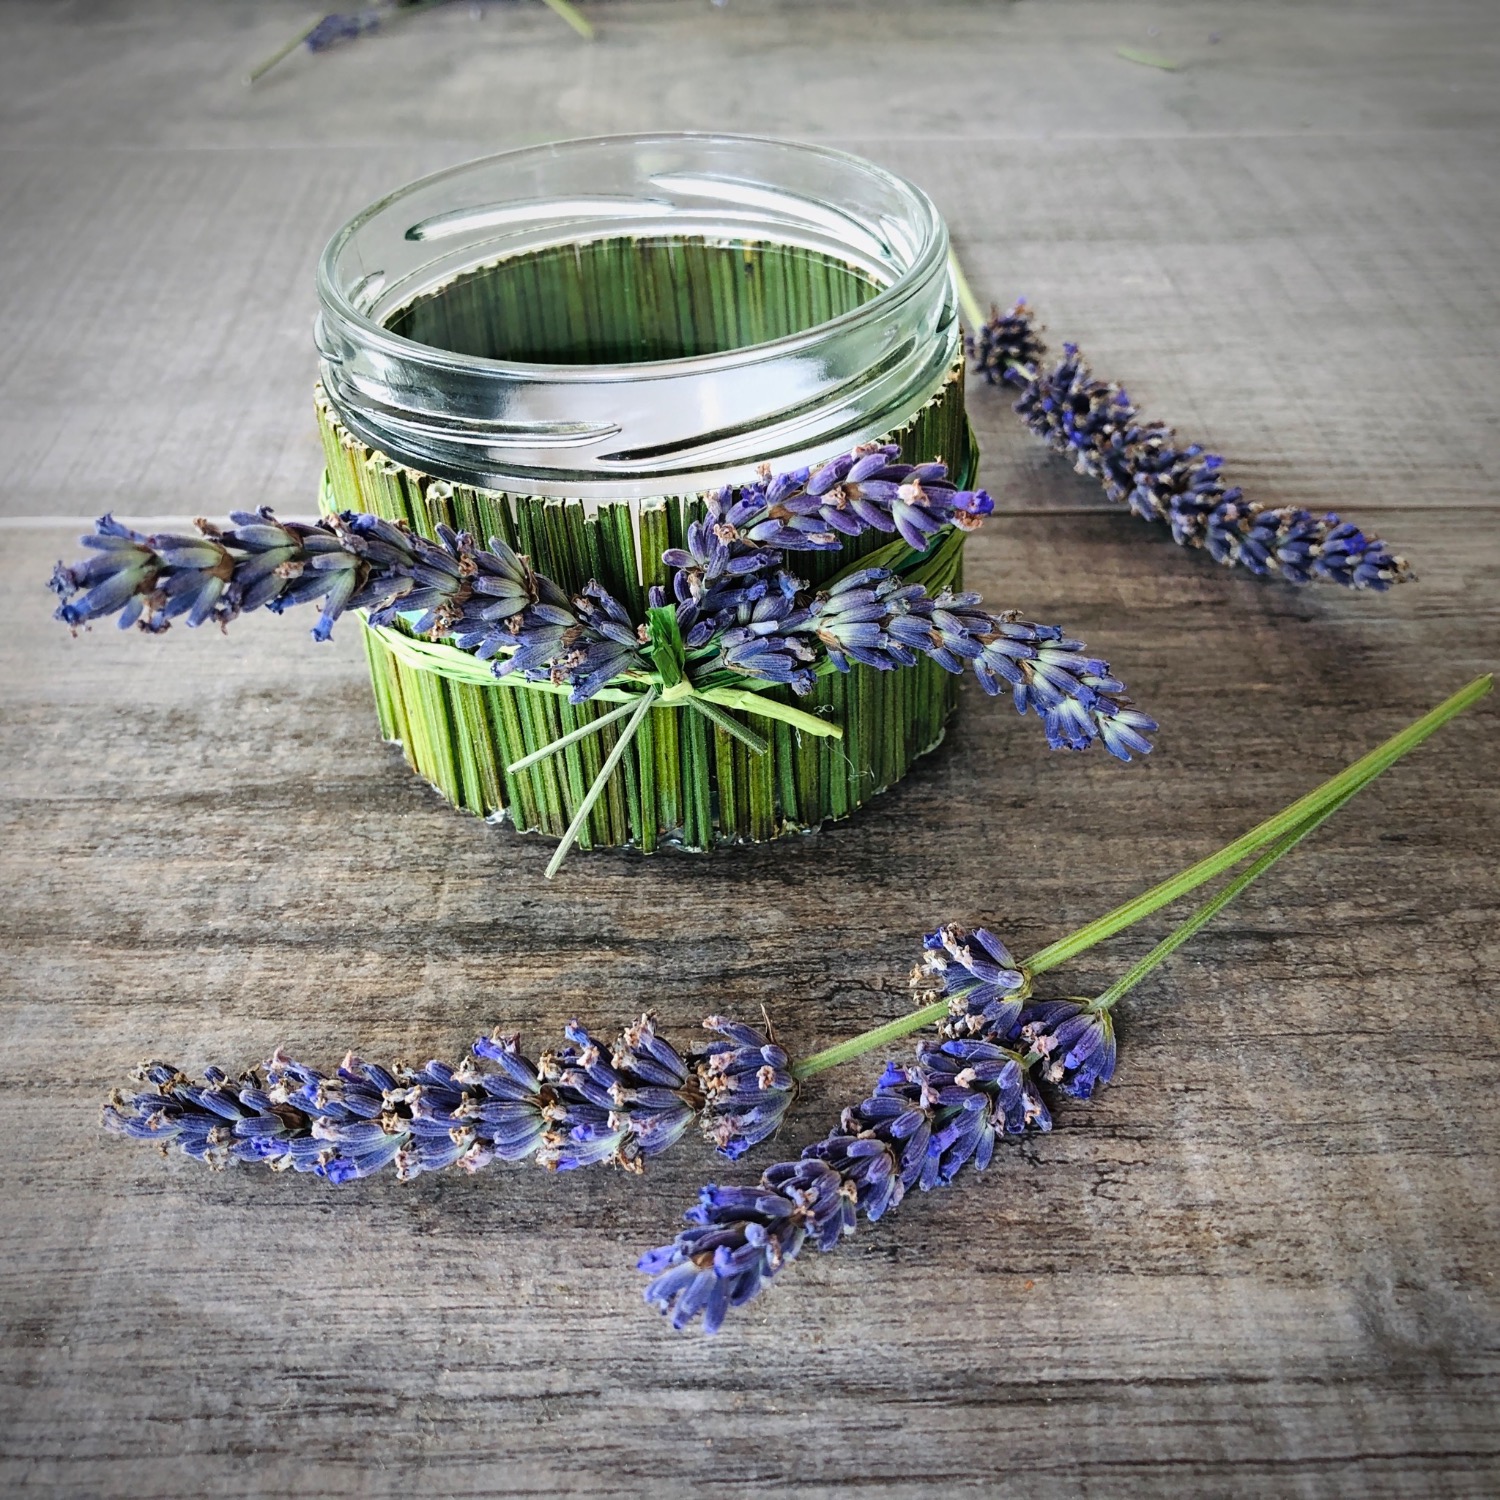
Windlight with lavender handles (4 variants)

AdventurerKatzi
Rating5.06.7 thousand times & (3) DifficultyIntermediate

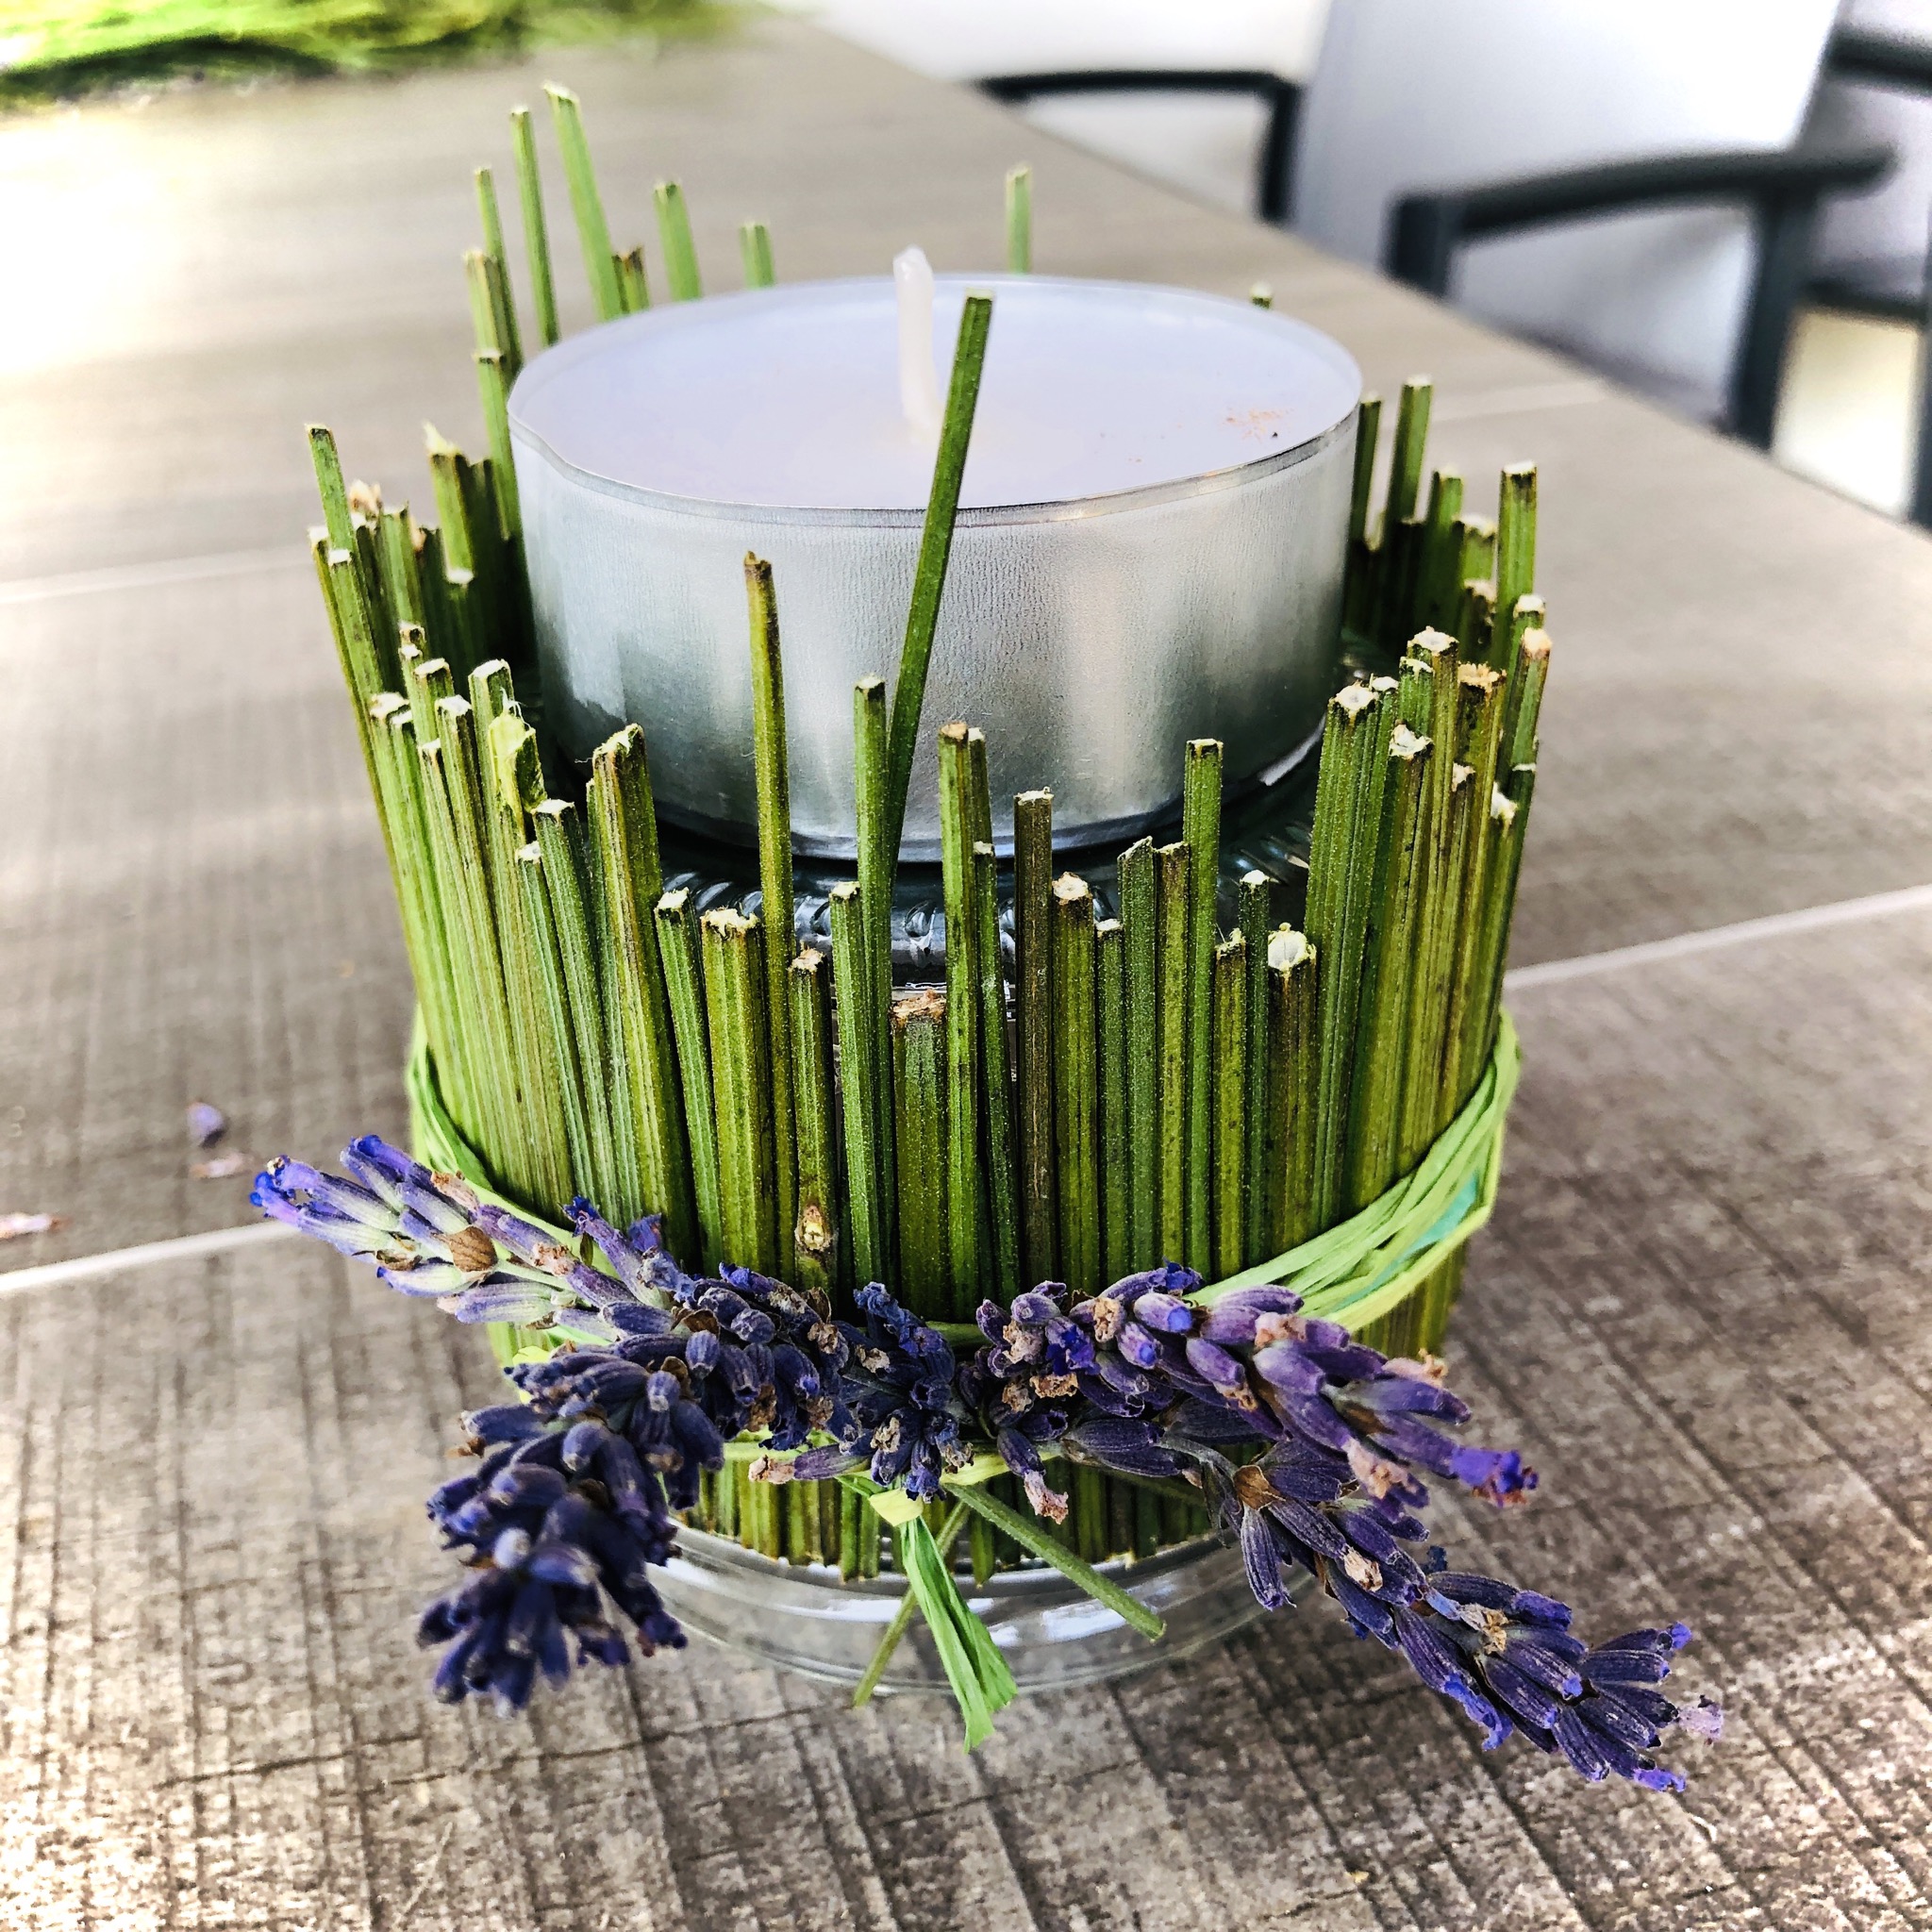
If the lavender is spoken of, it usually revolves around the lavender blossom. However, there were so many stalks left when crafting, that we came up with the idea to create windlights with it.
Use a small straight glass, cut the lavender stems into short pieces (about the height of the glass!) and tie them around the glass. Finished is an enchanting windlight!

Media Education for Kindergarten and Hort

Kind bastelt eine Rassel mit dem Navi
The Adventure Navi, the app for DIY projects, enables media education for the youngest.

Relief in everyday life, targeted promotion of individual children, independent learning and - without any pre-knowledge already usable by the youngest!


Titelbild zur Bastel- und DIY-Idee für Kinder '(357) Windlicht mit Lavendel-Stielen (4 Varianten)'
Material for1 Child
Prep Time10 min.Adv. Time20 min.Total Time30 min.
 thick lavender stalks without flowers
 a few lavender flowers
 1 Straight masonry glass
 1 Wide household rubber
 1 Hot glue gun
 1 big tealight
 1 Basted cordabout 40 cm long
All links marked with a shopping cart lead to Amazon - here we have selected products that we would order ourselves and in part also ordered. In a qualified purchase via the advertising link, we as Amazon partner receive a commission, for you there are no costs. You thus support our cost- and advertising banner-free, educational offer.
1

A wide household rubber is put around a flat straight glass.
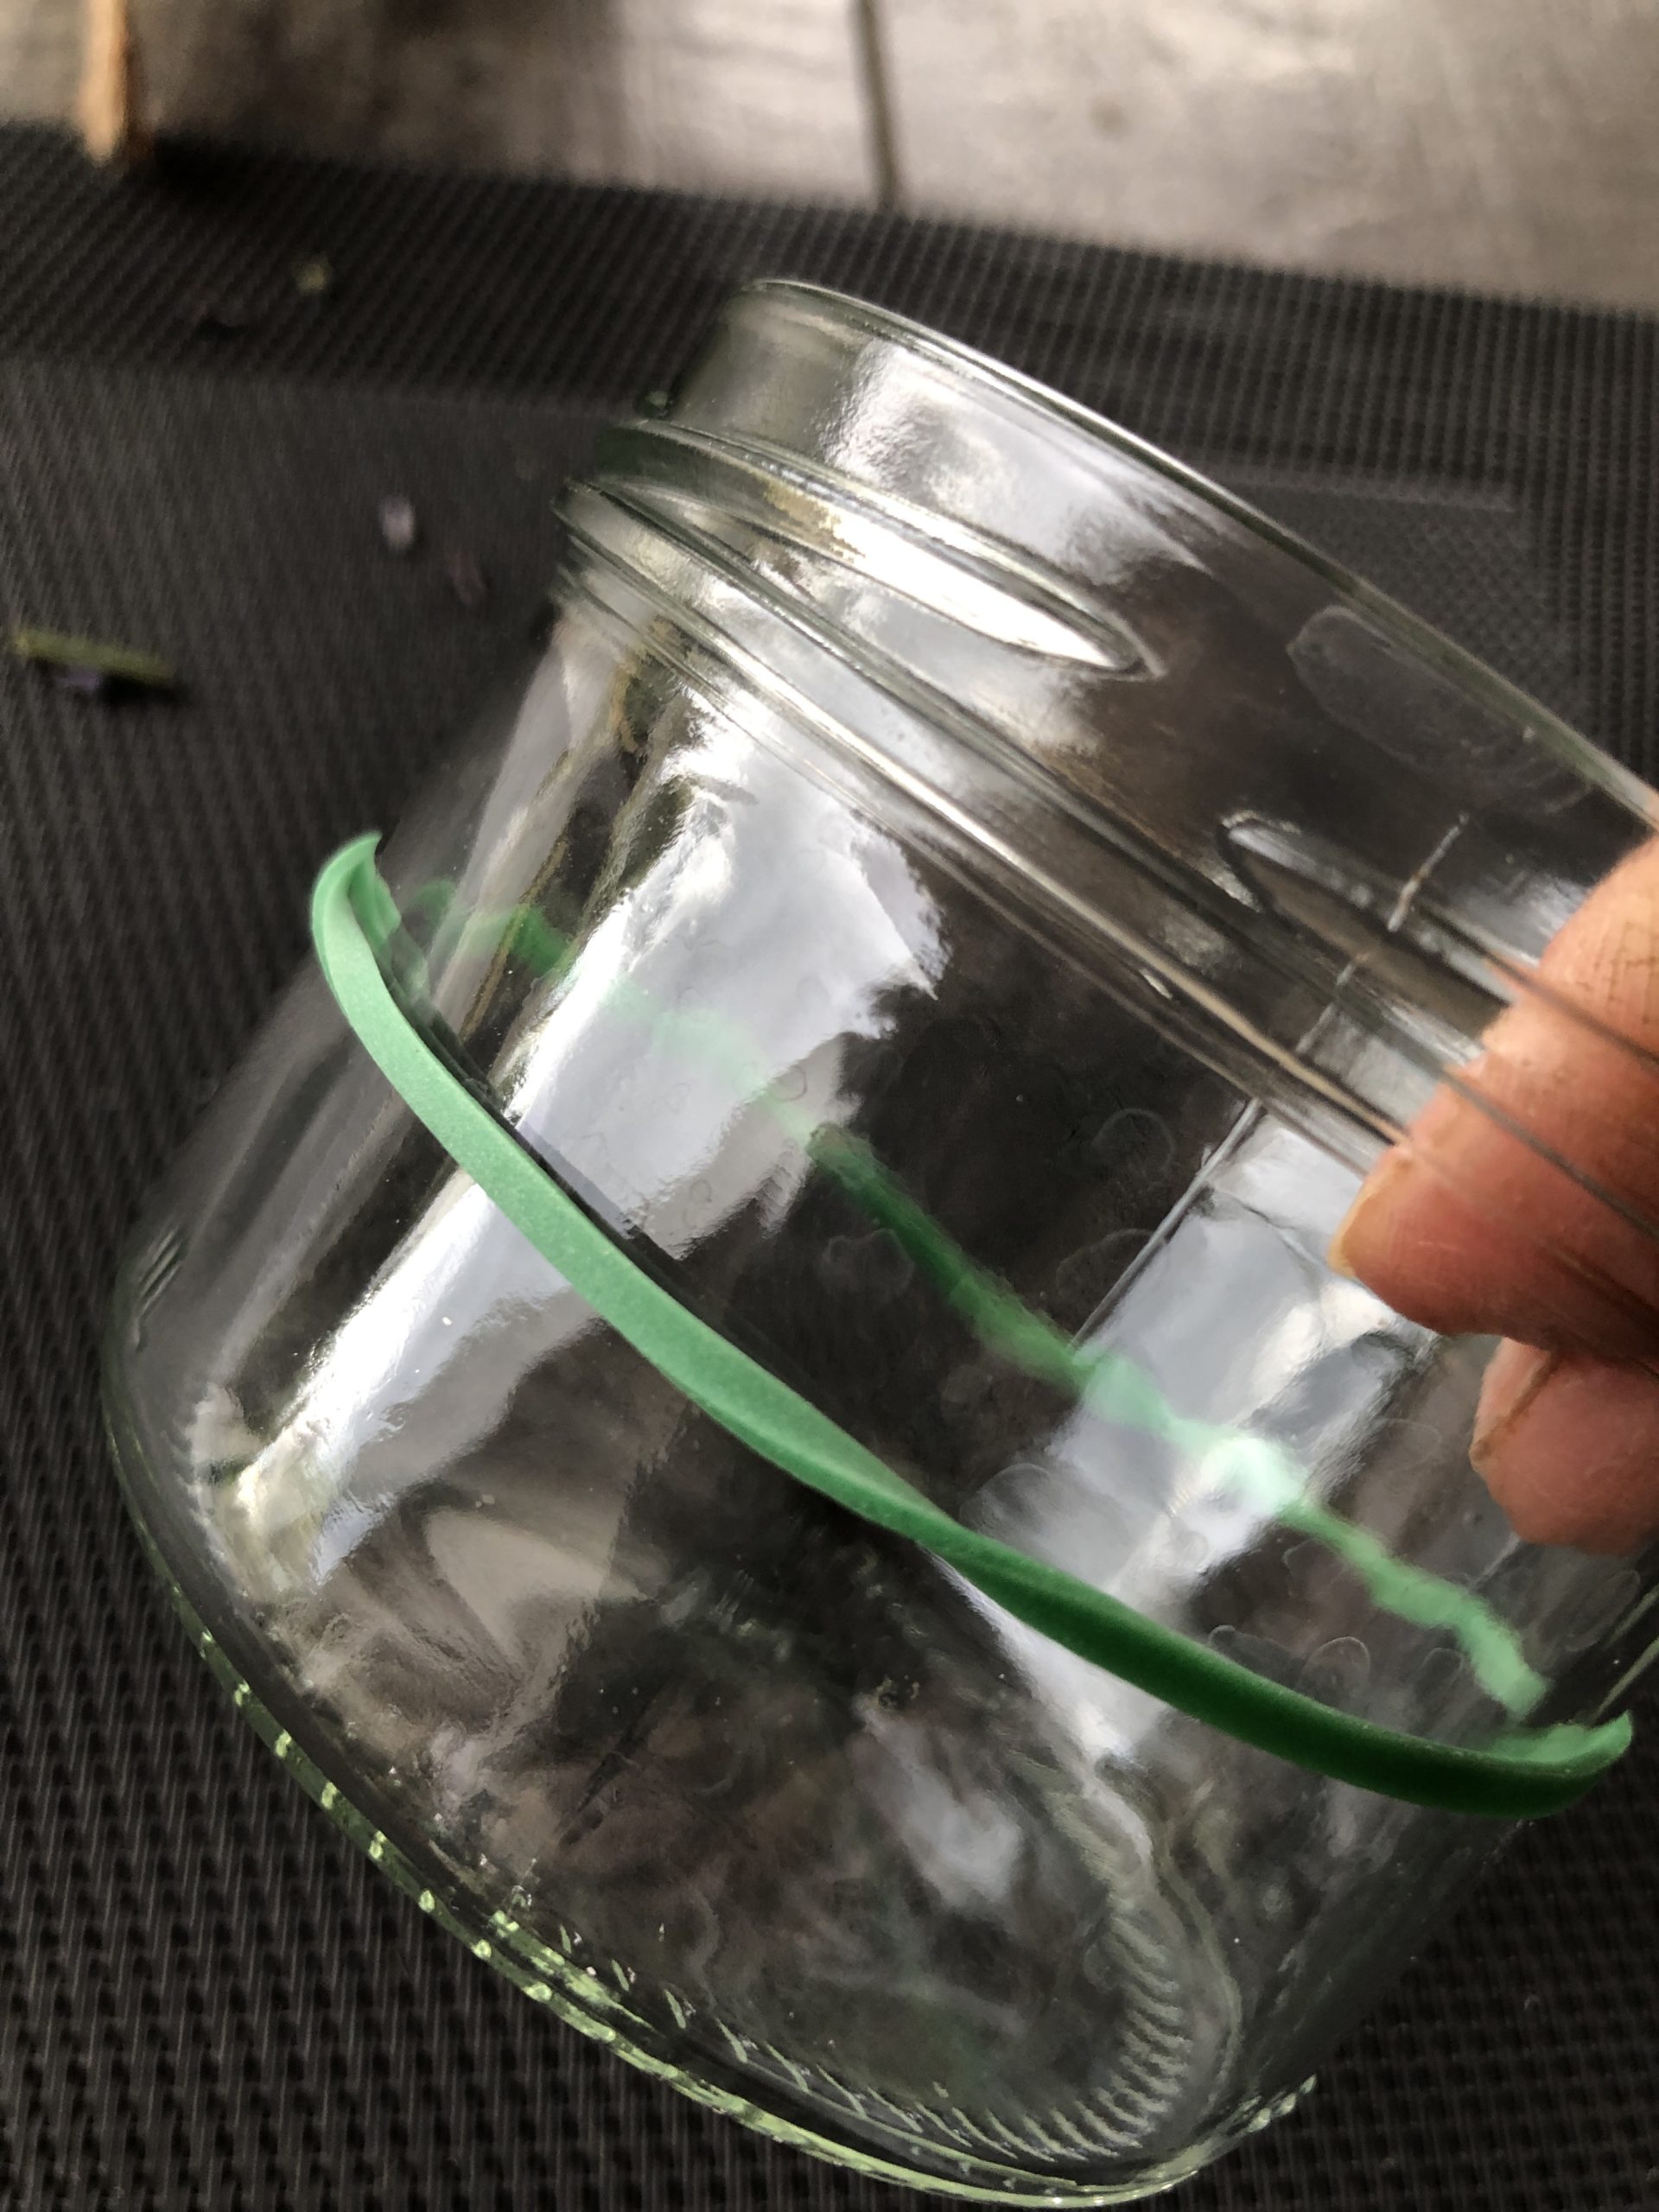
Bild zum Schritt 1 für das Bastel- und DIY-Abenteuer für Kinder: 'Um ein flaches gerades Glas wird ein breiter Haushaltsgummi gestülpt.'

2

Lavender stalks, which are often not used in full length, are used here!
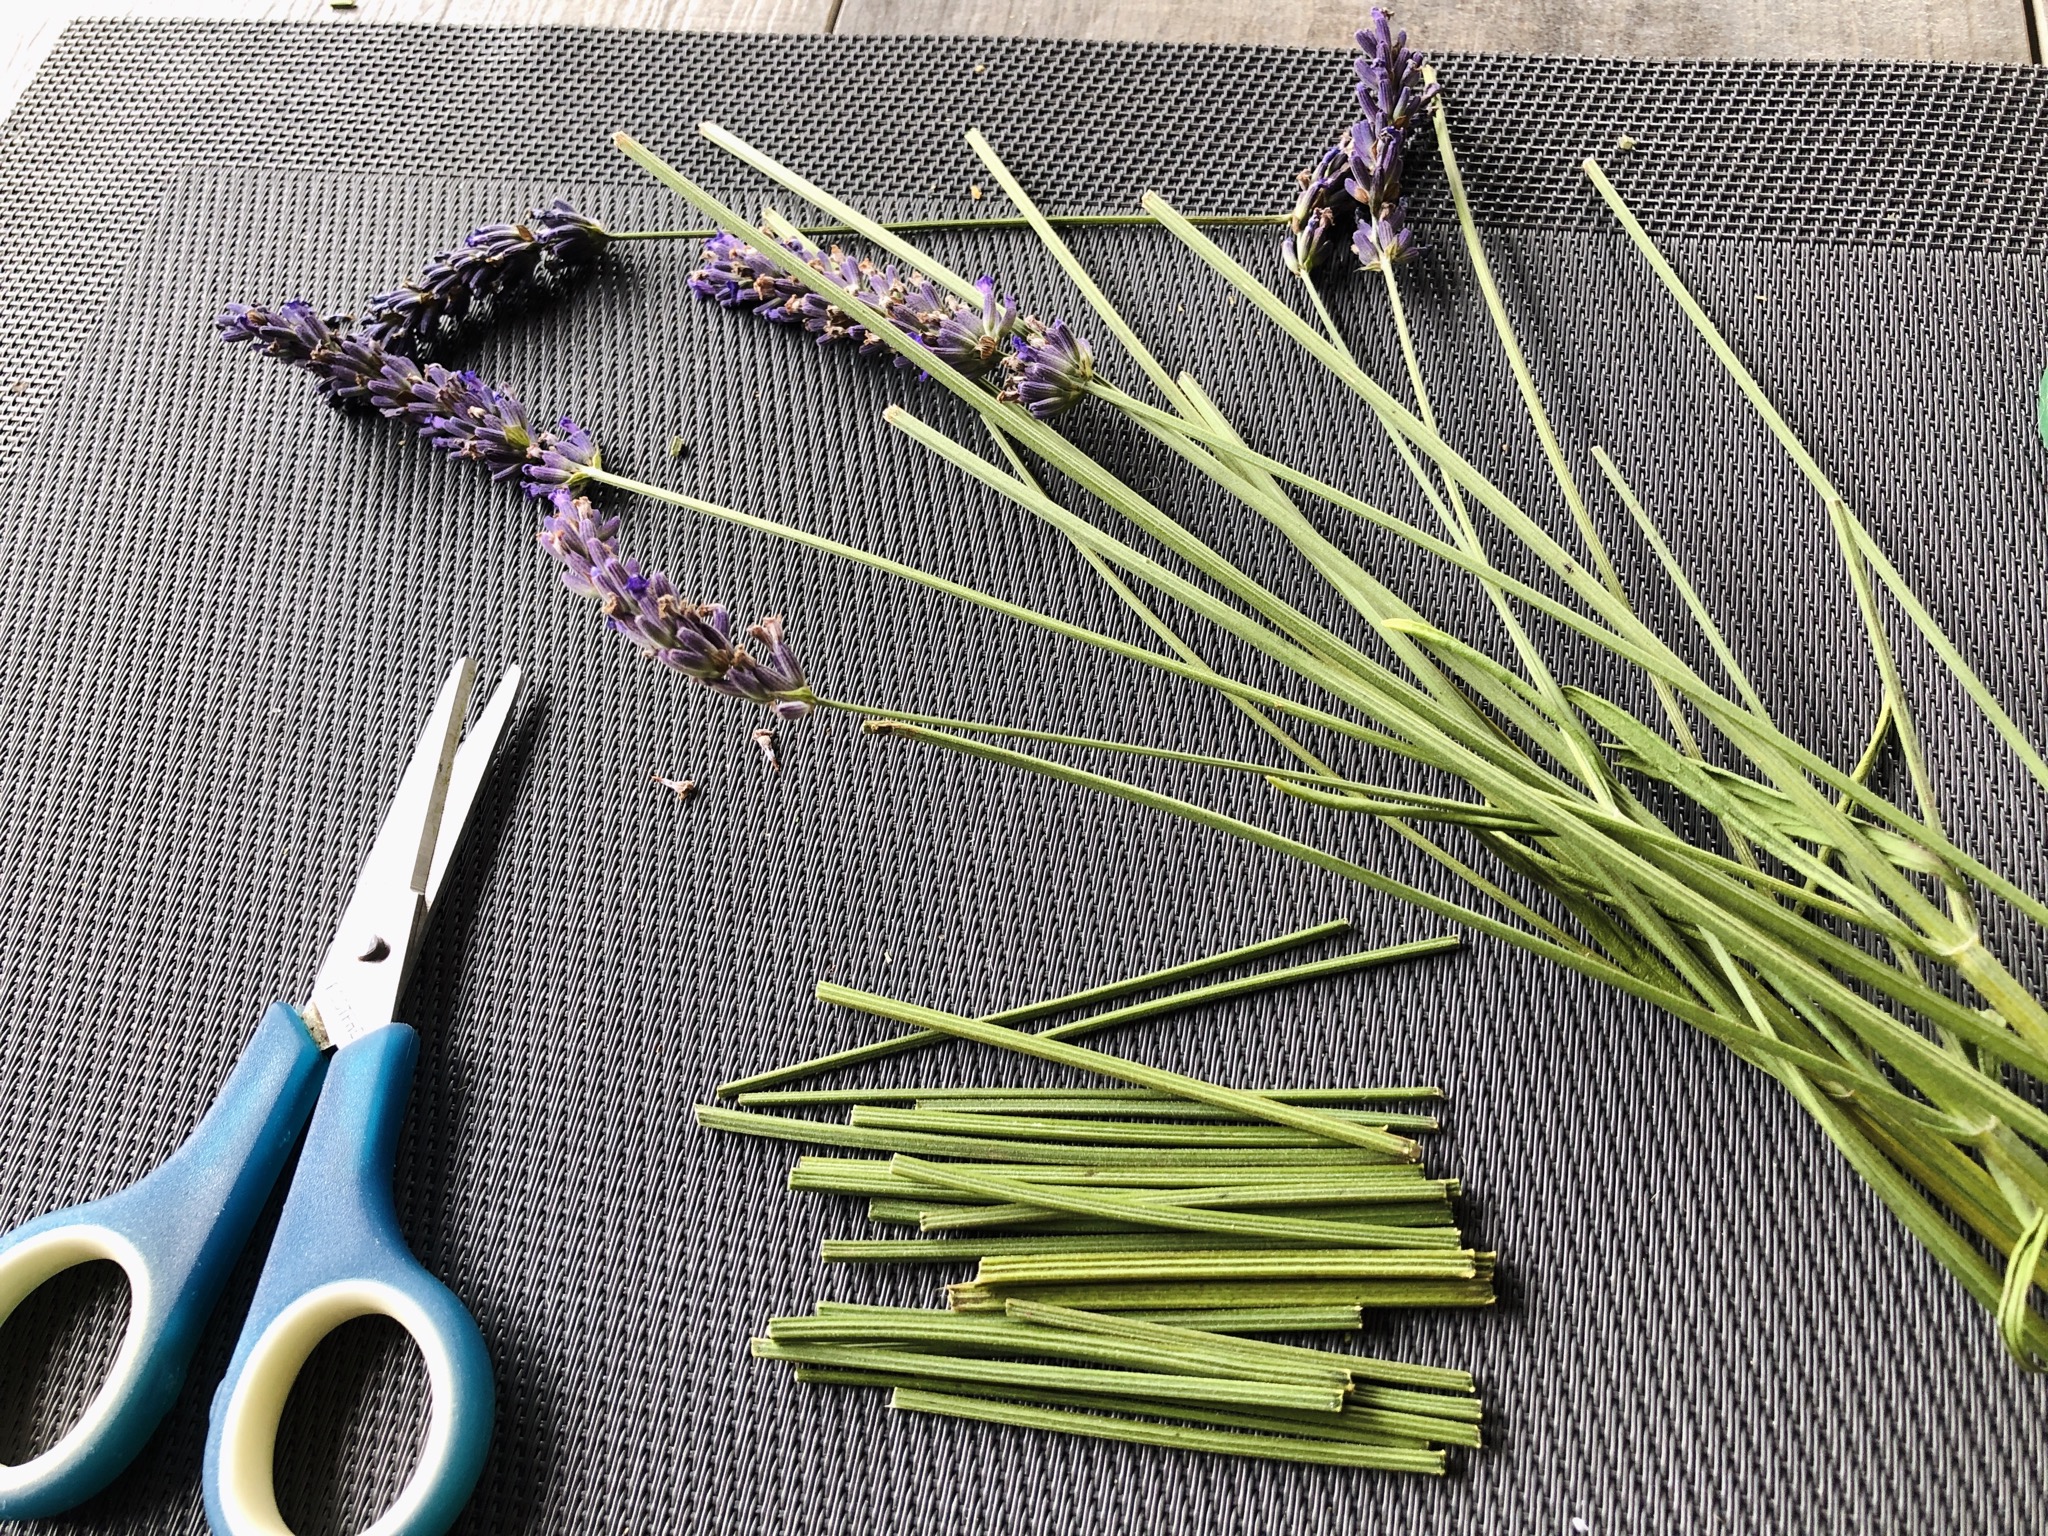
Bild zum Schritt 2 für das Bastel- und DIY-Abenteuer für Kinder: 'Lavendelstiele die oft nicht in voller Länge gebraucht werden, kommen...'

3

Cut stems with scissors into short pieces (in about the height of the glass).

Bild zum Schritt 3 für das Bastel- und DIY-Abenteuer für Kinder: 'Stiele mit der Schere in kurze Stücke schneiden (in etwa...'

4

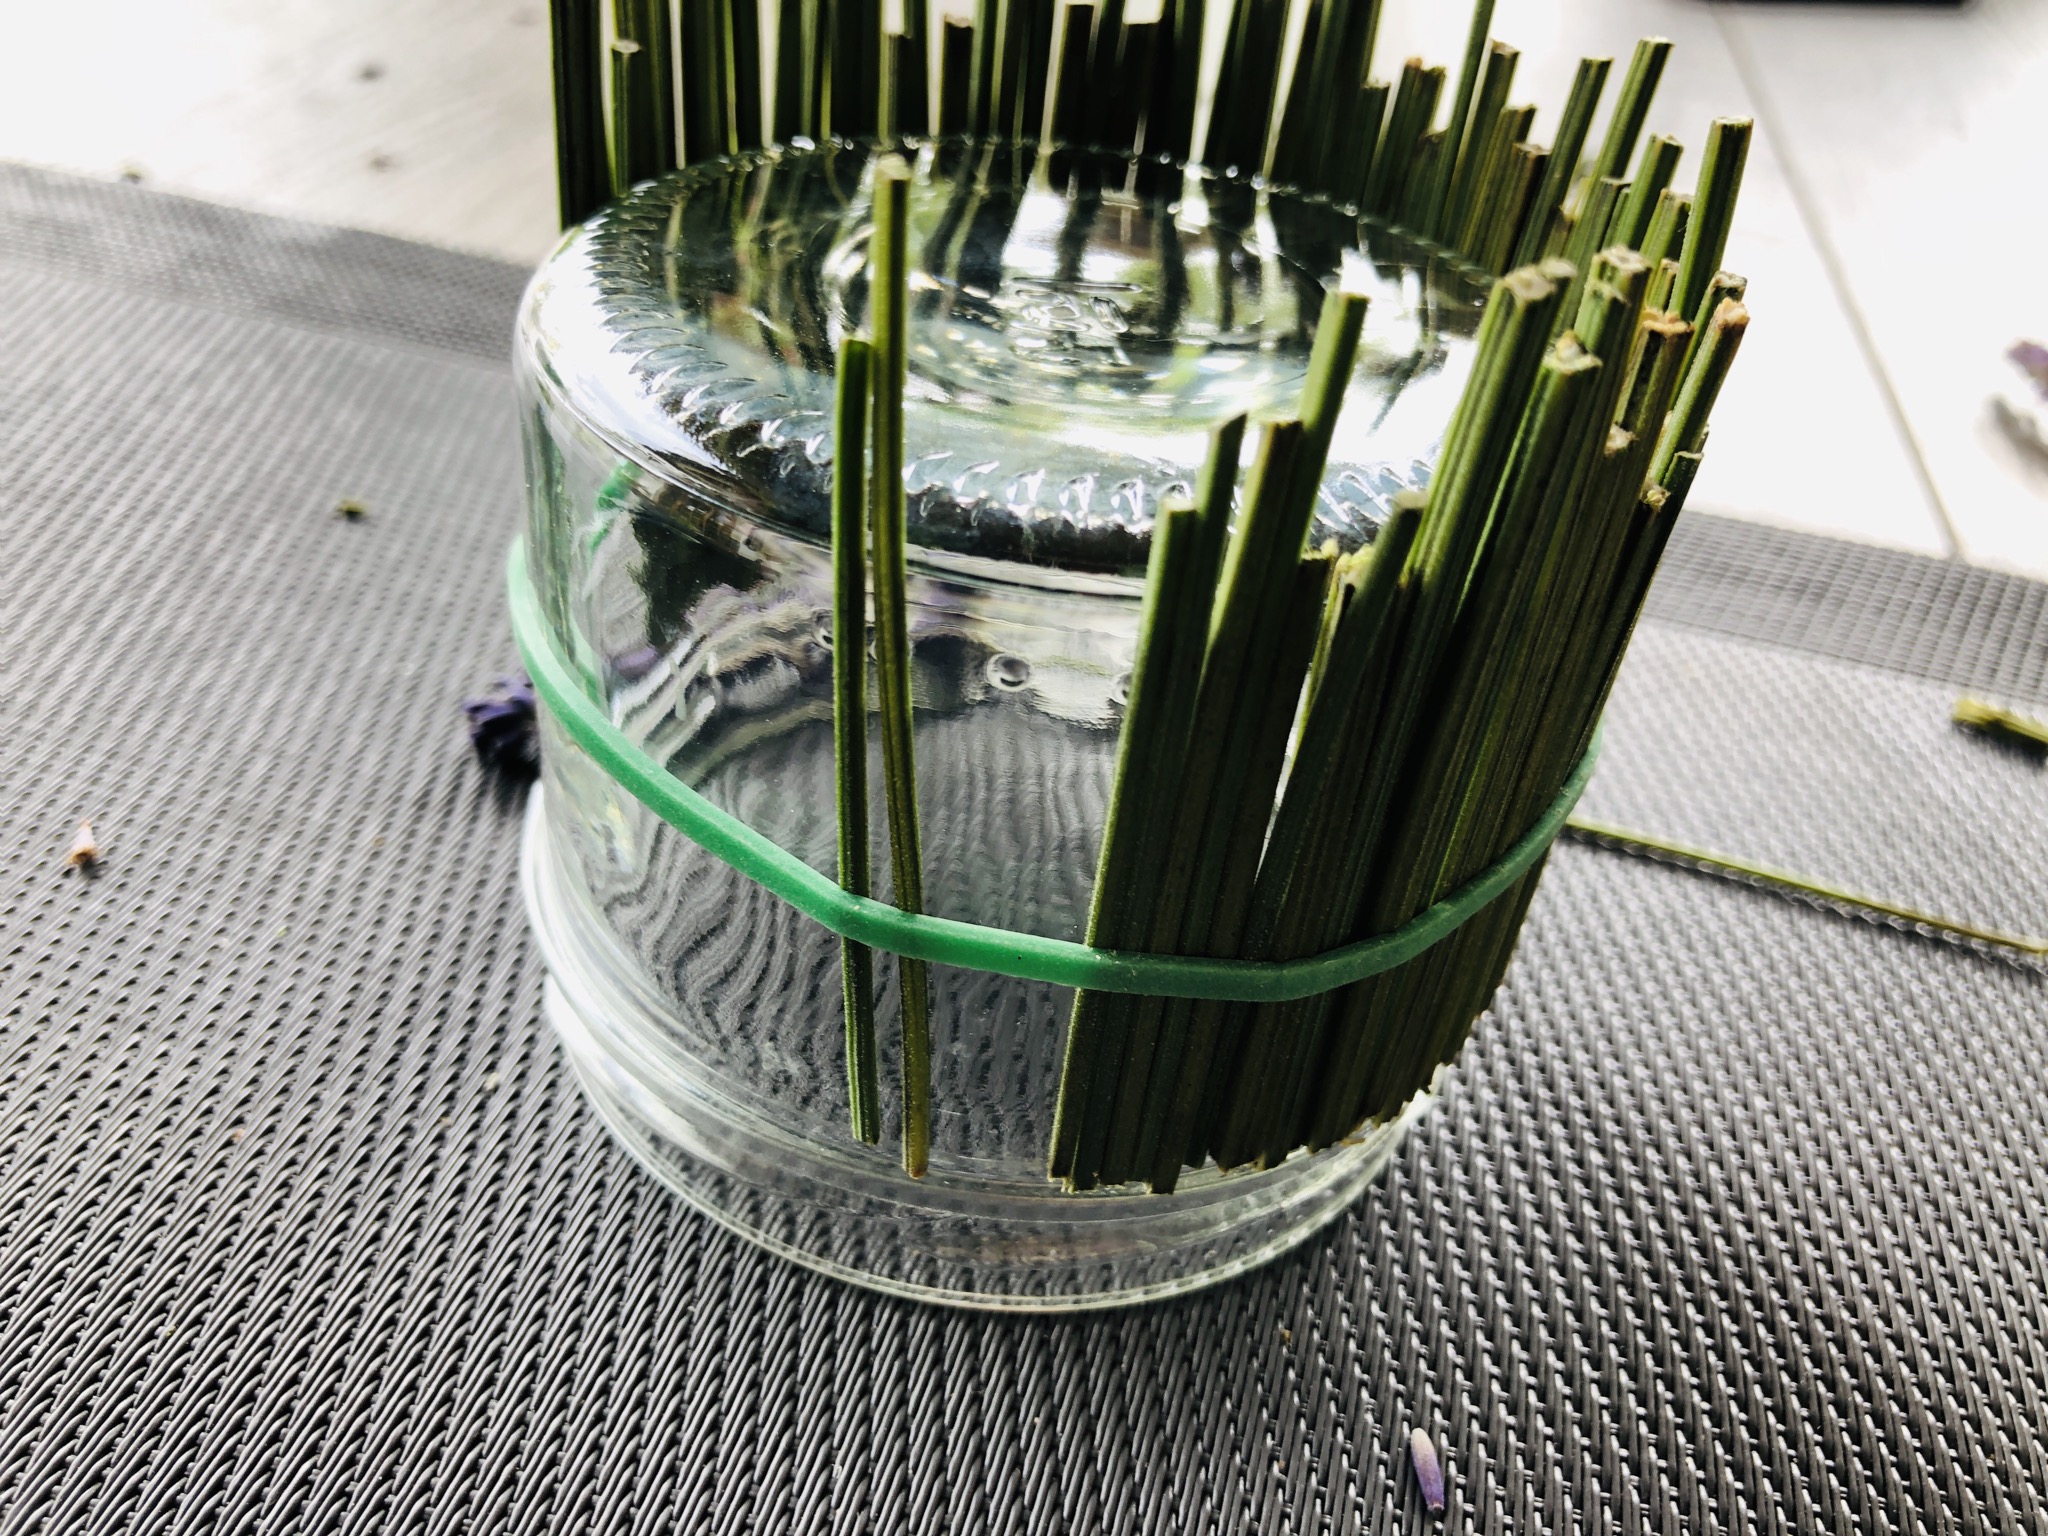
Through the rubber, the handles are fixed in turn to the glass. The grooved screw edge of the lid serves as a limitation here.

Bild zum Schritt 4 für das Bastel- und DIY-Abenteuer für Kinder: 'Durch den Gummi werden nun die Stiele der Reihe nach...'

5

Puts the stems closely together. They can be quiet different lengths!

Bild zum Schritt 5 für das Bastel- und DIY-Abenteuer für Kinder: 'Legt die Stiele eng aneinander. Sie können ruhig unterschiedlich lang...'

6

The arrangement of the stems also works well if the glass with the glass floor stands up on the table.

Bild zum Schritt 6 für das Bastel- und DIY-Abenteuer für Kinder: 'Die Anordnungen der Stiele funktioniert auch gut, wenn das Glas...'

7

2. Bild zum Schritt 6 für das Bastel- und DIY-Abenteuer für Kinder: 'Die Anordnungen der Stiele funktioniert auch gut, wenn das Glas...'

8

If you have the glass all around with stems, check again if all stems sit well.

Bild zum Schritt 8 für das Bastel- und DIY-Abenteuer für Kinder: 'Wenn ihr das Glas rundherum mit Stiele bestückt habt, kontrolliert...'

9

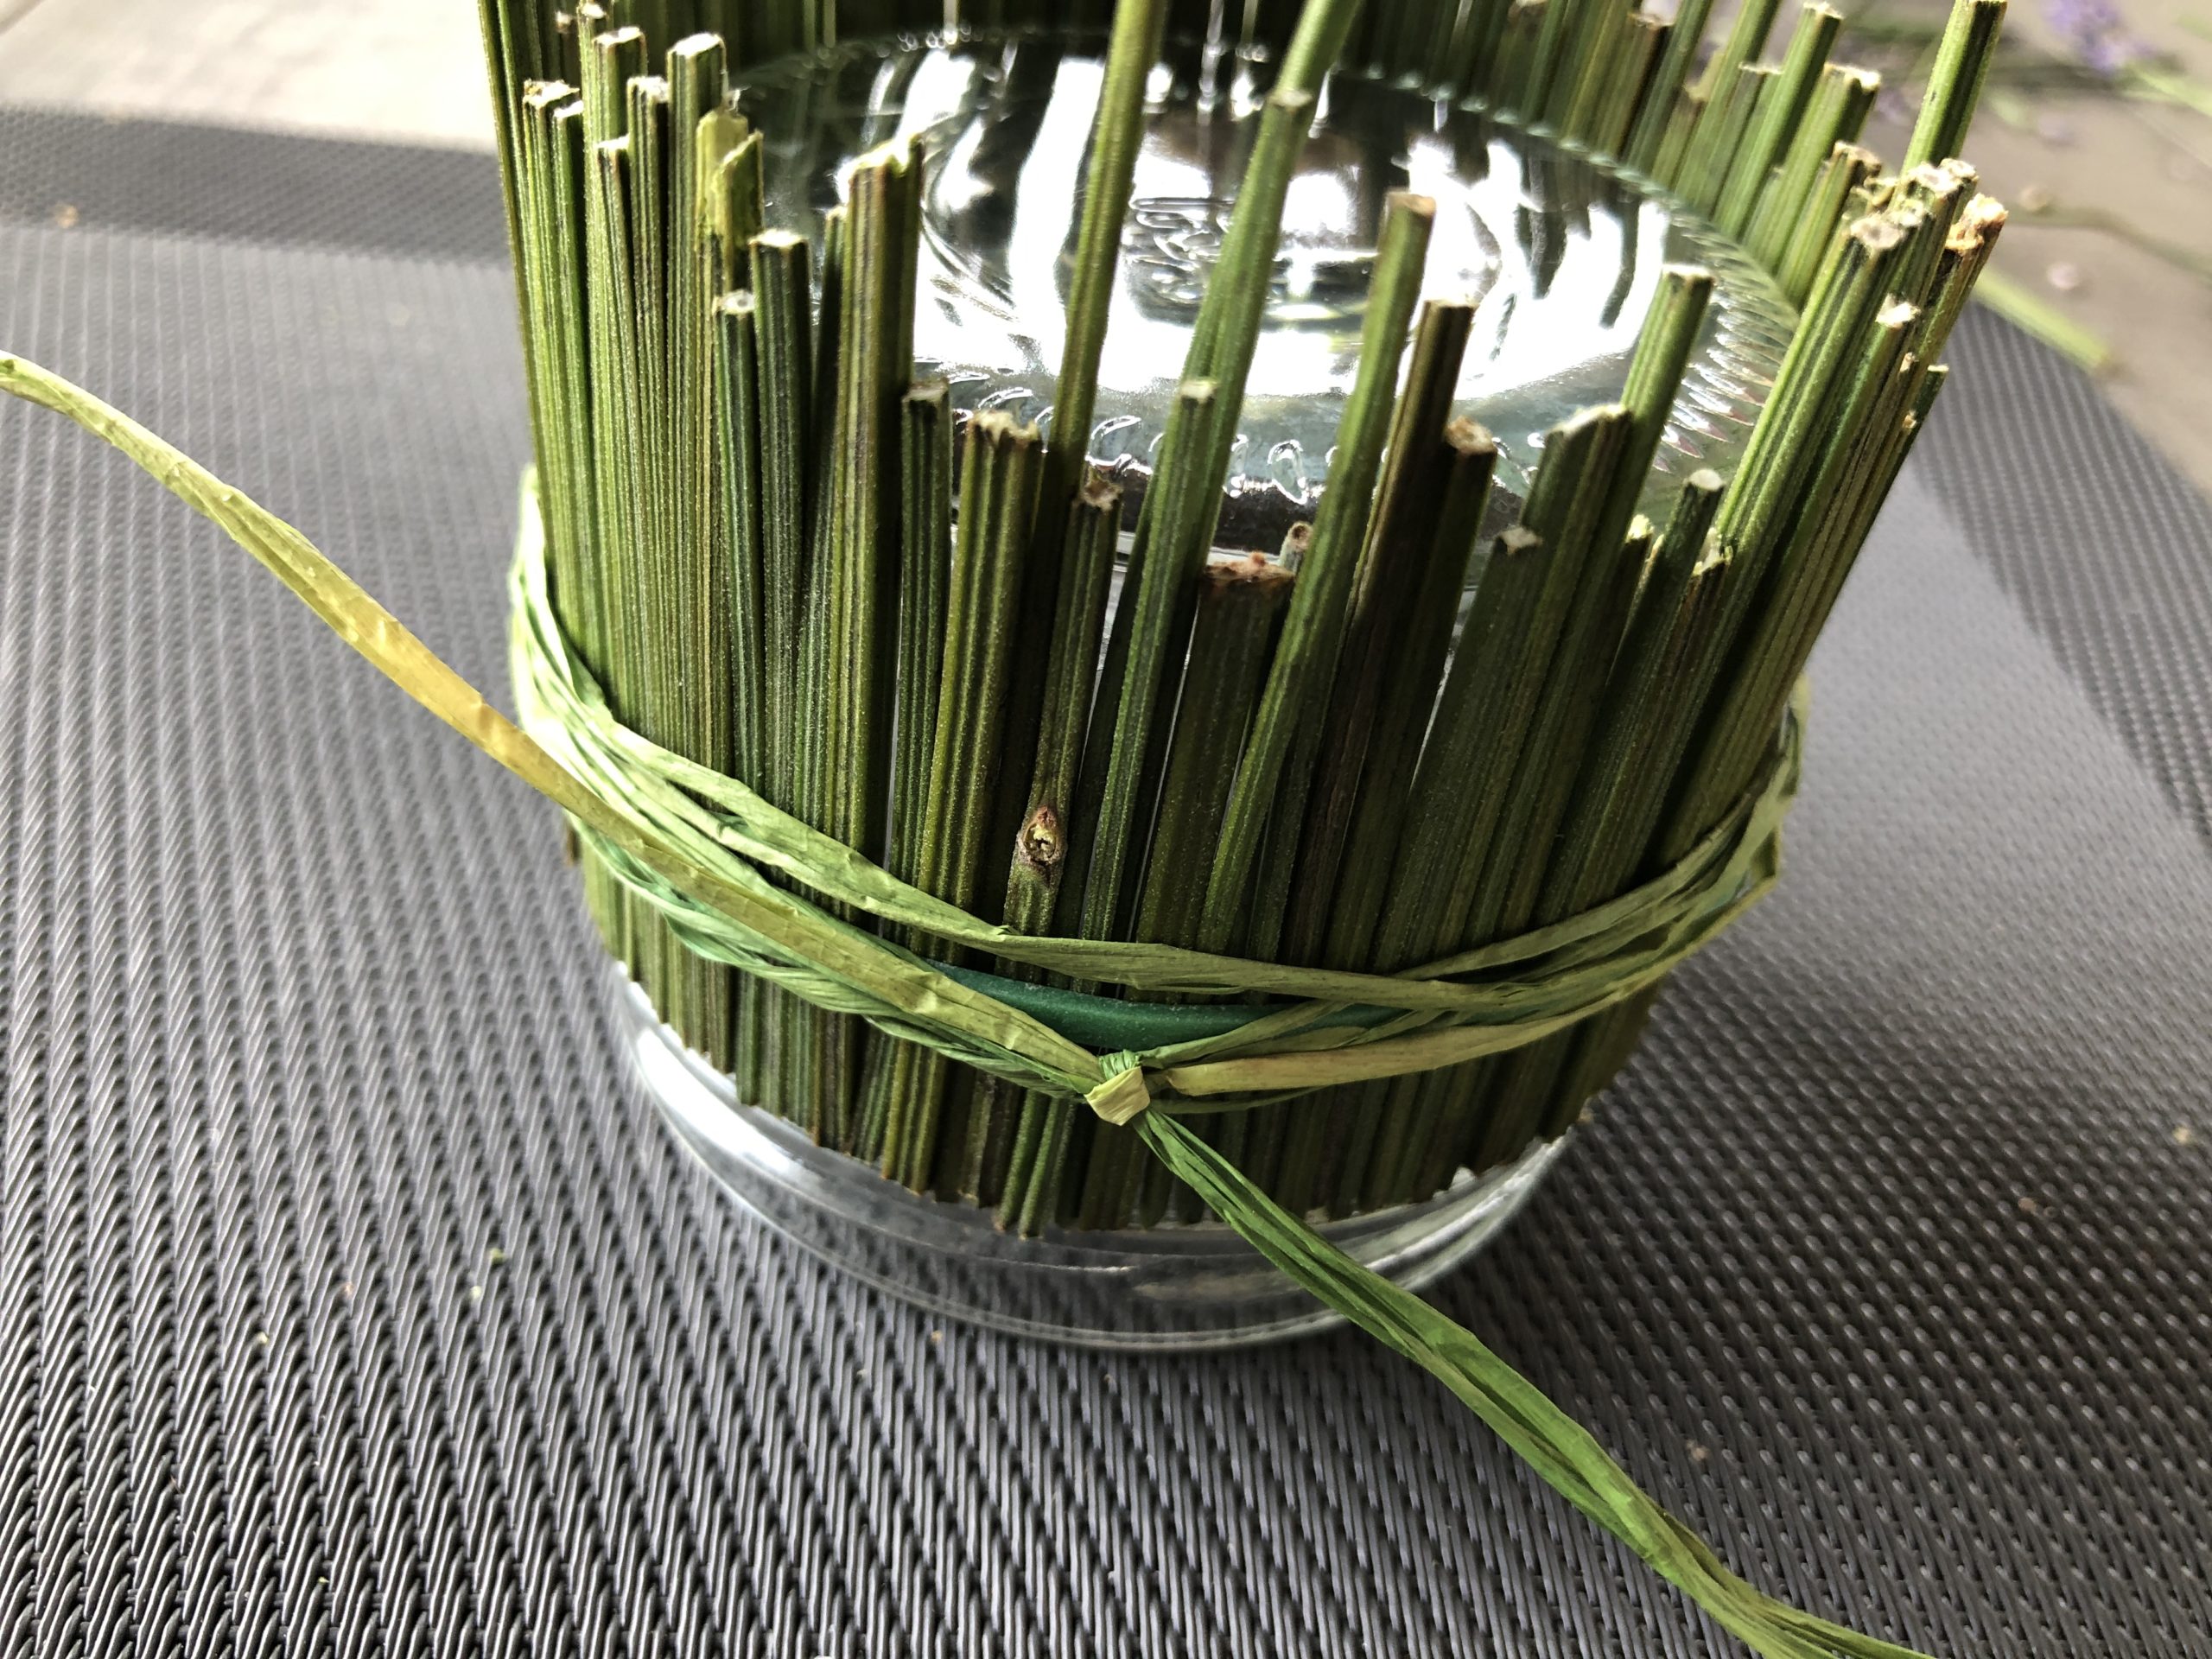
Now tie a bast cord over the rubber. Wrap the bast at least twice around the glass.

Bild zum Schritt 9 für das Bastel- und DIY-Abenteuer für Kinder: 'Bindet nun eine Bastschnur über den Gummi. Wickelt dazu den...'

10

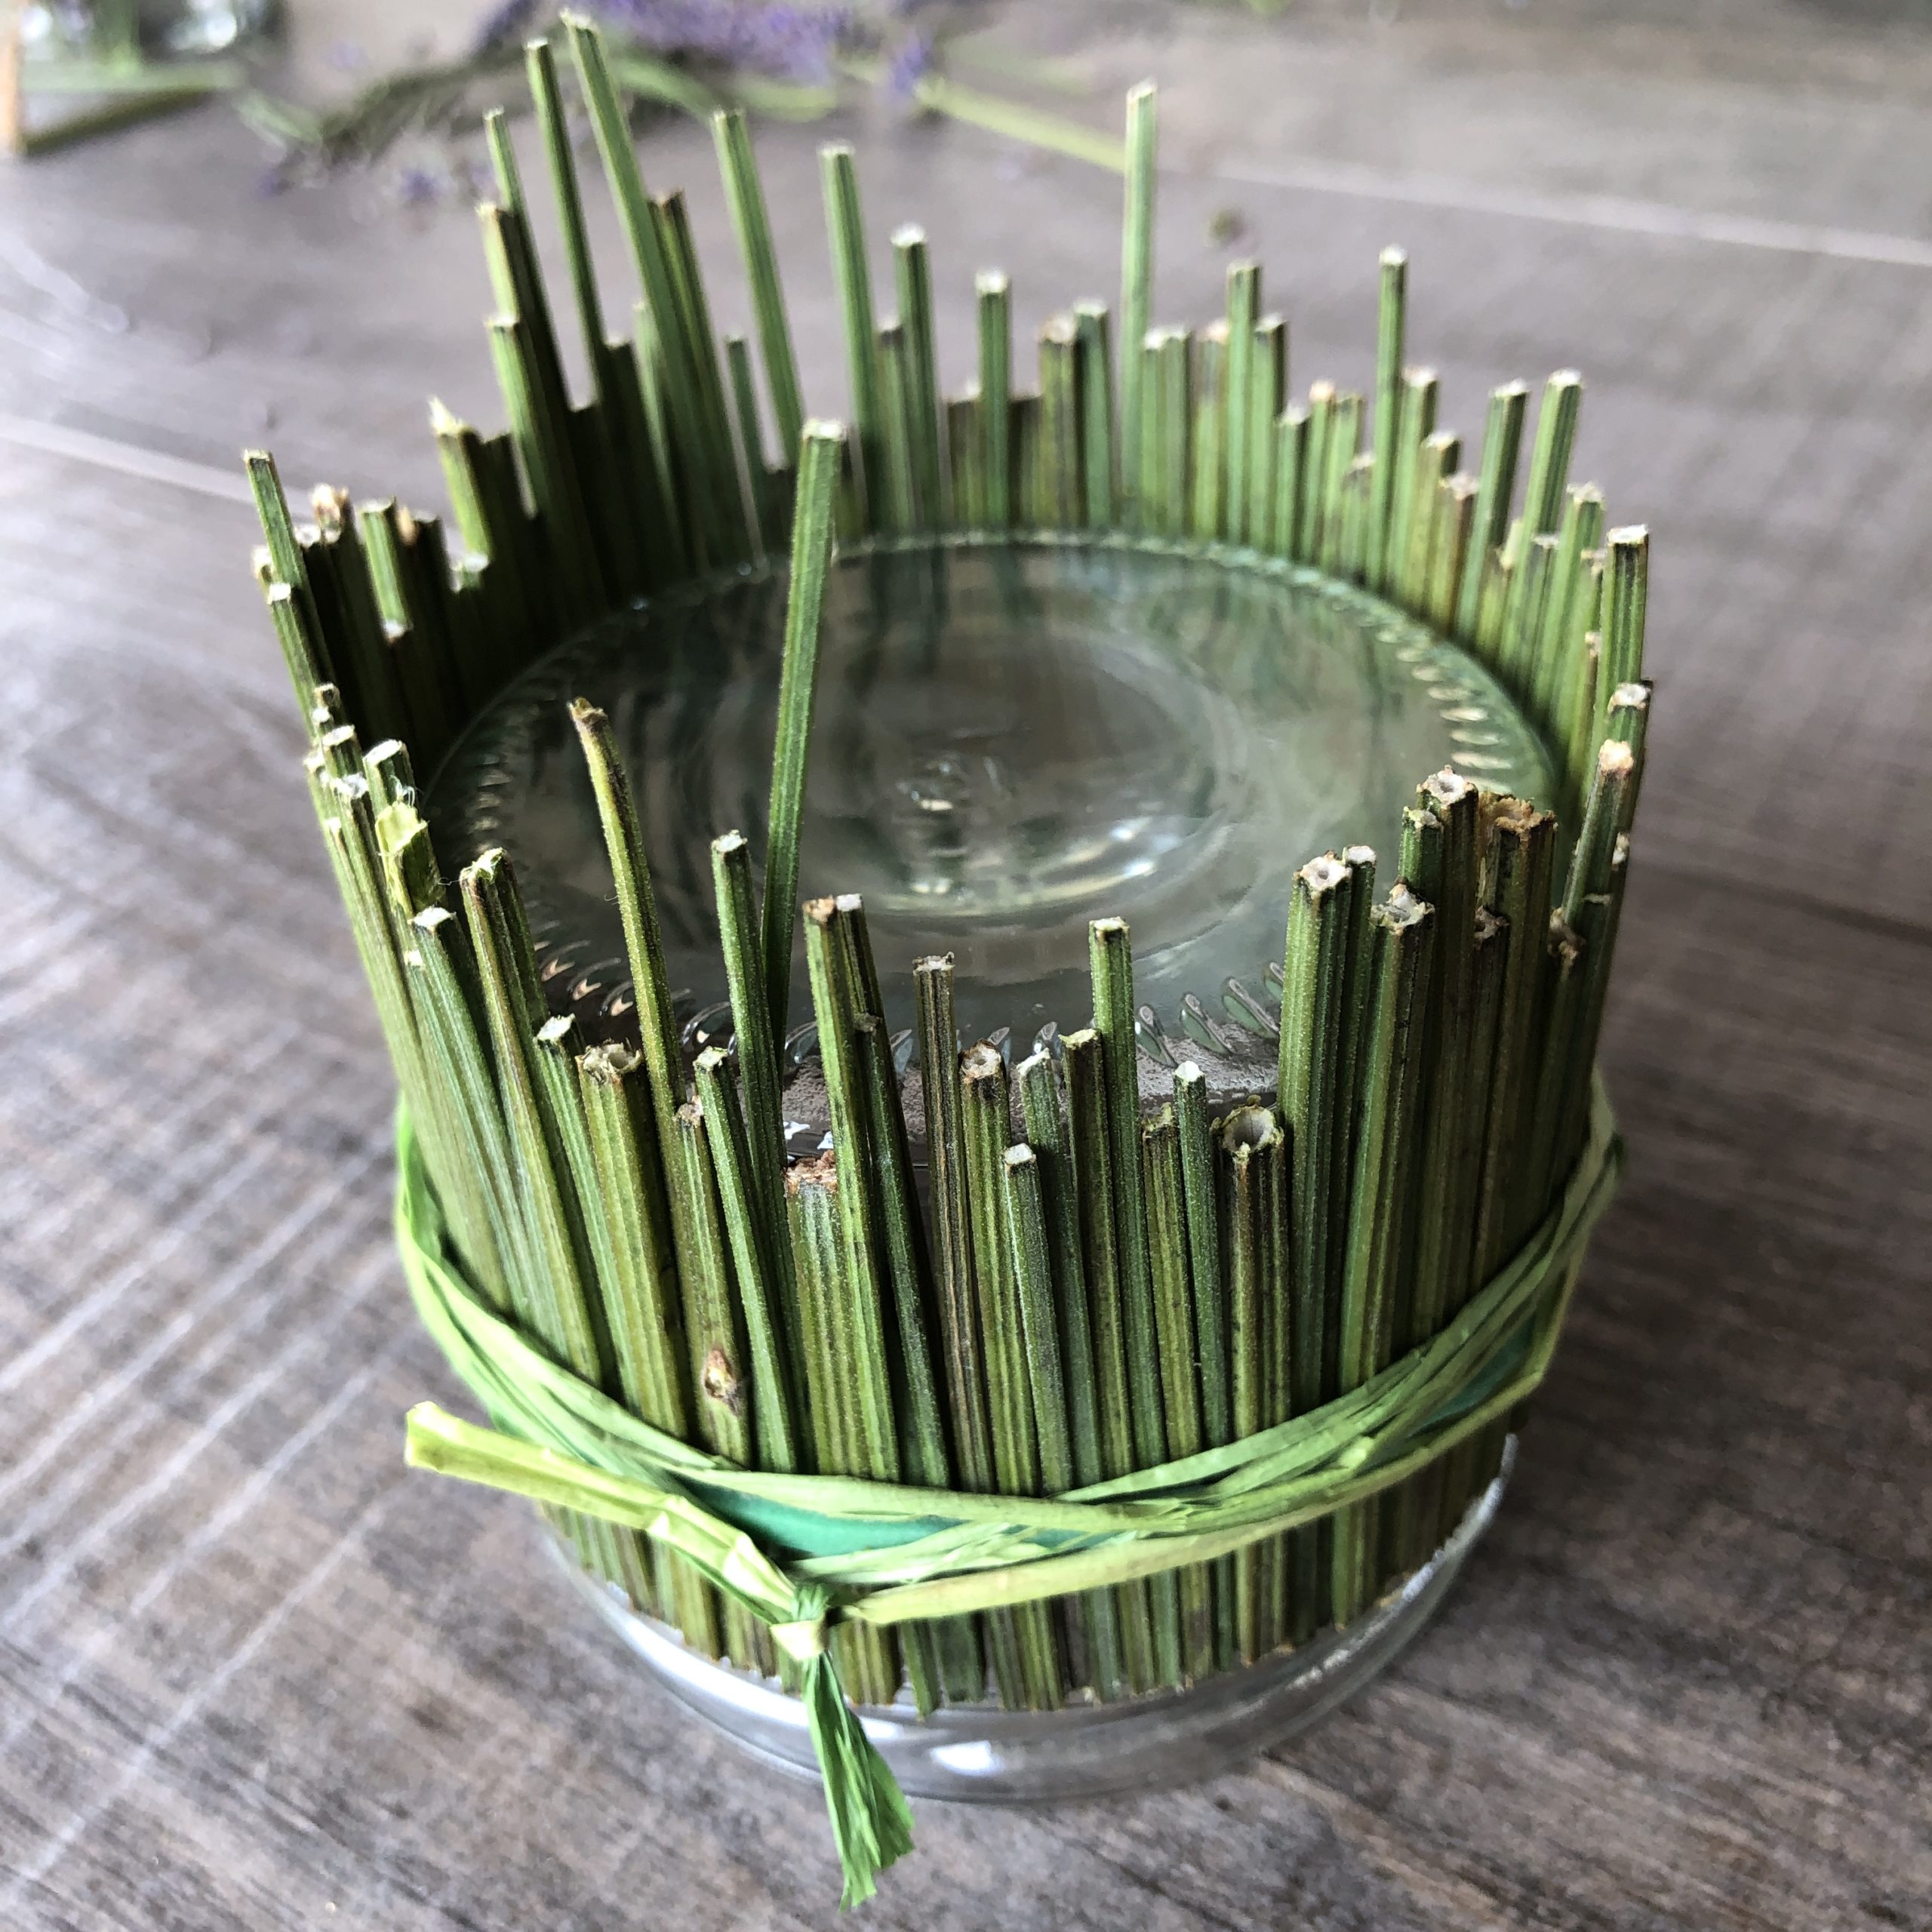
Knot the bast.

Bild zum Schritt 10 für das Bastel- und DIY-Abenteuer für Kinder: 'Verknotet den Bast.'

11

The wind is ready.

Bild zum Schritt 11 für das Bastel- und DIY-Abenteuer für Kinder: 'Fertig ist das Windlicht.'

12

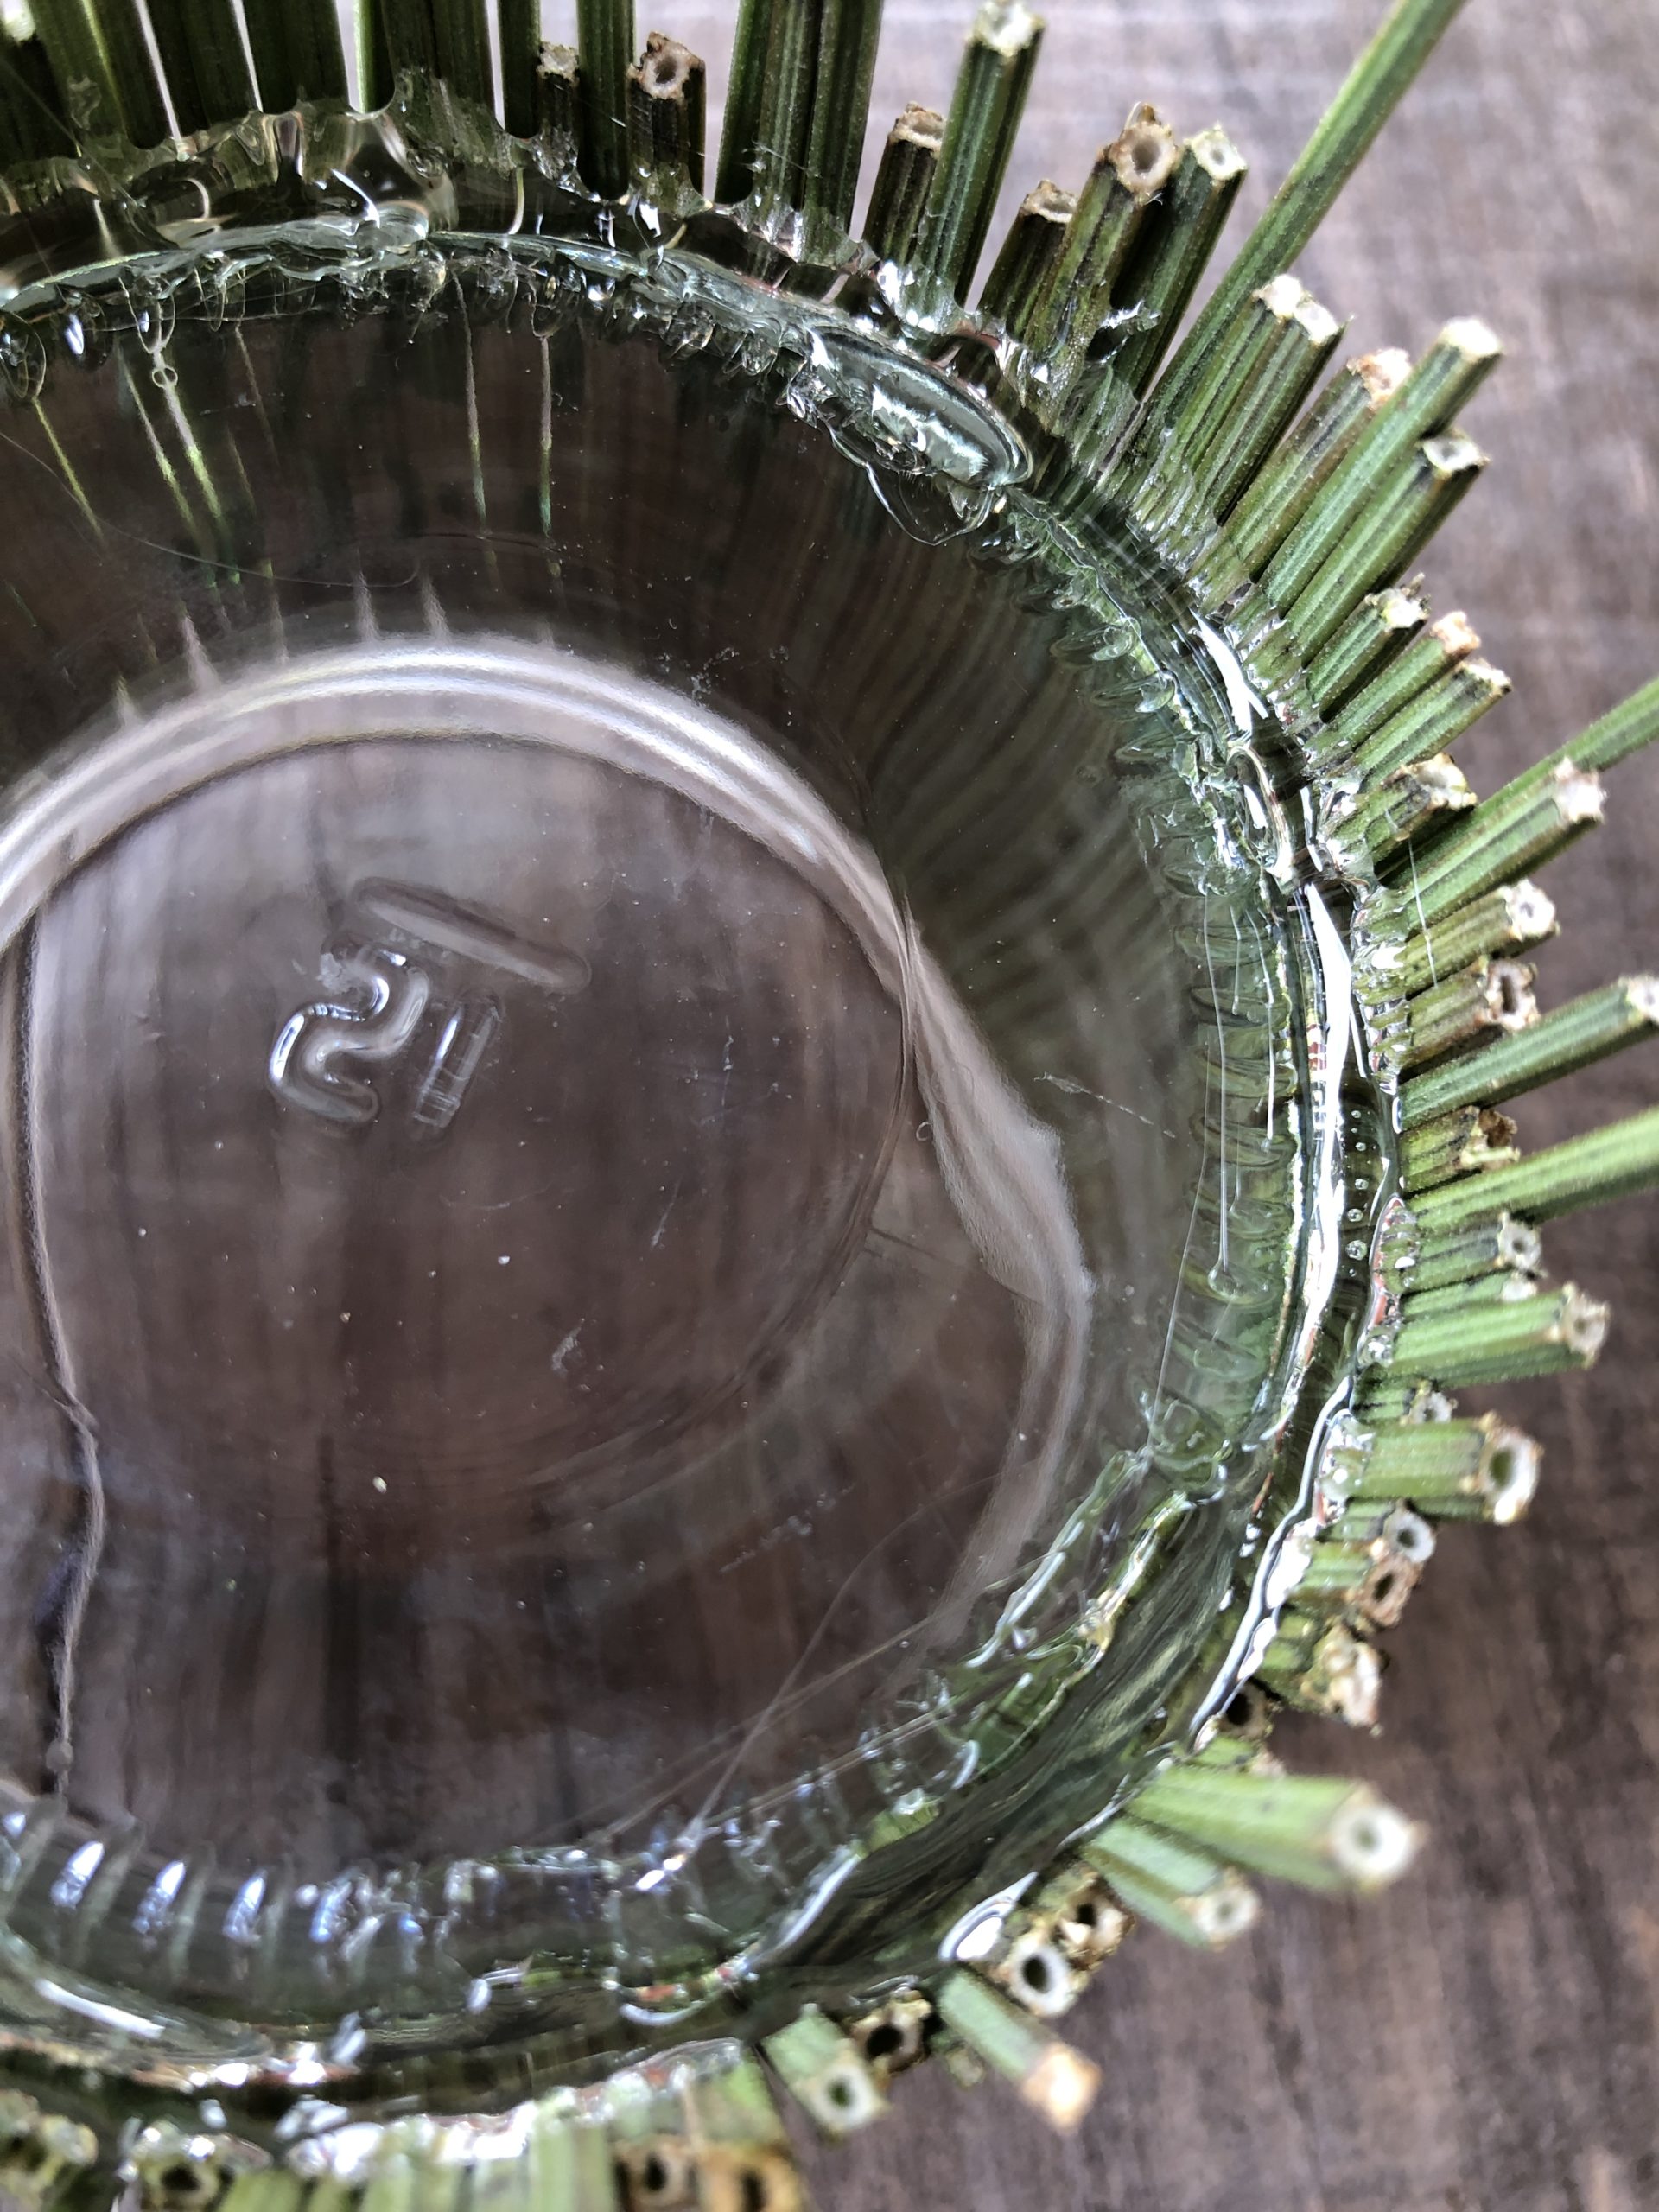
In order to hold the stems on the glass, a trace of hot glue is pulled on the glass floor (which points upwards!).

Bild zum Schritt 12 für das Bastel- und DIY-Abenteuer für Kinder: 'Um die Stiele am Glas zu halten, wird nun am...'

13

Well glued hold the stems.

Bild zum Schritt 13 für das Bastel- und DIY-Abenteuer für Kinder: 'Gut verklebt halten die Stiele.'

1. Variant:
14

Put a large tea light on the top of the glass floor and the first version is ready.

Bild zum Schritt 15 für das Bastel- und DIY-Abenteuer für Kinder: 'Stellt ein großes Teelicht oben auf den Glasboden und fertig...'

2. Variant:
15

Put some fresh lavender flowers on the knotted bast.

Bild zum Schritt 17 für das Bastel- und DIY-Abenteuer für Kinder: 'Steckt an den verknoteten Bast ein paar frische Lavendelblüten.'

16

The second variant is ready.

Bild zum Schritt 18 für das Bastel- und DIY-Abenteuer für Kinder: 'Fertig ist die zweite Variante.'

3. Variant:
17

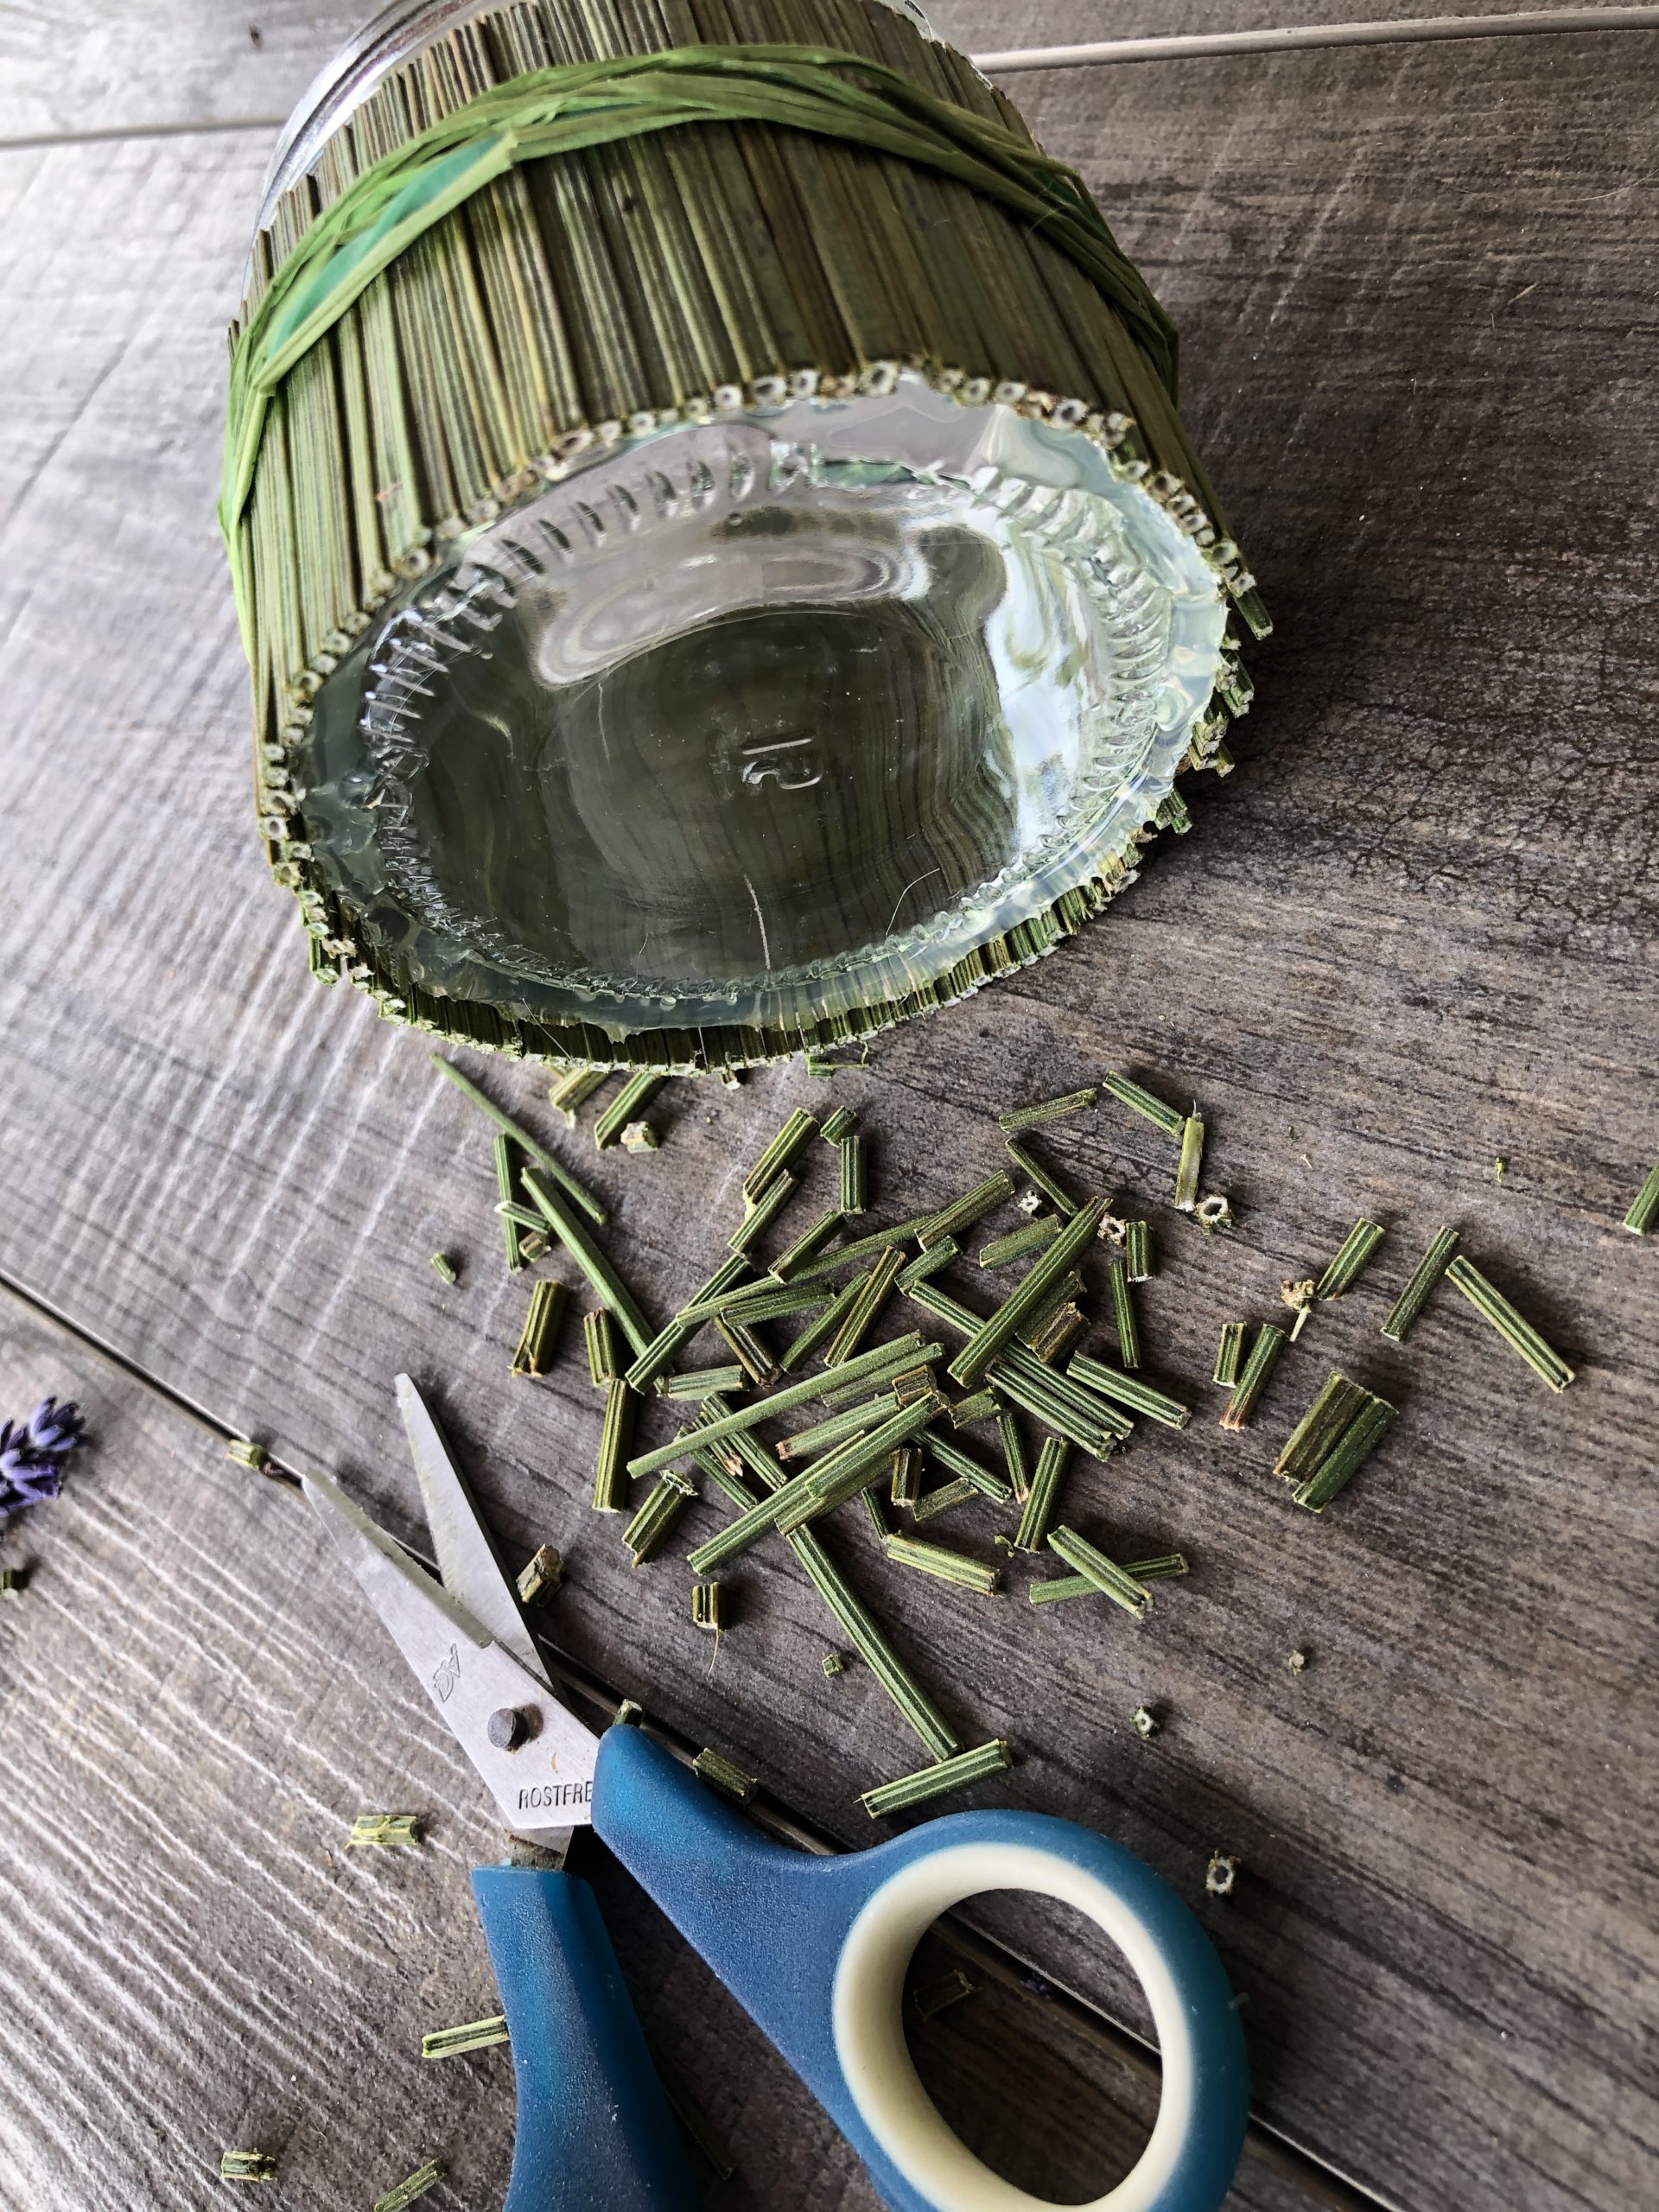
Use a scissors to cut off the stems standing on the glass floor flush with the glass floor.

Bild zum Schritt 20 für das Bastel- und DIY-Abenteuer für Kinder: 'Schneidet mit einer Schere die am Glasboden überstehenden Stängel bündig...'

18

2. Bild zum Schritt 20 für das Bastel- und DIY-Abenteuer für Kinder: 'Schneidet mit einer Schere die am Glasboden überstehenden Stängel bündig...'

19

You can glue the stems at the bottom of the glass with hot glue again.
So guaranteed no stalk slips out, even if the stalks dry!

Bild zum Schritt 22 für das Bastel- und DIY-Abenteuer für Kinder: 'Die Stiele am unteren Glasrand könnt ihr nochmals mit Heißkleber...'

20

The glass is up with the opening!

Bild zum Schritt 23 für das Bastel- und DIY-Abenteuer für Kinder: 'Das Glas steht mit der Öffnung nach oben!'

21

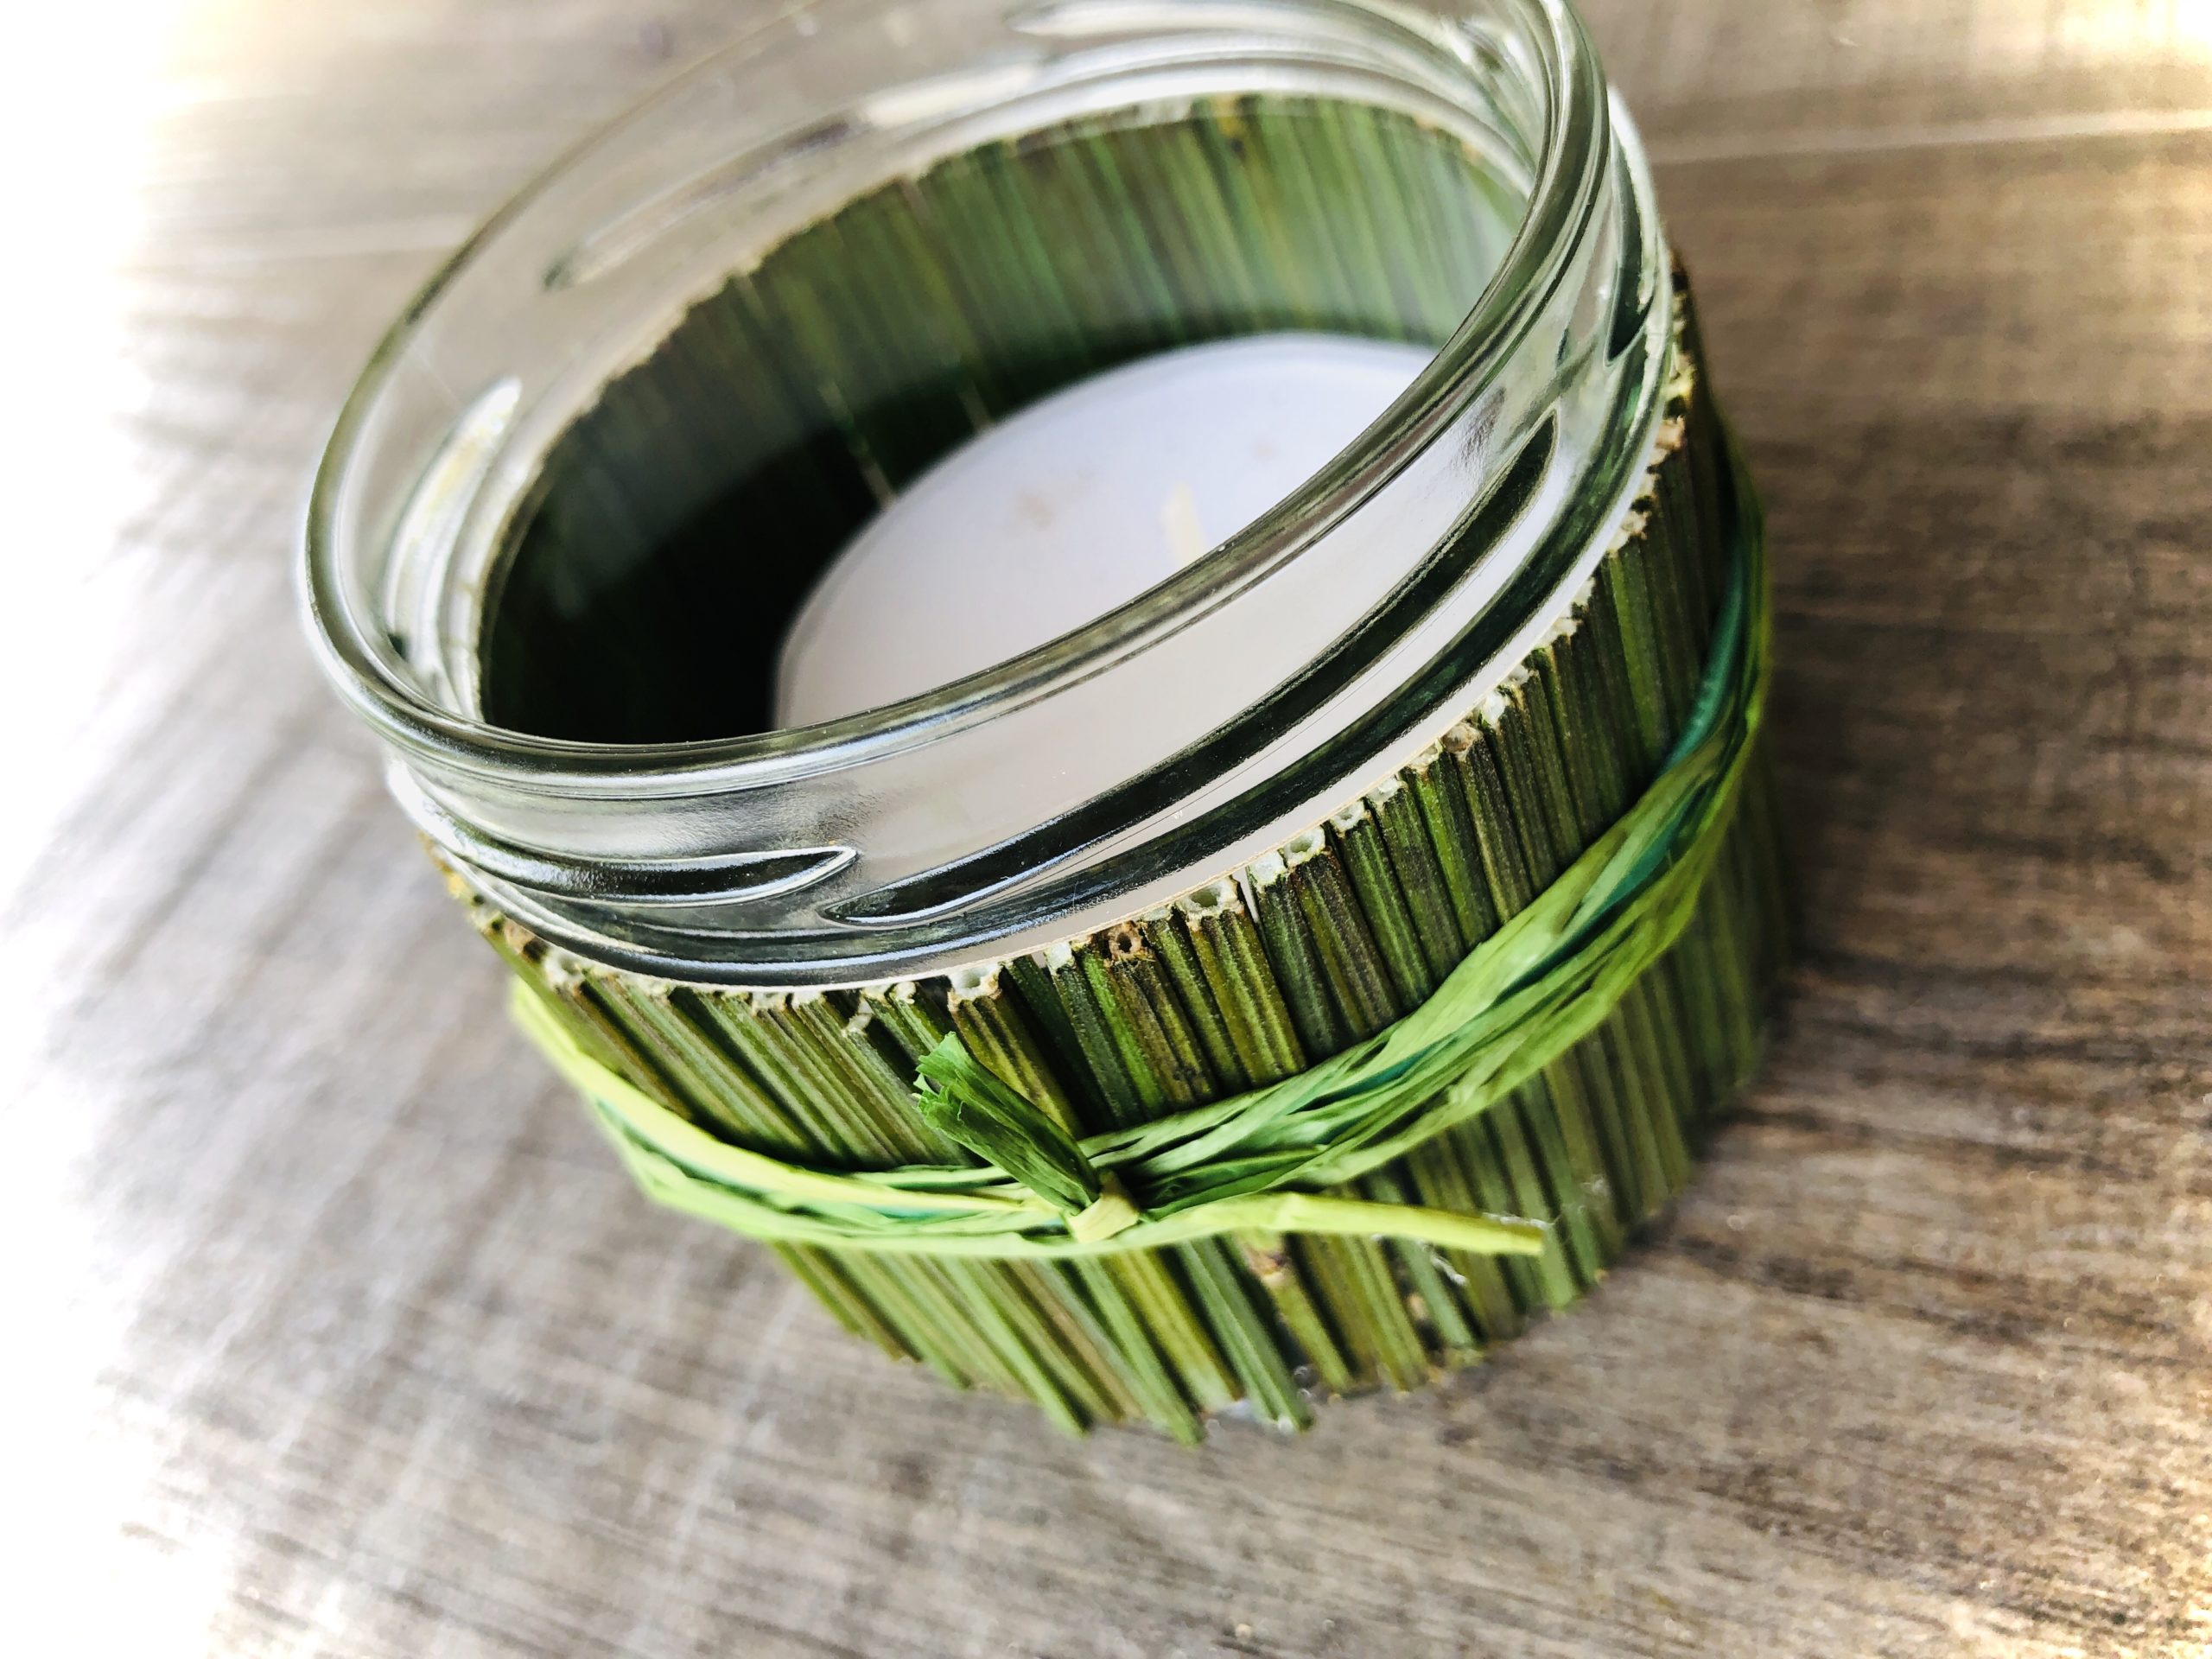
In the glass comes a (large) tea light.

Bild zum Schritt 24 für das Bastel- und DIY-Abenteuer für Kinder: 'In das Glas kommt nun ein (großes) Teelicht.'

22

Version 3 is ready.

Bild zum Schritt 25 für das Bastel- und DIY-Abenteuer für Kinder: 'Fertig ist Variante 3.'

4. Variant:
23

Quickly you change the appearance of the glass with a few fresh lavender flowers. Put it at the knotting in the bast and is finished variant 4.

Bild zum Schritt 27 für das Bastel- und DIY-Abenteuer für Kinder: 'Schnell verändert ihr mit ein paar frischen Lavendelblüten das Aussehen...'

One guide and four variations:
24

Have fun trying it out!

And like to send more ideas. What else can you think of?

Bild zum Schritt 29 für das Bastel- und DIY-Abenteuer für Kinder: 'Viel Spaß beim Ausprobieren!    Und schickt gerne...'

Materials

 thick lavender stalks without flowers
 a few lavender flowers
 1 Straight masonry glass
 1 Wide household rubber
 1 Hot glue gun
 1 big tealight
 1 Basted cordabout 40 cm long
All links marked with a shopping cart lead to Amazon - here we have selected products that we would order ourselves and in part also ordered. In a qualified purchase via the advertising link, we as Amazon partner receive a commission, for you there are no costs. You thus support our cost- and advertising banner-free, educational offer.

Directions

1

A wide household rubber is put around a flat straight glass.

Bild zum Schritt 1 für das Bastel- und DIY-Abenteuer für Kinder: 'Um ein flaches gerades Glas wird ein breiter Haushaltsgummi gestülpt.'

2

Lavender stalks, which are often not used in full length, are used here!

Bild zum Schritt 2 für das Bastel- und DIY-Abenteuer für Kinder: 'Lavendelstiele die oft nicht in voller Länge gebraucht werden, kommen...'

3

Cut stems with scissors into short pieces (in about the height of the glass).
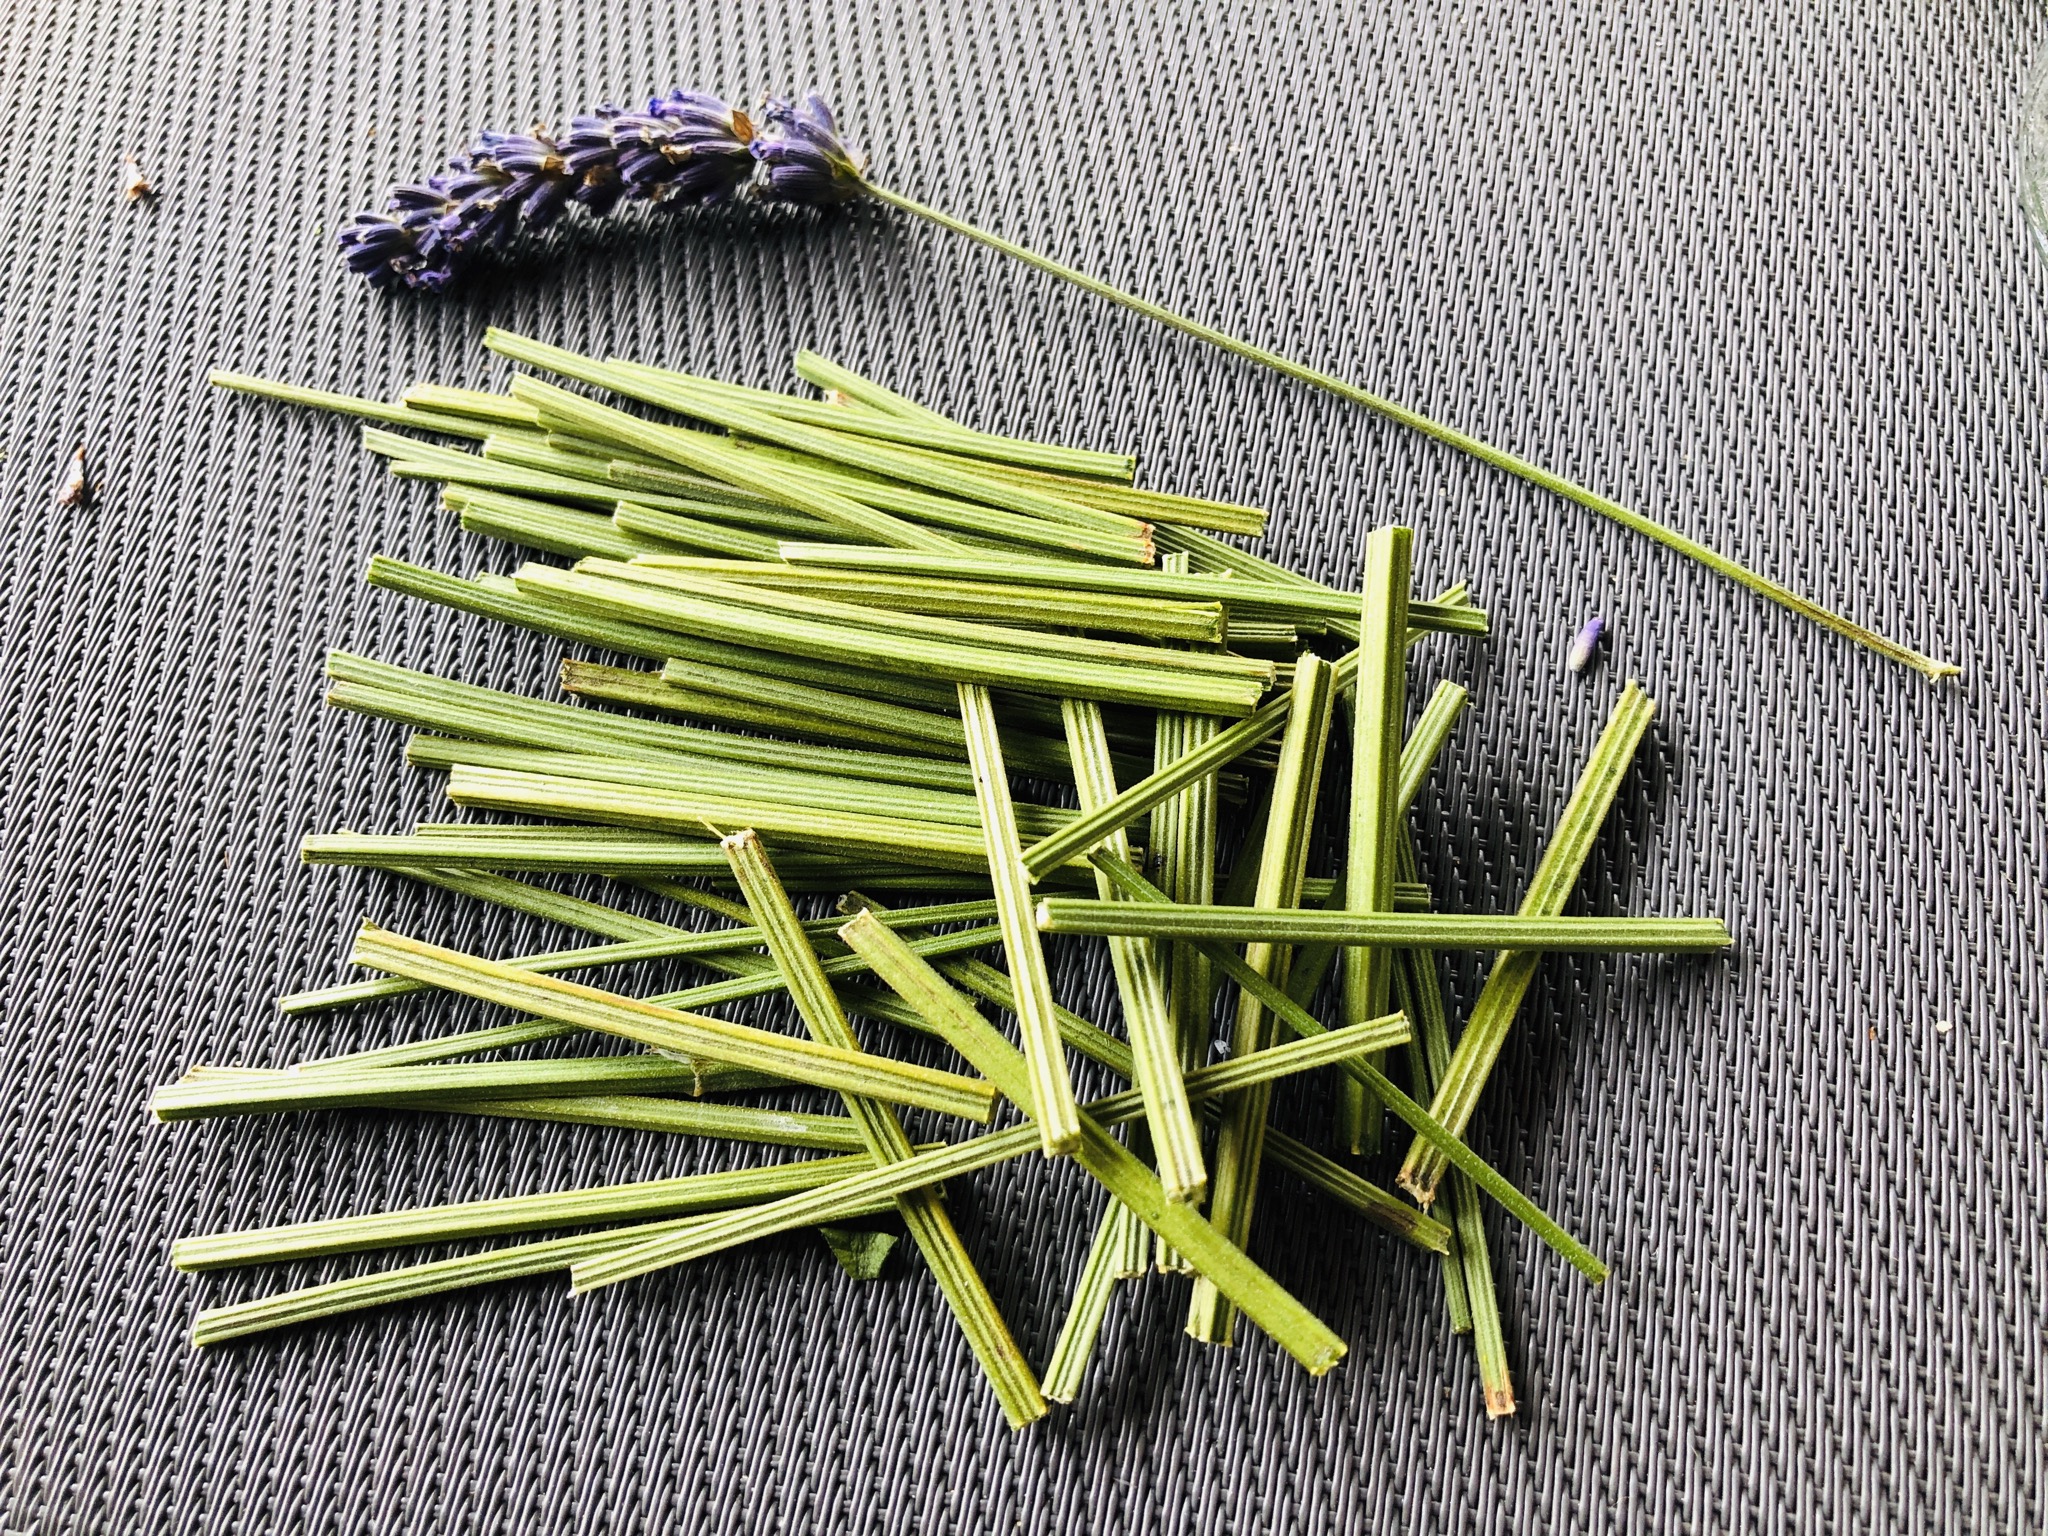
Bild zum Schritt 3 für das Bastel- und DIY-Abenteuer für Kinder: 'Stiele mit der Schere in kurze Stücke schneiden (in etwa...'

4

Through the rubber, the handles are fixed in turn to the glass. The grooved screw edge of the lid serves as a limitation here.
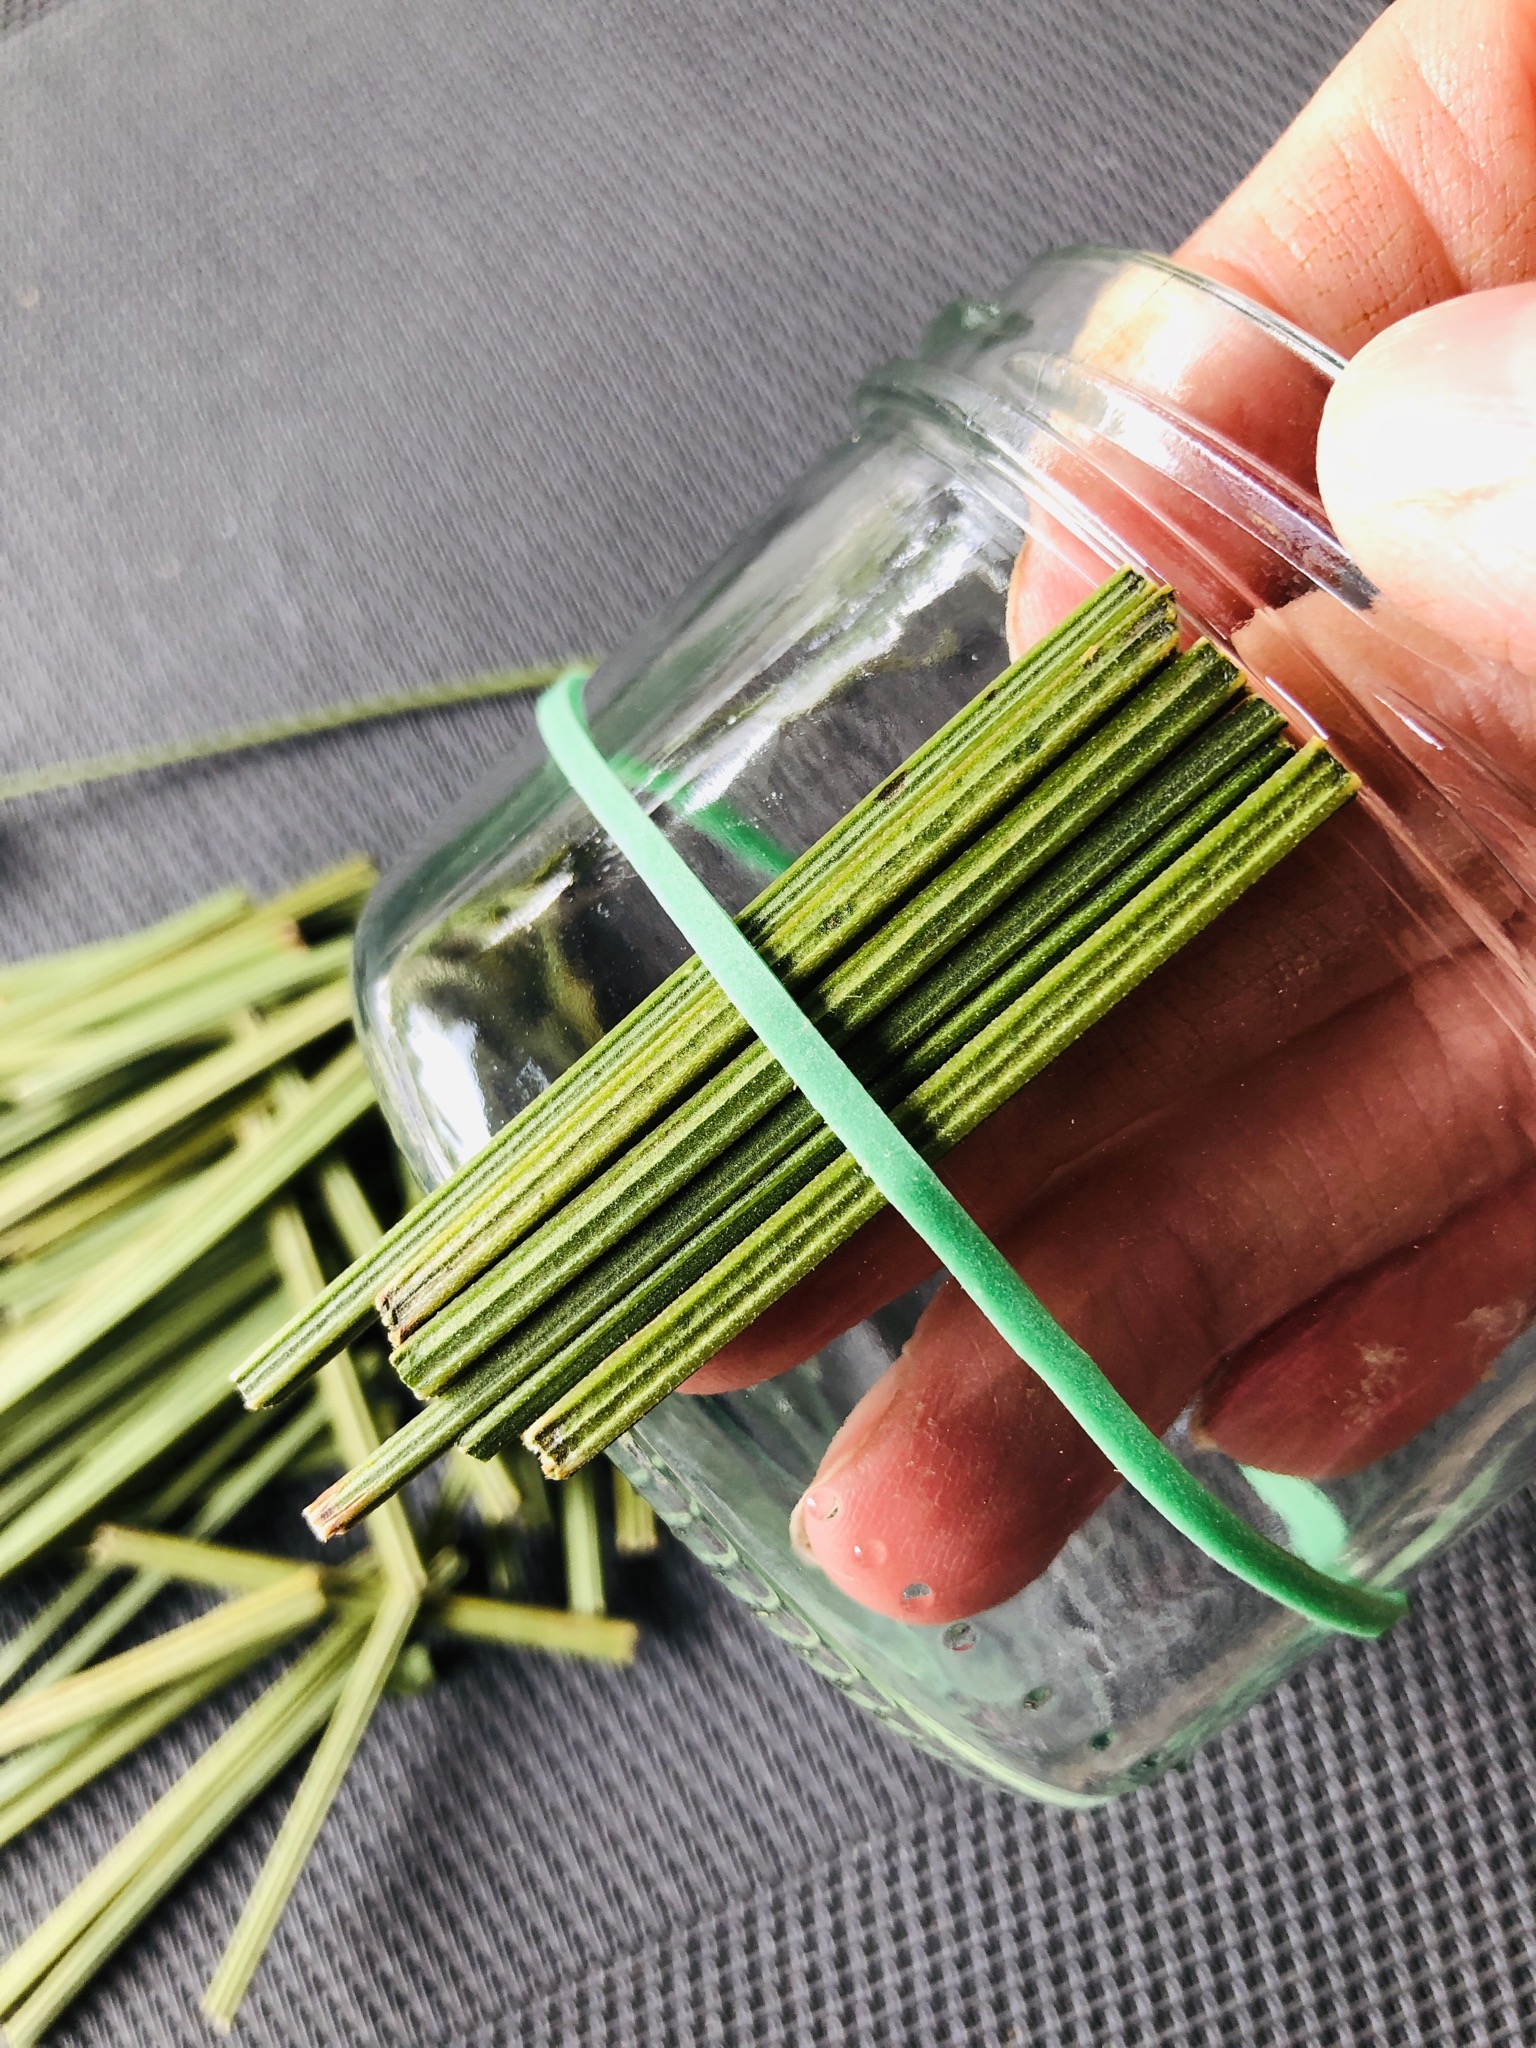
Bild zum Schritt 4 für das Bastel- und DIY-Abenteuer für Kinder: 'Durch den Gummi werden nun die Stiele der Reihe nach...'

5

Puts the stems closely together. They can be quiet different lengths!

Bild zum Schritt 5 für das Bastel- und DIY-Abenteuer für Kinder: 'Legt die Stiele eng aneinander. Sie können ruhig unterschiedlich lang...'

6

The arrangement of the stems also works well if the glass with the glass floor stands up on the table.
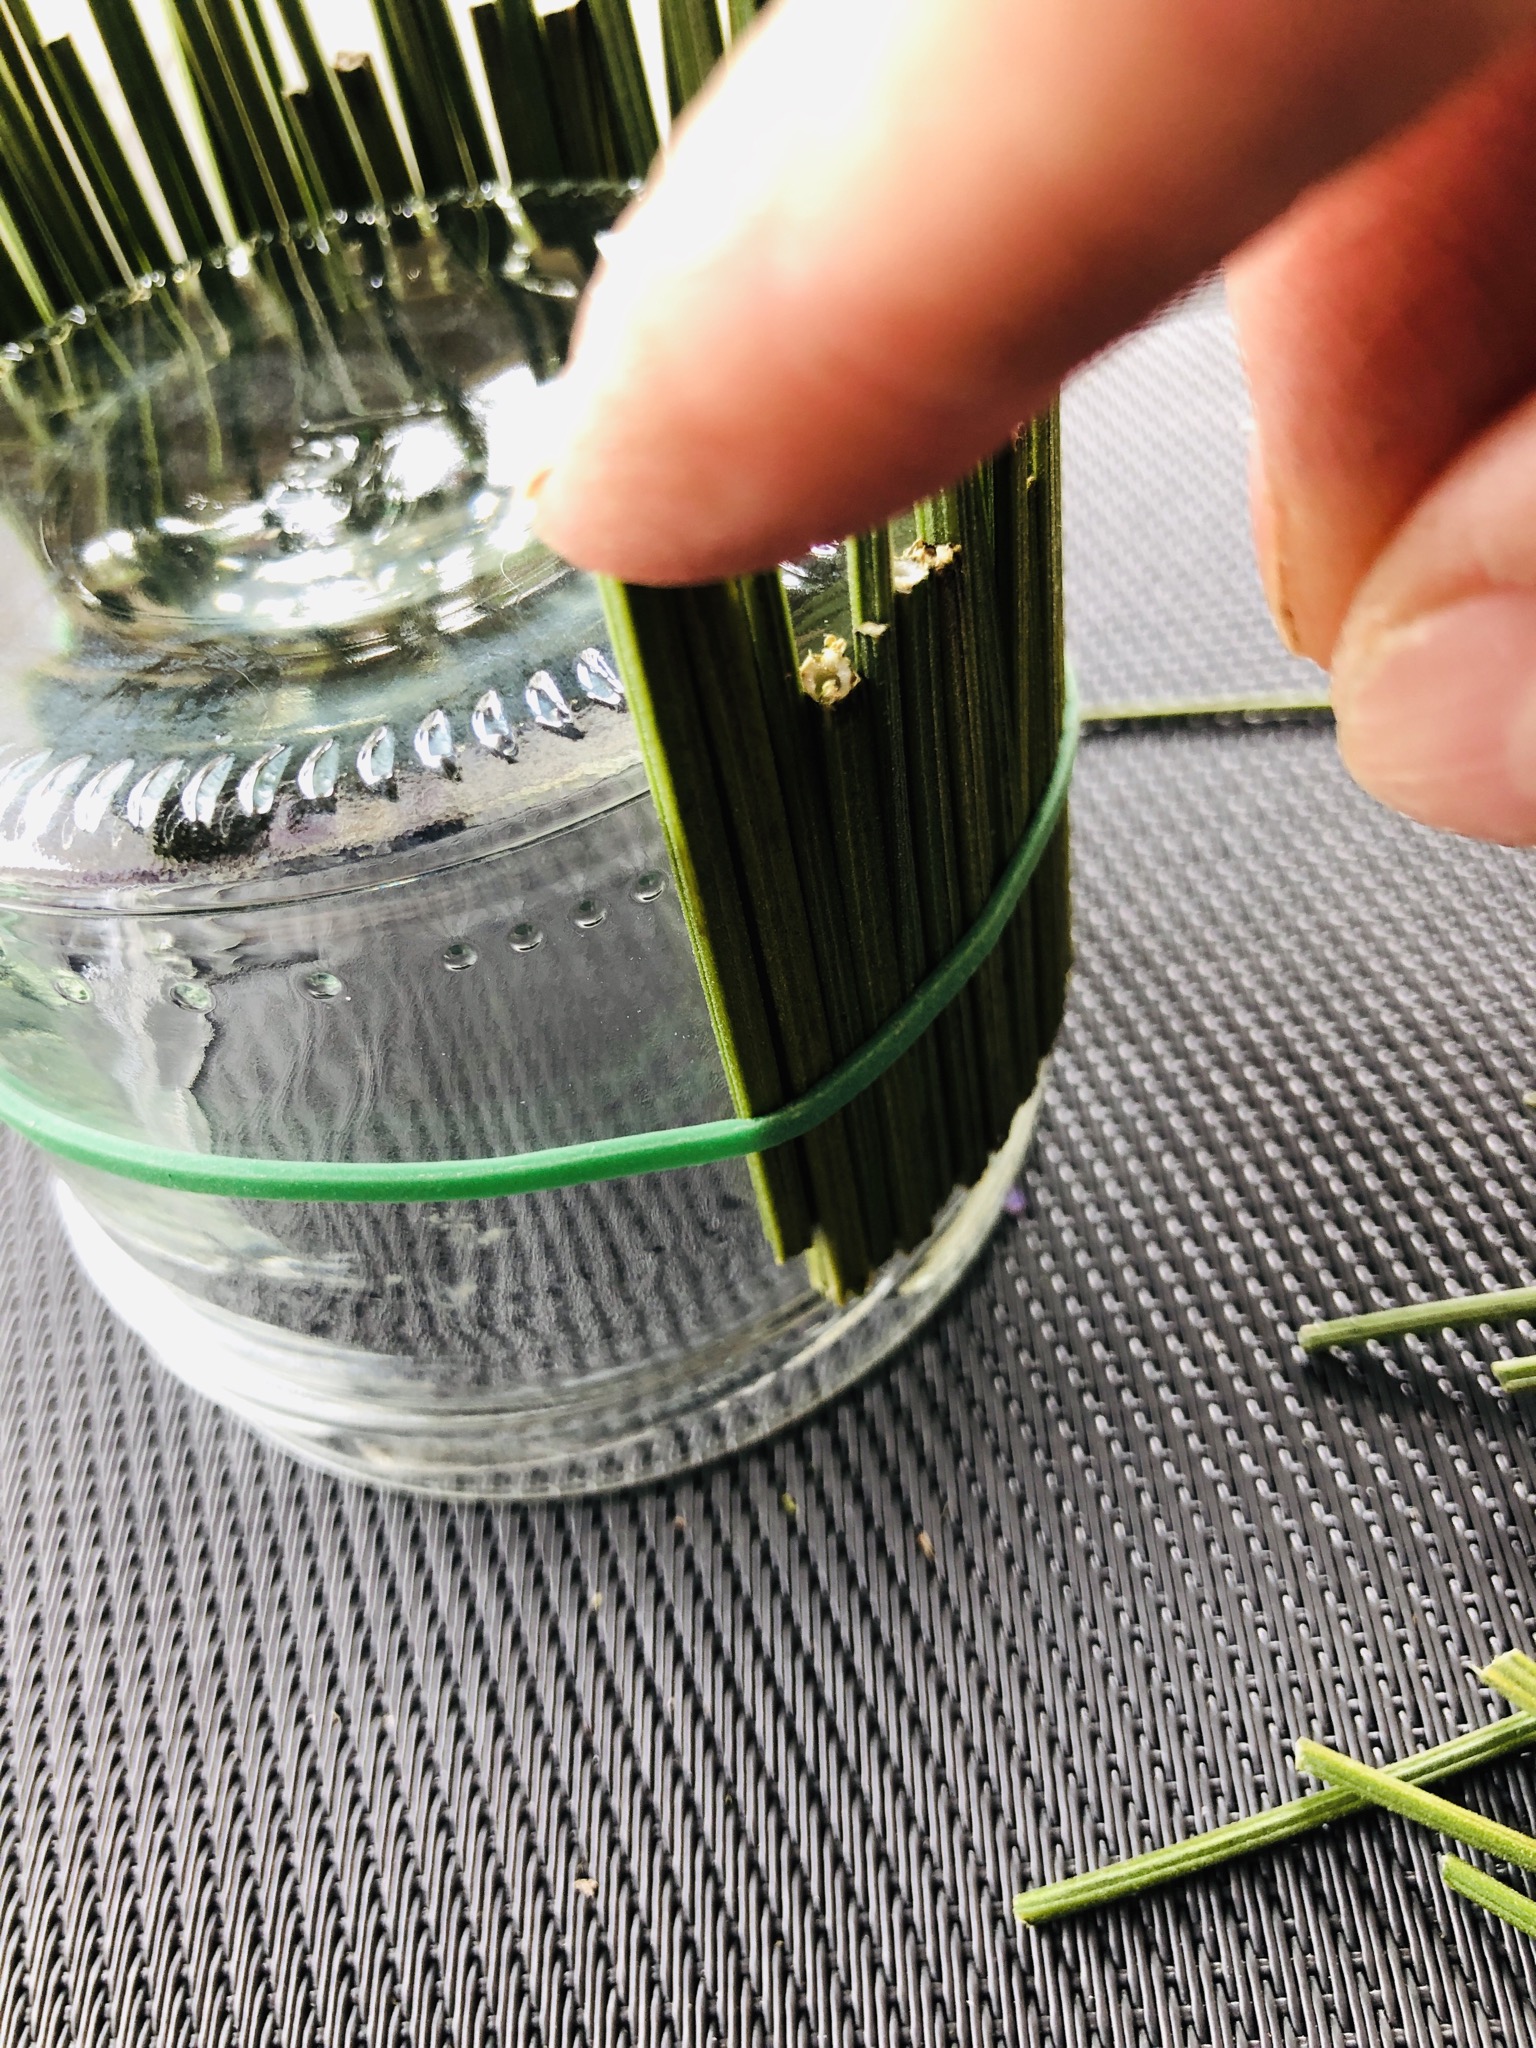
Bild zum Schritt 6 für das Bastel- und DIY-Abenteuer für Kinder: 'Die Anordnungen der Stiele funktioniert auch gut, wenn das Glas...'

7

2. Bild zum Schritt 6 für das Bastel- und DIY-Abenteuer für Kinder: 'Die Anordnungen der Stiele funktioniert auch gut, wenn das Glas...'

8

If you have the glass all around with stems, check again if all stems sit well.
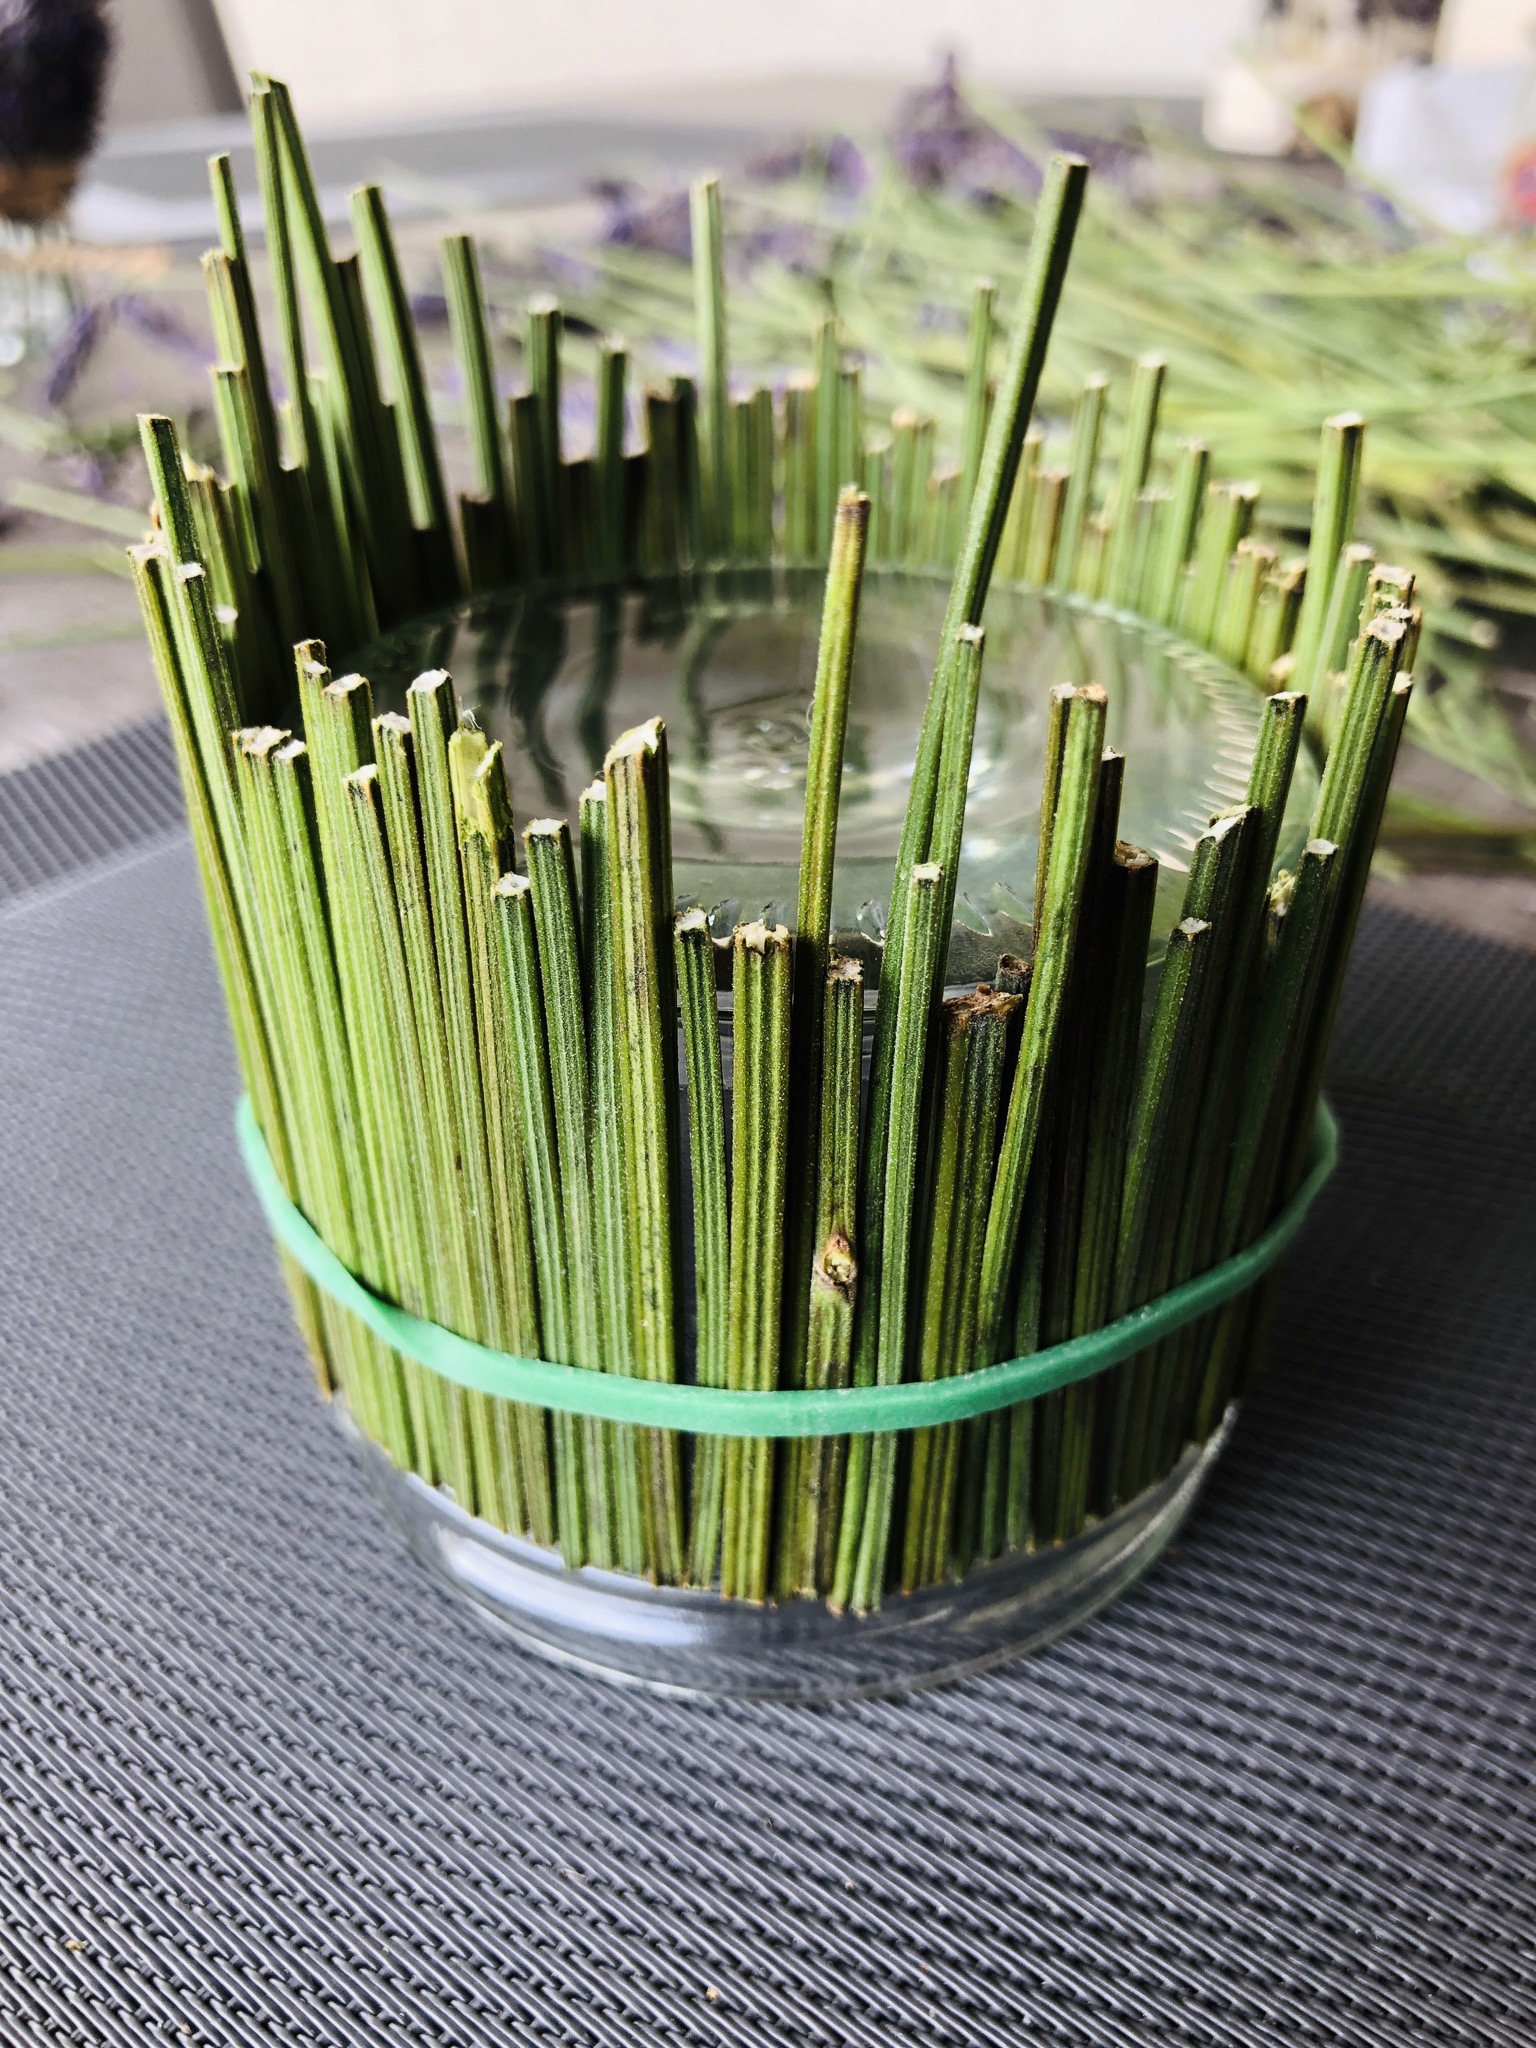
Bild zum Schritt 8 für das Bastel- und DIY-Abenteuer für Kinder: 'Wenn ihr das Glas rundherum mit Stiele bestückt habt, kontrolliert...'

9

Now tie a bast cord over the rubber. Wrap the bast at least twice around the glass.
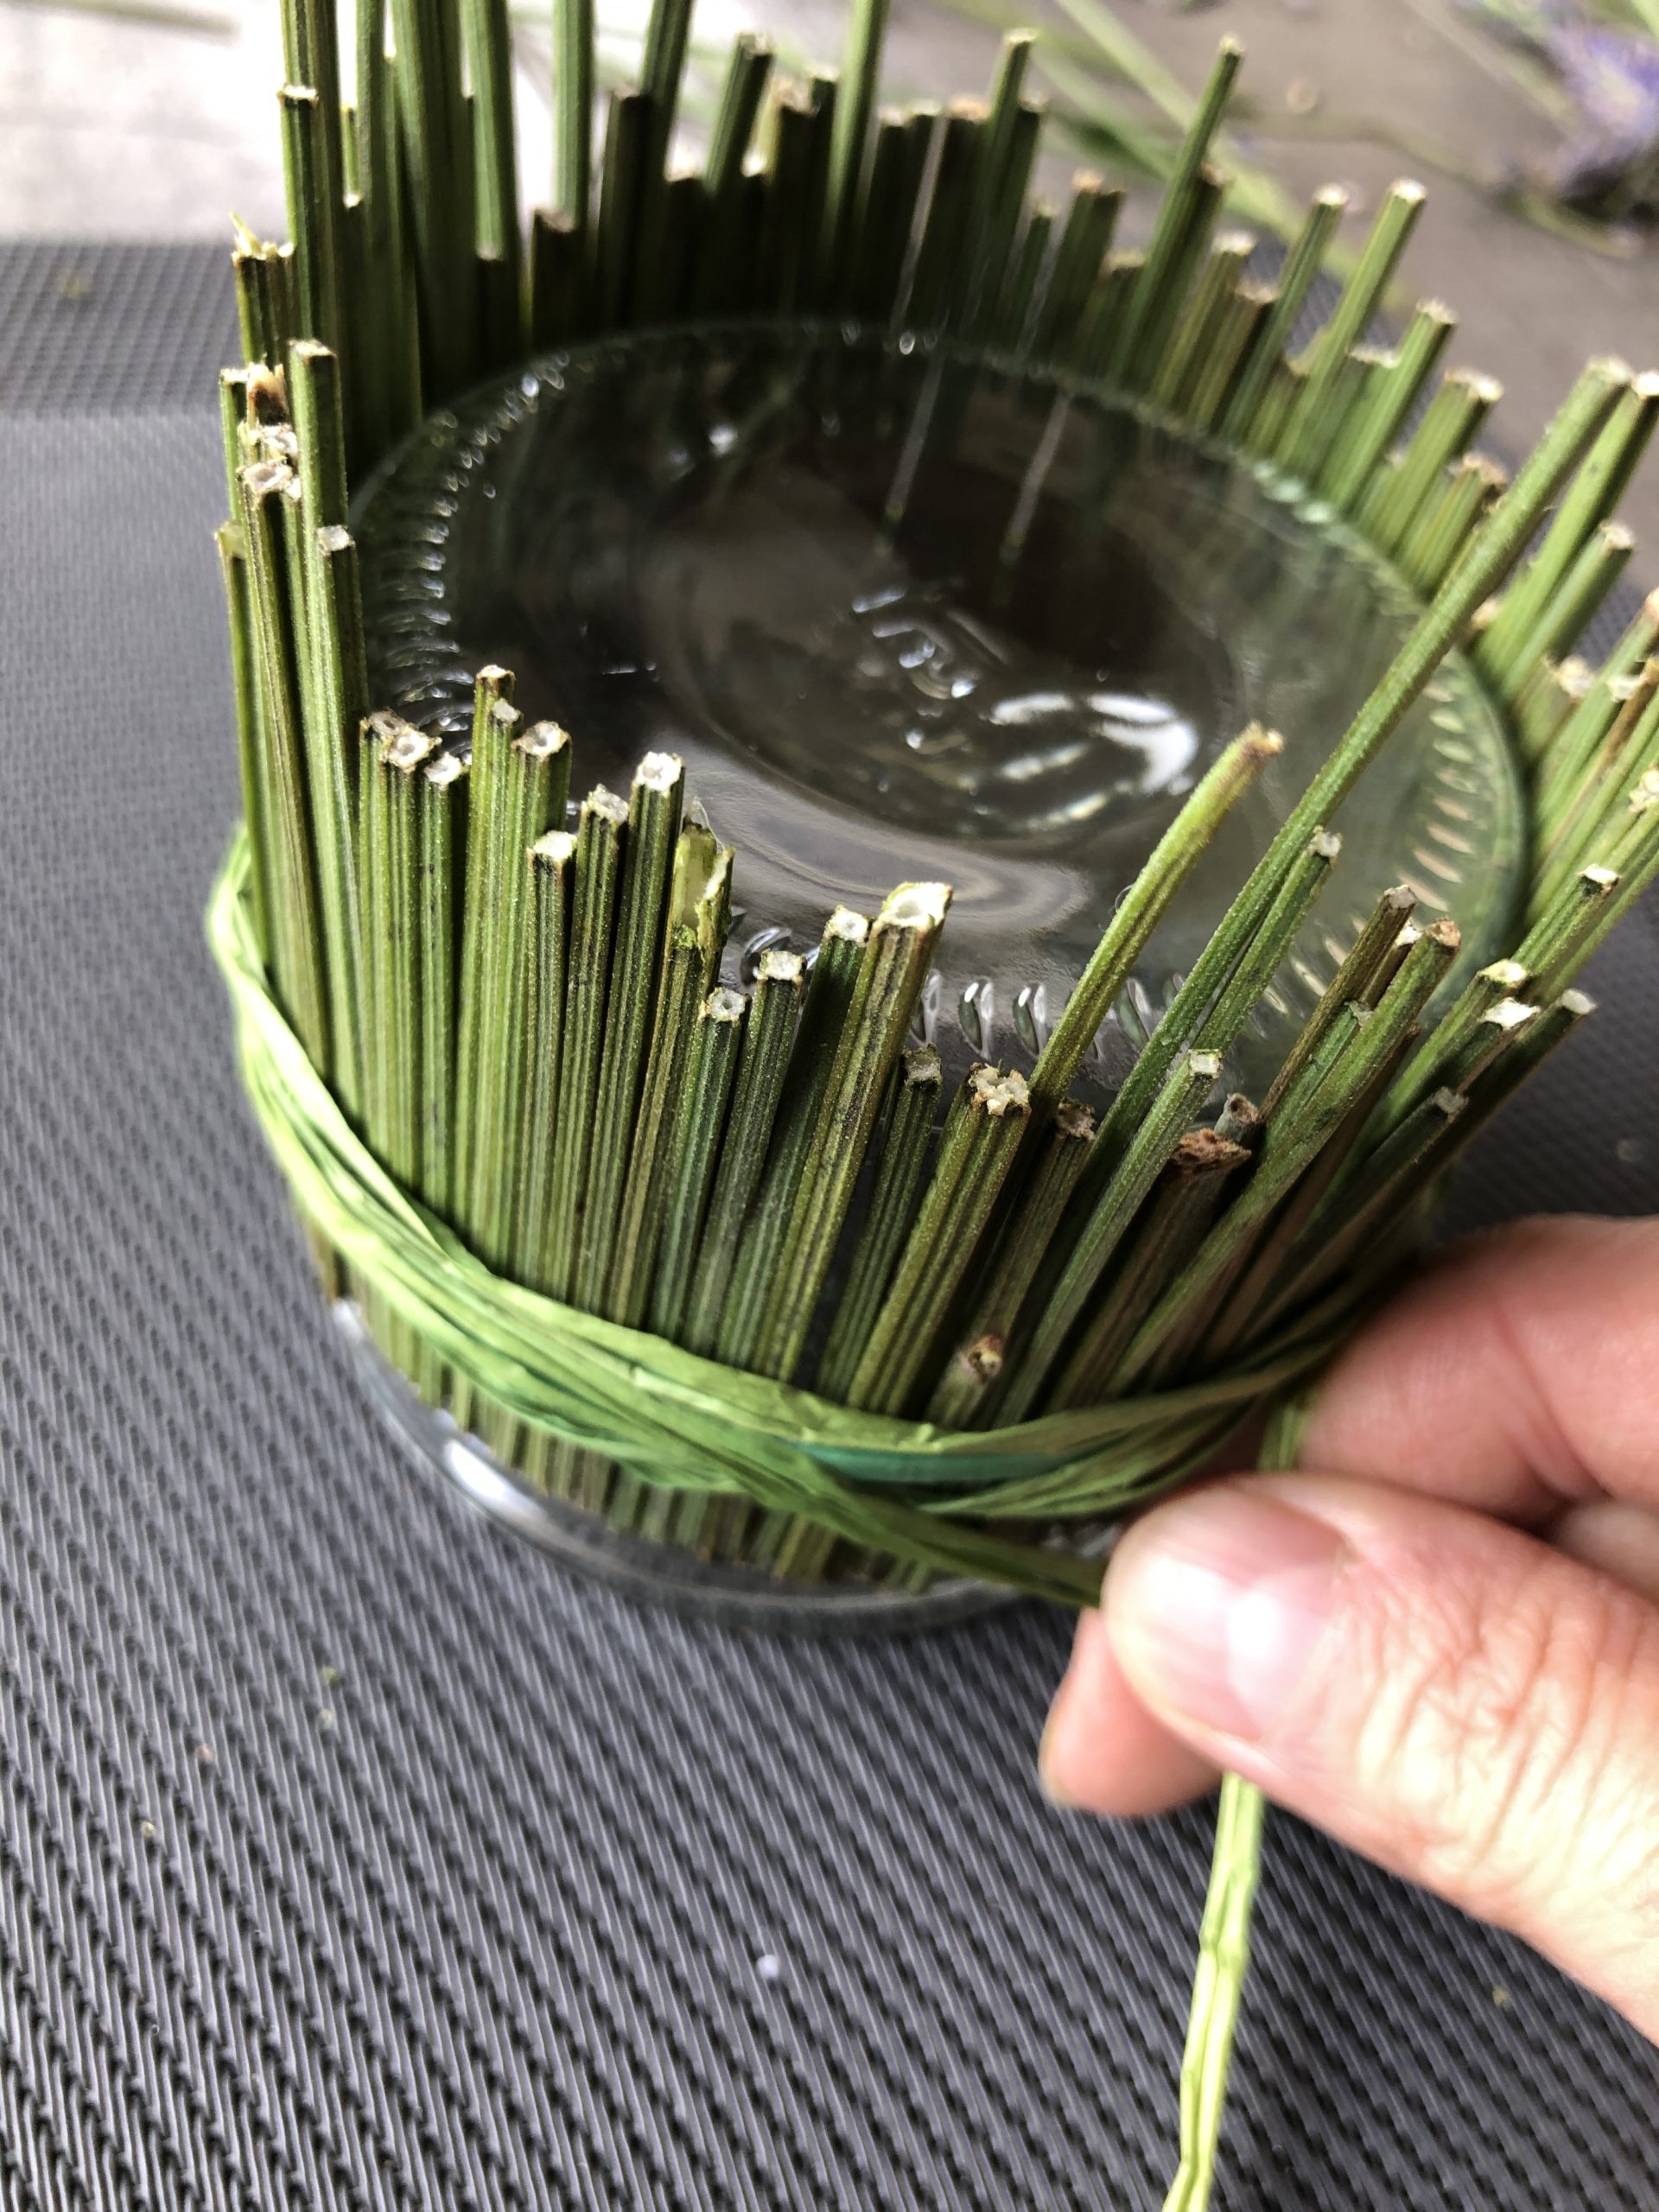
Bild zum Schritt 9 für das Bastel- und DIY-Abenteuer für Kinder: 'Bindet nun eine Bastschnur über den Gummi. Wickelt dazu den...'

10

Knot the bast.

Bild zum Schritt 10 für das Bastel- und DIY-Abenteuer für Kinder: 'Verknotet den Bast.'

11

The wind is ready.

Bild zum Schritt 11 für das Bastel- und DIY-Abenteuer für Kinder: 'Fertig ist das Windlicht.'

12

In order to hold the stems on the glass, a trace of hot glue is pulled on the glass floor (which points upwards!).

Bild zum Schritt 12 für das Bastel- und DIY-Abenteuer für Kinder: 'Um die Stiele am Glas zu halten, wird nun am...'

13

Well glued hold the stems.

Bild zum Schritt 13 für das Bastel- und DIY-Abenteuer für Kinder: 'Gut verklebt halten die Stiele.'

1. Variant:
14

Put a large tea light on the top of the glass floor and the first version is ready.
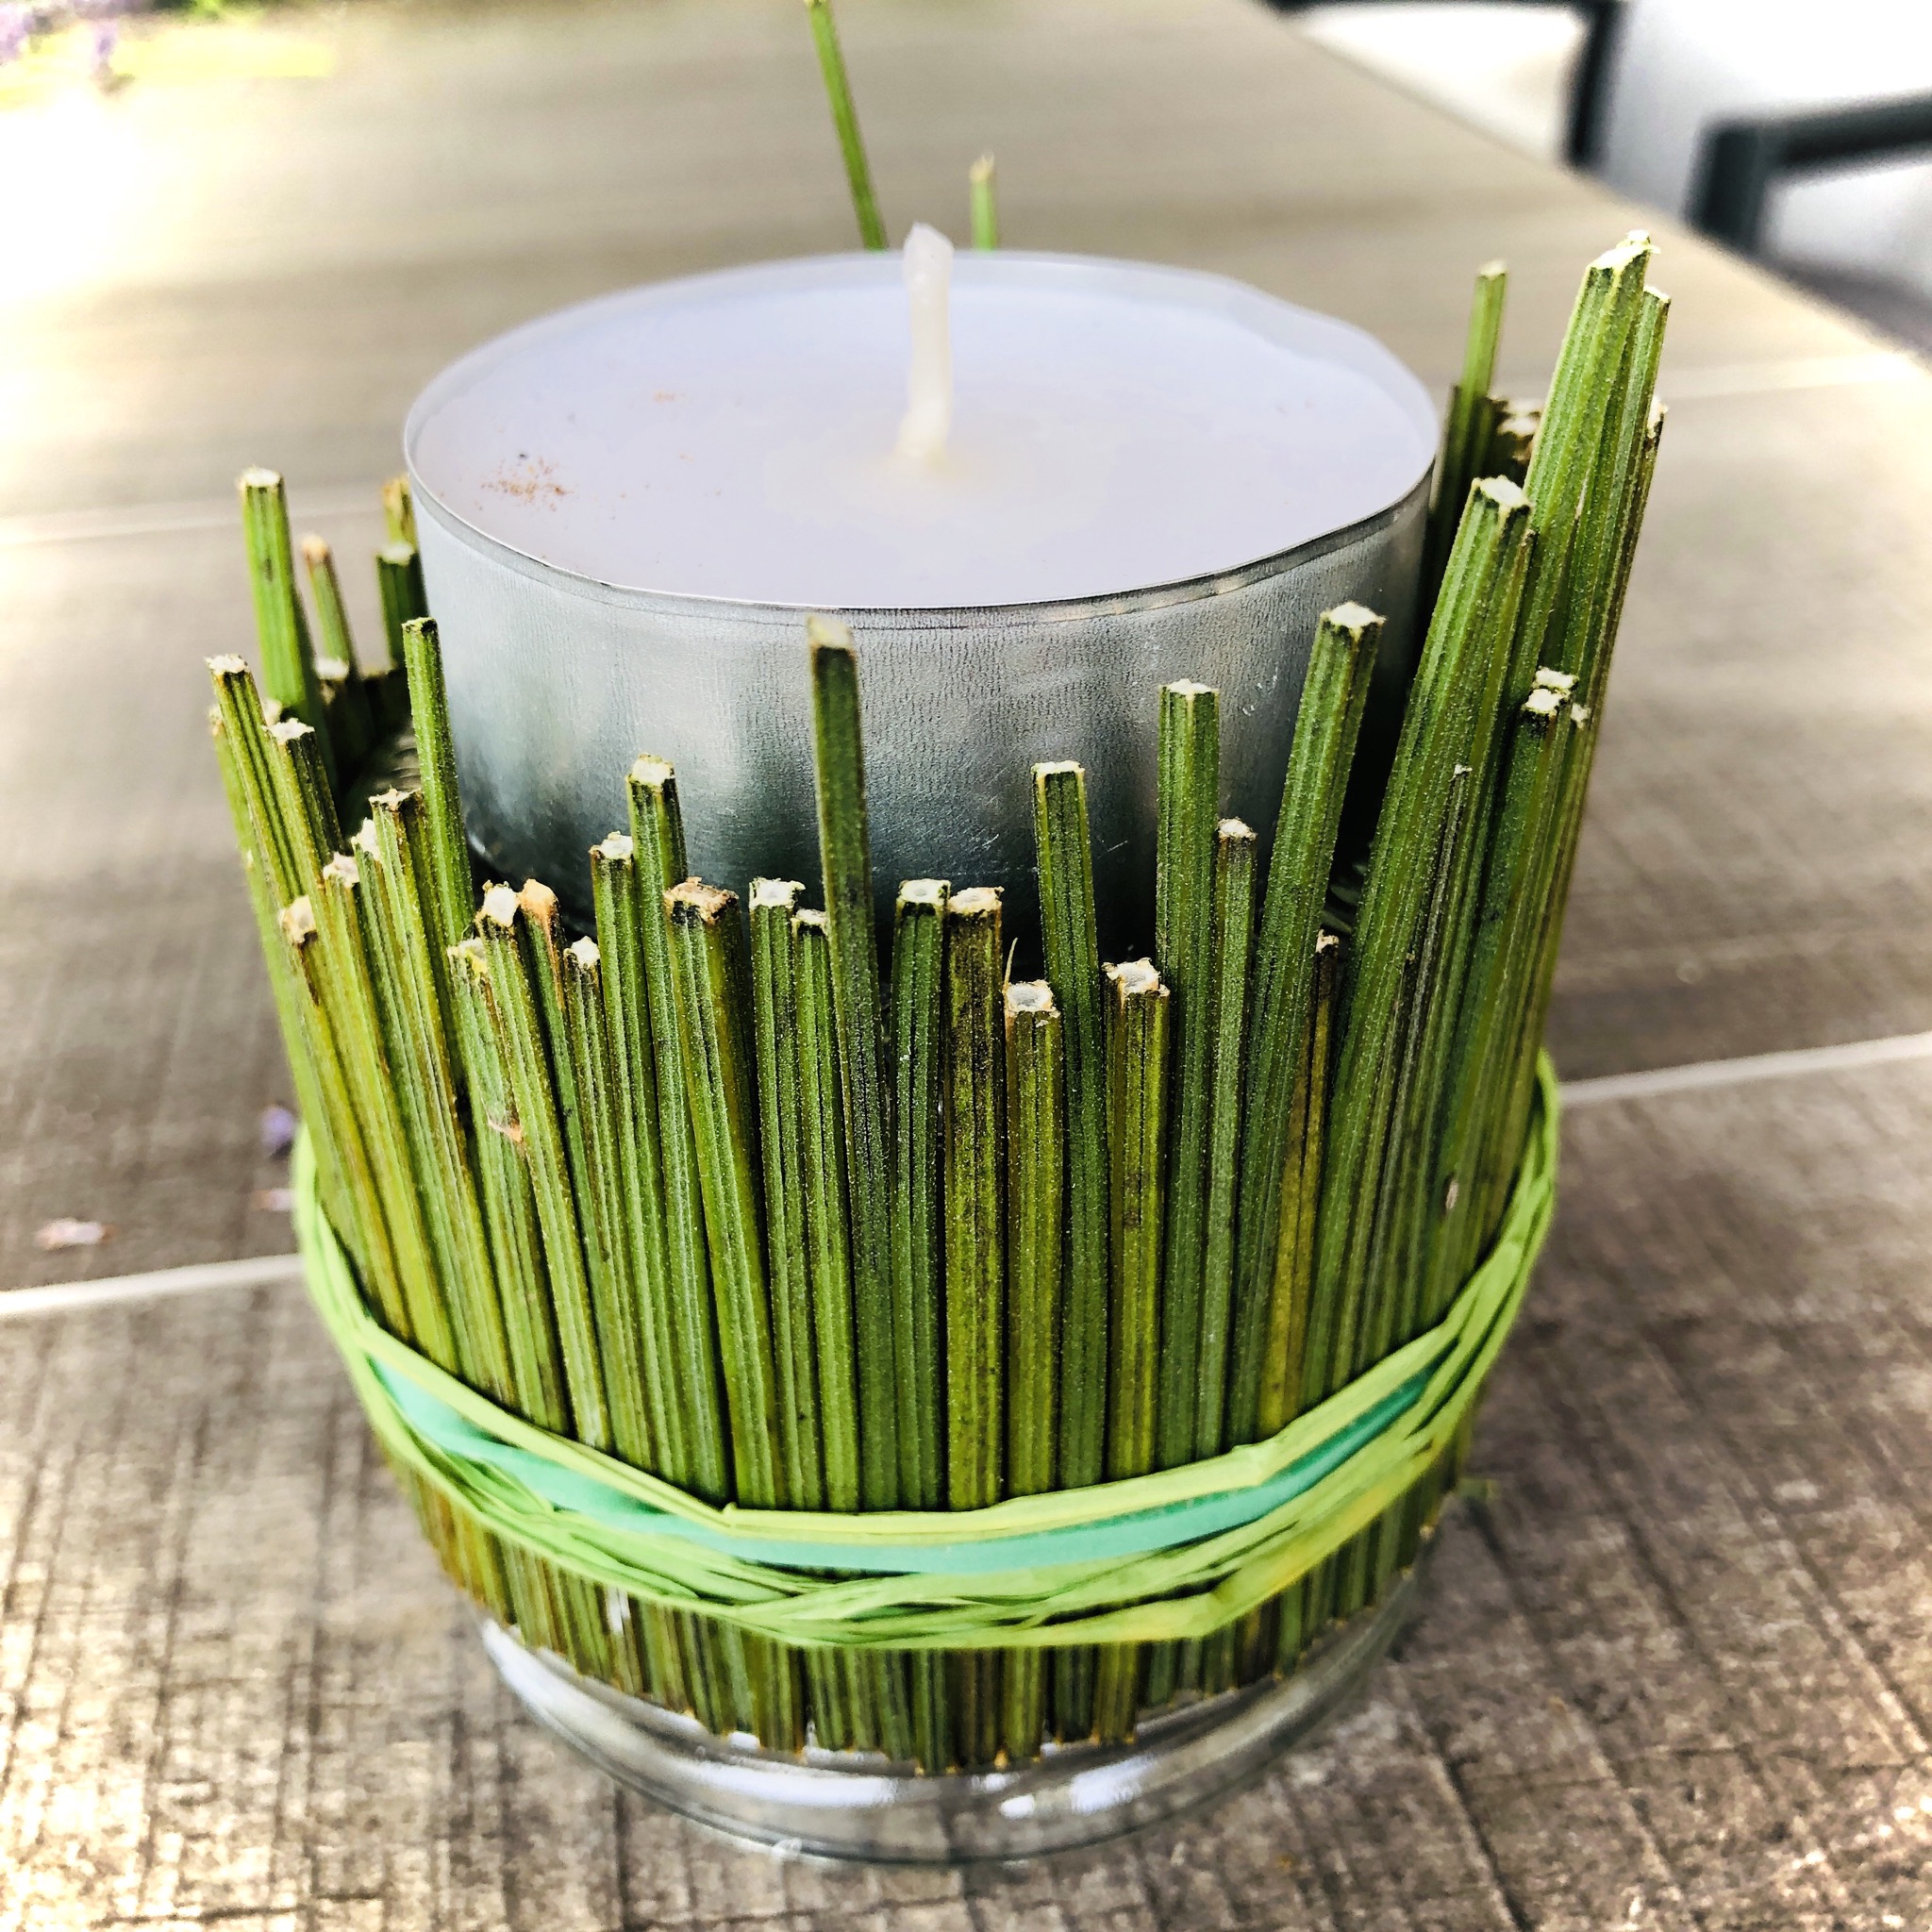
Bild zum Schritt 15 für das Bastel- und DIY-Abenteuer für Kinder: 'Stellt ein großes Teelicht oben auf den Glasboden und fertig...'

2. Variant:
15

Put some fresh lavender flowers on the knotted bast.
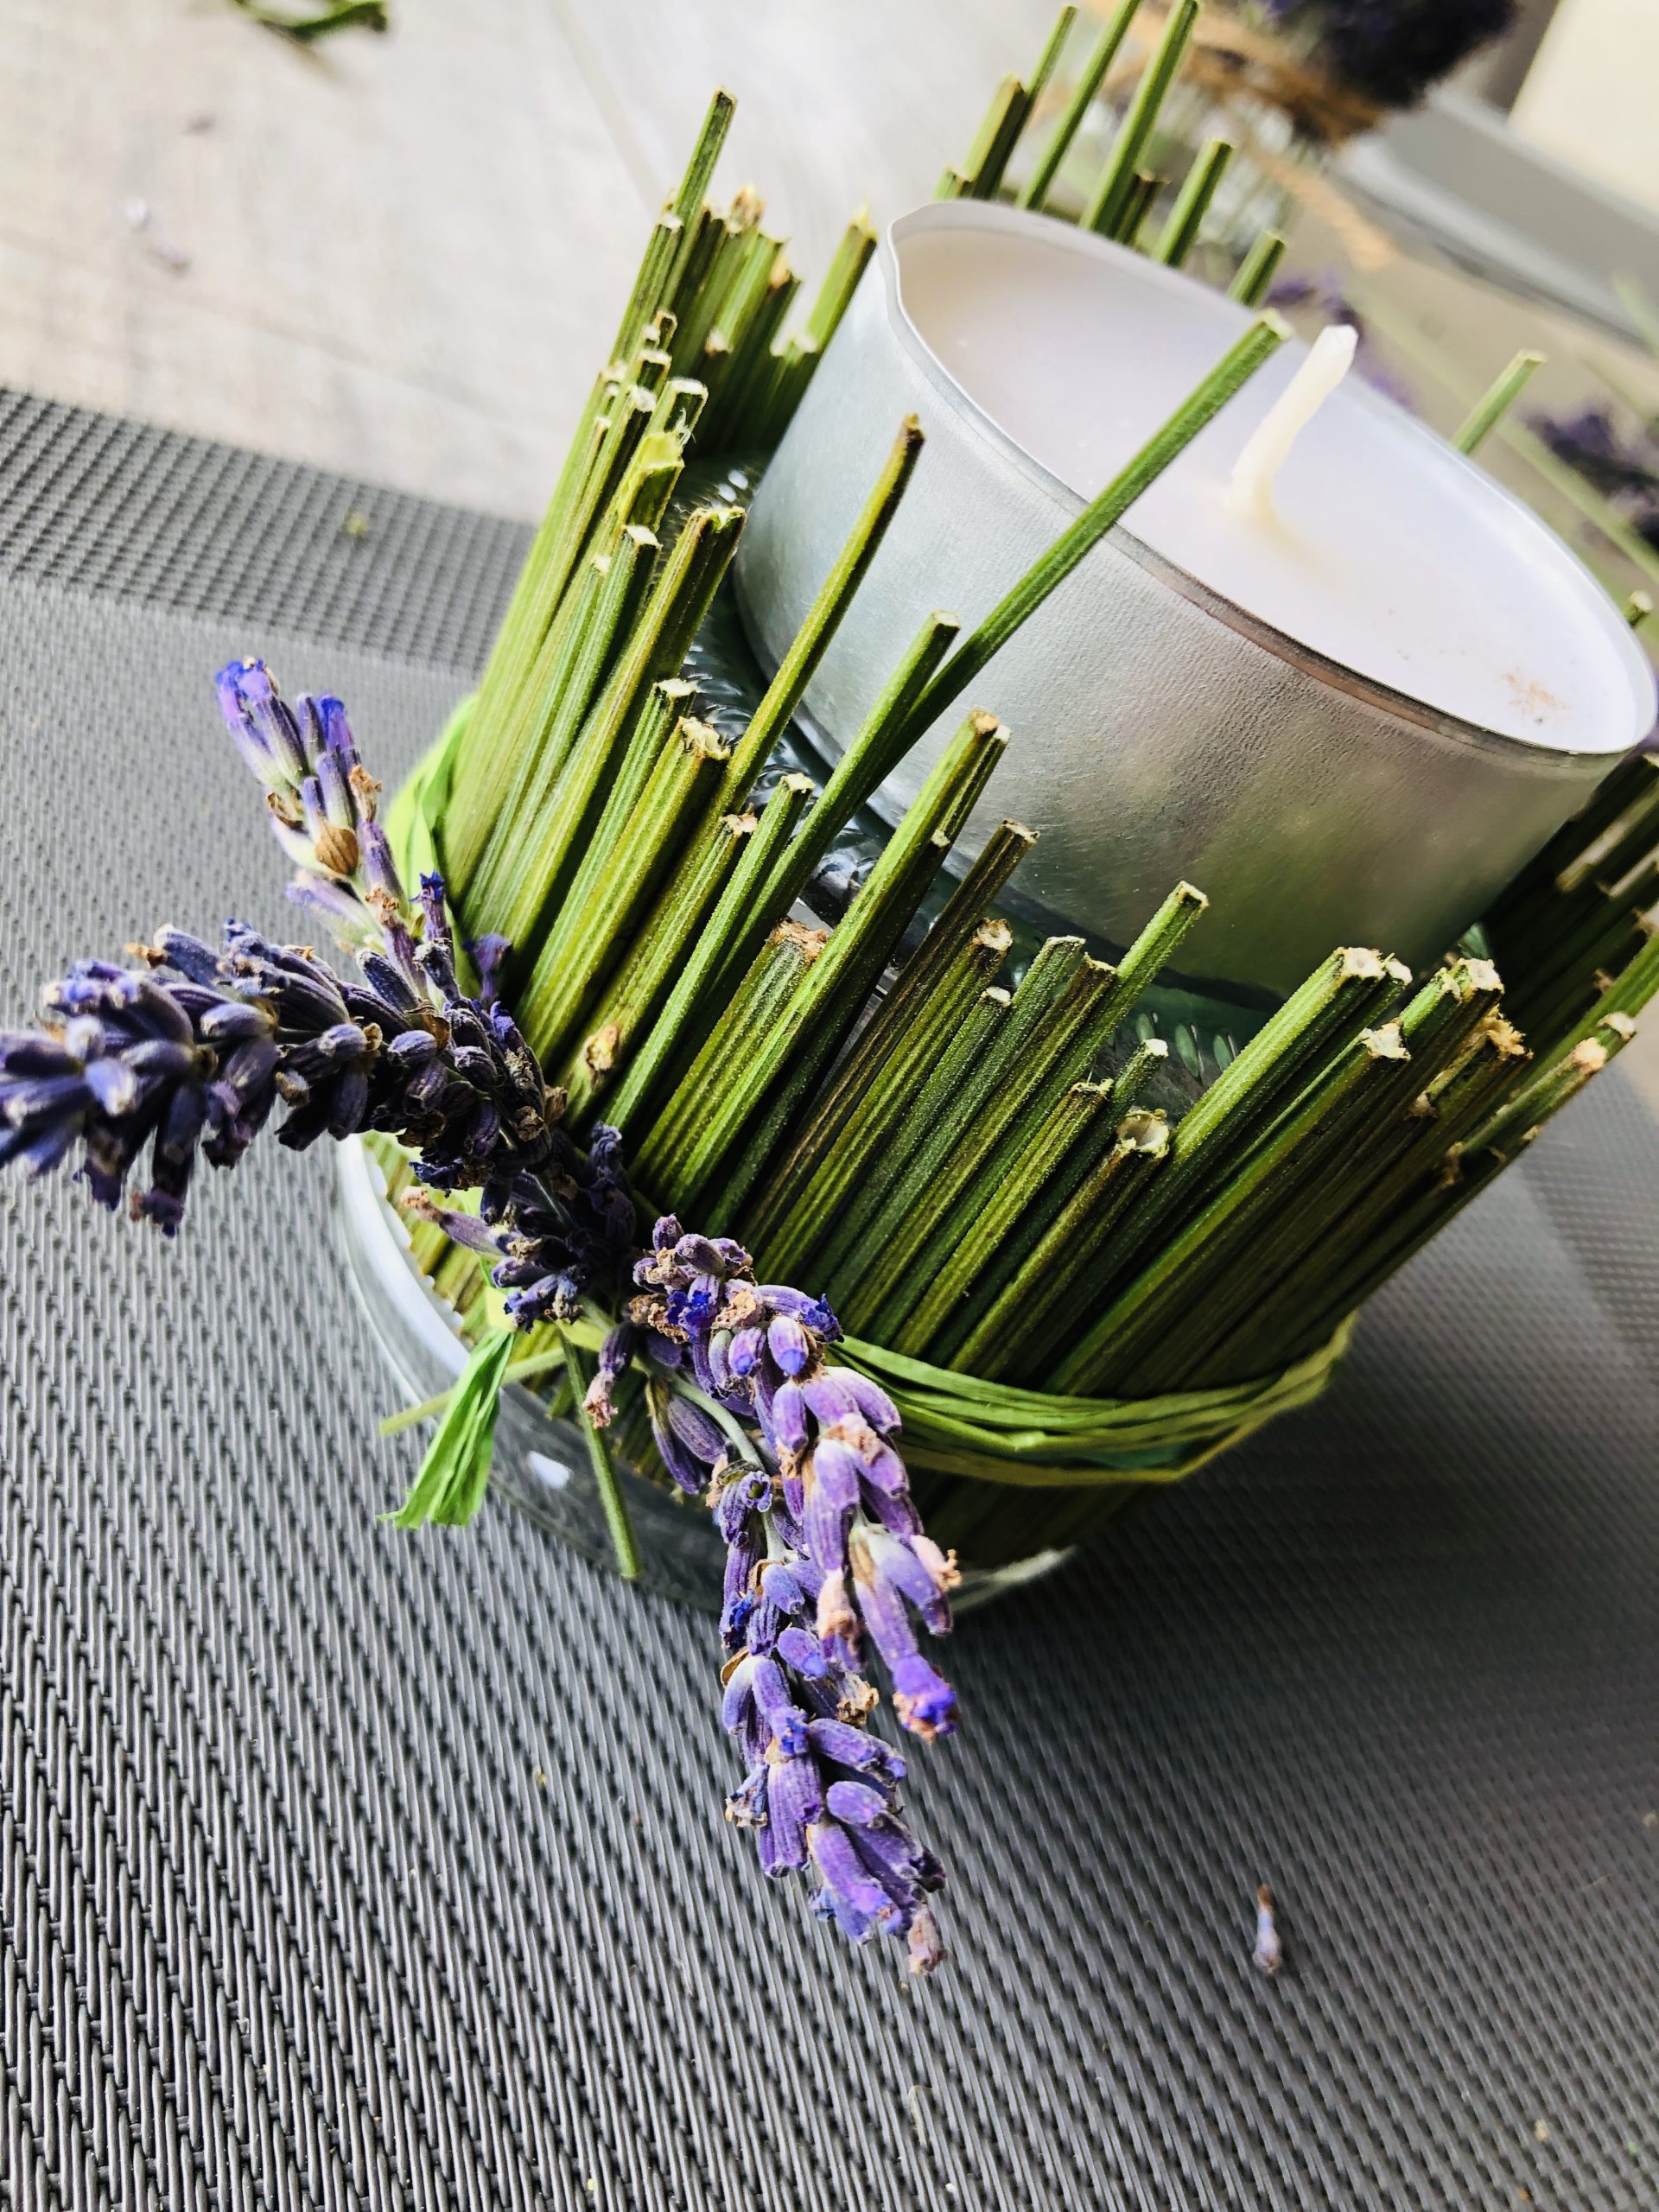
Bild zum Schritt 17 für das Bastel- und DIY-Abenteuer für Kinder: 'Steckt an den verknoteten Bast ein paar frische Lavendelblüten.'

16

The second variant is ready.

Bild zum Schritt 18 für das Bastel- und DIY-Abenteuer für Kinder: 'Fertig ist die zweite Variante.'

3. Variant:
17

Use a scissors to cut off the stems standing on the glass floor flush with the glass floor.
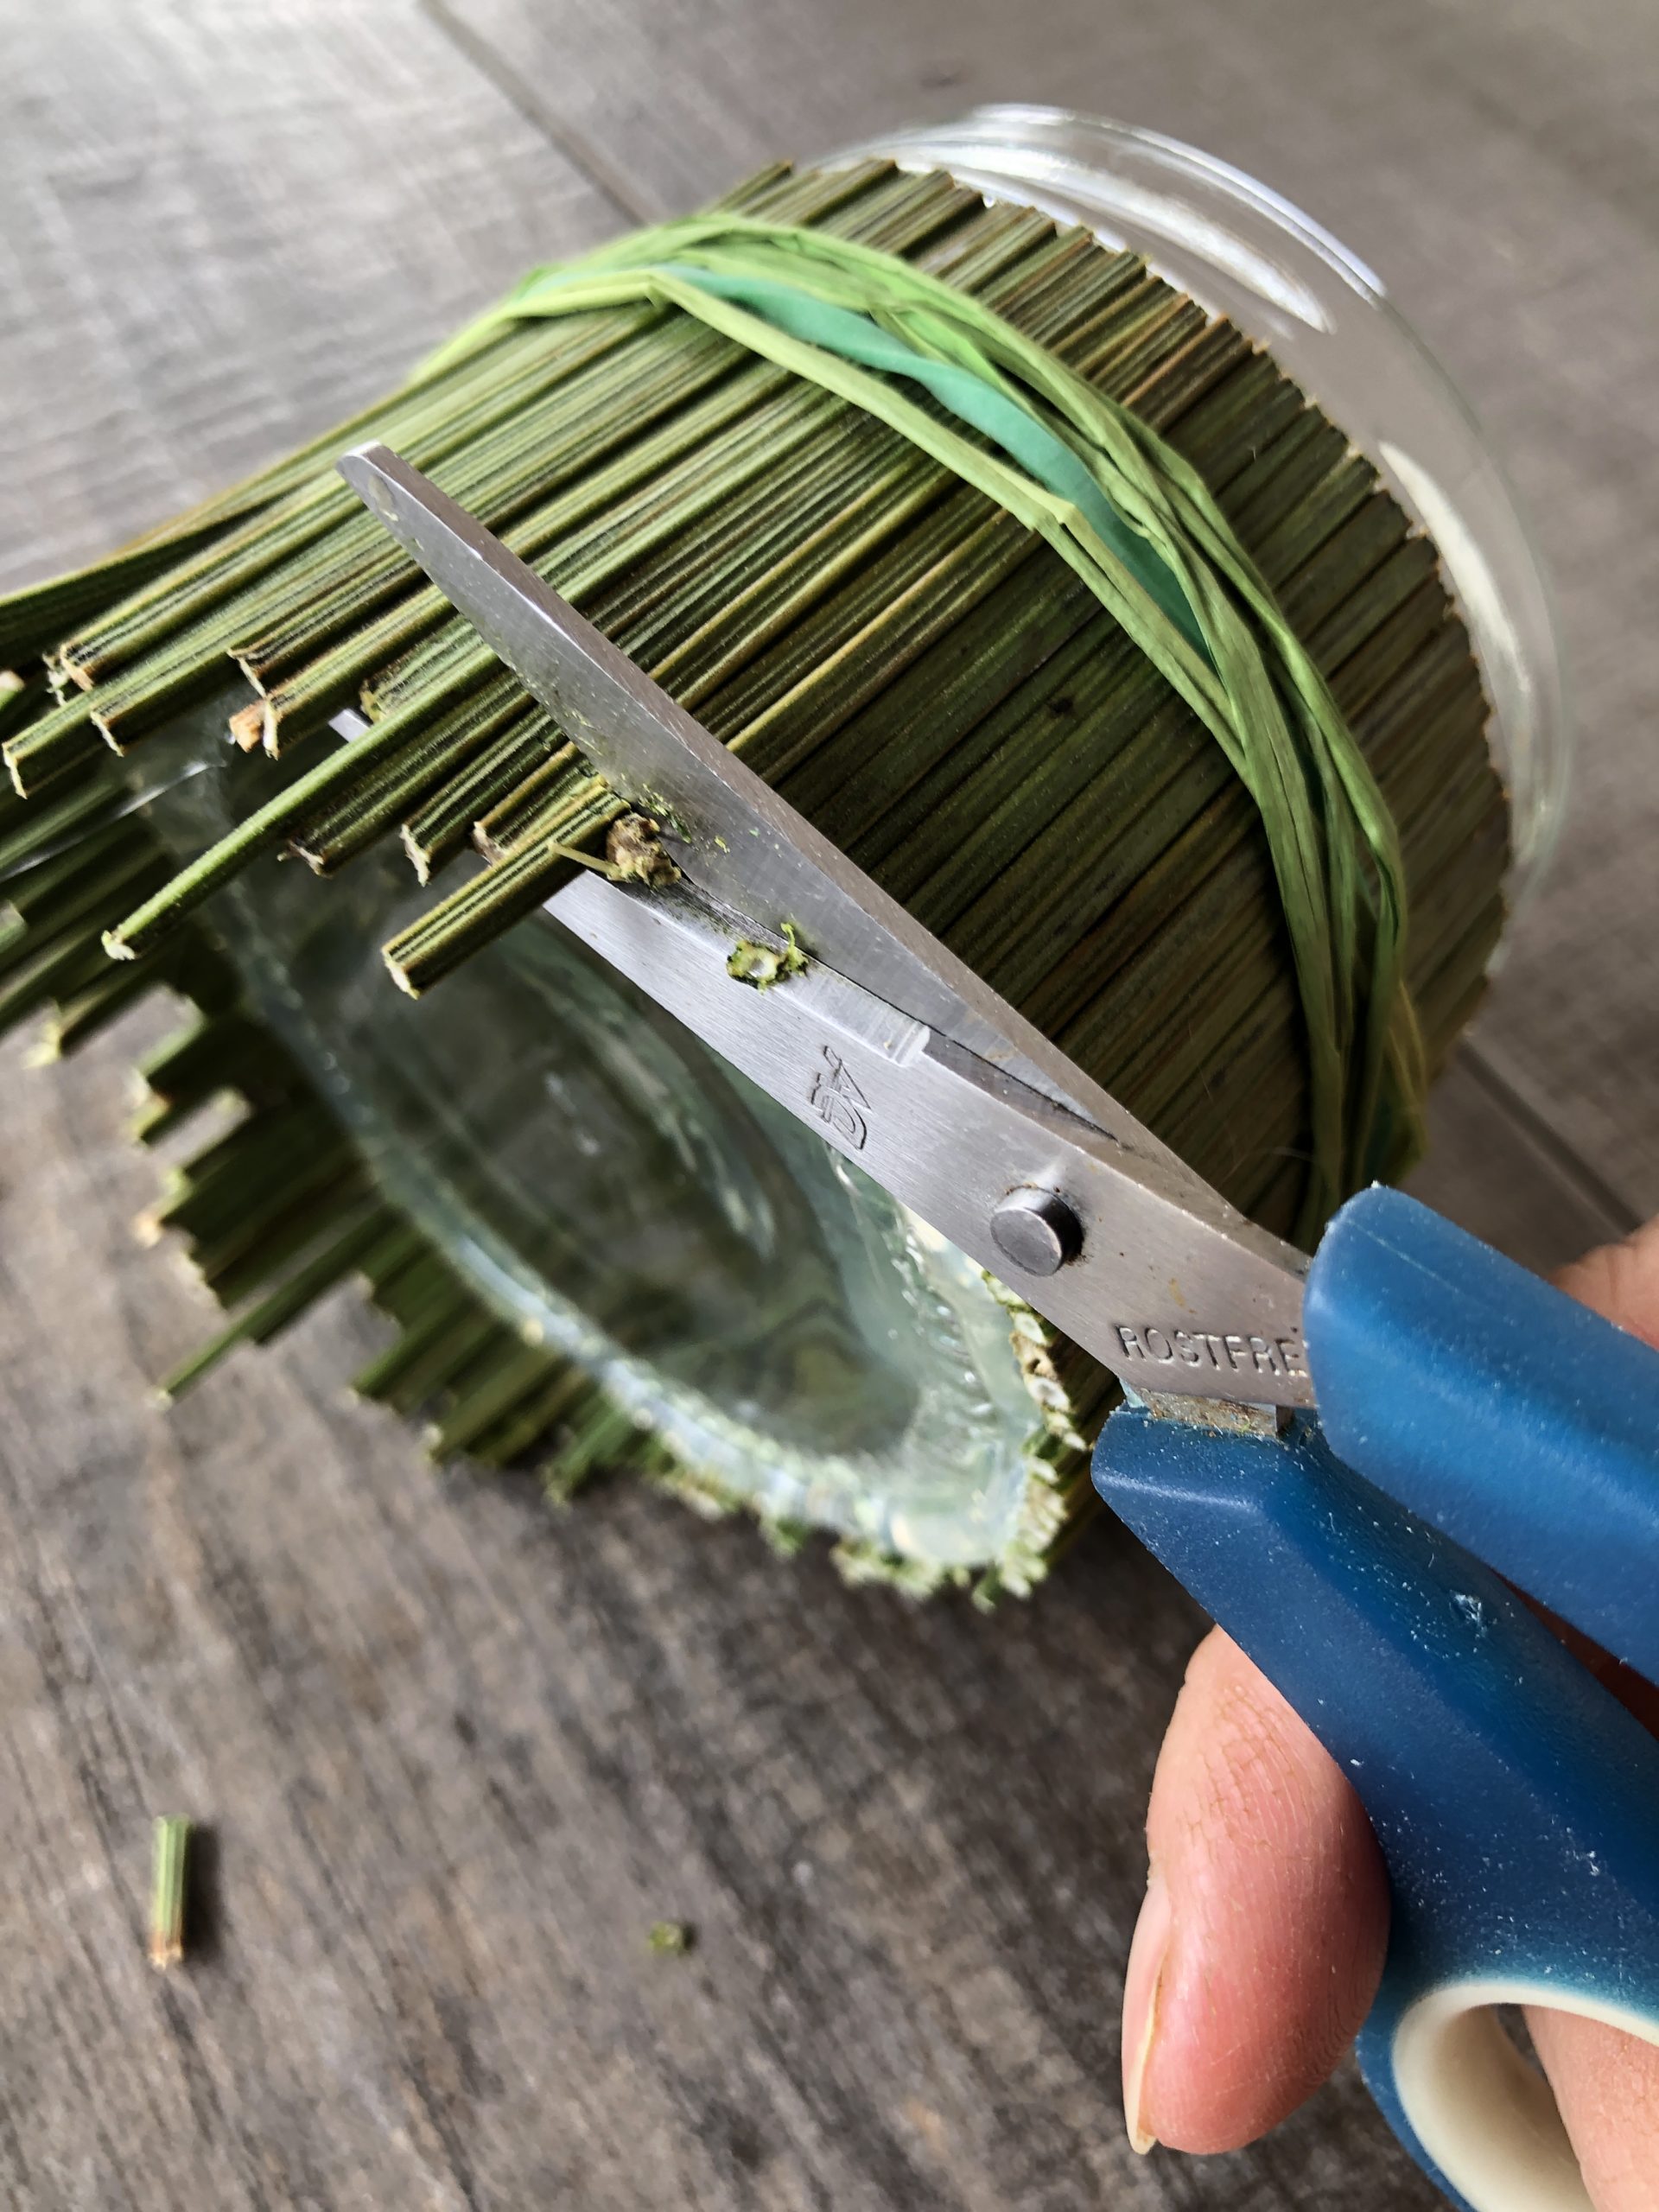
Bild zum Schritt 20 für das Bastel- und DIY-Abenteuer für Kinder: 'Schneidet mit einer Schere die am Glasboden überstehenden Stängel bündig...'

18

2. Bild zum Schritt 20 für das Bastel- und DIY-Abenteuer für Kinder: 'Schneidet mit einer Schere die am Glasboden überstehenden Stängel bündig...'

19

You can glue the stems at the bottom of the glass with hot glue again.
So guaranteed no stalk slips out, even if the stalks dry!
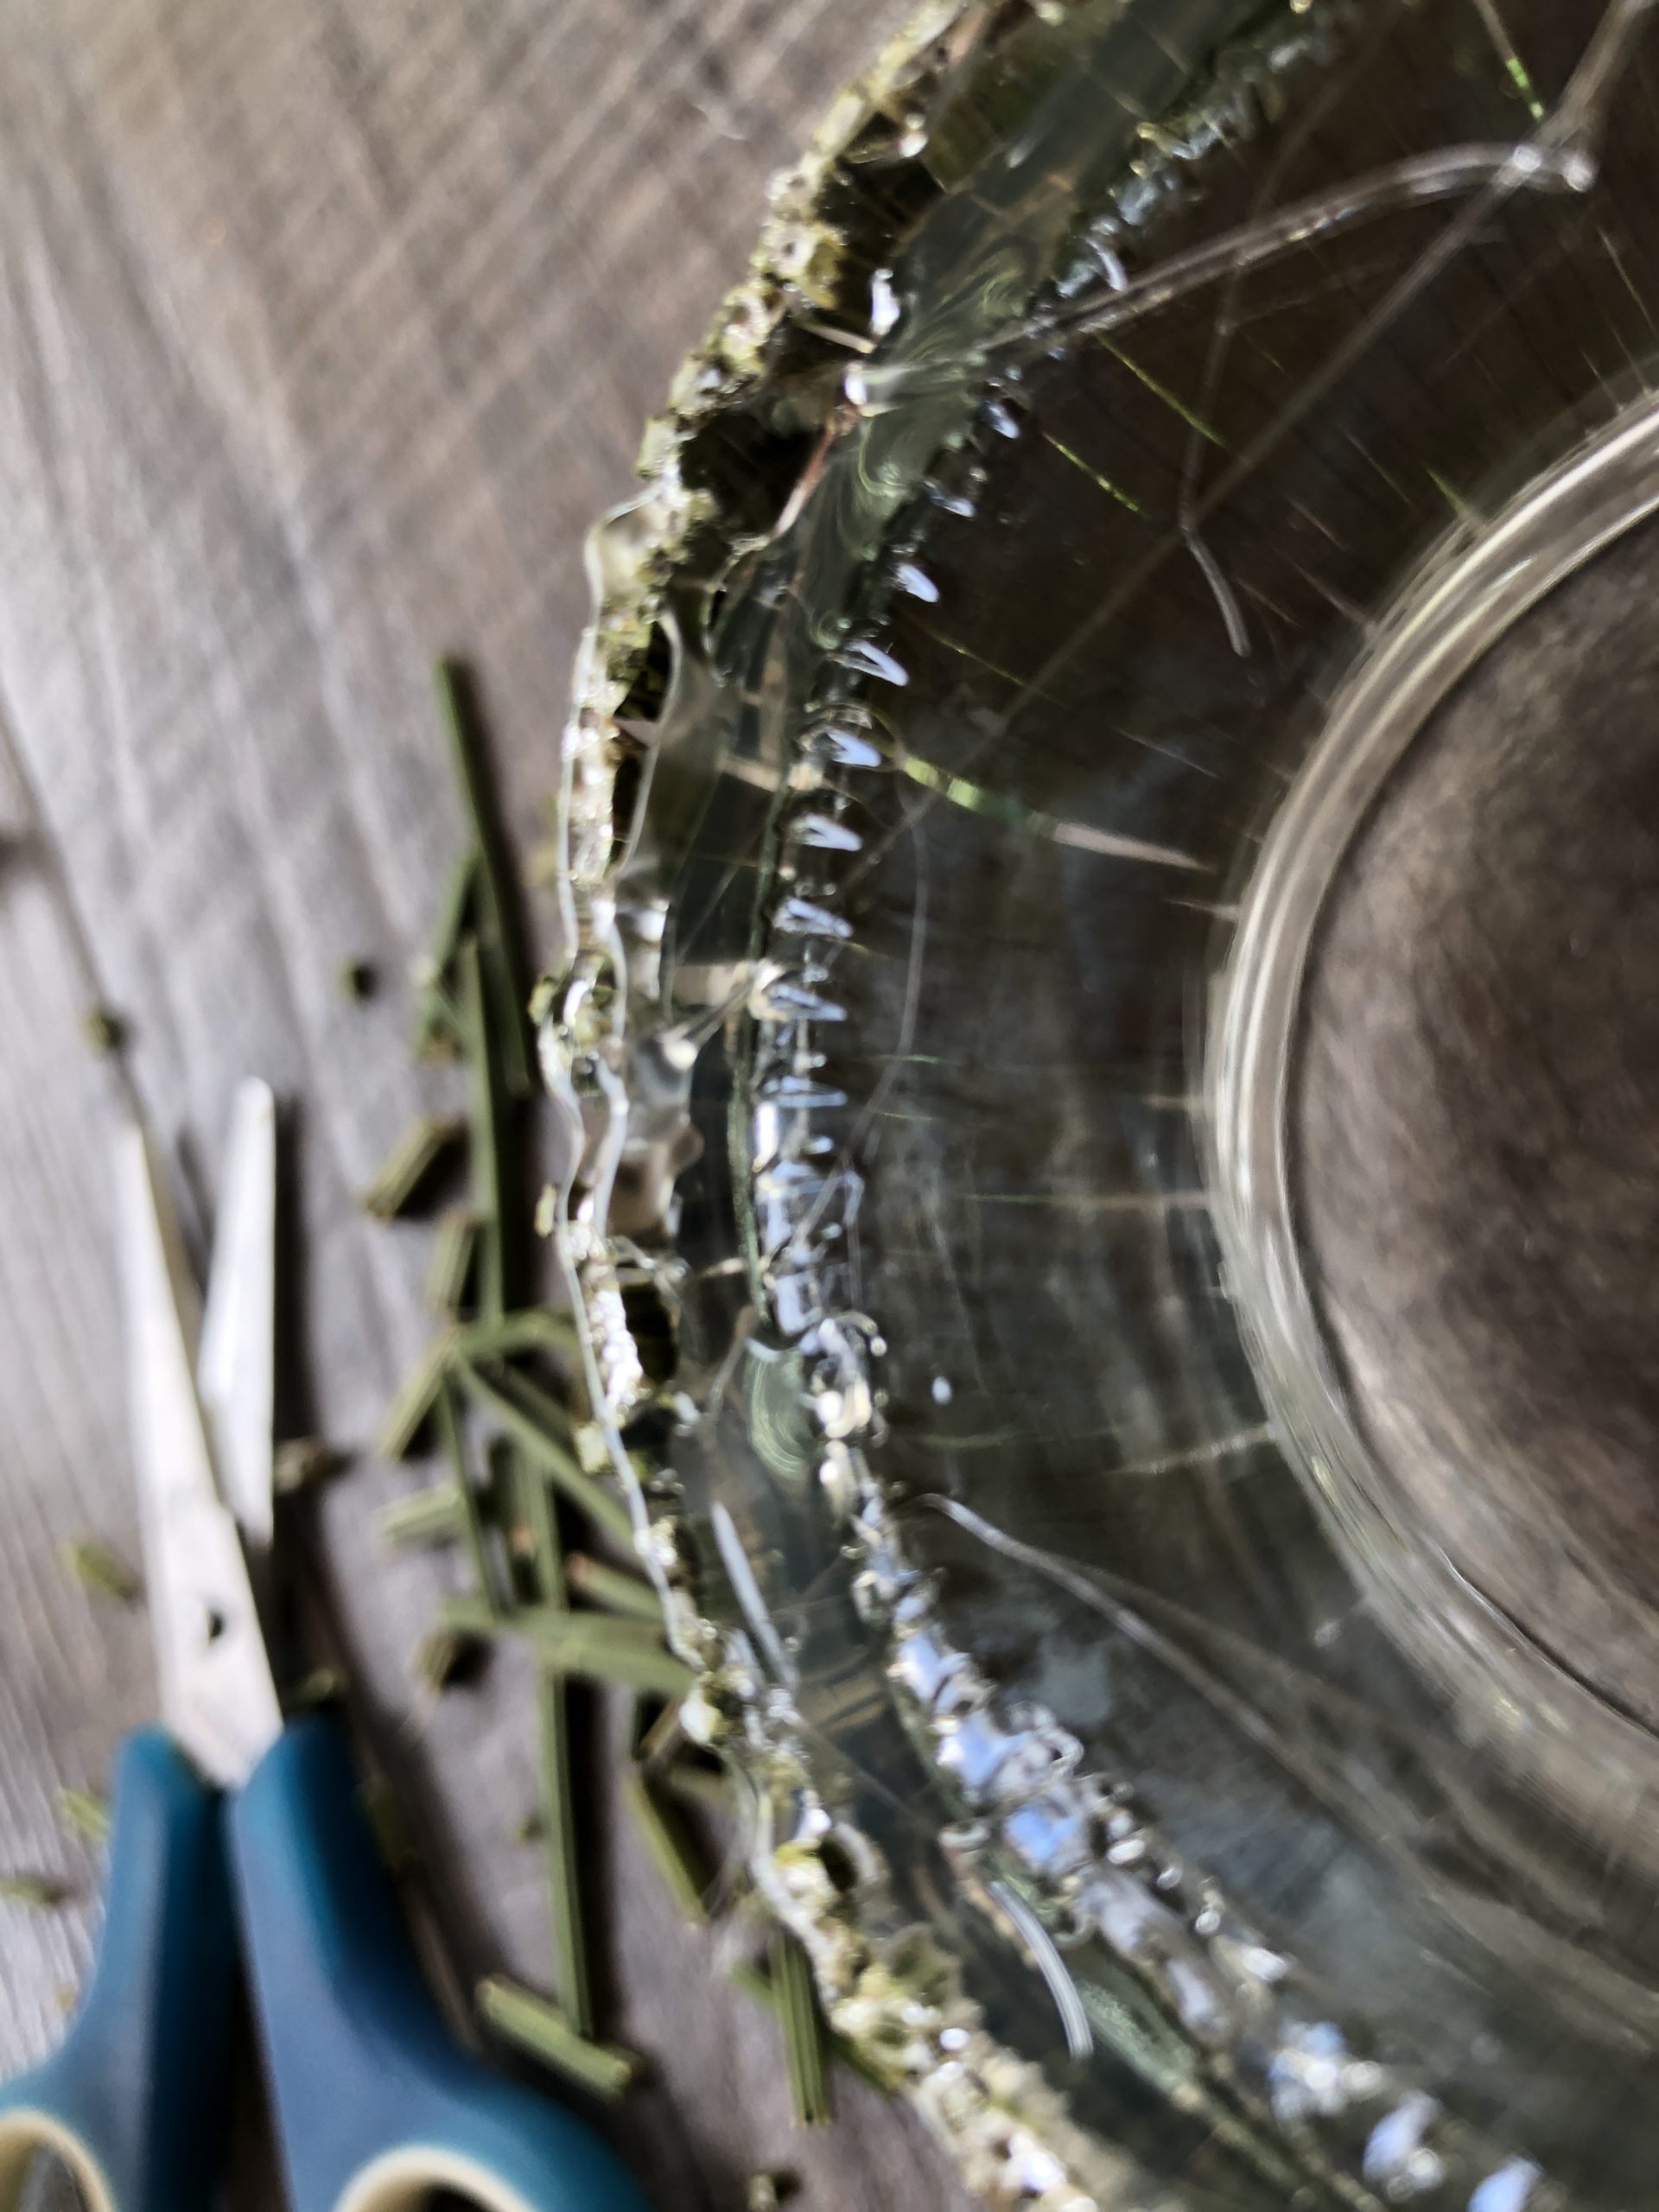
Bild zum Schritt 22 für das Bastel- und DIY-Abenteuer für Kinder: 'Die Stiele am unteren Glasrand könnt ihr nochmals mit Heißkleber...'

20

The glass is up with the opening!

Bild zum Schritt 23 für das Bastel- und DIY-Abenteuer für Kinder: 'Das Glas steht mit der Öffnung nach oben!'

21

In the glass comes a (large) tea light.
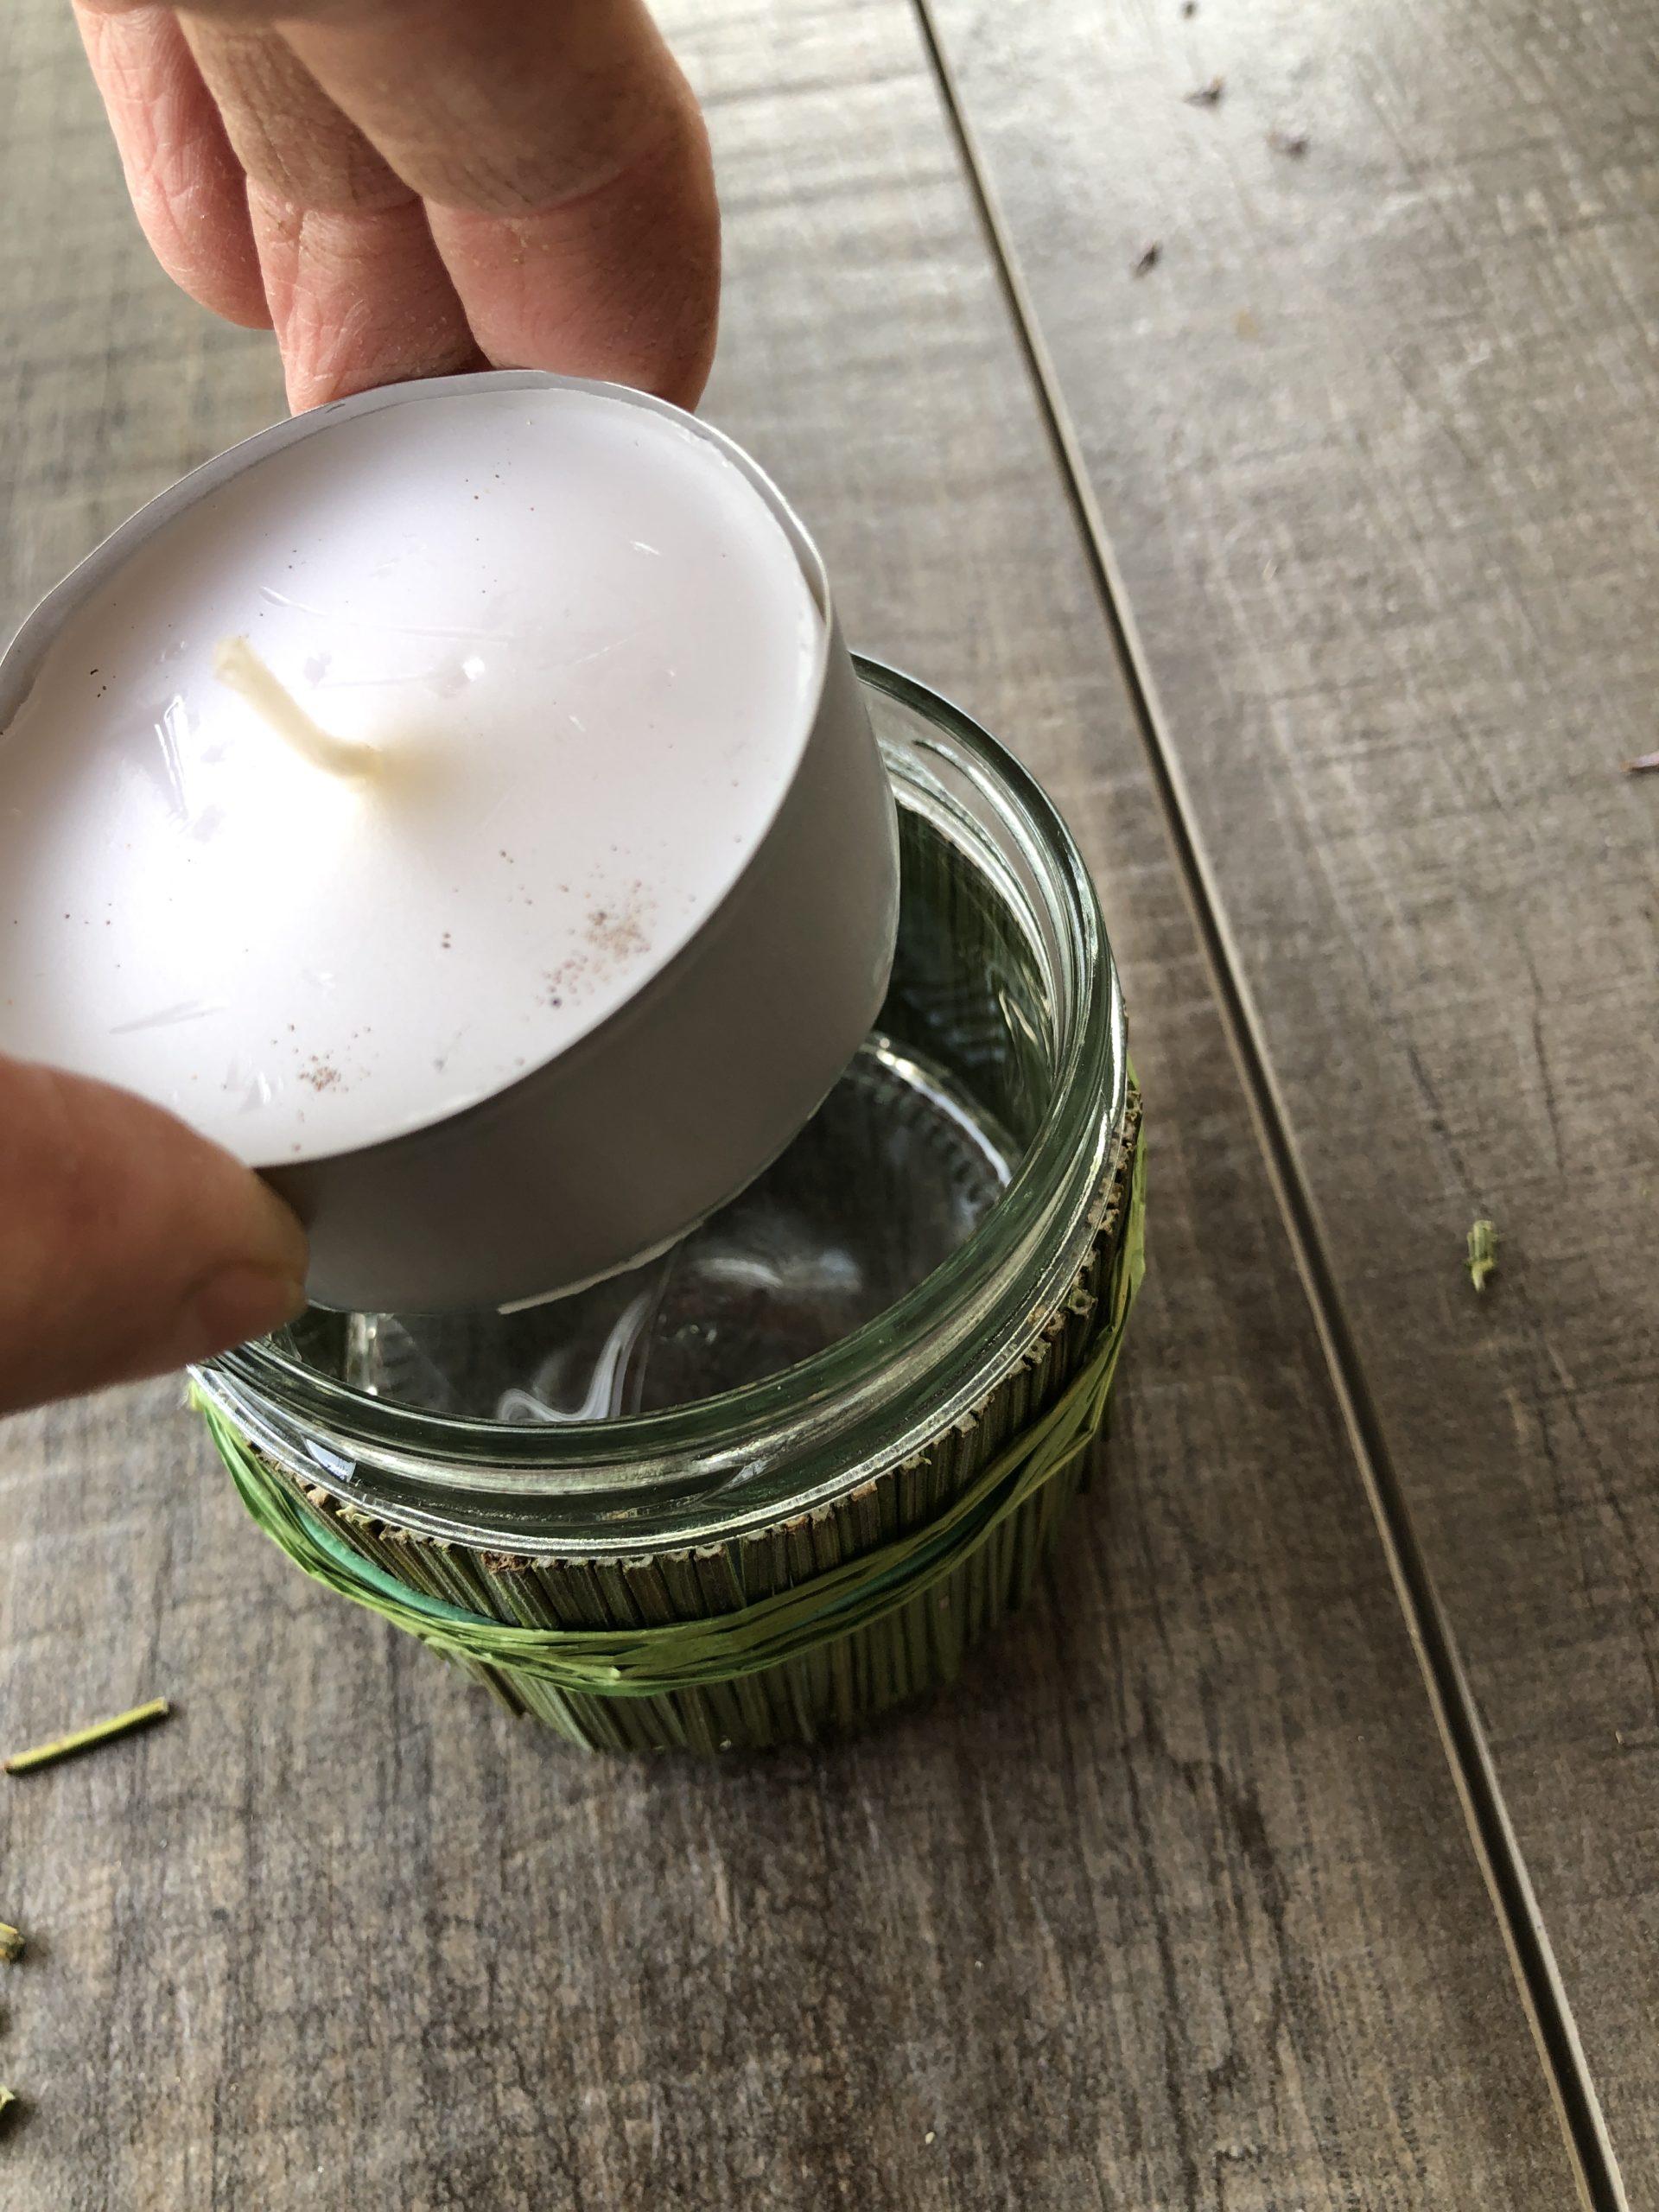
Bild zum Schritt 24 für das Bastel- und DIY-Abenteuer für Kinder: 'In das Glas kommt nun ein (großes) Teelicht.'

22

Version 3 is ready.

Bild zum Schritt 25 für das Bastel- und DIY-Abenteuer für Kinder: 'Fertig ist Variante 3.'

4. Variant:
23

Quickly you change the appearance of the glass with a few fresh lavender flowers. Put it at the knotting in the bast and is finished variant 4.
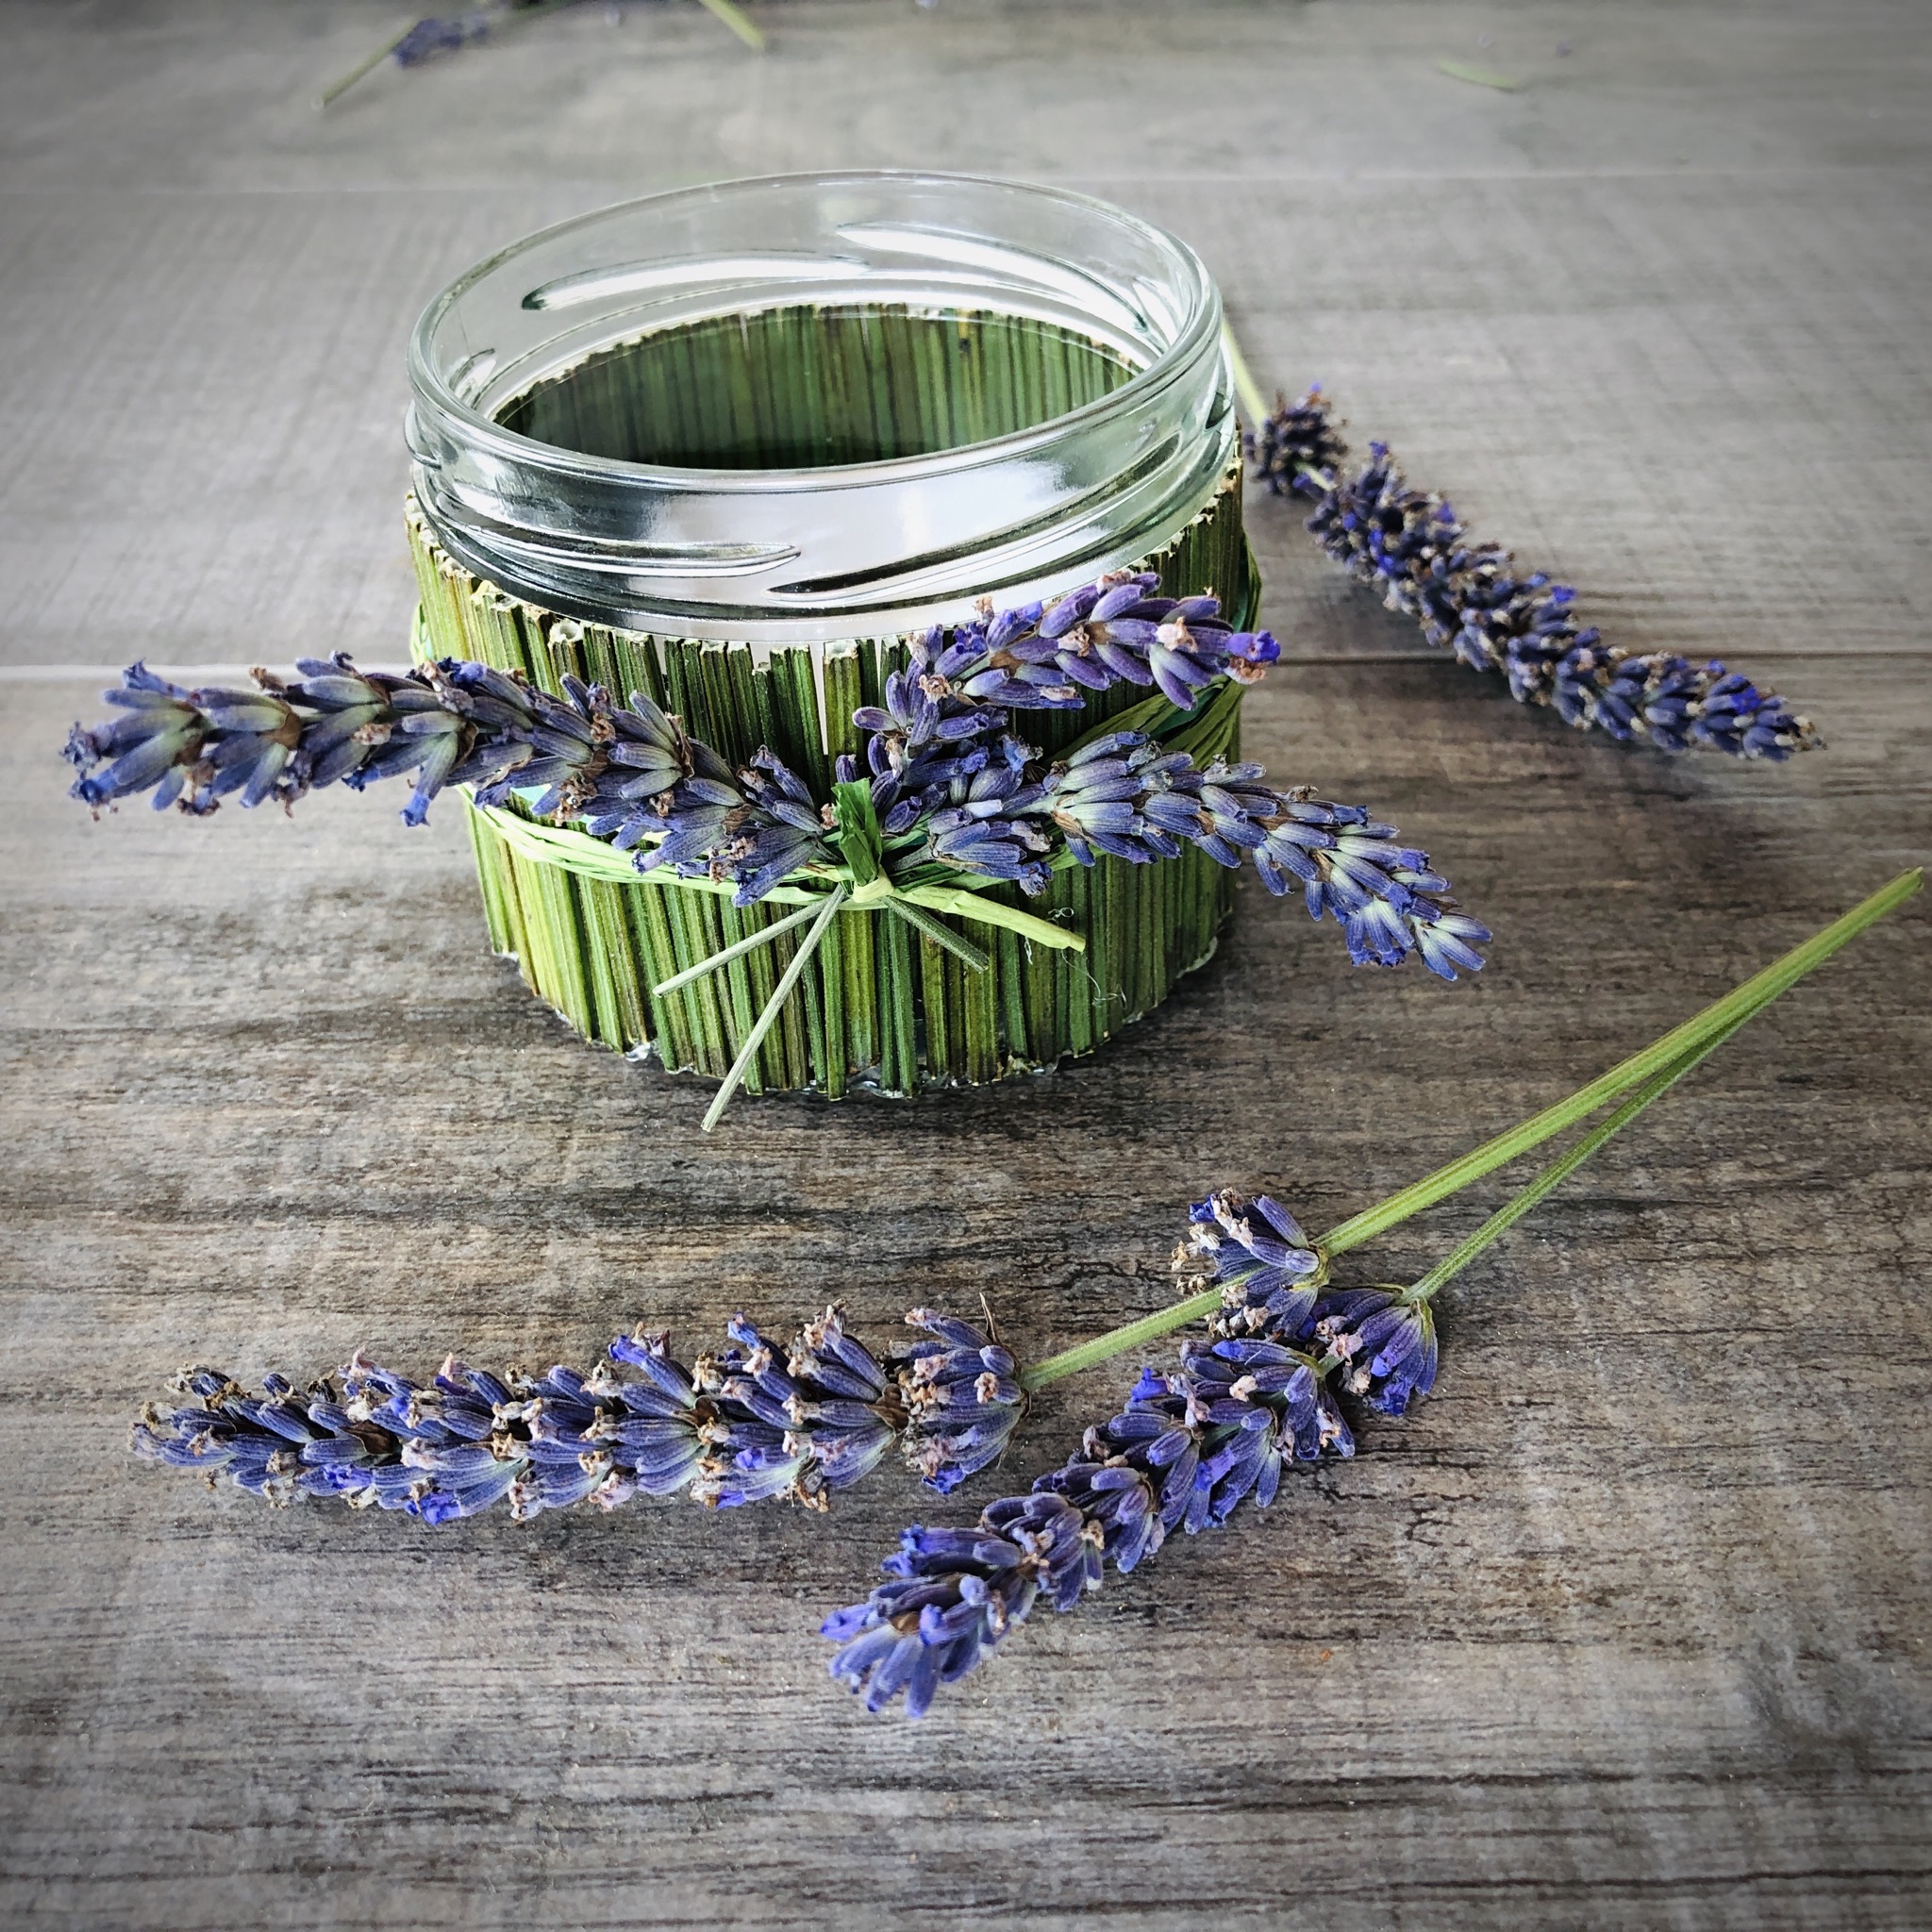
Bild zum Schritt 27 für das Bastel- und DIY-Abenteuer für Kinder: 'Schnell verändert ihr mit ein paar frischen Lavendelblüten das Aussehen...'

One guide and four variations:
24

Have fun trying it out!

And like to send more ideas. What else can you think of?
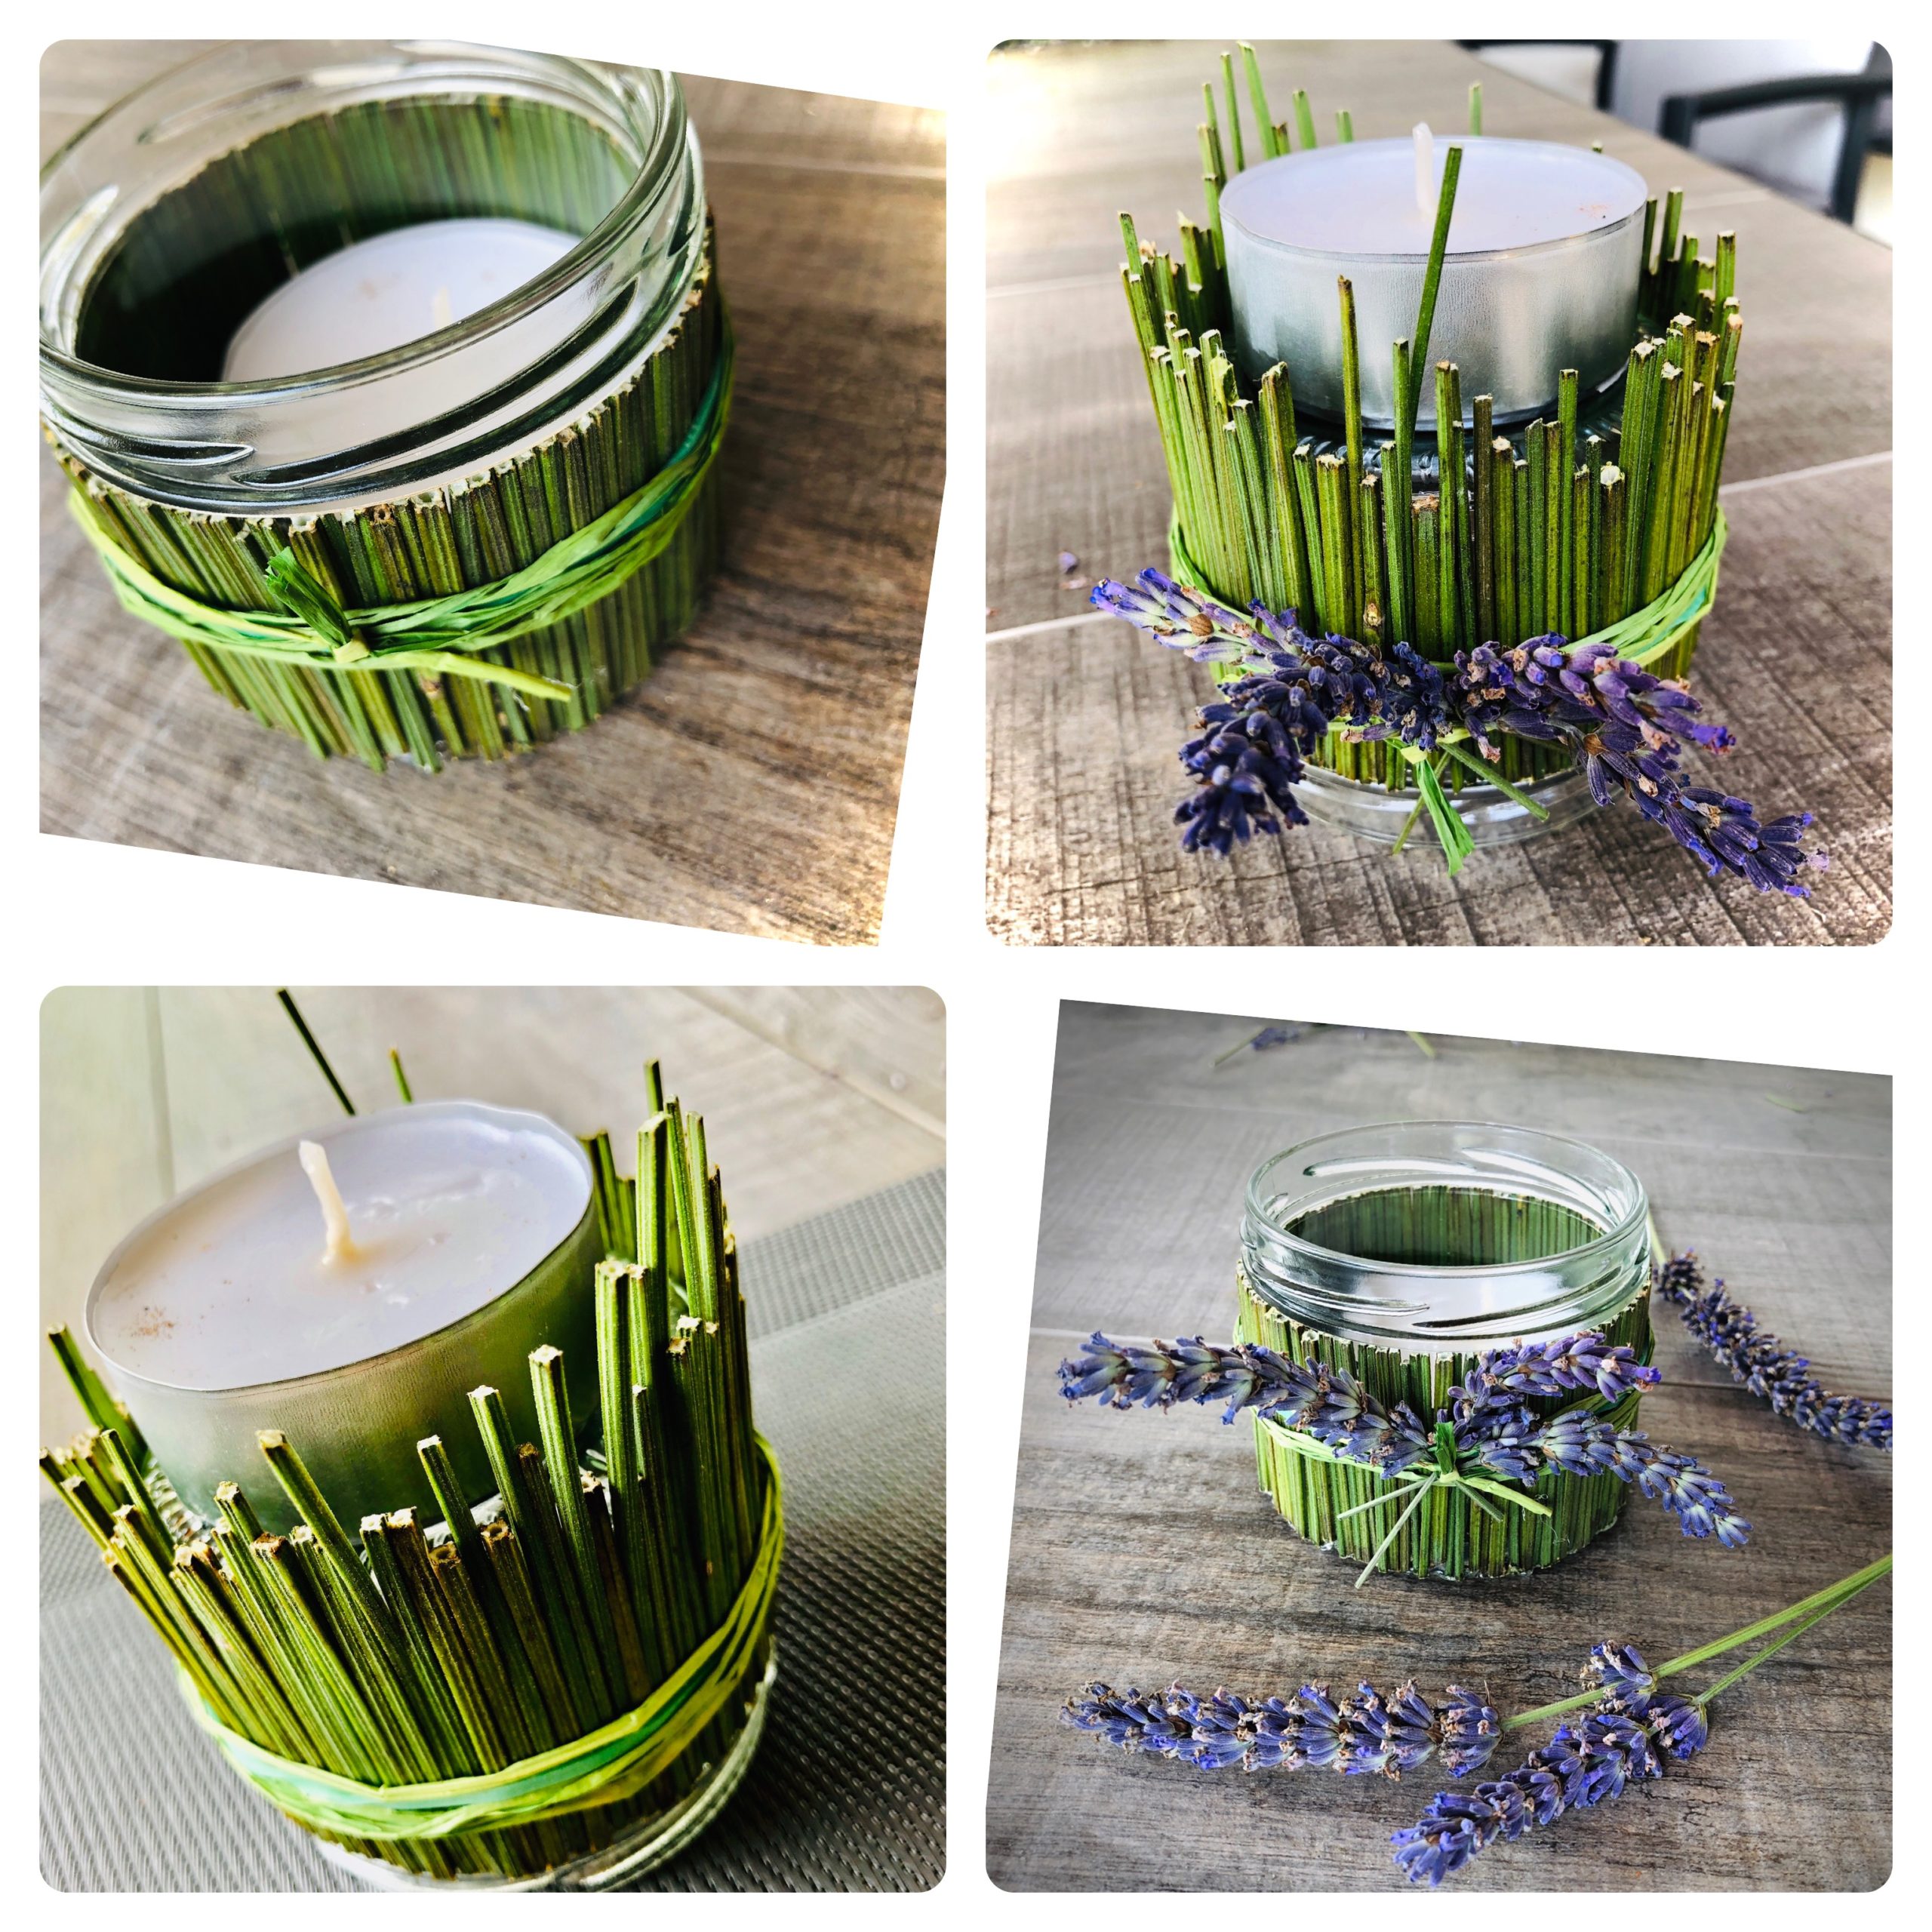
Bild zum Schritt 29 für das Bastel- und DIY-Abenteuer für Kinder: 'Viel Spaß beim Ausprobieren!    Und schickt gerne...'

Windlight with lavender handles (4 variants)

Follow us on Facebook , Instagram and Pinterest
Don't miss any more adventures: Our bottle mail

Leave a Reply

Your email address will not be published.

The maximum upload file size: 5 MB. You can upload: image, document. Drop file here