Building standing birdhouse

AdventurerKatzi
Rating0.03.7 Thousand times & (0) DifficultyAdvanced

This birdhouse is attached to a stick and can be easily placed in the garden or in a flower pot.
An empty beverage box forms the basic structure of this bird house. A wooden cooking spoon serves as a landing place in front of the entry hole. It is completely inserted through the beverage box and is so very stable. If a large screw glass lid is attached to it as a roof, this upcycling bird house is also protected from rain weather.
See for yourself - maybe you want to implement this crafting action.

Media Education for Kindergarten and Hort

Kind bastelt eine Rassel mit dem Navi
The Adventure Navi, the app for DIY projects, enables media education for the youngest.

Relief in everyday life, targeted promotion of individual children, independent learning and - without any pre-knowledge already usable by the youngest!
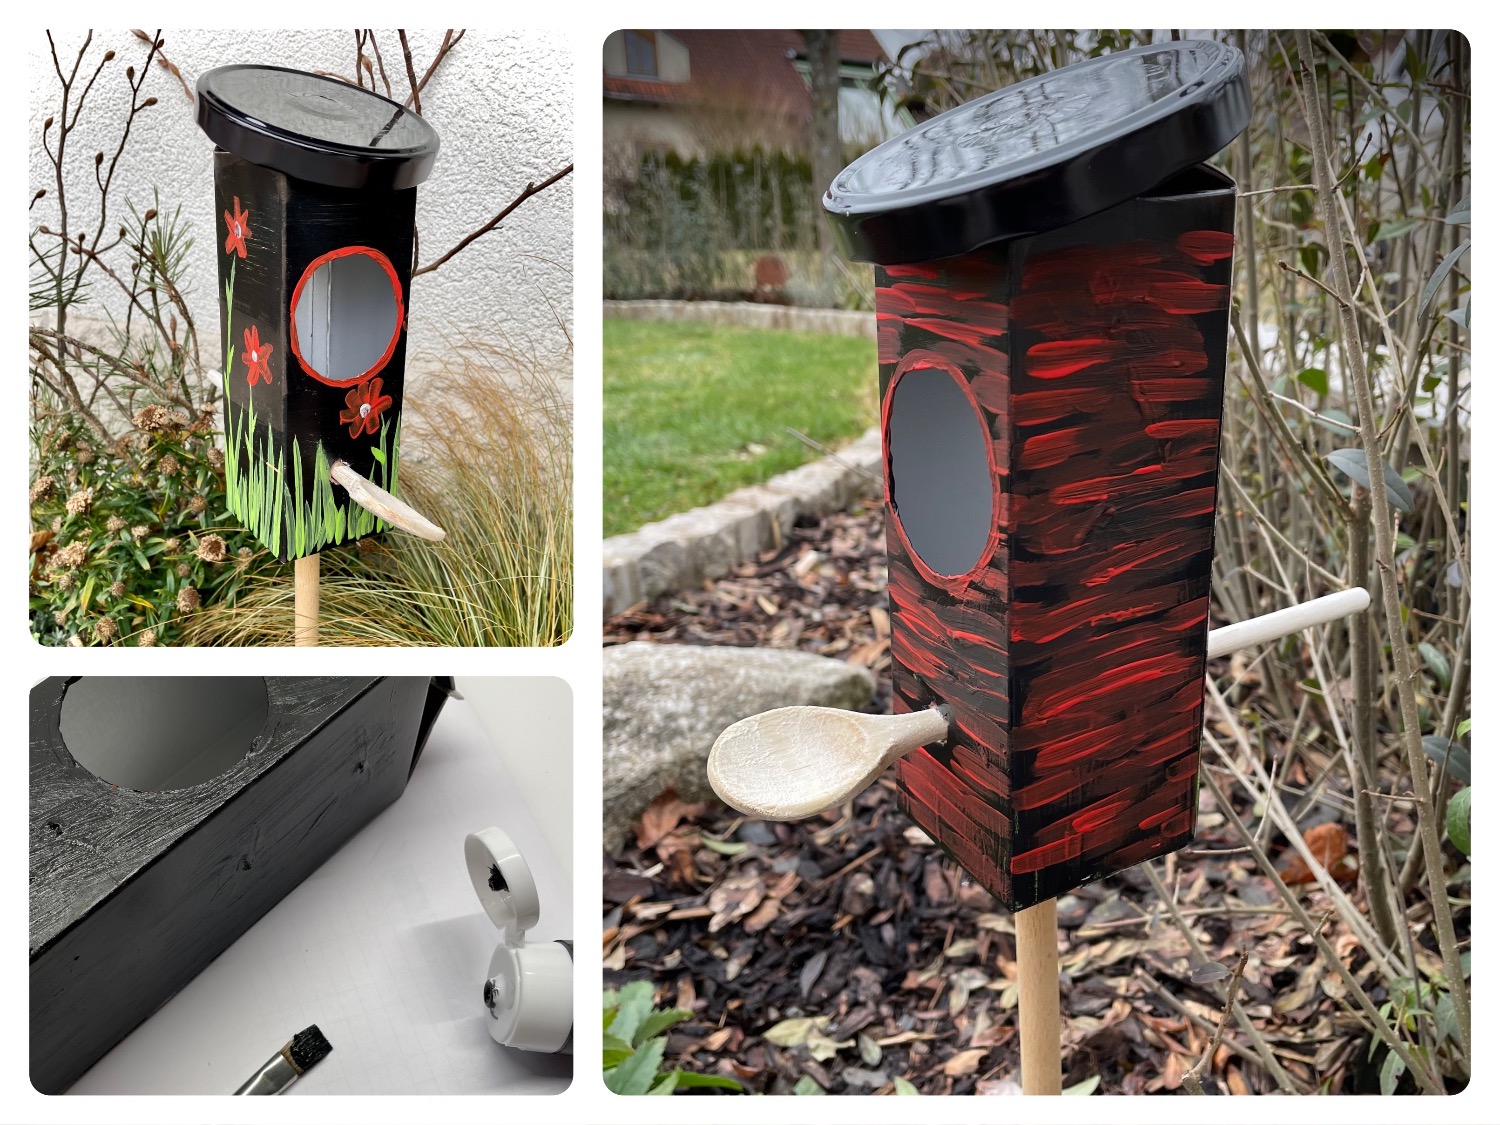


Titelbild zur Bastel- und DIY-Idee für Kinder '(969) Stehendes Vogelhaus bauen'
Material for1 Child
Prep Time10 min.Adv. Time40 min.Total Time50 min.
 1 Beverage carton Tetrapack
 1 Wooden cooking spoons
 1 Screw-glass lids 10cm diameter
 Colour weatherproof, opaquee.g. acrylic paint
 1 Wooden rod Not less than 1,5 cm in diameter
Tools needed:
 1 Pen
 1 Brushes
 1 Colouring documentor old newspaper
 possibly water glass
 1 Hot glue gun
 1 Builder's pad
All links marked with a shopping cart lead to Amazon - here we have selected products that we would order ourselves and in part also ordered. In a qualified purchase via the advertising link, we as Amazon partner receive a commission, for you there are no costs. You thus support our cost- and advertising banner-free, educational offer.
1

First, you rinse out an empty beverage box carefully.
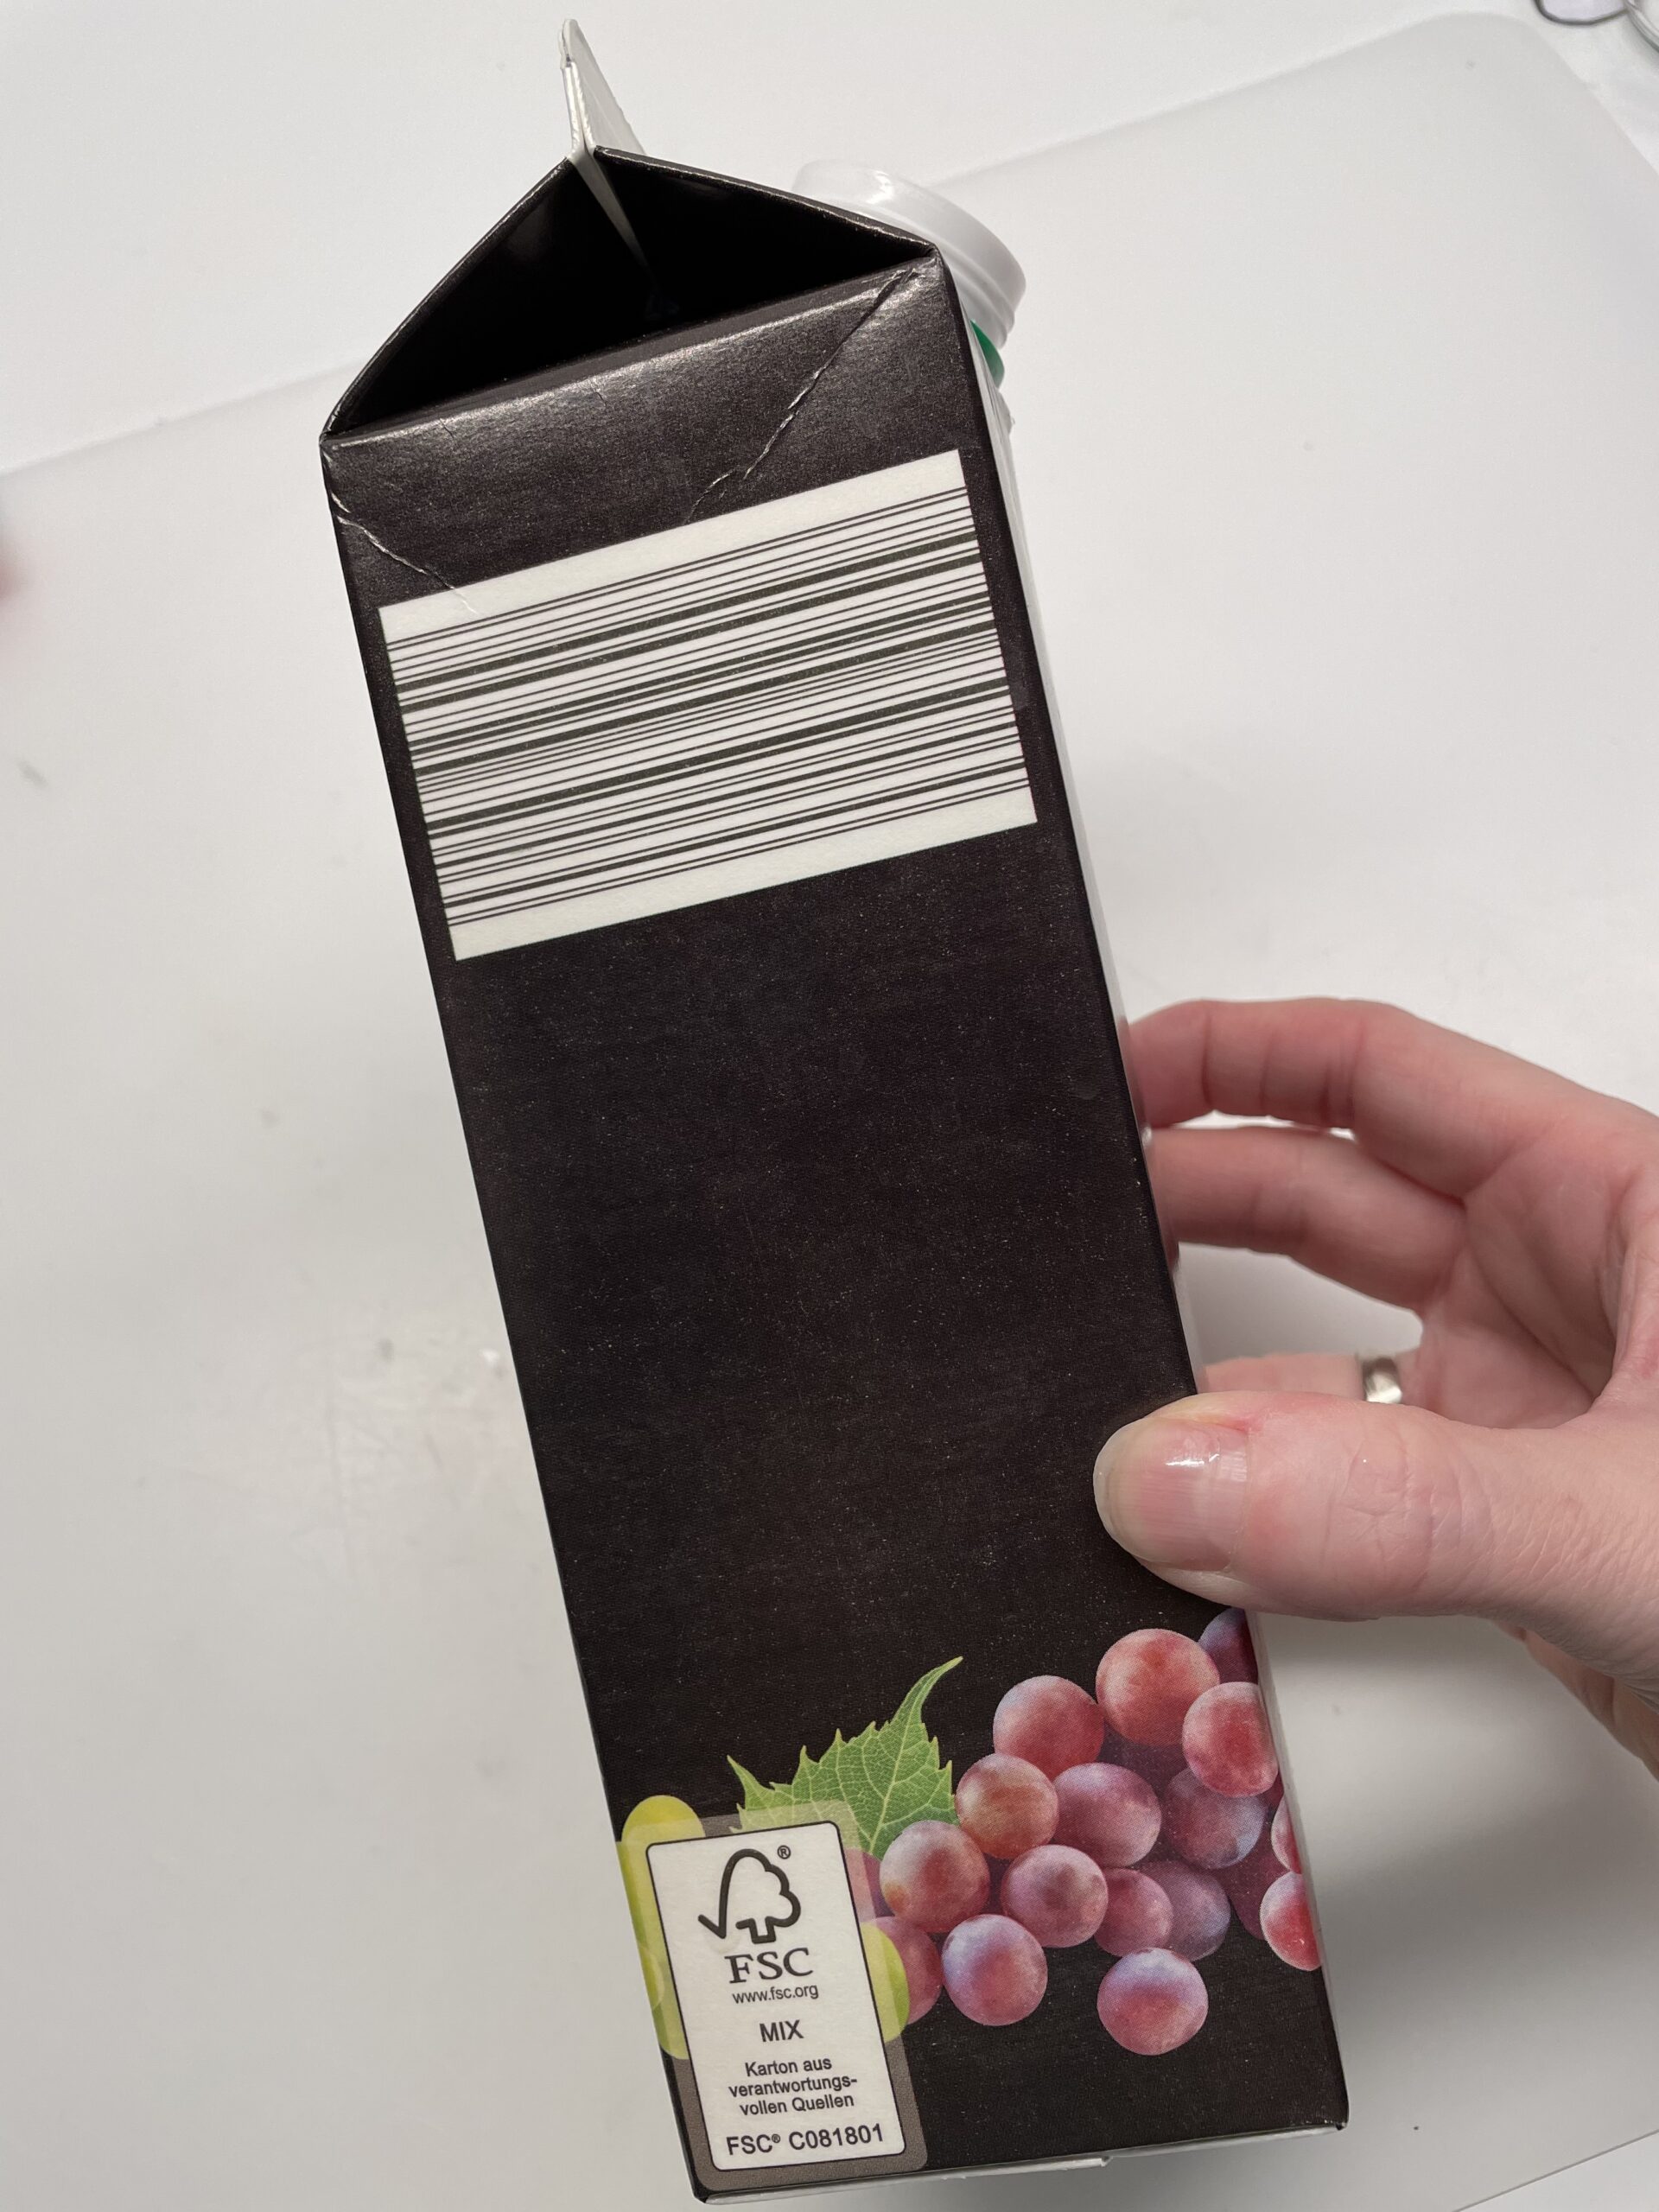
Bild zum Schritt 1 für das Bastel- und DIY-Abenteuer für Kinder: 'Zuerst spült ihr euch einen leeren Getränkekarton sorgfältig aus.'

2

Then you cut a large circle into the front of the box. Paint a circle and cut it in the middle. Now you cut it star-shaped outwards from here. This procedure makes it easier for you to cut out the circle. Important: Leave a piece from the side edge!
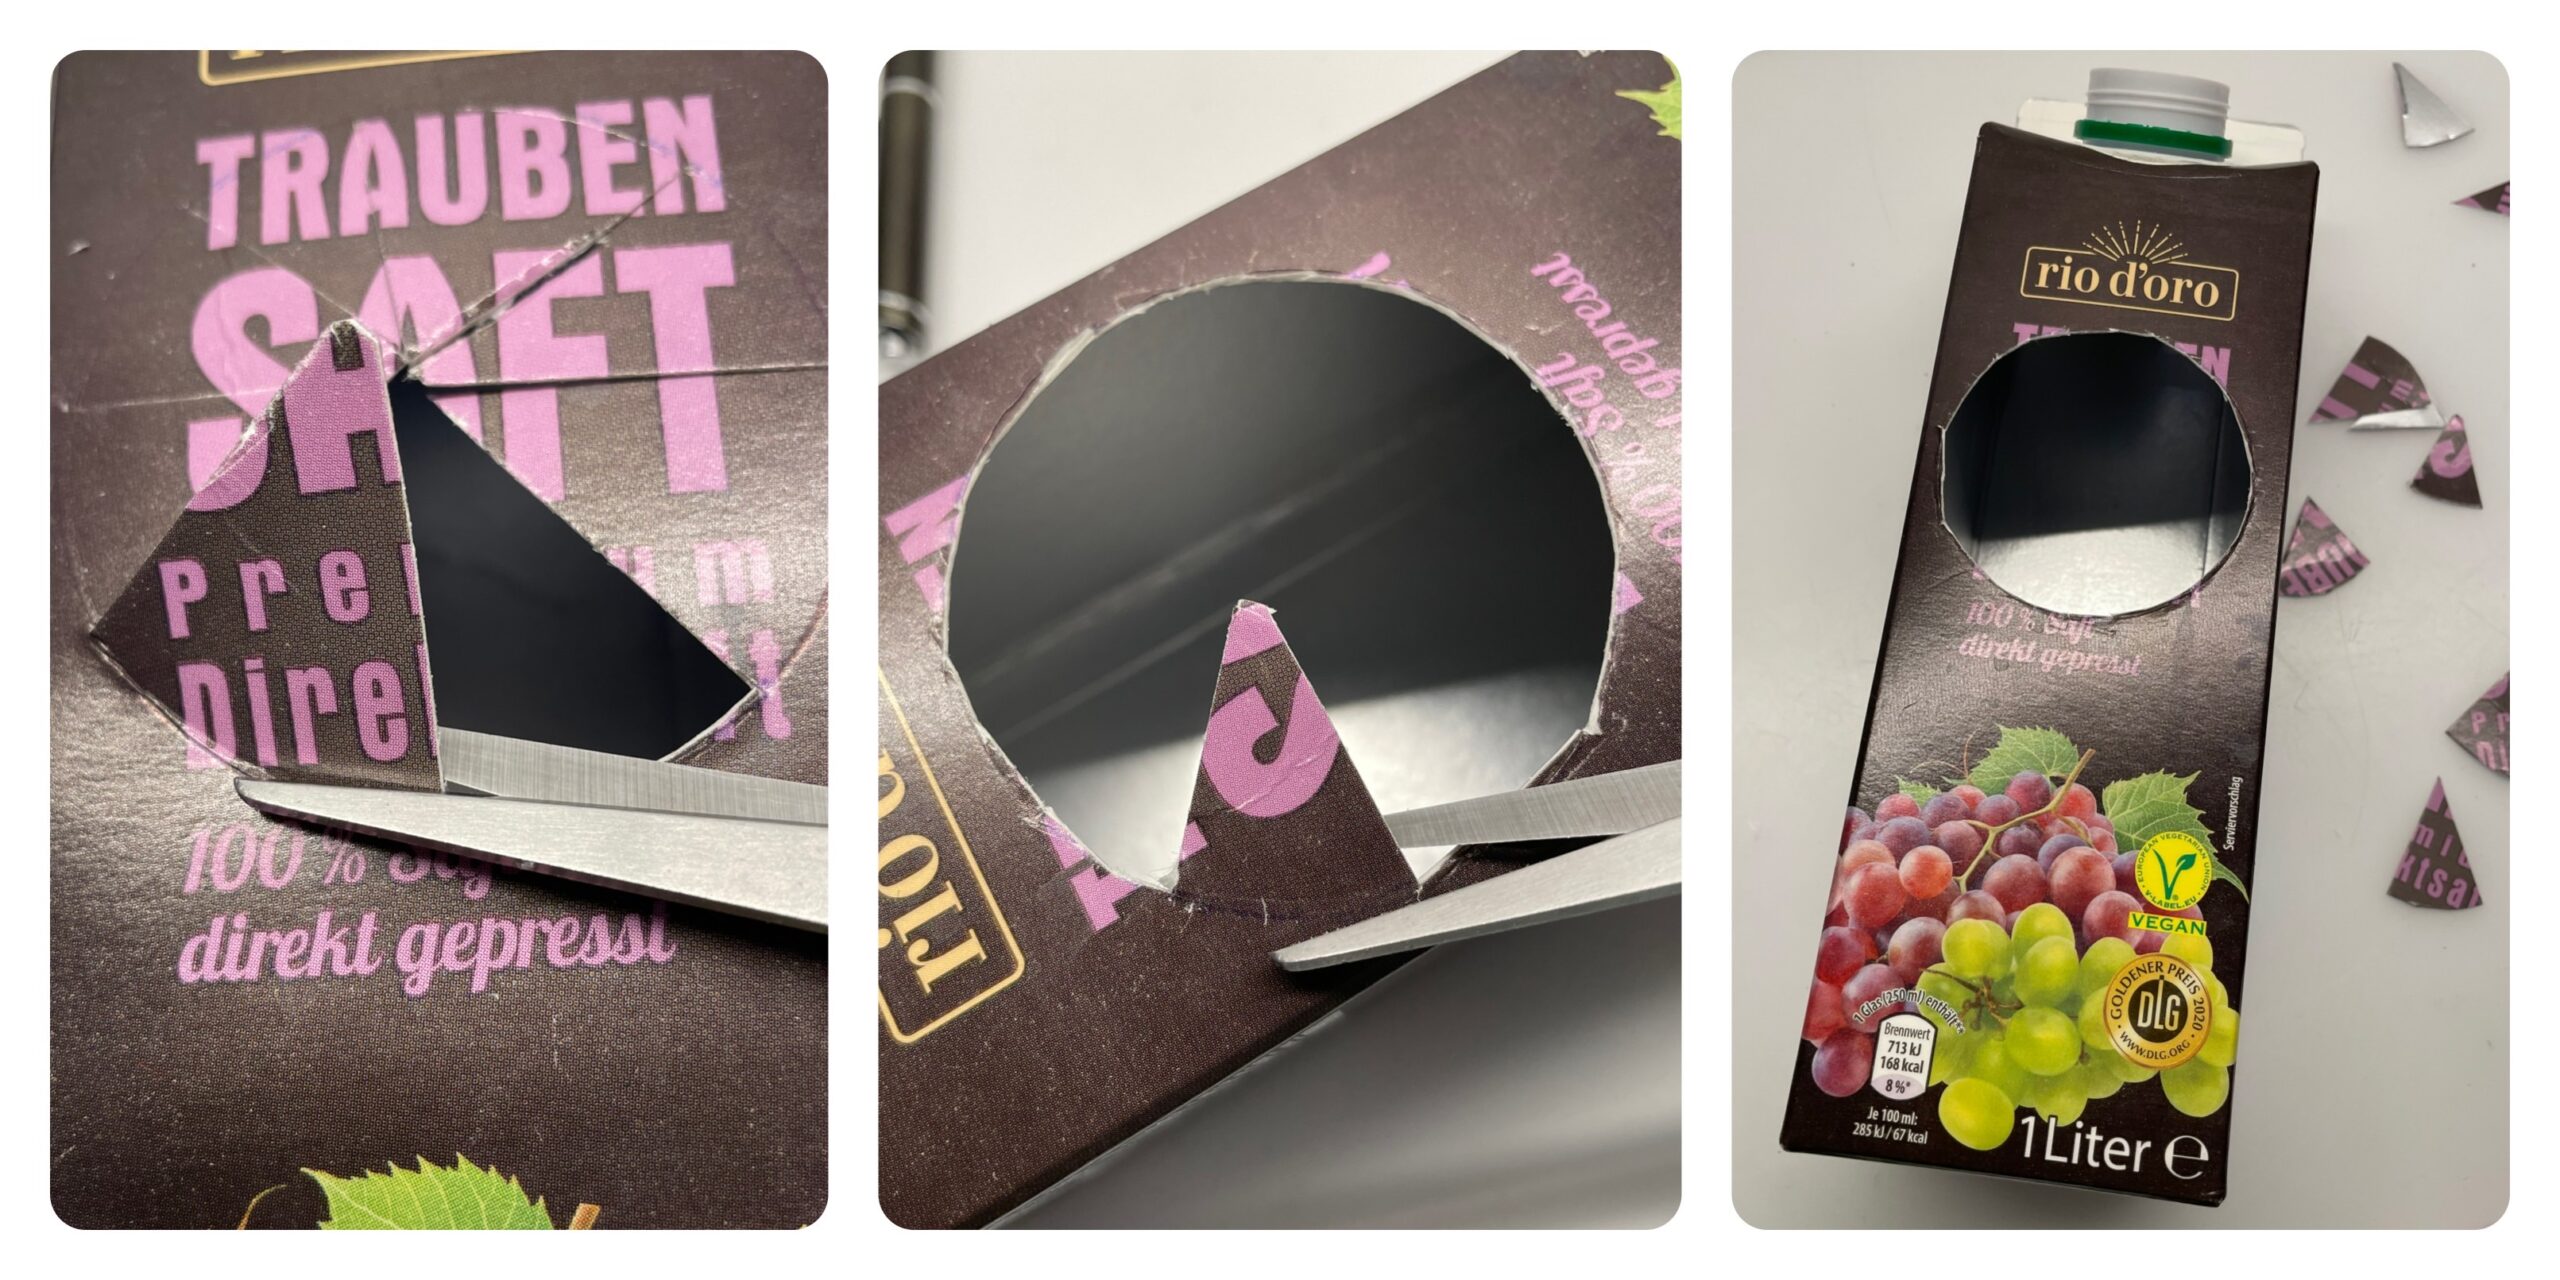
Bild zum Schritt 2 für das Bastel- und DIY-Abenteuer für Kinder: 'Anschließend schneidet ihr einen großen Kreis in die Vorderseite des...'

3

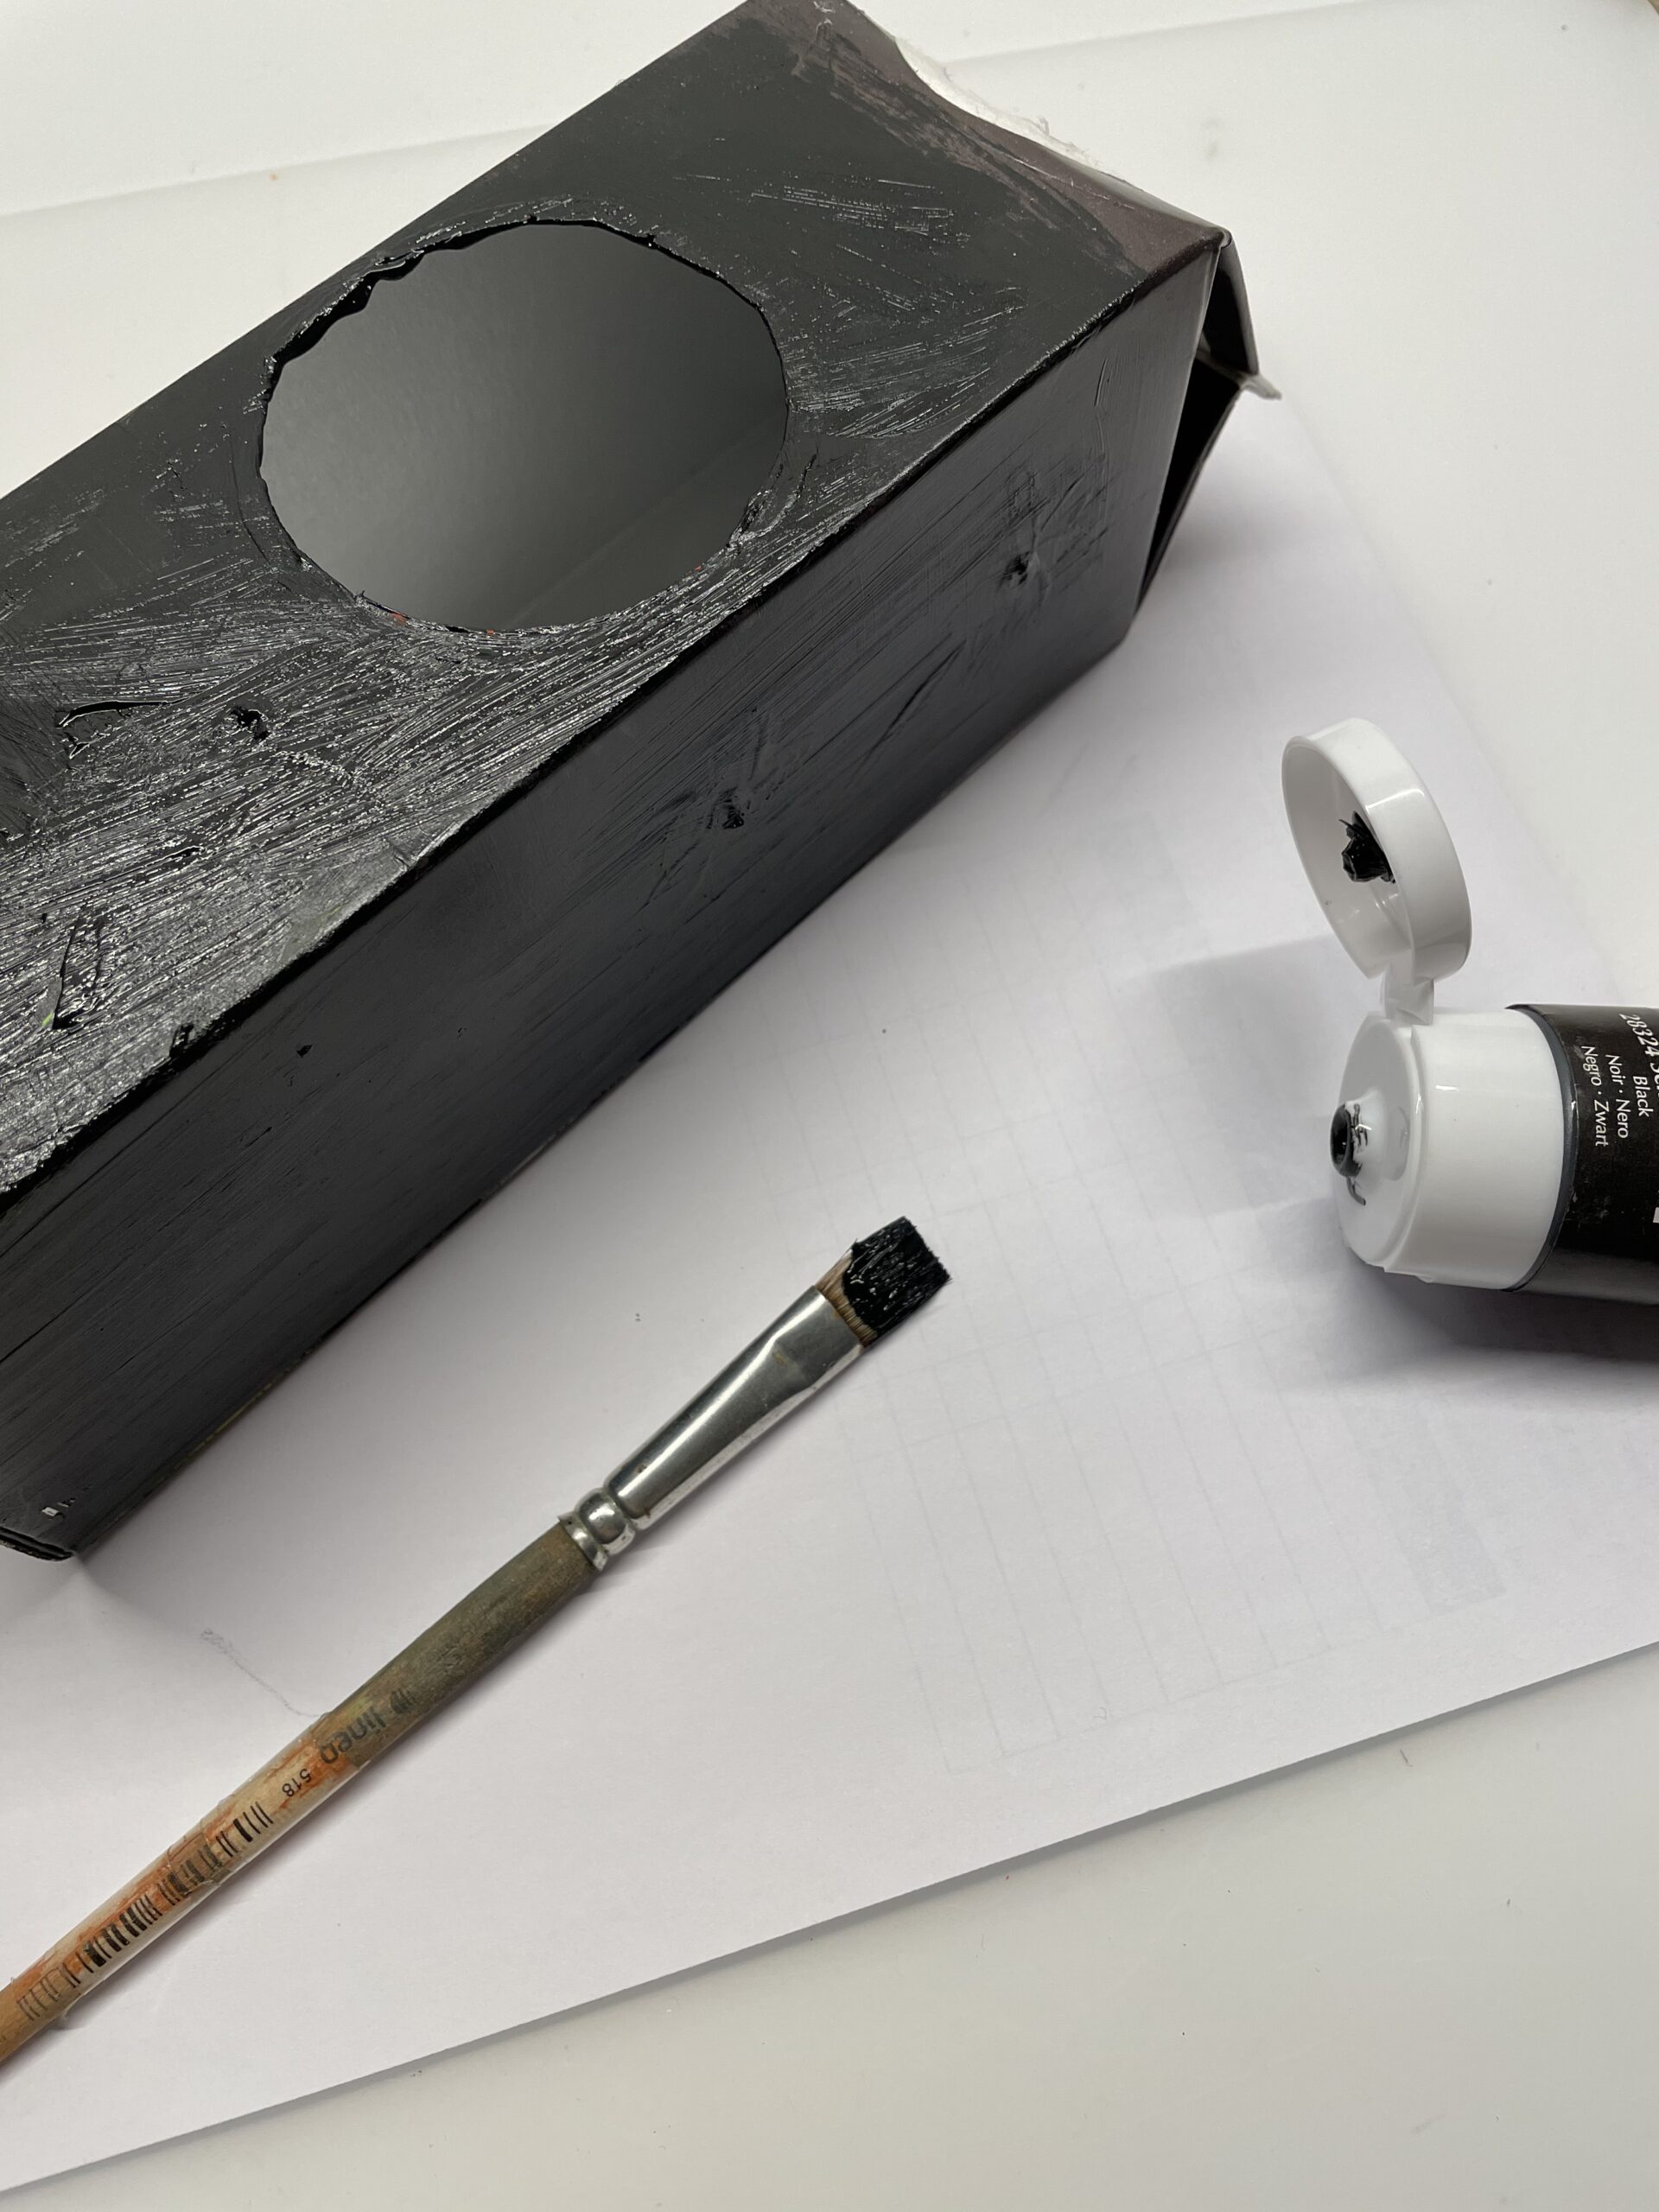
Now you paint the box.

Bild zum Schritt 3 für das Bastel- und DIY-Abenteuer für Kinder: 'Jetzt malt ihr den Karton an.'

4

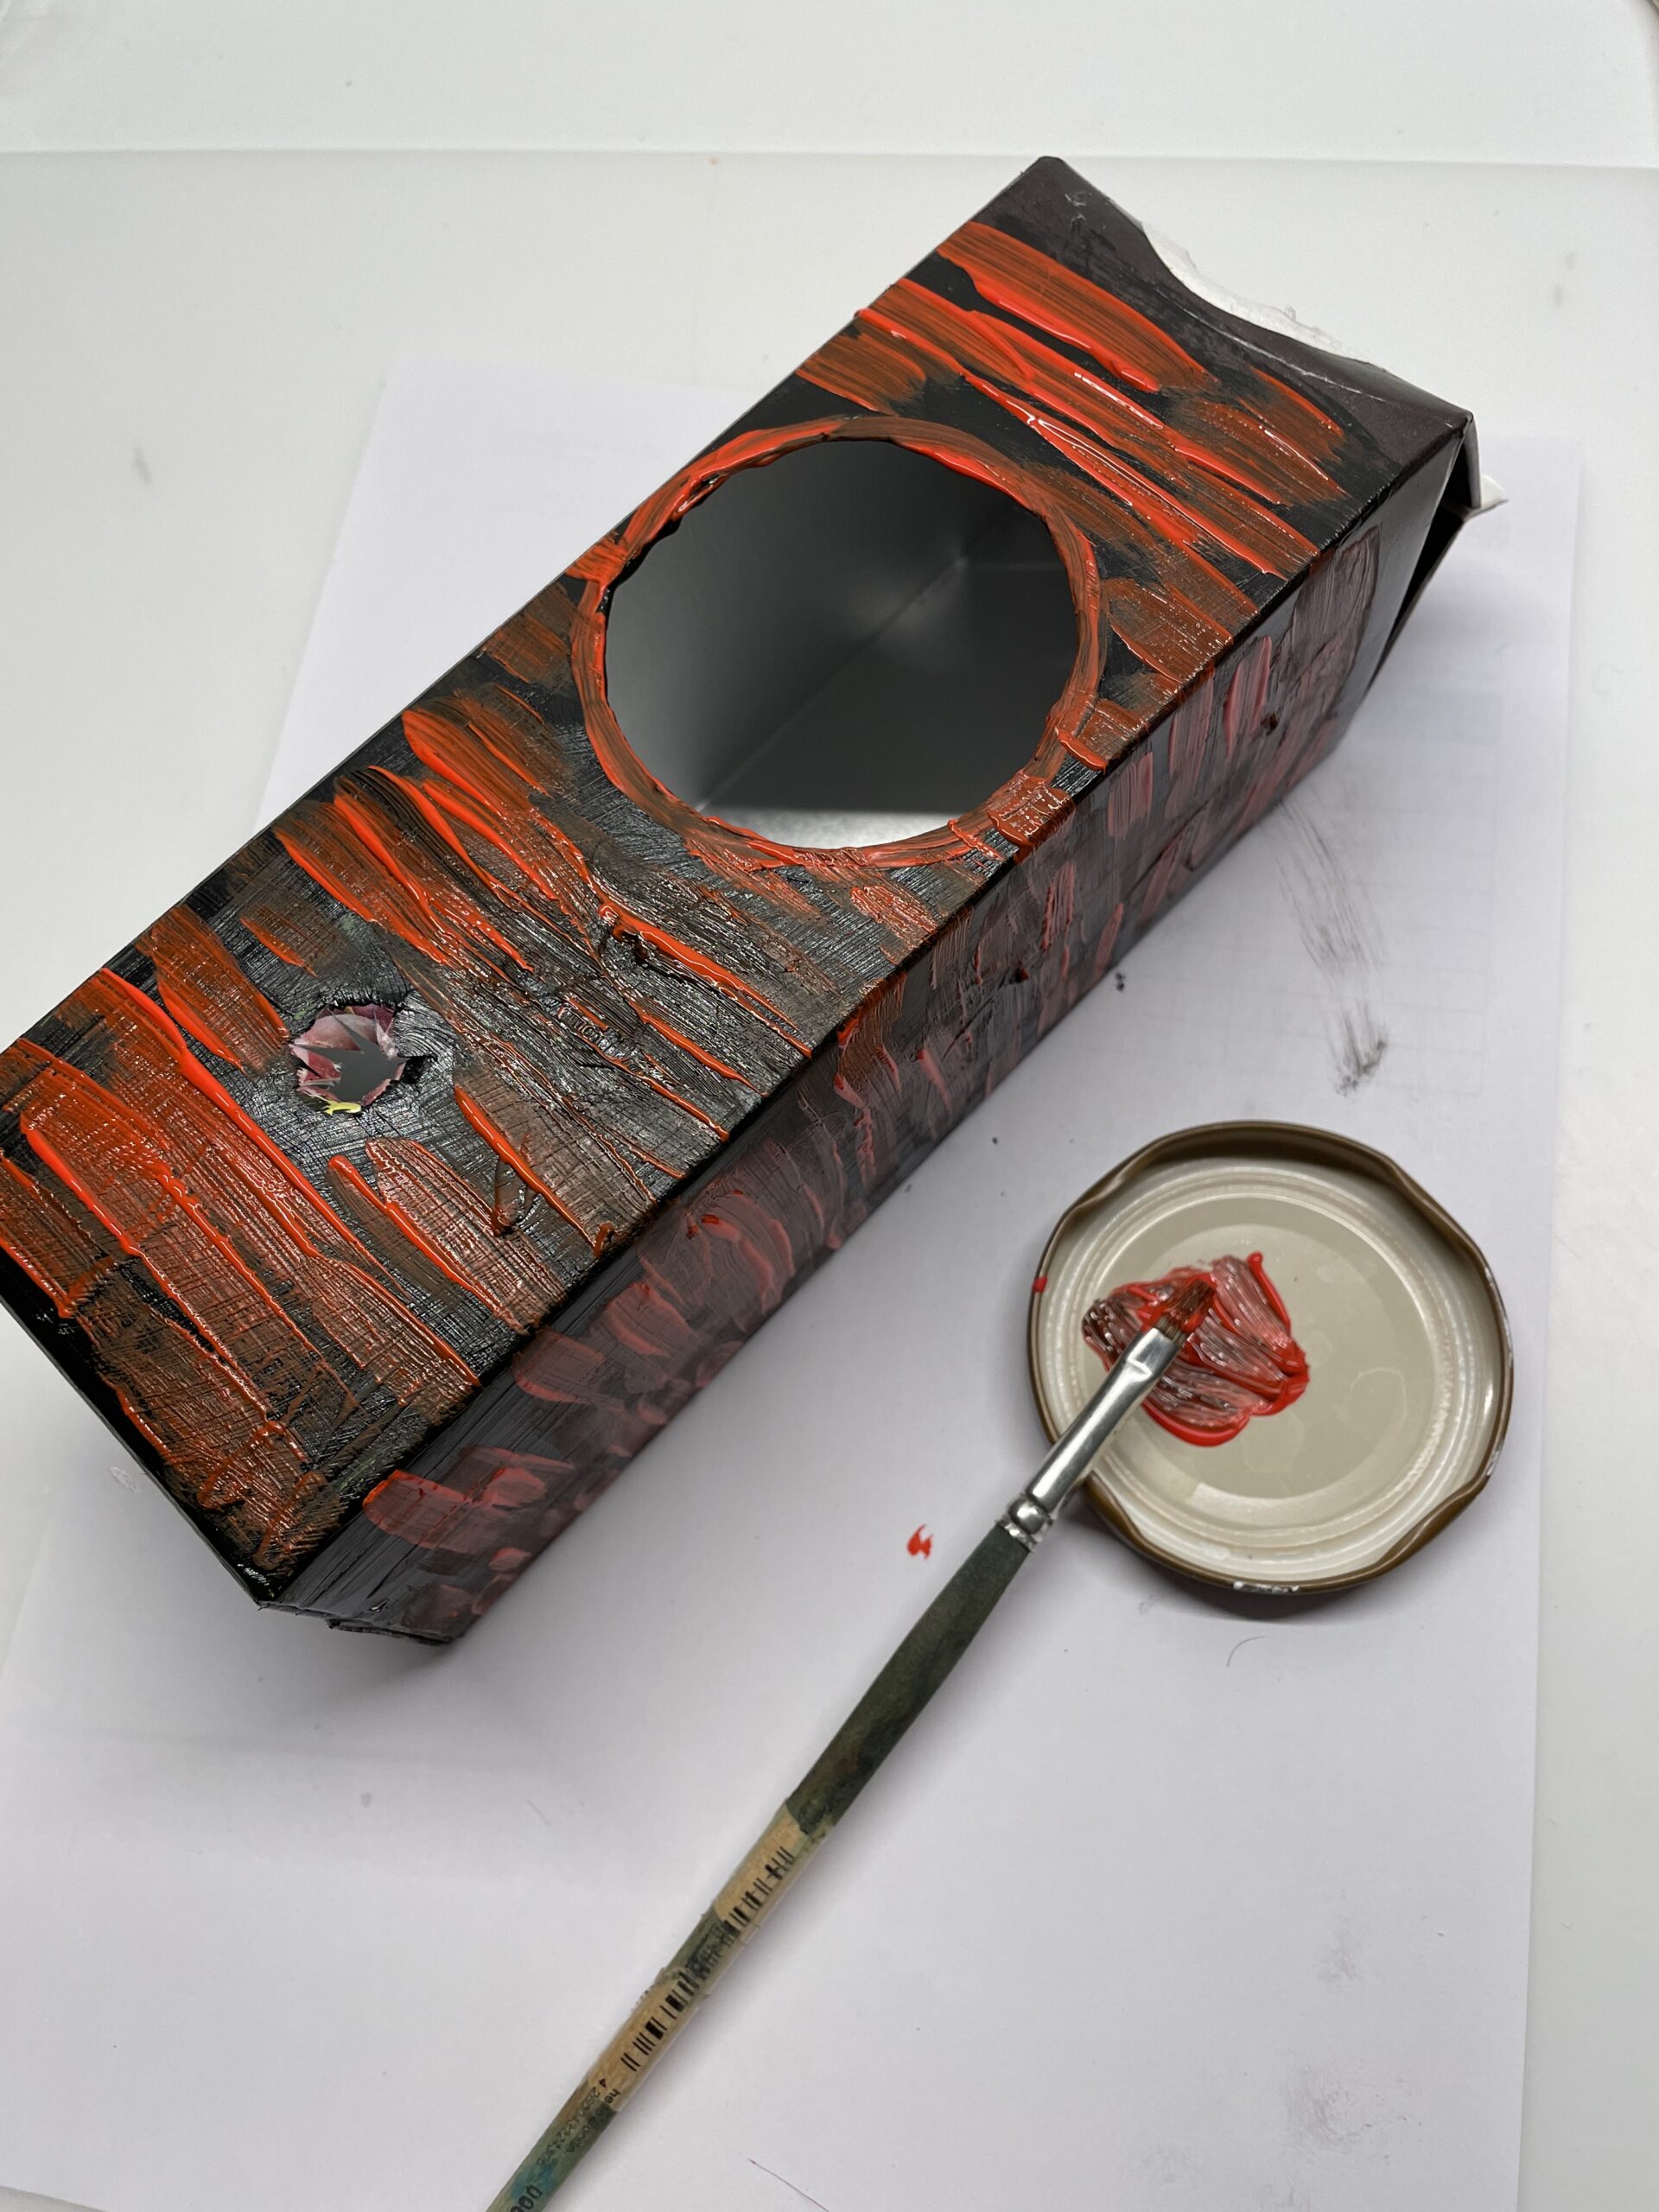
After drying, you can paint a second layer of paint over it and paint patterns or motifs.

Bild zum Schritt 4 für das Bastel- und DIY-Abenteuer für Kinder: 'Nach dem Trocknen könnt ihr noch eine zweite Farbschicht darüber...'

5

Then let the carton dry.

Bild zum Schritt 5 für das Bastel- und DIY-Abenteuer für Kinder: 'Anschließend lasst ihr den Karton trocknen.'

6

Now you slash a small hole under your circle and on the opposite side and put the spoon through the box.

Bild zum Schritt 6 für das Bastel- und DIY-Abenteuer für Kinder: 'Jetzt ritzt ihr ein kleines Loch unter eurem Kreis und...'

7

The spoon sits firmly and is firmly attached.
Now you put the screw-glass lid as a roof on the cardboard.

Bild zum Schritt 7 für das Bastel- und DIY-Abenteuer für Kinder: 'Der Kochlöffel sitzt fest und ist stabil befestigt.  Nun...'

8

To do this, apply hot glue to the upper part of the Tetrapack.
Attention when handling the hot glue - risk of injury!

Bild zum Schritt 8 für das Bastel- und DIY-Abenteuer für Kinder: 'Dafür tragt ihr Heißkleber auf den oberen Teil des Tetrapacks...'

9

Put the lid on it. Attention: Only touch the lid at the edge, because the middle gets very hot by the hot glue!

Bild zum Schritt 9 für das Bastel- und DIY-Abenteuer für Kinder: 'Setzt den Deckel darauf. Achtung: Fasst den Deckel dabei nur...'

10

The roof, which is protected from rain, is on the birdhouse.

Bild zum Schritt 10 für das Bastel- und DIY-Abenteuer für Kinder: 'Das vor Regenwetter schützende Dach ist auf dem Vogelhaus.'

11

Now glue a wooden stick to the bottom of the box.

Bild zum Schritt 11 für das Bastel- und DIY-Abenteuer für Kinder: 'Jetzt klebt ihr einen Holzstab an die Unterseite des Kartons.'

12

To do this, stick the wooden stick to the cardboard with a sticky spot of hot glue. Press the wooden stick firmly and hold it briefly.

Bild zum Schritt 12 für das Bastel- und DIY-Abenteuer für Kinder: 'Dafür klebt ihr den Holzstab mit einem Klebepunkt Heißkleber an...'

13

The home built birdhouse is ready.

Bild zum Schritt 13 für das Bastel- und DIY-Abenteuer für Kinder: 'Fertig ist das selbstgebaute Vogelhaus.'

14

Find a place to stand up.
Due to the use of very robust materials, the birdhouse is safe for some time weatherproof.

Bild zum Schritt 14 für das Bastel- und DIY-Abenteuer für Kinder: 'Sucht euch einen Platz zum Aufstellen.    Durch...'

15

In a protected place, the birdhouse is also suitable for outdoor use.

Bild zum Schritt 15 für das Bastel- und DIY-Abenteuer für Kinder: 'An einem geschützten Platz ist das Vogelhaus auch für draußen...'

16

Have fun trying it out!

Materials

 1 Beverage carton Tetrapack
 1 Wooden cooking spoons
 1 Screw-glass lids 10cm diameter
 Colour weatherproof, opaquee.g. acrylic paint
 1 Wooden rod Not less than 1,5 cm in diameter
Tools needed:
 1 Pen
 1 Brushes
 1 Colouring documentor old newspaper
 possibly water glass
 1 Hot glue gun
 1 Builder's pad
All links marked with a shopping cart lead to Amazon - here we have selected products that we would order ourselves and in part also ordered. In a qualified purchase via the advertising link, we as Amazon partner receive a commission, for you there are no costs. You thus support our cost- and advertising banner-free, educational offer.

Directions

1

First, you rinse out an empty beverage box carefully.

Bild zum Schritt 1 für das Bastel- und DIY-Abenteuer für Kinder: 'Zuerst spült ihr euch einen leeren Getränkekarton sorgfältig aus.'

2

Then you cut a large circle into the front of the box. Paint a circle and cut it in the middle. Now you cut it star-shaped outwards from here. This procedure makes it easier for you to cut out the circle. Important: Leave a piece from the side edge!

Bild zum Schritt 2 für das Bastel- und DIY-Abenteuer für Kinder: 'Anschließend schneidet ihr einen großen Kreis in die Vorderseite des...'

3

Now you paint the box.

Bild zum Schritt 3 für das Bastel- und DIY-Abenteuer für Kinder: 'Jetzt malt ihr den Karton an.'

4

After drying, you can paint a second layer of paint over it and paint patterns or motifs.
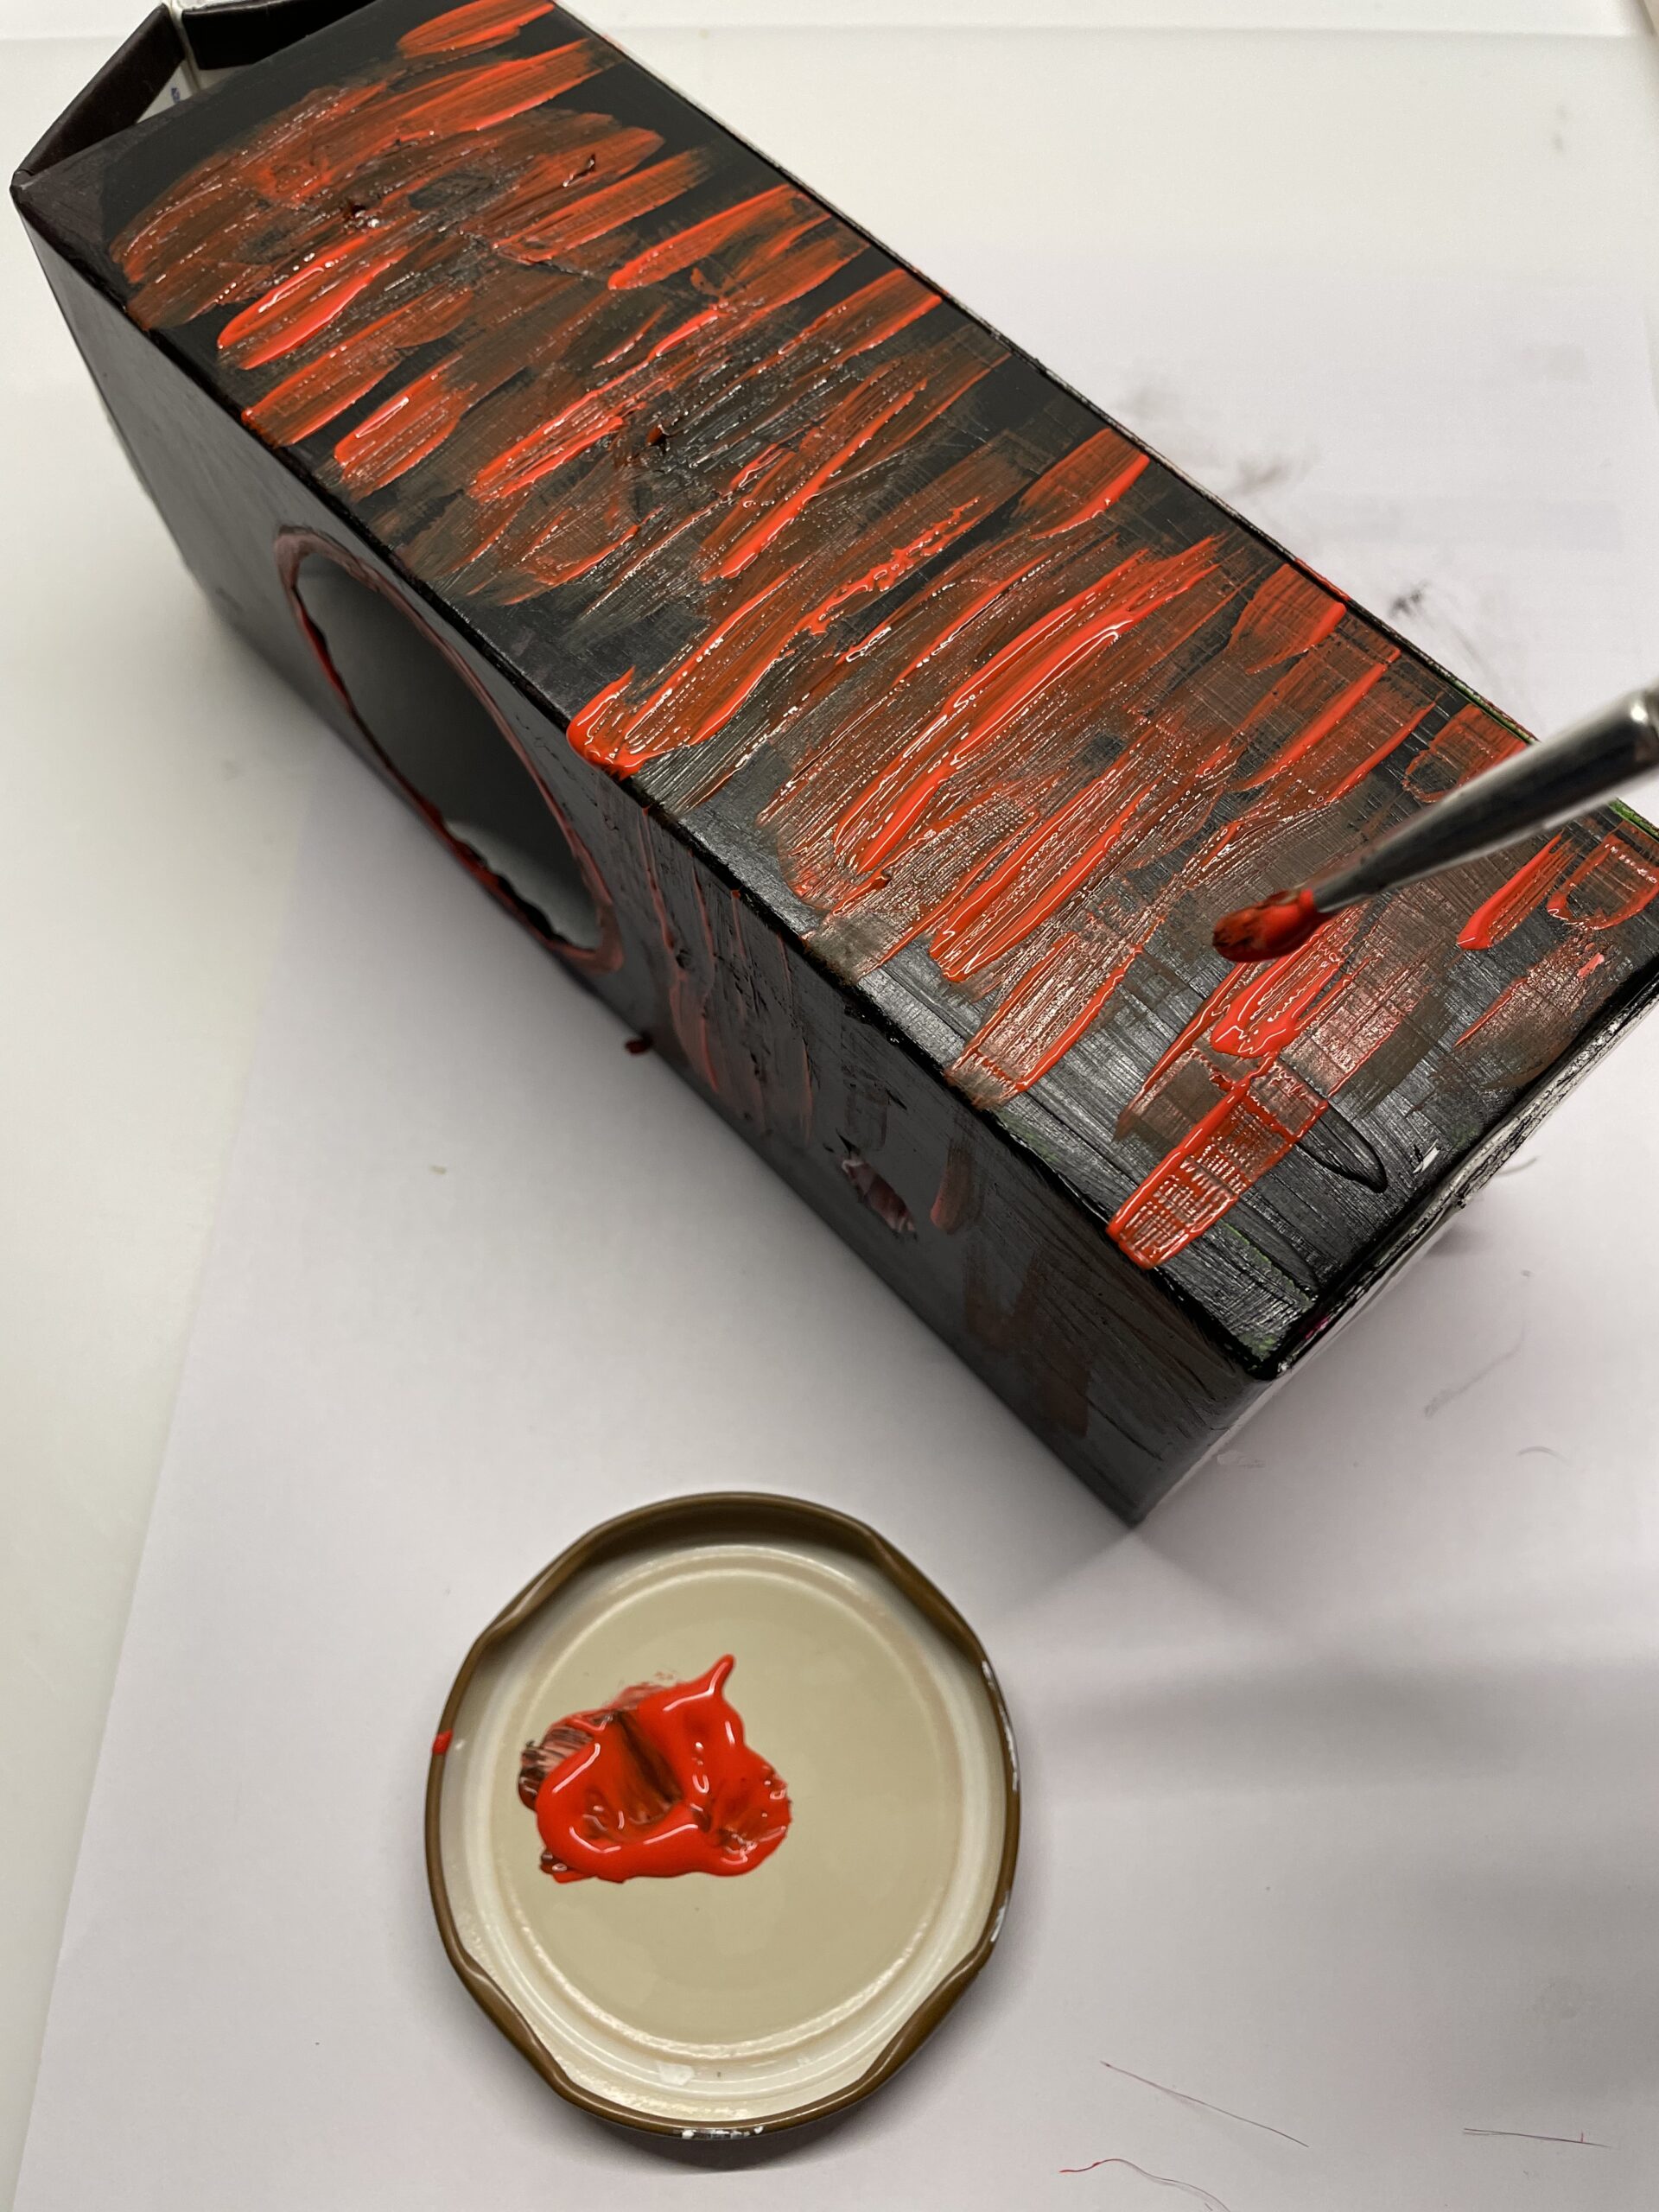
Bild zum Schritt 4 für das Bastel- und DIY-Abenteuer für Kinder: 'Nach dem Trocknen könnt ihr noch eine zweite Farbschicht darüber...'

5

Then let the carton dry.

Bild zum Schritt 5 für das Bastel- und DIY-Abenteuer für Kinder: 'Anschließend lasst ihr den Karton trocknen.'

6

Now you slash a small hole under your circle and on the opposite side and put the spoon through the box.
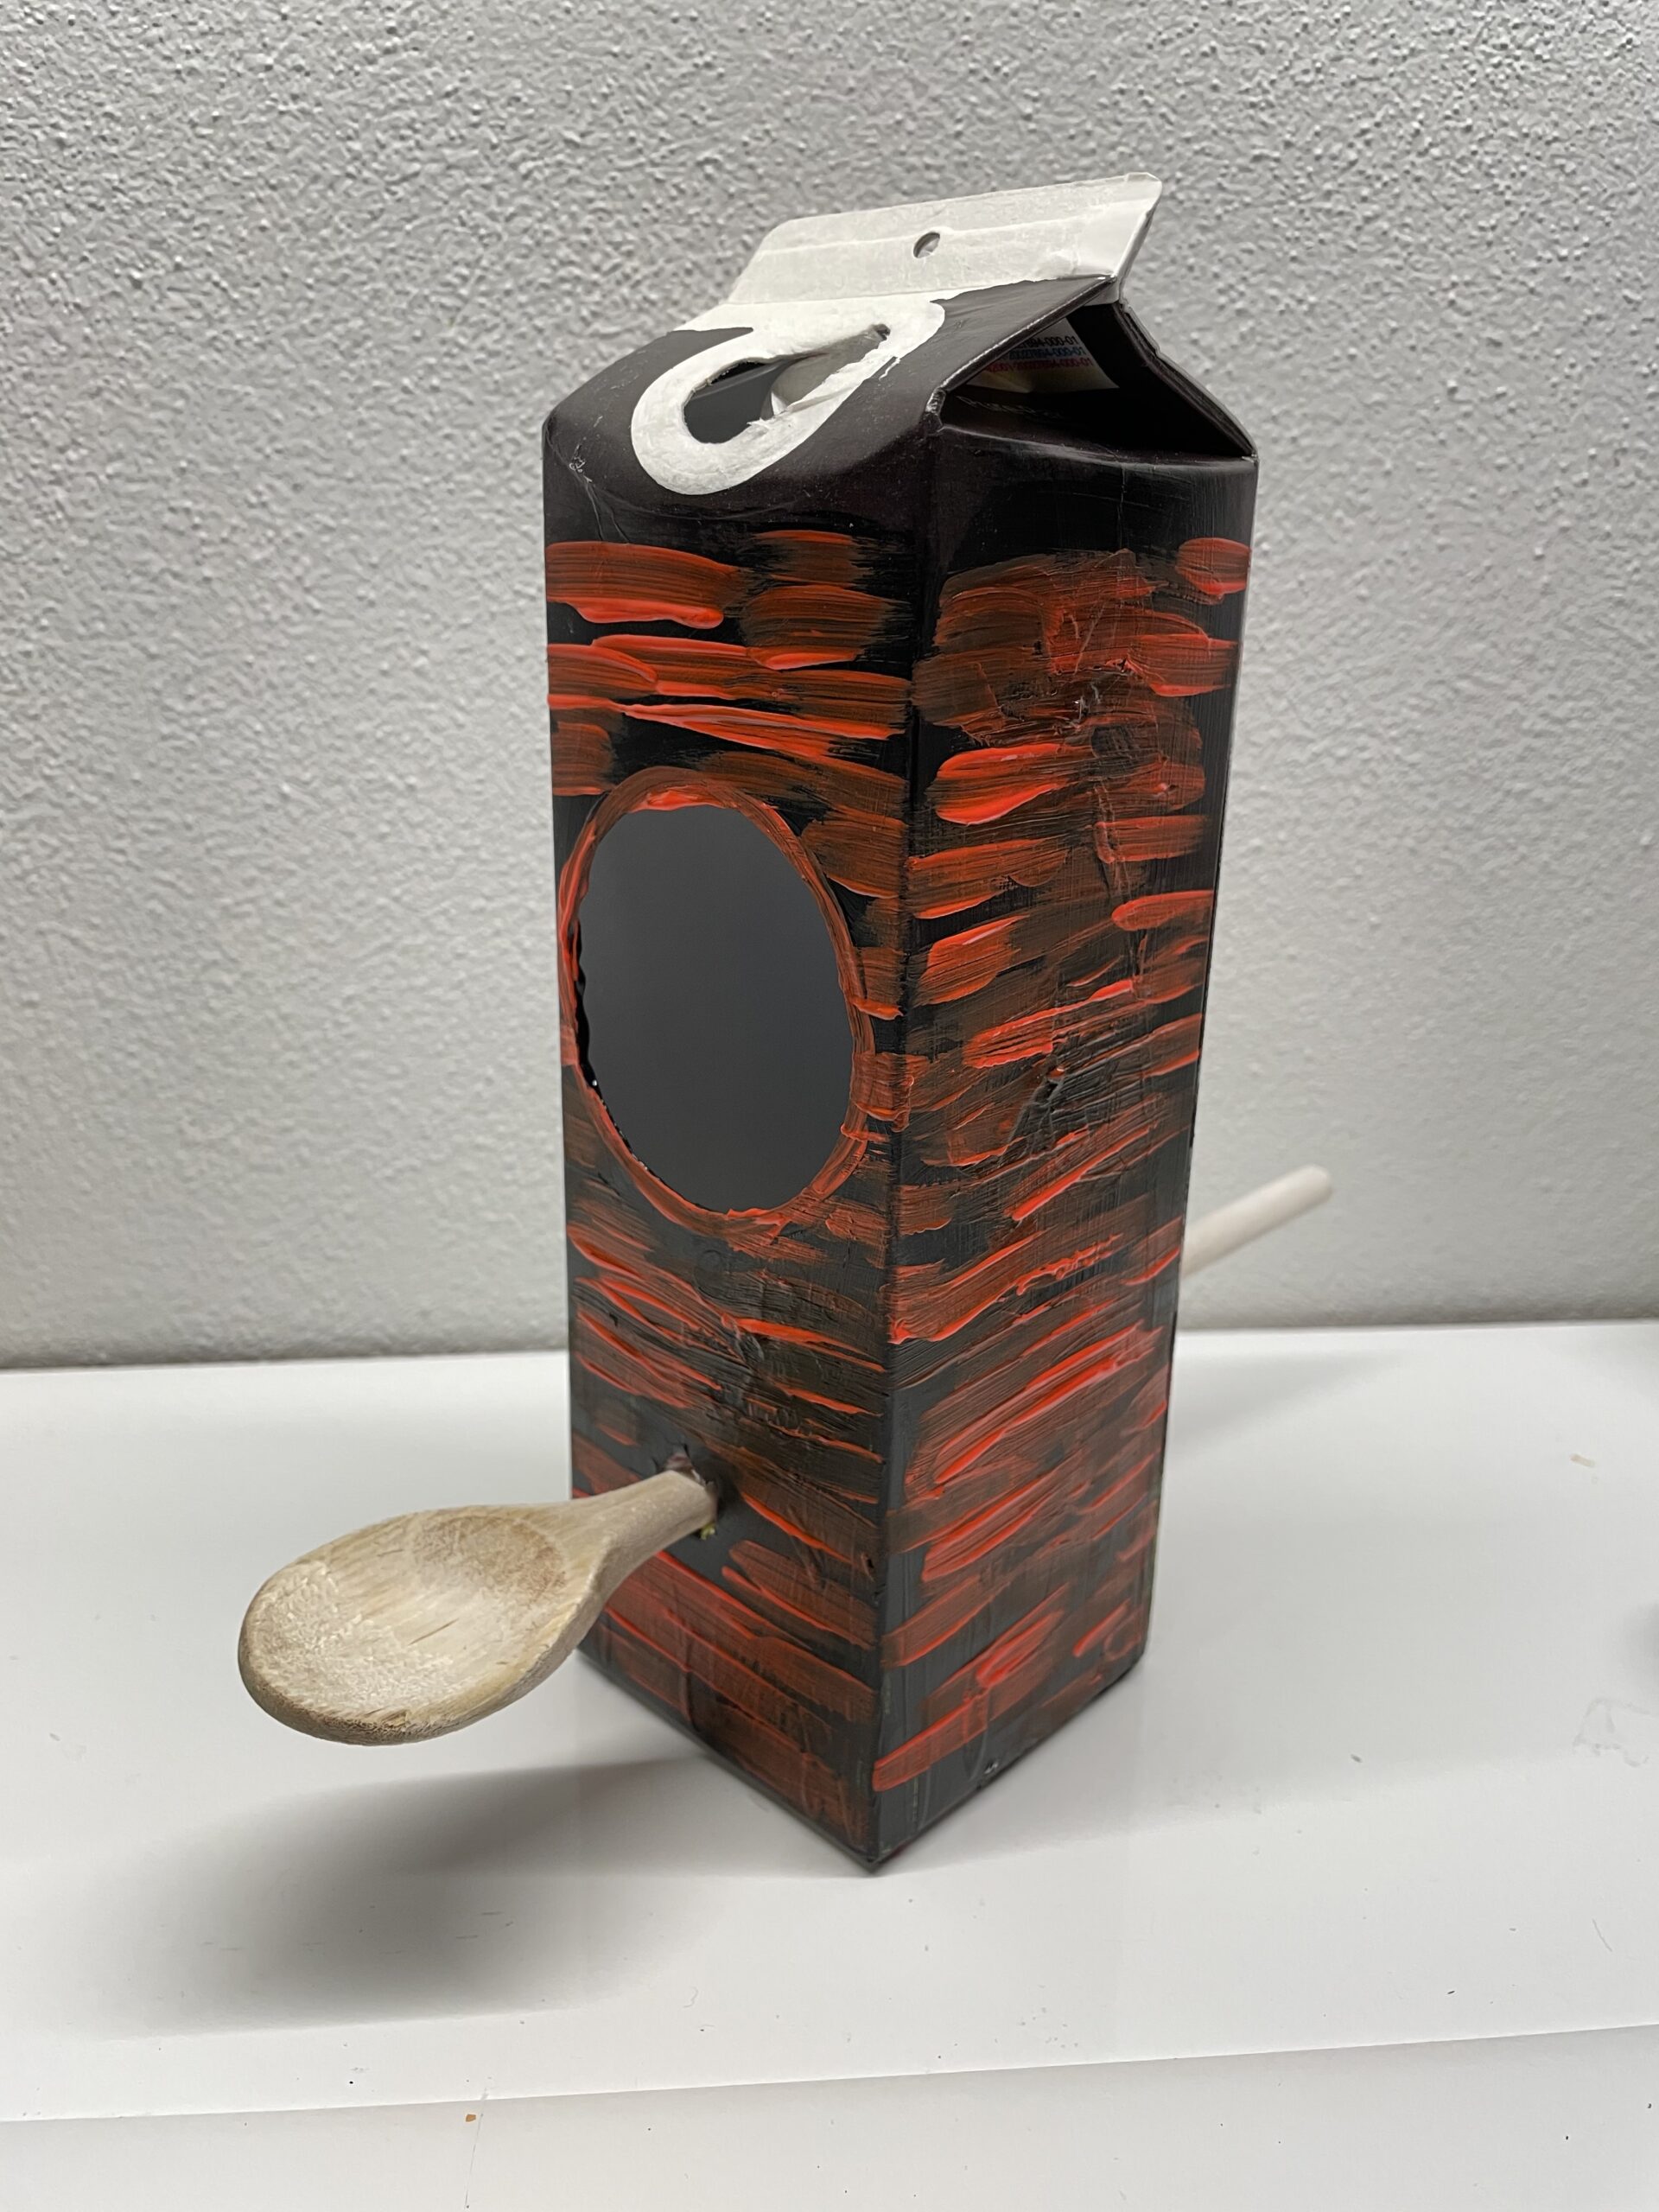
Bild zum Schritt 6 für das Bastel- und DIY-Abenteuer für Kinder: 'Jetzt ritzt ihr ein kleines Loch unter eurem Kreis und...'

7

The spoon sits firmly and is firmly attached.
Now you put the screw-glass lid as a roof on the cardboard.
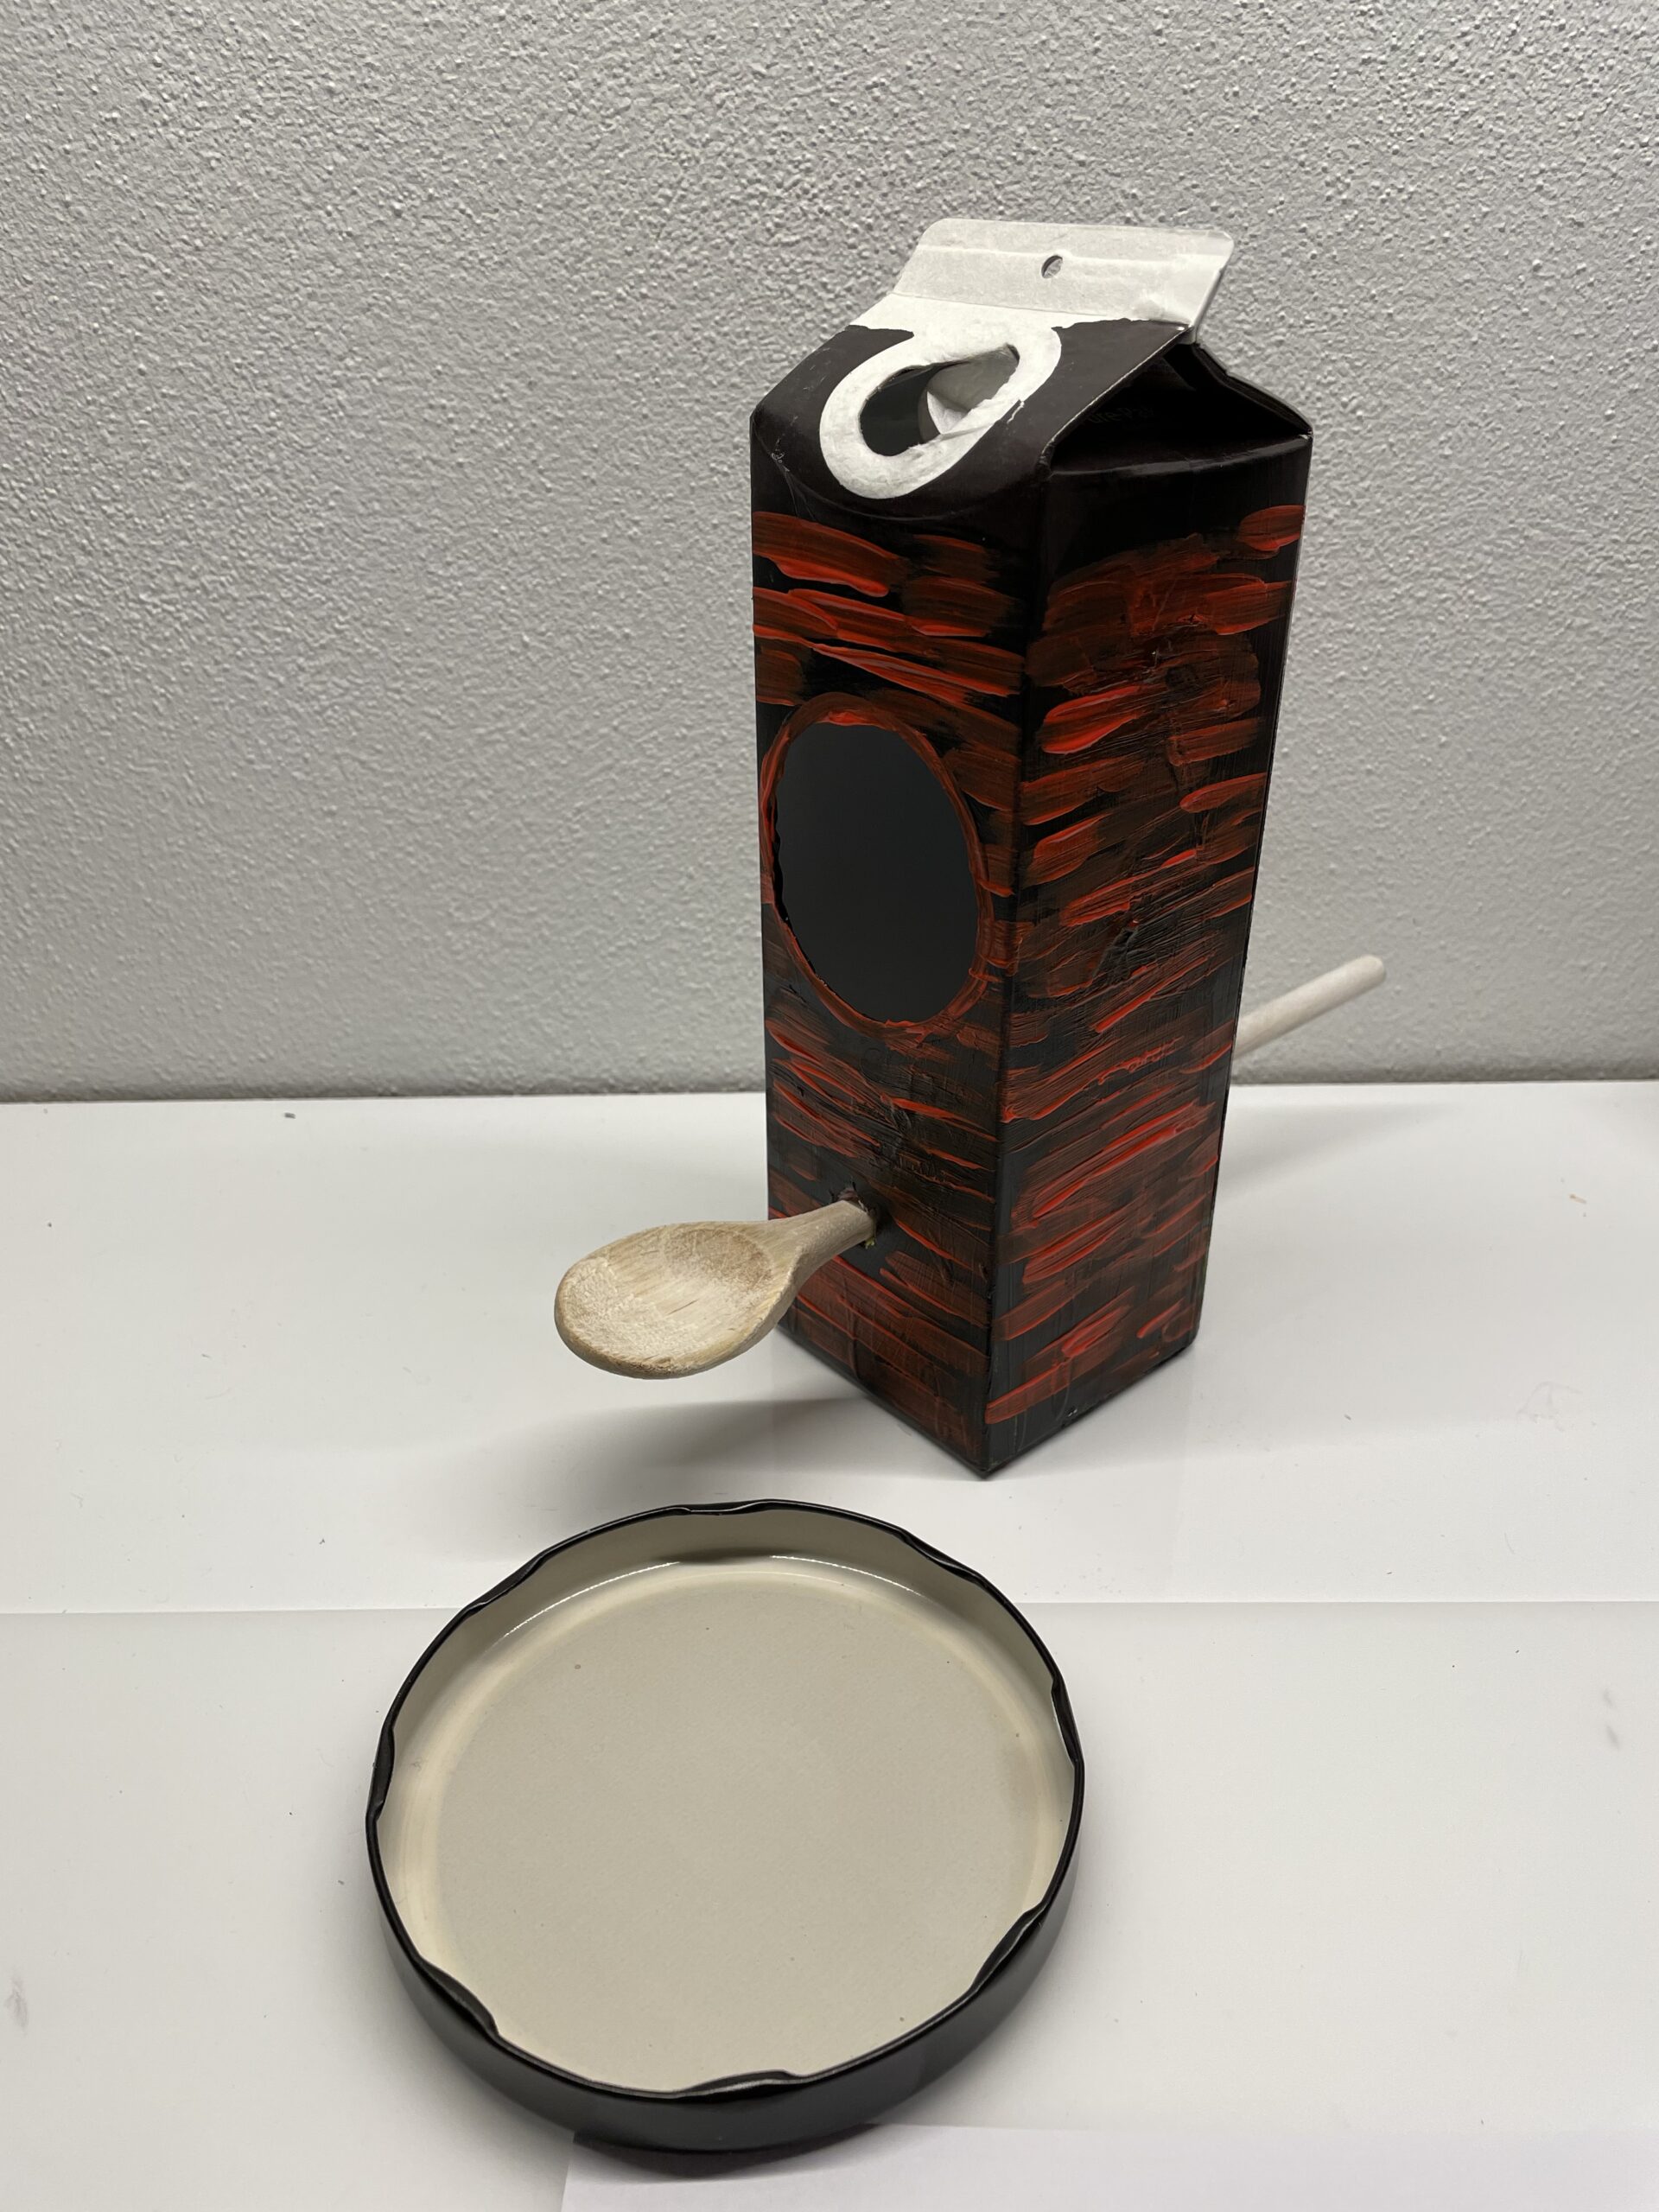
Bild zum Schritt 7 für das Bastel- und DIY-Abenteuer für Kinder: 'Der Kochlöffel sitzt fest und ist stabil befestigt.  Nun...'

8

To do this, apply hot glue to the upper part of the Tetrapack.
Attention when handling the hot glue - risk of injury!
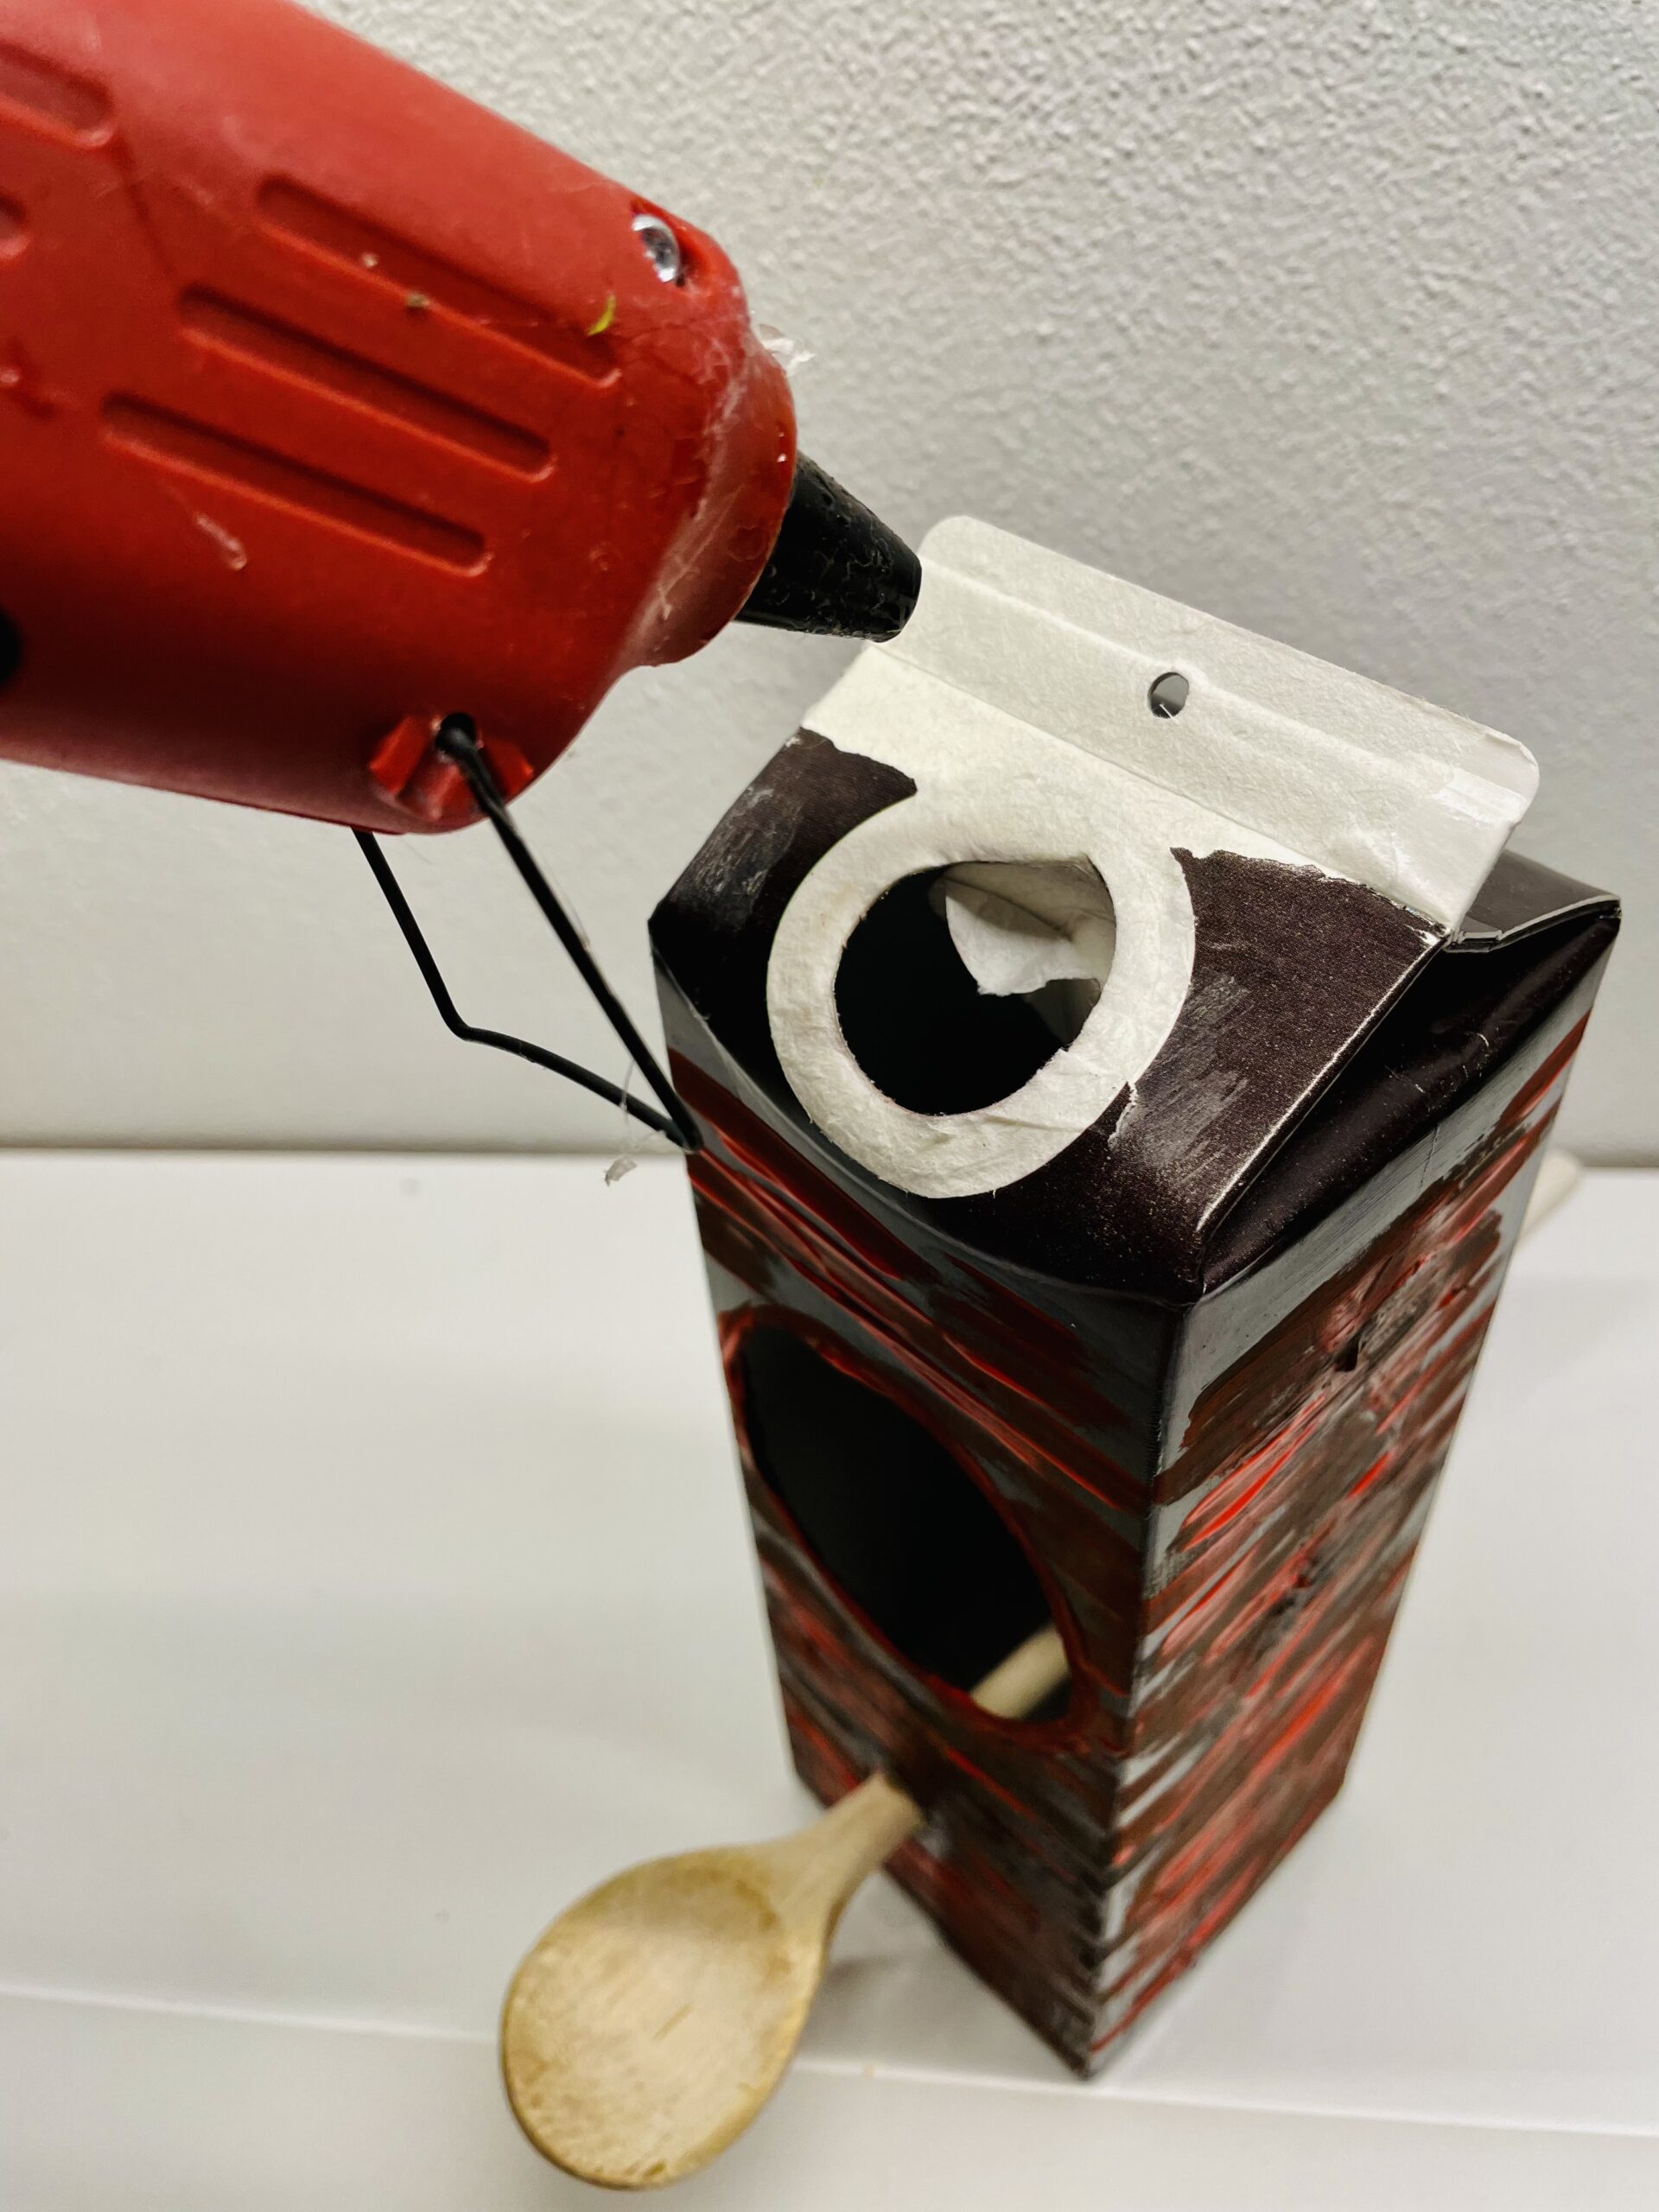
Bild zum Schritt 8 für das Bastel- und DIY-Abenteuer für Kinder: 'Dafür tragt ihr Heißkleber auf den oberen Teil des Tetrapacks...'

9

Put the lid on it. Attention: Only touch the lid at the edge, because the middle gets very hot by the hot glue!
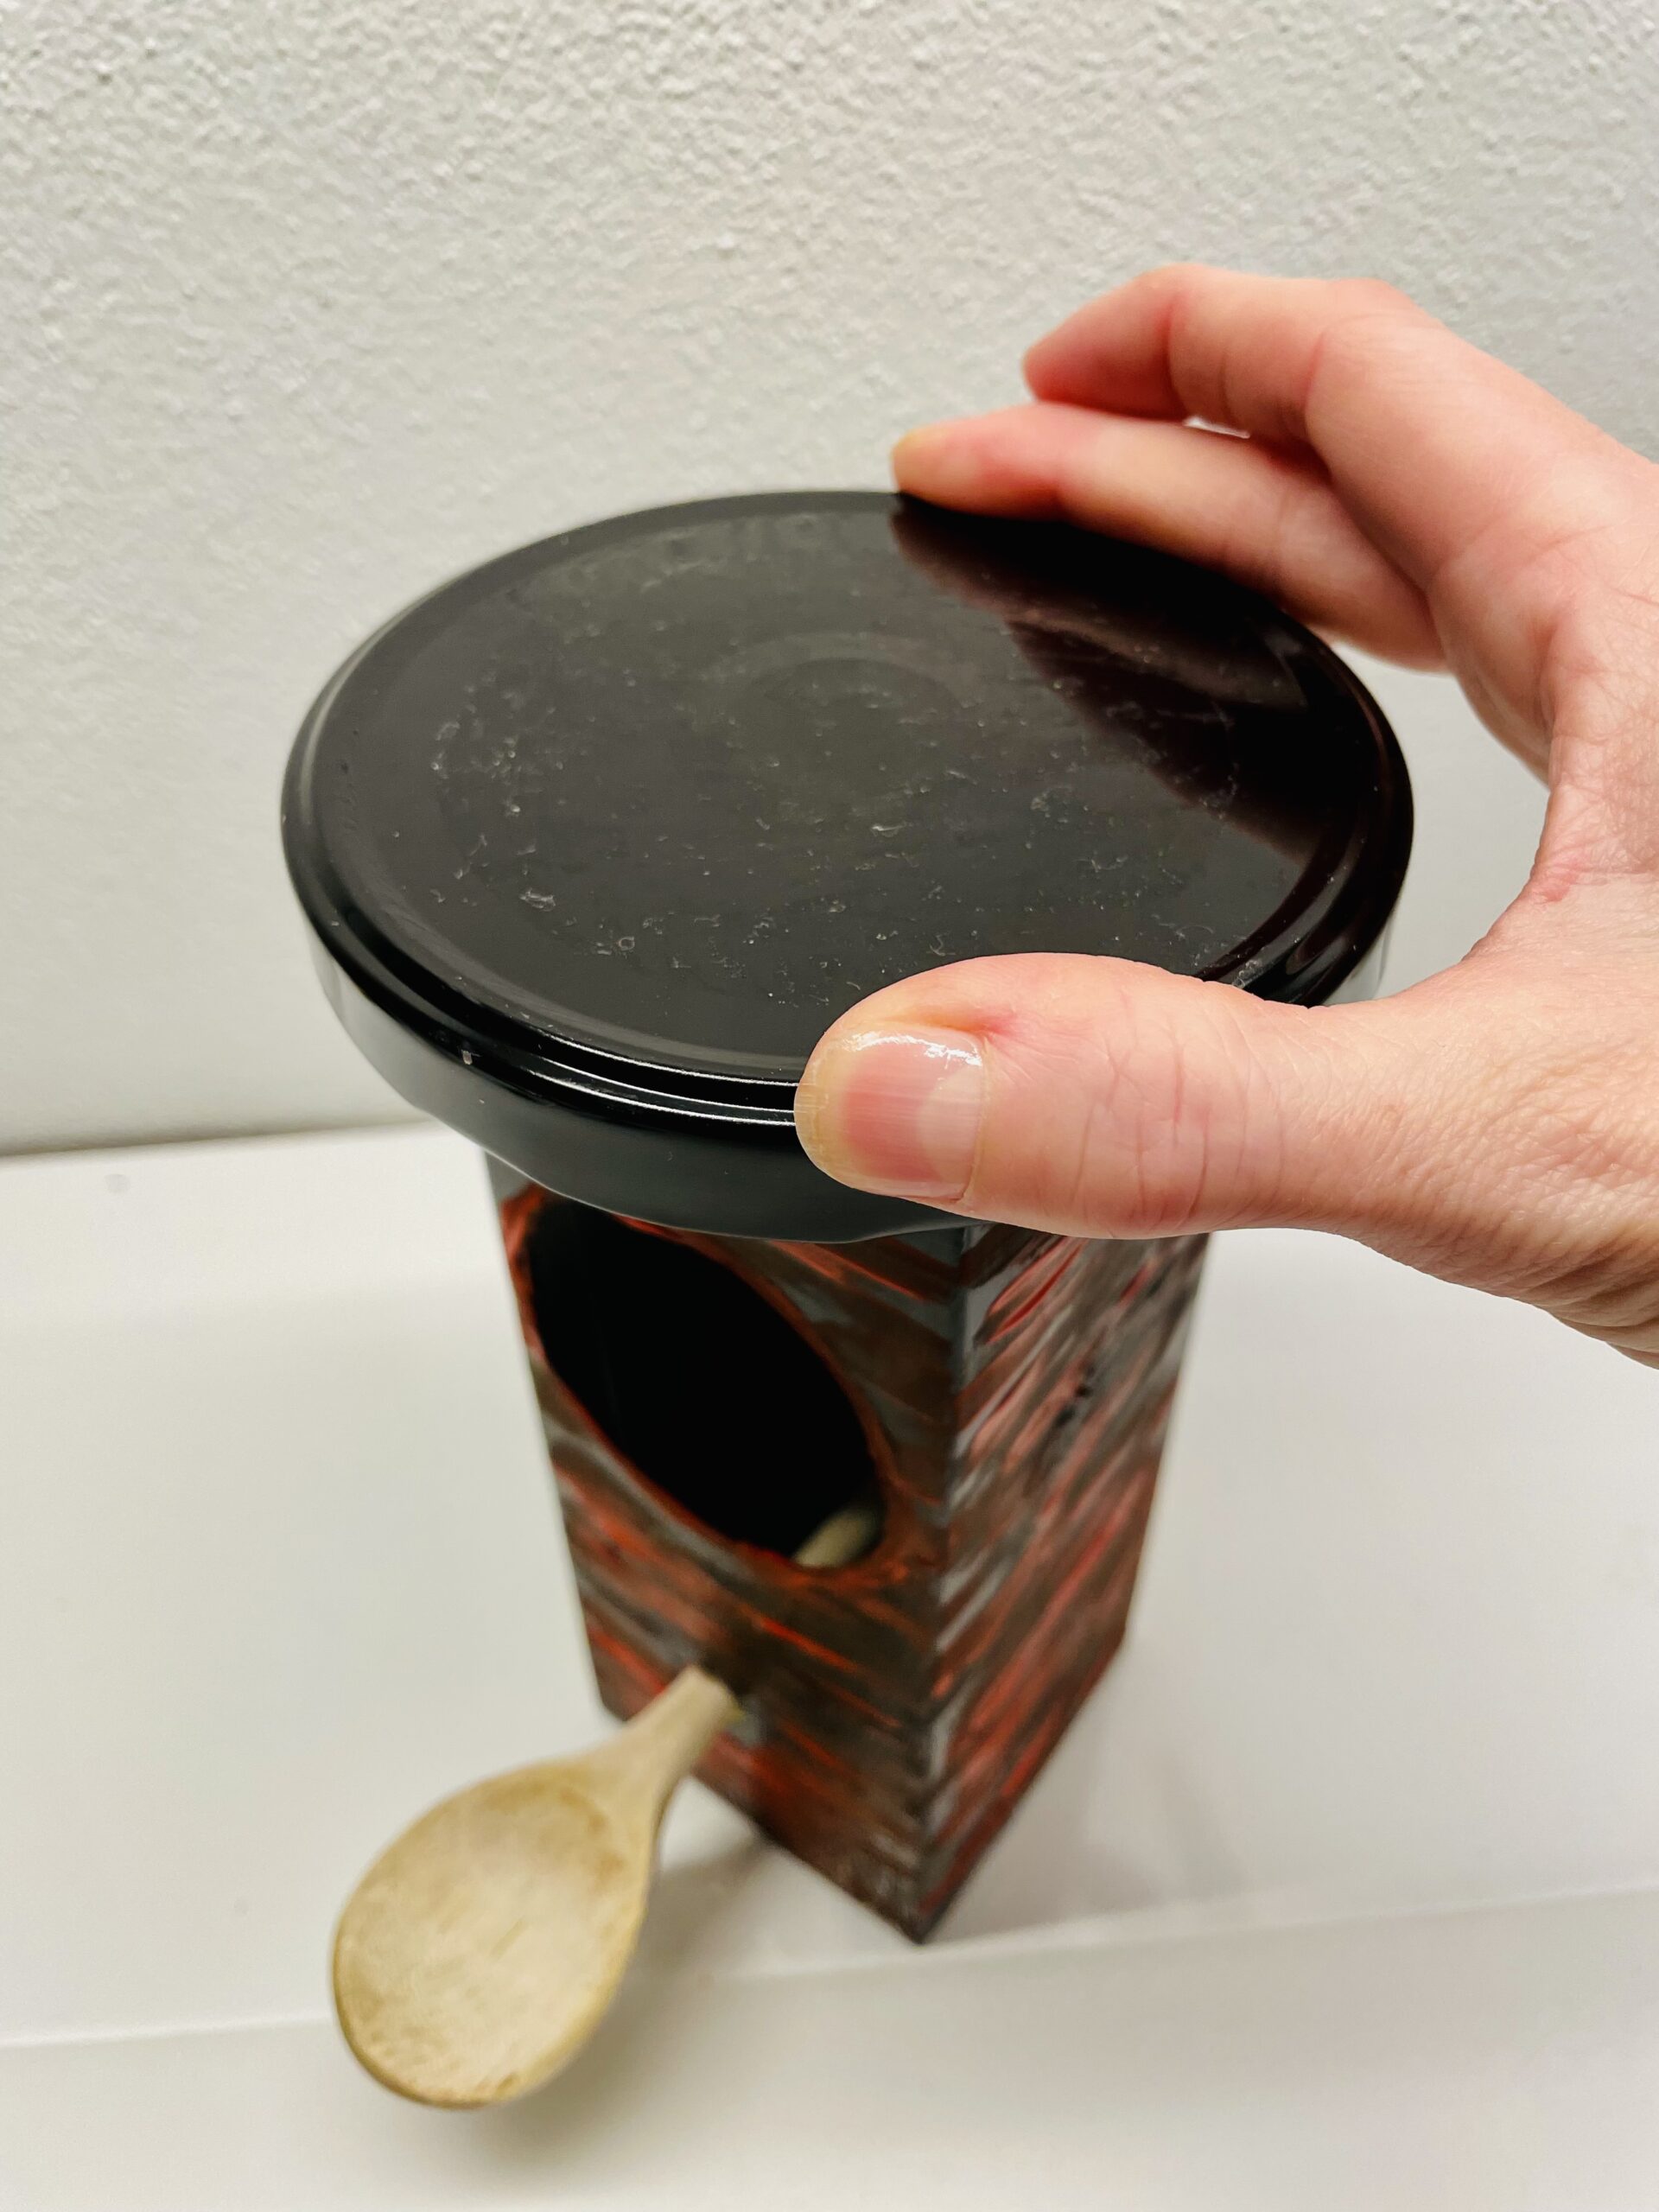
Bild zum Schritt 9 für das Bastel- und DIY-Abenteuer für Kinder: 'Setzt den Deckel darauf. Achtung: Fasst den Deckel dabei nur...'

10

The roof, which is protected from rain, is on the birdhouse.
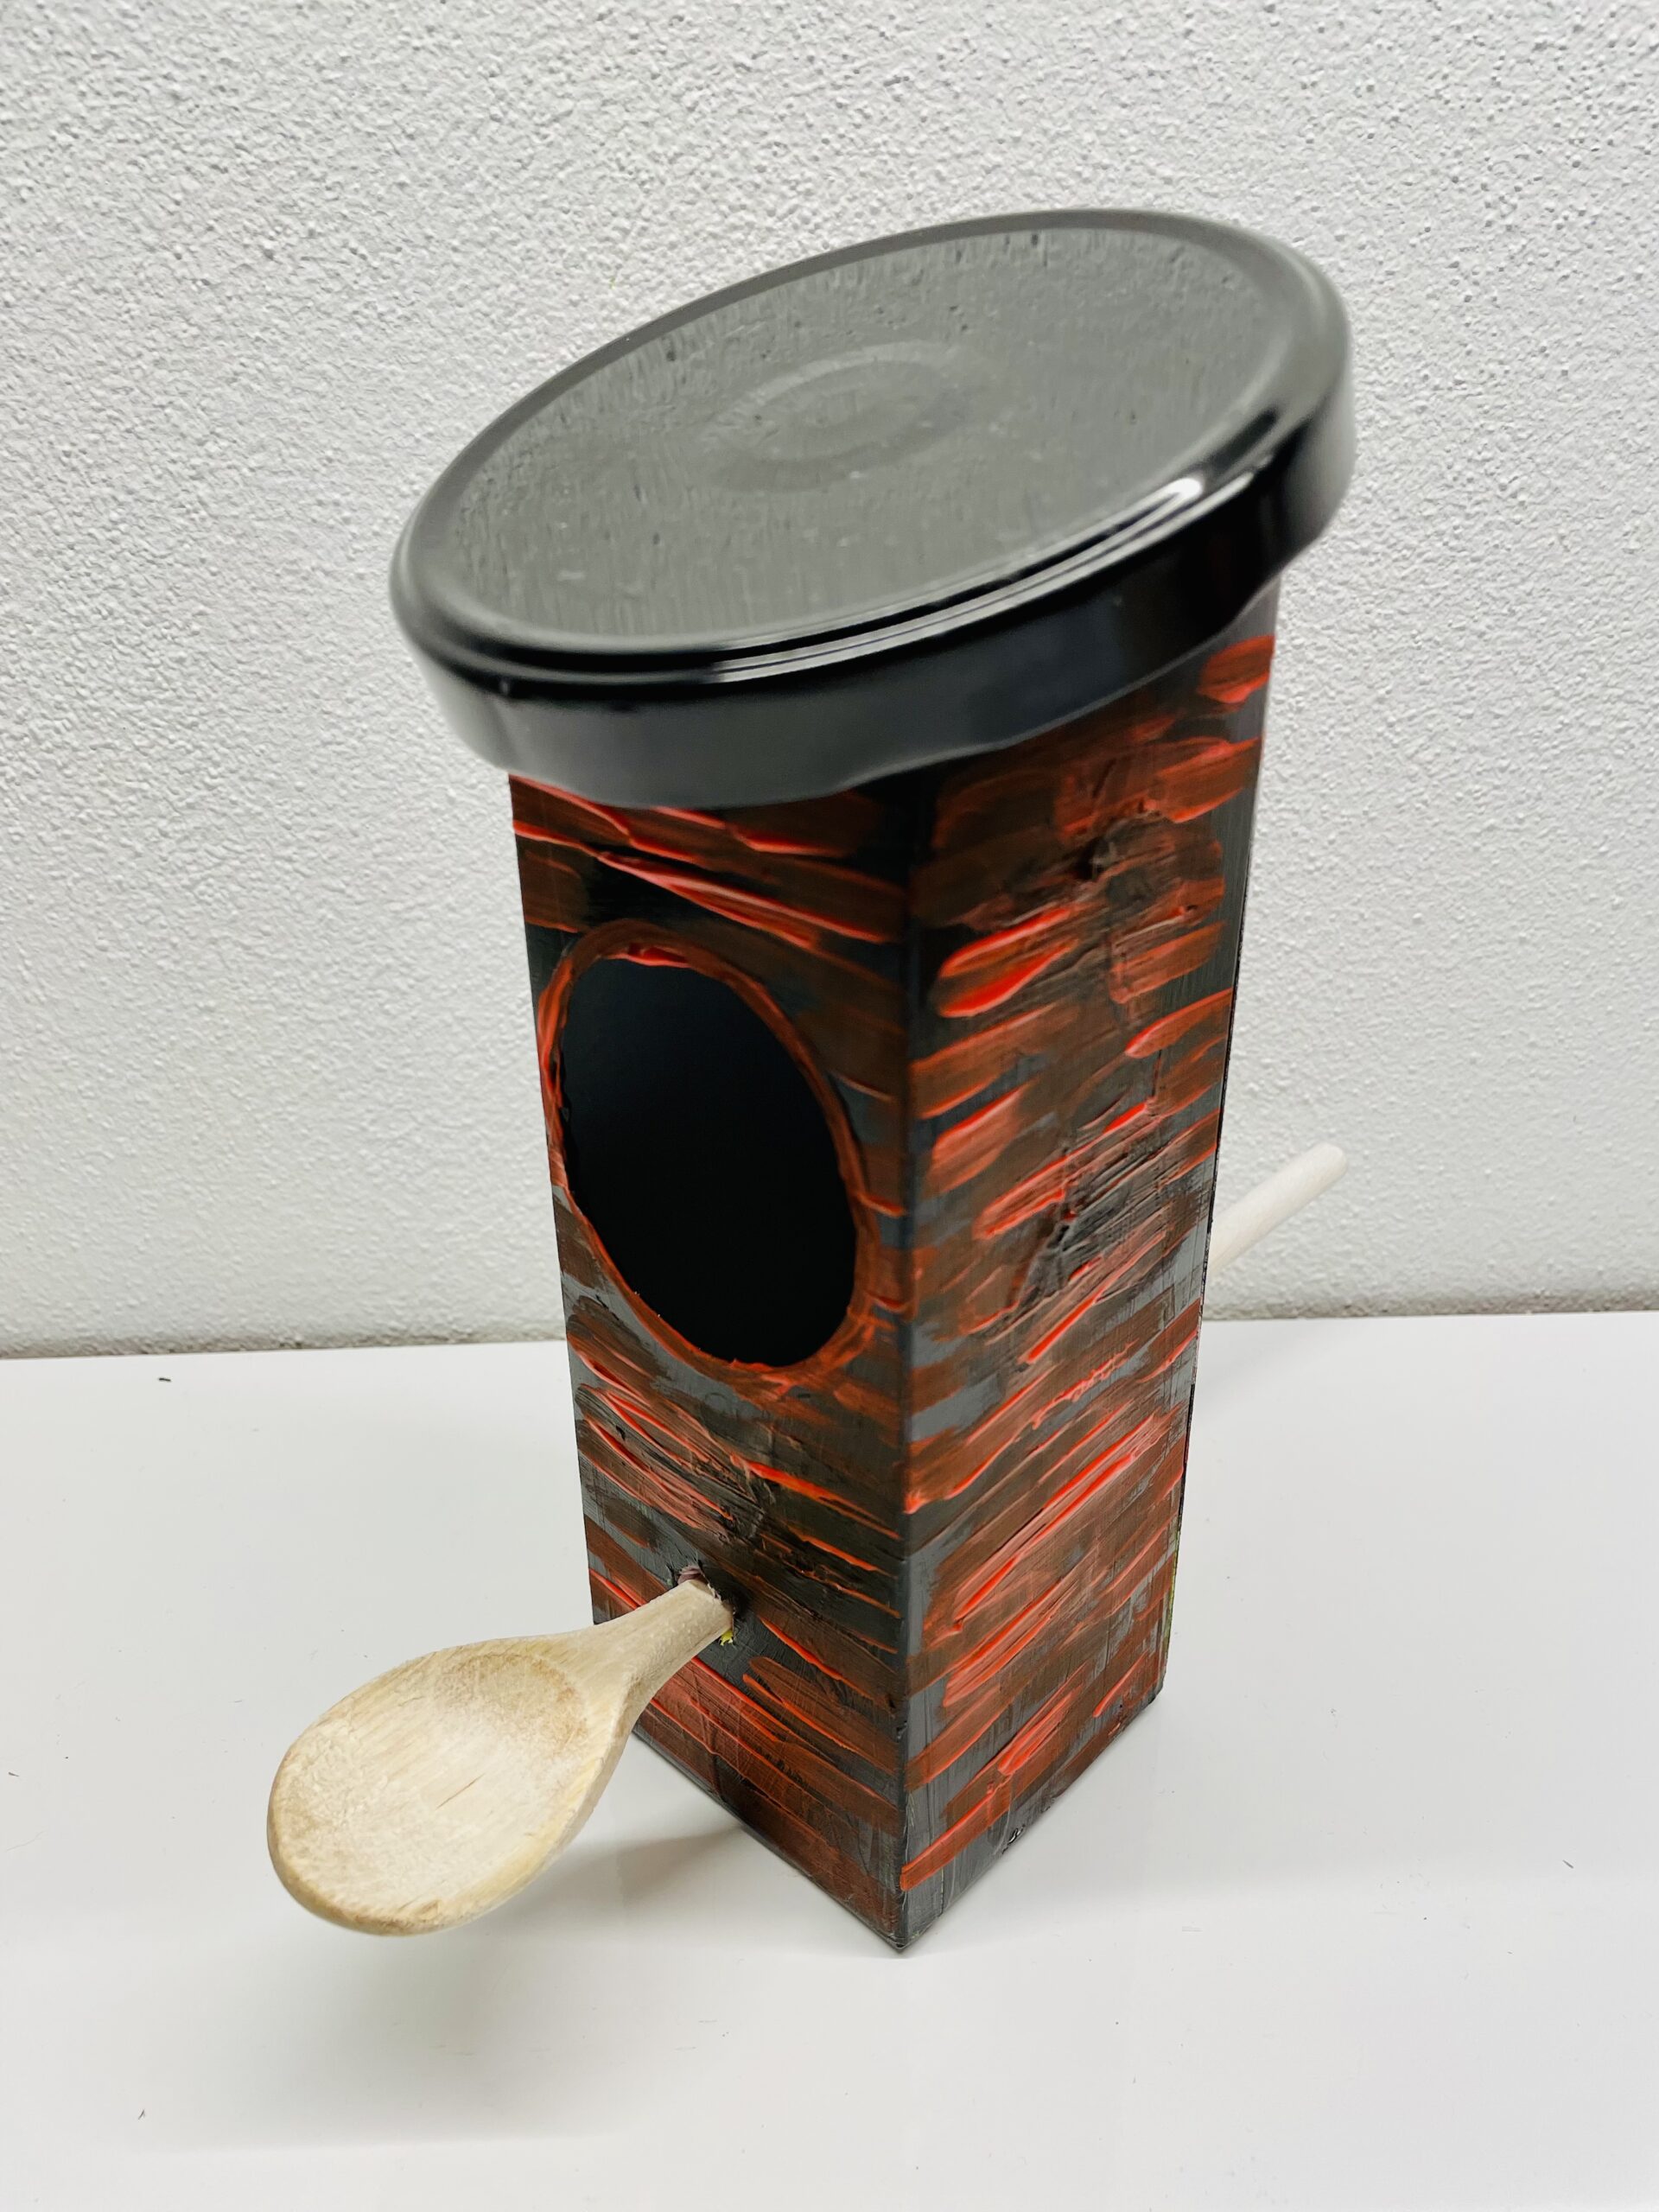
Bild zum Schritt 10 für das Bastel- und DIY-Abenteuer für Kinder: 'Das vor Regenwetter schützende Dach ist auf dem Vogelhaus.'

11

Now glue a wooden stick to the bottom of the box.
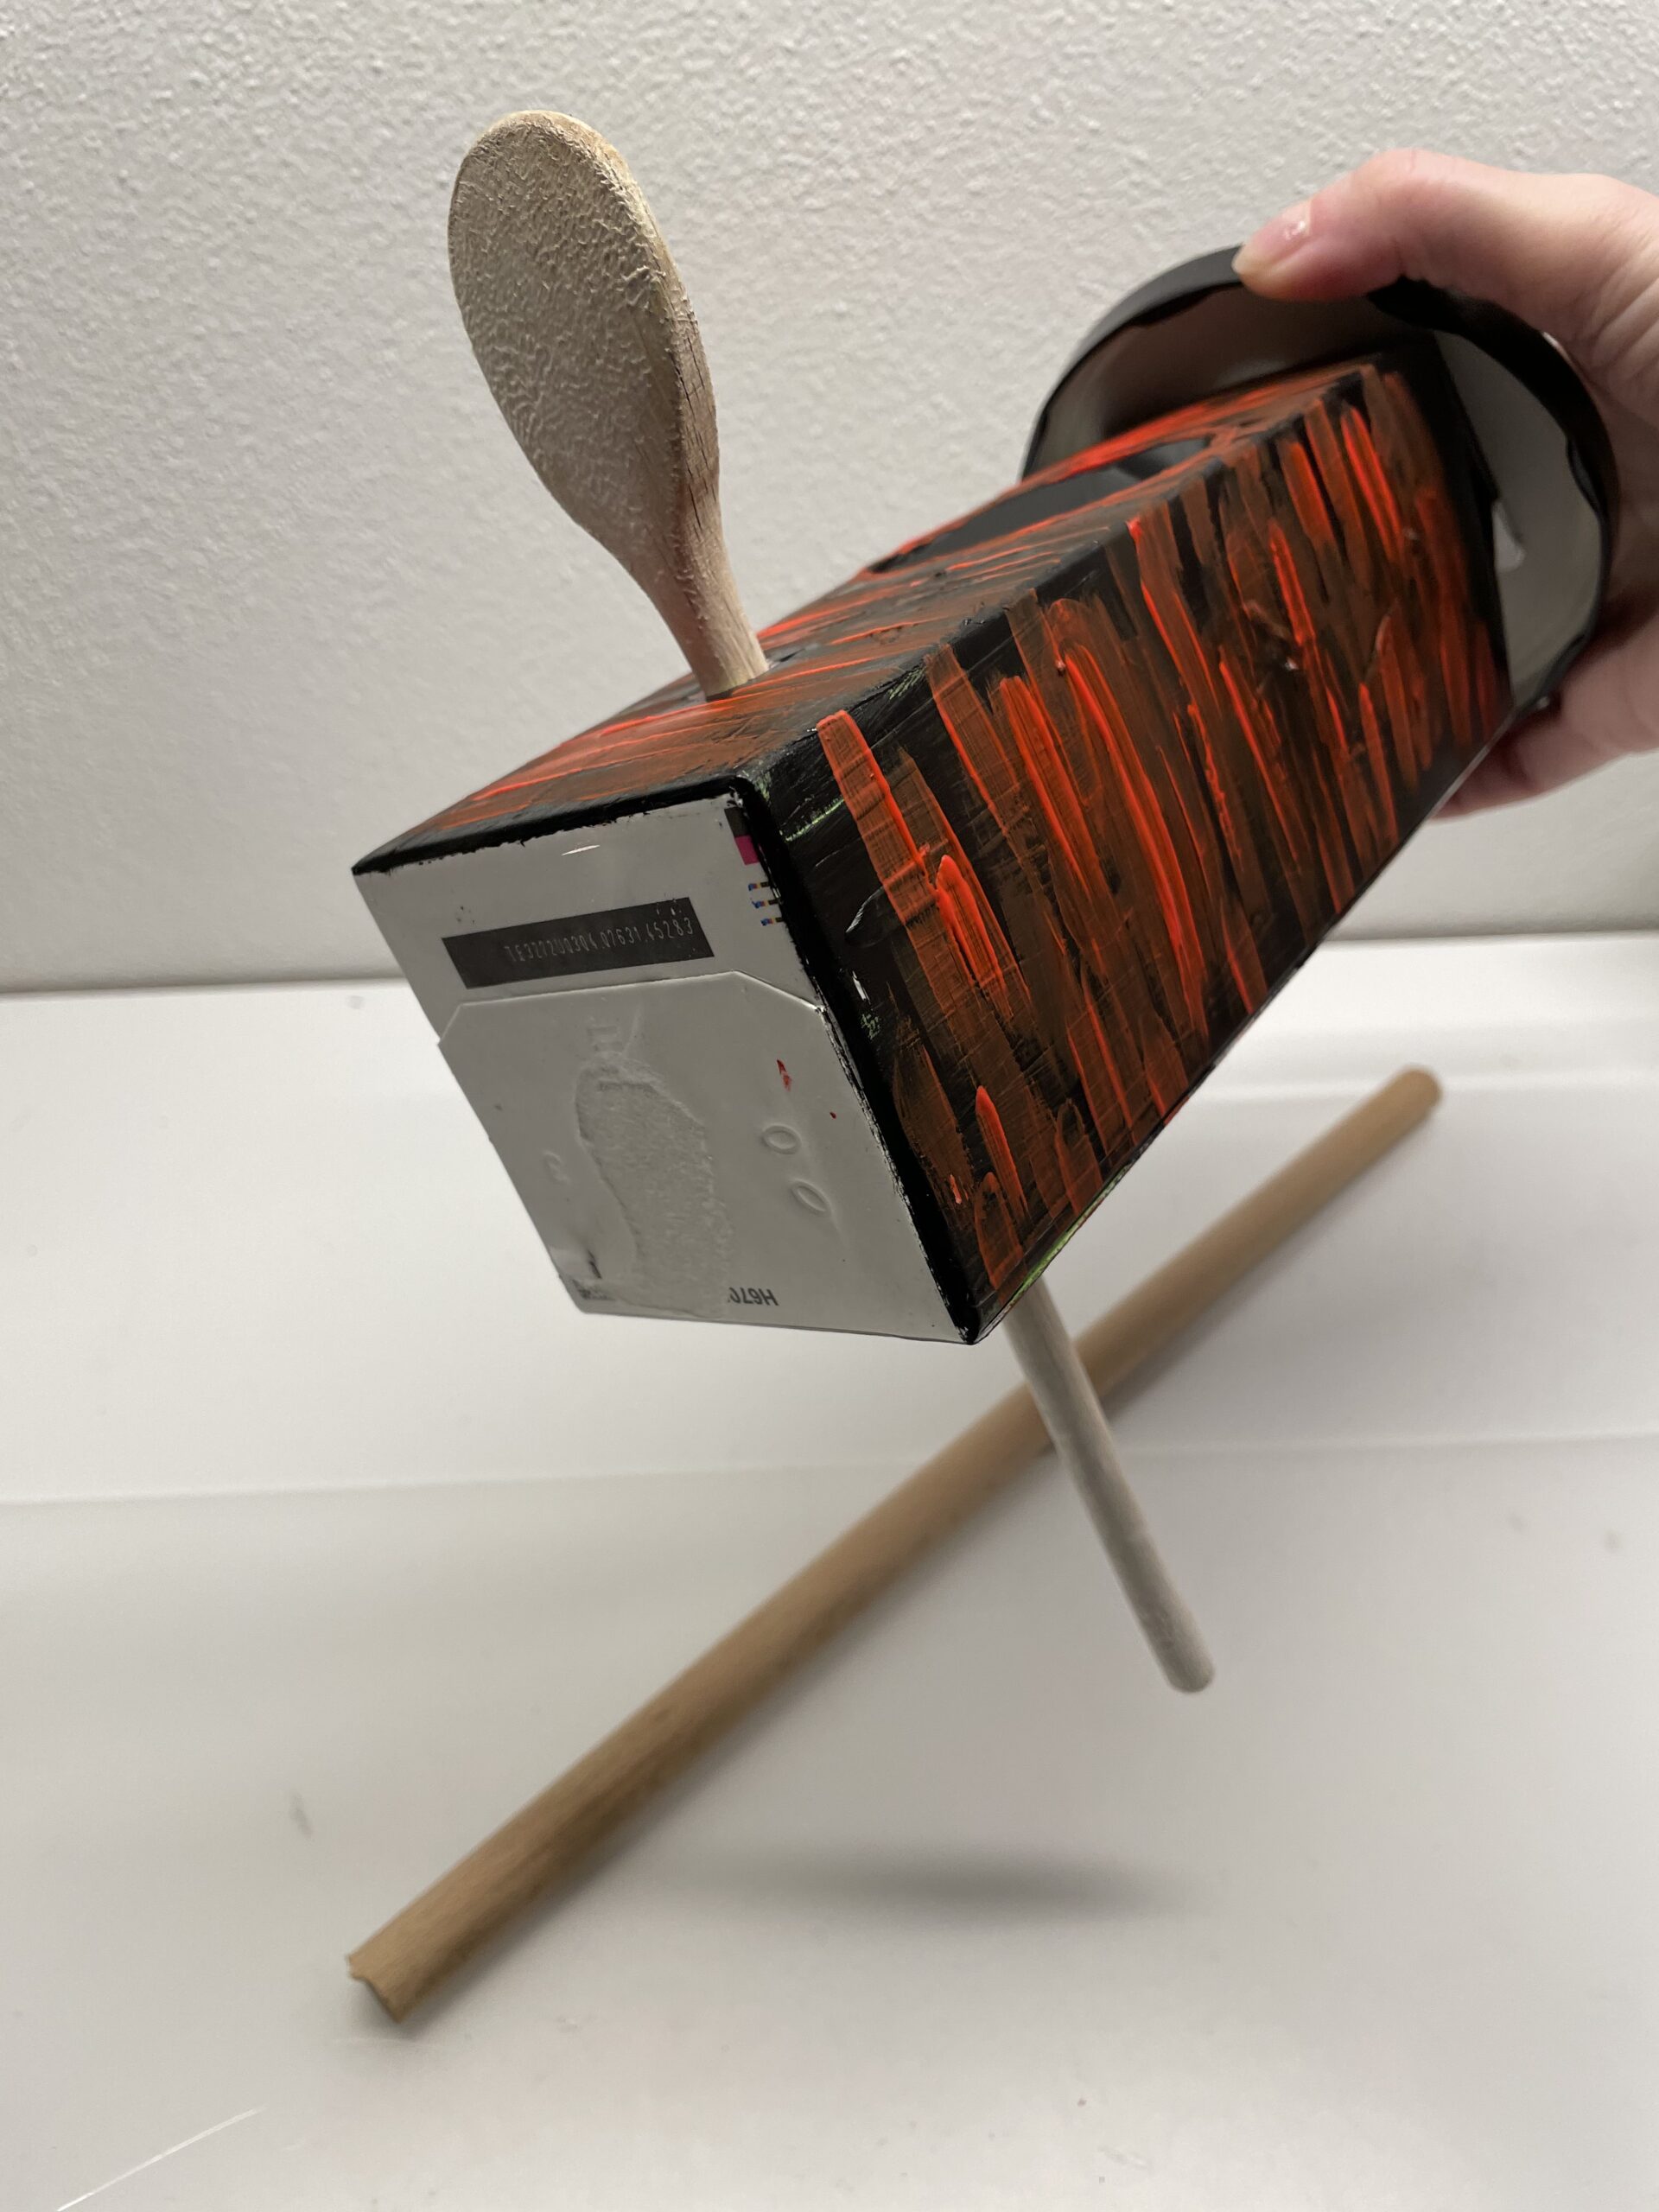
Bild zum Schritt 11 für das Bastel- und DIY-Abenteuer für Kinder: 'Jetzt klebt ihr einen Holzstab an die Unterseite des Kartons.'

12

To do this, stick the wooden stick to the cardboard with a sticky spot of hot glue. Press the wooden stick firmly and hold it briefly.
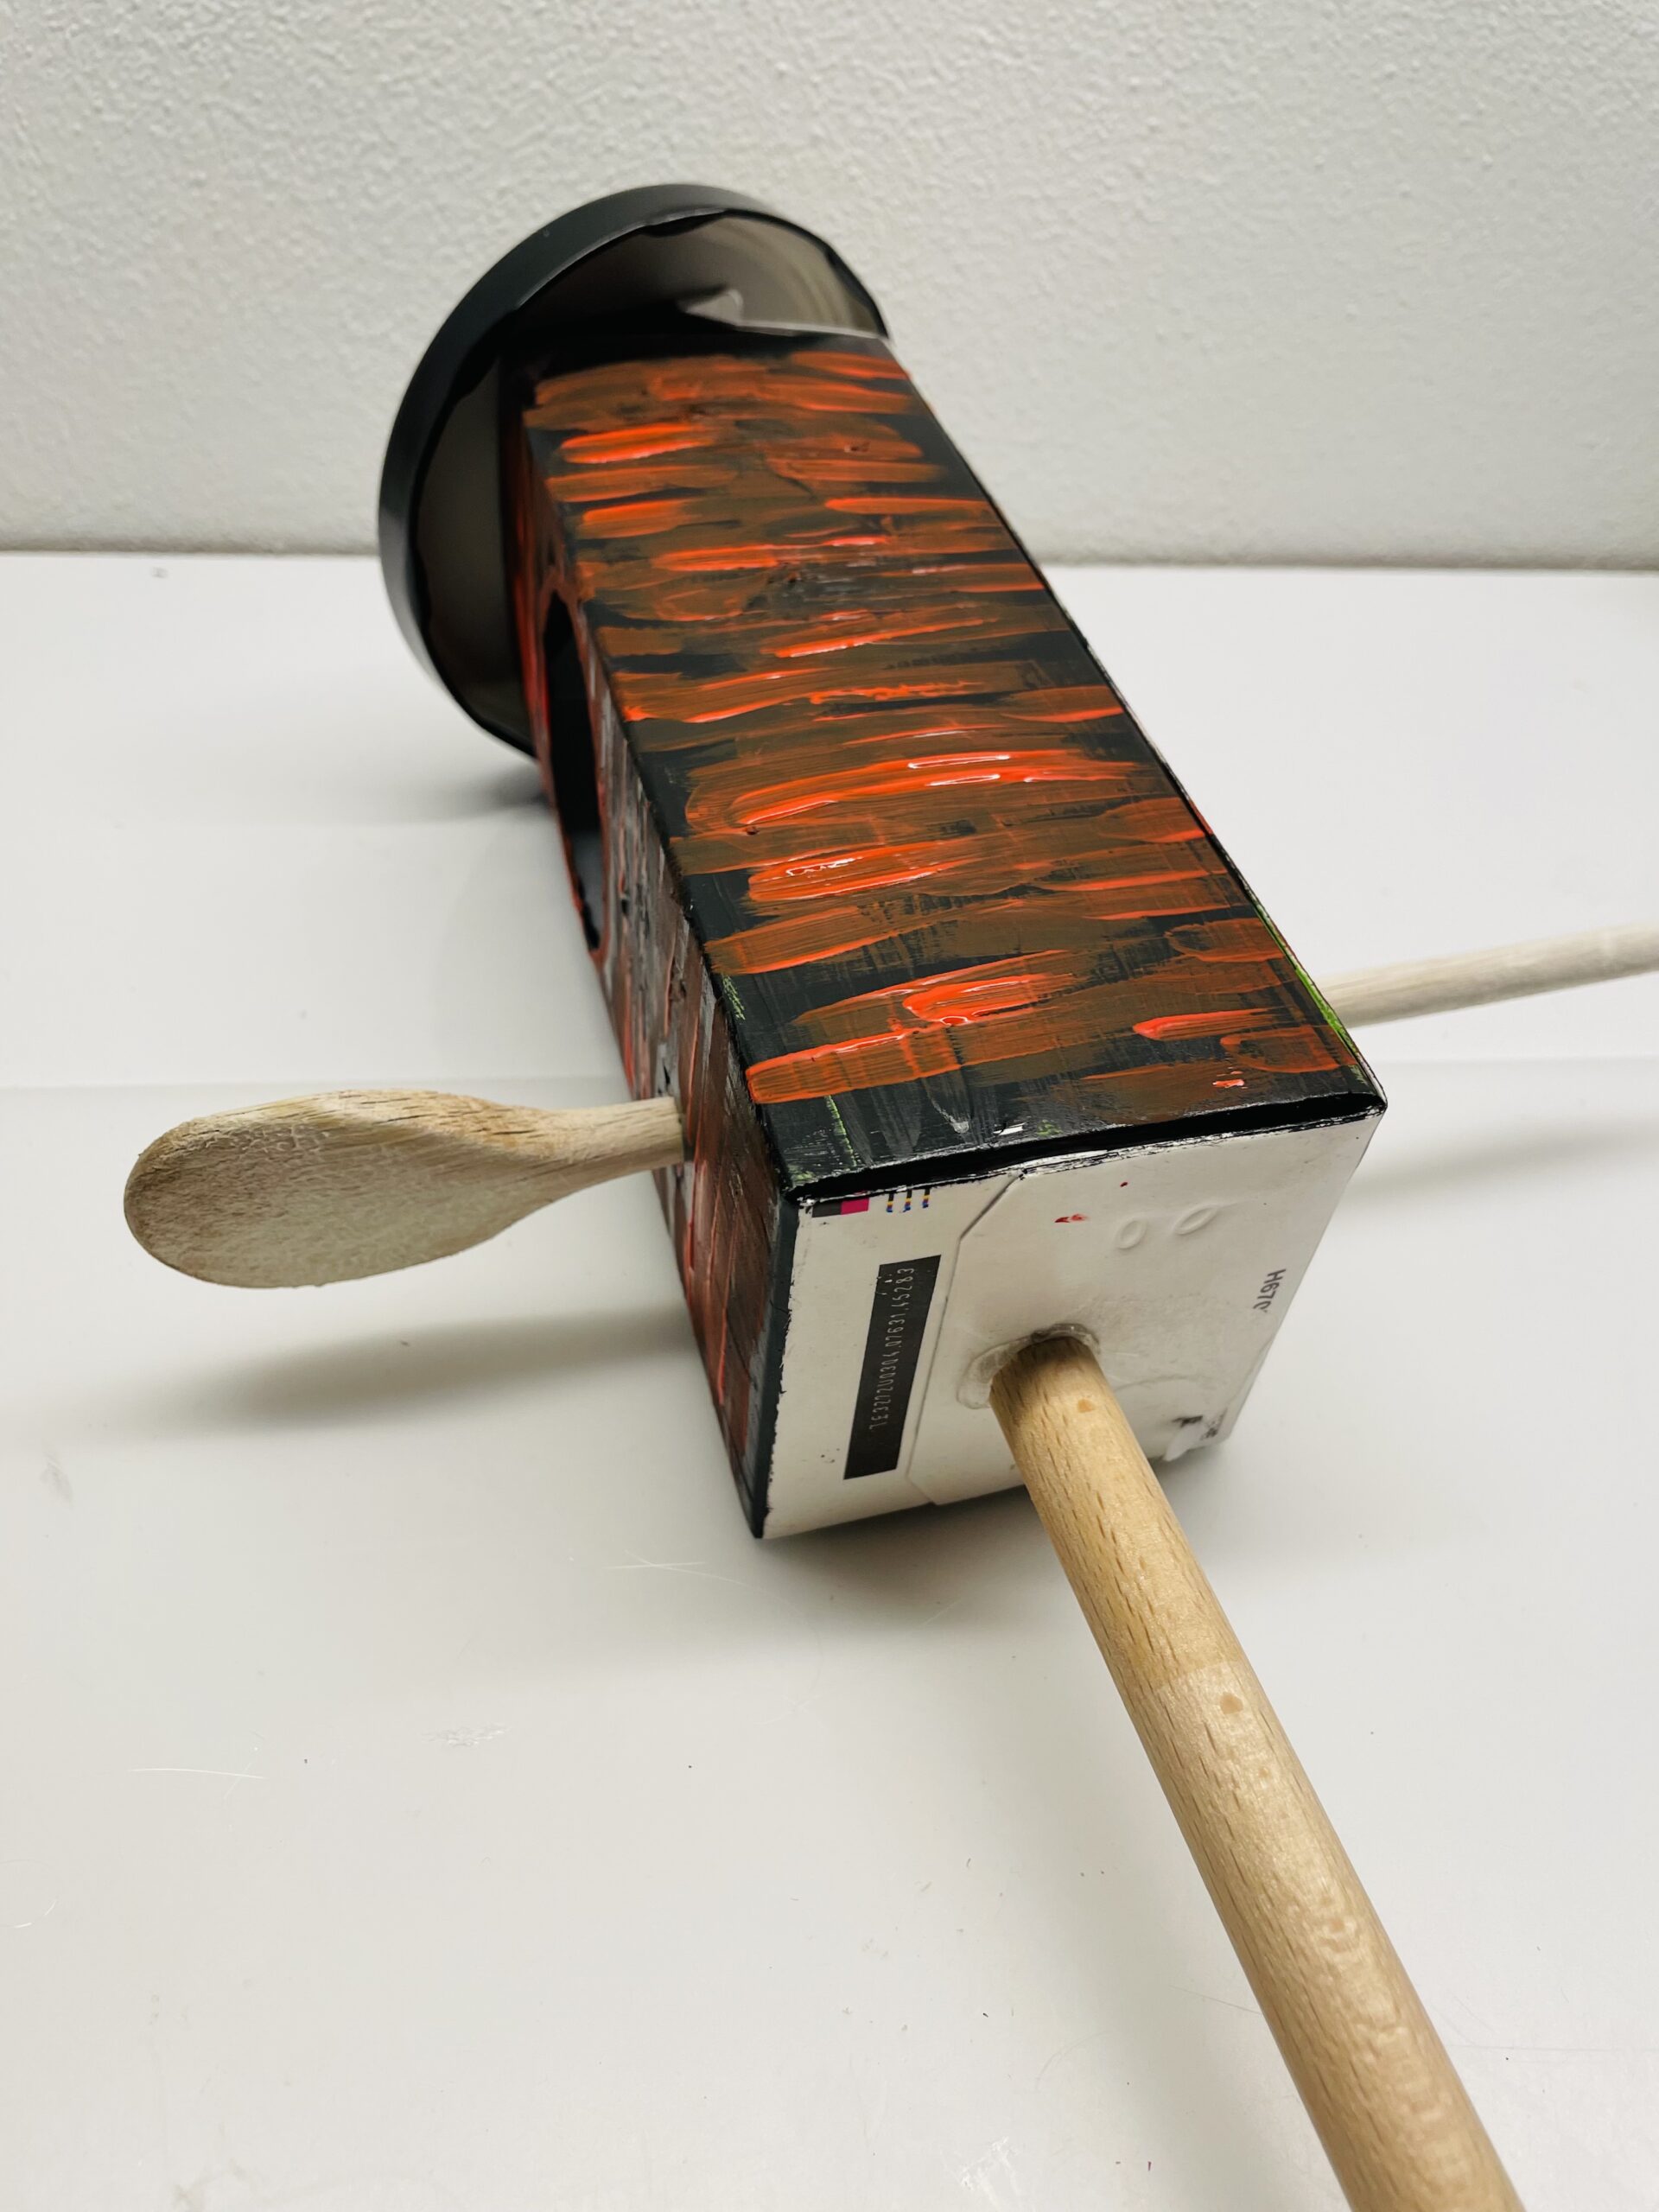
Bild zum Schritt 12 für das Bastel- und DIY-Abenteuer für Kinder: 'Dafür klebt ihr den Holzstab mit einem Klebepunkt Heißkleber an...'

13

The home built birdhouse is ready.
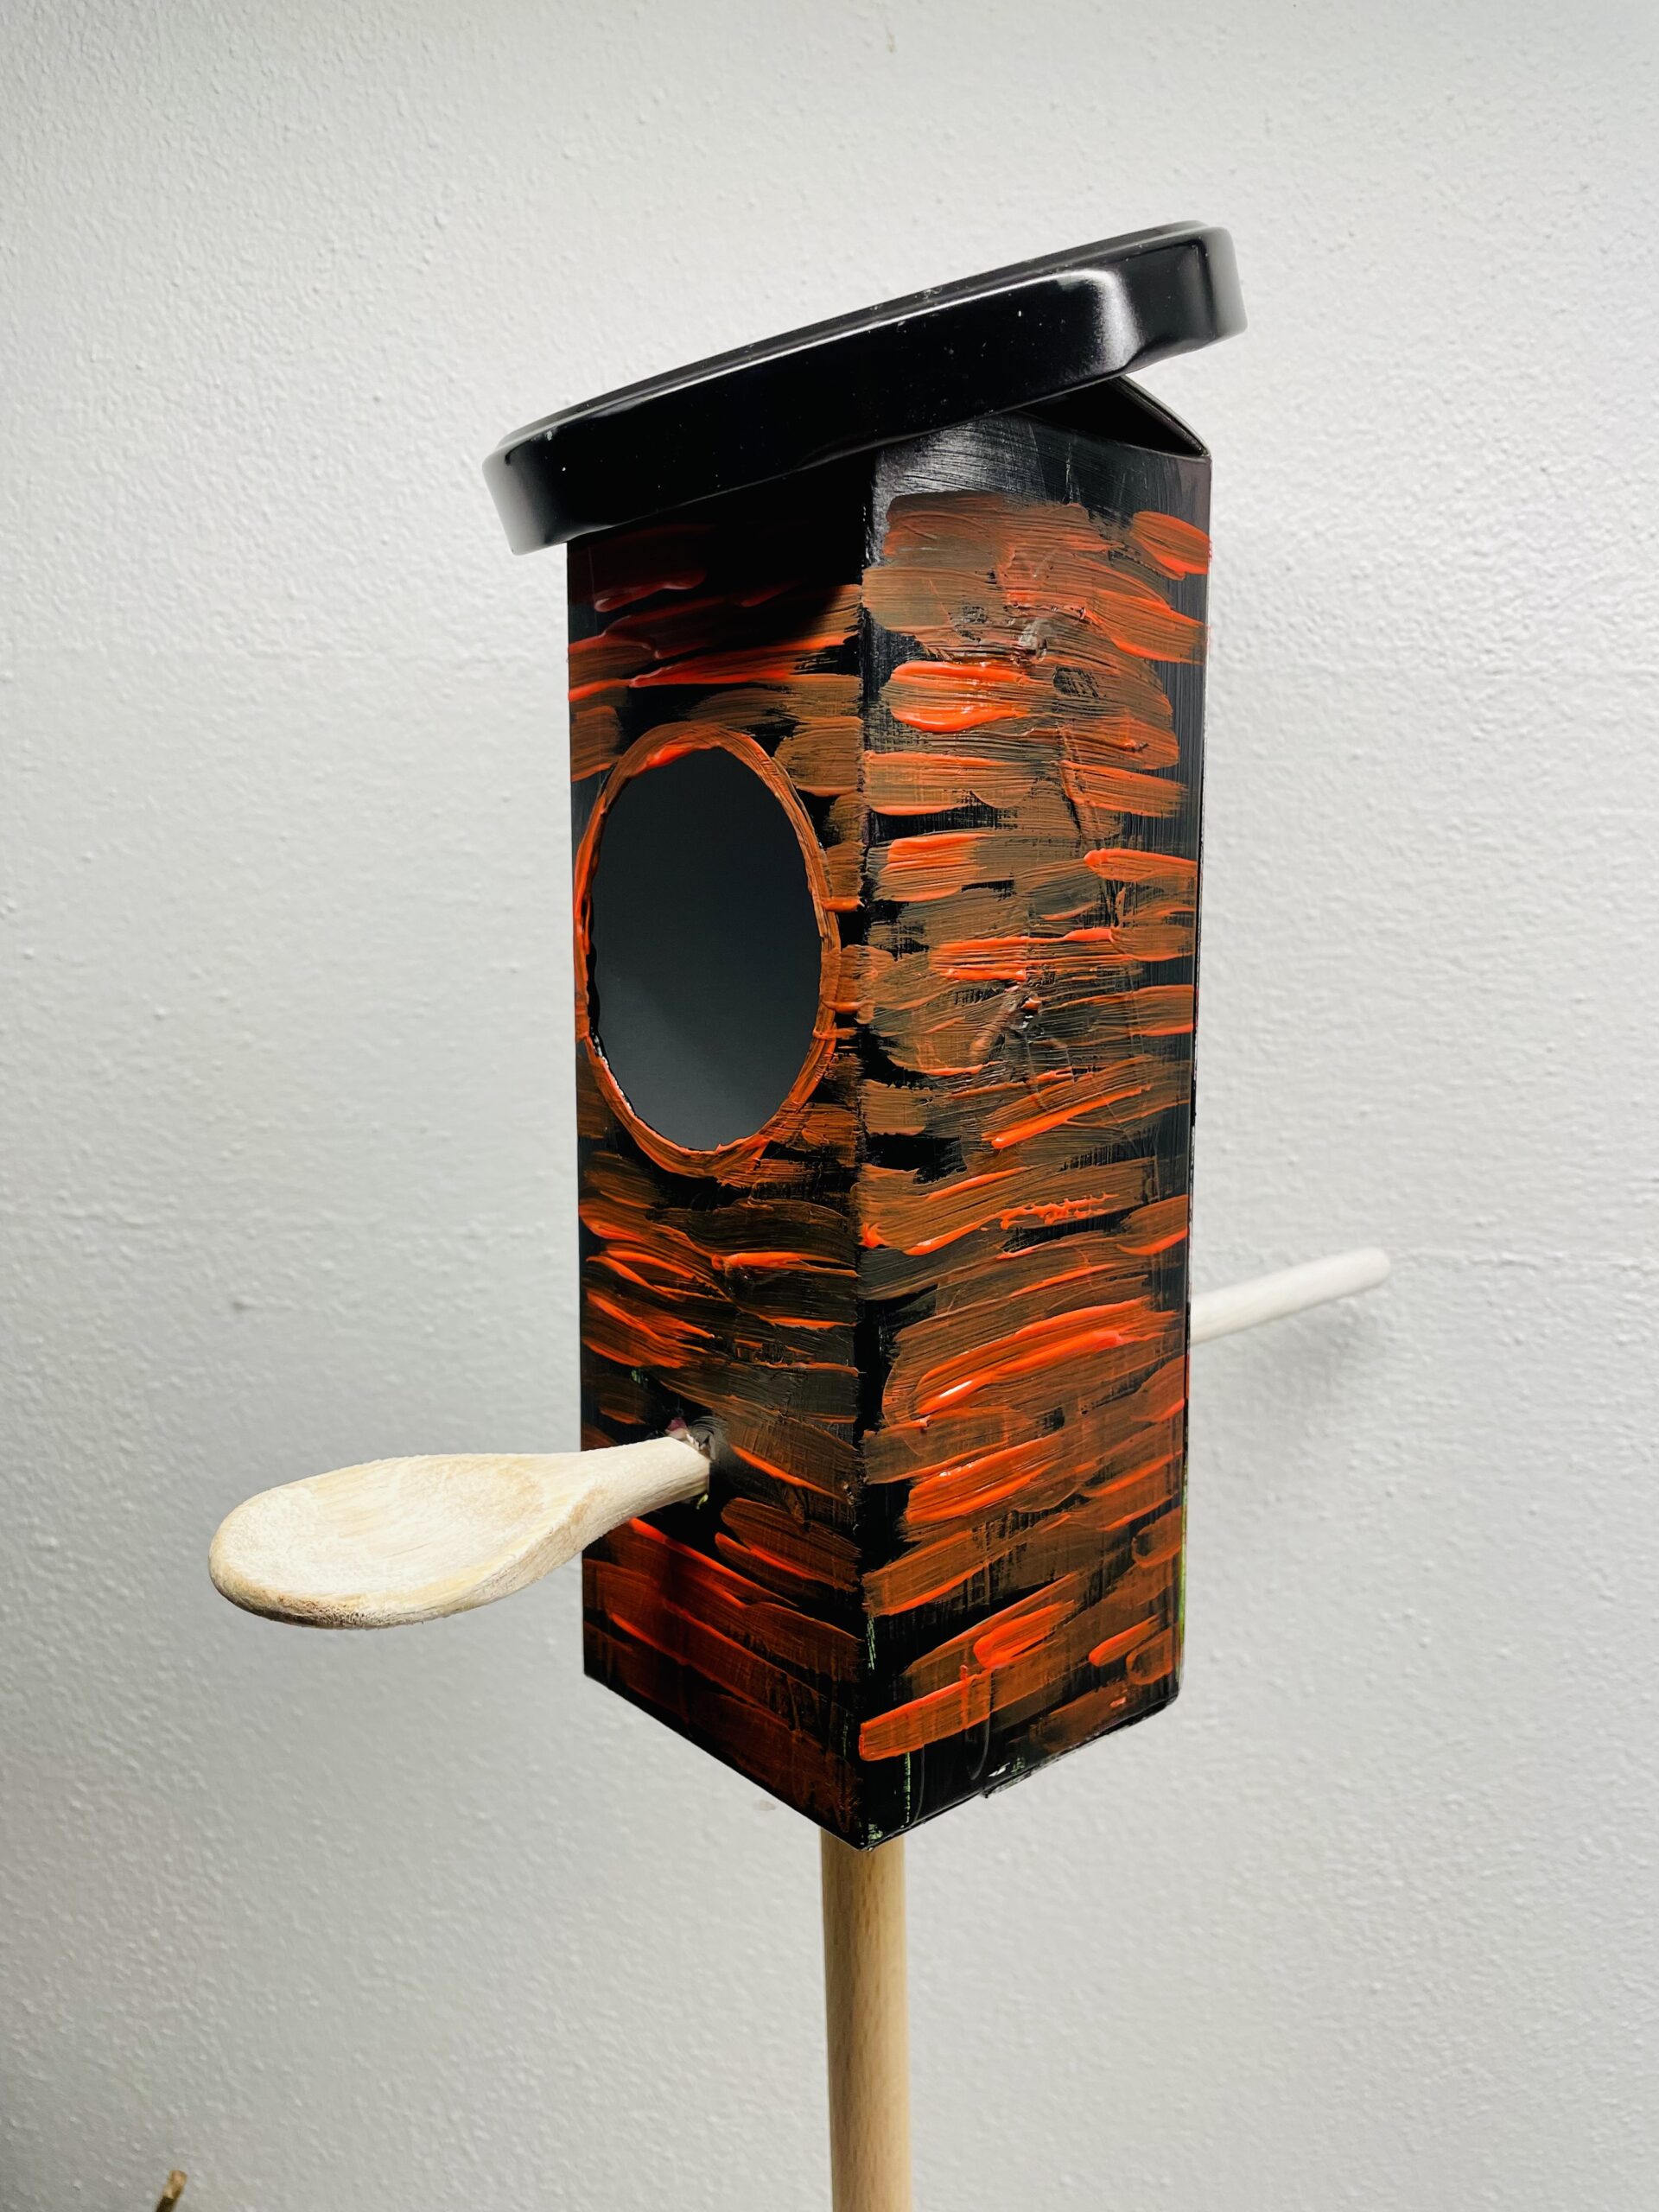
Bild zum Schritt 13 für das Bastel- und DIY-Abenteuer für Kinder: 'Fertig ist das selbstgebaute Vogelhaus.'

14

Find a place to stand up.
Due to the use of very robust materials, the birdhouse is safe for some time weatherproof.
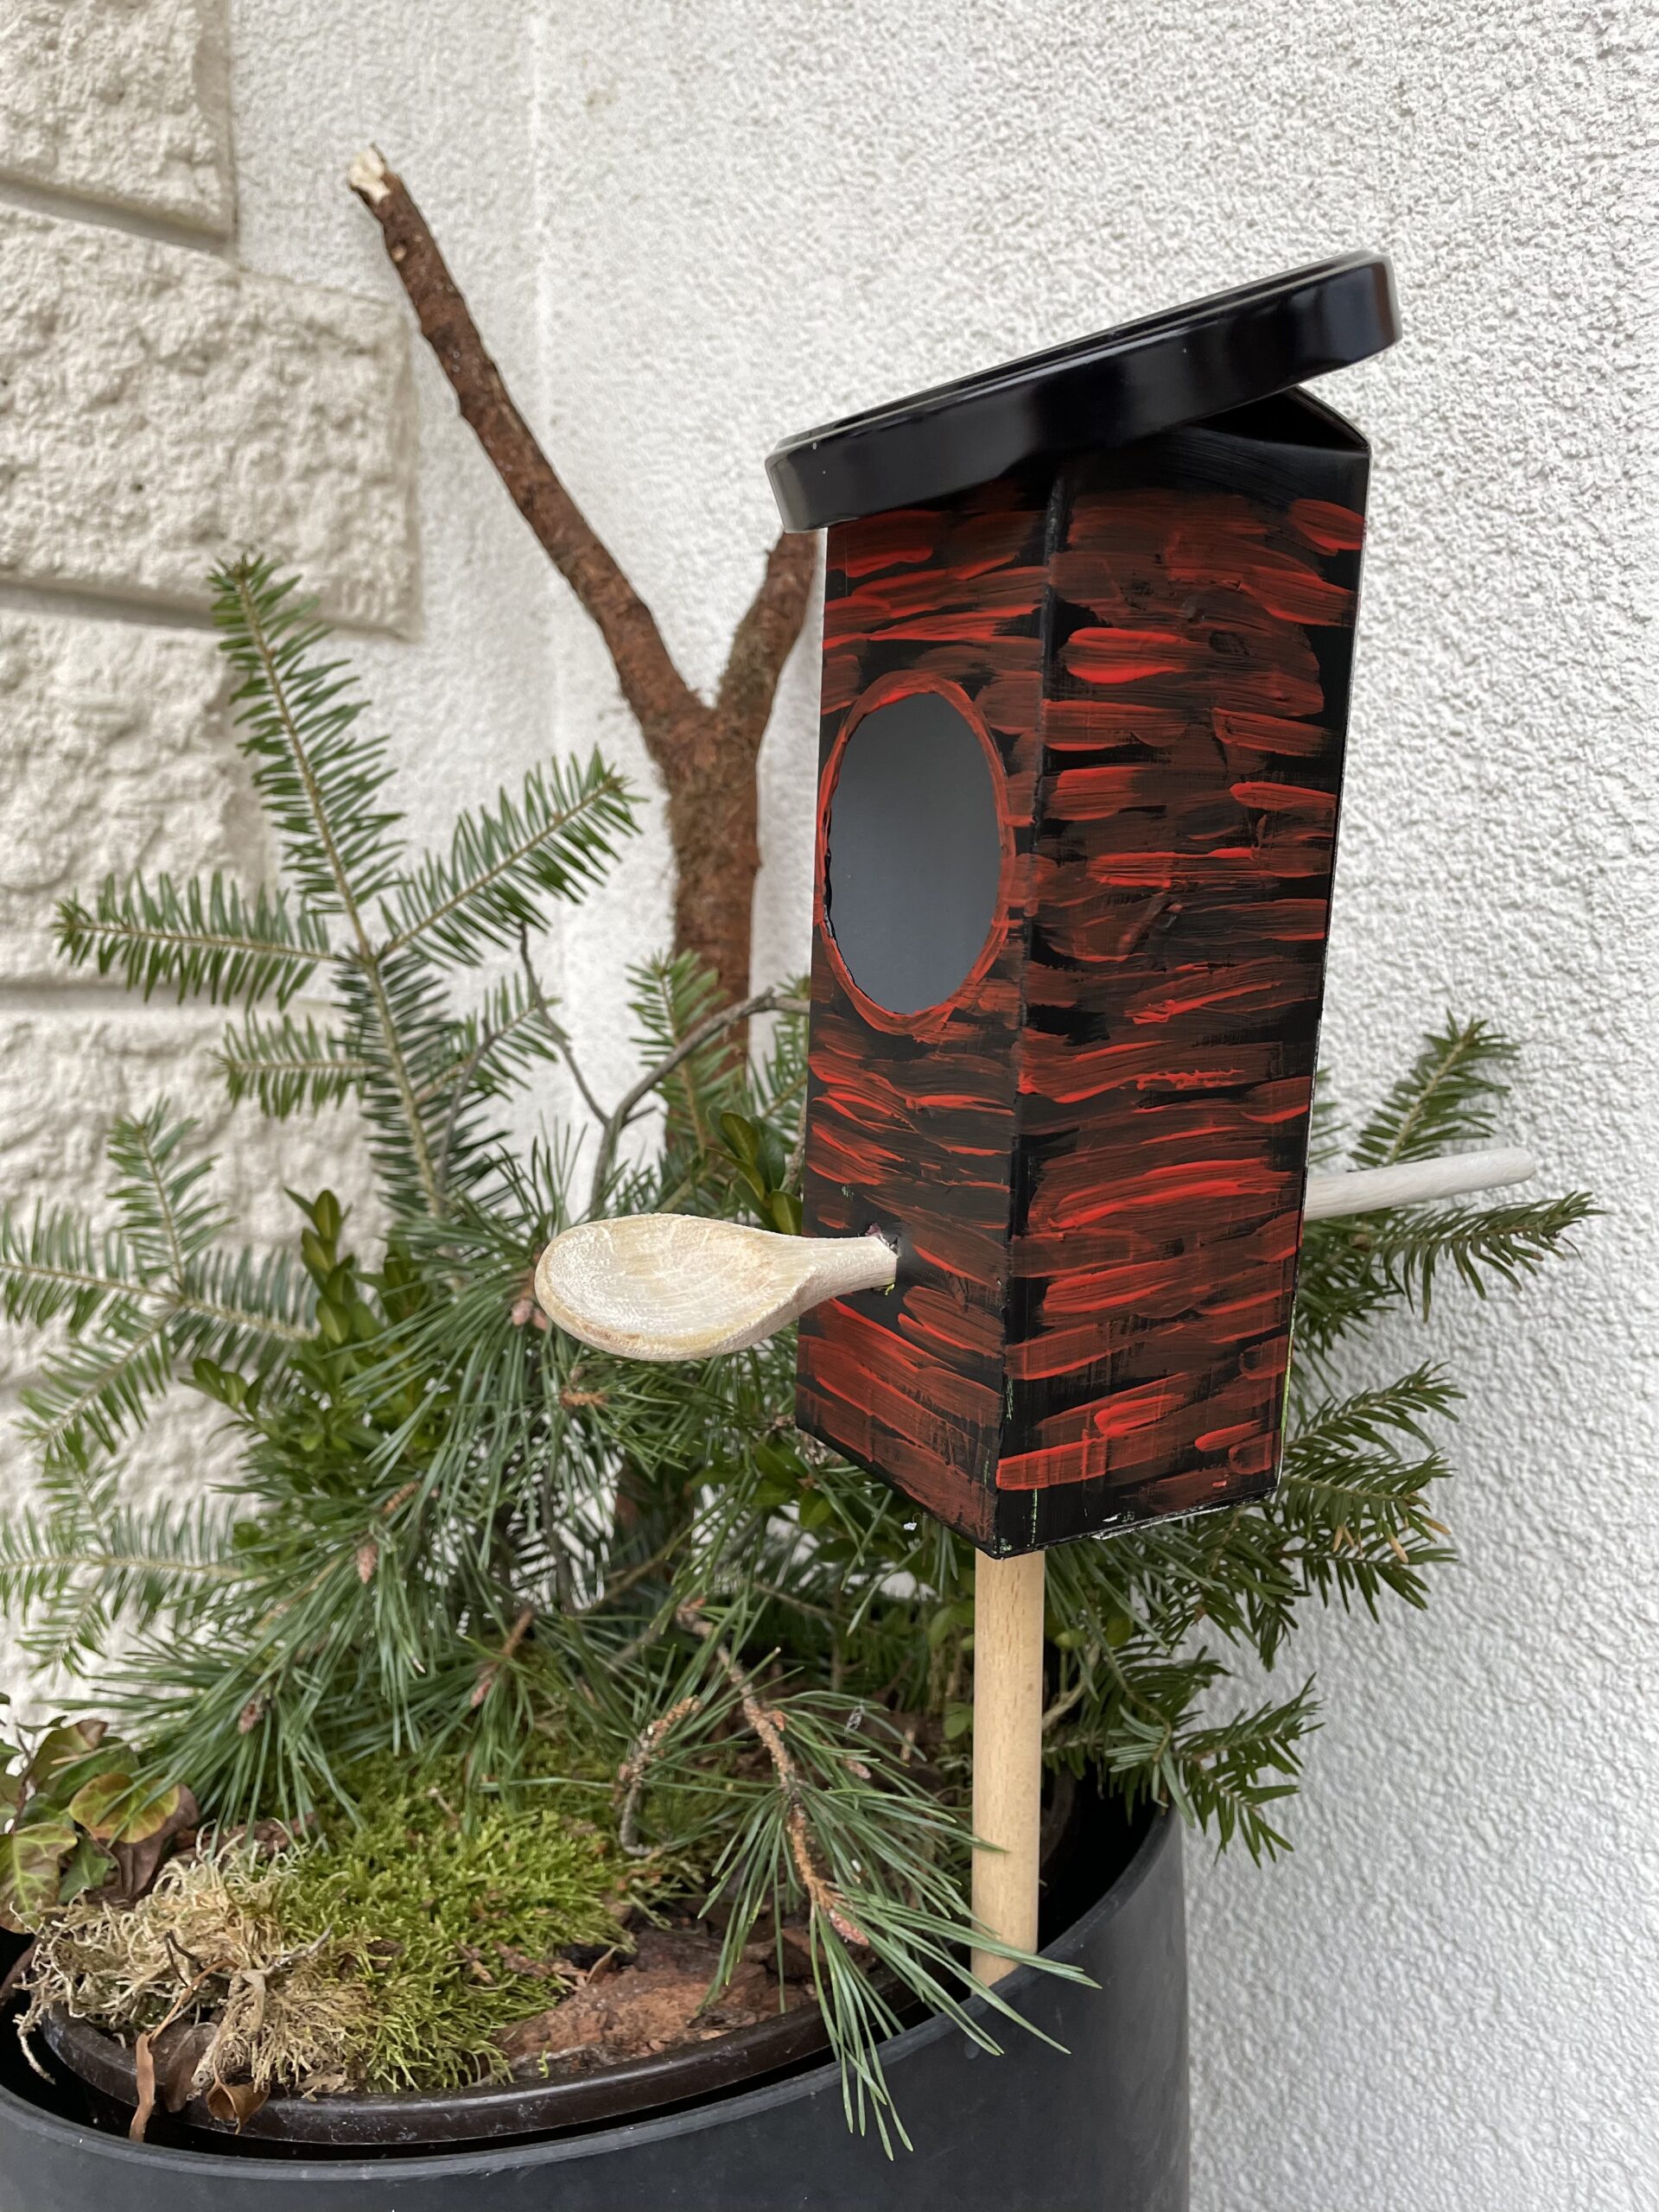
Bild zum Schritt 14 für das Bastel- und DIY-Abenteuer für Kinder: 'Sucht euch einen Platz zum Aufstellen.    Durch...'

15

In a protected place, the birdhouse is also suitable for outdoor use.

Bild zum Schritt 15 für das Bastel- und DIY-Abenteuer für Kinder: 'An einem geschützten Platz ist das Vogelhaus auch für draußen...'

16

Have fun trying it out!

Building standing birdhouse

Follow us on Facebook , Instagram and Pinterest
Don't miss any more adventures: Our bottle mail

Leave a Reply

Your email address will not be published.

The maximum upload file size: 5 MB. You can upload: image, document. Drop file here