Stars made of cardboard roll

AdventurerKatzi
Rating0.01.3 thousand times & (0) DifficultyAdvanced

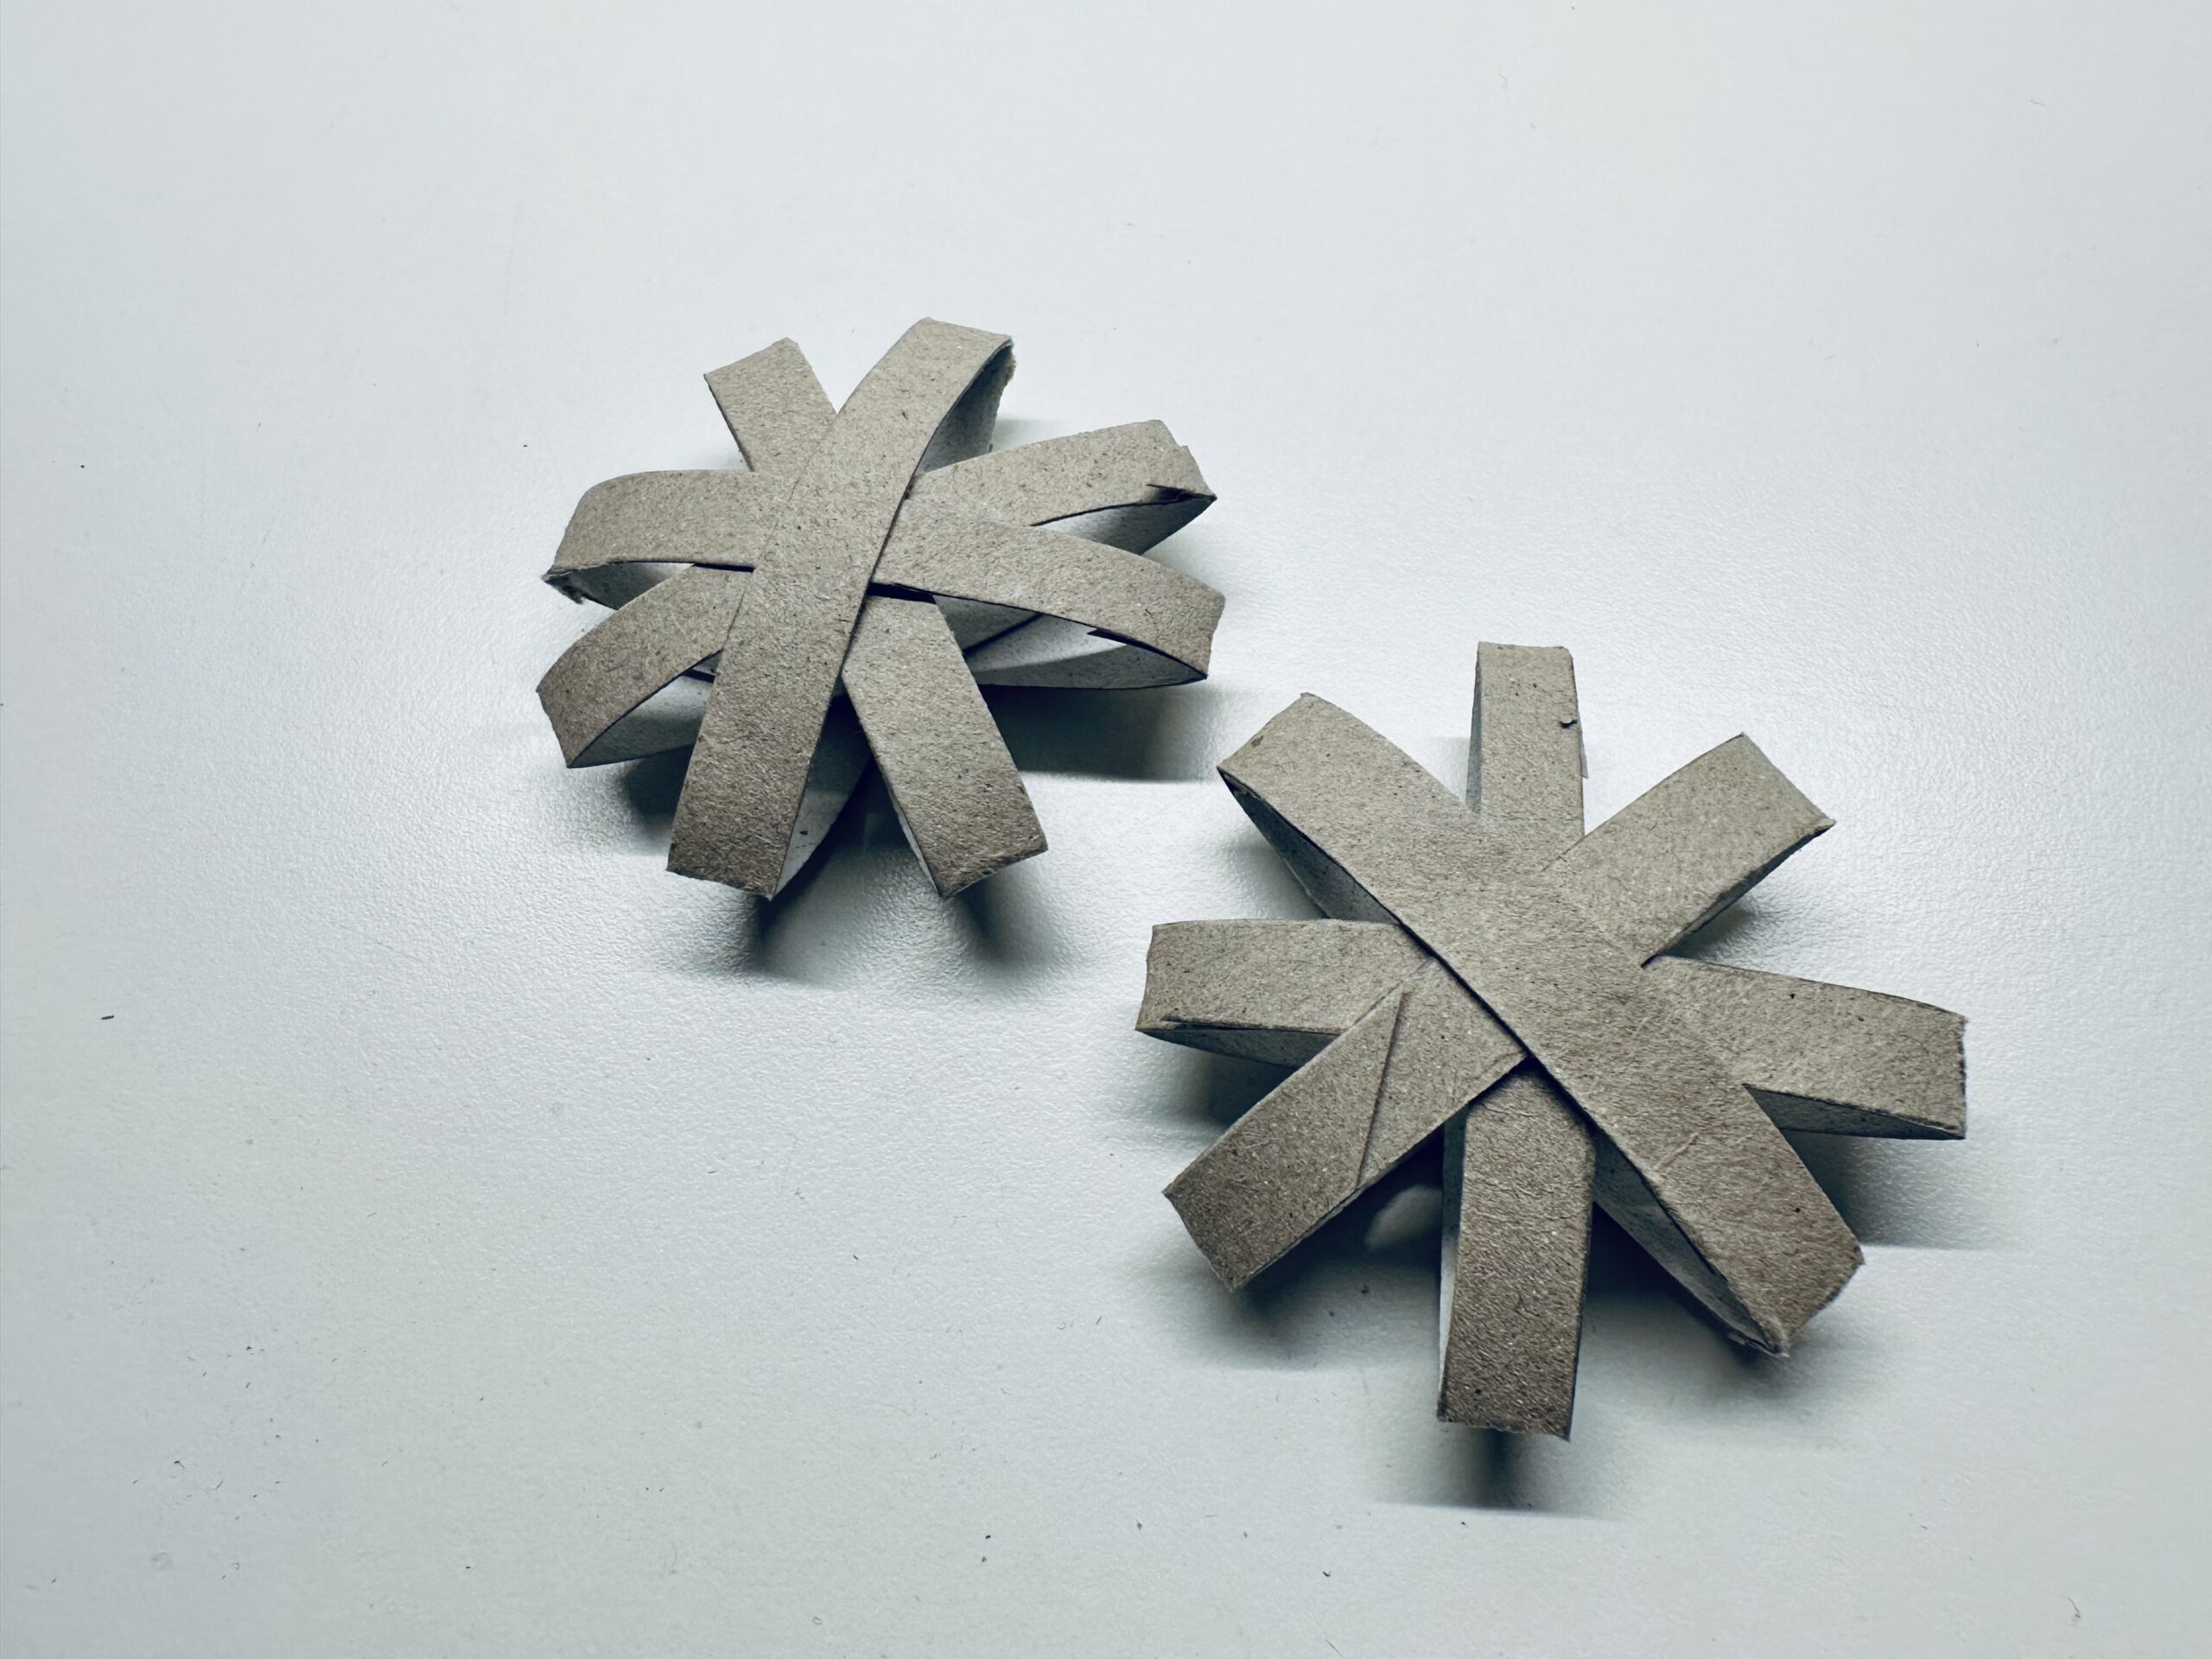
This upcycle project does not need much material. With a cardboard roll (kloroll or kitchen roll) the material is already complete. Stripes are cut, which are then put together as stars and glued together.

Media Education for Kindergarten and Hort

Kind bastelt eine Rassel mit dem Navi
The Adventure Navi, the app for DIY projects, enables media education for the youngest.

Relief in everyday life, targeted promotion of individual children, independent learning and - without any pre-knowledge already usable by the youngest!
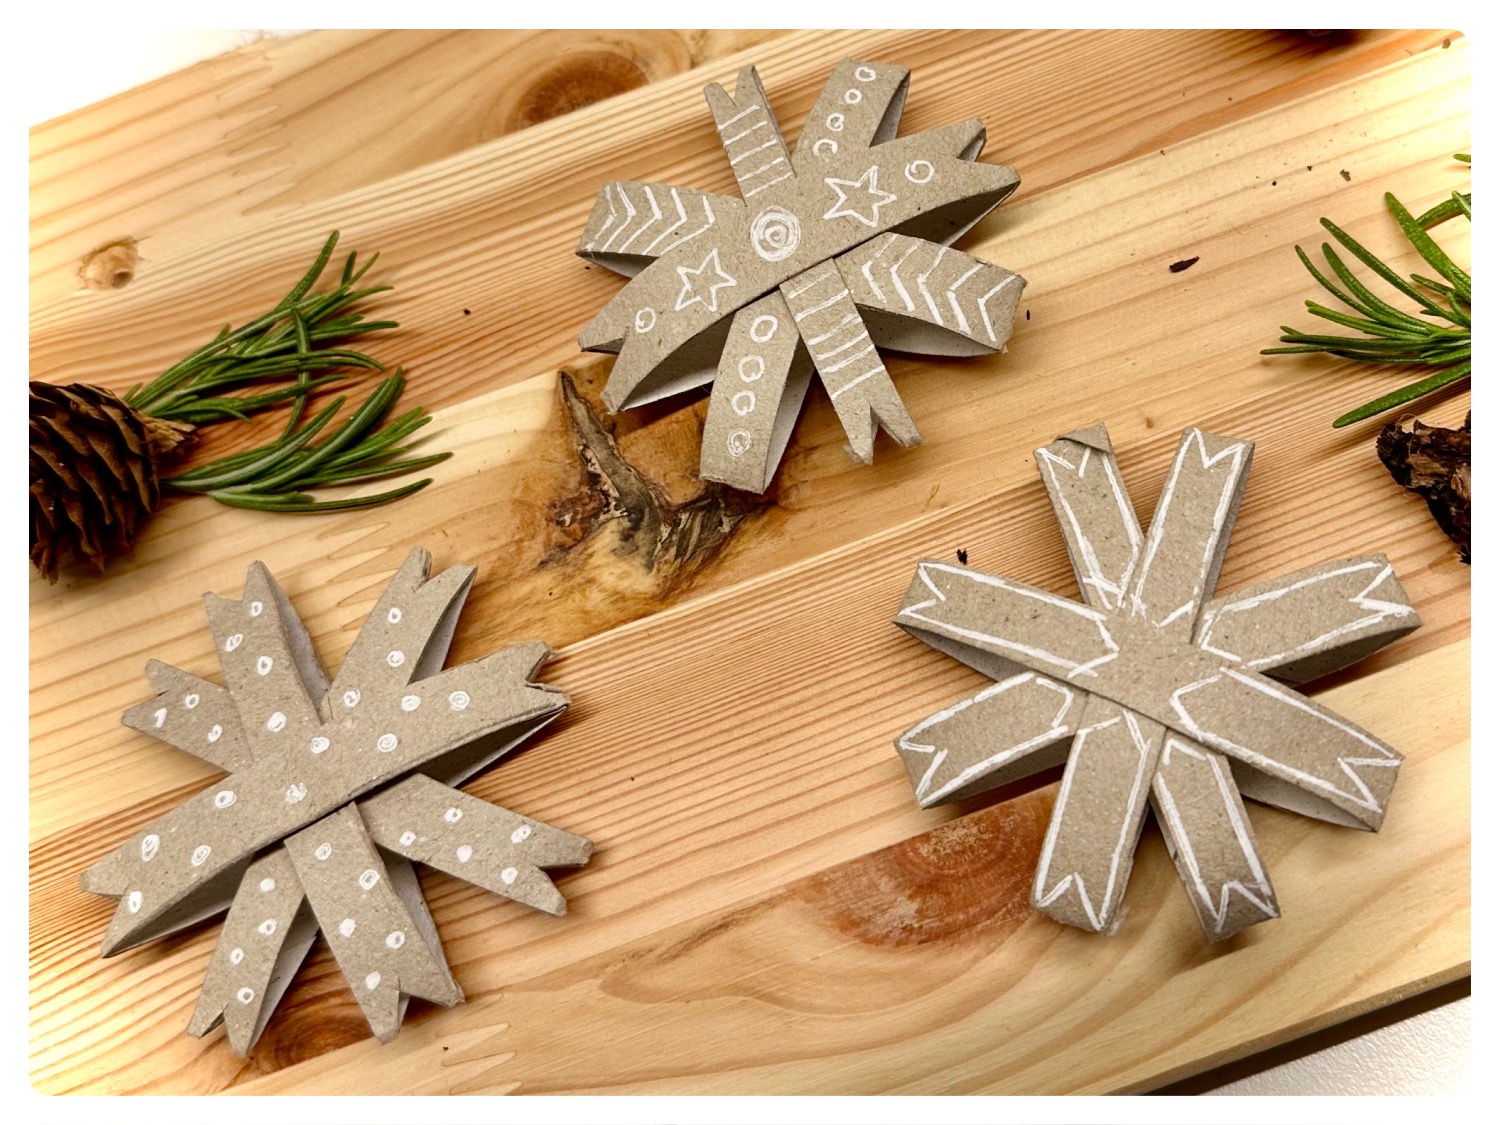


Titelbild zur Bastel- und DIY-Idee für Kinder '(253) Sterne aus Papprolle'
Material for1 Child
Prep Time5 min.Adv. Time20 min.Total Time25 min.
 1 Rolled paperToilet roll or kitchen roll
 1 Glue
 1 Pencil
 1 Ruler
 1 Felt pen/paint penWhite or gold/silver
 1 Builder's pad
All links marked with a shopping cart lead to Amazon - here we have selected products that we would order ourselves and in part also ordered. In a qualified purchase via the advertising link, we as Amazon partner receive a commission, for you there are no costs. You thus support our cost- and advertising banner-free, educational offer.
1

Put your craft pad on the table and all the craft materials.
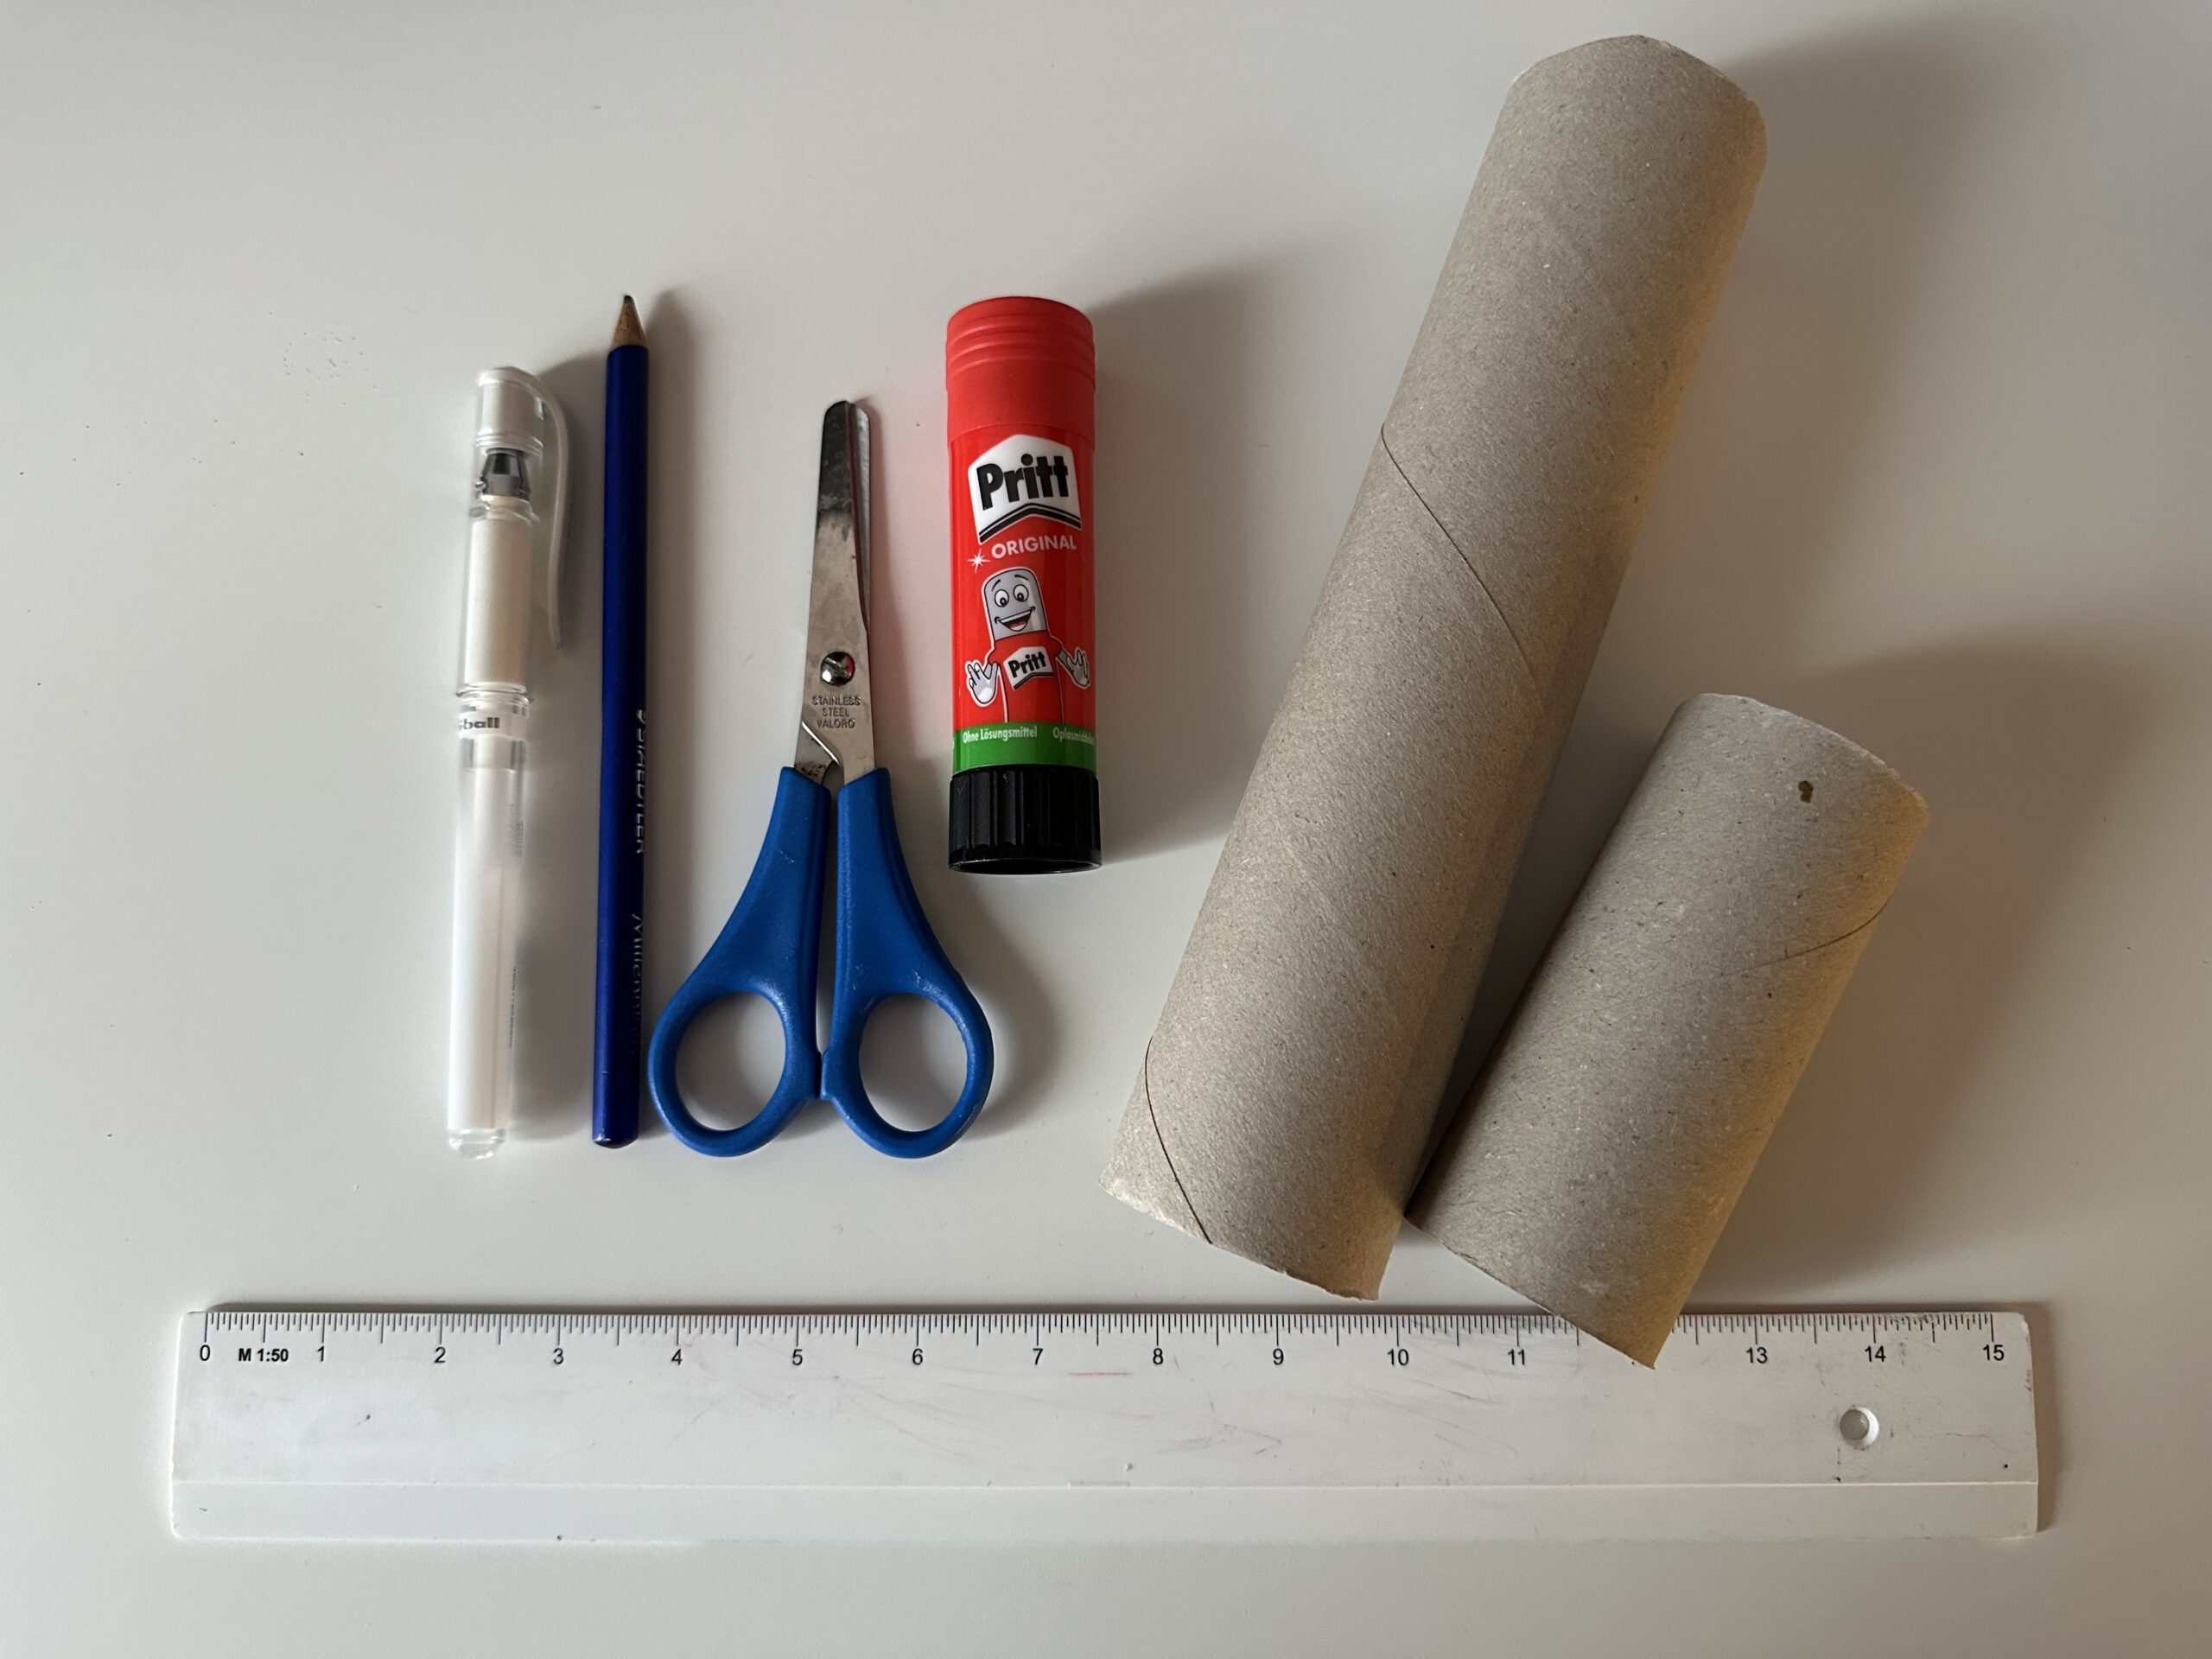
Bild zum Schritt 1 für das Bastel- und DIY-Abenteuer für Kinder: 'Legt euch eure Bastelunterlage auf den Tisch und alle Bastelmaterialien...'

2

Place the cardboard roll on the table and flatten it with the flat hand.
Now take a ruler and put it on the cardboard roll.
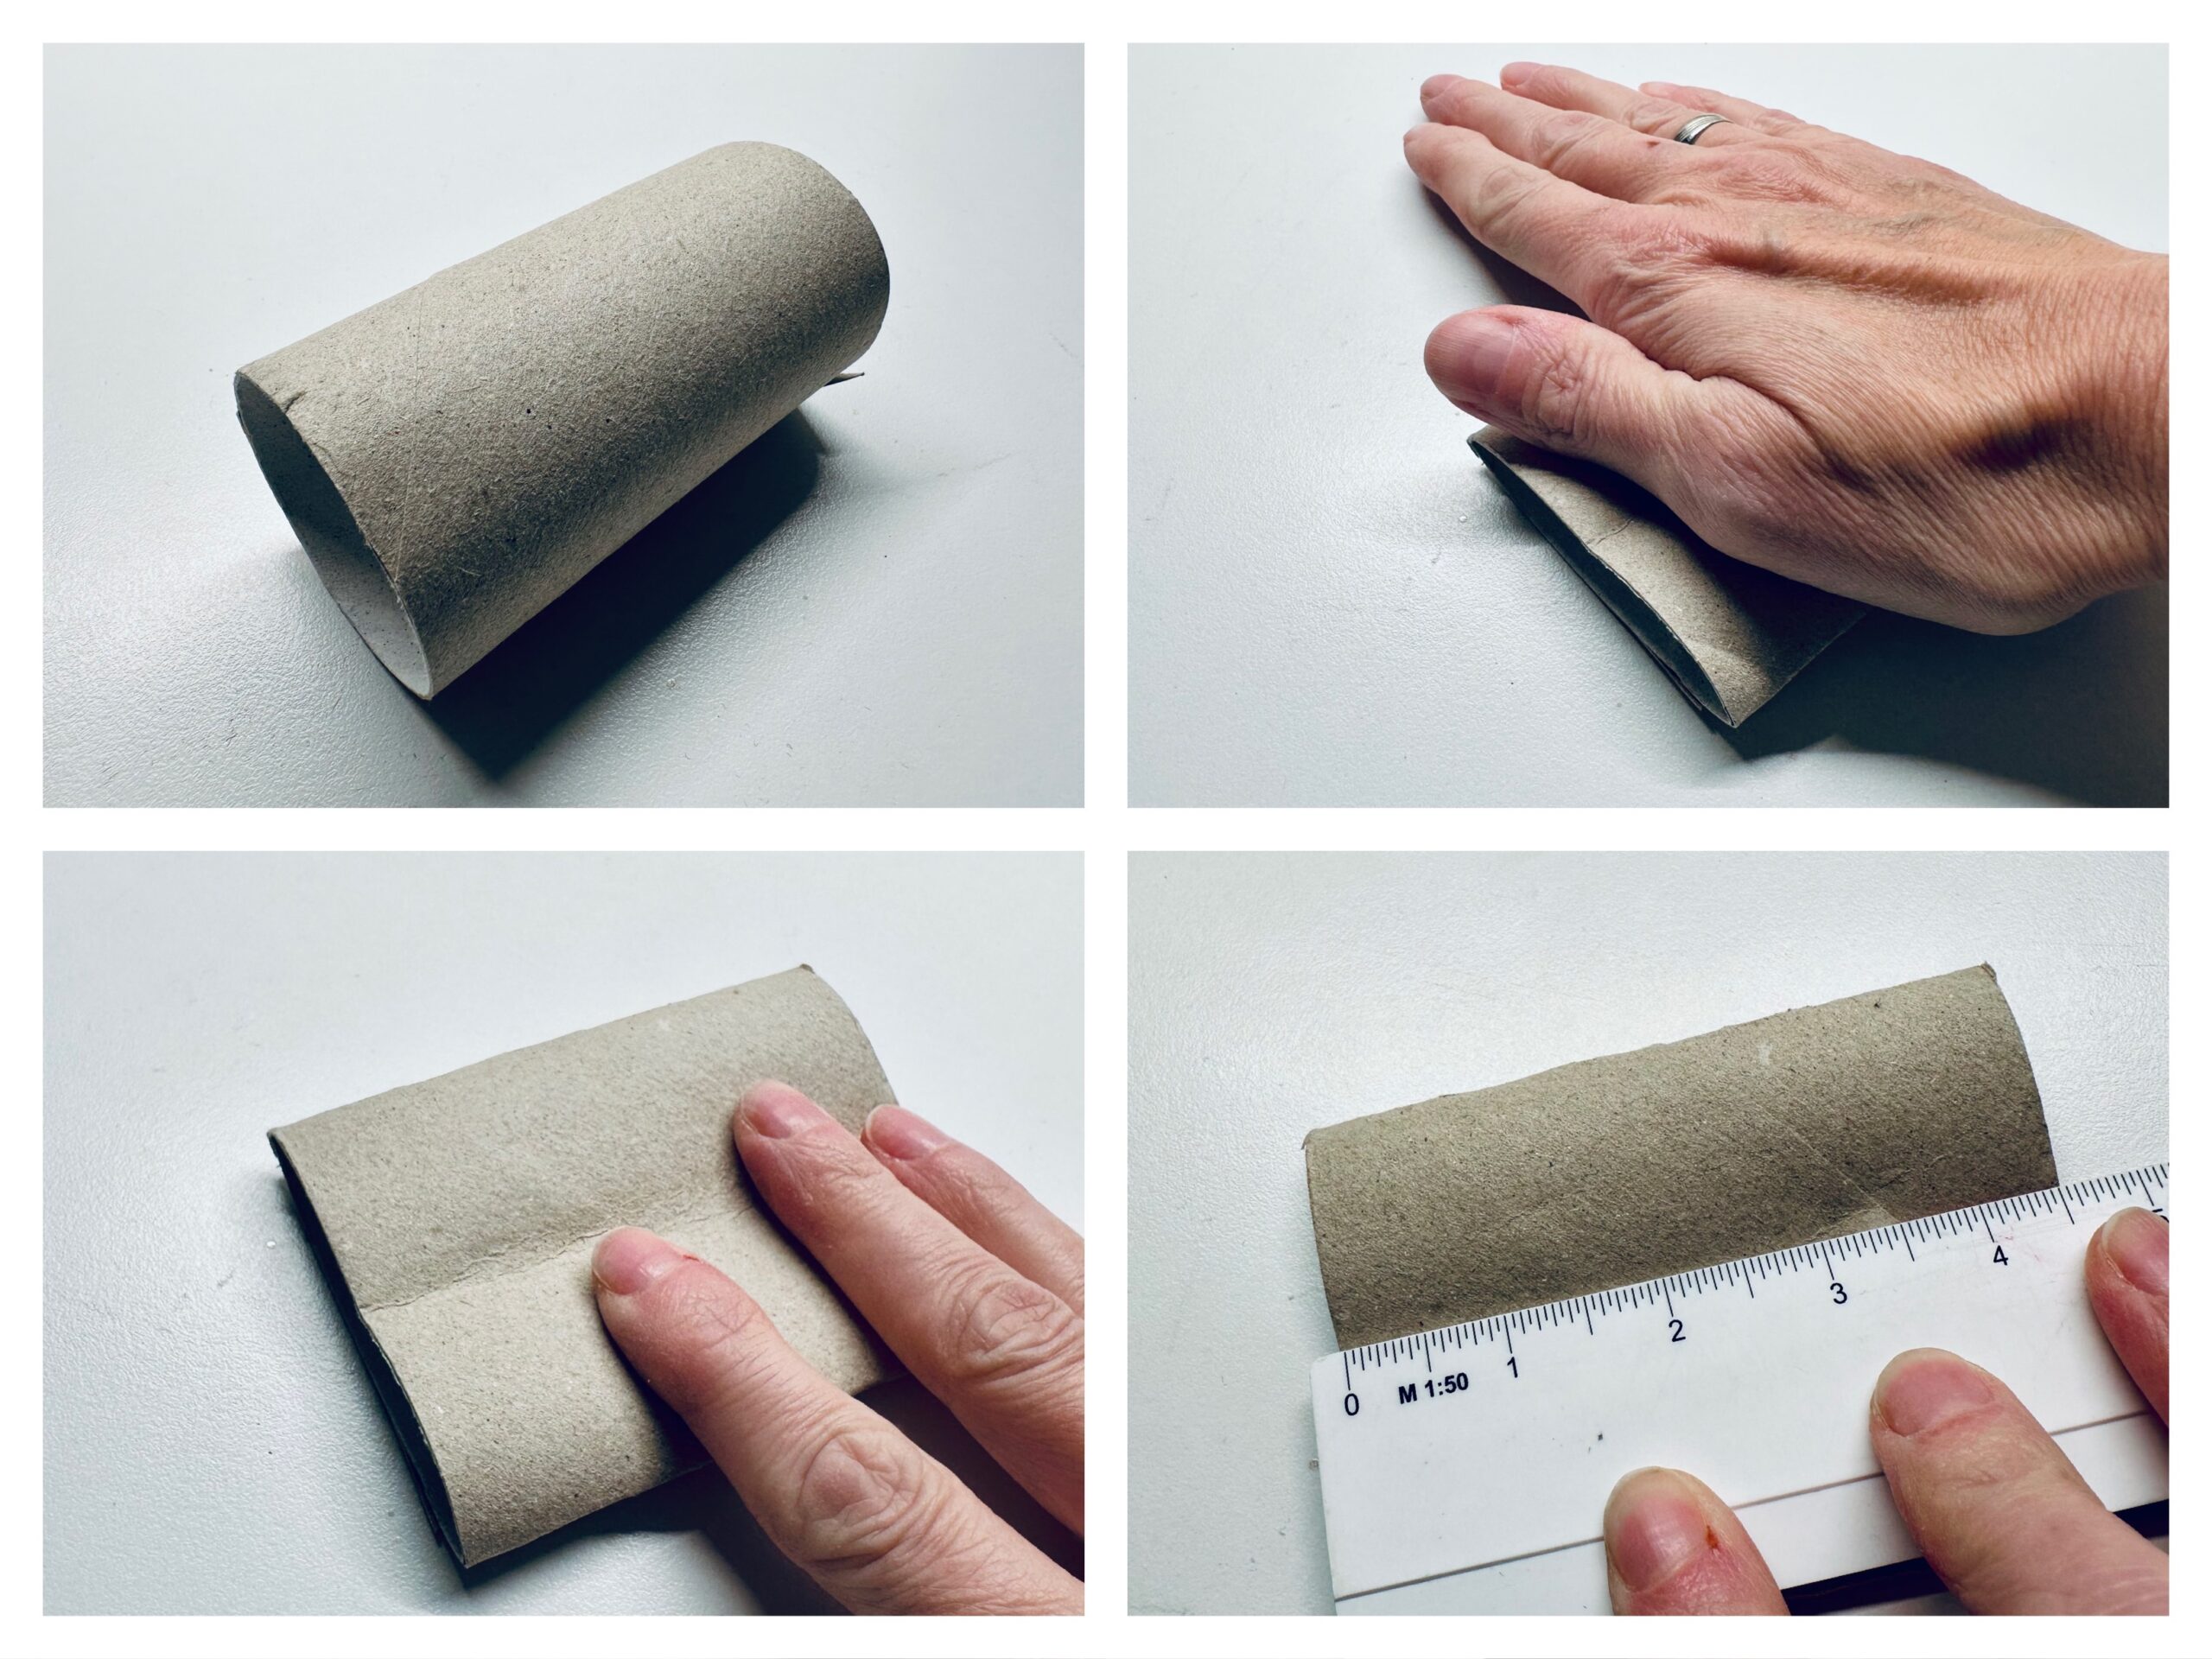
Bild zum Schritt 2 für das Bastel- und DIY-Abenteuer für Kinder: 'Legt die Papprolle auf den Tisch und drückt sie mit...'

3

Measures even stripes with the ruler. These can be 1-1.5 cm wide. Draw marks first and then draw even strokes on the roll. Cut off the stripes with the scissors.

Bild zum Schritt 3 für das Bastel- und DIY-Abenteuer für Kinder: 'Messt mit dem Lineal gleichmäßige Streifen ab. Diese können 1-1,5...'

4

For a star you need four stripes. First put two stripes together as a cross. A glue point holds the stripes together. Centered on the cross a second adhesive point is made. Insert another cardboard strip diagonally (= oblique) over the cross.

Bild zum Schritt 4 für das Bastel- und DIY-Abenteuer für Kinder: 'Für einen Stern braucht ihr vier Streifen. Steckt zuerst zwei...'

5

Holds the sticky spot briefly. Makes another sticky point again centered on the top of the cardboard strip. Slides another paper strip diagonally over the other strips and the star is finished. Holds the sticky spot still briefly pressed.

Bild zum Schritt 5 für das Bastel- und DIY-Abenteuer für Kinder: 'Haltet die Klebestelle kurz gedrückt. Macht einen weiteren Klebepunkt wieder...'

6

Makes more stars in this way.

Bild zum Schritt 6 für das Bastel- und DIY-Abenteuer für Kinder: 'Bastelt auf diese Weise weitere Sterne.'

7

At the startips you can cut small points. Paint them with a pencil and then cut them out with scissors.
Important: Make sure that something "stands" from the paper edge on the outside. Otherwise, the star falls apart.

Bild zum Schritt 7 für das Bastel- und DIY-Abenteuer für Kinder: 'An den Sternspitzen könnt ihr noch kleine Zacken einschneiden. Malt...'

8

You can decorate each star with a white/golden or different coloured felt or varnish pen.

Bild zum Schritt 8 für das Bastel- und DIY-Abenteuer für Kinder: 'Jeden Stern könnt ihr mit einem weißen/ goldenen oder andersfarbigen...'

9

Think of your own patterns and beautify the stars as you like.

Bild zum Schritt 9 für das Bastel- und DIY-Abenteuer für Kinder: 'Lasst euch eigene Muster einfallen und verschönert die Sterne wie...'

10

The stars are also very pretty as gift pendants.

Bild zum Schritt 10 für das Bastel- und DIY-Abenteuer für Kinder: 'Die Sterne sind auch als Geschenkanhänger sehr hübsch.'

11

Also as jewelry for the Christmas tree a great occupation for children.

Materials

 1 Rolled paperToilet roll or kitchen roll
 1 Glue
 1 Pencil
 1 Ruler
 1 Felt pen/paint penWhite or gold/silver
 1 Builder's pad
All links marked with a shopping cart lead to Amazon - here we have selected products that we would order ourselves and in part also ordered. In a qualified purchase via the advertising link, we as Amazon partner receive a commission, for you there are no costs. You thus support our cost- and advertising banner-free, educational offer.

Directions

1

Put your craft pad on the table and all the craft materials.

Bild zum Schritt 1 für das Bastel- und DIY-Abenteuer für Kinder: 'Legt euch eure Bastelunterlage auf den Tisch und alle Bastelmaterialien...'

2

Place the cardboard roll on the table and flatten it with the flat hand.
Now take a ruler and put it on the cardboard roll.

Bild zum Schritt 2 für das Bastel- und DIY-Abenteuer für Kinder: 'Legt die Papprolle auf den Tisch und drückt sie mit...'

3

Measures even stripes with the ruler. These can be 1-1.5 cm wide. Draw marks first and then draw even strokes on the roll. Cut off the stripes with the scissors.
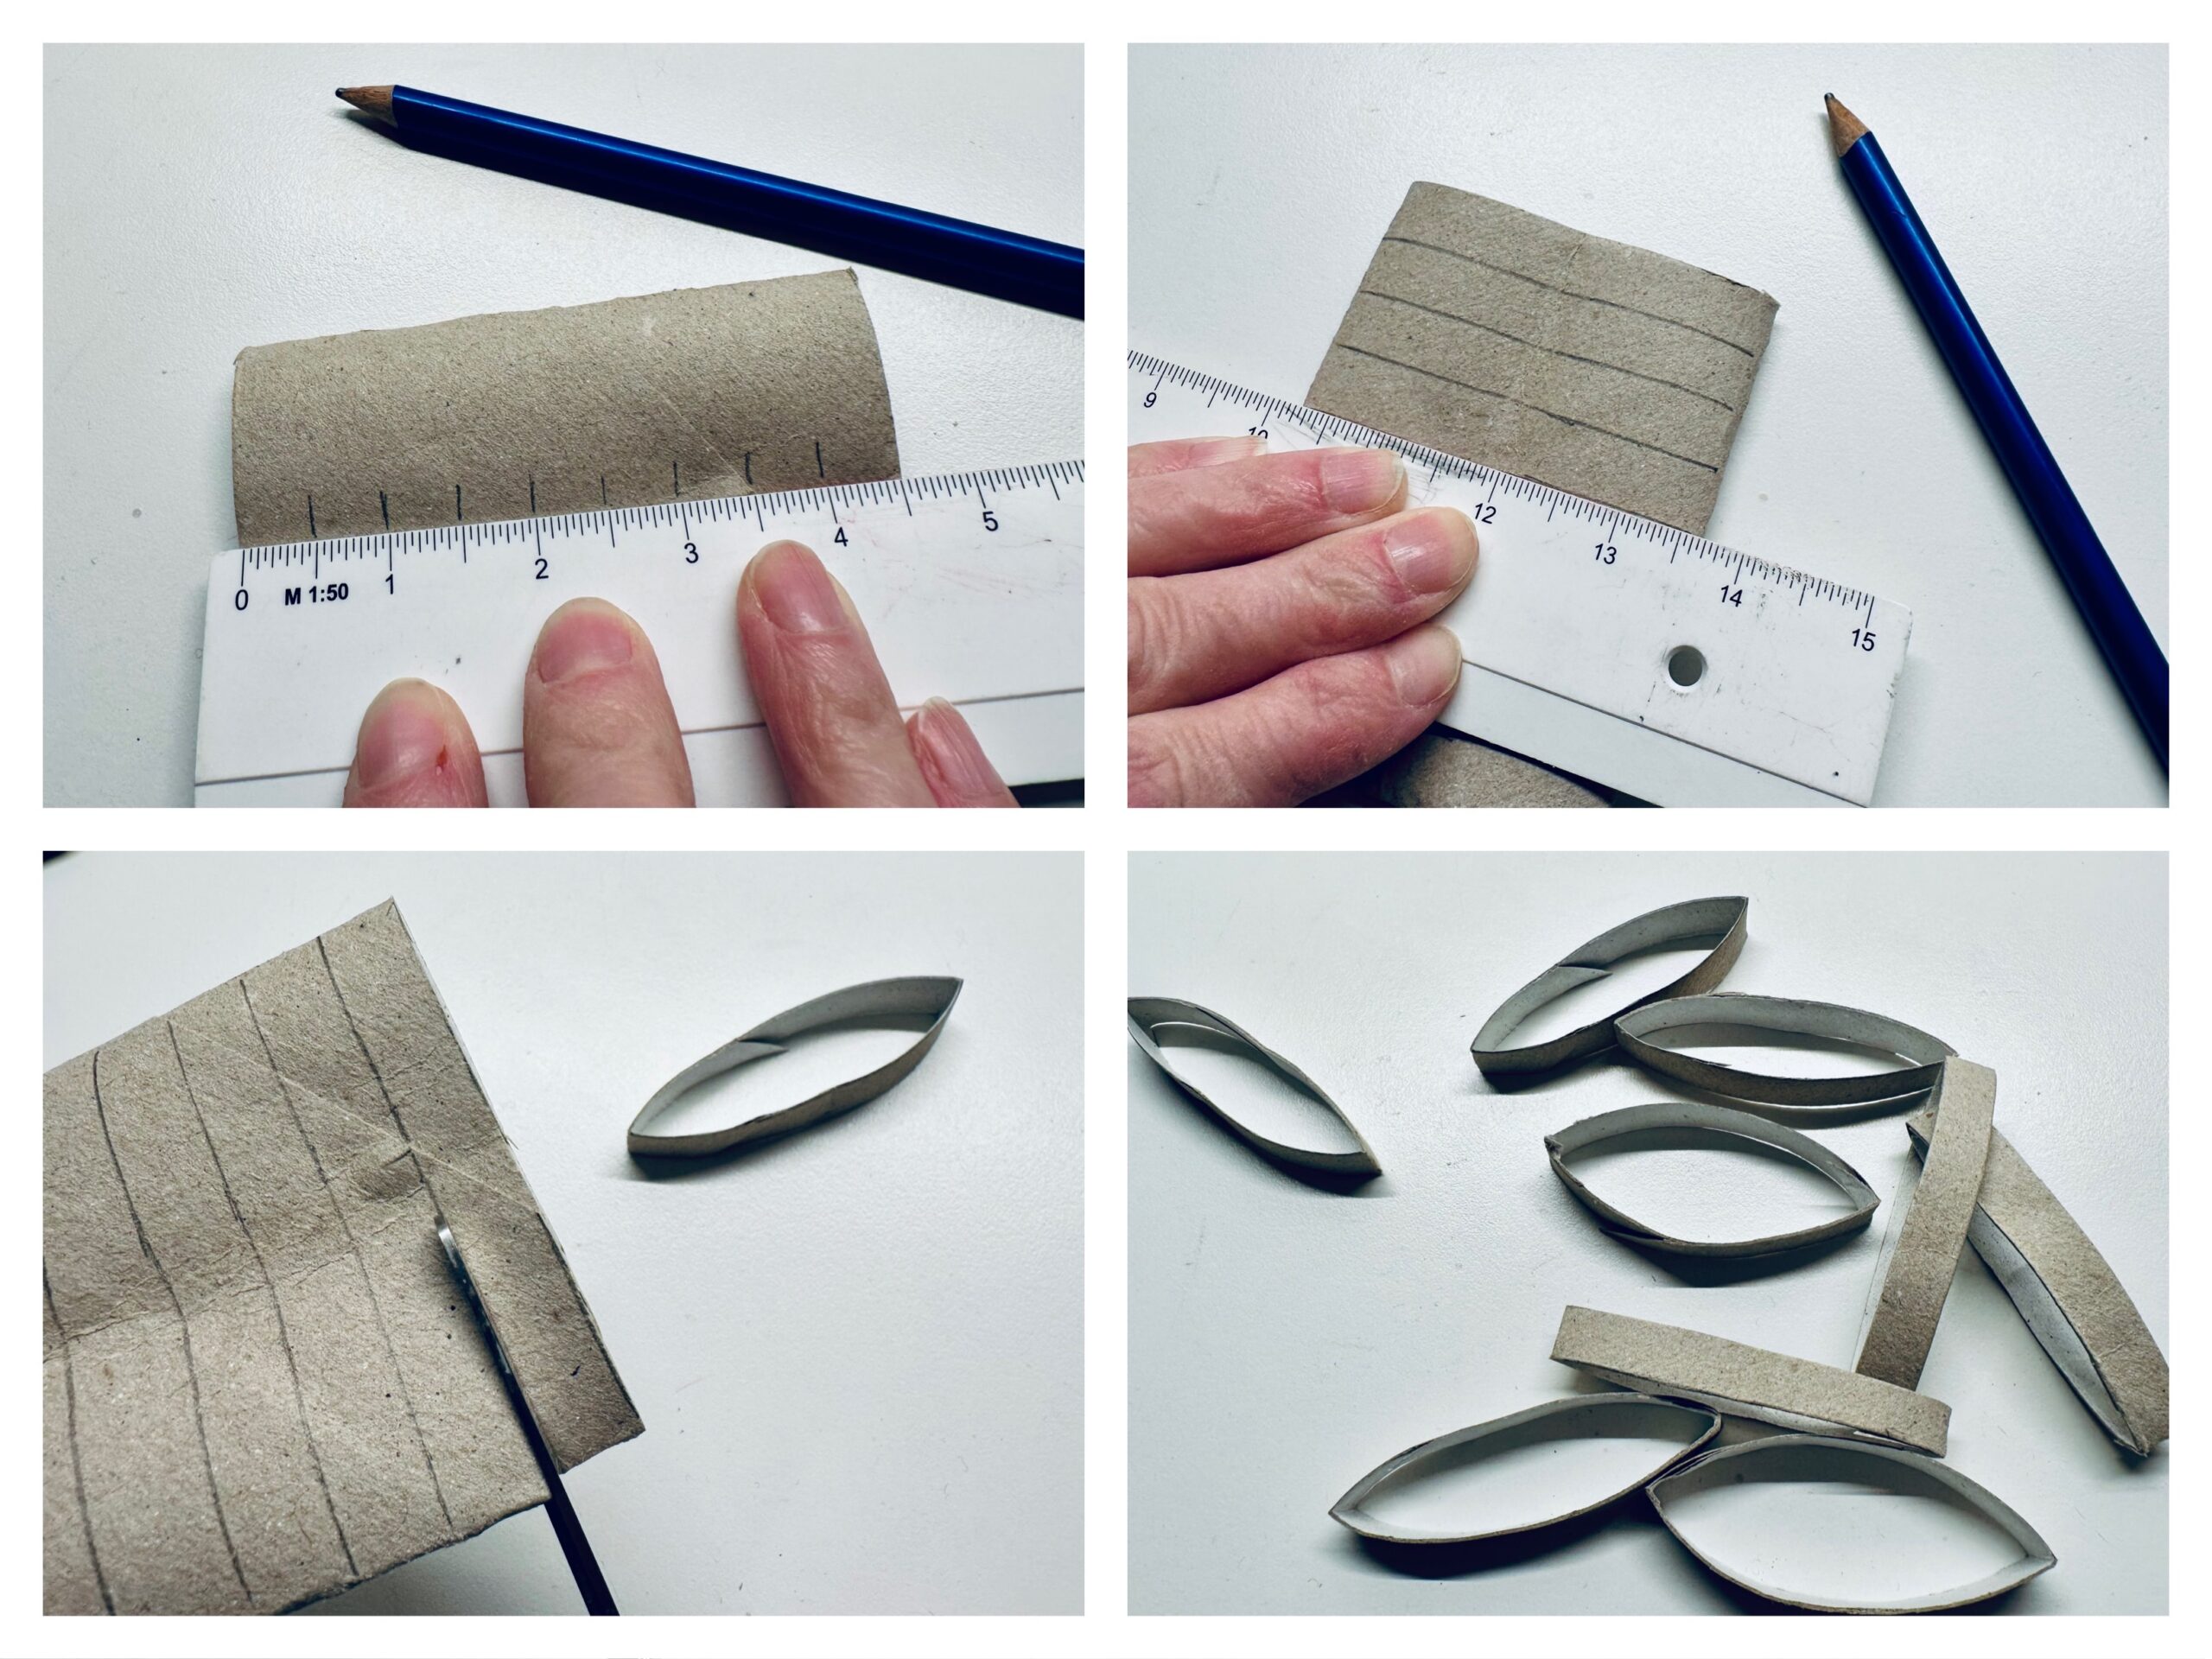
Bild zum Schritt 3 für das Bastel- und DIY-Abenteuer für Kinder: 'Messt mit dem Lineal gleichmäßige Streifen ab. Diese können 1-1,5...'

4

For a star you need four stripes. First put two stripes together as a cross. A glue point holds the stripes together. Centered on the cross a second adhesive point is made. Insert another cardboard strip diagonally (= oblique) over the cross.
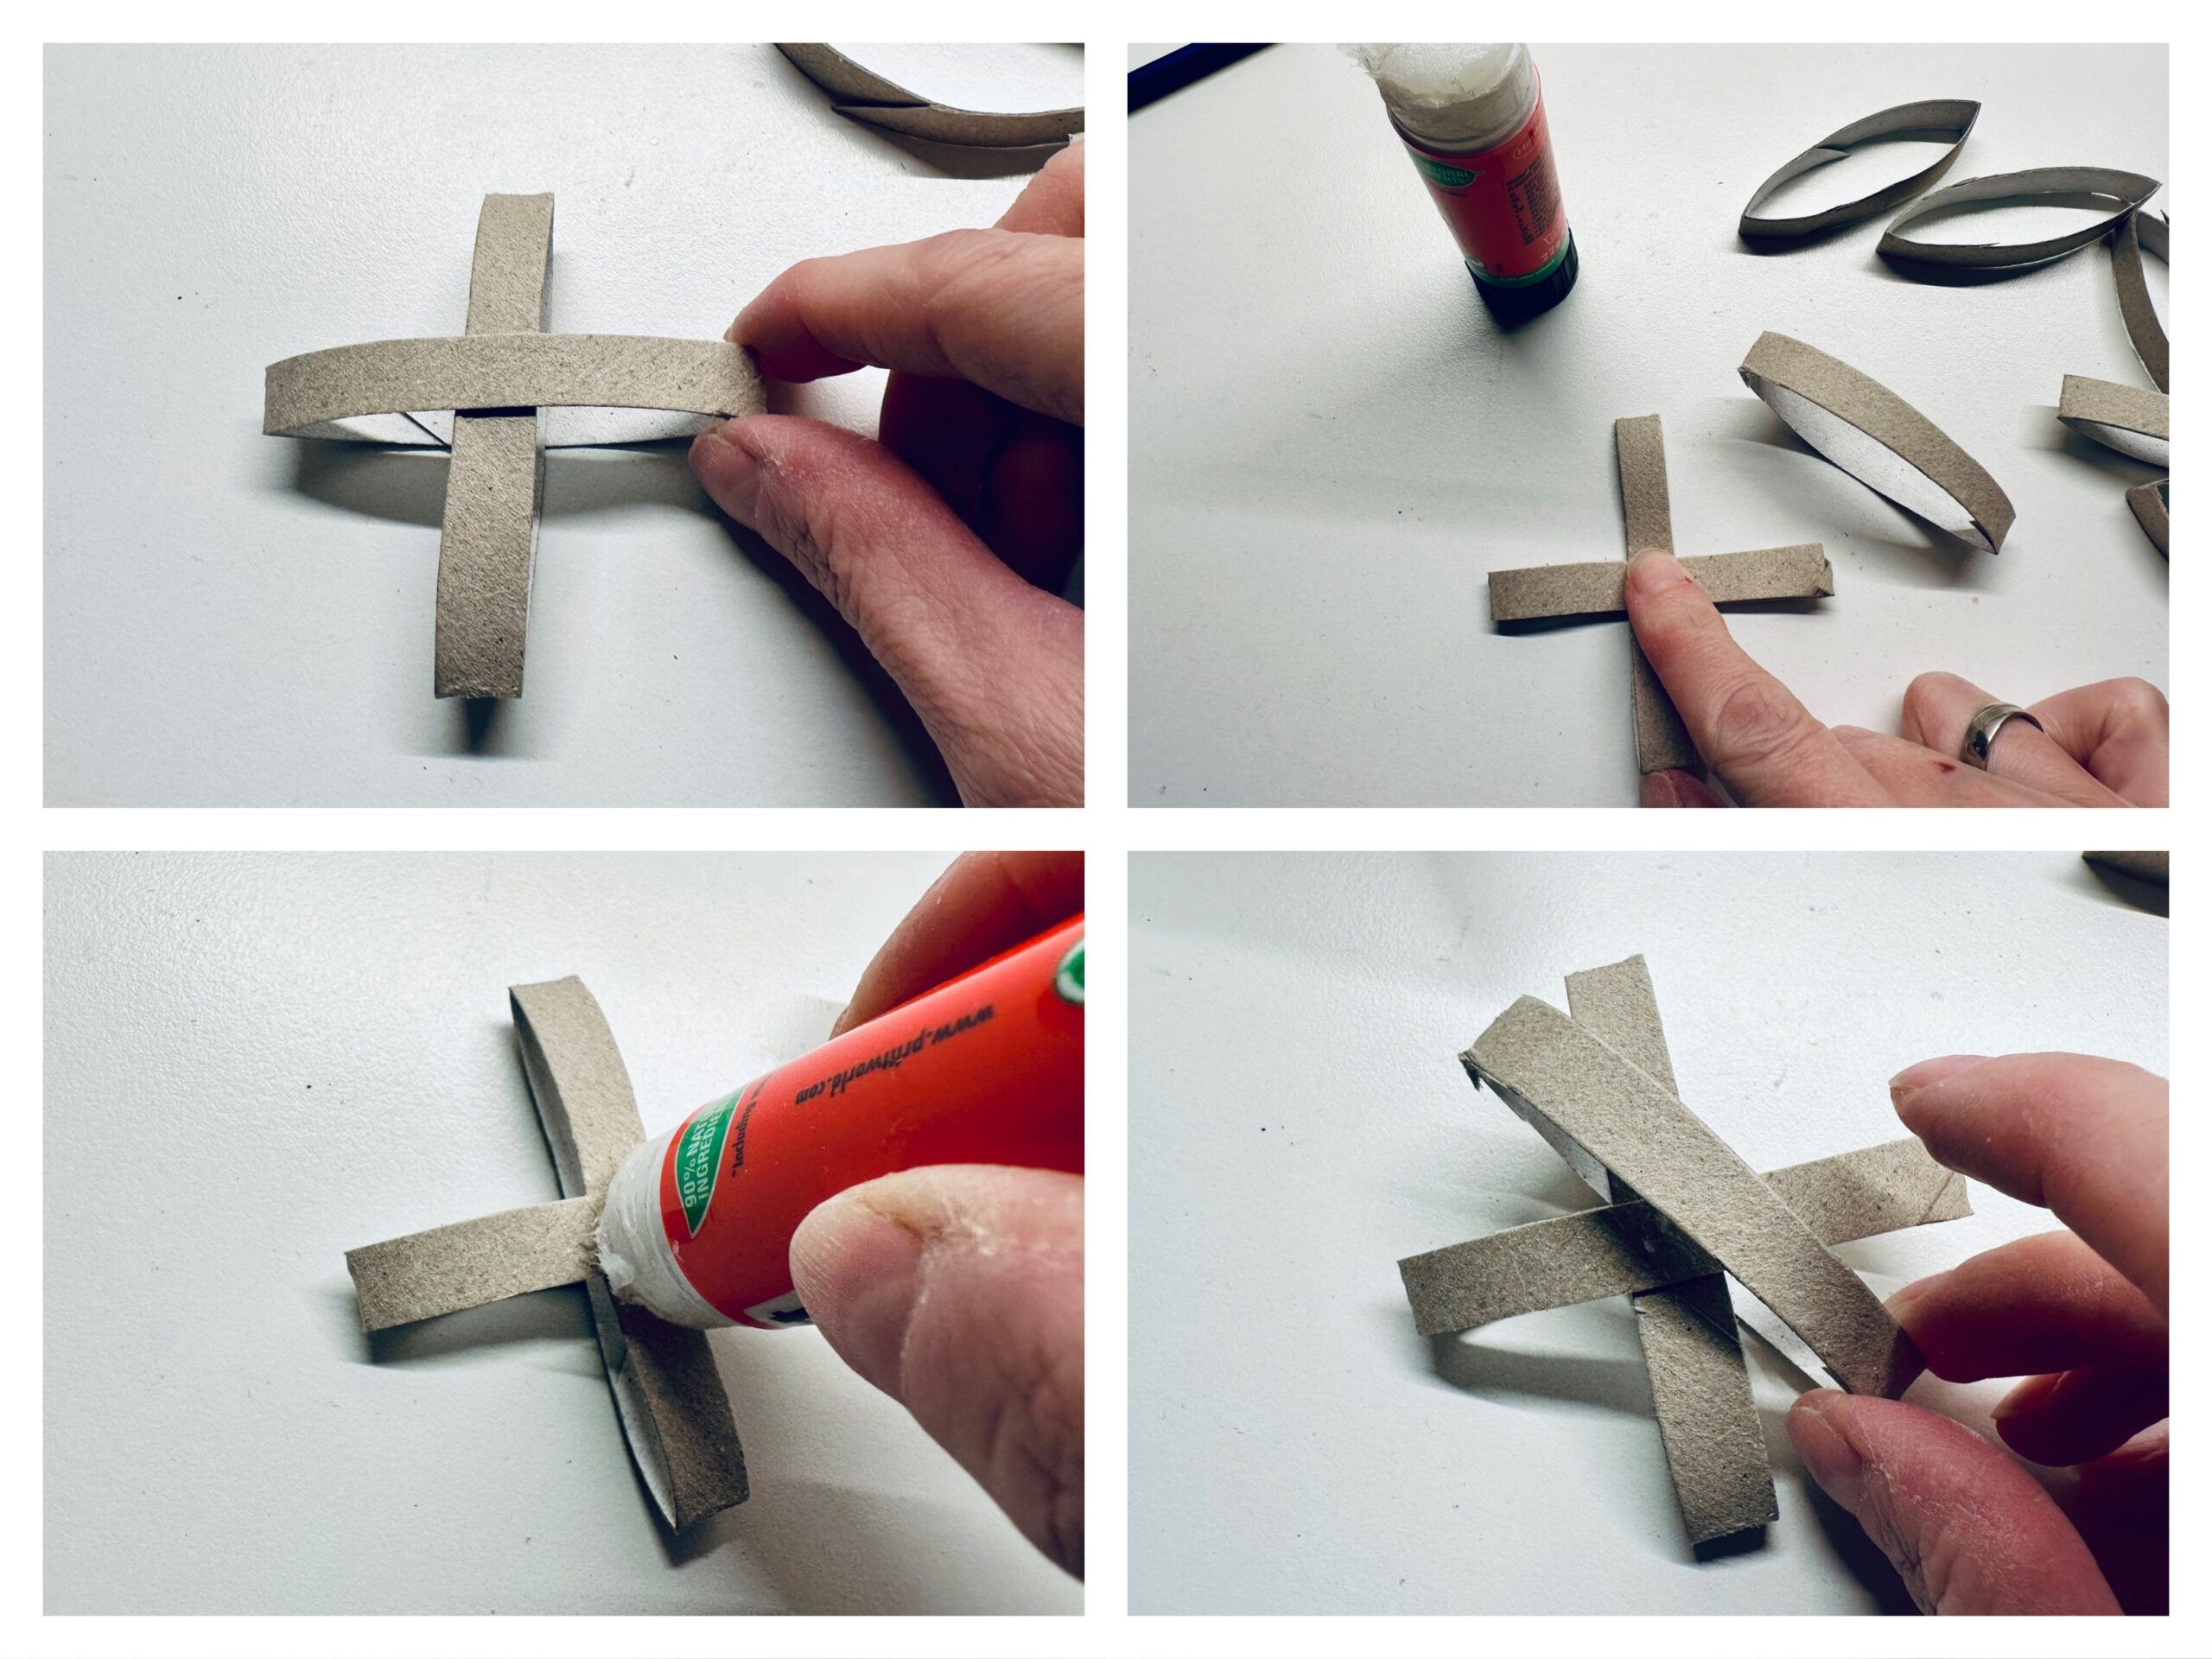
Bild zum Schritt 4 für das Bastel- und DIY-Abenteuer für Kinder: 'Für einen Stern braucht ihr vier Streifen. Steckt zuerst zwei...'

5

Holds the sticky spot briefly. Makes another sticky point again centered on the top of the cardboard strip. Slides another paper strip diagonally over the other strips and the star is finished. Holds the sticky spot still briefly pressed.
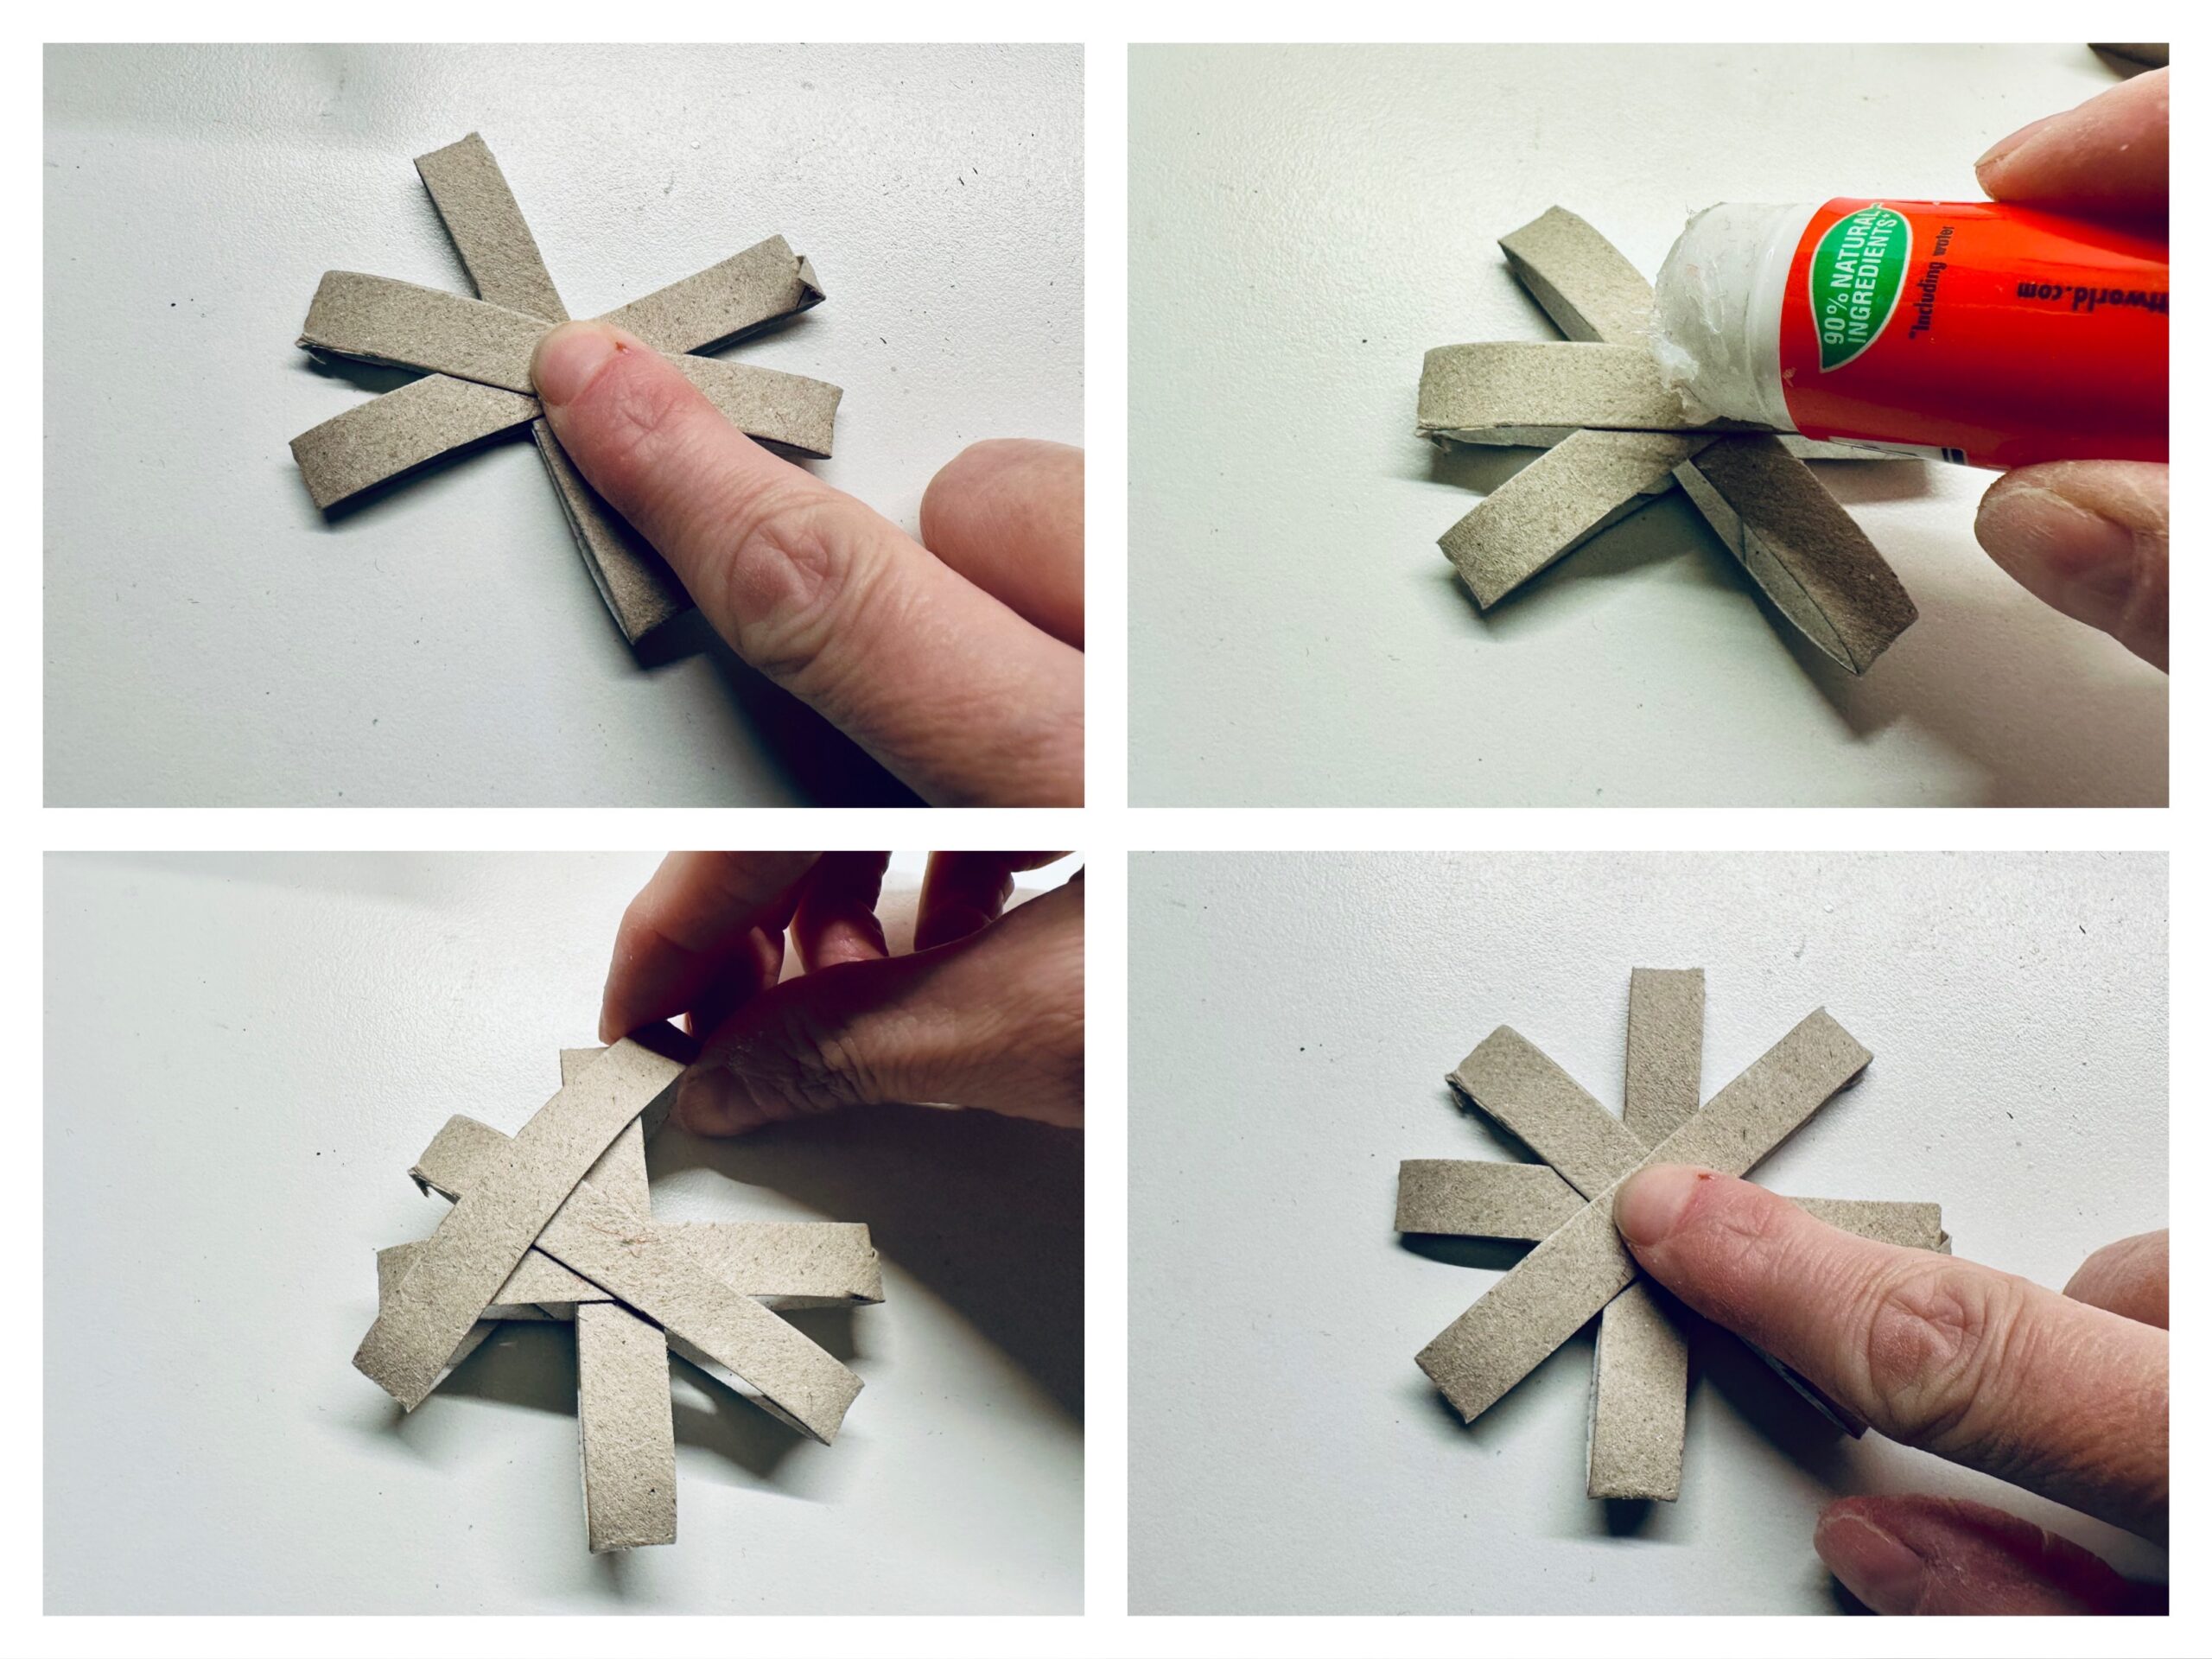
Bild zum Schritt 5 für das Bastel- und DIY-Abenteuer für Kinder: 'Haltet die Klebestelle kurz gedrückt. Macht einen weiteren Klebepunkt wieder...'

6

Makes more stars in this way.

Bild zum Schritt 6 für das Bastel- und DIY-Abenteuer für Kinder: 'Bastelt auf diese Weise weitere Sterne.'

7

At the startips you can cut small points. Paint them with a pencil and then cut them out with scissors.
Important: Make sure that something "stands" from the paper edge on the outside. Otherwise, the star falls apart.
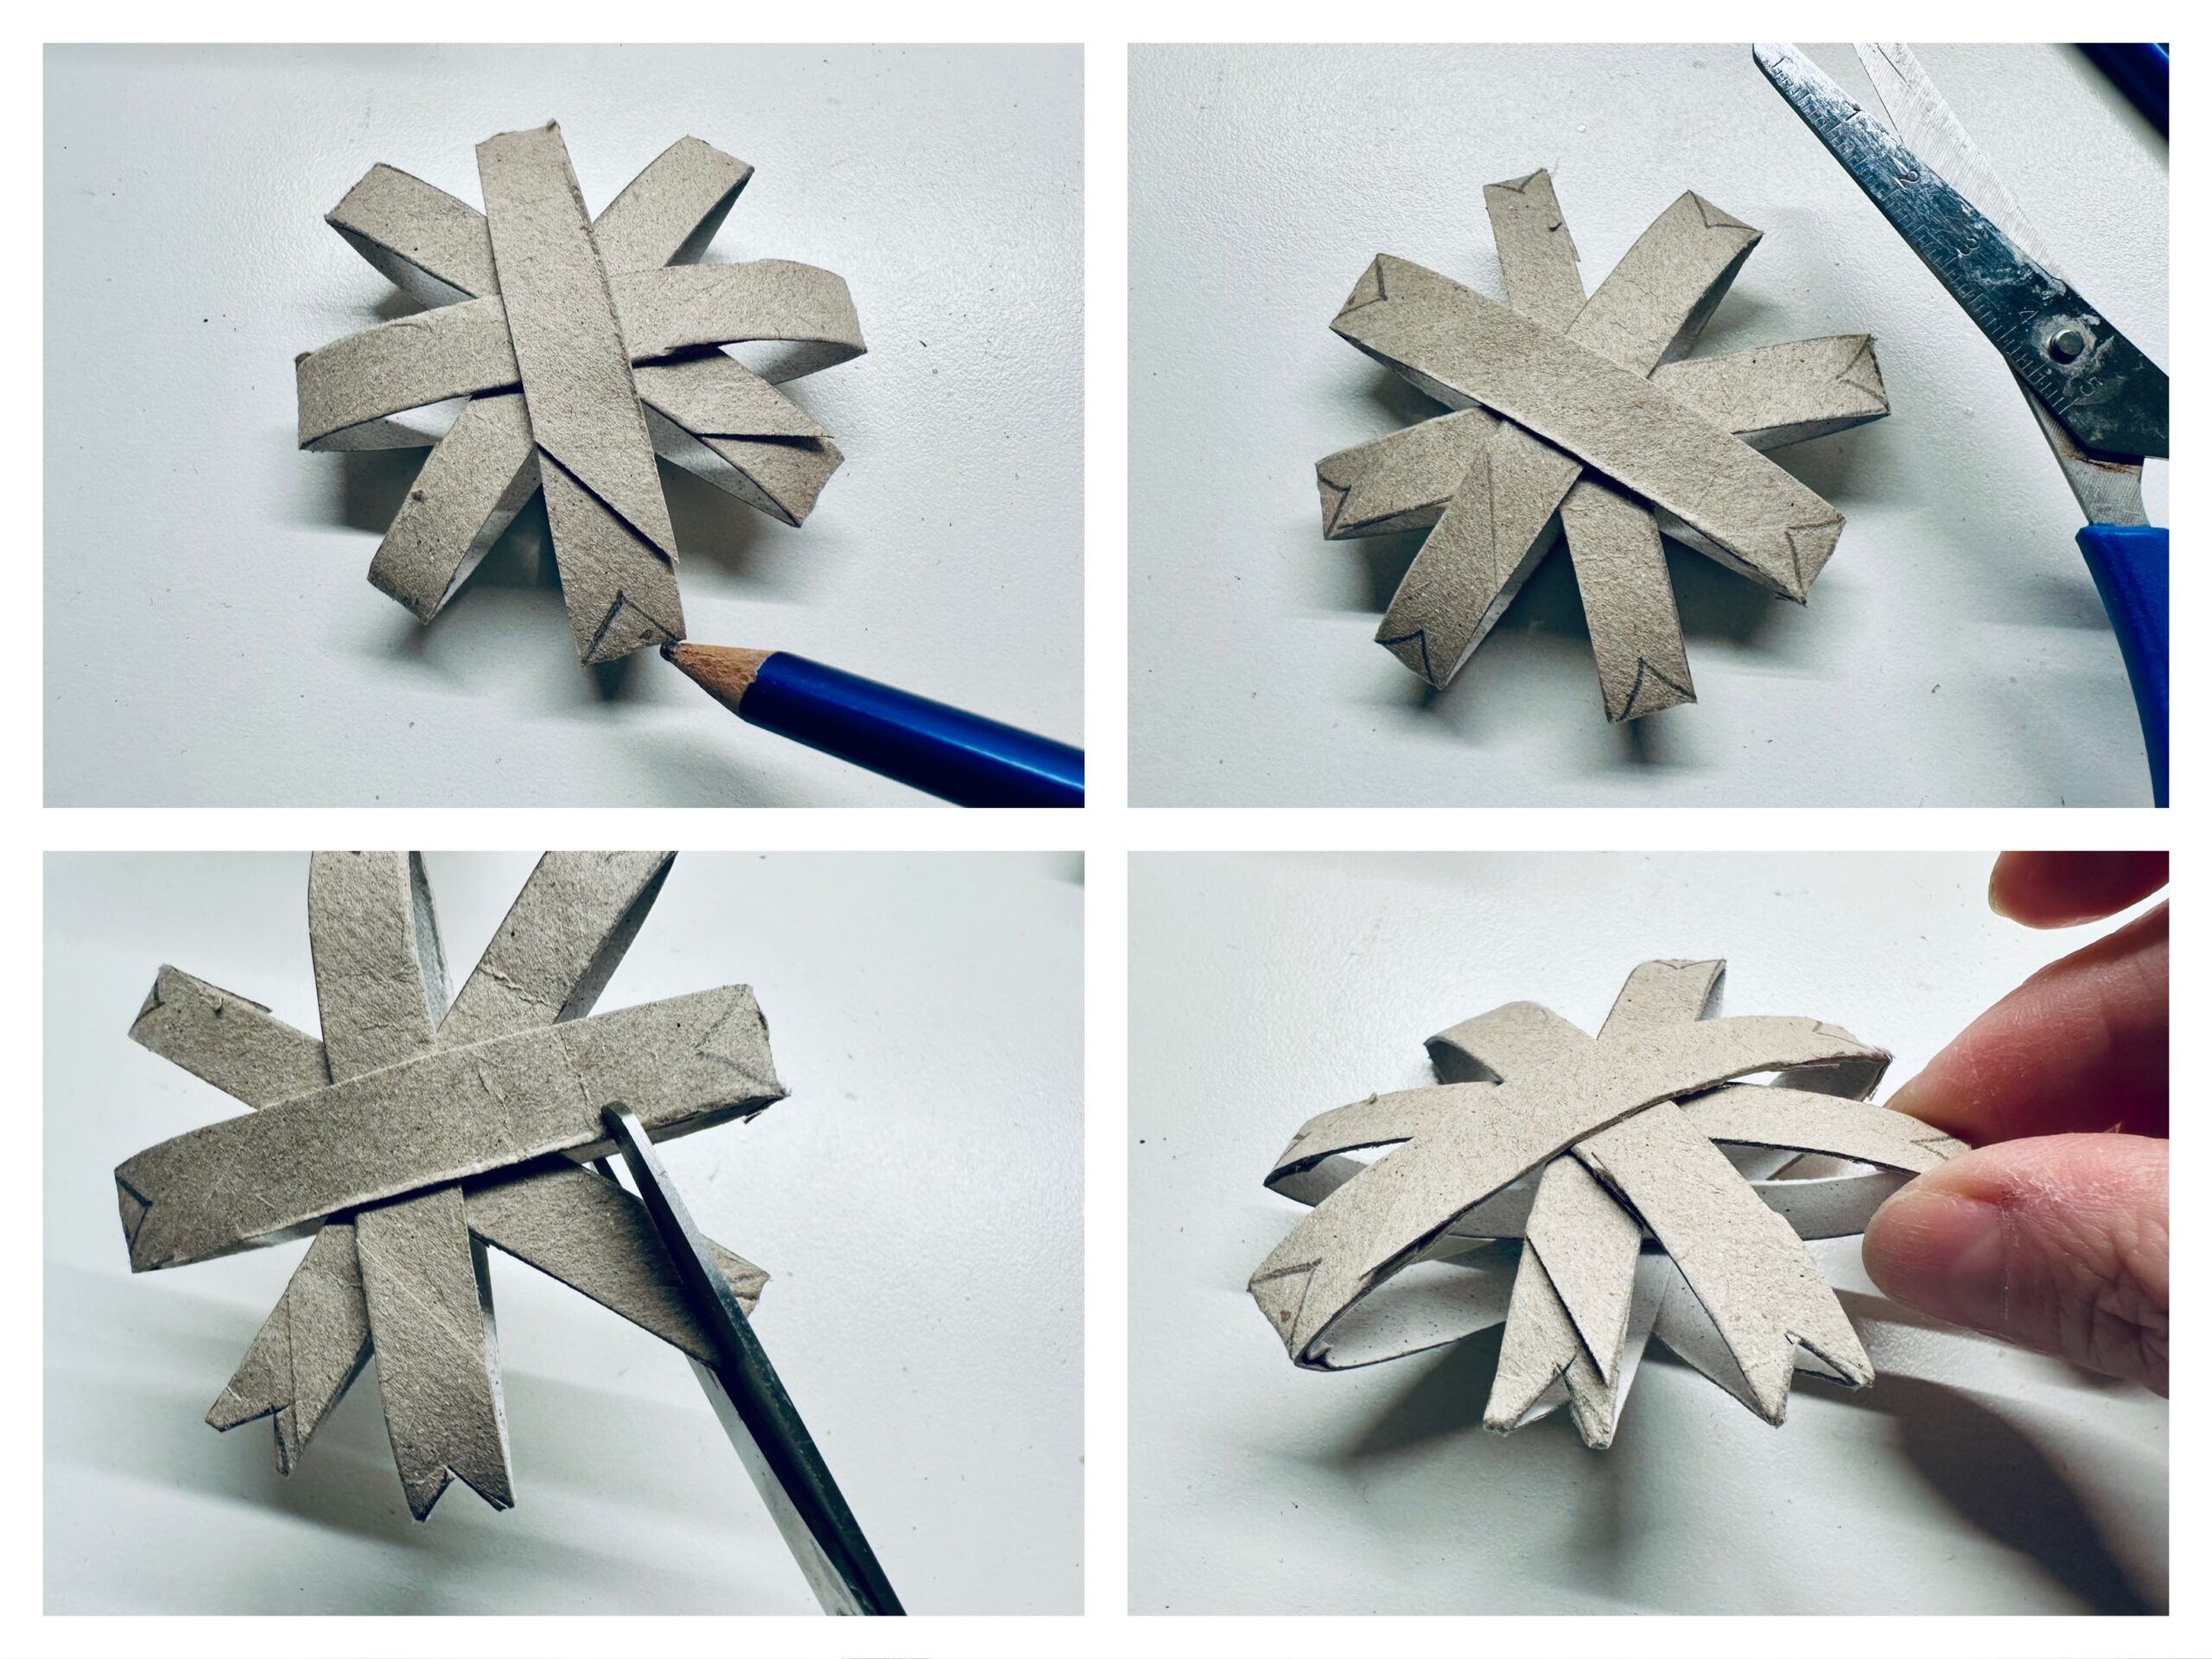
Bild zum Schritt 7 für das Bastel- und DIY-Abenteuer für Kinder: 'An den Sternspitzen könnt ihr noch kleine Zacken einschneiden. Malt...'

8

You can decorate each star with a white/golden or different coloured felt or varnish pen.
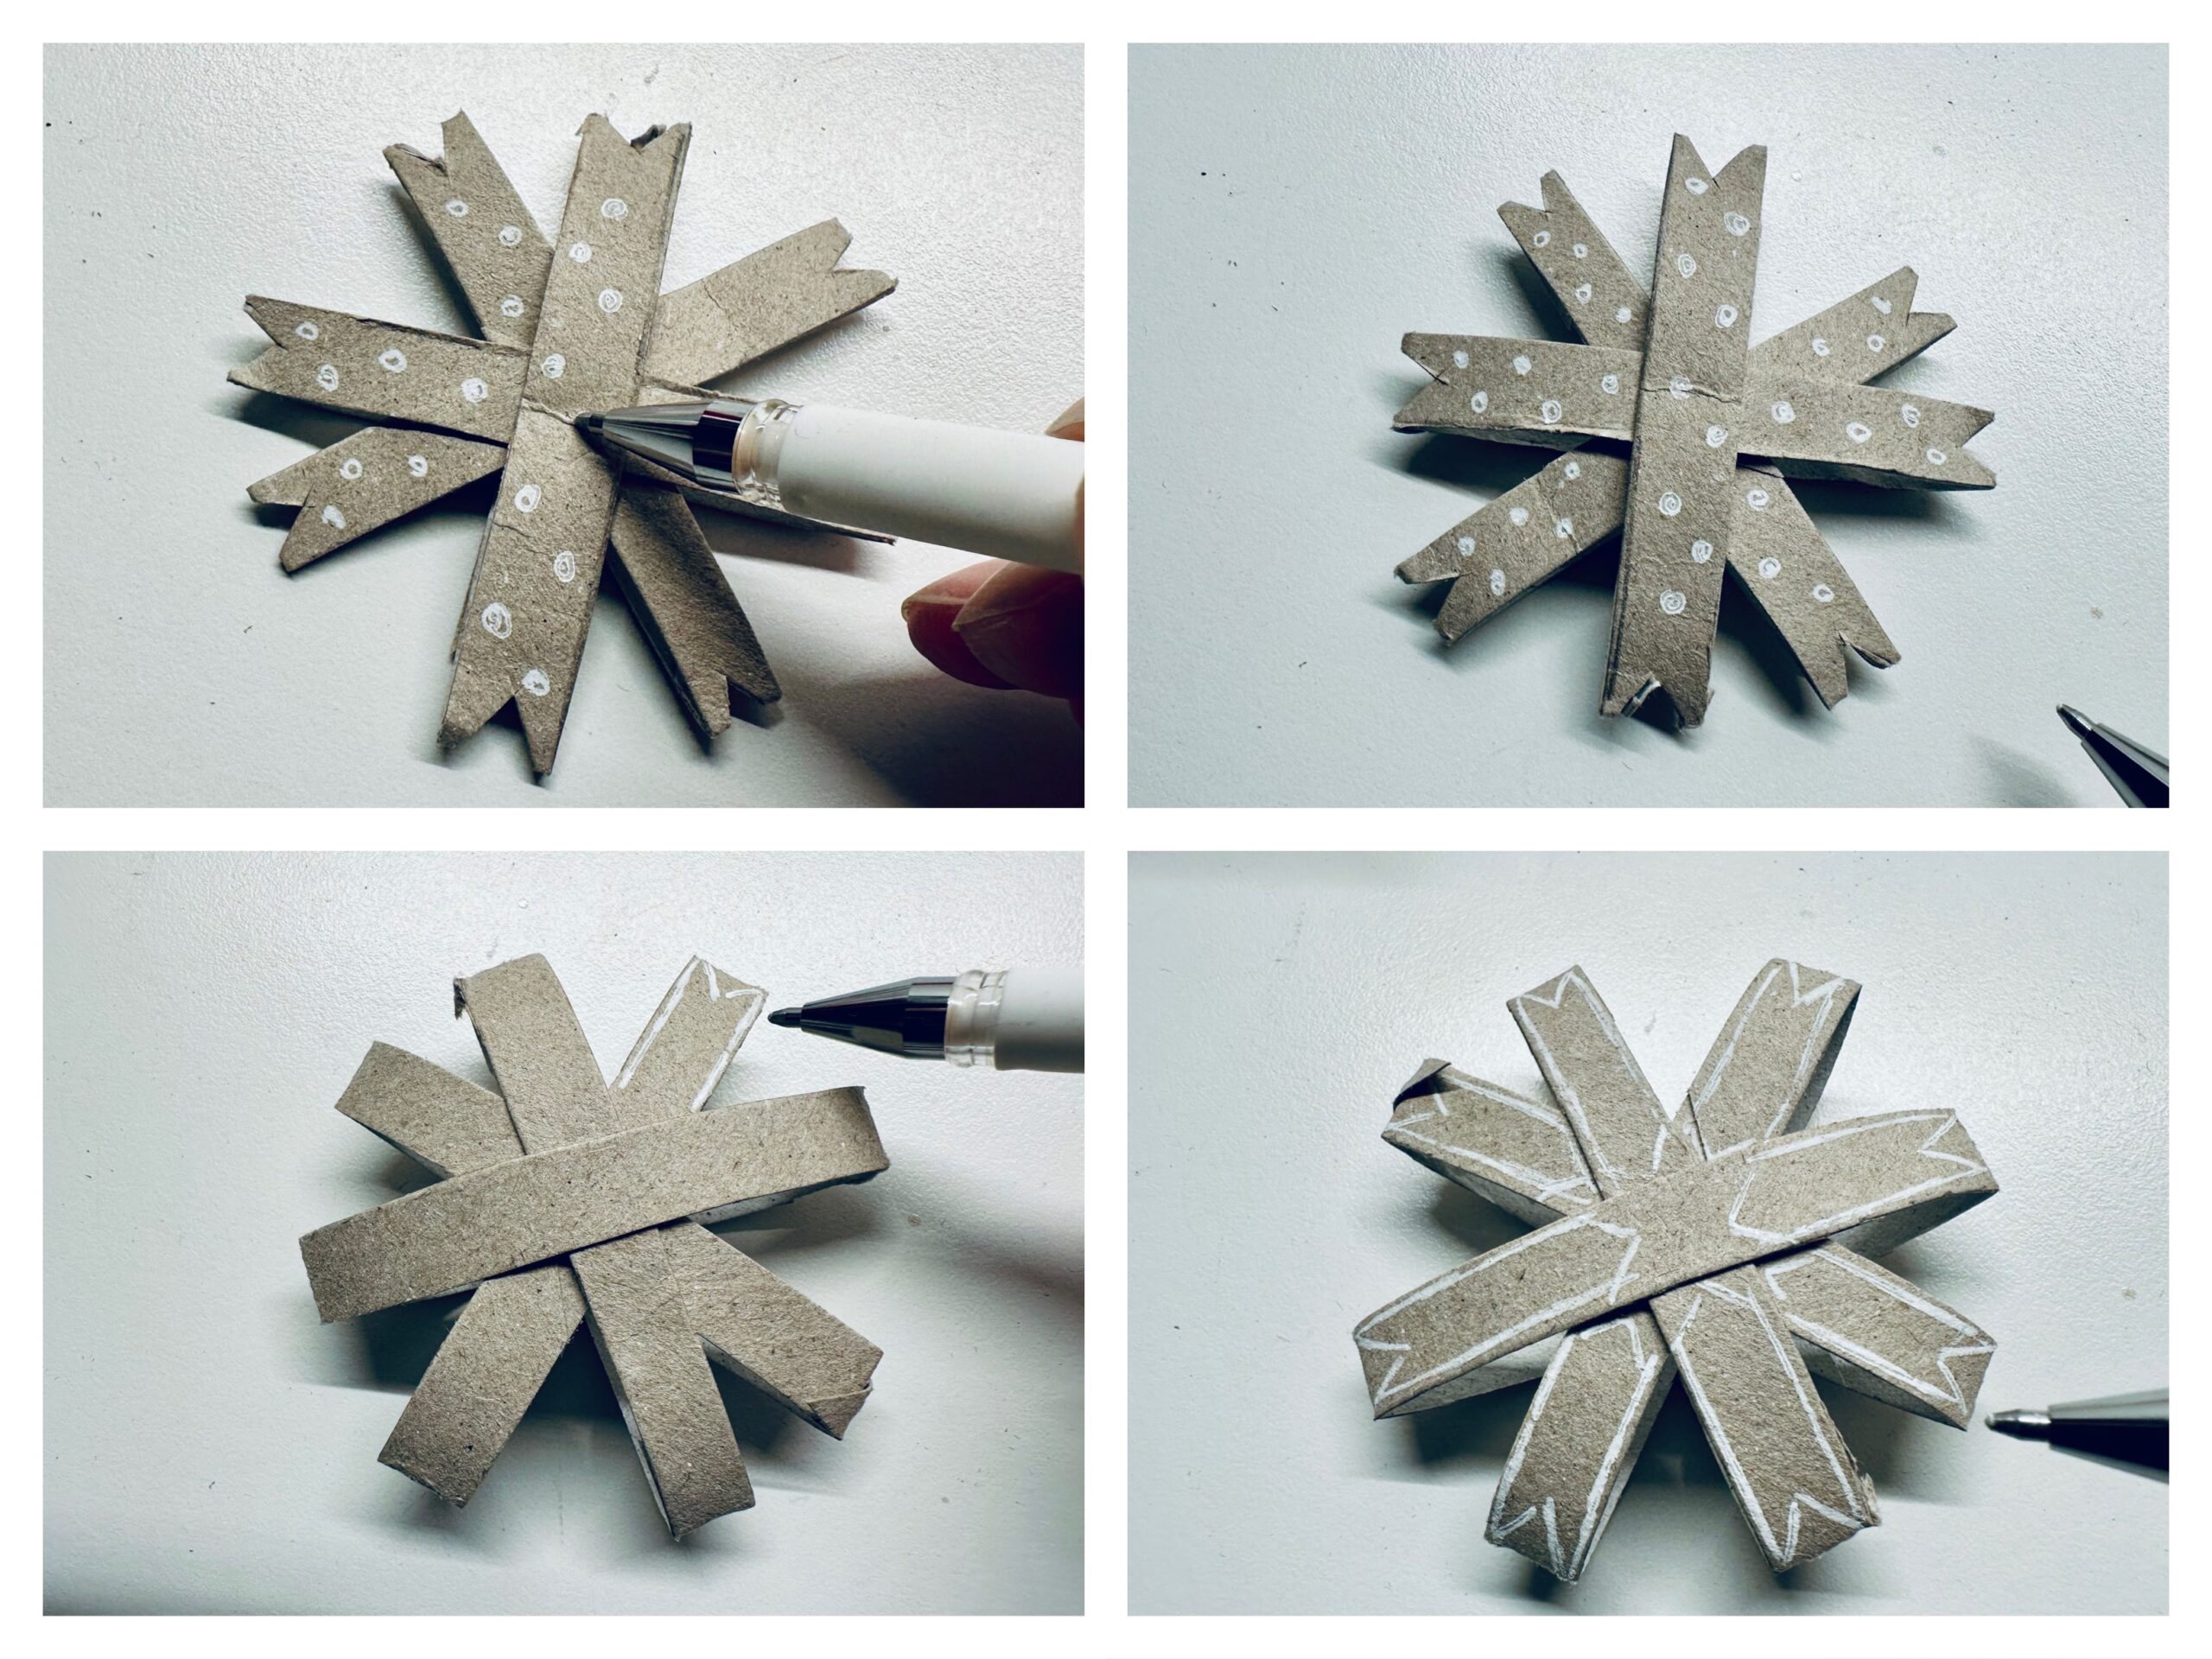
Bild zum Schritt 8 für das Bastel- und DIY-Abenteuer für Kinder: 'Jeden Stern könnt ihr mit einem weißen/ goldenen oder andersfarbigen...'

9

Think of your own patterns and beautify the stars as you like.
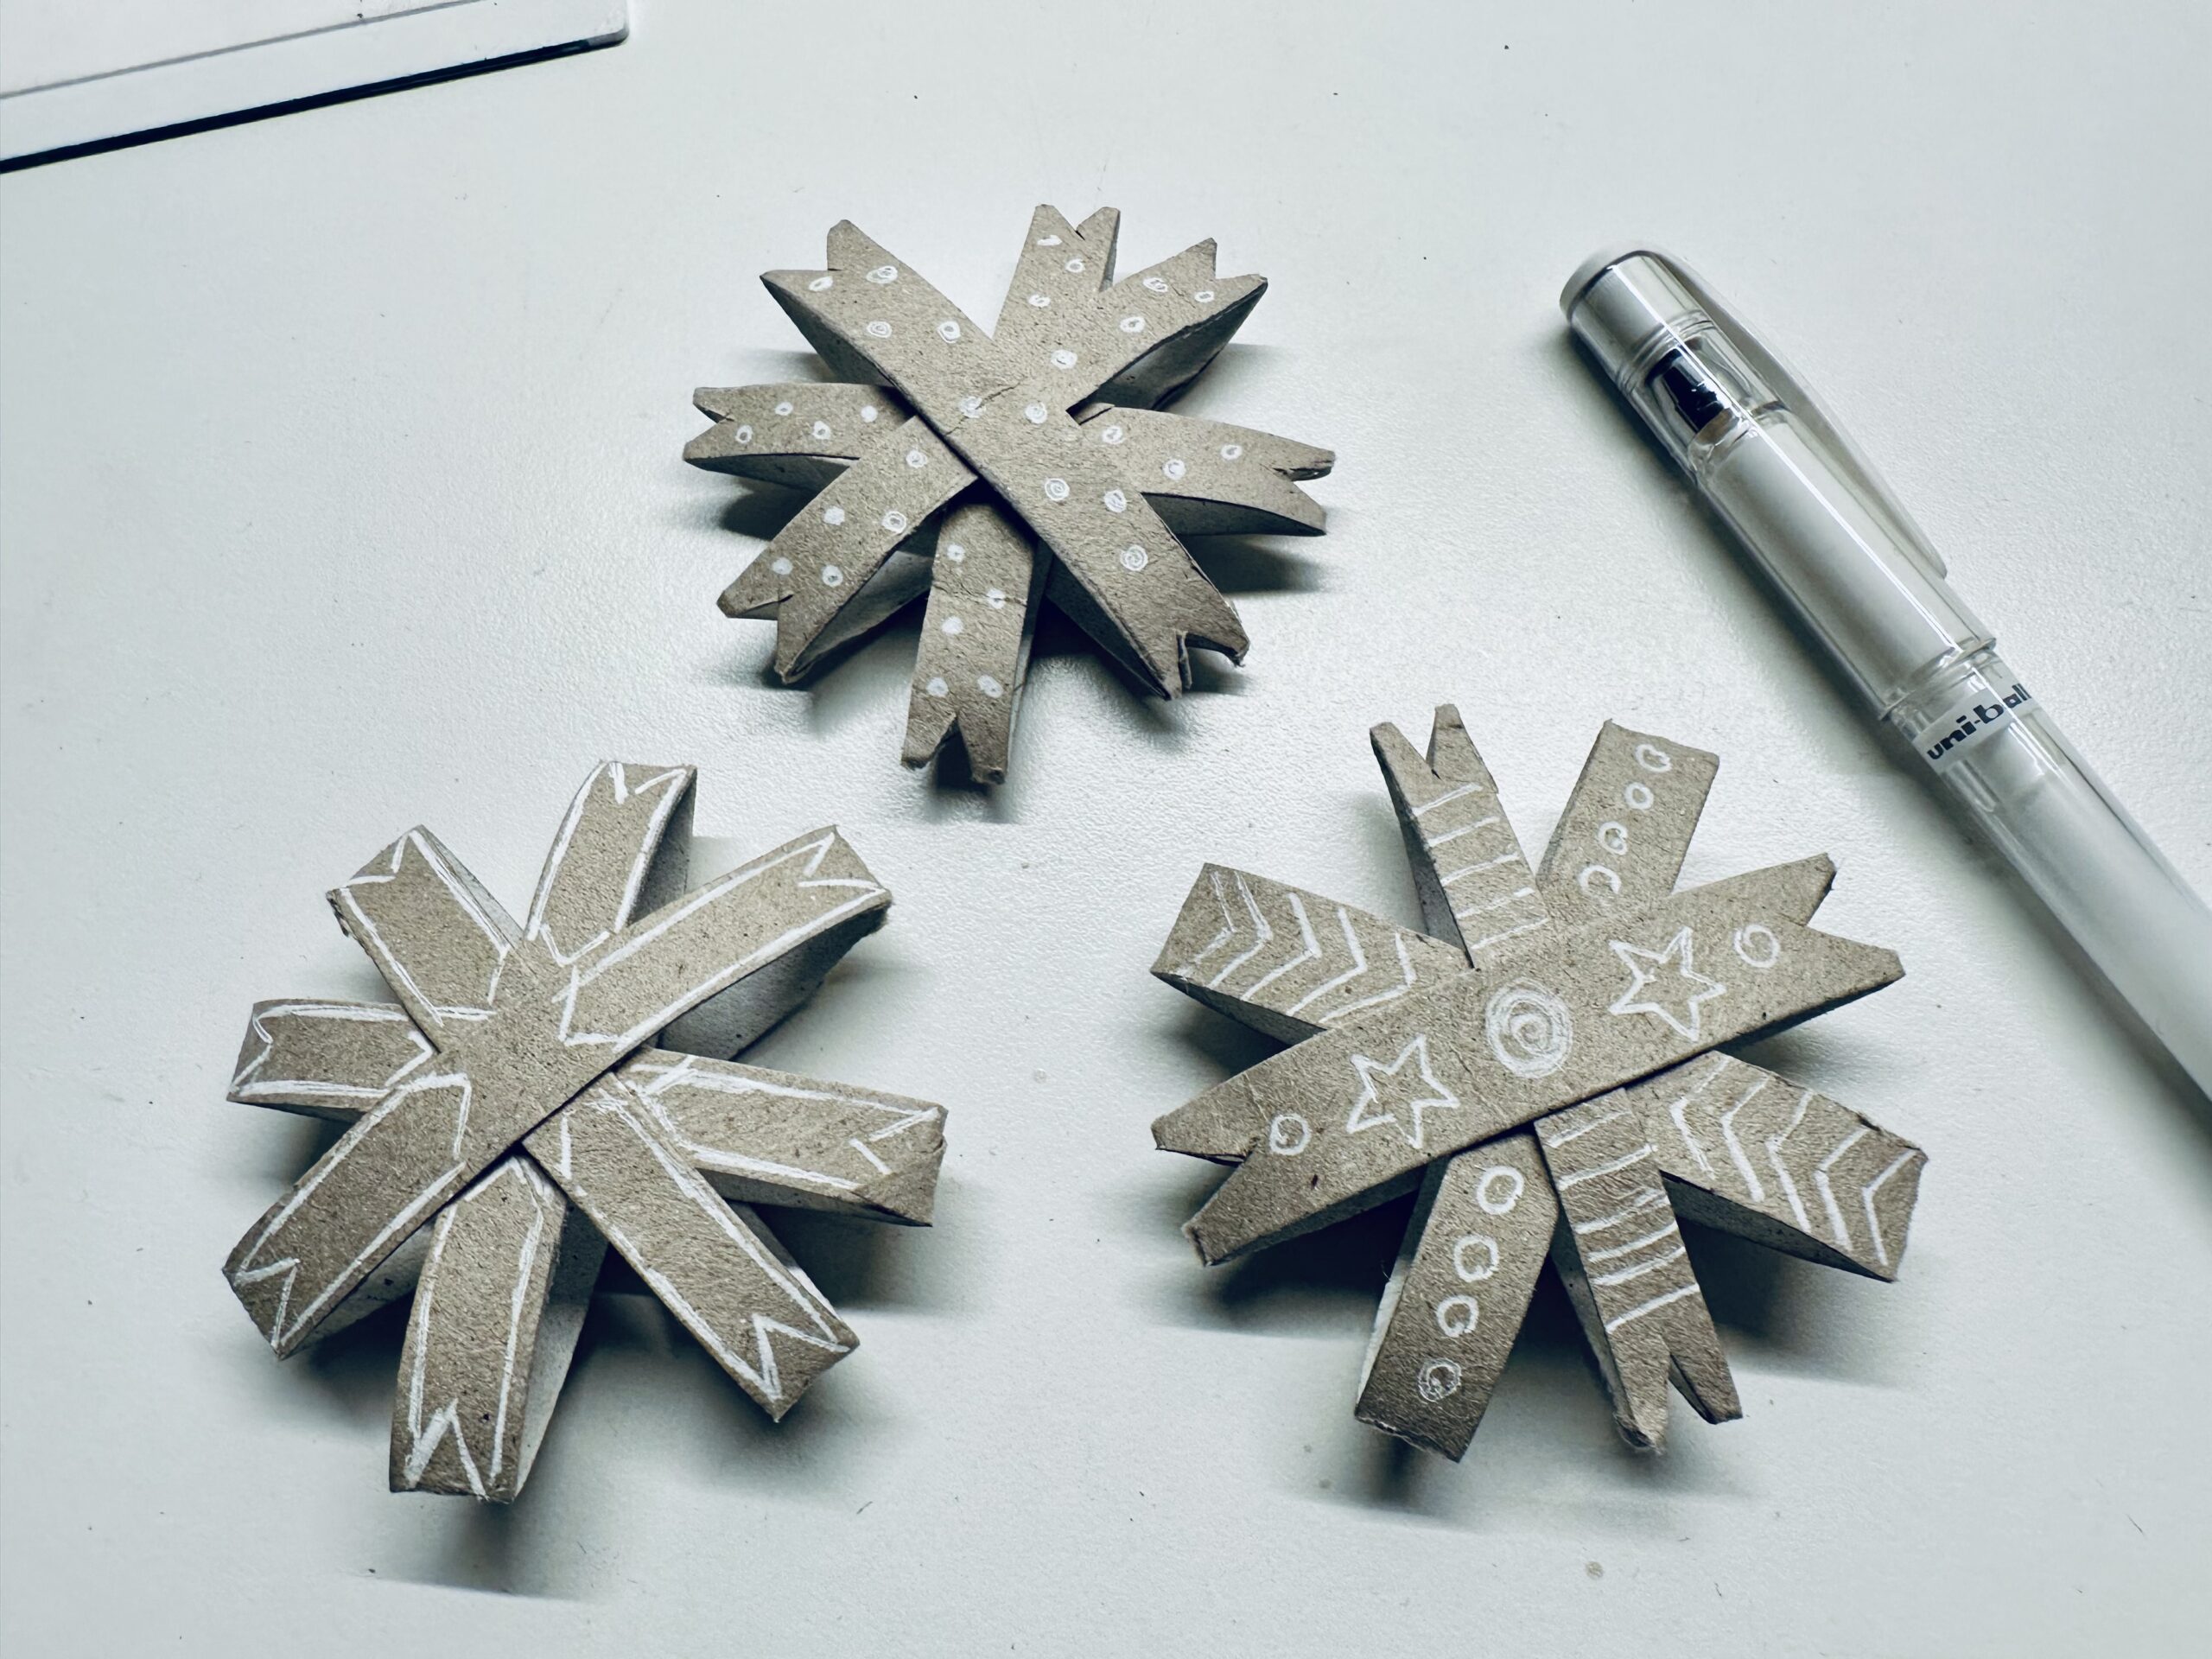
Bild zum Schritt 9 für das Bastel- und DIY-Abenteuer für Kinder: 'Lasst euch eigene Muster einfallen und verschönert die Sterne wie...'

10

The stars are also very pretty as gift pendants.
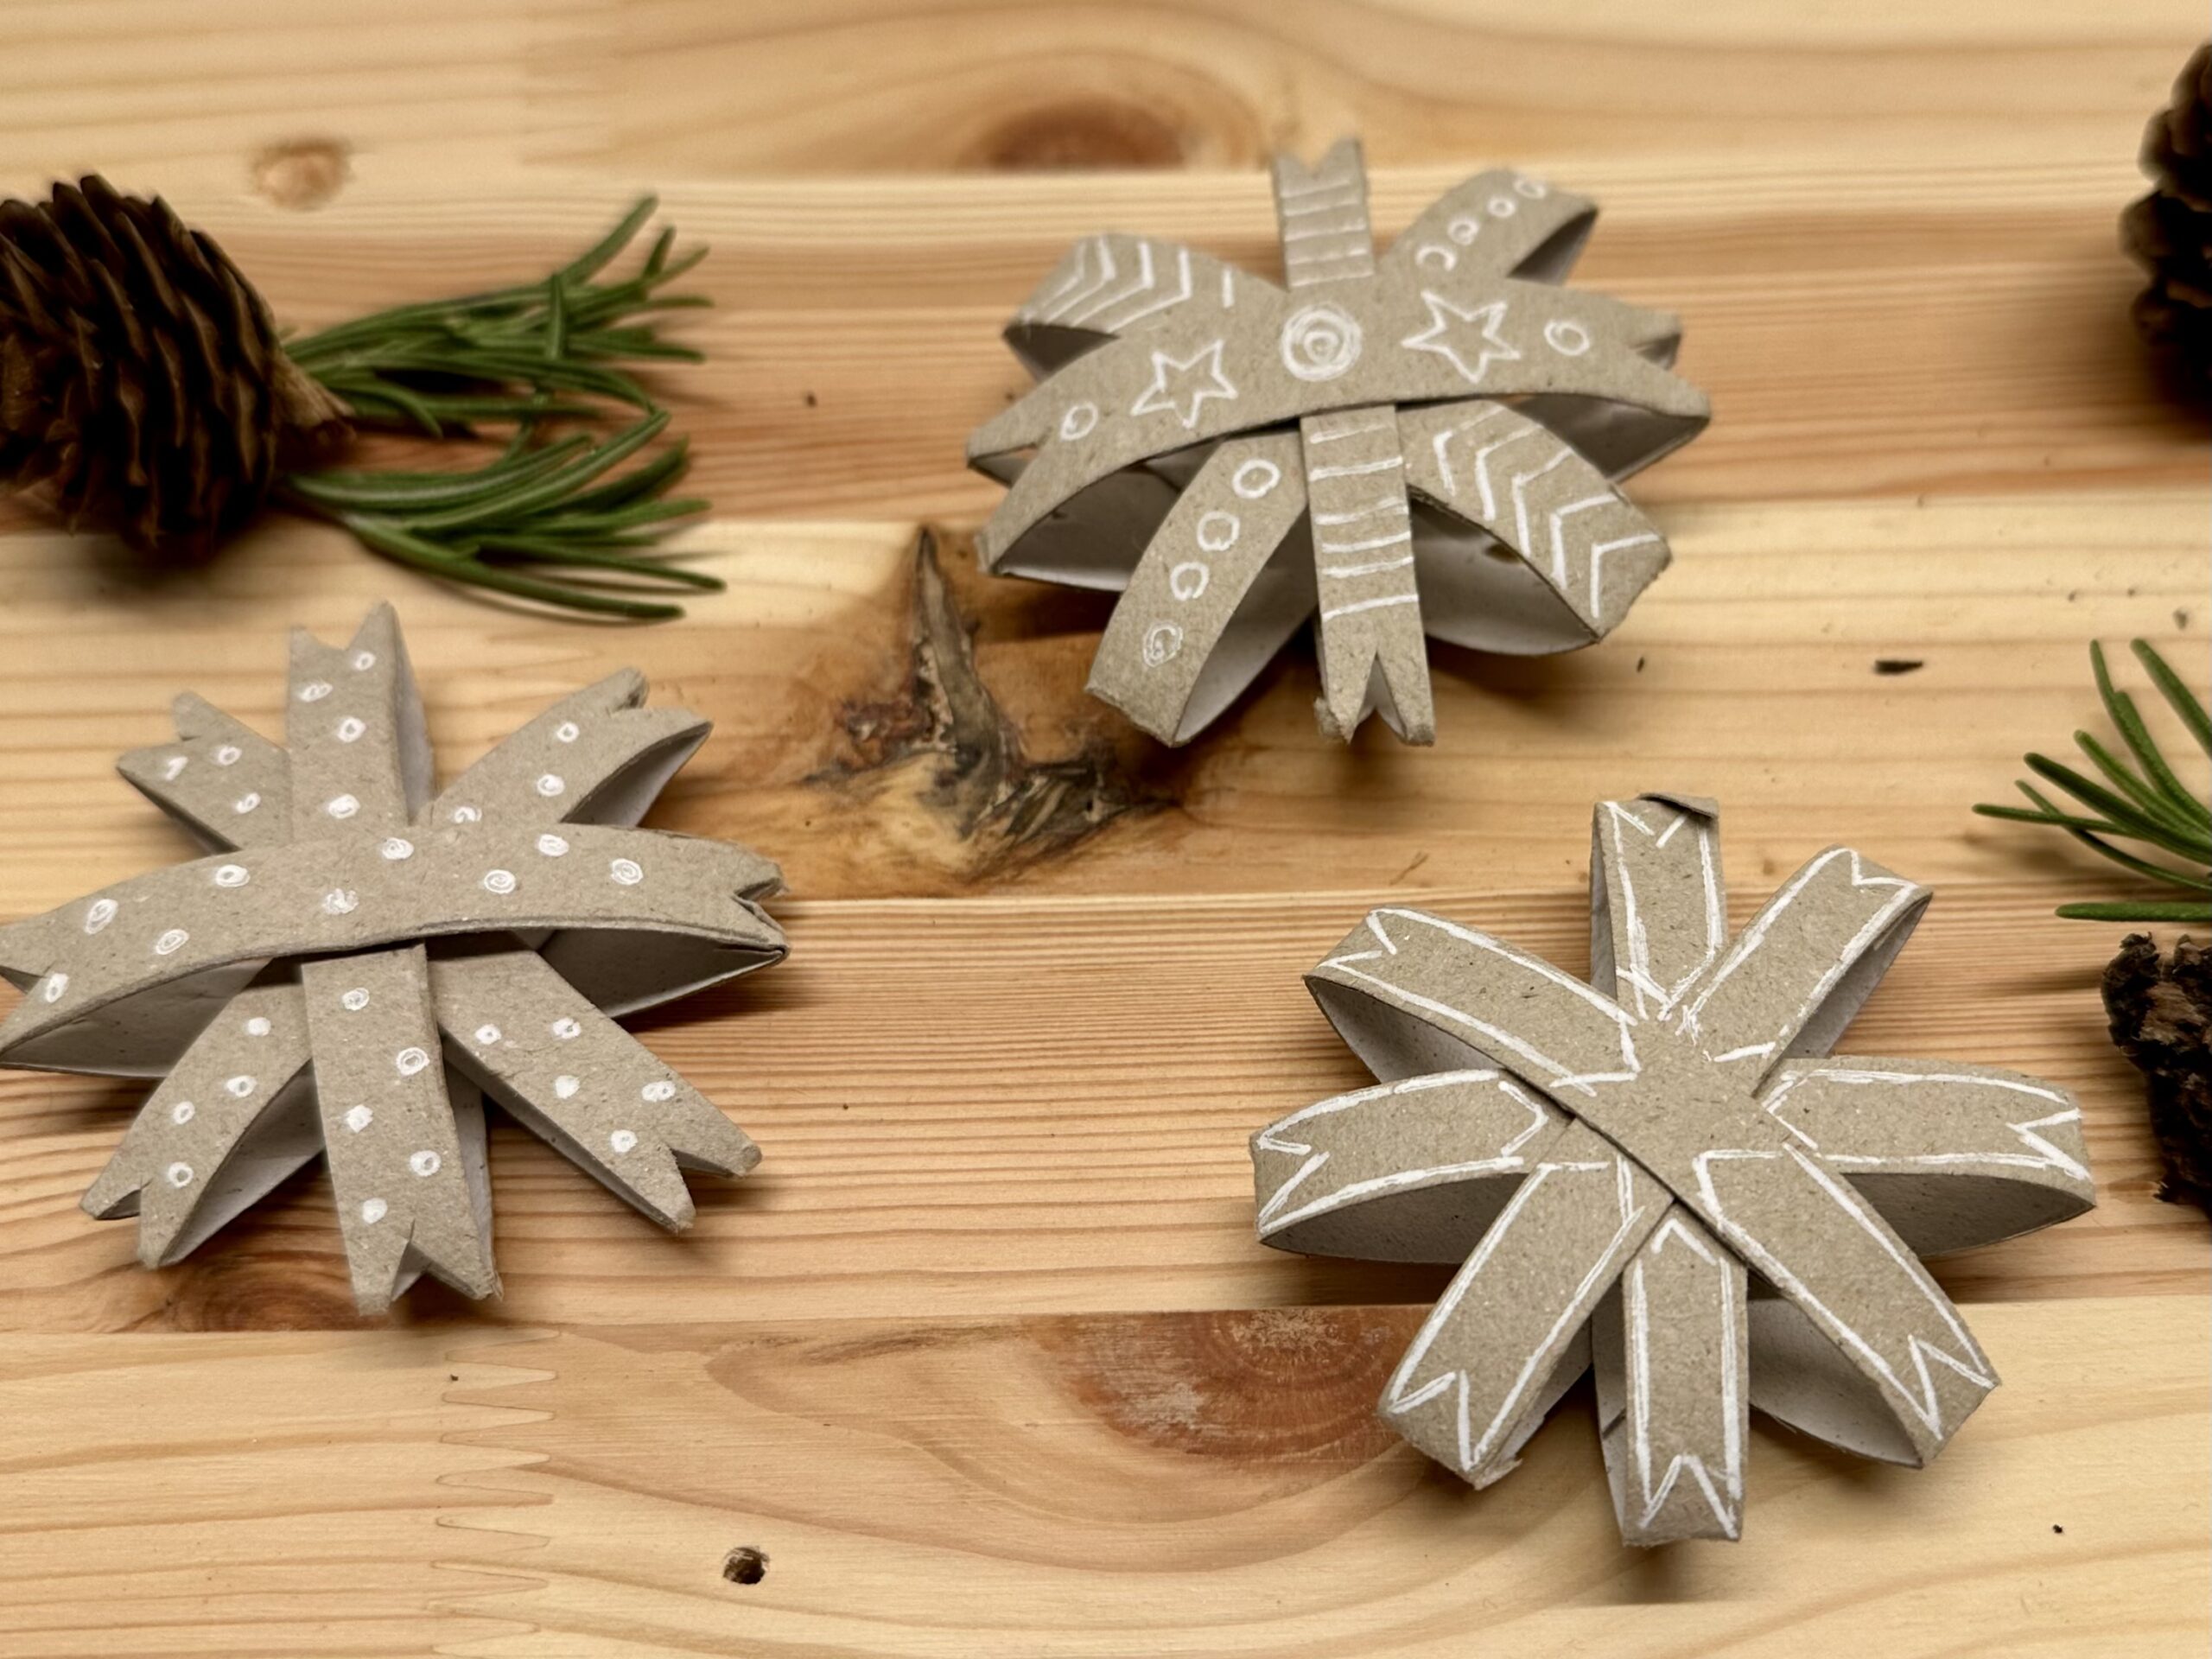
Bild zum Schritt 10 für das Bastel- und DIY-Abenteuer für Kinder: 'Die Sterne sind auch als Geschenkanhänger sehr hübsch.'

11

Also as jewelry for the Christmas tree a great occupation for children.

Stars made of cardboard roll

Follow us on Facebook , Instagram and Pinterest
Don't miss any more adventures: Our bottle mail

Leave a Reply

Your email address will not be published.

The maximum upload file size: 5 MB. You can upload: image, document. Drop file here