Print Options:

Sheep making (2 variants)

Material for1 ChildPrep Time5 min.Adv. Time20 min.Total Time25 min.

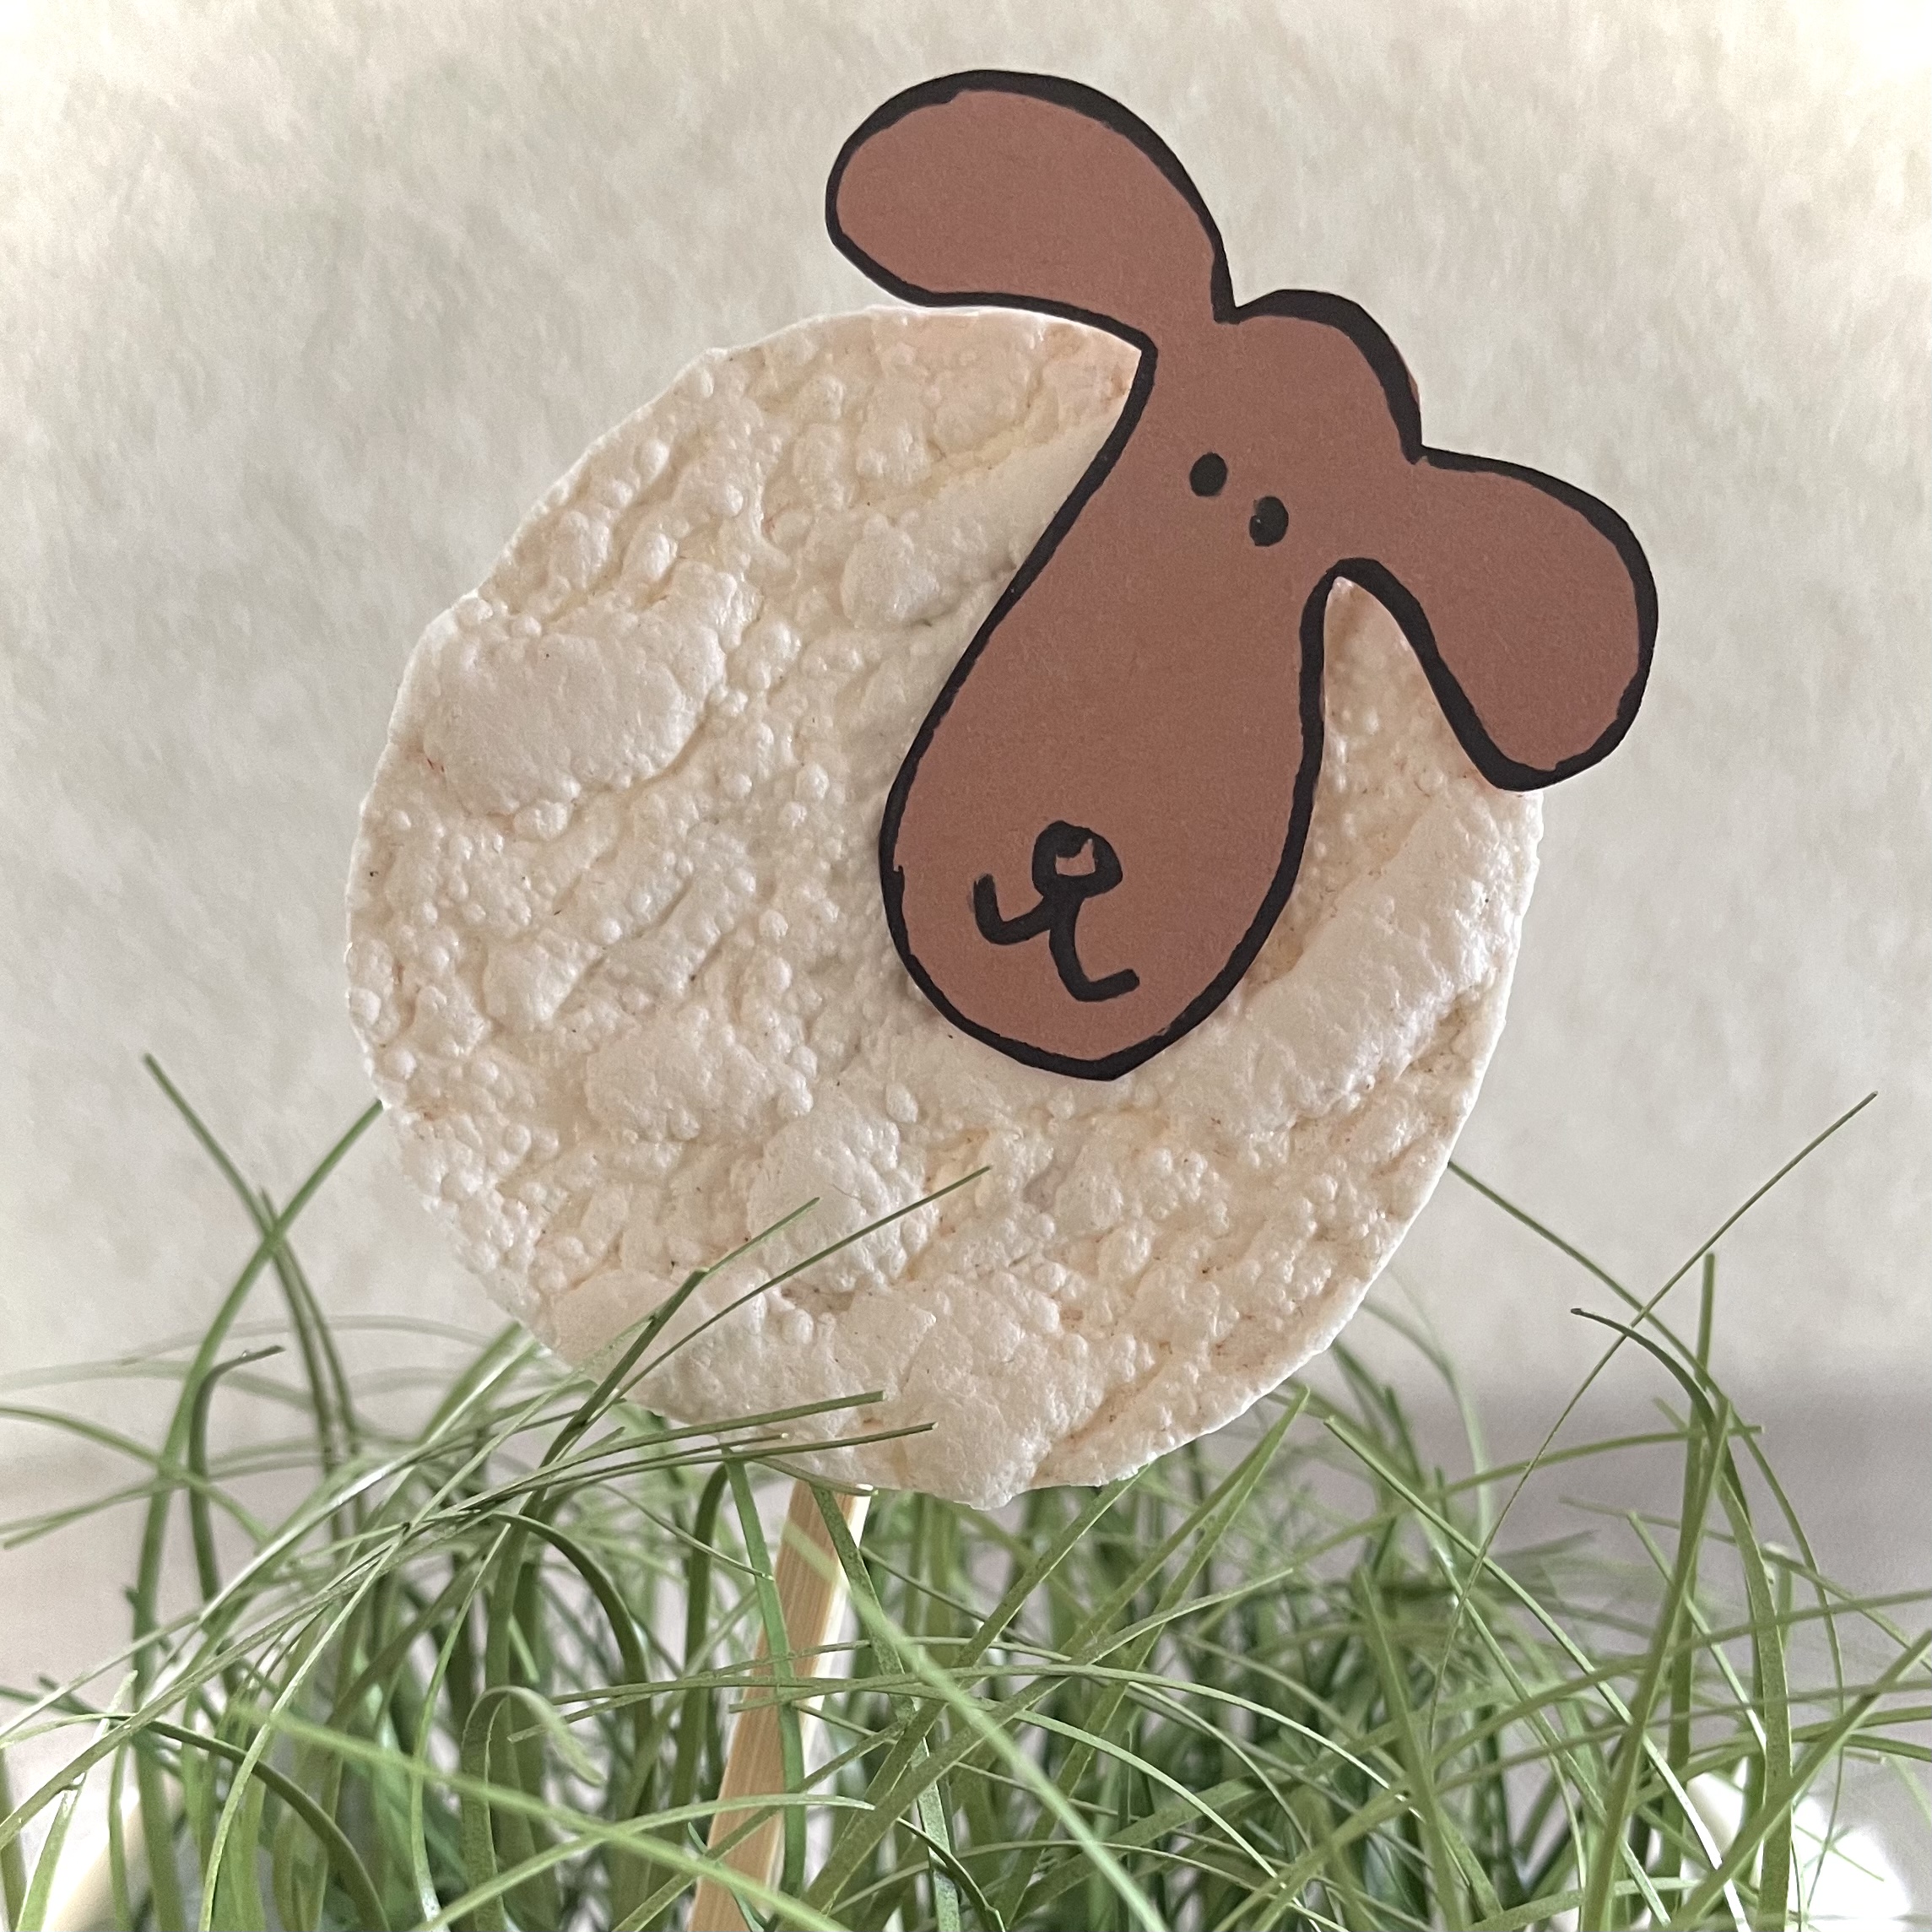
This sheep is made from only two parts quickly. Uses a small piece of foam wallpaper or foam rubber for the belly of the sheep and makes the head from clay paper. On a thick wooden skewer the sheep serves as a flower decoration and with wire the sheep can be fixed on a stone and set up. Both instructions can be found here, as well as the template for printing!

Titelbild zur Bastel- und DIY-Idee für Kinder '(717) Schaf basteln (2 Varianten)'

 1 Stone
 Wire approx. 20cm
 1 wallpaper rest white 7cm x 7cmFoam wallpaper or Mosgum
 1 Clay paper brown8cm x 6cm
 1 Felt pen black
 1 Scissors
 1 Adhesive pen
 1 Wire shears
 1 Hot glue gun
 1 Builder's pad
All links marked with a shopping cart lead to Amazon - here we have selected products that we would order ourselves and in part also ordered. In a qualified purchase via the advertising link, we as Amazon partner receive a commission, for you there are no costs. You thus support our cost- and advertising banner-free, educational offer.
1

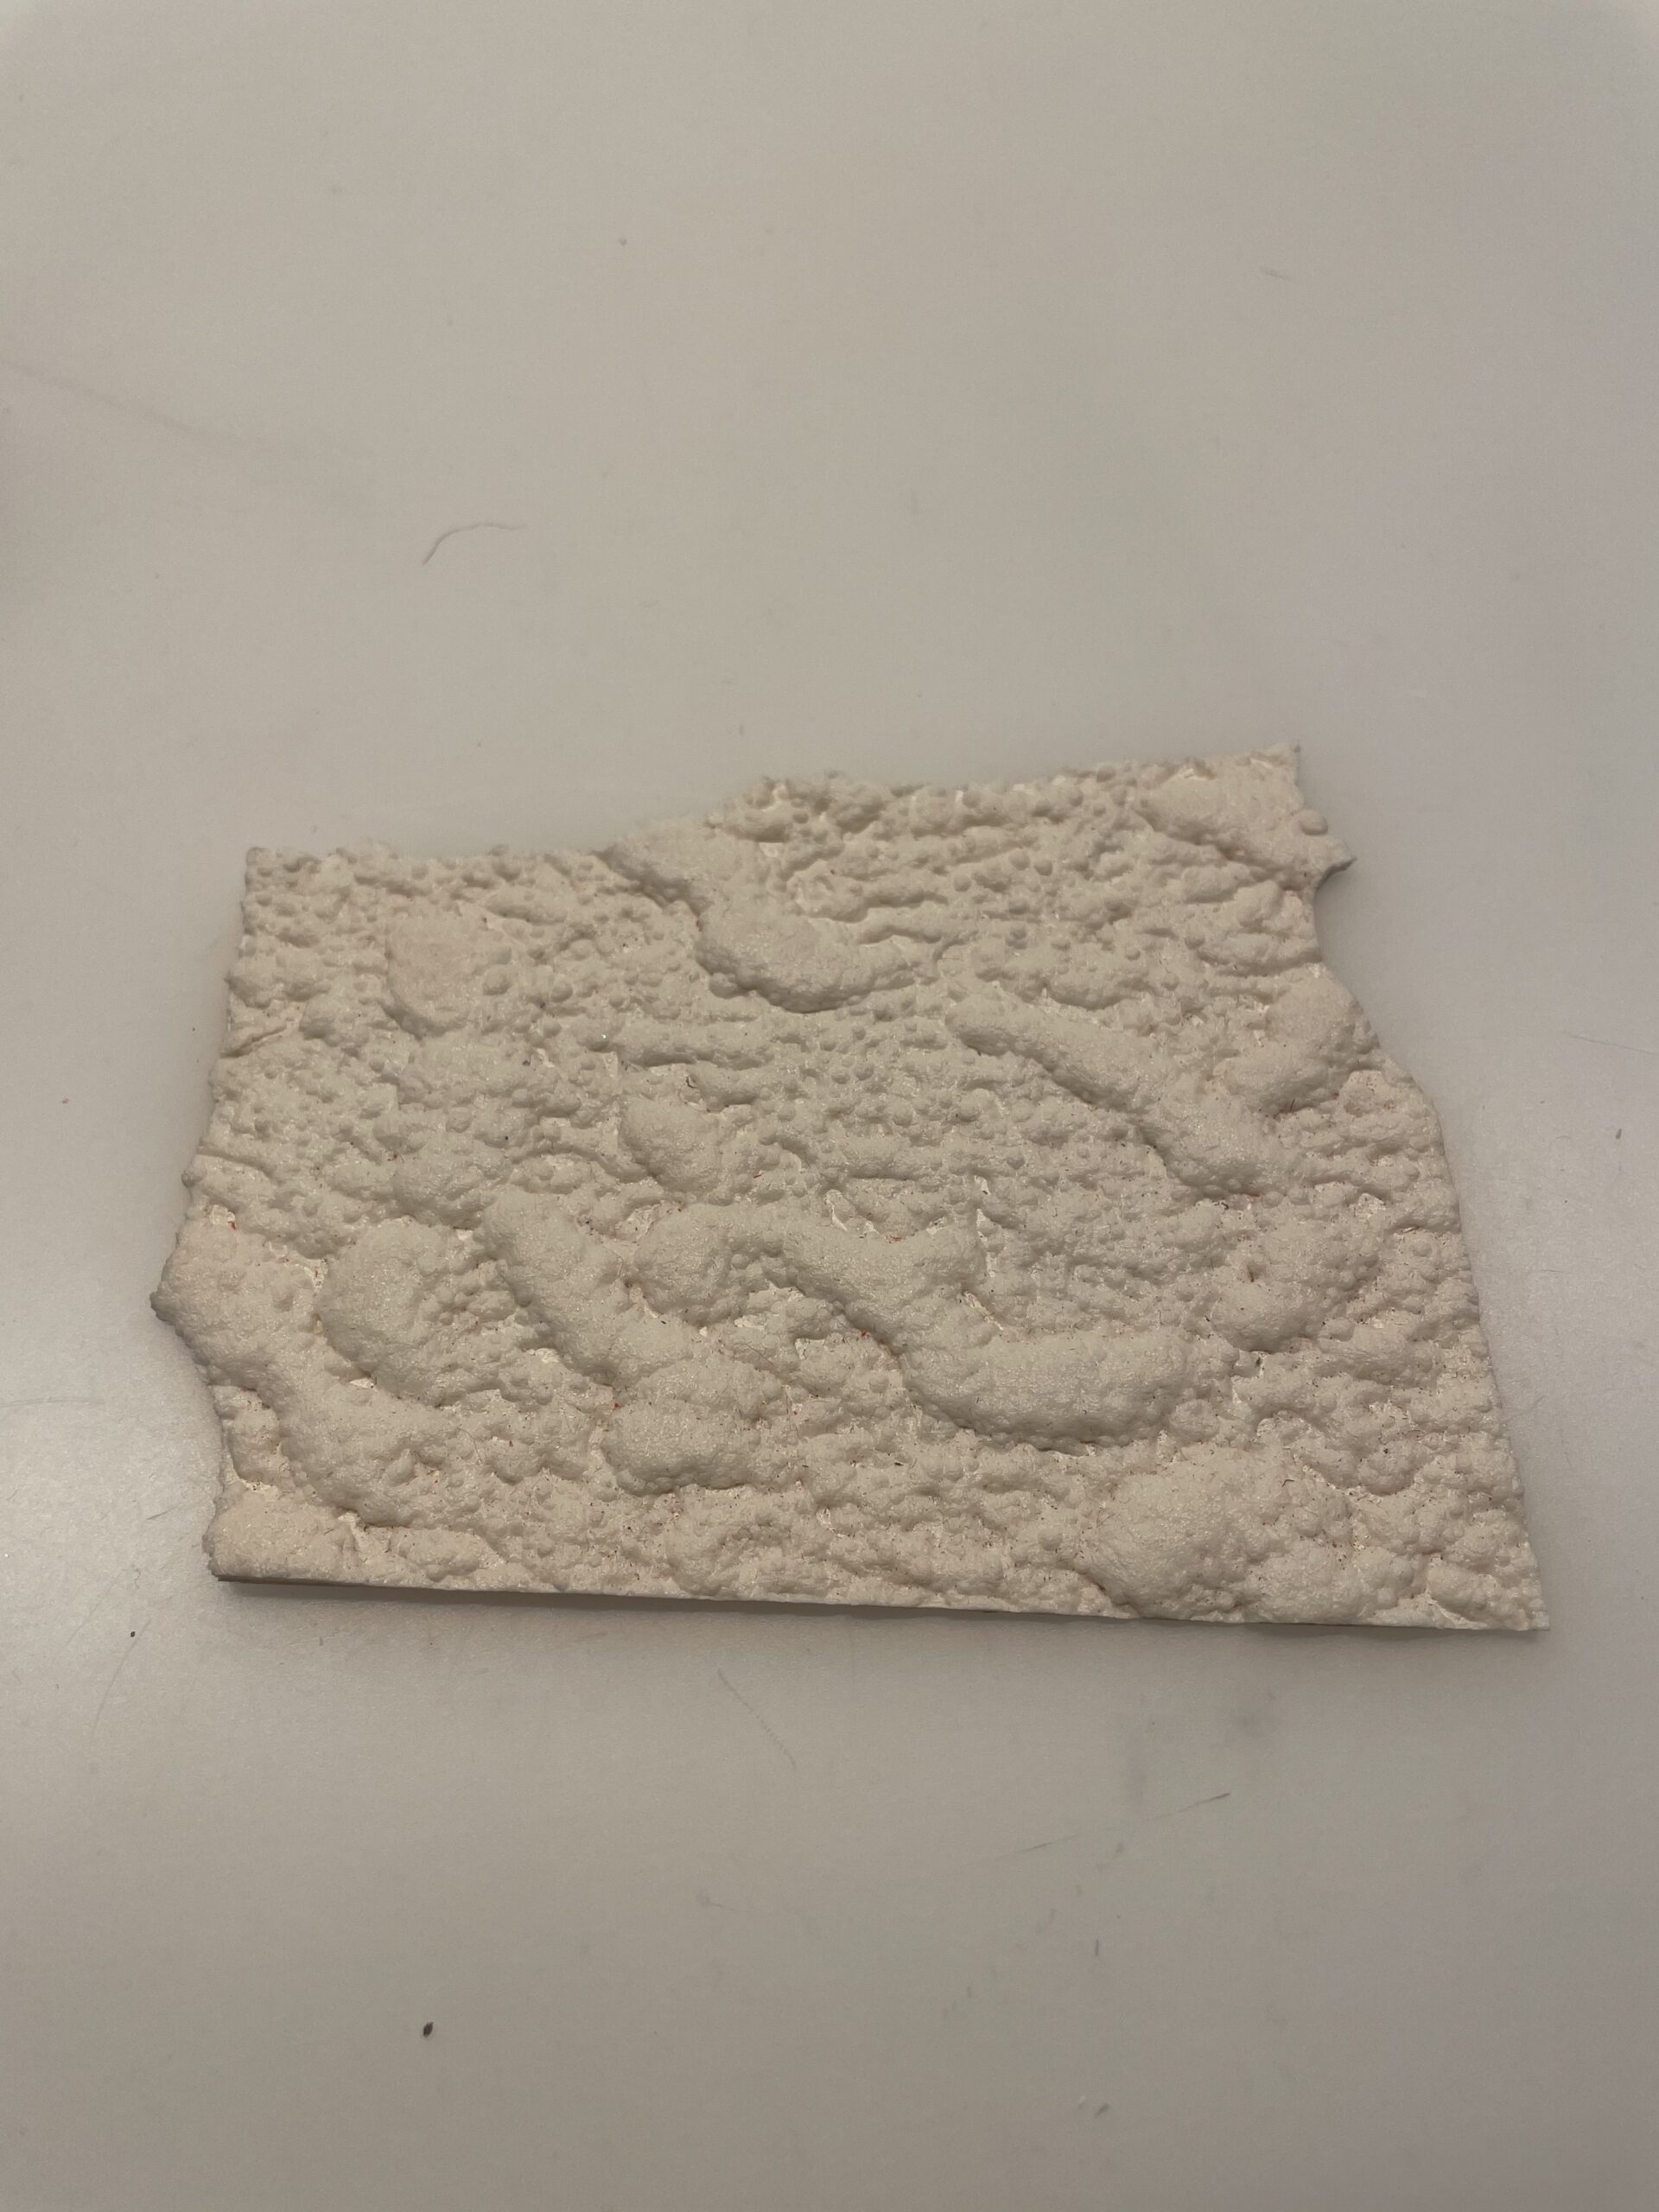
Uses either a remaining piece of a foam wallpaper (this is a bit thicker) or a piece of foam rubber in the size 7cm x 7cm.

Bild zum Schritt 1 für das Bastel- und DIY-Abenteuer für Kinder: 'Verwendet entweder ein Reststück einer Schaumstoff-Tapete (diese ist etwas dicker)...'

2

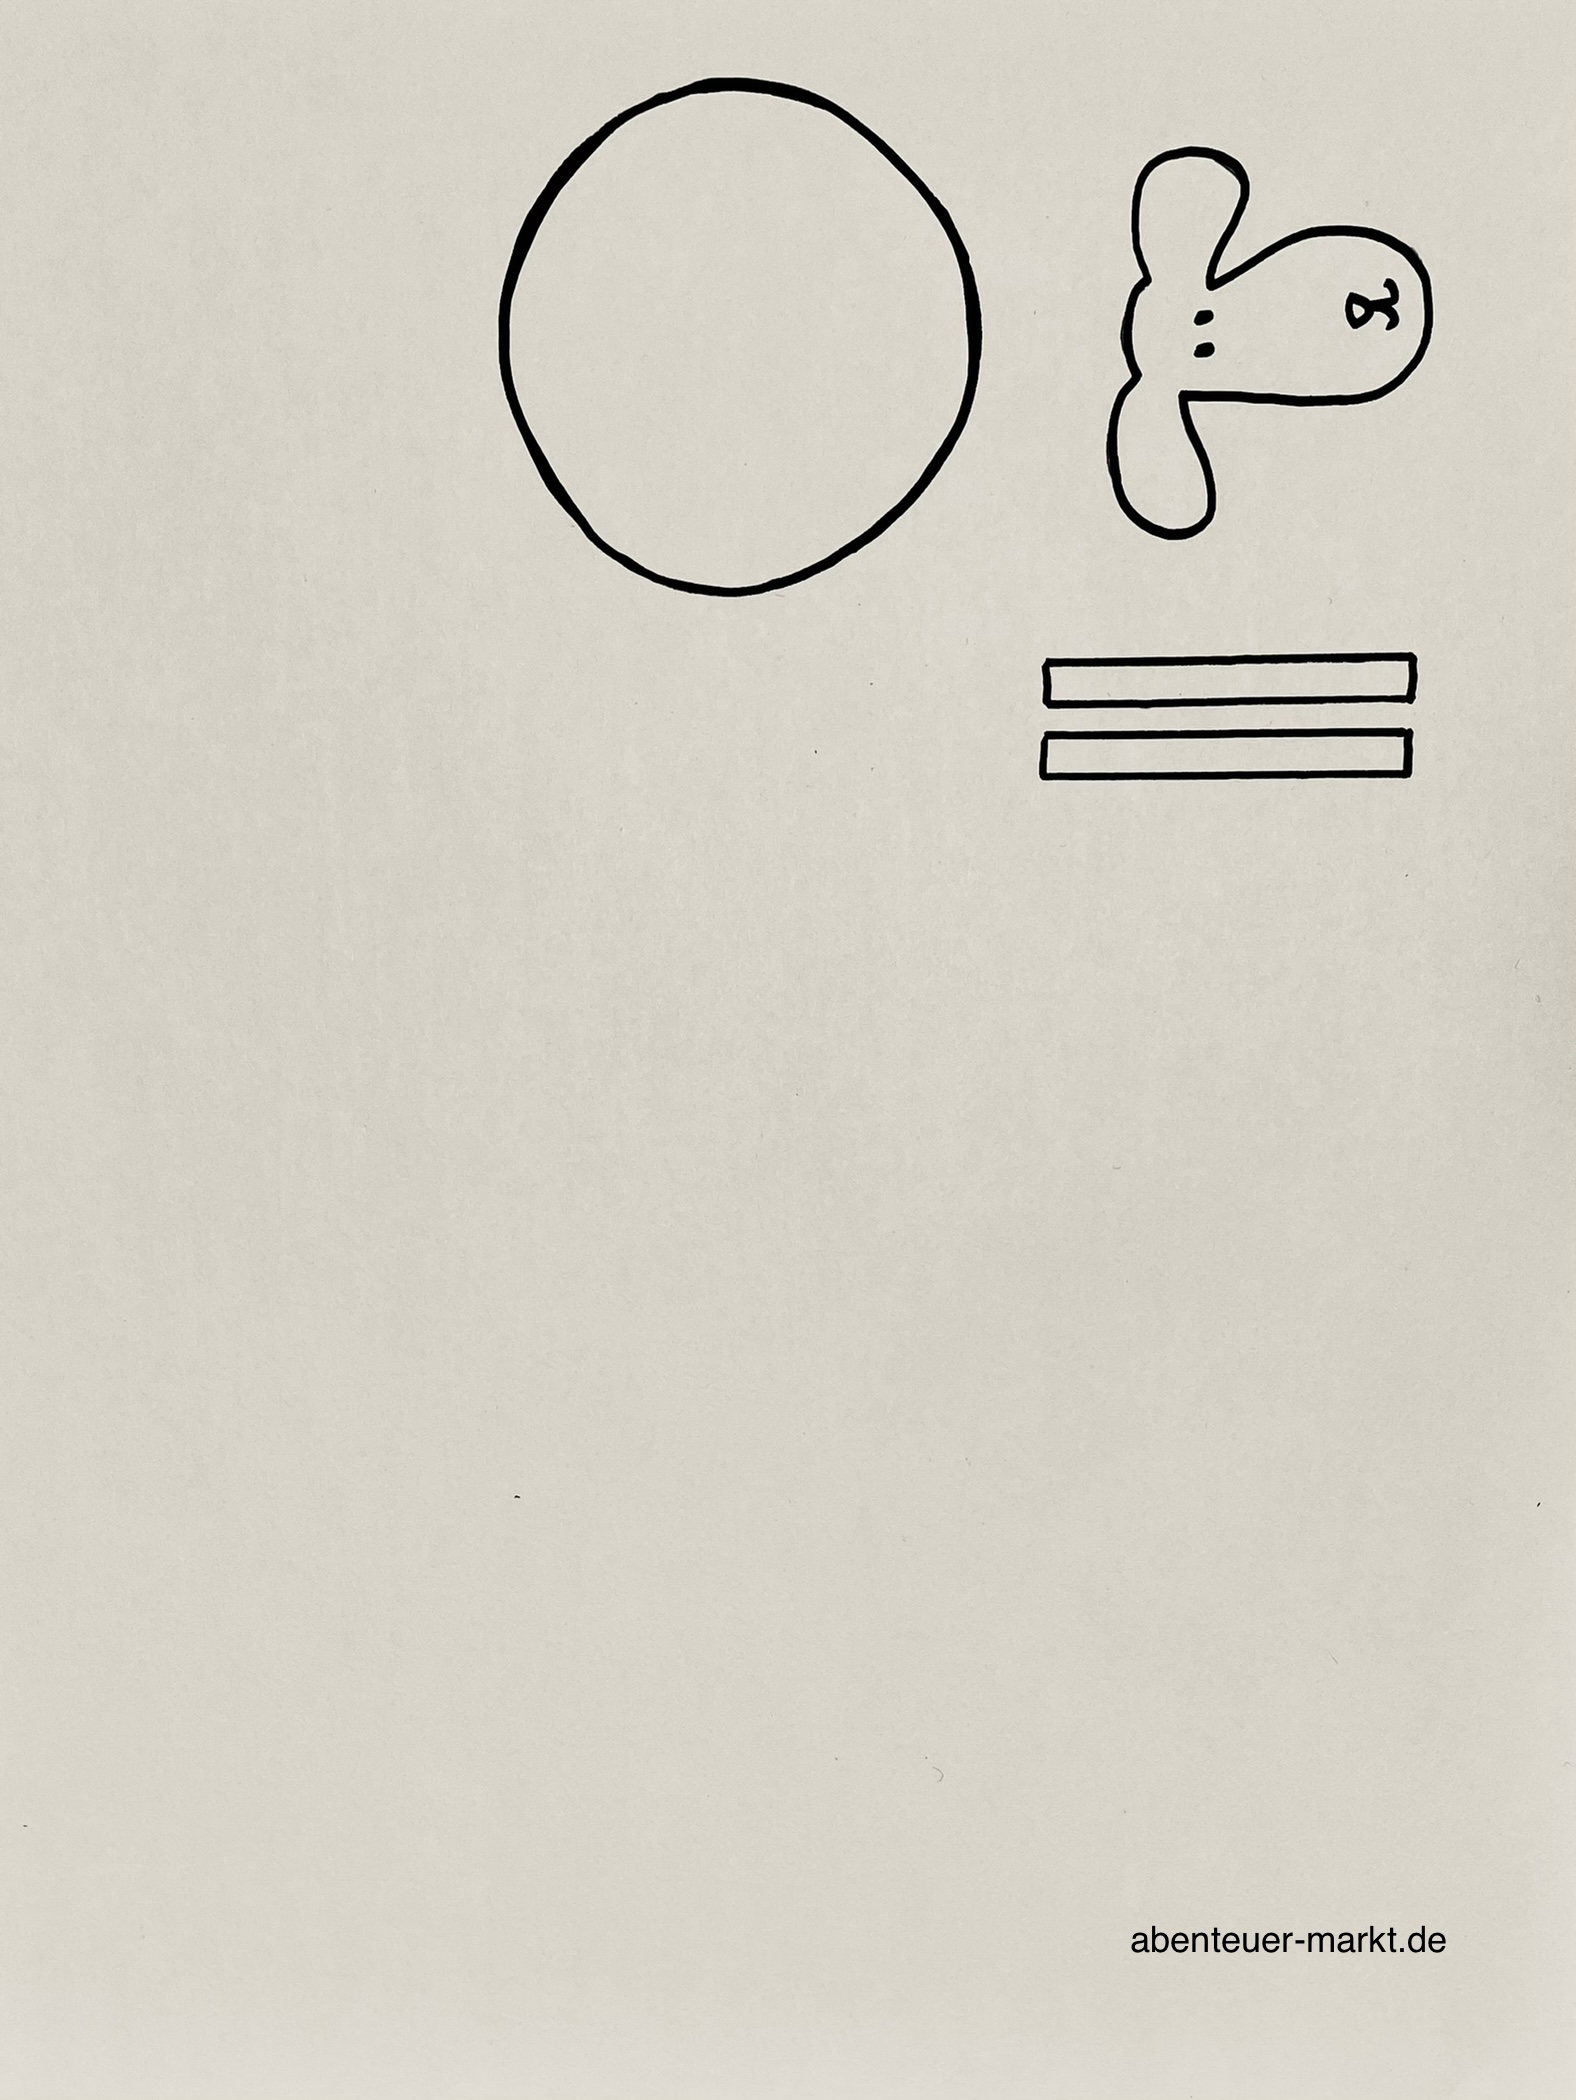
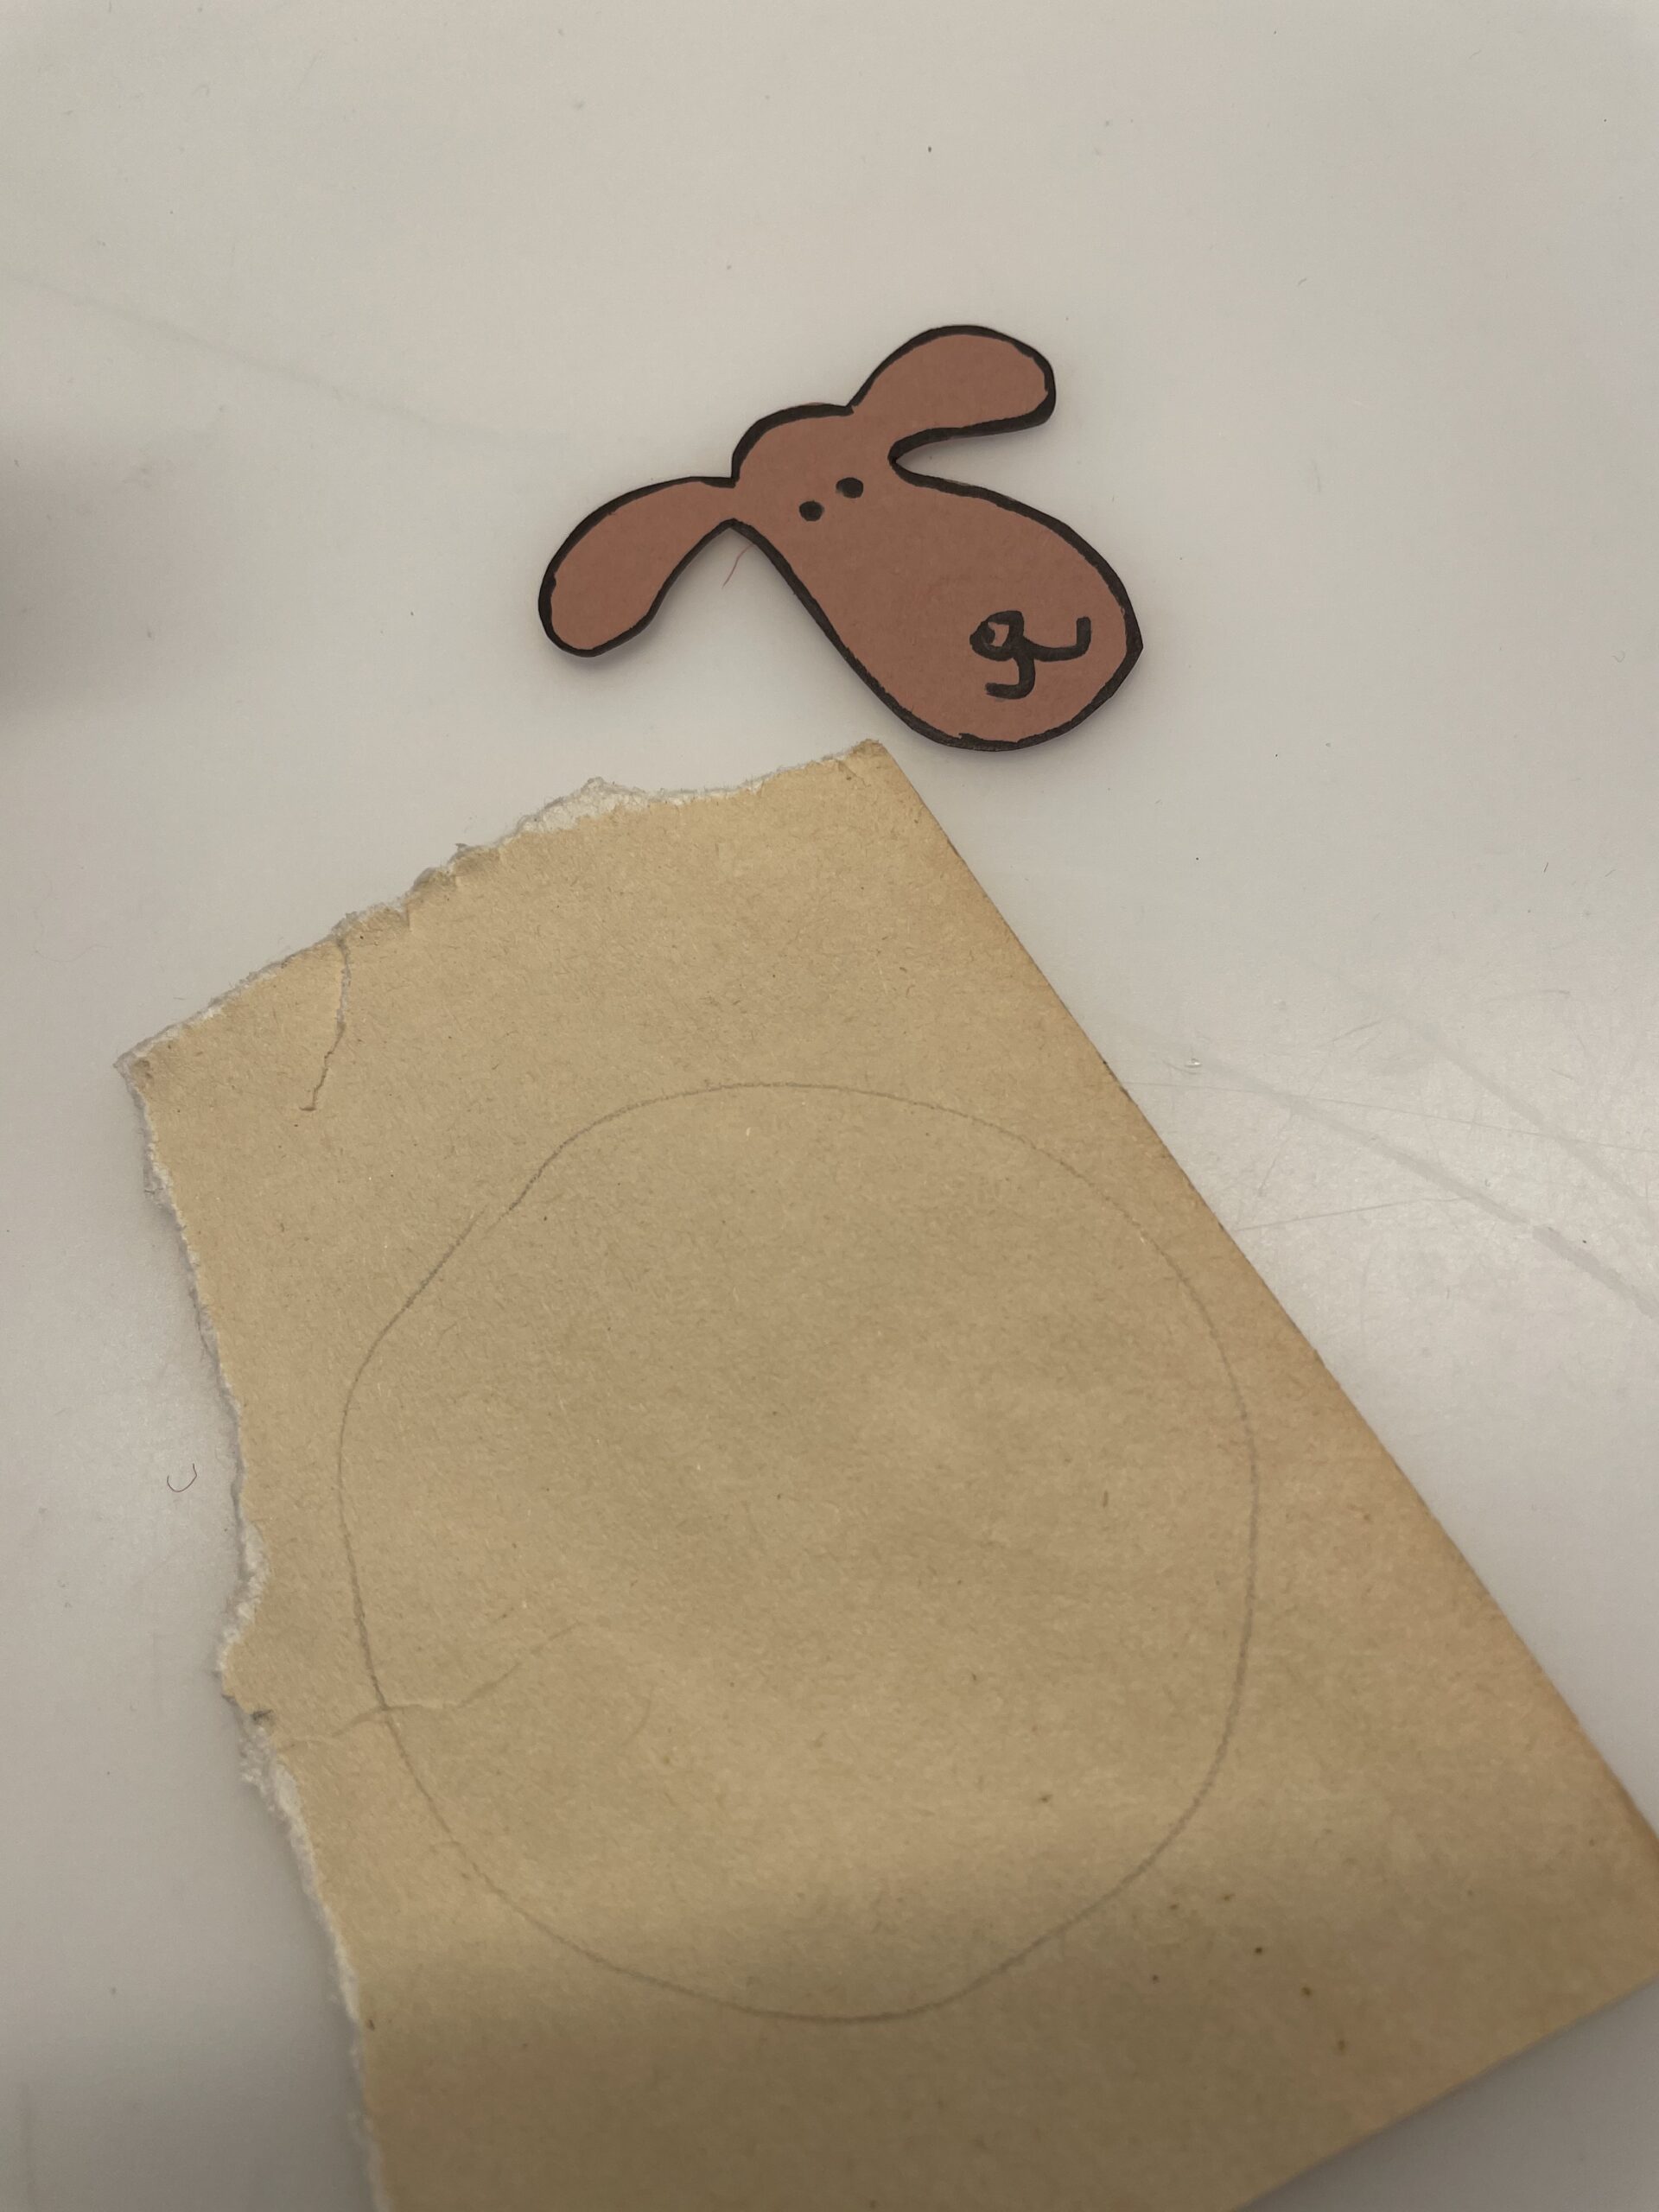
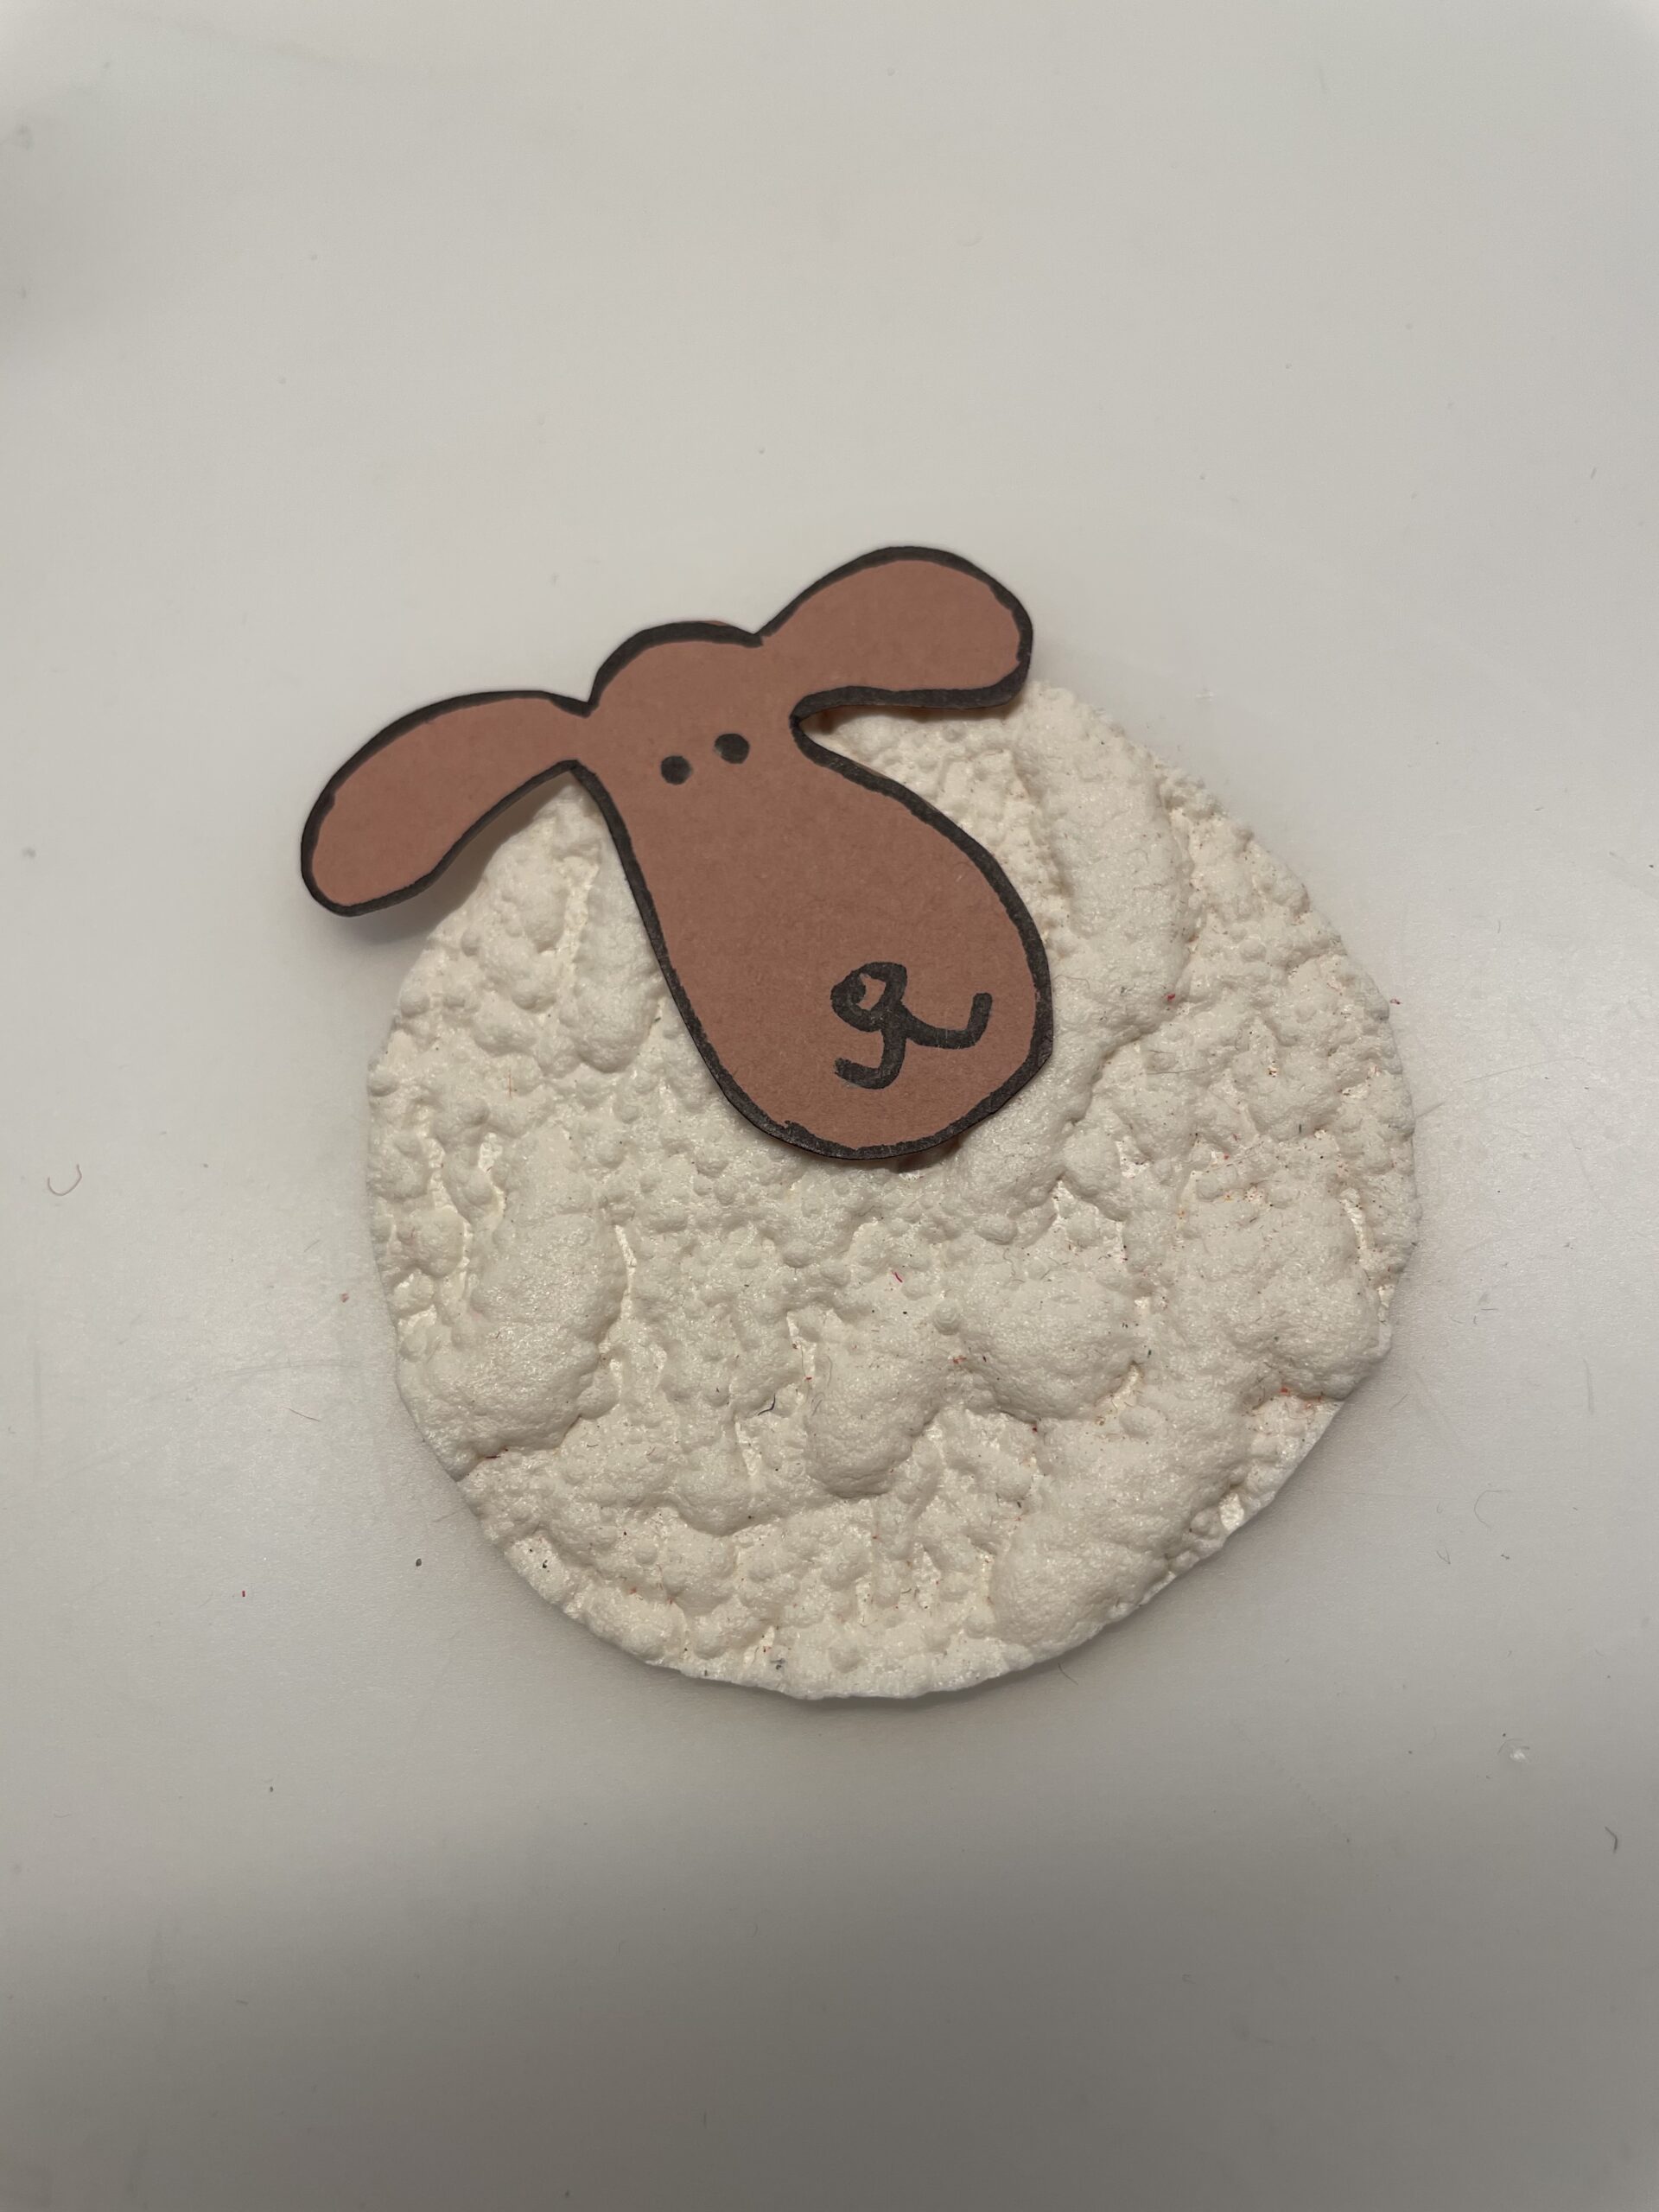
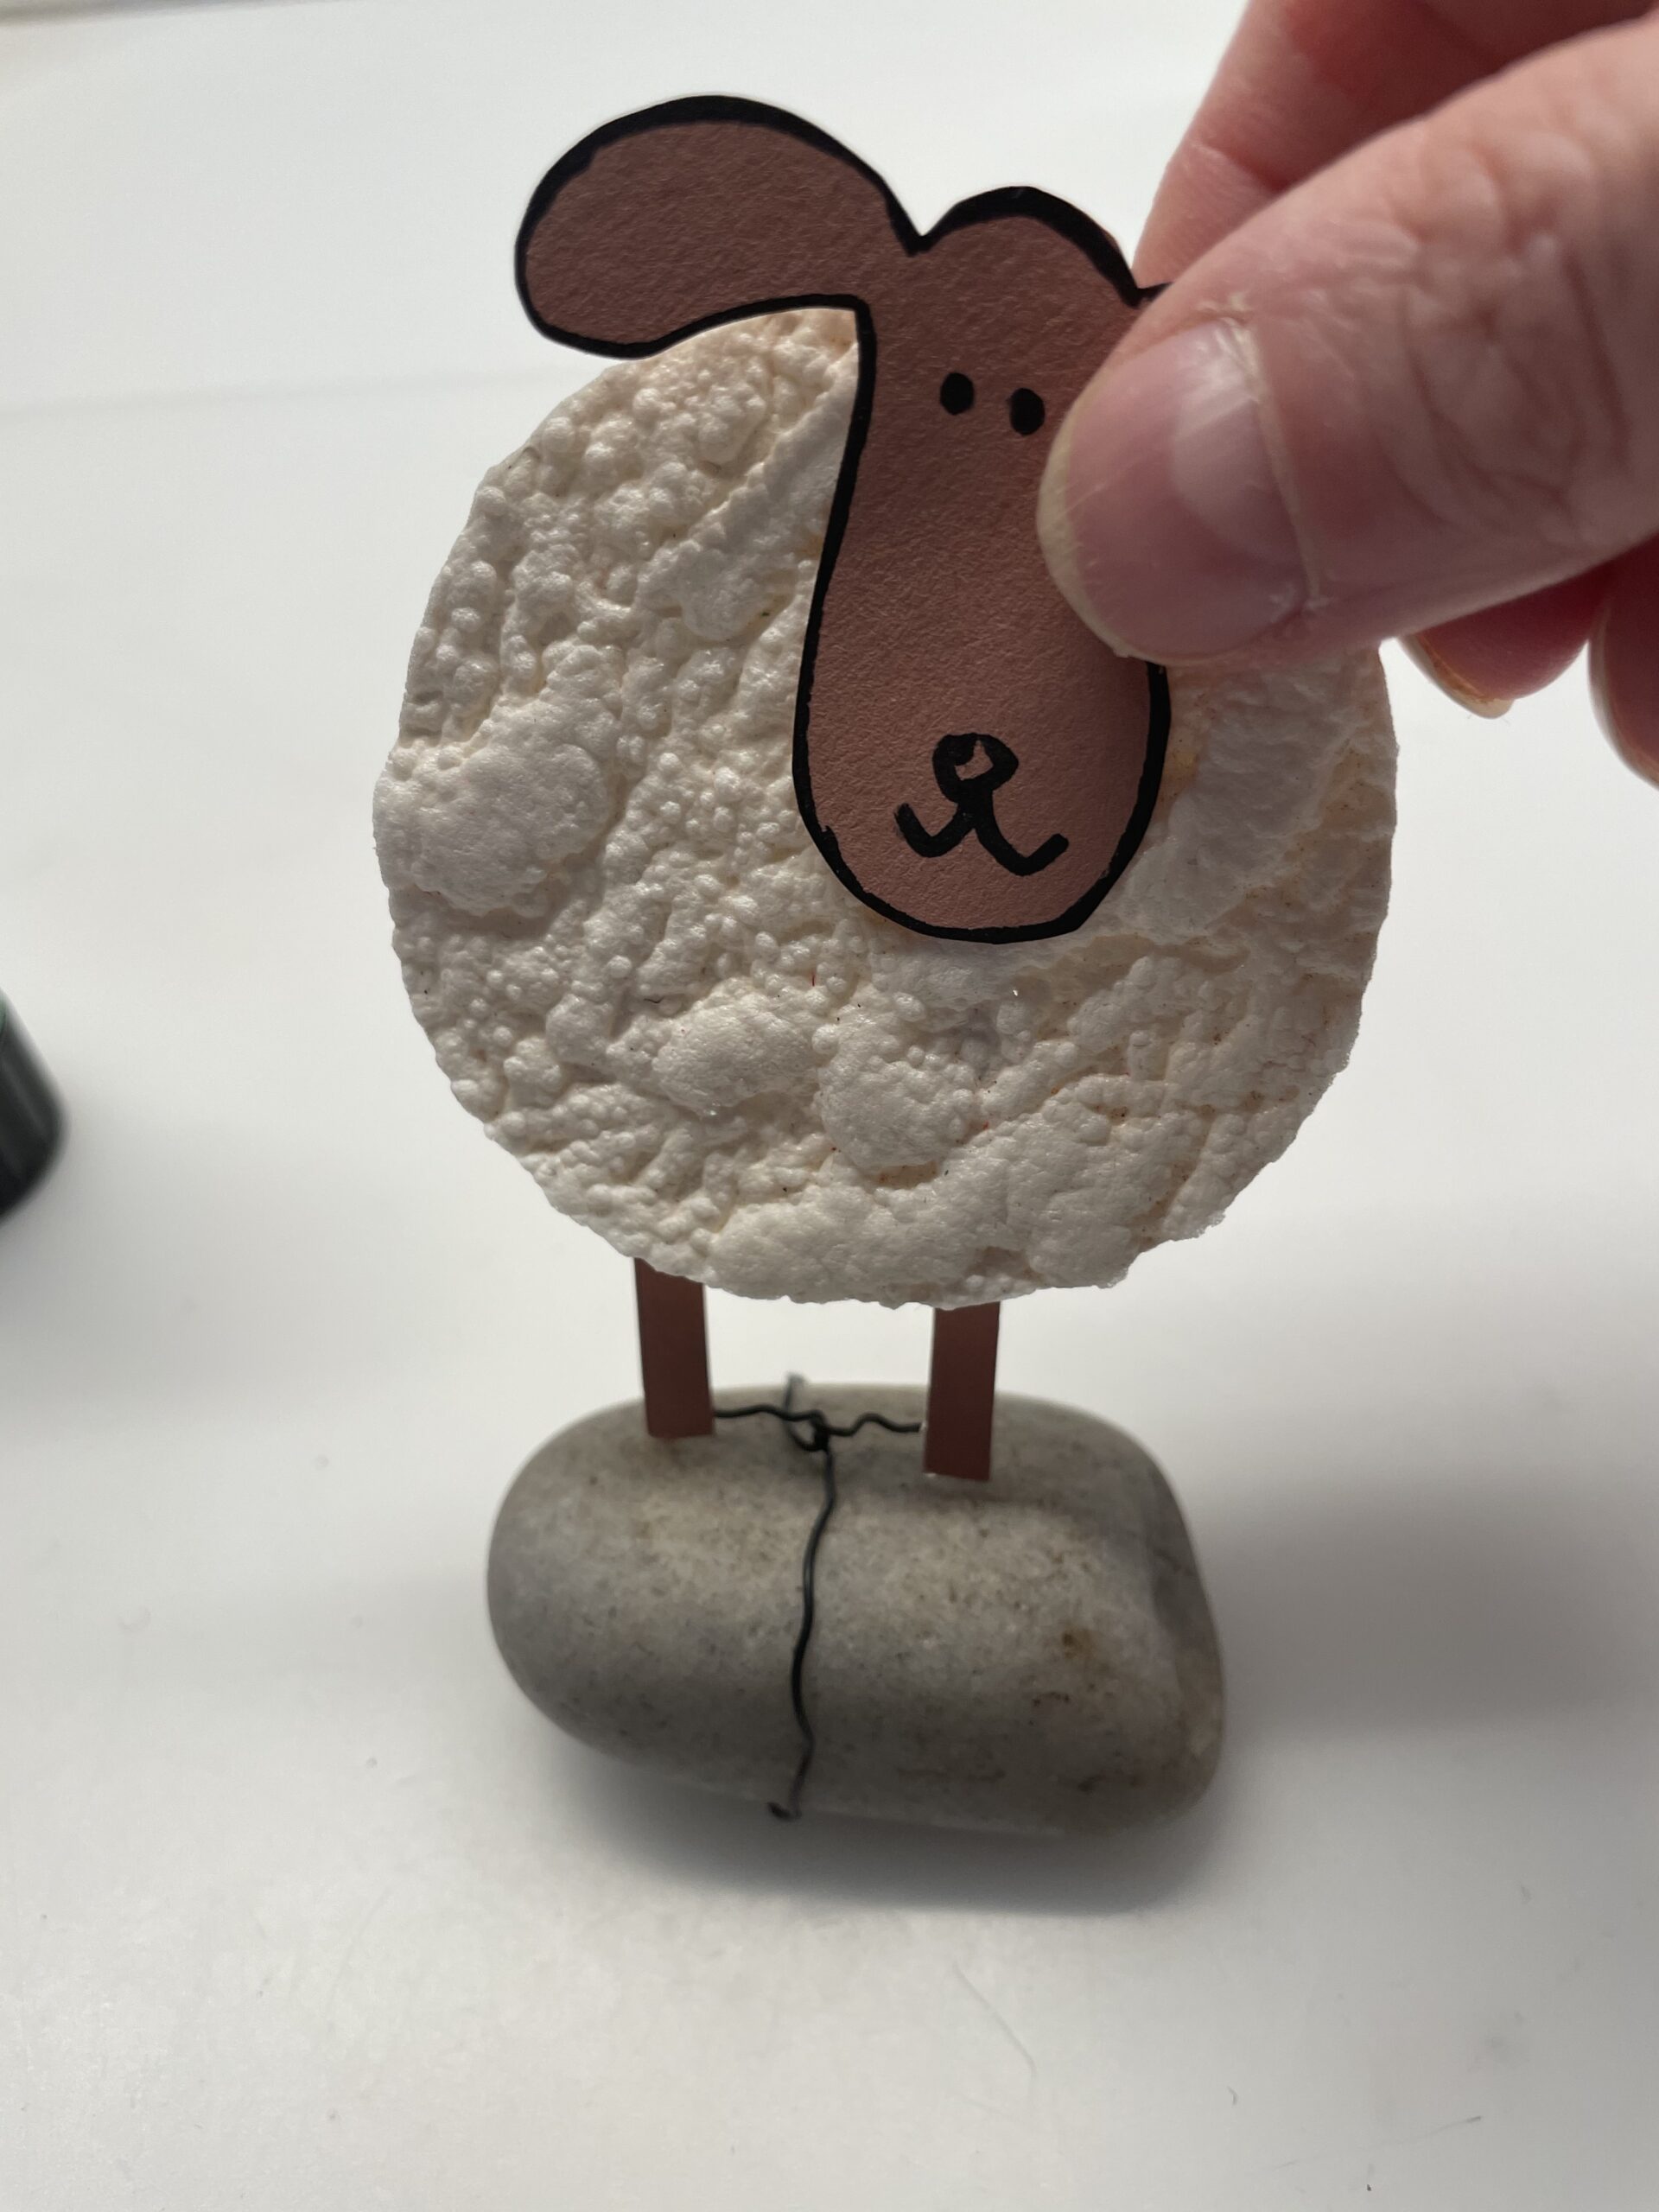
Paint the head of the sheep on a brown clay paper and cut it out.

Bild zum Schritt 2 für das Bastel- und DIY-Abenteuer für Kinder: 'Malt euch auf einem braunen Tonpapier den Kopf des Schafes...'

3

2. Bild zum Schritt 2 für das Bastel- und DIY-Abenteuer für Kinder: 'Malt euch auf einem braunen Tonpapier den Kopf des Schafes...'

4

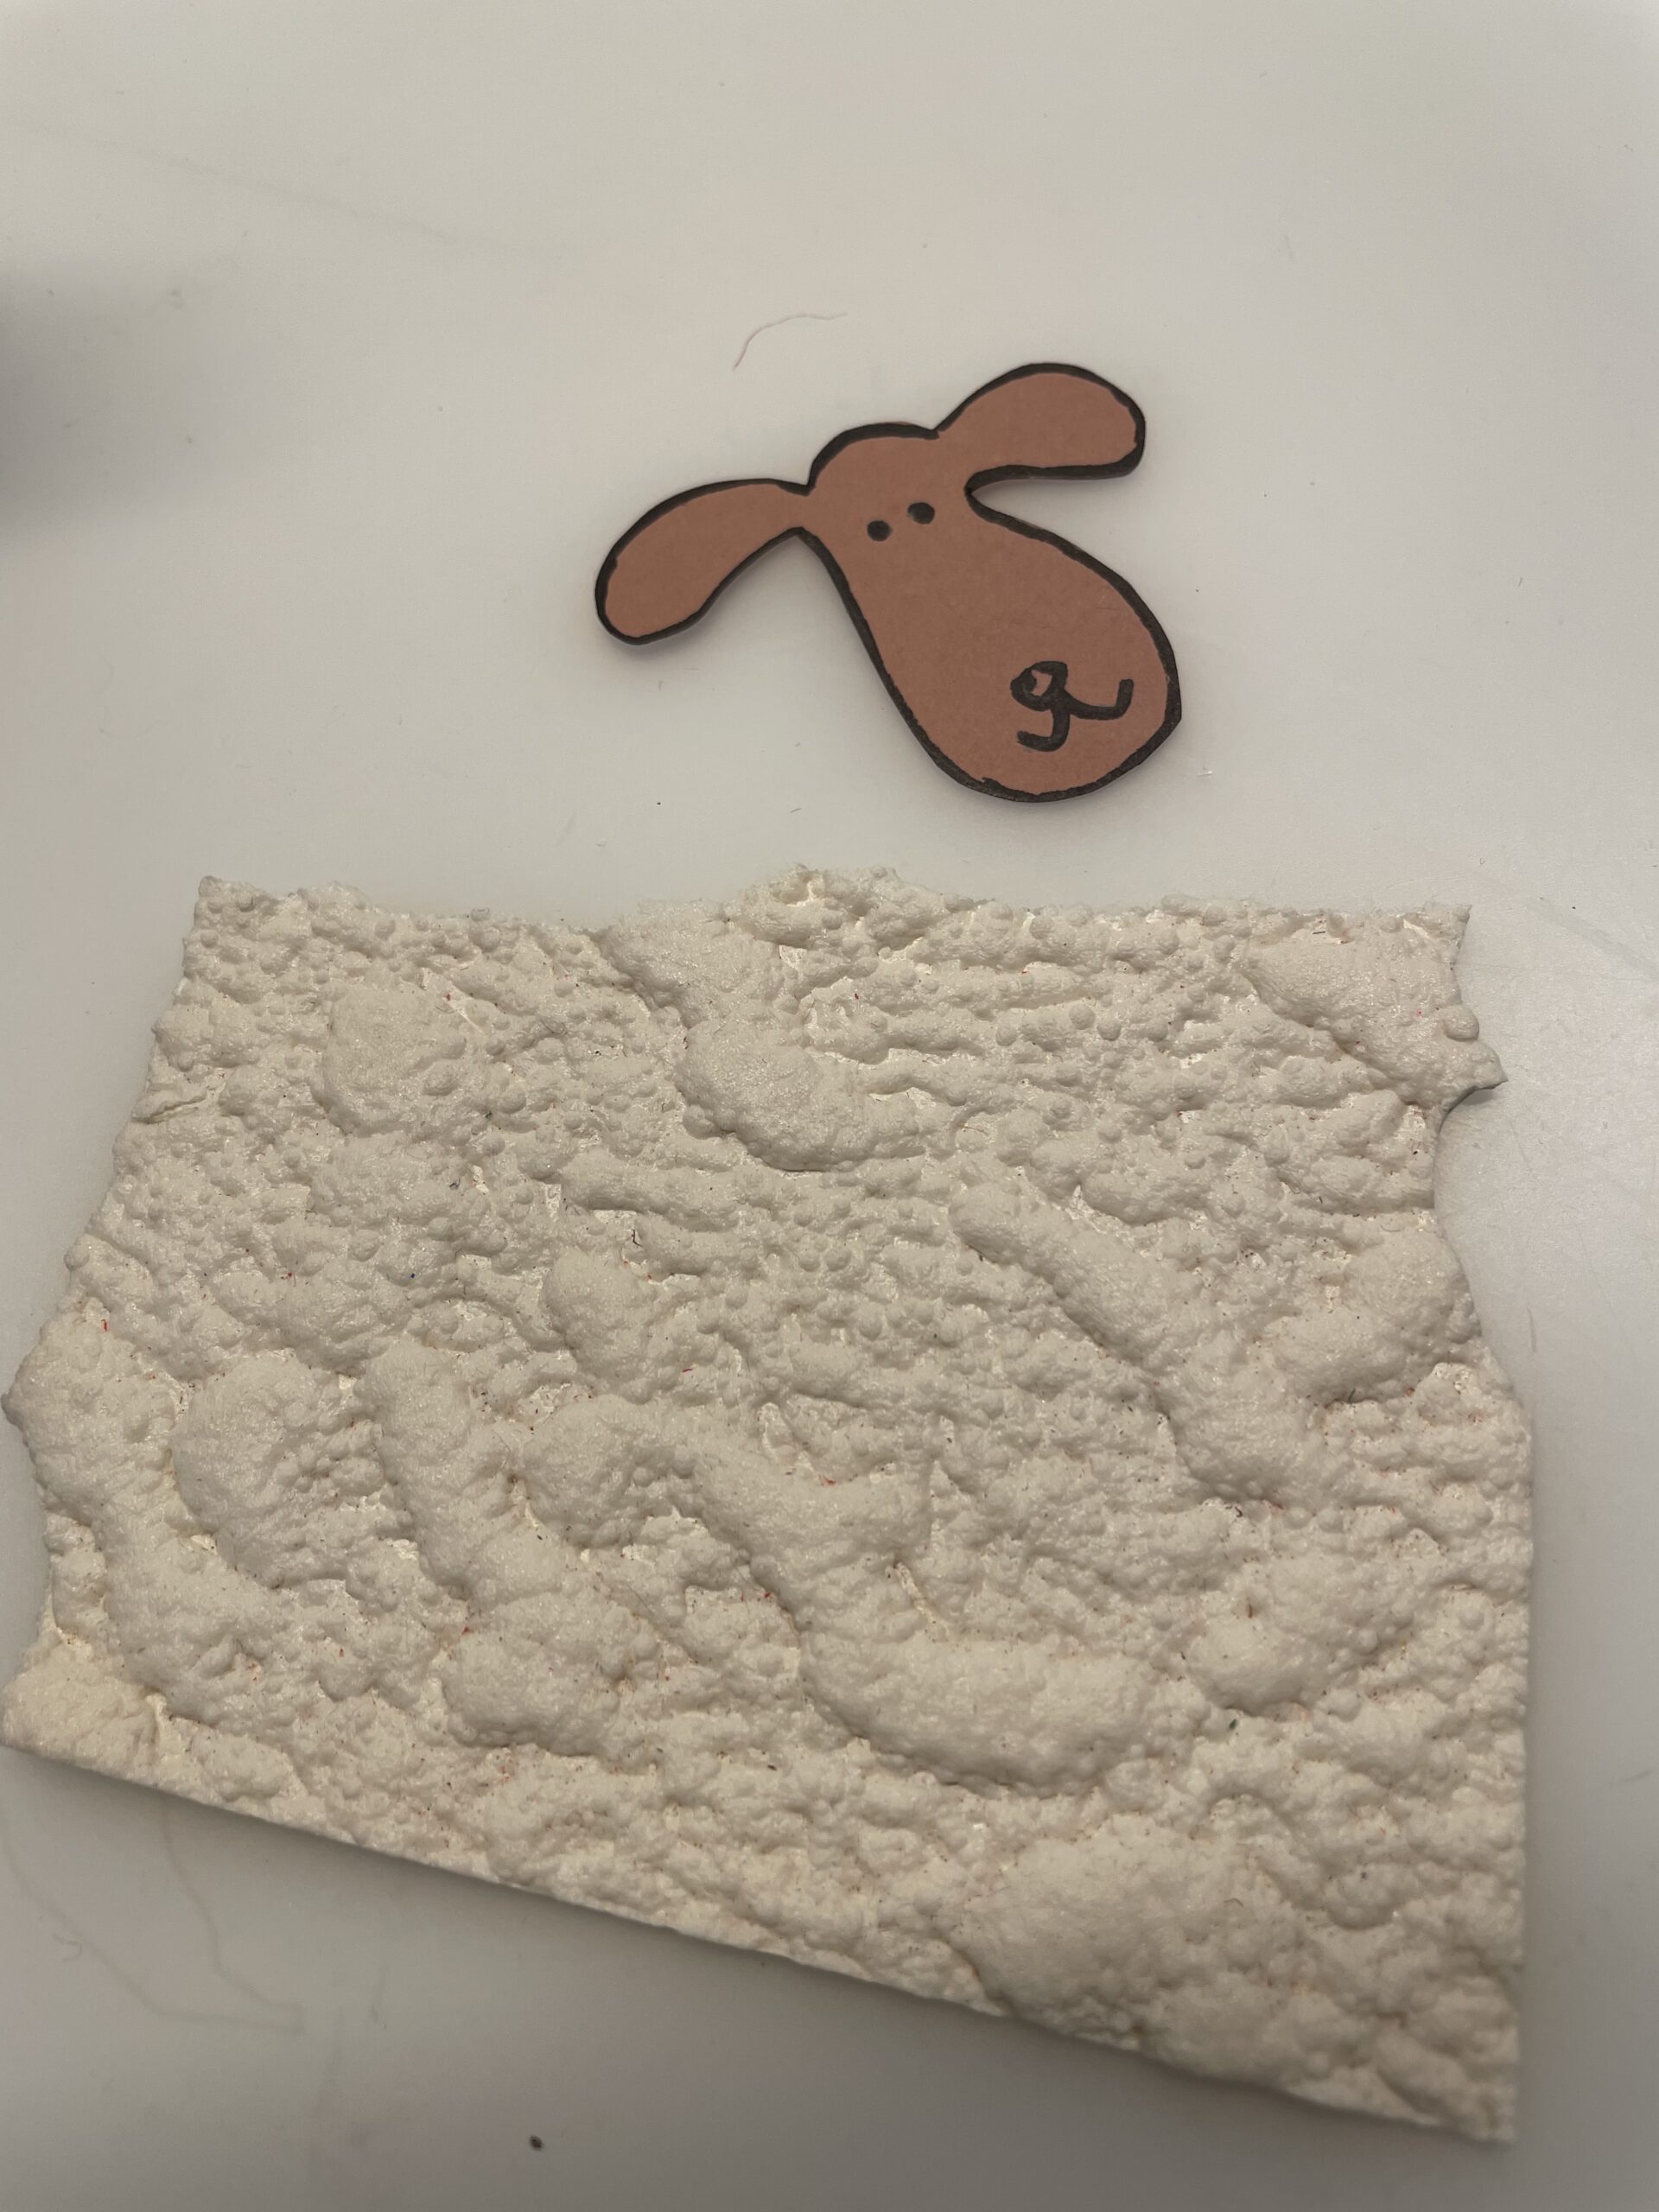
Now cut the belly of the sheep. Paint a circle on your wallpaper.

Bild zum Schritt 4 für das Bastel- und DIY-Abenteuer für Kinder: 'Schneidet jetzt den Bauch des Schafes zu. Malt hierzu einen...'

5

Then stick her head on the belly of the sheep.

Bild zum Schritt 5 für das Bastel- und DIY-Abenteuer für Kinder: 'Dann klebt ihr den Kopf auf den Bauch des Schafes.'

6

Now you put the wire around a stone and twist it. Both ends of the wire are about the same length.

Bild zum Schritt 6 für das Bastel- und DIY-Abenteuer für Kinder: 'Jetzt legt ihr den Draht um einen Stein und verdreht...'

7

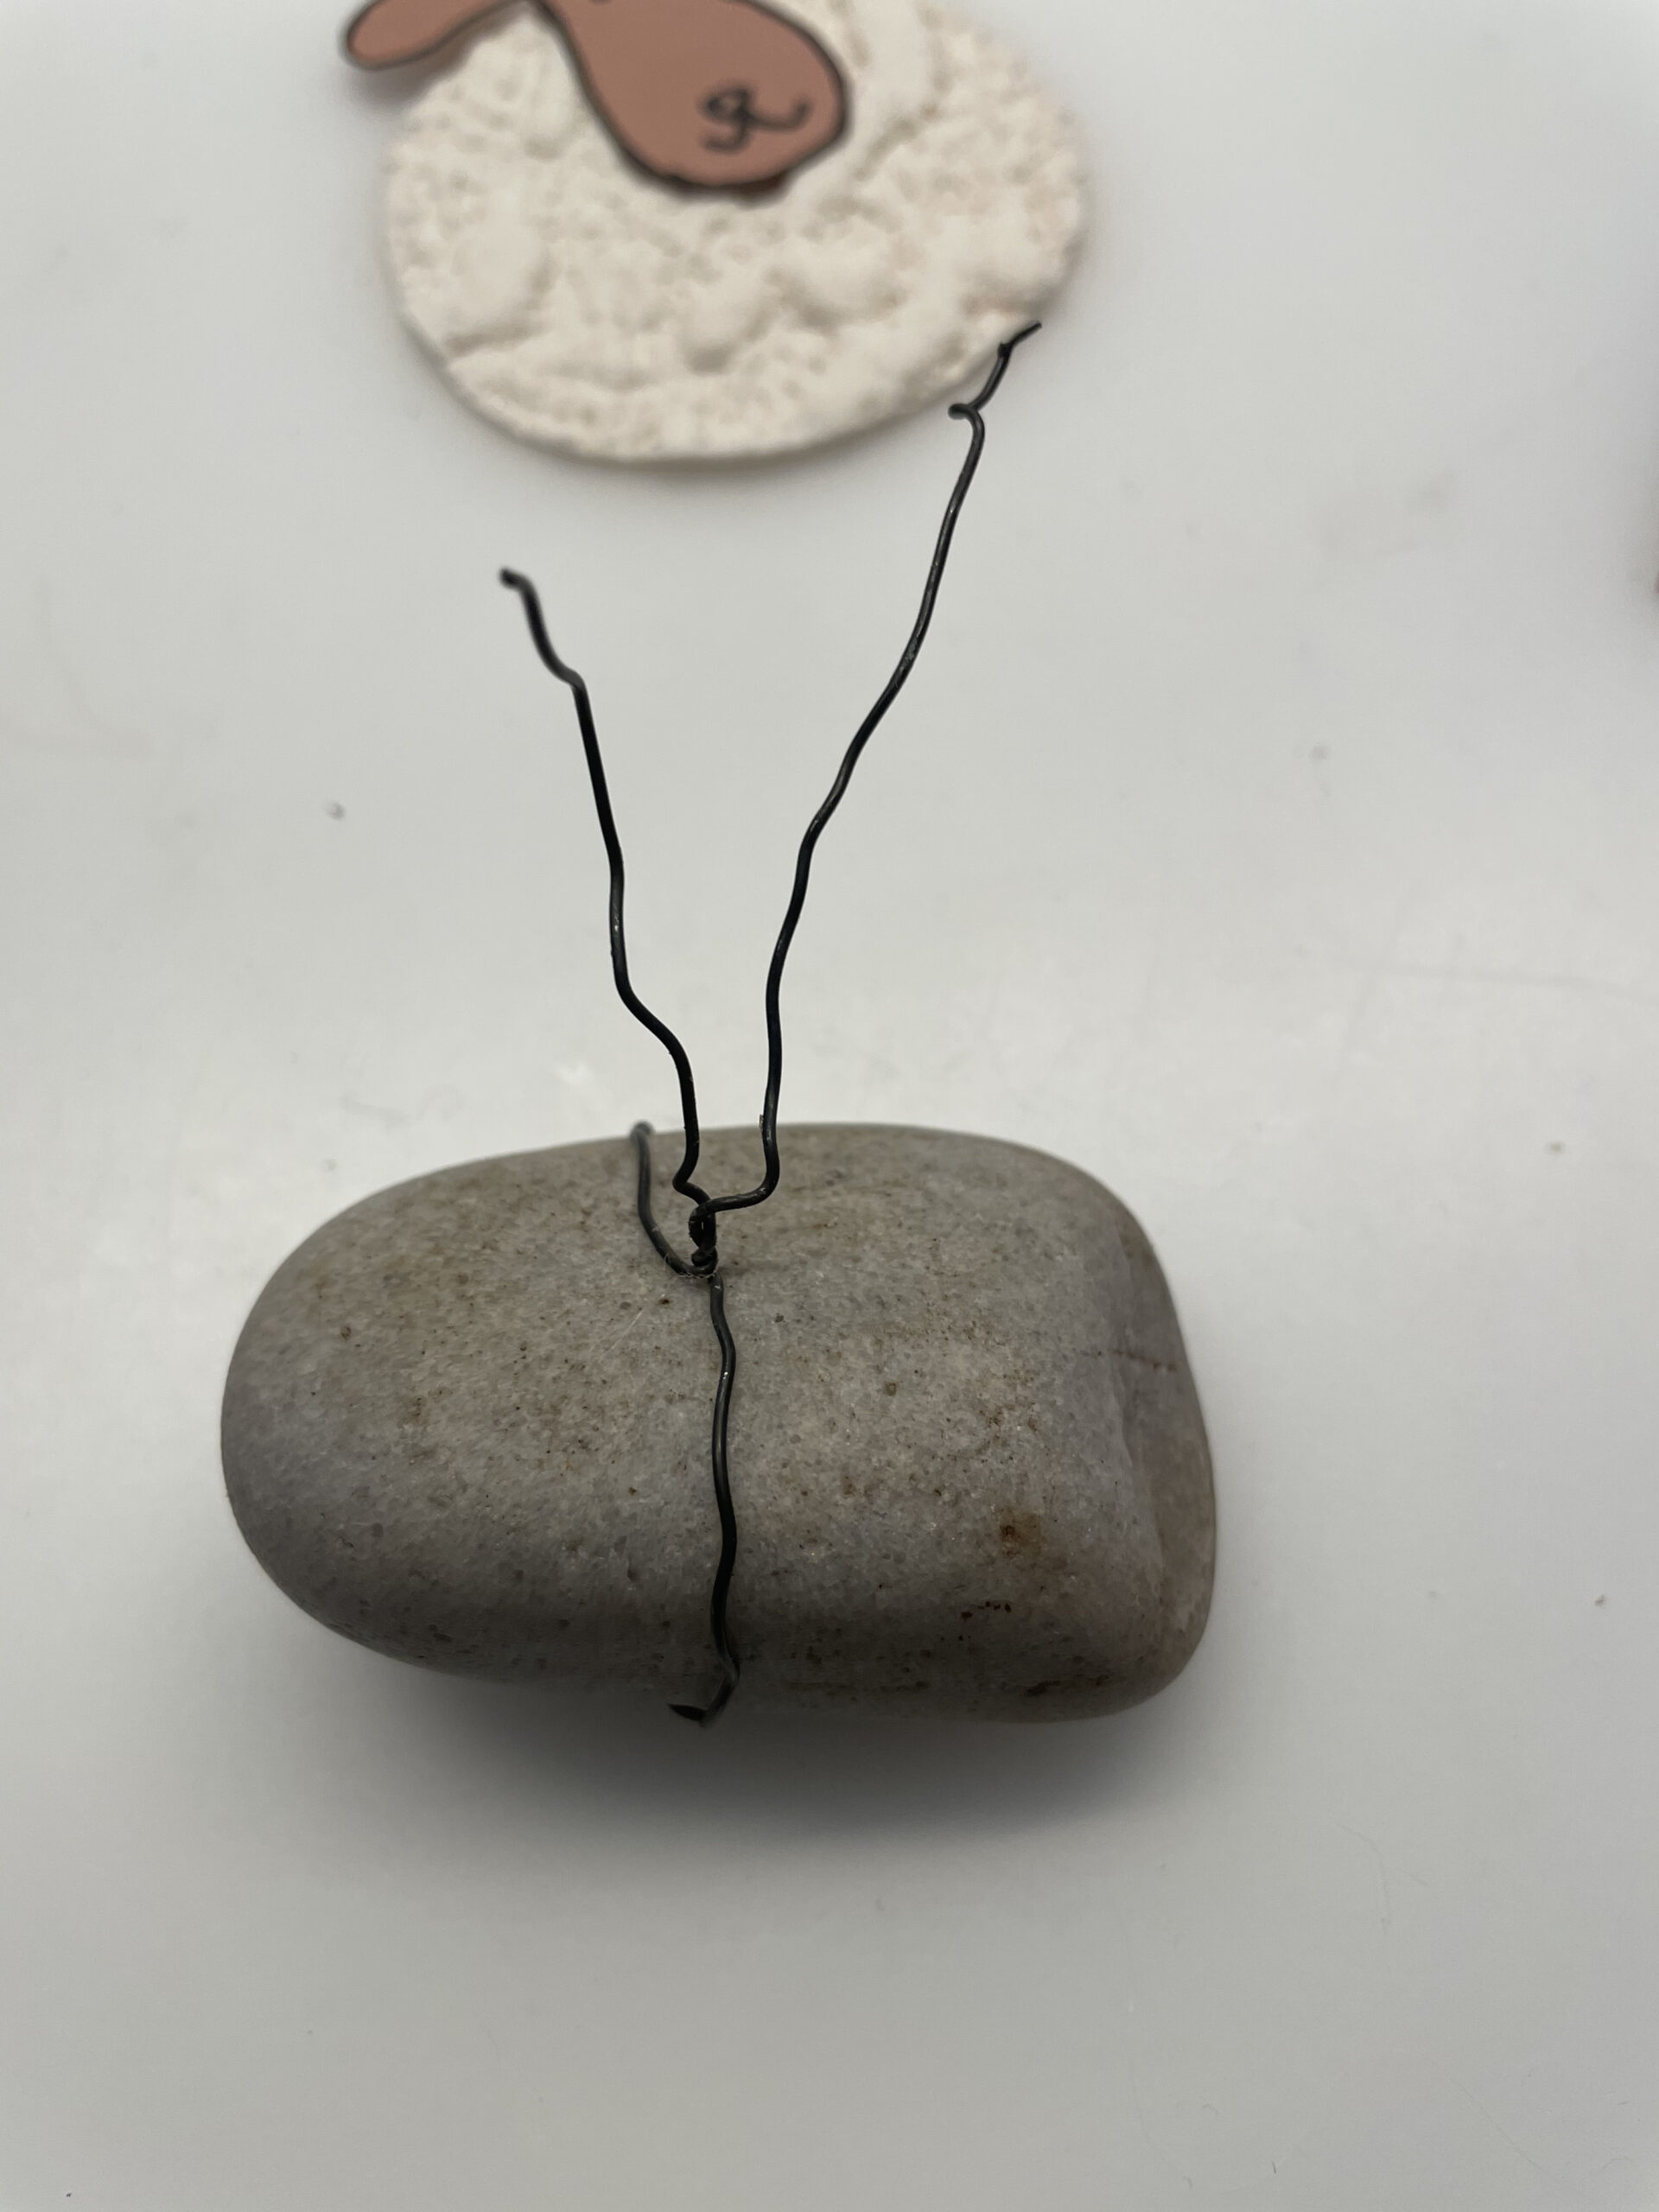
Bending the wire a bit apart so that it looks like in the picture. The two ends of the wire are pointing upwards.

Bild zum Schritt 7 für das Bastel- und DIY-Abenteuer für Kinder: 'Biegt den Draht etwas auseinander, so dass er wie im...'

8

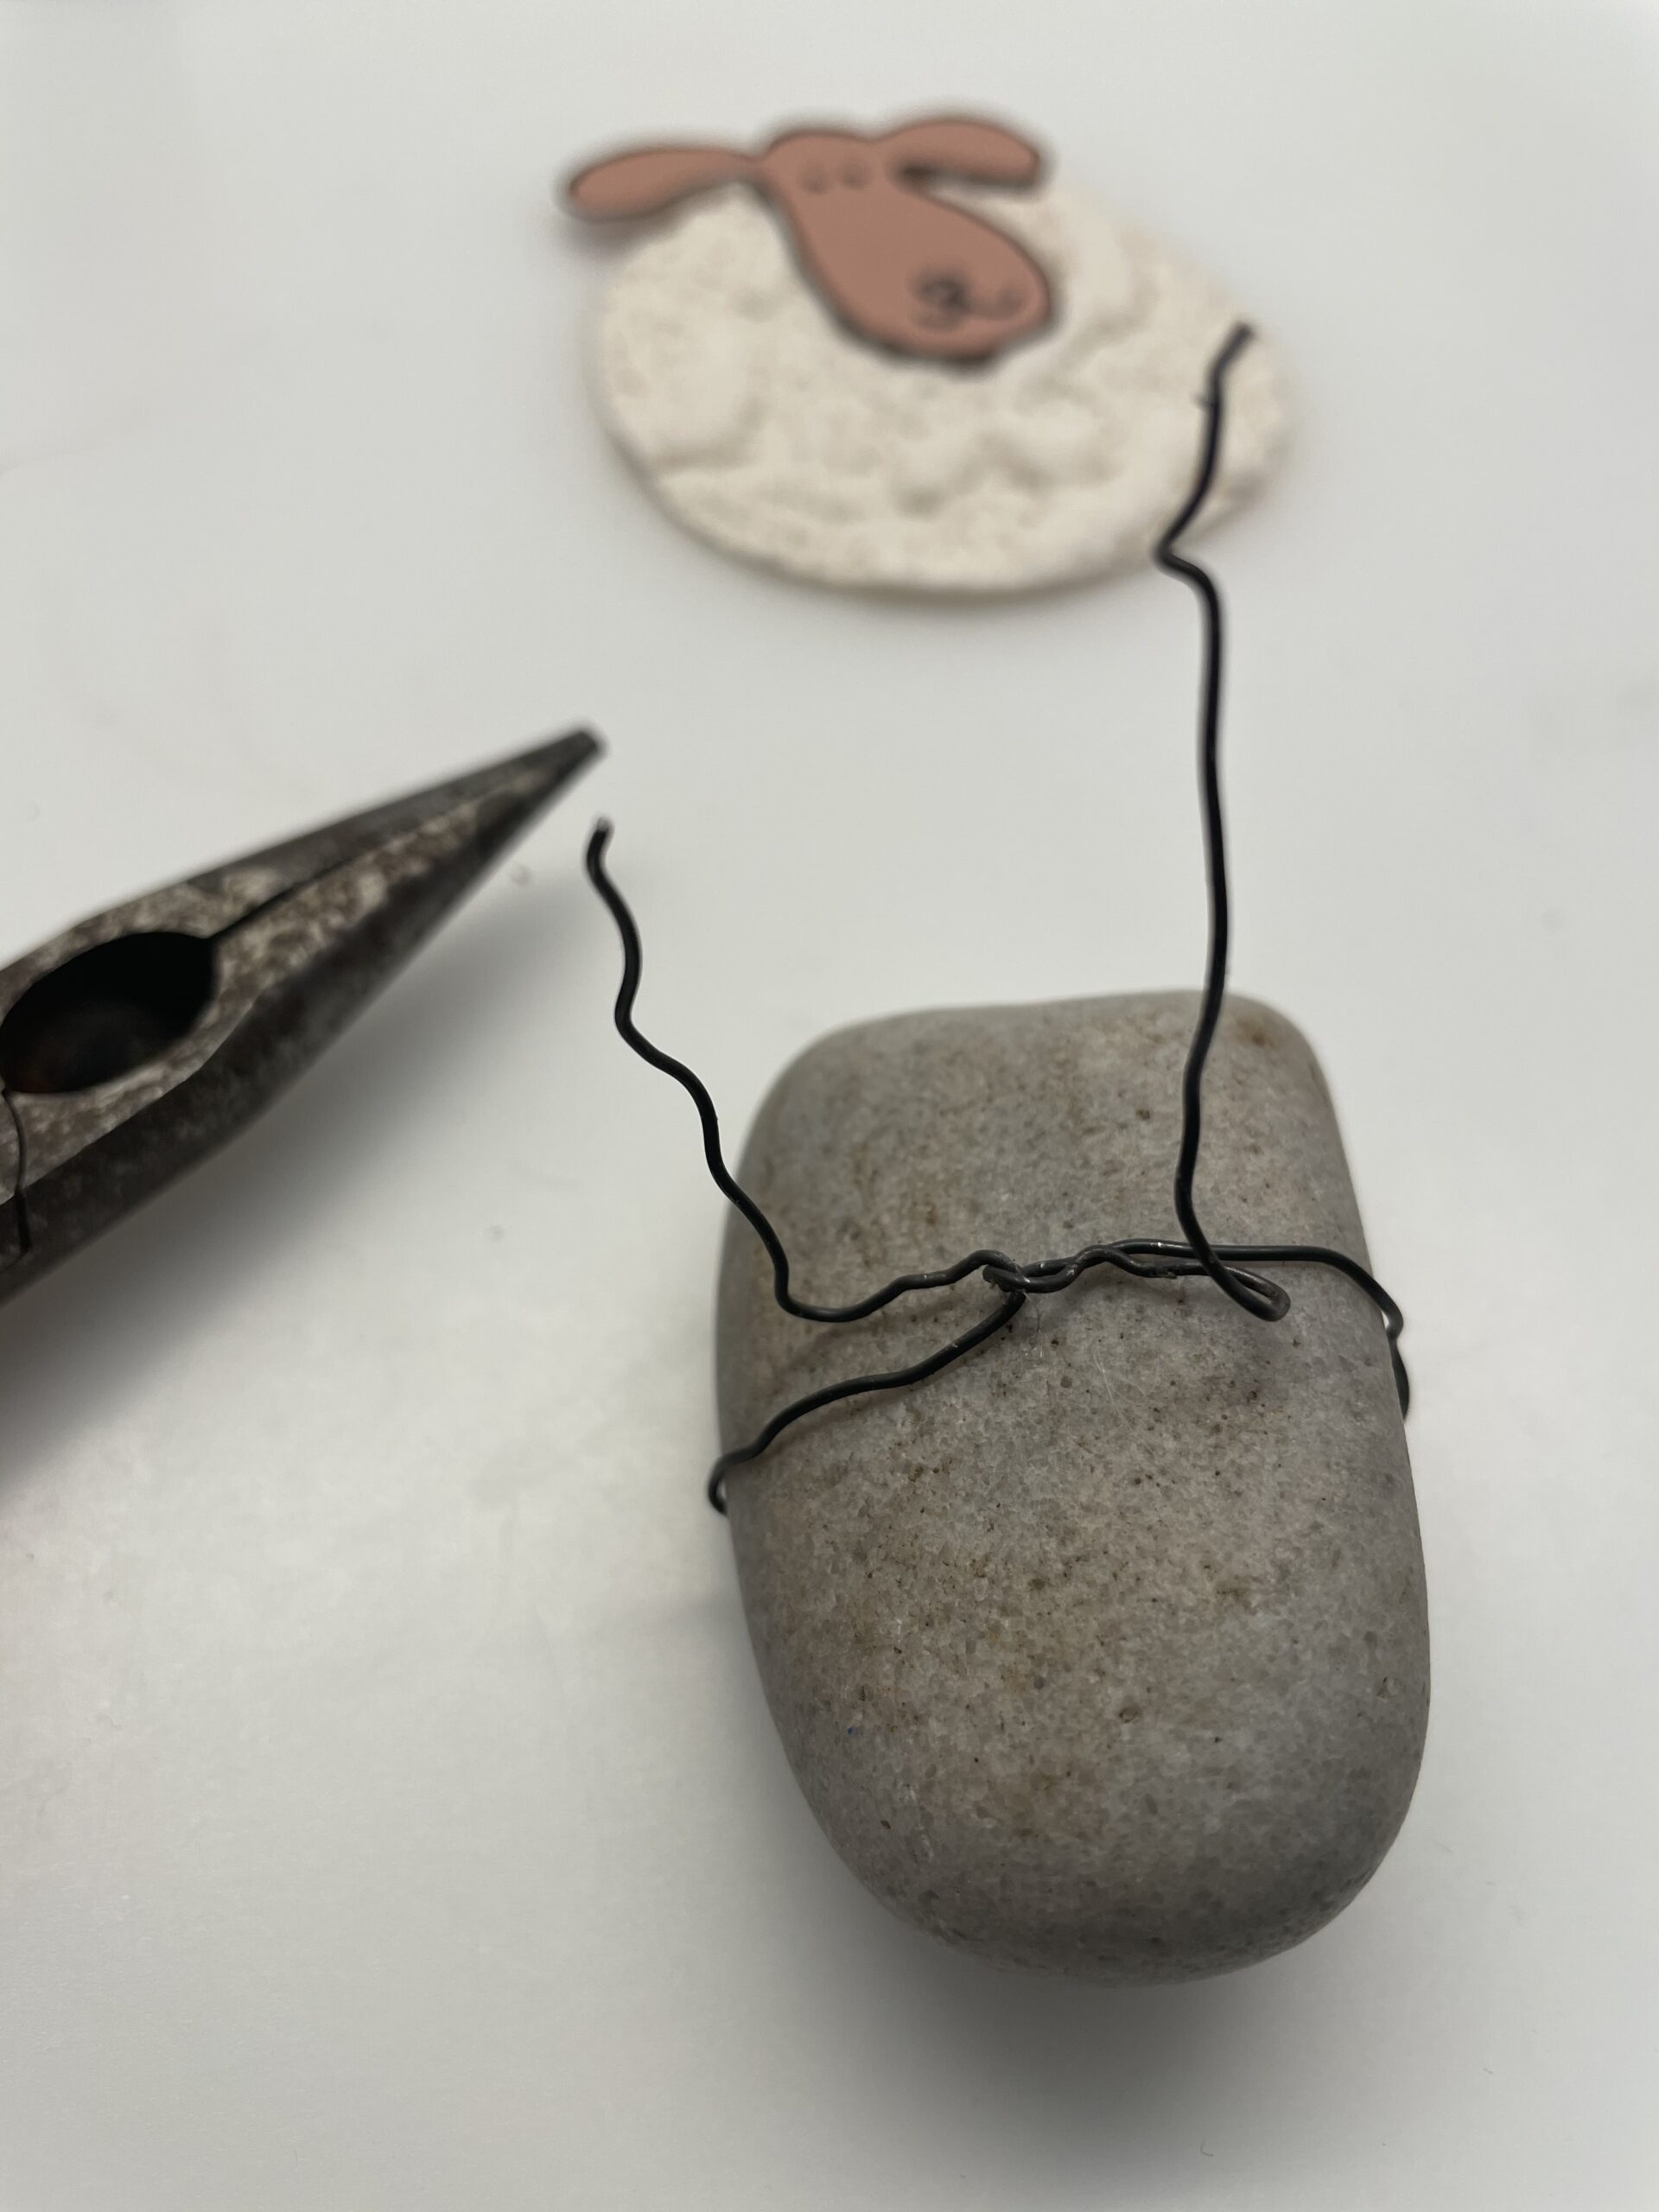
Now you cut two short thin strips of brown clay paper. These become the legs of the sheep.

Bild zum Schritt 8 für das Bastel- und DIY-Abenteuer für Kinder: 'Jetzt schneidet ihr euch zwei kurze dünne Streifen aus braunen...'

9

Then stick the strips to the wire. The paper strips point forward. The wire lies behind it.

Bild zum Schritt 9 für das Bastel- und DIY-Abenteuer für Kinder: 'Anschließend klebt ihr die Streifen an den Draht. Die Papierstreifen...'

10

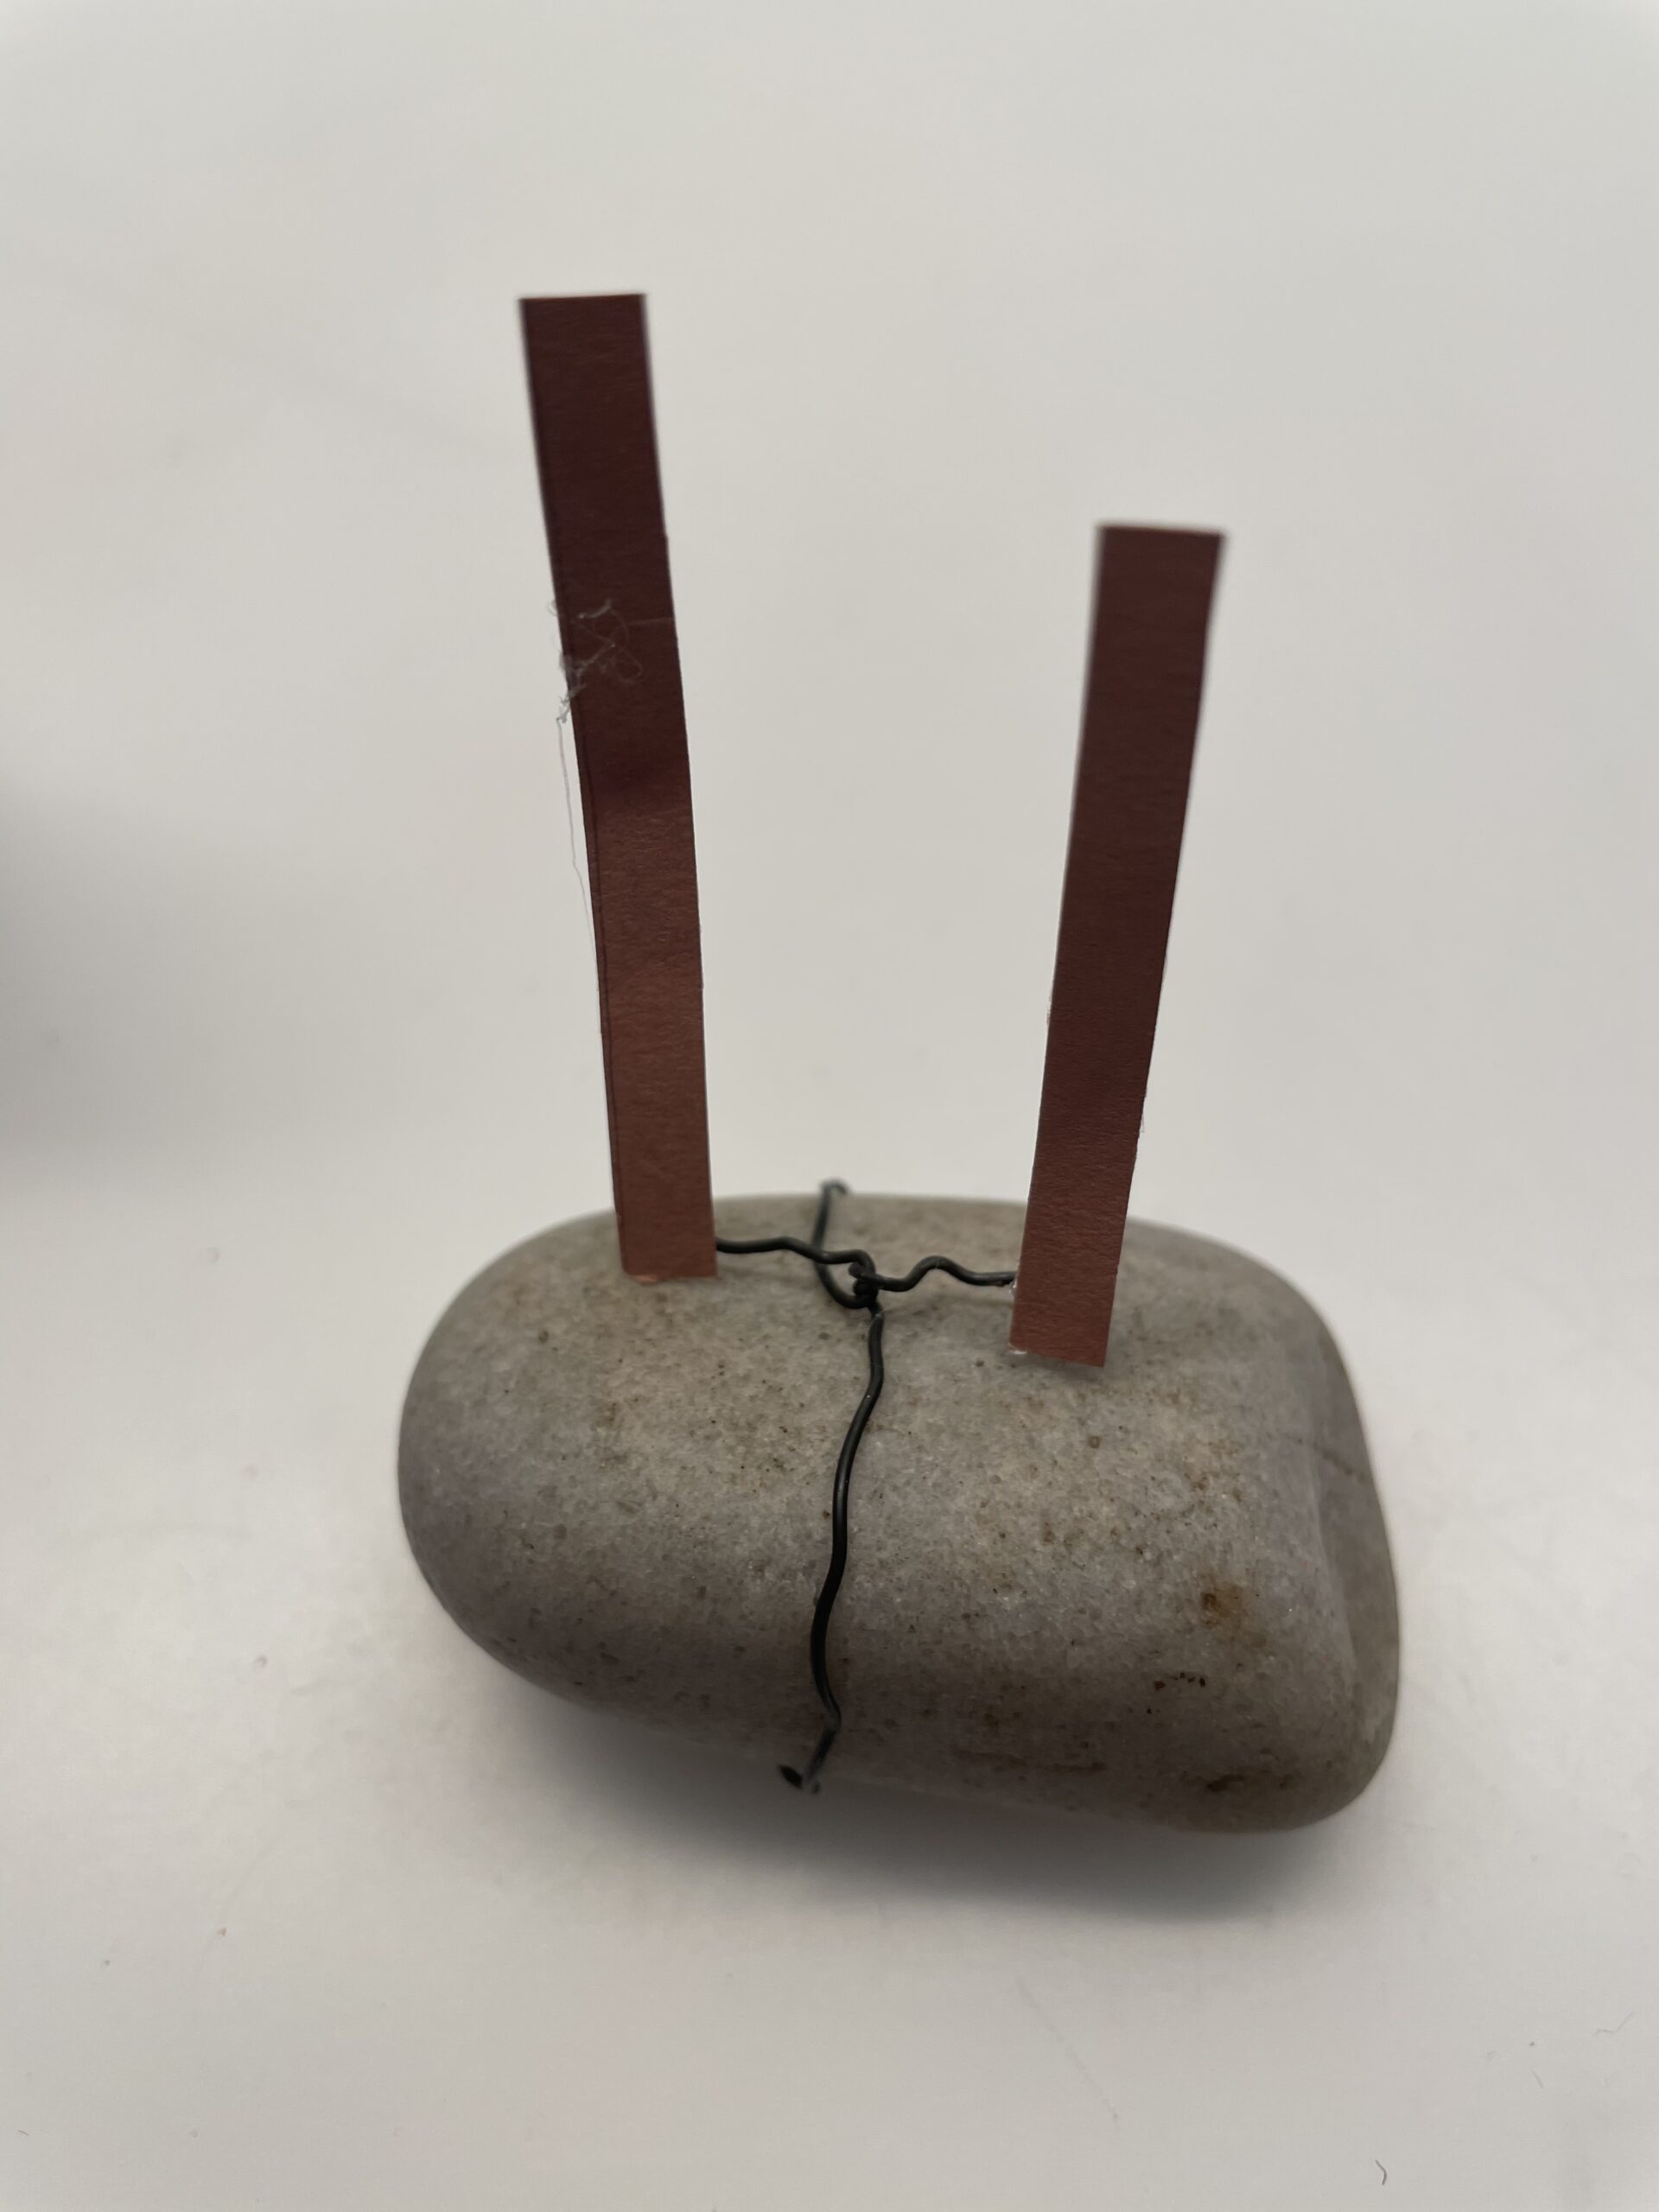
Now stick the body to the front of the legs.
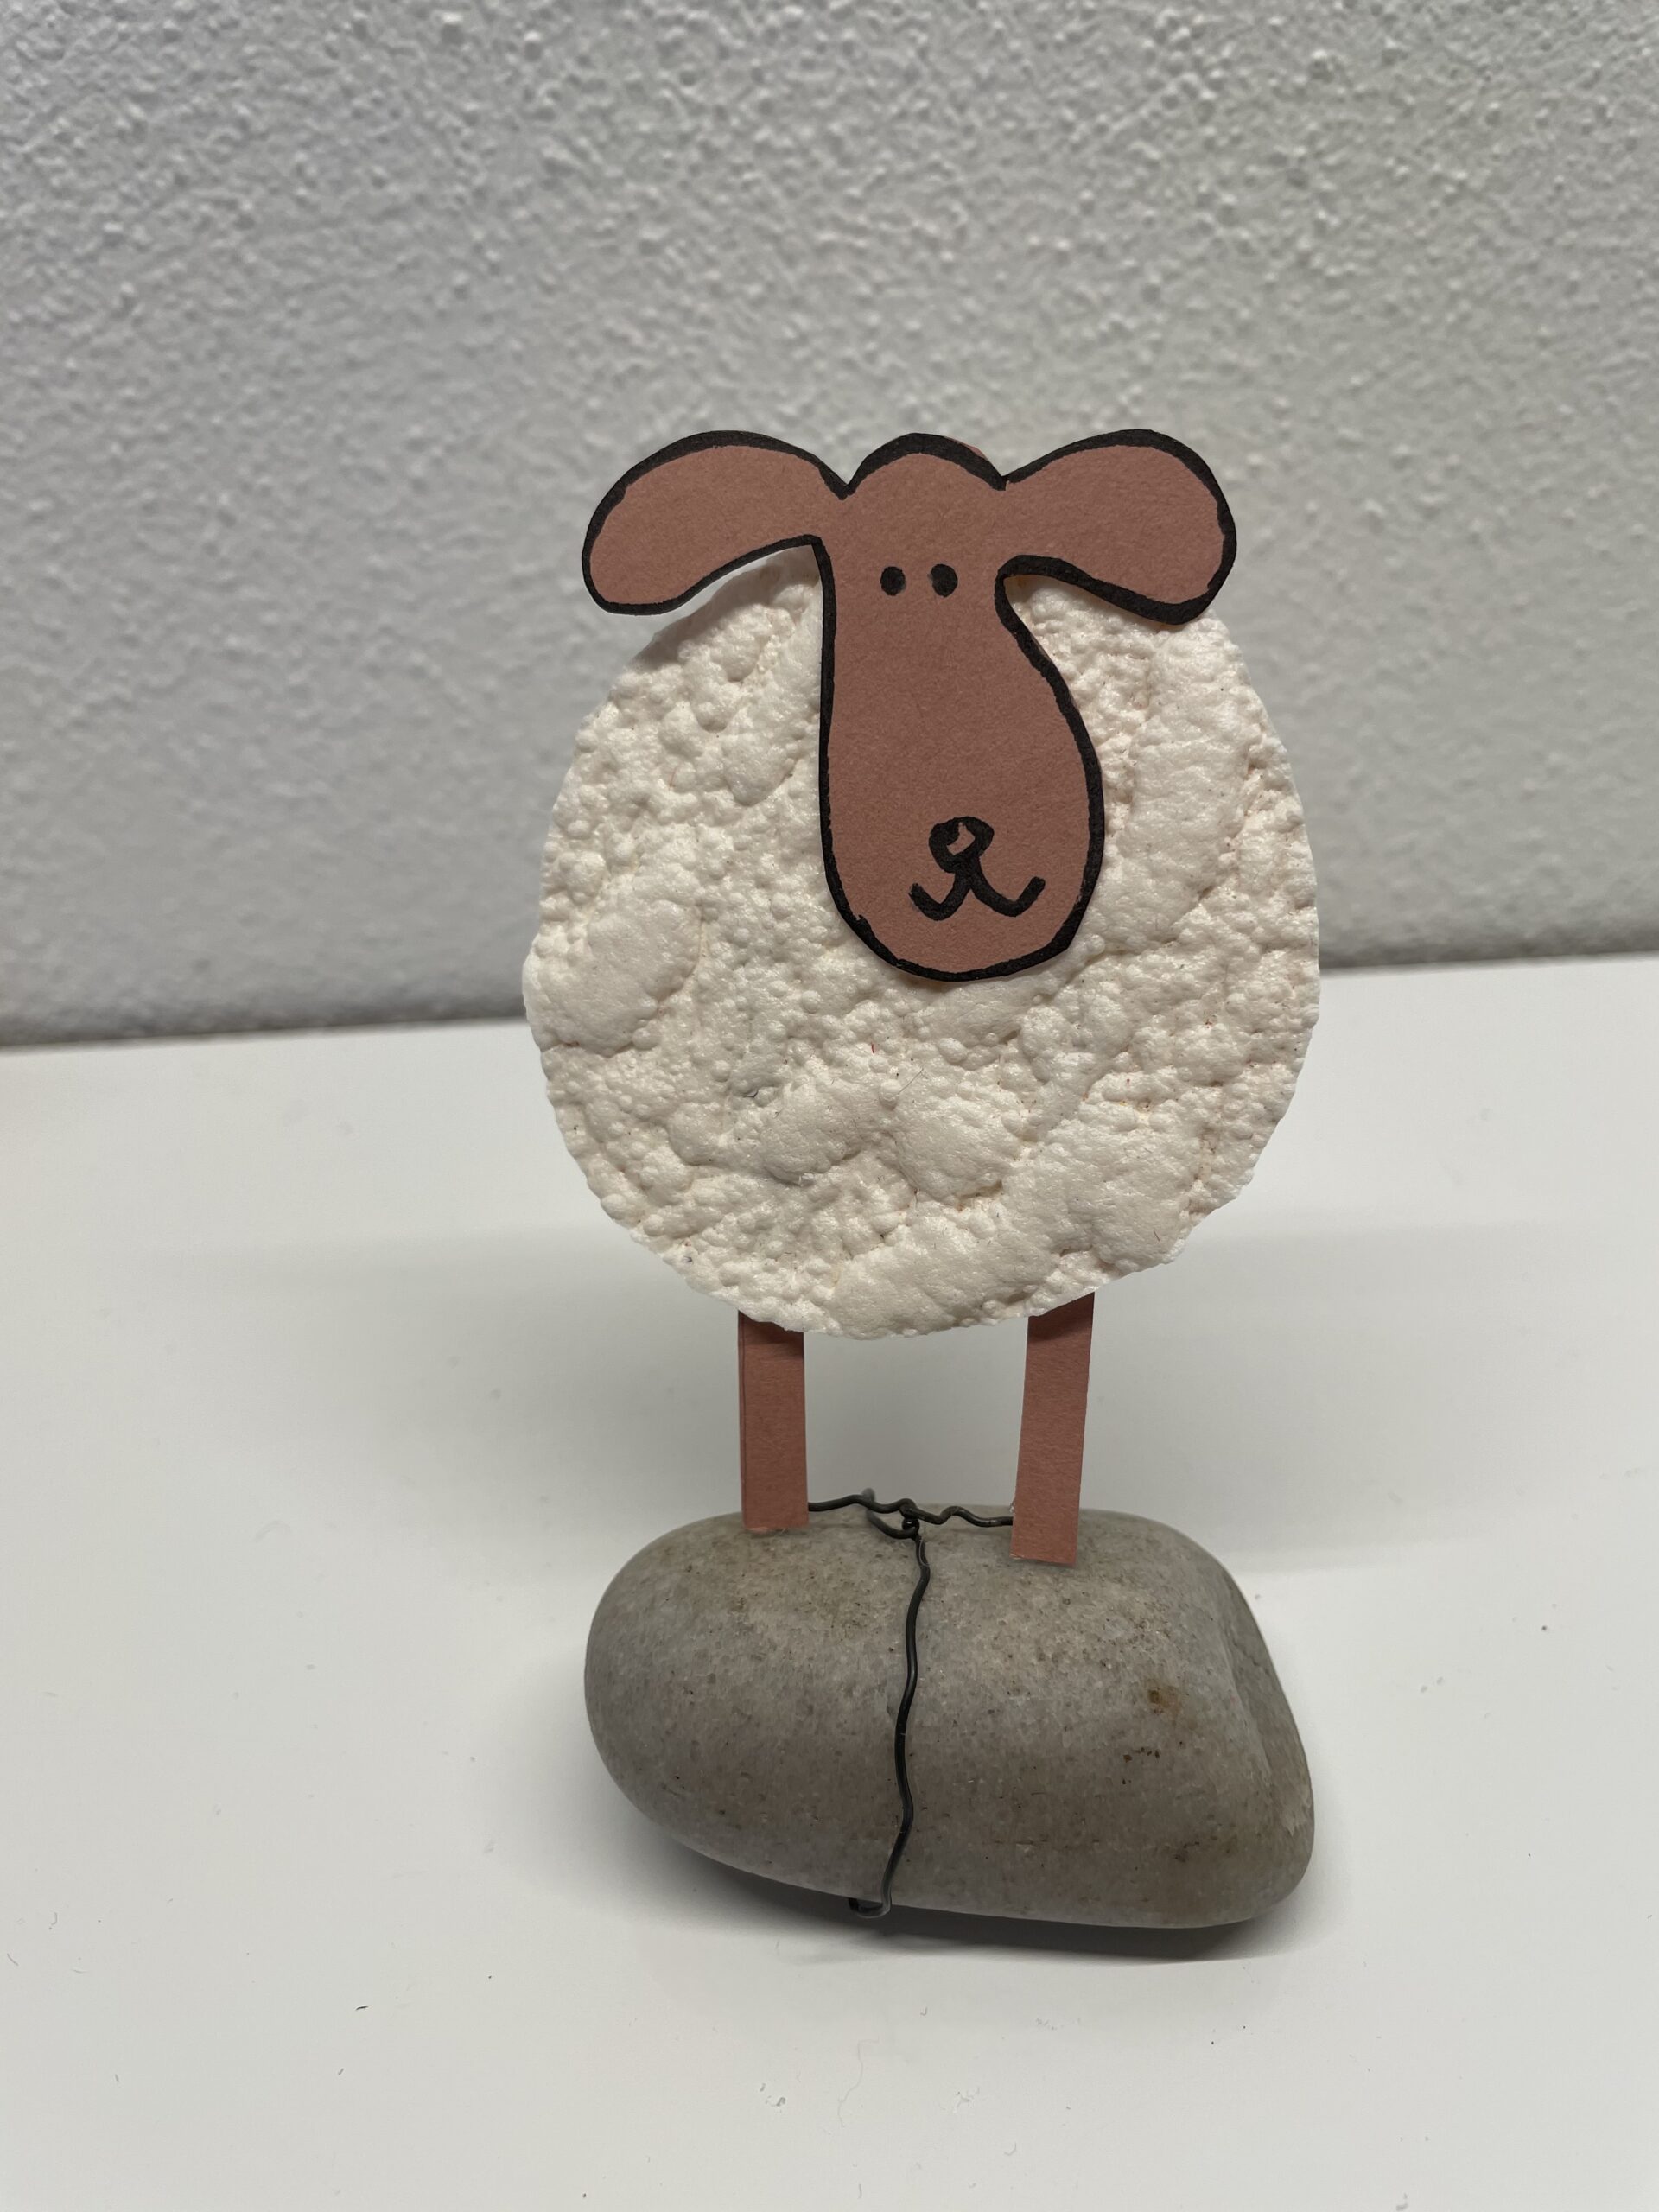
Bild zum Schritt 10 für das Bastel- und DIY-Abenteuer für Kinder: 'Klebt nun den Körper vorne an die Beine.'

11

The sheep is ready.

Bild zum Schritt 11 für das Bastel- und DIY-Abenteuer für Kinder: 'Fertig ist das Schaf.'

12

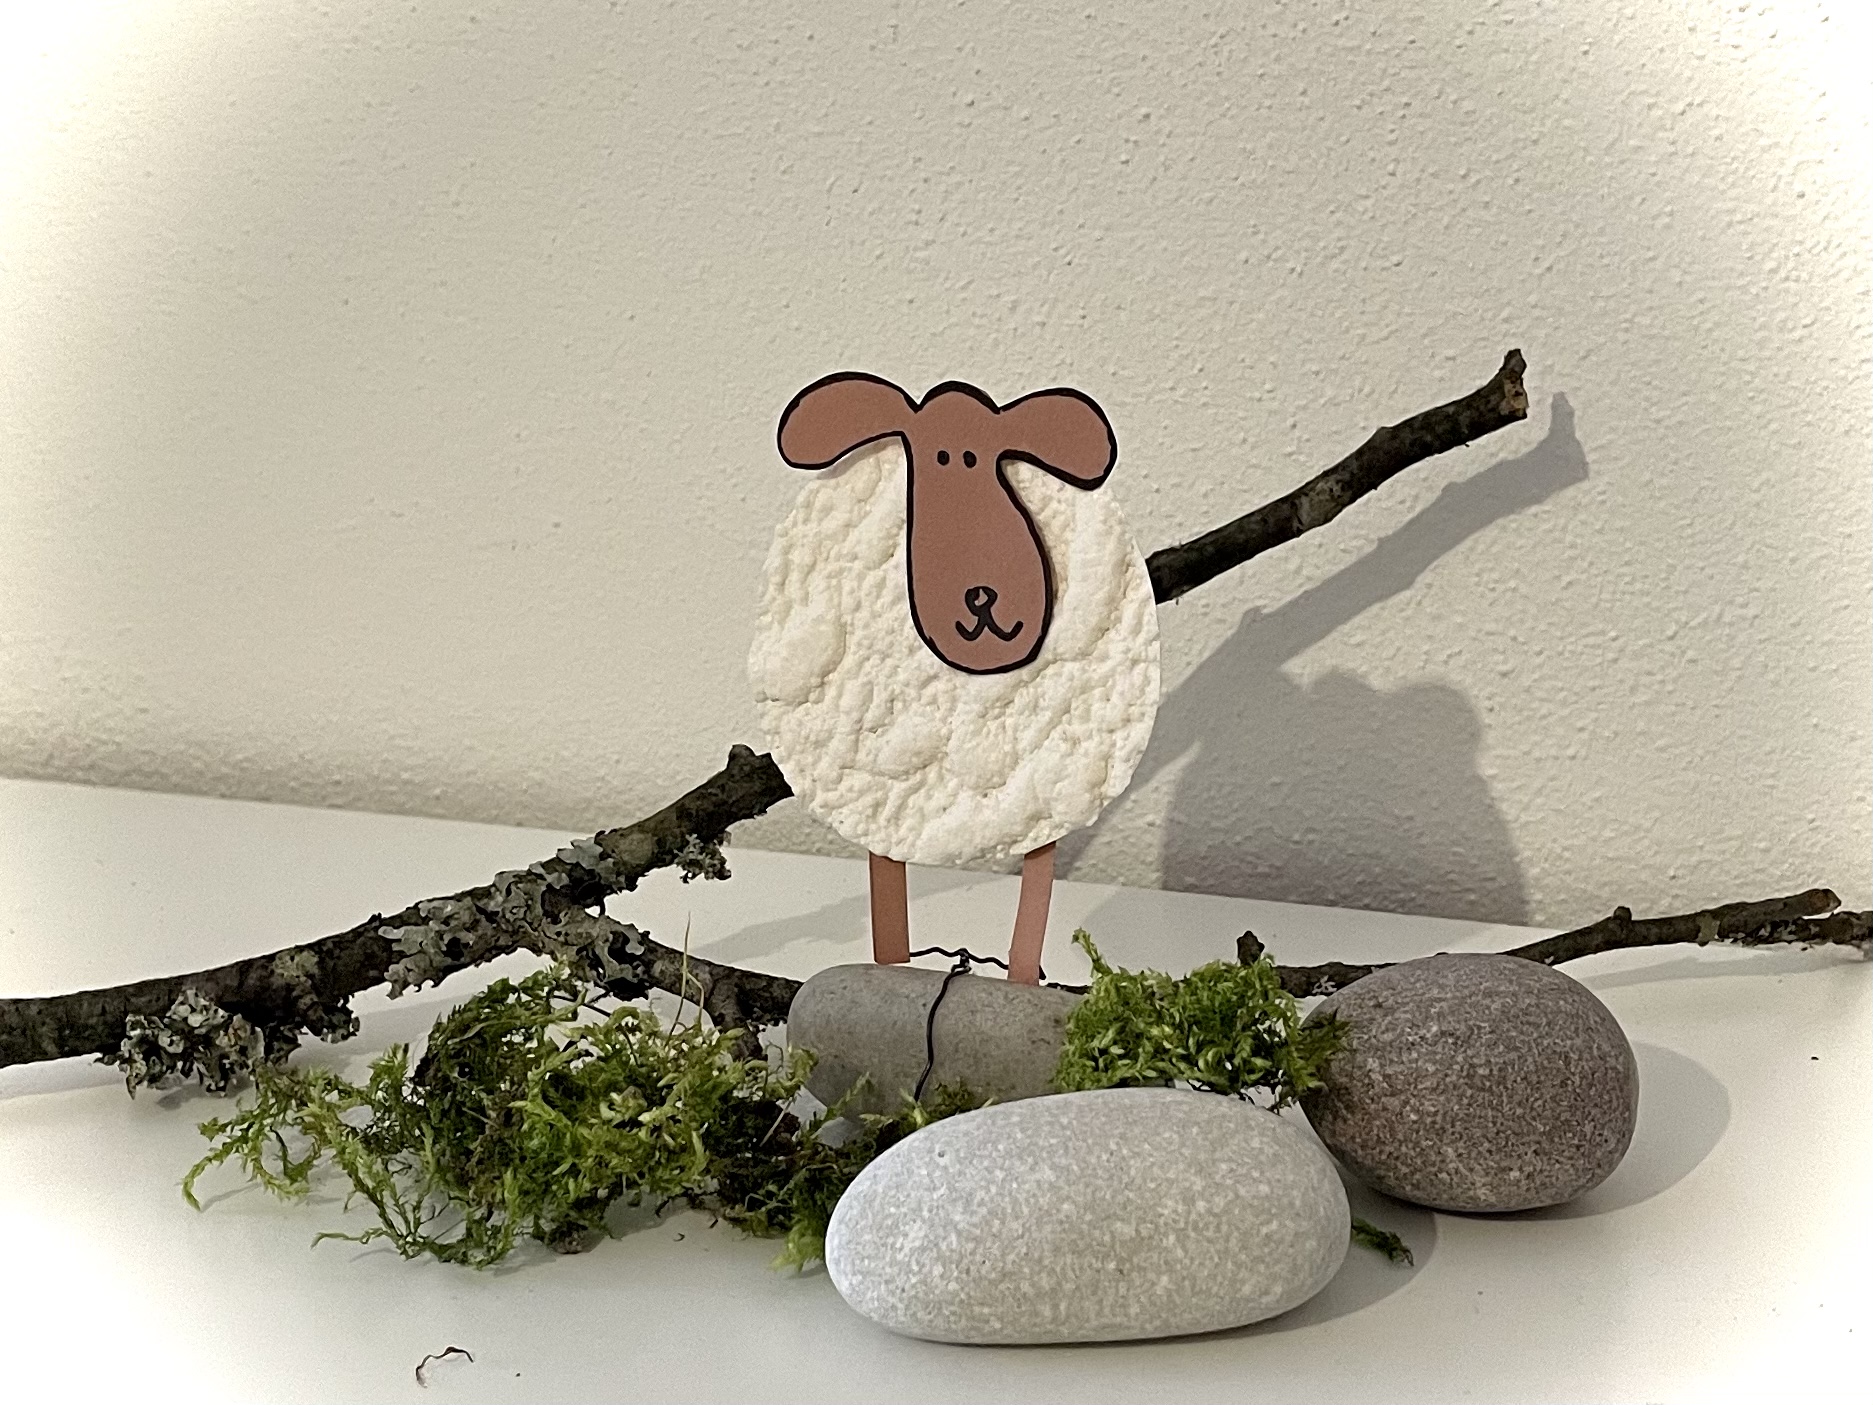
Decorate it with moss and other stones or a branch.

Bild zum Schritt 12 für das Bastel- und DIY-Abenteuer für Kinder: 'Dekoriert es mit Moos und weiteren Steinen oder einem Ast.'

Another idea:
13

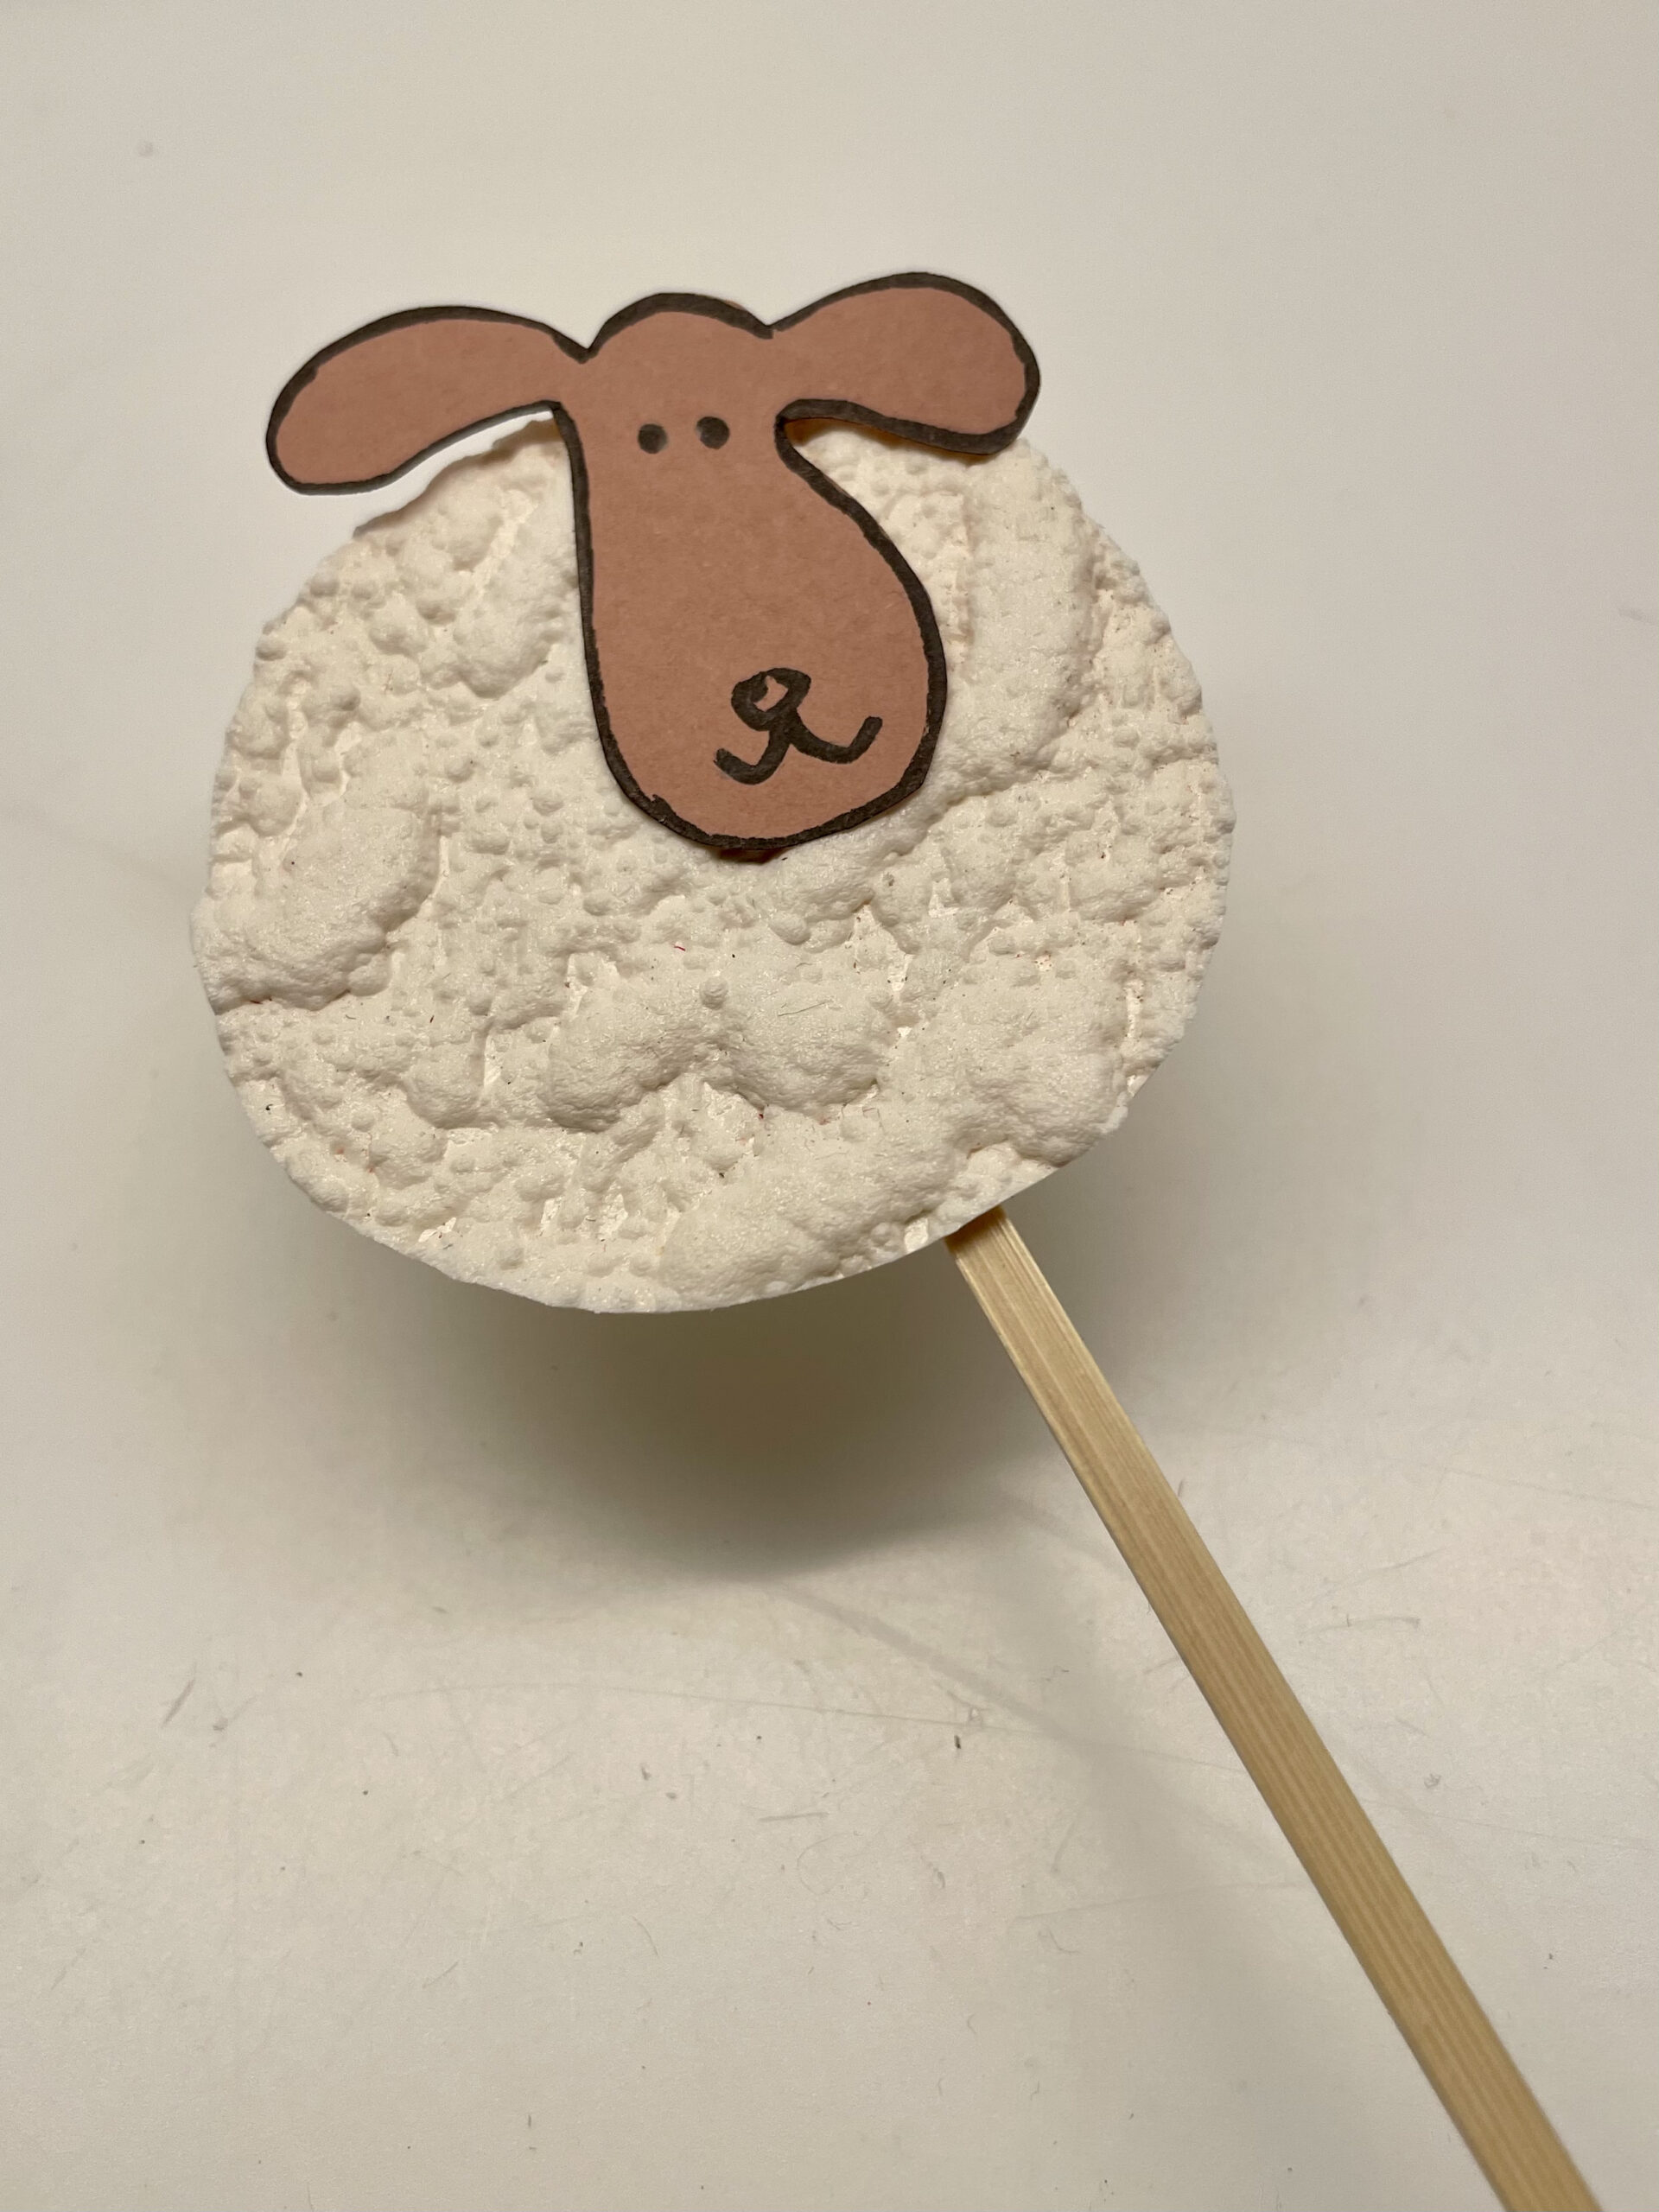
It is easier to glue the sheep on a wooden stick.

Bild zum Schritt 14 für das Bastel- und DIY-Abenteuer für Kinder: 'Einfacher ist es das Schaf auf einen Holzstab zu kleben.'

14

Now you can use the sheep as a decoration and stick it in a flower pot or vase, for example.

Bild zum Schritt 15 für das Bastel- und DIY-Abenteuer für Kinder: 'Nun könnt ihr das Schaf als Dekoration verwenden und zum...'

15

Have fun!

Bild zum Schritt 16 für das Bastel- und DIY-Abenteuer für Kinder: 'Viel Freude!'

16

A nice idea for Easter or overall in spring.

Bild zum Schritt 17 für das Bastel- und DIY-Abenteuer für Kinder: 'Eine schöne Idee für Ostern oder insgesamt im Frühling.'

17

Template for printing!

Bild zum Schritt 18 für das Bastel- und DIY-Abenteuer für Kinder: 'Vorlage zum Ausdrucken!'