Penguin making out of a cardboard roll

AdventurerKatzi
Rating5.05.8 thousand times & (3) DifficultyAdvanced

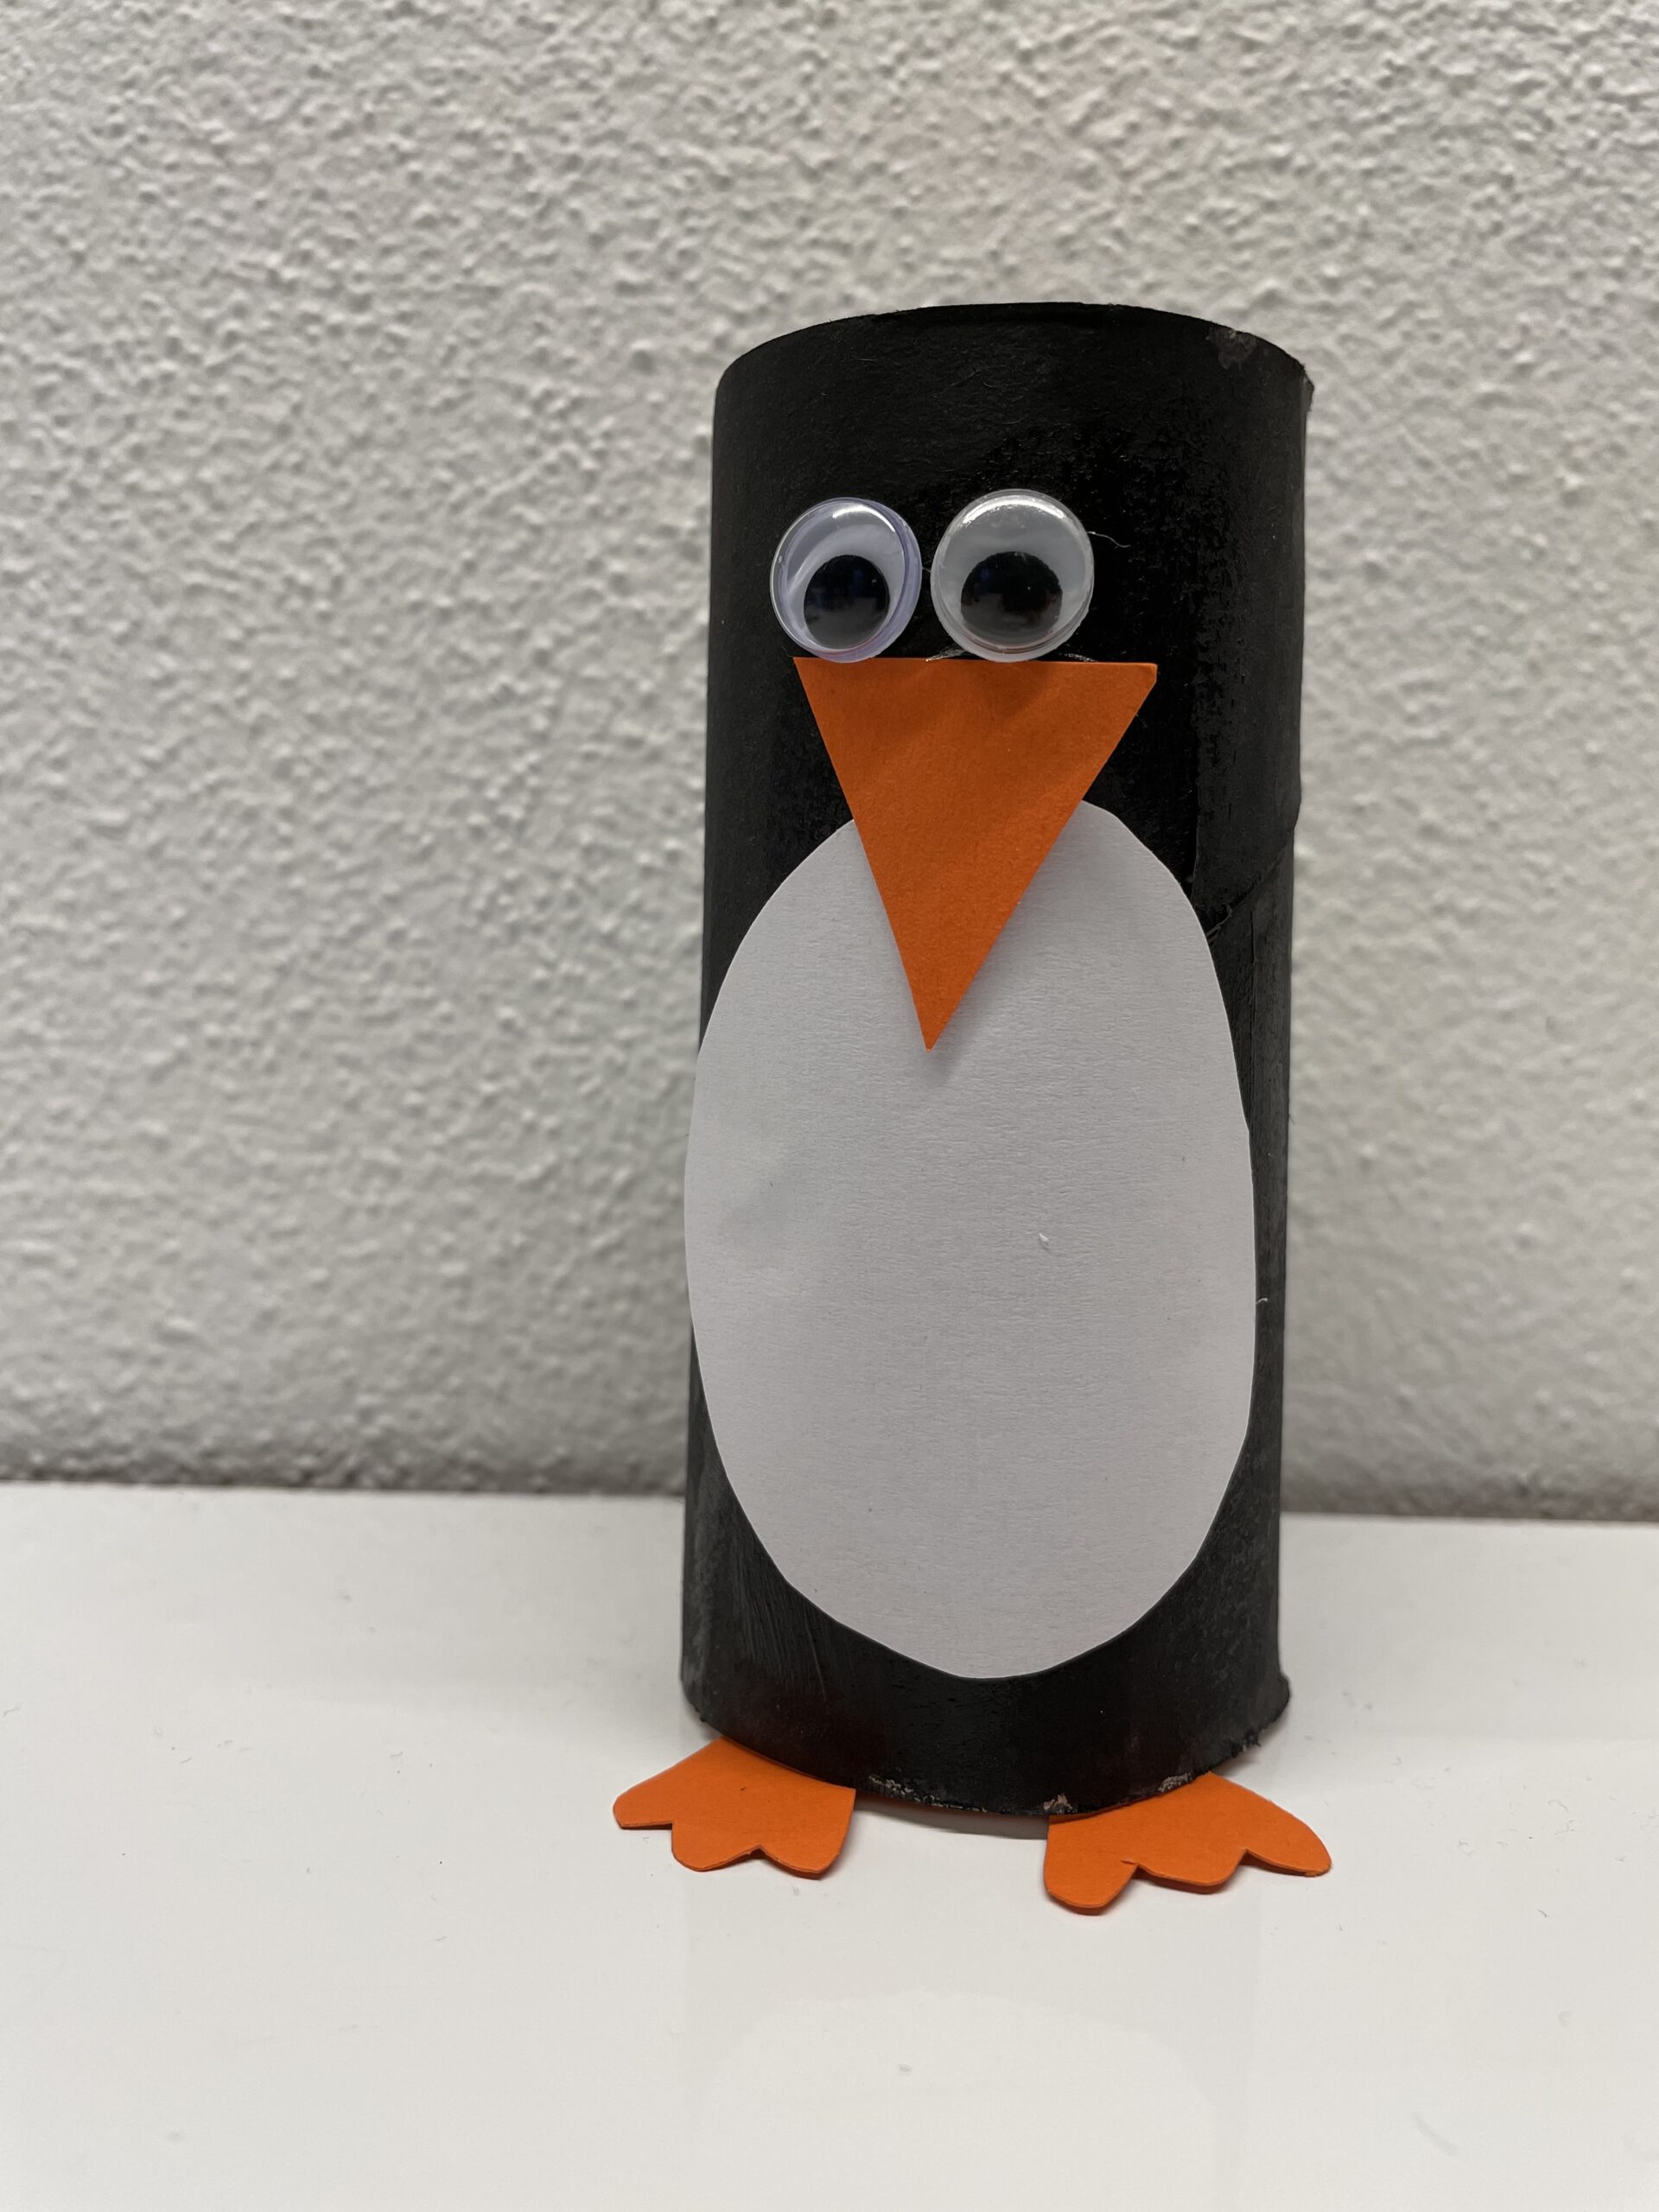
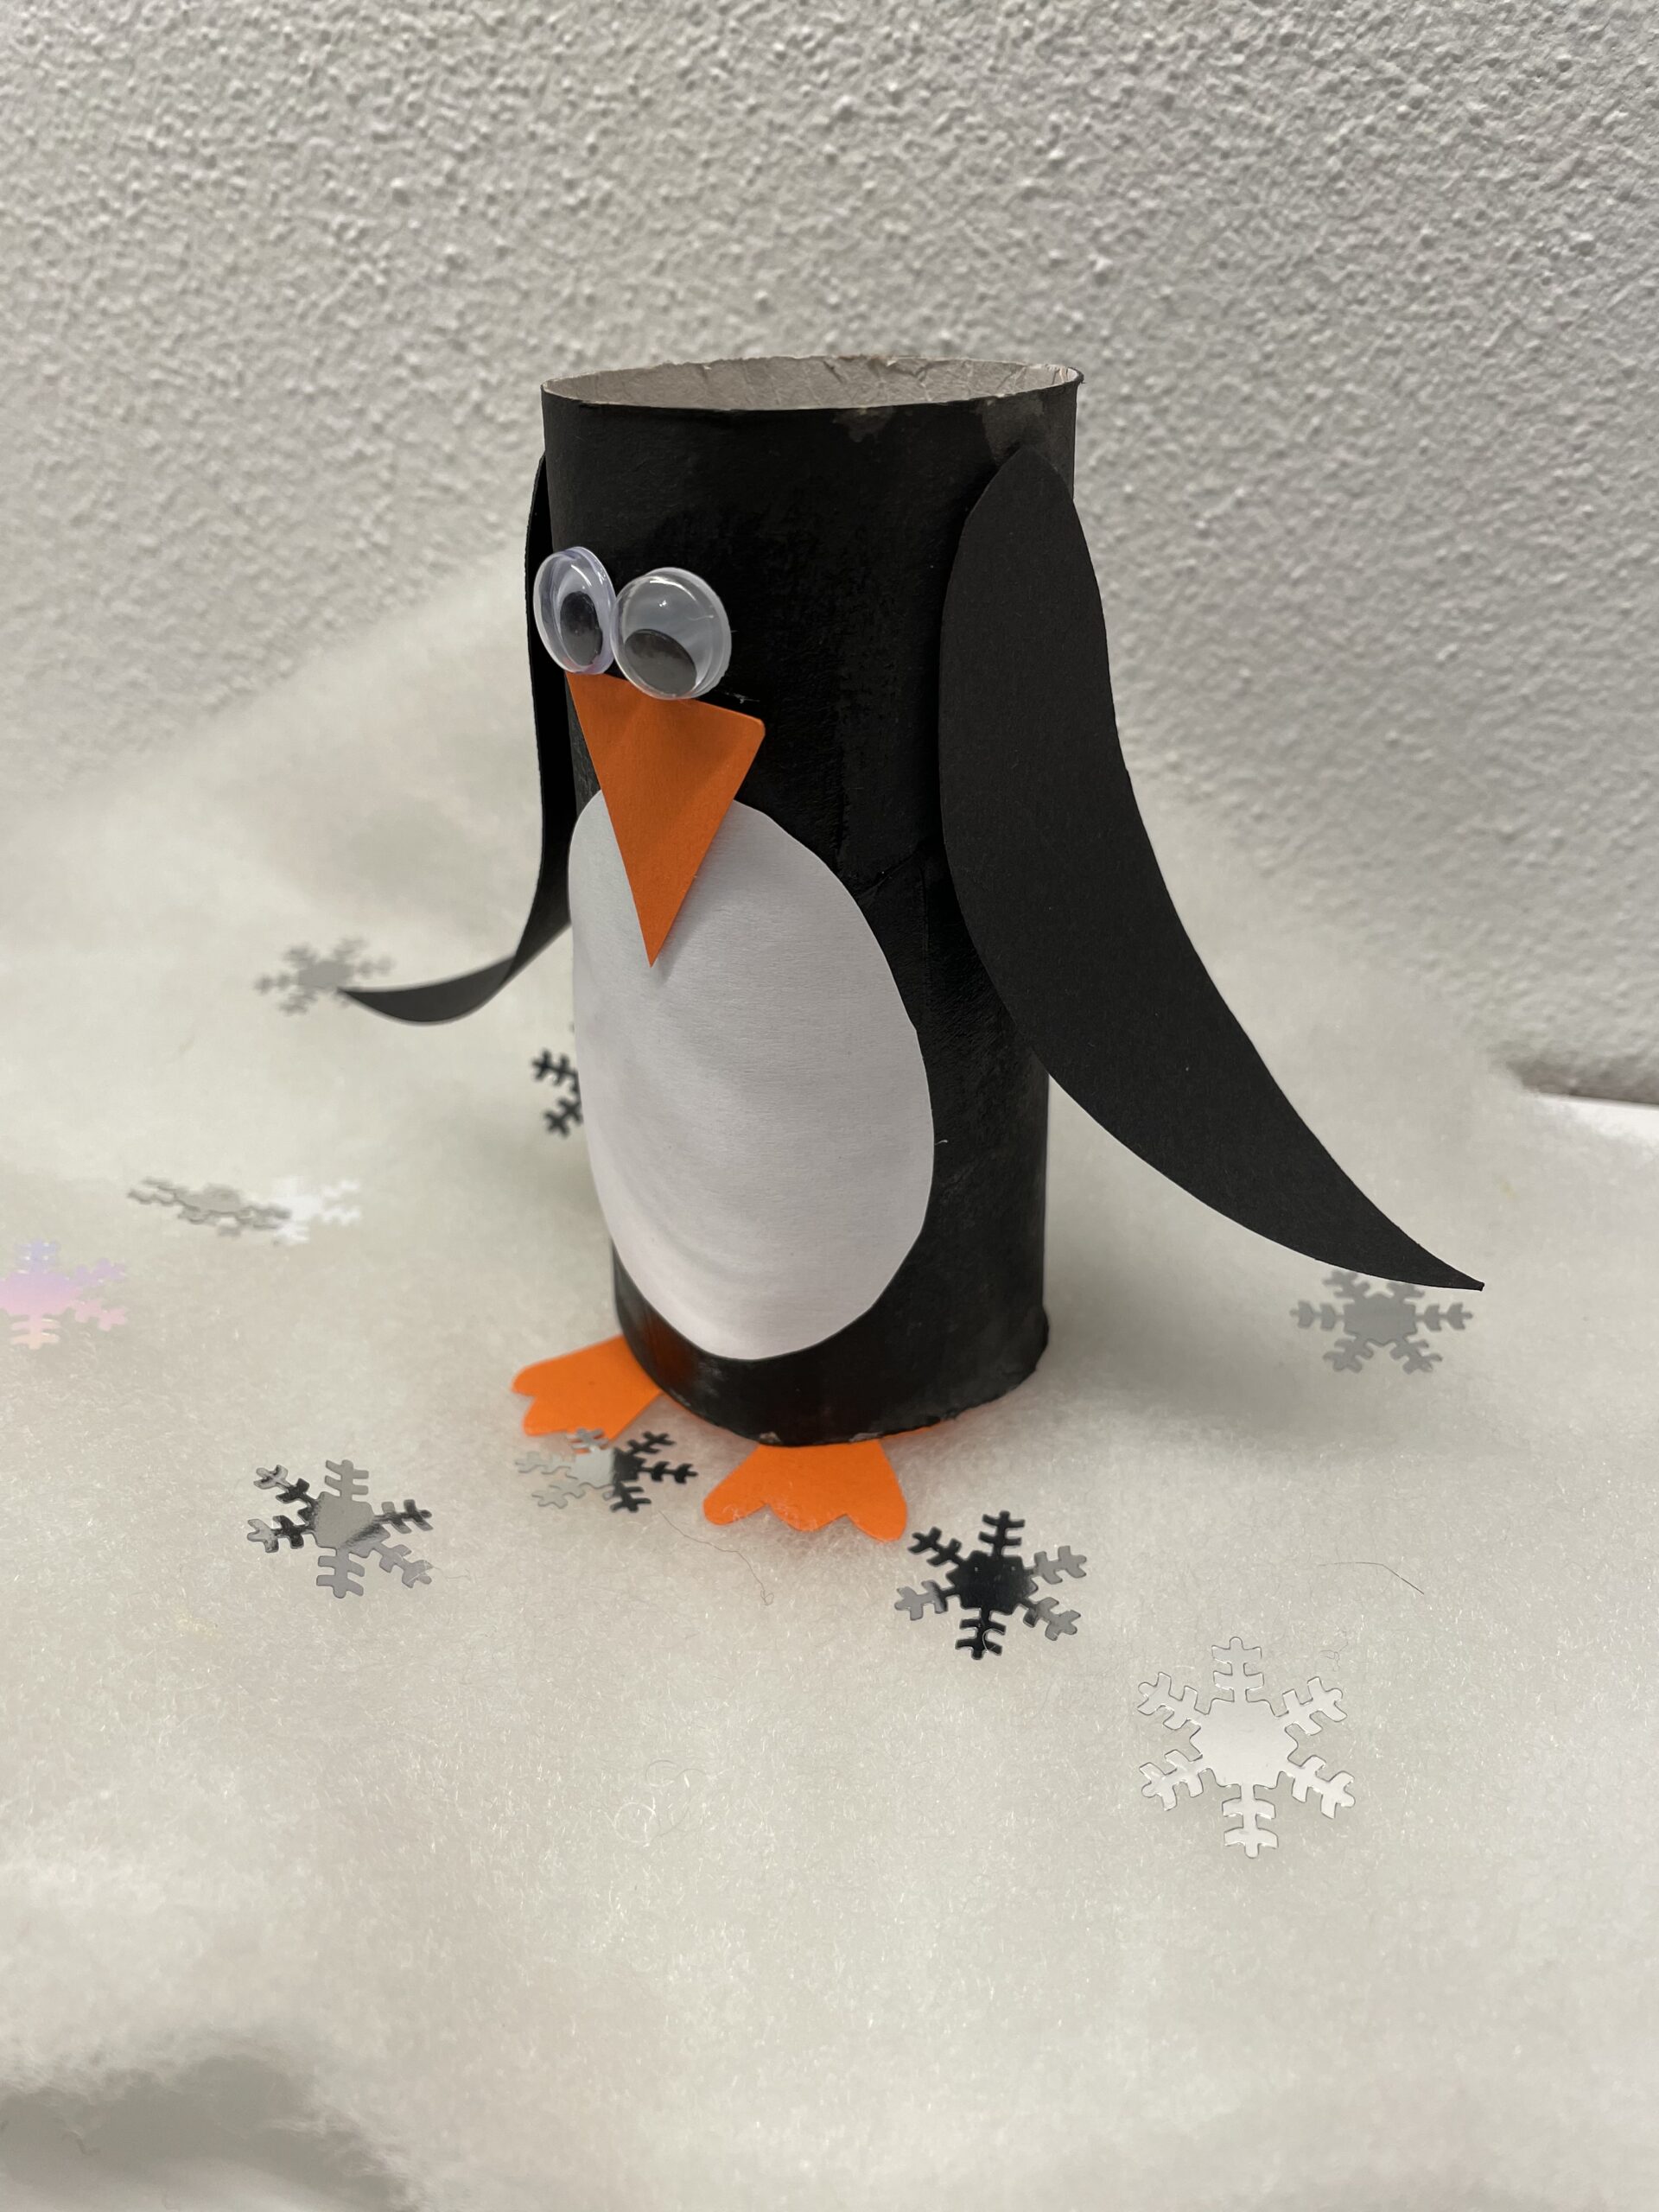
For the little fluttering penguin you only need a cardboard roll, which glues it with black paper. A white paper for the belly, an orange beak, two wobble eyes and two wings, which rings and sticks to the outside and it is ready, the small cardboard roll penguin.

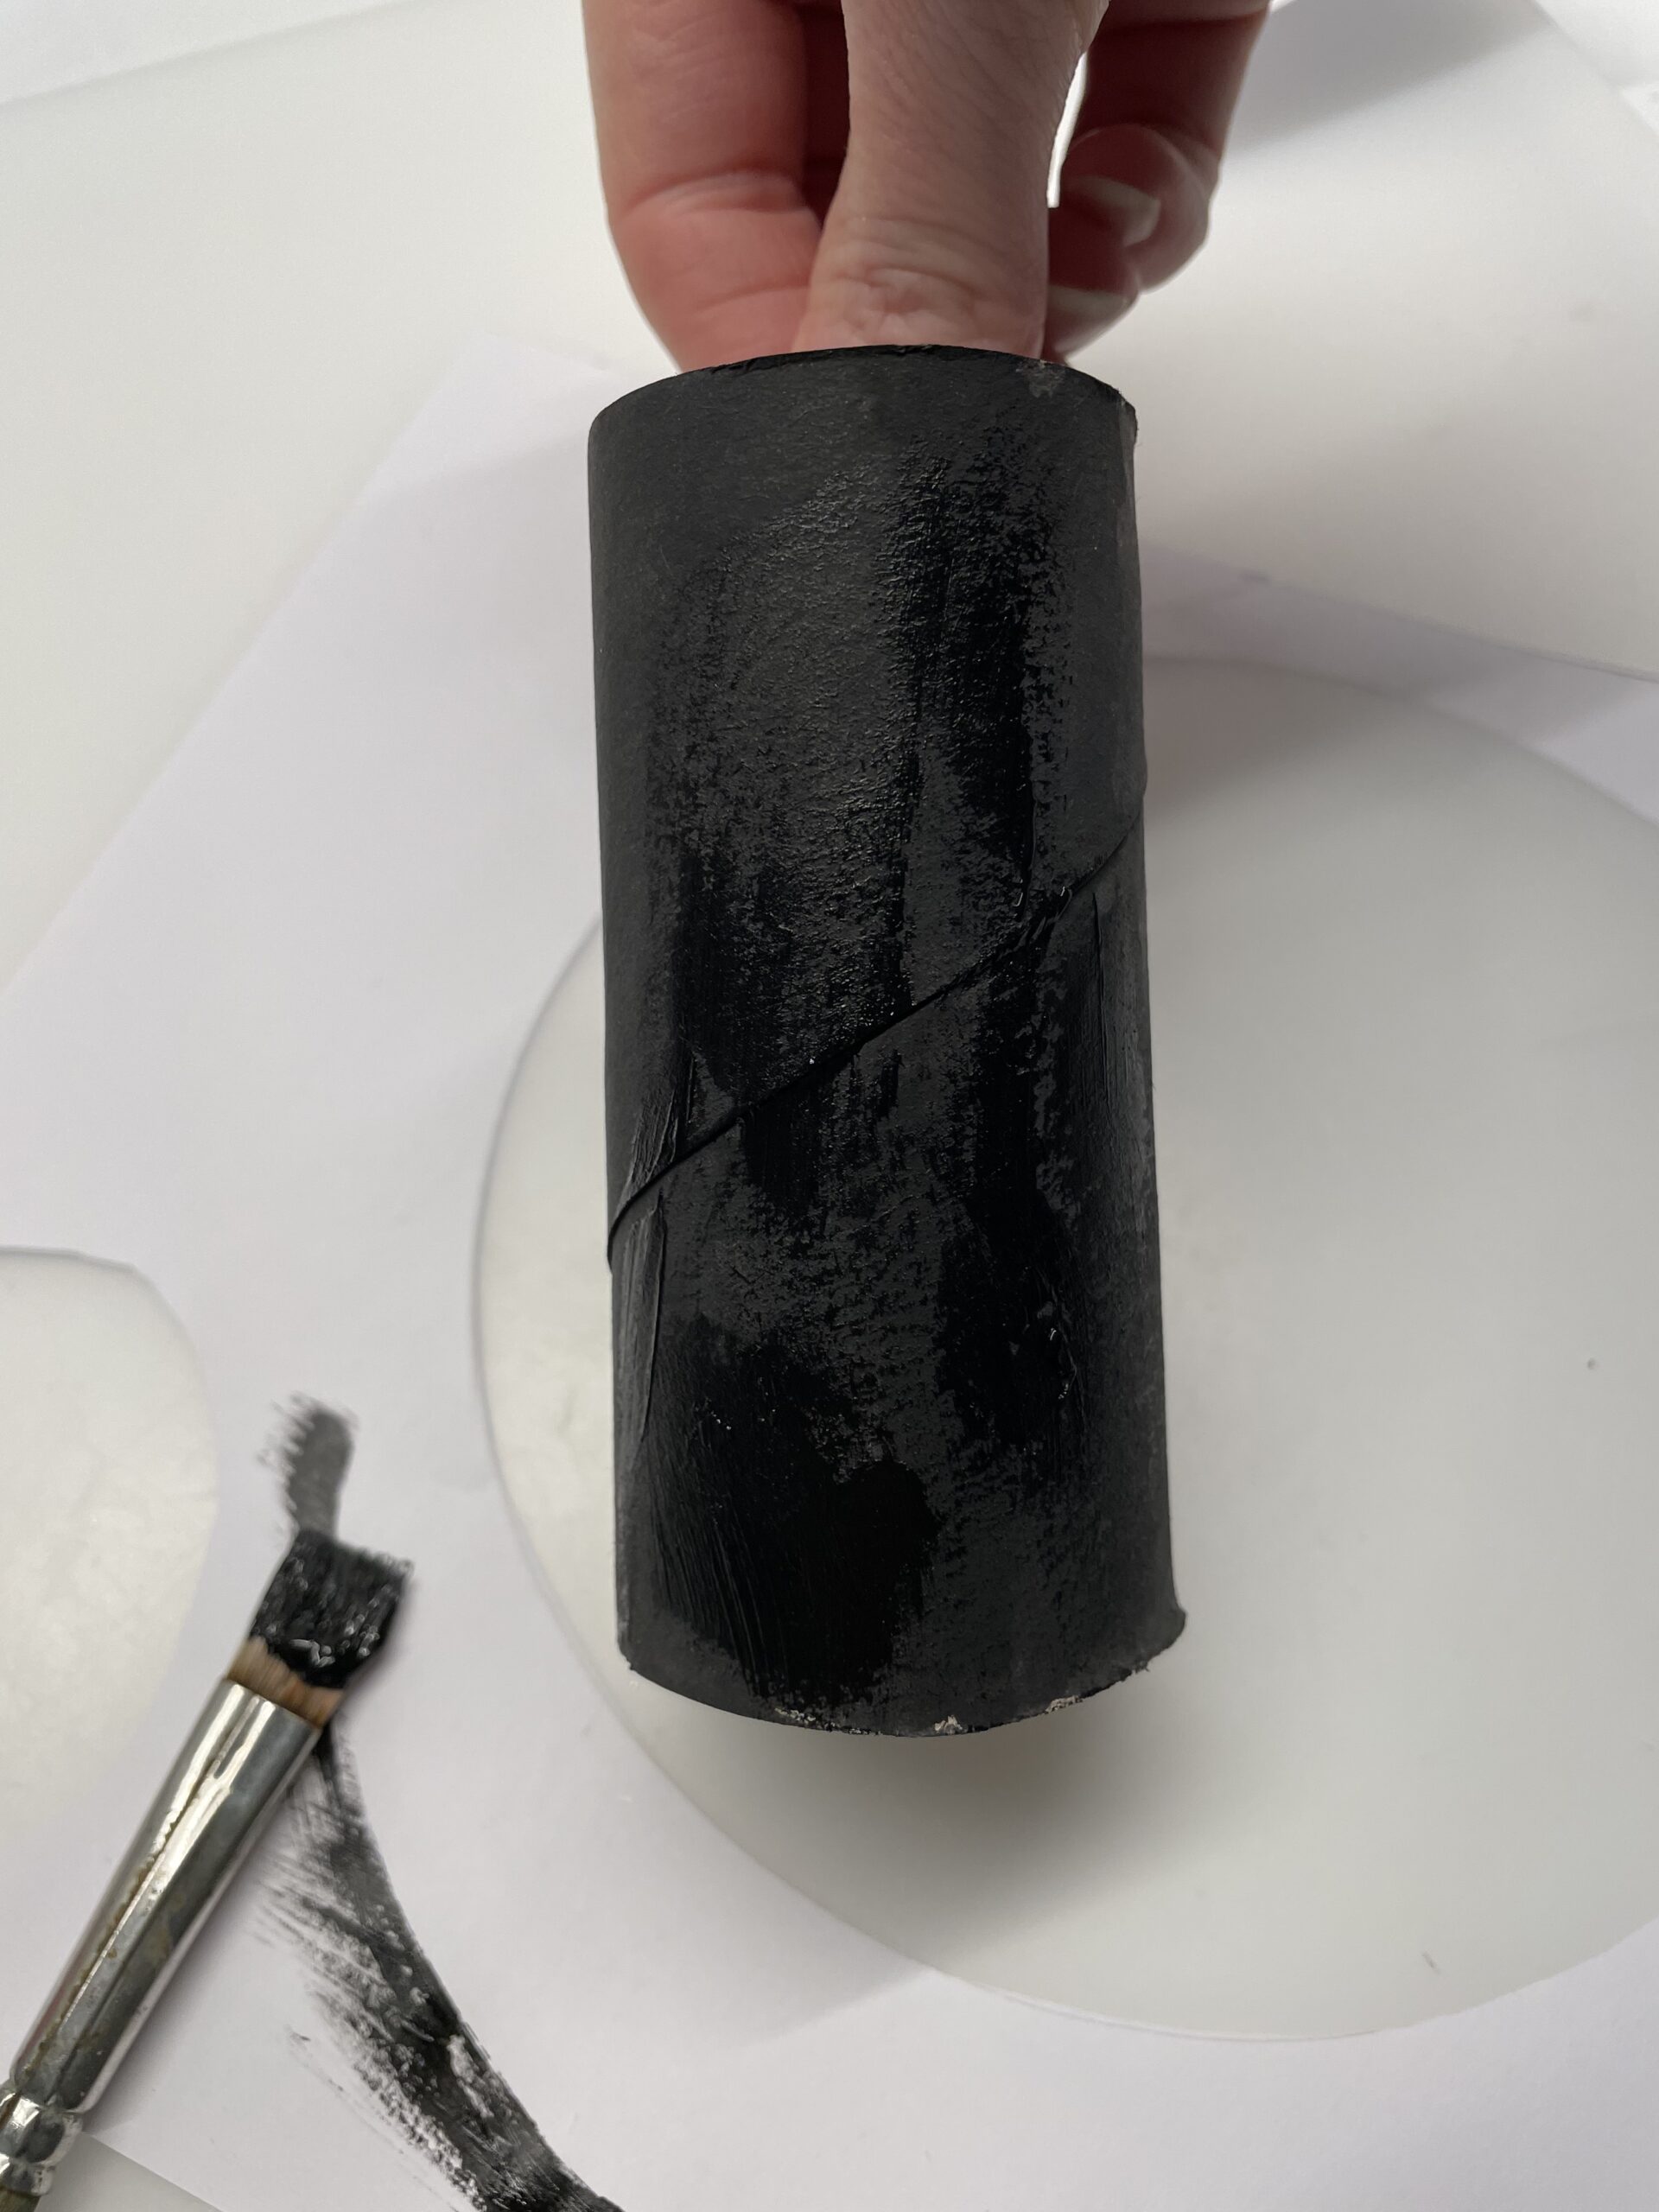
You don't have black clay paper? No problem. Alternatively, you can paint the paper roll in black.
Have fun doing crafts! With this instruction it is easy!

Media Education for Kindergarten and Hort

Kind bastelt eine Rassel mit dem Navi
The Adventure Navi, the app for DIY projects, enables media education for the youngest.

Relief in everyday life, targeted promotion of individual children, independent learning and - without any pre-knowledge already usable by the youngest!


Titelbild zur Bastel- und DIY-Idee für Kinder '(946) Pinguin basteln aus einer Papprolle'
Material for1 Child
Prep Time5 min.Adv. Time30 min.Total Time35 min.
 1 Rolled paper
 Color blacke.g. water colour
 Orange clay paper
 Clay paper black
 White paper
 2 Wax eyes
 1 Felt pen
 1 Pencil
 1 Builder's pad
To paint the cardboard roll:
 1 Brushes
 1 Kitchen crepe
 1 Water glass
 1 Water colour black
 1 Document or old newspaper
All links marked with a shopping cart lead to Amazon - here we have selected products that we would order ourselves and in part also ordered. In a qualified purchase via the advertising link, we as Amazon partner receive a commission, for you there are no costs. You thus support our cost- and advertising banner-free, educational offer.
1

First you pick up your materials and put out the craft file.

2

Now you paint the cardboard roll with black paint.
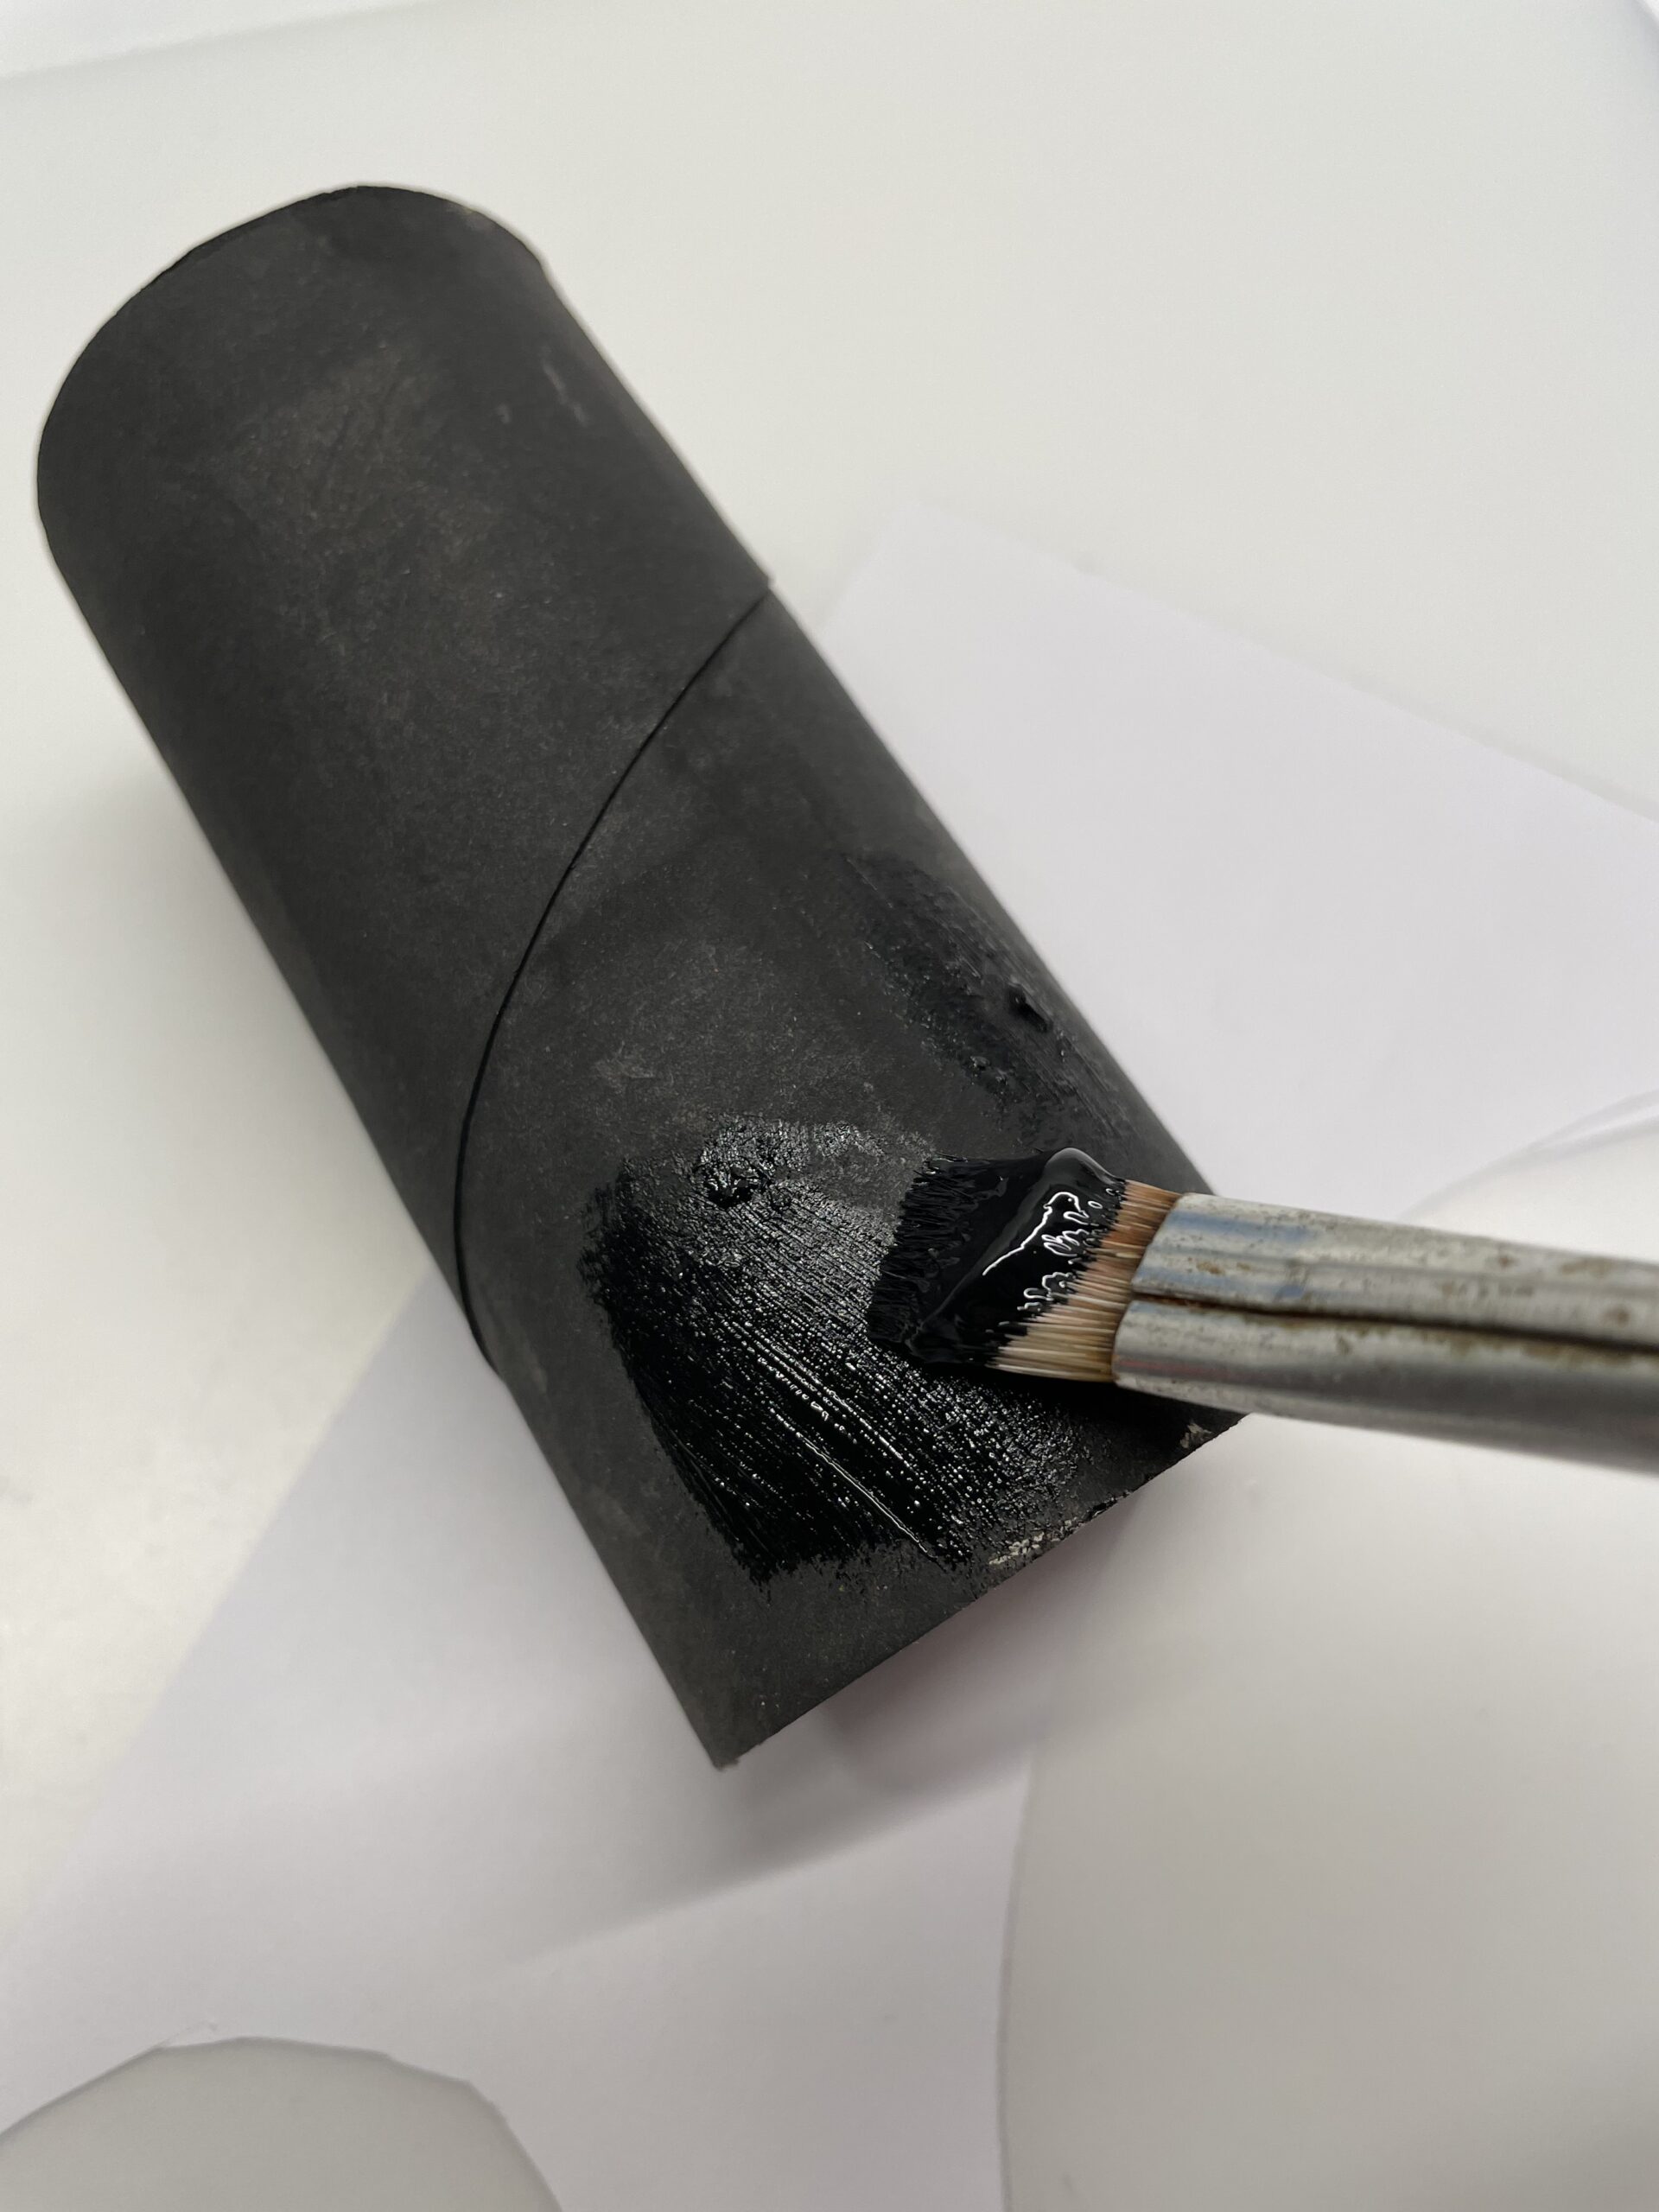
Bild zum Schritt 2 für das Bastel- und DIY-Abenteuer für Kinder: 'Jetzt malt ihr die Papprolle (Klorolle) mit schwarzer Farbe an.'

3

Then adjust the roll to dry.

Bild zum Schritt 3 für das Bastel- und DIY-Abenteuer für Kinder: 'Stellt die Rolle anschließend zum Trocknen.'

4

Now you paint on a white paper an oval circle for the white part of the belly and cut it out.
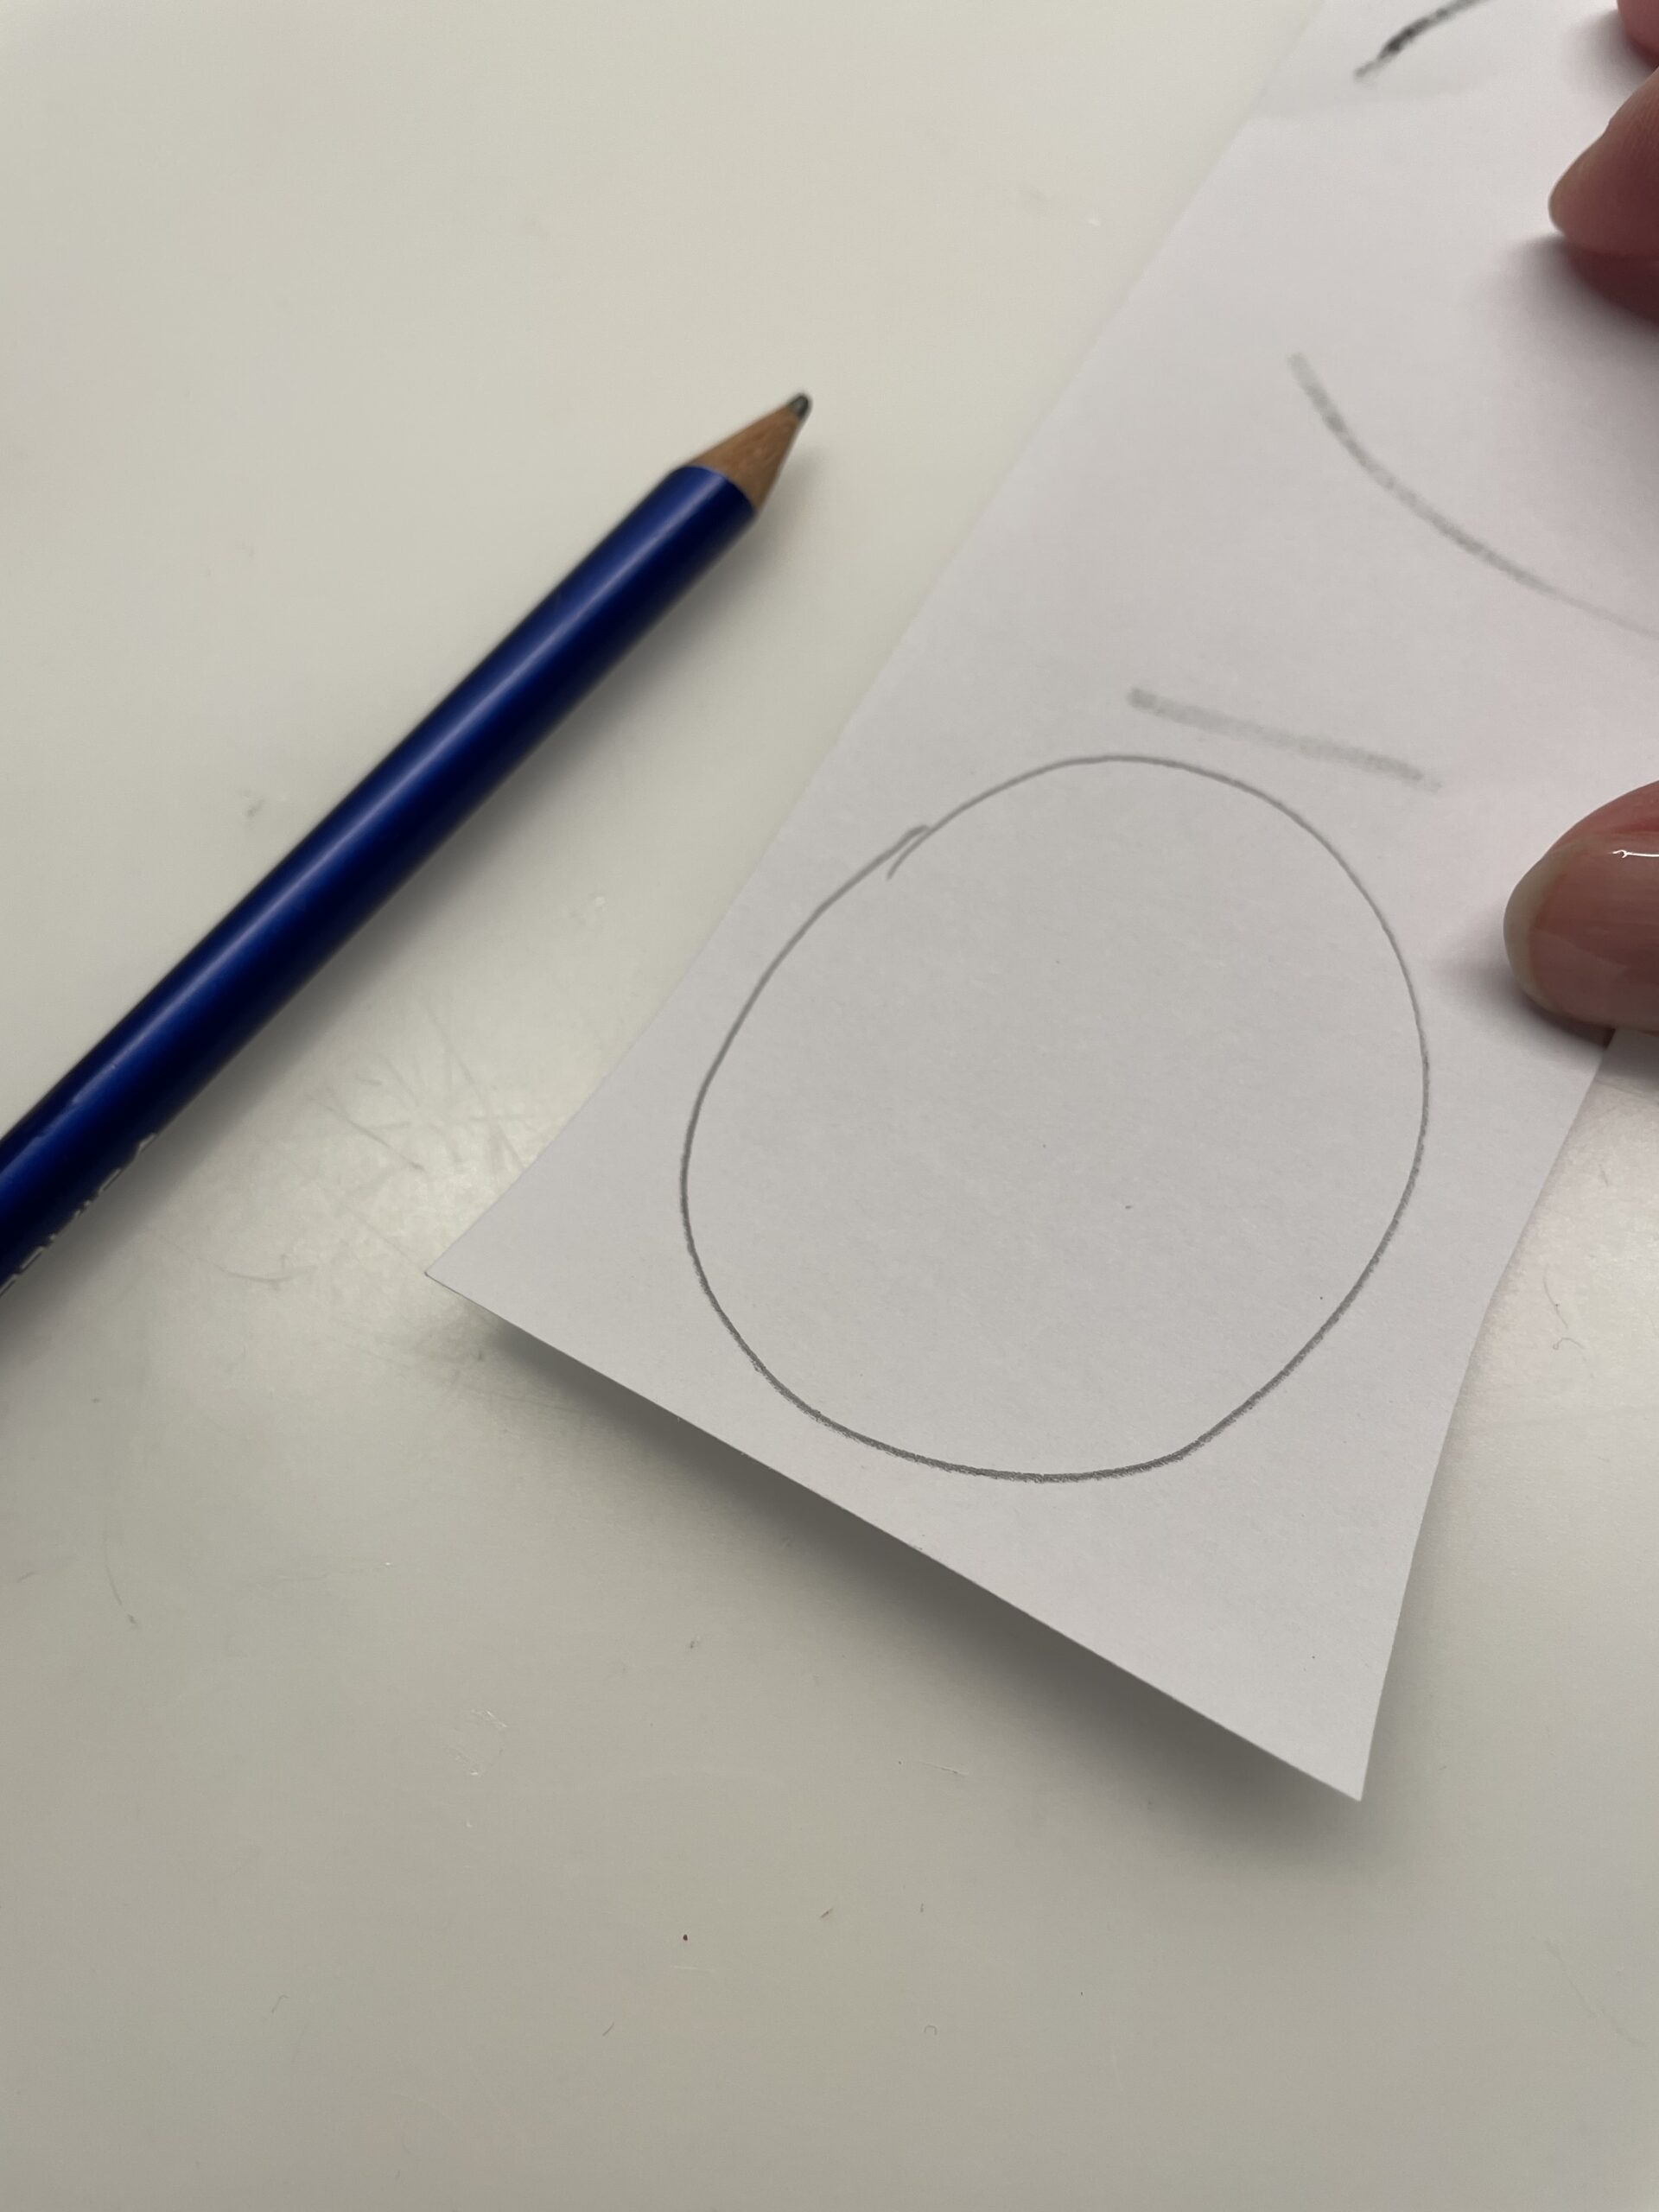
Bild zum Schritt 4 für das Bastel- und DIY-Abenteuer für Kinder: 'Jetzt malt ihr auf ein weißes Papier einen ovalen Kreis...'

5

Then you paint a small triangle on orange paper and cut it out.

Bild zum Schritt 5 für das Bastel- und DIY-Abenteuer für Kinder: 'Danach malt ihr auf orangefarbenes Papier ein kleines Dreieck auf...'

6

Now you put the cardboard roll on orange paper and draw with the pencil around the roll. Then you put the cardboard roll aside and paint two feet on the circle. Then you cut it out.

Bild zum Schritt 6 für das Bastel- und DIY-Abenteuer für Kinder: 'Jetzt stellt ihr die Papprolle auf orangefarbenes Papier und zeichnet...'

7

Then position your feet under the dried cardboard roll.

Bild zum Schritt 7 für das Bastel- und DIY-Abenteuer für Kinder: 'Danach positioniert ihr die Füße unter der getrockneten Papprolle.'

8

Now attach all other parts to the cardboard roll.

Bild zum Schritt 8 für das Bastel- und DIY-Abenteuer für Kinder: 'Befestigt jetzt alle anderen Einzelteile an der Papprolle.'

9

First stick the white part of the belly high on the roll.

Bild zum Schritt 9 für das Bastel- und DIY-Abenteuer für Kinder: 'Klebt zuerst den weißen Teil des Bauchs hochkant auf die...'

10

On top of that, you stick your beak and your eyes.

Bild zum Schritt 10 für das Bastel- und DIY-Abenteuer für Kinder: 'Darüber klebt ihr den Schnabel und die Augen.'

11

2. Bild zum Schritt 10 für das Bastel- und DIY-Abenteuer für Kinder: 'Darüber klebt ihr den Schnabel und die Augen.'

12

For the wings you cut a narrow strip of black clay paper to the dimensions of 15cm x 3cm. You fold this strip half in length. Now you paint the shape of a wing on the strip and cut it out. The paper is double, so that two wings are created at once.

Bild zum Schritt 12 für das Bastel- und DIY-Abenteuer für Kinder: 'Für die Flügel schneidet ihr euch einen schmalen Streifen schwarzes...'

13

Now you pull each wing over a pen. Press the paper firmly on the pen. The paper bends very easily and wrinkles.

Bild zum Schritt 13 für das Bastel- und DIY-Abenteuer für Kinder: 'Jetzt zieht ihr jeden Flügel über einen Stift. Drückt dabei...'

14

Then glue the wings to the cardboard roll with an adhesive point at the top of the round end. The wing now stands down a bit.

Bild zum Schritt 14 für das Bastel- und DIY-Abenteuer für Kinder: 'Anschließend klebt ihr die Flügel mit einem Klebepunkt am runden...'

15

The penguin is ready.

Bild zum Schritt 15 für das Bastel- und DIY-Abenteuer für Kinder: 'Fertig ist der Pinguin.'

16

Have fun crafting the penguin! Maybe you want to make an entire penguin family.

Materials

 1 Rolled paper
 Color blacke.g. water colour
 Orange clay paper
 Clay paper black
 White paper
 2 Wax eyes
 1 Felt pen
 1 Pencil
 1 Builder's pad
To paint the cardboard roll:
 1 Brushes
 1 Kitchen crepe
 1 Water glass
 1 Water colour black
 1 Document or old newspaper
All links marked with a shopping cart lead to Amazon - here we have selected products that we would order ourselves and in part also ordered. In a qualified purchase via the advertising link, we as Amazon partner receive a commission, for you there are no costs. You thus support our cost- and advertising banner-free, educational offer.

Directions

1

First you pick up your materials and put out the craft file.

2

Now you paint the cardboard roll with black paint.

Bild zum Schritt 2 für das Bastel- und DIY-Abenteuer für Kinder: 'Jetzt malt ihr die Papprolle (Klorolle) mit schwarzer Farbe an.'

3

Then adjust the roll to dry.

Bild zum Schritt 3 für das Bastel- und DIY-Abenteuer für Kinder: 'Stellt die Rolle anschließend zum Trocknen.'

4

Now you paint on a white paper an oval circle for the white part of the belly and cut it out.

Bild zum Schritt 4 für das Bastel- und DIY-Abenteuer für Kinder: 'Jetzt malt ihr auf ein weißes Papier einen ovalen Kreis...'

5

Then you paint a small triangle on orange paper and cut it out.

Bild zum Schritt 5 für das Bastel- und DIY-Abenteuer für Kinder: 'Danach malt ihr auf orangefarbenes Papier ein kleines Dreieck auf...'

6

Now you put the cardboard roll on orange paper and draw with the pencil around the roll. Then you put the cardboard roll aside and paint two feet on the circle. Then you cut it out.
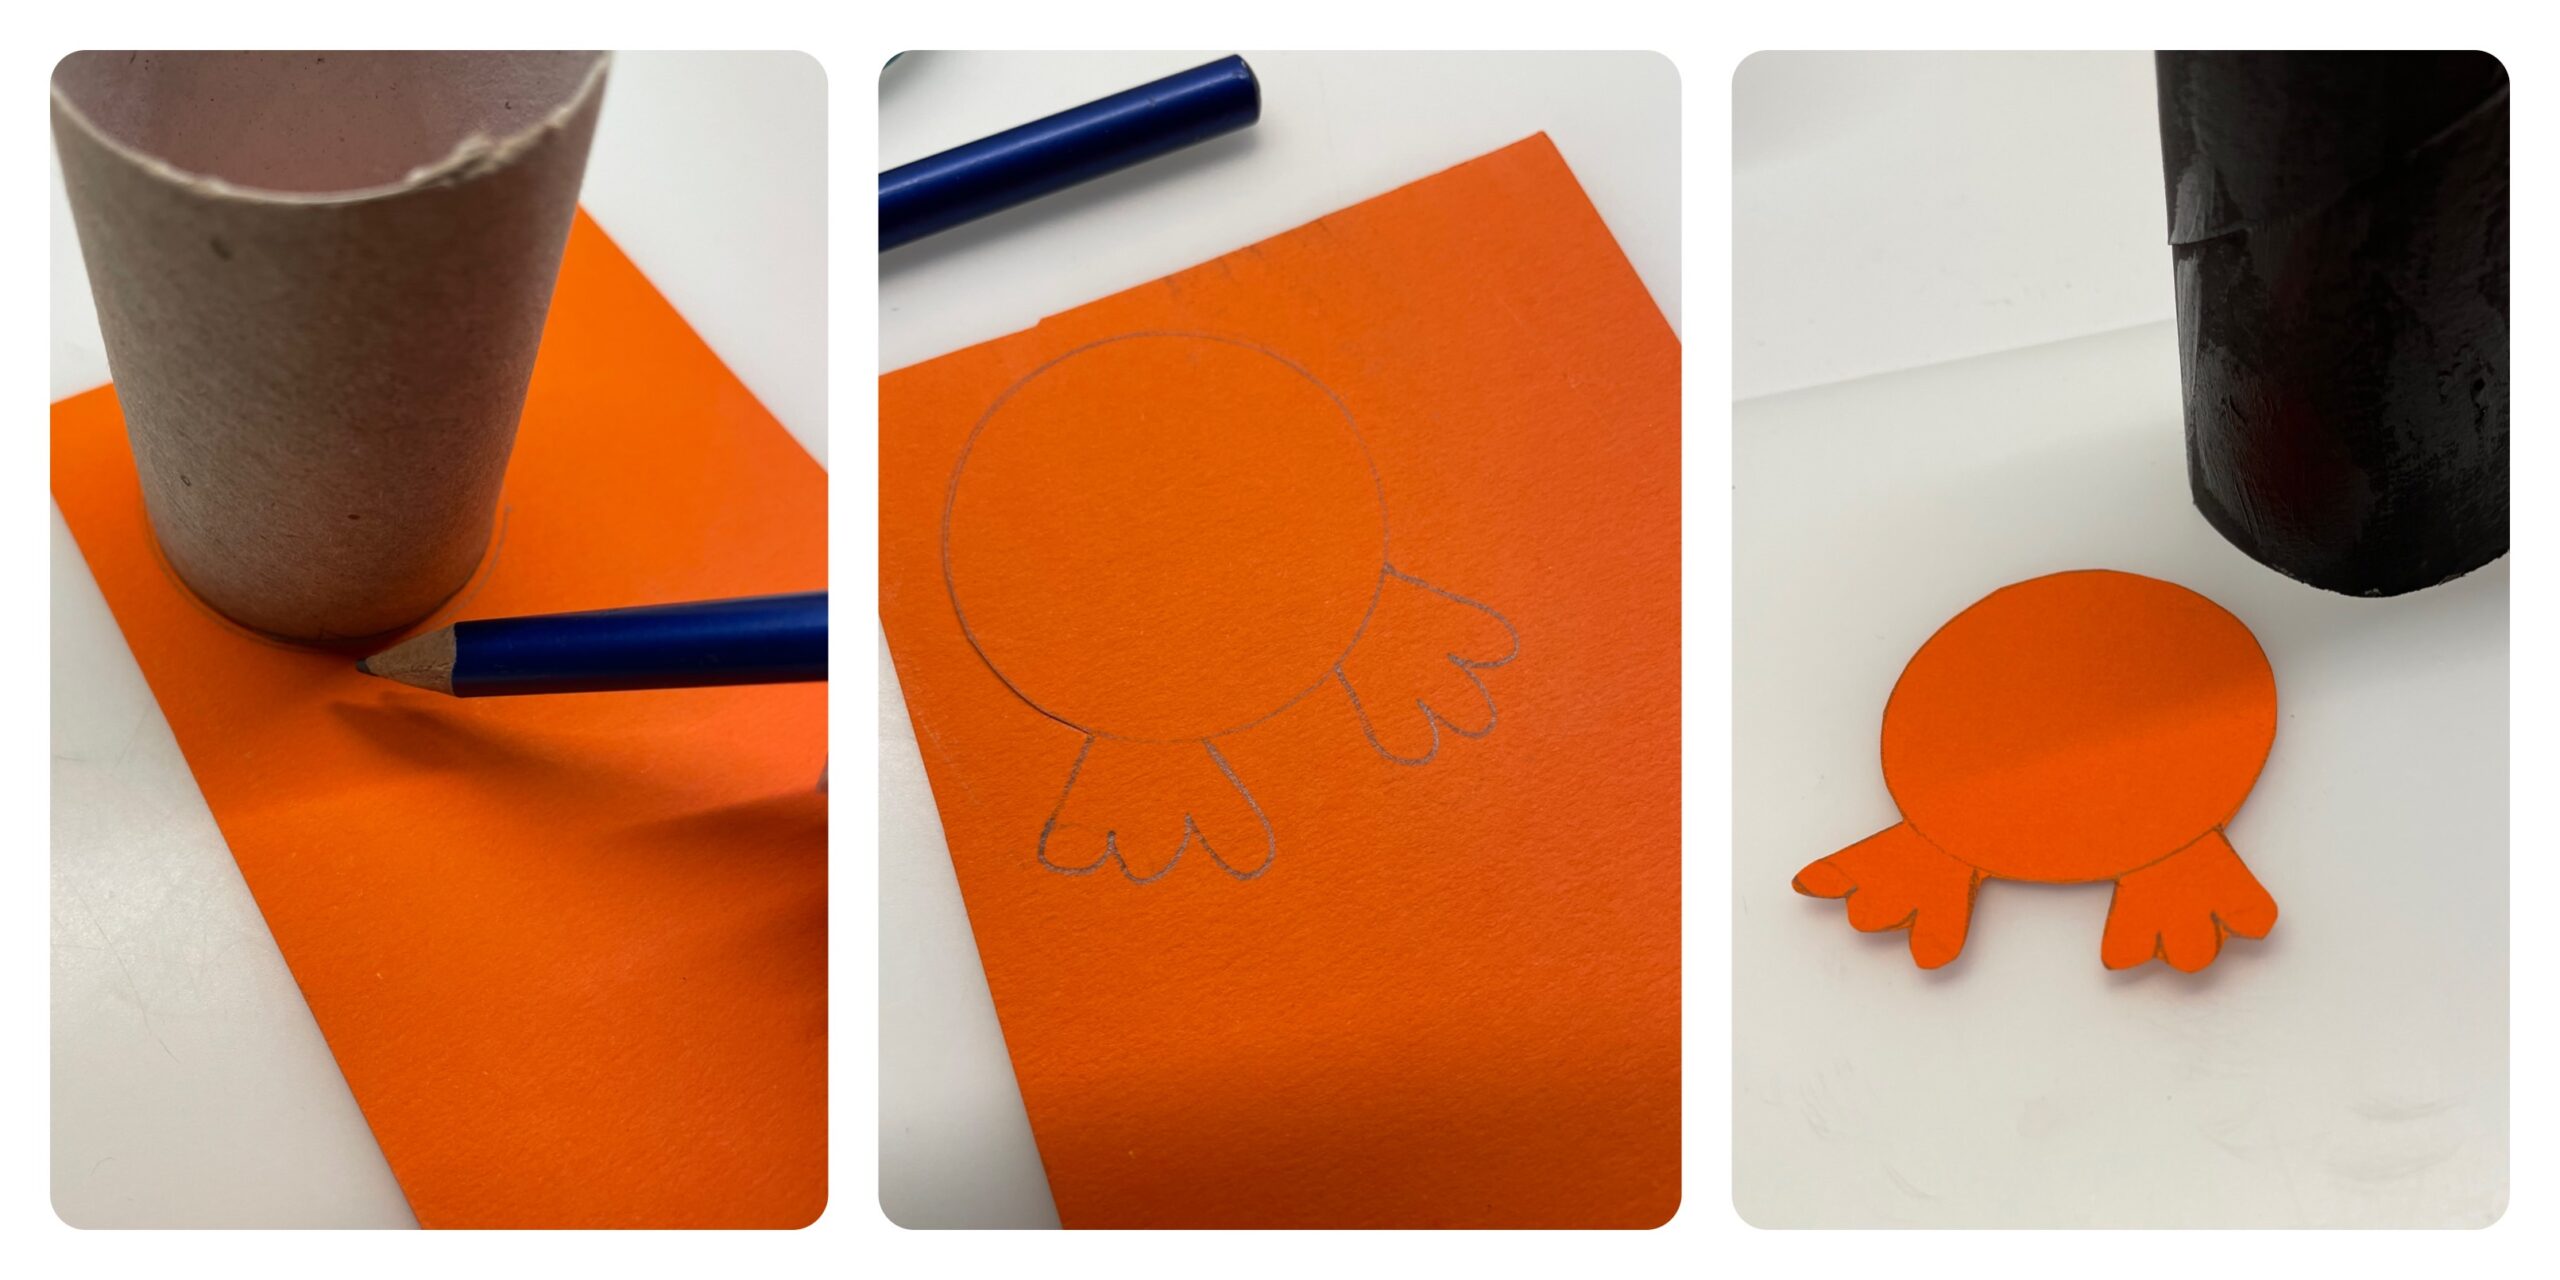
Bild zum Schritt 6 für das Bastel- und DIY-Abenteuer für Kinder: 'Jetzt stellt ihr die Papprolle auf orangefarbenes Papier und zeichnet...'

7

Then position your feet under the dried cardboard roll.
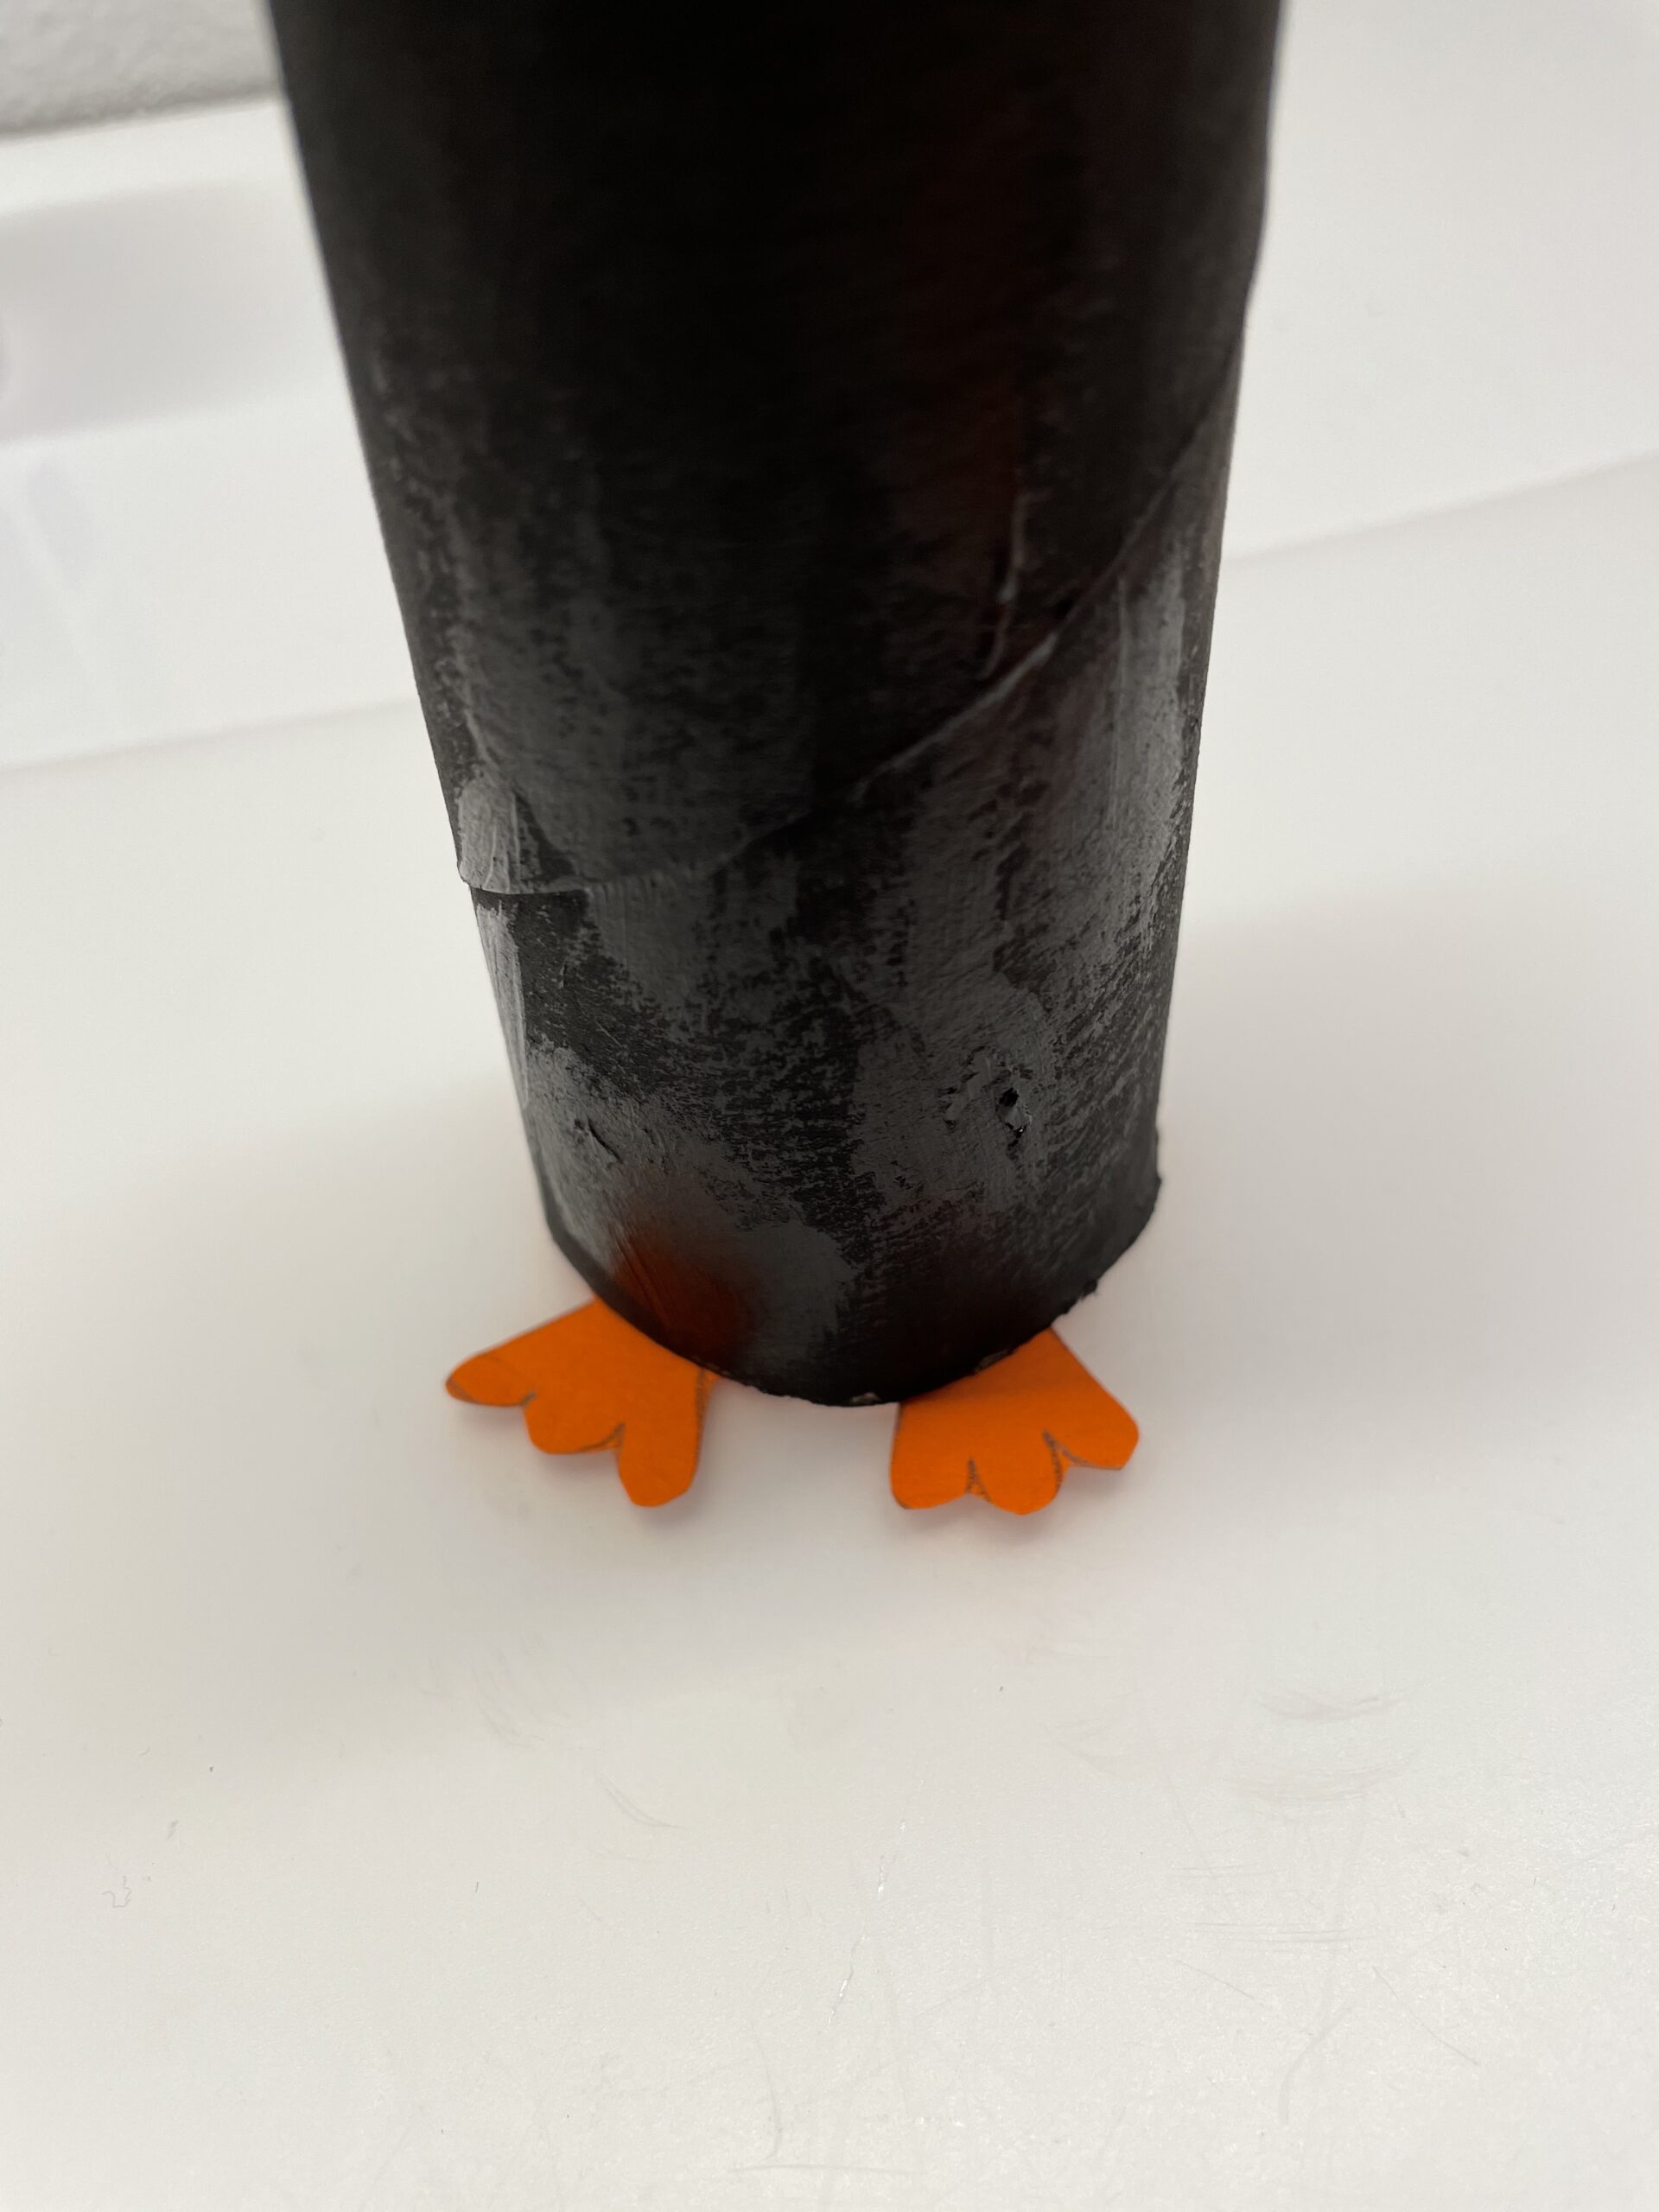
Bild zum Schritt 7 für das Bastel- und DIY-Abenteuer für Kinder: 'Danach positioniert ihr die Füße unter der getrockneten Papprolle.'

8

Now attach all other parts to the cardboard roll.
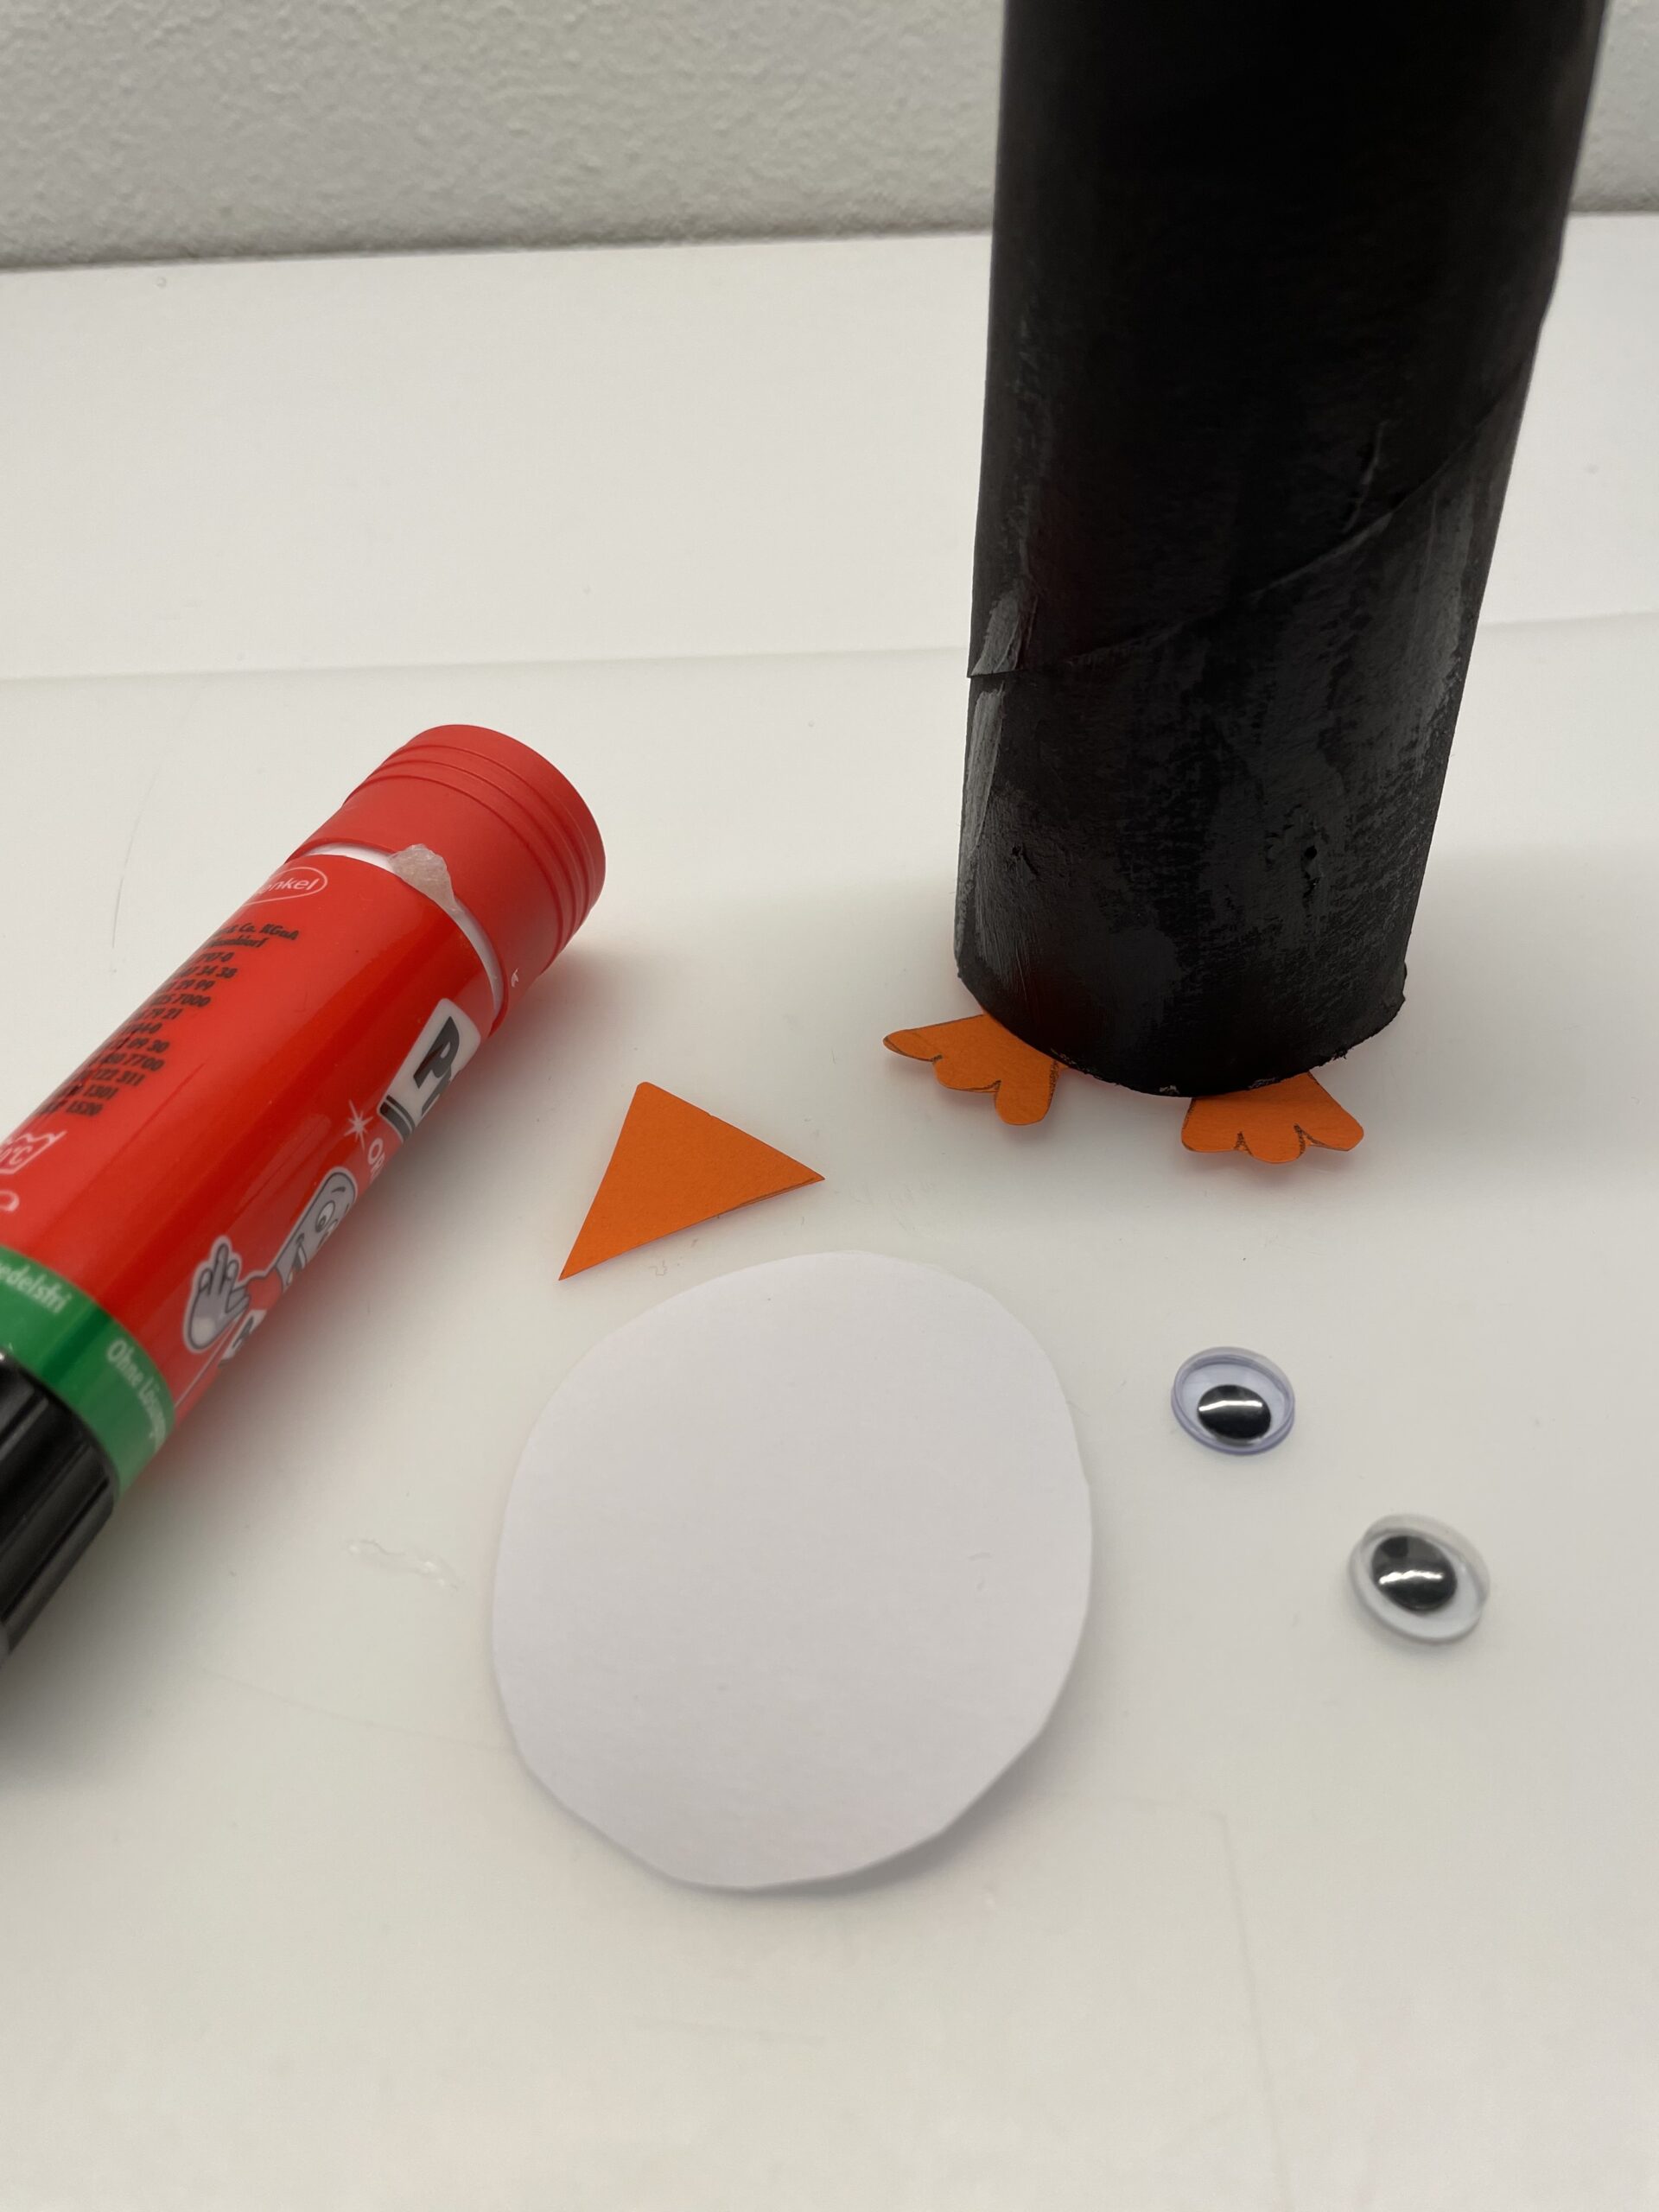
Bild zum Schritt 8 für das Bastel- und DIY-Abenteuer für Kinder: 'Befestigt jetzt alle anderen Einzelteile an der Papprolle.'

9

First stick the white part of the belly high on the roll.
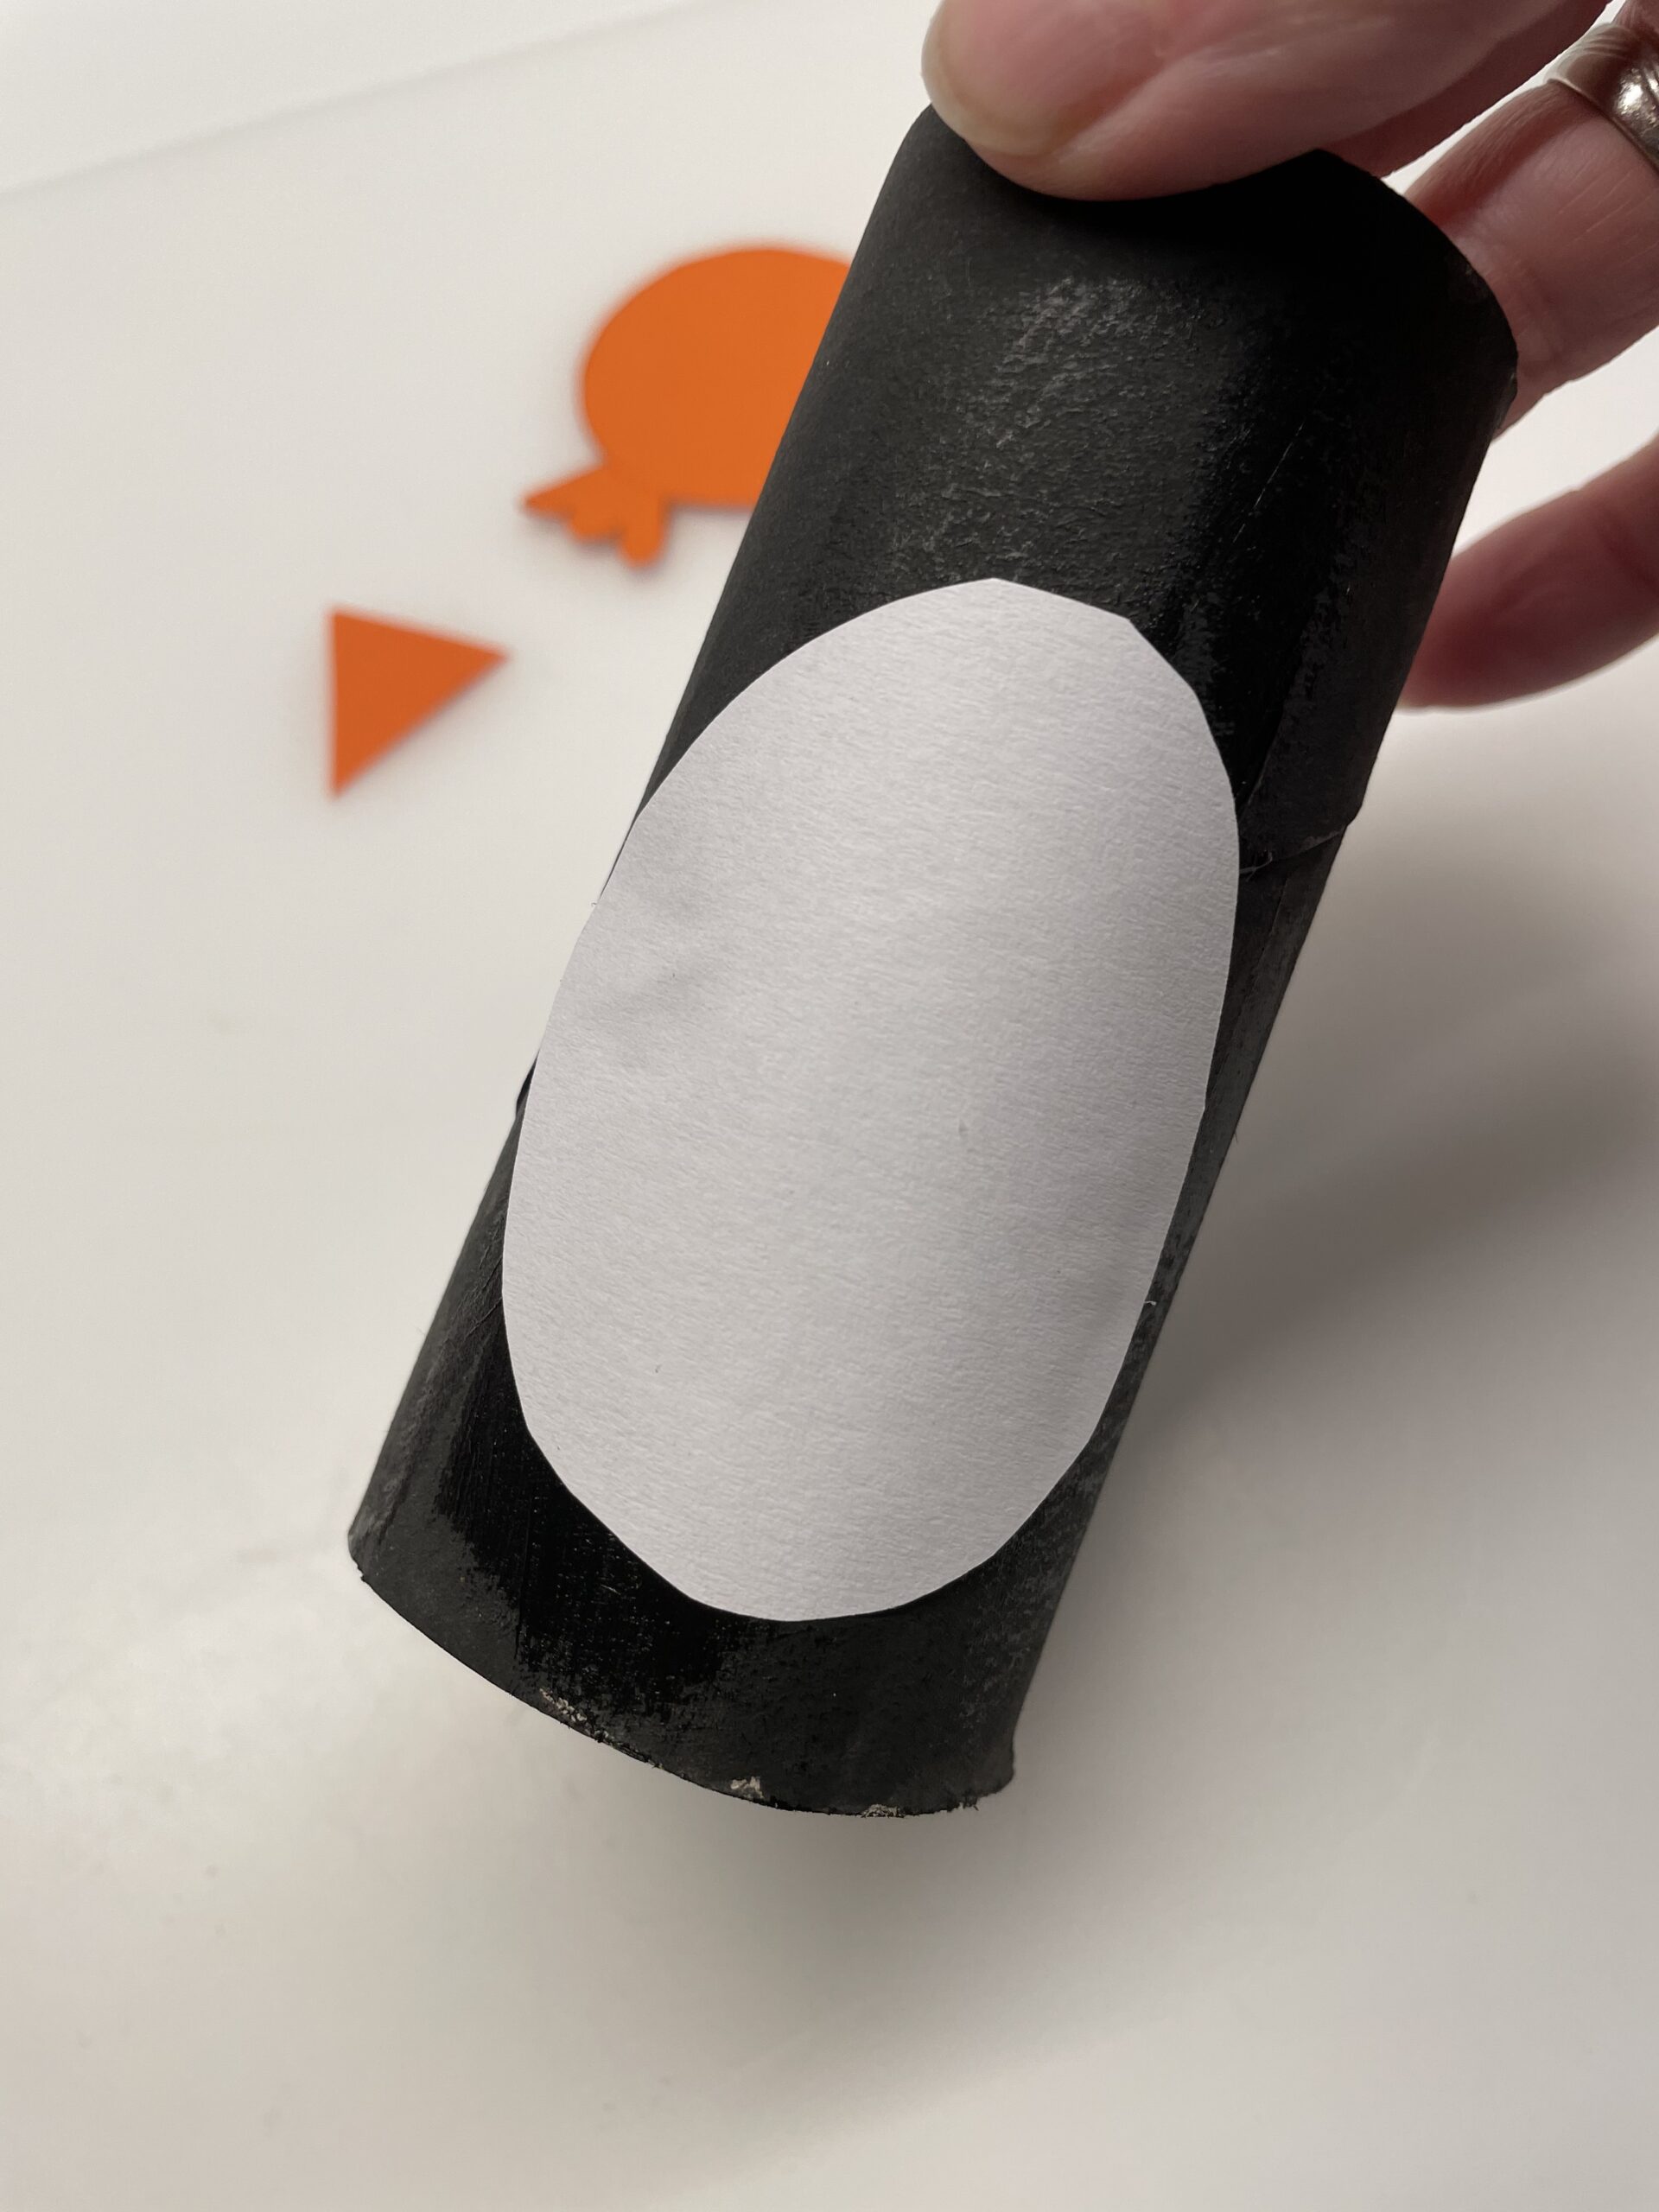
Bild zum Schritt 9 für das Bastel- und DIY-Abenteuer für Kinder: 'Klebt zuerst den weißen Teil des Bauchs hochkant auf die...'

10

On top of that, you stick your beak and your eyes.
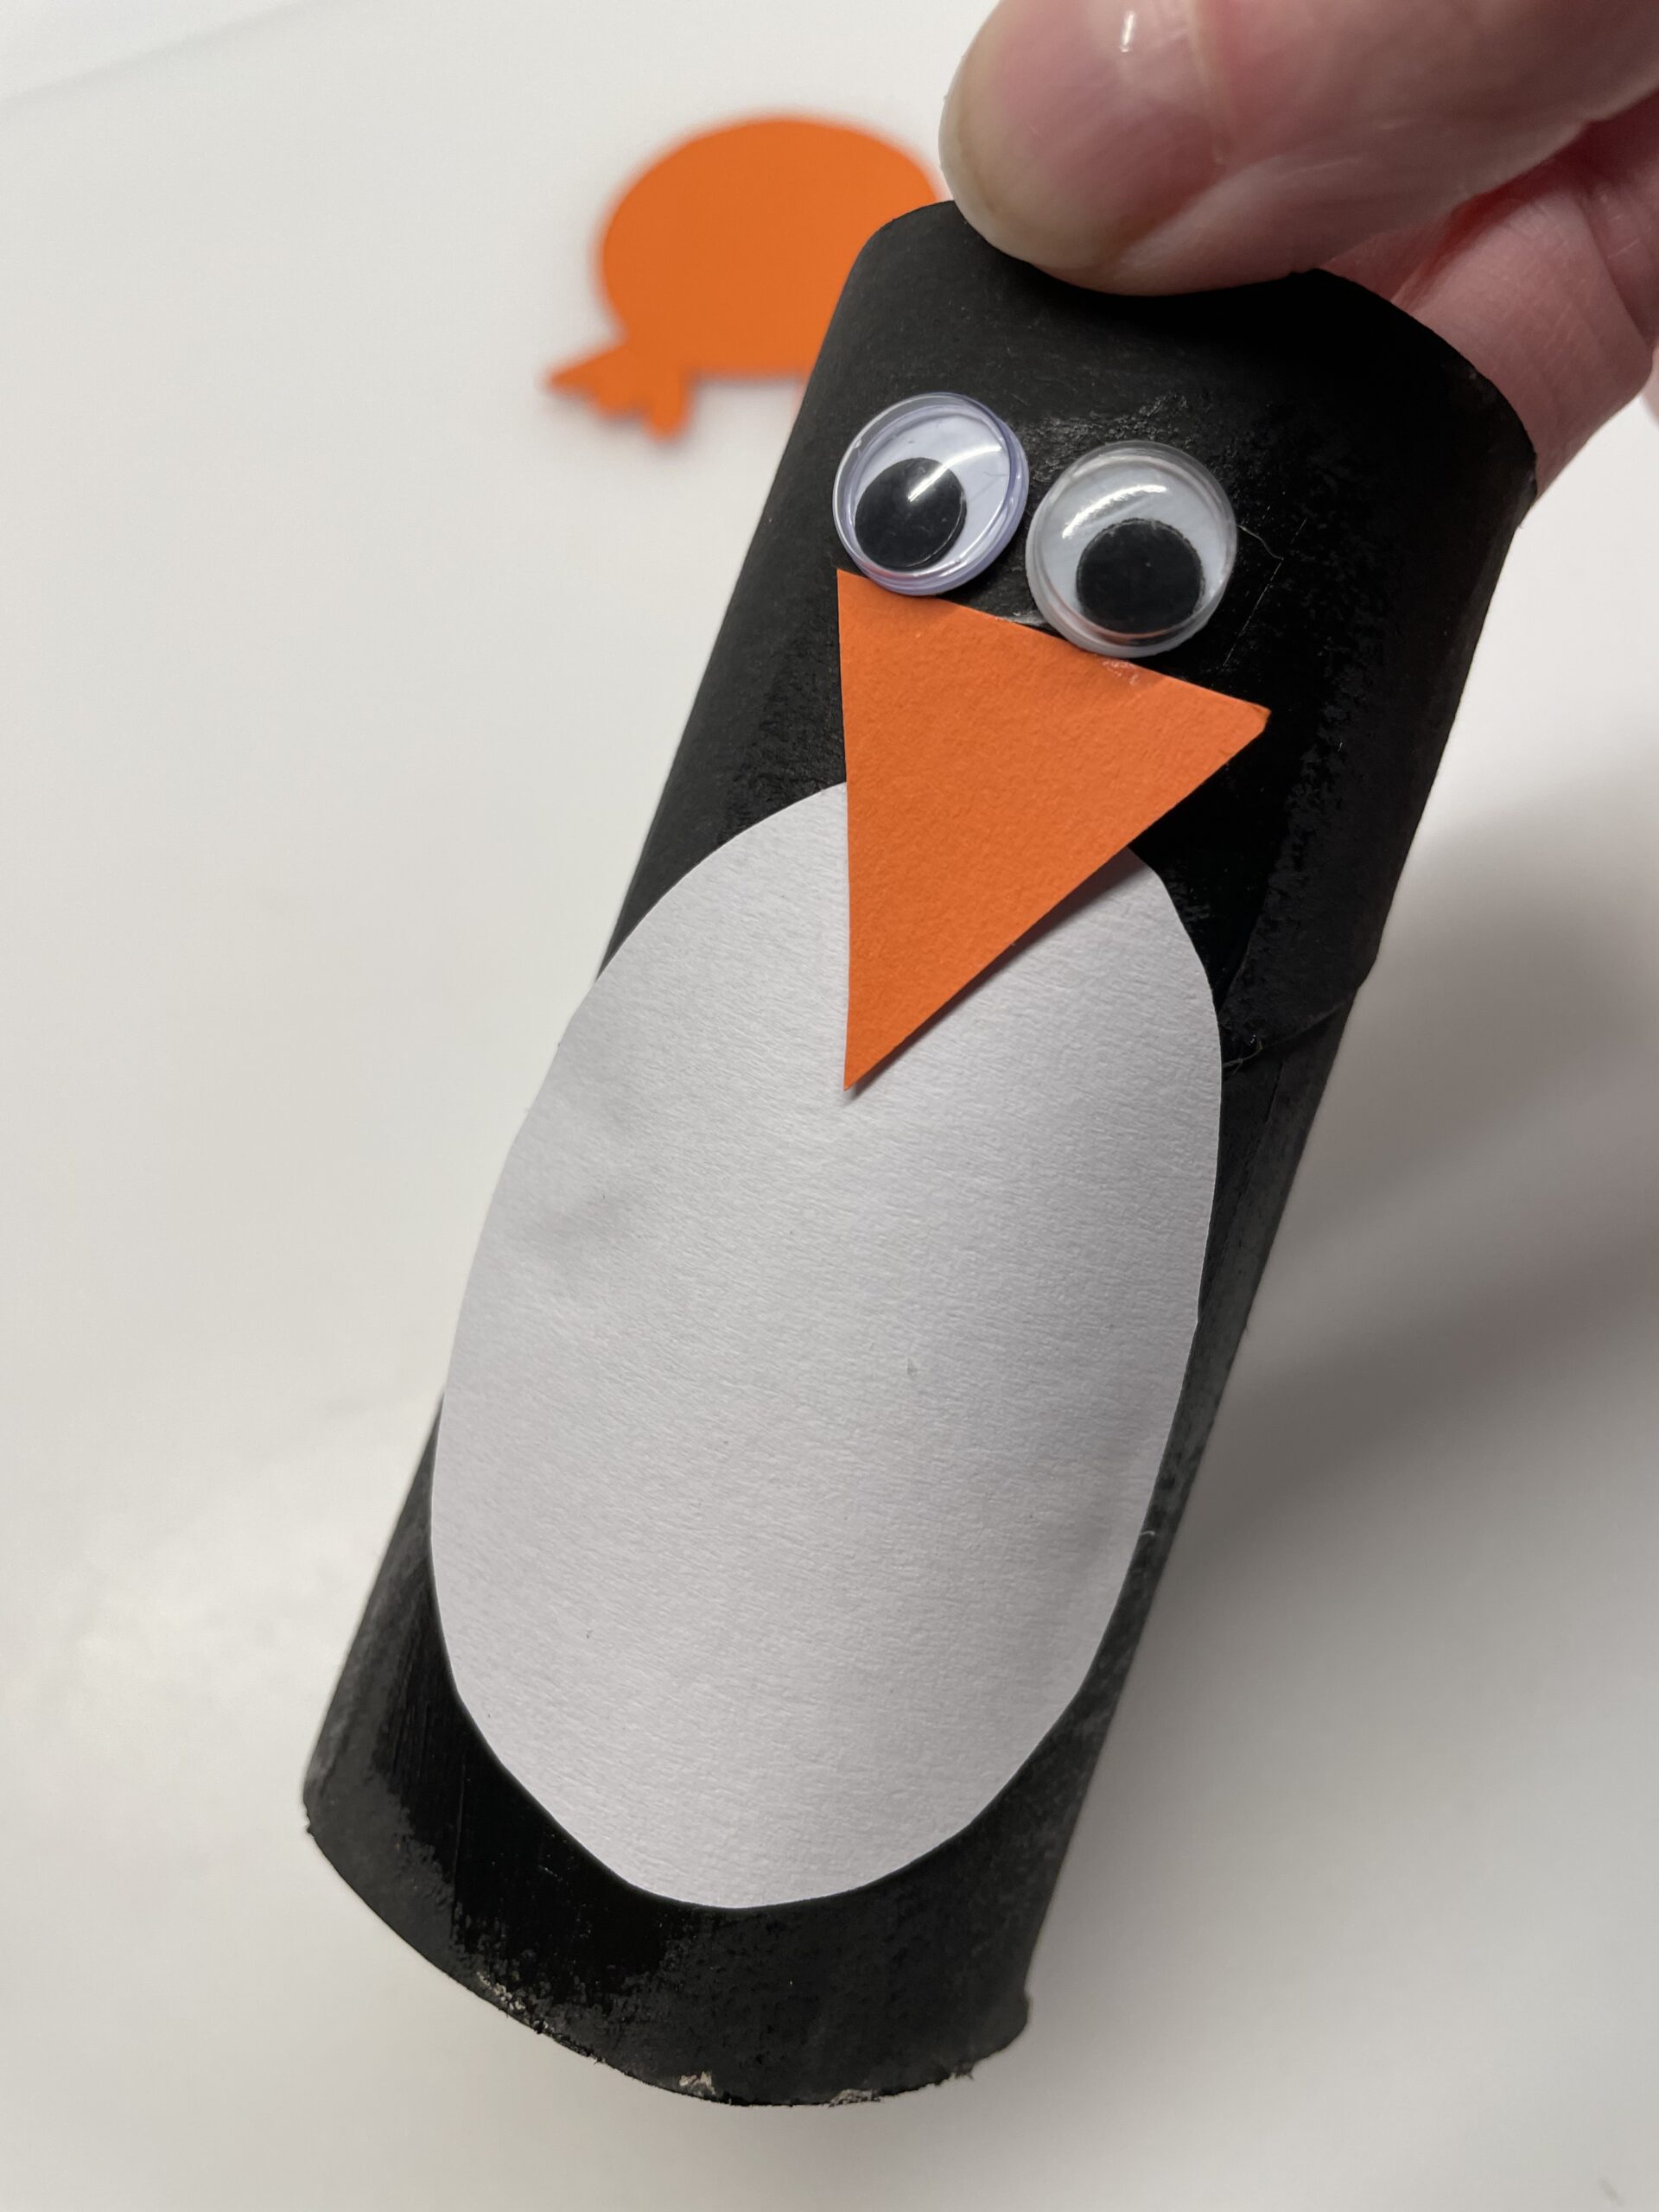
Bild zum Schritt 10 für das Bastel- und DIY-Abenteuer für Kinder: 'Darüber klebt ihr den Schnabel und die Augen.'

11

2. Bild zum Schritt 10 für das Bastel- und DIY-Abenteuer für Kinder: 'Darüber klebt ihr den Schnabel und die Augen.'

12

For the wings you cut a narrow strip of black clay paper to the dimensions of 15cm x 3cm. You fold this strip half in length. Now you paint the shape of a wing on the strip and cut it out. The paper is double, so that two wings are created at once.
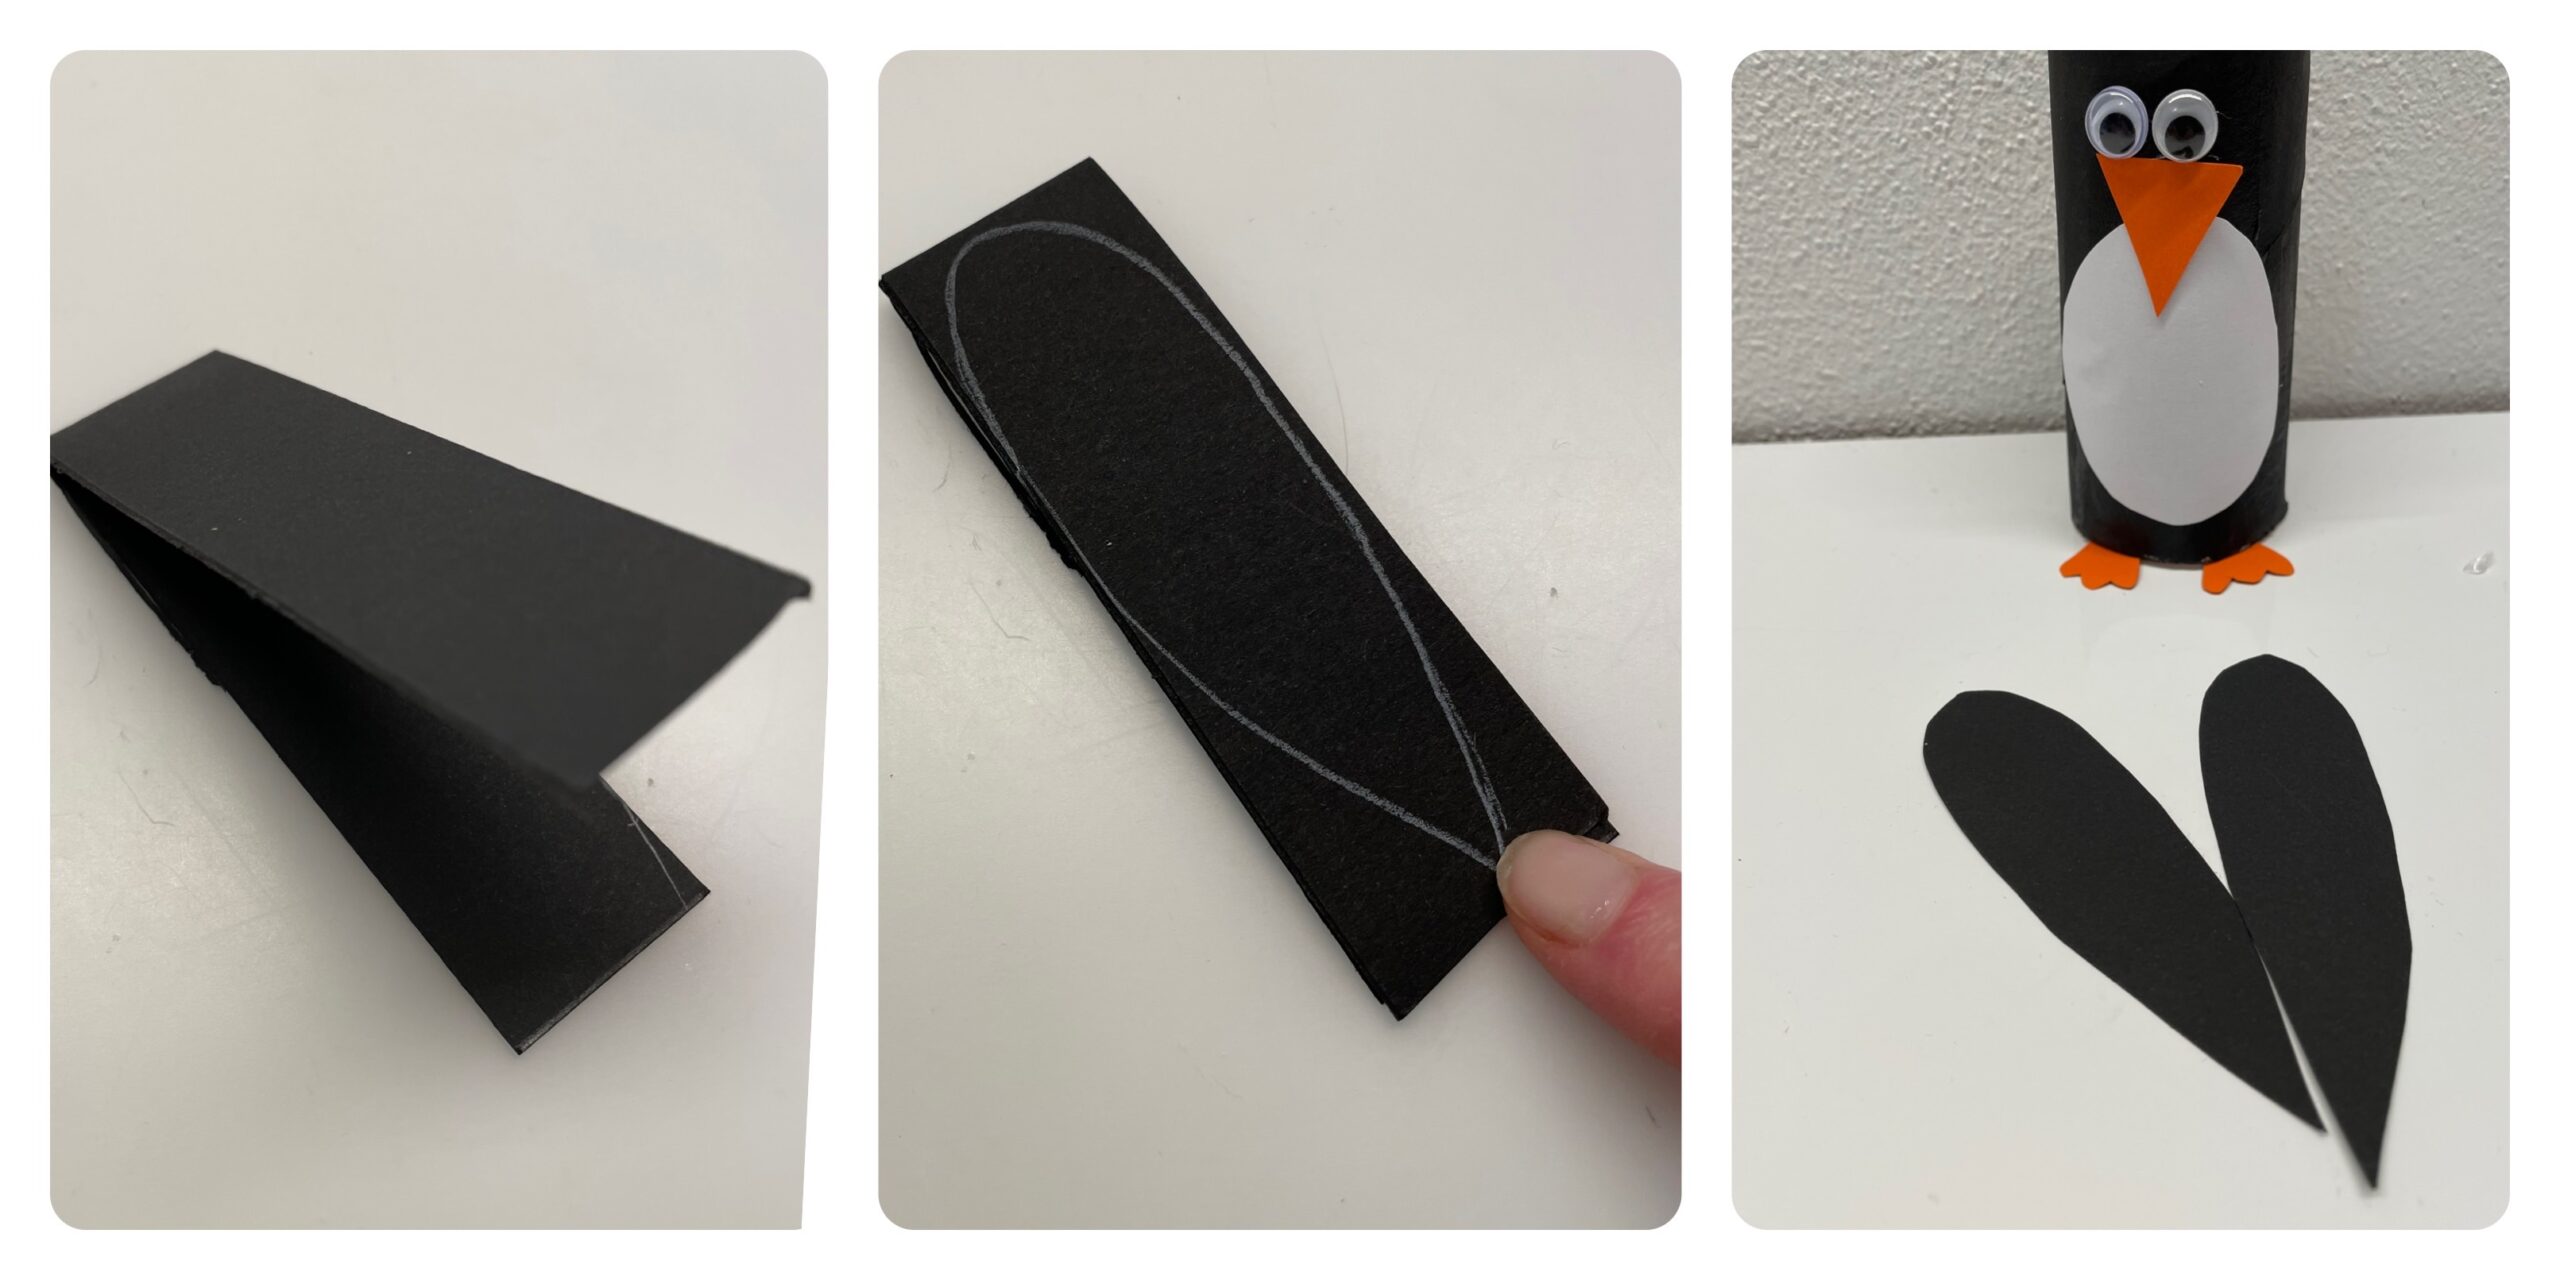
Bild zum Schritt 12 für das Bastel- und DIY-Abenteuer für Kinder: 'Für die Flügel schneidet ihr euch einen schmalen Streifen schwarzes...'

13

Now you pull each wing over a pen. Press the paper firmly on the pen. The paper bends very easily and wrinkles.
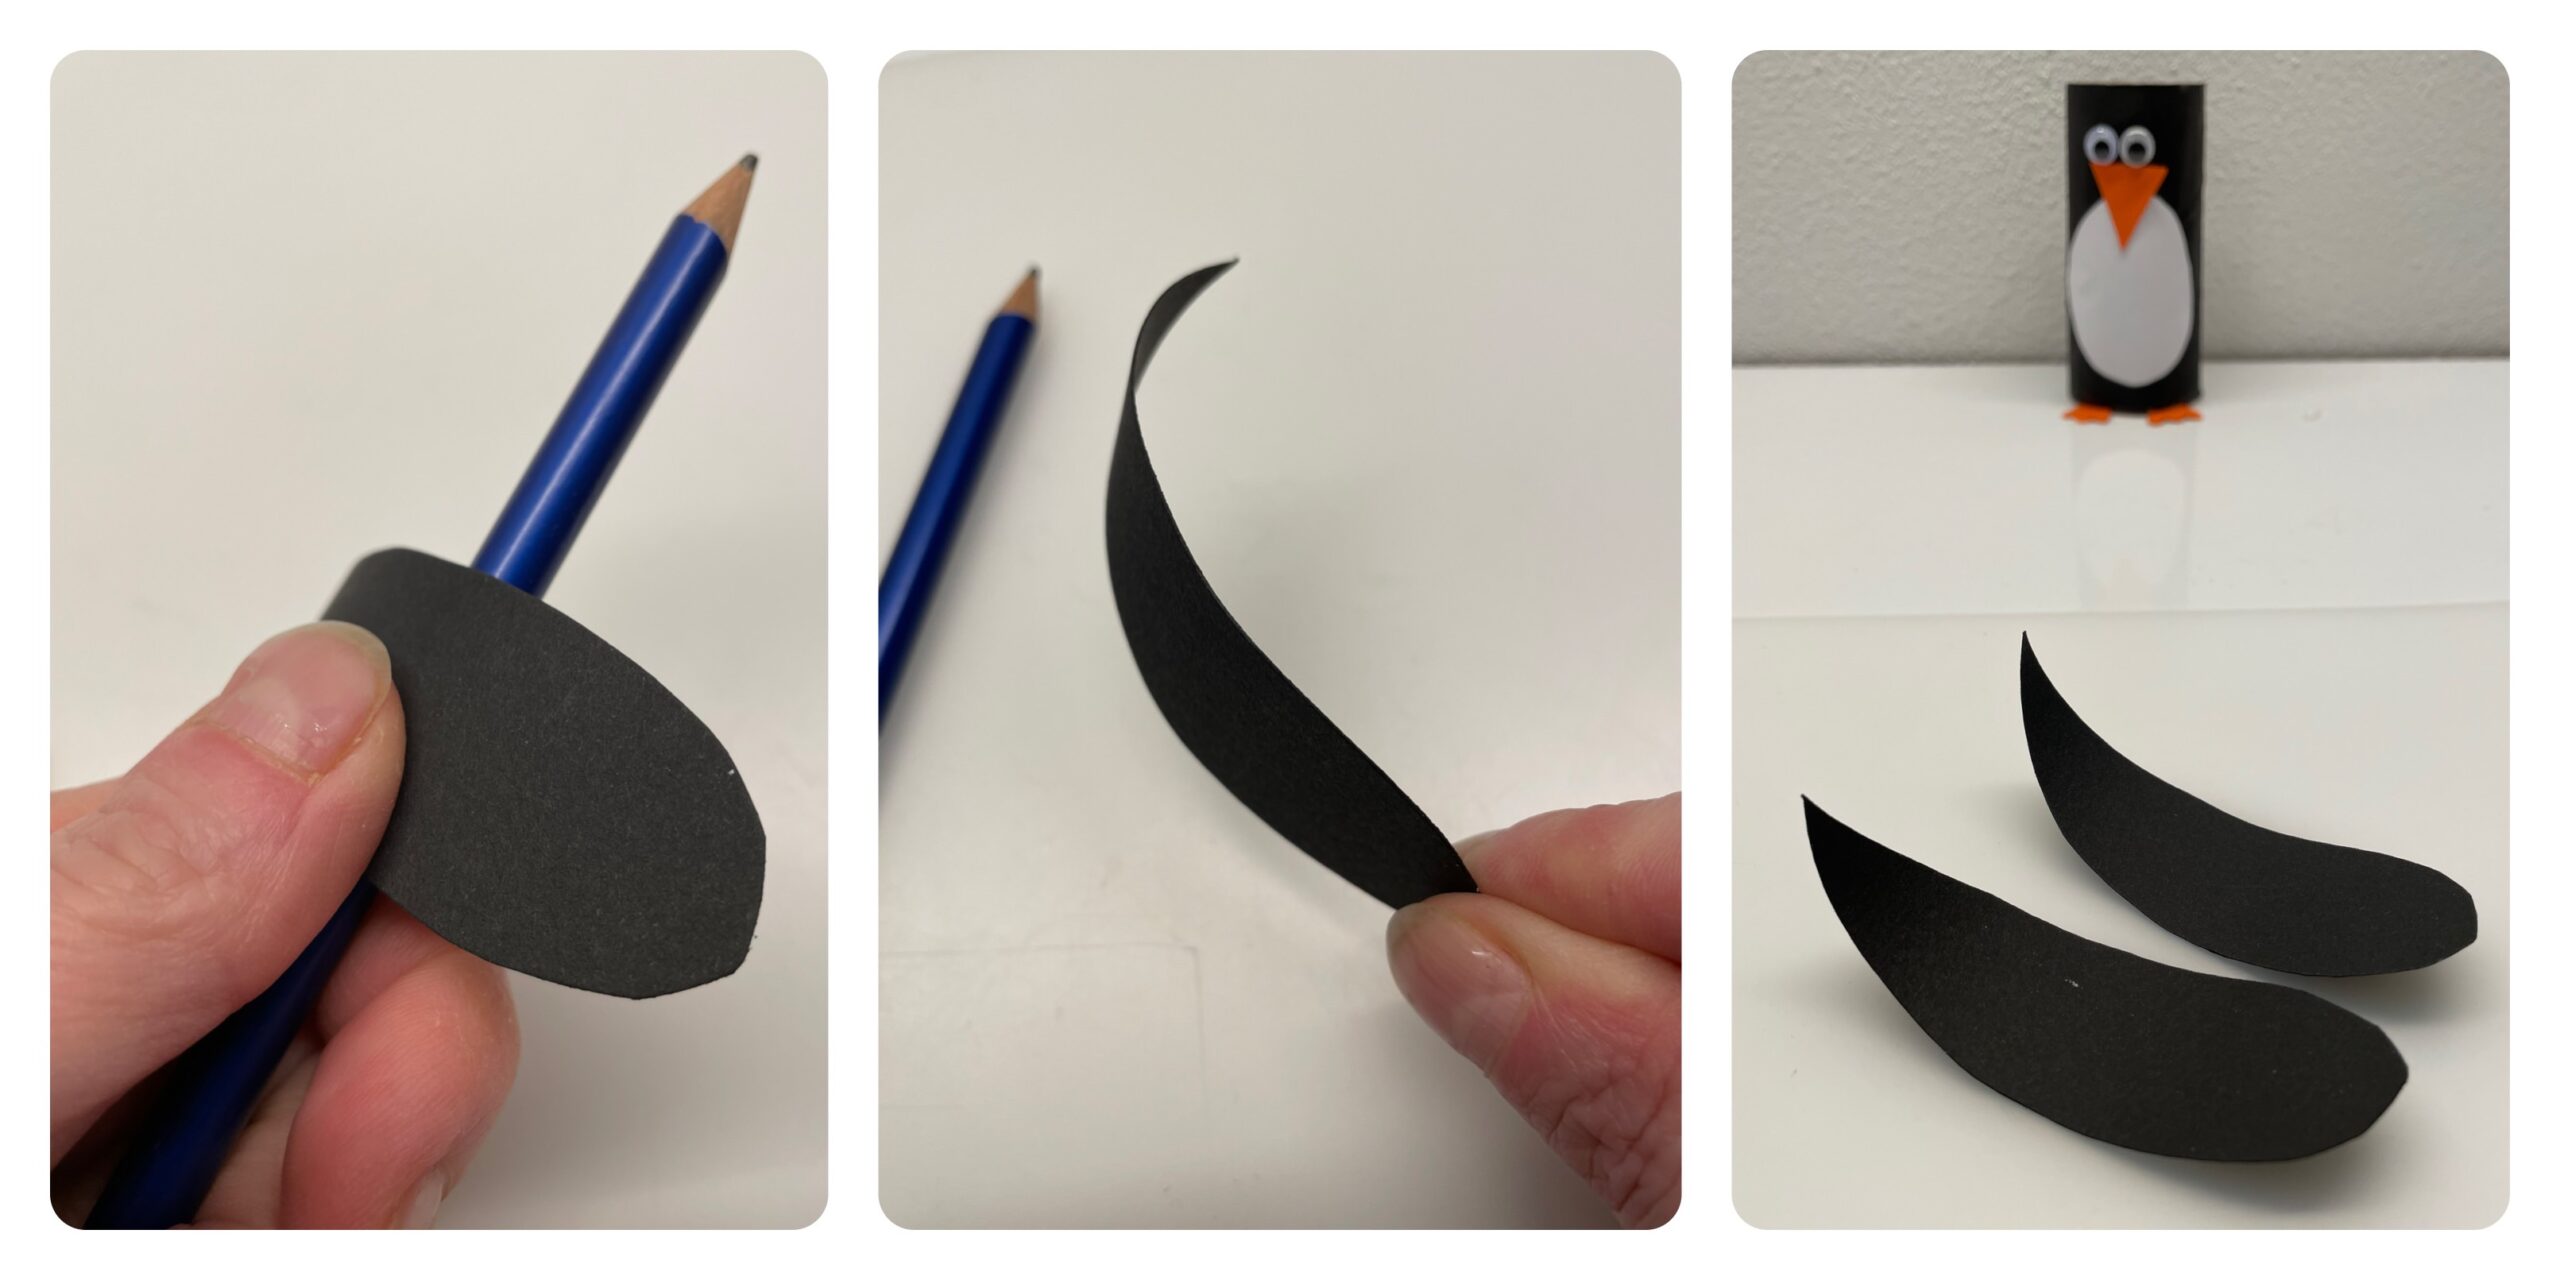
Bild zum Schritt 13 für das Bastel- und DIY-Abenteuer für Kinder: 'Jetzt zieht ihr jeden Flügel über einen Stift. Drückt dabei...'

14

Then glue the wings to the cardboard roll with an adhesive point at the top of the round end. The wing now stands down a bit.
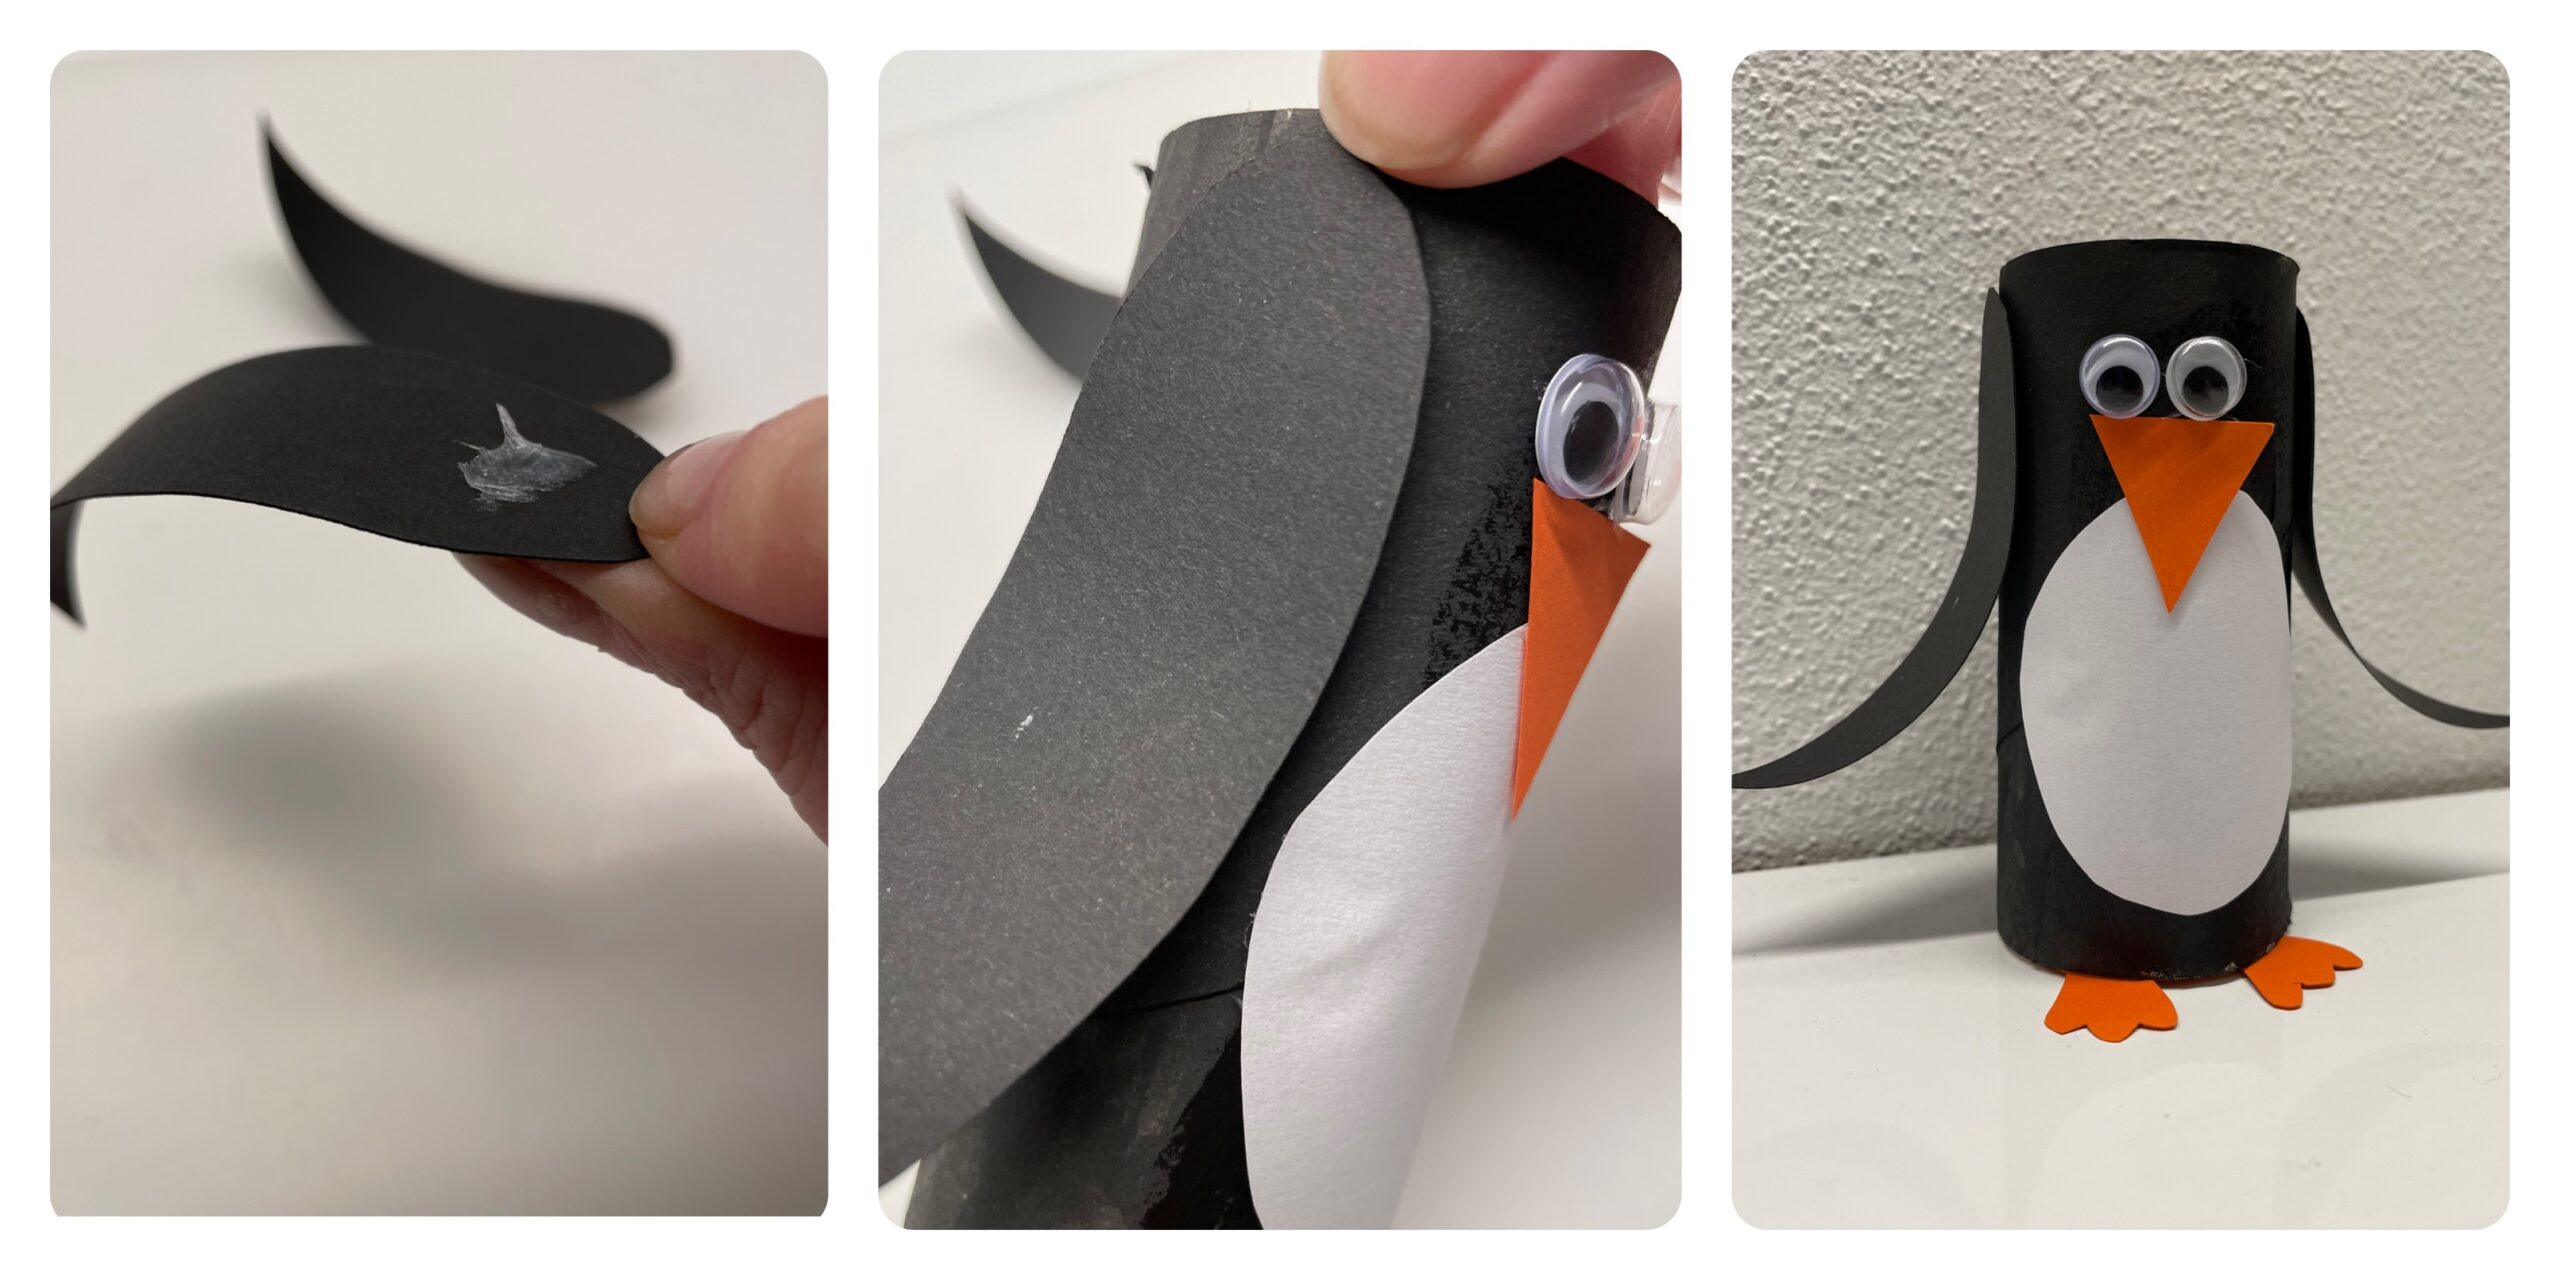
Bild zum Schritt 14 für das Bastel- und DIY-Abenteuer für Kinder: 'Anschließend klebt ihr die Flügel mit einem Klebepunkt am runden...'

15

The penguin is ready.

Bild zum Schritt 15 für das Bastel- und DIY-Abenteuer für Kinder: 'Fertig ist der Pinguin.'

16

Have fun crafting the penguin! Maybe you want to make an entire penguin family.

Penguin making out of a cardboard roll

Follow us on Facebook , Instagram and Pinterest
Don't miss any more adventures: Our bottle mail

Leave a Reply

Your email address will not be published.

The maximum upload file size: 5 MB. You can upload: image, document. Drop file here