Print Options:

Lantern with leaf

Material for1 ChildPrep Time5 min.Adv. Time20 min.Total Time25 min.

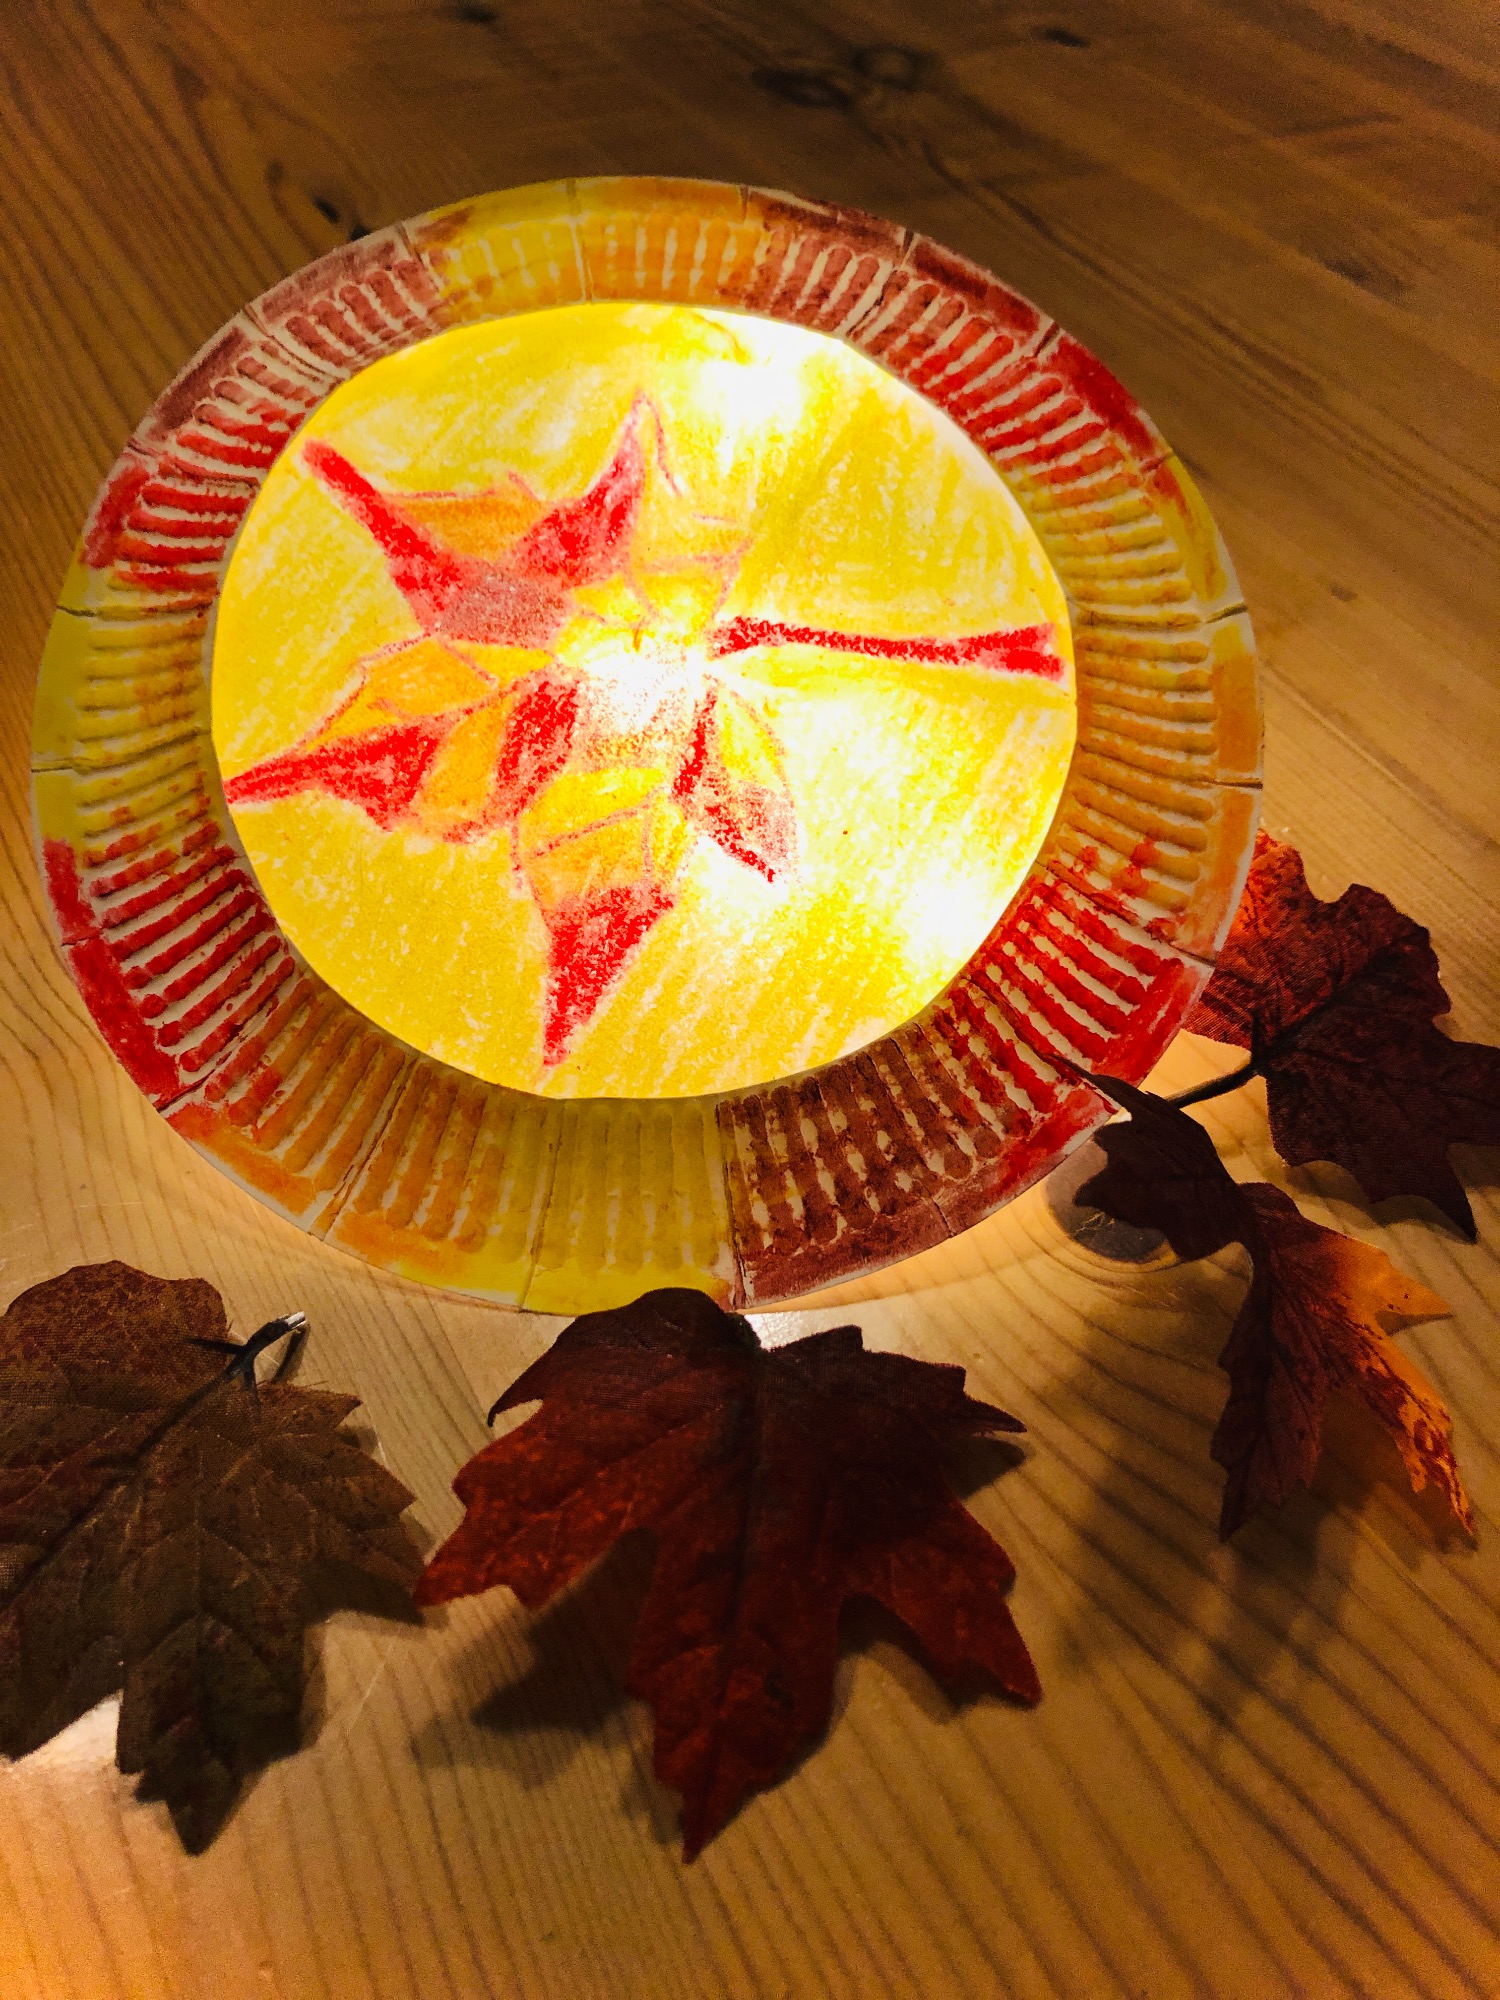
A colourful autumn leaf is the motif of this lantern. This small lantern is very easy to craft and the colorful autumn leaf is already the largest and most elaborate action.? A small but very enchanting idea for the autumn.

Titelbild zur Bastel- und DIY-Idee für Kinder '(449) Laterne mit Blatt'

 2 Cardboard plates
 1 Sheet of paper
 Wax crayons
 1 Fresh maple leafor oak leaf
 Scissors
 Food oiluses neutral smelling oil, such as sunflower oil
 1 Brushes
 Kitchen crepe
 Hot glue gun
All links marked with a shopping cart lead to Amazon - here we have selected products that we would order ourselves and in part also ordered. In a qualified purchase via the advertising link, we as Amazon partner receive a commission, for you there are no costs. You thus support our cost- and advertising banner-free, educational offer.
1

Complete instructions are required twice.
Take two cardboard plates and make the front and back of your lantern.

Bild zum Schritt 1 für das Bastel- und DIY-Abenteuer für Kinder: 'Komplette Anleitung wird  zweimal benötigt.   Nehmt zwei...'

2

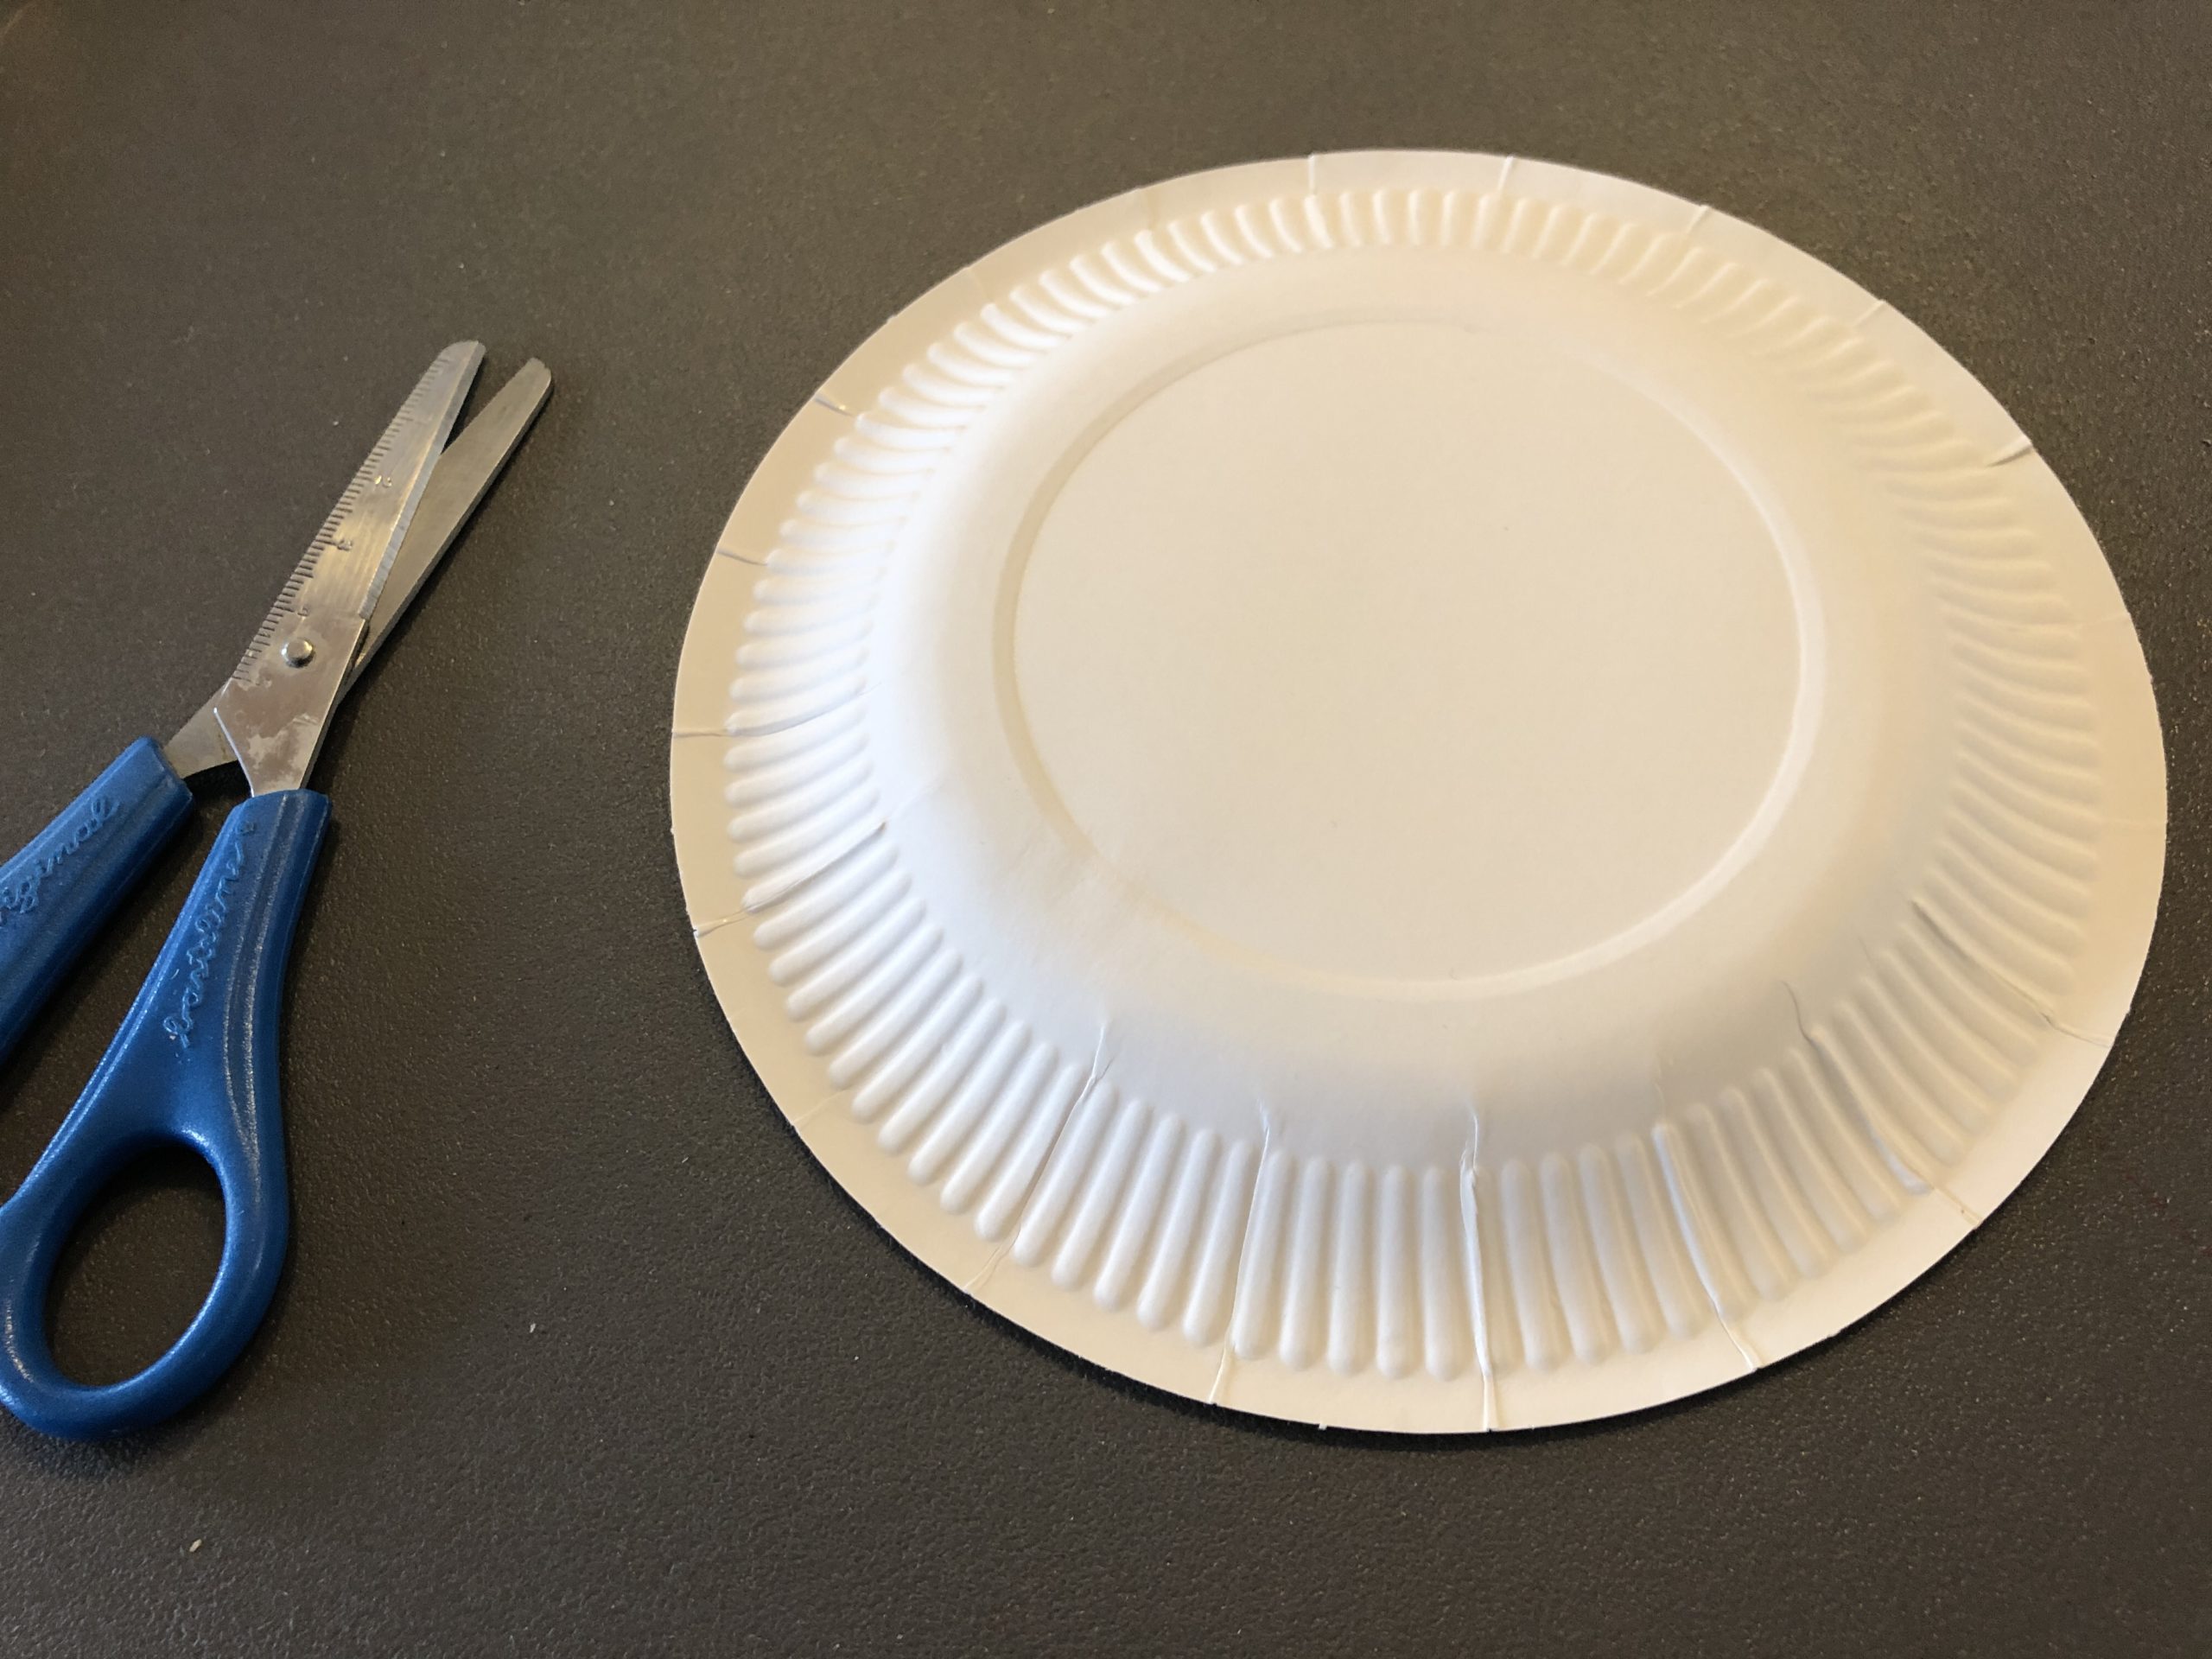
First cut a circle out of both cardboard plates.

Bild zum Schritt 2 für das Bastel- und DIY-Abenteuer für Kinder: 'Schneidet zuerst einen Kreis aus beiden Papptellern heraus.'

3

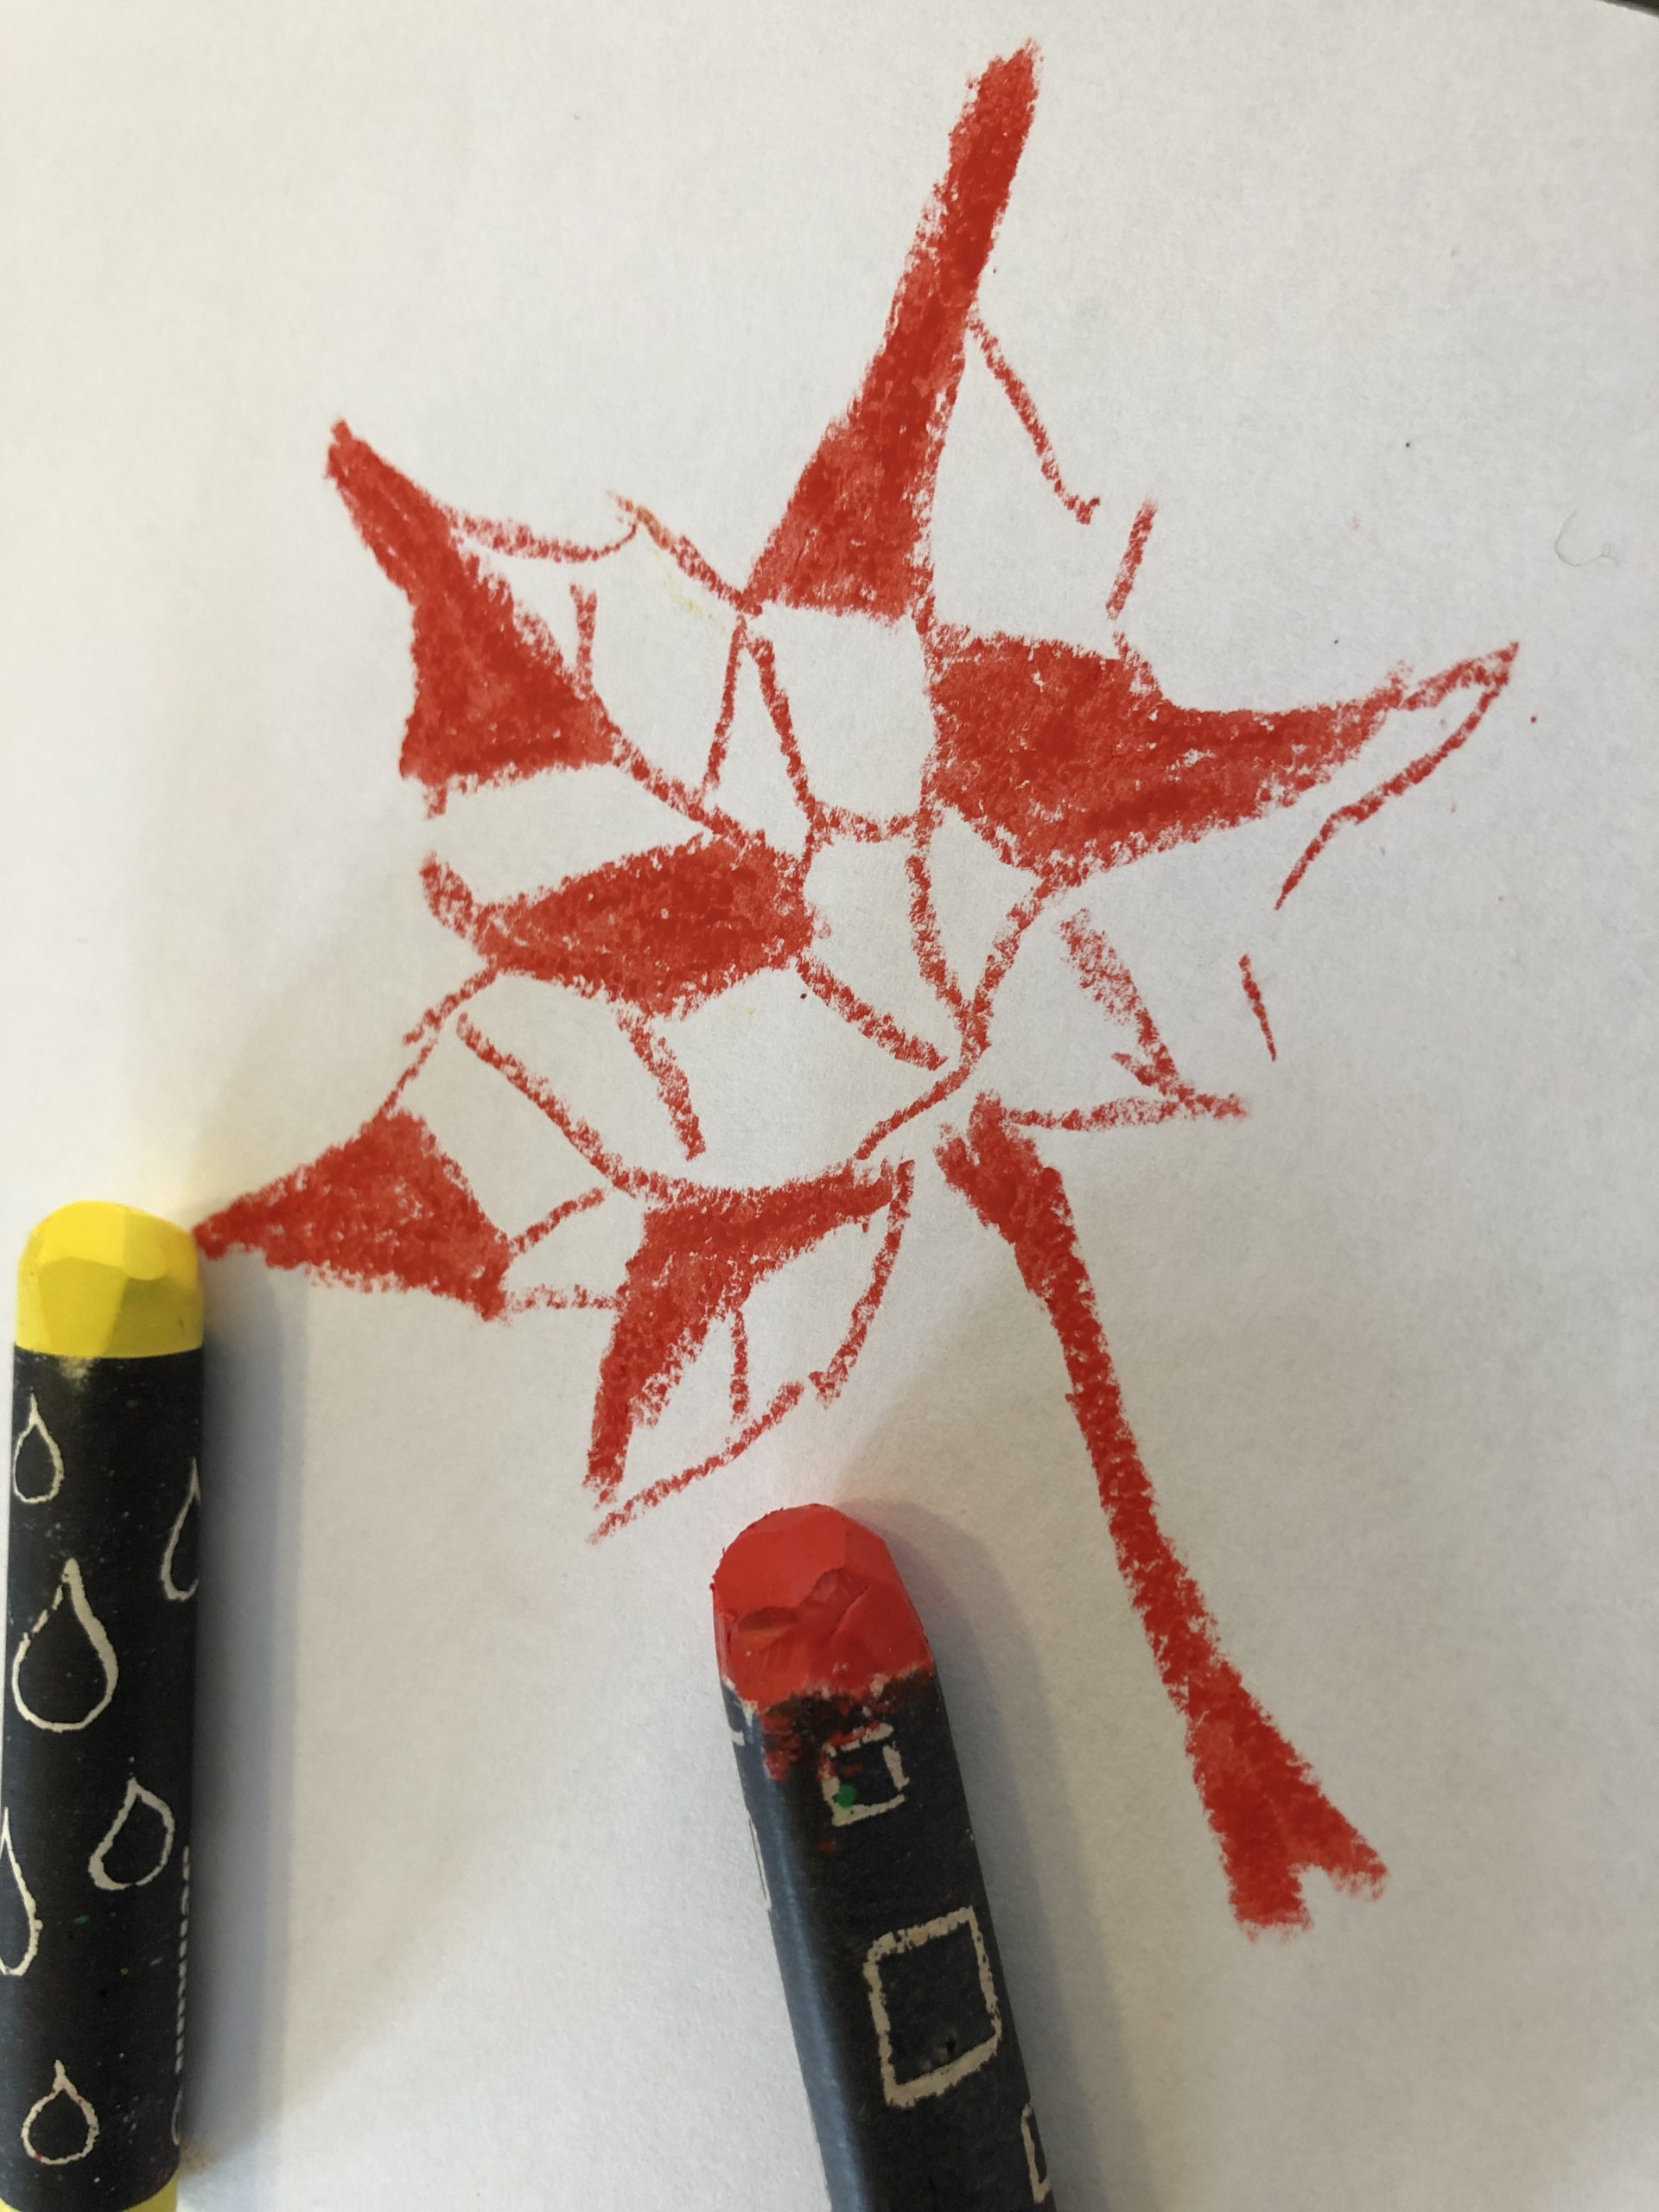
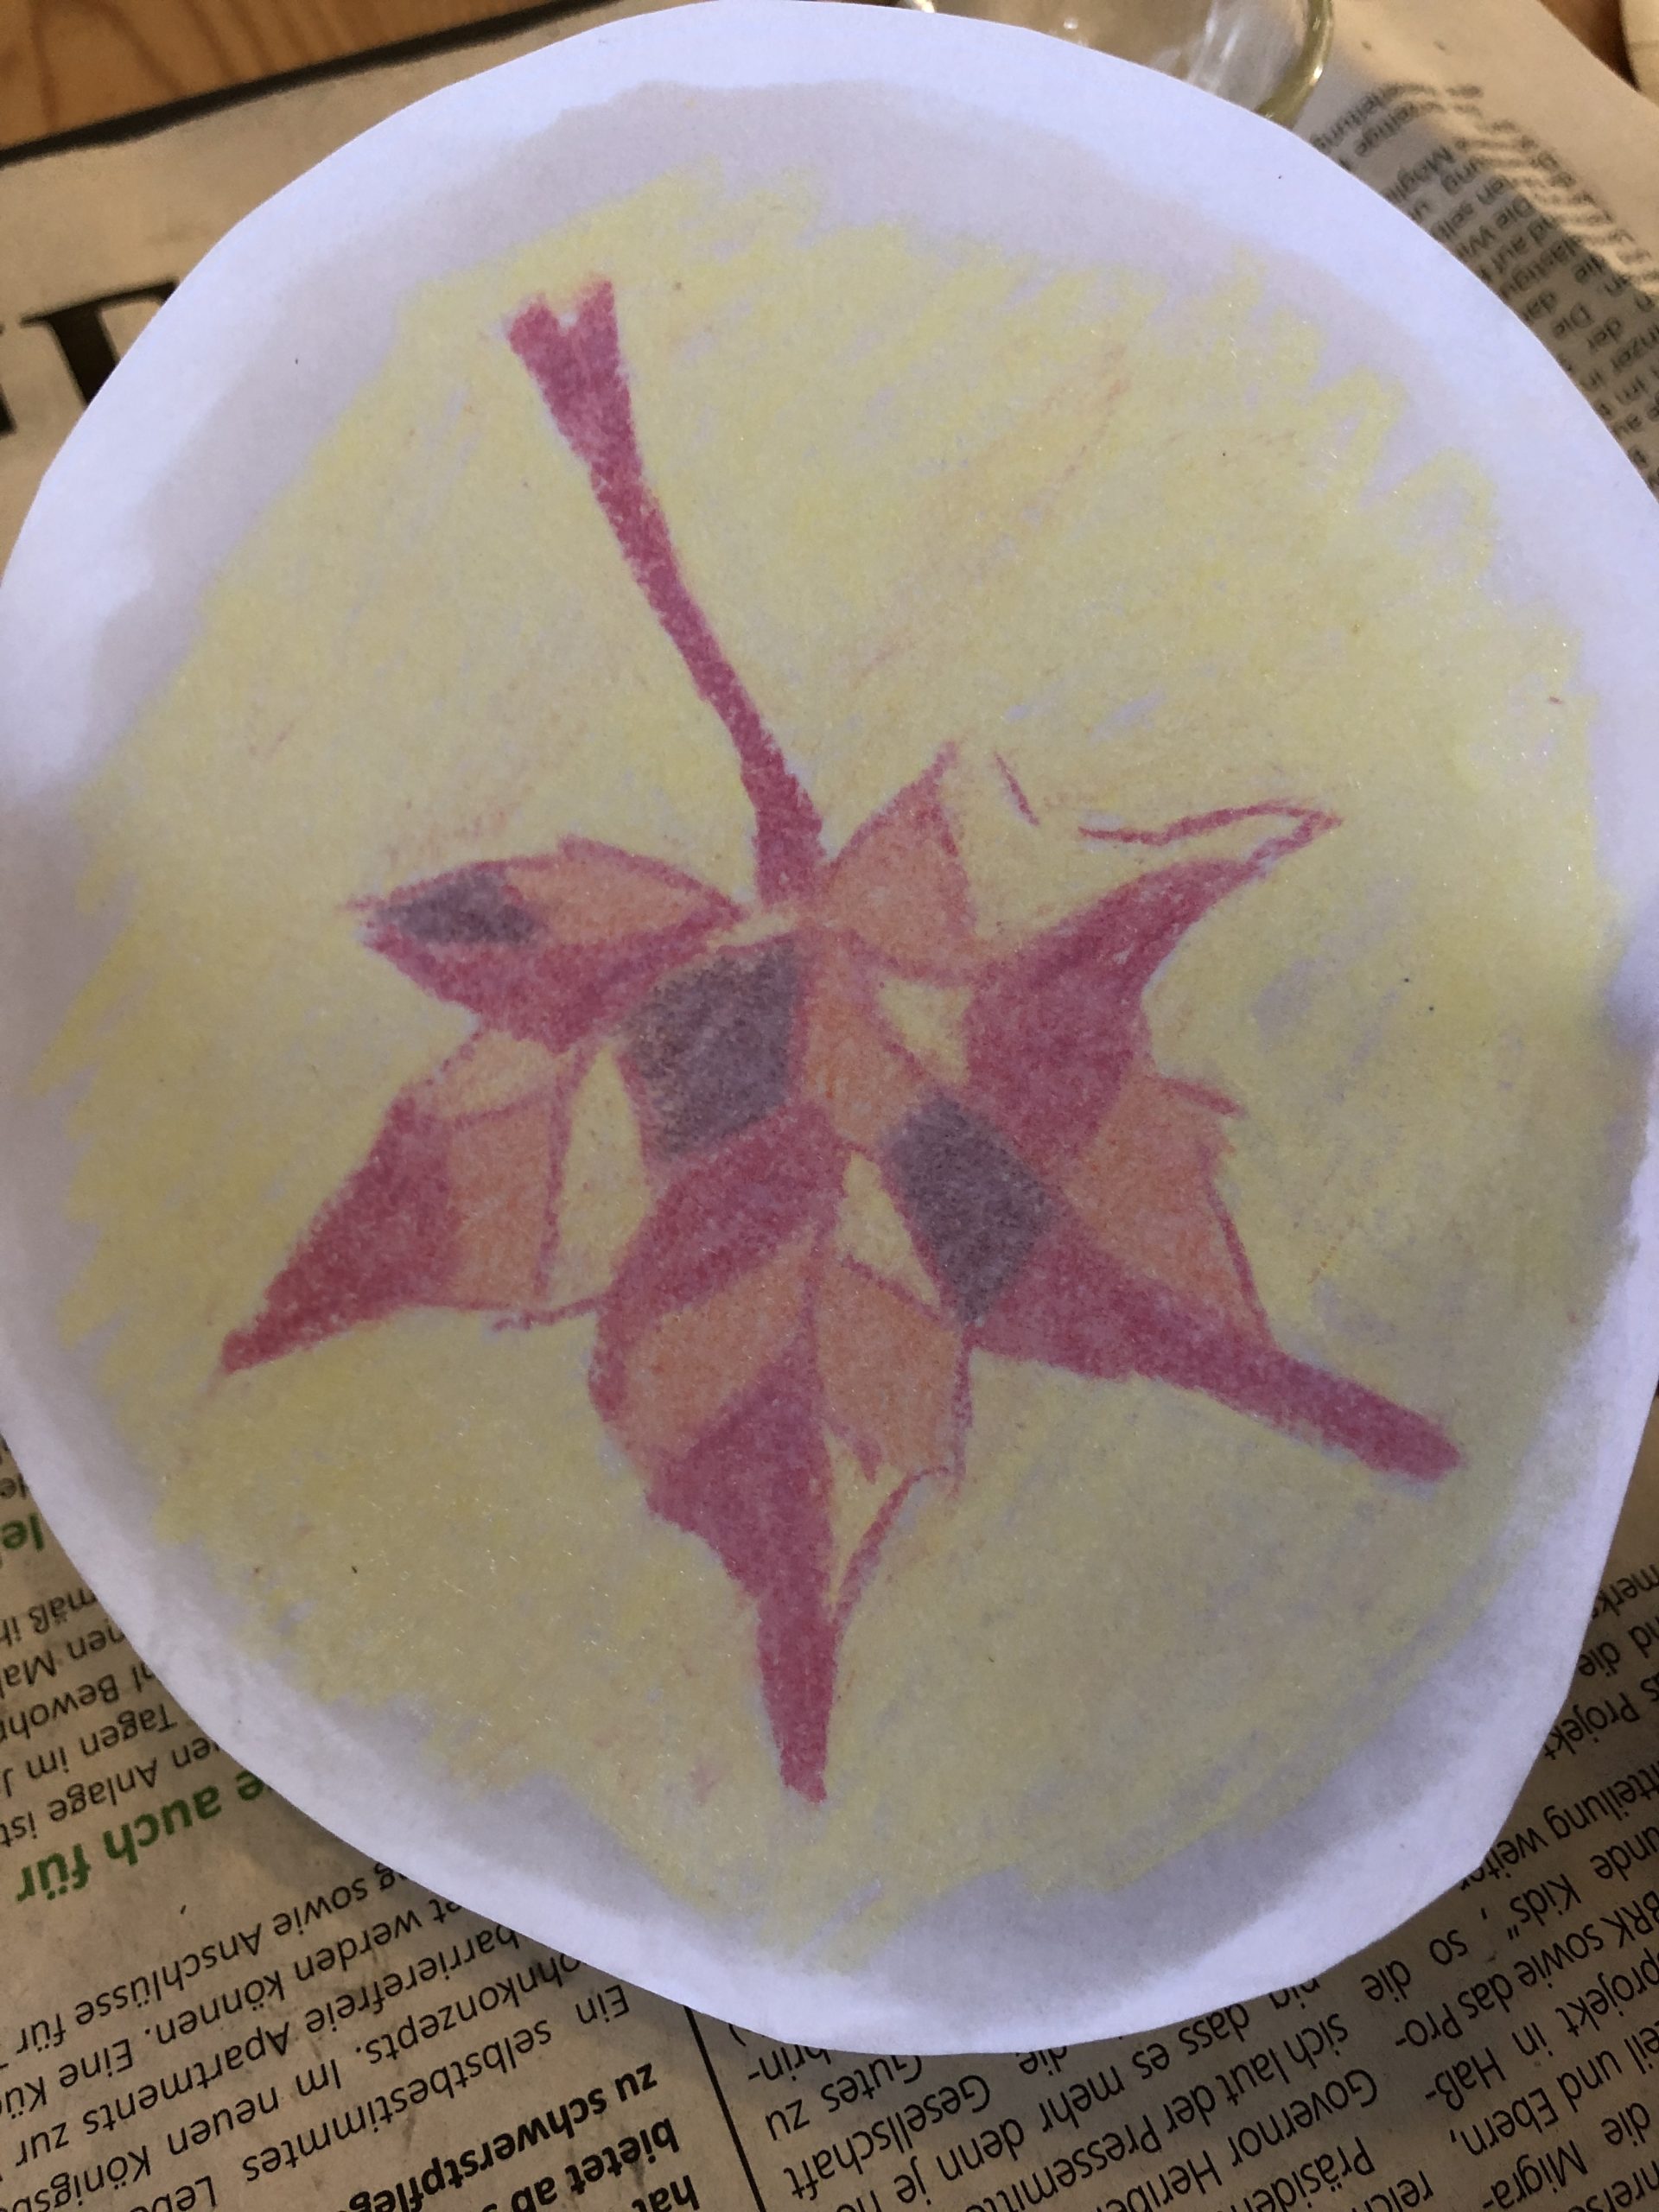
Find a nice maple leaf. You place it in the middle on a sheet of paper. Then you paint around the leaf with a crayon.

Bild zum Schritt 3 für das Bastel- und DIY-Abenteuer für Kinder: 'Sucht euch ein schönes Ahornblatt. Diese legt ihr mittig auf...'

4

2. Bild zum Schritt 3 für das Bastel- und DIY-Abenteuer für Kinder: 'Sucht euch ein schönes Ahornblatt. Diese legt ihr mittig auf...'

5

3. Bild zum Schritt 4 für das Bastel- und DIY-Abenteuer für Kinder: 'Sucht euch ein schönes Ahornblatt. Diese legt ihr mittig auf...'

6

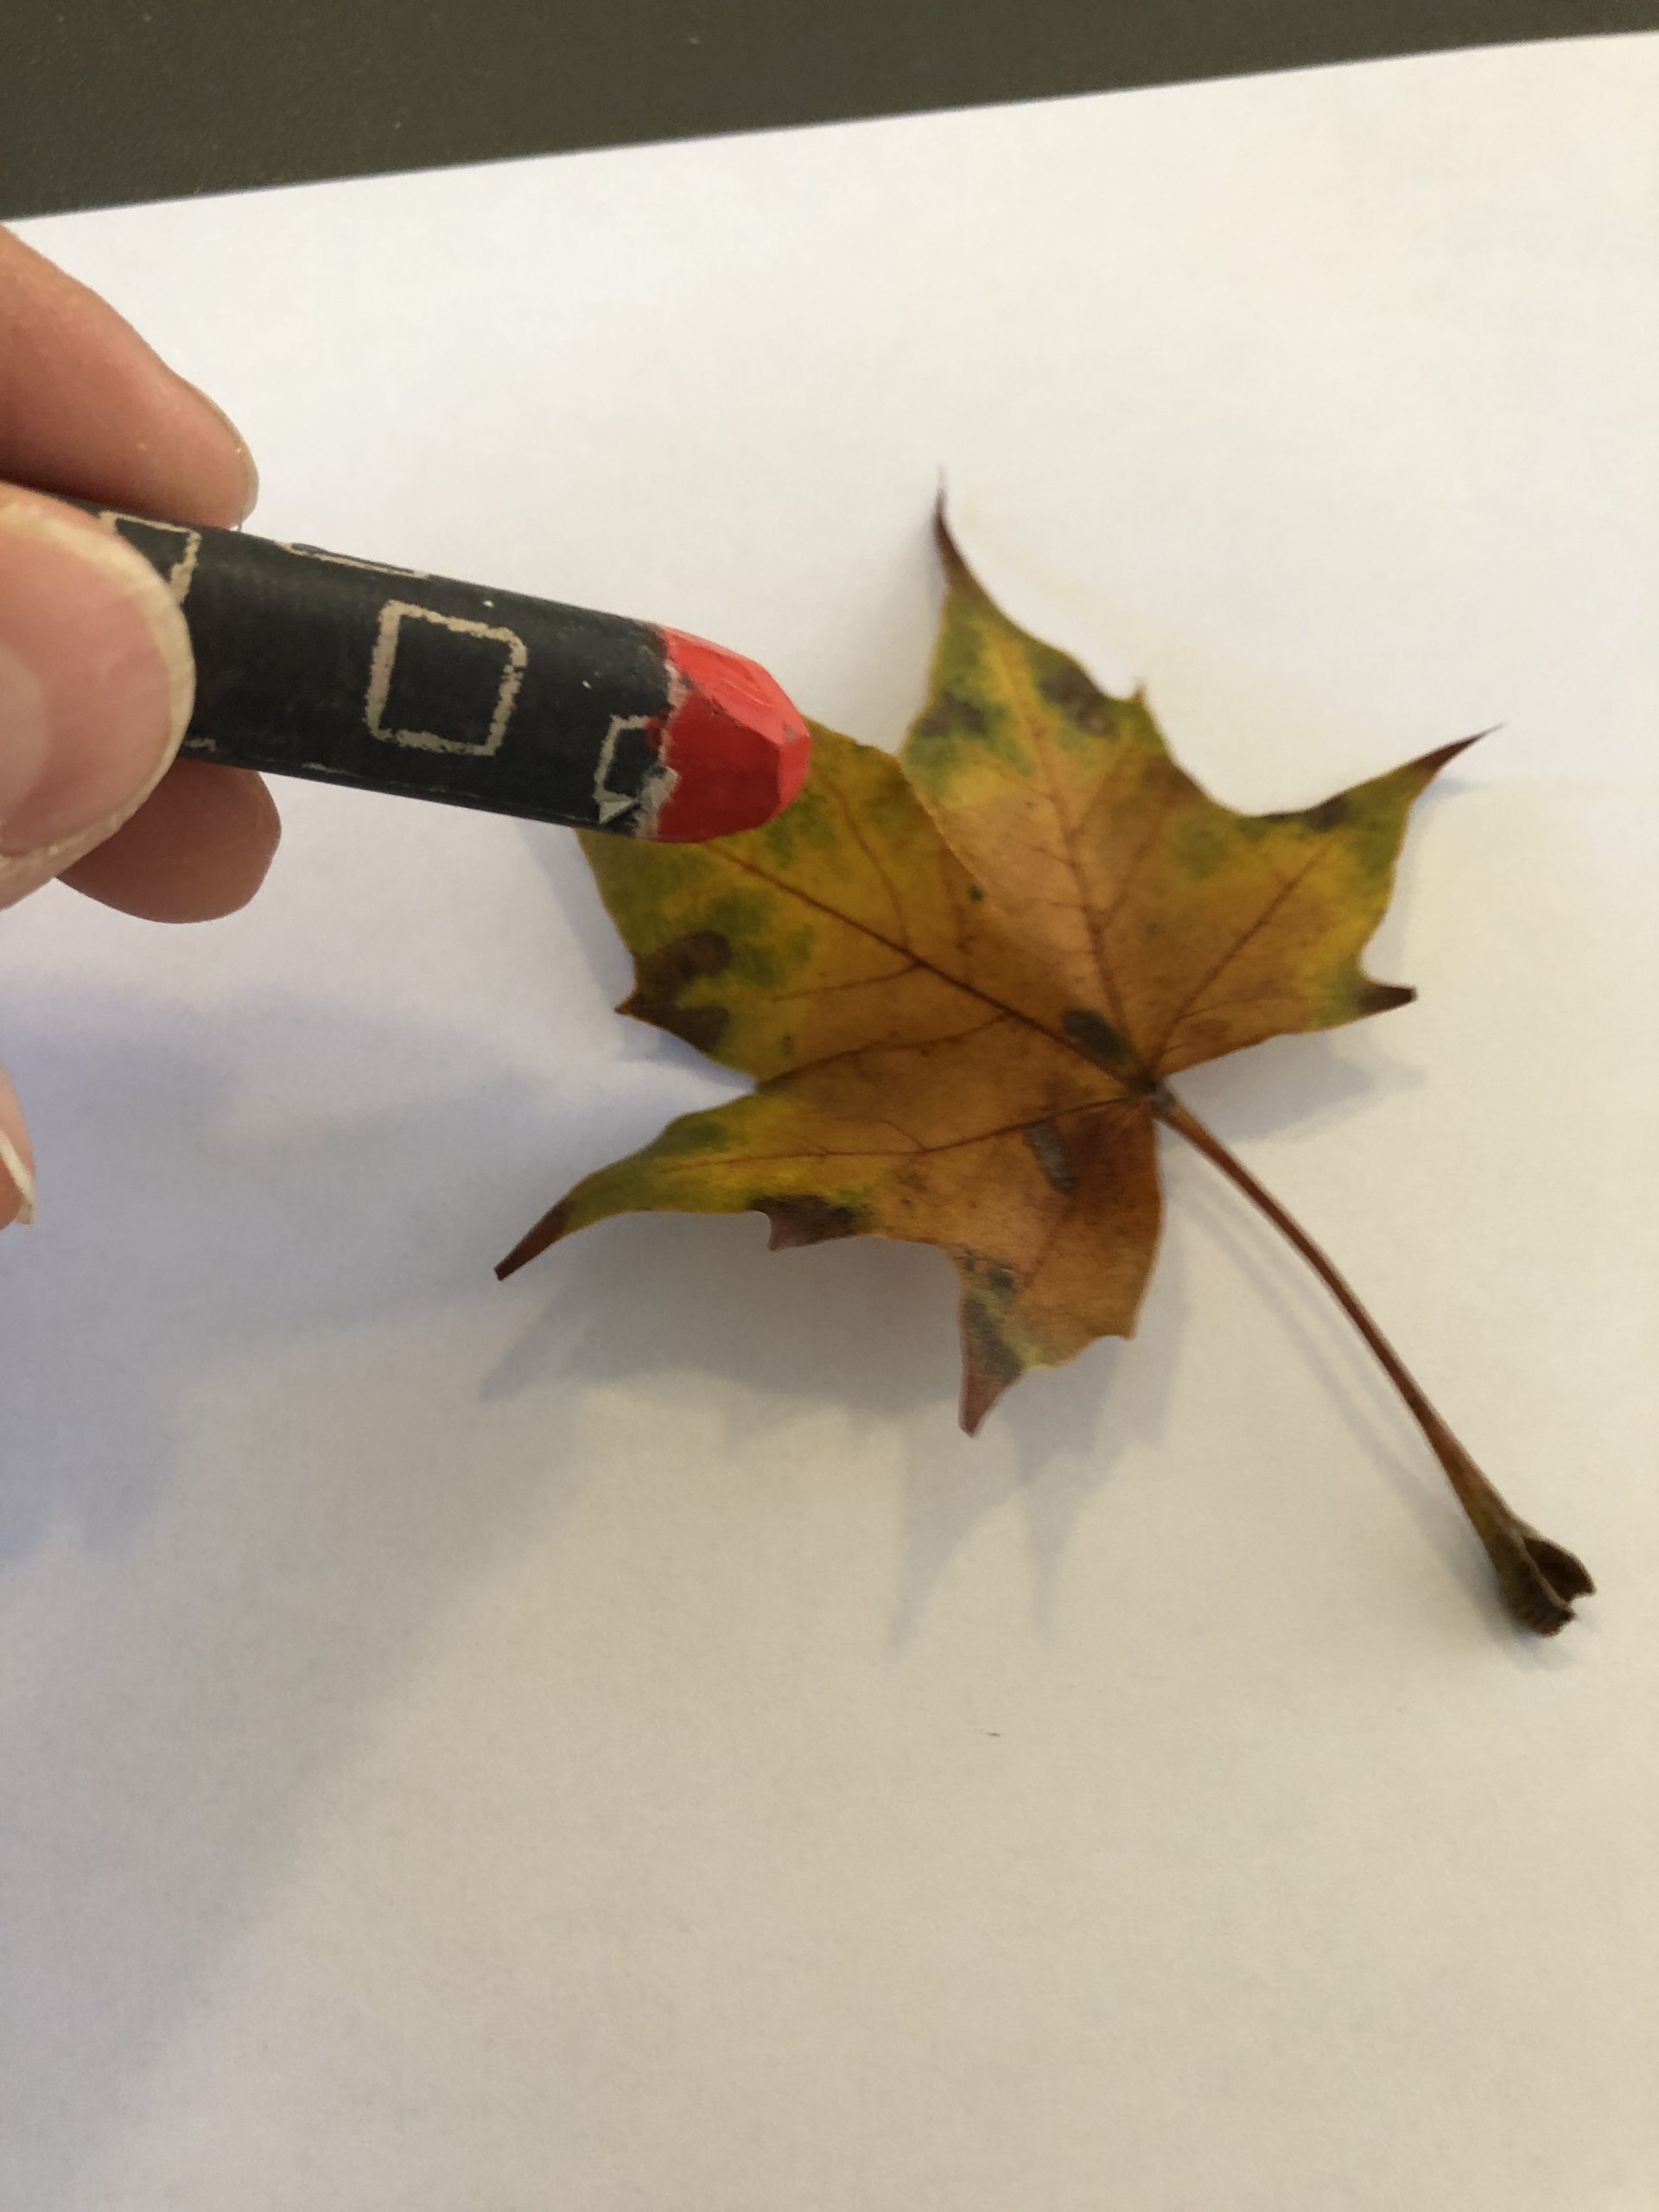
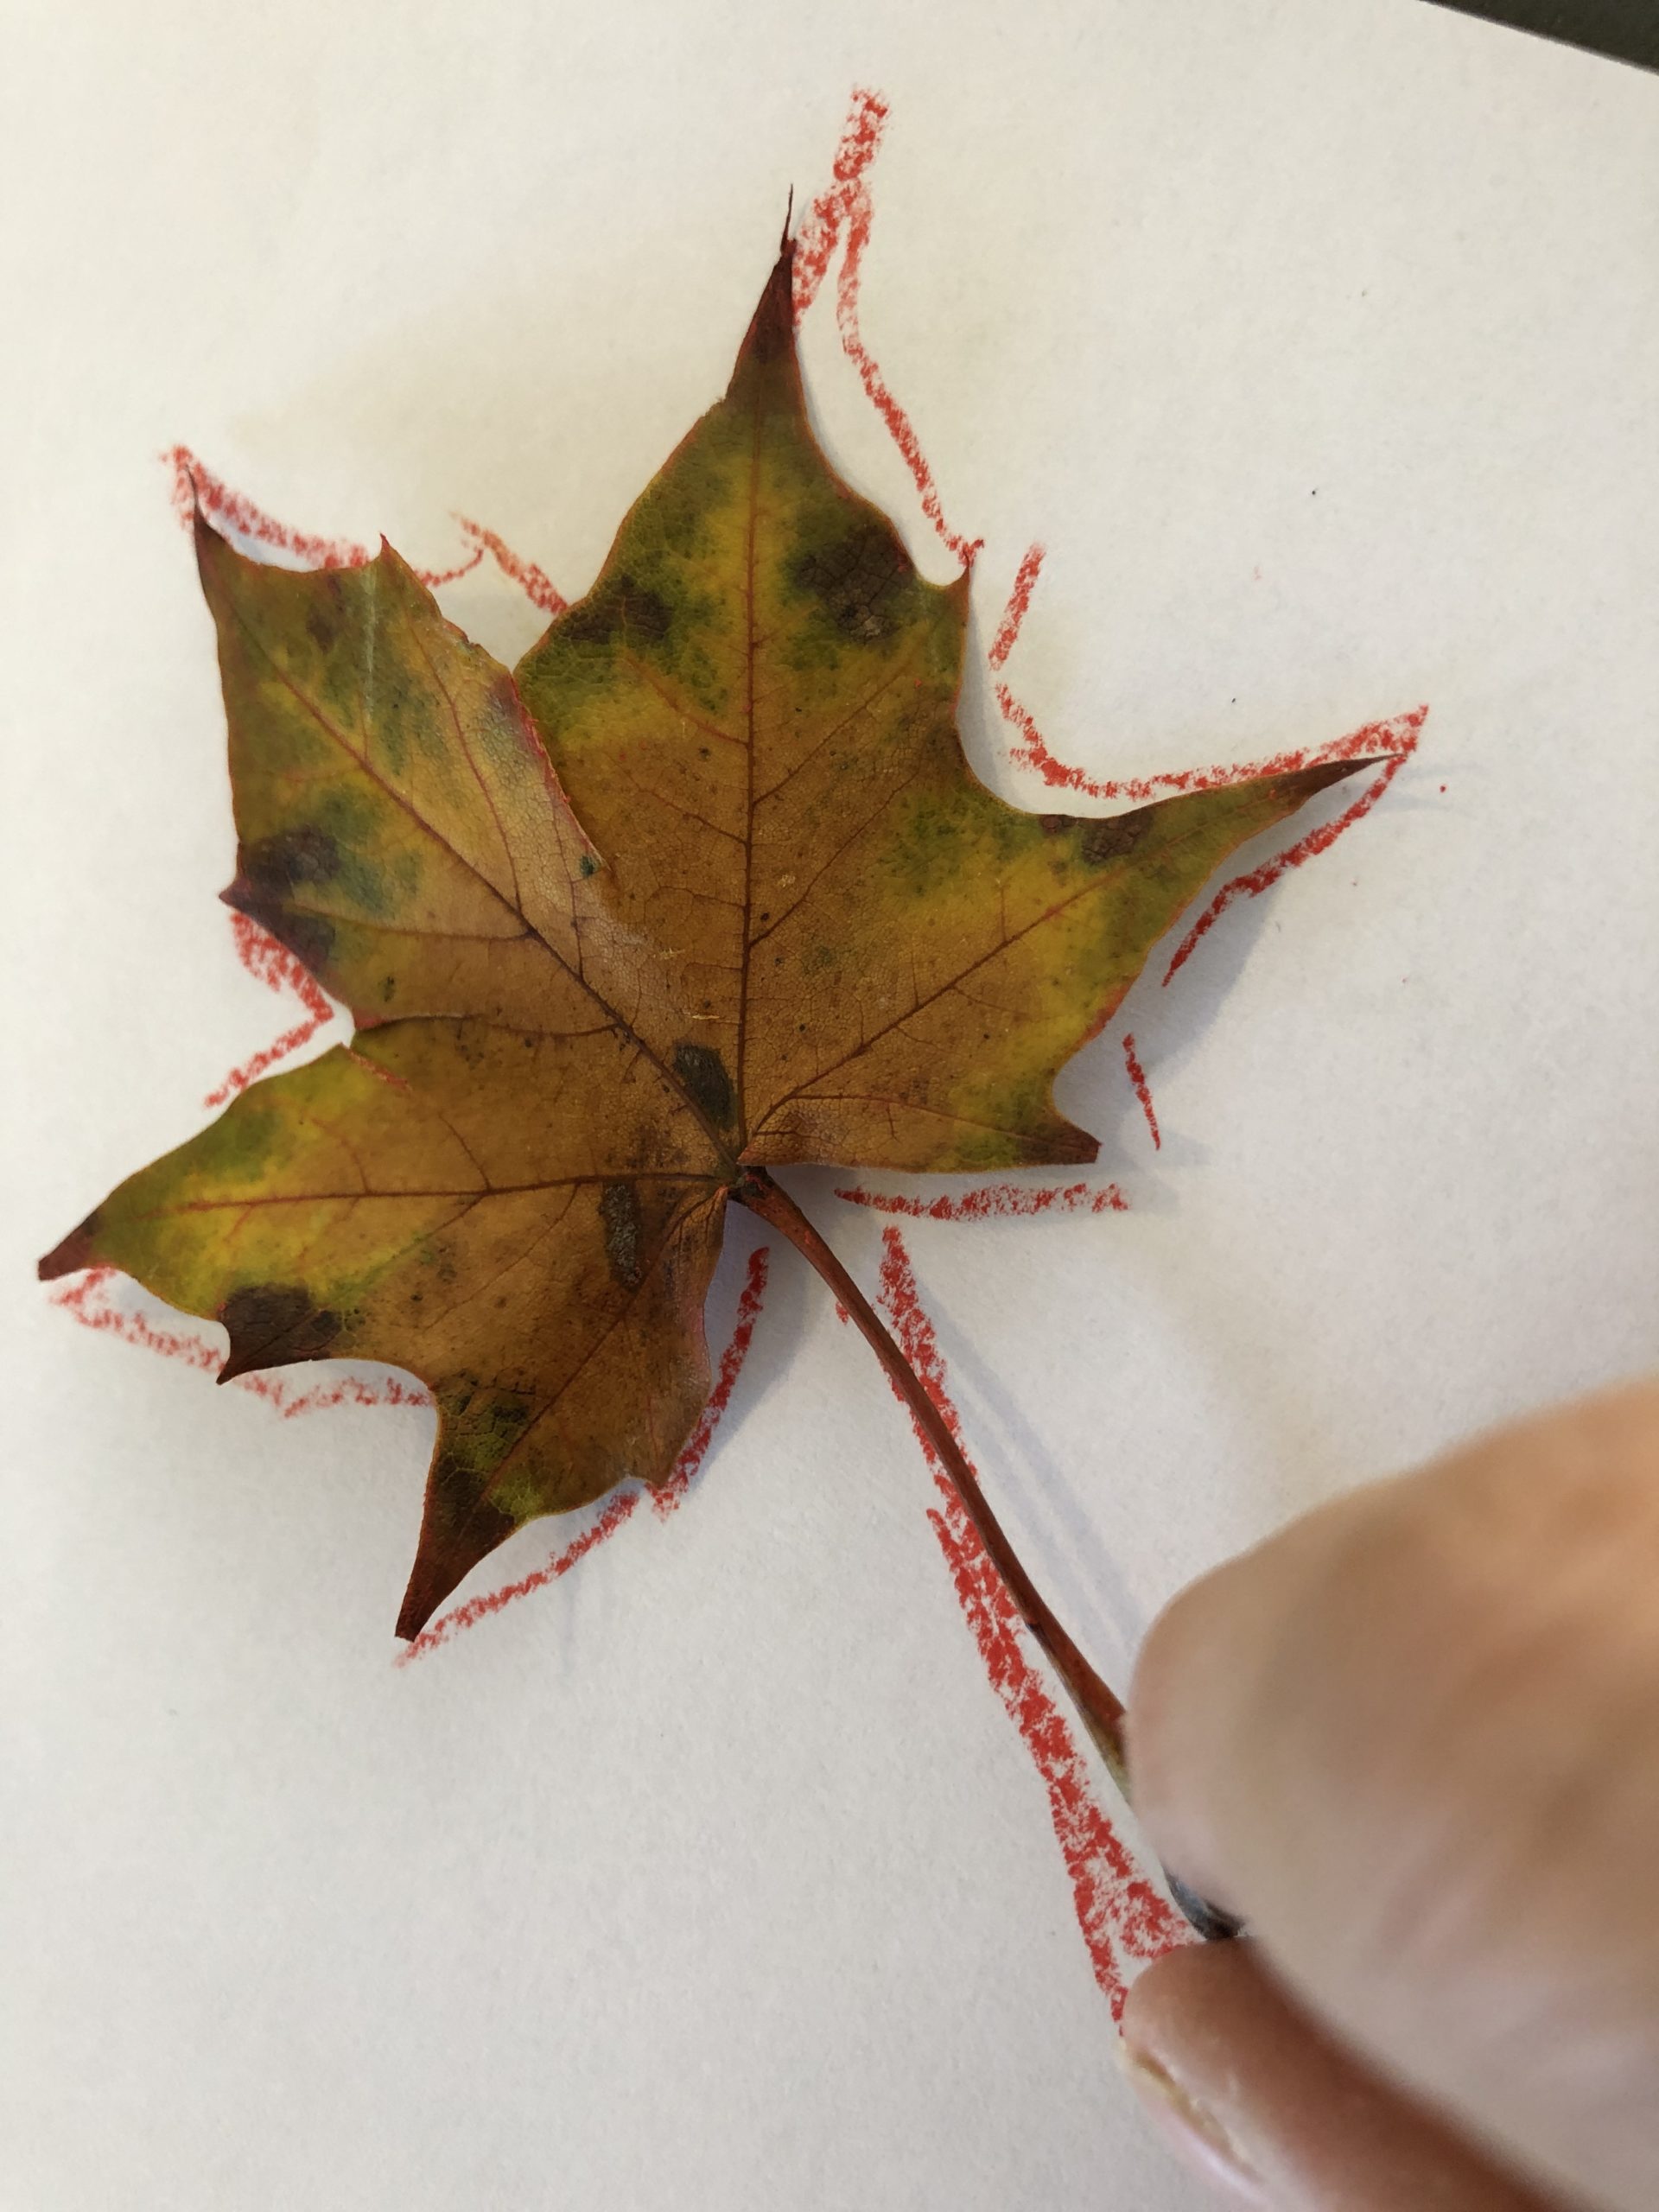
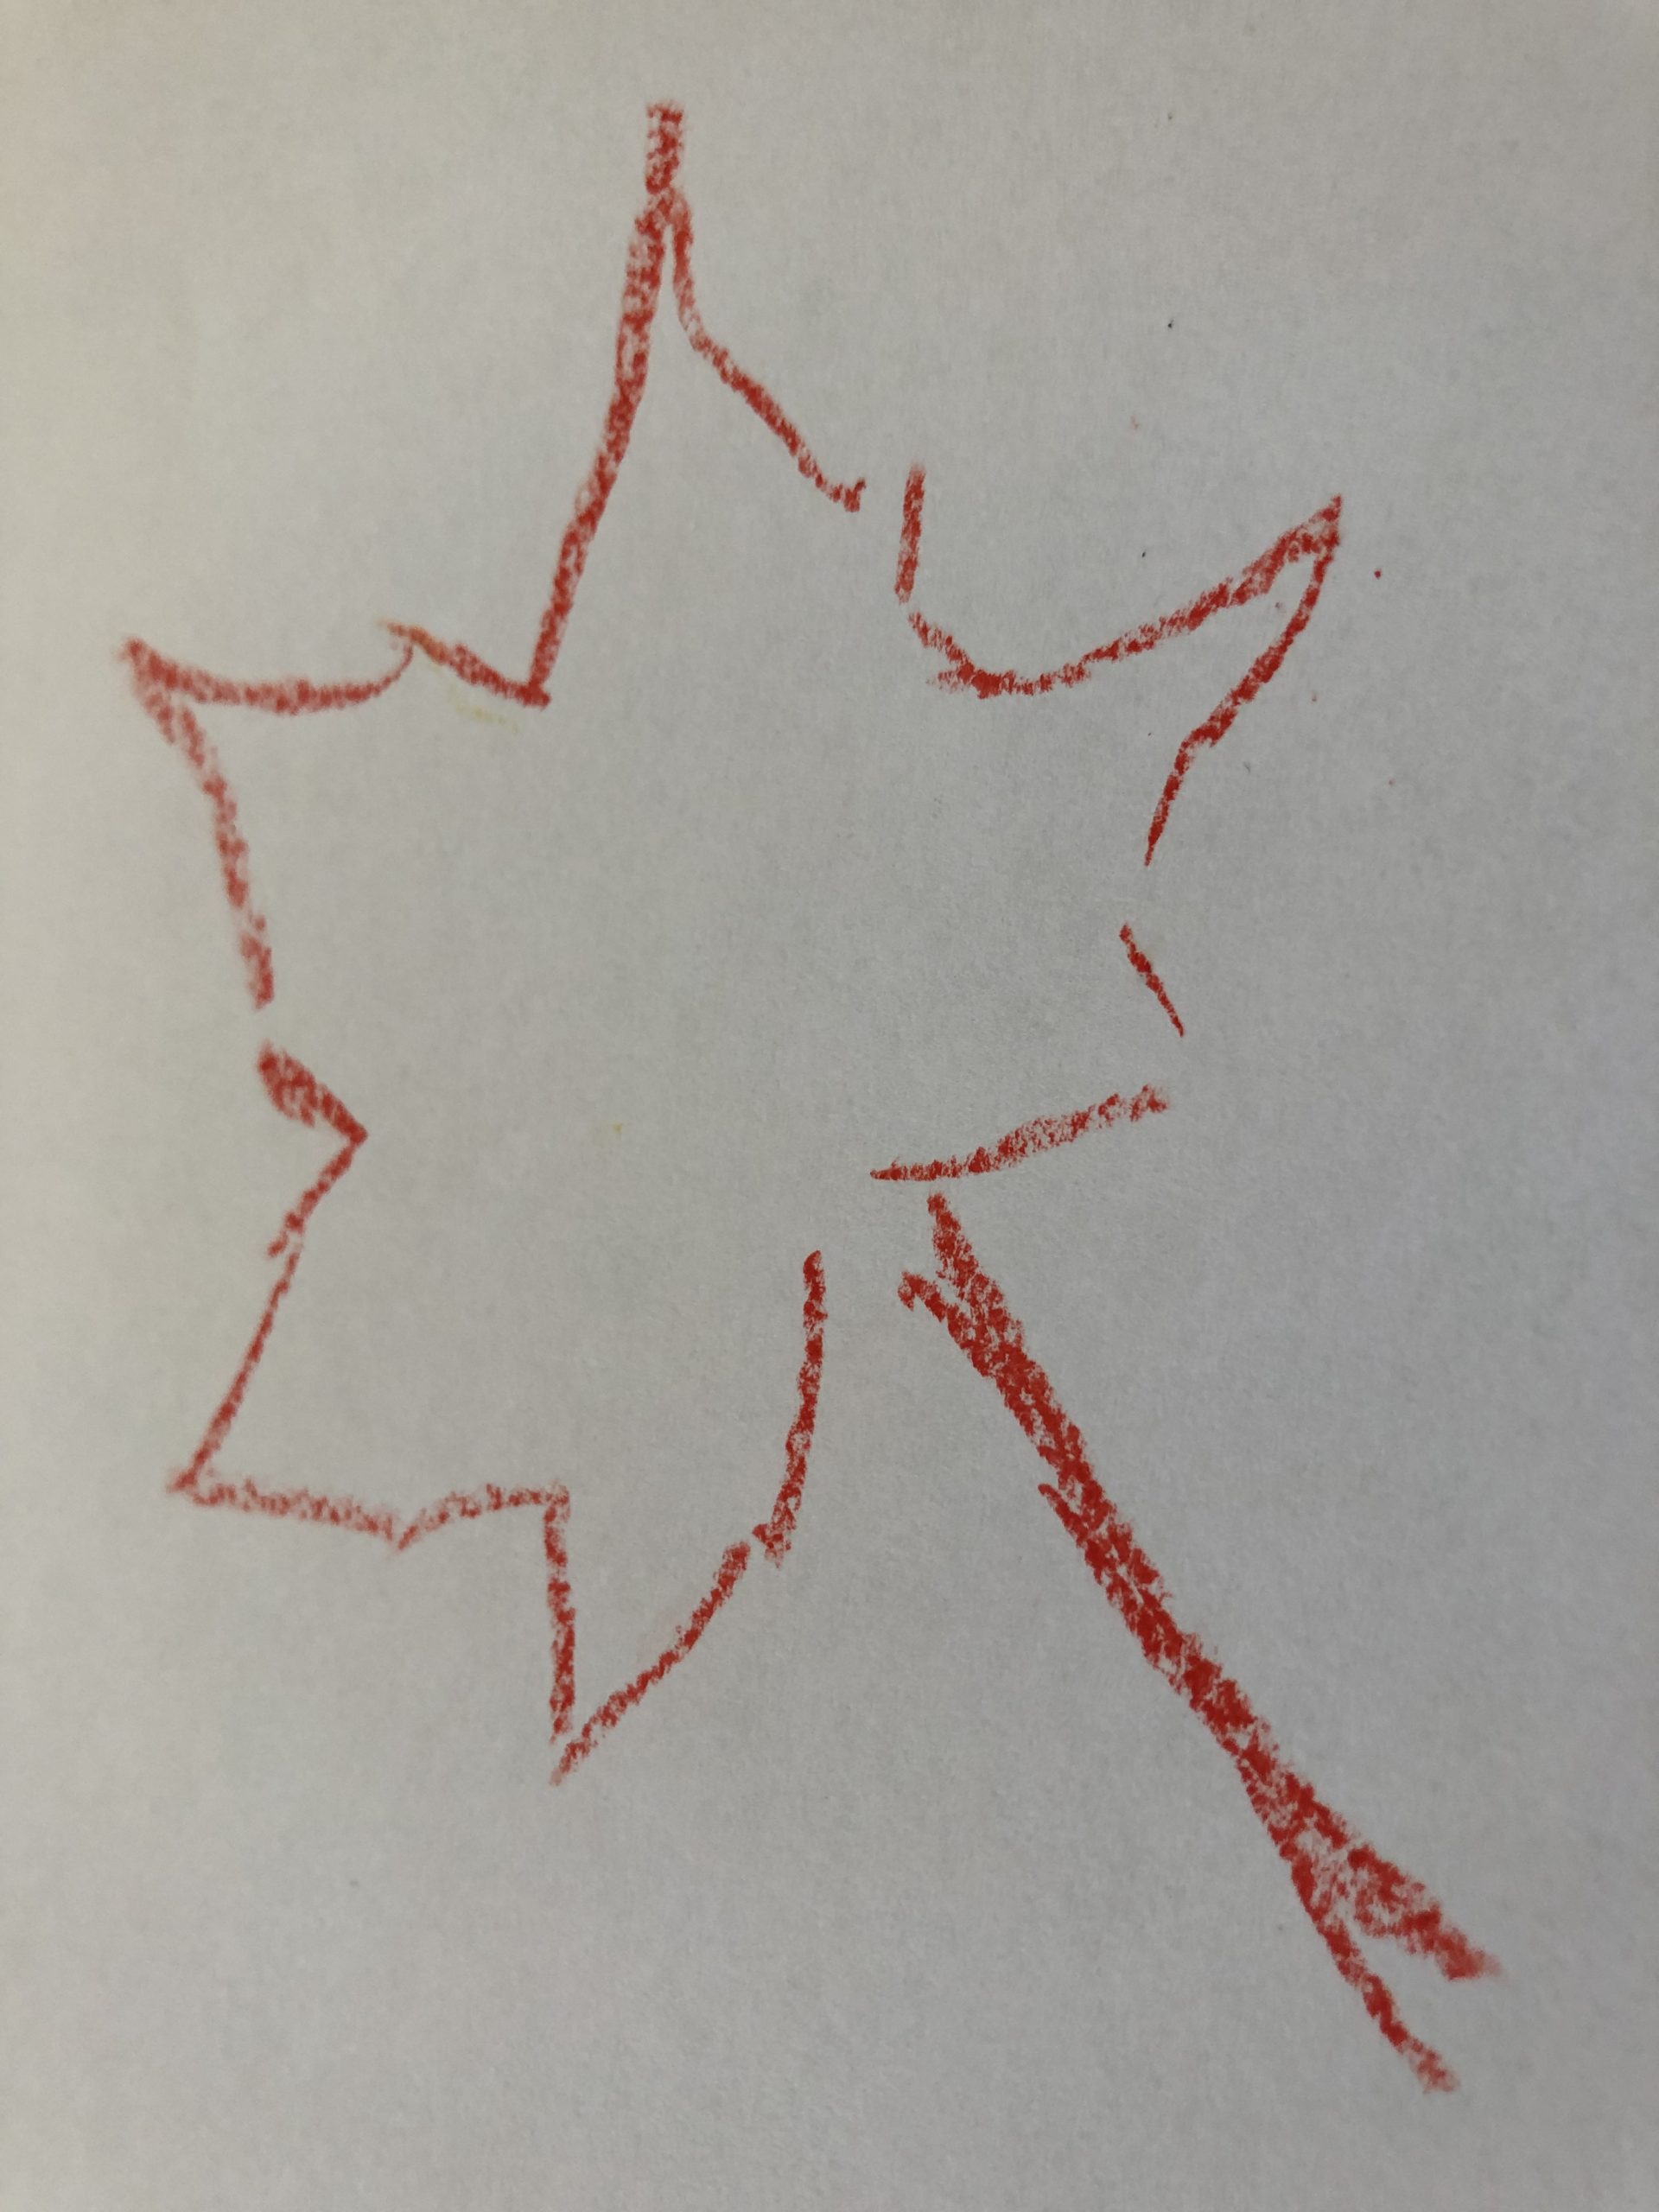
Now put the sheet aside. You now have the outline of the sheet.

Bild zum Schritt 6 für das Bastel- und DIY-Abenteuer für Kinder: 'Legt jetzt das Blatt zur Seite. Ihr habt nun den...'

7

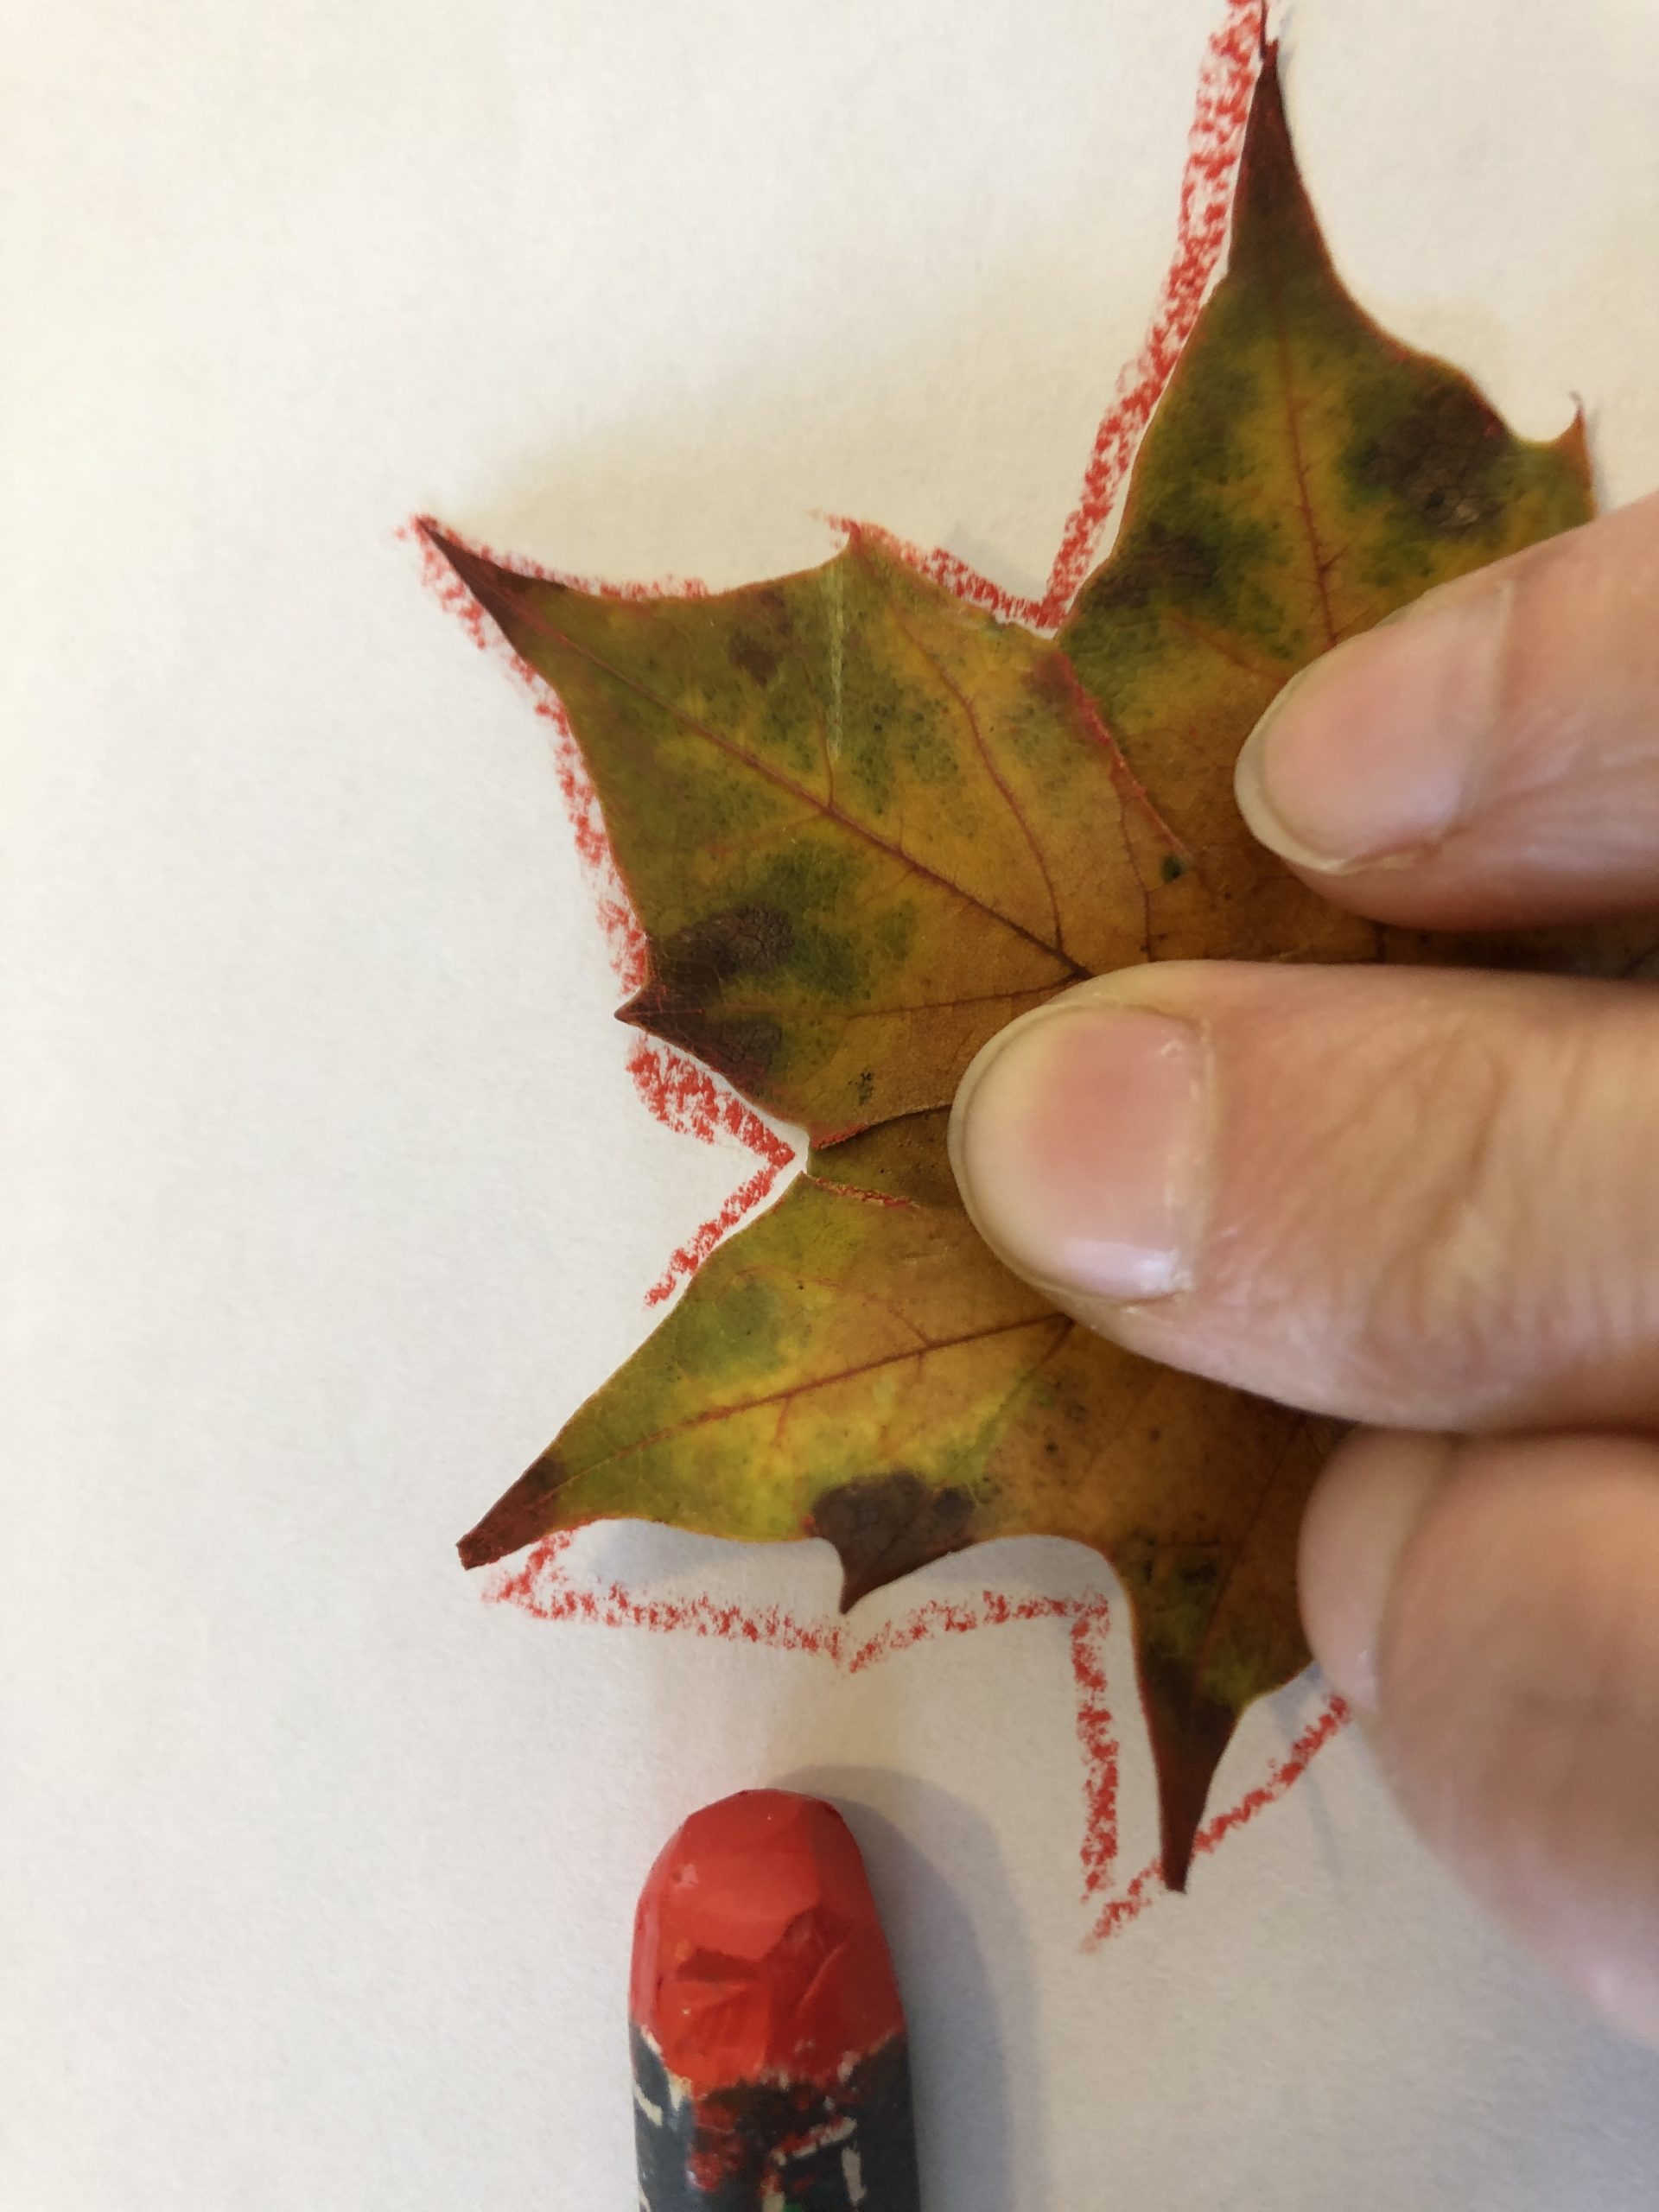
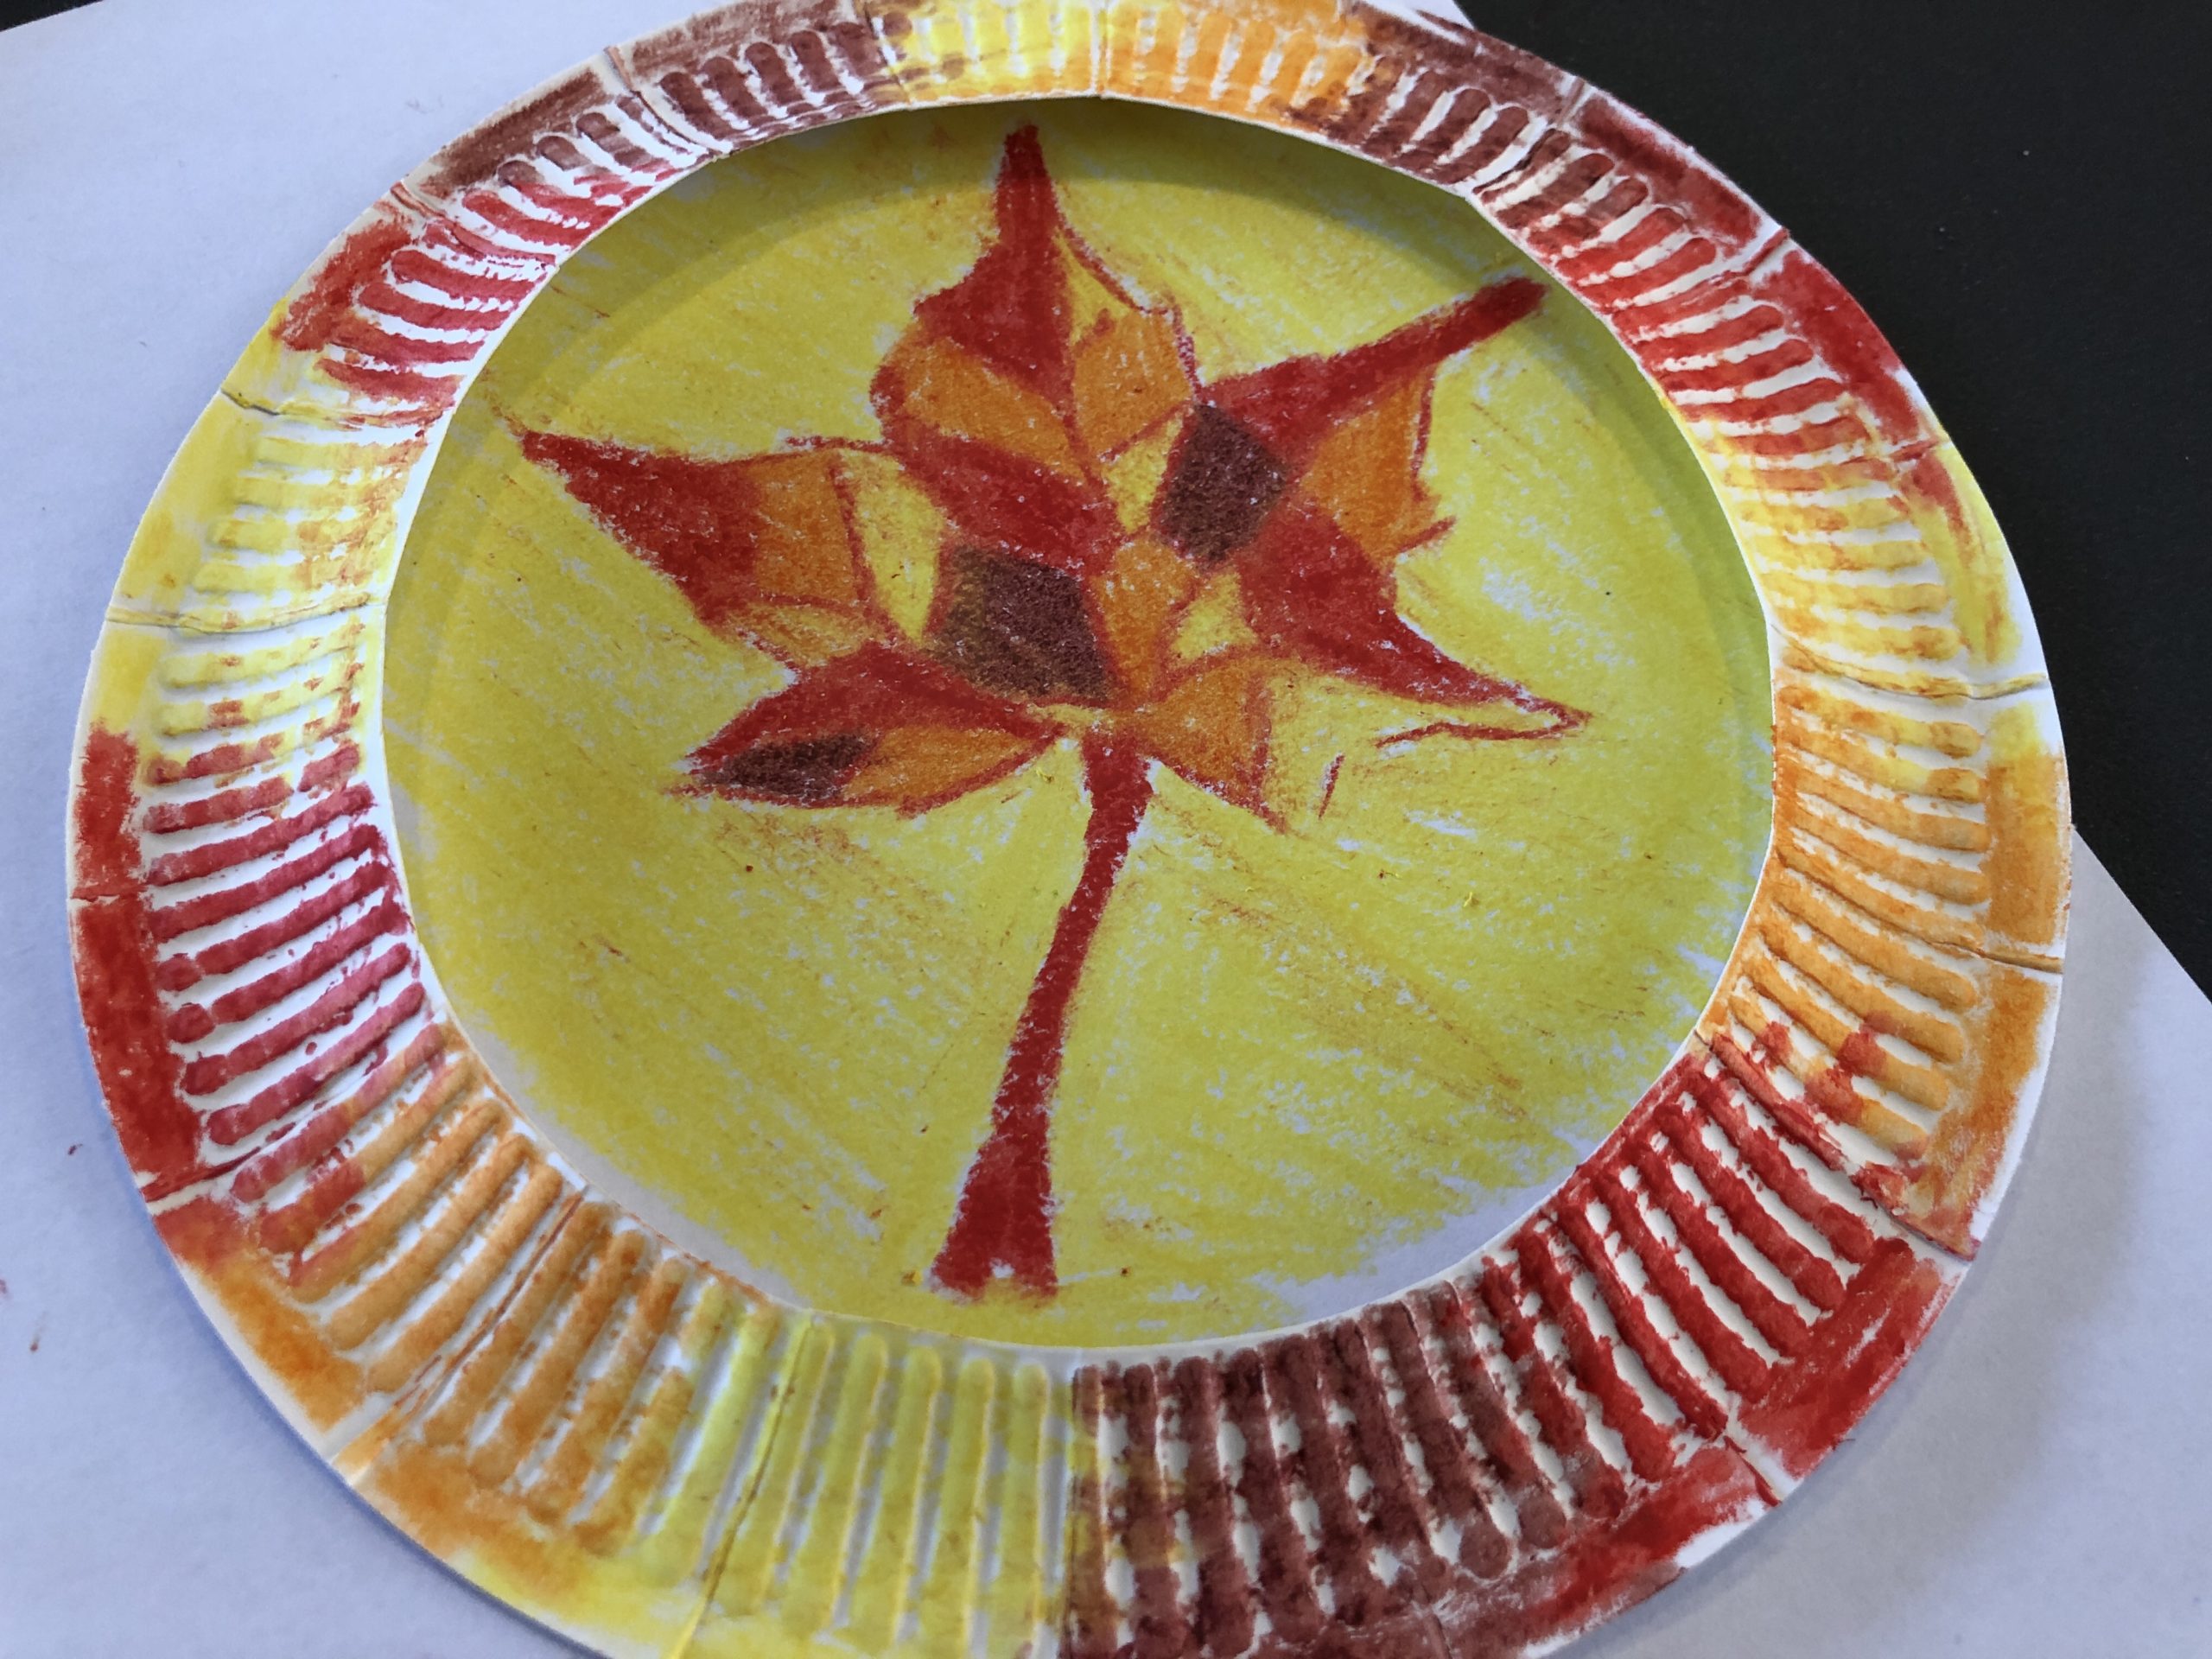
Now you paint the veins of the leaf. Look at your leaf and take it as a template. The children learn to observe and know the structure of the leaf.

Bild zum Schritt 7 für das Bastel- und DIY-Abenteuer für Kinder: 'Jetzt malt ihr die Adern des Blattes. Schaut euch euer...'

8

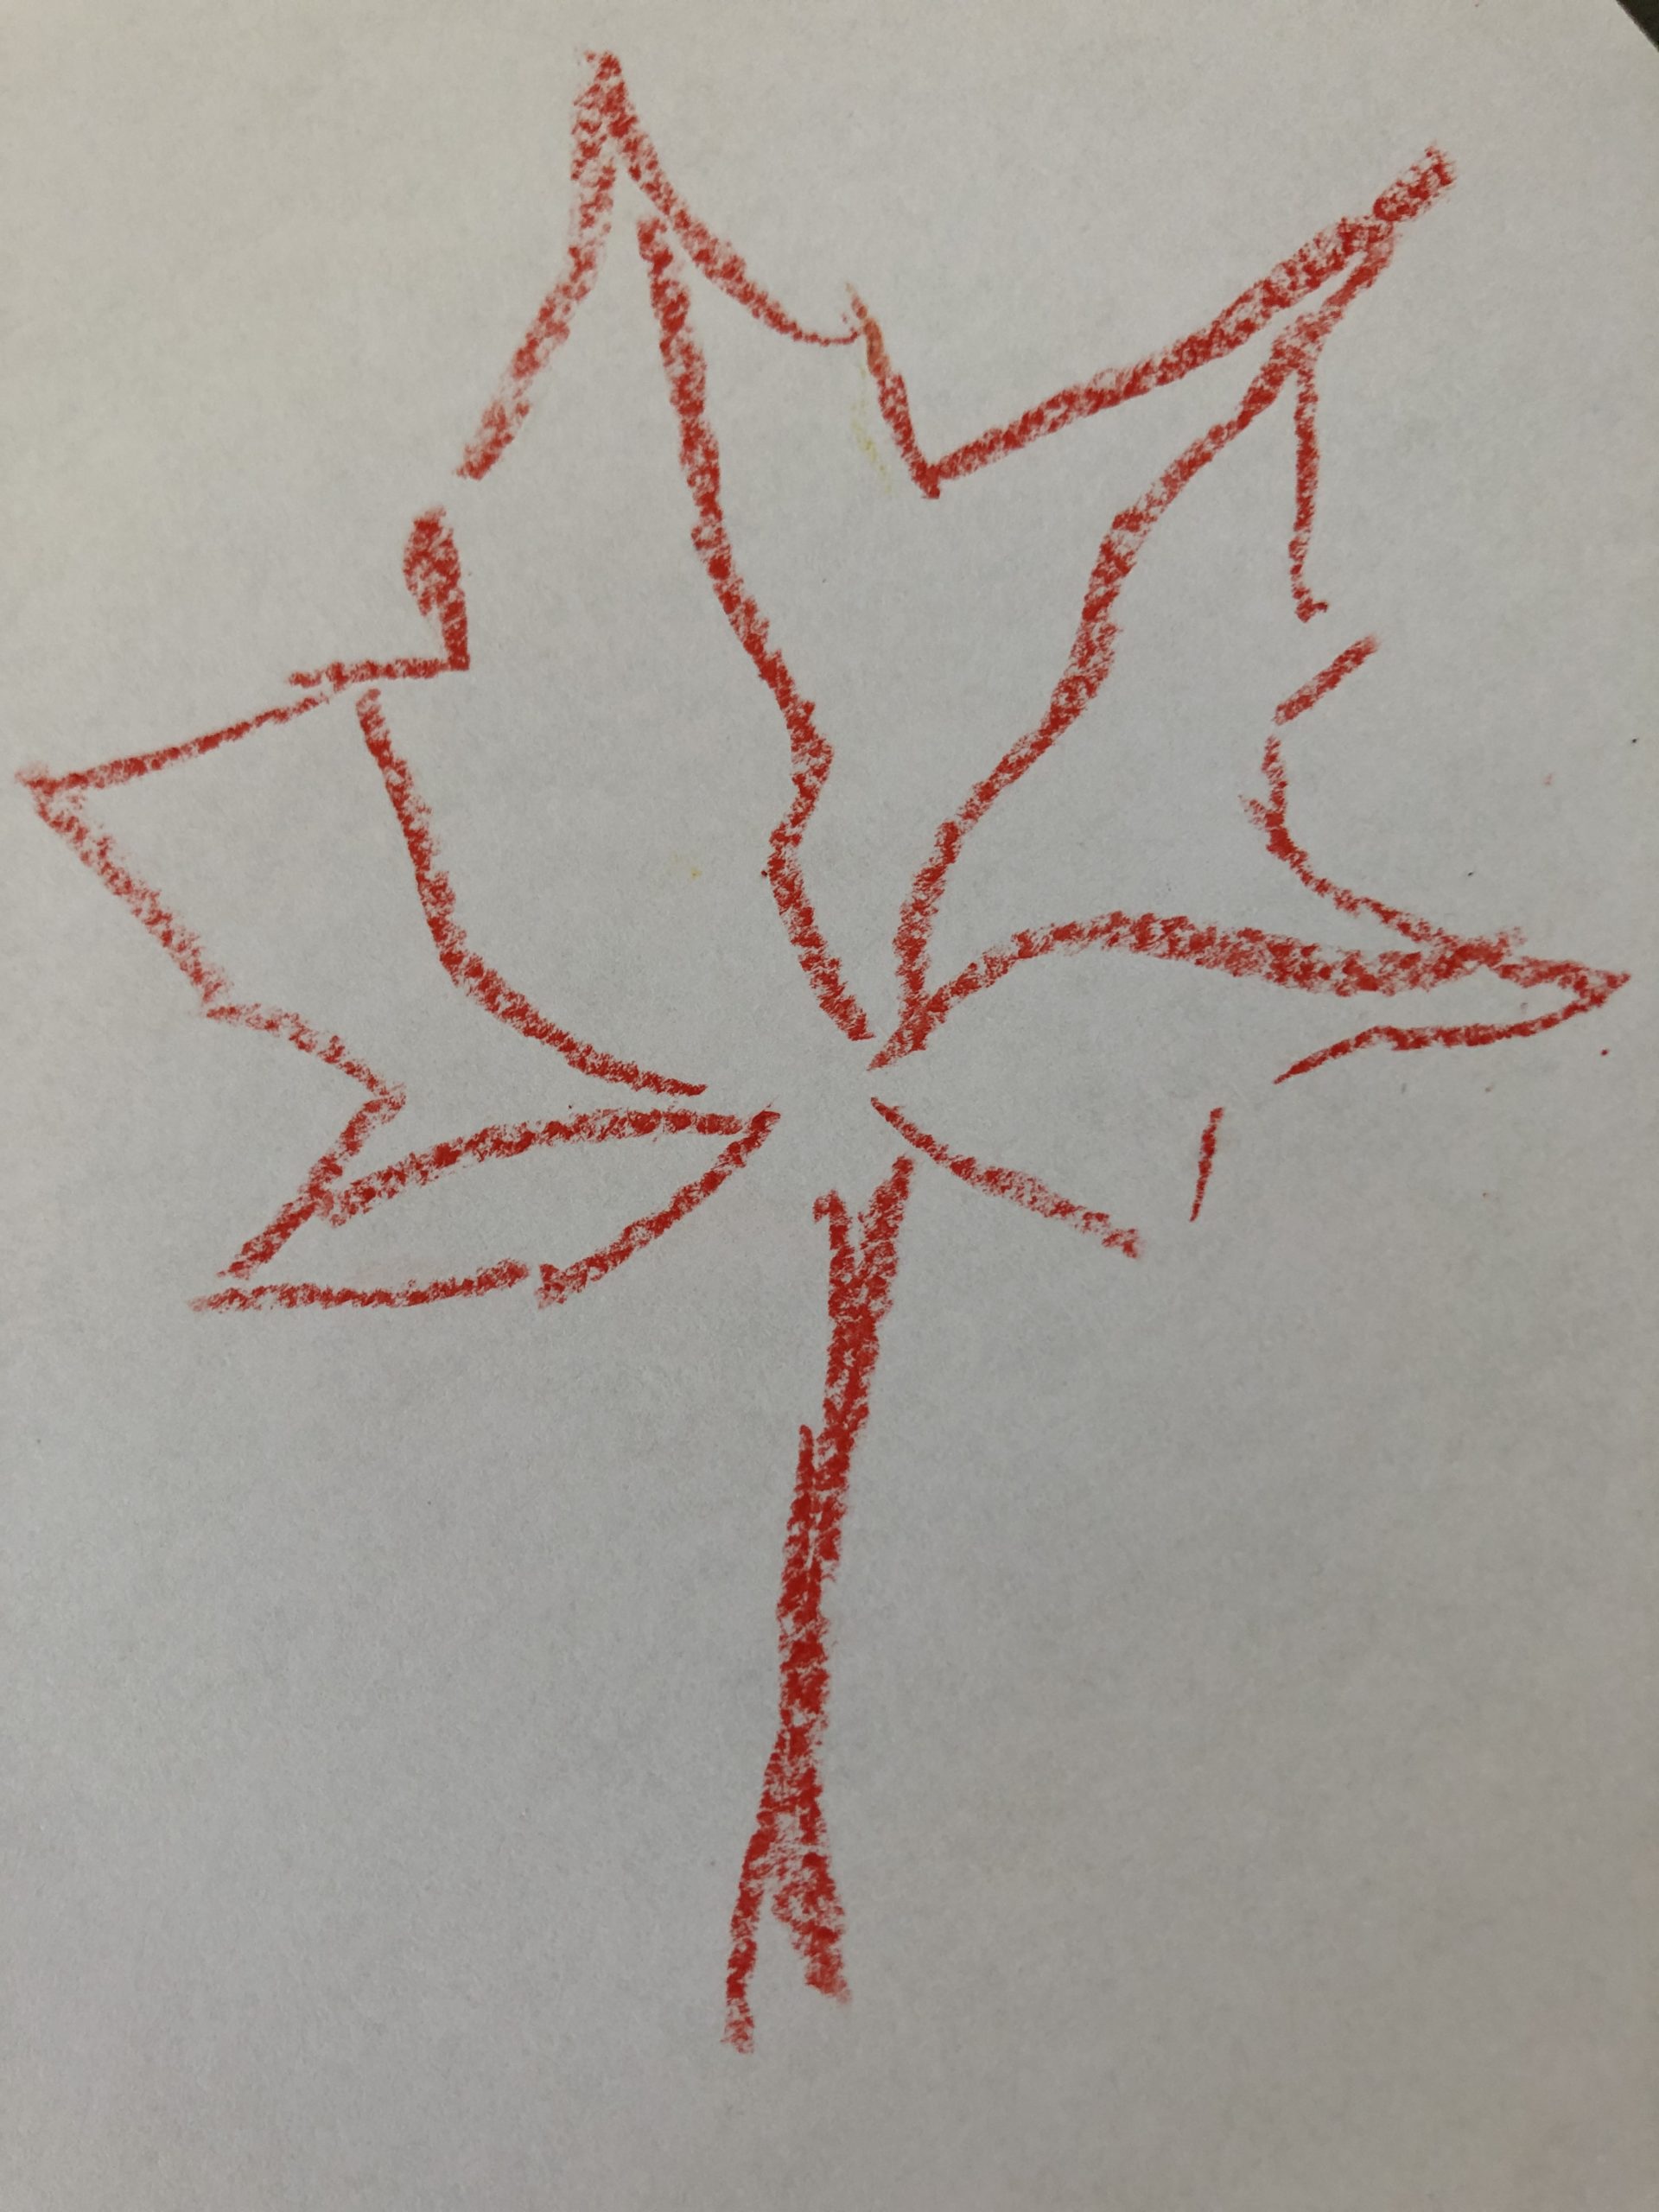
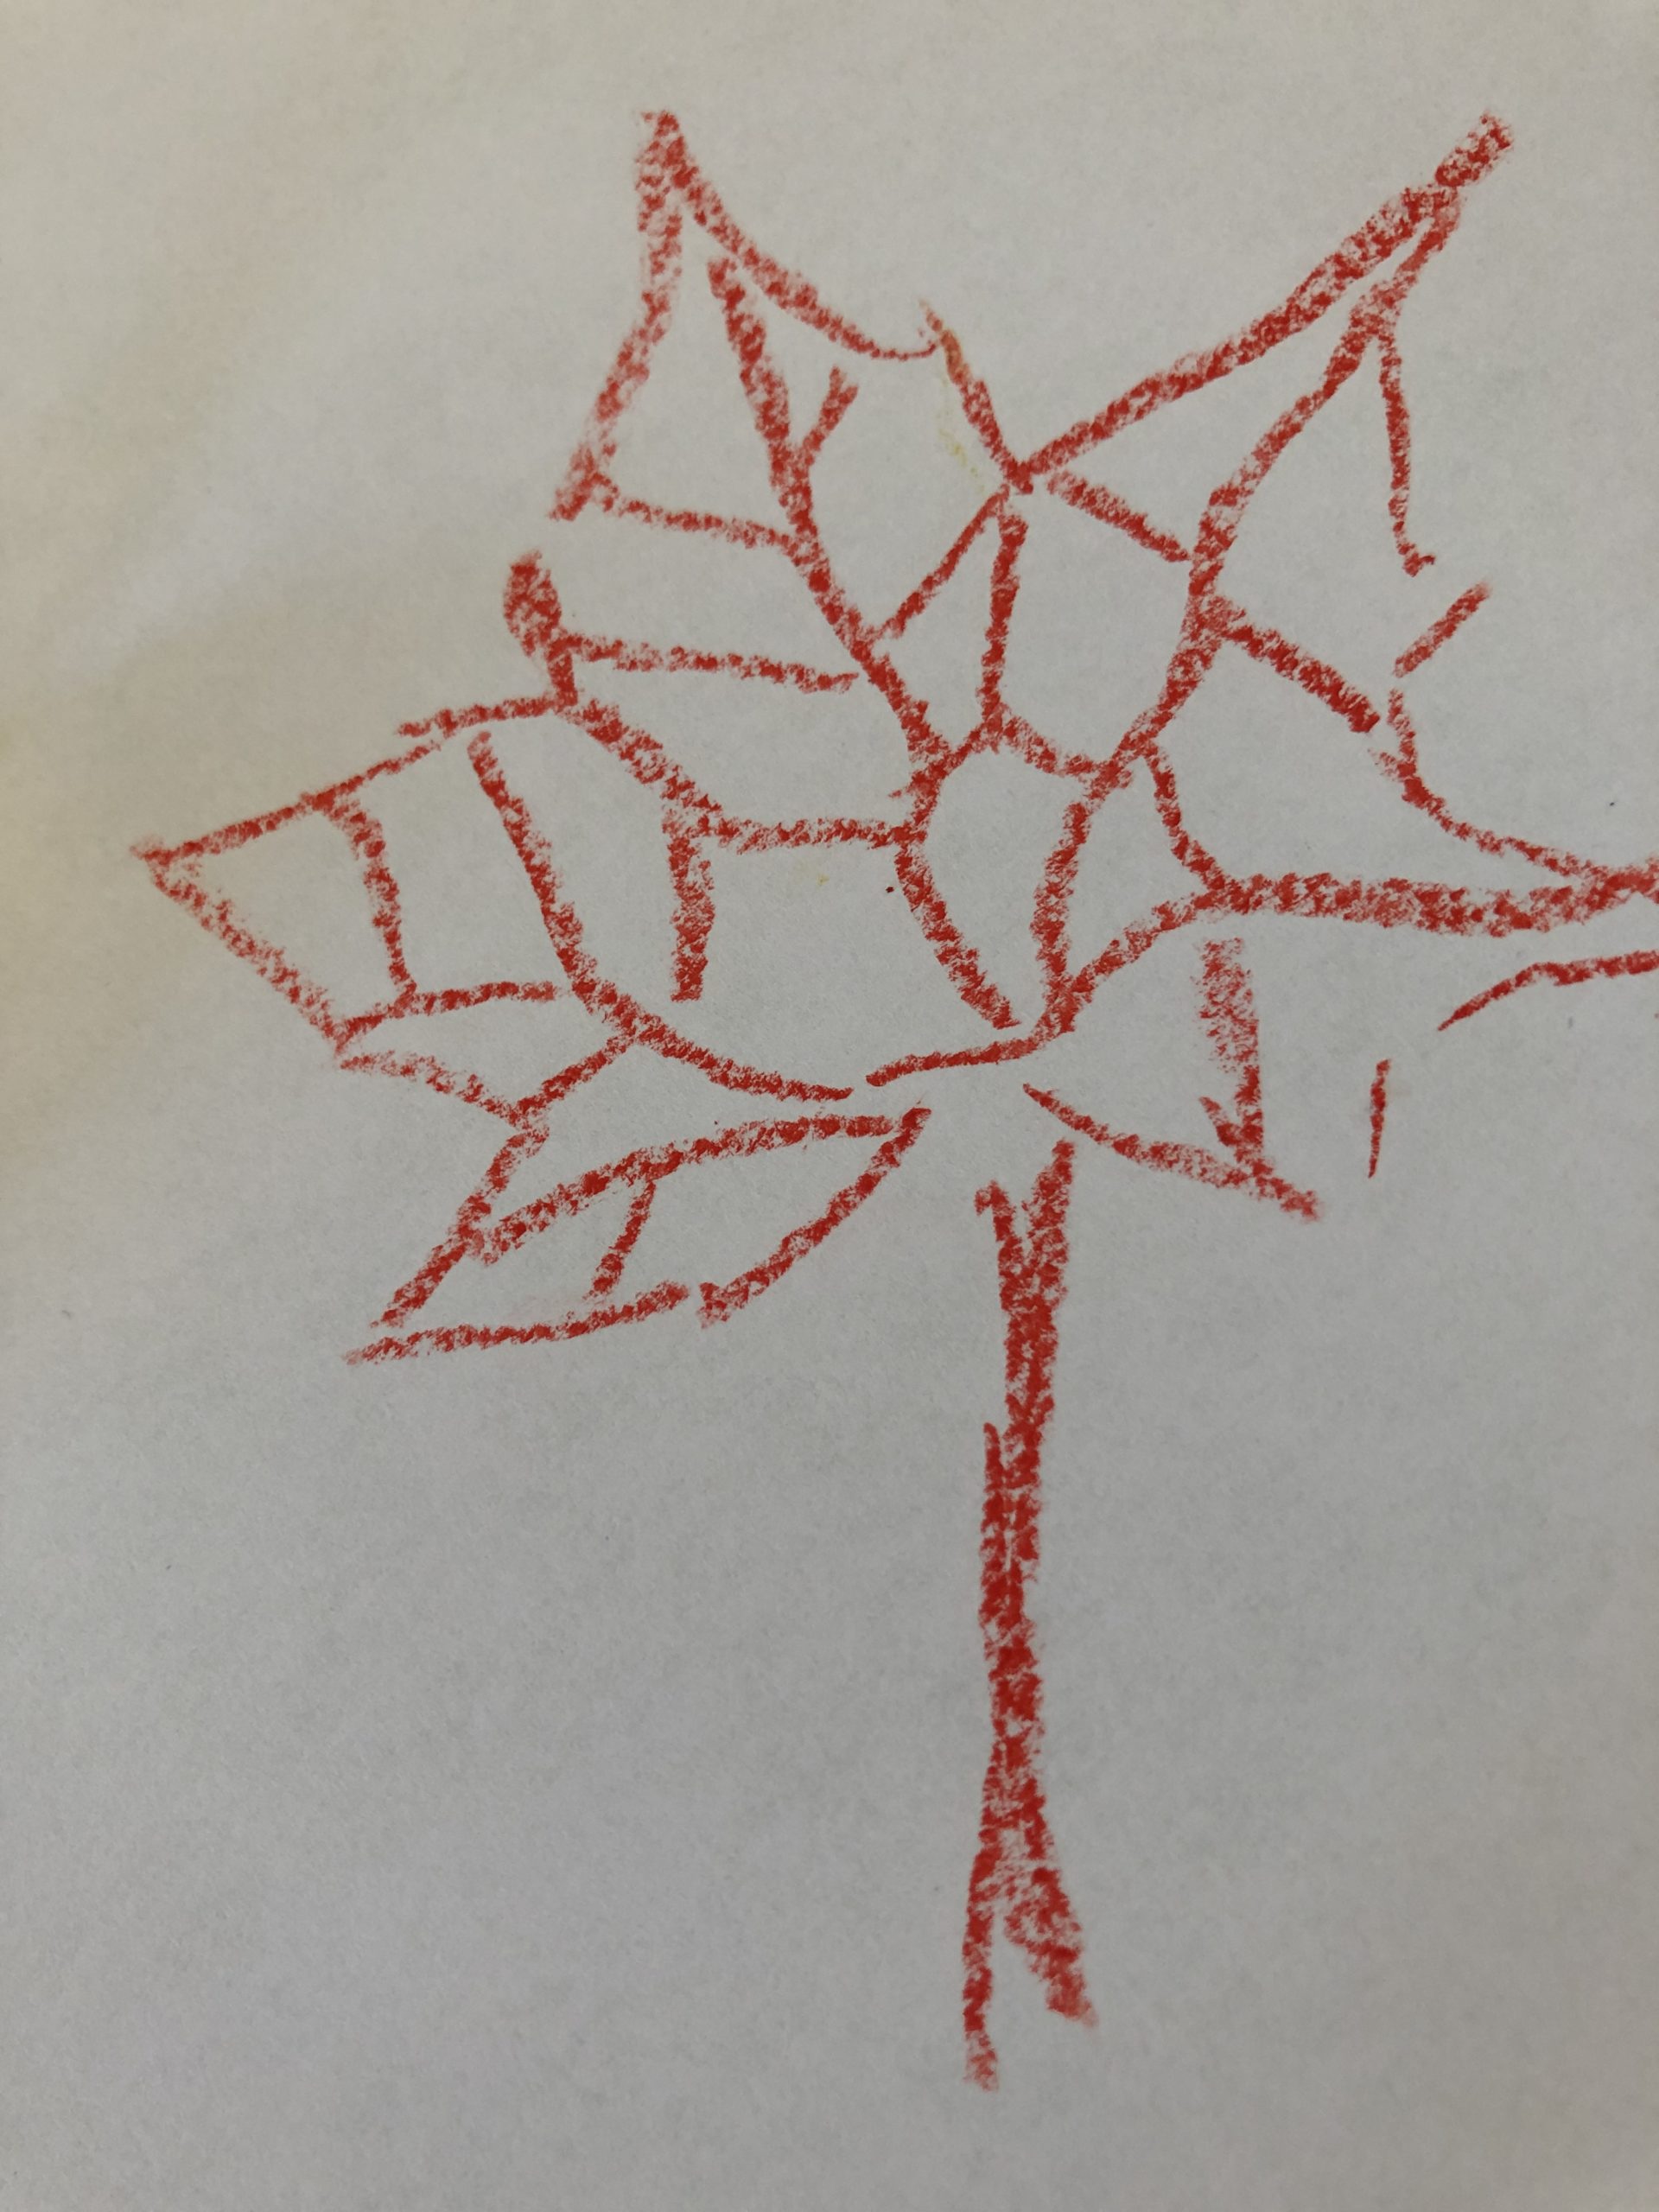
Then paints the further branched veins of the leaf.
Individual fields are created.

Bild zum Schritt 8 für das Bastel- und DIY-Abenteuer für Kinder: 'Malt anschließend die weiter verzweigten Adern des Blattes.  ...'

9

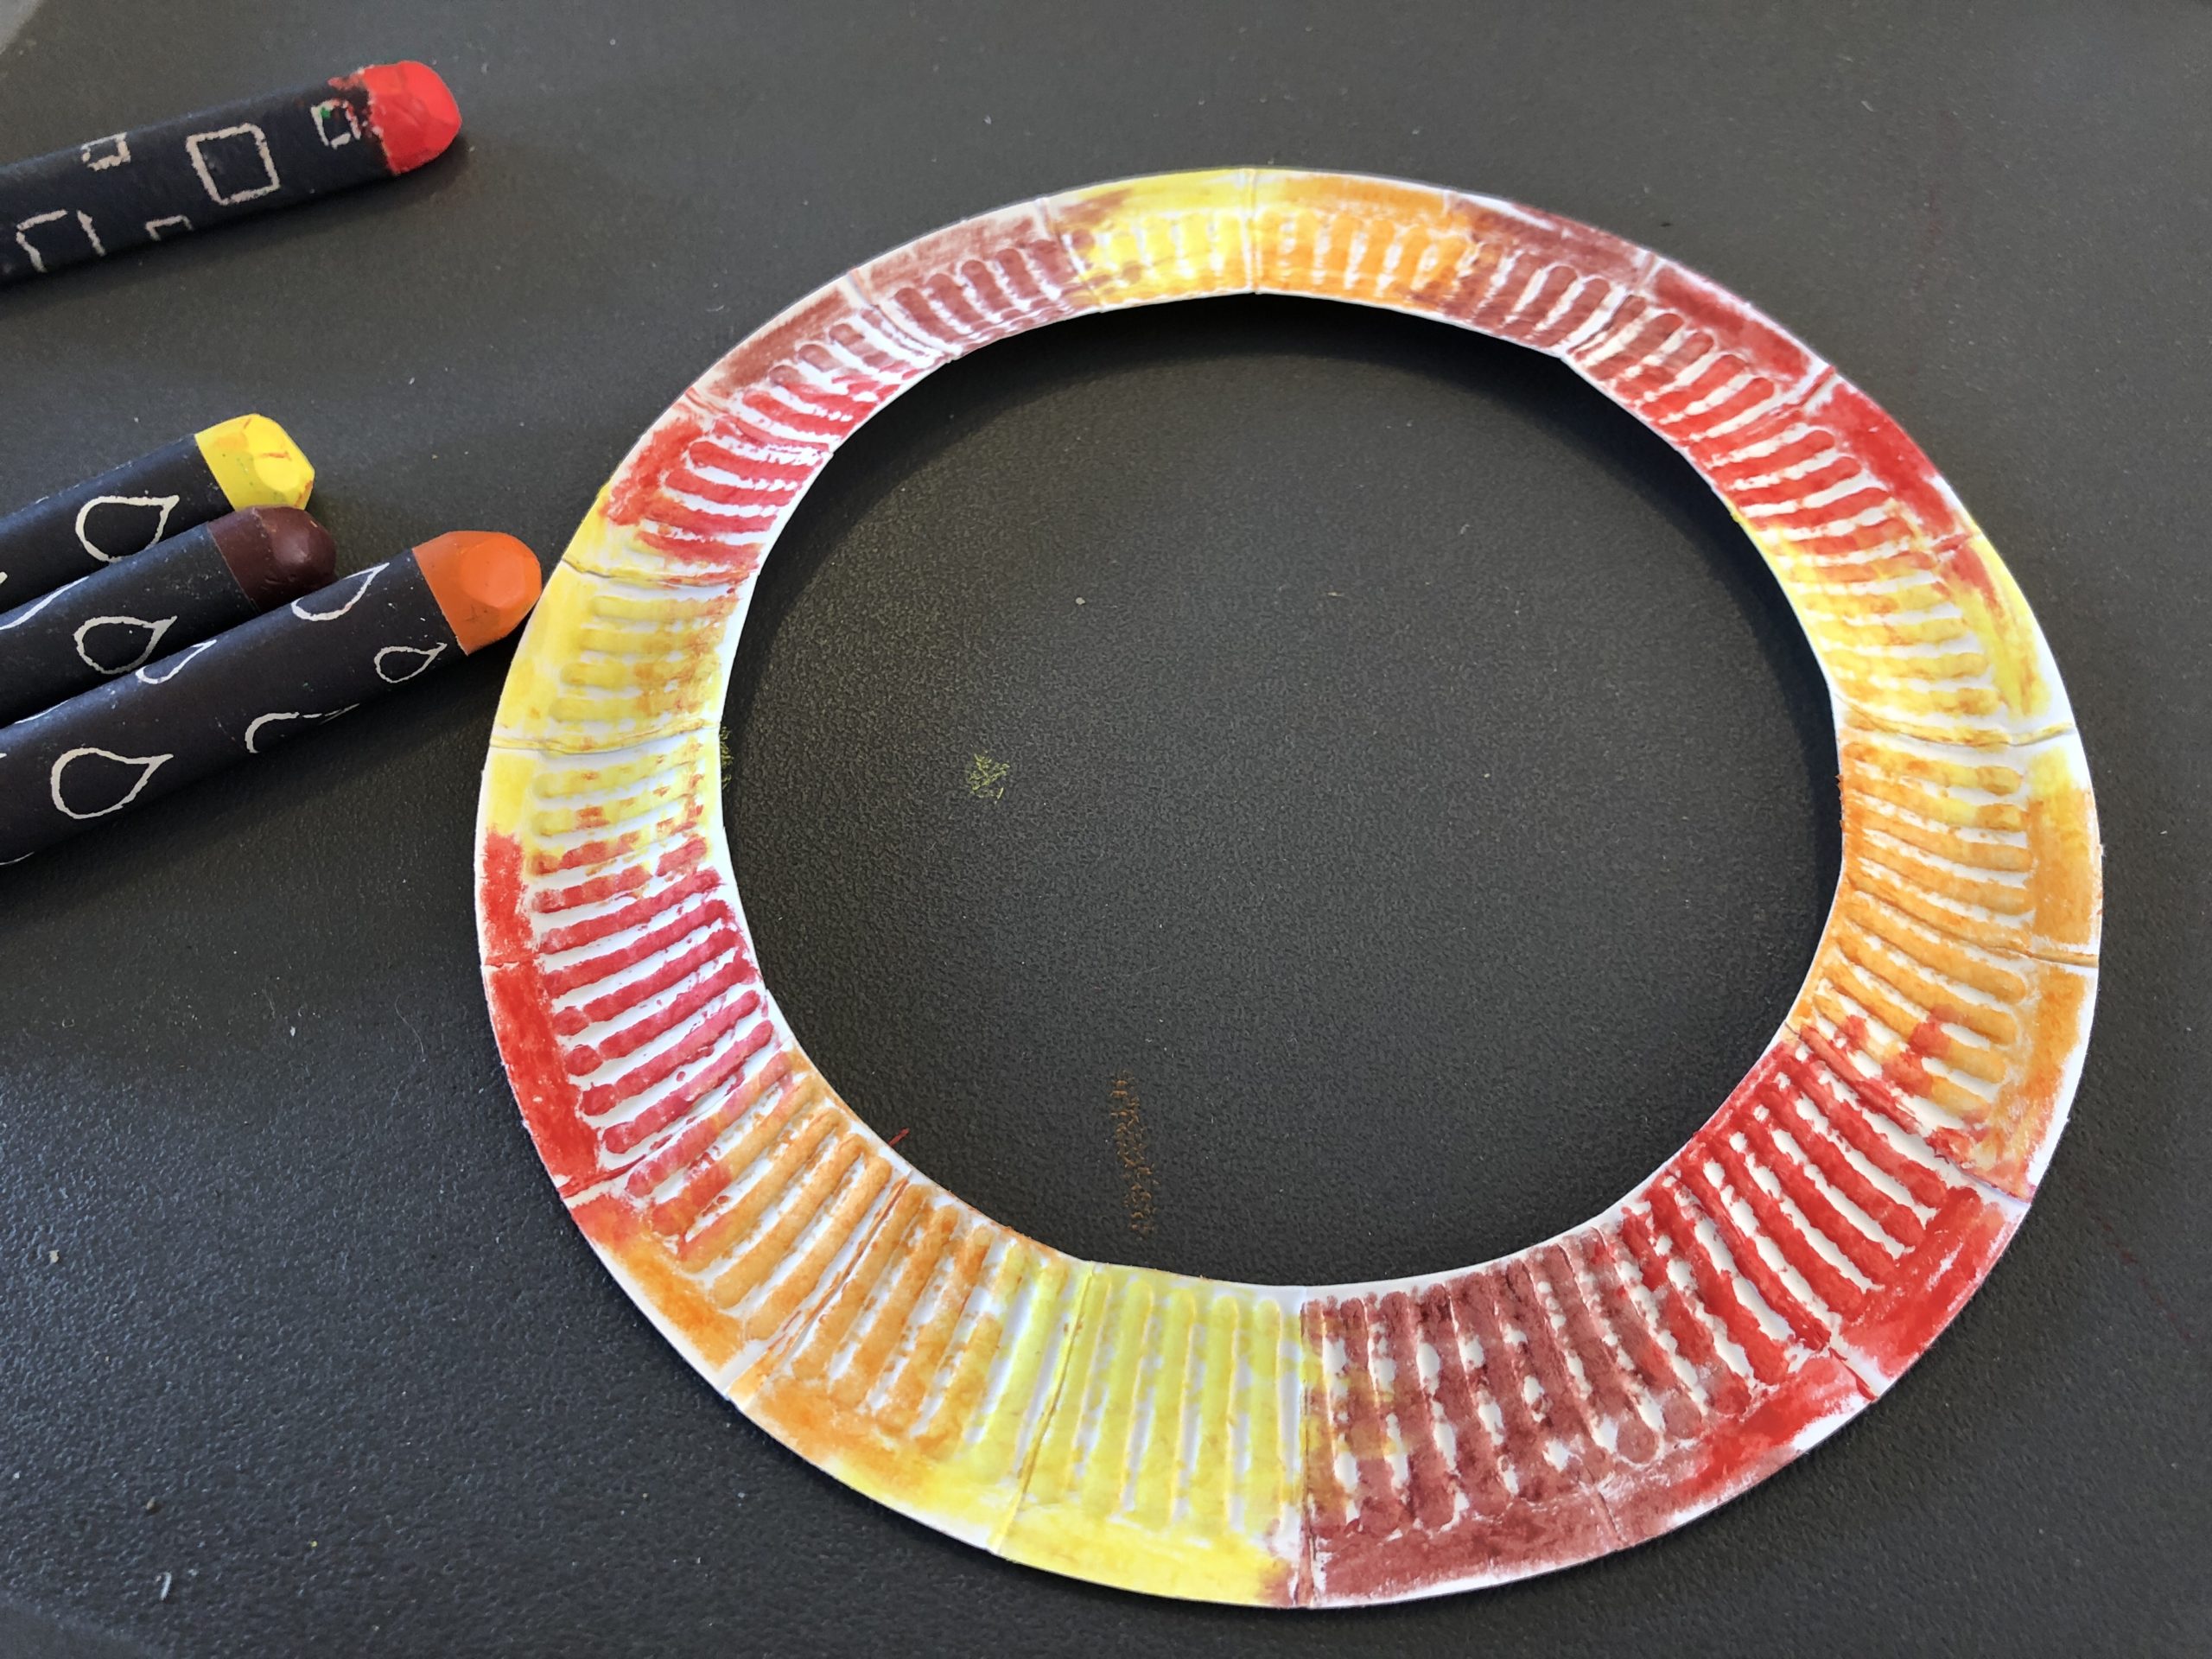
All these fields are now painted with the crayons in the different autumn colors.

Bild zum Schritt 9 für das Bastel- und DIY-Abenteuer für Kinder: 'Alle diese Felder werden jetzt mit den Wachsmalstiften in den...'

10

2. Bild zum Schritt 9 für das Bastel- und DIY-Abenteuer für Kinder: 'Alle diese Felder werden jetzt mit den Wachsmalstiften in den...'

11

3. Bild zum Schritt 10 für das Bastel- und DIY-Abenteuer für Kinder: 'Alle diese Felder werden jetzt mit den Wachsmalstiften in den...'

12

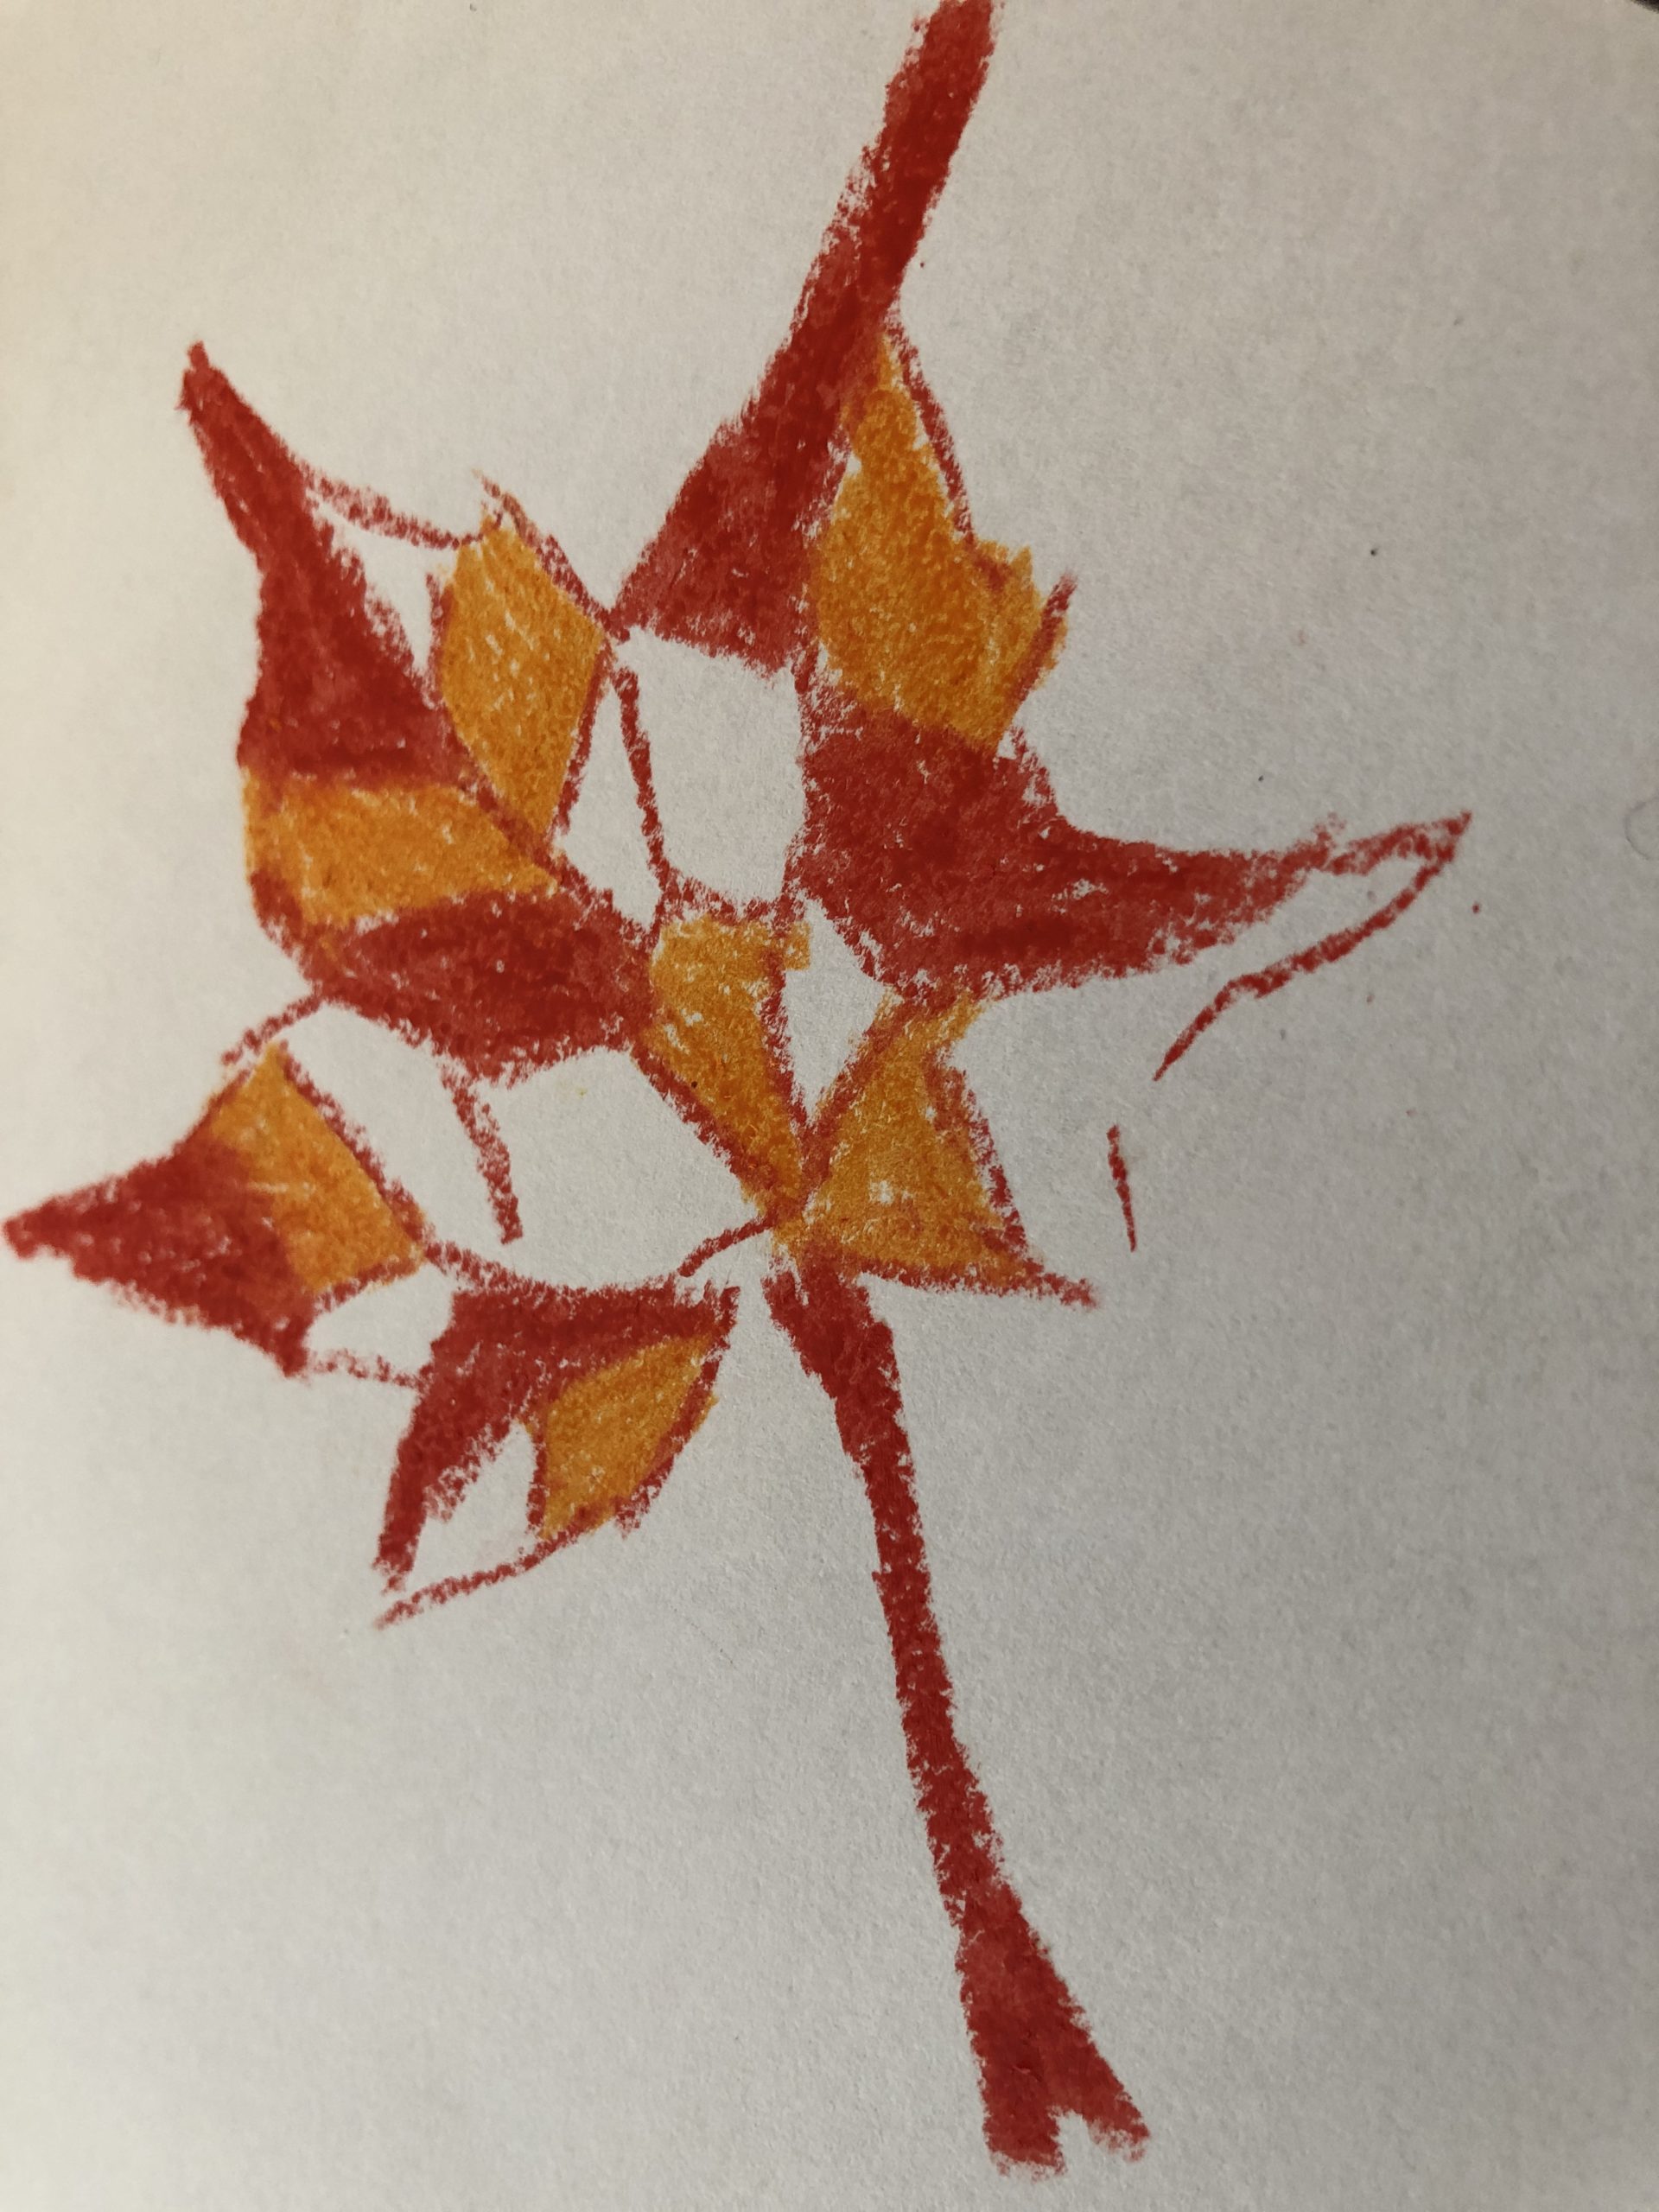
Then you paint the background of the leaf with a bright color.

Bild zum Schritt 12 für das Bastel- und DIY-Abenteuer für Kinder: 'Dann bemalt ihr der Hintergrund des Blattes mit einer leuchtenden...'

13

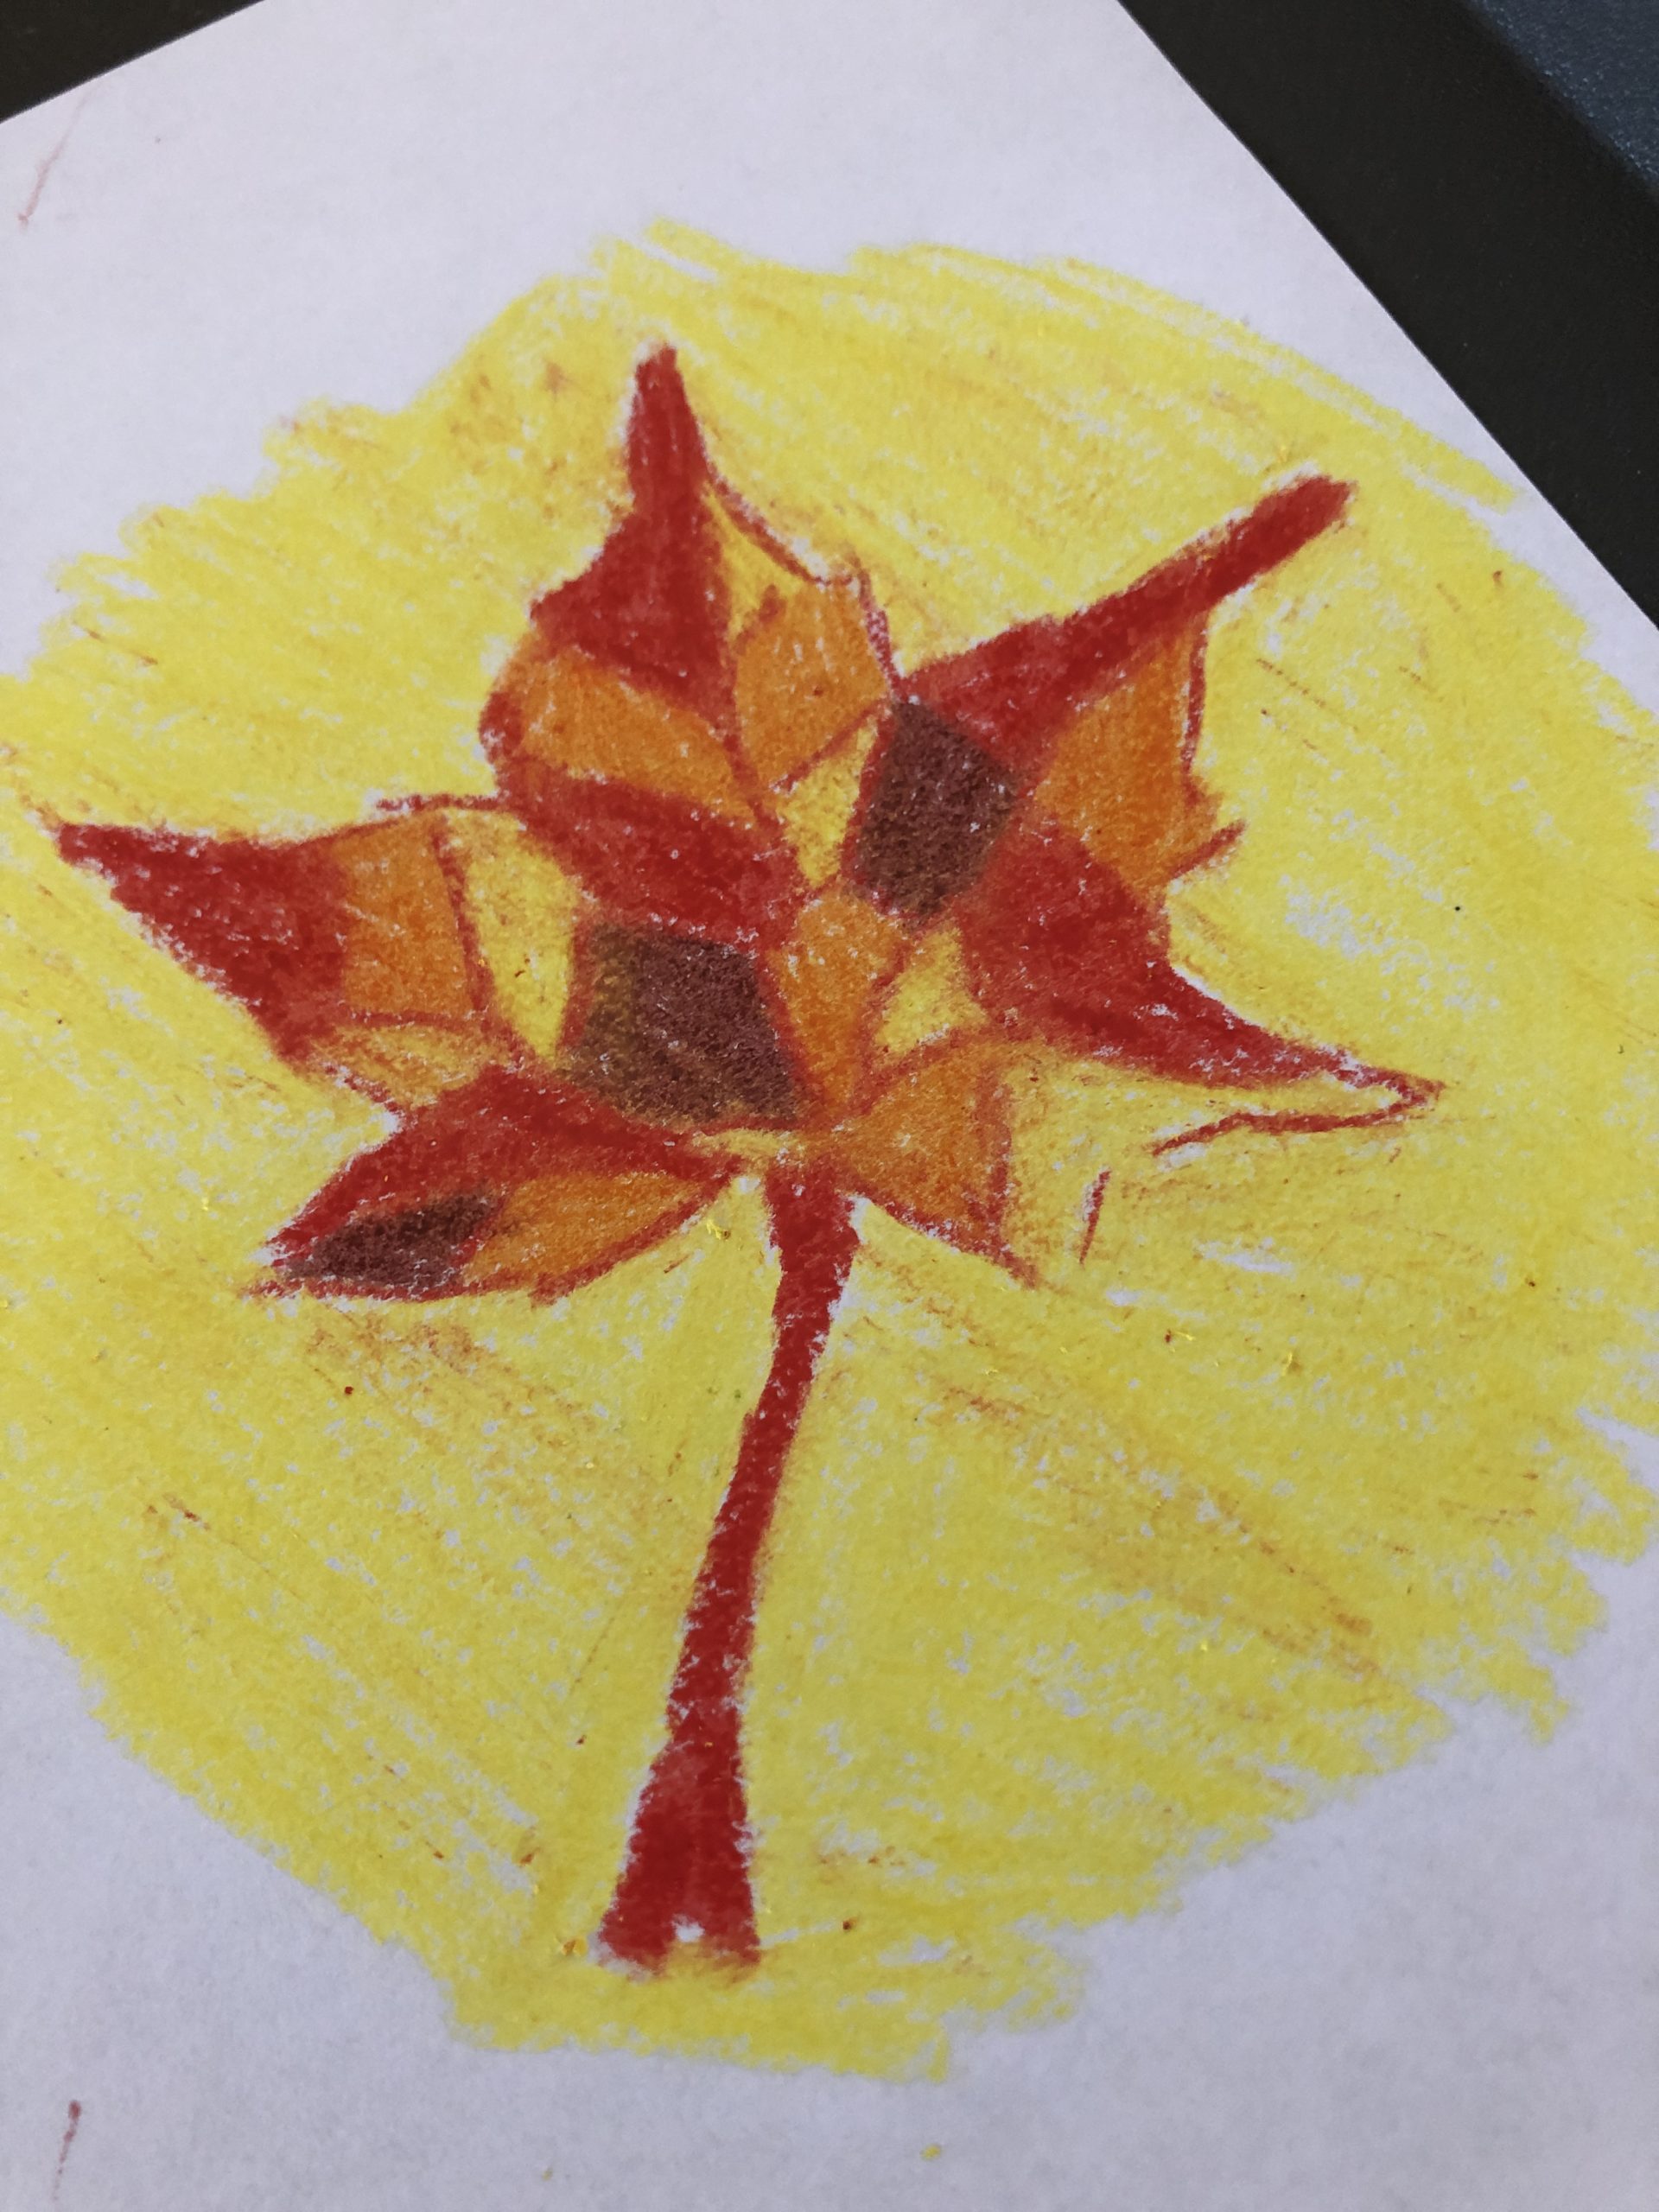
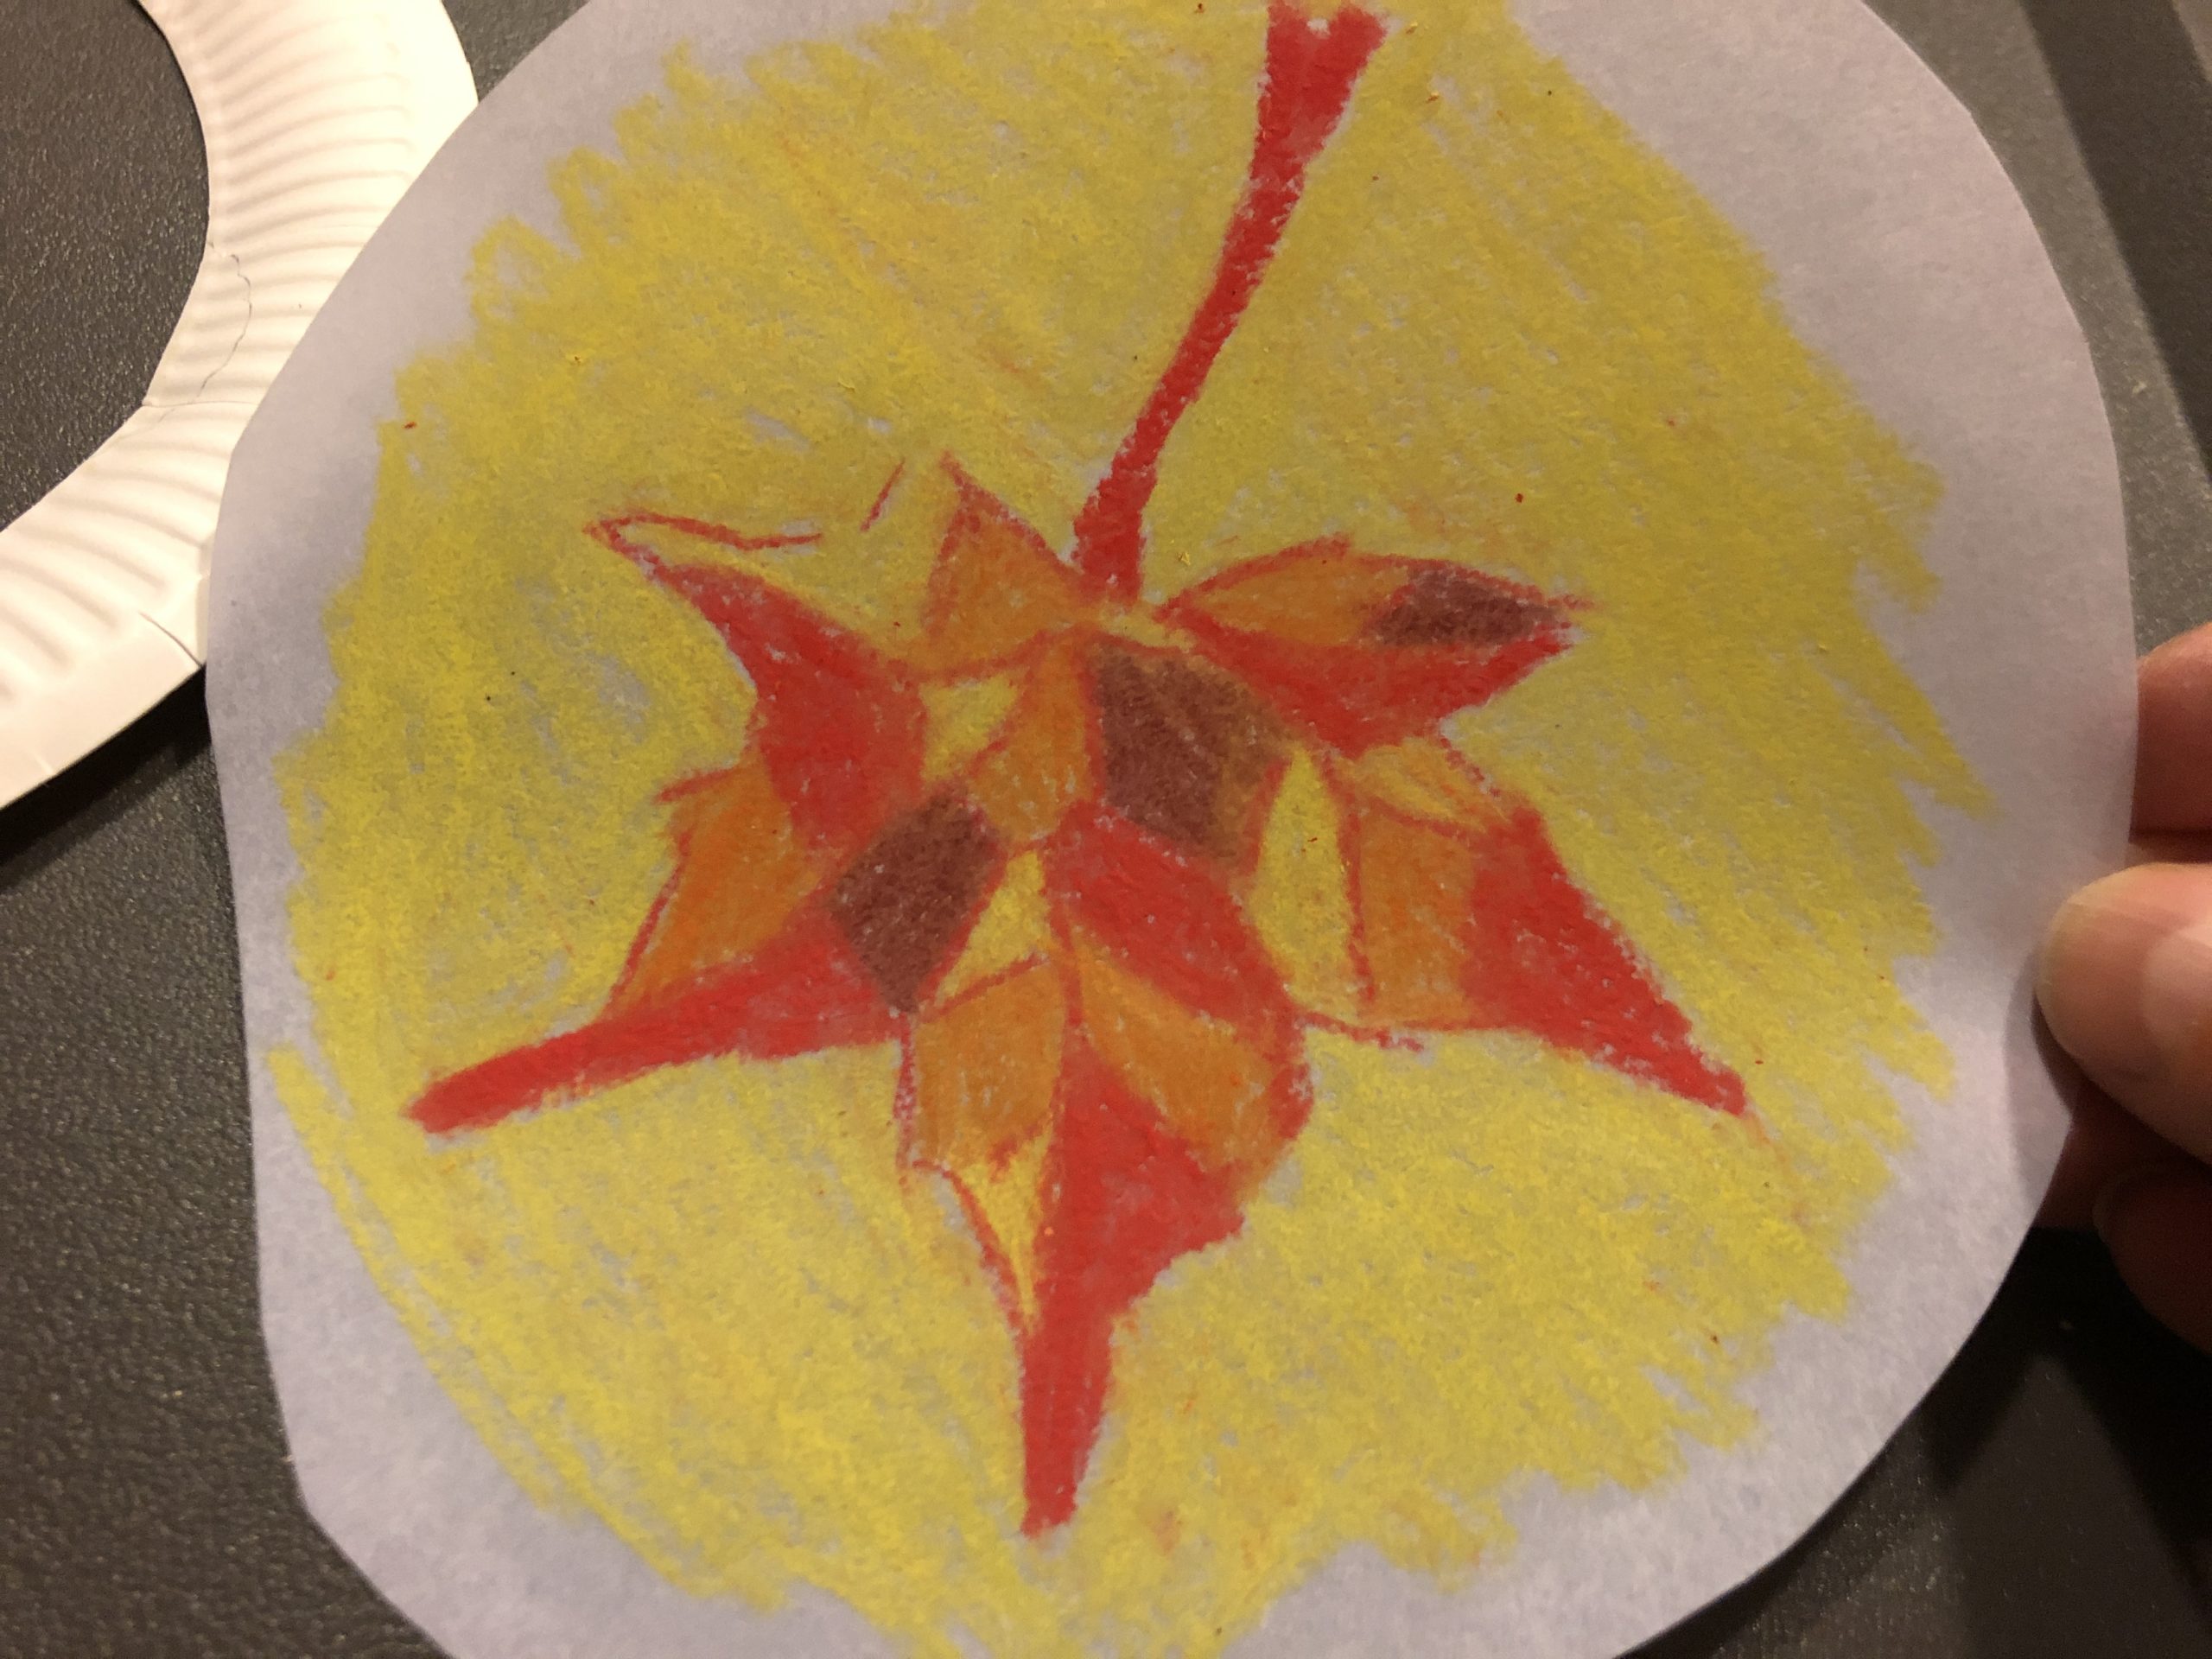
Put the cardboard plate over your painting and cut the painting round. Just border the cardboard plate.

Bild zum Schritt 13 für das Bastel- und DIY-Abenteuer für Kinder: 'Legt den Pappteller über euer Gemälde und schneidet das Gemälde...'

14

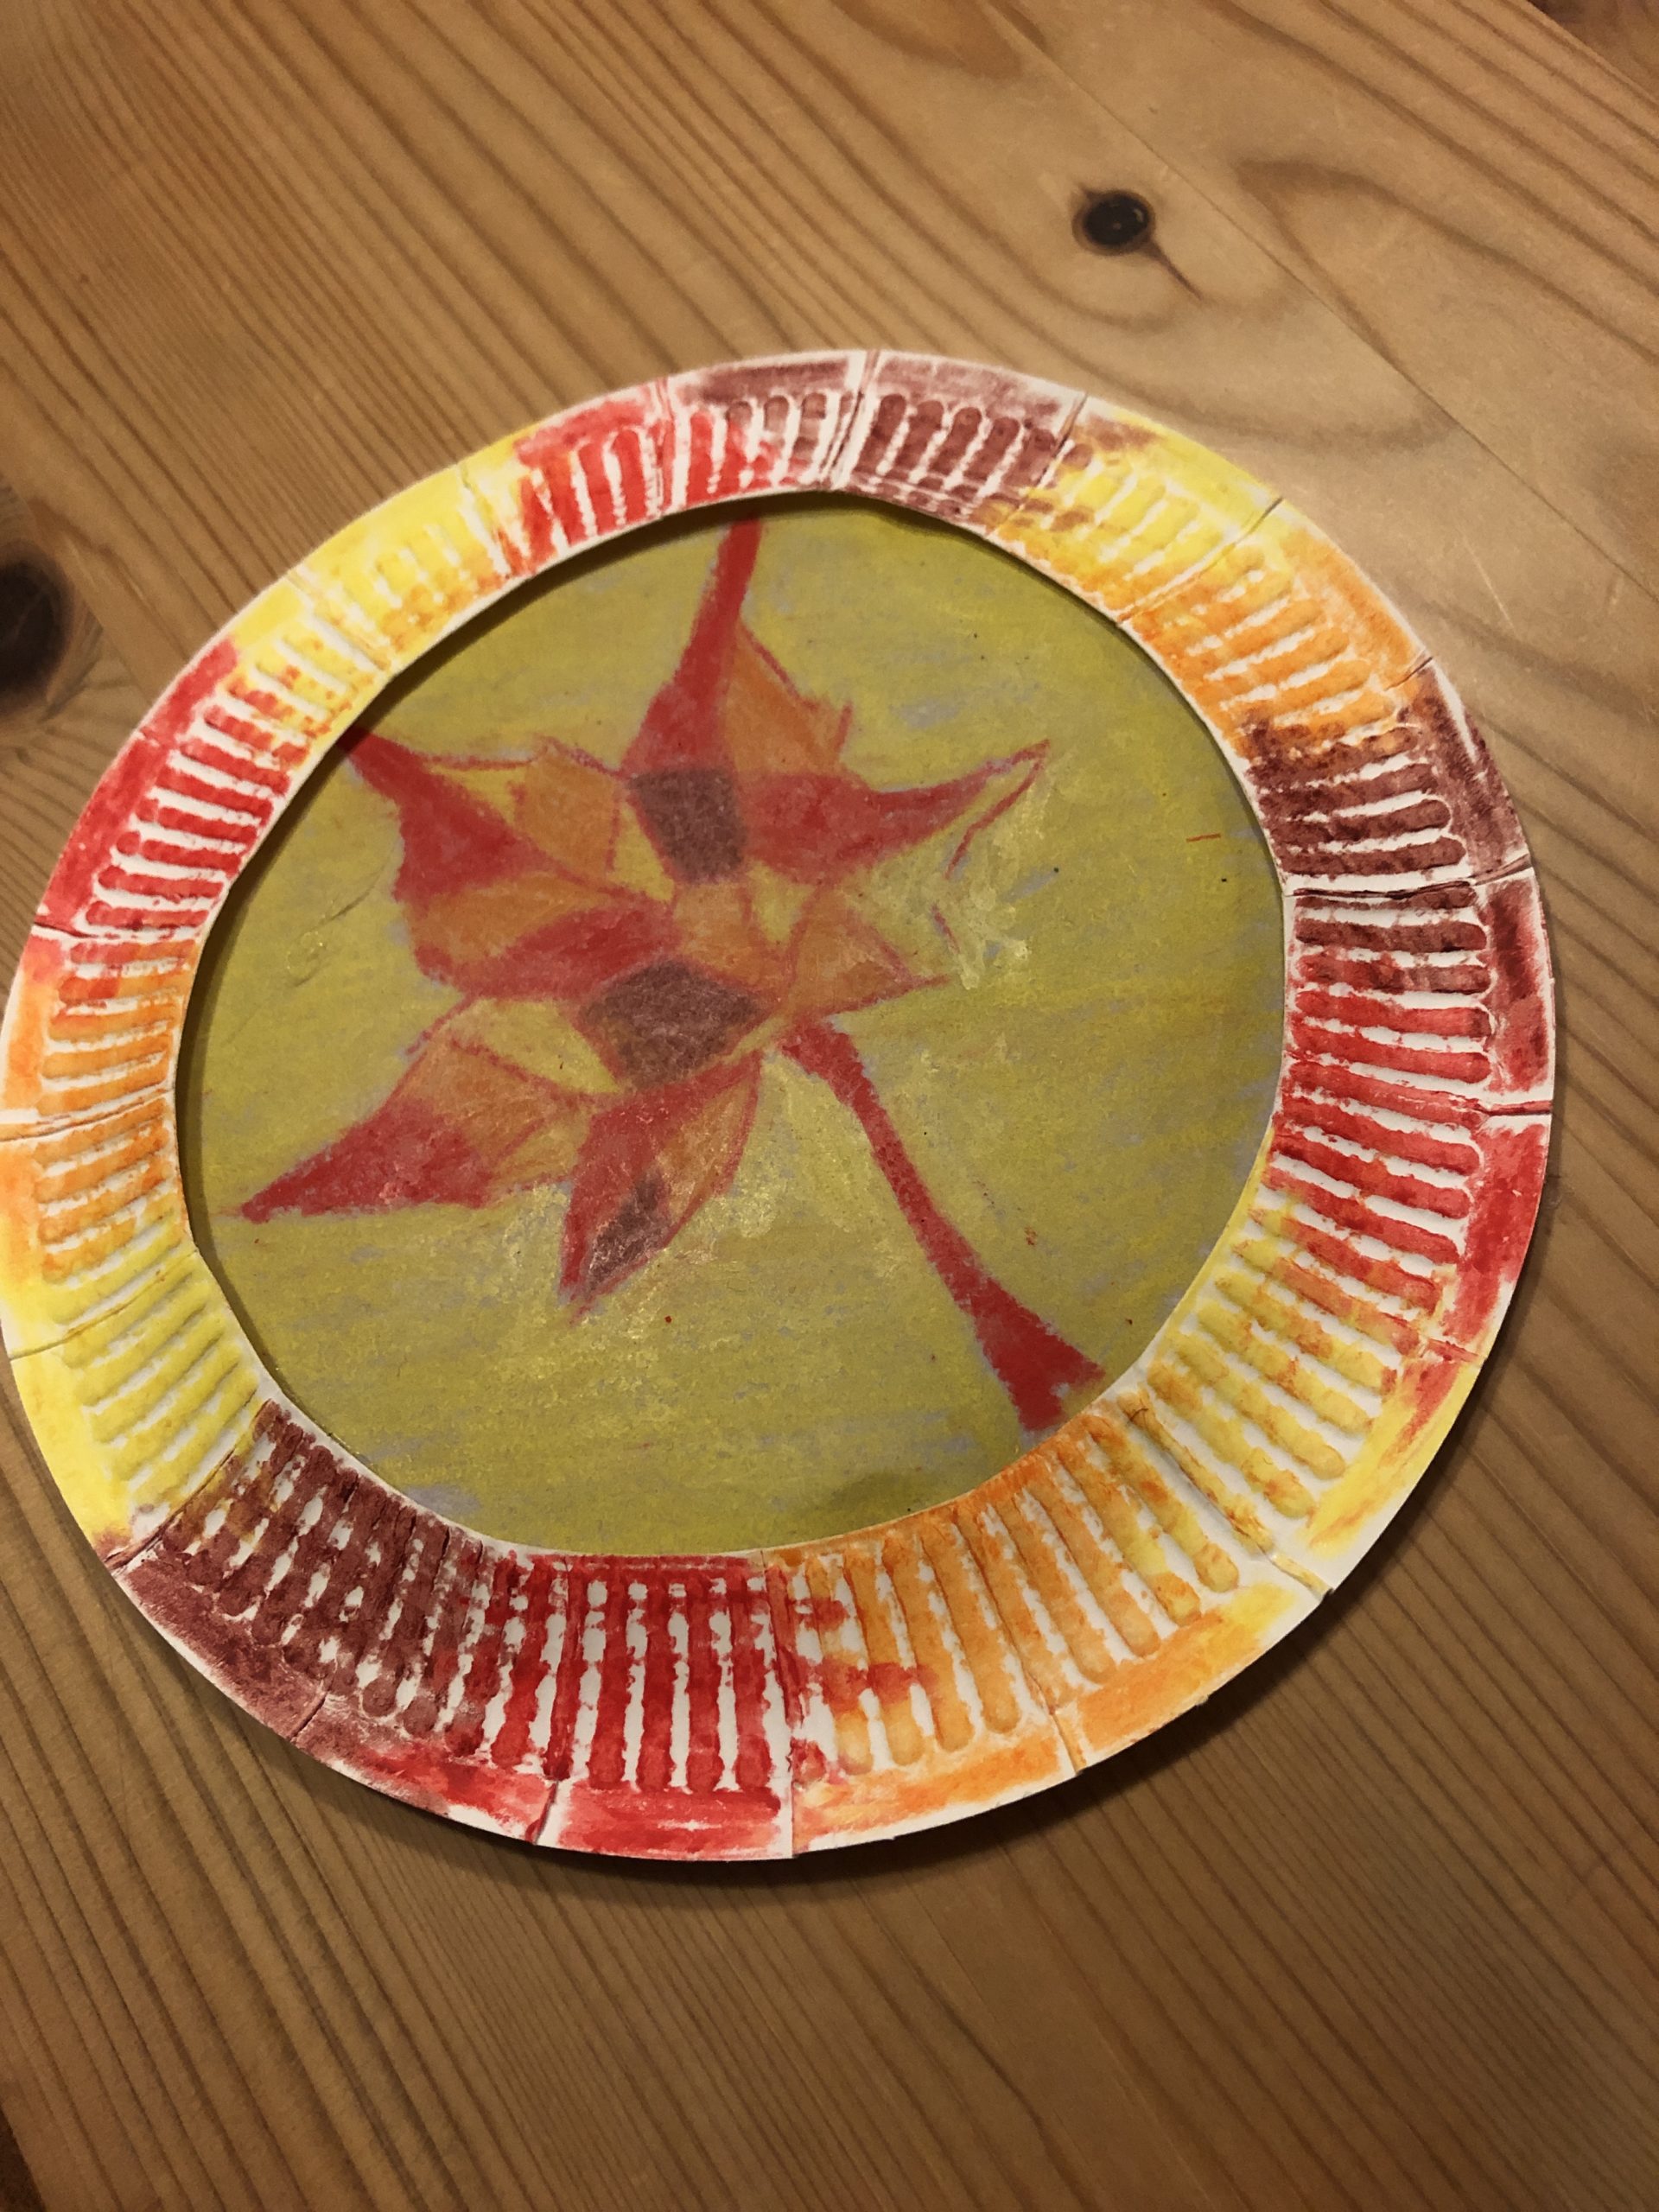
Now you paint the frame in the autumn leaf as well.

Bild zum Schritt 14 für das Bastel- und DIY-Abenteuer für Kinder: 'Jetzt malt ihr den Rahmen ebenfalls in den Herbstblatt an.'

15

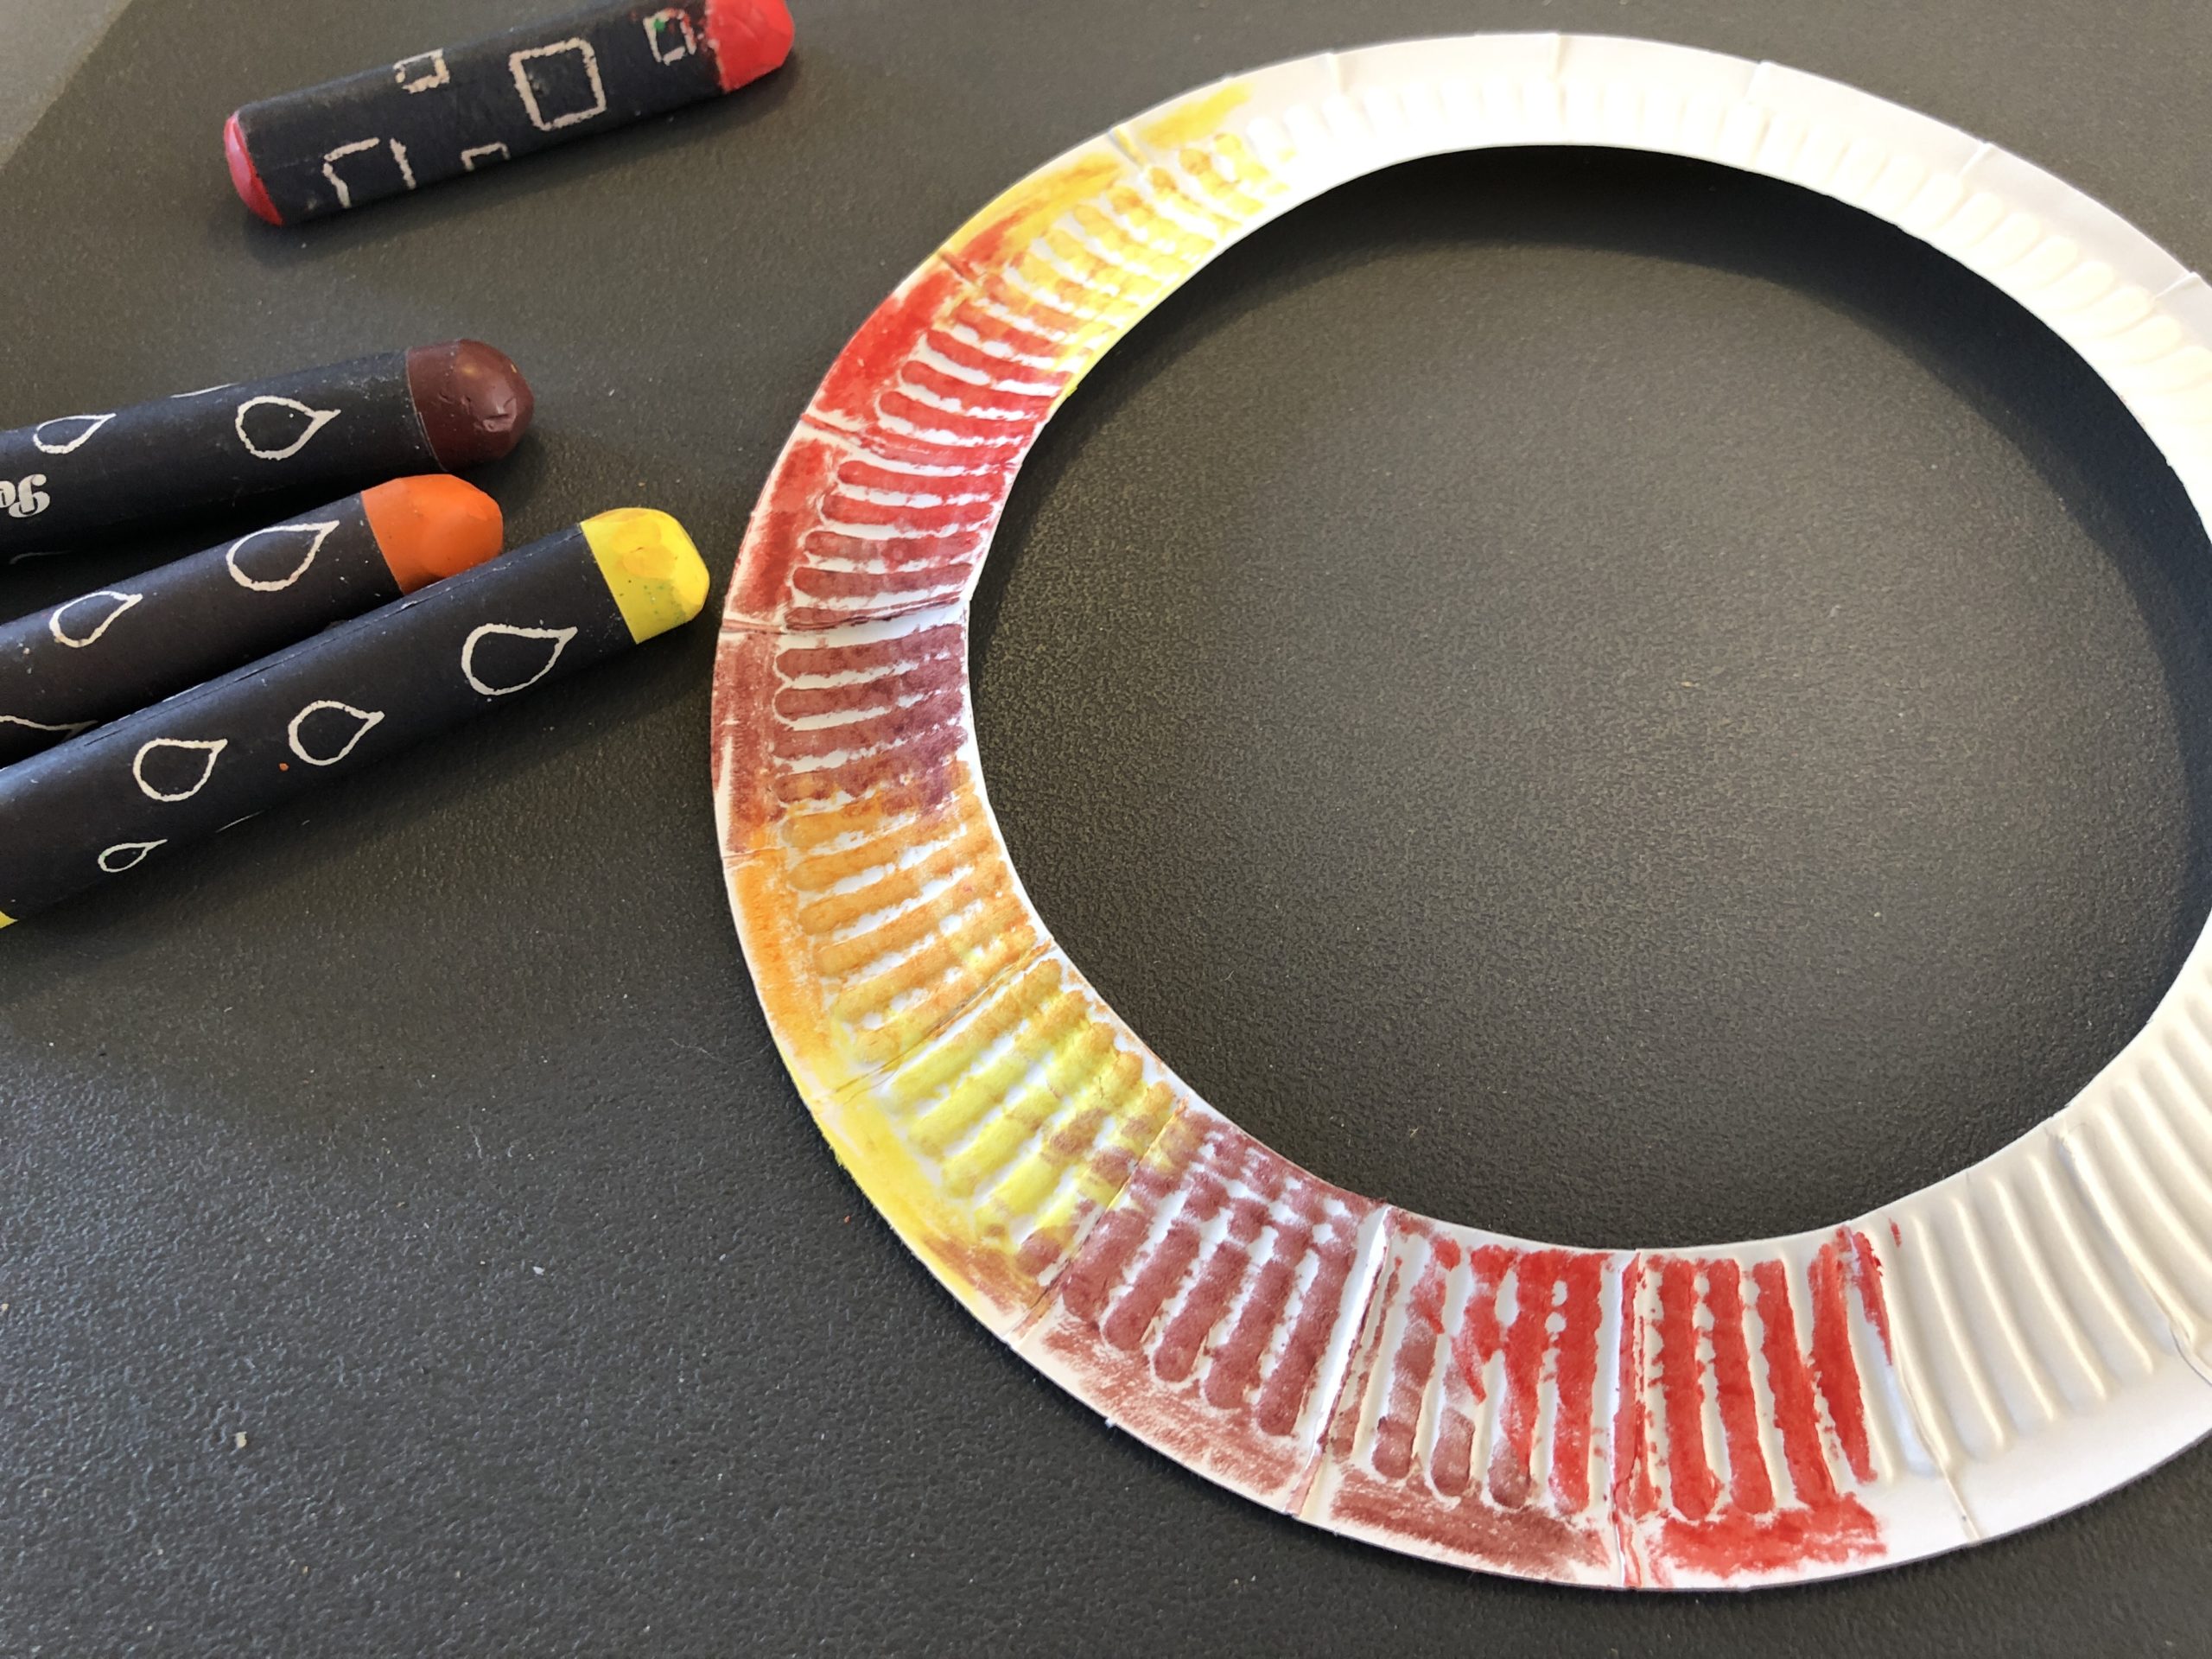
If the colors change, a beautiful pattern is created.

Bild zum Schritt 15 für das Bastel- und DIY-Abenteuer für Kinder: 'Wechselt dabei die Farben, so entsteht ein schönes Muster.'

16

2. Bild zum Schritt 15 für das Bastel- und DIY-Abenteuer für Kinder: 'Wechselt dabei die Farben, so entsteht ein schönes Muster.'

17

Now, with a brush, apply some edible oil to your painting on the back, making your painting transparent.

Bild zum Schritt 17 für das Bastel- und DIY-Abenteuer für Kinder: 'Nun streicht mit einem Pinsel euer Gemälde auf der Rückseite...'

18

2. Bild zum Schritt 17 für das Bastel- und DIY-Abenteuer für Kinder: 'Nun streicht mit einem Pinsel euer Gemälde auf der Rückseite...'

19

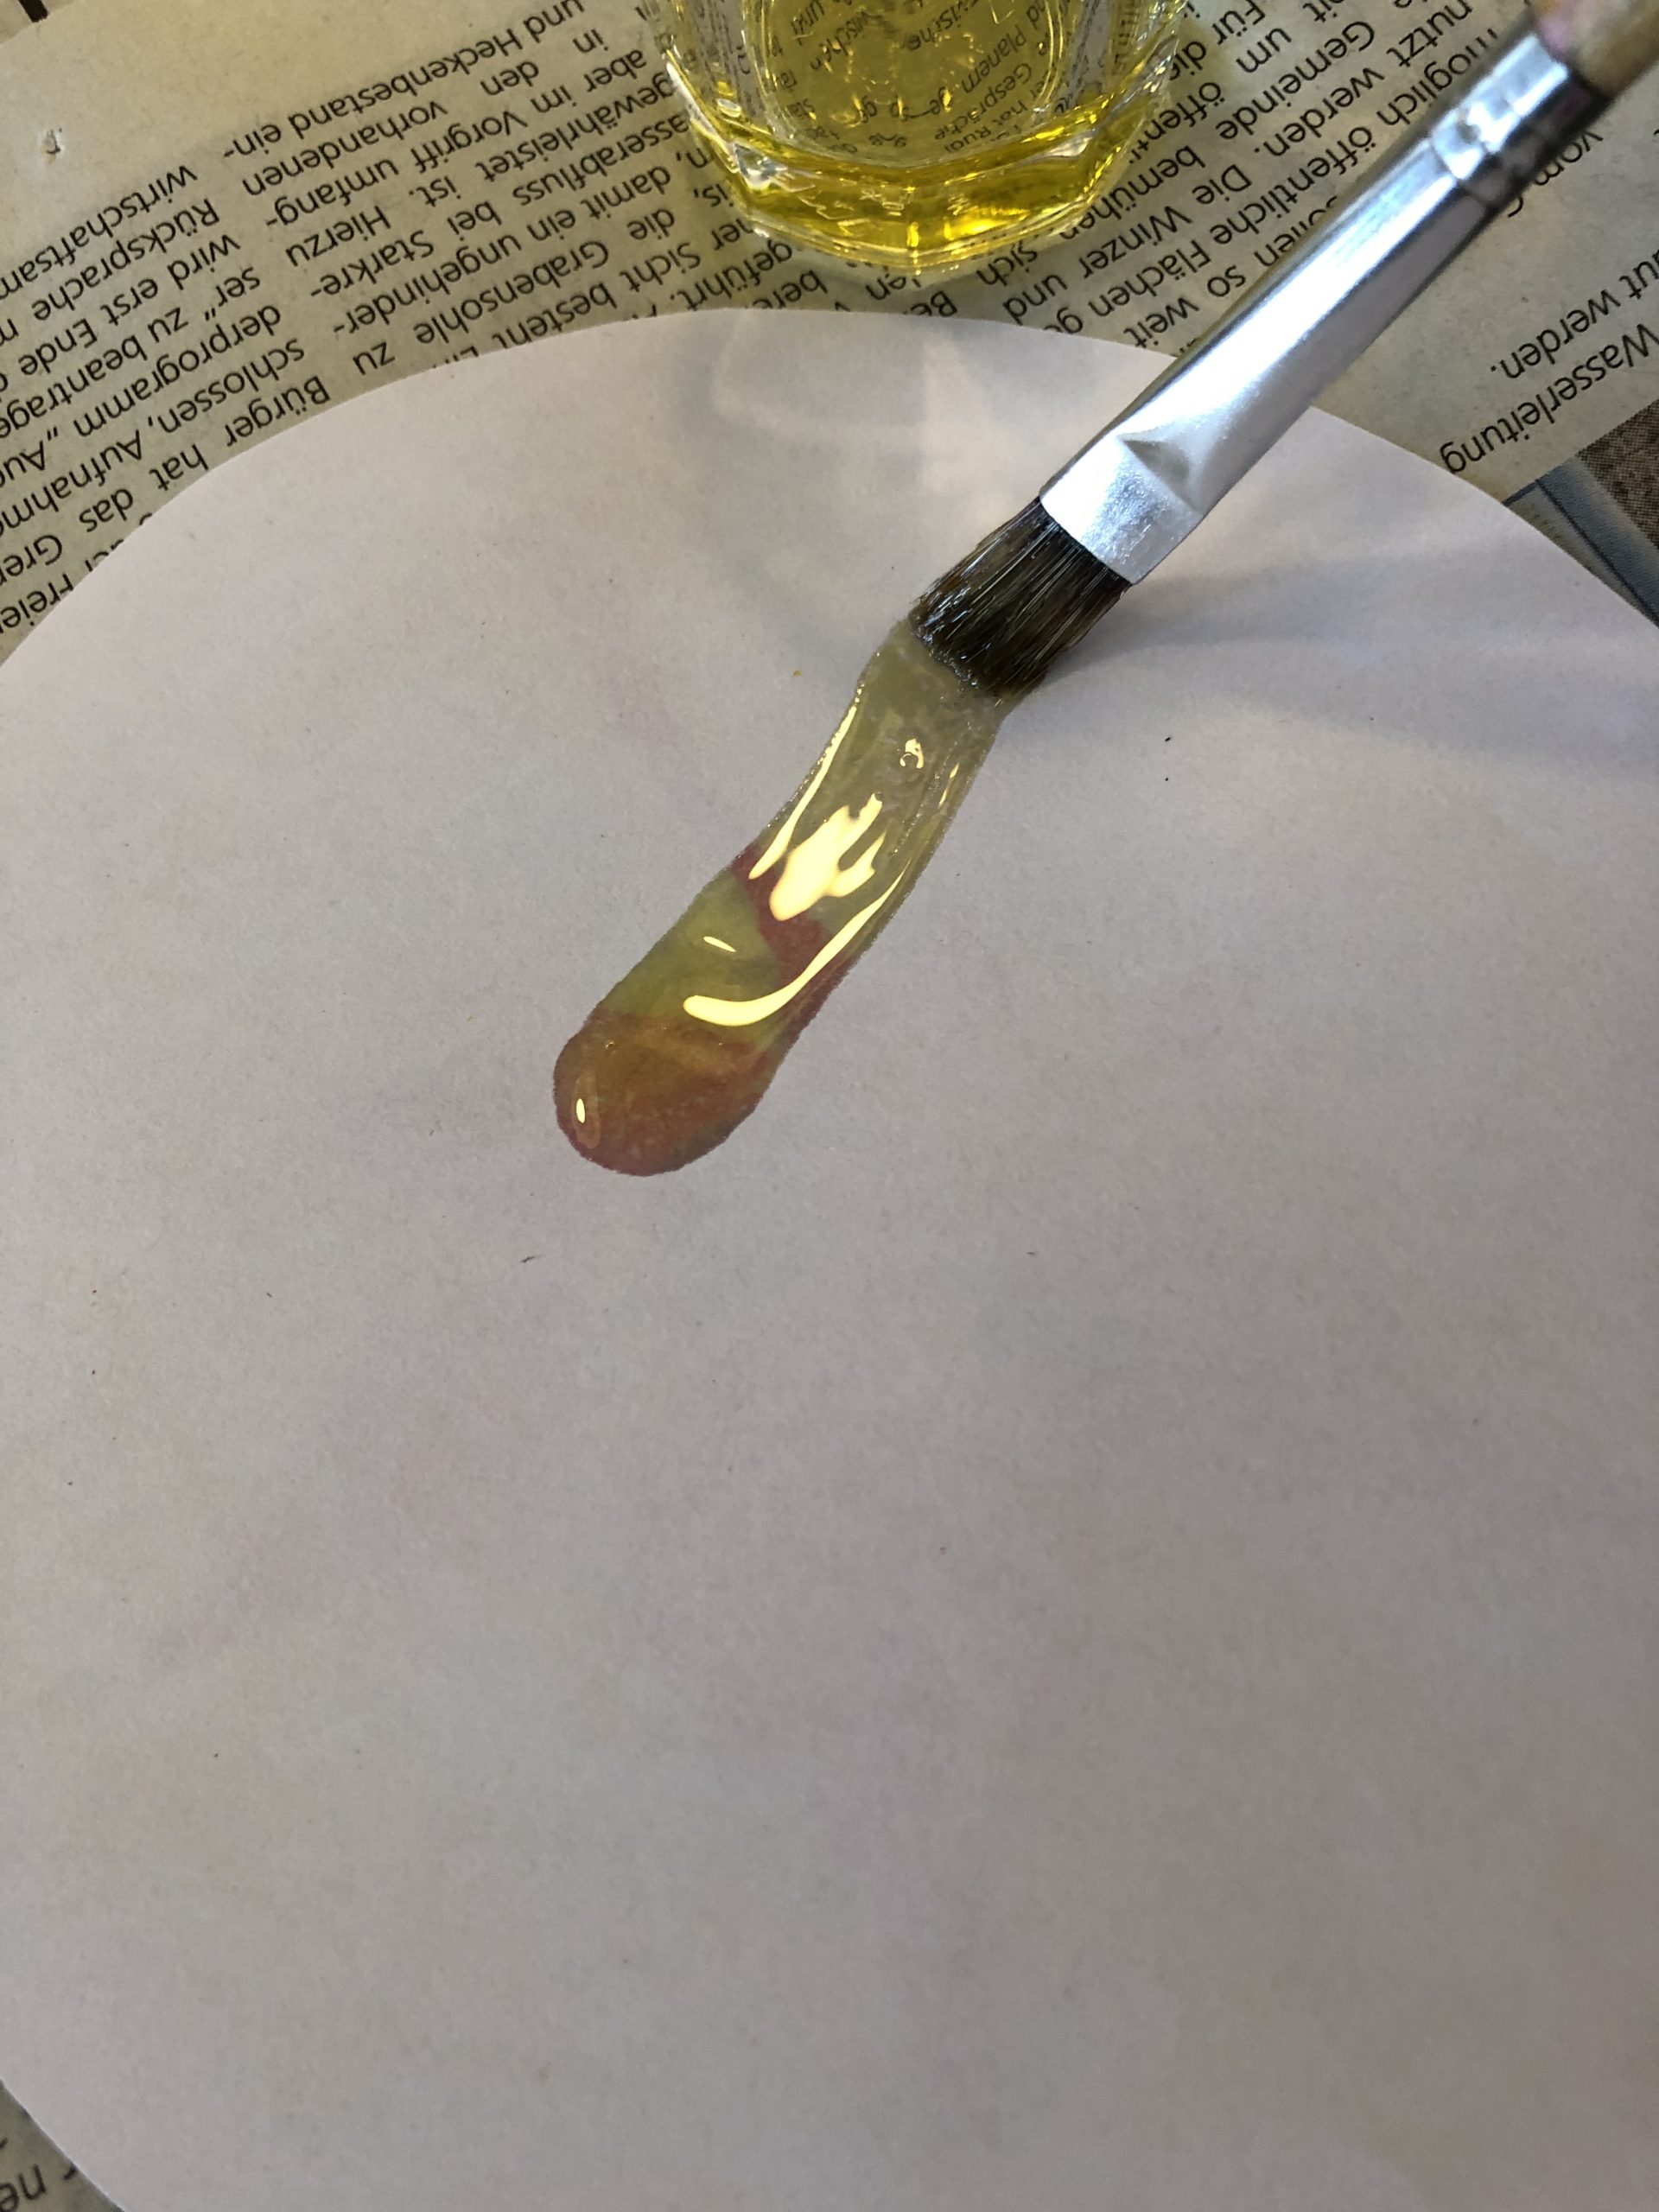
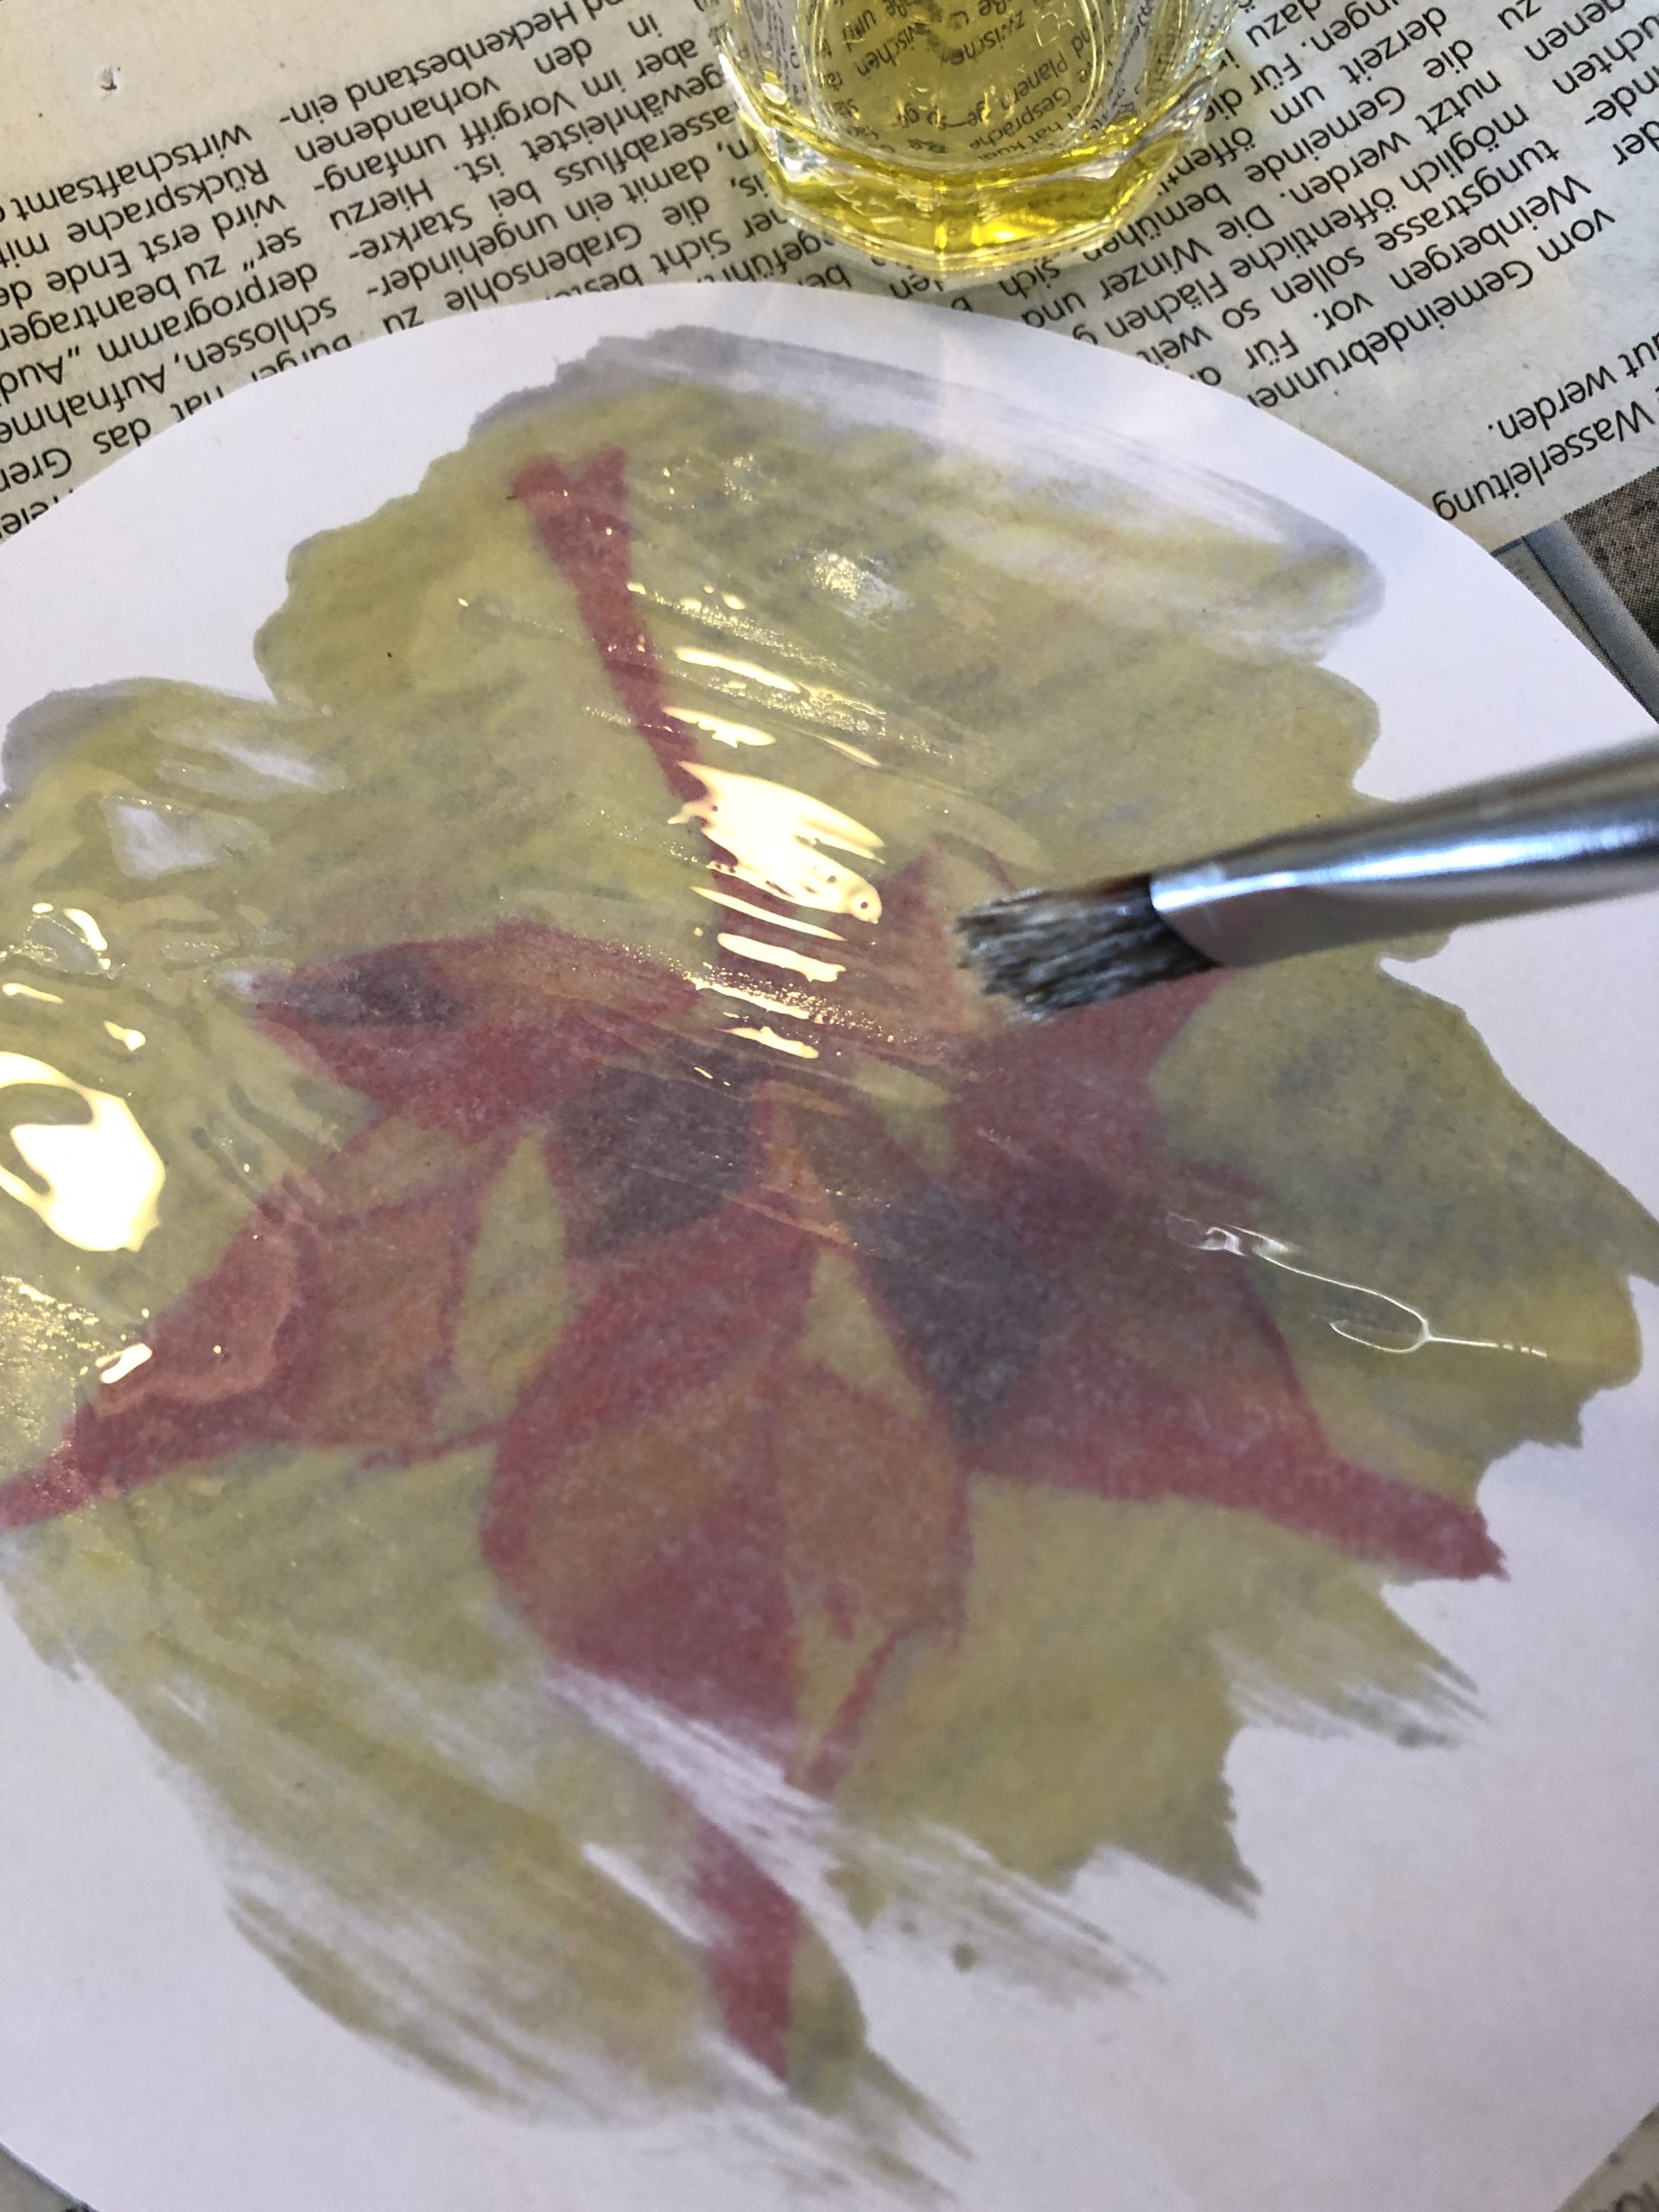
At the end, remove the excess oil with a kitchen crepe or handkerchief.

Bild zum Schritt 19 für das Bastel- und DIY-Abenteuer für Kinder: 'Am Schluss tupft ihr das überschüssige Öl mit einem Küchenkrepp...'

20

Put the paper to dry.

Bild zum Schritt 20 für das Bastel- und DIY-Abenteuer für Kinder: 'Legt das Papier zum Trocknen.'

21

The dried painting now sticks to her frame.

Bild zum Schritt 21 für das Bastel- und DIY-Abenteuer für Kinder: 'Das getrocknete Gemälde klebt ihr nun in den Rahmen.'

22

Use the hot glue gun. Attention: do not glue the cardboard plates together in all places. Leave an approximately 8cm wide edge open.
Through the opening you can later put your light source (e.g. mini-light chain) into the lantern.

Bild zum Schritt 22 für das Bastel- und DIY-Abenteuer für Kinder: 'Verwendet dazu die Heißklebepistole. Achtung: klebt die Pappteller nicht an...'

23

Before that, you hole two holes in the opposite sides of the upper, open edge with a hole. Then you push a wire through the holes that you twist at the ends. You can attach a lantern rod to this wire.

Bild zum Schritt 23 für das Bastel- und DIY-Abenteuer für Kinder: 'Zuvor locht ihr mit einem Locher noch zwei Löcher in...'

24

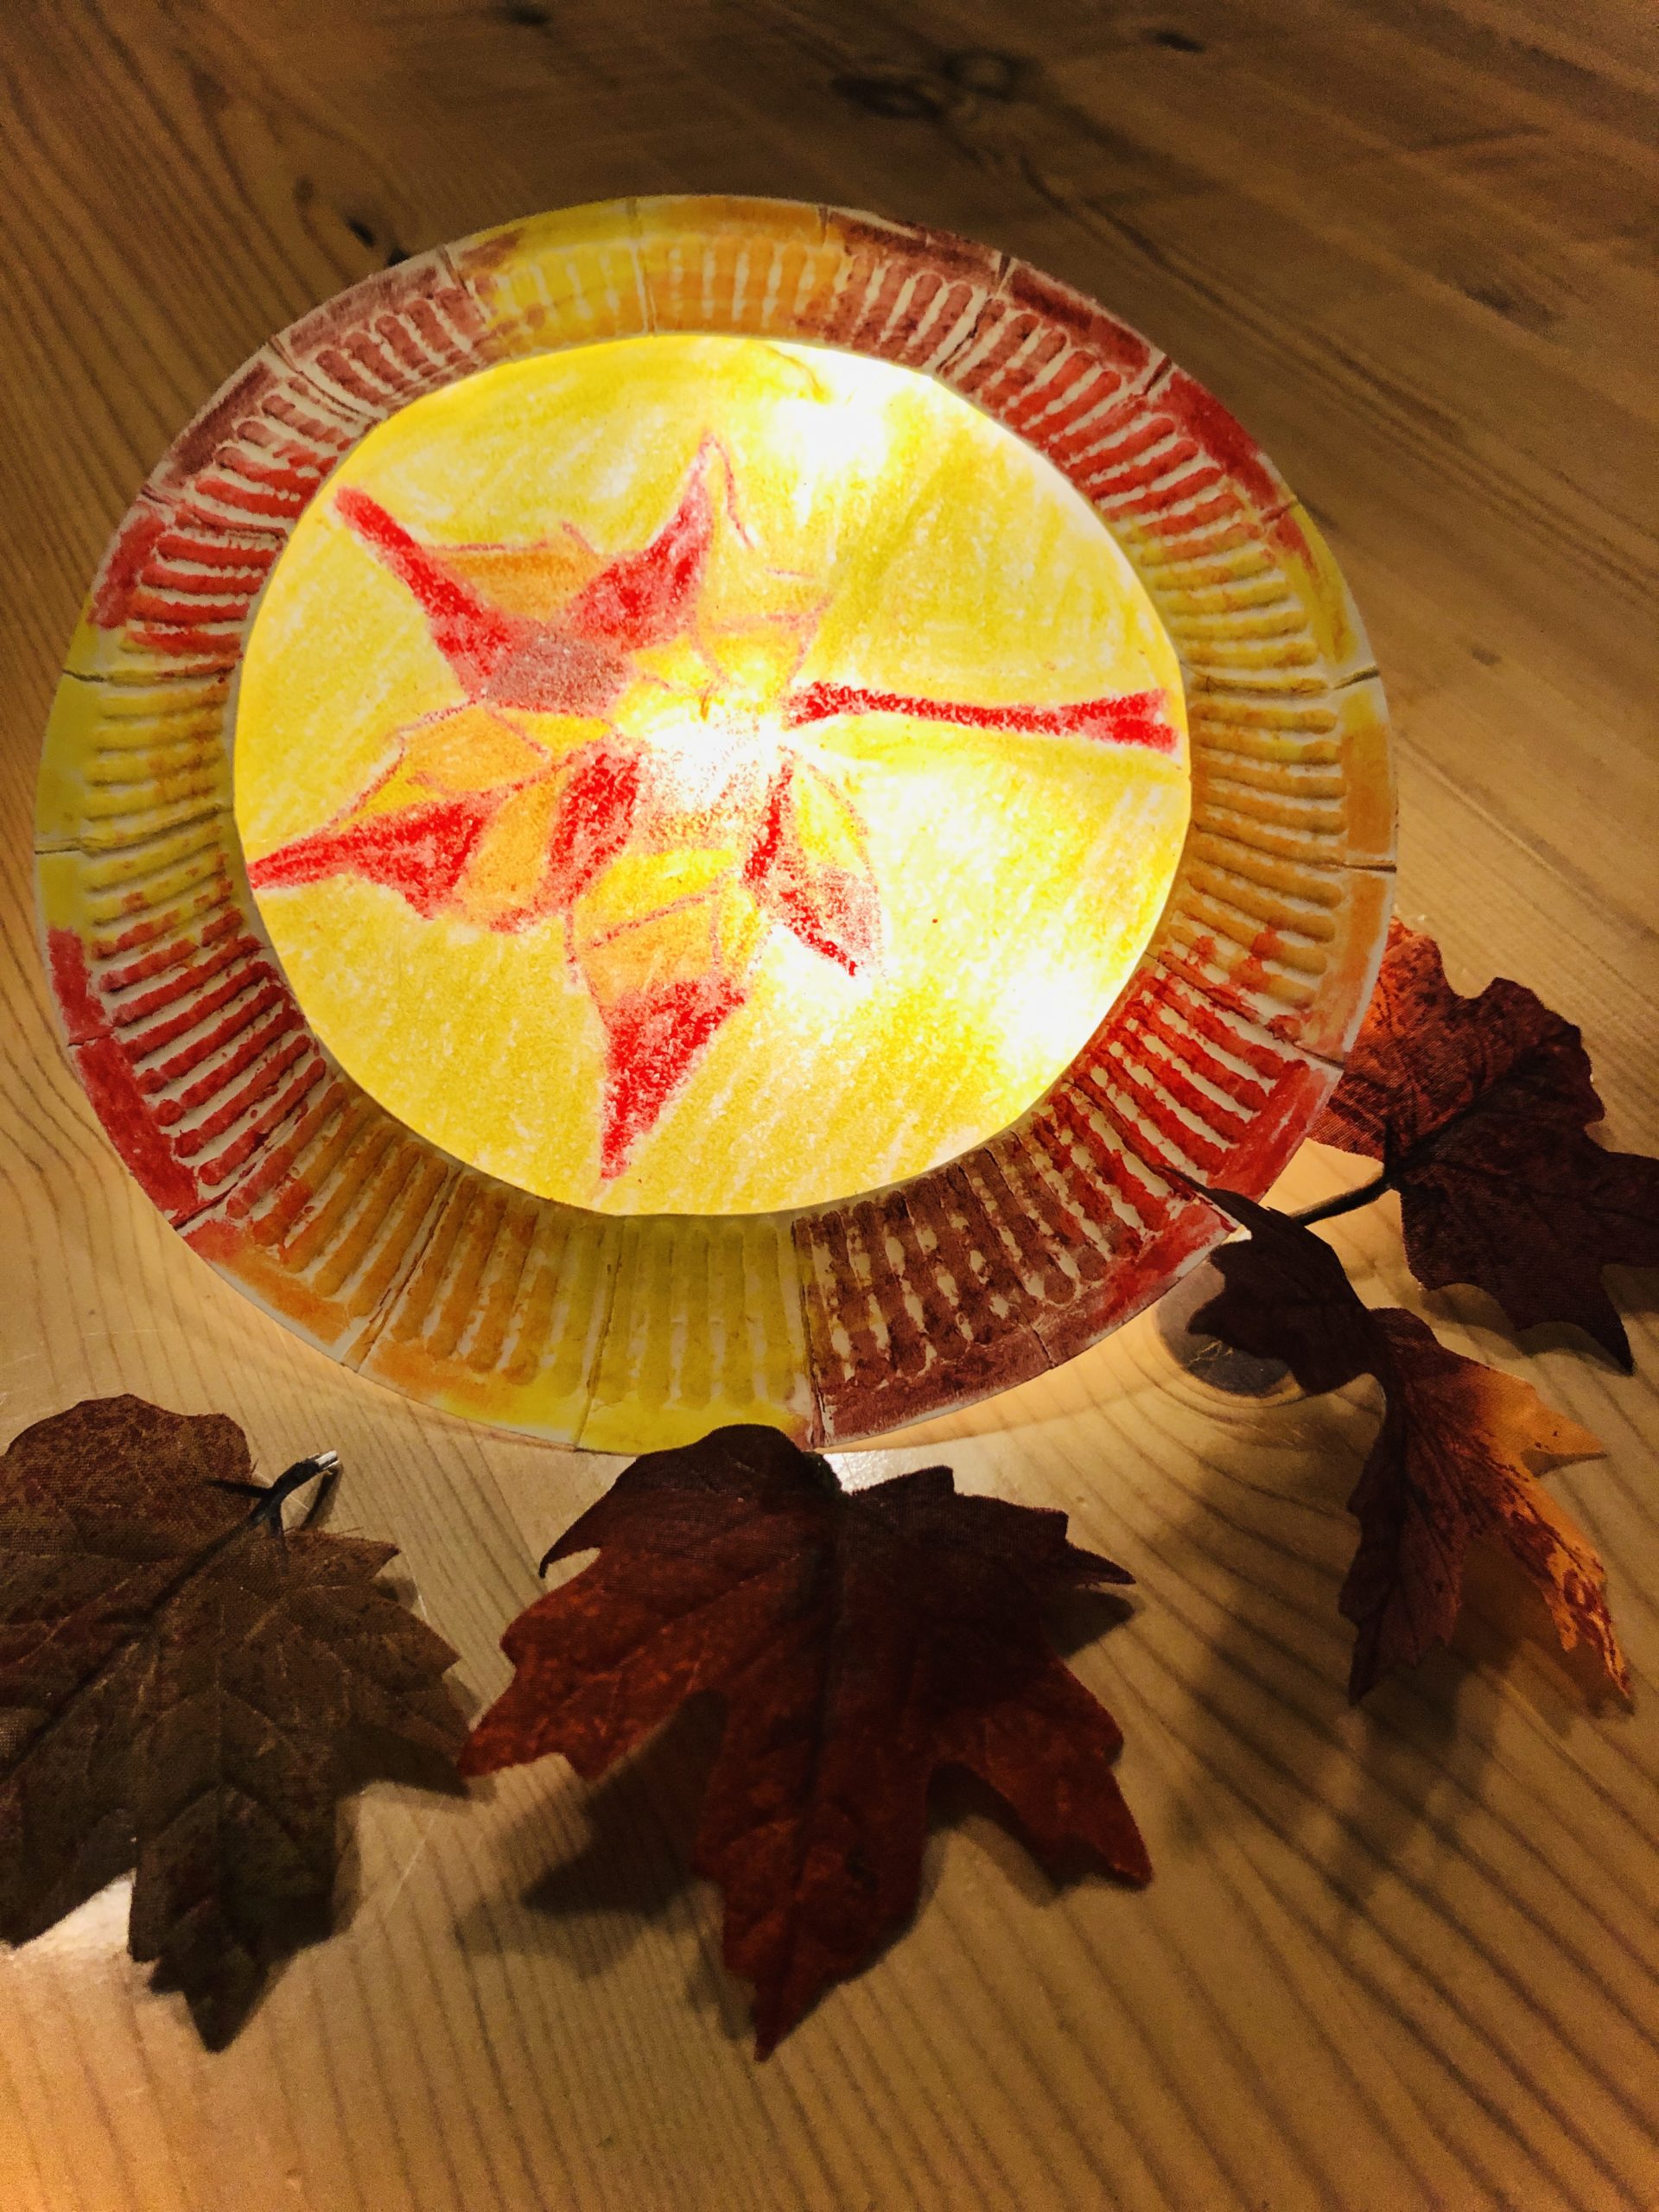
Have fun with your lantern!