Print Options:

Sew crown (adjustable!)

Material for1 ChildPrep Time10 min.Adv. Time45 min.Total Time55 min.

This crown is a great sewing project for small and large sewing enthusiasts.
You only need the crown as a fabric cut three times and you can start sewing. The buttons on the crown do not necessarily have to be attached, depending on the fabric pattern this is perhaps not necessary, but they look very nice on a monochrome fabric. By sewing the buttons, this can also be used for younger children, who like to pick things off or put them in the mouth (hazard of swallowing). If you use the crown exclusively for older children, the buttons or other things can also be glued on.
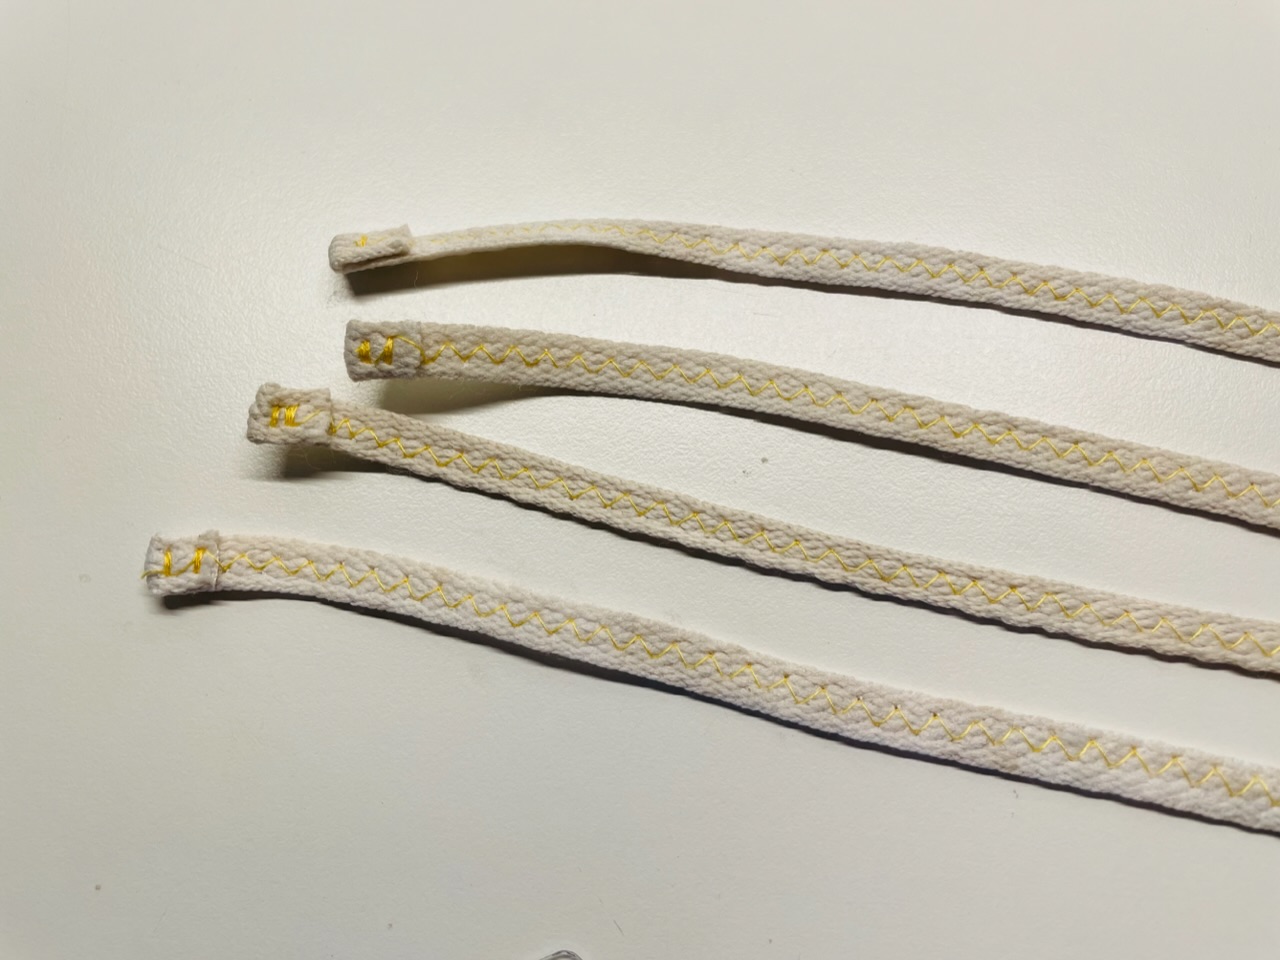
Here you can use ribbons from a shoelace, which can be upgraded with a coloured sewing thread. You can also find the detailed instructions here. Of course you can already use a nice binding tape.
The steps are described very detailed, if you don't need so much illustrated instructions just skip these pictures. Now you just need a pretty, non-stretchable fabric, this can be fluffy, shiny, monochrome or colorful and you can start. Have fun!

Titelbild zur Bastel- und DIY-Idee für Kinder '(905) Krone nähen (verstellbar!)'

 1 Fabric in gold 45cm x 15cmor any other color!
 1 Fabric in yellow 45cm x 15cmor any other color!
 1 Fleece fabric for strengthening 45cm x 15cmalternatively: fleece washcloths/cleaning cloths
 8 Buttons mother-of-pearlany buttons possibly different
 4 Volumes per 24 cm longe.g. a shoelace or flat cord
 1 Template for printing
 1 Paper shears
 1 Substance shears
 1 Adhesive pen
 1 Ballpoint pens
 1 Pen
 Sewing thread
 Sewing machine
All links marked with a shopping cart lead to Amazon - here we have selected products that we would order ourselves and in part also ordered. In a qualified purchase via the advertising link, we as Amazon partner receive a commission, for you there are no costs. You thus support our cost- and advertising banner-free, educational offer.
1

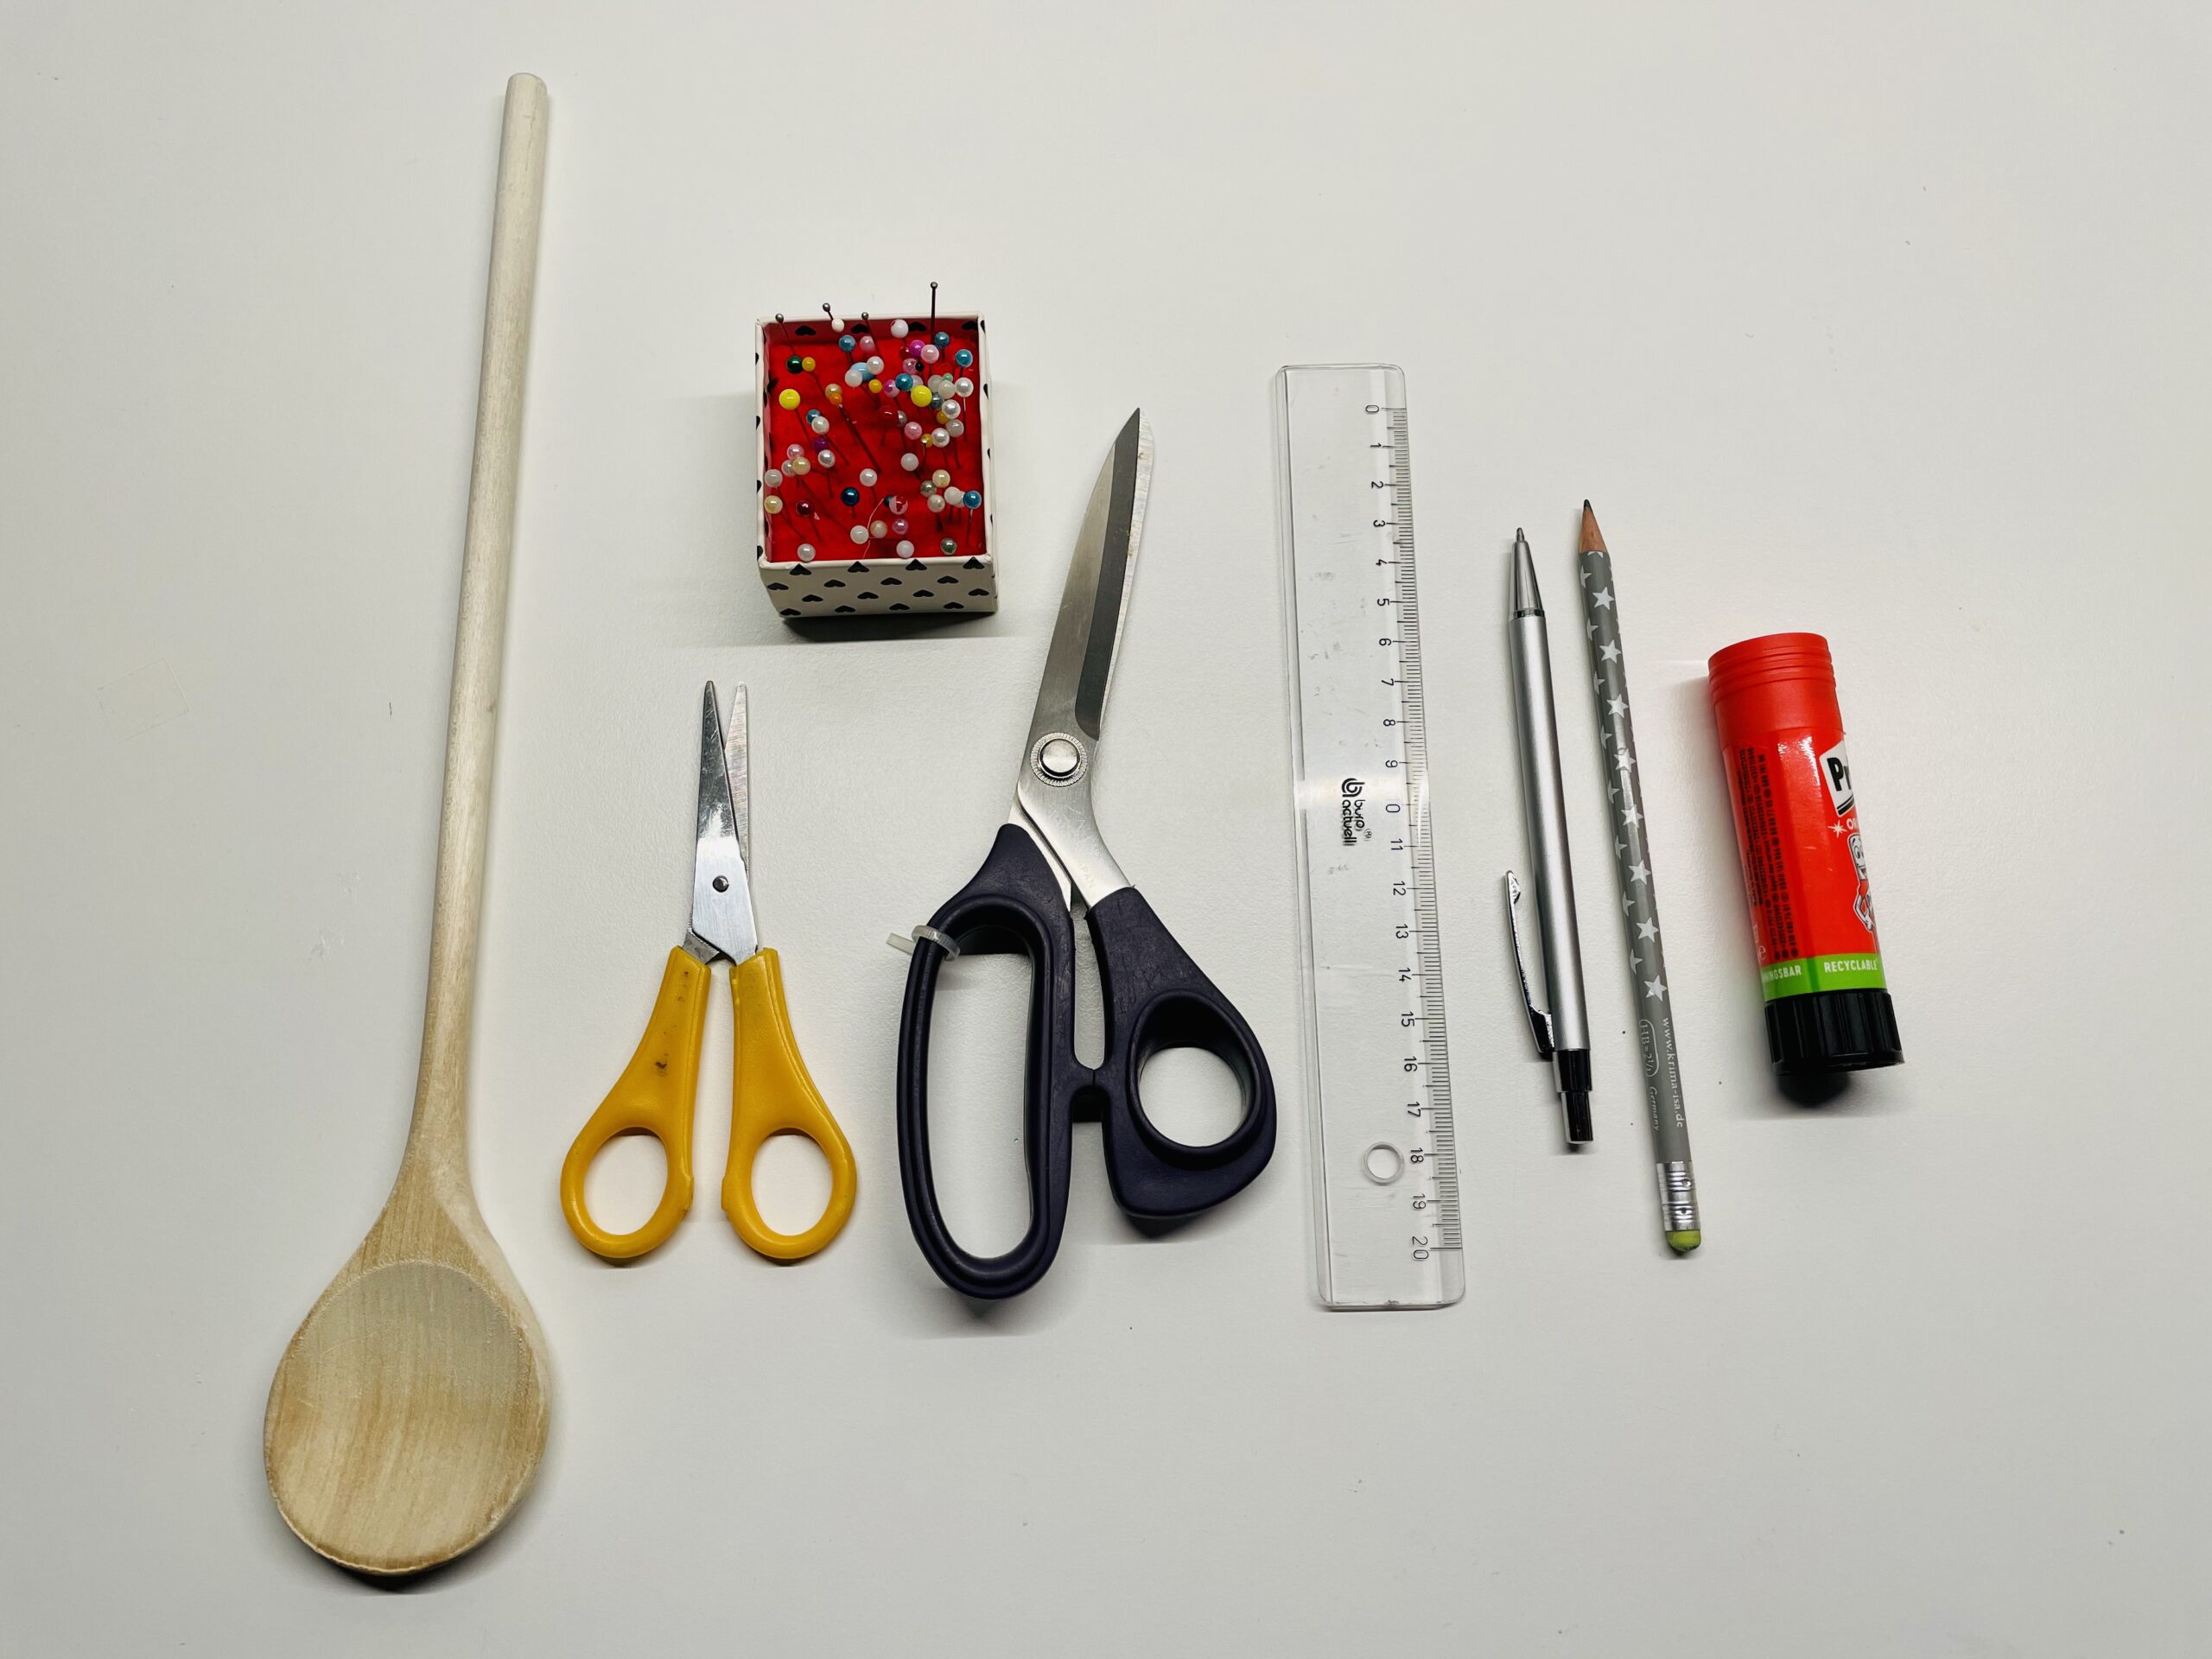
Get all the materials ready.

Bild zum Schritt 1 für das Bastel- und DIY-Abenteuer für Kinder: 'Legt alle Materialien bereit.'

Template:
2

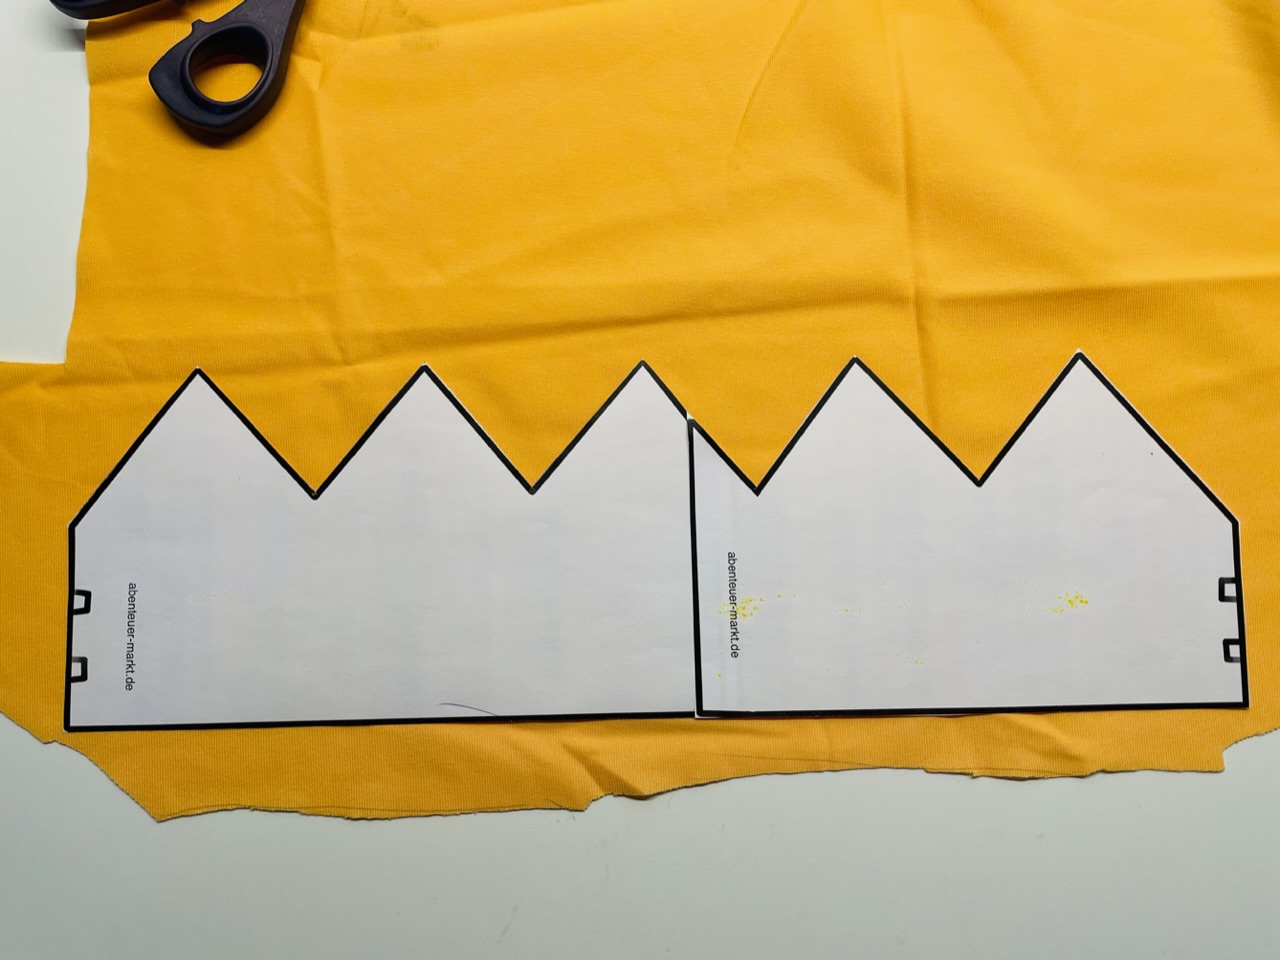
First print out the two templates once.

Bild zum Schritt 3 für das Bastel- und DIY-Abenteuer für Kinder: 'Druckt zuerst die beiden Vorlagen je einmal aus.'

3

2. Bild zum Schritt 3 für das Bastel- und DIY-Abenteuer für Kinder: 'Druckt zuerst die beiden Vorlagen je einmal aus.'

4

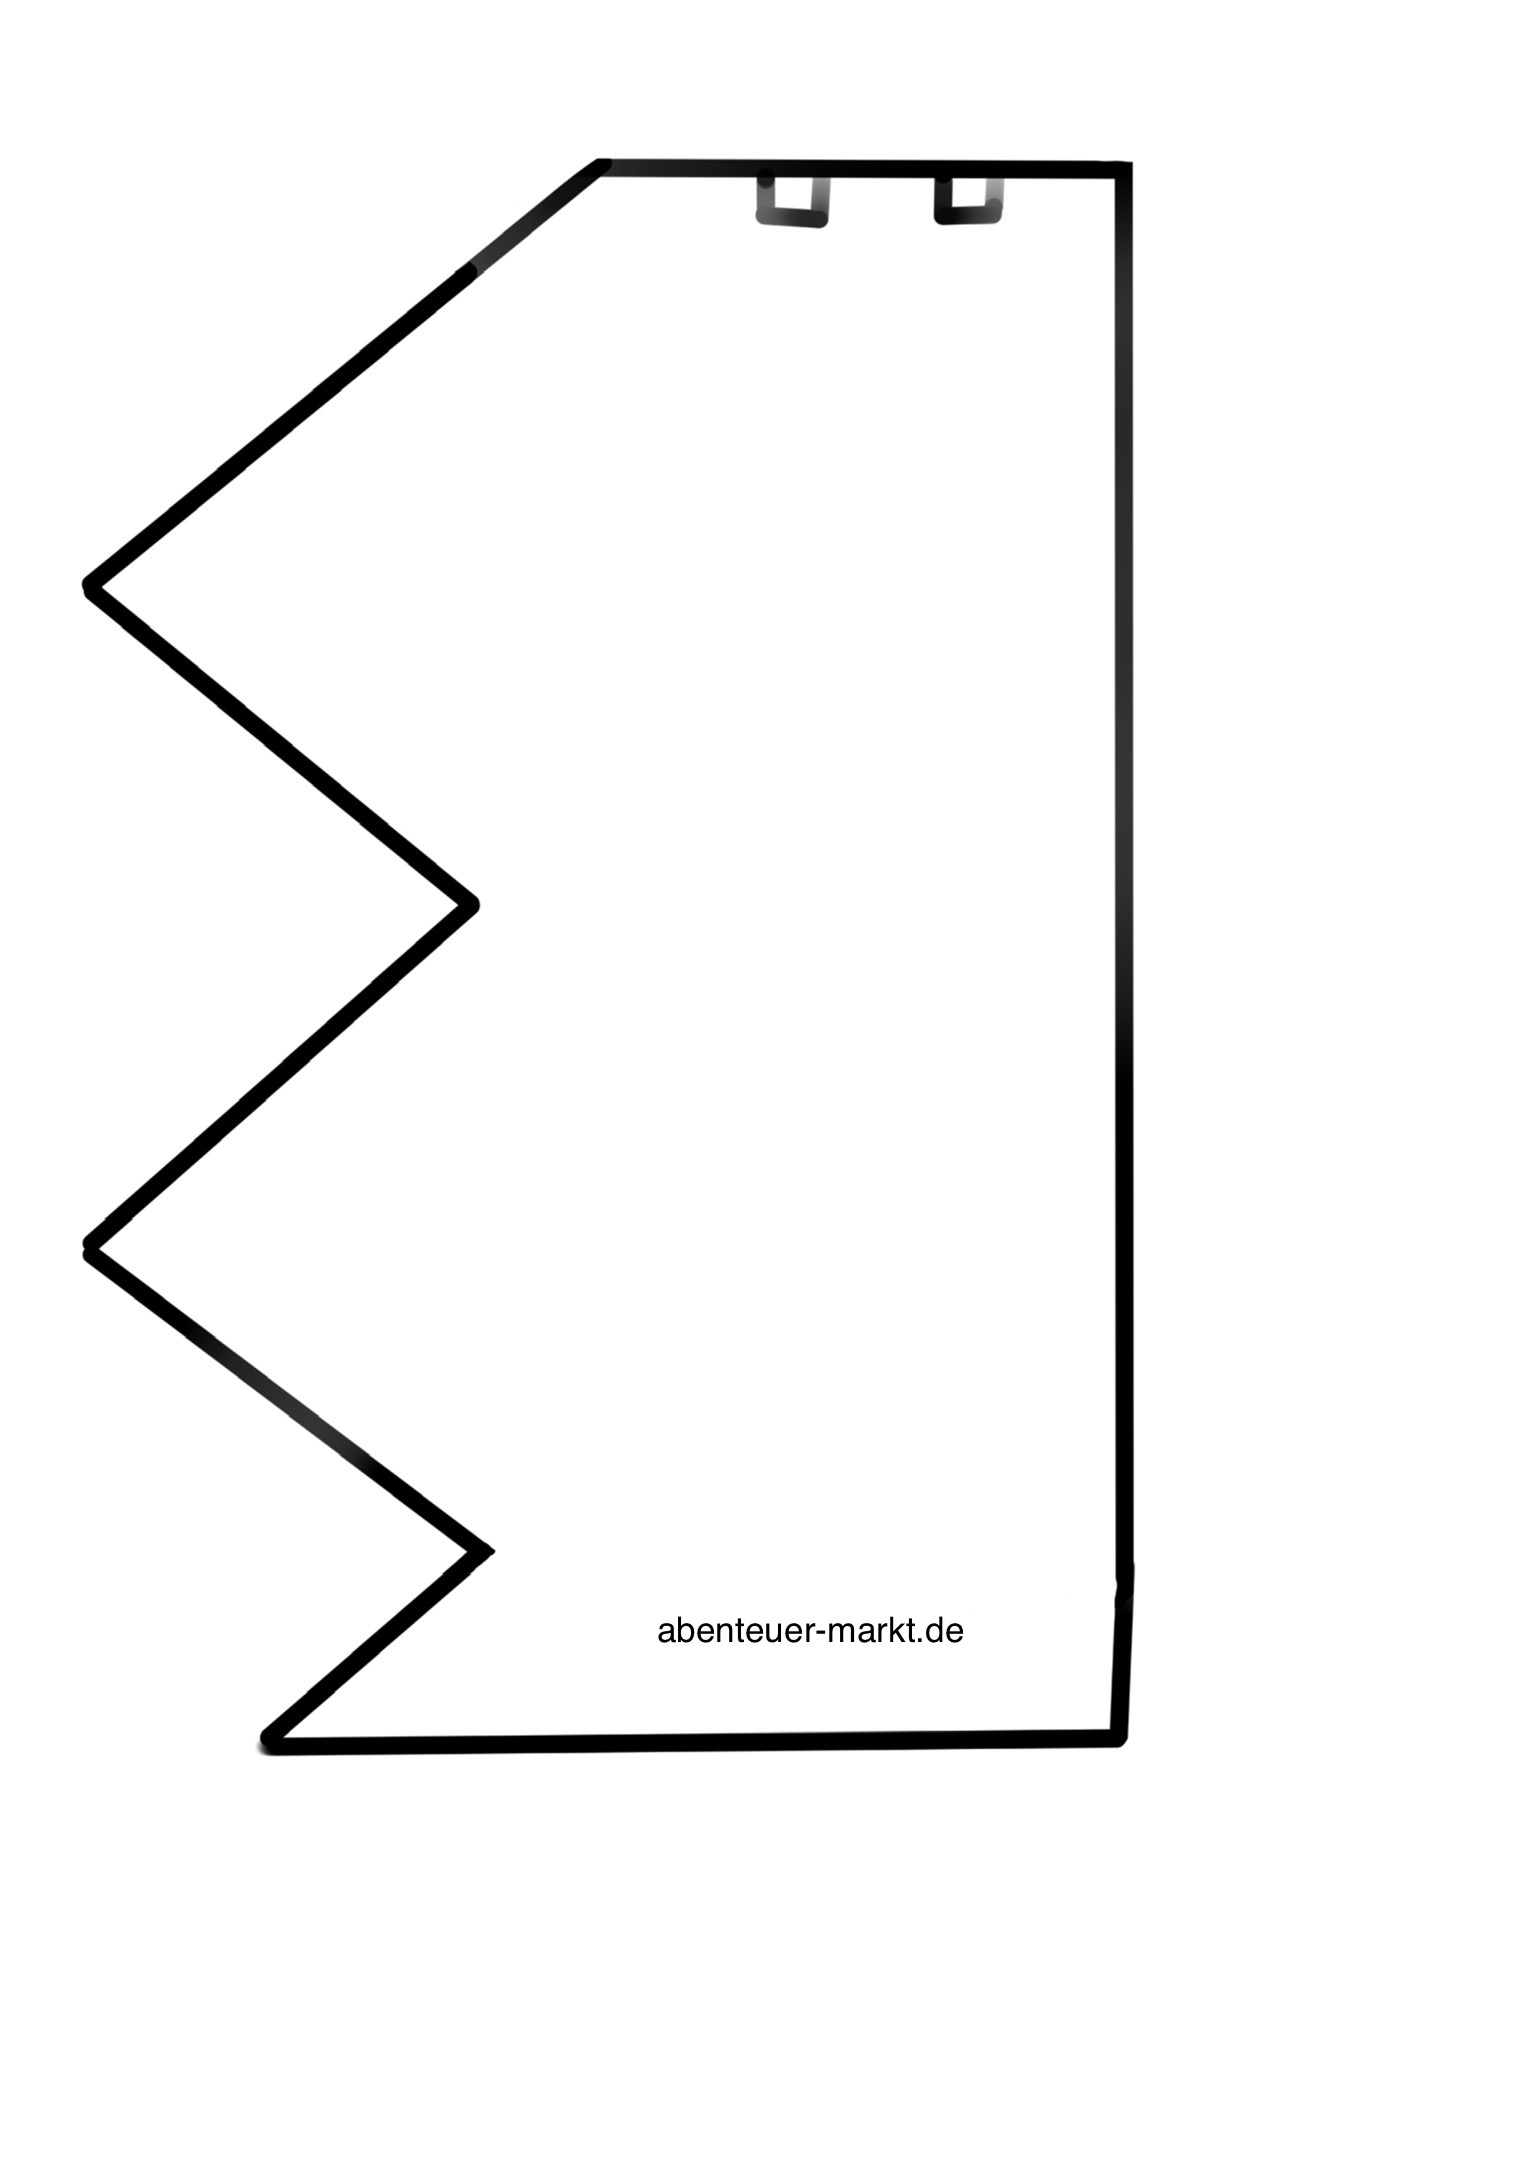
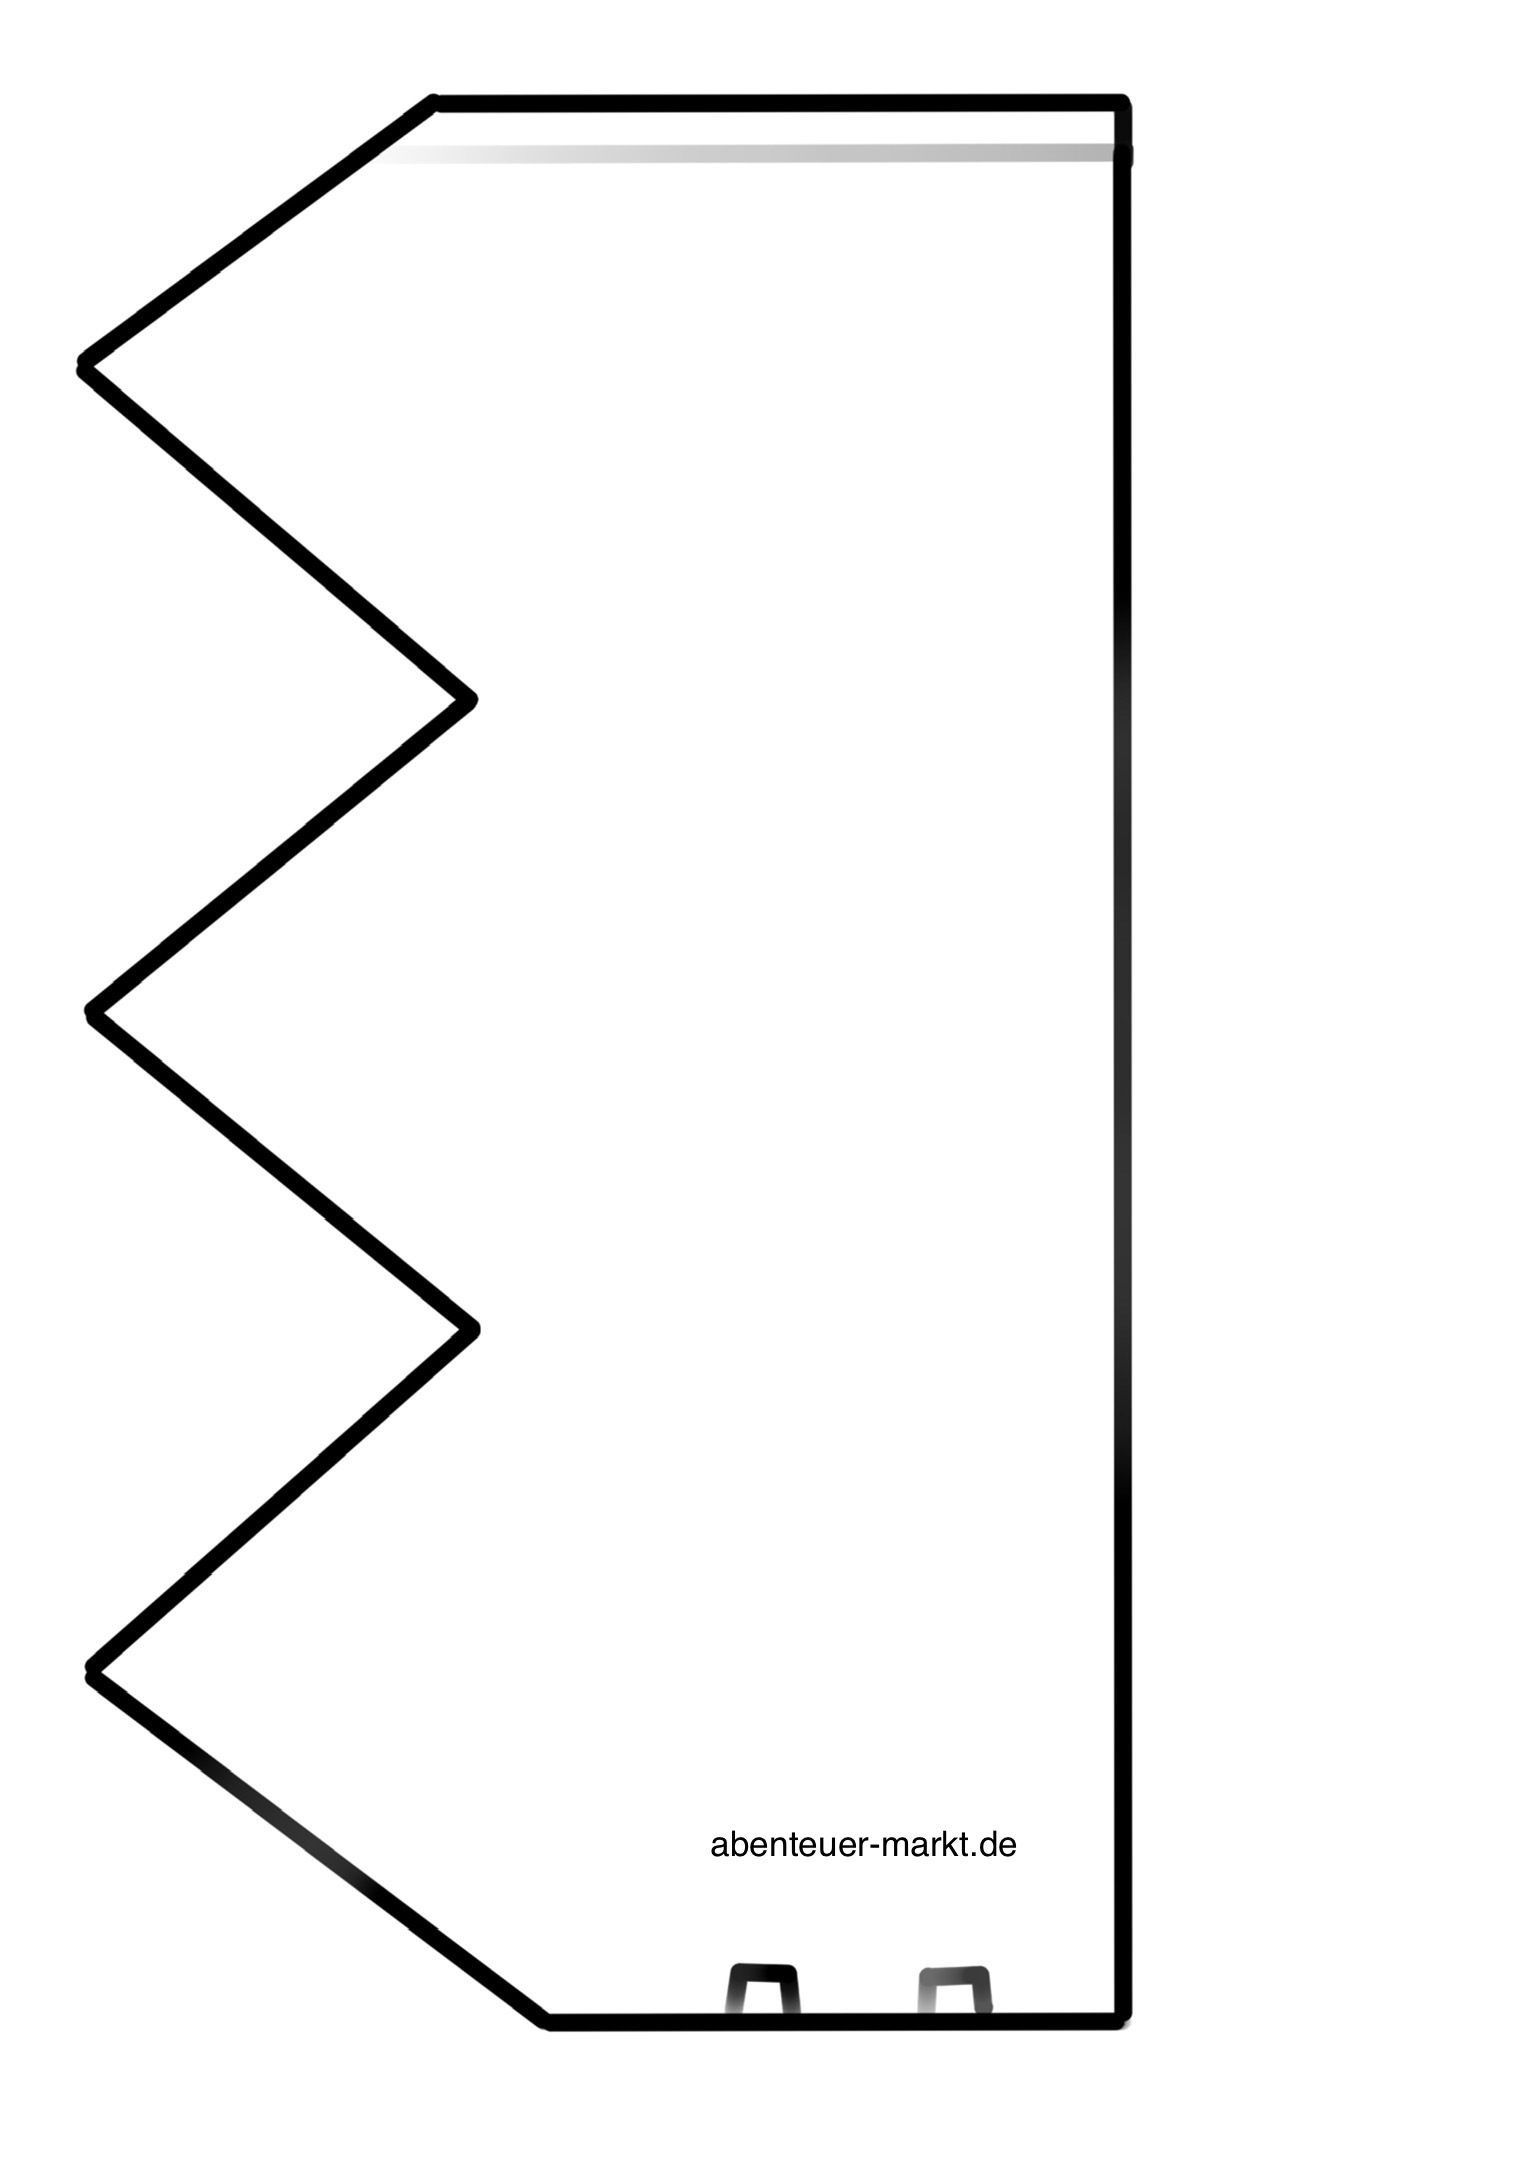
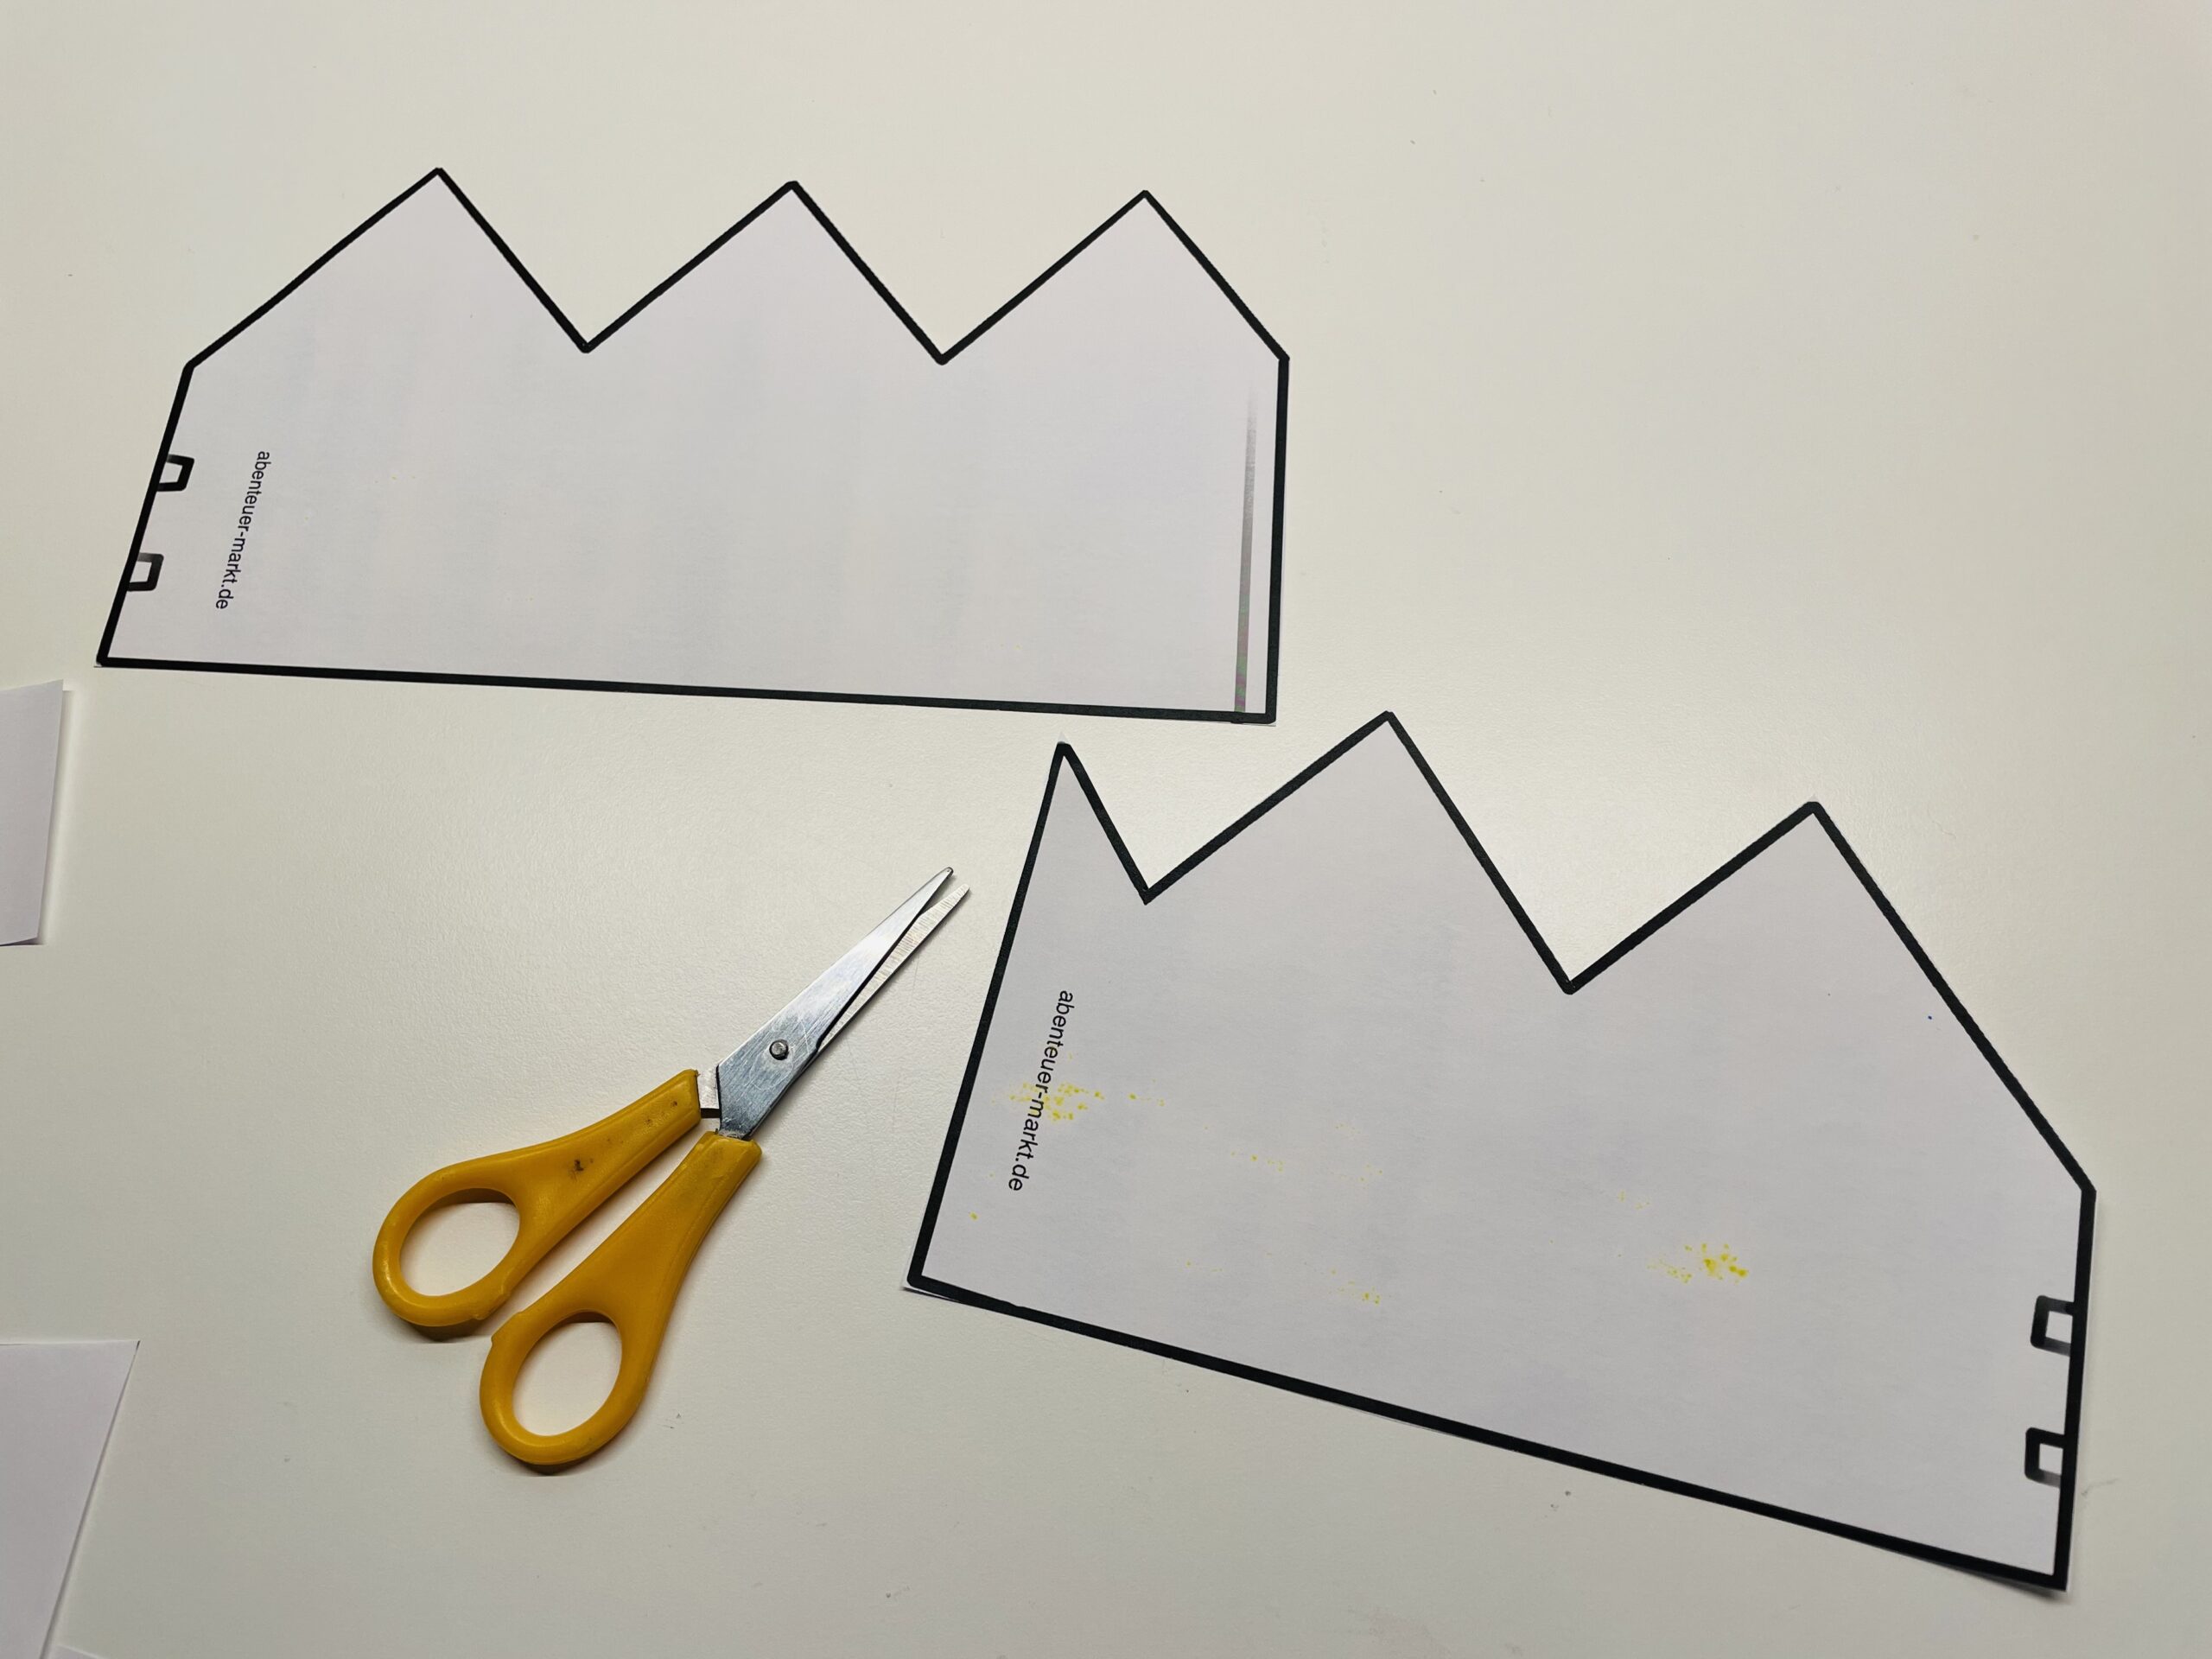
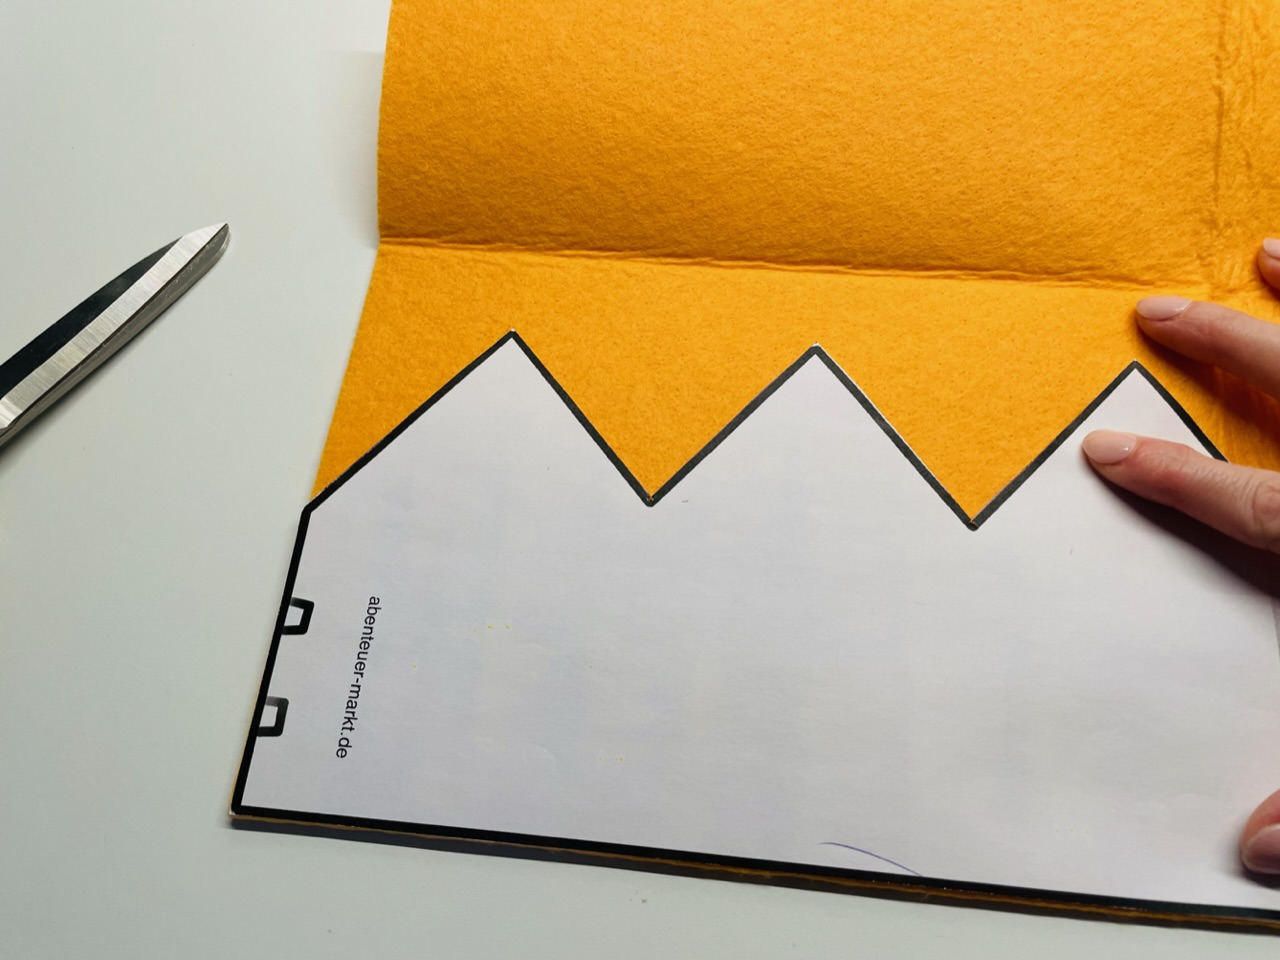
Cuts out the templates with the scissors.

Bild zum Schritt 5 für das Bastel- und DIY-Abenteuer für Kinder: 'Schneidet die Vorlagen mit der Schere aus.'

5

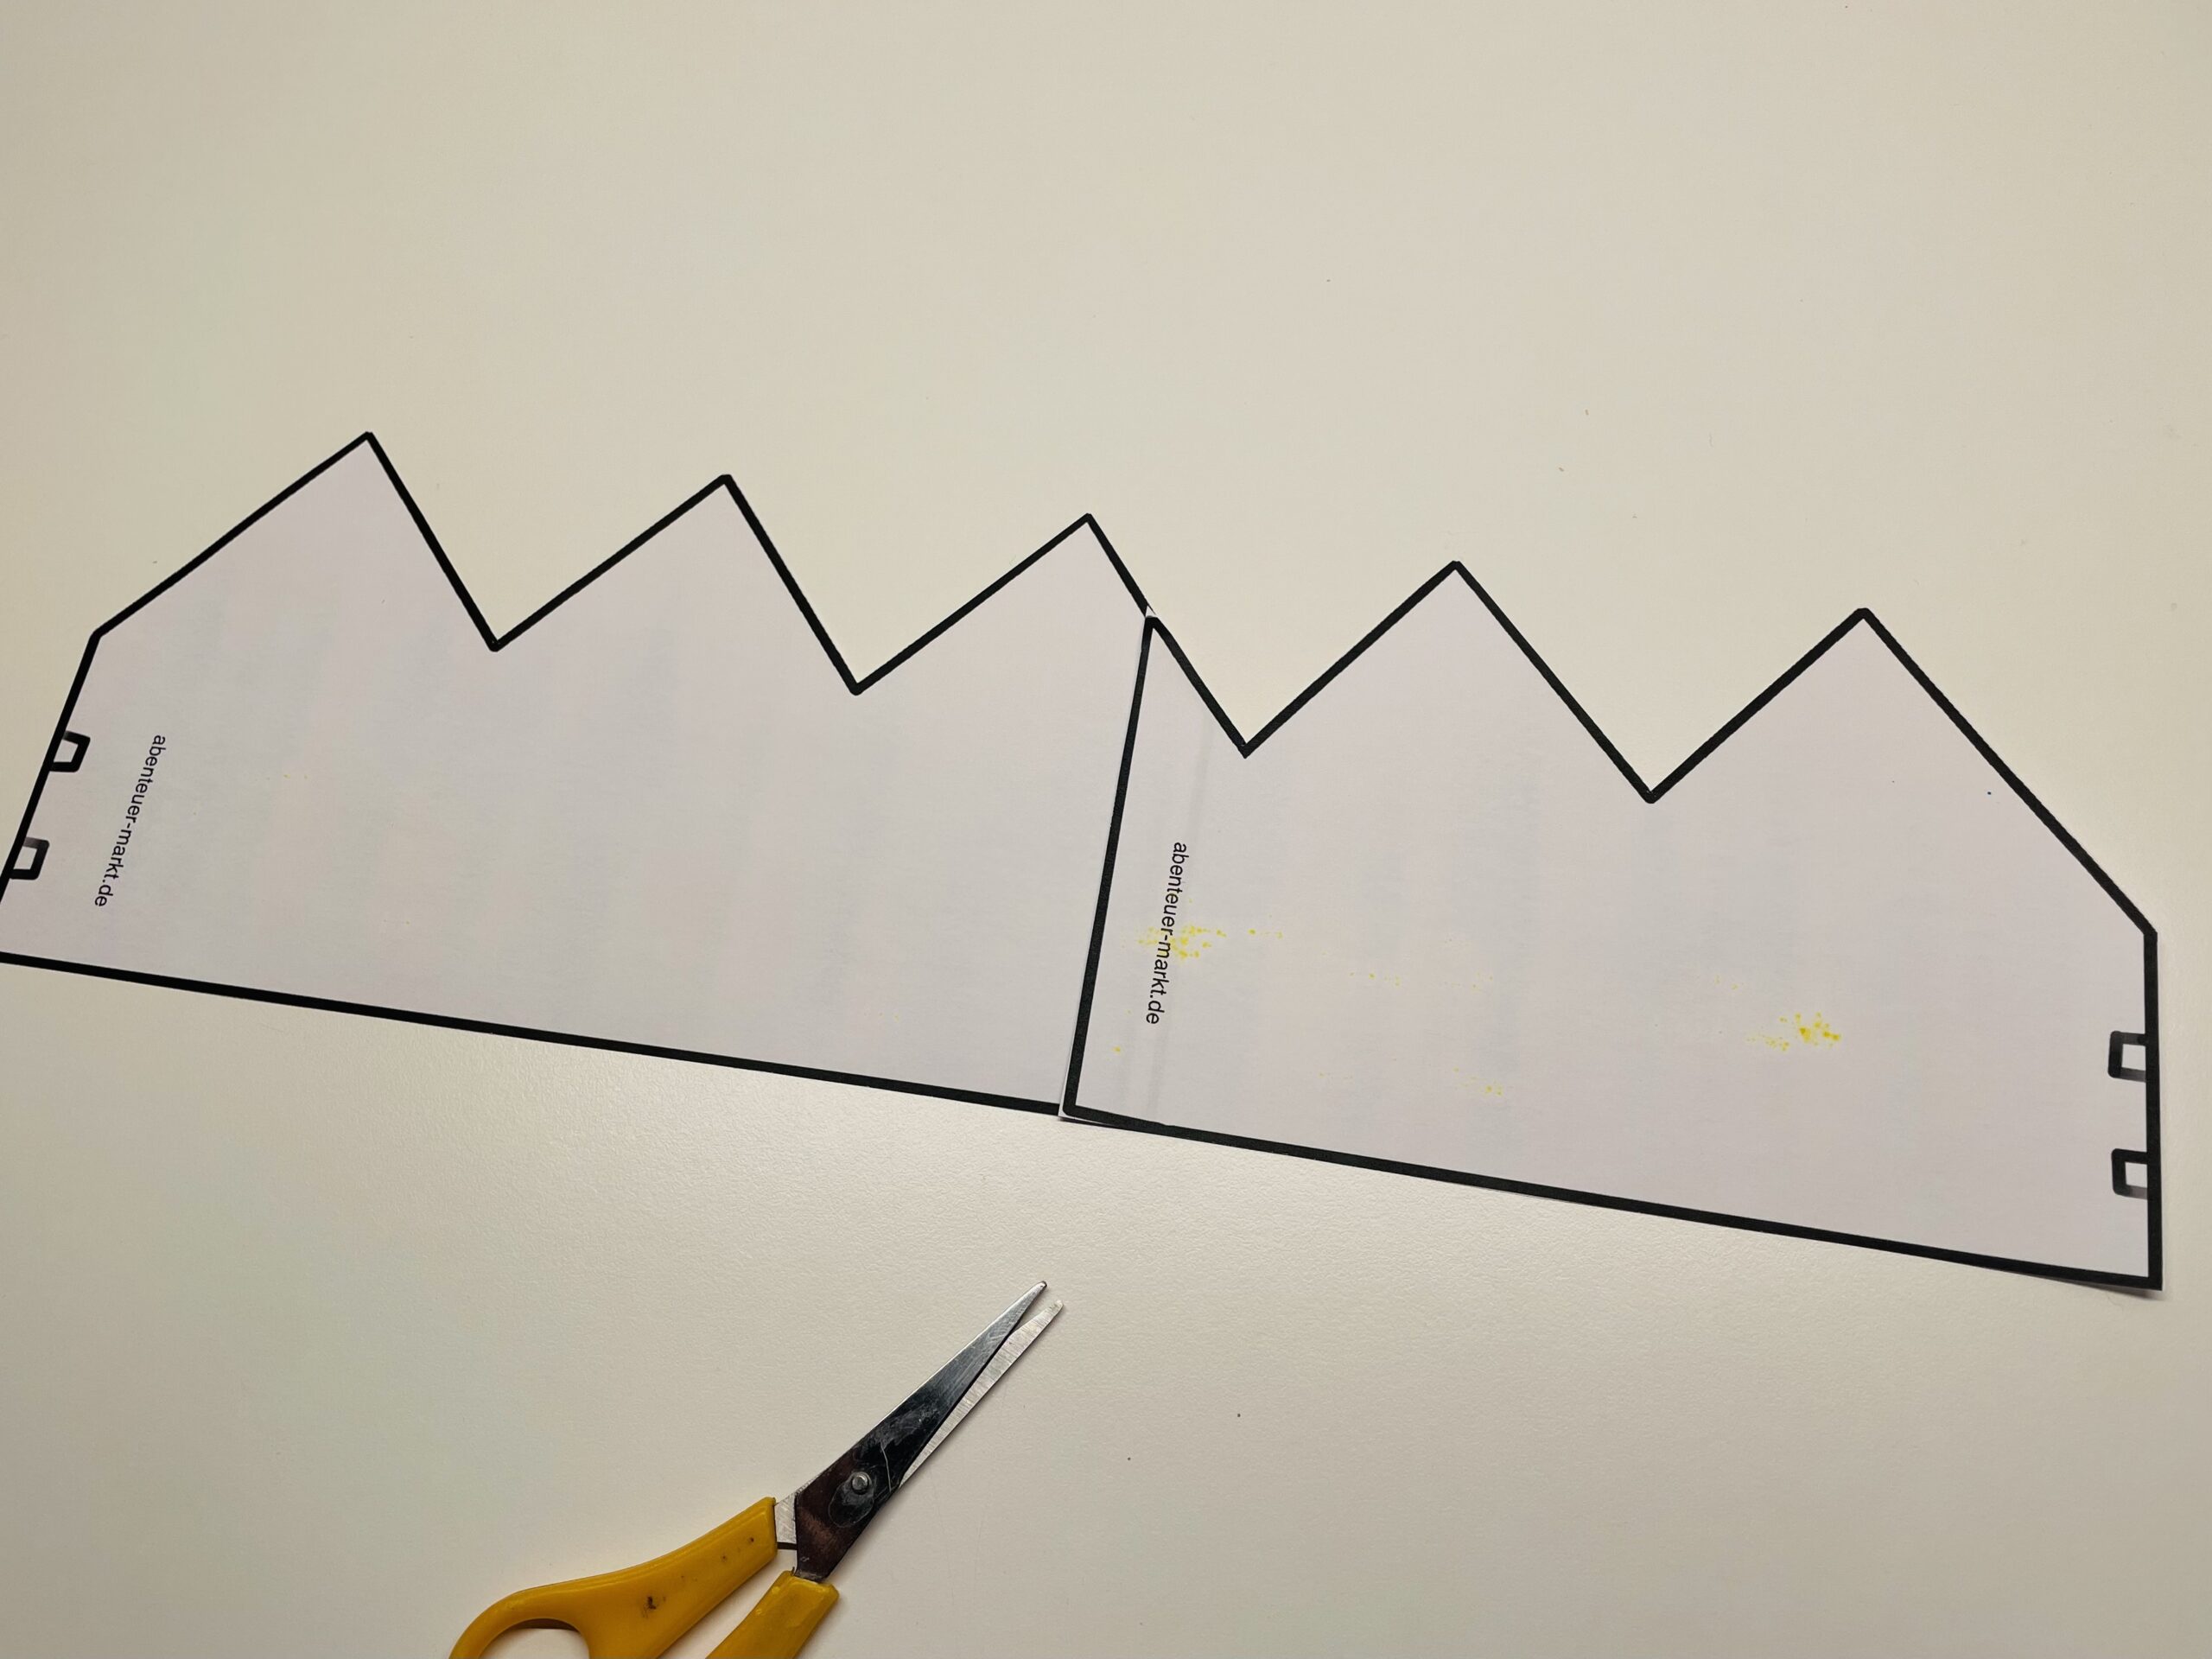
Sticks it to each other on the side with the "double" bridge. Aligns the border lines so that they lie exactly on each other.

Bild zum Schritt 6 für das Bastel- und DIY-Abenteuer für Kinder: 'Klebt sie an der Seite mit dem „Doppel“-Strich aufeinander. Richtet...'

Prepare the substance:
6

Uses a cotton fabric or fleece fabric for the crown. It should not be stretchy.
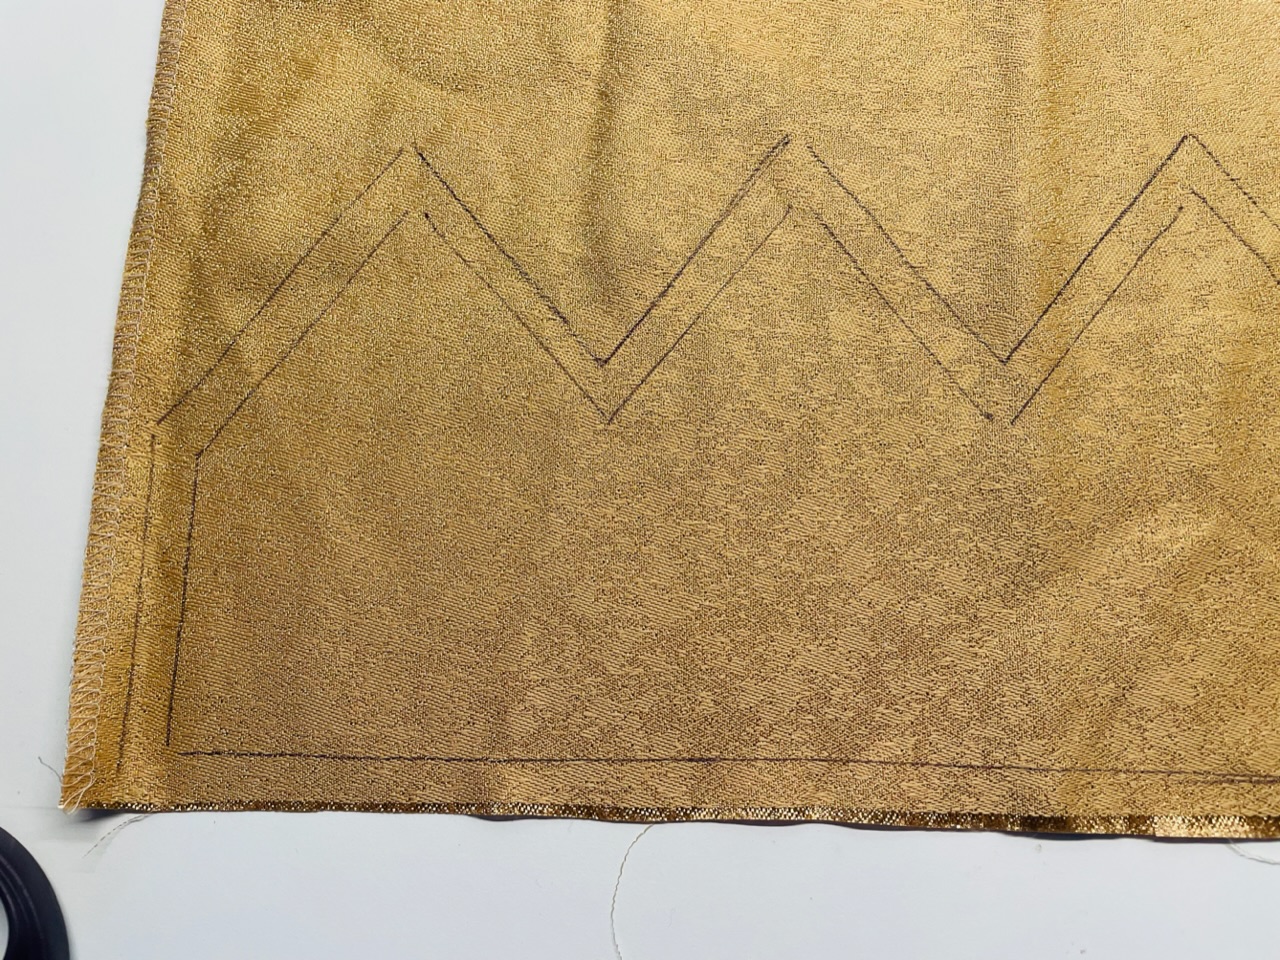
Since both sides of the fabric can be used as a "front side", you can also use different fabrics, patterns or motifs. Place the fabric so that the beautiful side points downwards. Place the crown template on it and cover the complete outline. Tip: On many fabrics ballpoint pen (for recording) can be easily recognized.

Bild zum Schritt 8 für das Bastel- und DIY-Abenteuer für Kinder: 'Verwendet für die Krone einen Baumwollstoff, oder Fleecestoff. Er sollte...'

7

If the outline is painted, you can paint your sewing line right away. To do this, the template moves about half a centimetre from the edge inwards and paints a second line on your fabric. This runs completely parallel to the outside line.

Bild zum Schritt 9 für das Bastel- und DIY-Abenteuer für Kinder: 'Ist der Umriss aufgemalt, könnt ihr gleich noch eure Nählinie...'

8

You have to adjust the template again and again when repainting, because it is a bit larger than the required sewing line.

Bild zum Schritt 10 für das Bastel- und DIY-Abenteuer für Kinder: 'Die Vorlage müsst ihr beim Ummalen immer wieder versetzt anpassen,...'

9

This is what the painted on the fabric should look like.

Bild zum Schritt 11 für das Bastel- und DIY-Abenteuer für Kinder: 'So sollte das Aufgemalte auf dem Stoff dann aussehen.'

10

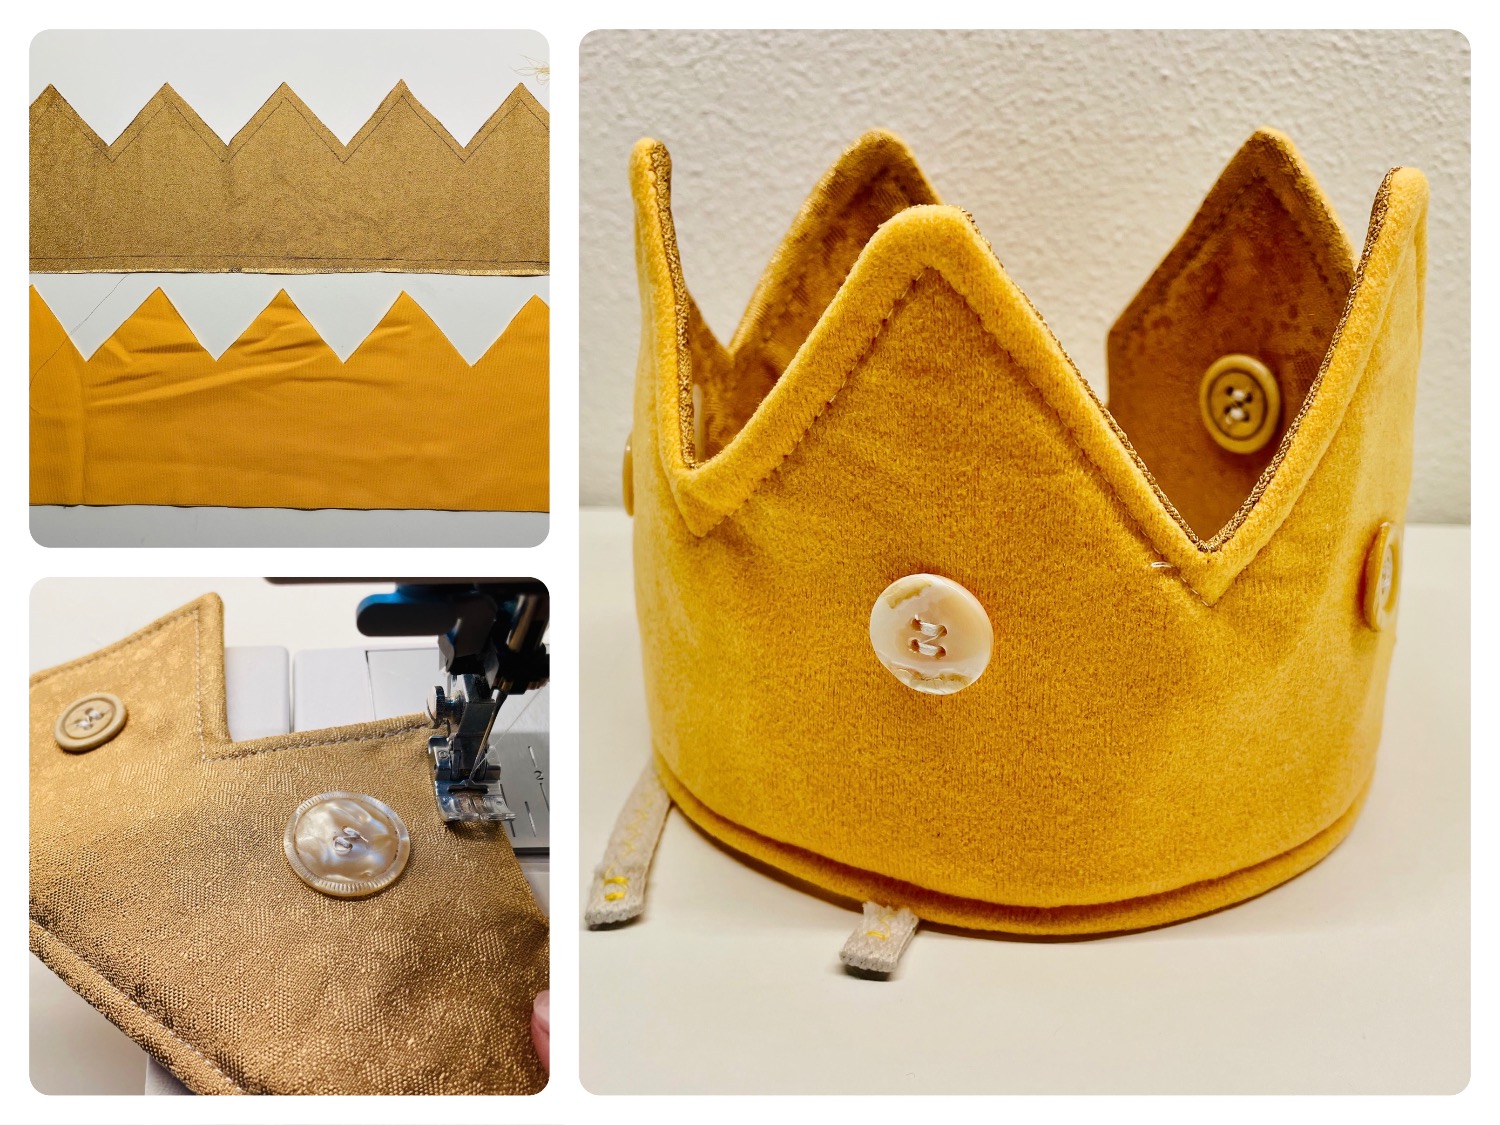
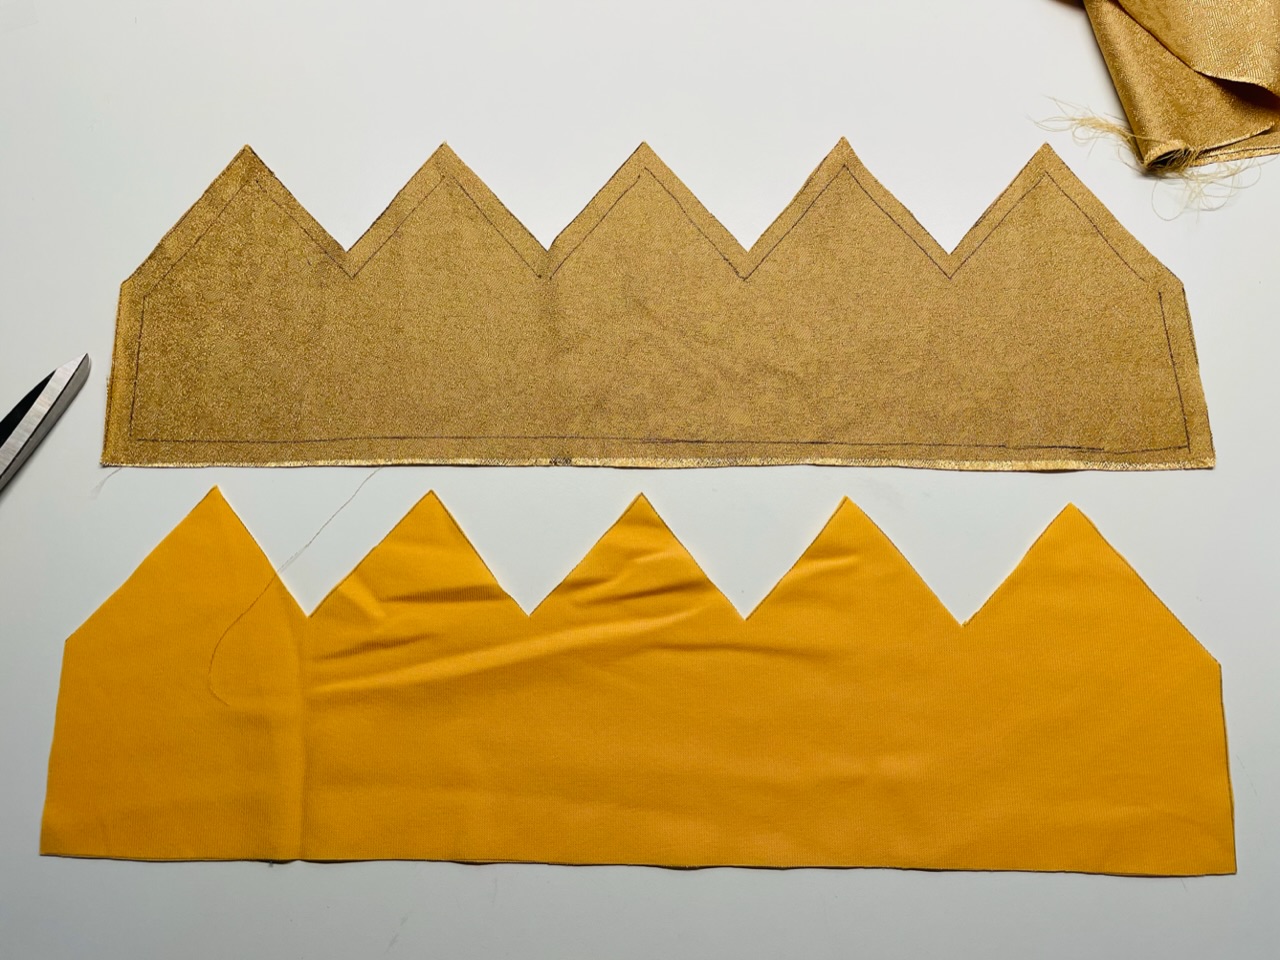
Cuts the "crown" out of the fabric properly with the fabric scissors. Then the first cut is already finished.

Bild zum Schritt 12 für das Bastel- und DIY-Abenteuer für Kinder: 'Schneidet die "Krone" aus den Stoff mit der Stoffschere ordentlich...'

11

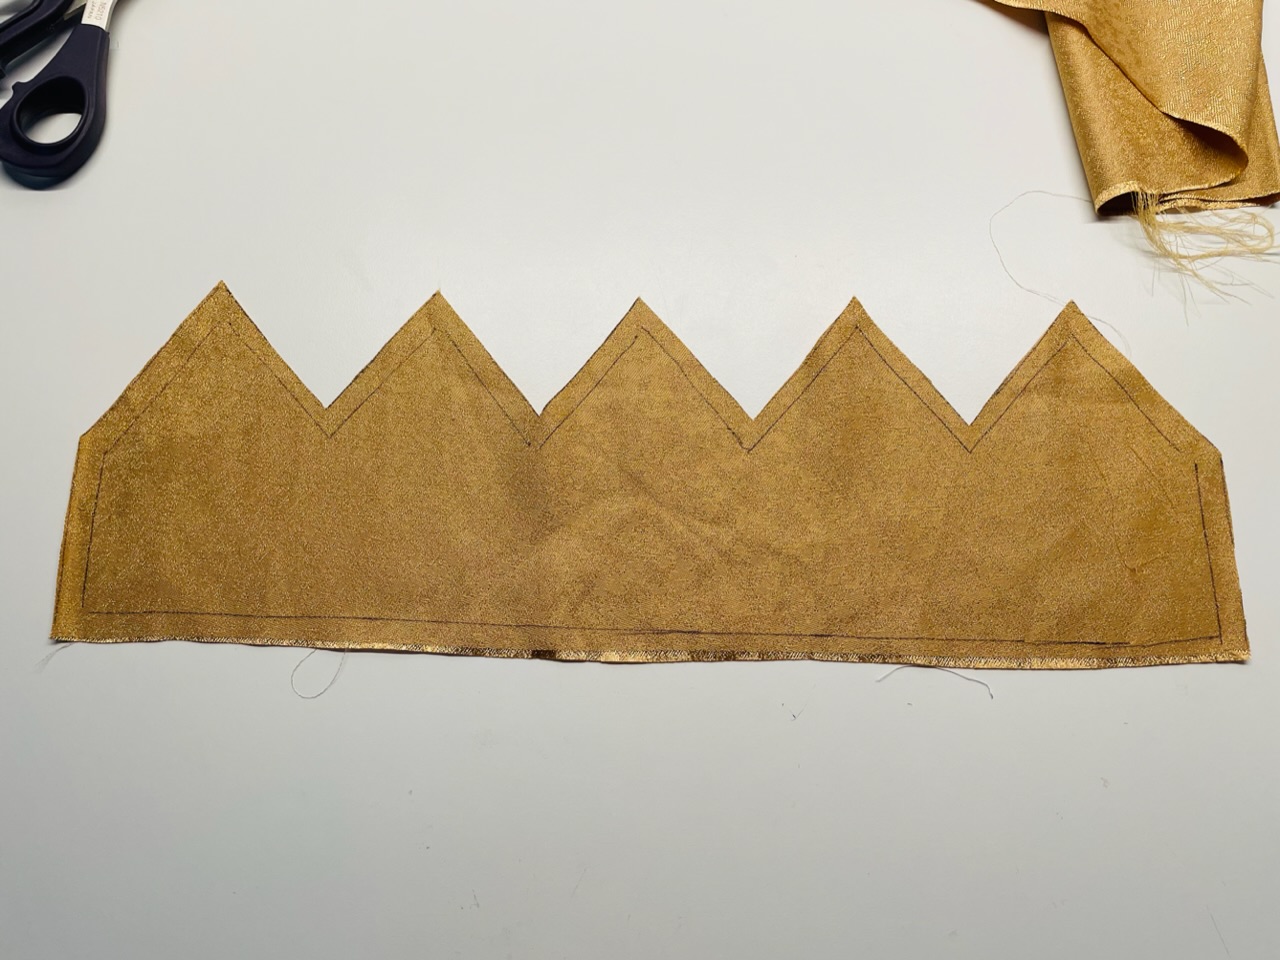
On the second outer fabric only the outline line is necessary. (On which fabric you mark the sewing line you can decide.) Cut also this fabric.

Bild zum Schritt 13 für das Bastel- und DIY-Abenteuer für Kinder: 'Auf dem zweiten Außenstoff ist nur die Umrisslinie nötig. (Auf...'

12

Both outer materials are now ready.

Bild zum Schritt 14 für das Bastel- und DIY-Abenteuer für Kinder: 'Beide Außenstoffe sind nun fertig.'

13

In addition, a stabilizing fleece is needed. For this you can also use a fleece cloth (new dishcloth or floor cloth).
Paint the border on the fleece fabric and cut it out.

Bild zum Schritt 15 für das Bastel- und DIY-Abenteuer für Kinder: 'Zusätzlich wird noch ein stabilisierendes Fleece benötigt. Hierfür könnt ihr...'

14

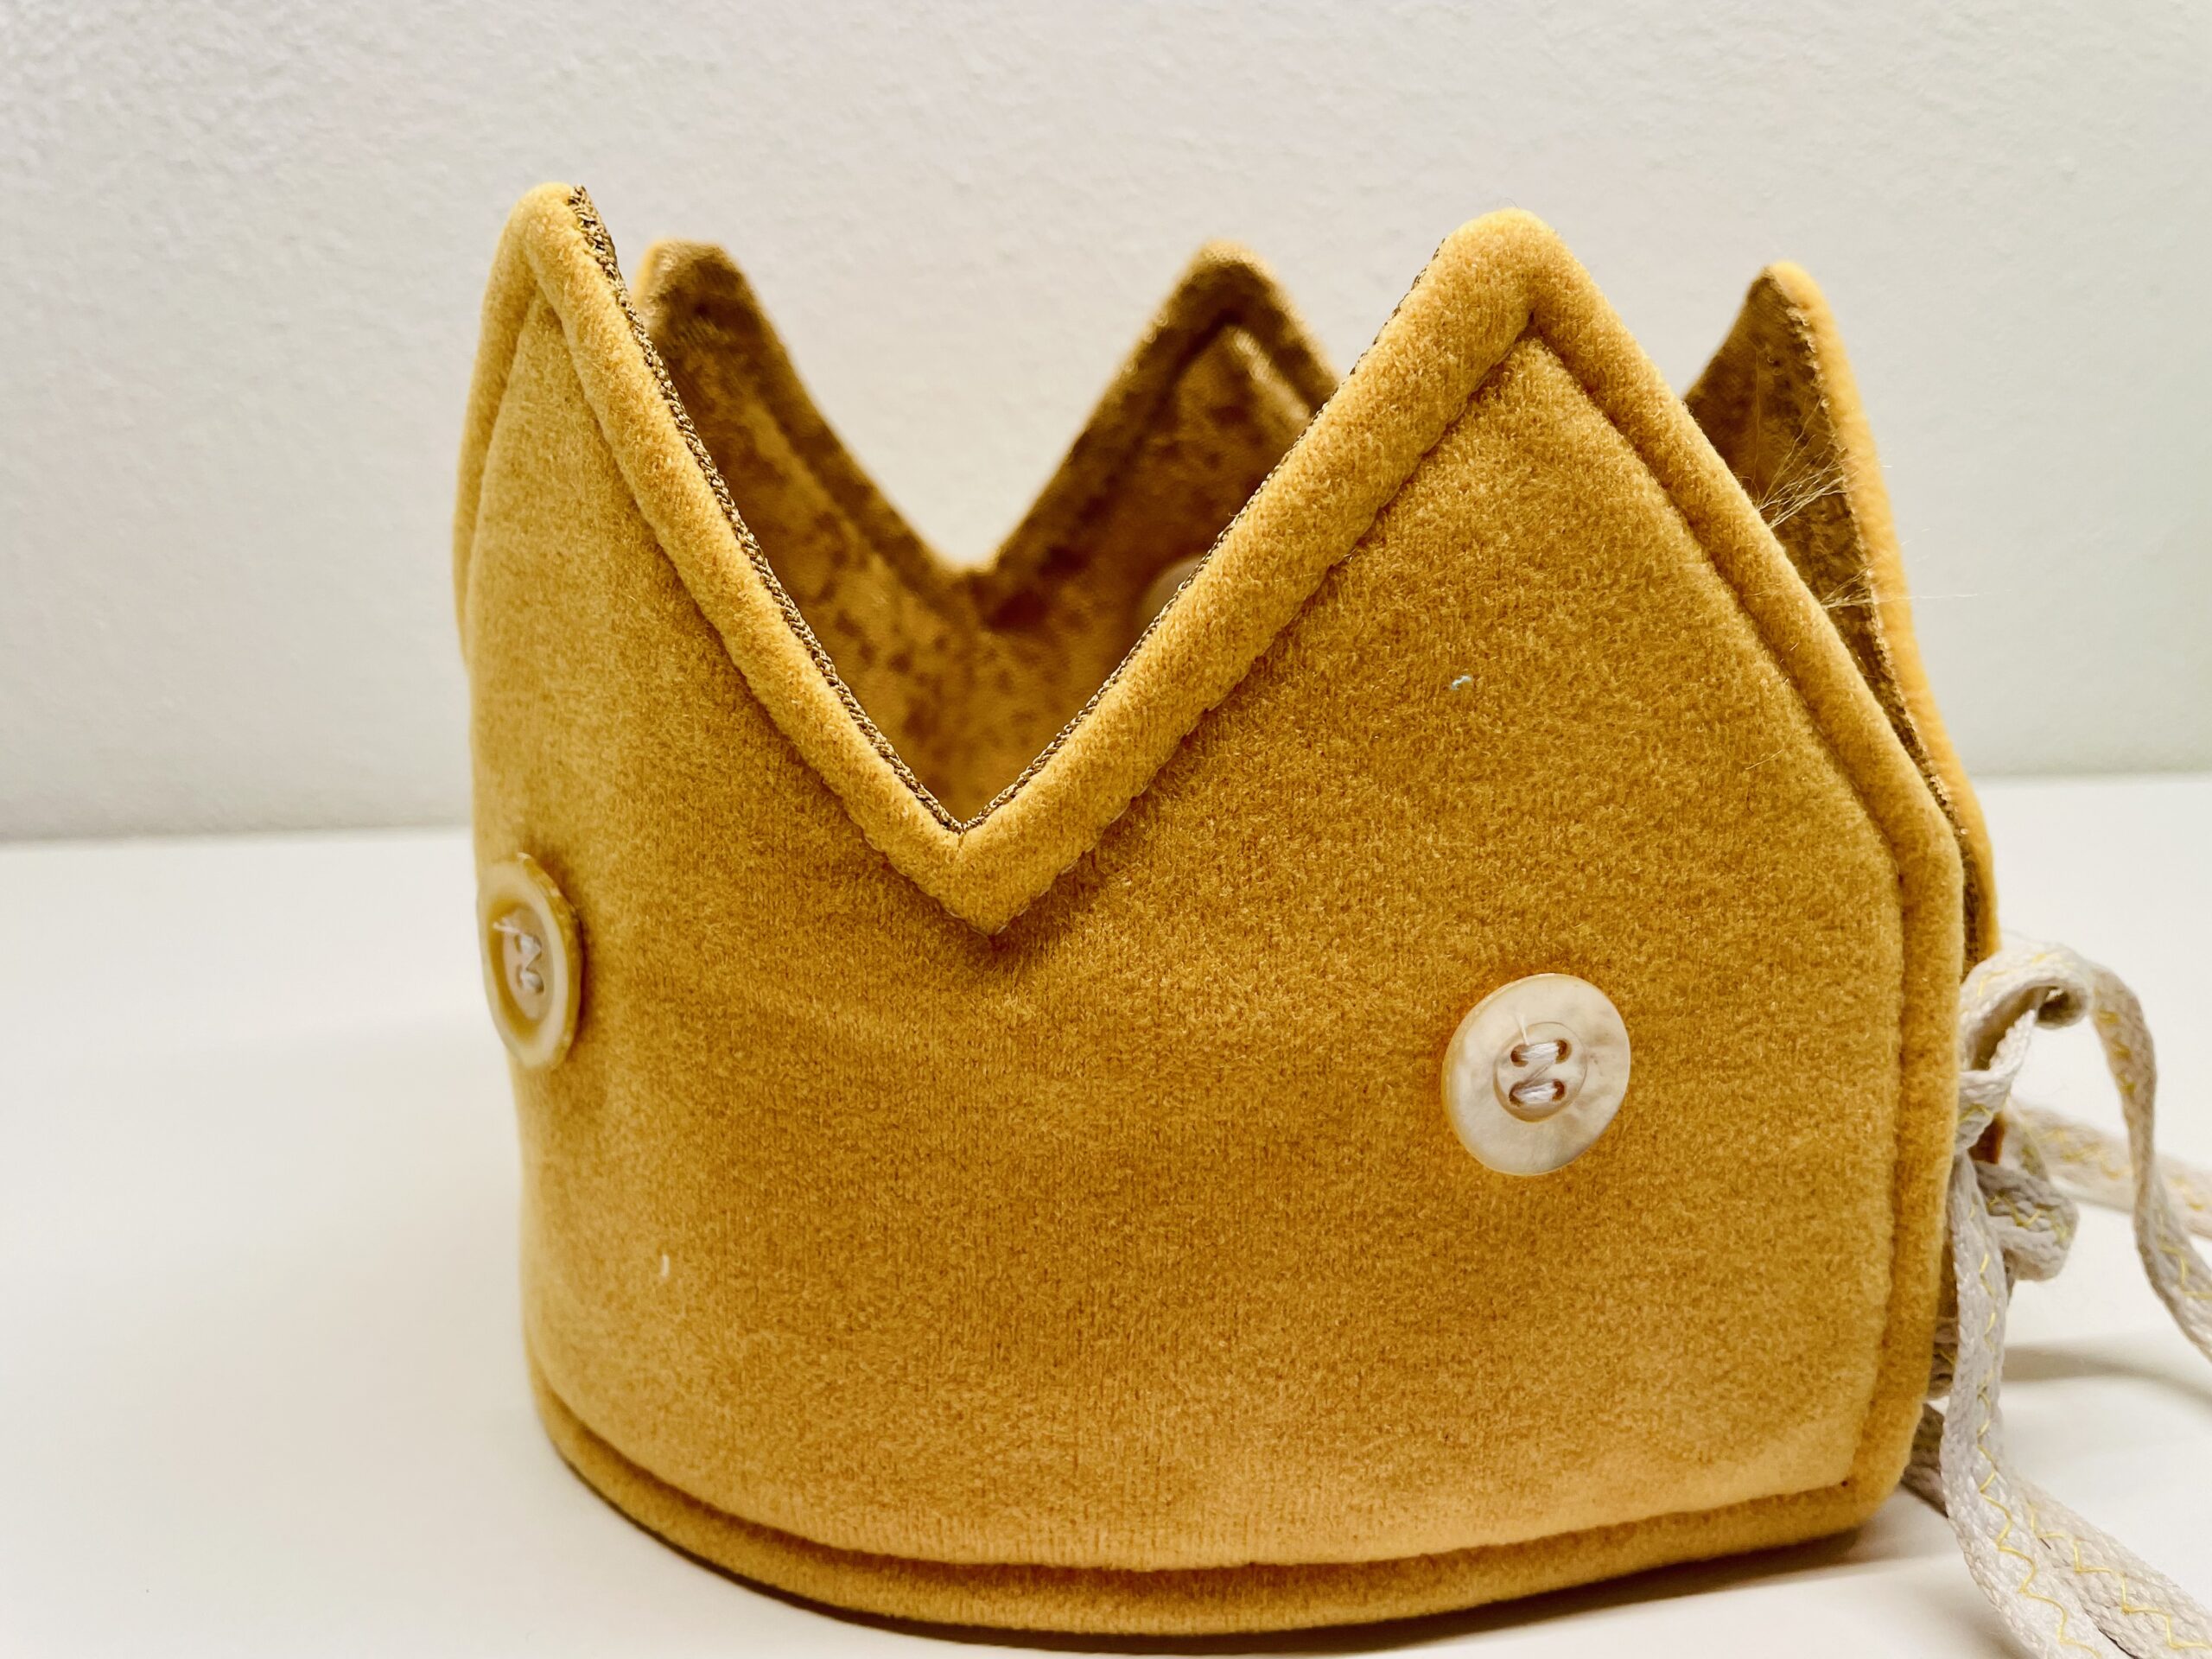
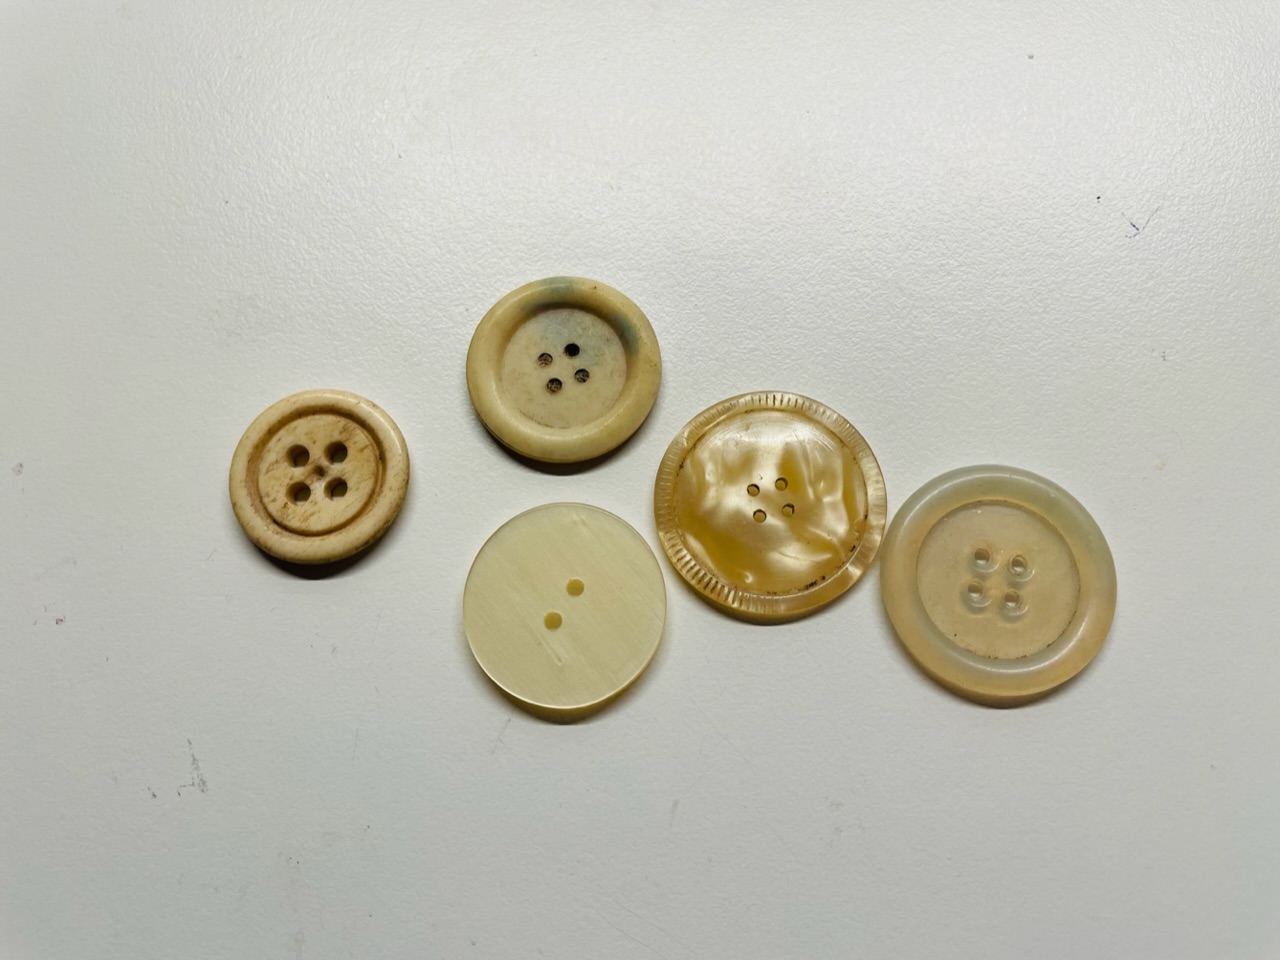
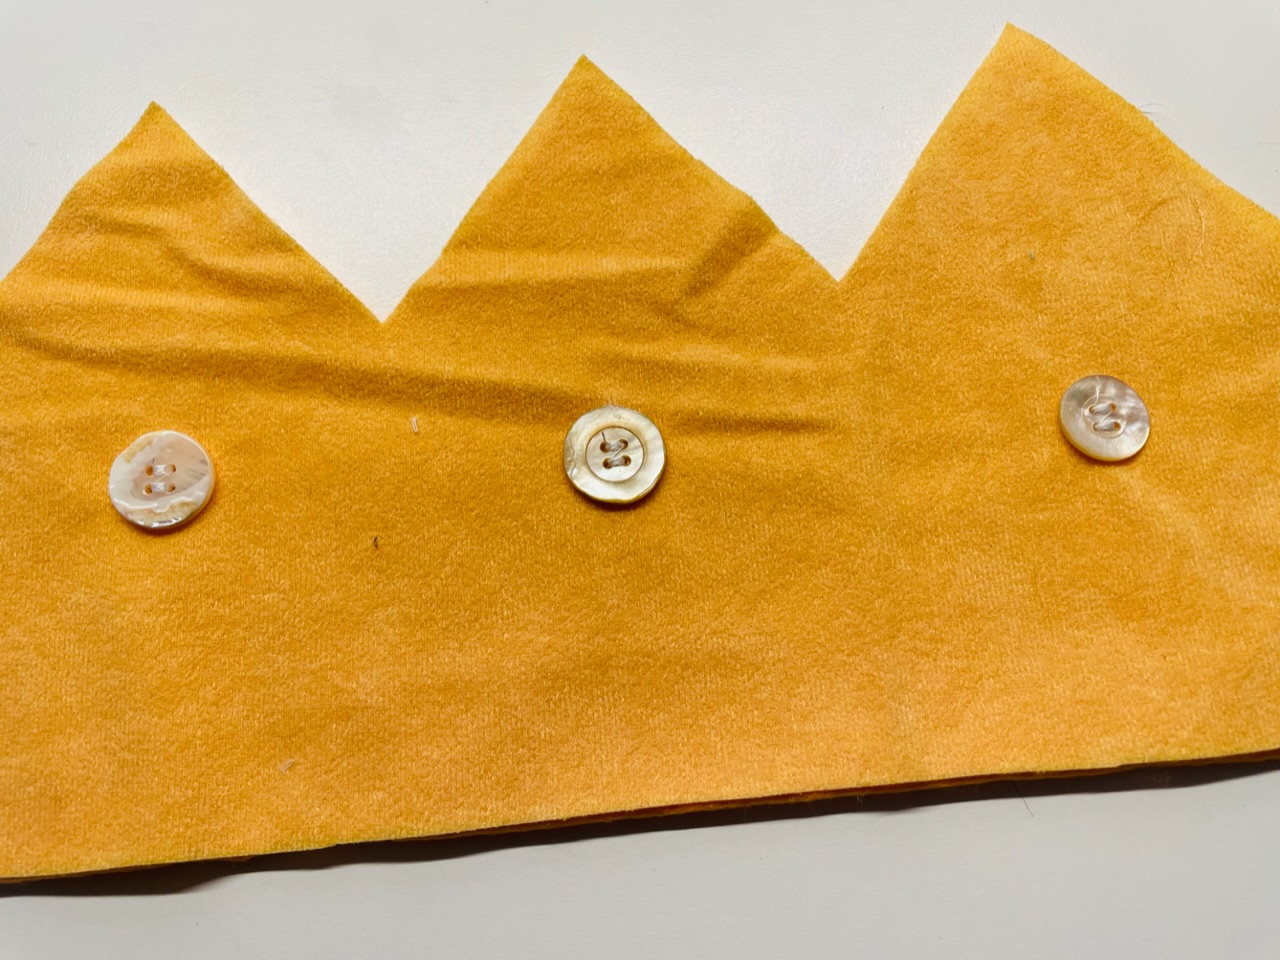
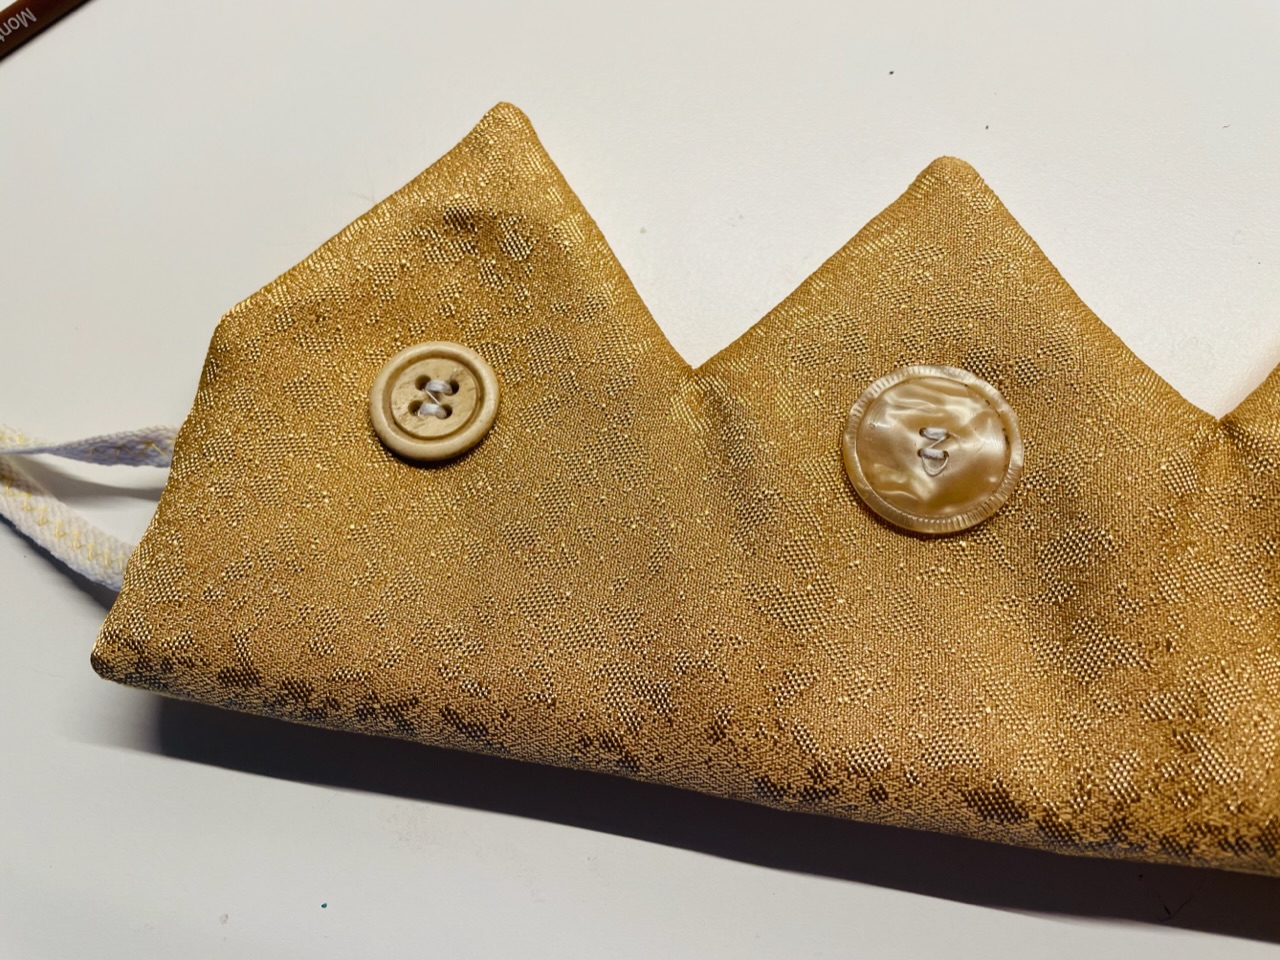
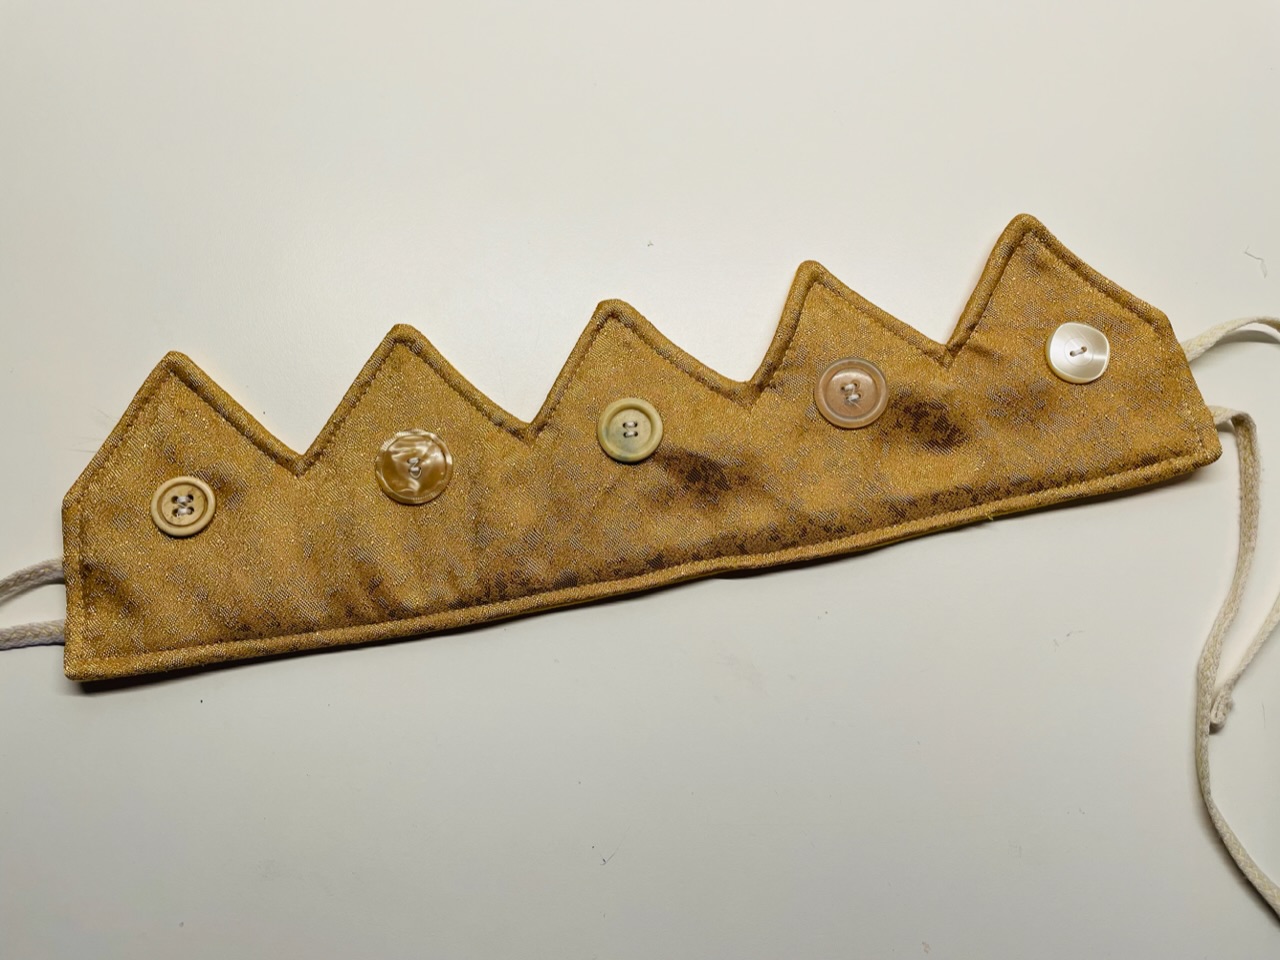
To beautify the crown, you can place a different or similar-looking button under each zacke.
You can also sew these in retrospect, but then you can see the threads on the back. To have buttons on both sides where no threads can be seen, it would be good to sew the buttons before sewing the crown together. Choose a button for each pitch that you like.

Bild zum Schritt 16 für das Bastel- und DIY-Abenteuer für Kinder: 'Um die Krone zu verschönern, könnt ihr unter jede Zacke...'

15

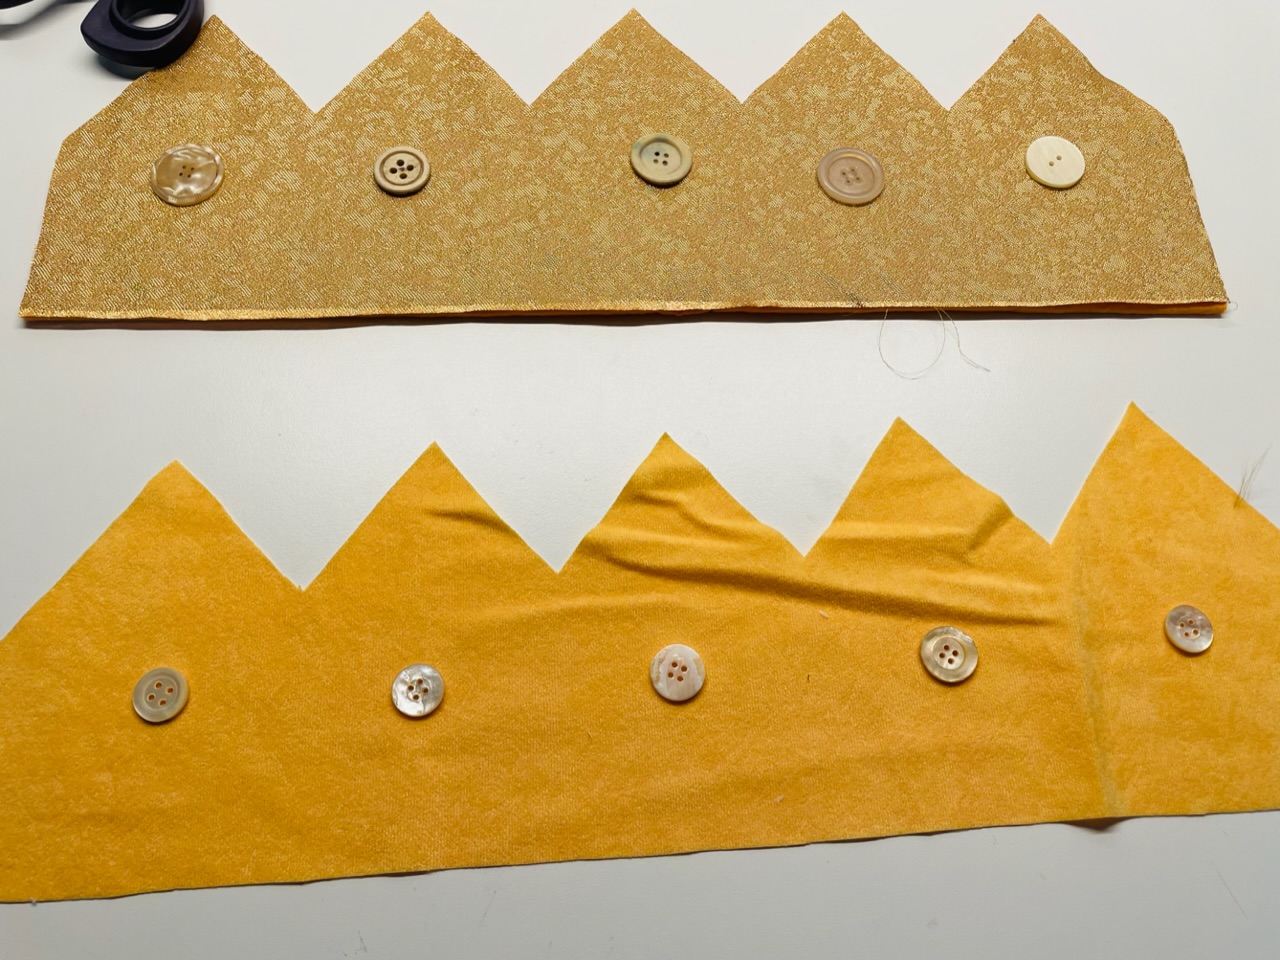
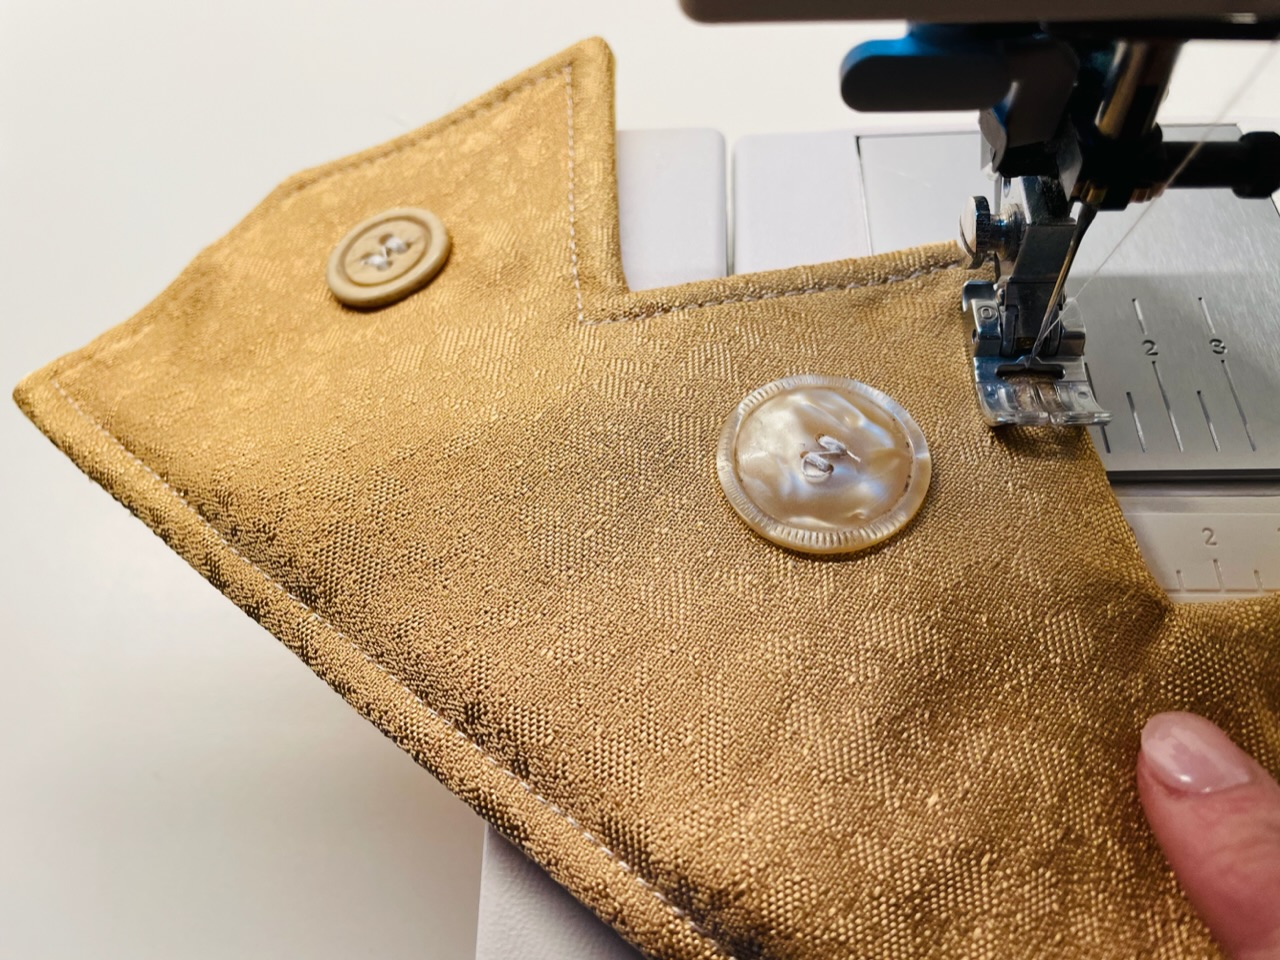
First place the buttons where you want them. Buttons that lie in the middle of the crown will later be visible "front" on the crown.

Bild zum Schritt 17 für das Bastel- und DIY-Abenteuer für Kinder: 'Platziert die Knöpfe zunächst, wo ihr sie haben möchtet. Knöpfe...'

16

Both fabric parts can also get buttons.

Bild zum Schritt 18 für das Bastel- und DIY-Abenteuer für Kinder: 'Es können auch beide Stoffteile Knöpfe bekommen.'

17

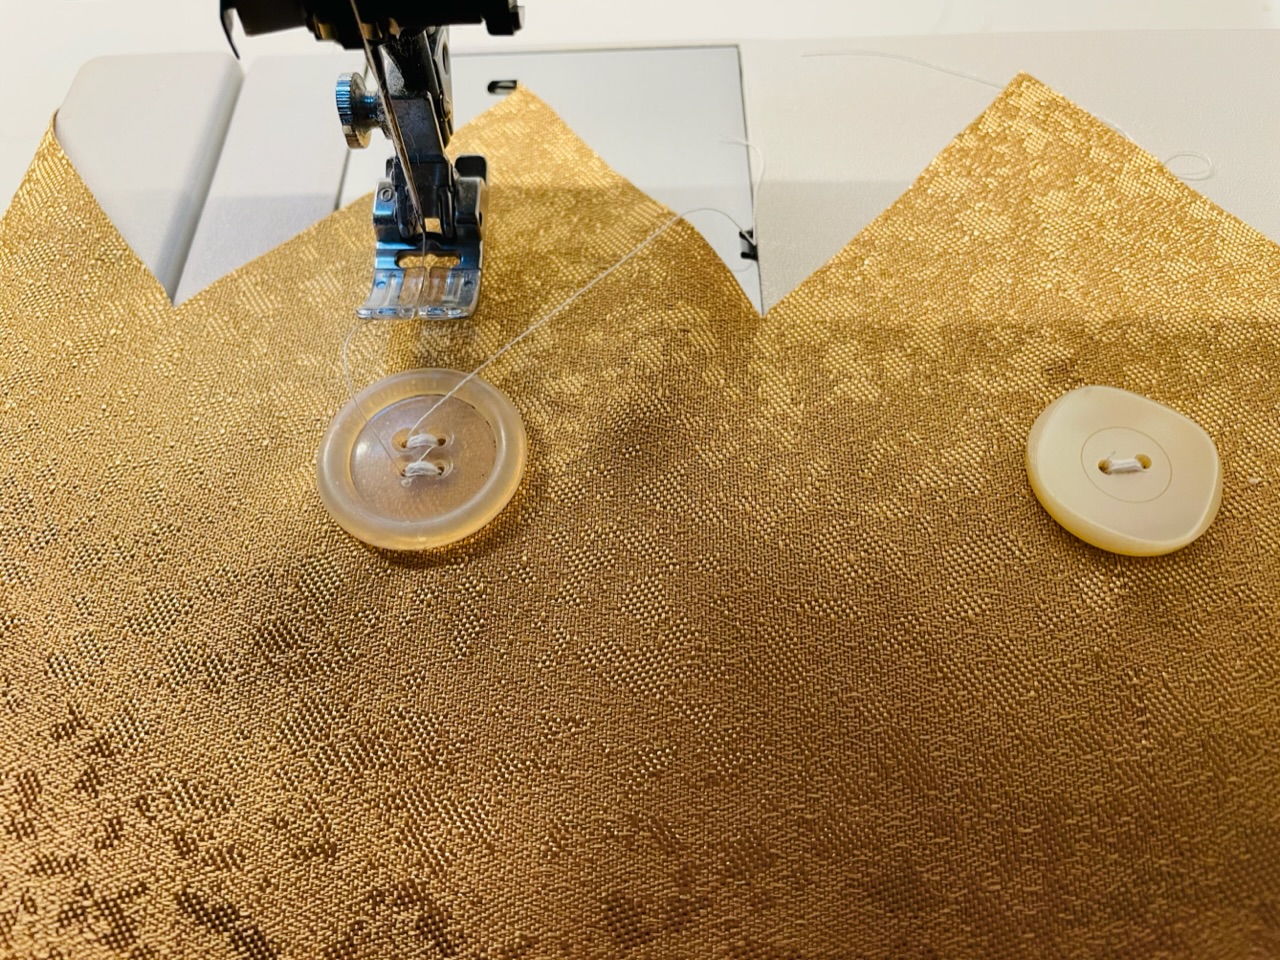
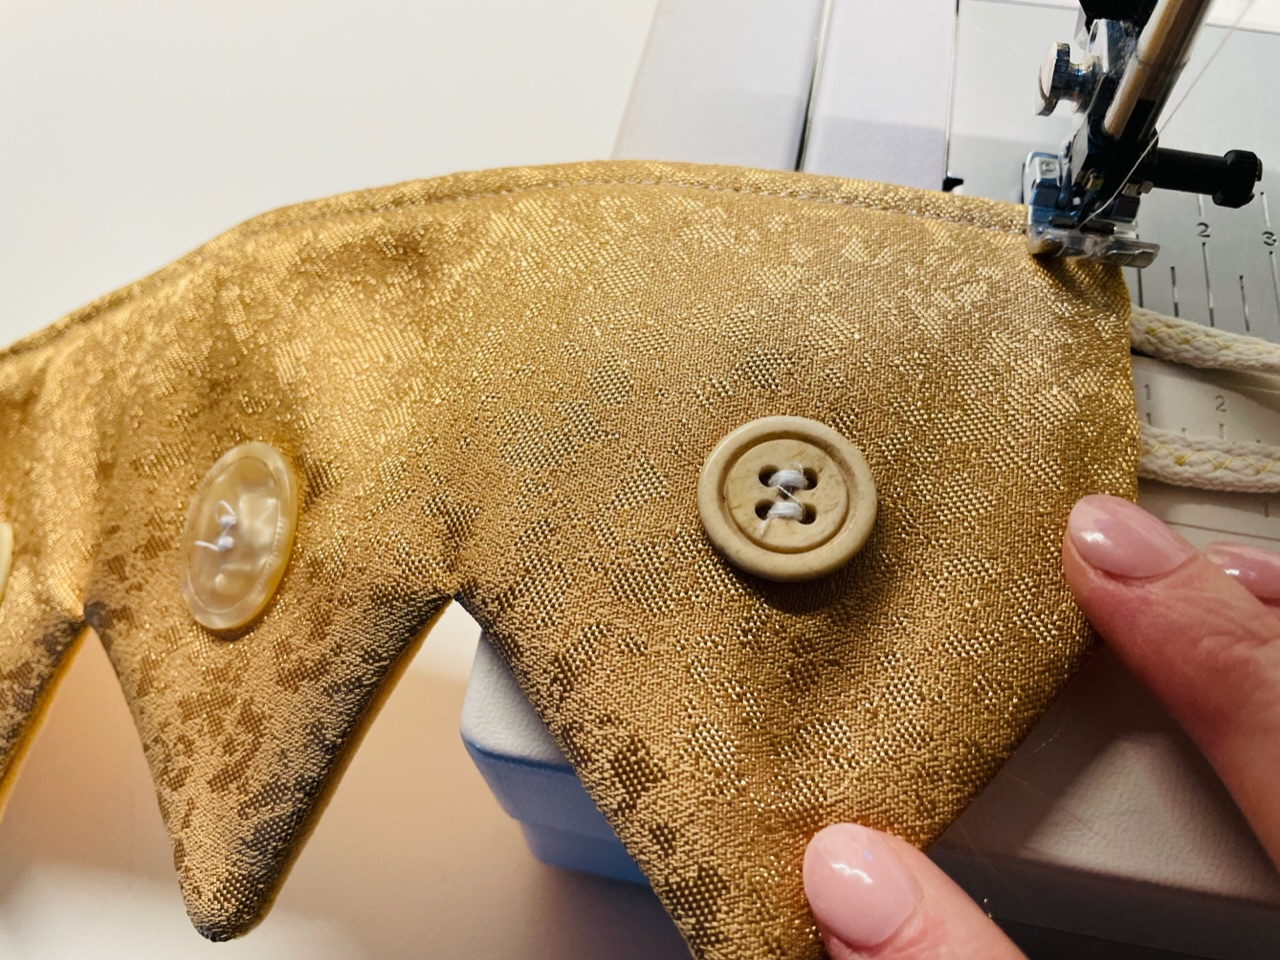
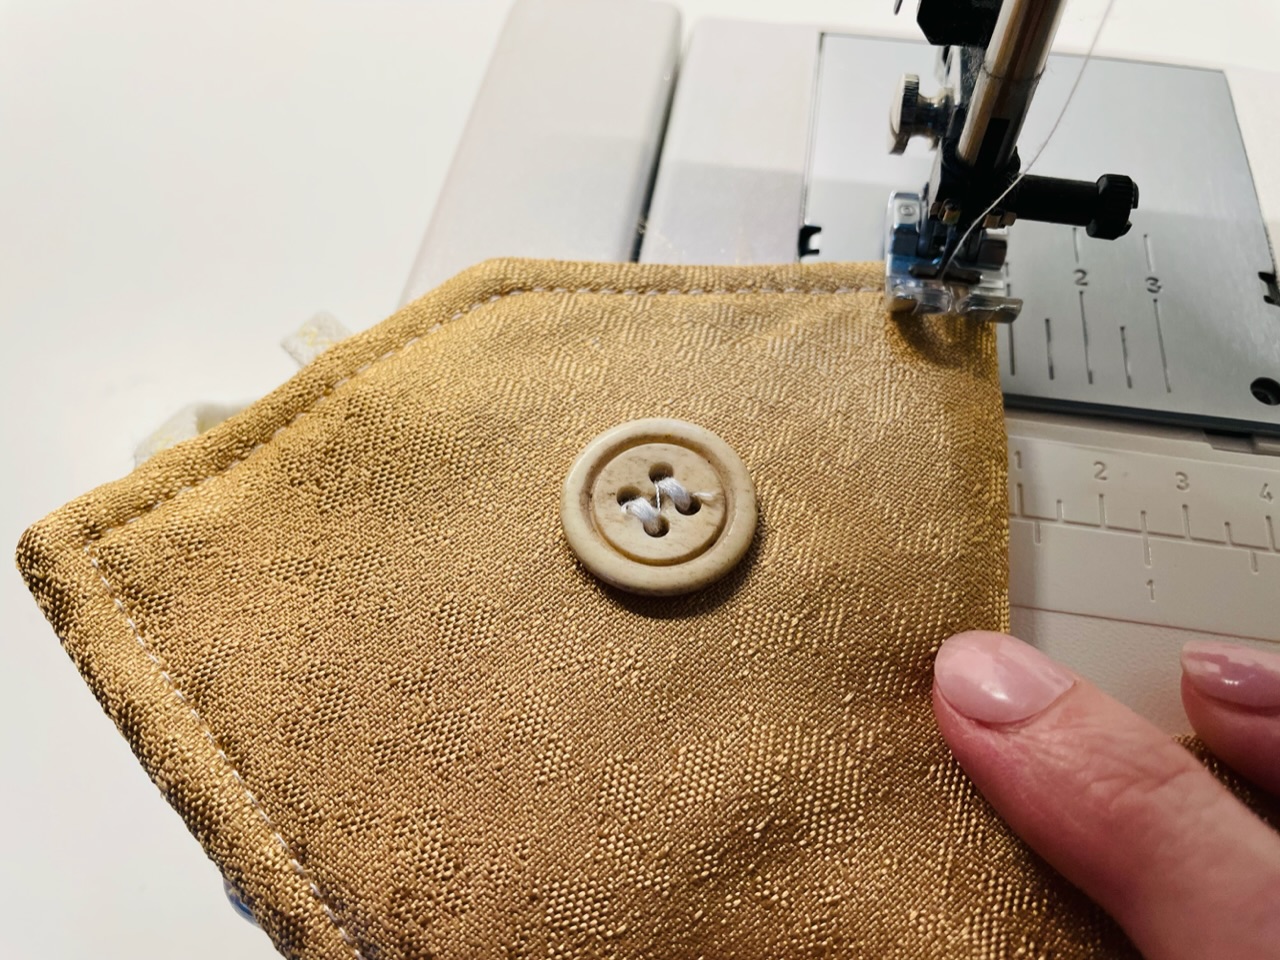
With the sewing machine, each button can be sewn very quickly. However, some sewing experience is good for this.
This is how you go about it:
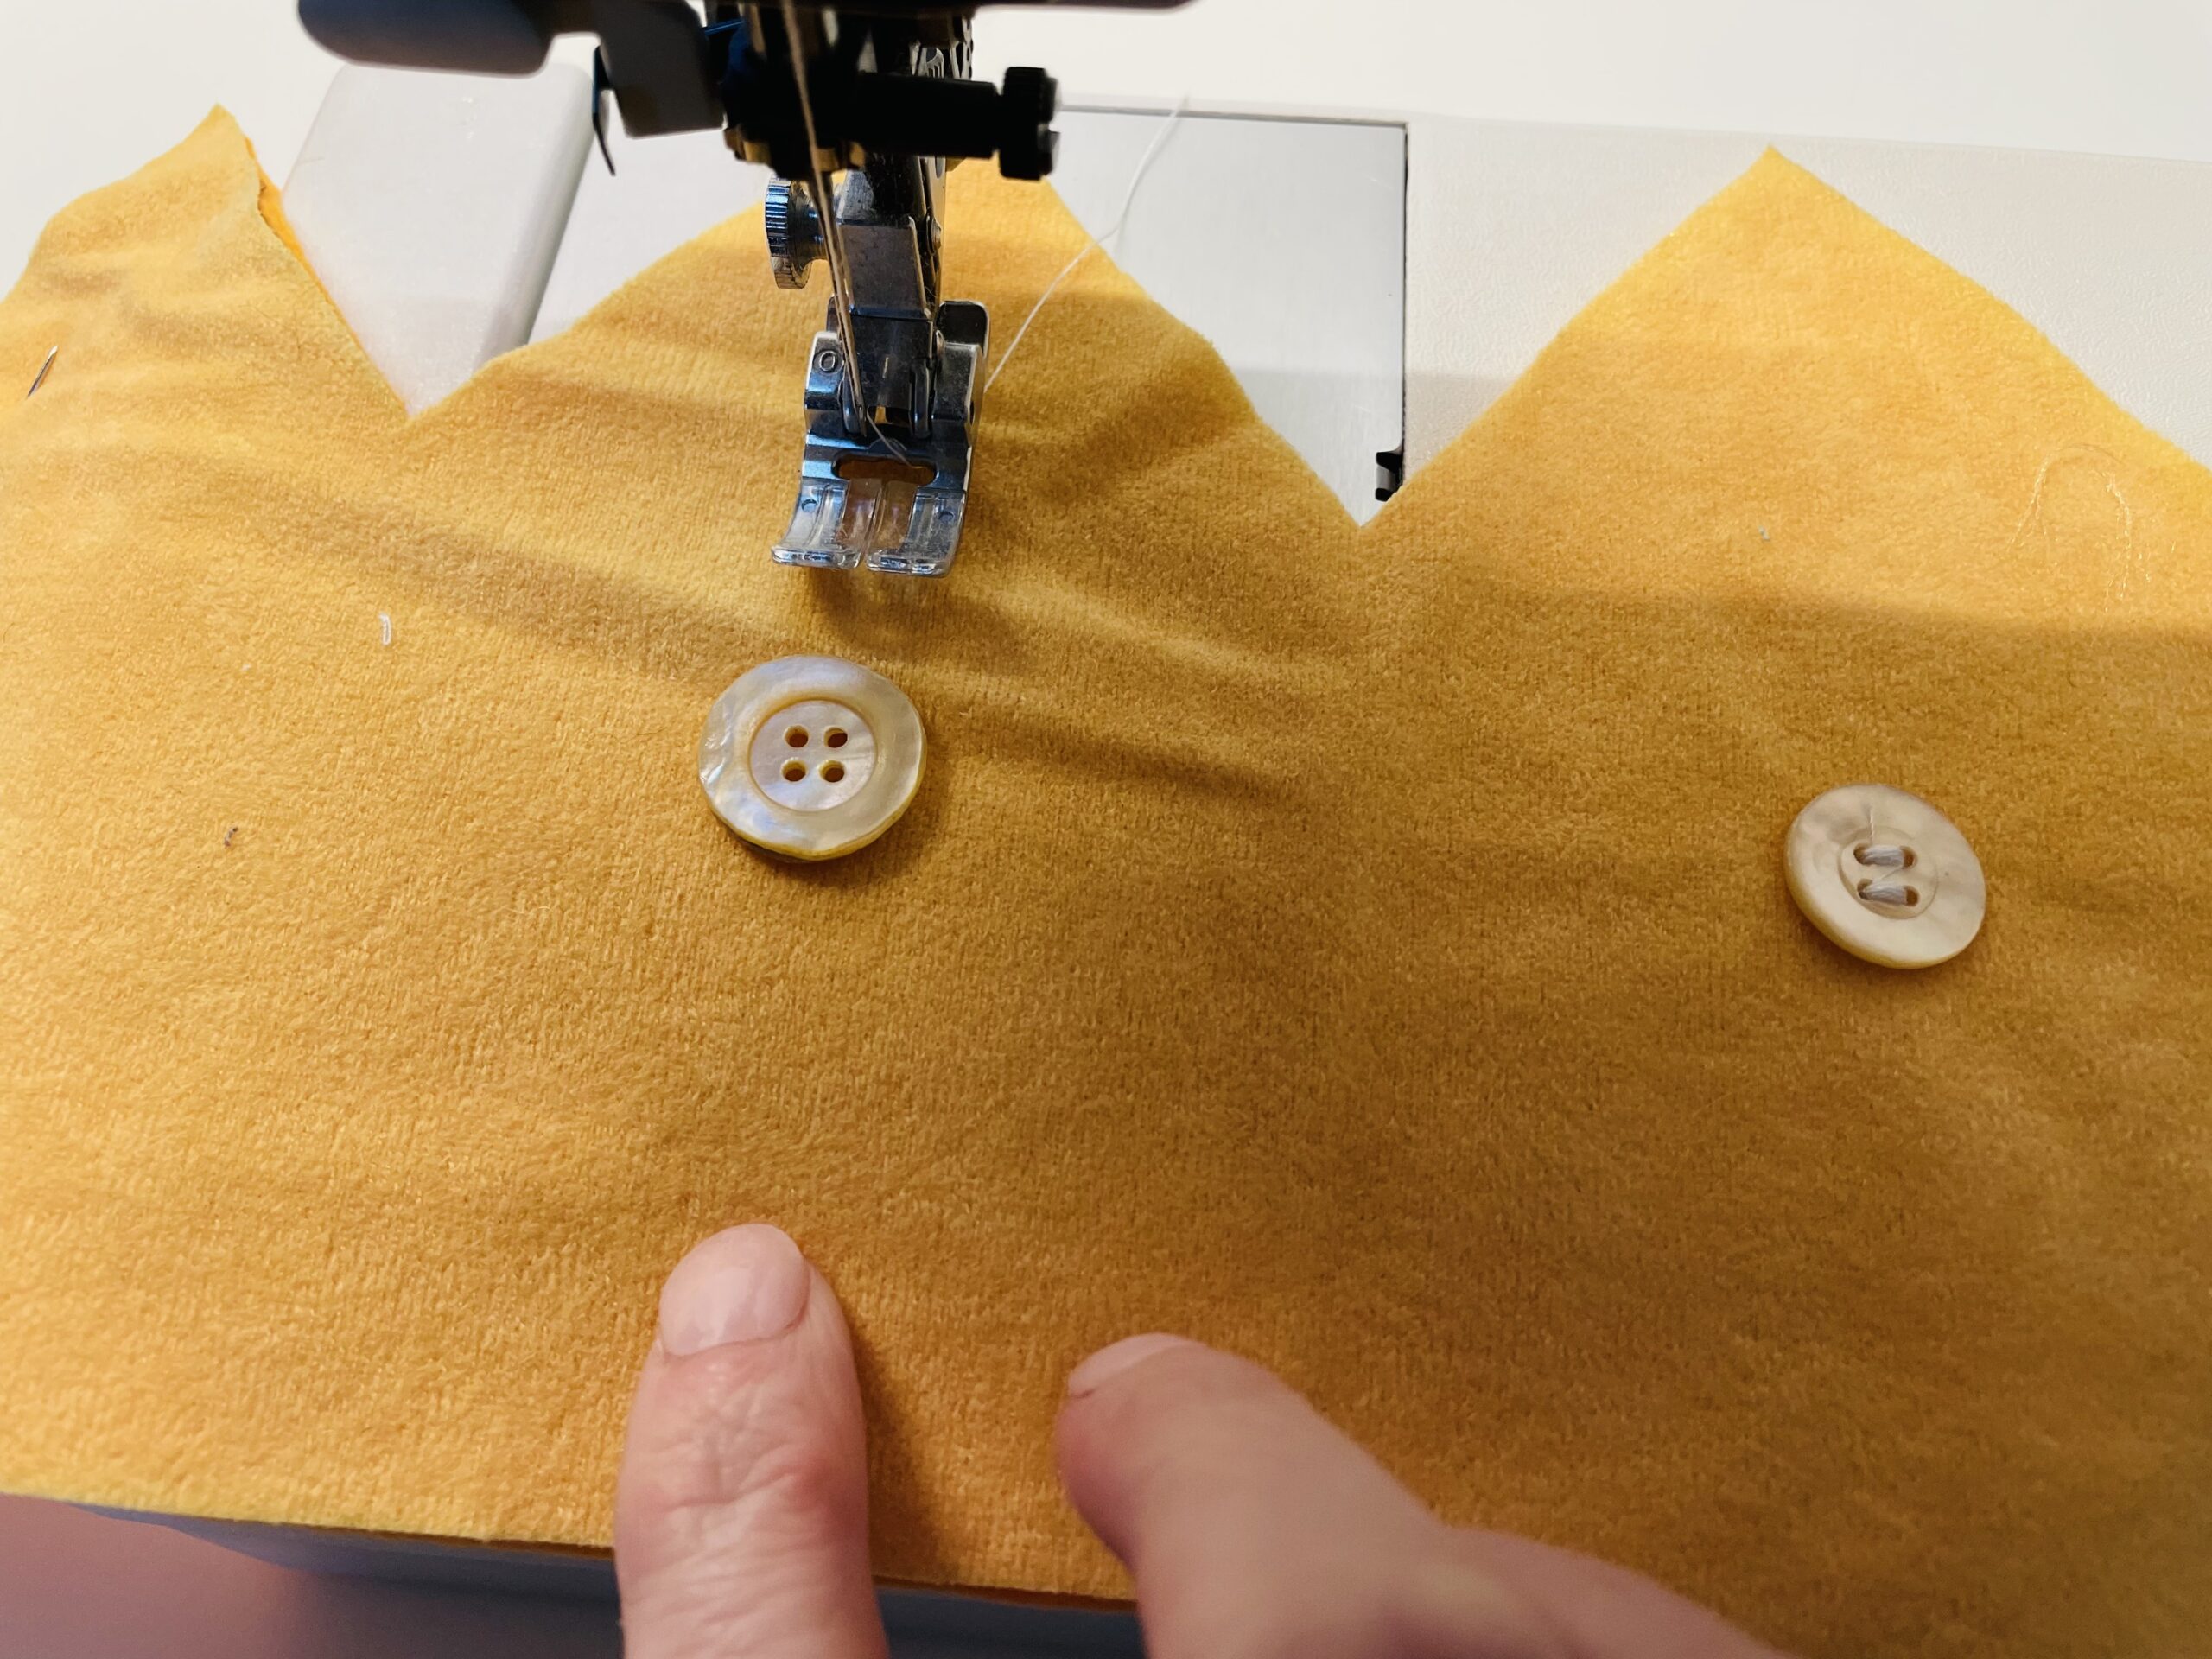
If the transport feet first lower on the sewing machine, the fabric remains lying when sewing.
Set the stitch to "Zick Zack".
Places the button directly under the sewing feet.
Move the needle with the hand-rotating wheel and let it pierce into a hole.
Turn the rotary wheel further and make the first stitch, which then punches into the second button hole. (The first stitch is sewn!)
Now you can continue "sew" with the hand-rotating wheel or you operate the foot pedal of the sewing machine carefully and very slowly. Both are possible.
Make several stitches until the button is well sewn.
Raise the little foot again and push the fabric forward so that you can cut the thread directly on the button. Leave the thread on it and first sew on the other buttons. This thread can be cut off at the end.

Bild zum Schritt 19 für das Bastel- und DIY-Abenteuer für Kinder: 'Mit der Nähmaschine kann jeder Knopf sehr schnell angenäht werden....'

18

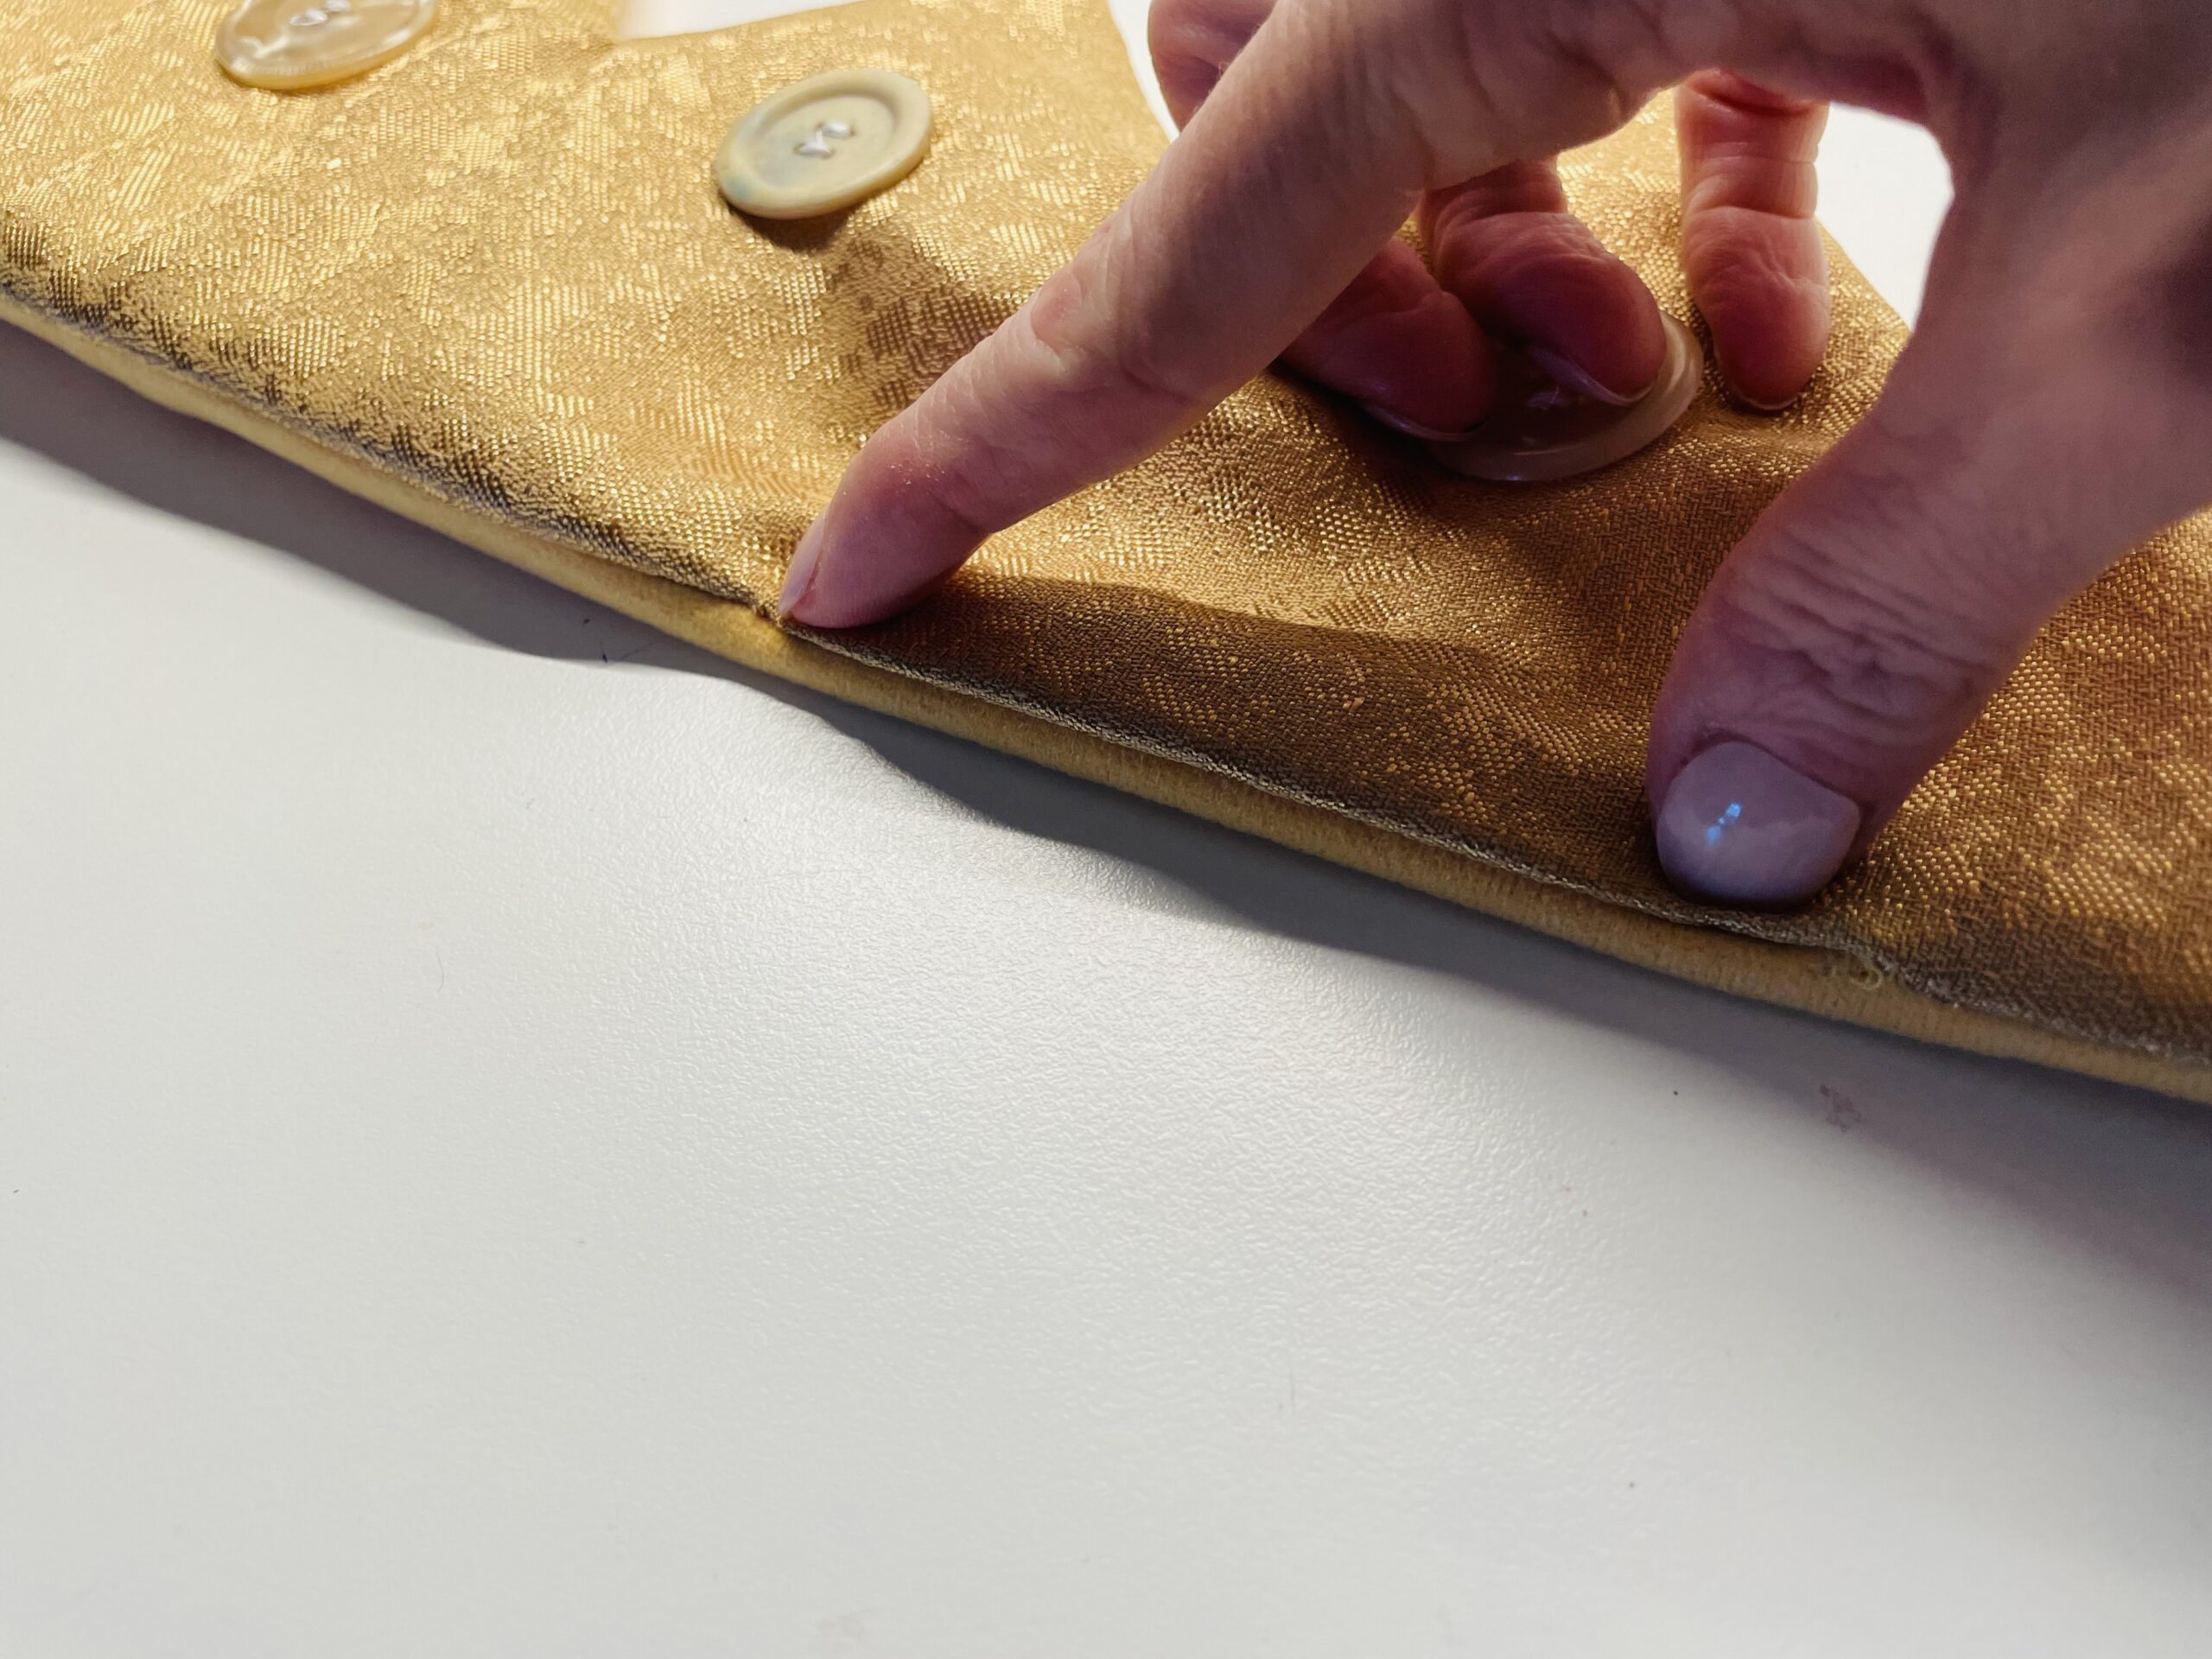
At the front of the crown, on which no sewing line was painted, the fleece can already lie under the fabric when sewing on the button. So this is also fixed.

Bild zum Schritt 20 für das Bastel- und DIY-Abenteuer für Kinder: 'Bei der Kronenvorderseite, auf der keine Nählinie aufgemalt wurde, kann...'

19

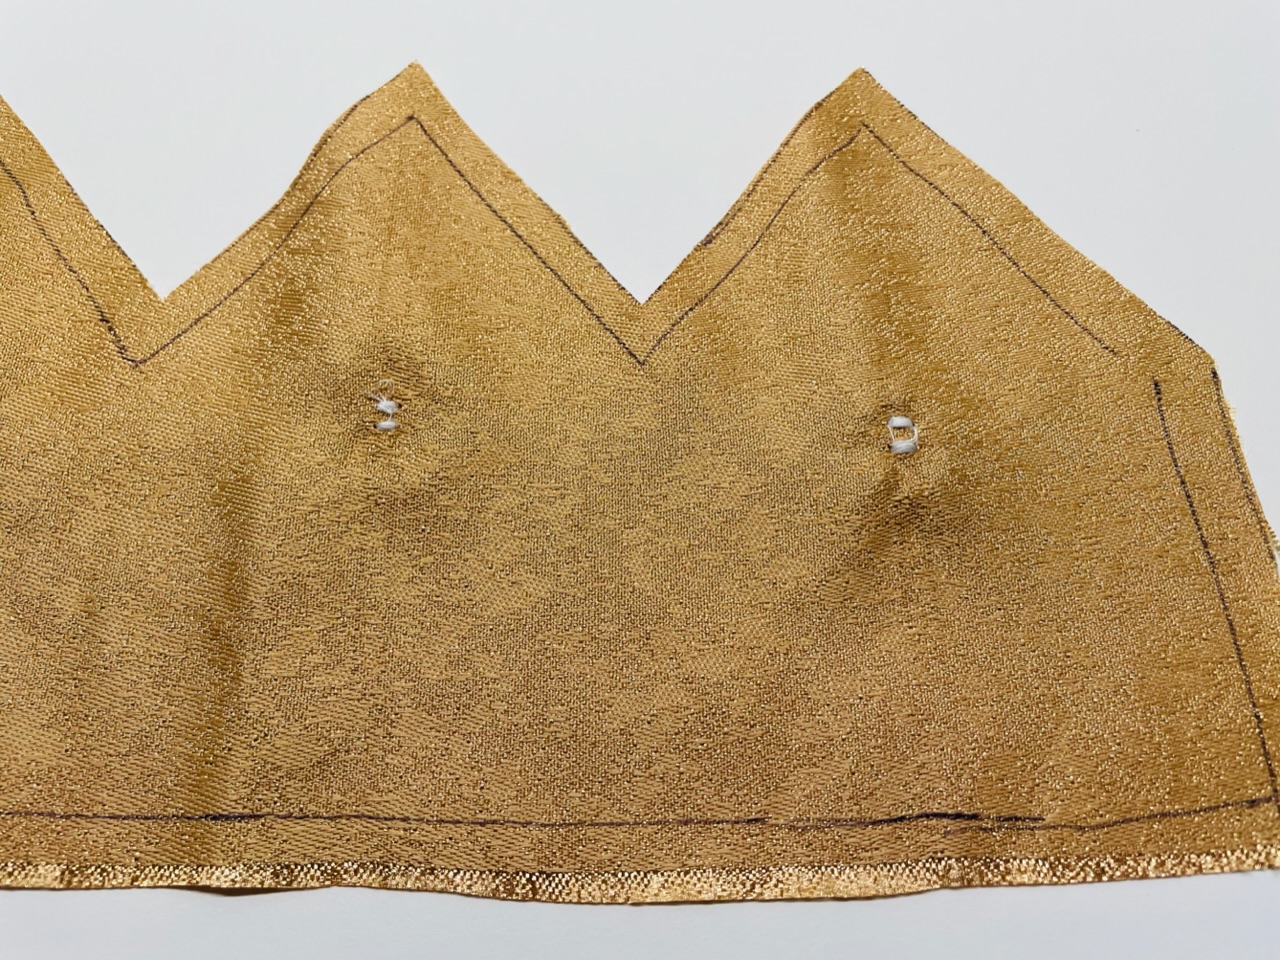
Sew all the buttons.

Bild zum Schritt 21 für das Bastel- und DIY-Abenteuer für Kinder: 'Näht alle Knöpfe an.'

20

At the end of the last button turn off the fabric and cut off the lower threads with scissors. Additional sewing is not necessary.

Bild zum Schritt 22 für das Bastel- und DIY-Abenteuer für Kinder: 'Wendet am Ende des letzen Knopfes den Stoff und schneidet...'

21

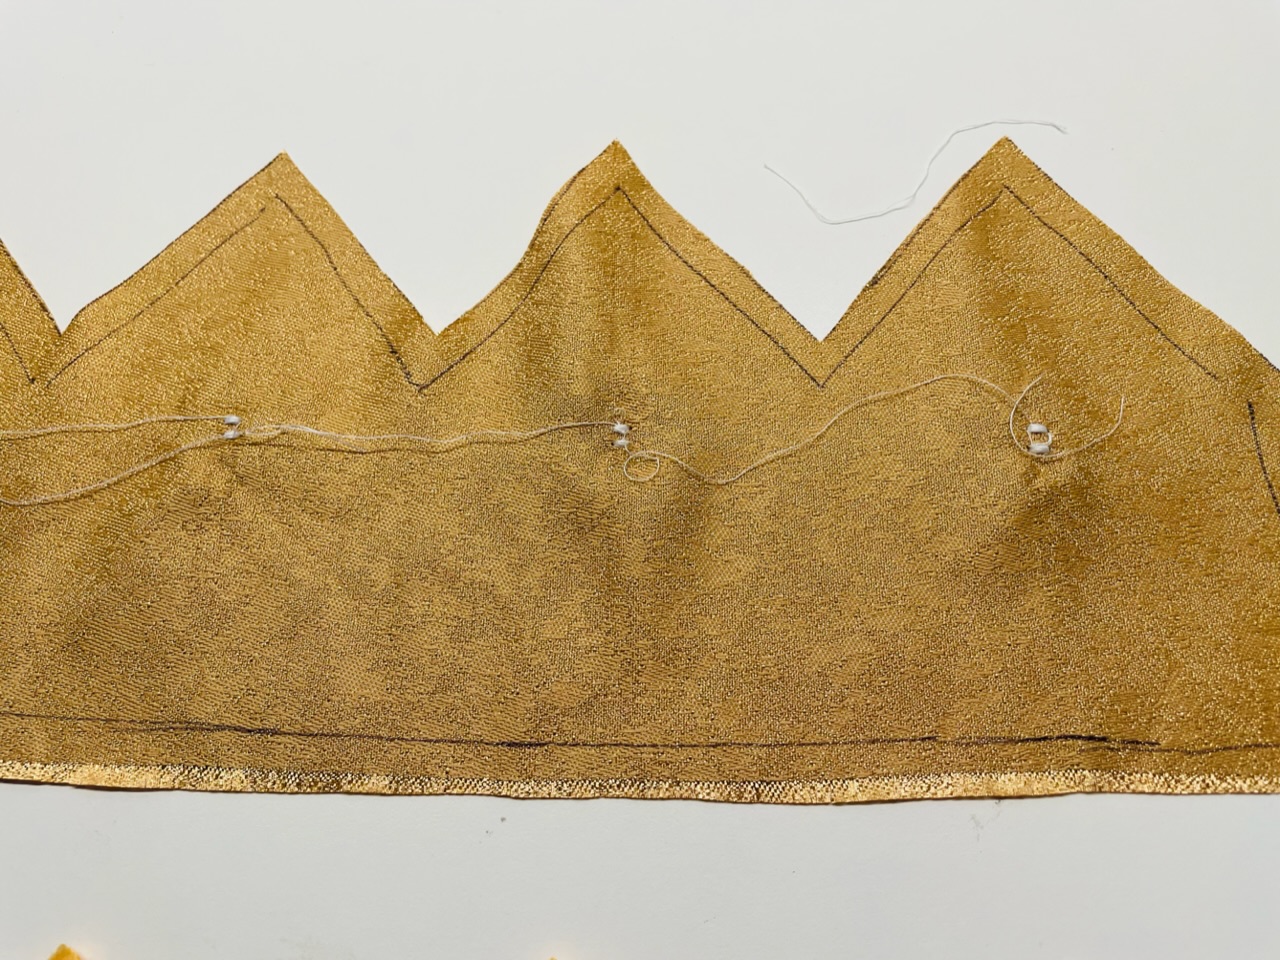
That's what the back could look like.
Now put the transport feet of the sewing machine back up!

Bild zum Schritt 23 für das Bastel- und DIY-Abenteuer für Kinder: 'So könnte die Rückseite dann aussehen.  Stellt nun das...'

Prepare tapes:
22

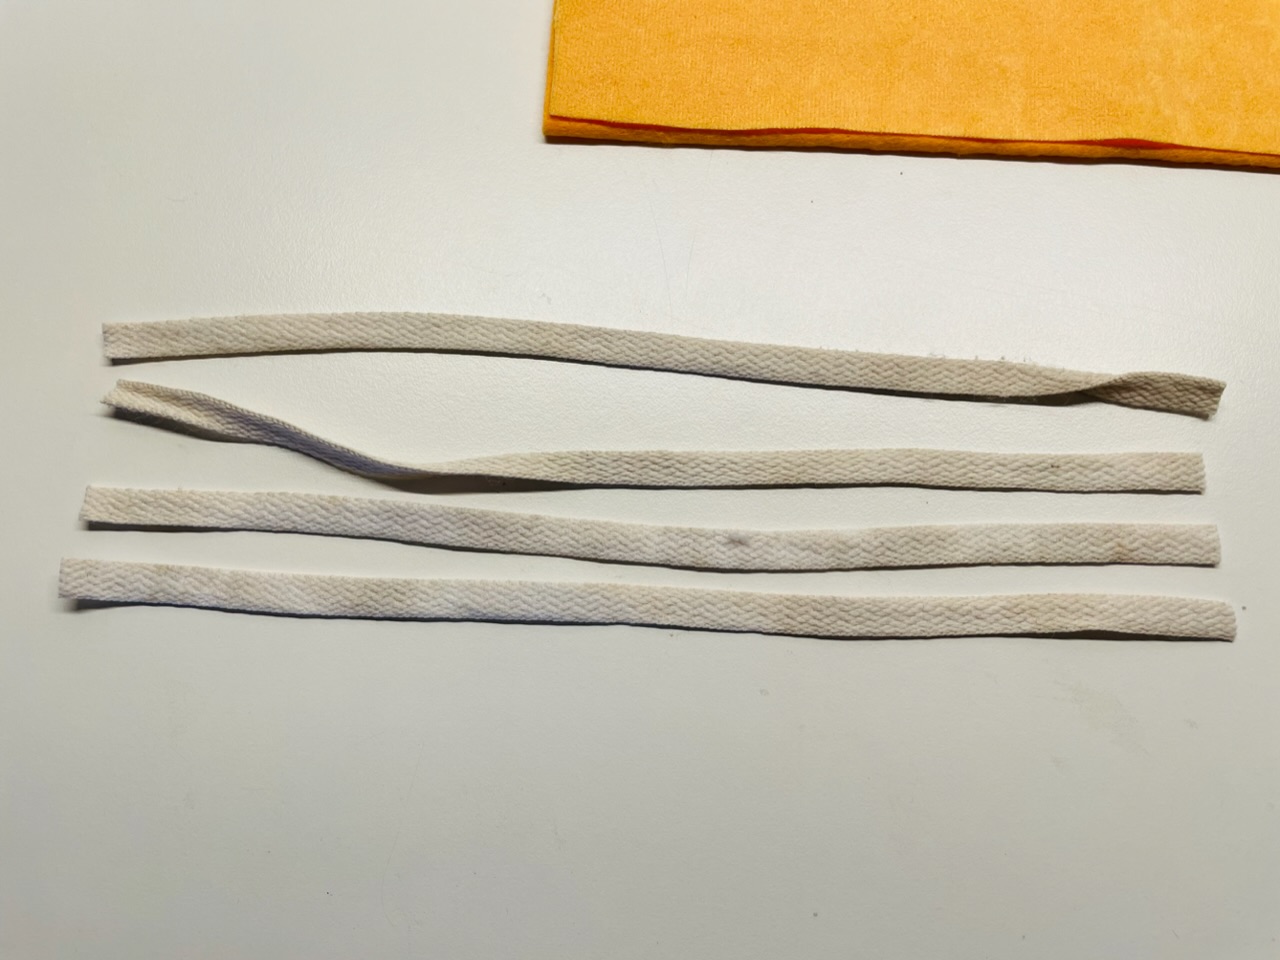
In order to adjust the crown to the child's head, ribbons are sewn on. Cuts them to a length of 24 cm. You need 4 ribbons.
You can also use shoelaces for this. You can see how these can be upgraded in the following steps. If you want to use them this way, simply skip the next steps.

Bild zum Schritt 25 für das Bastel- und DIY-Abenteuer für Kinder: 'Um die Krone dem mitwachsenden Kinderkopf entsprechend anpassen zu können,...'

23

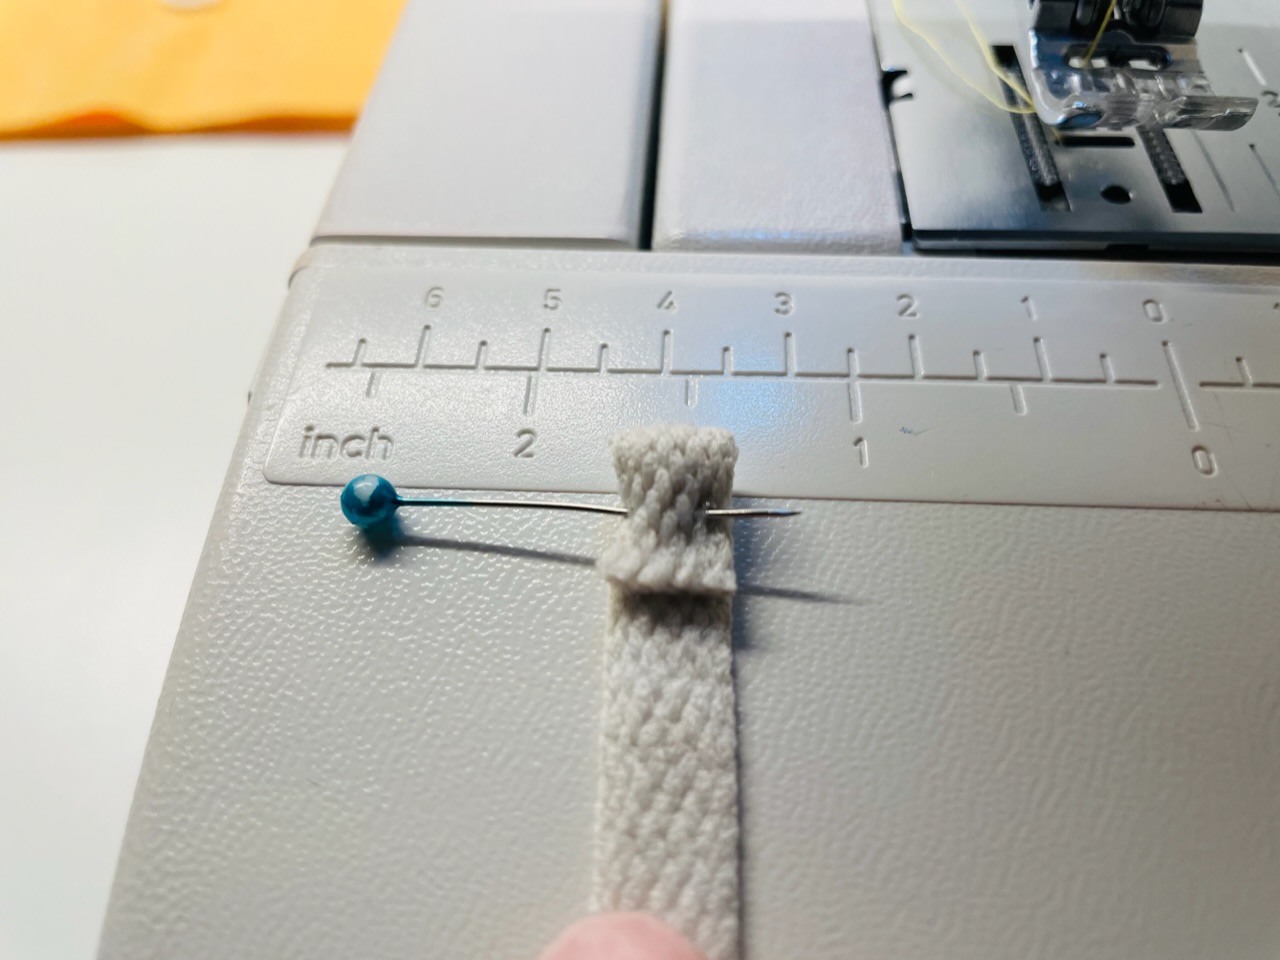
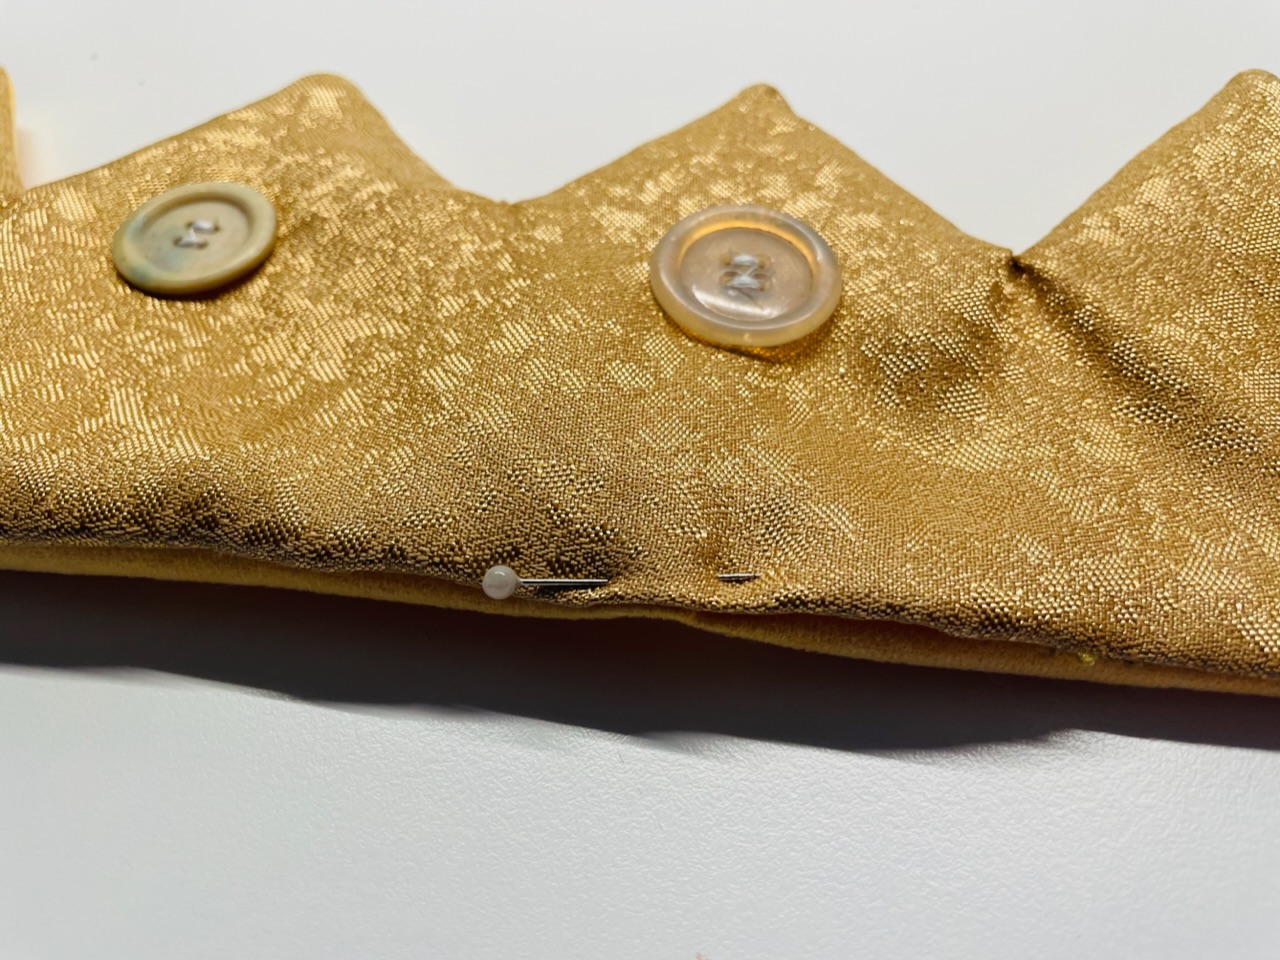
So that the ribbons do not fray, knock it in half an inch and fix it with a pin. Stitch it across the tape.

Bild zum Schritt 26 für das Bastel- und DIY-Abenteuer für Kinder: 'Damit die Bänder nicht ausfranzen, schlagt ihn einen halben Zentimeter...'

24

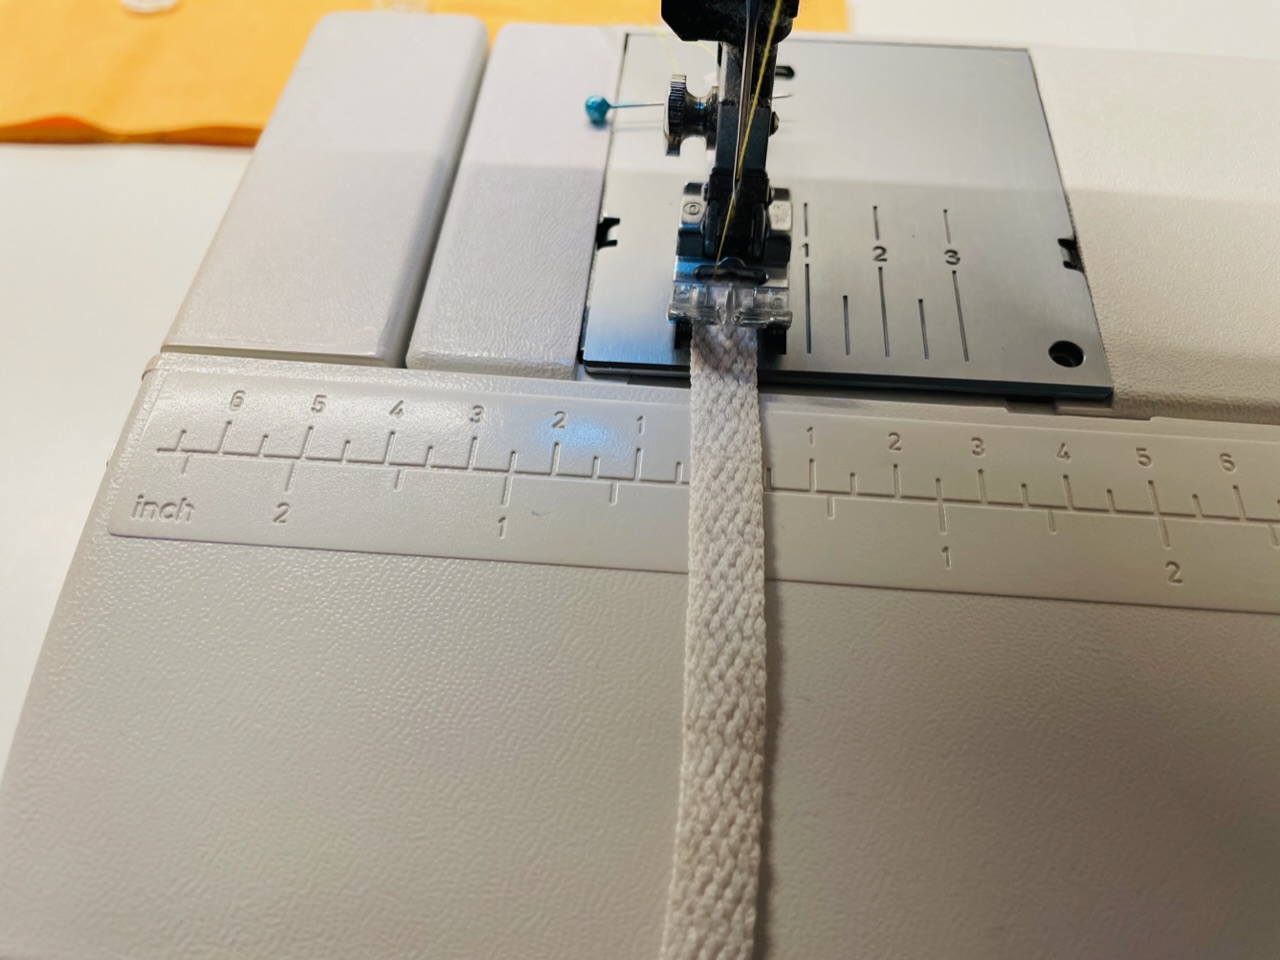
Put the tape under the sewing machine and hold the pin in your hand. So you can hold the tape under the sewing machine feet. Make a few stitches with the hand turning wheel and possibly raise the little foot again if the tape is not transported further. Stitch a little further in the front again into the tape. Then you can sew along the tape with a zig-zag stitch. It looks particularly nice if you use a different coloured thread for this.

Bild zum Schritt 27 für das Bastel- und DIY-Abenteuer für Kinder: 'Legt das Band unter die Nähmaschine und haltet die Stecknadel...'

25

Here the tape is finished sewn.
It's enough if you flip one side of the band, because the other one "disappears" in the crown.

Bild zum Schritt 28 für das Bastel- und DIY-Abenteuer für Kinder: 'Hier ist das Band fertig genäht.   Es reicht,...'

26

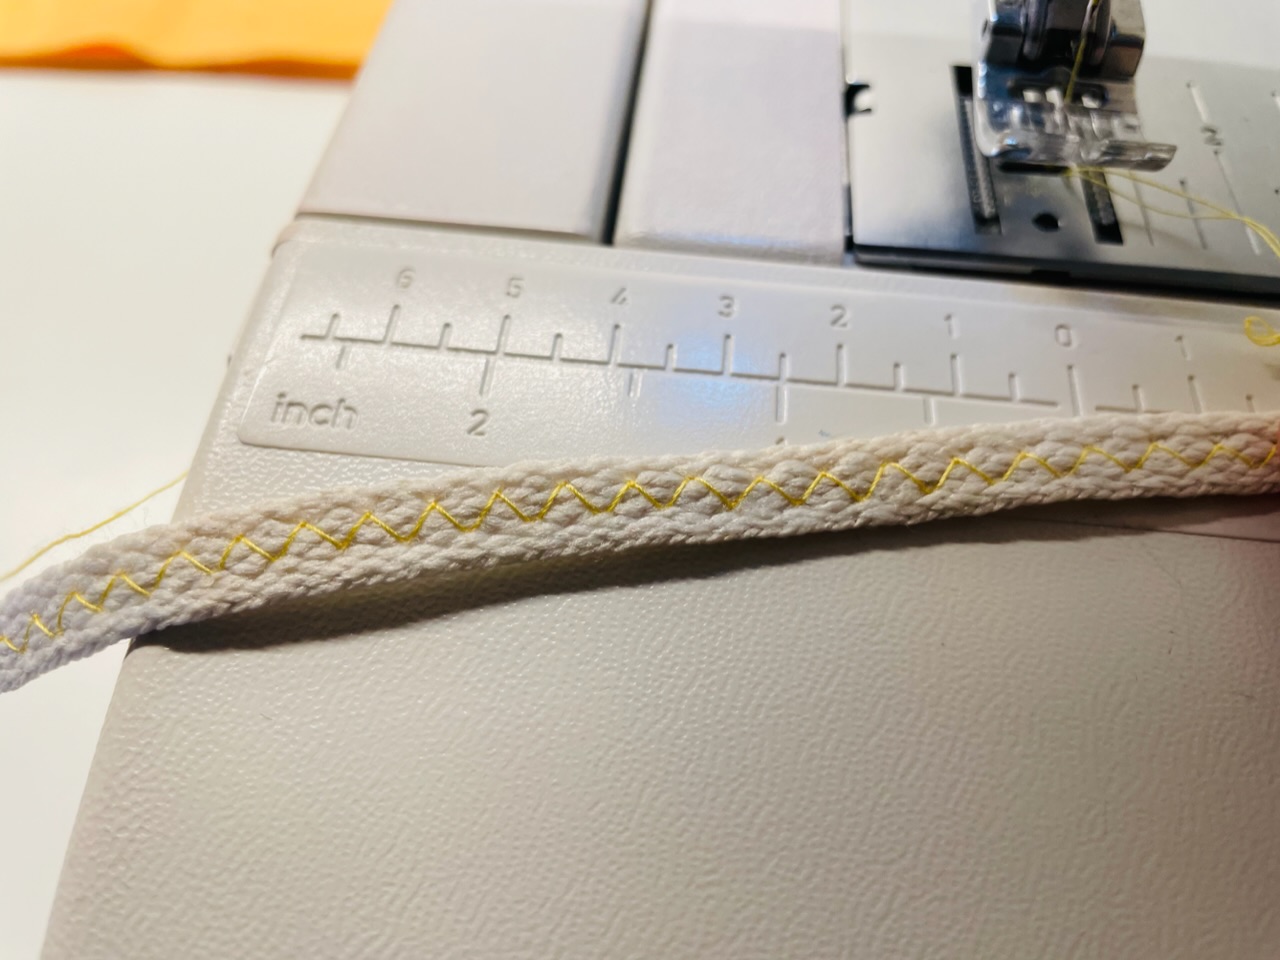
This way, embellish your shoelace band.

Bild zum Schritt 29 für das Bastel- und DIY-Abenteuer für Kinder: 'Verschönert auf diese Weise eure Schnürsenkel-Band.'

All parts are joined together:
27

Now everything is ready.
Now place the crown parts on each other for sewing:
At the bottom is the fleece and on top is the crown cut without sewing line, with the beautiful side facing upwards! (You could have fixed these two parts together if you did this on the button!)
On it the outsides inwards the bands are put on. The uncleaned side of the tape shows outwards.

Bild zum Schritt 31 für das Bastel- und DIY-Abenteuer für Kinder: 'Nun ist alles vorbereitet.  Legt die Kronen-Teile nun aufeinander...'

28

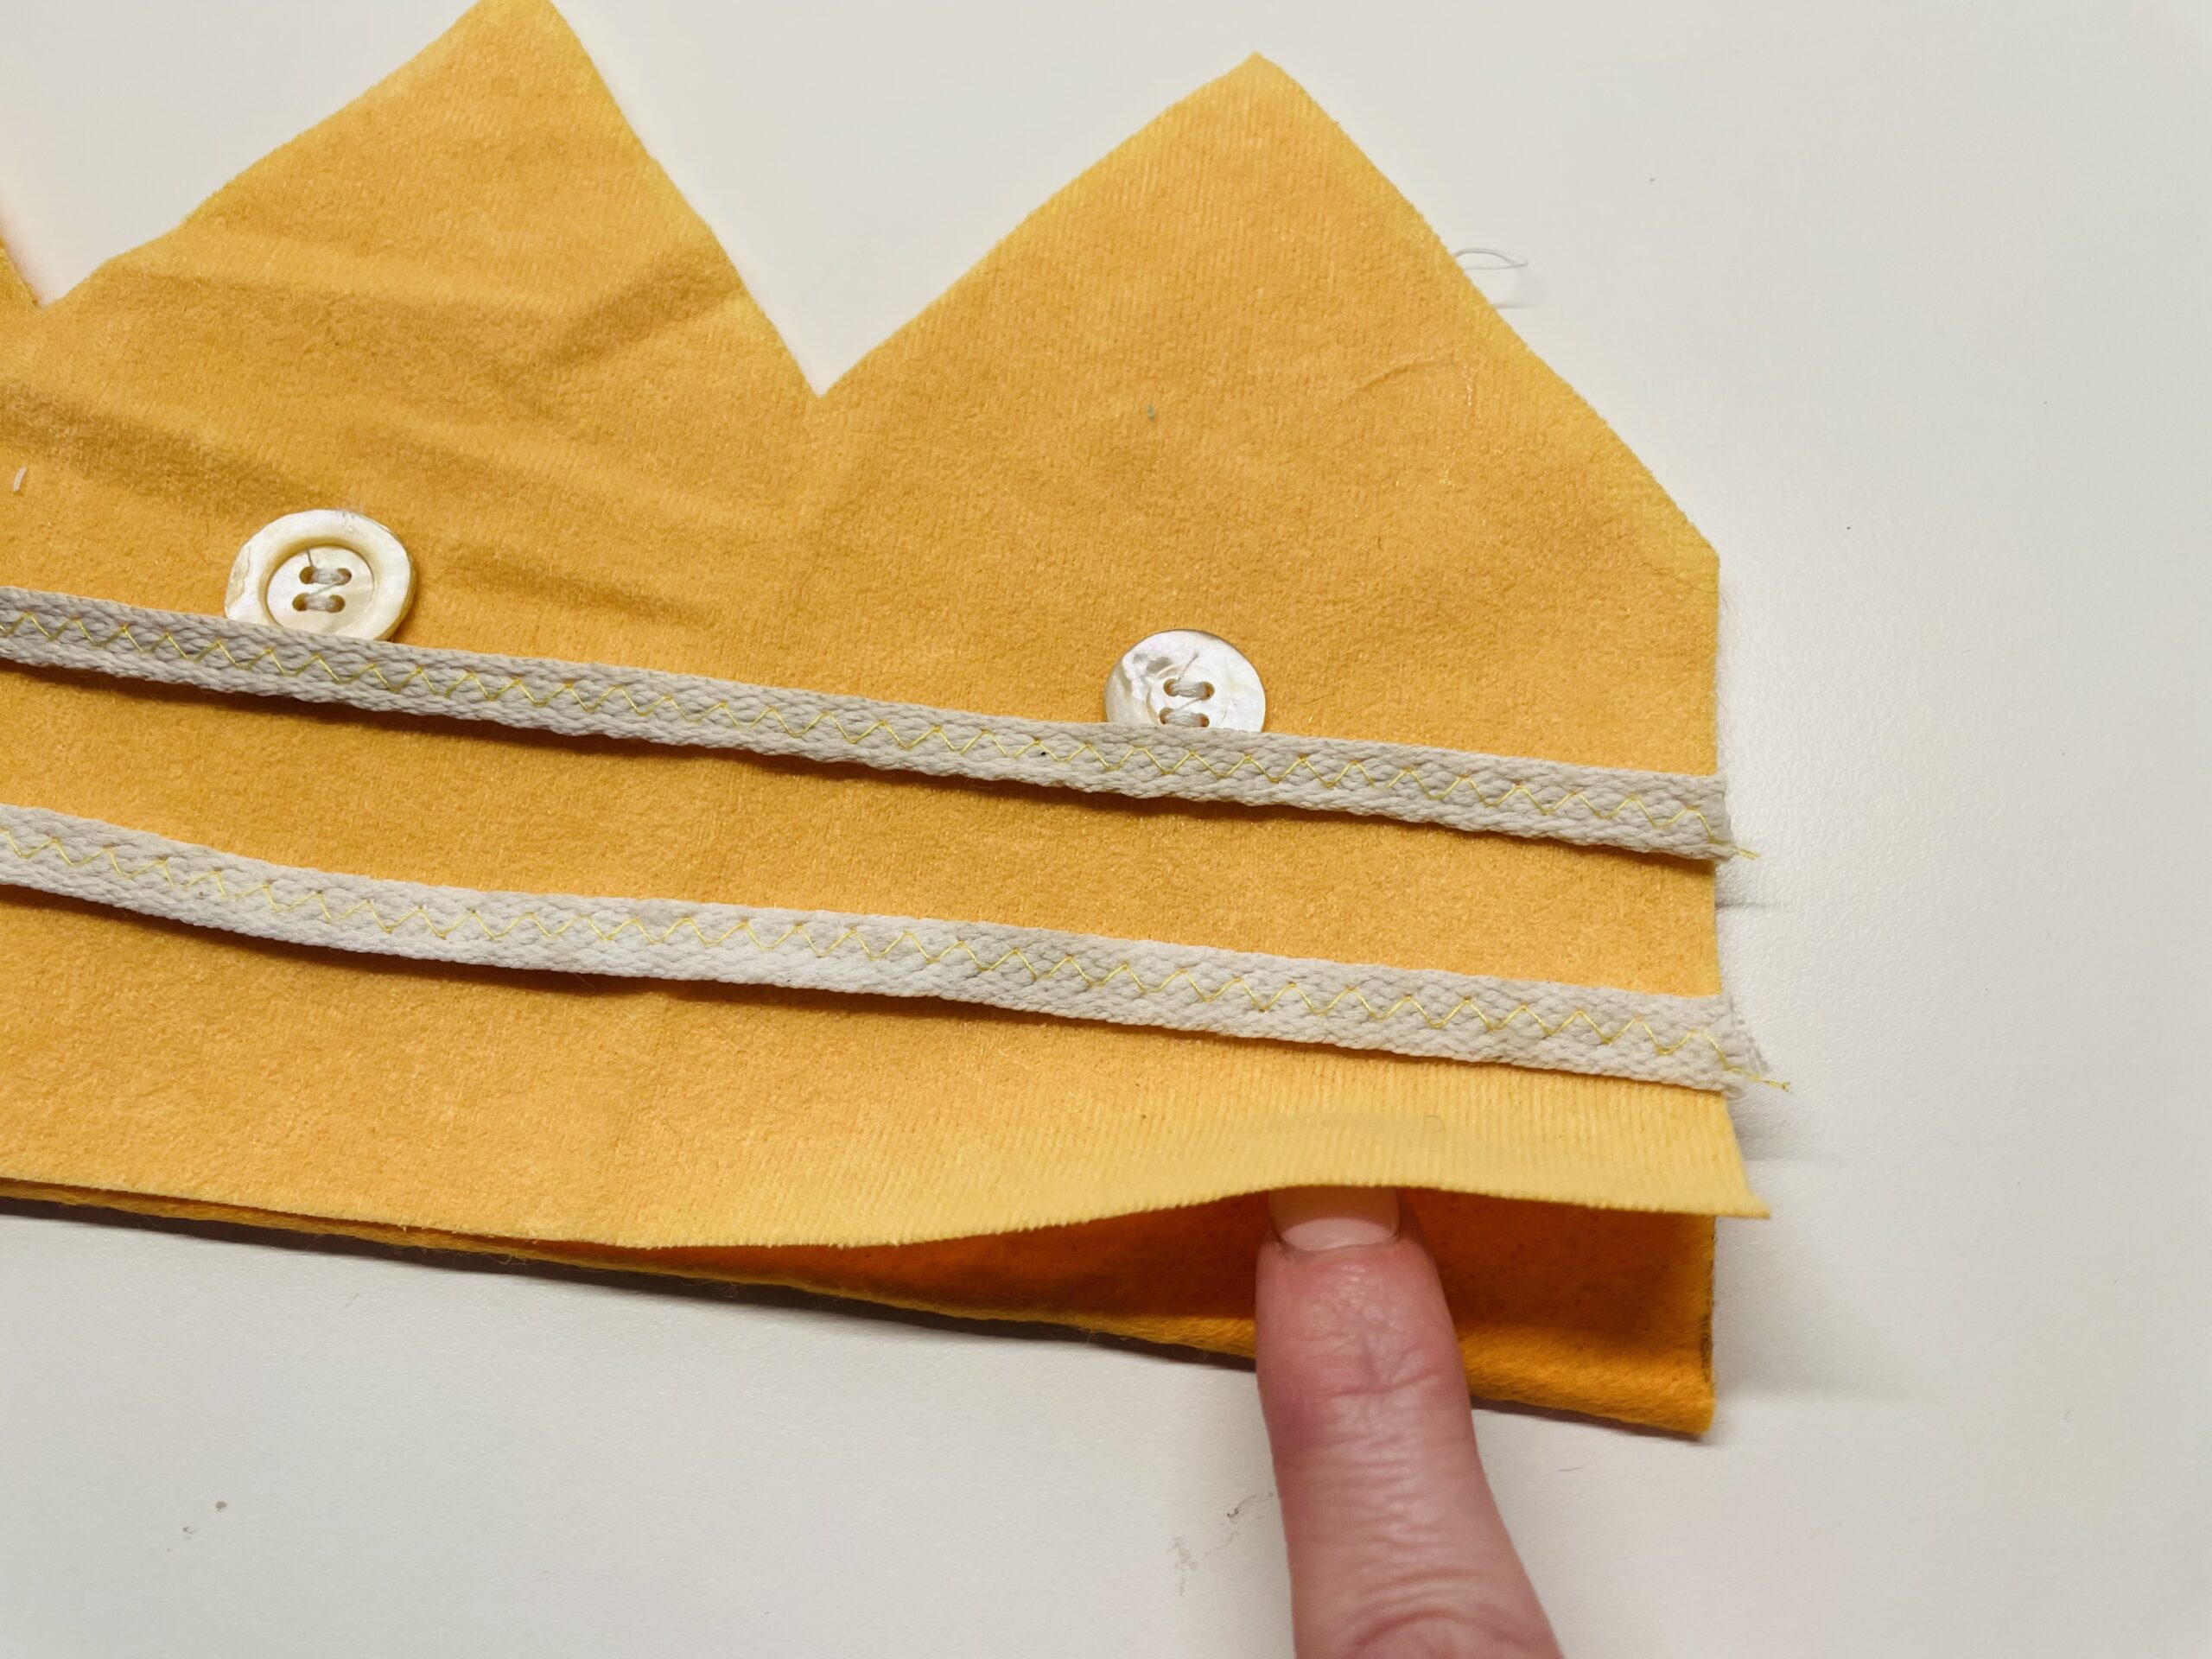
Fixes the two bands with two pins and sews on the edge with a straight stitch once over the bands, so they no longer slip.

Bild zum Schritt 32 für das Bastel- und DIY-Abenteuer für Kinder: 'Fixiert mit zwei Stecknadeln die beiden Bänder und näht ganz...'

29

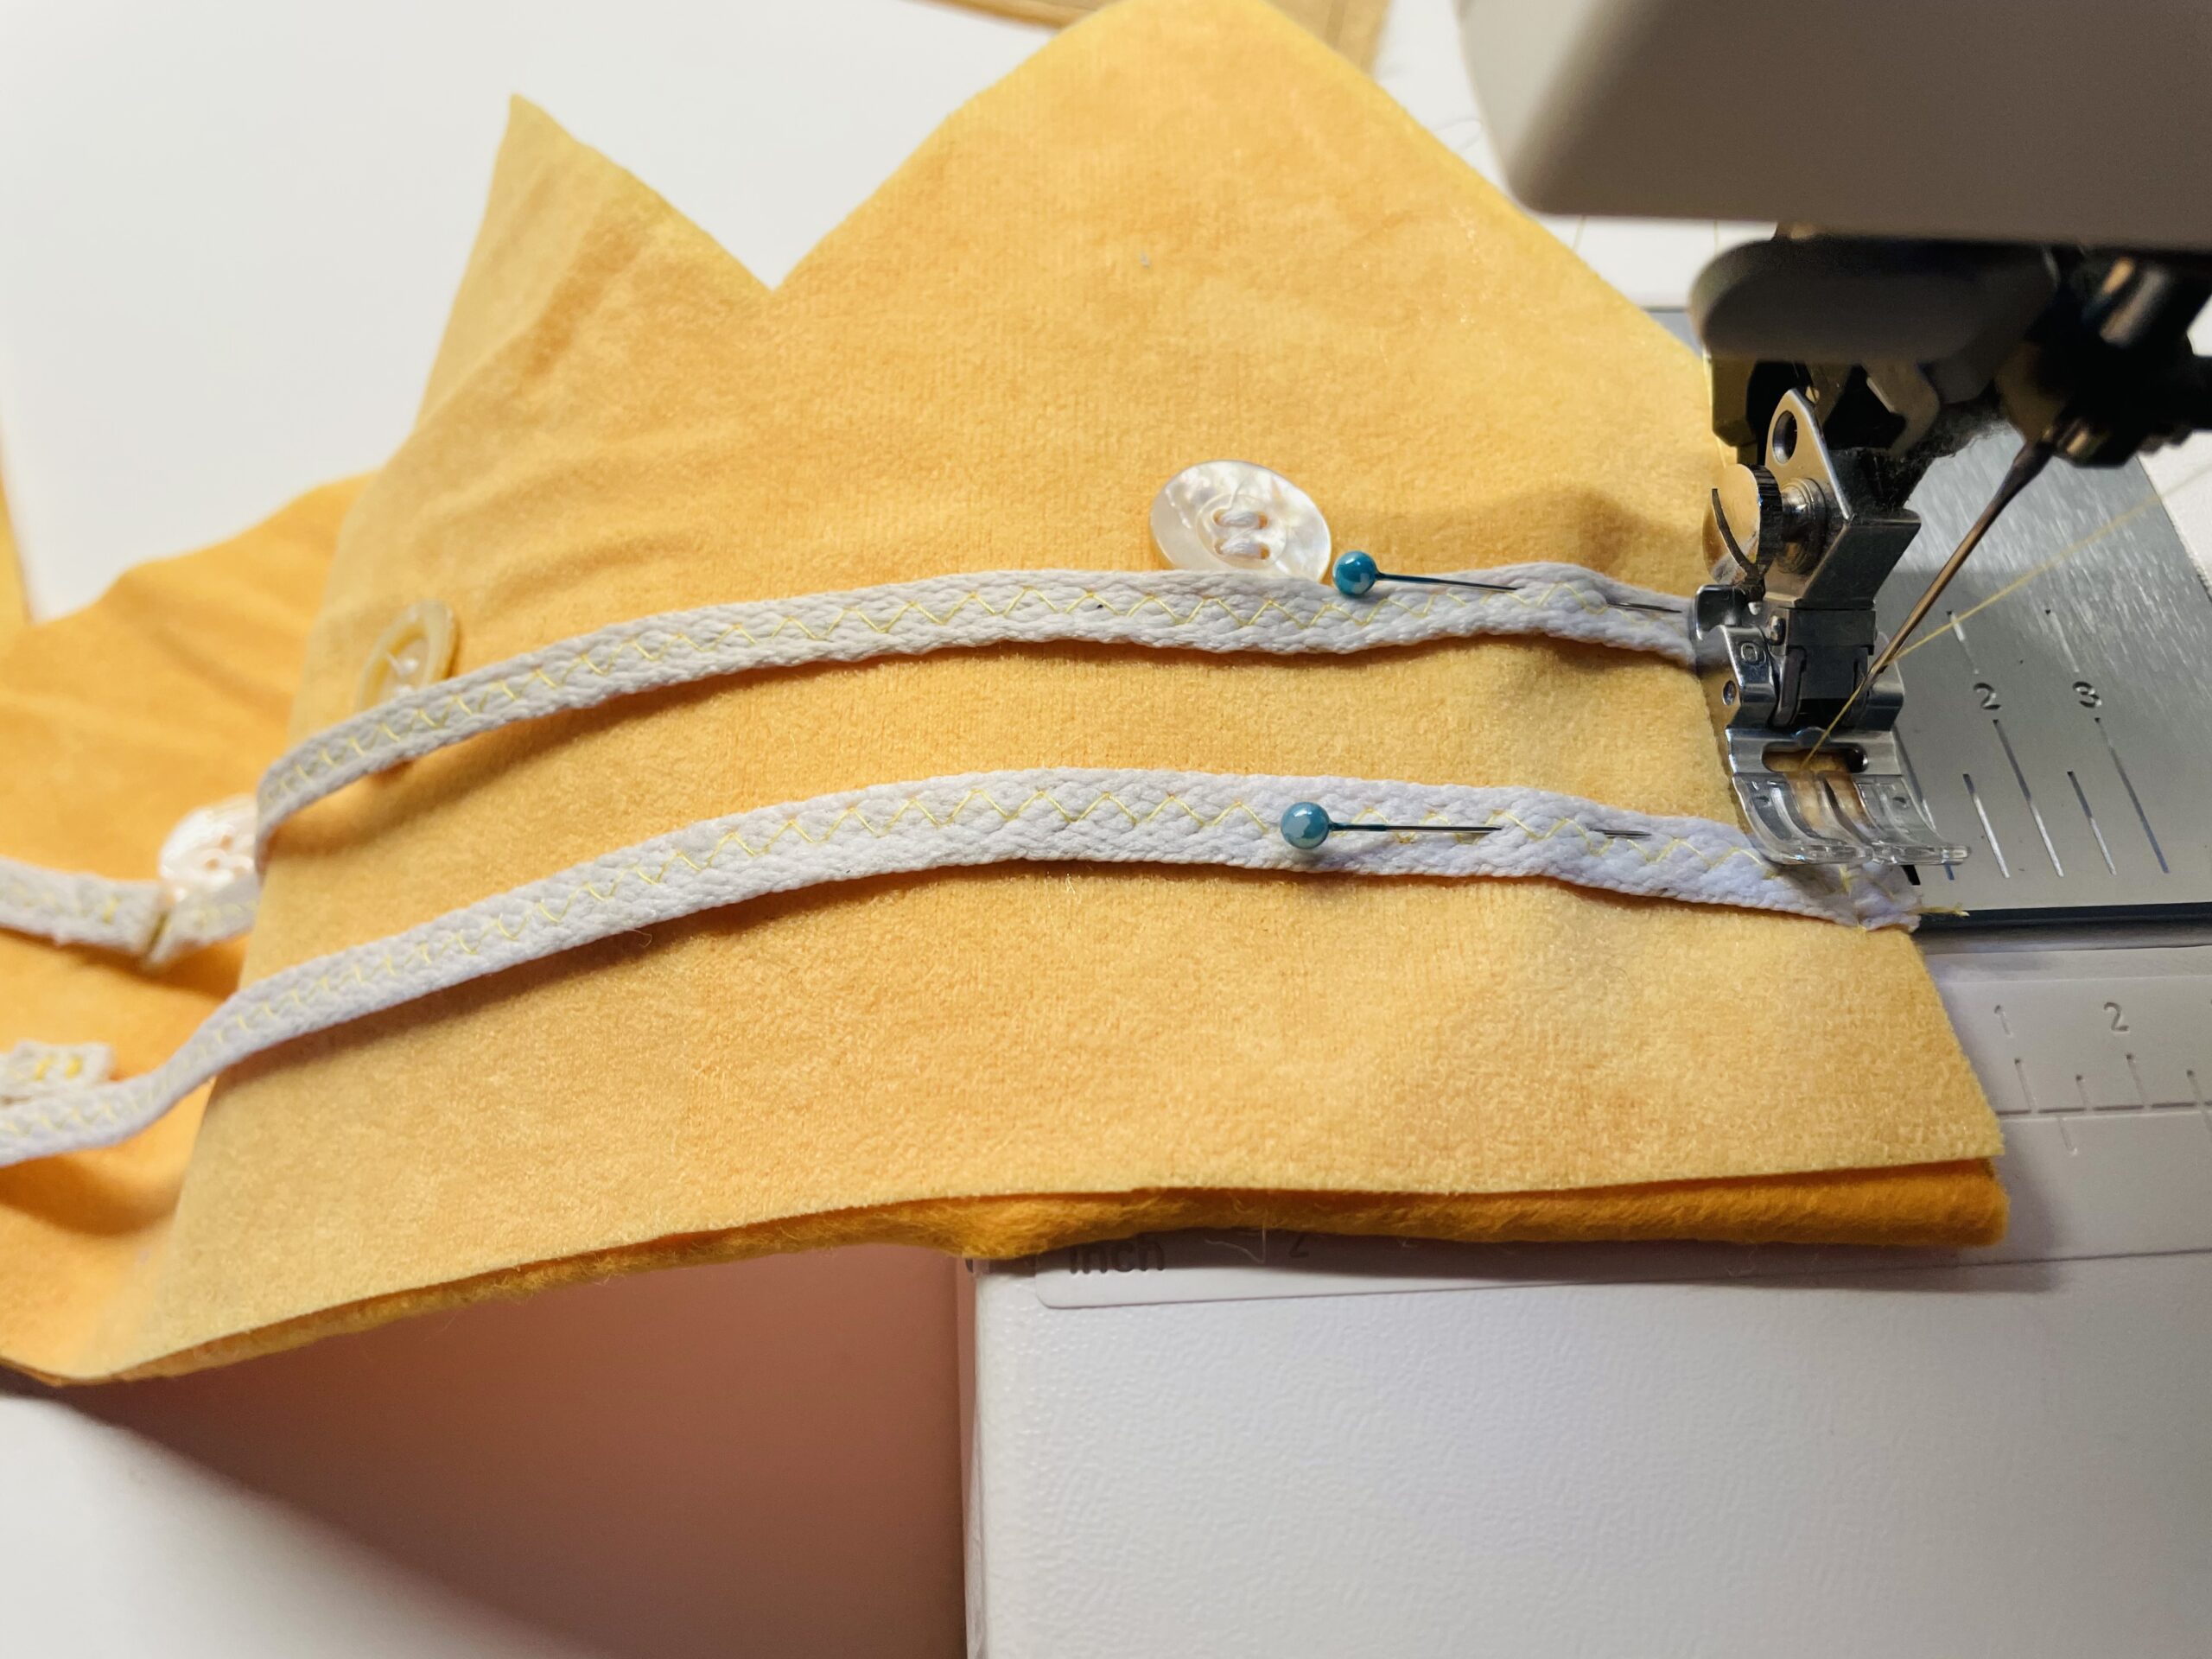
Repeat this on the opposite side of the crown.

Bild zum Schritt 33 für das Bastel- und DIY-Abenteuer für Kinder: 'Wiederholt das auch auf der gegenüberliegenden Kronenseite.'

30

Place the other crown cut with the beautiful side down exactly on the other parts. The seam line must now be visible above.

Bild zum Schritt 34 für das Bastel- und DIY-Abenteuer für Kinder: 'Legt den anderen Kronenzuschnitt mit der schönen Seite nach unten...'

31

Sticks everything well so that the parts can no longer slip.

Bild zum Schritt 35 für das Bastel- und DIY-Abenteuer für Kinder: 'Steckt alles gut fest, damit die Teile nicht mehr verrutschen...'

32

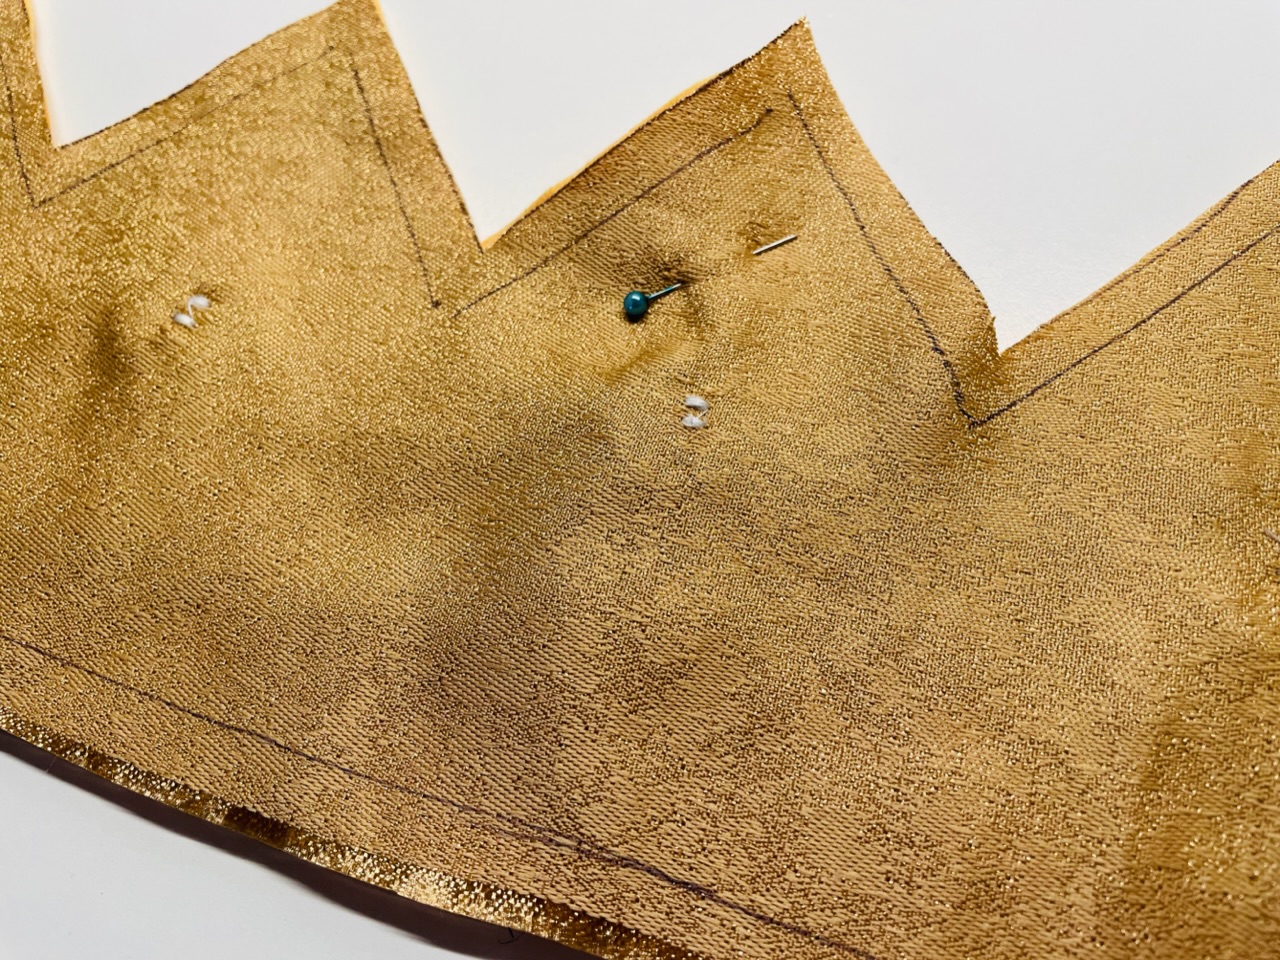
At the straight lower line, a piece about 10 centimetres wide is marked at the height of the second point, which cannot be sewn as a turning opening.

Bild zum Schritt 36 für das Bastel- und DIY-Abenteuer für Kinder: 'An der geraden unteren Linie wird in Höhe der zweiten...'

33

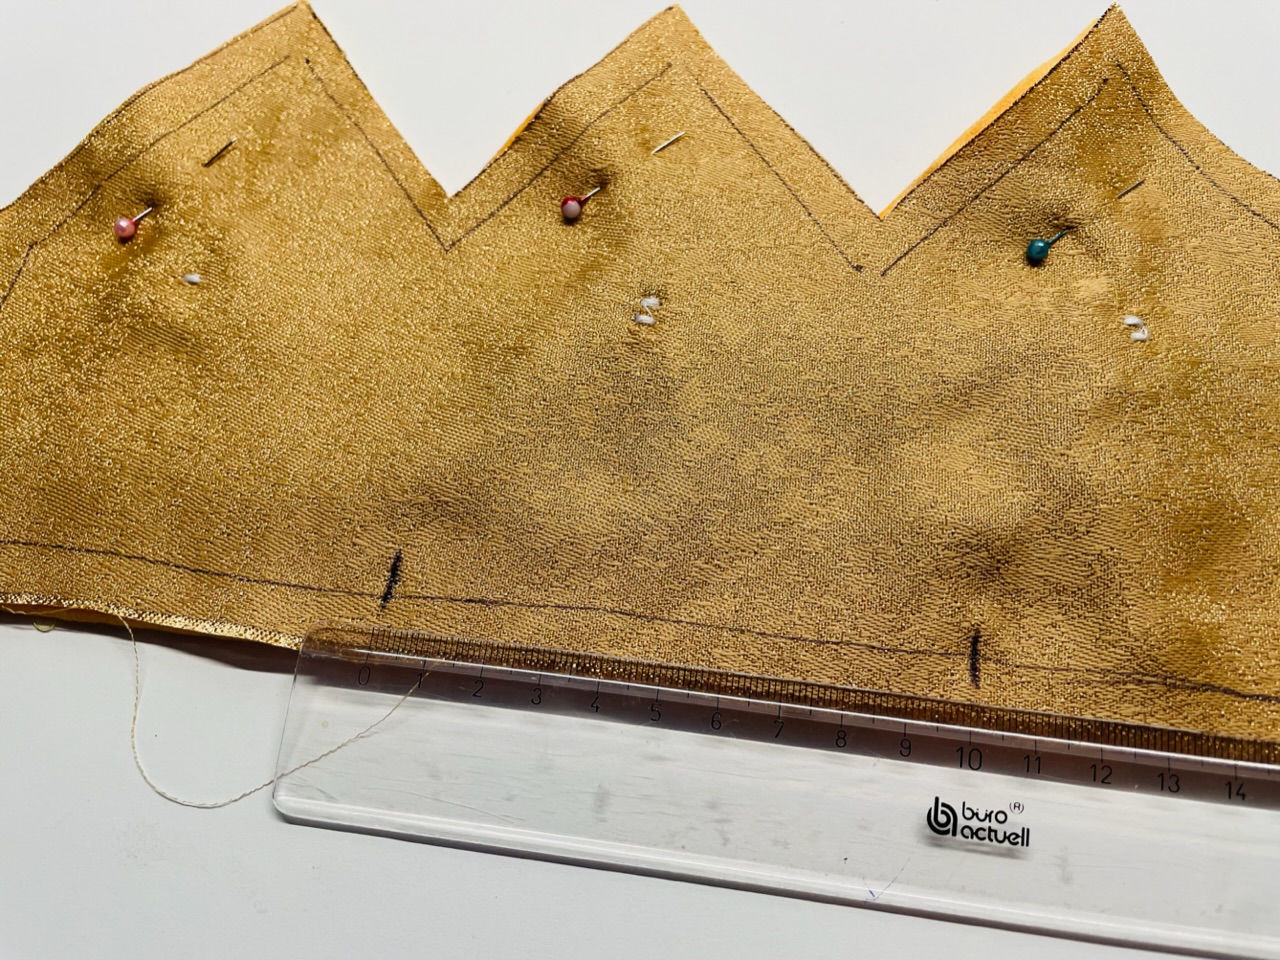
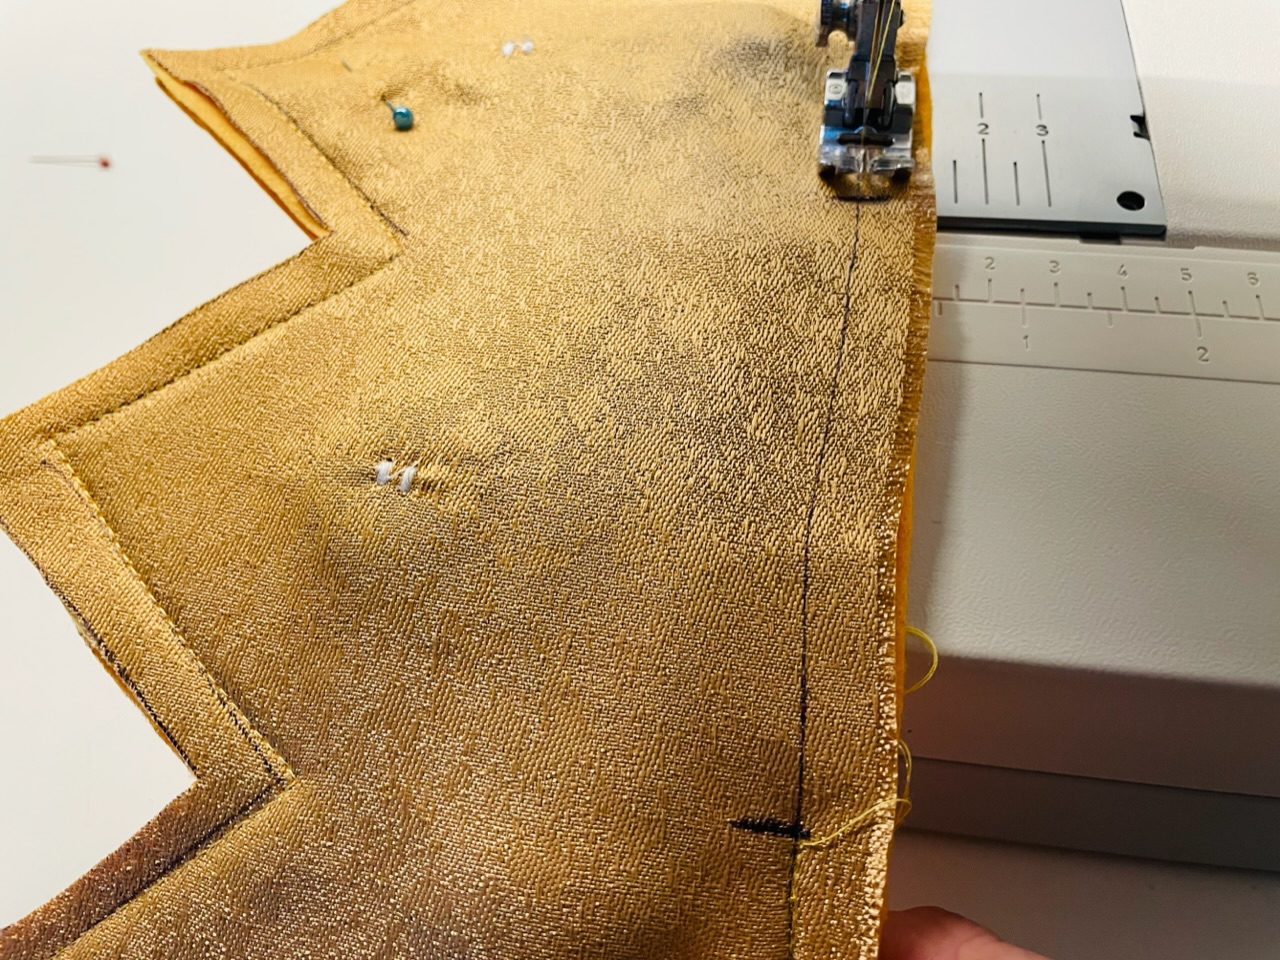
Starts at the marking of the turning opening with the sewing of the crown. On the sewing line the crown can now easily be sewn together.

Bild zum Schritt 37 für das Bastel- und DIY-Abenteuer für Kinder: 'Beginnt an der Markierung der Wendeöffnung mit dem Umnähen der...'

34

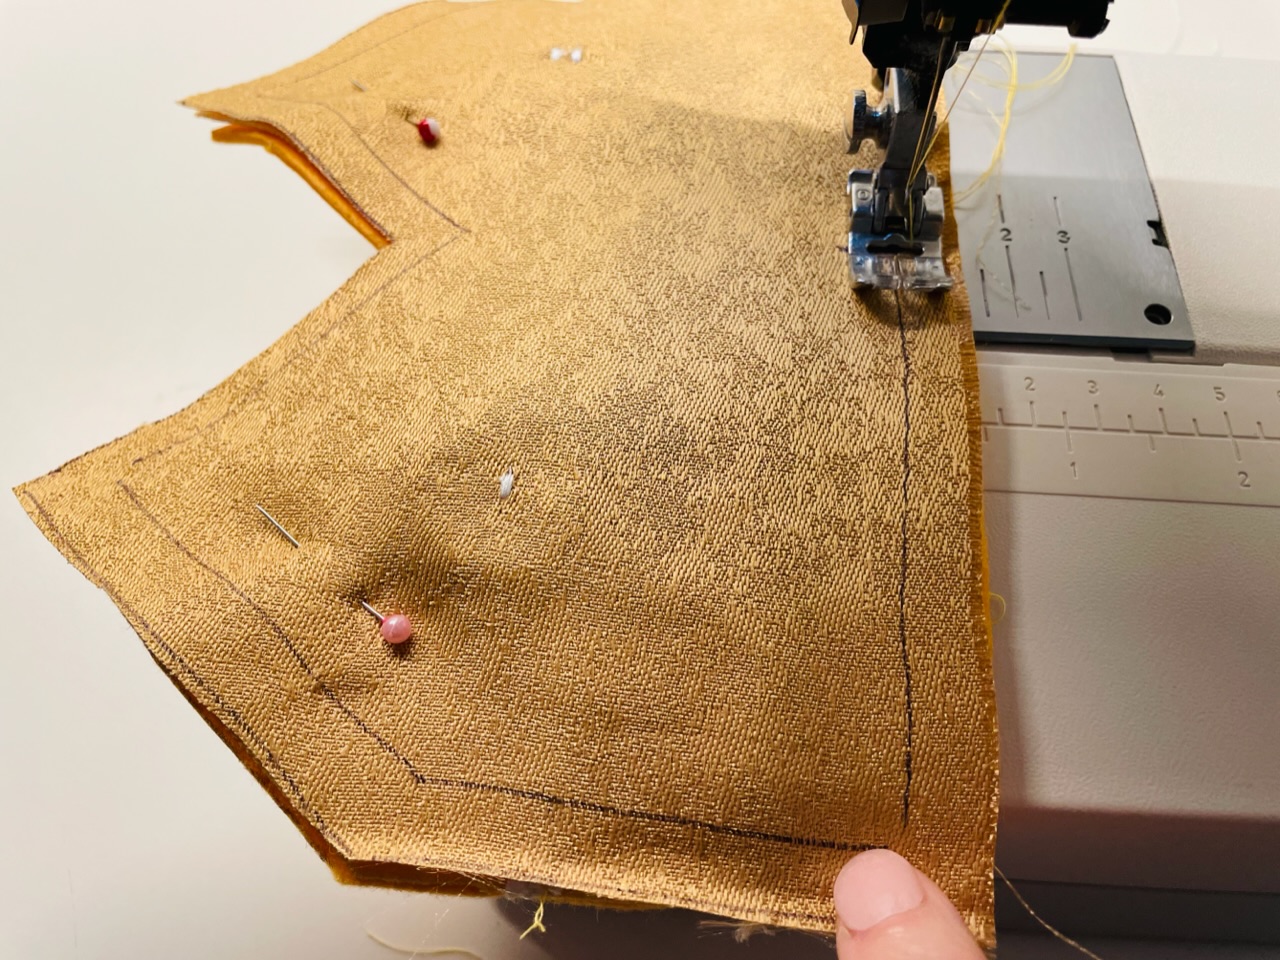
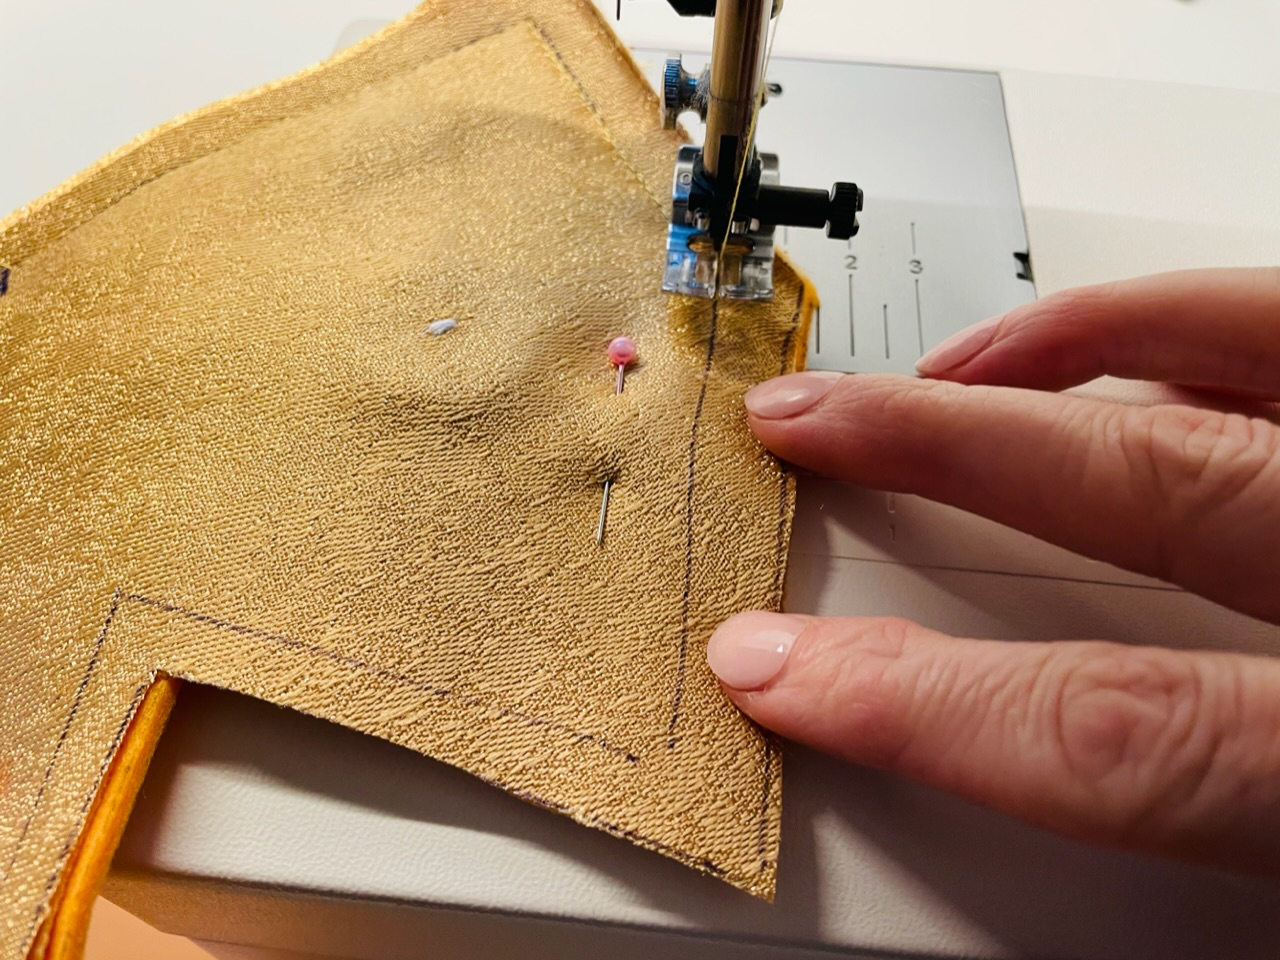
If you arrive at a corner while sewing, leave the needle in the fabric, lift the little foot briefly, turn the fabric so far, until you can continue sewing on the sewing line and lower the little foot again. Continue sewing to the next corner and drive the same way.

Bild zum Schritt 38 für das Bastel- und DIY-Abenteuer für Kinder: 'Wenn ihr an einer Ecke ankommt beim Nähen, lasst die...'

35

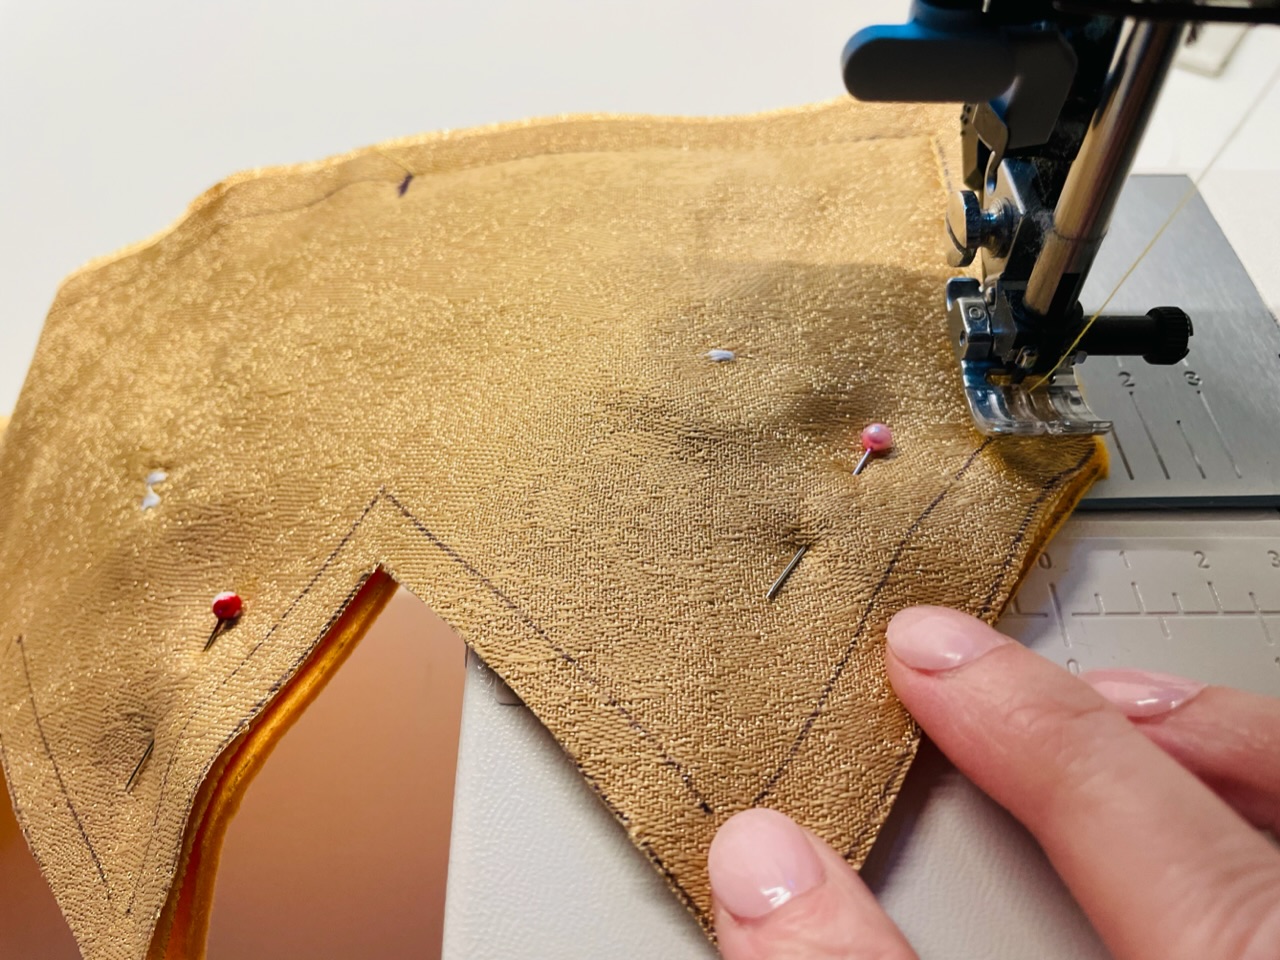
So you can sew the corners cleanly.

Bild zum Schritt 39 für das Bastel- und DIY-Abenteuer für Kinder: 'So könnt ihr sauber die Ecken nähen.'

36

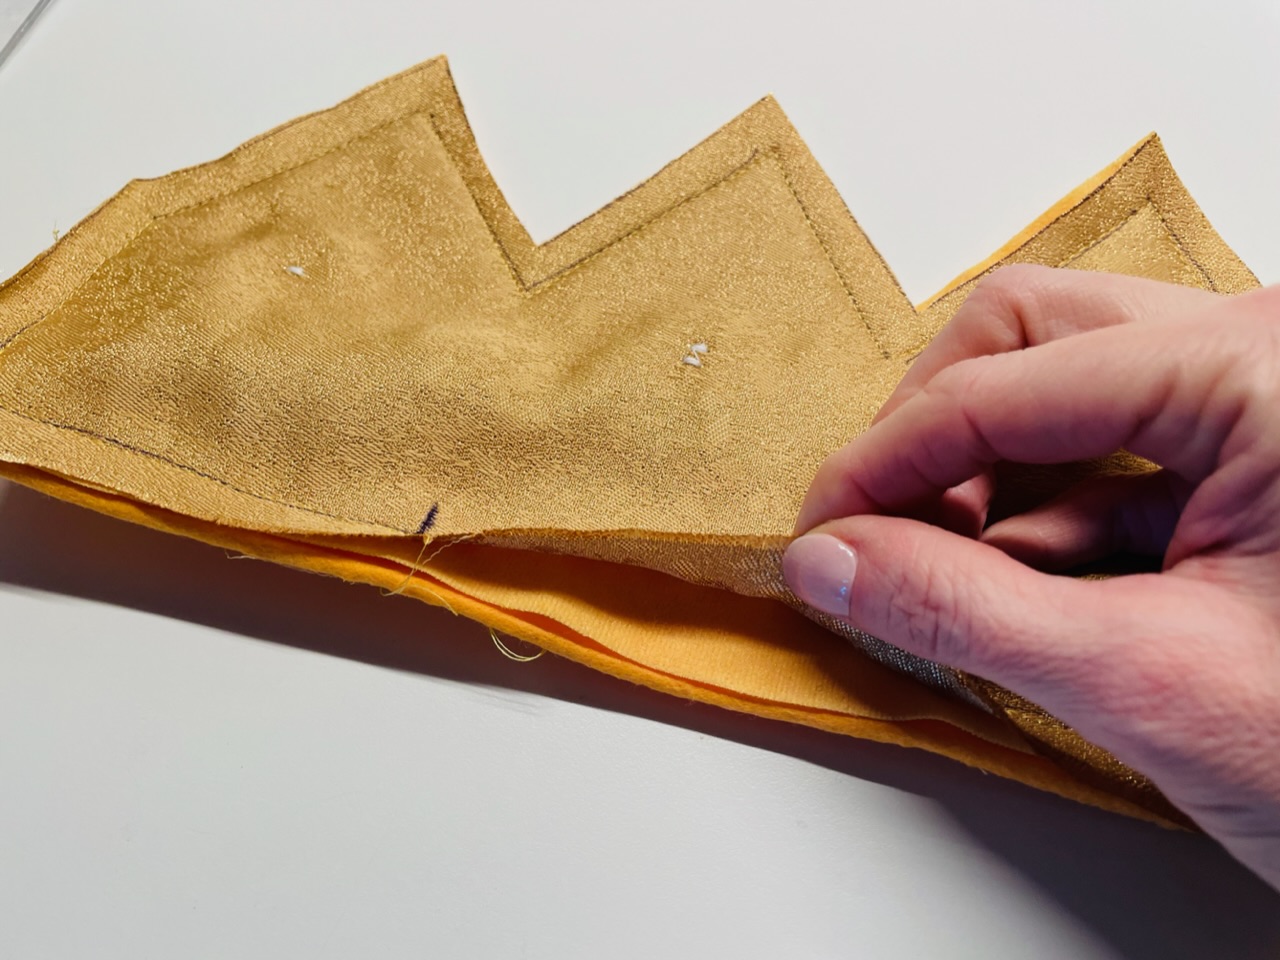
Sews all around until the second marker of the turning opening. Sews briefly the thread so that the seam does not open when turning.

Bild zum Schritt 40 für das Bastel- und DIY-Abenteuer für Kinder: 'Näht rundherum bis zur zweiten Markierung der Wendeöffnung. Vernäht kurz...'

37

The turning opening.

Bild zum Schritt 41 für das Bastel- und DIY-Abenteuer für Kinder: 'Die Wendeöffnung.'

38

Before the crown is turned, you have to cut off the corners at the seams.

Bild zum Schritt 42 für das Bastel- und DIY-Abenteuer für Kinder: 'Bevor die Krone nun gewendet wird, müsst ihr die Ecken...'

39

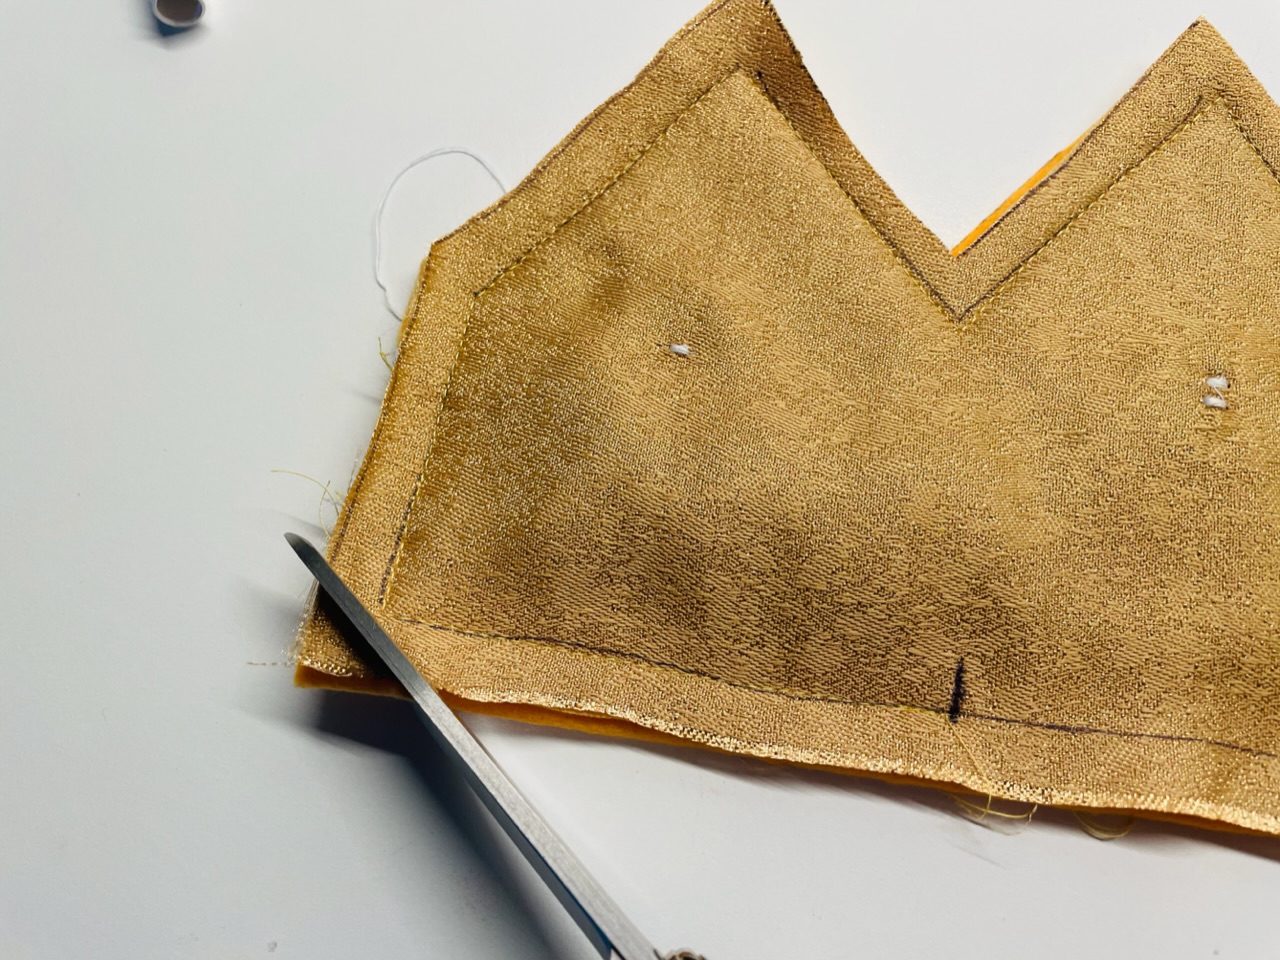
Even at the tips, the fabric is cut short. Later, the fabric can be shaped better than the lace.

Bild zum Schritt 43 für das Bastel- und DIY-Abenteuer für Kinder: 'Auch an den Spitzen wird der Stoff knapp abgeschnitten. So...'

40

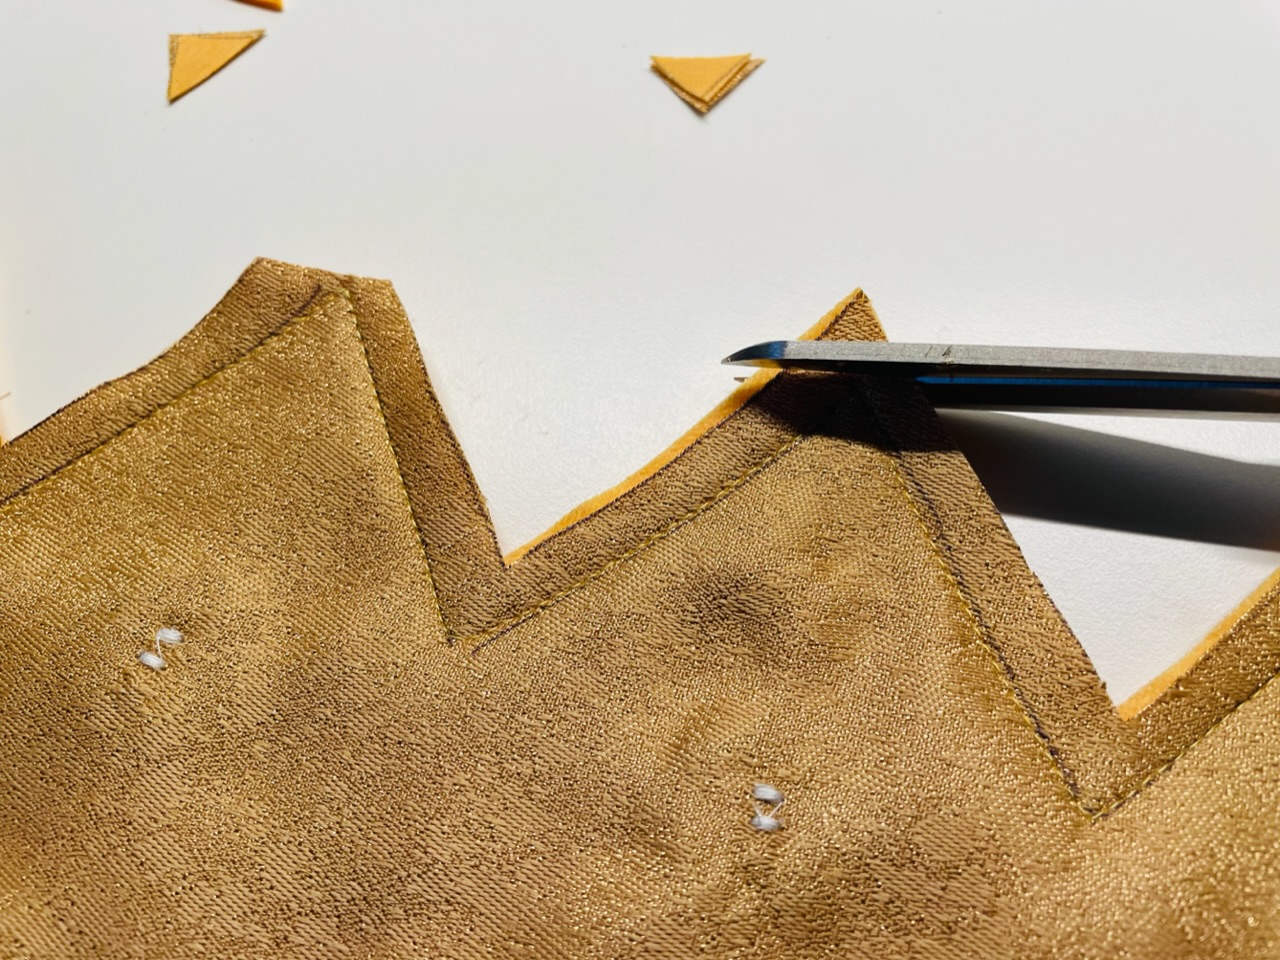
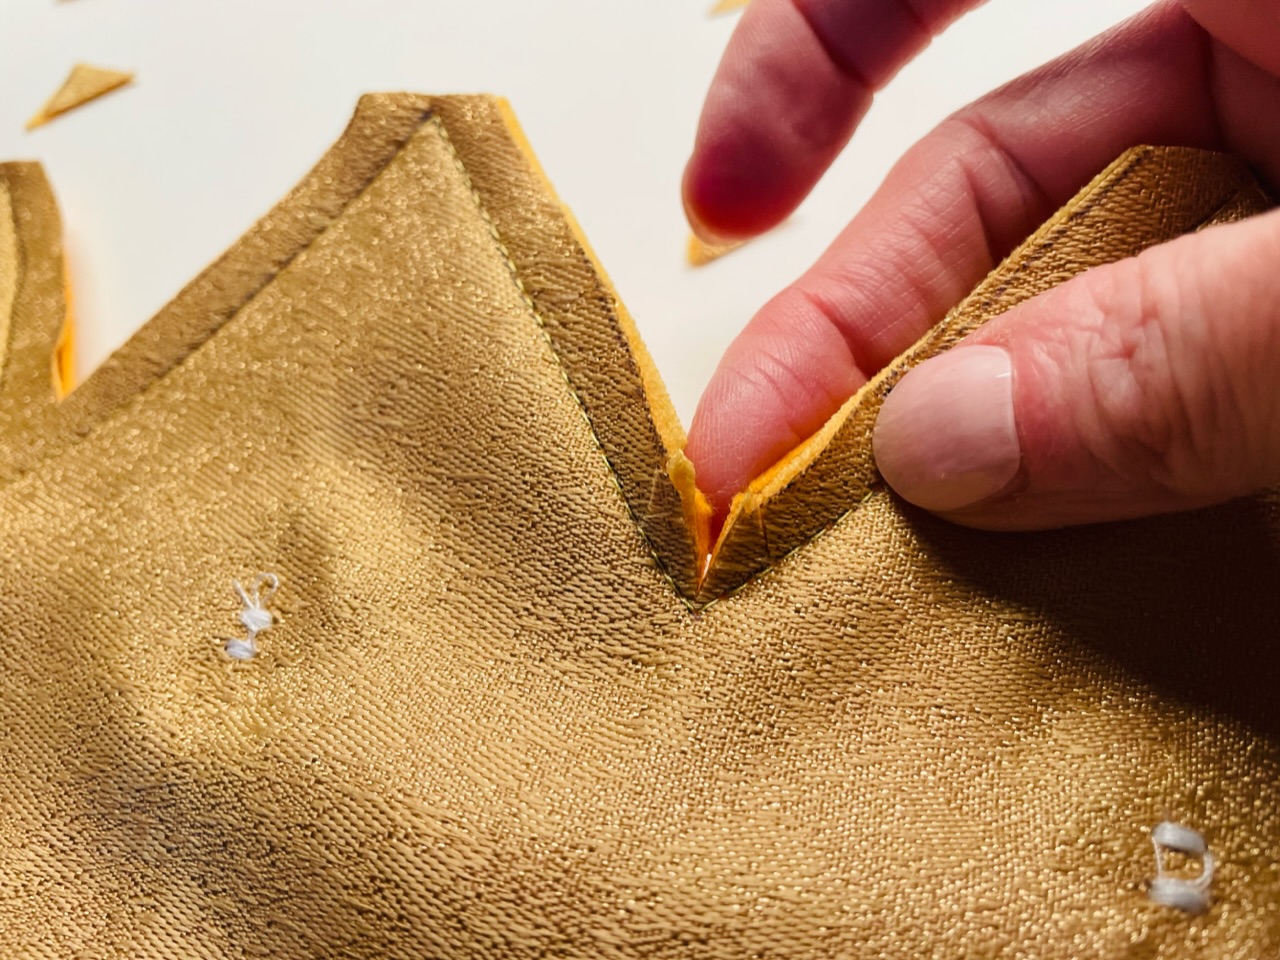
At the inner points the fabric is cut to the seam, otherwise it "throws" later when the fabric is turned over.

Bild zum Schritt 44 für das Bastel- und DIY-Abenteuer für Kinder: 'An den innenliegenden Zacken wird der Stoff bis zur Naht...'

41

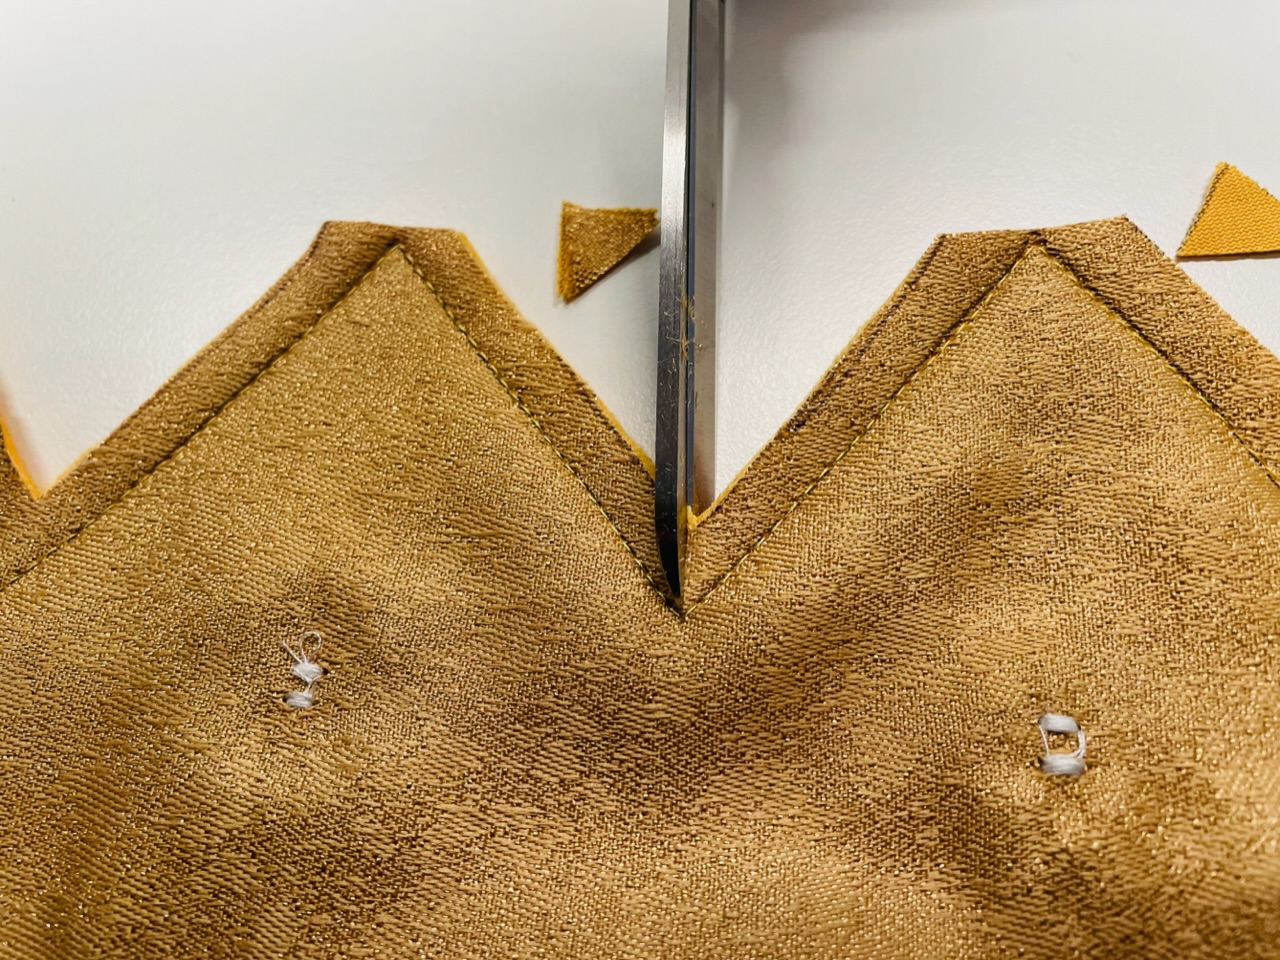
Here you can also make several small incisions. Just make sure not to cut the seam!

Bild zum Schritt 45 für das Bastel- und DIY-Abenteuer für Kinder: 'Hier könnt ihr auch mehrere kleine Einschnitte machen. Achtet nur...'

42

Through the turning opening between the two beautiful fabric sides and the crown is arched outwards.

Bild zum Schritt 46 für das Bastel- und DIY-Abenteuer für Kinder: 'Durch die Wendeöffnung wird zwischen die beiden schönen Stoffseiten gegriffen...'

43

This is a bit difficult, maybe you can also use the tapes to help...

Bild zum Schritt 47 für das Bastel- und DIY-Abenteuer für Kinder: 'Das ist etwas schwierig, vielleicht könnt ihr auch die Bänder...'

44

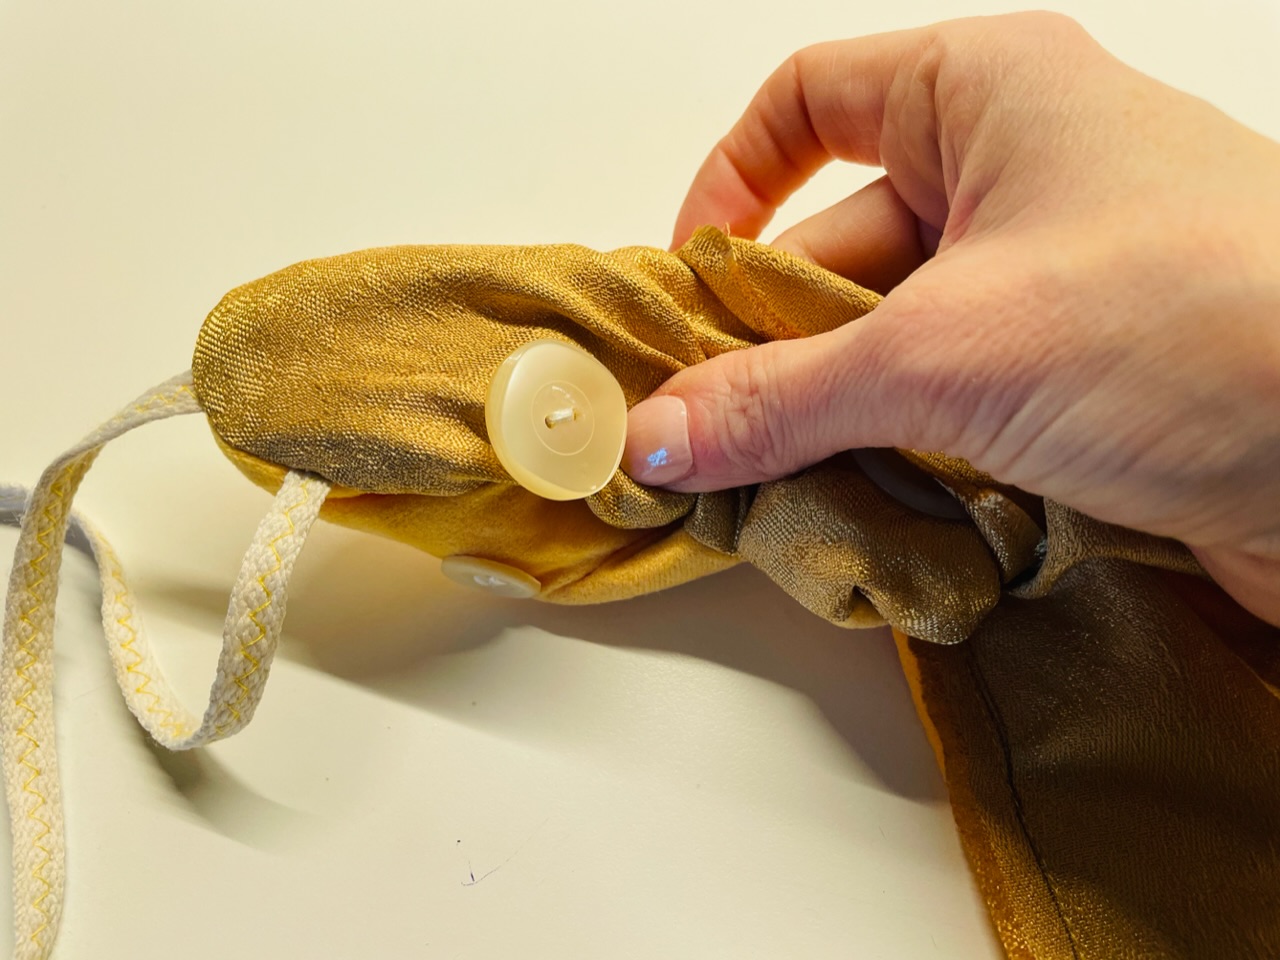
First turn the largest and then use a cooking spoon to bulge out the tacks.

Bild zum Schritt 48 für das Bastel- und DIY-Abenteuer für Kinder: 'Wendet erst einmal das Gröbste und helft dann mit einem...'

45

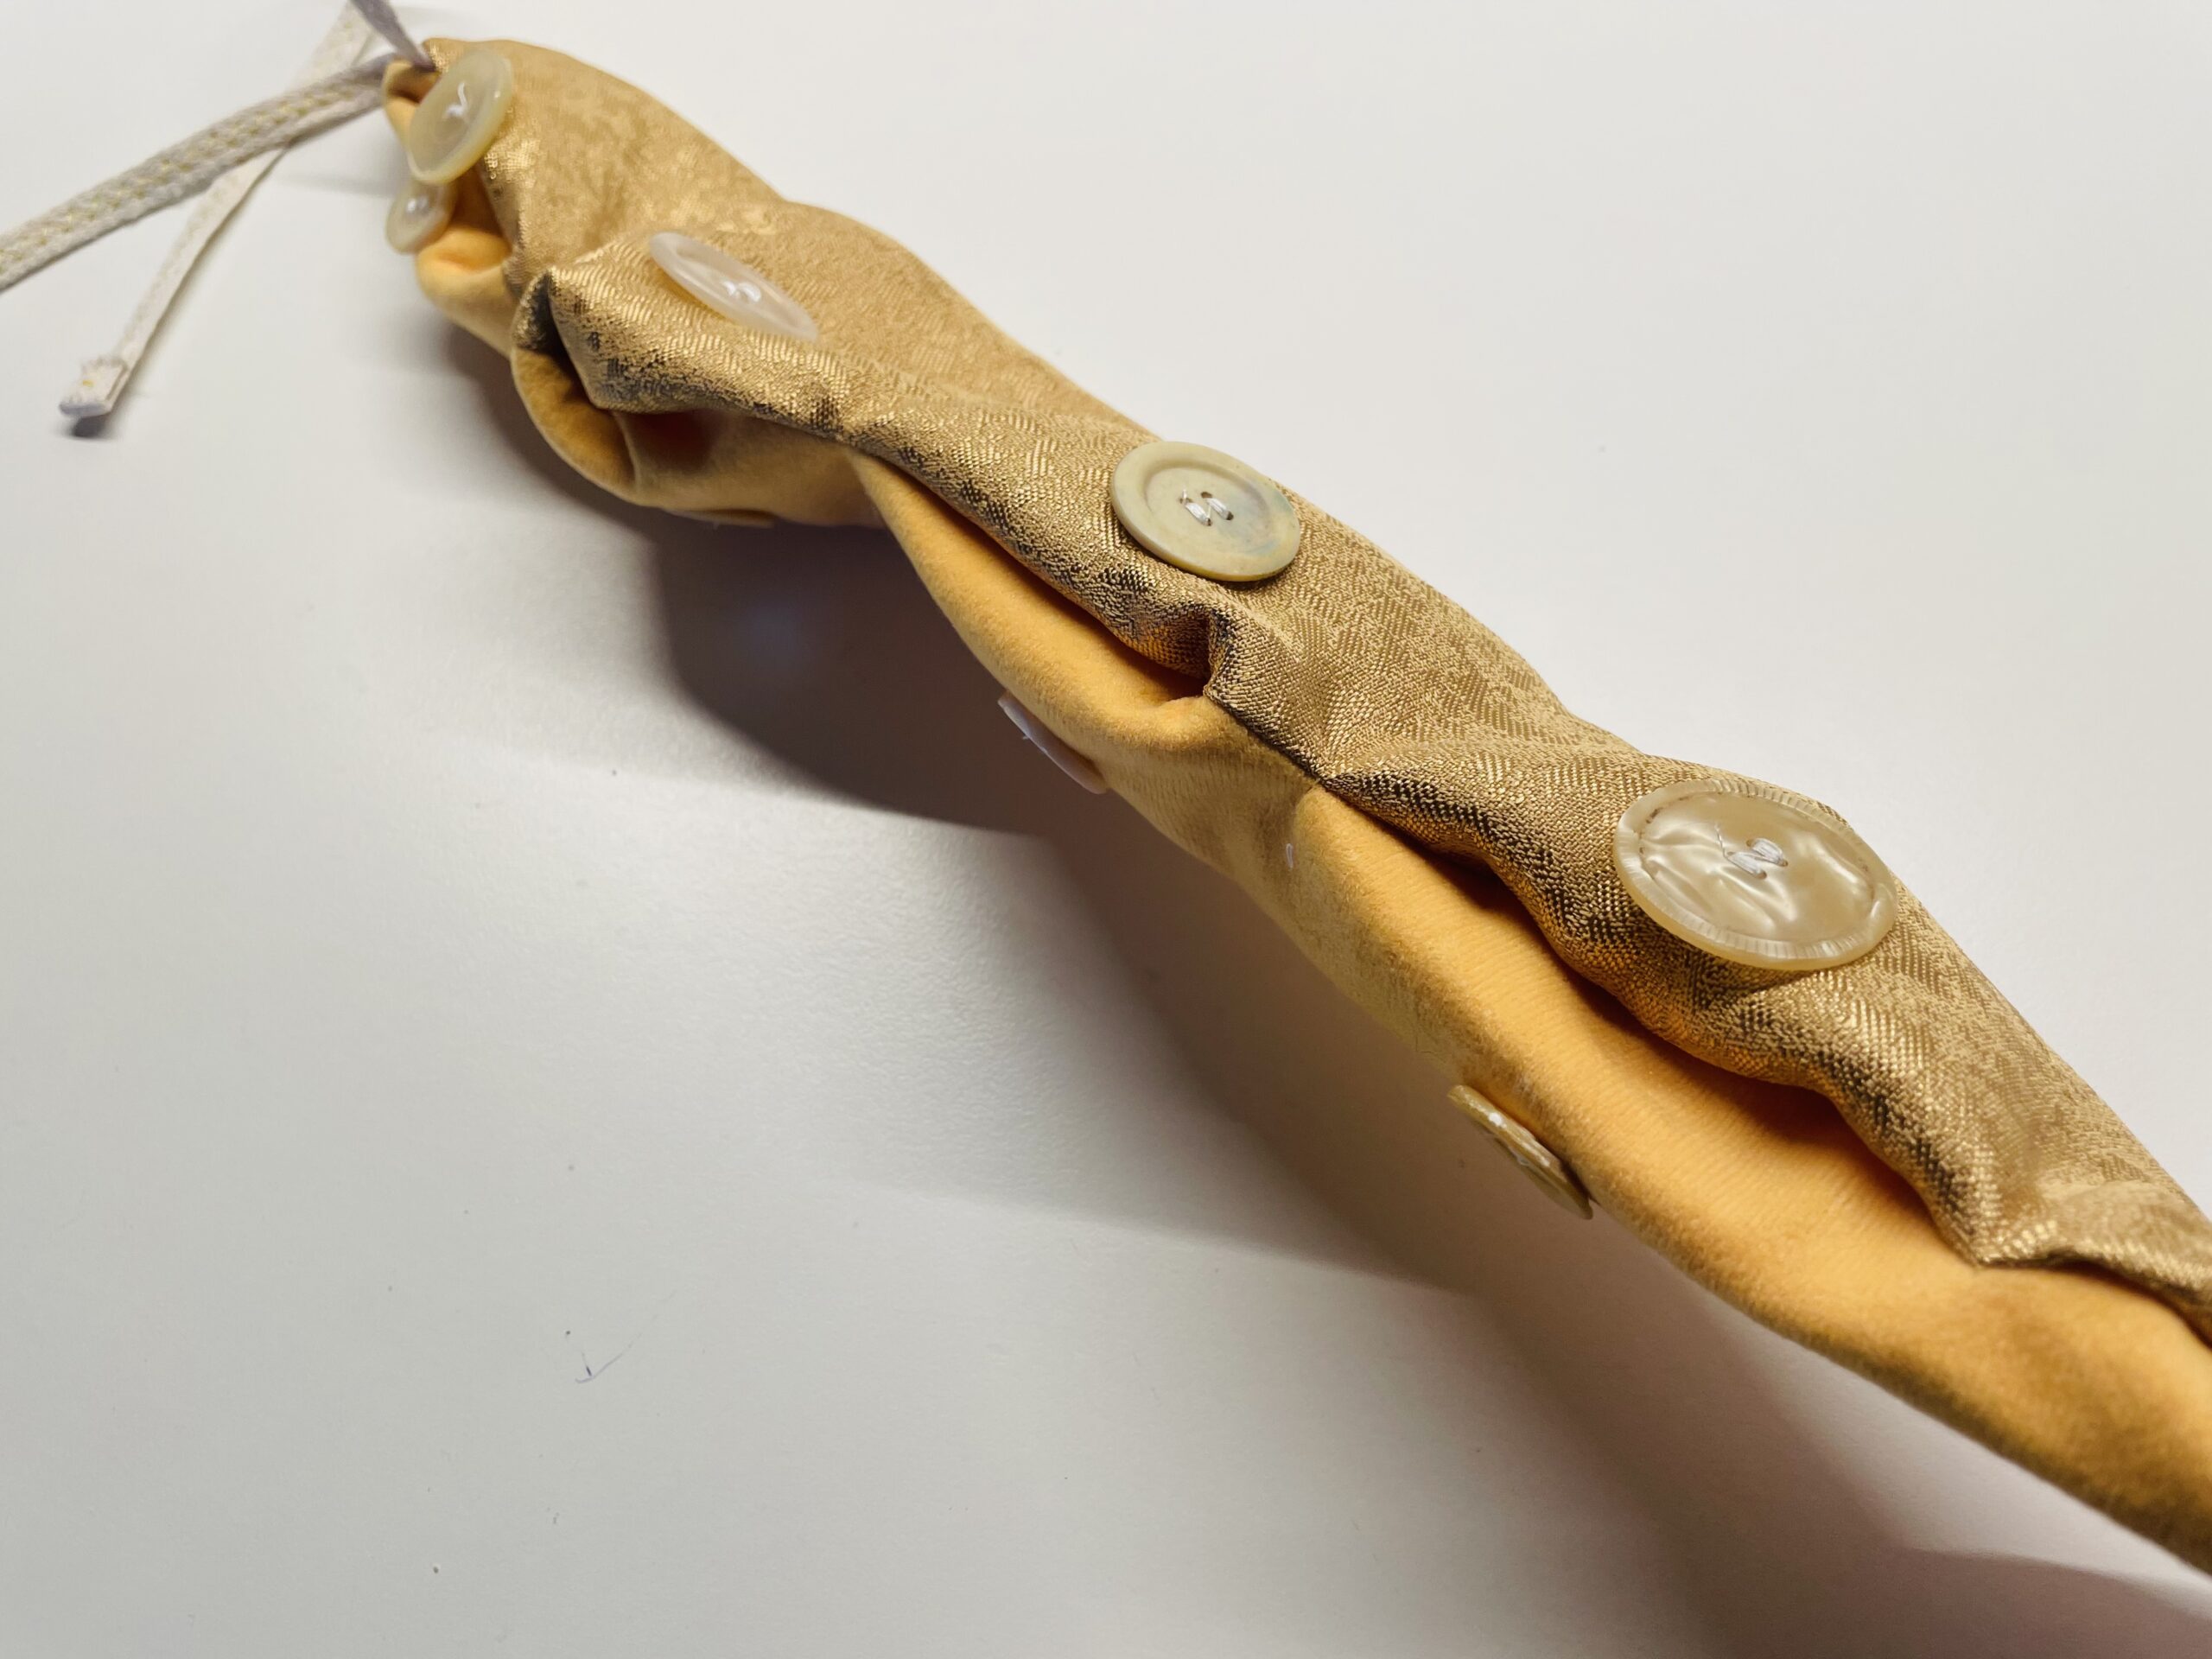
Drive with the style of the wooden spoon into each jig.

Bild zum Schritt 49 für das Bastel- und DIY-Abenteuer für Kinder: 'Fahrt mit dem Stil des Holzlöffels in jede Zacke.'

46

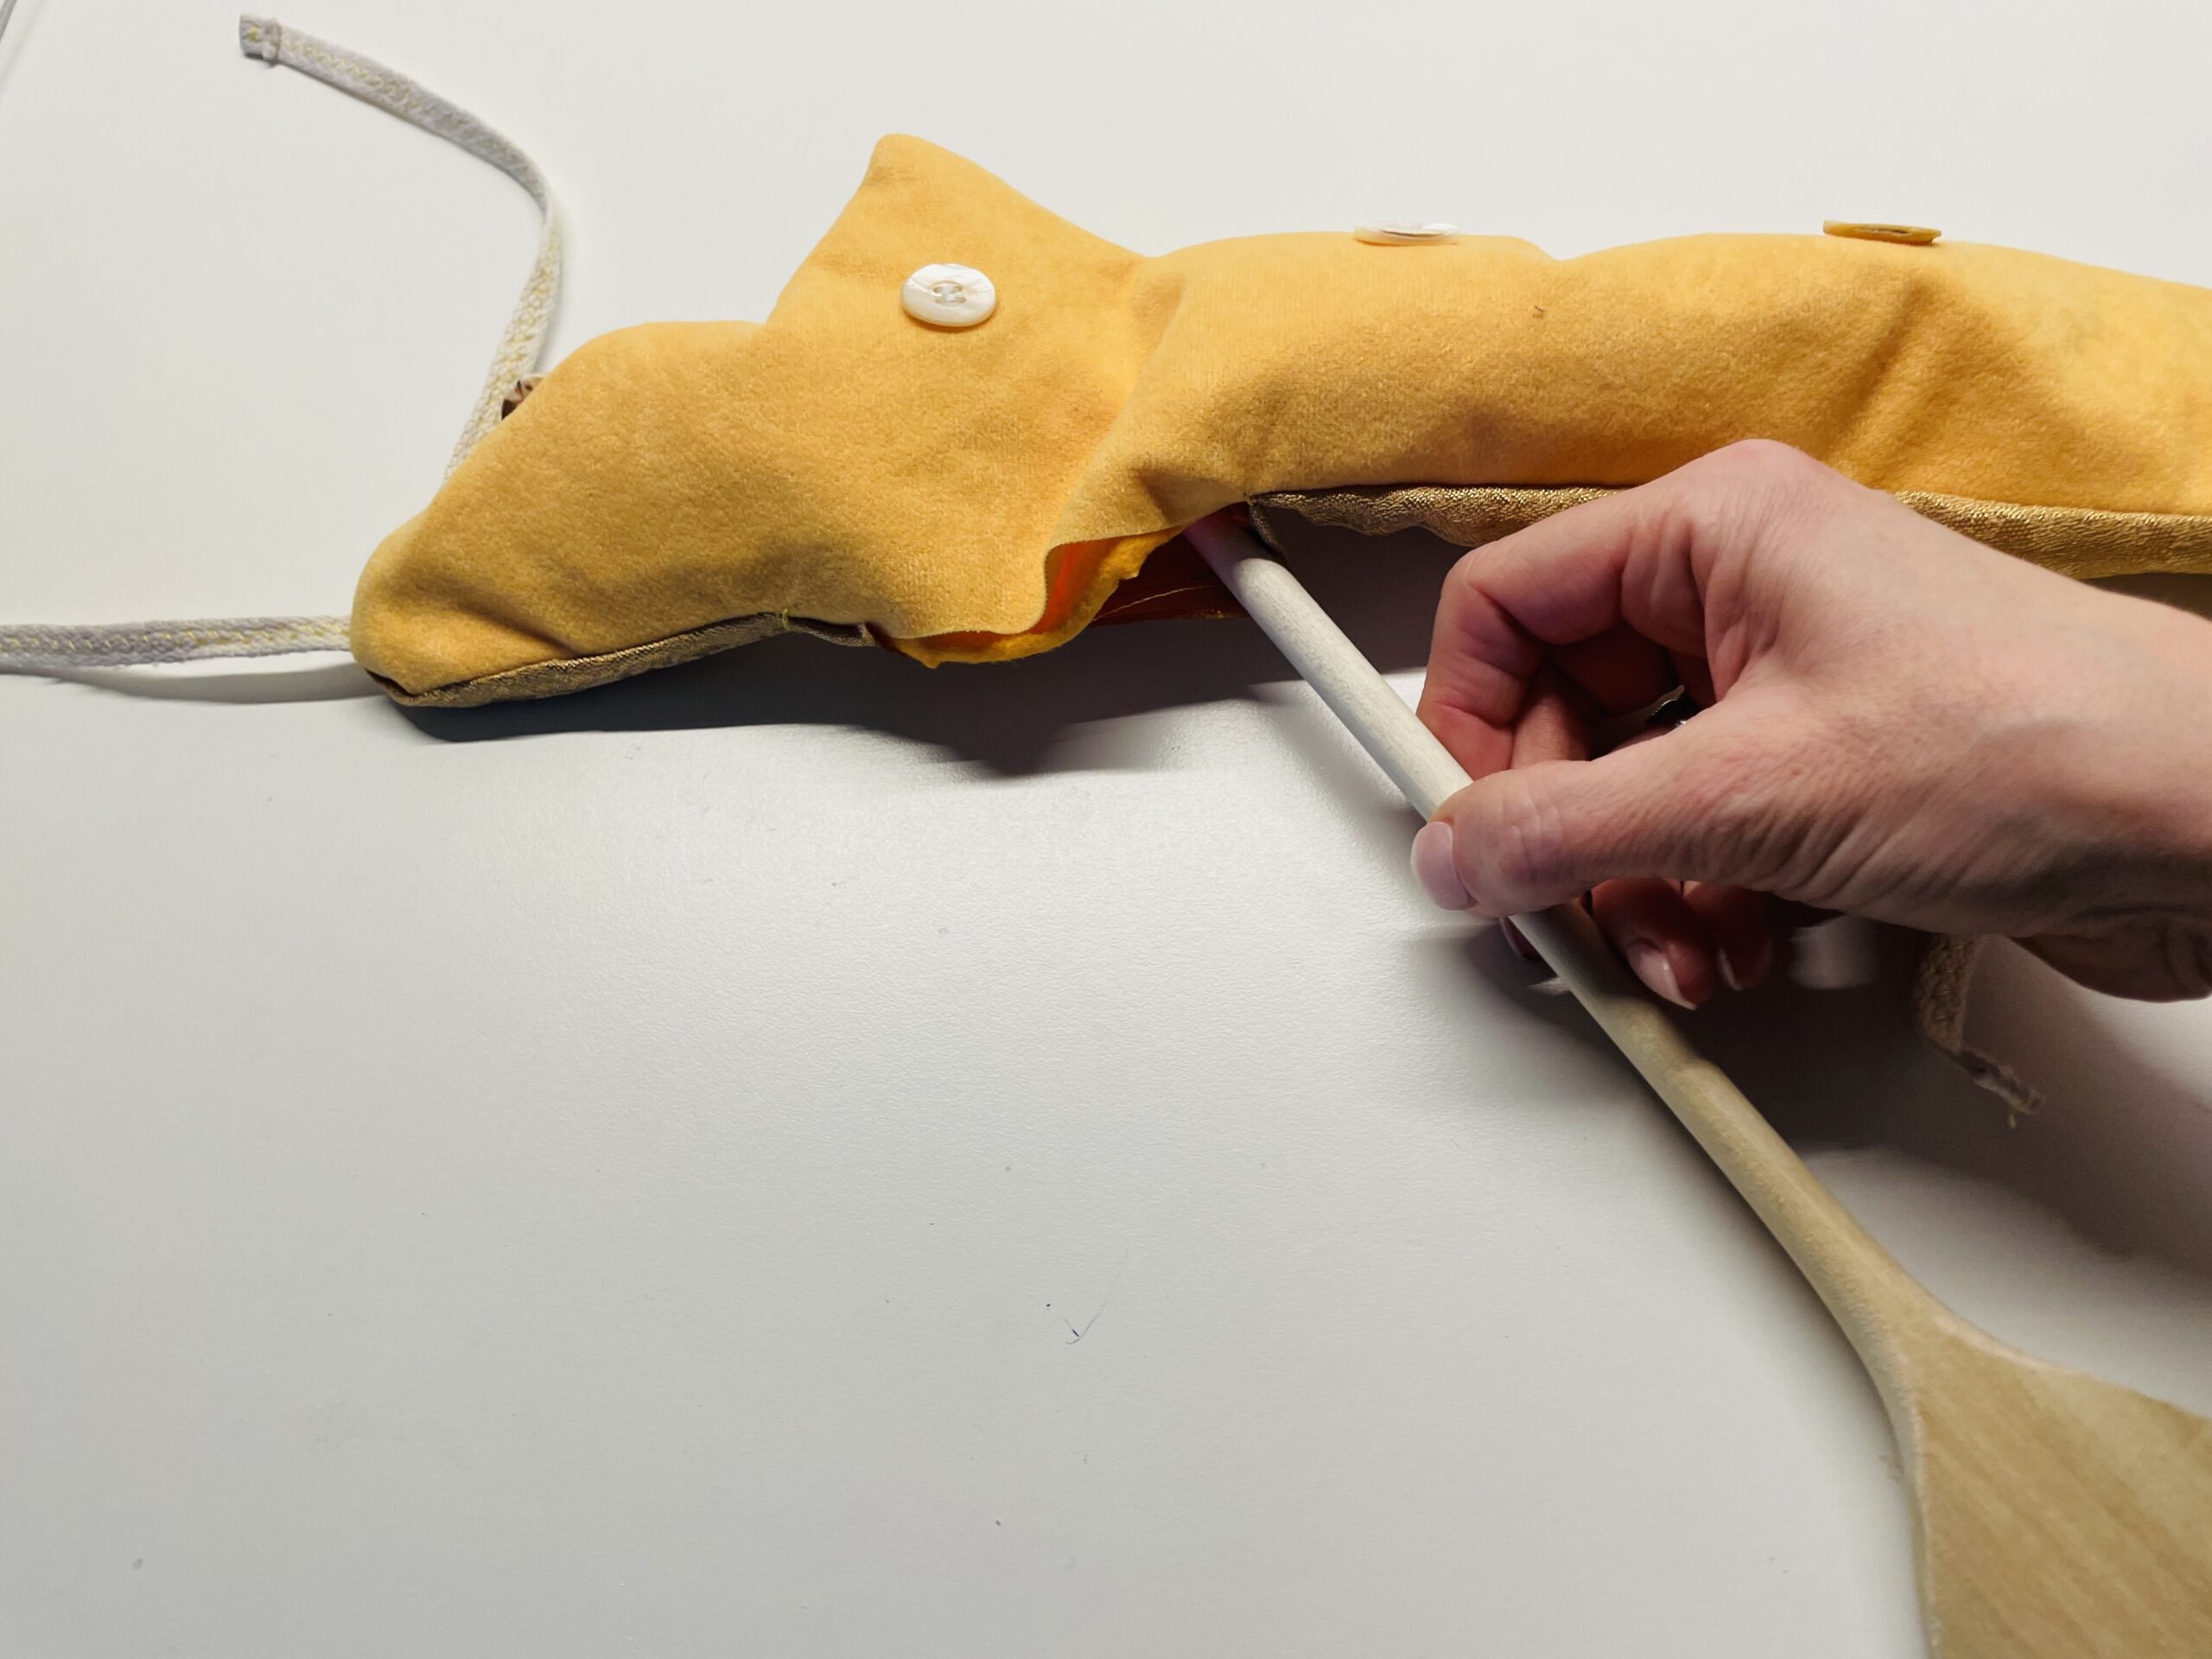
Forms as well as it goes out the jigs.

Bild zum Schritt 50 für das Bastel- und DIY-Abenteuer für Kinder: 'Formt so gut es geht die Zacken aus.'

47

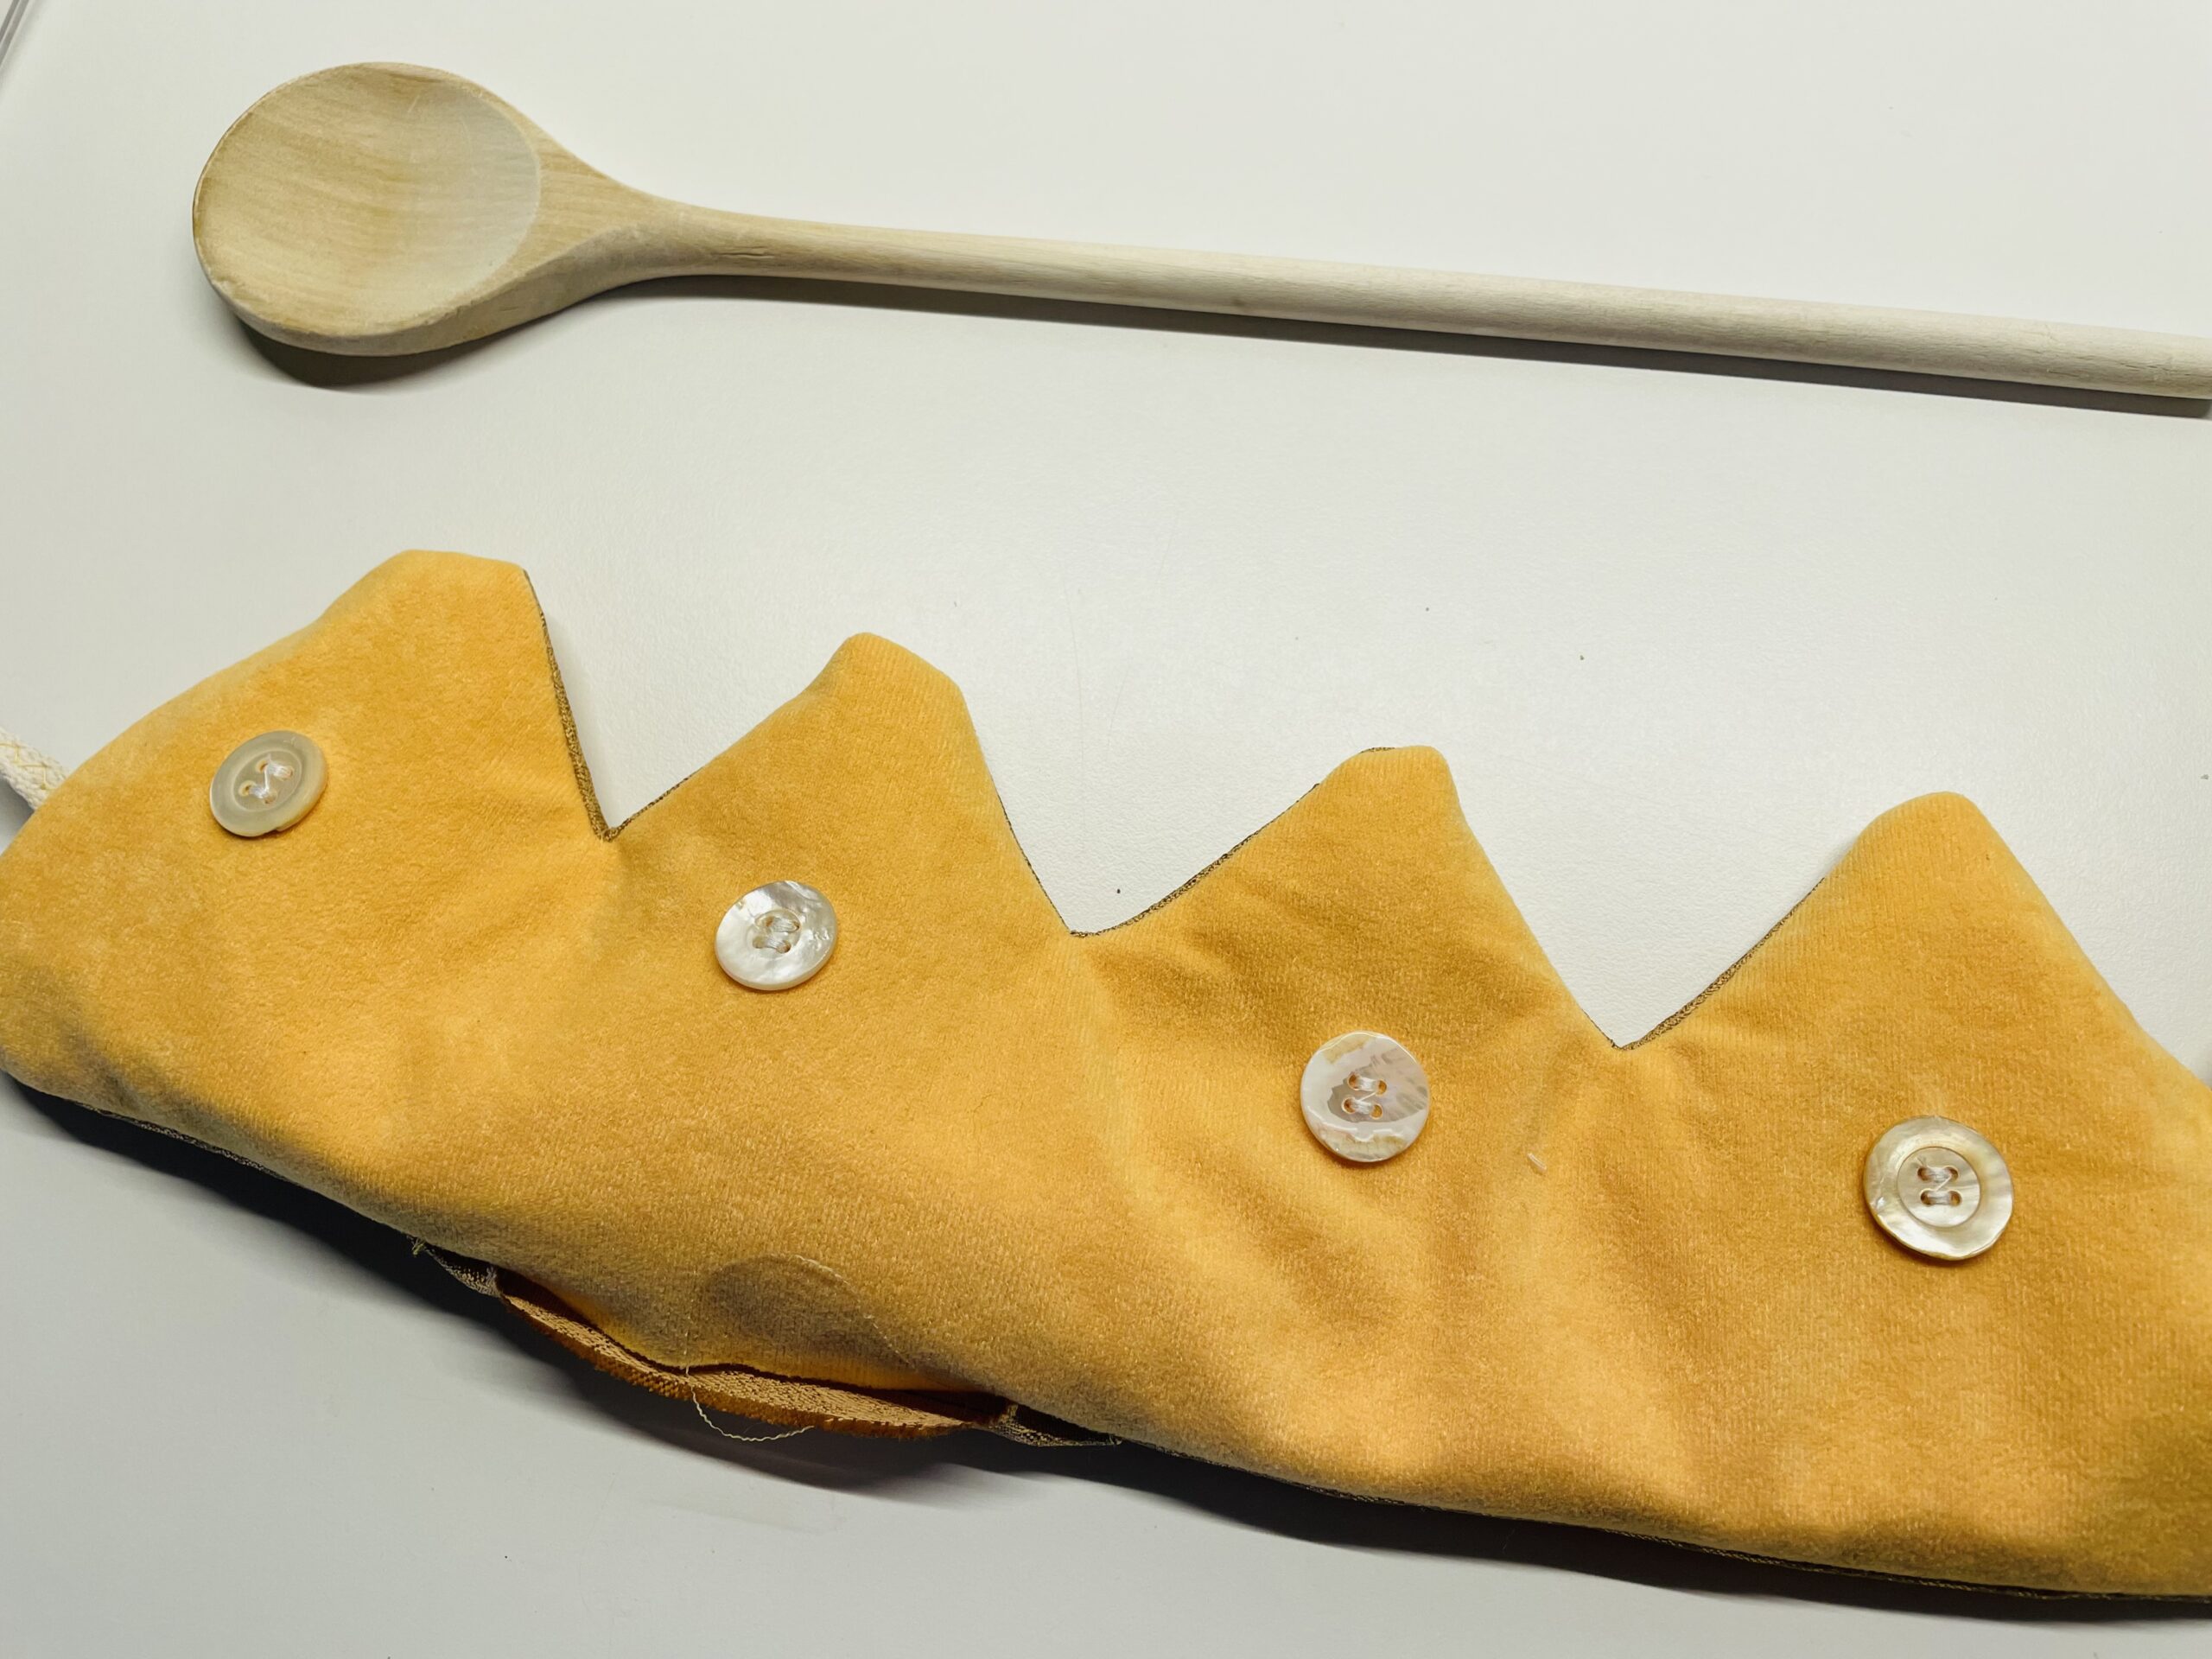
You can also use a blunt pen to refine the points, but be careful not to put holes in the fabric.

Bild zum Schritt 51 für das Bastel- und DIY-Abenteuer für Kinder: 'Zur Verfeinerung der Zacken könnt ihr auch einen stumpfen Stift...'

48

This is how both sides of the crown look like.

Bild zum Schritt 52 für das Bastel- und DIY-Abenteuer für Kinder: 'So sehen dann beide Seiten der Krone aus.'

49

2. Bild zum Schritt 52 für das Bastel- und DIY-Abenteuer für Kinder: 'So sehen dann beide Seiten der Krone aus.'

50

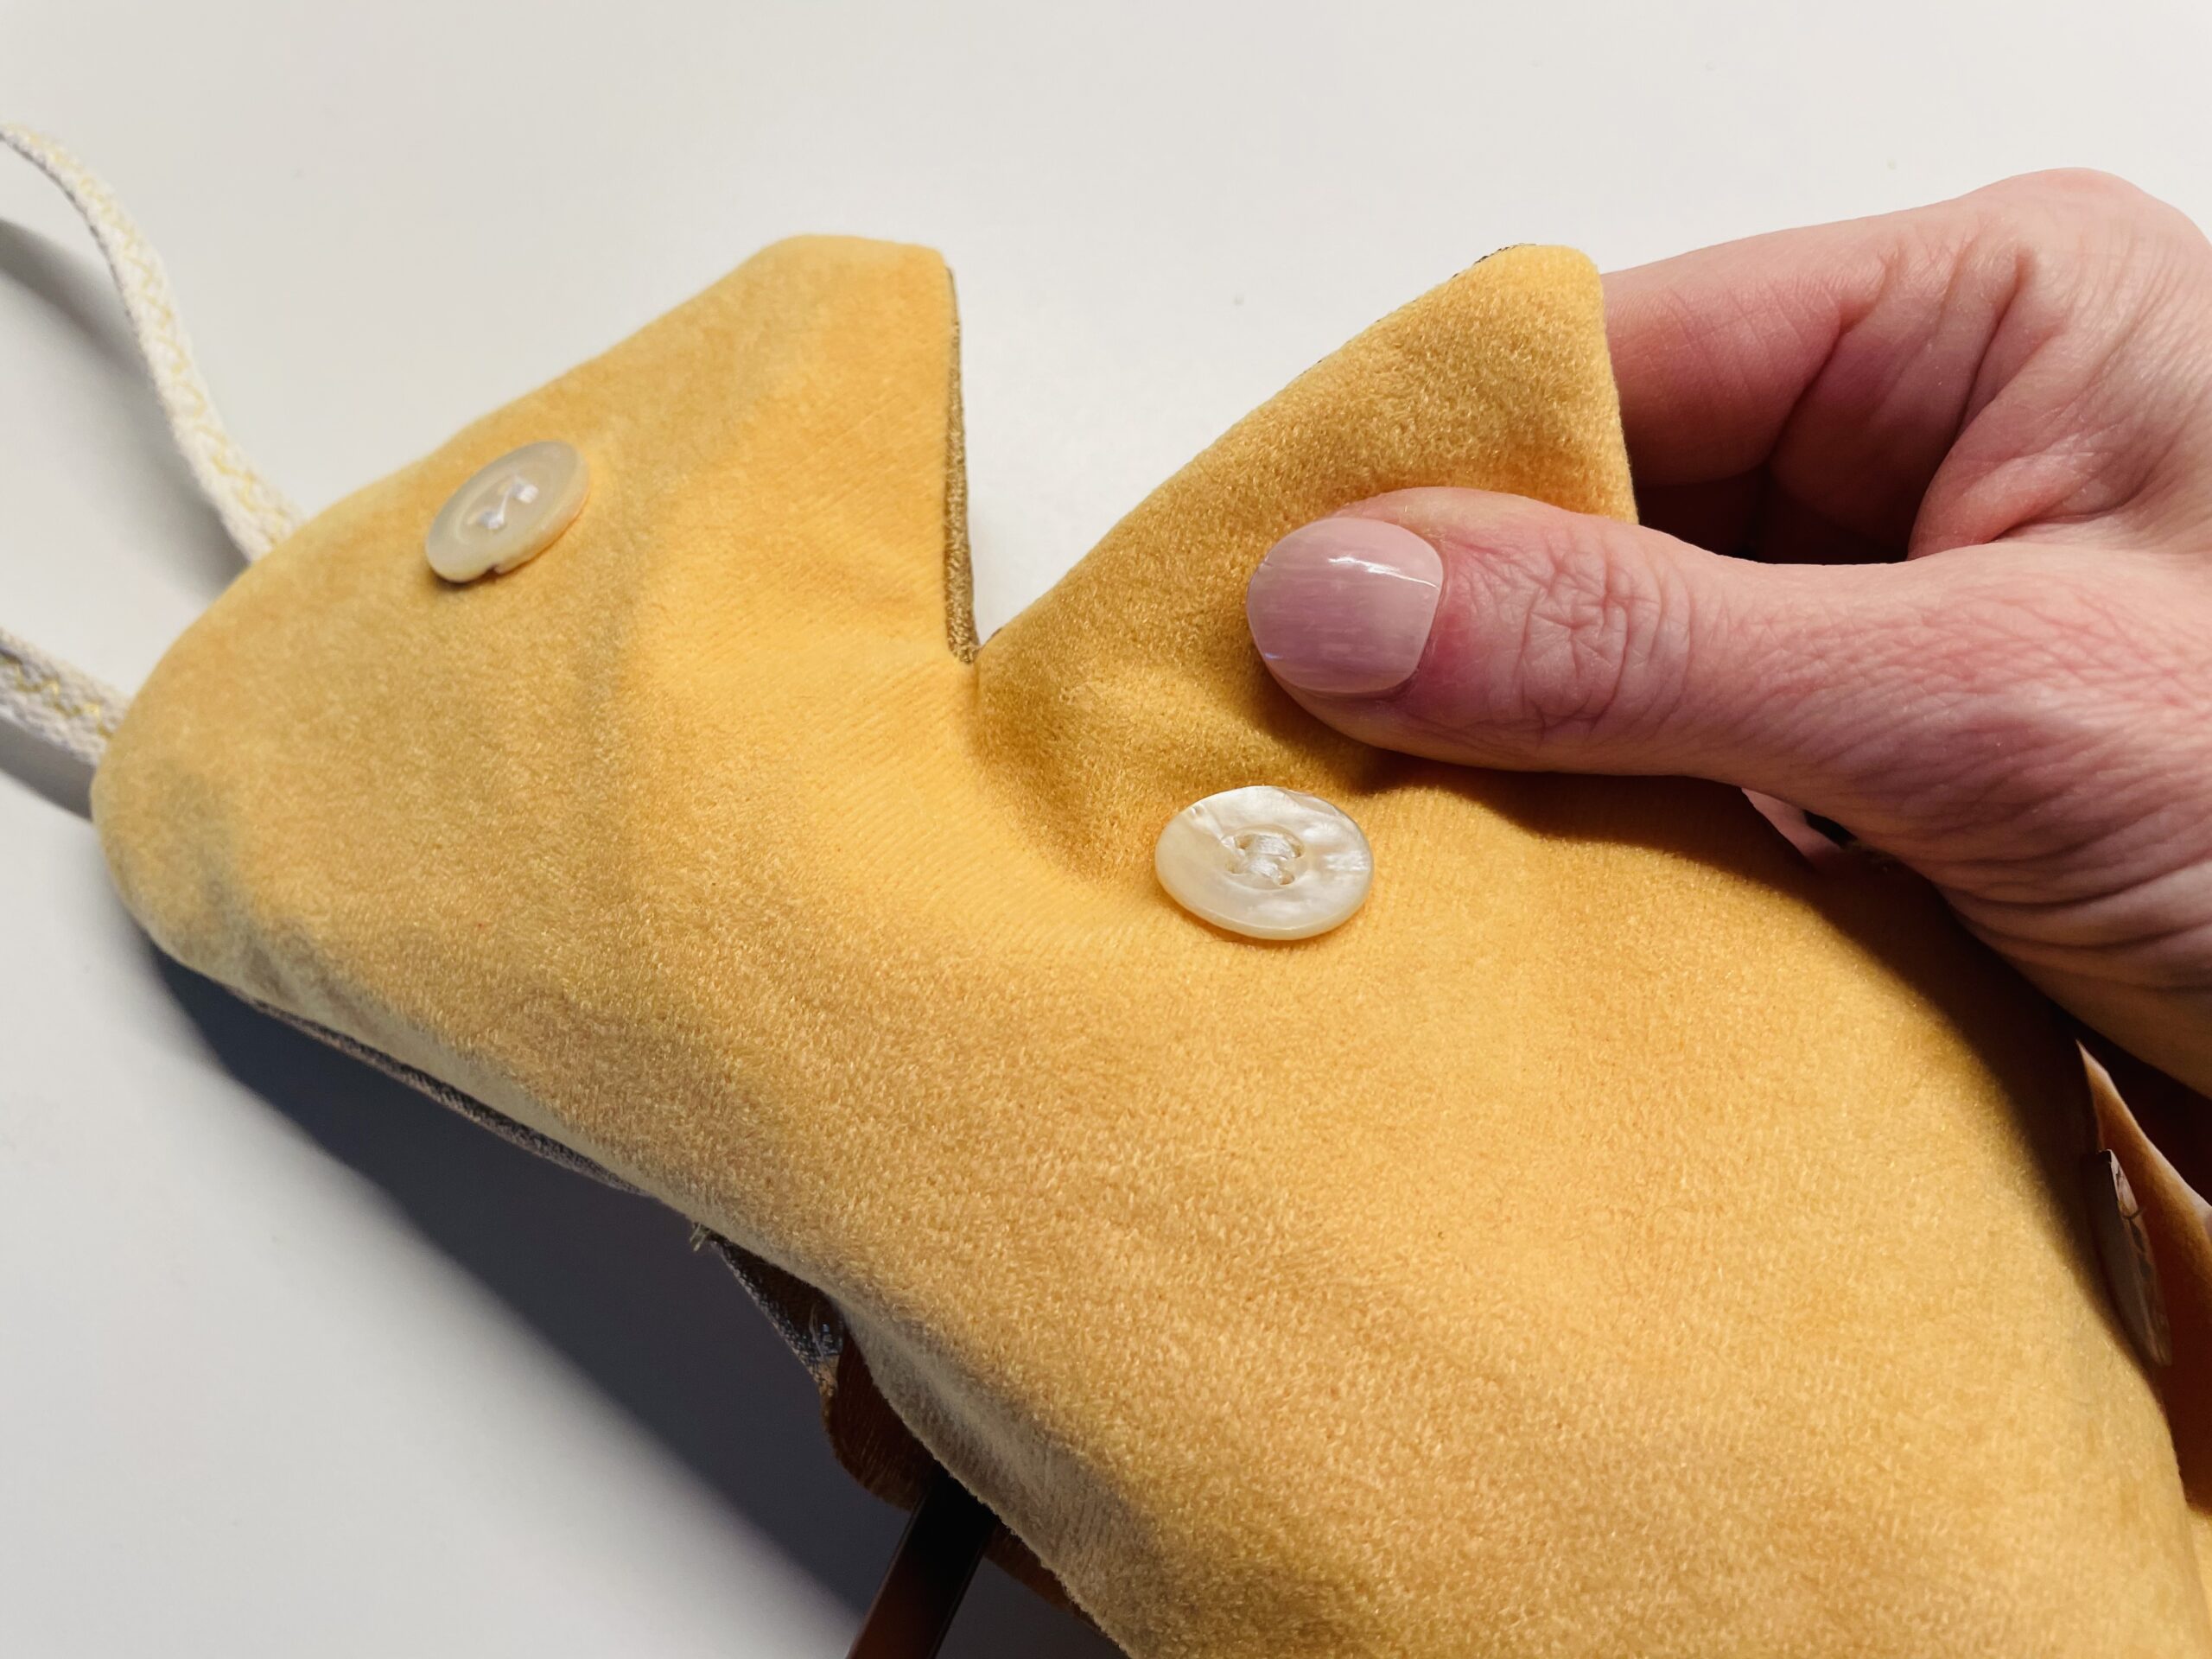
The turning opening still has to be closed. Put the fabrics neatly on top of each other.

Bild zum Schritt 54 für das Bastel- und DIY-Abenteuer für Kinder: 'Die Wendeöffnung muss noch verschlossen werden. Legt die Stoffe ordentlich...'

51

First close the opening with a pin.

Bild zum Schritt 55 für das Bastel- und DIY-Abenteuer für Kinder: 'Verschließt die Öffnung zunächst mit einer Stecknadel.'

52

The crown is now completely sewn again, so it gets stability and the turning opening is closed "invisible". Start sewing the complete straight bottom first. Start sewing at a corner for this.

Bild zum Schritt 56 für das Bastel- und DIY-Abenteuer für Kinder: 'Die Krone wird nun komplett noch einmal umnäht, so erhält...'

53

The seam line runs the same way as the previously sewn line, only on the "beautiful" side. Again, raise the foot of the sewing machine and let the needle stick in the fabric when you turn the crown.

Bild zum Schritt 57 für das Bastel- und DIY-Abenteuer für Kinder: 'Die Nahtlinie verläuft genauso wie die vorher genähte Linie, nur...'

54

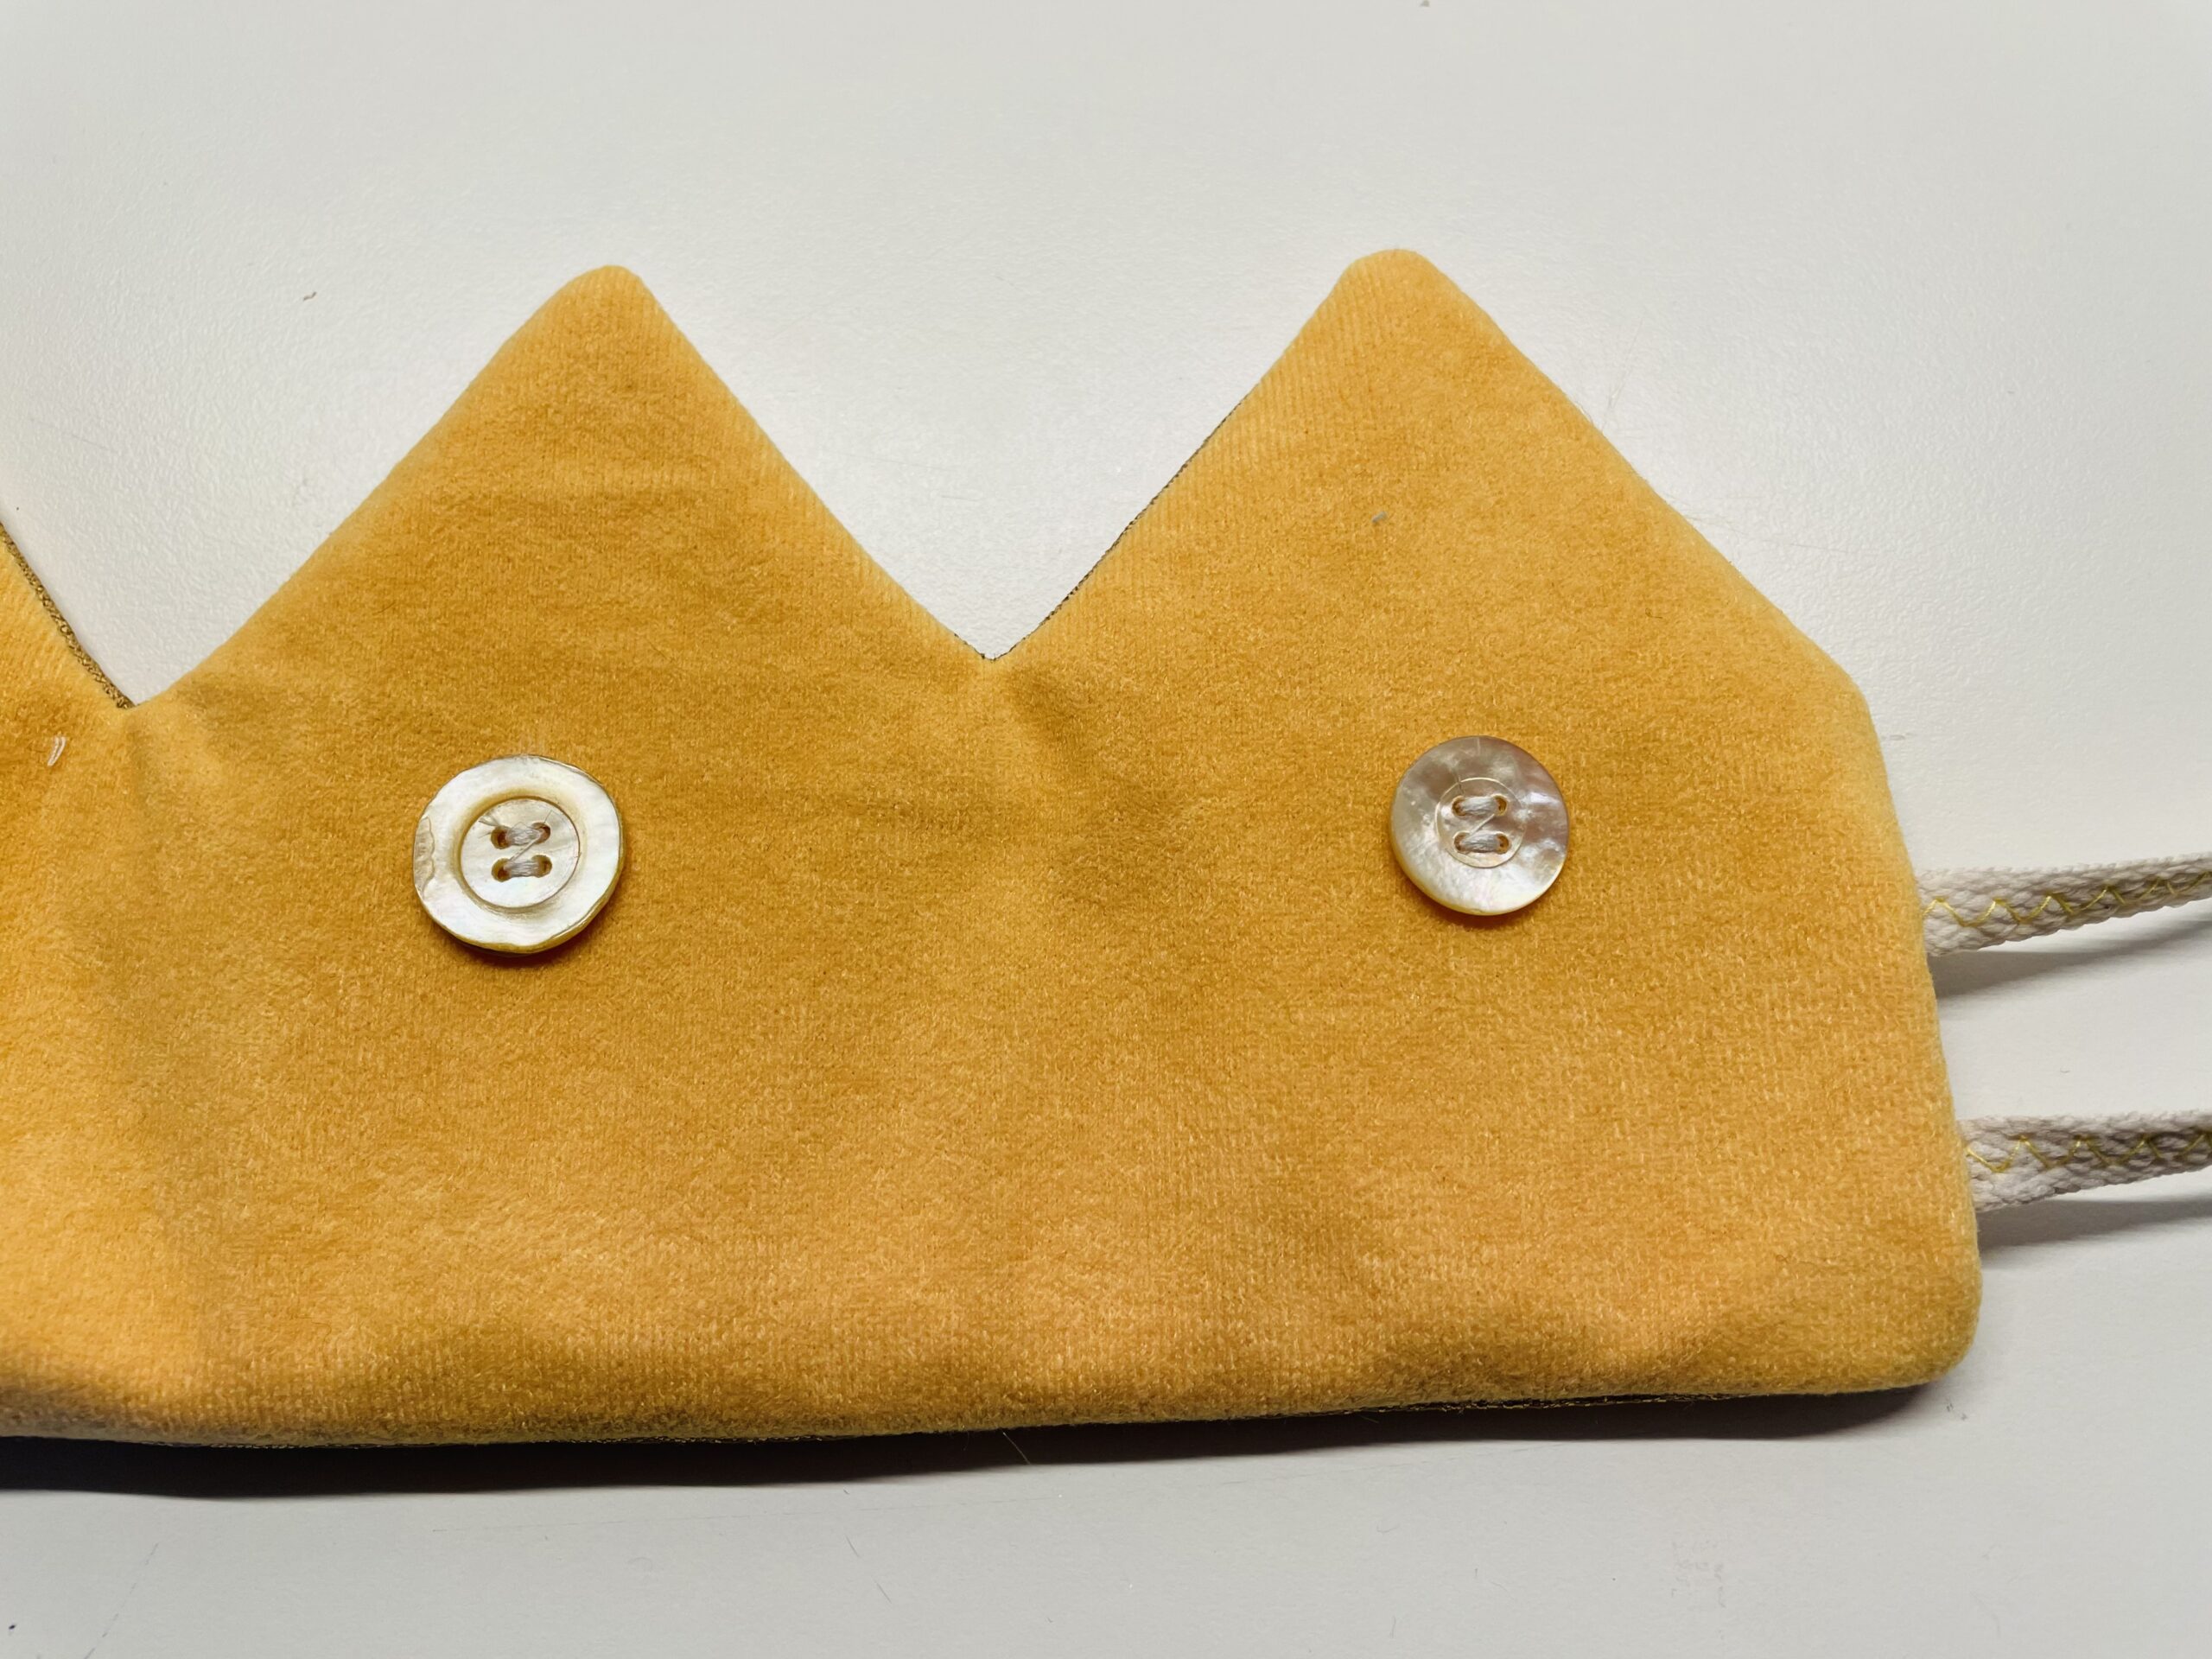
So you get a clean seam and the crown is very beautiful from both sides.

Bild zum Schritt 58 für das Bastel- und DIY-Abenteuer für Kinder: 'So erhaltet ihr eine saubere Naht und die Krone ist...'

55

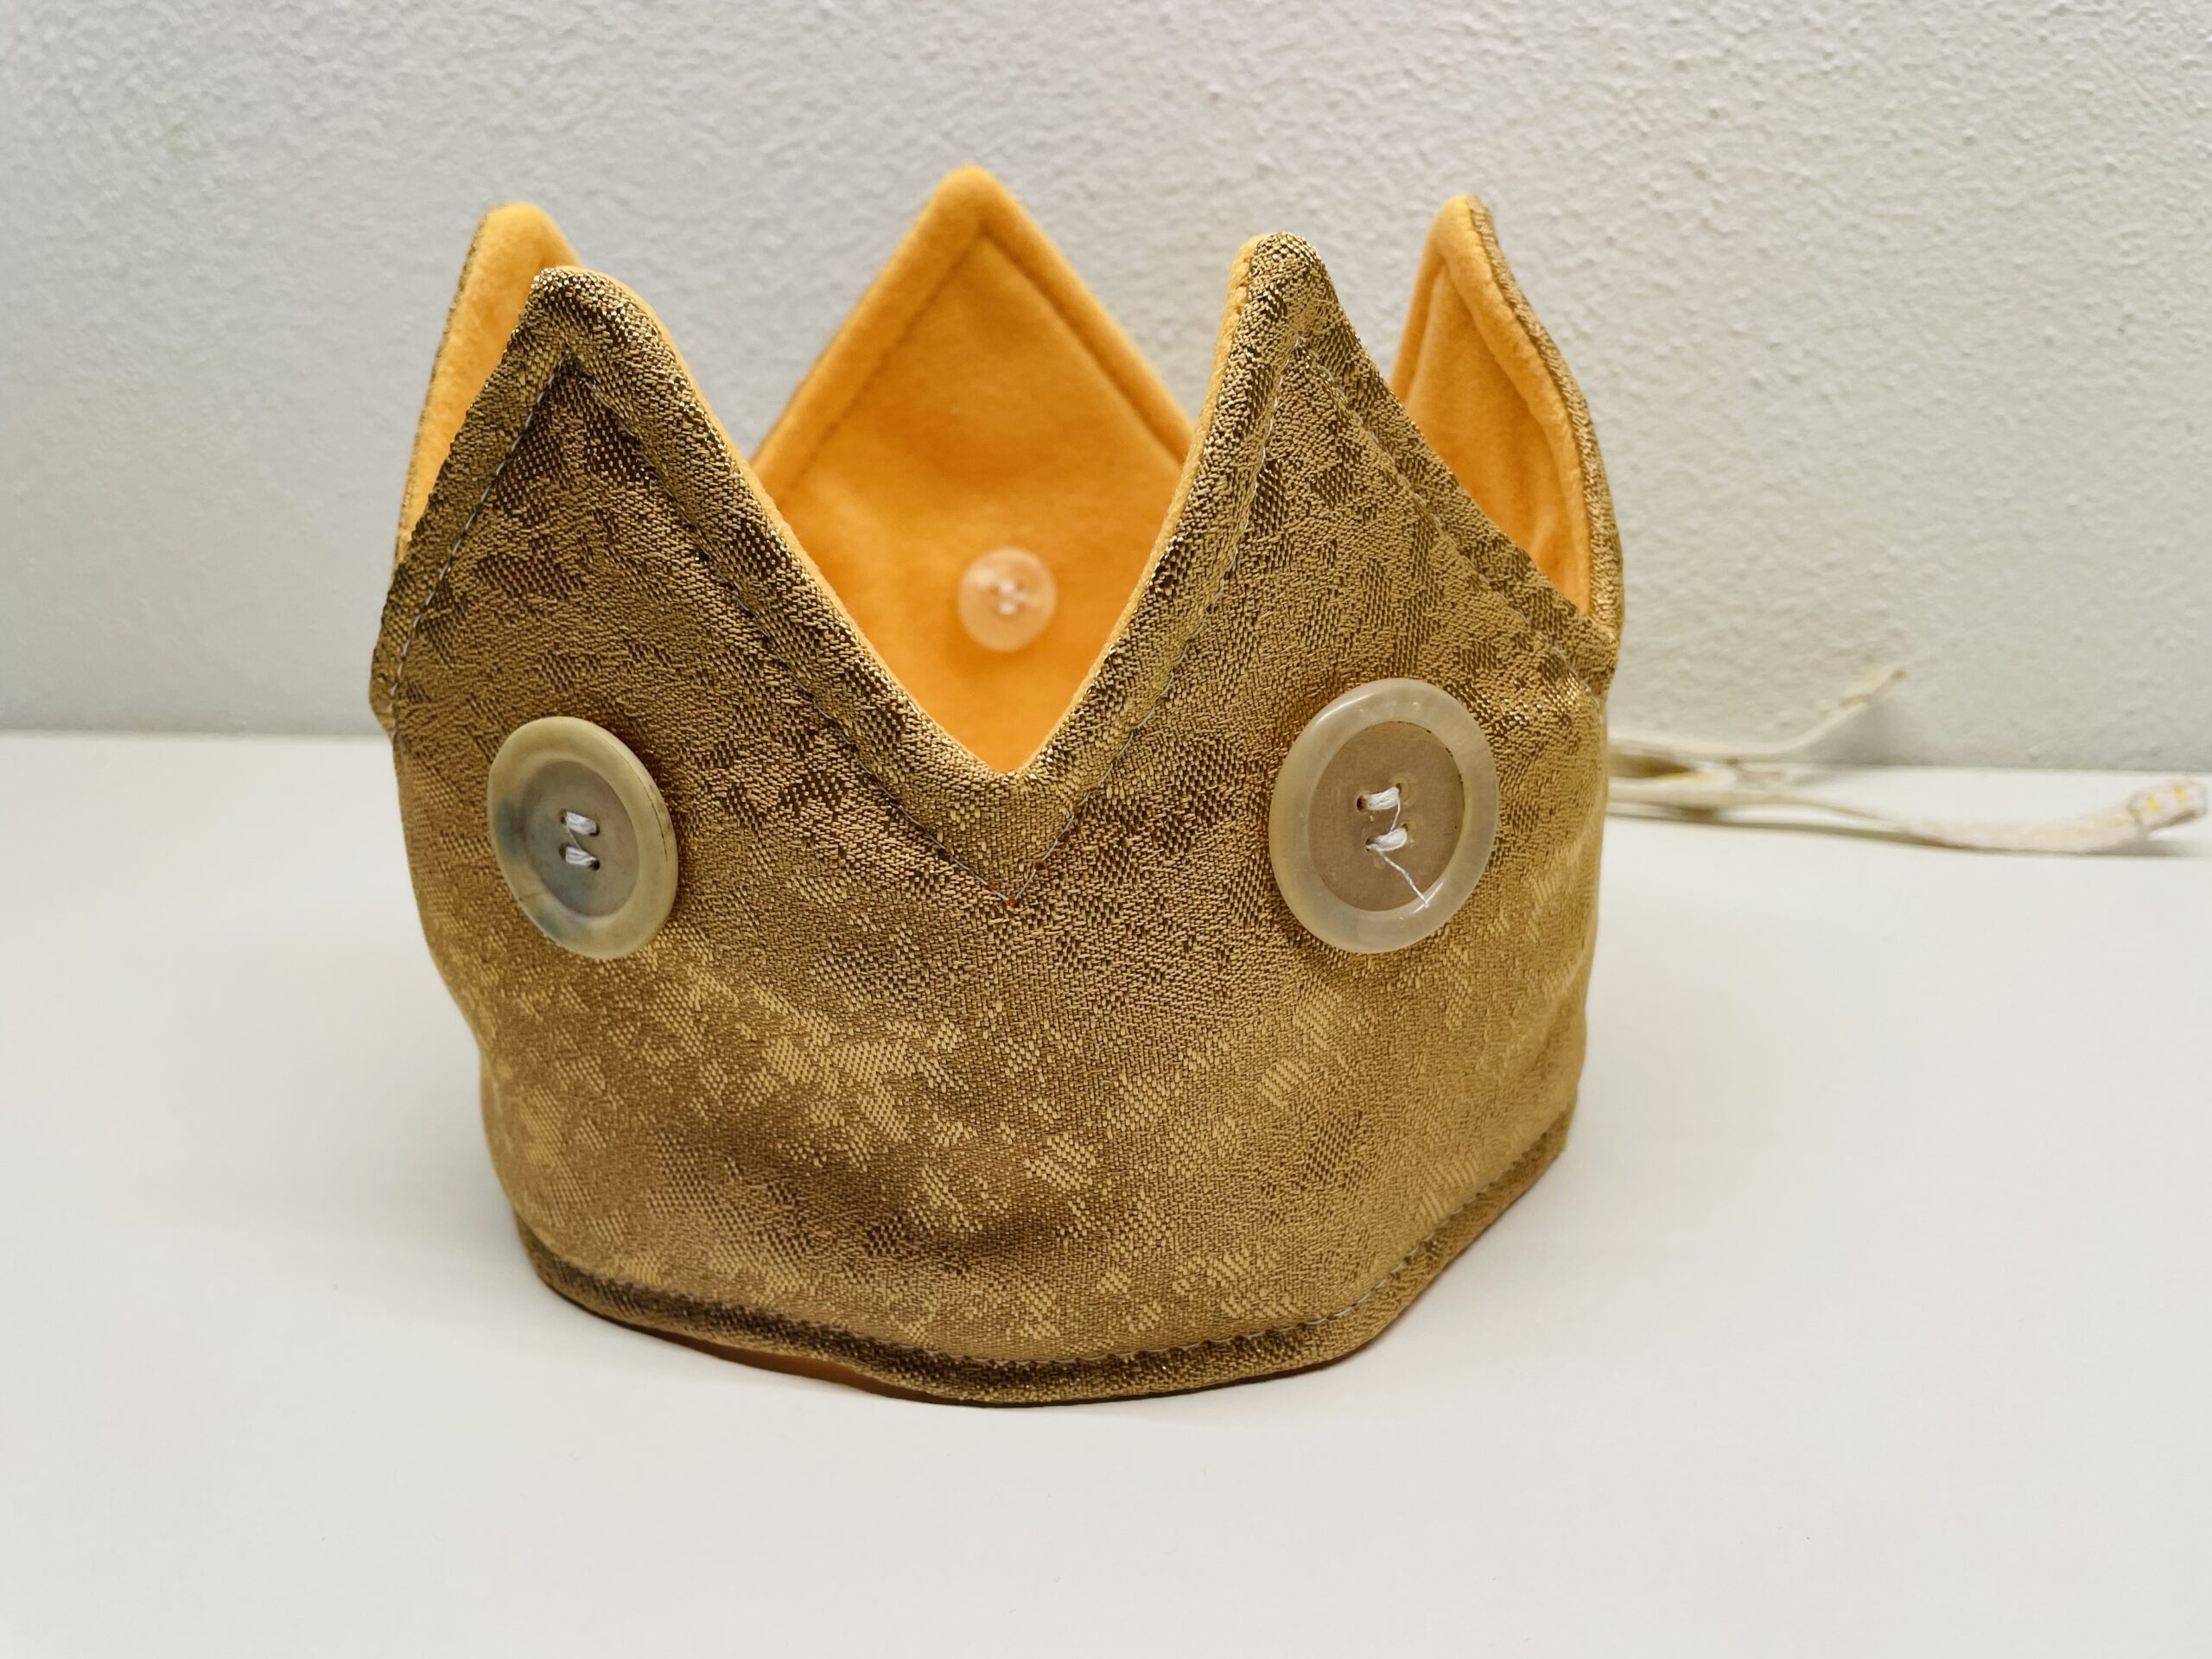
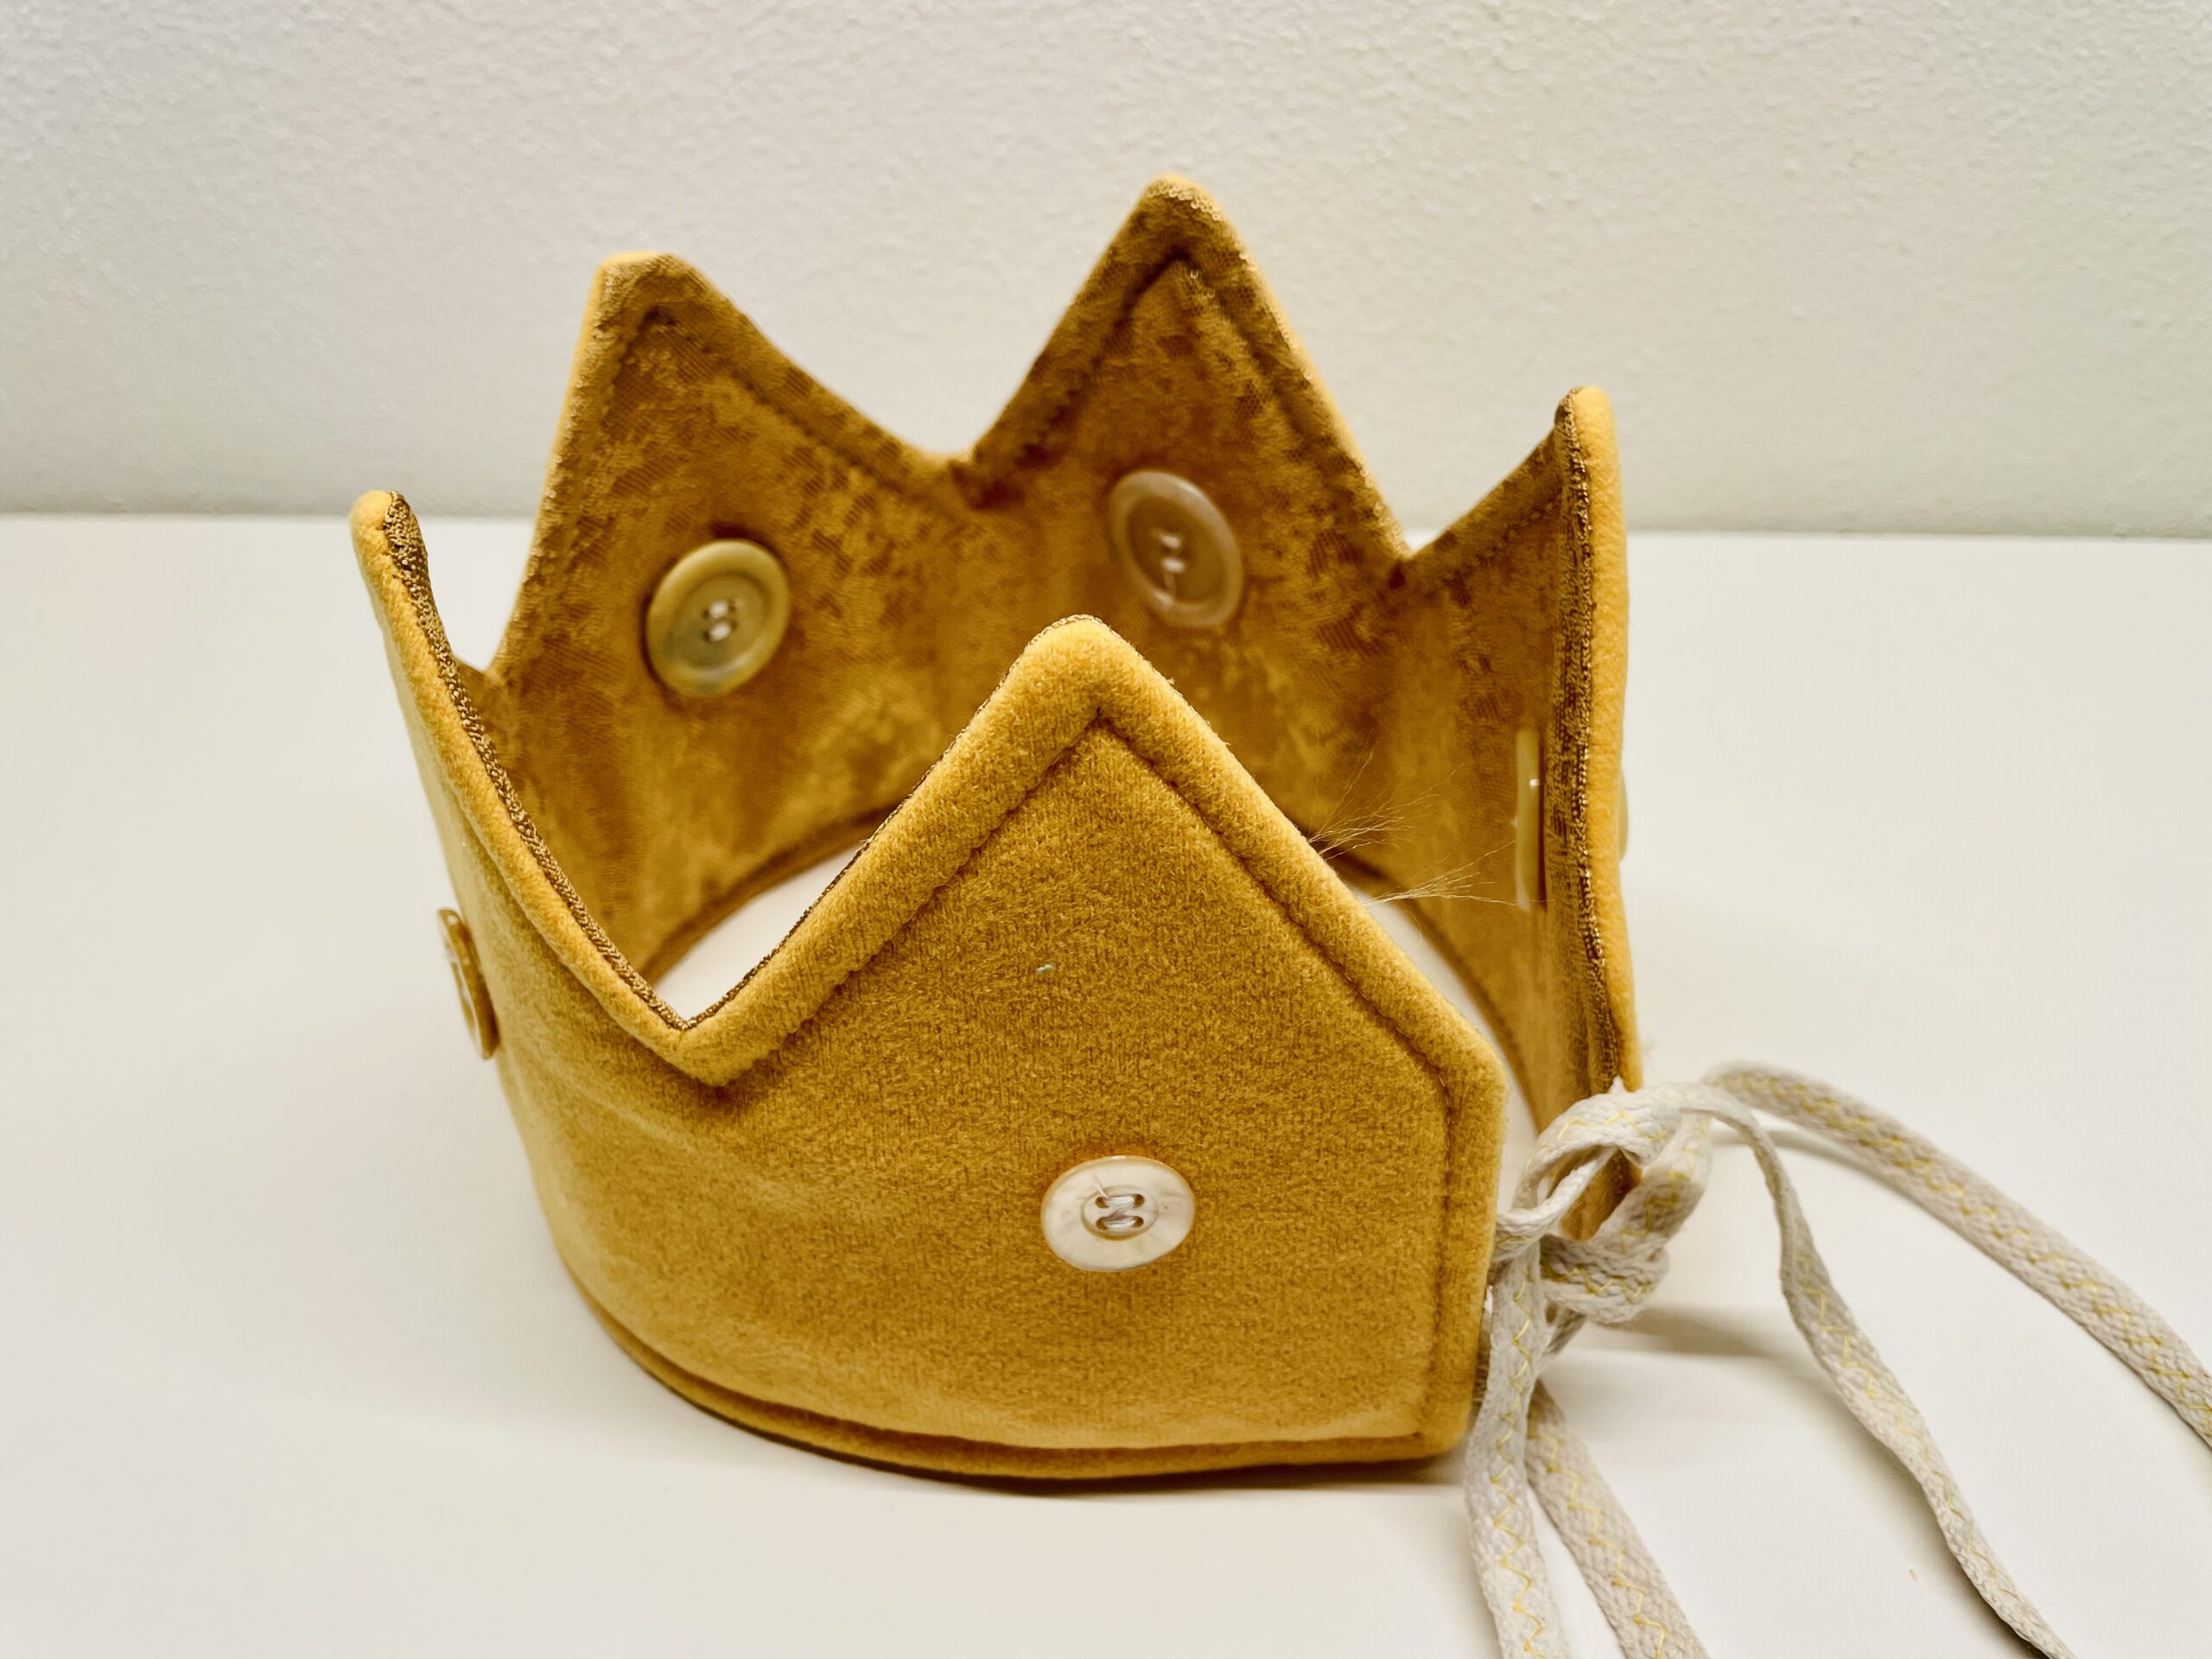
Both sides can now be seen for themselves. Decide on which "crowns" you want.

Bild zum Schritt 59 für das Bastel- und DIY-Abenteuer für Kinder: 'Beide Seiten für sich können sich nun sehen lassen. Entscheidet...'

56

2. Bild zum Schritt 59 für das Bastel- und DIY-Abenteuer für Kinder: 'Beide Seiten für sich können sich nun sehen lassen. Entscheidet...'

57

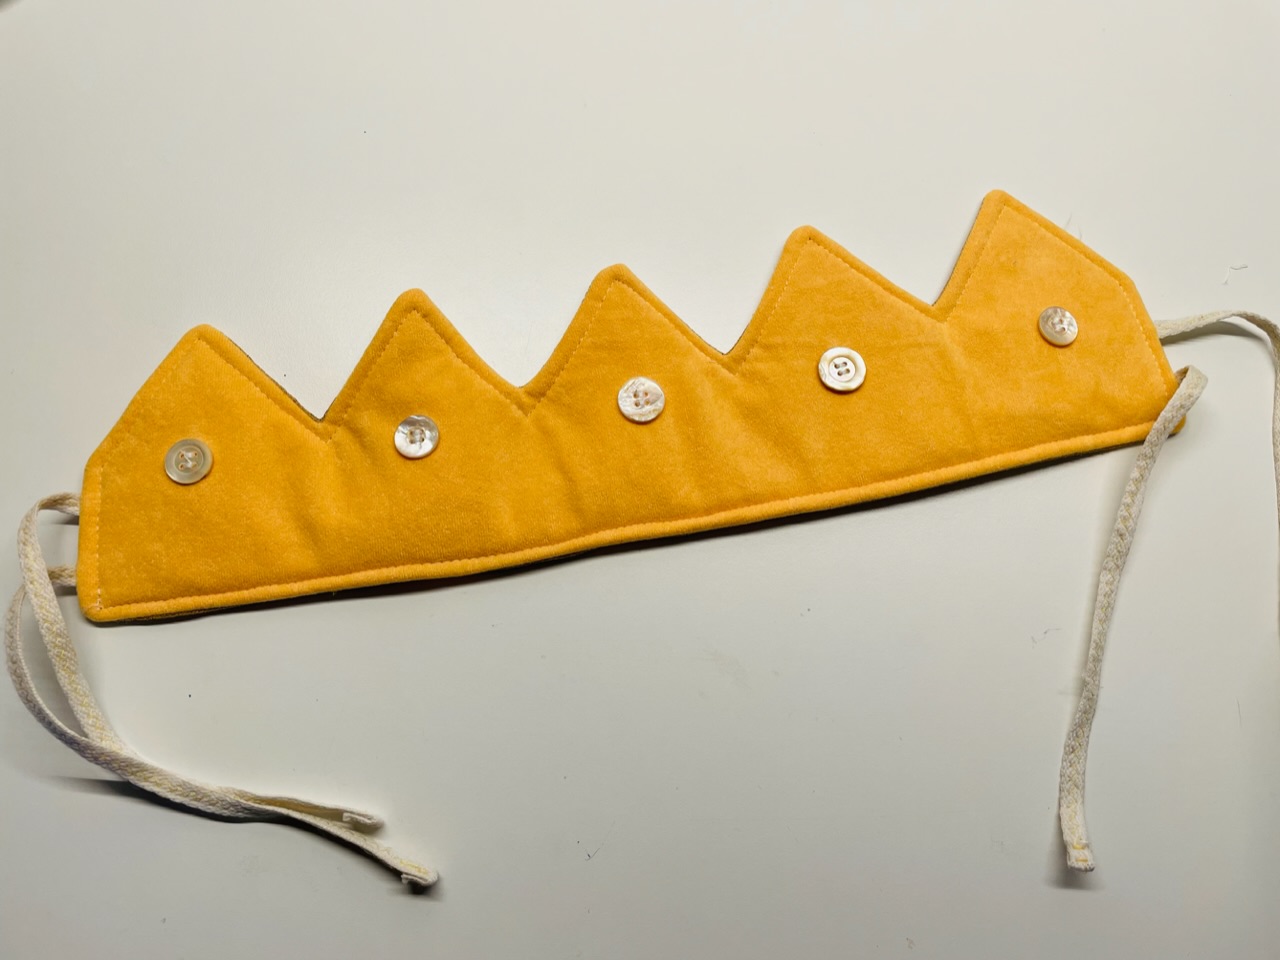
With the ribbons you can tie the crown together and put it on.

Bild zum Schritt 61 für das Bastel- und DIY-Abenteuer für Kinder: 'Mit den Bändern könnt ihr die Krone zusammenbinden und aufsetzen.'

58

Have fun sewing.
The next birthday party can come! By the way, the crown is also a nice gift and can also be used to dress up for role playing or carnival.
Stay creative.

Bild zum Schritt 62 für das Bastel- und DIY-Abenteuer für Kinder: 'Viel Spaß beim Nachnähen.  Die nächste Geburtstagsparty kann kommen!...'

59

2. Bild zum Schritt 62 für das Bastel- und DIY-Abenteuer für Kinder: 'Viel Spaß beim Nachnähen.  Die nächste Geburtstagsparty kann kommen!...'