Print Options:

Embellish buttons

Material for1 ChildPrep Time5 min.Adv. Time10 min.Total Time15 min.

Make ALT NEW! I'll show you how you can easily change a button to match your outfit or a carnival costume or use it to embellish a pillow.
Often the matching button is missing, but with a small fabric residue you can make any button suitable! How this works, I'll show you here!

Titelbild zur Bastel- und DIY-Idee für Kinder '(586) Knöpfe verschönern'

 1 Button
 Residual substance
 Scissors
 Needle
 Thread
All links marked with a shopping cart lead to Amazon - here we have selected products that we would order ourselves and in part also ordered. In a qualified purchase via the advertising link, we as Amazon partner receive a commission, for you there are no costs. You thus support our cost- and advertising banner-free, educational offer.
1

Find a button and the matching, as thin as possible fabric.
Preferably you use a button that has an eyelet at the bottom (see picture).
Now prepare fabric scissors and pen.

Bild zum Schritt 1 für das Bastel- und DIY-Abenteuer für Kinder: 'Sucht euch einen Knopf und den passenden, möglichst dünnen Stoff....'

2

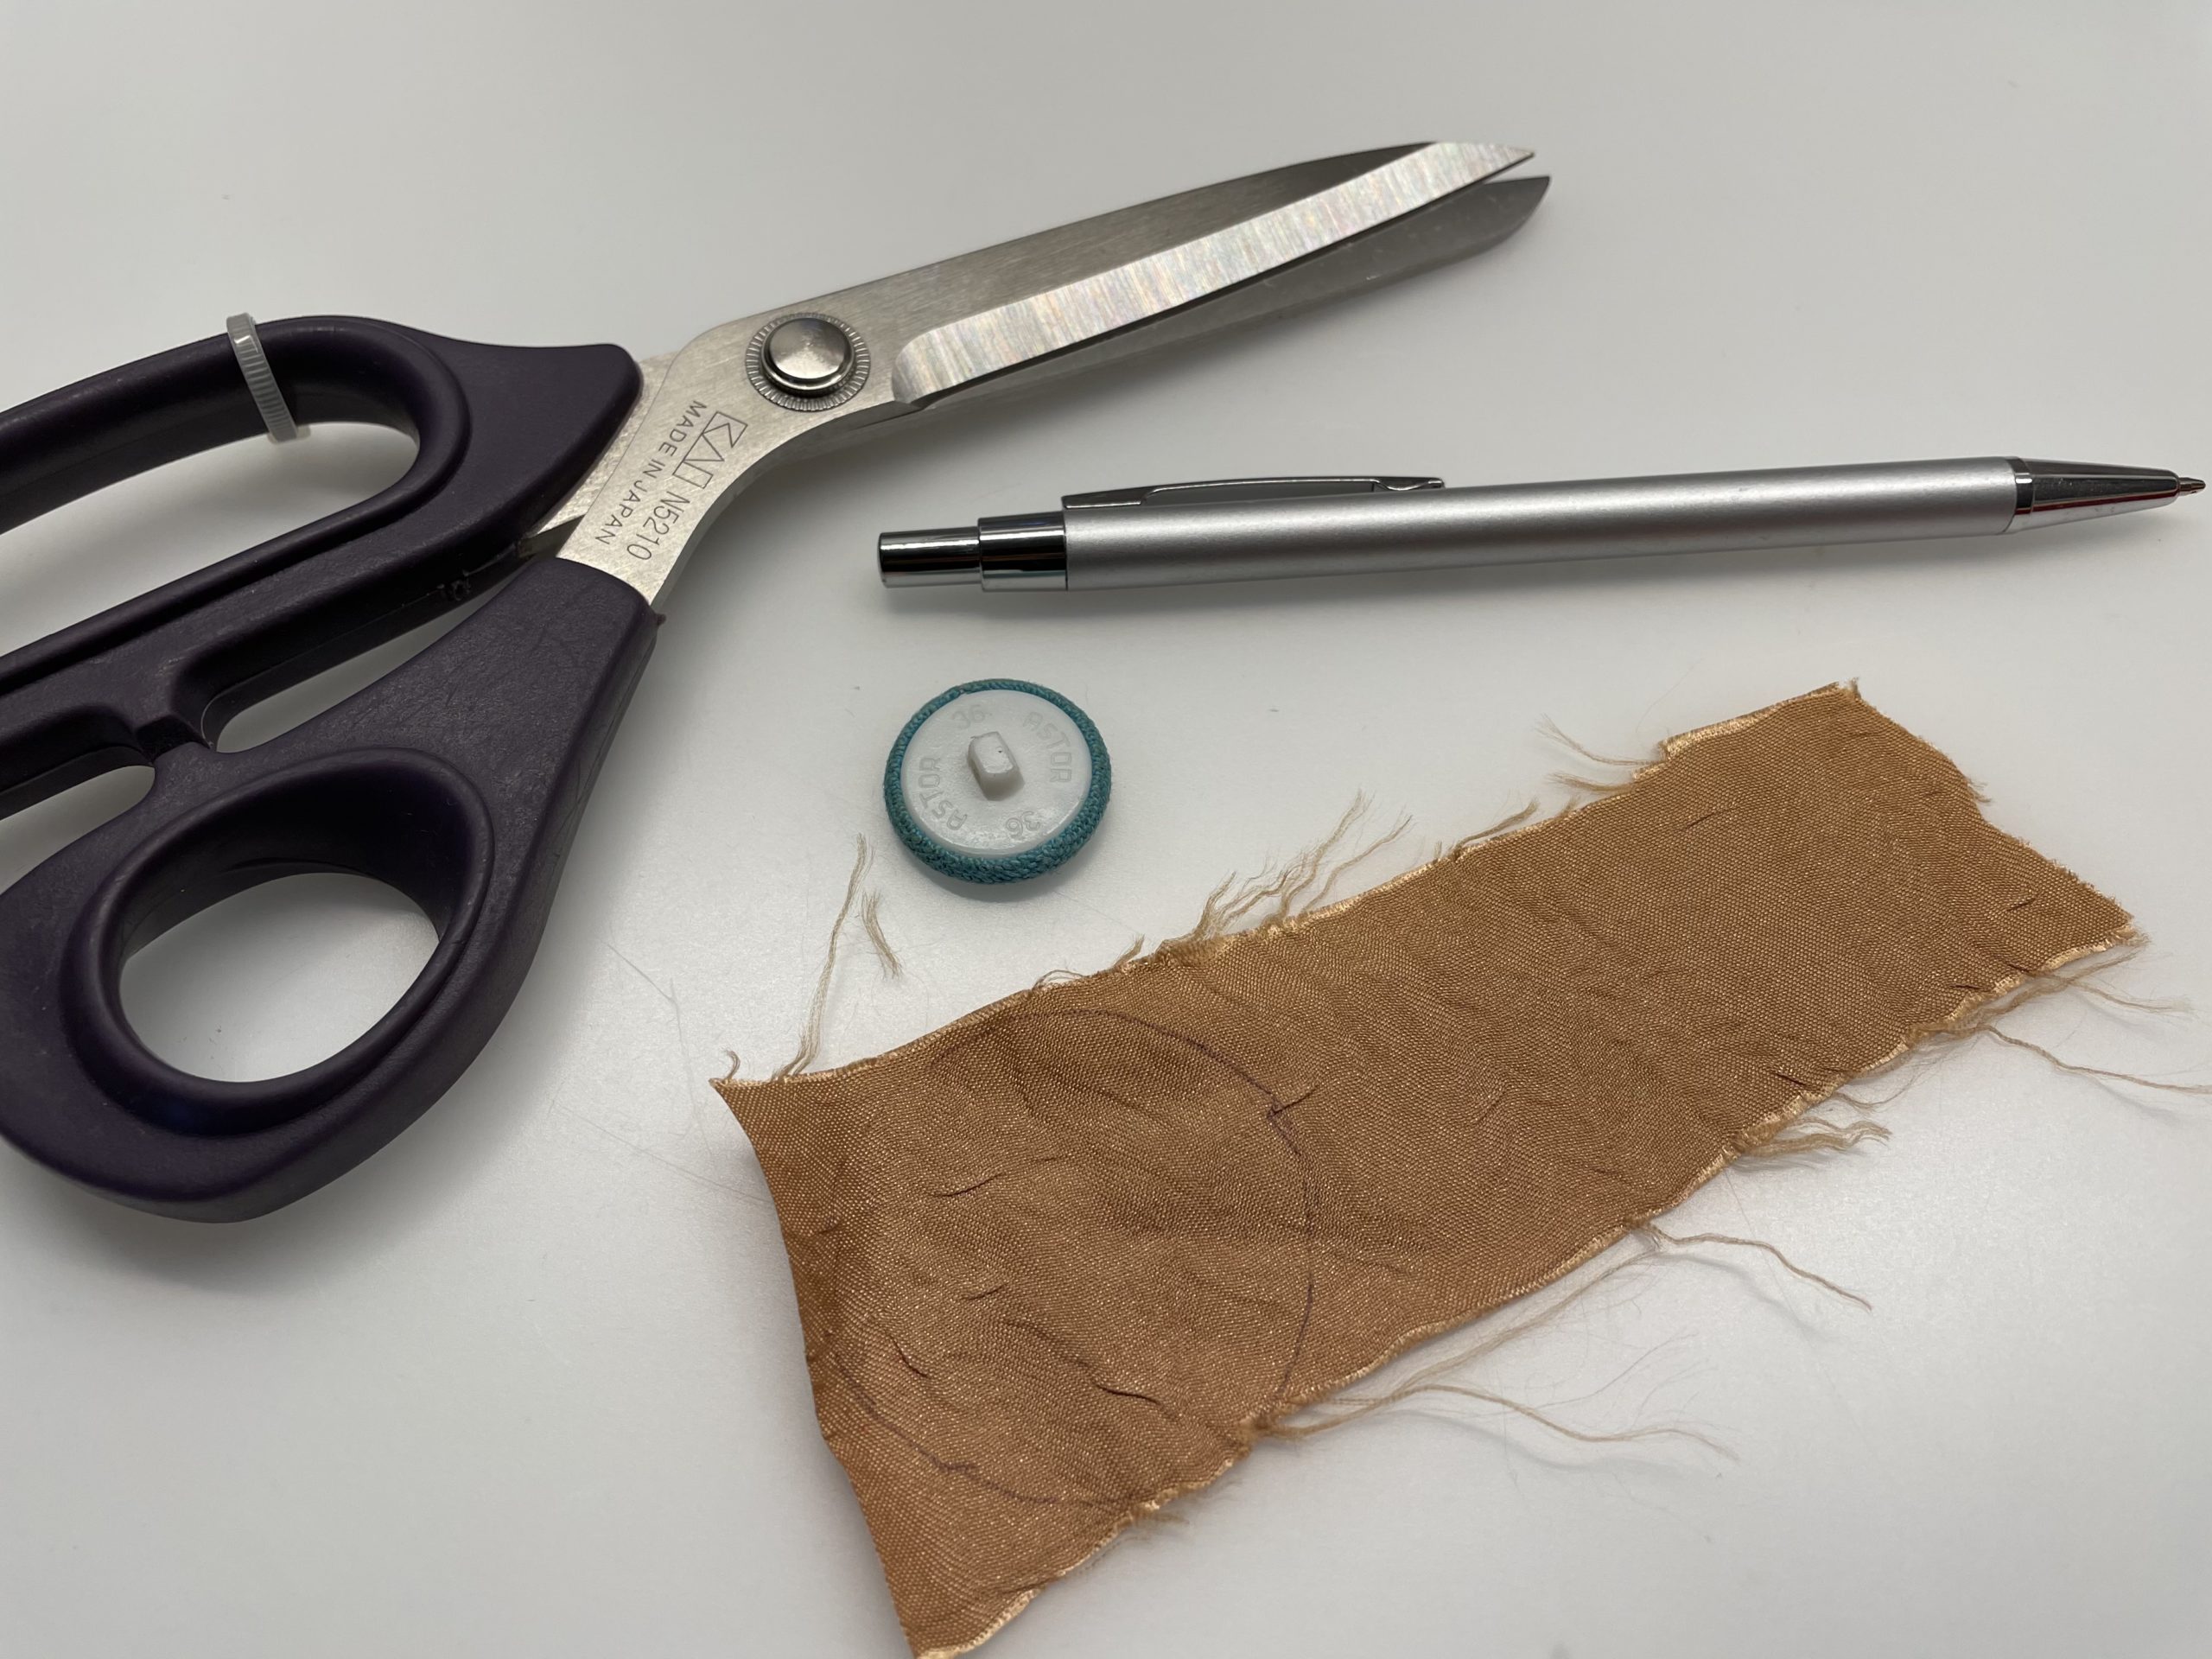
Now place the button on the rest of the fabric and edge it about 1cm wider than the button itself is.

Bild zum Schritt 2 für das Bastel- und DIY-Abenteuer für Kinder: 'Jetzt legt den Knopf auf den Stoffrest und umrandet diesen...'

3

Then cut out the fabric circle with the scissors.

Bild zum Schritt 3 für das Bastel- und DIY-Abenteuer für Kinder: 'Danach schneidet ihr den Stoffkreis mit der Schere aus.'

4

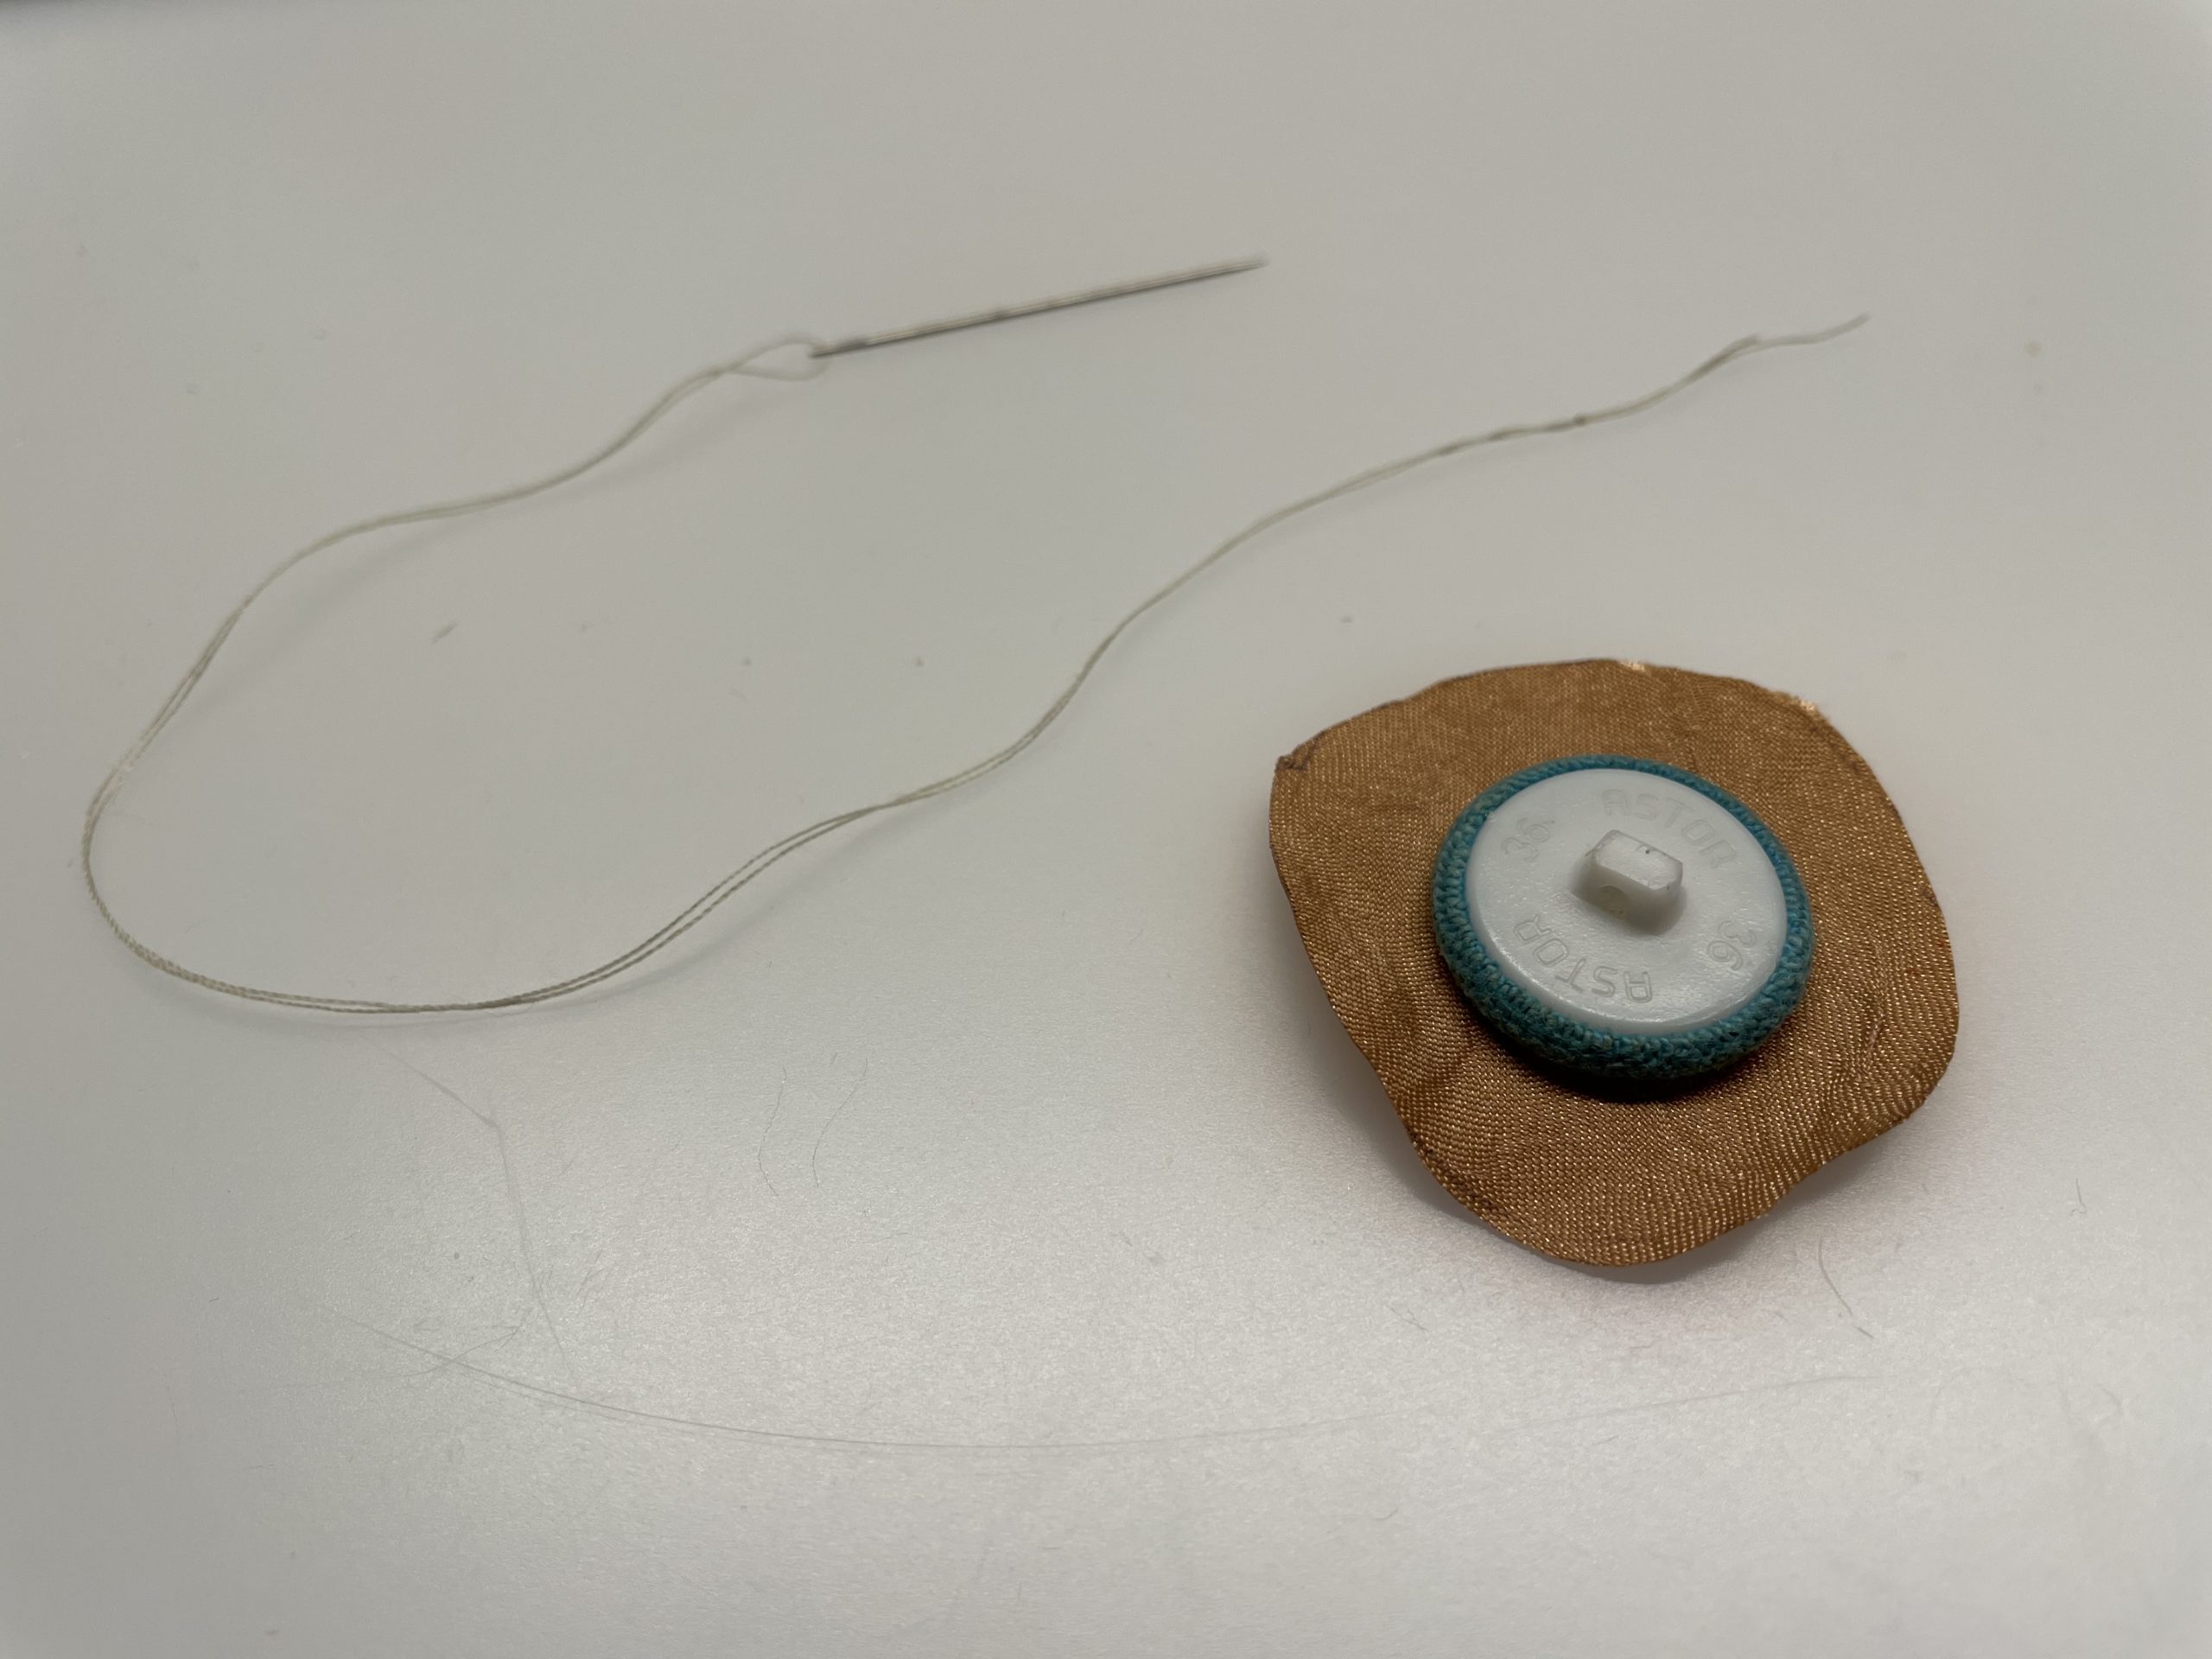
Now thread a thread into a thin needle. You select the color of the thread according to the color of your fabric.
Then you knot the thread ends together.

Bild zum Schritt 4 für das Bastel- und DIY-Abenteuer für Kinder: 'Fädelt nun einen Faden in eine dünne Nadel ein. Die...'

5

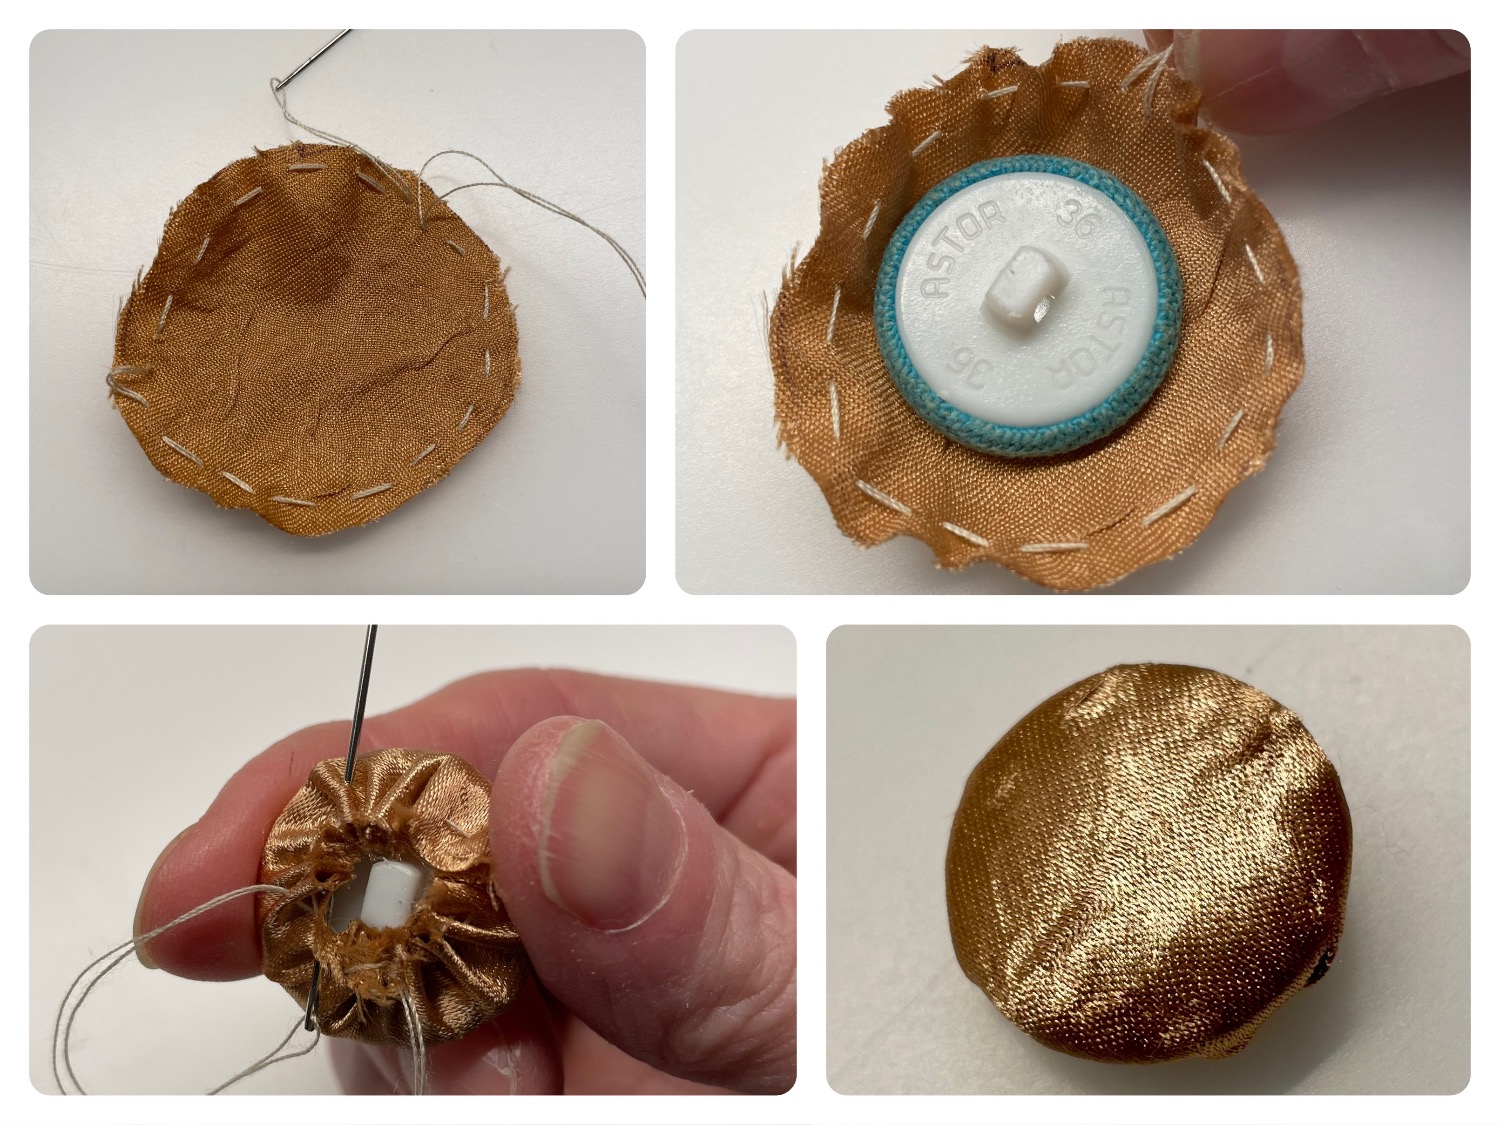
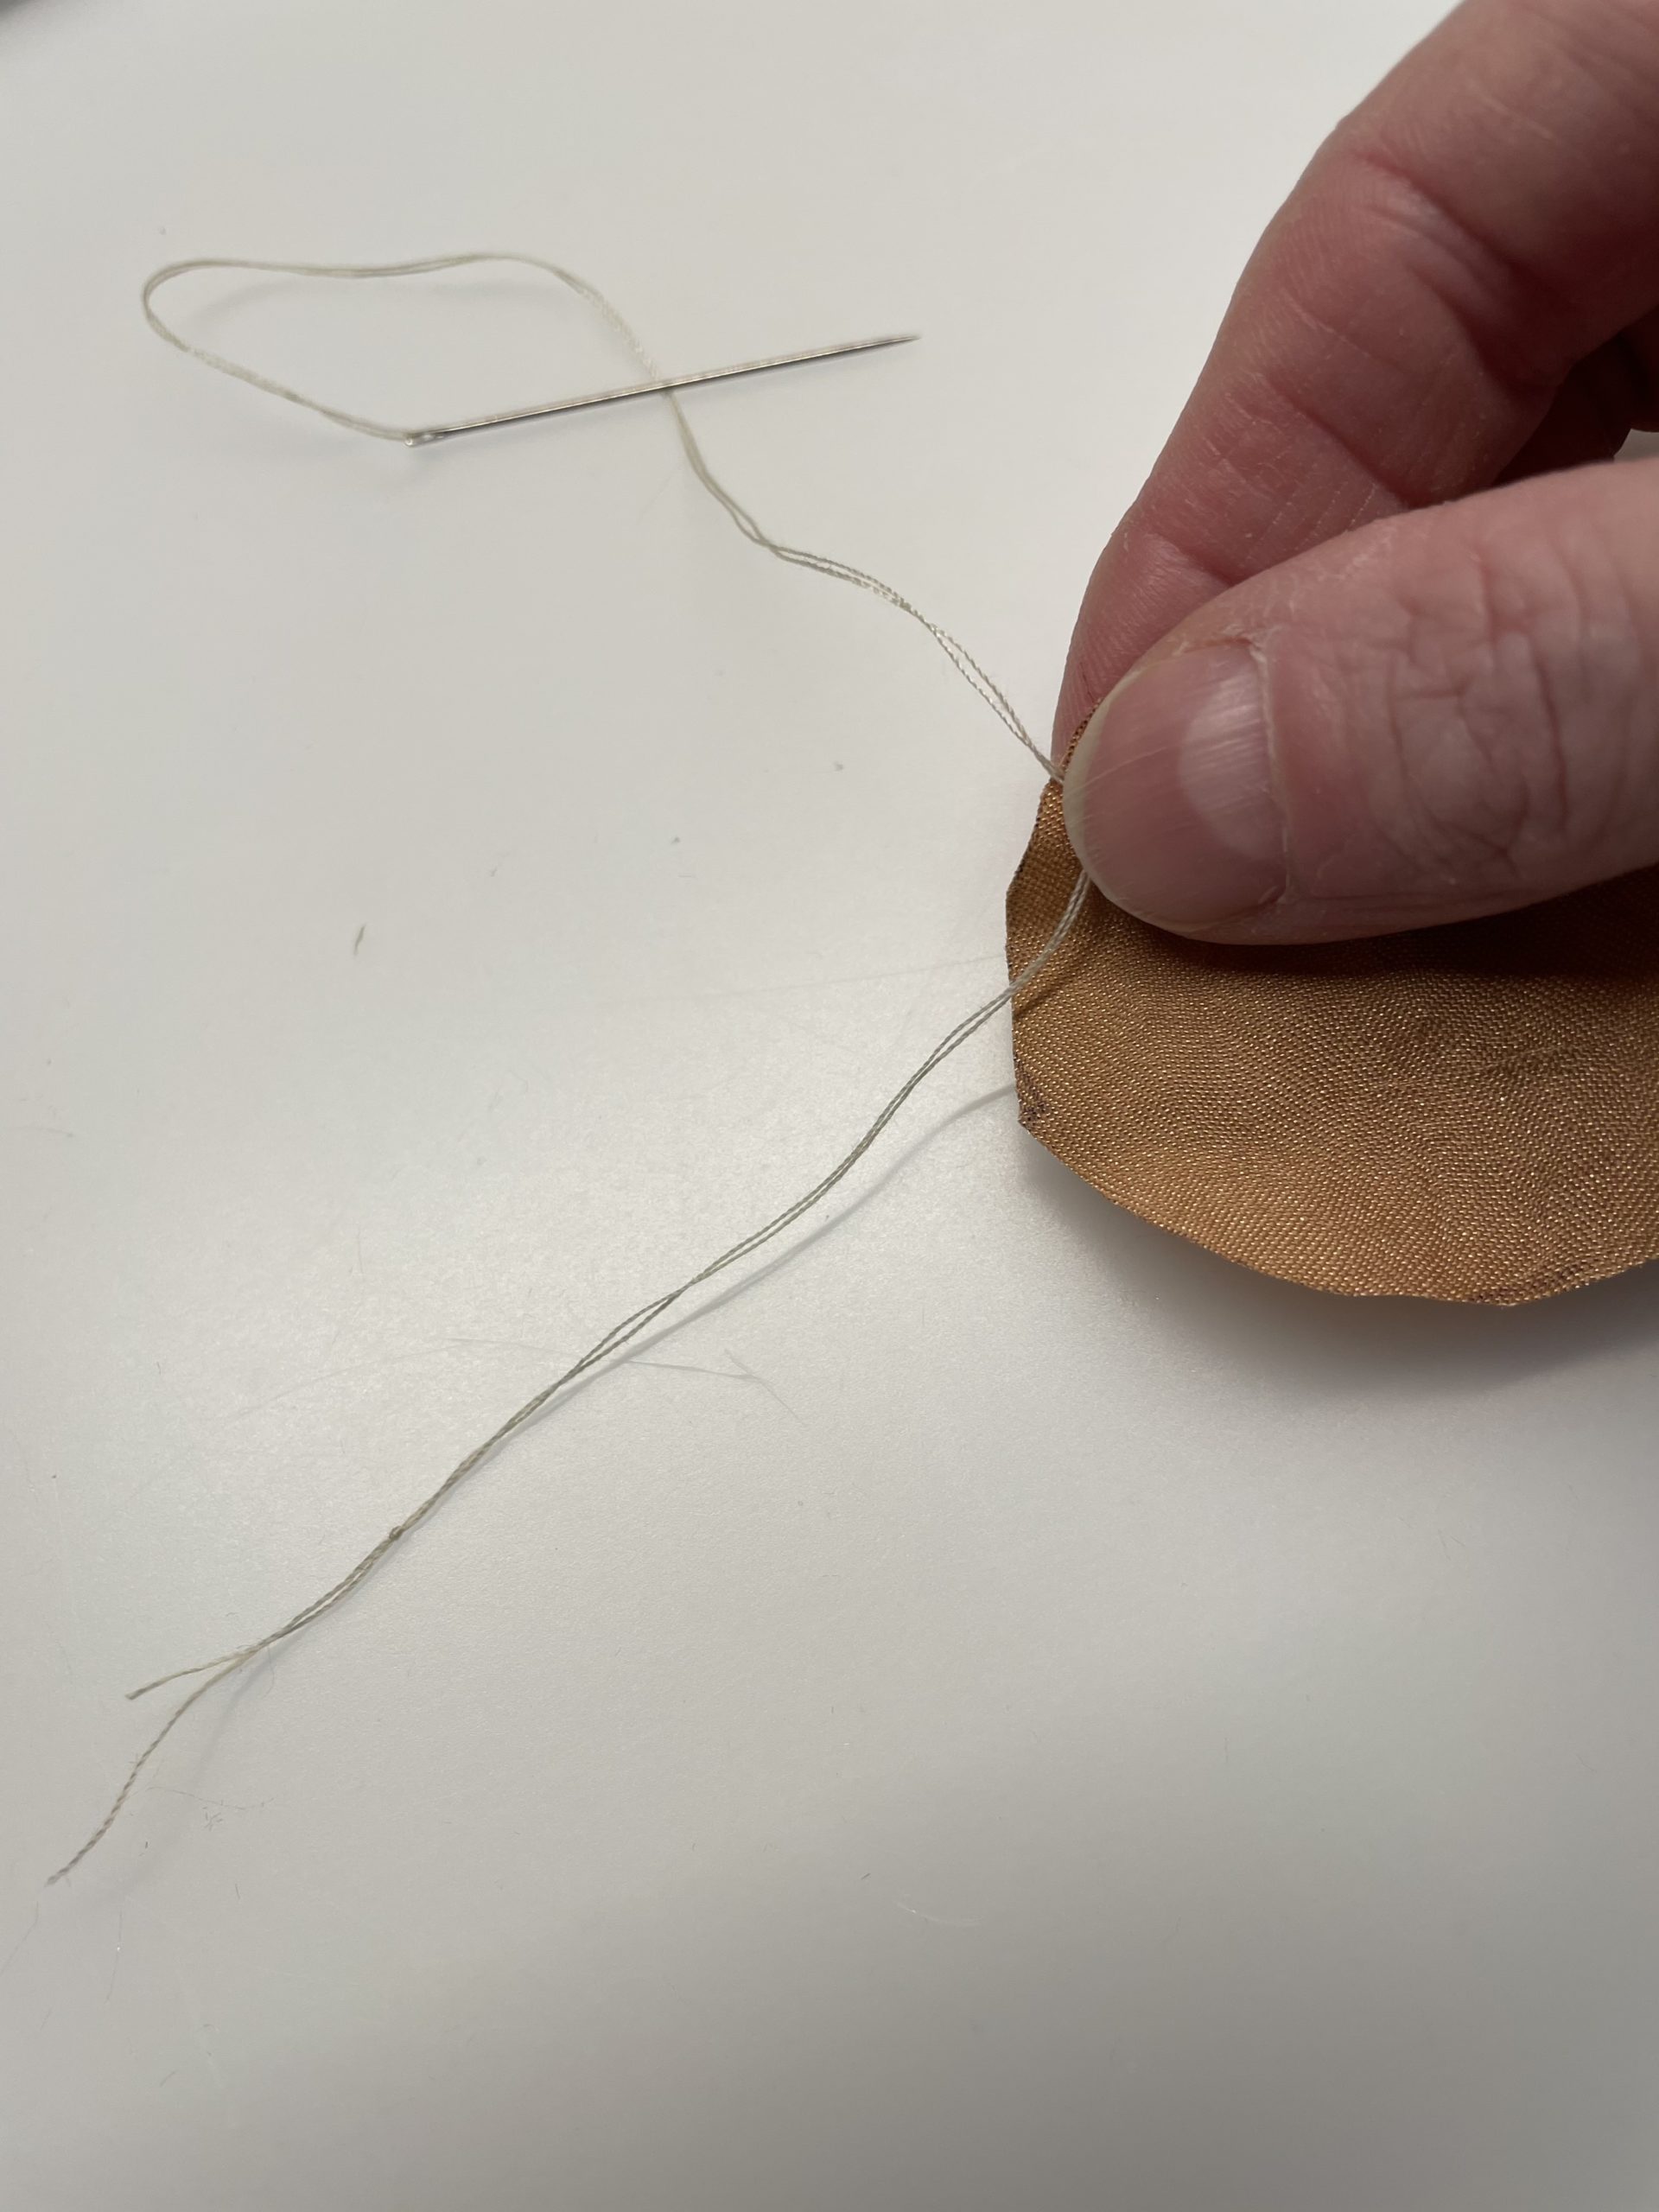
Now you stick the needle pretty close to the outer edge in the fabric.

Bild zum Schritt 5 für das Bastel- und DIY-Abenteuer für Kinder: 'Jetzt stecht ihr mit der Nadel ziemlich nahe dem äußeren...'

6

Then pull through the thread and let the end of the thread survive just under 10cm.

Bild zum Schritt 6 für das Bastel- und DIY-Abenteuer für Kinder: 'Zieht dann den Faden durch und lasst das Fadenende knapp...'

7

Now go up and down around the fabric circle.
It is not important which side of the fabric lies above and below.

Bild zum Schritt 7 für das Bastel- und DIY-Abenteuer für Kinder: 'Jetzt fahrt ihr hoch und runter rund um den Stoffkreis...'

8

In doing so, you keep pulling the thread piece by piece.
However, make sure not to pull through the end thread (the 10cm above).

Bild zum Schritt 8 für das Bastel- und DIY-Abenteuer für Kinder: 'Dabei zieht ihr den Faden immer wieder stückchenweise nach. ...'

9

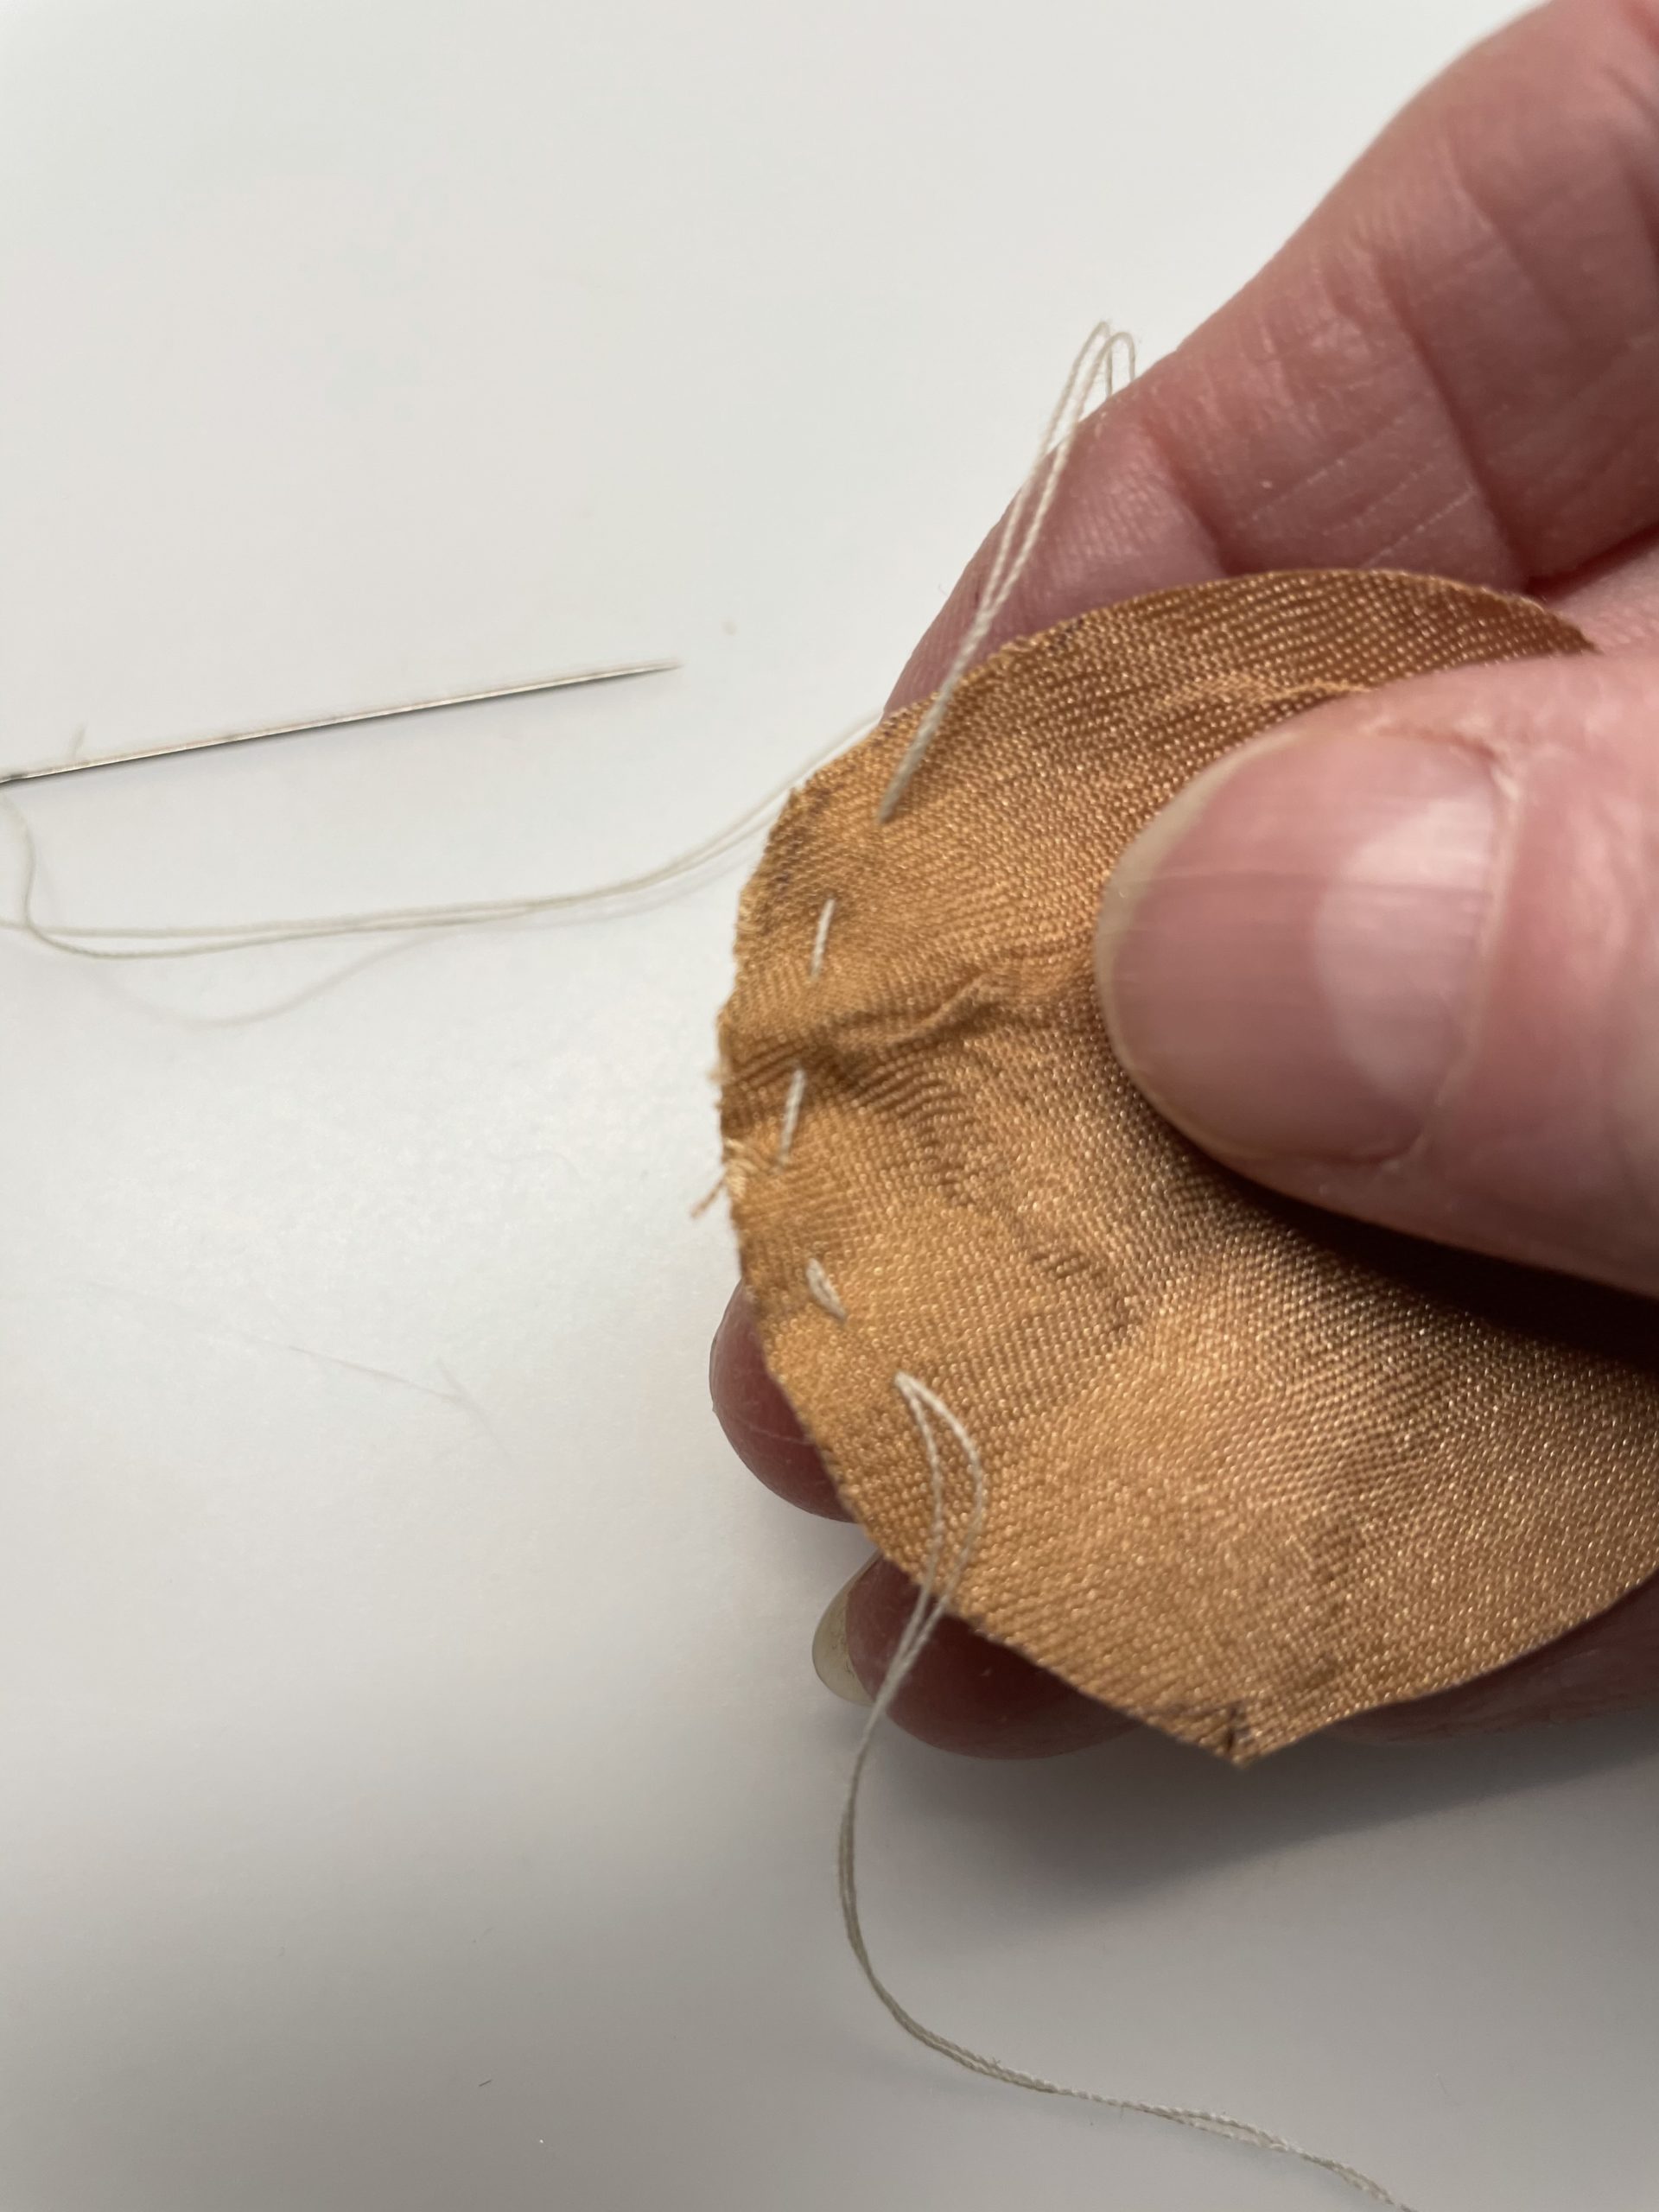
Sow until you are back at the beginning of the seam around the circle.

Bild zum Schritt 9 für das Bastel- und DIY-Abenteuer für Kinder: 'Näht so lange bis ihr einmal rund um den Kreis...'

10

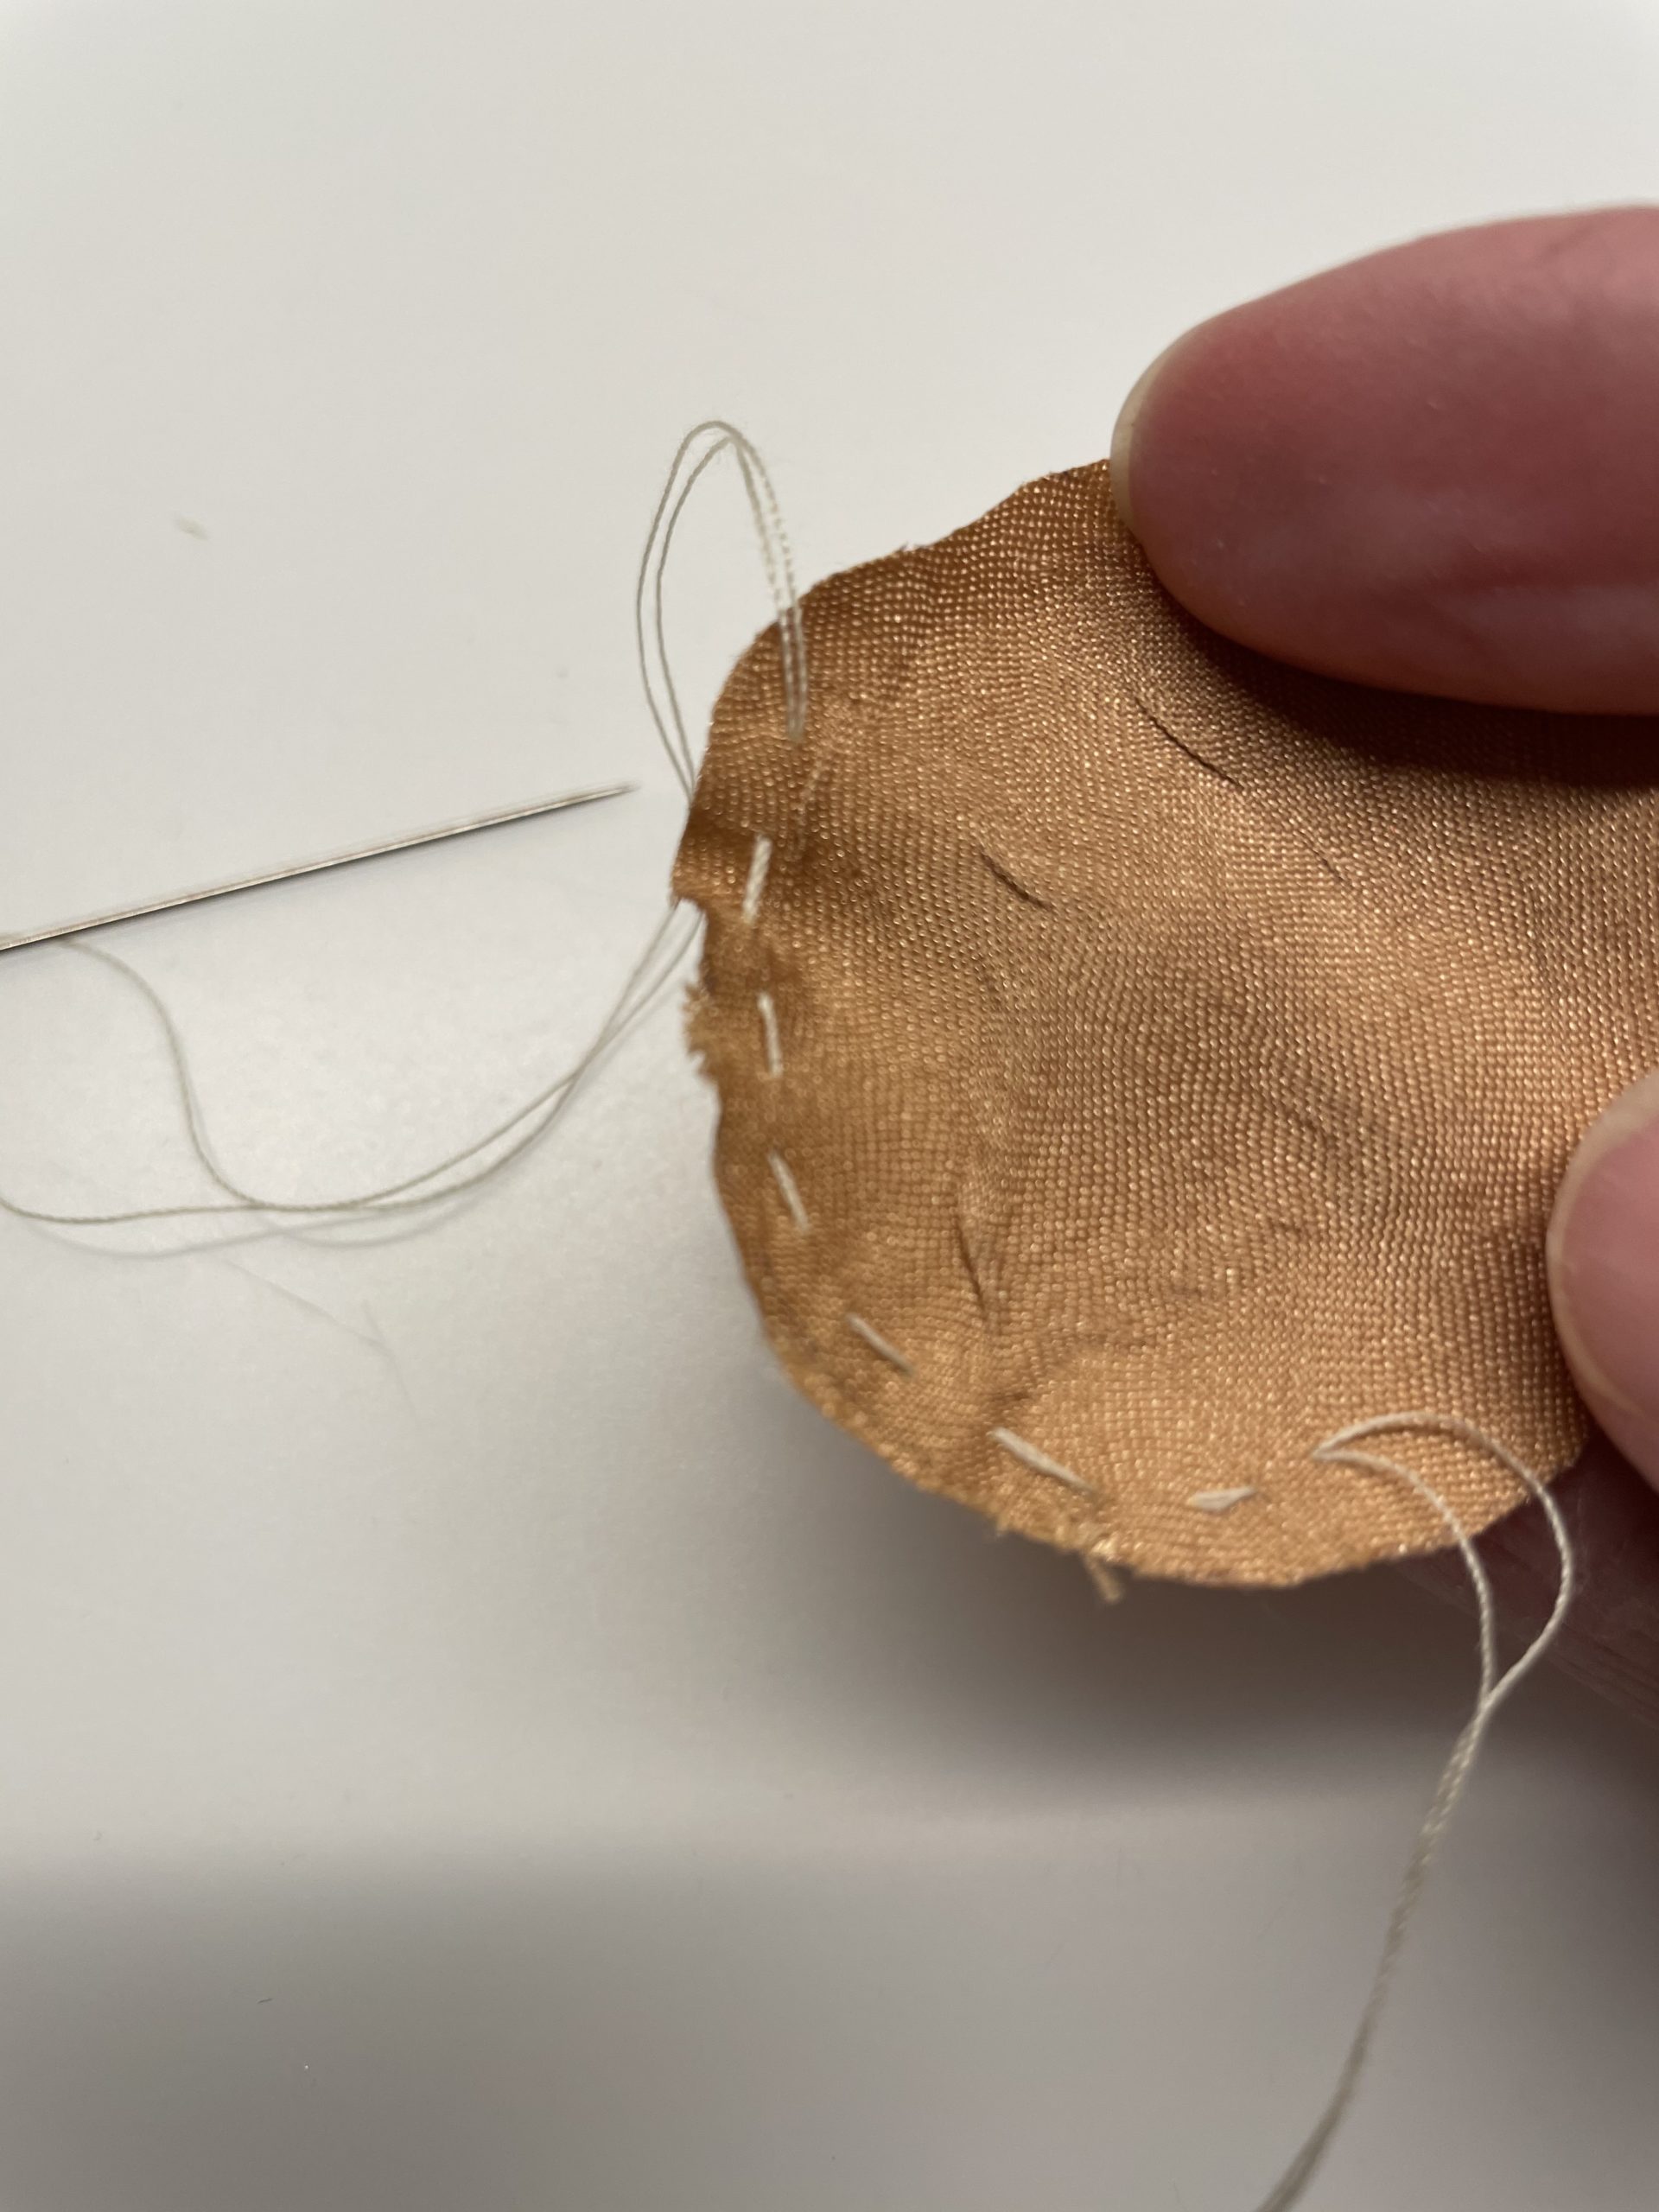
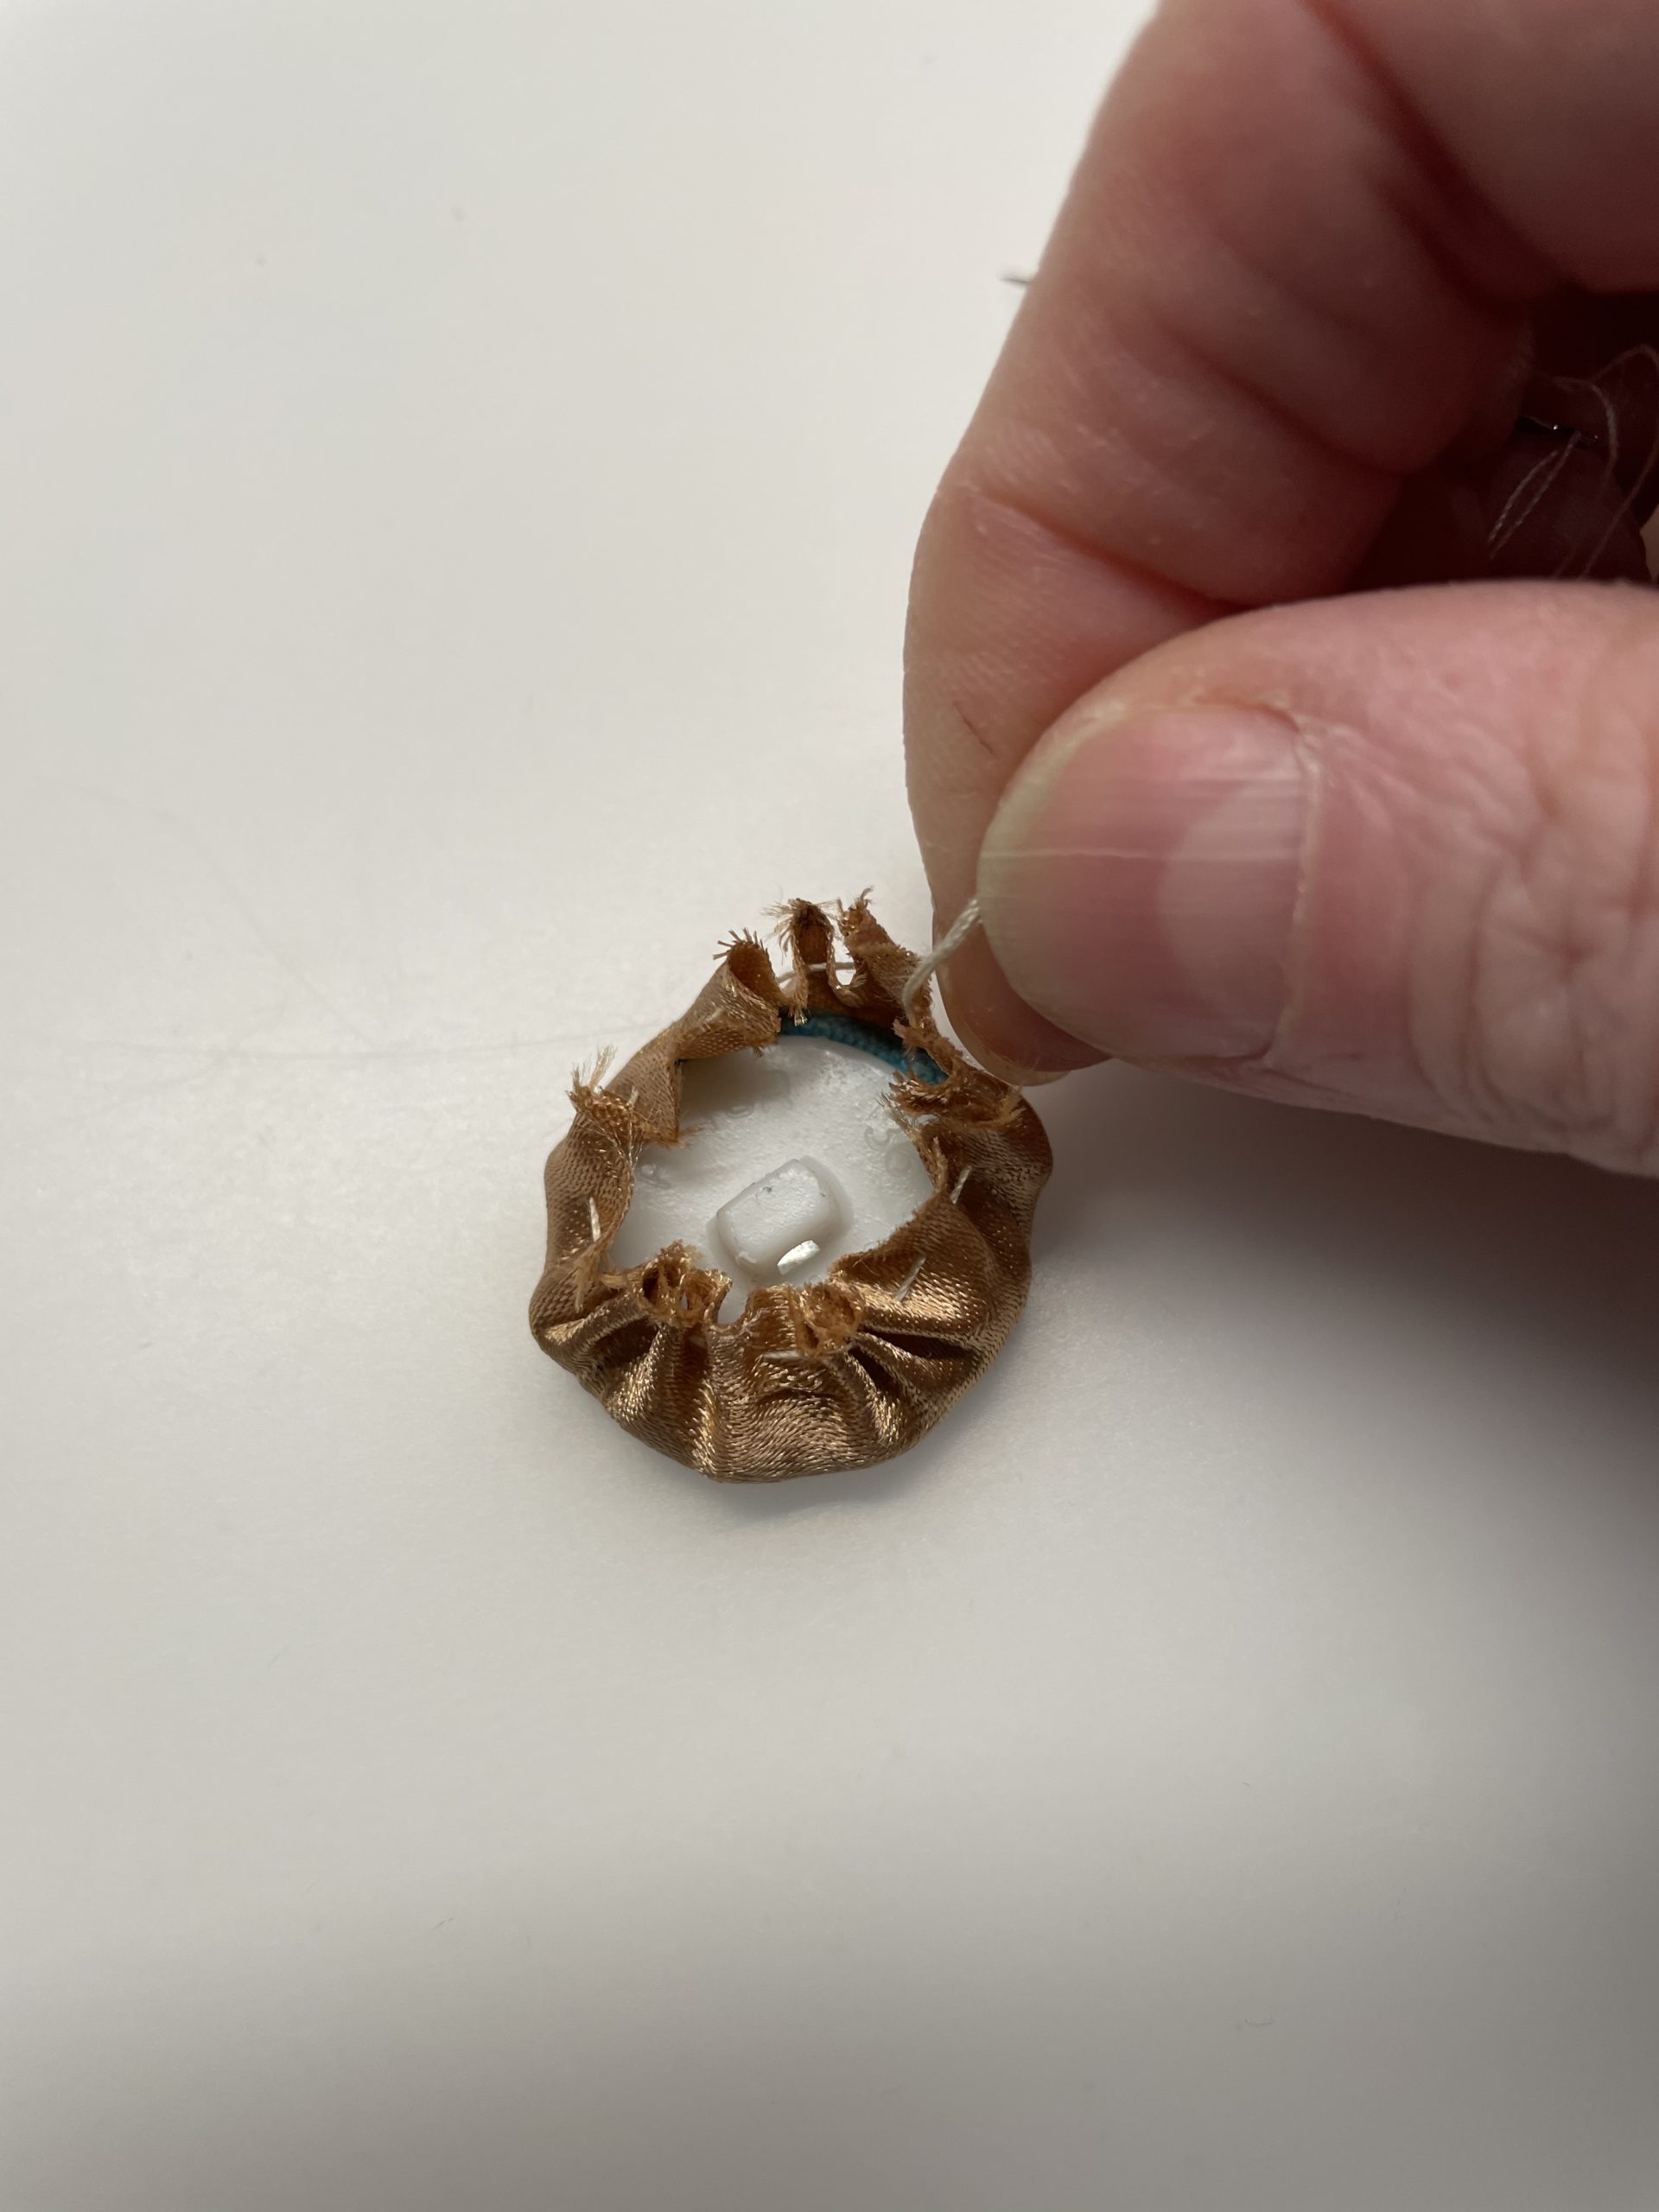
That's what your stuff should look like now.
Leave both threads loose and the needle still on the thread!

Bild zum Schritt 10 für das Bastel- und DIY-Abenteuer für Kinder: 'So sollte euer Stoff jetzt aussehen.   Lasst beide...'

11

Now put the button in the middle of the fabric.
The beautiful side of the fabric now lies below!

Bild zum Schritt 11 für das Bastel- und DIY-Abenteuer für Kinder: 'Jetzt legt ihr den Knopf in die Mitte des Stoffs....'

12

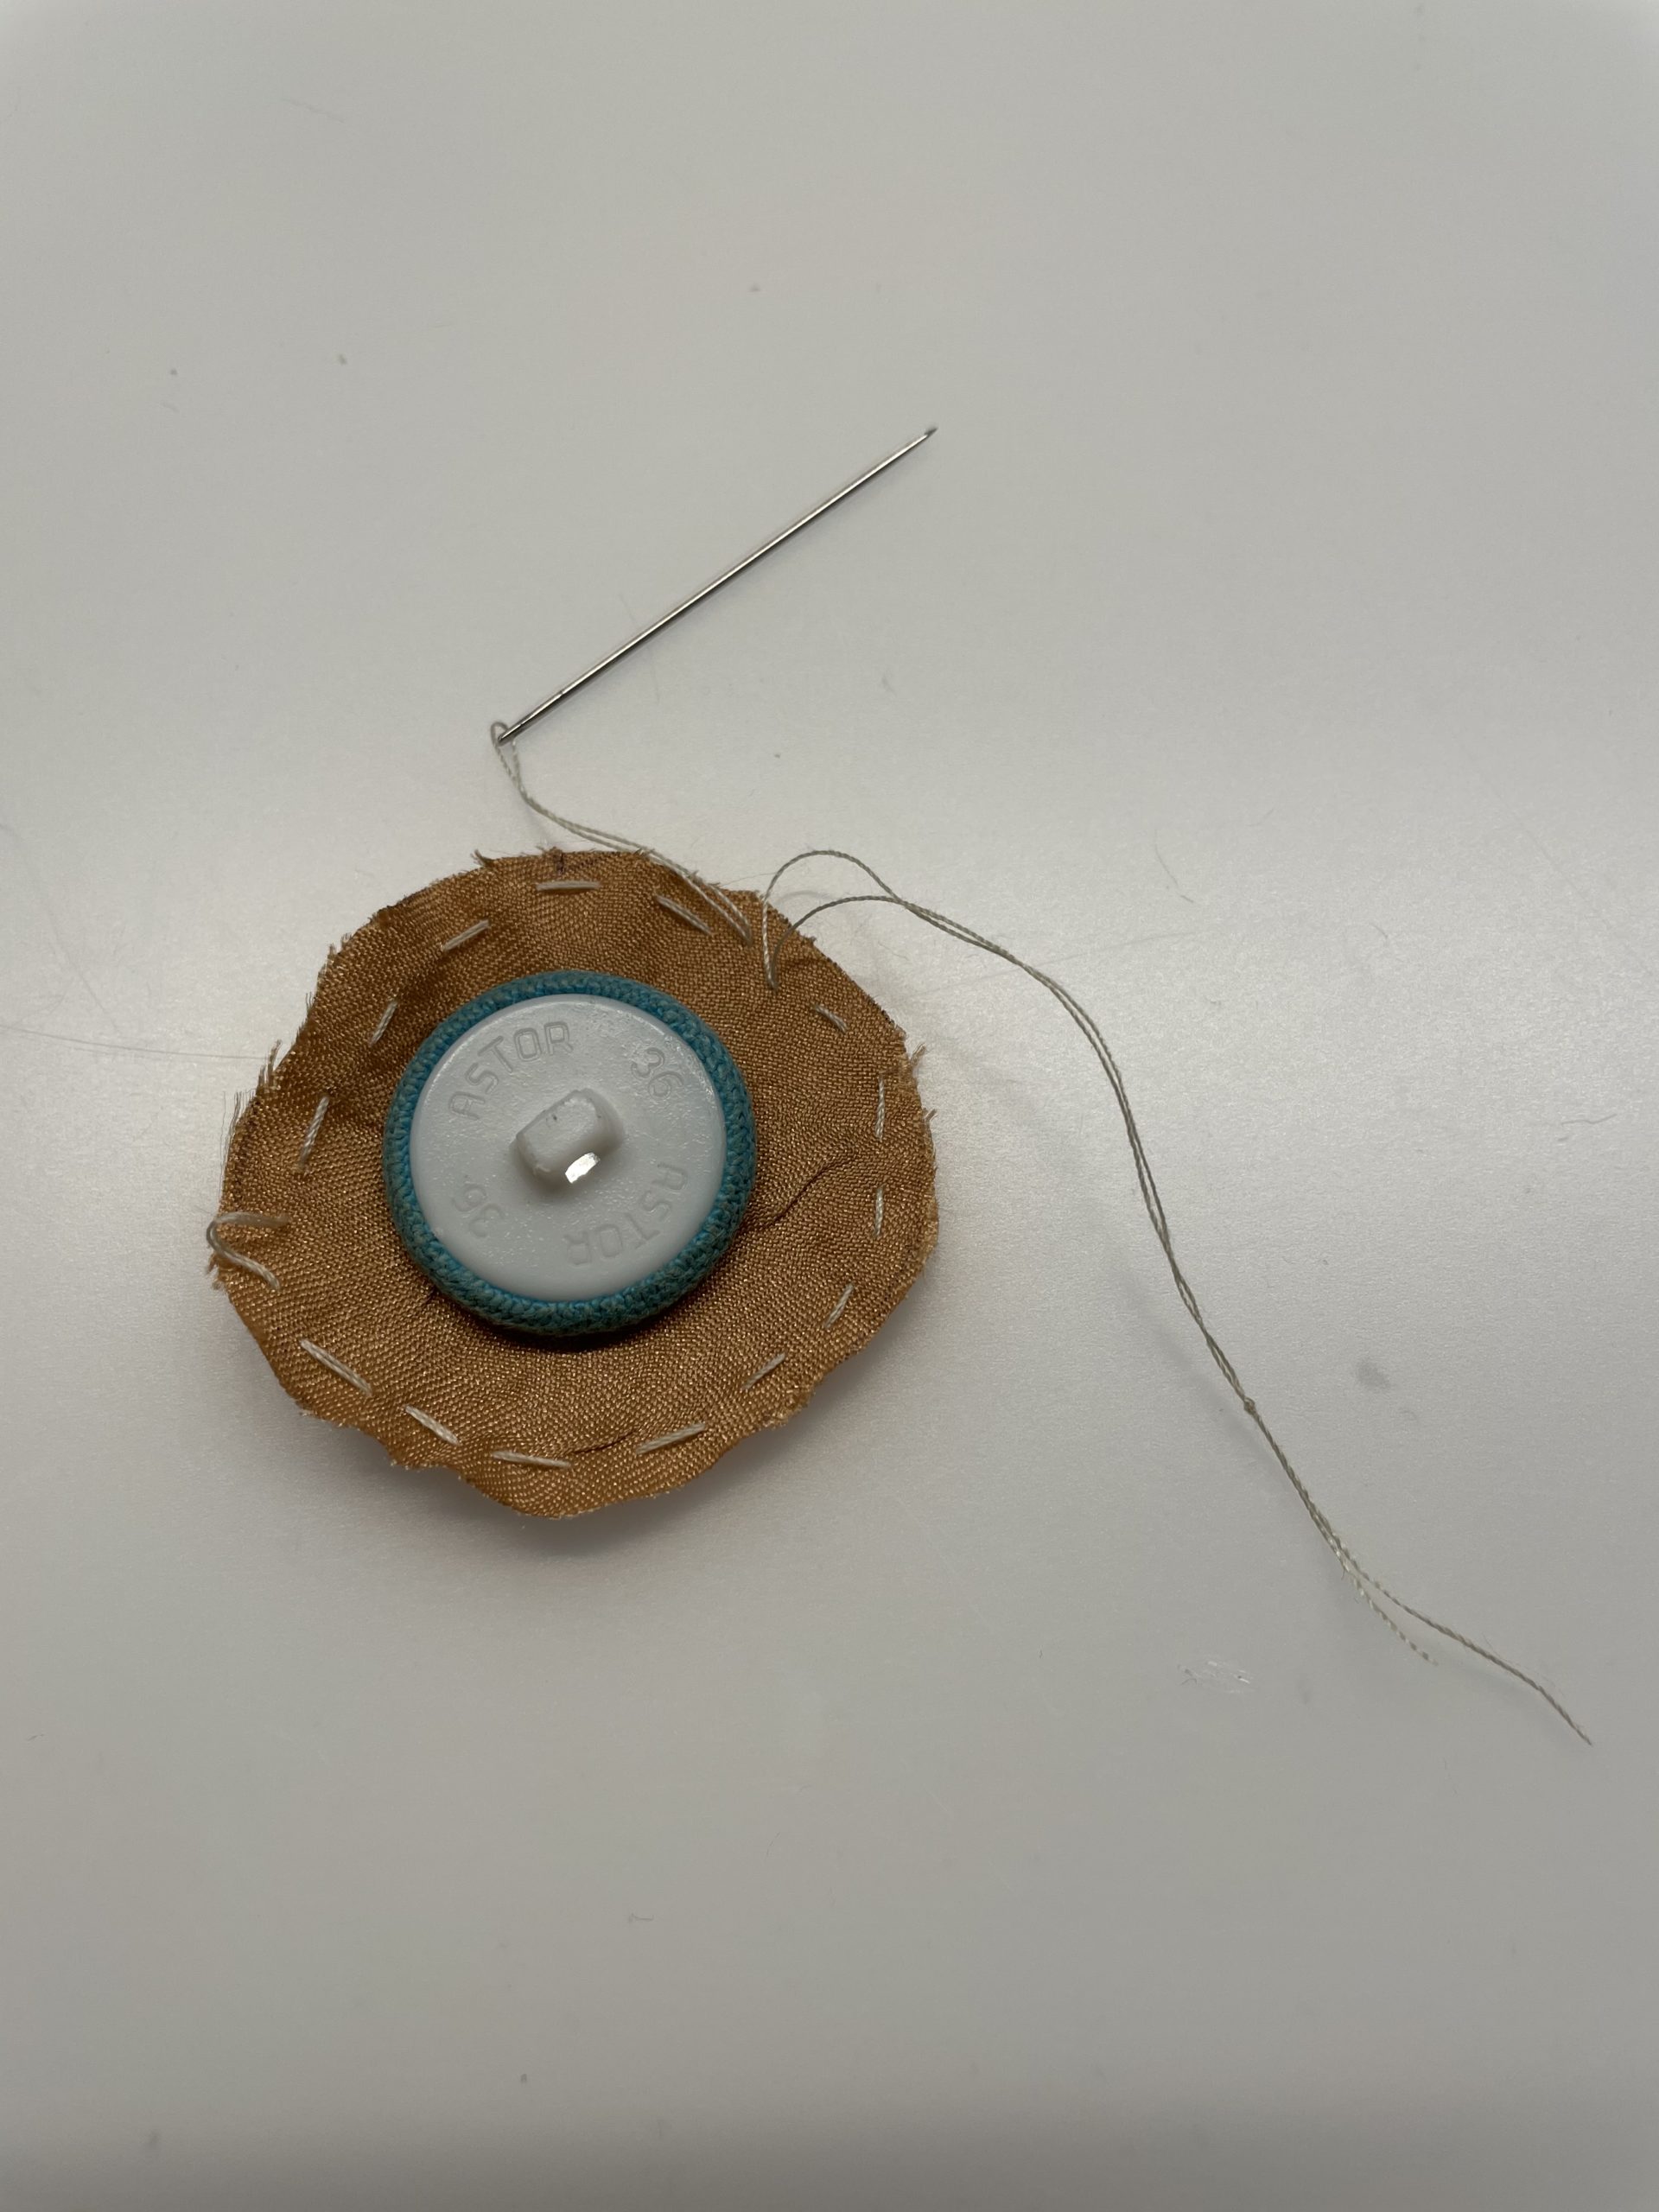
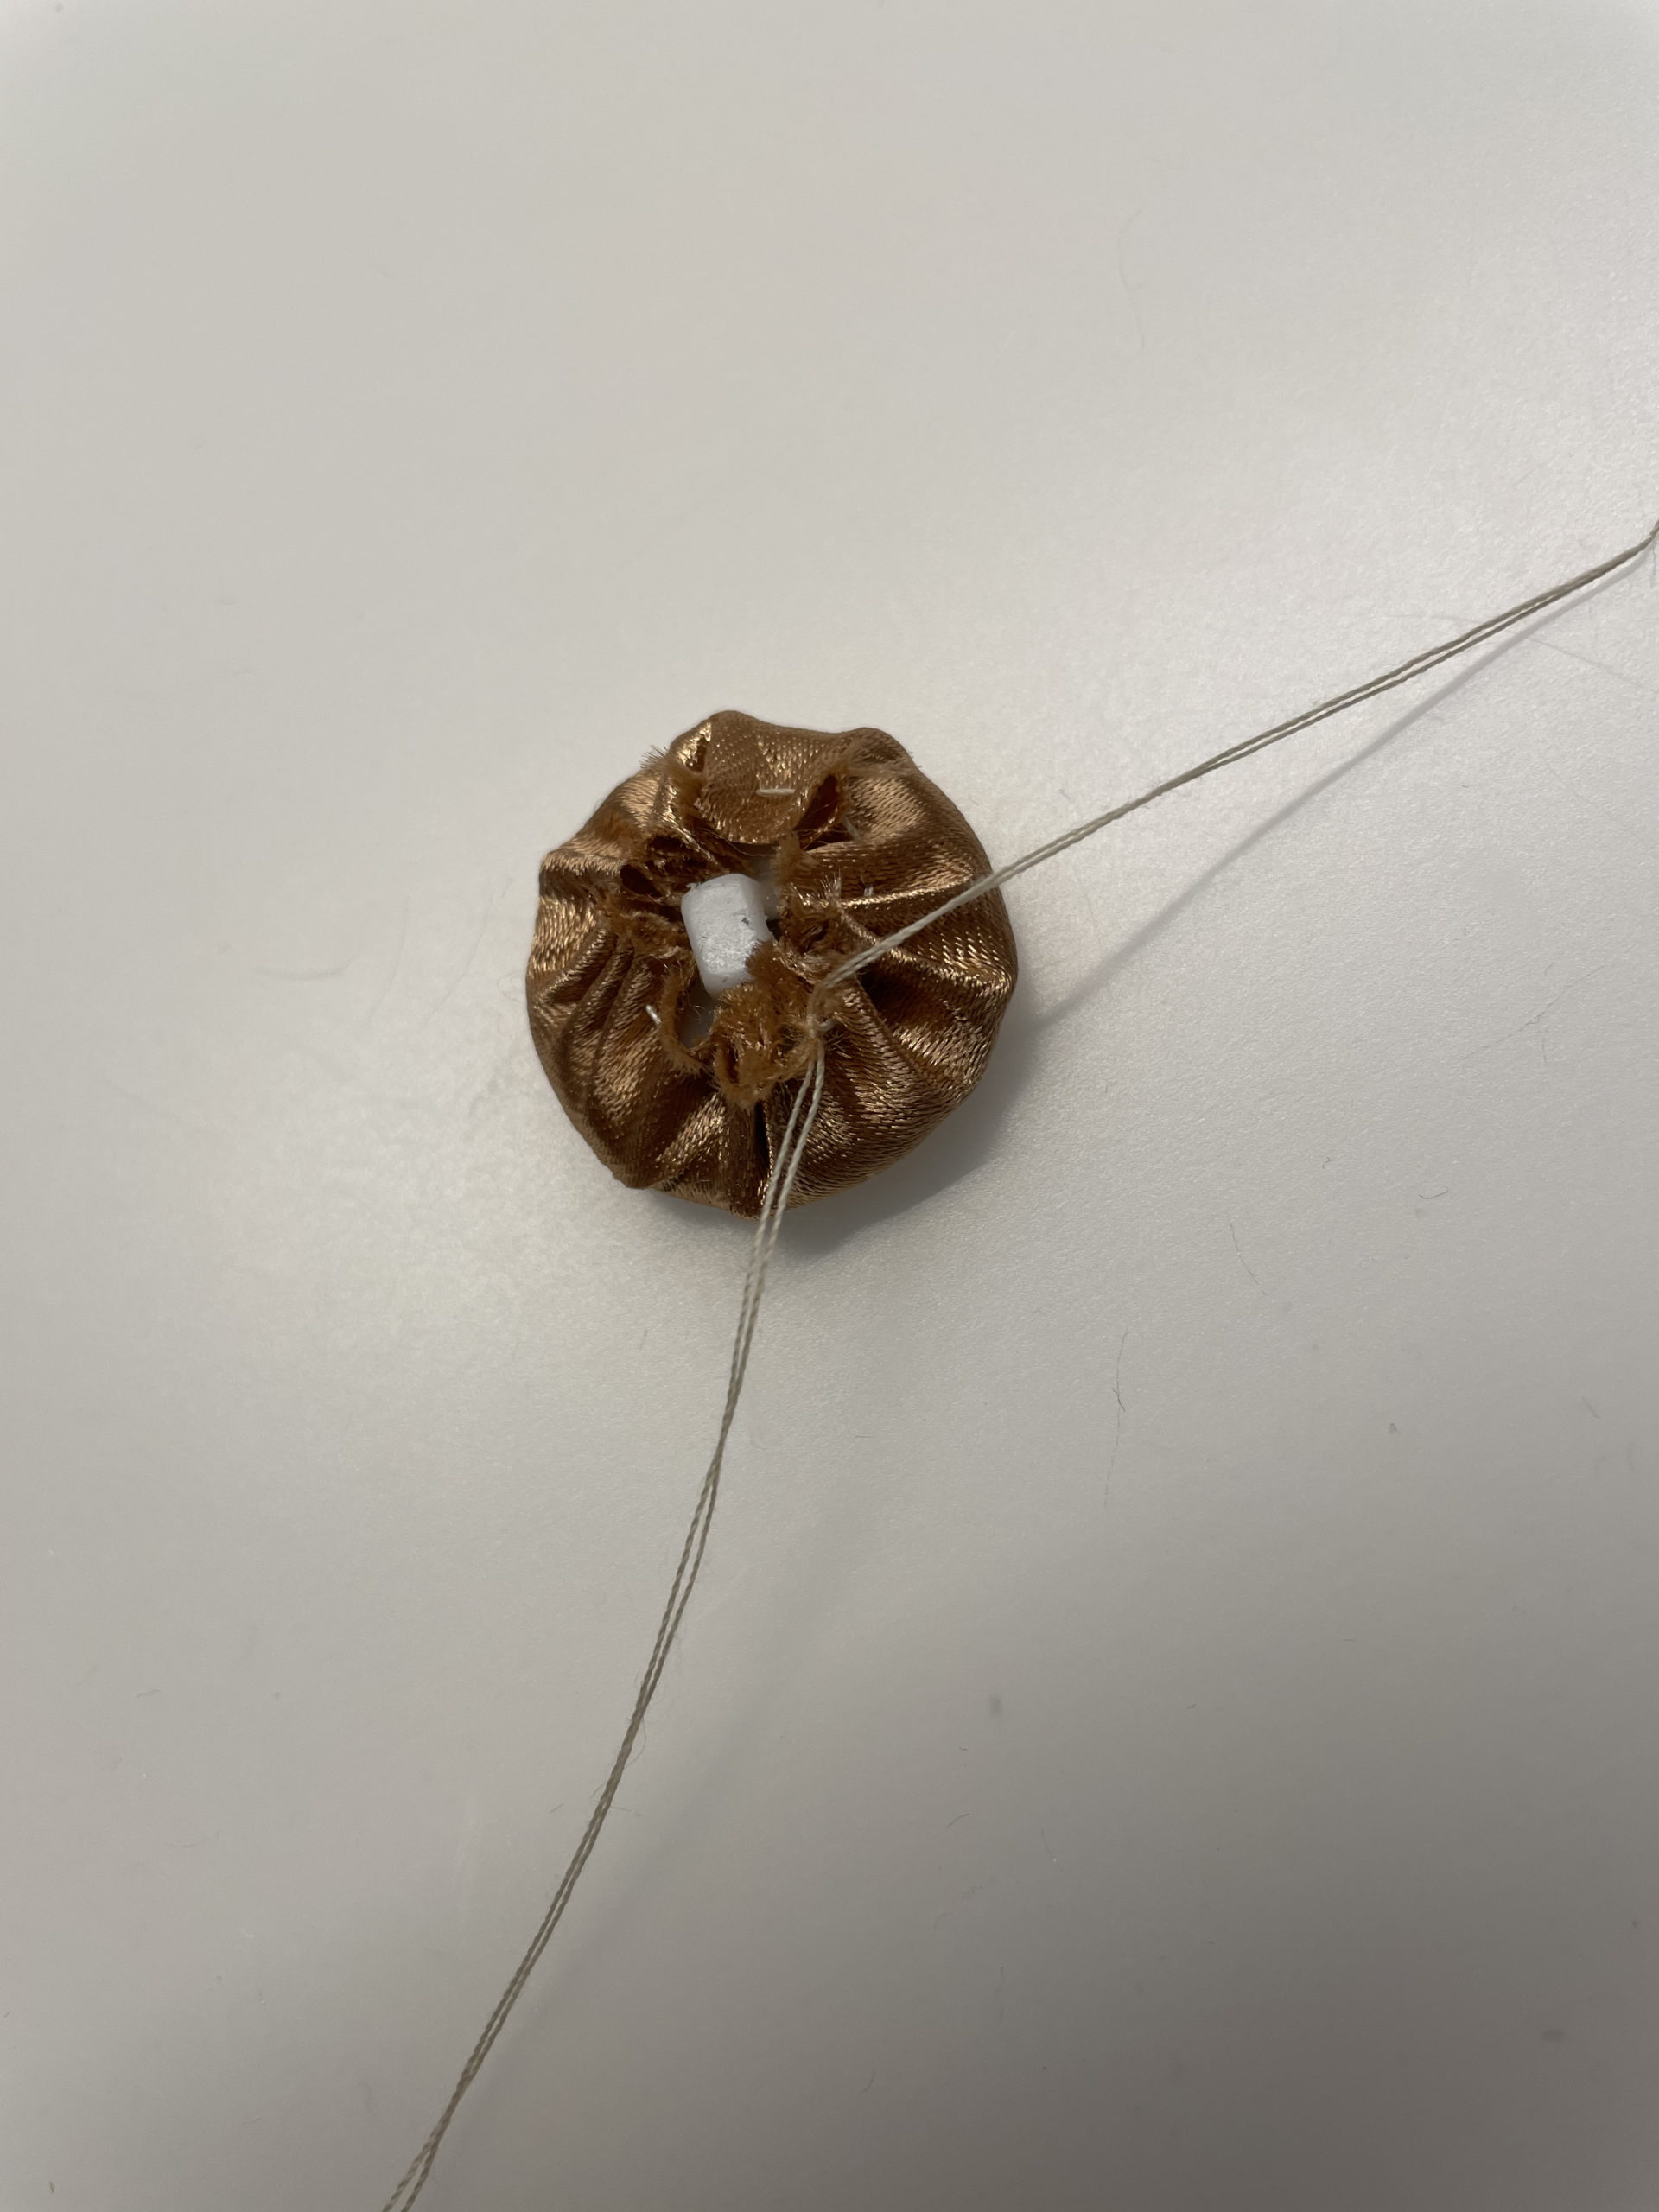
Then you touch the two ends of the thread and put them on carefully.
As a result, the fabric pulls together and lays around the button.

Bild zum Schritt 12 für das Bastel- und DIY-Abenteuer für Kinder: 'Dann fasst ihr die beide Fadenenden und zieht an diesen...'

13

Pull the threads together as evenly as possible.
Attention: pulls carefully so that the thread does not tear off!

Bild zum Schritt 13 für das Bastel- und DIY-Abenteuer für Kinder: 'Zieht die Fäden möglichst gleichmäßig zusammen.   Achtung: zieht...'

14

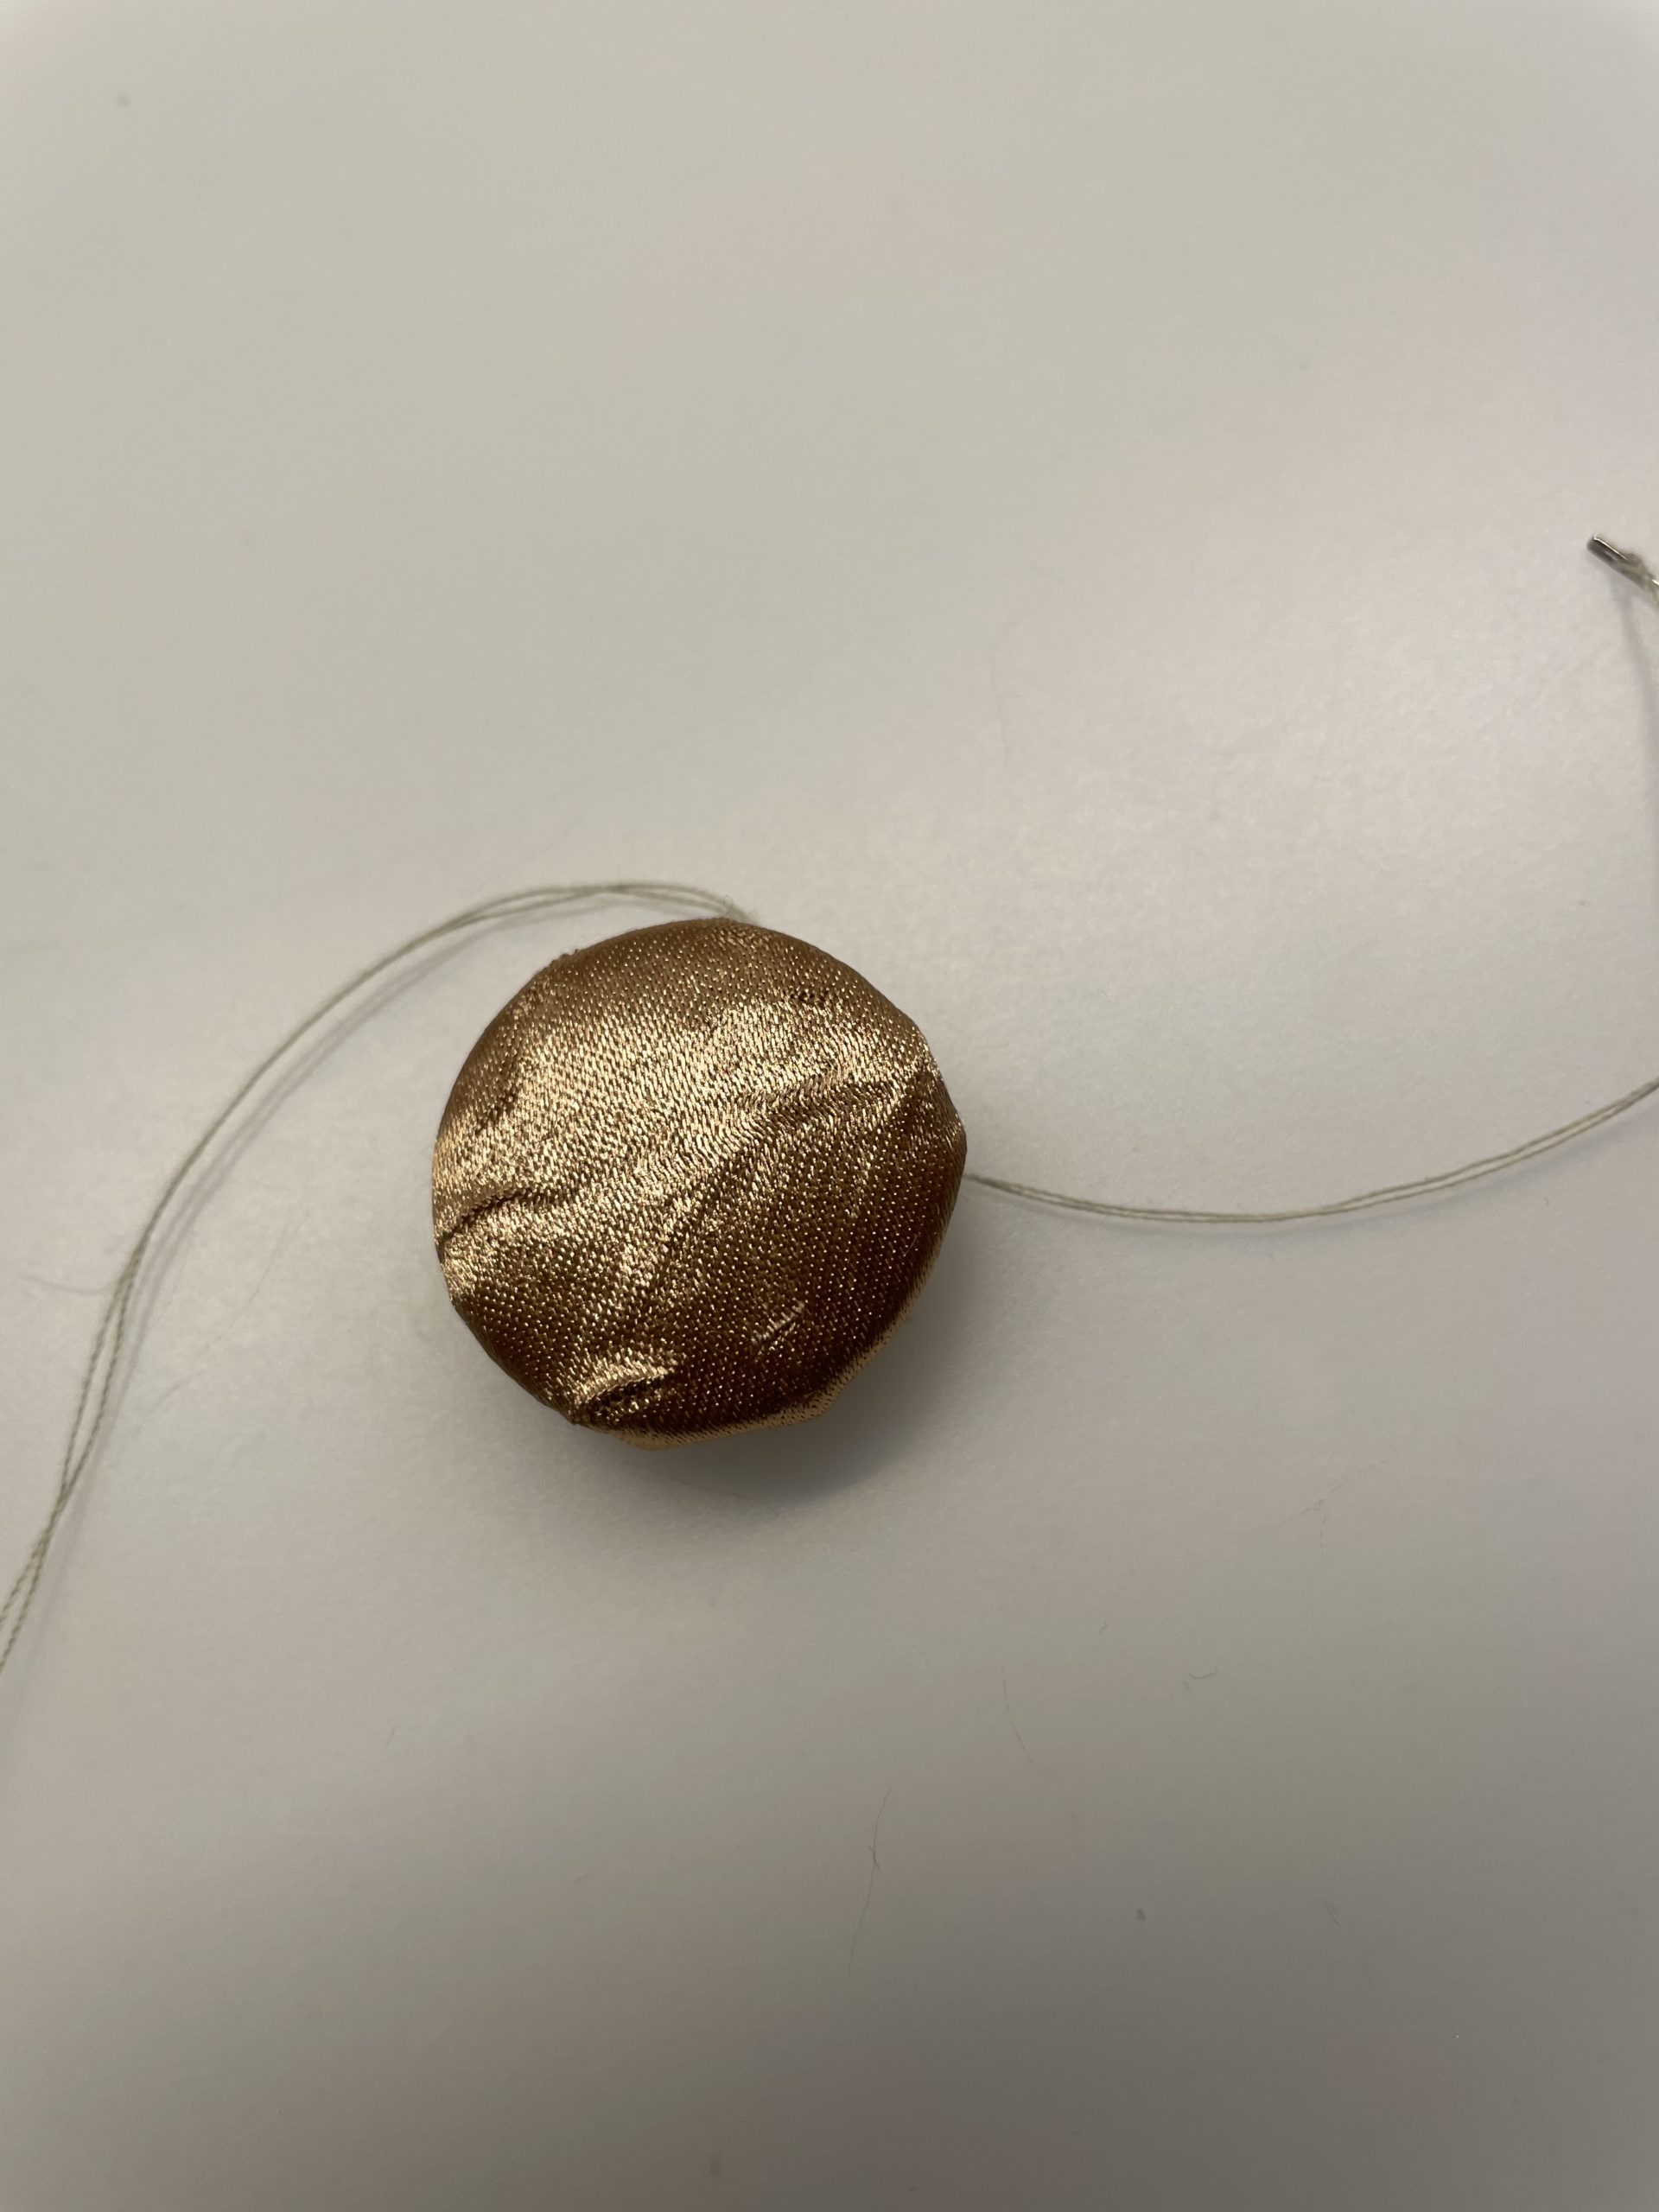
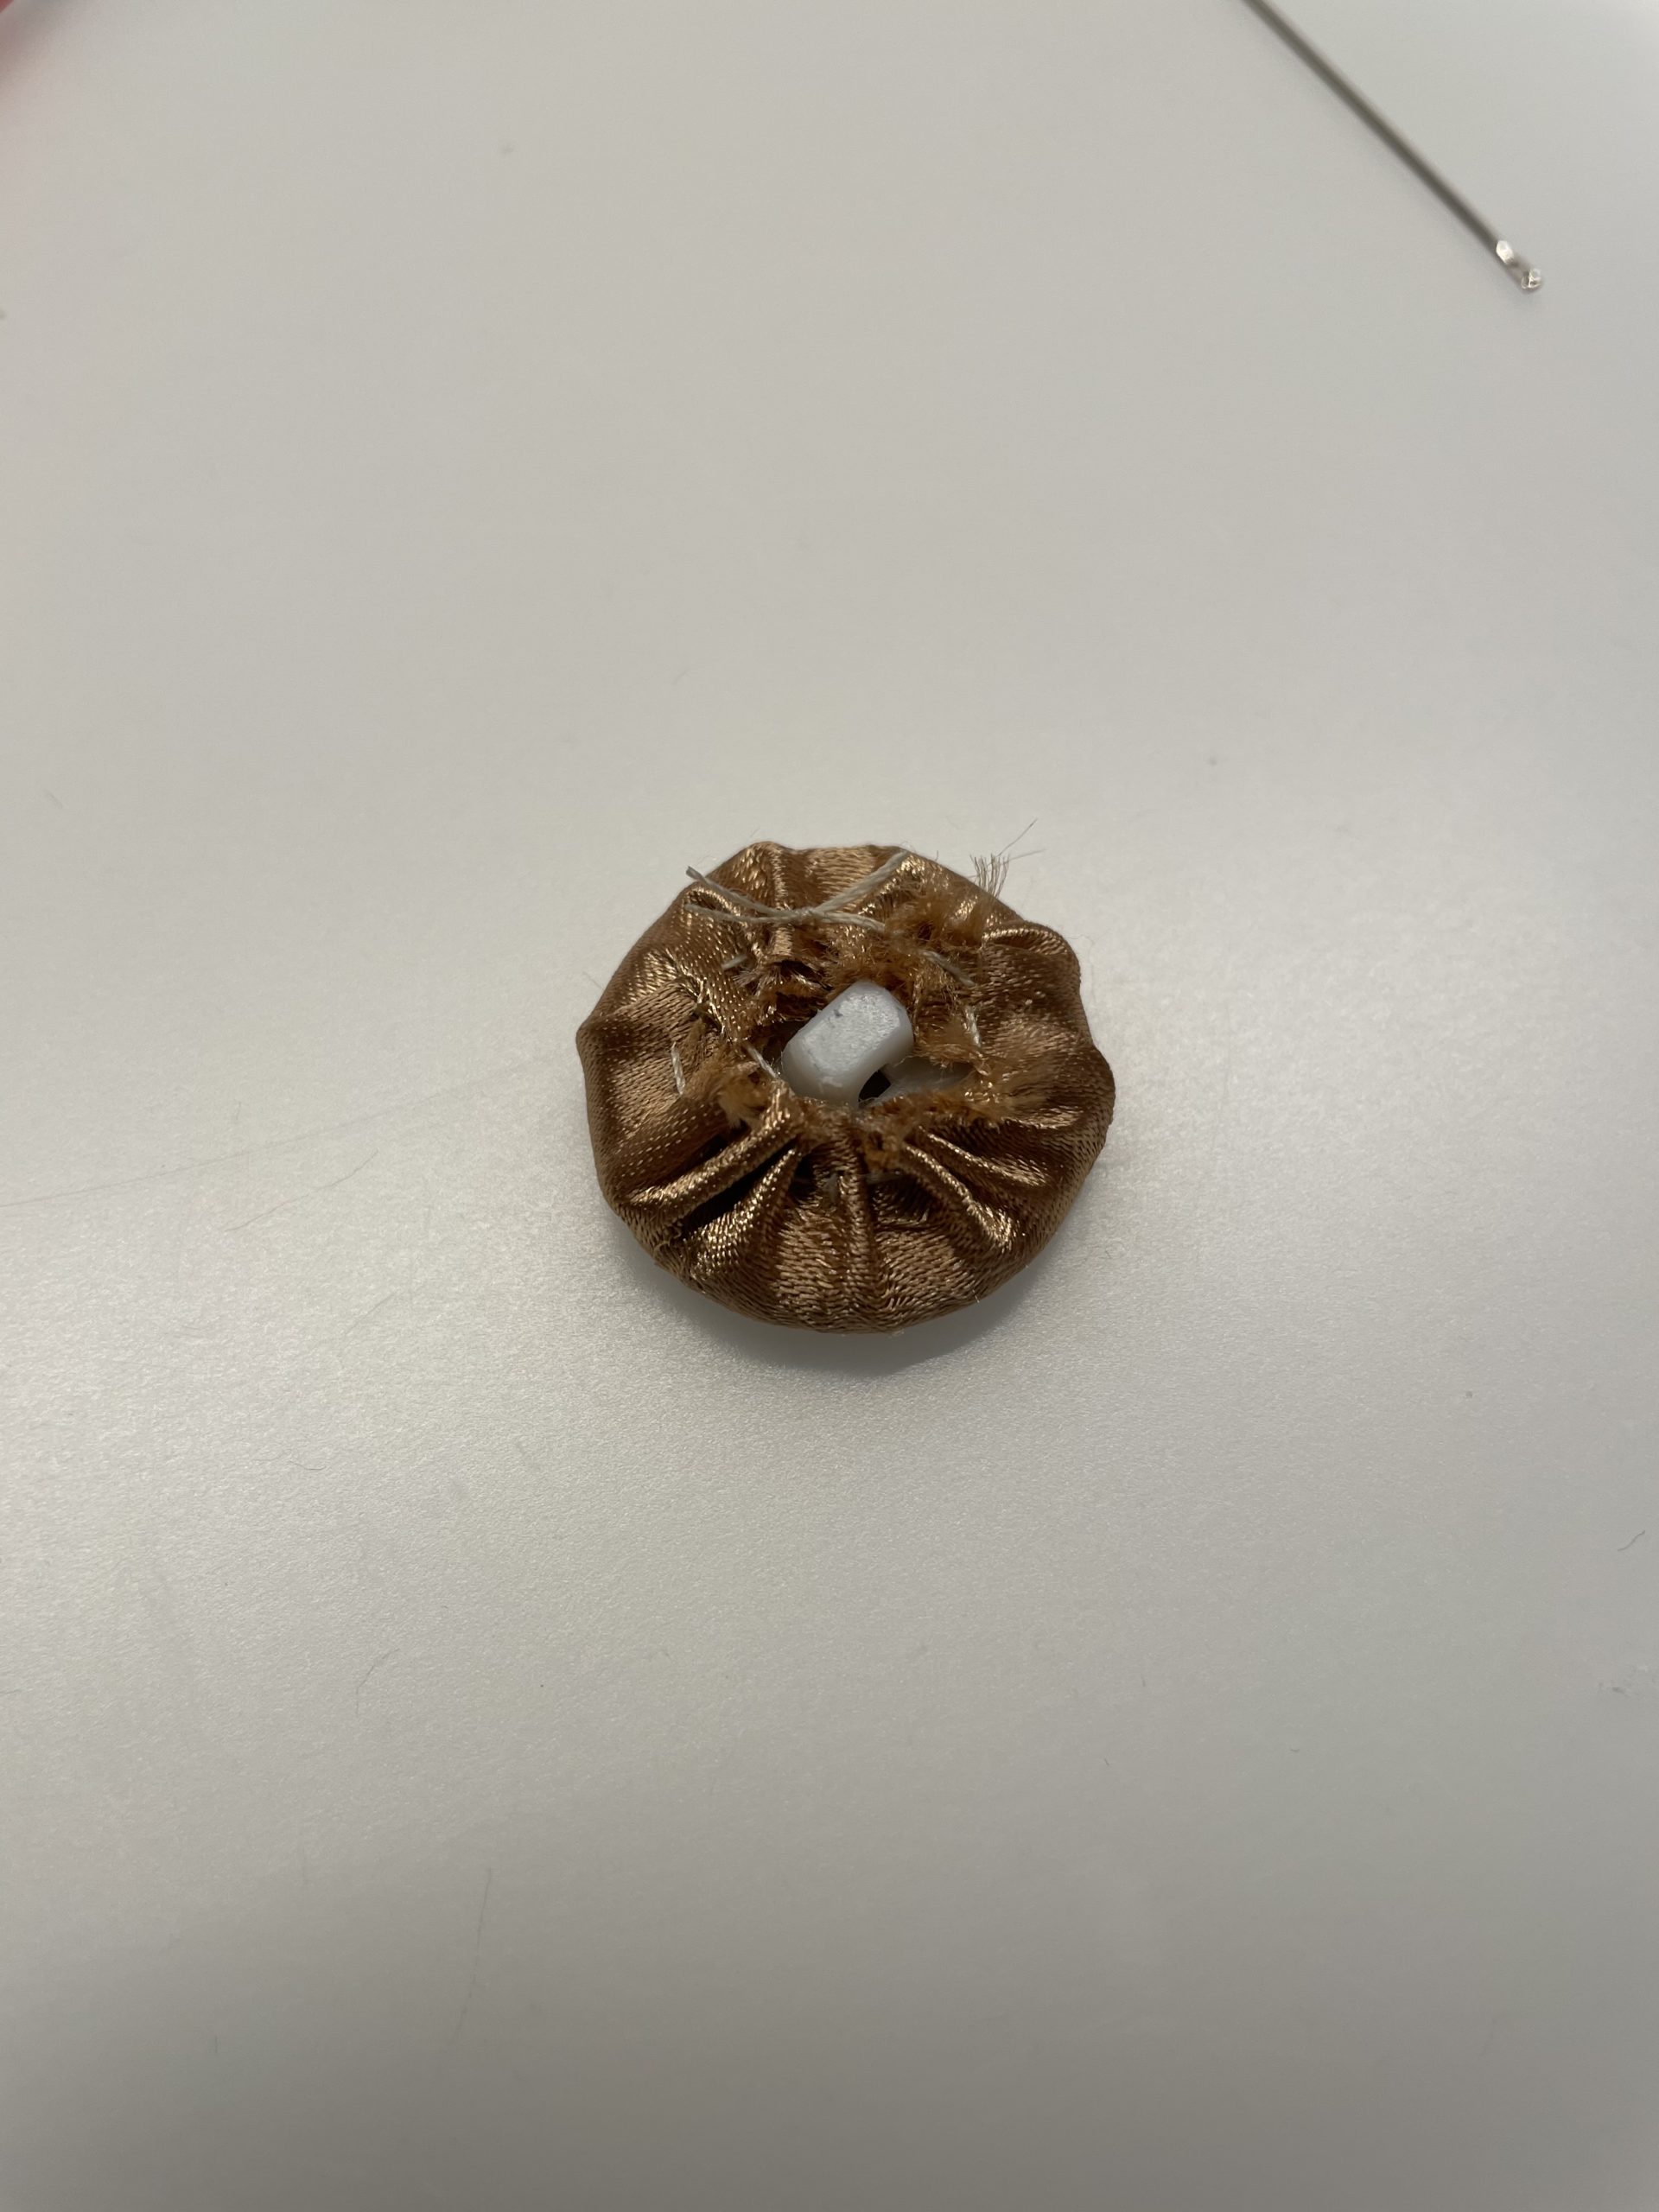
If the fabric circle has narrowly moved around the button, your result looks like in the picture!

Bild zum Schritt 14 für das Bastel- und DIY-Abenteuer für Kinder: 'Hat sich der Stoffkreis eng um den Knopf gelegt, sieht...'

15

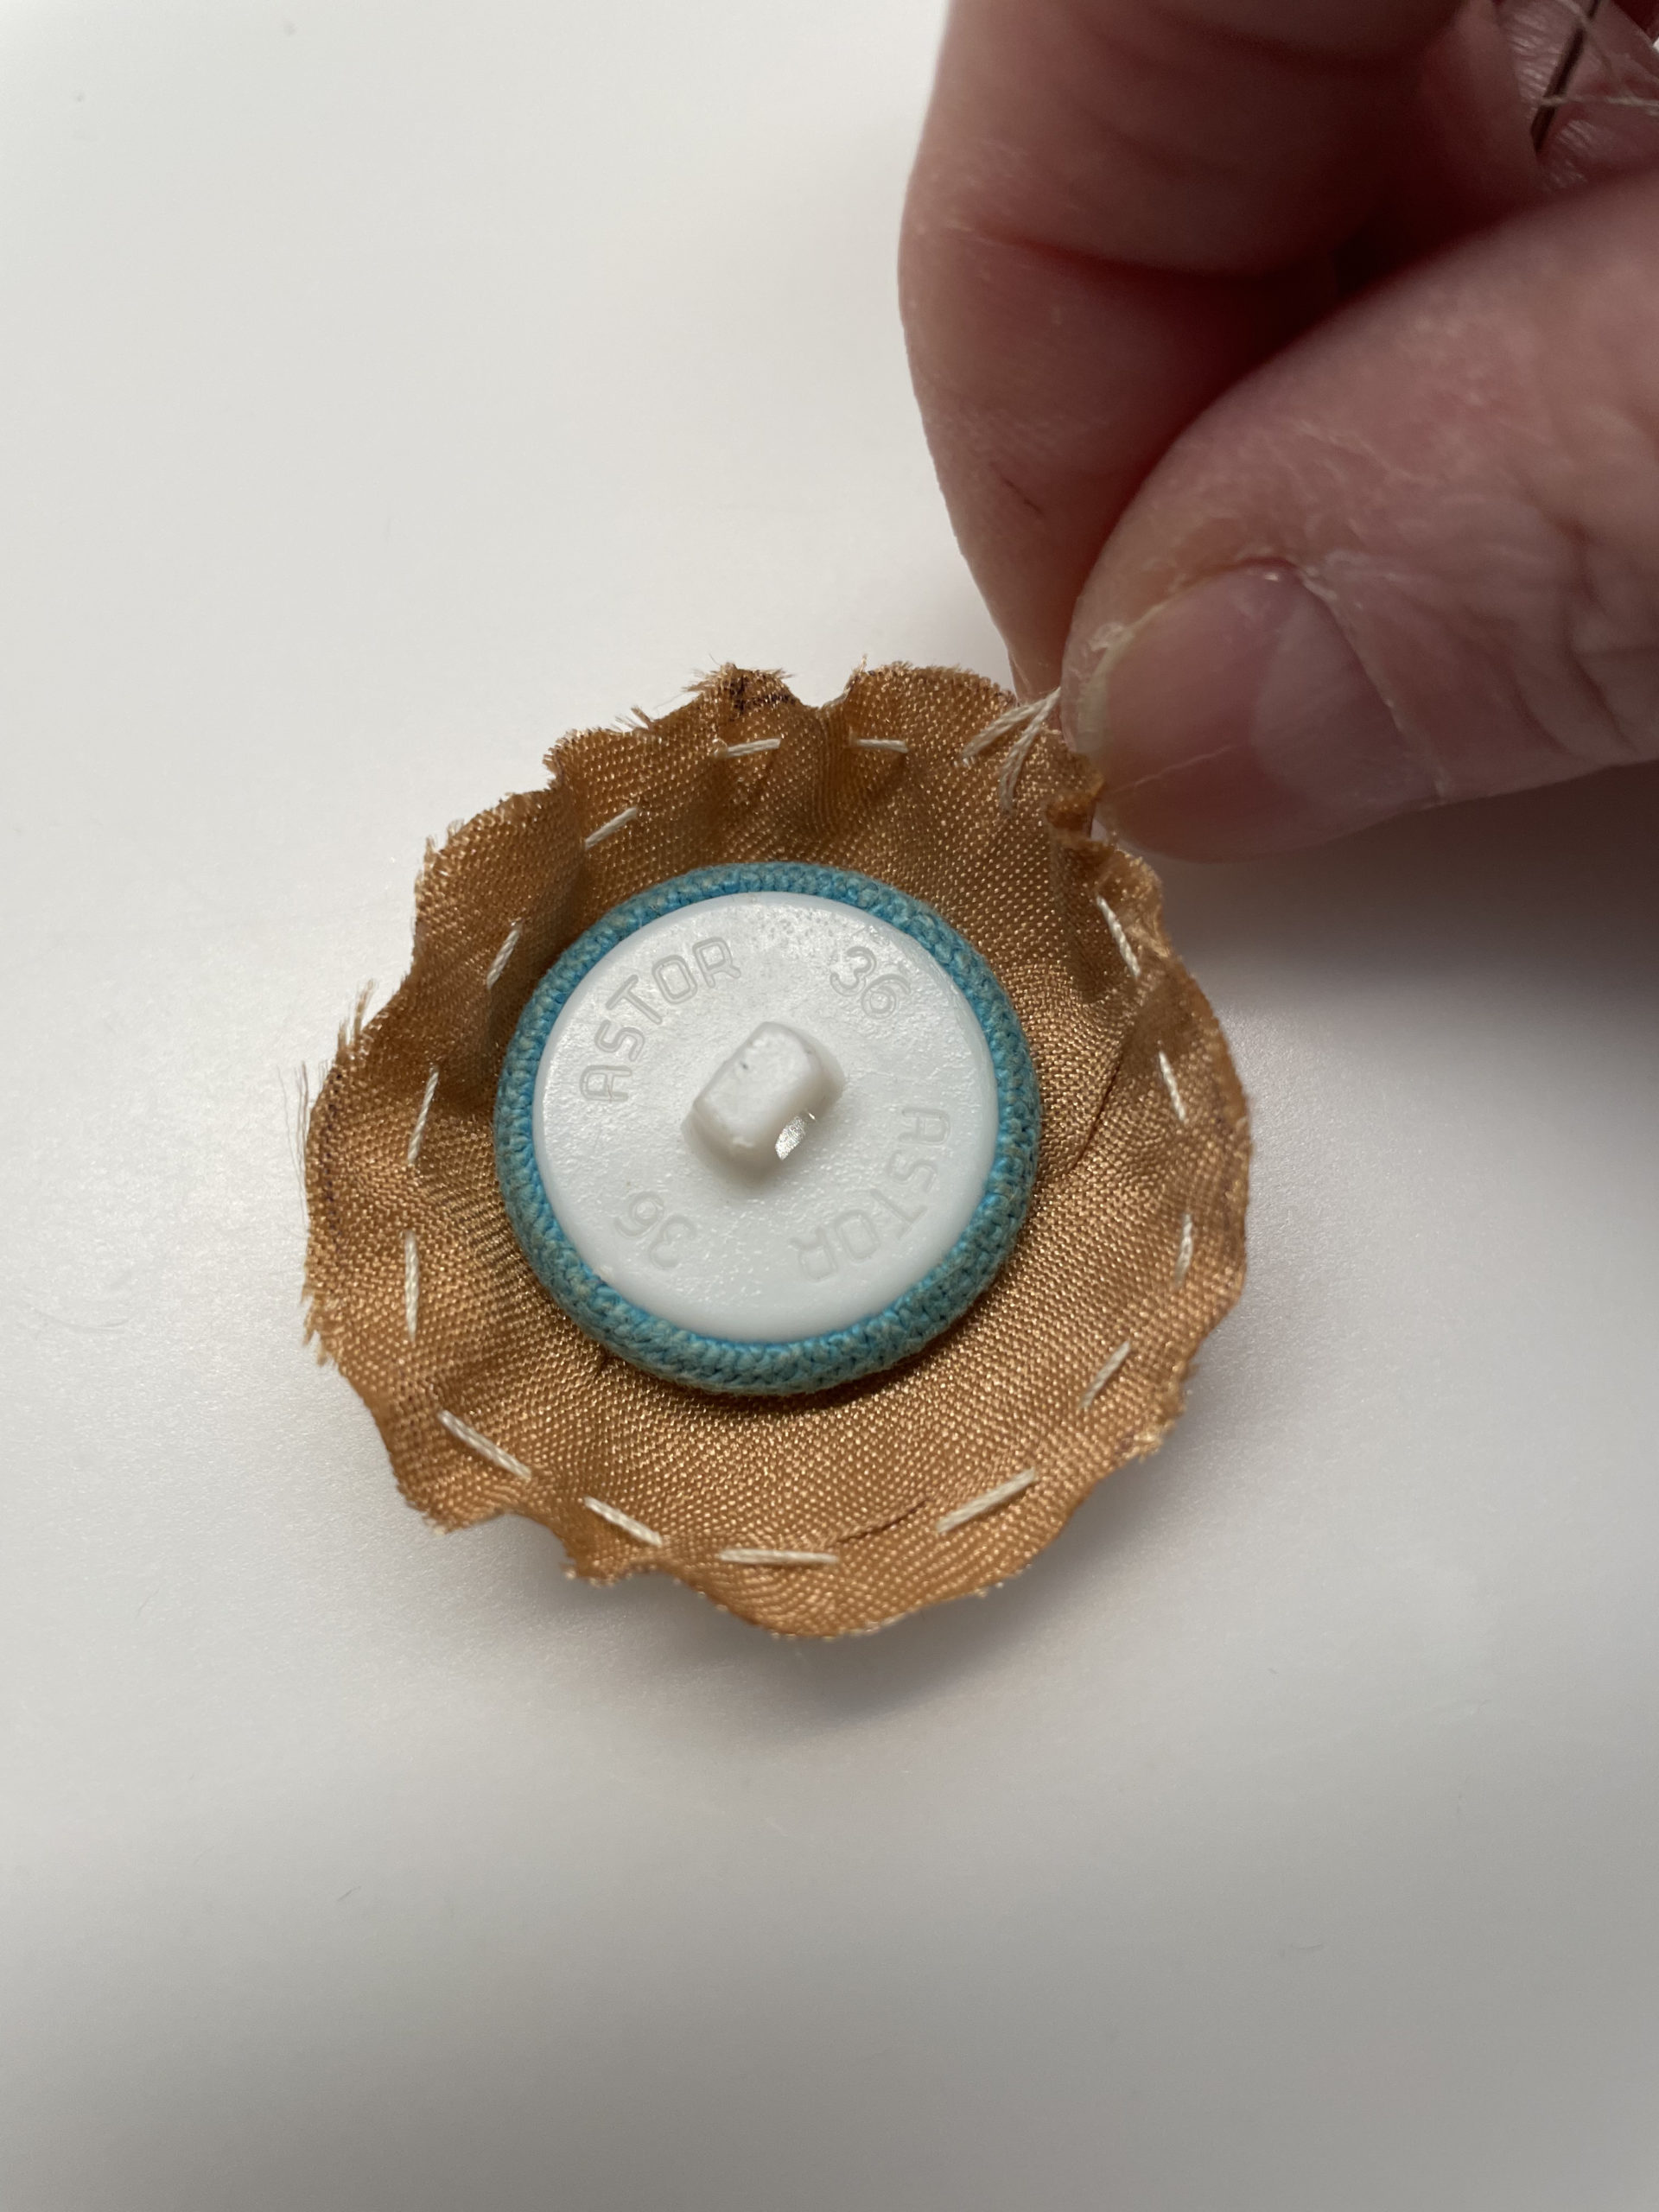
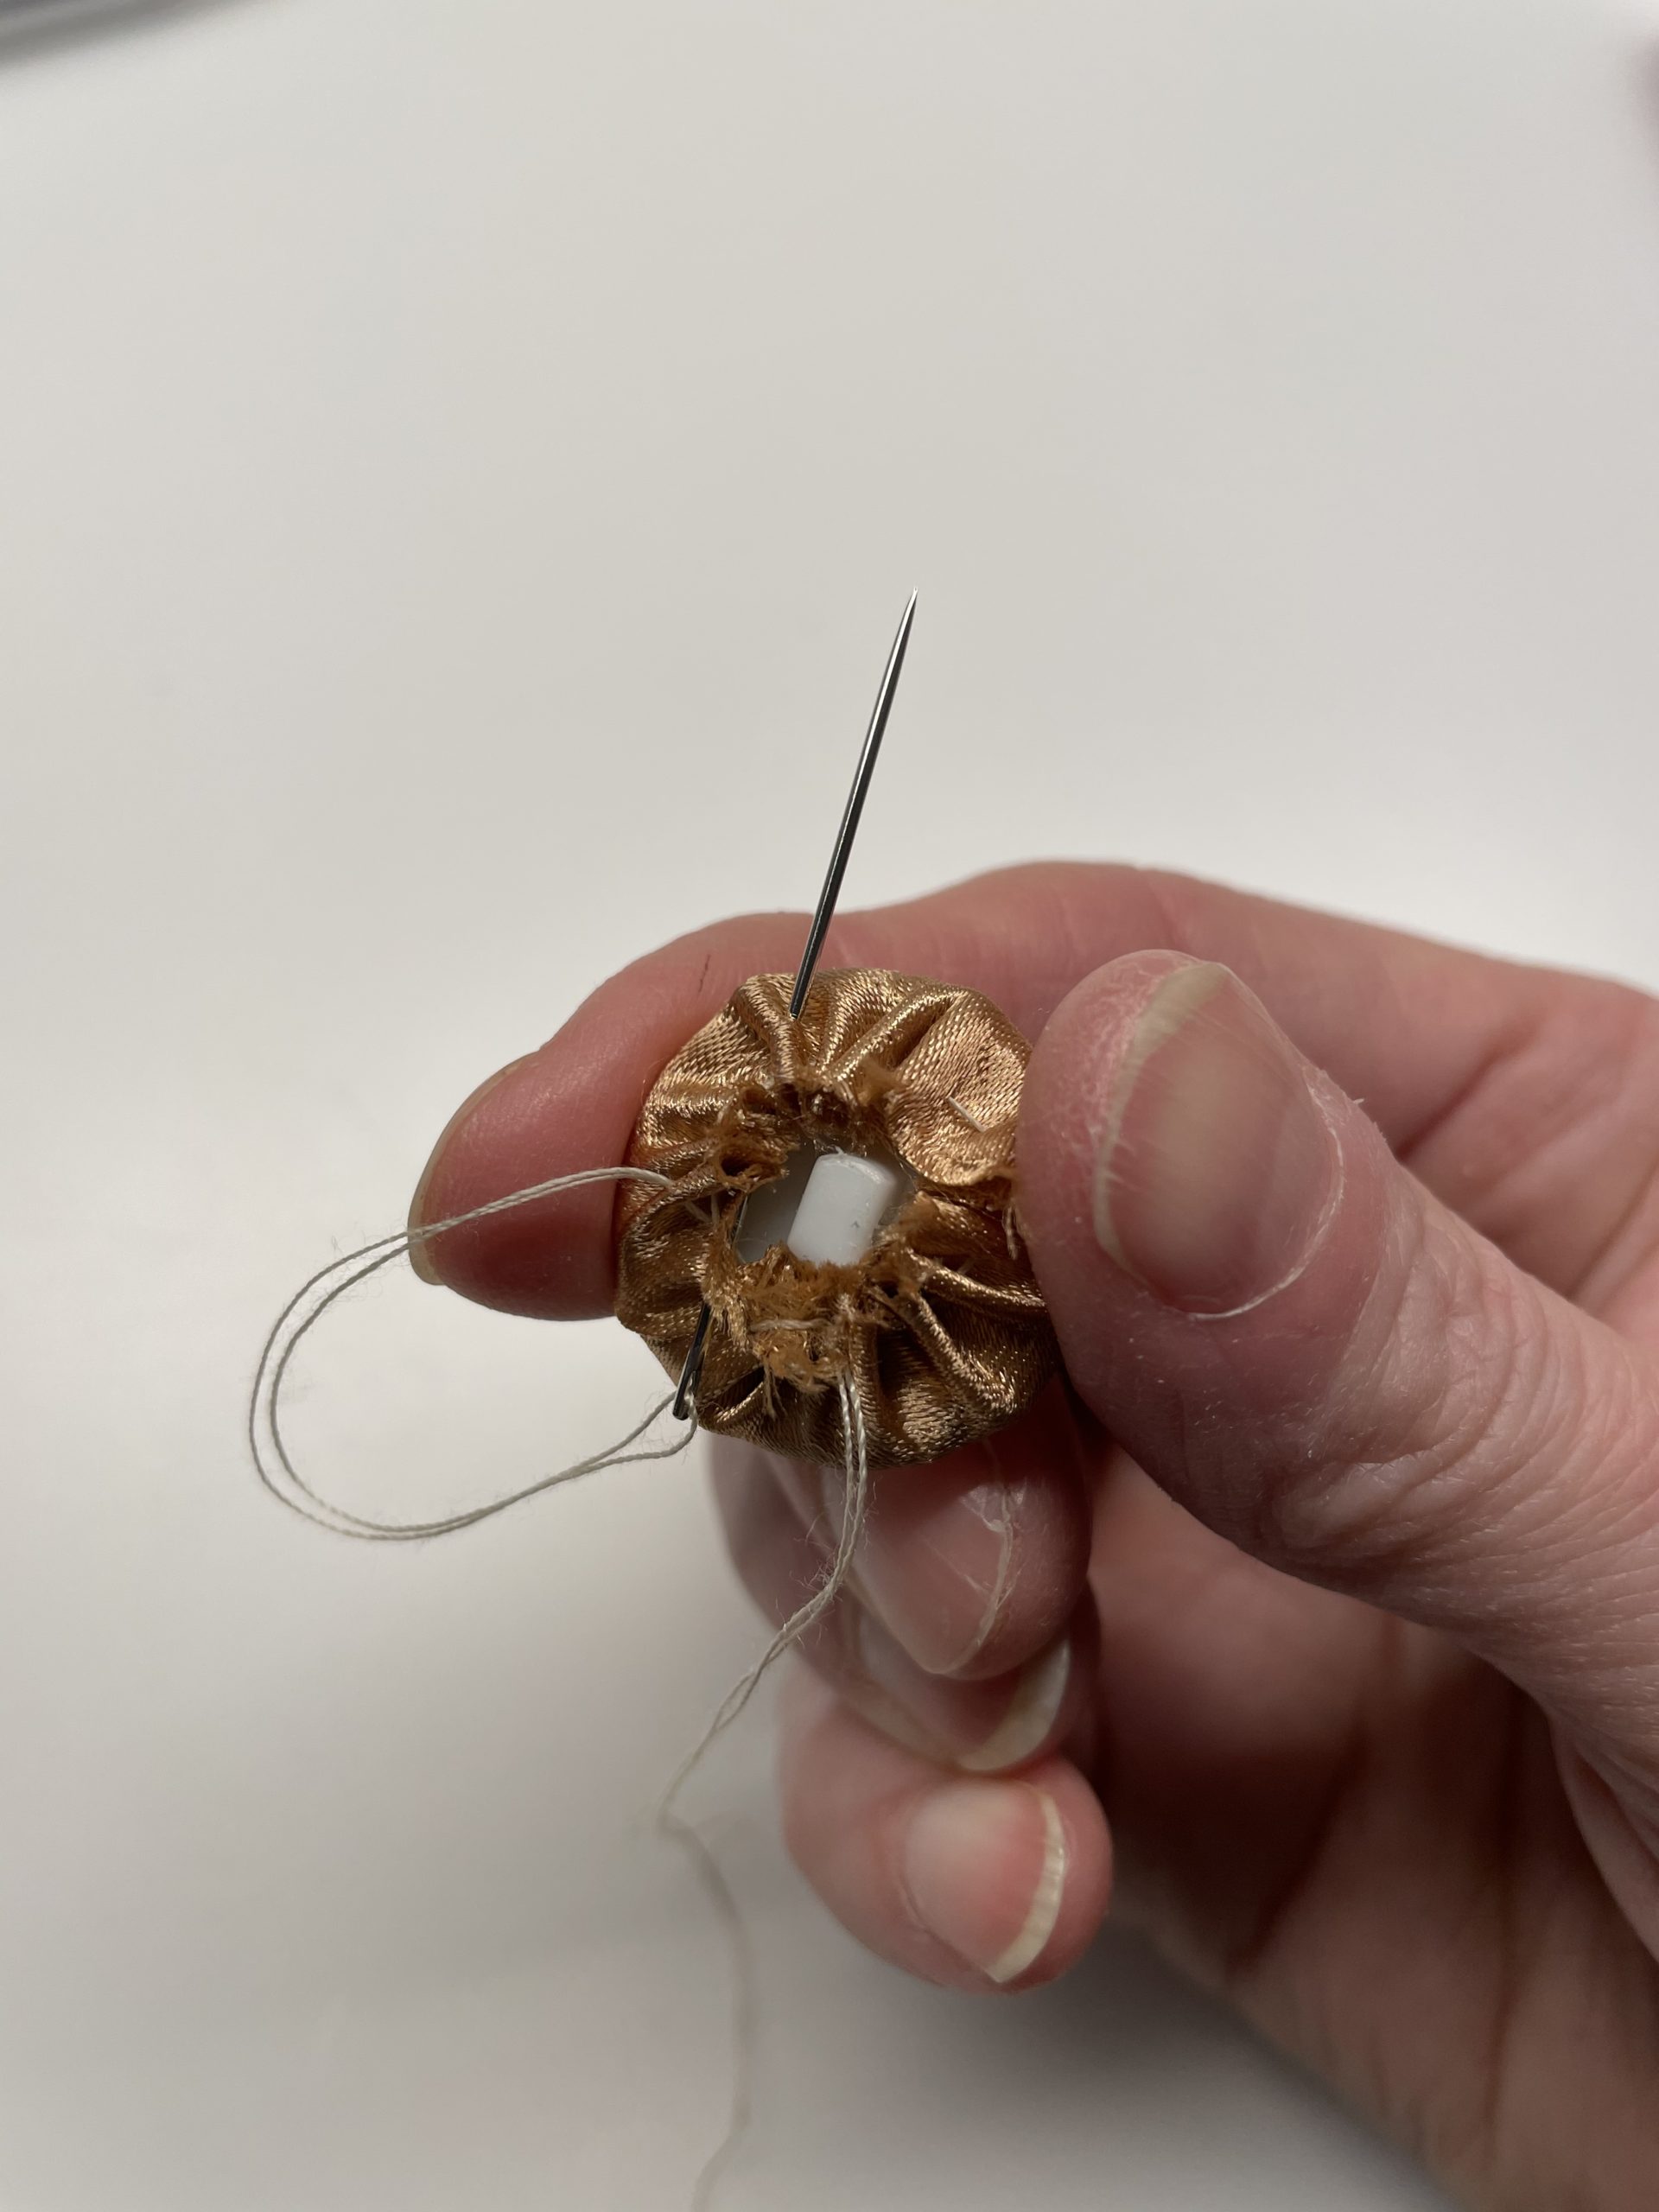
Now you tie the two threads together several times.

Bild zum Schritt 15 für das Bastel- und DIY-Abenteuer für Kinder: 'Nun verknotet ihr die beide Fäden mehrmals fest miteinander.'

16

Check if the button looks nice from the other side as well. As soon as everything fits, sew the overhanging thread.

Bild zum Schritt 16 für das Bastel- und DIY-Abenteuer für Kinder: 'Kontrolliert danach ob der Knopf auch von der anderen Seite...'

17

For this, you puncture the thread on the back several times through the fabric edge.
Then cut off the thread on the needle and finish sewing with a knot.

Bild zum Schritt 17 für das Bastel- und DIY-Abenteuer für Kinder: 'Dafür stichst du den Faden auf der Rückseite mehrmals durch...'

18

Cut off the overhanging threads now.

Bild zum Schritt 18 für das Bastel- und DIY-Abenteuer für Kinder: 'Schneidet jetzt die überstehenden Fäden ab.'

19

Finished is the covered button!

Bild zum Schritt 19 für das Bastel- und DIY-Abenteuer für Kinder: 'Fertig ist der bezogene Knopf!'

20

2. Bild zum Schritt 19 für das Bastel- und DIY-Abenteuer für Kinder: 'Fertig ist der bezogene Knopf!'

21

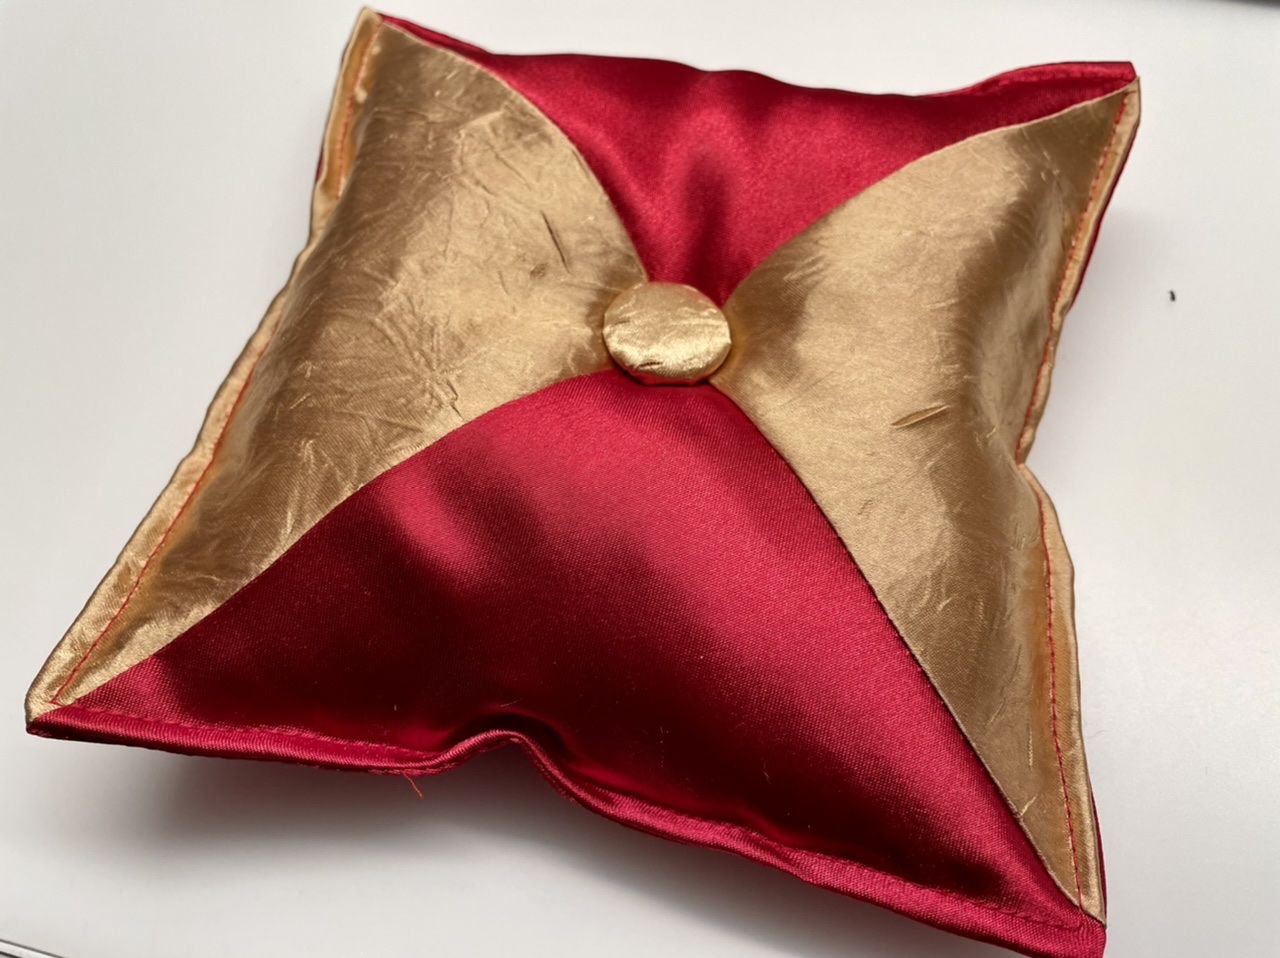
You can also use the button for a nice pillow.
To do this, you choose the fabric of your pillow.
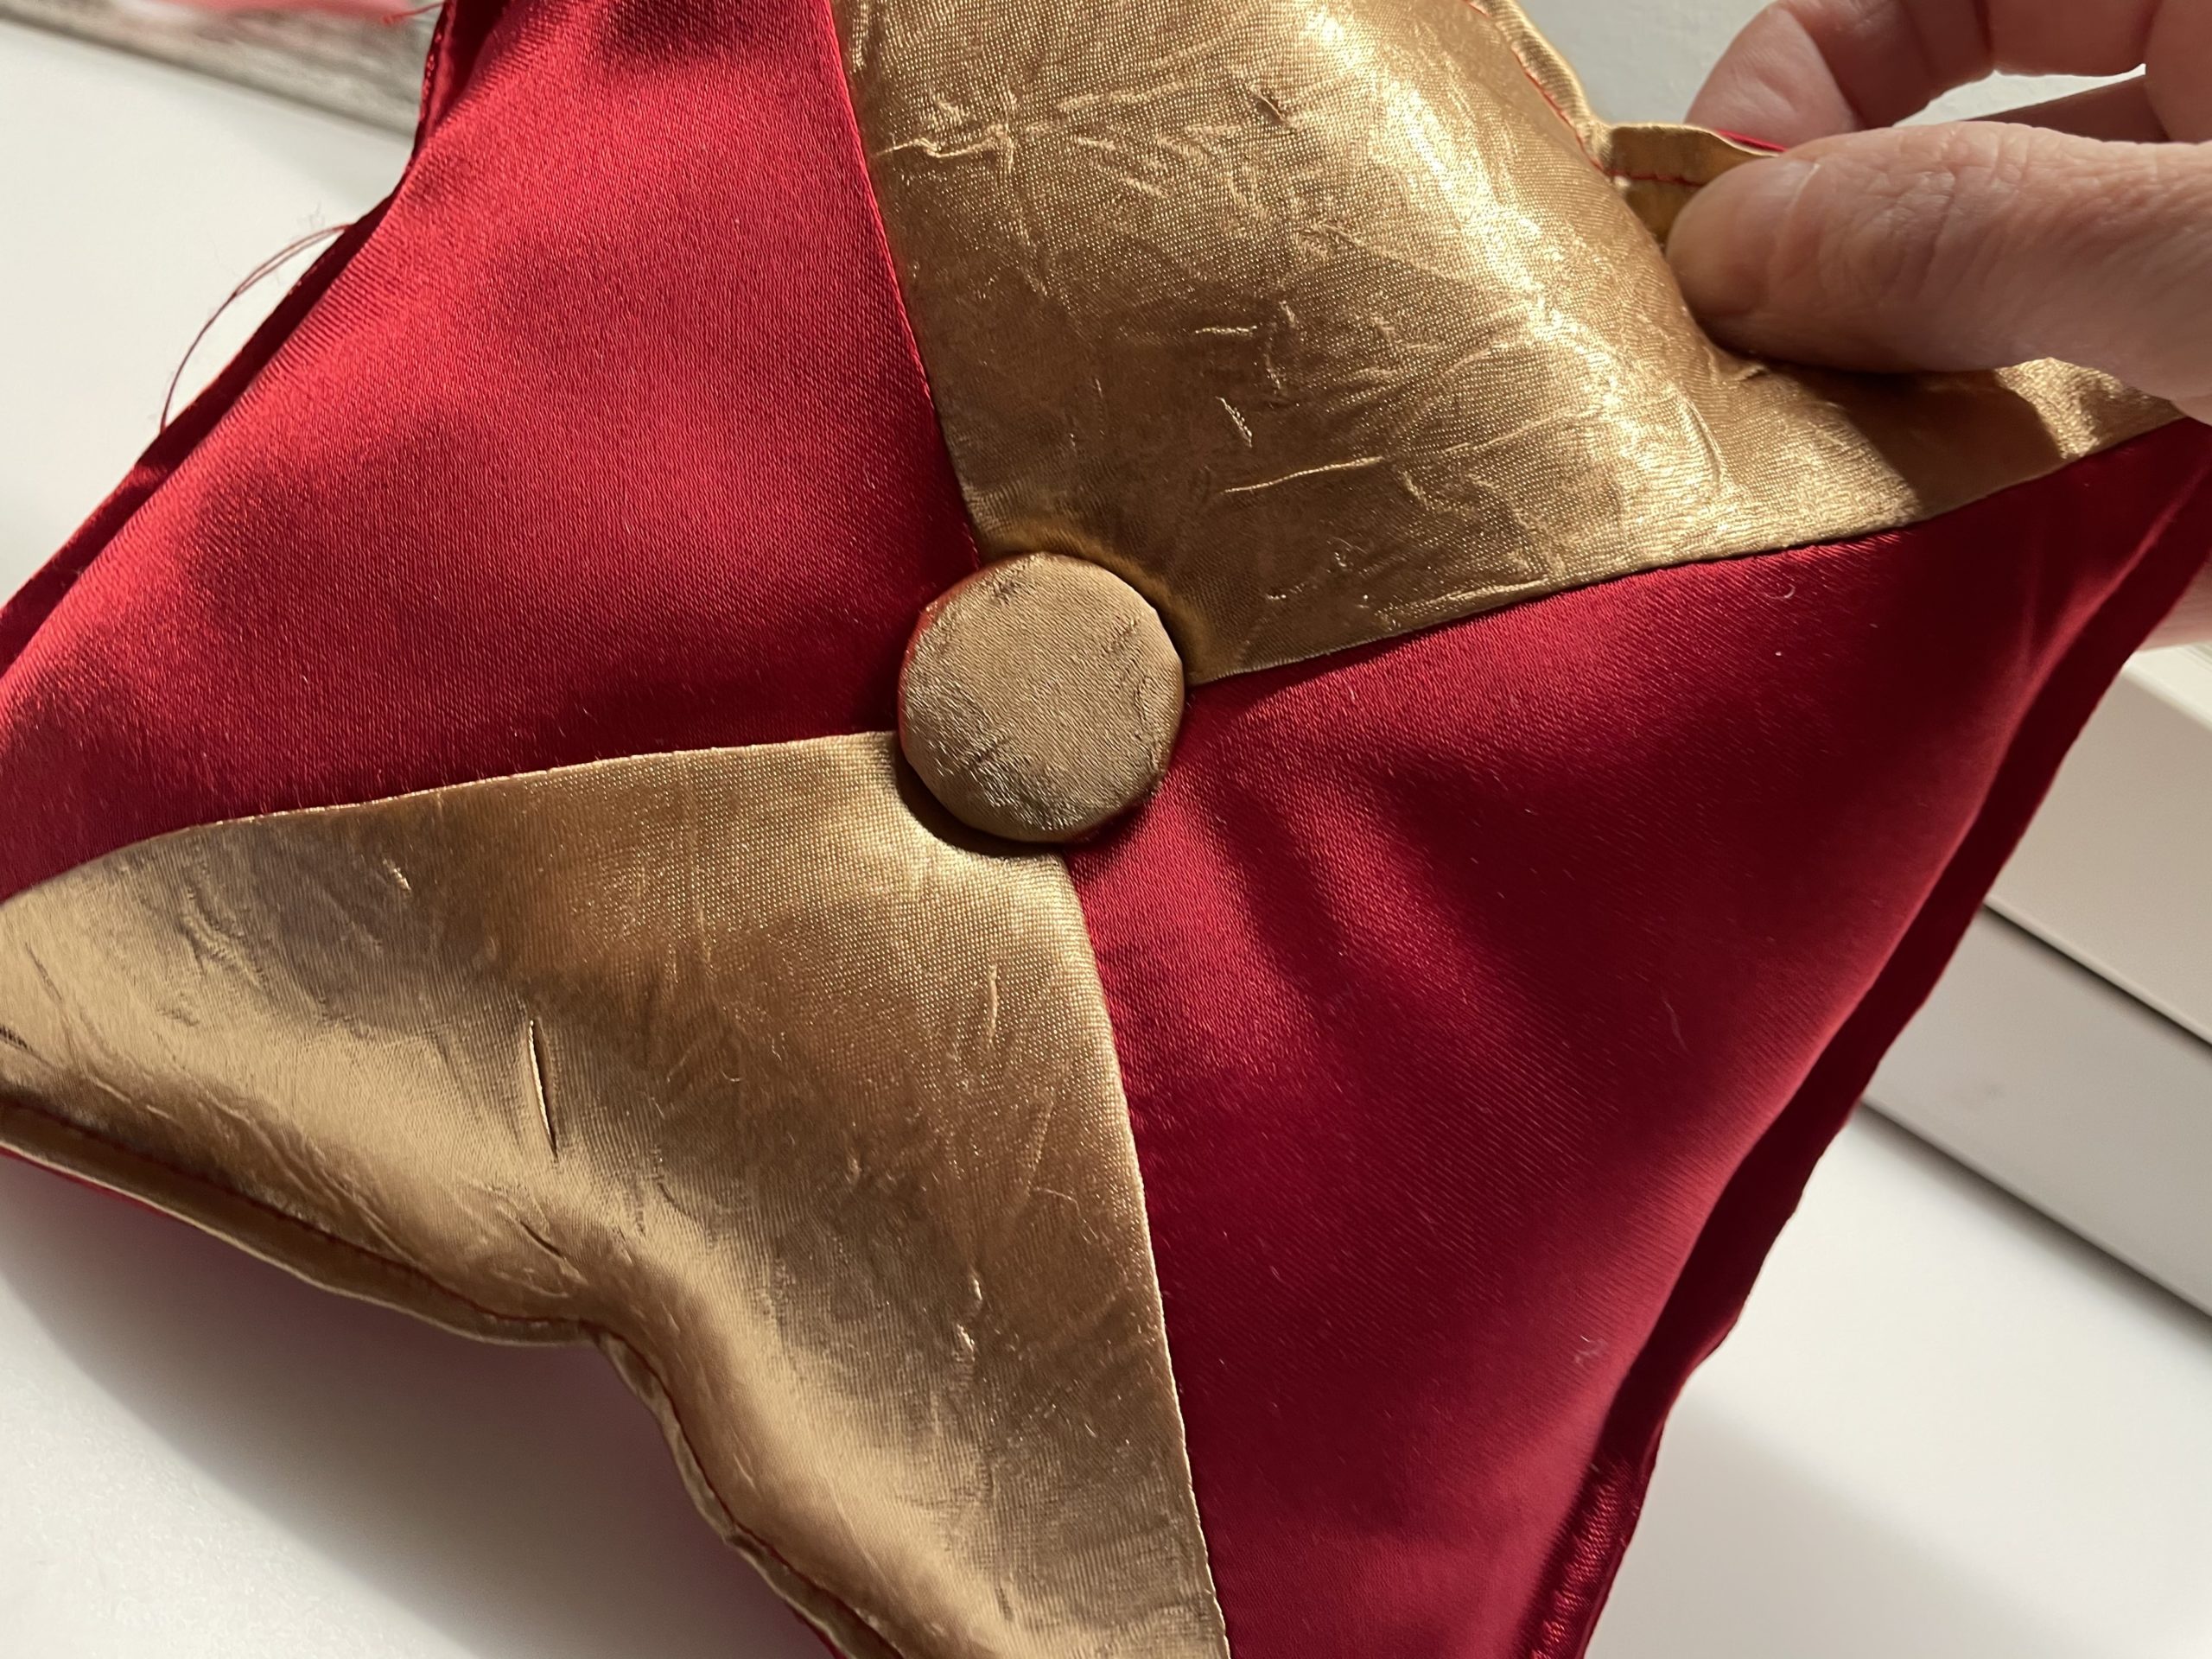
Attach the thread several times to the buttonhole. Only then push the needle through the pillow at the desired point.
You may also sew a button on the back of the pillow.

Bild zum Schritt 21 für das Bastel- und DIY-Abenteuer für Kinder: 'Ihr könnt den Knopf auch für ein schönes Kissen verwenden....'

22

This creates a beautiful pillow!

Bild zum Schritt 22 für das Bastel- und DIY-Abenteuer für Kinder: 'So entsteht ein wunderschönes Kissen!'

23

2. Bild zum Schritt 22 für das Bastel- und DIY-Abenteuer für Kinder: 'So entsteht ein wunderschönes Kissen!'

24

Have fun trying it out!