Small Easter nest (4x quite simple)

AdventurerKatzi
Rating5.05.5 Thousand times & (1) DifficultyIntermediate

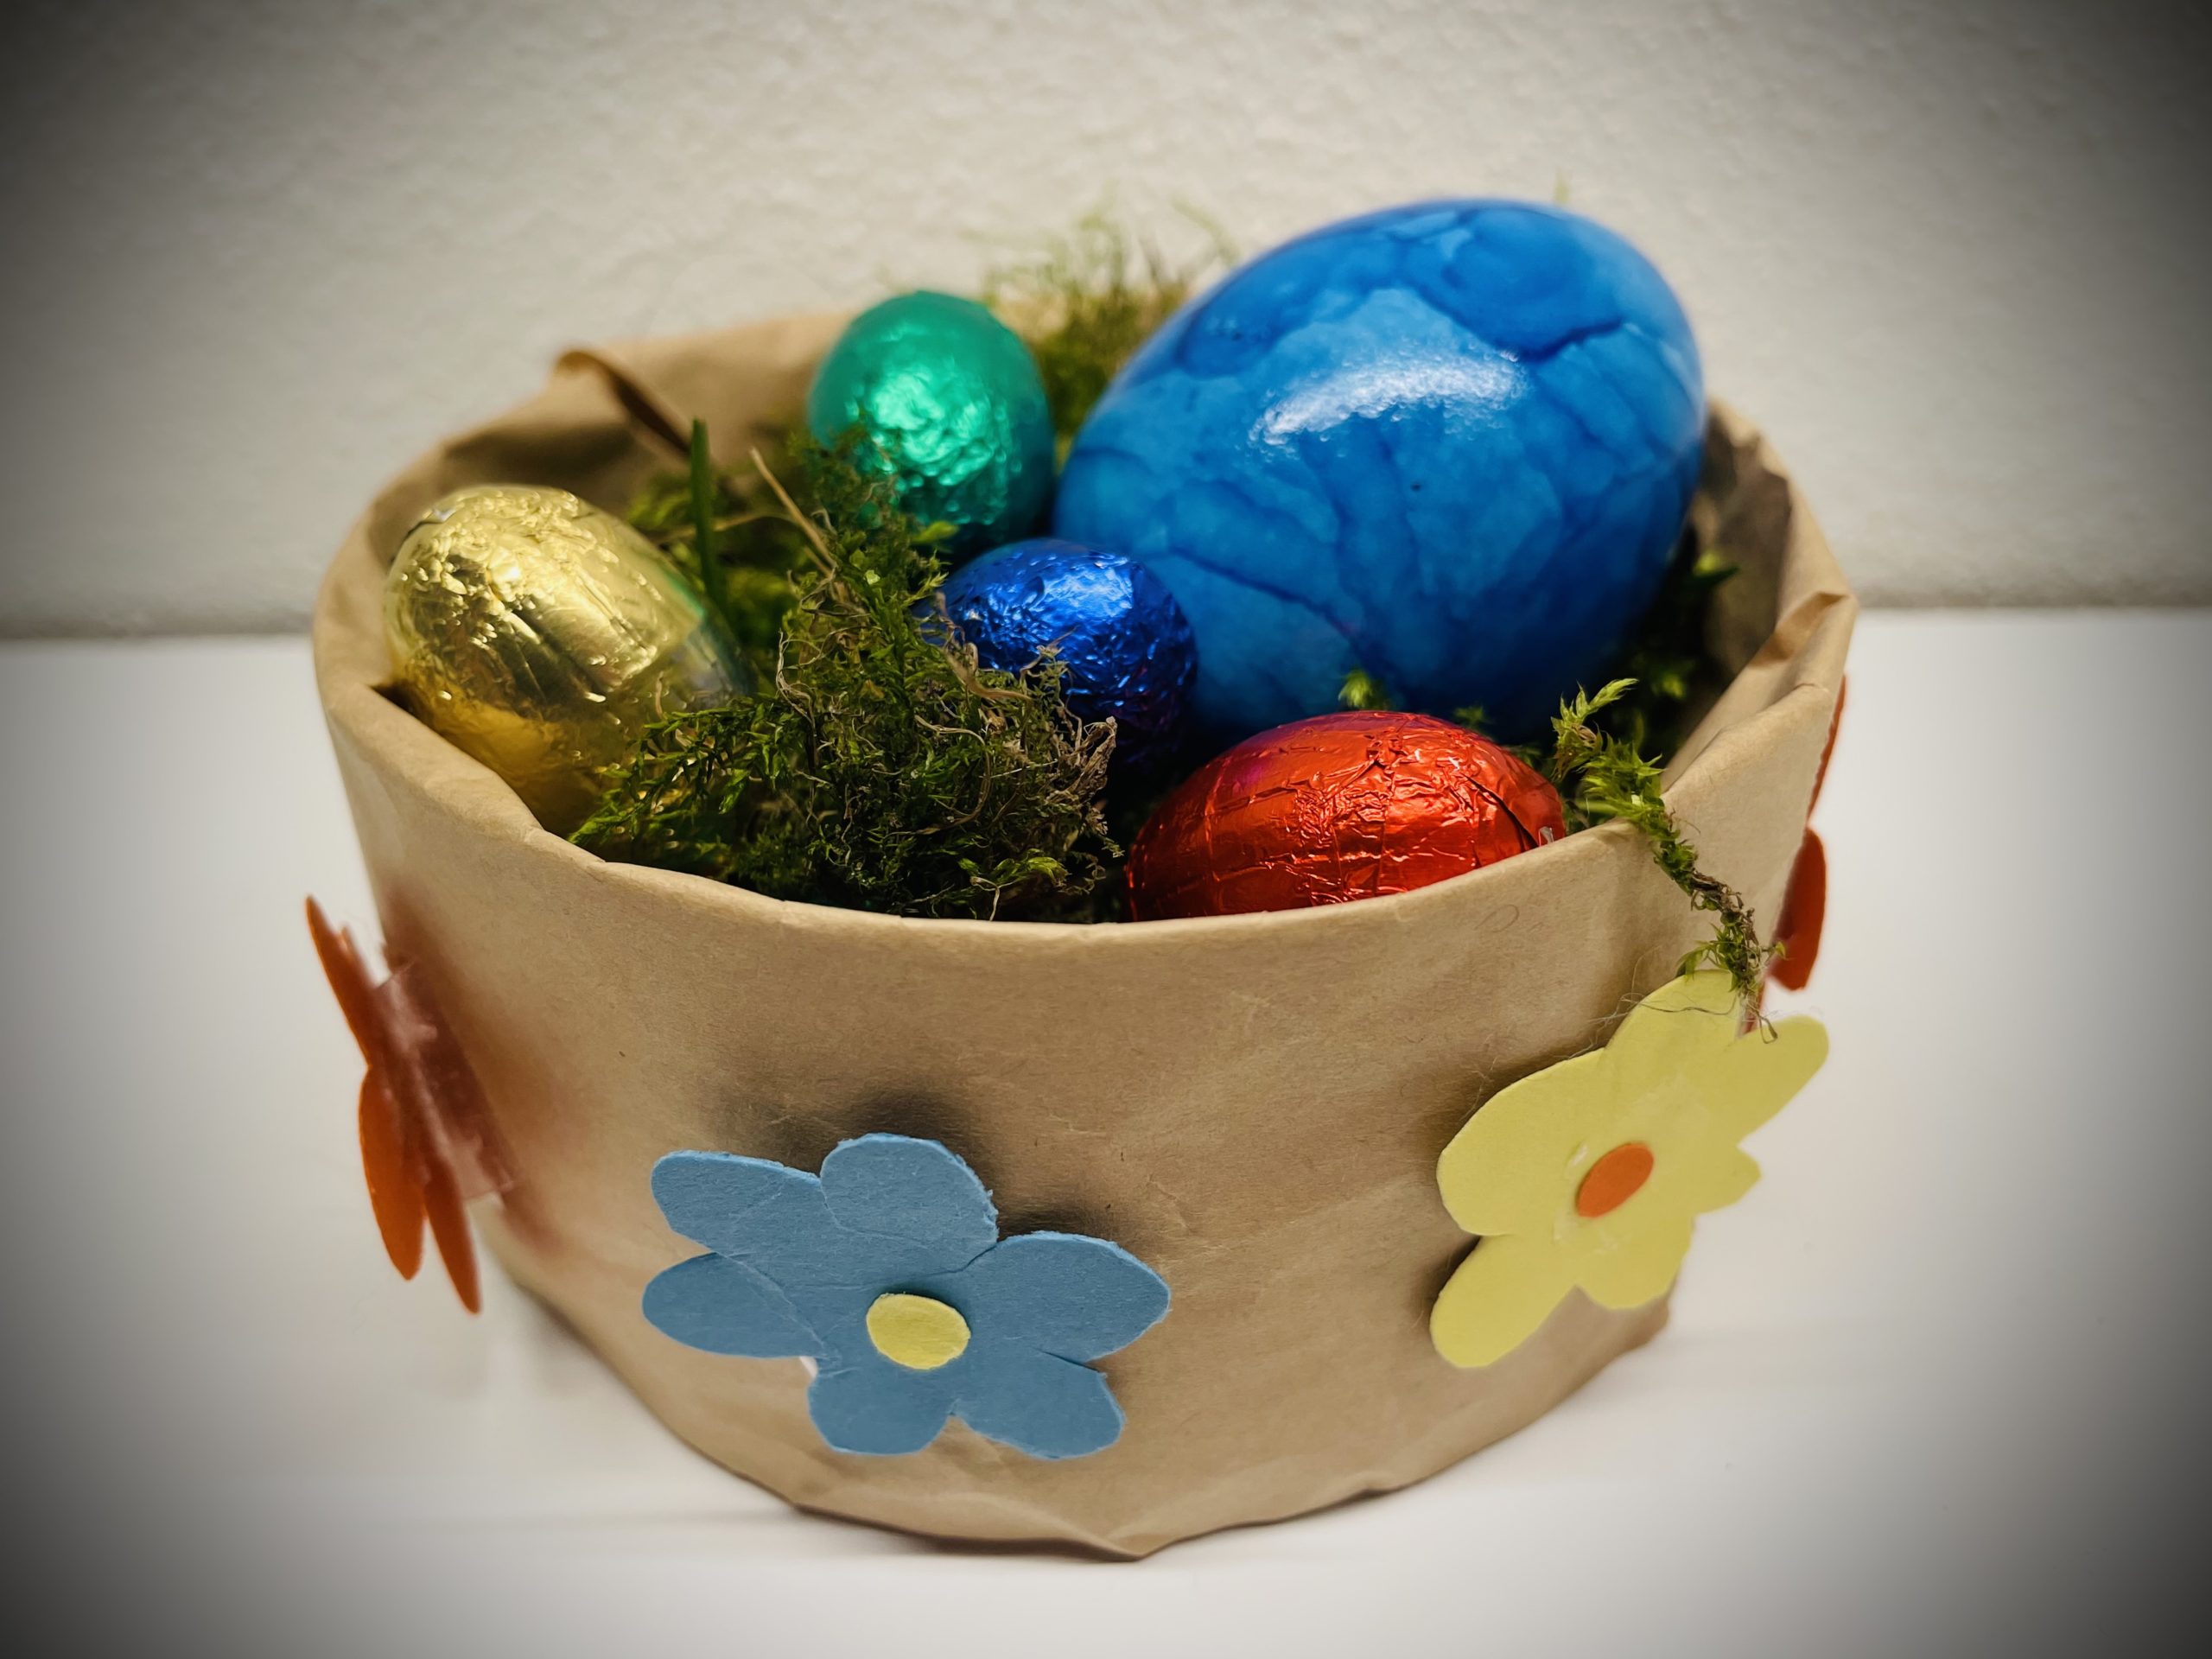
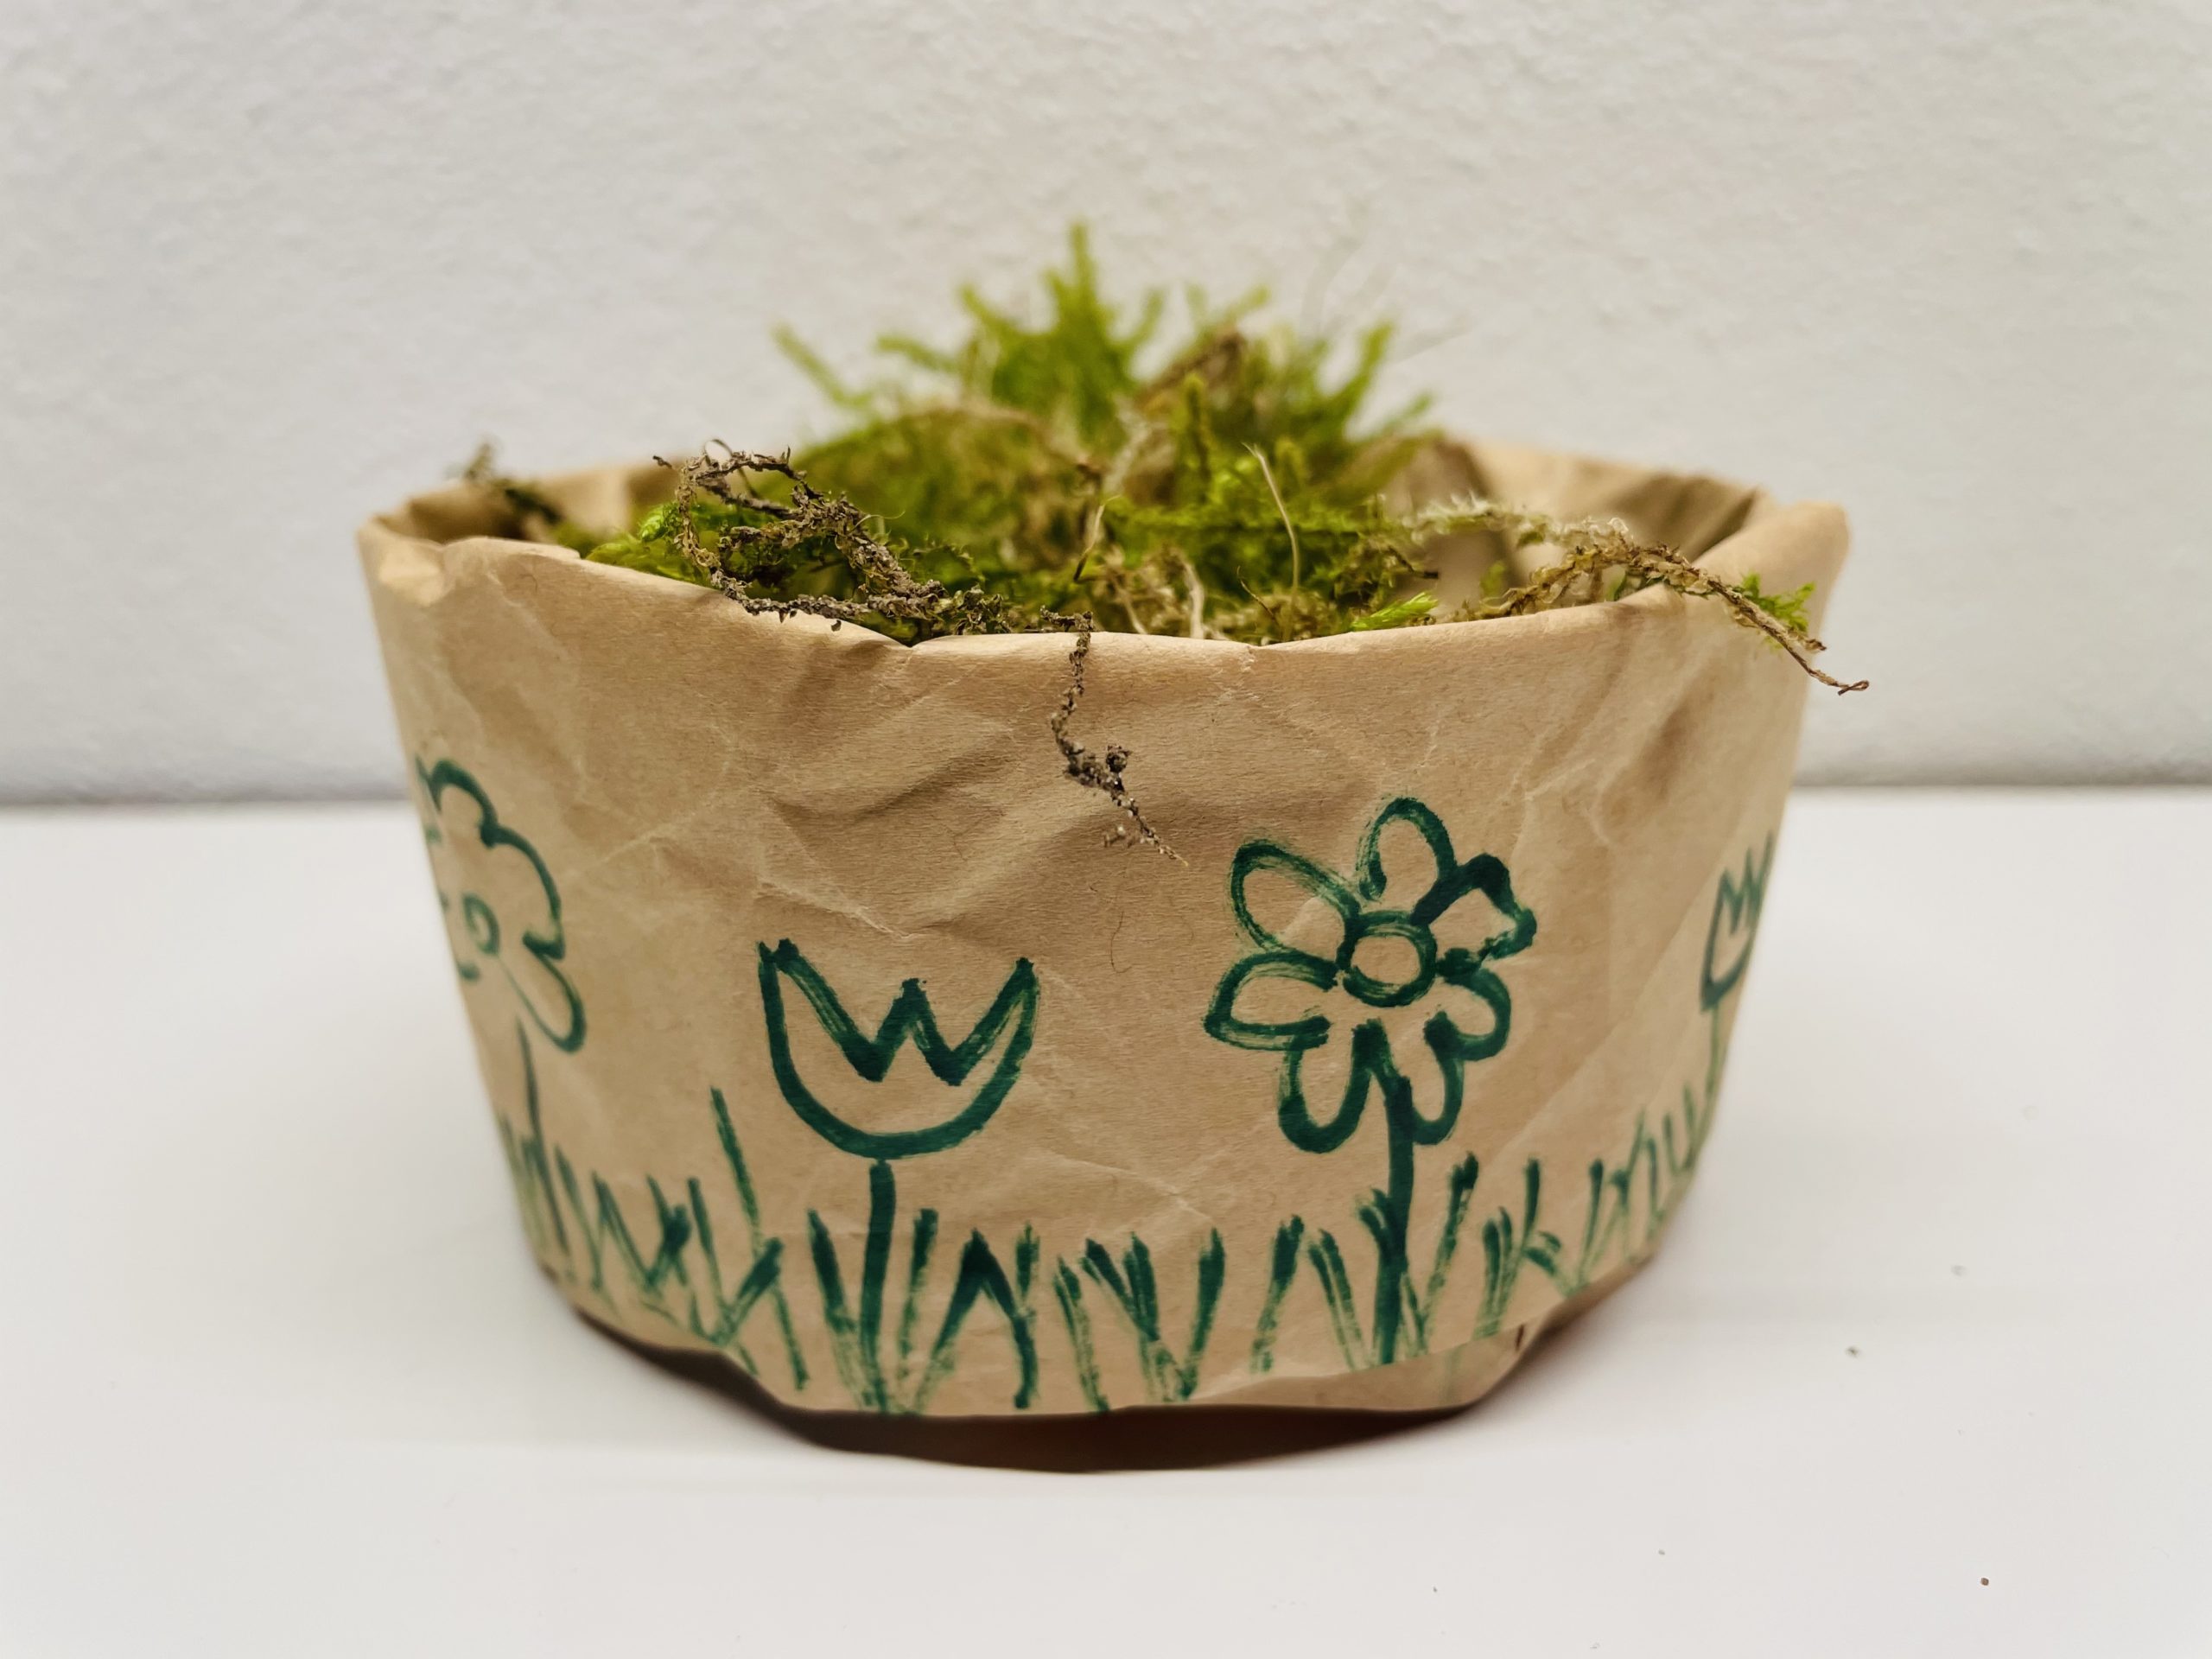
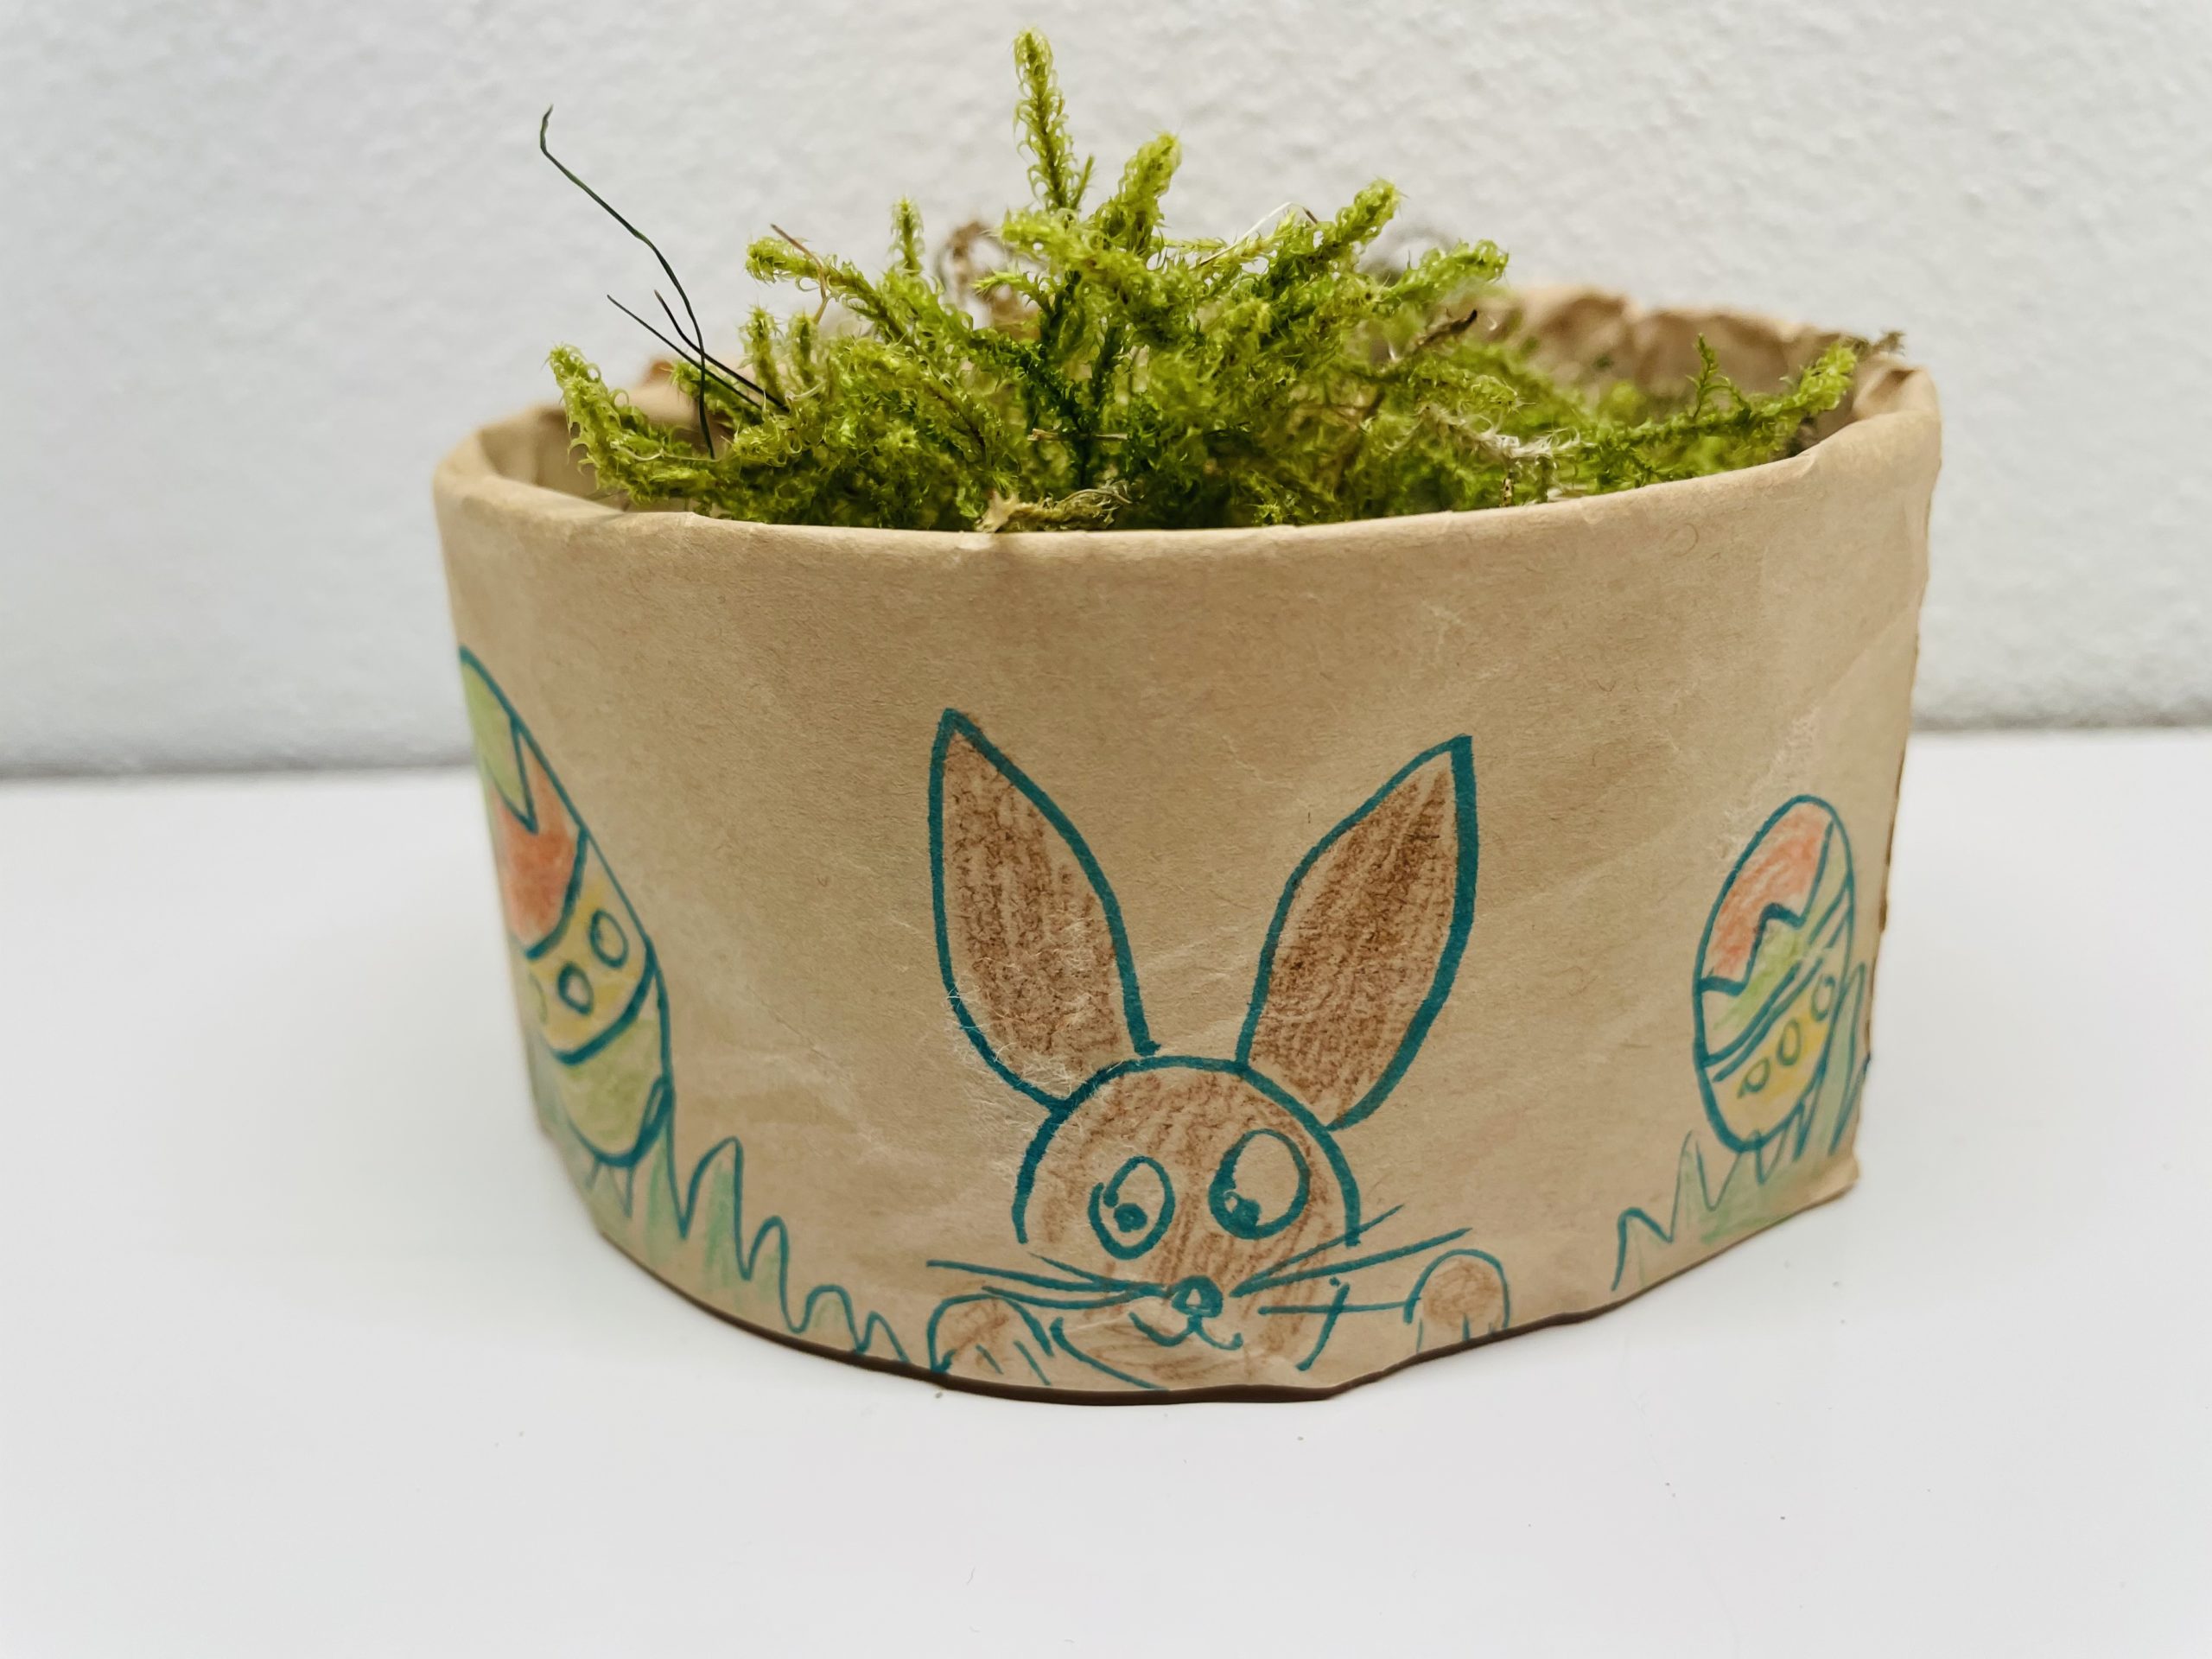
Simply use a flat can or a margarine box and glue it with packing paper. The nest is filled with fresh moss (that can be found in the spring on meadows and possibly even in the own garden or in the forest) or with hay. You can decorate the nest by painting or sticking flowers.
Have fun

Media Education for Kindergarten and Hort

Kind bastelt eine Rassel mit dem Navi
The Adventure Navi, the app for DIY projects, enables media education for the youngest.

Relief in everyday life, targeted promotion of individual children, independent learning and - without any pre-knowledge already usable by the youngest!
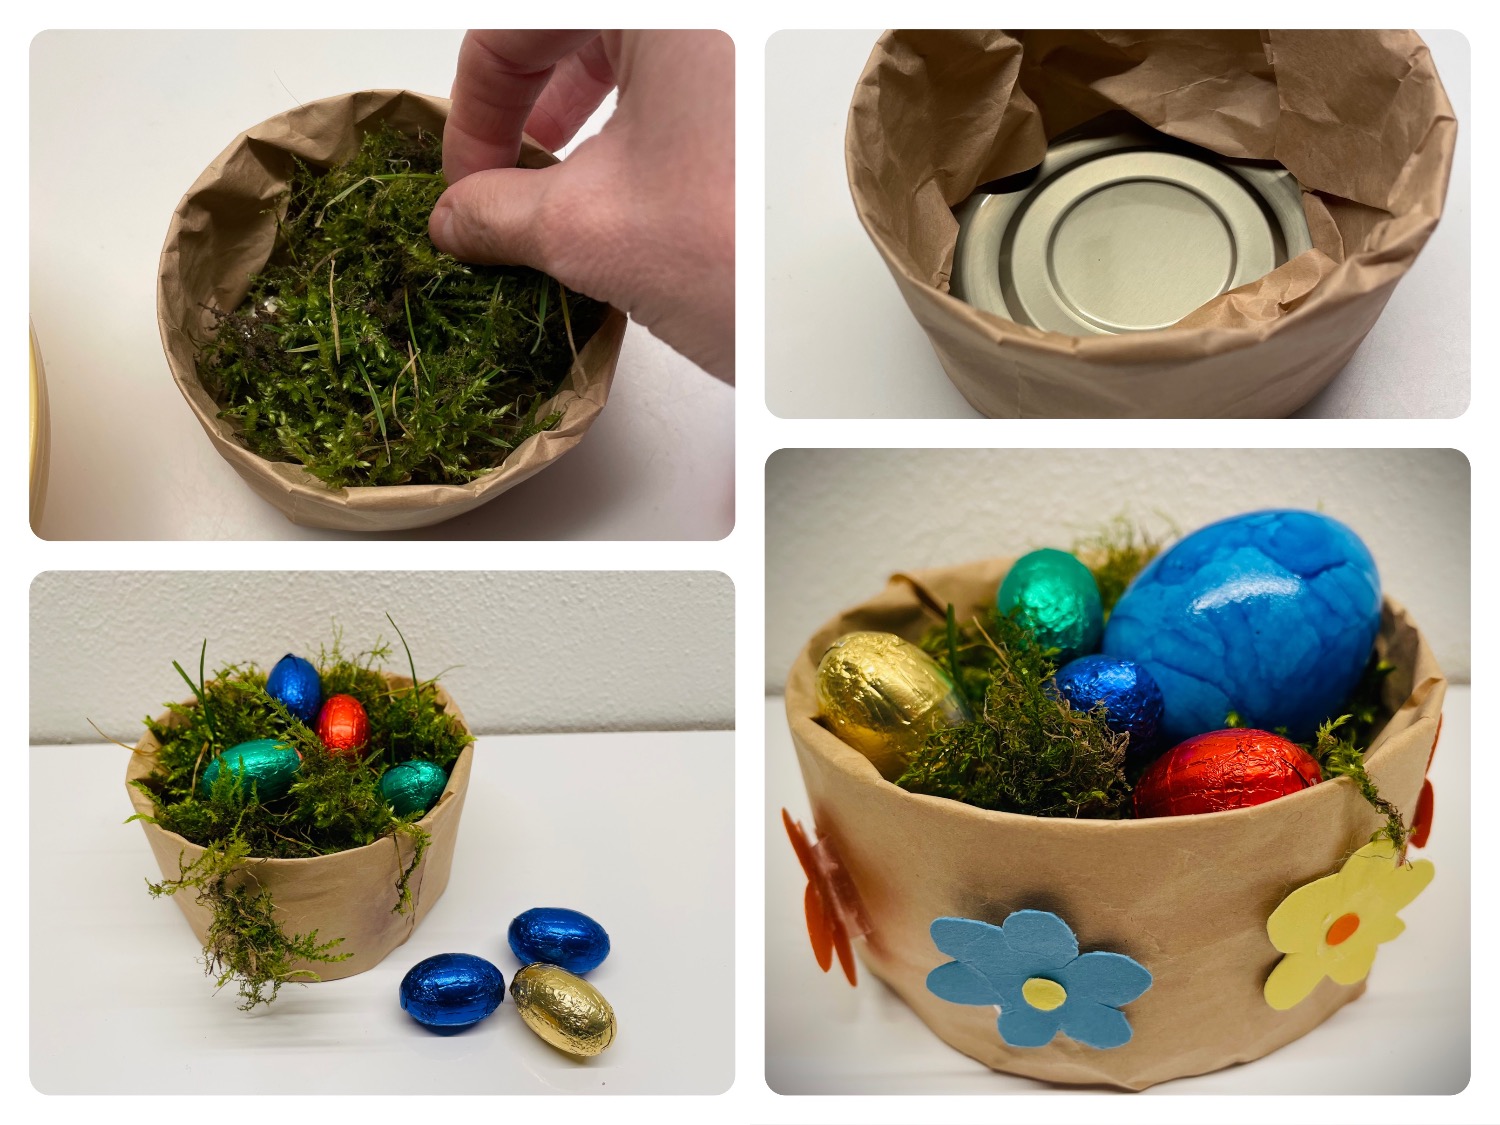


Titelbild zur Bastel- und DIY-Idee für Kinder '(668) Kleines Osternest (4x ganz einfach)'
Material for1 Child
Prep Time10 min.Adv. Time15 min.Total Time25 min.
 1 Canned foodflat and empty
 Packaging paper Or baking paper, newsprint
 Fowls of the species Gallus domesticus, not put up for retail saleor hay
 Glue
 Adhesive strips
 Builder's pad
Maybe to beautify:
 Felt pencils colorful
 Paper remnants colorful
All links marked with a shopping cart lead to Amazon - here we have selected products that we would order ourselves and in part also ordered. In a qualified purchase via the advertising link, we as Amazon partner receive a commission, for you there are no costs. You thus support our cost- and advertising banner-free, educational offer.
1

Get it ready.
The flat can must have a rounded edge (otherwise there is risk of injury!) and be clean. Alternatively, use a margarine box without lid.
Then cut a strip of packing paper. Leave the paper slightly longer and larger than the size of your can.
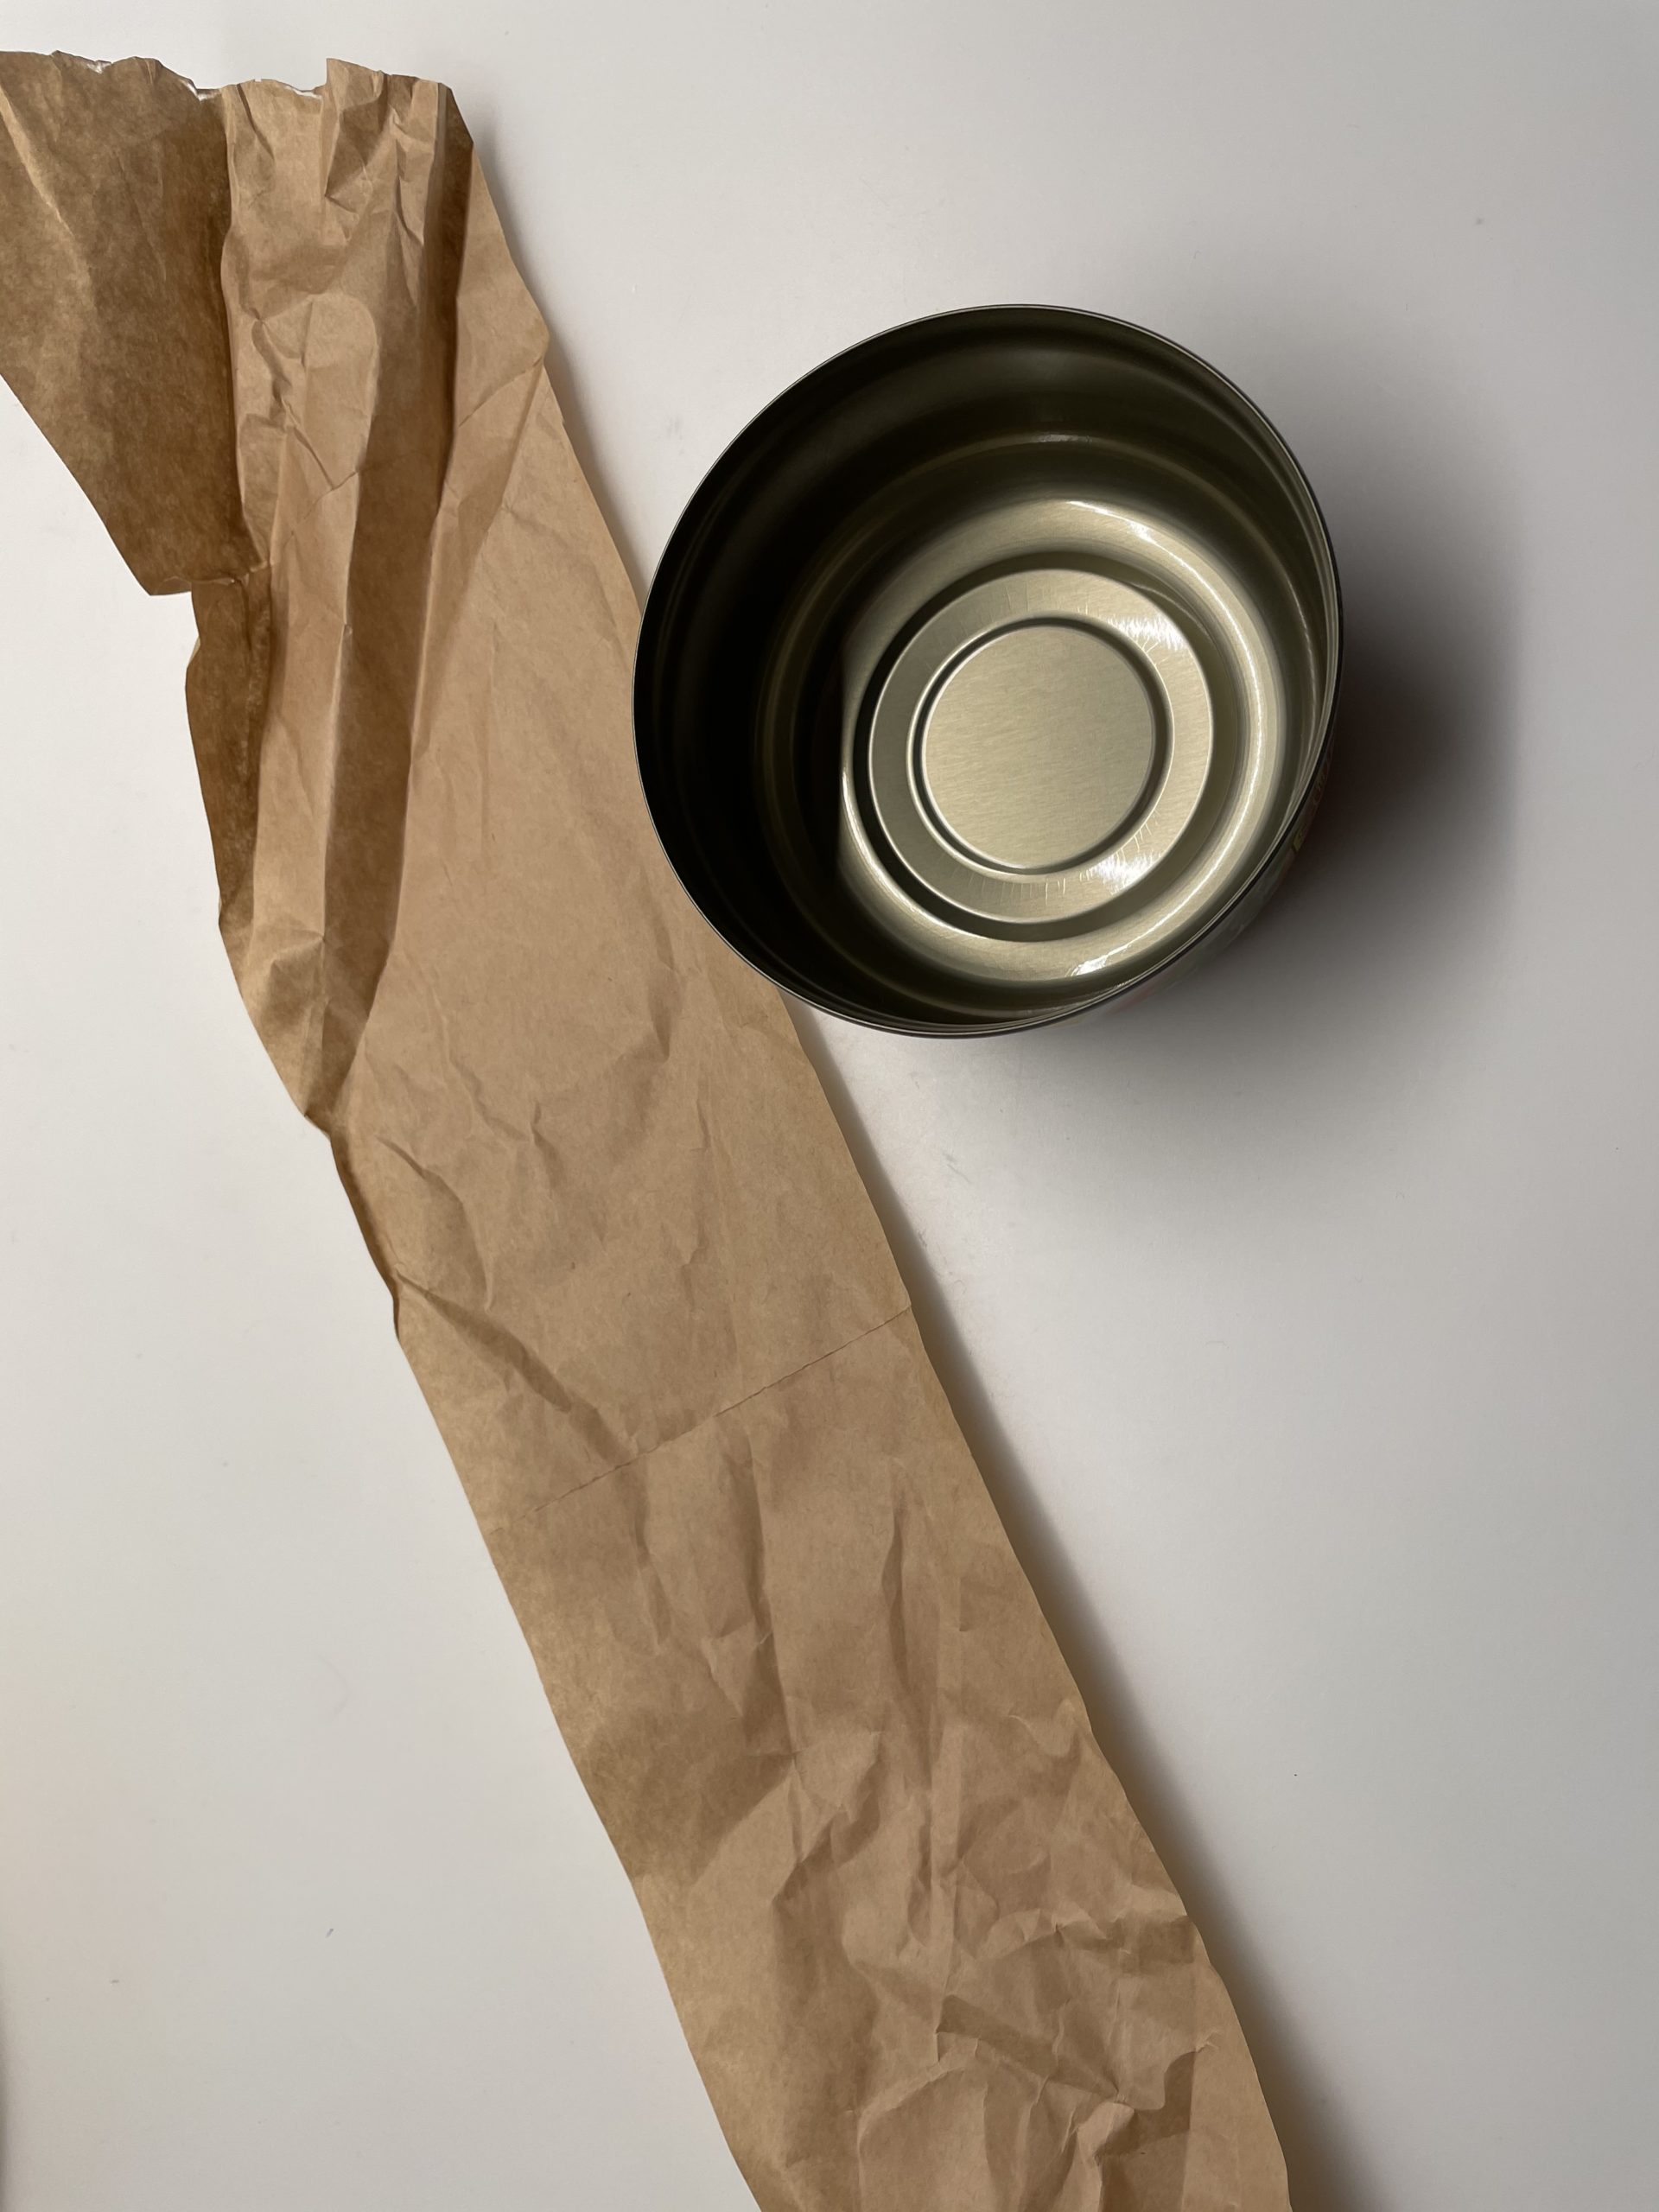
Bild zum Schritt 1 für das Bastel- und DIY-Abenteuer für Kinder: 'Legt alles bereit.  Die flache Dose muss einen abgerundeten...'

2

Now you wrap your can with the packing paper. You stick the beginning of the paper strip to the can.
Attention: At the bottom of the can, the paper closes flush.
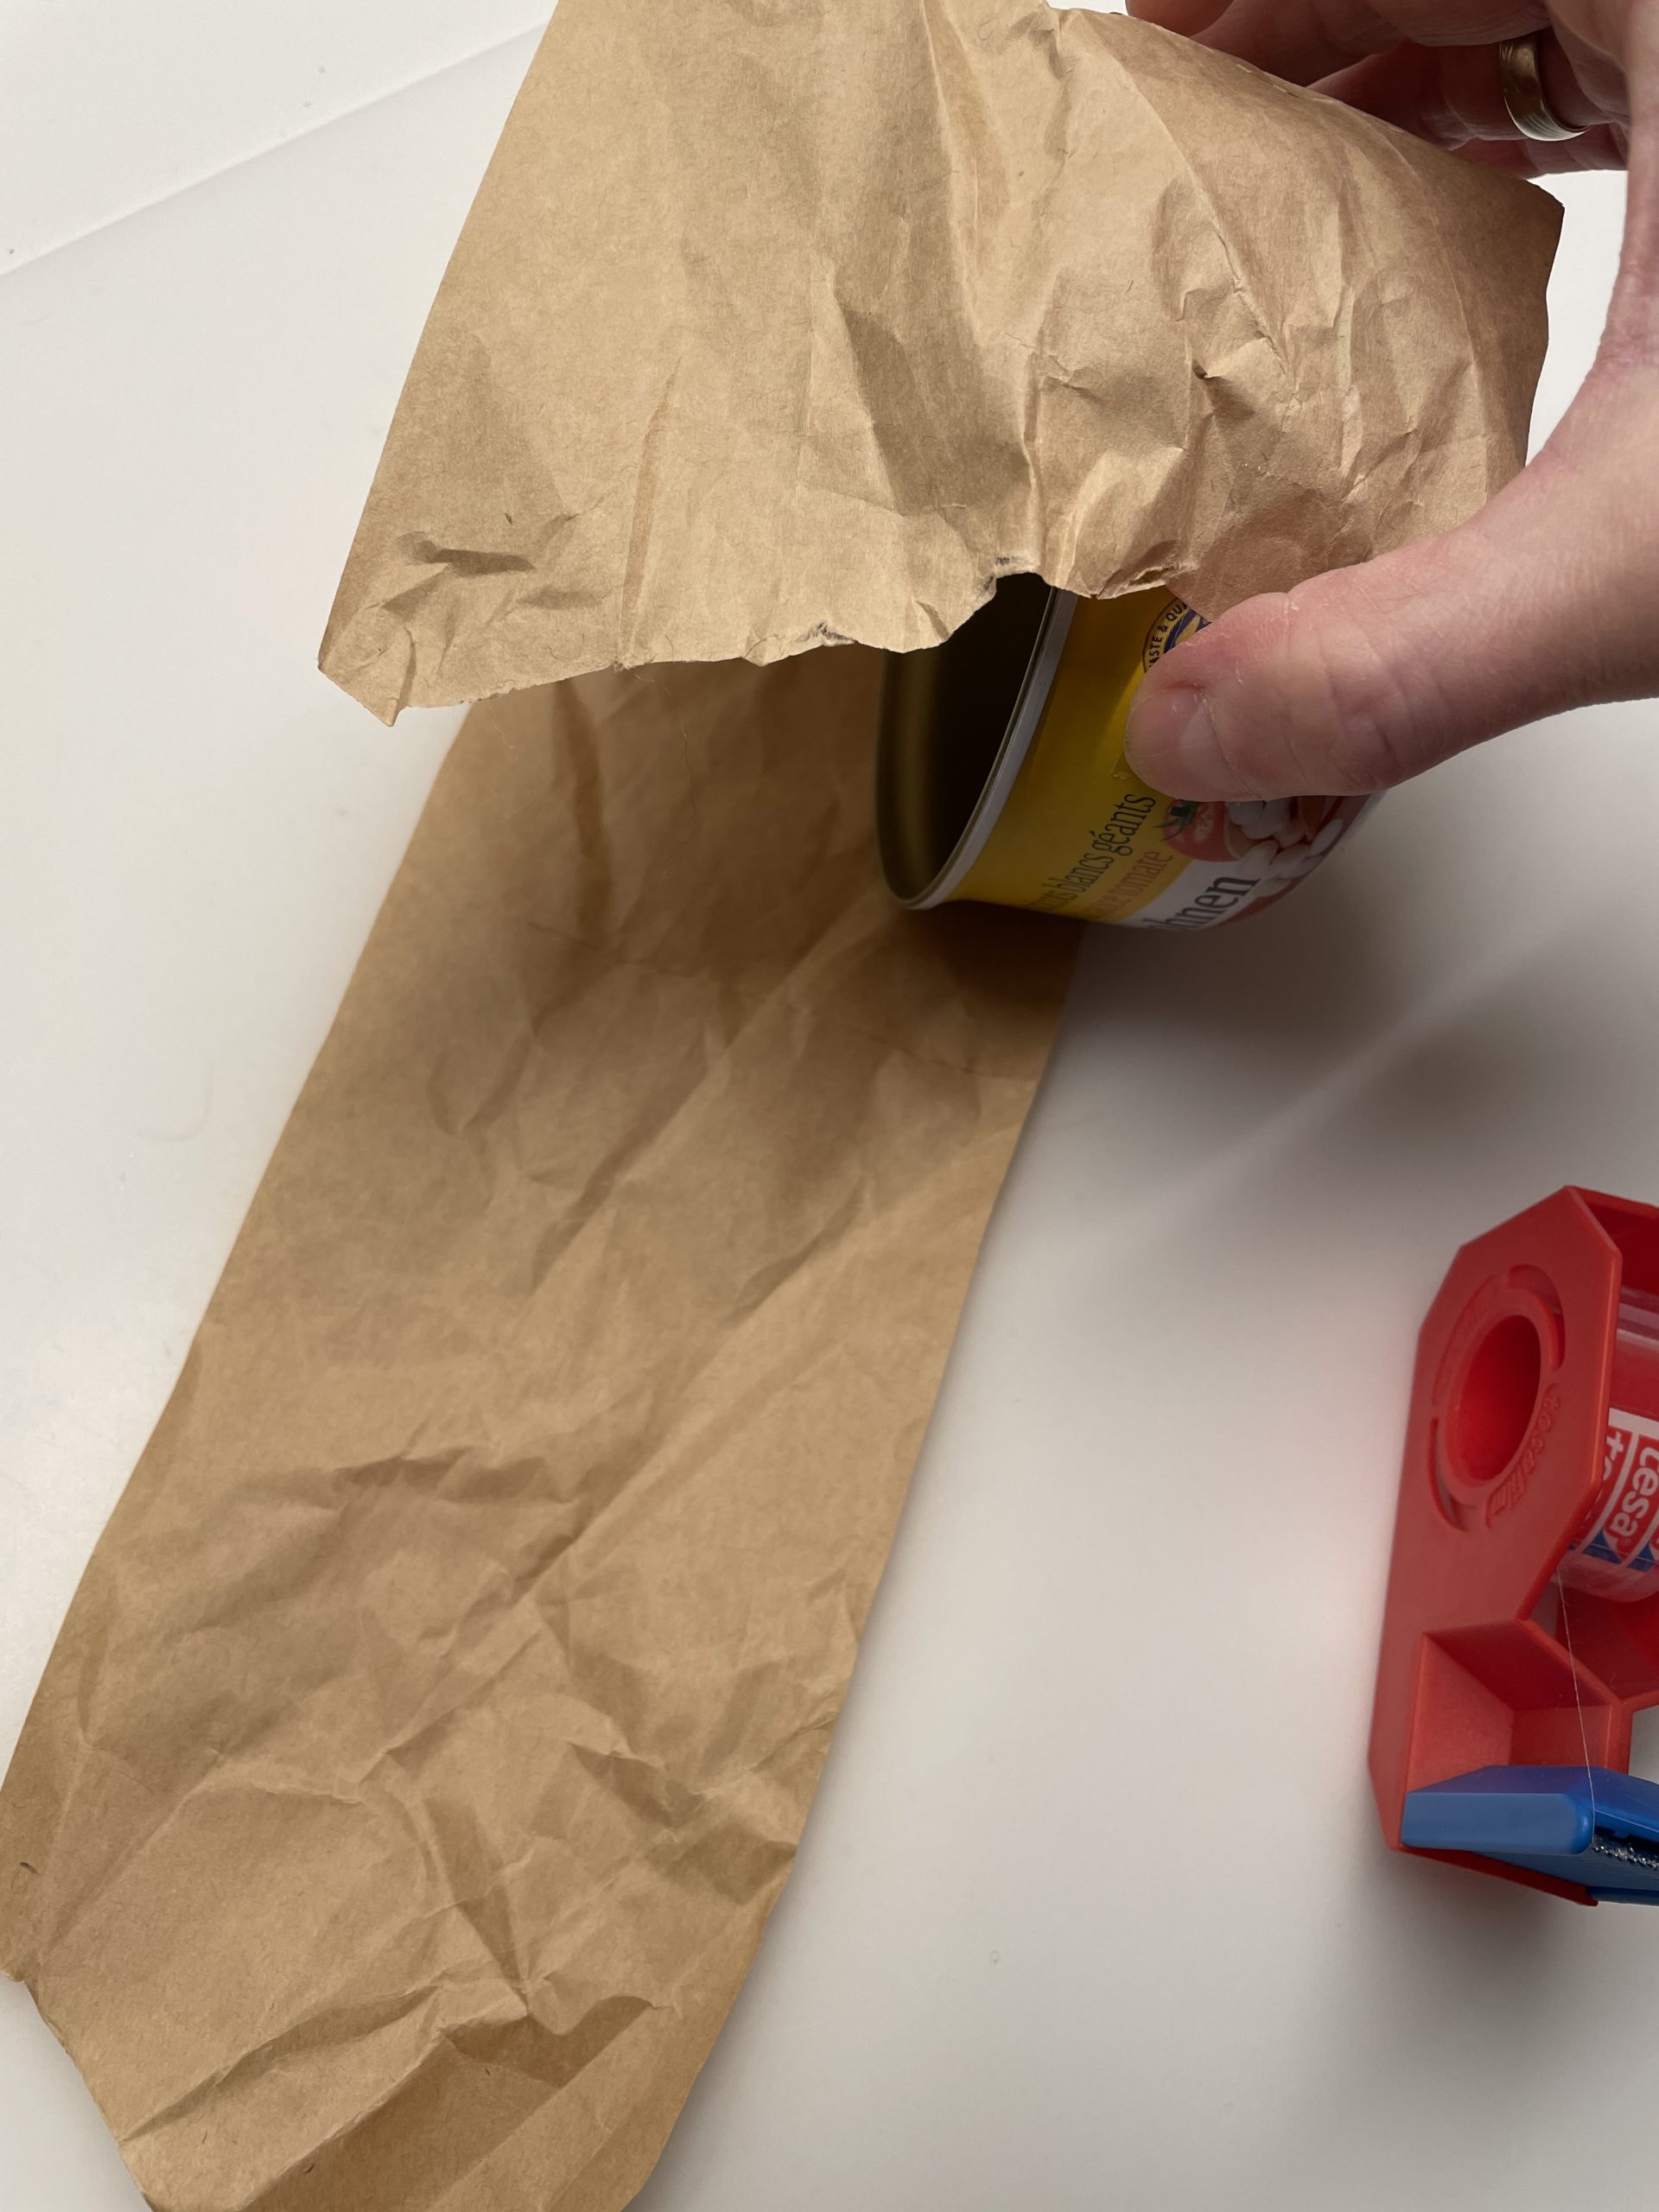
Bild zum Schritt 2 für das Bastel- und DIY-Abenteuer für Kinder: 'Jetzt umwickelt ihr eure Dose mit dem Packpapier. Dabei klebt...'

3

Put the paper around the can and stick to the end as well.
The paper can overlap a piece.

Bild zum Schritt 3 für das Bastel- und DIY-Abenteuer für Kinder: 'Legt das Papier um die Dose und klebt dann das...'

4

Then you put up the can.

Bild zum Schritt 4 für das Bastel- und DIY-Abenteuer für Kinder: 'Anschließend stellt ihr die Dose auf.'

5

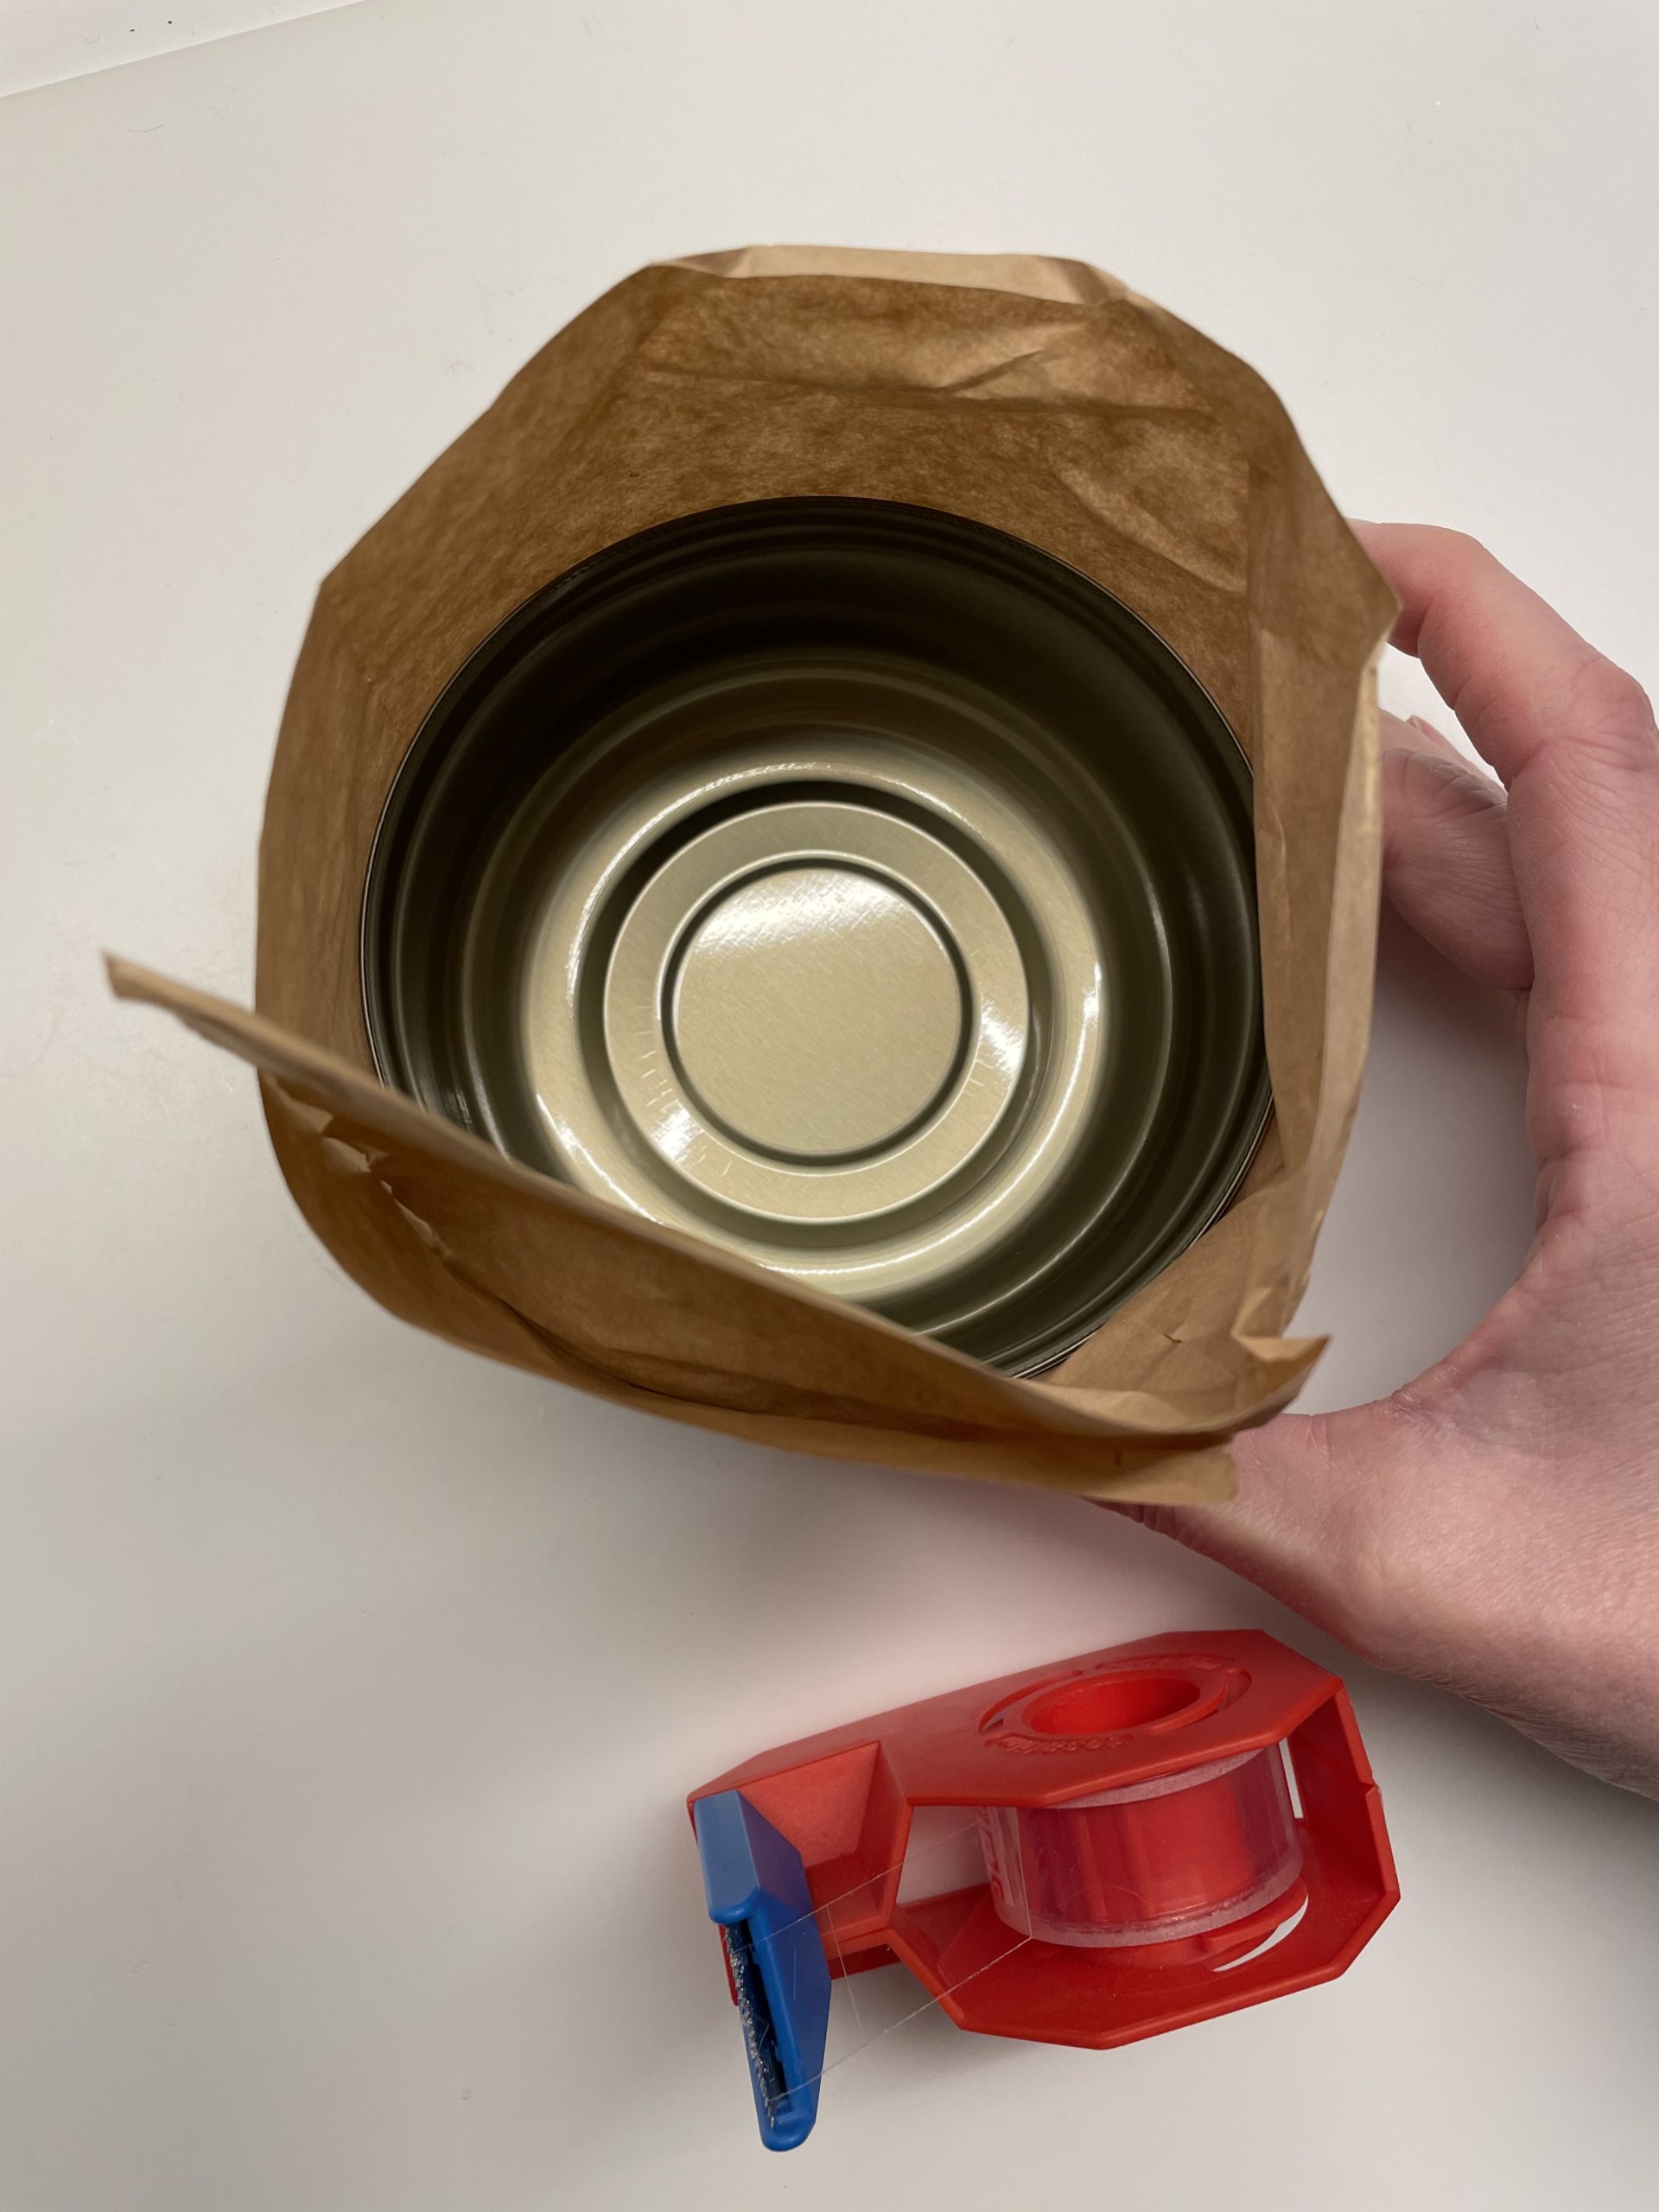
The overhanging paper edge is now turned inwards.

Bild zum Schritt 5 für das Bastel- und DIY-Abenteuer für Kinder: 'Der überstehende Papierrand wird nun nach innen umgeschlagen.'

6

Here, try to squeeze the paper around the edge.
That's how the nest will look more beautiful later.

Bild zum Schritt 6 für das Bastel- und DIY-Abenteuer für Kinder: 'Versucht hier das Papier fest um die Kante zu drücken....'

7

Now take your moss - the amount depends on the can size!

Bild zum Schritt 7 für das Bastel- und DIY-Abenteuer für Kinder: 'Nun nehmt euer Moos - die Menge richtet sich nach...'

8

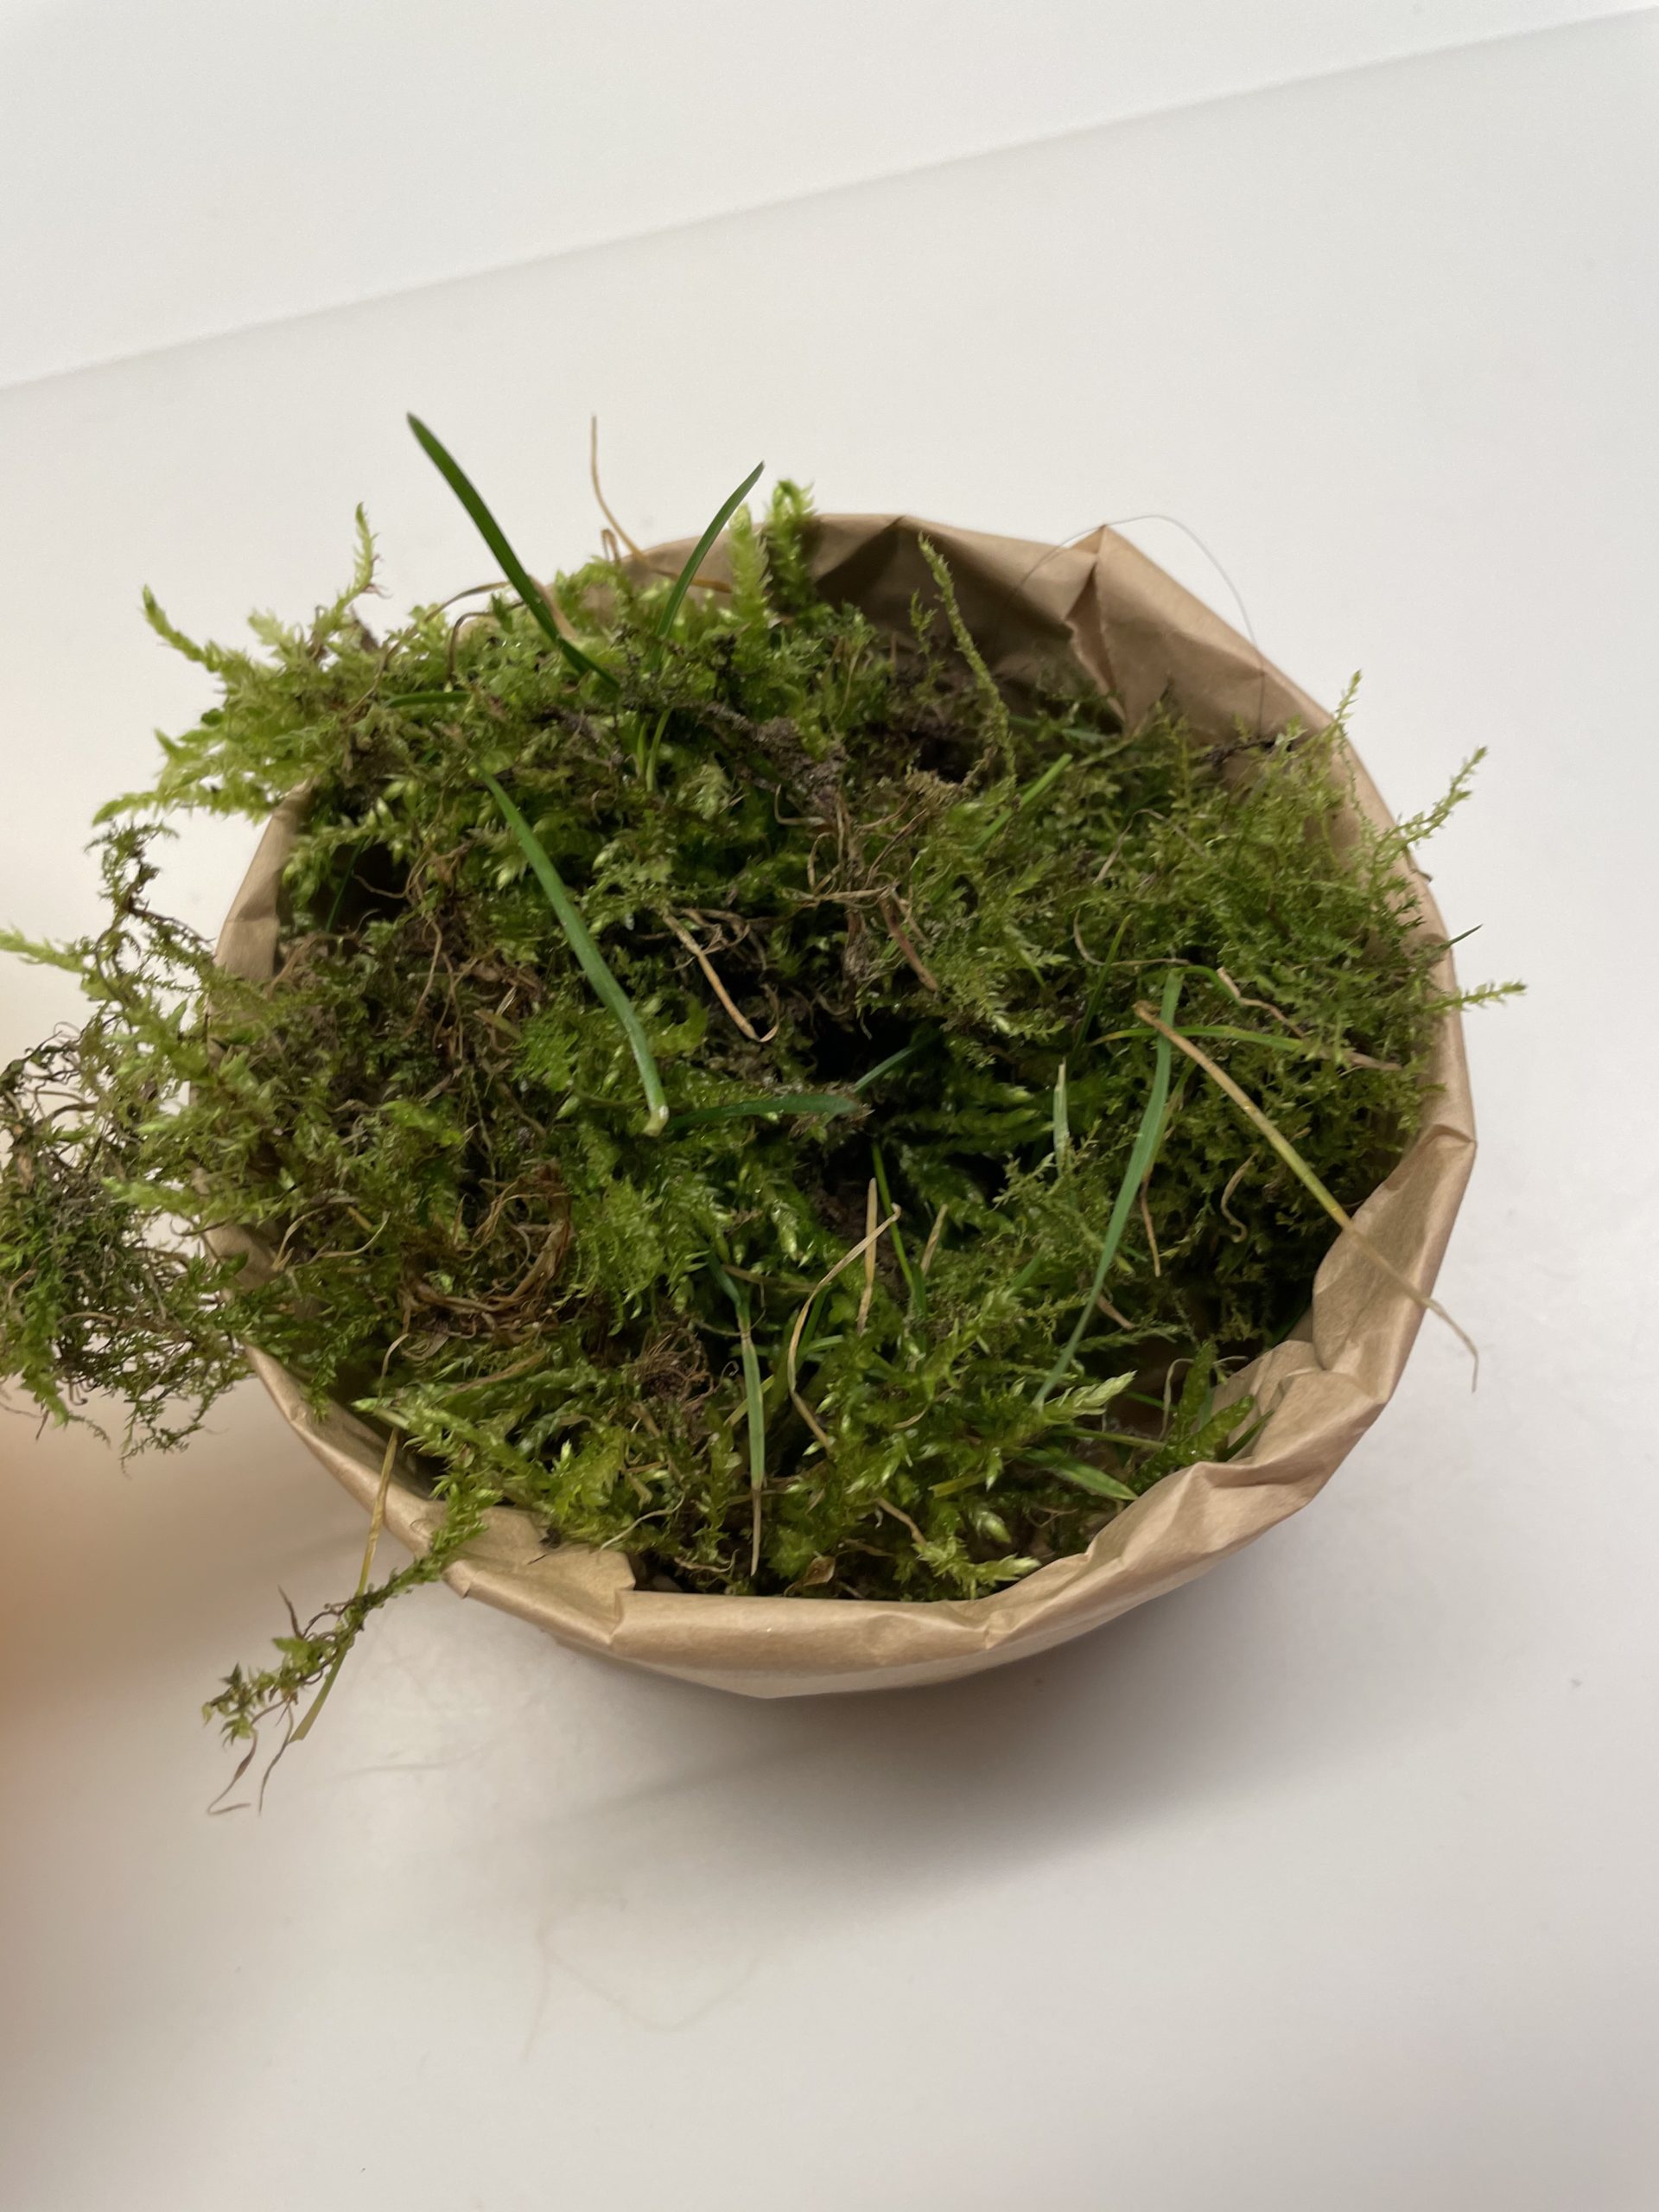
Put the moss loosely in the can. You turn earthy places down.

Bild zum Schritt 8 für das Bastel- und DIY-Abenteuer für Kinder: 'Legt das Moos locker in die Dose. Dabei dreht ihr...'

9

Tap the moss and remove possibly disturbing stones, twigs or small animals.

Bild zum Schritt 9 für das Bastel- und DIY-Abenteuer für Kinder: 'Zupft das Moos zurecht und entfernt evtl. störende Steine, Zweige...'

10

The nest is ready.

Bild zum Schritt 10 für das Bastel- und DIY-Abenteuer für Kinder: 'Fertig ist das Nest.'

11

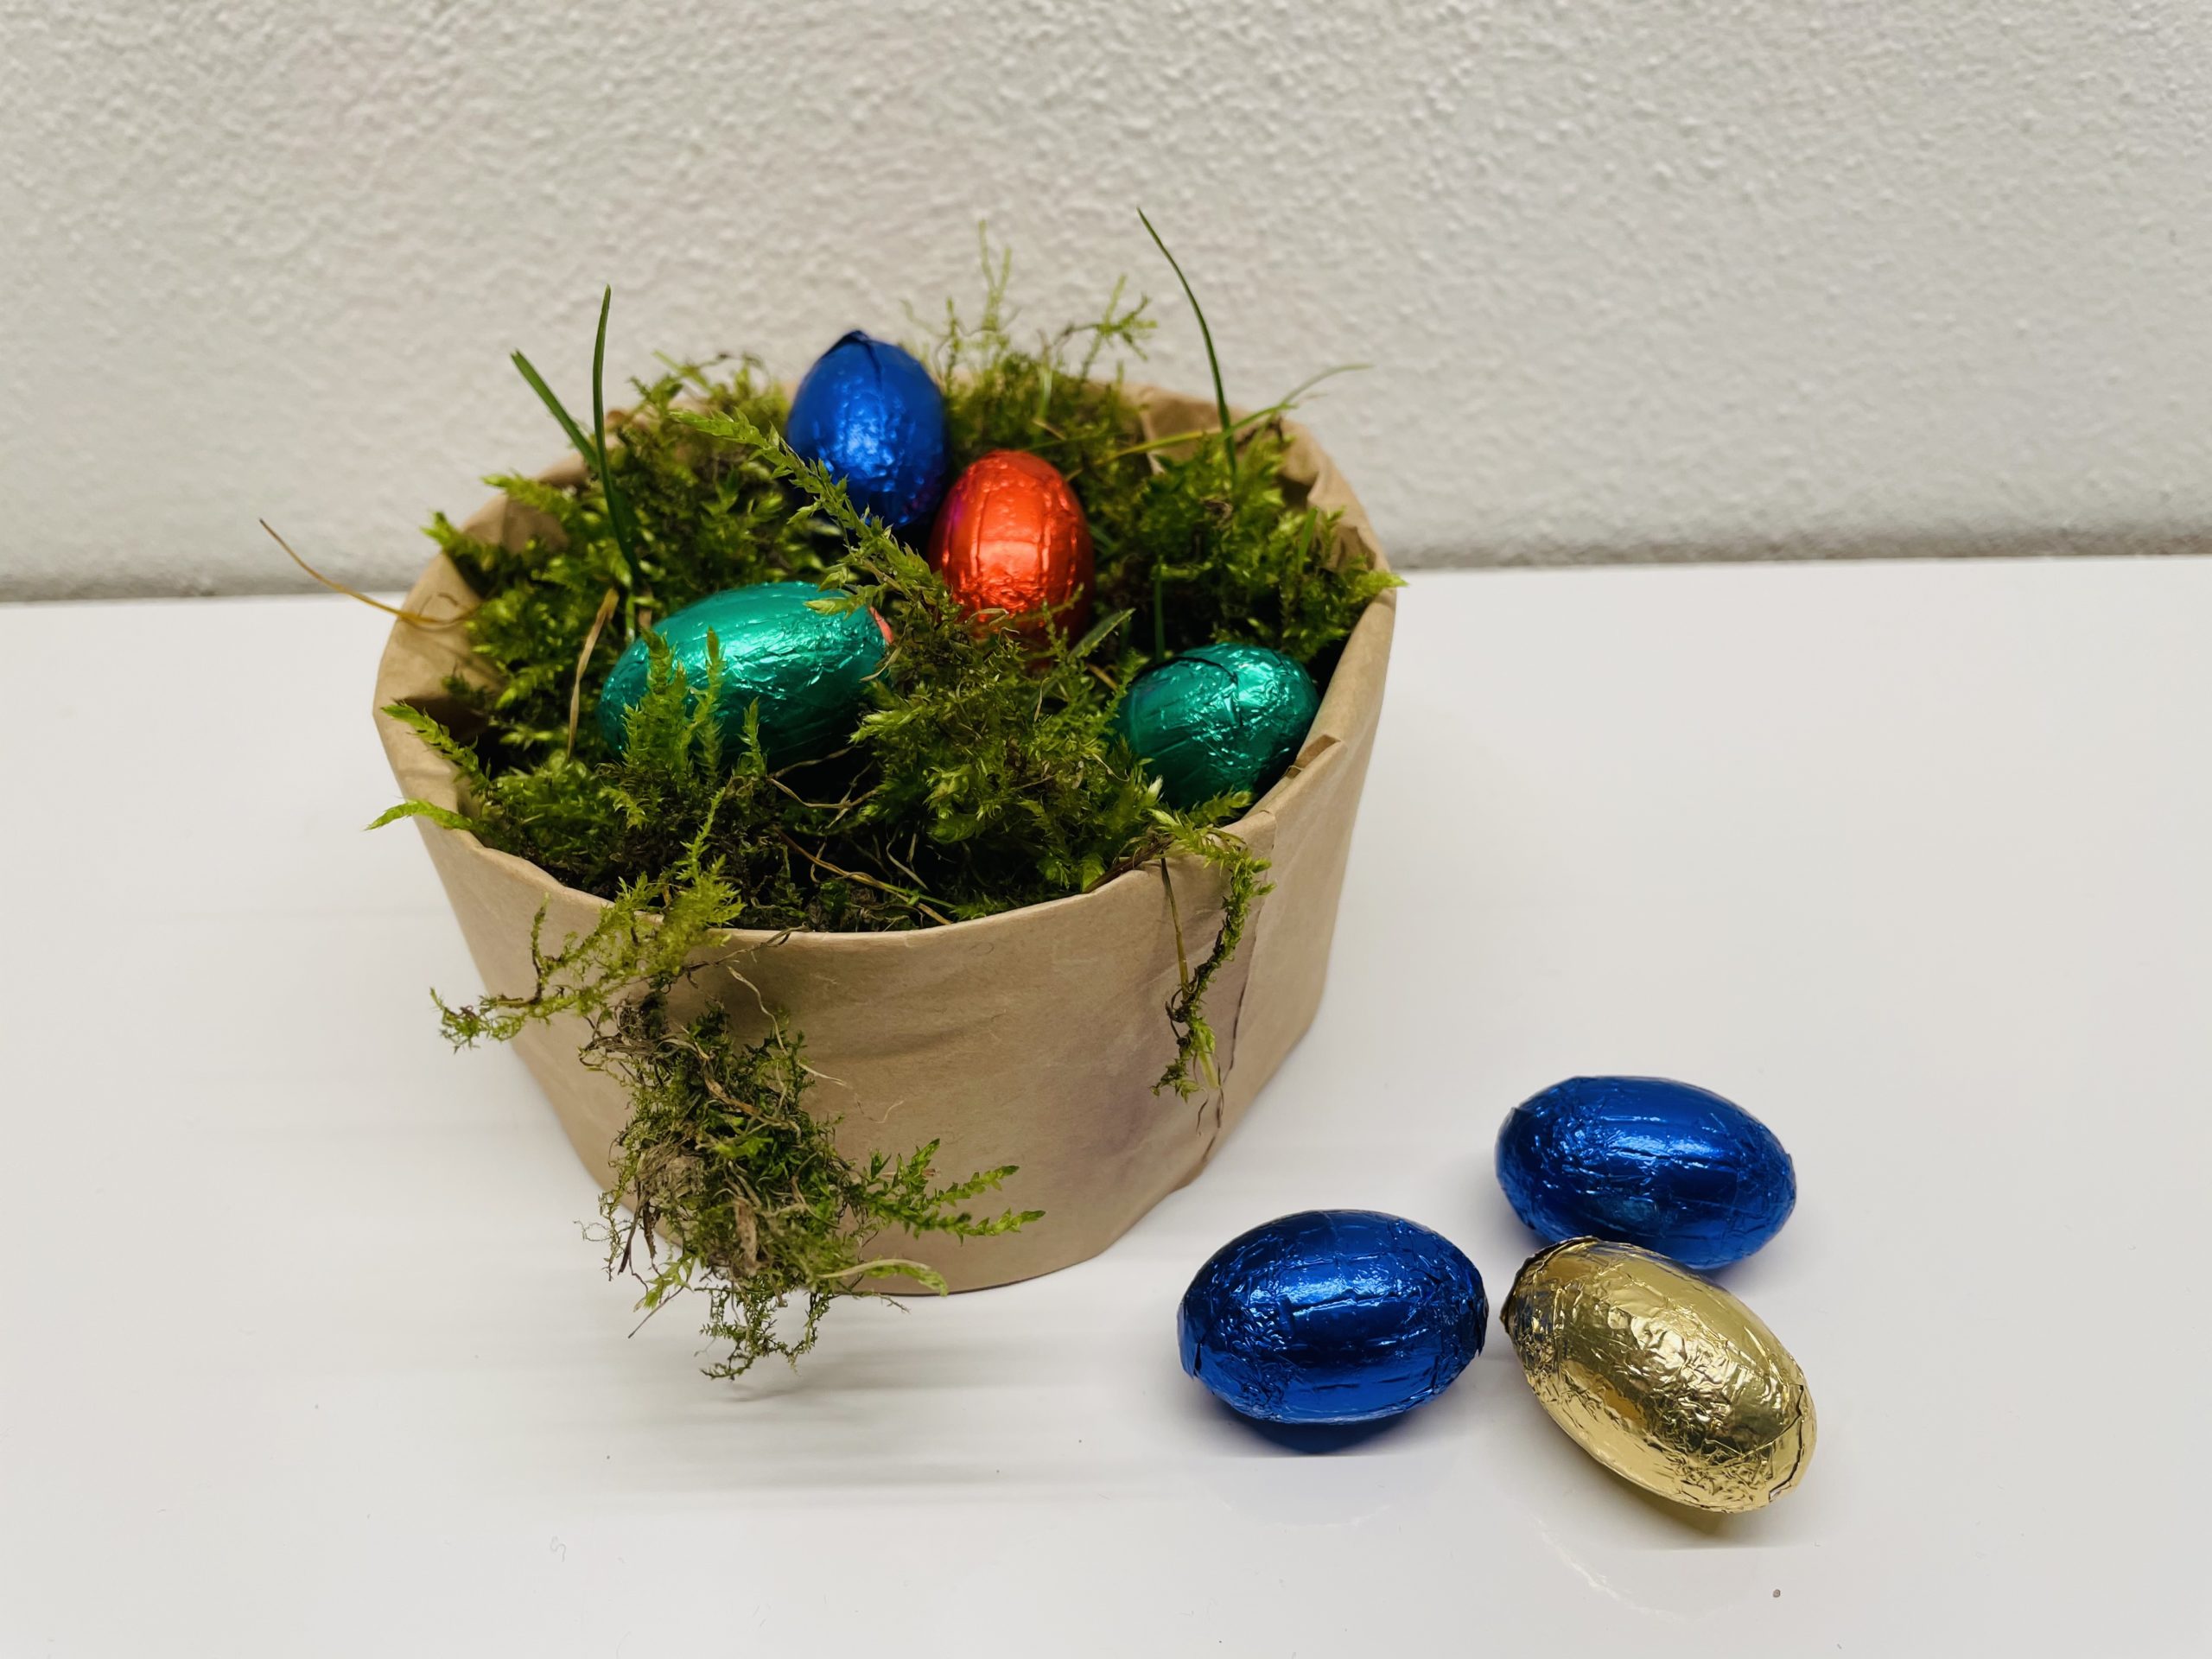
Now you can put in some eggs or hide it for the Easter bunny.

Bild zum Schritt 11 für das Bastel- und DIY-Abenteuer für Kinder: 'Jetzt könnt ihr ein paar Eier hineinlegen oder es für...'

12

2. Bild zum Schritt 11 für das Bastel- und DIY-Abenteuer für Kinder: 'Jetzt könnt ihr ein paar Eier hineinlegen oder es für...'

13

3. Bild zum Schritt 12 für das Bastel- und DIY-Abenteuer für Kinder: 'Jetzt könnt ihr ein paar Eier hineinlegen oder es für...'

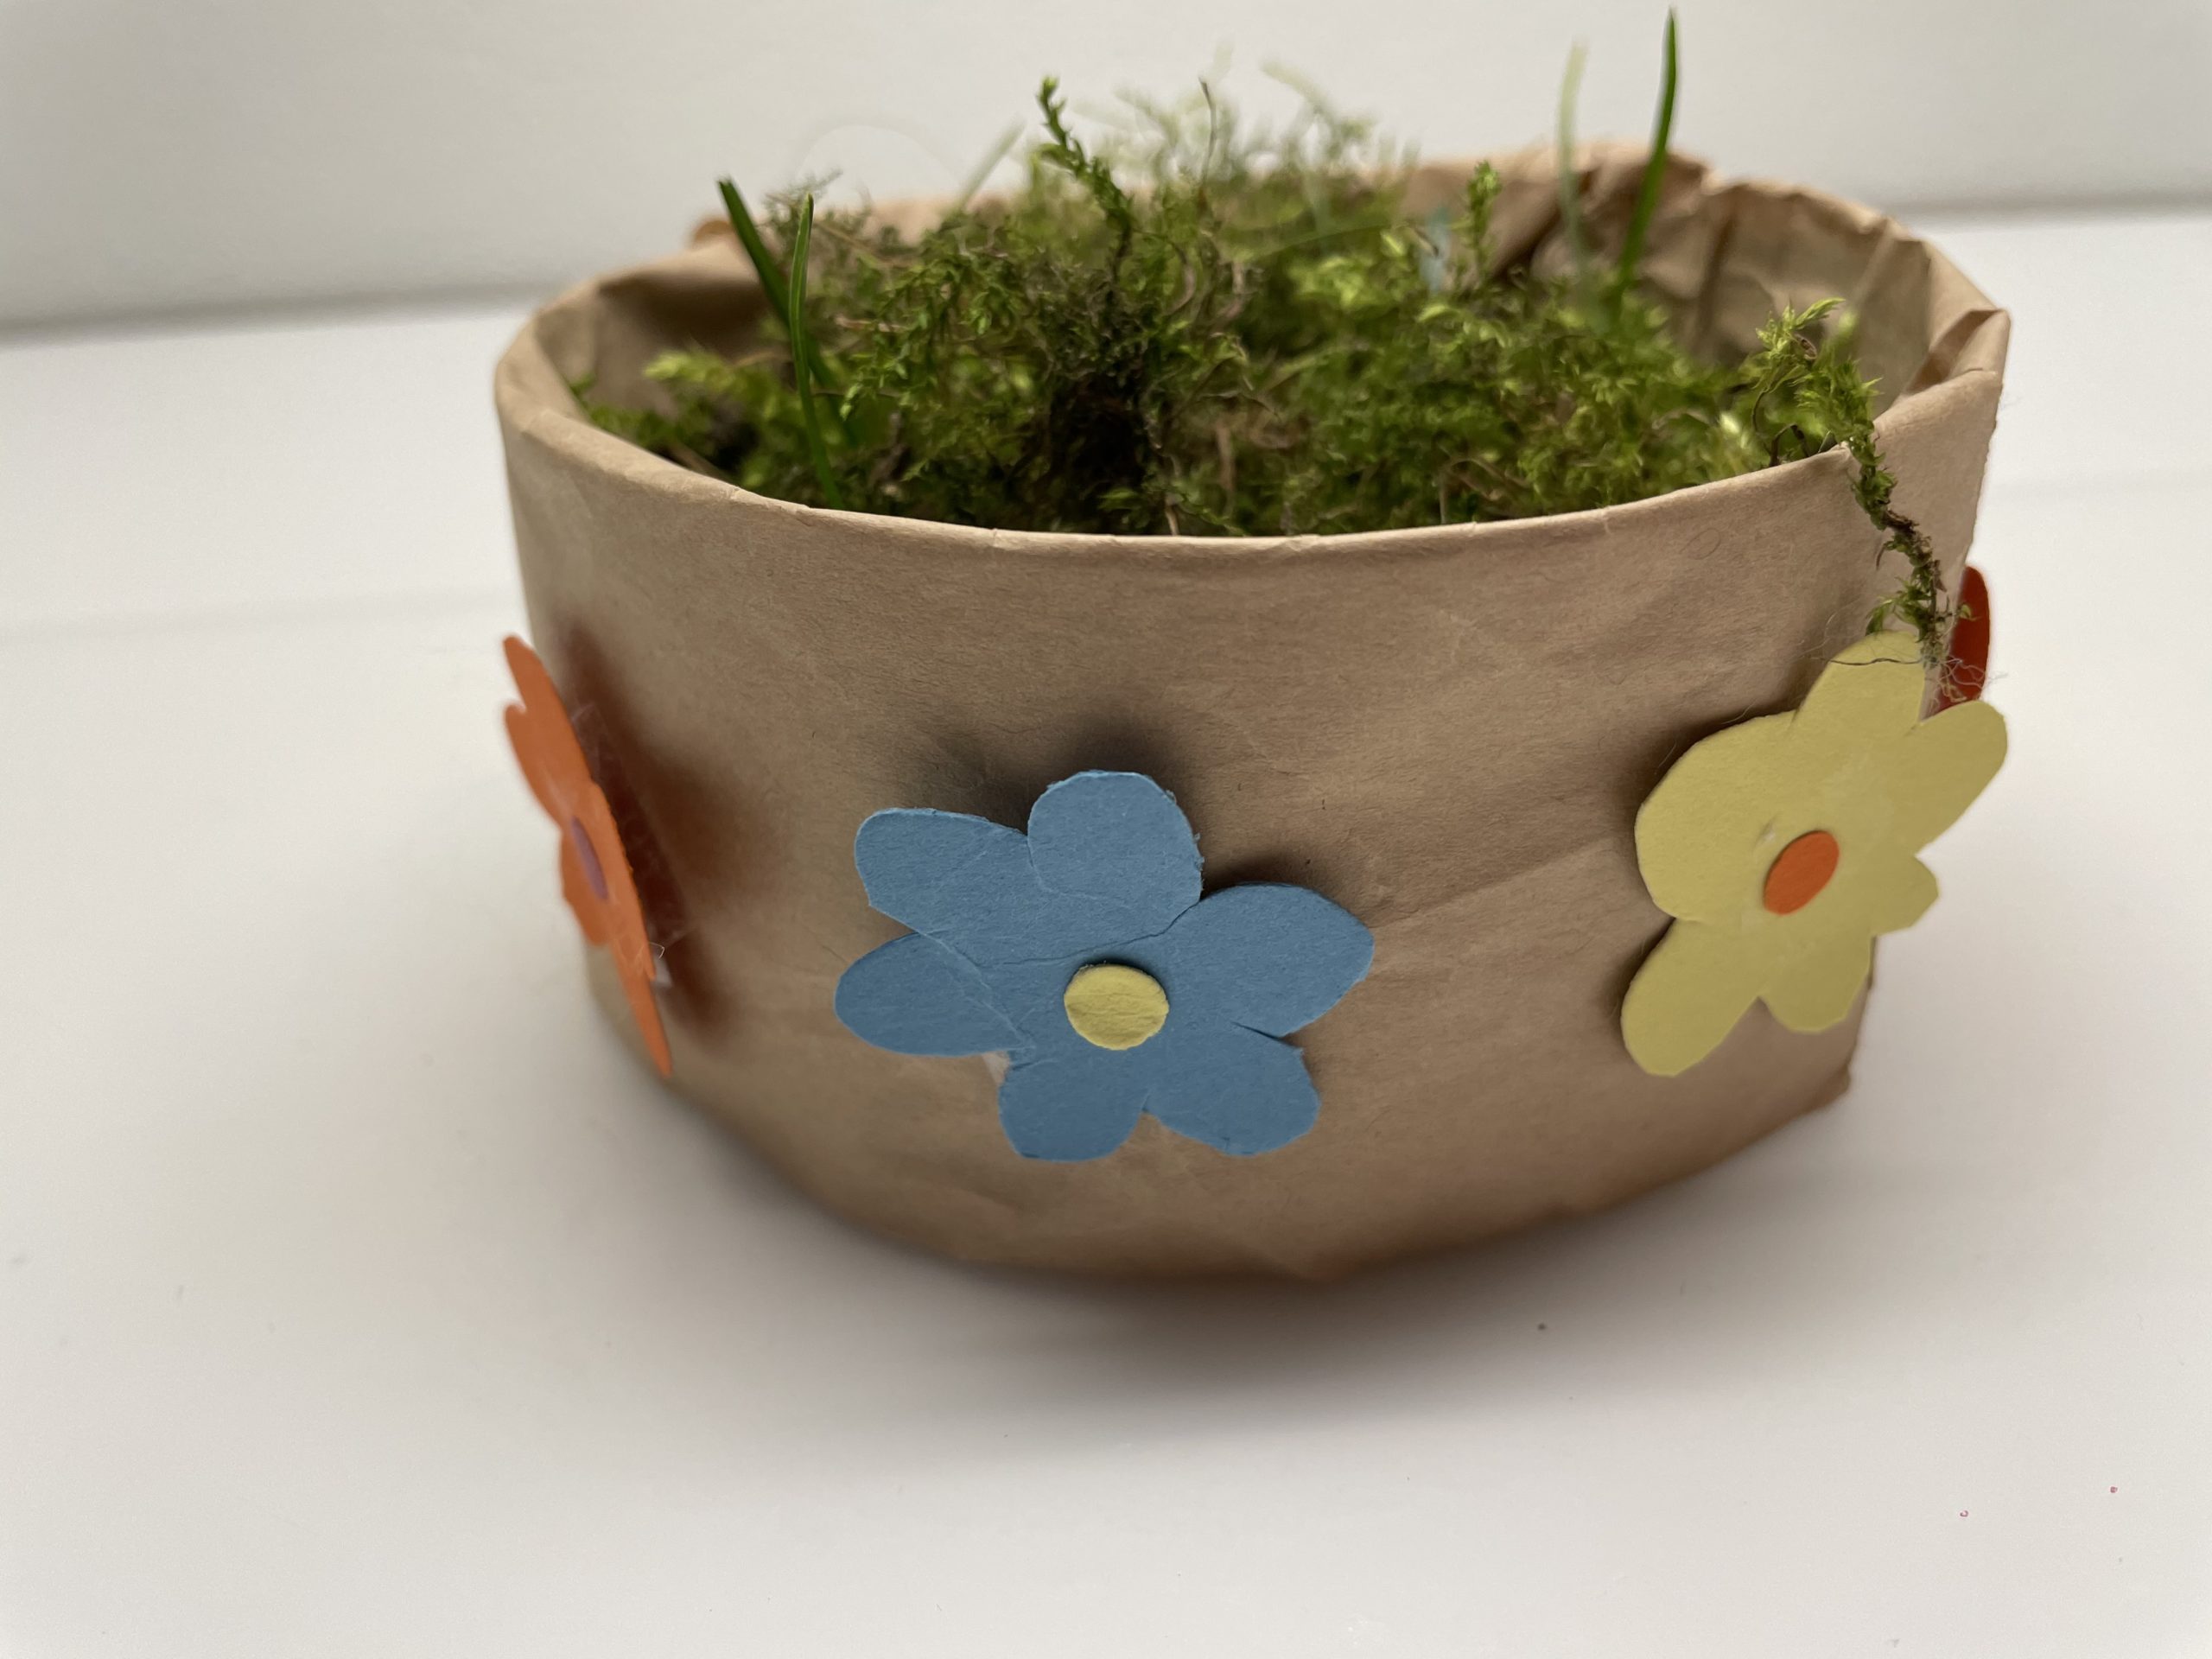
Or you can embellish your nest with flowers:
14

Make some flowers to beautify.

Bild zum Schritt 15 für das Bastel- und DIY-Abenteuer für Kinder: 'Bastelt zum Verschönern ein paar Blumen.'

15

Stick these around the can.

Bild zum Schritt 16 für das Bastel- und DIY-Abenteuer für Kinder: 'Klebt diese außen um die Dose.'

16

2. Bild zum Schritt 16 für das Bastel- und DIY-Abenteuer für Kinder: 'Klebt diese außen um die Dose.'

Or paint the paper before you stick it on the can!
17

You can paint flowers.

Bild zum Schritt 19 für das Bastel- und DIY-Abenteuer für Kinder: 'Ihr könnt Blumen aufmalen.'

18

After that, paint these still colorful.

Bild zum Schritt 20 für das Bastel- und DIY-Abenteuer für Kinder: 'Diese danach noch bunt ausmalen.'

19

You can paint Easter eggs and Easter bunnies.

Bild zum Schritt 21 für das Bastel- und DIY-Abenteuer für Kinder: 'Ihr könnt Ostereier und Osterhasen aufmalen.'

20

Stay creative!

Bild zum Schritt 22 für das Bastel- und DIY-Abenteuer für Kinder: 'Bleibt kreativ!'

21

These are just a few ideas, you'll surely come up with many more creative things!

Bild zum Schritt 23 für das Bastel- und DIY-Abenteuer für Kinder: 'Das sind nur ein paar Ideen, sicher fallen euch noch...'

22

Have fun doing crafts!

Materials

 1 Canned foodflat and empty
 Packaging paper Or baking paper, newsprint
 Fowls of the species Gallus domesticus, not put up for retail saleor hay
 Glue
 Adhesive strips
 Builder's pad
Maybe to beautify:
 Felt pencils colorful
 Paper remnants colorful
All links marked with a shopping cart lead to Amazon - here we have selected products that we would order ourselves and in part also ordered. In a qualified purchase via the advertising link, we as Amazon partner receive a commission, for you there are no costs. You thus support our cost- and advertising banner-free, educational offer.

Directions

1

Get it ready.
The flat can must have a rounded edge (otherwise there is risk of injury!) and be clean. Alternatively, use a margarine box without lid.
Then cut a strip of packing paper. Leave the paper slightly longer and larger than the size of your can.

Bild zum Schritt 1 für das Bastel- und DIY-Abenteuer für Kinder: 'Legt alles bereit.  Die flache Dose muss einen abgerundeten...'

2

Now you wrap your can with the packing paper. You stick the beginning of the paper strip to the can.
Attention: At the bottom of the can, the paper closes flush.

Bild zum Schritt 2 für das Bastel- und DIY-Abenteuer für Kinder: 'Jetzt umwickelt ihr eure Dose mit dem Packpapier. Dabei klebt...'

3

Put the paper around the can and stick to the end as well.
The paper can overlap a piece.
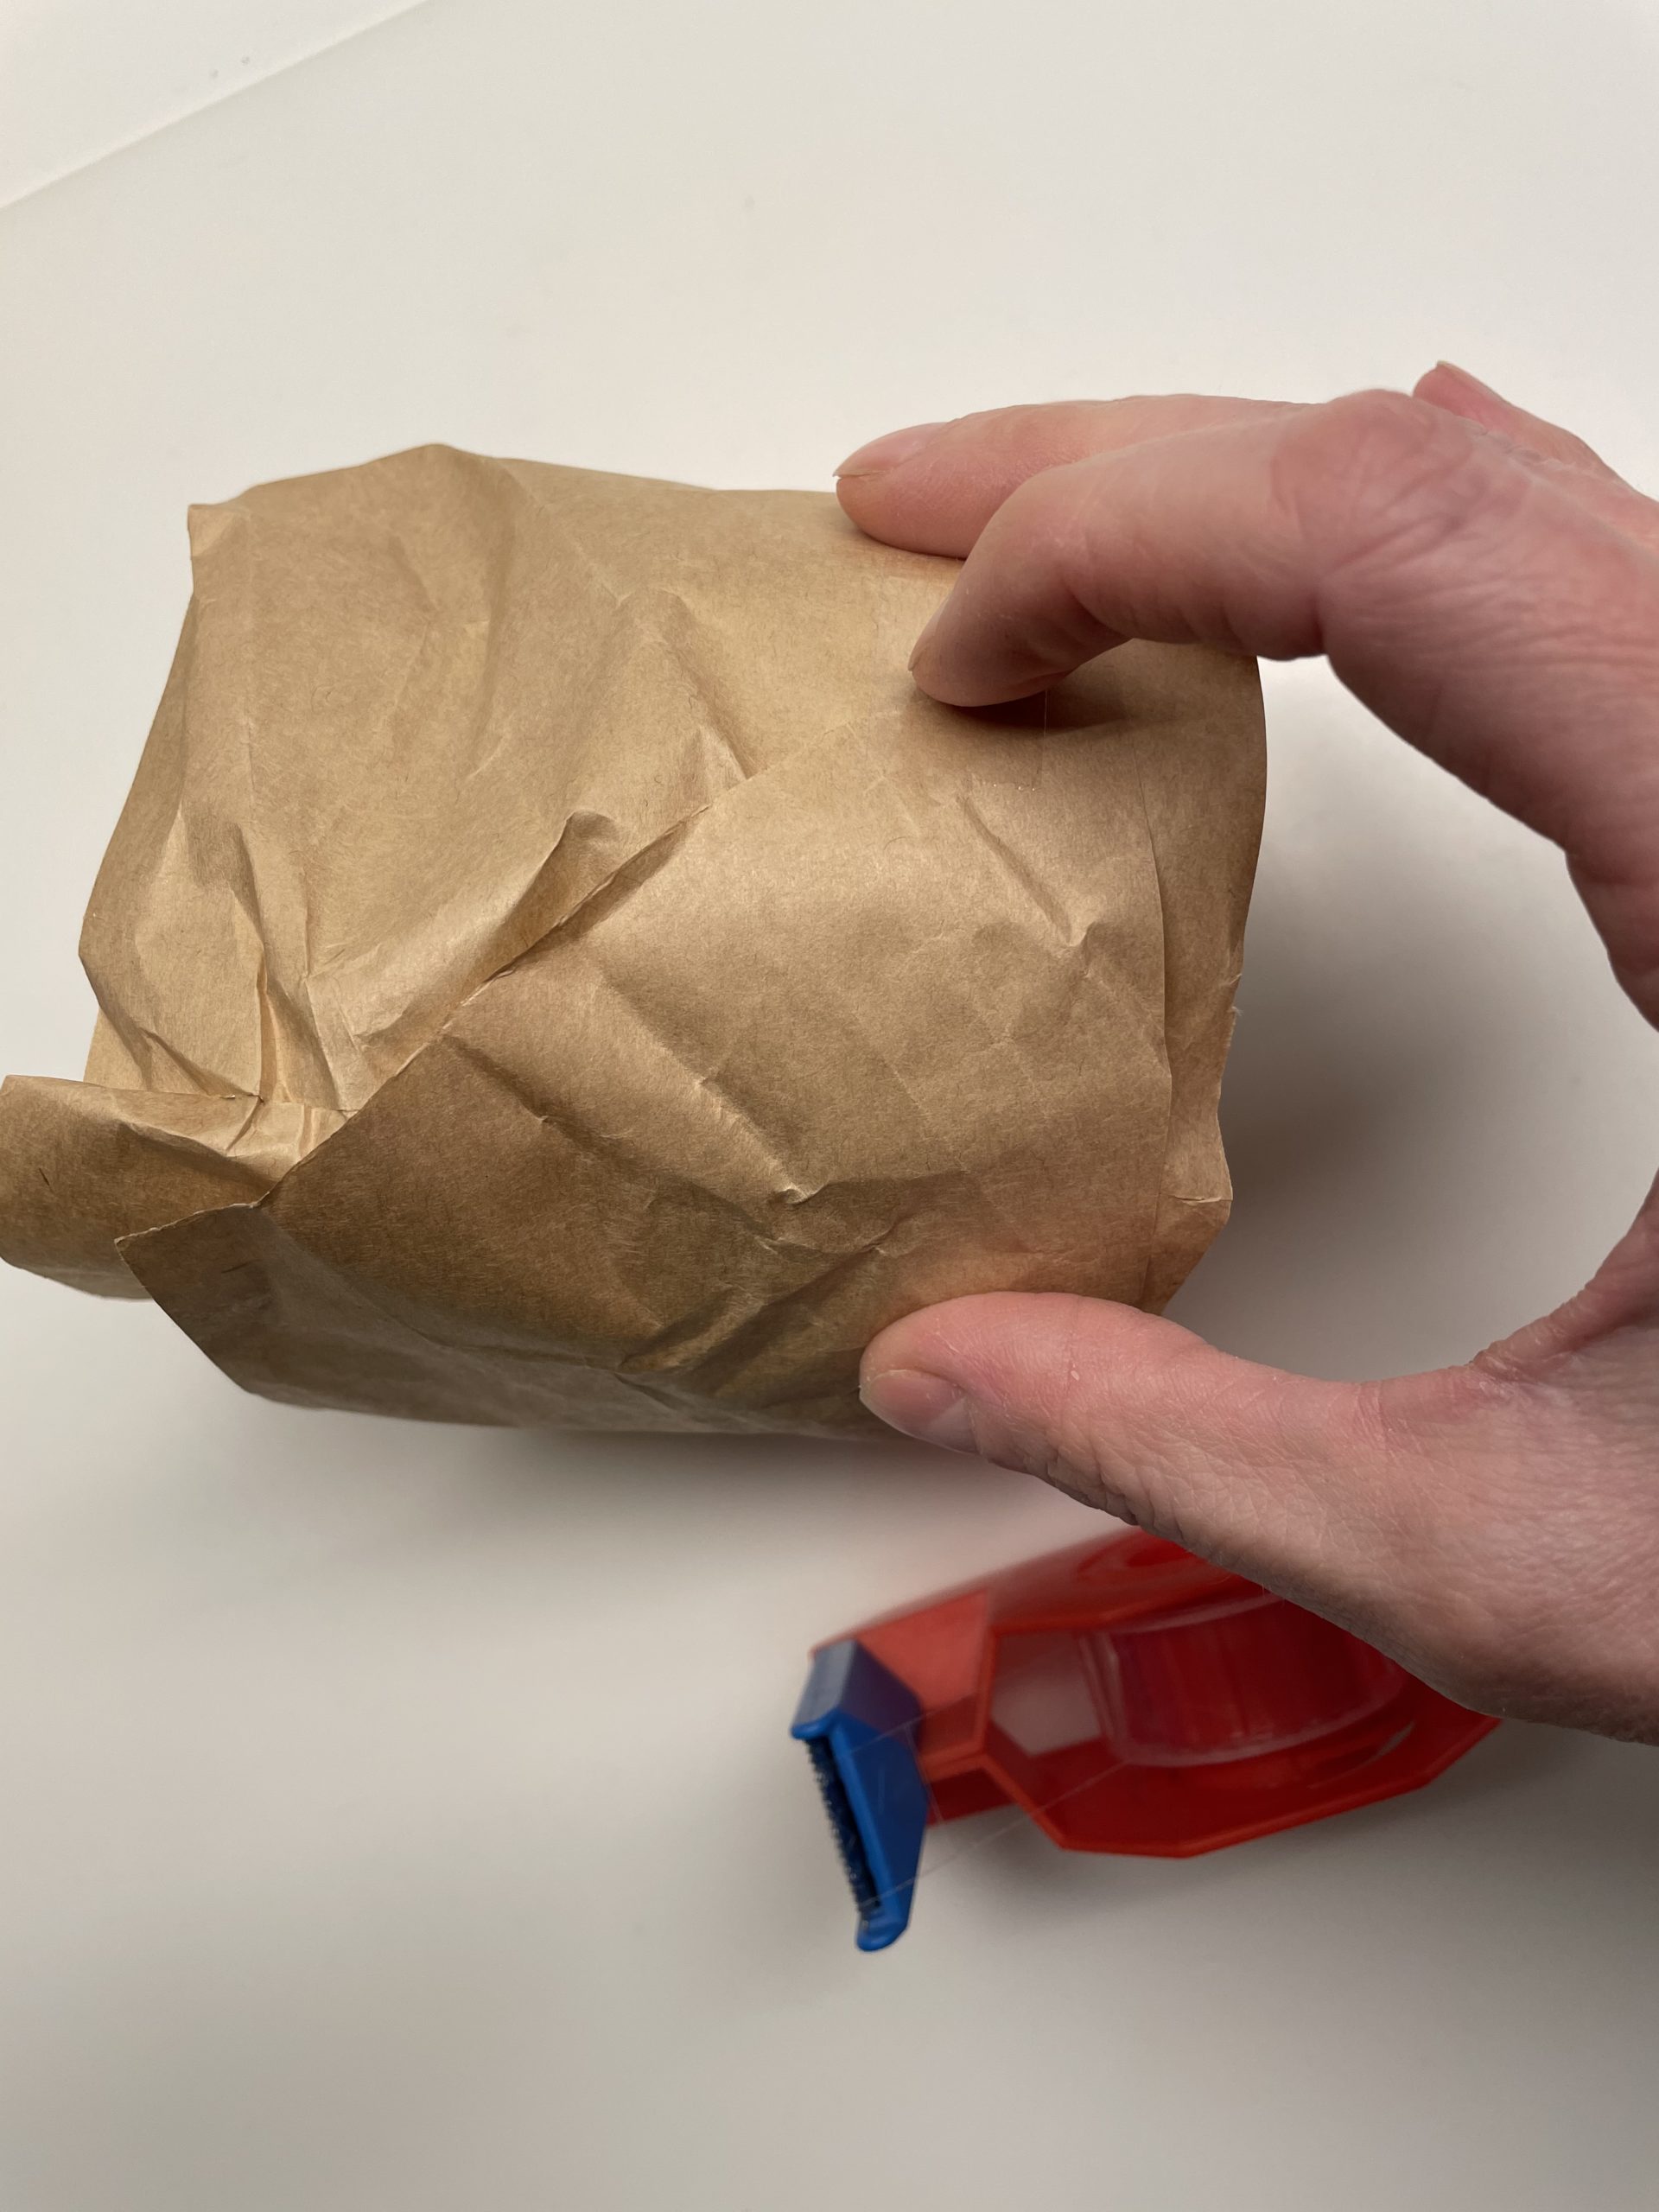
Bild zum Schritt 3 für das Bastel- und DIY-Abenteuer für Kinder: 'Legt das Papier um die Dose und klebt dann das...'

4

Then you put up the can.

Bild zum Schritt 4 für das Bastel- und DIY-Abenteuer für Kinder: 'Anschließend stellt ihr die Dose auf.'

5

The overhanging paper edge is now turned inwards.
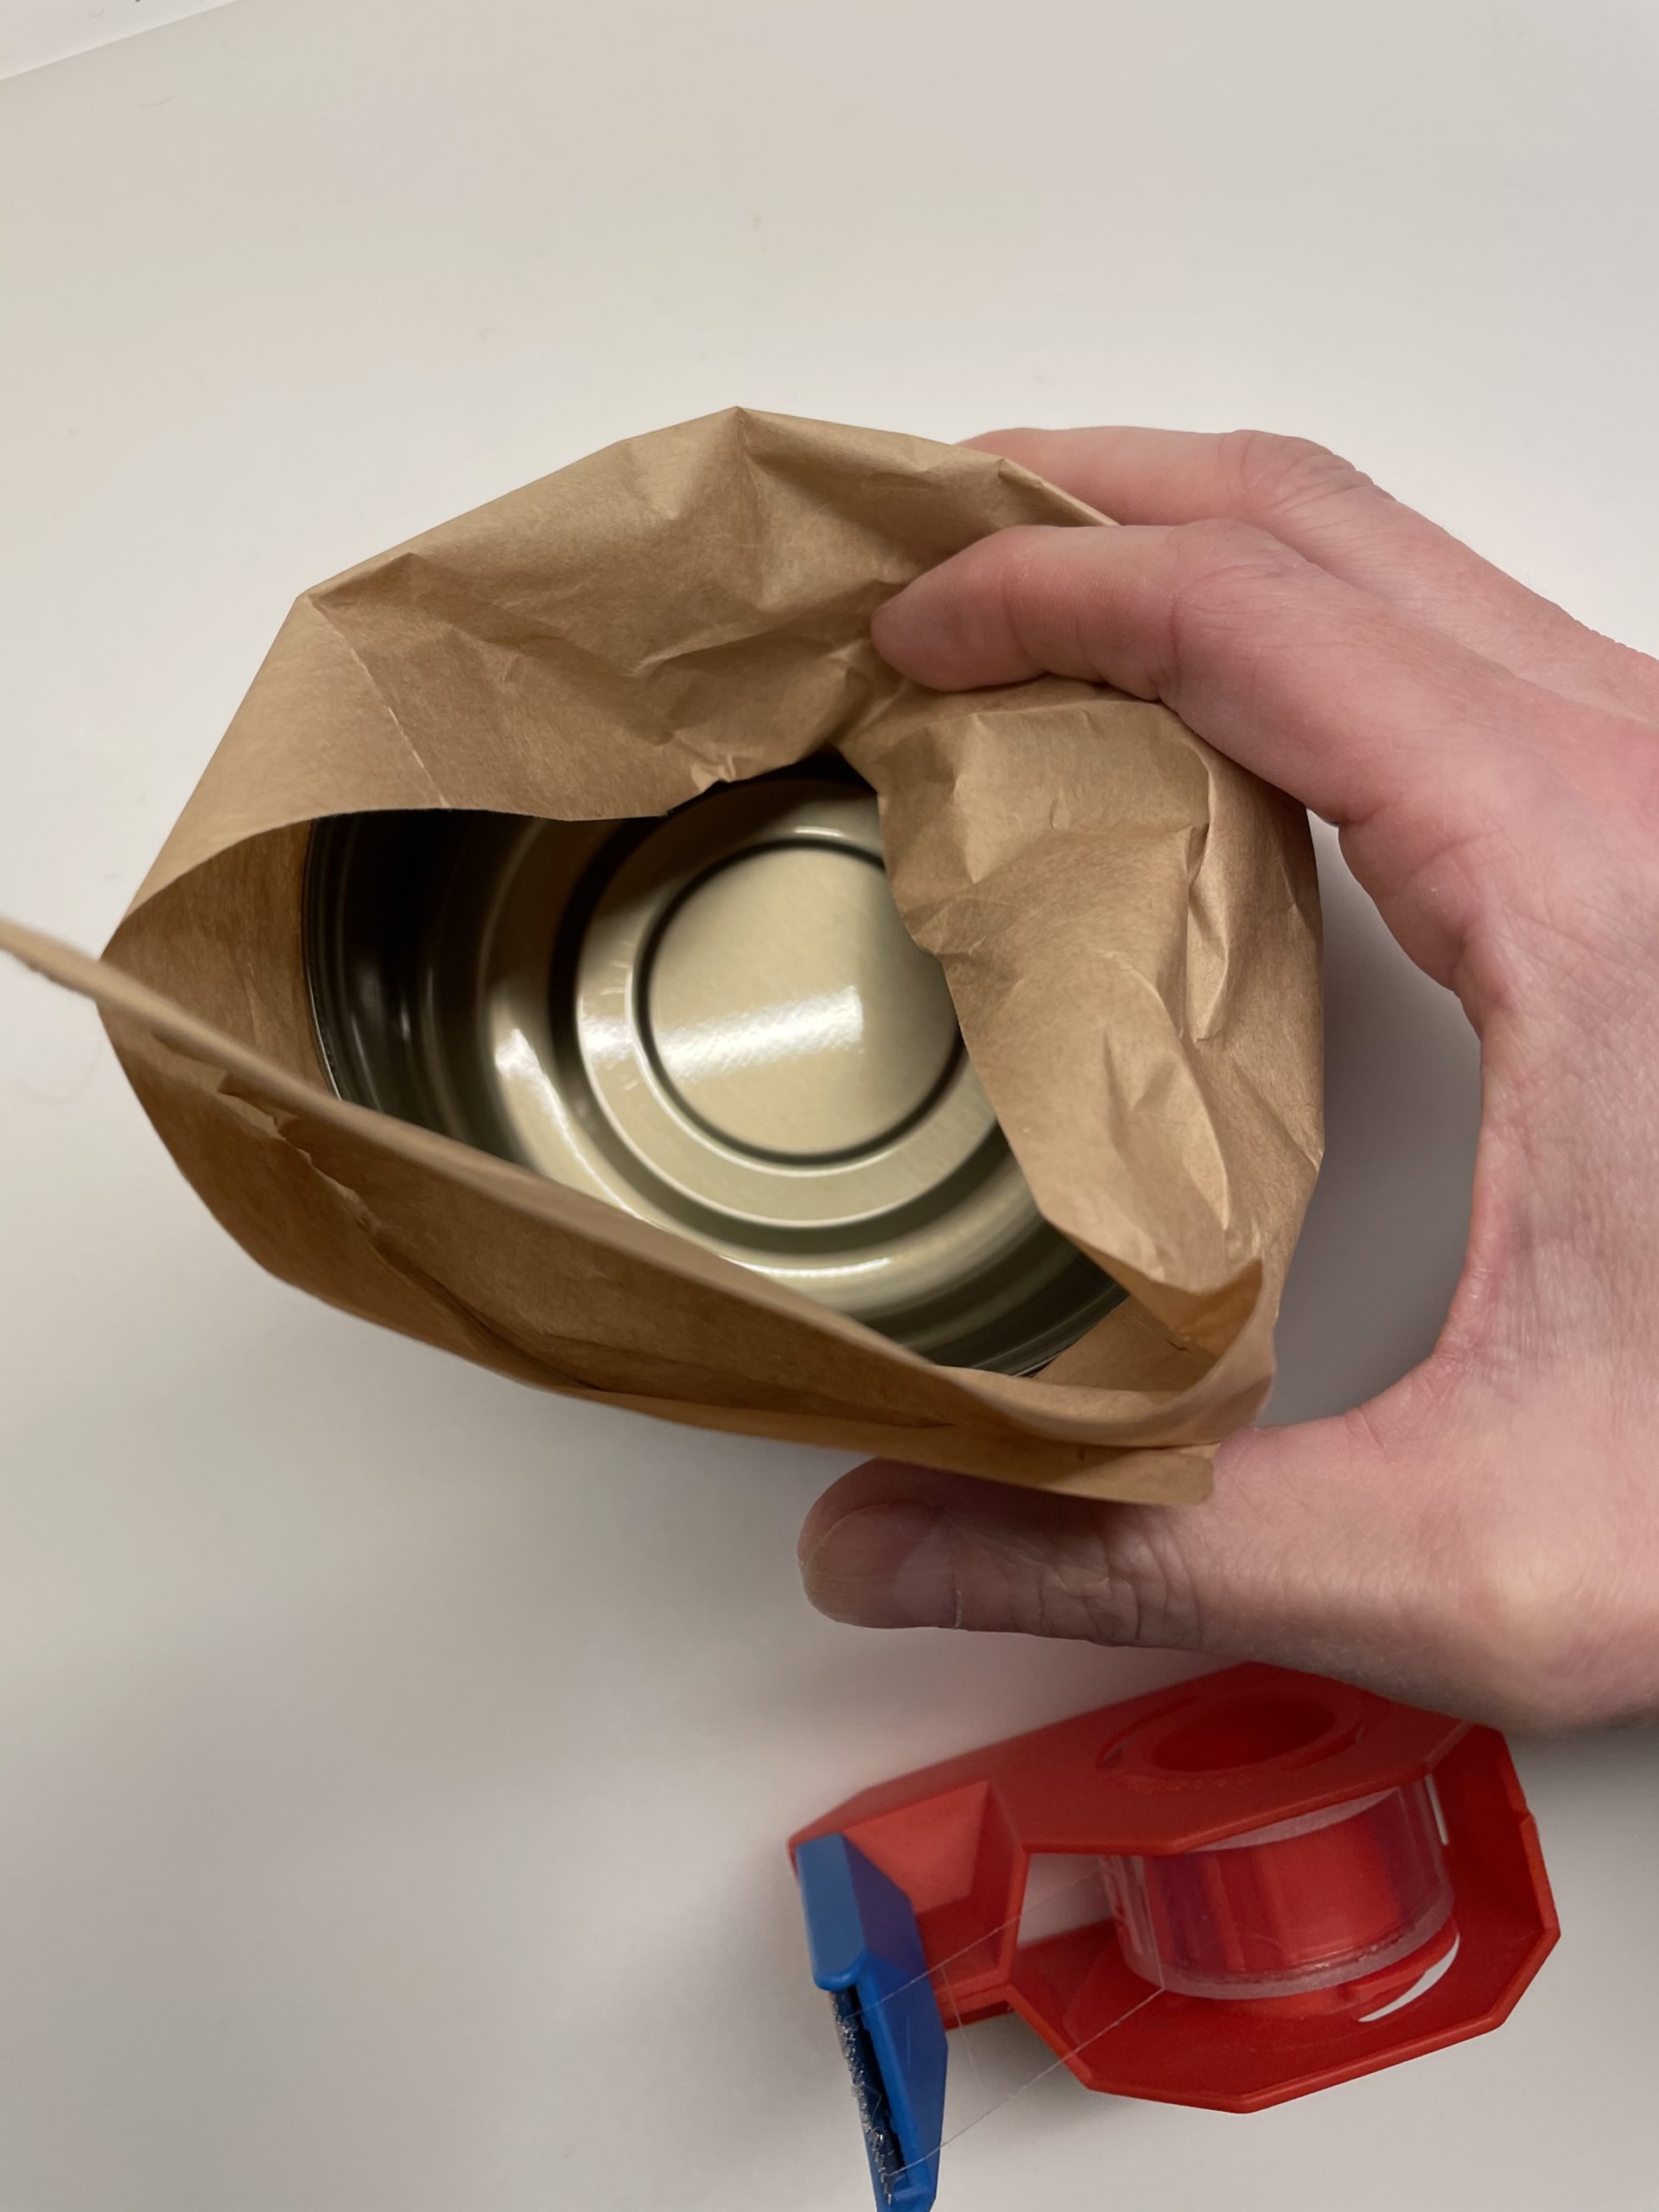
Bild zum Schritt 5 für das Bastel- und DIY-Abenteuer für Kinder: 'Der überstehende Papierrand wird nun nach innen umgeschlagen.'

6

Here, try to squeeze the paper around the edge.
That's how the nest will look more beautiful later.
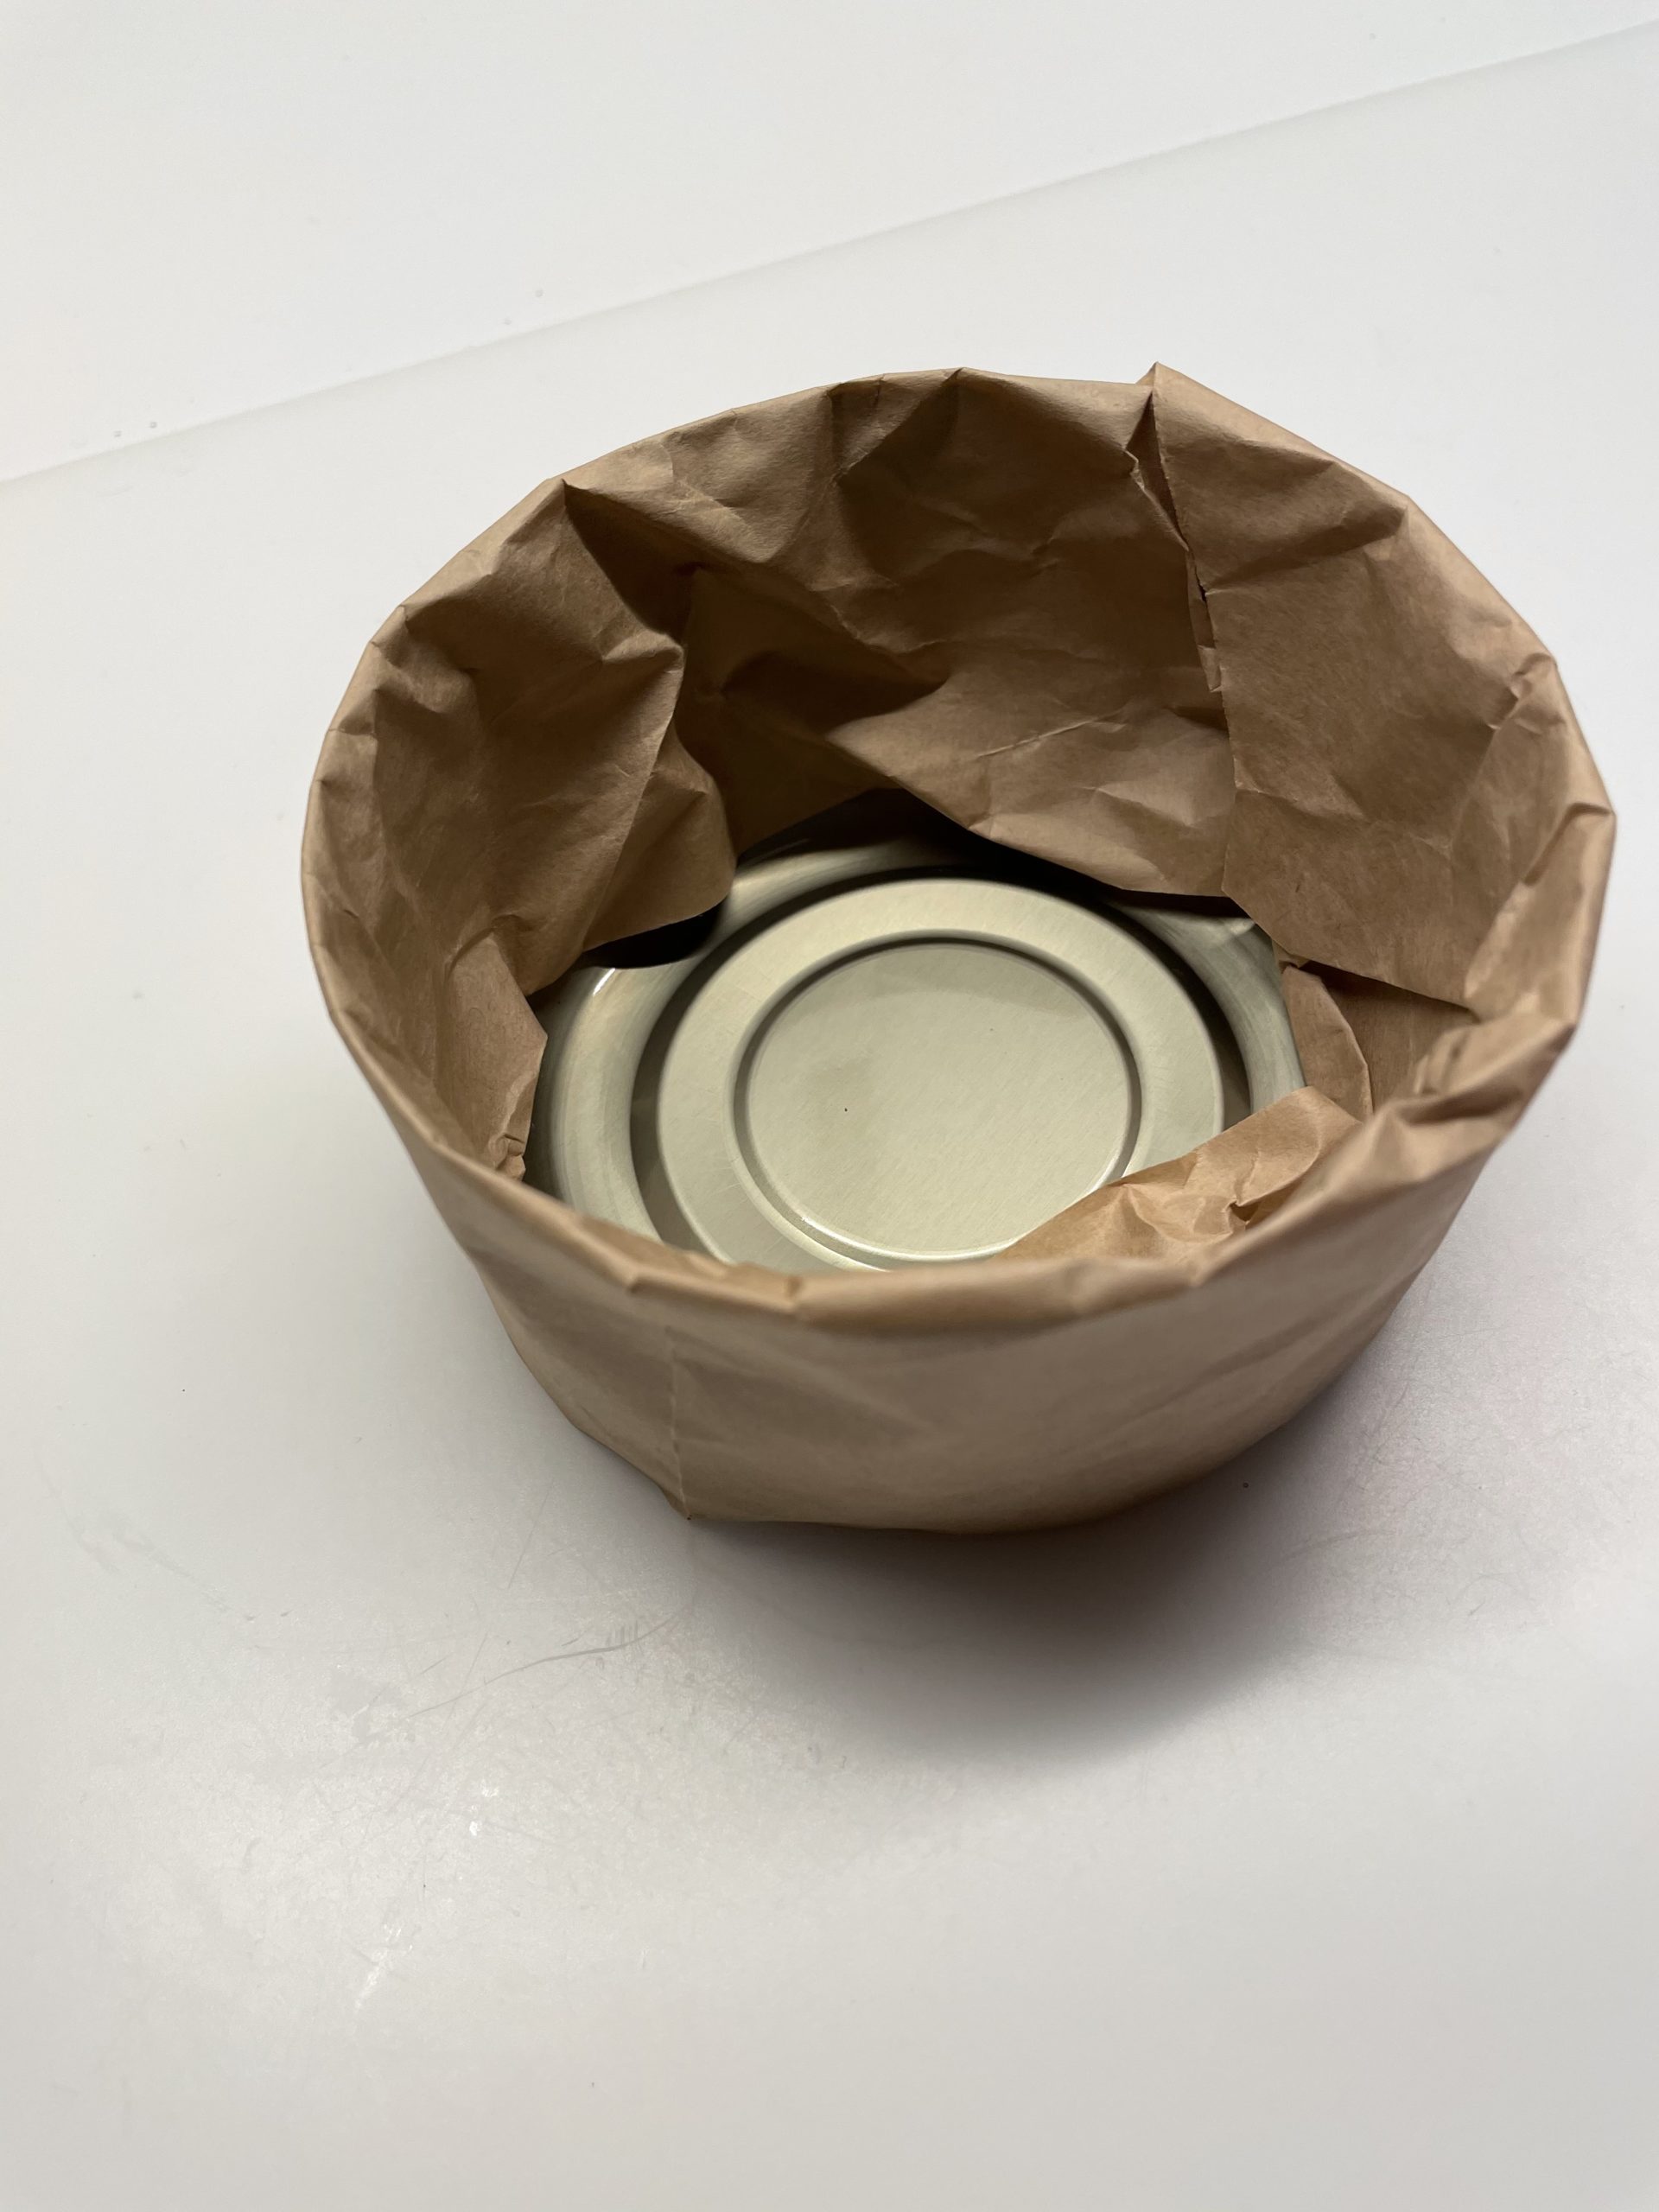
Bild zum Schritt 6 für das Bastel- und DIY-Abenteuer für Kinder: 'Versucht hier das Papier fest um die Kante zu drücken....'

7

Now take your moss - the amount depends on the can size!
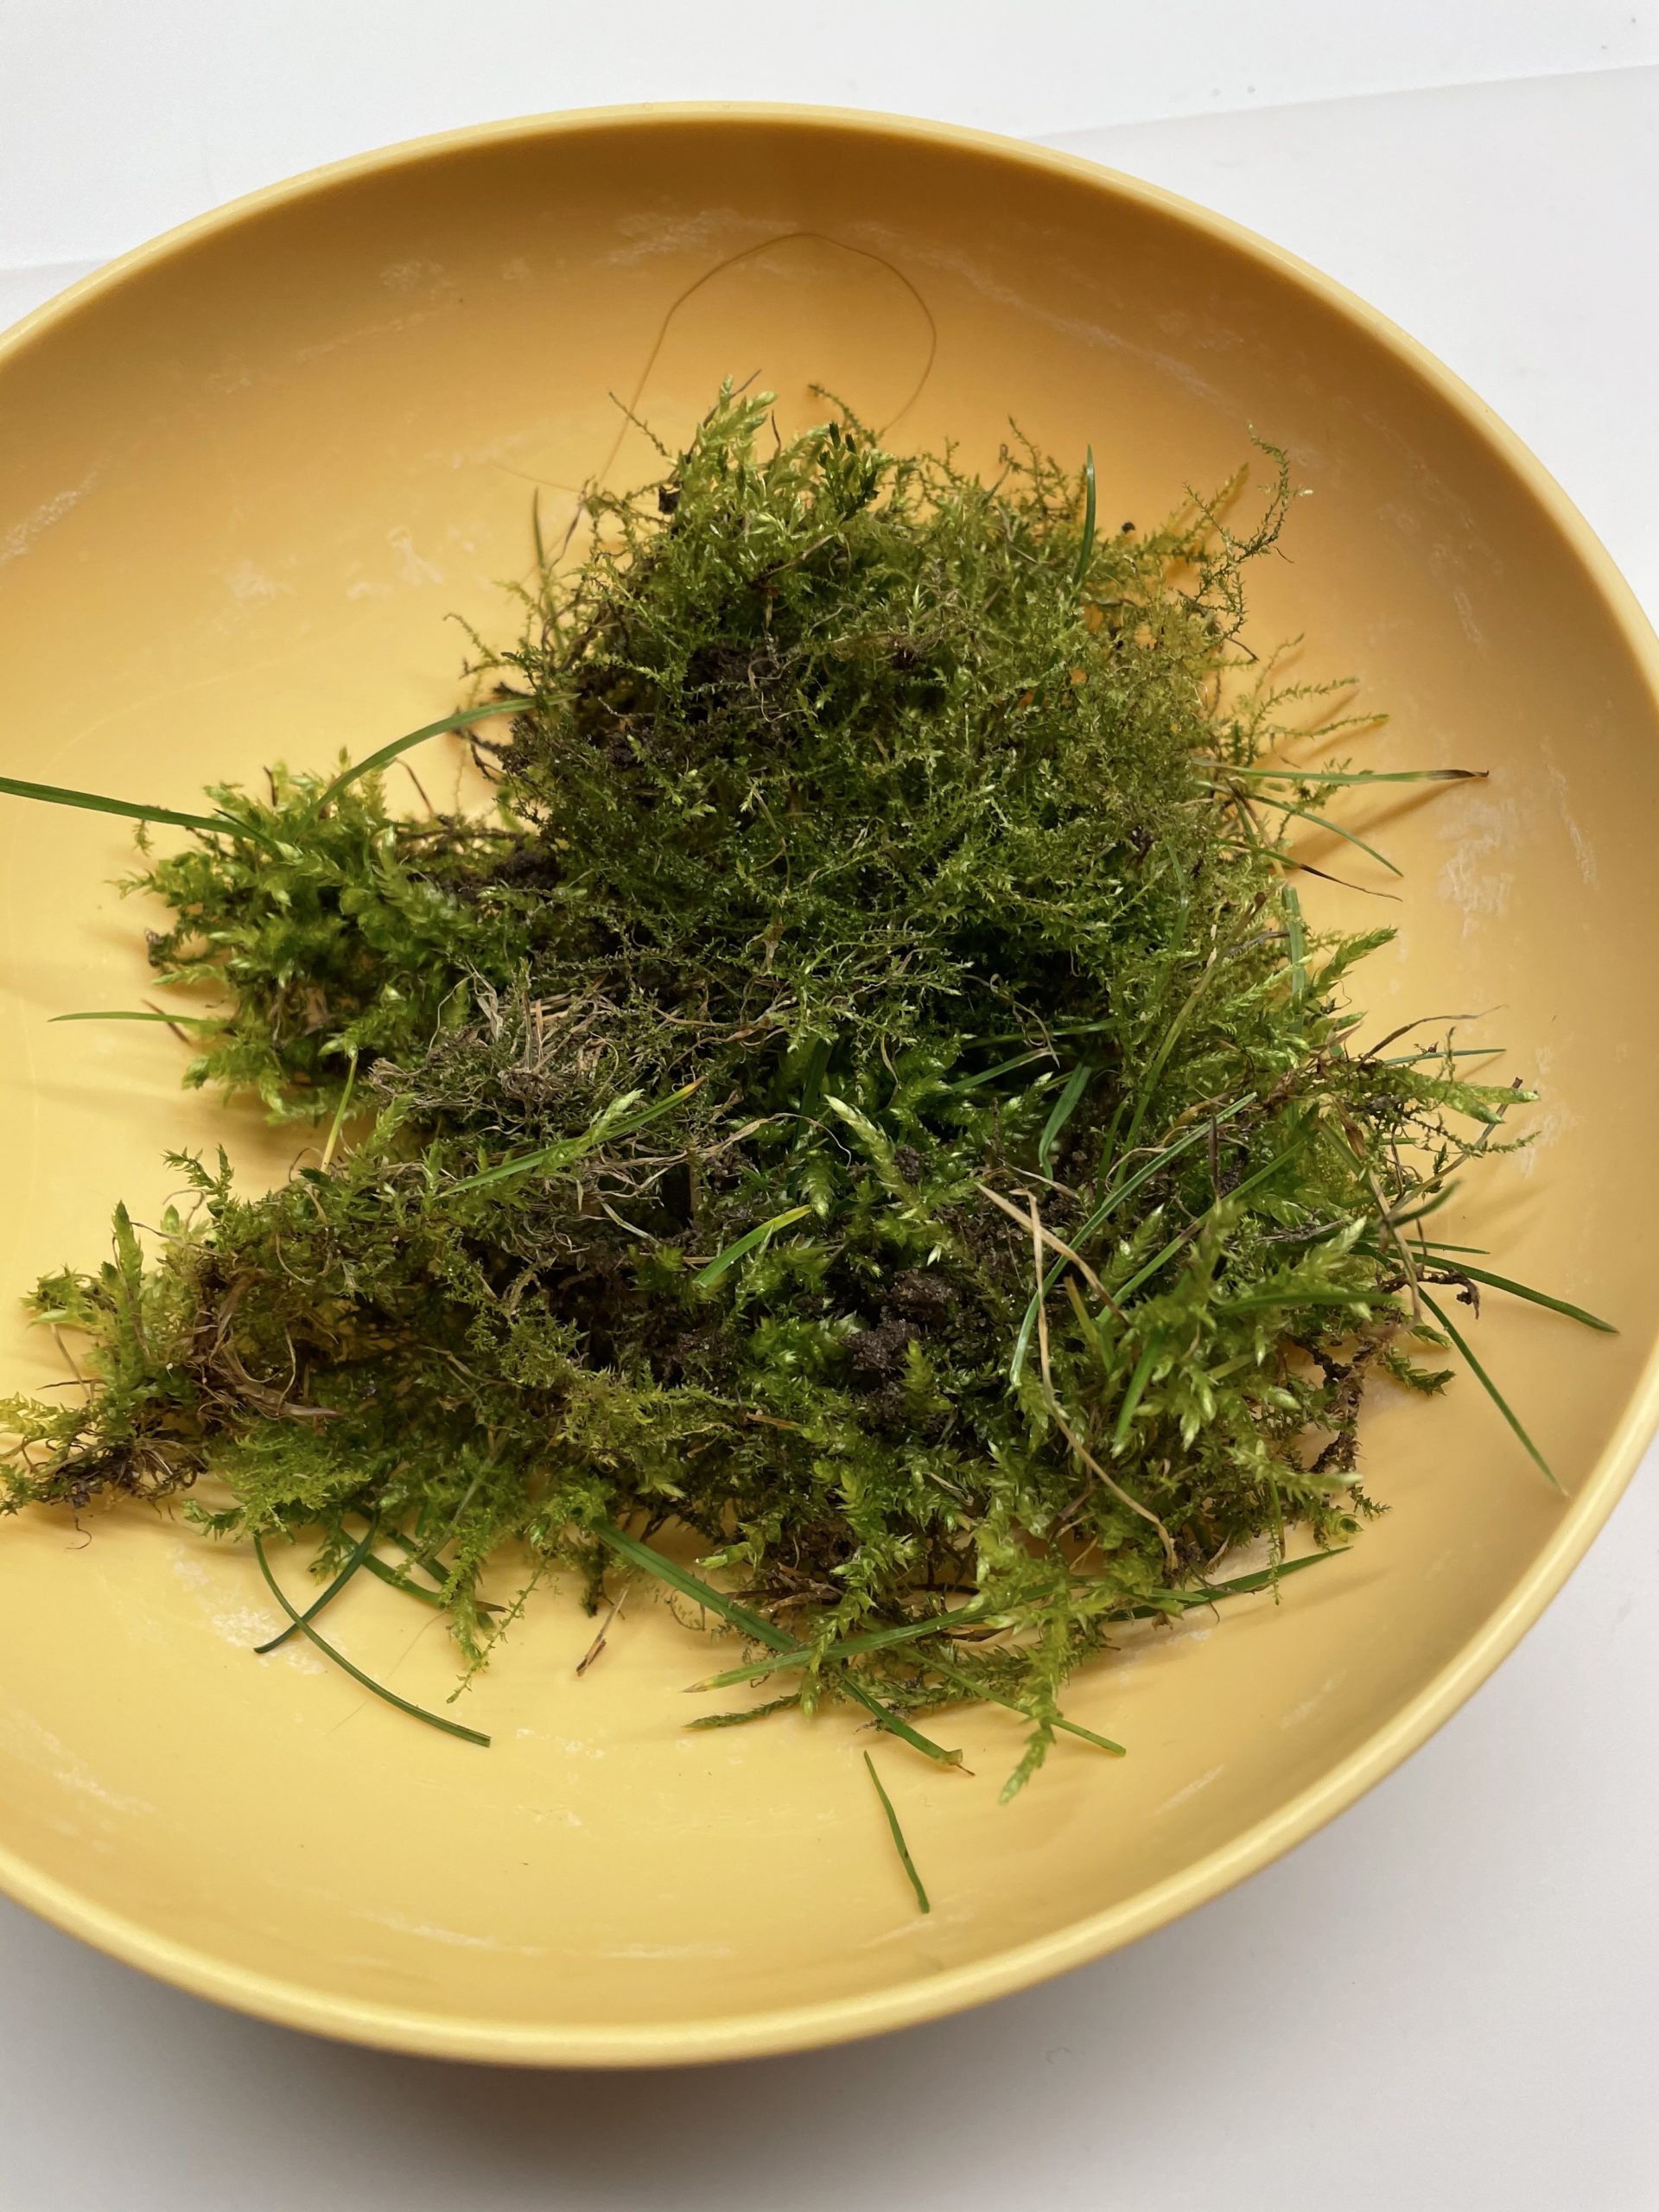
Bild zum Schritt 7 für das Bastel- und DIY-Abenteuer für Kinder: 'Nun nehmt euer Moos - die Menge richtet sich nach...'

8

Put the moss loosely in the can. You turn earthy places down.
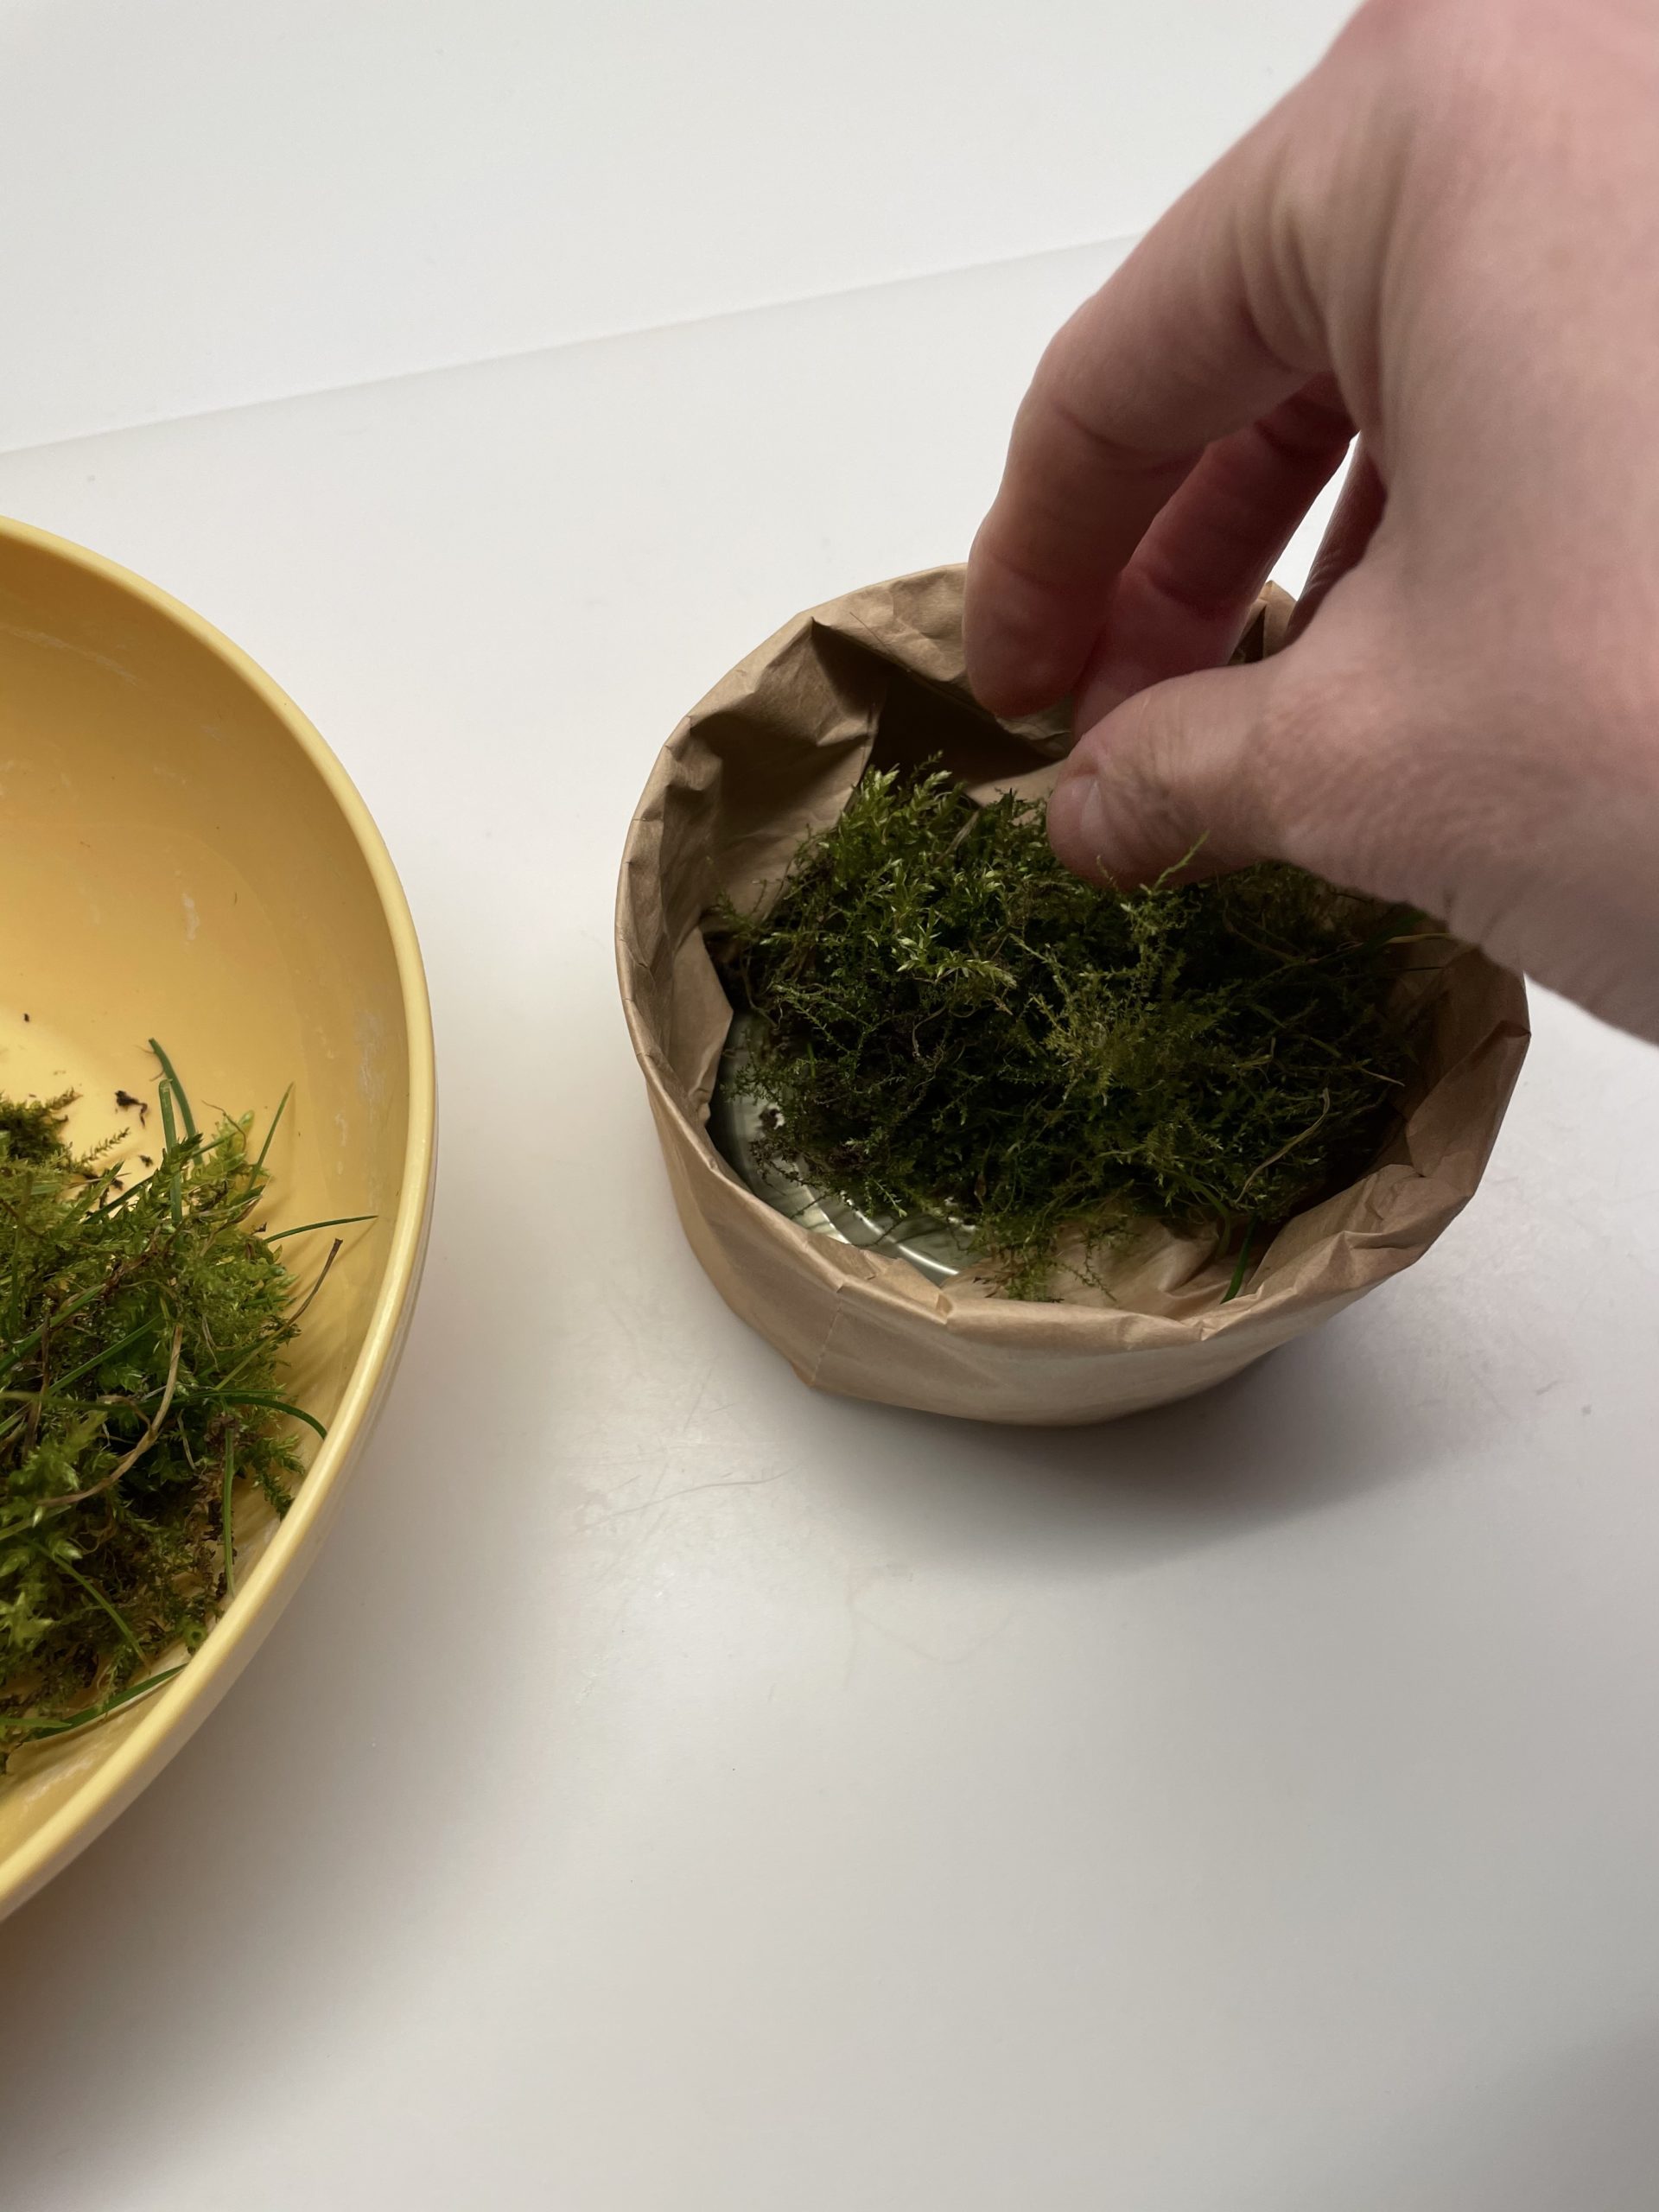
Bild zum Schritt 8 für das Bastel- und DIY-Abenteuer für Kinder: 'Legt das Moos locker in die Dose. Dabei dreht ihr...'

9

Tap the moss and remove possibly disturbing stones, twigs or small animals.
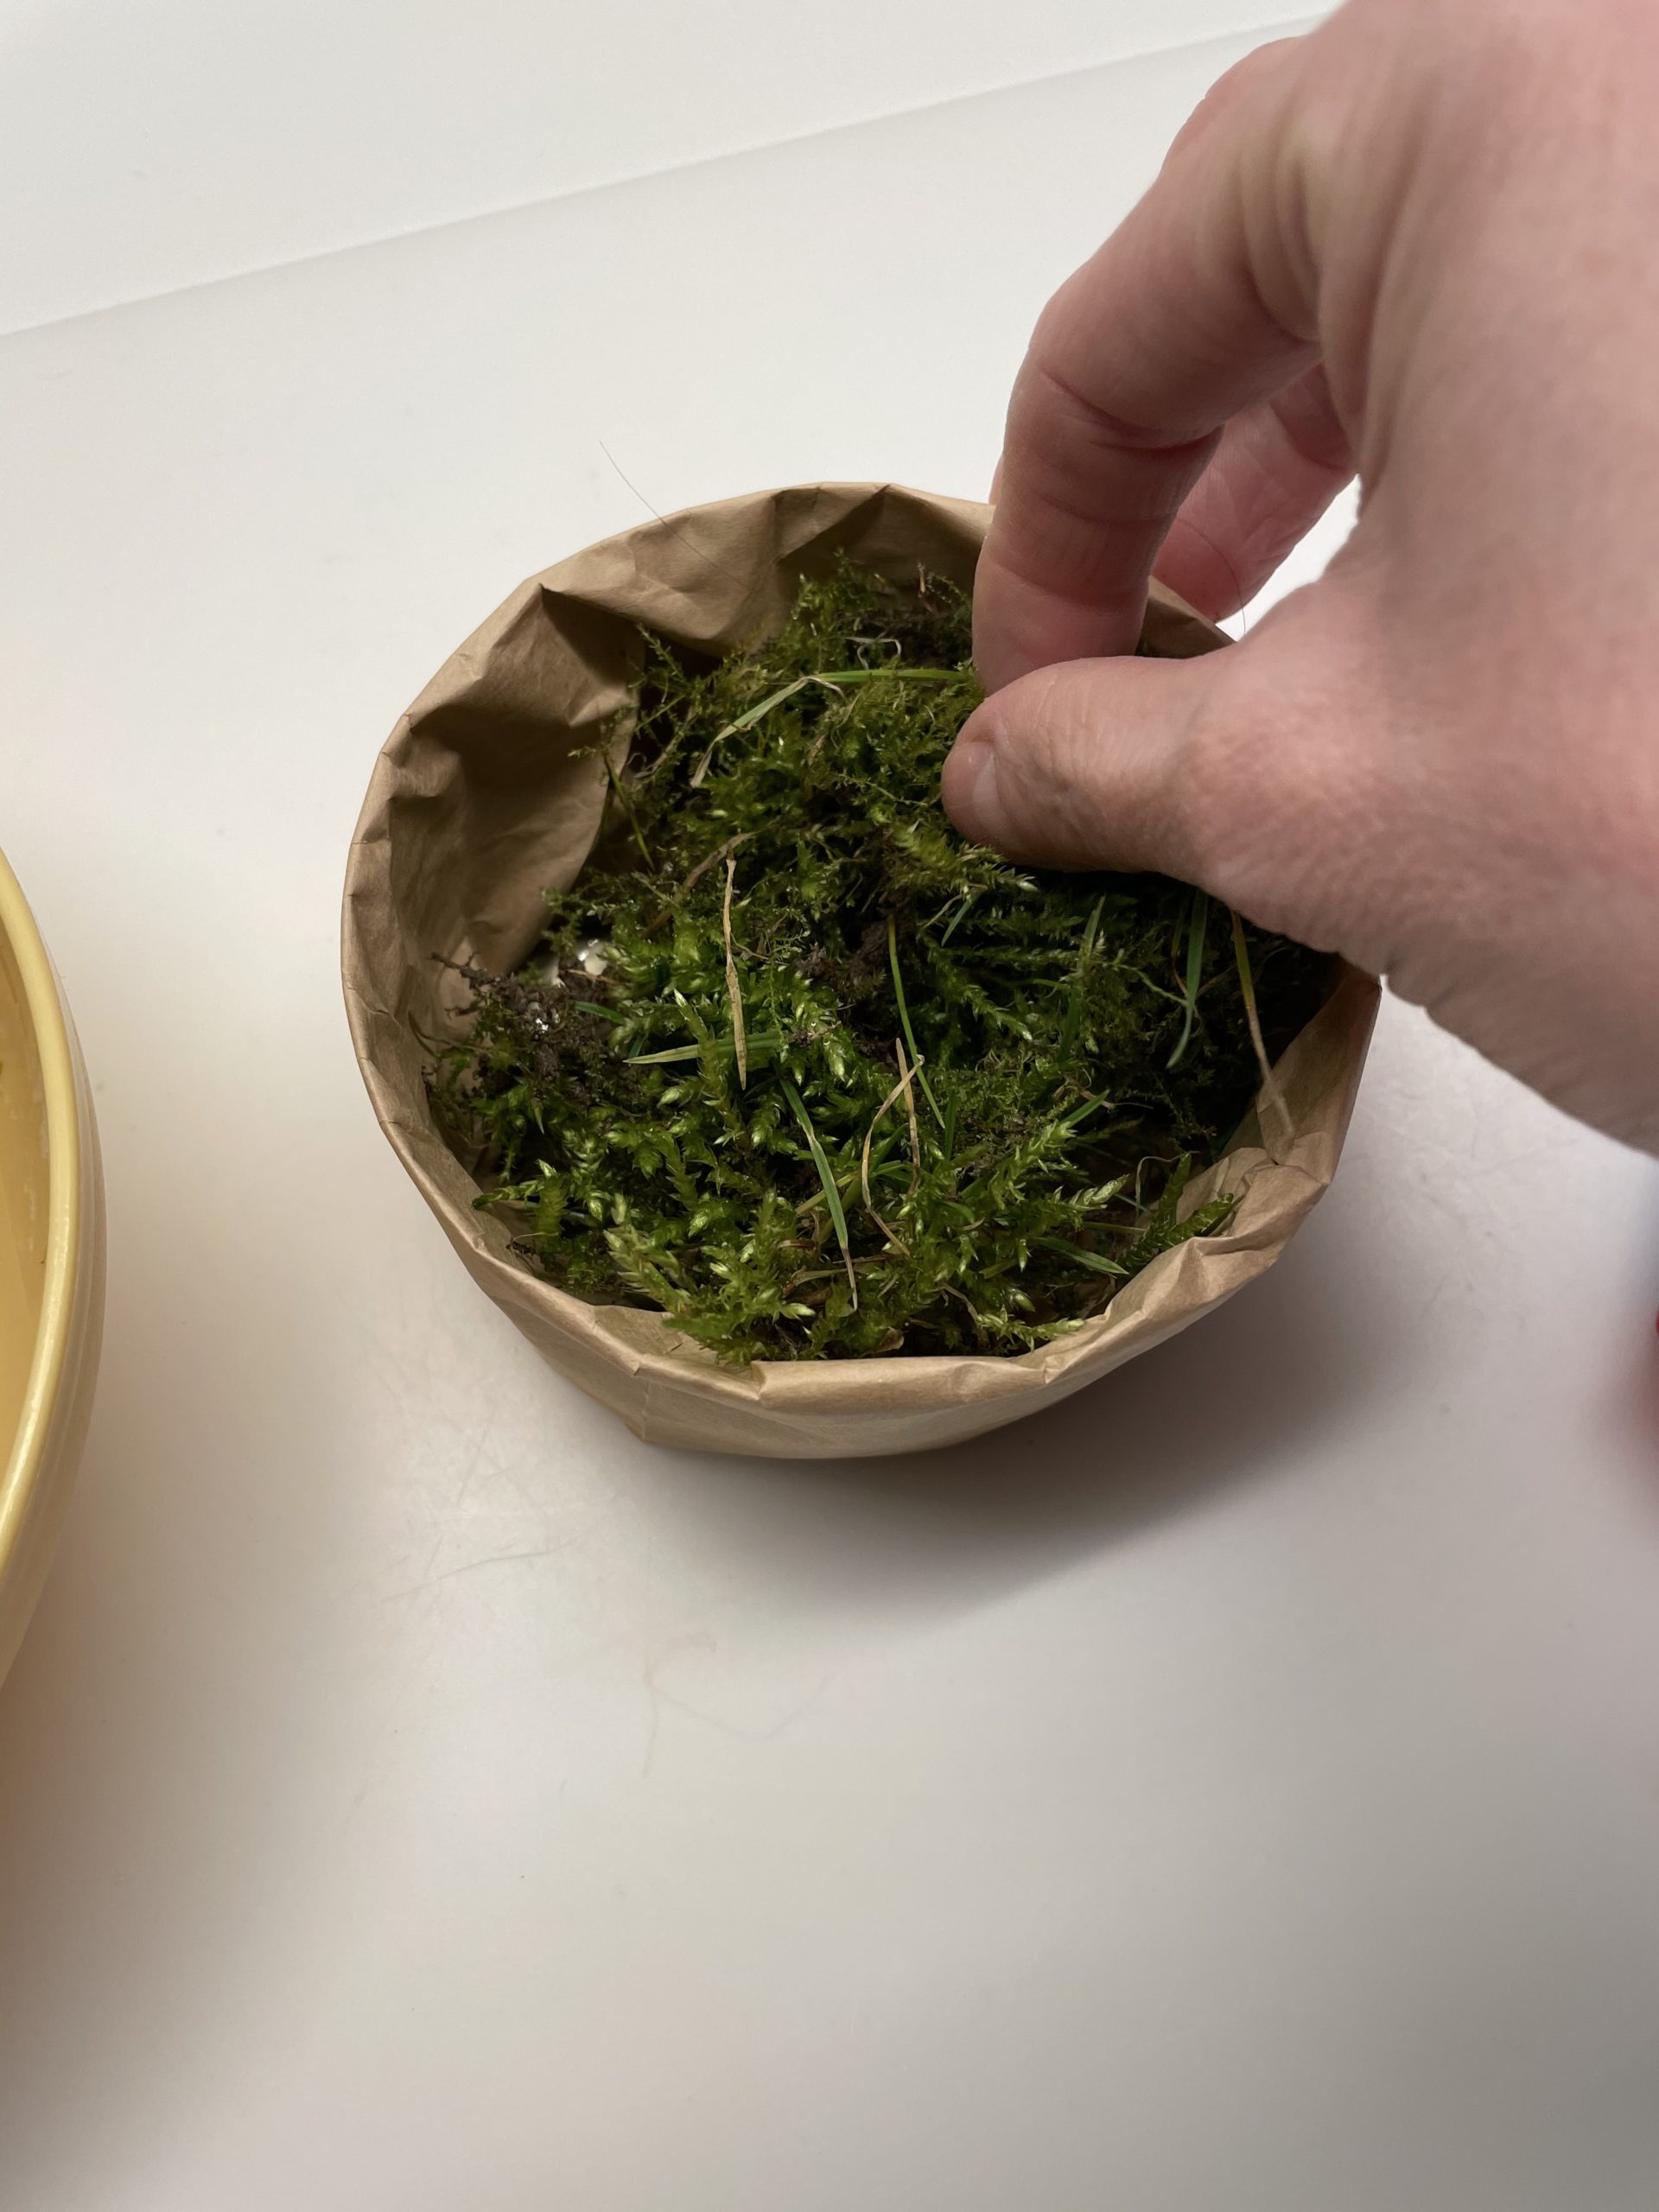
Bild zum Schritt 9 für das Bastel- und DIY-Abenteuer für Kinder: 'Zupft das Moos zurecht und entfernt evtl. störende Steine, Zweige...'

10

The nest is ready.

Bild zum Schritt 10 für das Bastel- und DIY-Abenteuer für Kinder: 'Fertig ist das Nest.'

11

Now you can put in some eggs or hide it for the Easter bunny.
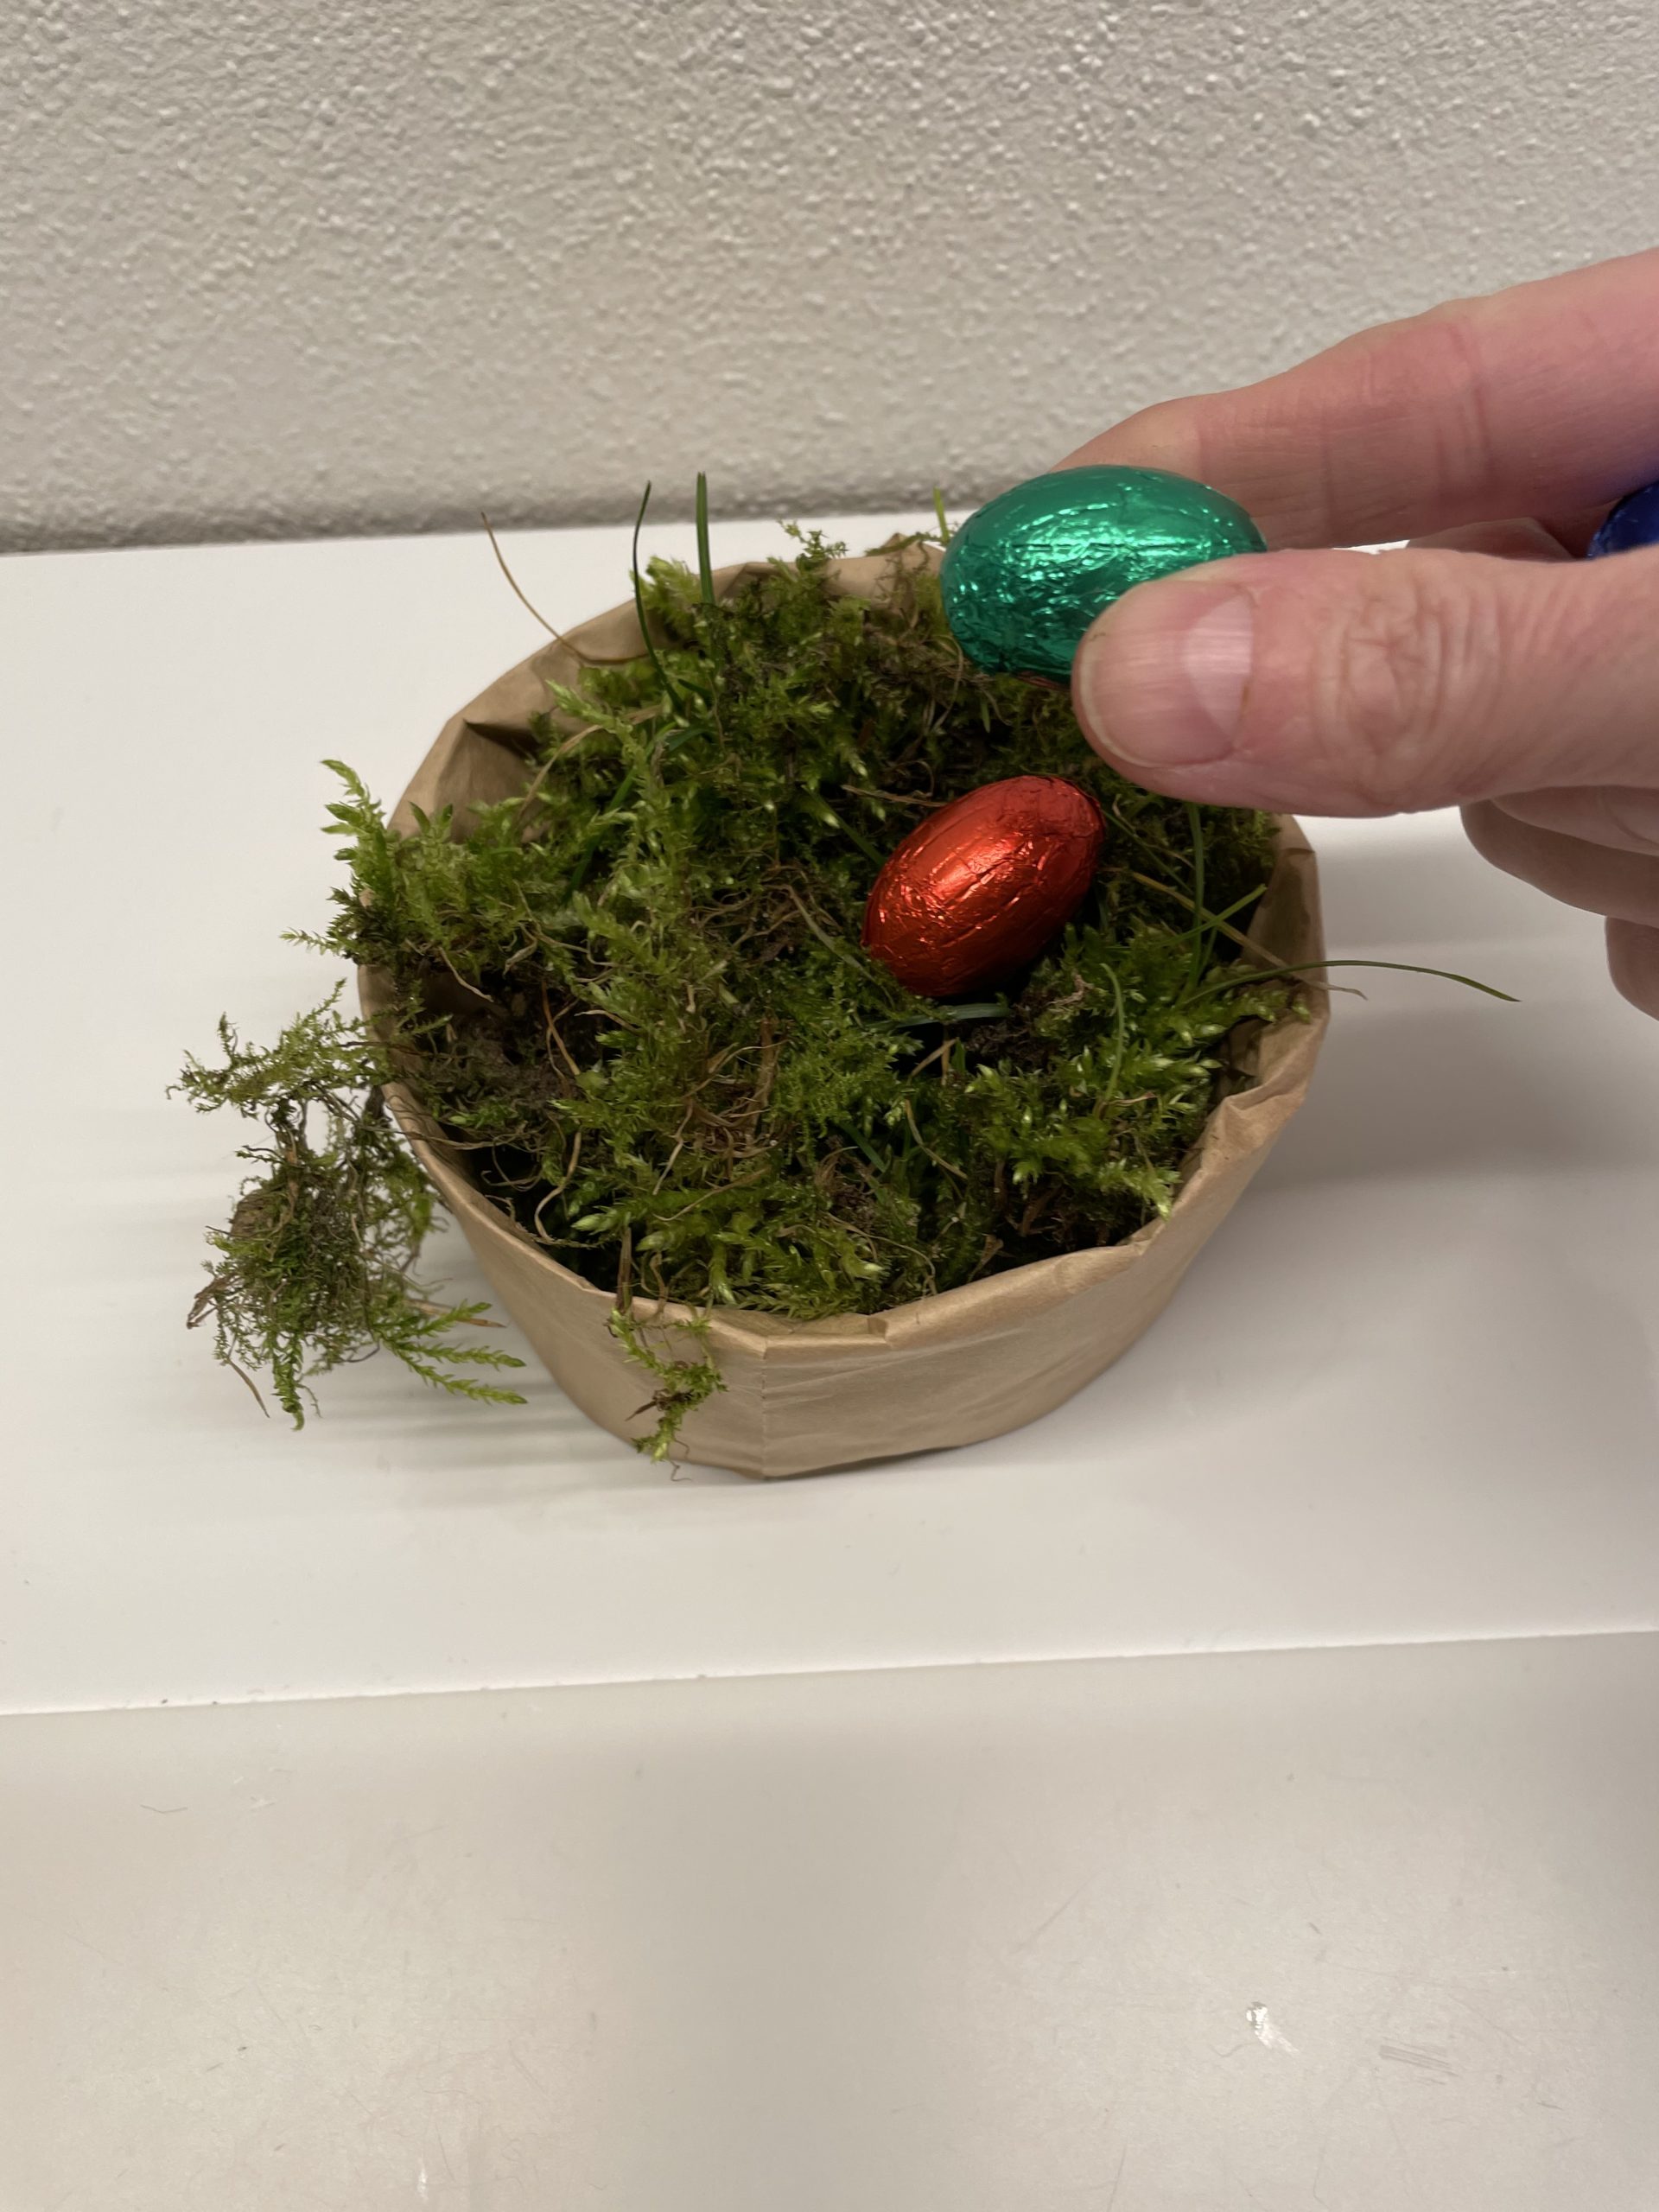
Bild zum Schritt 11 für das Bastel- und DIY-Abenteuer für Kinder: 'Jetzt könnt ihr ein paar Eier hineinlegen oder es für...'

12

2. Bild zum Schritt 11 für das Bastel- und DIY-Abenteuer für Kinder: 'Jetzt könnt ihr ein paar Eier hineinlegen oder es für...'

13

3. Bild zum Schritt 12 für das Bastel- und DIY-Abenteuer für Kinder: 'Jetzt könnt ihr ein paar Eier hineinlegen oder es für...'

Or you can embellish your nest with flowers:
14

Make some flowers to beautify.
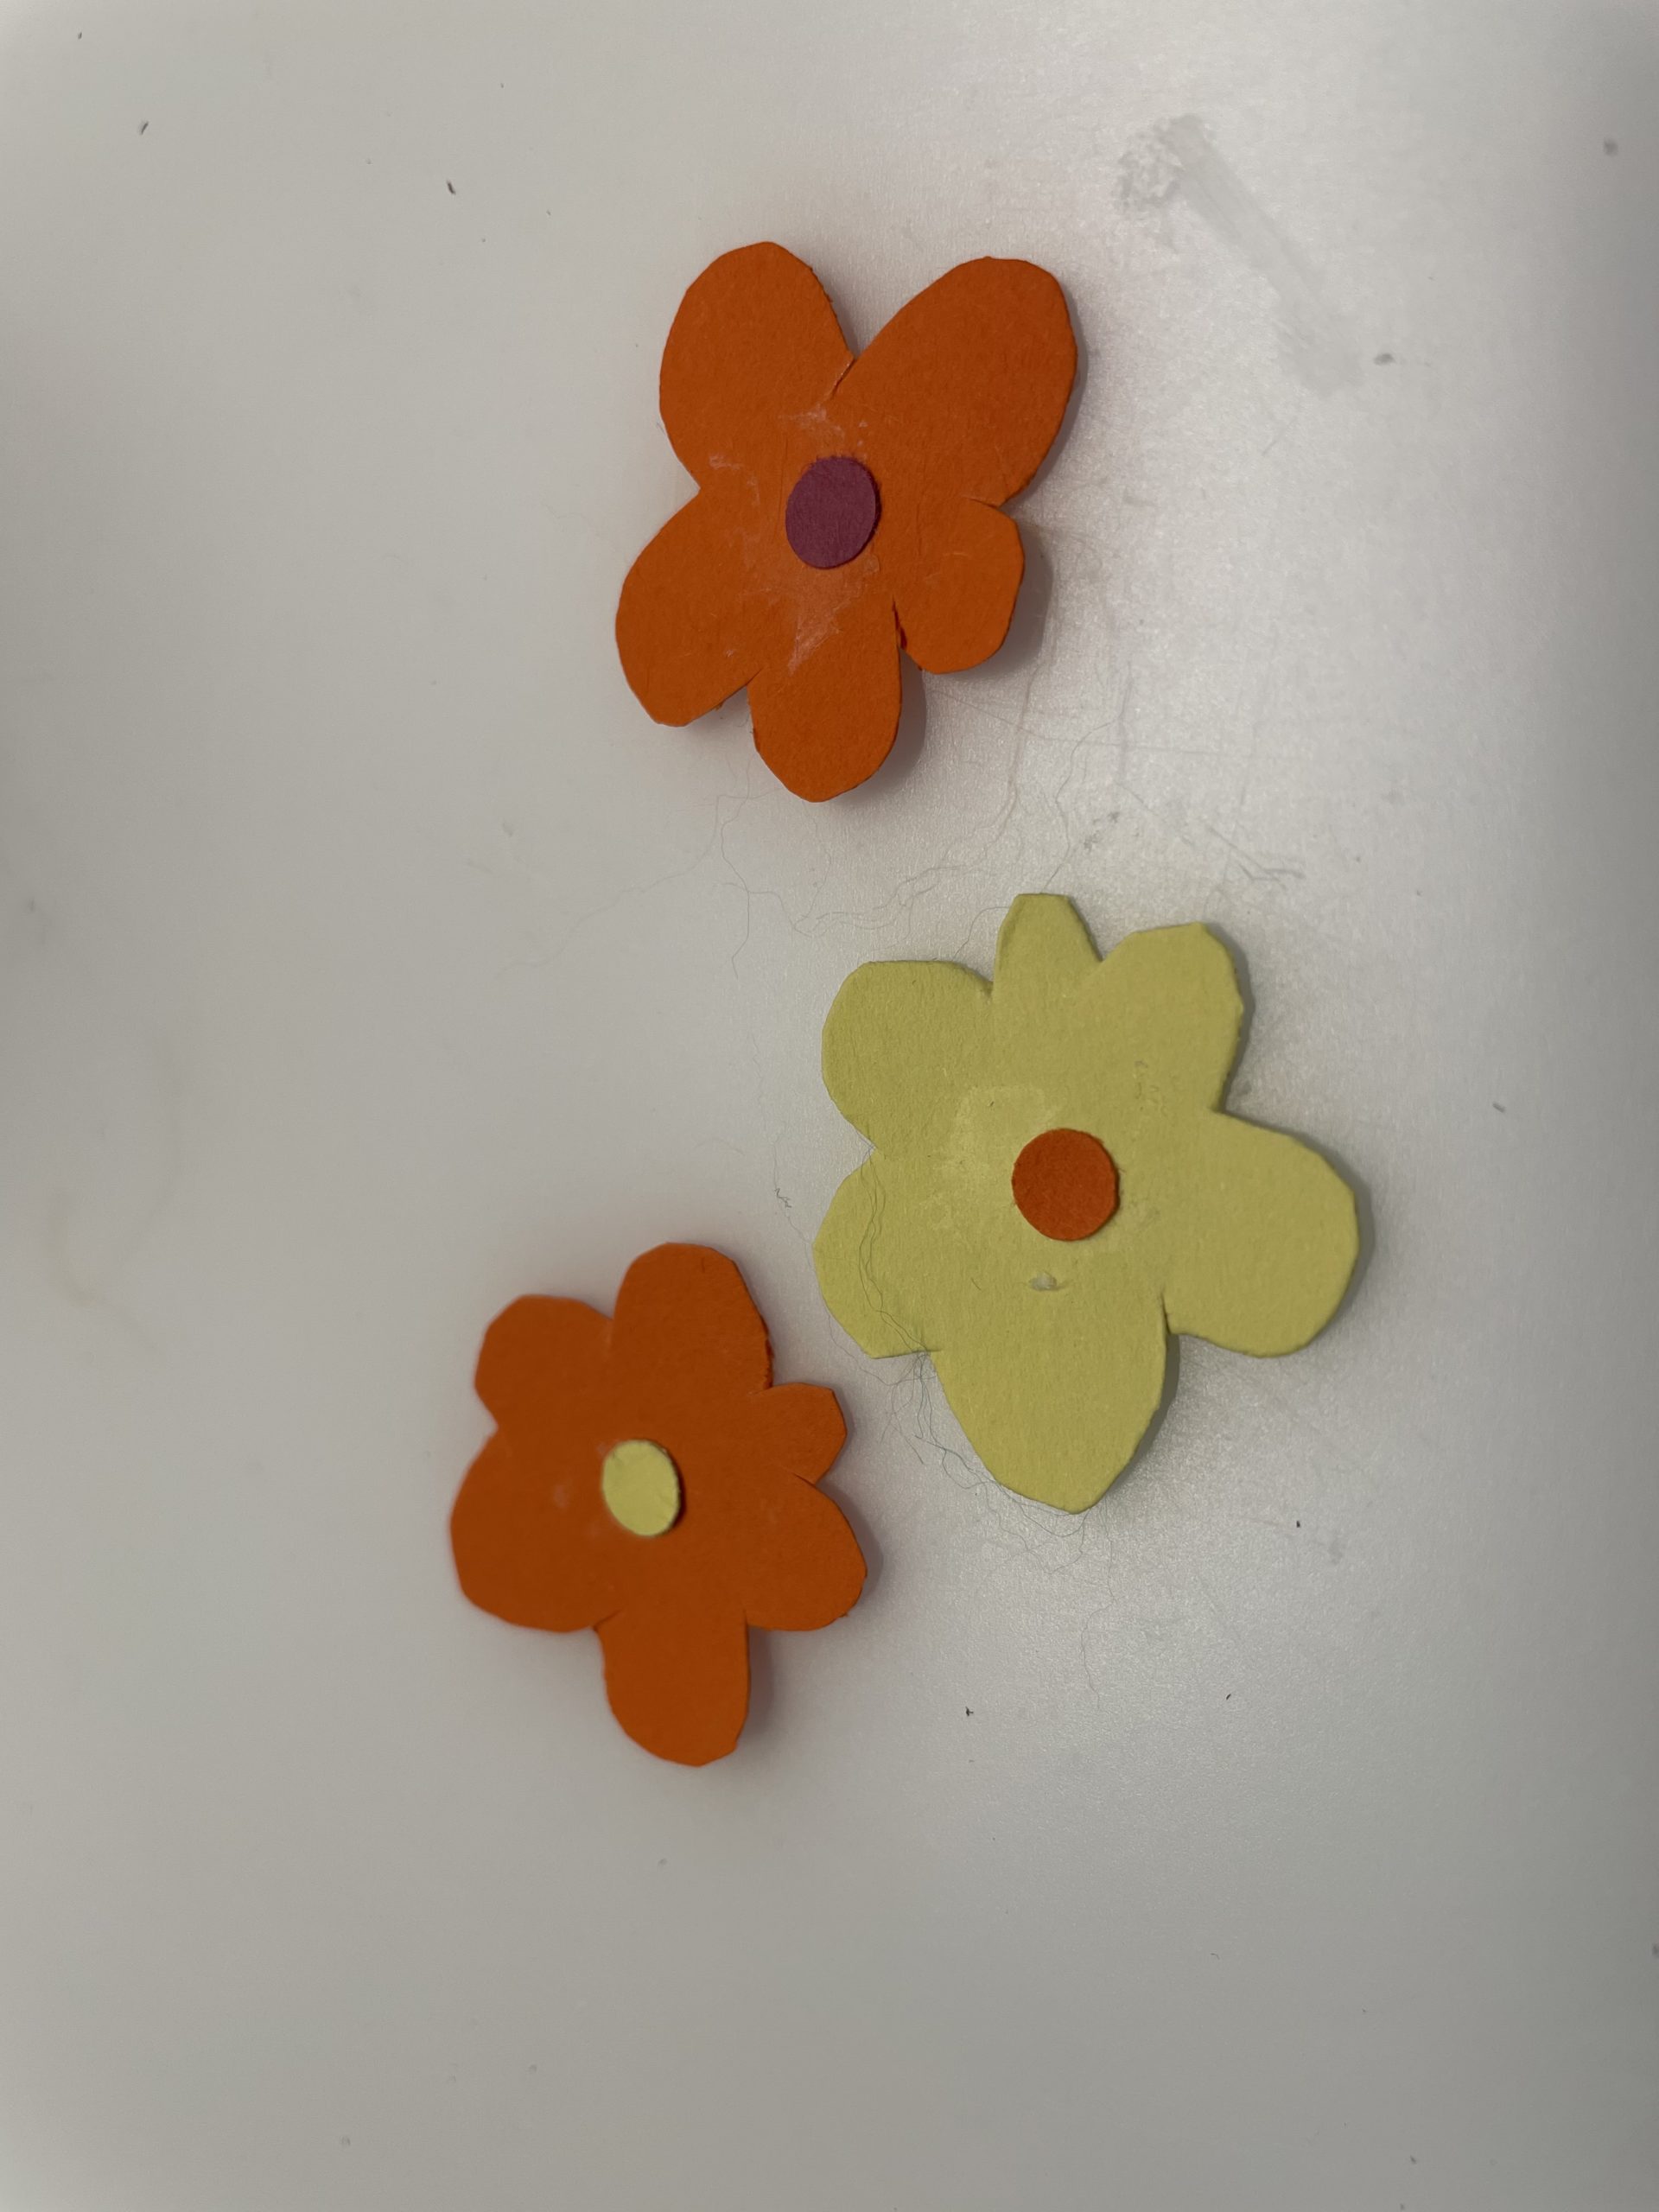
Bild zum Schritt 15 für das Bastel- und DIY-Abenteuer für Kinder: 'Bastelt zum Verschönern ein paar Blumen.'

15

Stick these around the can.

Bild zum Schritt 16 für das Bastel- und DIY-Abenteuer für Kinder: 'Klebt diese außen um die Dose.'

16

2. Bild zum Schritt 16 für das Bastel- und DIY-Abenteuer für Kinder: 'Klebt diese außen um die Dose.'

Or paint the paper before you stick it on the can!
17

You can paint flowers.

Bild zum Schritt 19 für das Bastel- und DIY-Abenteuer für Kinder: 'Ihr könnt Blumen aufmalen.'

18

After that, paint these still colorful.
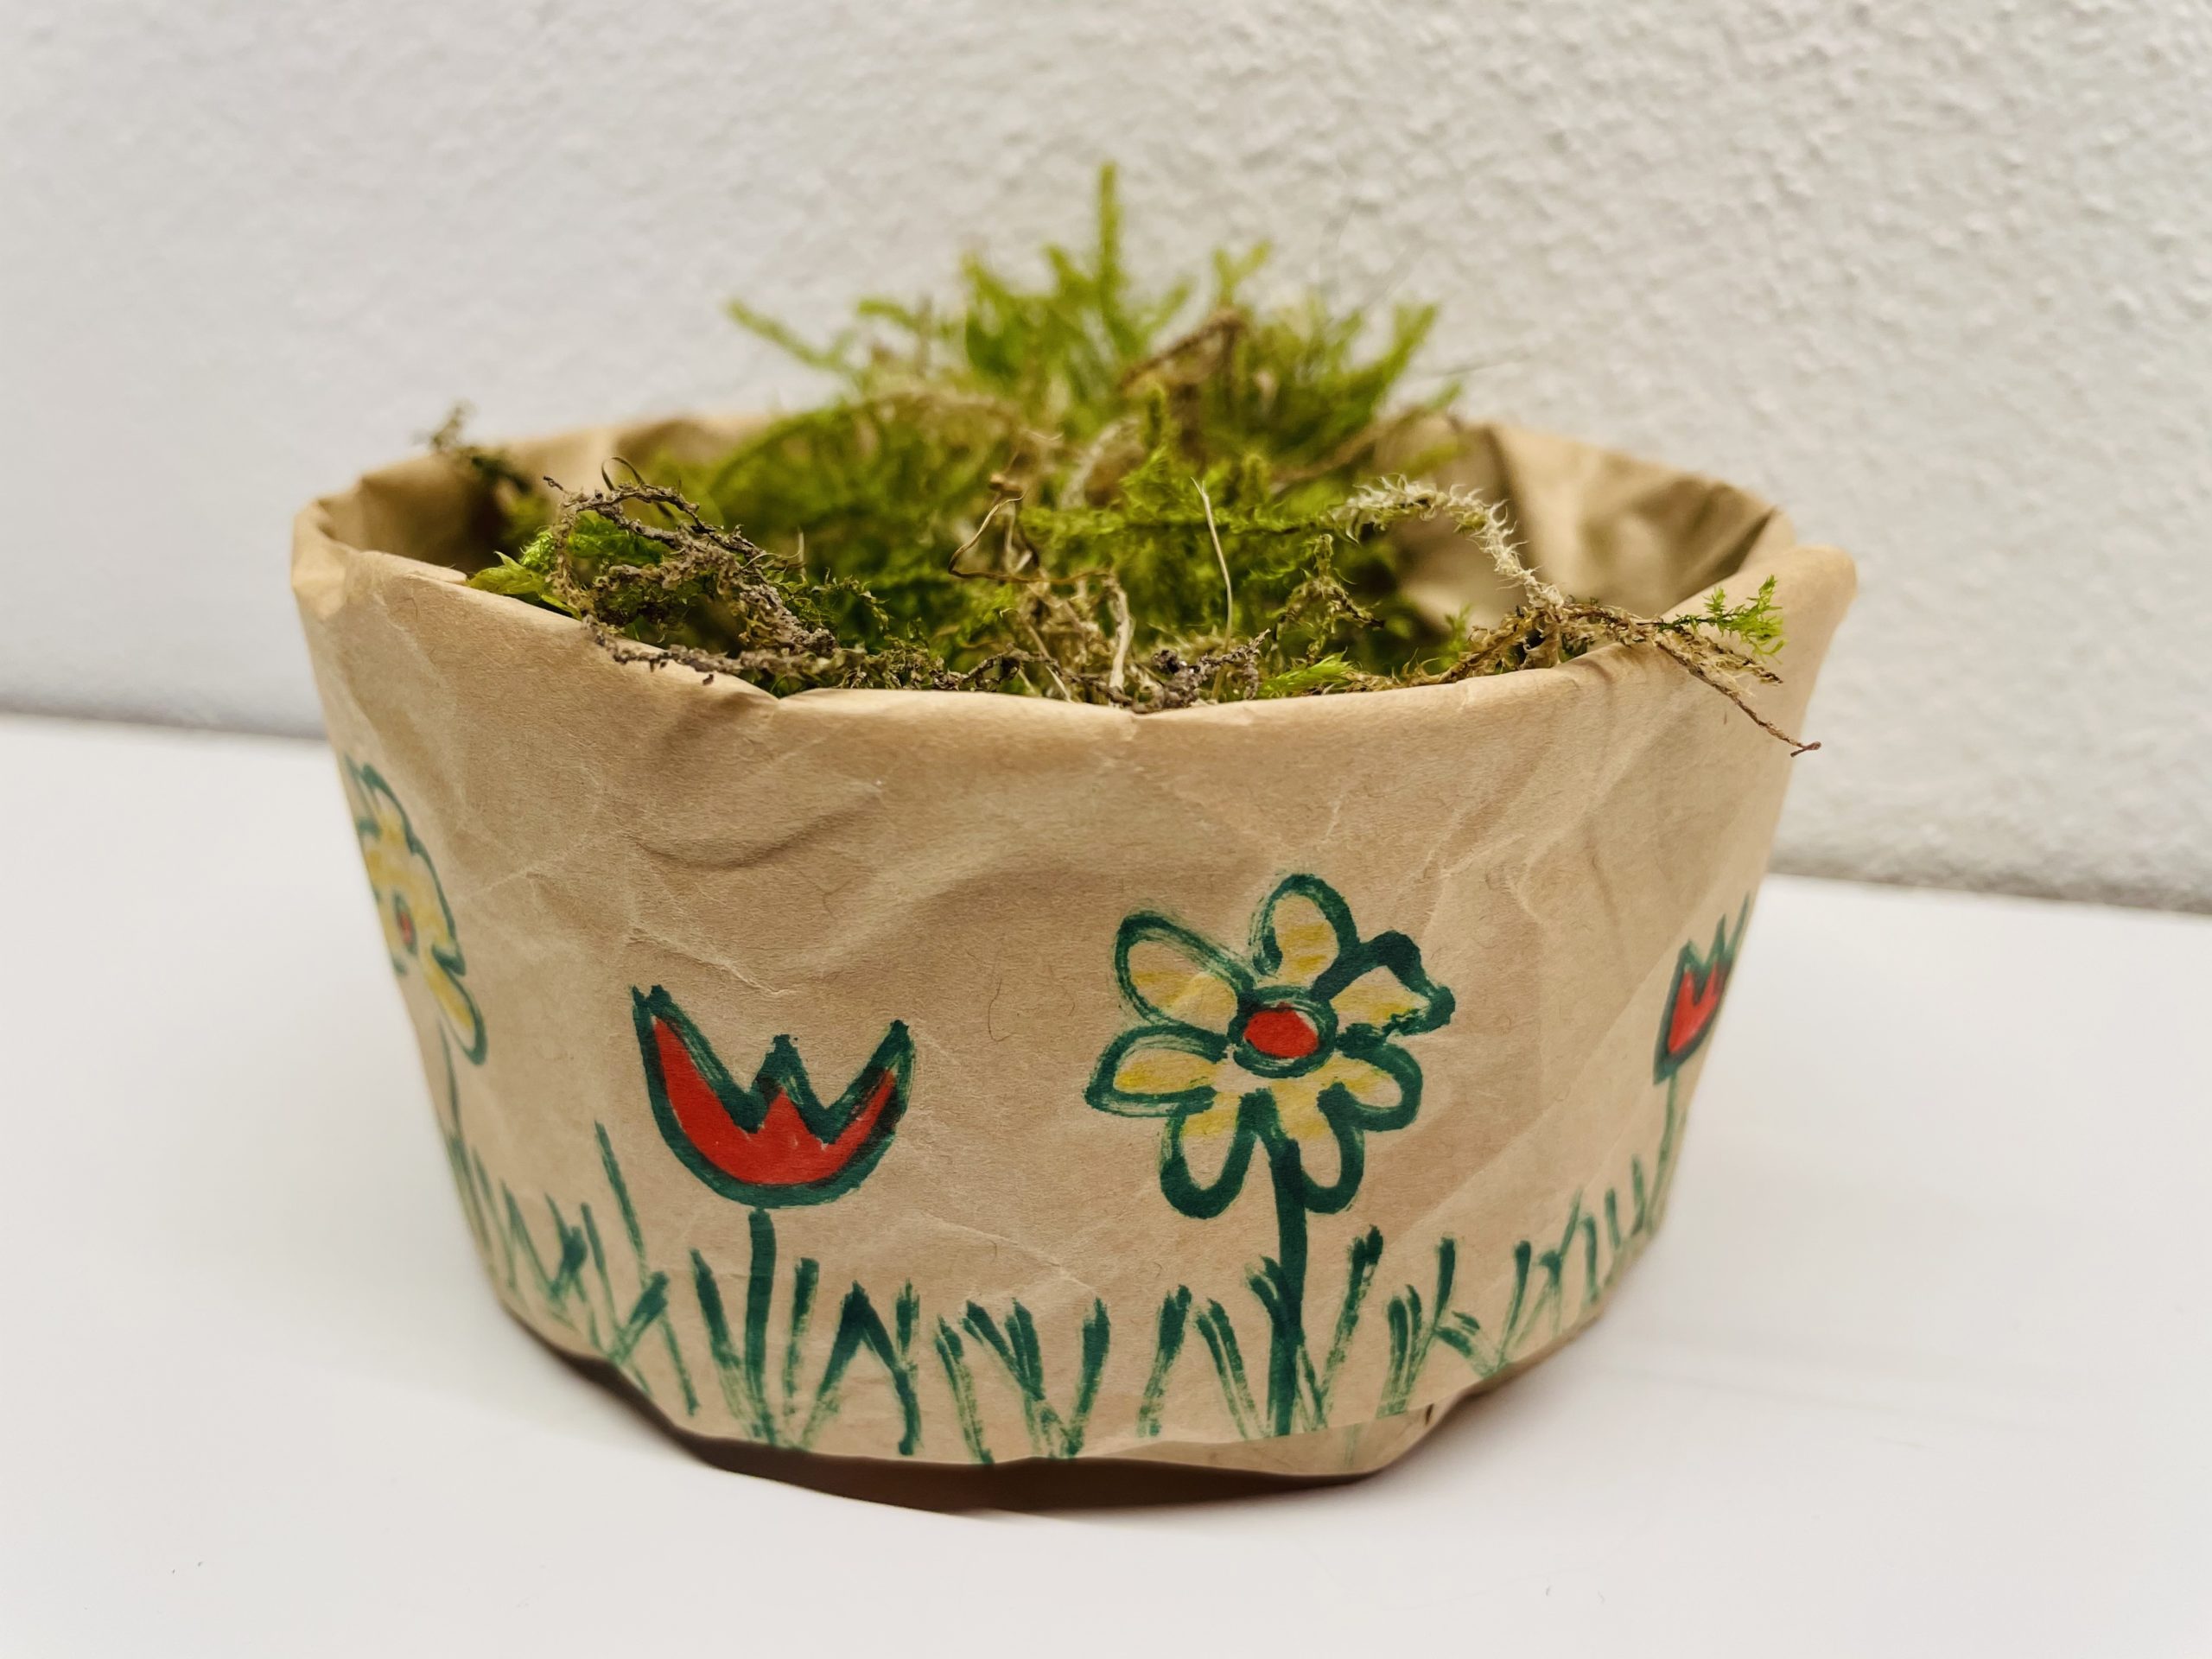
Bild zum Schritt 20 für das Bastel- und DIY-Abenteuer für Kinder: 'Diese danach noch bunt ausmalen.'

19

You can paint Easter eggs and Easter bunnies.
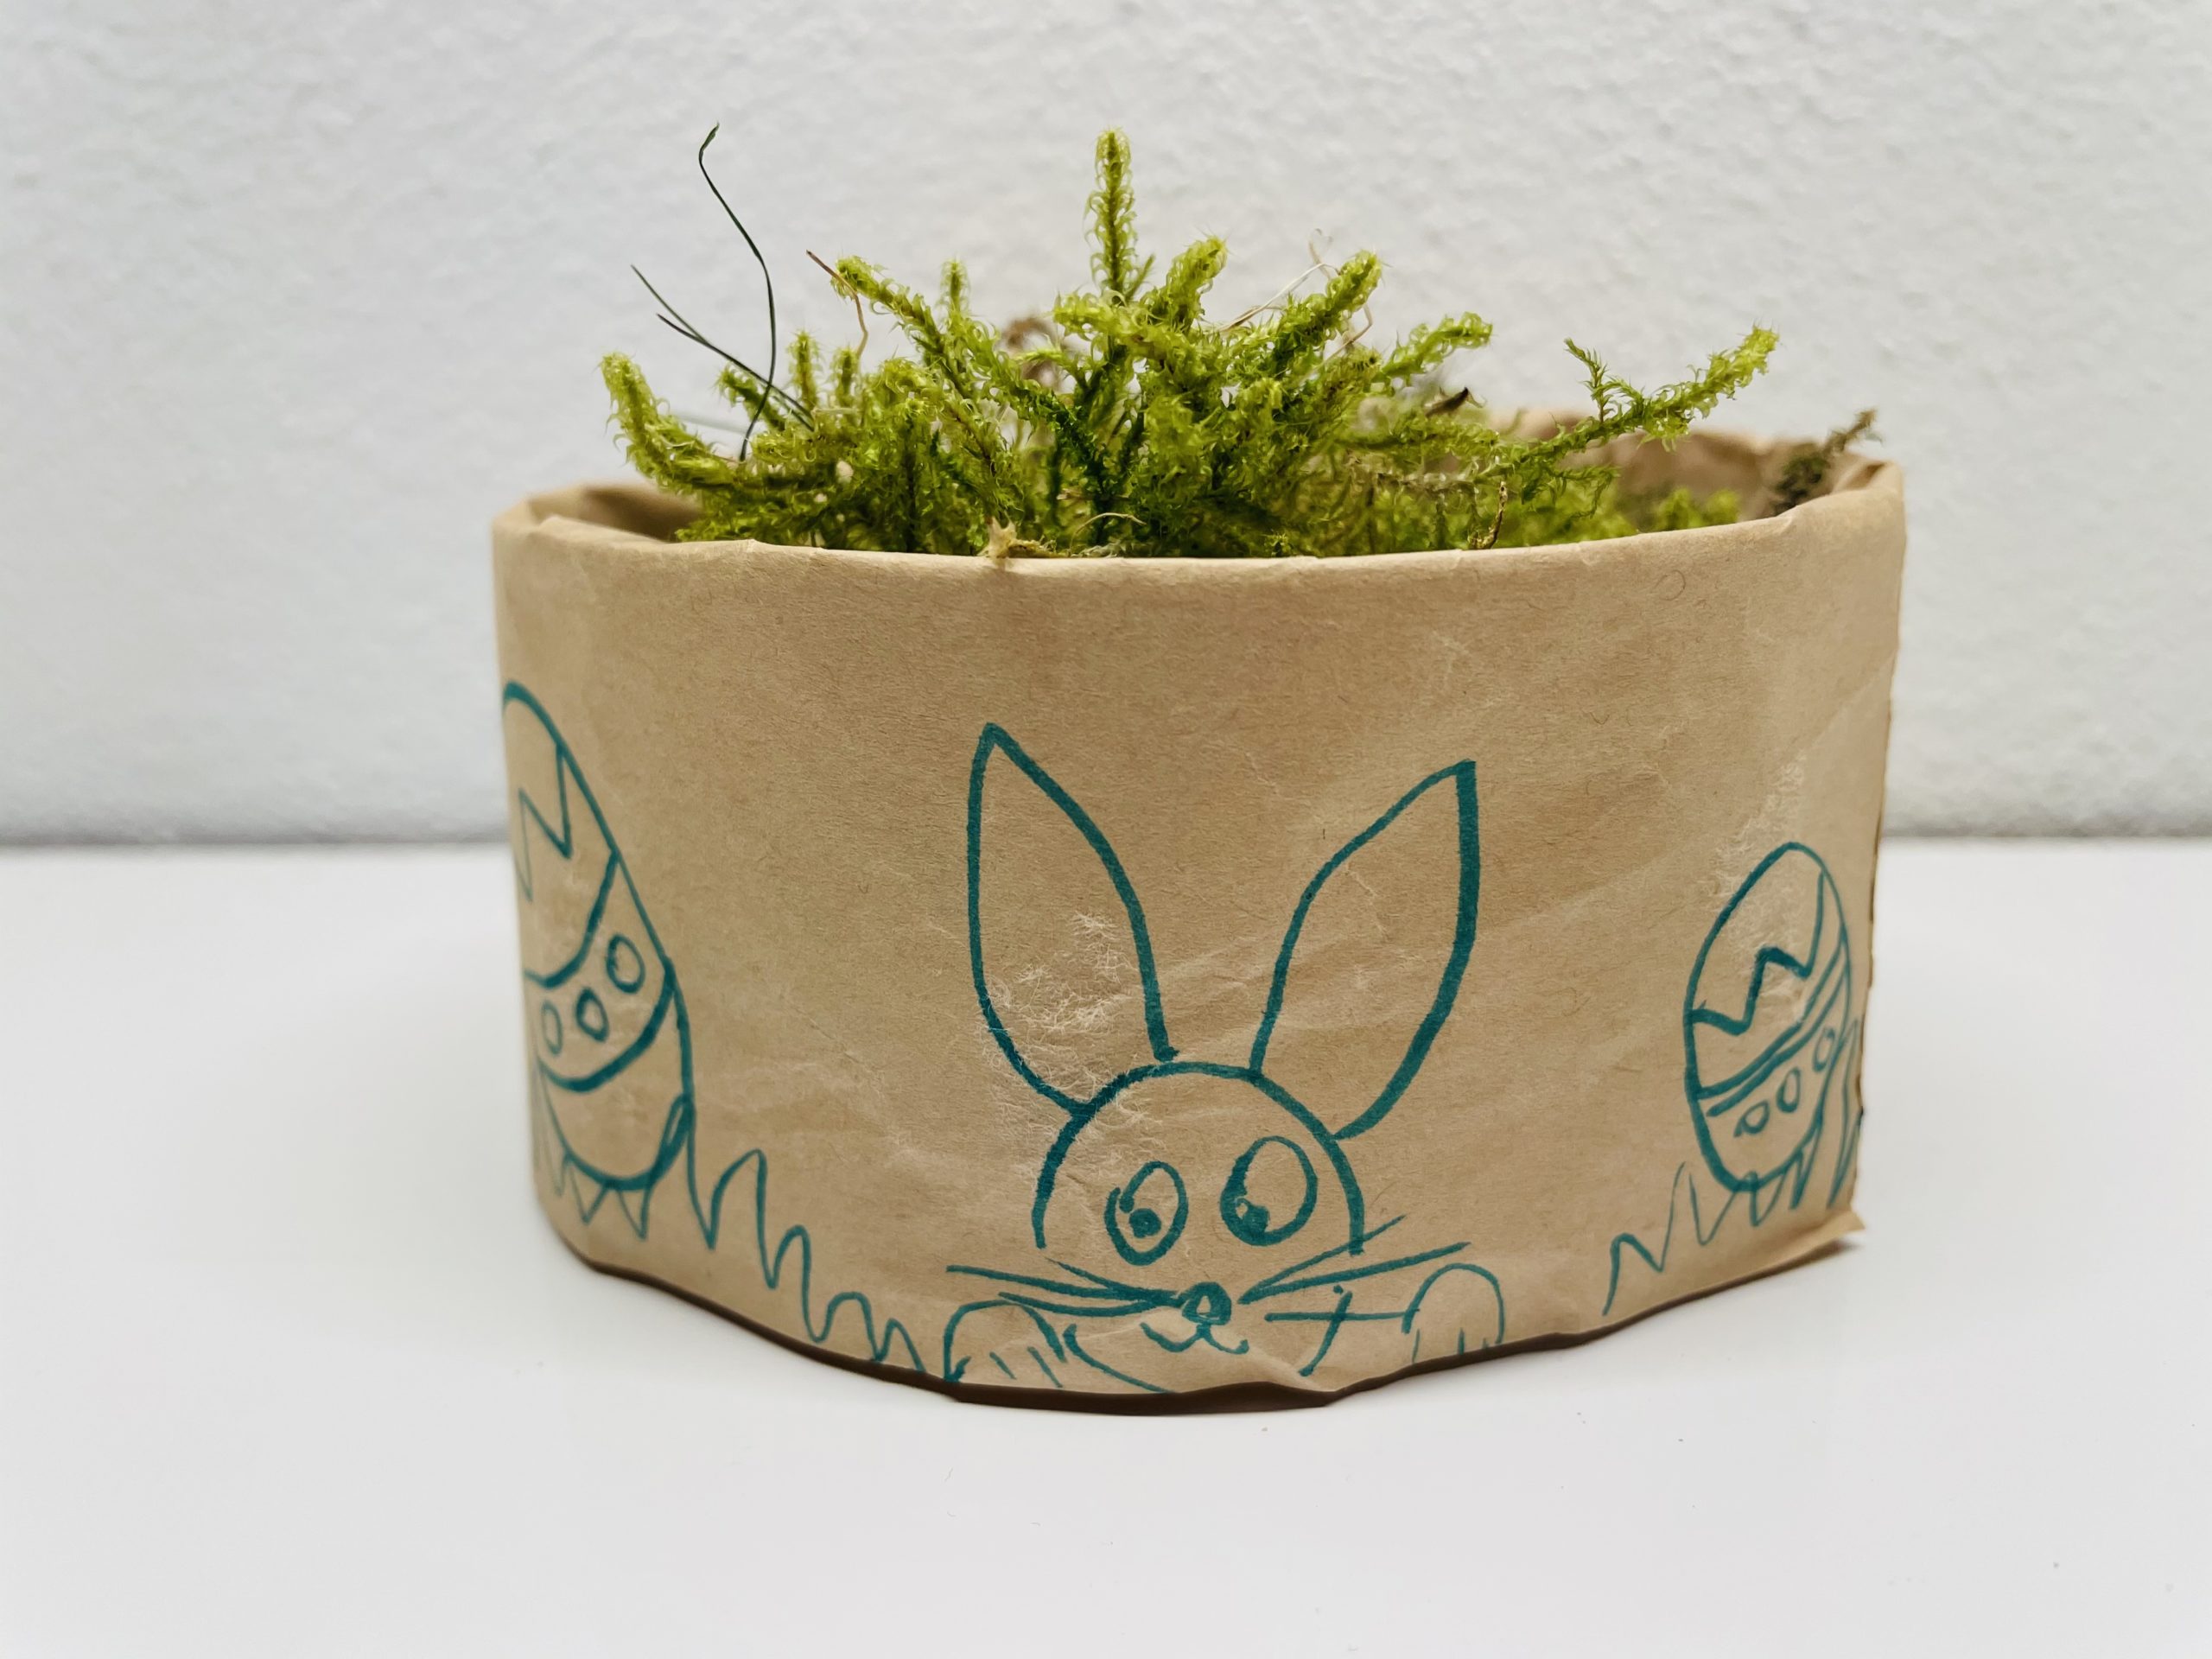
Bild zum Schritt 21 für das Bastel- und DIY-Abenteuer für Kinder: 'Ihr könnt Ostereier und Osterhasen aufmalen.'

20

Stay creative!

Bild zum Schritt 22 für das Bastel- und DIY-Abenteuer für Kinder: 'Bleibt kreativ!'

21

These are just a few ideas, you'll surely come up with many more creative things!
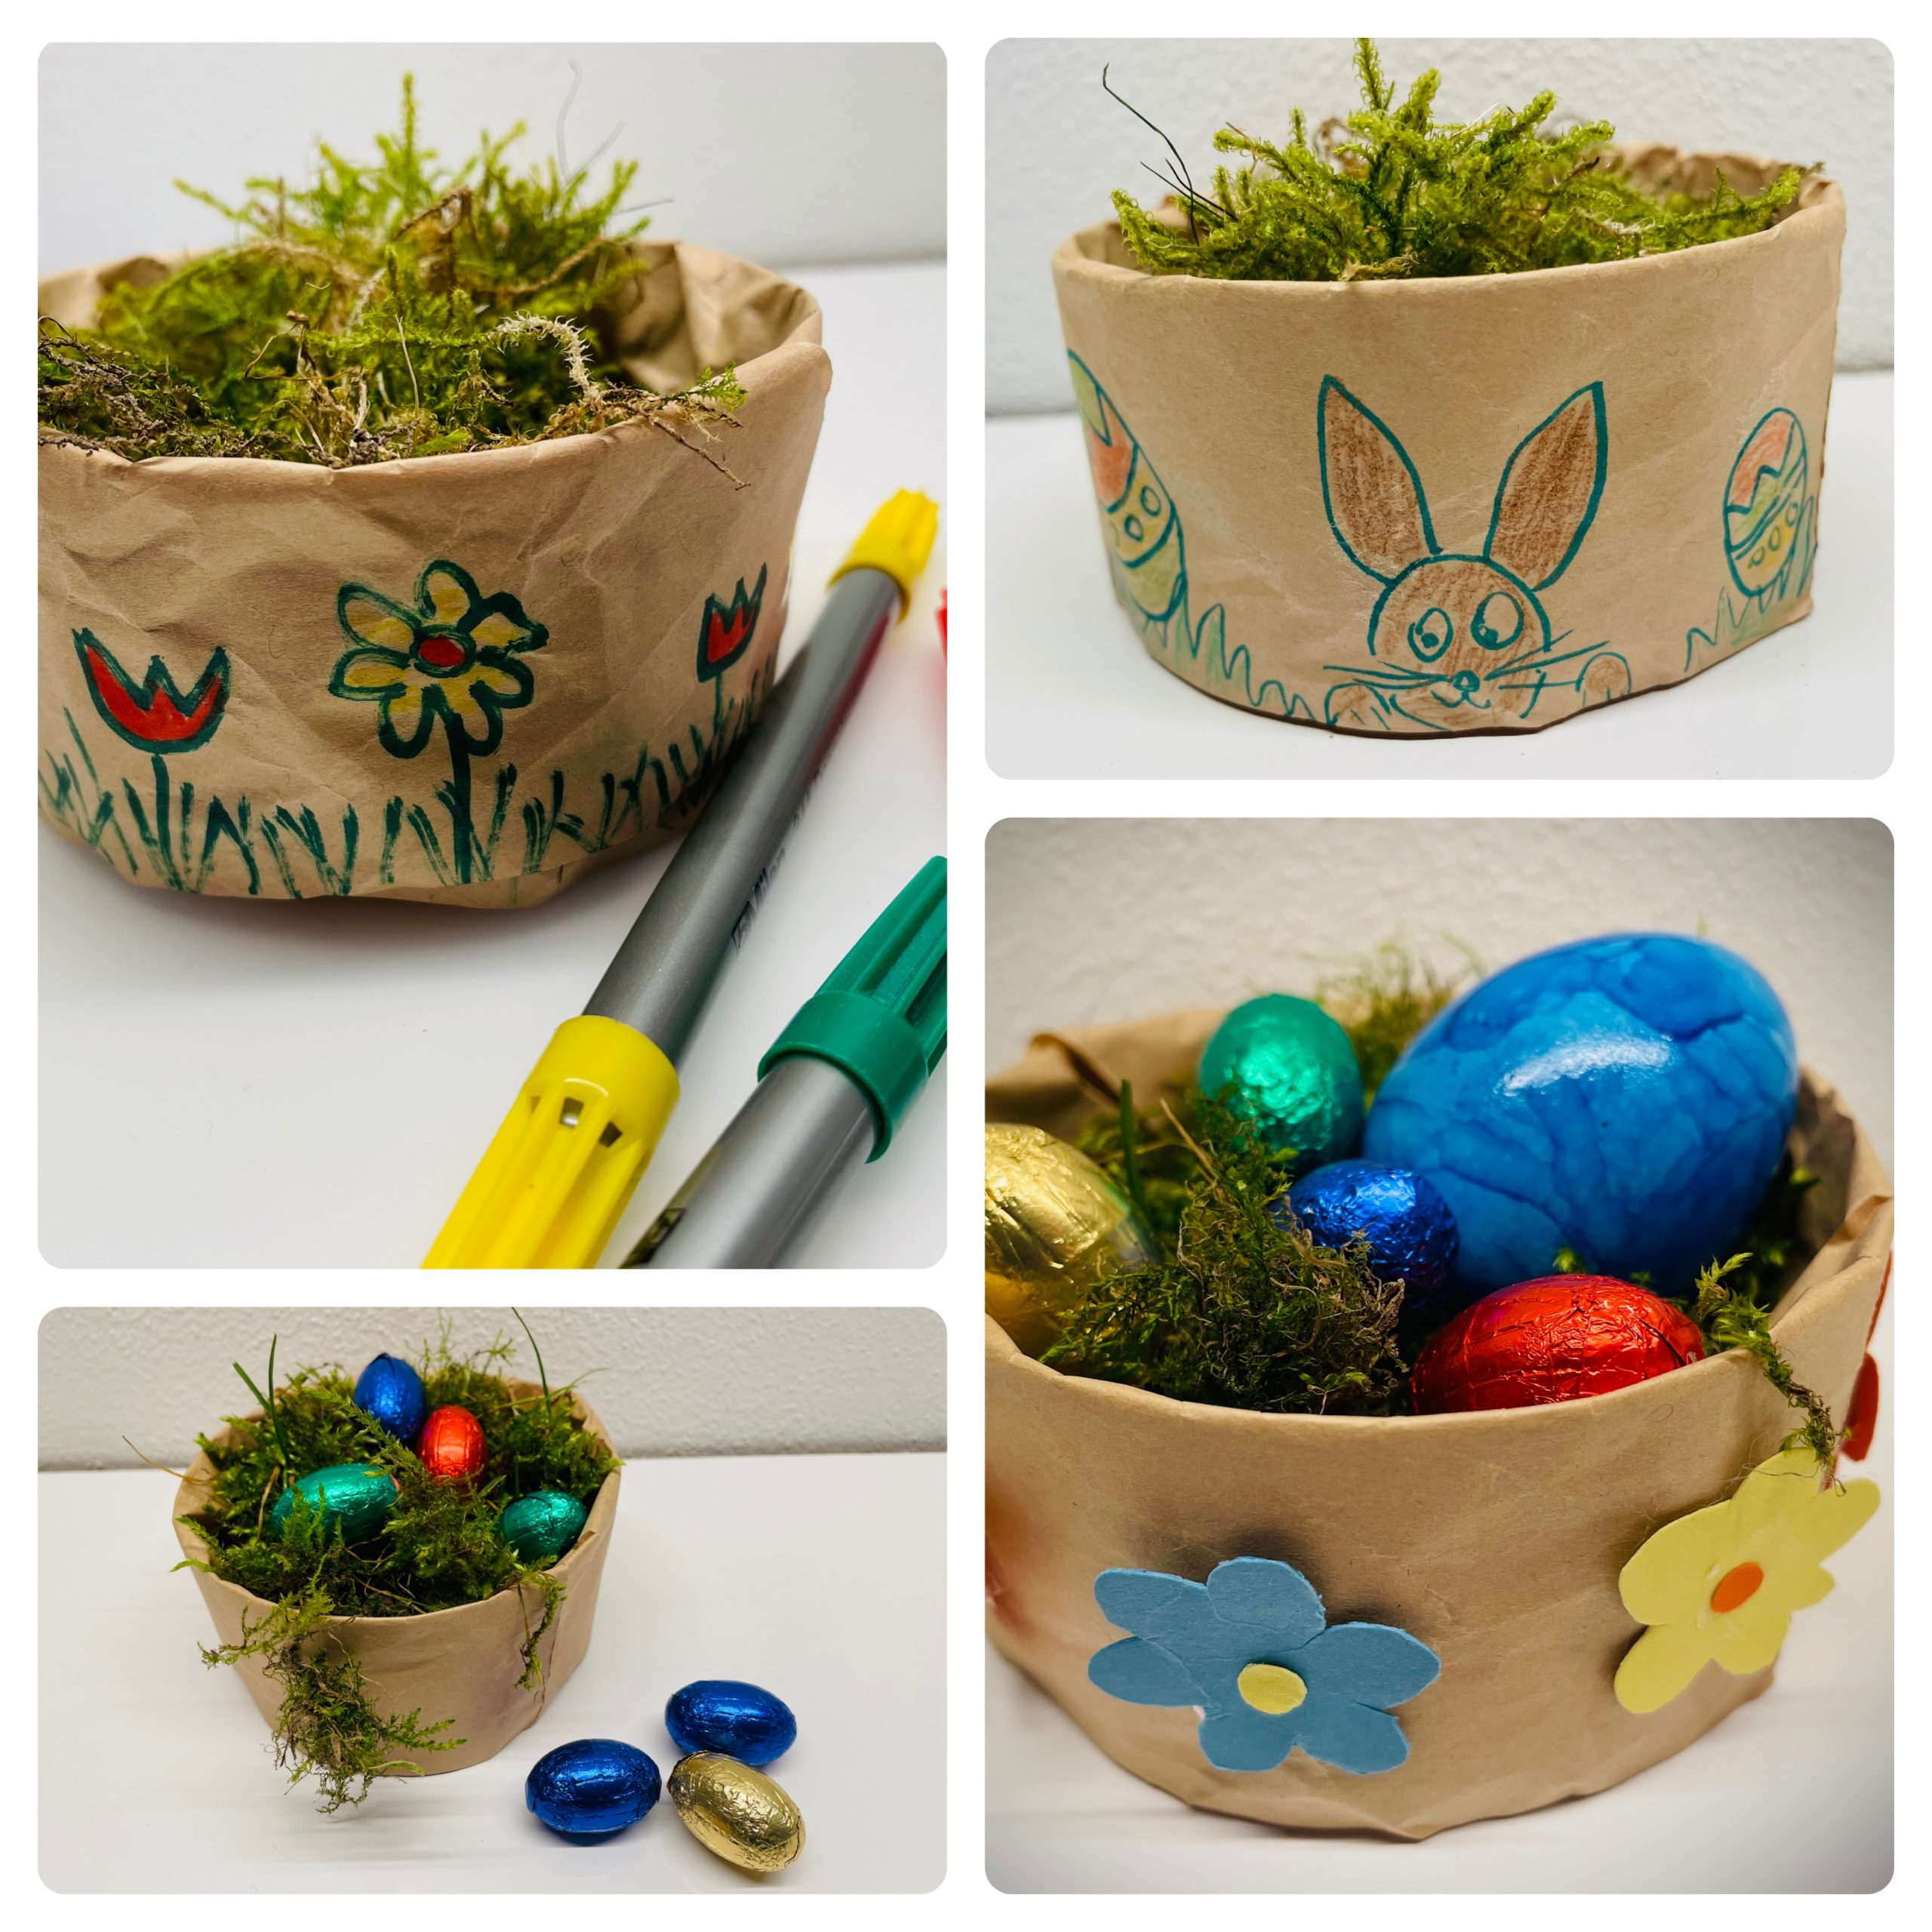
Bild zum Schritt 23 für das Bastel- und DIY-Abenteuer für Kinder: 'Das sind nur ein paar Ideen, sicher fallen euch noch...'

22

Have fun doing crafts!

Small Easter nest (4x quite simple)

Follow us on Facebook , Instagram and Pinterest
Don't miss any more adventures: Our bottle mail

Leave a Reply

Your email address will not be published.

The maximum upload file size: 5 MB. You can upload: image, document. Drop file here