Print Options:

Paint hedgehogs – Paint simple hedgehogs with hands

Material for1 ChildPrep Time2 min.Adv. Time20 min.Total Time22 min.

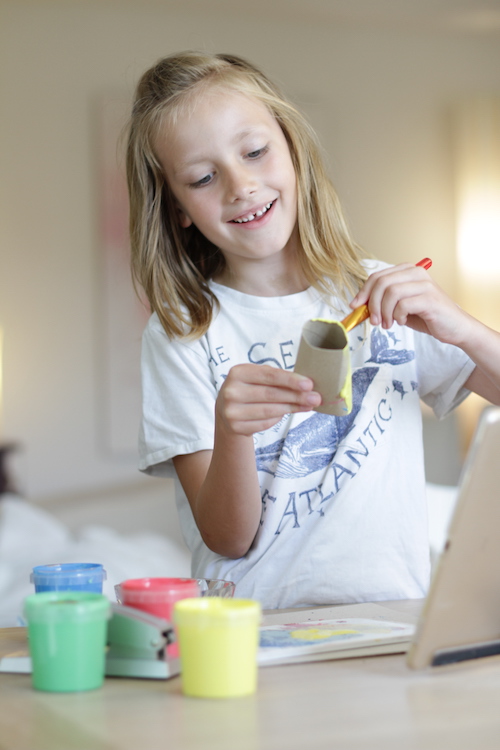
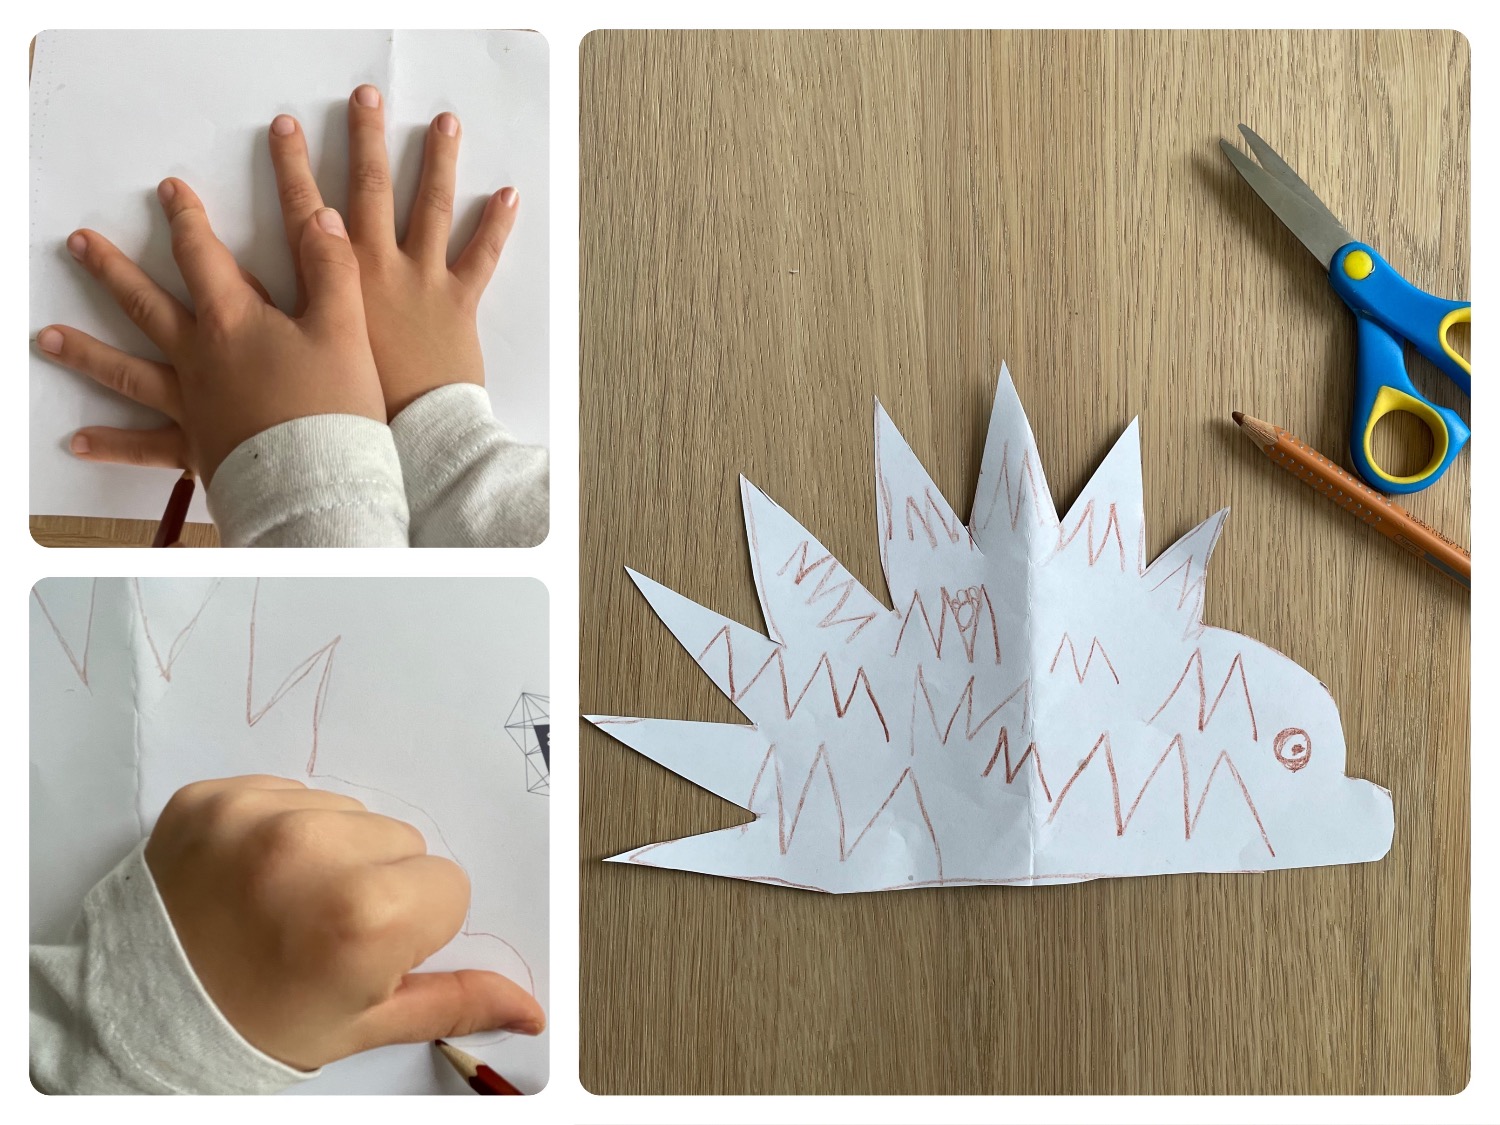
"I can't paint a hedgehog!" - Yes, look here how easy this can be. The hands serve as a template. For this you place these with spread fingers on the paper and border them. Then a hand is clenched to the fist the head of the hedgehog. The outline is already finished. Then the spines, eyes and the muzzle can be painted. Look here exactly how it works and try it out. Have fun painting the hedgehog!

Titelbild zur Bastel- und DIY-Idee für Kinder '(916) Igel malen – Einfachen Igel malen mit Händen'

 1 Sheet of paper or brown clay paper
 Coloured pencils
 1 Scissors
All links marked with a shopping cart lead to Amazon - here we have selected products that we would order ourselves and in part also ordered. In a qualified purchase via the advertising link, we as Amazon partner receive a commission, for you there are no costs. You thus support our cost- and advertising banner-free, educational offer.
1

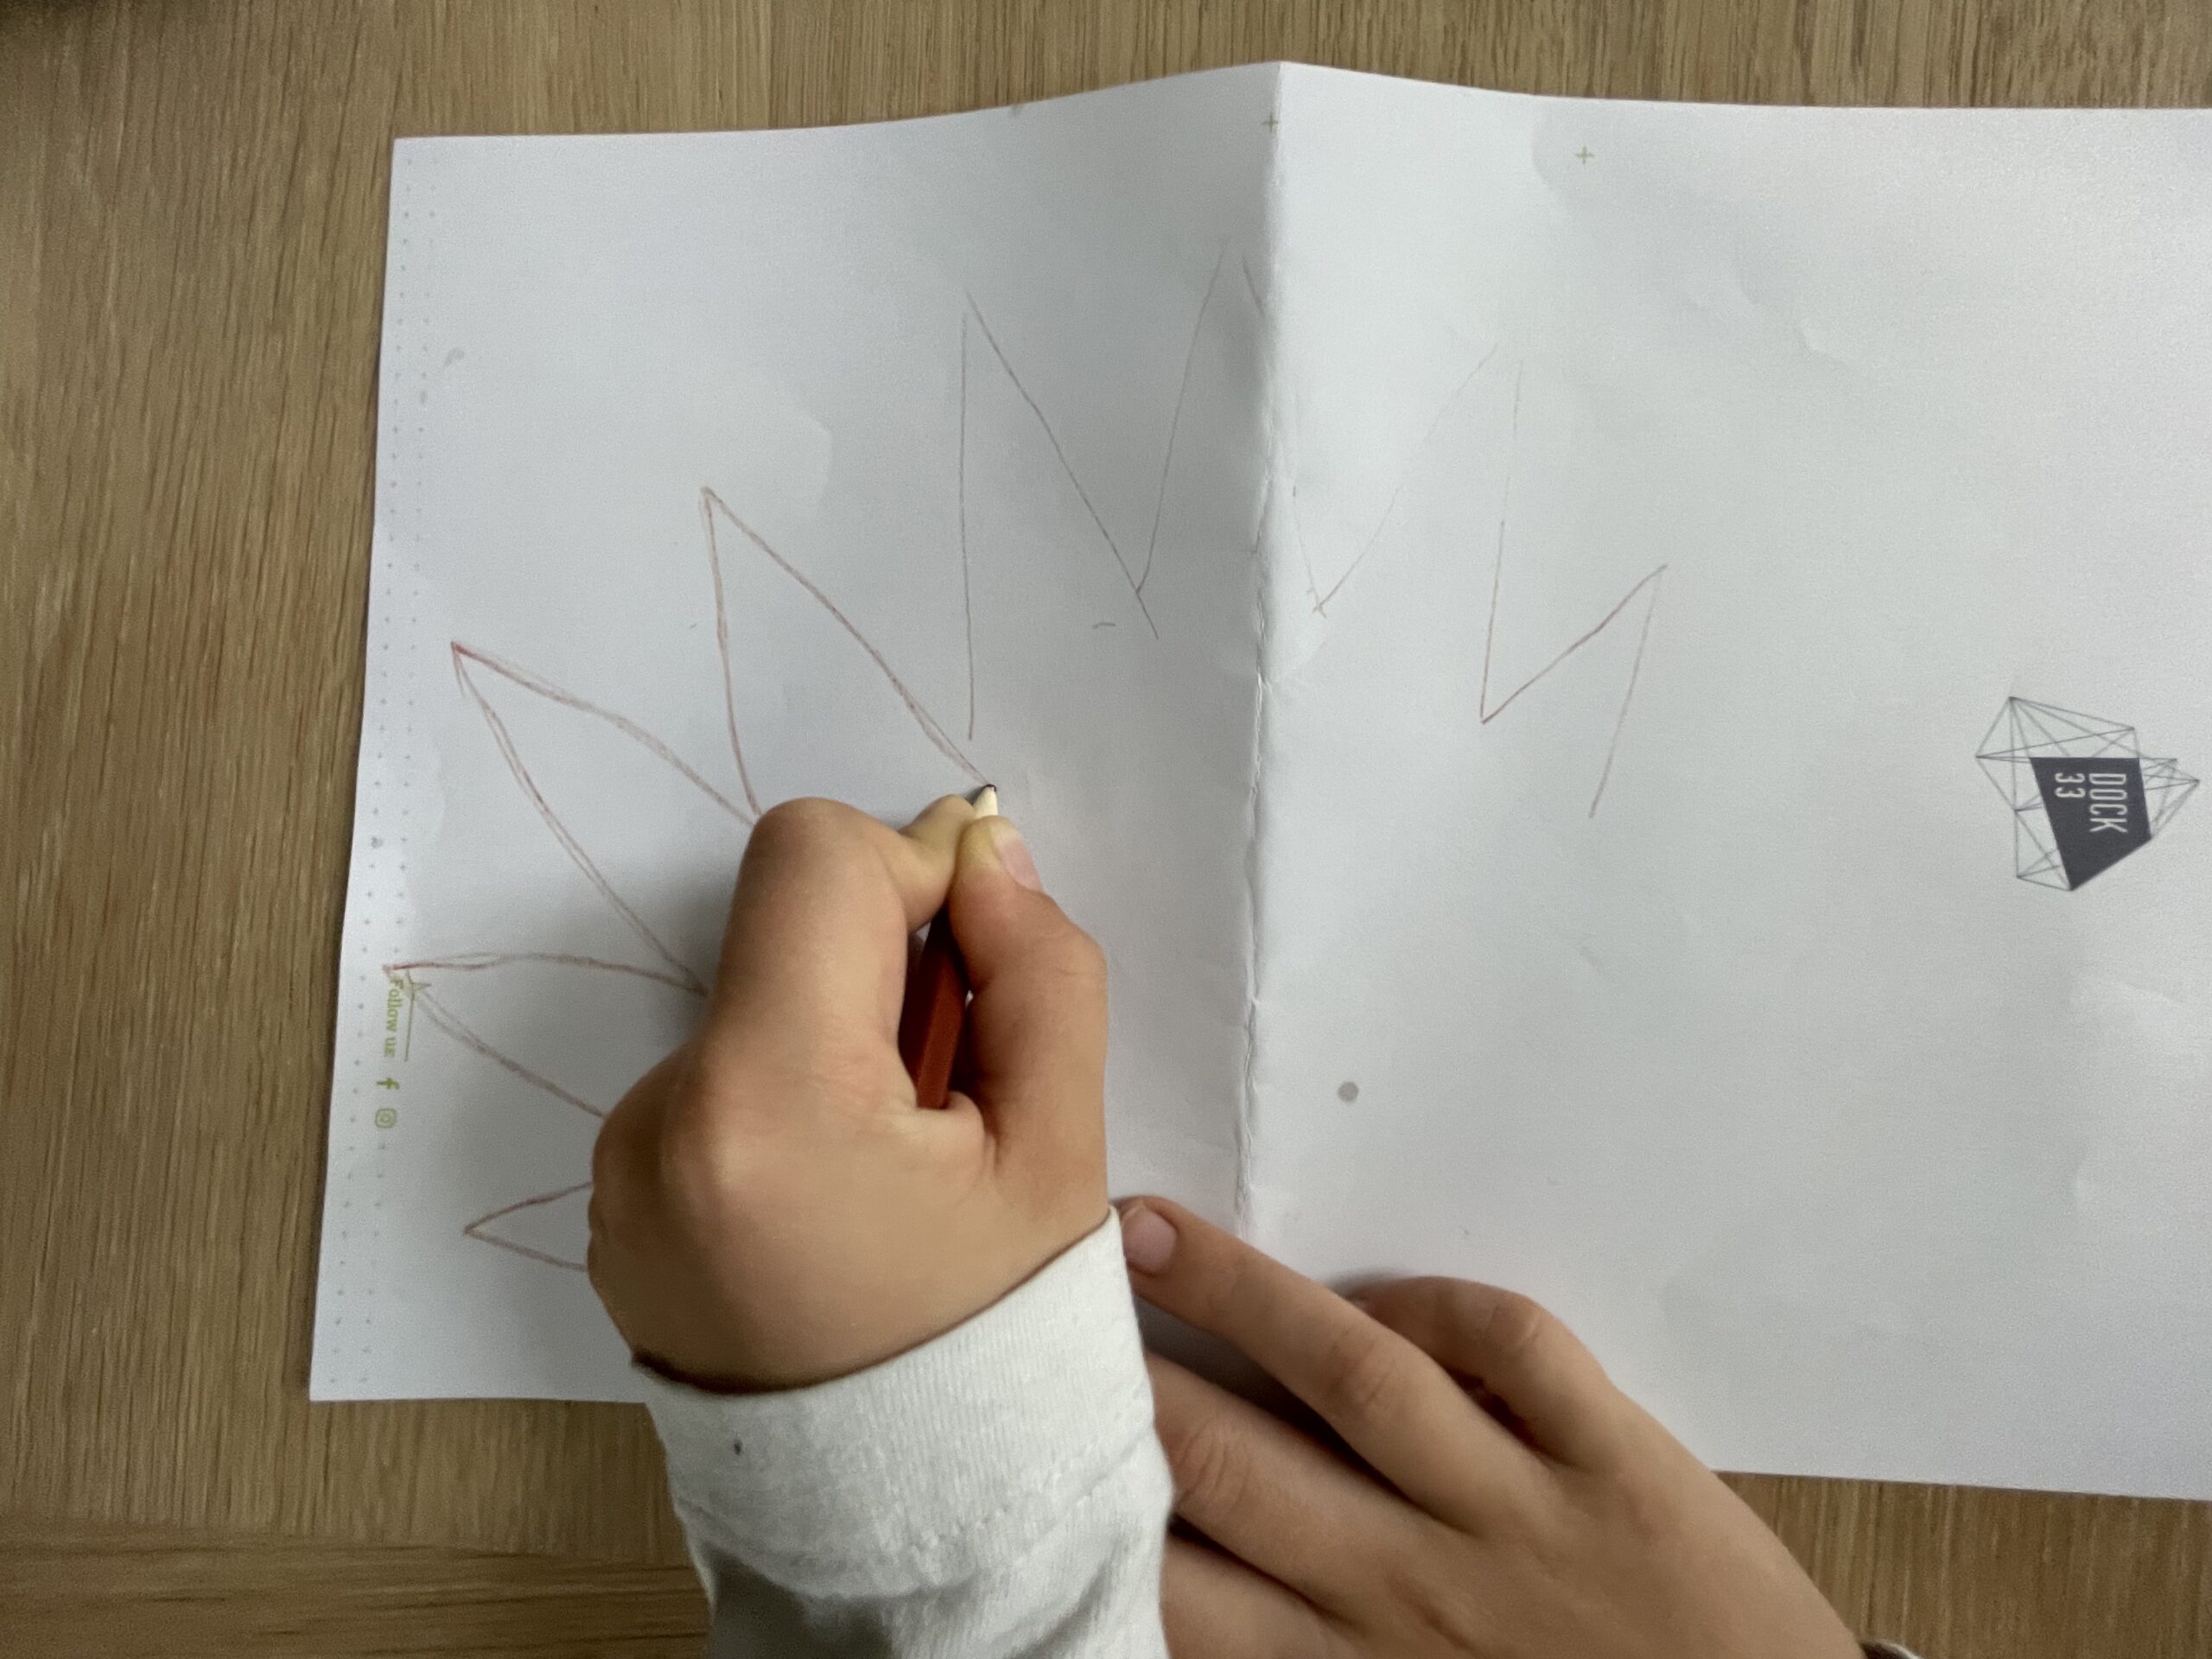
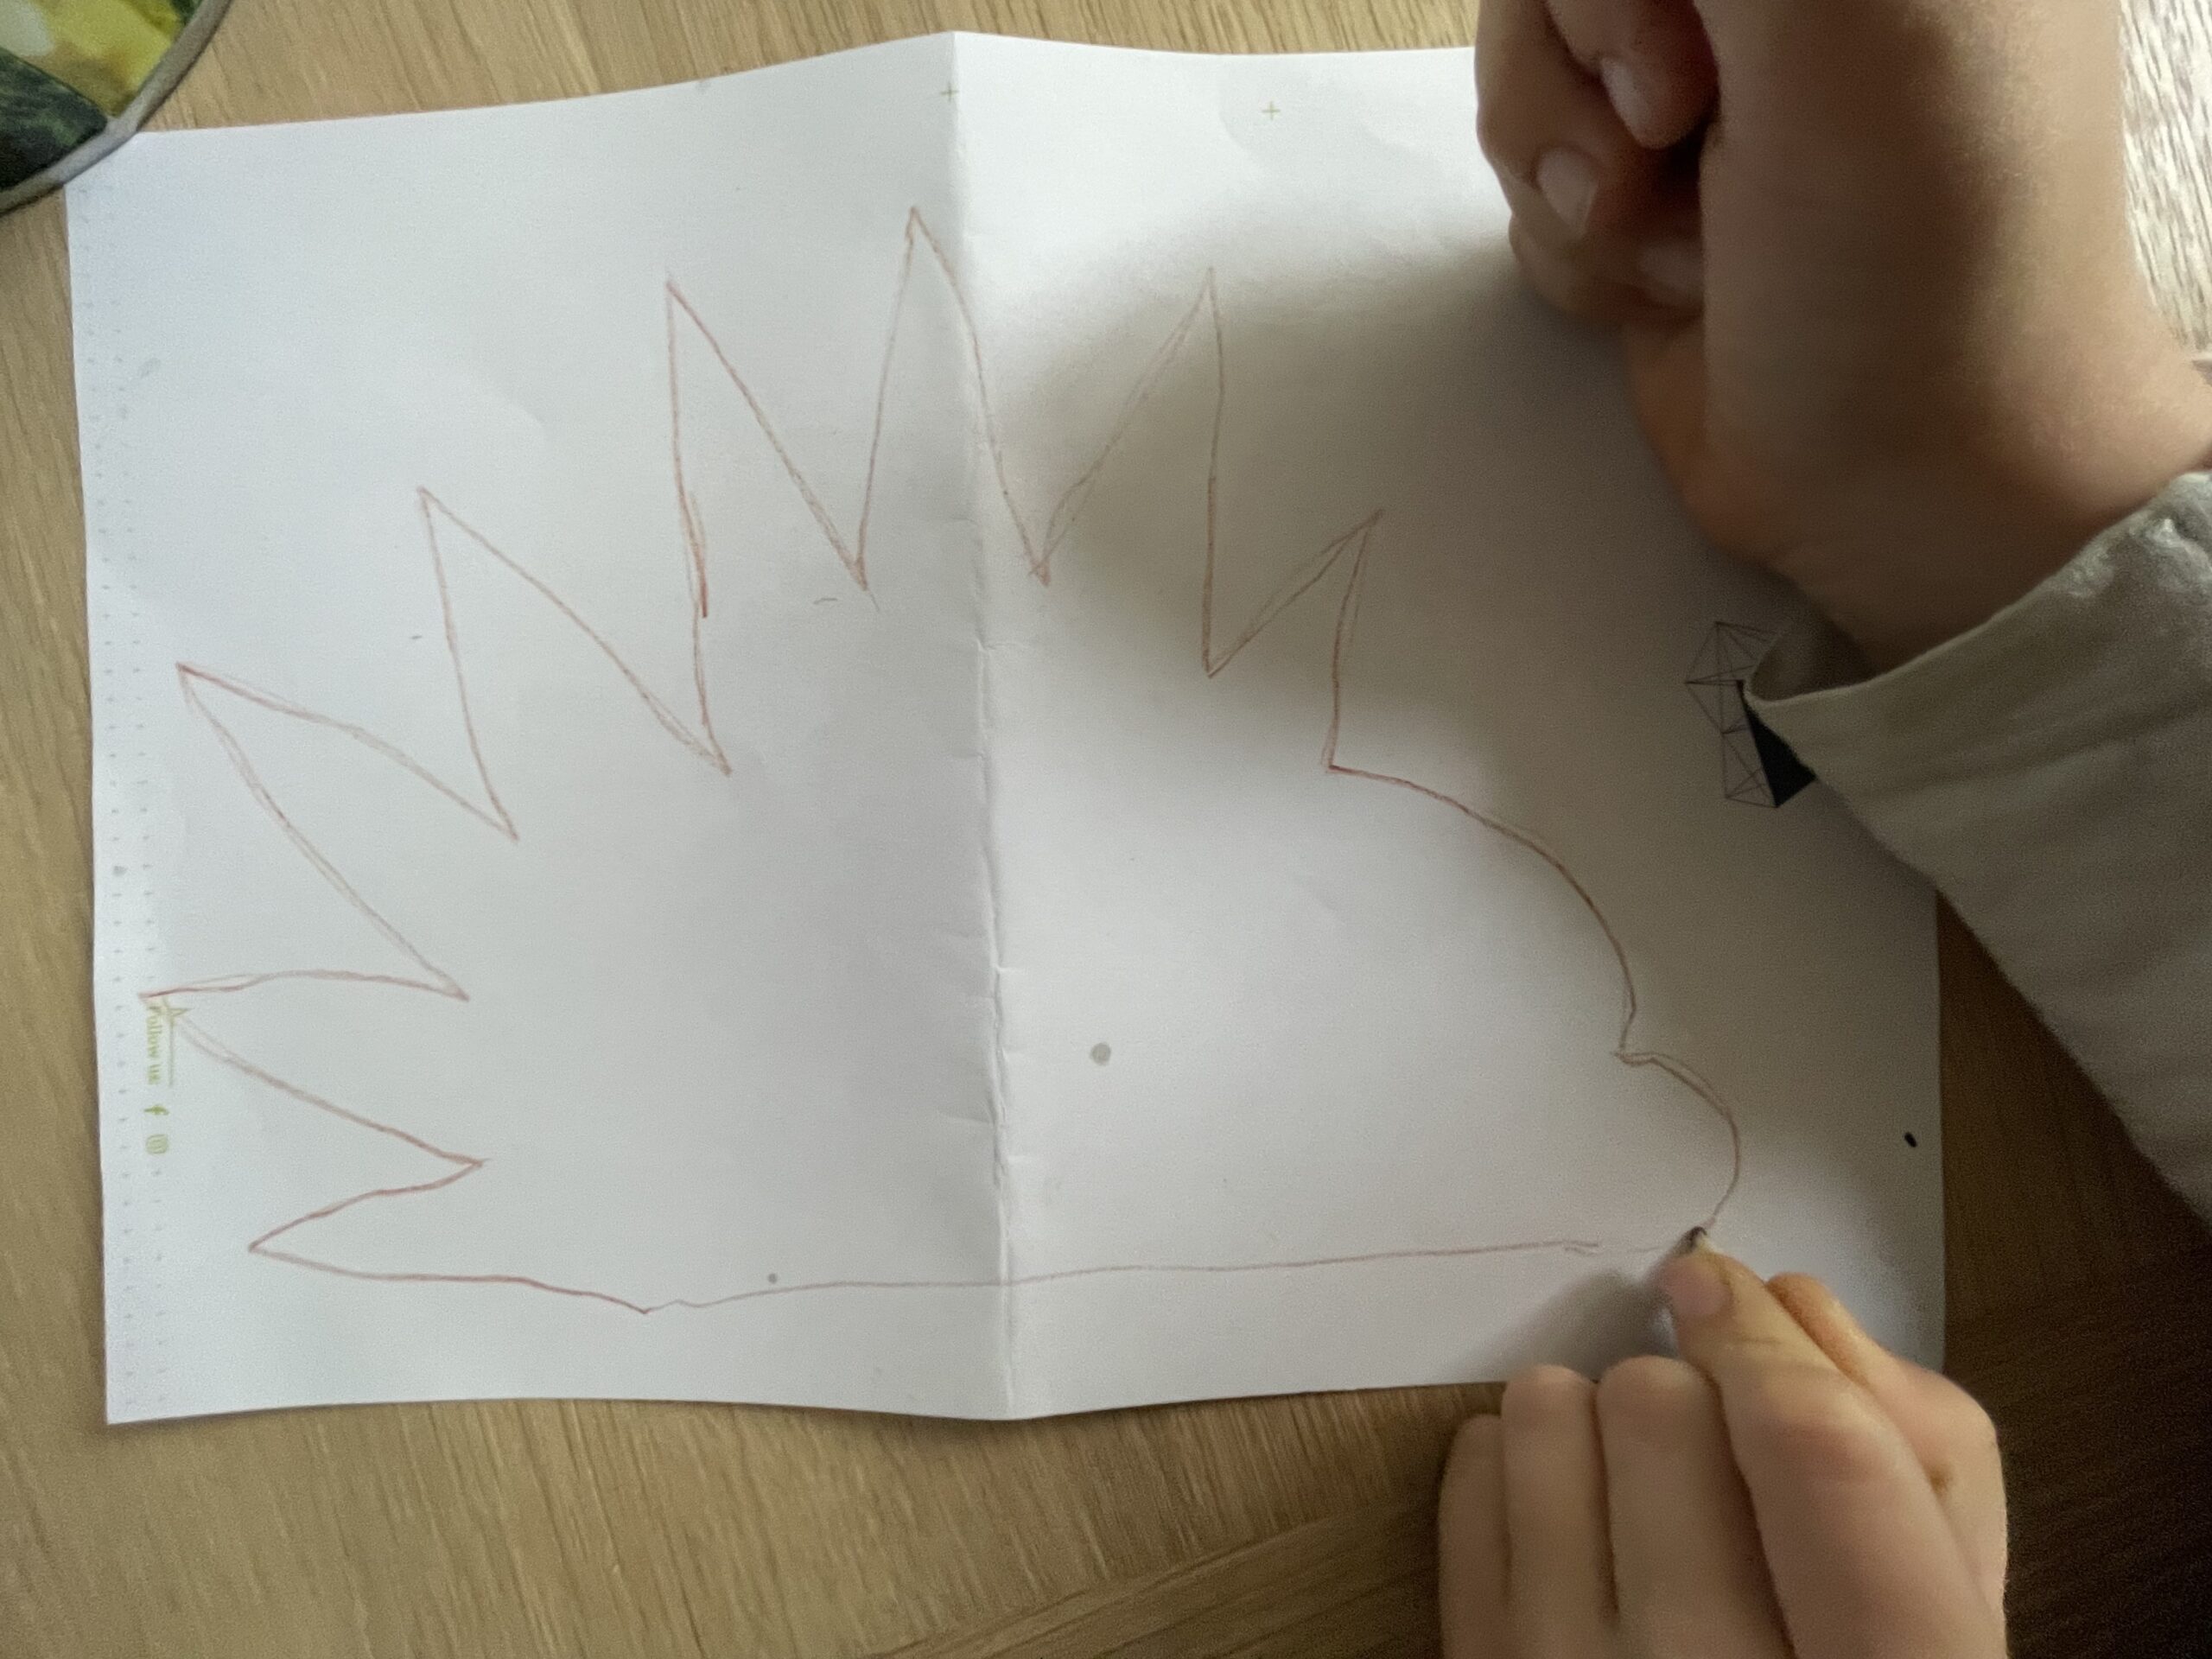
Place the paper in front of you on the table and position the spreaded hands obliquely above each other. The thumb of the left hand lies on the forefinger and the forefinger of the left hand lies on the thumb of the right hand. The small finger of the one hand lies parallel to the lower edge of the leaf.

Bild zum Schritt 1 für das Bastel- und DIY-Abenteuer für Kinder: 'Legt das Papier vor euch auf den Tisch und positioniert...'

2

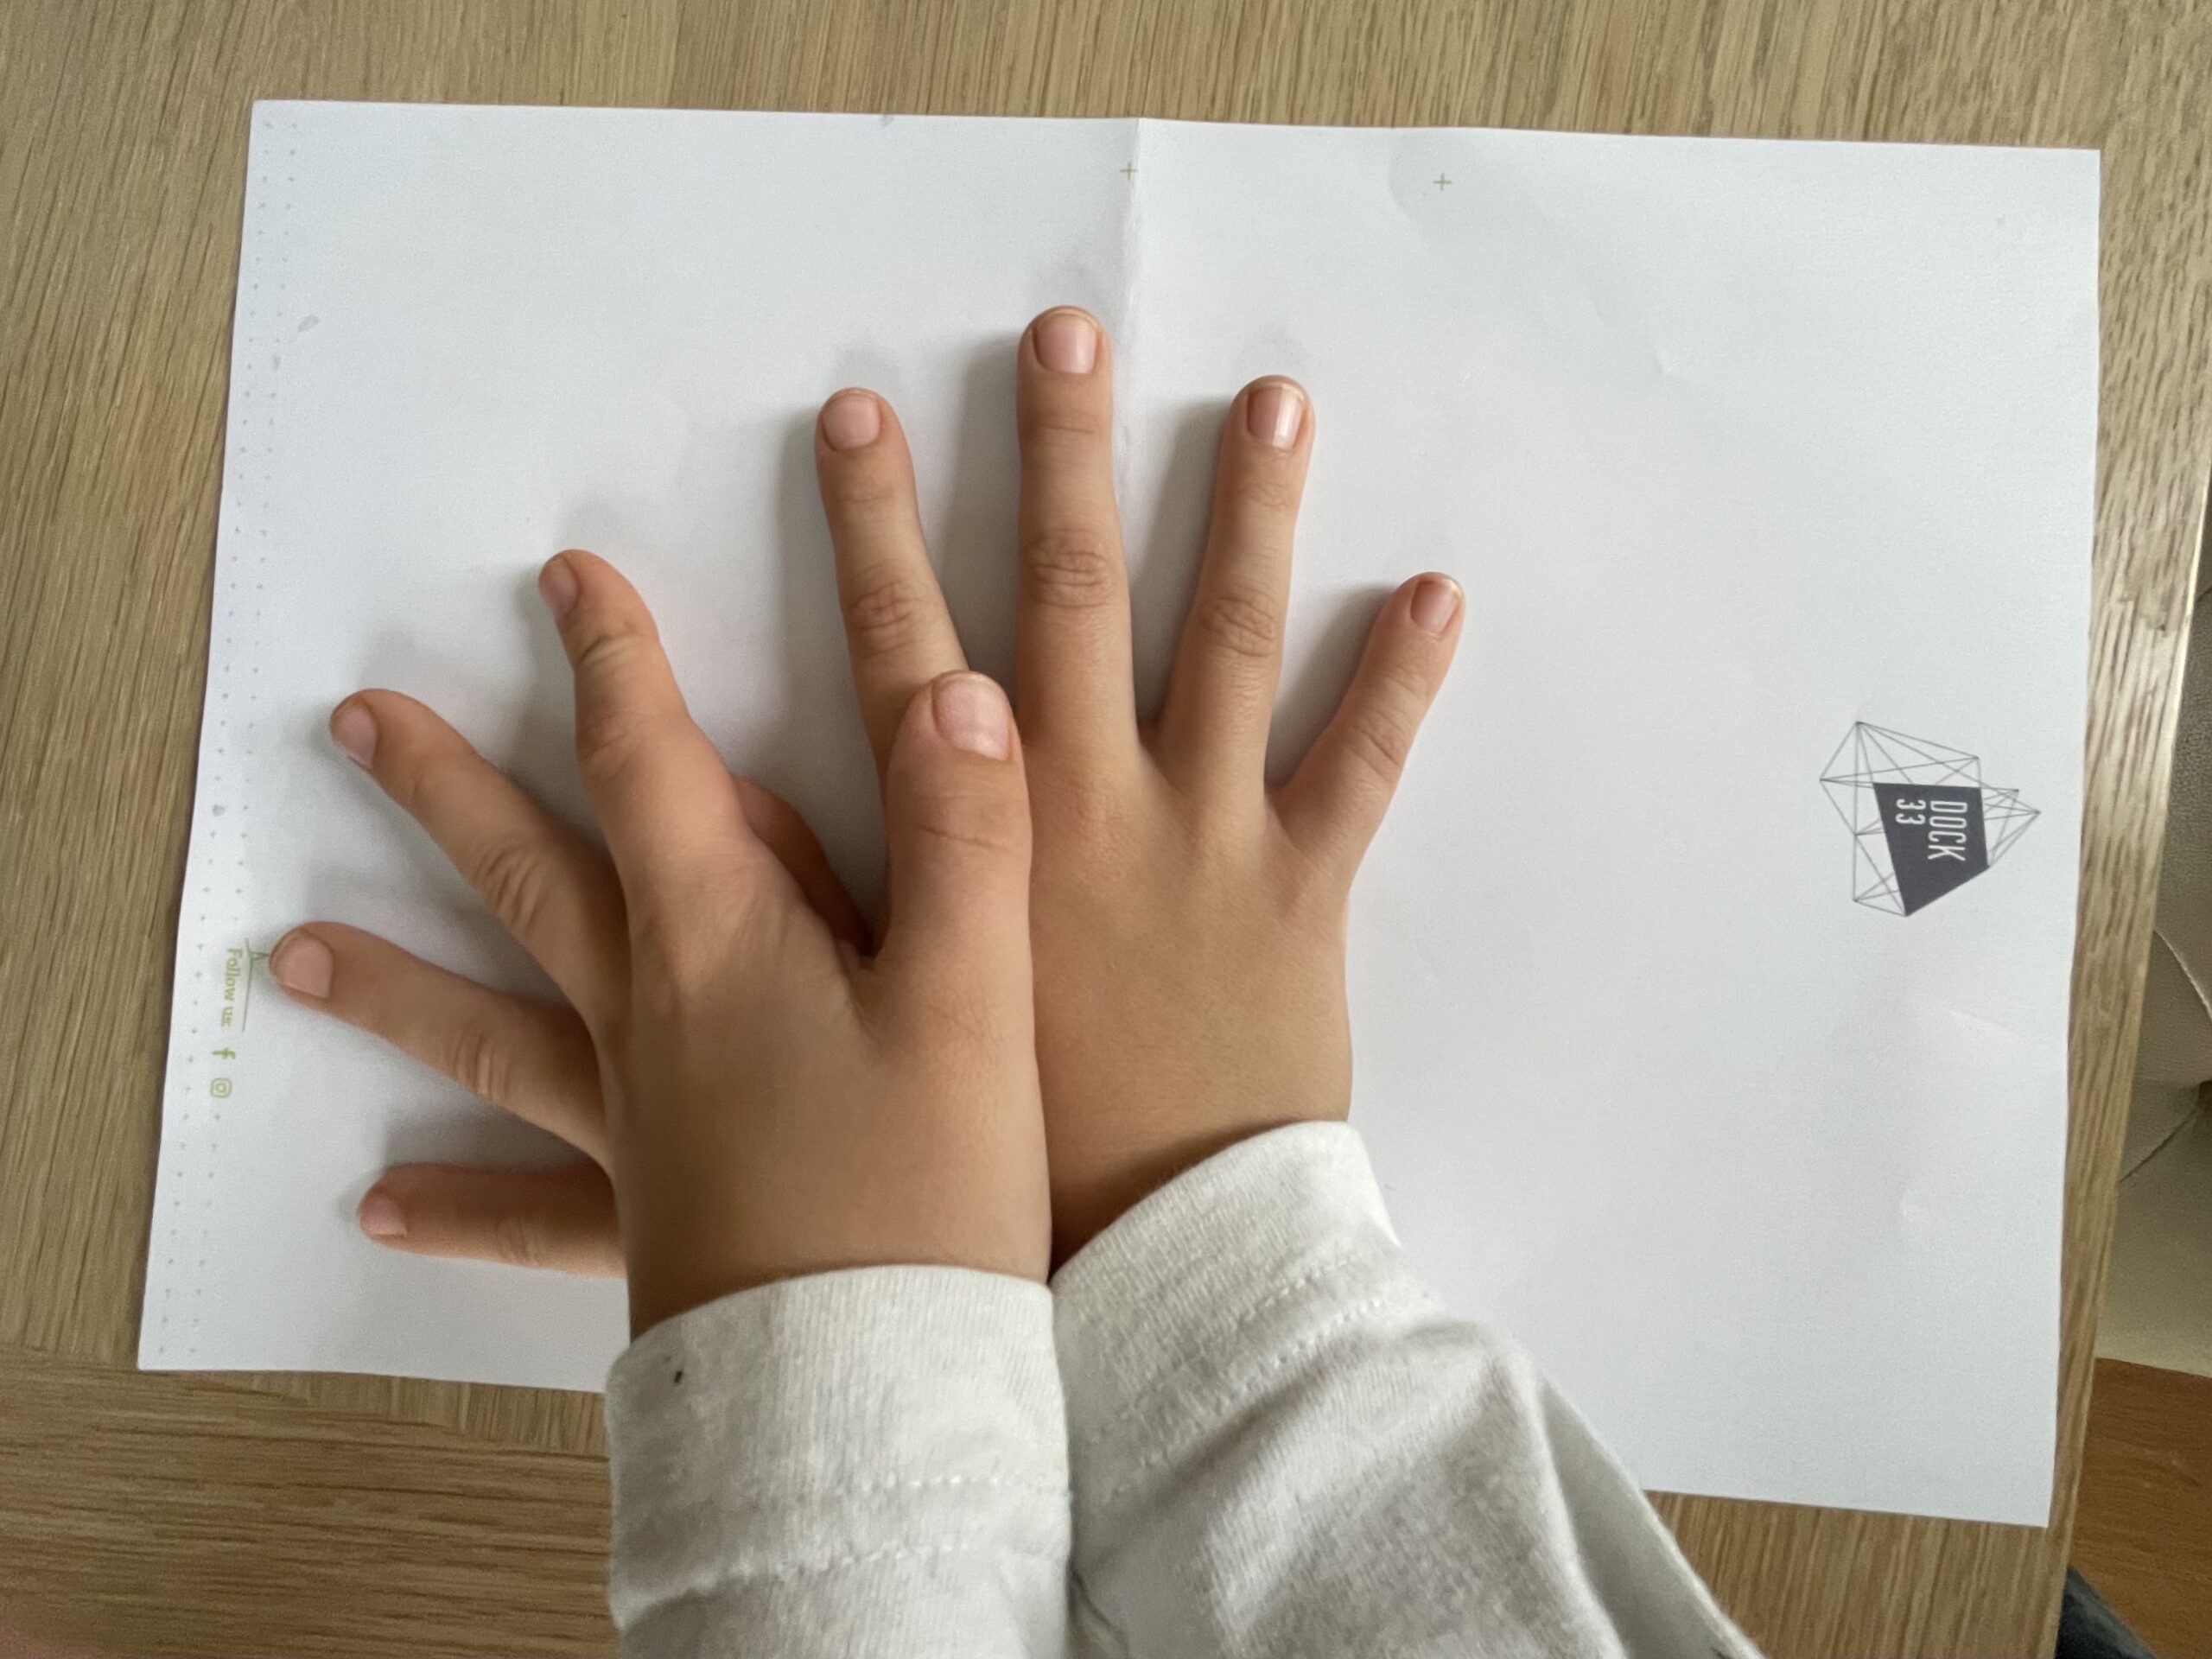
Now you start at the small finger of the left hand with the border of the children's hands. Border the hands in a jagged shape, so that each finger becomes a pointed jig.

Bild zum Schritt 2 für das Bastel- und DIY-Abenteuer für Kinder: 'Jetzt beginnt ihr am kleinen Finger der linken Hand mit...'

3

At the last finger you stop the border at the height of the finger.

Bild zum Schritt 3 für das Bastel- und DIY-Abenteuer für Kinder: 'Beim letzten Finger stoppt ihr die Umrandung auf der Höhe...'

4

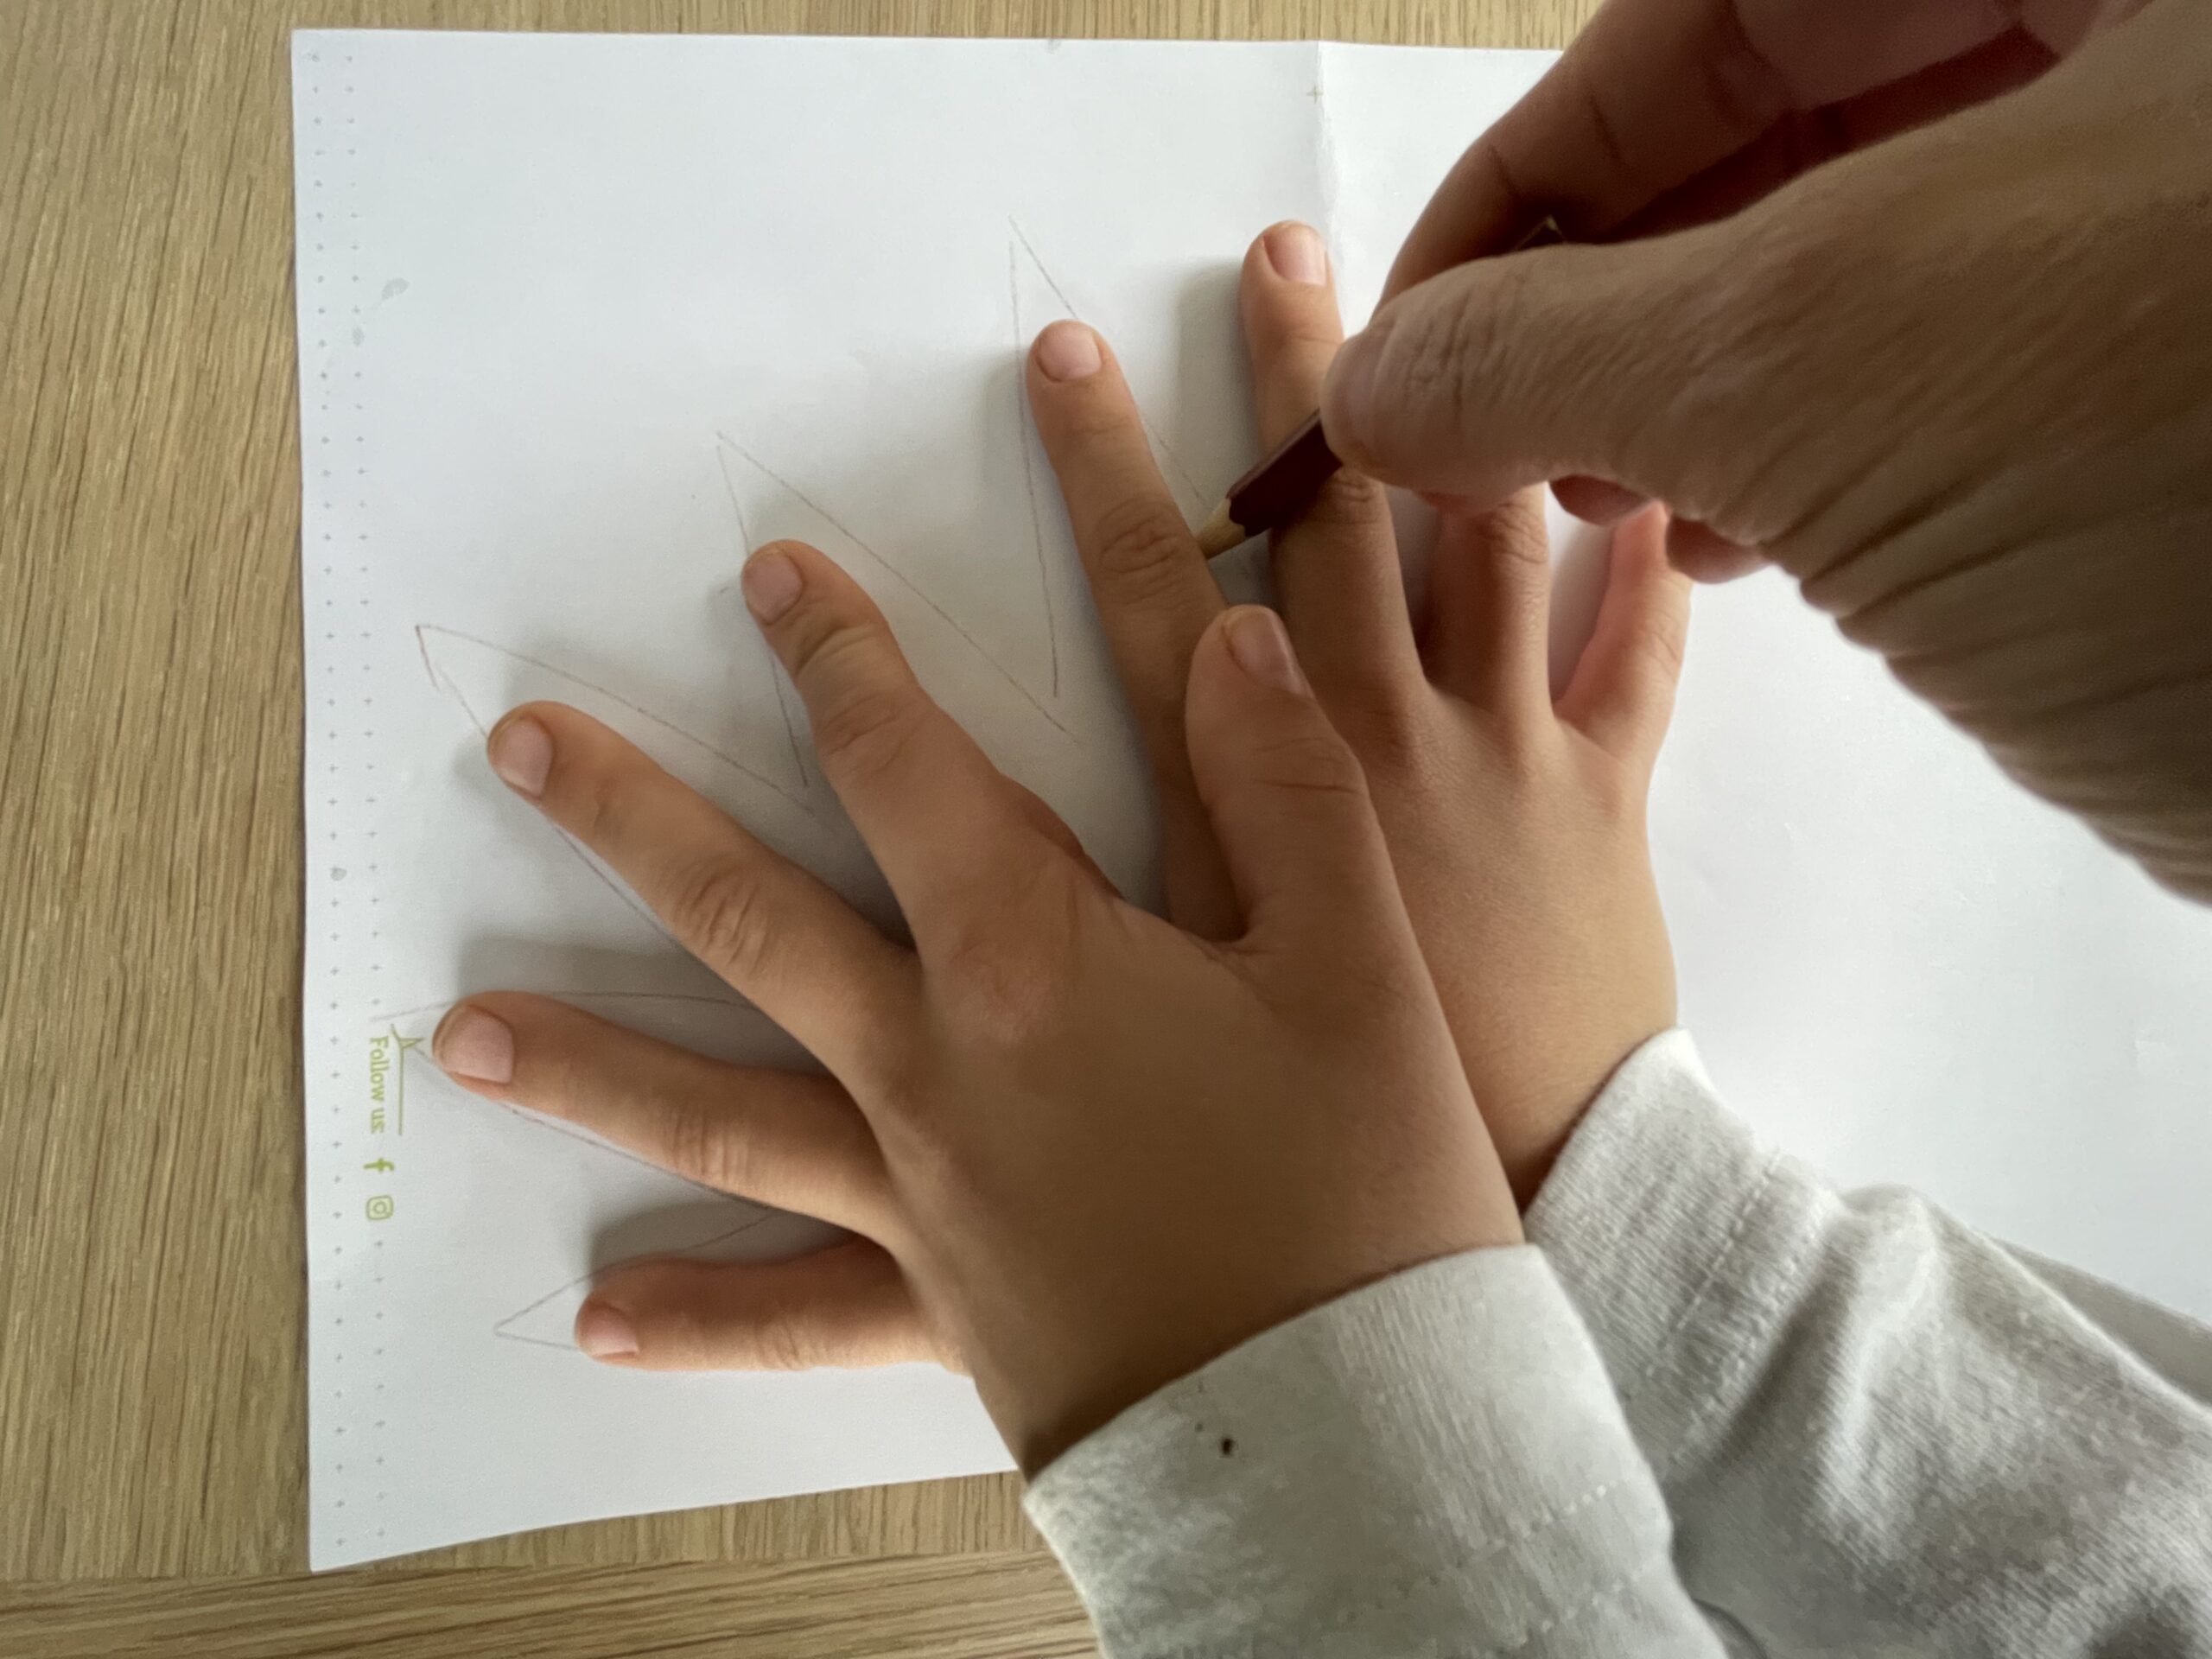
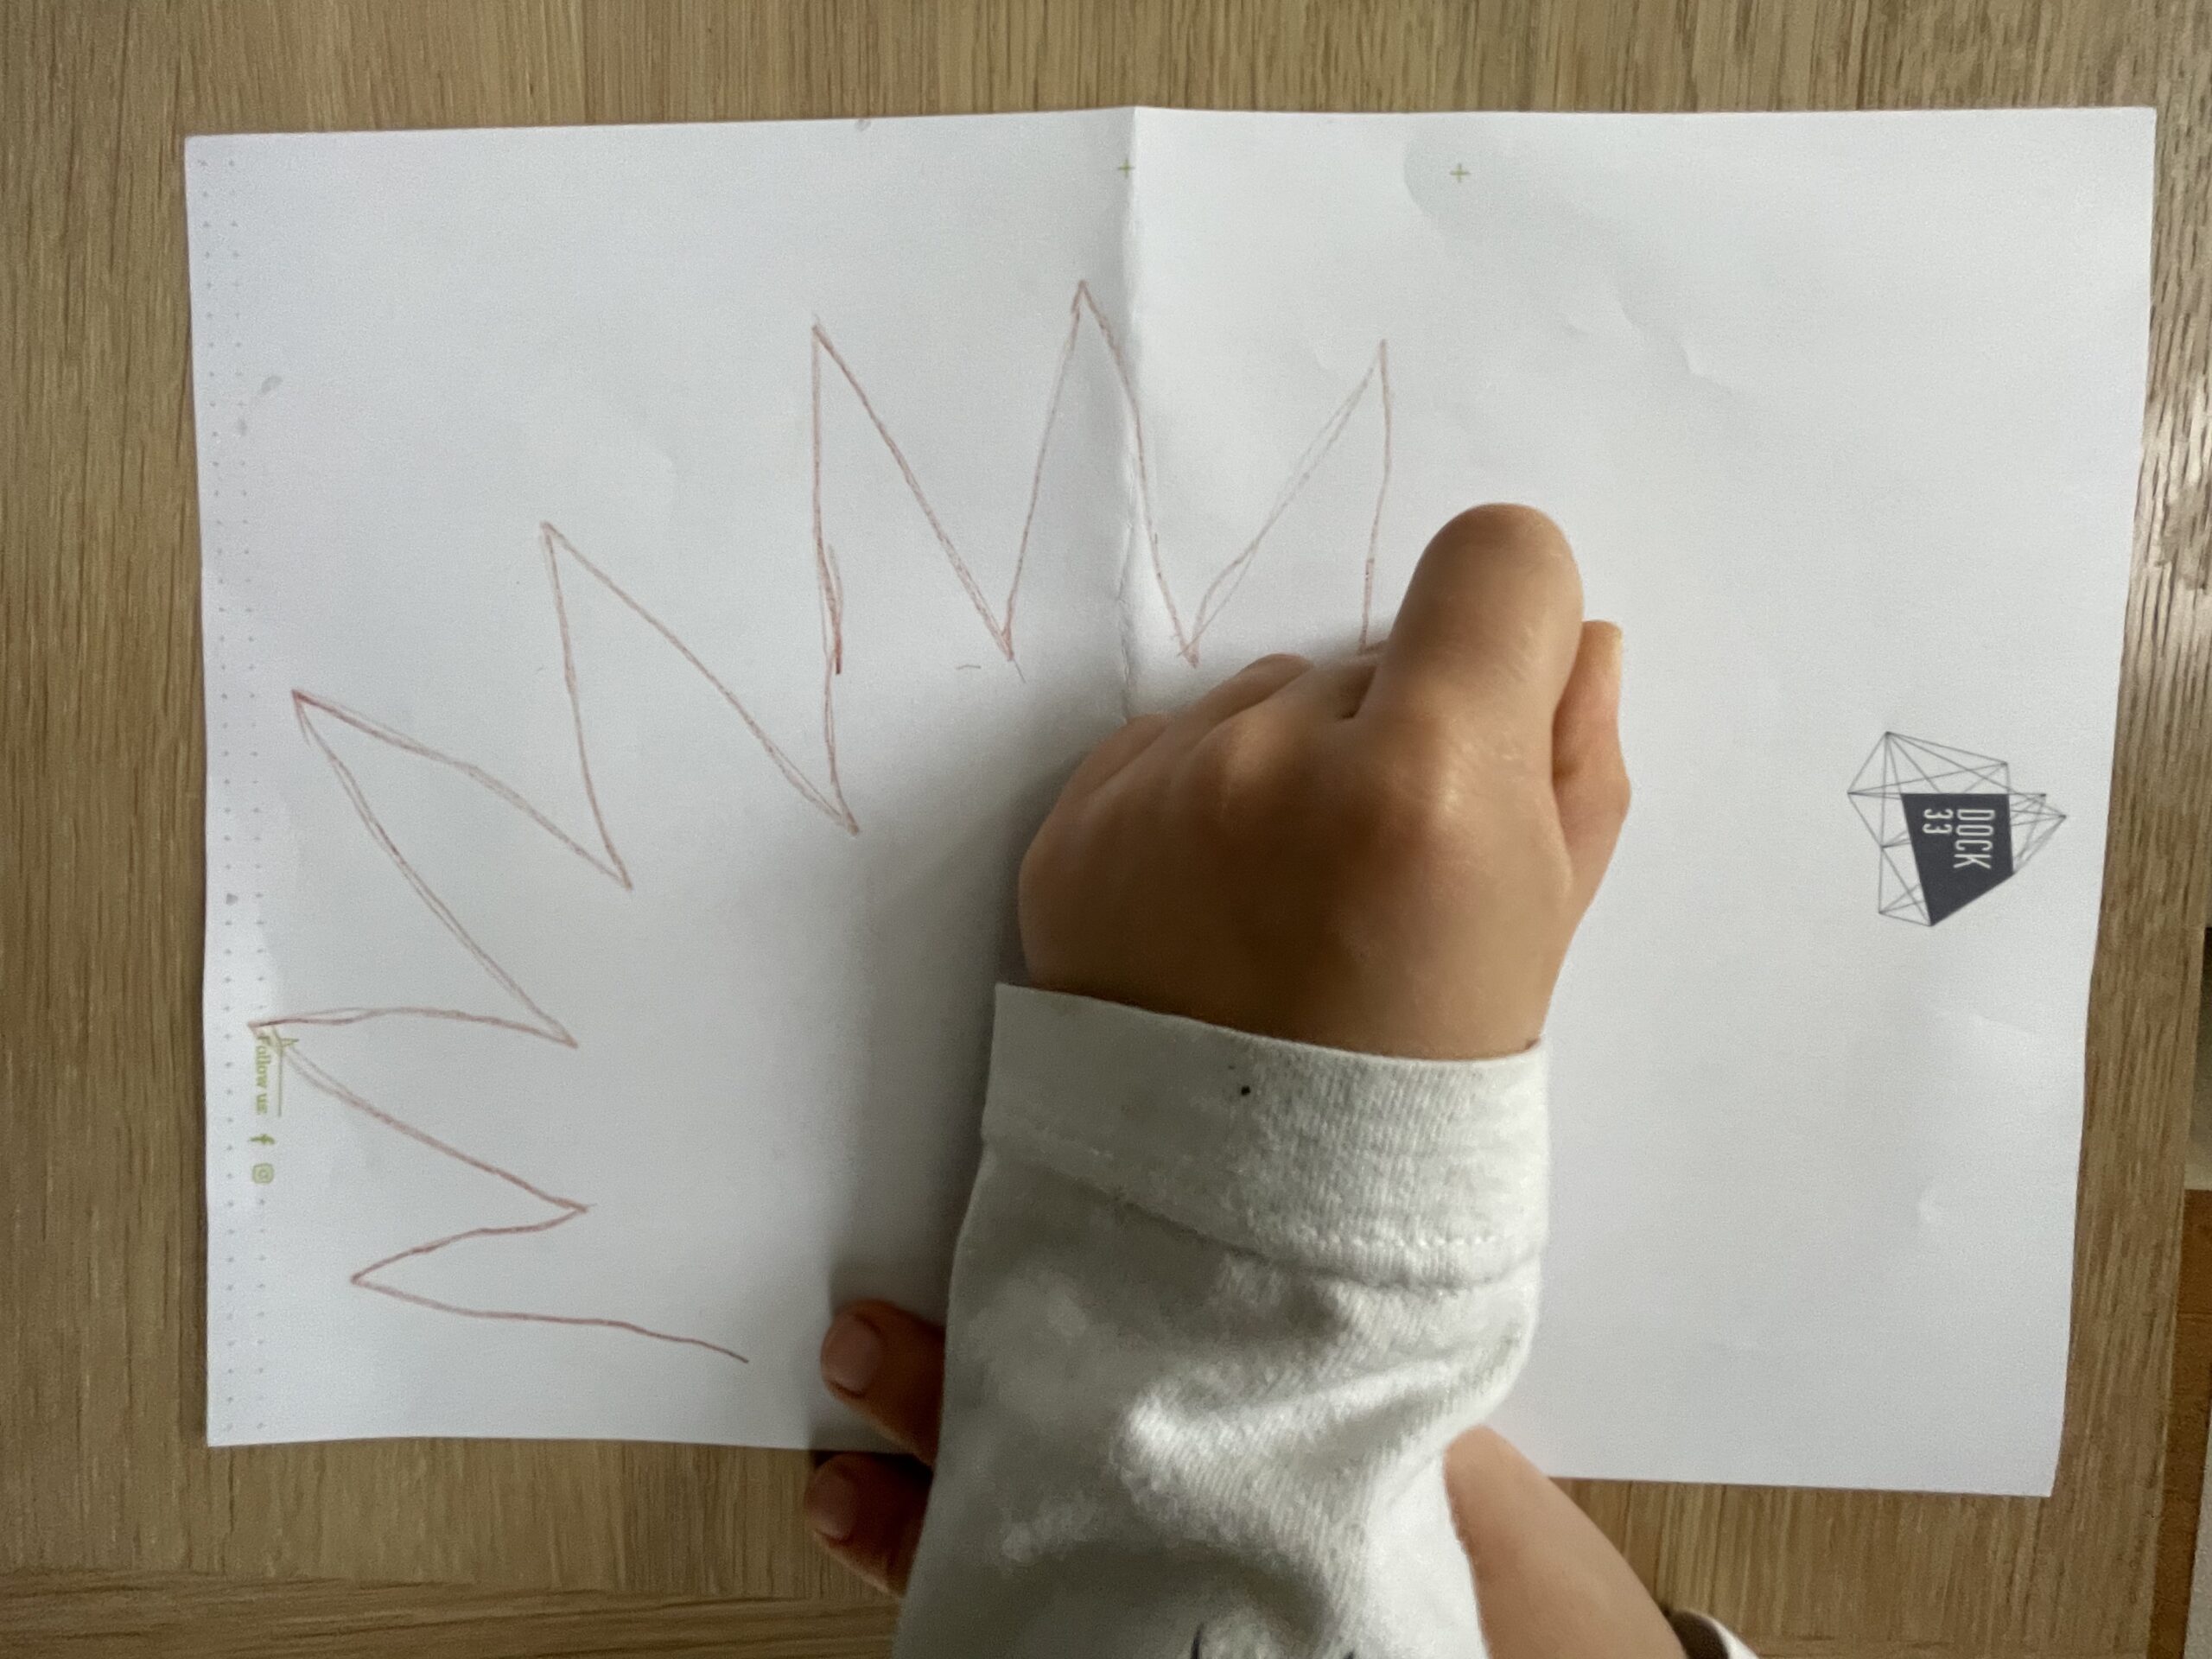
Now you paint the pre-drawn points with a pen.

Bild zum Schritt 4 für das Bastel- und DIY-Abenteuer für Kinder: 'Jetzt malt ihr die vorgezeichneten Zacken mit einem Stift kräftig...'

5

2. Bild zum Schritt 4 für das Bastel- und DIY-Abenteuer für Kinder: 'Jetzt malt ihr die vorgezeichneten Zacken mit einem Stift kräftig...'

6

The body of the painted hedgehog is finished.

Bild zum Schritt 6 für das Bastel- und DIY-Abenteuer für Kinder: 'Fertig ist der Körper des gemalten Igels.'

7

Next you paint the head of the hedgehog. For this you clench a hand to the fist. You let the thumb stand off. Then you put your fist on the leaf, so that the small finger of the fist lies under the last point of the hedgehog body and the thumb at the edge of the leaf.

Bild zum Schritt 7 für das Bastel- und DIY-Abenteuer für Kinder: 'Als nächstes malt ihr den Kopf des Igels. Dafür ballt...'

8

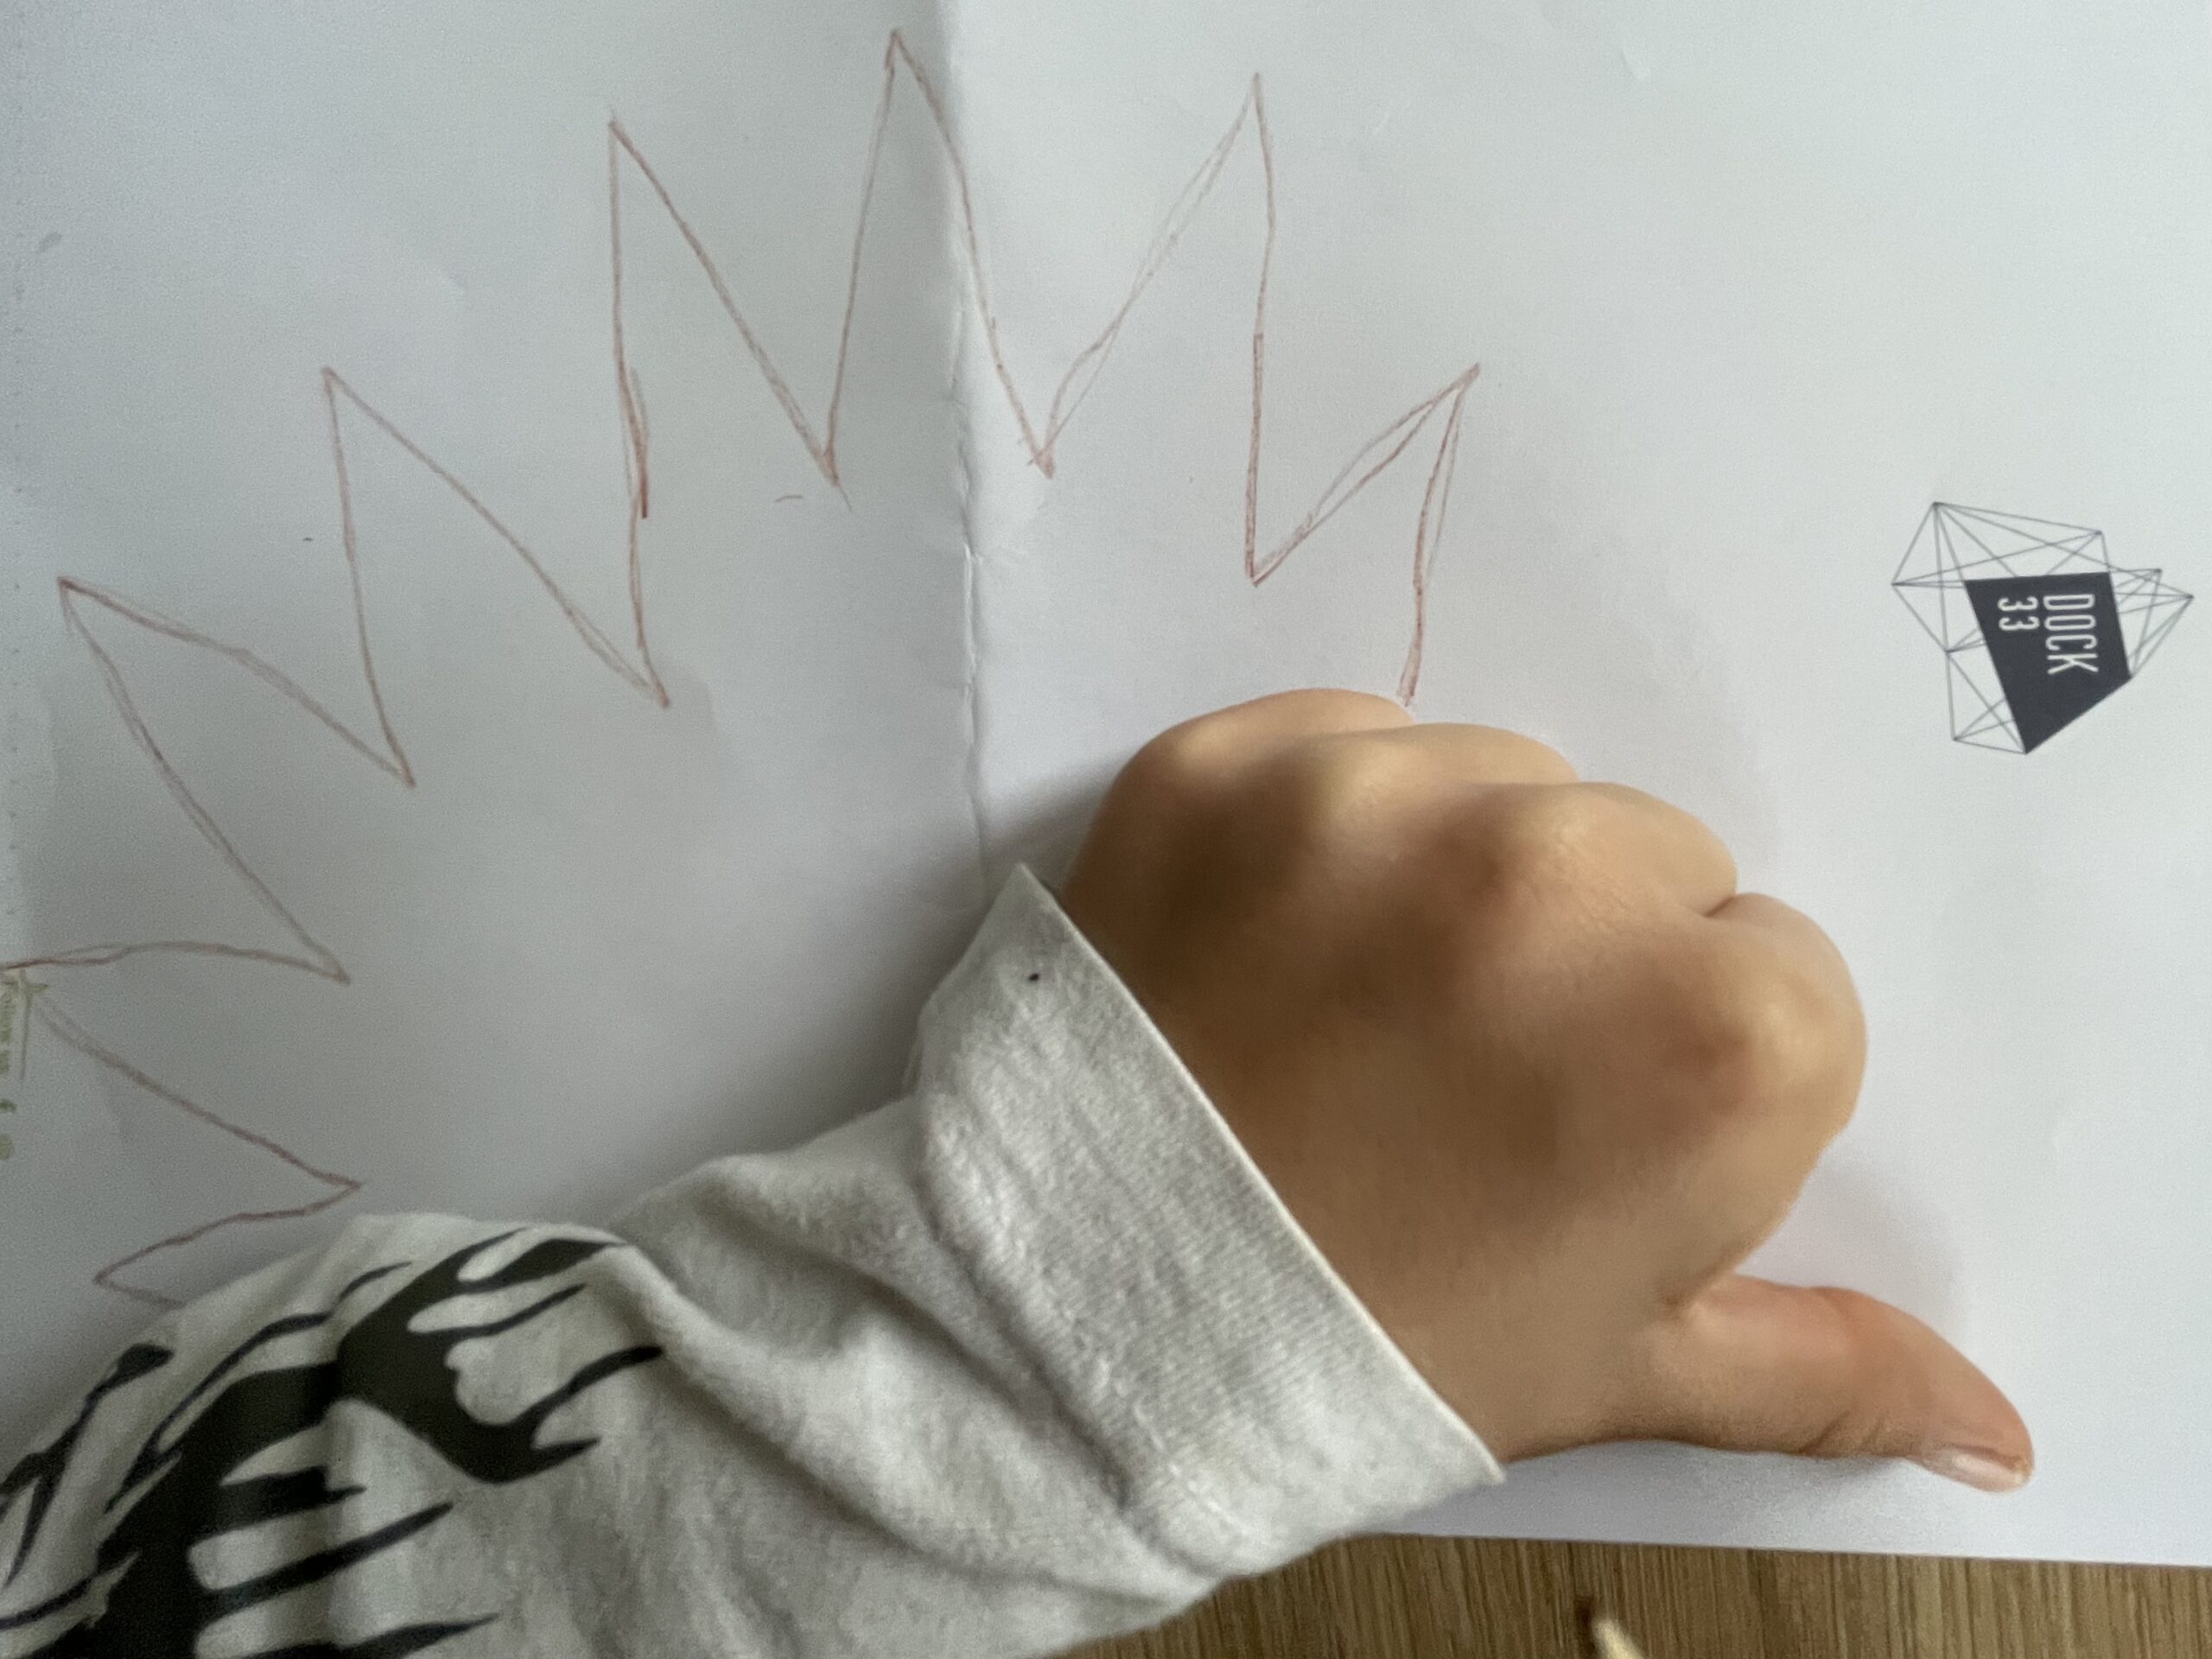
Now border the fist with a pen and then connect the lines with the points.

Bild zum Schritt 8 für das Bastel- und DIY-Abenteuer für Kinder: 'Umrandet nun die Faust mit einem Stift und verbindet danach...'

9

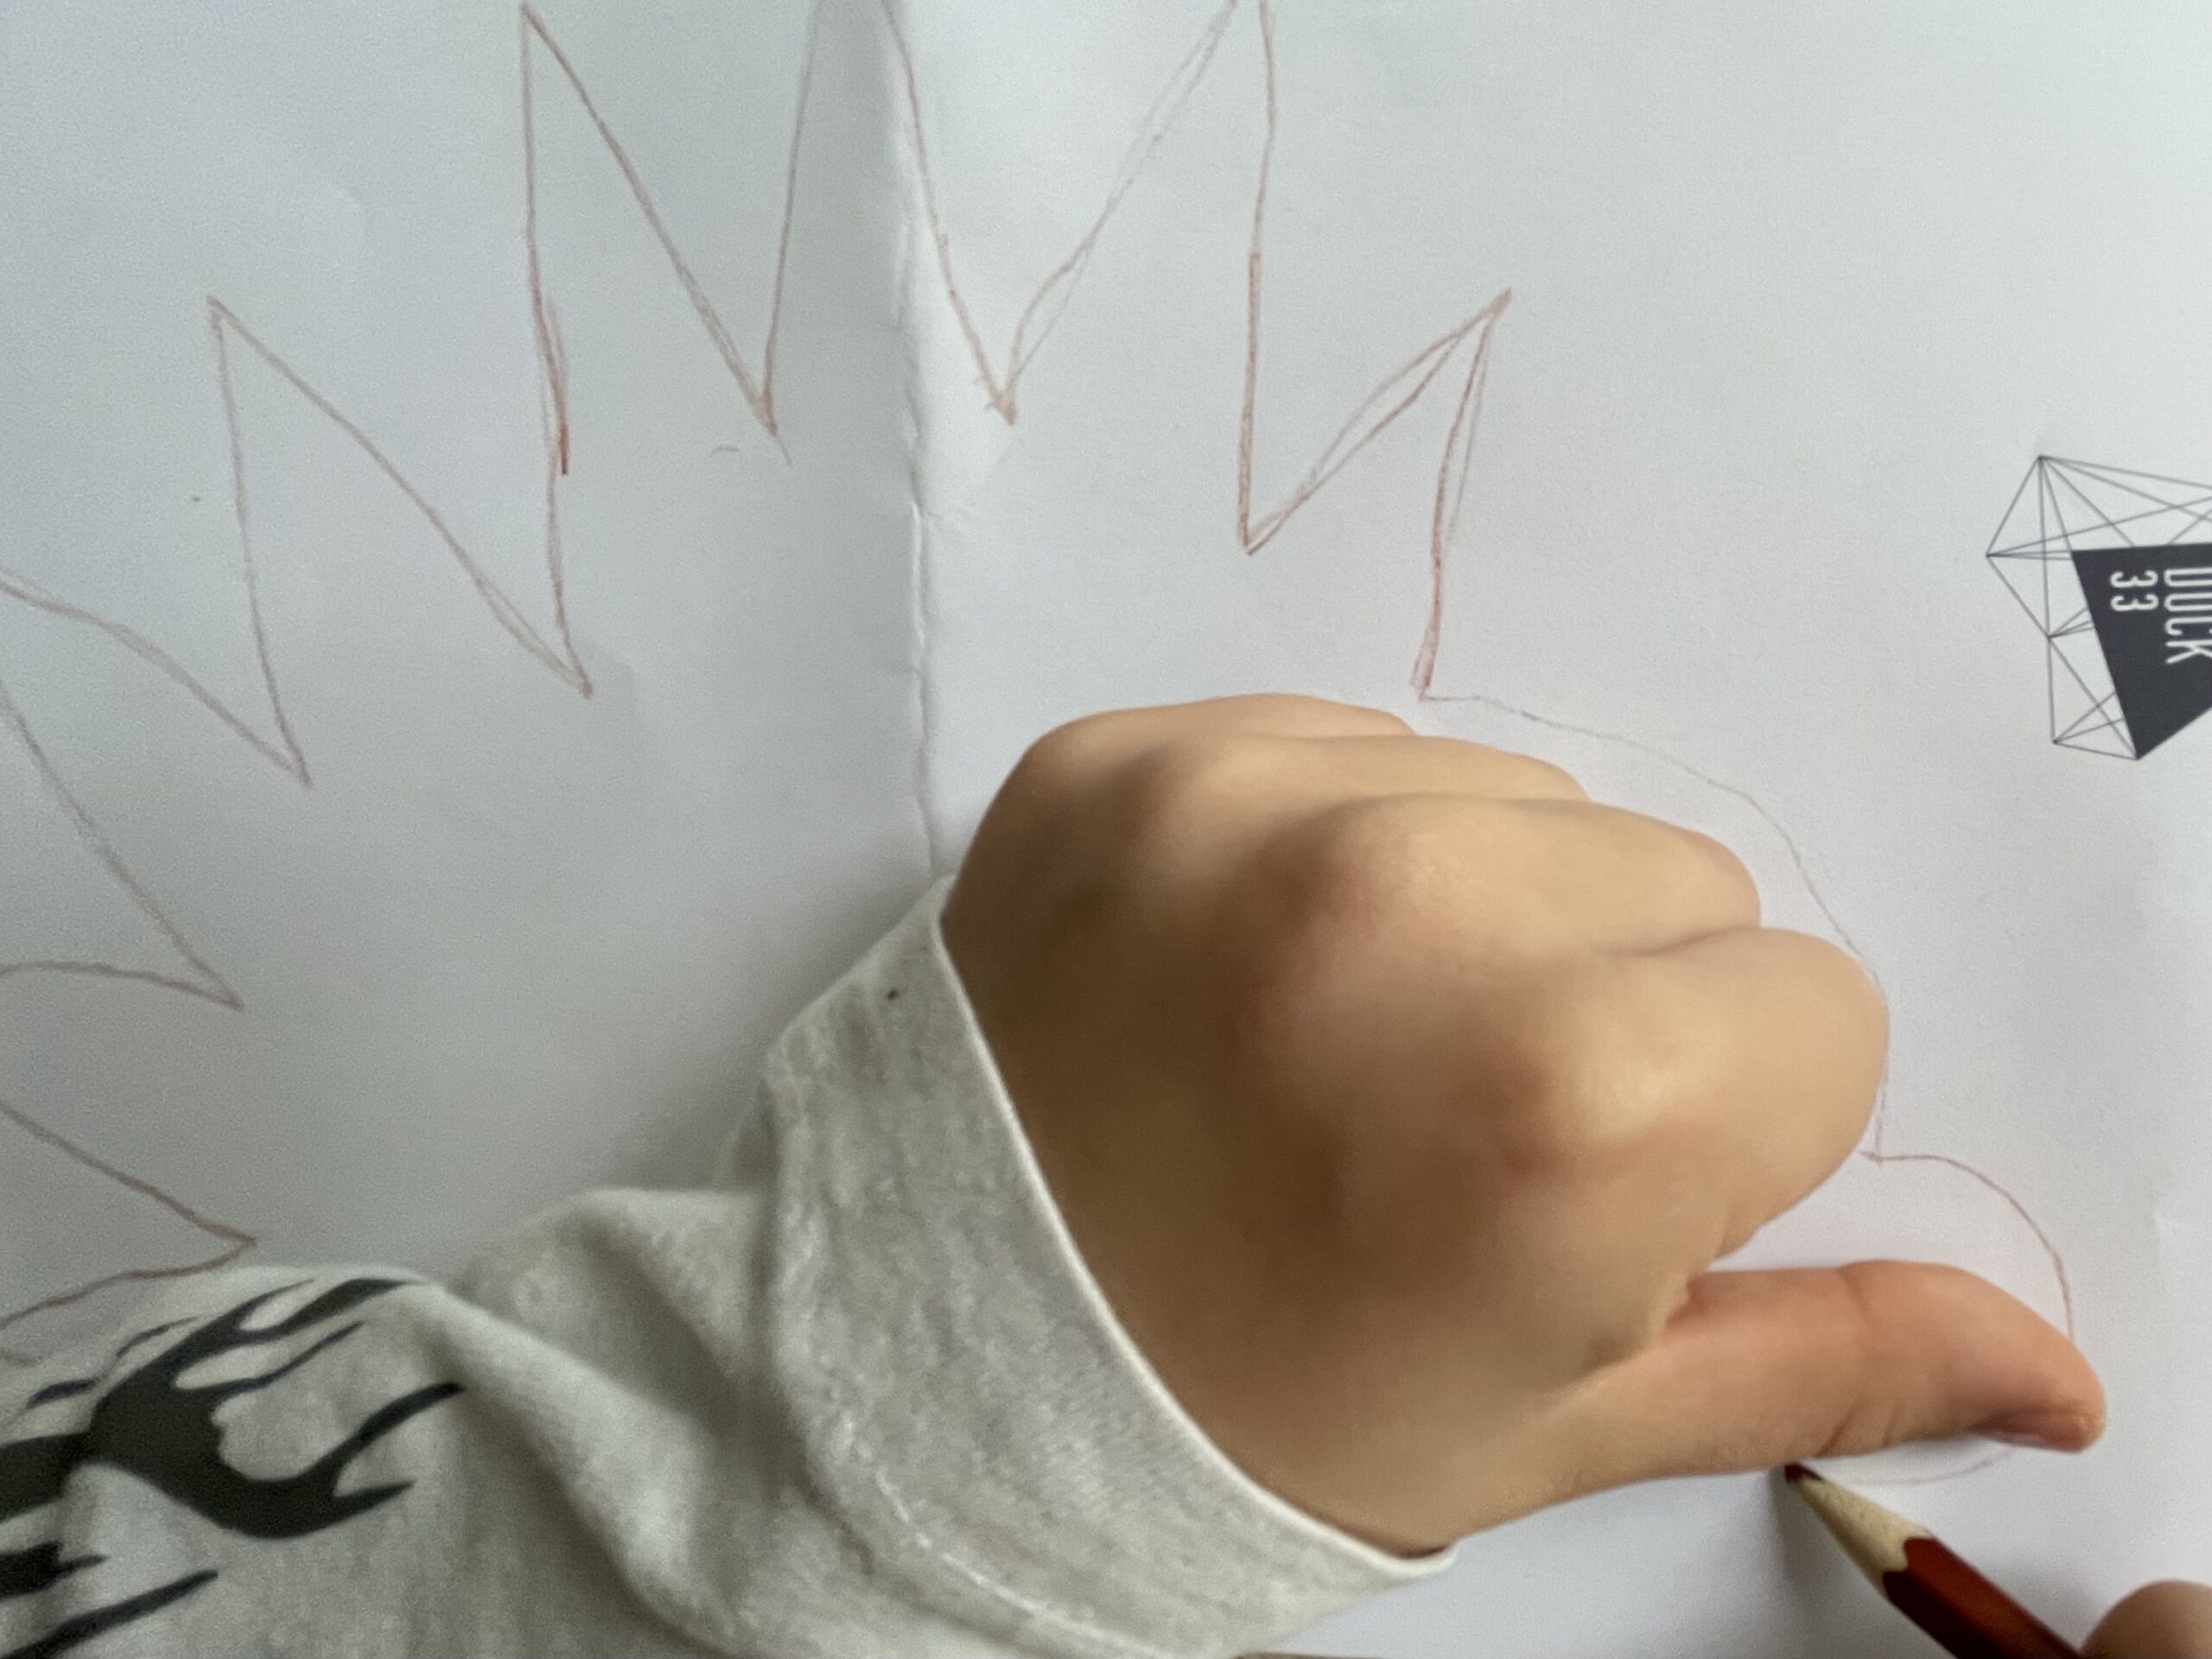
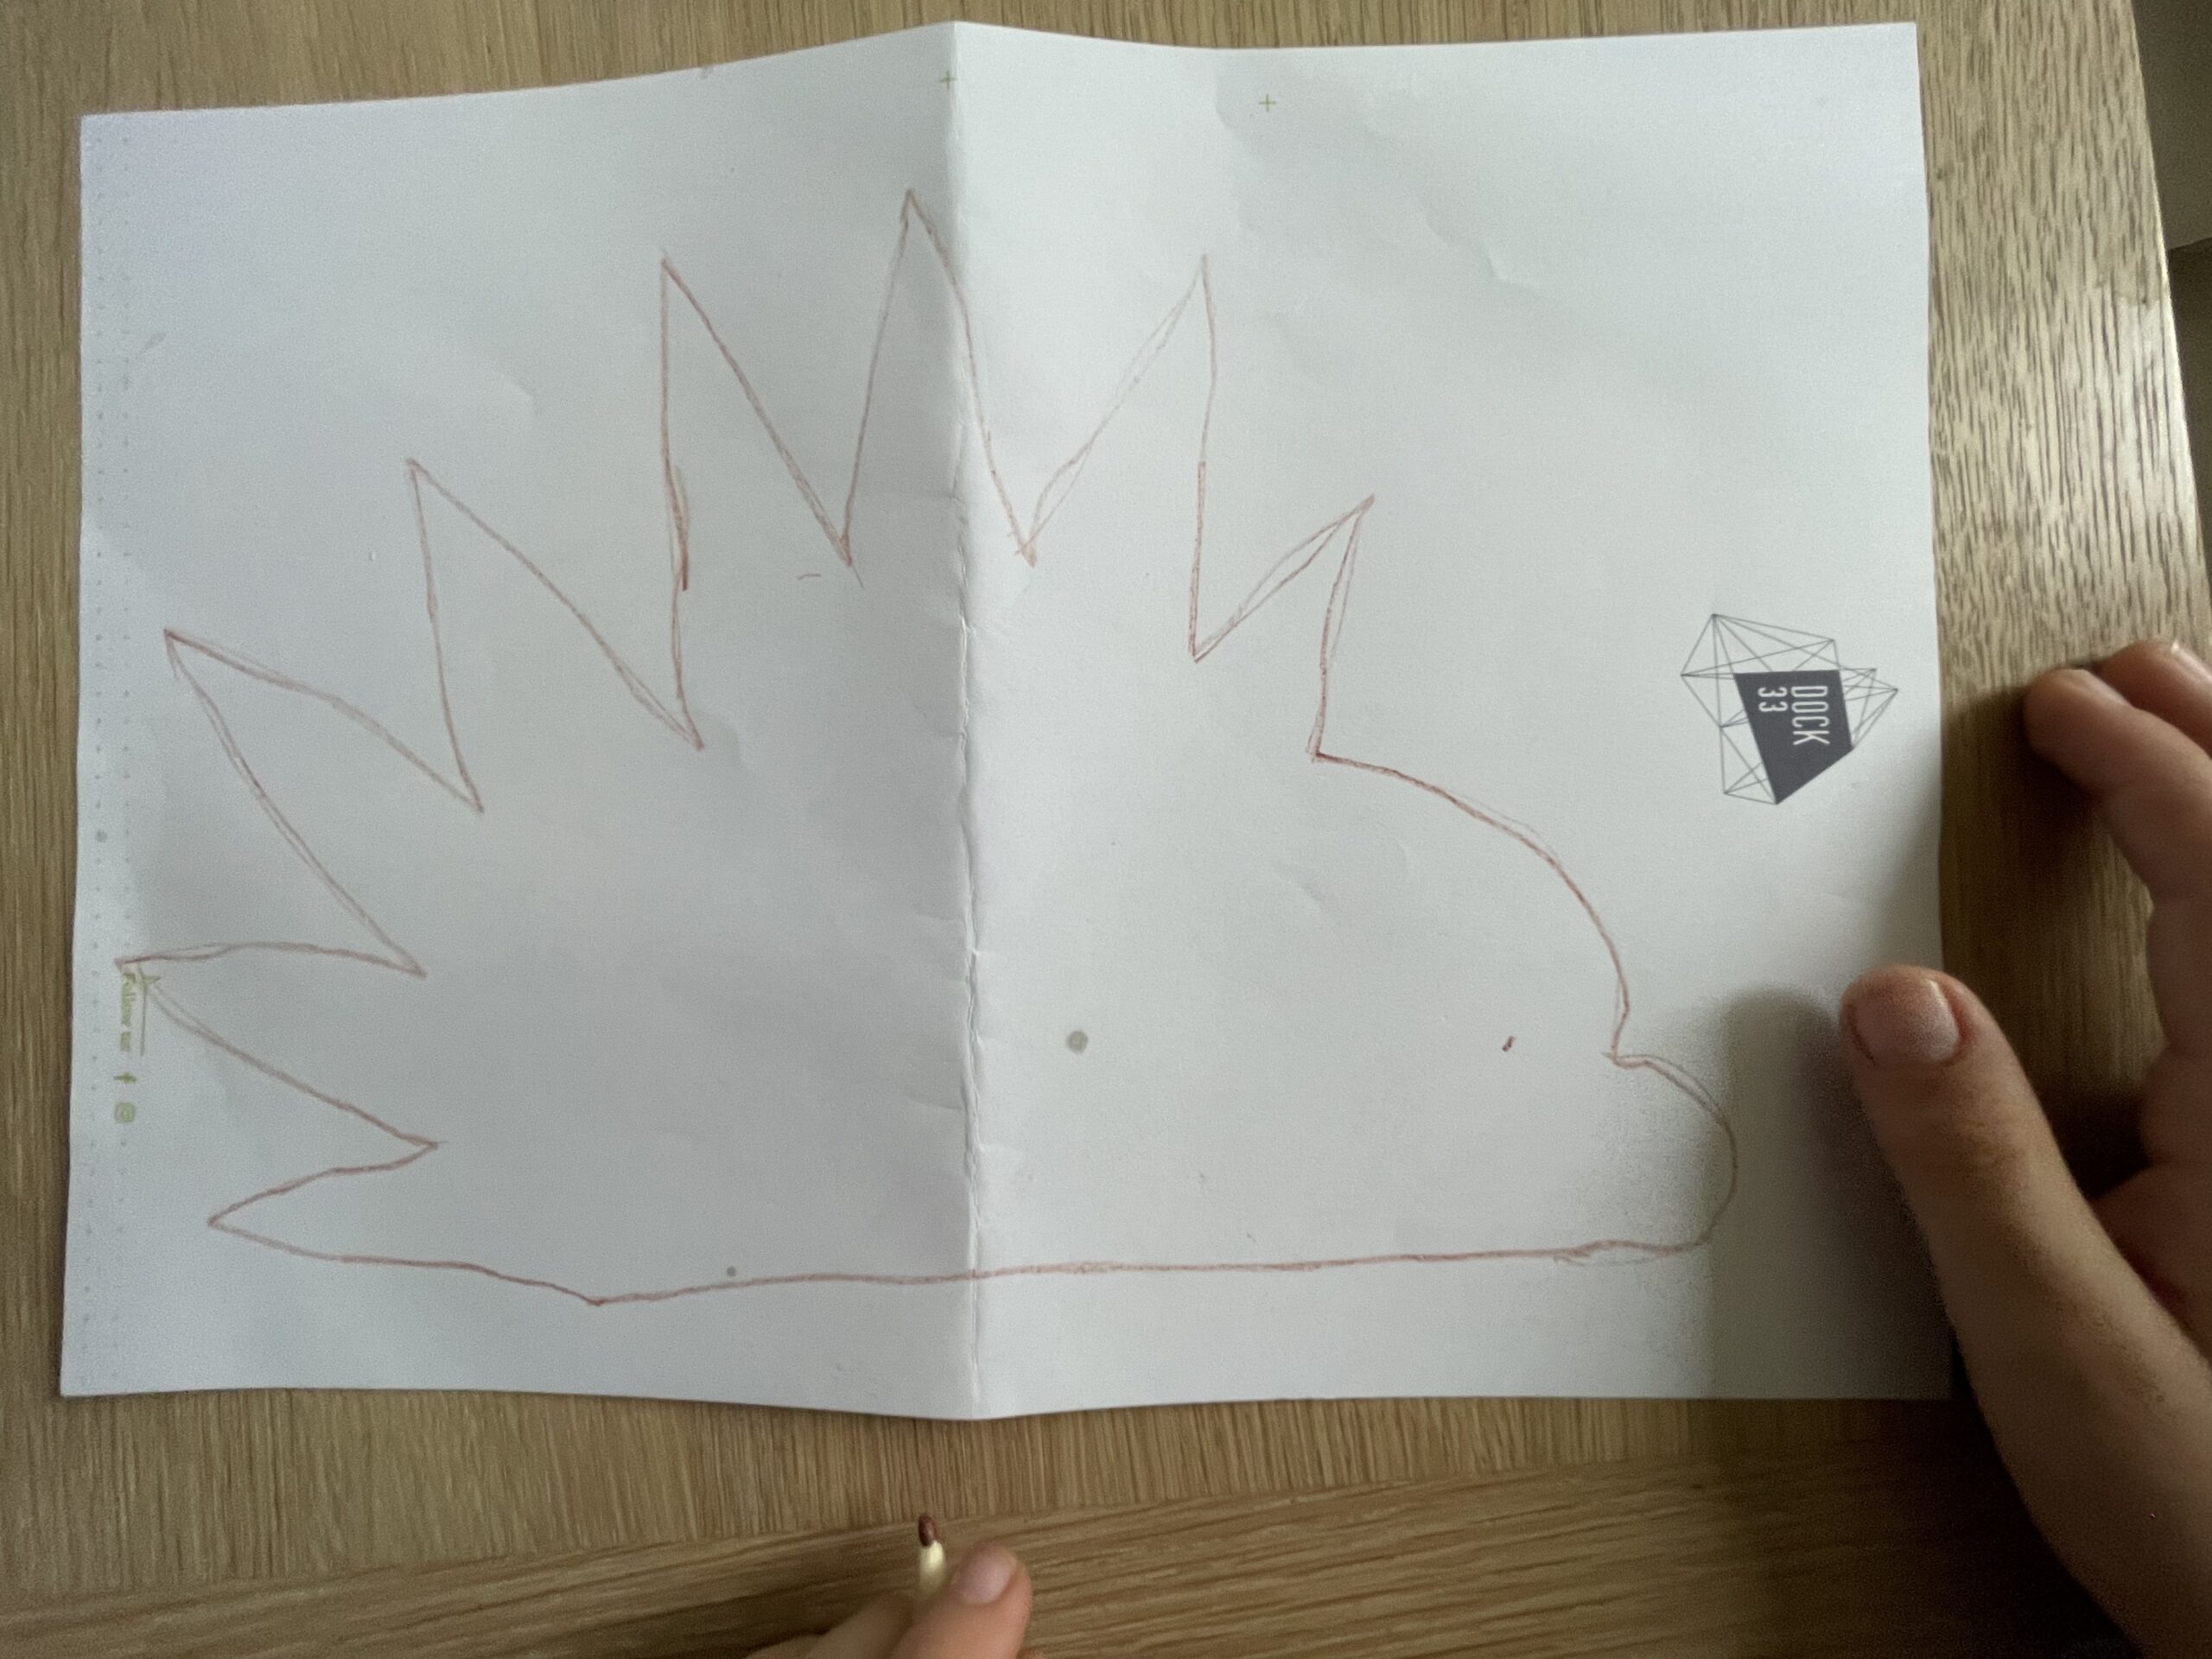
After that, you also repaint this pre-drawn line vigorously.

Bild zum Schritt 9 für das Bastel- und DIY-Abenteuer für Kinder: 'Danach malt ihr auch diese vorgezeichnete Linie kräftig nach.'

10

Connects the head to the jig in front of it.
The basic form of the hedgehog is ready.

Bild zum Schritt 10 für das Bastel- und DIY-Abenteuer für Kinder: 'Verbindet dabei den Kopf mit der davorliegenden Zacke.  ...'

11

Now design the hedgehog and then cut it out with the scissors.

Bild zum Schritt 11 für das Bastel- und DIY-Abenteuer für Kinder: 'Gestaltet den Igel jetzt aus und schneidet ihn anschließend mit...'

12

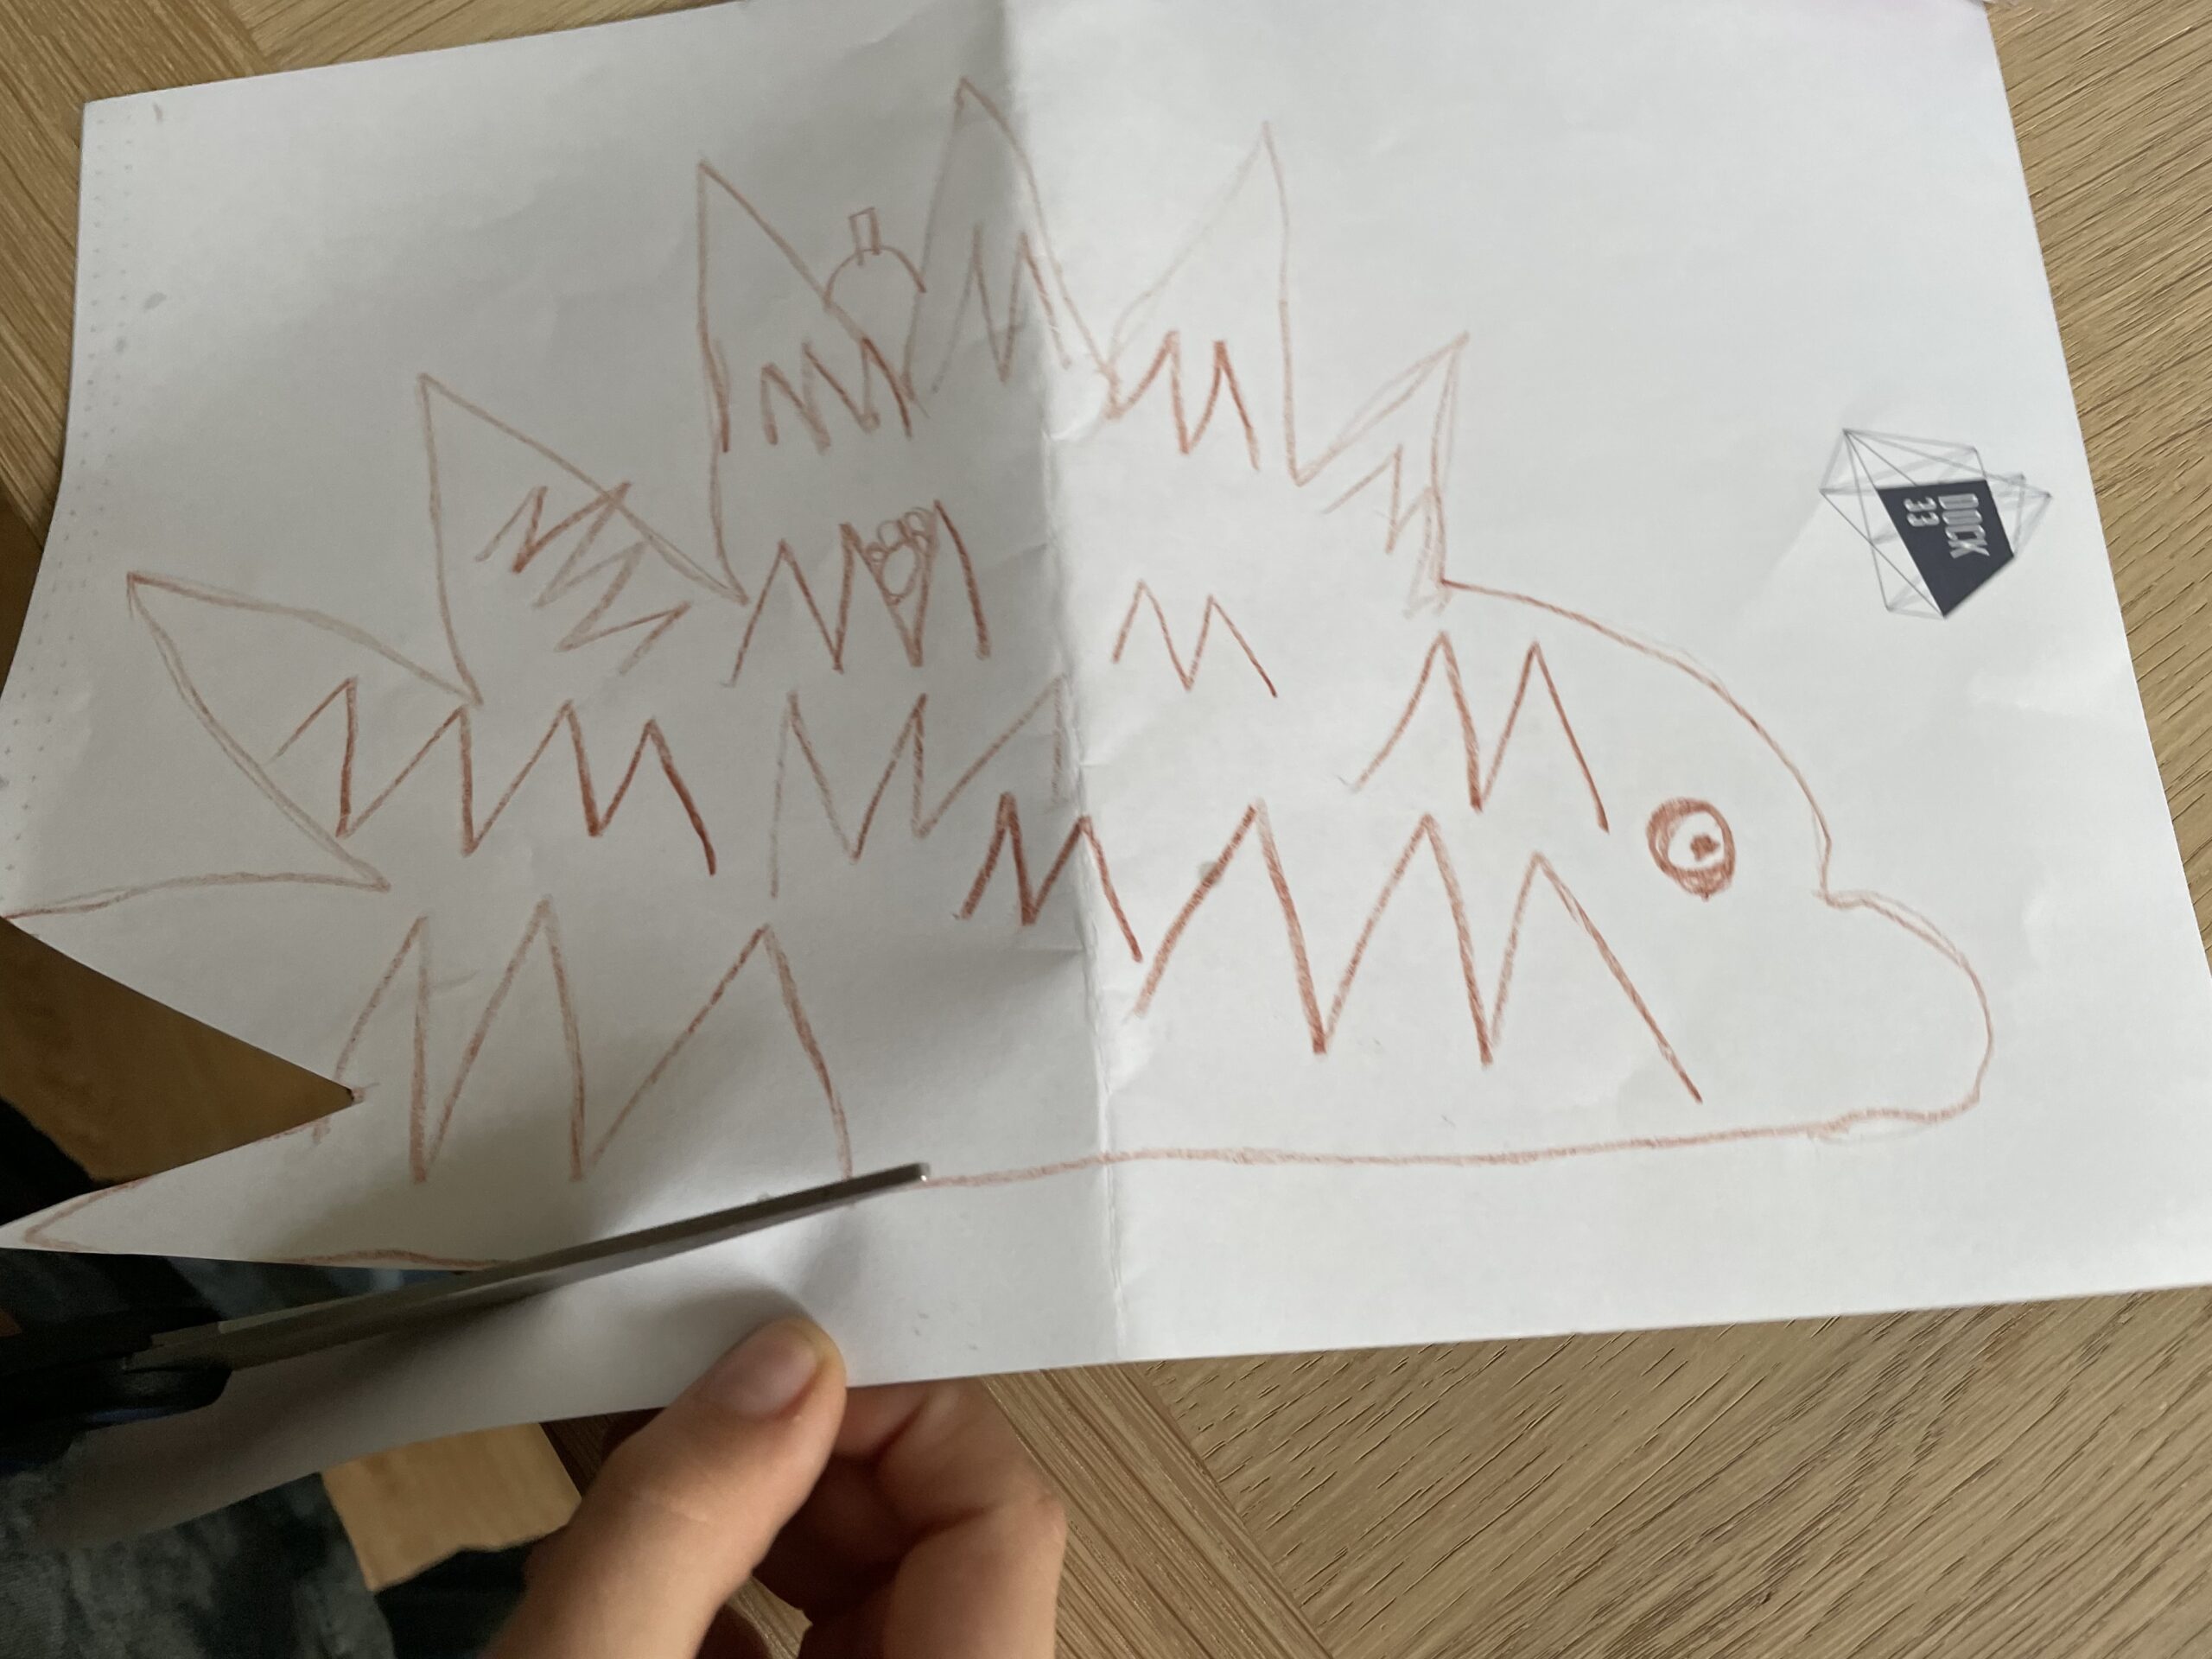
The self-painted hedgehog is finished.

Bild zum Schritt 12 für das Bastel- und DIY-Abenteuer für Kinder: 'Fertig ist der selbst gemalte Igel.'

13

Have fun painting hedgehogs.