This gift box is a nice packaging for a small Easter gift. The cutting and folding of the box is not difficult, however, when putting together the box finger skills is required. You may let an adult help you with this.
The individual steps are well illustrated and clearly explained. Just try it out once!
A simpler version, where you can put the box together more easily, can be found here under gift box. Check it out and have a lot of fun while crafting.
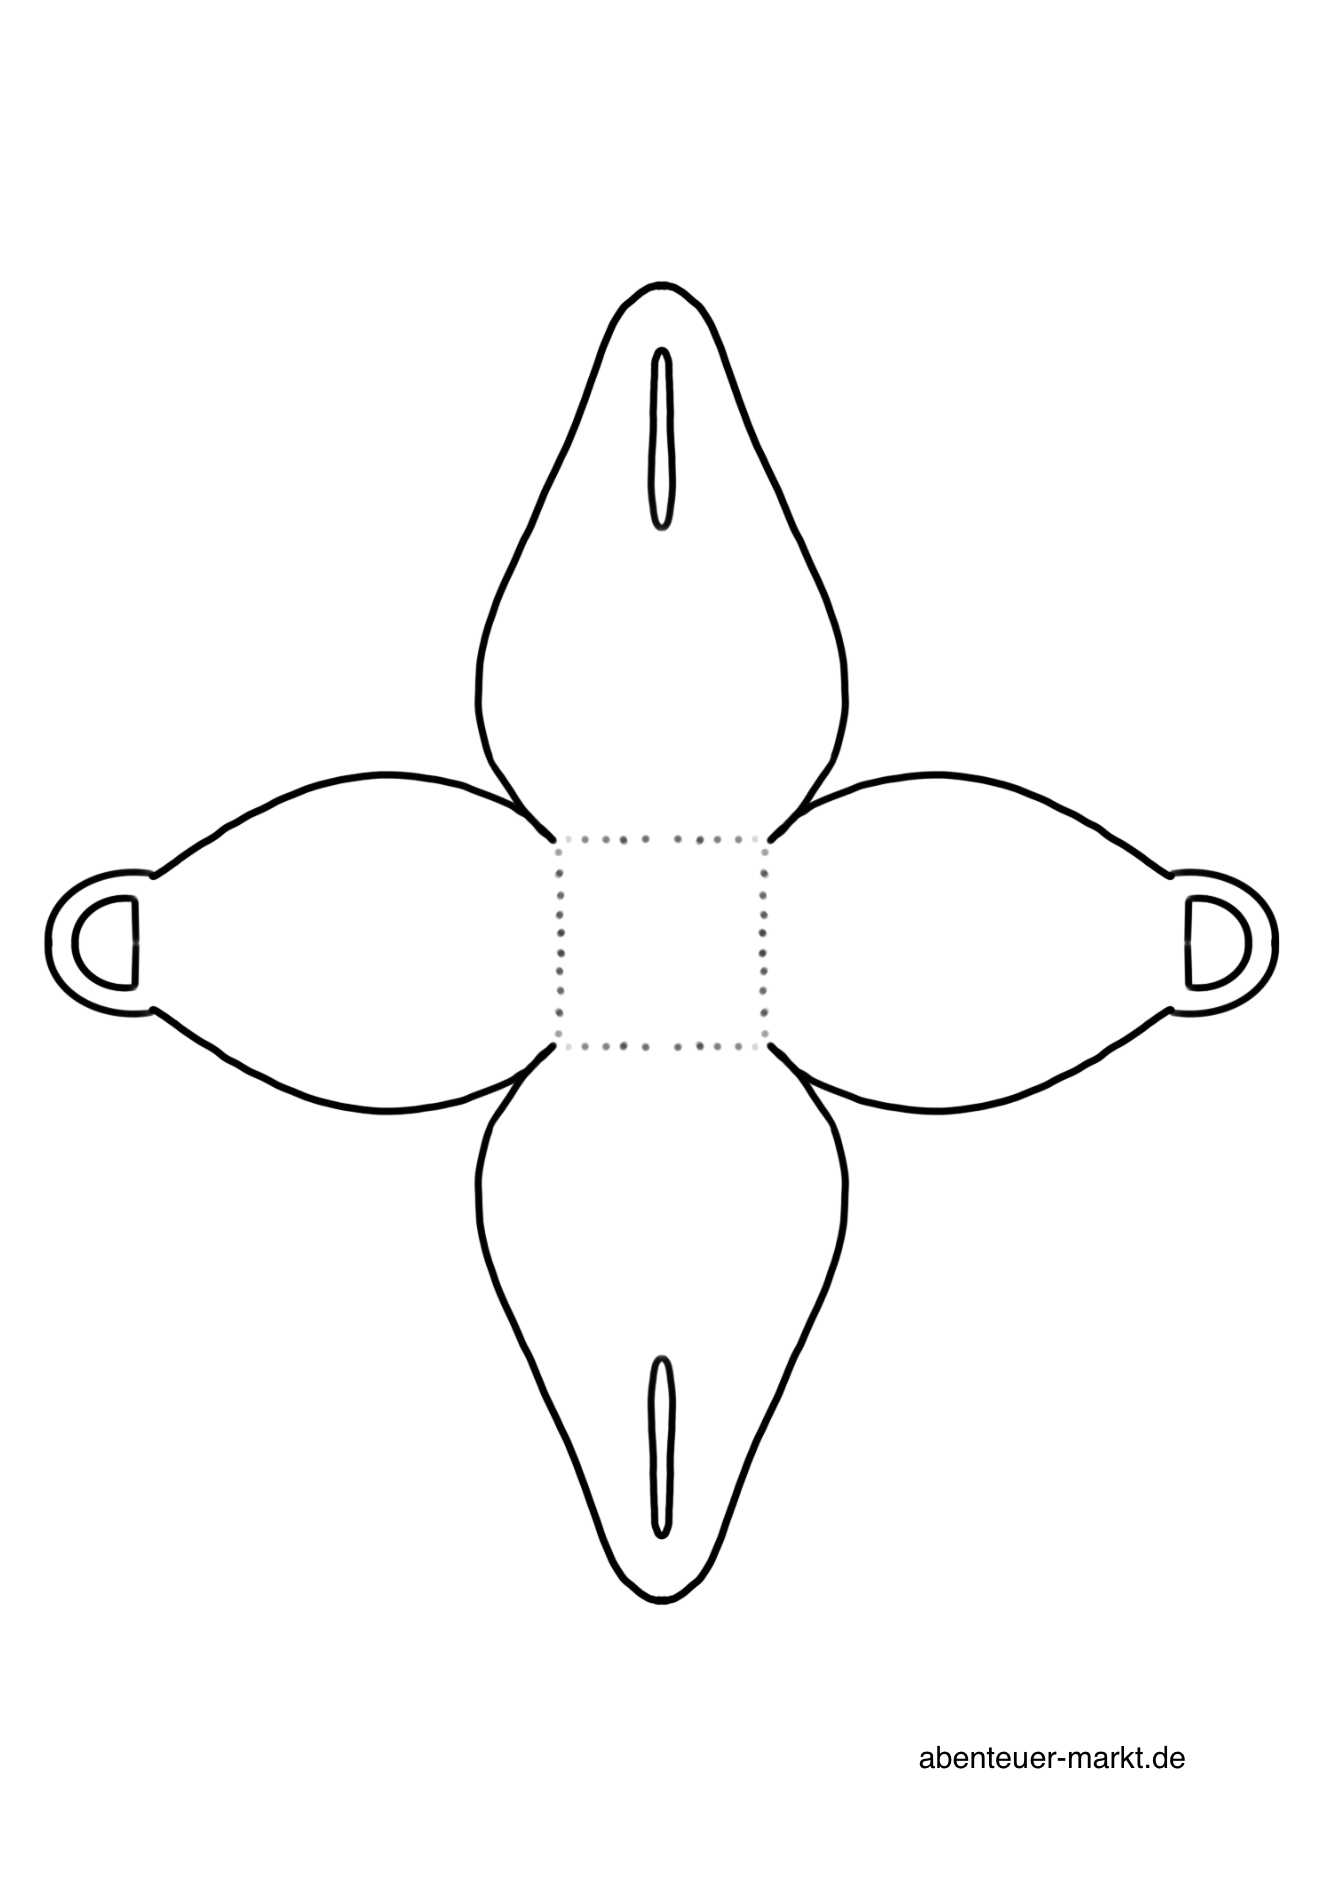
Prints the template on a copy paper first.
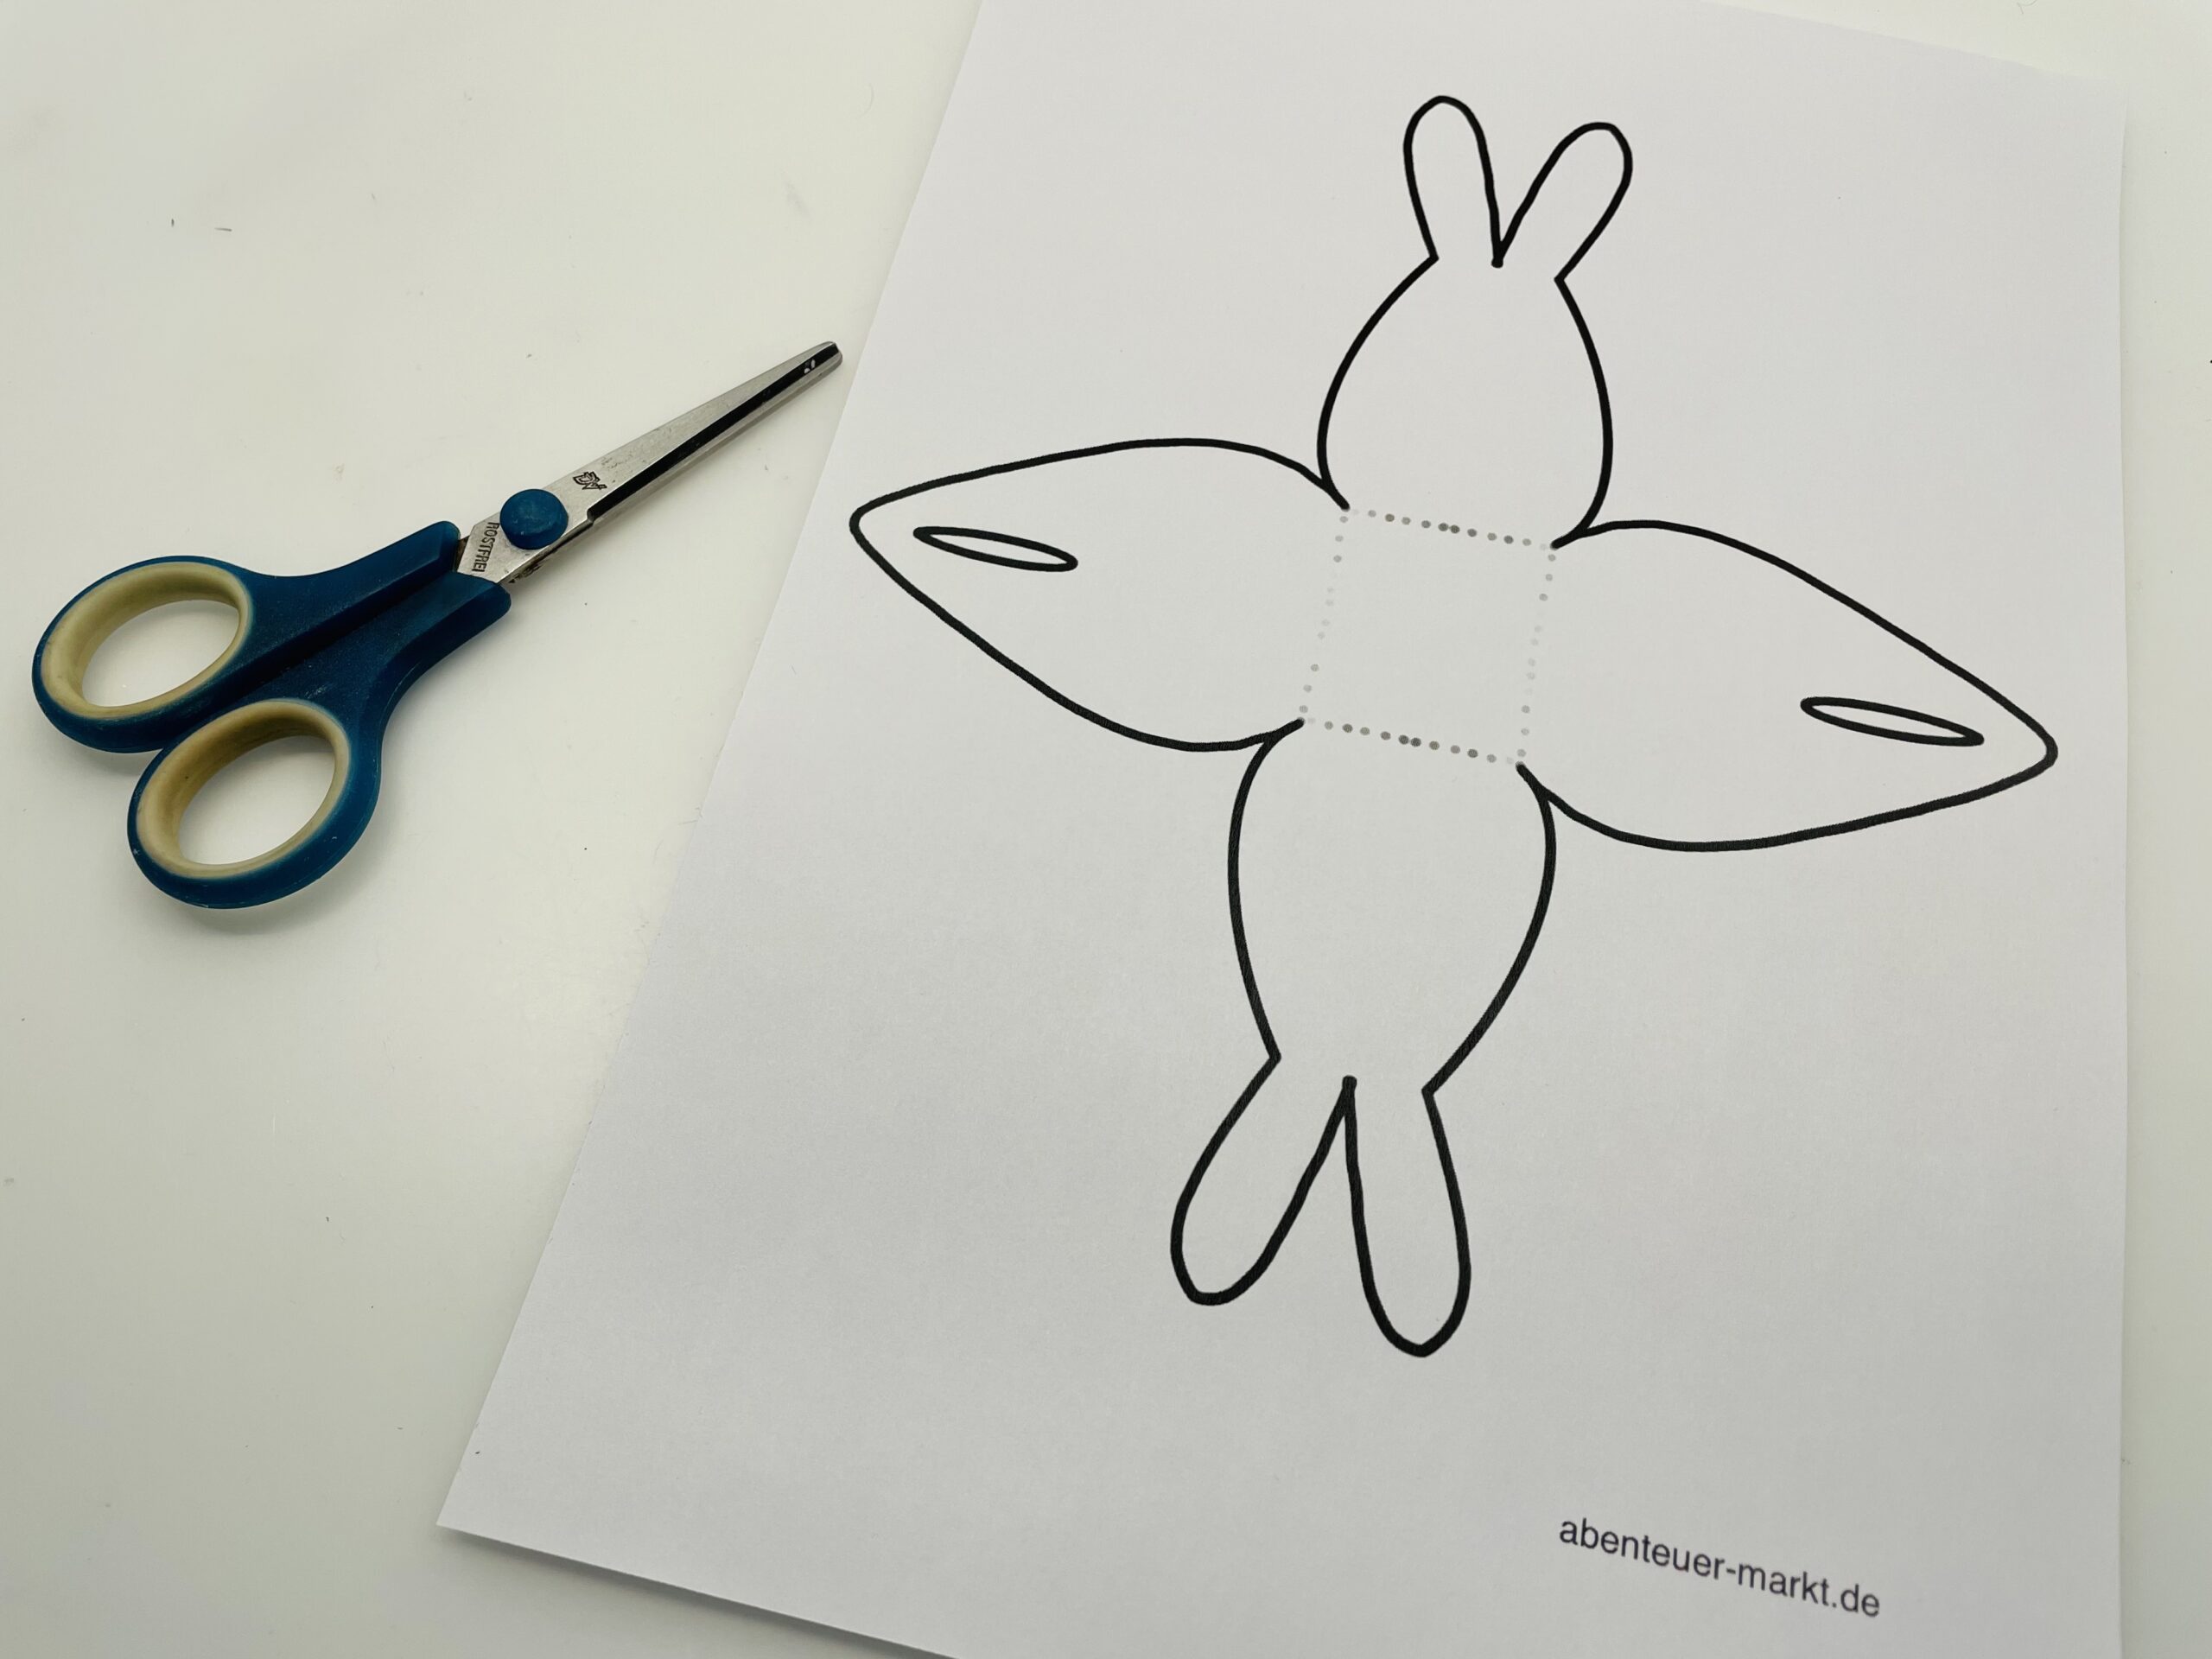
Then cut out the outer shape with the scissors. Cut the corners to the dashed line. Then cut into the incisions with a fingernail scissors and cut them out. Then turn the paper so that the back is pointing upwards.
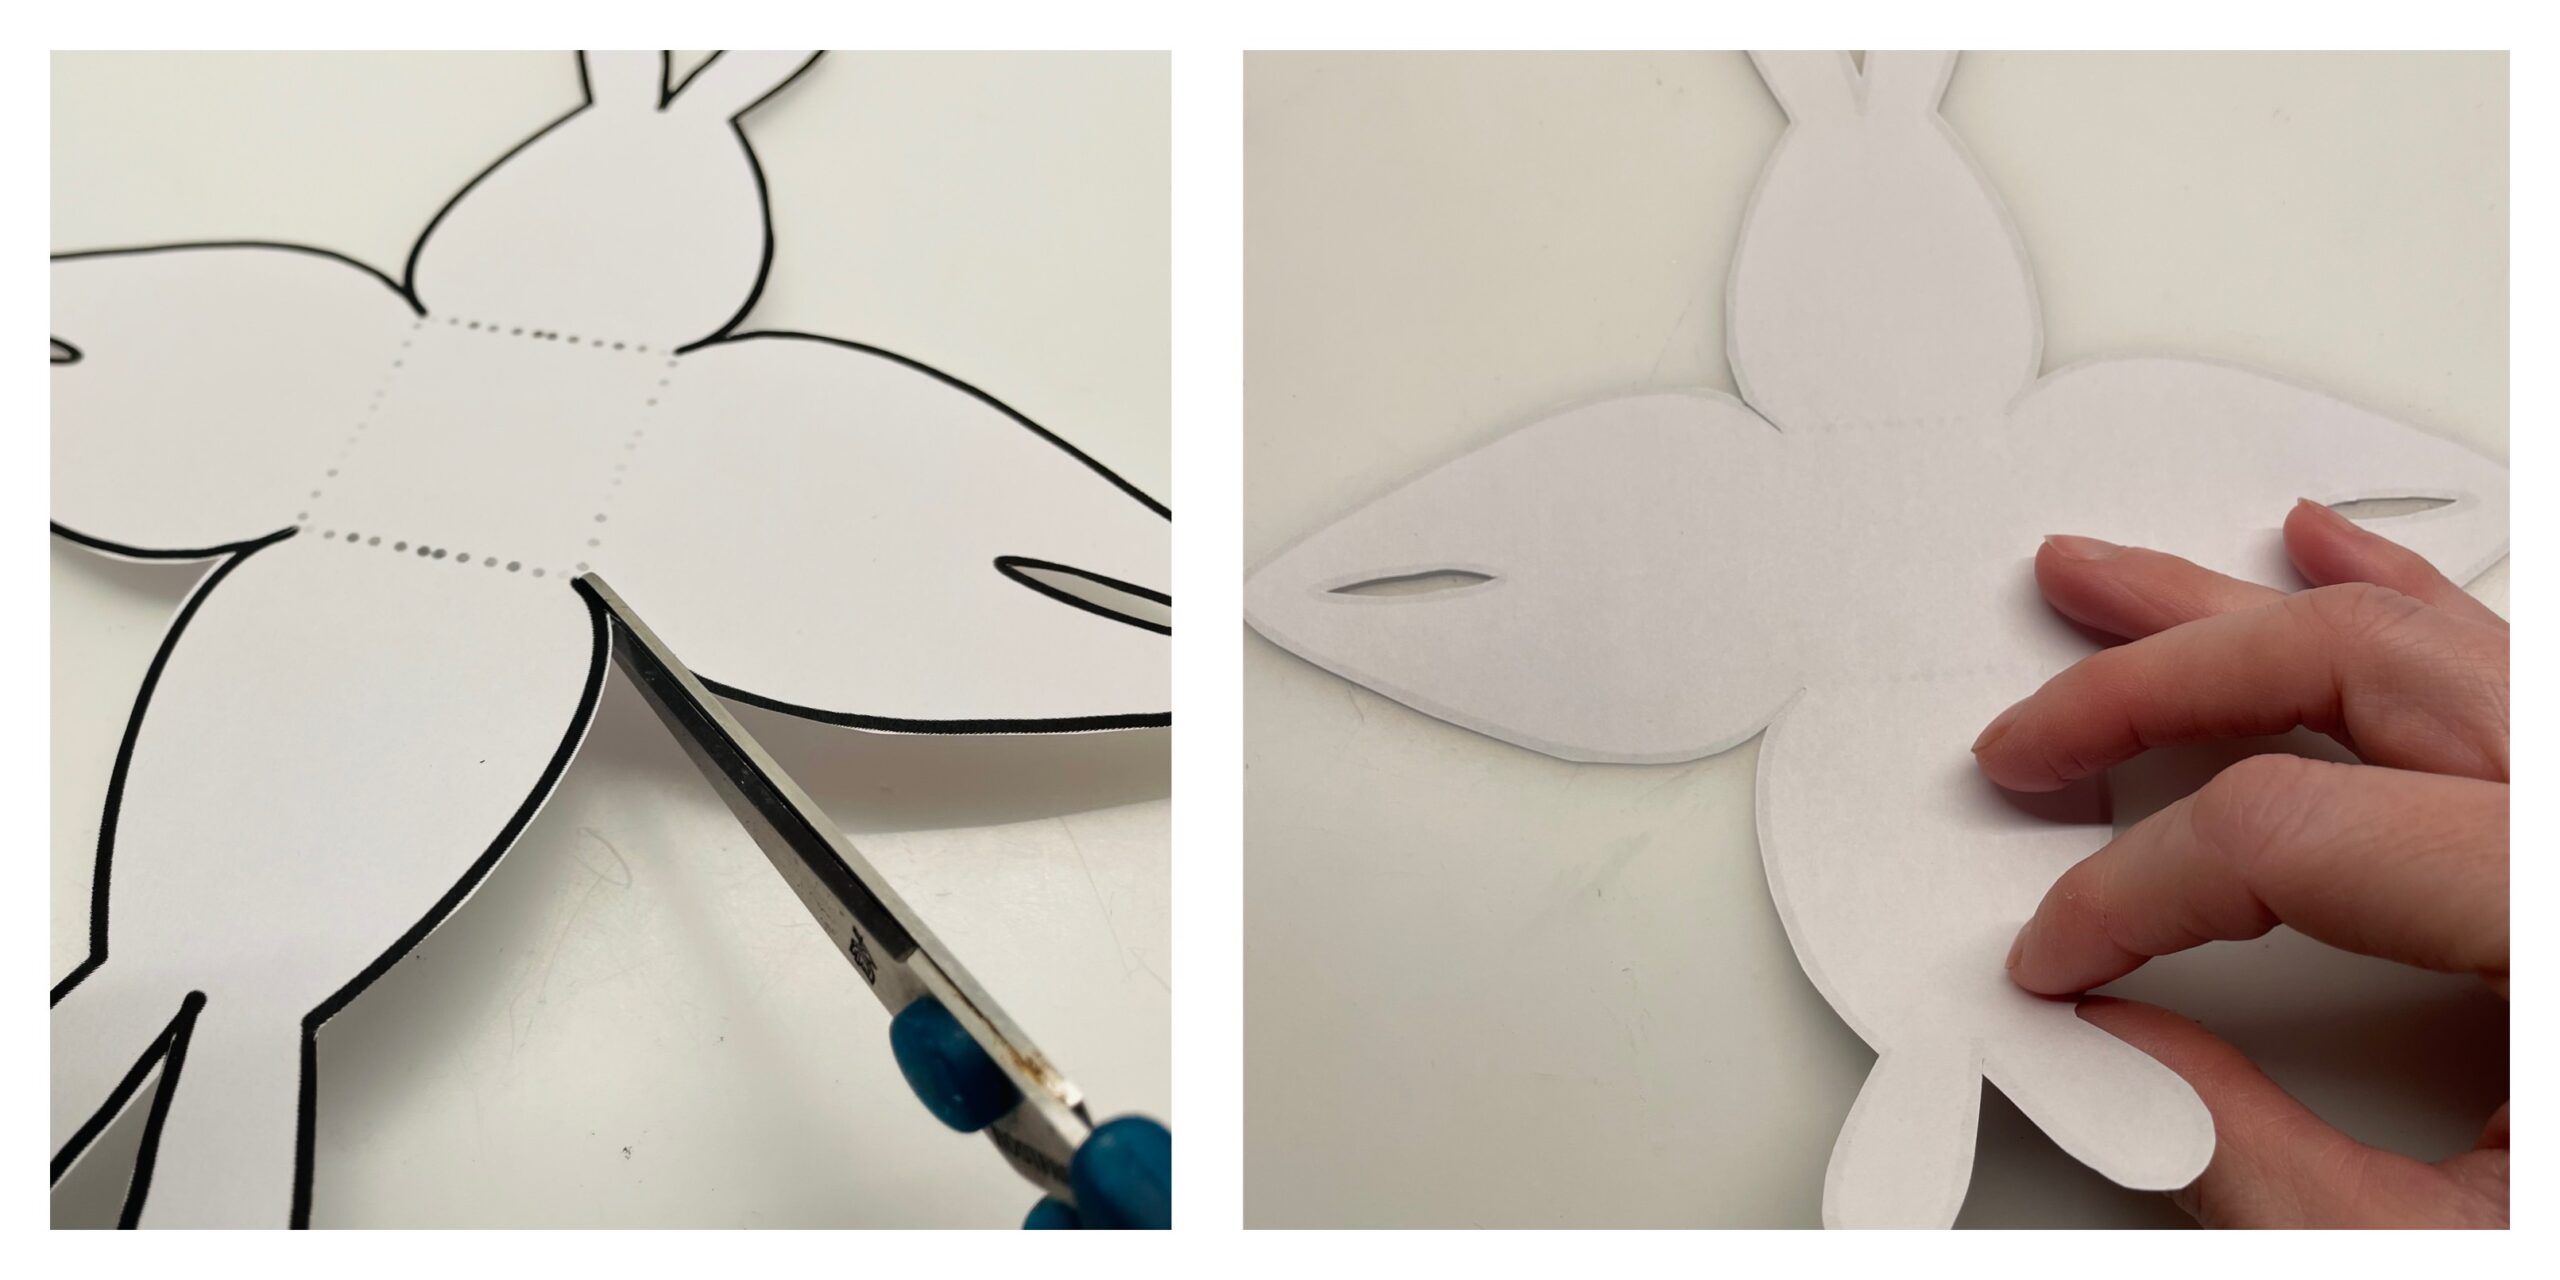
Now fold the side parts individually inwards and strip them off at the break (on the dotted line).
This creates a folded square in the middle. This is the bottom of the gift box.
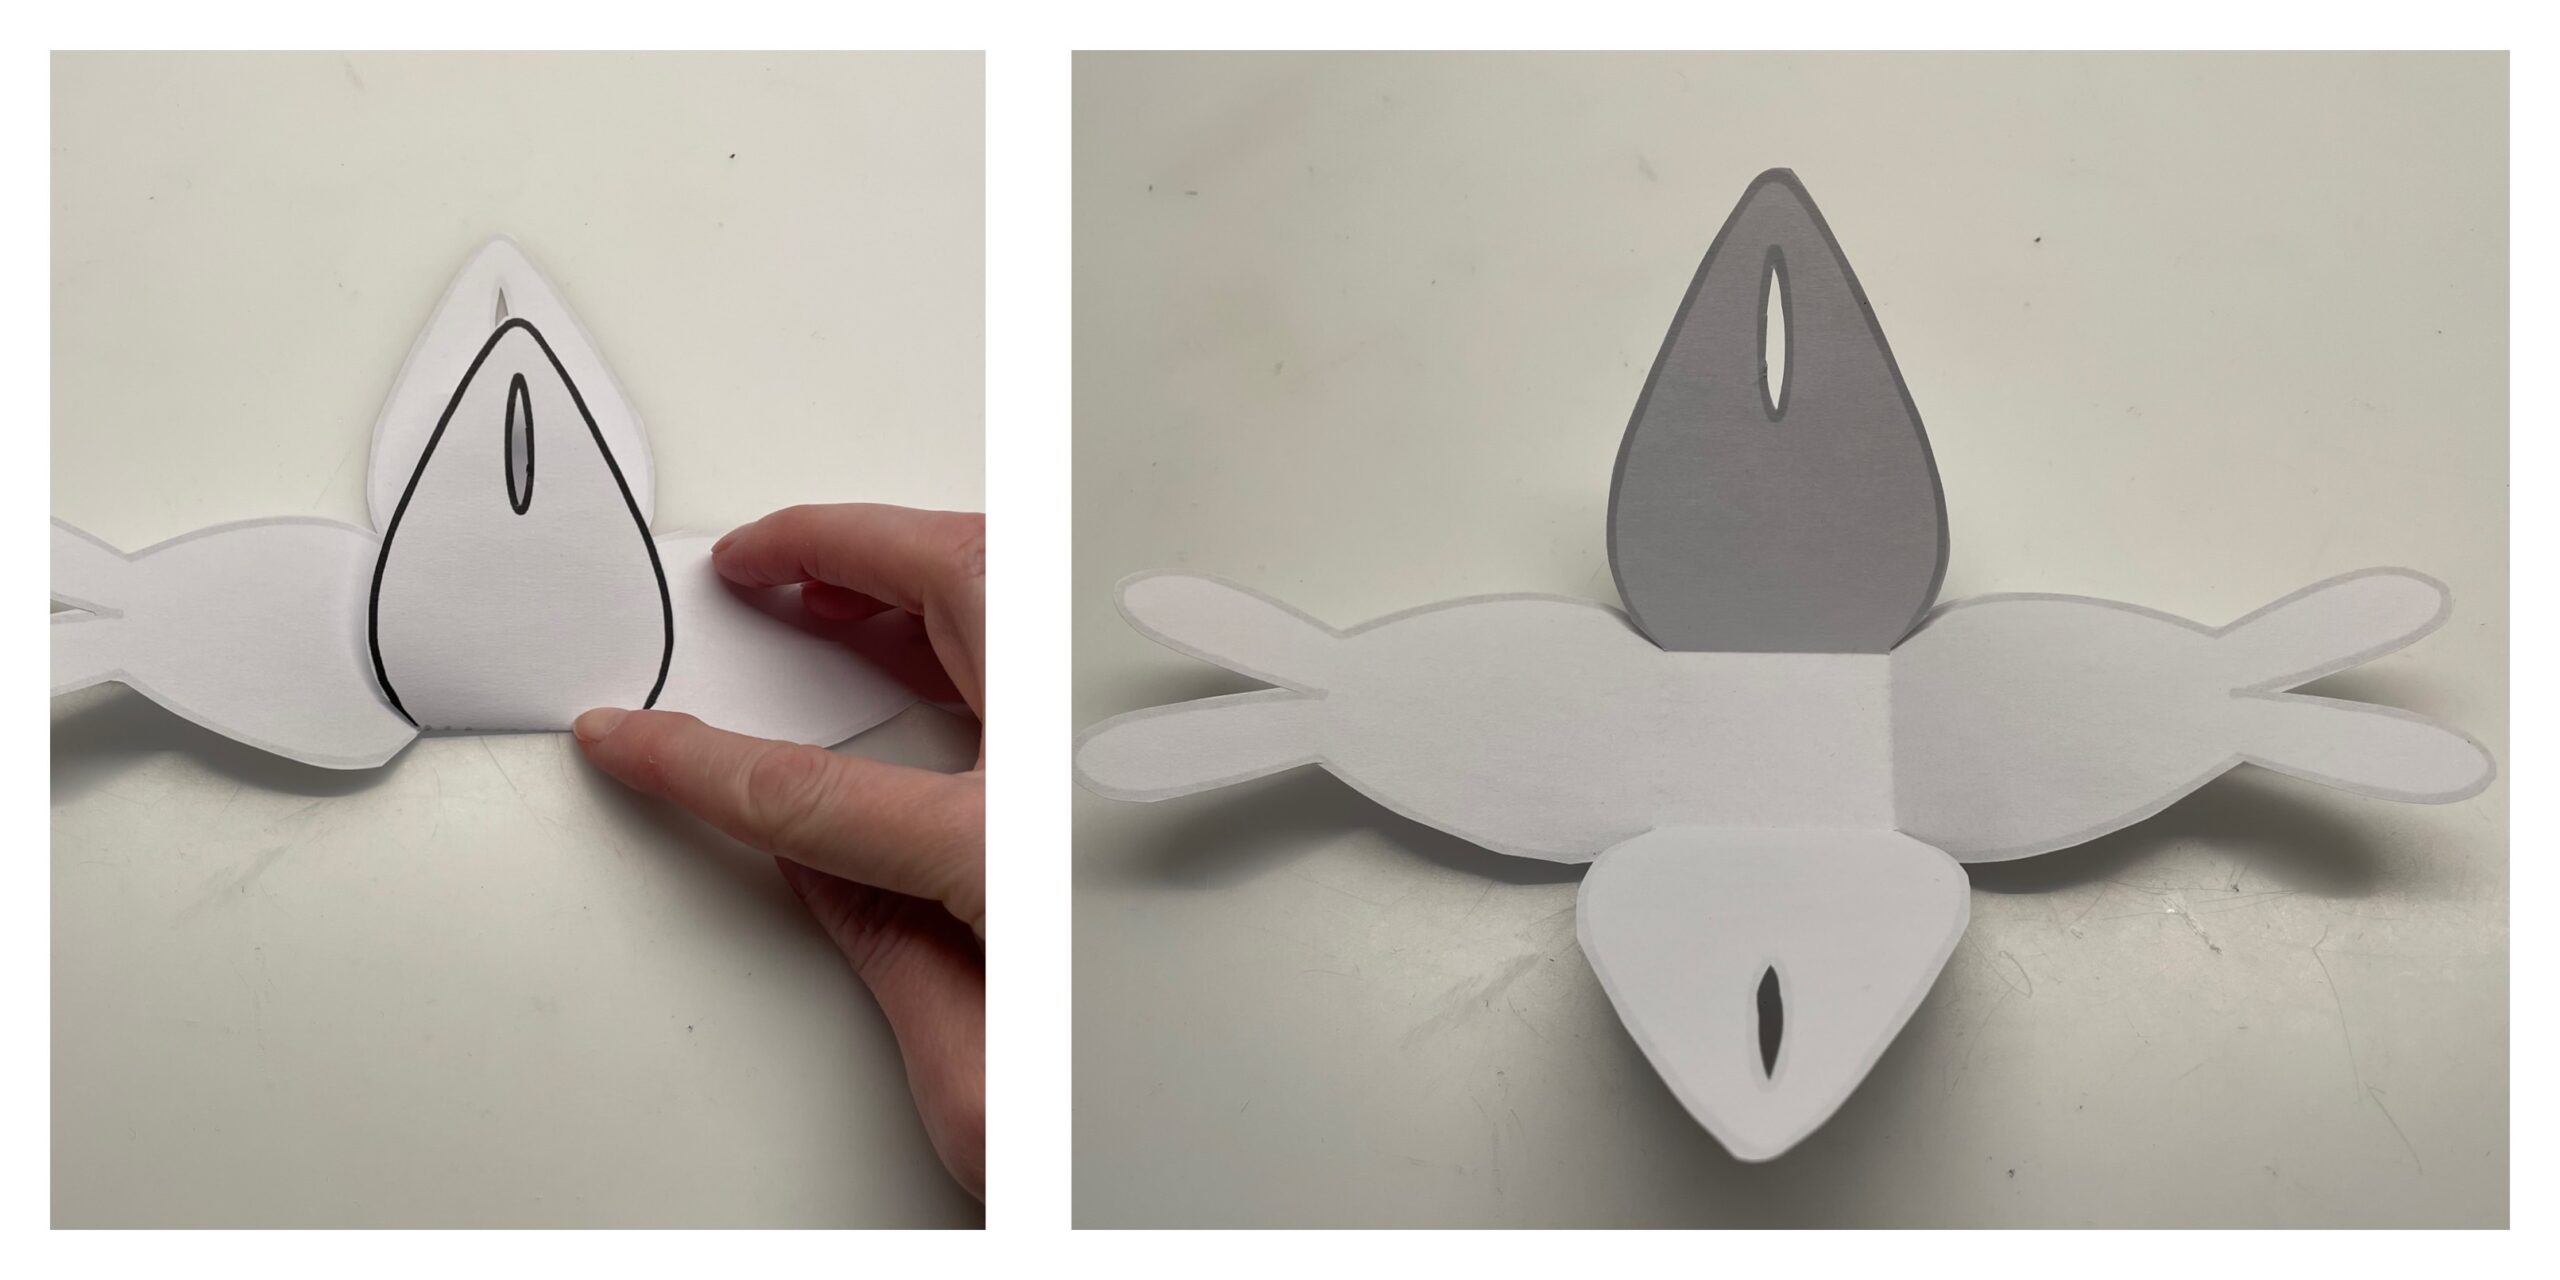
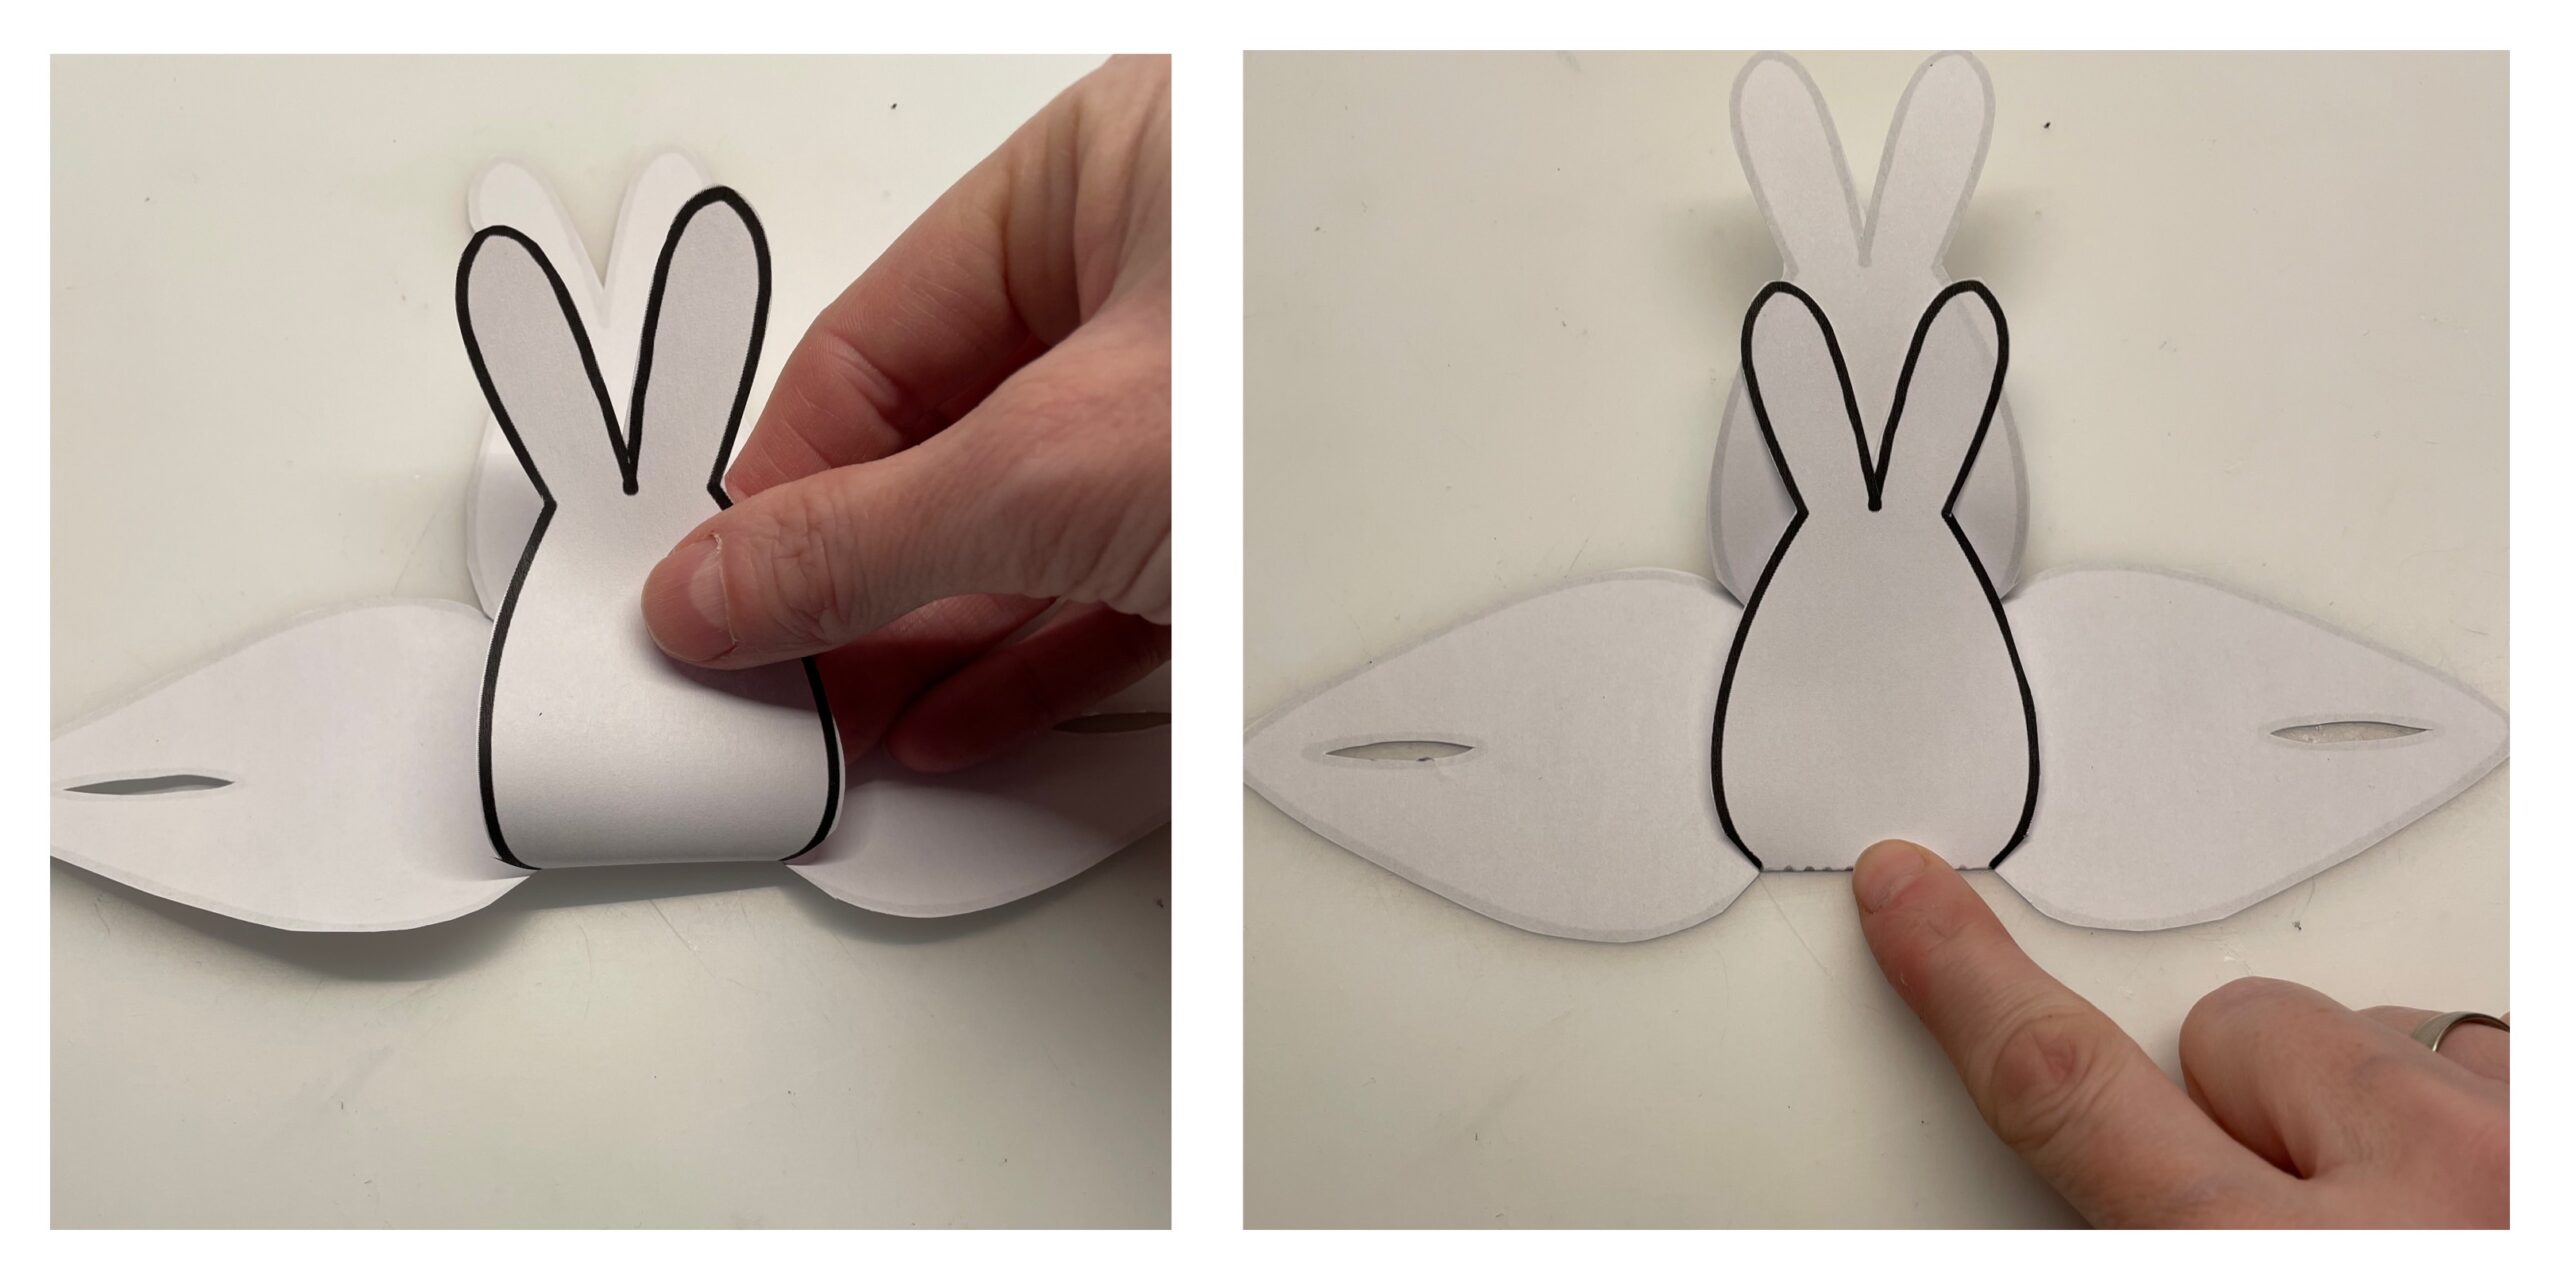
Now put the two opposite cut-in side parts on top of each other so that the incisions lie on top of each other.
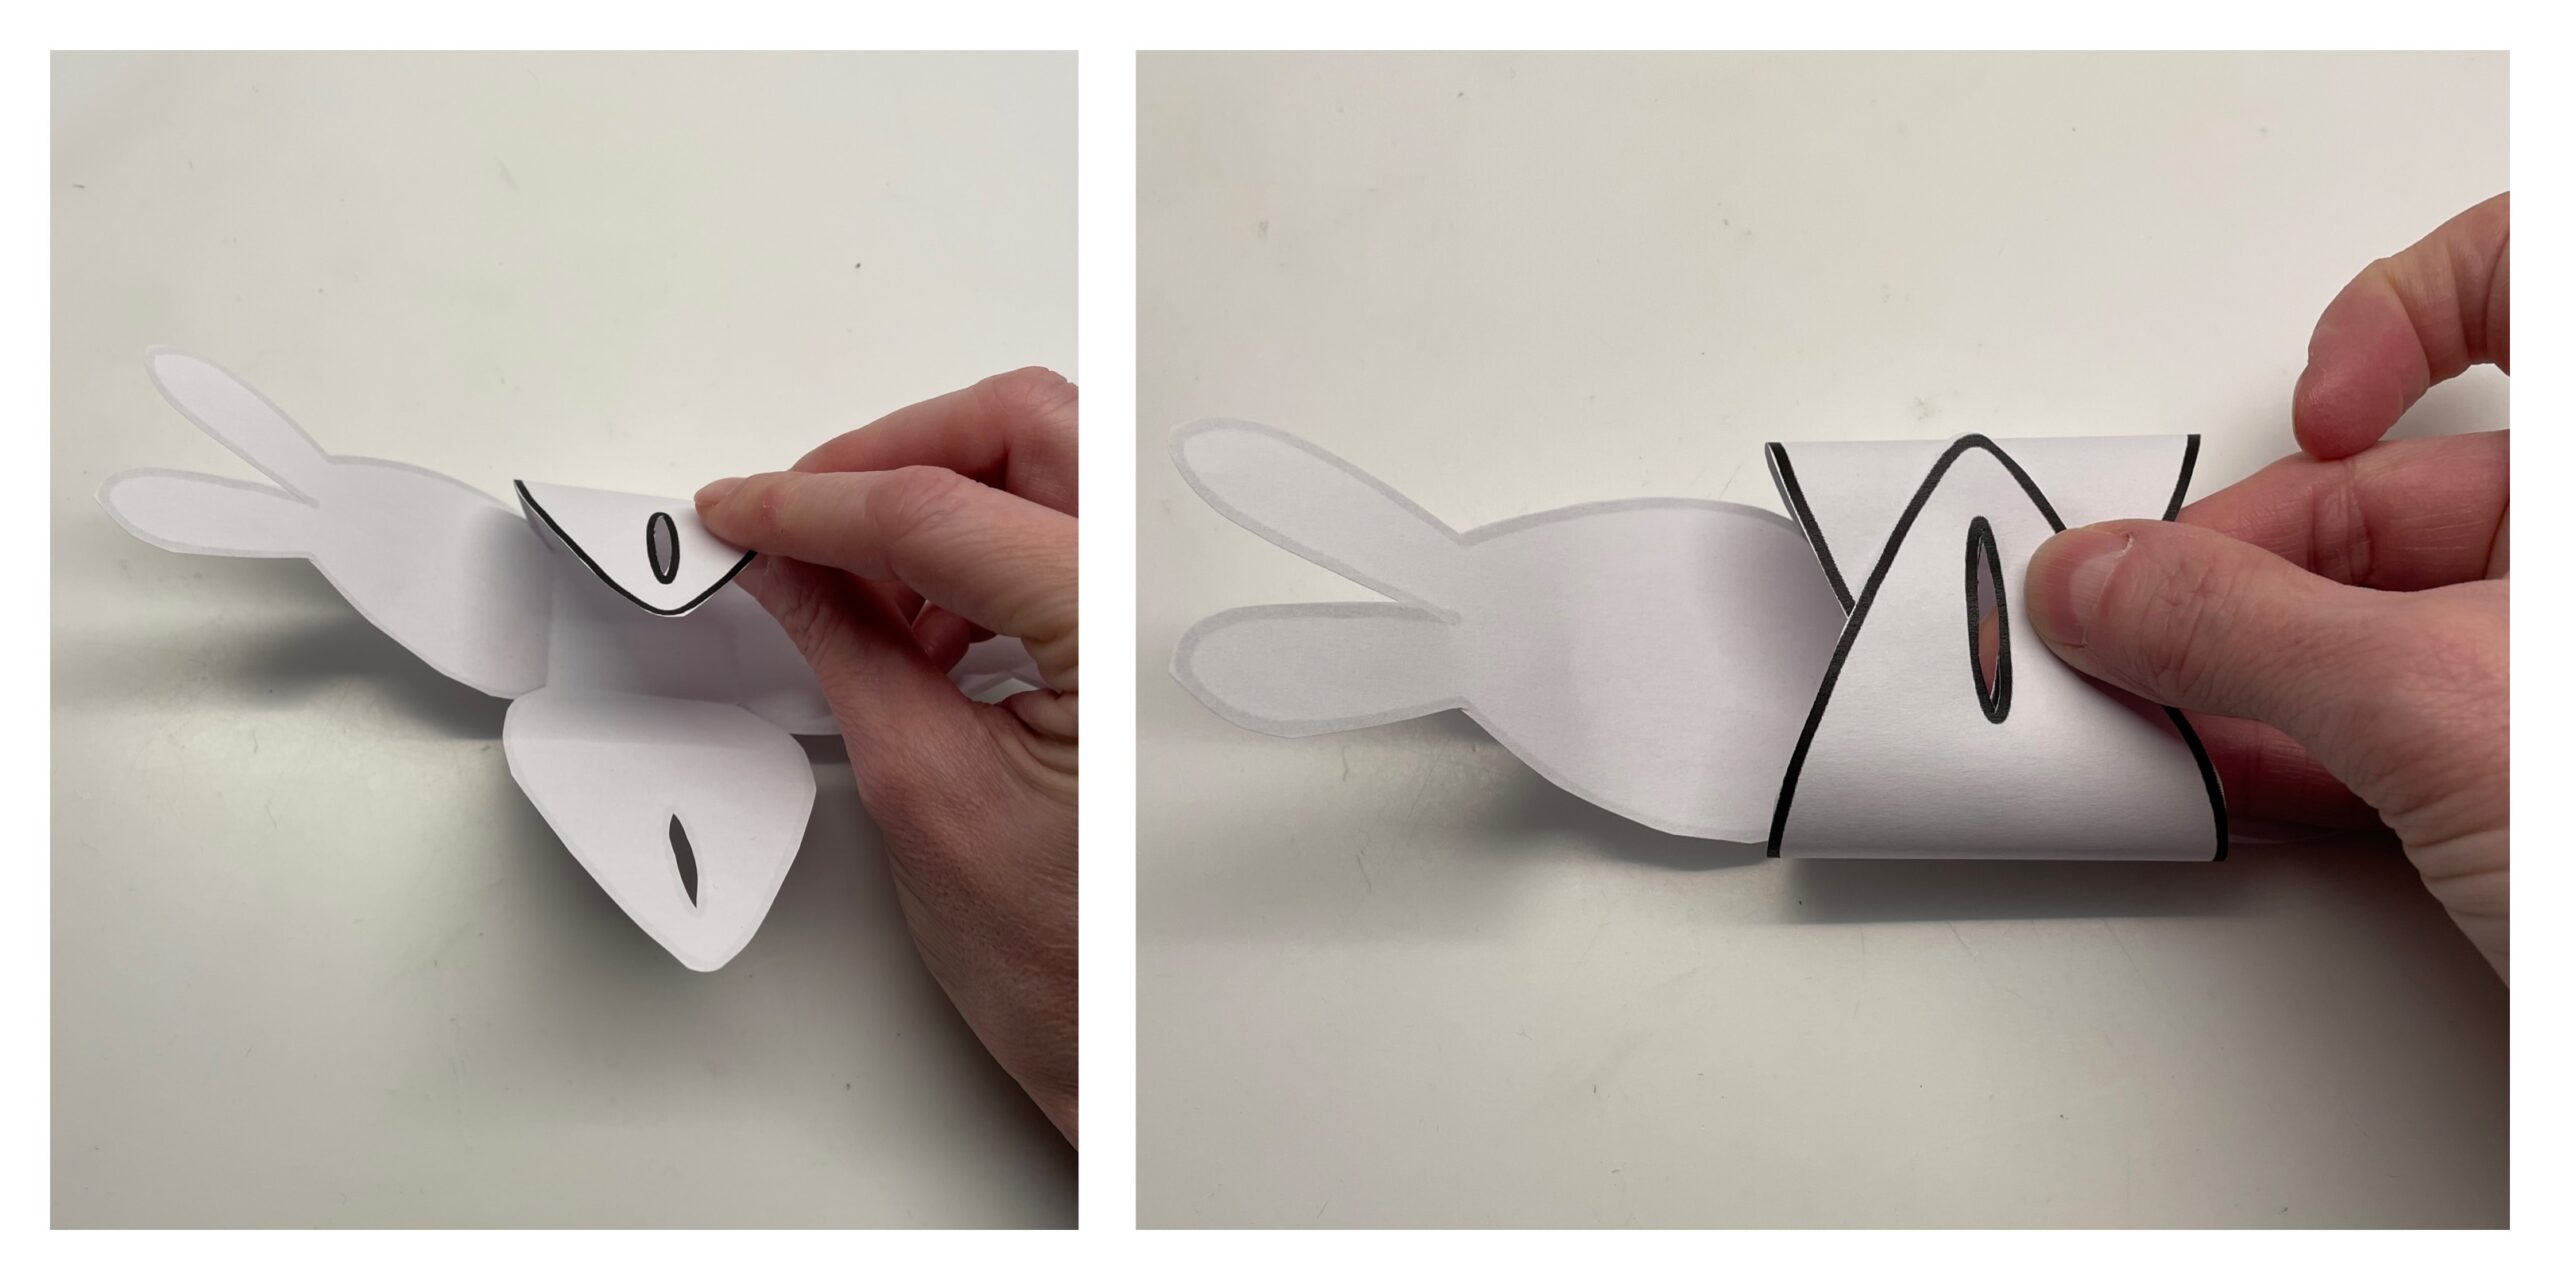
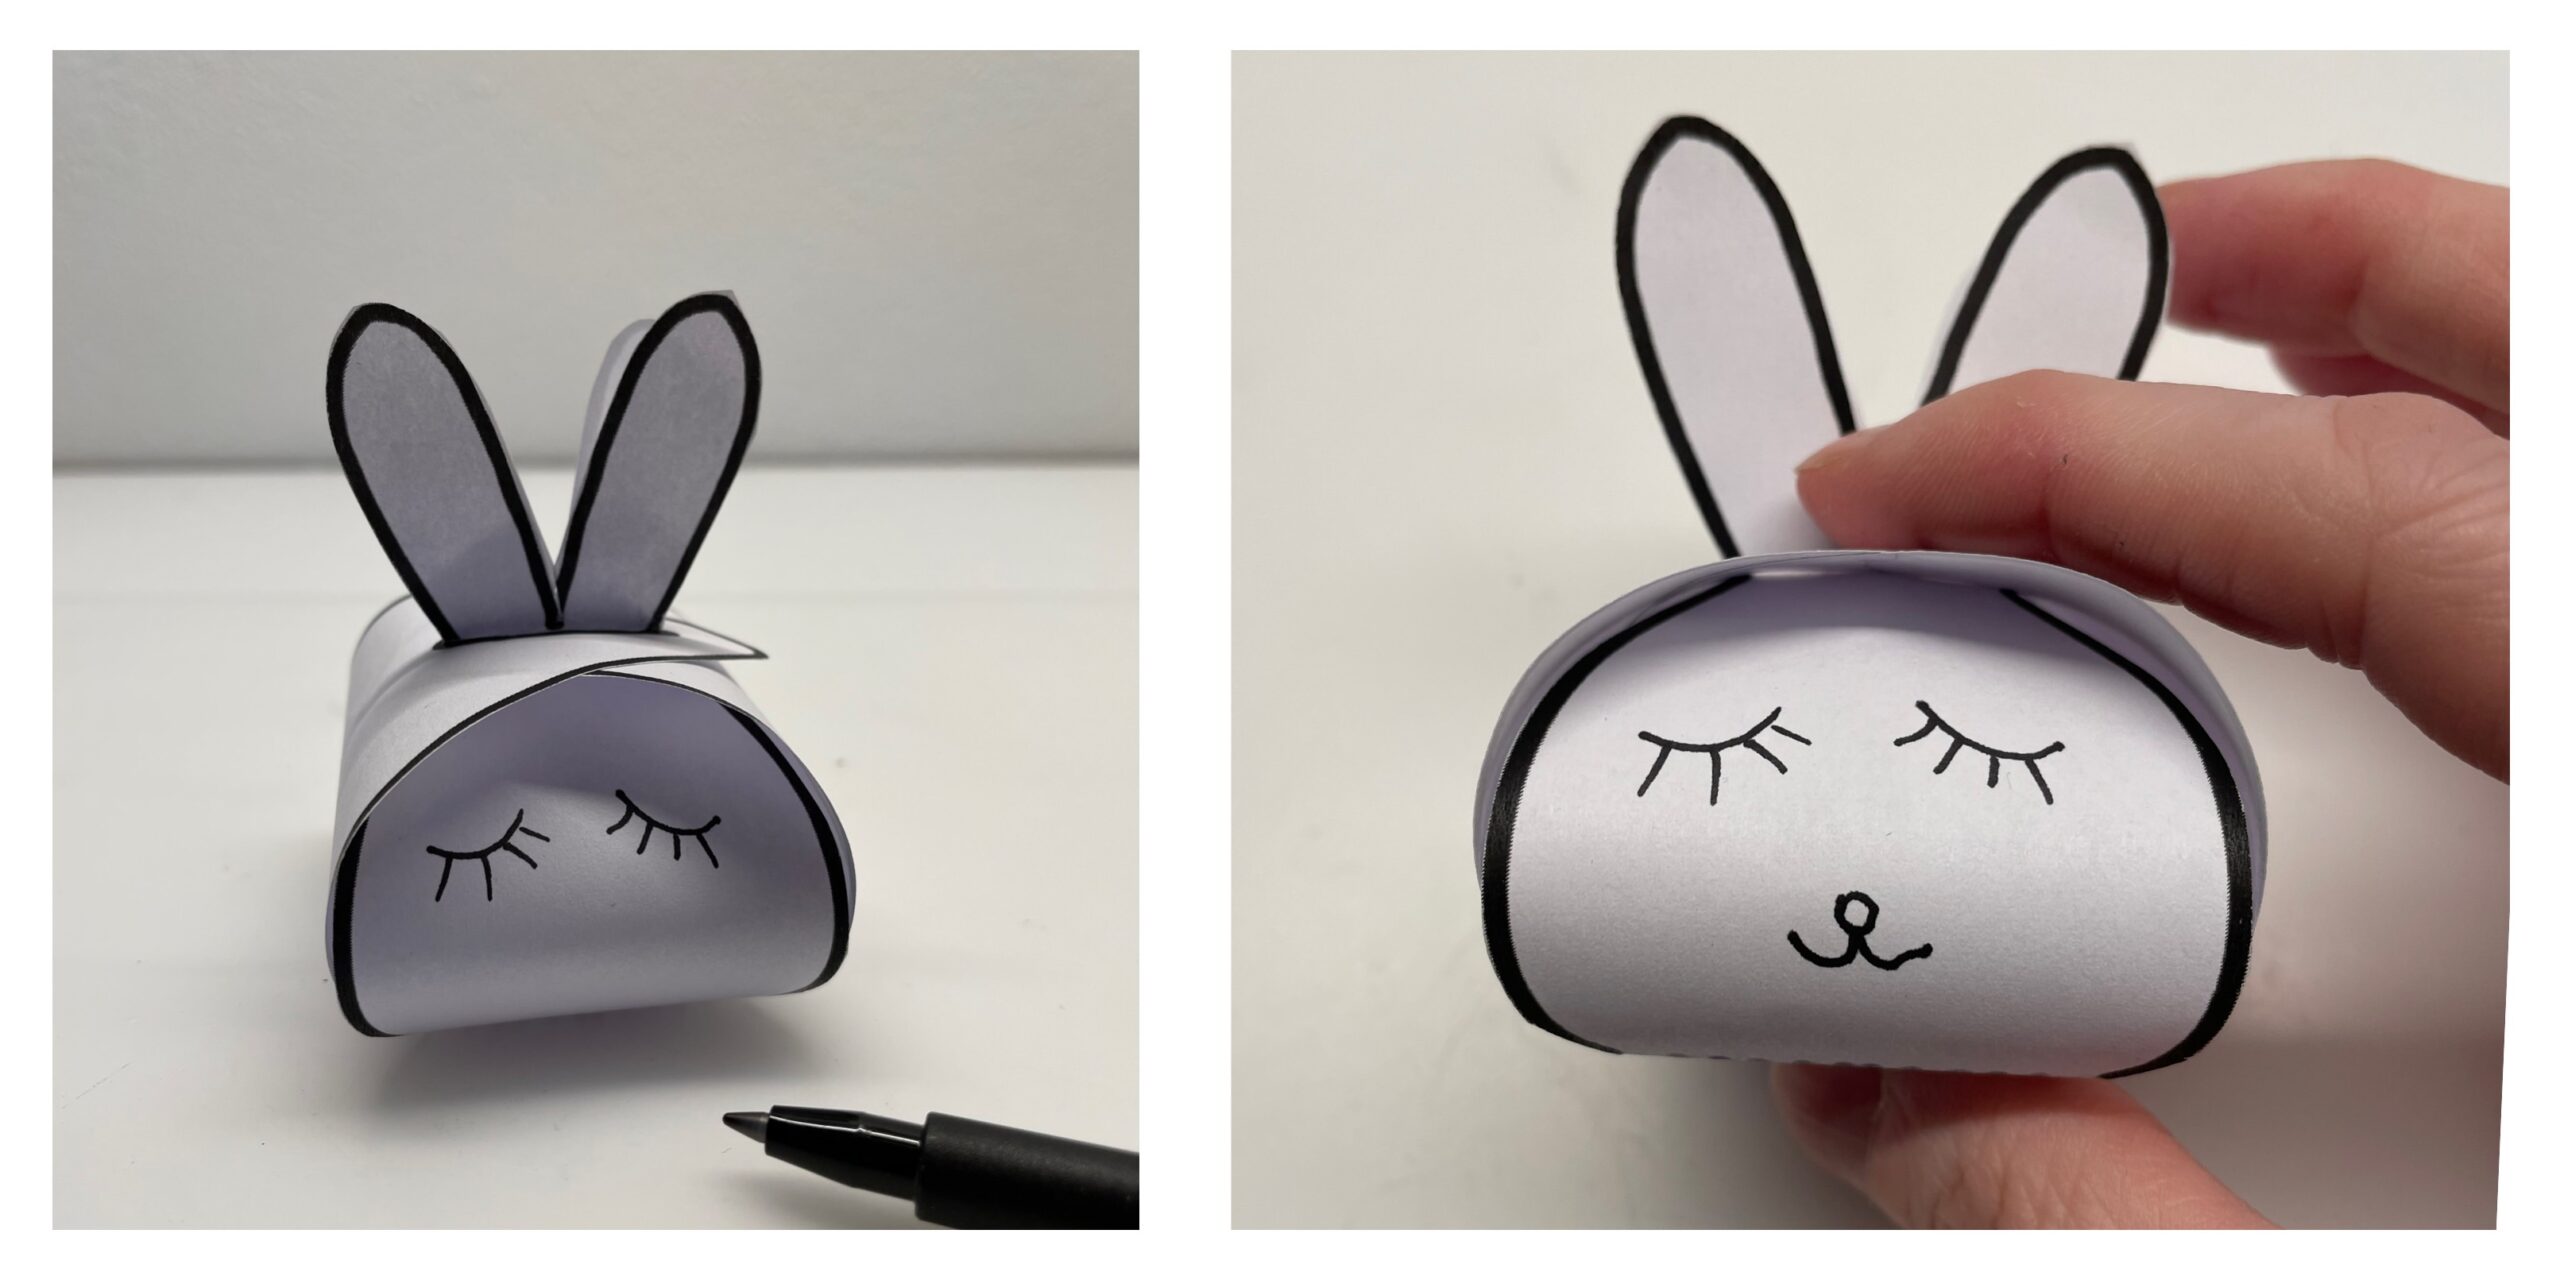
With a side part with rabbit ears you place the two ears on each other as much as possible. In doing so, the paper gently pinches in. Then you put the ears through the incision. The ears fold apart again when plugged through.
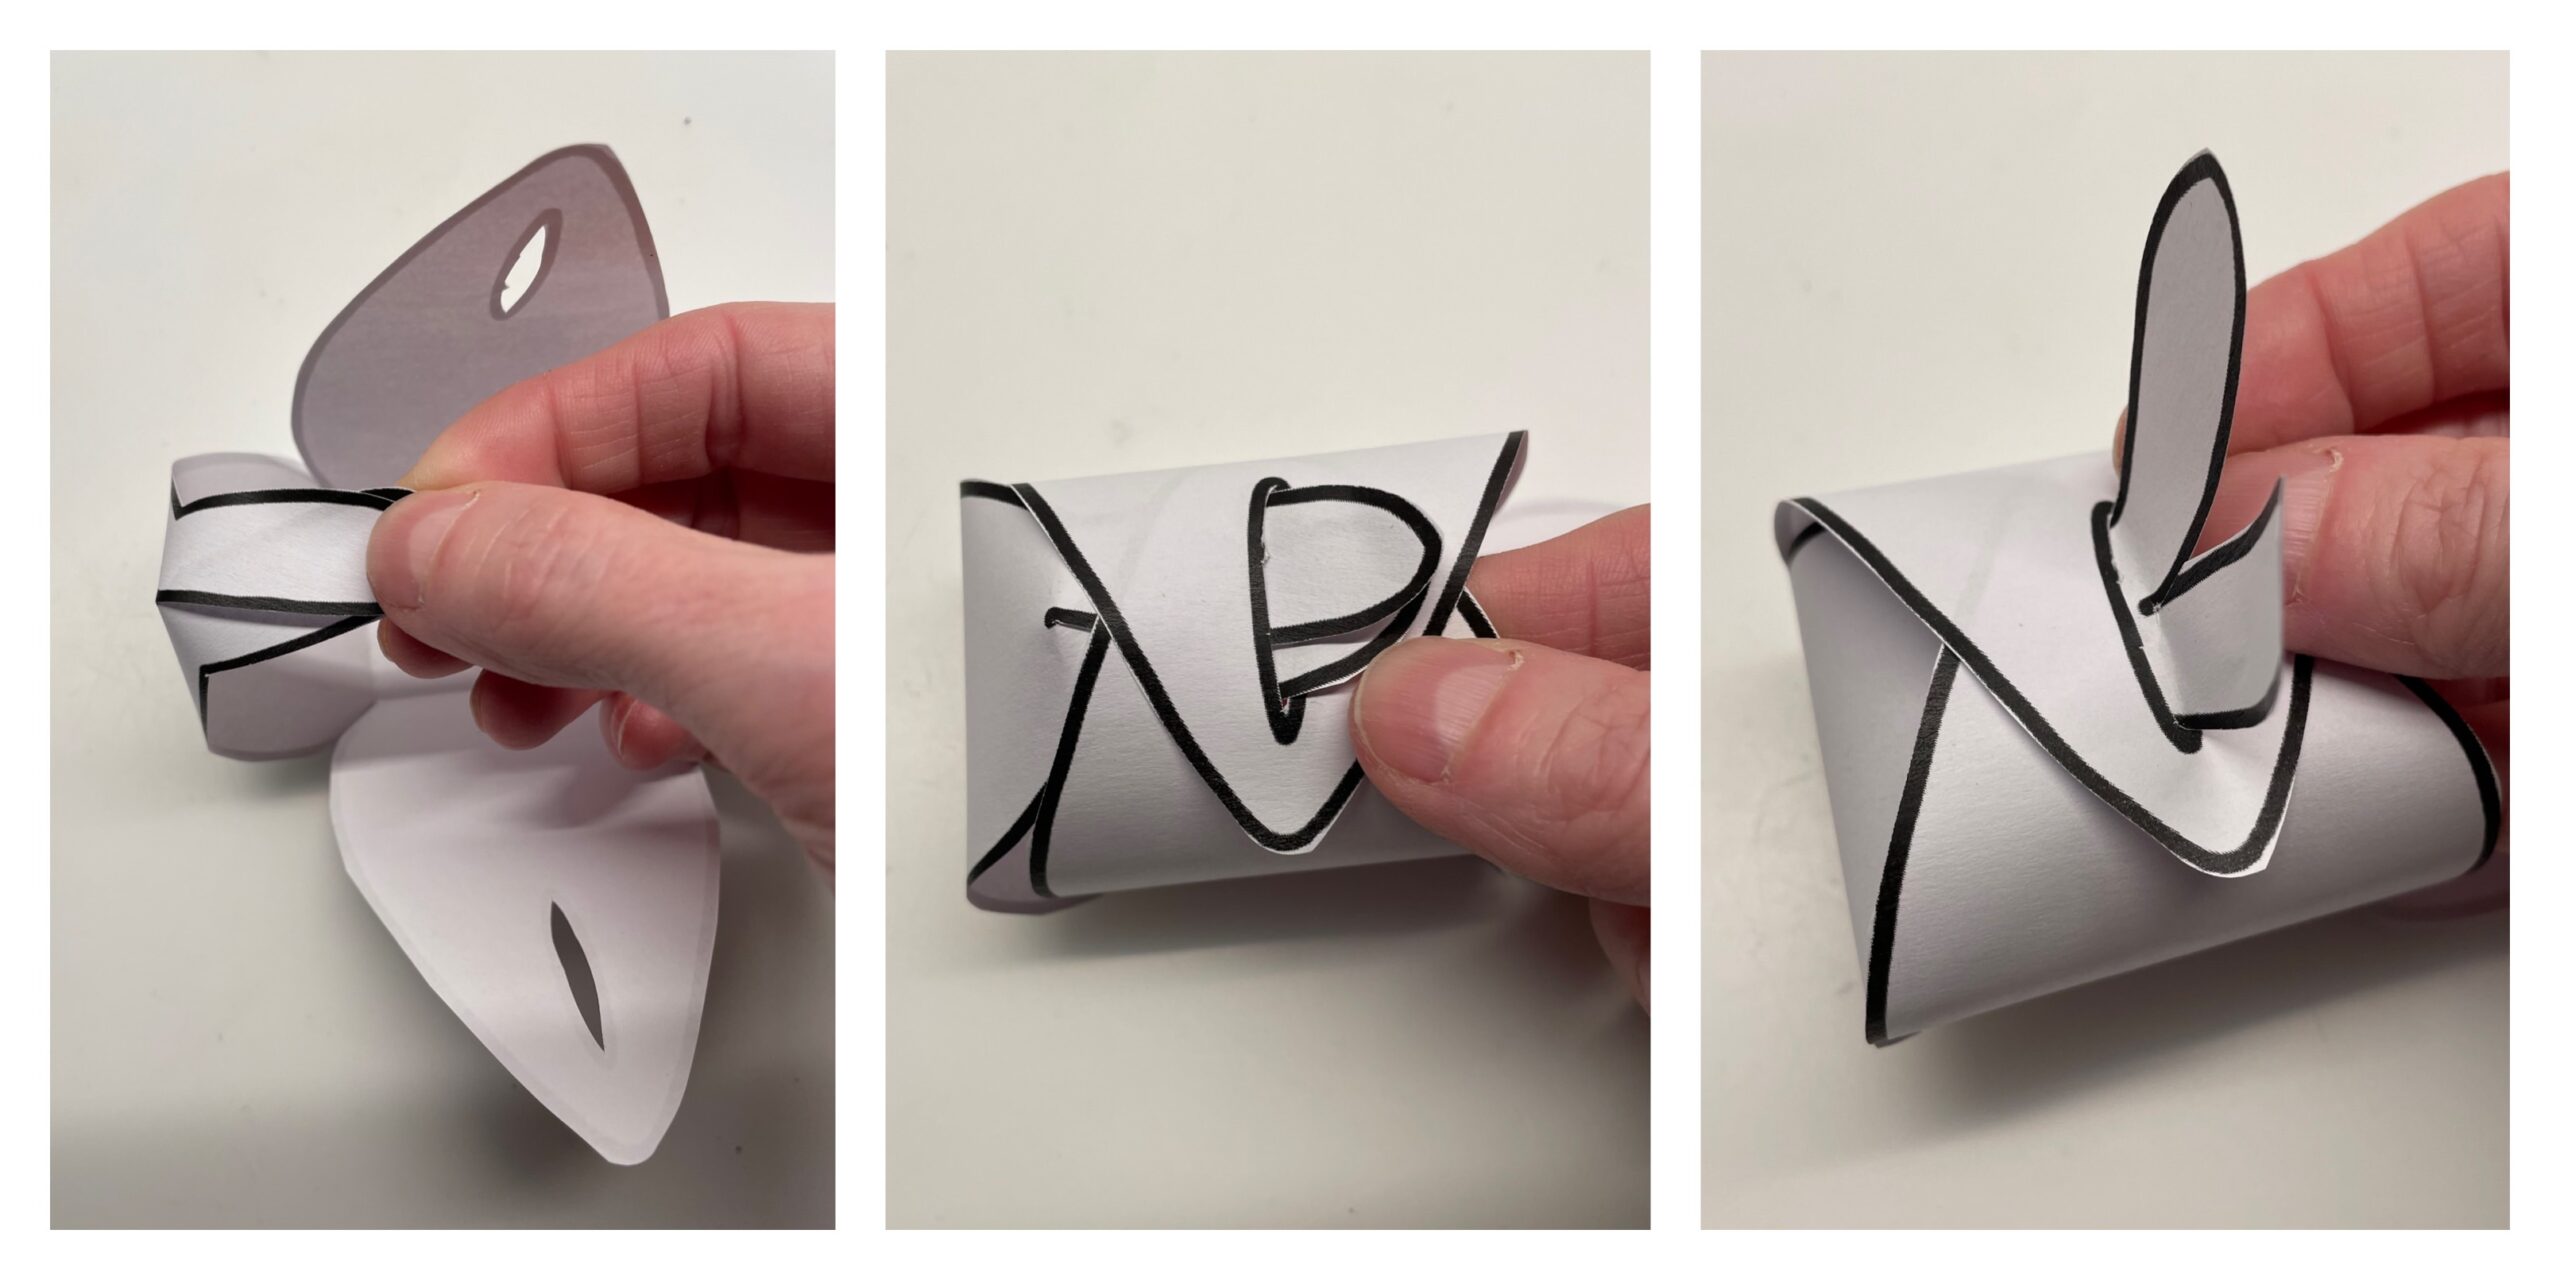
Now you put your gift in the box and fold the opposite side part with the rabbit ears as well and put it through the incision. Thus the box is closed.
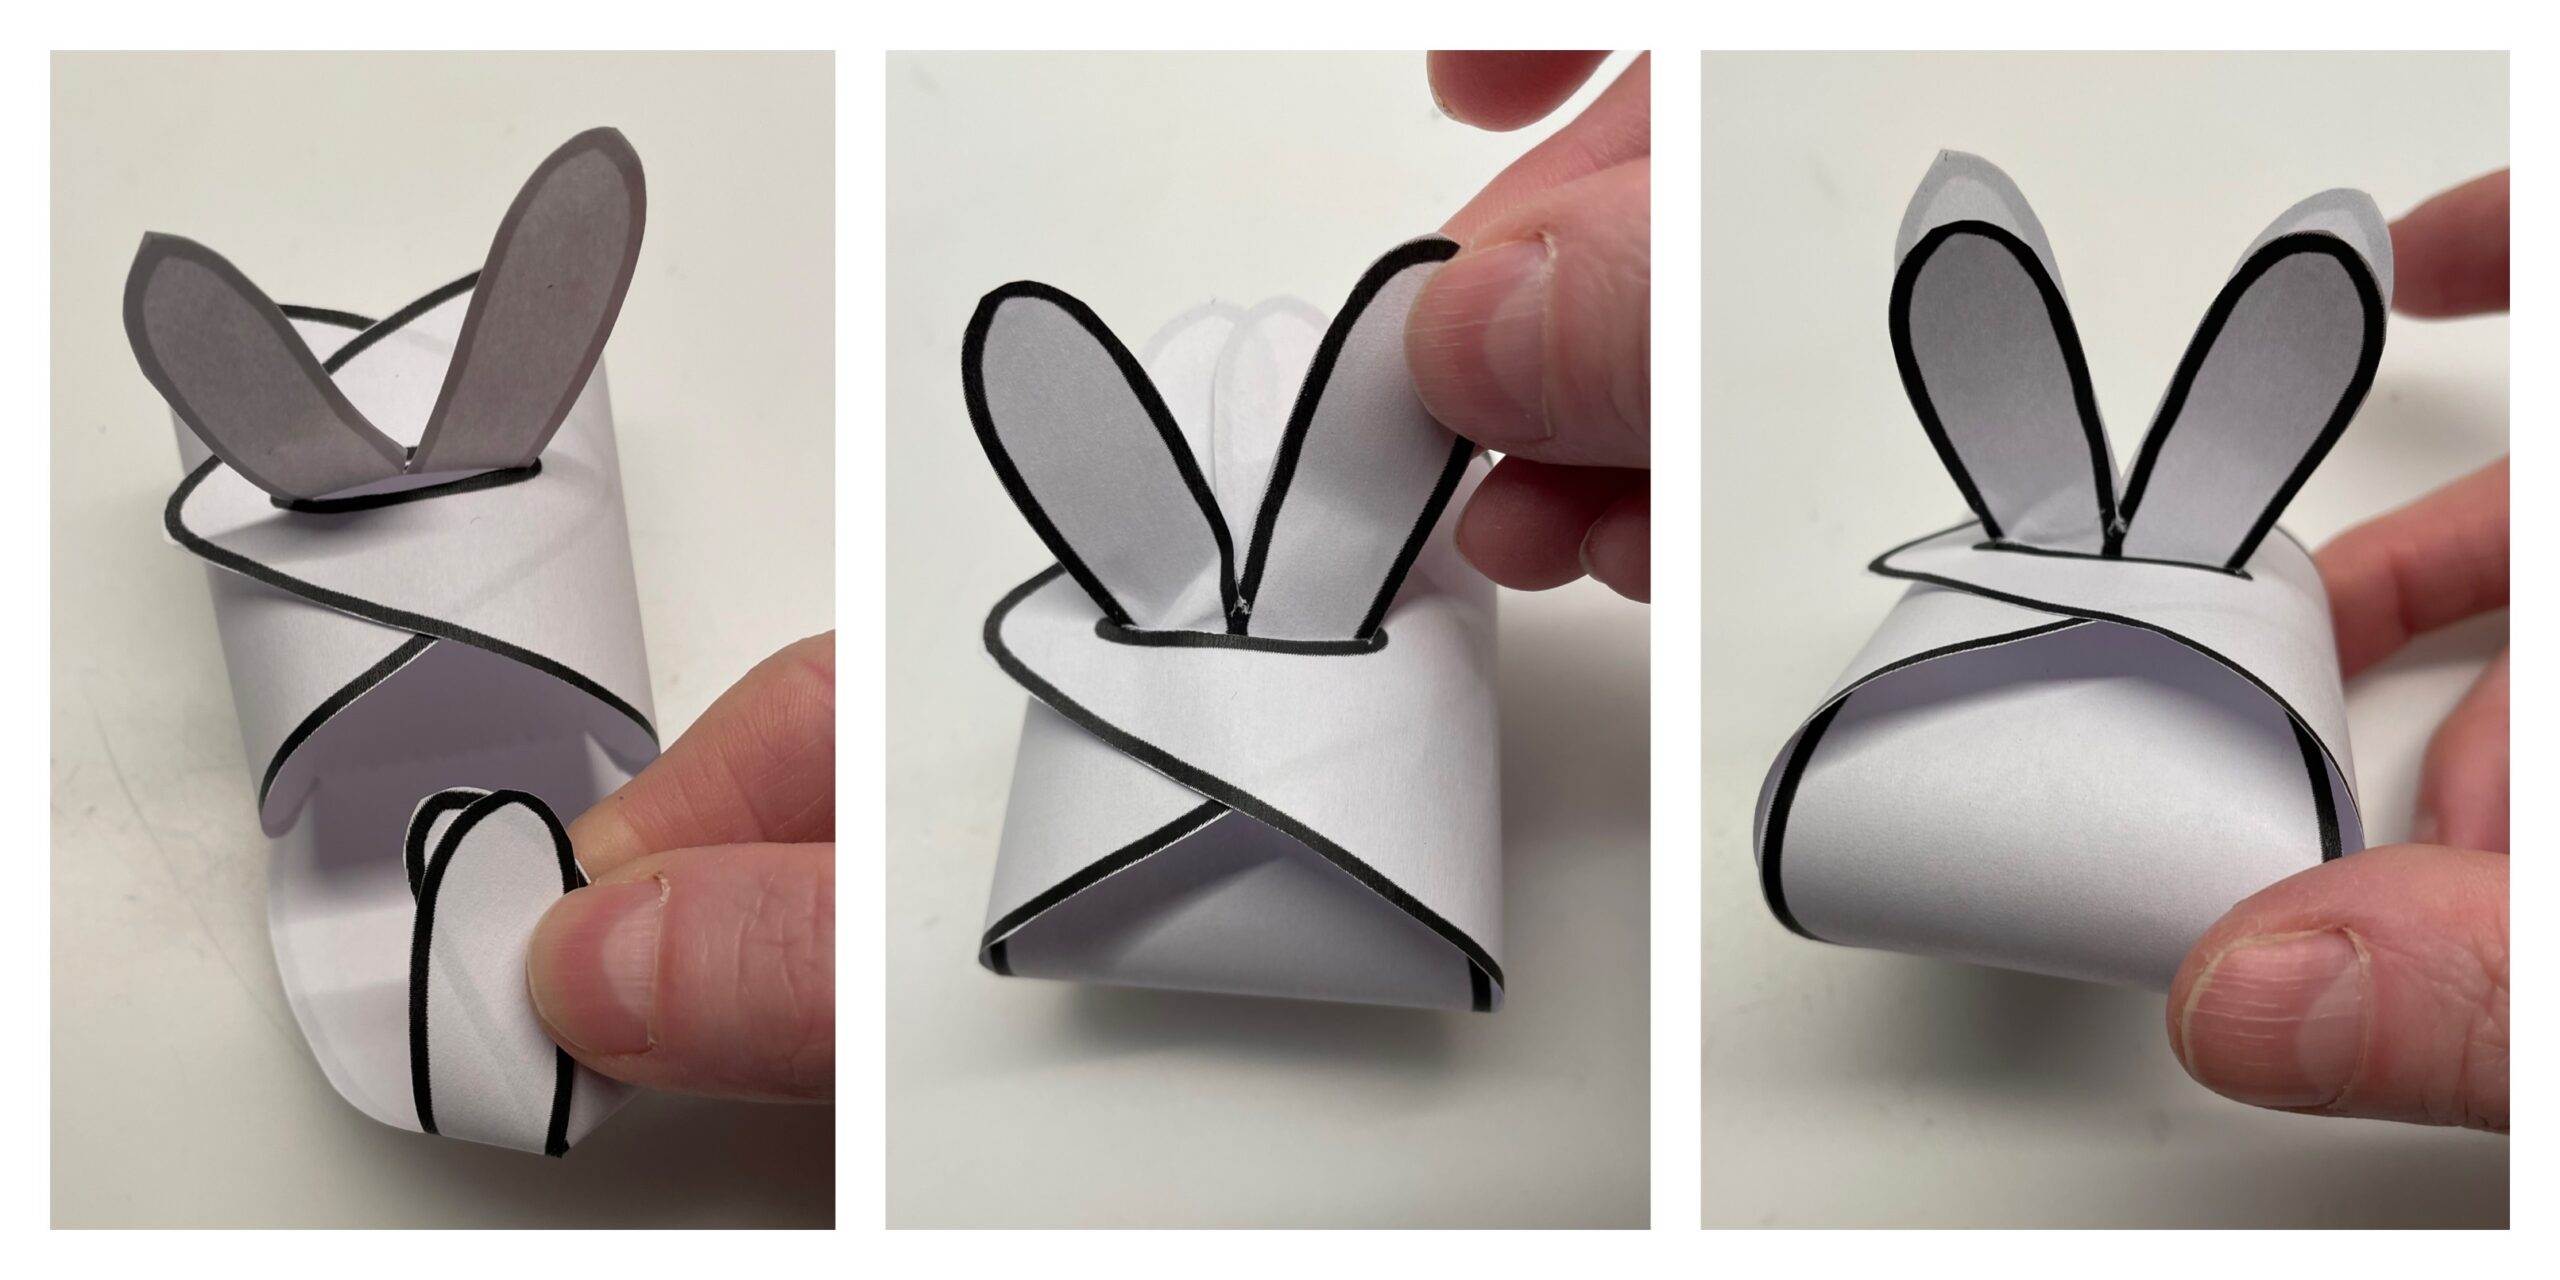
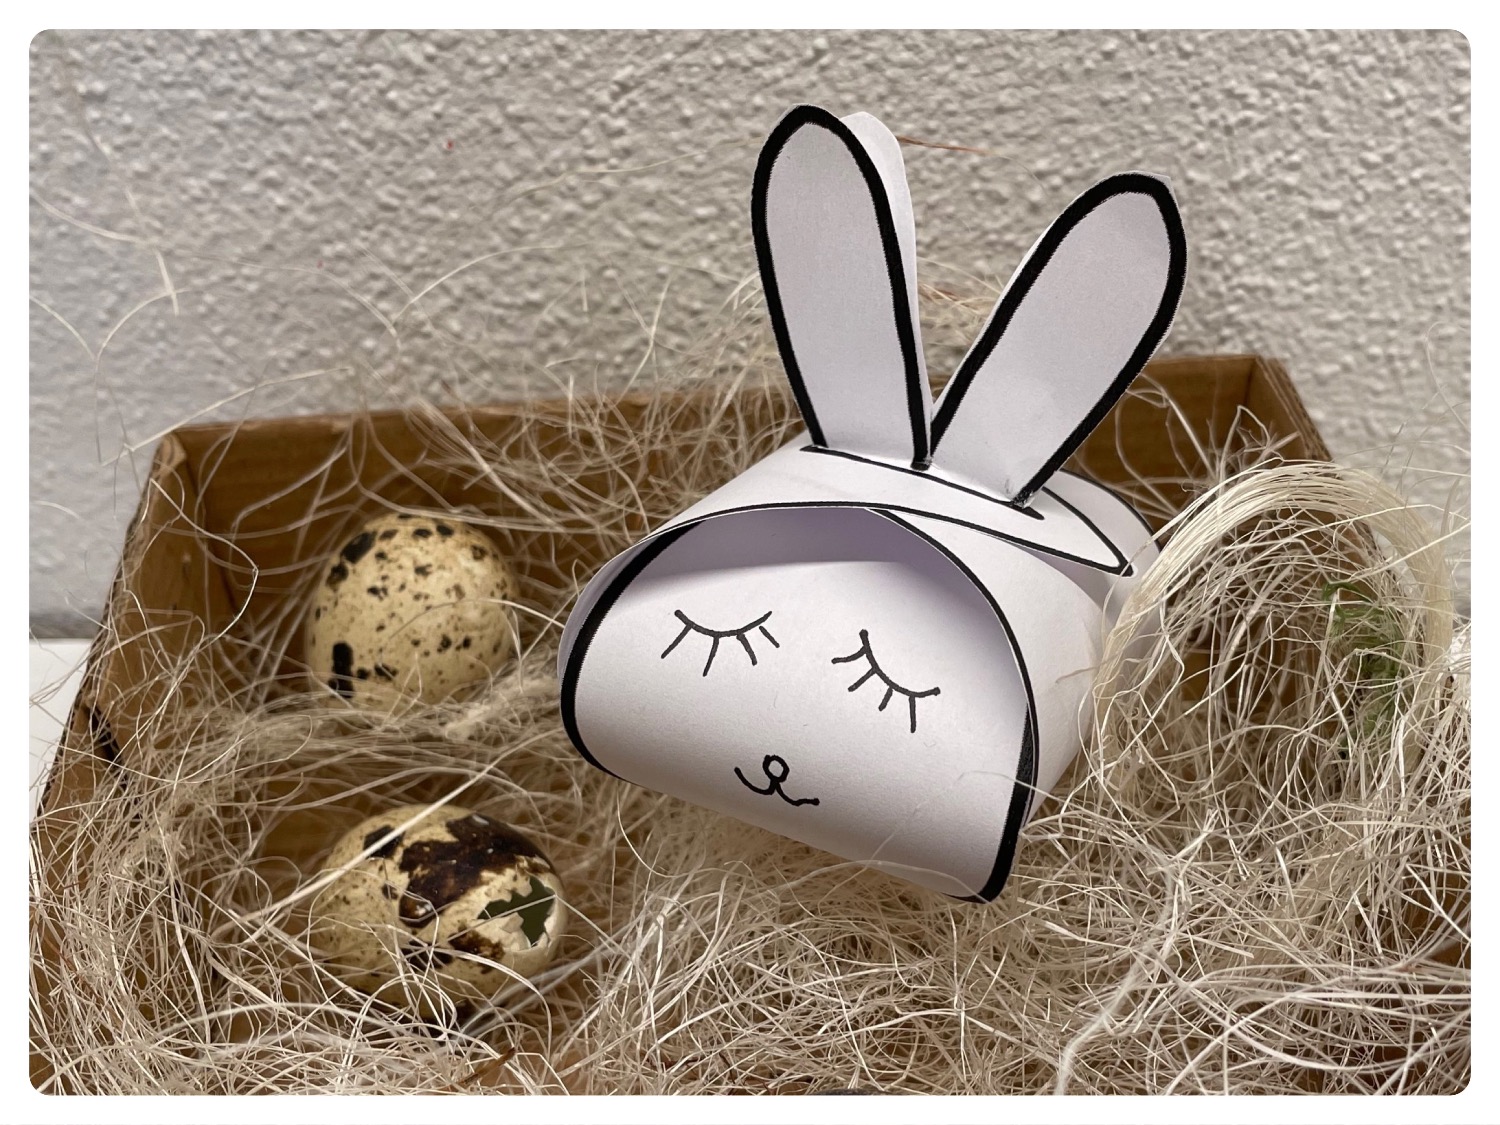
Now you paint a rabbit face on the ready folded gift box.
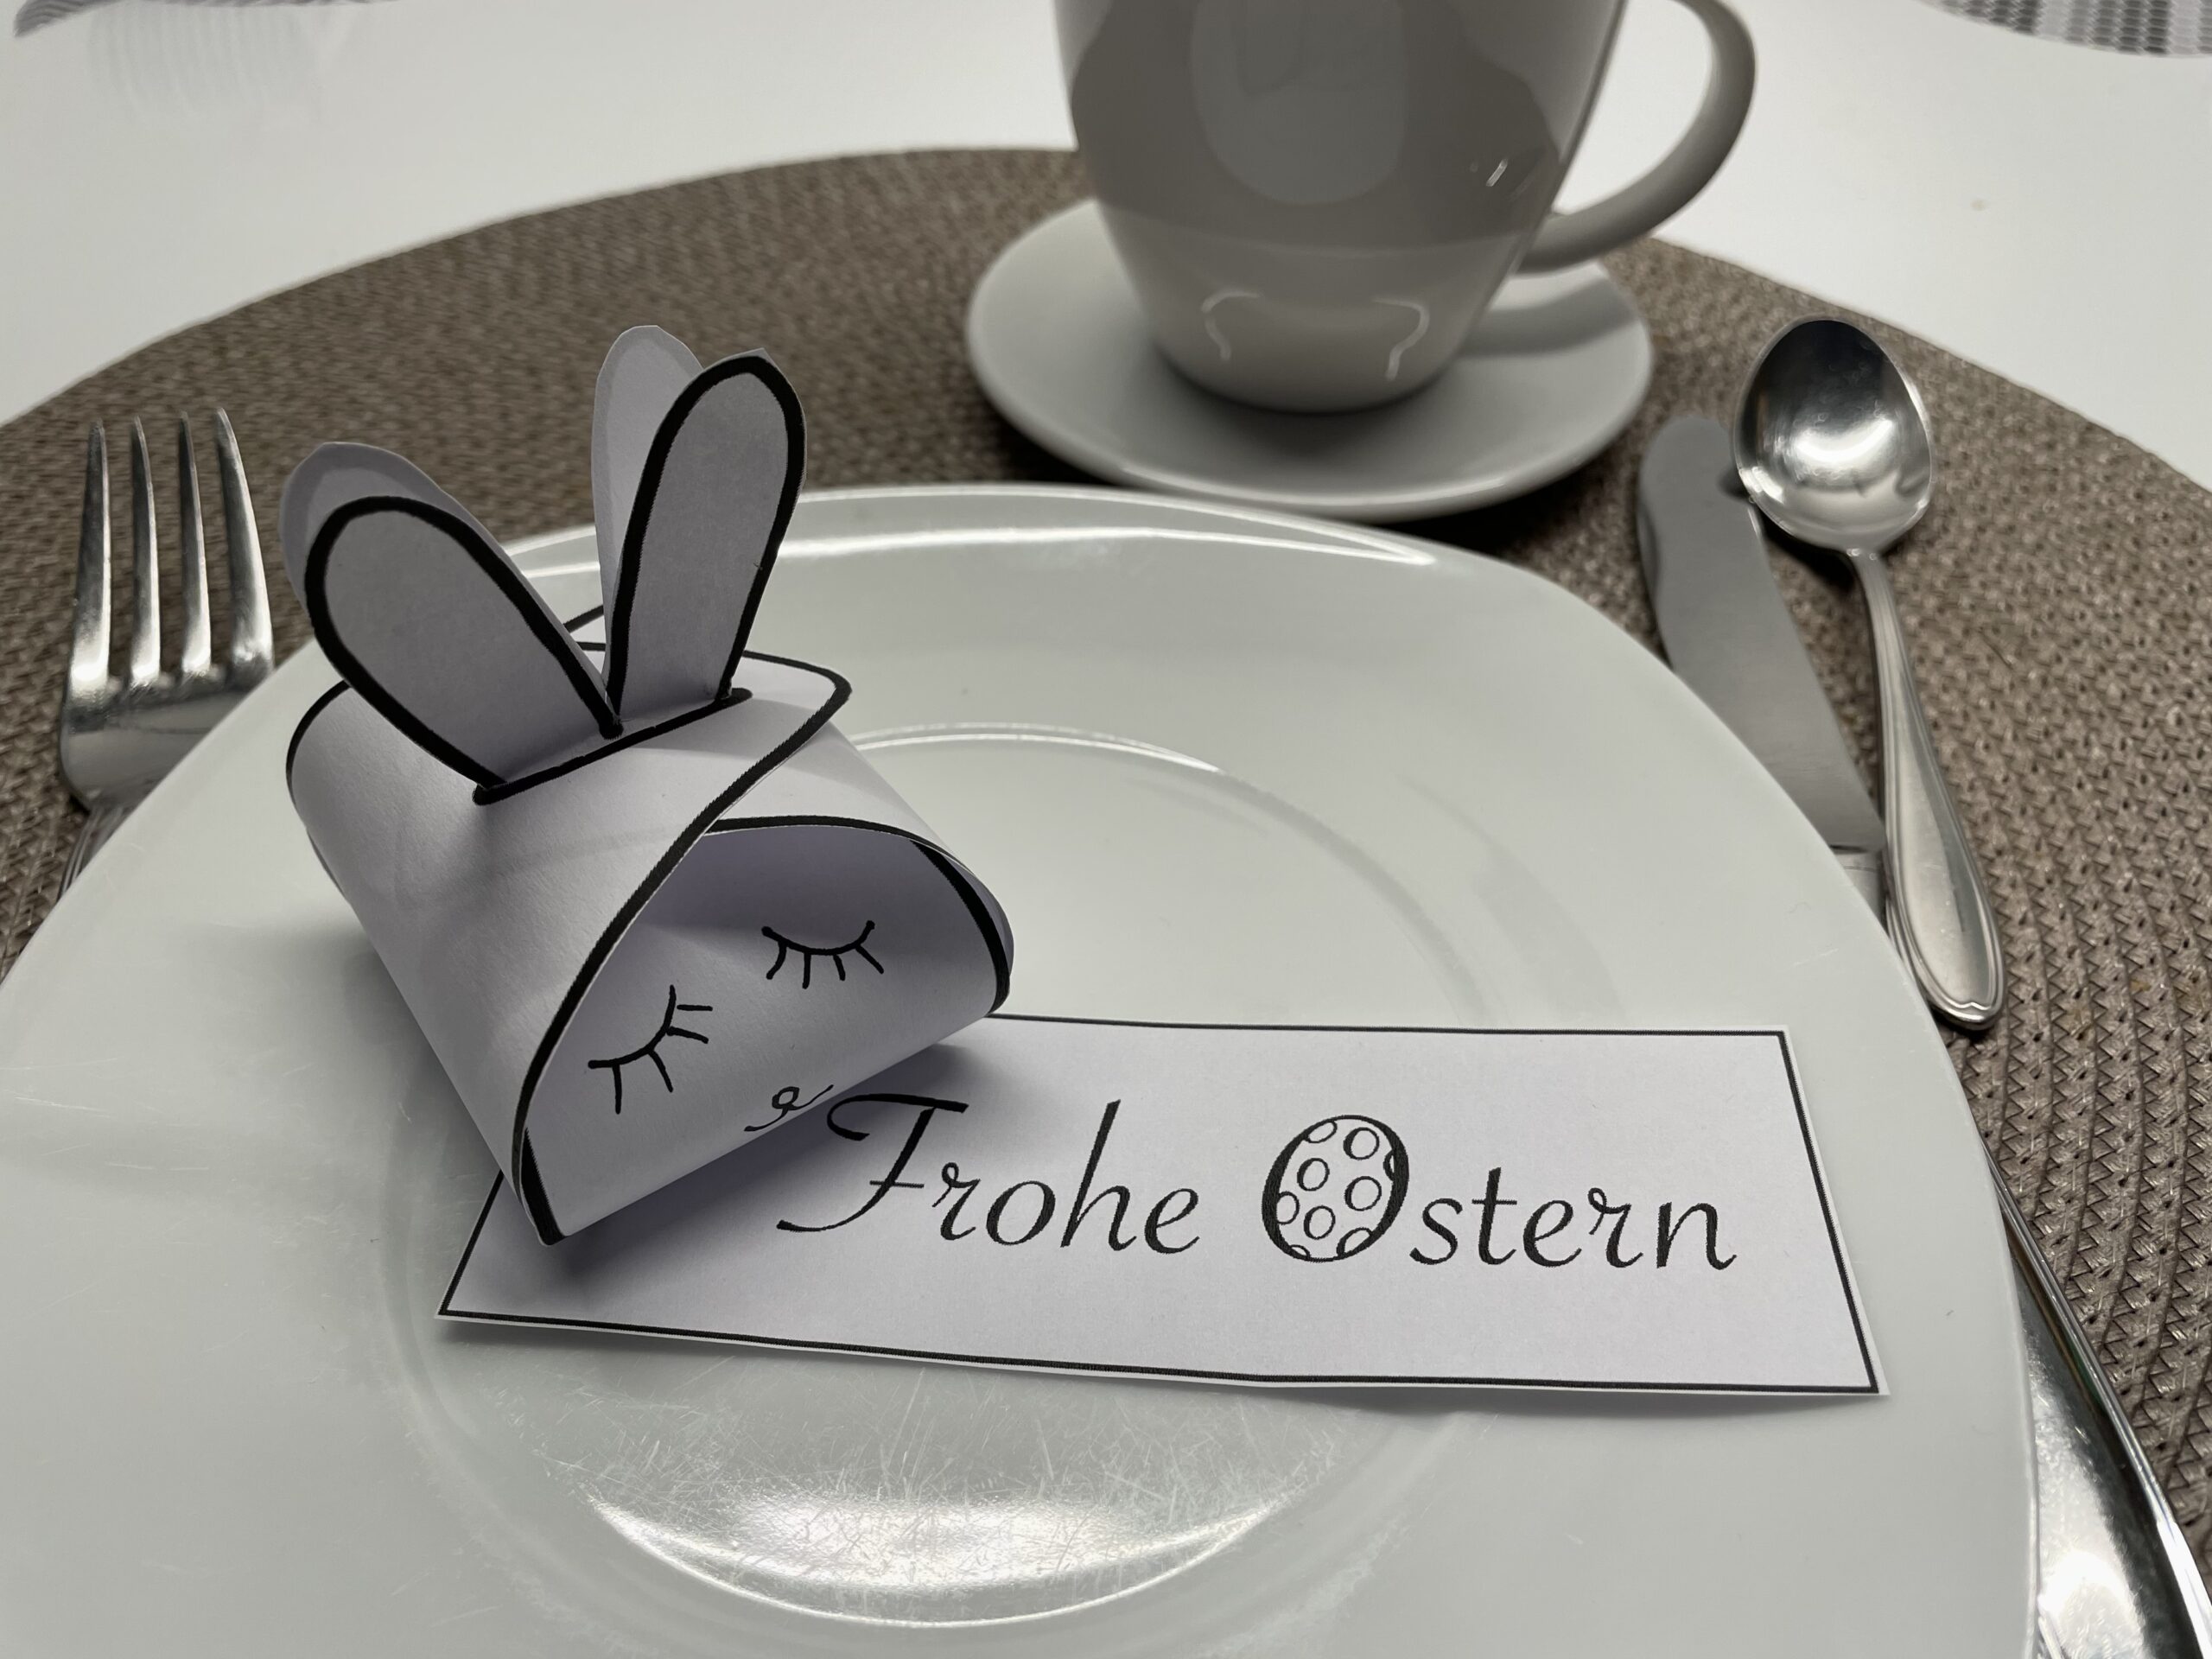
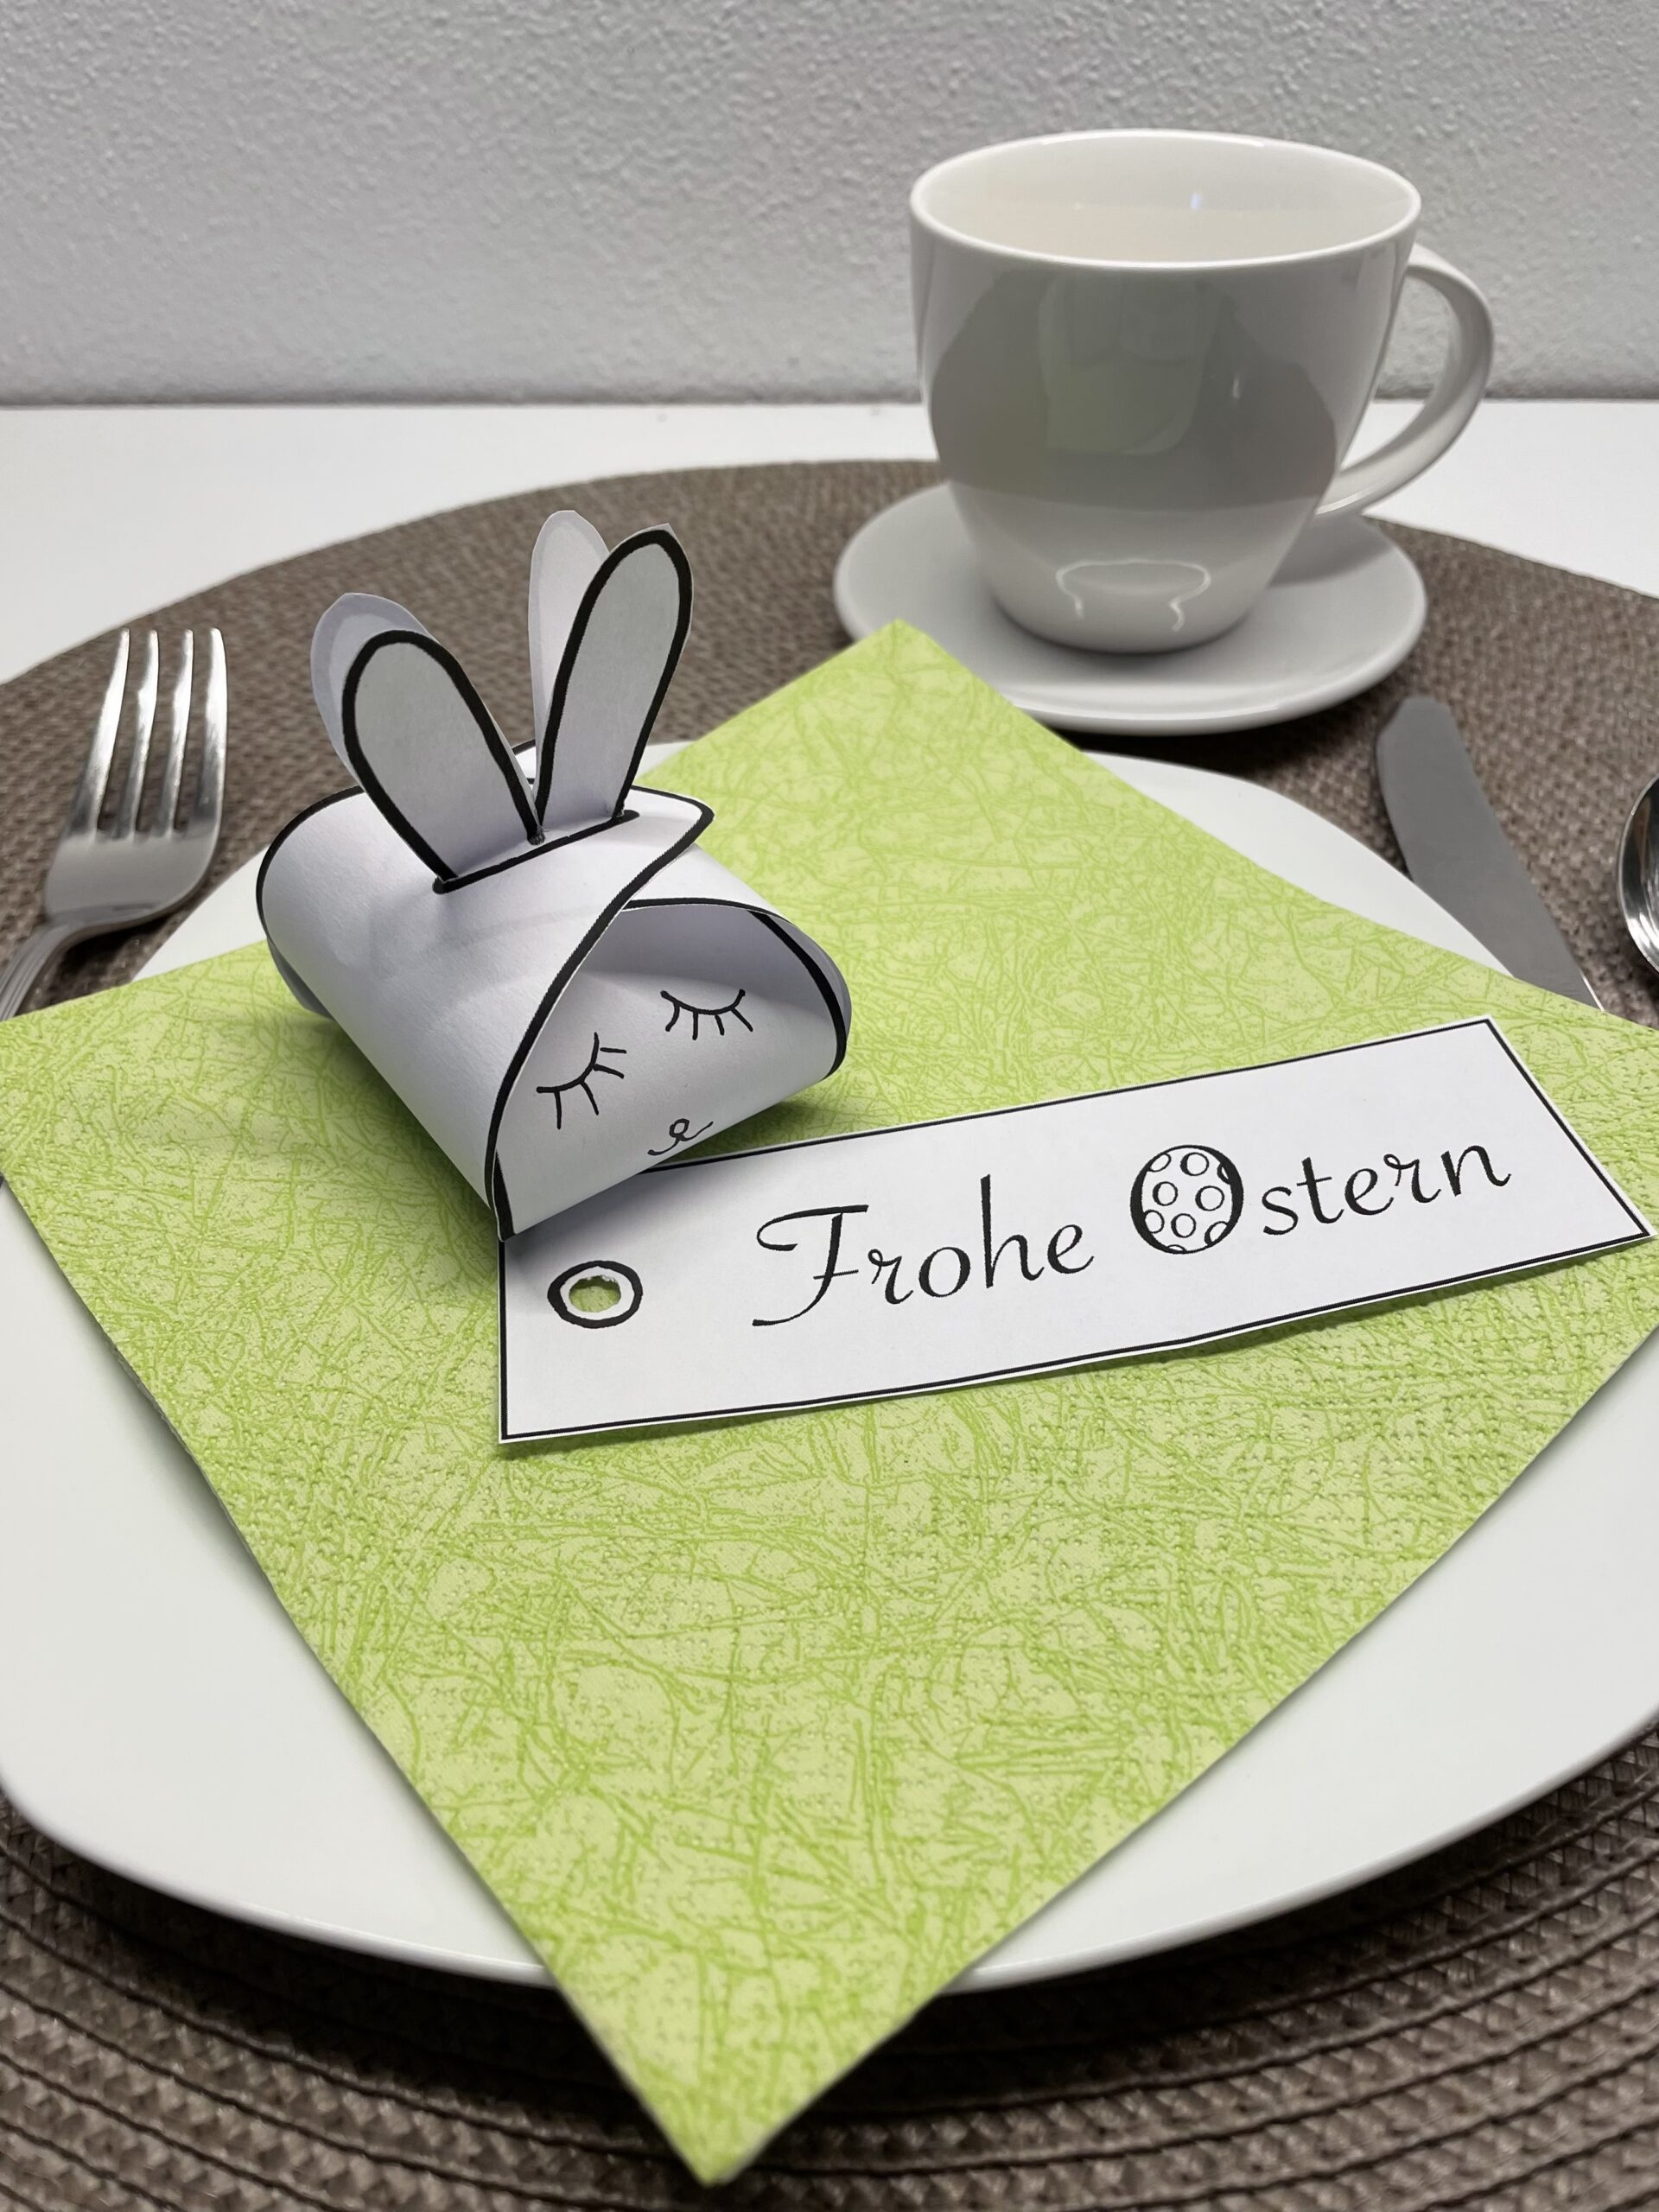
This small bunny gift box can also be used as decoration on the Easter table.
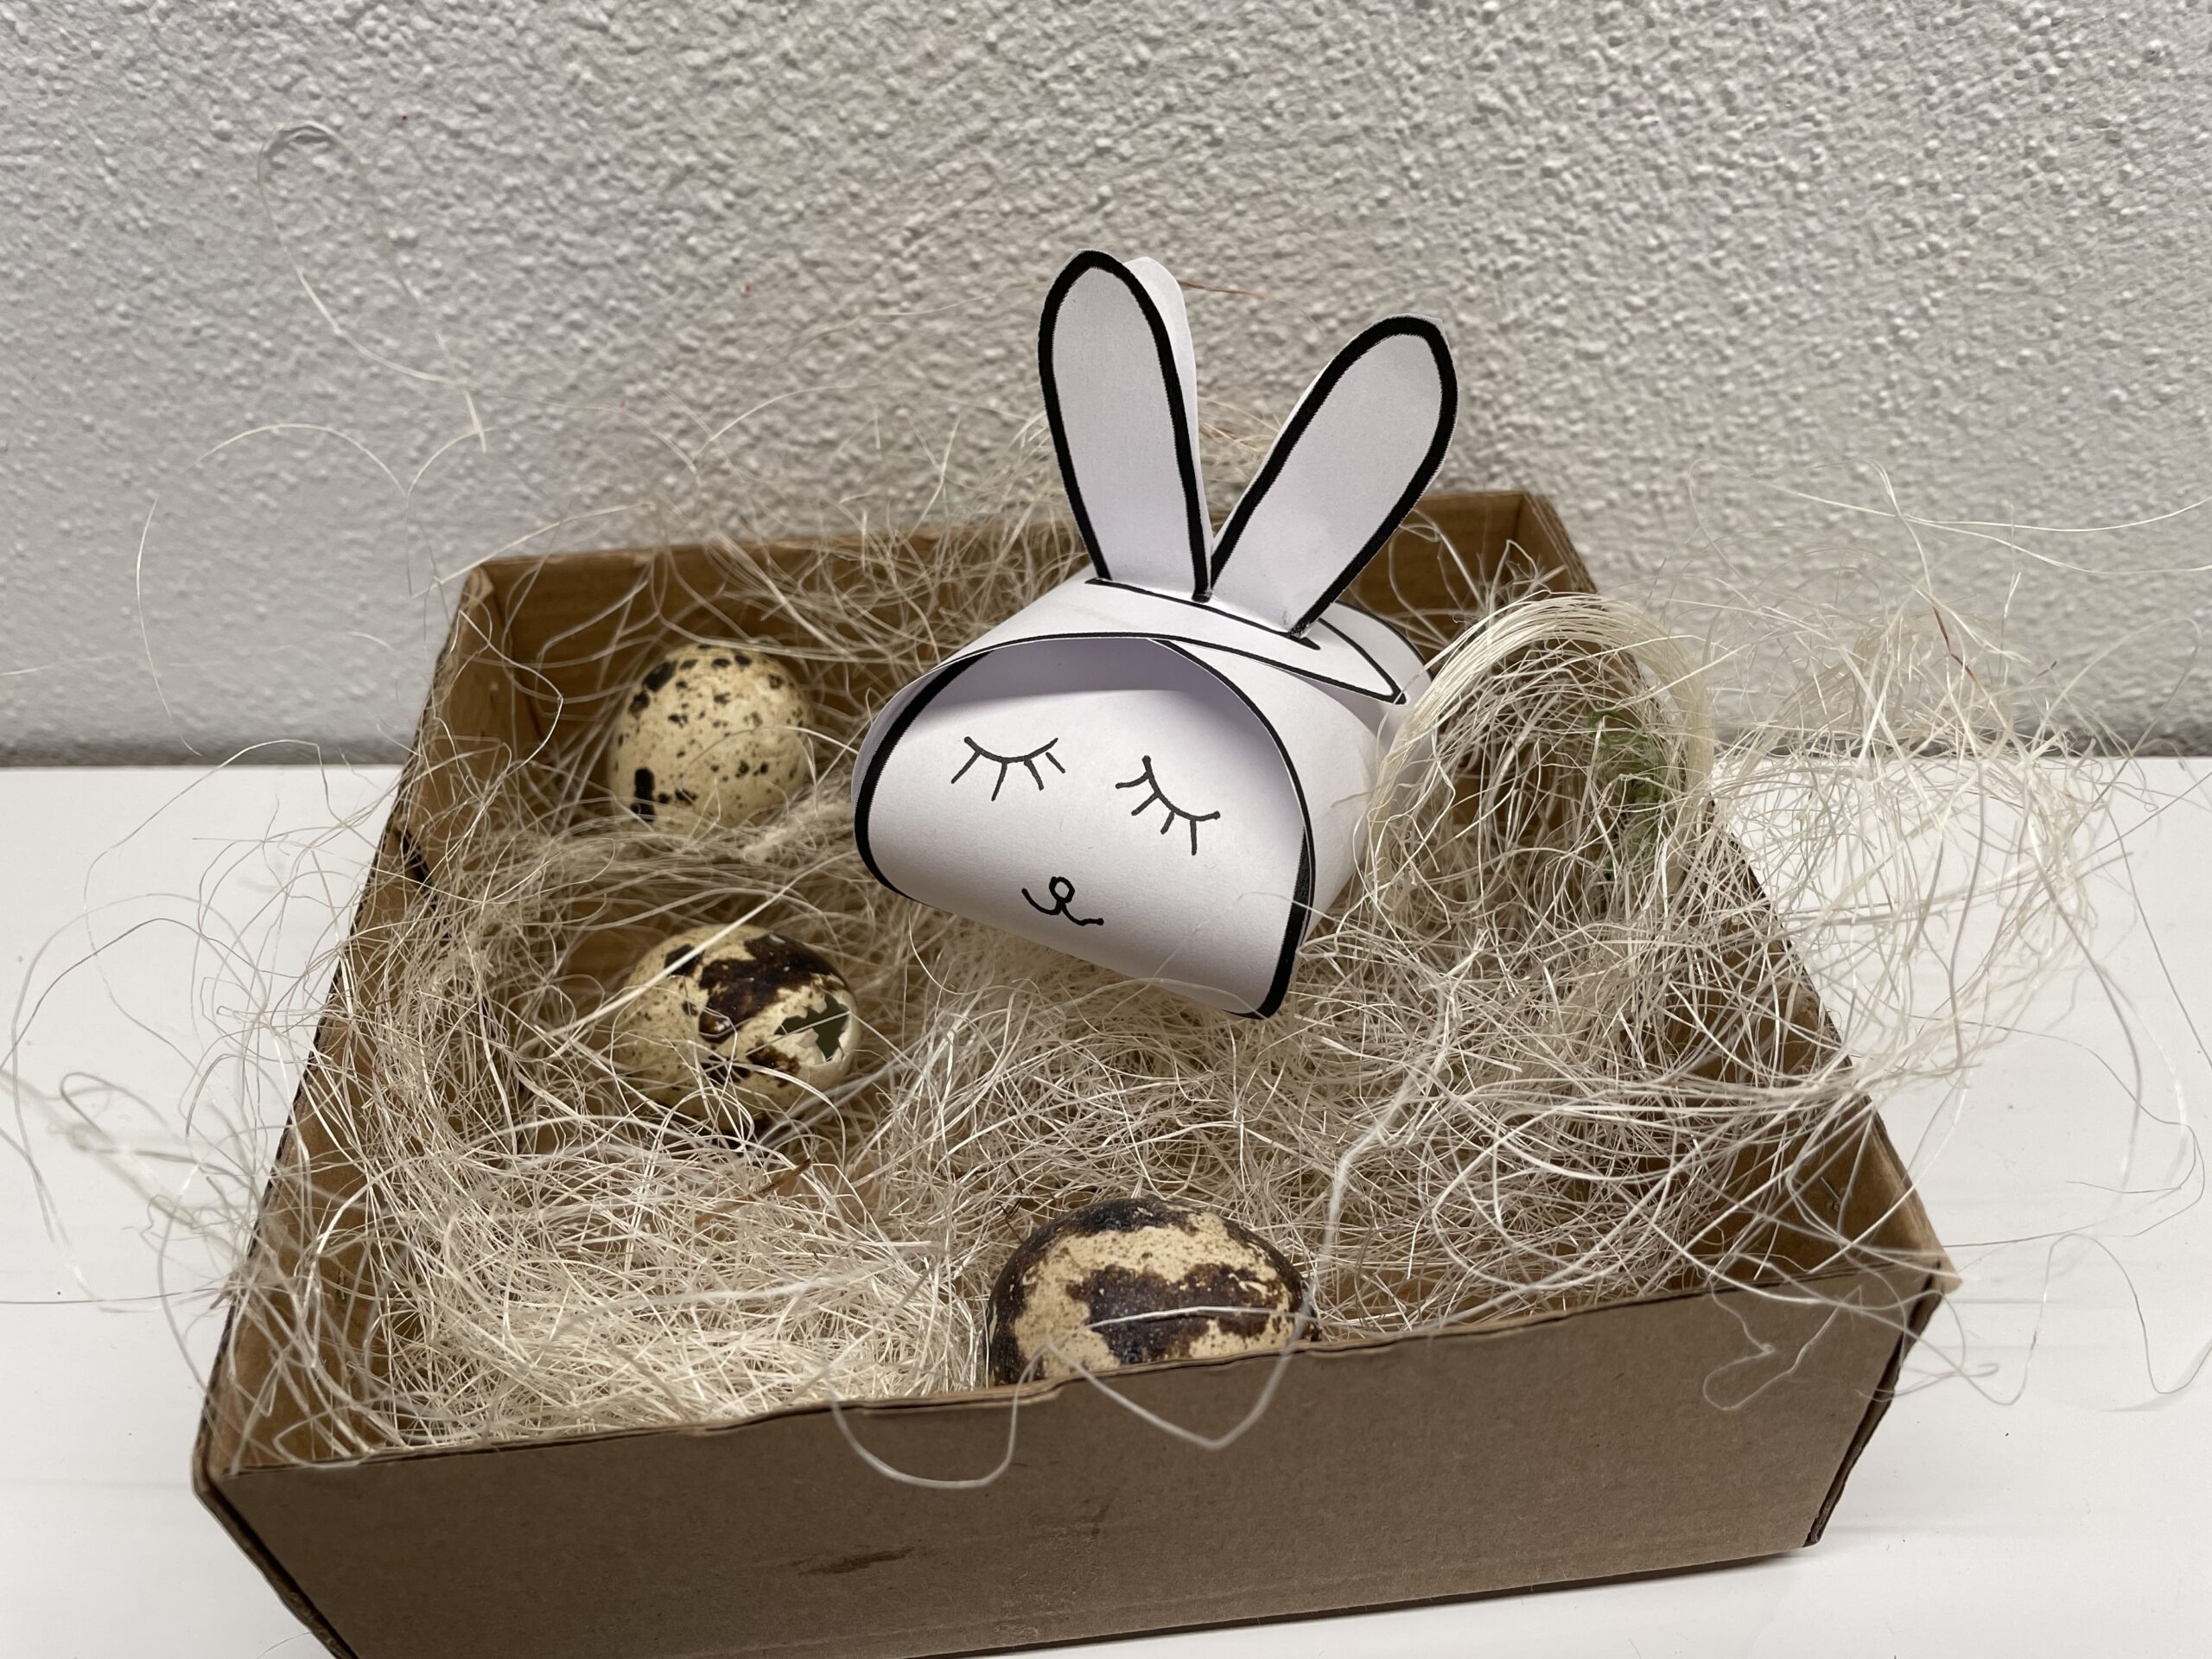
Or you use the bunny gift box for an Easter present in a small nest.
Stay creative and have fun doing crafts with children!
Template for printing:
Children 0