Print Options:

Cut egg-boxed paper flower

Material for1 ChildPrep Time5 min.Adv. Time15 min.Total Time20 min.

This flower is made of an egg box with coloured paper strips. In the flower cup is a paper handkerchief. Then the whole flower is attached only to a beautiful thin branch and is finished this original flower. Whether as a table decoration in spring, summer or for a birthday. You don't need much.

Titelbild zur Bastel- und DIY-Idee für Kinder '(634) Gerissene Papier-Blume aus Eierkarton'

 1 Egg carton
 1 thin paper DIN A5 pinkca. 80 grams heavy
 1 Paper handkerchief
 1 Scissors
 1 Gluepossibly hot glue
 Adhesive strips
 Builder's pad
All links marked with a shopping cart lead to Amazon - here we have selected products that we would order ourselves and in part also ordered. In a qualified purchase via the advertising link, we as Amazon partner receive a commission, for you there are no costs. You thus support our cost- and advertising banner-free, educational offer.
1

First put out your craft pad and then tear the pink paper into strips (maximum 1cm wide).
Paper can only be easily cut in one direction at a time. Try out in which direction it is easier!

Bild zum Schritt 1 für das Bastel- und DIY-Abenteuer für Kinder: 'Legt zuerst eure Bastelunterlage aus und dann reißt ihr das...'

2

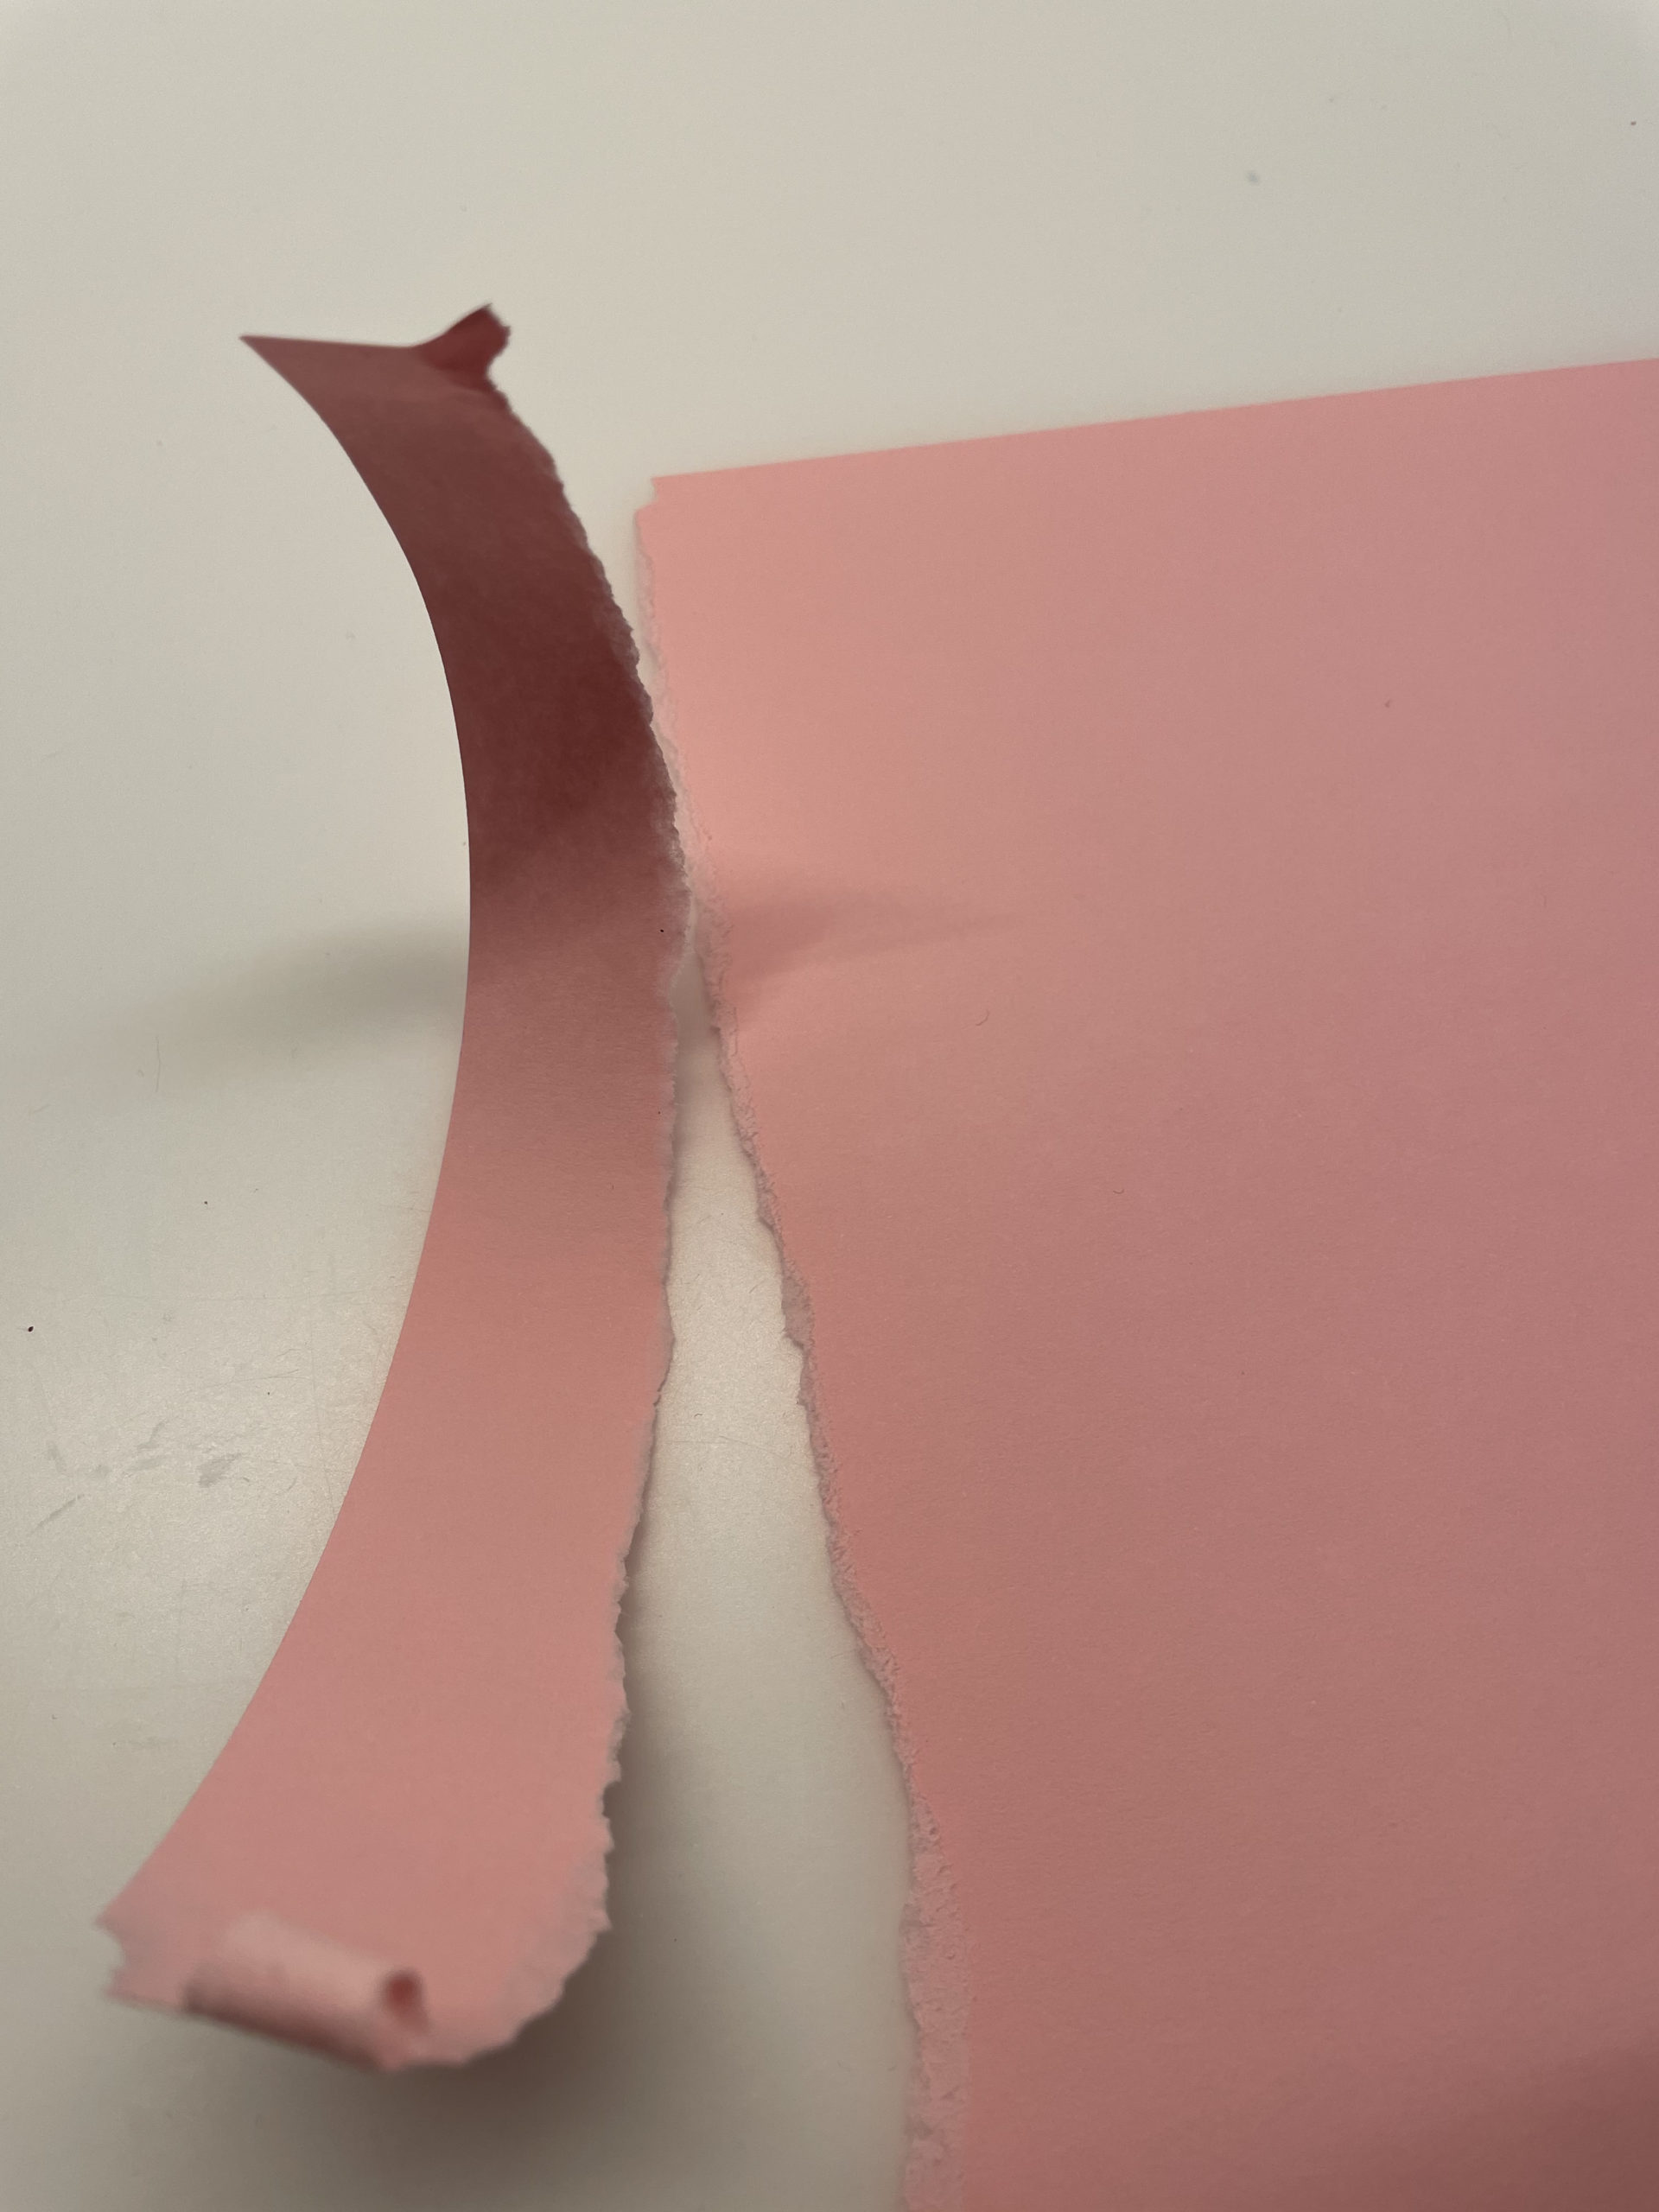
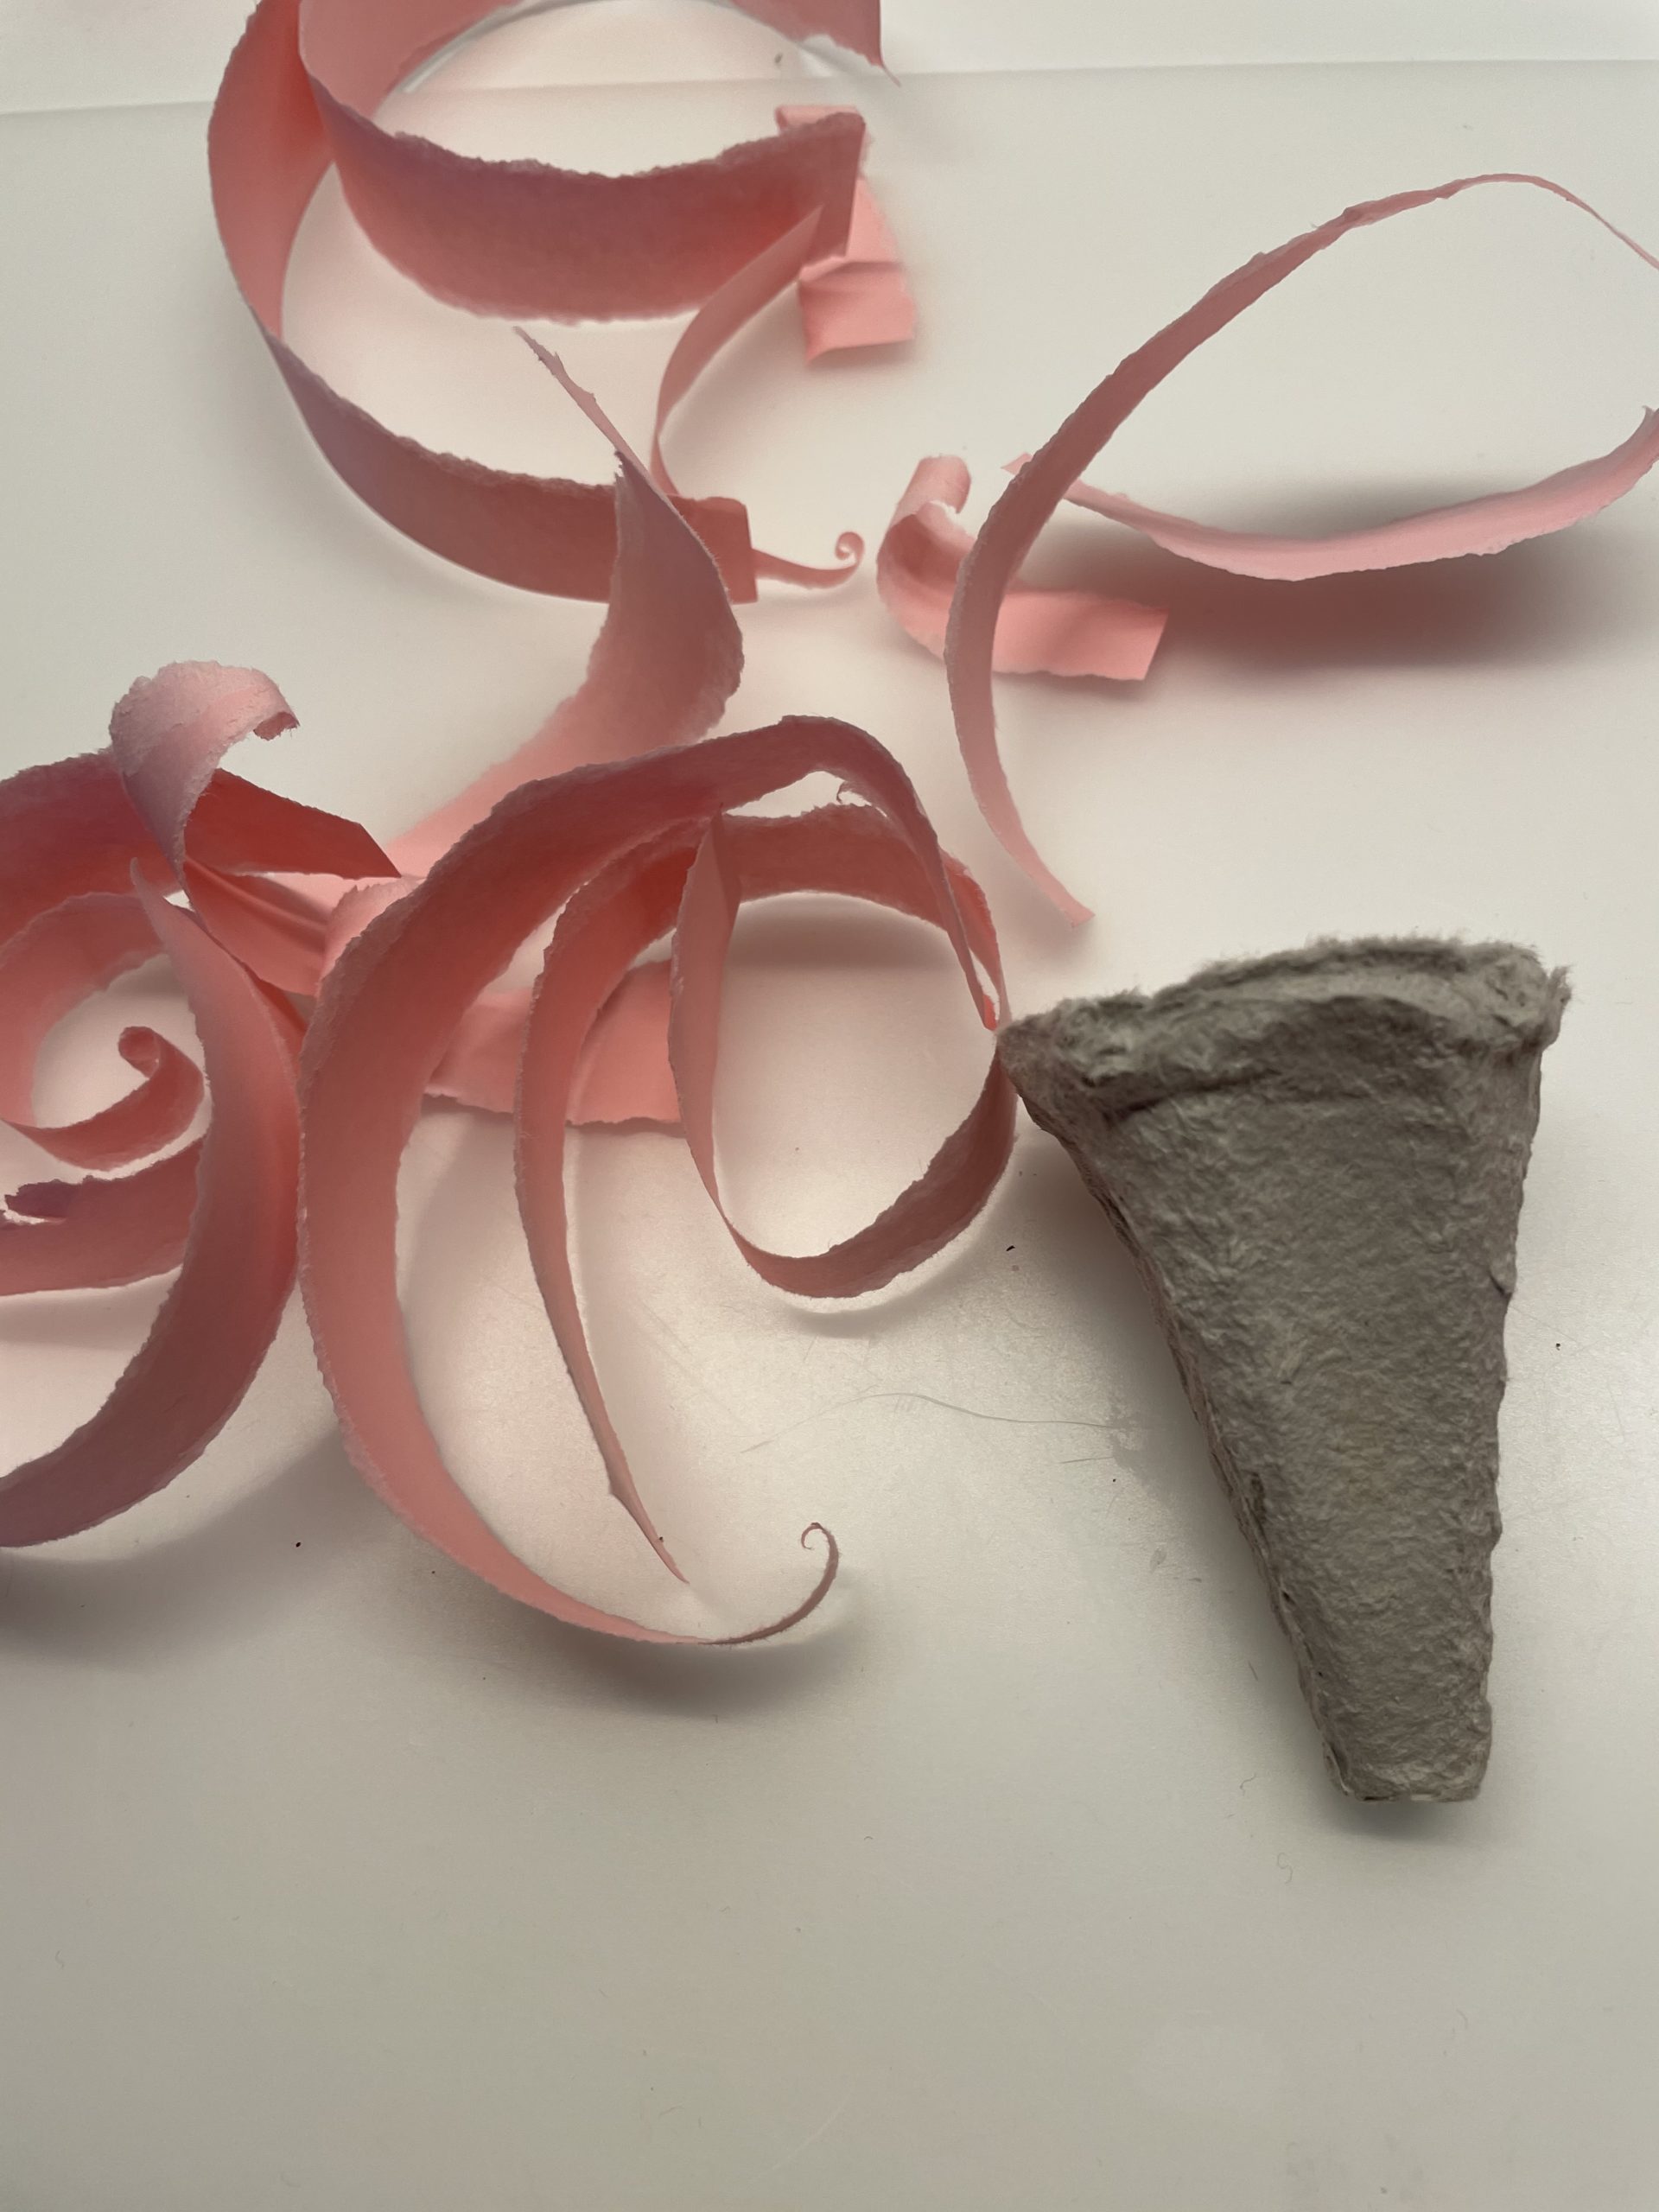
Tear about 10 to 12 strips.

Bild zum Schritt 2 für das Bastel- und DIY-Abenteuer für Kinder: 'Reißt circa 10 bis 12 Streifen.'

3

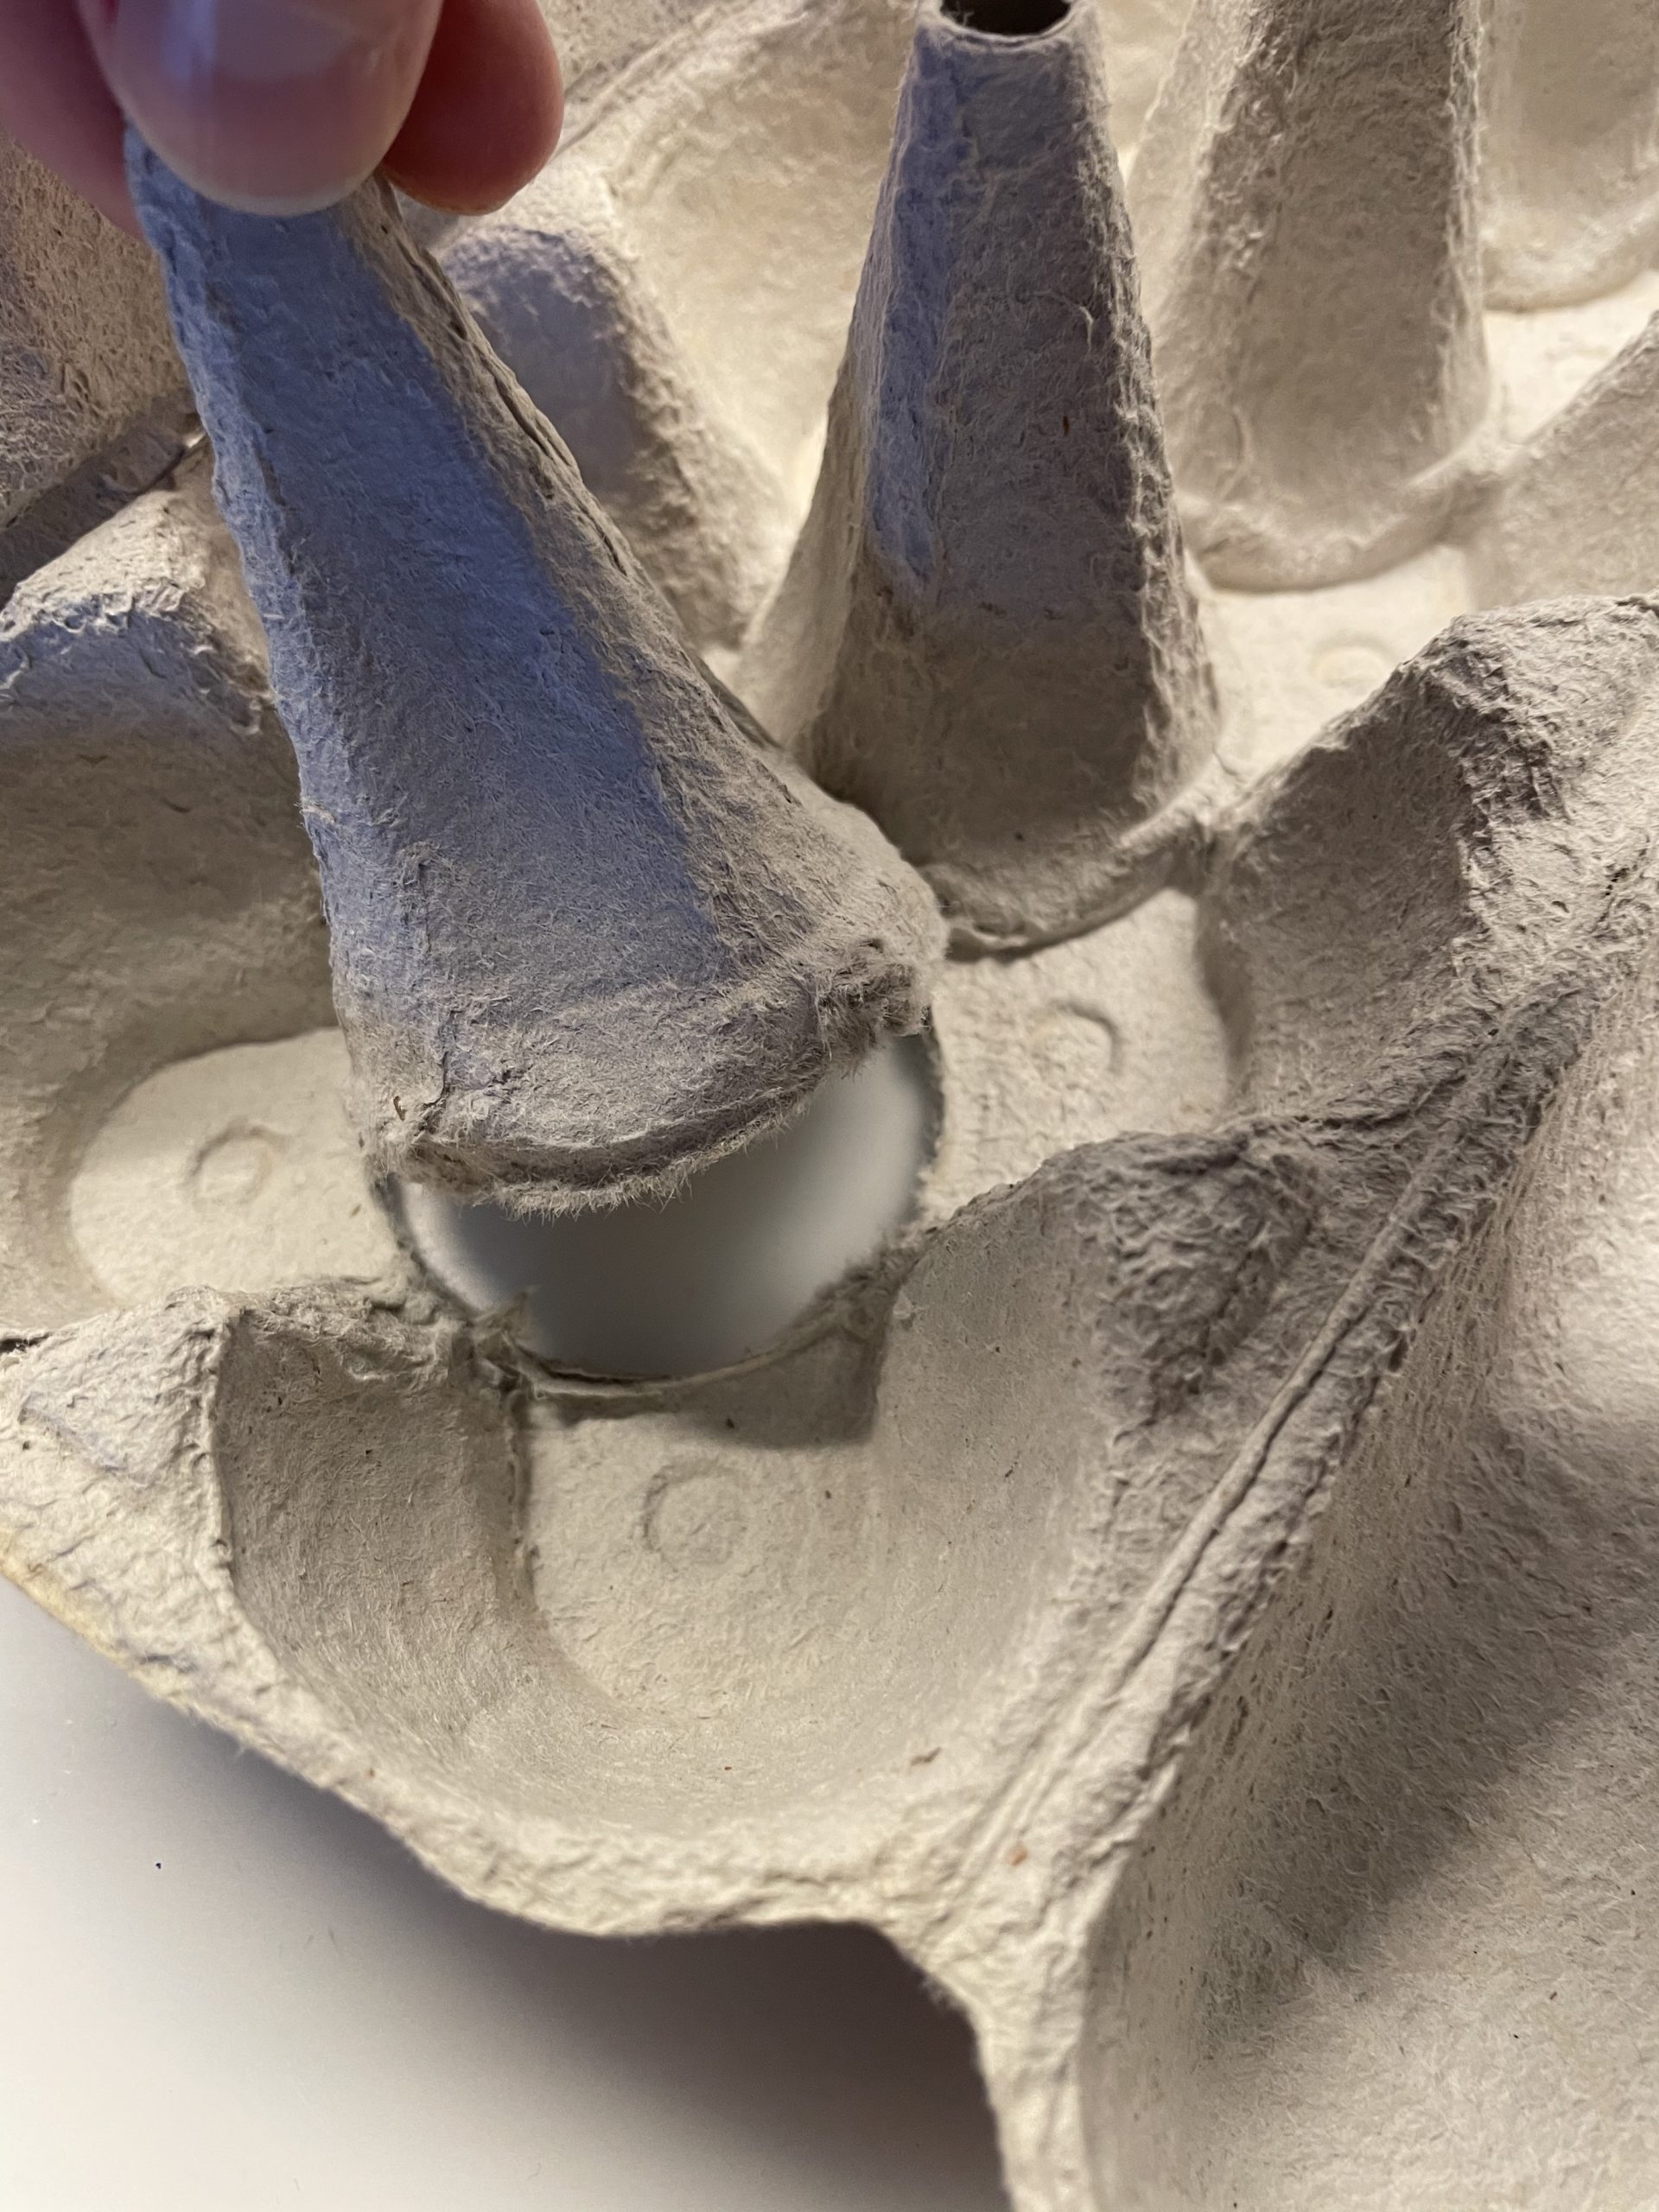
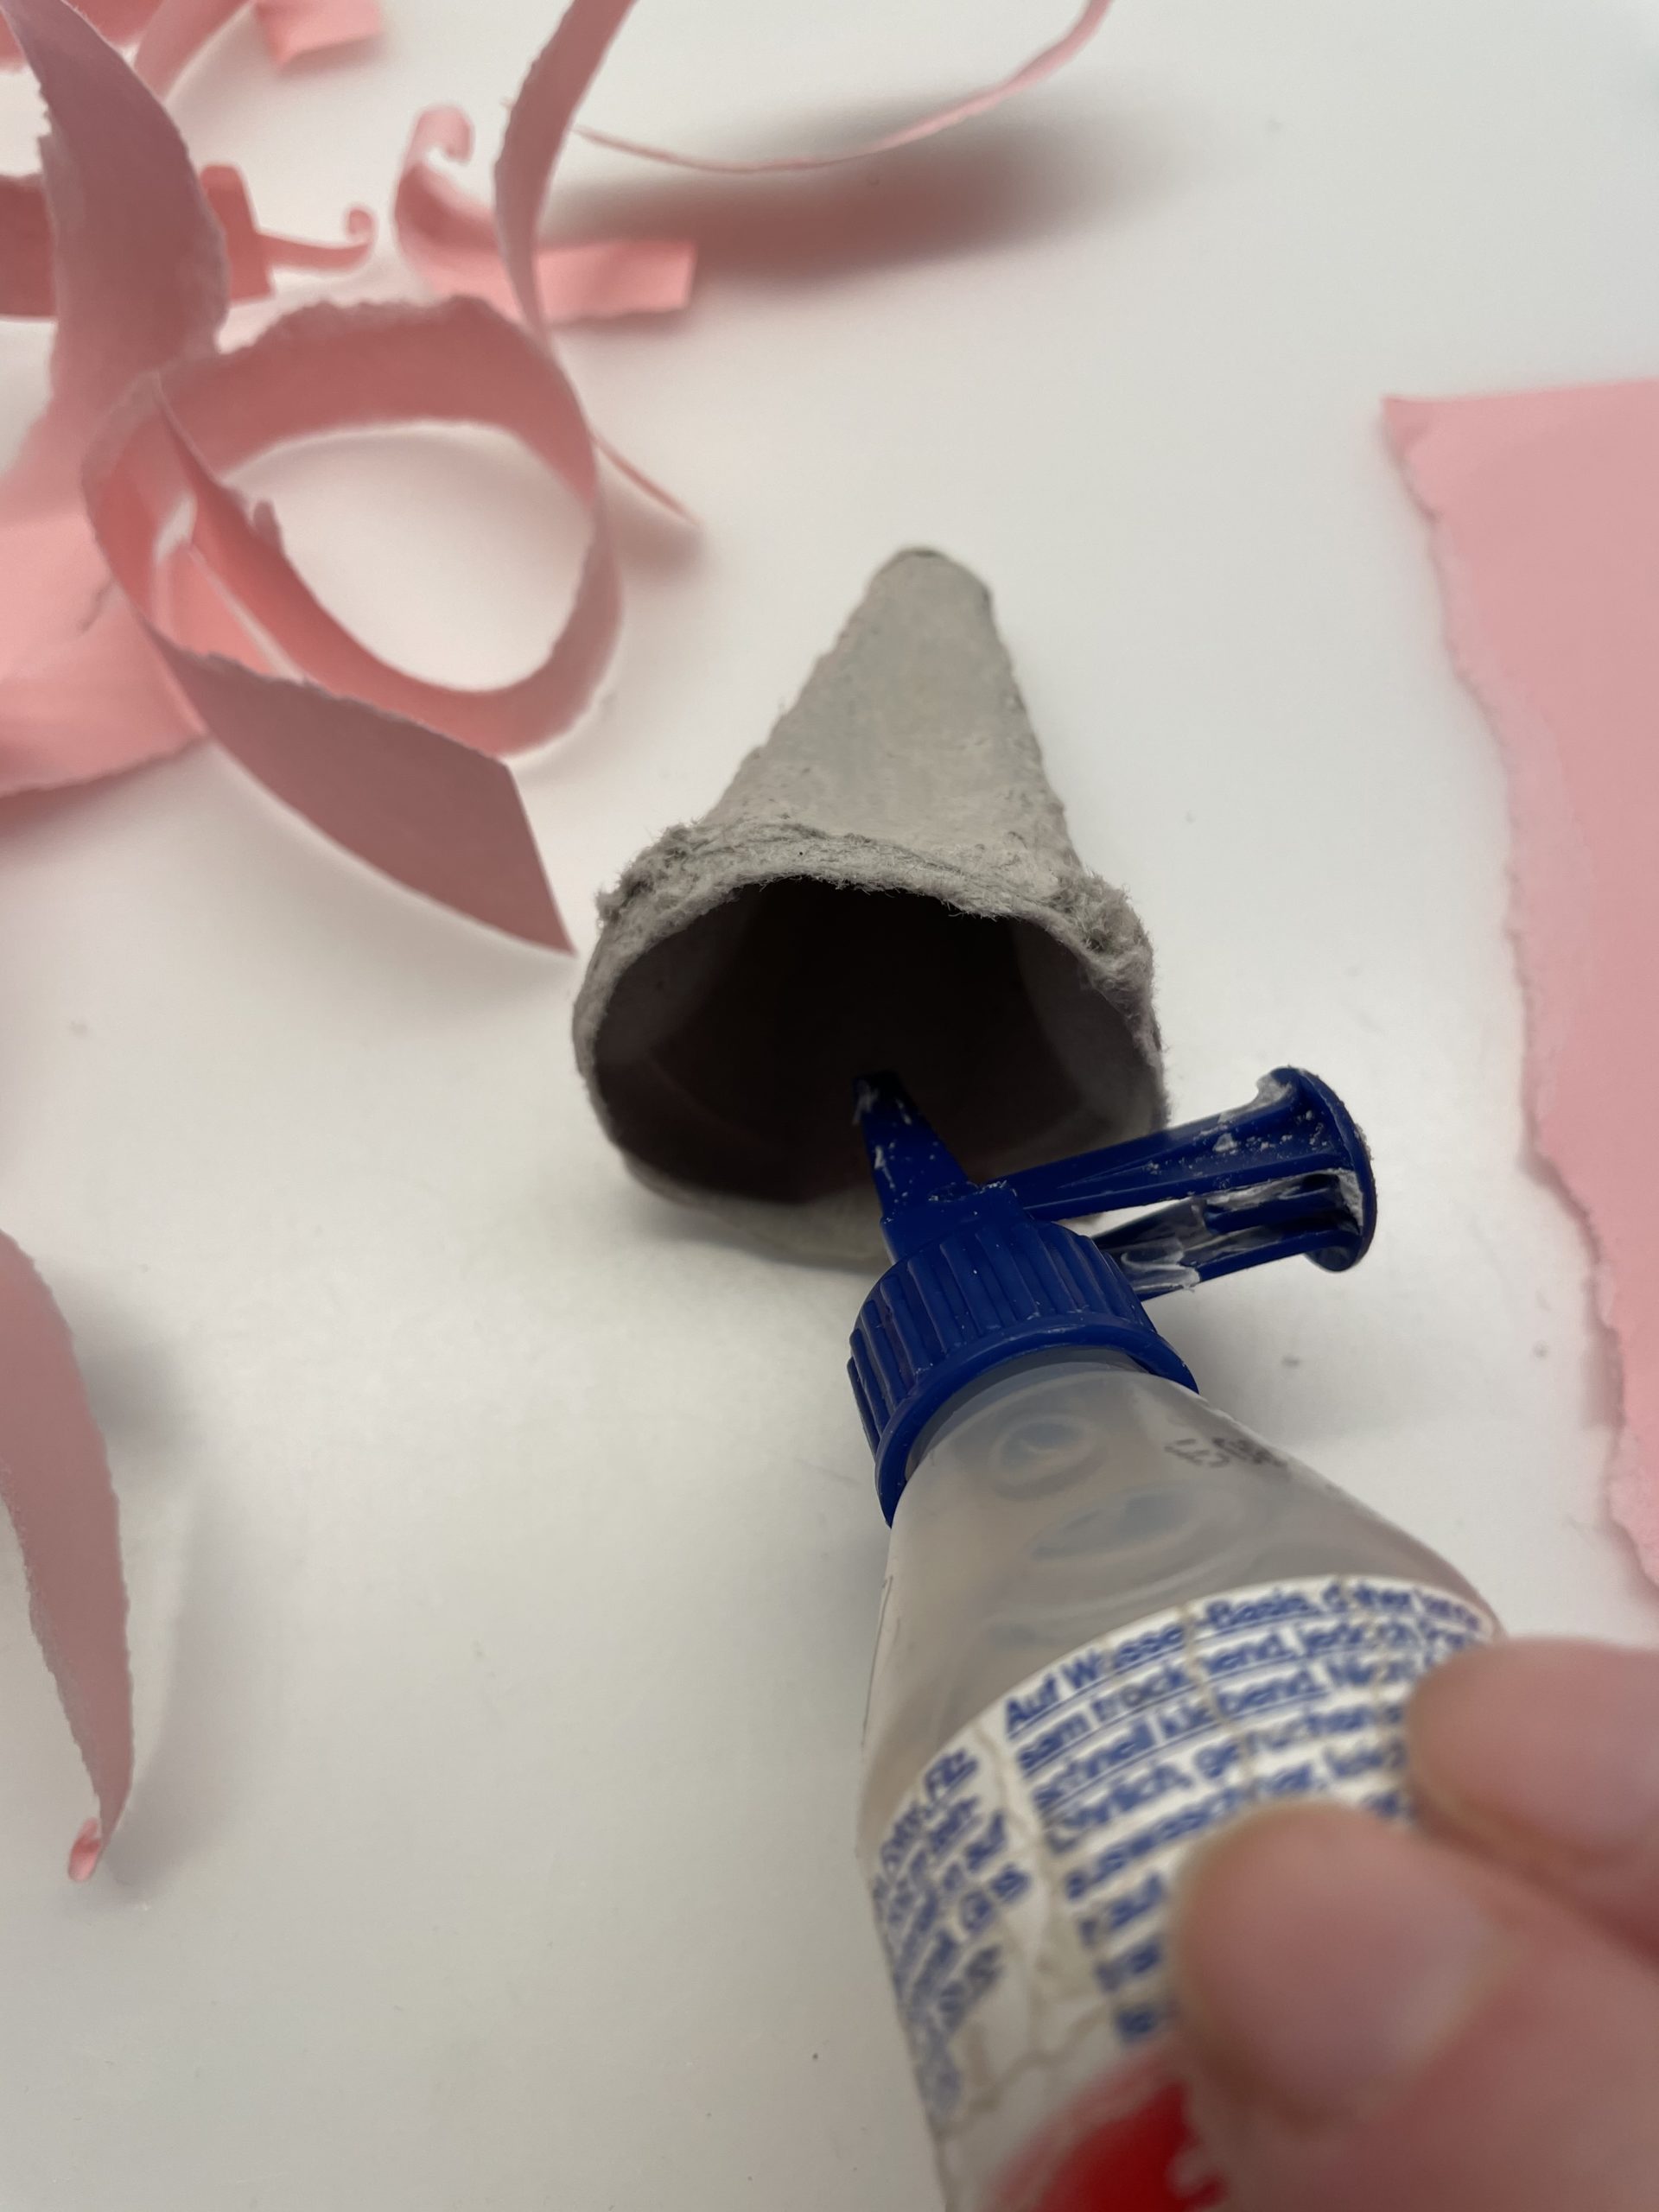
Then you separate a tip from an egg box.

Bild zum Schritt 3 für das Bastel- und DIY-Abenteuer für Kinder: 'Dann trennt ihr aus einem Eierkarton eine Spitze heraus.'

4

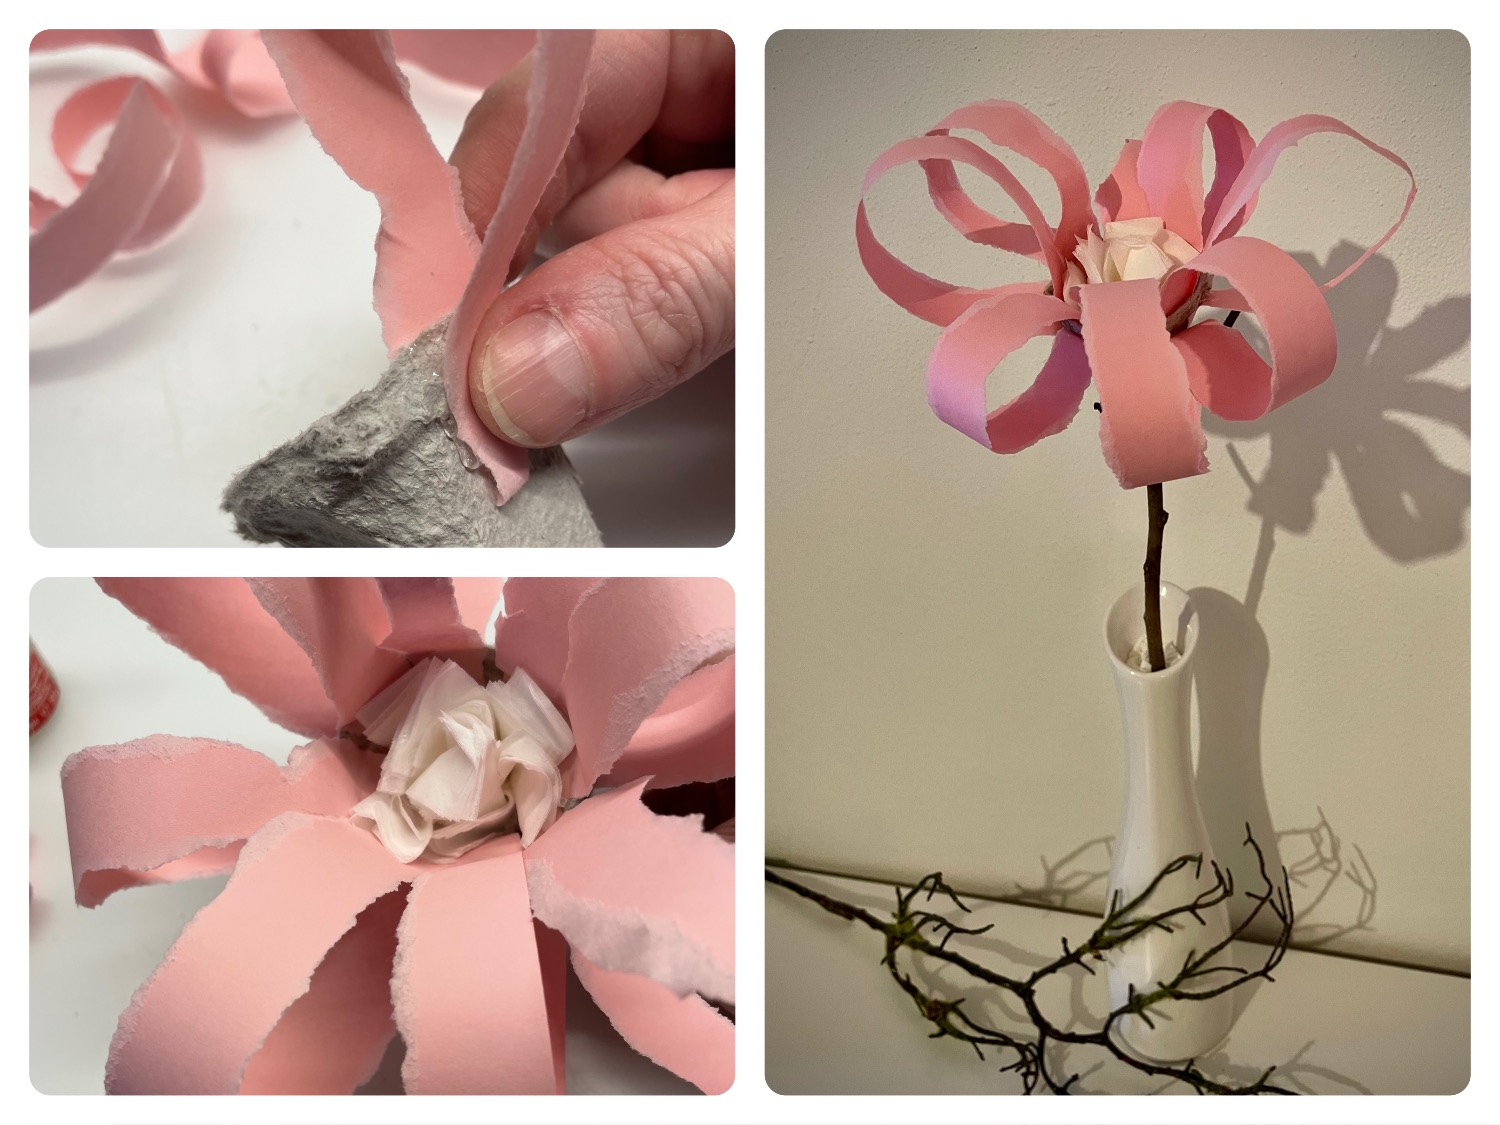
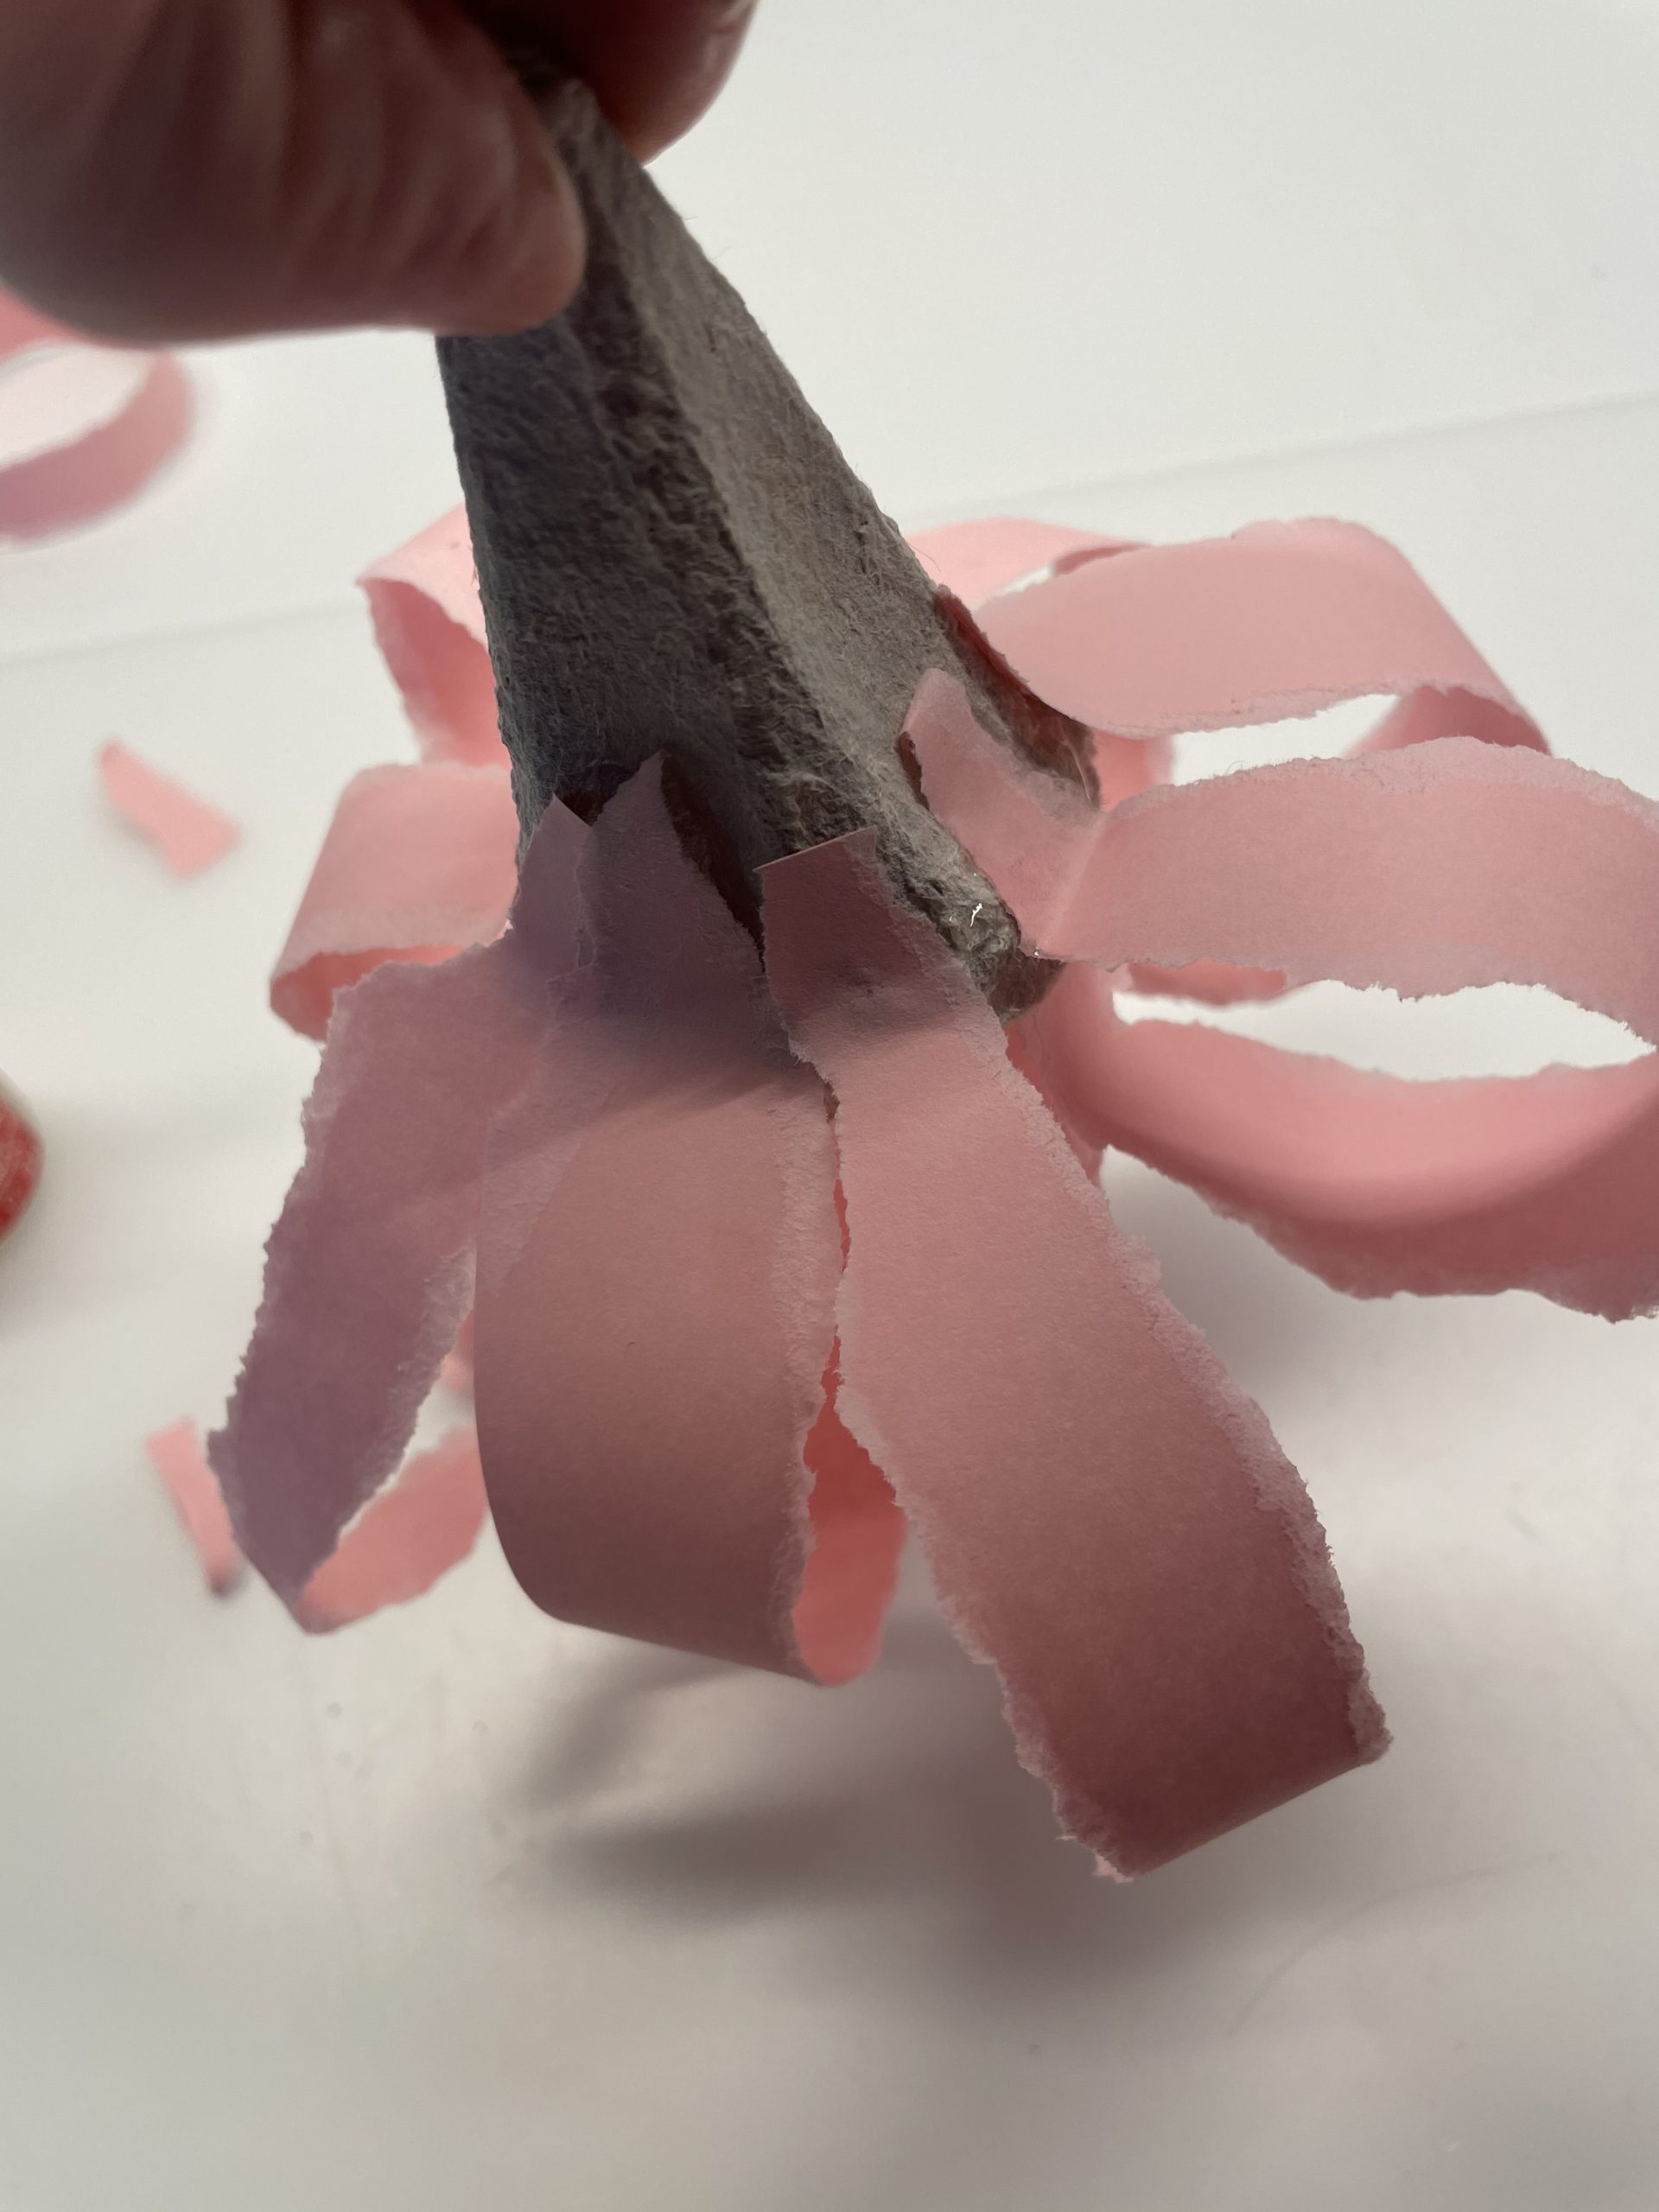
Now you stick the torn stripes as petals in the petal, the tip of the egg box.

Bild zum Schritt 4 für das Bastel- und DIY-Abenteuer für Kinder: 'Nun klebt ihr die gerissenen Streifen als Blütenblätter in den...'

5

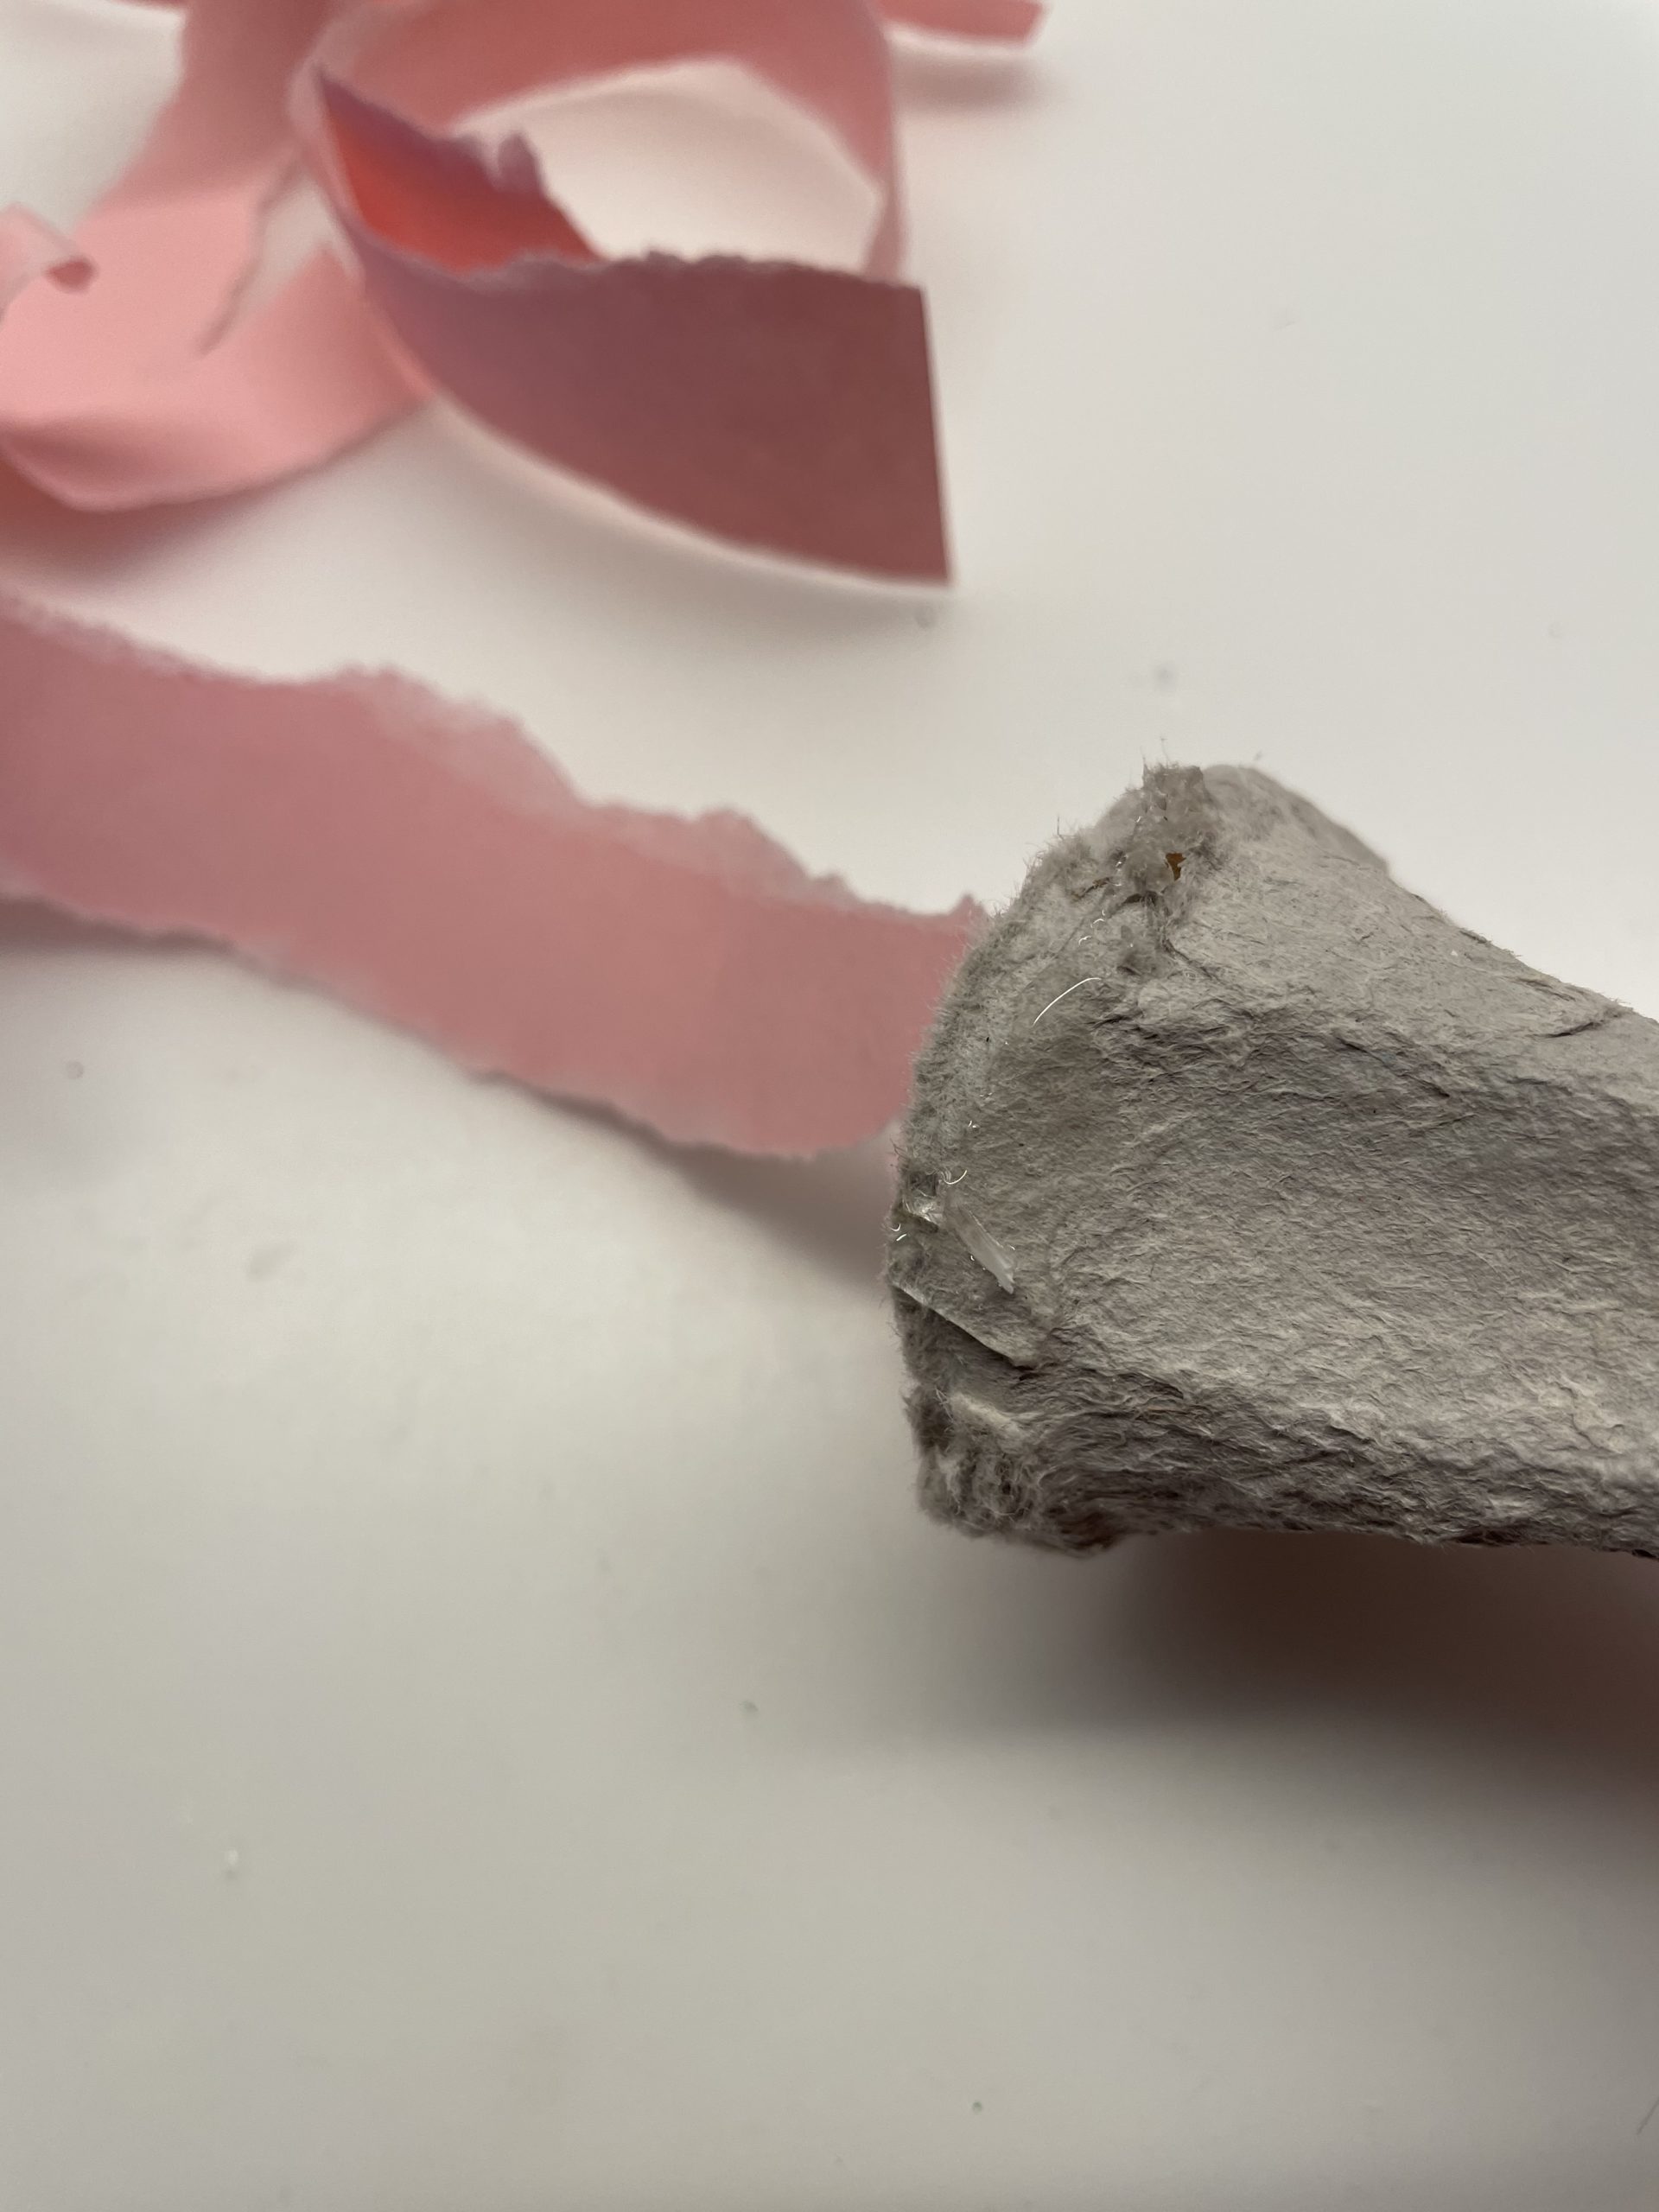
Apply glue all around in the inside of the egg carton tip at the upper edge.

Bild zum Schritt 5 für das Bastel- und DIY-Abenteuer für Kinder: 'Tragt dafür im inneren der Eierkarton-Spitze am oberen Rand rundherum...'

6

Now stick the first paper strip on the inside first.

Bild zum Schritt 6 für das Bastel- und DIY-Abenteuer für Kinder: 'Klebt nun den ersten Papierstreifen zuerst innen fest.'

7

Then put an adhesive point on the outer edge of the egg carton and glue the other end of the strip on the outside.

Bild zum Schritt 7 für das Bastel- und DIY-Abenteuer für Kinder: 'Anschließend setzt ihr am äußeren Rand des Eierkartons einen Klebepunkt...'

8

To do this, you turn the paper strip outwards in an arc.

Bild zum Schritt 8 für das Bastel- und DIY-Abenteuer für Kinder: 'Dafür schlagt ihr den Papierstreifen bogenförmig nach außen um.'

9

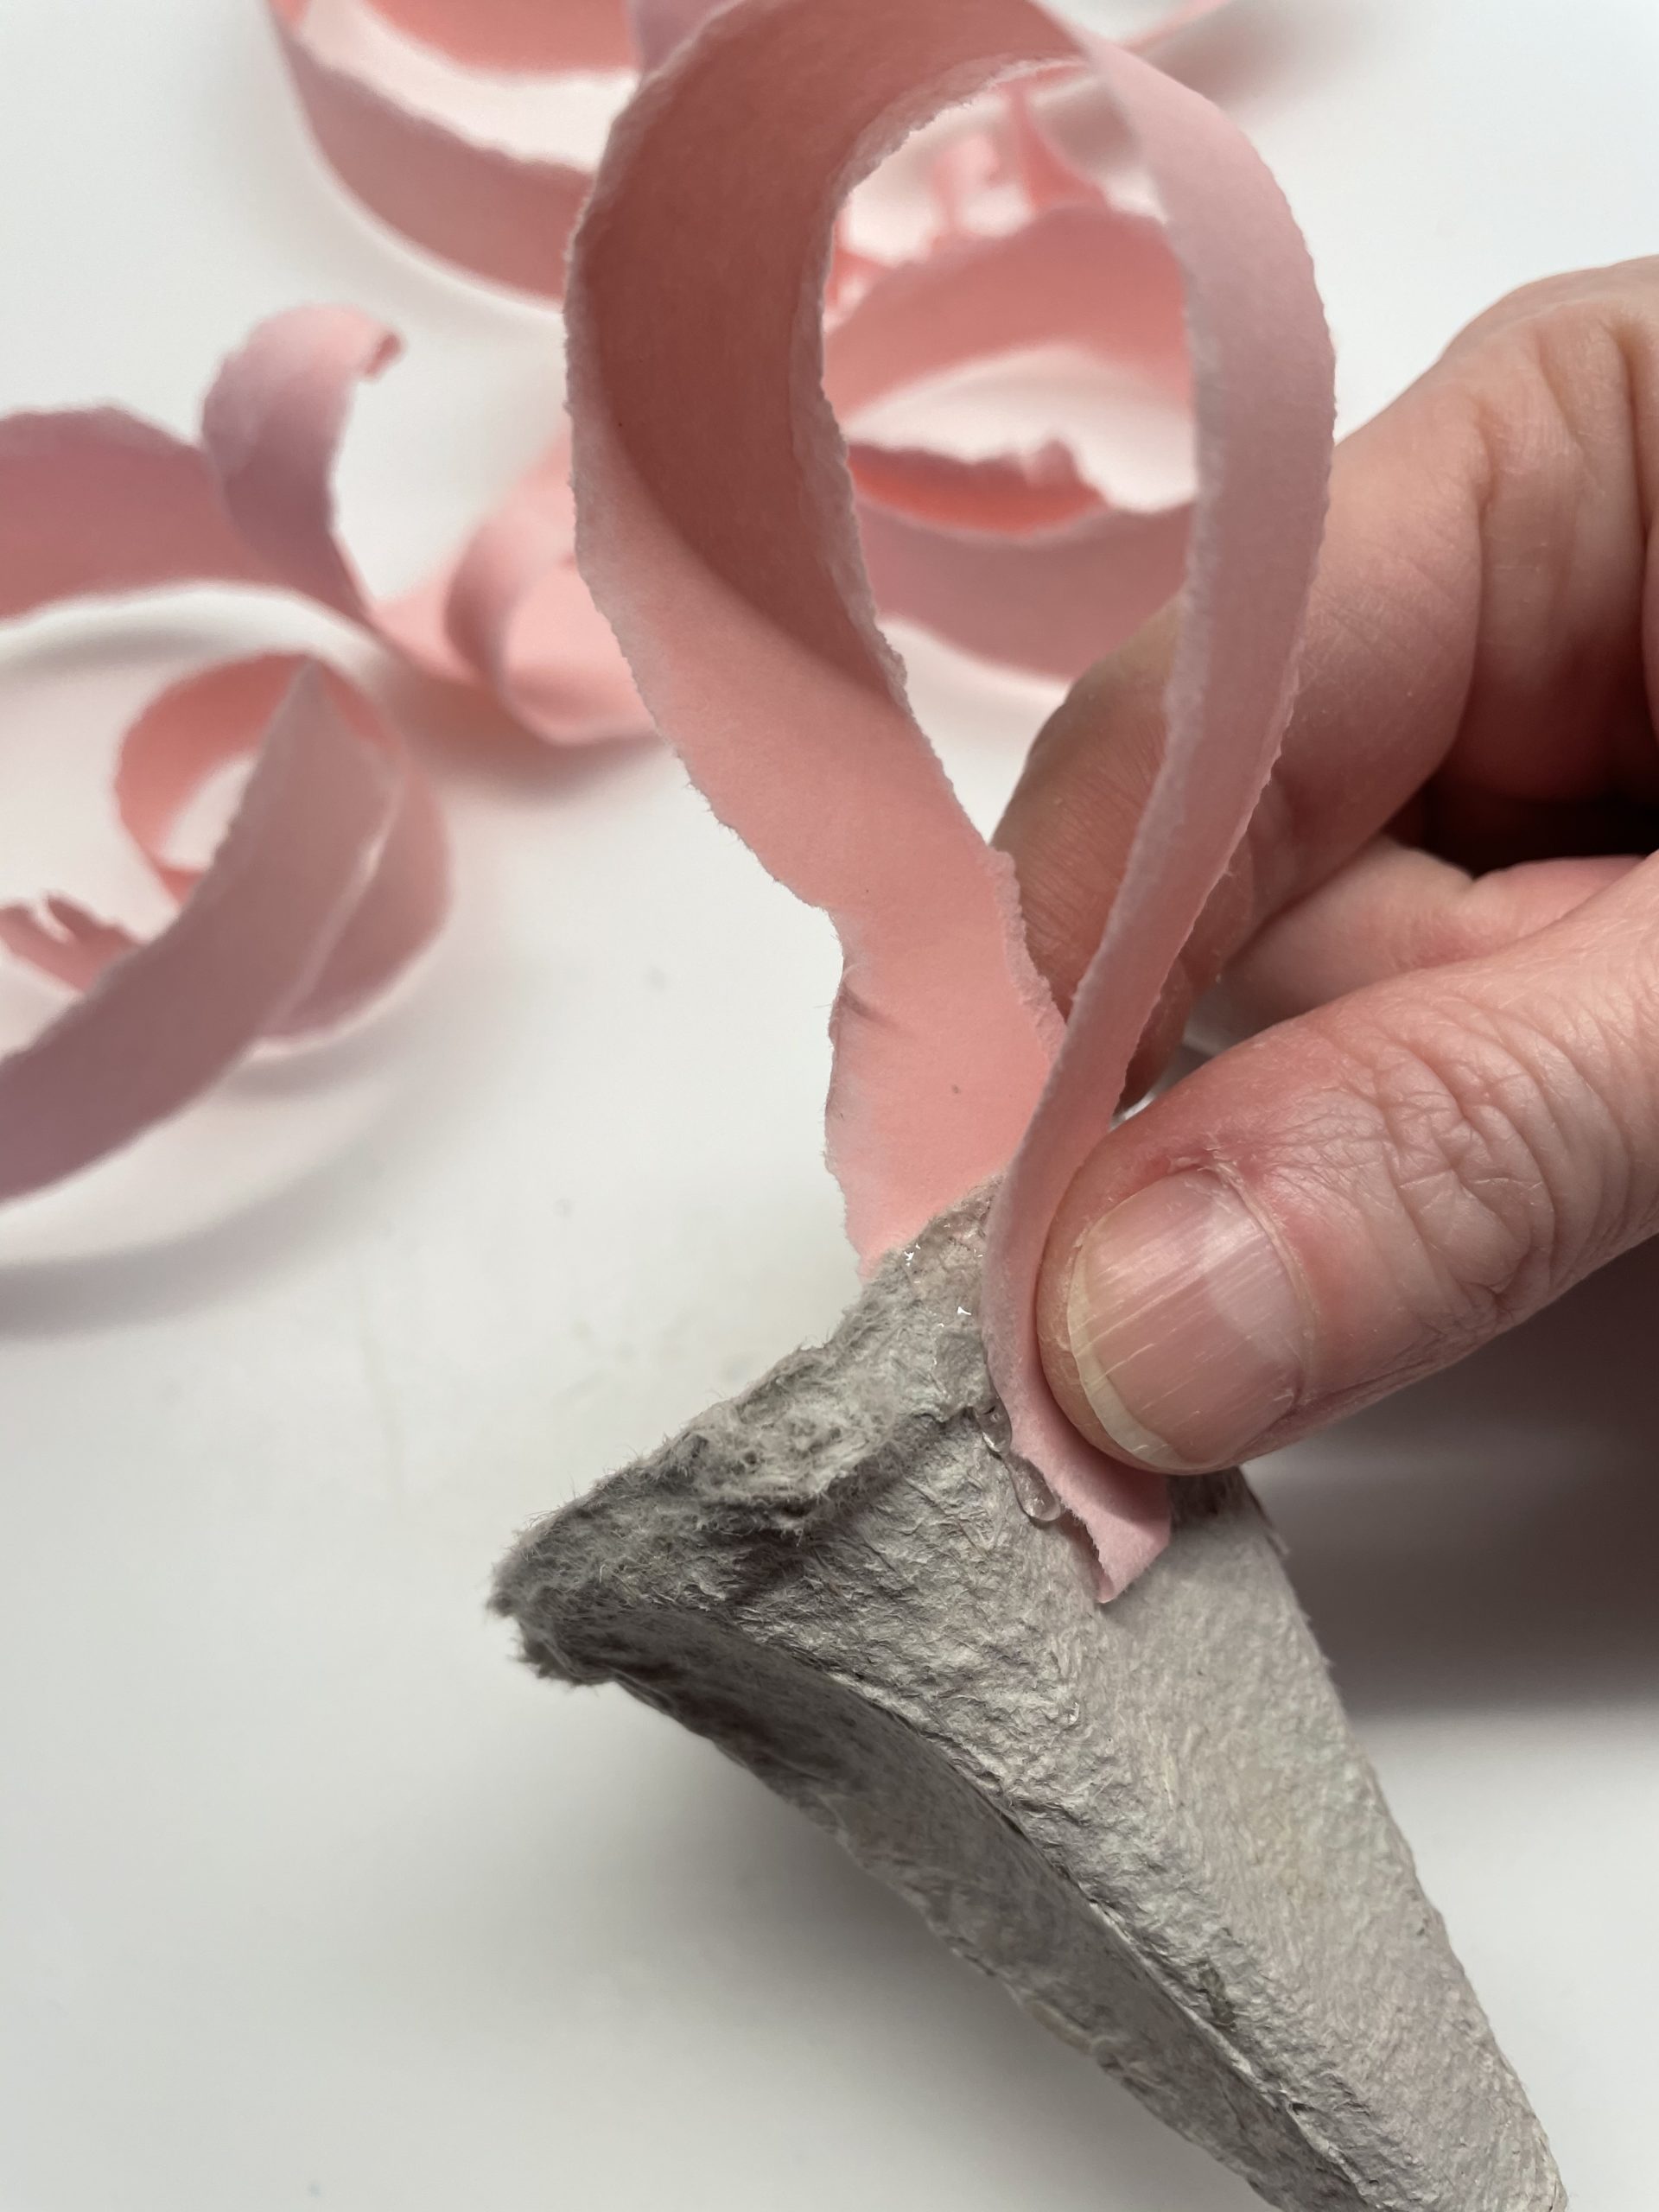
Now place the torn stripes around the opening in the same way.

Bild zum Schritt 9 für das Bastel- und DIY-Abenteuer für Kinder: 'Setzt nun auf die gleiche Weise die gerissenen Streifen rund...'

10

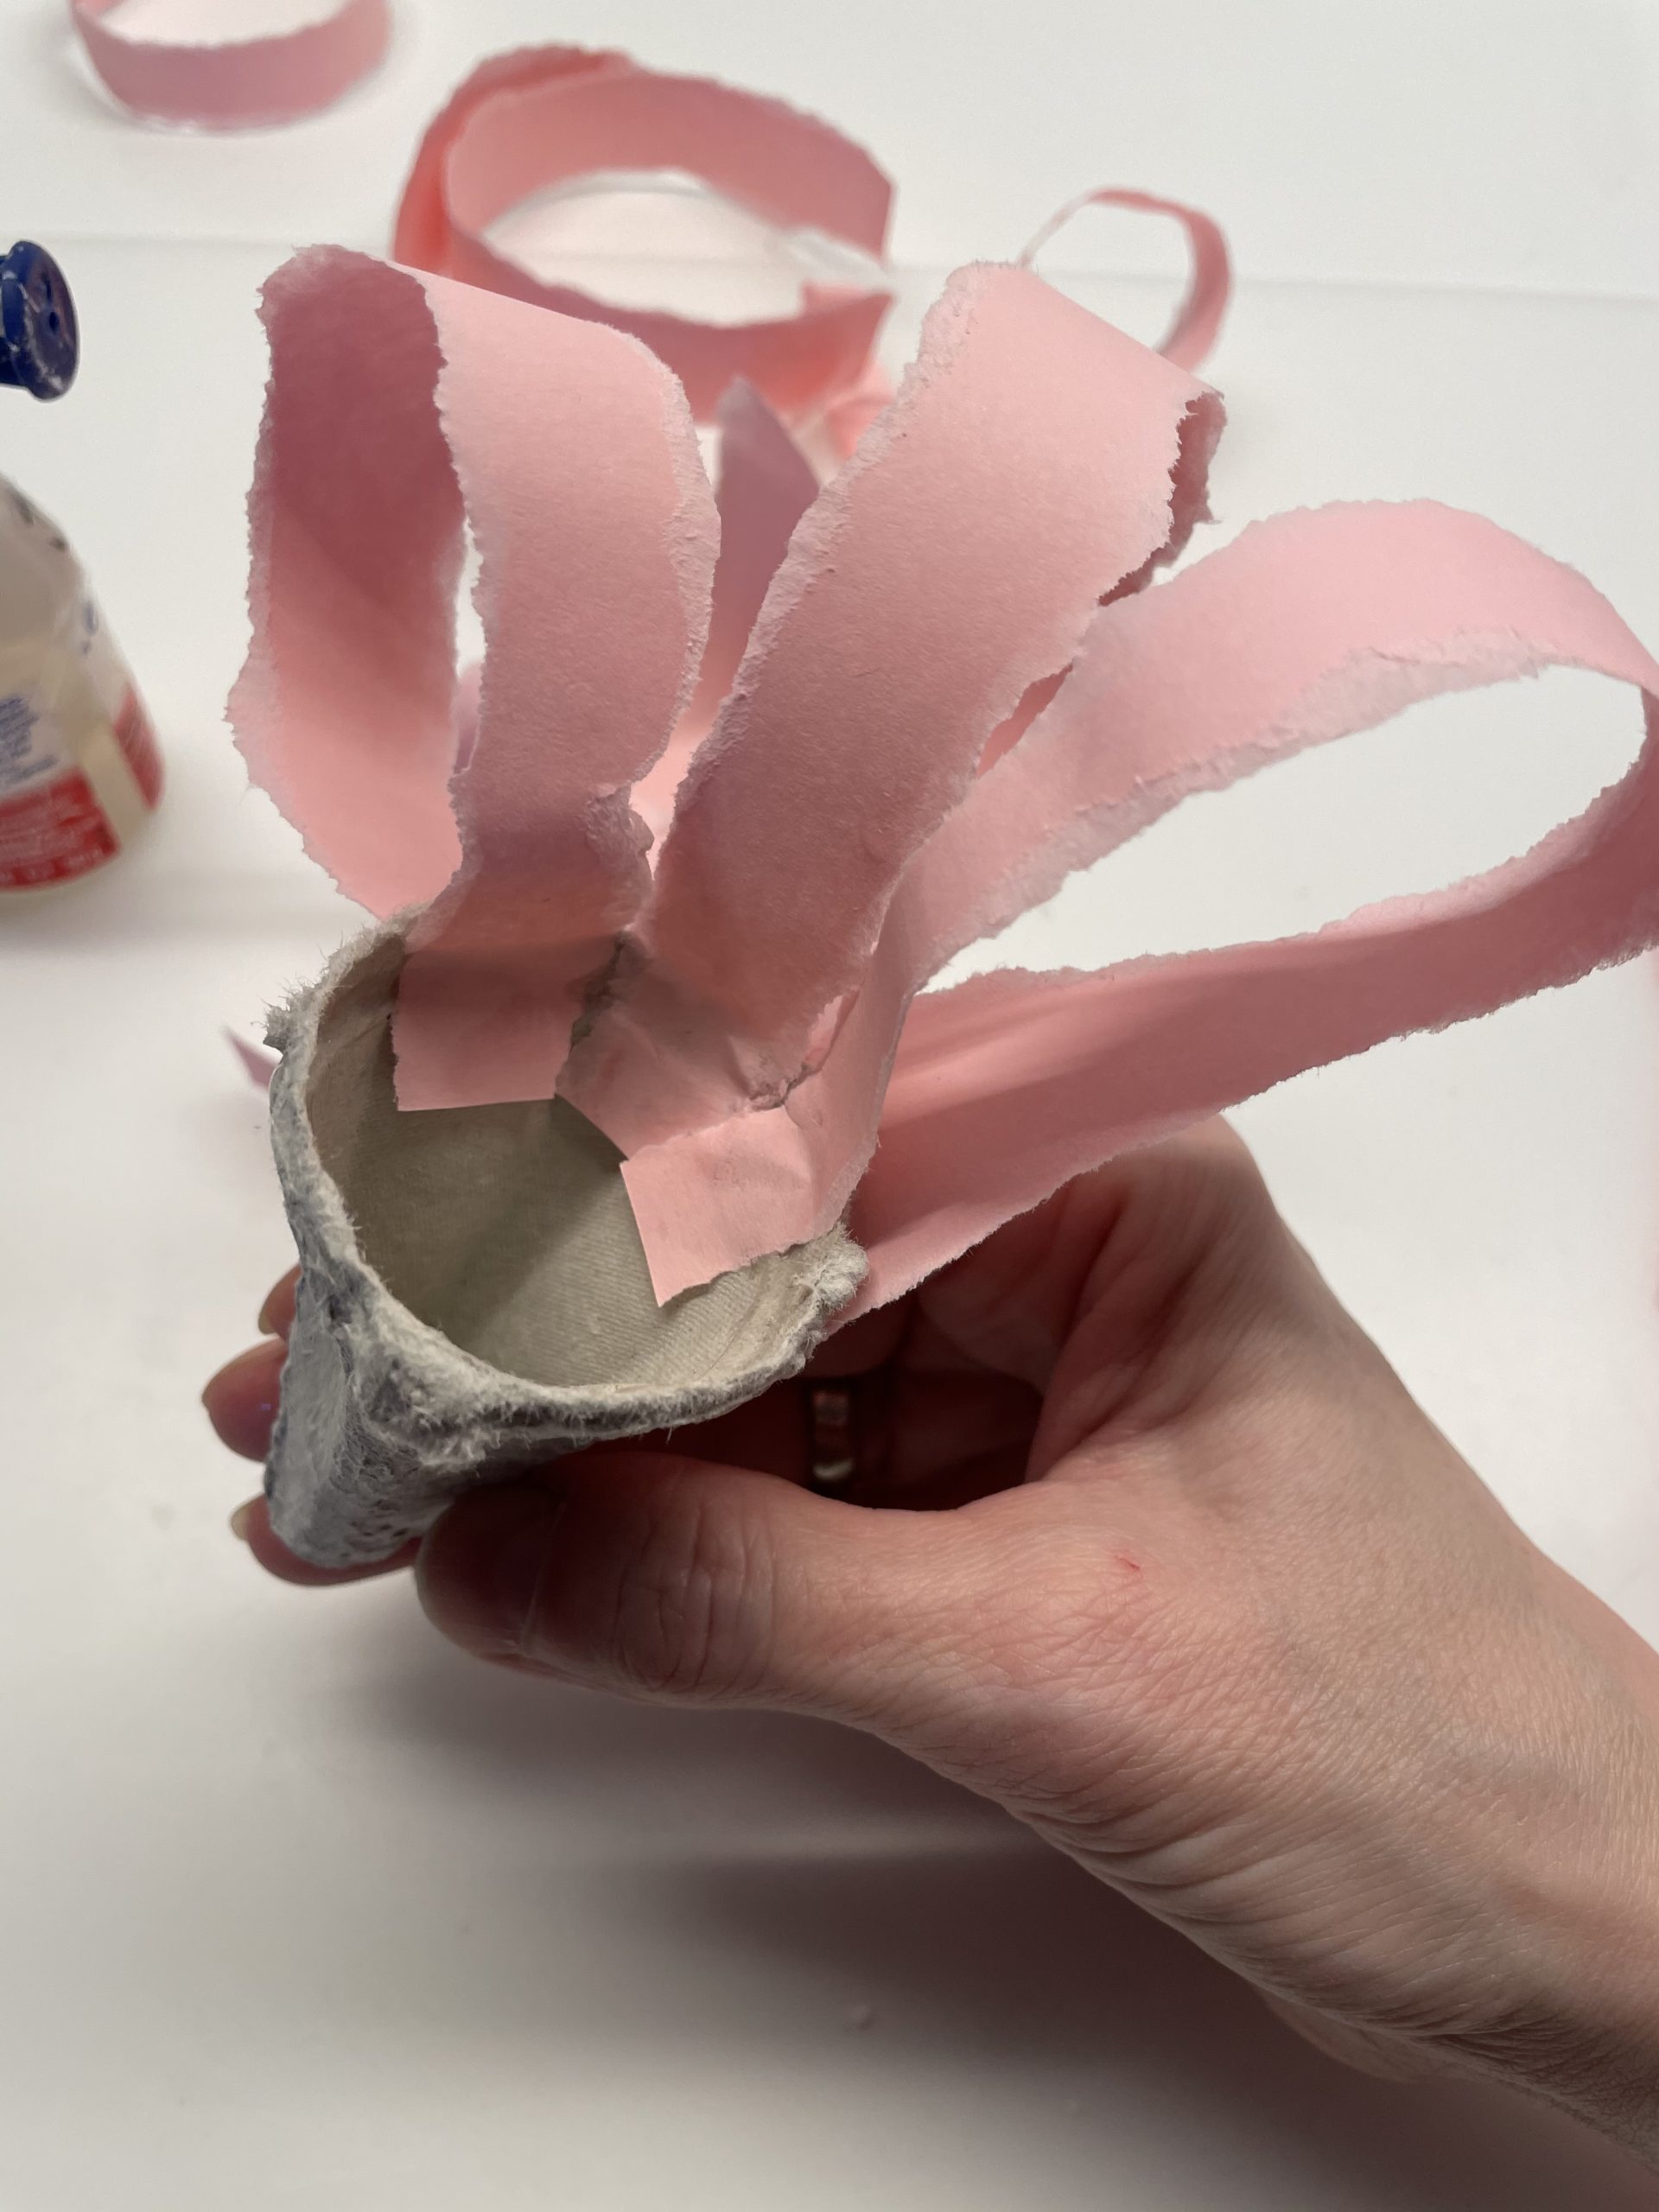
The stripes do not necessarily all have to be the same length!

Bild zum Schritt 10 für das Bastel- und DIY-Abenteuer für Kinder: 'Dabei müssen die Streifen nicht unbedingt alle gleich lang sein!'

11

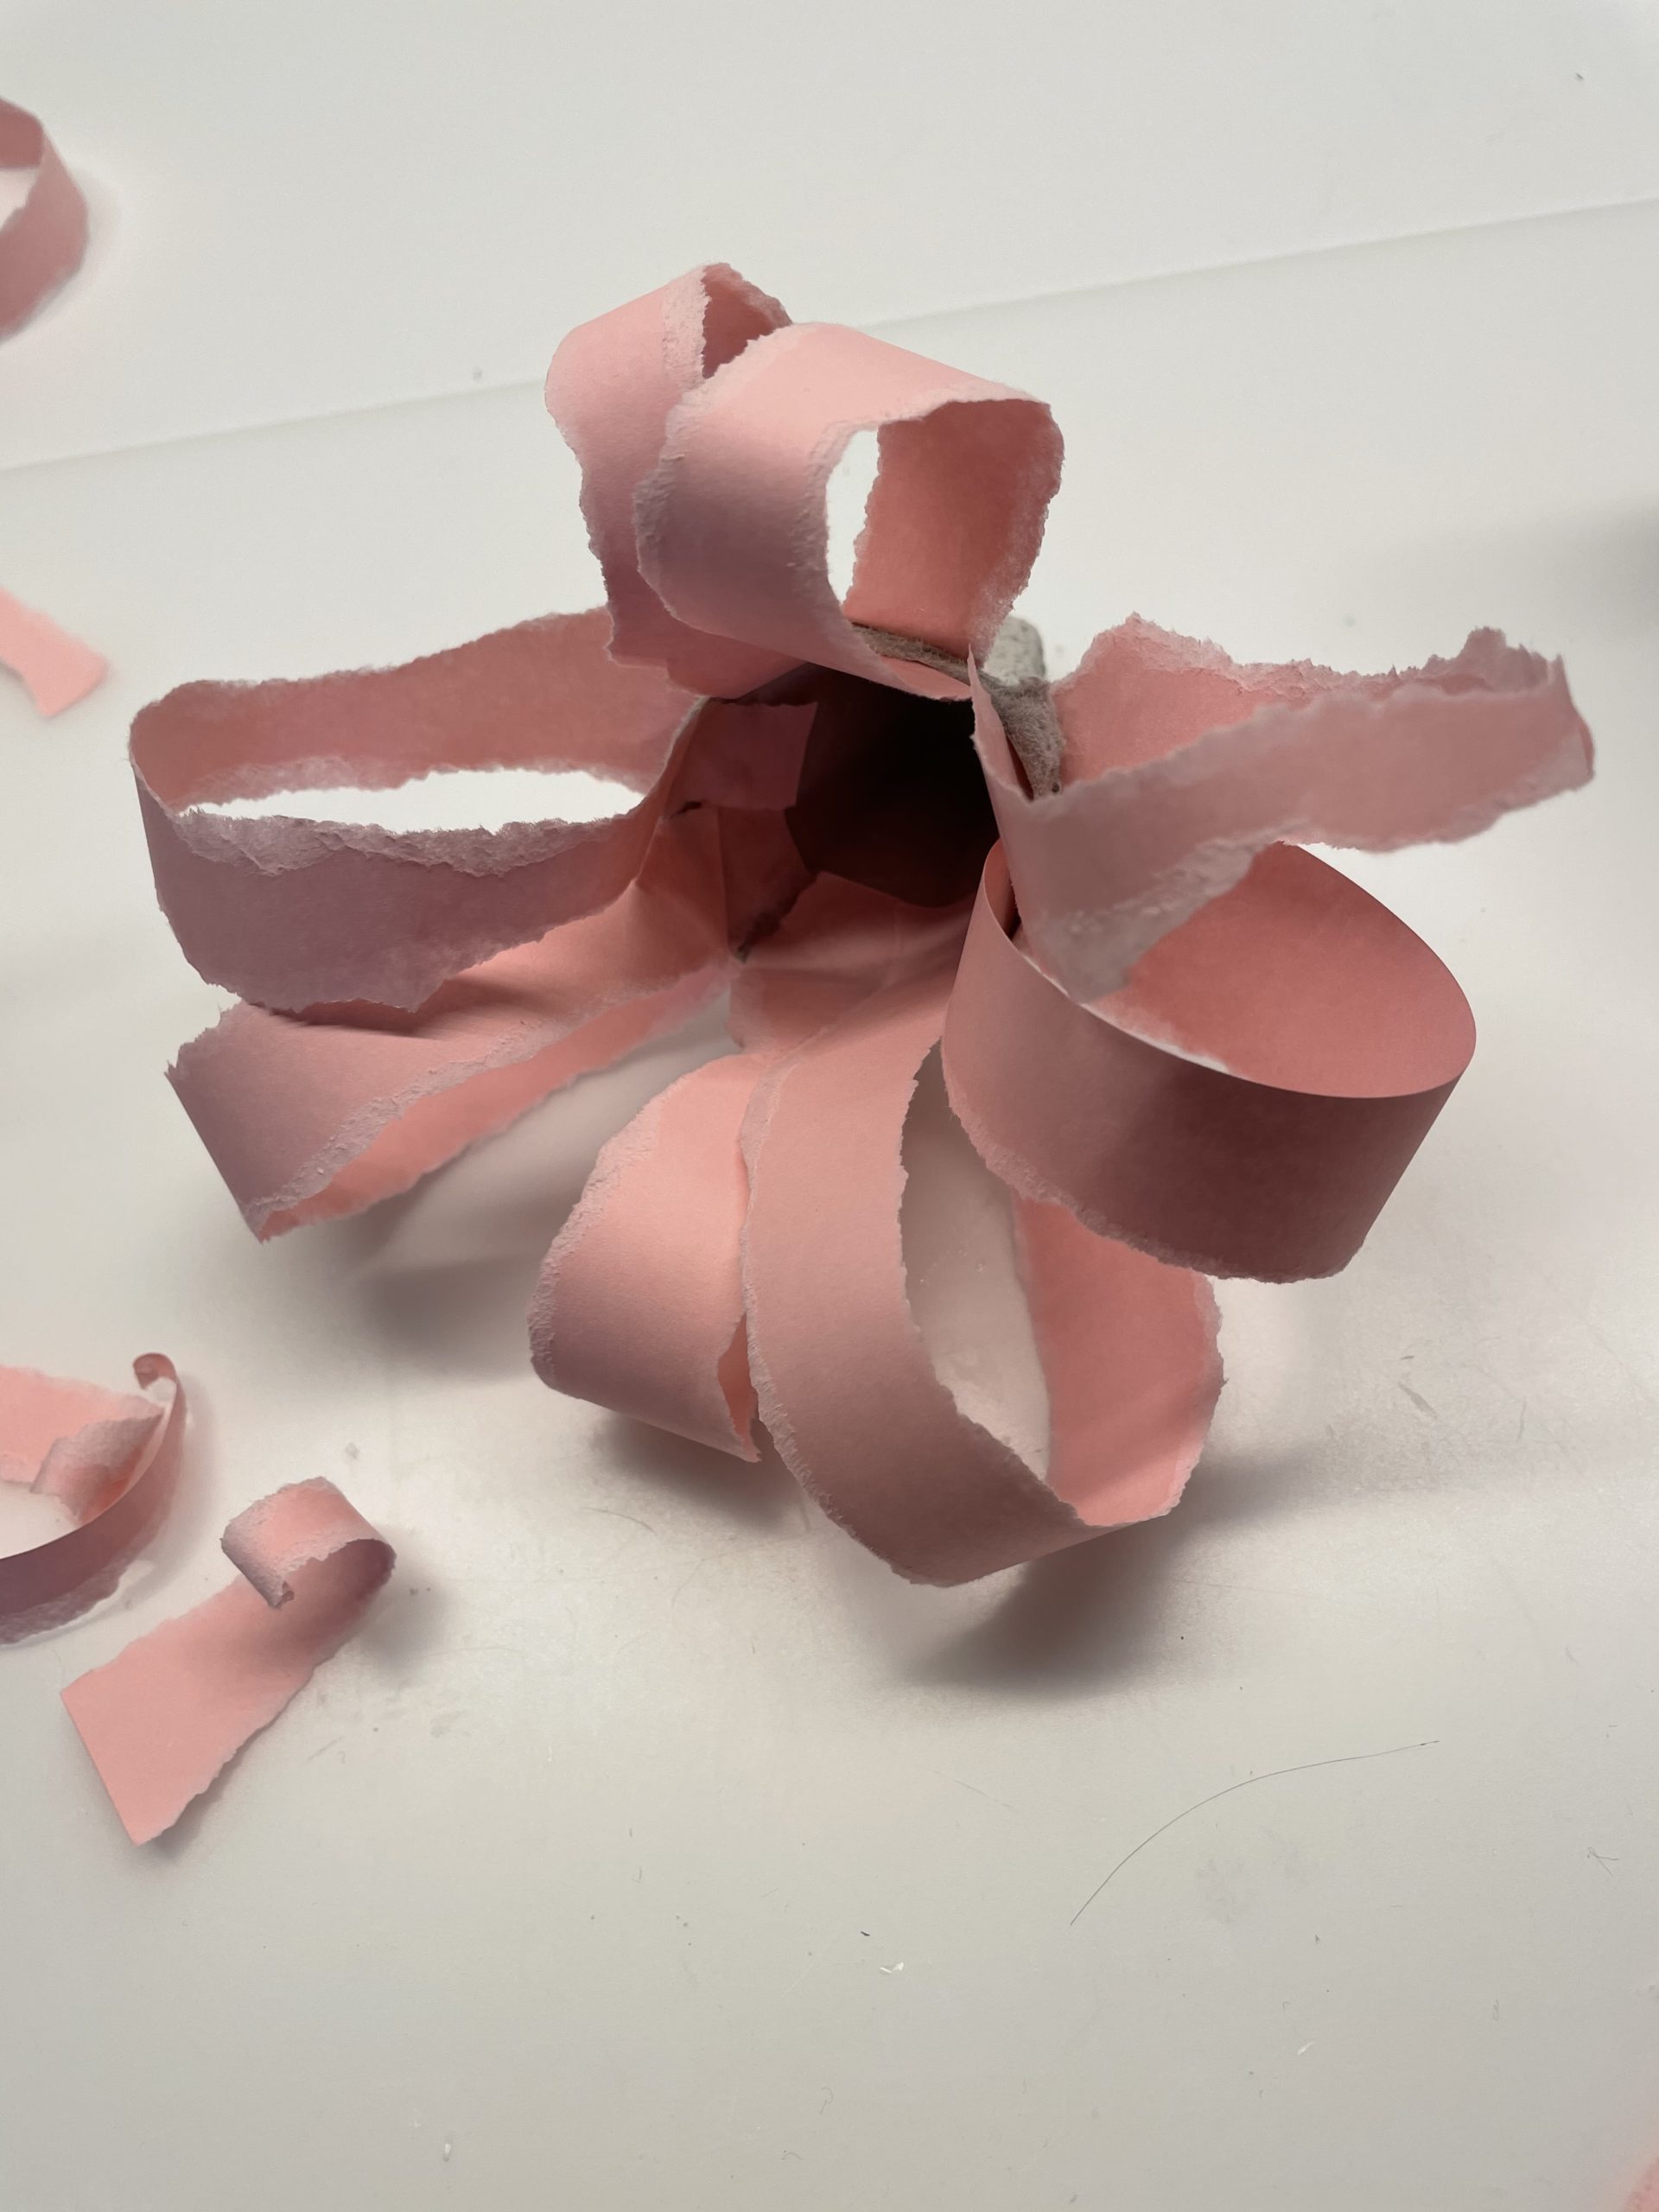
This is what the underside of the flower looks like now.

Bild zum Schritt 11 für das Bastel- und DIY-Abenteuer für Kinder: 'So sieht jetzt die Unterseite der Blume aus.'

12

And that's what she looks like from above.

Bild zum Schritt 12 für das Bastel- und DIY-Abenteuer für Kinder: 'Und so sieht sieht sie von oben aus.'

13

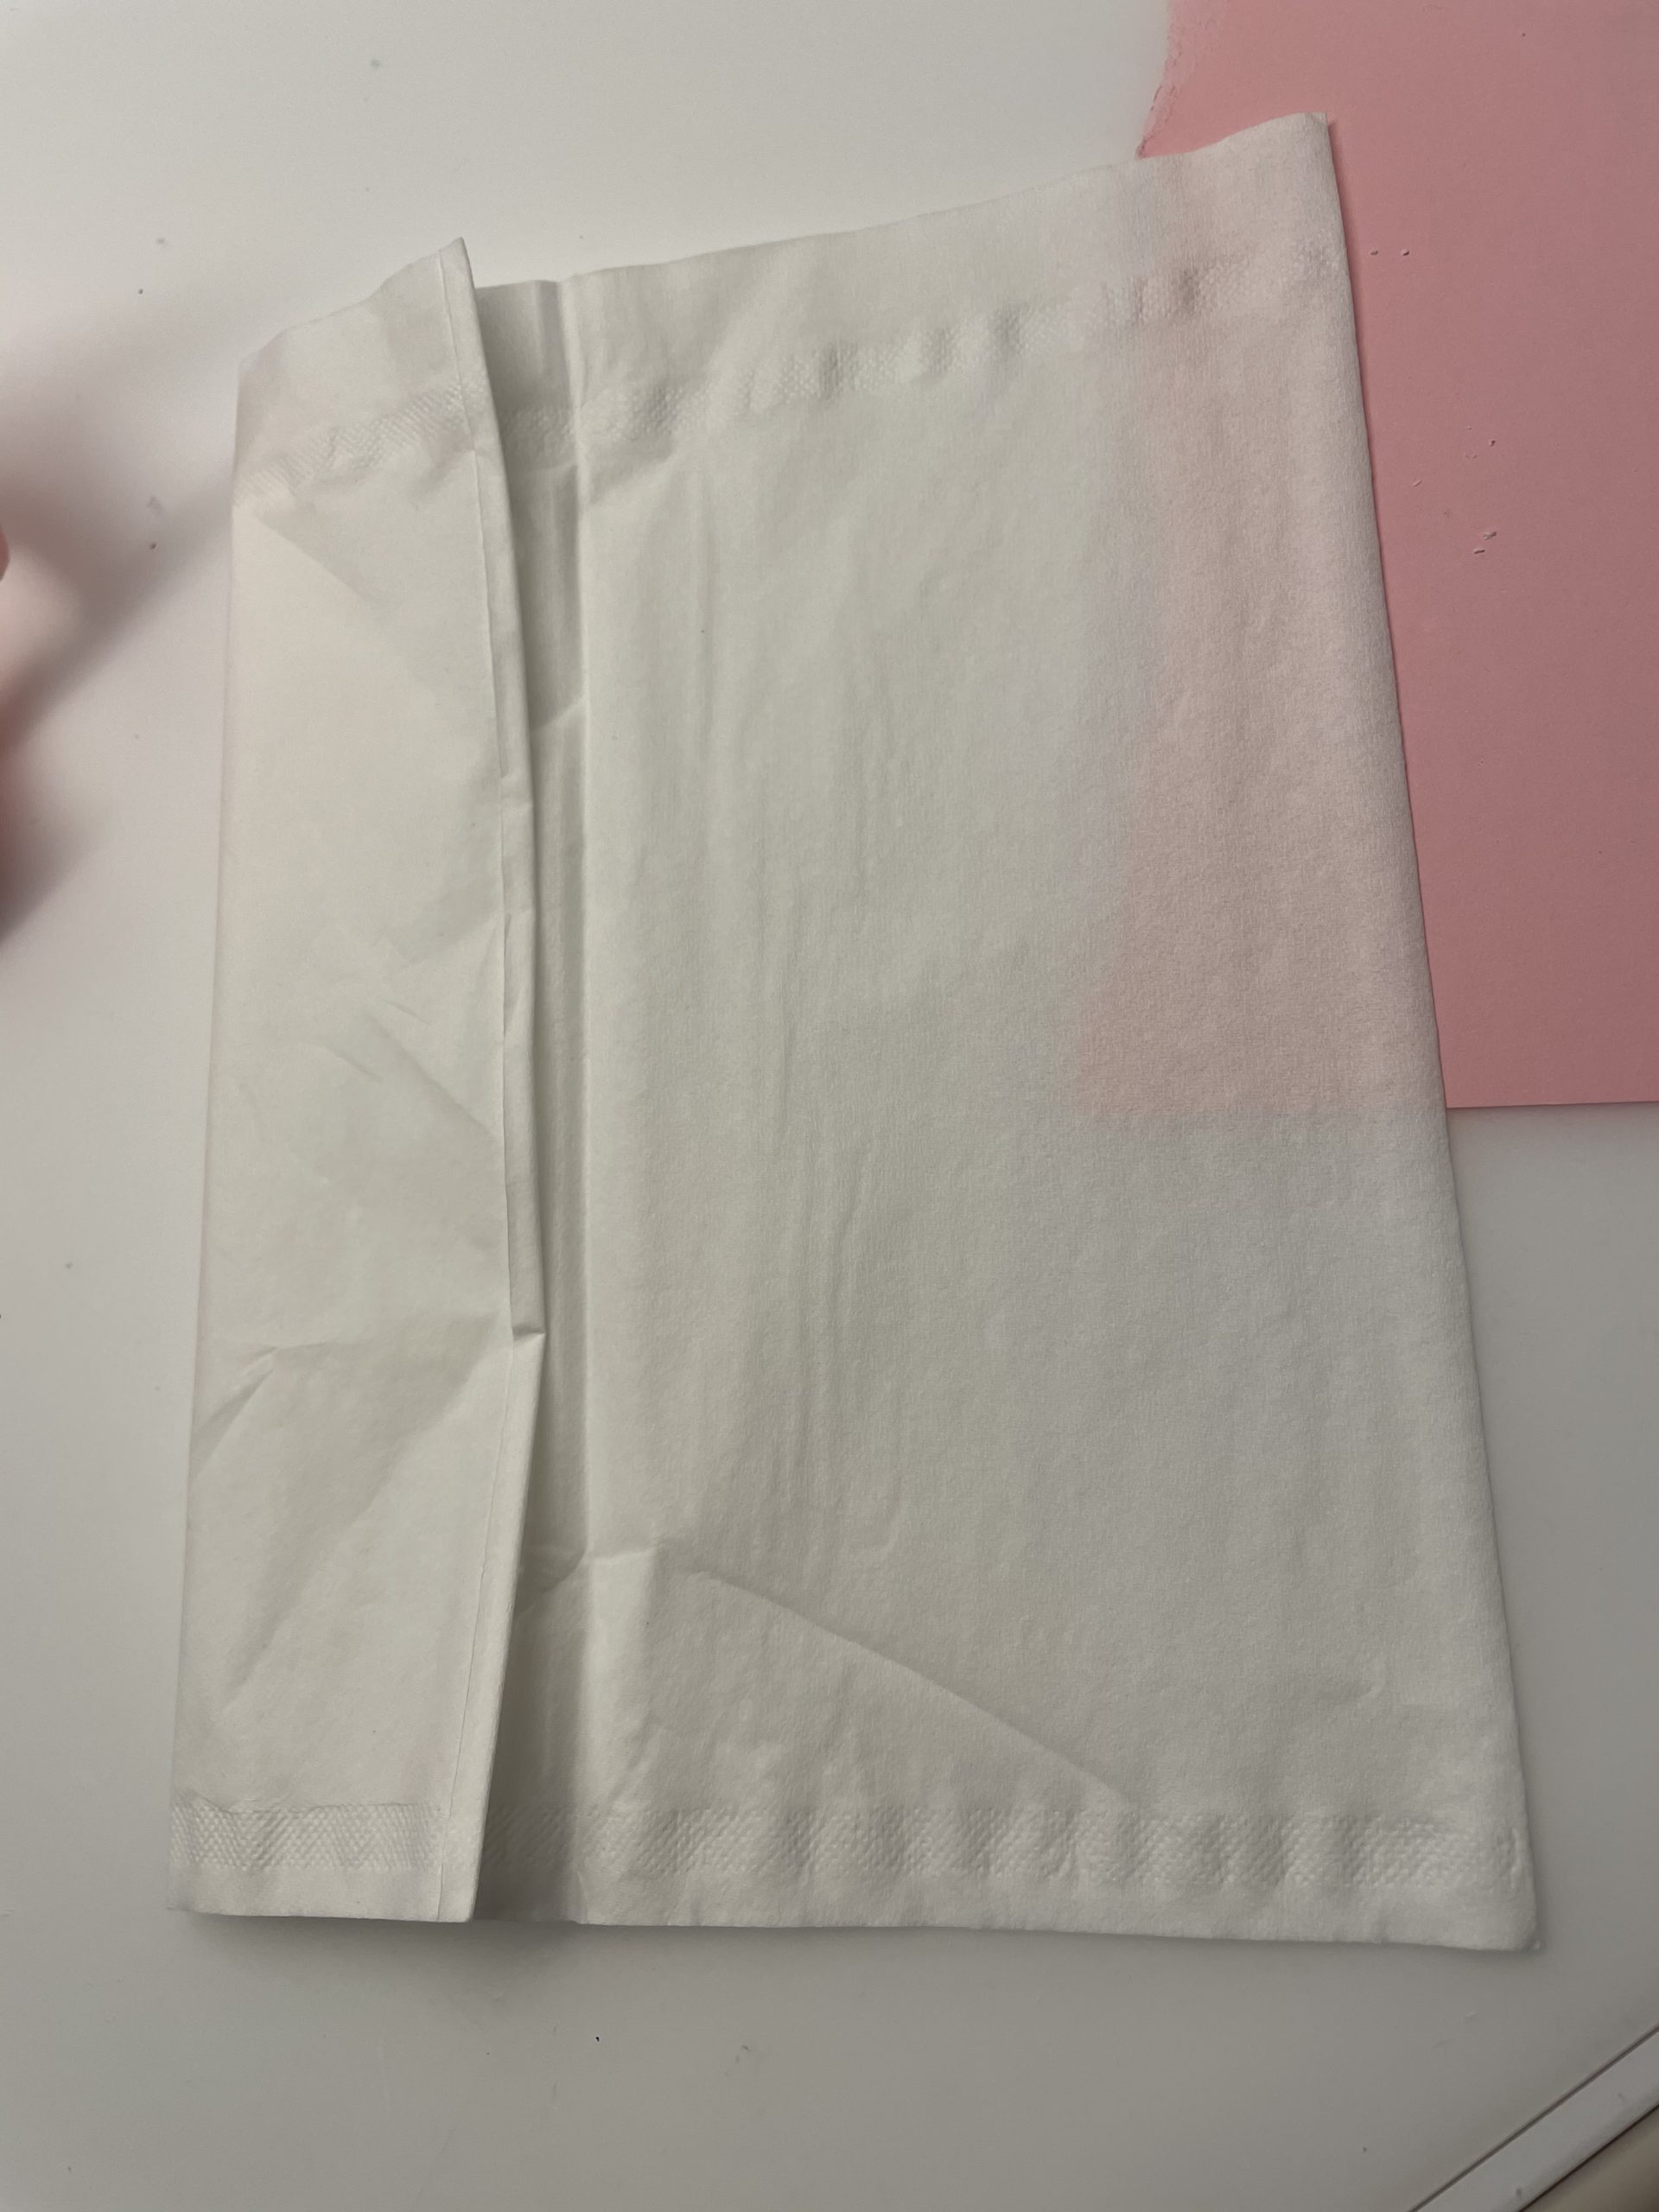
Now you make the inside of the flower from a handkerchief.

Bild zum Schritt 13 für das Bastel- und DIY-Abenteuer für Kinder: 'Nun bastelt ihr aus einem Taschentuch das Innere der Blume.'

14

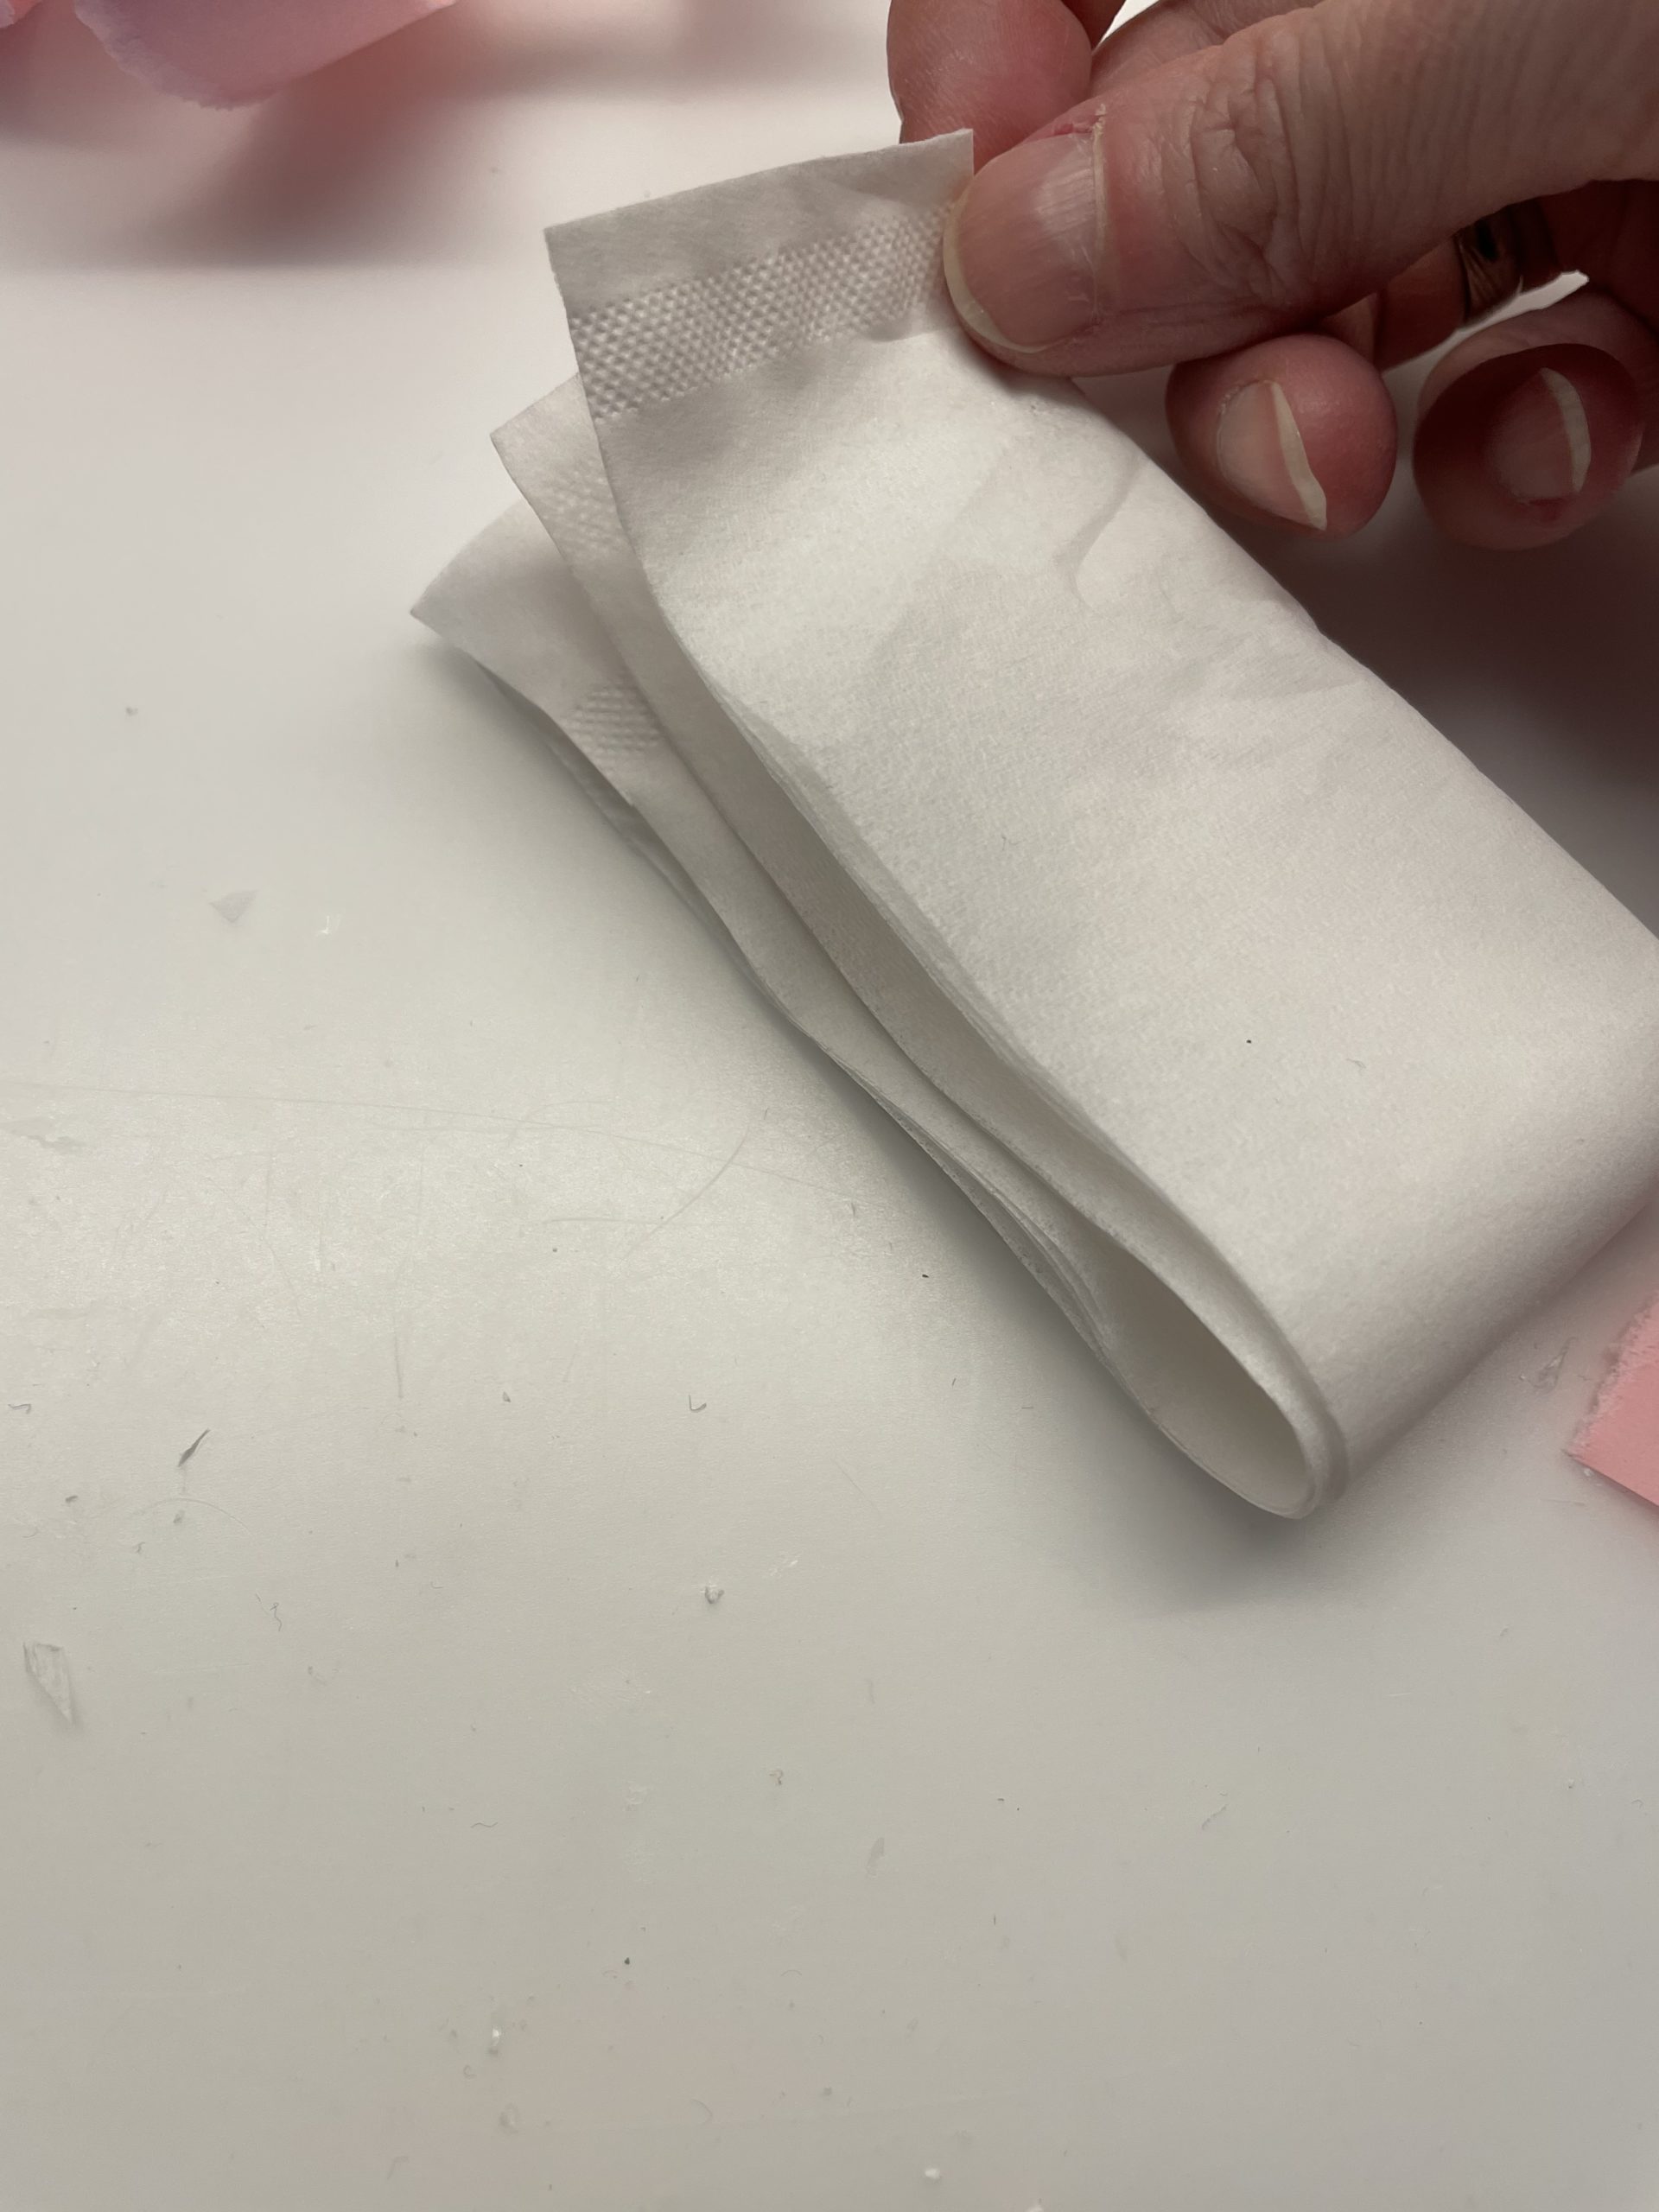
If the handkerchief folds half, you get a narrow stripe.

Bild zum Schritt 14 für das Bastel- und DIY-Abenteuer für Kinder: 'Faltet das Taschentuch zur Hälfte, so erhaltet ihr einen schmalen...'

15

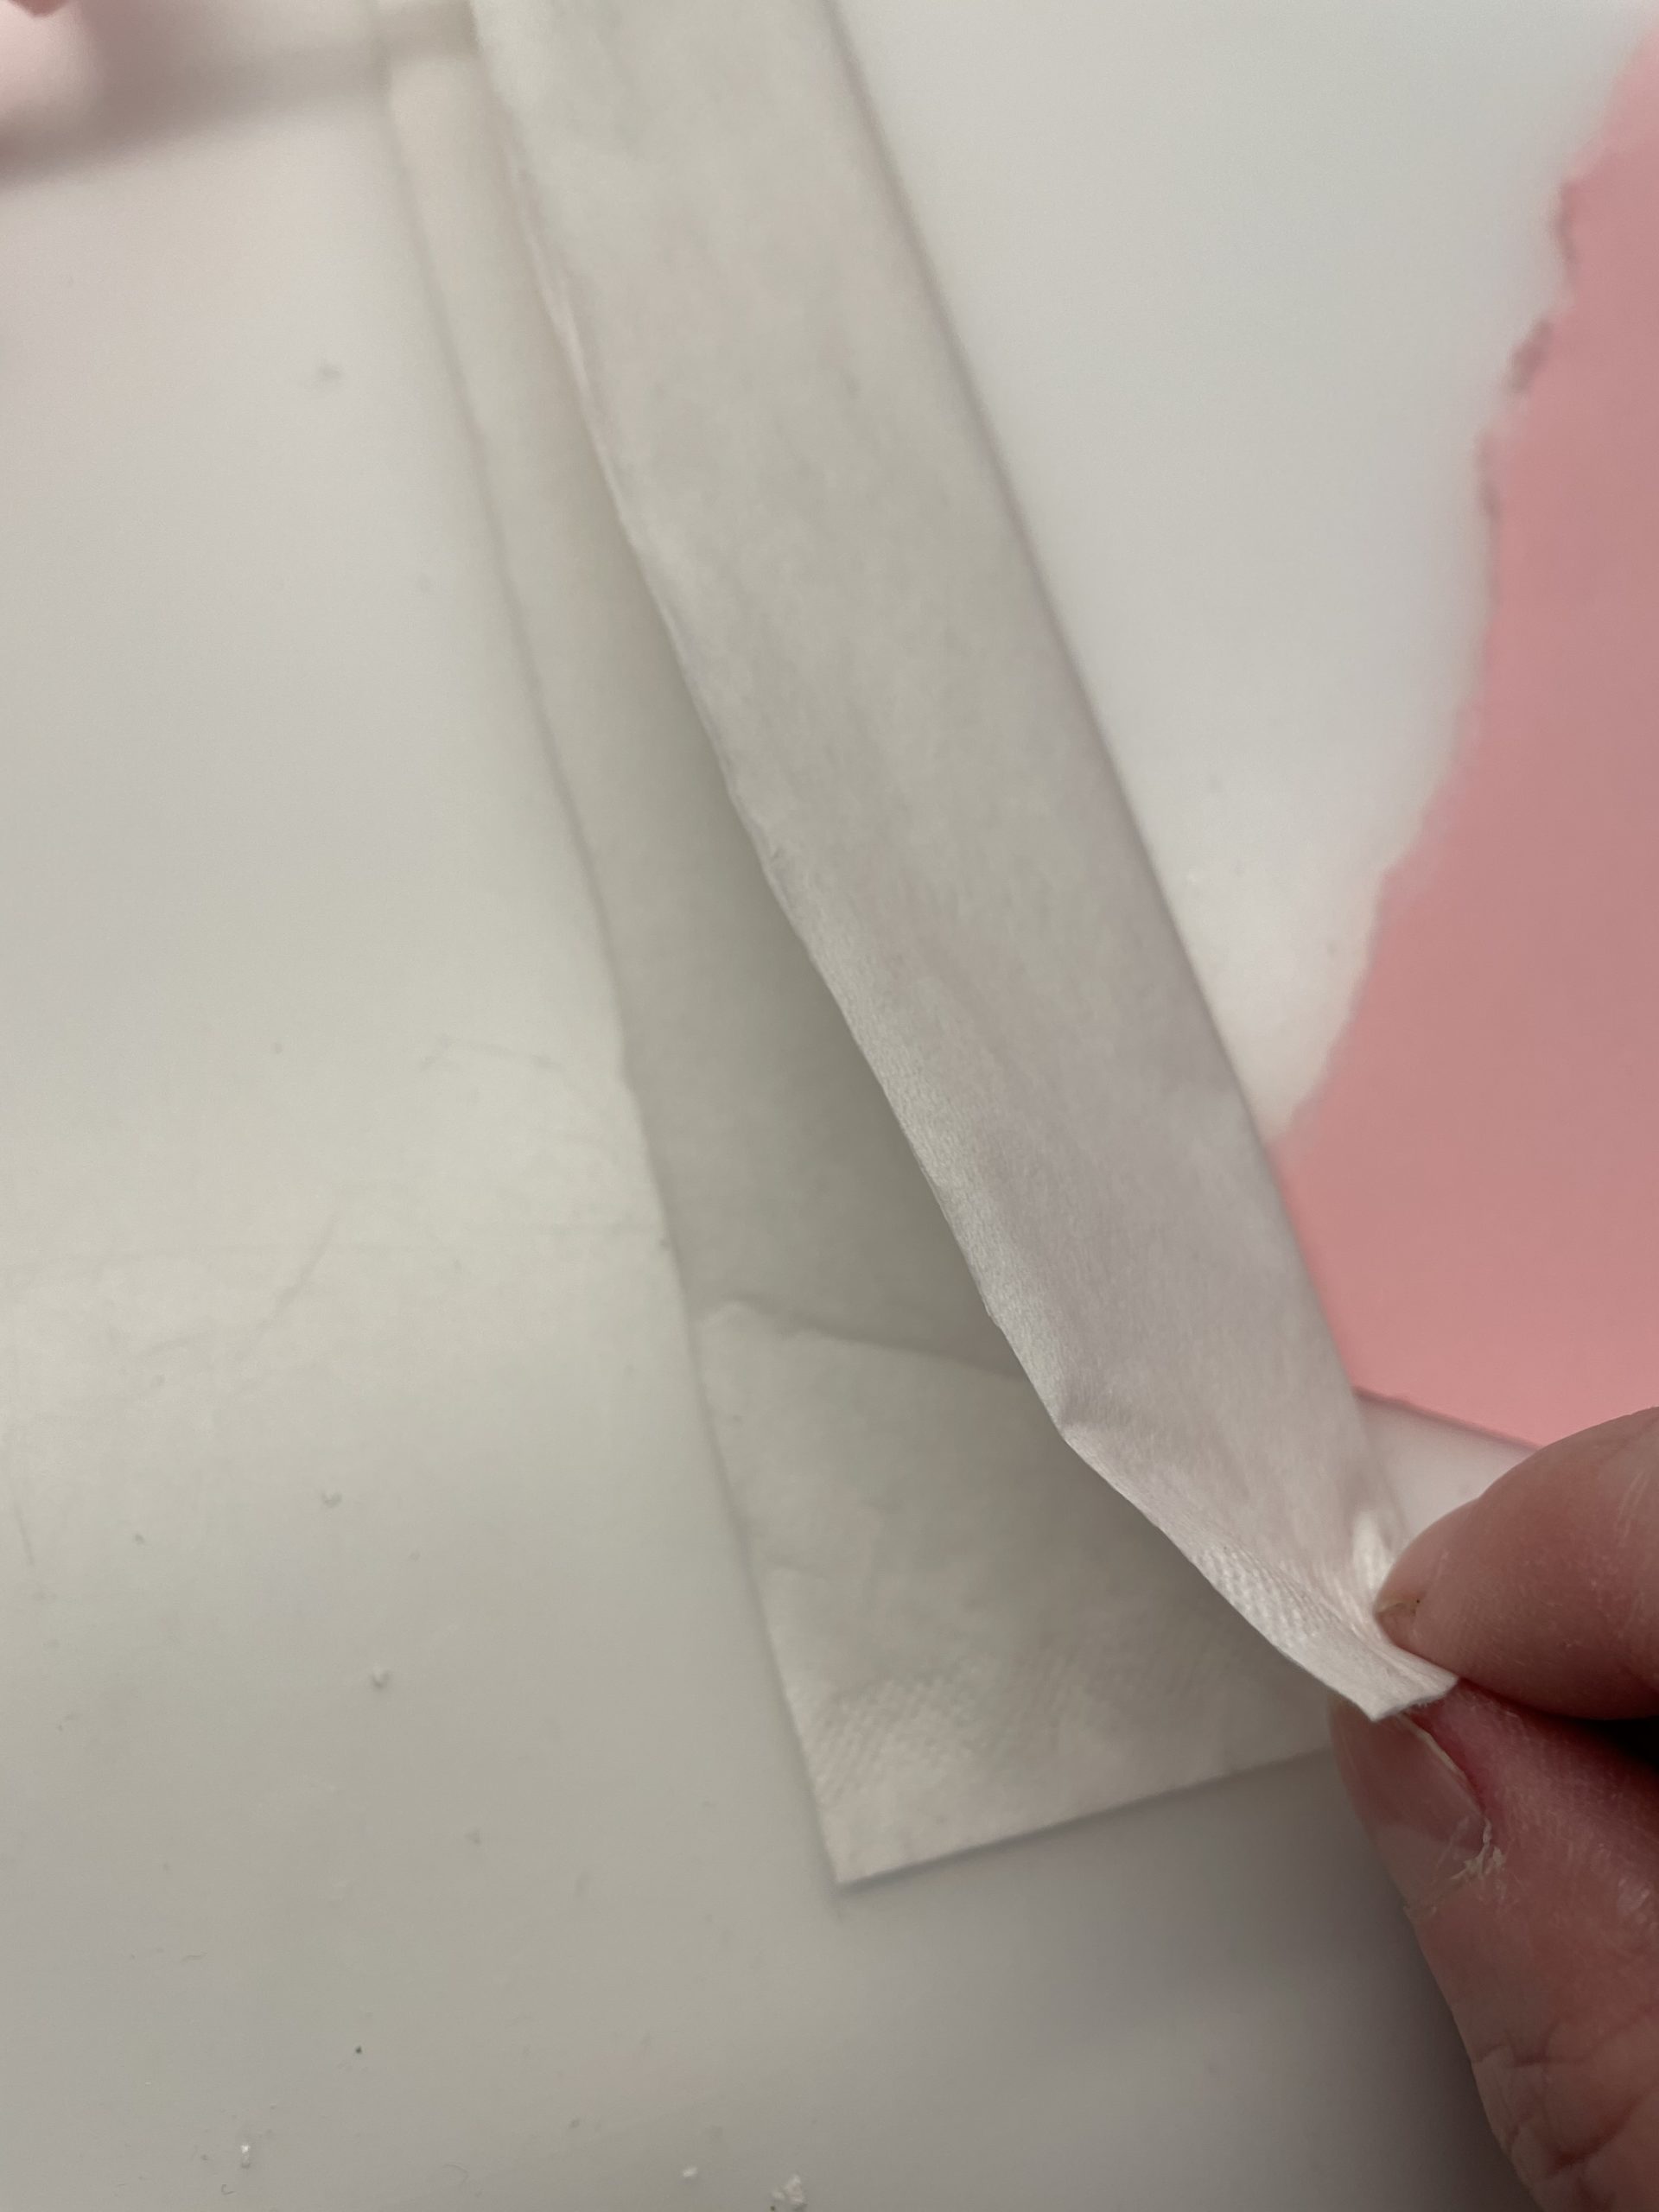
Put this strip together again.

Bild zum Schritt 15 für das Bastel- und DIY-Abenteuer für Kinder: 'Klappt diesen Streifen noch einmal zusammen.'

16

Then with scissors you cut the handkerchief on the open side several times a piece (something more than half).

Bild zum Schritt 16 für das Bastel- und DIY-Abenteuer für Kinder: 'Dann schneidet ihr mit der Schere das Taschentuch an der...'

17

2. Bild zum Schritt 16 für das Bastel- und DIY-Abenteuer für Kinder: 'Dann schneidet ihr mit der Schere das Taschentuch an der...'

18

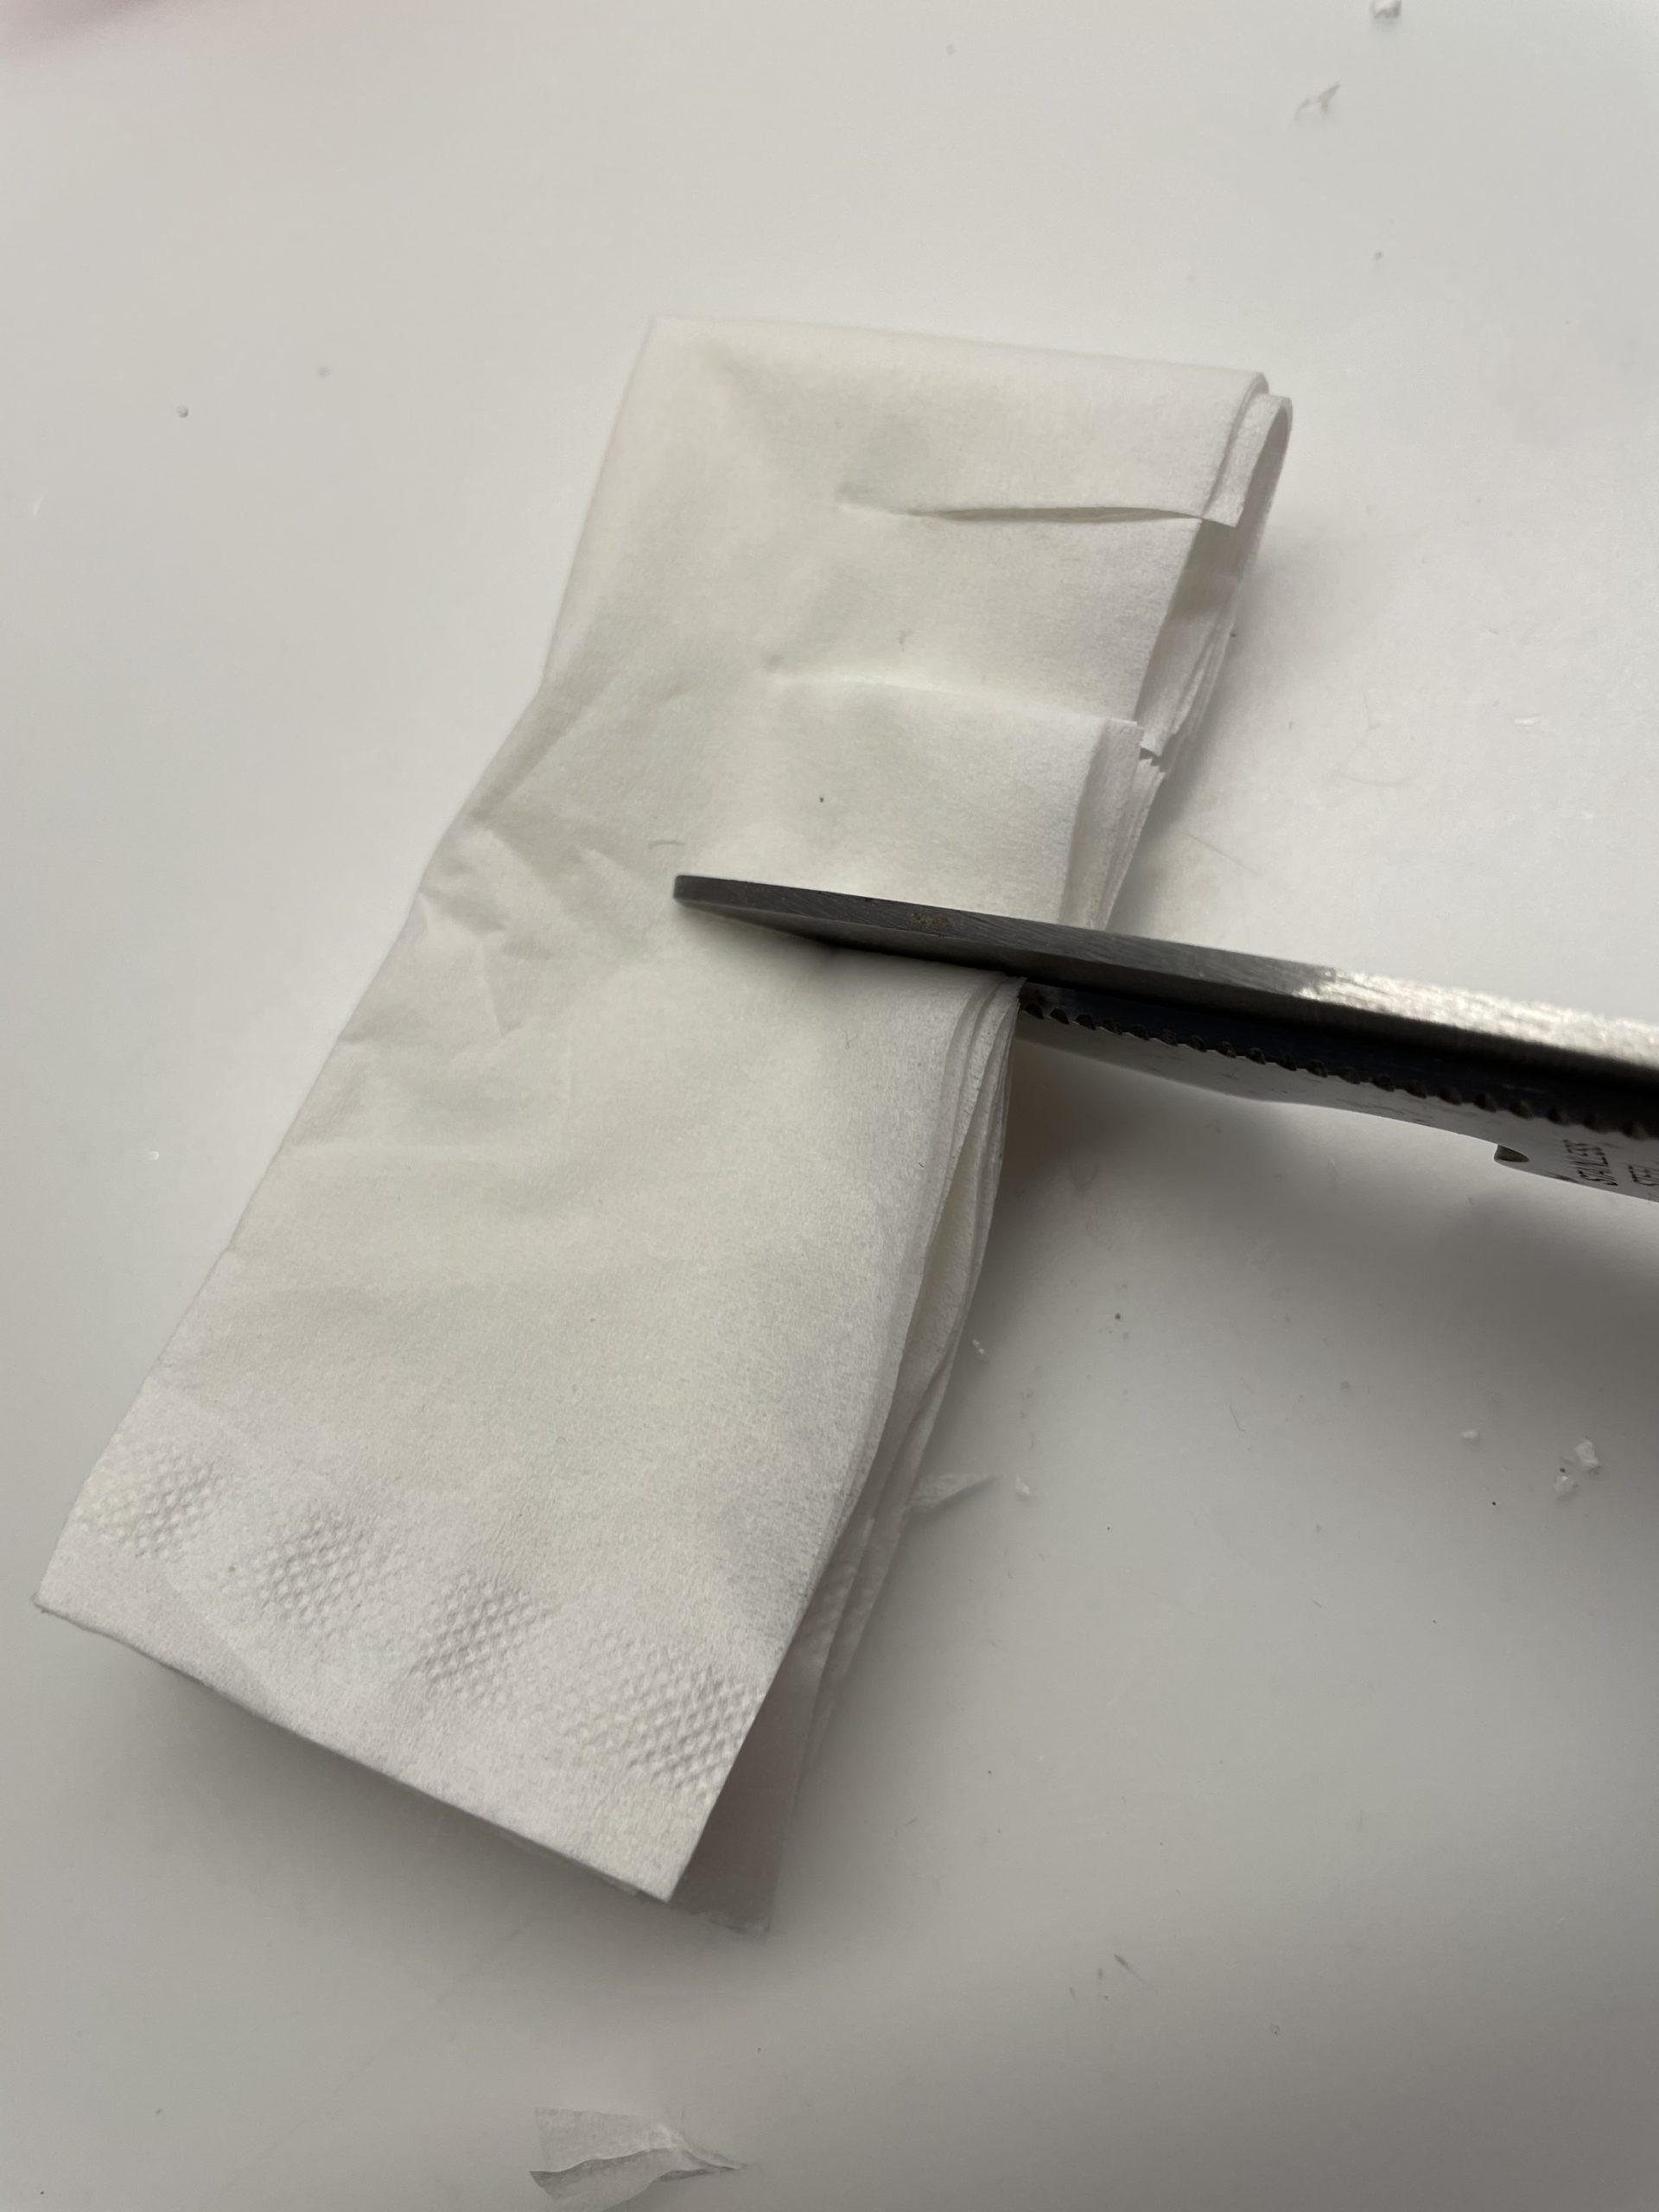
That's what the handkerchief looks like now.

Bild zum Schritt 18 für das Bastel- und DIY-Abenteuer für Kinder: 'So sieht das Taschentuch jetzt aus.'

19

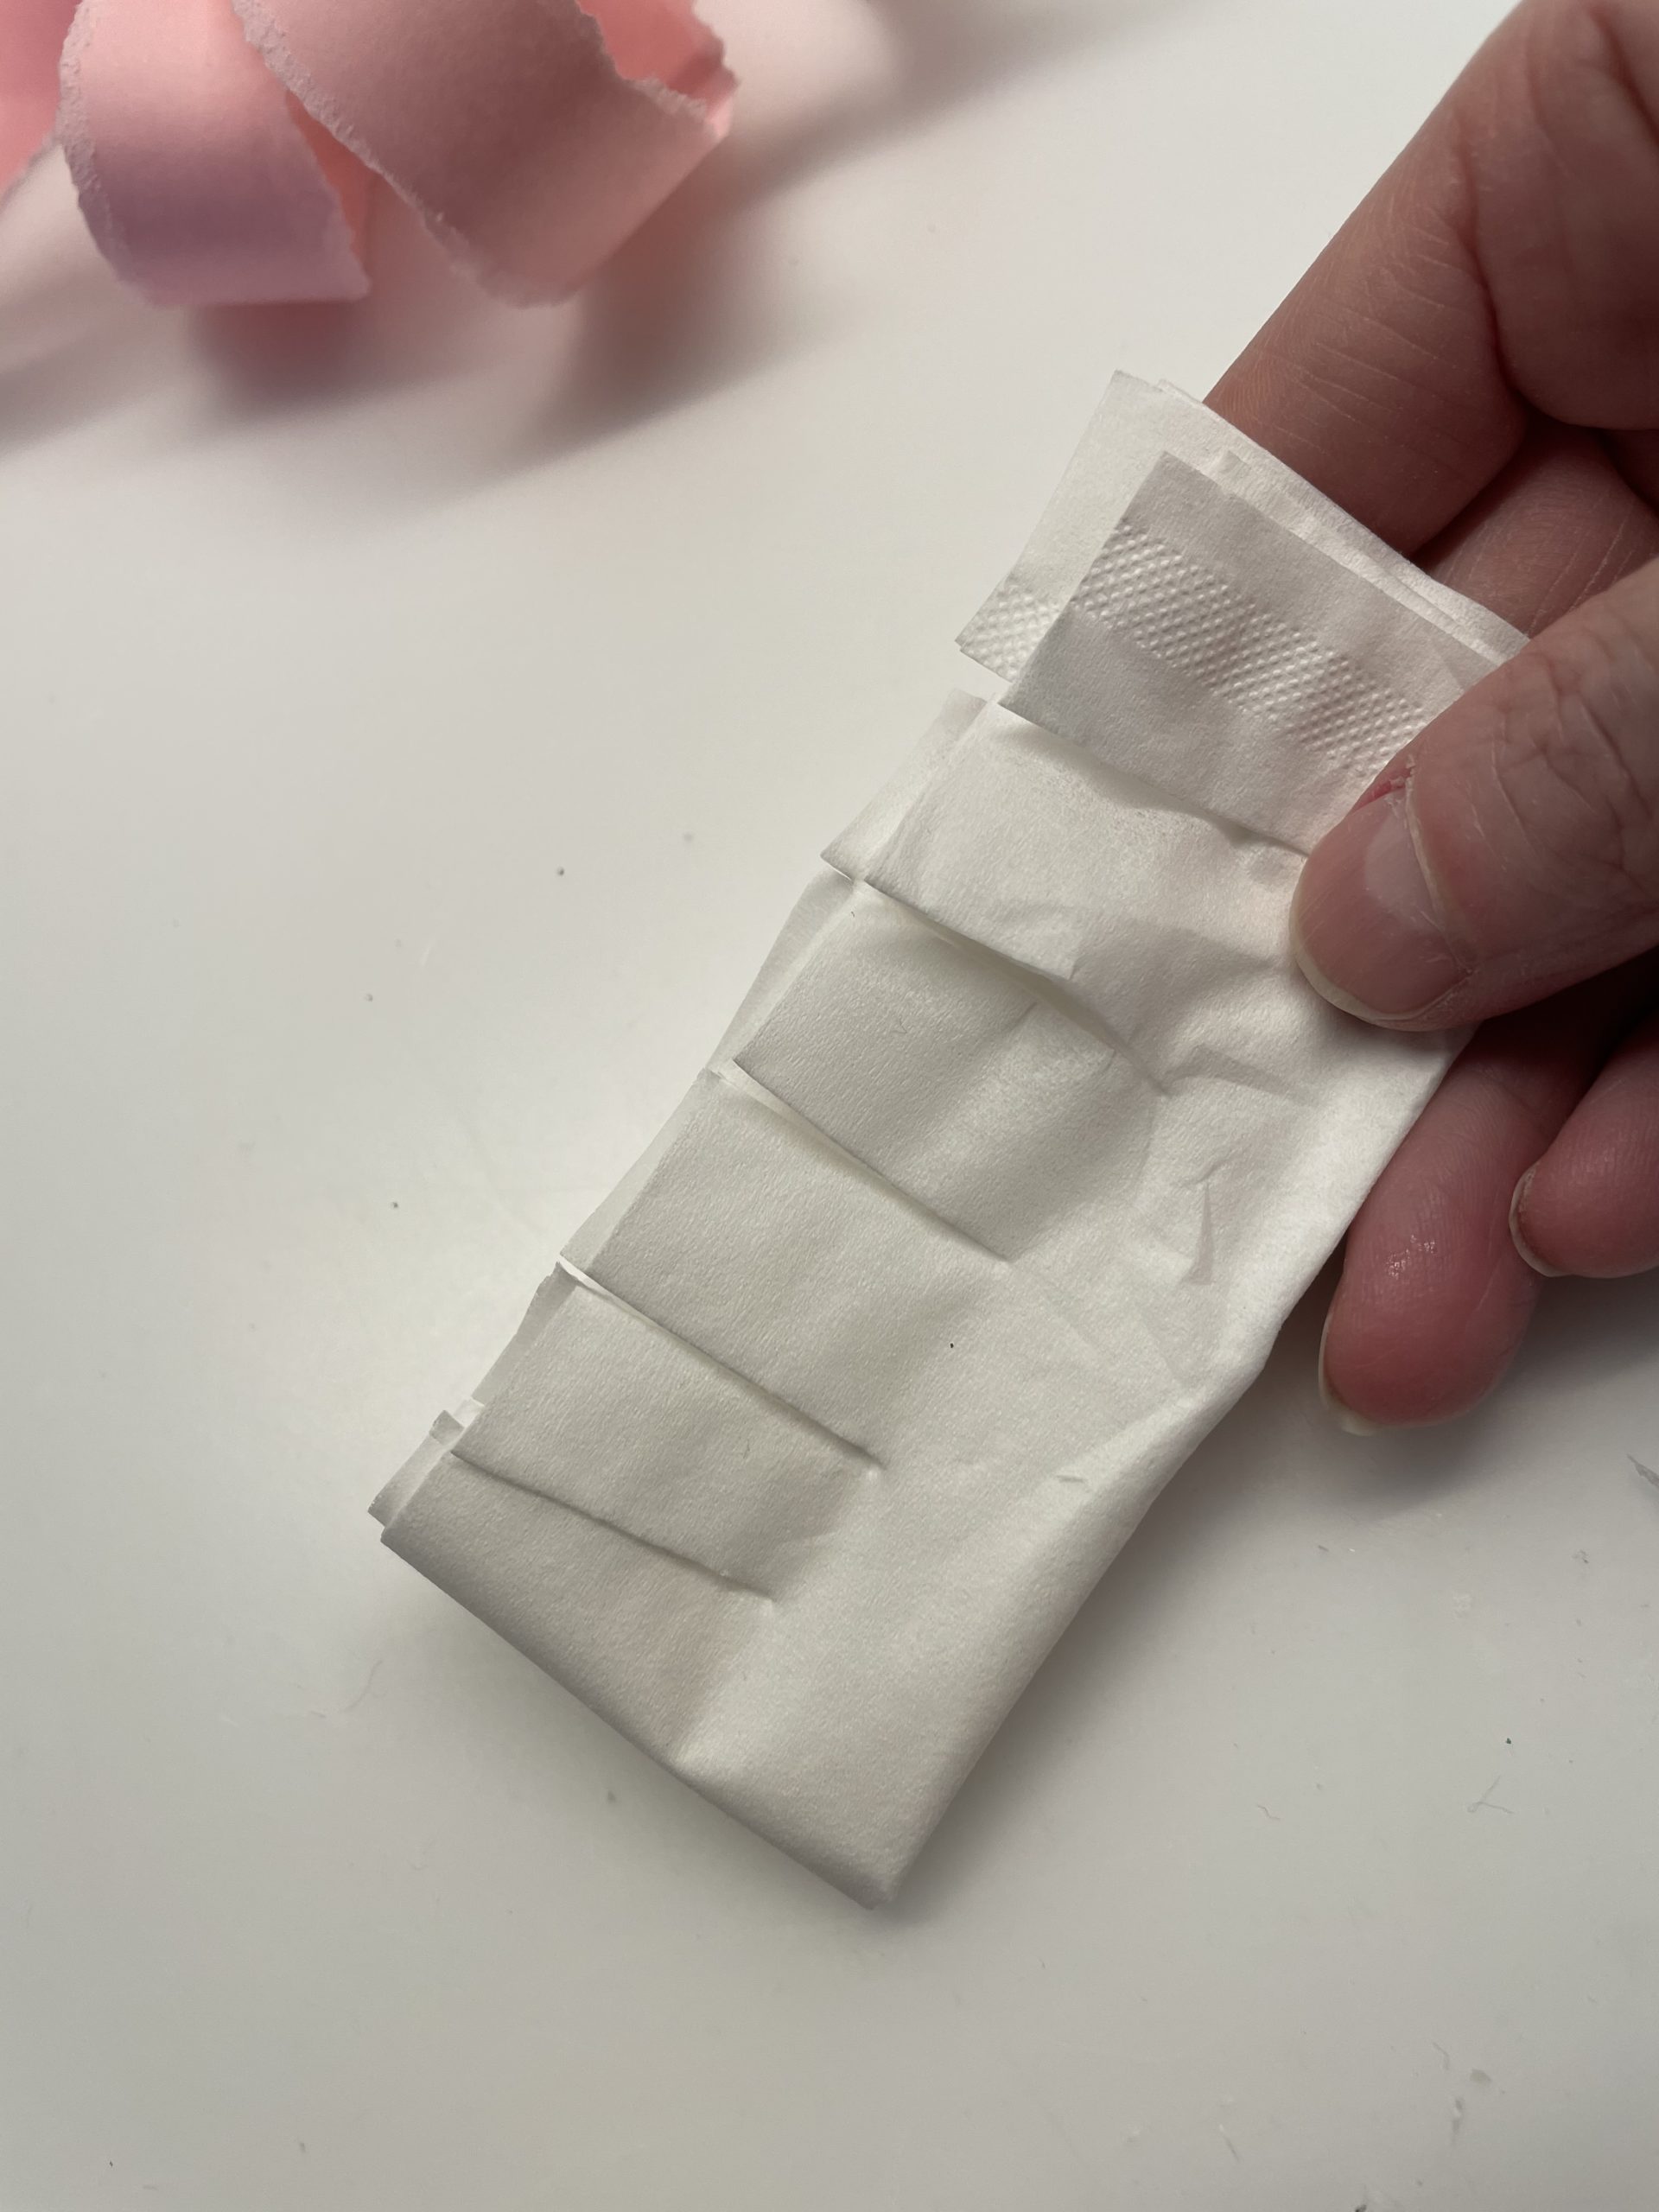
Now fold or roll the strip several times.

Bild zum Schritt 19 für das Bastel- und DIY-Abenteuer für Kinder: 'Jetzt faltet oder rollt ihr den Streifen mehrfach zusammen.'

20

2. Bild zum Schritt 19 für das Bastel- und DIY-Abenteuer für Kinder: 'Jetzt faltet oder rollt ihr den Streifen mehrfach zusammen.'

21

Now fix the lower edge with an adhesive tape.

Bild zum Schritt 21 für das Bastel- und DIY-Abenteuer für Kinder: 'Fixiert nun den unteren Rand mit einen Klebestreifen.'

22

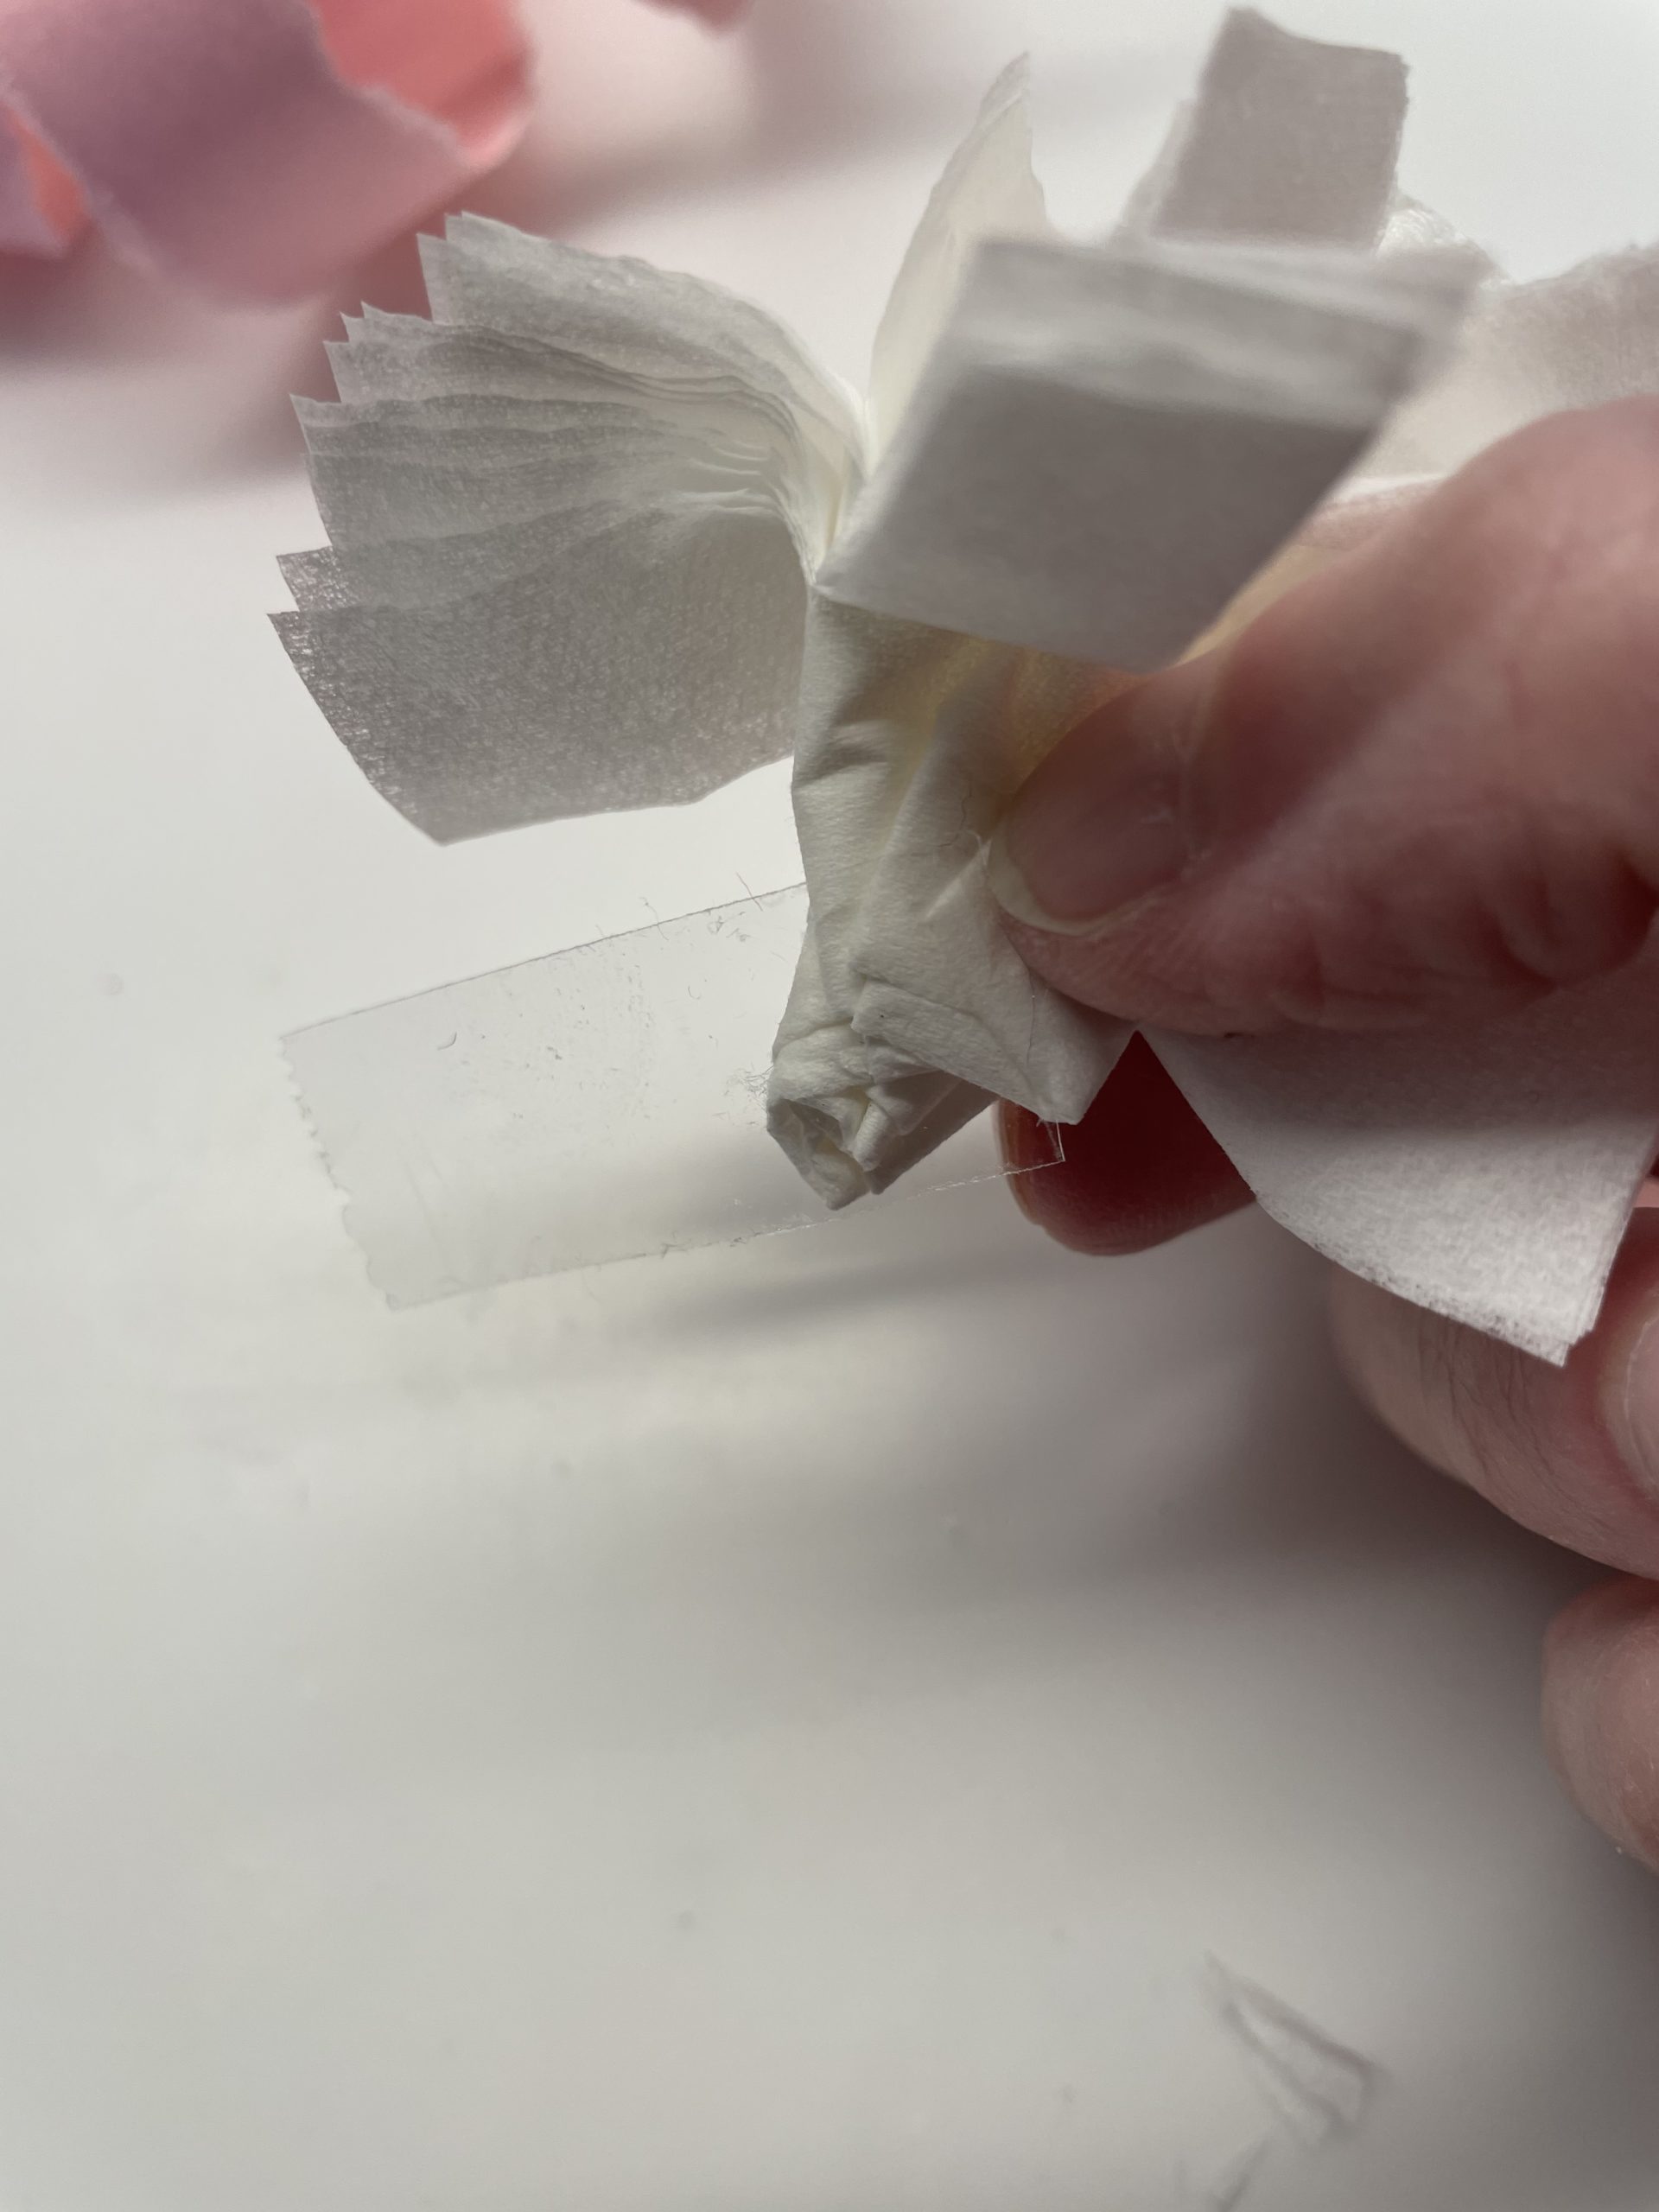
So the roll from the handkerchief holds together.

Bild zum Schritt 22 für das Bastel- und DIY-Abenteuer für Kinder: 'So hält die Rolle aus dem Taschentuch zusammen.'

23

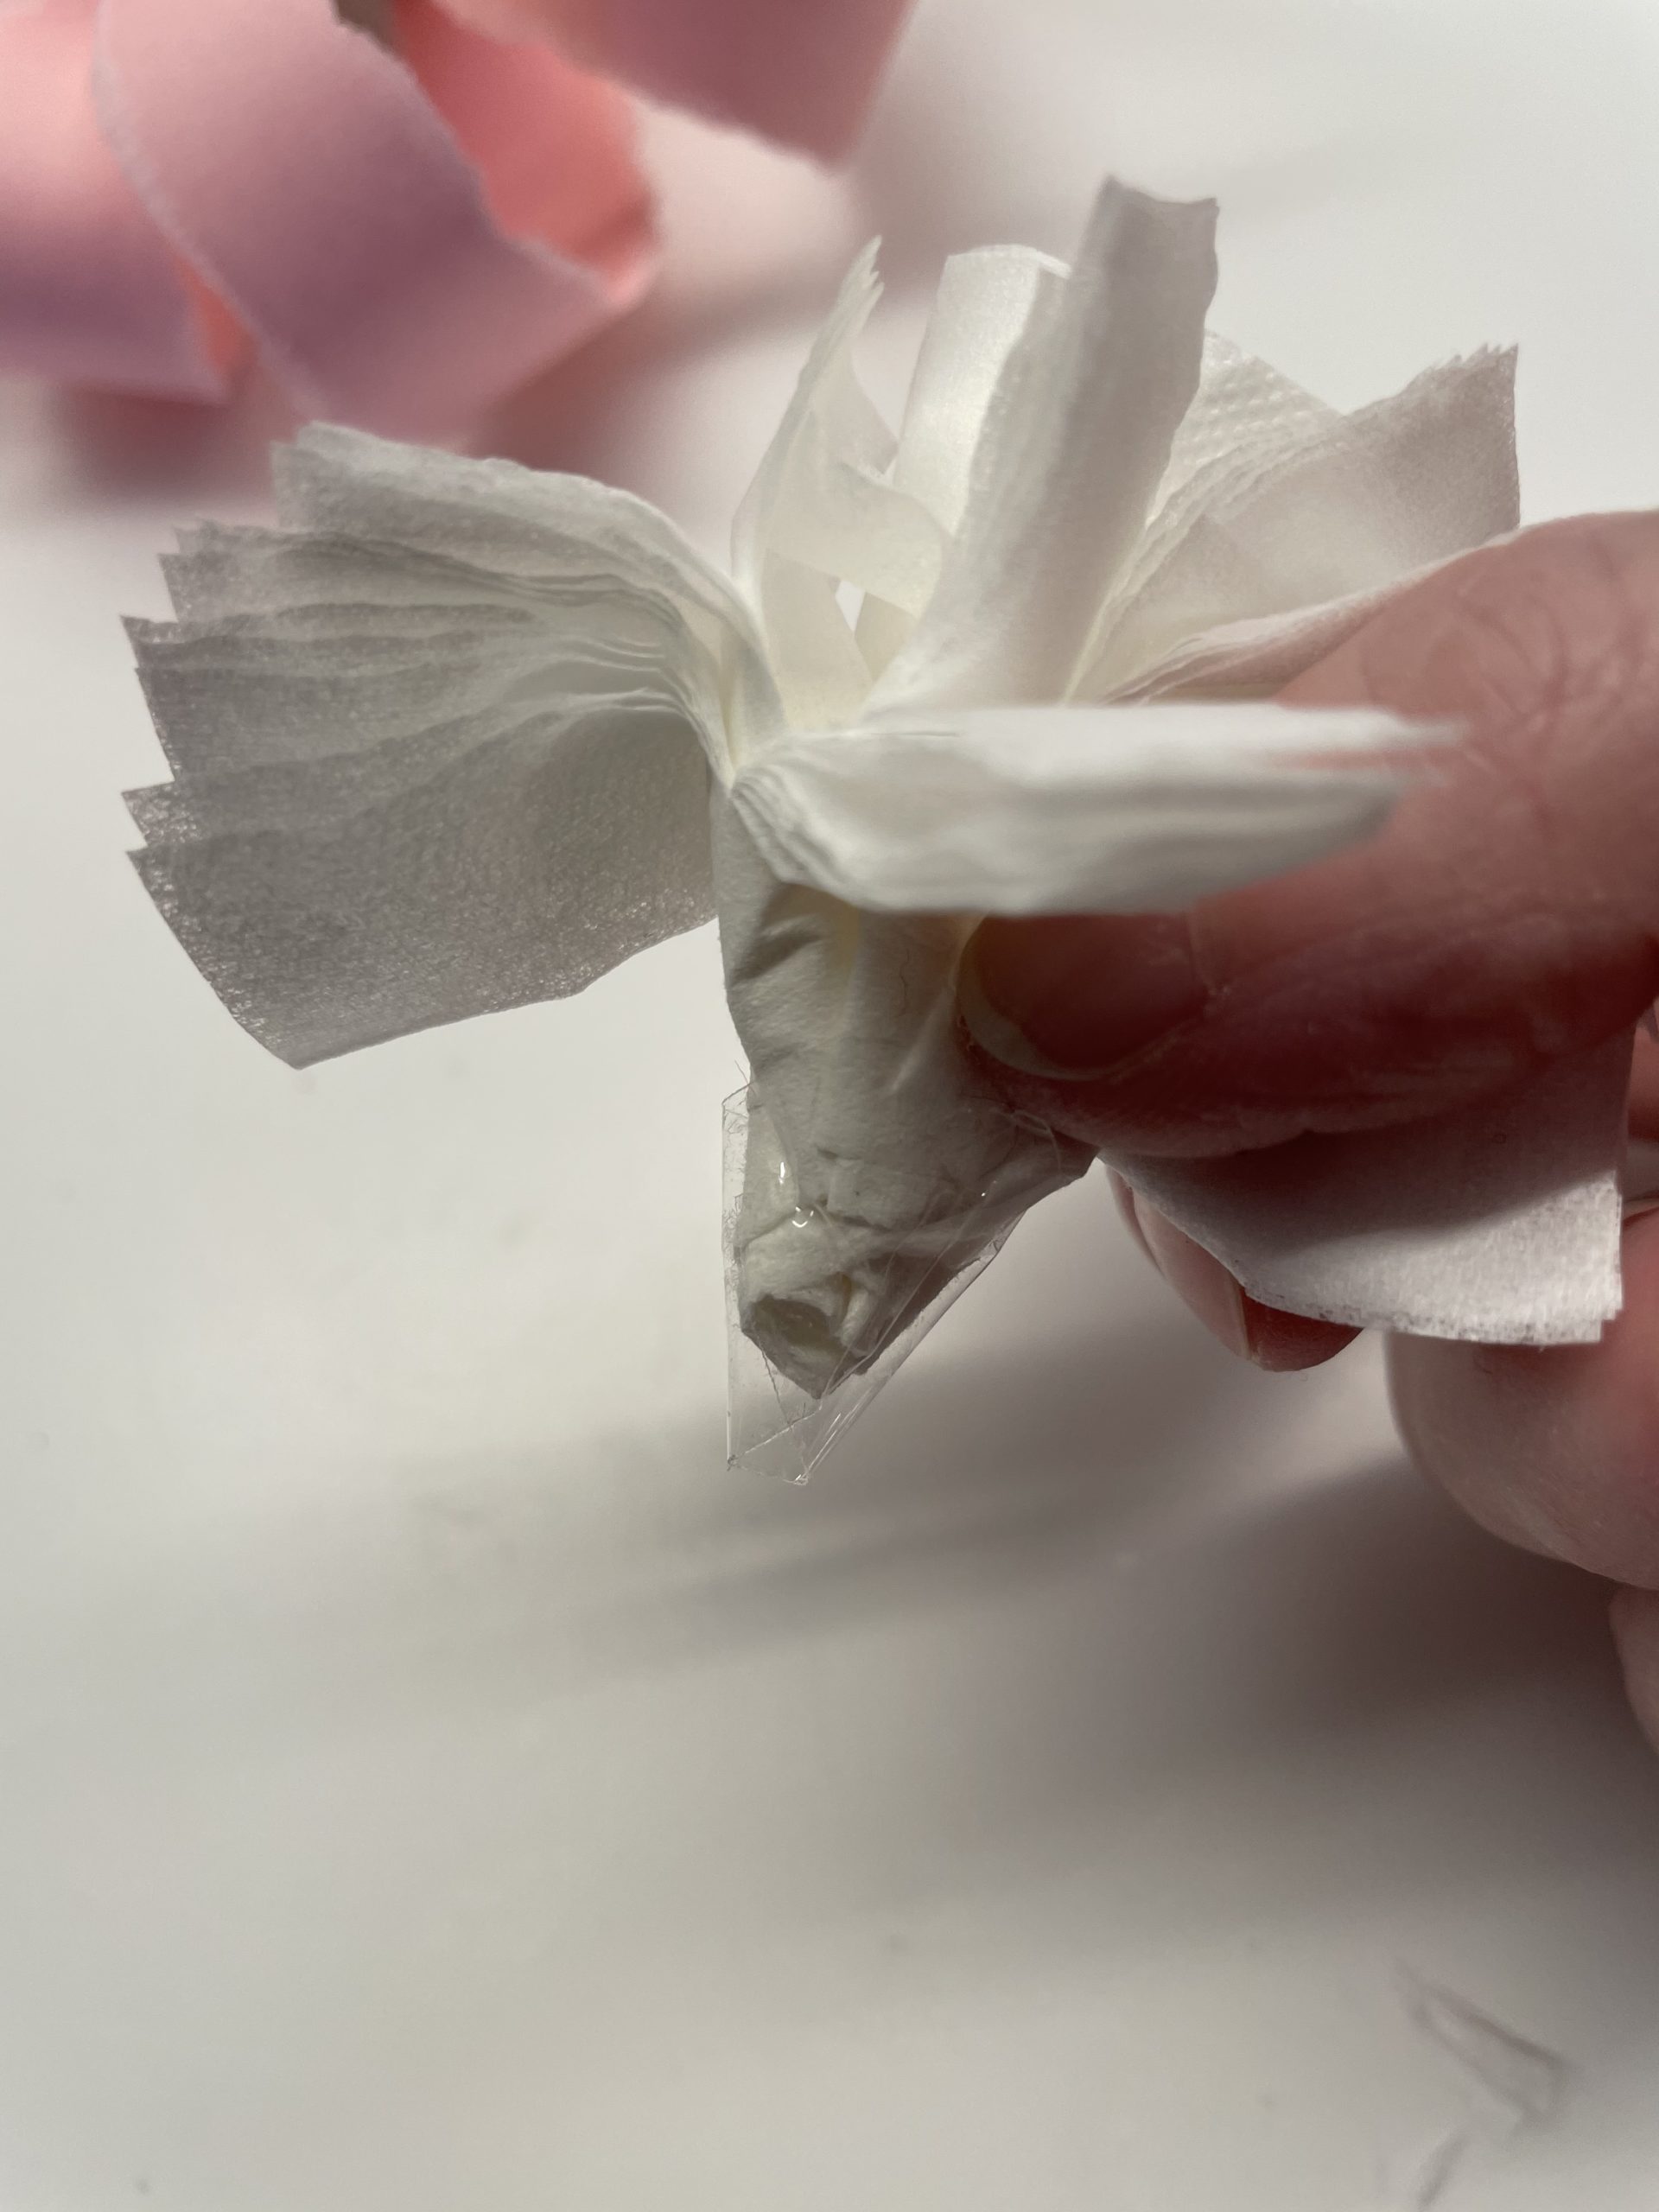
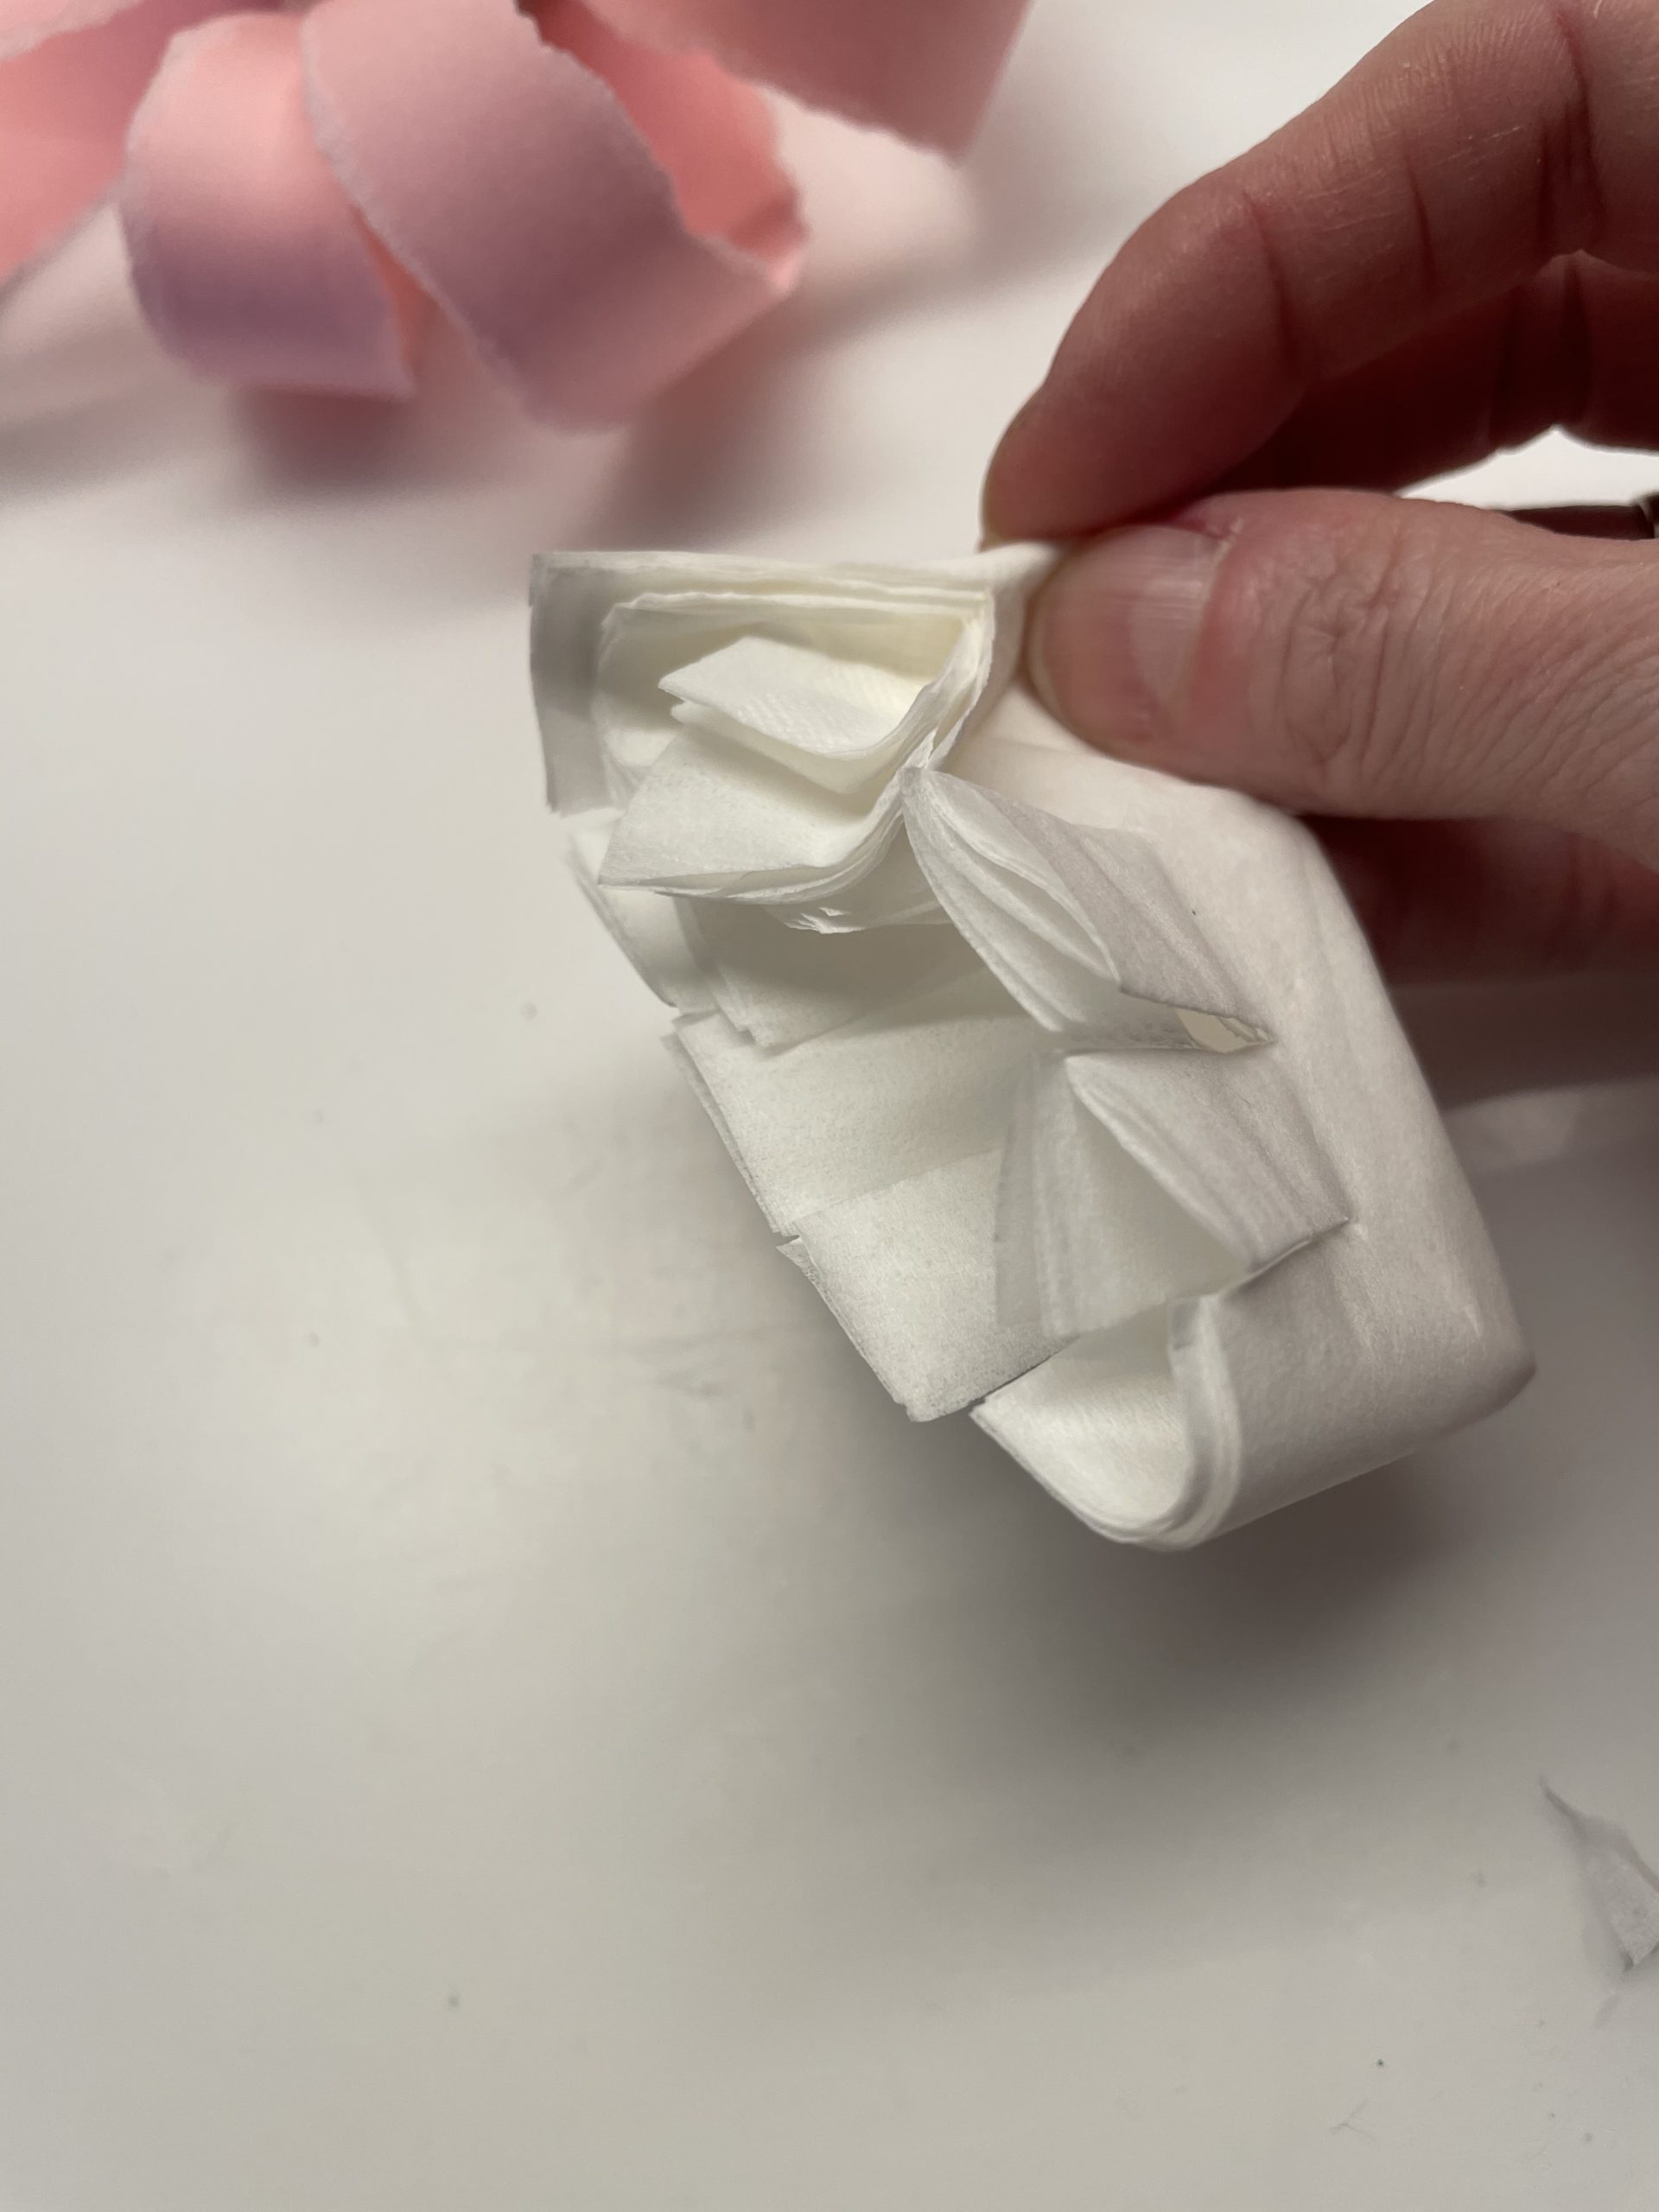
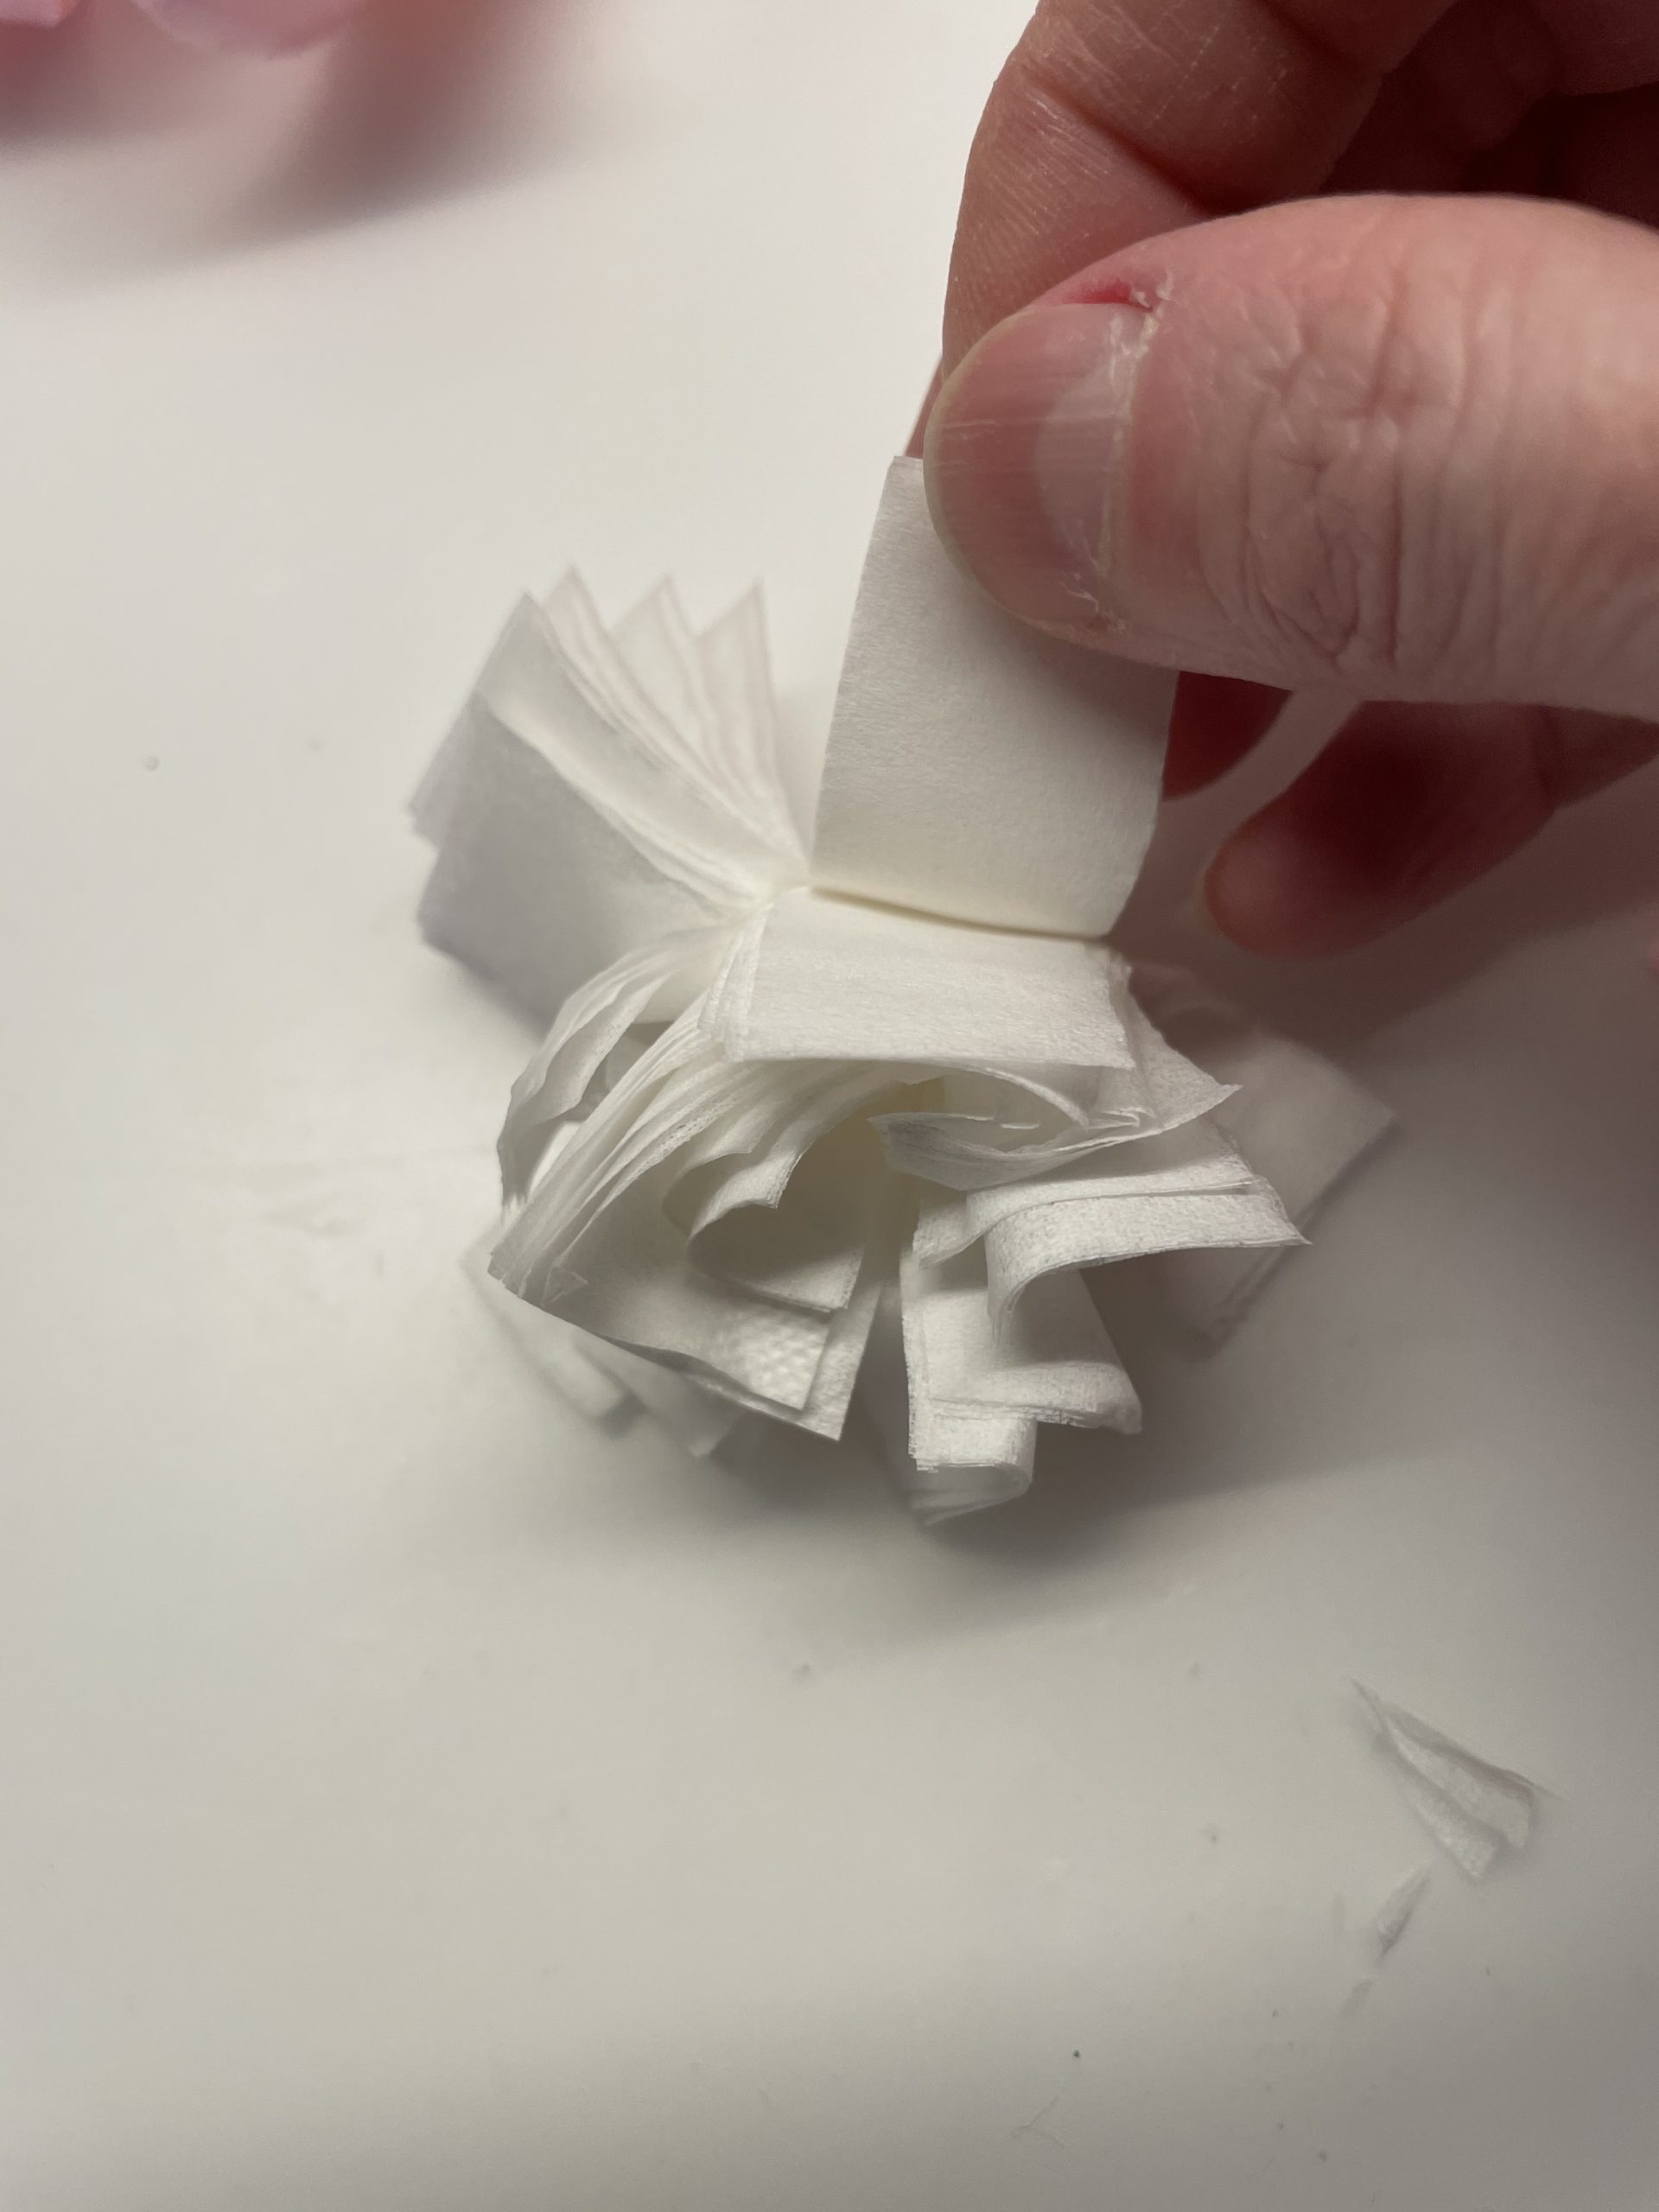
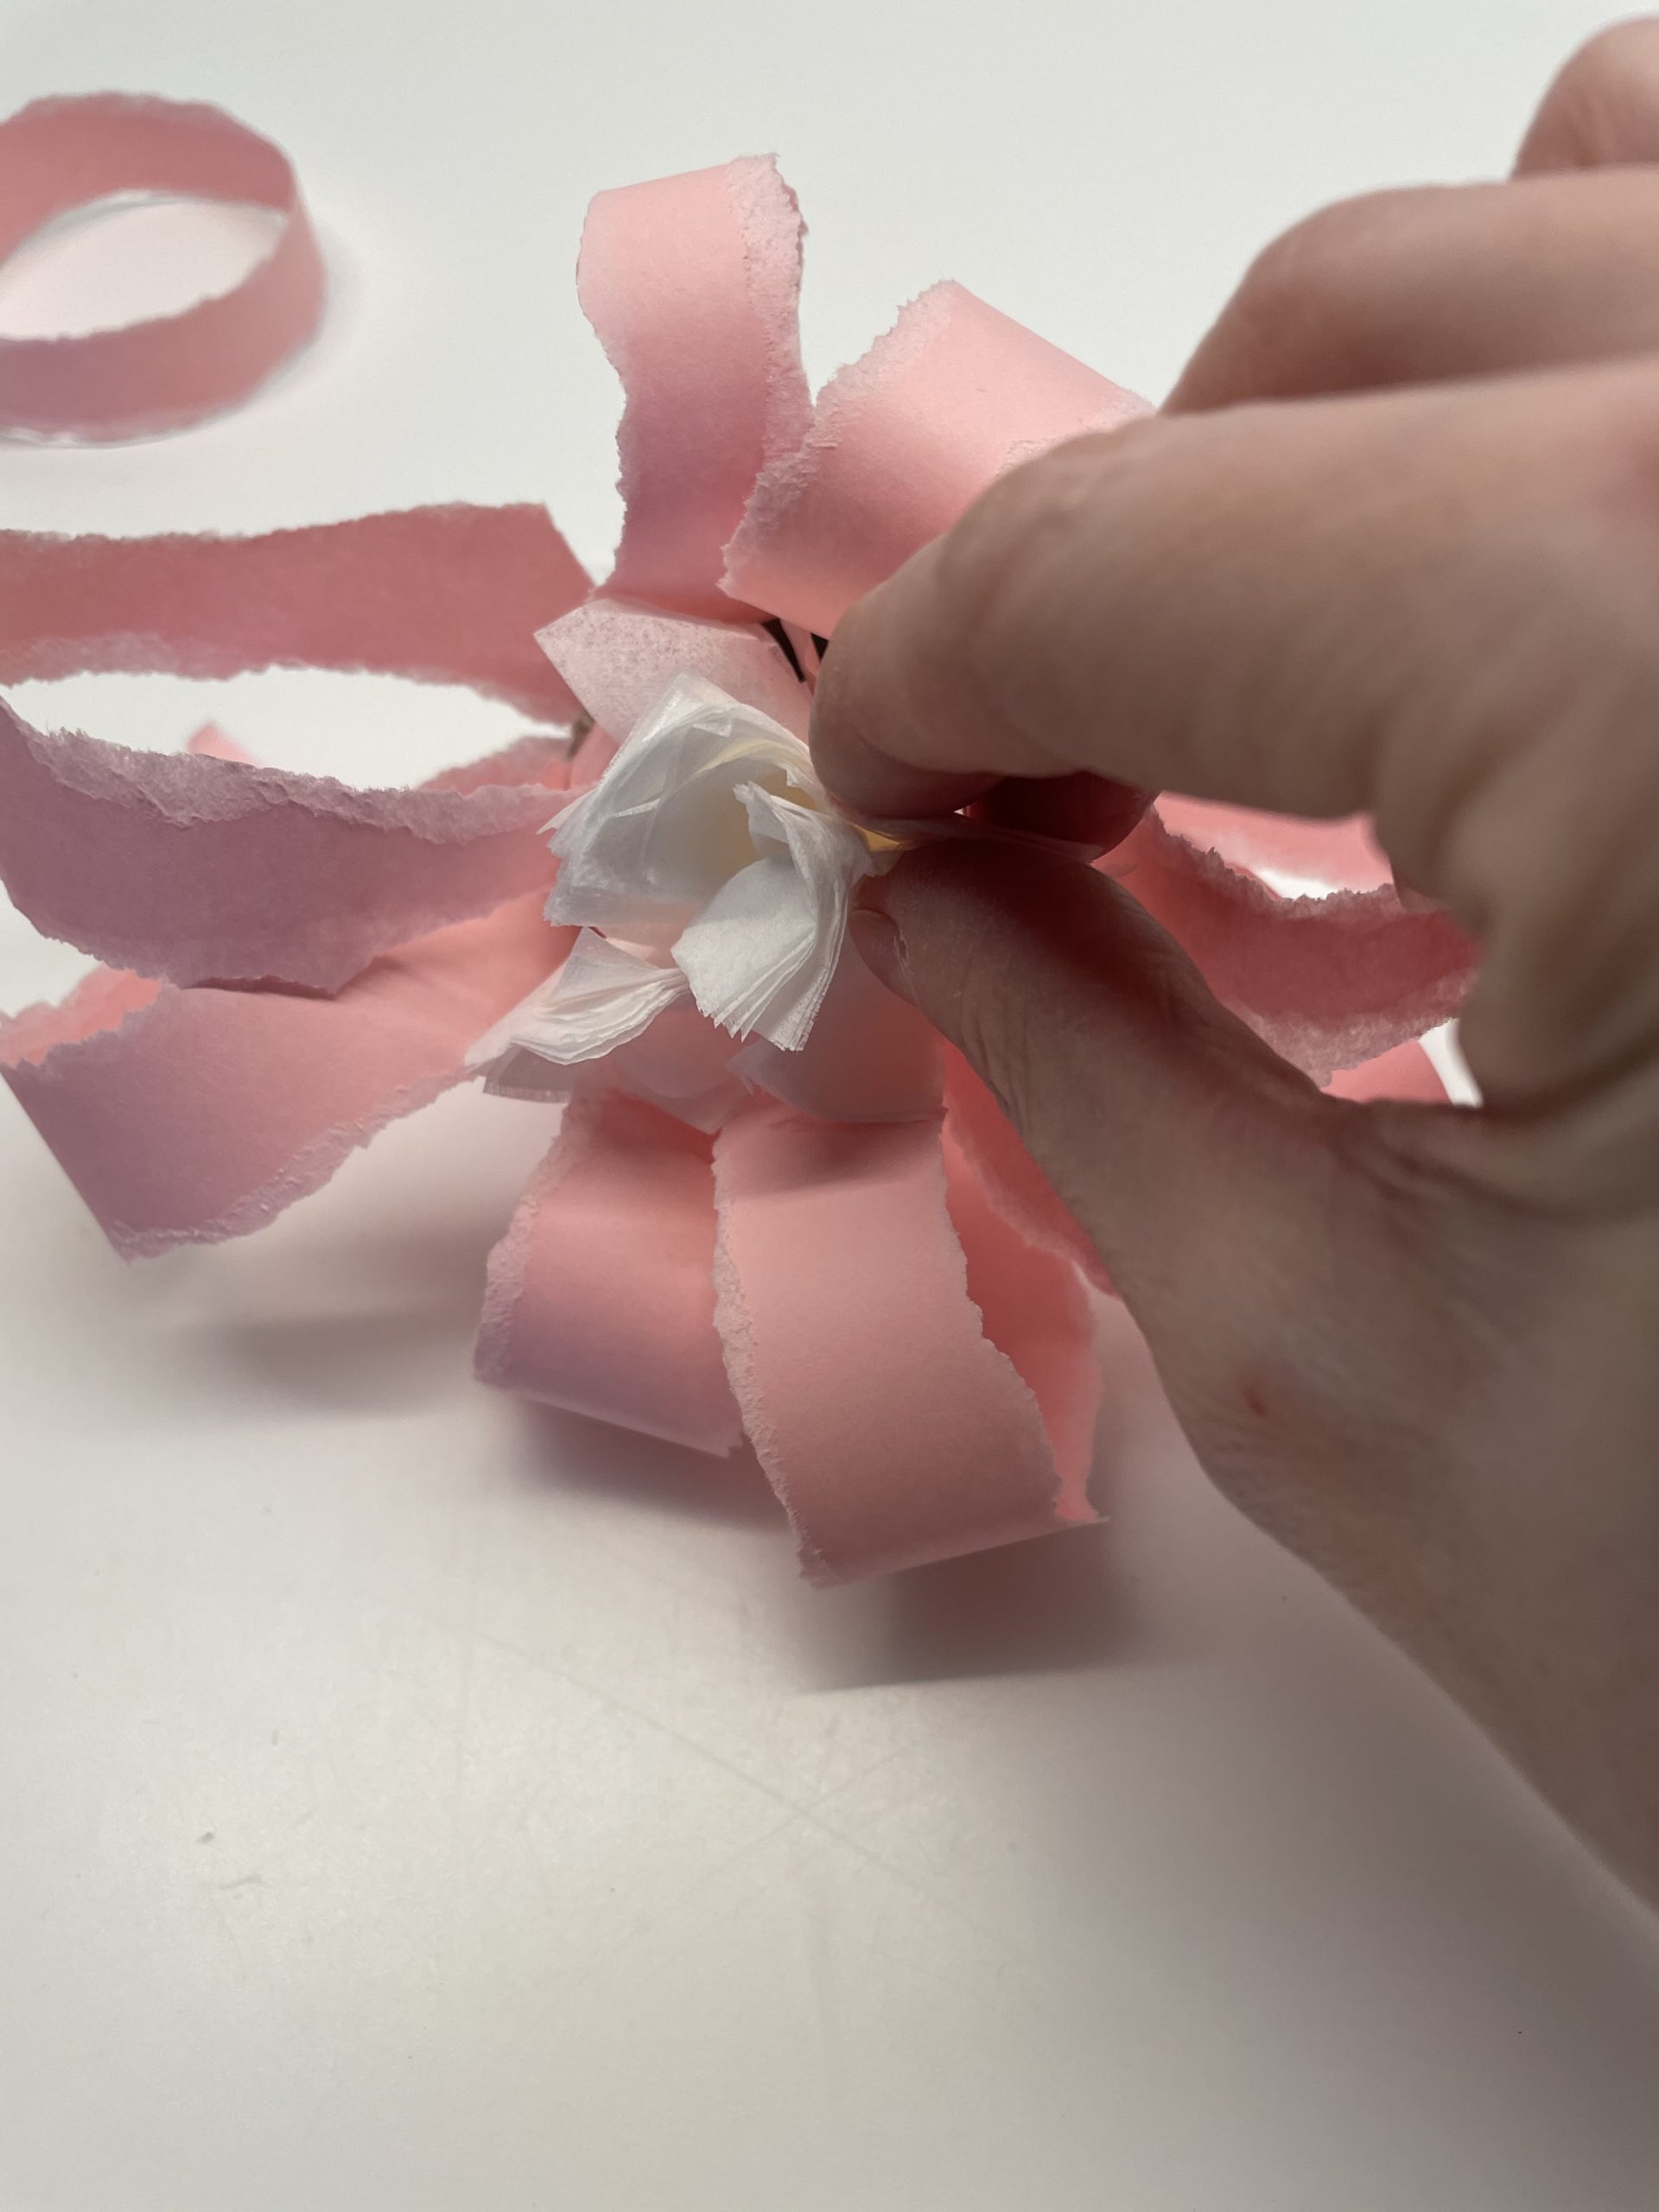
Now you pull the handkerchief a little apart.

Bild zum Schritt 23 für das Bastel- und DIY-Abenteuer für Kinder: 'Jetzt zupft ihr das Taschentuch etwas auseinander.'

24

2. Bild zum Schritt 23 für das Bastel- und DIY-Abenteuer für Kinder: 'Jetzt zupft ihr das Taschentuch etwas auseinander.'

25

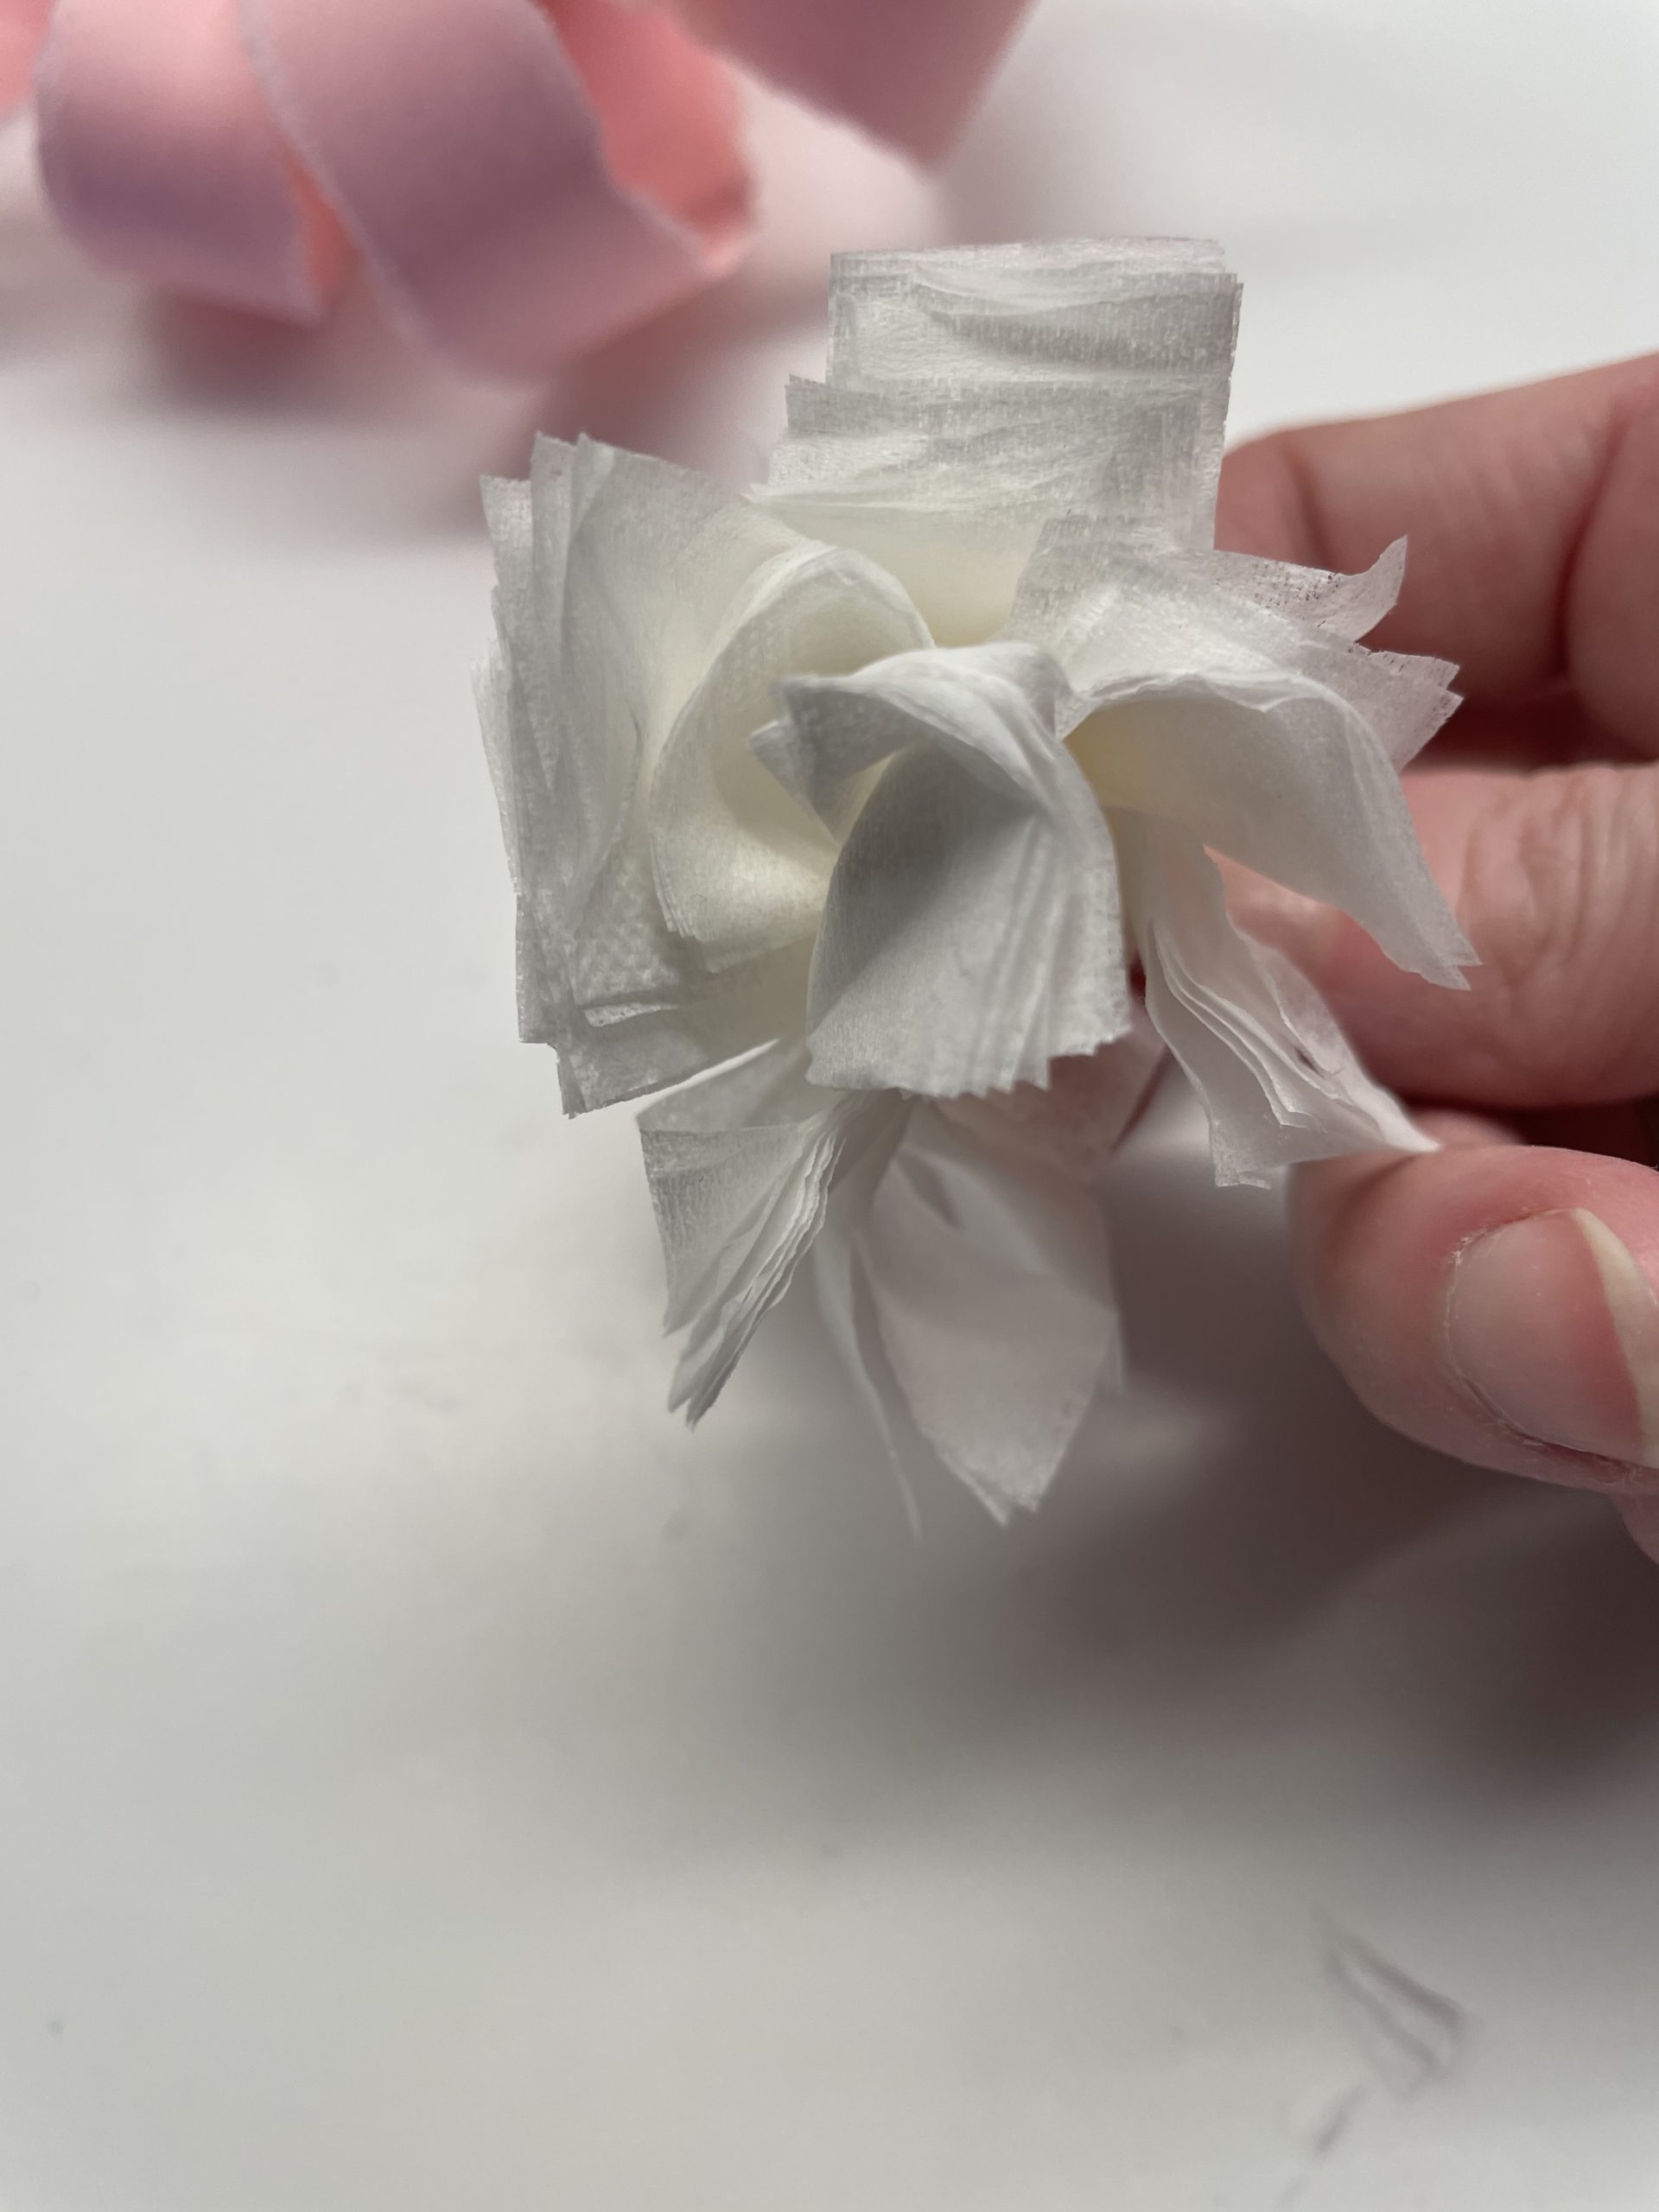
Then you put the handkerchief in the flower cup.

Bild zum Schritt 25 für das Bastel- und DIY-Abenteuer für Kinder: 'Anschließend steckt ihr das Taschentuch in den Blütenkelch.'

26

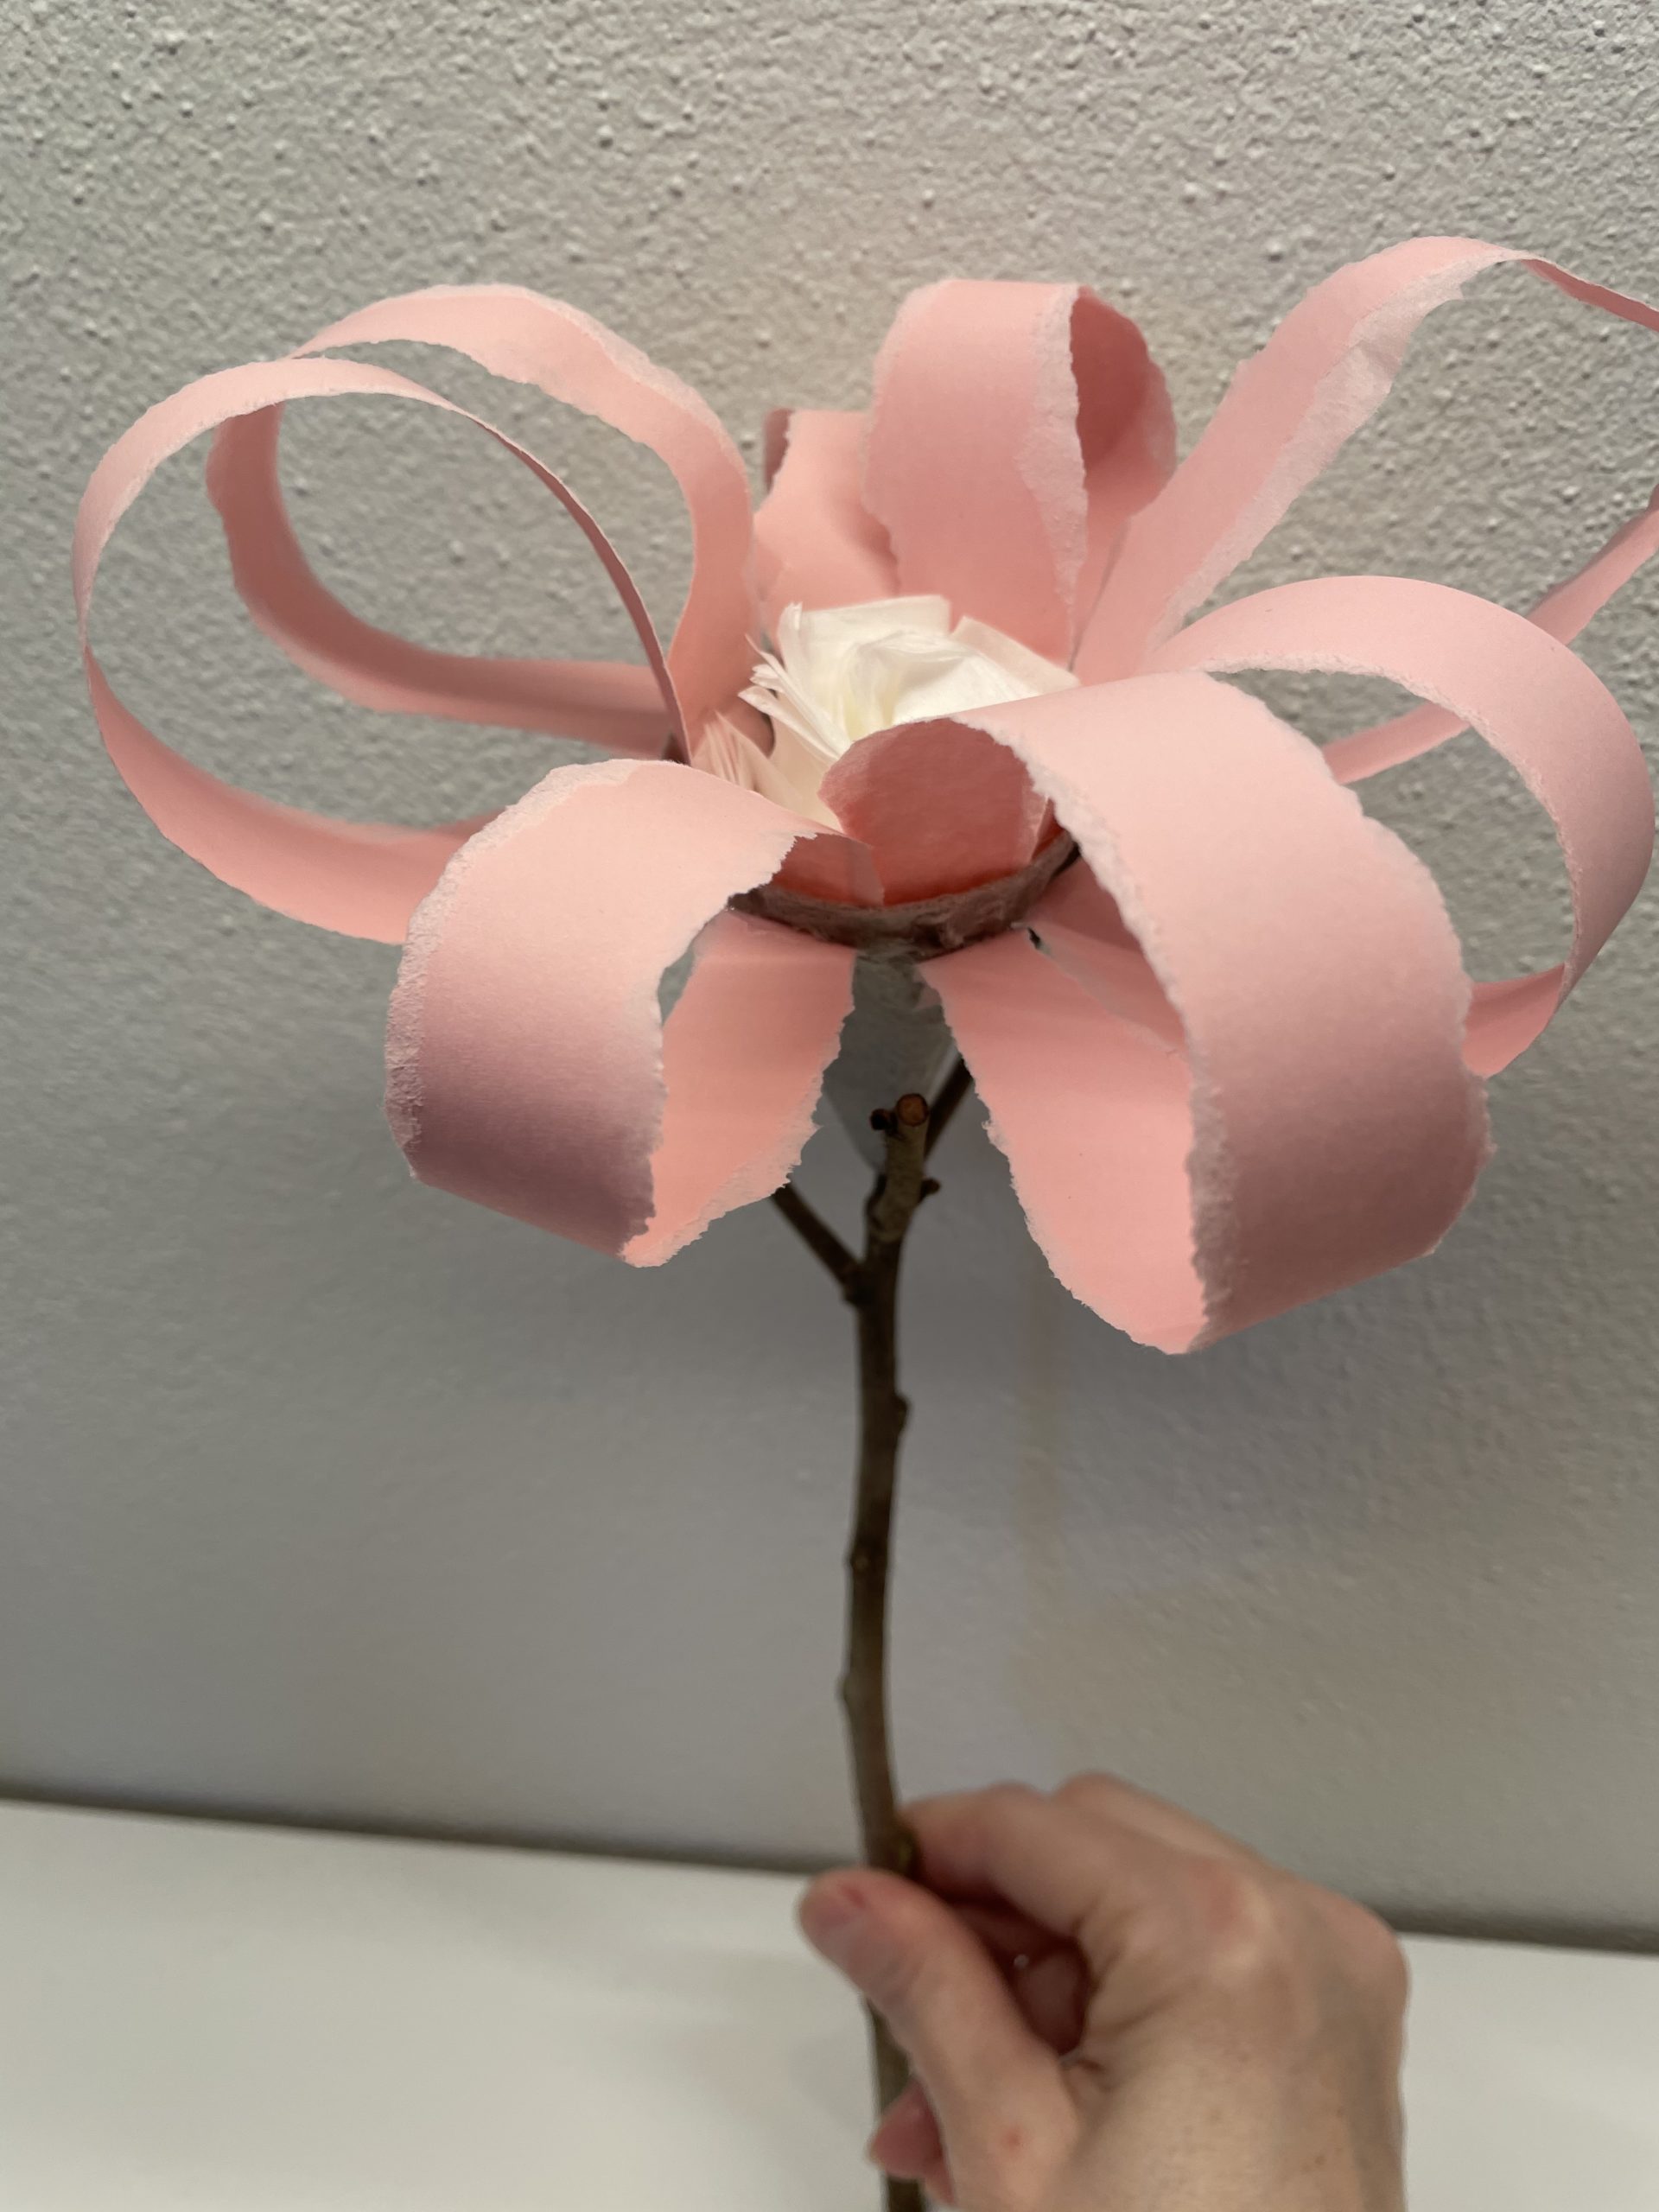
The flower is ready.

Bild zum Schritt 26 für das Bastel- und DIY-Abenteuer für Kinder: 'Fertig ist die Blüte.'

27

Finally, the flower sticks to a thin branch.

Bild zum Schritt 27 für das Bastel- und DIY-Abenteuer für Kinder: 'Klebt die Blüte abschließend noch auf einen dünnen Ast.'

28

Ready!

Bild zum Schritt 28 für das Bastel- und DIY-Abenteuer für Kinder: 'Fertig!'

29

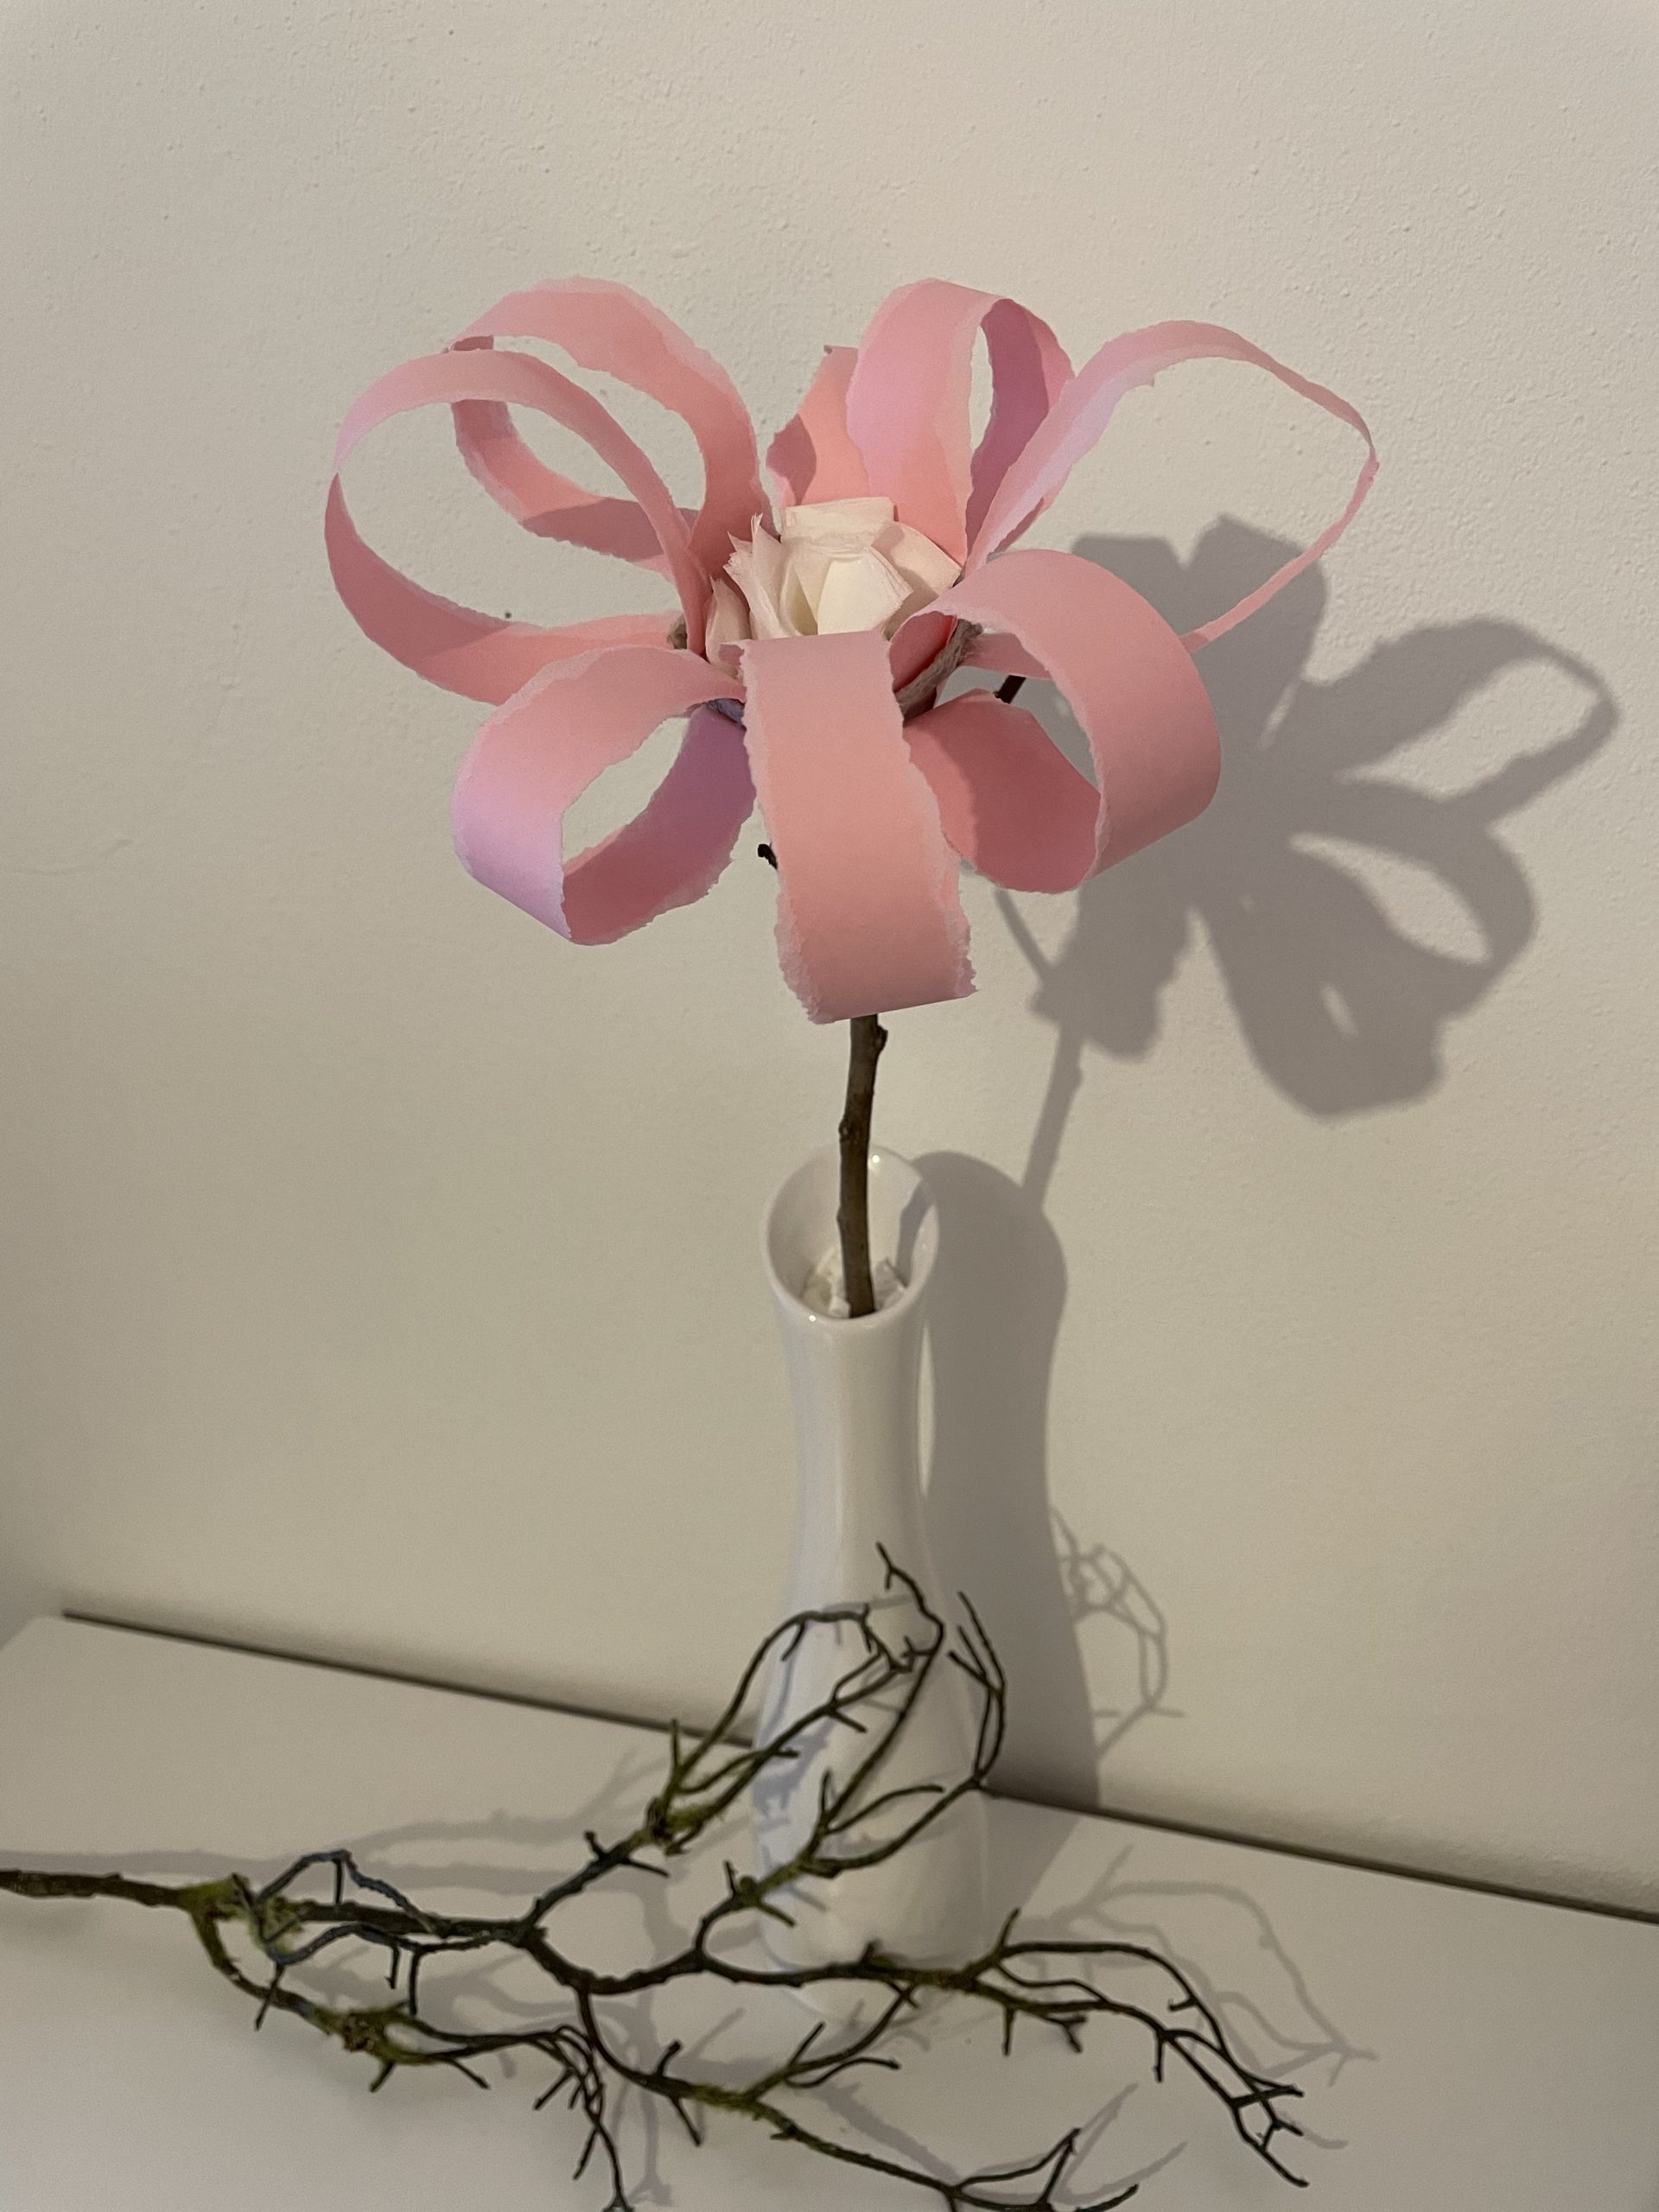
She looks beautiful in a vase!
You can also make them in other colors!

Bild zum Schritt 29 für das Bastel- und DIY-Abenteuer für Kinder: 'In einer Vase sieht sie wunderschön aus!   Ihr...'

Alternative craft ideas:
30

As sunflower:
Make her with yellow paper and a brown napkin in the center of the flower.

31

As daisies:
Make her with white paper and a pink napkin in the center of the flower.

32

As Gerbera:
Make her with white paper and a brown or yellow napkin in the center of the flower.

33

Maybe you'll come up with a creative variant!

34

Have fun trying it out!