This torch lantern is something for school children who no longer want to participate in the Martin parade with a children's lantern. This upcycle project is also great for a night hike or a torch hike on a child's birthday party. Only an empty plastic bottle with a bulbous bottle neck and a branch that fits into the bottle opening is required.
With the help of the marble technique the colour is distributed in the bottle and thus ensures an individual appearance. The individual steps are explained well here, see for yourself. Have fun!
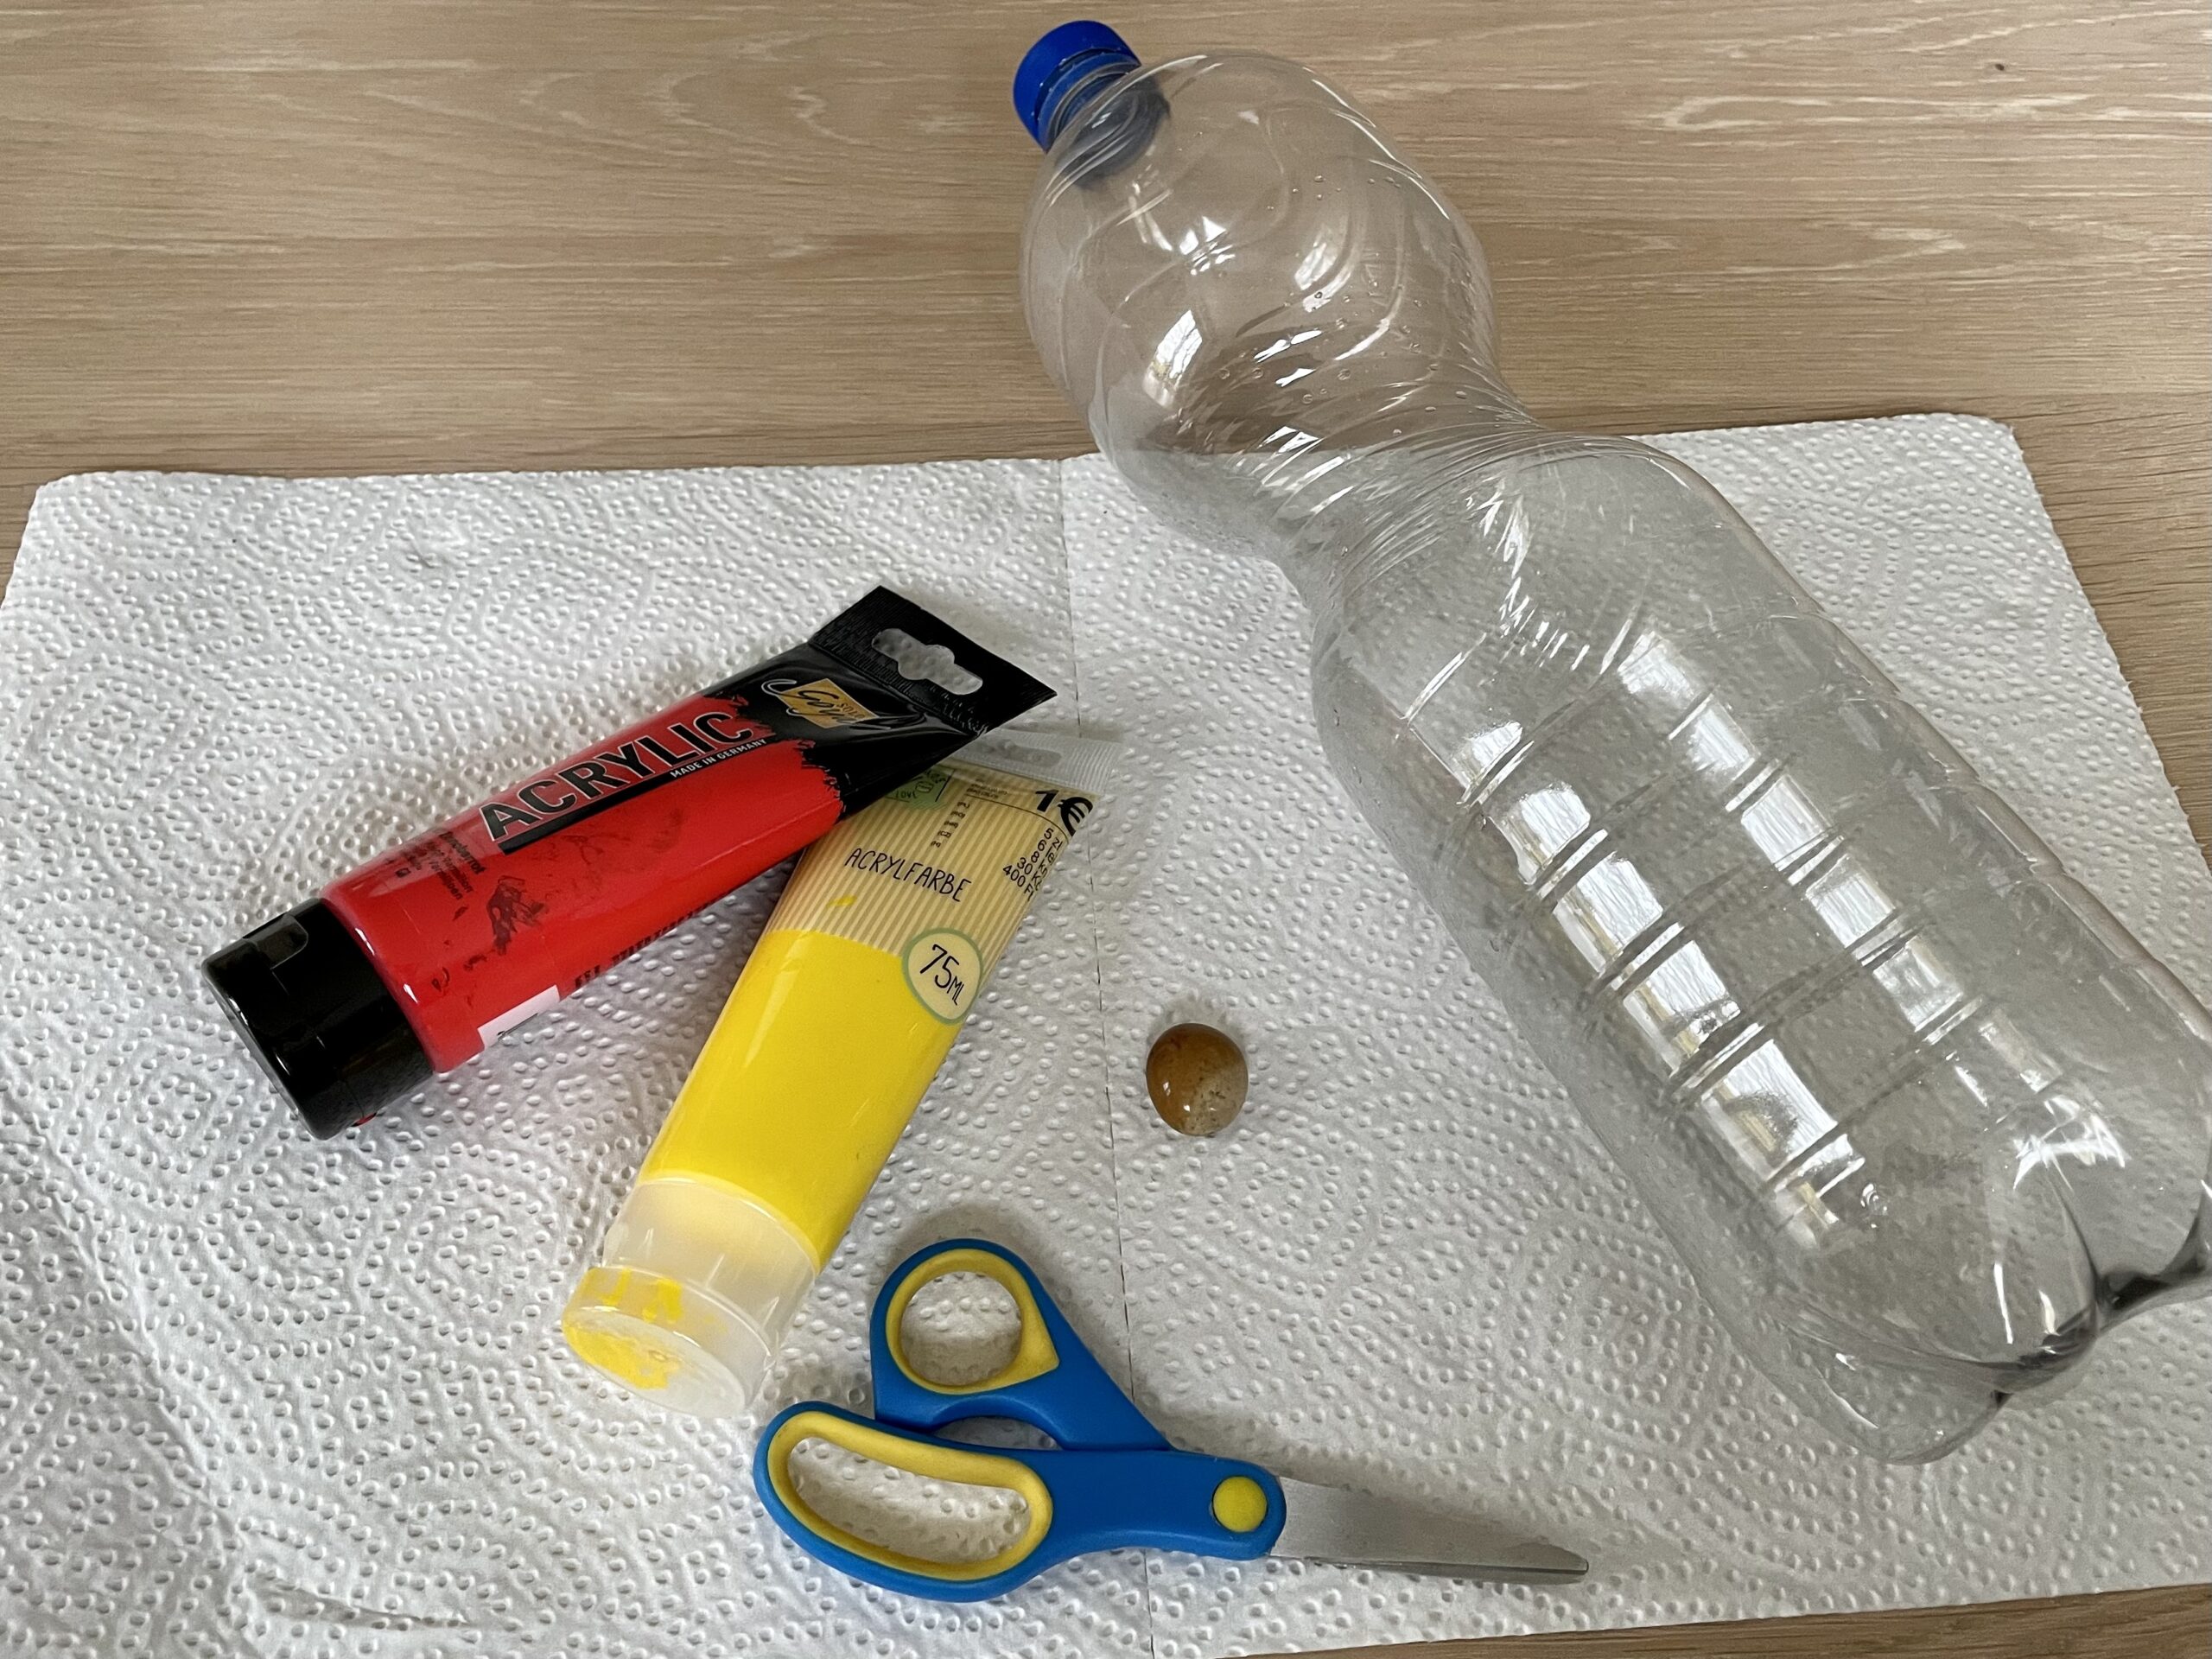
First, you prepare everything.
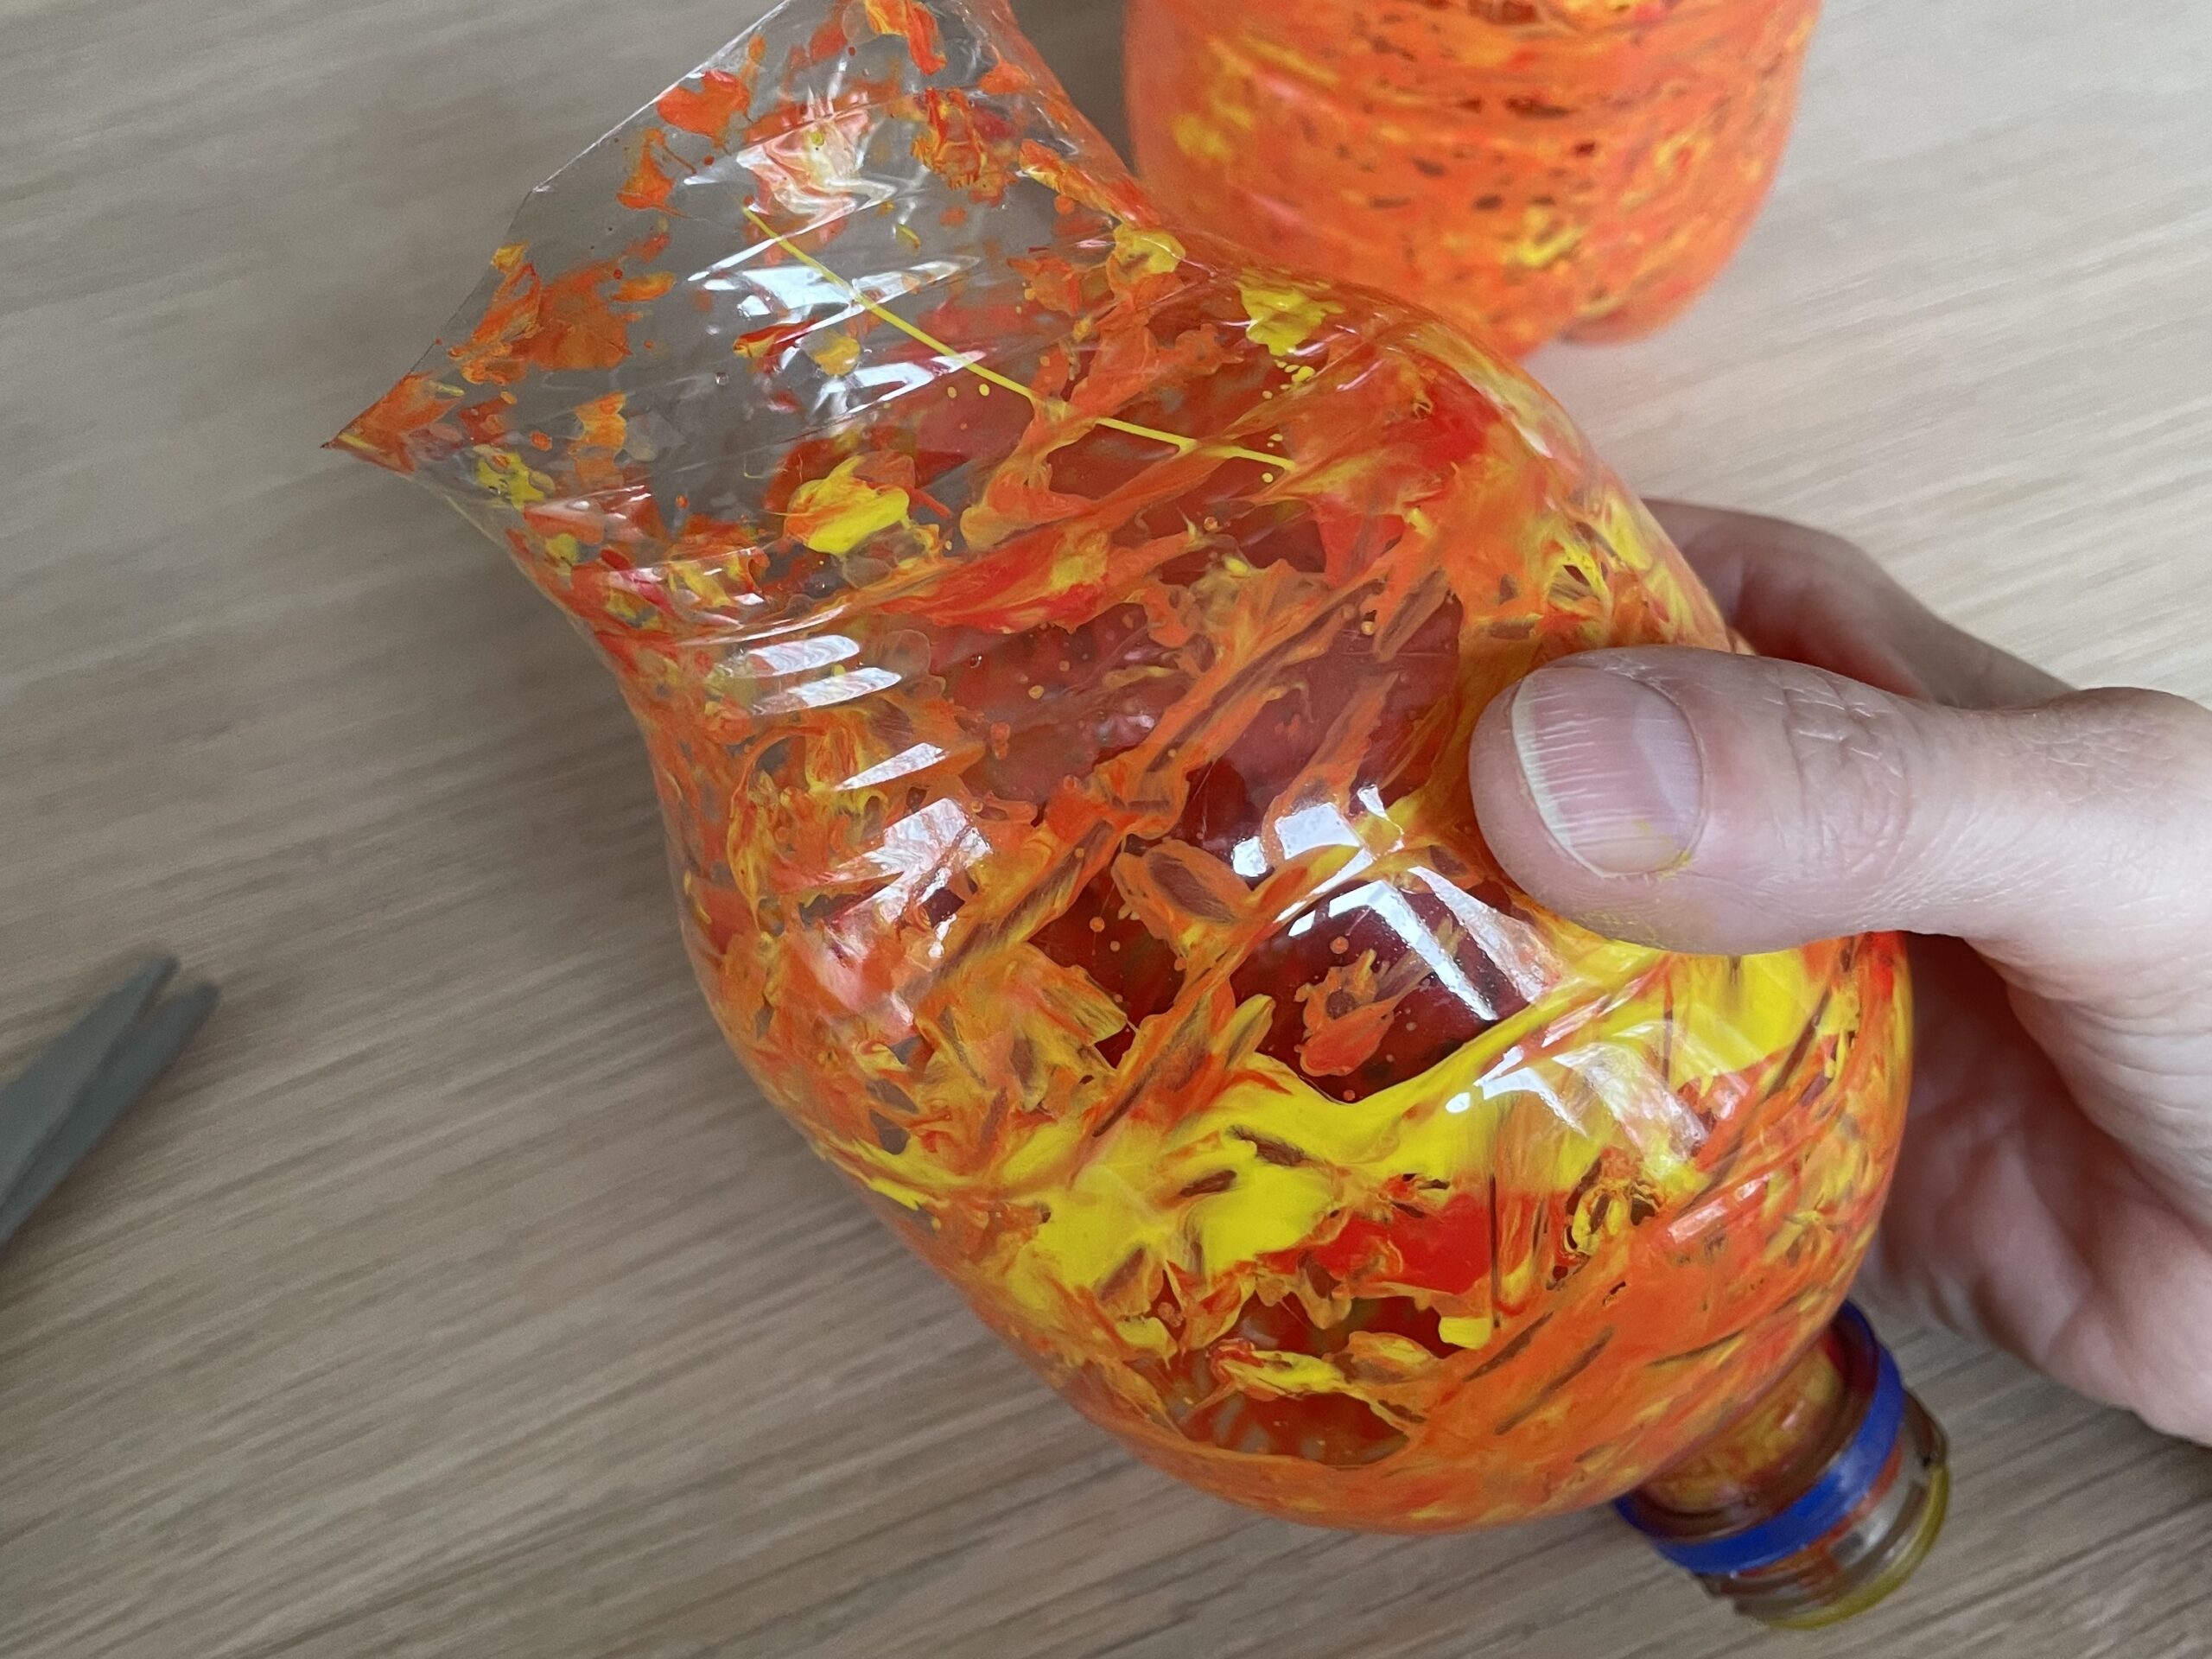
Now open the bottle and put the marble in the bottle. Then place the bottle on the kitchen crepe. Sprinkle a little yellow and red acrylic paint into the bottle. The paint can remain at the top. Then screw the cap back onto the bottle.
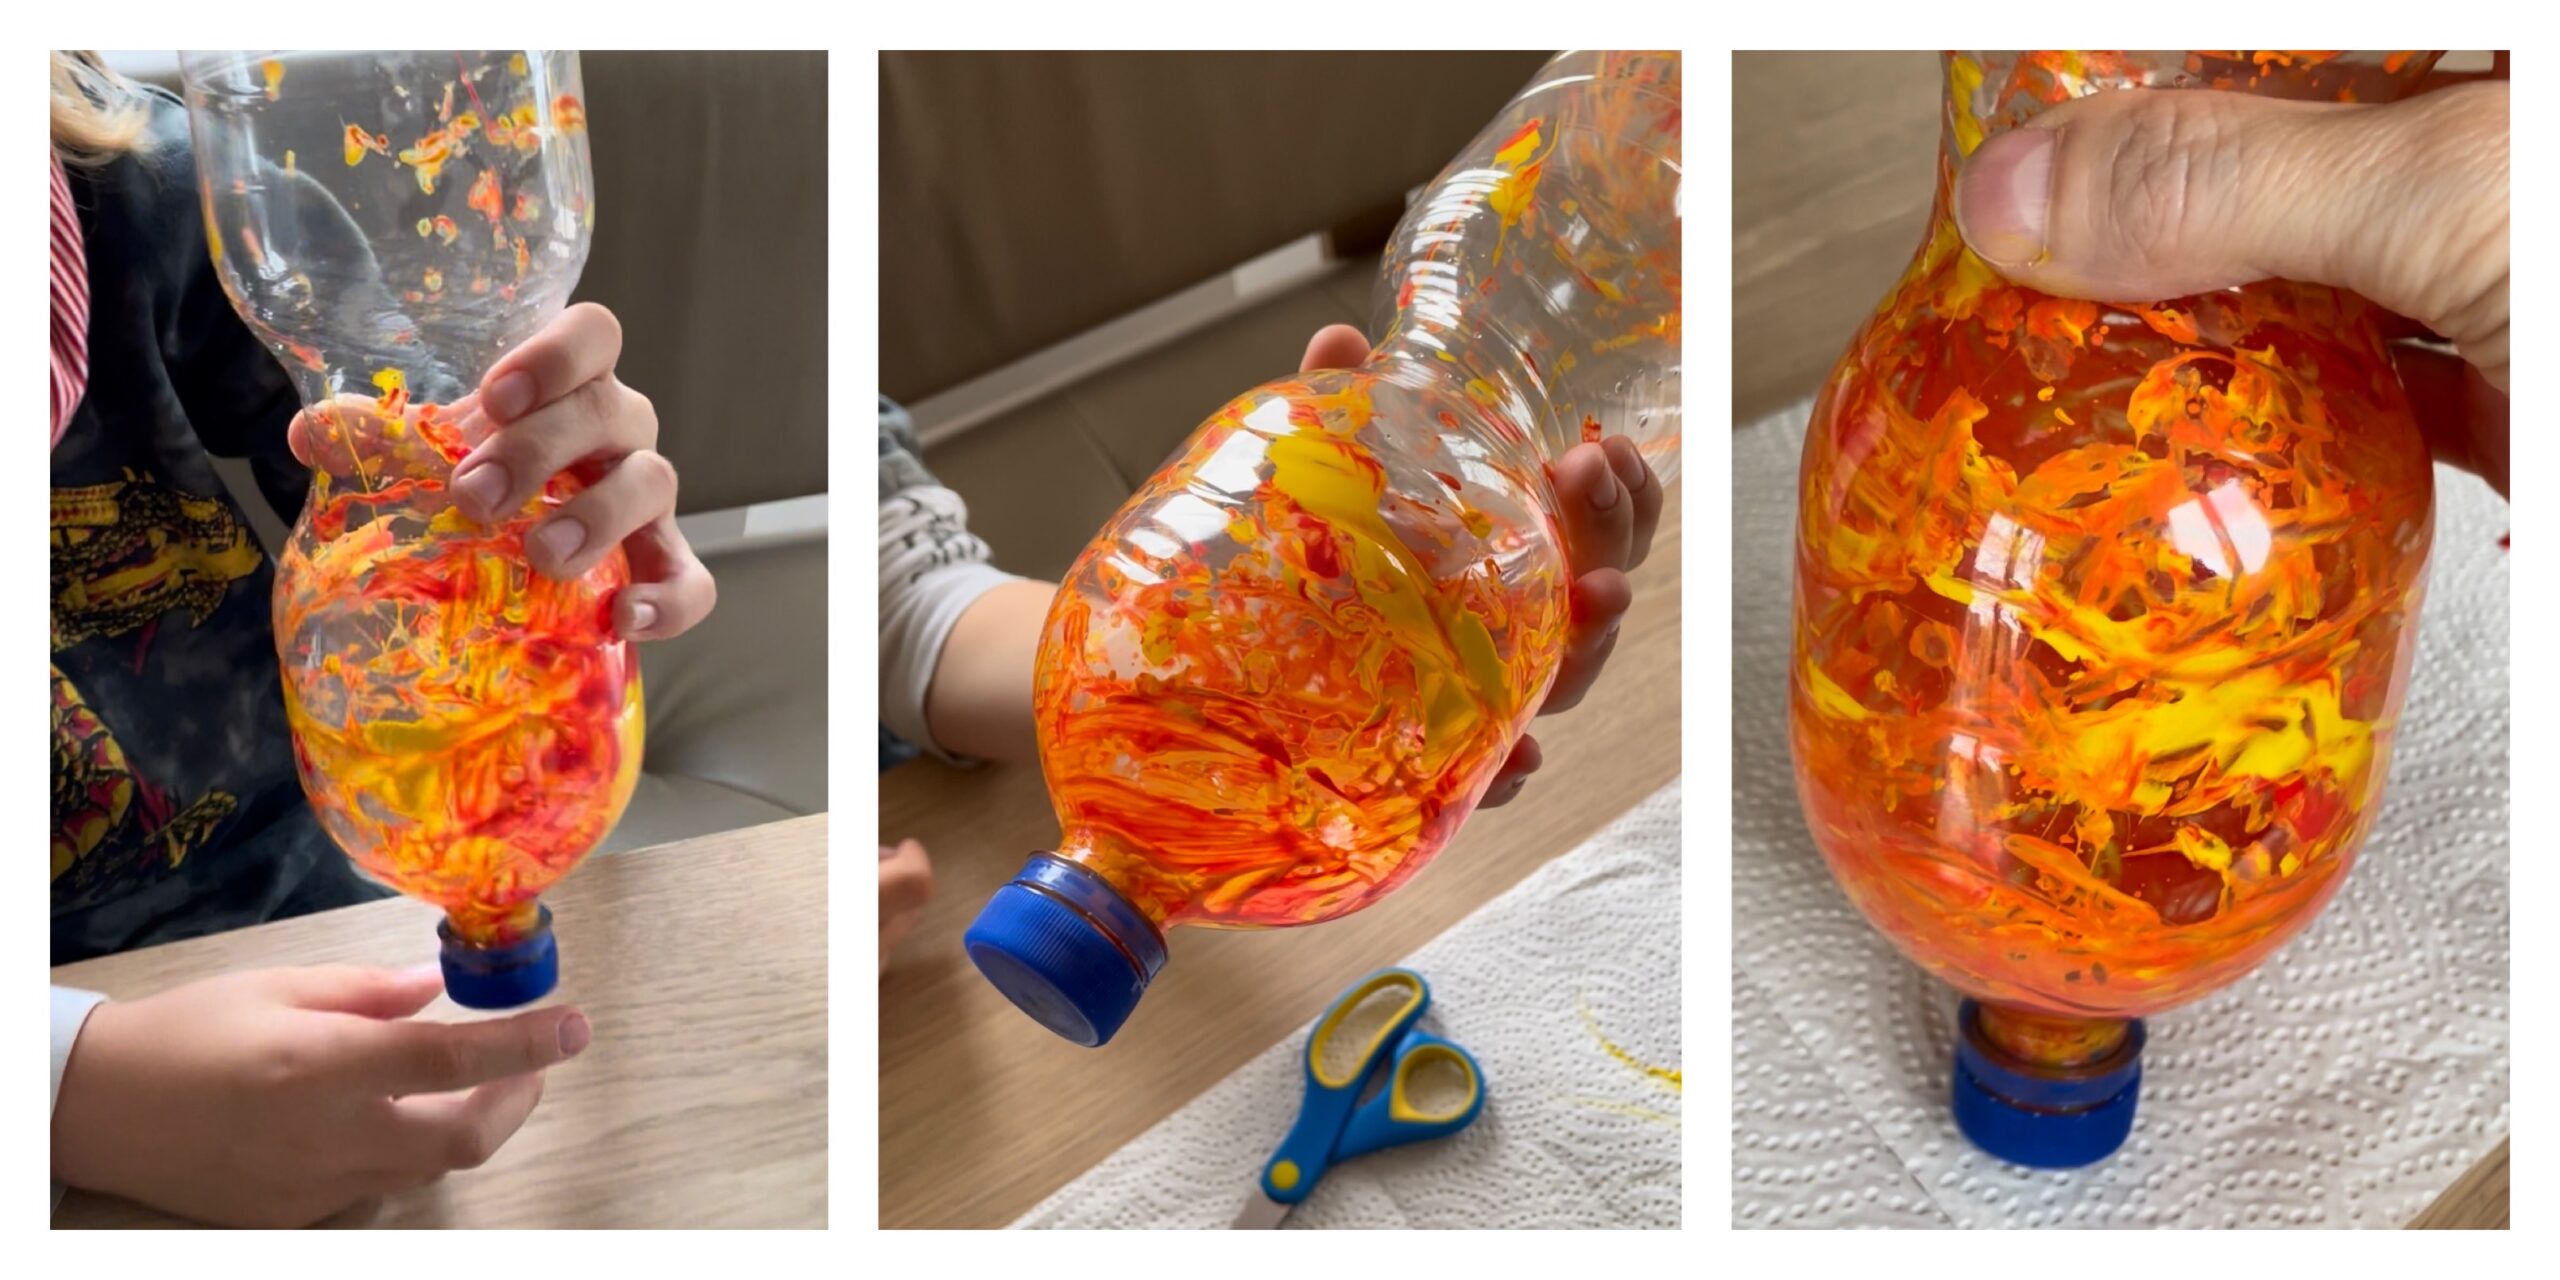
Now you shake the bottle with the marble back and forth. As a result, the colour is distributed in the bottle. Move the marble through, shake and circle until you like the resulting pattern.
Then open the bottle and let the marble roll out carefully. Clean the marble immediately and turn the bottle to dry.
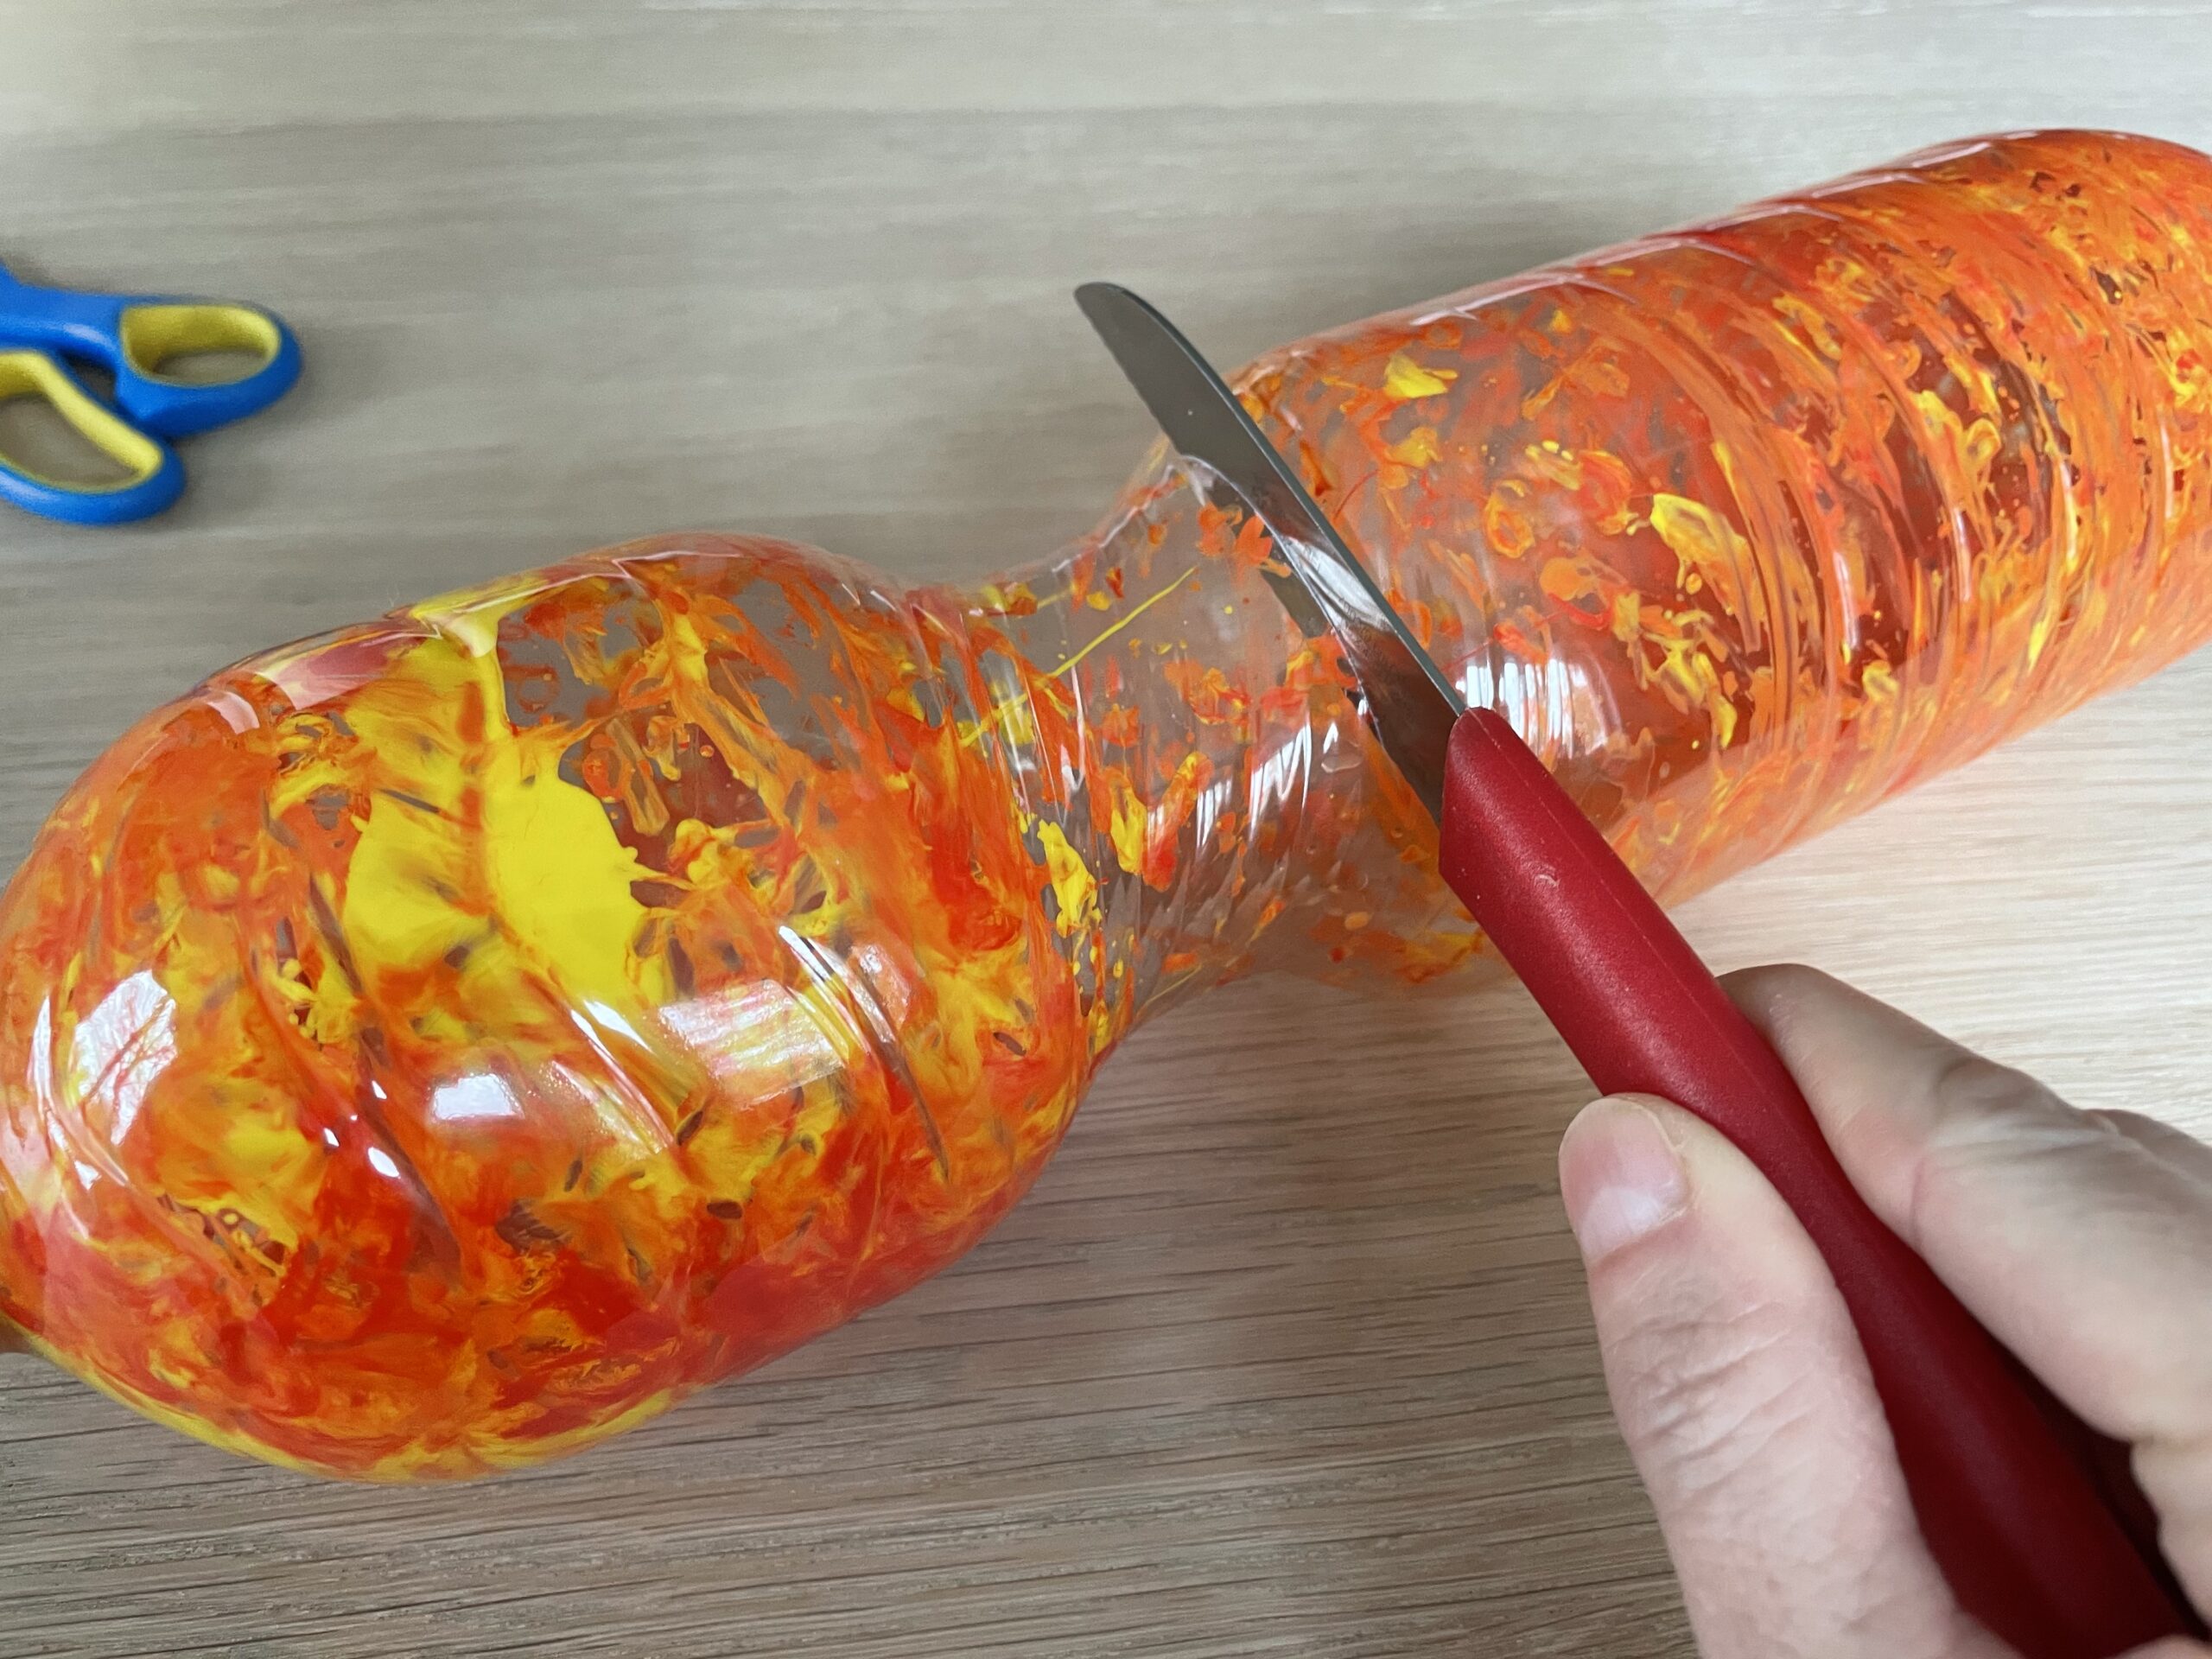
Cut the bottle in the thin spot after 10-15 minutes. Use a jagged sharp knife. Sew in one place until a cut is made. Through it you thread the scissors and then cut the bottle around.
Now put the two parts of the bottle back to dry.
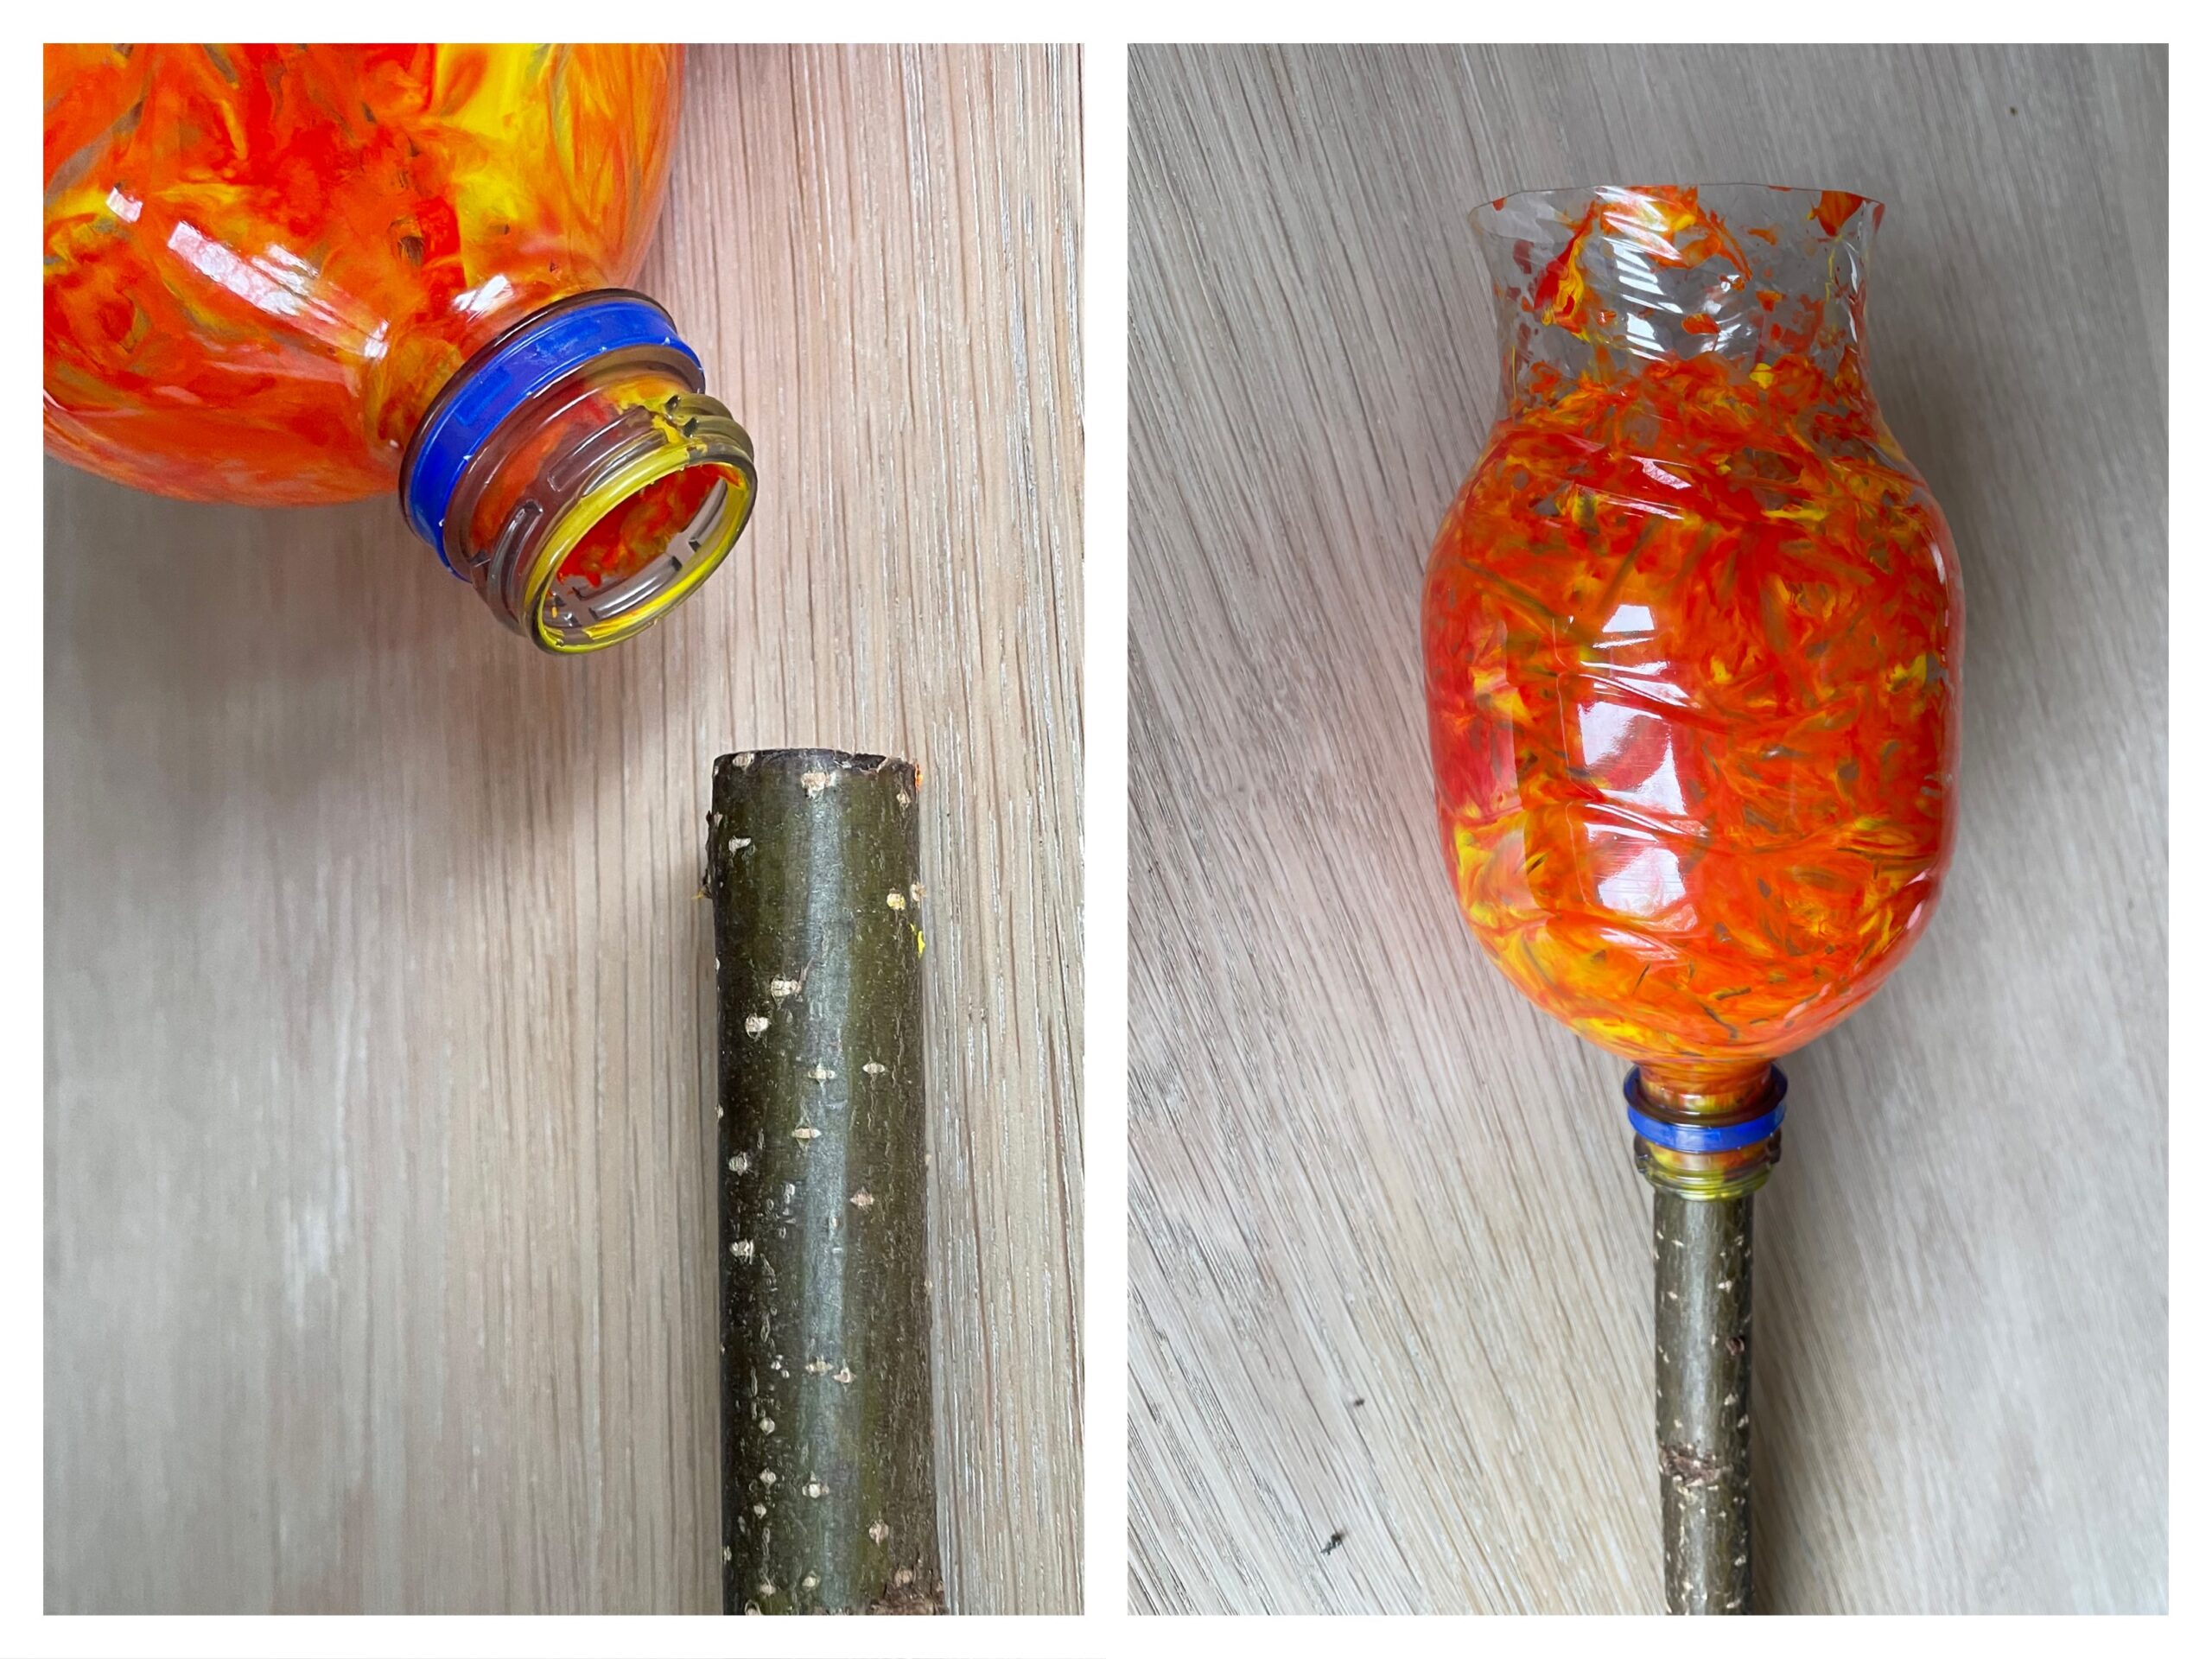
Now look for a branch that fits exactly into the bottle opening.
Tip: Maybe you cut it off or you use a knife and cut the opening appropriately. Attention: Risk of injury! Let an adult help you!
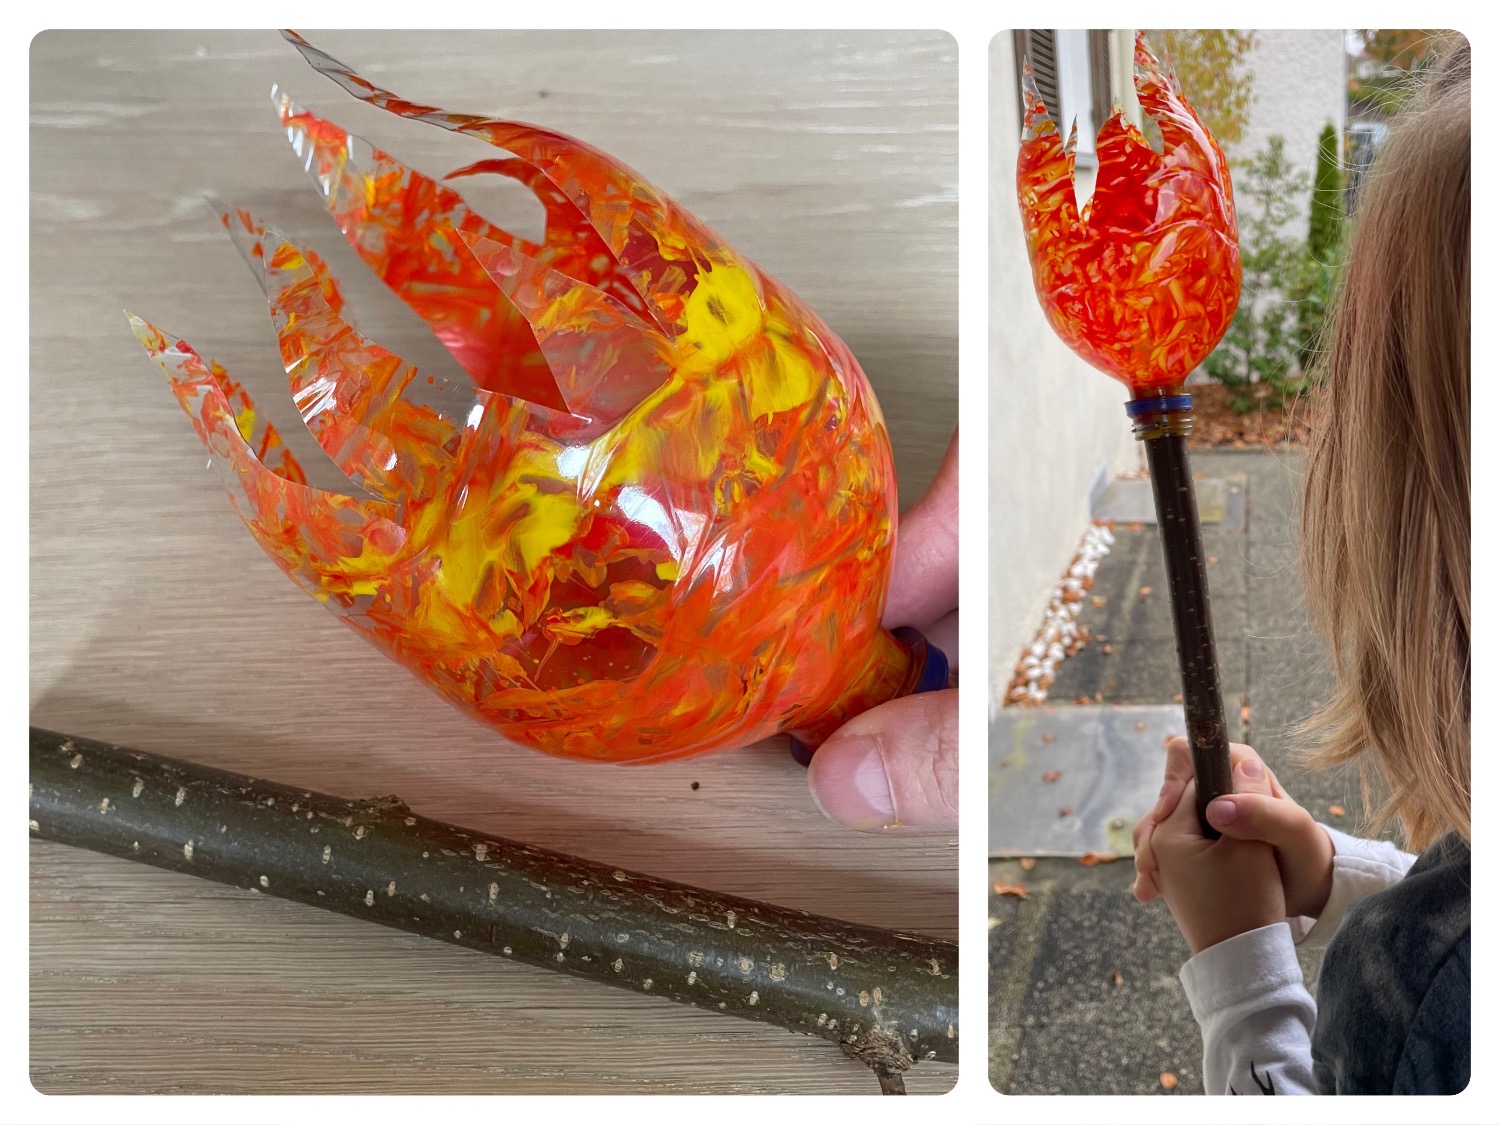
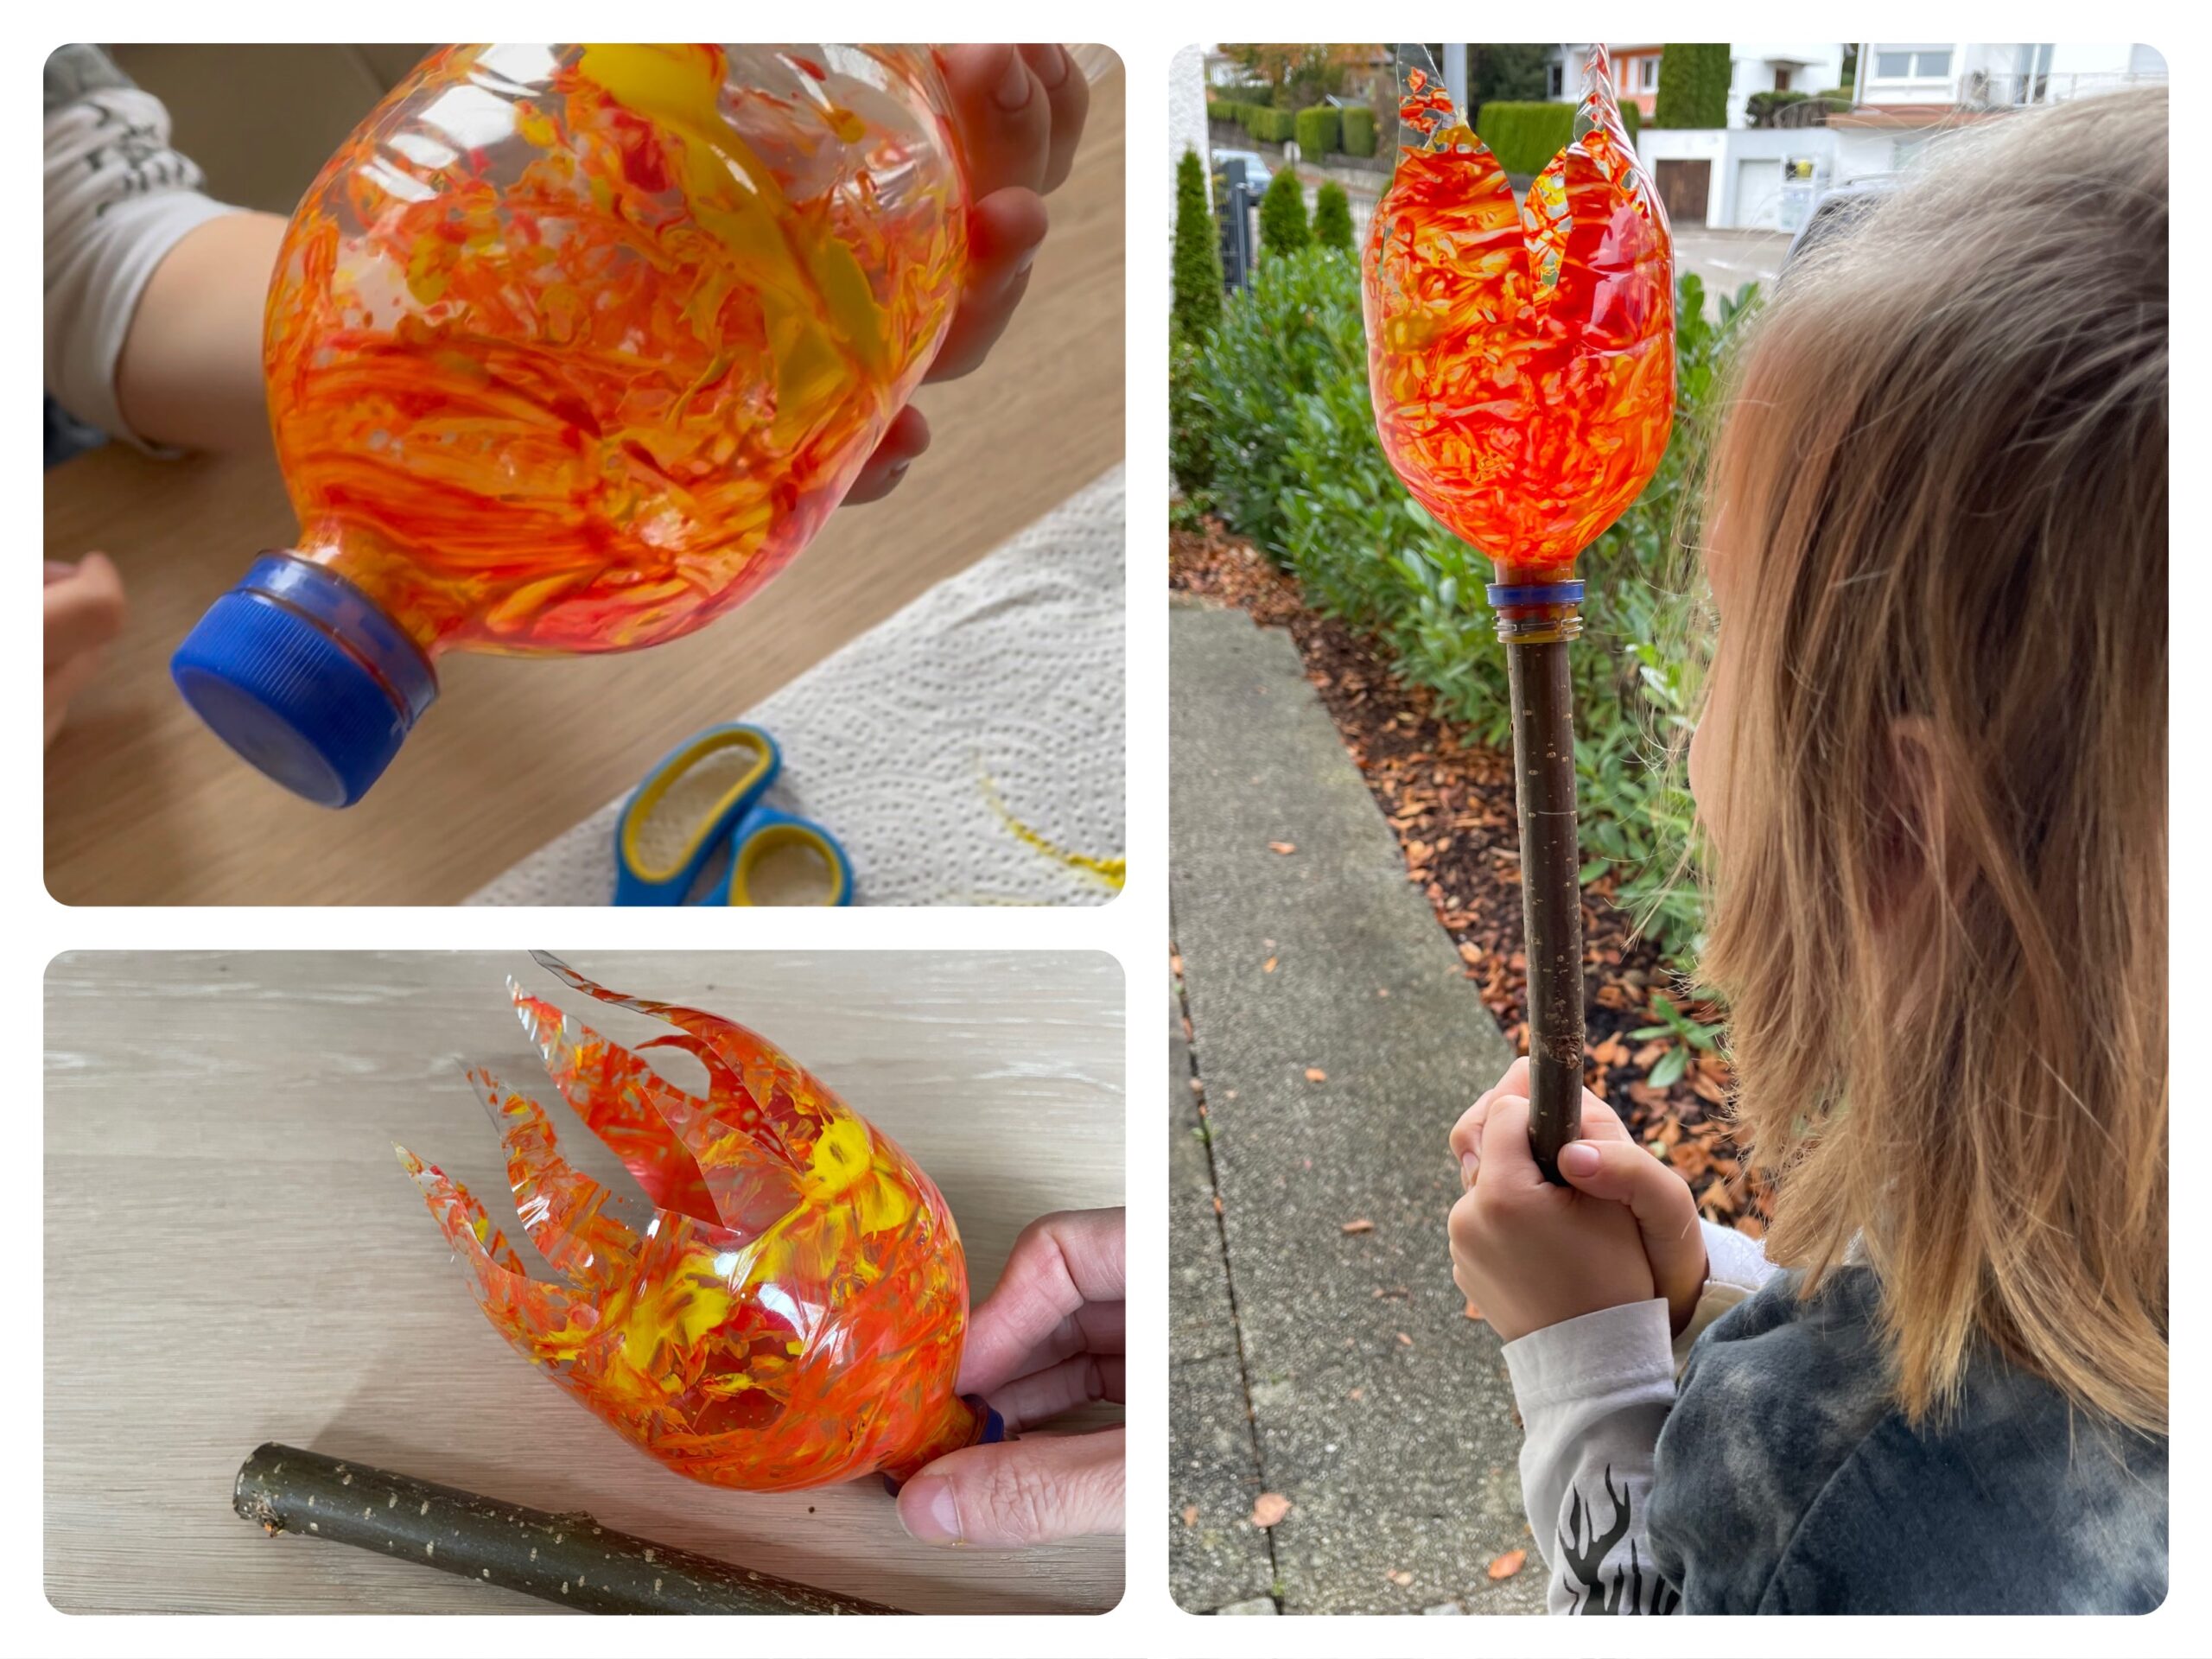
As soon as the paint is dried, you cut the cut edge in flame with the scissors.

Now attach the finished bottle flame to the branch.
Tip: If the flame should shake, then fasten it with some hot glue. Attention - Risk of injury when handling hot glue!

For the flame to shine properly, you can put a small mini-light chain or bottle light in it.
The torch is ready!
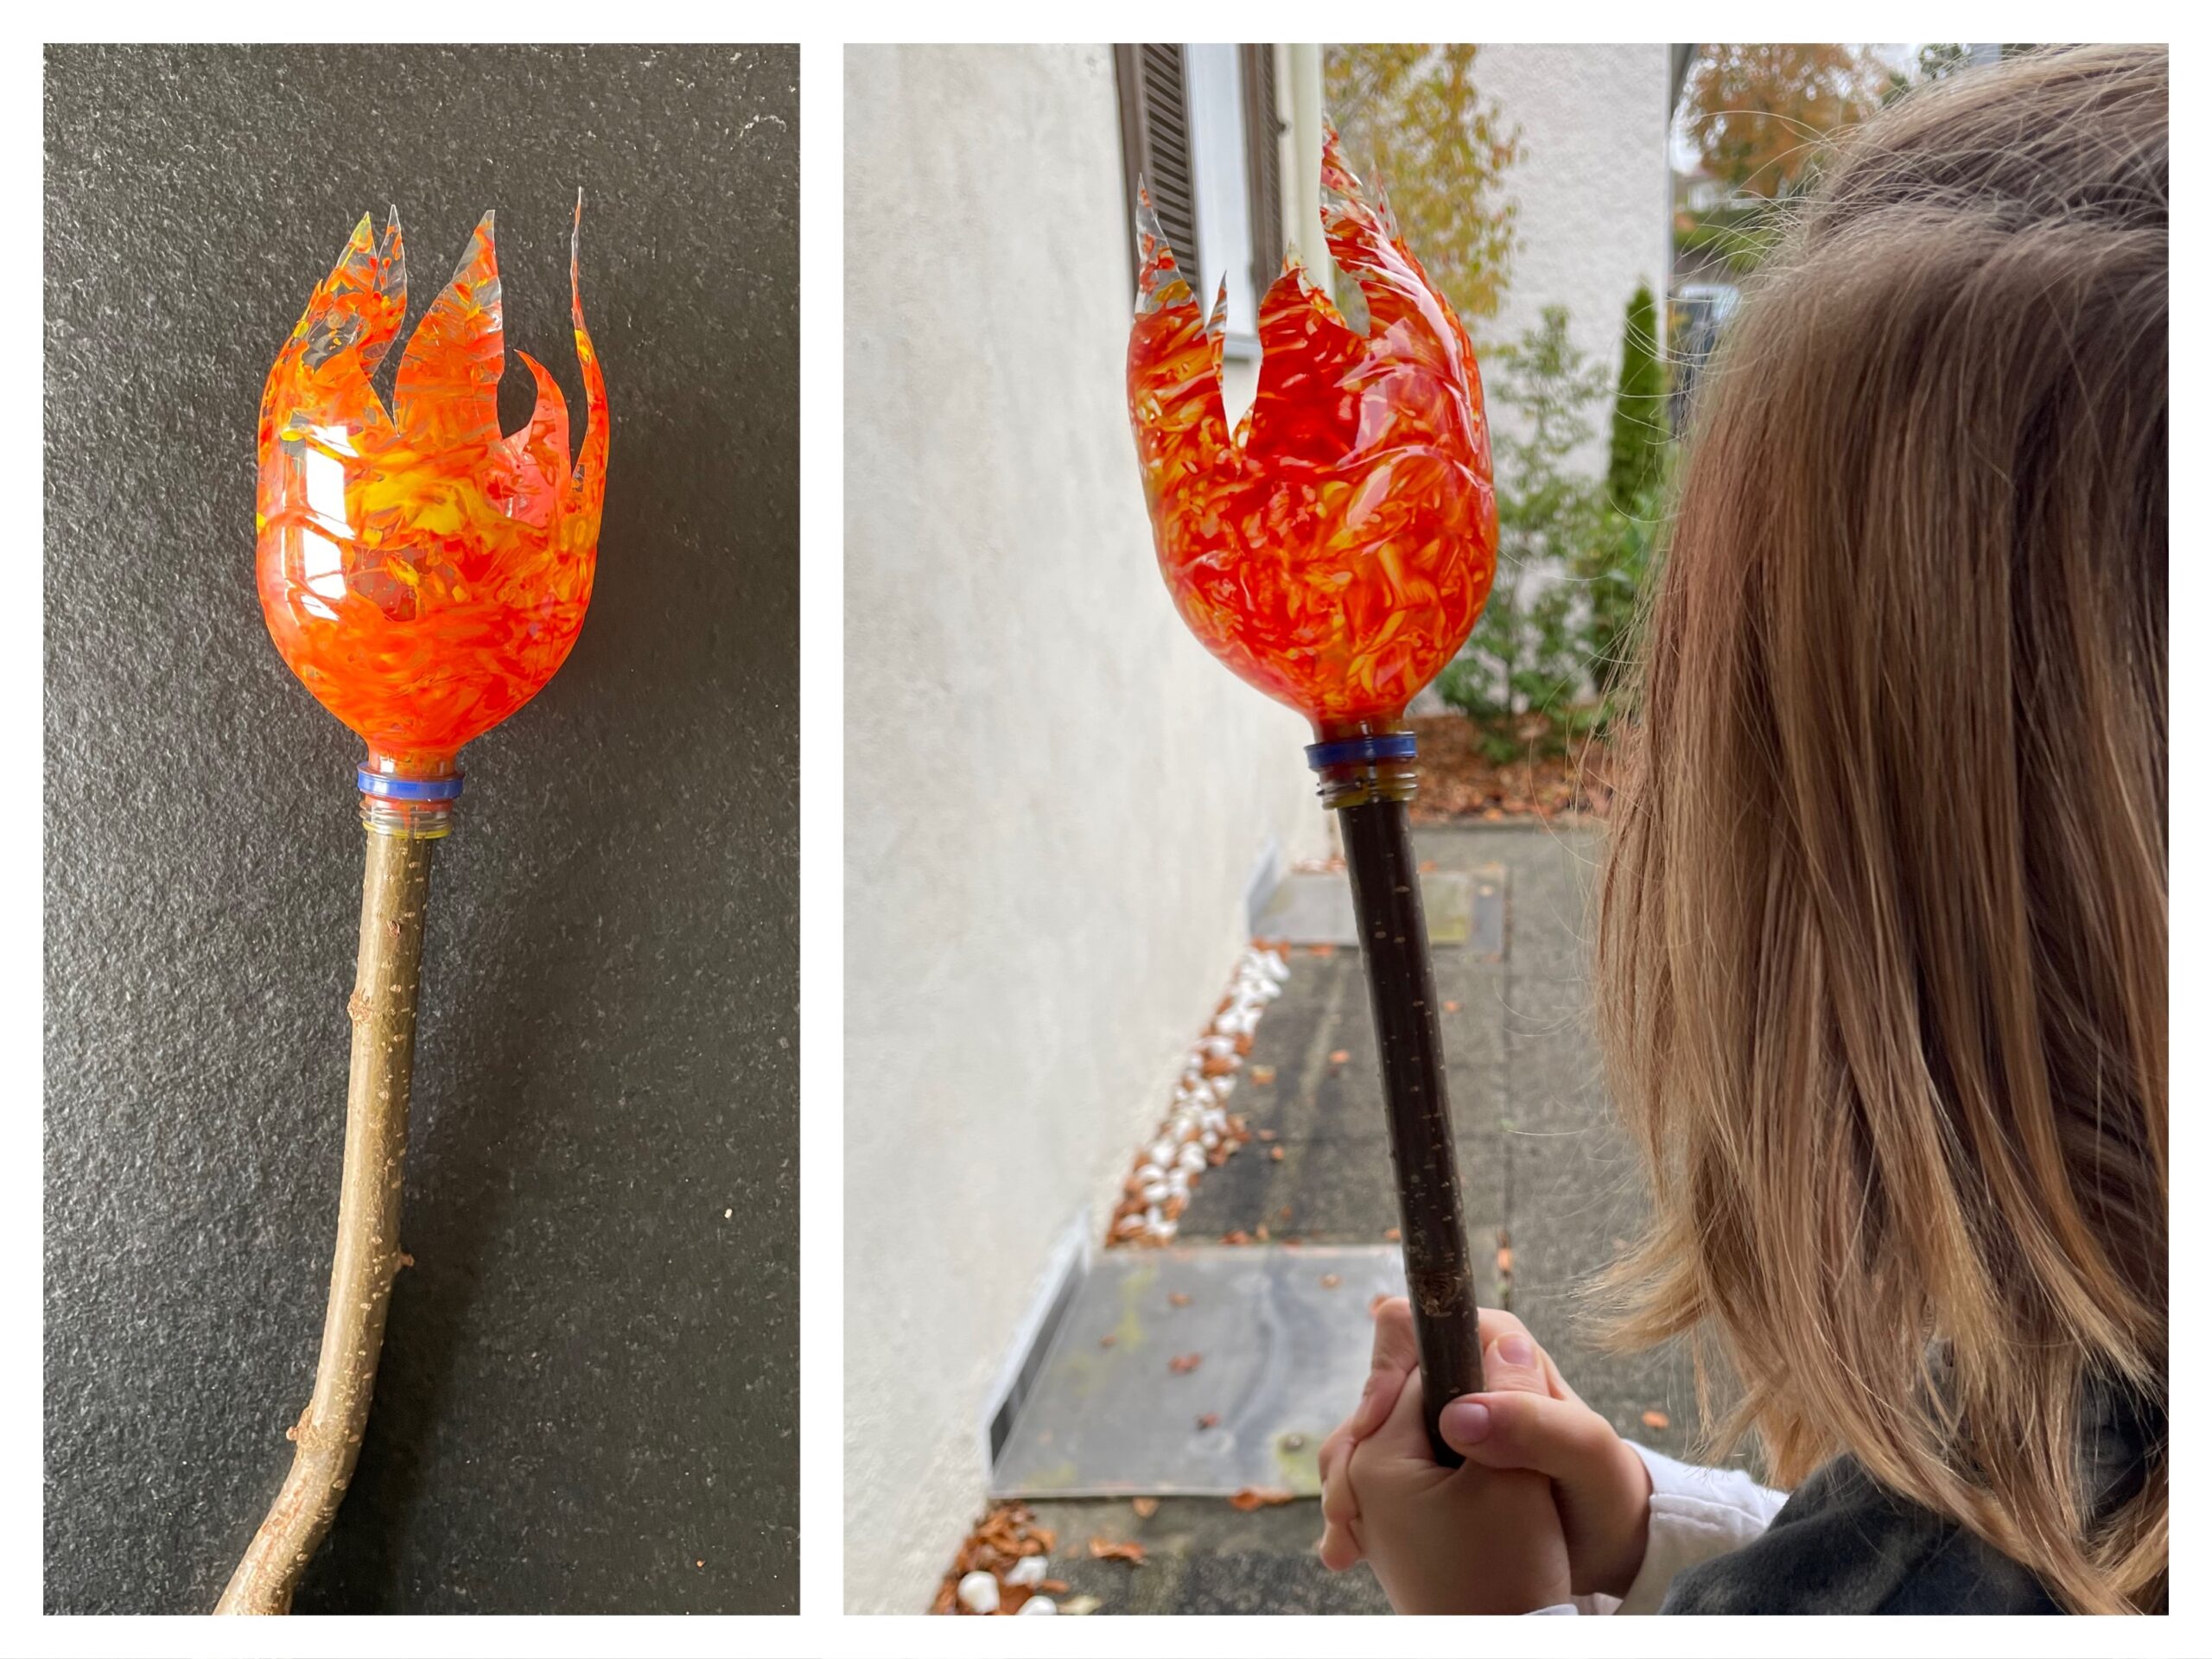
Enjoy the crafts, the lantern parade or the night hike.
Stay creative!