Torch – lantern making – torch making

AdventurerKatzi
Rating5.03.2 thousand times & (5) DifficultyIntermediate

This torch lantern is something for school children who no longer want to participate in the Martin parade with a children's lantern. This upcycle project is also great for a night hike or a torch hike on a child's birthday party. Only an empty plastic bottle with a bulbous bottle neck and a branch that fits into the bottle opening is required.
With the help of the marble technique the colour is distributed in the bottle and thus ensures an individual appearance. The individual steps are explained well here, see for yourself. Have fun!

Media Education for Kindergarten and Hort

Kind bastelt eine Rassel mit dem Navi
The Adventure Navi, the app for DIY projects, enables media education for the youngest.

Relief in everyday life, targeted promotion of individual children, independent learning and - without any pre-knowledge already usable by the youngest!
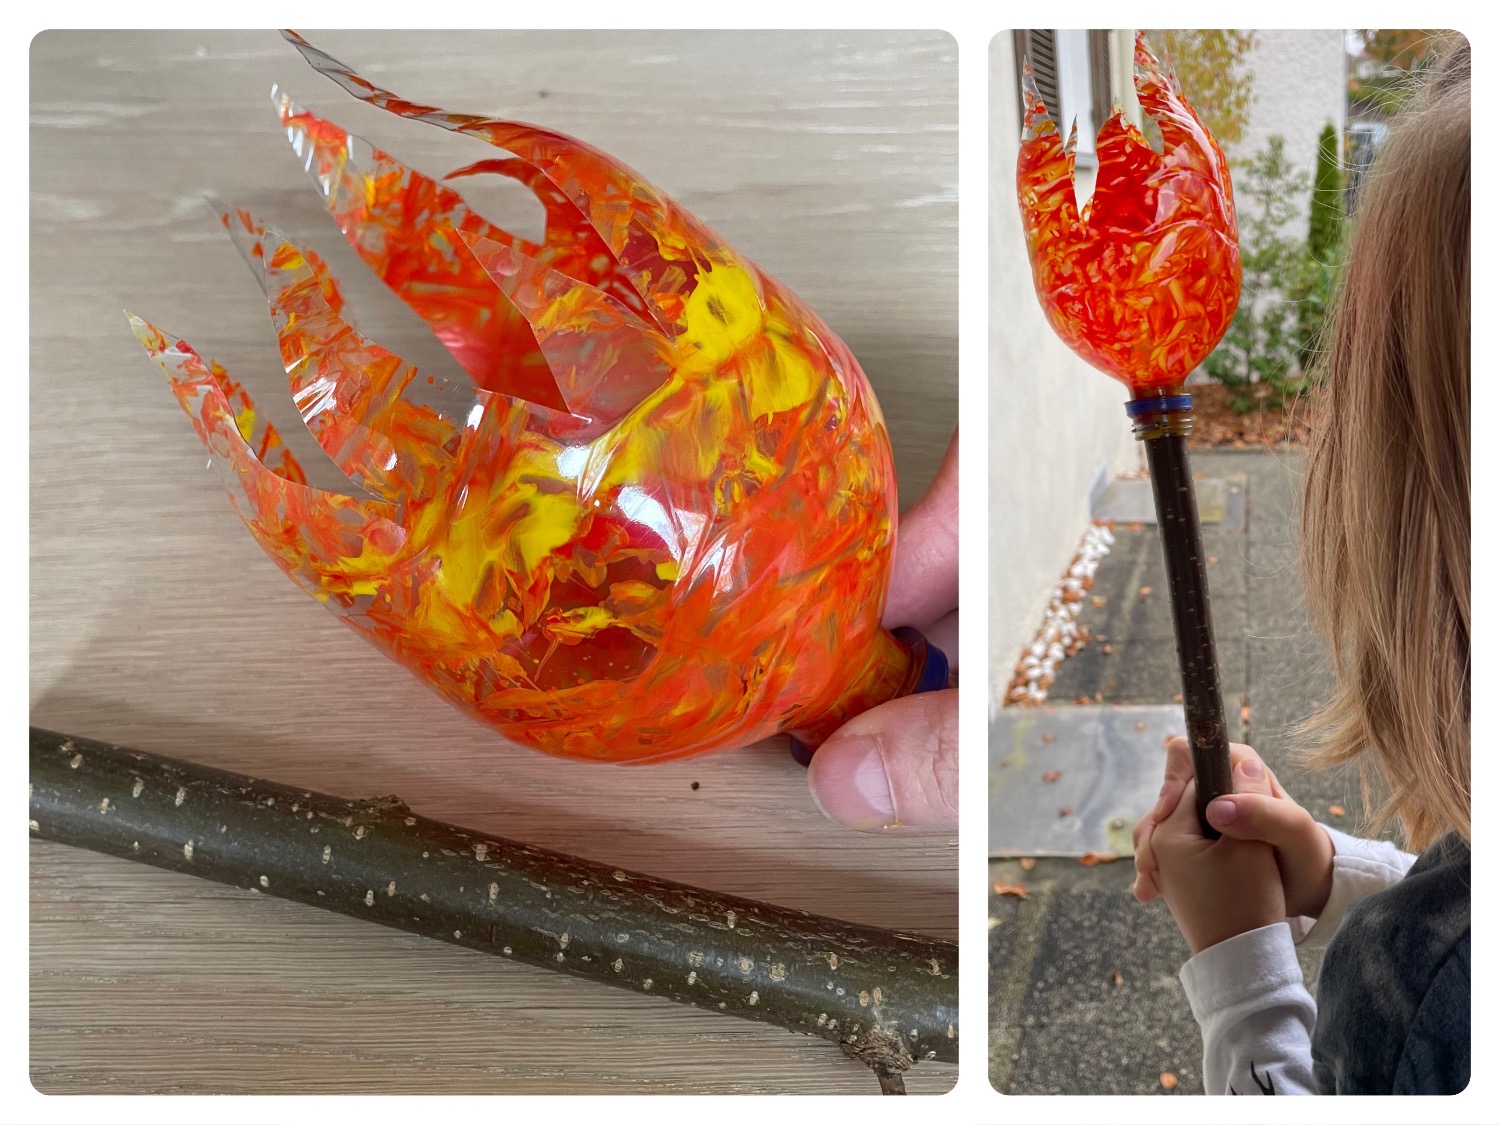


Titelbild zur Bastel- und DIY-Idee für Kinder '(914) Fackel – Laterne basteln – Fackel basteln'
Material for1 Child
Prep Time5 min.Adv. Time20 min.Total Time25 min.
 1 Plastic bottle empty, clean, dry
 Acrylic paint red
 Acrylic paint yellow
 1 Marbleor round stone, pearl, small chestnut
 1 Knife jagged
 1 Thick branch
 1 Hot glue gun
 1 Chain of lights Mini or bottle light chain
 1 Kitchen crepe Of a width not exceeding 5 mm
All links marked with a shopping cart lead to Amazon - here we have selected products that we would order ourselves and in part also ordered. In a qualified purchase via the advertising link, we as Amazon partner receive a commission, for you there are no costs. You thus support our cost- and advertising banner-free, educational offer.
1

First, you prepare everything.
Now open the bottle and put the marble in the bottle. Then place the bottle on the kitchen crepe. Sprinkle a little yellow and red acrylic paint into the bottle. The paint can remain at the top. Then screw the cap back onto the bottle.
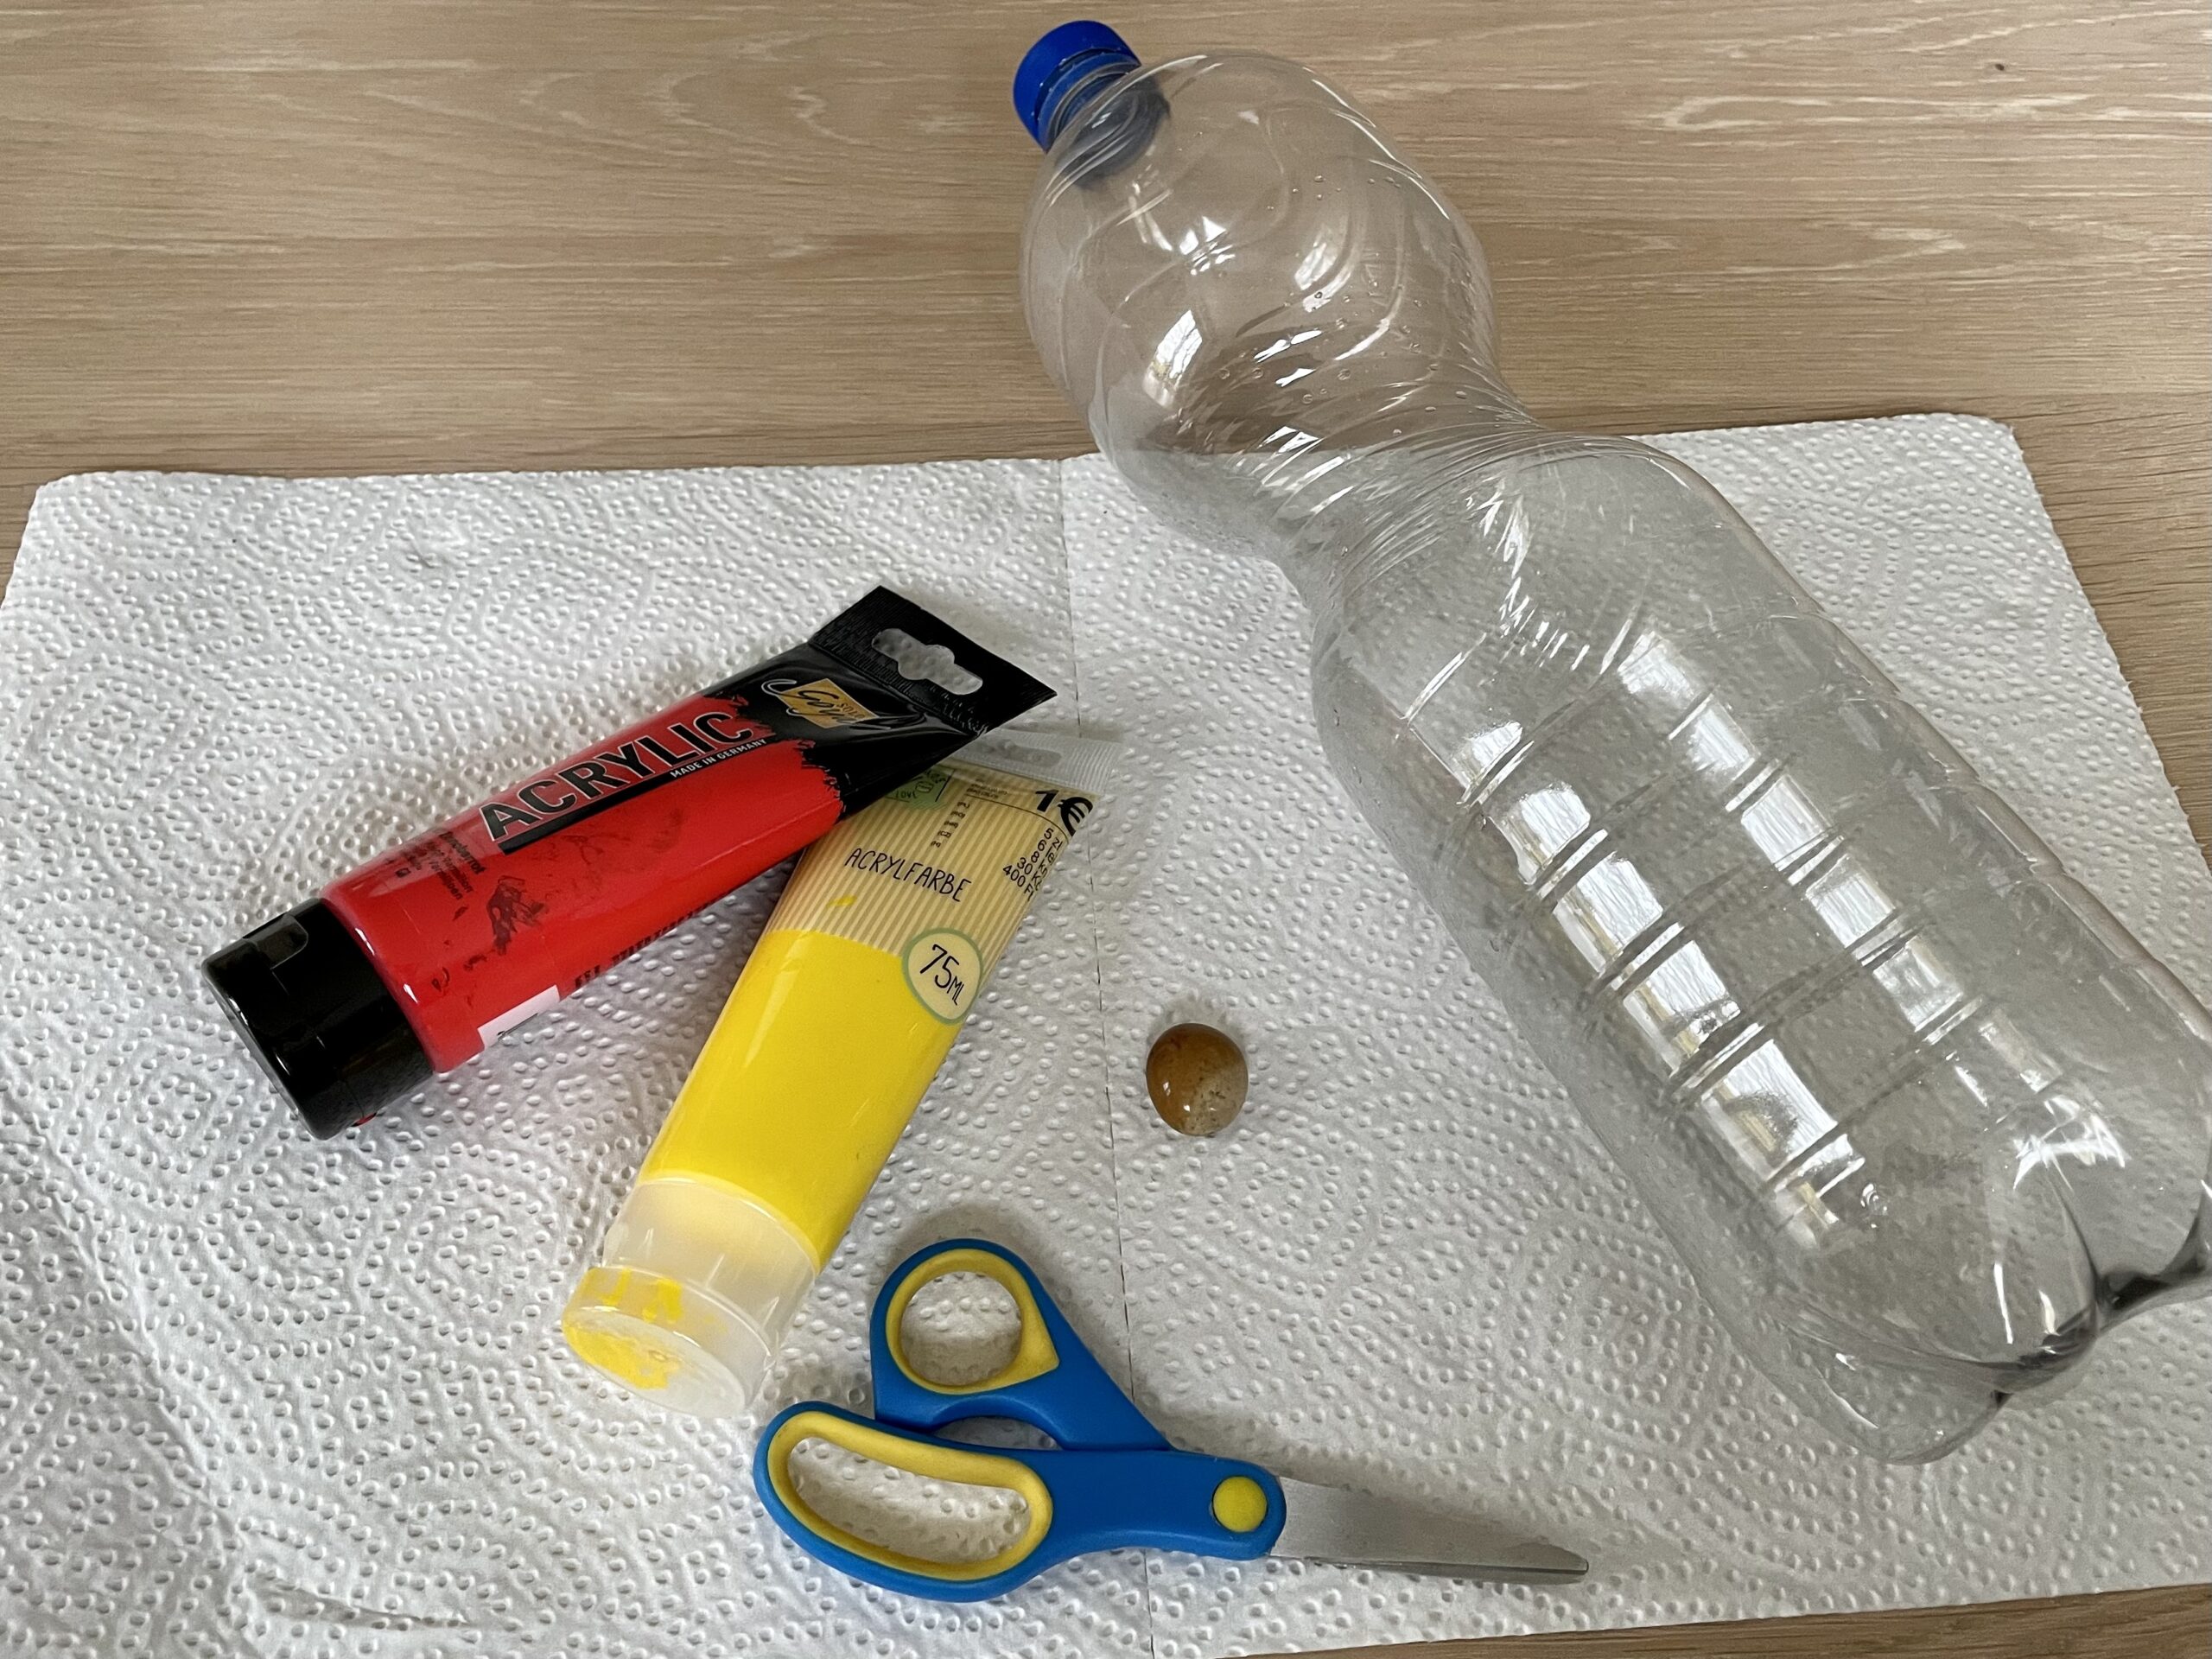
Bild zum Schritt 1 für das Bastel- und DIY-Abenteuer für Kinder: 'Zuerst legt ihr alles bereit.  Öffnet nun die Flasche...'

2

Now you shake the bottle with the marble back and forth. As a result, the colour is distributed in the bottle. Move the marble through, shake and circle until you like the resulting pattern.
Then open the bottle and let the marble roll out carefully. Clean the marble immediately and turn the bottle to dry.
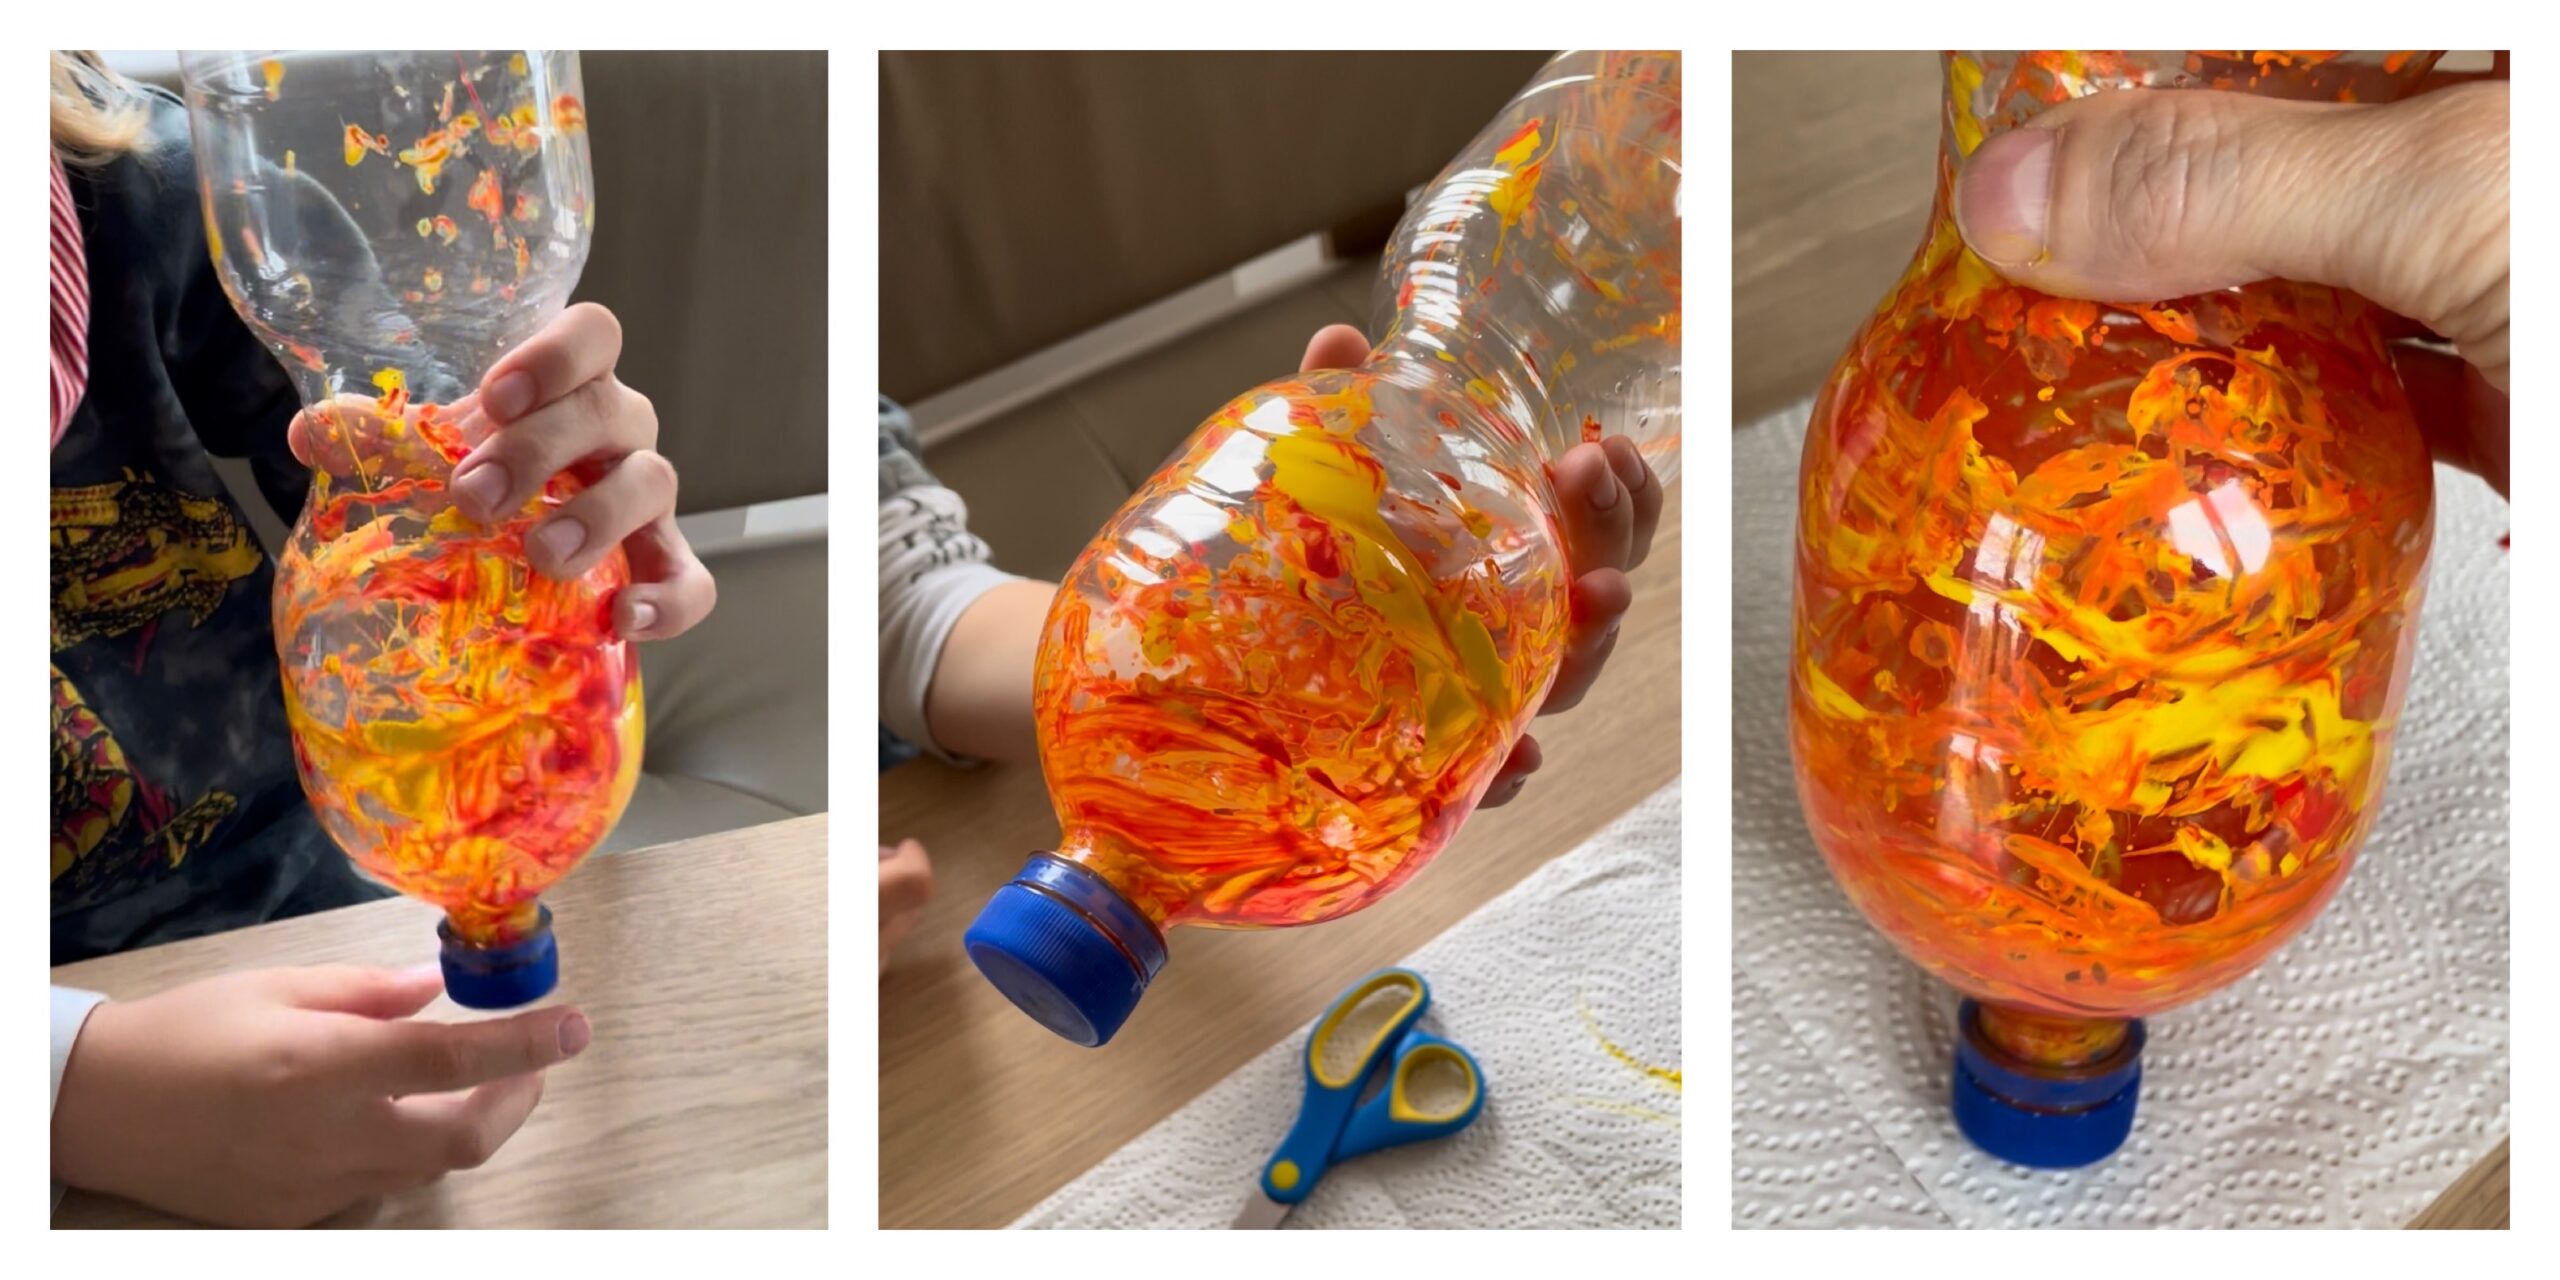
Bild zum Schritt 2 für das Bastel- und DIY-Abenteuer für Kinder: 'Jetzt schüttelt ihr die Flasche mit der Murmel hin und...'

3

Cut the bottle in the thin spot after 10-15 minutes. Use a jagged sharp knife. Sew in one place until a cut is made. Through it you thread the scissors and then cut the bottle around.

Bild zum Schritt 3 für das Bastel- und DIY-Abenteuer für Kinder: 'Schneidet nach 10-15 Minuten die Flasche an der dünnen Stelle...'

4

Now put the two parts of the bottle back to dry.

Bild zum Schritt 4 für das Bastel- und DIY-Abenteuer für Kinder: 'Jetzt lege ihr die beiden Teile der Flasche erneut zum...'

5

Now look for a branch that fits exactly into the bottle opening.

Tip: Maybe you cut it off or you use a knife and cut the opening appropriately. Attention: Risk of injury! Let an adult help you!

Bild zum Schritt 5 für das Bastel- und DIY-Abenteuer für Kinder: 'Sucht euch nun einen Ast der genau in die Flaschenöffnung...'

6

As soon as the paint is dried, you cut the cut edge in flame with the scissors.

Bild zum Schritt 6 für das Bastel- und DIY-Abenteuer für Kinder: 'Sobald die Farbe getrocknet ist, schneidet ihr den abgeschnittene Rand...'

7

Now attach the finished bottle flame to the branch.

Tip: If the flame should shake, then fasten it with some hot glue. Attention - Risk of injury when handling hot glue!

Bild zum Schritt 7 für das Bastel- und DIY-Abenteuer für Kinder: 'Befestige die fertige Flaschenflamme nun auf dem Ast.  ...'

8

For the flame to shine properly, you can put a small mini-light chain or bottle light in it.
The torch is ready!

Bild zum Schritt 8 für das Bastel- und DIY-Abenteuer für Kinder: 'Damit die Flamme richtig leuchtet, kannst du eine kleine Mini-Lichterkette...'

9

Enjoy the crafts, the lantern parade or the night hike.

Bild zum Schritt 9 für das Bastel- und DIY-Abenteuer für Kinder: 'Viel Freude beim Basteln, auf dem Laternenumzug oder bei der...'

10

Stay creative!

Materials

 1 Plastic bottle empty, clean, dry
 Acrylic paint red
 Acrylic paint yellow
 1 Marbleor round stone, pearl, small chestnut
 1 Knife jagged
 1 Thick branch
 1 Hot glue gun
 1 Chain of lights Mini or bottle light chain
 1 Kitchen crepe Of a width not exceeding 5 mm
All links marked with a shopping cart lead to Amazon - here we have selected products that we would order ourselves and in part also ordered. In a qualified purchase via the advertising link, we as Amazon partner receive a commission, for you there are no costs. You thus support our cost- and advertising banner-free, educational offer.

Directions

1

First, you prepare everything.
Now open the bottle and put the marble in the bottle. Then place the bottle on the kitchen crepe. Sprinkle a little yellow and red acrylic paint into the bottle. The paint can remain at the top. Then screw the cap back onto the bottle.

Bild zum Schritt 1 für das Bastel- und DIY-Abenteuer für Kinder: 'Zuerst legt ihr alles bereit.  Öffnet nun die Flasche...'

2

Now you shake the bottle with the marble back and forth. As a result, the colour is distributed in the bottle. Move the marble through, shake and circle until you like the resulting pattern.
Then open the bottle and let the marble roll out carefully. Clean the marble immediately and turn the bottle to dry.

Bild zum Schritt 2 für das Bastel- und DIY-Abenteuer für Kinder: 'Jetzt schüttelt ihr die Flasche mit der Murmel hin und...'

3

Cut the bottle in the thin spot after 10-15 minutes. Use a jagged sharp knife. Sew in one place until a cut is made. Through it you thread the scissors and then cut the bottle around.
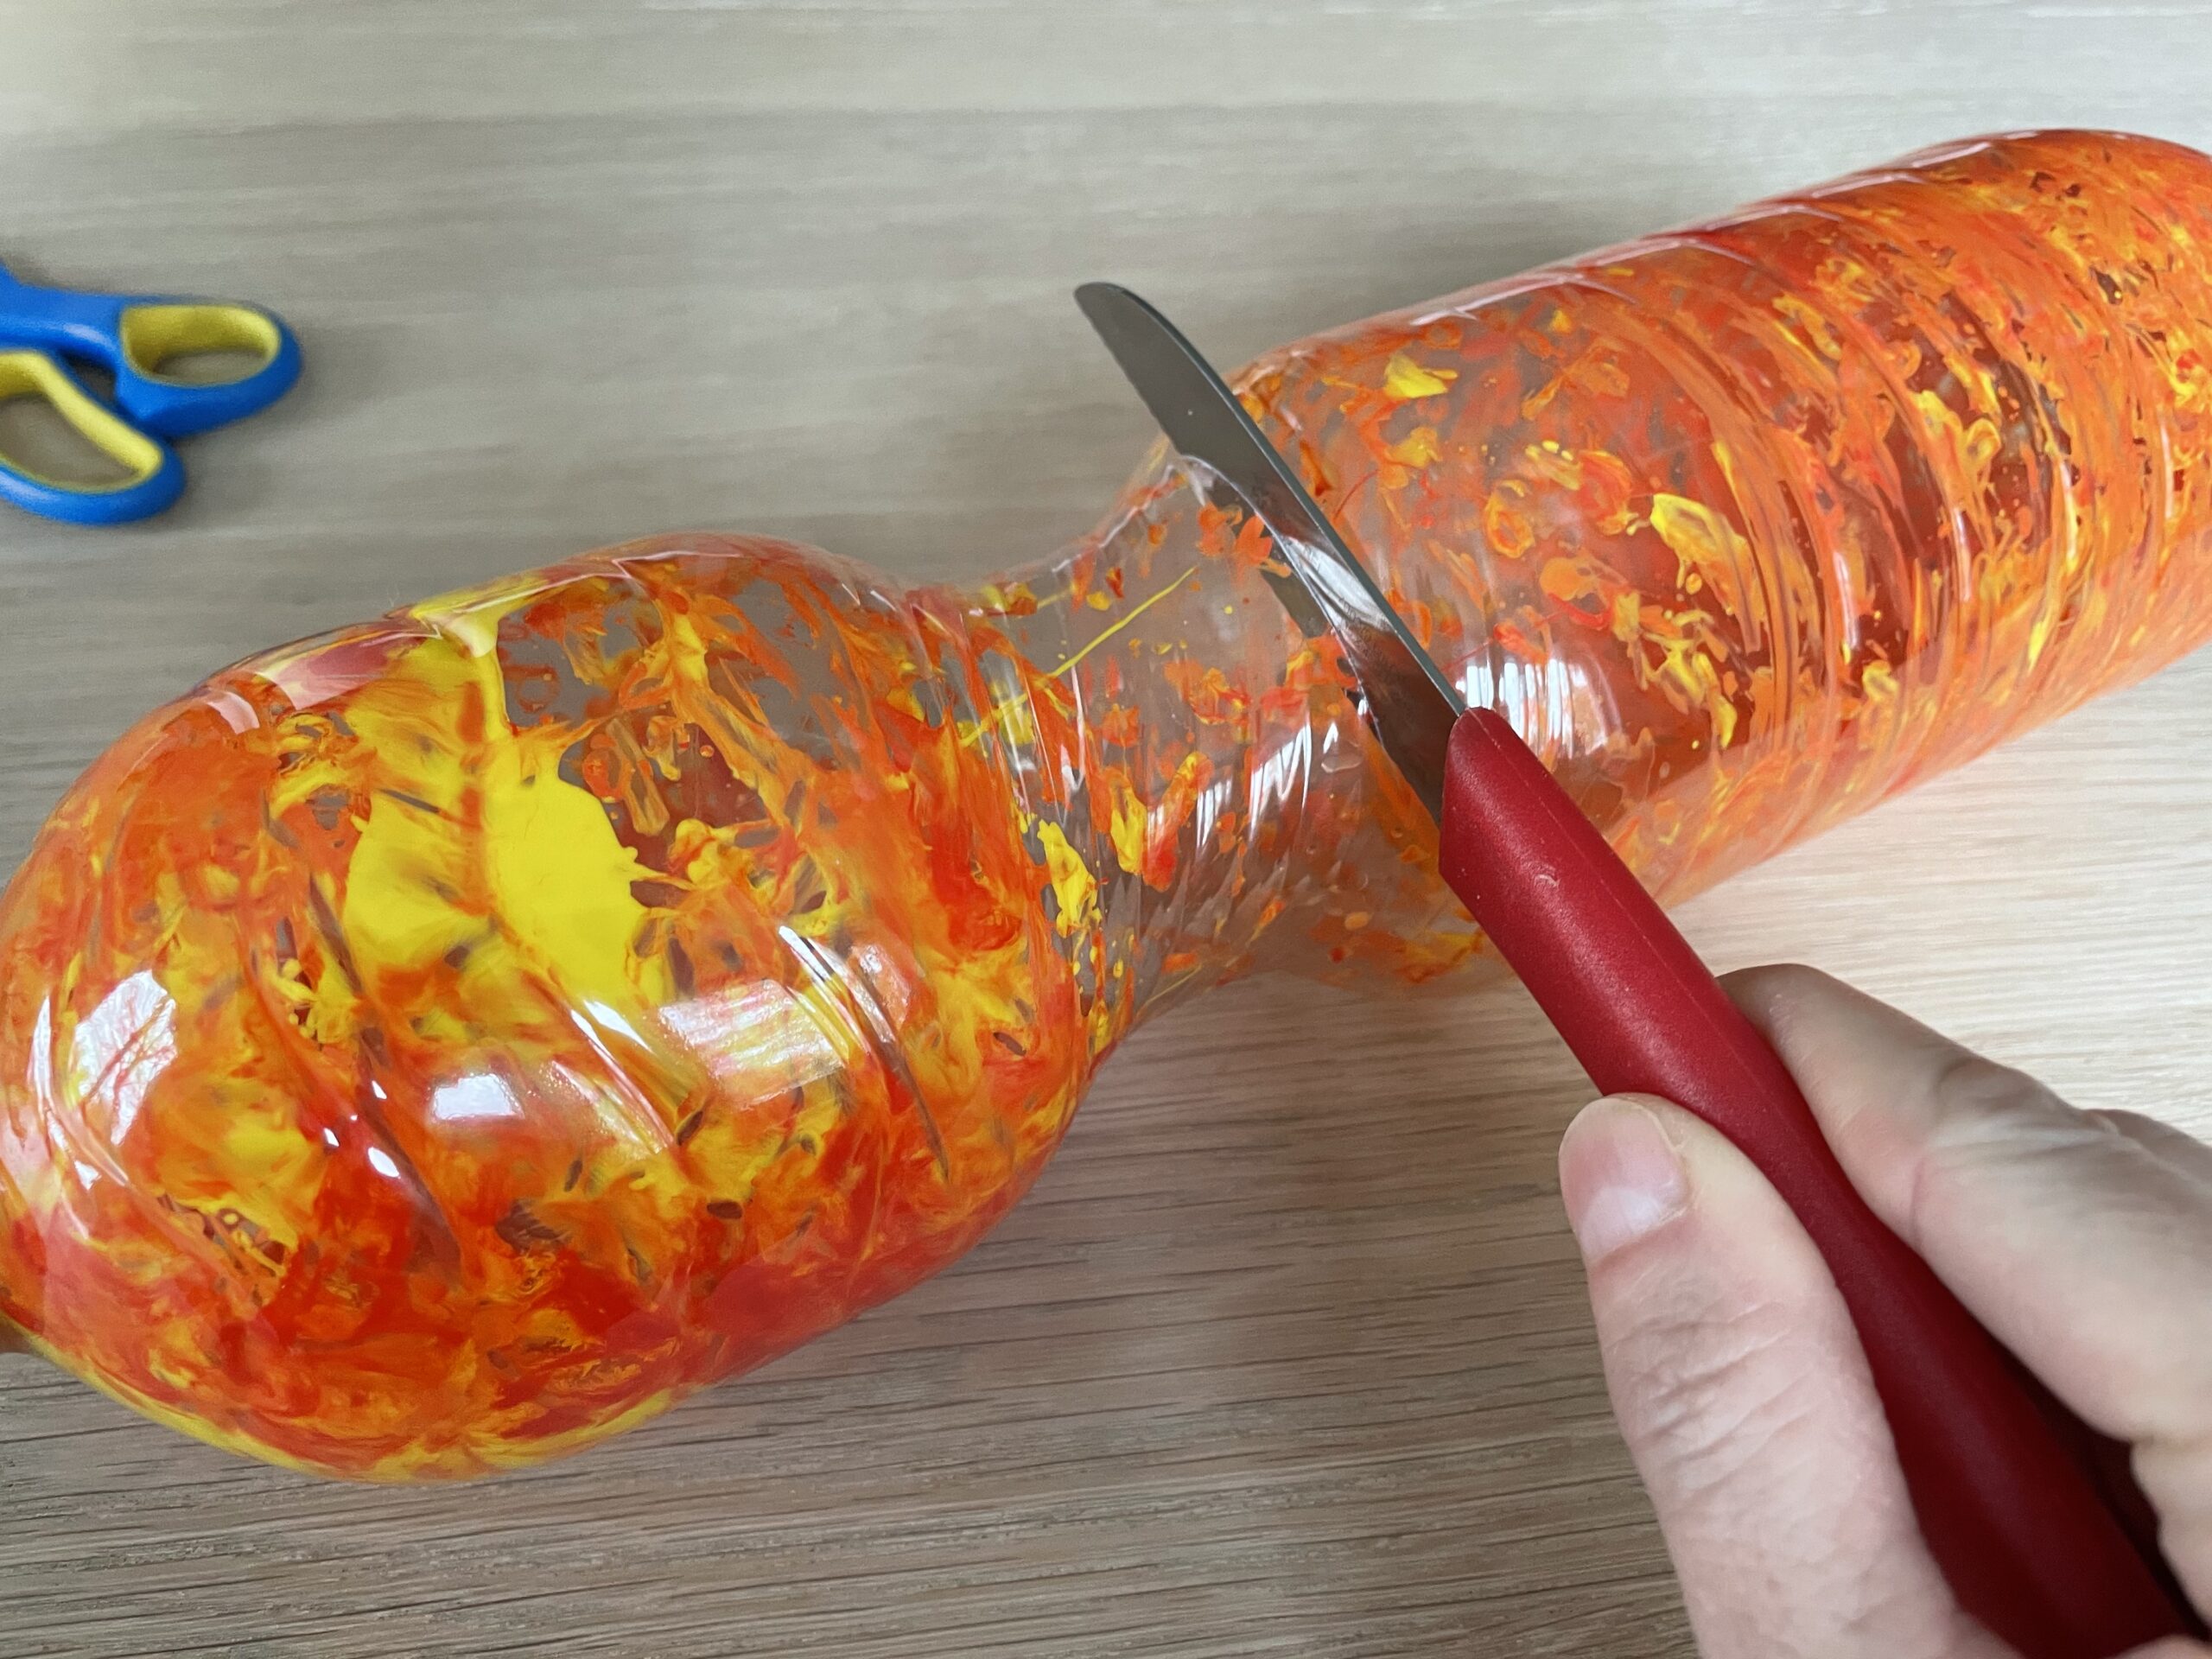
Bild zum Schritt 3 für das Bastel- und DIY-Abenteuer für Kinder: 'Schneidet nach 10-15 Minuten die Flasche an der dünnen Stelle...'

4

Now put the two parts of the bottle back to dry.
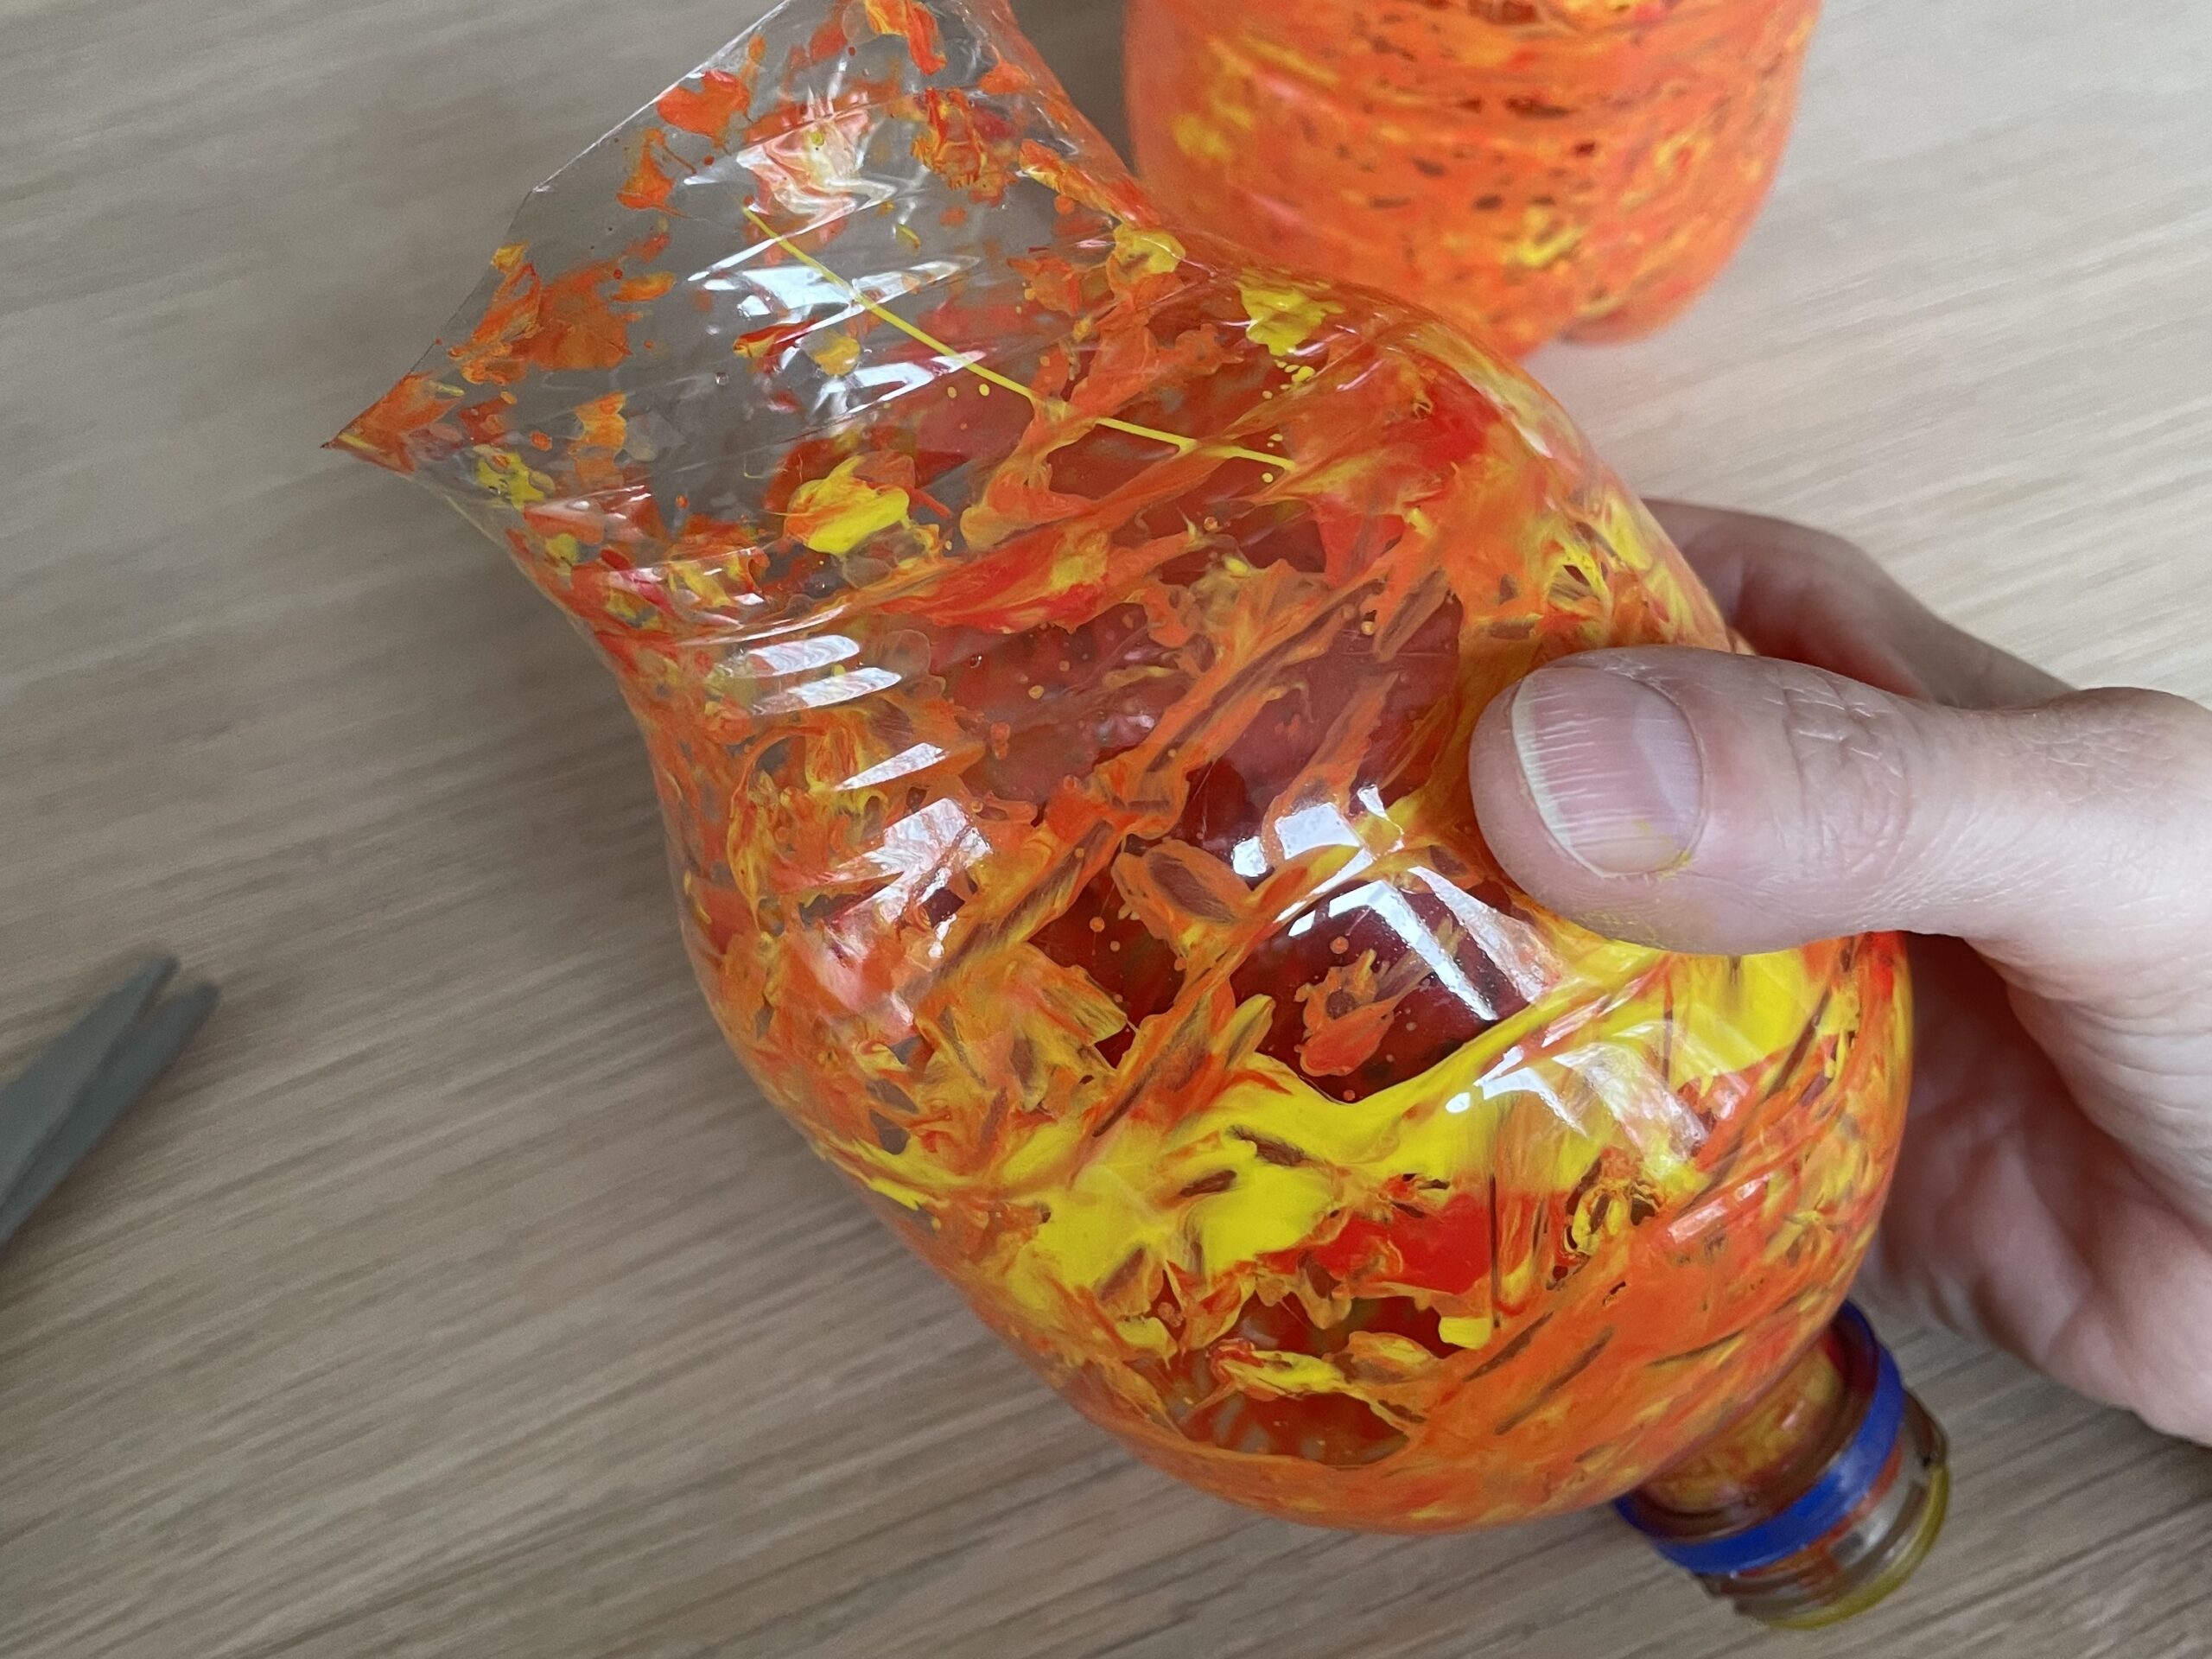
Bild zum Schritt 4 für das Bastel- und DIY-Abenteuer für Kinder: 'Jetzt lege ihr die beiden Teile der Flasche erneut zum...'

5

Now look for a branch that fits exactly into the bottle opening.

Tip: Maybe you cut it off or you use a knife and cut the opening appropriately. Attention: Risk of injury! Let an adult help you!
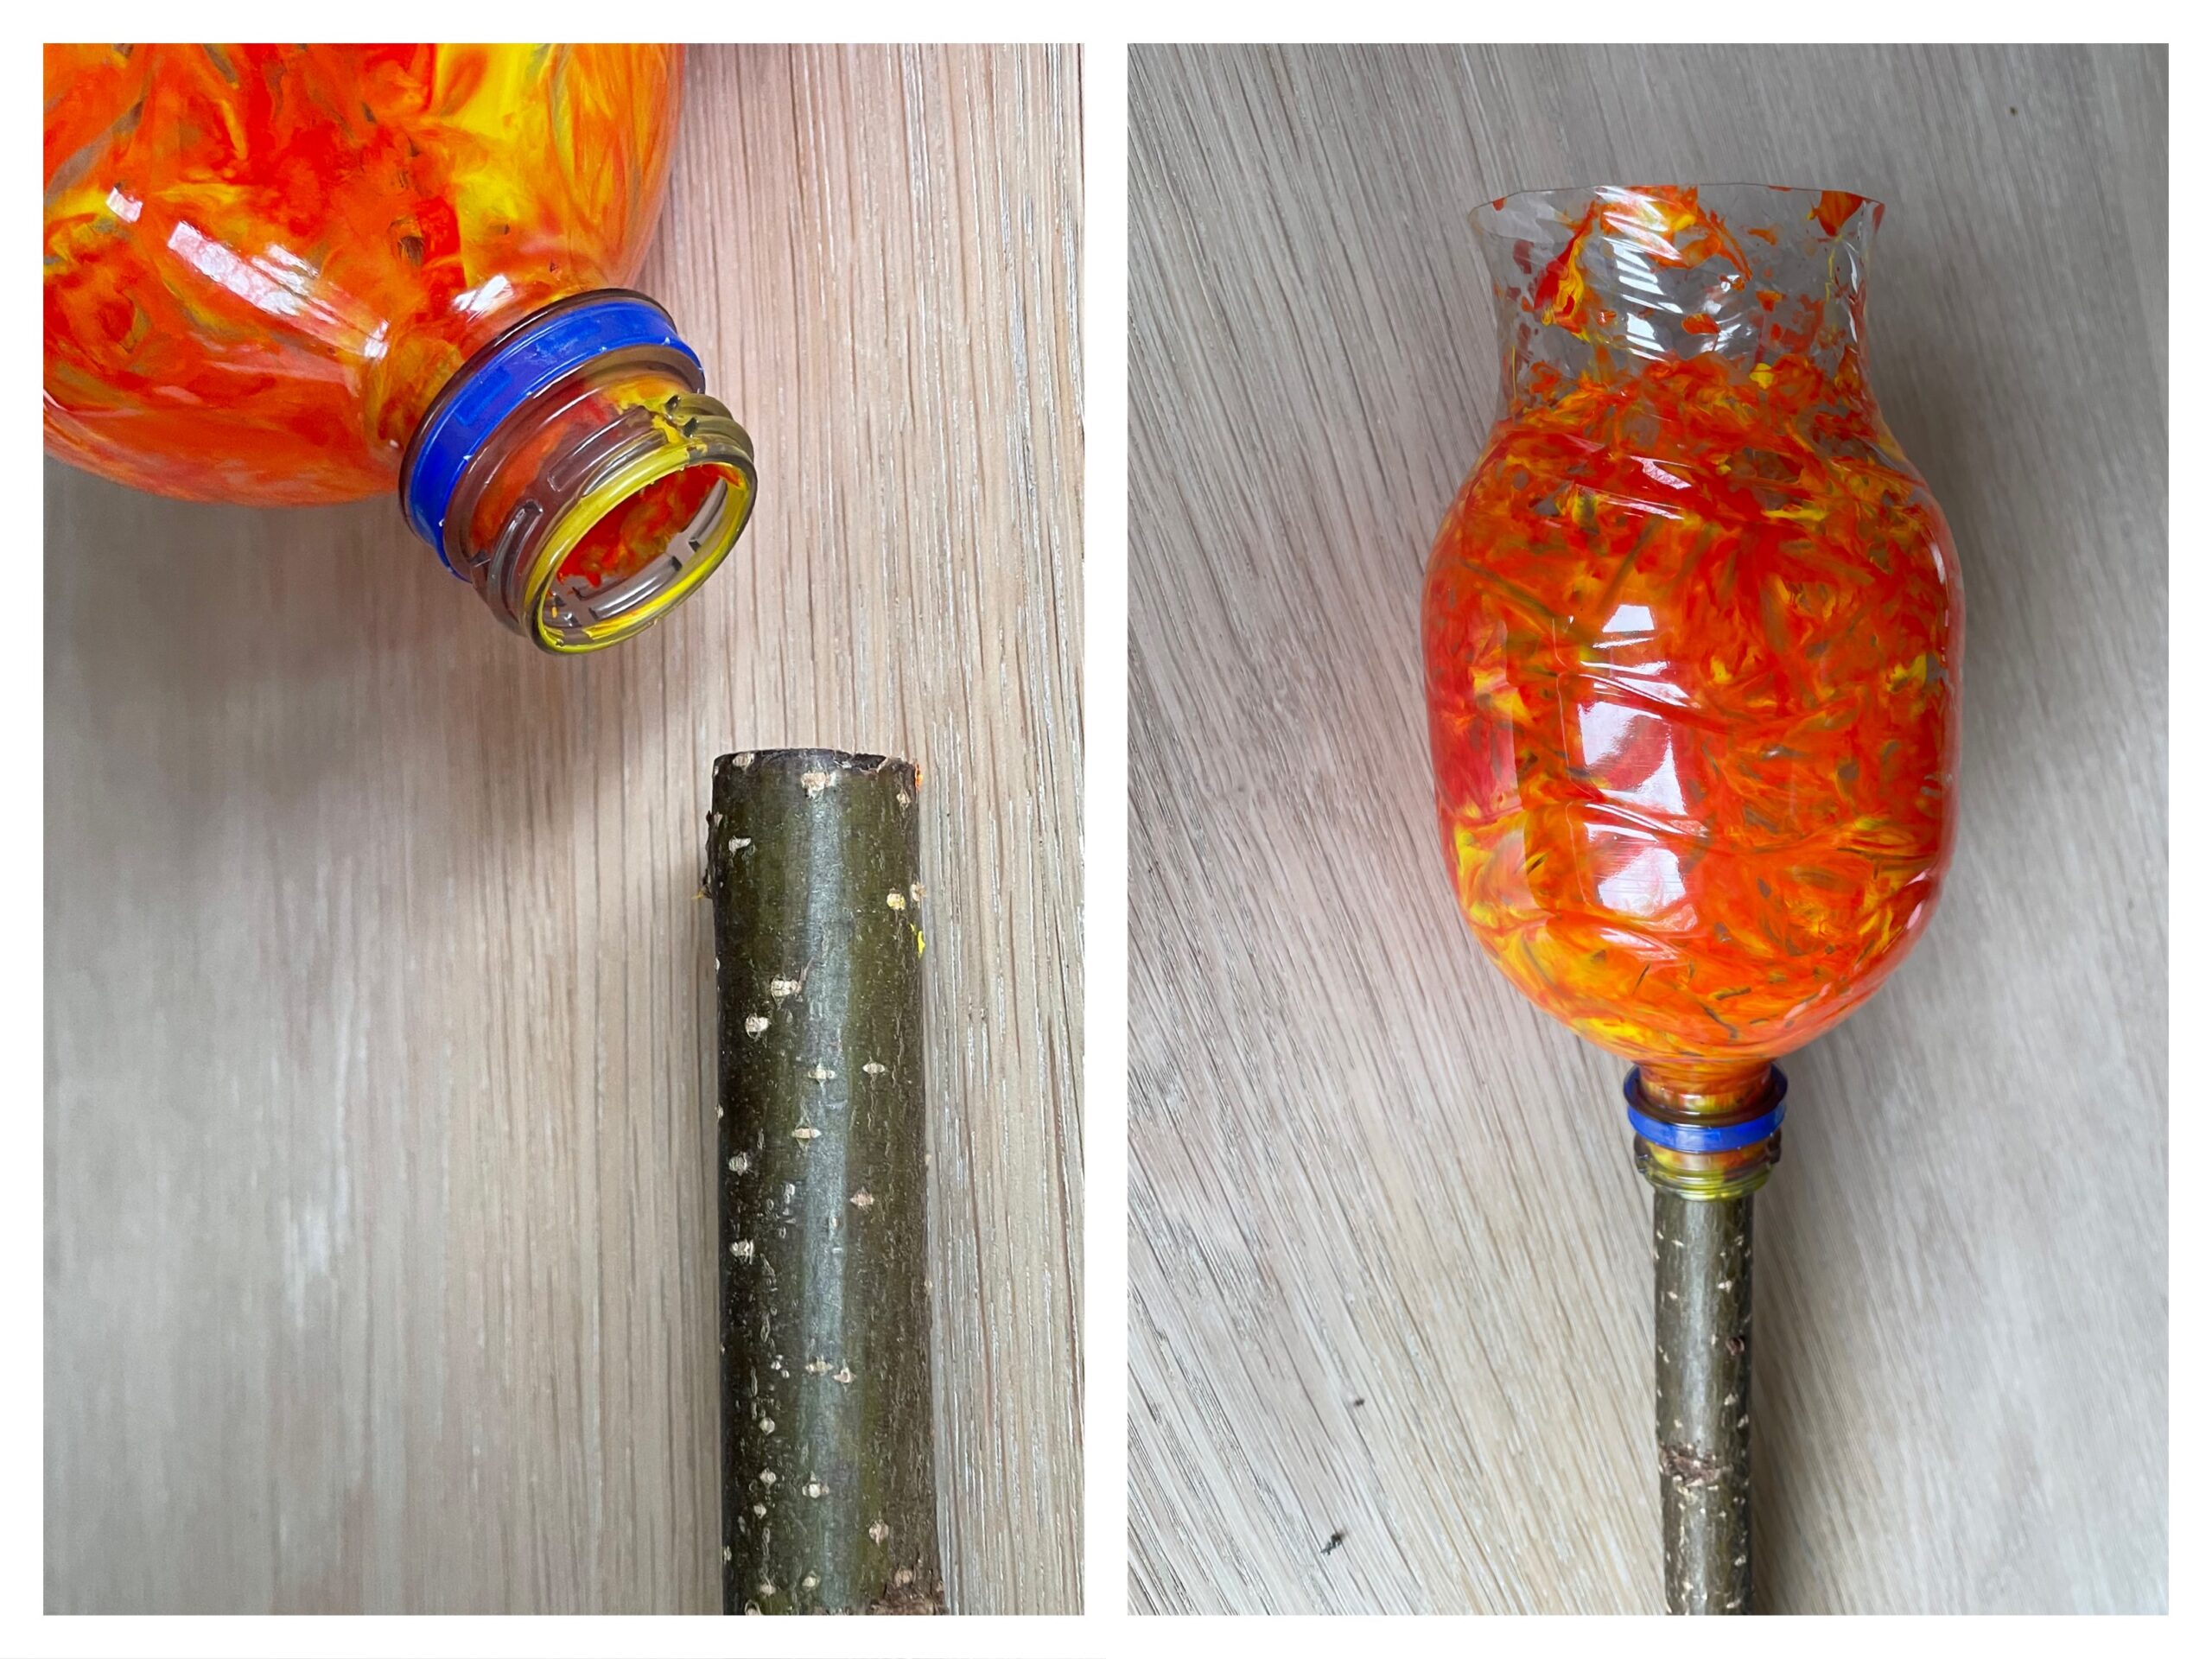
Bild zum Schritt 5 für das Bastel- und DIY-Abenteuer für Kinder: 'Sucht euch nun einen Ast der genau in die Flaschenöffnung...'

6

As soon as the paint is dried, you cut the cut edge in flame with the scissors.

Bild zum Schritt 6 für das Bastel- und DIY-Abenteuer für Kinder: 'Sobald die Farbe getrocknet ist, schneidet ihr den abgeschnittene Rand...'

7

Now attach the finished bottle flame to the branch.

Tip: If the flame should shake, then fasten it with some hot glue. Attention - Risk of injury when handling hot glue!
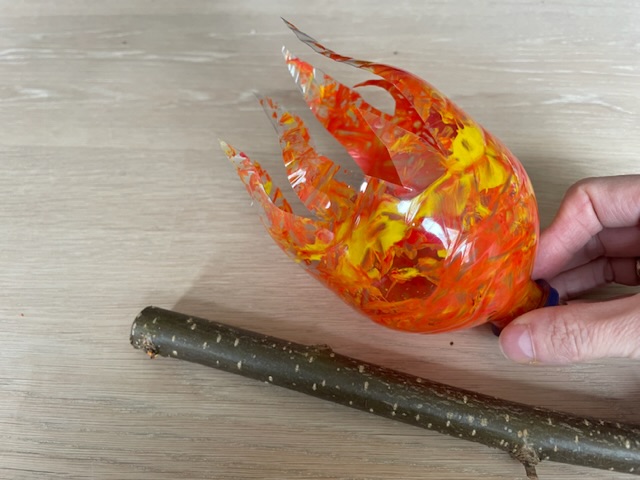
Bild zum Schritt 7 für das Bastel- und DIY-Abenteuer für Kinder: 'Befestige die fertige Flaschenflamme nun auf dem Ast.  ...'

8

For the flame to shine properly, you can put a small mini-light chain or bottle light in it.
The torch is ready!
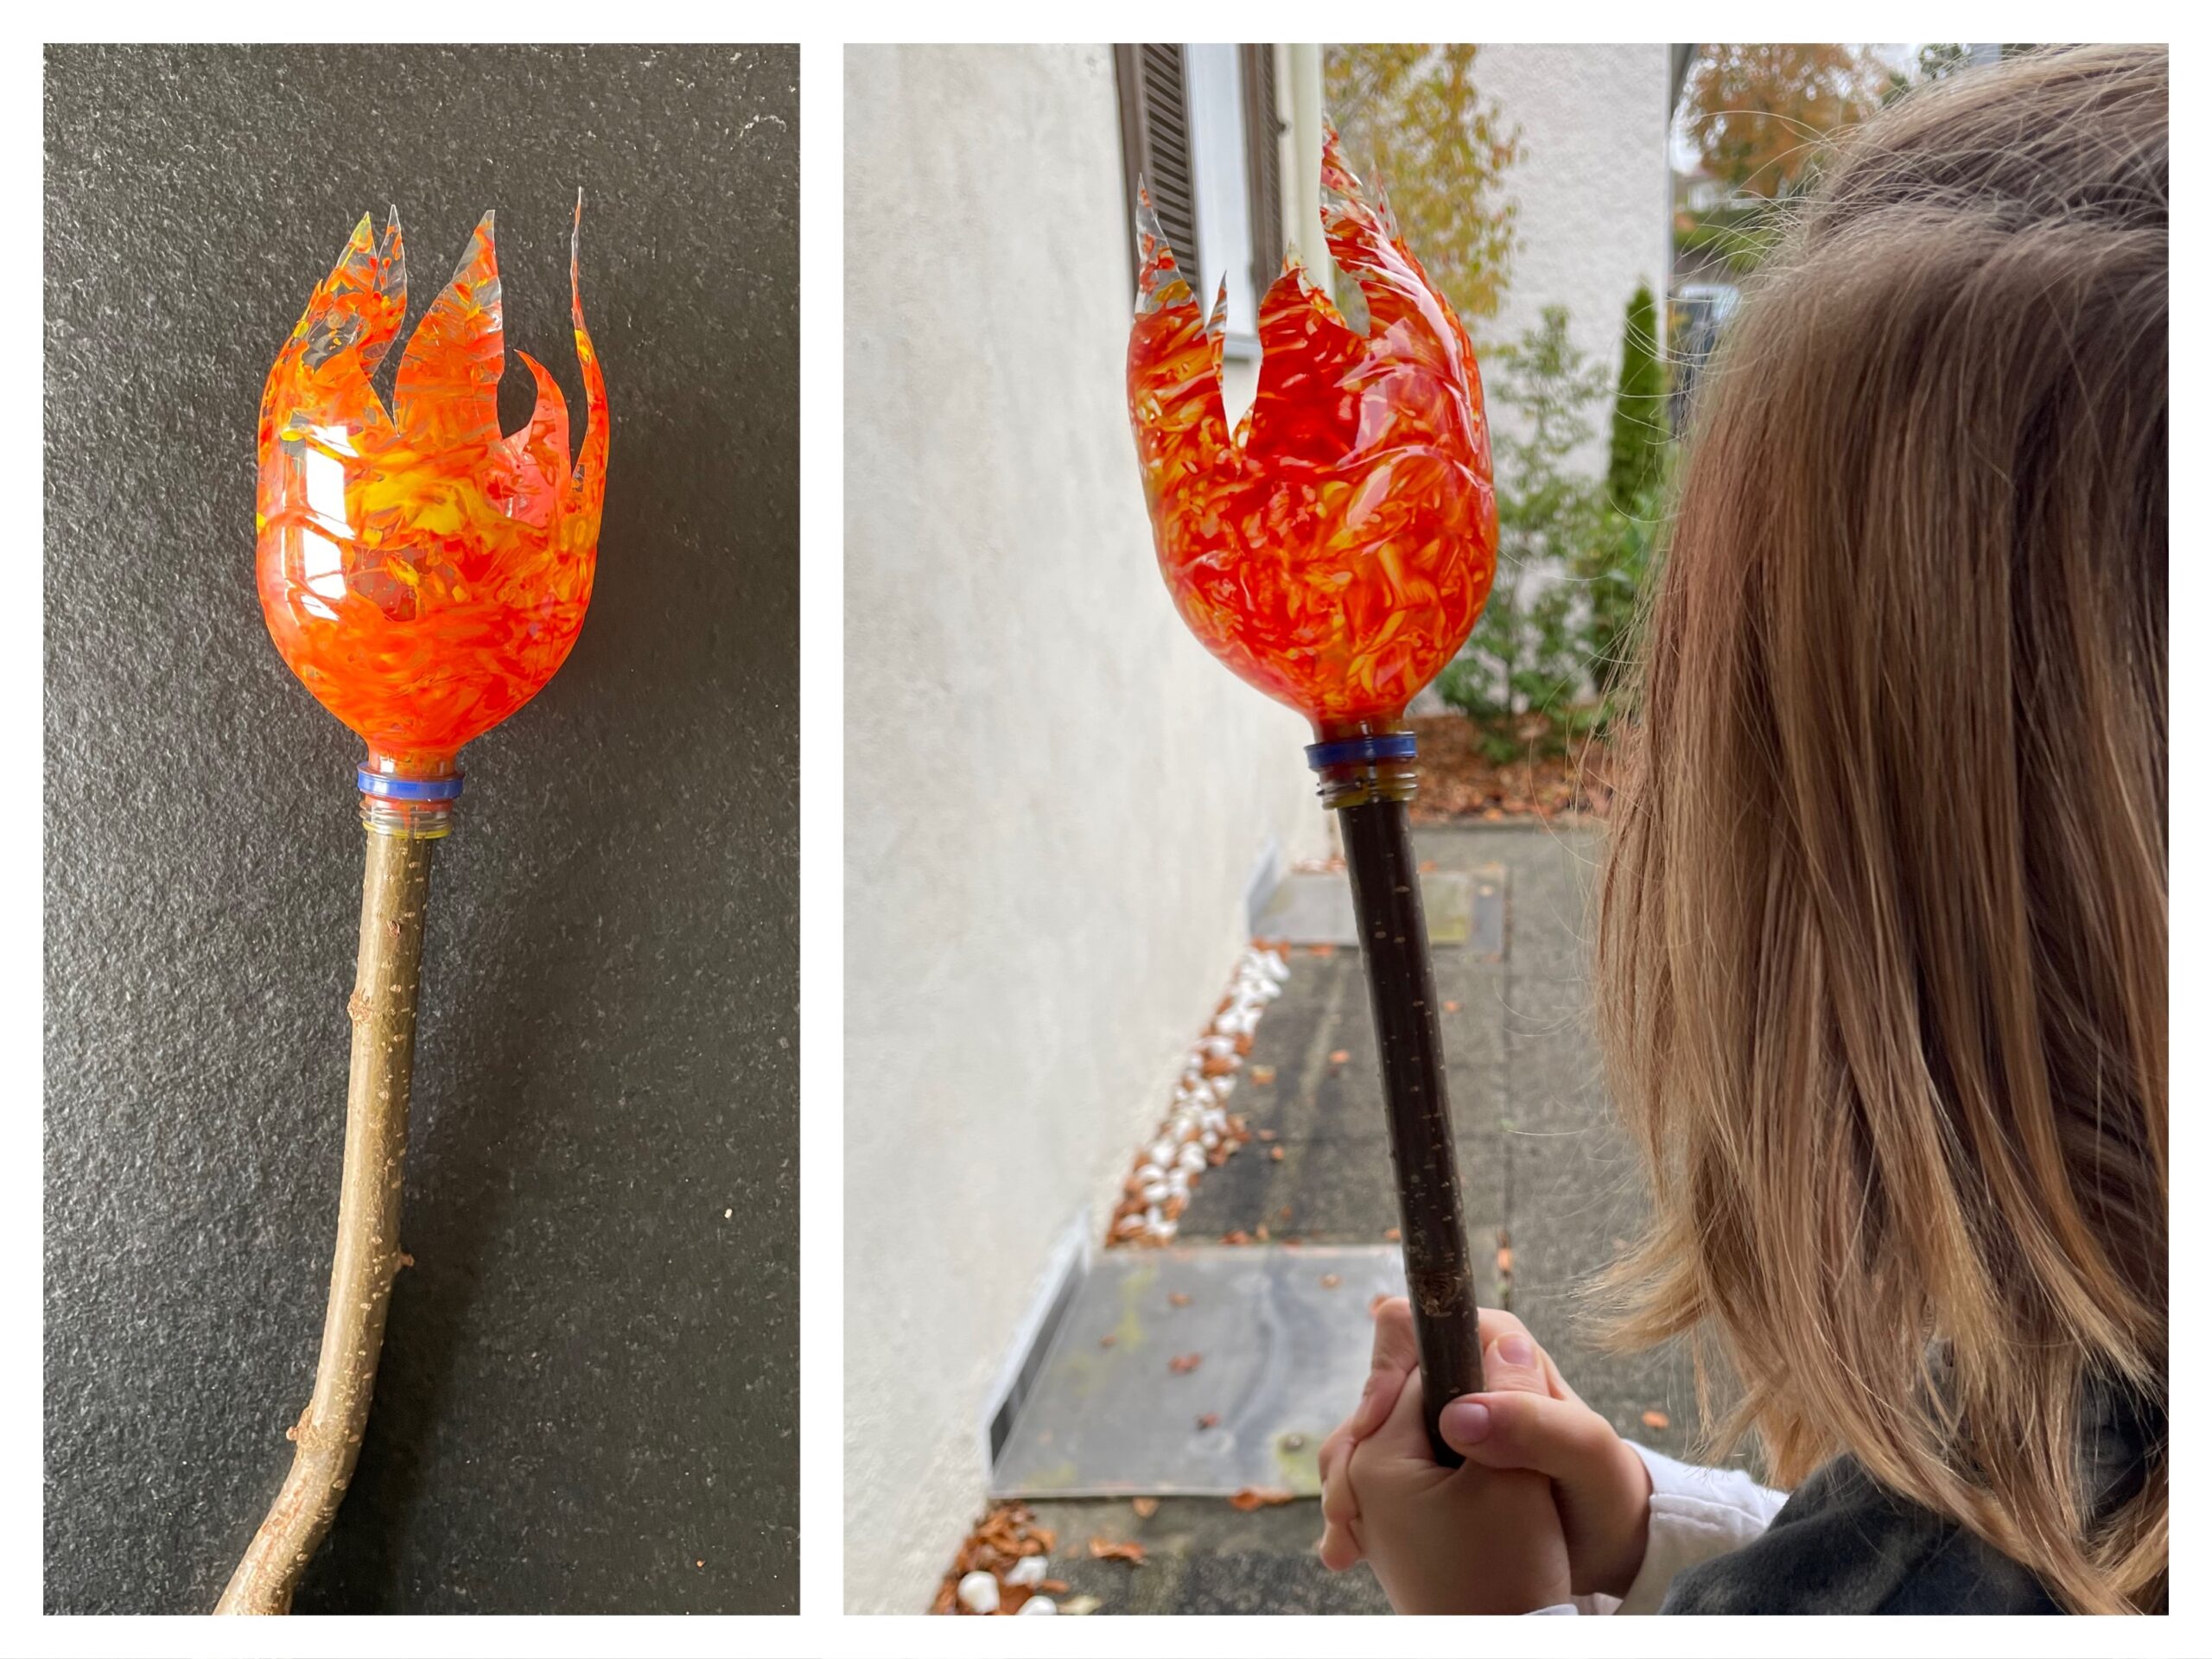
Bild zum Schritt 8 für das Bastel- und DIY-Abenteuer für Kinder: 'Damit die Flamme richtig leuchtet, kannst du eine kleine Mini-Lichterkette...'

9

Enjoy the crafts, the lantern parade or the night hike.
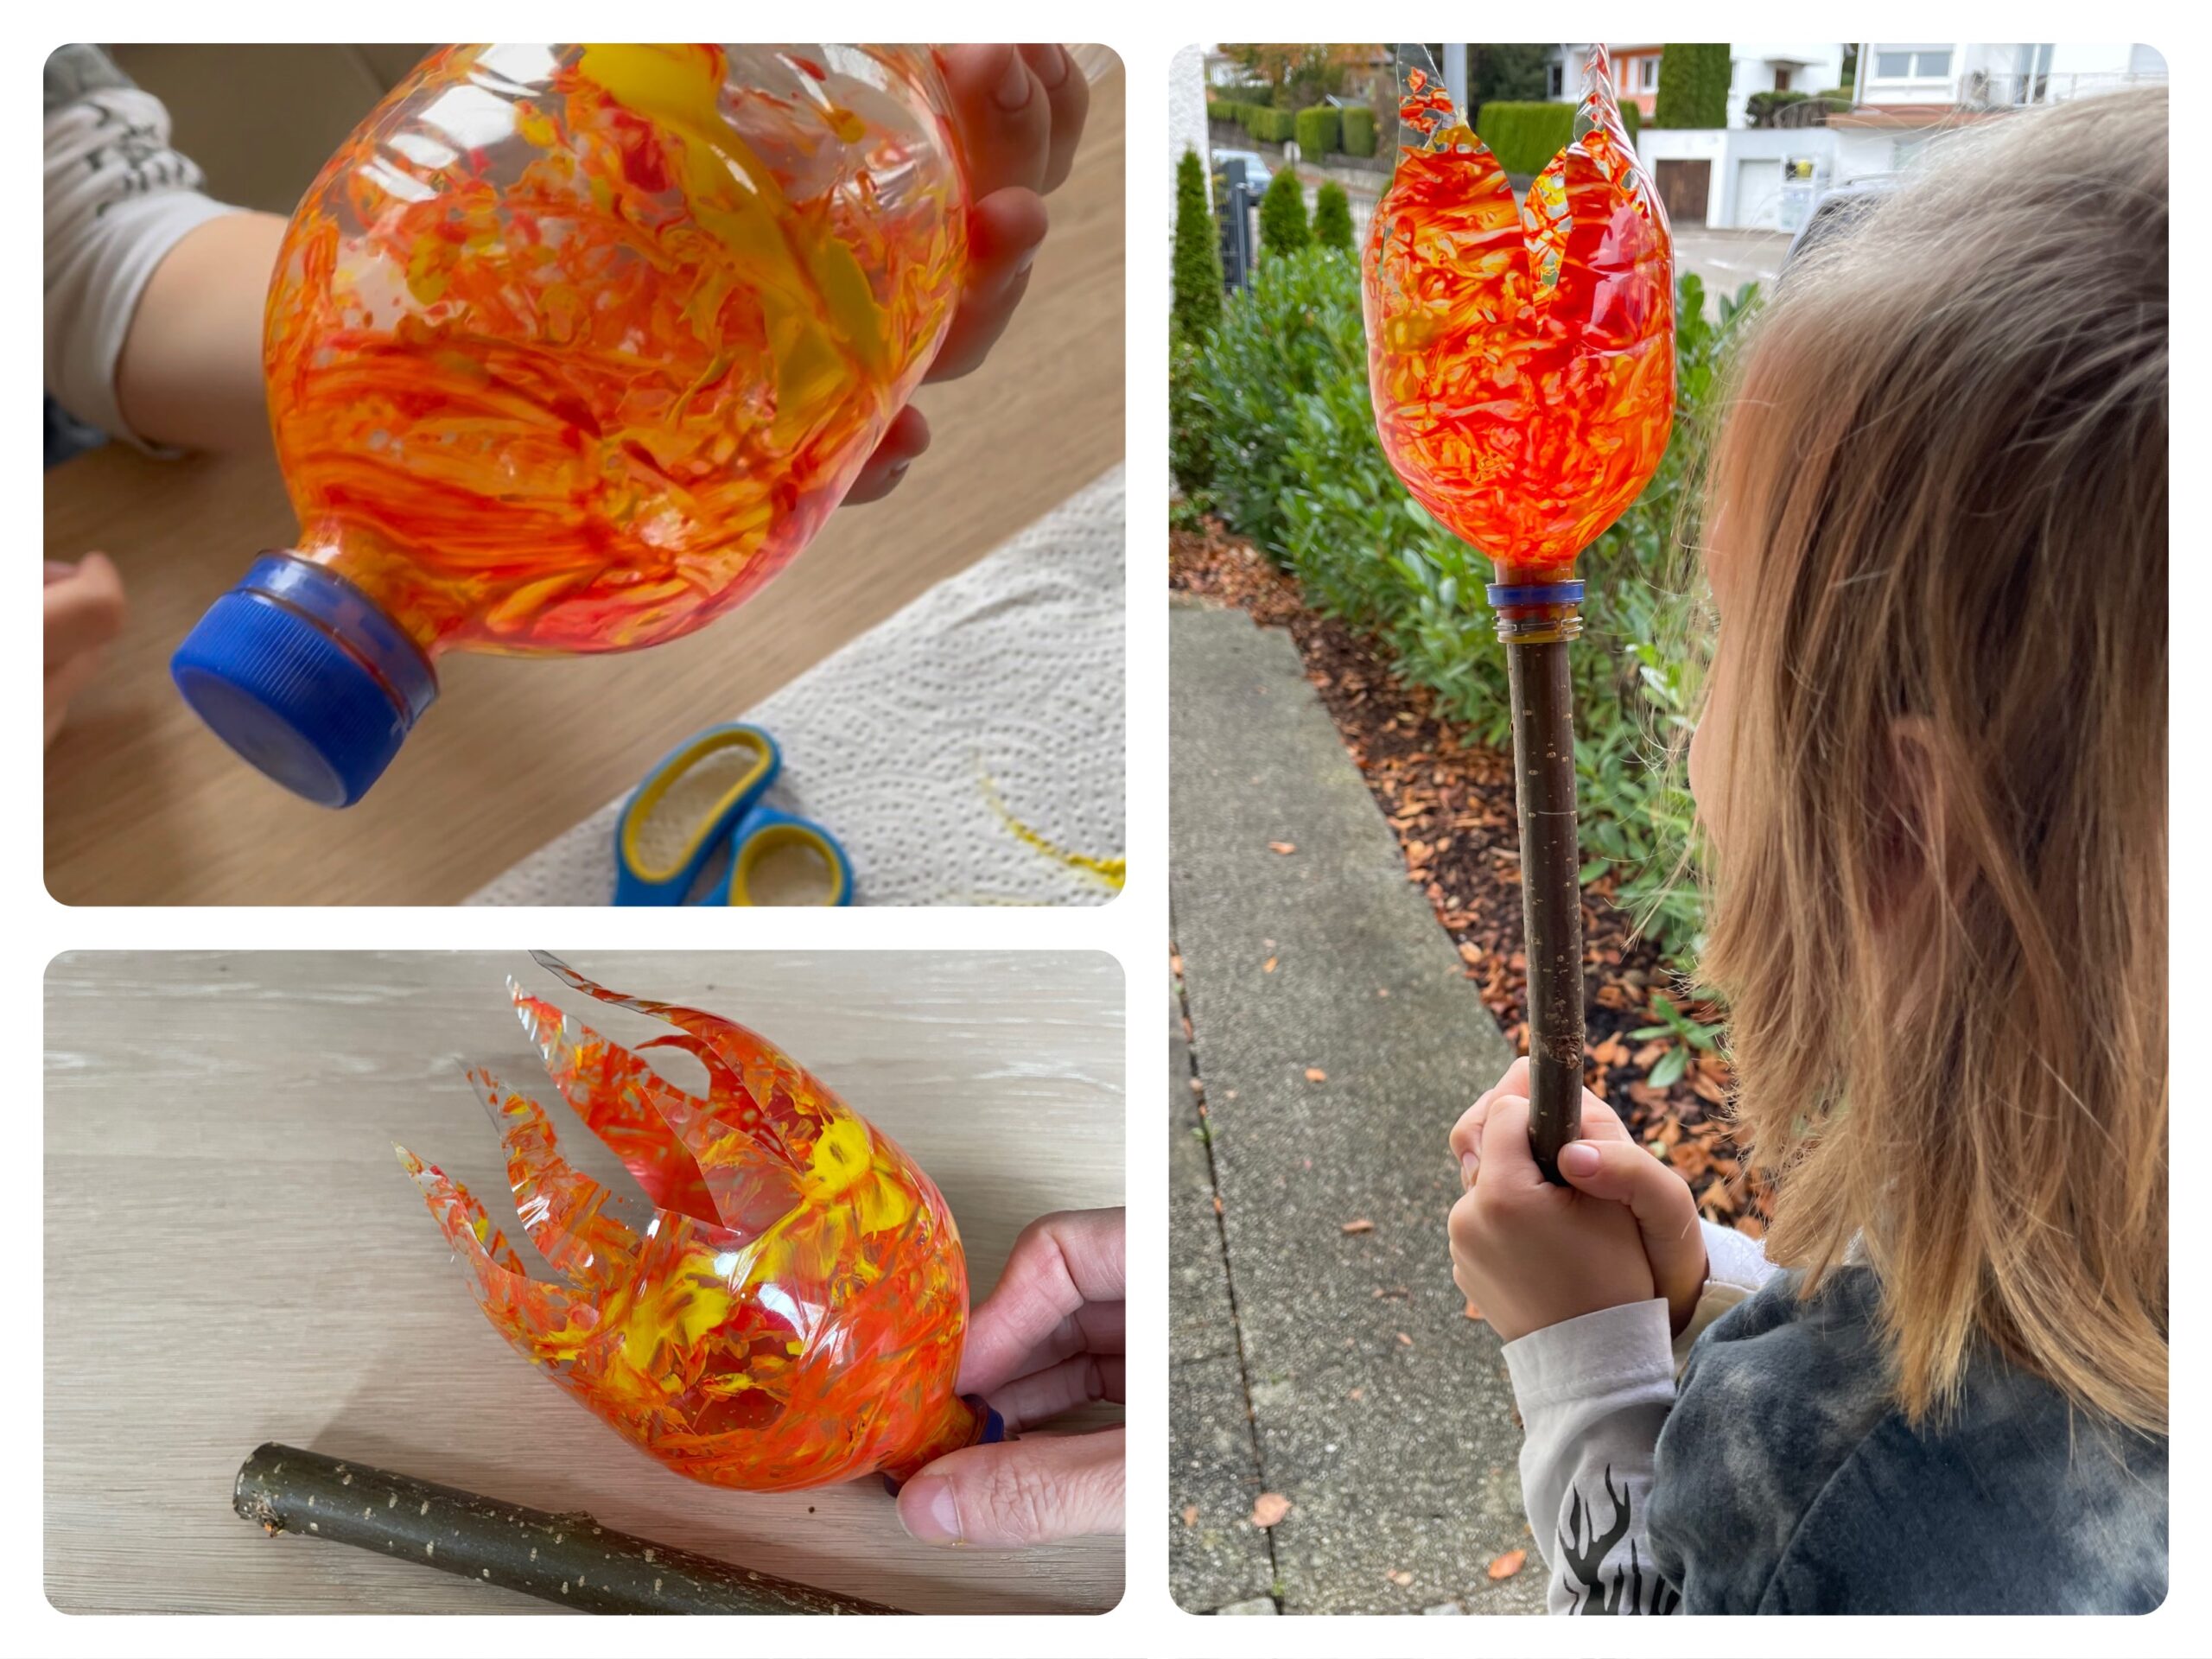
Bild zum Schritt 9 für das Bastel- und DIY-Abenteuer für Kinder: 'Viel Freude beim Basteln, auf dem Laternenumzug oder bei der...'

10

Stay creative!

Torch – lantern making – torch making

Follow us on Facebook , Instagram and Pinterest
Don't miss any more adventures: Our bottle mail

Leave a Reply

Your email address will not be published.

The maximum upload file size: 5 MB. You can upload: image, document. Drop file here