Print Options:

Make a flower of cardboard roll

Material for1 ChildPrep Time5 min.Adv. Time20 min.Total Time25 min.

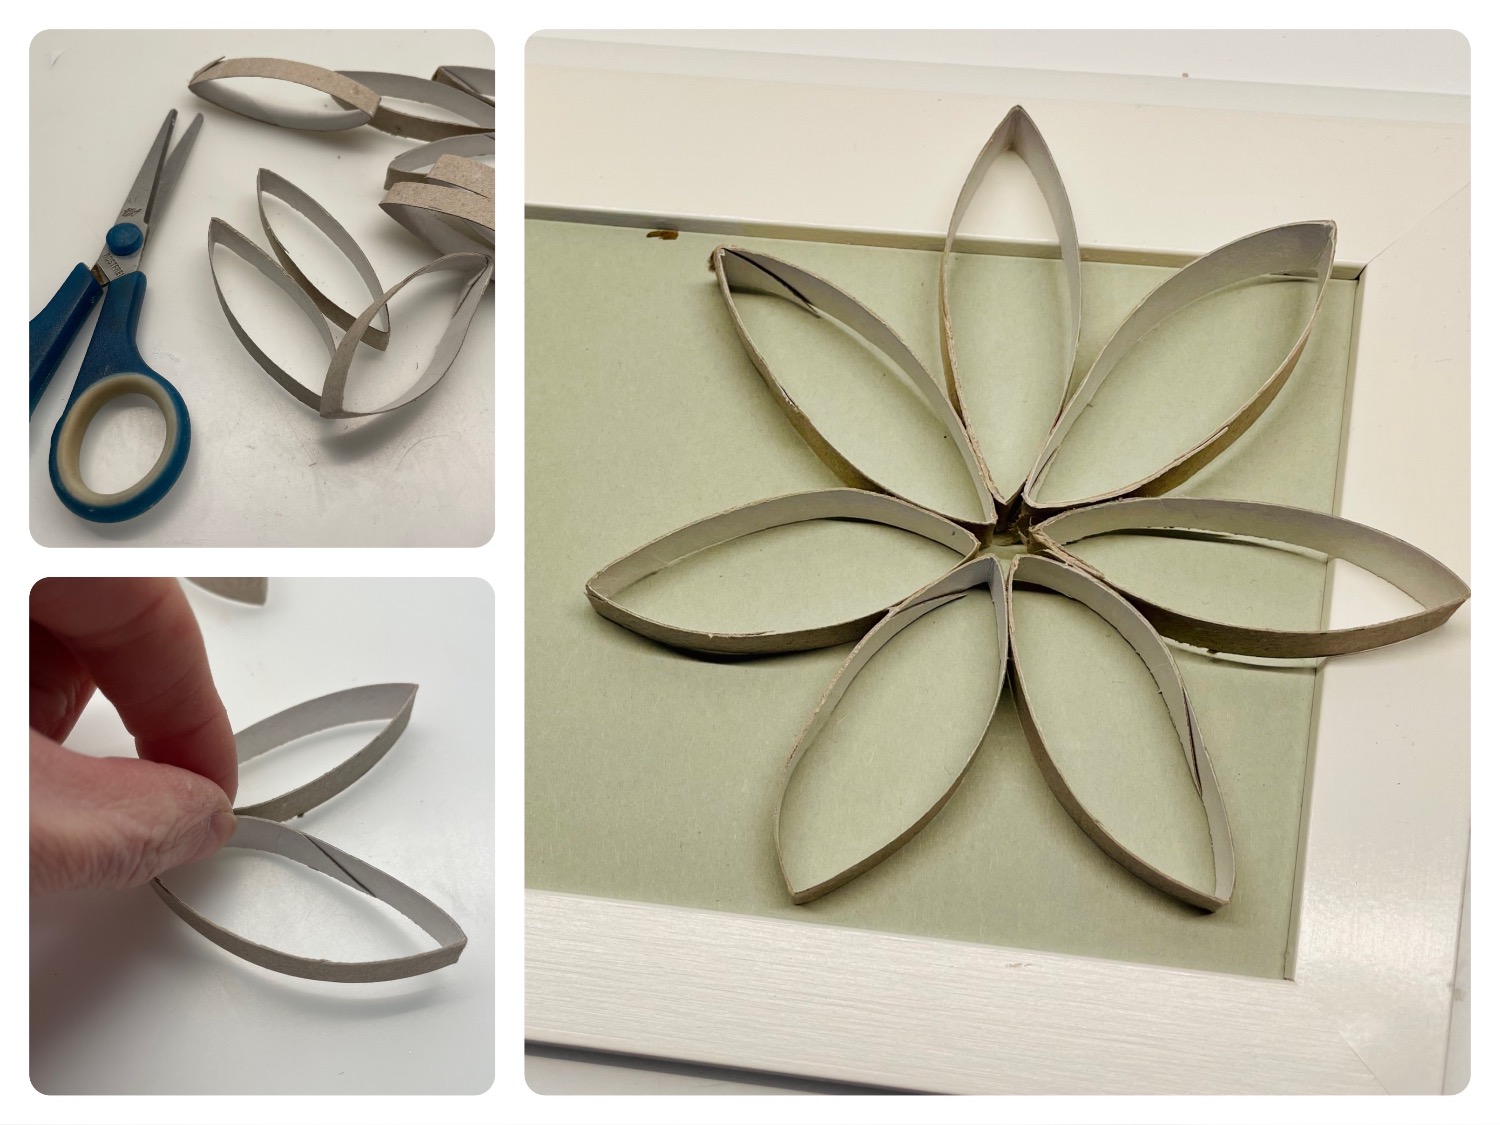
For this flower you cut a cardboard roll (cloroll) into thin strips. If you press the cardboard roll first, then you can even double cut the cardboard. From each strip a petal is created. These individual petals then stick together on one side leaf by leaf to form a circle. The flower wreath is finished. You can now paint it or decorate it as you like. Try it out, it's not difficult!

Titelbild zur Bastel- und DIY-Idee für Kinder '(1025) Blume aus Papprolle basteln'

 1 Rolled paper
 1 Ruler
 1 Pencil
 1 Scissors
 1 Adhesive pen
 1 Builder's pad
 Thread for hanging
All links marked with a shopping cart lead to Amazon - here we have selected products that we would order ourselves and in part also ordered. In a qualified purchase via the advertising link, we as Amazon partner receive a commission, for you there are no costs. You thus support our cost- and advertising banner-free, educational offer.
1

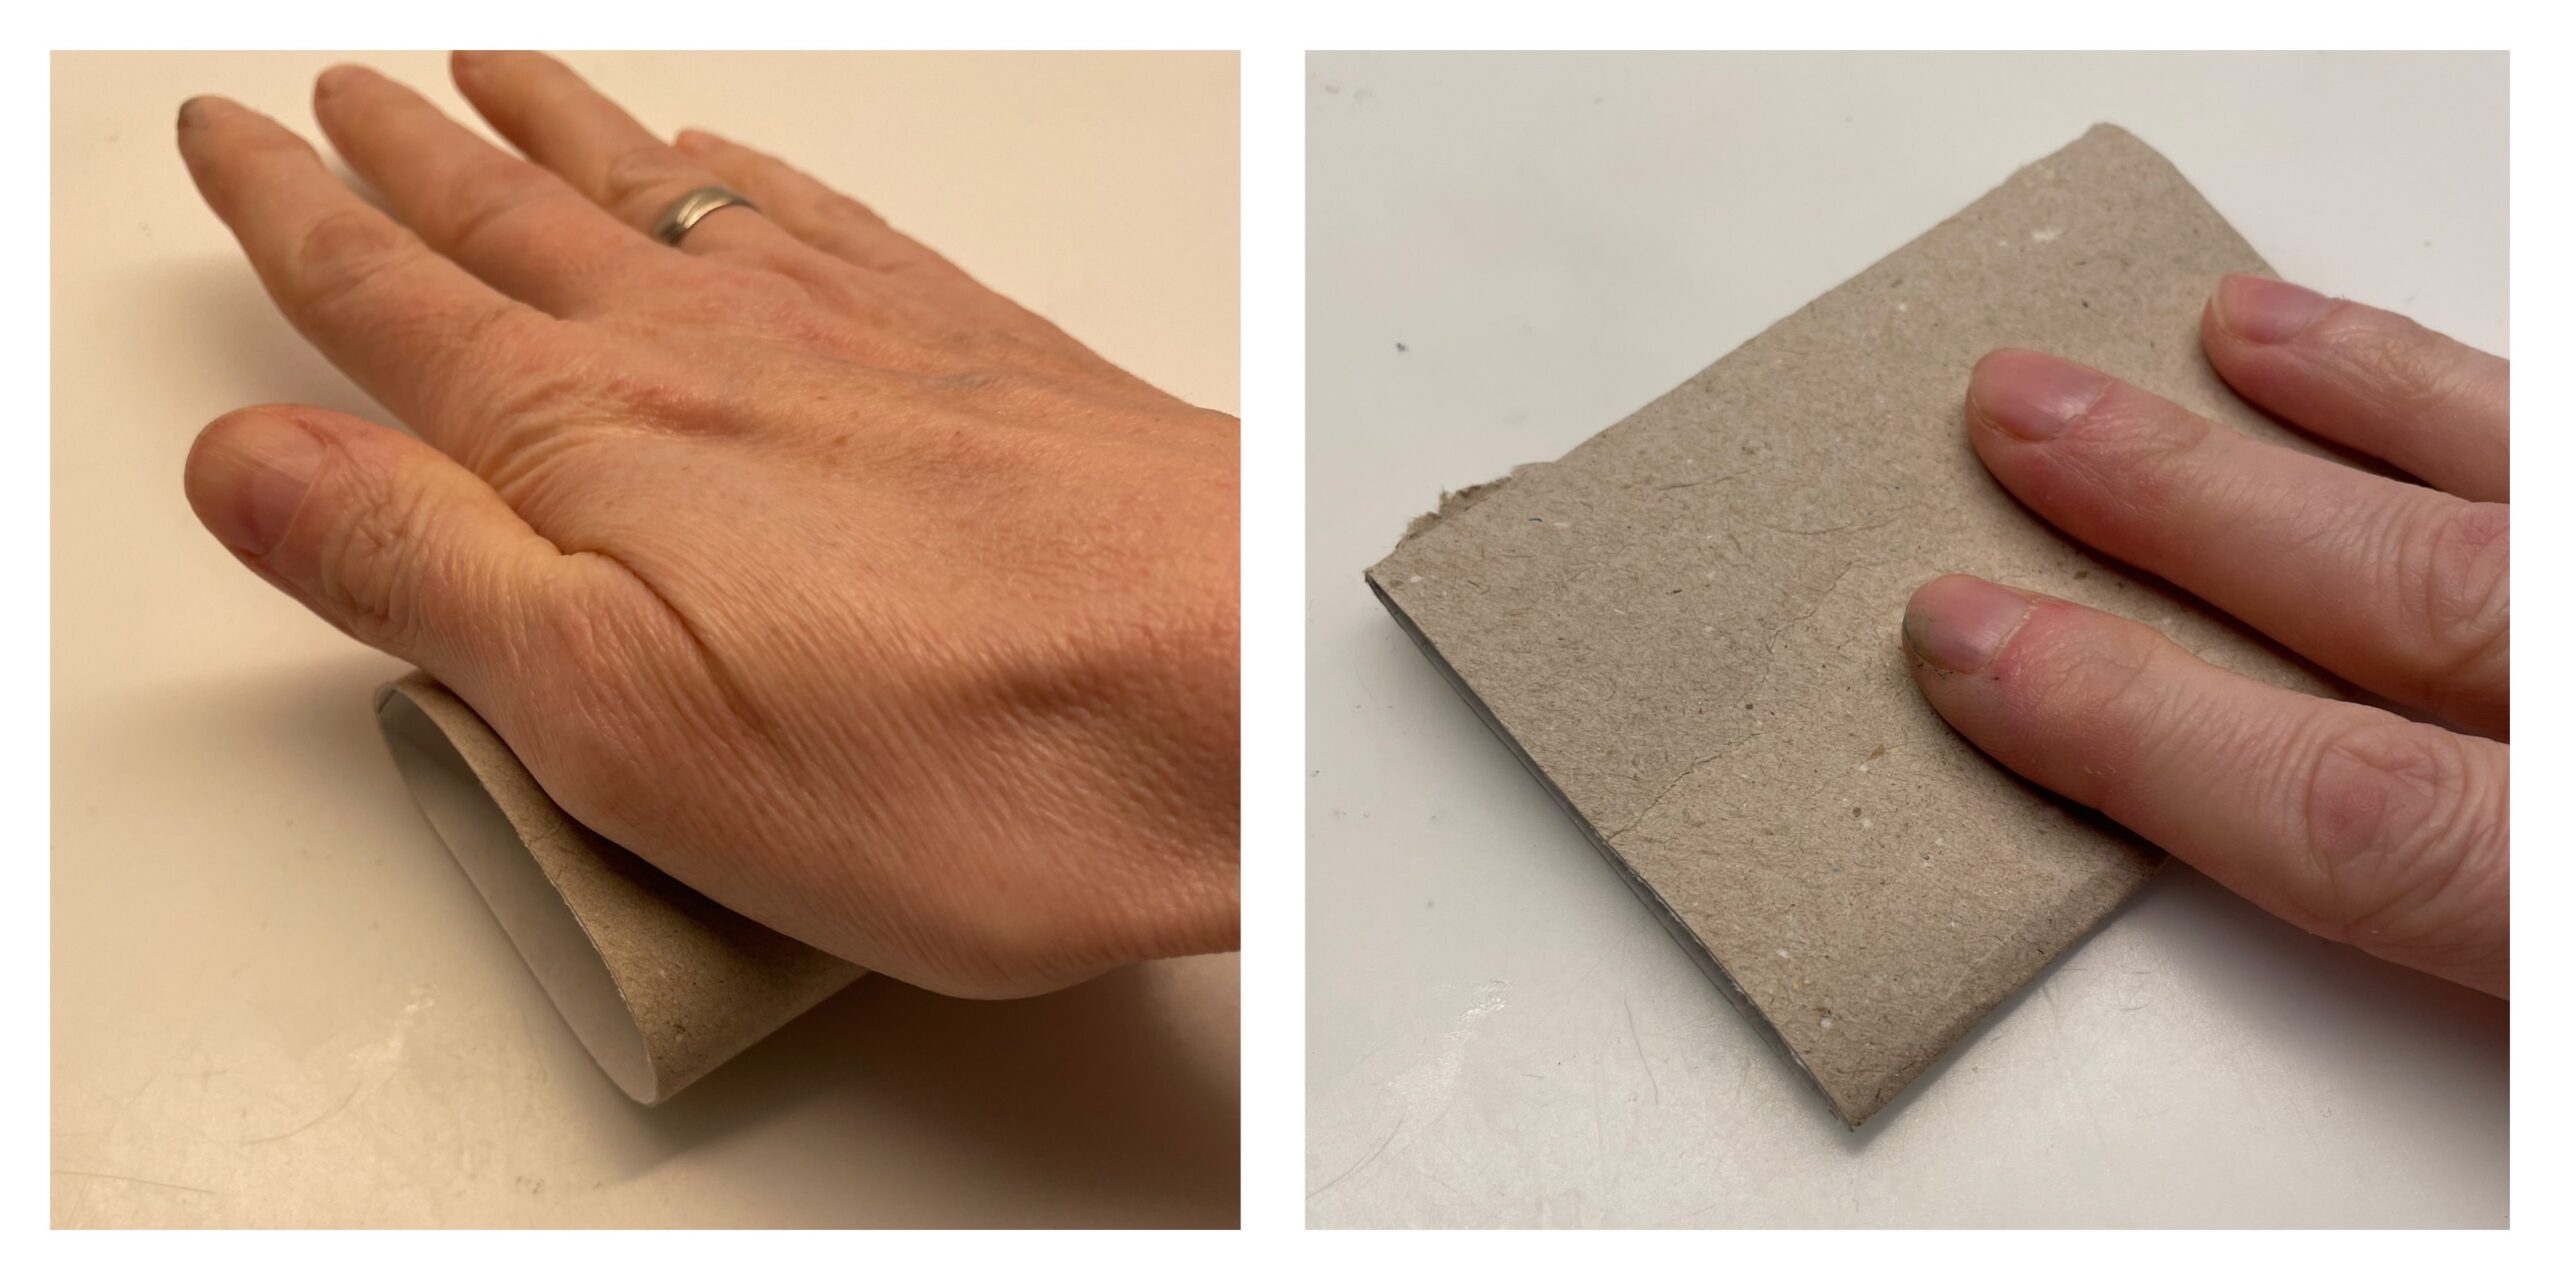
First, put the cardboard roll on the table and squeeze it with the flat hand.

Bild zum Schritt 1 für das Bastel- und DIY-Abenteuer für Kinder: 'Zuerst legt ihr die Papprolle auf den Tisch und drückt...'

2

Then put a ruler on the cardboard roll and mark each centimeter with a pencil.

Bild zum Schritt 2 für das Bastel- und DIY-Abenteuer für Kinder: 'Anschließend legt ihr ein Lineal auf die Papprolle und markiert...'

3

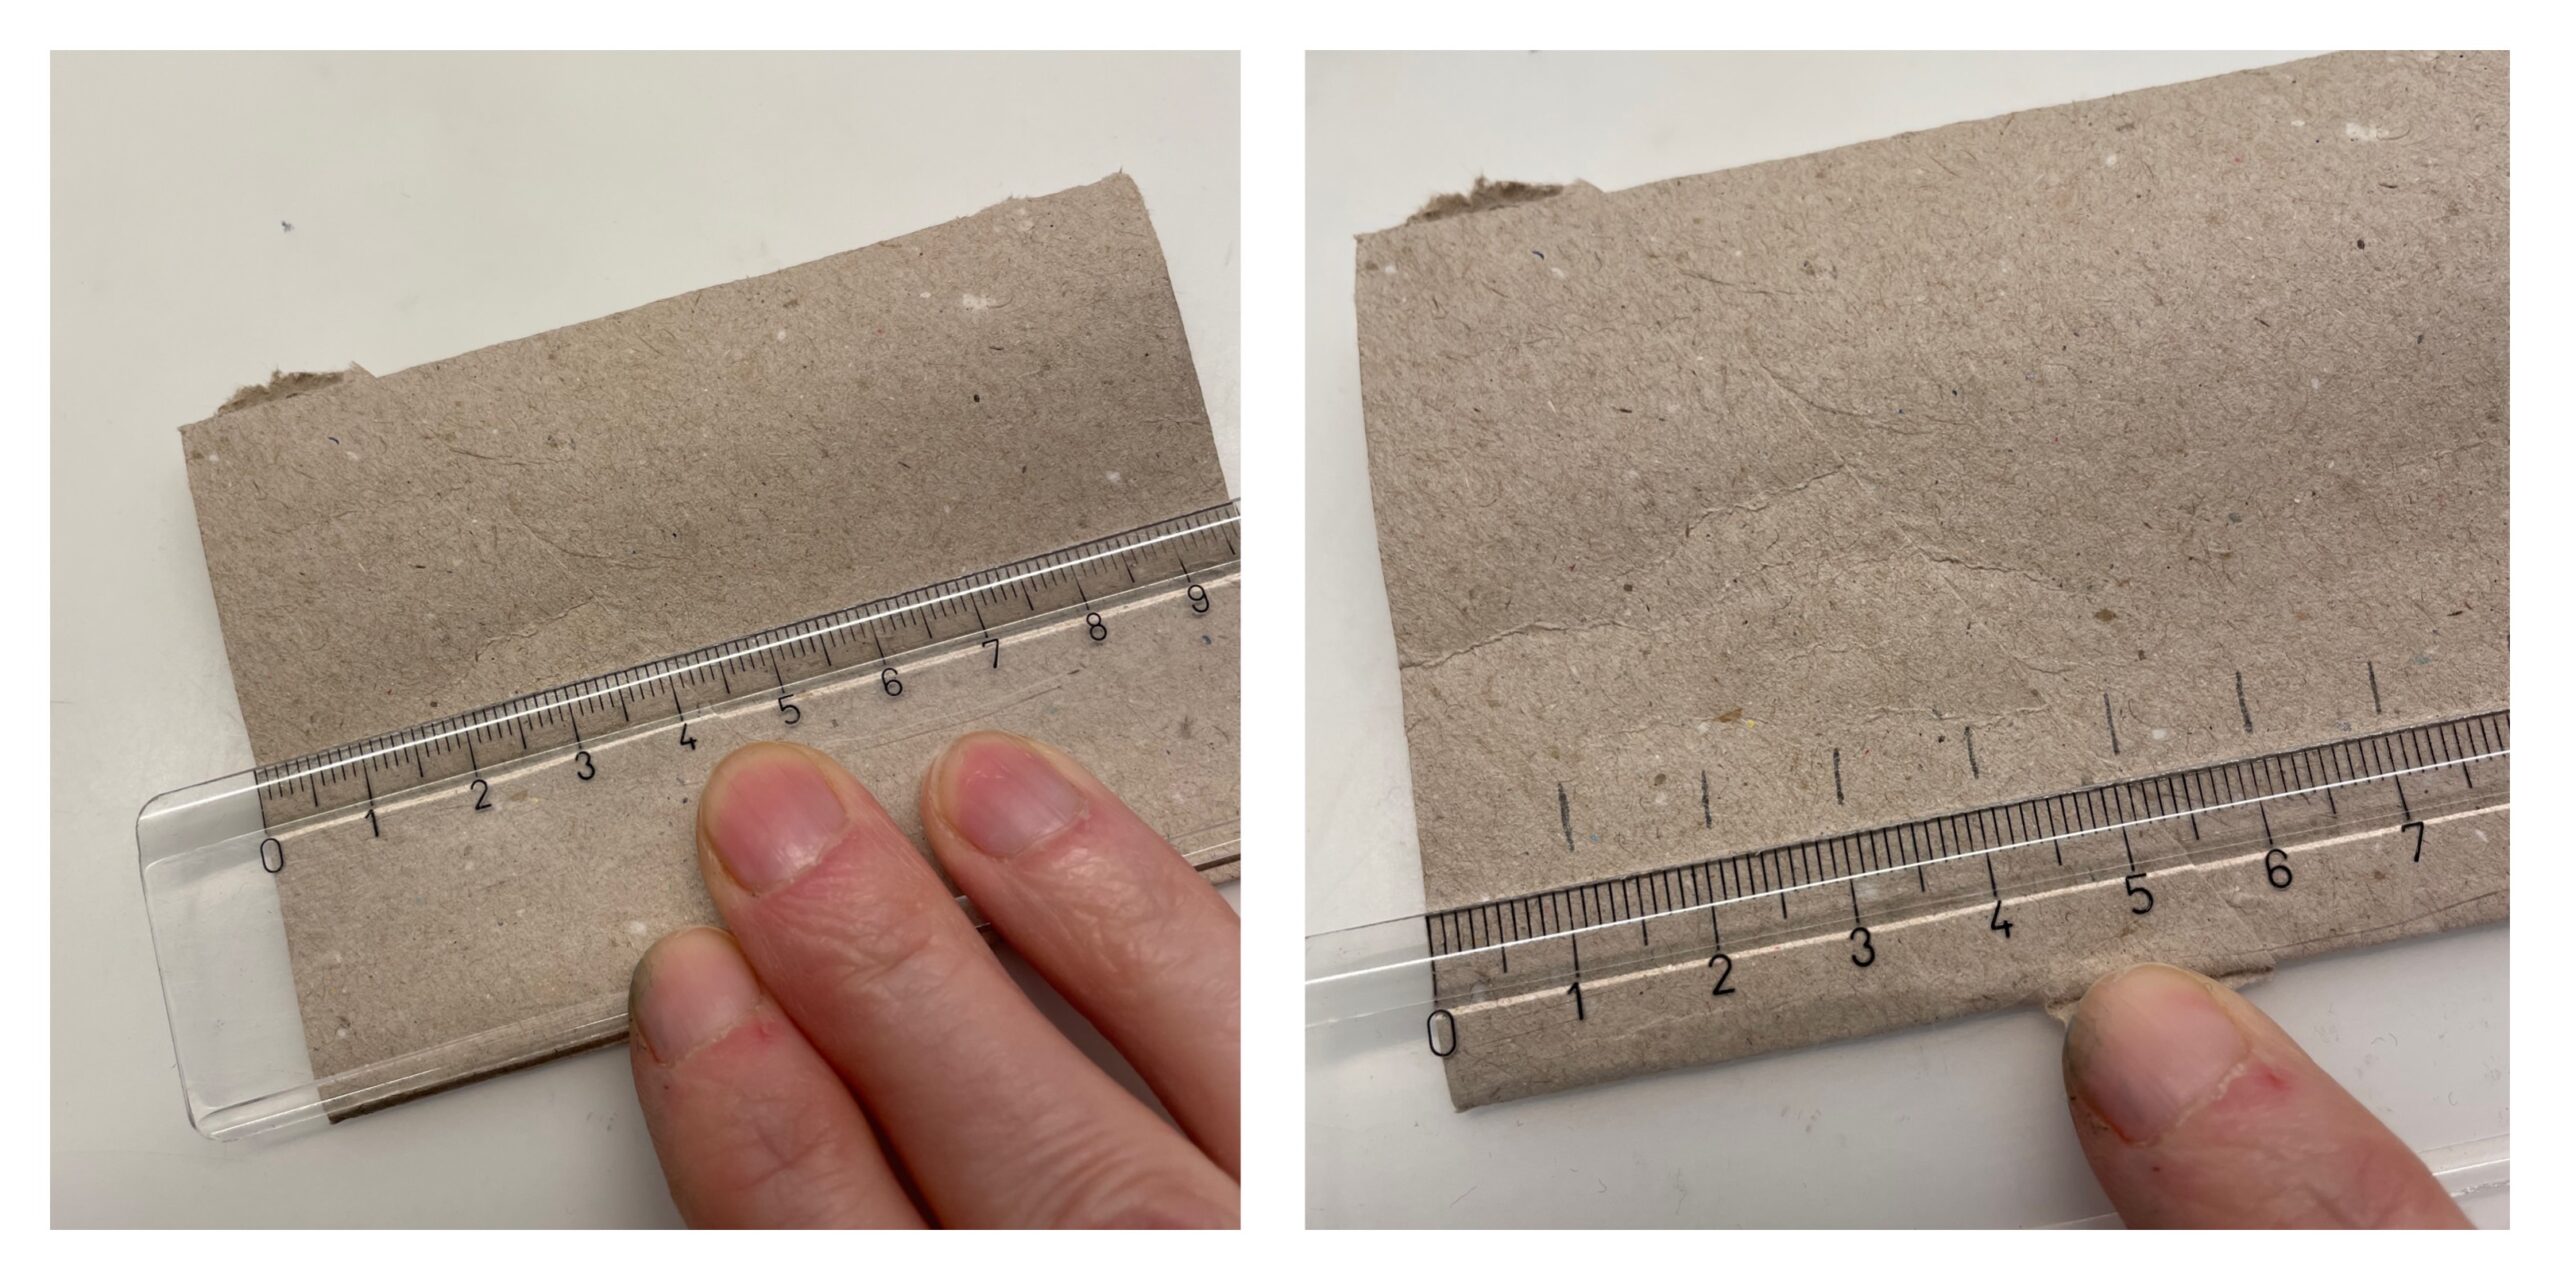
Then you cut the roll along each marking into narrow strips.

Bild zum Schritt 3 für das Bastel- und DIY-Abenteuer für Kinder: 'Anschließend schneidet ihr die Rolle entlang jeder Markierung in schmale...'

4

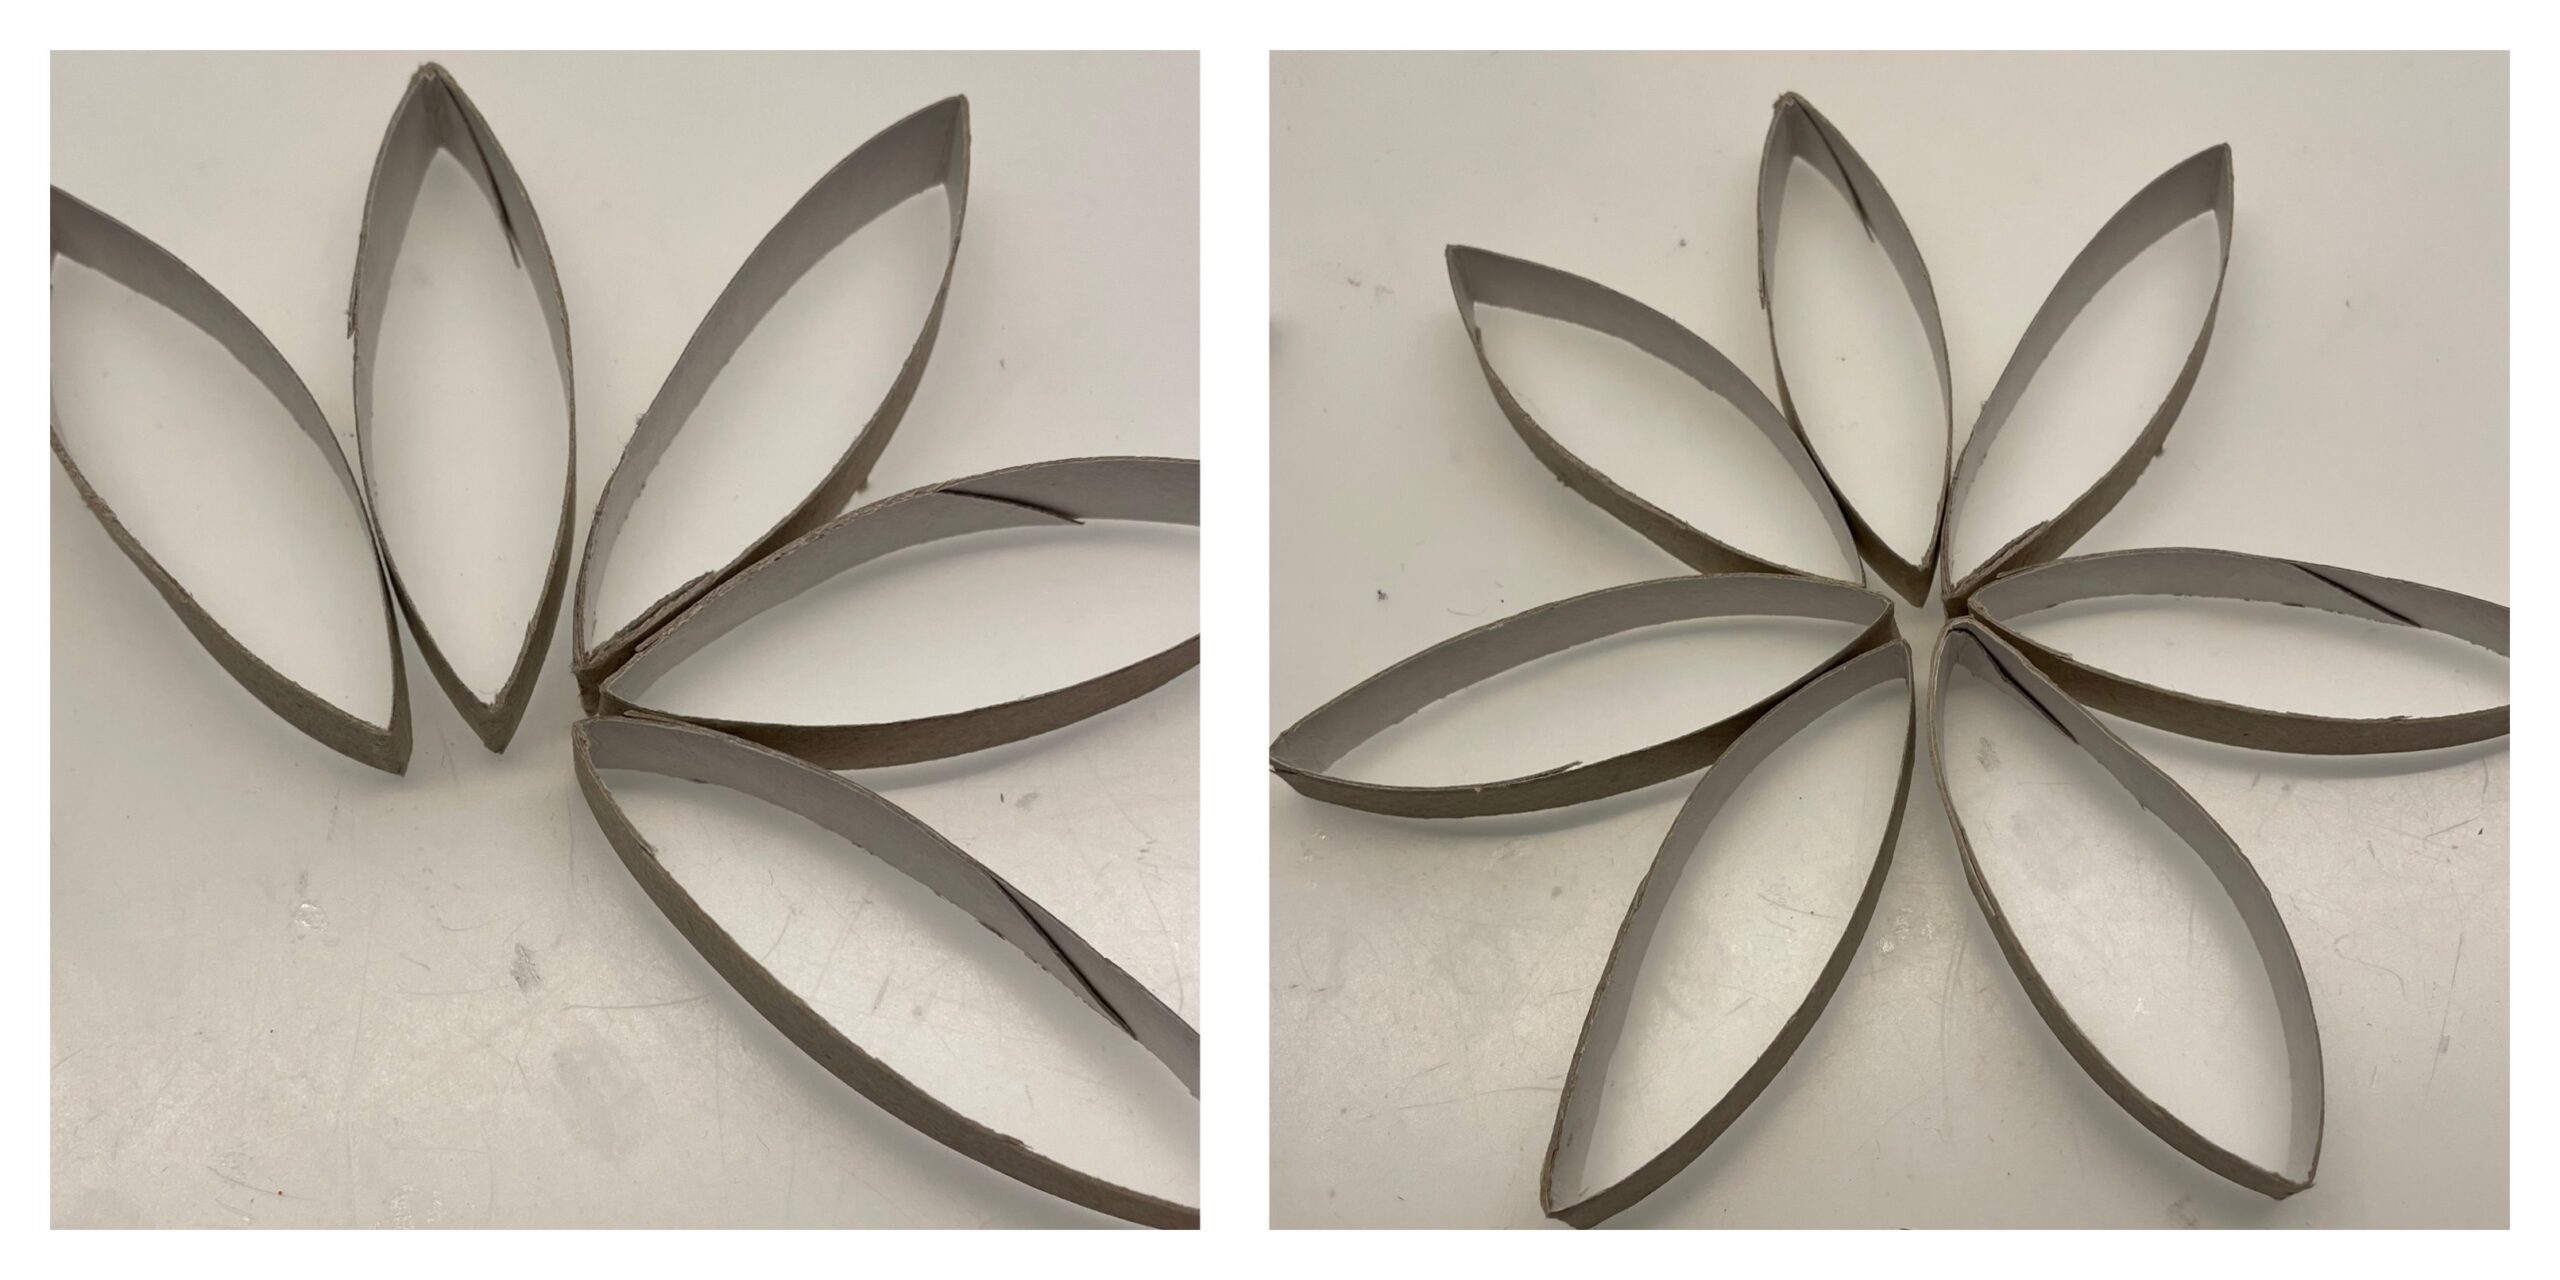
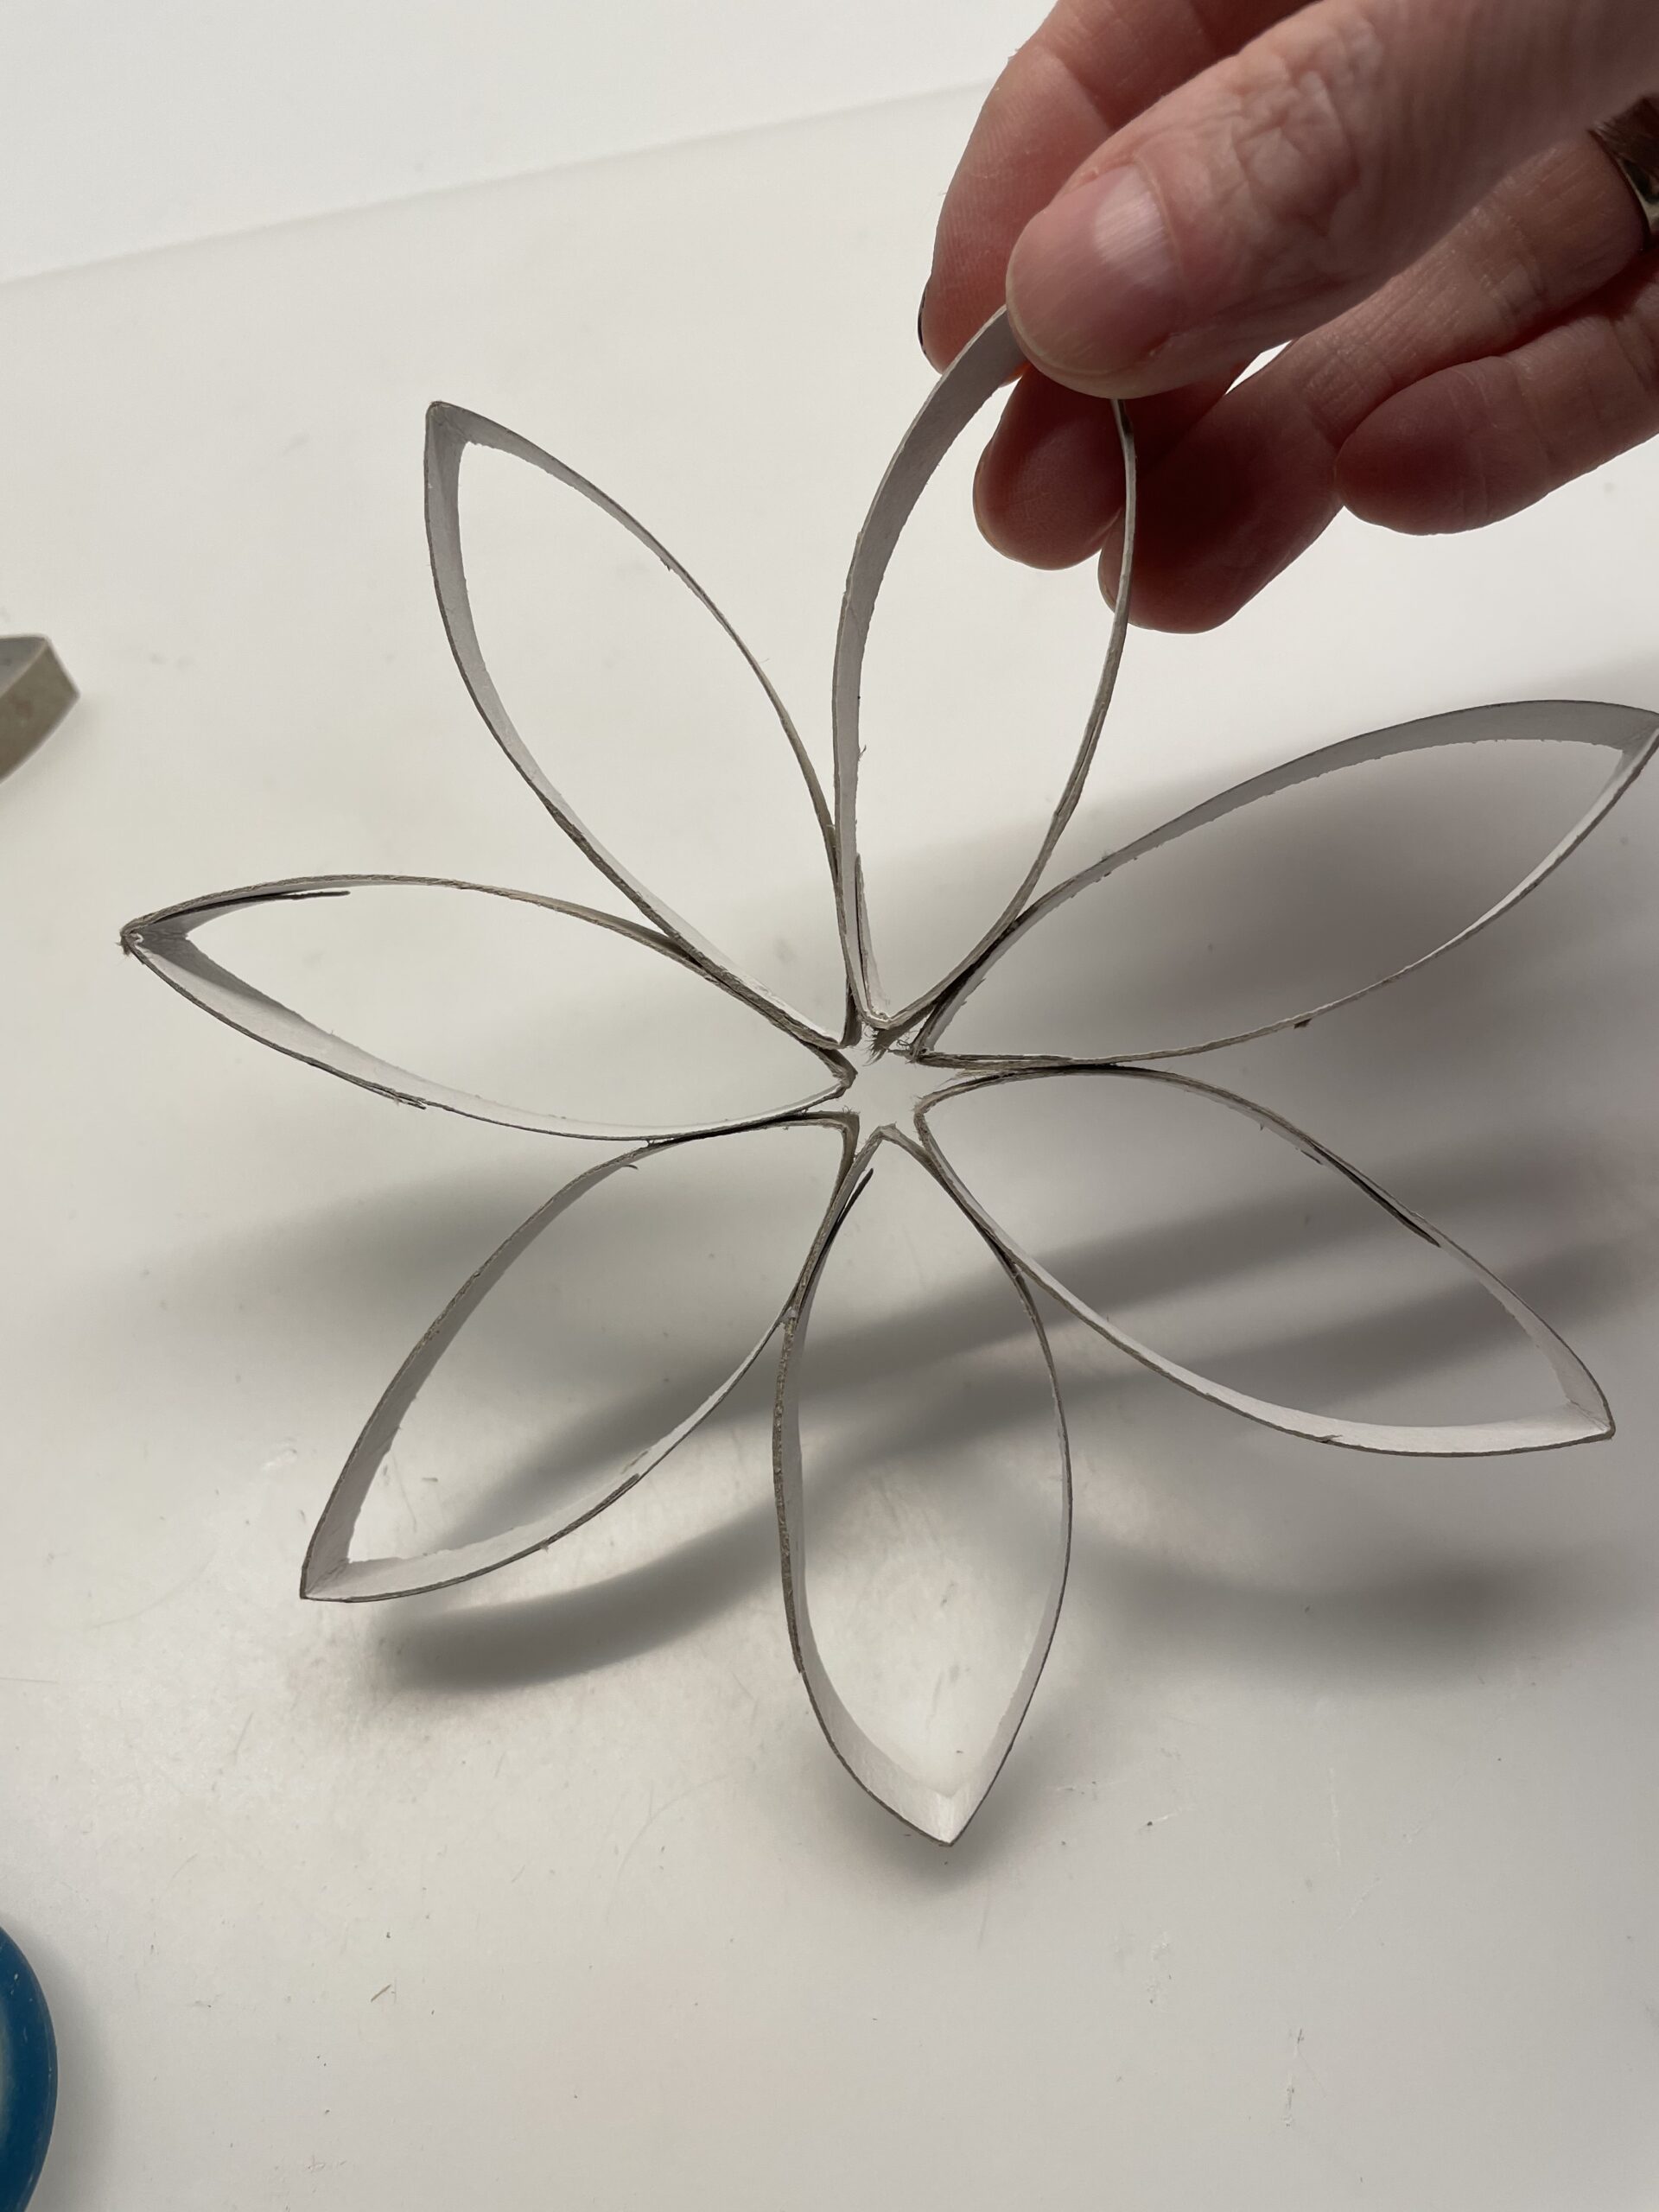
This creates the individual cardboard rolls in the form of a petal.

Bild zum Schritt 4 für das Bastel- und DIY-Abenteuer für Kinder: 'So entstehen die einzelnen Papprollen-Streifen in Form eines Blütenblatts.'

5

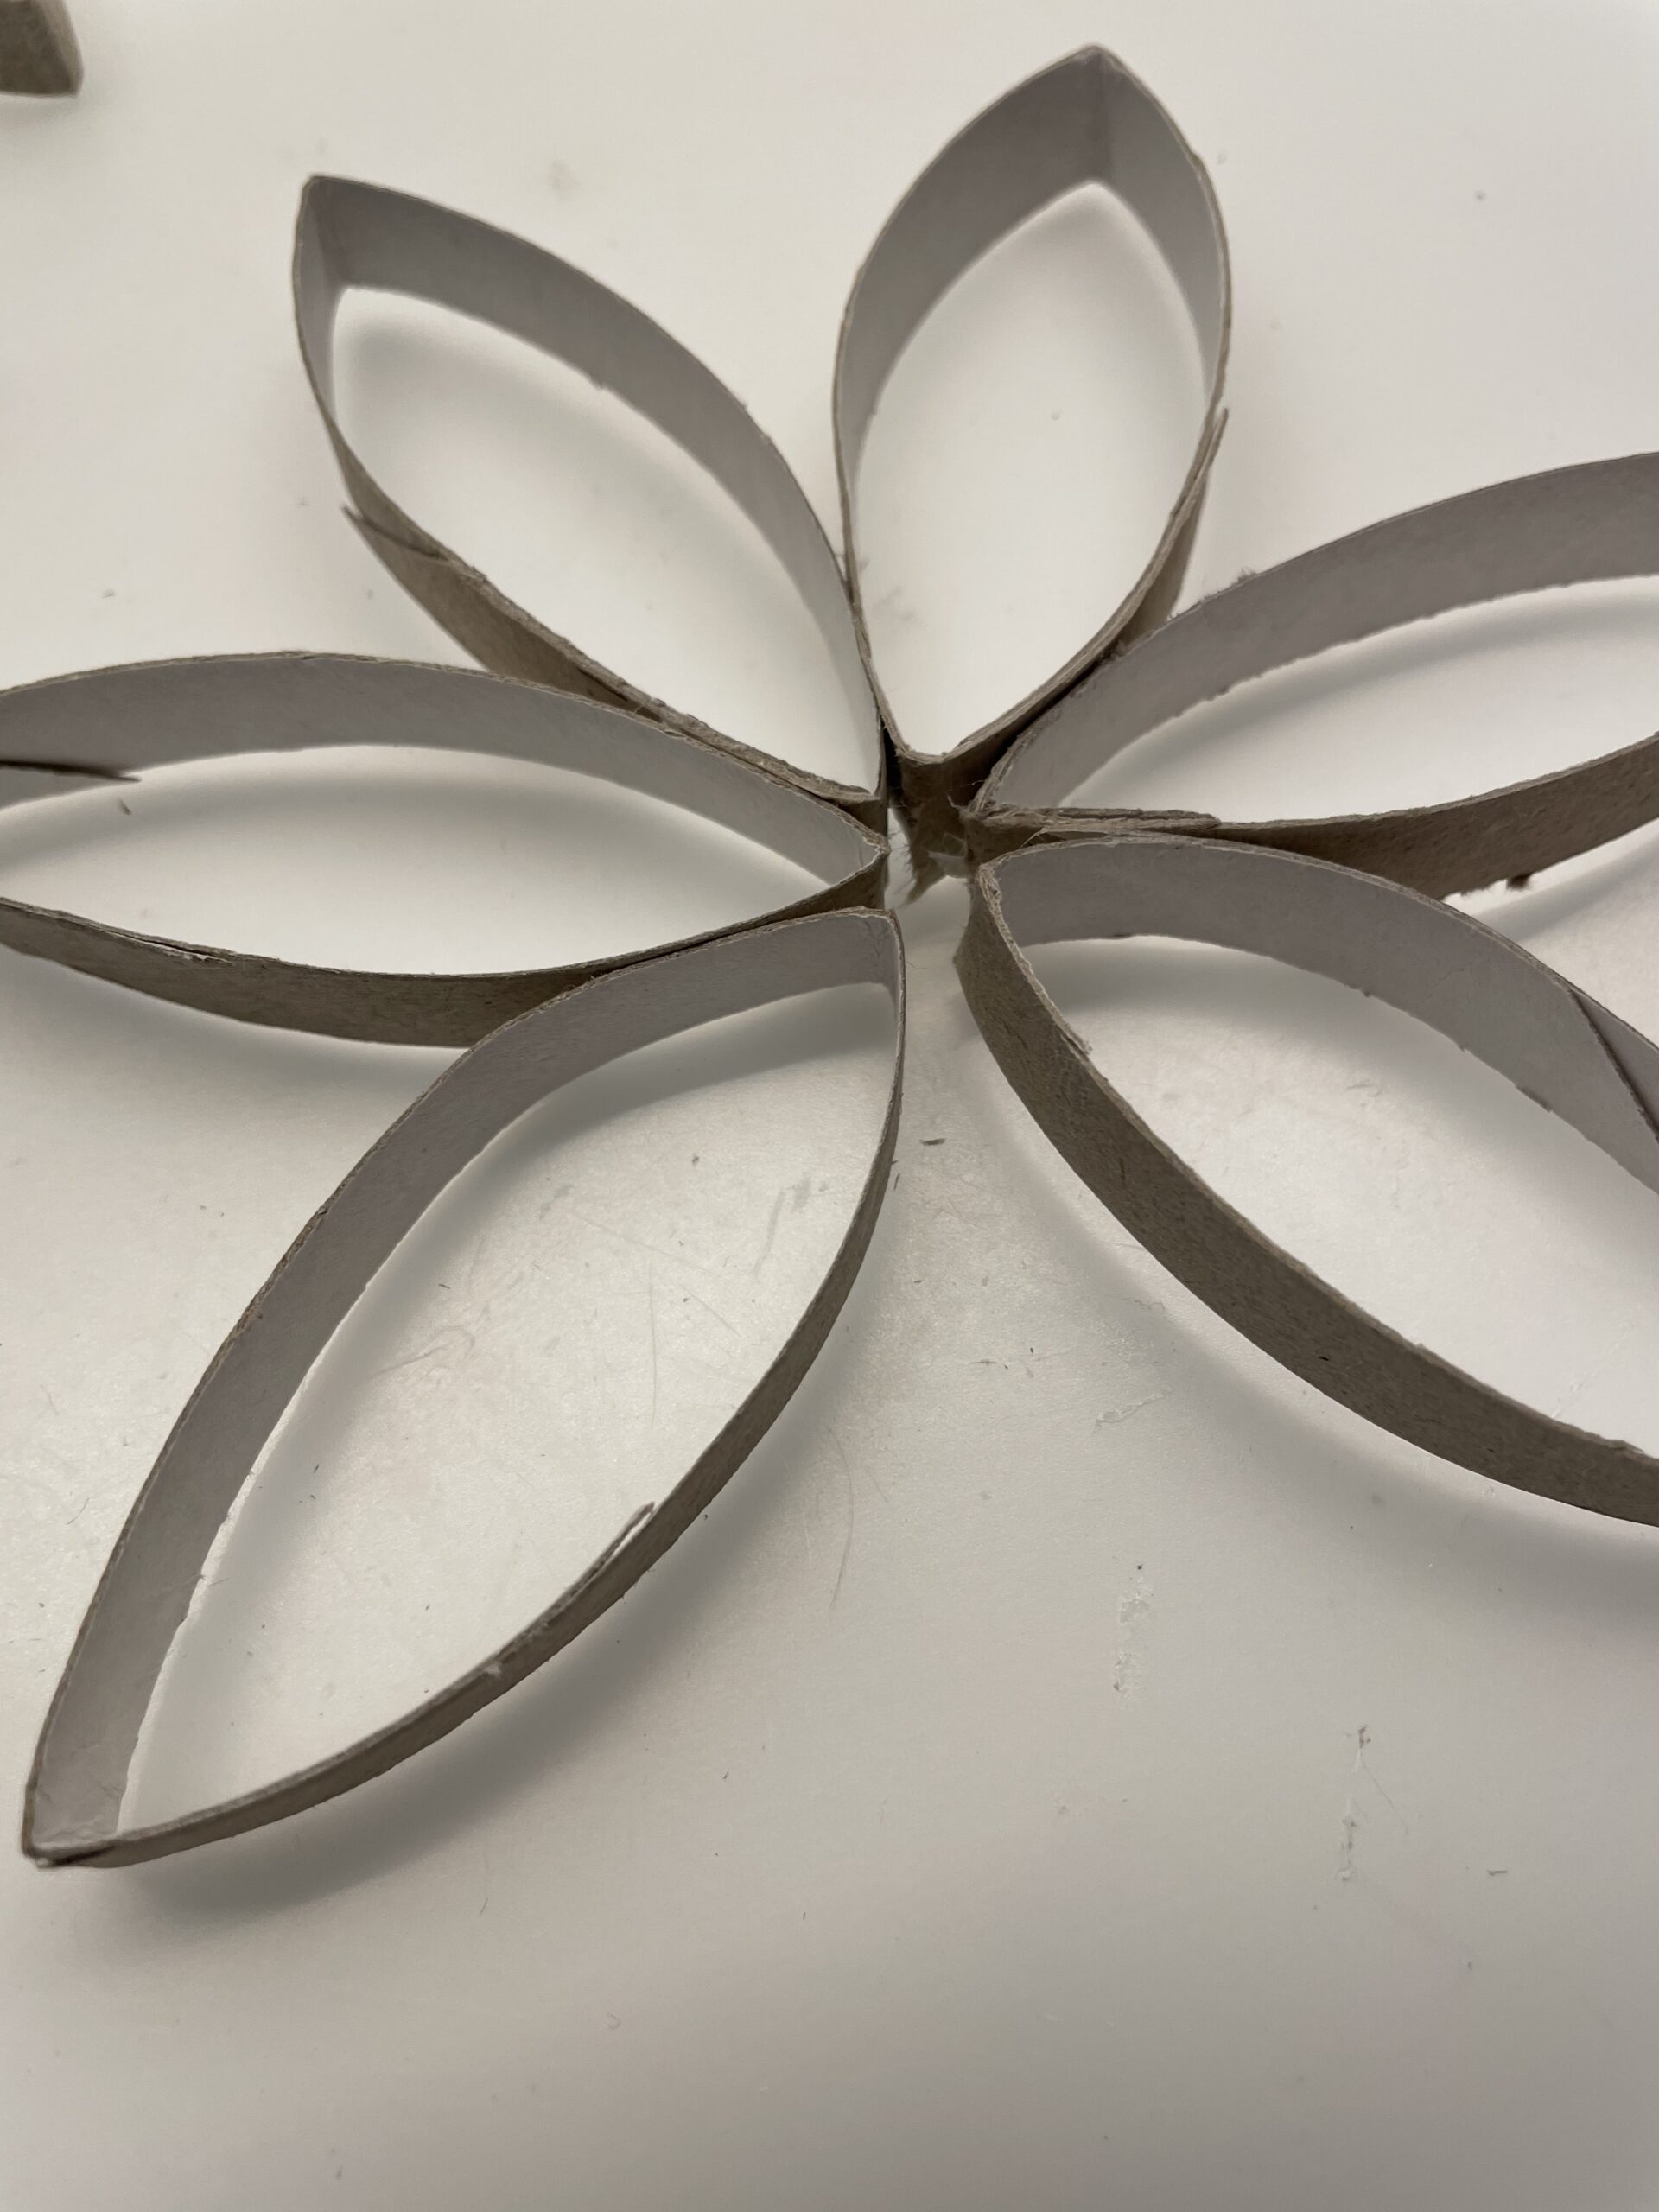
Put the petals together to form a circle at each point.

Bild zum Schritt 5 für das Bastel- und DIY-Abenteuer für Kinder: 'Legt die Blütenblätter an jeweils einer Spitze zu einem Kreis...'

6

Then glue the first two petals together with glue. Place an adhesive point on the side of the tip and press a second strip on it.

Bild zum Schritt 6 für das Bastel- und DIY-Abenteuer für Kinder: 'Anschließend klebt ihr die ersten zwei Blütenblätter mit Kleber zusammen....'

7

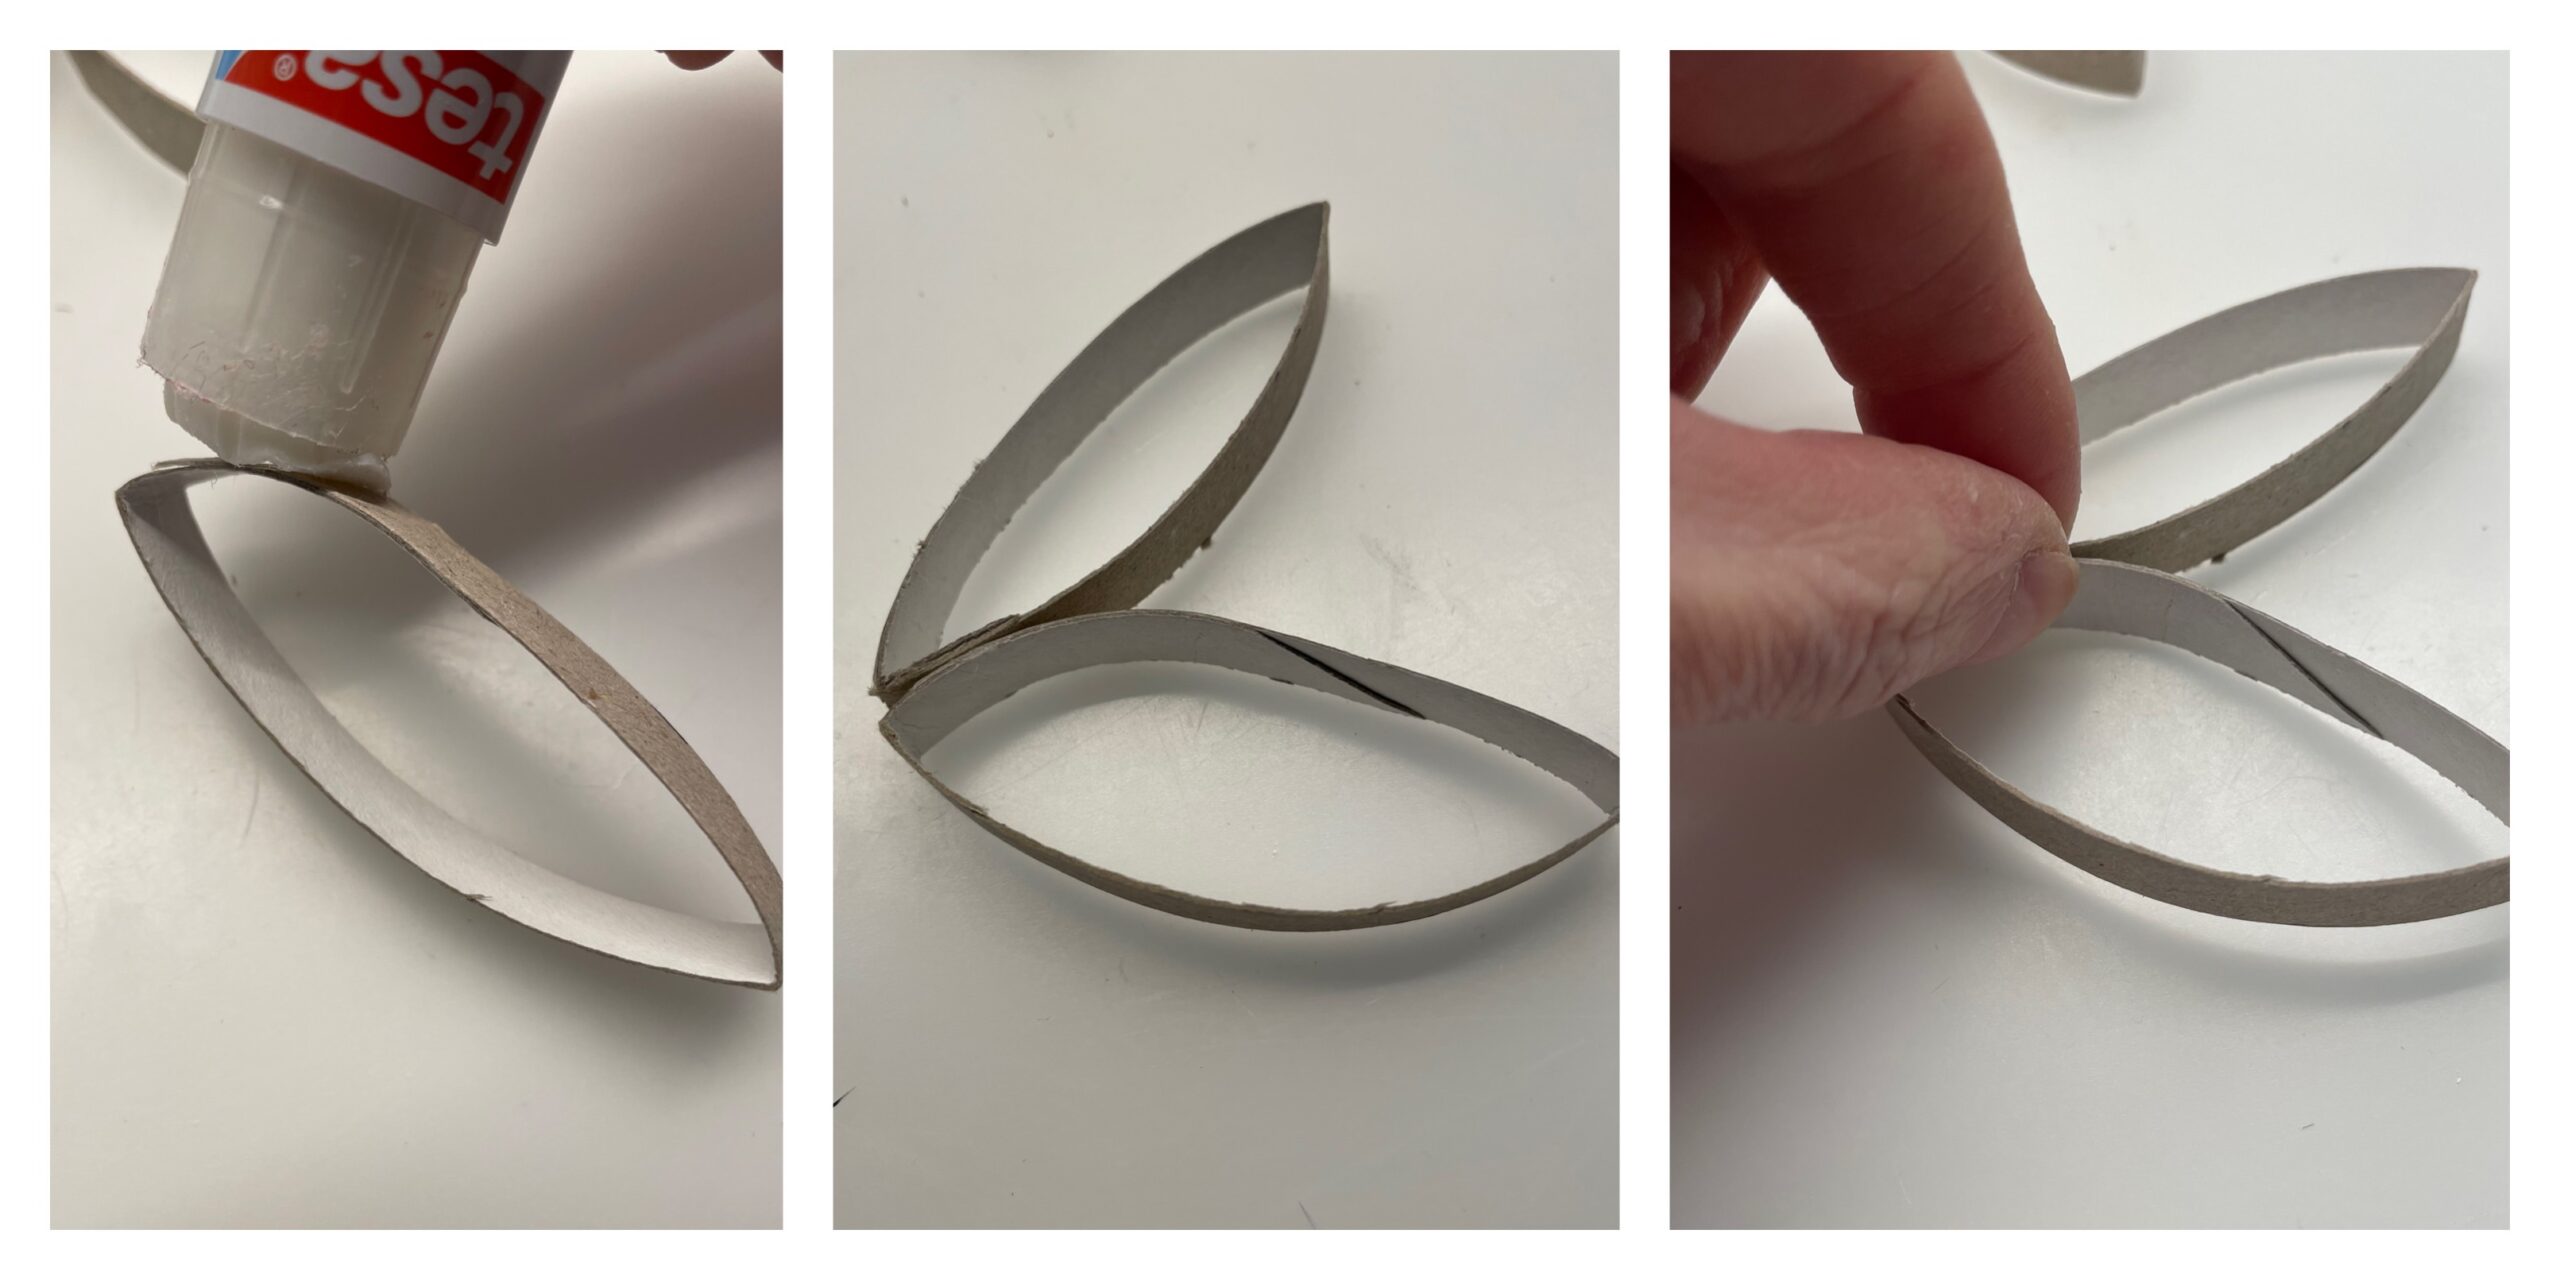
So each additional petal sticks to it.

Bild zum Schritt 7 für das Bastel- und DIY-Abenteuer für Kinder: 'Klebt so jedes weitere Blütenblatt daran.'

8

2. Bild zum Schritt 7 für das Bastel- und DIY-Abenteuer für Kinder: 'Klebt so jedes weitere Blütenblatt daran.'

9

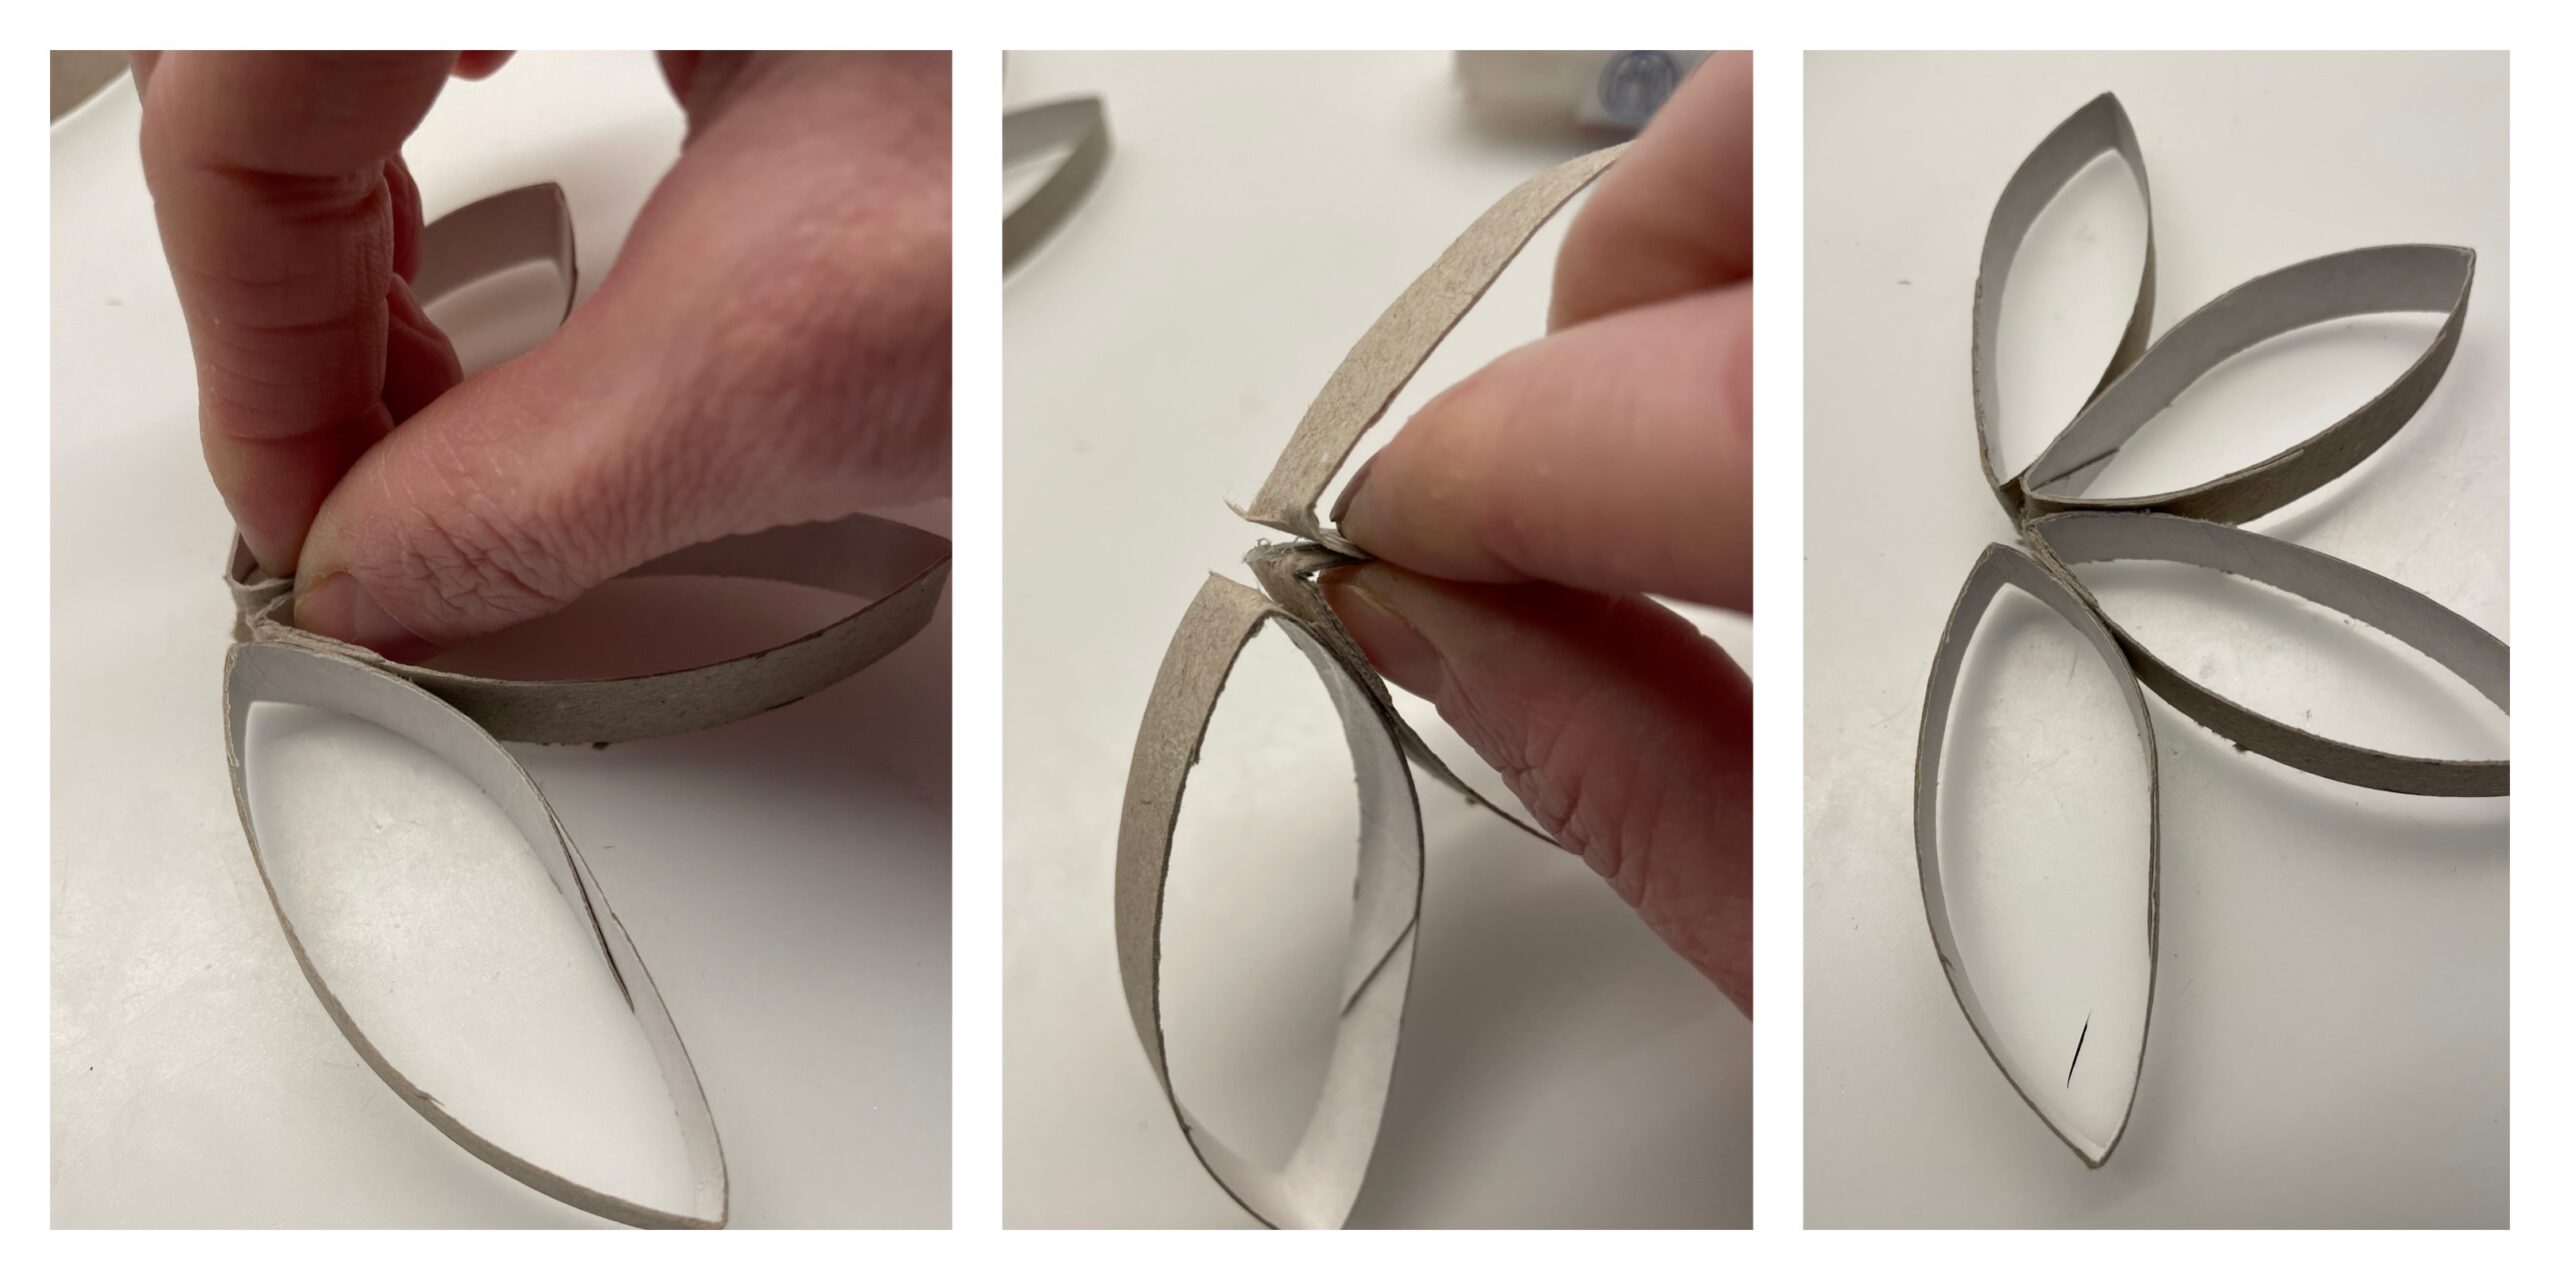
The last petal on both sides is covered with glue.

Bild zum Schritt 9 für das Bastel- und DIY-Abenteuer für Kinder: 'Das letzte Blütenblatt bestreicht ihr auf beiden Seiten mit Kleber.'

10

Then gently push the petal to the still open place.

Bild zum Schritt 10 für das Bastel- und DIY-Abenteuer für Kinder: 'Schiebt dann das Blütenblatt vorsichtig an die noch offene Stelle.'

11

Now you're pushing both sides together.

Bild zum Schritt 11 für das Bastel- und DIY-Abenteuer für Kinder: 'Jetzt drückt ihr beide Seiten zusammen.'

12

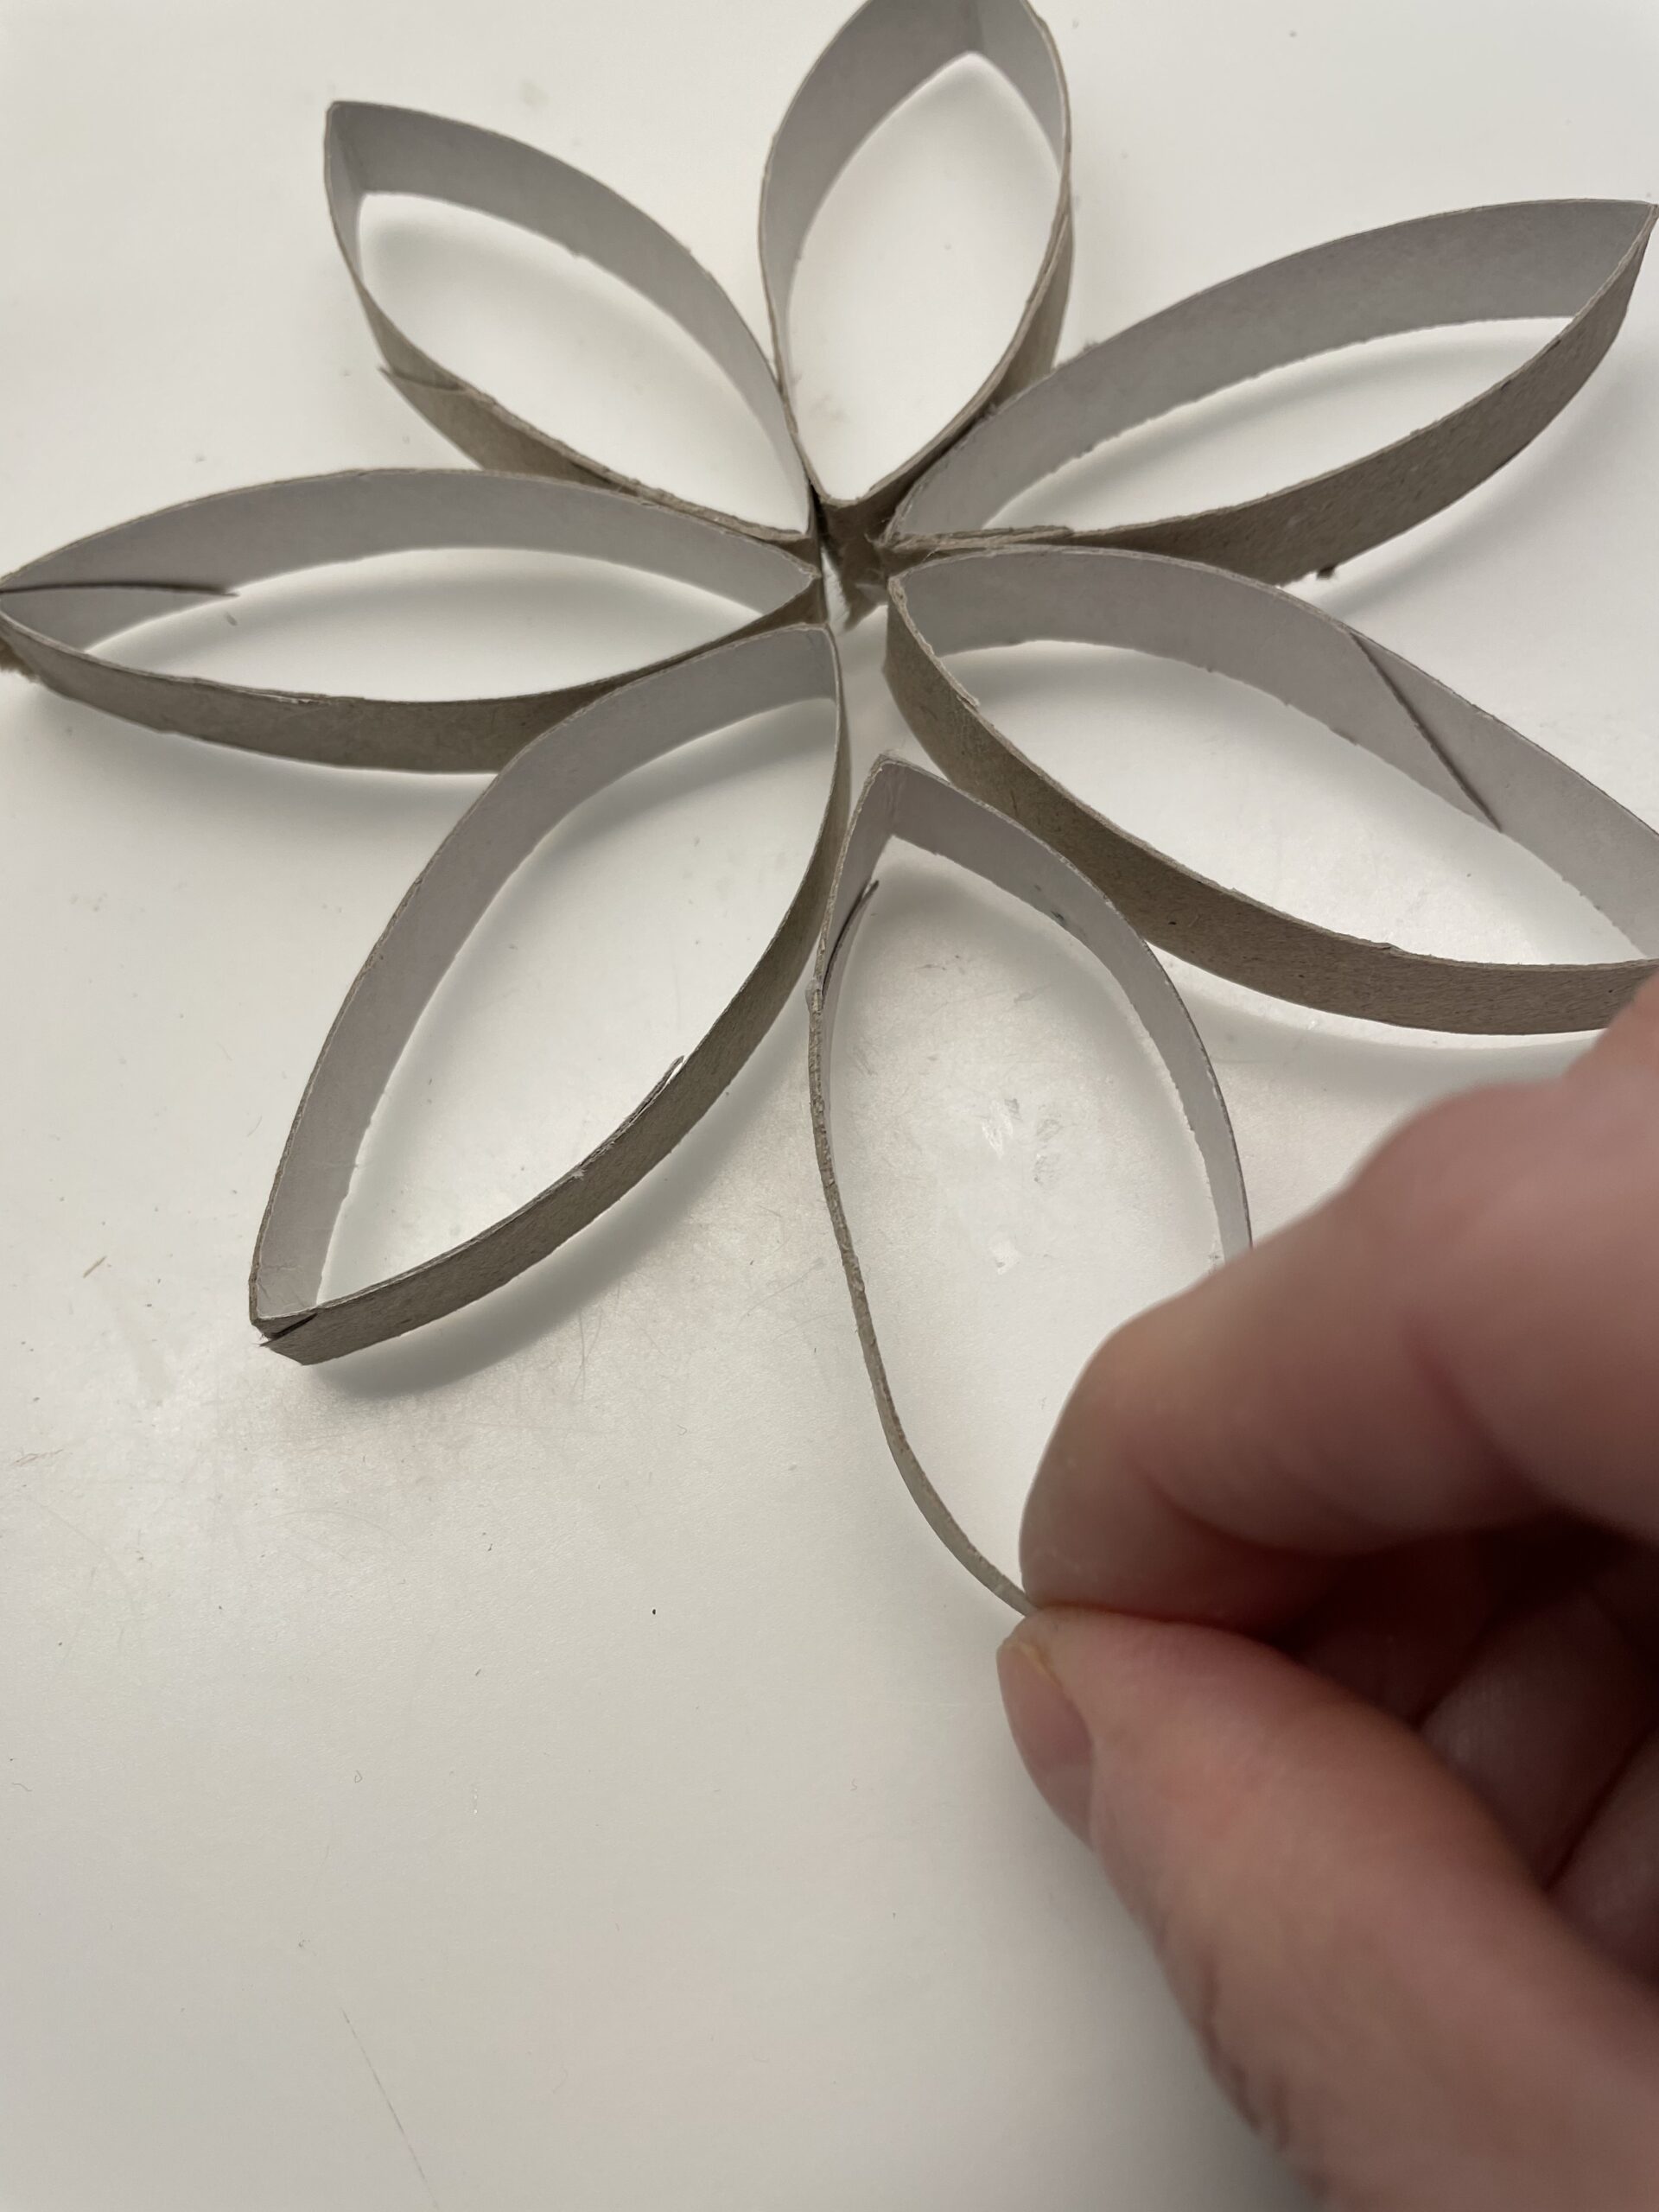
The flower is ready.
Take it up carefully, thread a thread through, knot it and find a place to hang up.

Bild zum Schritt 12 für das Bastel- und DIY-Abenteuer für Kinder: 'Fertig ist die Blume.   Nehmt sie vorsichtig hoch,...'

13

Maybe you'll paint the flower or design it.

Bild zum Schritt 13 für das Bastel- und DIY-Abenteuer für Kinder: 'Vielleicht malt ihr die Blume noch an oder gestaltet sie...'

14

Or you can create a beautiful picture frame with the cardboard roll flower.
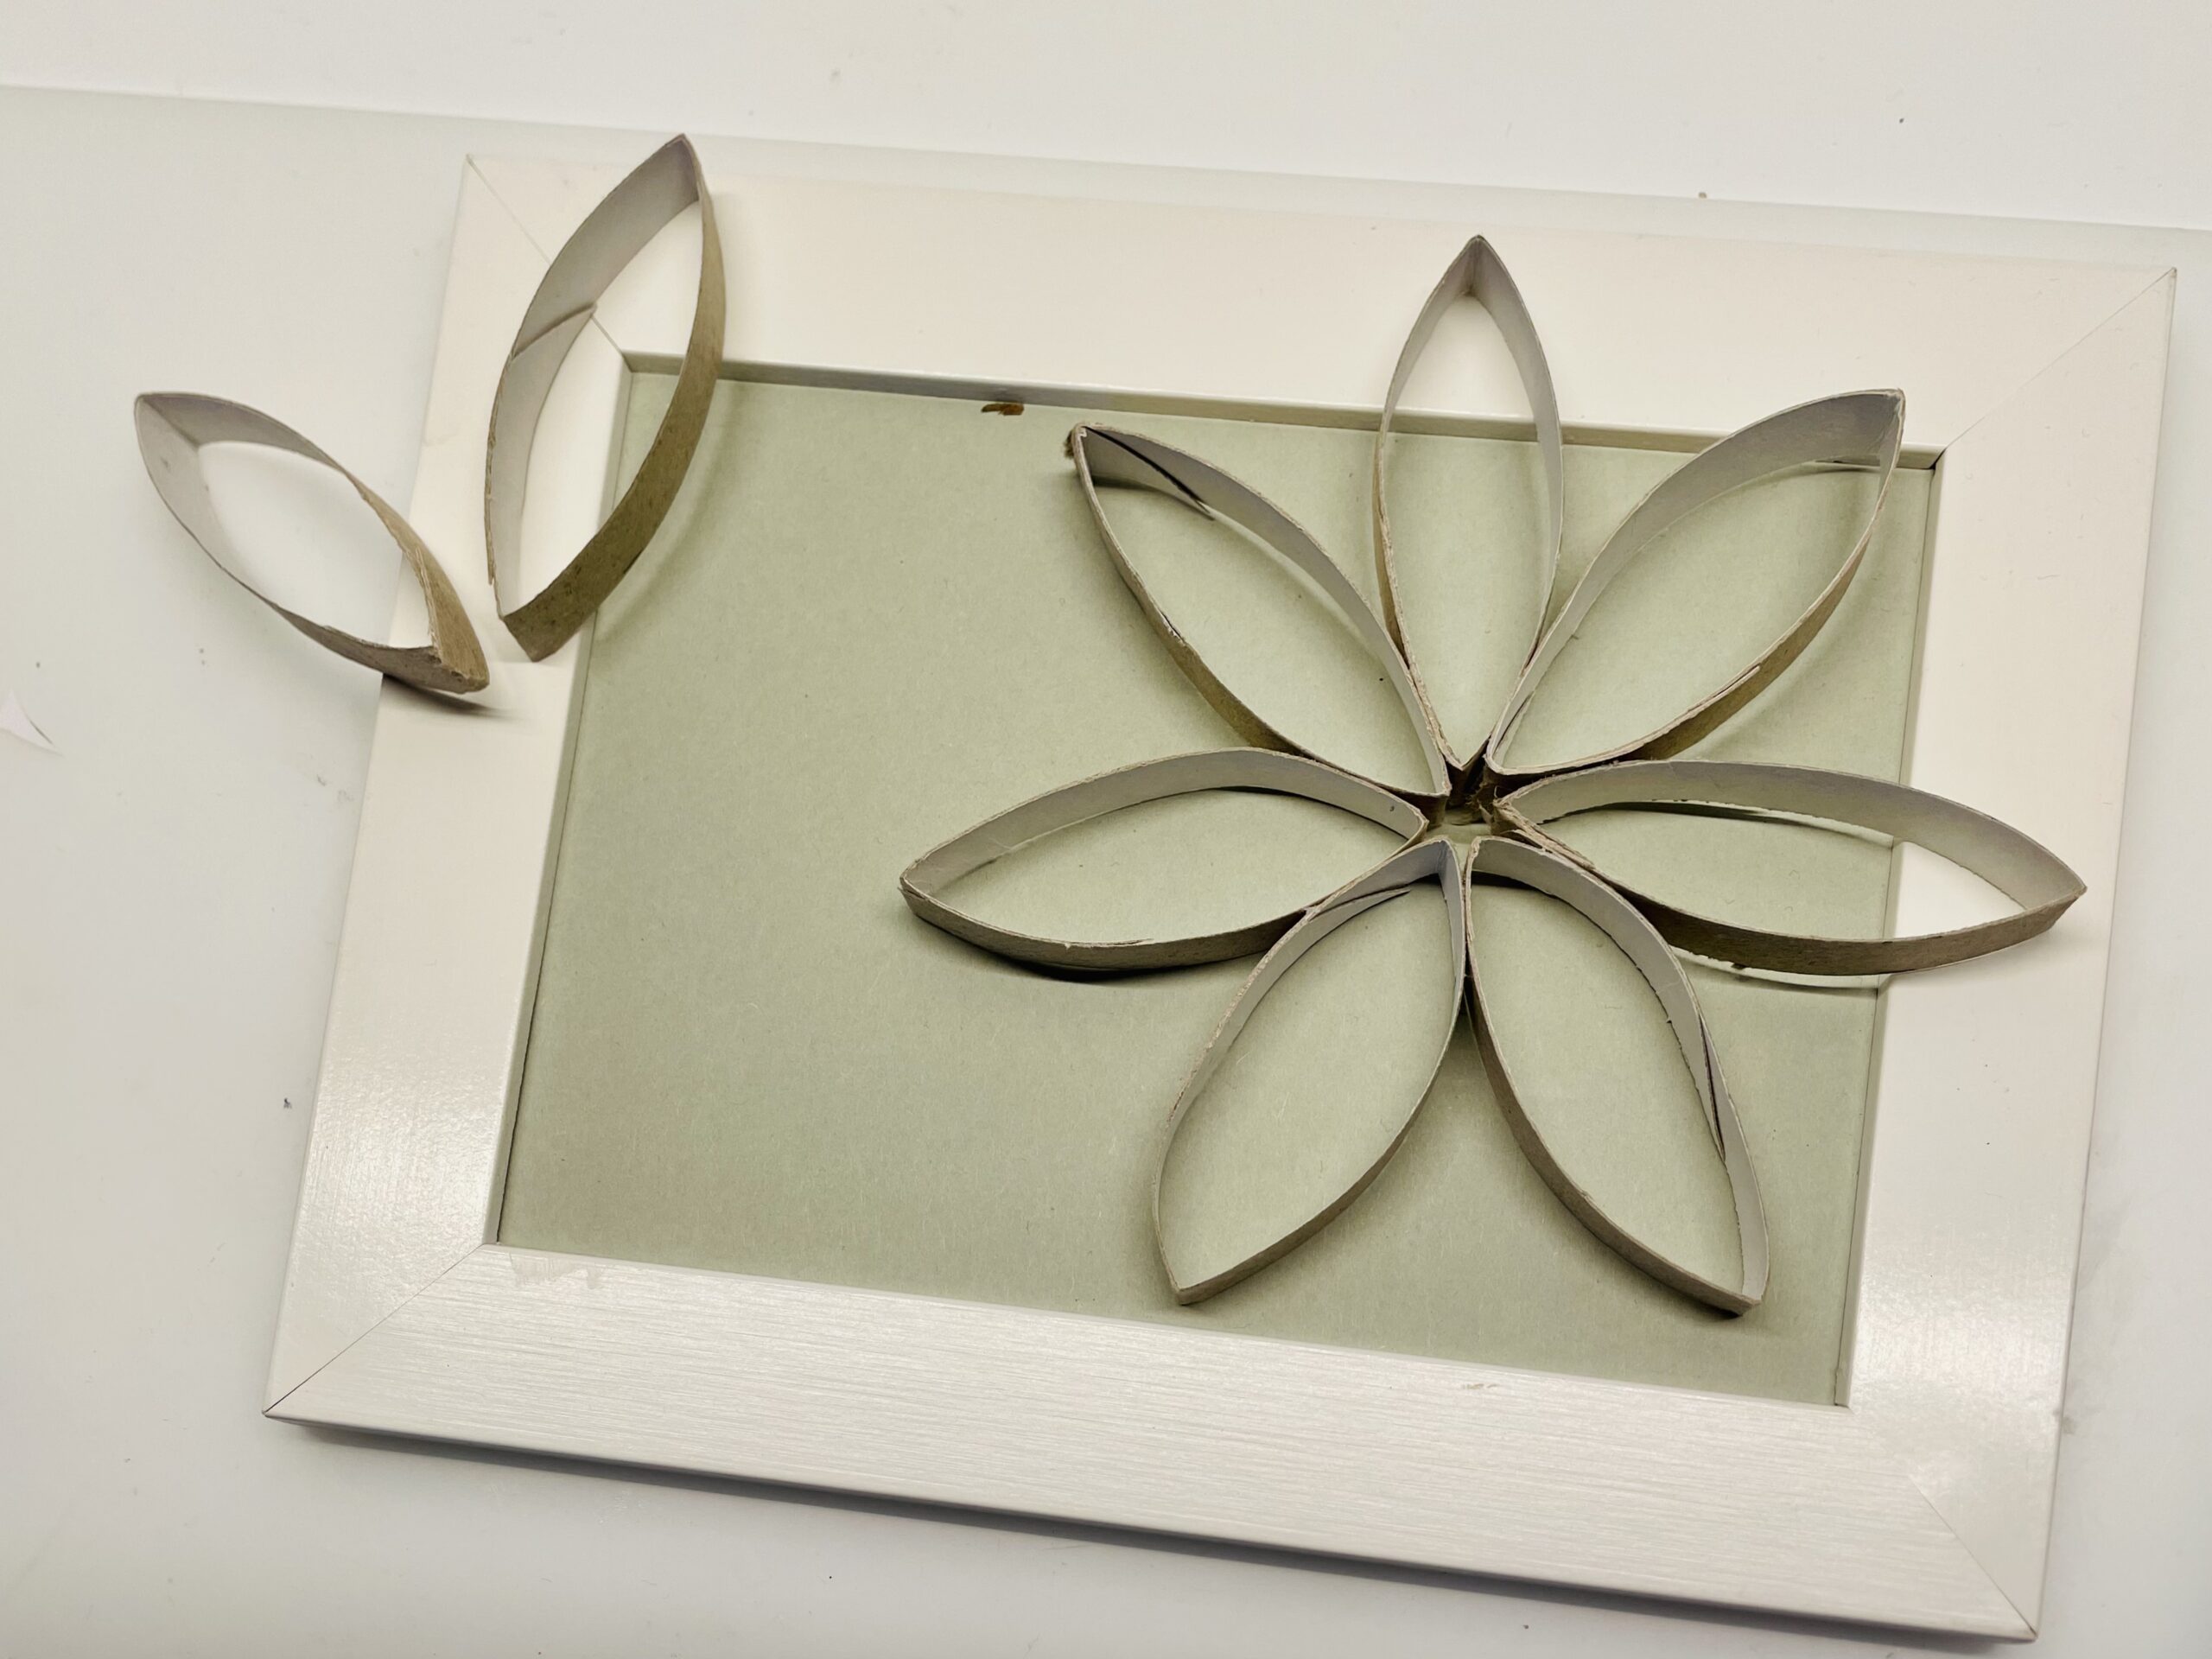
Bild zum Schritt 14 für das Bastel- und DIY-Abenteuer für Kinder: 'Oder ihr gestaltet einen schönen Bilderrahmen mit der Papprollen-Blume.'

15

Stay creative!