Print Options:

Flower made of wire and button

Material for1 ChildPrep Time5 min.Adv. Time15 min.Total Time20 min.

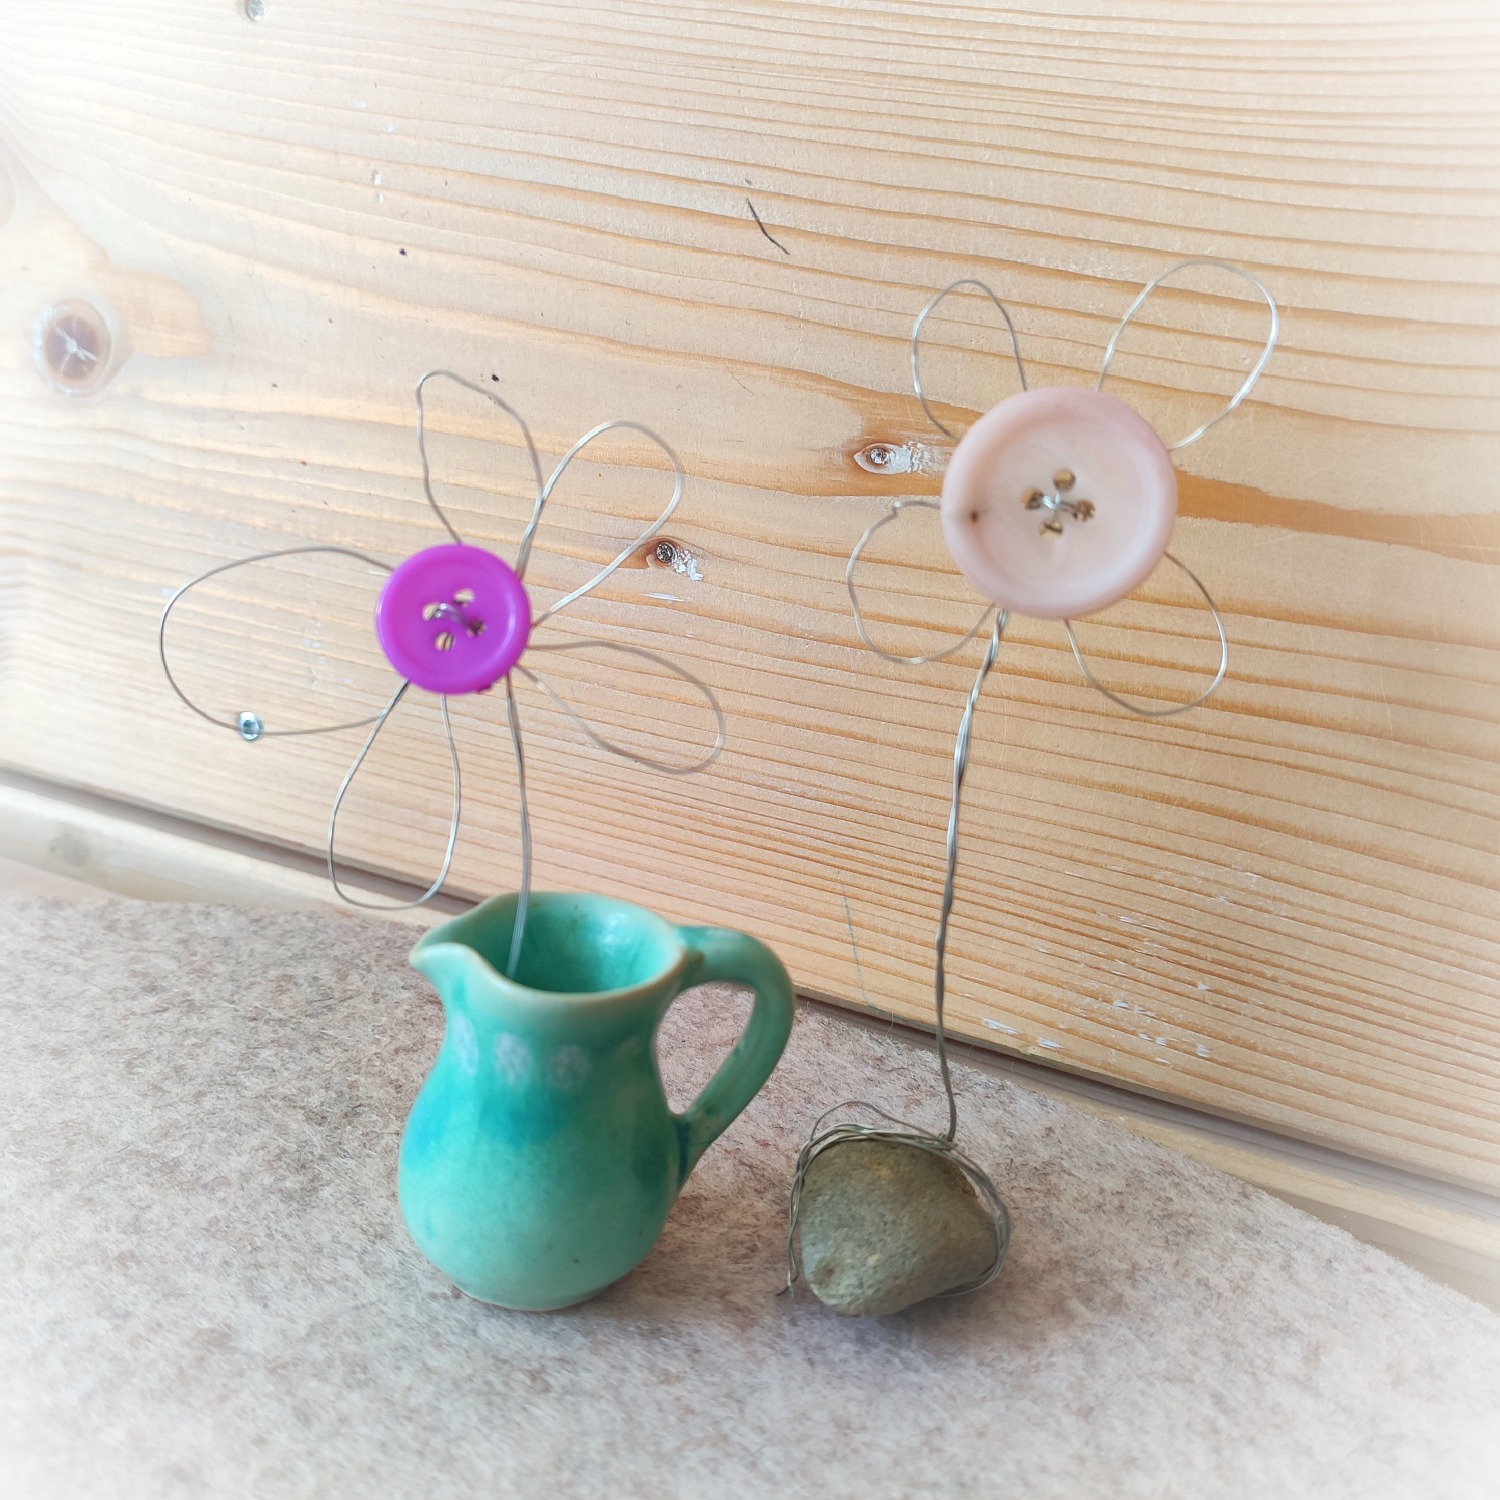
Magic with a little wire and a button these beautiful flowers. These are excellent for giving away and decorating. You don't need much and can start with wire and button and a stone for fixings.
Have fun trying it out!

Titelbild zur Bastel- und DIY-Idee für Kinder '(1079) Blume aus Draht und Knopf basteln'

 1 Meters of wire Thin wire
 1 Button
 Stone Complaints
1

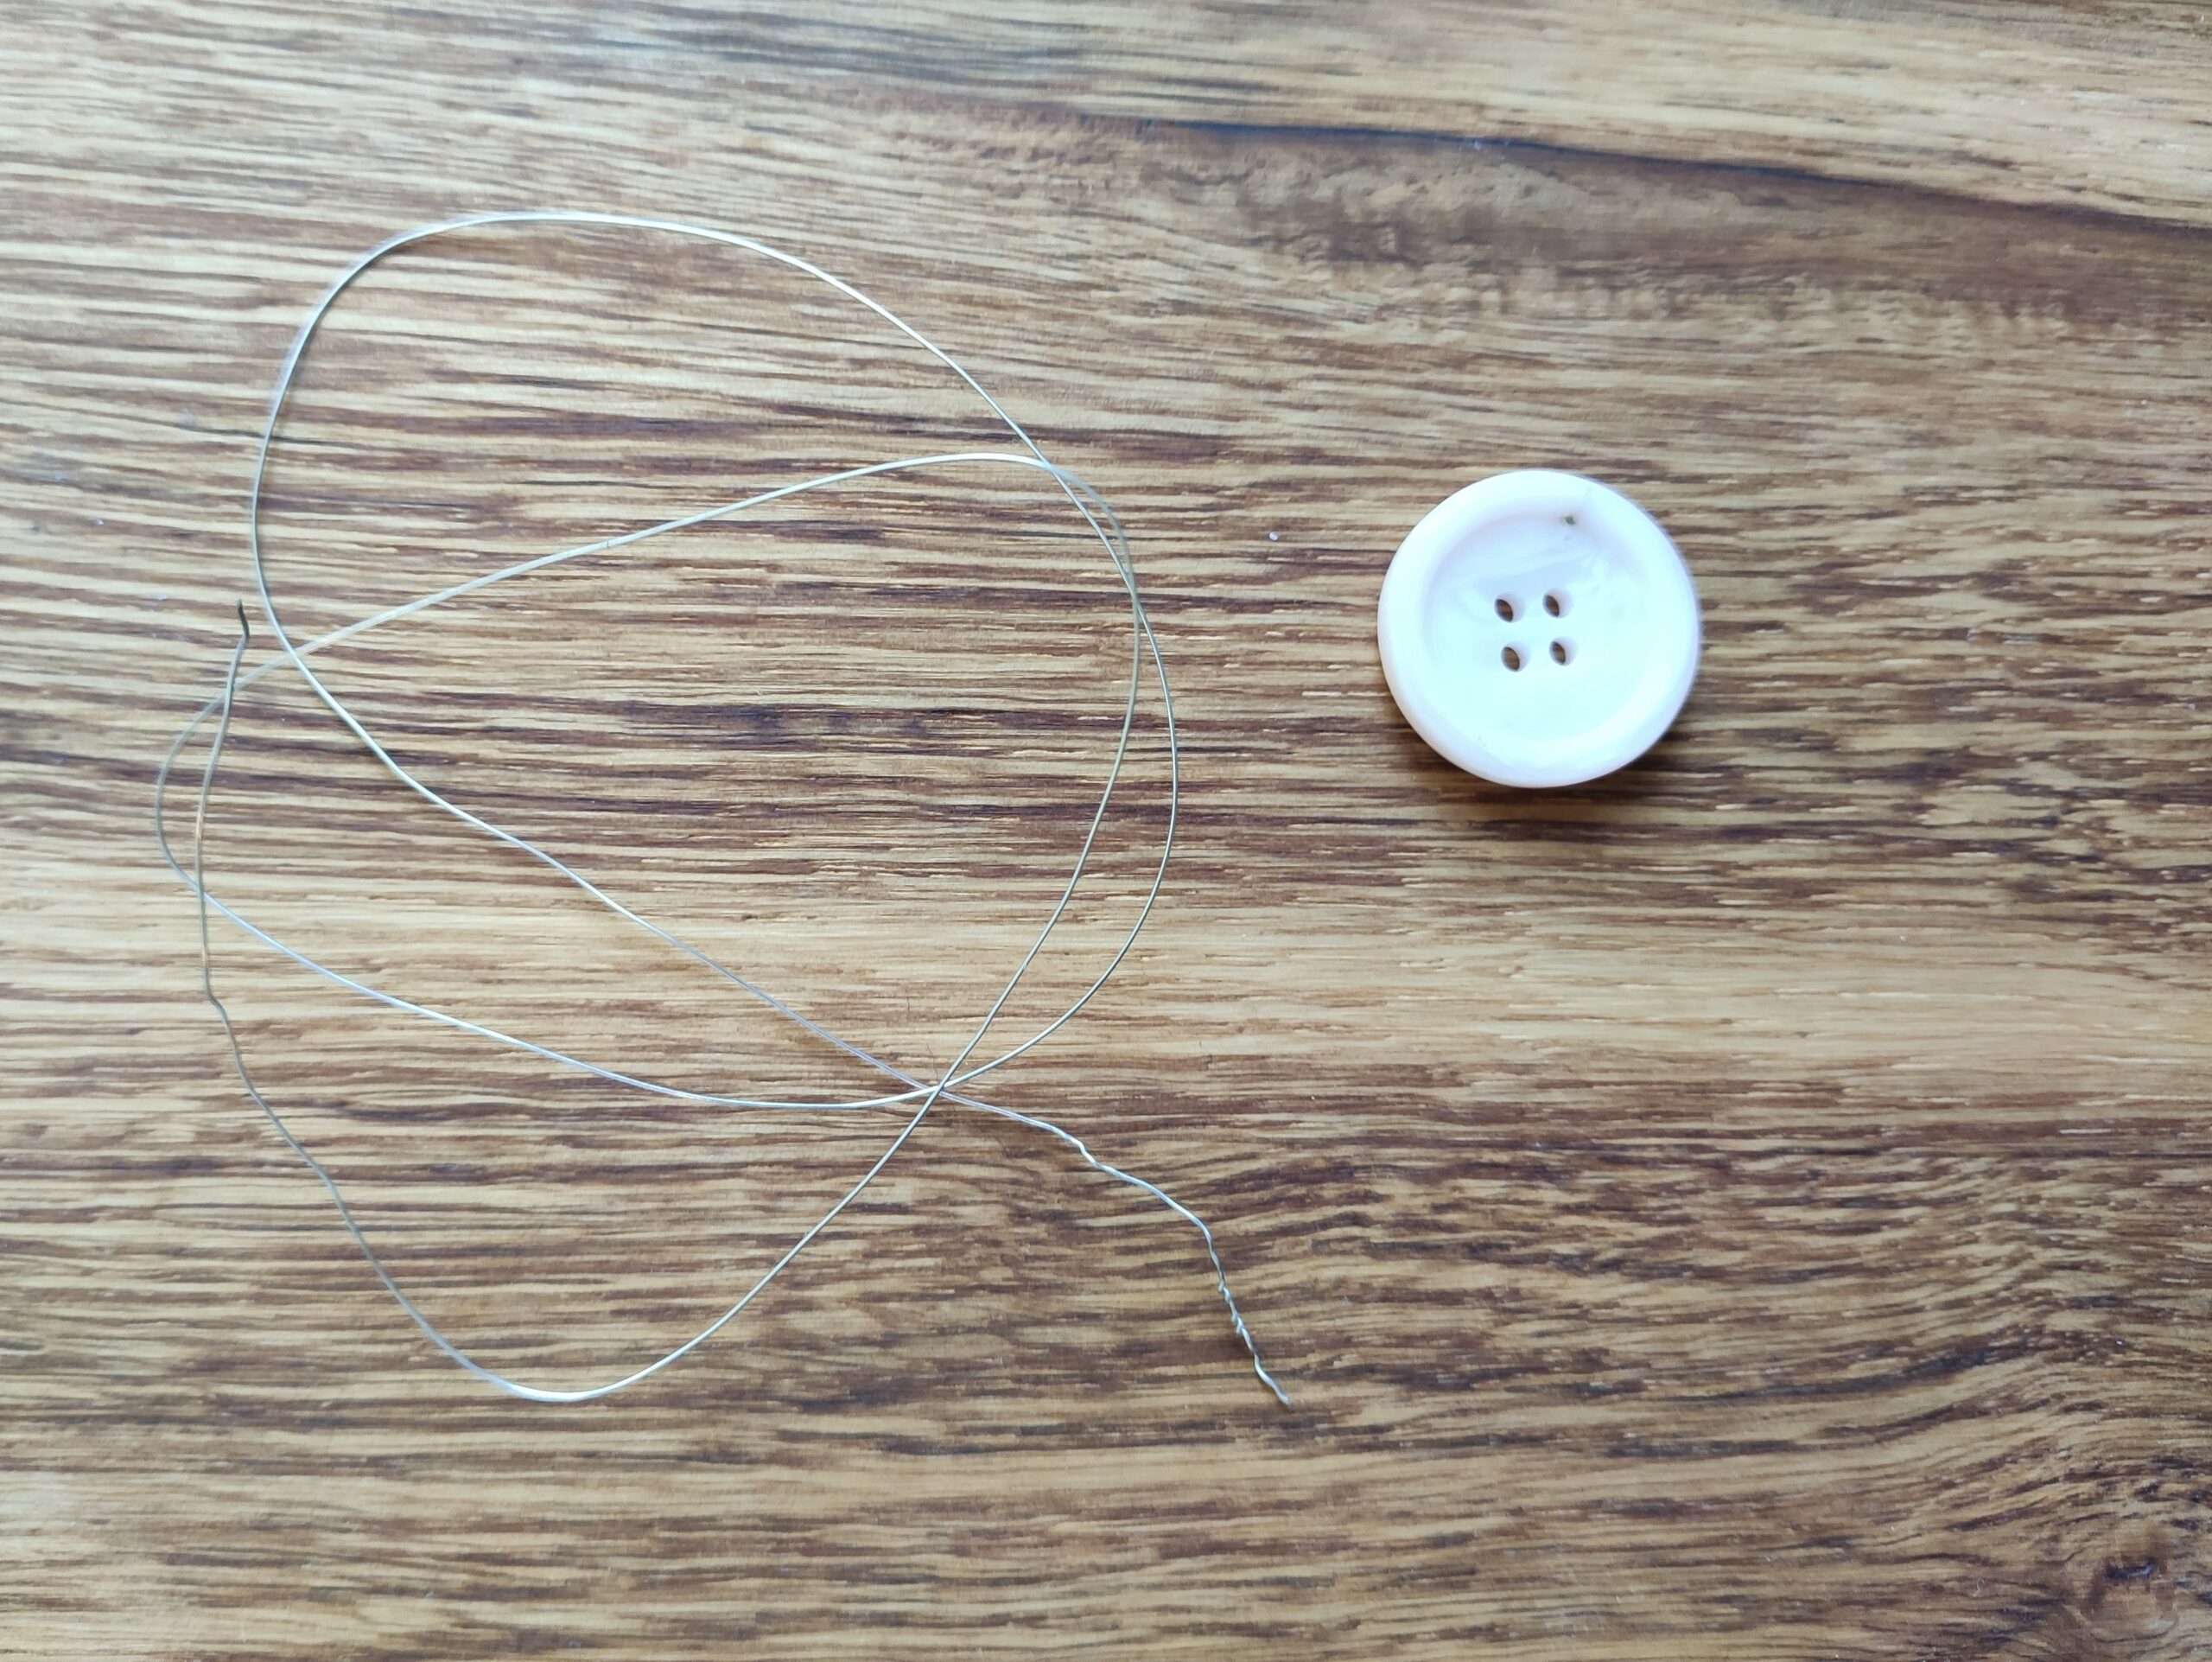
Cut two pieces of wire in the length of about 50 cm and bend it to a loop.

Tip: Uses thin wire, because it can be easily shaped.

Bild zum Schritt 1 für das Bastel- und DIY-Abenteuer für Kinder: 'Schneidet euch zwei Stücke Draht in der Länge von ca....'

2

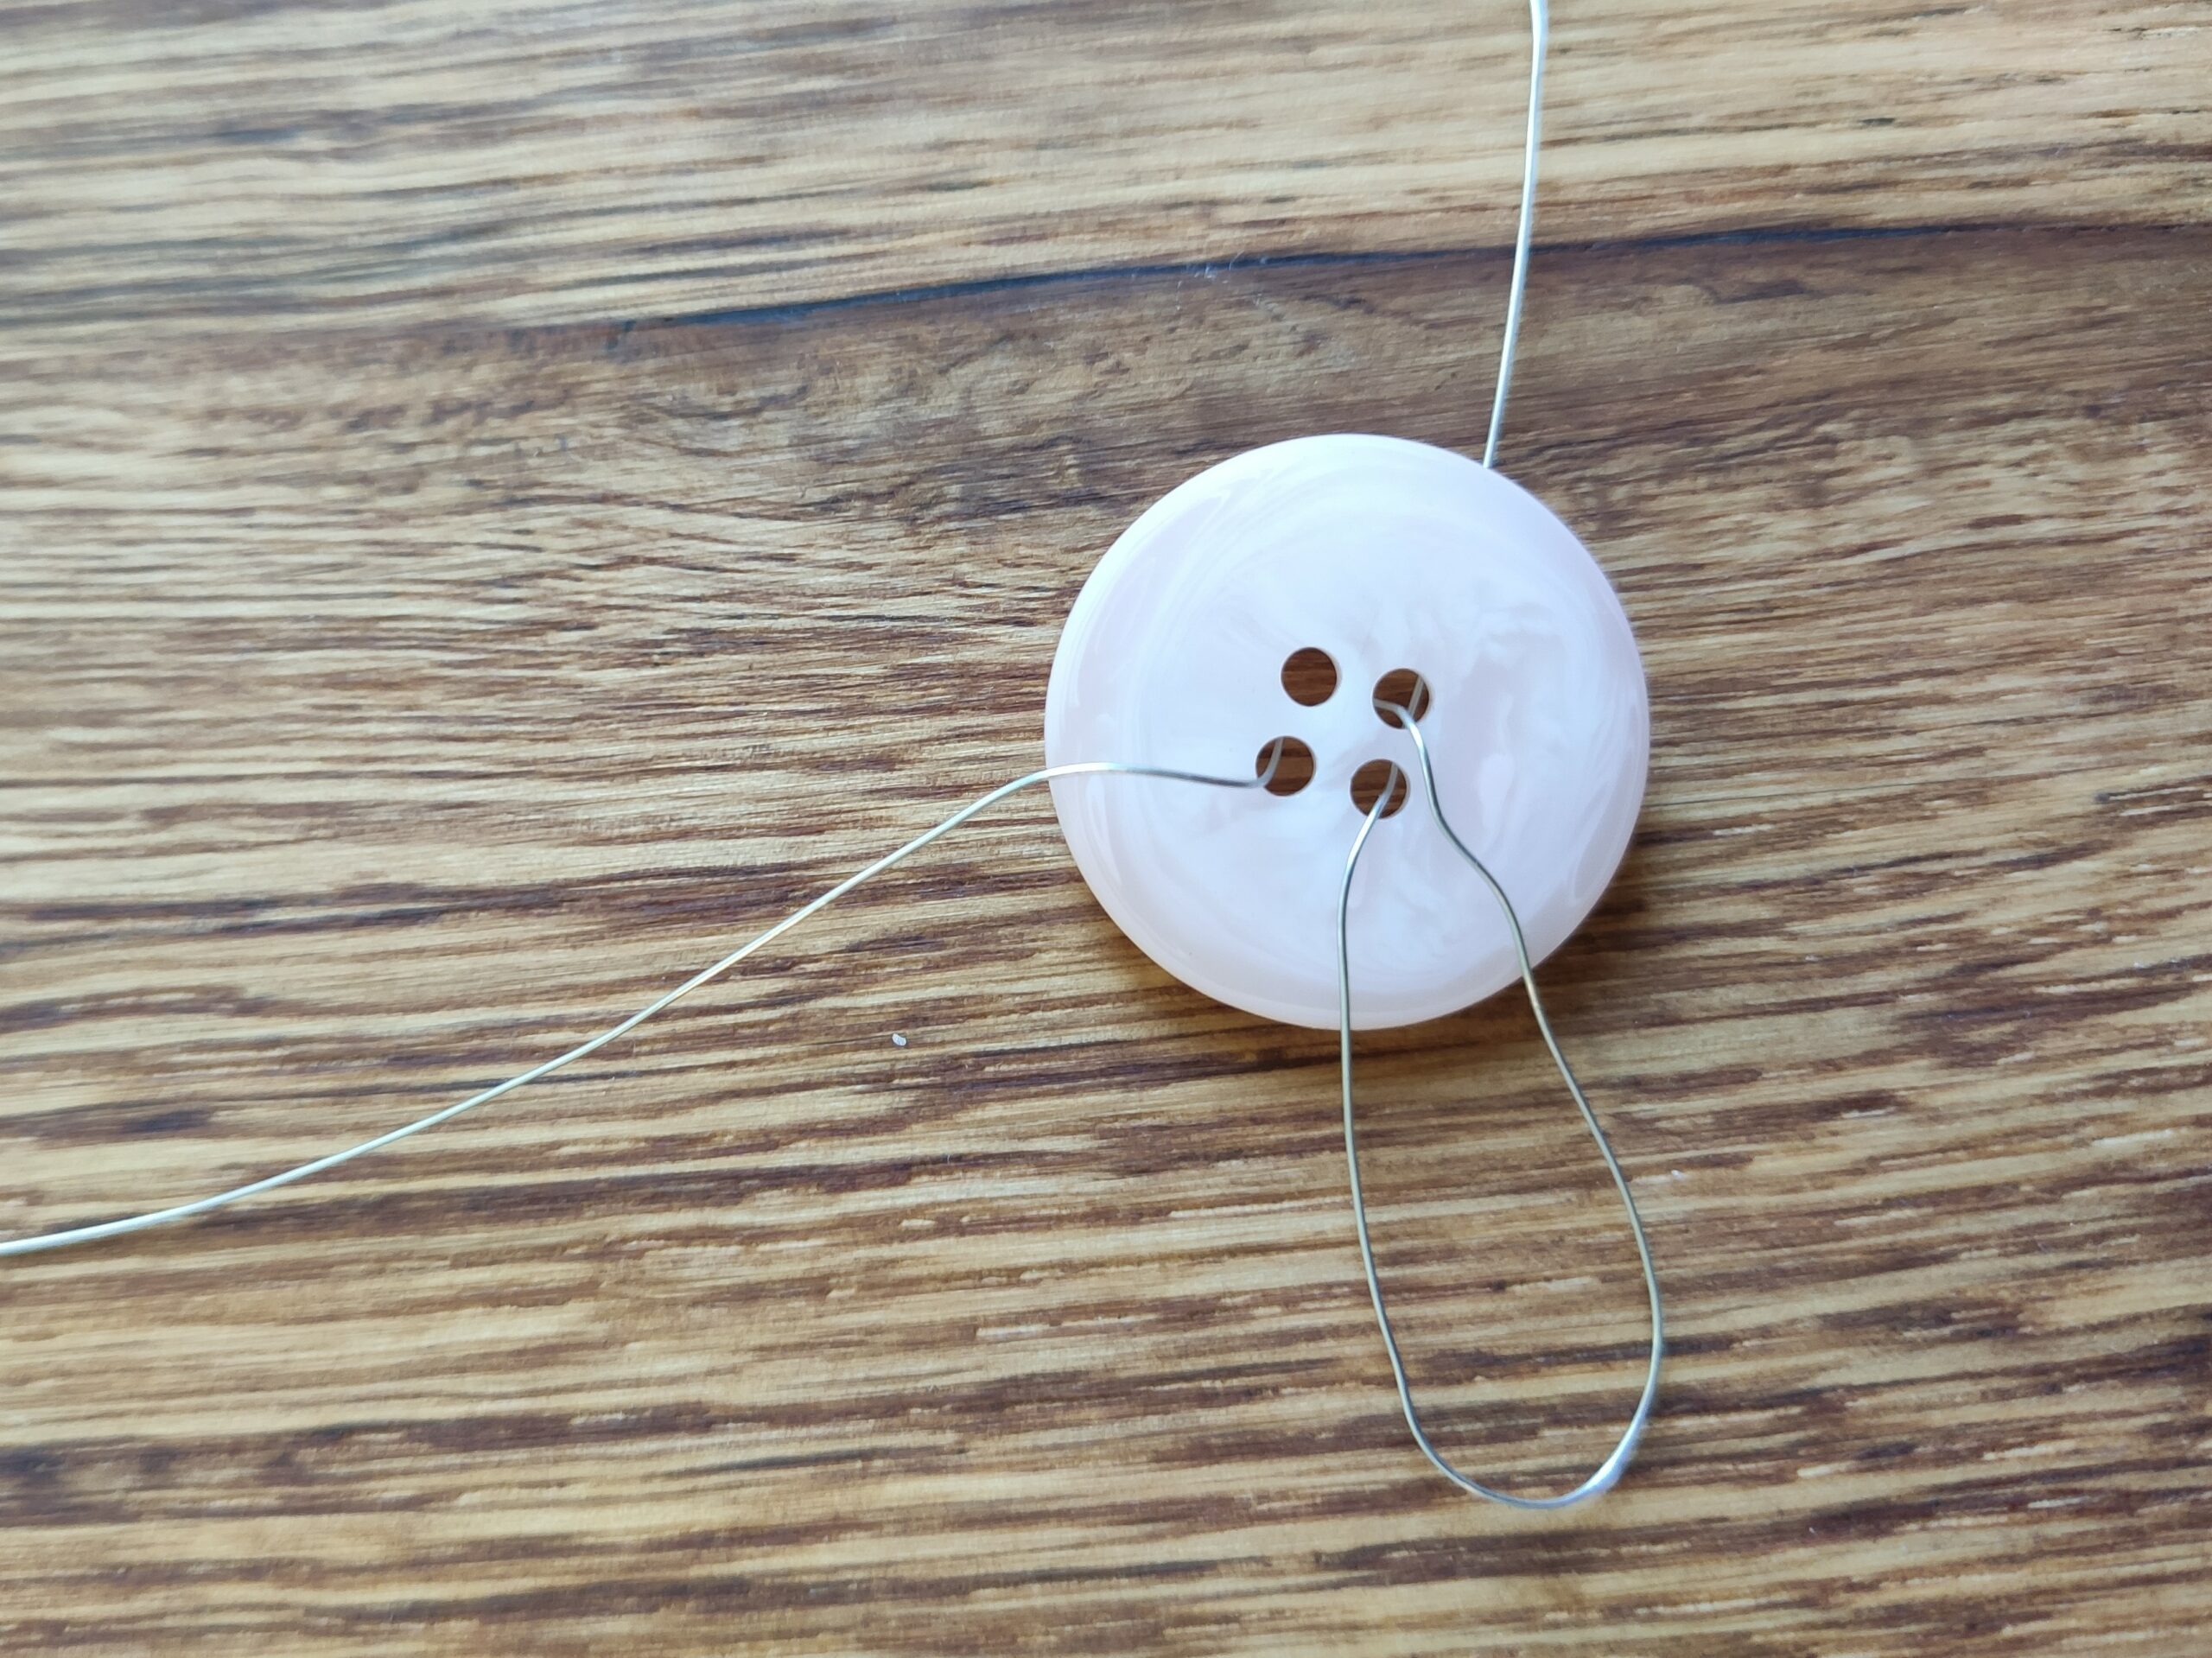
Next, thread the wire from the back to the front through a buttonhole. Then thread the wire back through another buttonhole.

Bild zum Schritt 2 für das Bastel- und DIY-Abenteuer für Kinder: 'Als Nächstes fädelt ihr den Draht von hinten nach vorne...'

3

The ends of the wire are different lengths.

Bild zum Schritt 3 für das Bastel- und DIY-Abenteuer für Kinder: 'Die Enden des Drahtes sind dabei unterschiedlich lang.'

4

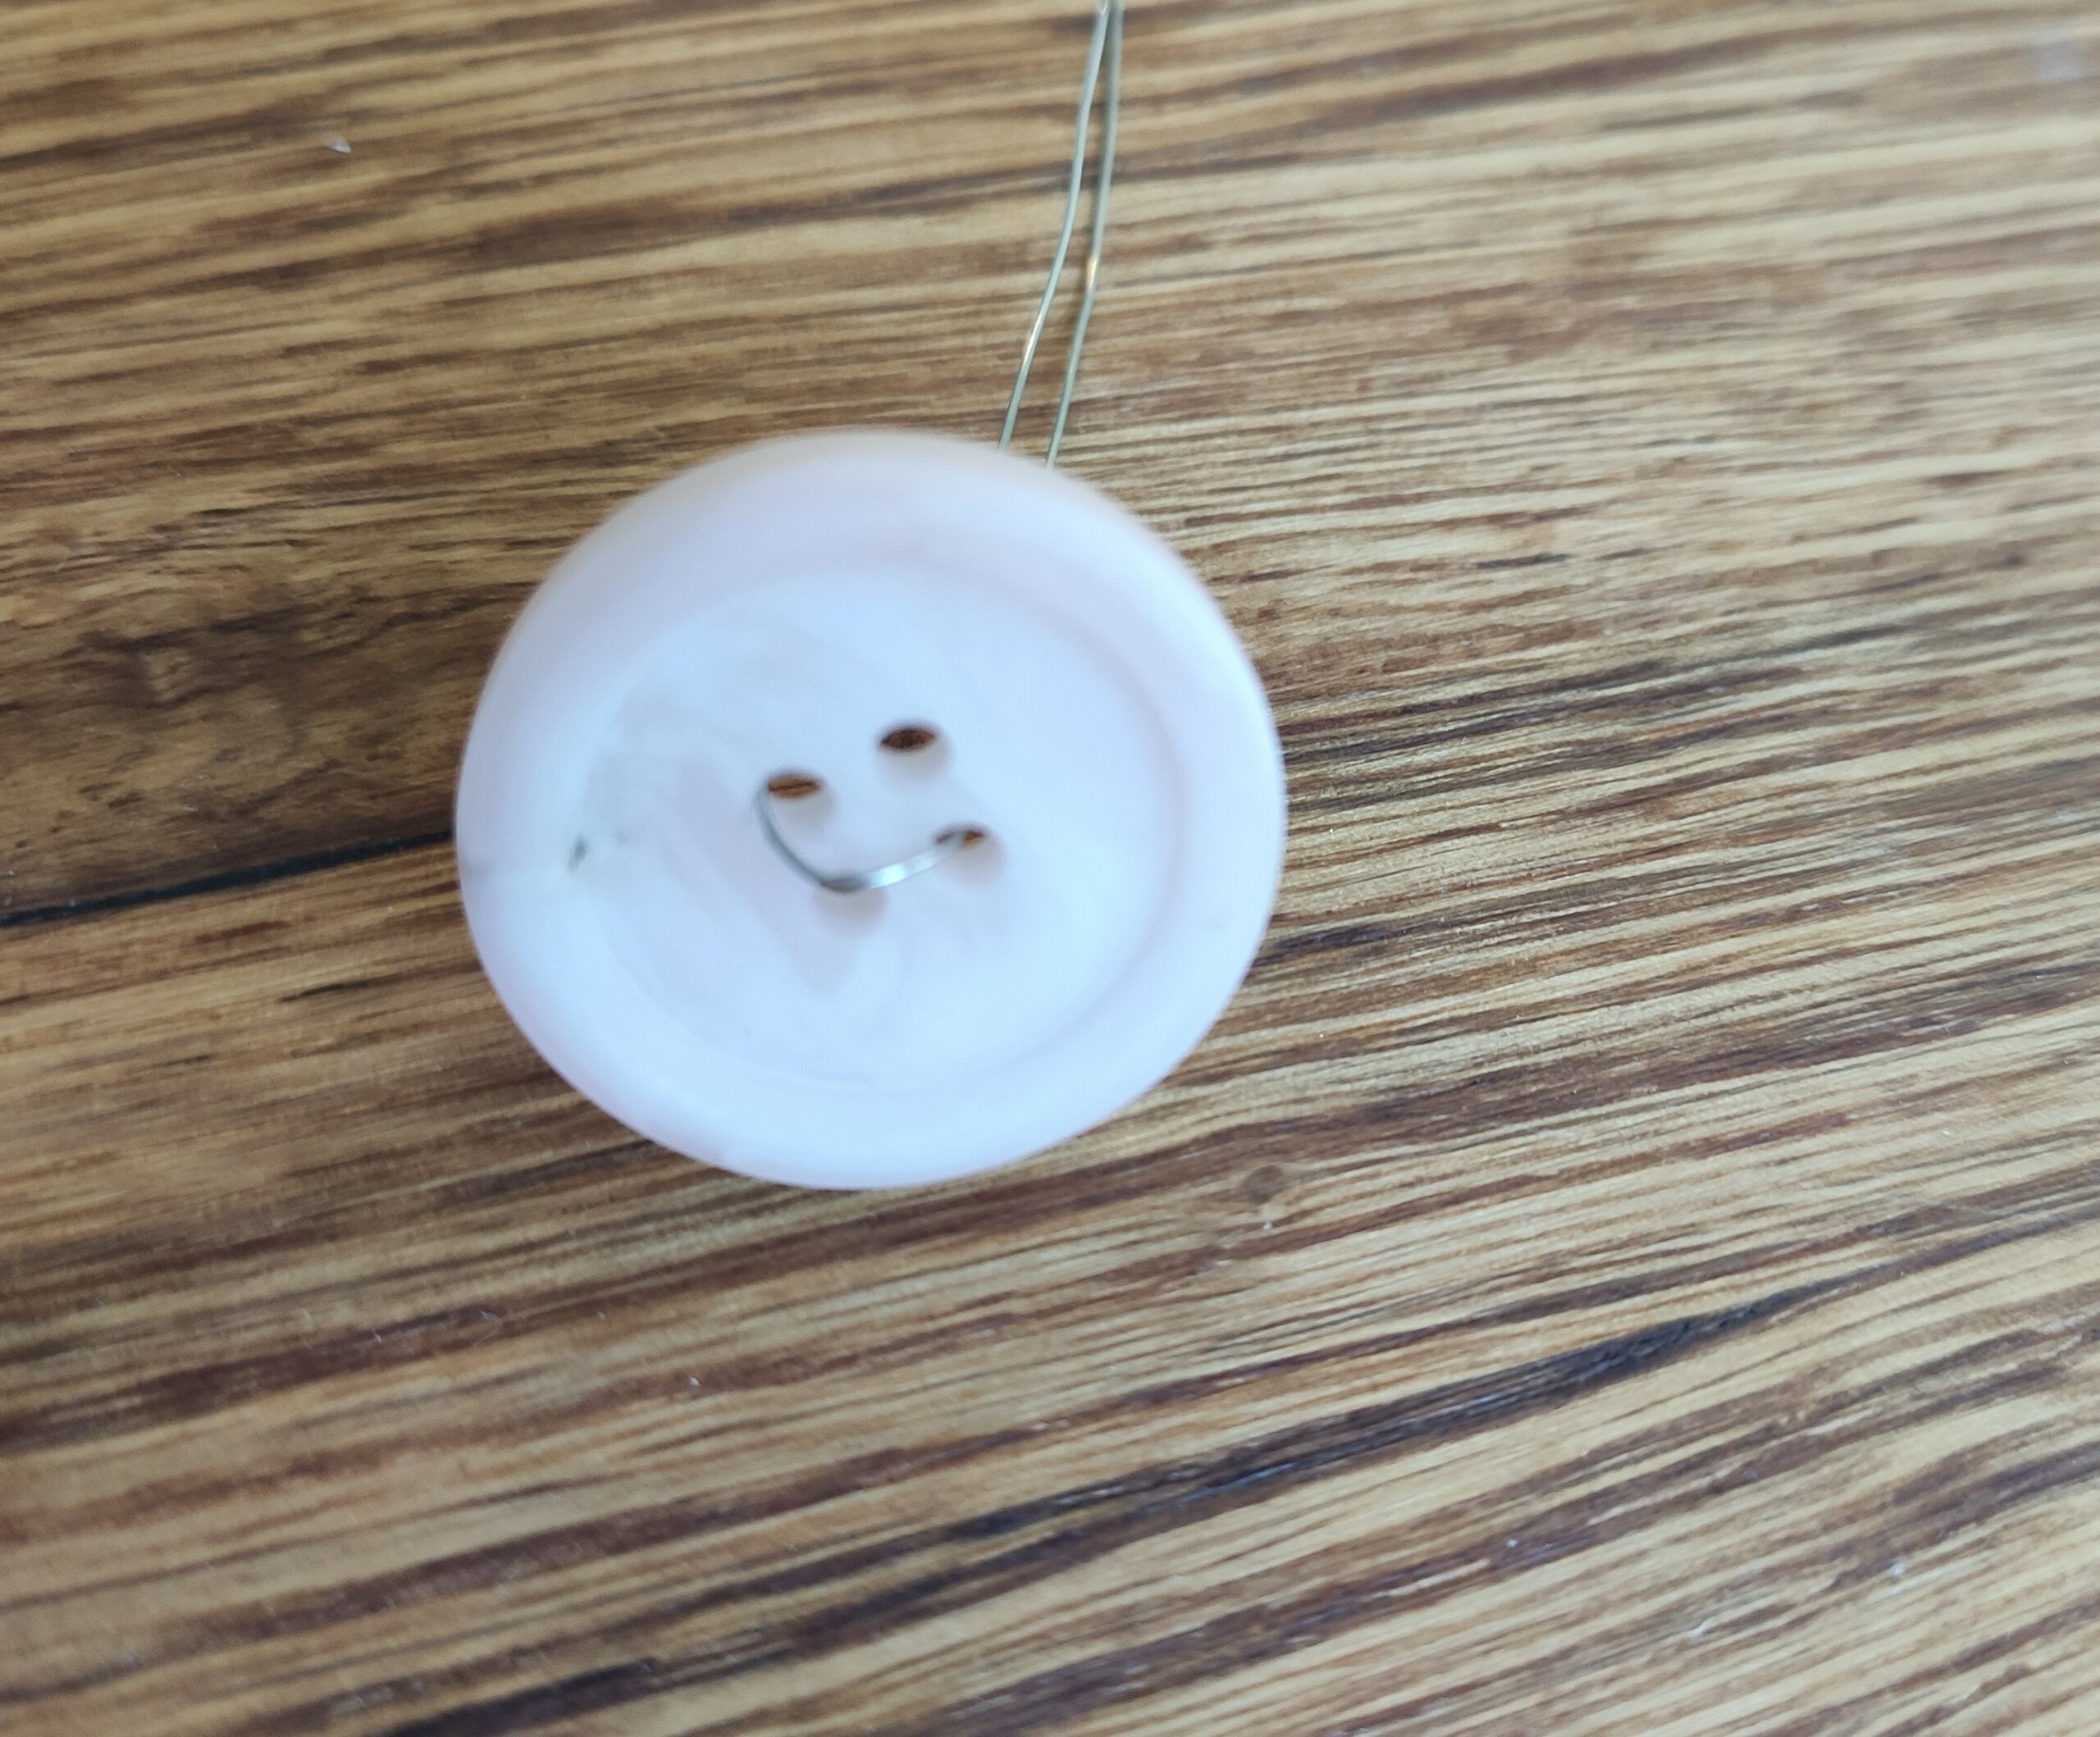
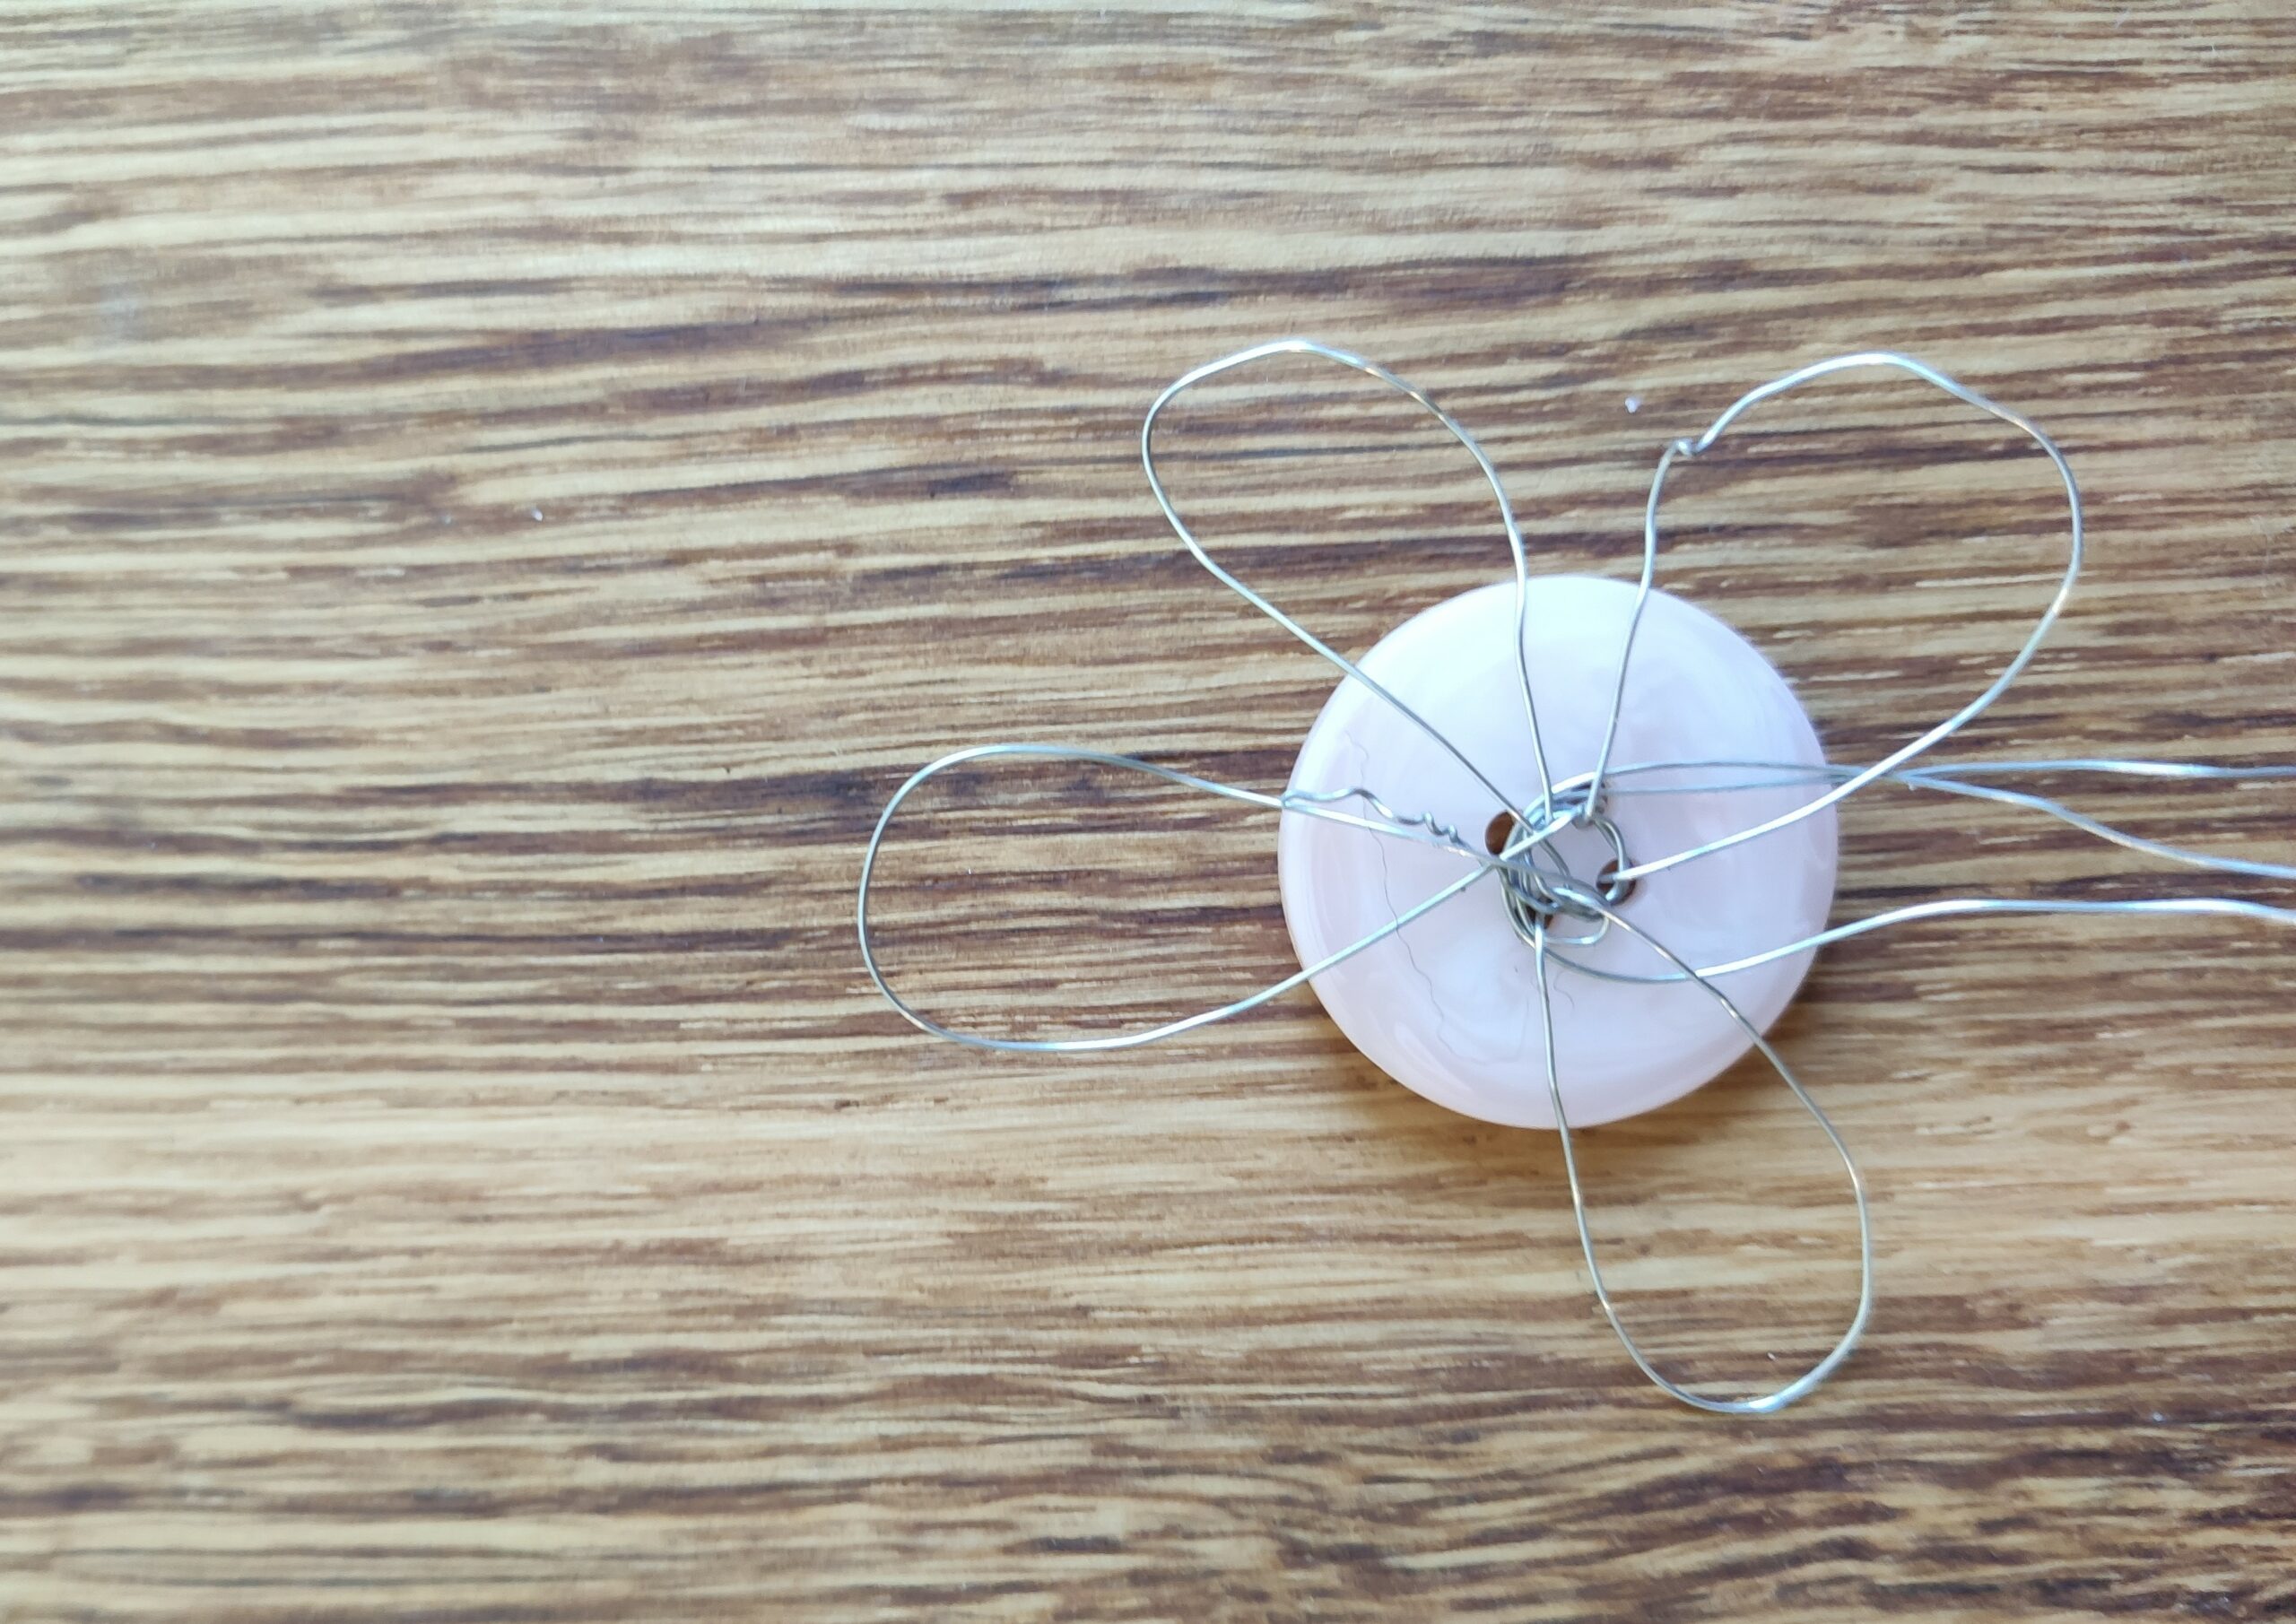
Now you thread the short end of the wire again from the back to the front through a buttonhole. Now you do not pull the wire completely through, but leave a loop. This creates the first petal on the back of the button.

Bild zum Schritt 4 für das Bastel- und DIY-Abenteuer für Kinder: 'Jetzt fädelt ihr das kurze Ende des Drahtes wieder von...'

5

Now thread the short wire end from front to back, form a second petal. Now wrap the remaining wire around the petals on the back of the button.

Bild zum Schritt 5 für das Bastel- und DIY-Abenteuer für Kinder: 'Nun fädelt ihr das kurze Drahtende von vorne nach hinten...'

6

So now both petals as well as the long and short end of the wire are on the back of the button.

Bild zum Schritt 6 für das Bastel- und DIY-Abenteuer für Kinder: 'So befinden sich nun beide Blütenblätter als auch das lange...'

7

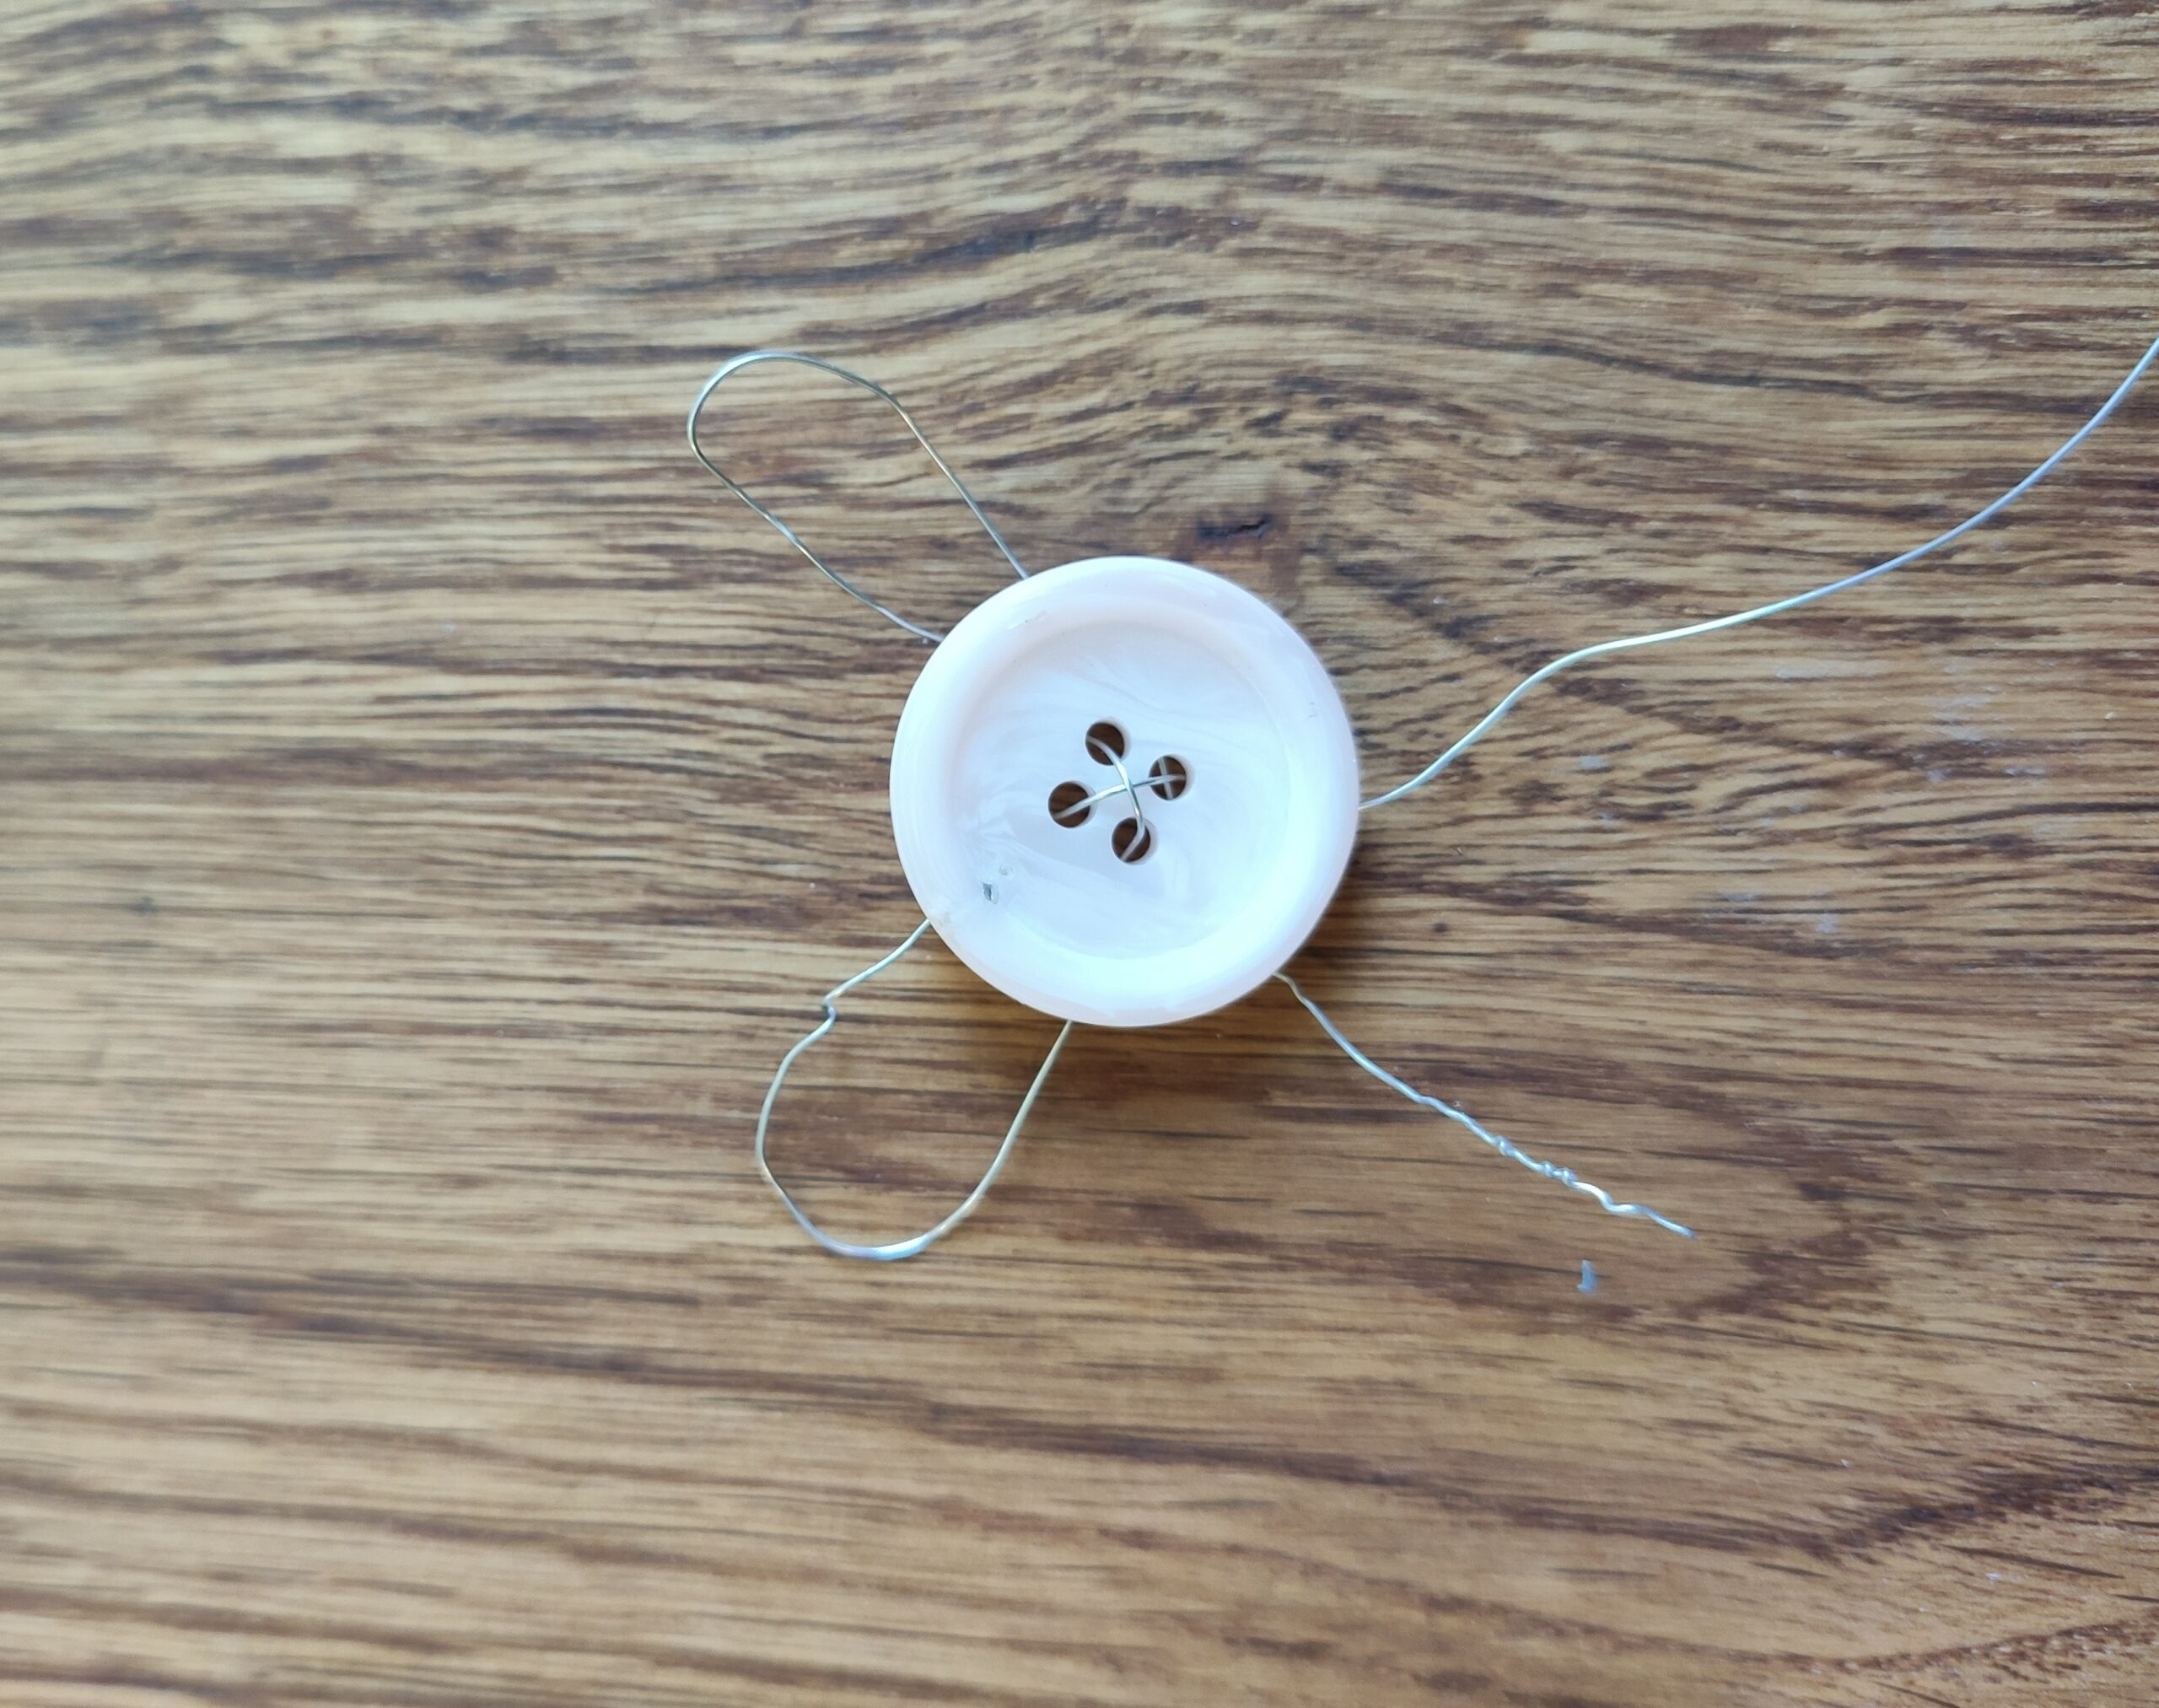
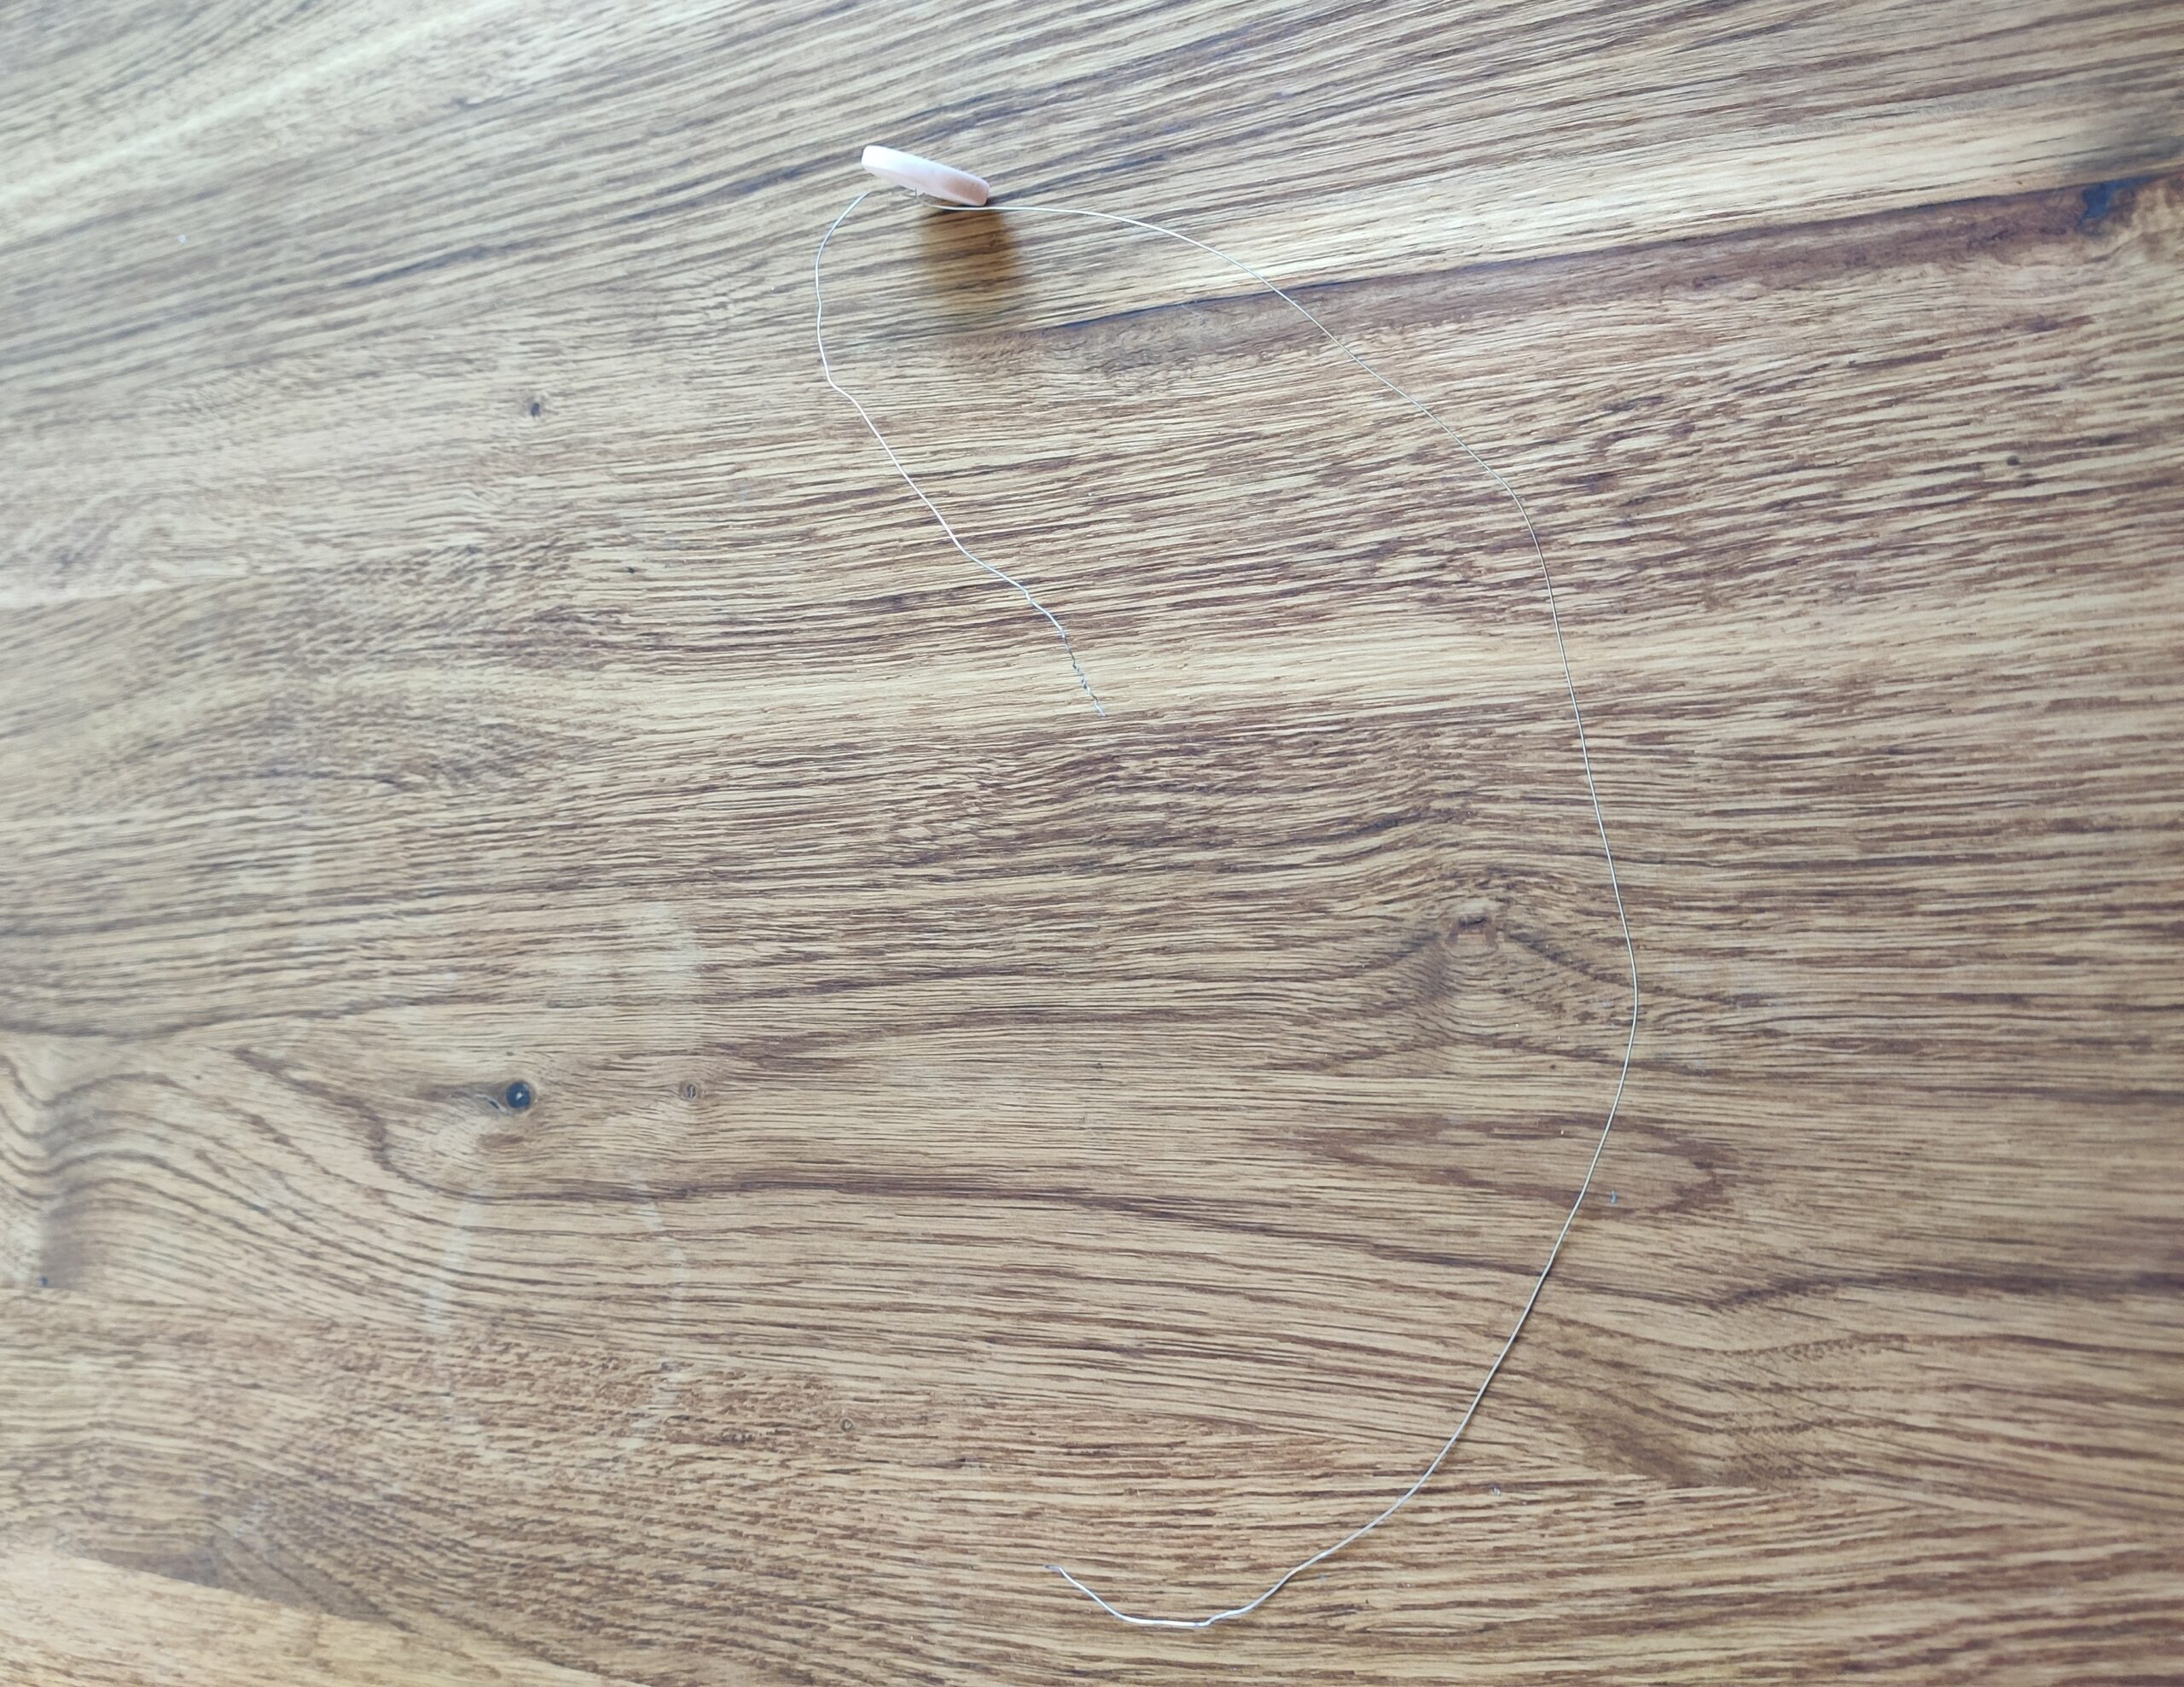
Now you form a third petal from the long end of the wire.

Bild zum Schritt 7 für das Bastel- und DIY-Abenteuer für Kinder: 'Nun formt ihr aus dem langen Ende des Drahtes ein...'

8

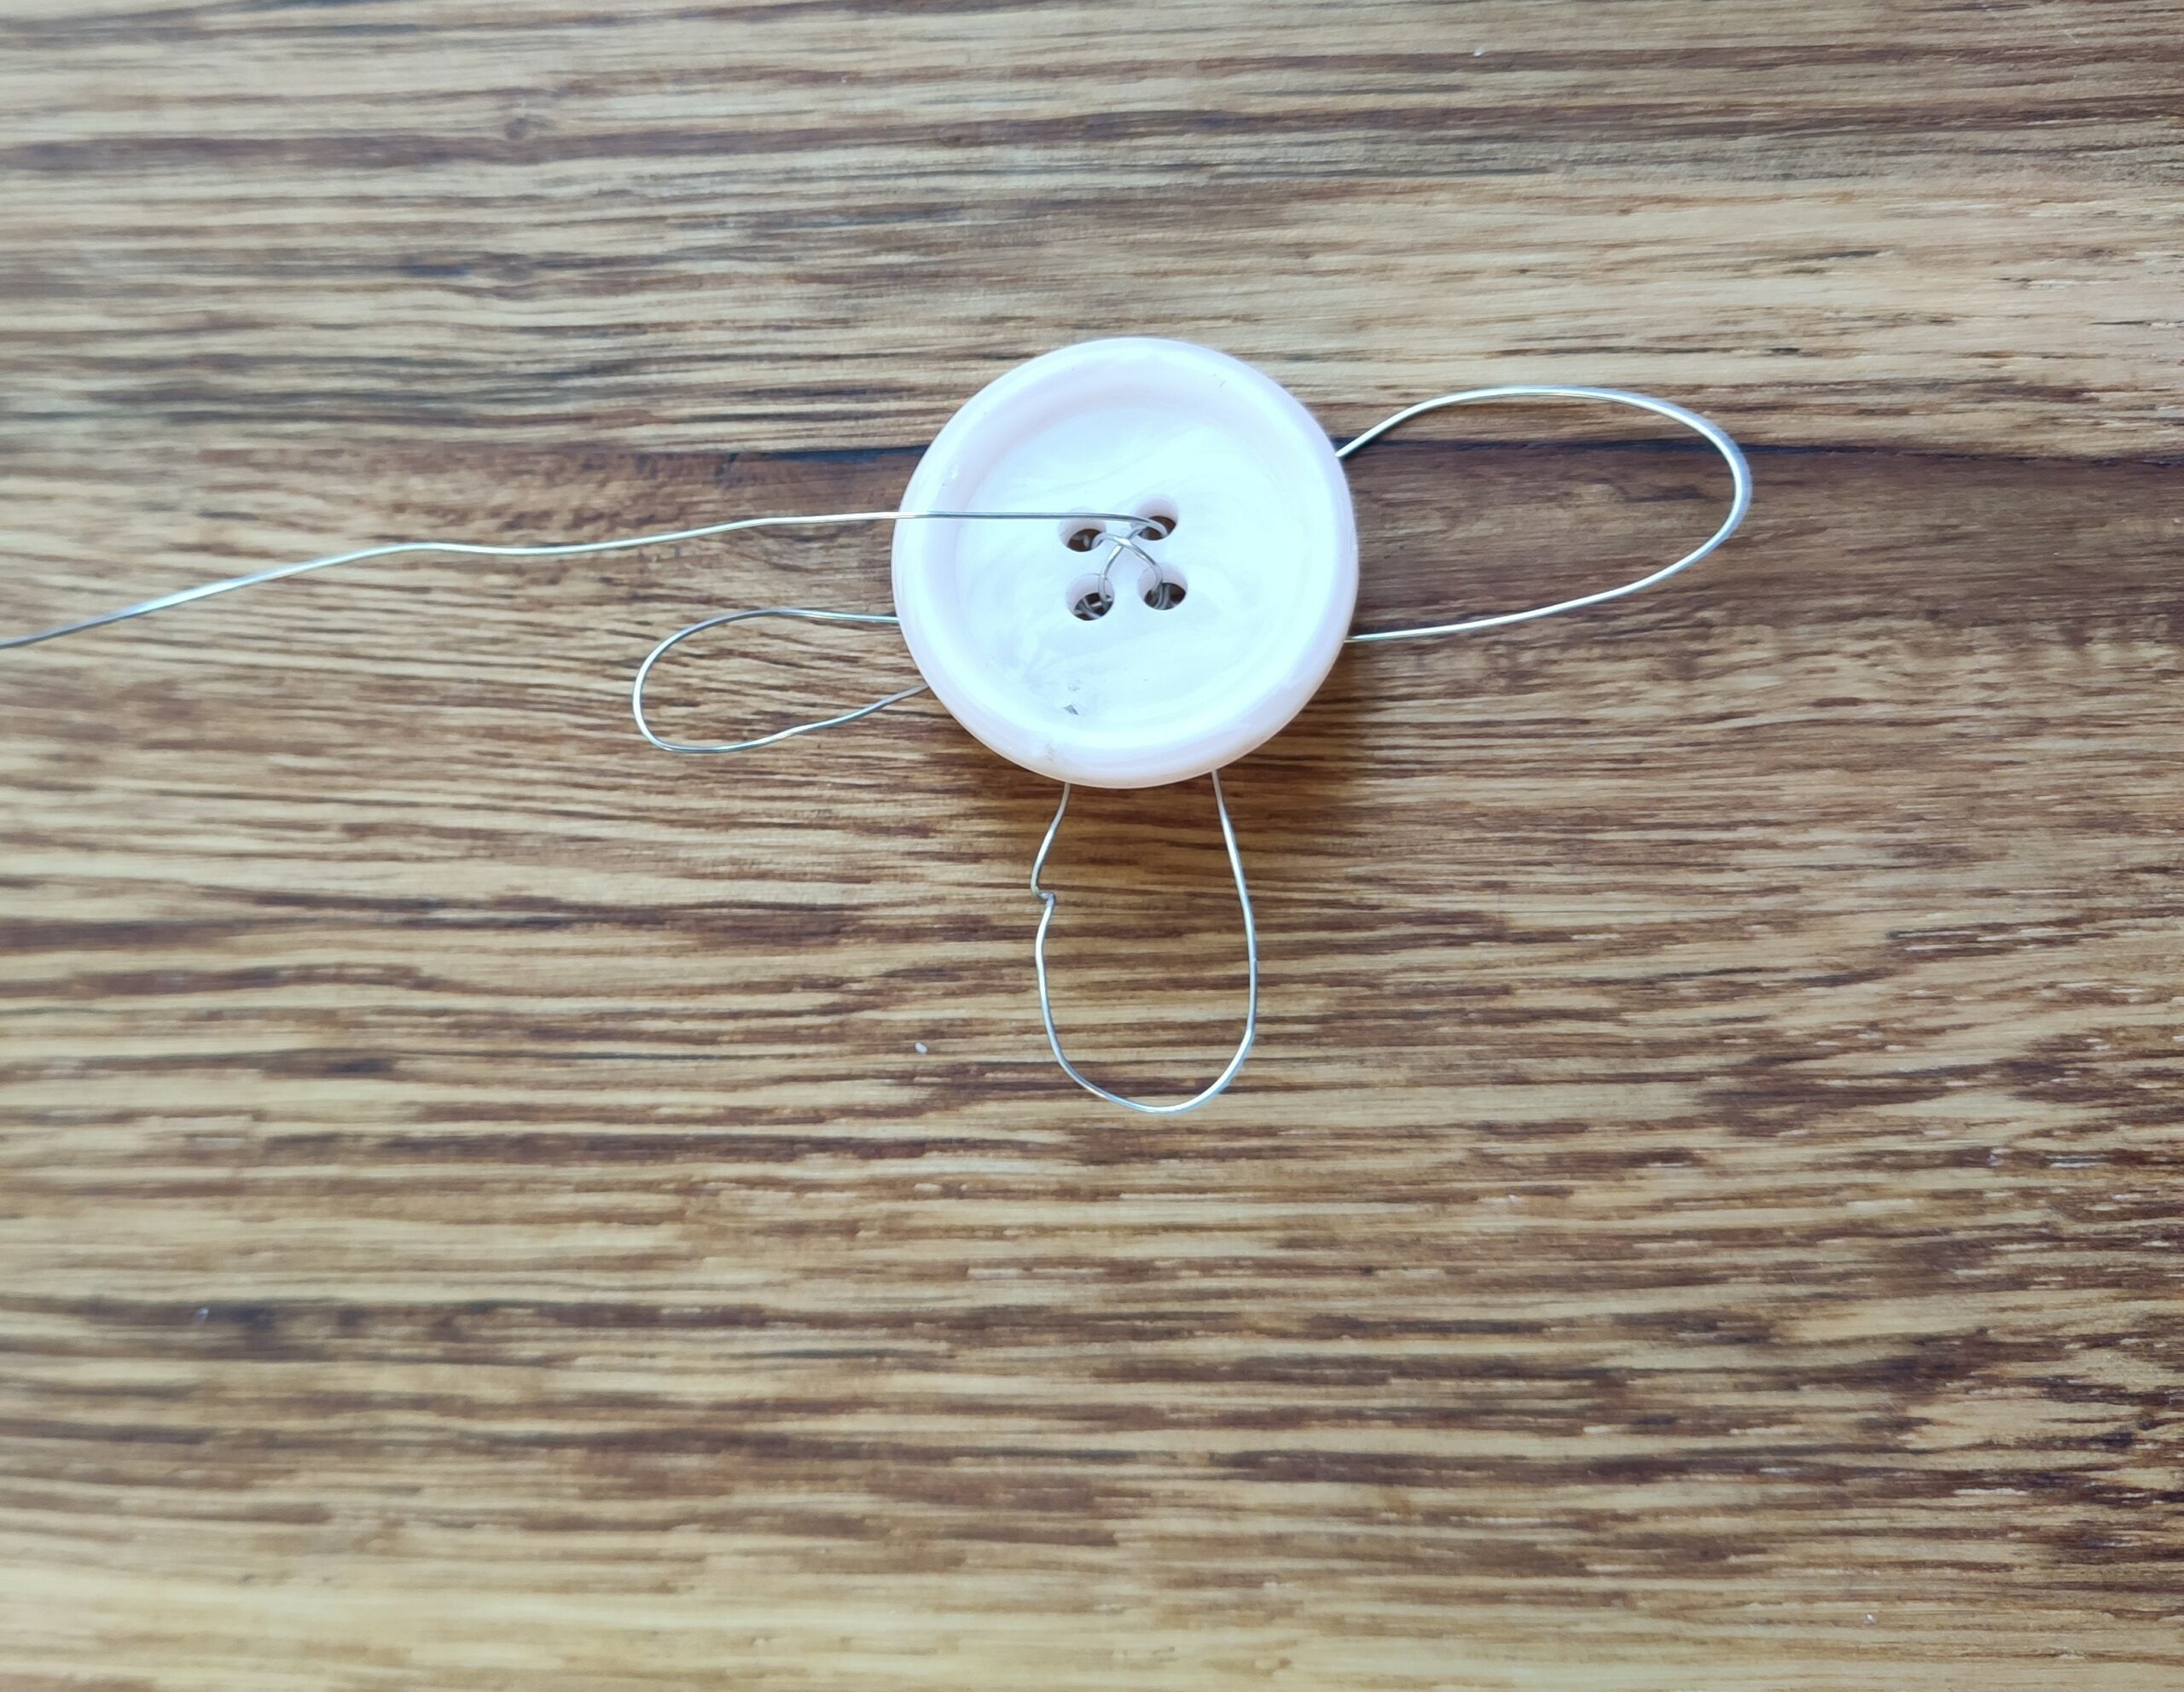
Then you put the long end back on the back of the button.

Bild zum Schritt 8 für das Bastel- und DIY-Abenteuer für Kinder: 'Danach steckt ihr das lange Ende auf die Rückseite den...'

9

Then you form the fourth petal on the back.

Bild zum Schritt 9 für das Bastel- und DIY-Abenteuer für Kinder: 'Dann formt ihr auf der Rückseite das vierte Blütenblatt.'

10

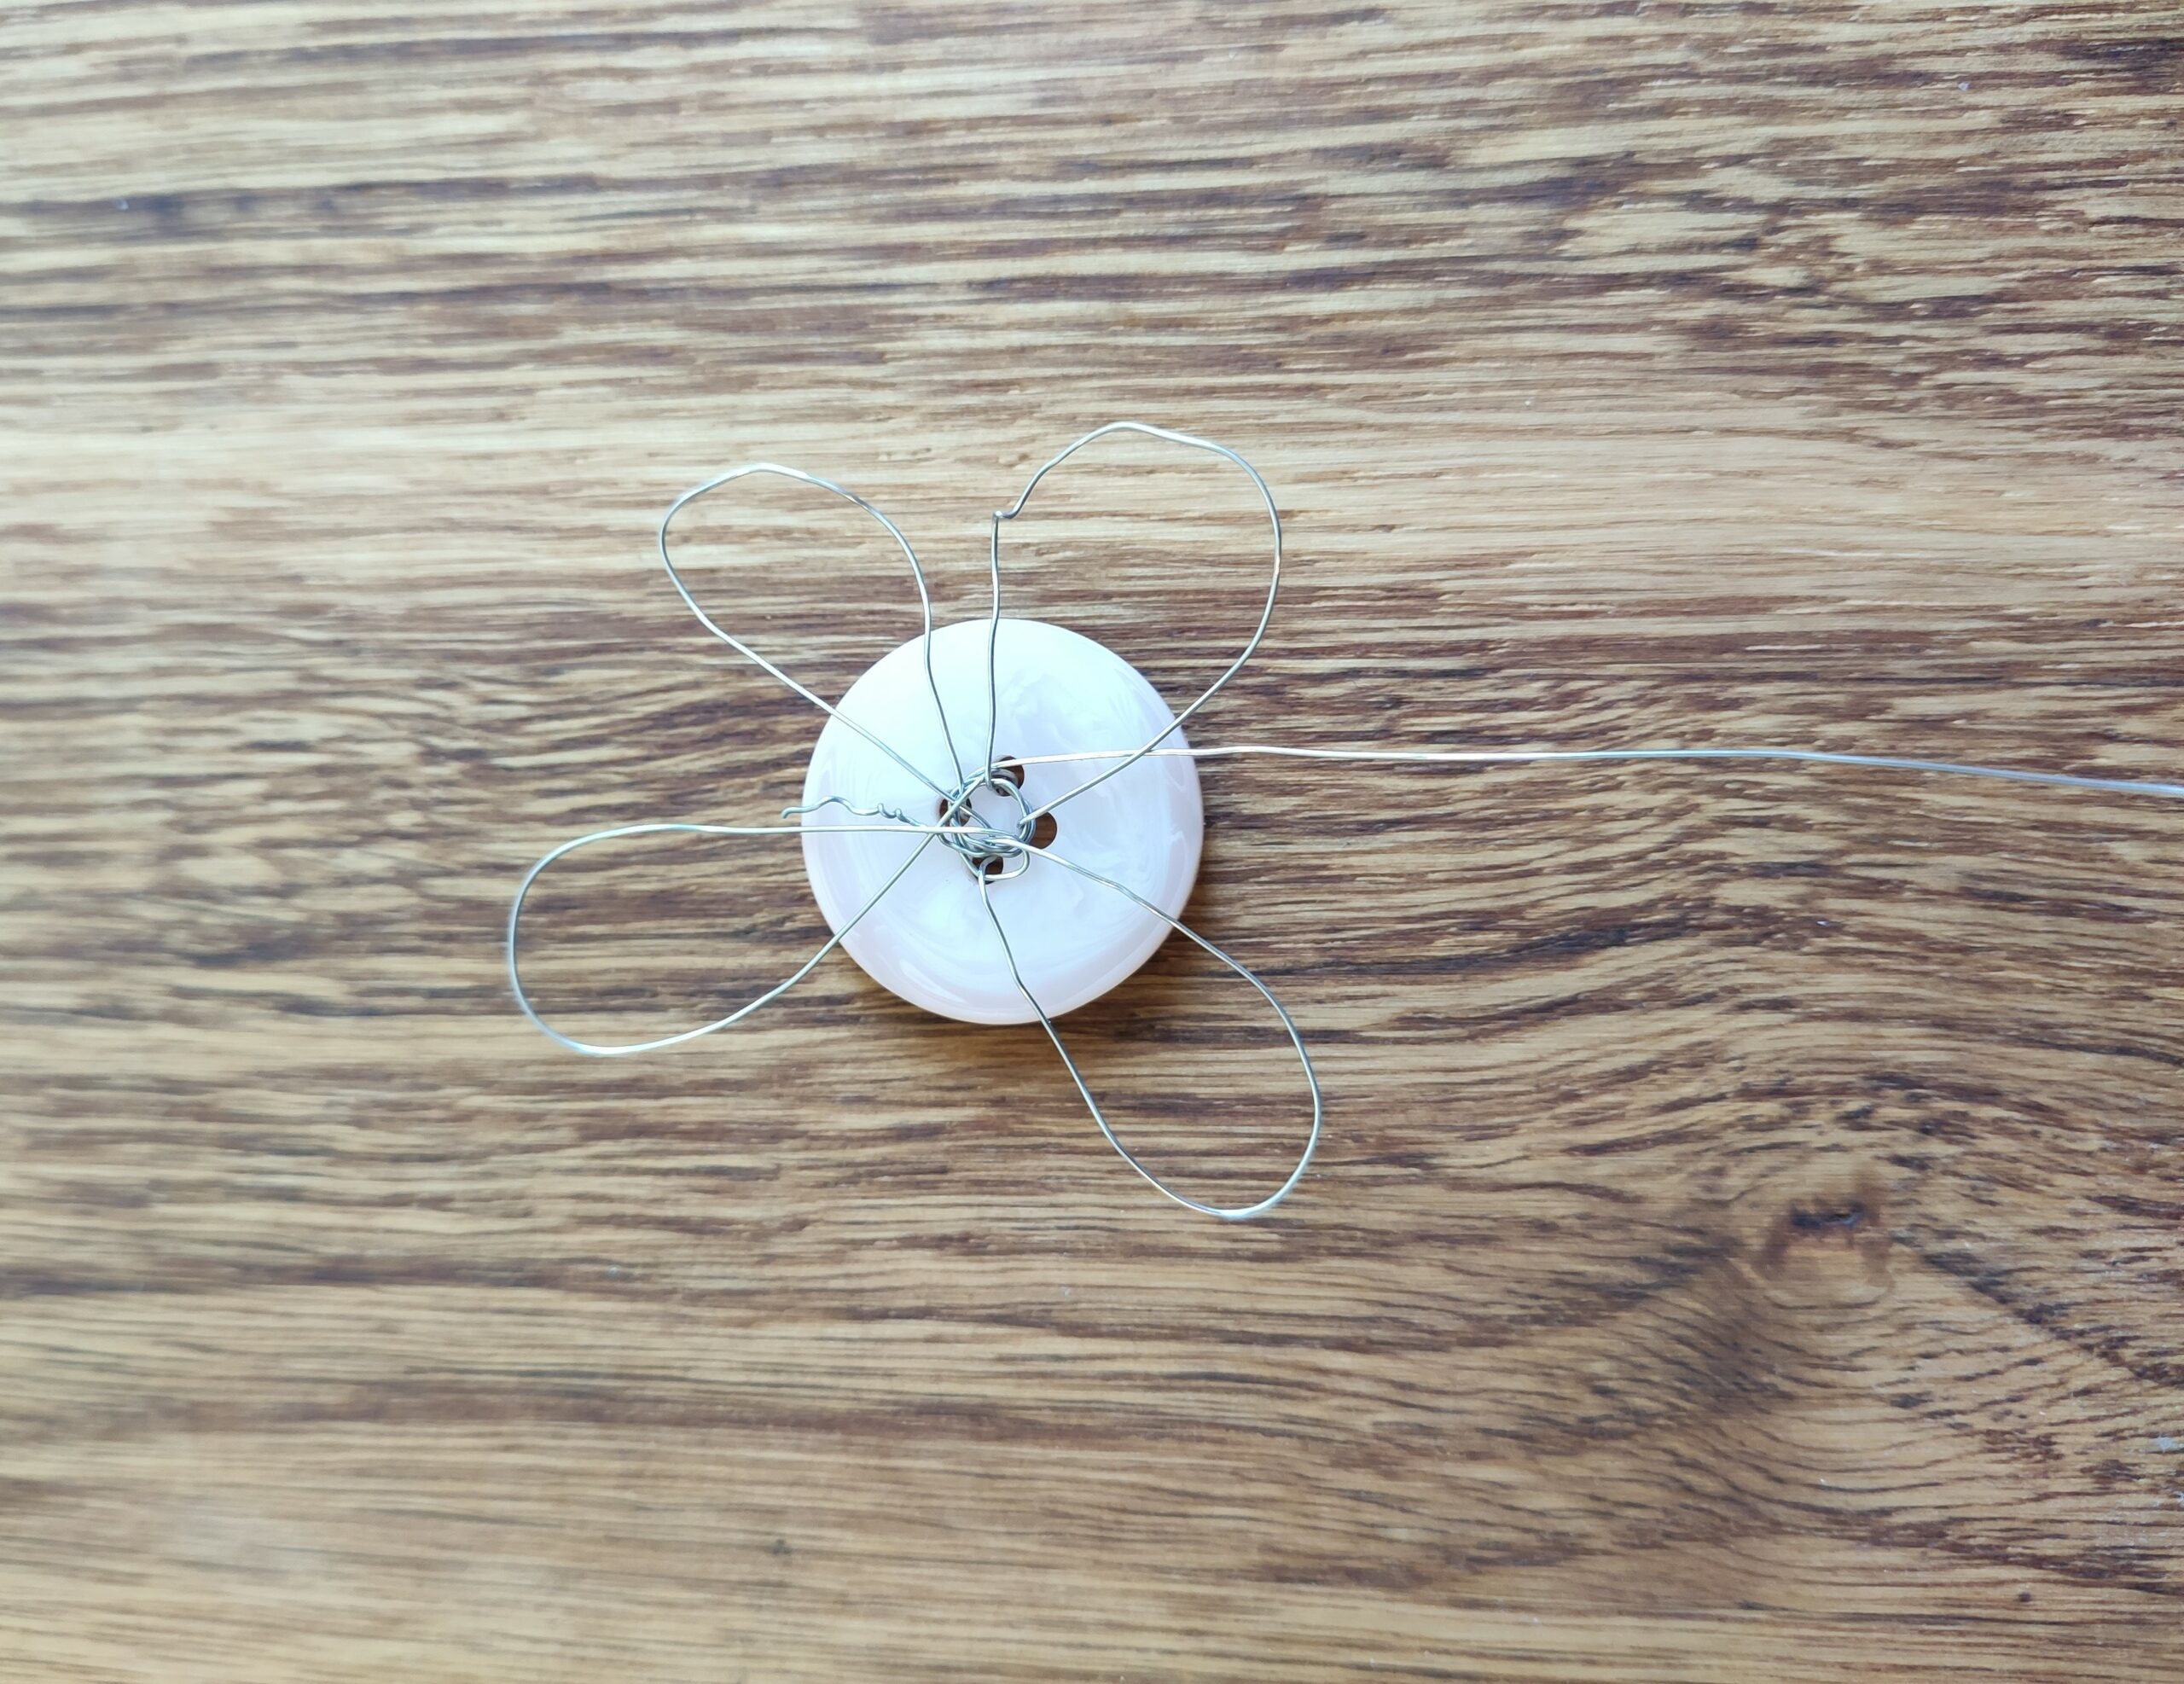
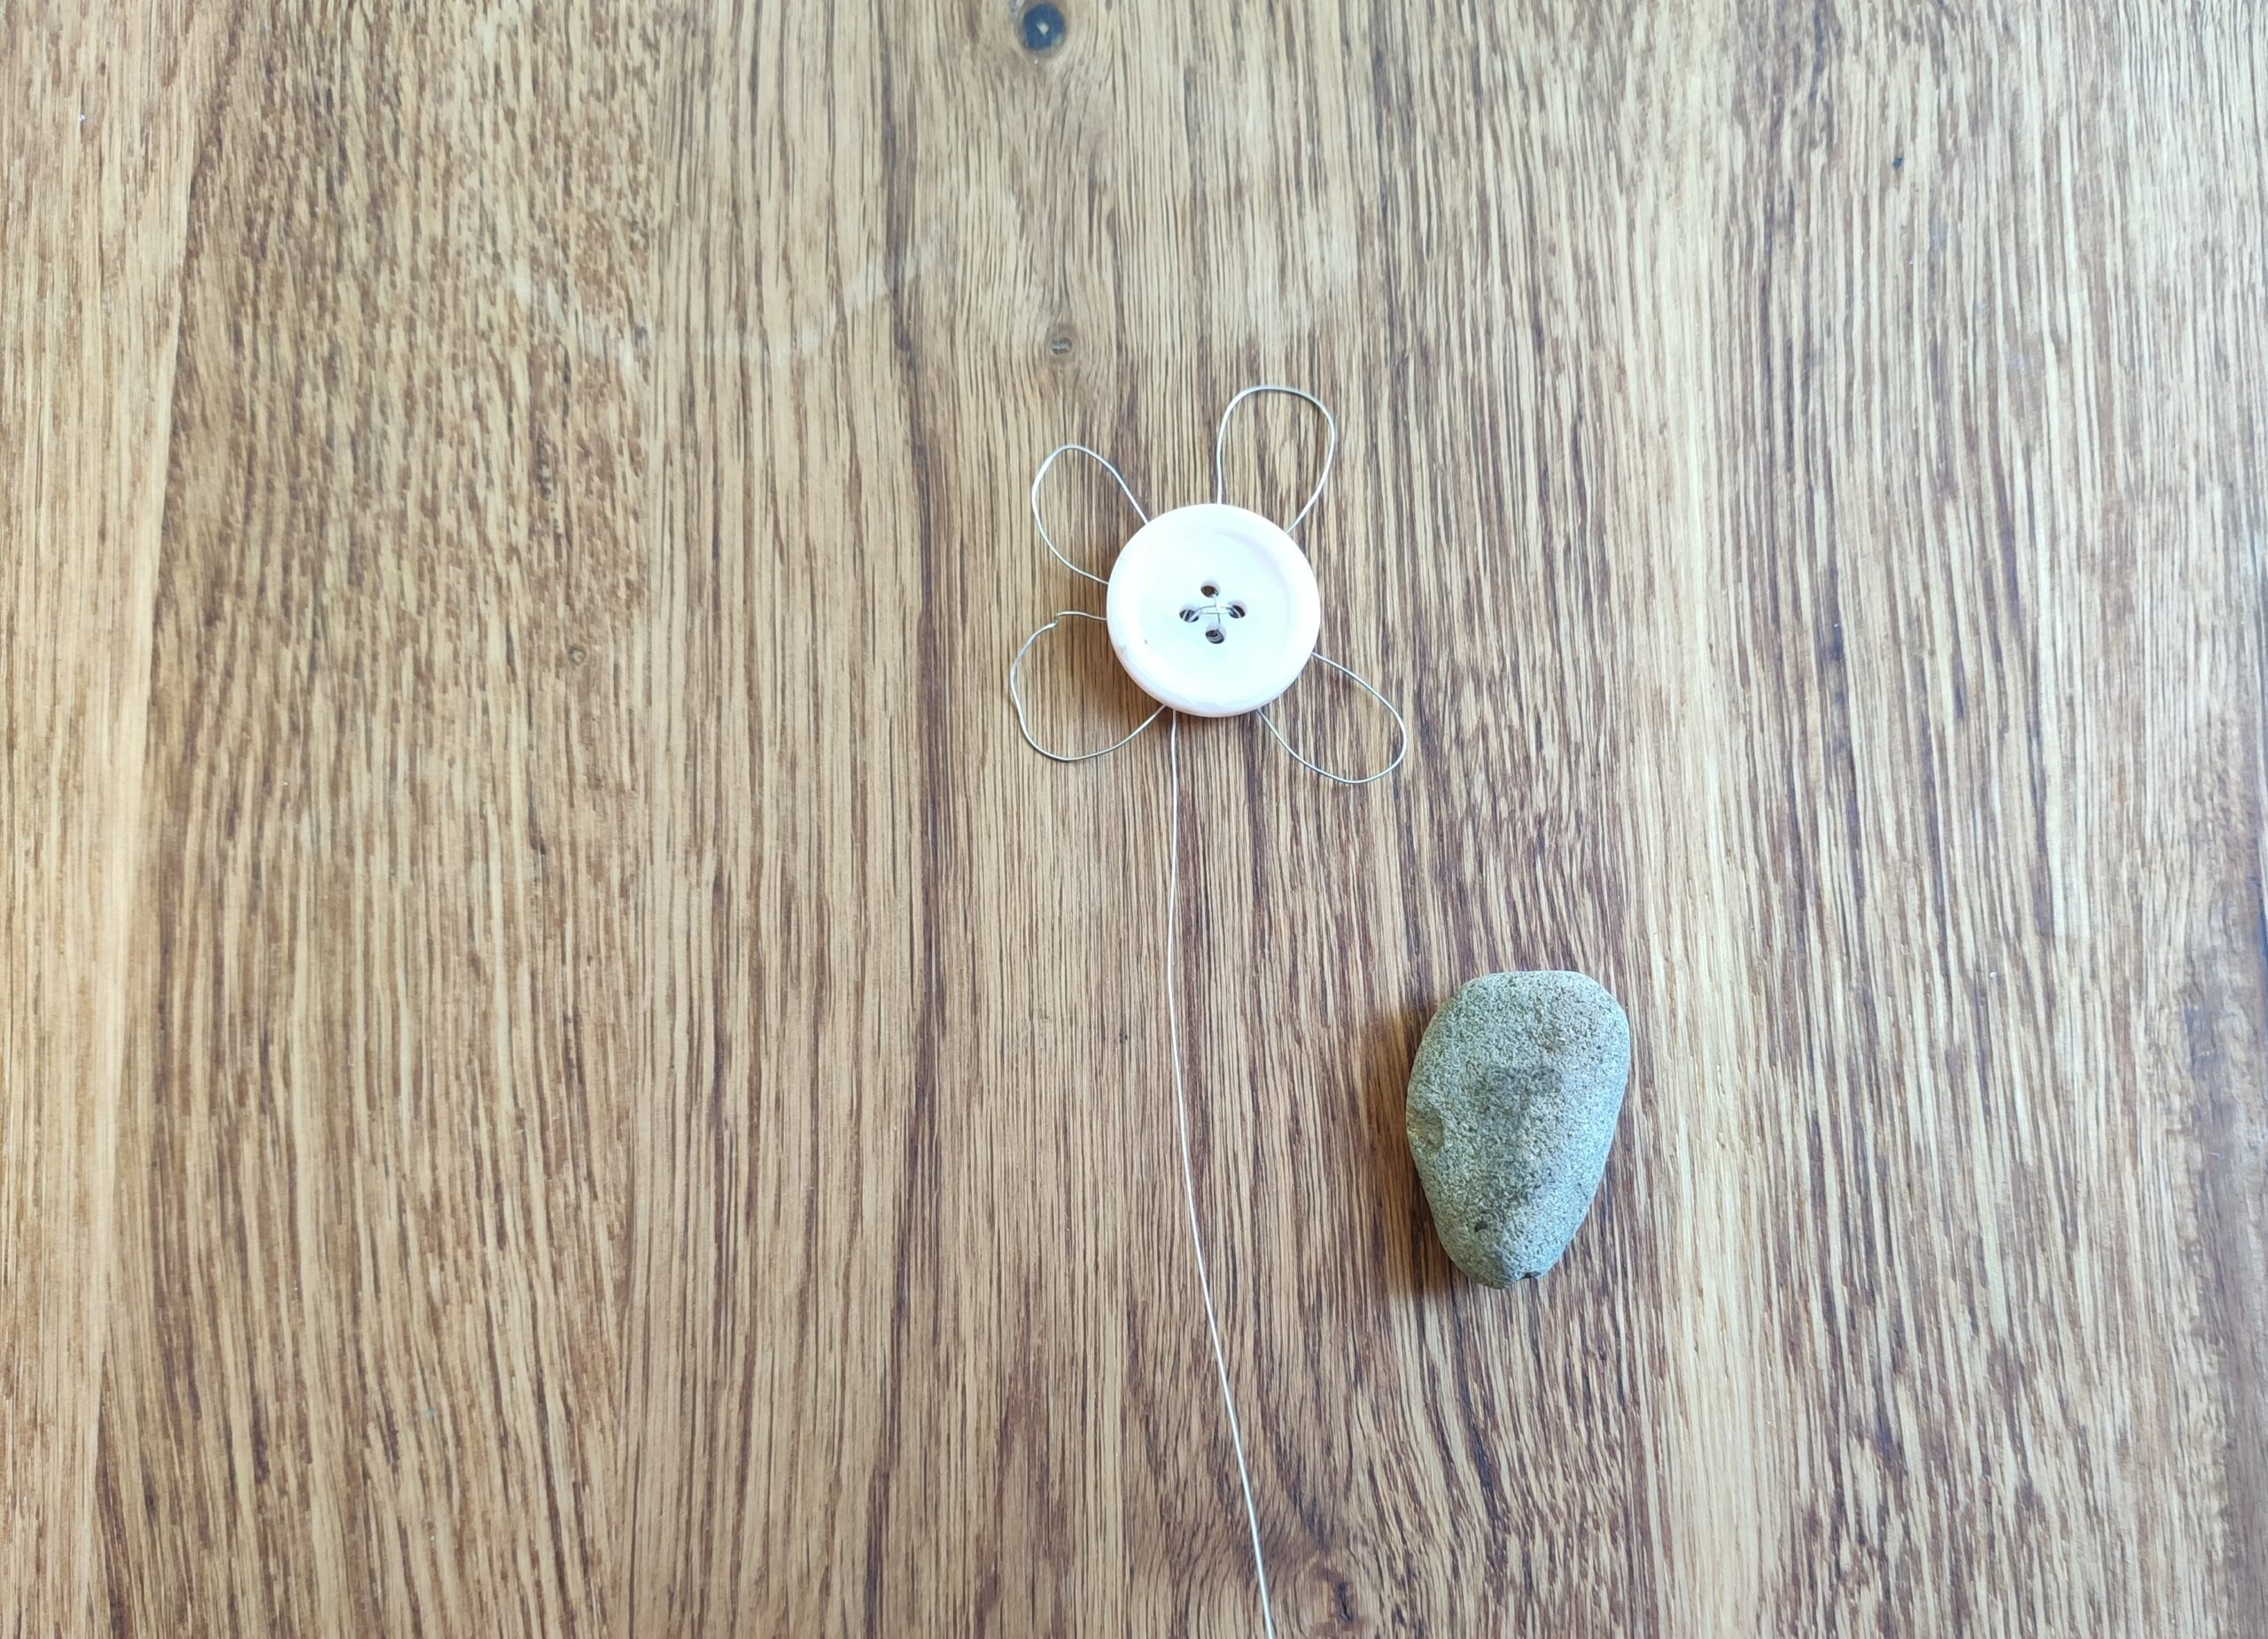
This is what the flower looks like from the front.

Bild zum Schritt 10 für das Bastel- und DIY-Abenteuer für Kinder: 'So sieht die Blume jetzt von vorne aus.'

11

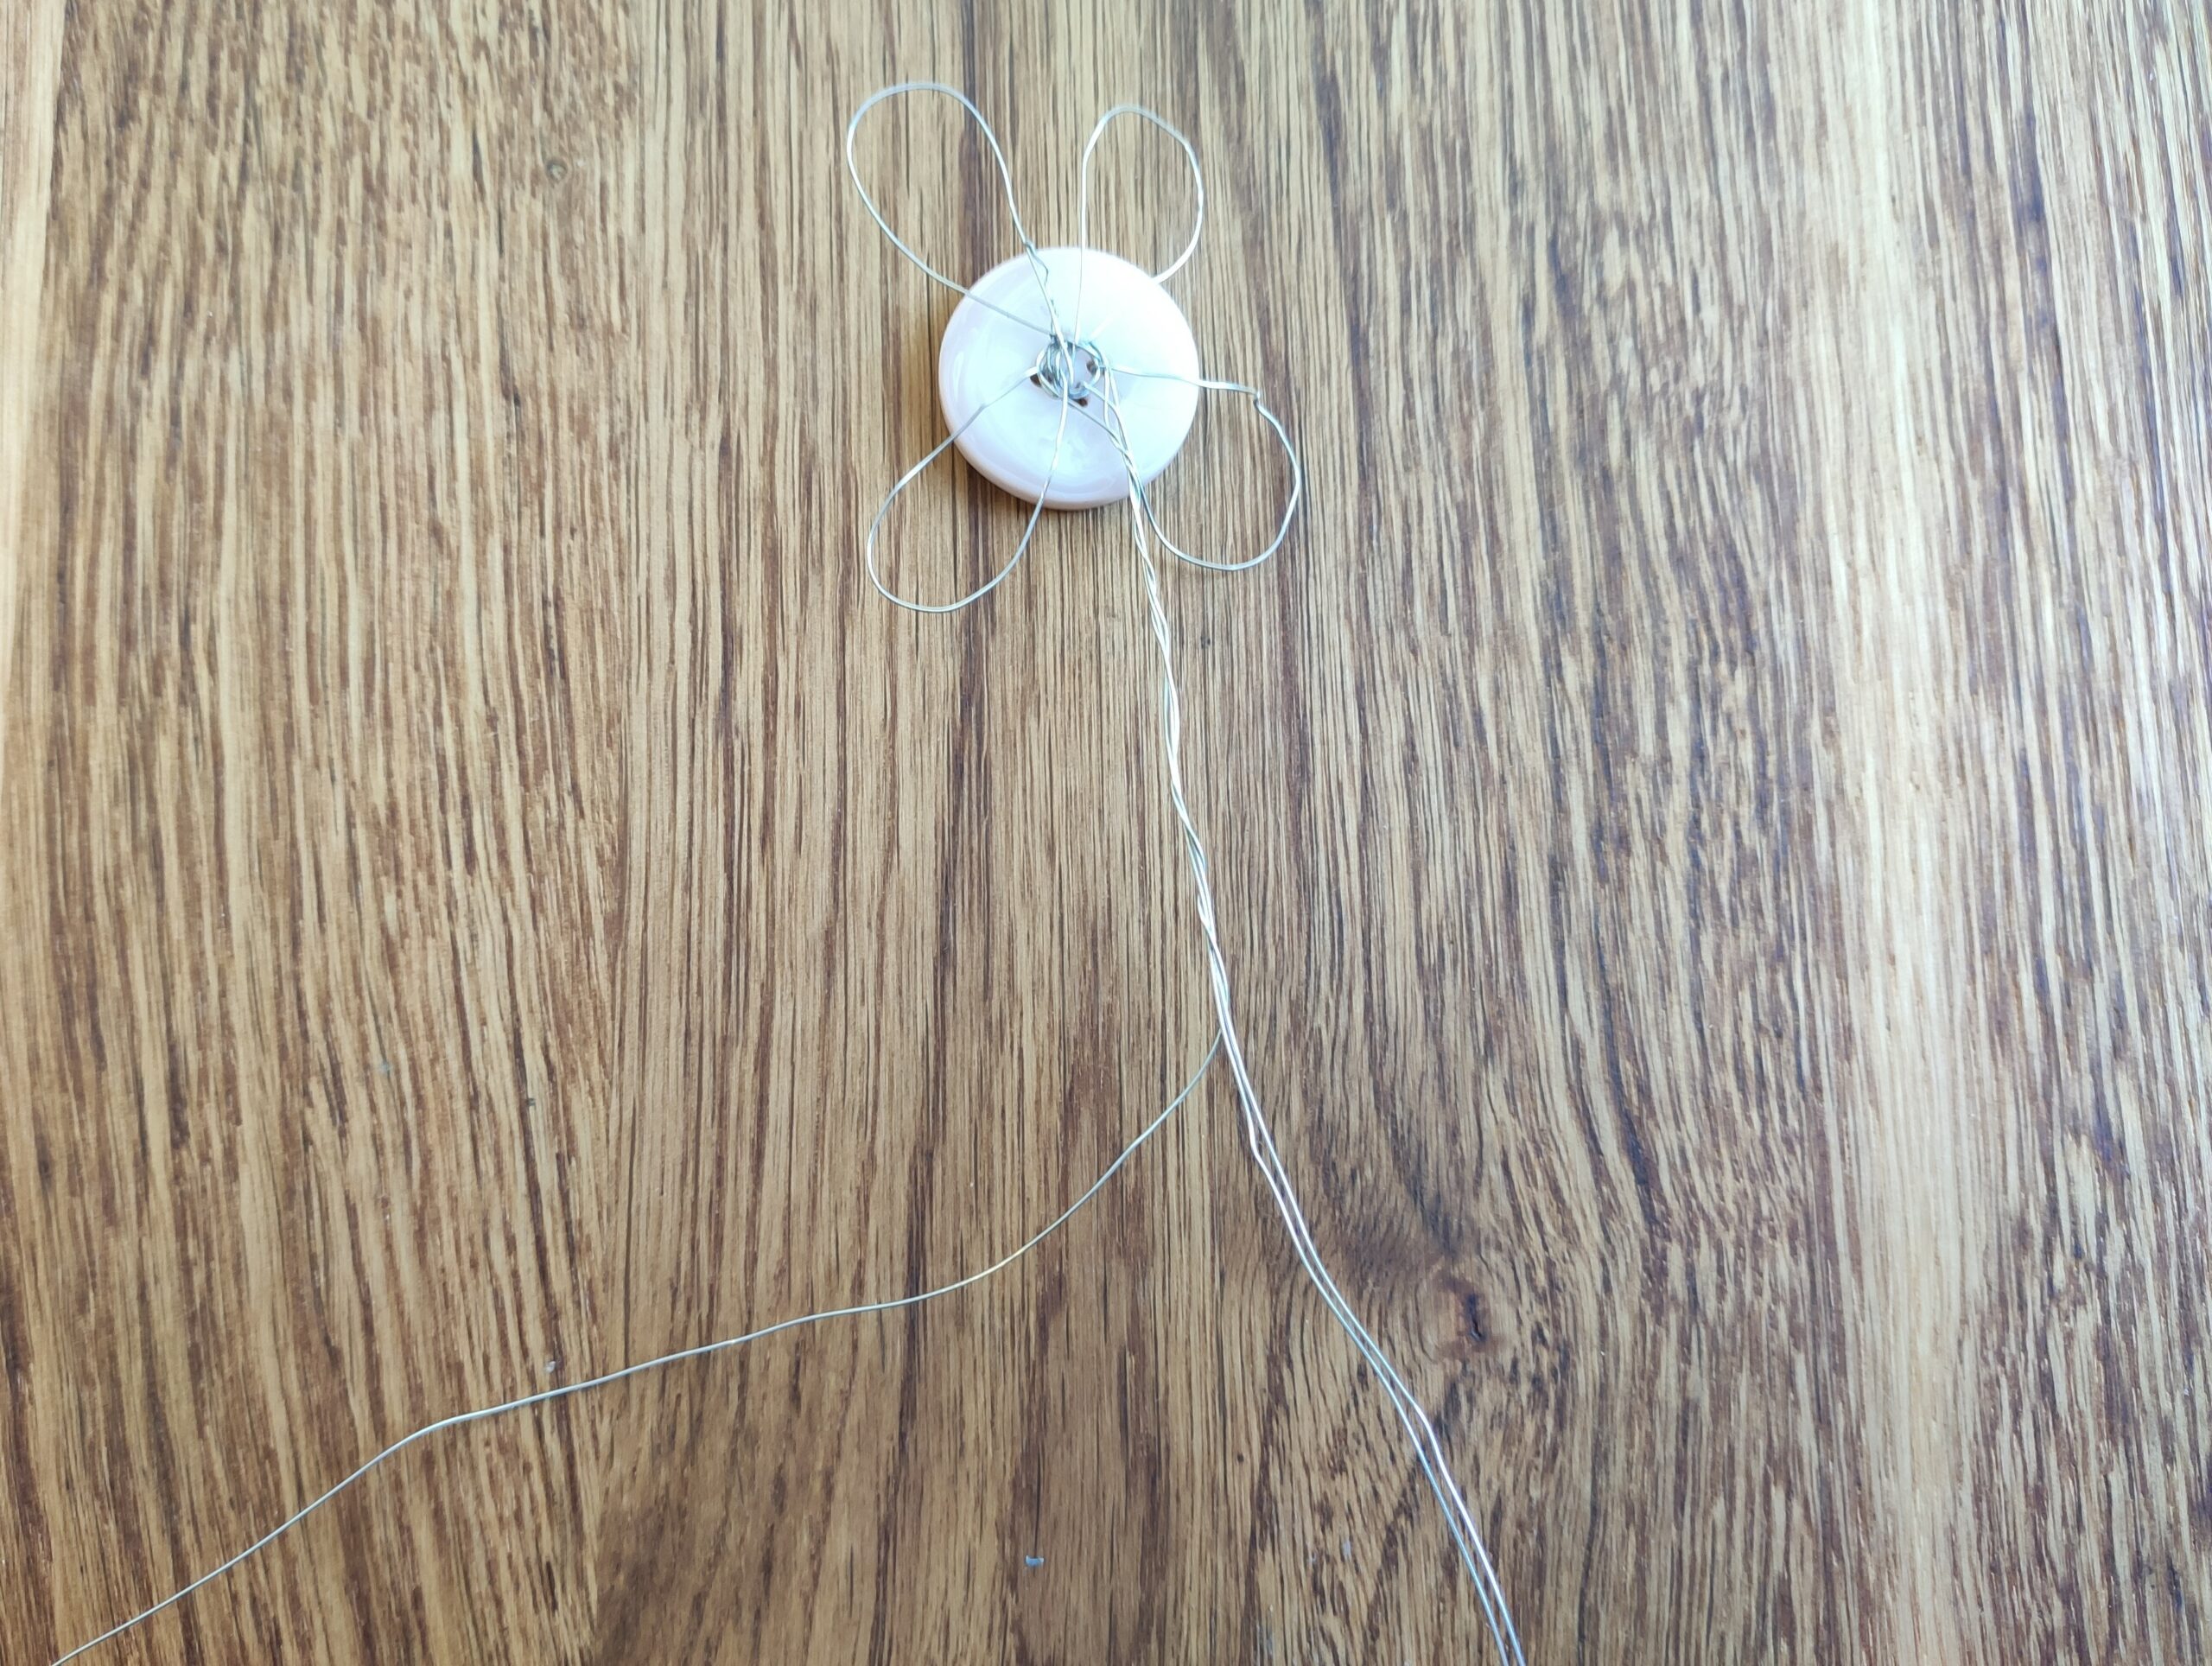
Next, take the second piece of wire with a length of about 50 cm.

Bild zum Schritt 11 für das Bastel- und DIY-Abenteuer für Kinder: 'Als Nächstes nehmt ihr euch das zweite Stück Draht mit...'

12

Then you bend the wire in half and place the loop around all four petals.

Bild zum Schritt 12 für das Bastel- und DIY-Abenteuer für Kinder: 'Dann biegt ihr den Draht zur Hälfte und legt die...'

13

Now you twist the three wires around each other, creating a stable stalk for your flower.

Bild zum Schritt 13 für das Bastel- und DIY-Abenteuer für Kinder: 'Jetzt verdreht ihr die drei Drähte umeinander. So entsteht ein...'

14

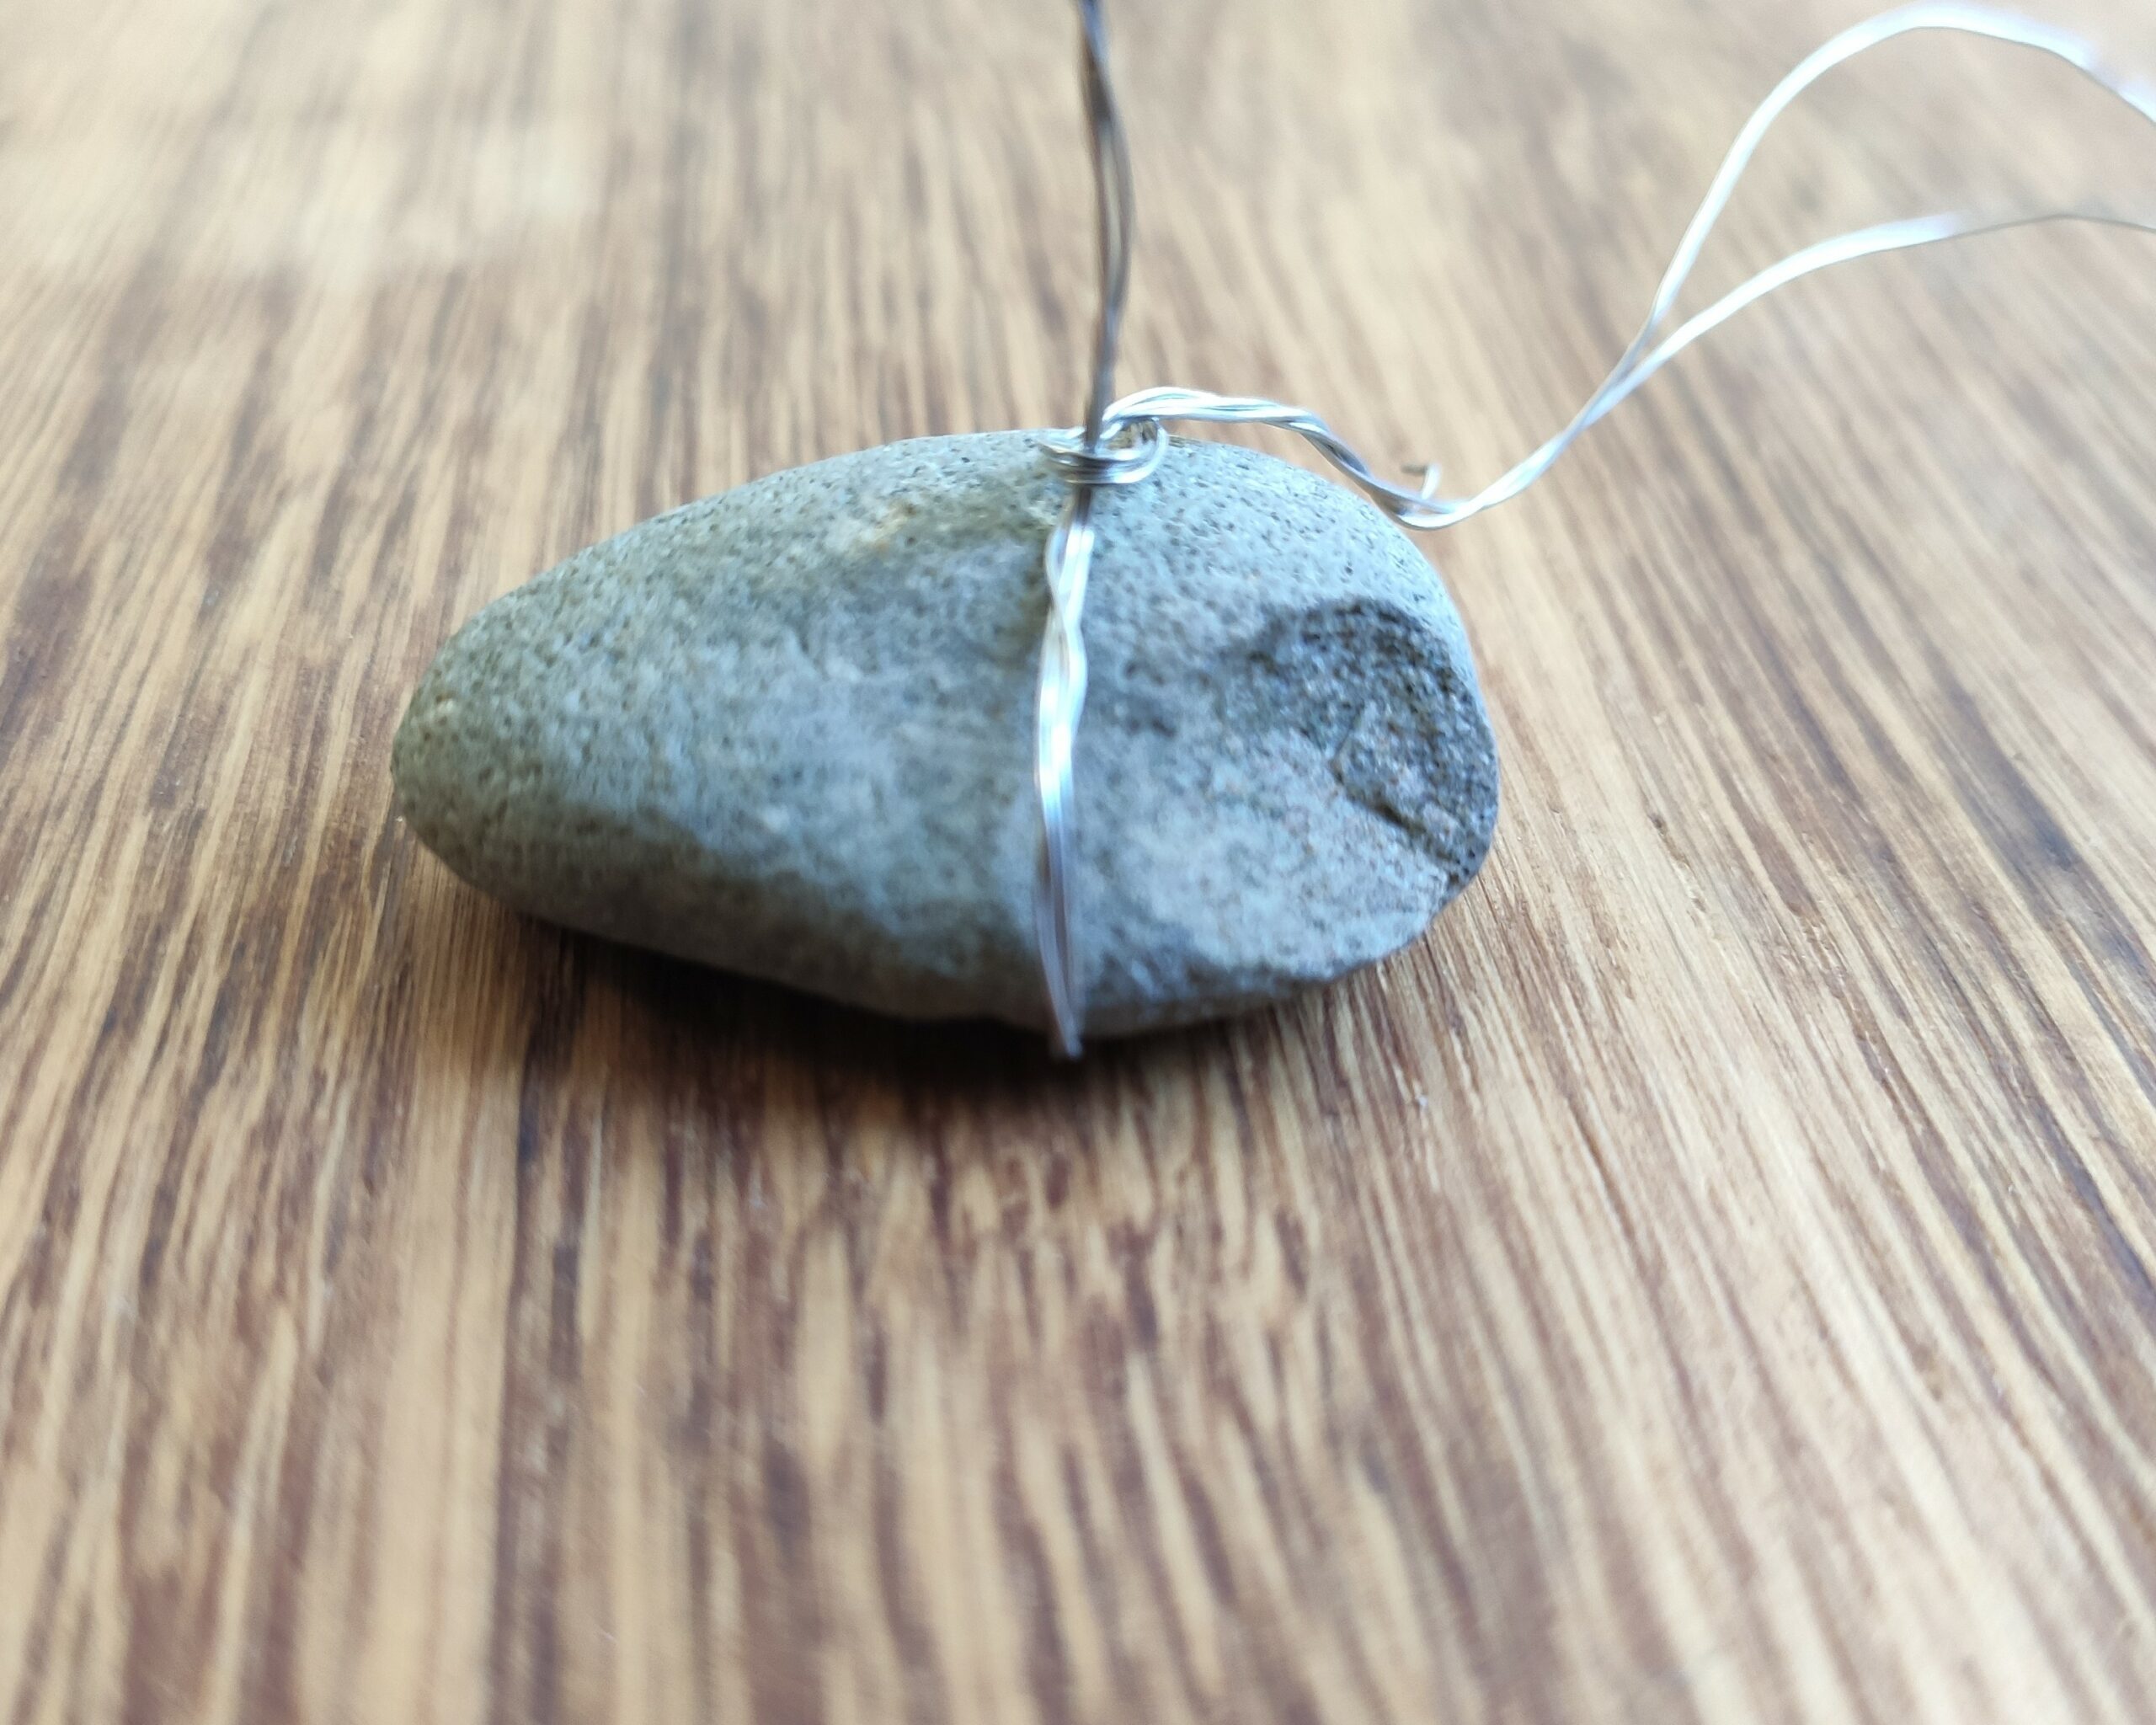
Finally, you attach your flower to a stone, so it's stable.

Bild zum Schritt 14 für das Bastel- und DIY-Abenteuer für Kinder: 'Zum Schluss befestigt ihr eure Blume an einem Stein. So...'

15

Alternatively, you can place the flowers in a small vase or put them in a flower pot in the ground.

Bild zum Schritt 15 für das Bastel- und DIY-Abenteuer für Kinder: 'Alternativ könnt ihr die Blumen auch in eine kleine Vase...'

16

Have fun doing crafts with children!